

![Atomic Tank – The Robot Wars Review | Fast-Paced 10mm Sci-Fi Wargame [7 Days Early Access]](https://images.beastsofwar.com/2026/01/unboxing-hydra-miniatures-atomic-tank-the-robot-wars-coverimage-225-127.jpg)

![246 Dwarves in One Box?! | Wargames Atlantic Dwarven Host Unboxing & Review [7 Days Early Access]](https://images.beastsofwar.com/2026/01/unboxing-wargames-atlantic-epic-fantasy-battles-dwarven-host-coverimage-225-127.jpeg)


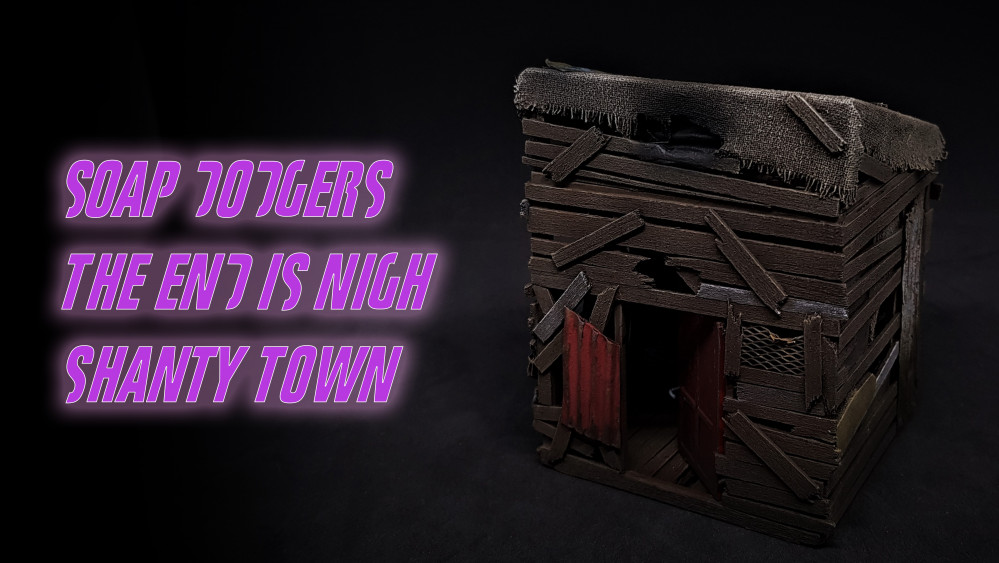
Terrain Challenge – Shanty Town


Recommendations: 244
About the Project
it's about time that I started my terrain challenge for The end is nigh. I Don't have much time at the moment. So I hope I get done in time! This will be based around a shanty town idea and a quick method of building.
Related Game: Fallout: Wasteland Warfare
Related Genre: Post-Apocalyptic
This Project is Completed
Wood glorious wood
A short tutorial on how I do wood (cant phrase this any other way) If you cant face watching an hour long video, I don’t blame you! This may be for you.
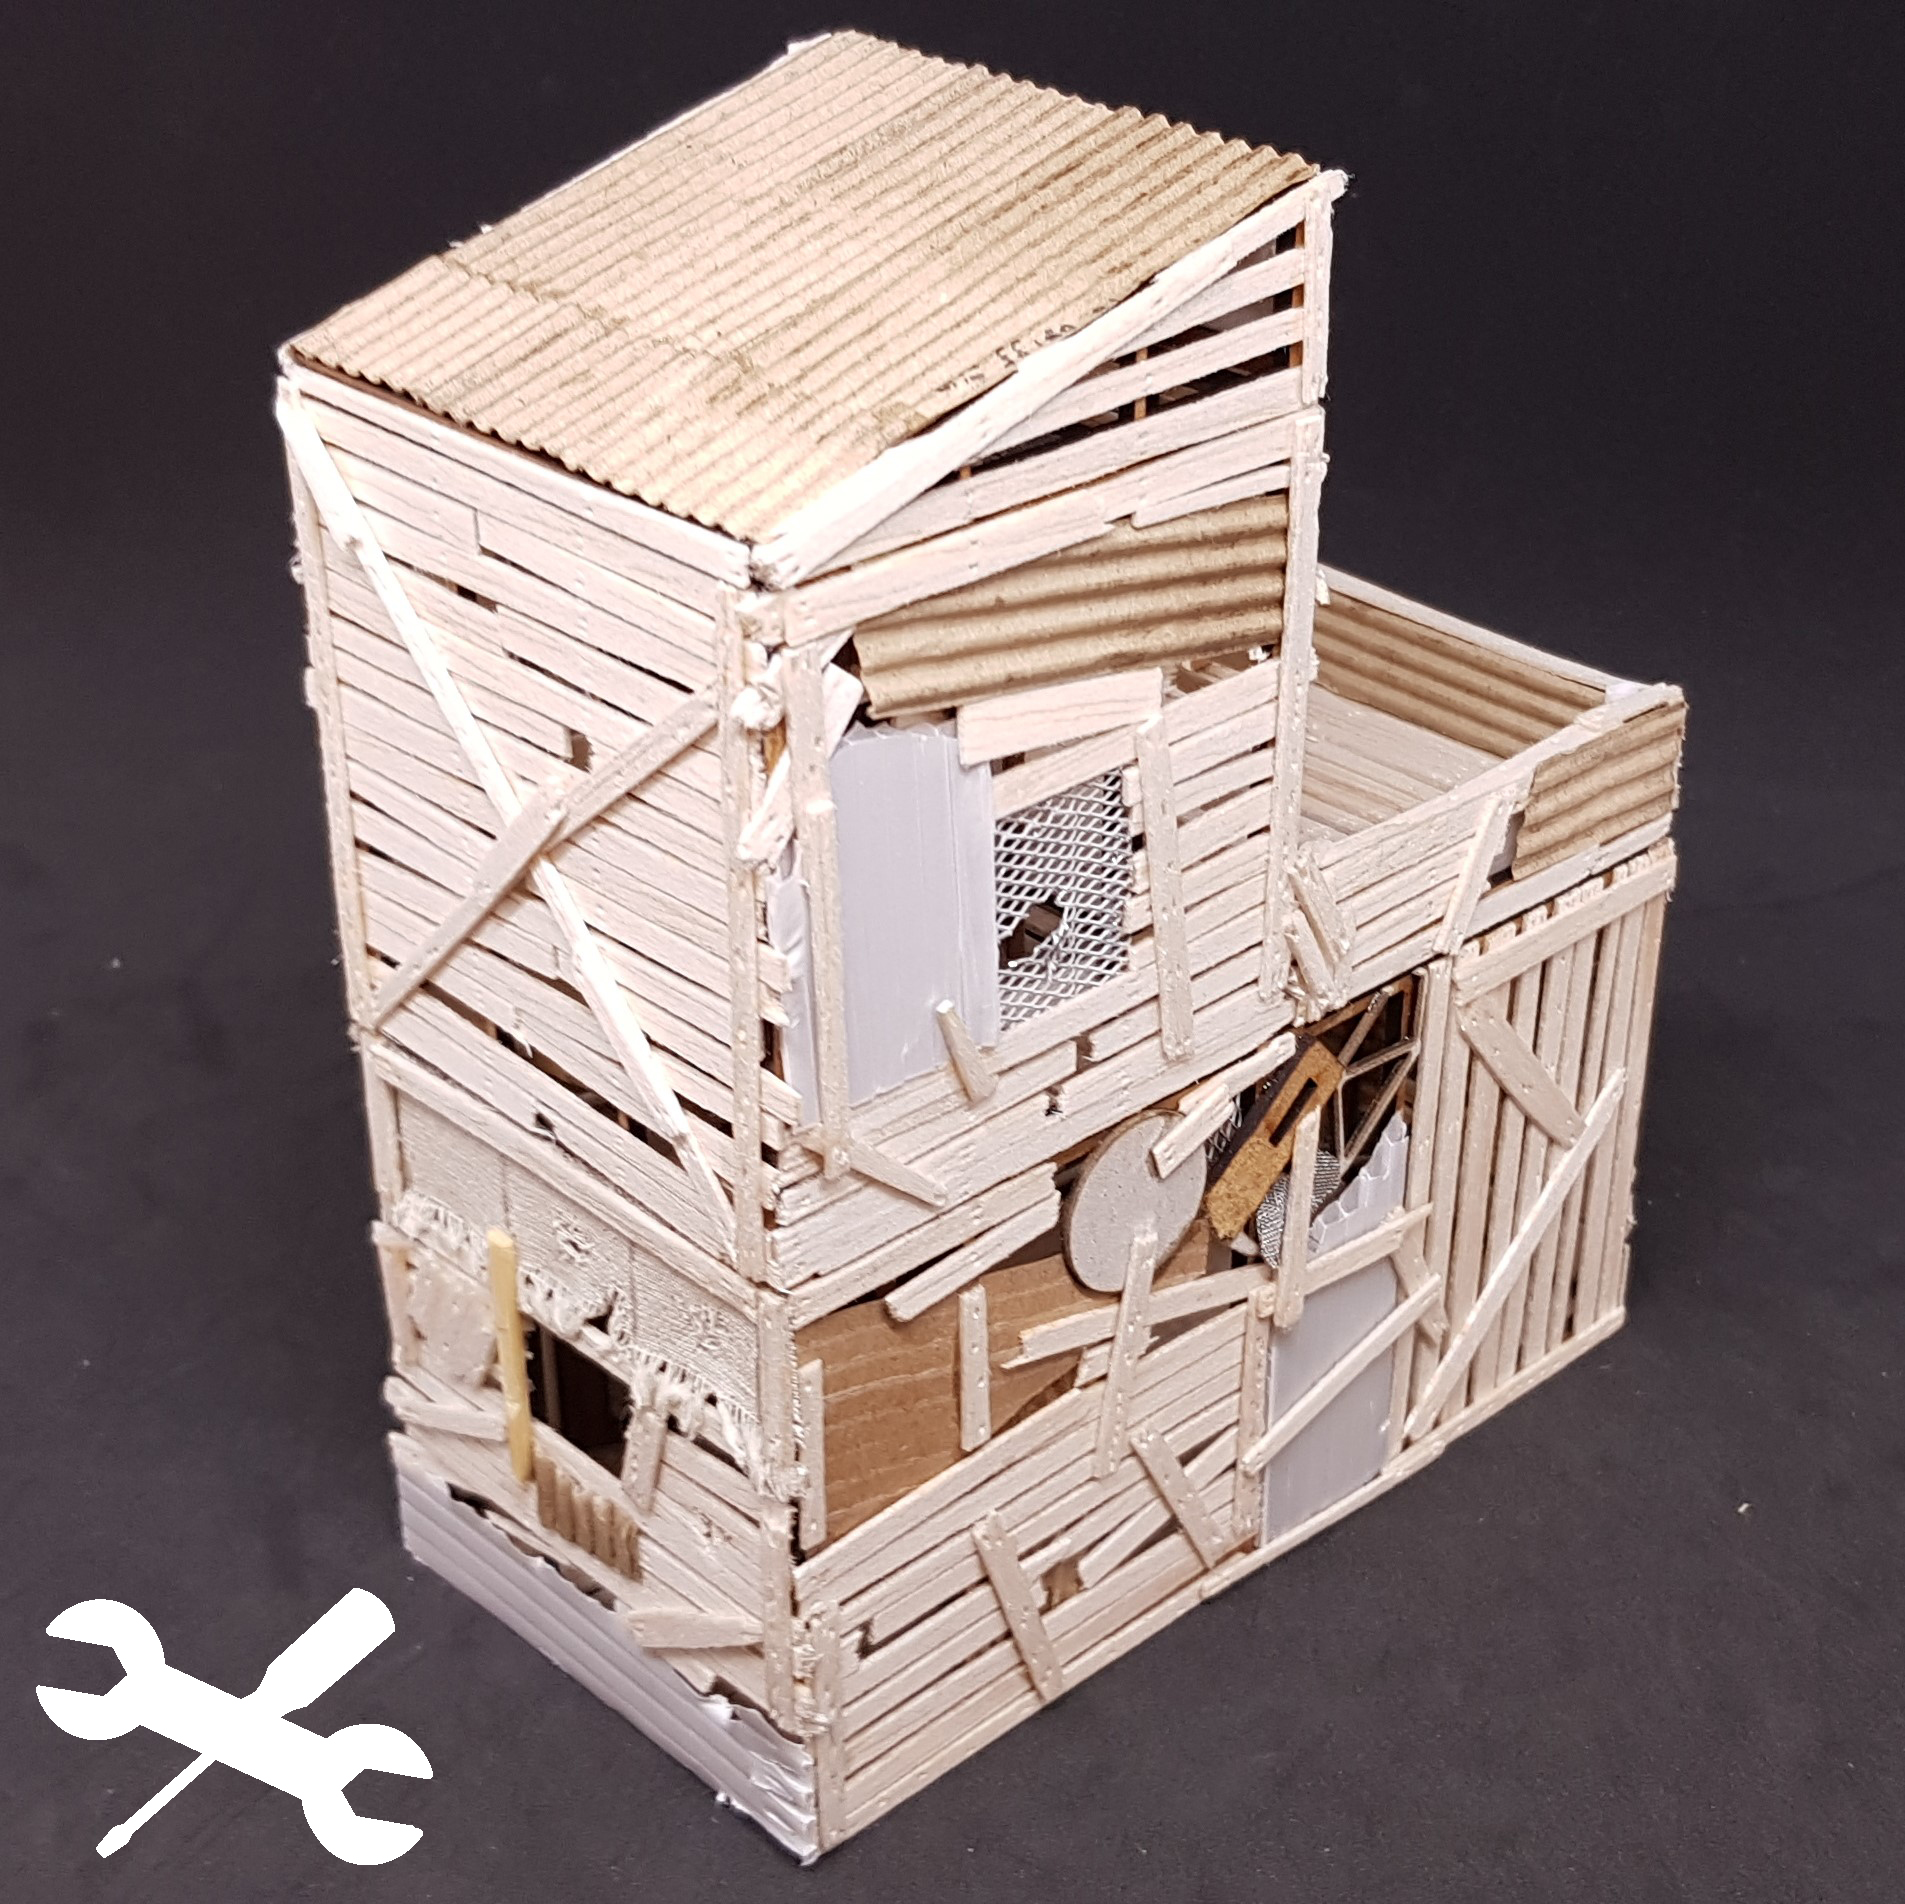 You need to make or buy something wooden to paint. If like me you use thin balsa wood then this effect works great as it gets all the detail.
 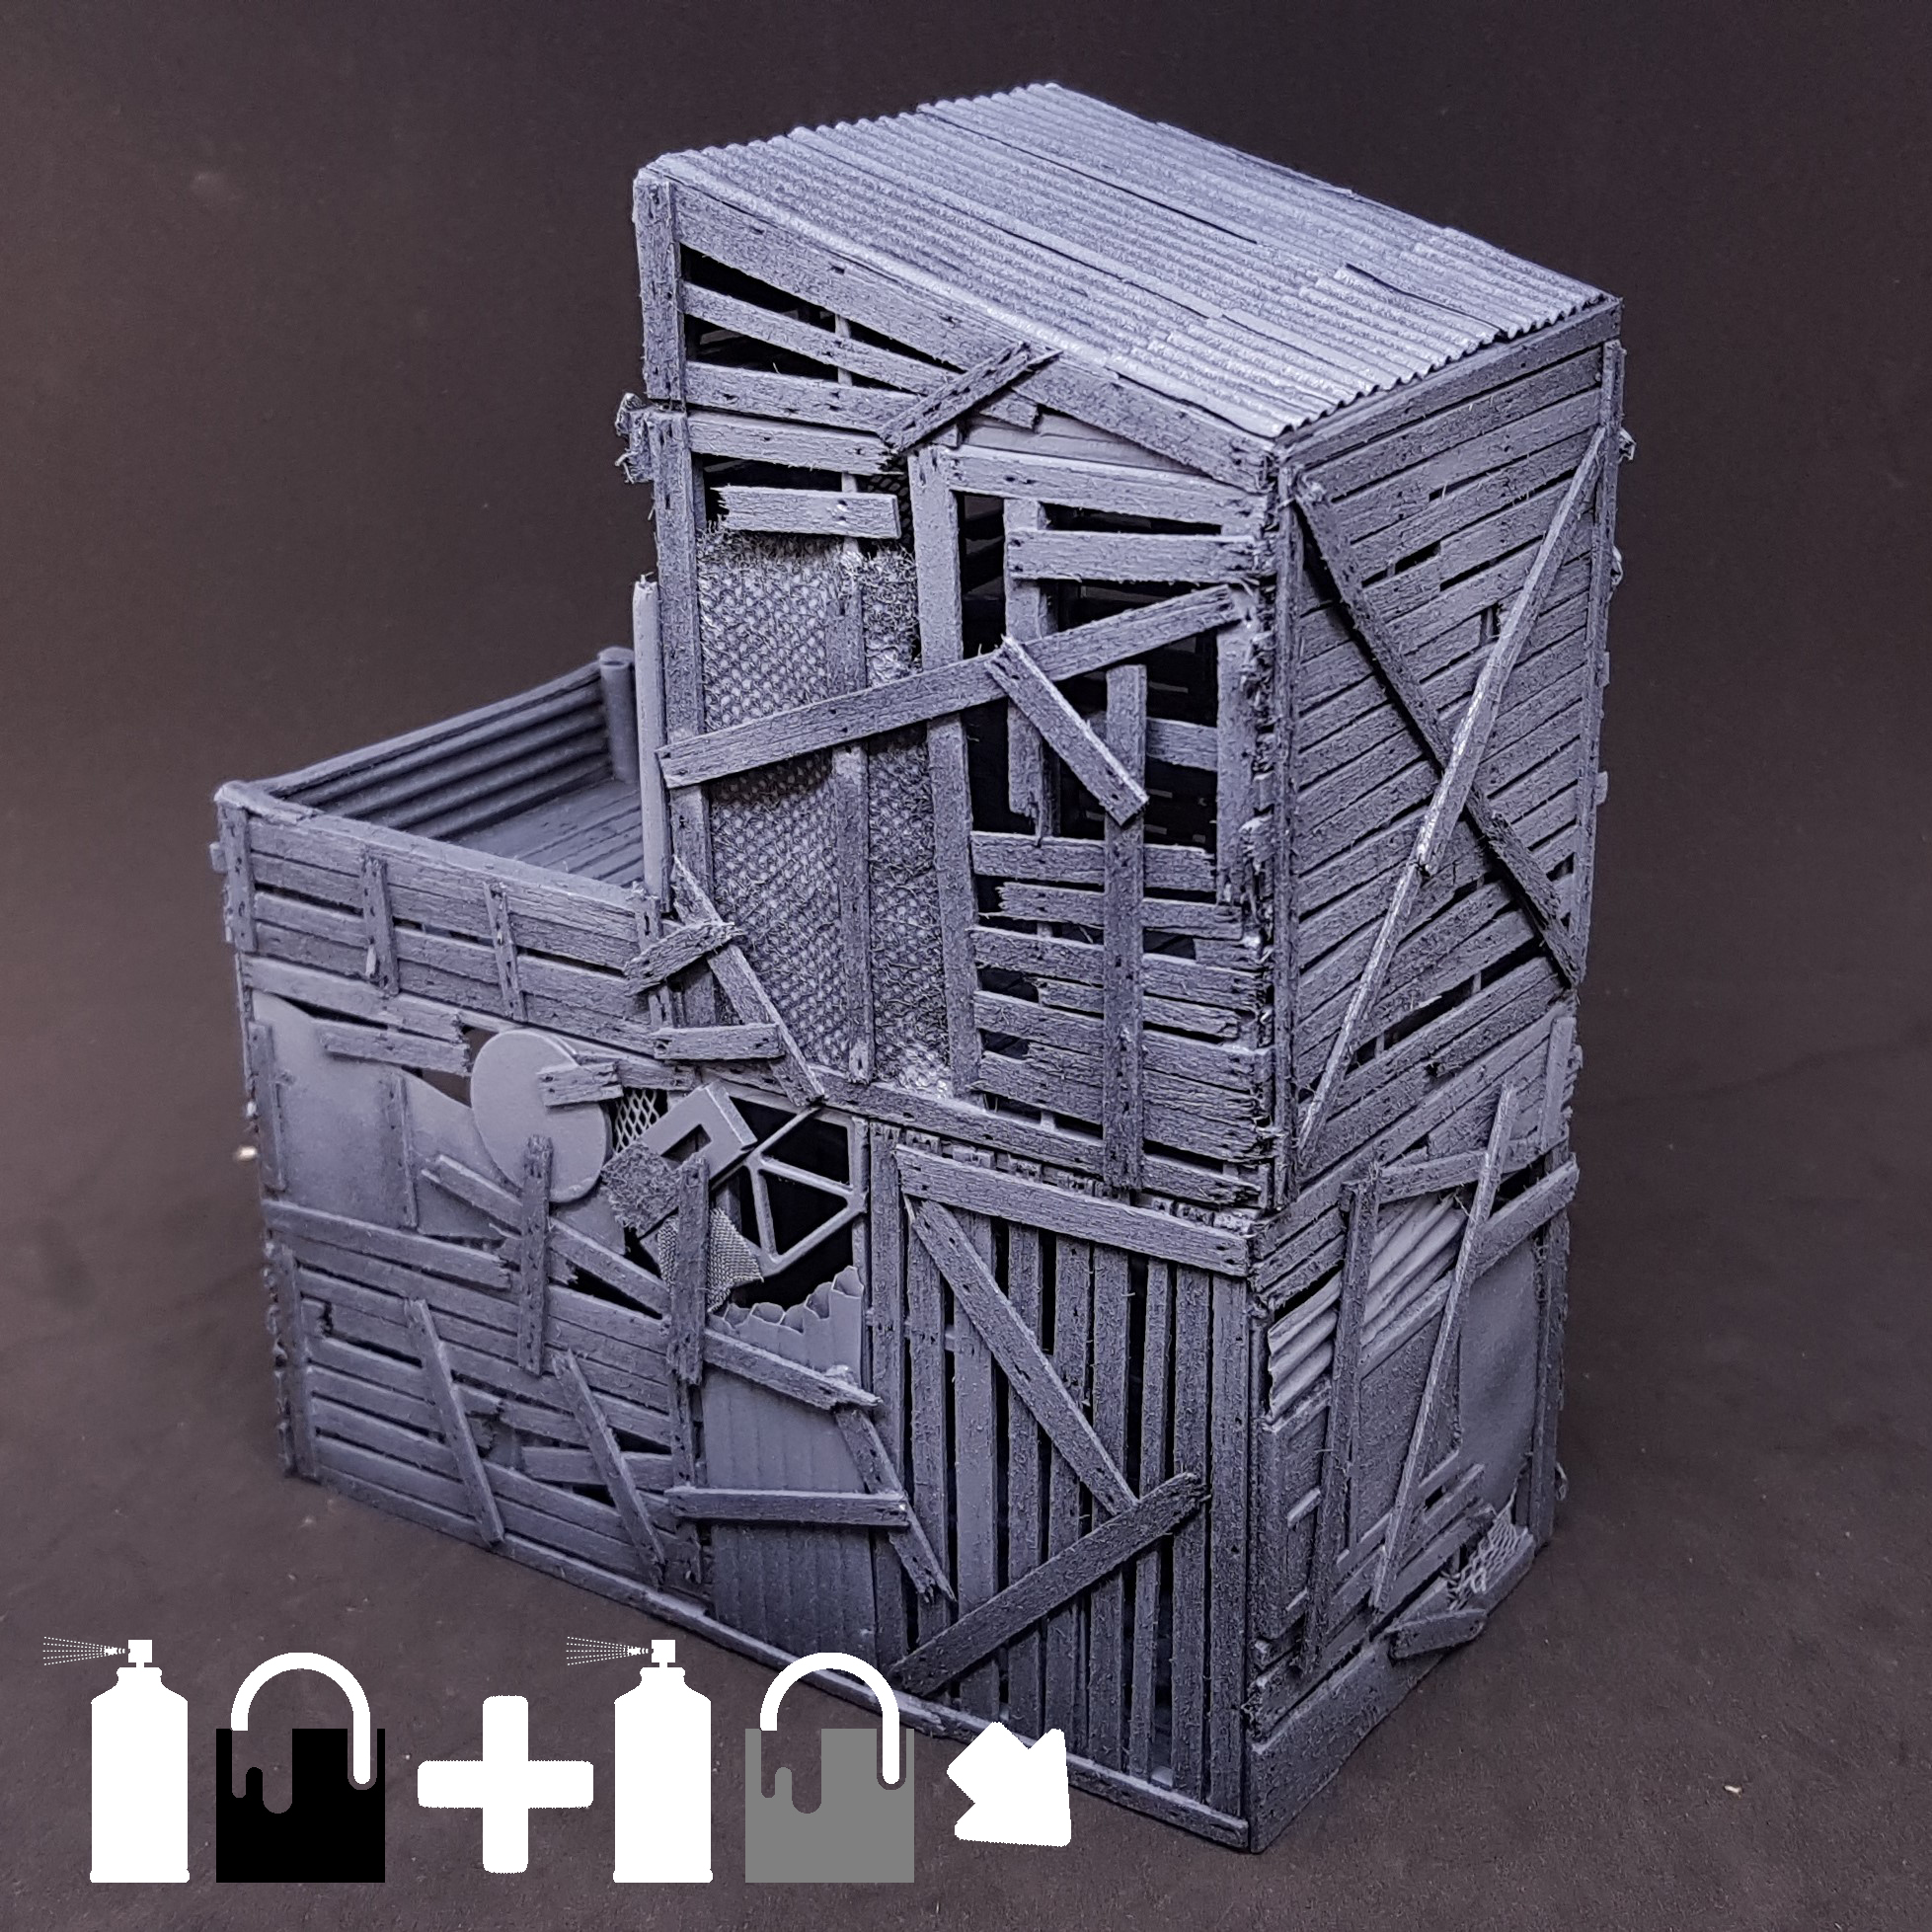 I spray everything black and then at 45degrees grey. I Zenith spray to protect the wood and to give me an idea of shading that I want to try and preserve, though less drastic.
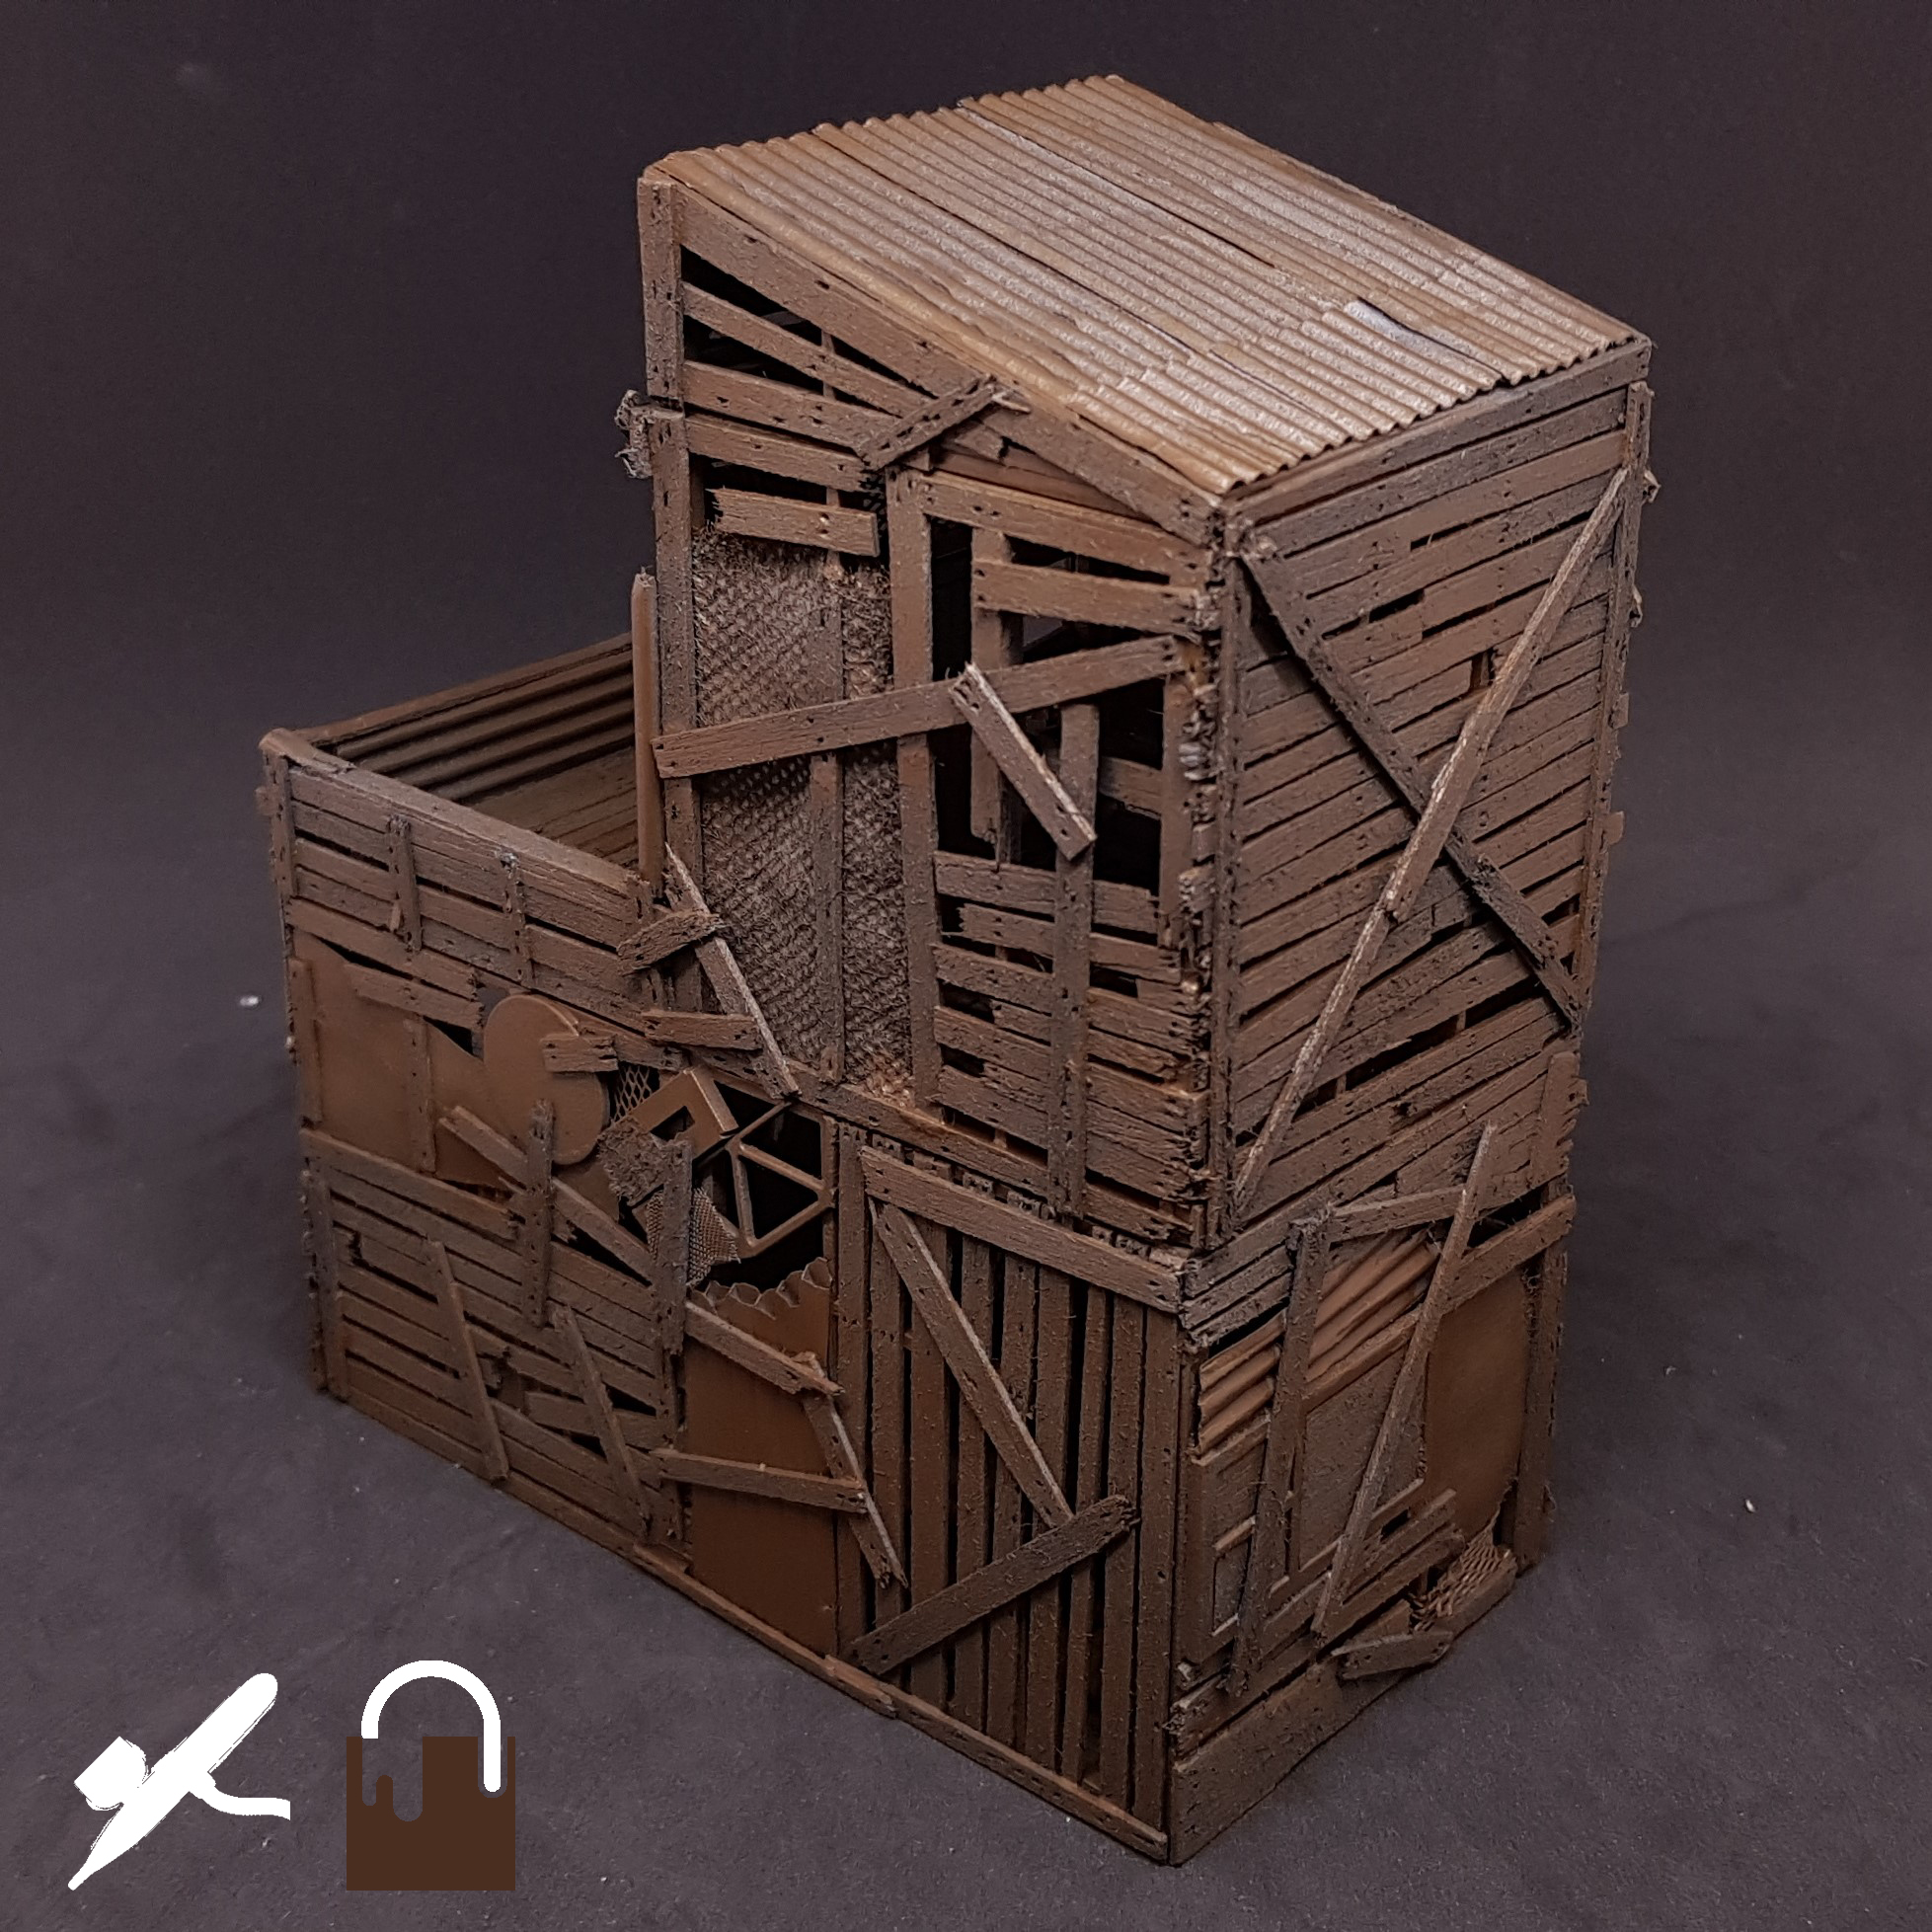 I airbrush Vallejo chocolate brown, but you can use any brown paint or even thing the paint and hand paint it. Just remember to keep this a thin coat to preserve detail. The thinner this coat and the more grey you let show though can give this a different effect.
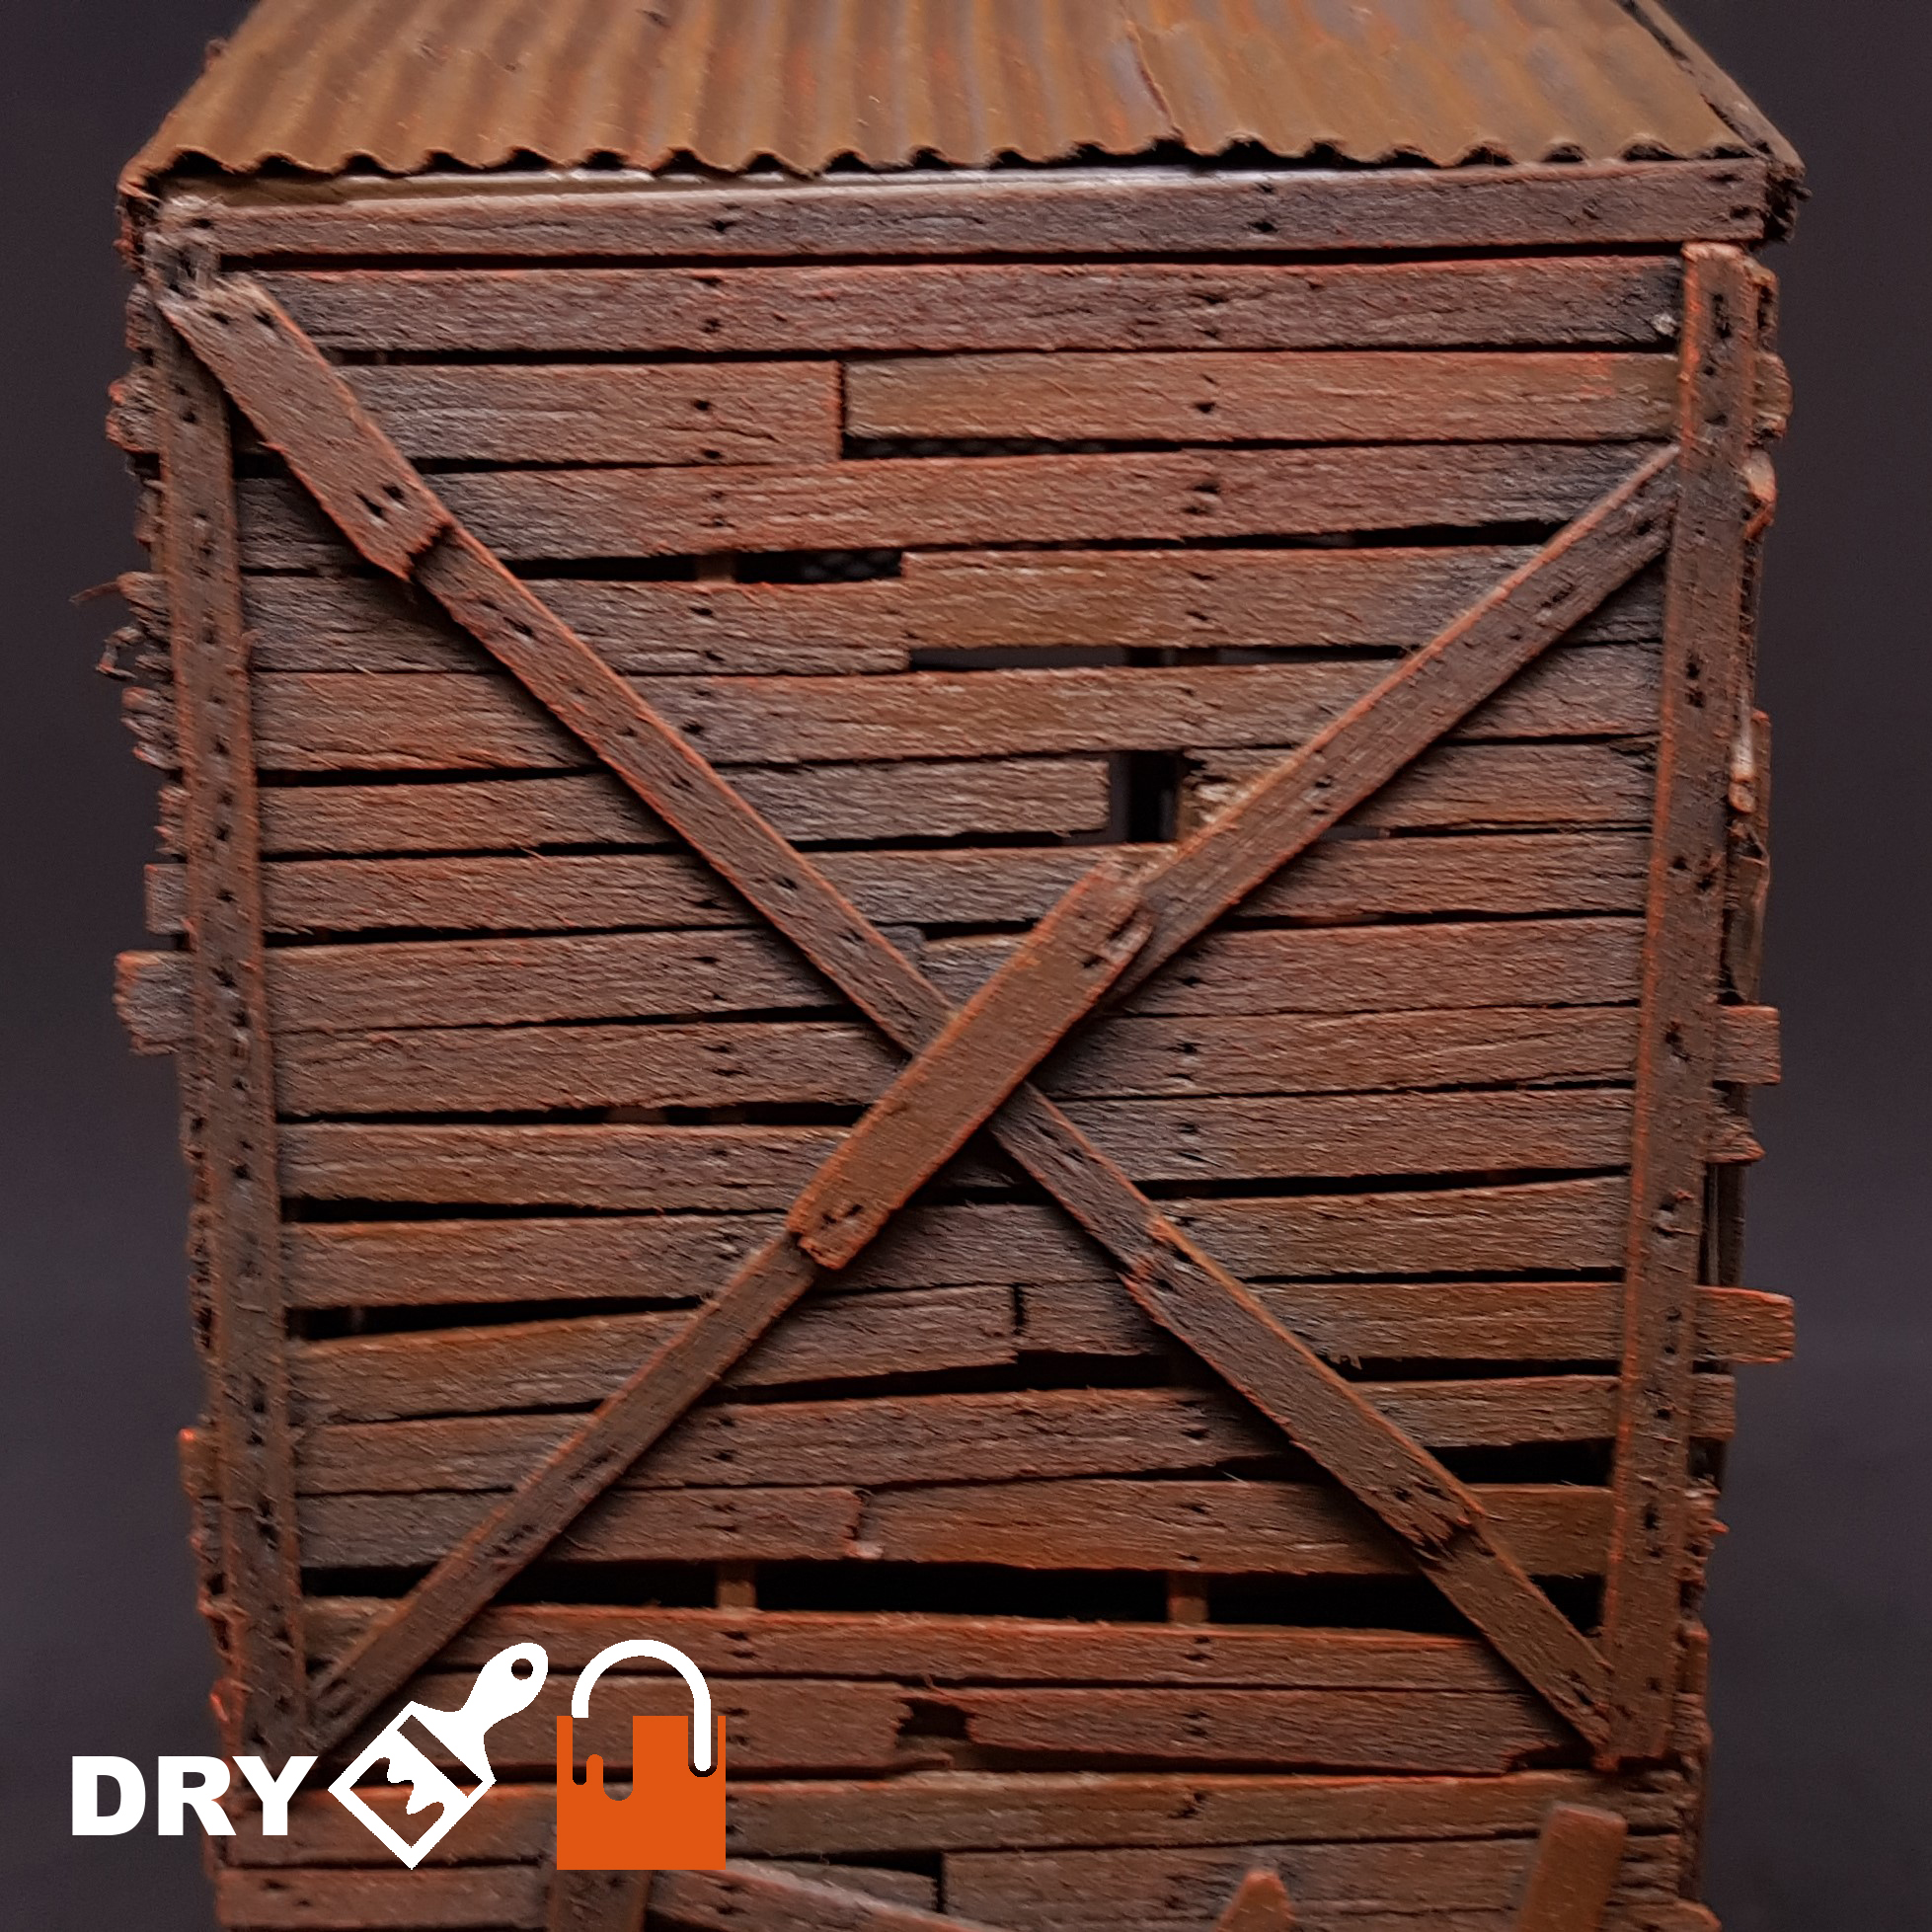 I drybrush with Vallejo Orange red. I do this as the next colours I use are quite cold this helps me preserve some heat. This always appear to be controversial but it's just a filter layer. You can use anything from blues to purples depending on what you wish to end up with.
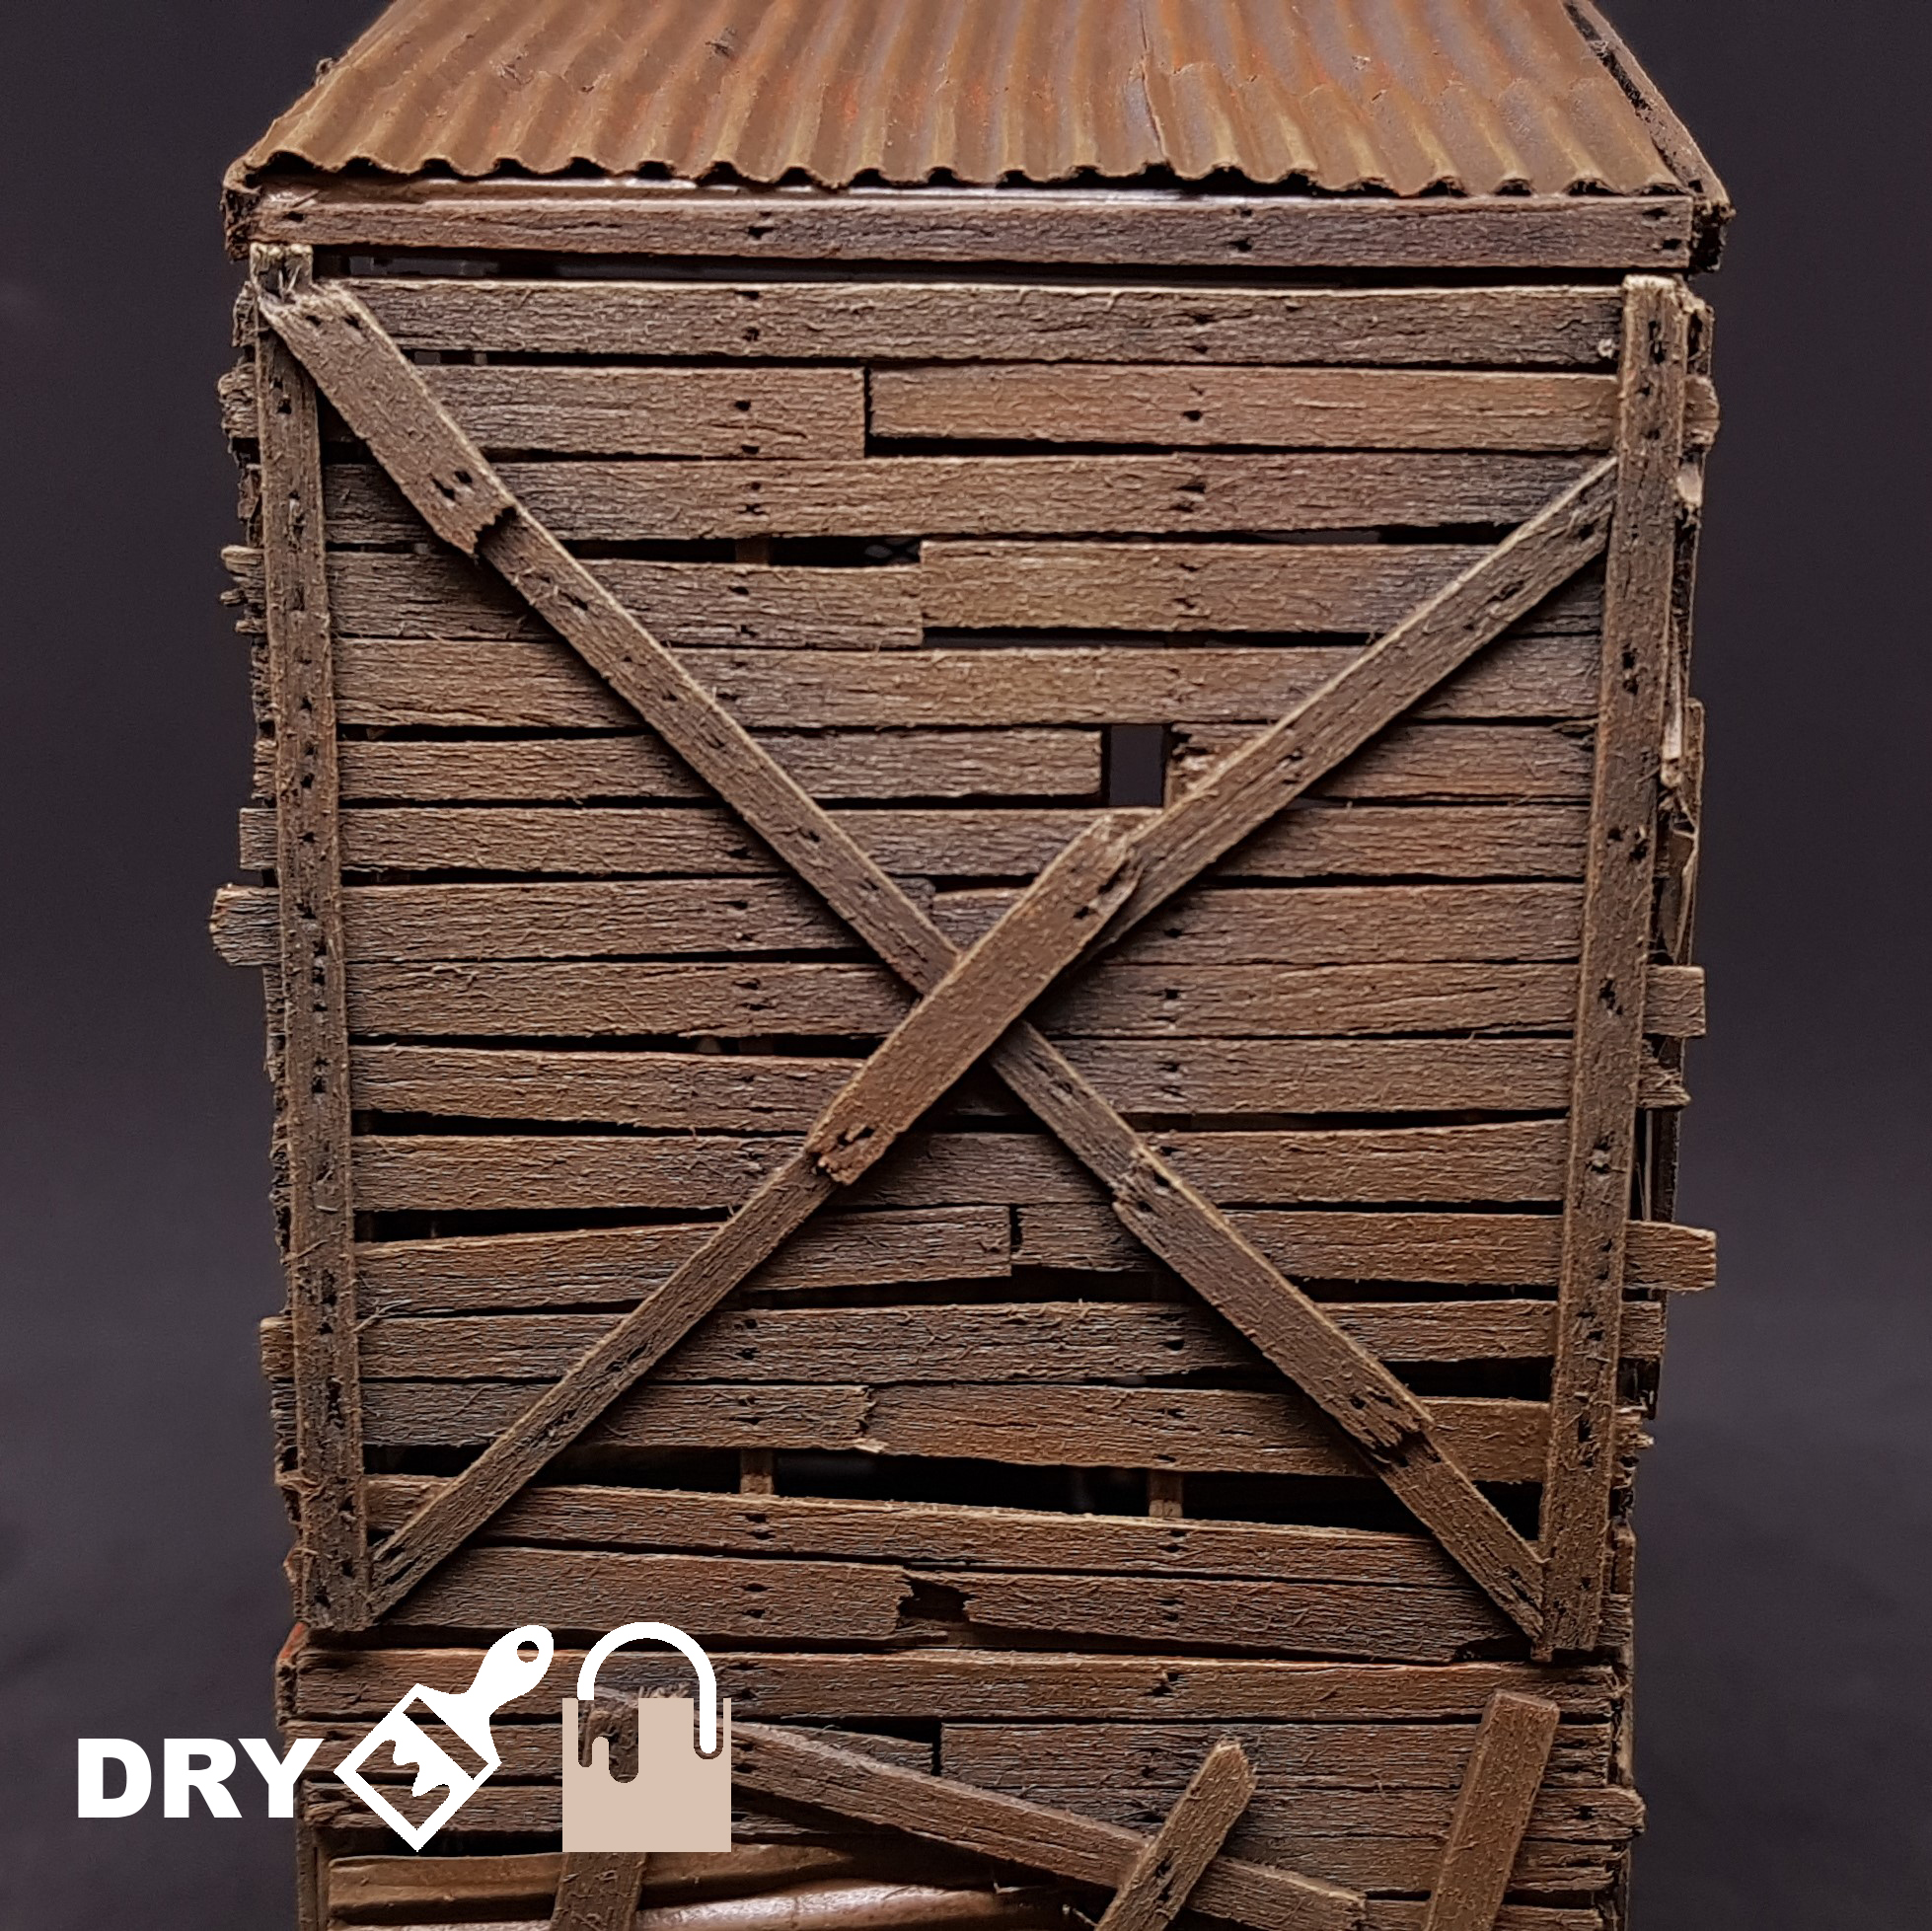 I drybrush with Vallejo khaki, I like adding a tinge of green into the mix. This is also the base layer. It also covers most of the orange filter layer.
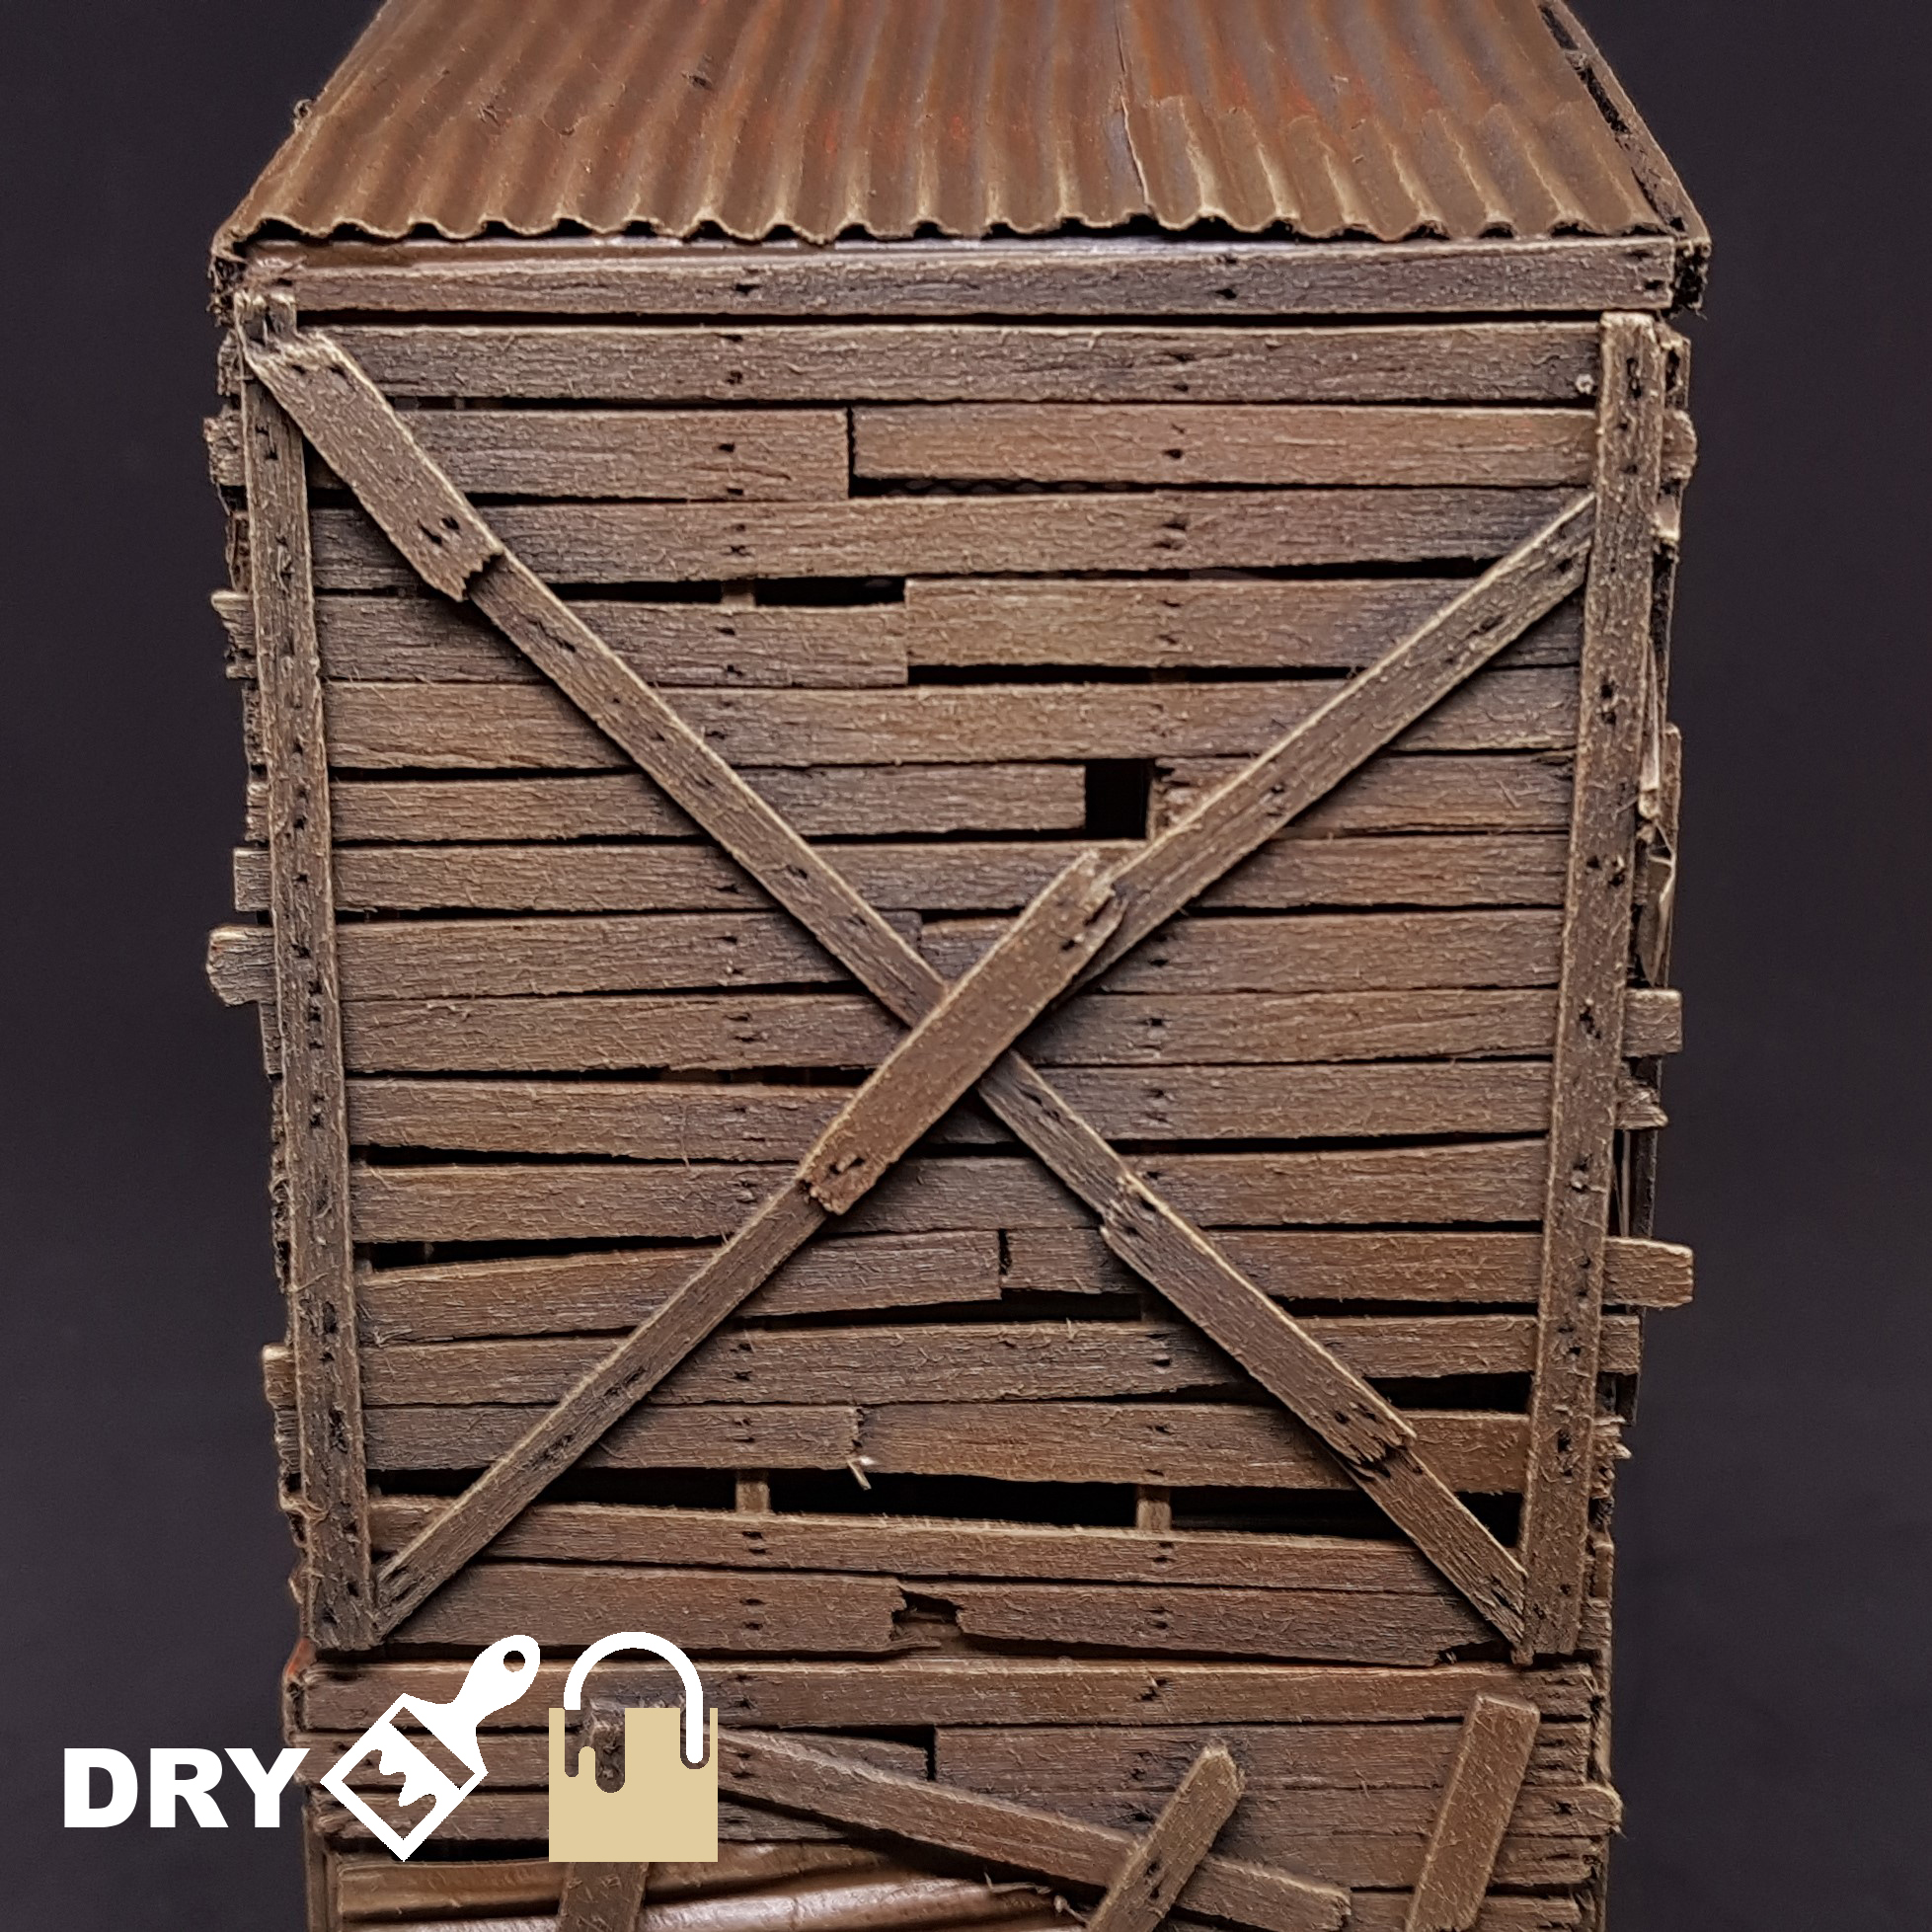 I then use Vallejo dark sand to drybrush further. This is like the first highlight. This is done lightly and in areas of interest I want your eyes to be drawn to. I think it makes it look more dynamic.
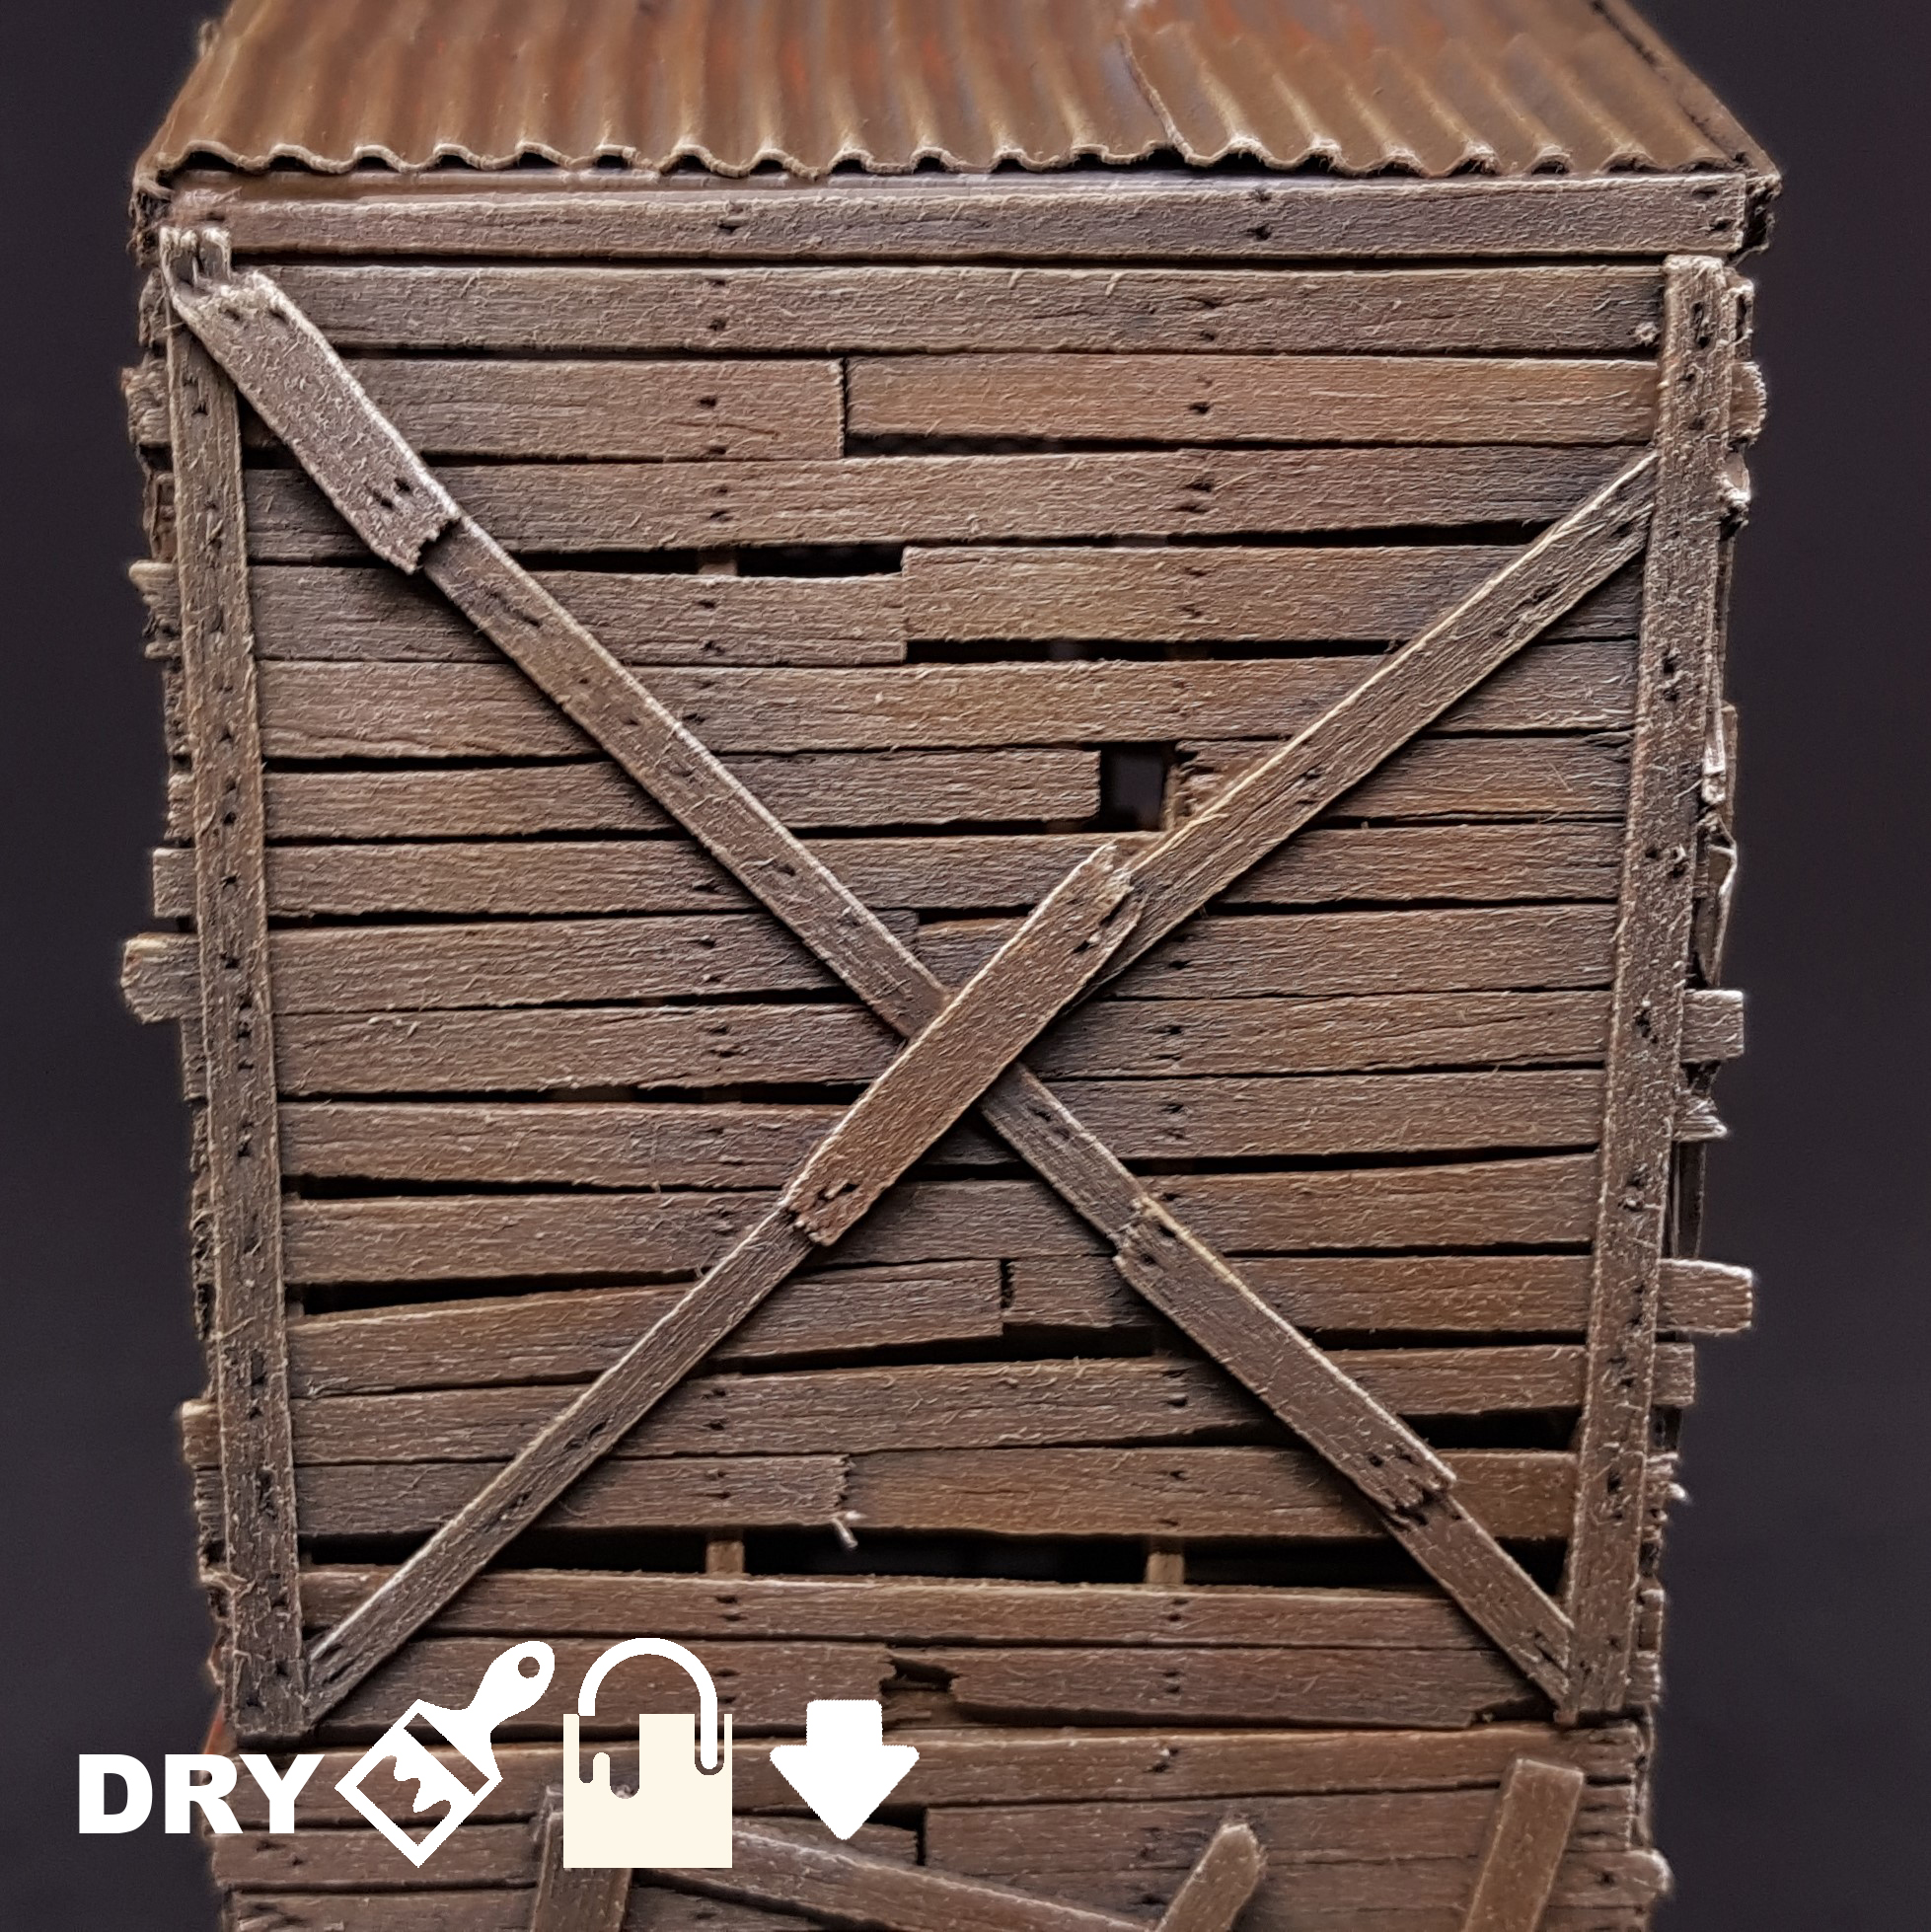 Lastly, I go in with a vertical drybrush only going in one direction down of Vallejo off white. this is to make it look like the light is just coming down and hitting the edges. I don’t do this step on the interior as it would be too much. It doesn’t add a lot but i like the look. This is a very light drybrush.
That’s how I paint wood. It’s not a natural looking wood but if you look at railway sleepers this is more like that effect but a bit brighter and warmer. I do this so I can knock it back later with washes but still keep the lighter spots.
I use balsa wood as I like the fibres from it they pick up the paint and drybrush very well. I think it’s impossible to get this effect from any other material. it’s also quite cheap from where I get it from (£1.90 a sheet) but I am sure you could find much better value if you didn’t just walk into your local craft shop.
Coffee stirrers are a close second but depending which ones you end up with they can be too smooth unless that’s the effect your looking for I would say get some 1 – 2mm balsa sheets.
I also try where possible to drybrush cross grain but also drybrush in a circular motion and focus on a spot for a light effect.
I am not a fan of dry brushing overall but if you are going to overuse this technique anywhere it should be on terrain. as you are painting large objects and need to get a good result quick for your own sanity. Also you don’t want to use a lot of paint especially if you are using model paints this didn’t take much at all apart from the base layer of brown.
I am thinking of doing the same thing as the above for the rusted corrugated panels. I made one panel all wood and the woof all metal to do these tutorials as both things are key to the painting of this project.
Any feedback on the icons on the pictures would be good, but I think people read this asking for feedback may not be the people it was aimed at. Just trying something different.
I hope to have more today.
Keep up the great work everyone and start a challenge project and show us your stuff if you haven’t already!
Rusted corrugated sheet
As I said before I stole this from the scale model people. It’s not new but I have not seen it used much in wargaming I like the effect a lot and it adds so much into post apocalyptic terrain.
A few things before I start you can get rust effect paint and rust texture paint or even both. If you are only doing a small piece or looking for the best quality I suggest doing this for the rust. This is almost a quick and dirty version of something that can look even better!
 I started by using the base brown I used on the entire building. I didn’t re-spray this as it was good enough for a base coat.
 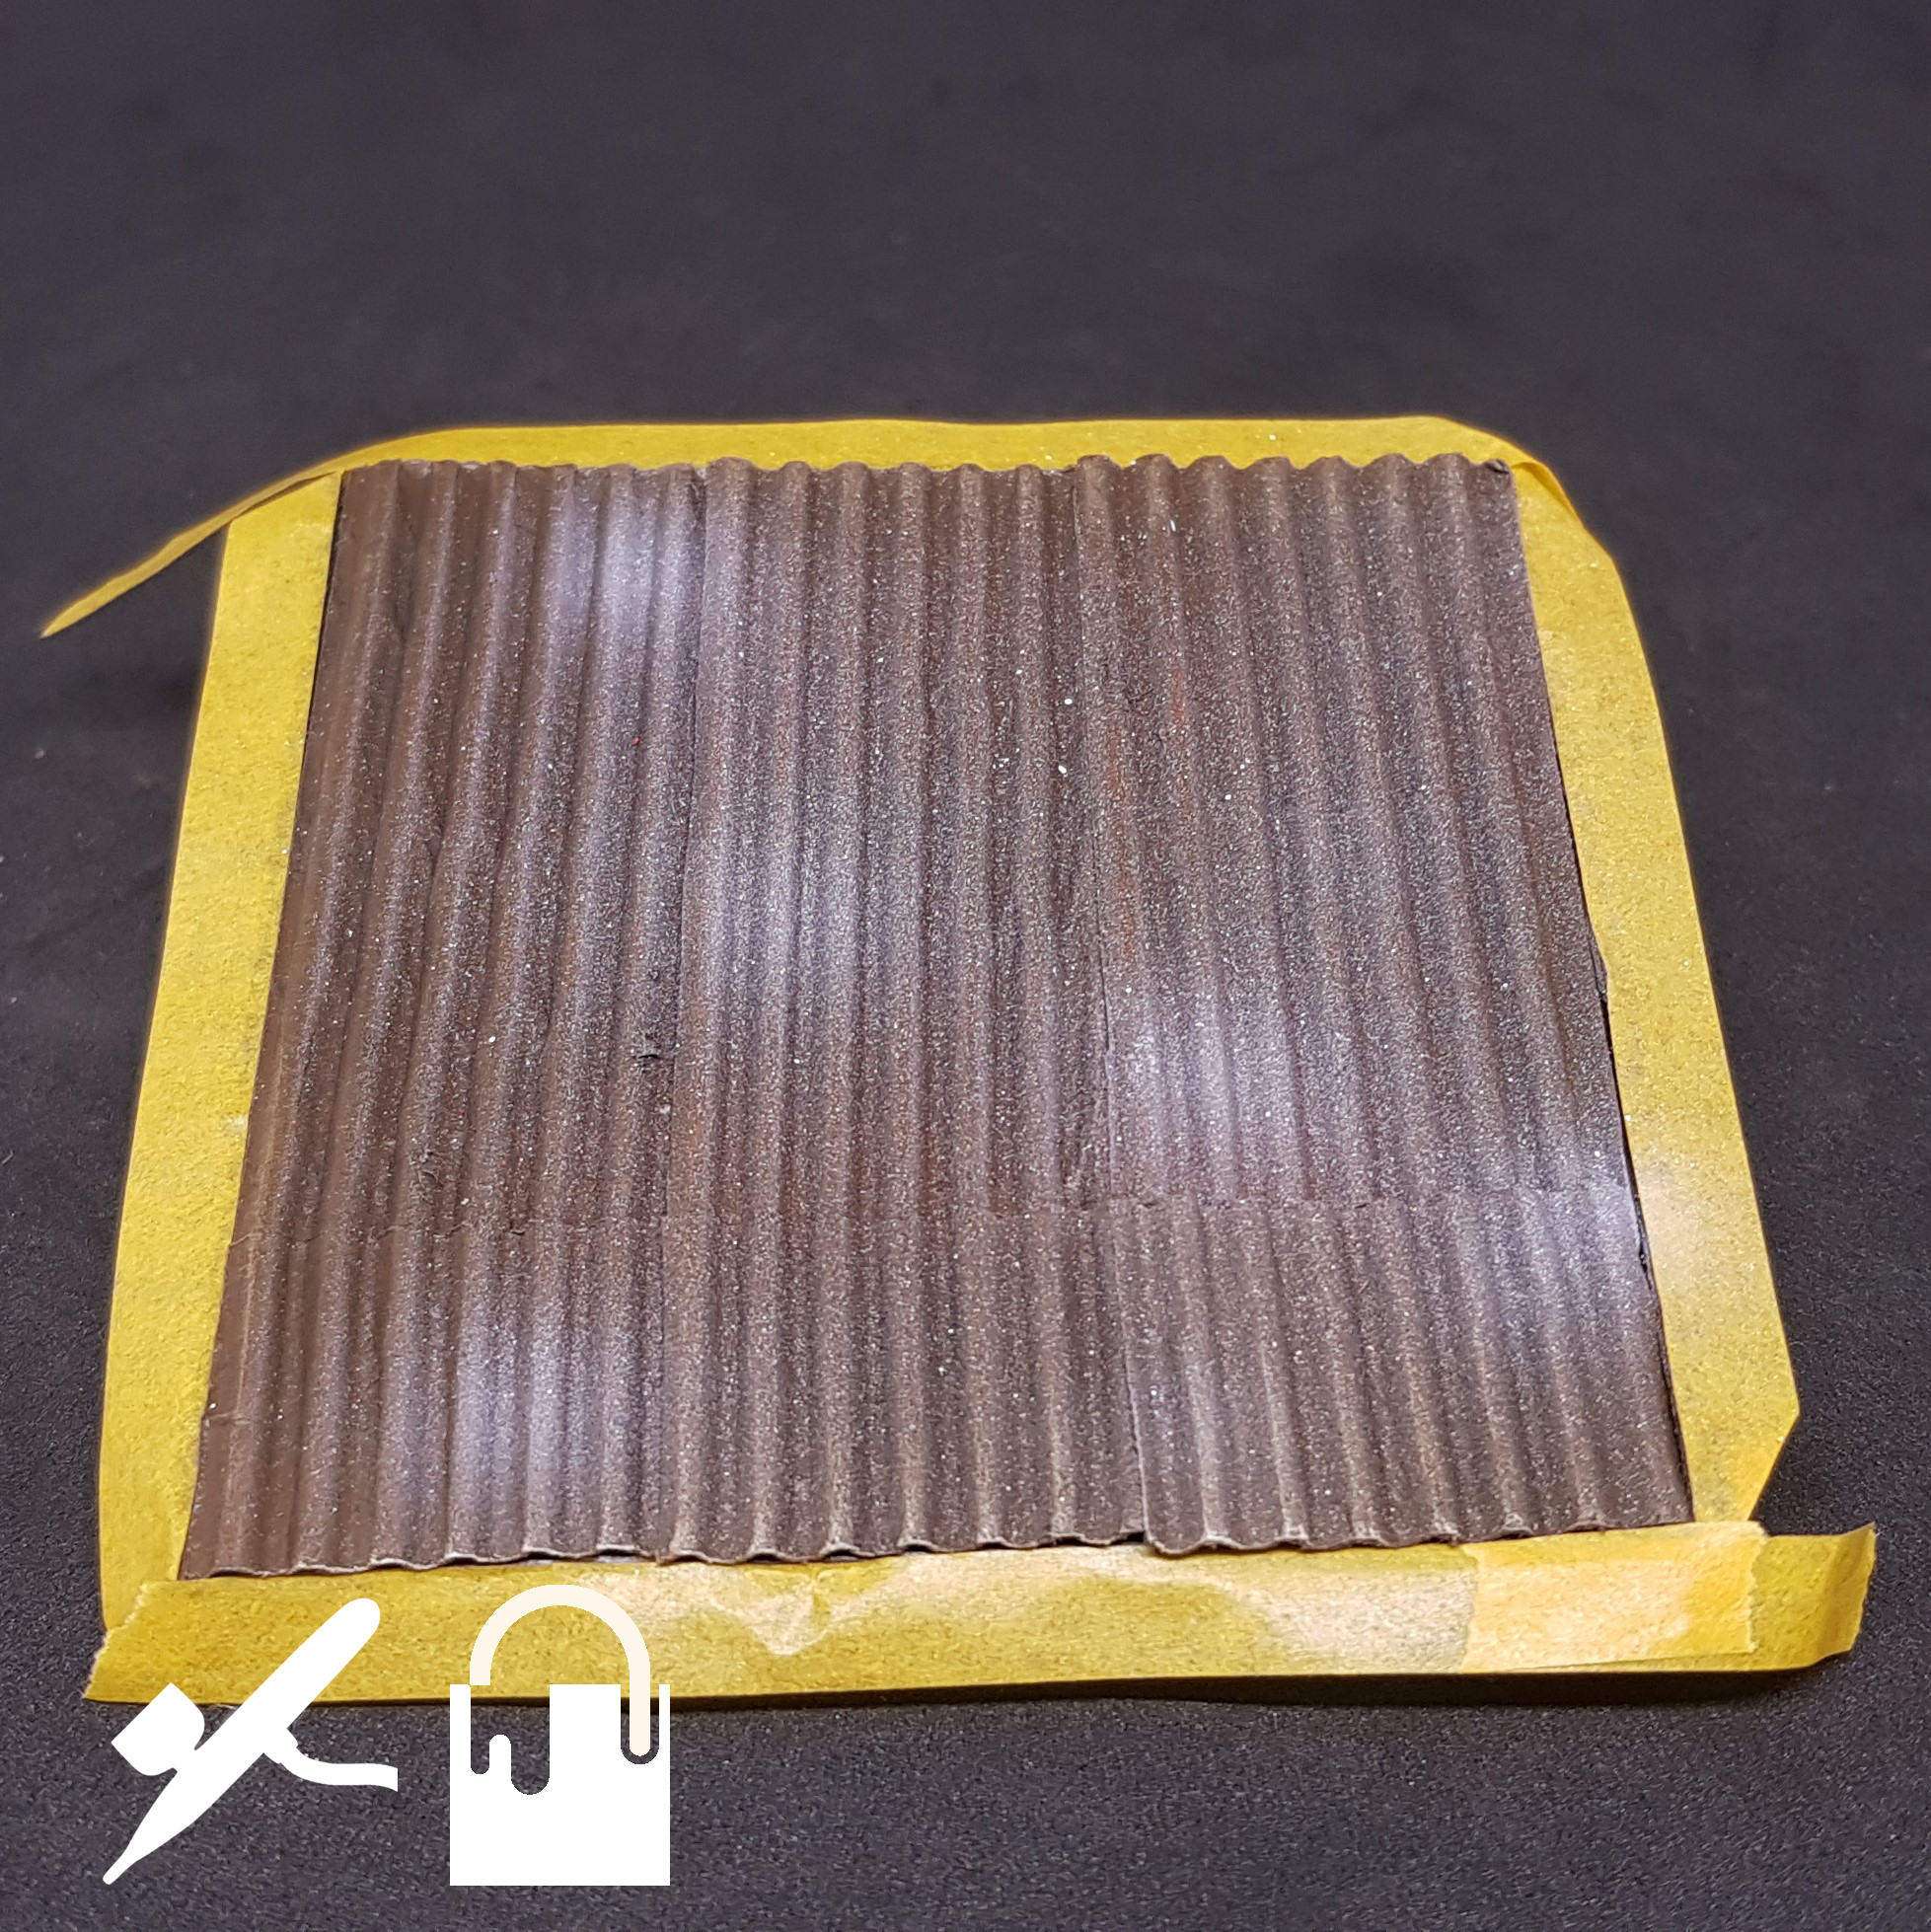 I airbrushed white spots I wanted this to be a bit brighter on these locations and the paints I use next are not fully opaque.
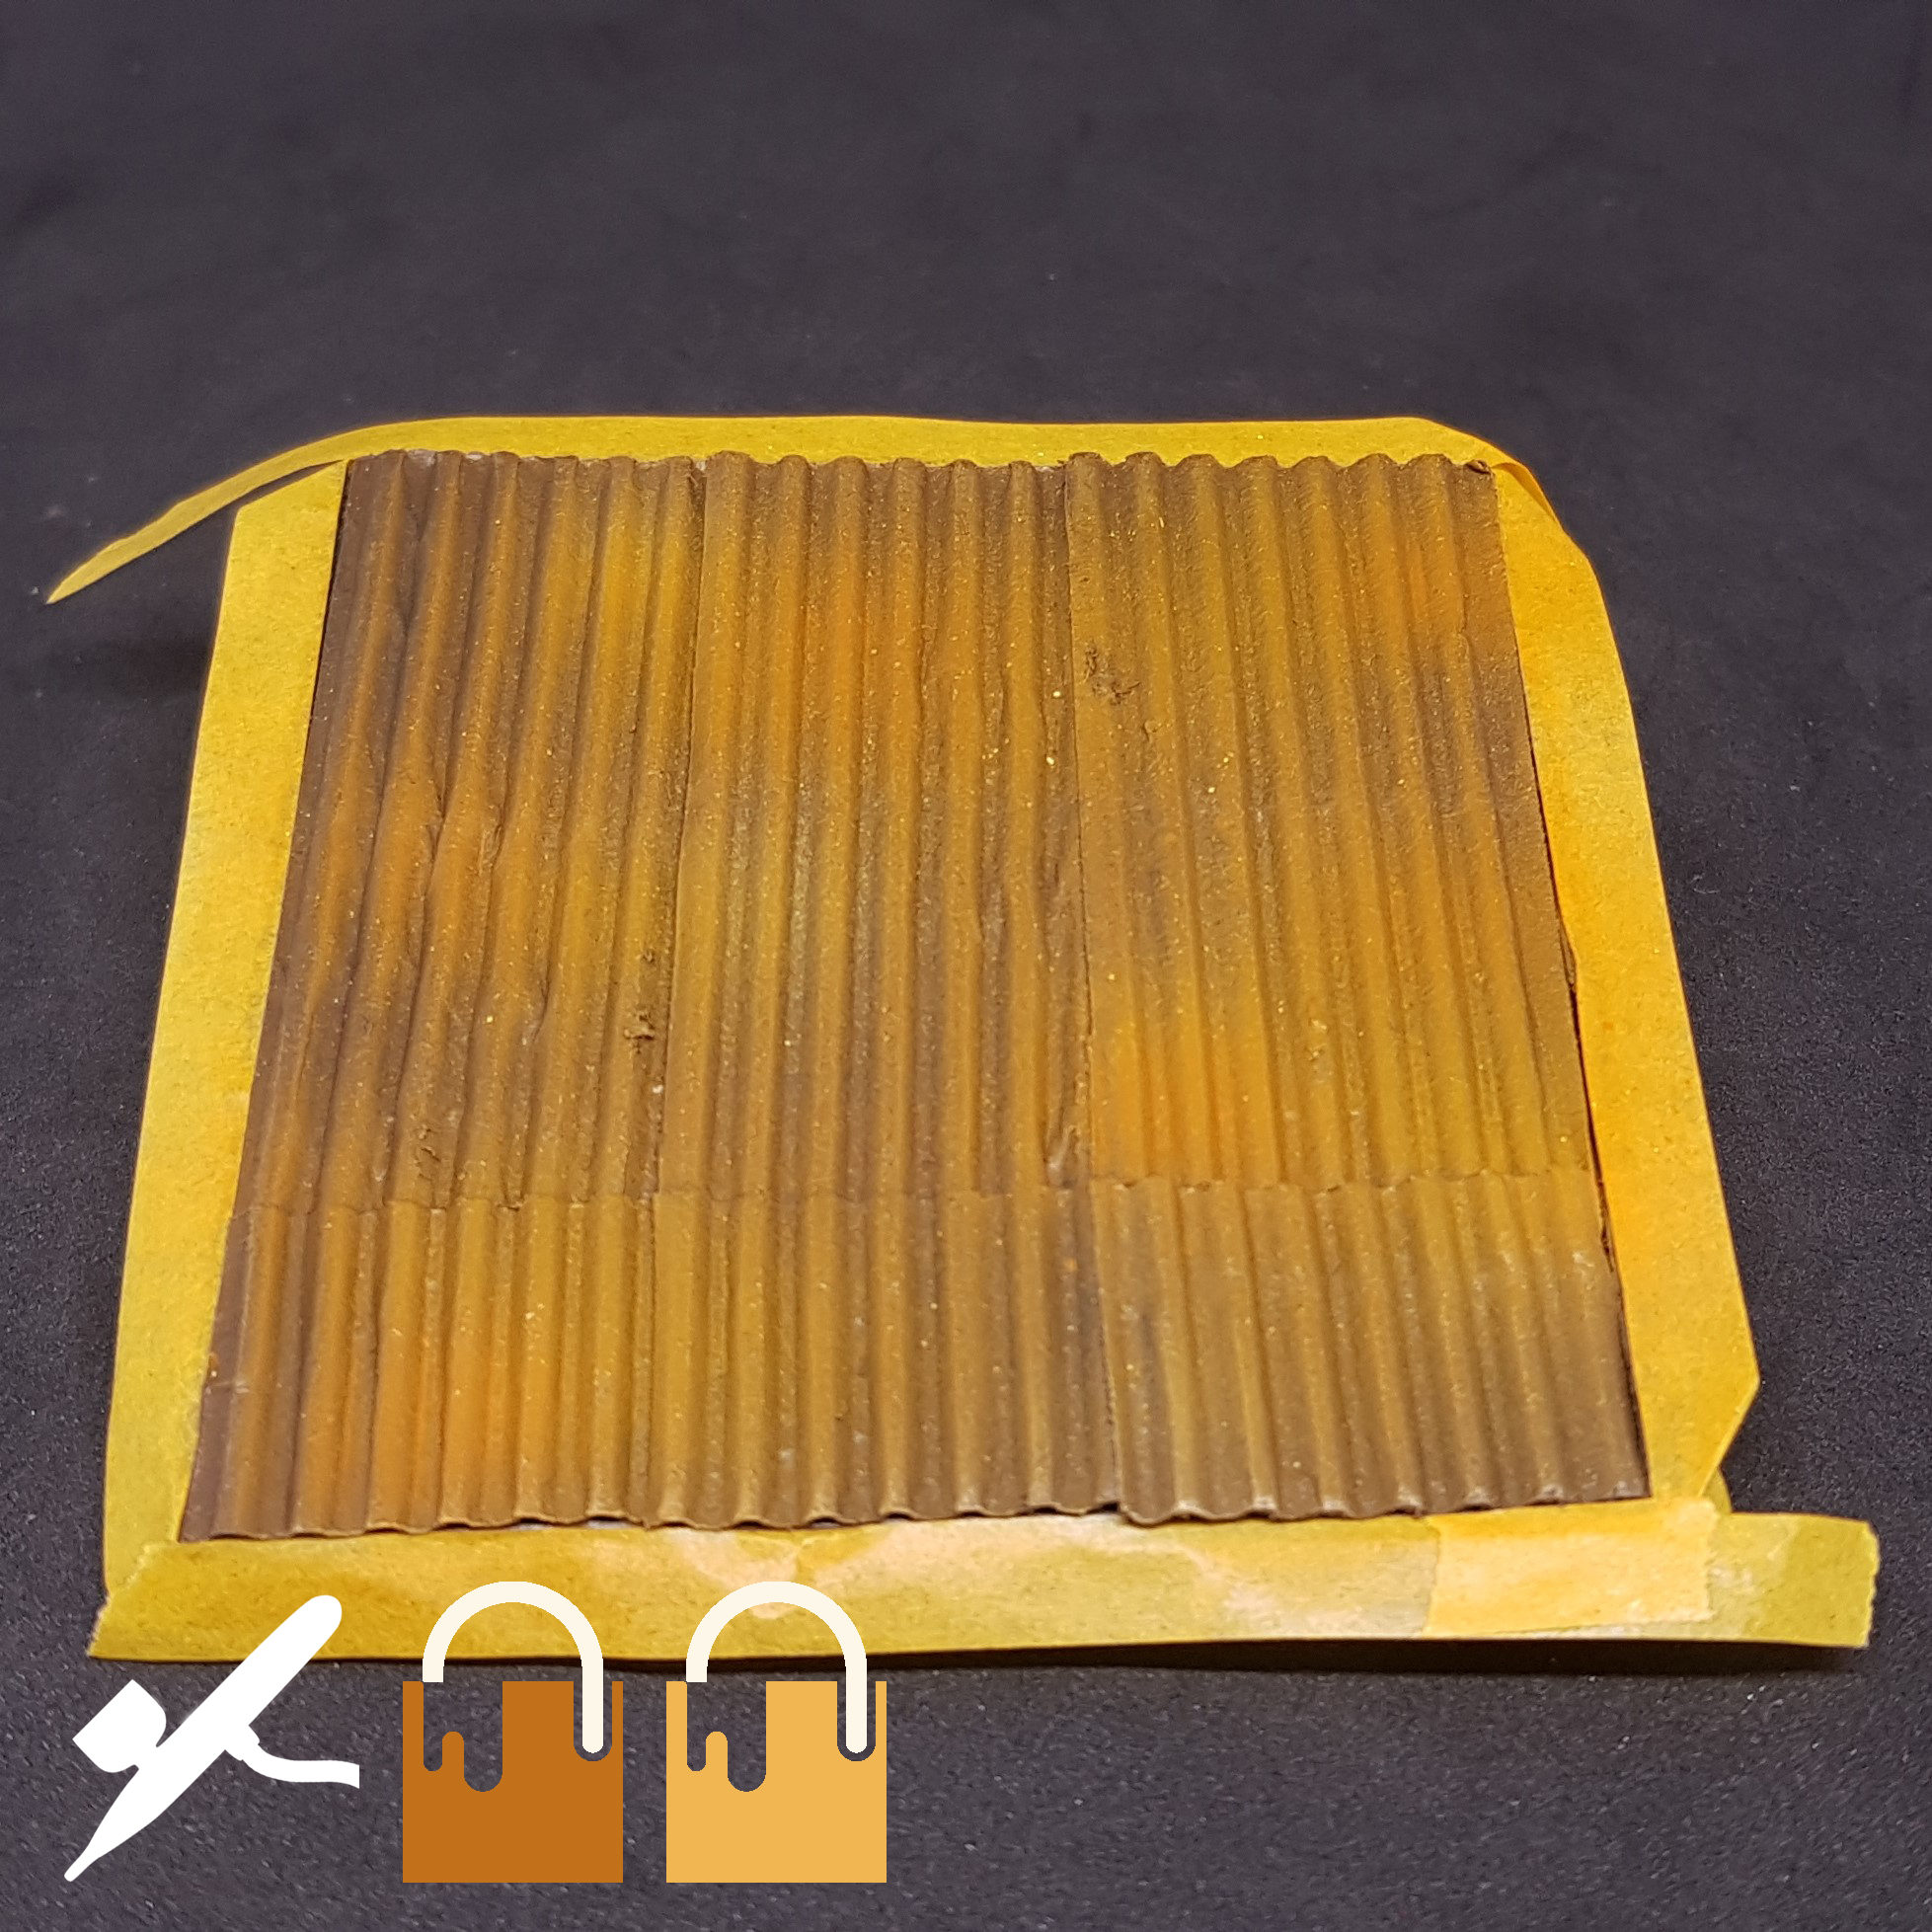 I sprayed orange and yellow over everything again trying to be patchy and get a rusty looking colour.
 I then went in with brown and black wash. I airbrushed this on to finish the rust. This does not look very rusty just now but the colours are about right.
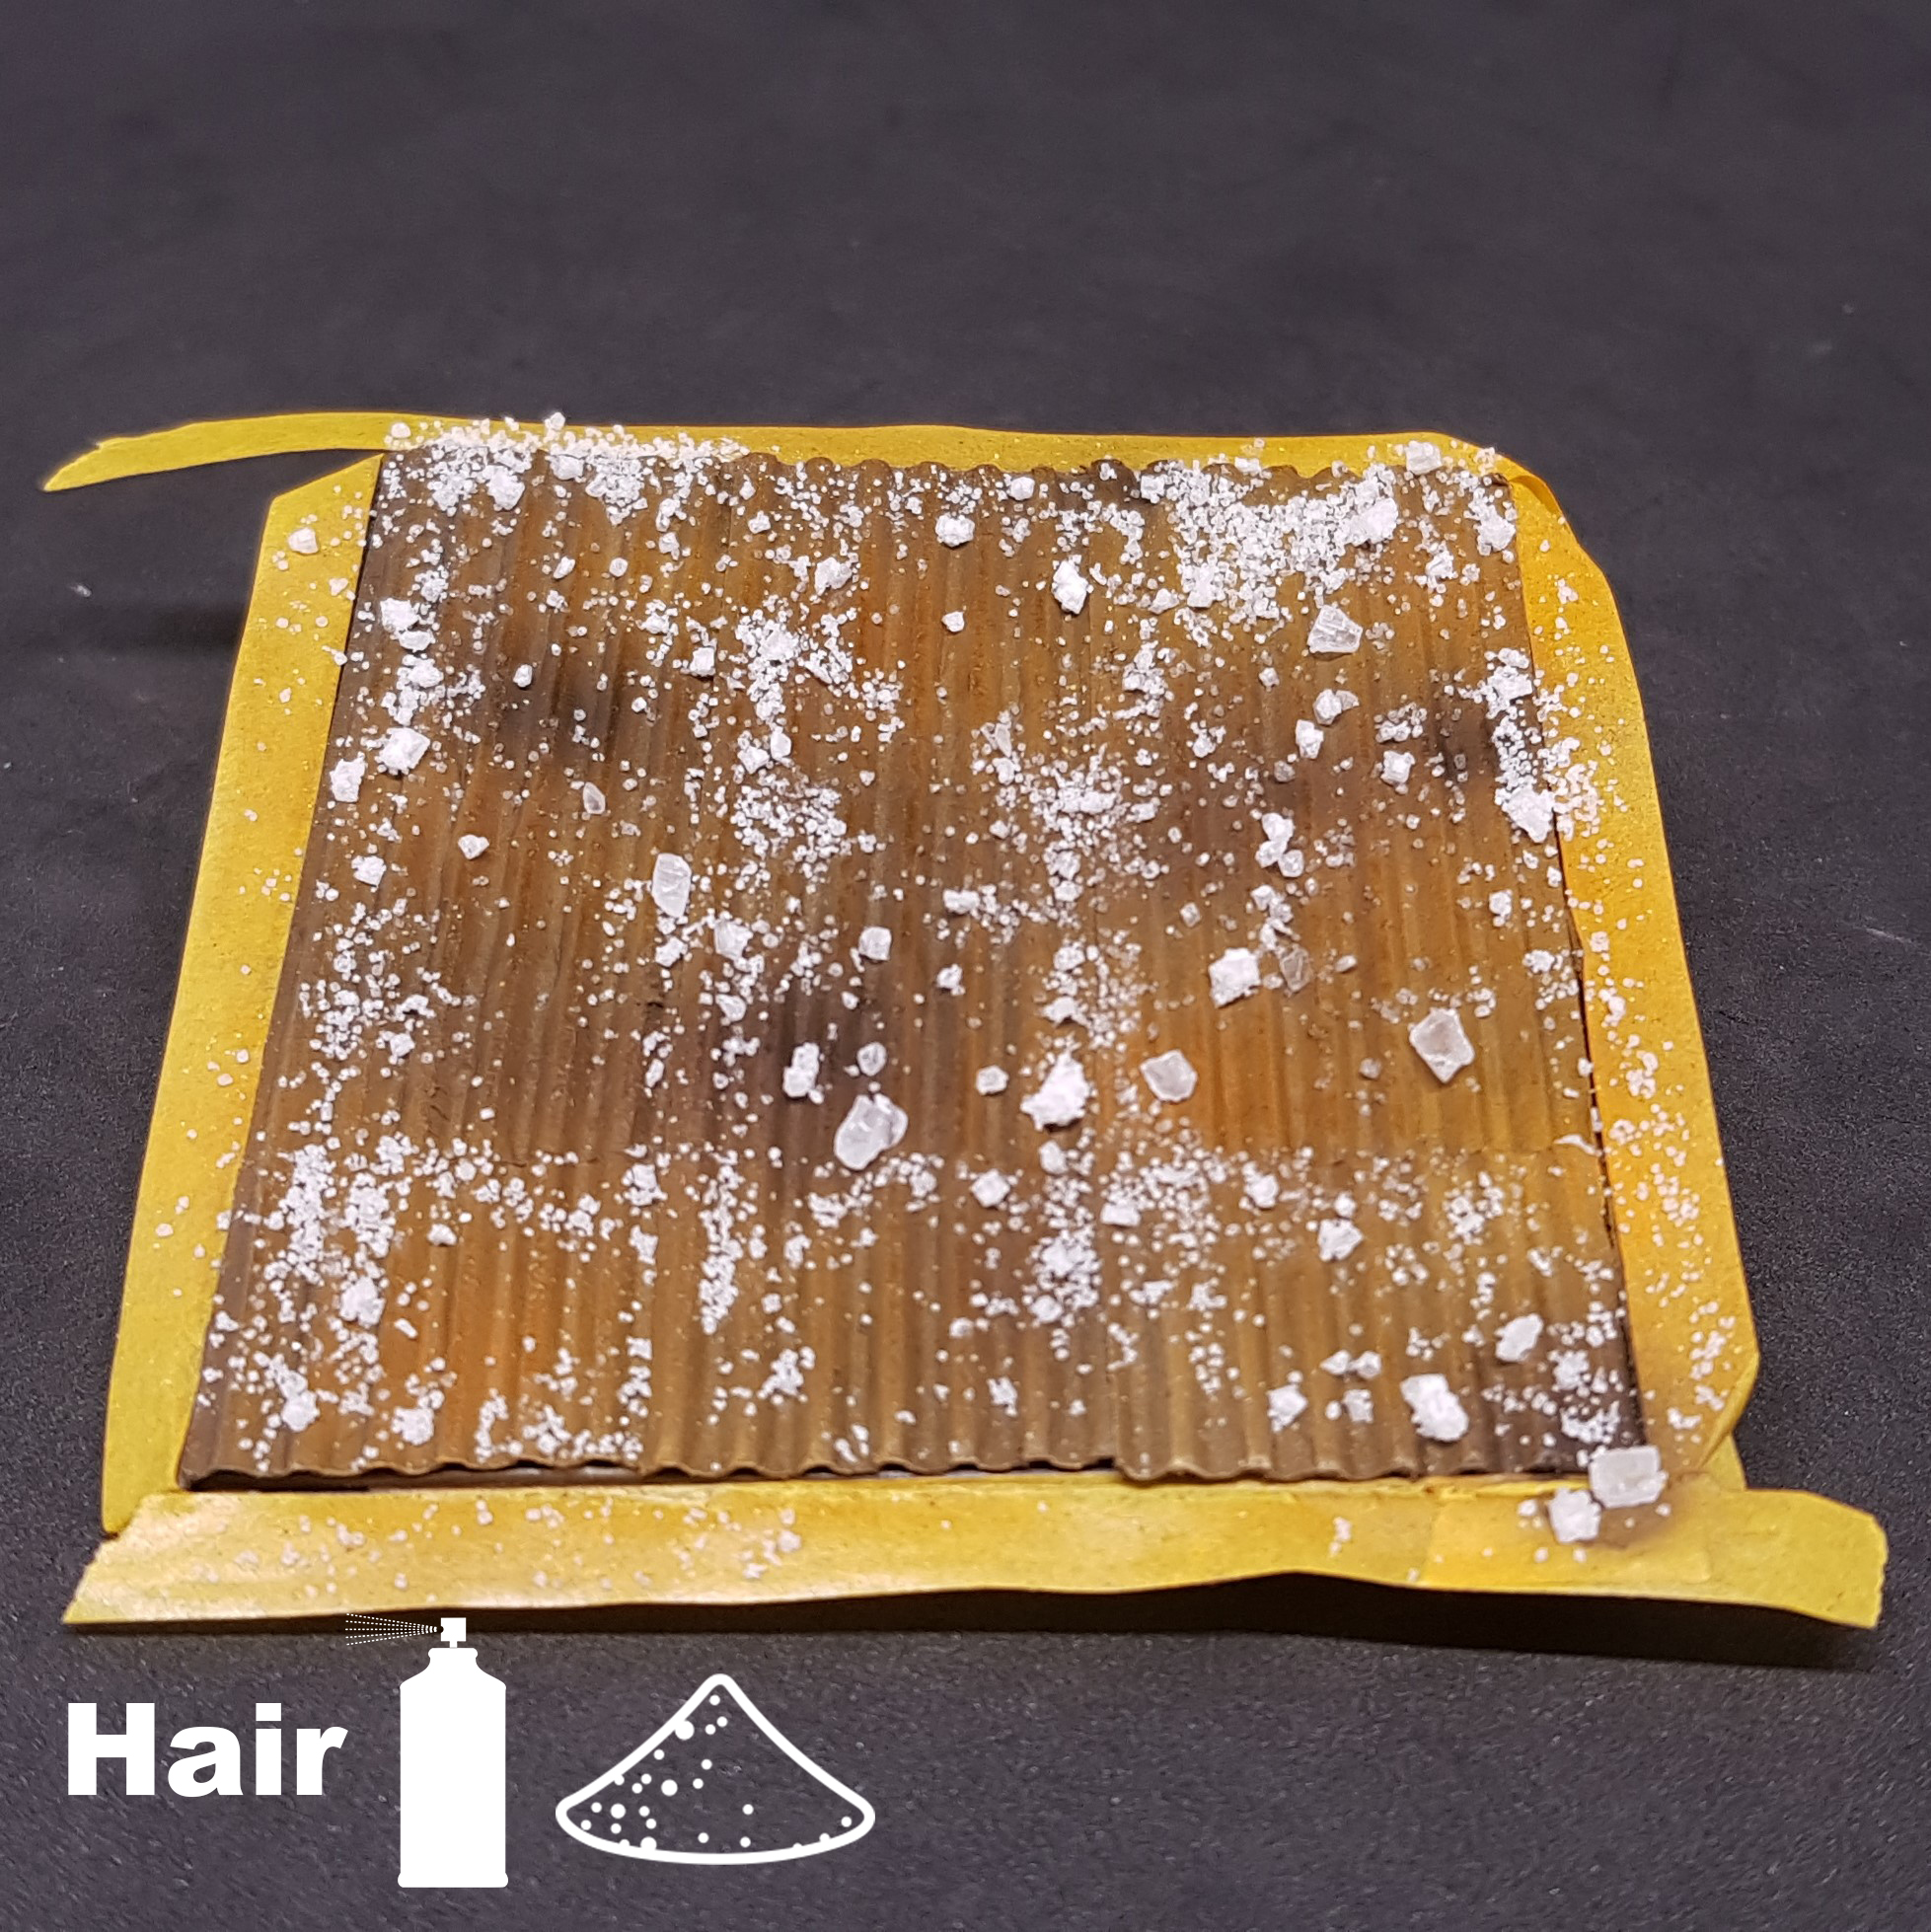 I sprayed the cheapest possible hairspray onto everything and sprinkled with various salts (table, rock etc) and baking powder. Like on all steps I used a hair dryer to speed up the process.
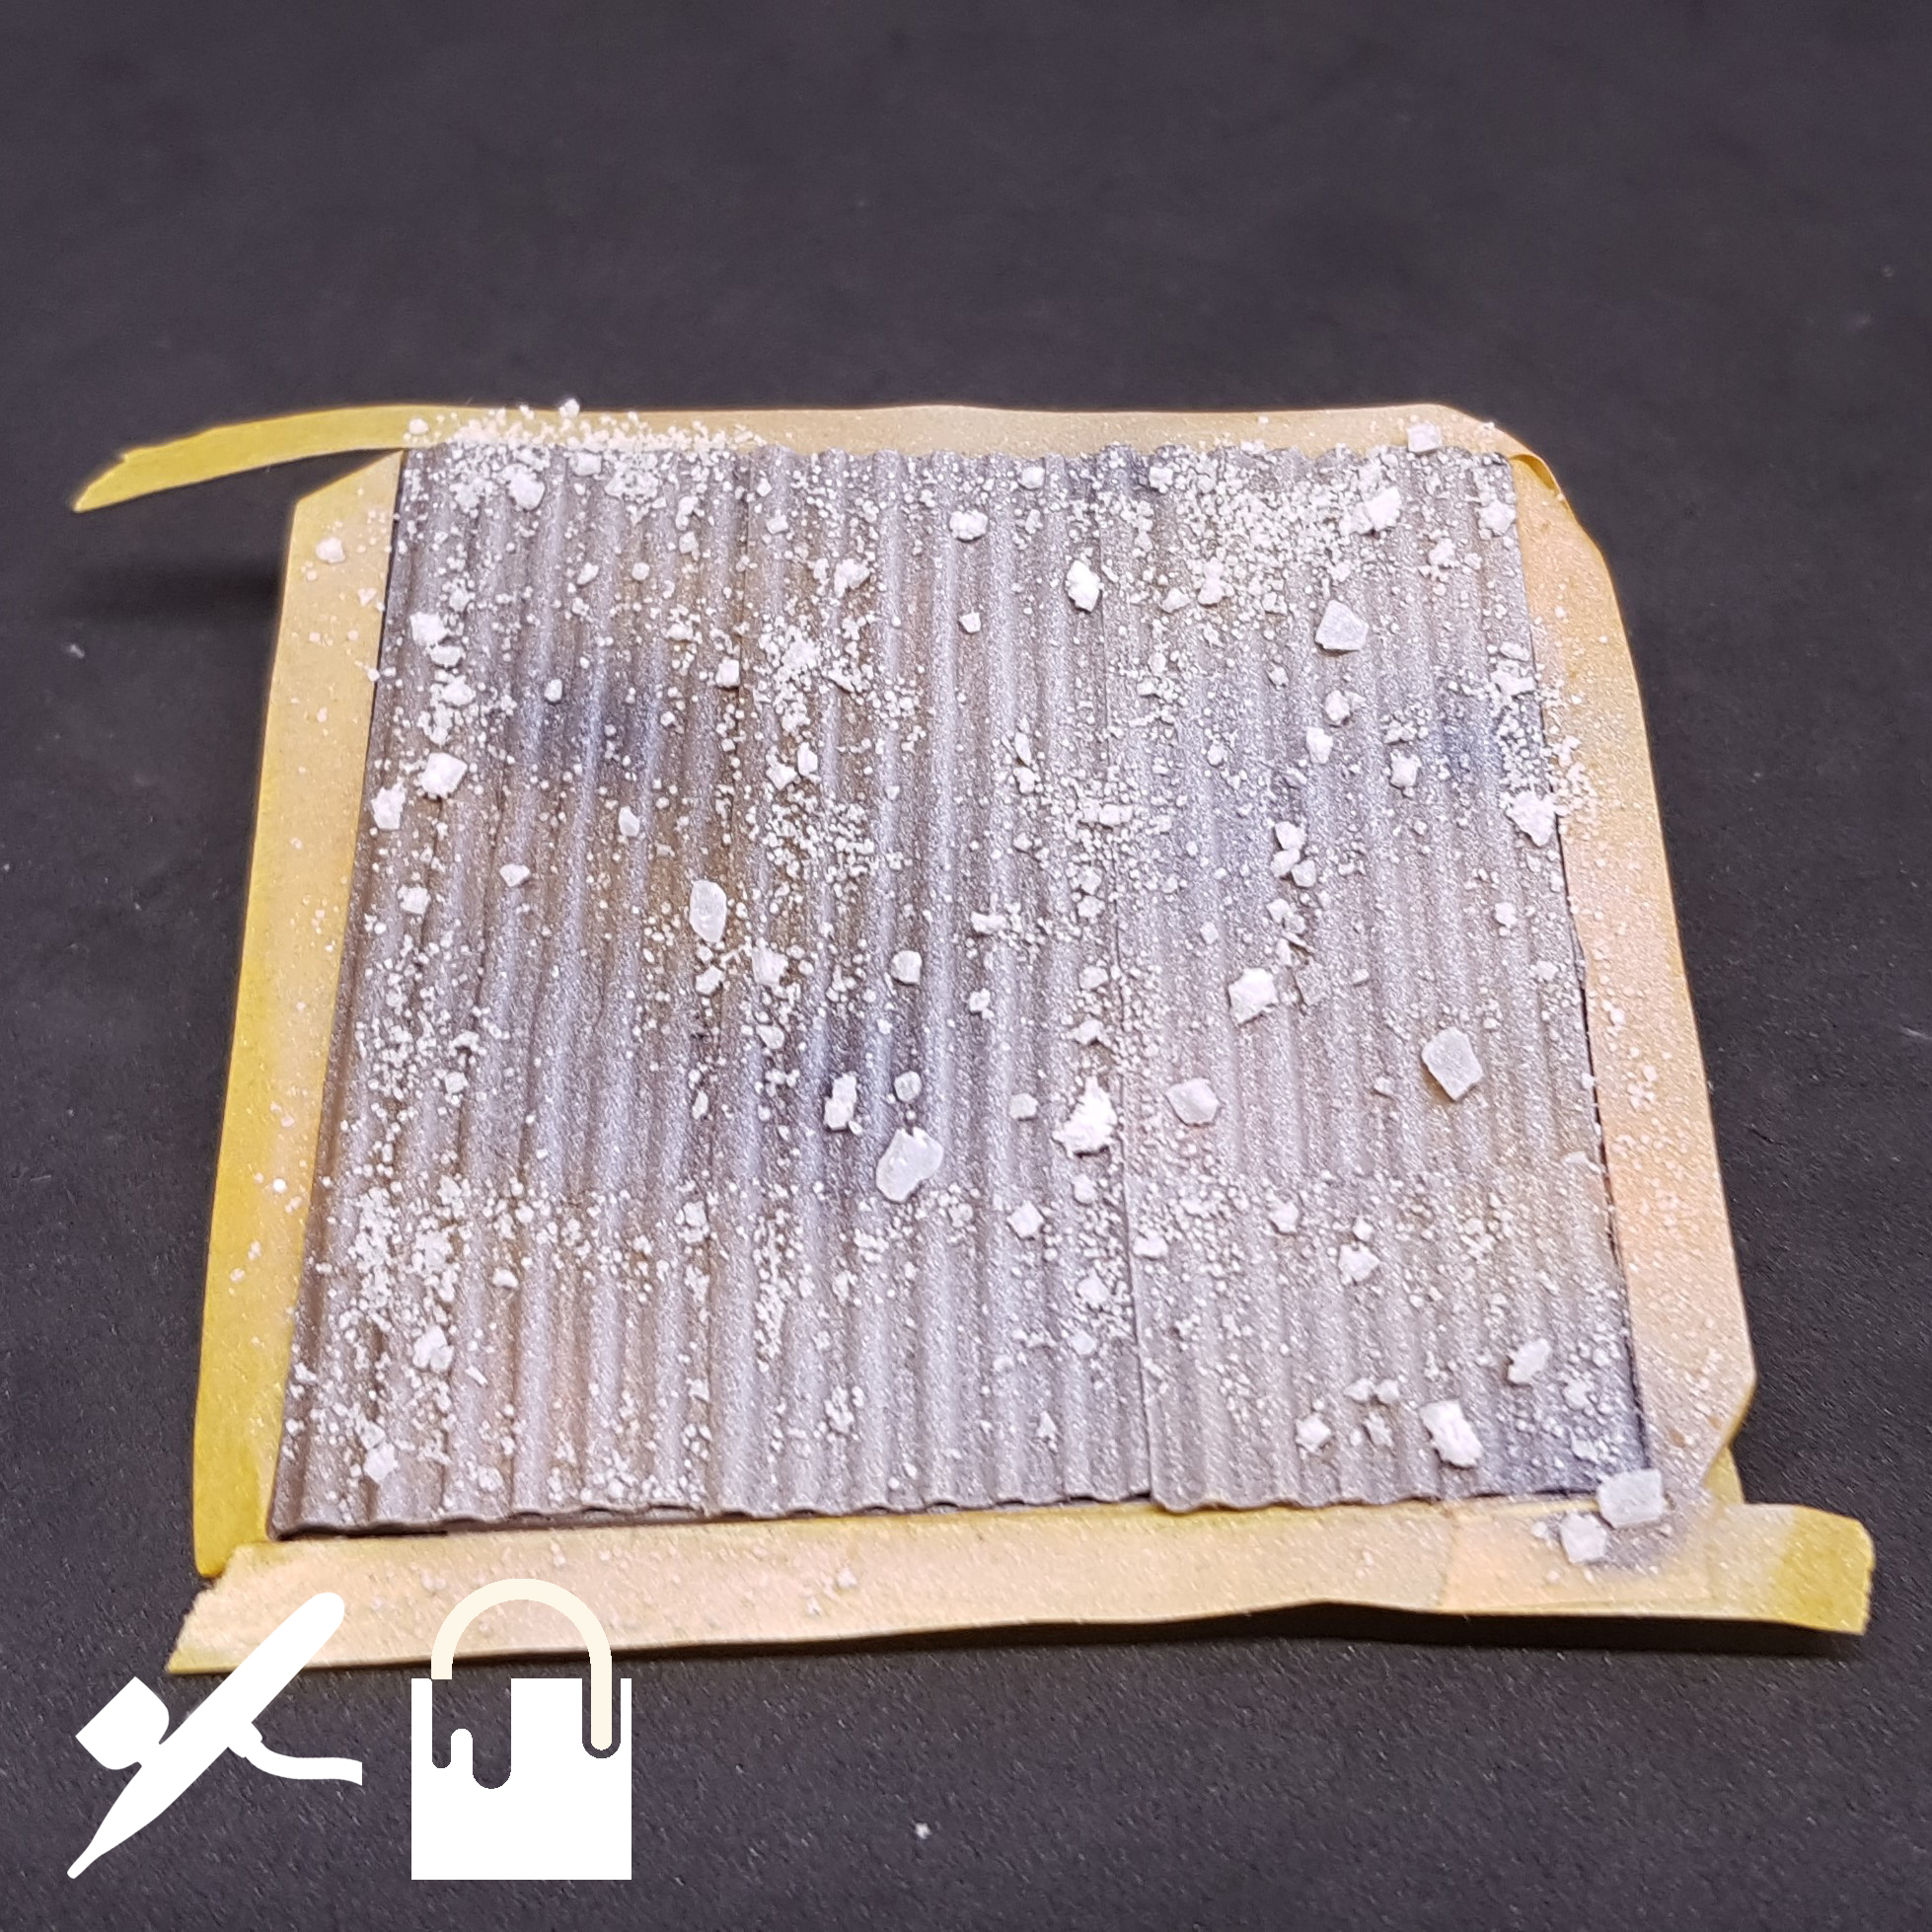 I then airbrushed white a very light coat to even up the colour on the next step.
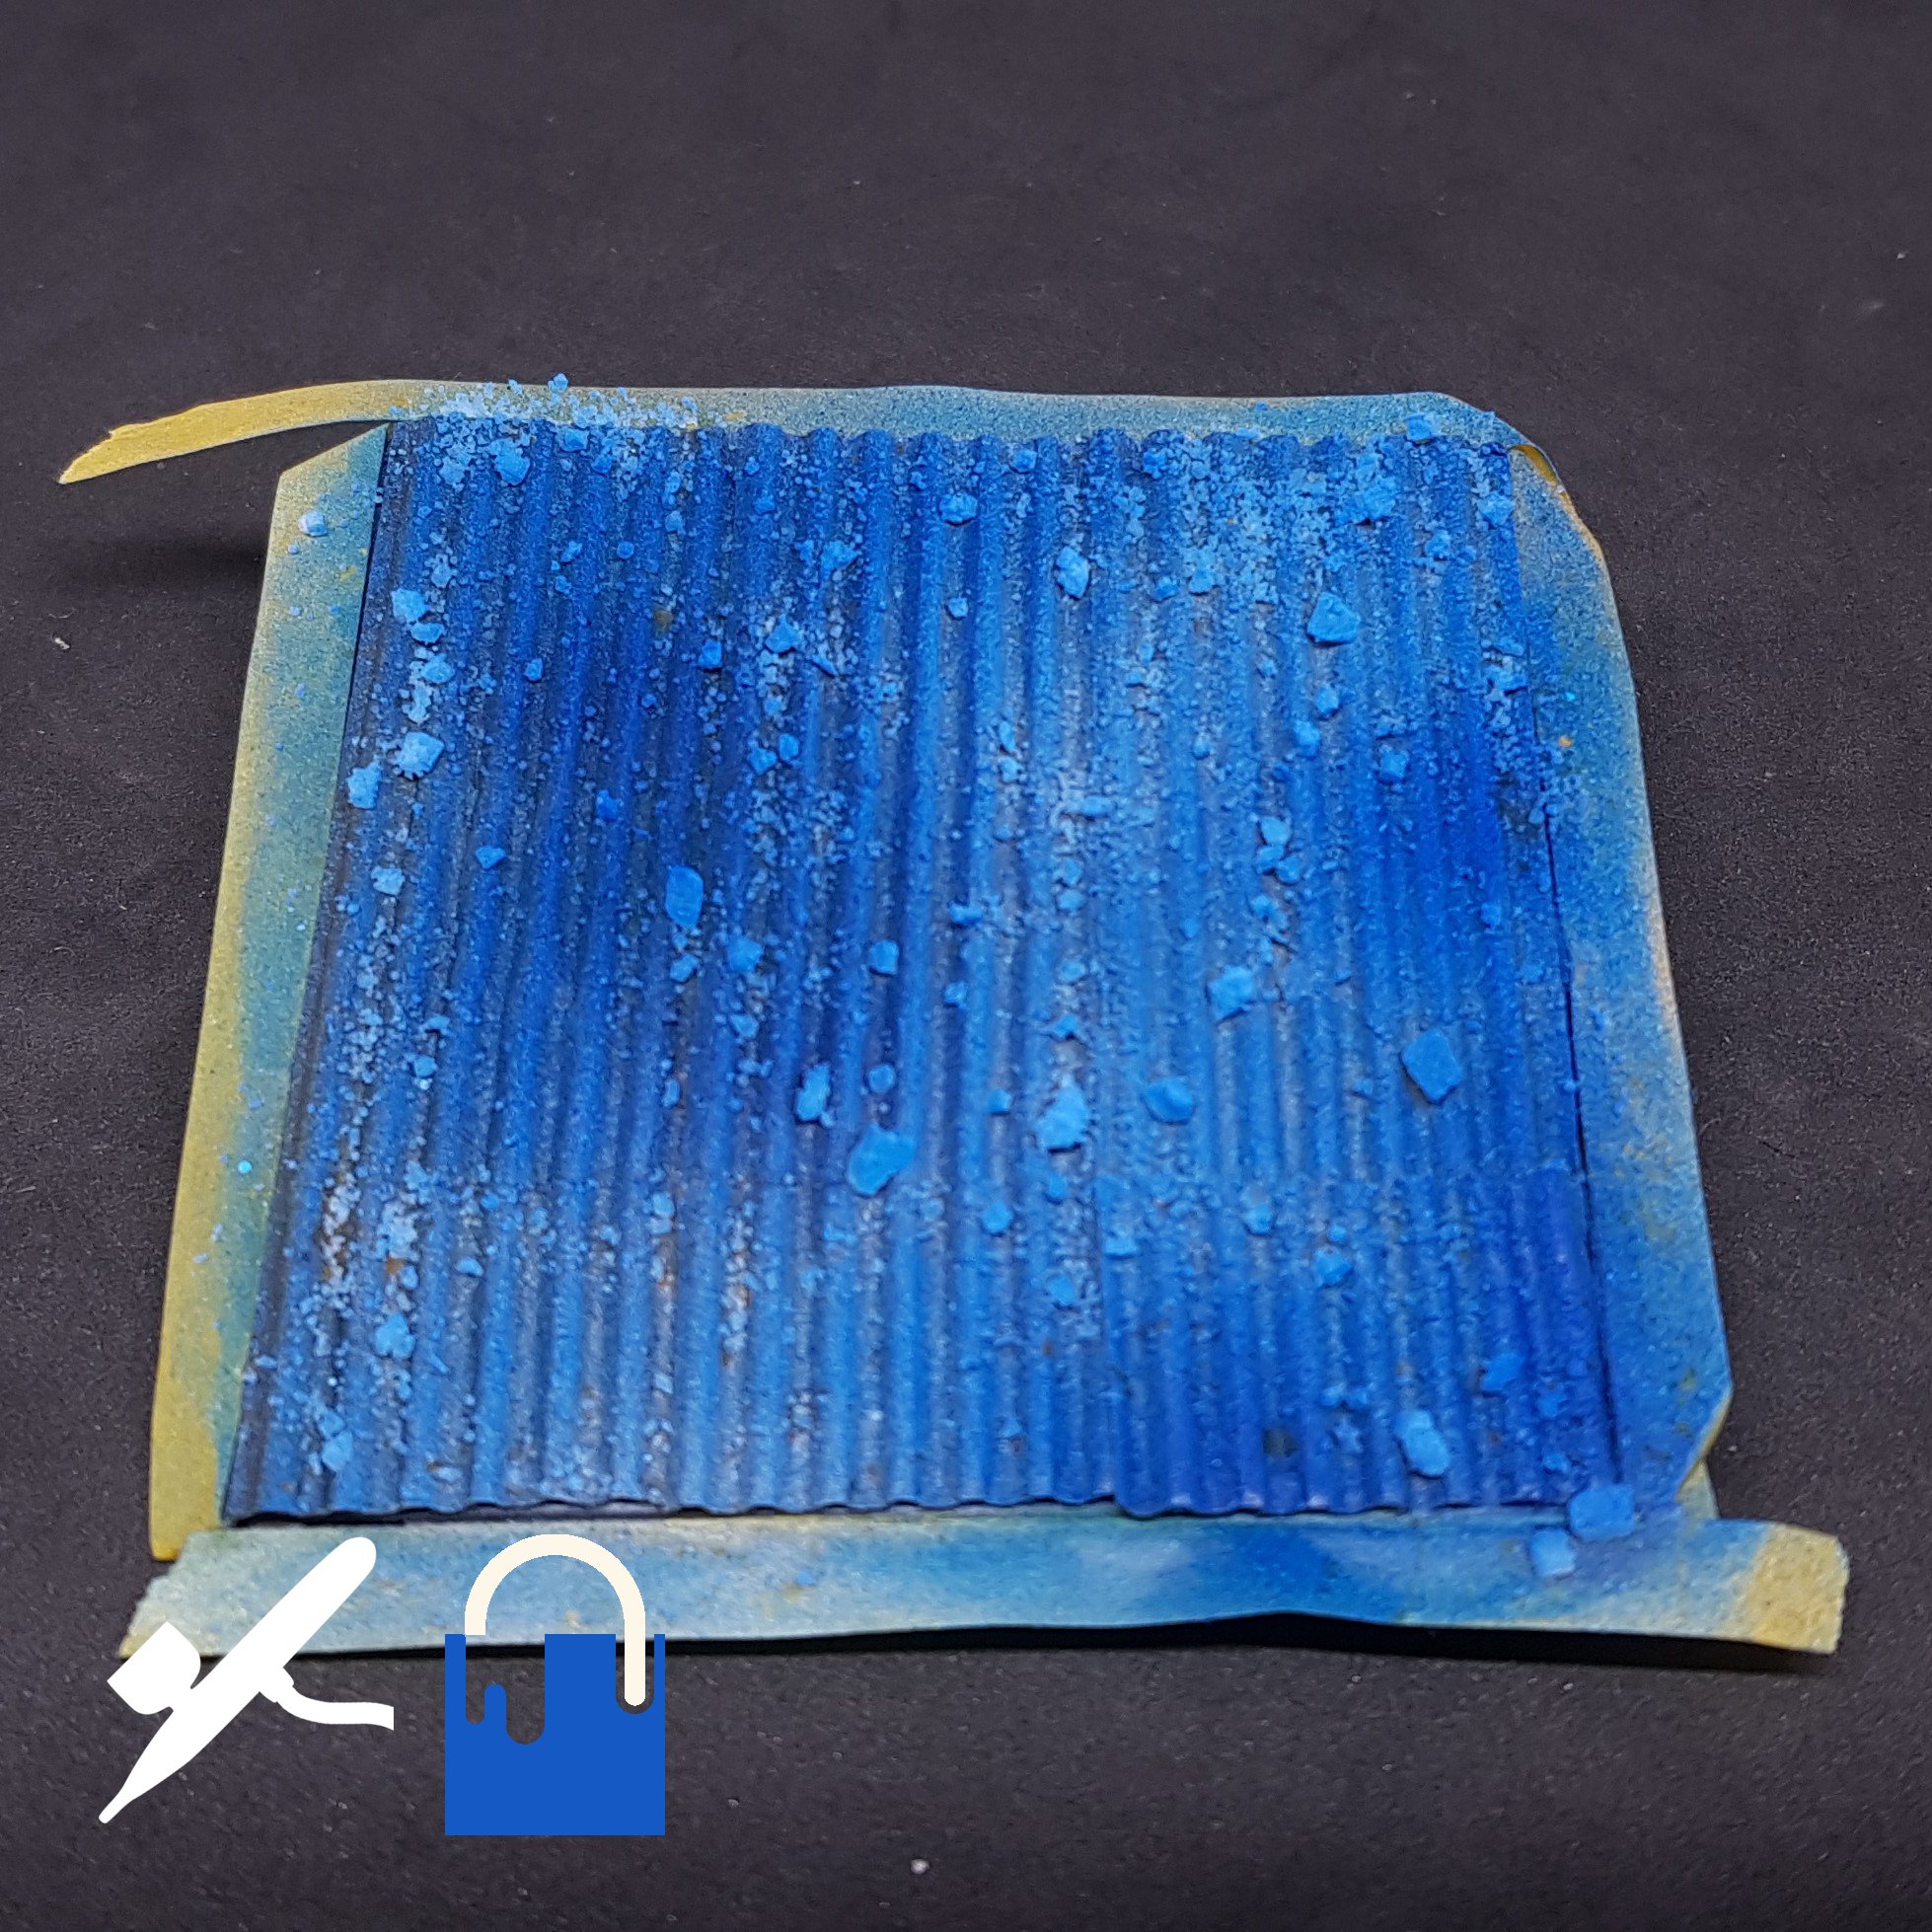 A patchy coat of blue was next.
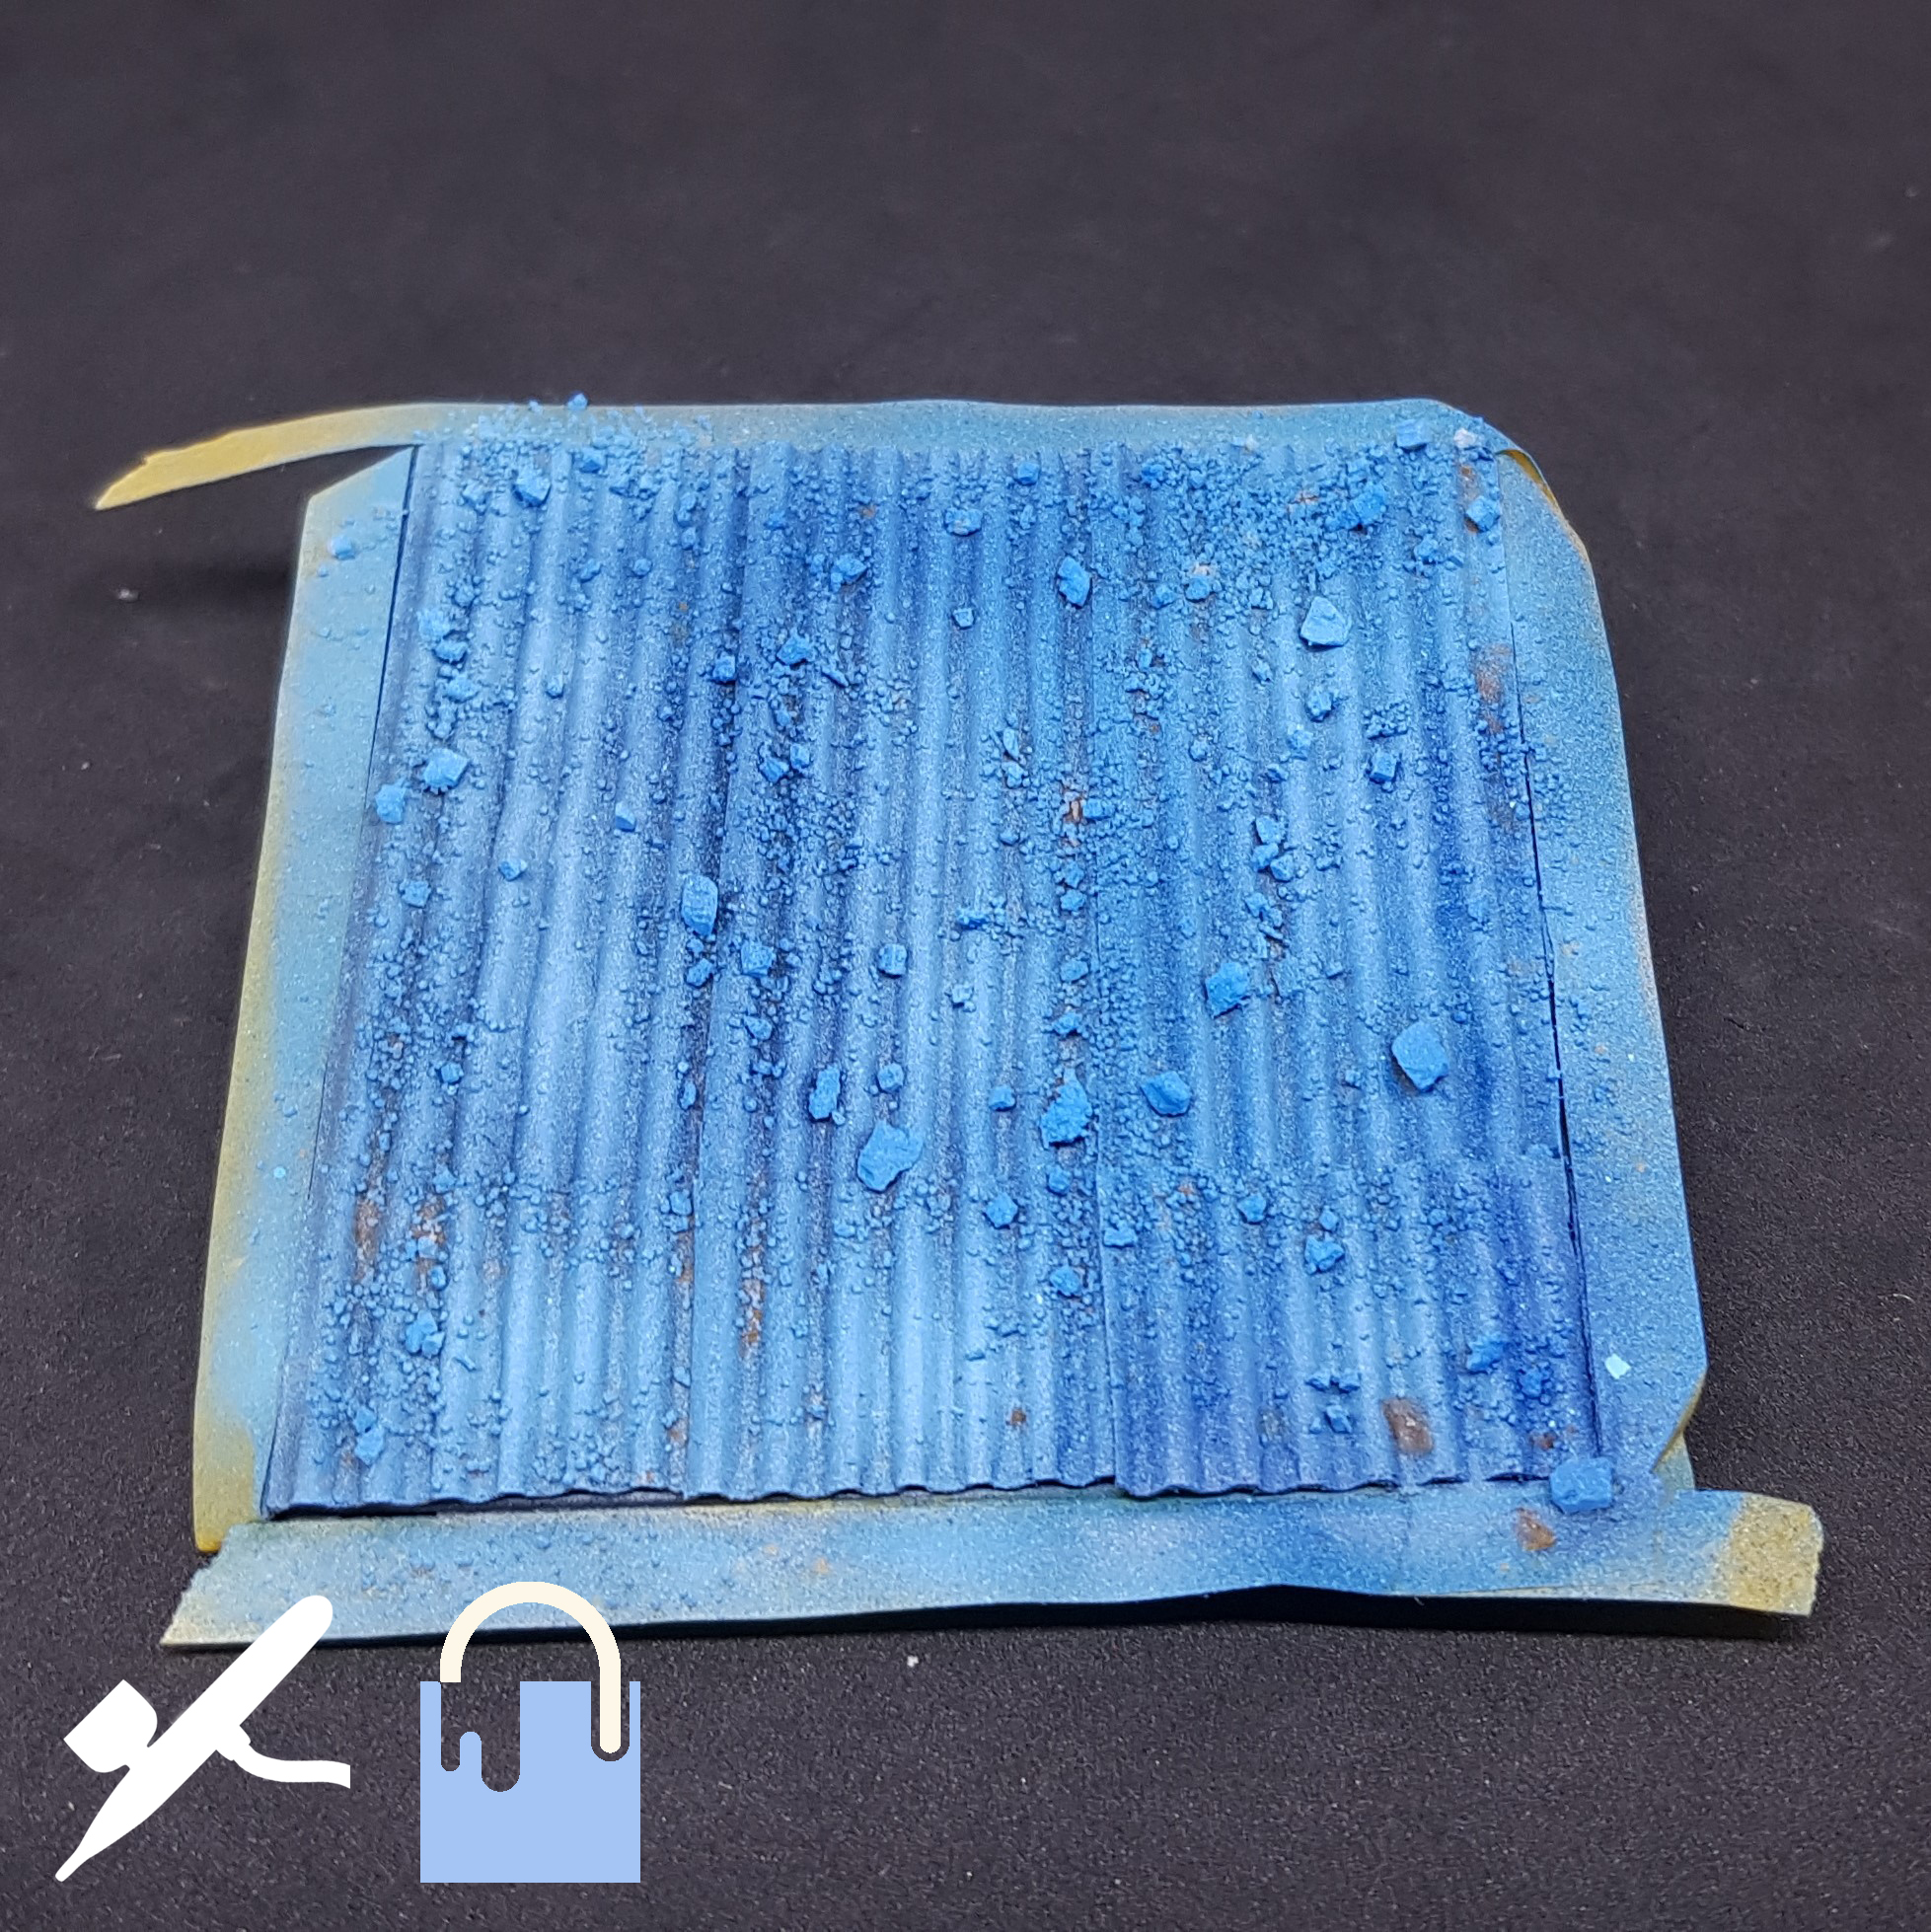 I went over the centre of the panels in a lighter blue.
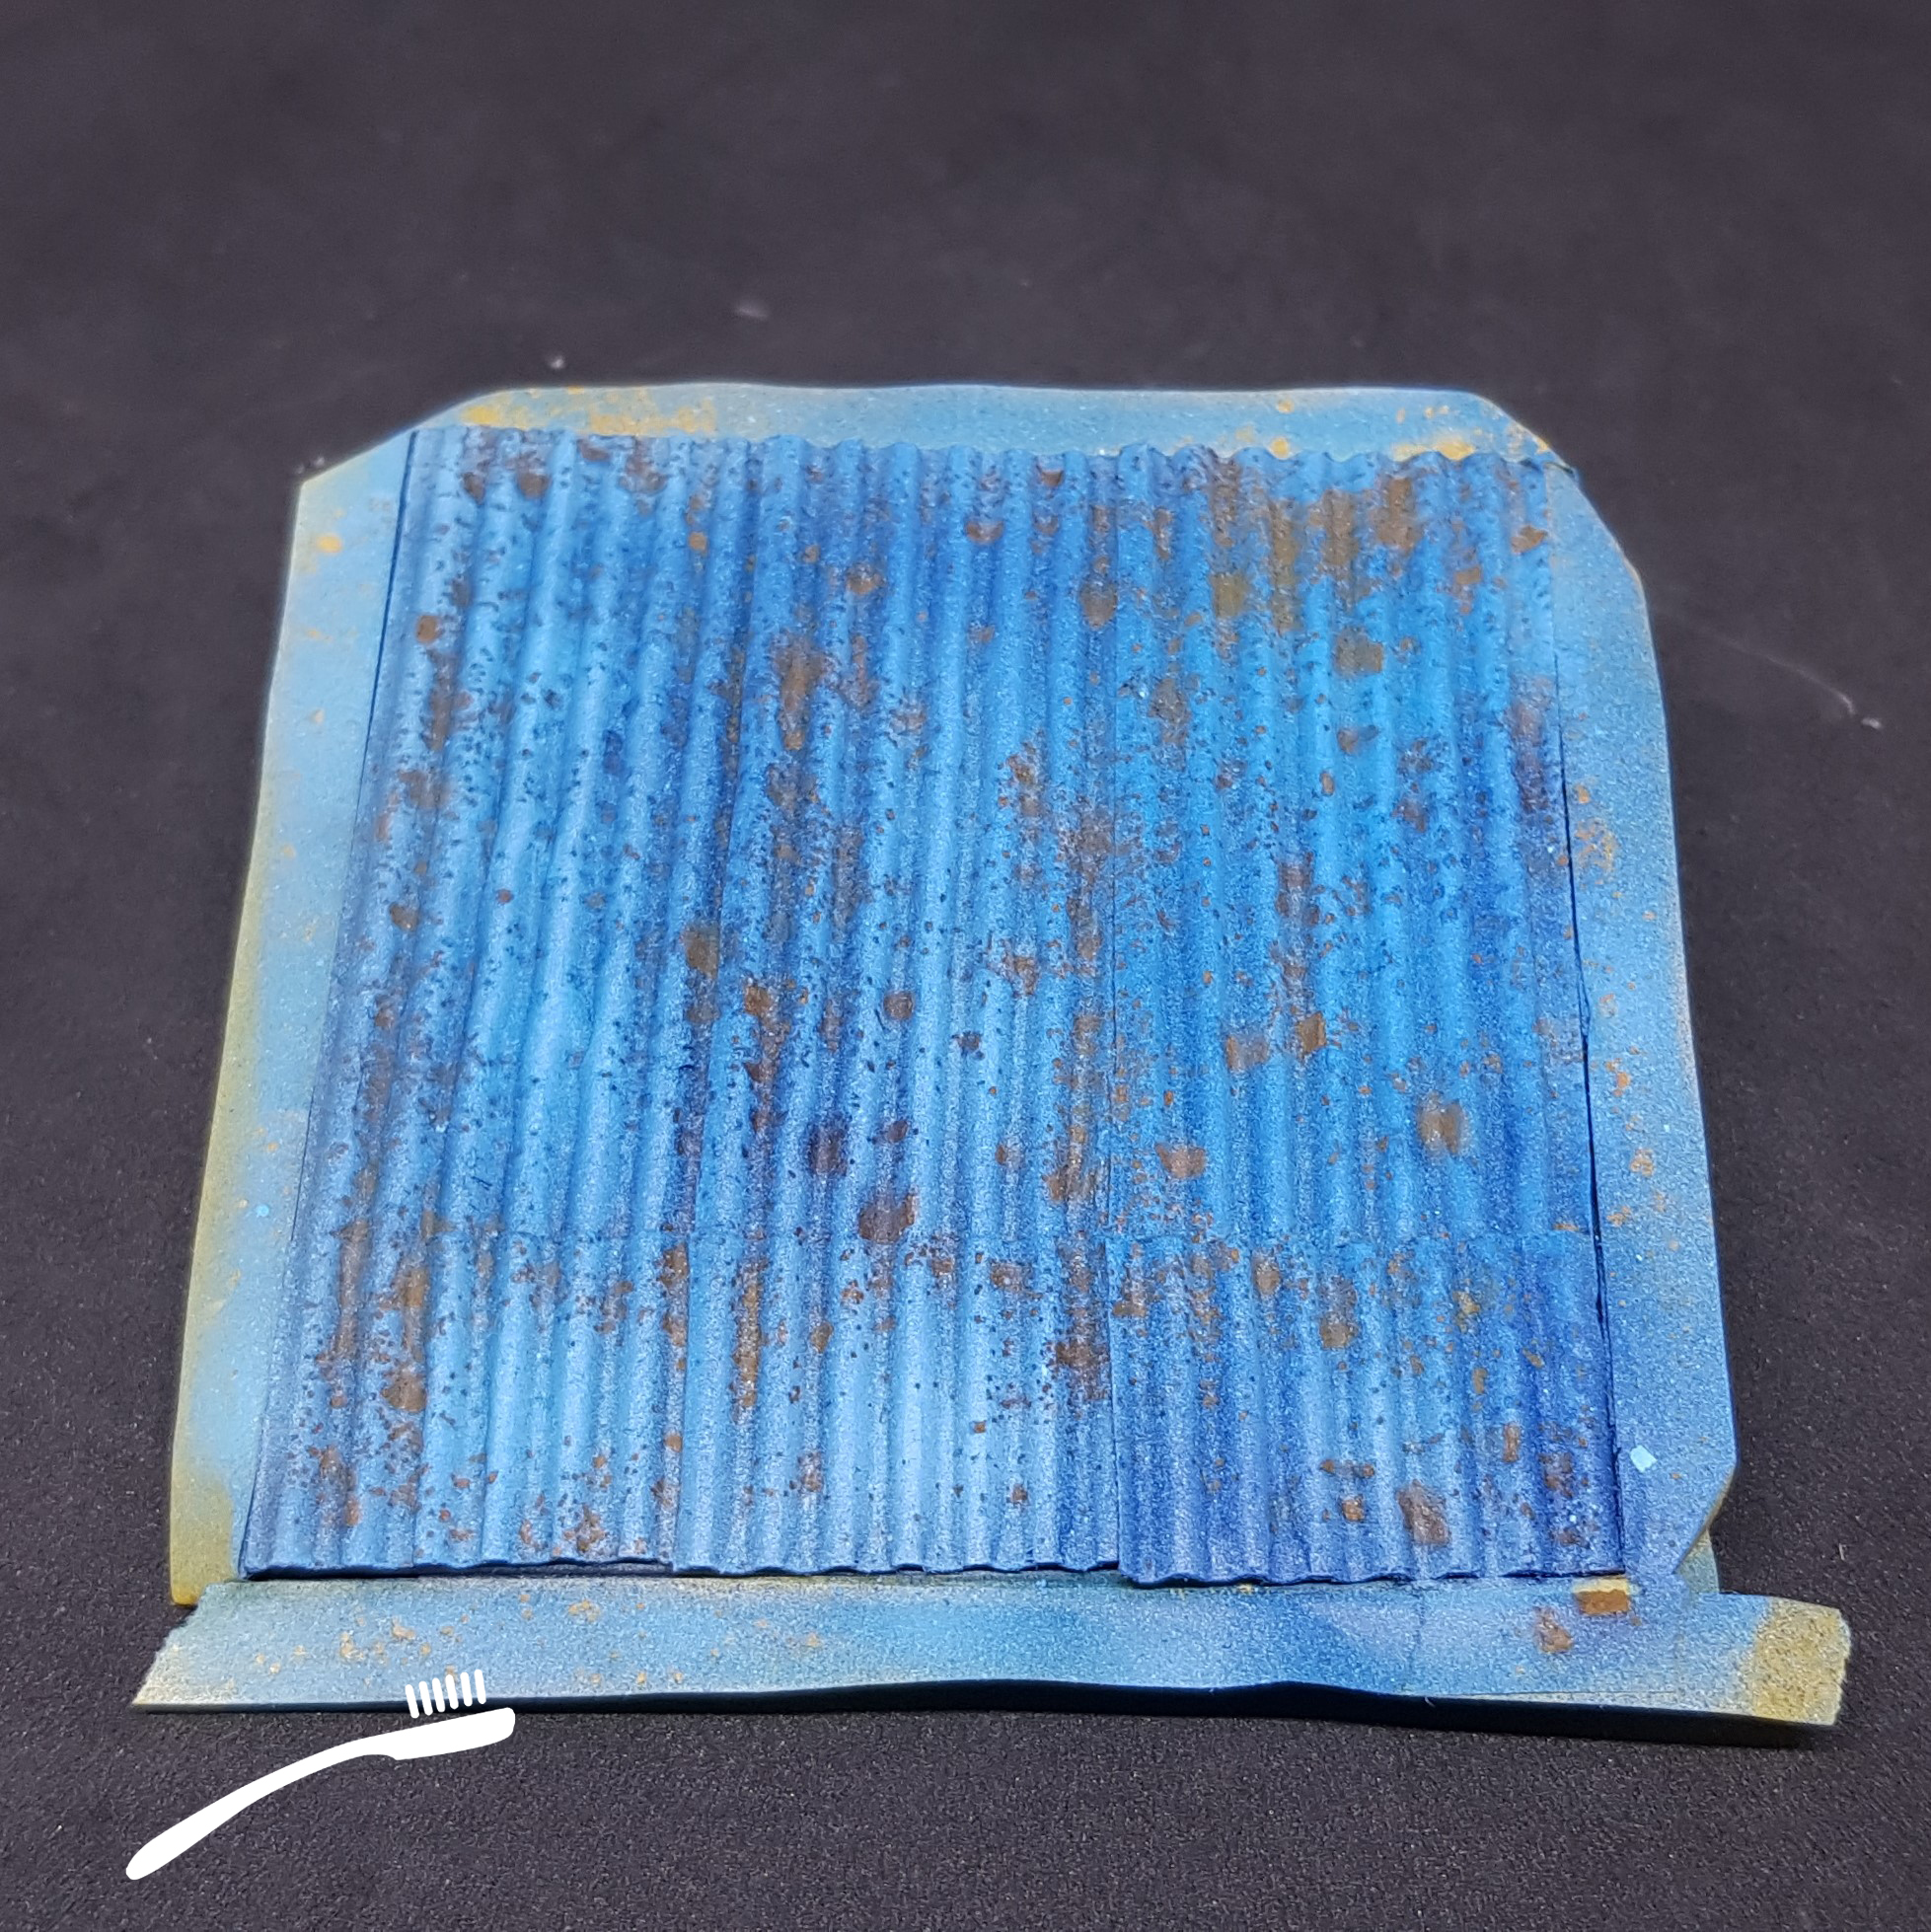 I used a dry toothbrush to take off all the salt.
 I then went in with a toothbrush and water to remove some more paint around the edge. More can be done to give a more worn effect. I then used a scrap of sponge to go in with a yellow ochre to make final highlights to some of the rust patches.
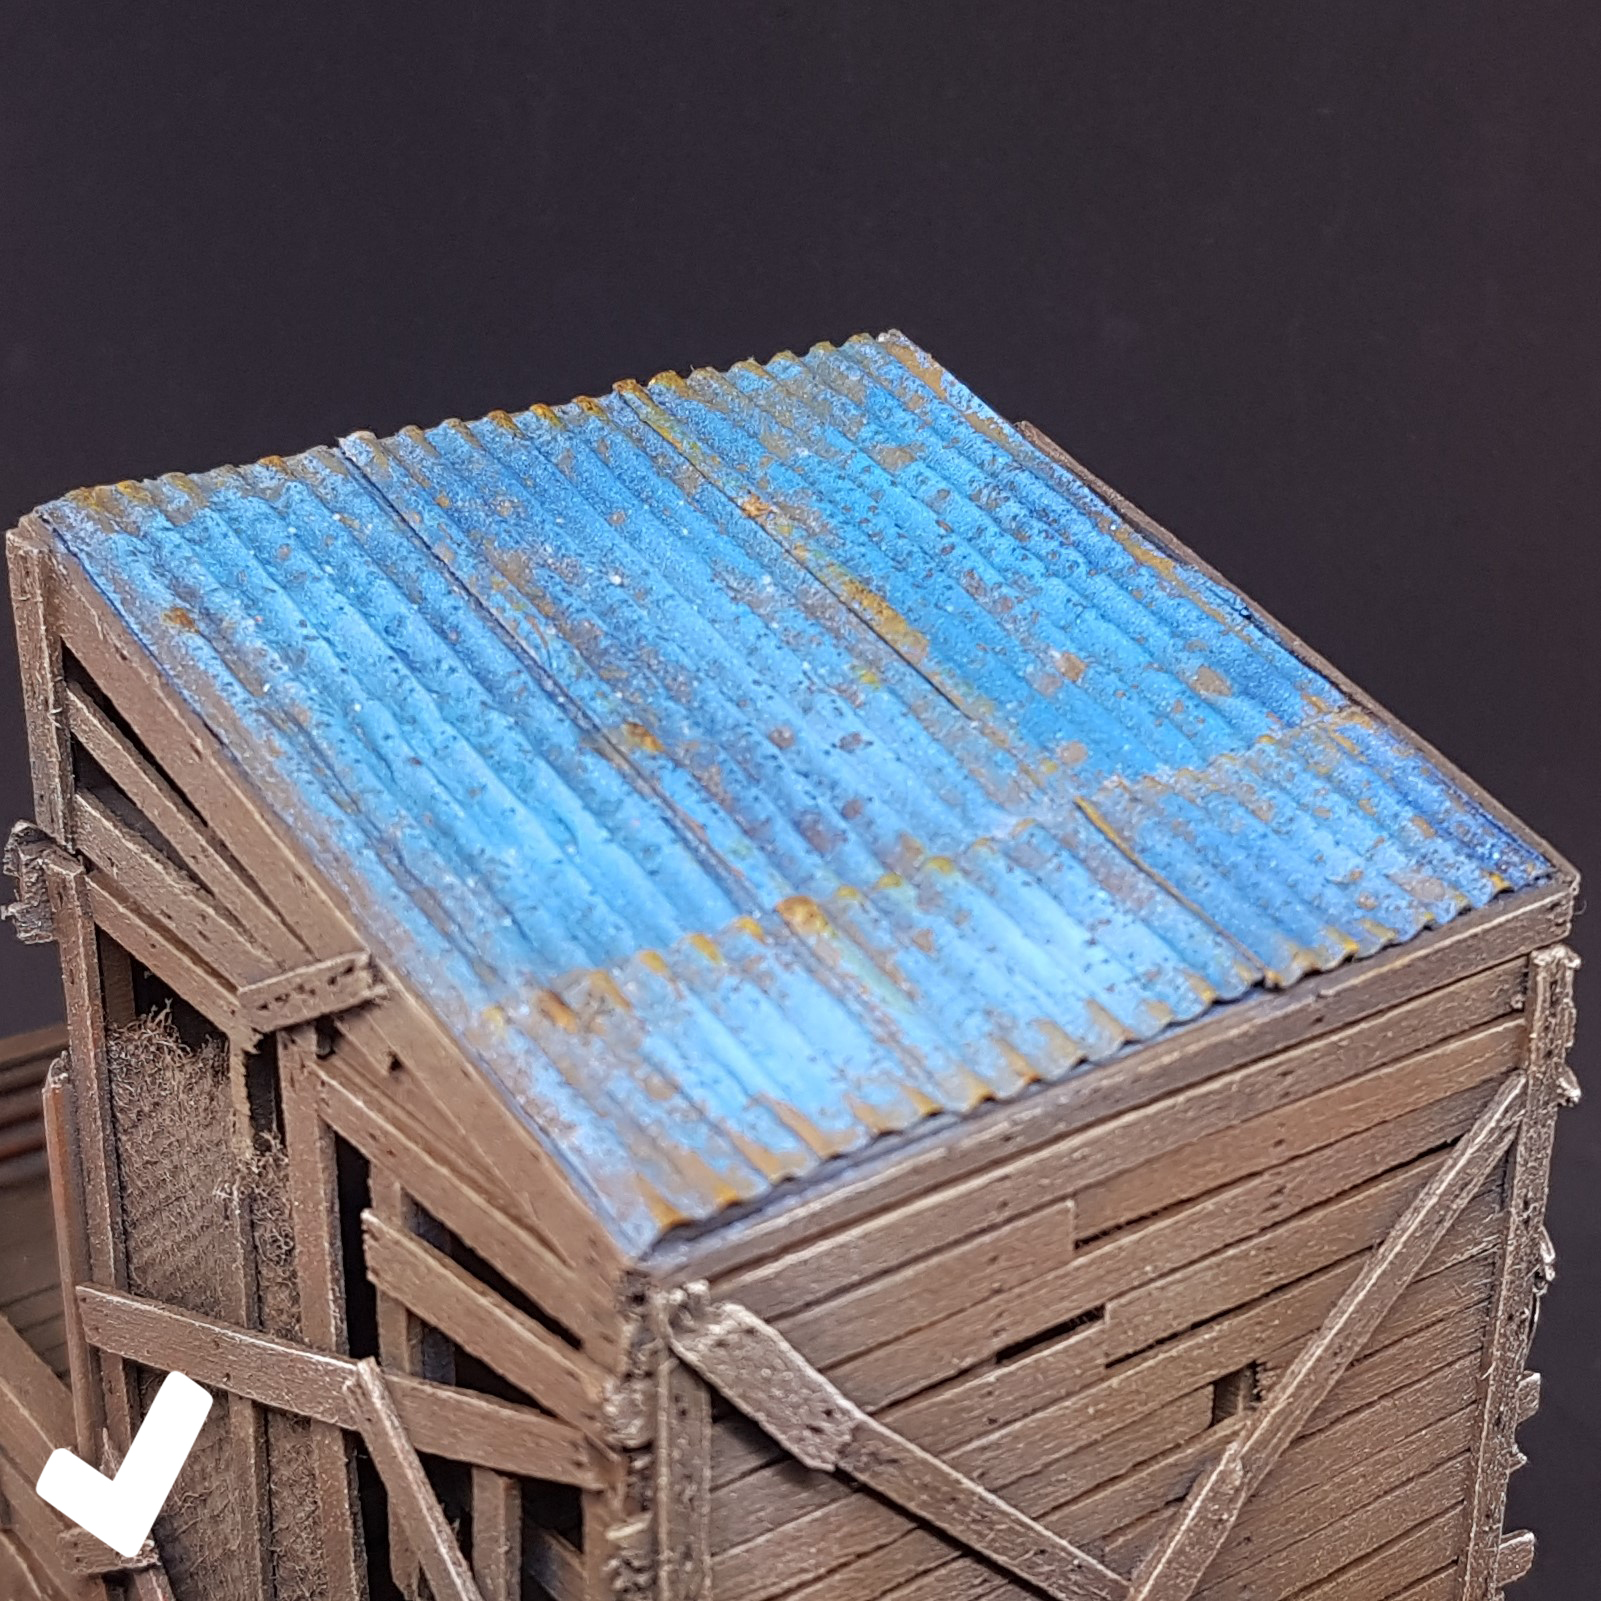 The finished piece on the model. Great little effect. Glad I learned it and I hope this has been useful.
 Painted two floor hut.
Been busy this week but had the day off today so finished up this Shanty hut. Two more to go and a few more ideas that I should progress.
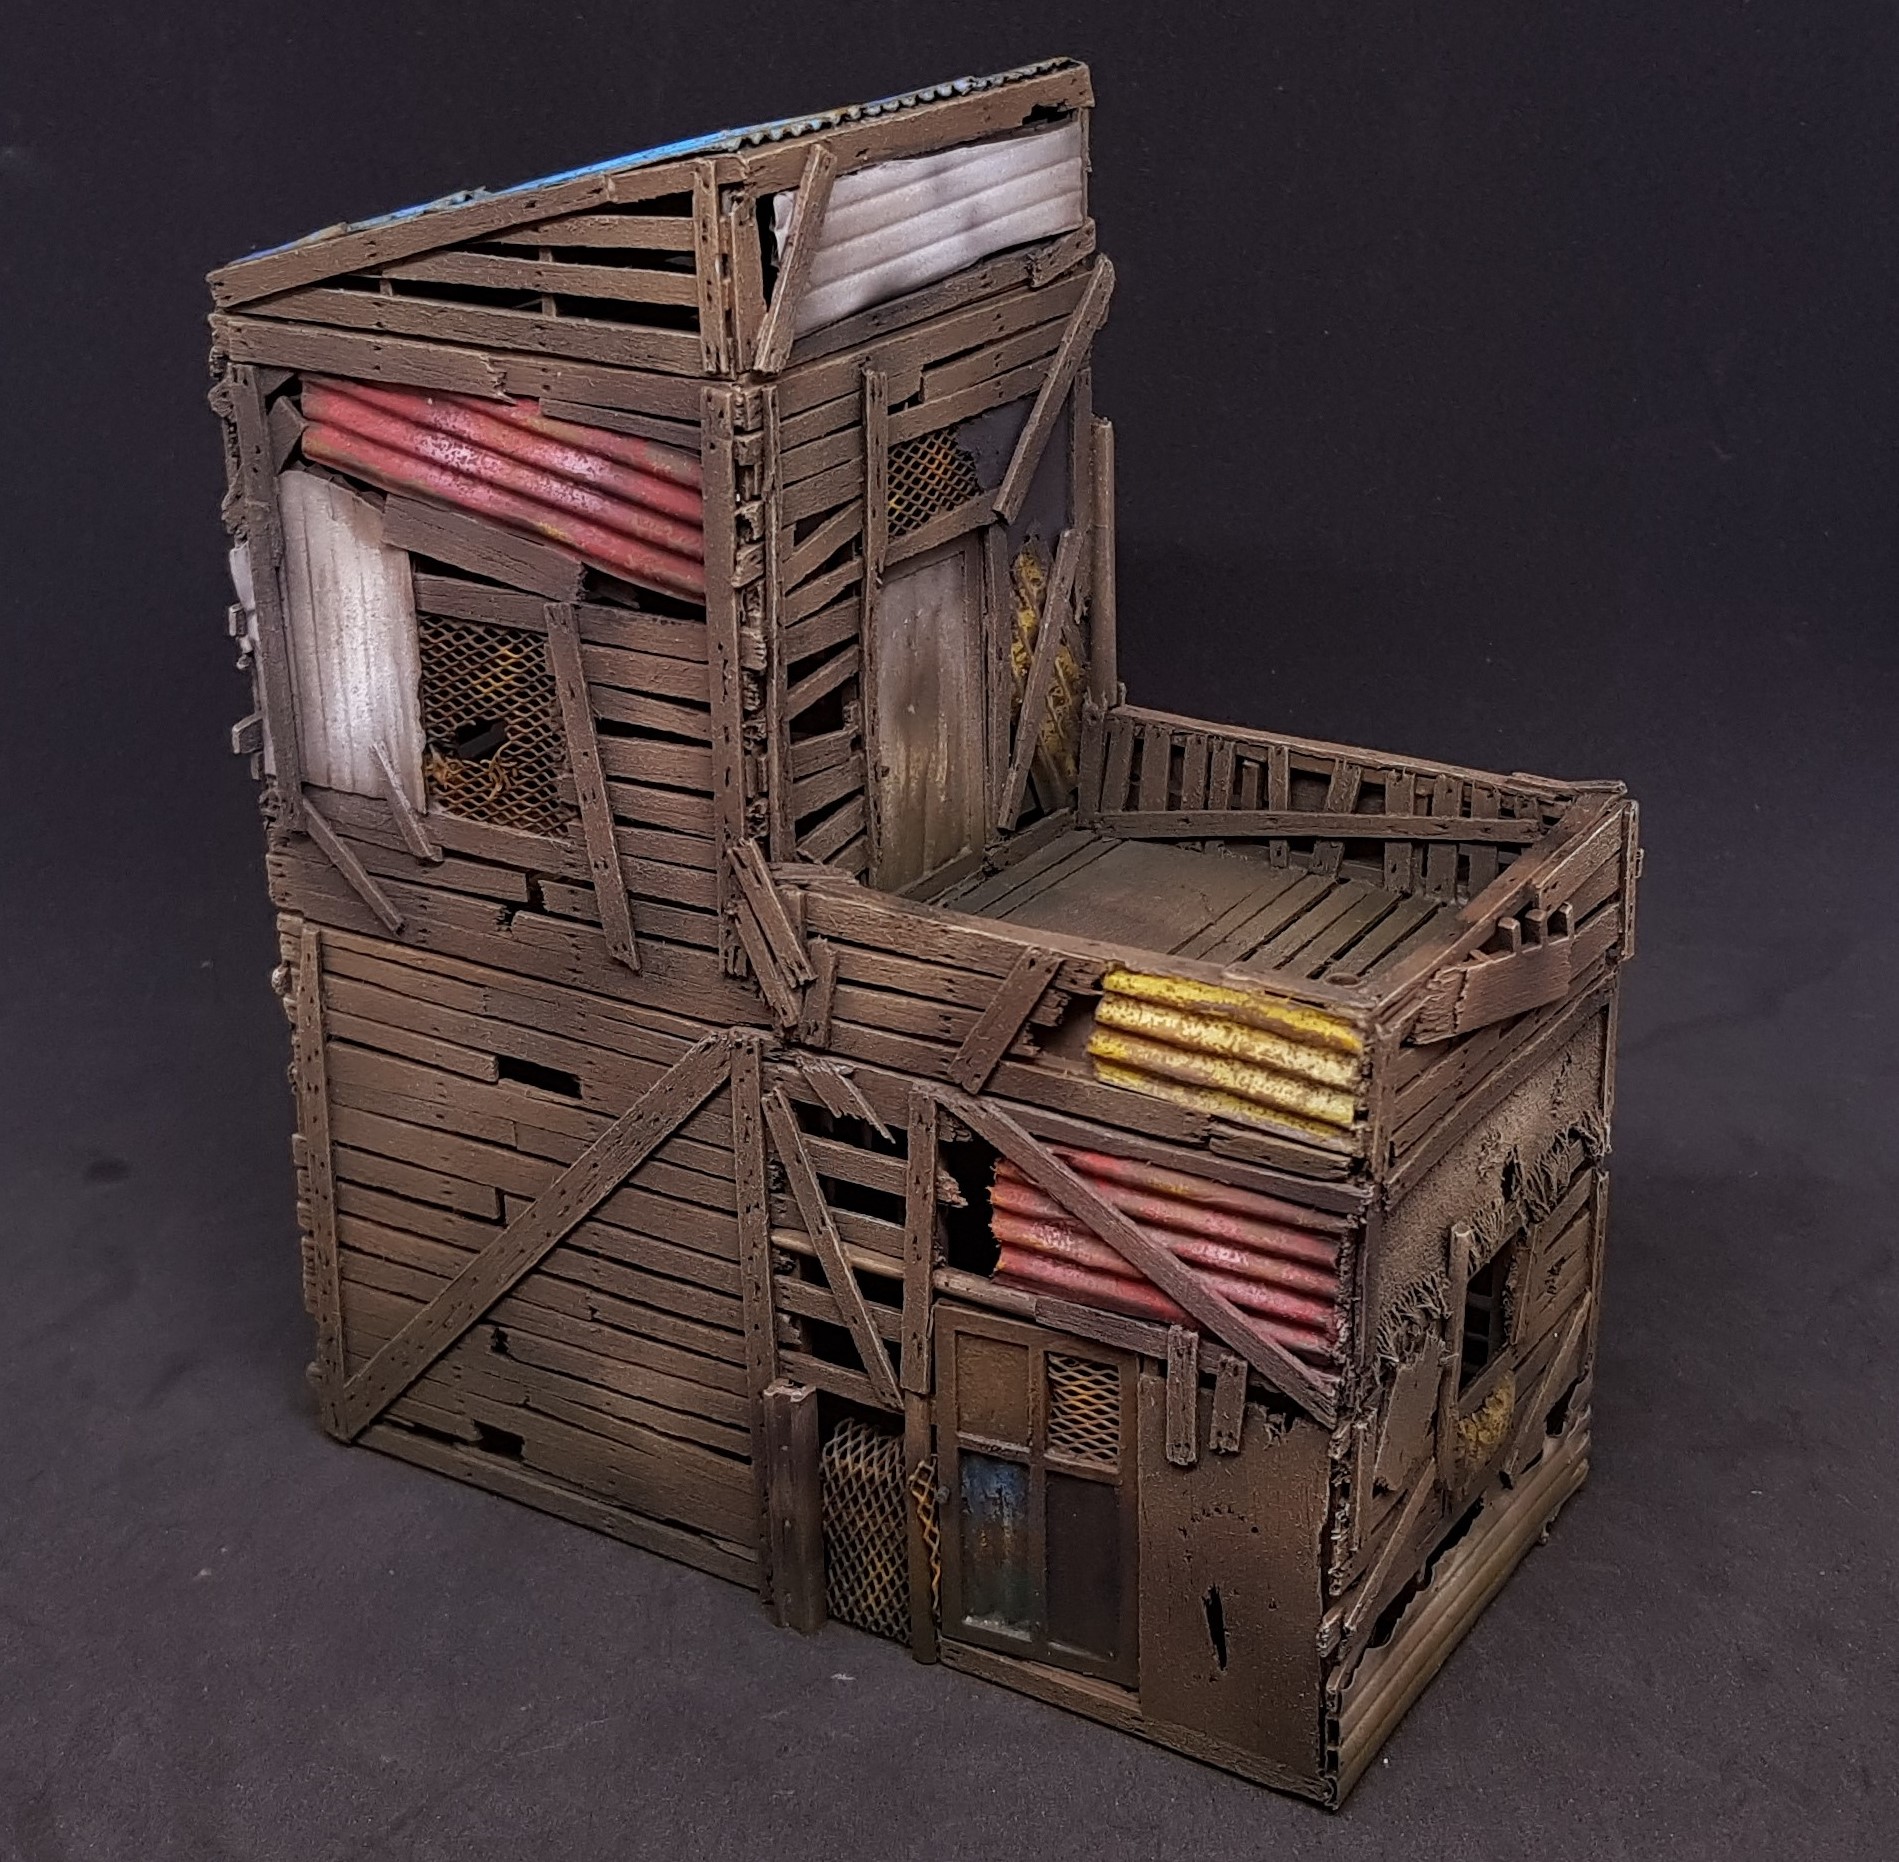 Front if there is such a thing on this.
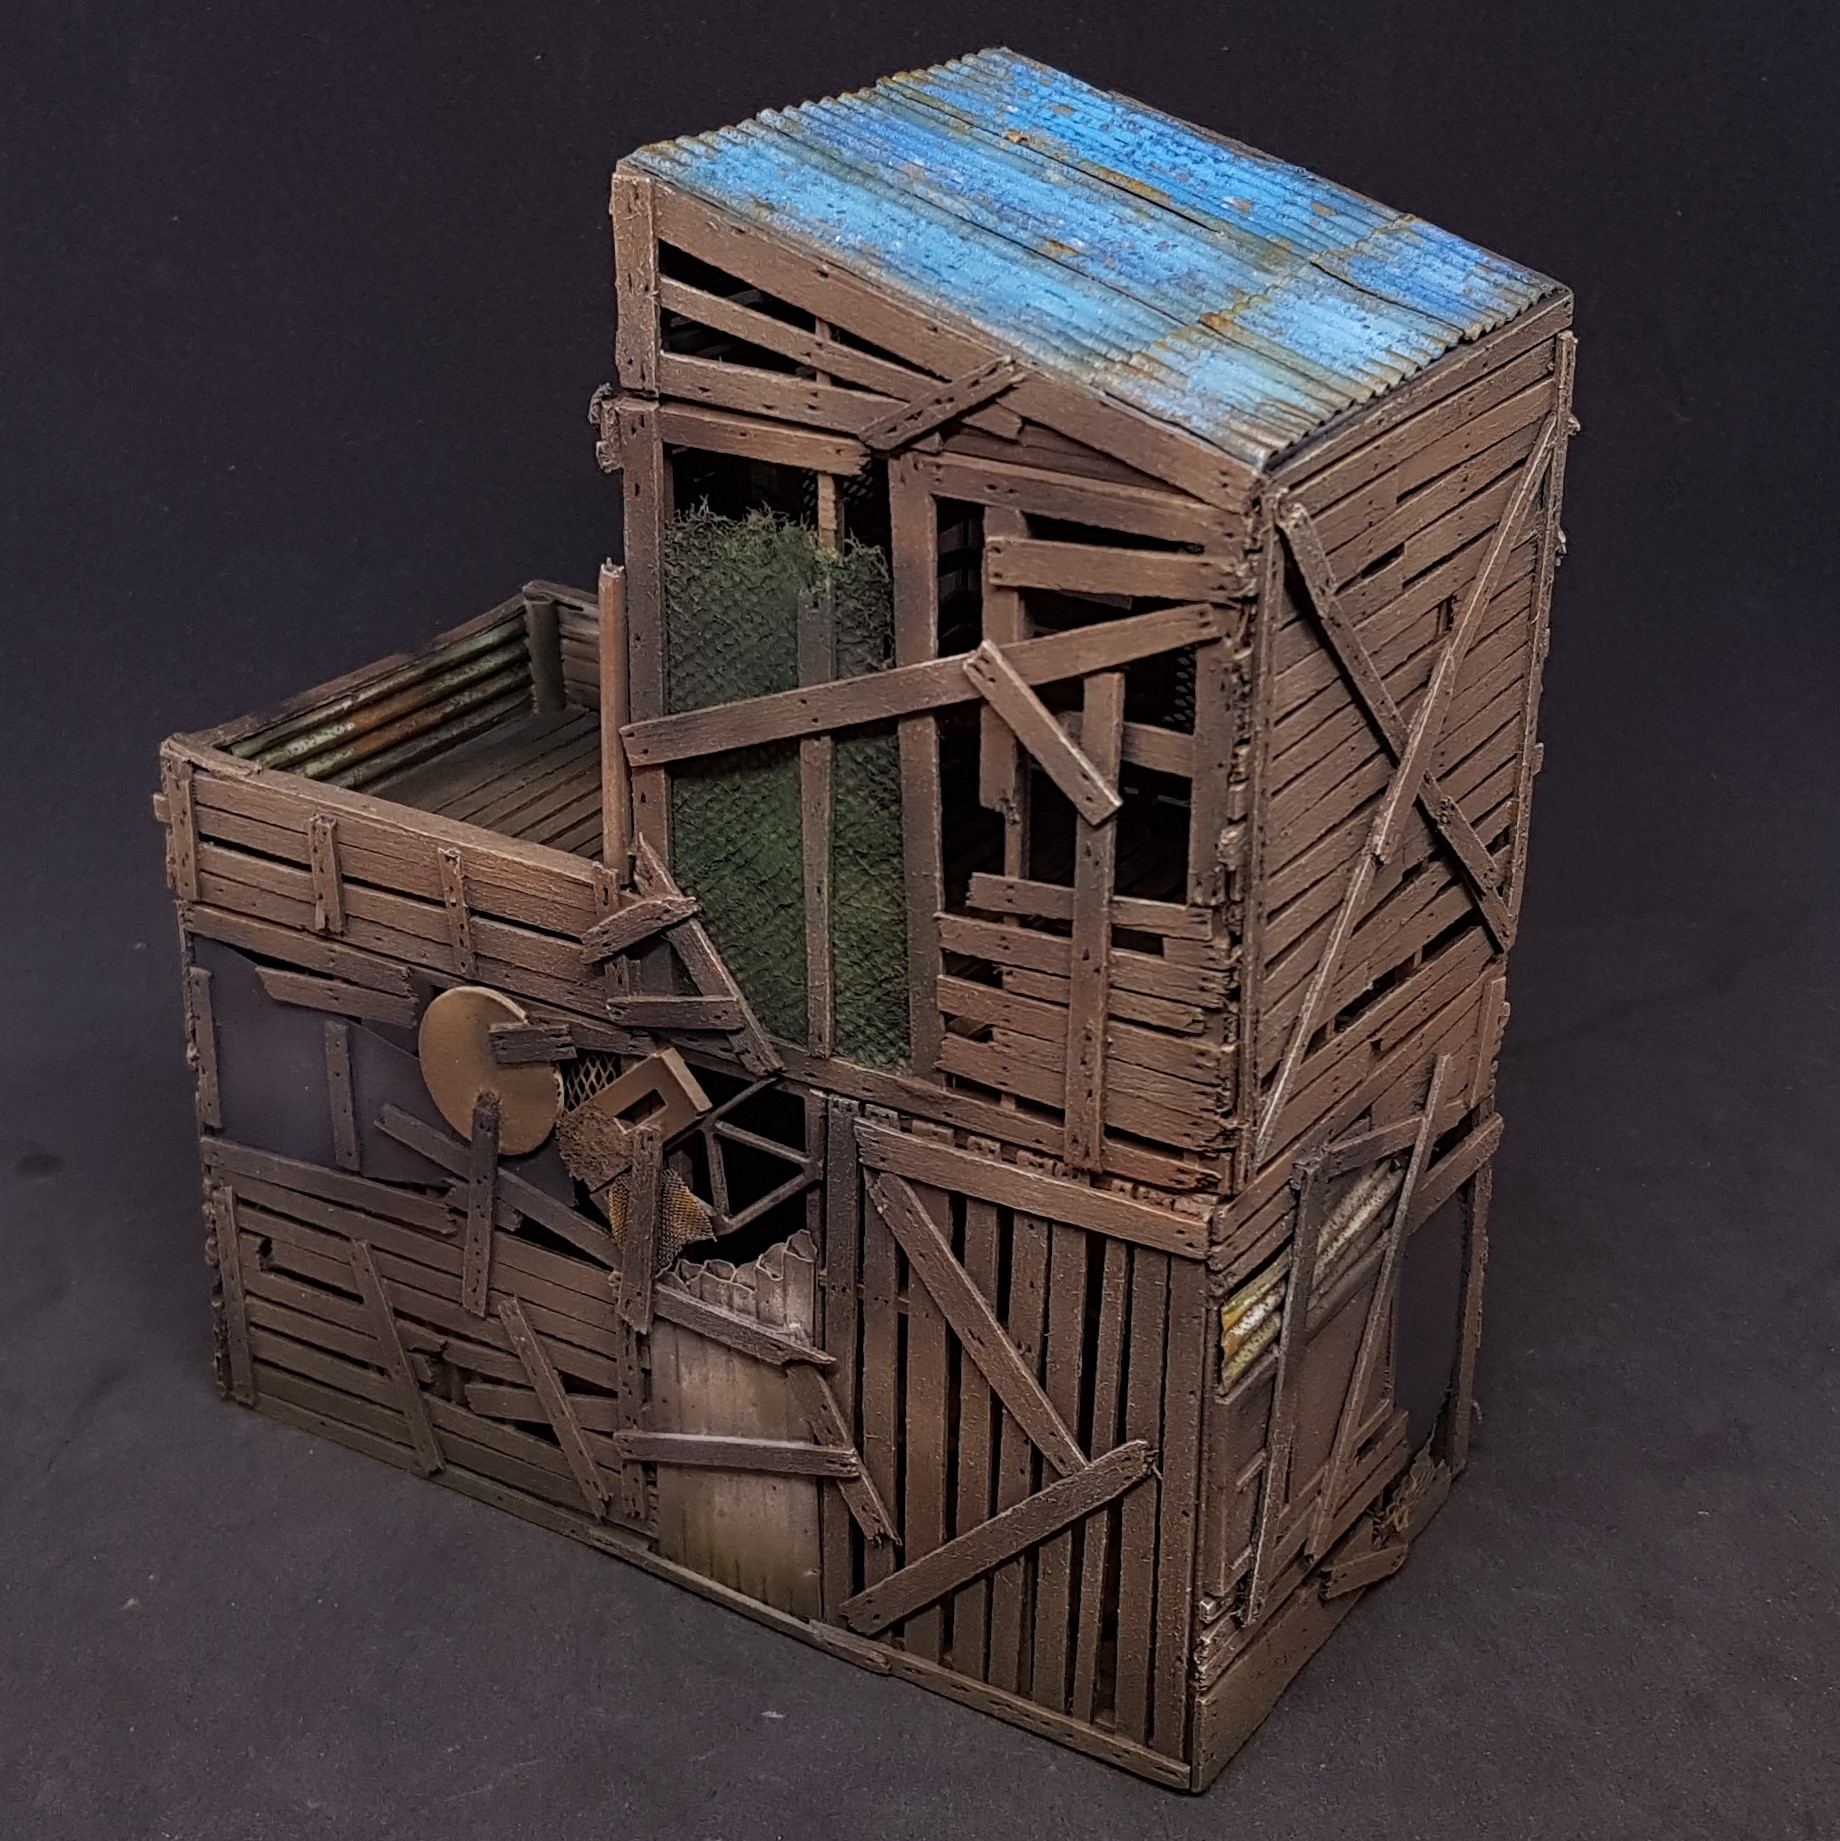 Other side
 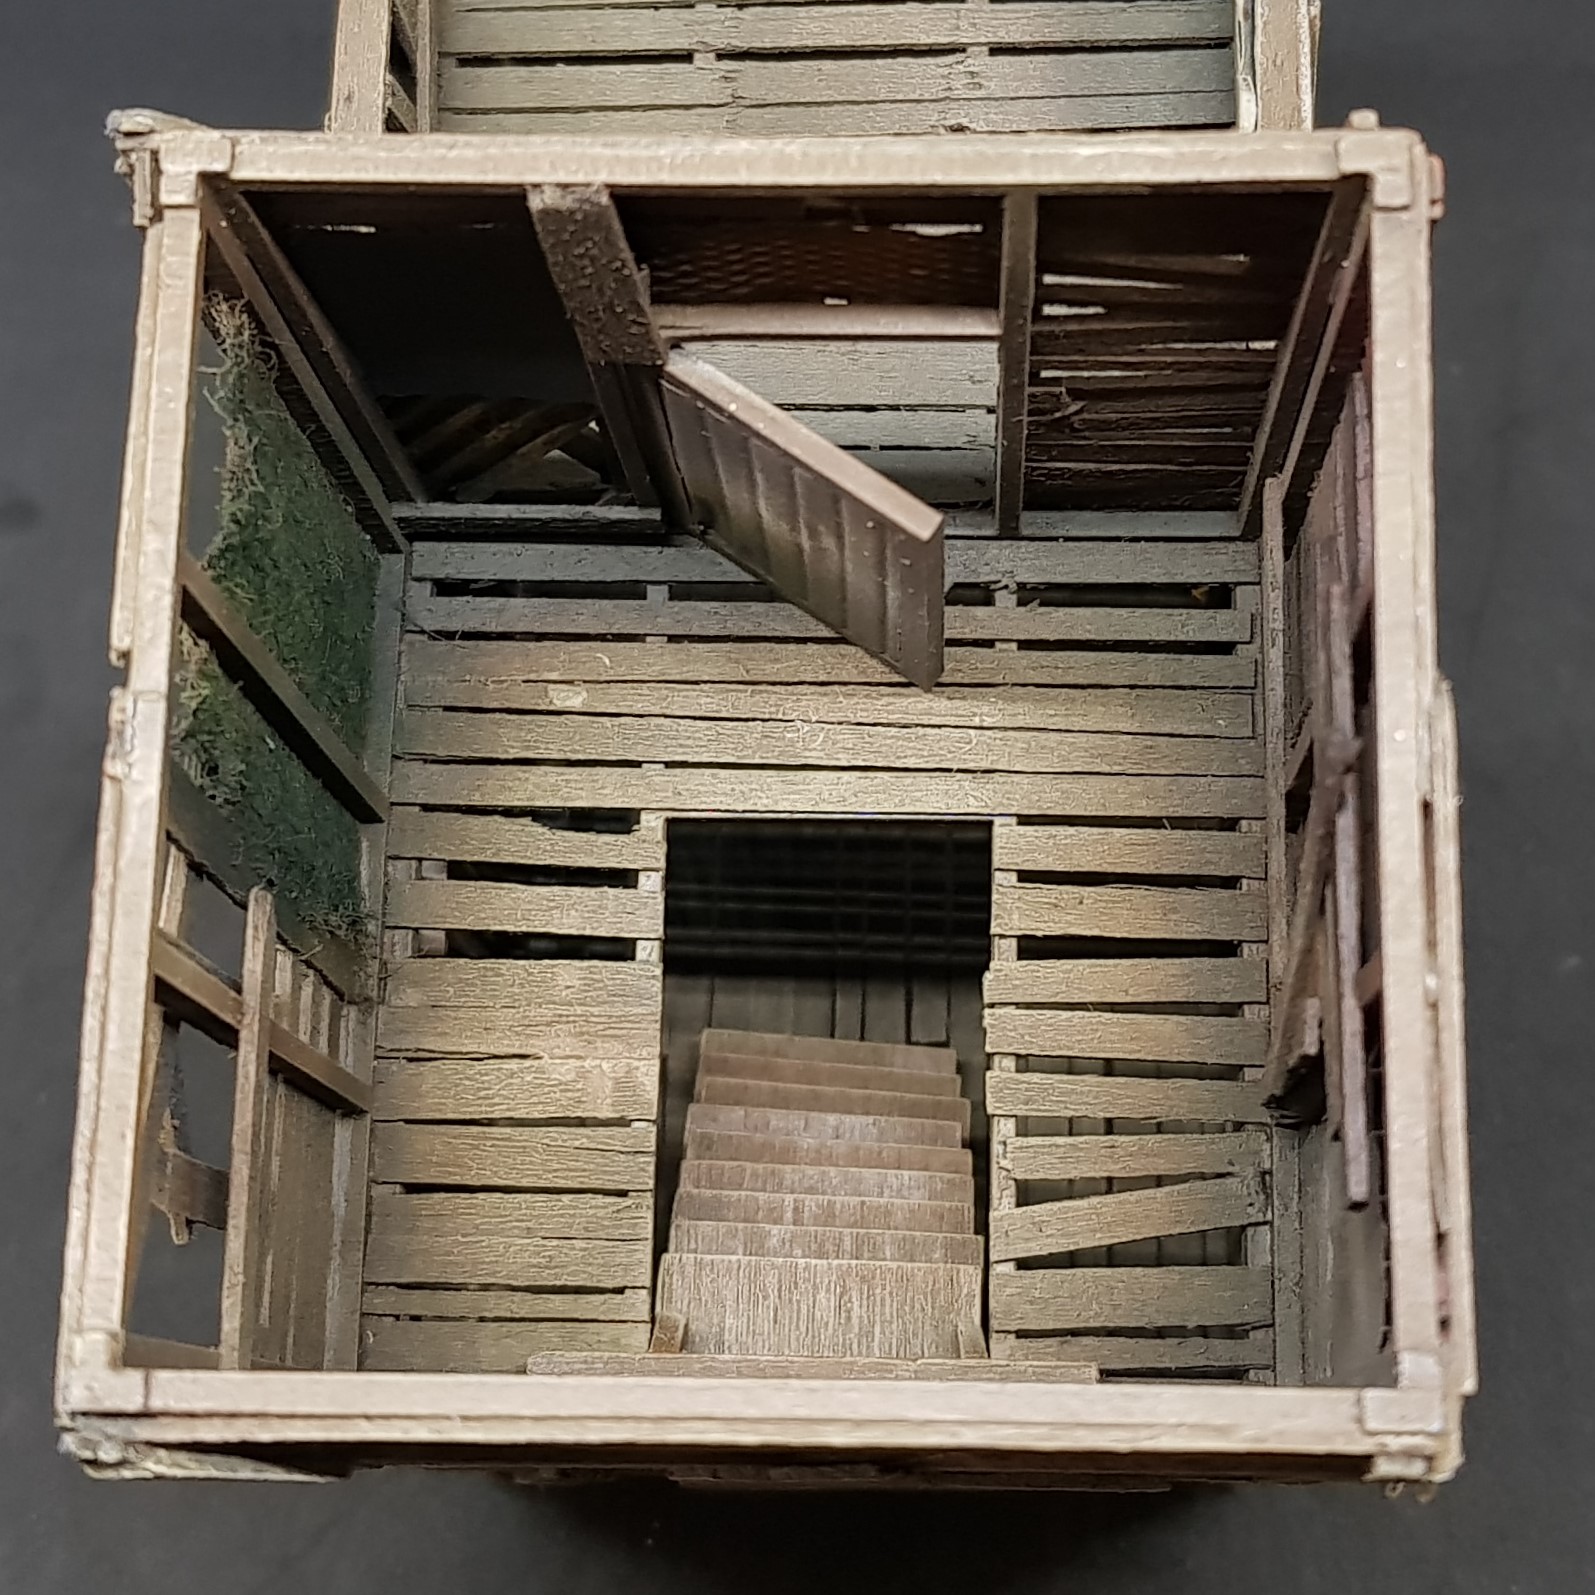 Interior and steps.
 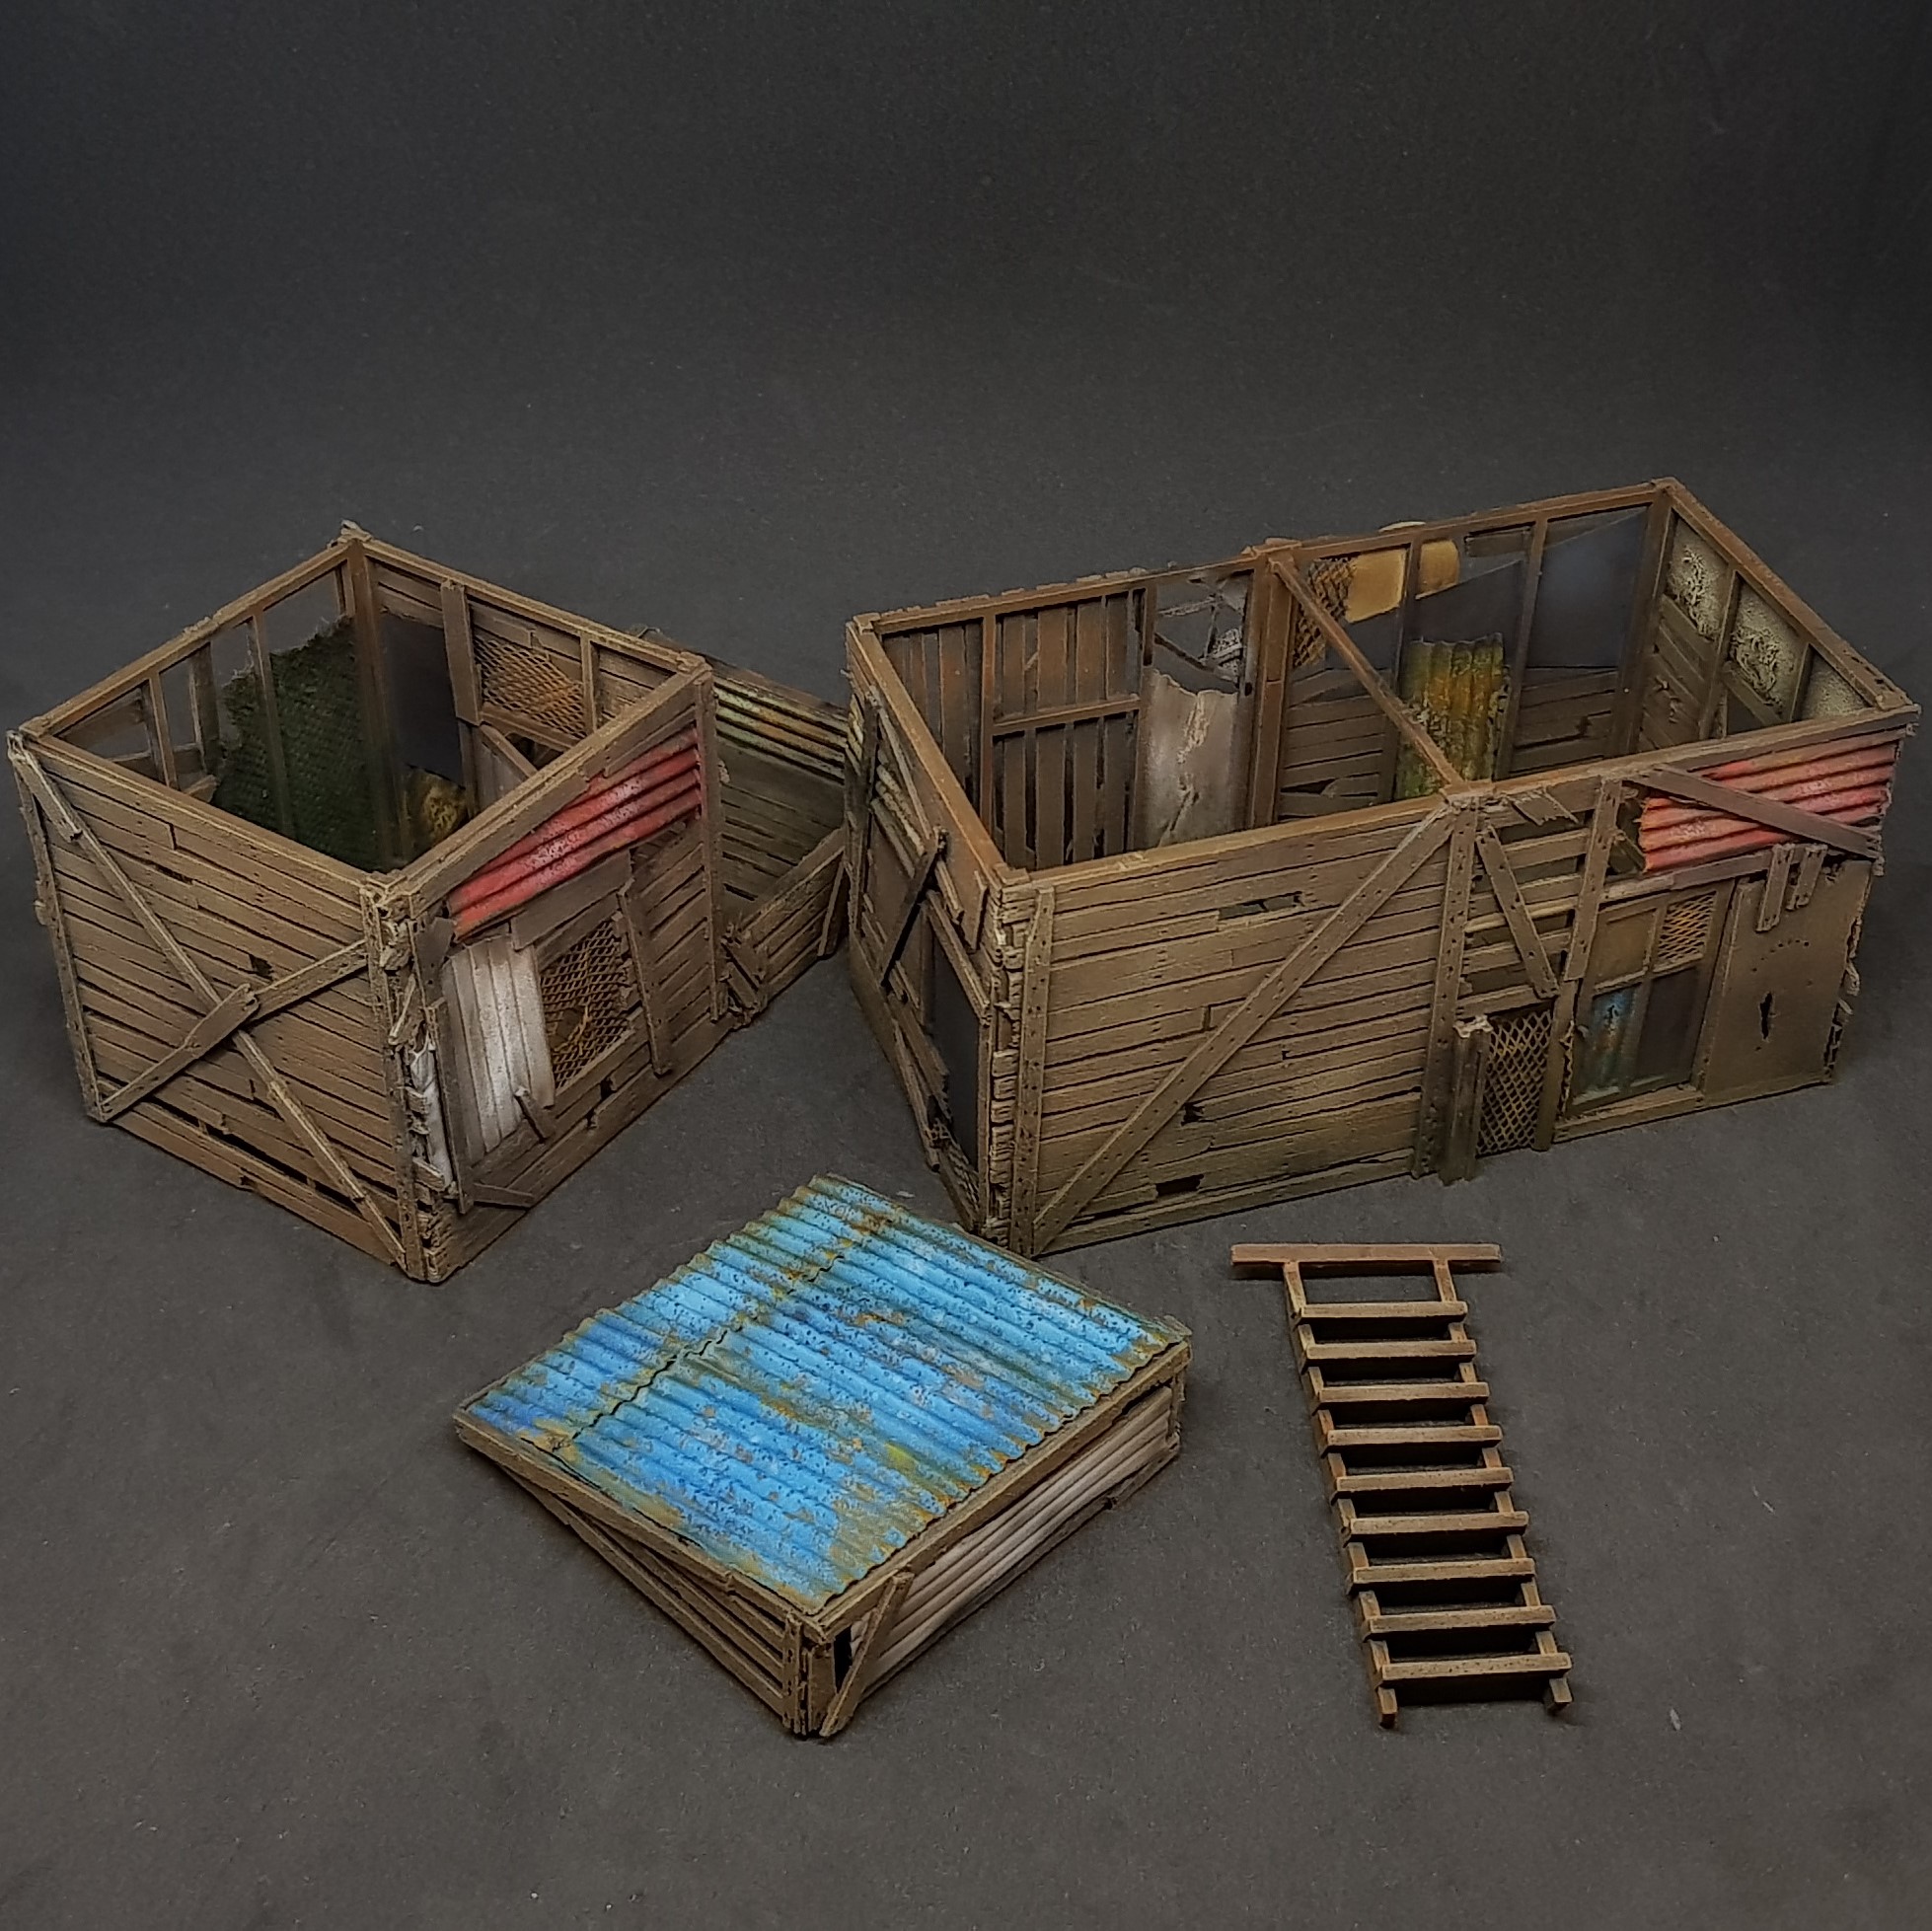 Everything disassembled.
 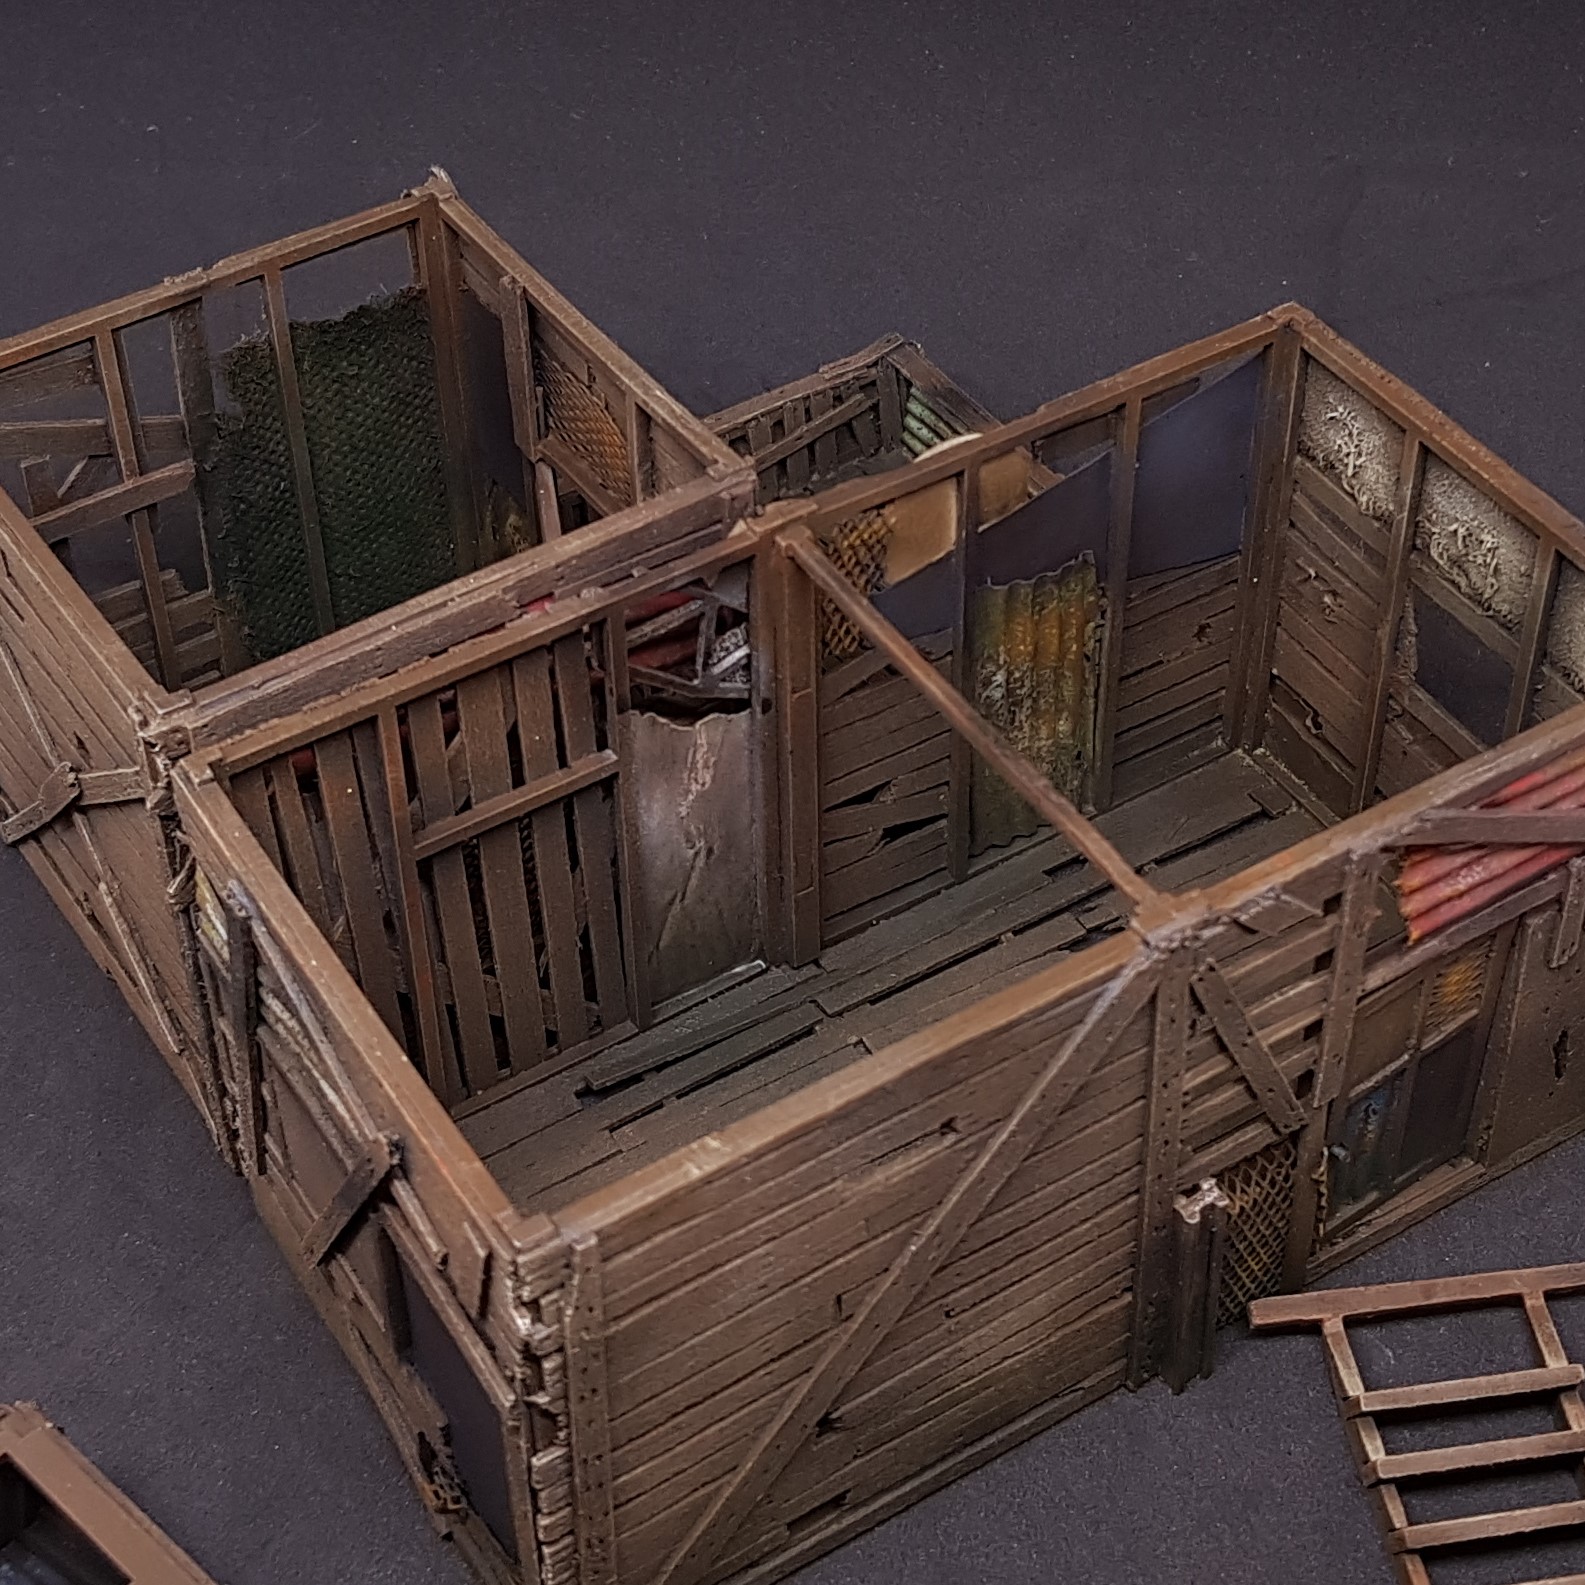 Interior.
 Interior other side.
 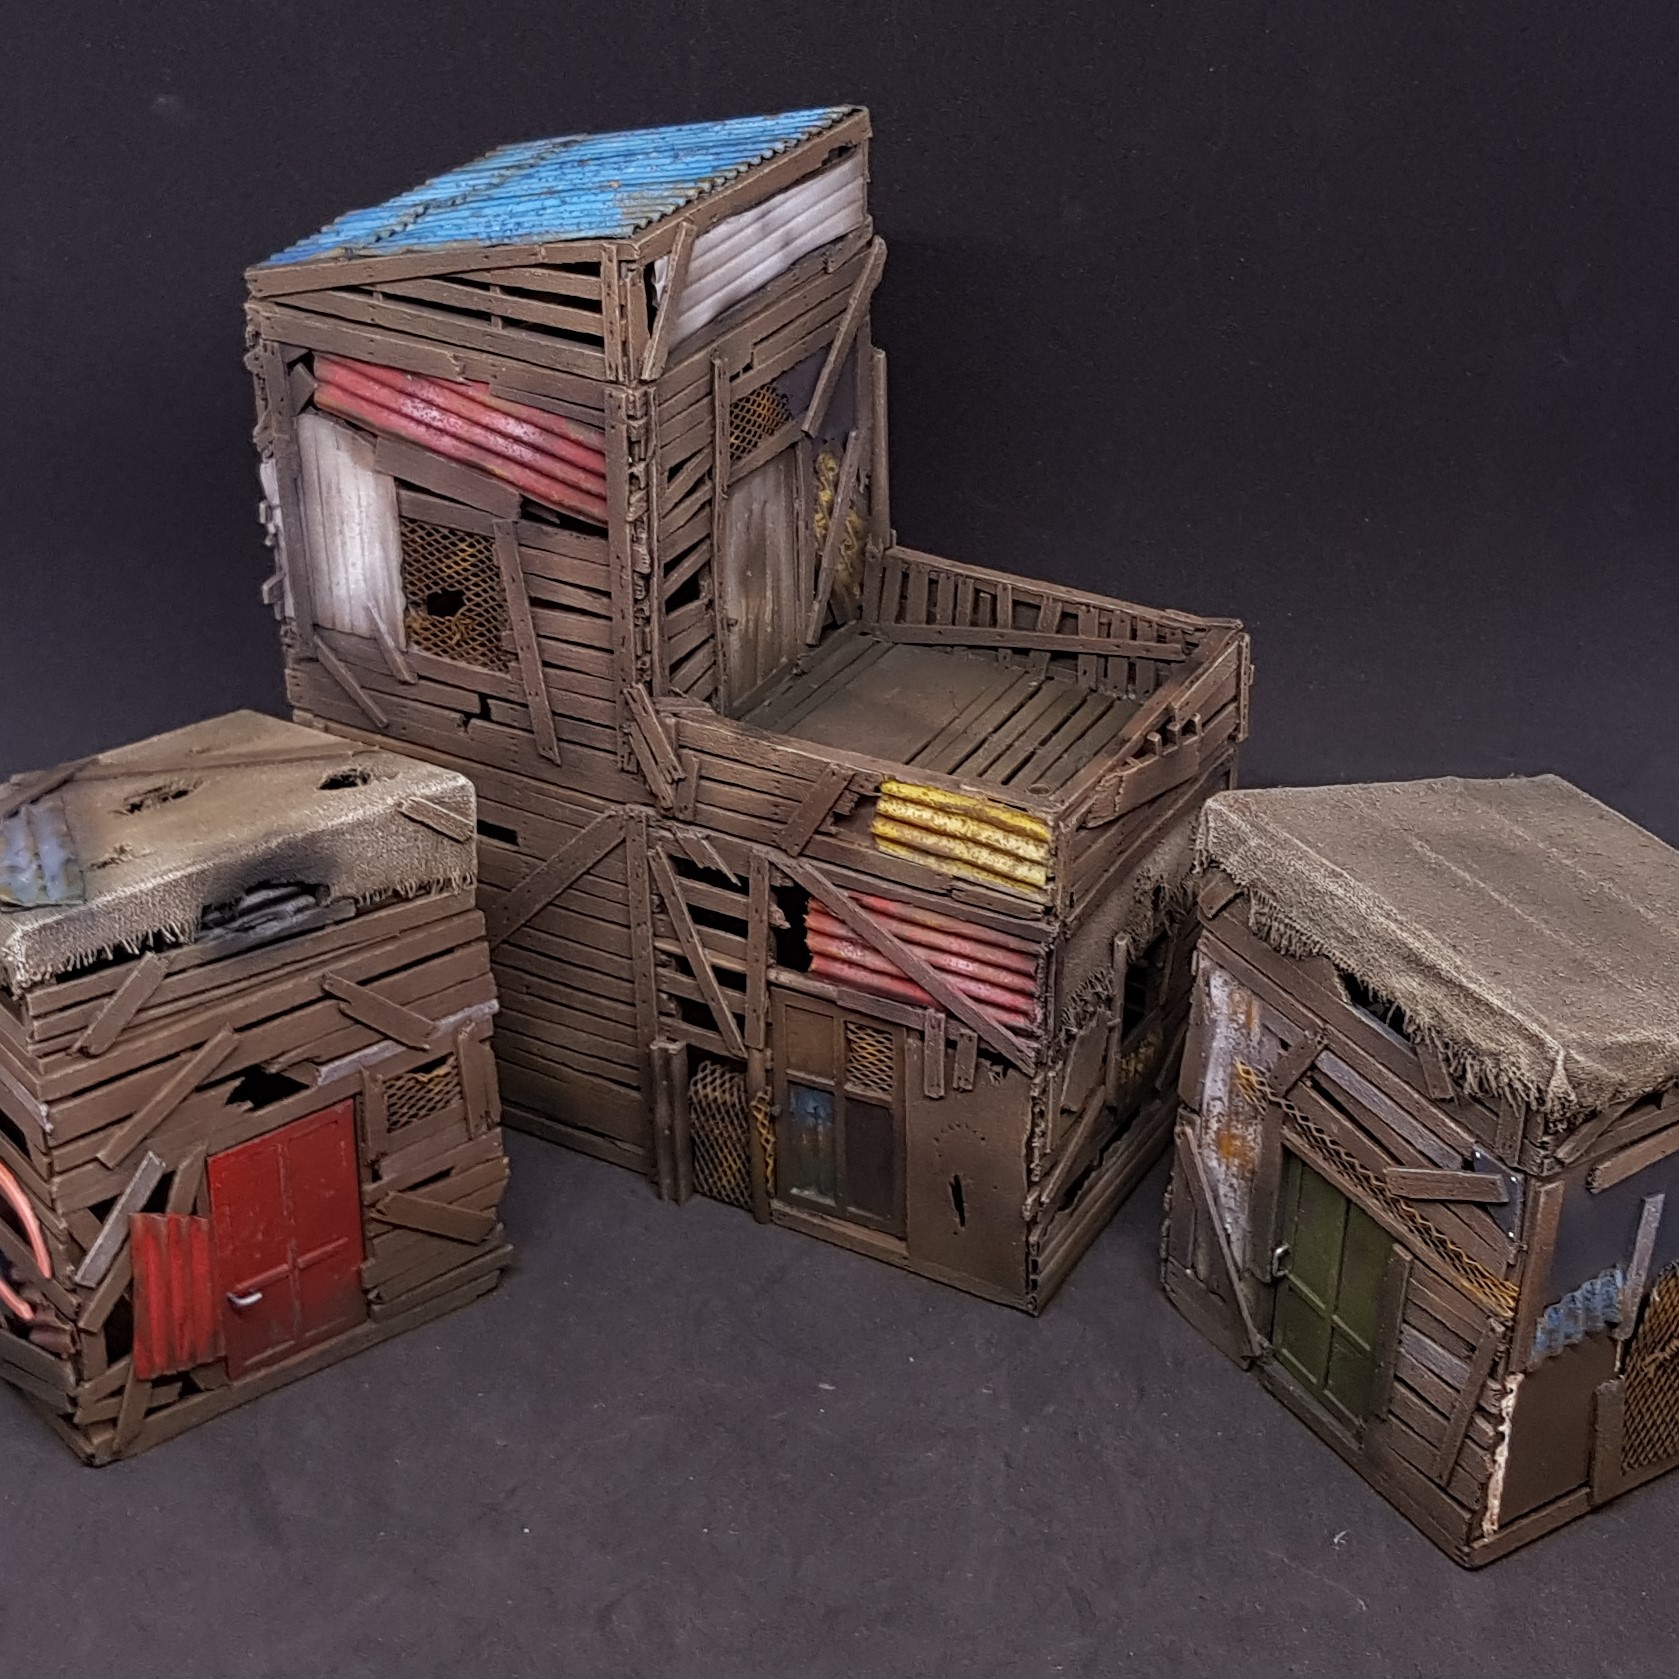 Everything so far.
 Another building bites the dust.
Two more to come. One big one small and then moving onto some items to make this more lived in if I get the time.
As ever more to come.
Progress update
So it’s been a while for this project. As I suspected, so little time. I used my time where I had it. Got obsessed with pressing refresh on a certain site for tickets to an event and got a promotion at work! It’s been eventful, but not for this project!
Started again today. Got side tracked as ever. I will not have time next week so I think I will finish the project with the large building.
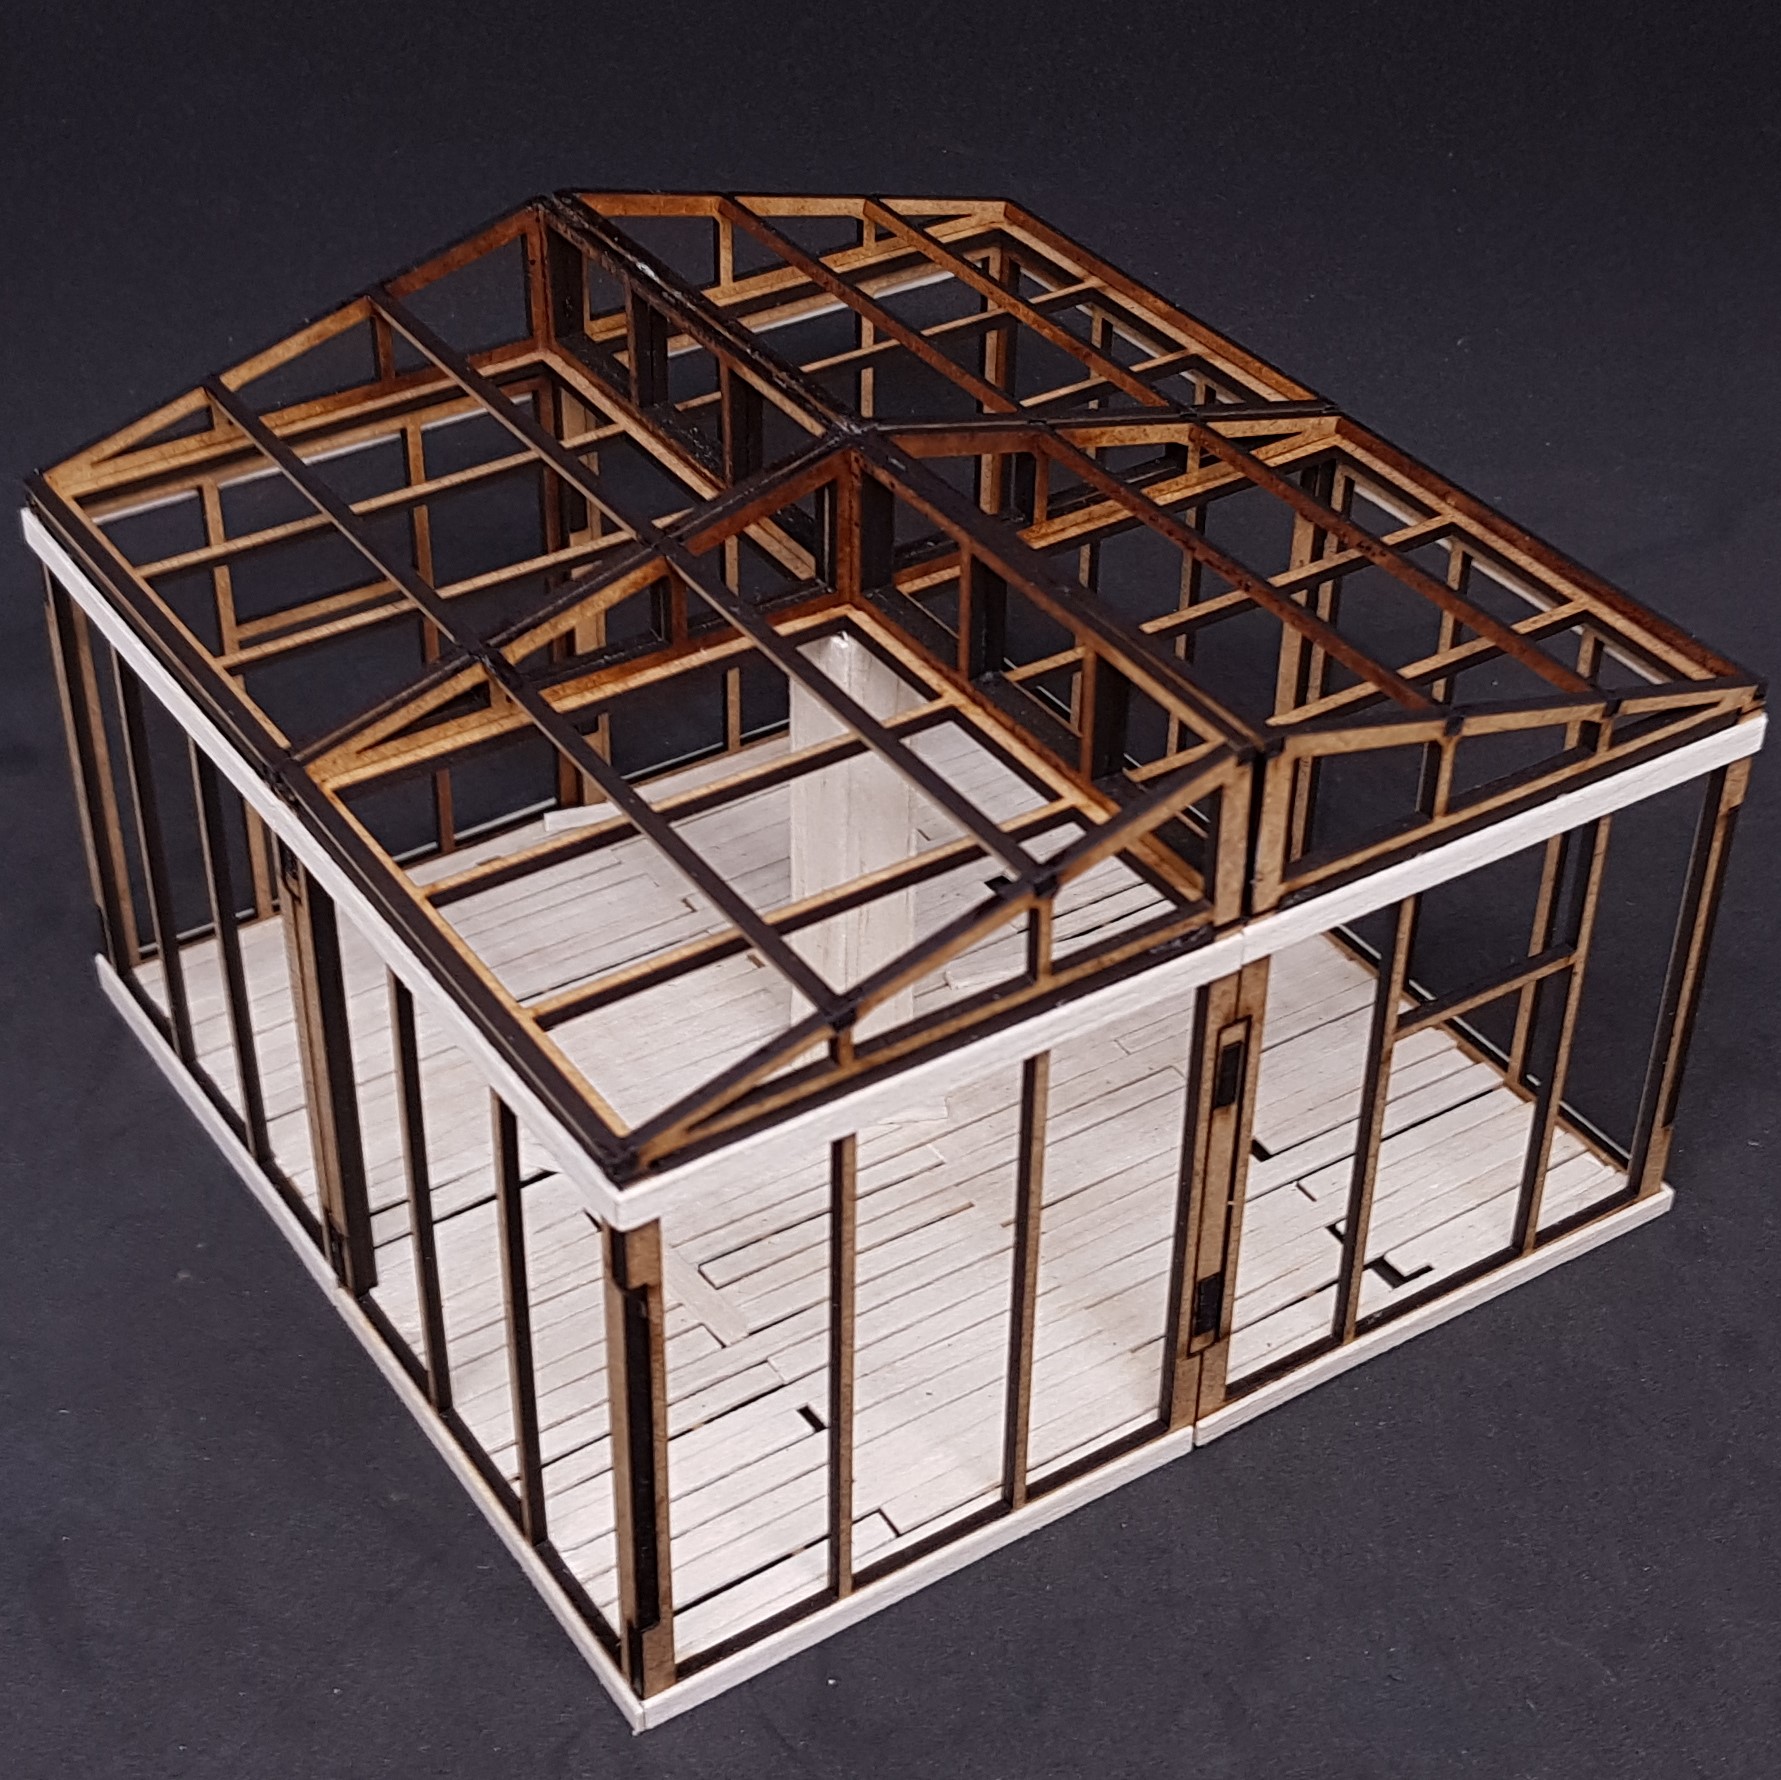 Progress so far on the Large shanty hut.
 This was todays side-track. I was remembering comments and what I should add. I tried to find a suitable 28mm kit car but it seems modelers do not like 28mm or scales close to it so I couldn’t find any car panels. I did find ones for 3D printing but alas time got away from me and I would have needed to get these printed somewhere.
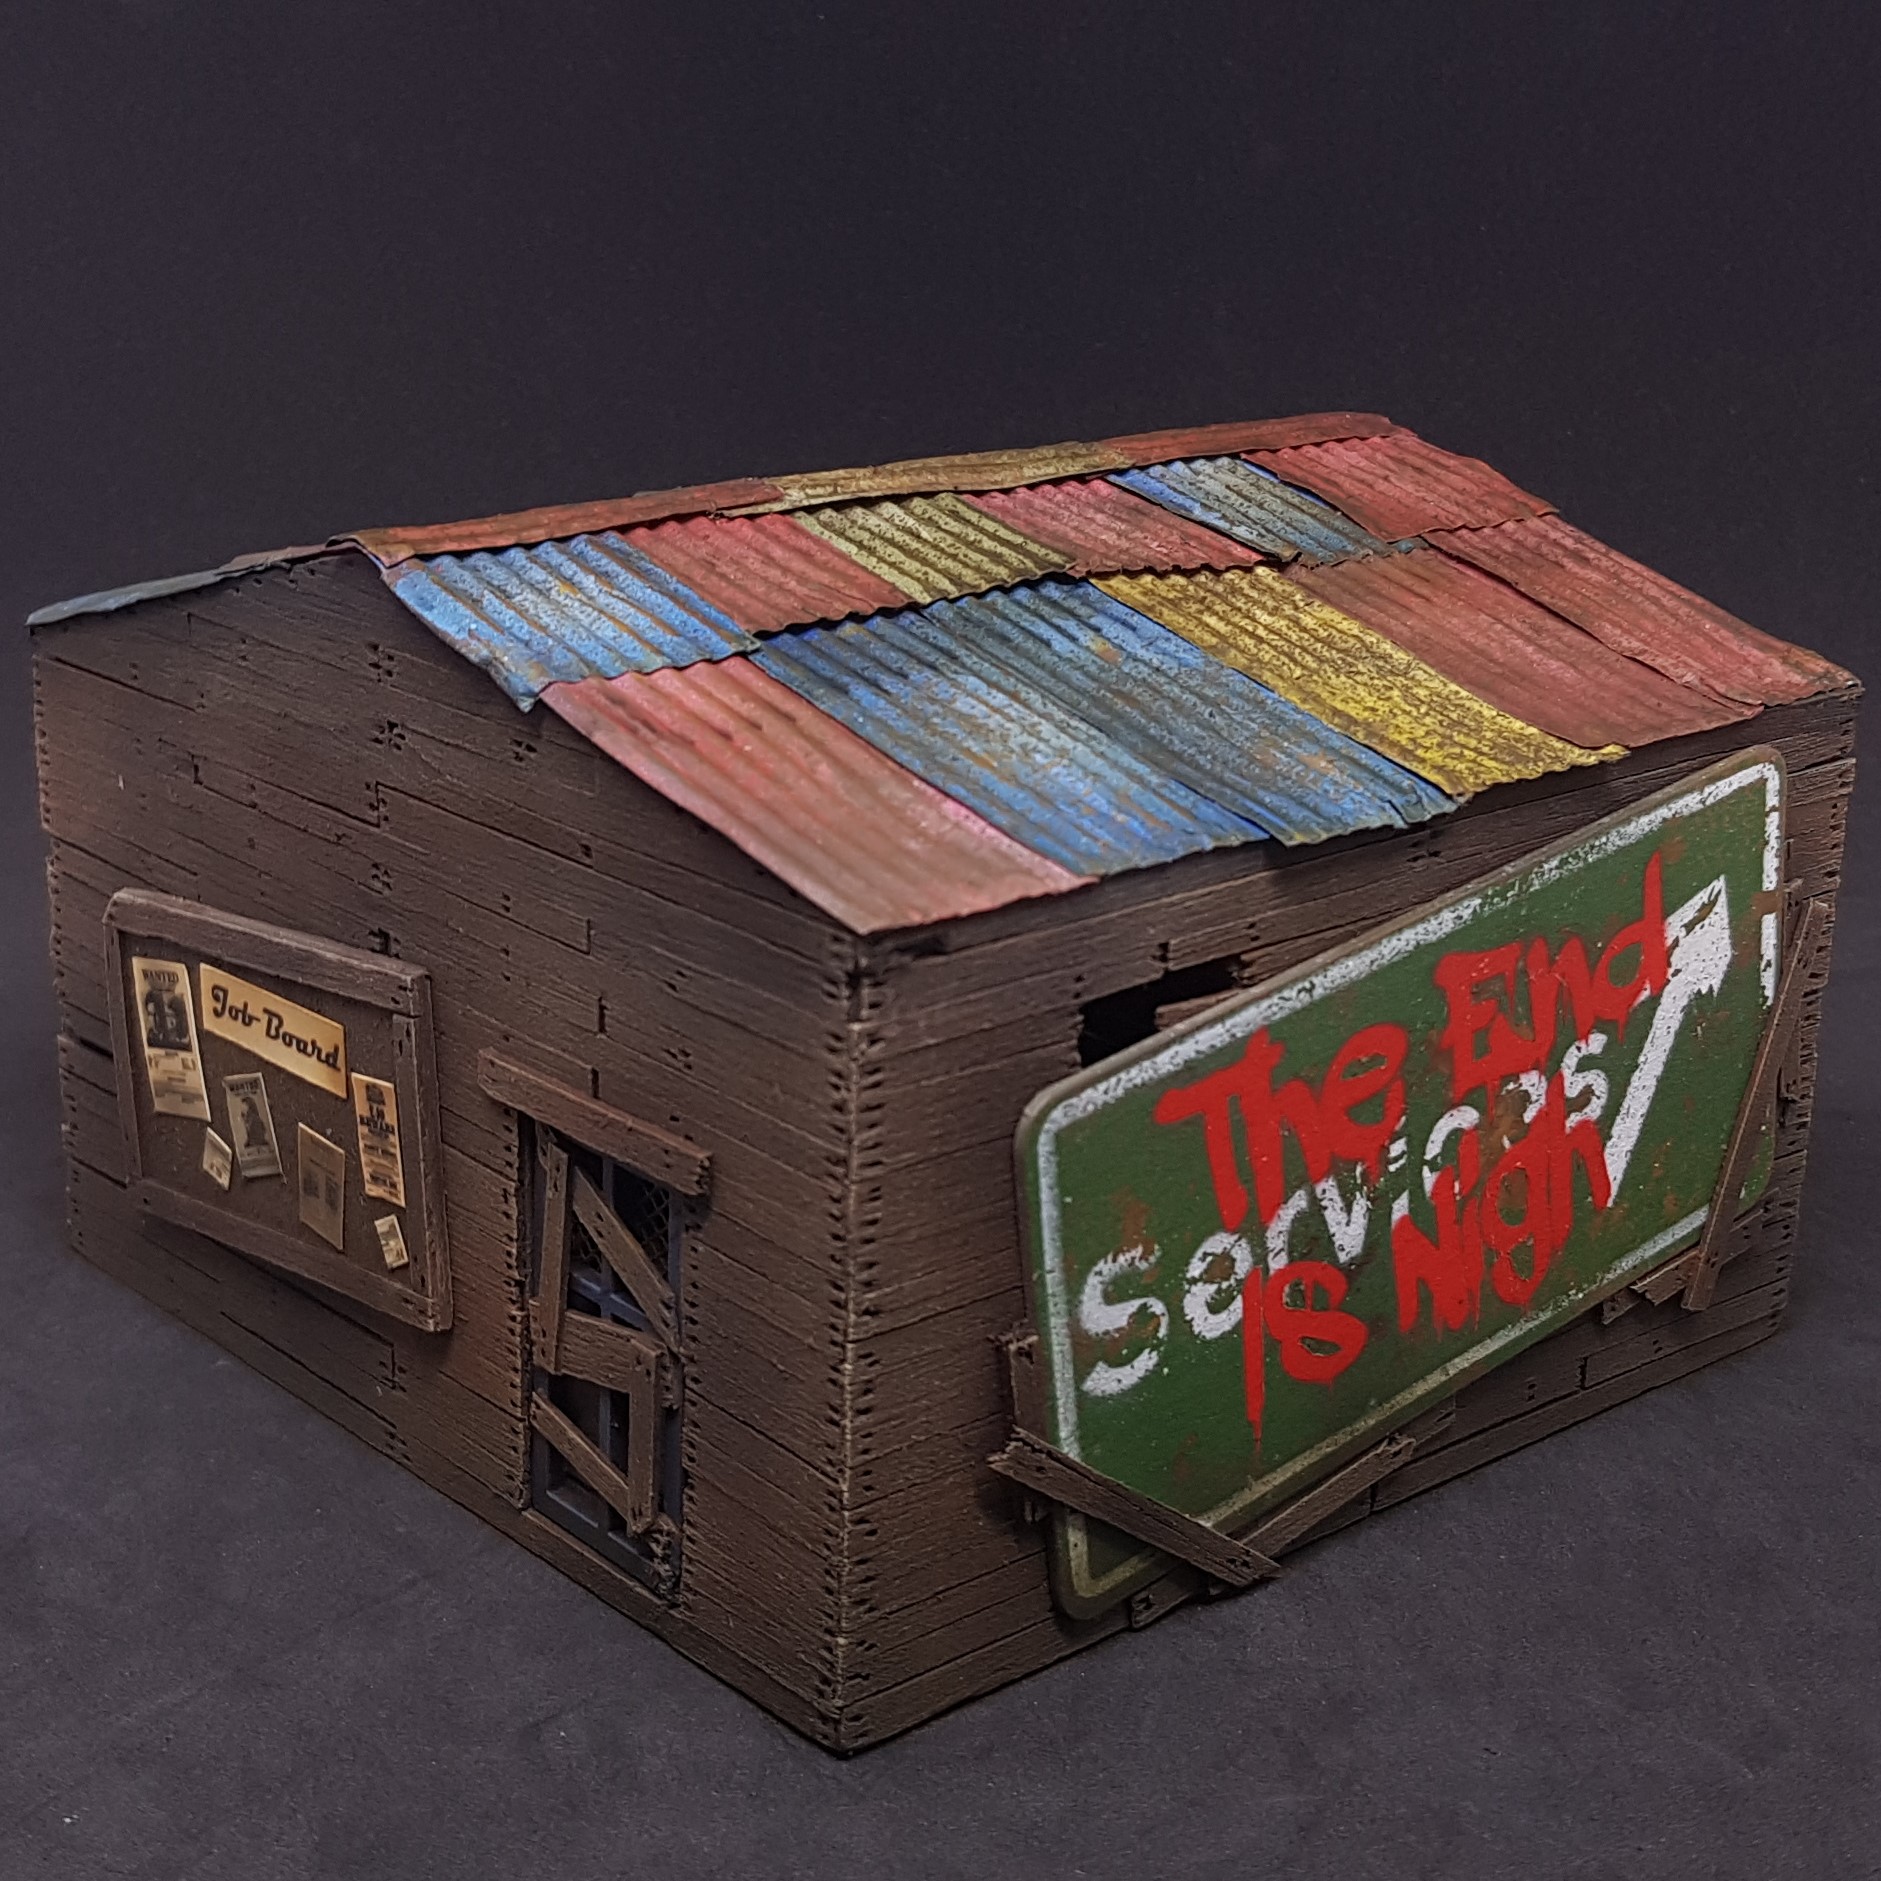
I loved the idea of signs but with time constraints and the size of road signs at 28mm I didn’t think this would be possible. Then I remembered motorway signs and they are big! I think these are aluminium these days but with some creative licence I made mine out of steel.
Steps using the techniques I have already shown used in layers.
- Cut out your sign. I used 1mm thick card. ( I used a laser cutter for speed)
- Prime this using a spray primer (the cheaper the better when it comes to terrain)
- I prayed the rust colours on using an air brush. Brown base followed by patches of orange and yellow then knocking it back with spraying brown and black wash.
- Hairspray everything I done two coats on the second I threw some salt over it. I done each side like this in turn.
- I airbrushed one side green and the other grey. and rubbed off the stuck down salt.
- I cut the first stencil out of 1mm card. I used masking tape over the parts that would fall out and removed only the letters. For the parts that would fall out I removed the masking tape so I could move them covered the bottom in PVA and stuck them down again, then lifted only the masking tape to hold them in position.
- I sprayed more hairspray then white.
- Removed the mask and the parts I stuck down with PVA I tore and then used some water to remove them without disturbing the paint to much. I then weathered further with a toothbrush.
- I then used a toothbrush and water after the above had dried to chip and scape away the paint in places.
- I applied the second stencil which was in a graffiti font it was applied as before. I sprayed red for the letters and removed the mask.
- Final touch ups were done with a tooth pick and a hard brush when dry to further weather this.
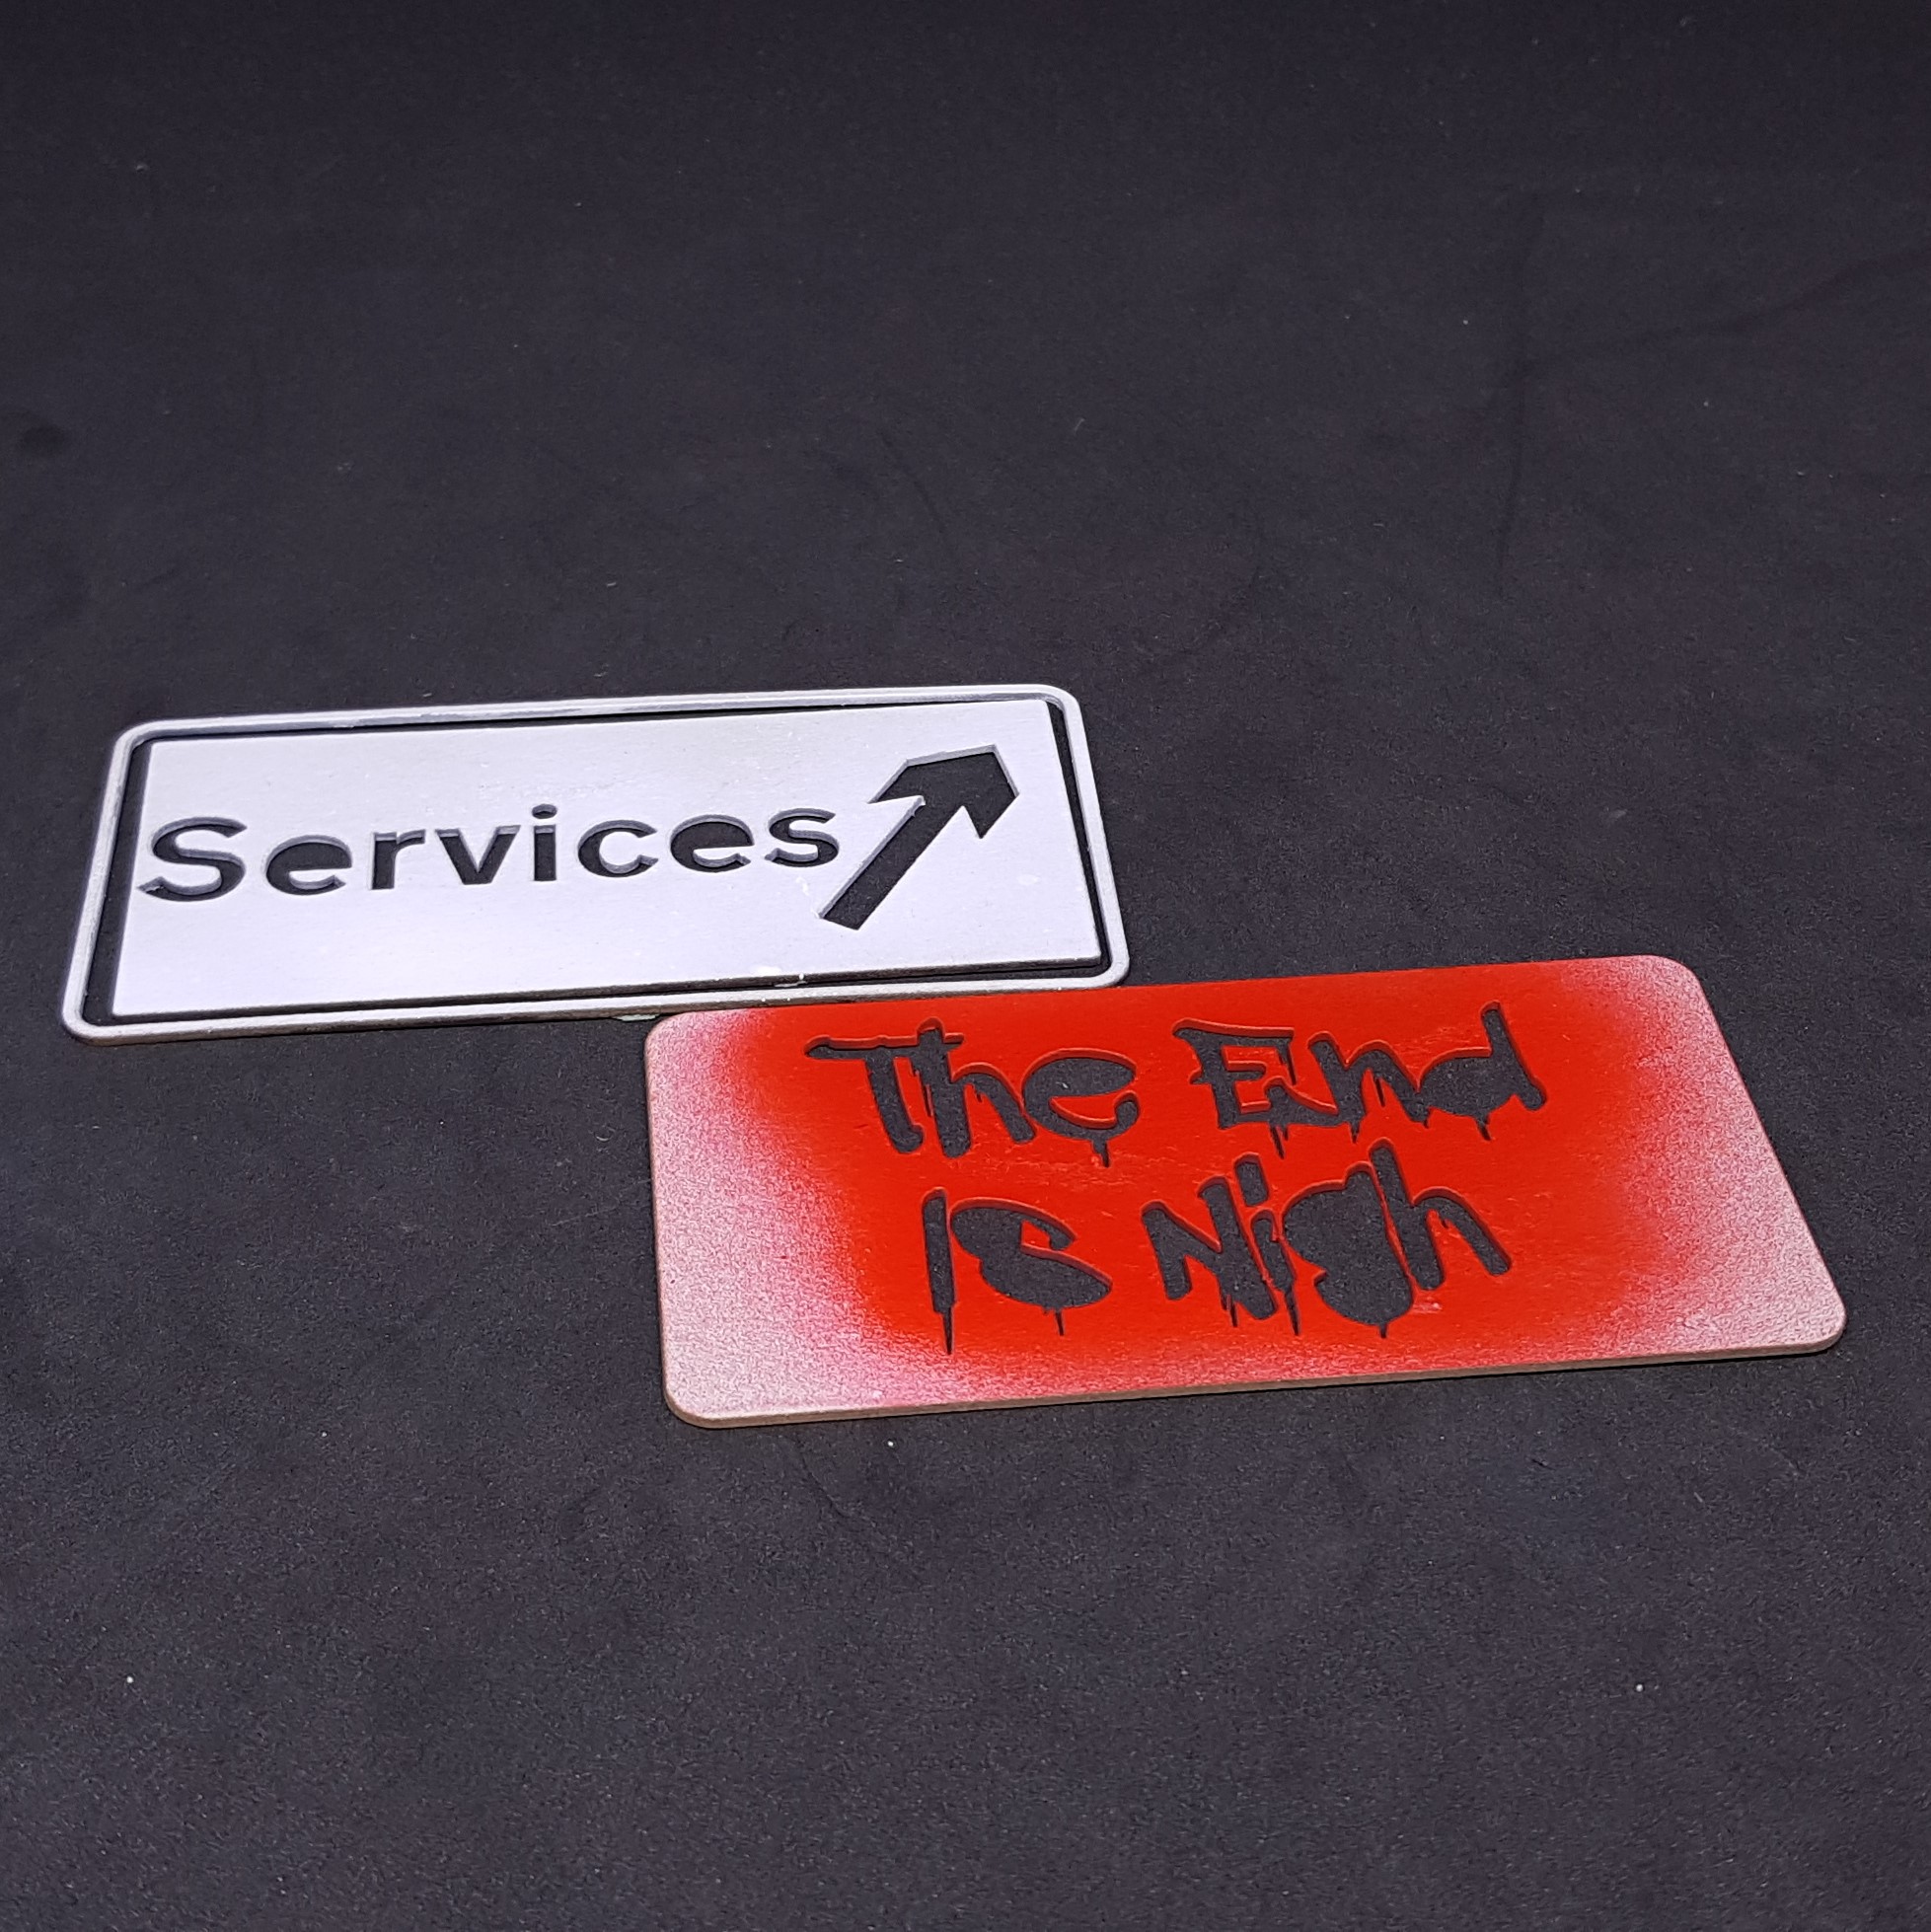 Stencil's I made and used to make this effect.
  Back of the sign.
  Front of the sign. Also quite commemorative of the challenge .
I will continue to work and get the large building done tomorrow (I hope) this will be better built in terms of materials used as this would have taken them longer to build and I think more care would have been taken.
I will then apply the sign when the main painting is done to remove the need to mask this.
More to come…. but the end is nigh!
Finishing the communal shanty hut.
Finishing the communal shanty hut. I didn’t get this done last week but did manage to find some hours throughout the week and finished this on Thursday.
I wanted this to look more taken care of as this wouldn’t be a single of family dwelling but a community building and as such better build and repairs.
I used all the same techniques as before I like everything on this apart form the roof. I had something in my head and just didn’t achieve this I think if I were to do anything again it would be this but it can be pulled off and replaced later due to the modularity of it.
Just as well the car wash down the road from the shanty town got blown up for materials. 🙂
The only thing done different was the notice board for side quests. In my (sci-fi) RPG this would mostly be done via a terminal but in this location I think a noticeboard is more fitting. This was just some balsa wood and some print outs varnished and sprayed with washes.
 Front side
 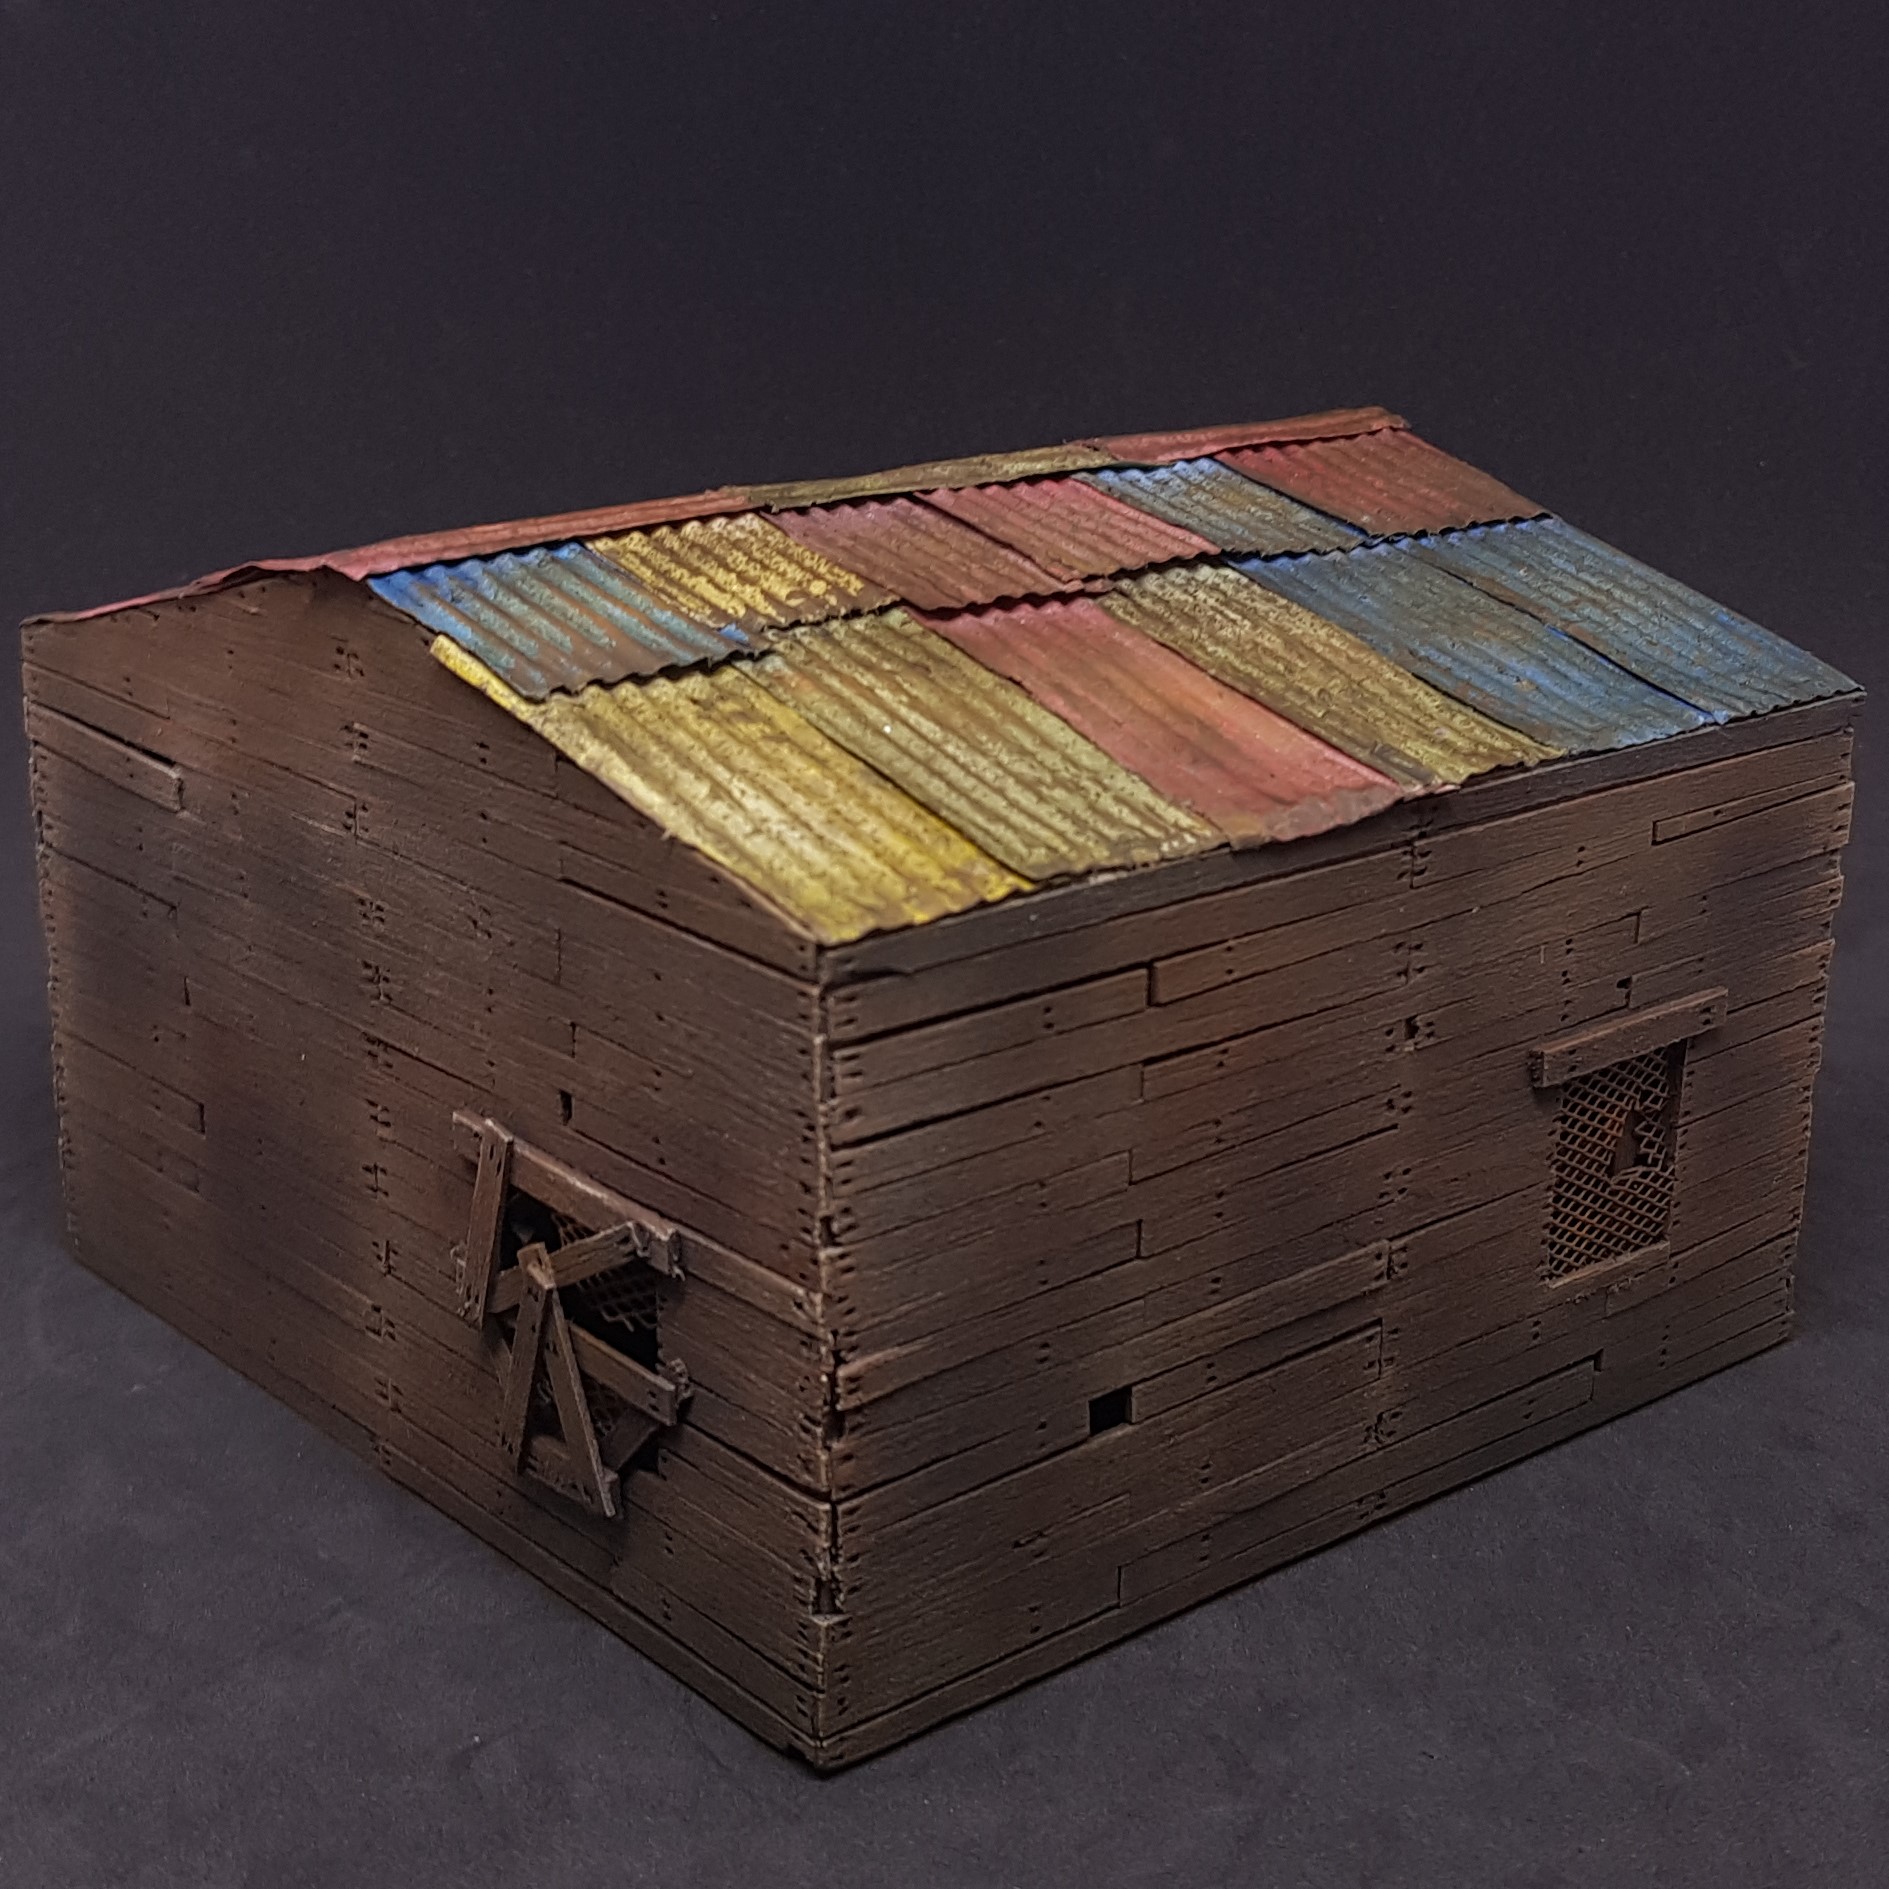 Back side
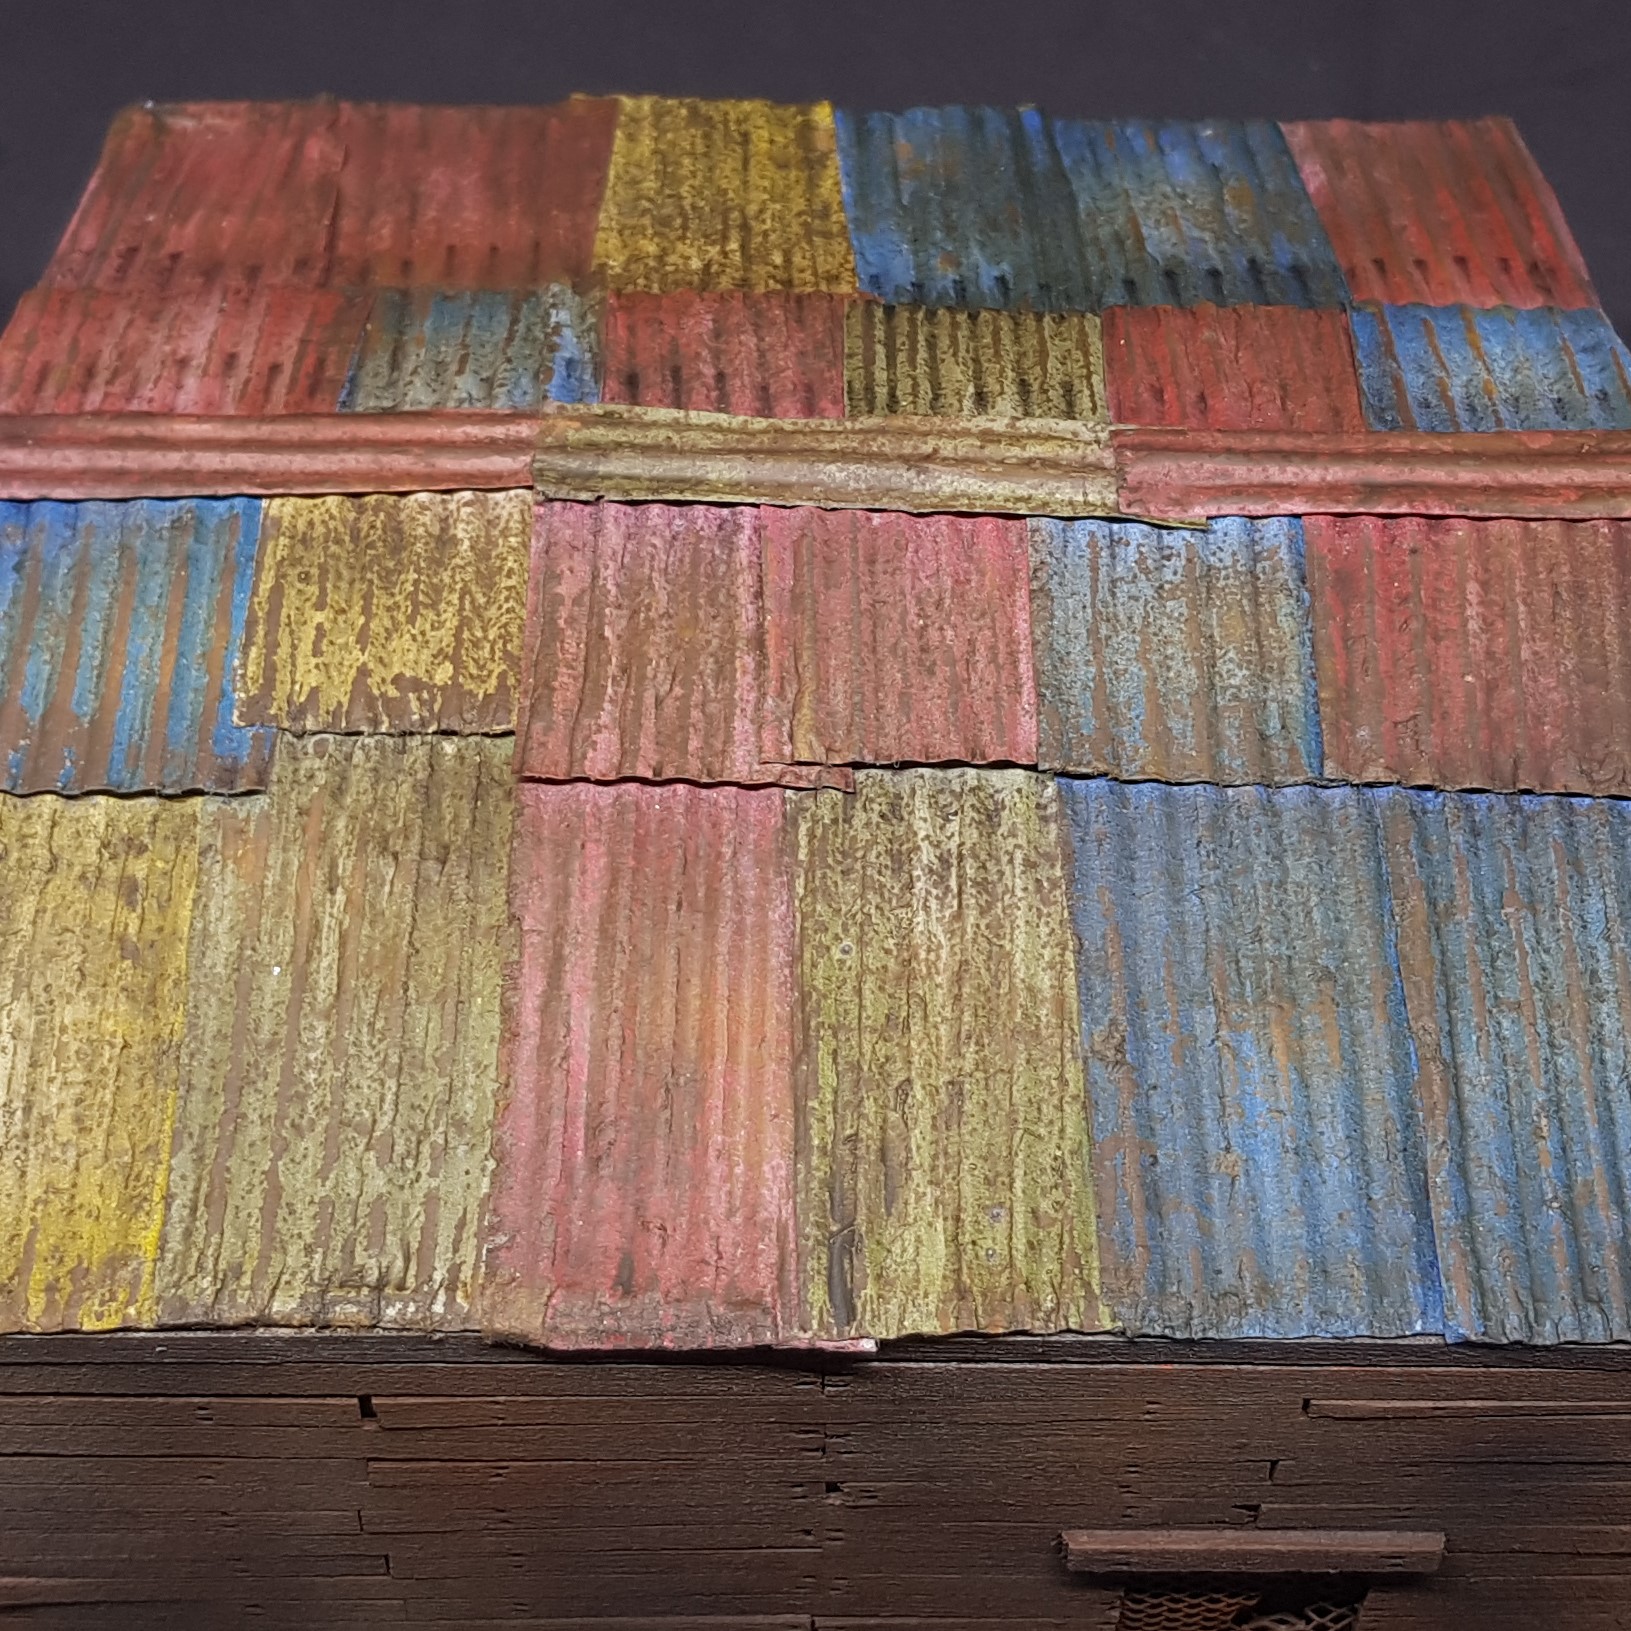 Roof
Roof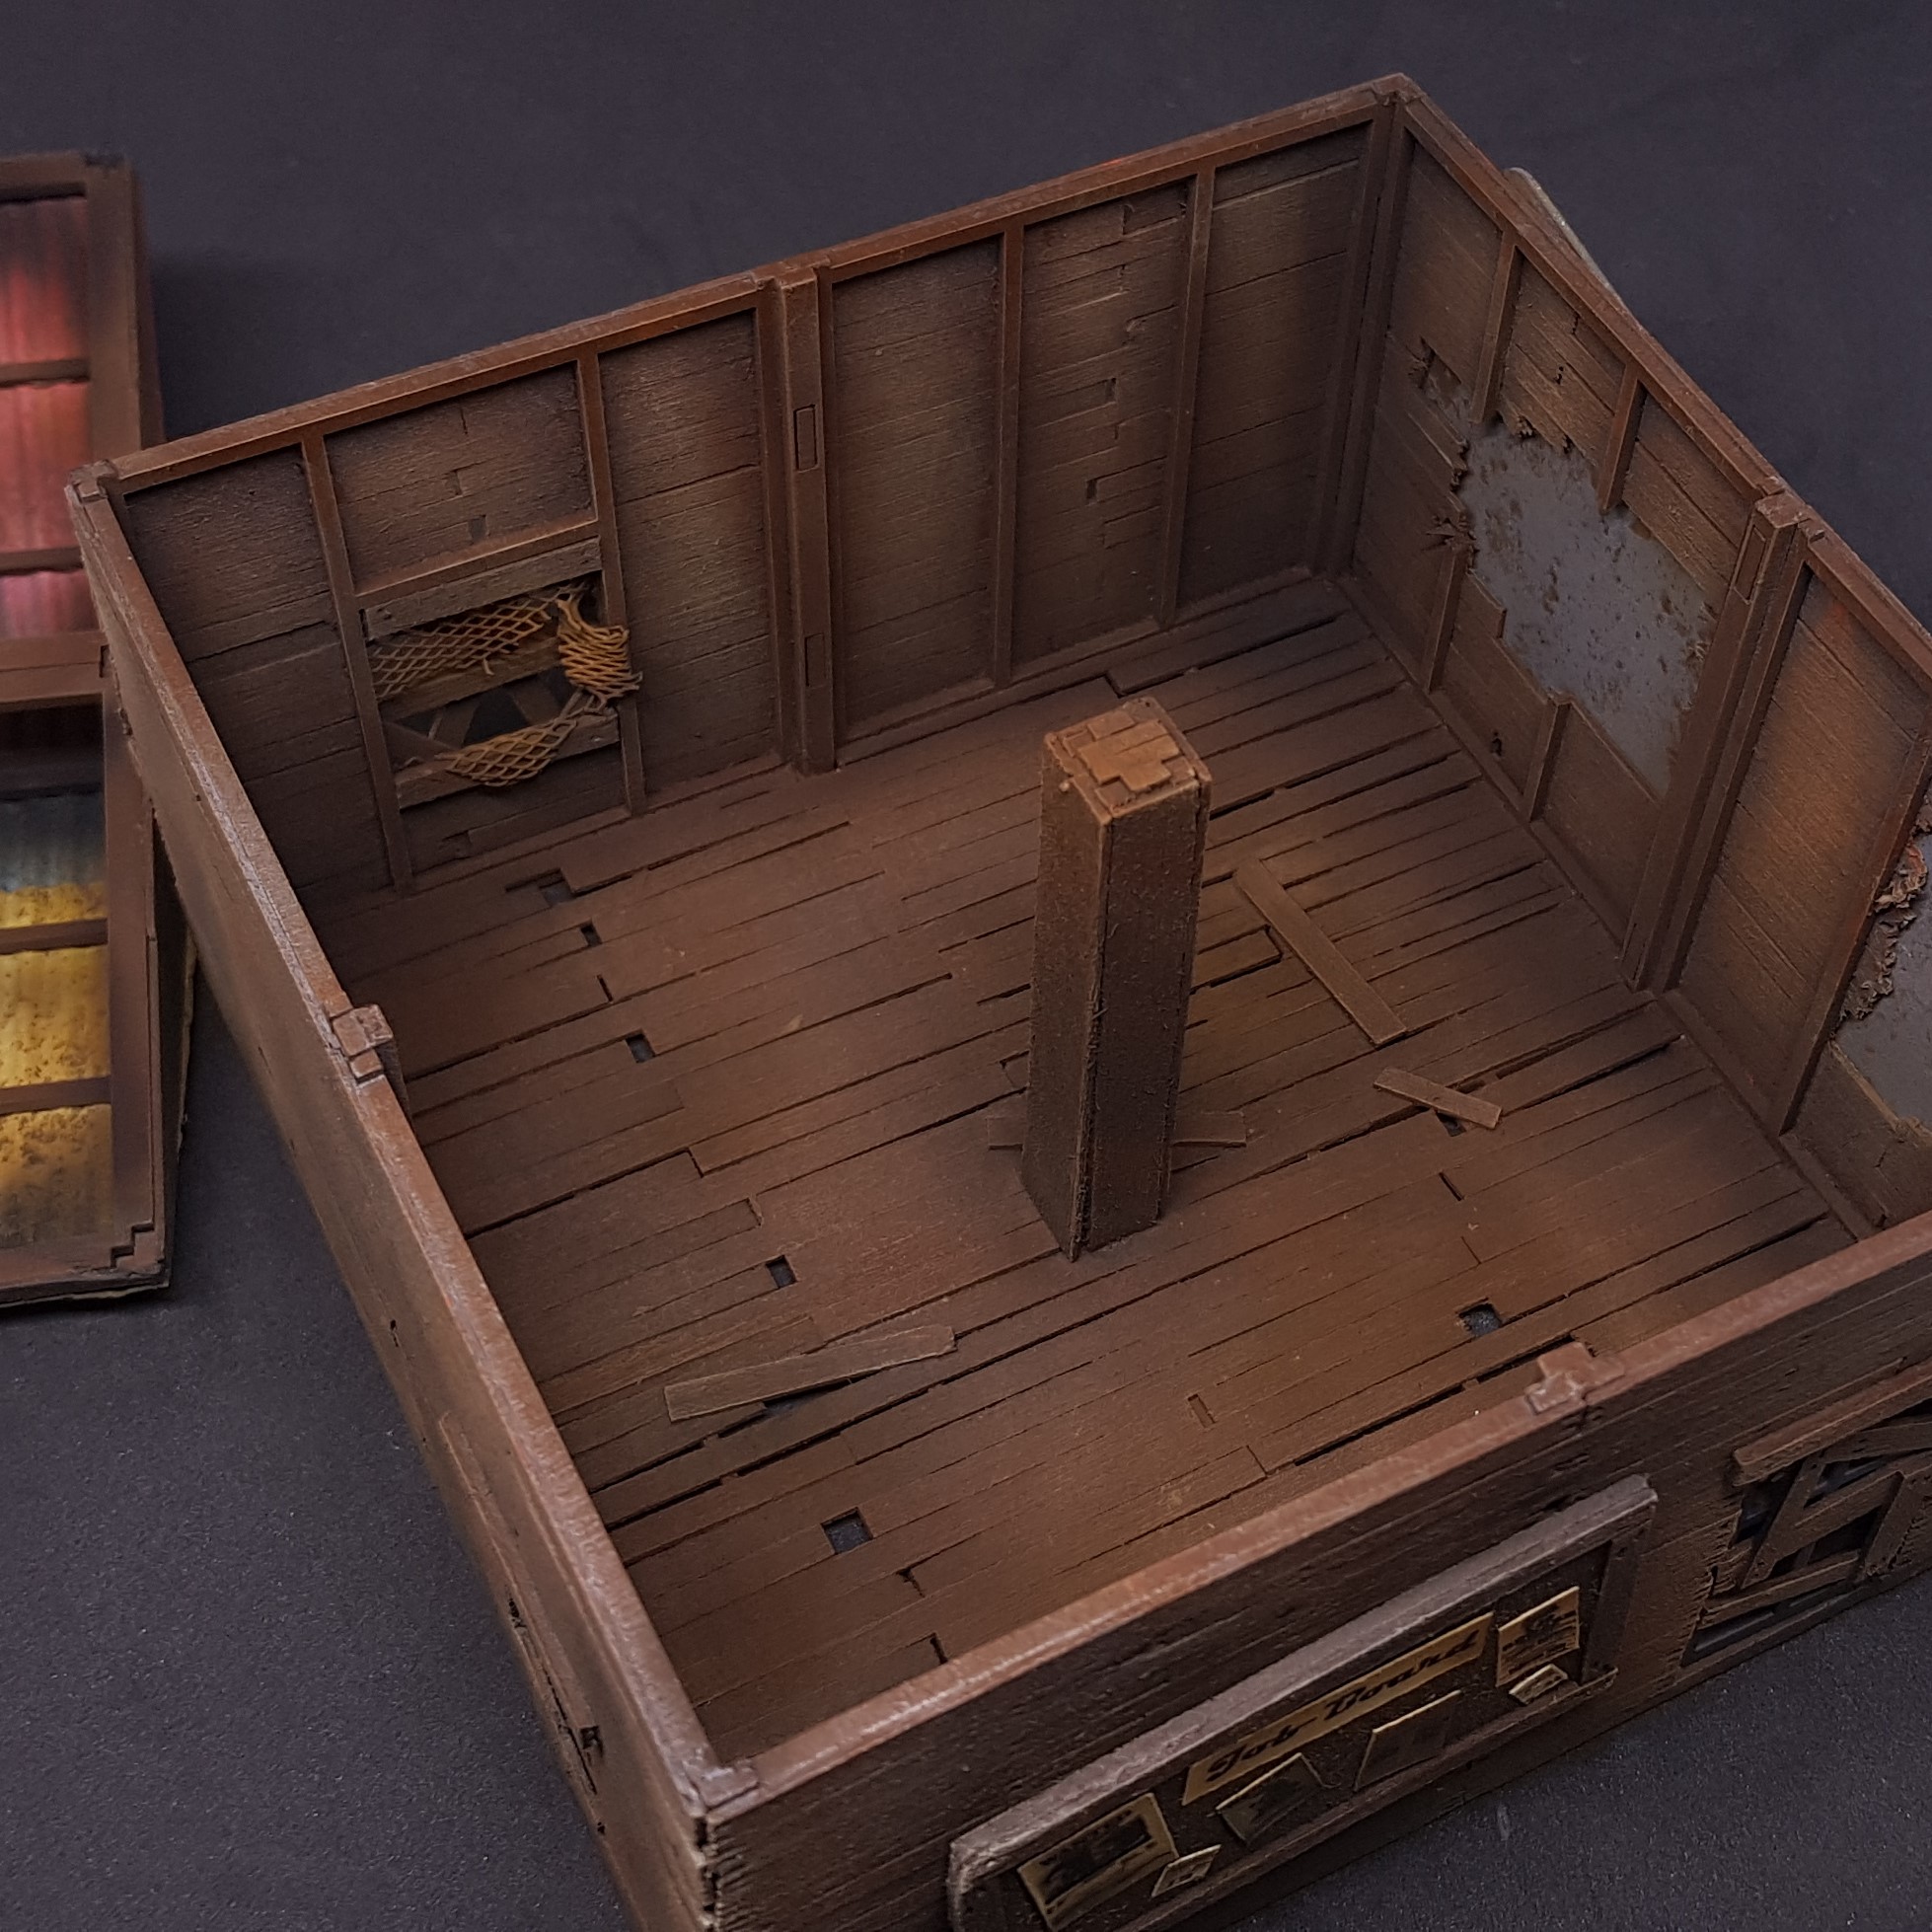 Interior
One last post to come with some conclusions and I will end this. But As I have finished a project I am off to get stuff to start the next.
The end is here!
I have already moved onto my next project in the desert.
As I said before I wished to wrap this one up with some reflective thoughts.
Things that I think went well:
- More natural looking rust and paint effects than I have managed to do before.
- Modular building layout. This may not be modular enough for some but it makes sense having a building helper rather than me just laser cutting the sides of a box with all the texture engraved in it. It did speed up building time.
- I love the motorway sign. building this up with just paint was time consuming that could have arguably be spent better elsewhere but I love it and made me think about laser cutting stencils which I don’t know why I don’t do more of because I like the end result so much.
Things that I think didn’t go so well and possible reasons why/how to fix:
- Colour choice on roof of communal shanty hut. I think I should have perhaps done 1 or 2 colours. It ended up too bright and eye catching. If I were to do this again with the same colours I should have added way more salt so that this is mostly rust and the accent is the colours.
- Time. I planned this to be quick due to life commitments / aspirations away from the hobby. I managed to achieve all of those but the hobby did take it’s rightful back seat. I think I could have designed this to be a faster less time consuming build and paint.
- Internal details should have been thought about from the start e.g. furniture. I am now left with empty shells and although for use in wargaming this may not matter, but for my roleplay. I will need to come up with other parts before use. Again this may come down to time above.
- While happy with materials used I think it needed more and to be random. The great suggestions I received were mostly unrealised. If this in the future is used for fallout wasteland warfare then expanded, I may be able to fully realise this.
That’s just a few points. I am sure when I have used these and looked at them some more I will come up with much better ways to do everything!
 Everything built for the entry
This was fun to build and paint which is the main thing and provides another location for the players of my RPG if they wish to go down this path. The files are present bellow (or above) if you wish to give it a go or you can print them off and use as a template if you want to scratch build the frames out of 2mm balsa wood (which would look better).
It would still be great to get some form of discussion on what kind of formats you think are good for projects. I don’t a few things in here. Written instruction, pictorial instruction and videos trying to find what I think works best within the project system. I myself prefer the bog standard written instruction but I am still curios to see what people prefer.
Oh well… the end is nigh.
More to come just not here.
THE END