


The End is Nigh: Deadlands


Recommendations: 354
About the Project
For my “The End is Nigh” terrain challenge entry, I will be producing a full-blown nightmare landscape, known as a Deadland, in the award winning, Weird West, Deadlands RPG setting, as well as the Great Rail Wars miniatures game and some board and living card games, by Pinnacle Entertainment Group, first published in 1996 and still going strong with it’s Reloaded version using their Savage Worlds engine. In the setting there are some evil spirits that are attempting to turn the world into a true Hell on Earth by causing more and more fear throughout the land which causes even the landscape to warp. The end goal is the world to become a Deadland at which time these spirits can freely walk the earth.
Related Game: Savage Worlds
Related Genre: Western
This Project is Active
Pre-painting the Cave
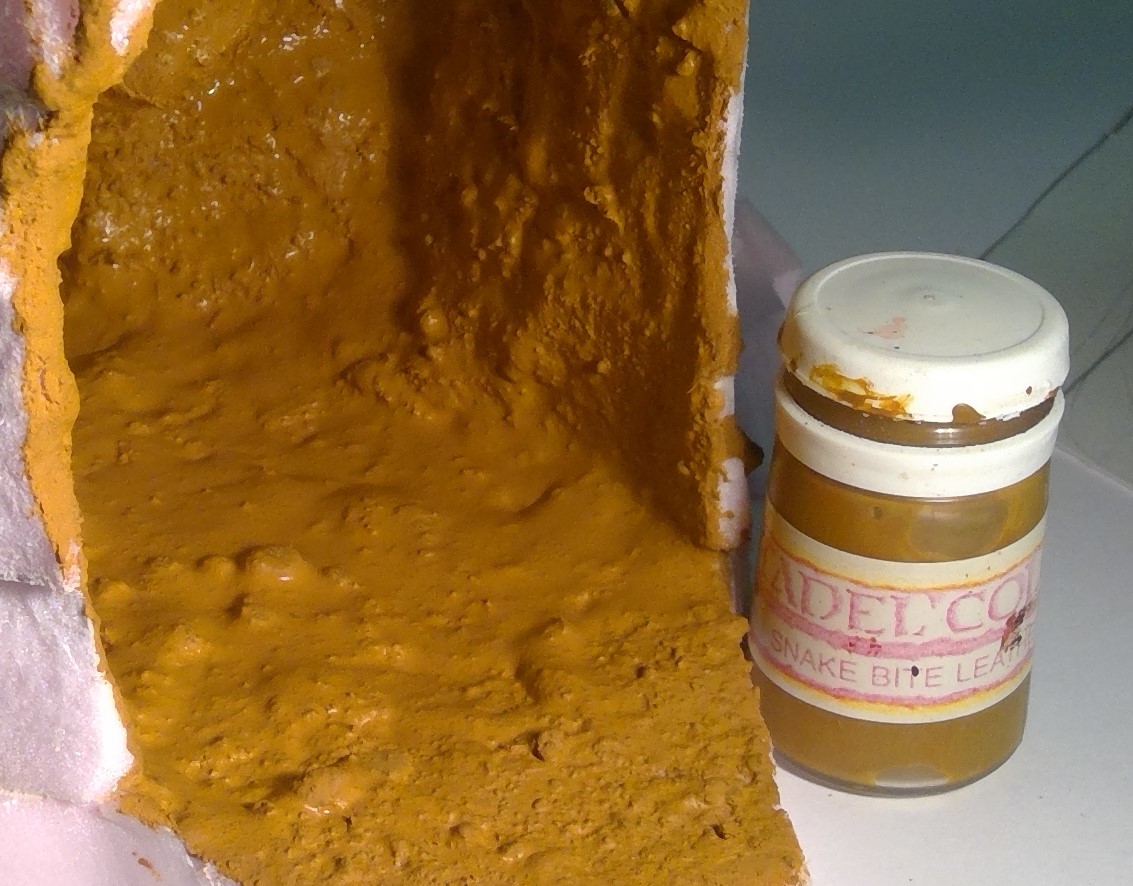
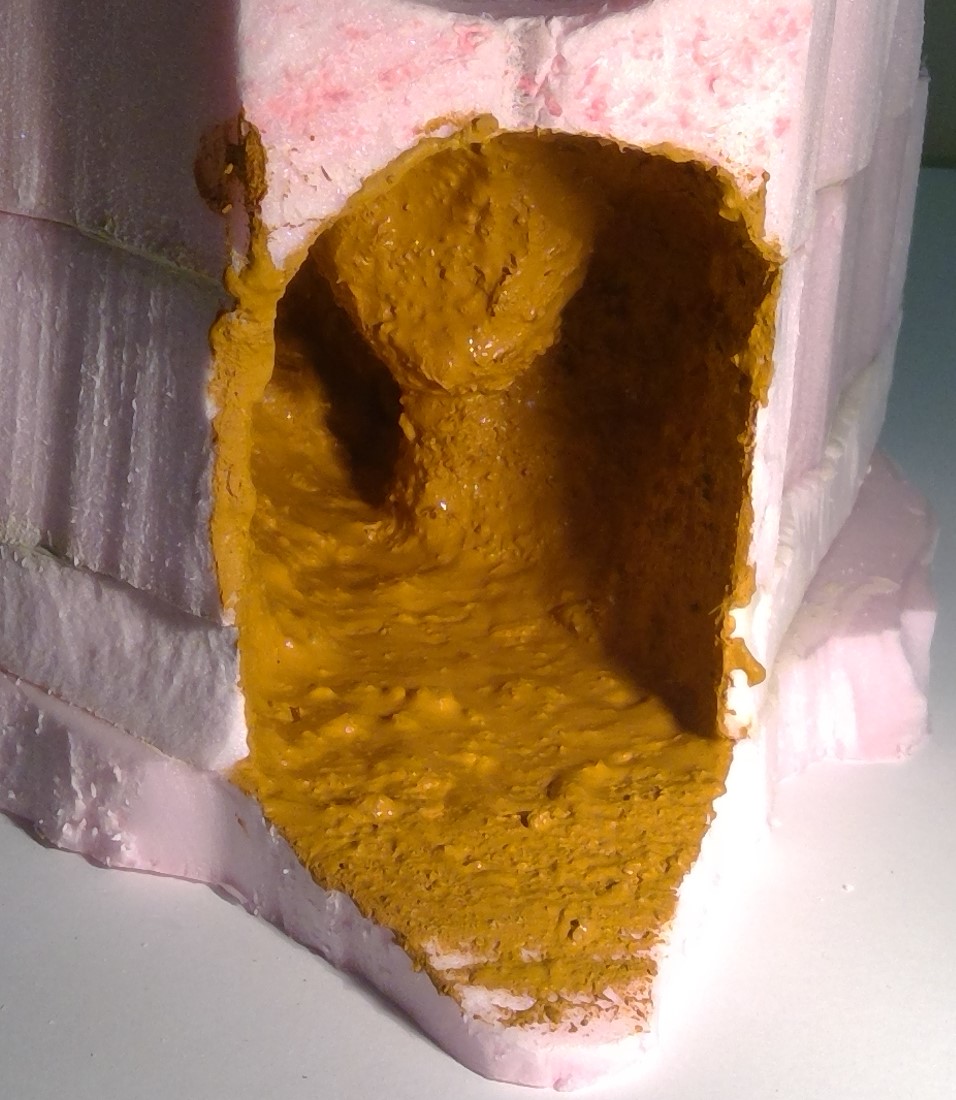
As it is much easier to reach all the nooks and crannies of the cave without the skull in place I went ahead and gave it a good heavy coat of a mix of sand and the Durham’s Water Putty tinted with interior flat latex house paint (color matched to the ooooooold Citadel Snake Bite Leather). This will dry nice and hard, with a sandy, rocky texture already in place. I will do the same over the entire model before it’s over, at which time I will go into more detail on this method.
The color is a tad more orange than I’d like but I can take care of that with a heavy wash of another darker brown.

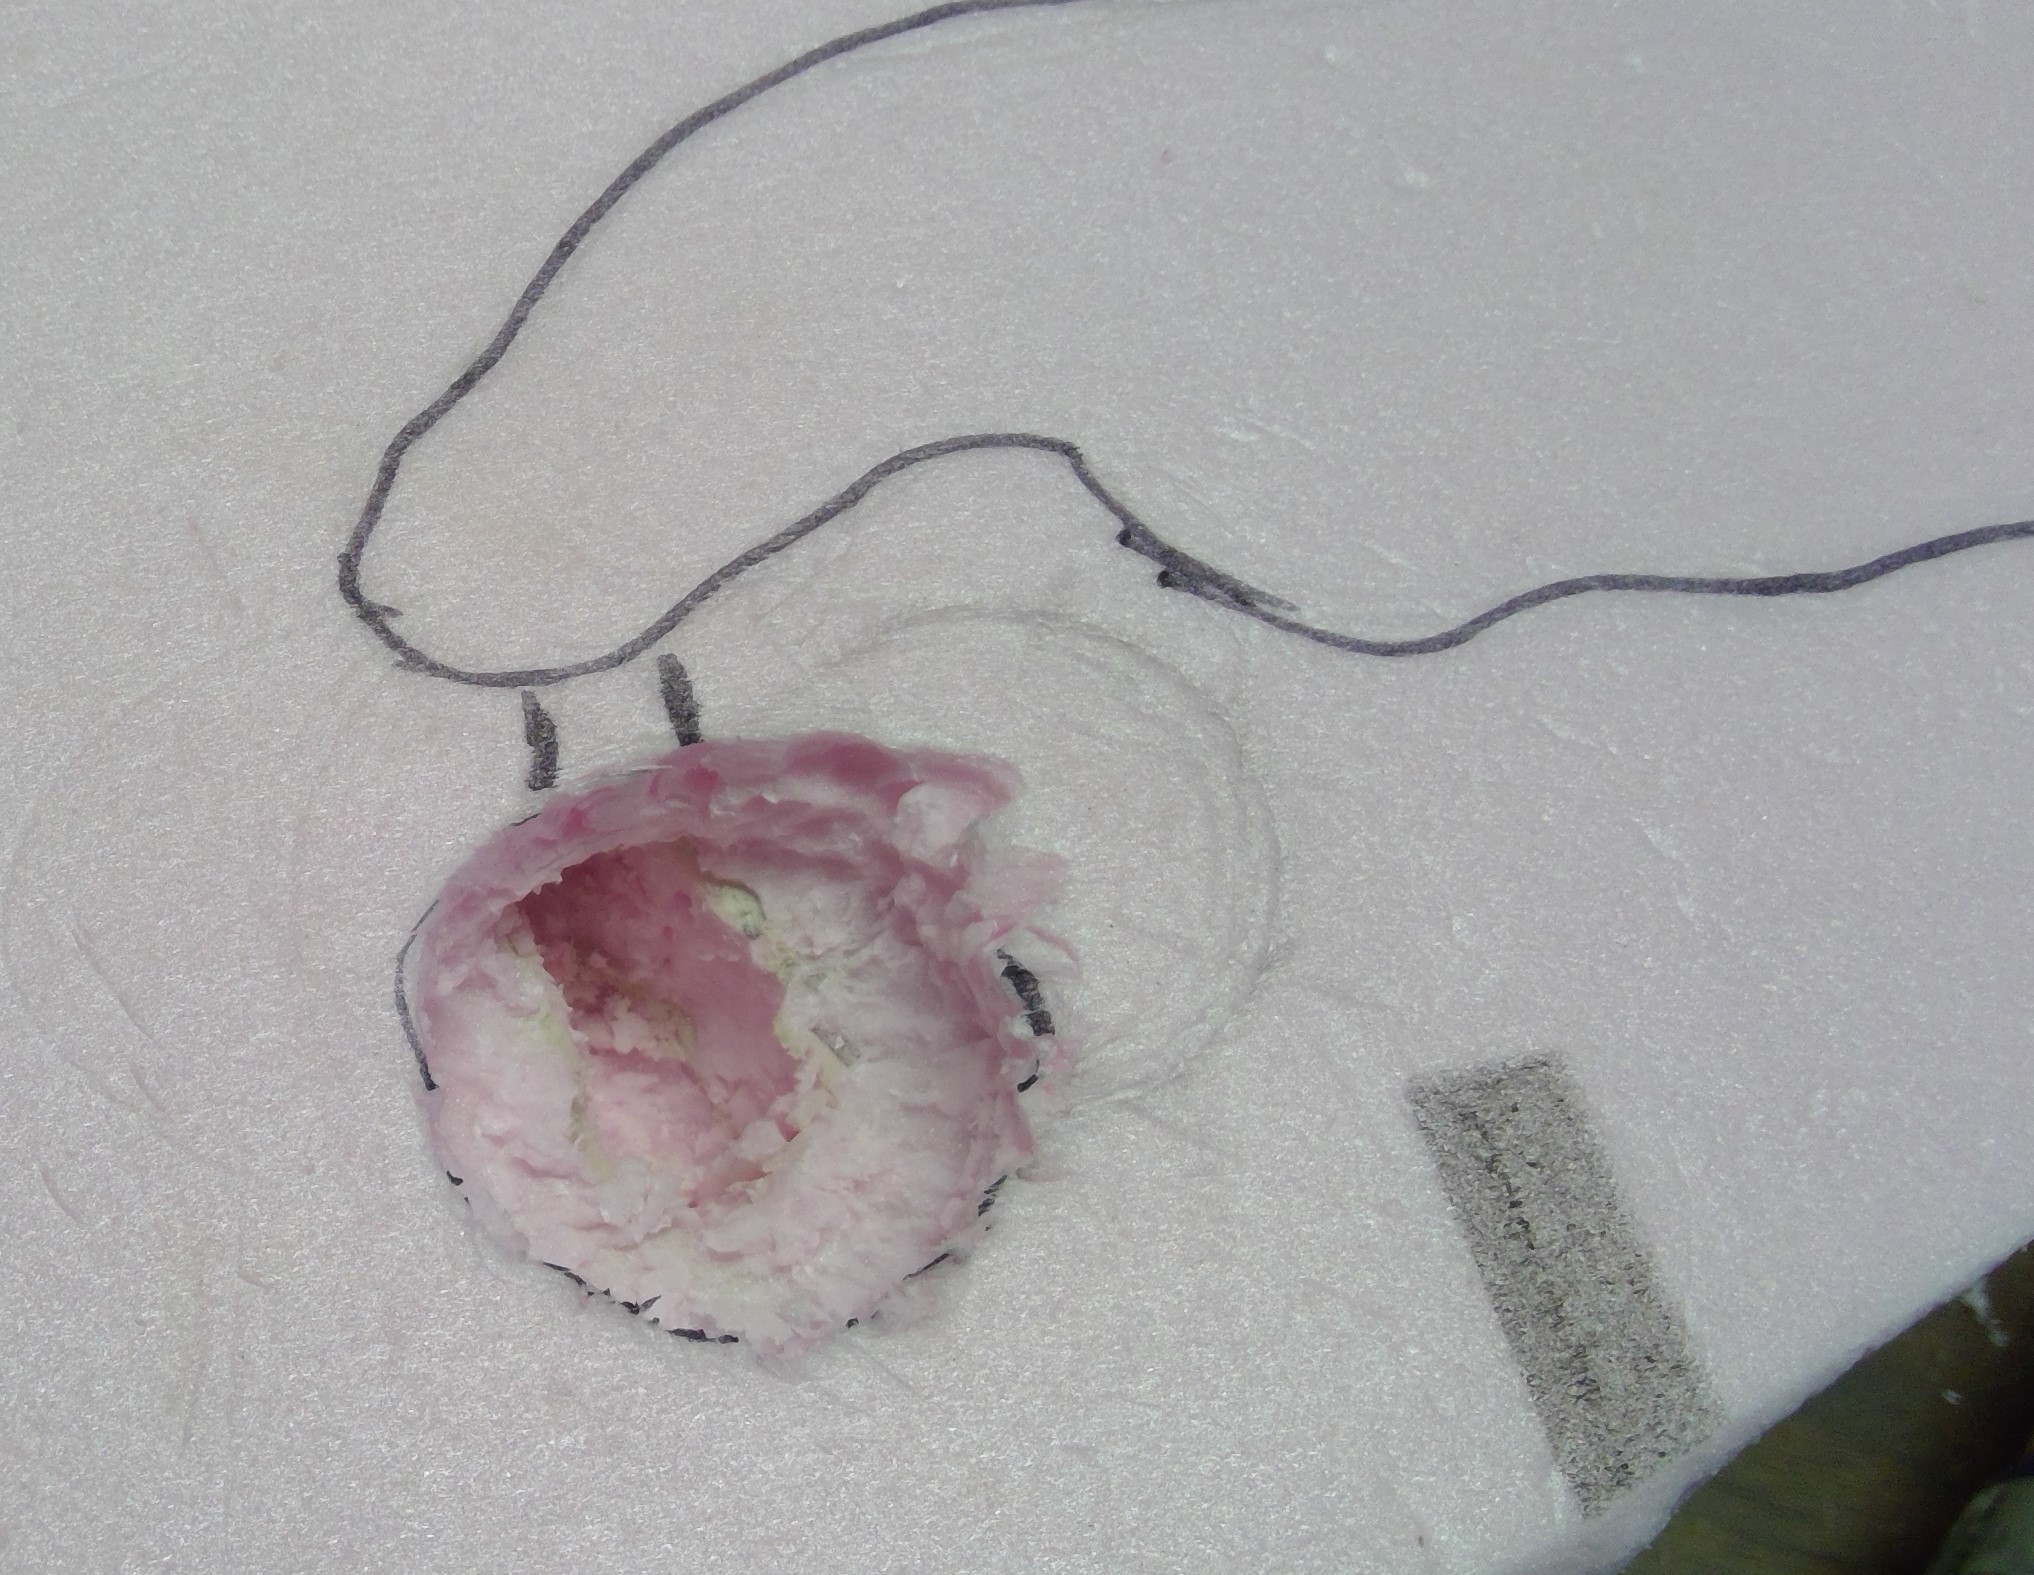
Deeper and More Interesting
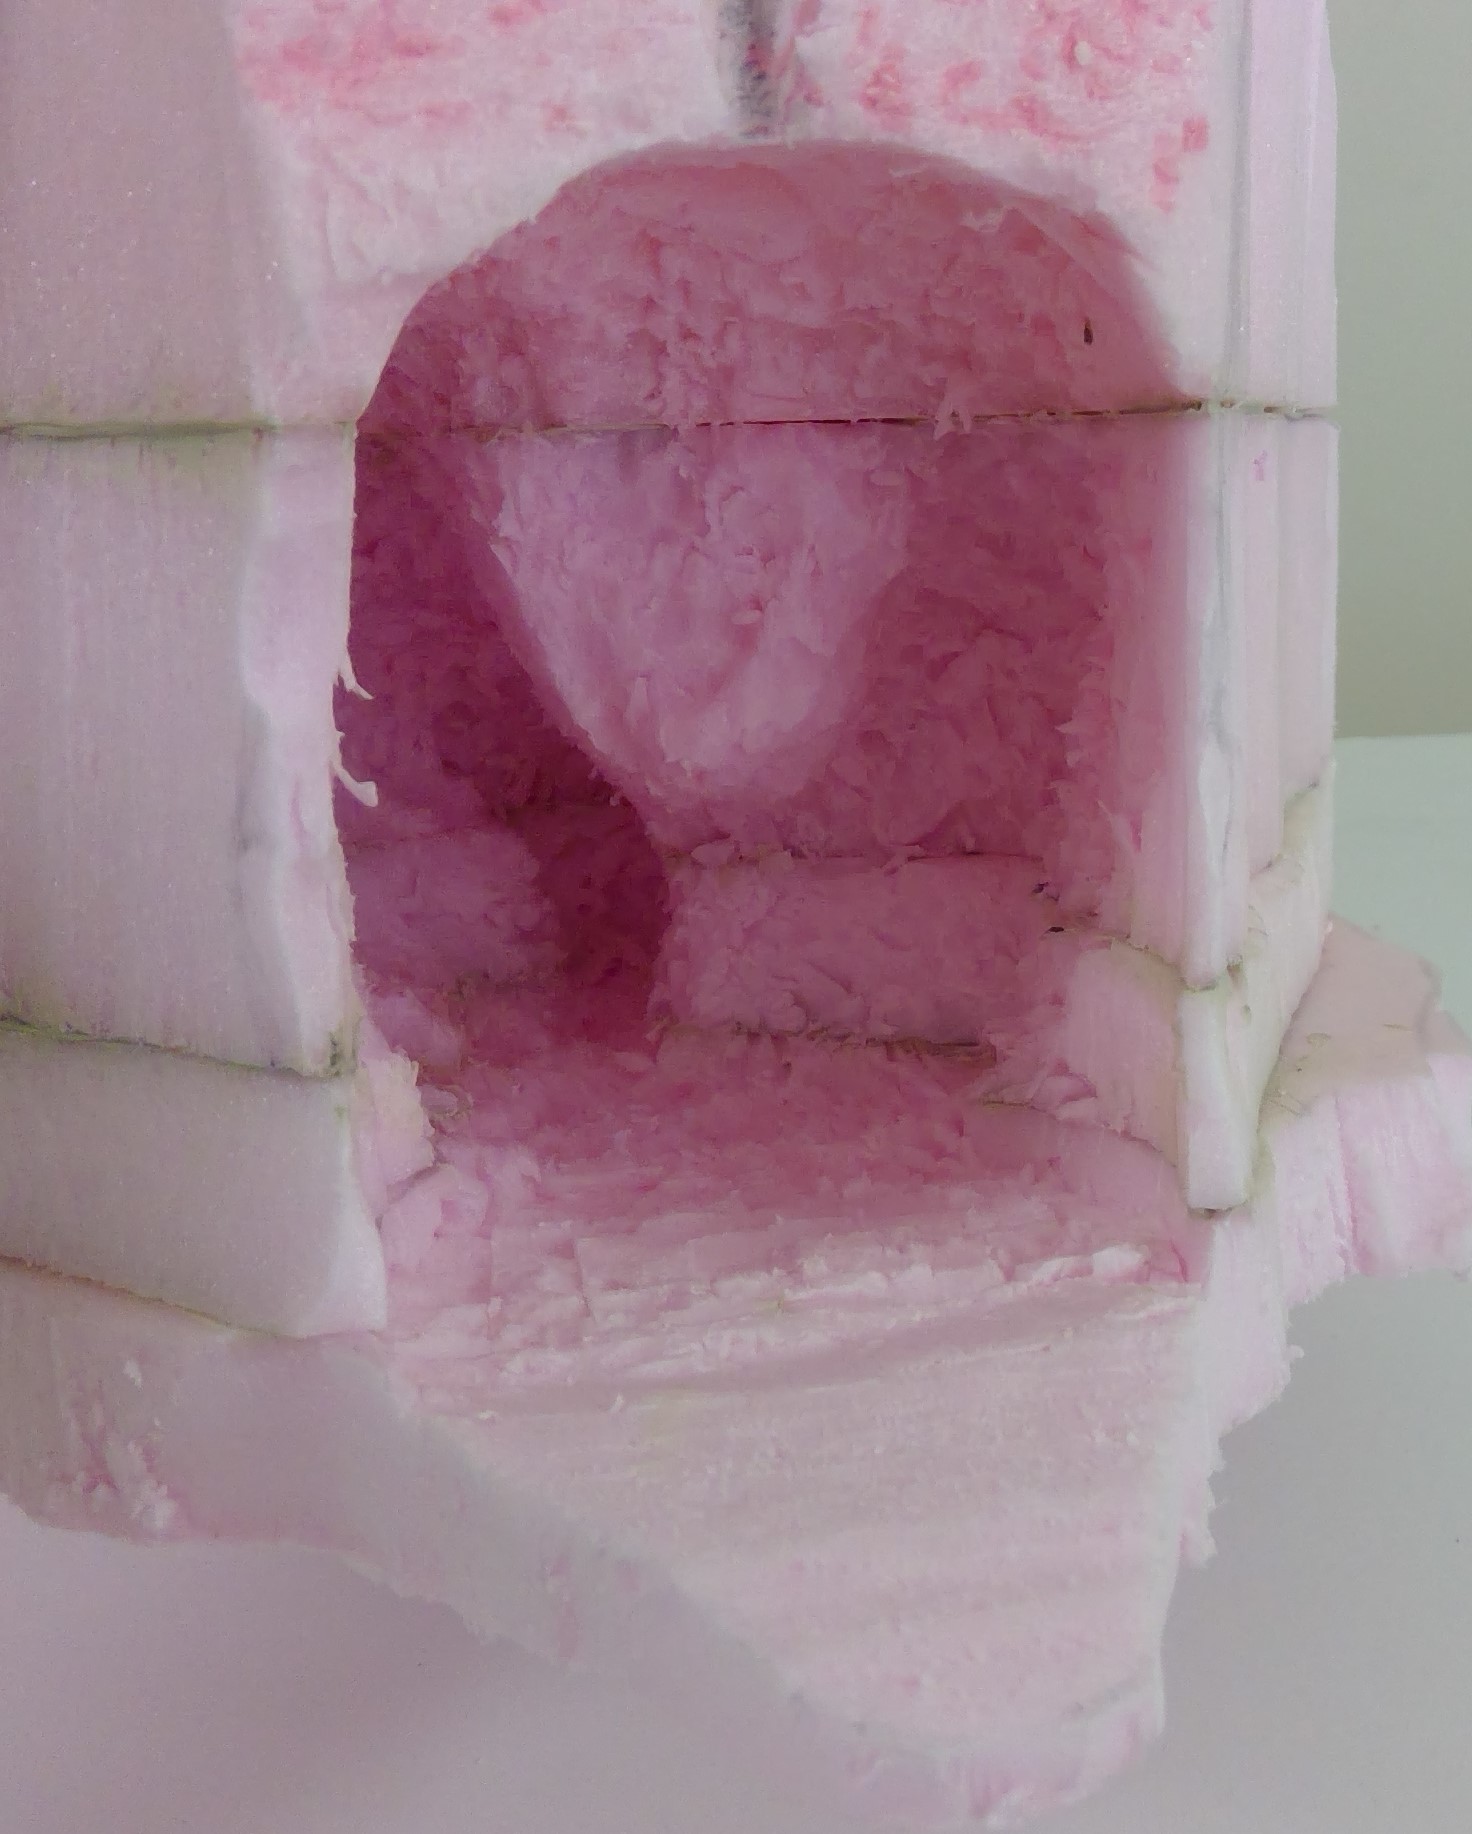
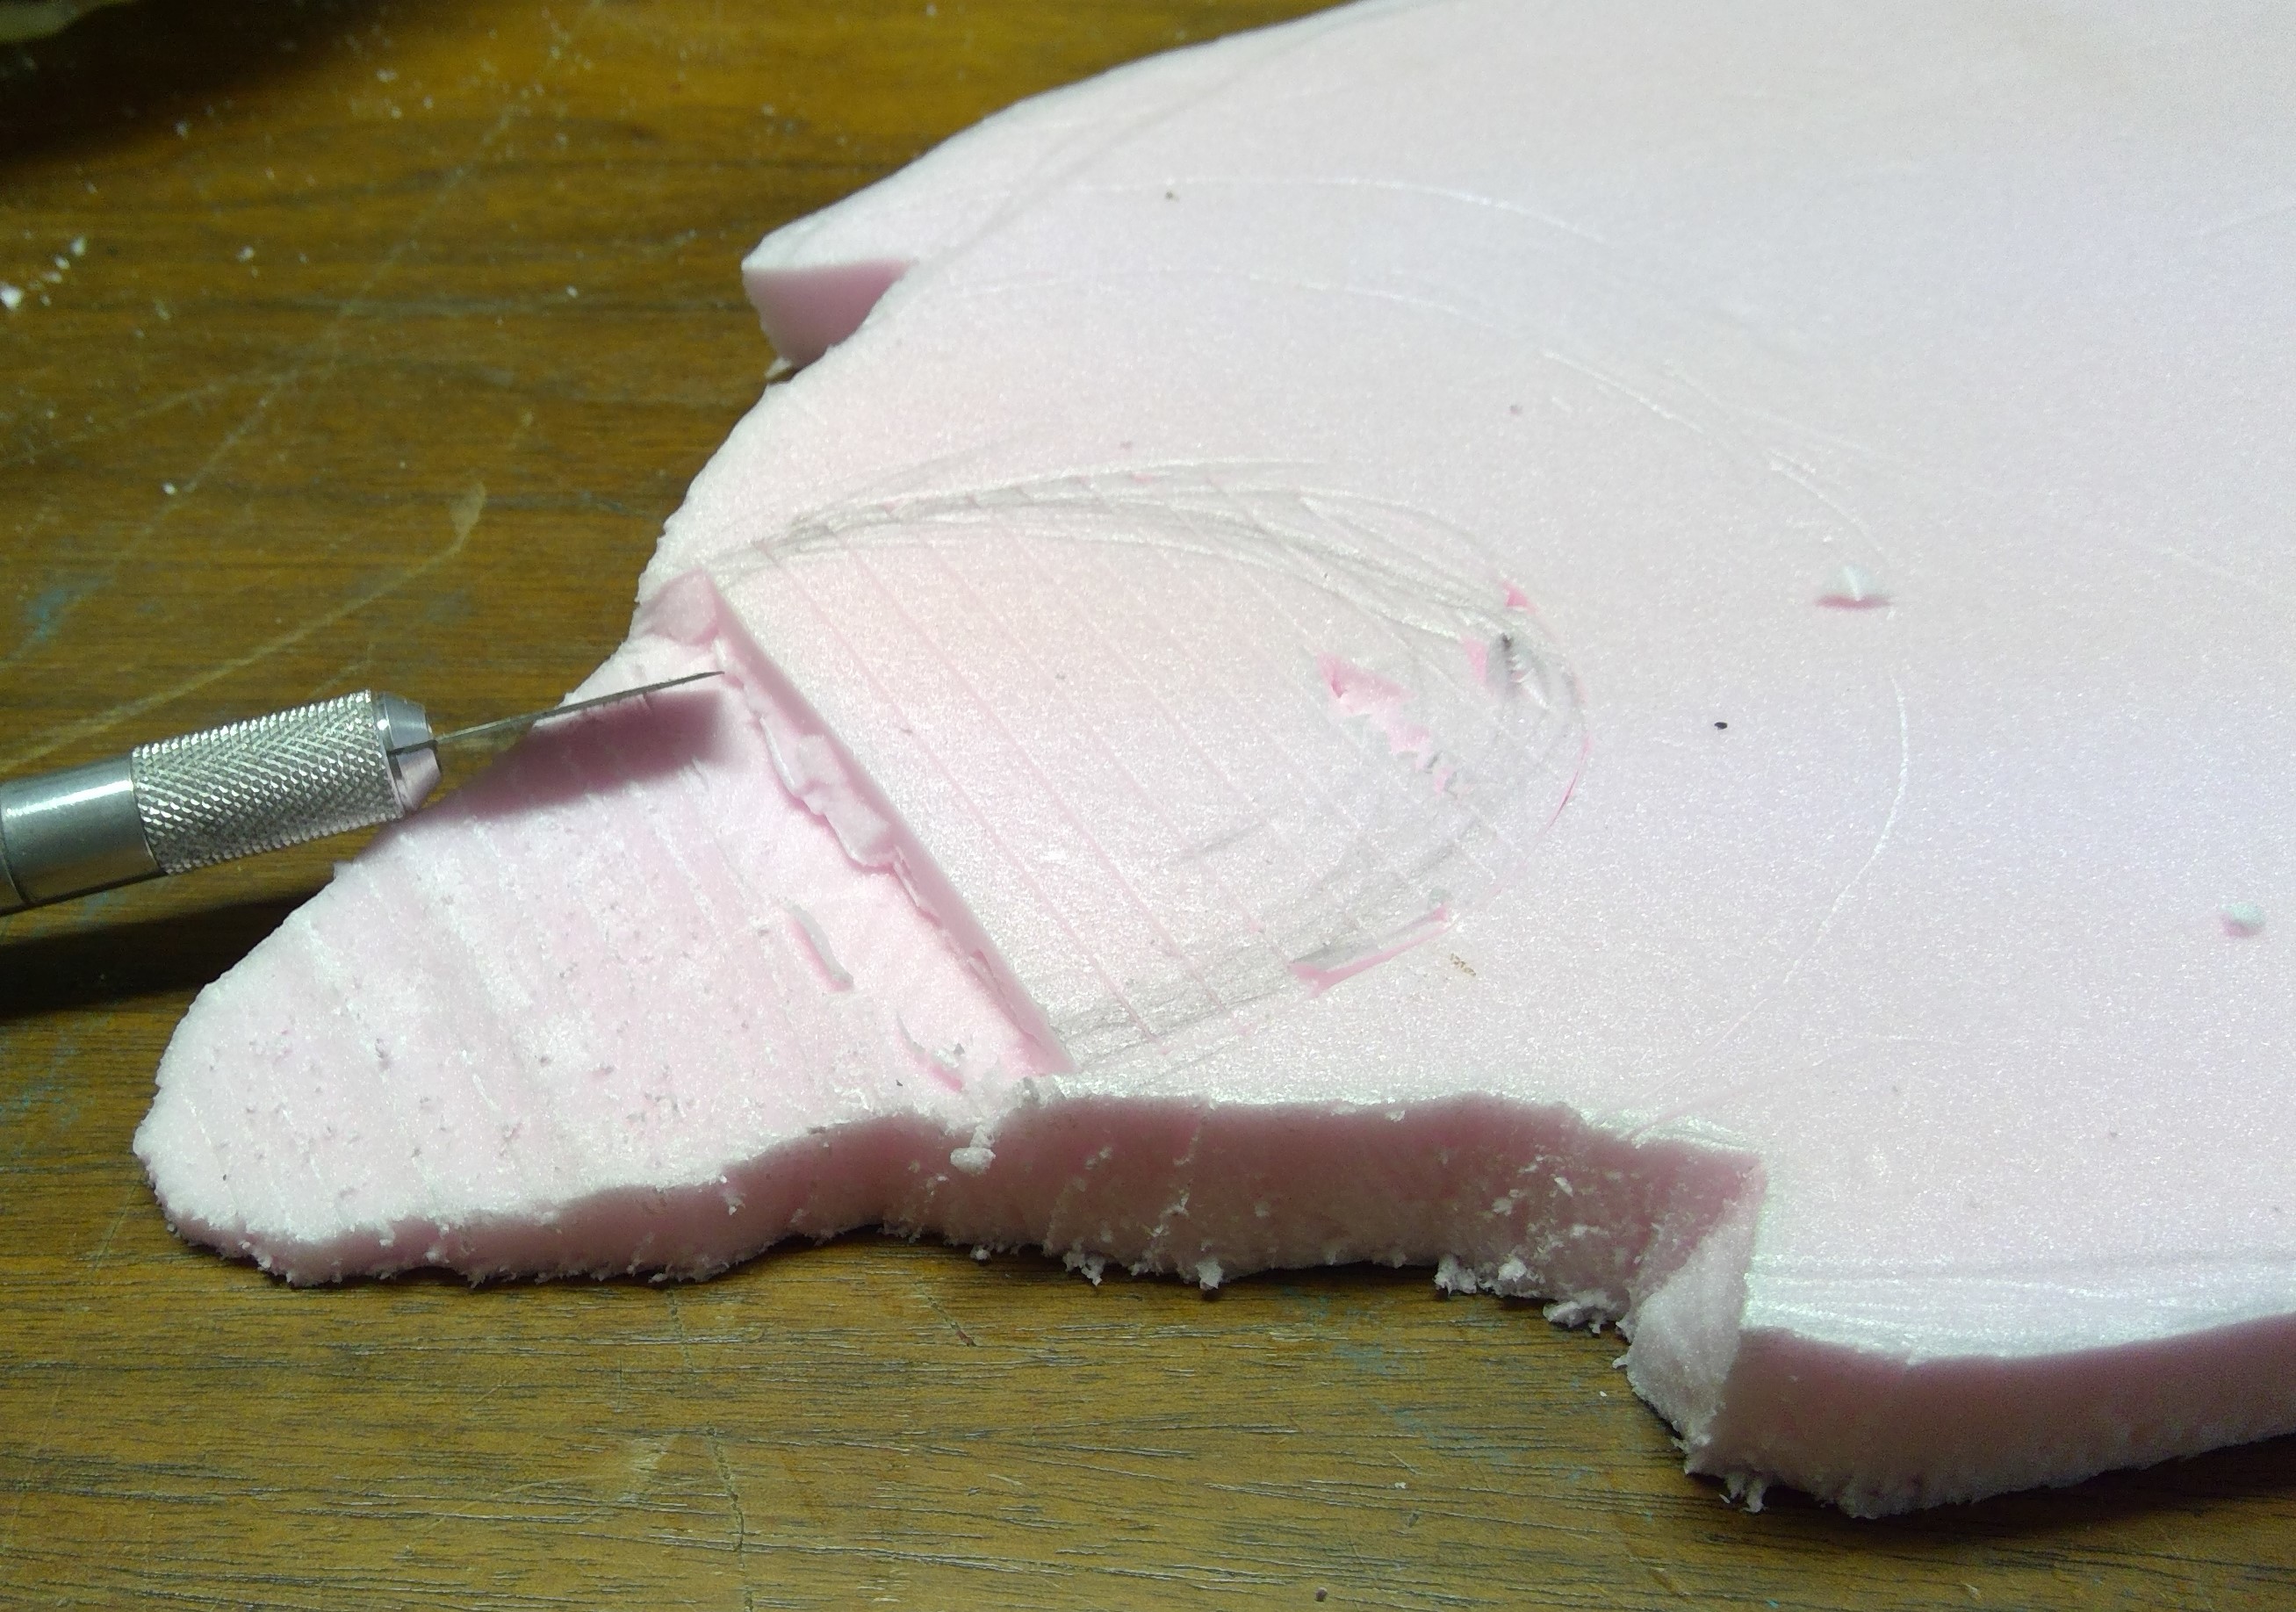
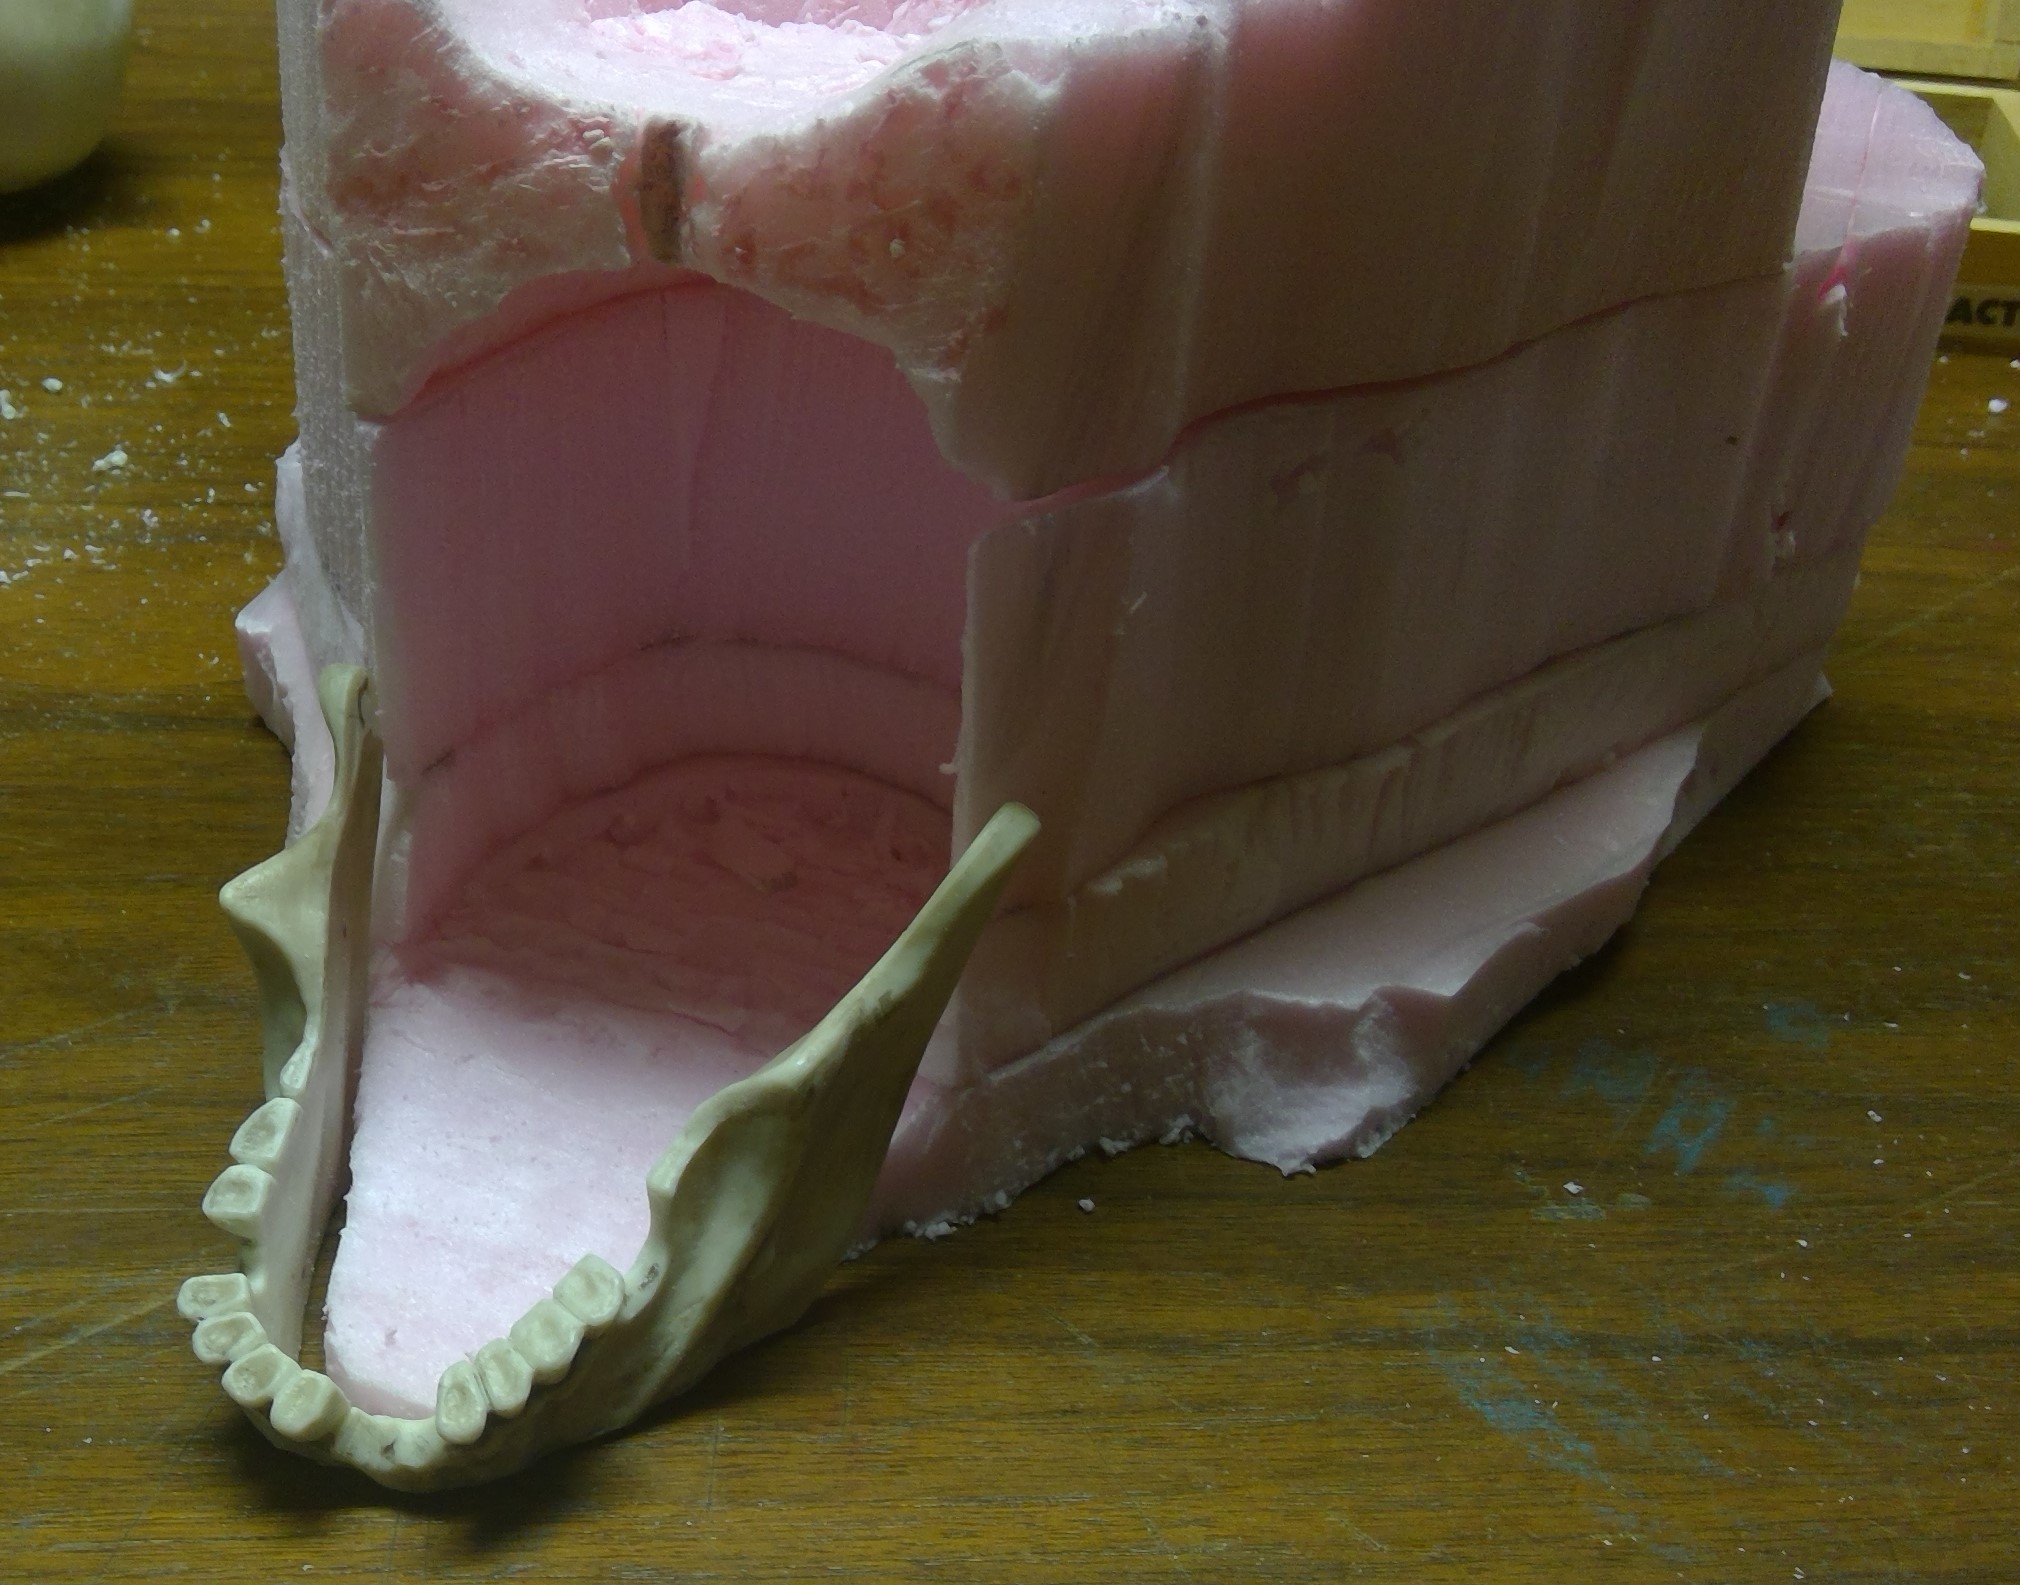
While I have decided not to make the interior of this cave “playable”, by that I mean I decided not to have the top removable to give access to the cave itself, I did feel that it would look better if I made it go deeper into the mesa.
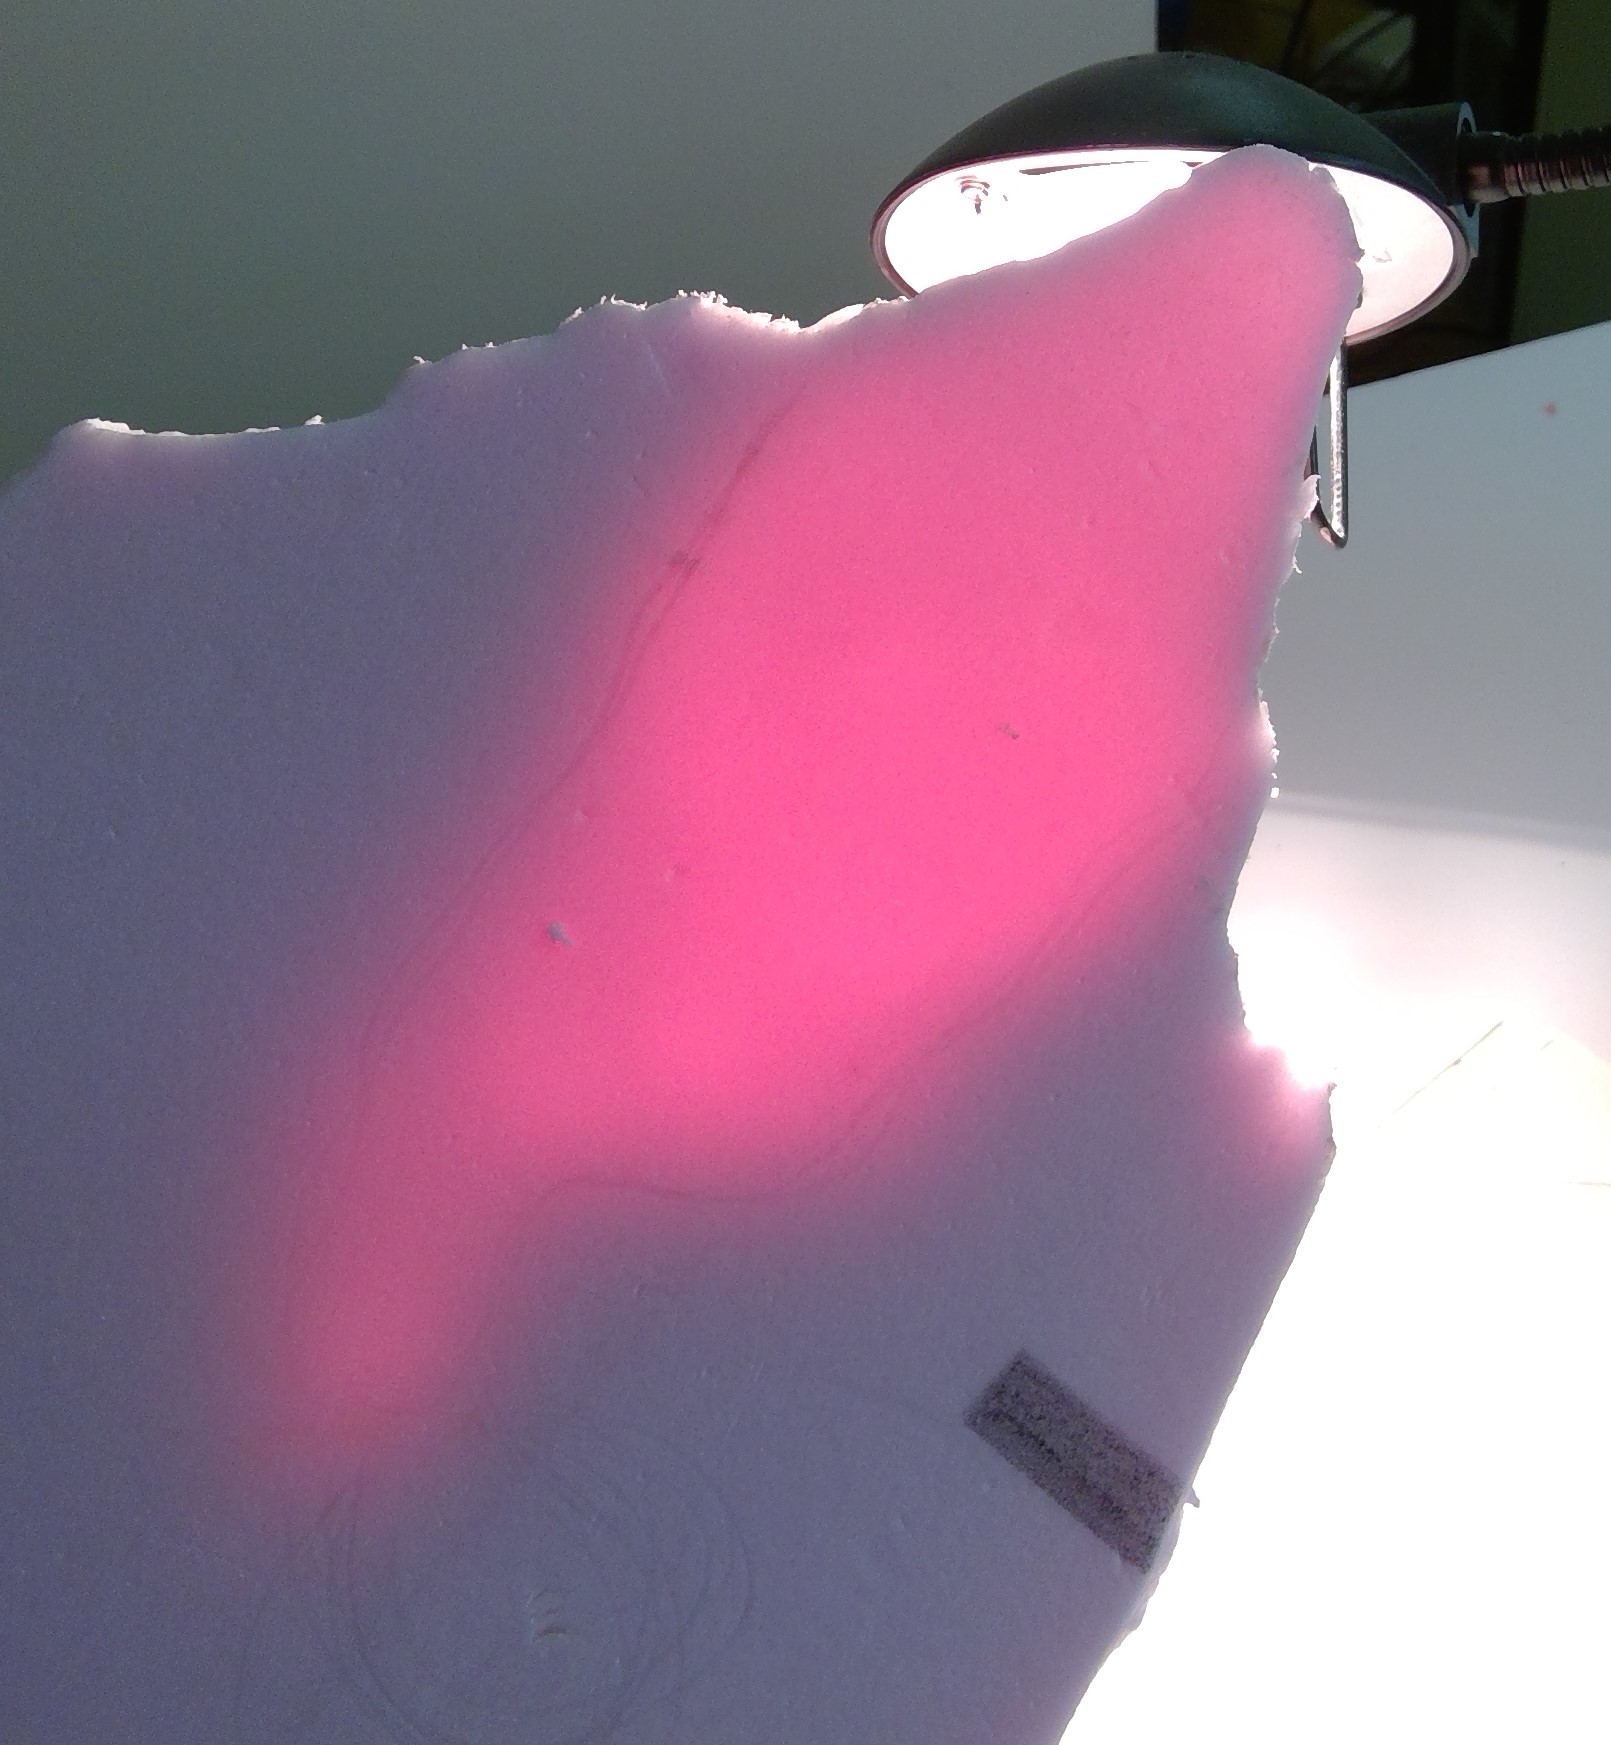
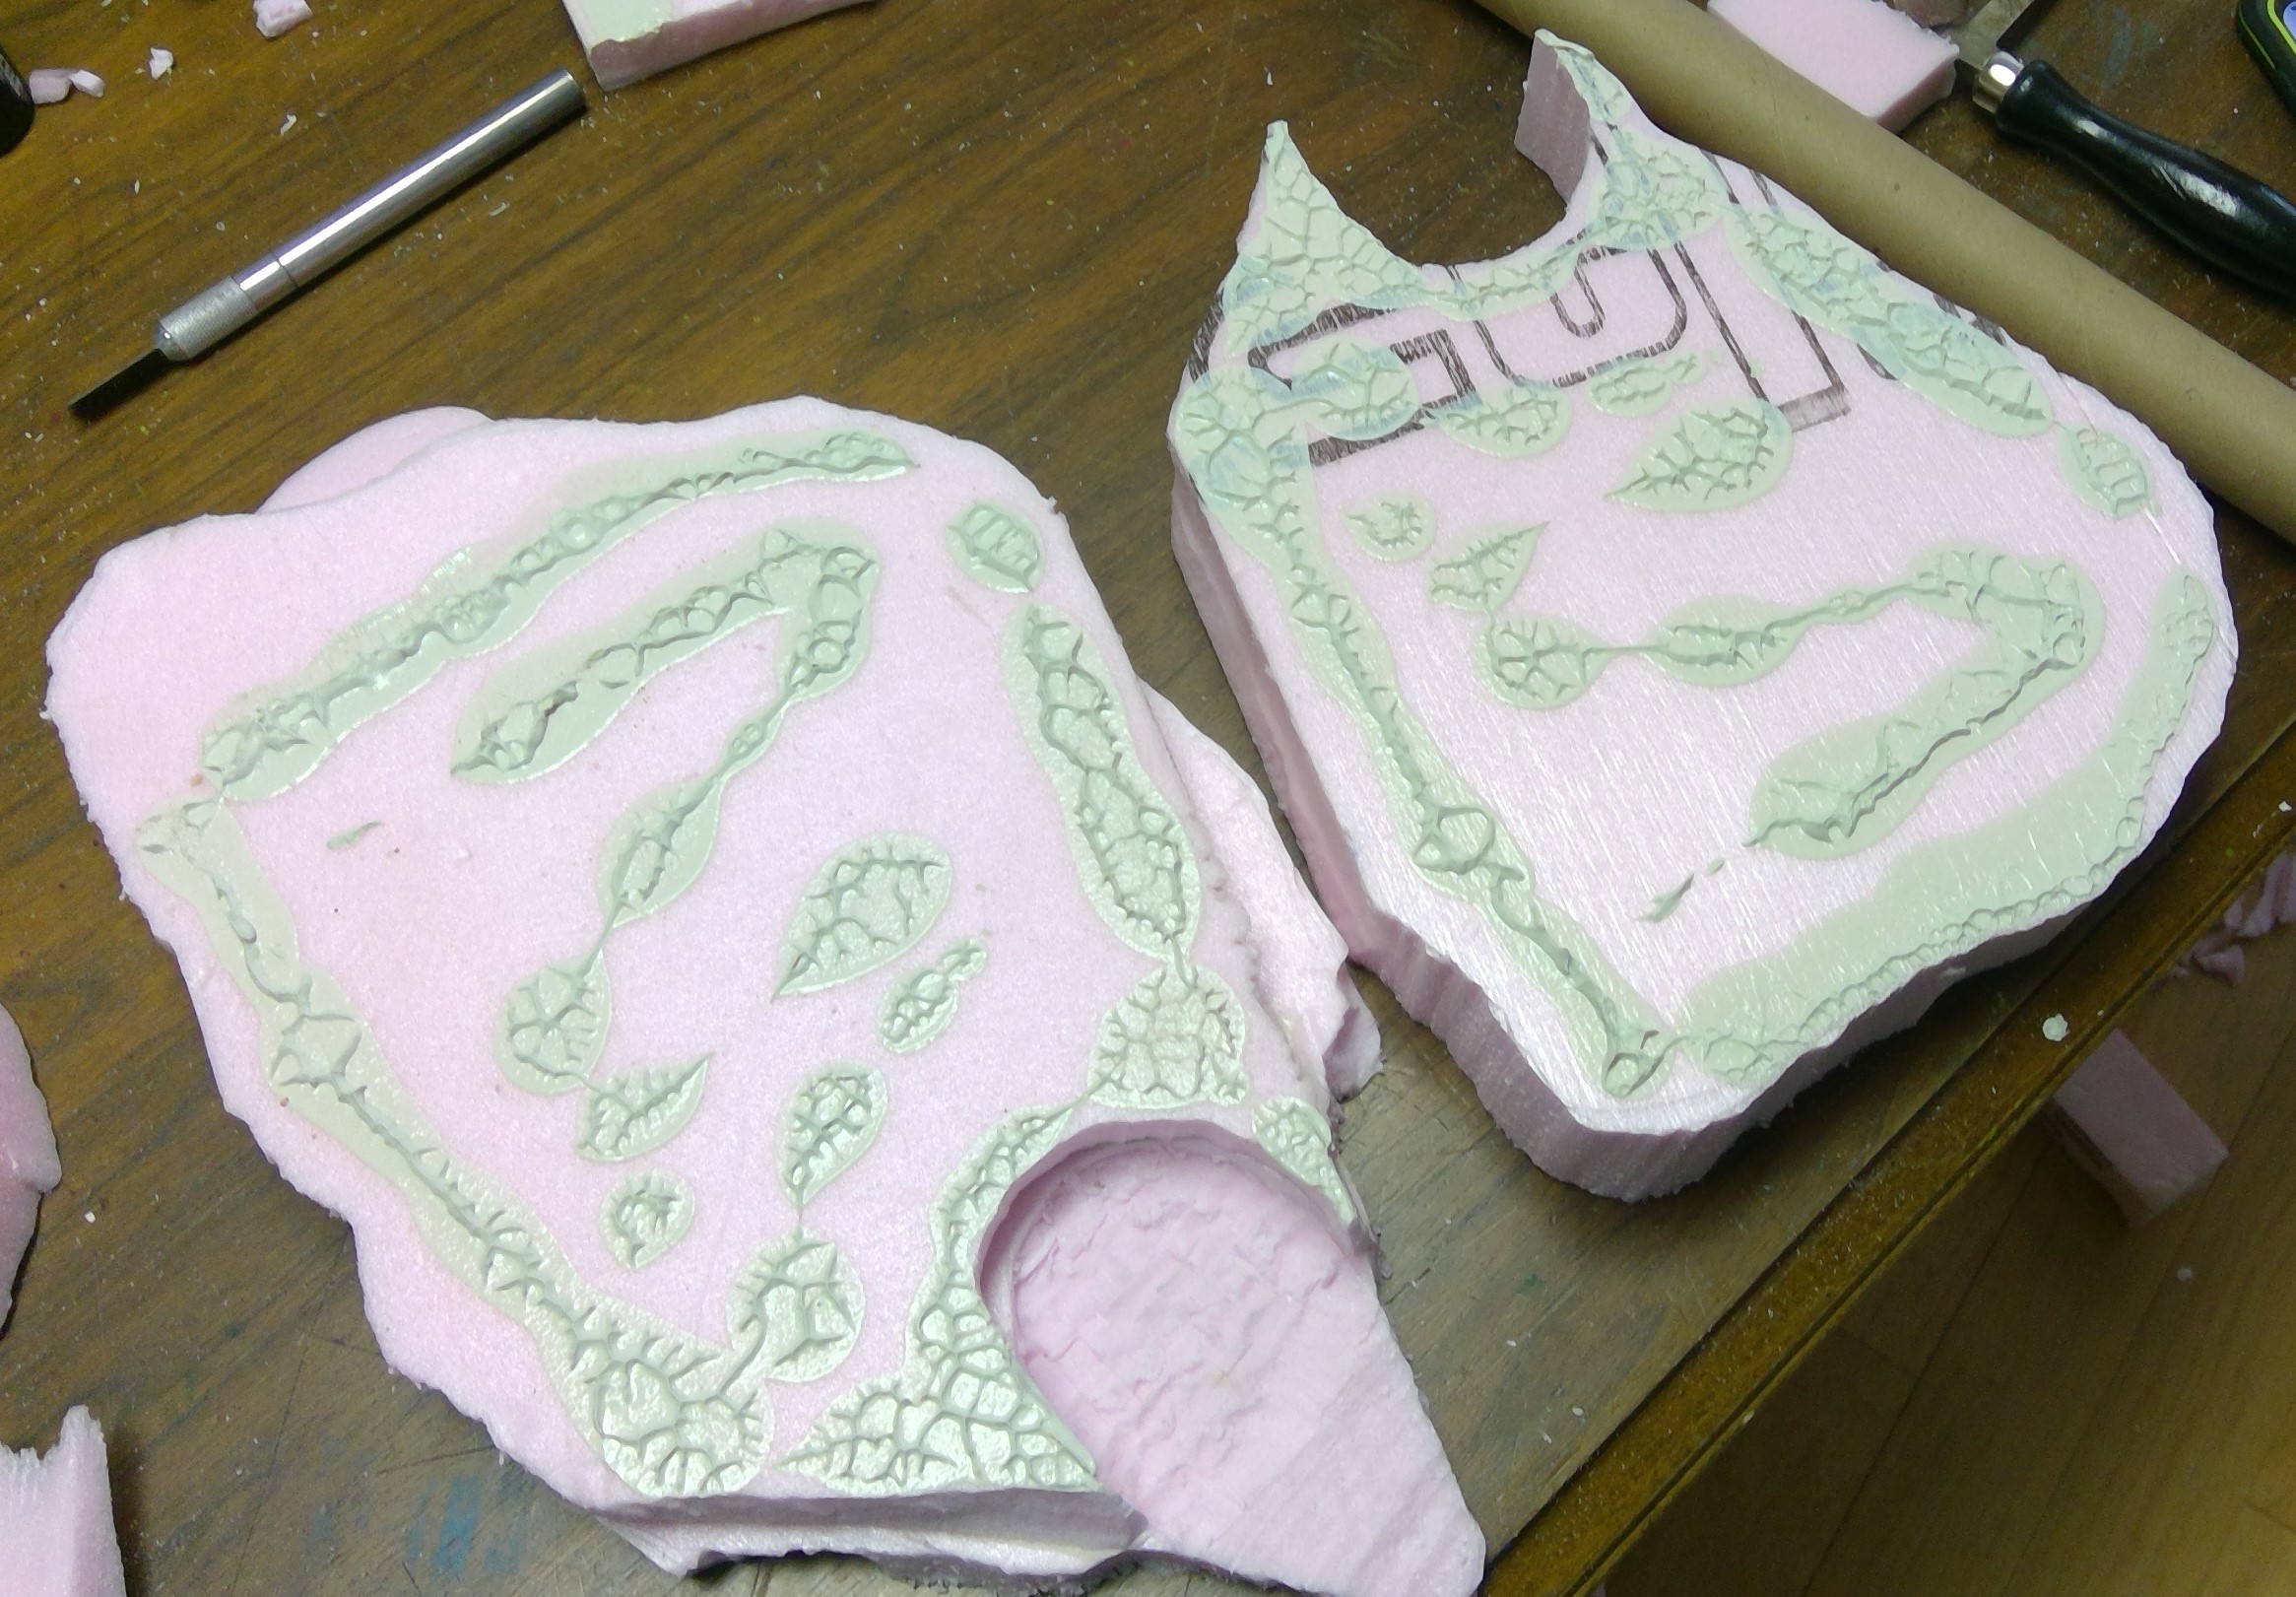
To do this I carefully employed drill bits, knives, and scraping devices to give the cave more depth and definition, and in such more visual interest. I used a large, ½”, drill bit, in an electric drill, to do the bulk of the “carving”. I did this by lightly pressing and moving the drill arround, using the tip as well as the side of the bit, as opposed to drilling deep holes. This gives much better control and less worry that I would blow through a side. If I were to make an unwanted hole, I would just hide it with one of the small skeleton bits.
 Carefully carving with drill.
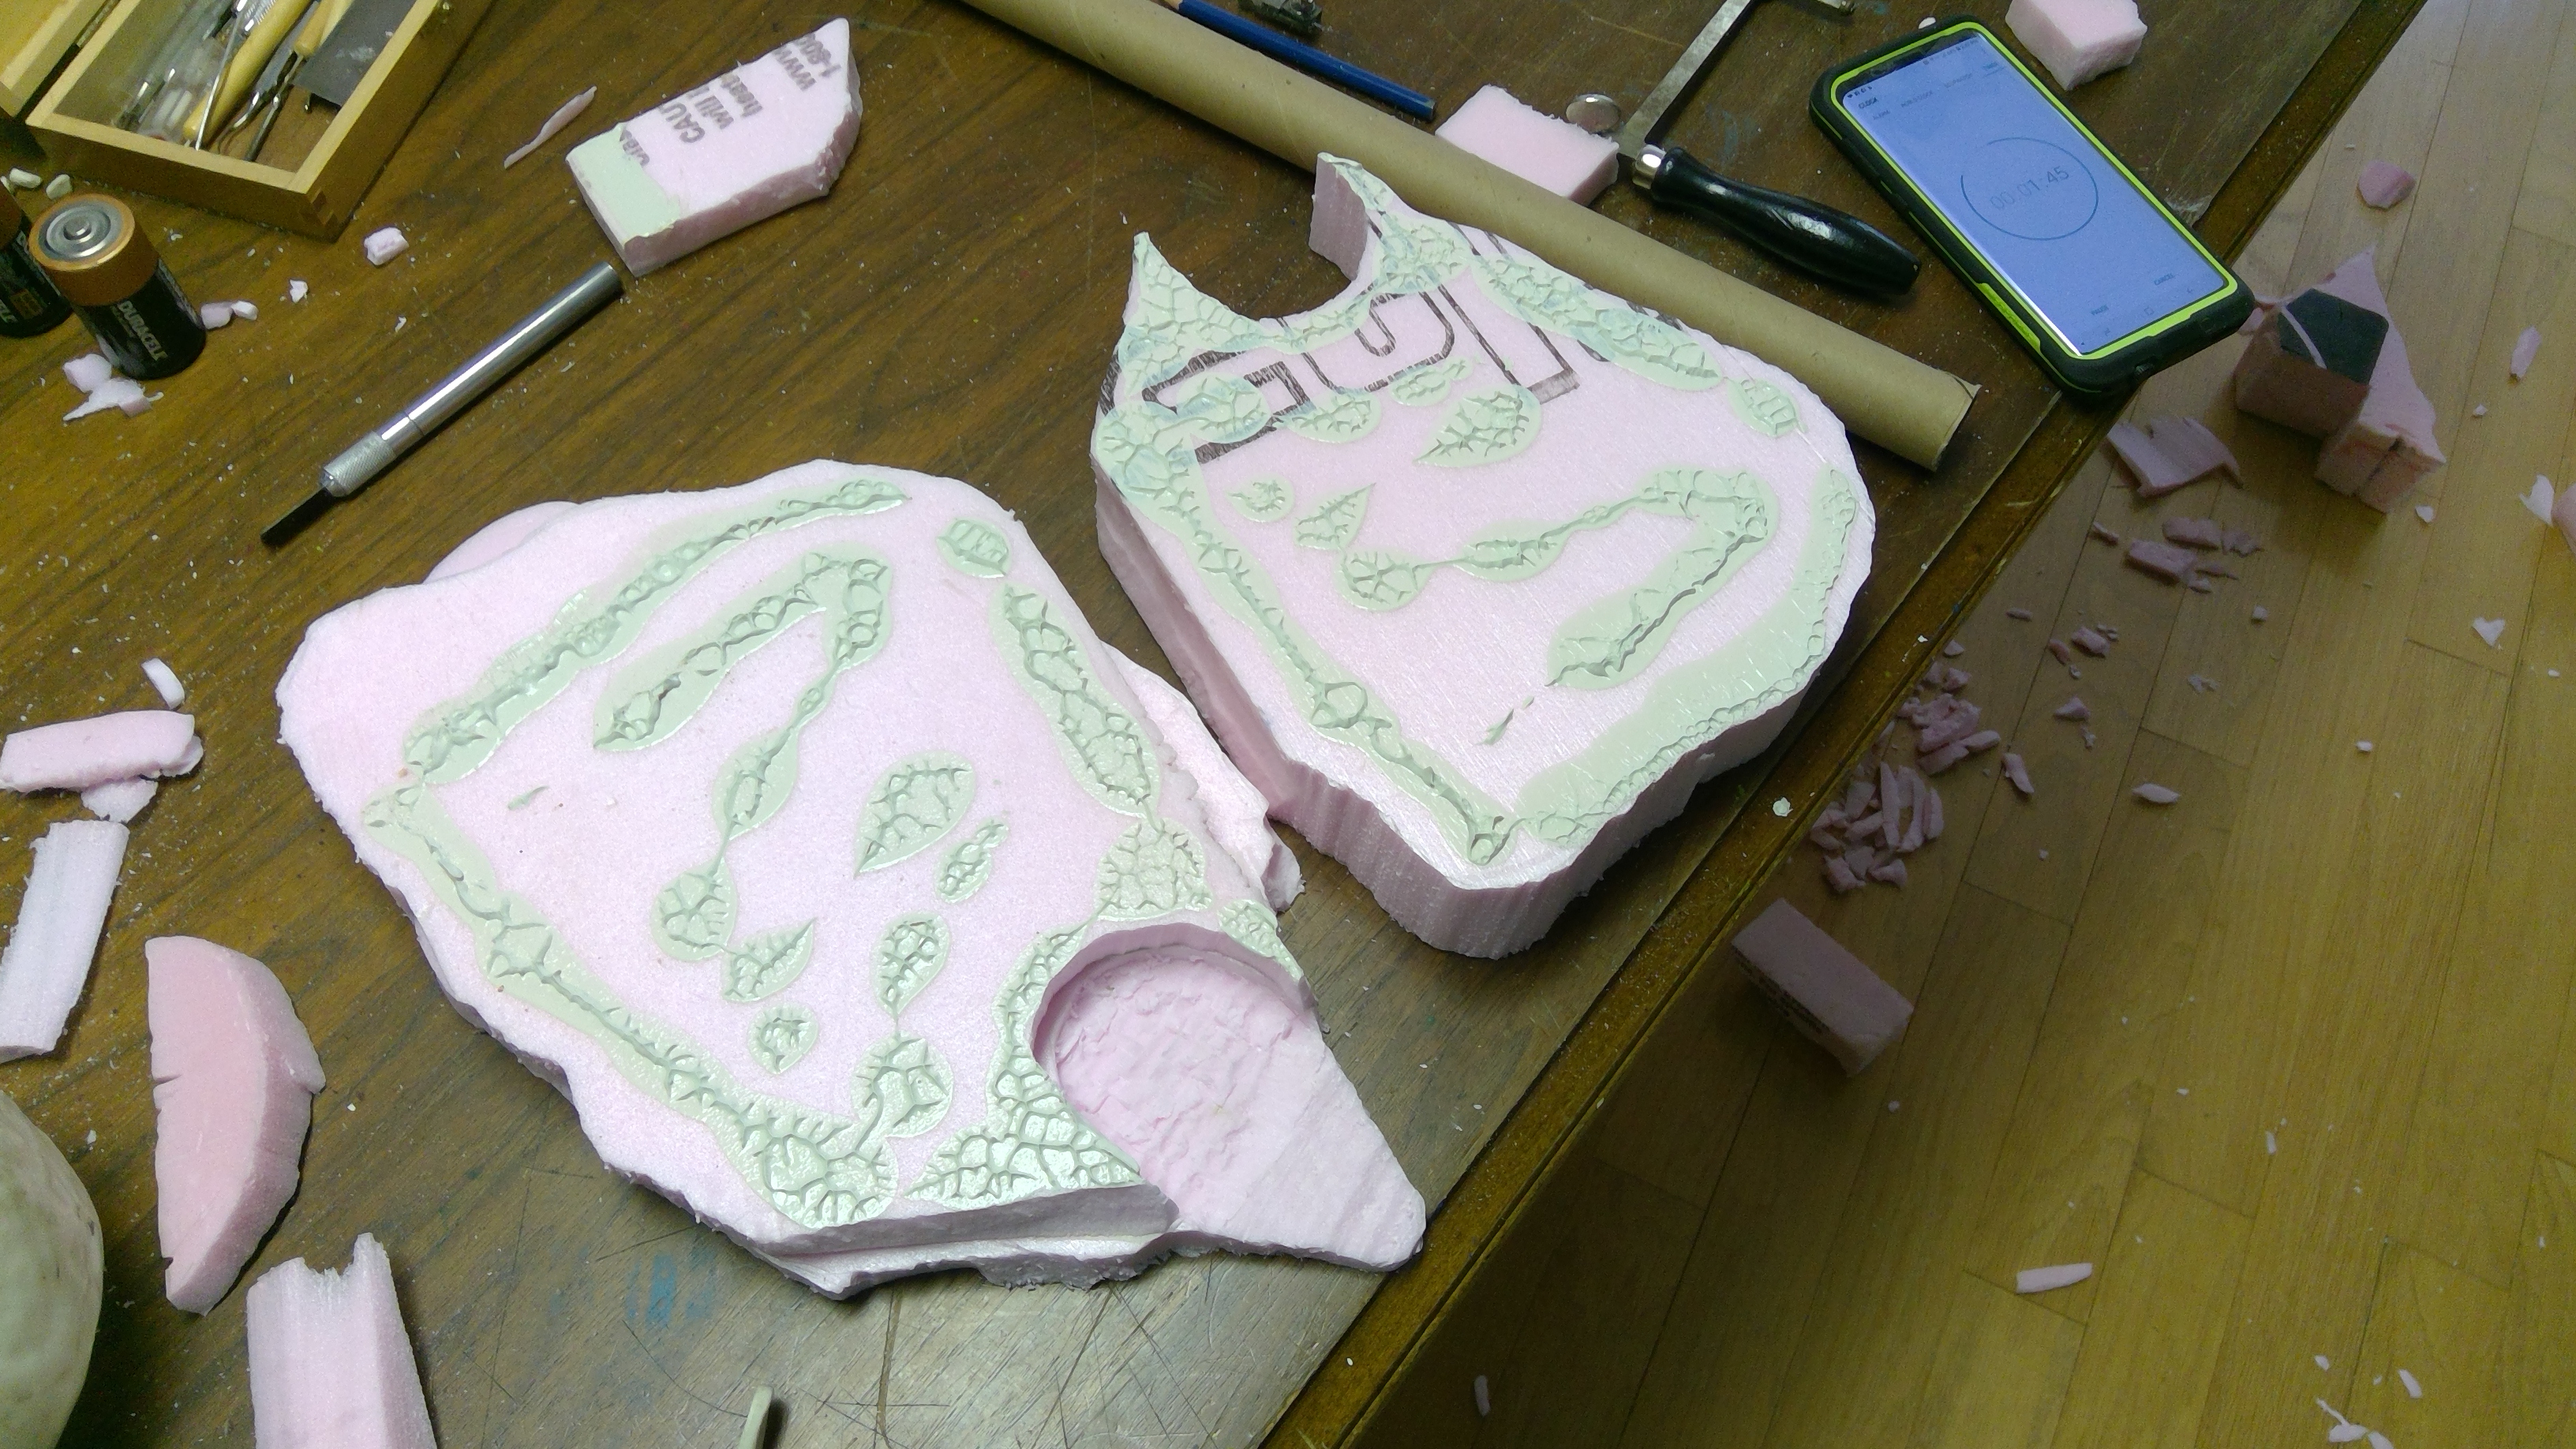
To check to see how close to the bottom or edge I was getting I stuck a lamp into the cave opening and, as you can see from the photo, it shows up very nicely.
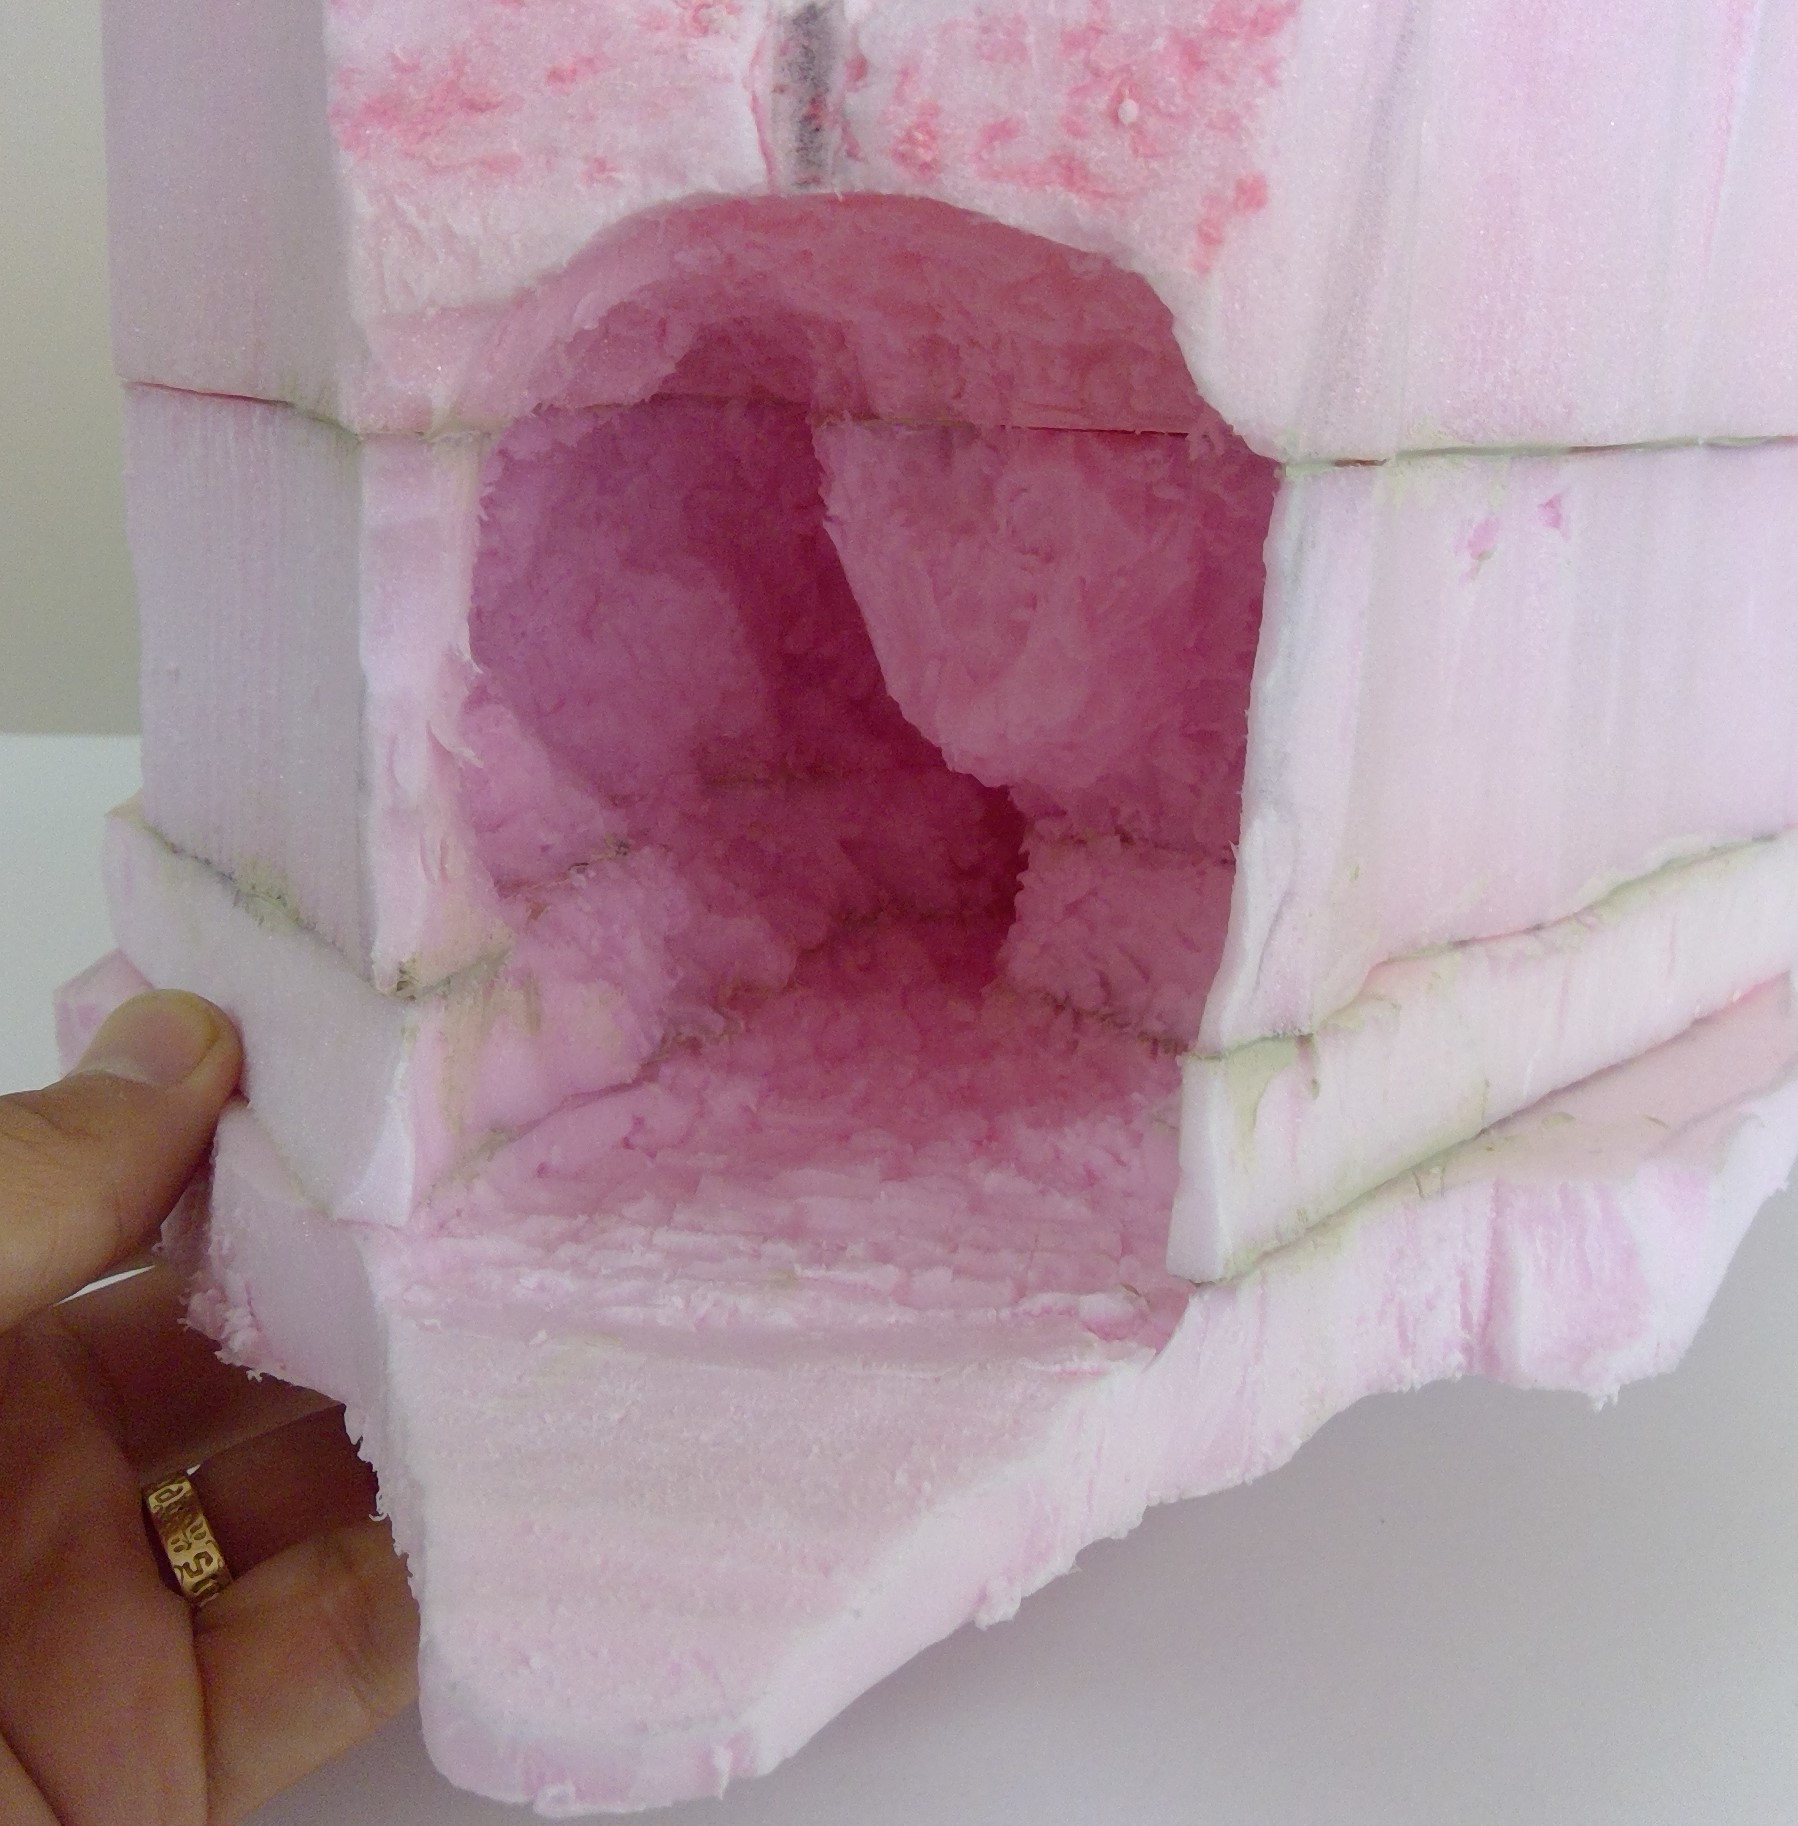
It was at this time that I decided to add a flickering tea light in the cave to give the appearance of a fire deep within. So I traced the shape of the cave, from the lamp stuck in, and found a suitable spot to place the tea light that would be out of site. I carved the hole for it with the drill and a hobby knife. I will also need to add a hole in the MDF base when I come to that.

 Tea light in action.
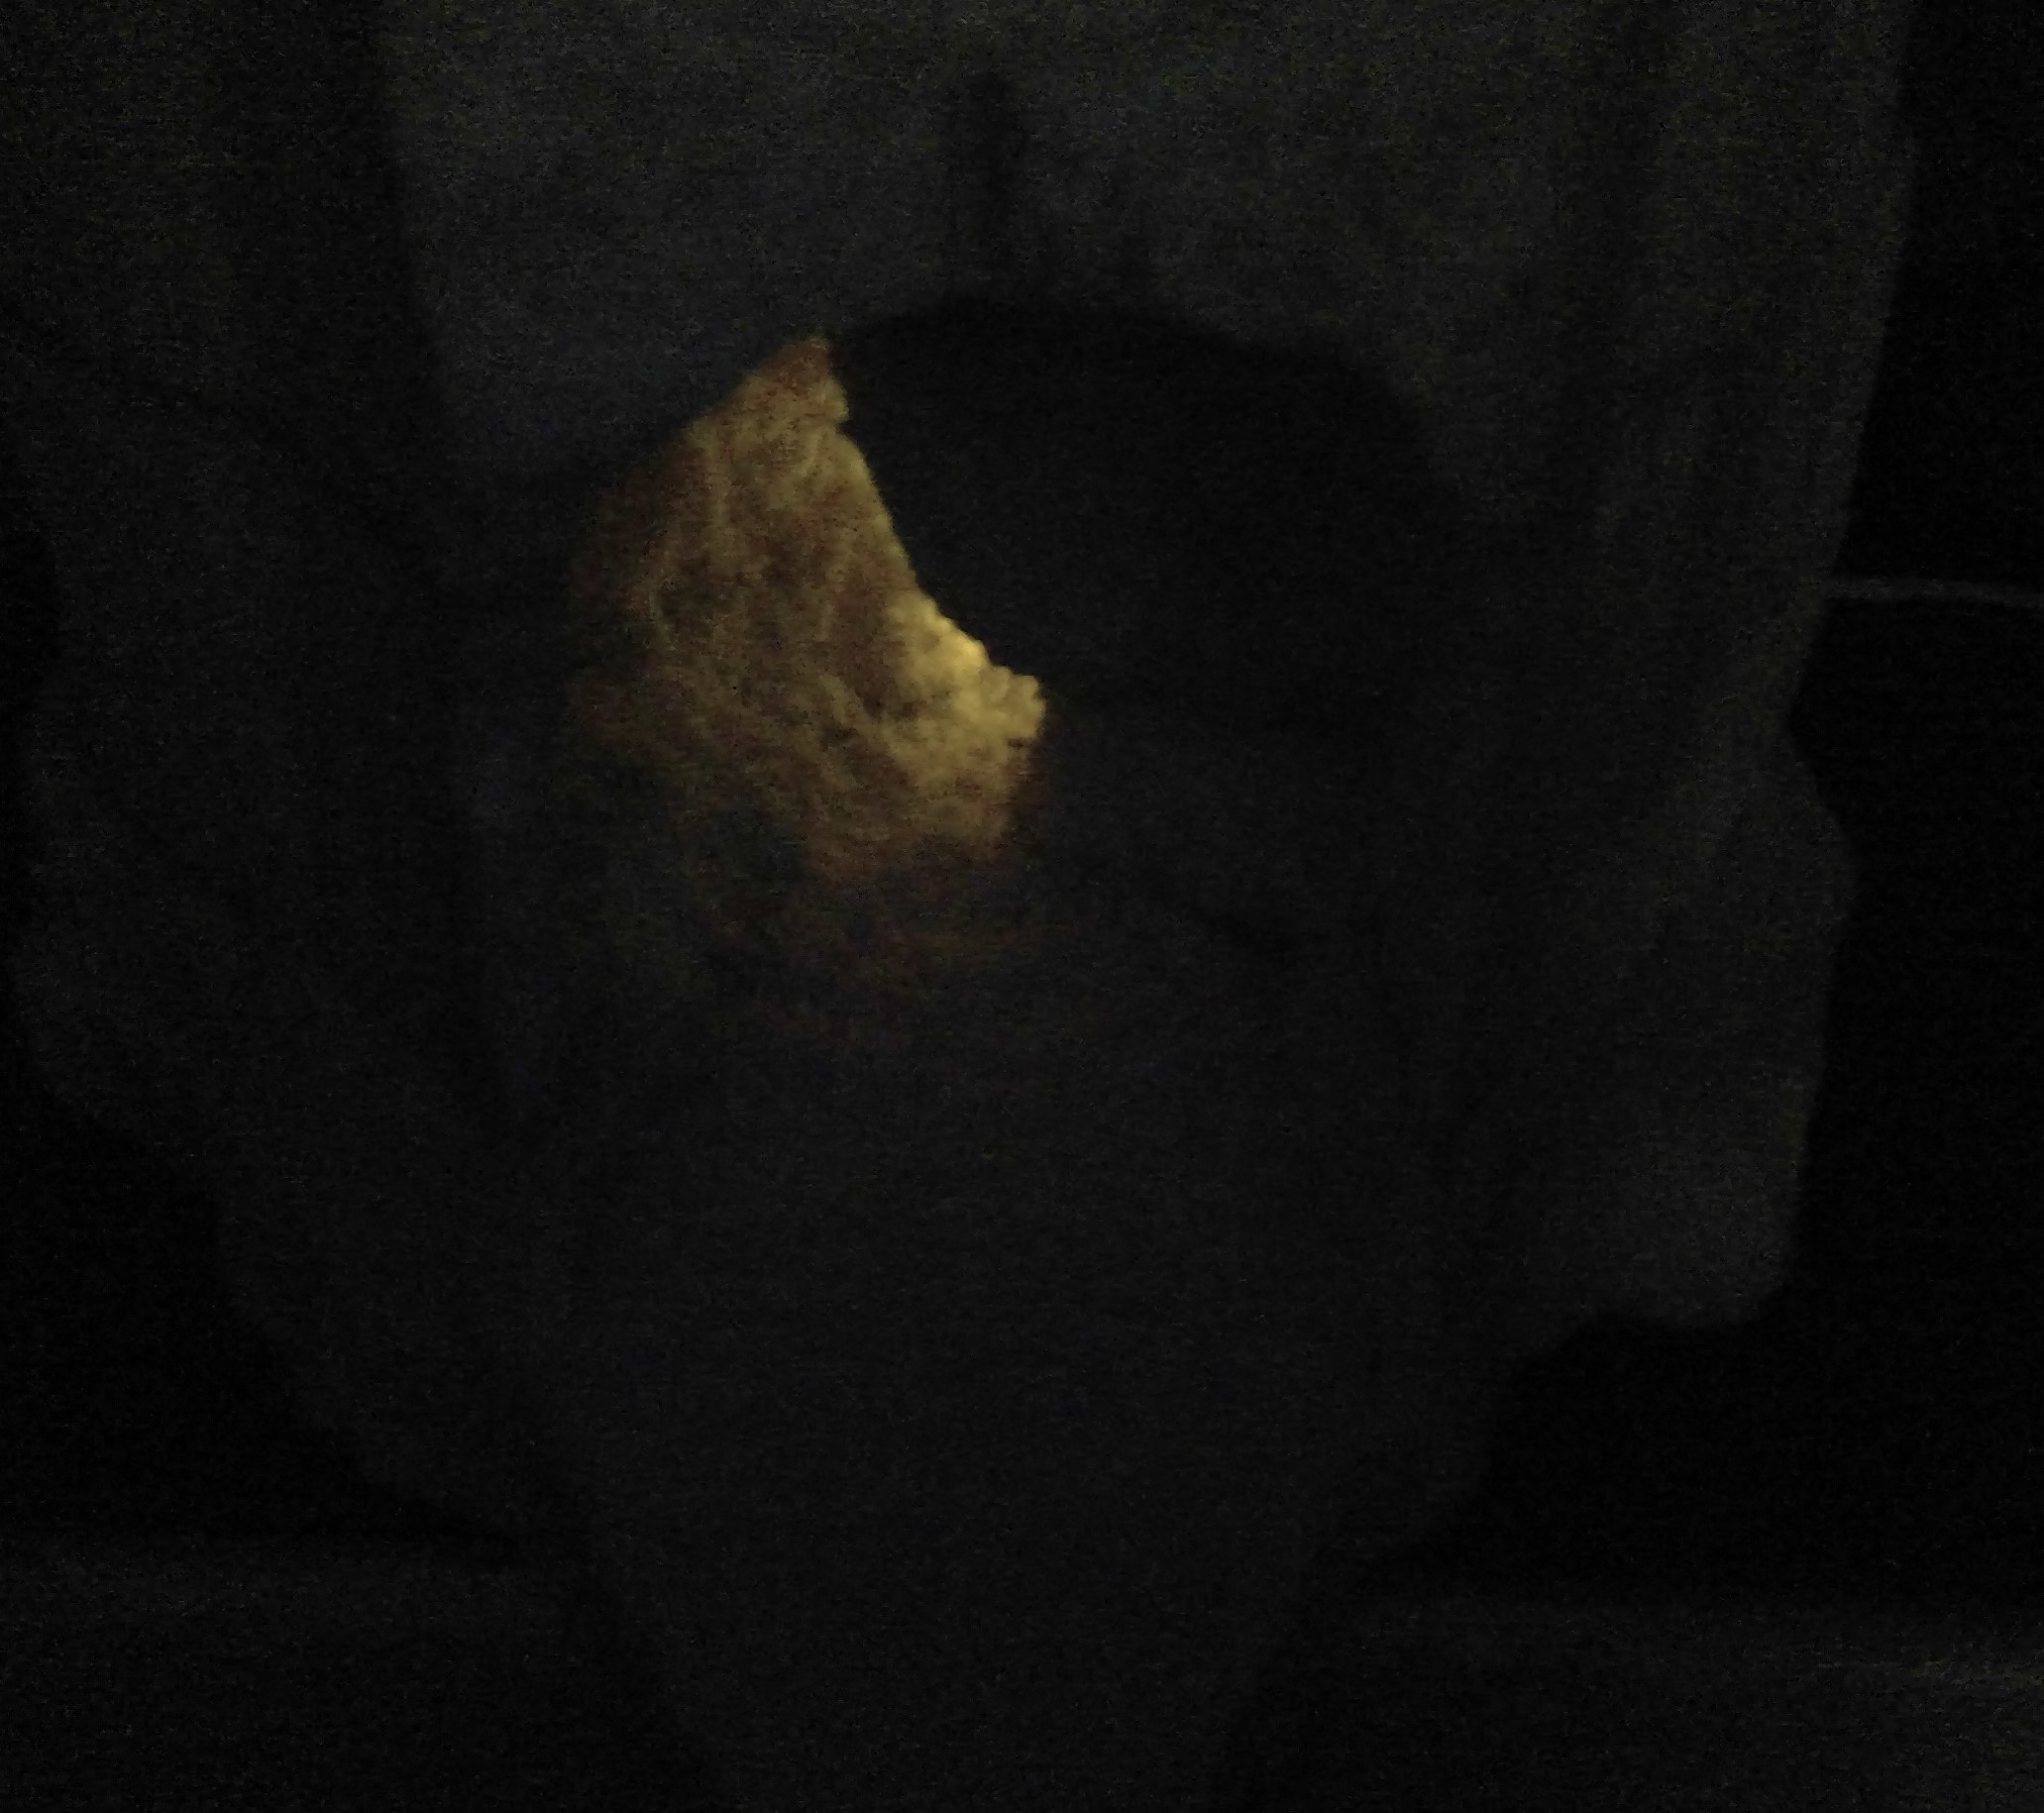 With all the lights out.
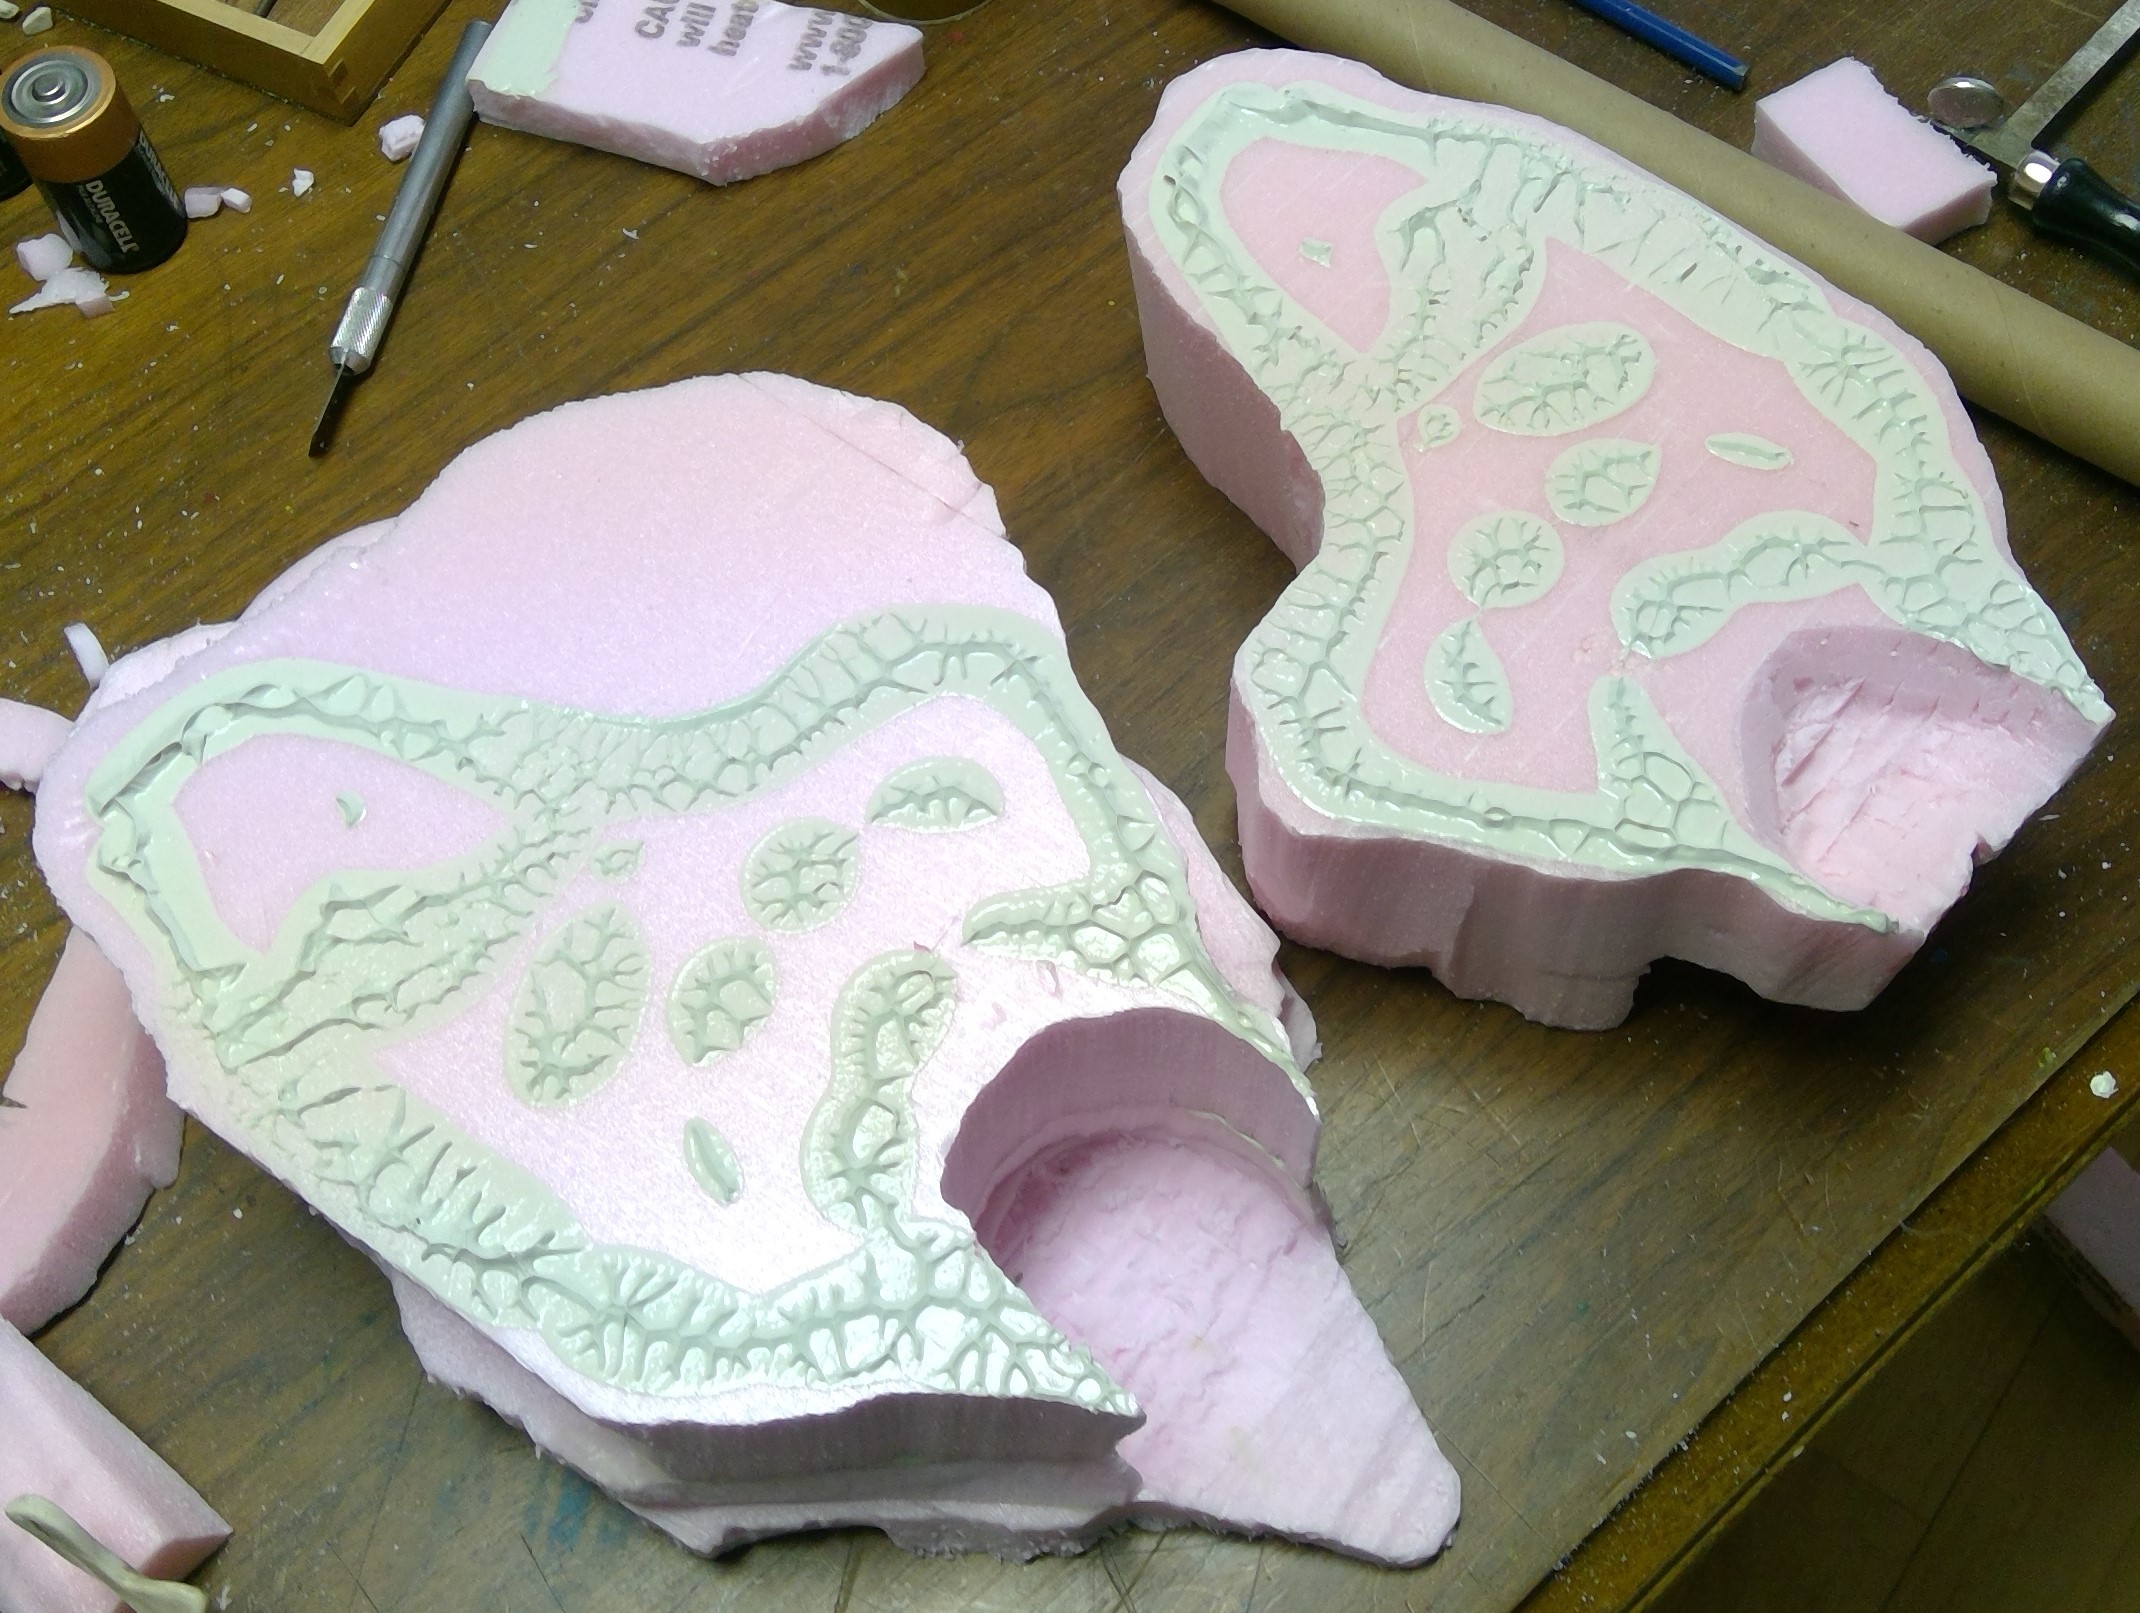
Comparison of the original boring cave entrance with the new more interesting and lifelike cave.

Smooth out the interior?
If I had wished I could have used a heat gun to smooth out the interior of the cave a bit, but rough texture will make less work for me later. If I were to use the heat gun, to avoid melting the exterior of the mesa I would have wrapped the area around the outside of the cave opening with dampened paper towels and newspaper to protect it from the heat.
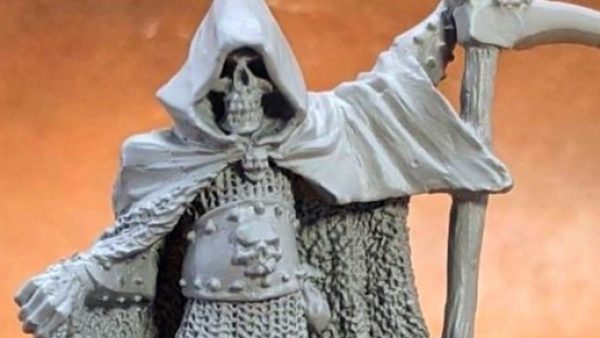
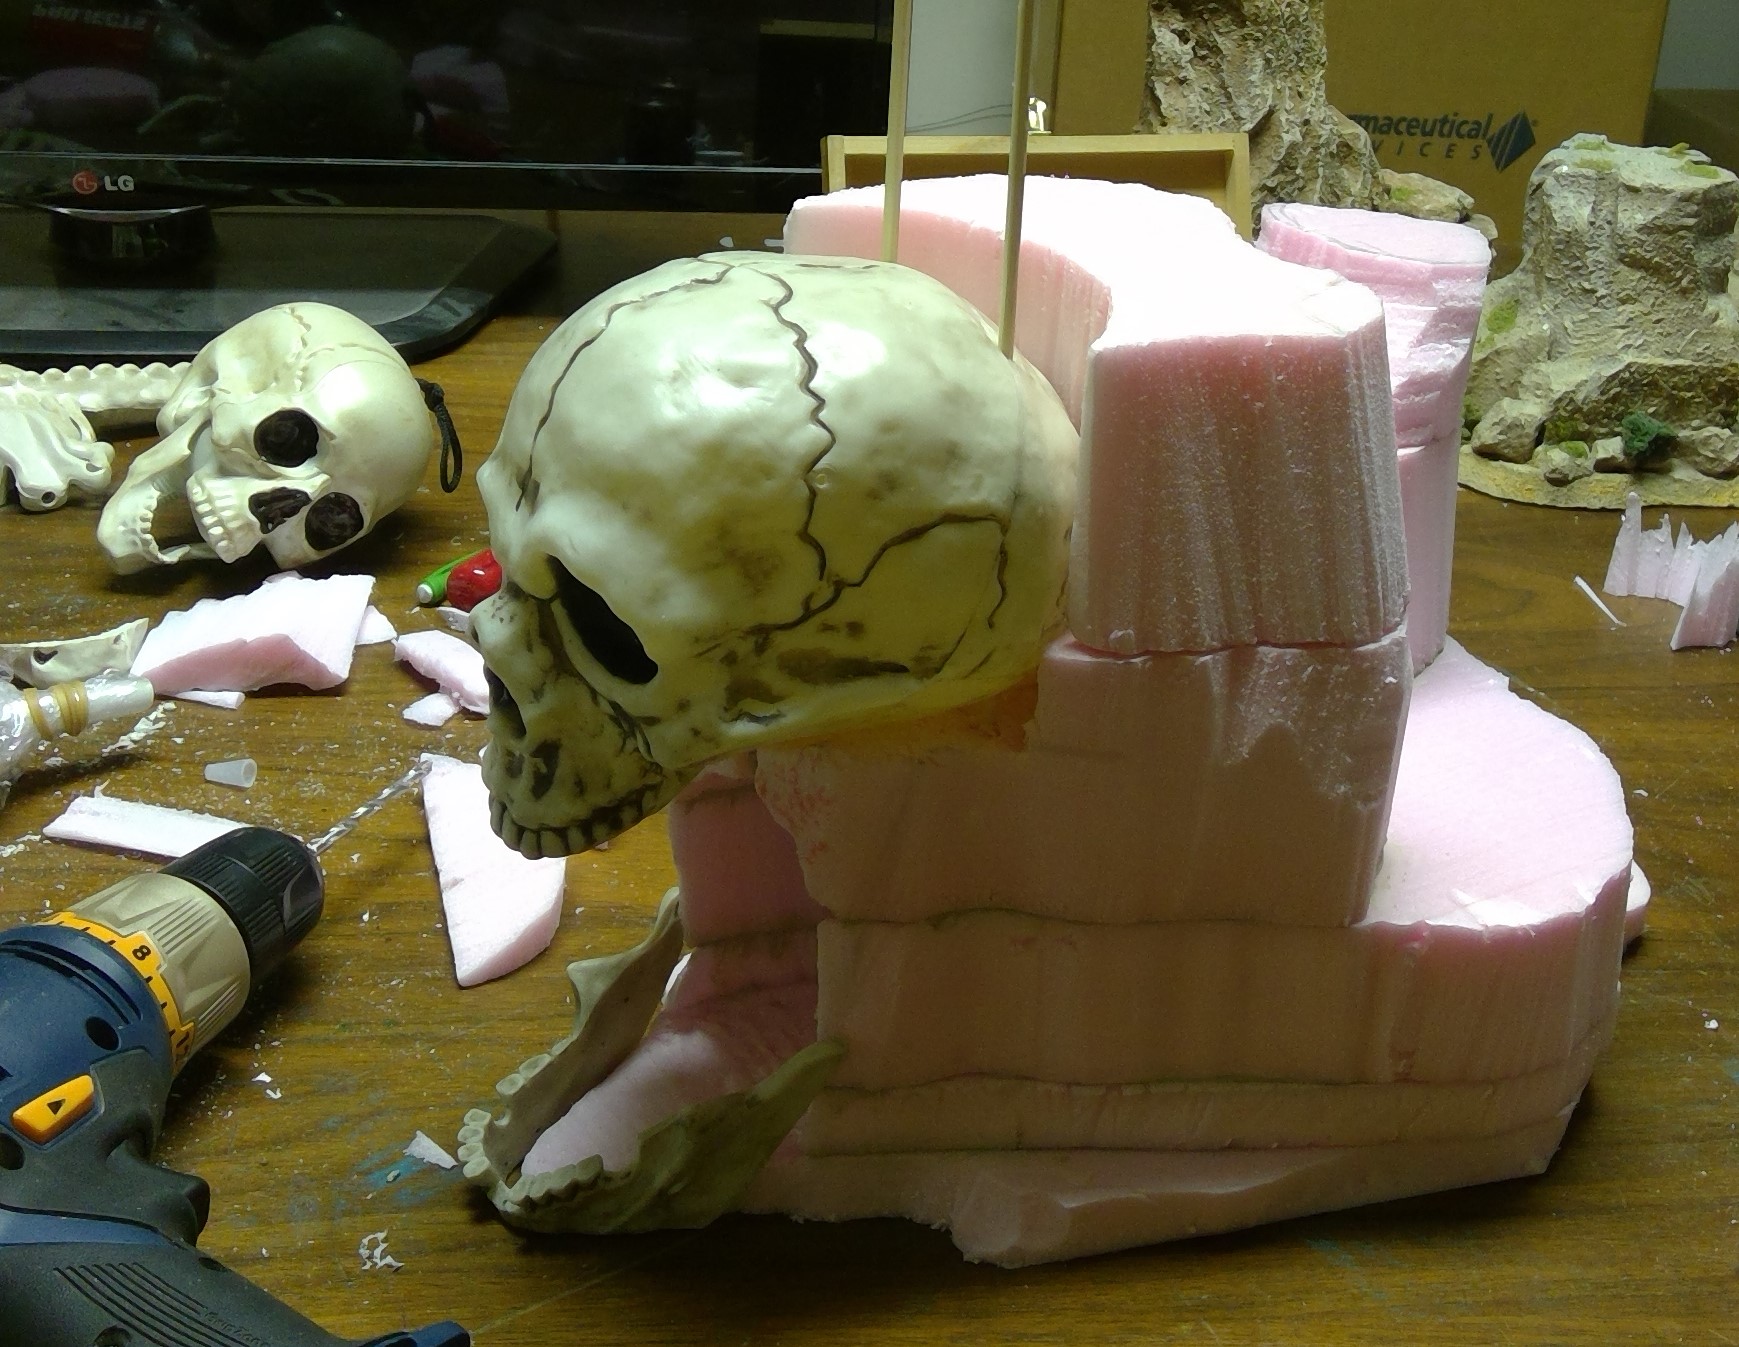
Prepping the Skull
While the layers were setting up, I prepped the skull for mounting. I decided it would need more support than just the glue to hold up to the rigors of gaming. So, I drilled some holes in the back of the skull in order to be able to run skewers through them and into the foam. This worked like a charm and should hold up for years to come.
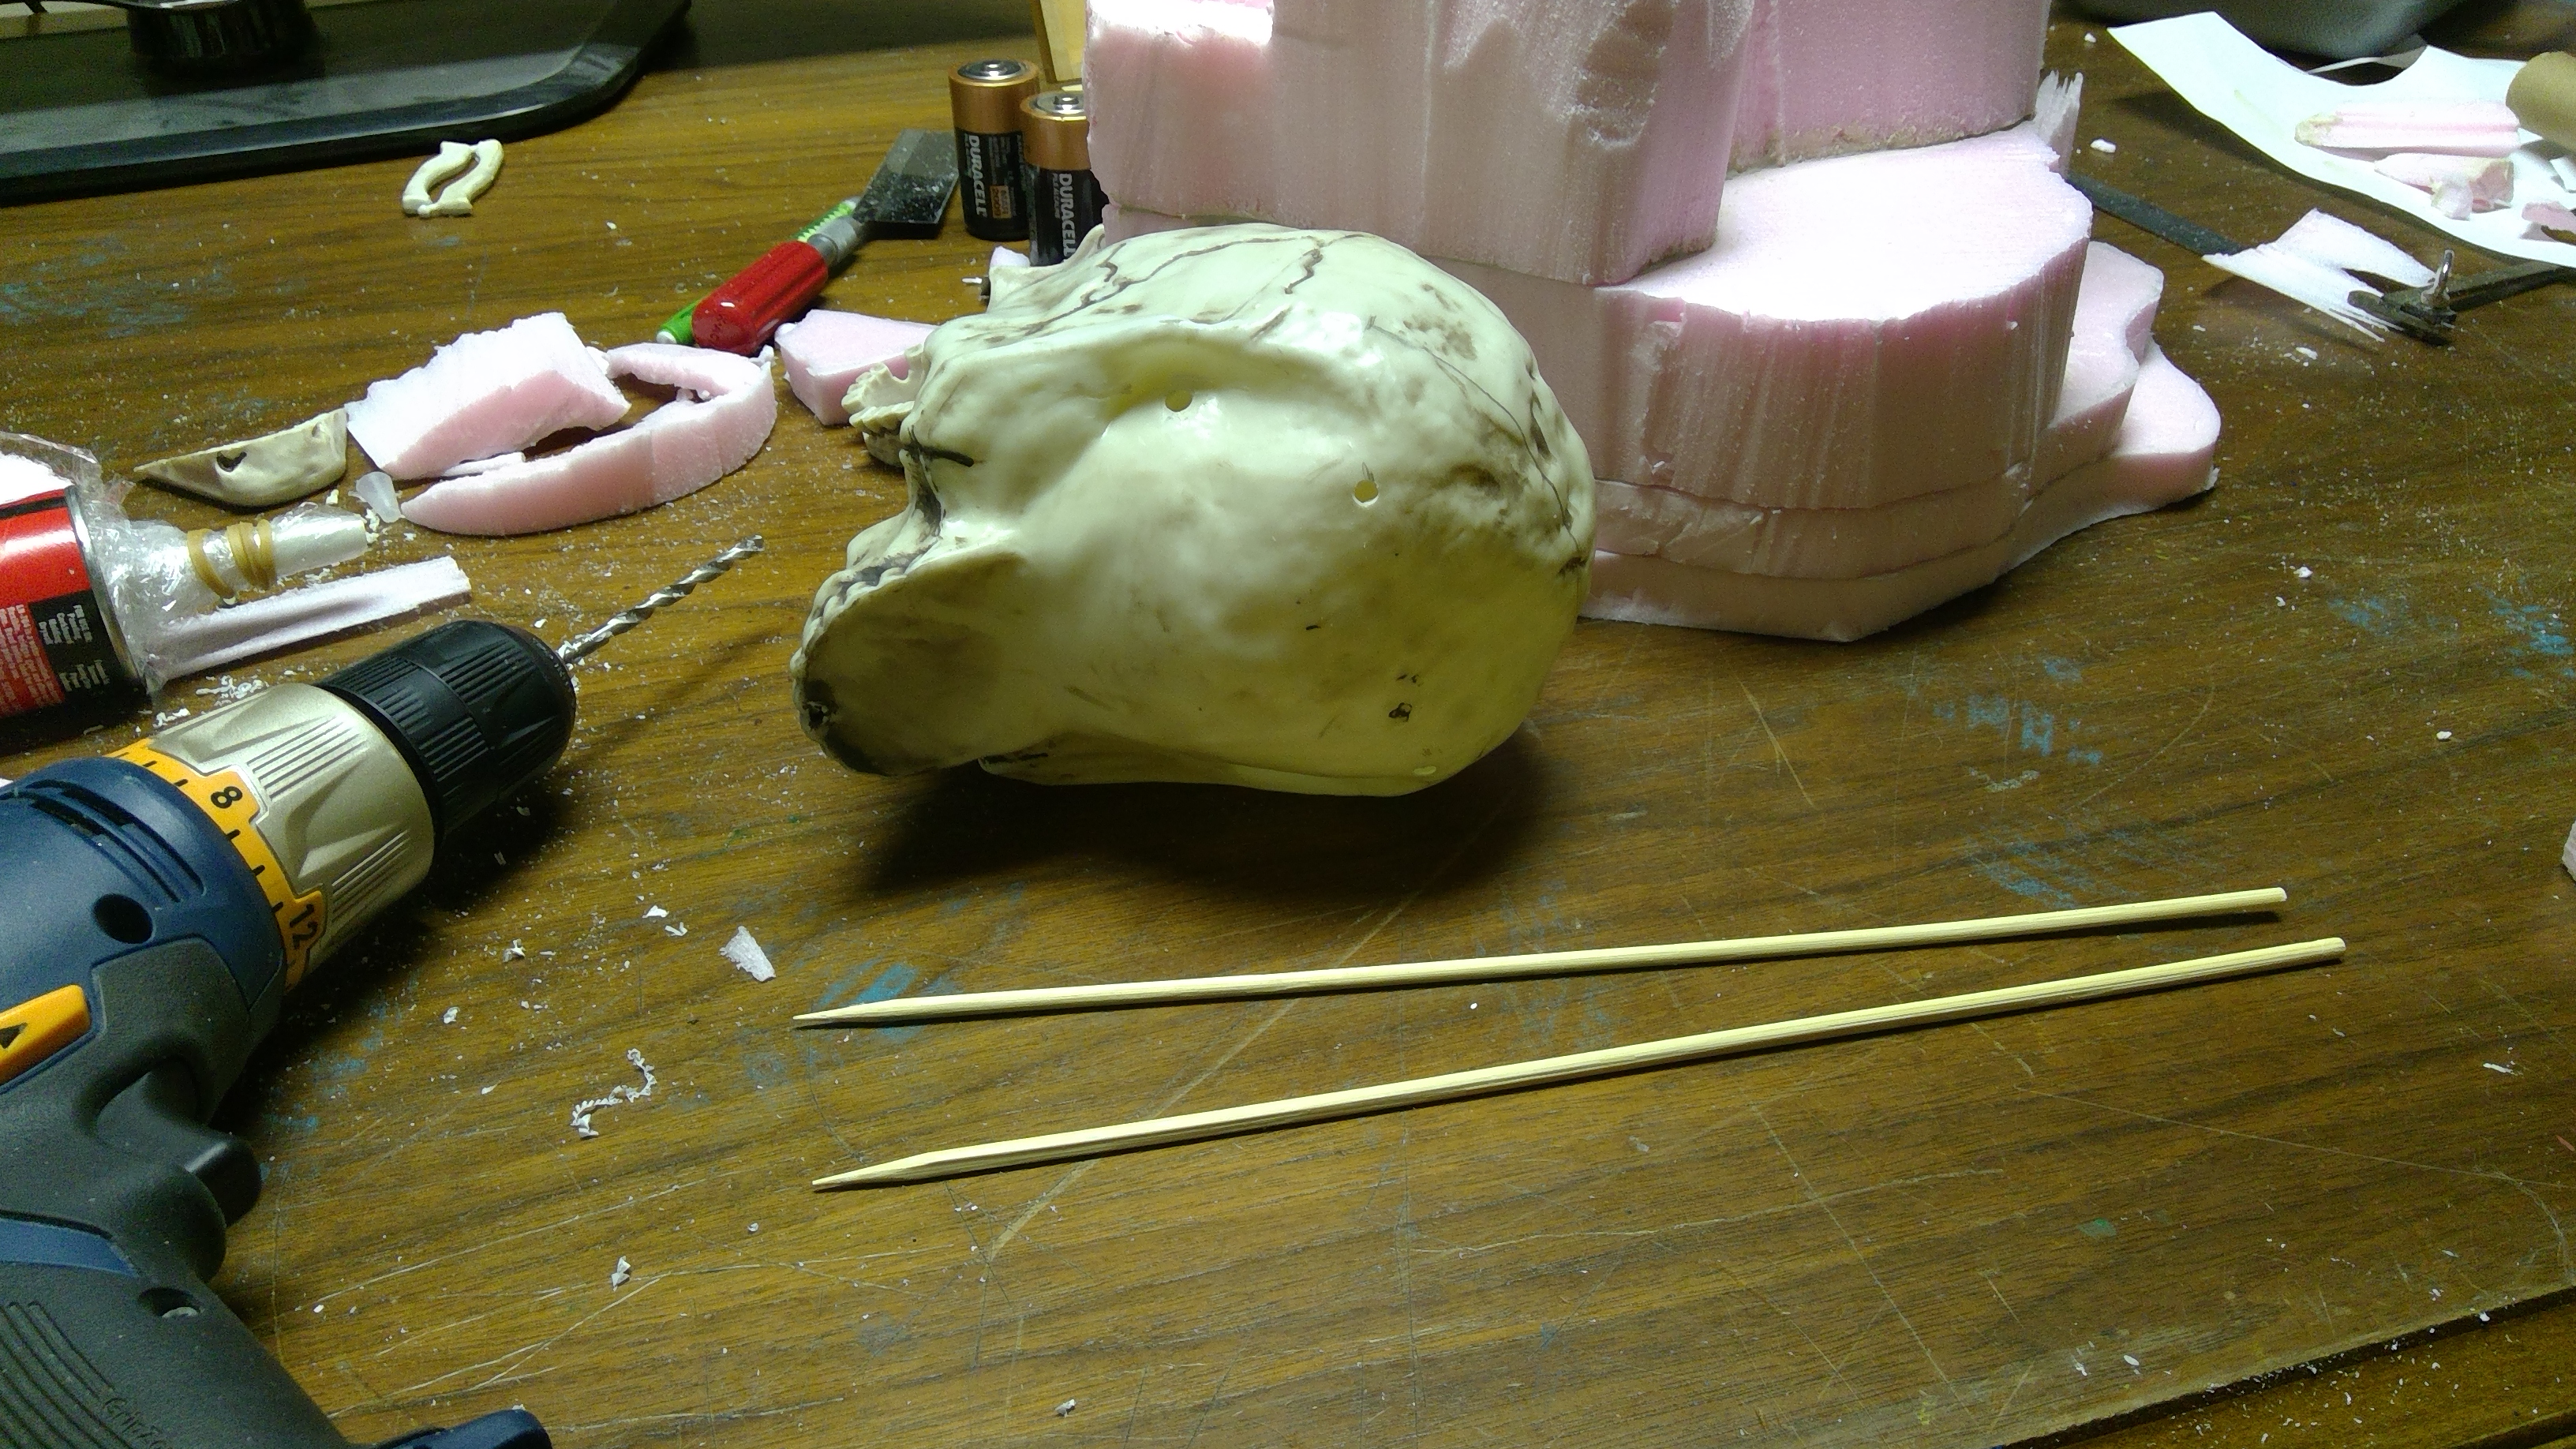
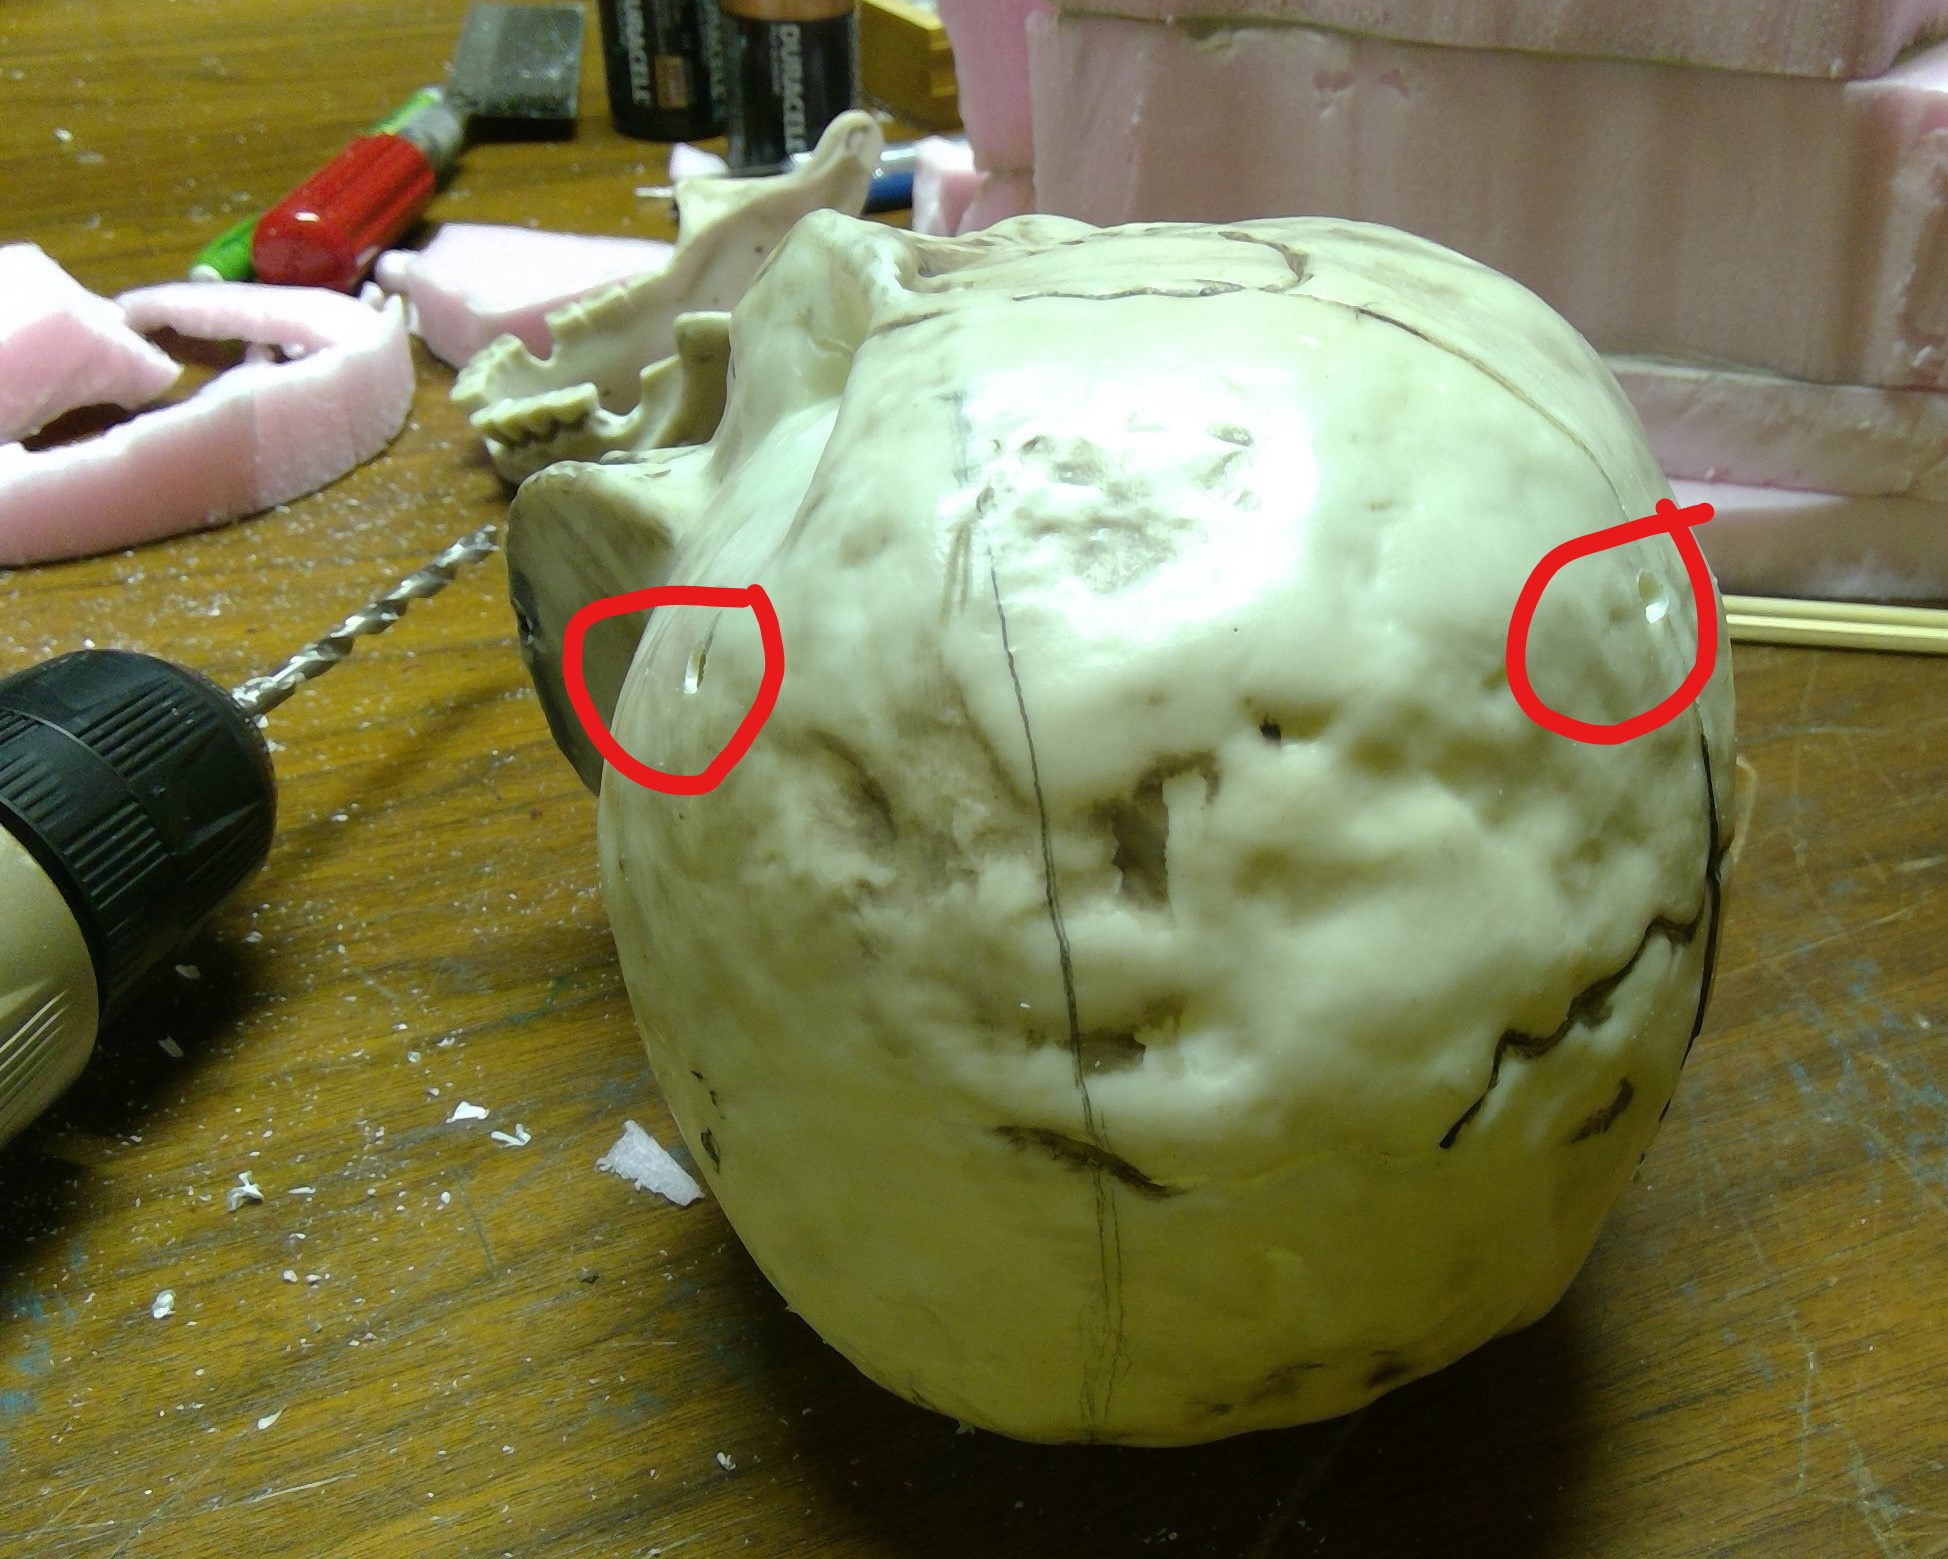
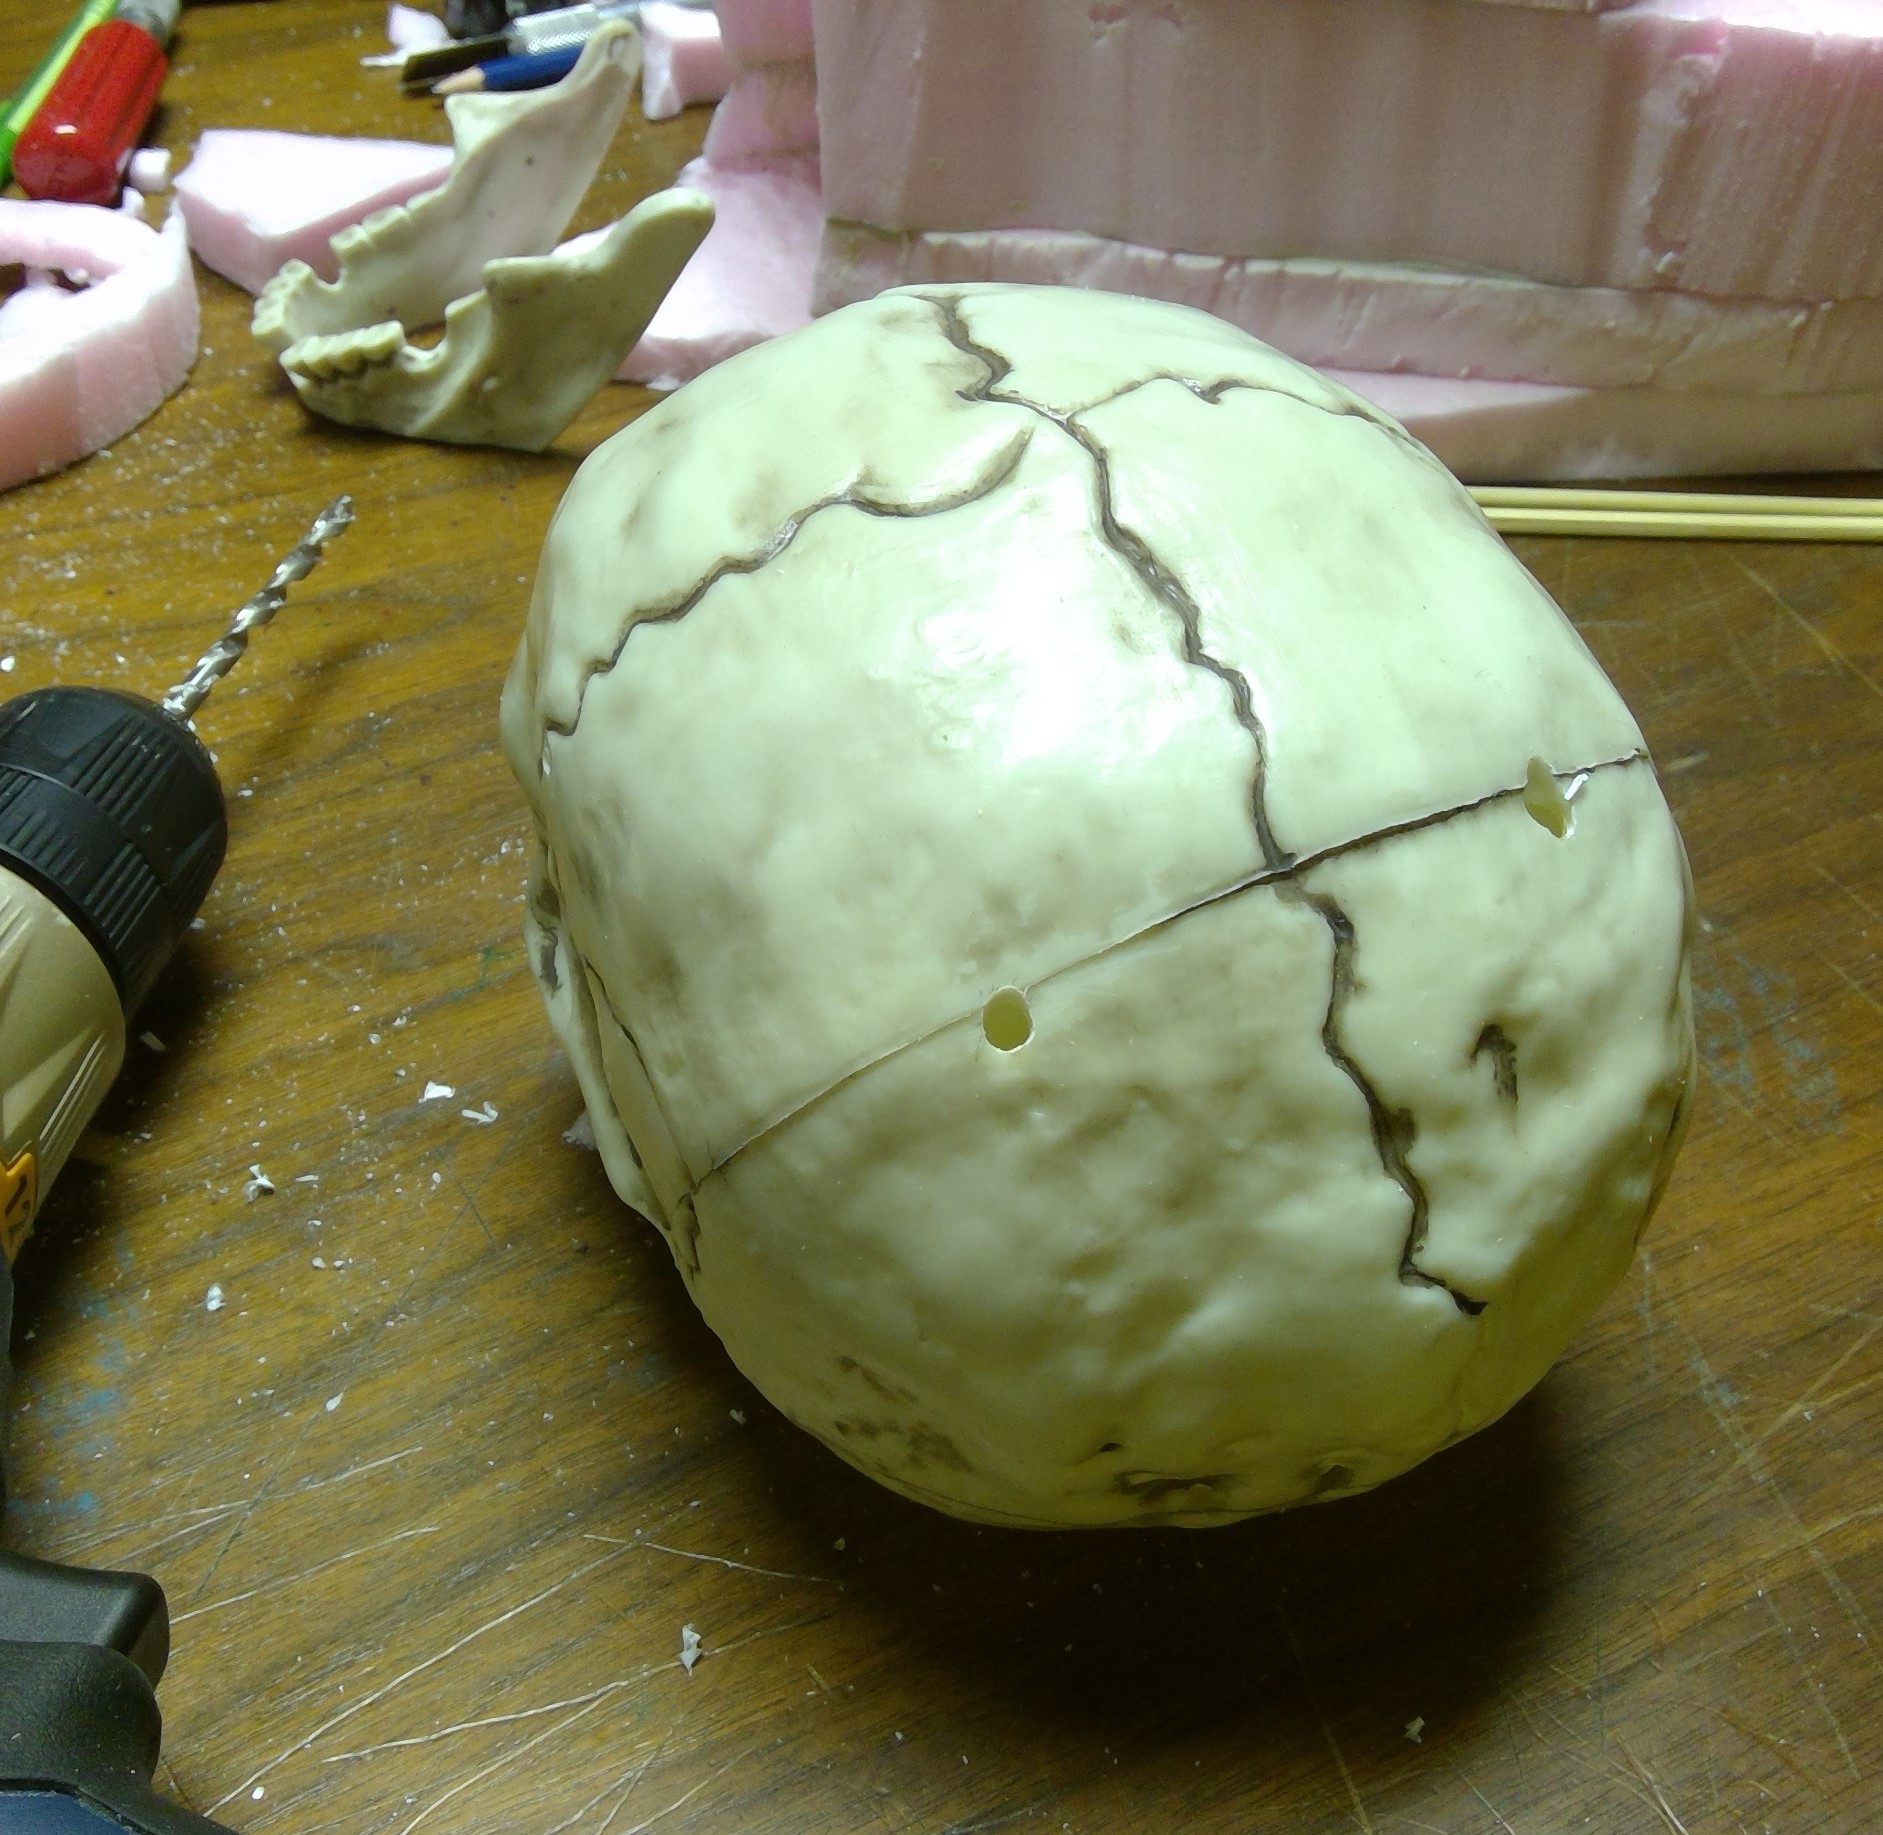
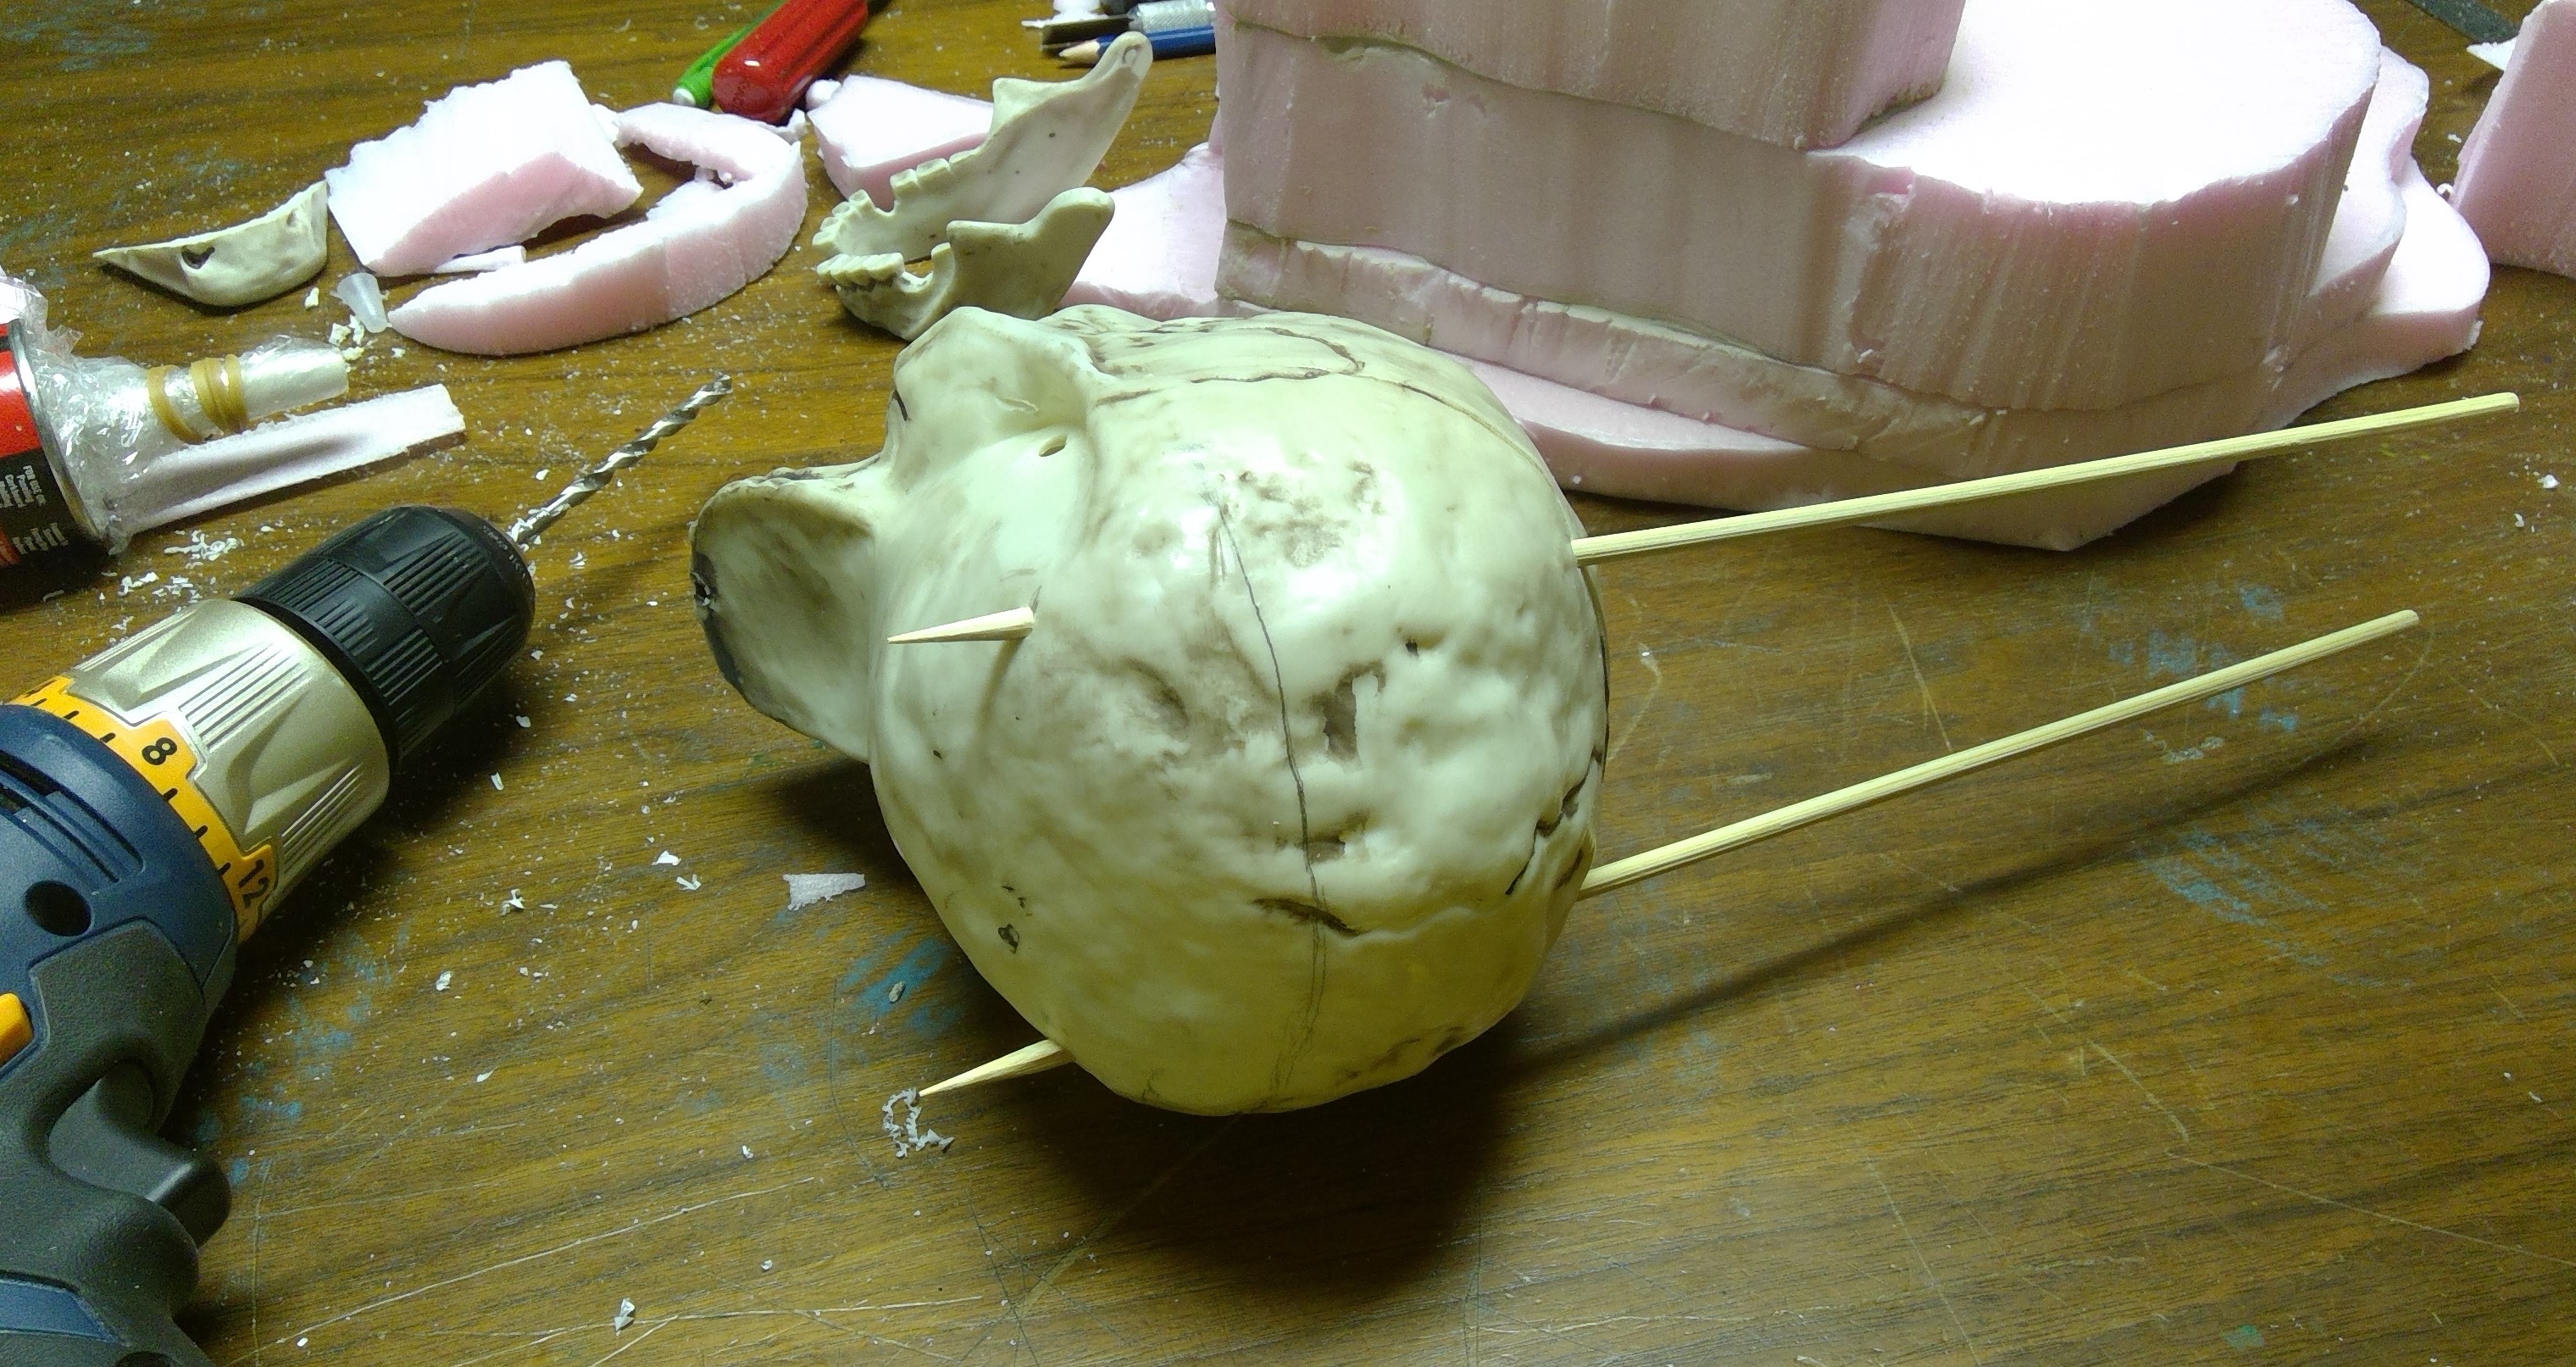


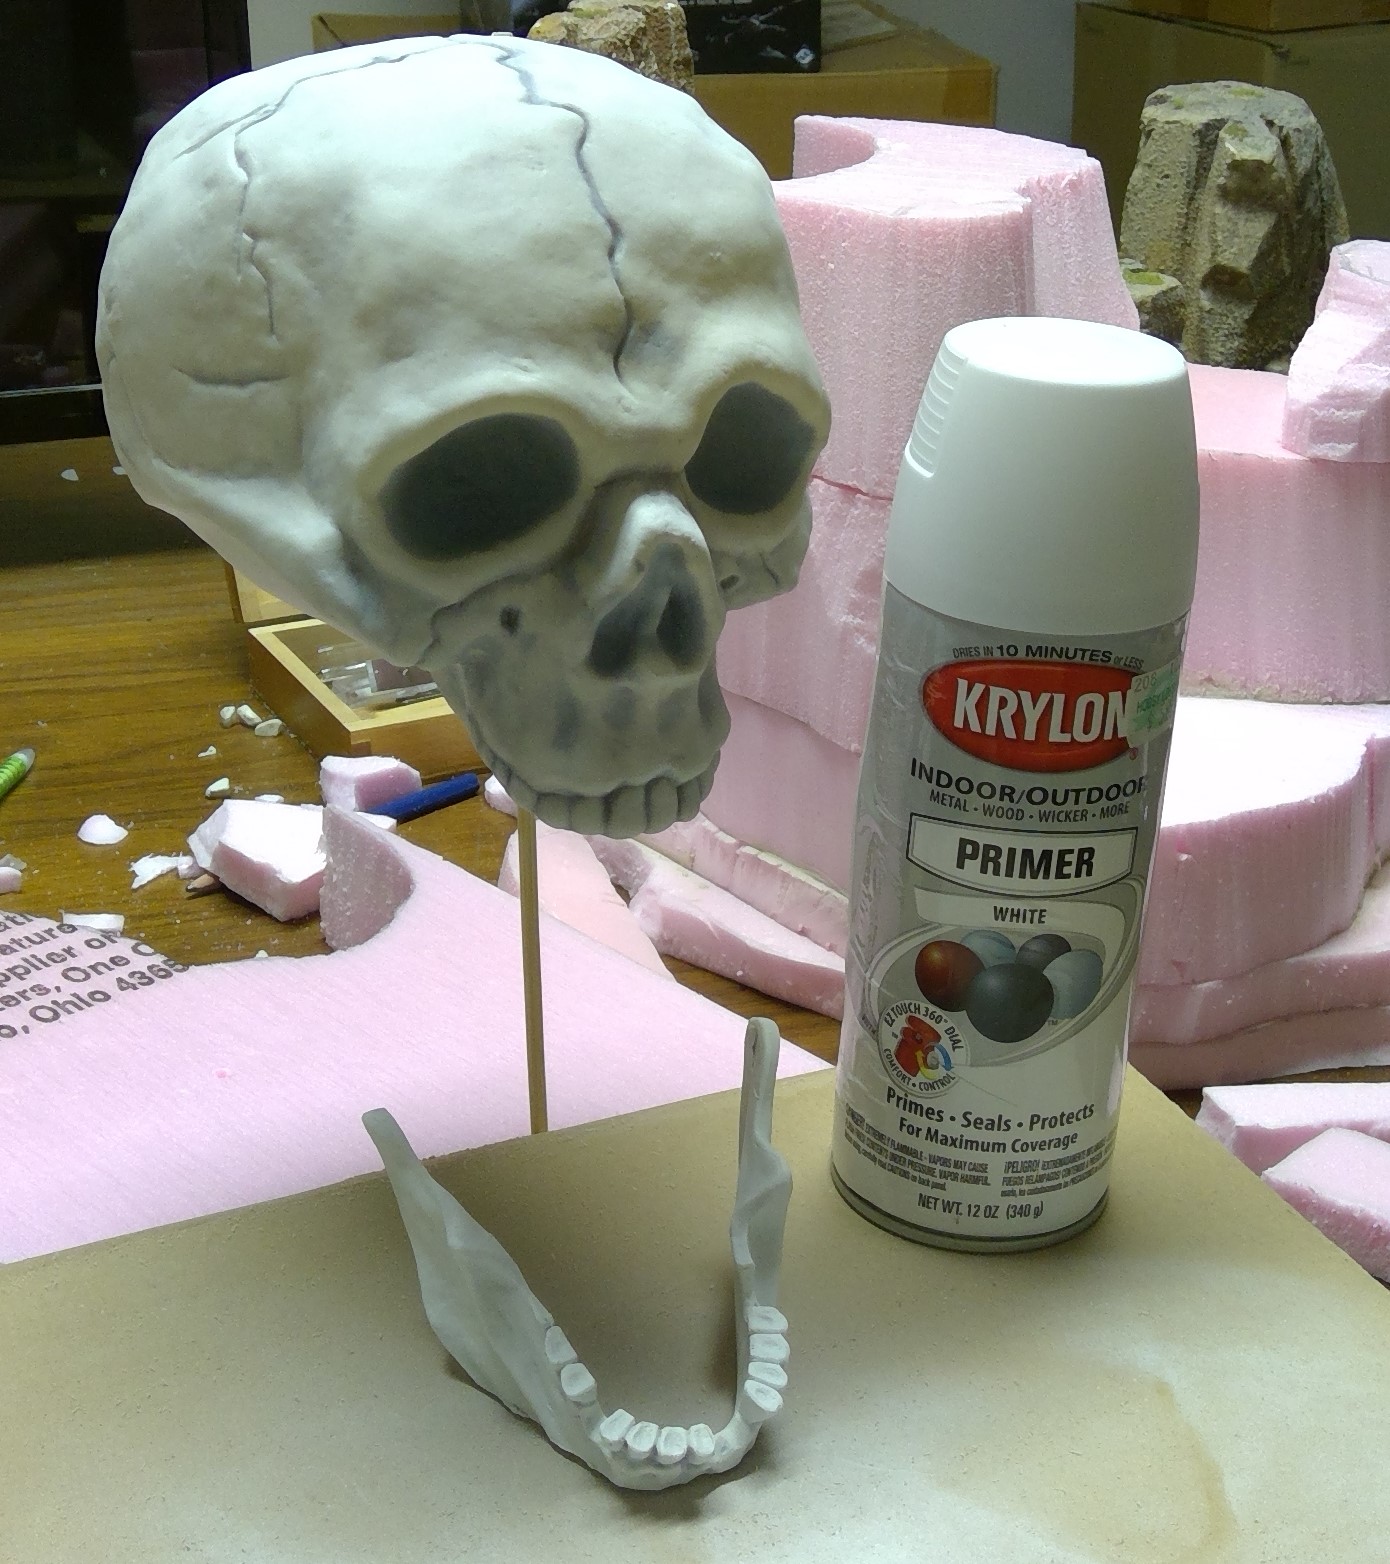
I also gave the skull a light spray of white primer to give the latex paint a better surface to hold onto.
Gluing Up
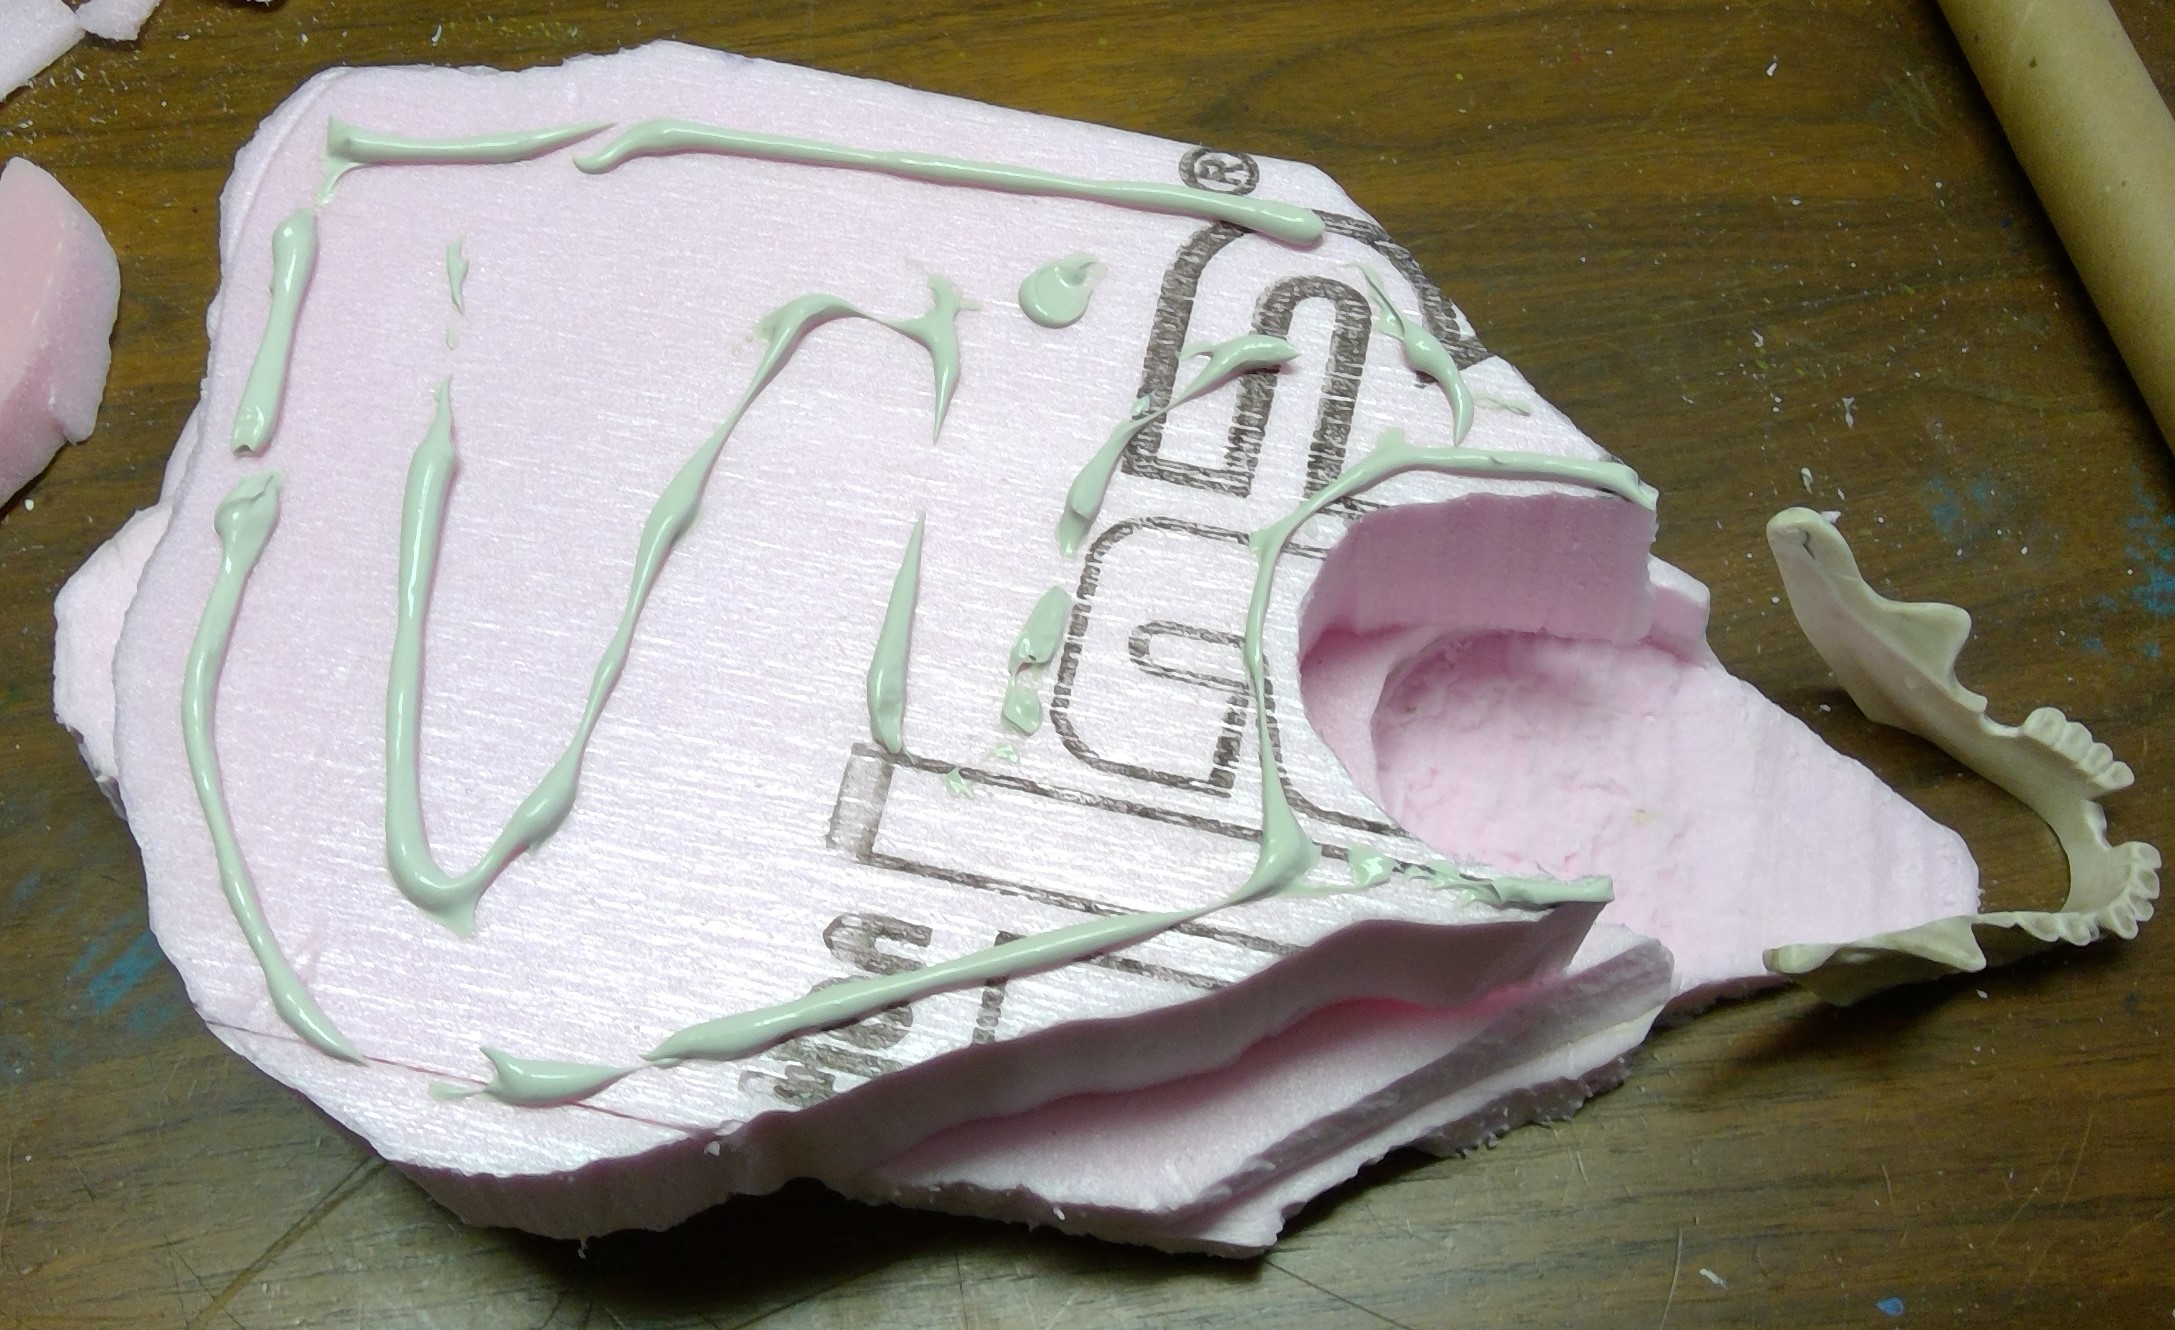
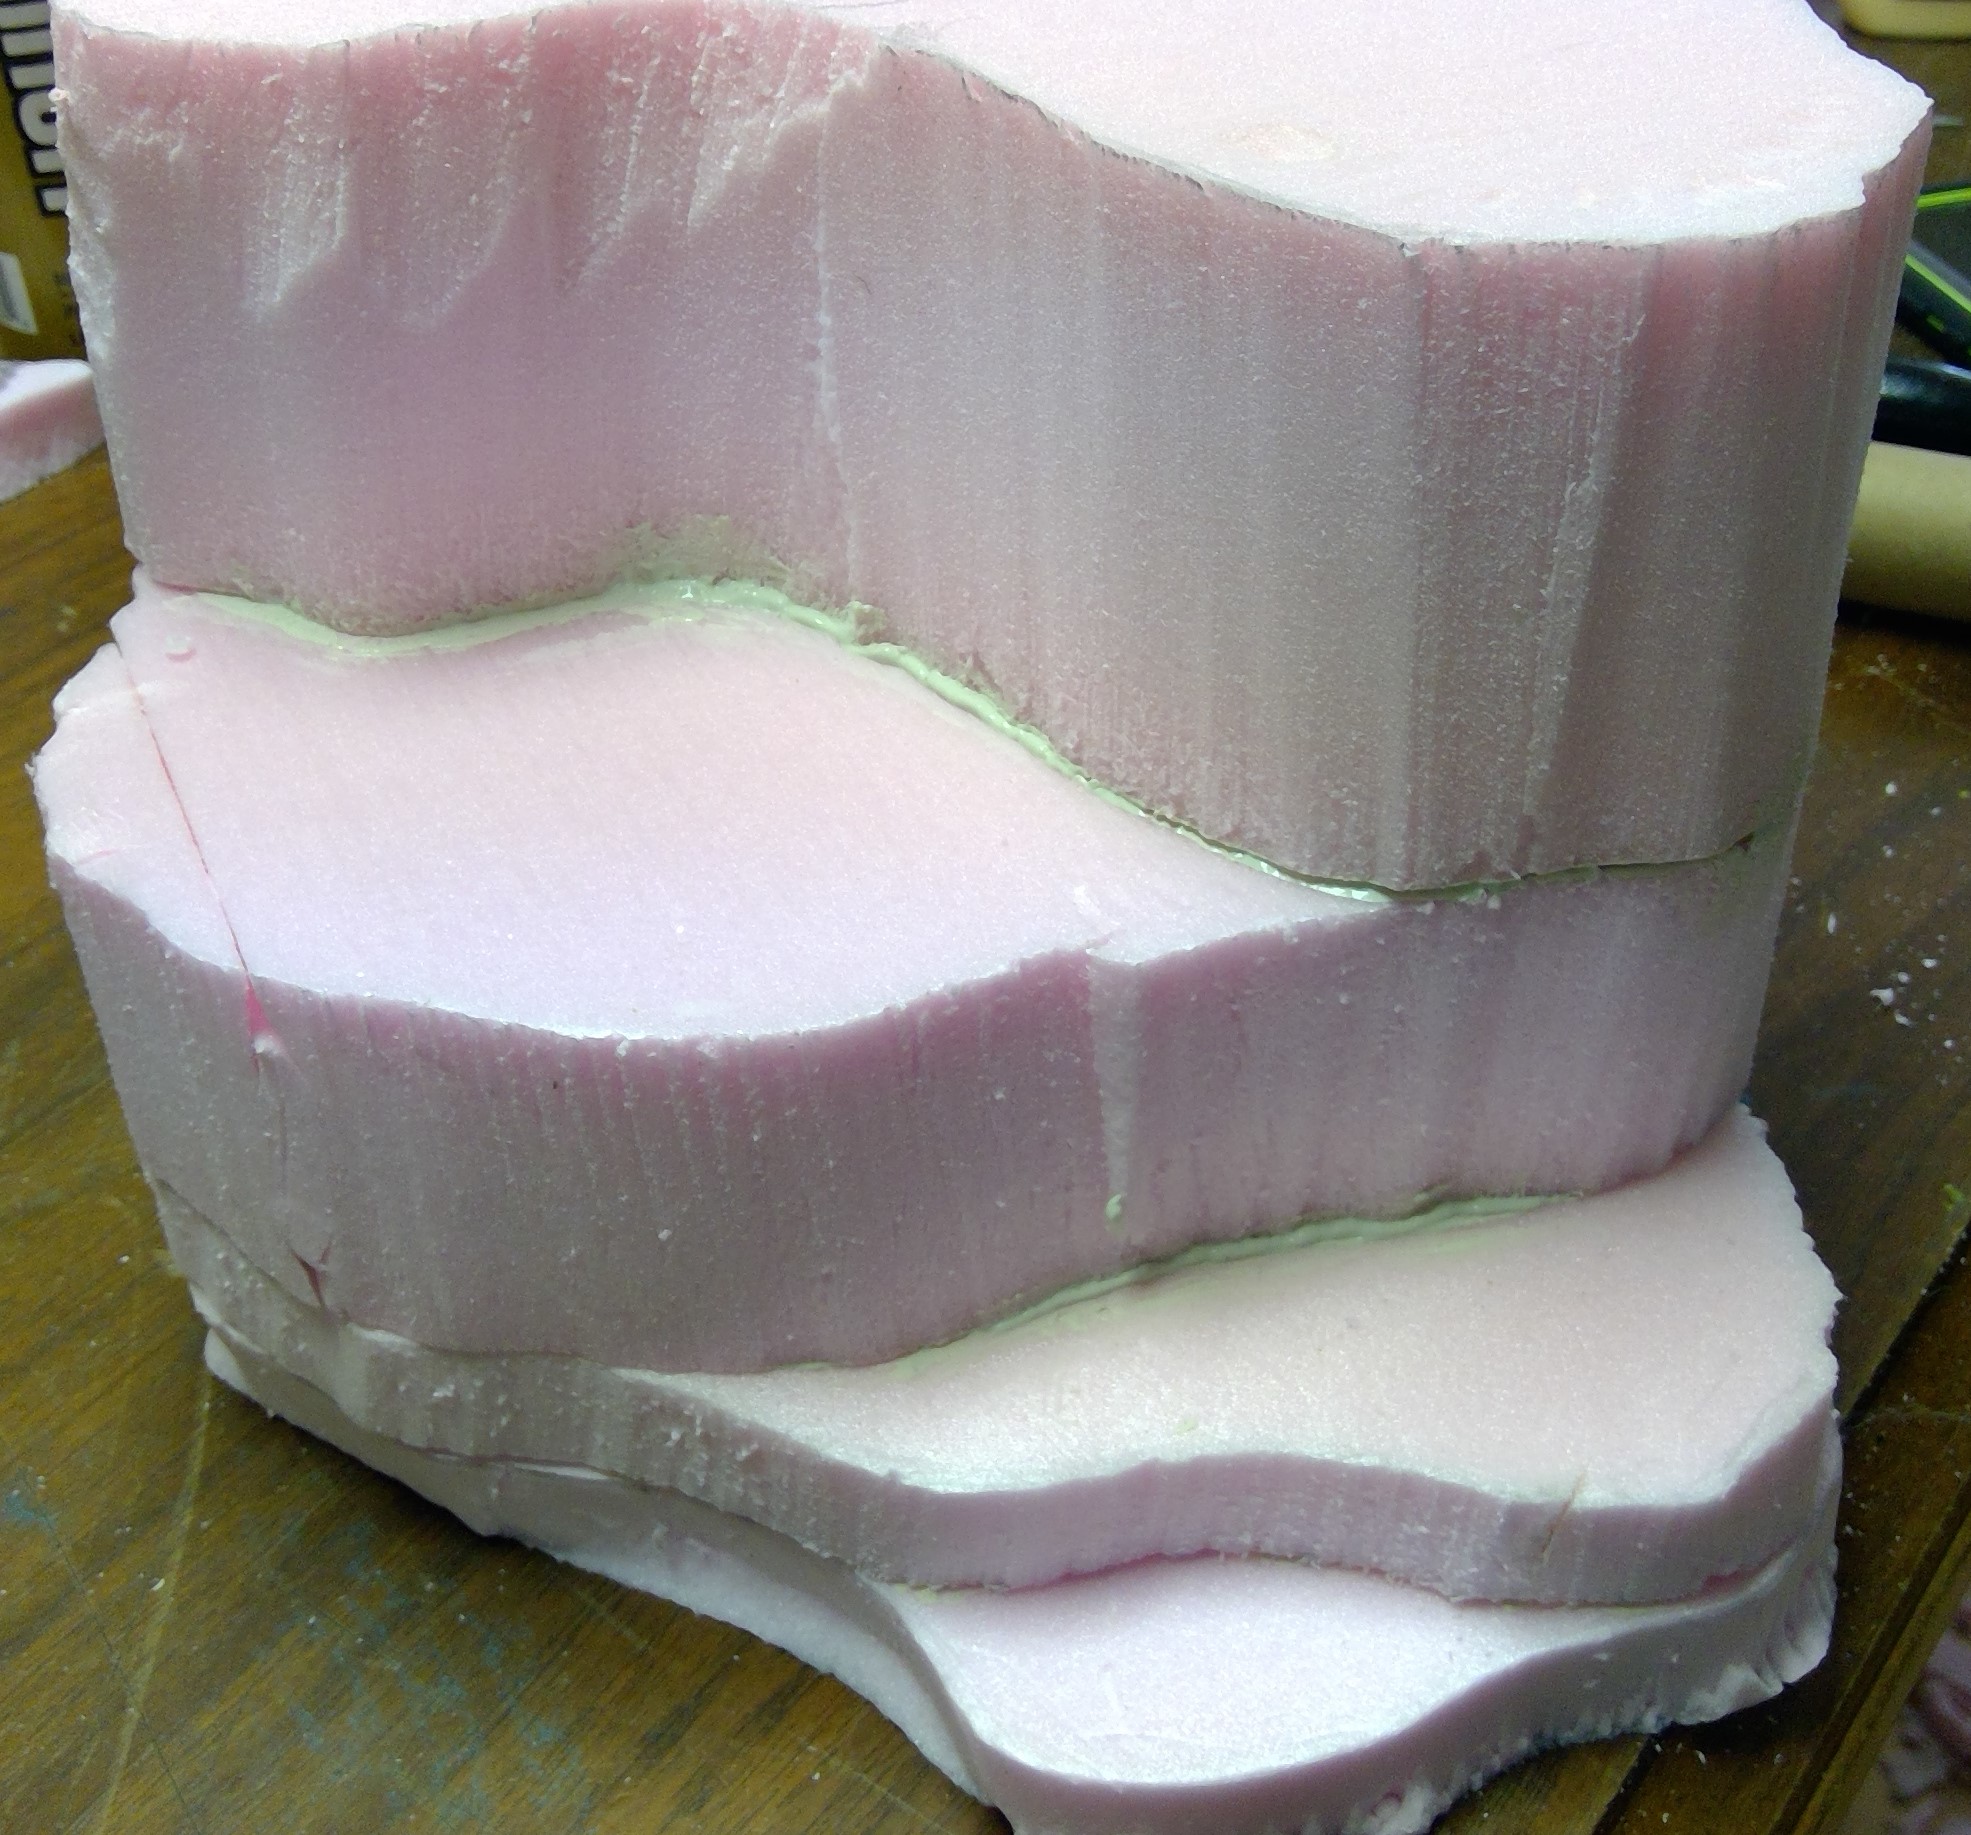
Before heading out on vacation I glued up the layers. For this I prefer to use Liquid Nails: Projects – Construction Adhesive. It works great on all the surfaces I need to glue up, including the foam insulation, and has a very strong bond. As a bonus you can clean up with water until it has set, at which point you will need to use mineral spirits, just don’t get the spirits on the foam.


Following the directions on the tube, I ran a ¼” bead near the edge, as well as some in the center, of the bottom of a layer, as the tops of each layer may have some open areas. Then you press the layer into place, lift off for 2 -4 minutes, then press back into place.
Once all the layers were glued, I smoothed out the excess that had squeezed out around the edges with my finger and some scrap card just to tidy it up.
I then stacked some books on it to act as a poor mans “clamp” to hold it all firm while it set up.
 Poor mans "clamp"
I then left that to sit while I prepped the skull for mounting.
Have been on vacation/holiday.
We are back from a week of cruising the Caribbean with Disney. Now to get caught up on this project. I had intended to post an update before hitting the high seas, but totally forgot to crop the photos and write it up before we were at sea and without internet service. Now that we are home, I’ll get that posted and get back to work on finishing up this first bit of Deadland.
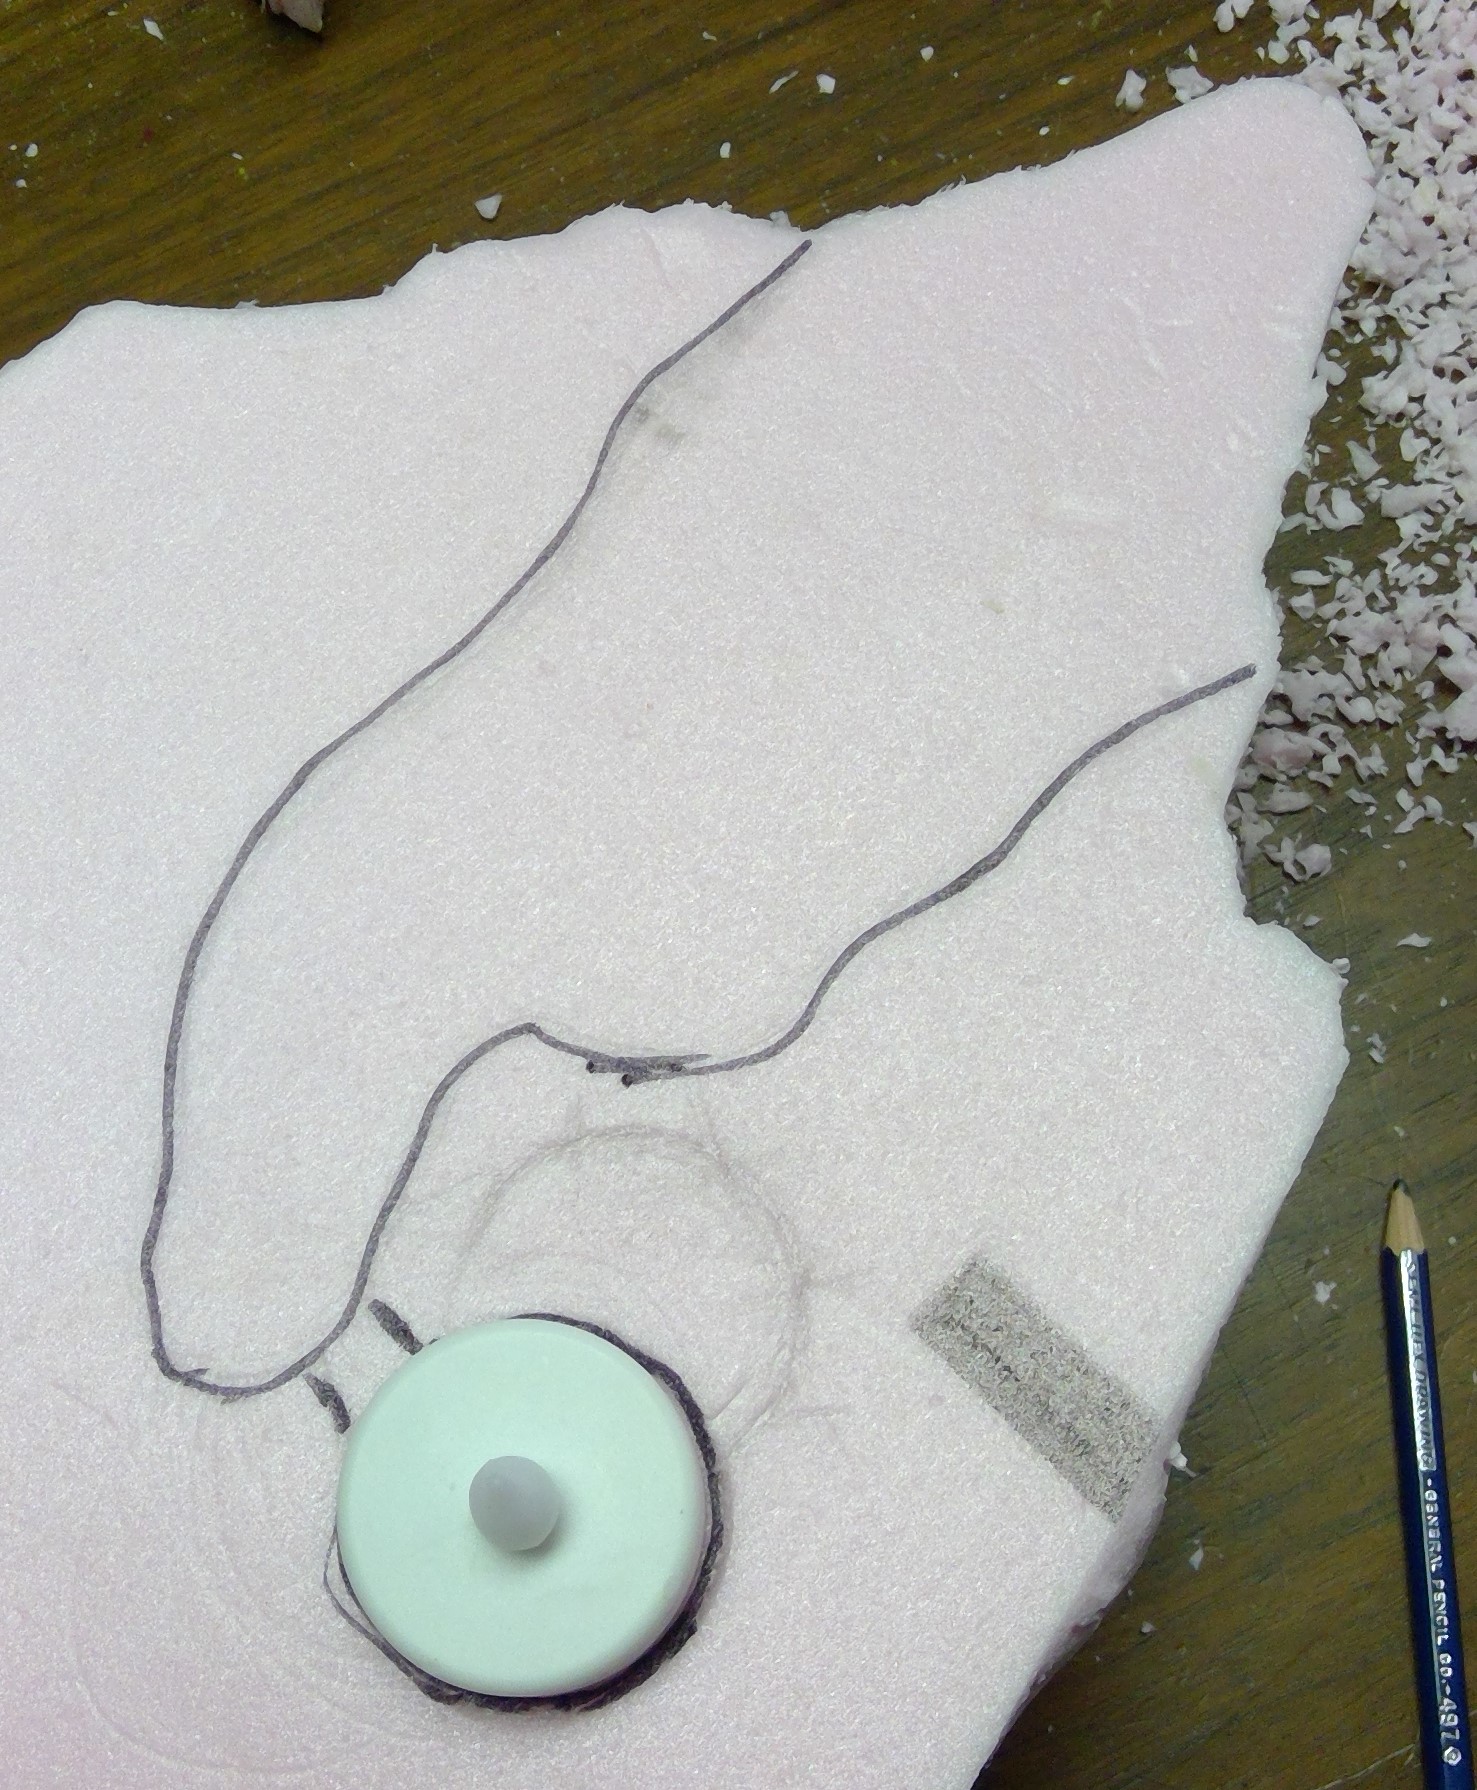
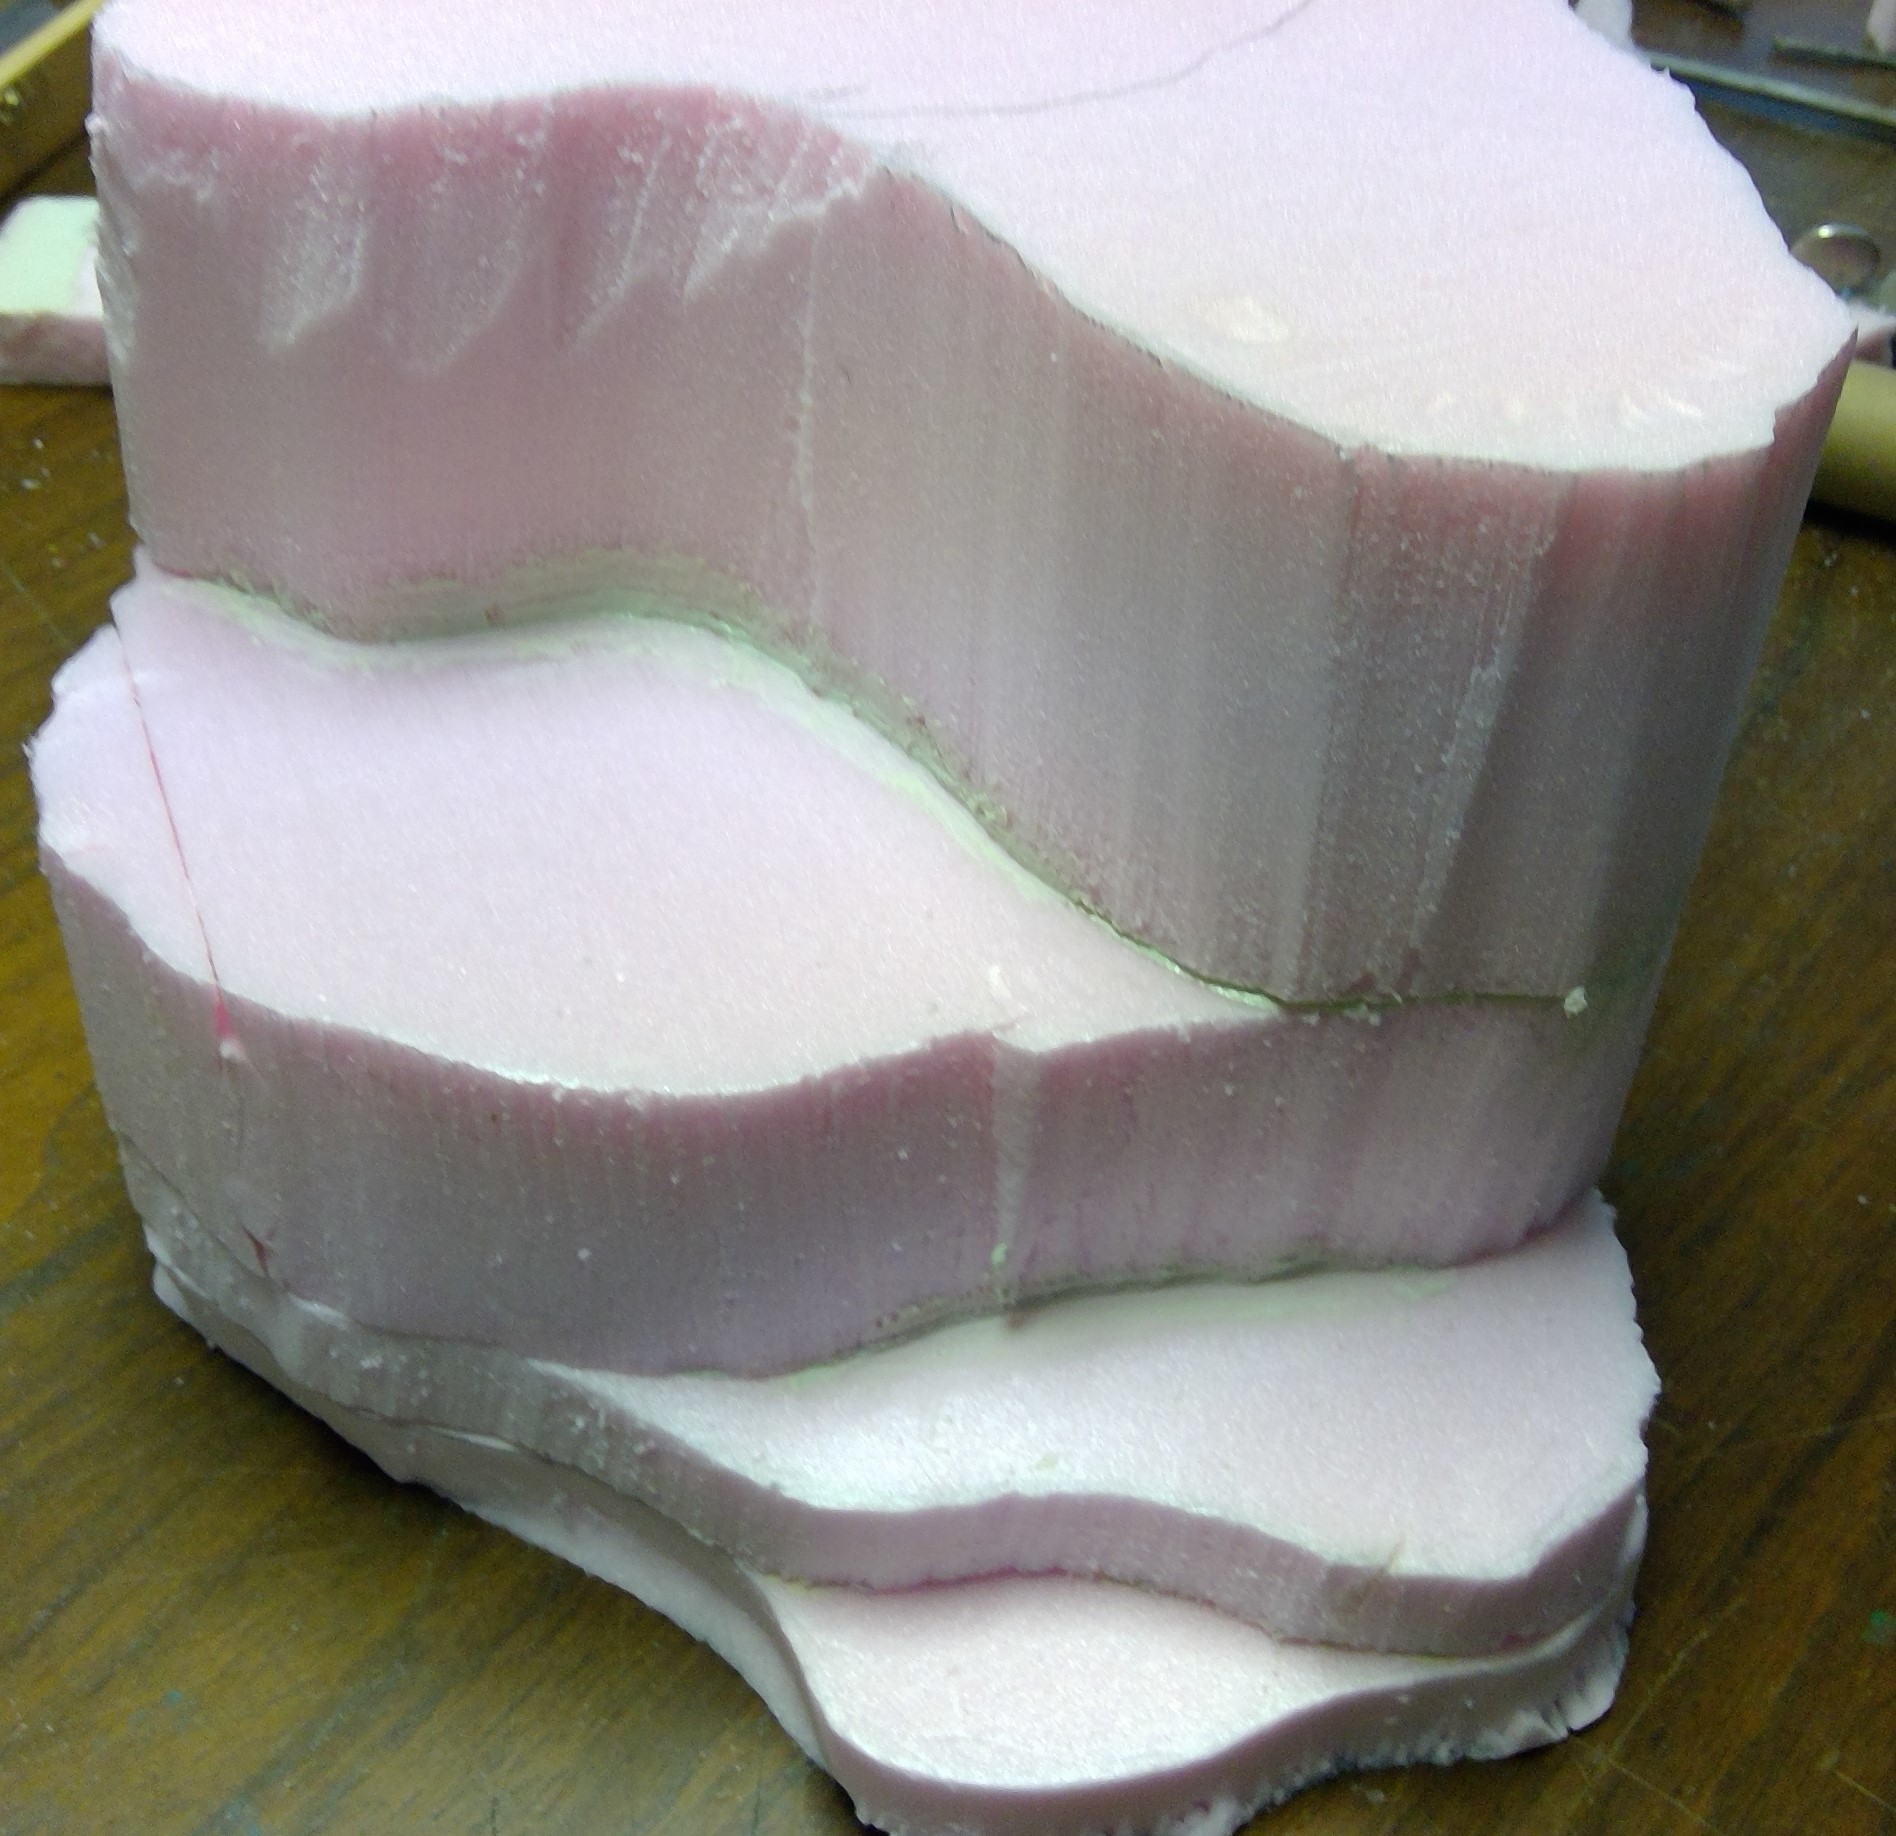
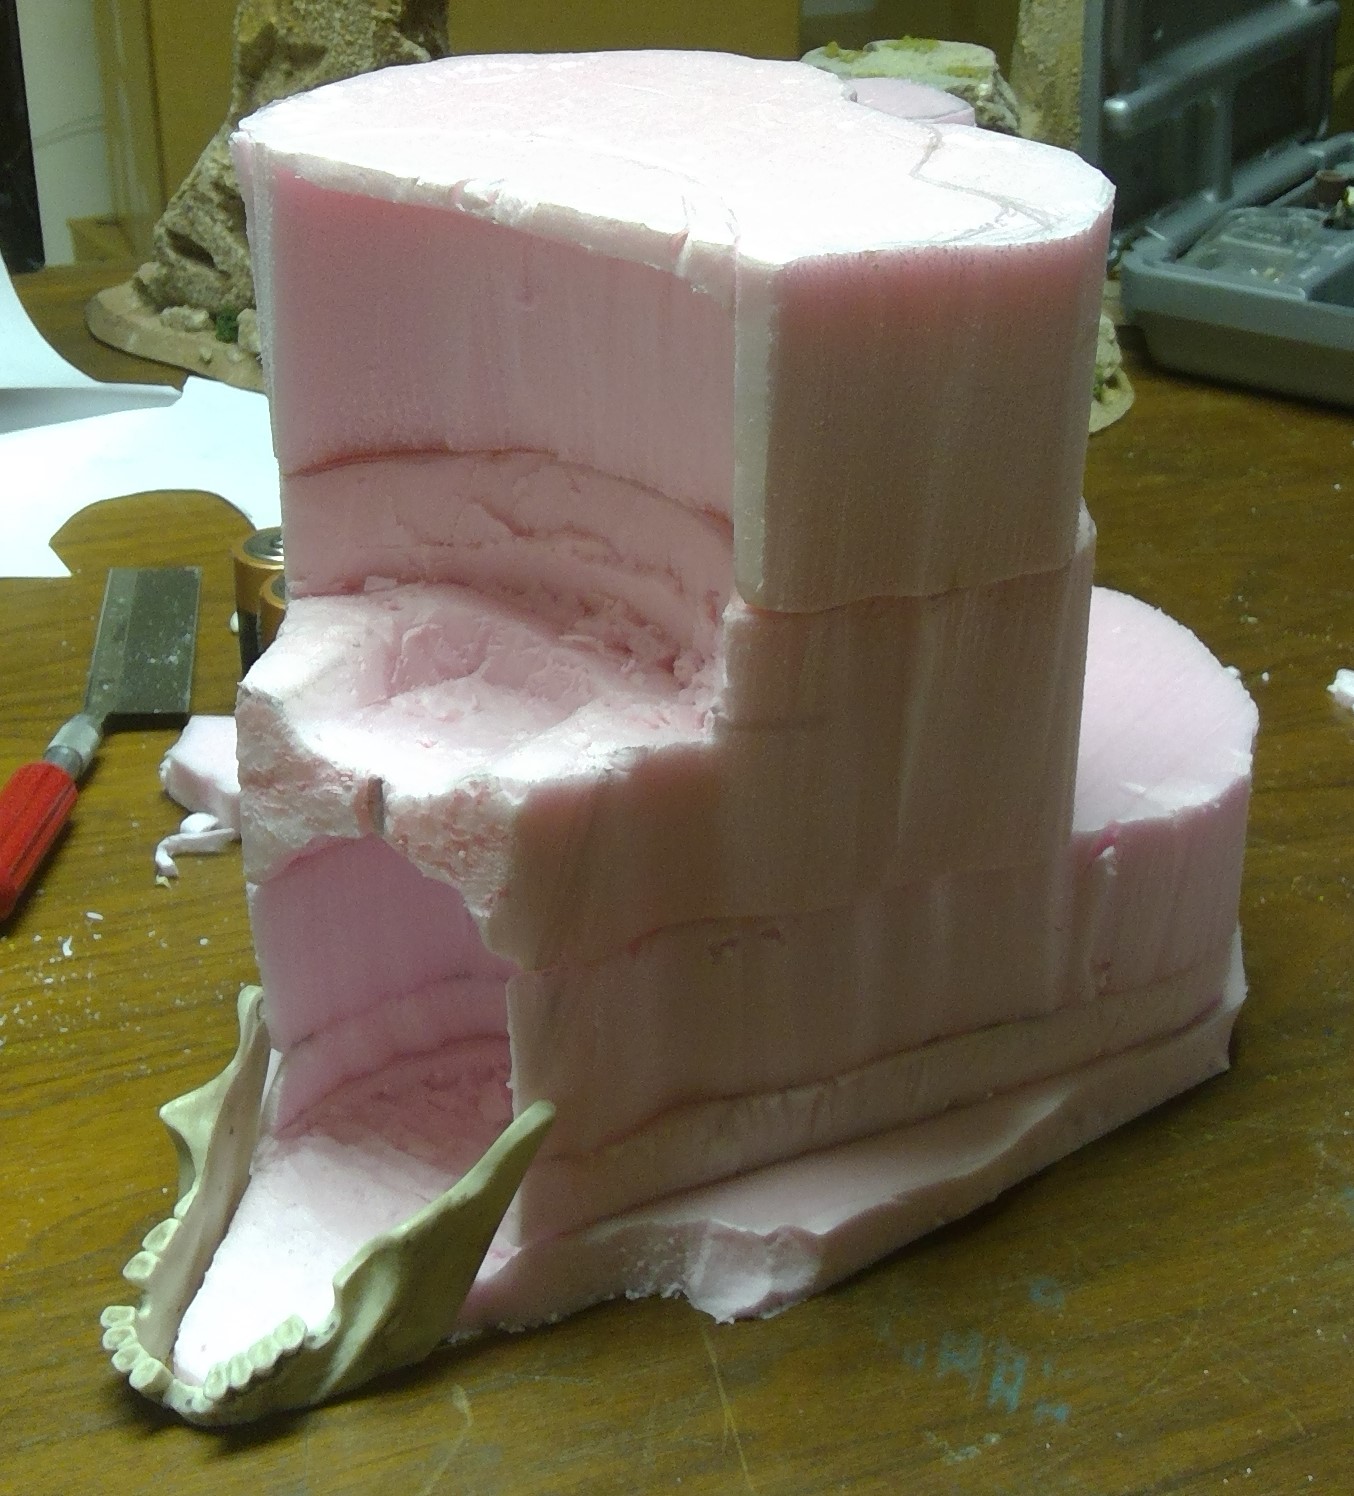
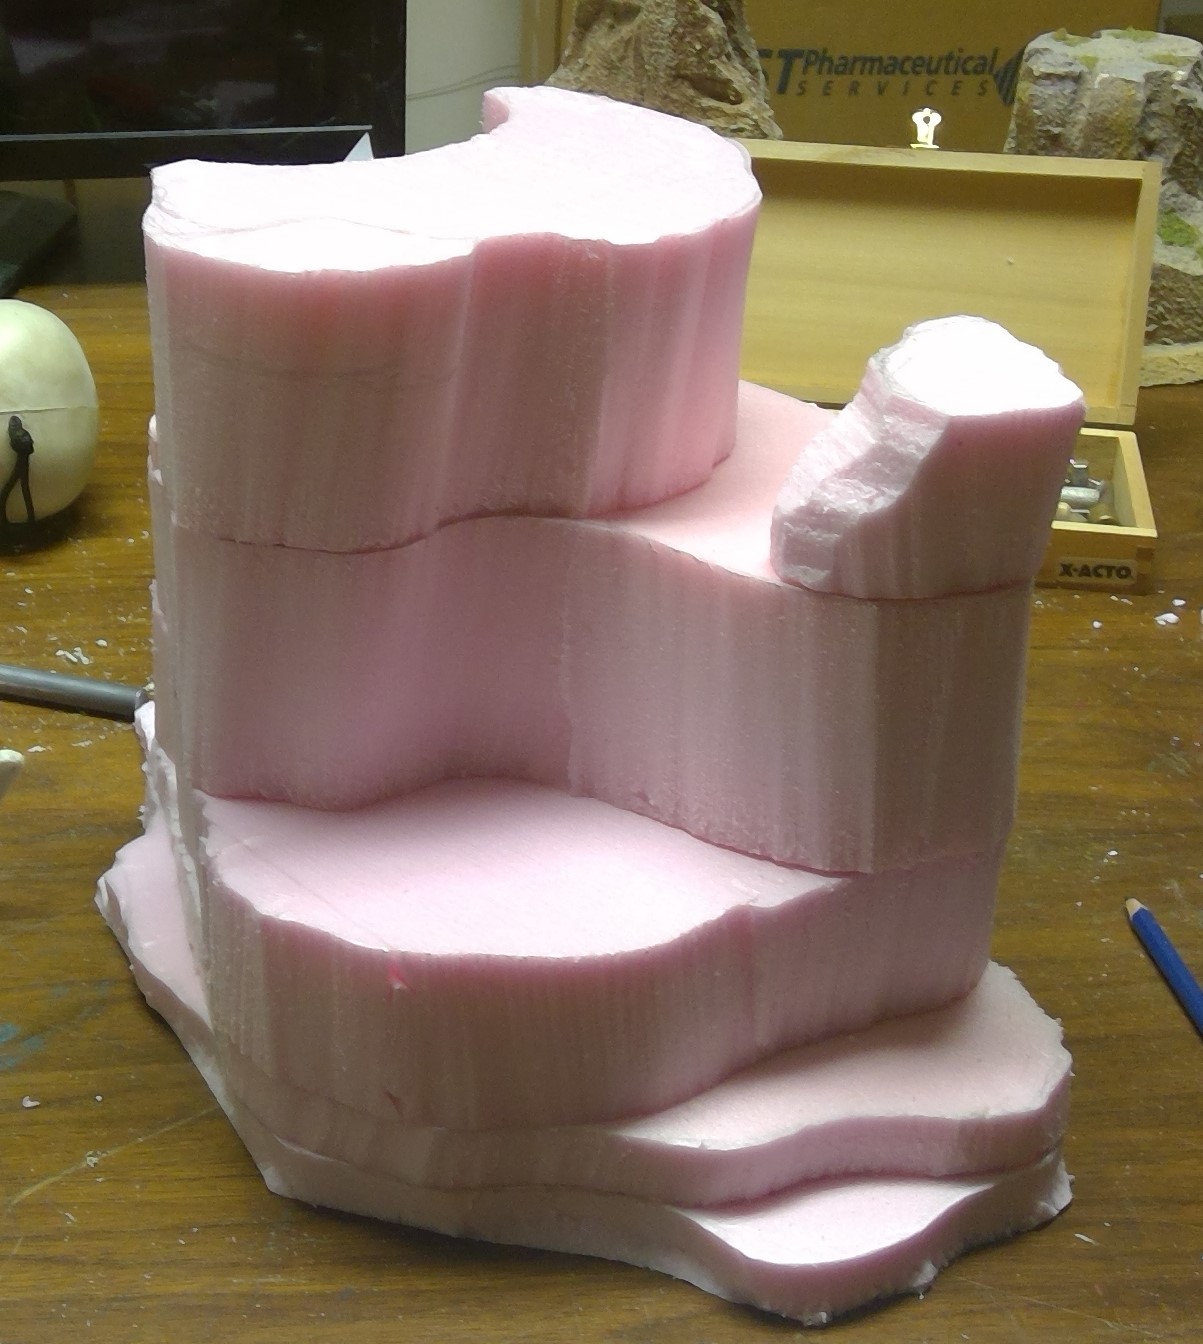
Terraforming Begins
Here I begin roughing out the basic shape of the skull cave/mesa. As my batteries were dead in my hot wire cutters, I opted to give my jewelers saw a try and it worked like a charm, especially on the 3″ foam that would have been too thick for the hot cutter I have. I also used a hobby knife where it was more appropriate for the job.
At this point I am not concerned with the MDF base as I will cut it once the final footprint of the mesa is determined.
 Shaped to fit inside of lower jaw and cut lines for beginning of cave interior.
 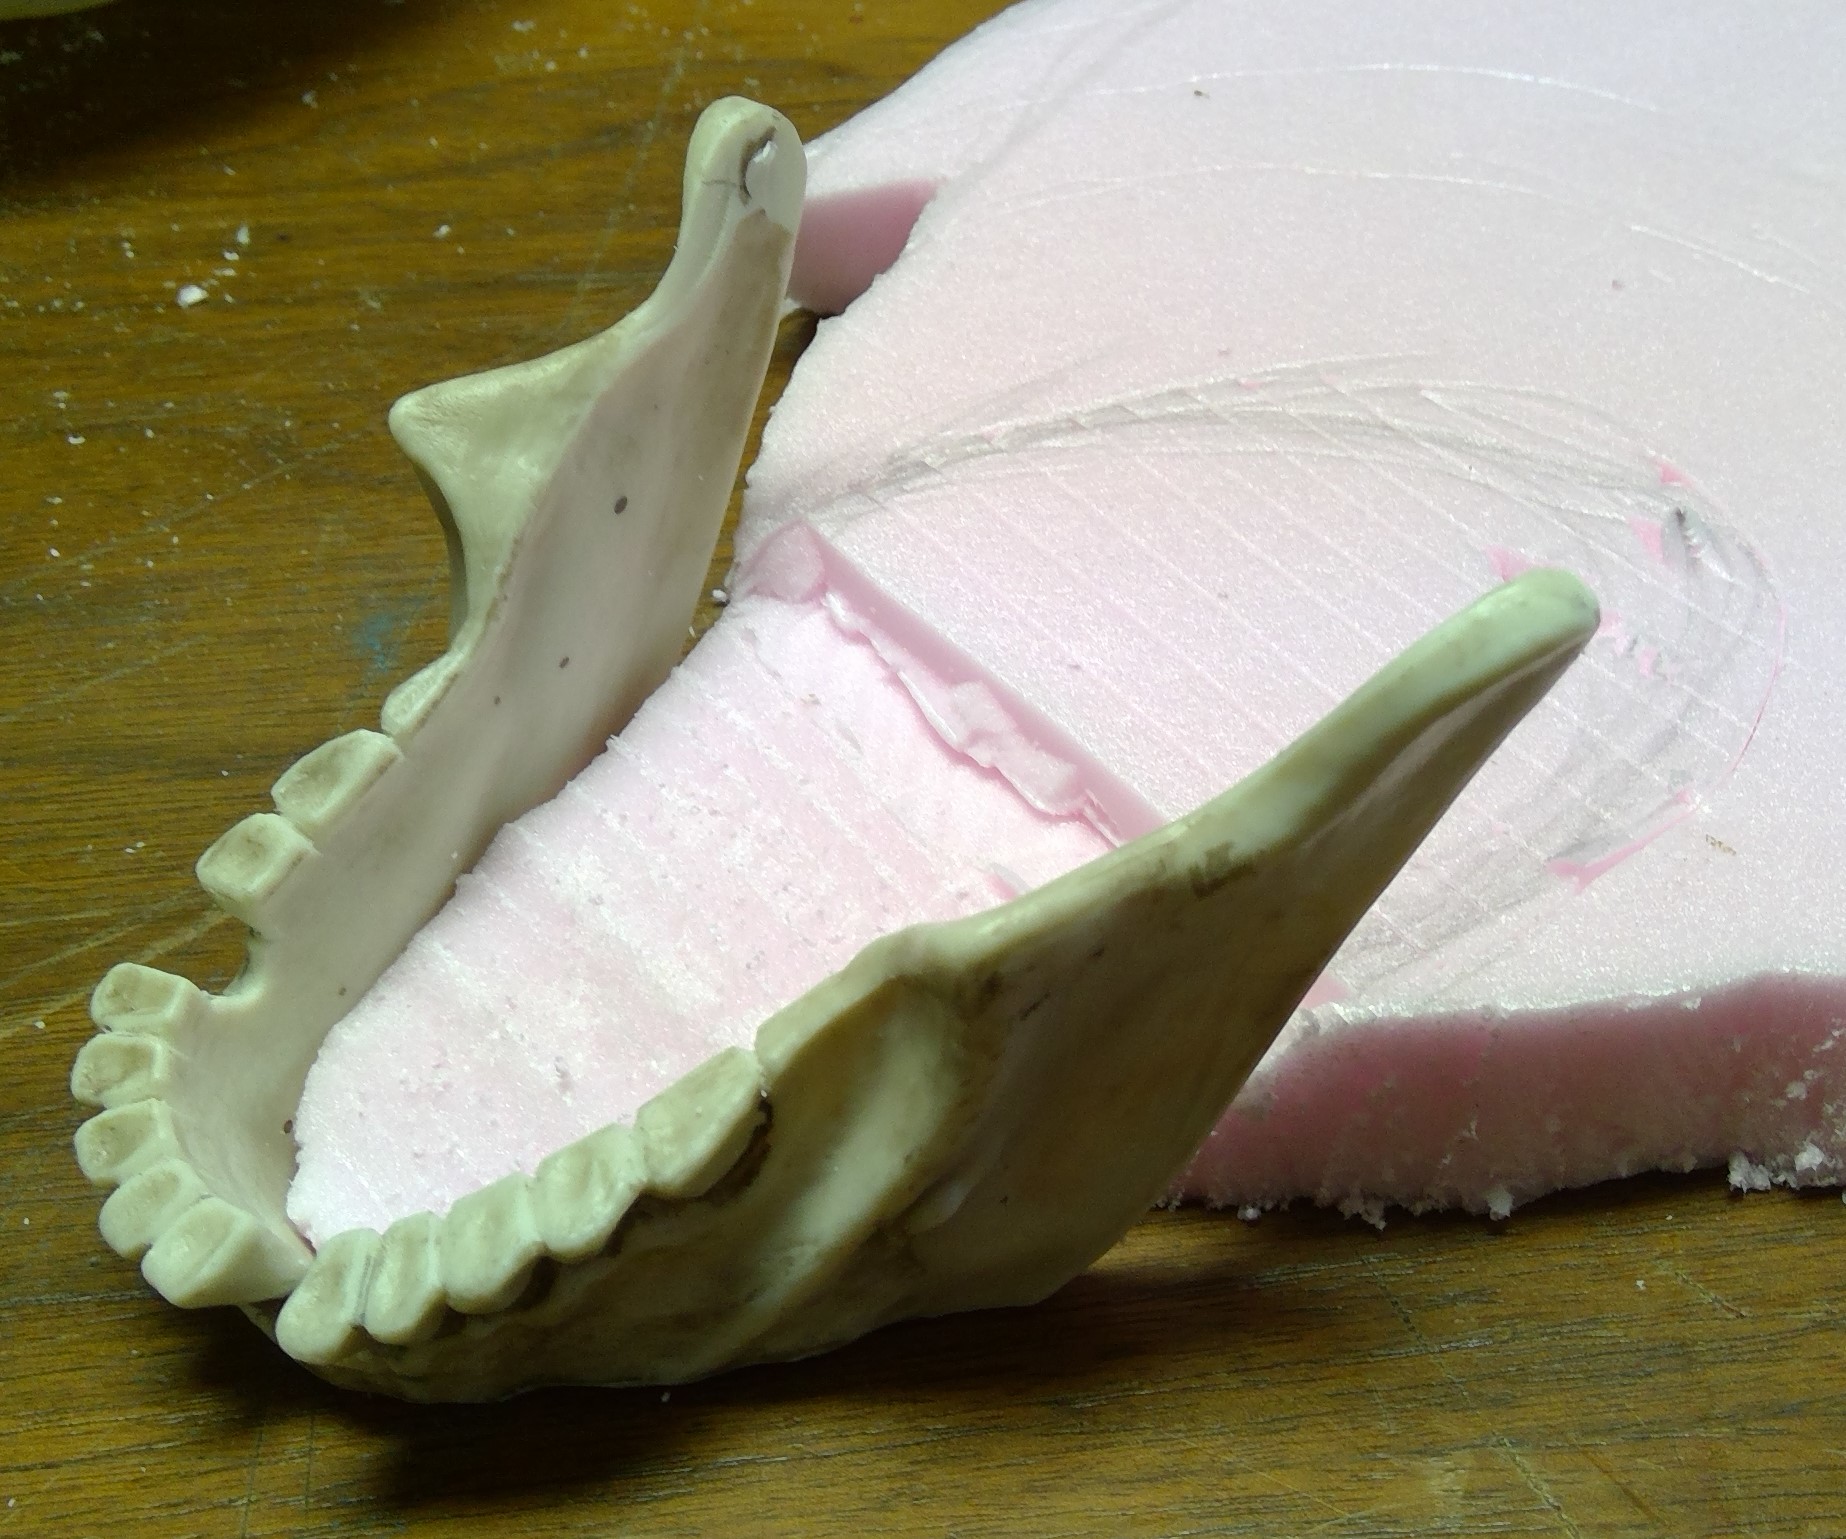 Nice fit.
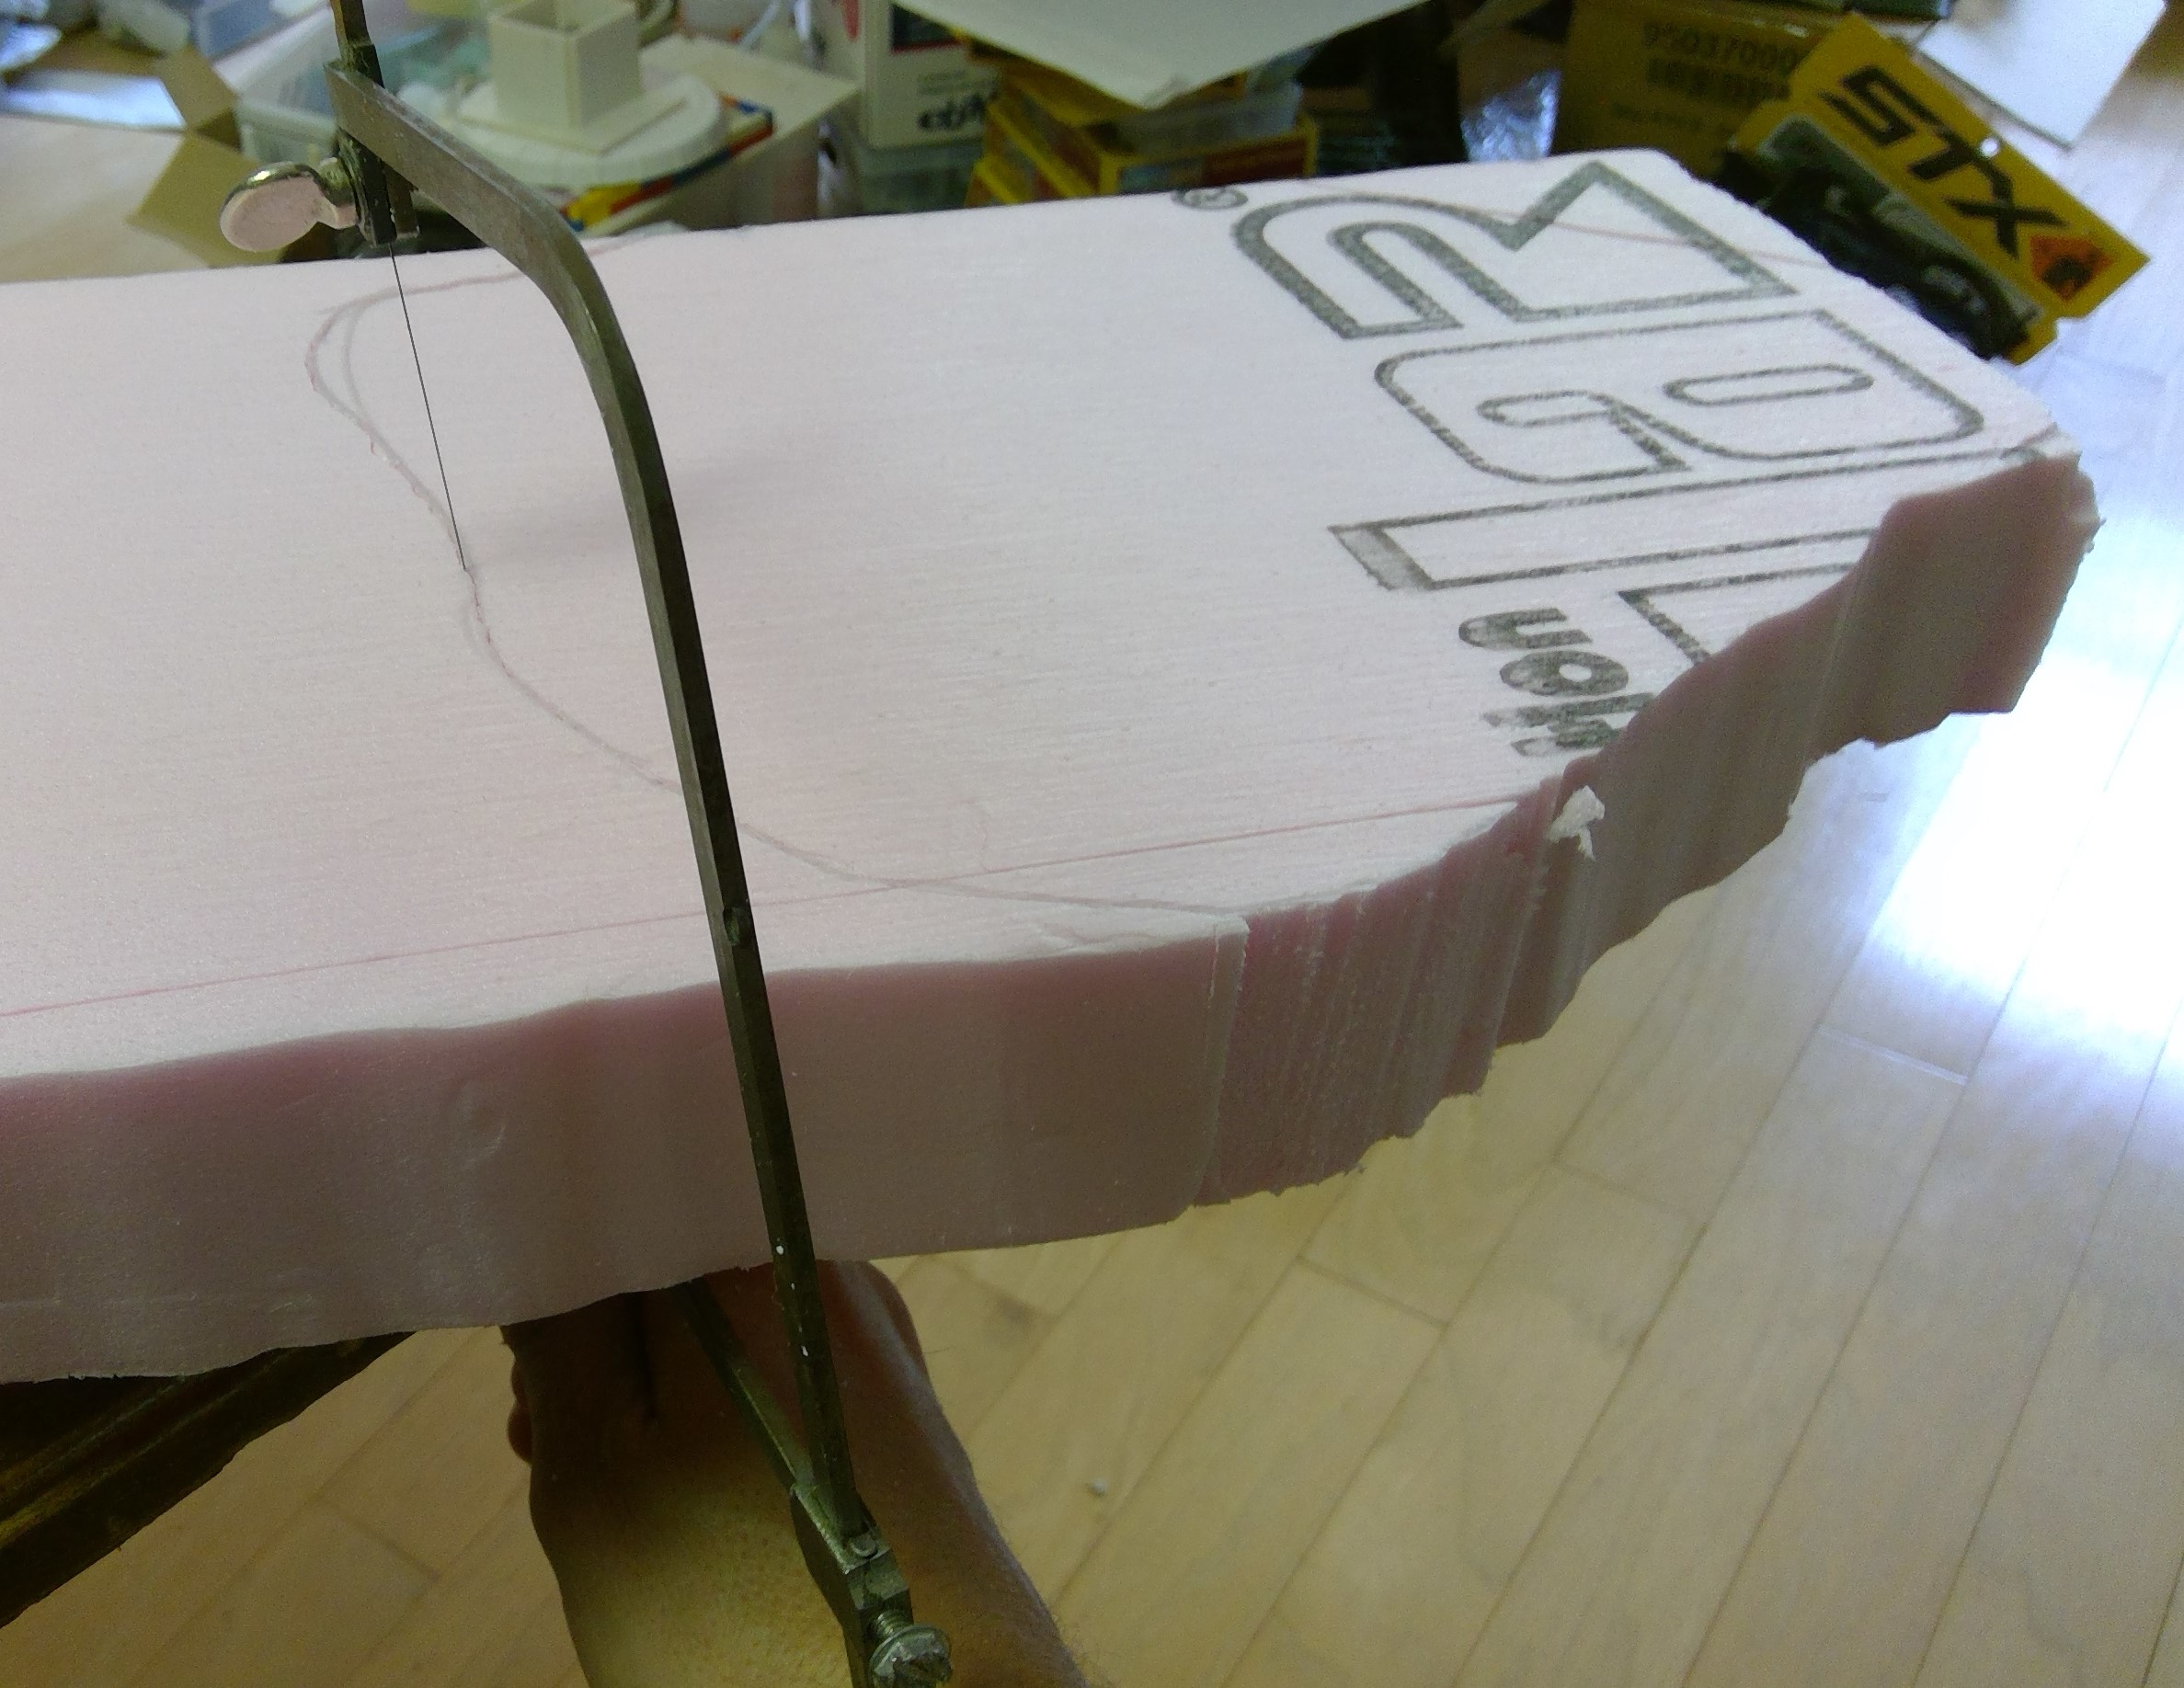 Jewelers saw in action.
Layering it up
I then begin roughing out the next two layers and forming the cave opening.
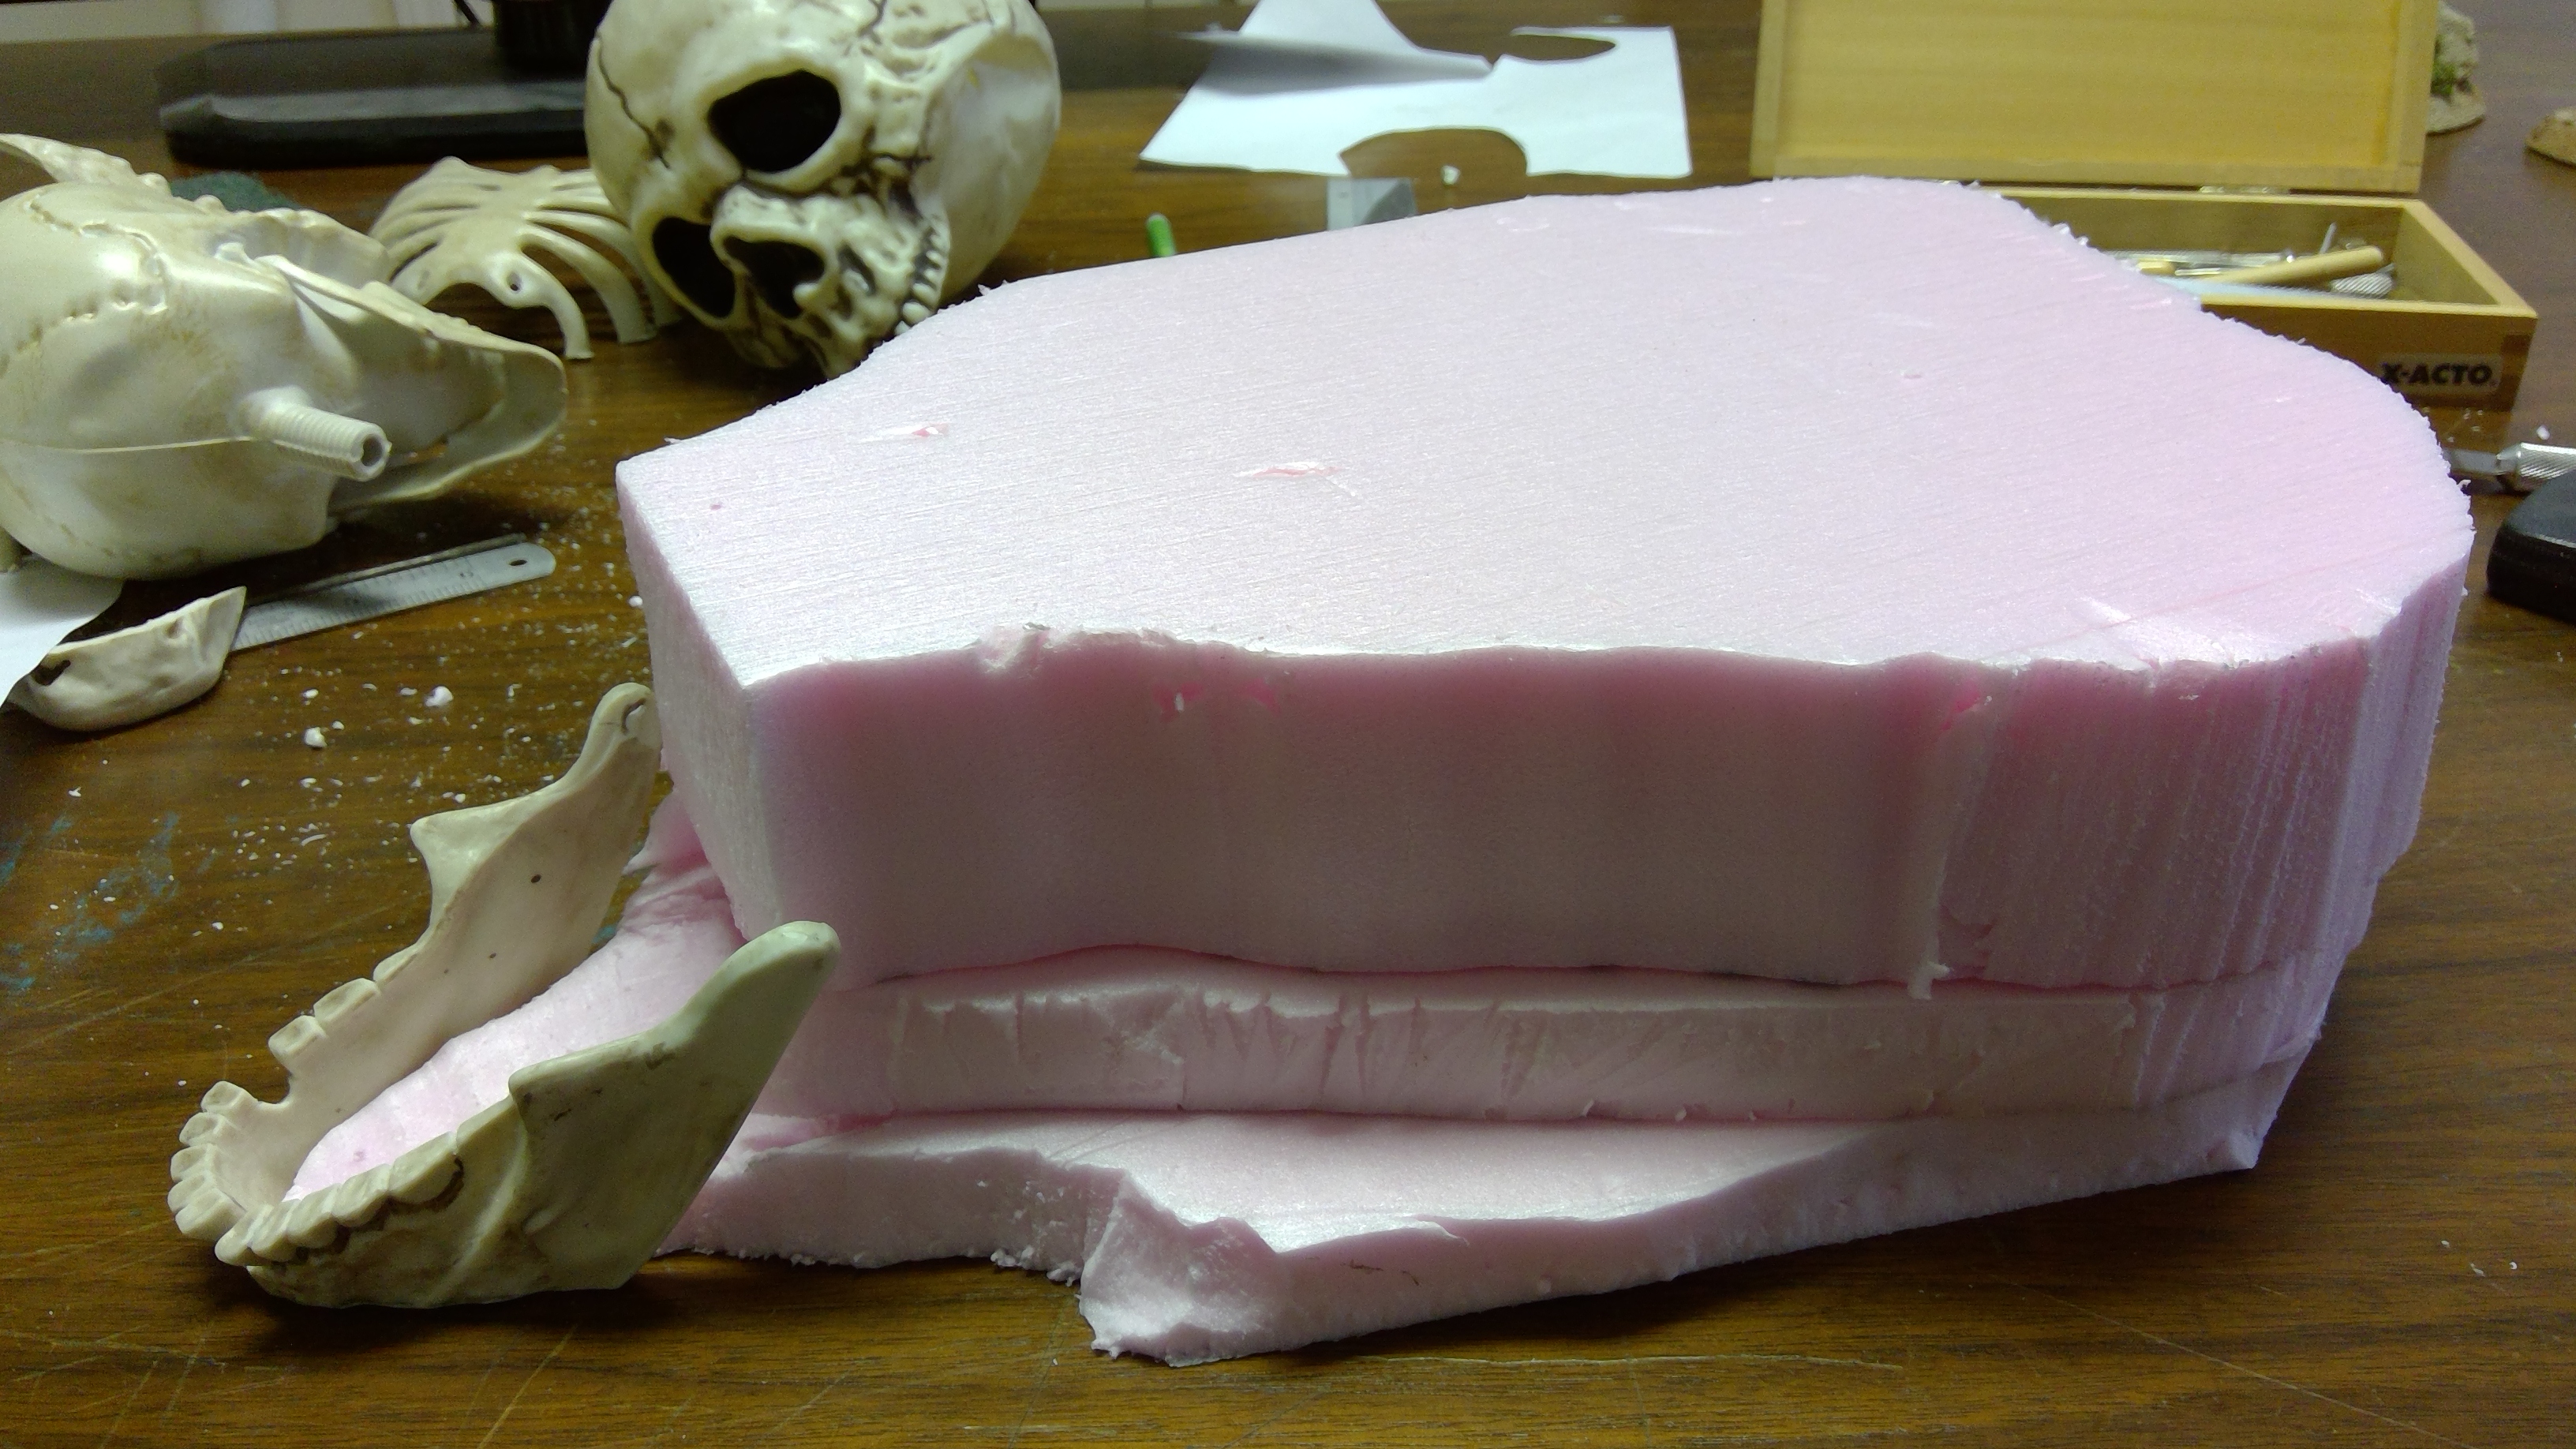
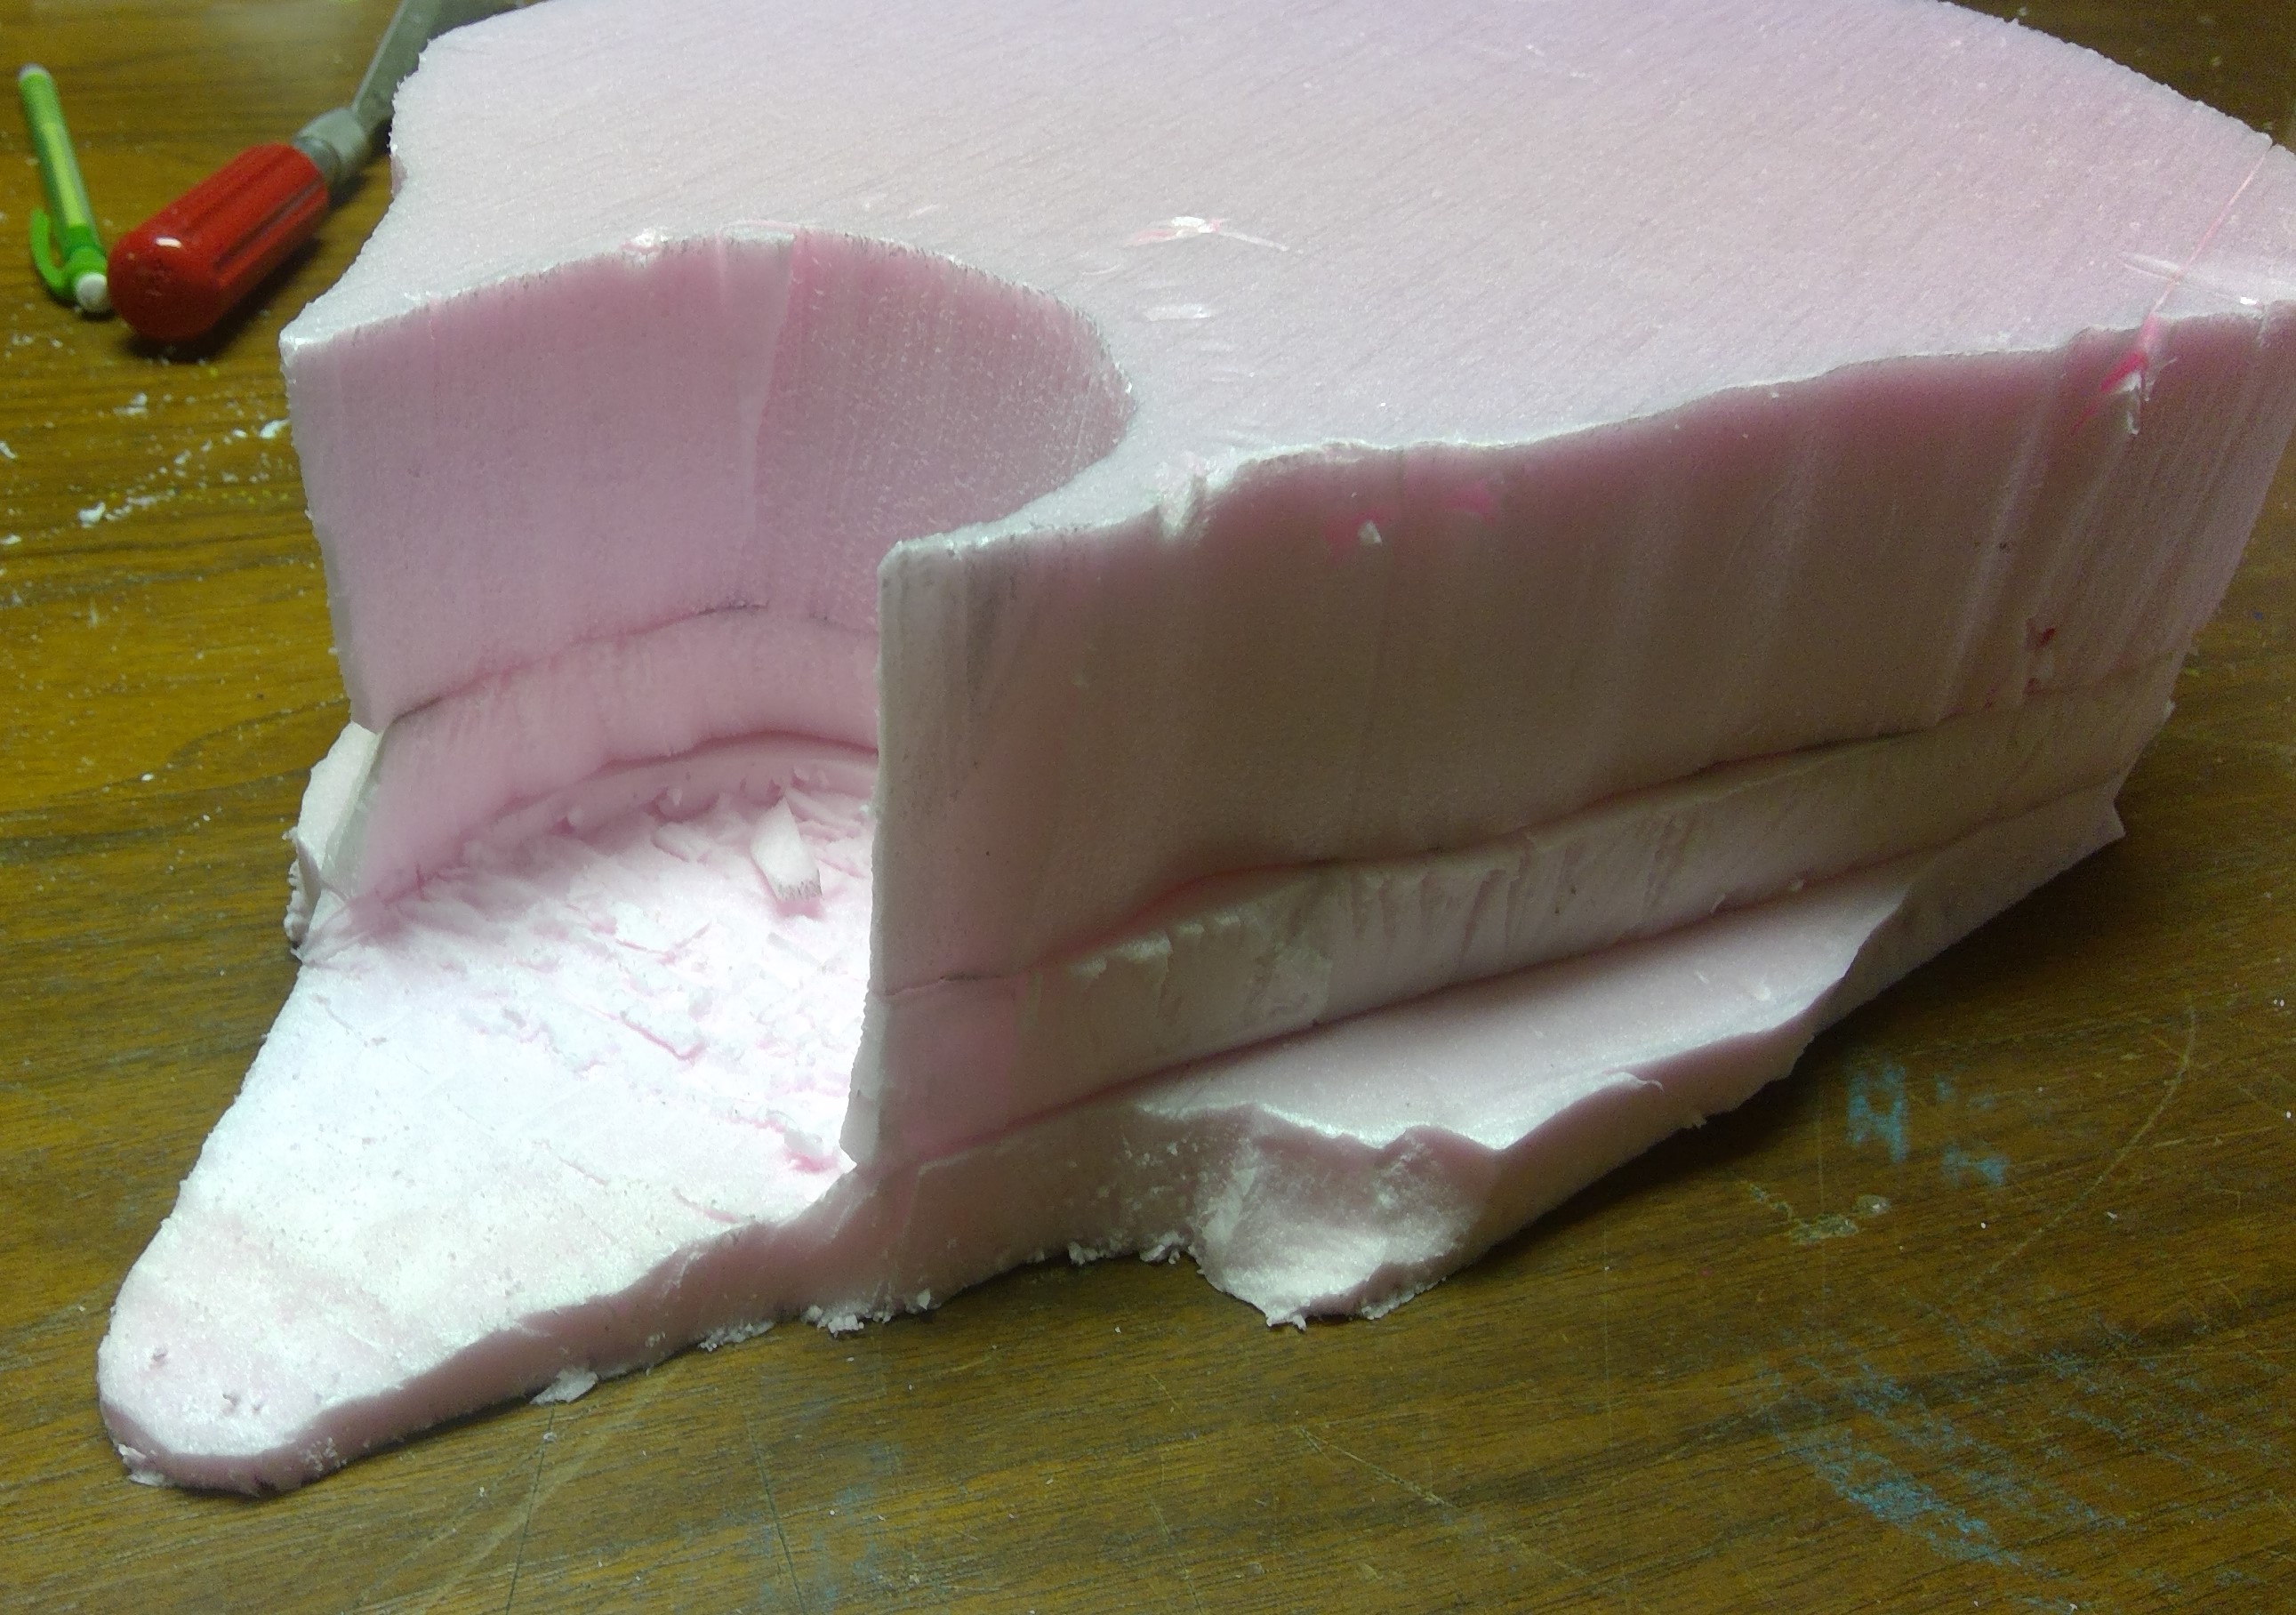
In the next layer I cut a spot, with the hobby knife, for the skull to sit and adjusted it for a height that was pleasing to the eye and would allow the top of the skull to be relatively flush with the top of the mesa. I also cut a piece to help fill in the large gap behind the top of the skull. The other gaps will eventually be filled in with the Celluclay.
Once that was done I carved in the top of the cave just below the skull.
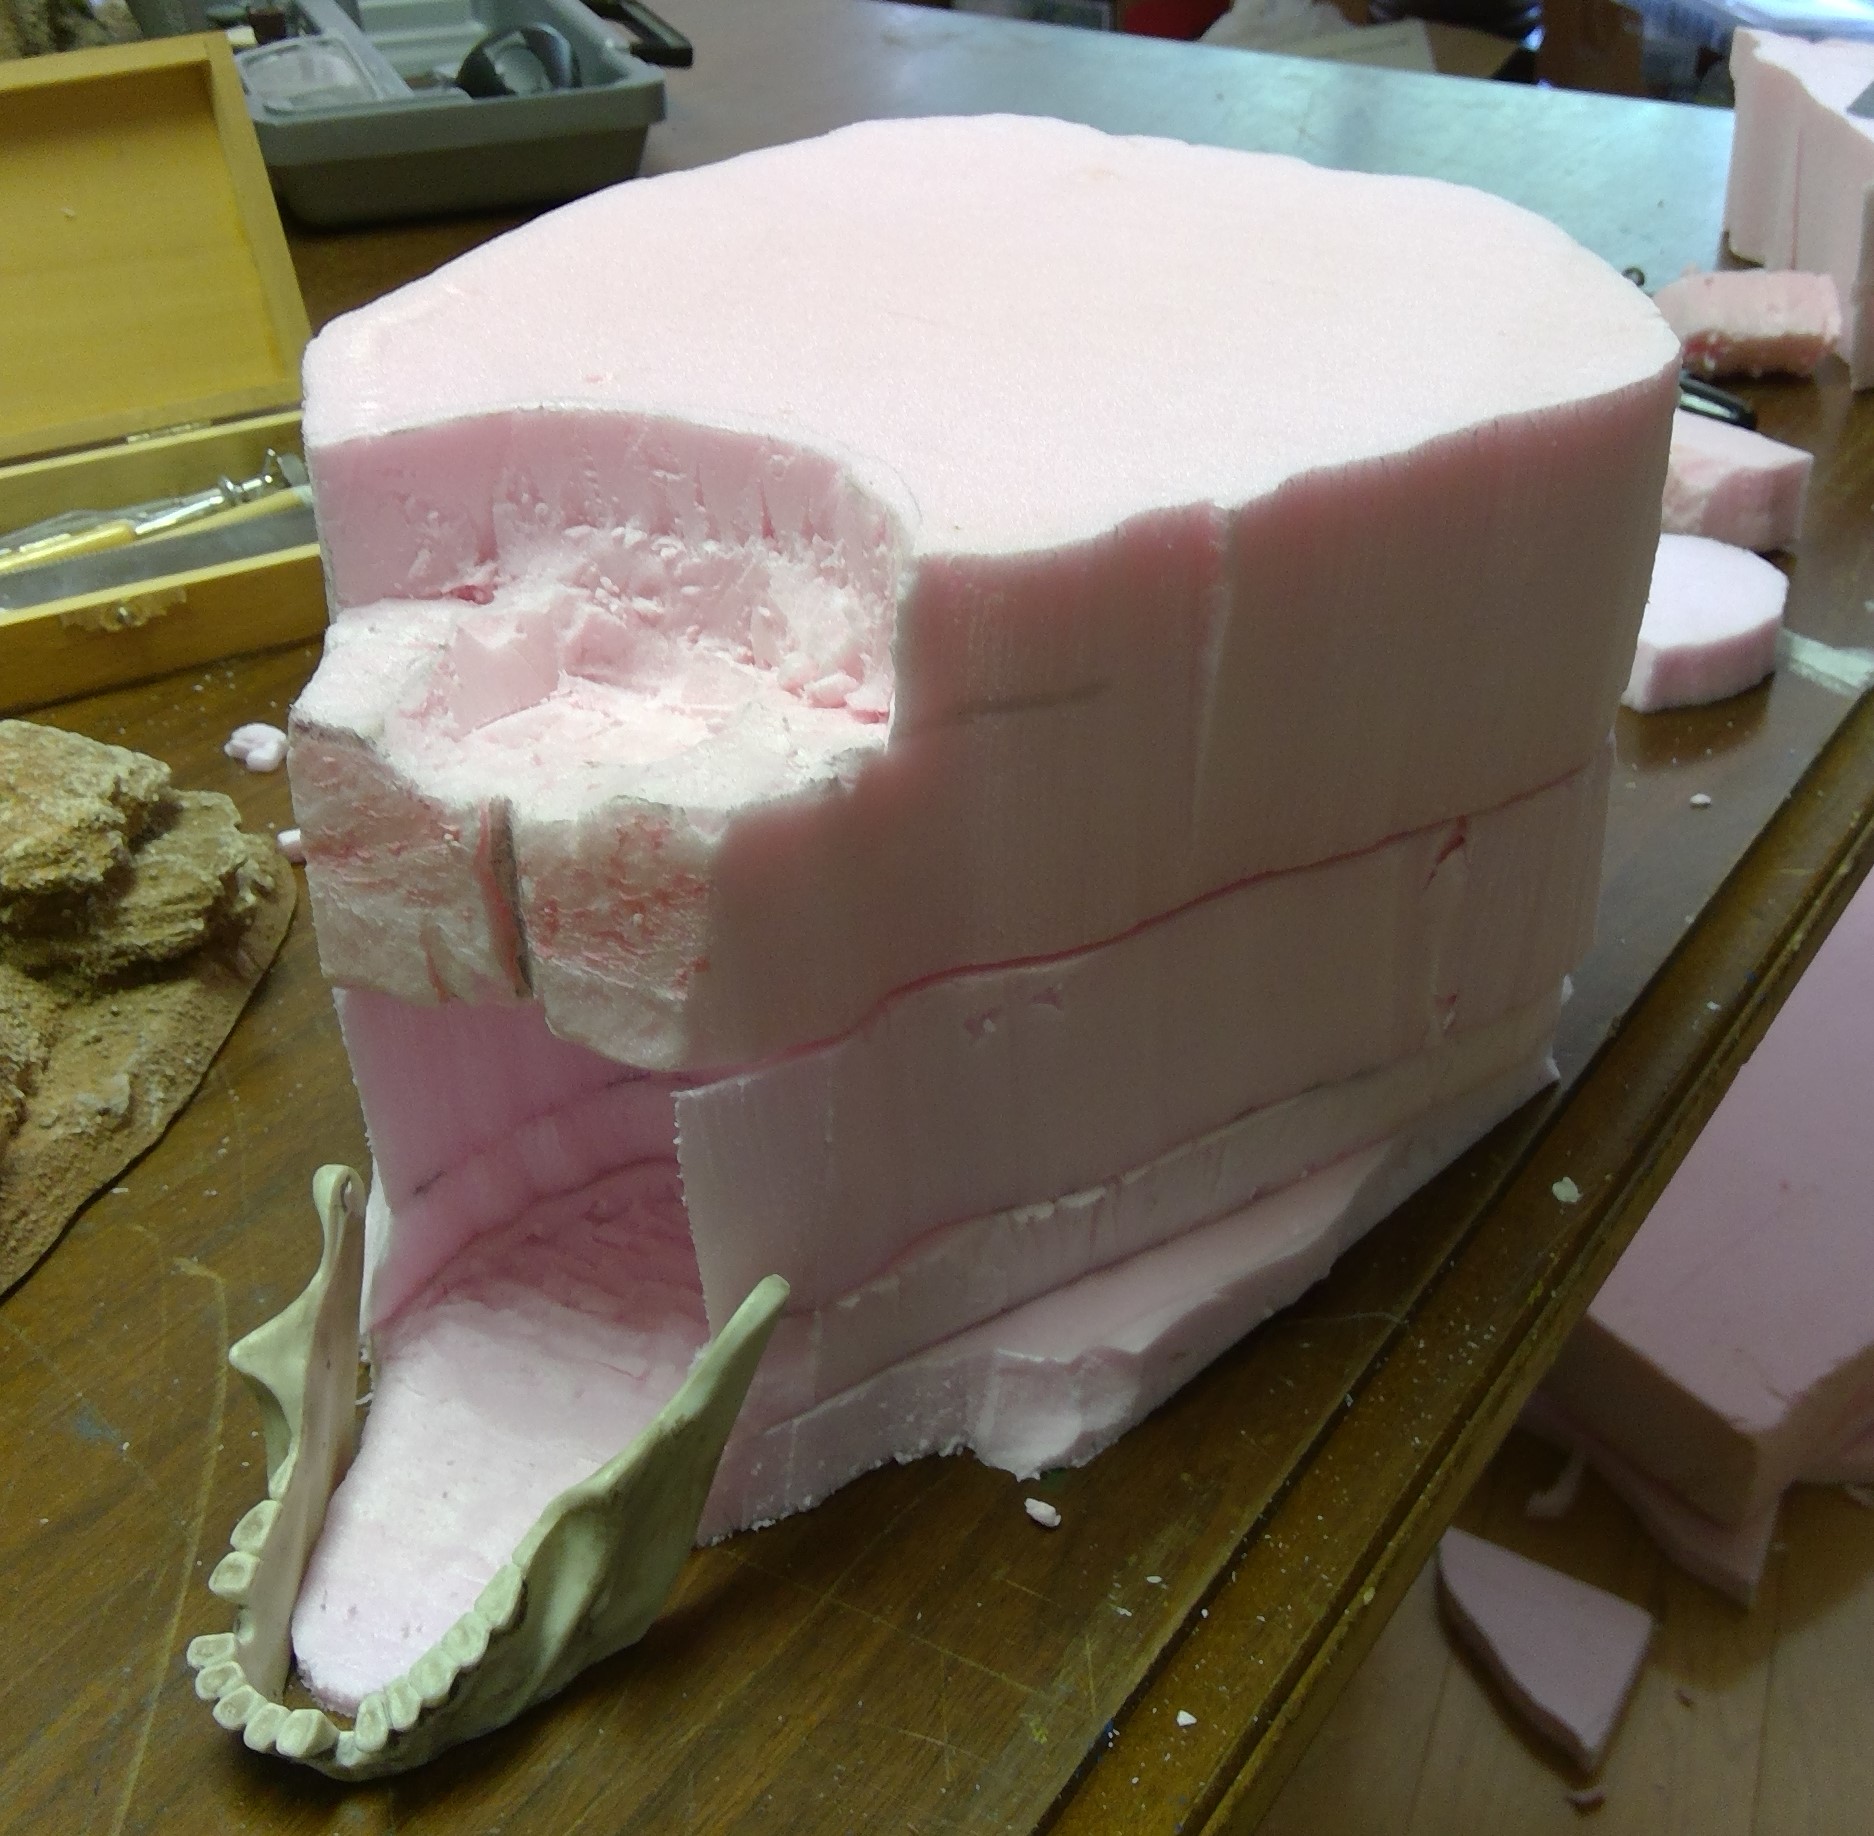

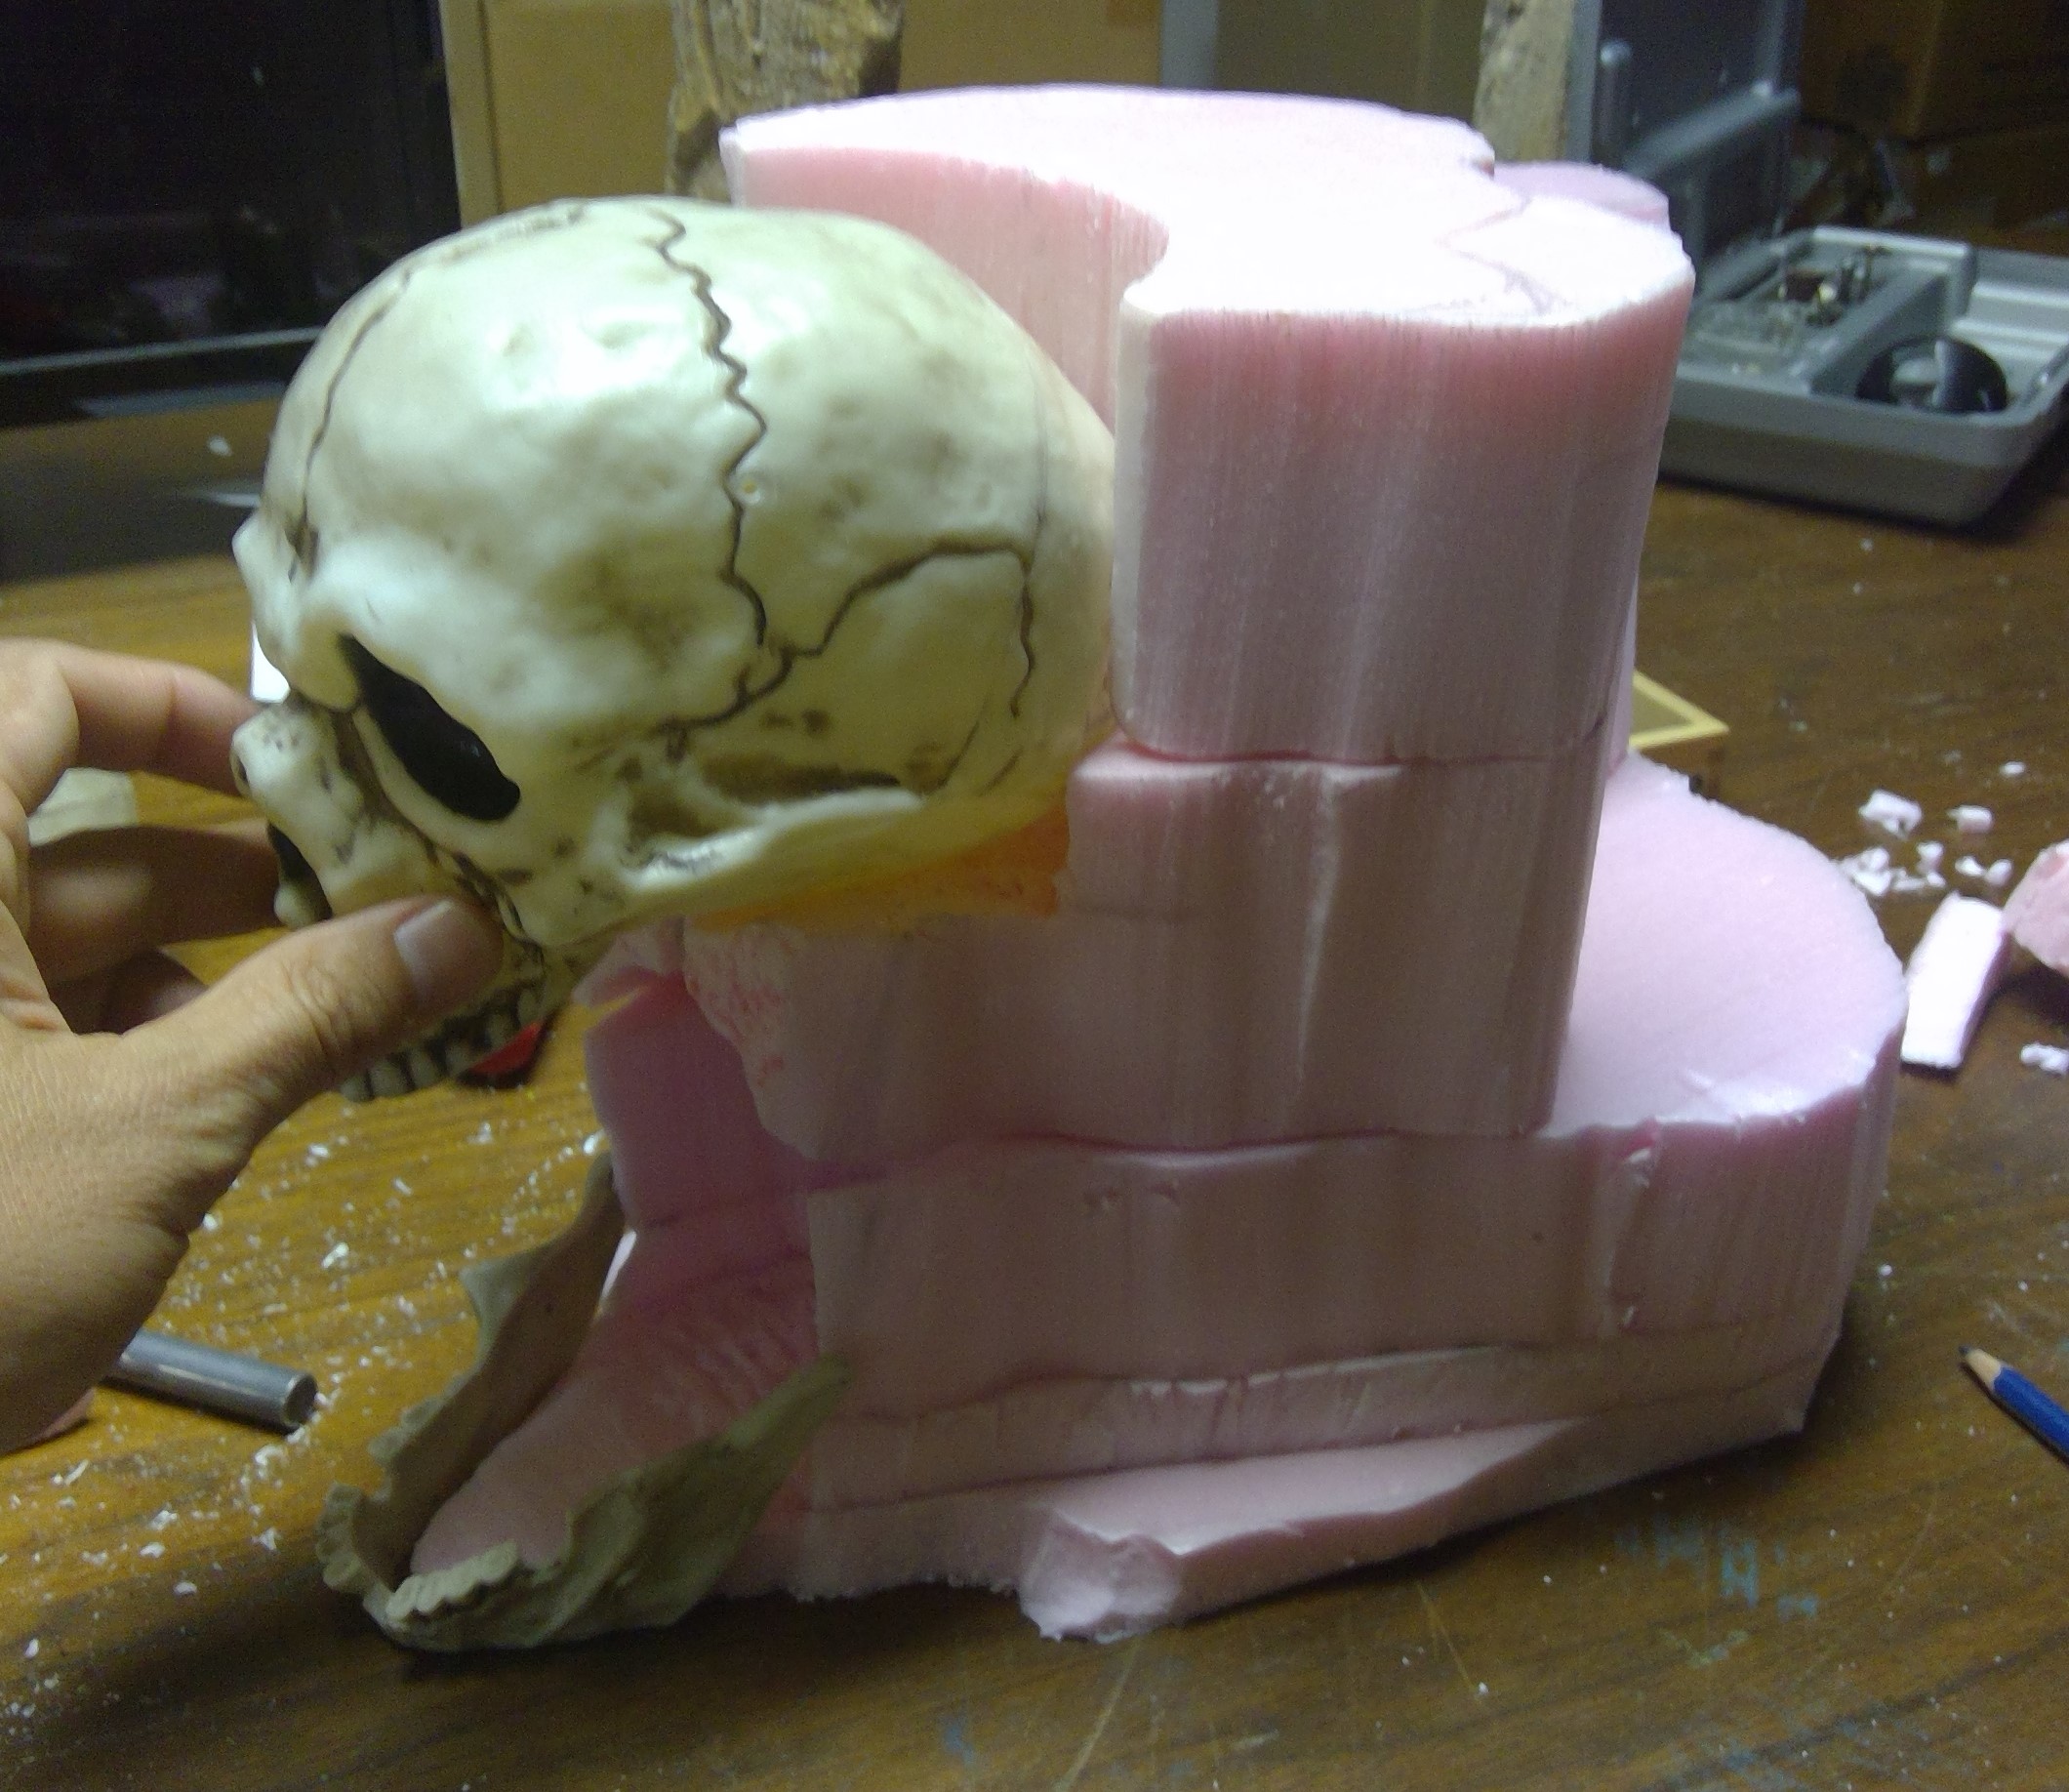
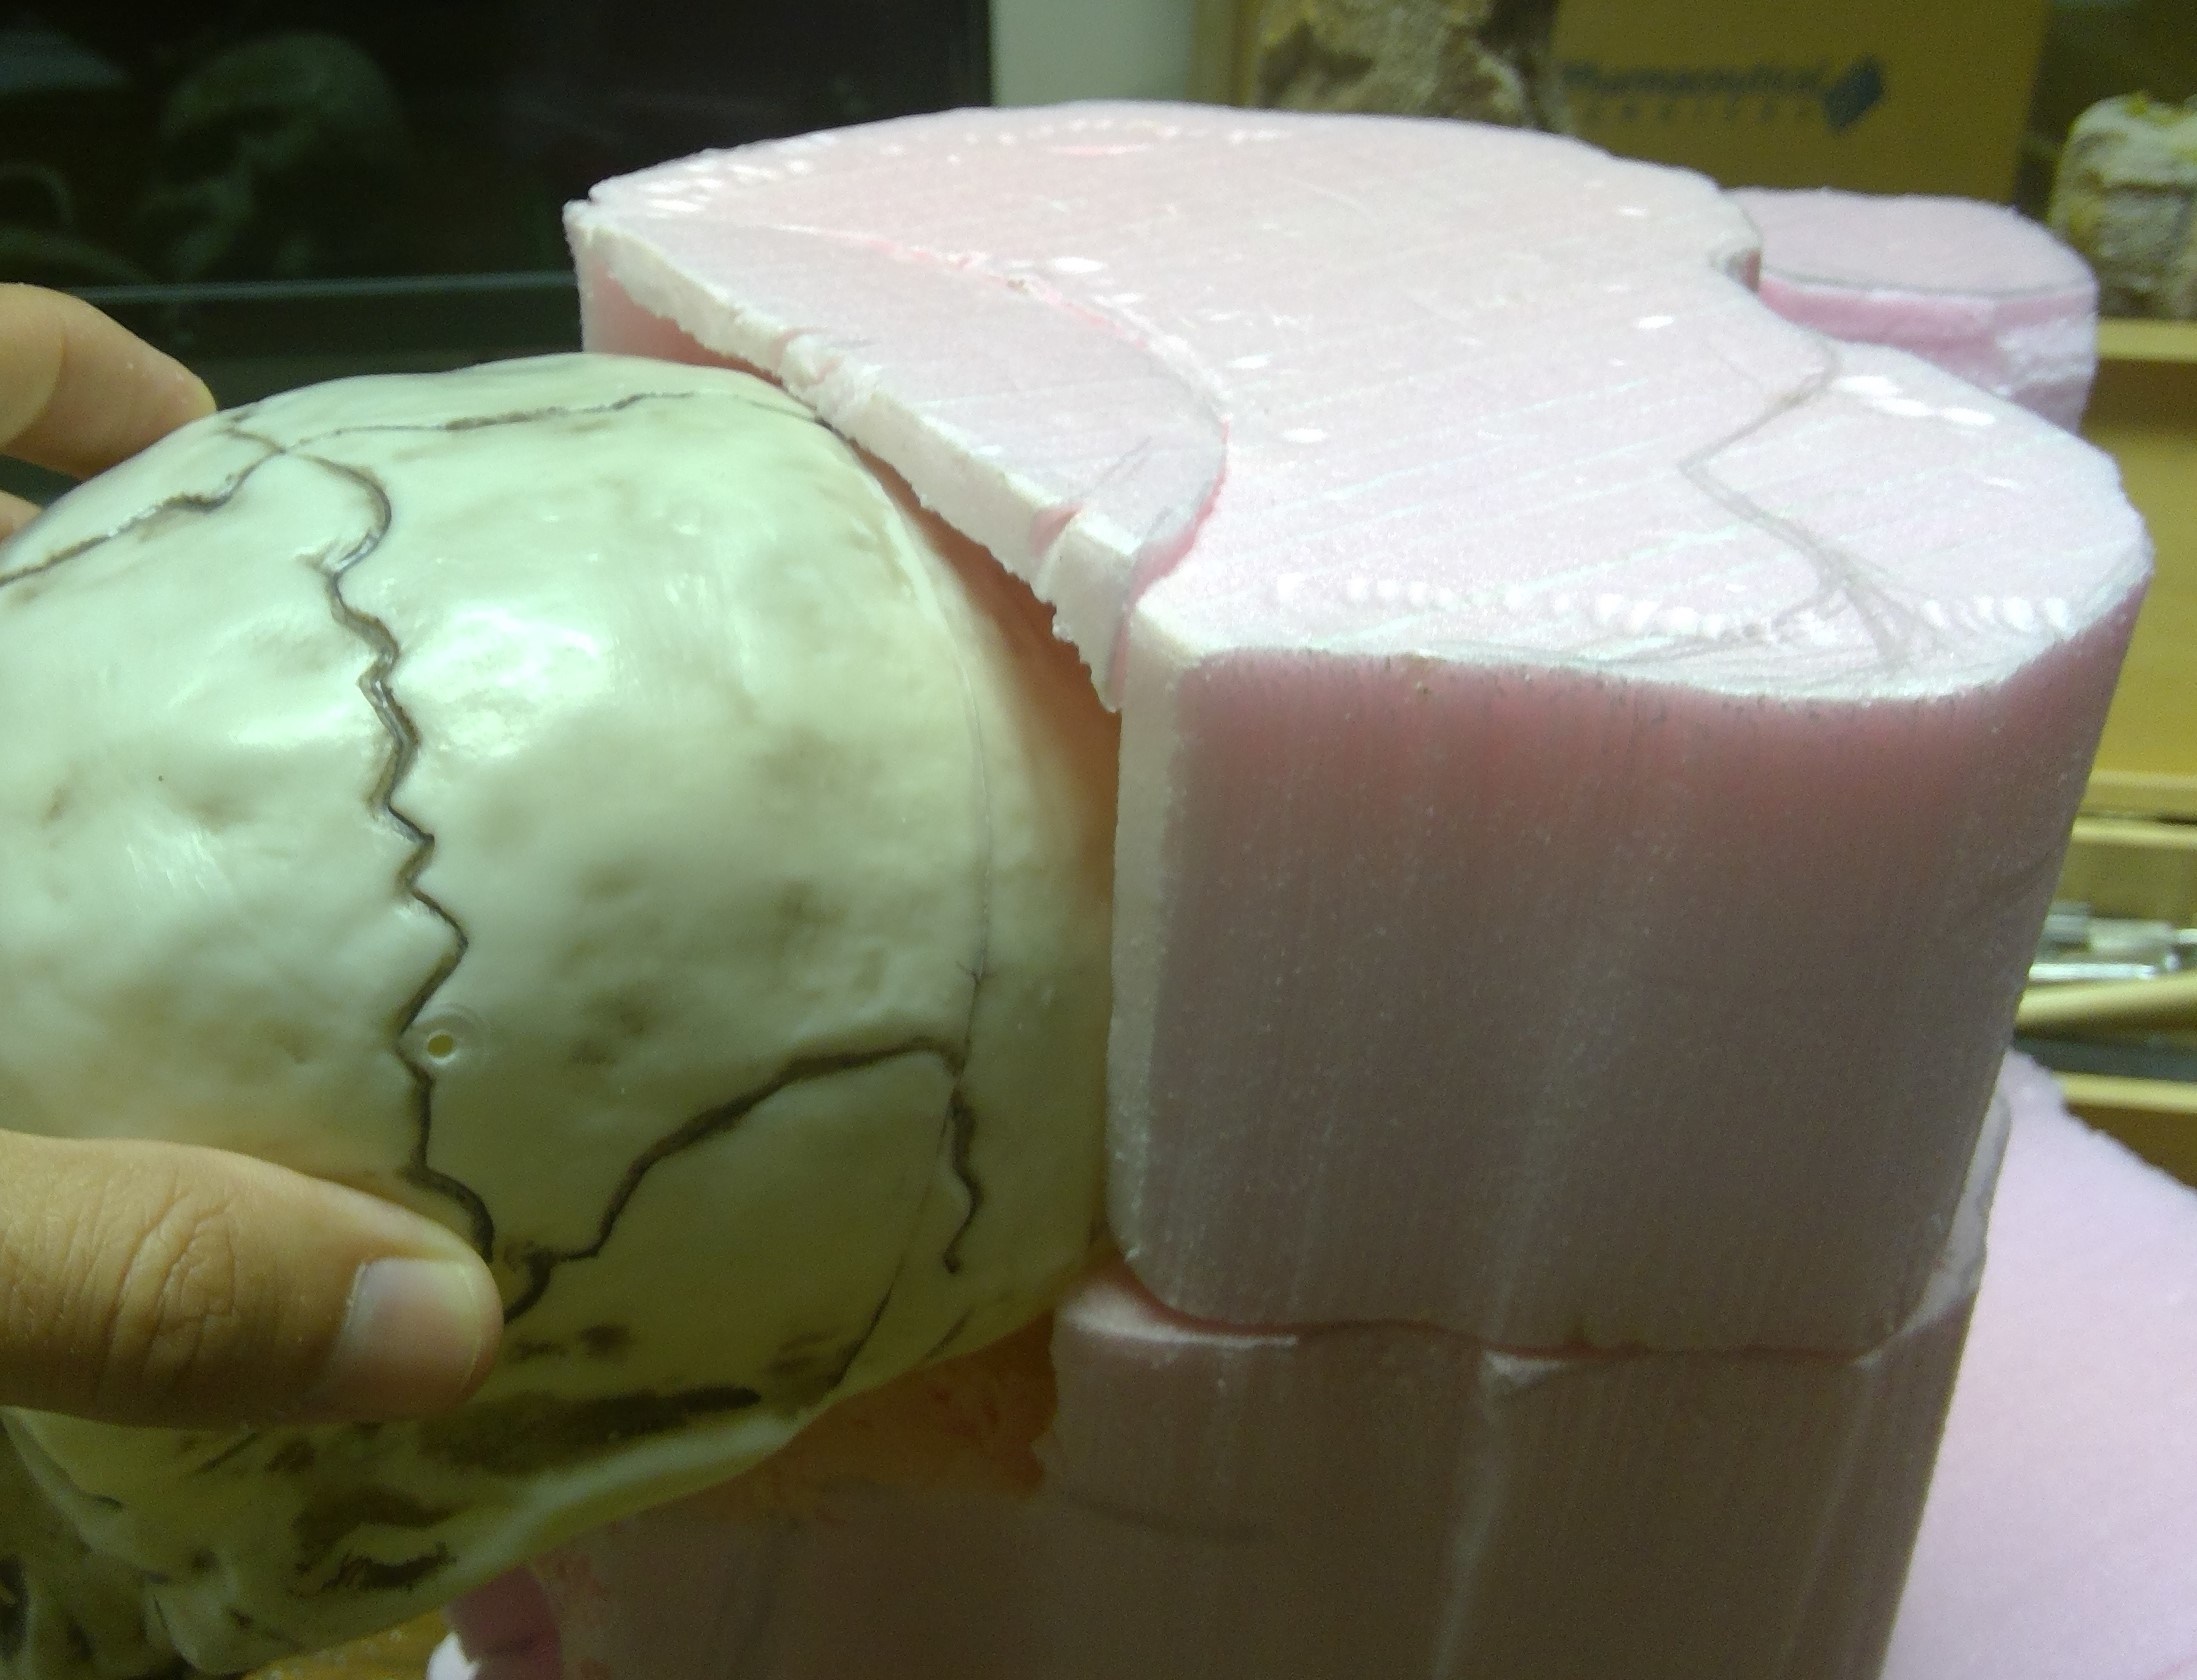
I then focus on roughing in the shape of the back and sides of the mesa.
At this point, it’s important to note that none of the layers have been glued together. This allows me more freedom in forming the overall shape. Once I have the look I want I will start gluing the layers and skull in place so that I can move on to more precise carving.
It is also the time to decide if I want to expand the cave into the mesa and make the top removable to allow for gameplay inside the cave itself, like a couple of the smaller terrain pieces I have, or just use a map or separate, much larger, cave system board for taking the action underground.
The primary drawback to making the cave playable is the unsightly seam created when the roof is made to be removable.

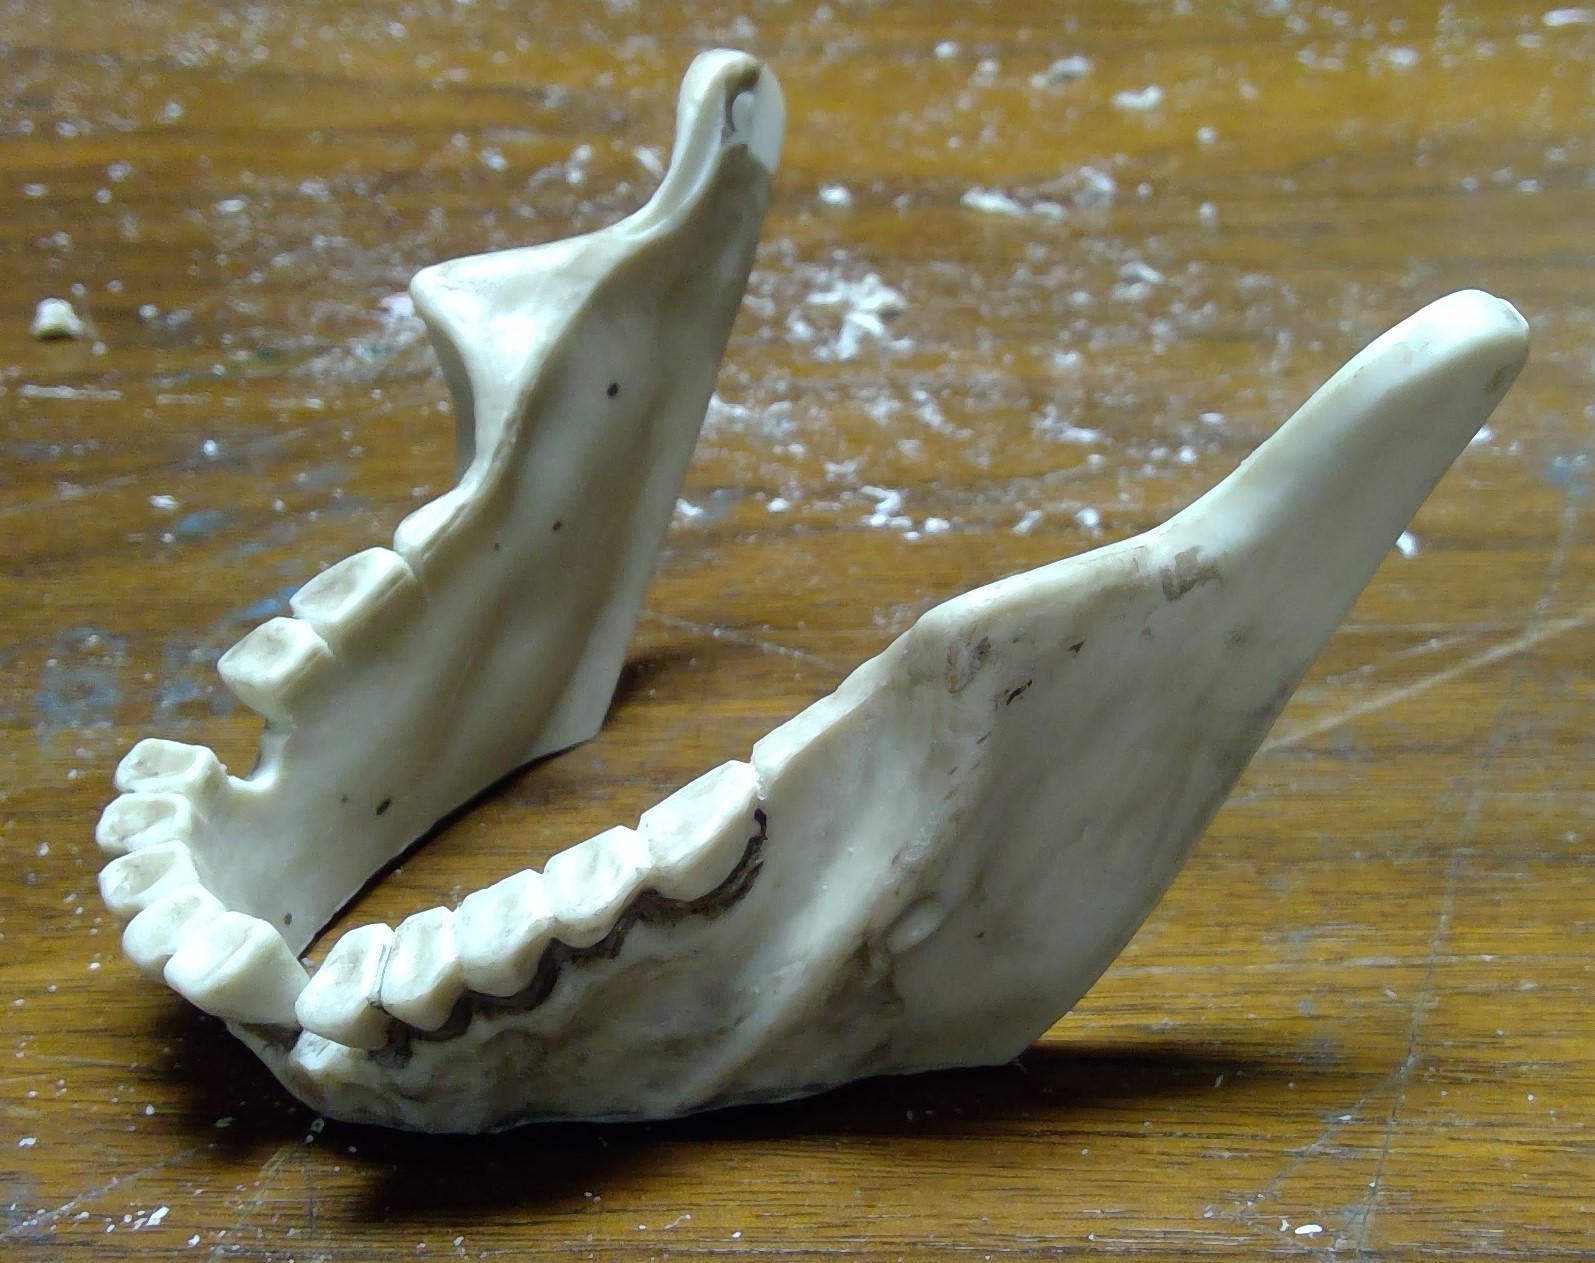
For those paying close attention, you might have noticed I not only went ahead and removed that tooth in question, but also another from the rear of the mouth. You know…to give it just a bit more of that ragged look.
Once again that was performed with the jewelers saw and cleaned up and shaped with files.
Surgery
Disassembly
I removed the bottom jaw from the large skull, using a a rotary tool and hobby saw.
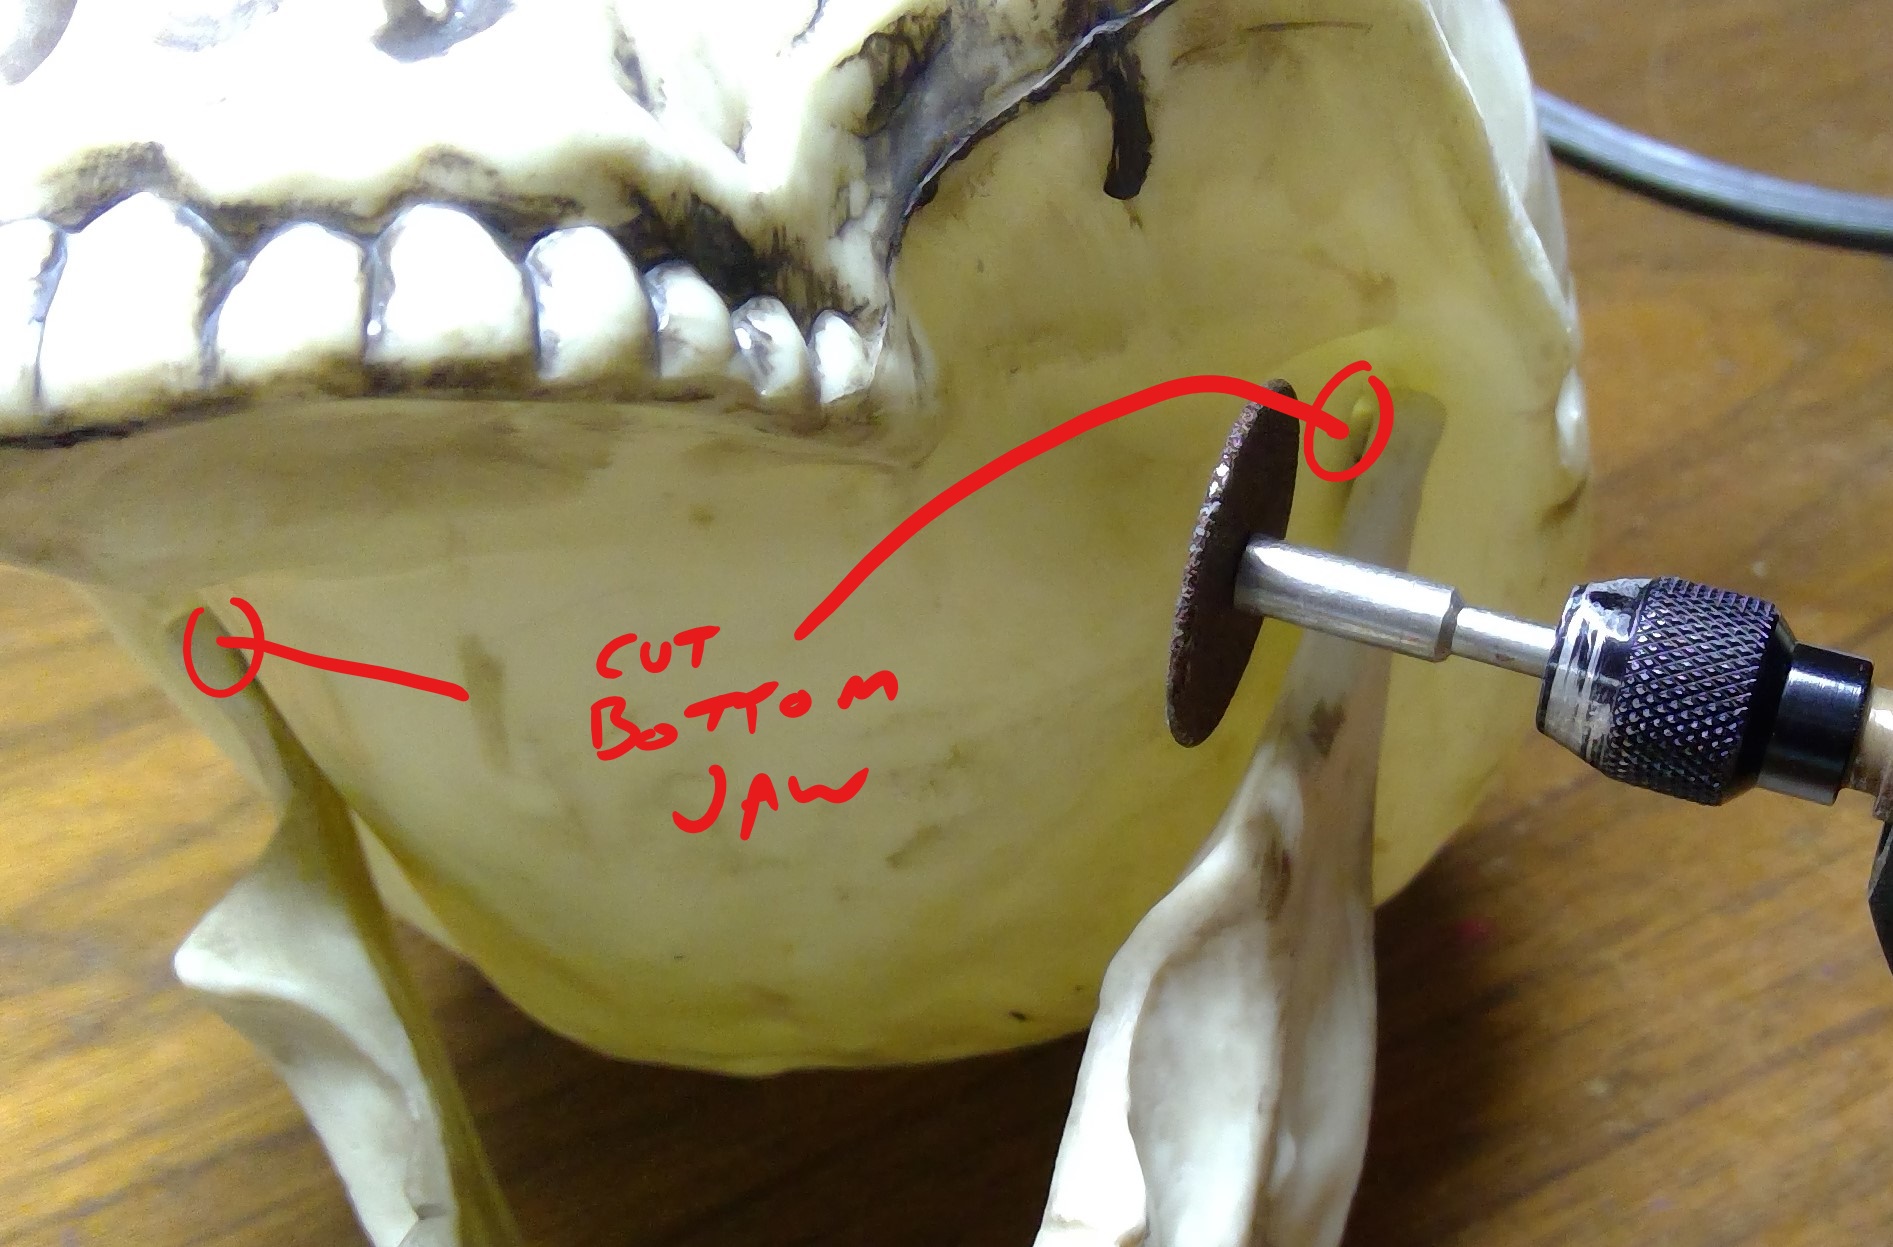
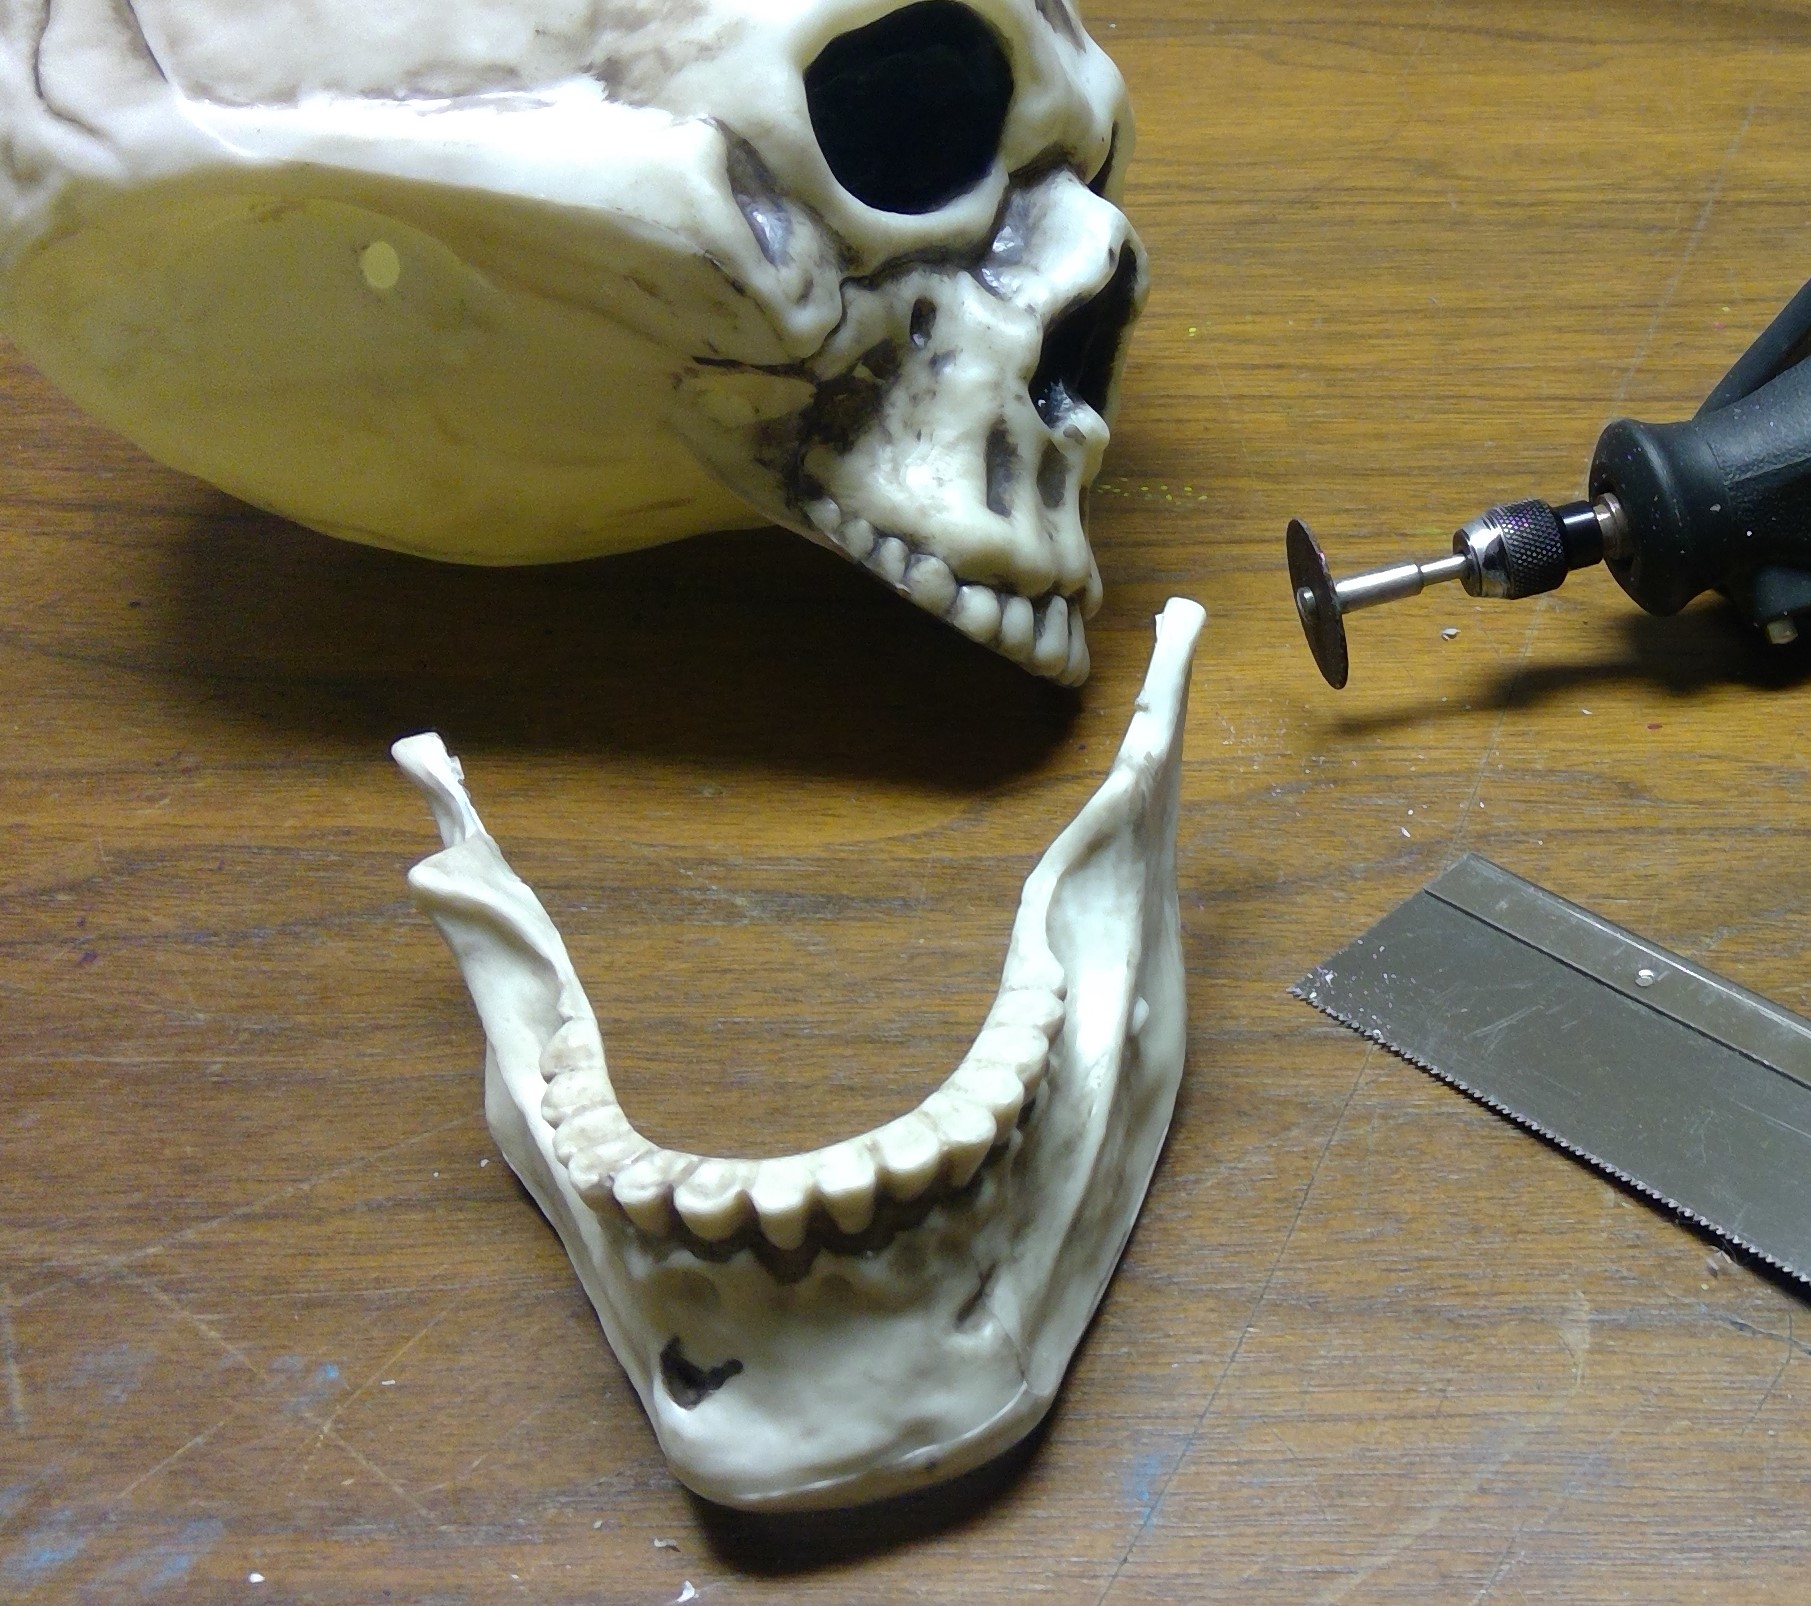
As this skull is for the cave I needed to remove some of the bottom of the jaw so it would sit at the angle I wanted.
I also decided to remove a couple of the teeth to give a more ragged look. As this required a much more controlled cut, I used a jewelers saw and cleaned up the surrounding teeth and resulting cavity with a hobby knife and fine files.


More Dentistry?
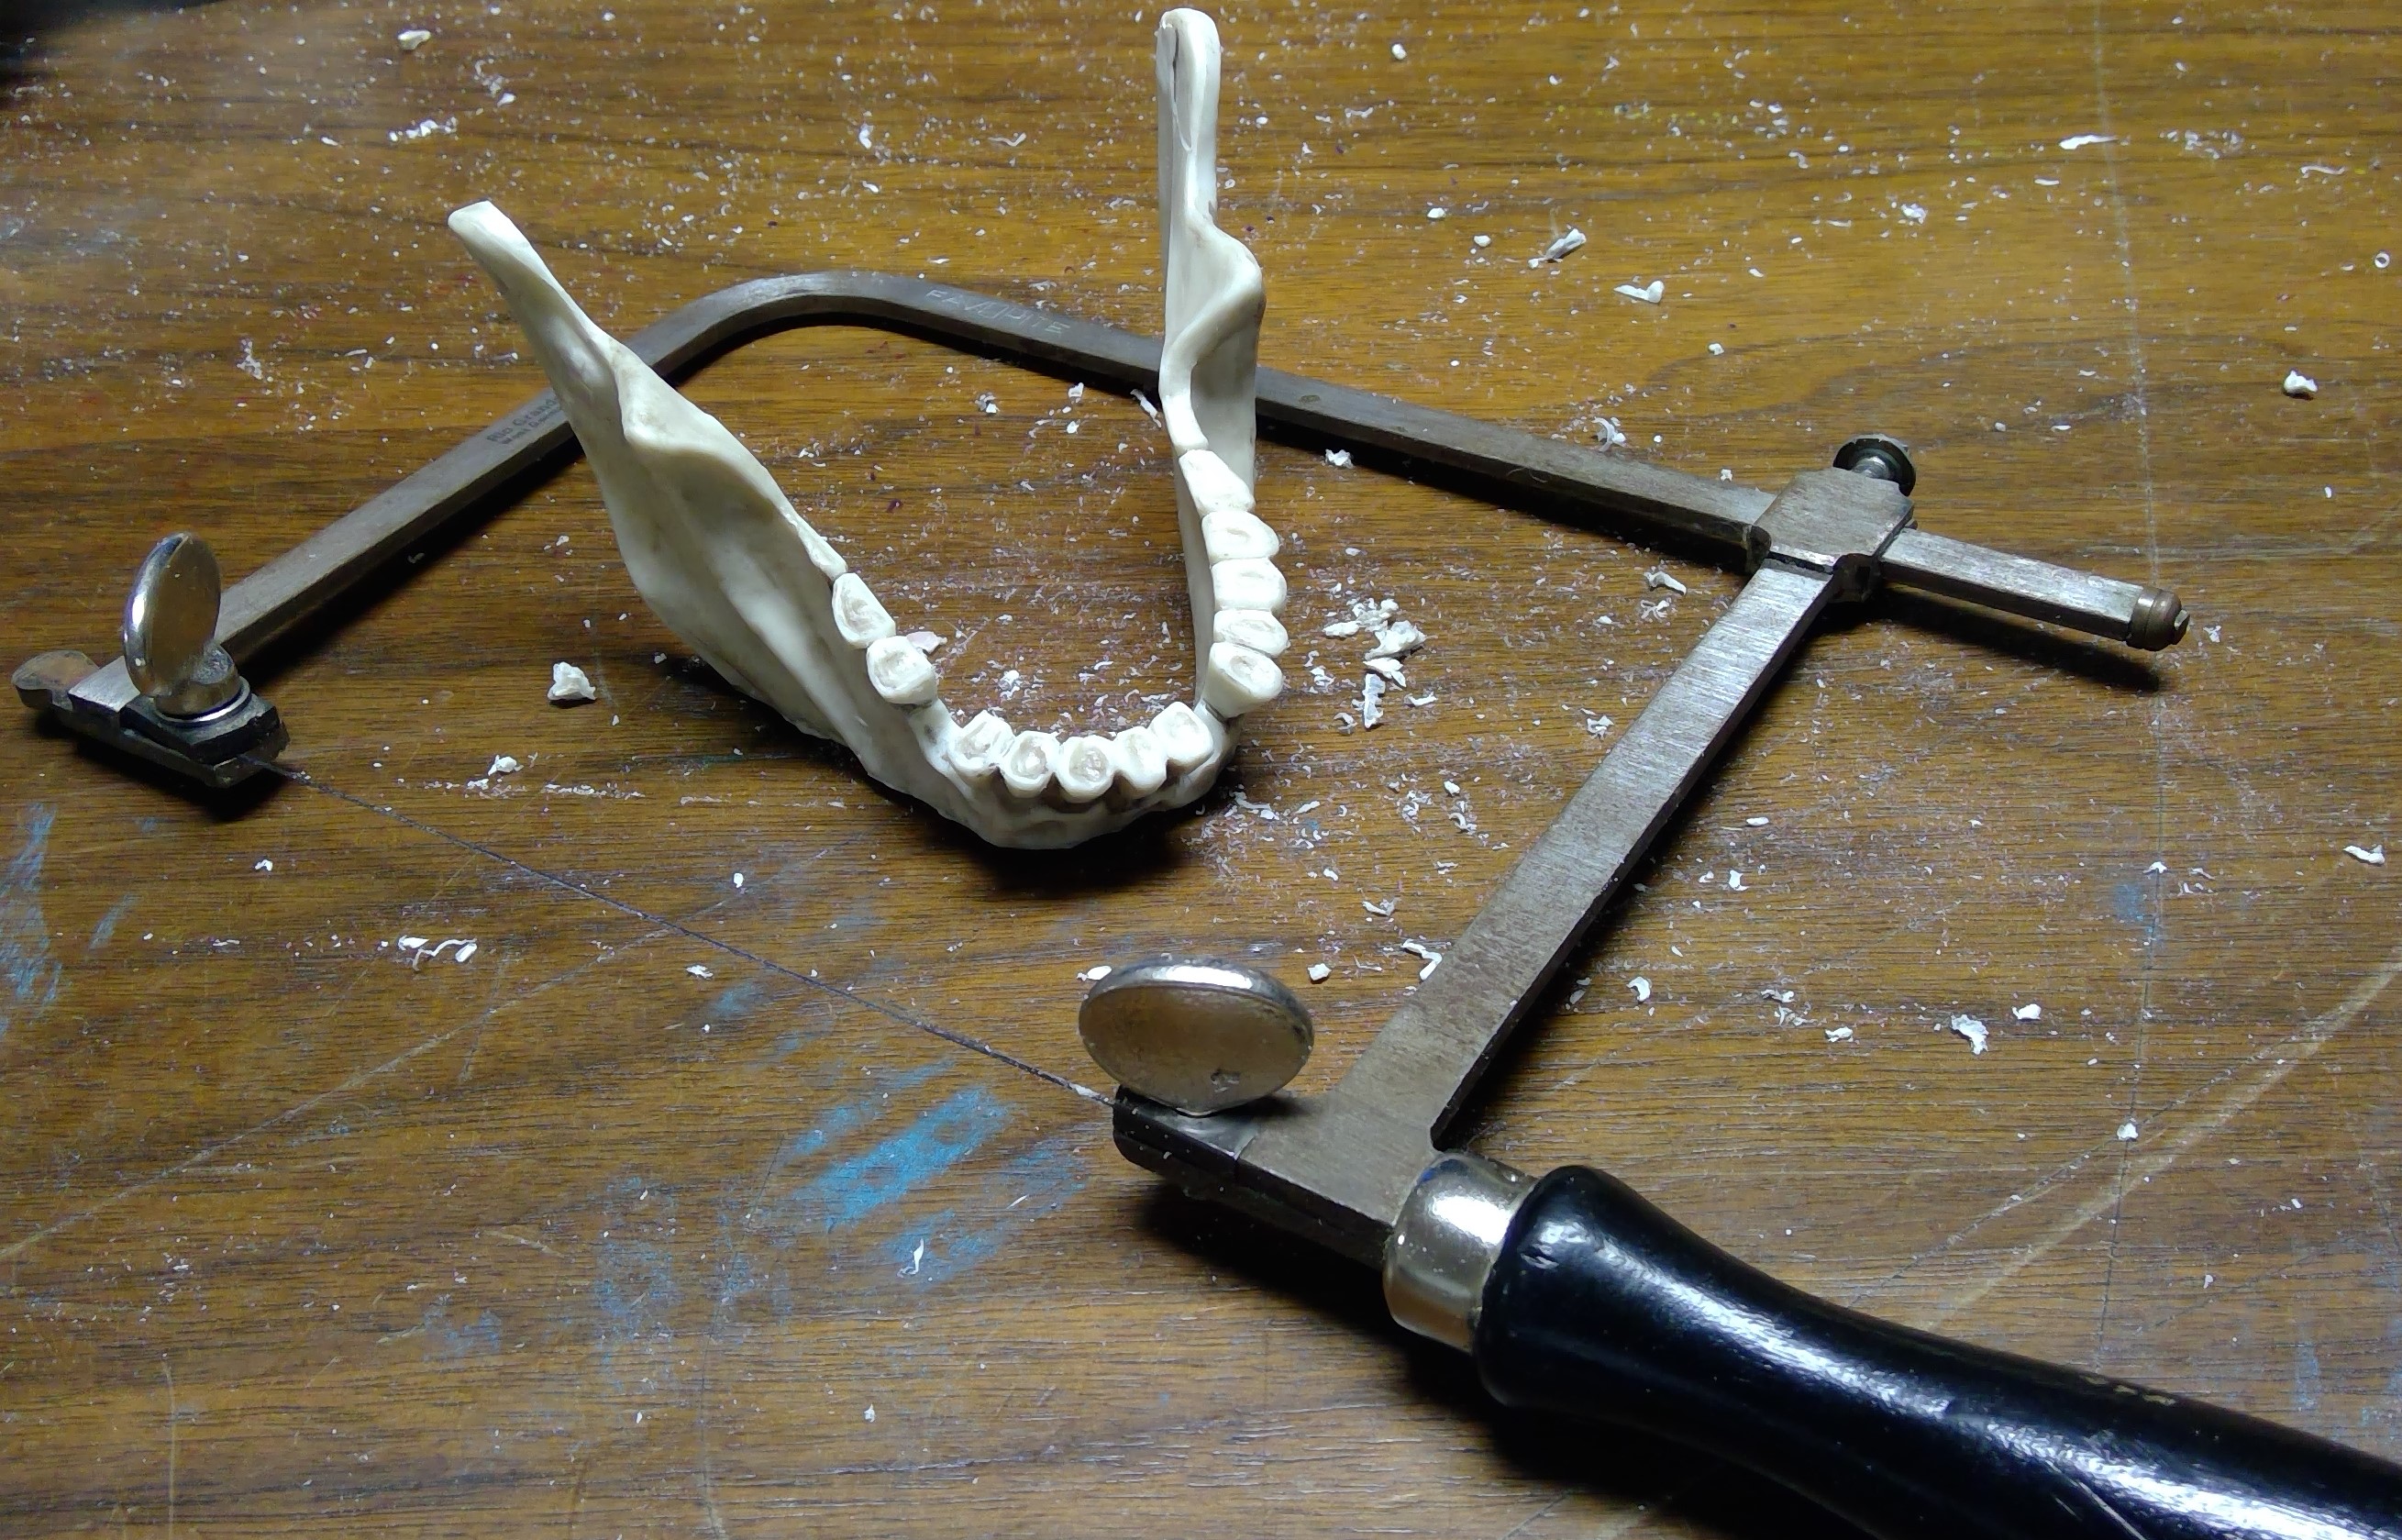
I’m also debating removing one more tooth, to give a bit more access to the cave. What do you guys think?
 Remove another tooth?
Hacking Up More Bones
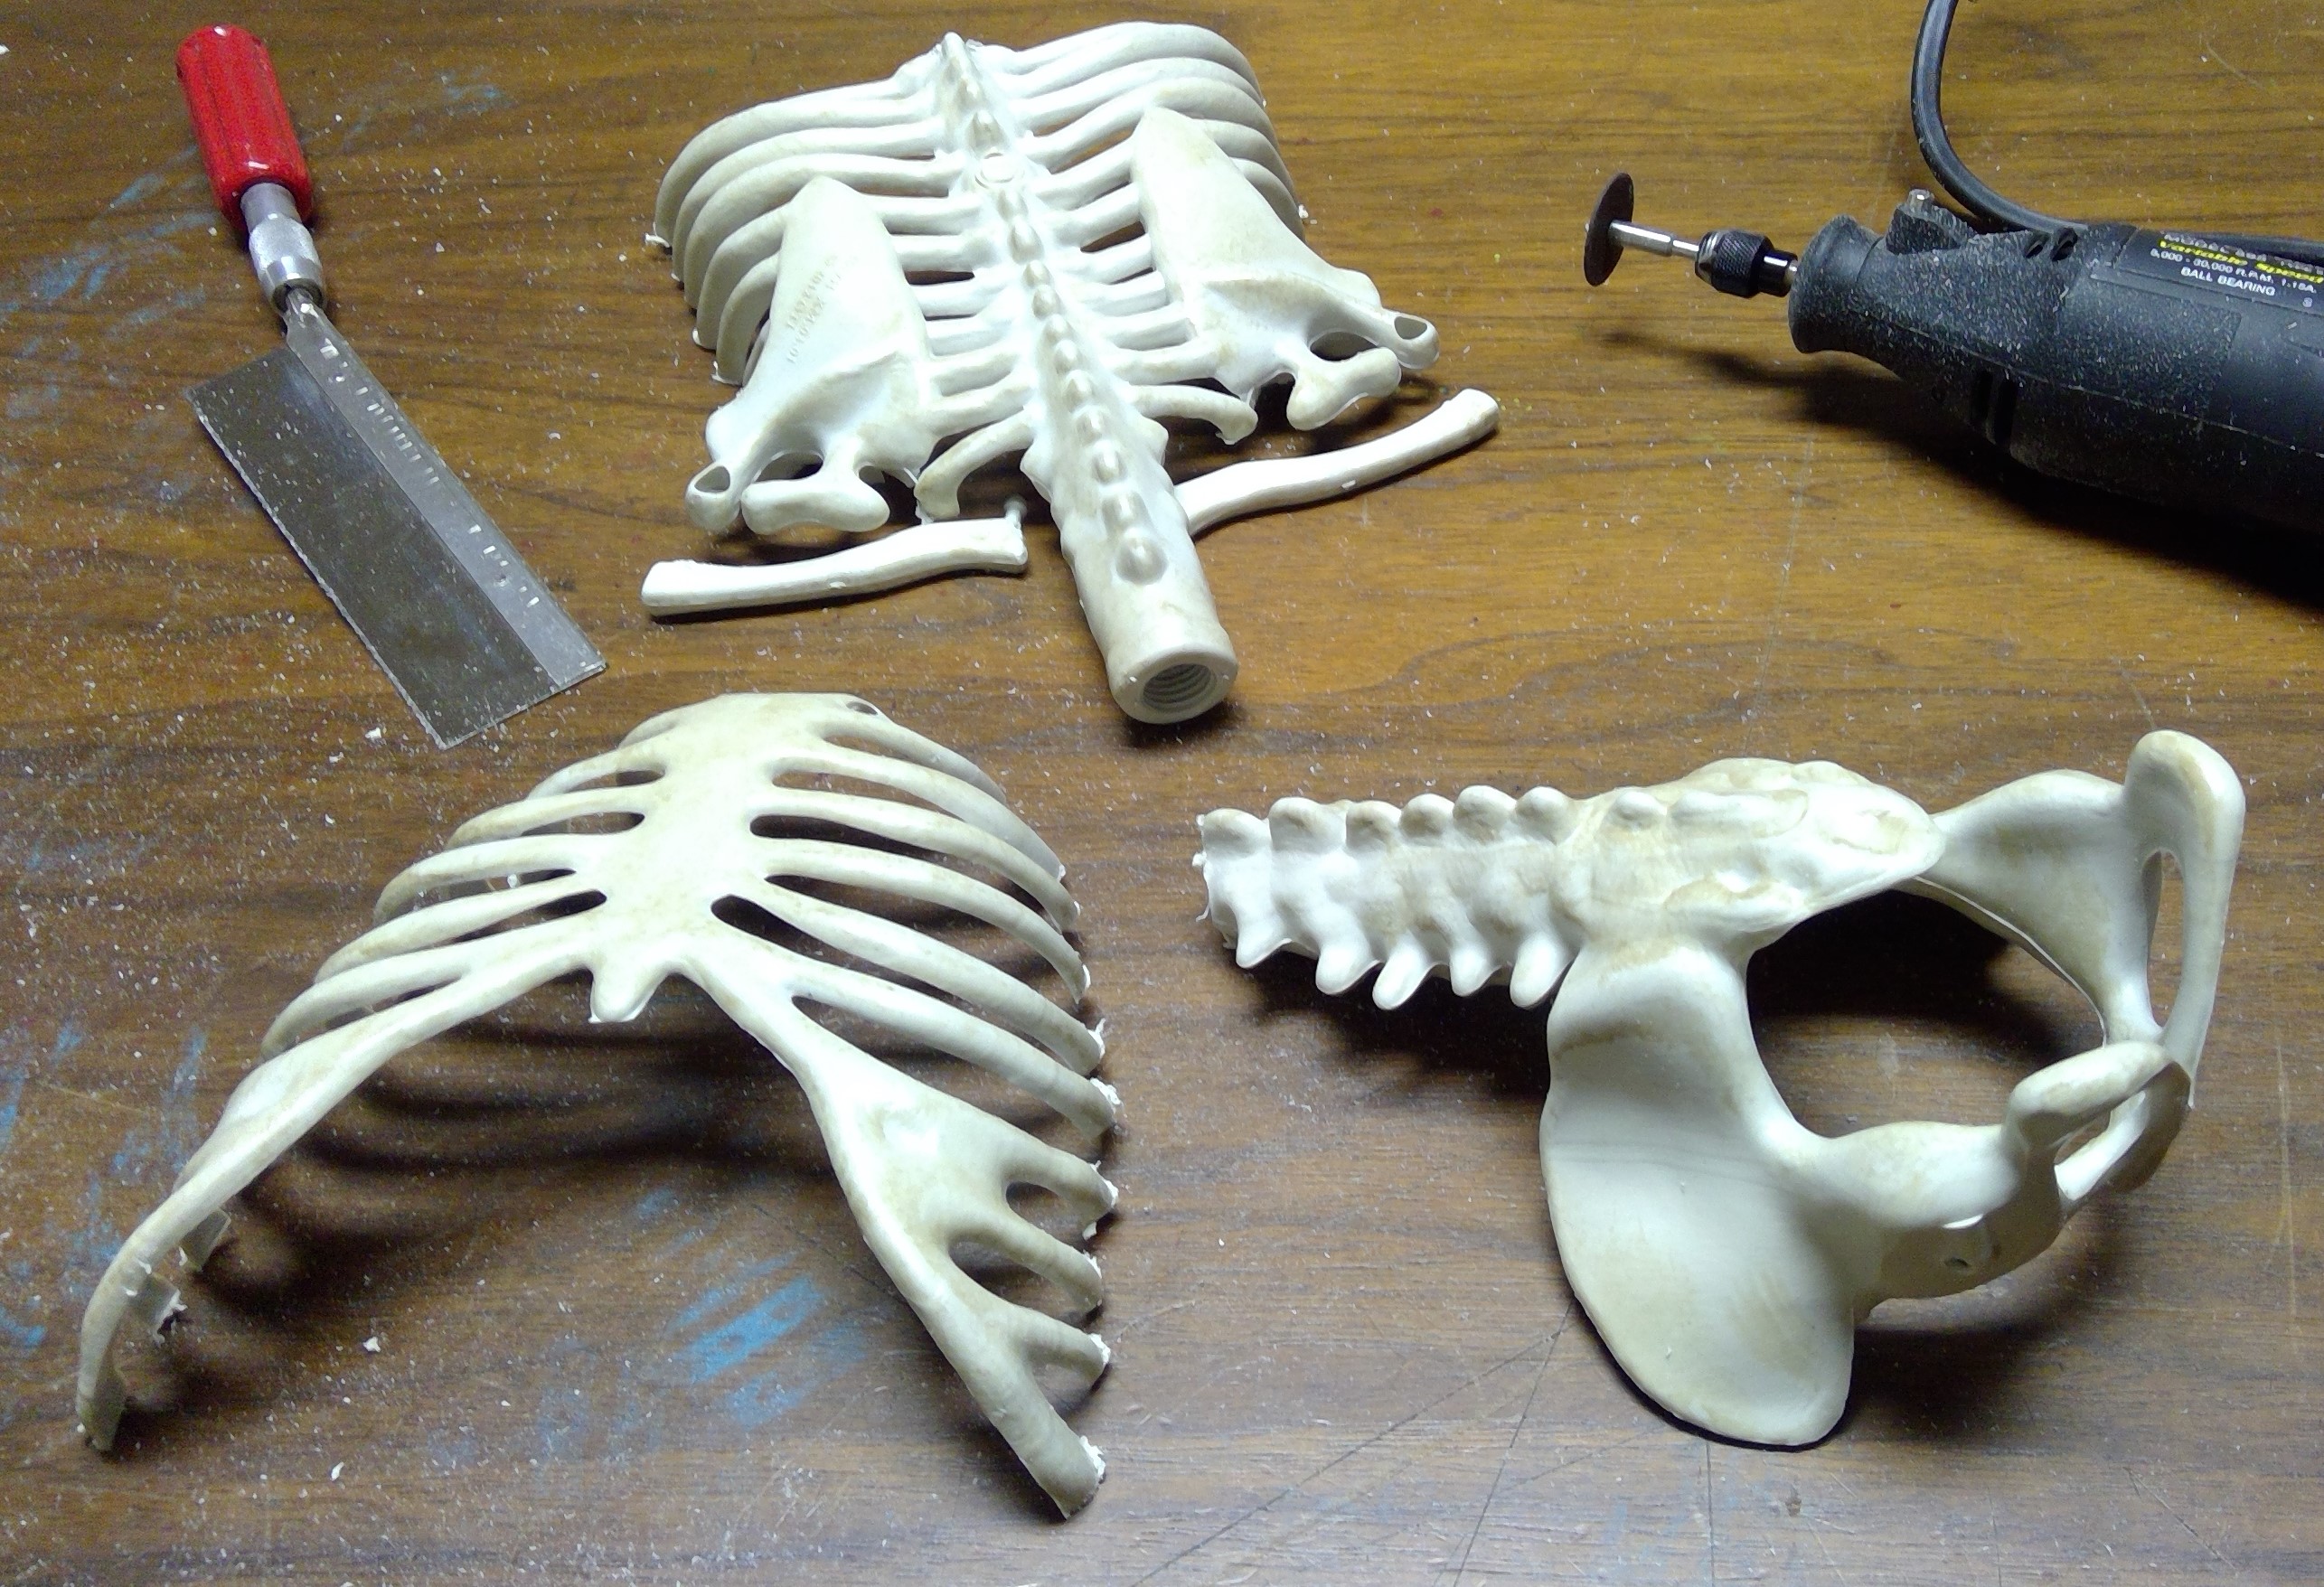
While I had the cutting tools out, I also started disassembling the spine and rib-cage of the skeleton.

Now on to cleaning up the mold lines and such, and getting a primer coat on as I will not be able to spray the foam and I want to be sure the latex paint has a good surface to adhere to.
Next up…planning the mesa cave and start cutting the foam.
Design Stage
Now I have several ideas such as:
- the obligatory skull cave opening
- a ridge utilizing the spine and rear portion of the rib cage
- a hill or mesa using the front of the rib cage
- doing something with the hands like they are reach up from the earth
- the obligatory mound of skulls
- the lower spine and pelvis jutting out of the earth
Now all of these will be made to look as if the rocks and earth have formed these shapes. Not like actual bone forming on the rocks and hills. I might try to use some of the smaller skeletons to make some weird cactus or other “plant”.
Sketches
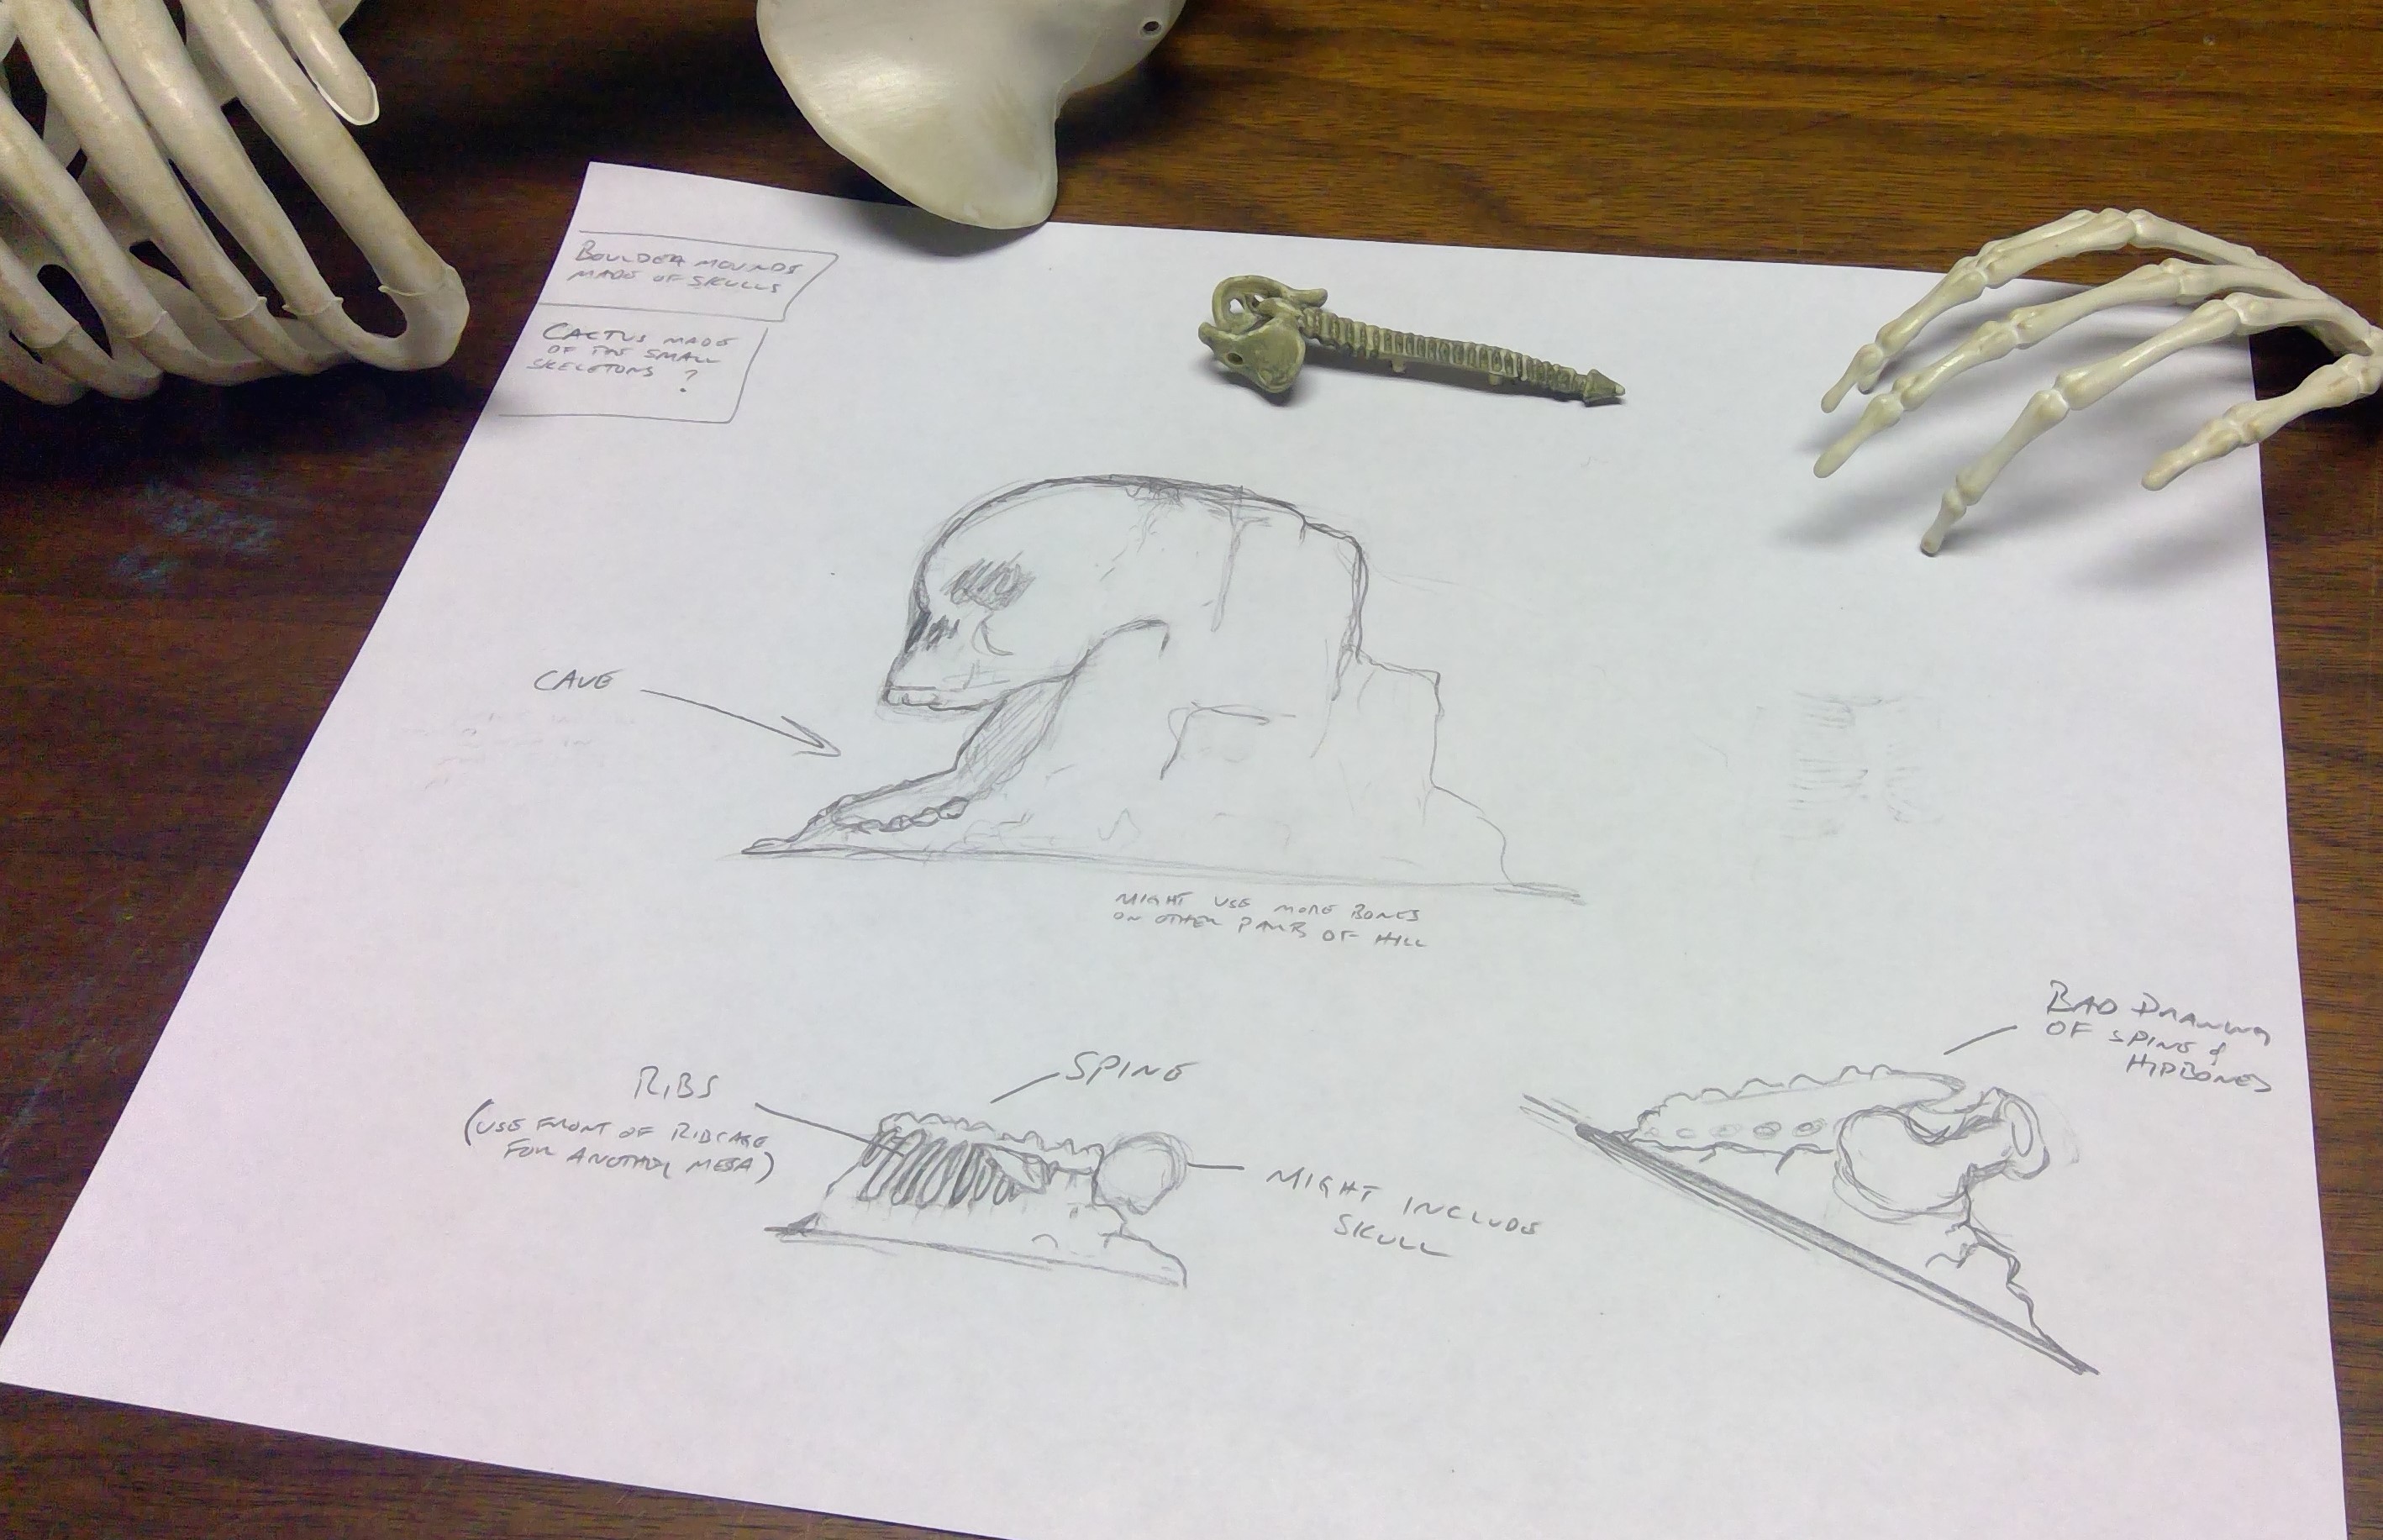 The planning begins