Klorophil’s Bolt Action armies
Recommendations: 86
About the Project
Hi guys, Just a collection of everything that I'll do that is Bolt Action related. I have a couple of armies in the work and so will be adding my progress on them here. Enjoy!
Related Game: Bolt Action
Related Company: Warlord Games
Related Genre: Historical
This Project is On Hold
Chars B1 bis
Hello there!
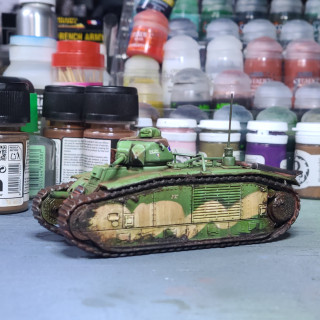
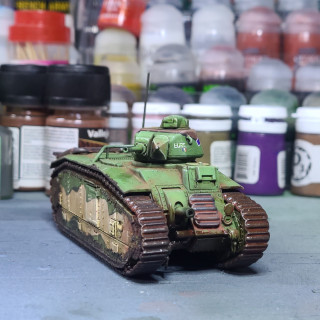
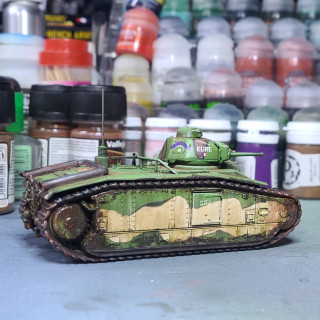
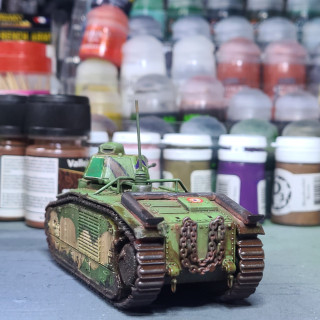
I’ve been doing a French Army comission for a while now. This the latest addition, a nice chunky B1 bis heavy tank.
I relied heavily on my new airbrush for this one. It makes the job much easier and the finish is smoother than with normal paint brushes. I wouldn’t say it is faster though. You still have to clean your airbrush between different coats.
I also made most of the weathering with oil washes. It’s a bit of an investment to get started. Different paint, brushes, sponges, thinner and what not. However, the results are amazing. If you forget the drying time it’s also really quick to get awesome results.
So here’s a couple of pics of the finished tank. Sorry I didn’t document most of the other stuff. But there’s definitely more coming. I’ll keep you posted.
Cheers!
Sad news...
Hi there!
I have to put this project on hold. I sold all my Bolt Action armies a while back. I may revisit this game but I can’t say that I really like the rules. They are a bit light, especially the vehicle rules. Like the alternating activations though, but would prefer something a lot less random.
The only way I see myself returning to this game is if I buy a 3D printer but that’s pretty far away in the future. We’ll see what Warlord comes up with. For example, if the Vietnam rumors happen I might get back into it.
Cheers.
Finishing touches.
We’re almost done. I then painted the face. I used Formula P3 Khardic Flesh. Washed with Citadel’s Reikland Fleshade. Highlights were done with a mix of P3 Khardic Flesh and Midlundflesh, simply adding more Midlundflesh until I was happy with the results.
Leather straps and wooden stocks were done in Formula P3 Bootstrap Leather. Washed with Citadel’s Agrax Earthshade and then highlighted with a mix of Bootstrap Leather and P3’s Rucksack Tan.
Metal parts were basecoated with P3’s Thamar Black. However, any flat black would do the job. I then lightly drybrushed some Army Painter’s Gun Metal over that. I was careful not to touch the parts already painted in another color. You could use any metallic paints as long as it’s not too silvery or bright. I find that painting weapons and metallic parts fully in metallic paint doesn’t give a realistic result. It is ok for fantasy minis or WH40K but for Bolt Action I prefer a more gritty feel. It also makes the weapons look battle worn and used.
Last was the hands. I simply redid the same step as for the faces. I did the hands last to leave me space to paint the weapons and weapon’s drybrushing etc.
You’ll see in the pictures that I painted the bases brown. I think it was Bootstrap Leather again but any brown would do. I do that before flocking the bases so that if there’s any little spot that I miss it won’t shine through as the base is already in the same tones as the flock.
I’ll try and take some good pictures of the finished models.
Cheers!!
Painting the webbings.
It was now time for the webbing. While the uniform was definitely done for the desert, the webbing was the standard british olive drab. Don’t know how effective this was in real life as on the tabletop it does make for a lot of contrast and easy spotting. I guess this was due to the unique way the Canadian Army is administered. Soldiers had the same problem in Afghanistan where they were first deployed wearing their forest-pattern CADPAT camos.
Anyways, to the painting. After some tinkering and painting on paper etc. I found out that Formula P3 Traitor Green is a pretty good match to the color of the webbing worn by soldiers of the 22ieme. No mixing here, simply thinning the paint with Liquitex Flow Improver and water. The Flow Improver helps control the brush and I couldn’t live without it now.
Once the basecoat was dry I washed the webbing with Citadel’s Coelian Camoshade and once this too was dry I redid the midtones with Traitor Green. Where I felt it needed more highlights I added some Formula P3 Ordic Olive to the mix. However, I was very parcimonial with this highlight. I didn’t want the webbing to show too much and steal the show from the rest of the mini.
Sorry for the poor quality pictures, my tablet is not very good when it is dark.
Reestablishing the midtones and highlights.
Once the wash was dry I started redoing the midtones. I simply used my previous base mix of 3/4 Menoth White Base and 1/3 Menoth White Highlight. I thinned the mix with more water than usual so that it would blend more easily with the tones underneath. Once all that was done, I did another pass with my previous paint mix but with more Menoth White Highlight added. Unfortunately, I cannot give you a precise ratio as I mainly did things by eye at this stage. Where I felt that it needed more highlights I added more MWH in the mix and did a final pass.
Unfortunately, like you can see, the previous layers are way too dark adding unwanted contrast to the mini. Once everything was done it wasn’t too apparent but I learned from my mistake and my second batch of minis are better balanced.
Putting on some wash.
Once the basecoats were dry I applied a wash of pure Citadel Agrax Earthshade. It did a good job as always but it is too dark. On a 2nd batch of minis, I lightened the dark tones on the basecoat and I got much better results. They’re not finished yet but you’ll see the difference when I post them.
I also tend to work a color at a time. It might not be the most productive way of doing things, but I see the result right away. It keeps me motivated and I can correct errors and there are ones.
Adding the dark tones.
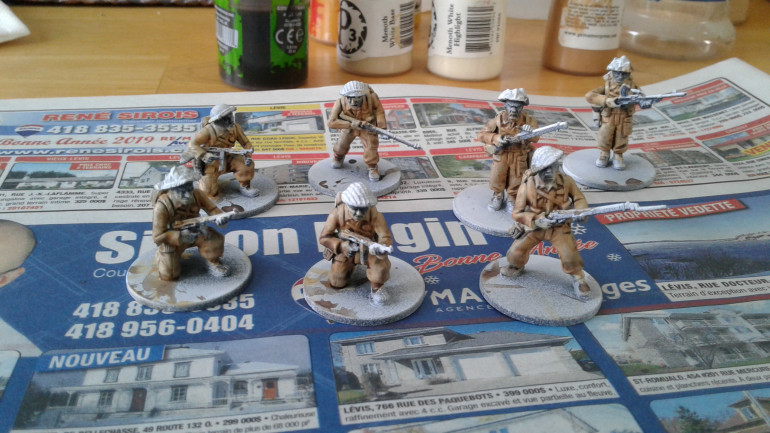
Here you can see I added some darker tones to the minis. Actually, I only did a single pass of my previous color mixed with Formula P3 Rucksack Tan. I put in a little bit too much in my mix. You’ll see later that it ended up too dark once the wash was applied. At least to my taste.
Basecoating.
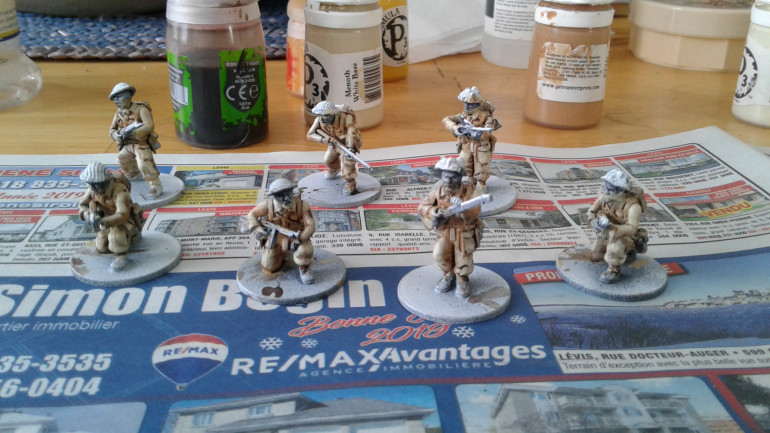
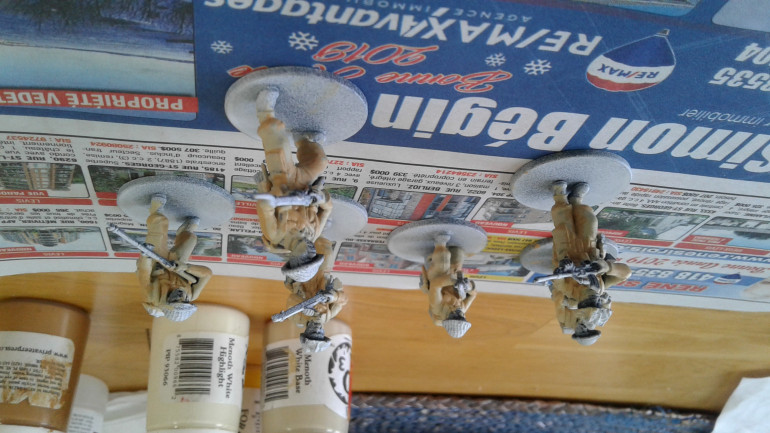
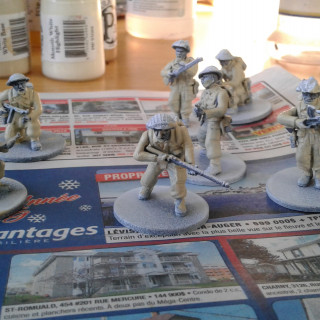
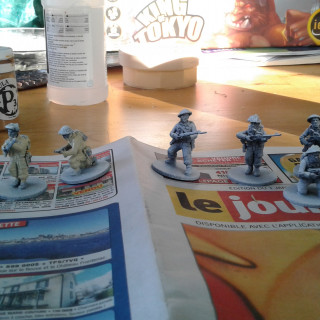
So this is my first step in painting the soldiers of the 22ieme Regiment. Like I always do, I started by priming them black. Then I made a 45deg. pass with gray and finished with pure white from the top. I thus achieved my zenithal higlight. I still don’t have an airbrush so I simply used spray cans. The texture and fineness of the paint is a little rough but I think it doesn’t show too much. Getting an airbrush is one of my 2019 resolutions so we’ll see if it makes any difference when priming models.
Once that was dry I started researching the uniform. Obviously there isn’t a lot of color photos dating from World War II so it was a bit difficult finding reference material about the 22ieme. However, I found plenty of pictures of Major Paul Triquet, a decorated officer of the 22ieme. So I based my colors on his uniform. I understand that he was an officer and that his soldiers’ uniforms were a little bit different but it will have to do as I couldn’t find any better references on the web.
The base uniform is a mix of 3/4 Formula P3 Menoth White Base and 1/4 Formula P3 Menoth White Highlight. It may seem a little light right now, but passes of darker tones and washes will follow.
Royale 22ieme Regiment
So this is my newest Bolt Action army. It is inspired by the Royal 22ieme Regiment of Quebec City, Canada, my hometown. Oblviously they were part of the Canadian Army during WWII. They fought on the Italian front in 1943 onward. They were in Sicily and Monte Cassino to name but a few battle in which they fought. It was one of the few french-speaking regiments who fought for Canada and the Commonwealth during the Second World War. The regiment is still active nowadays and is based in BFC Valcartier north of Quebec City.
Painting wise I’ll try and do a small tutorial like I did for my SW Legion stuff.
Cheers!


