Recommendations: 3
About the Project
Introduction: If you've been collecting furniture tables for awhile, you probably have a fair amount of tables but no actual dishes of food to serve to hungry adventurers. This certainly won't please them at all, will it? The Tiny Furniture's Dishes set is a set of sixty-some resin miniatures for about ten dollars. Since the dishes can be painted different ways for multiple genres, such as medieval and modern-day, you may wish to purchase more than one set. Tiny Furniture also sells sets of bare tables, and sets of tables with food. The drink set itself consists of multiple sprues:
- Goblets sprue: About ten metal goblets
- Cutting board sprue: Three cutting boards and a small dish
- Plate sprue: Six plates and the lid of a stein
- Bowl sprue: About ten bowls and plates with food, four steins, a salt shaker (?), and half a loaf of bread
Pigs and Apples sprue: A plate of apples, and a hog's head served on a platter
- Main Dish sprue: Chicken on a platter, cheese, two bread loaves, two serving plates, and an unusual fish on a platter
- Drinks sprue: A candle, a knife, four bottles, two bread loaves, a wicker basket for a wine bottle, a pitcher, a fruit server, and a matching pitcher and cup
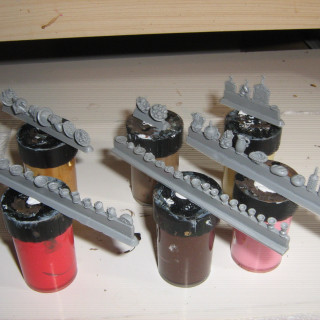
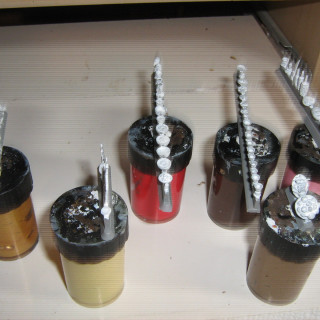
Painting on the Sprue: Because of their tiny size (the pieces are small enough to lose on a messy painting desk!), you may wish to paint on the sprue. Some of the pieces are pretty close to each other, so you may wish to paint just the primer and base coat on a miniature, before detaching it and finishing the details. Although resin is not difficult to work with, completely painting a miniature then detaching it from the sprue risks some repainting if you damage the miniature. And, of course, you will need to paint the part of the miniature attached to the sprue.
Painting Tips: The sprues have been listed roughly in order of difficuly to paint. You will want to decide upon a paint scheme before painting to minimize unnecessary painting that lost detail, although all but a few pieces have deep enough detail for multiple color changes. (That was my case for the miniatures!) Prime with white primer. Use Museum Wax to temporarily adhere the pieces to tables. The cup and pitcher, fruit tray, pitchers, and bottles were the most difficult to paint. See below for details.
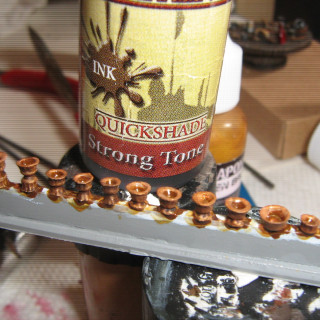
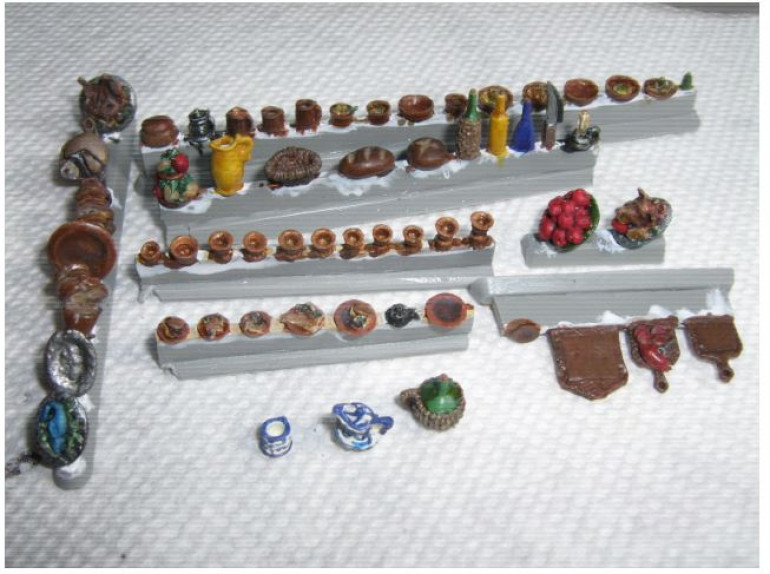
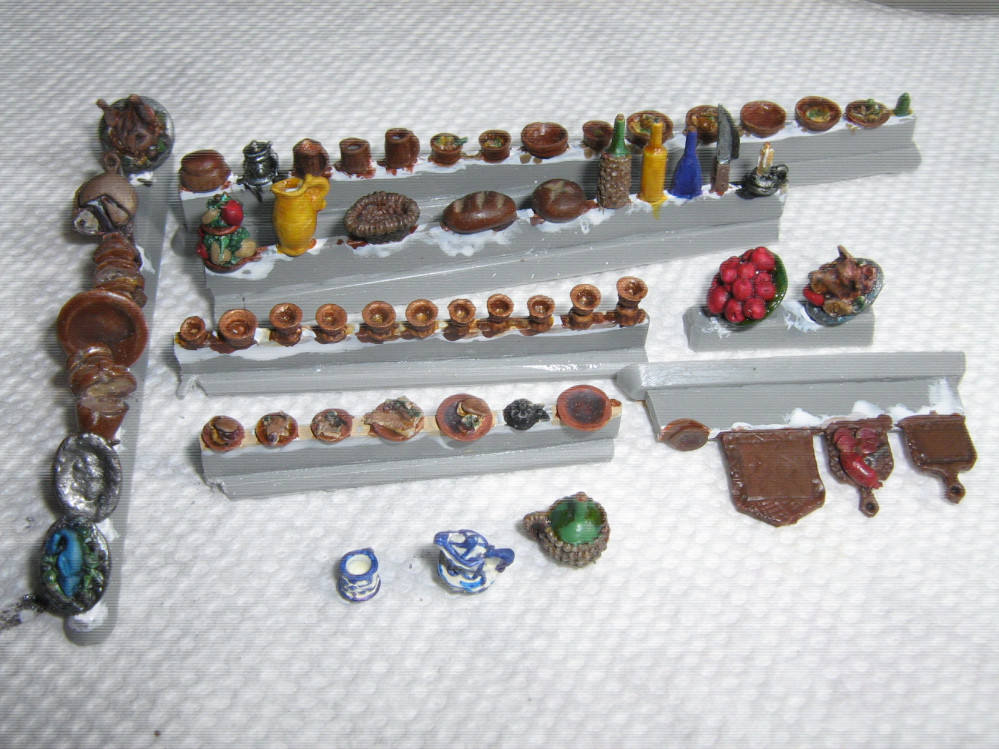
Goblets: You can paint the goblets brass or pewter. For brass, undercoat them brown, paint with a brass paint, then wash with a brown wash, such as Army Painter Strong Tone Ink. For pewter, prime black instead of white, paint with a silver or other metallic, then wash with a black wash, such as Army Painter Dark Tone Ink. For contrast, make sure that the inside of the goblet is much darker than the rim of the goblet, by using additional wash inside the goblet, and painting the rim of the cup with the metallic paint another time.
Cutting Board: Paint the boards brown then wash with a brown wash, such as Army Painter Strong Tone Ink. Increase the contrast of the "holes" of the boards by using additional wash in them. For the sausage, paint it red or flesh. Paint the tine metallic. (Unfortunately, I dropped the sprue sticky-tacked to a paint bottle twice, so one of the handles broke in the photo.)
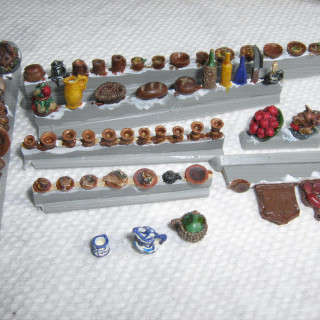
Dishes: For wooden dishes, paint the dishes brown then wash with a brown wash, such as Army Painter Strong Tone Ink. You can also paint the dishes as china, plastic, metal, etc. China and plastic have a glossy surface, so you can use gloss varnish or Tamiya clear, just make sure it doesn't get onto the food! In the pictures, for the plate of apples, I tried a green China. For the fish, chicken, and pig's head, I tried a metallic plate. For the bits of food itself, I experimented with leftover paint whenever I completed a step in another paint project. Again, for contrast, for the empty dishes, paint the center of the paint darker than the rim of the plate or bowl. For full ones, paint the stew a darker color than the dish, and the food a brighter one.
Beer Steins: For the wooden beer steins, besides a light brown paint followed by brown Army Painter Strong Tone wash, for the beer head, I used ochre Army Painter Skeleton Bone, and whiter Army Painter Brainmatter Beige. For the metal beer stein, I used metallic Army Painter Machinegun Metal, followed by black Army Painter Dark Tone wash. Note that the lid of one of the beer steins is on the other dish sprue.
Bread: Paint the outside of the bread brown, such as Army Painter Monster Brown or Leather Brown. Paint the inside of the bread ochre Army Painter Skeleton Bone. Glaze for a smoother transition.
Apples: For red applies, I painted the apples a strong red color, then washed with Army Painter Red Ink. For green apples, I would try a yellow-orange green, then a wash of Army Painter Green Ink.
Pig and Chicken: I tried a variety of browns and washes, exaggerating the contrast by painting the recesses with darker colors, and highlighting the edges of the "meat".
Cheese: Medieval cheese had a brown exterior with a white core. Today's cheese wheels, of course, can have a red through ochre rind, with a white core. I painted the cheese with a brown exterior and white core, but a red rind will have more contrast.
Serving Platters: Serving platters can be painted metallic, china, wooden, etc. If you paint it metallic, you may want to exaggerate the contrast by washing the recesses with a dark wash, such as Army Painter Dark Tone, and highlighting the raised parts. (I forgot to do this in the picture, and repainted the platter too many times and lost details!) Or, if you paint it as a piece of china, freehand paint the raised surfaces.
Serving Platter with Fish: The whole fish can be painted any color. You may wish to select a color that contrasts with ther serving platter color you have chosen.
Pitcher and Cup: You can paint this matched set metallic, or painted ceramic. I think metallic would be easier, with a dark wash and highlighting the raised surfaces. A painted ceramic required more freehand painting skills. (I didn't do too well with my attempt!)
Bottles and Wicker Basket: For the wicker, I painted the miniature brown, then drybrushed in ochre. For the bottles, I painted the bottles in dark green (or blue or yellow), held the miniature to a bright light, then painted the light side with a lighter green, and darker side with a darker green. Then, I painted the glass part with Tamiya Clear Green. The cork was painted with ochre paint.
Fruit Tray: You need a fair amount of brush control to make sure you don't accidentally paint something the wrong color. I started with a white primer, but, while this made the fruit look bright, it also left white marks in the recesses, which needed to be carefully colored in with wash. The tray itself can be painted as wood or metallic. Leaves should be painted green, with green wash. The grapes can be colored either green or purple, though purple will stand out better from the leaves. The apple can be painted either green or red. The pears were painted ochre and washed with the brown Army Painter Soft Tone ink.
Pitcher: Despite pitchers being made of different materials than glass bottles, painting them is similar. Blue and dark colors are easier to paint than lighter ones. The handle, lip, and bottom rim of the pitcher should be highlighted, and a darker wash applied to the recesses next to them. Withough this contrast, the pitcher may appear "flat" and featureless.
Candle: The candle itself was painted ochre with applications of brown Army Painter Soft Tone ink. The melted was was then painted white. The wick was painted from colors that are the hottest on a candle to the coolest: white, yellow, orange, red. If you have colored pens, you may wish to use them instead of paints.
Conclusion: The Tiny Furniture Dishes set has the most pieces for the price, and you may wish to purchase more than one set, since they can be painted a variety of ways, particularly for different time periods. Because of their small size, painting these miniatures can be quite challenging. At least, however, your miniatures won't go hungry!
This Project is Completed


![How To Paint Moonstone’s Nanny | Goblin King Games [7 Days Early Access]](https://images.beastsofwar.com/2024/12/3CU-Gobin-King-Games-Moonstone-Shades-Nanny-coverimage-225-127.jpg)


