


![How To Paint Moonstone’s Nanny | Goblin King Games [7 Days Early Access]](https://images.beastsofwar.com/2024/12/3CU-Gobin-King-Games-Moonstone-Shades-Nanny-coverimage-225-127.jpg)


On the Warcry Path!


Recommendations: 141
About the Project
After much hesitation, I decided to delve into WArcry and am sharing my building and painting adventures within this marvelous game.
Related Game: Warhammer Age Of Sigmar: Warcry
Related Company: Games Workshop
Related Genre: Fantasy
This Project is Active
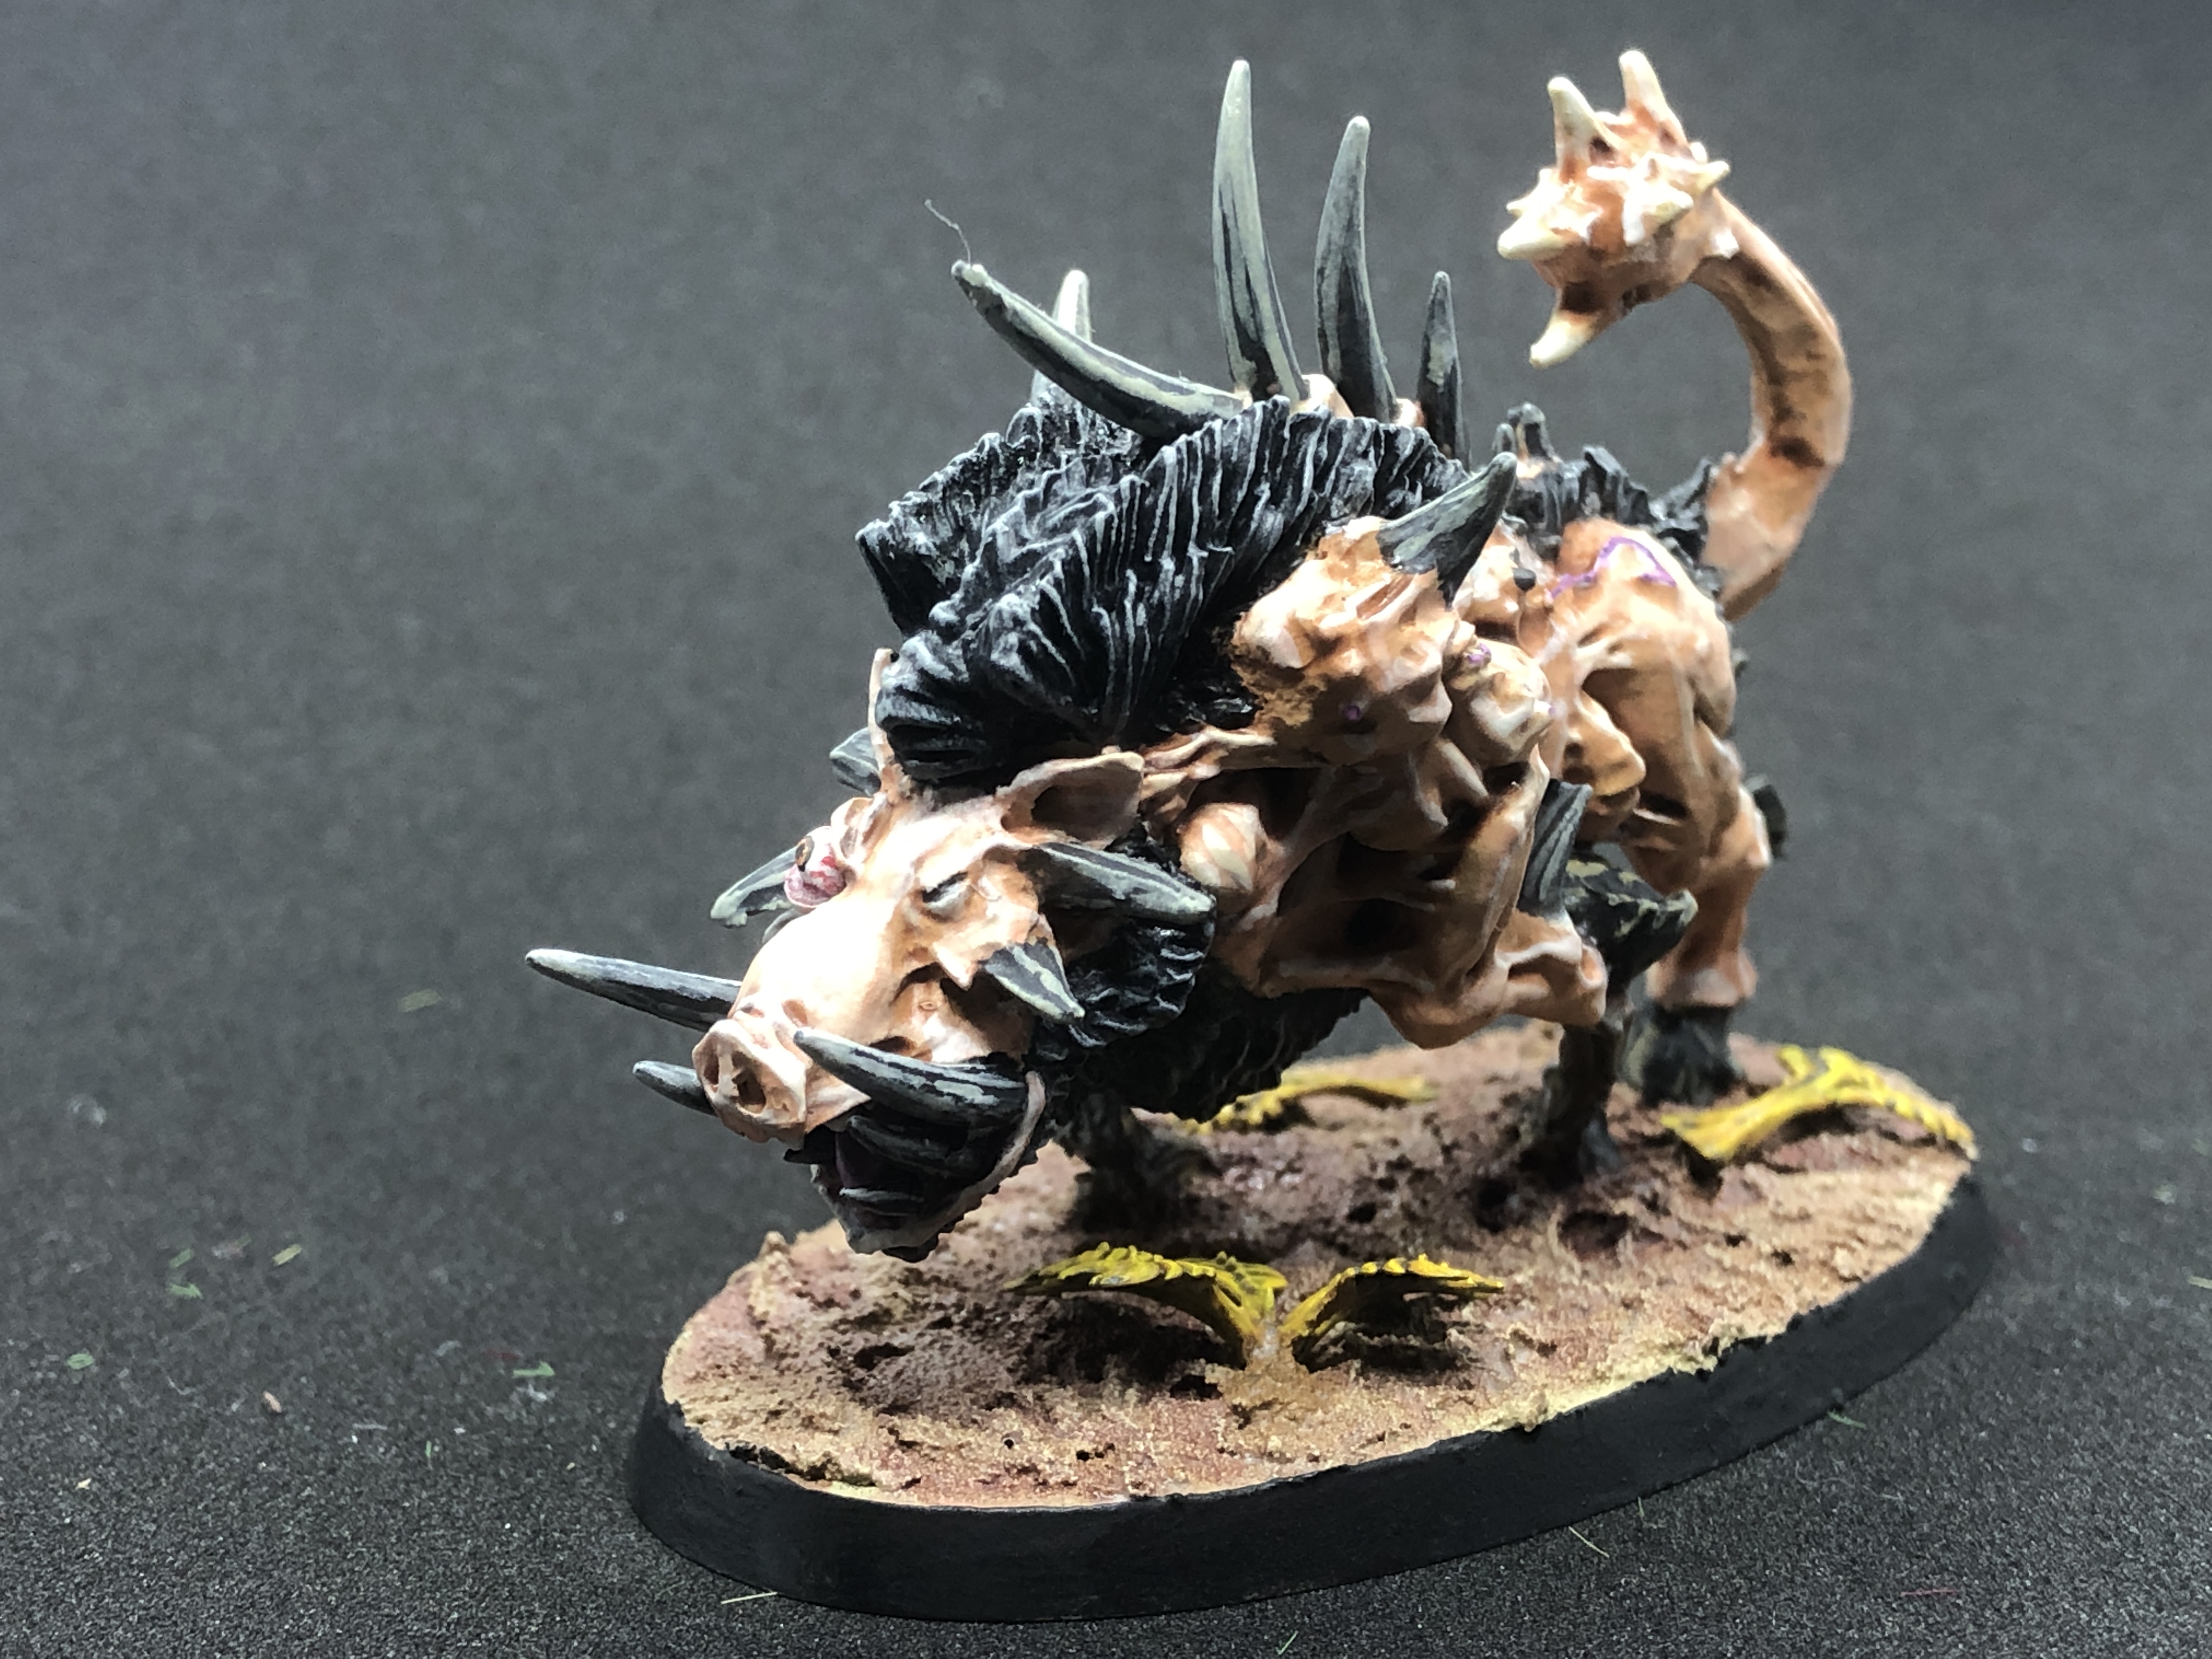
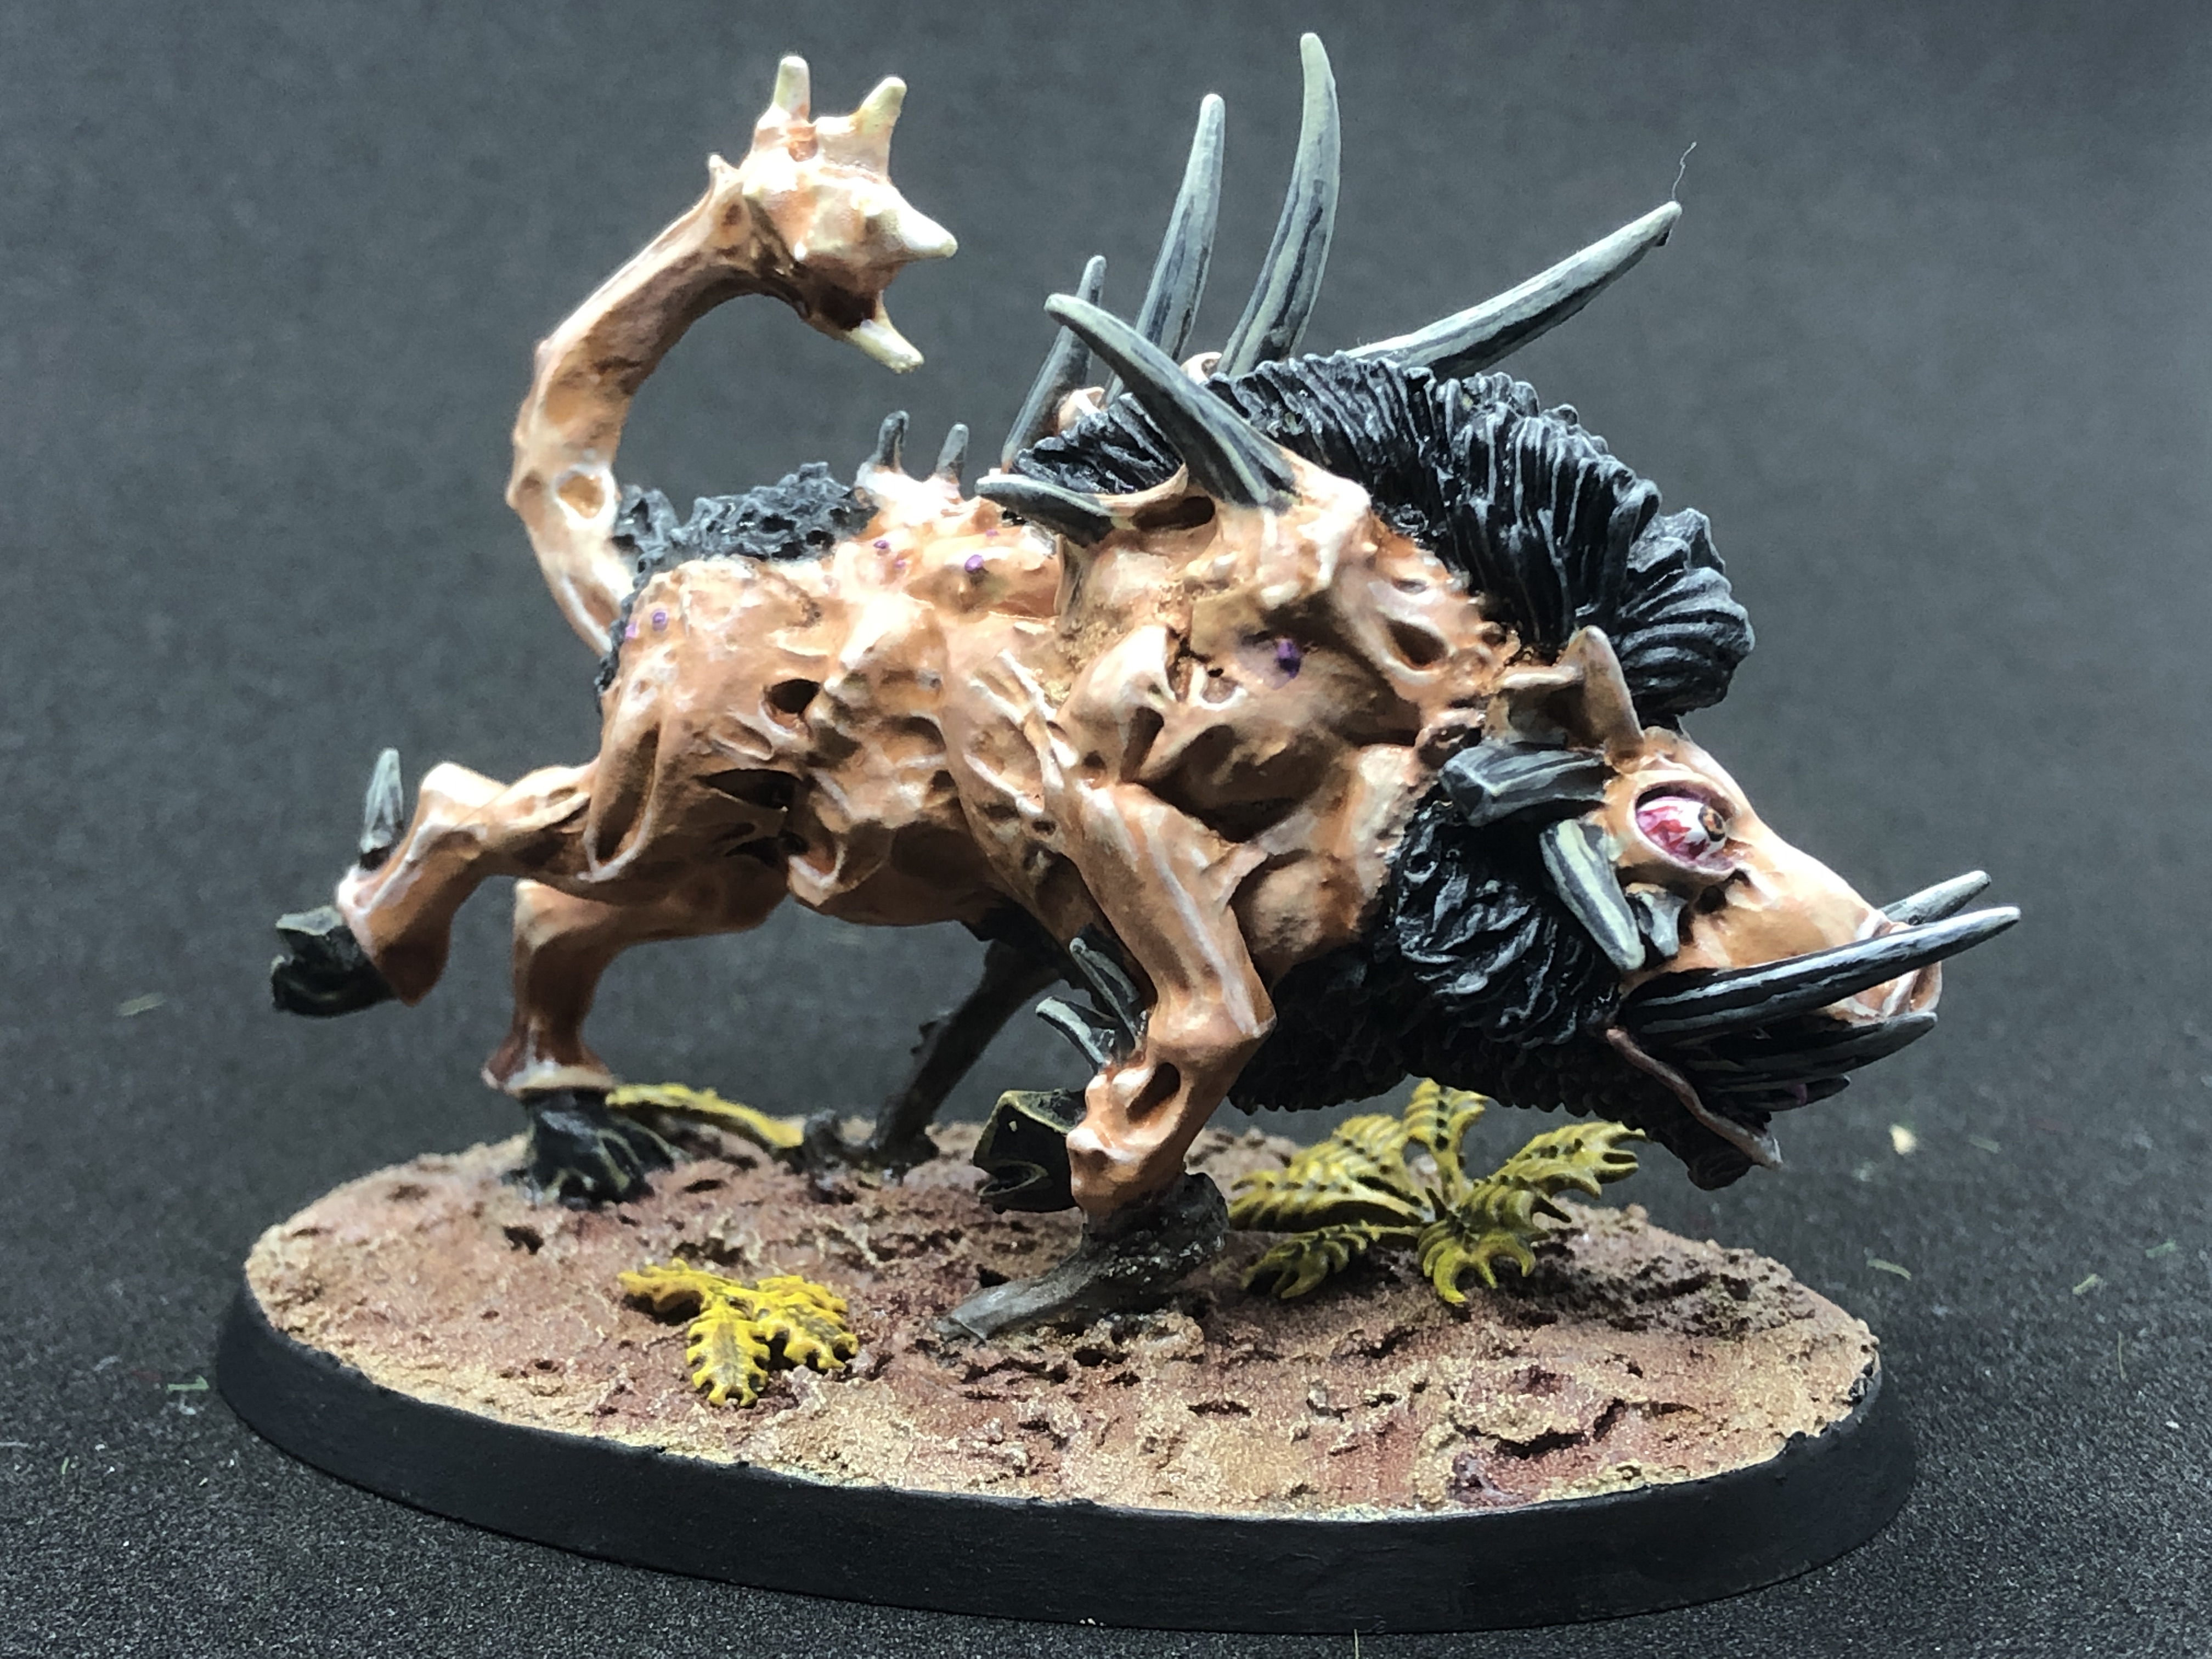
Warcry Flesh-Eater Court Warband - Part 3
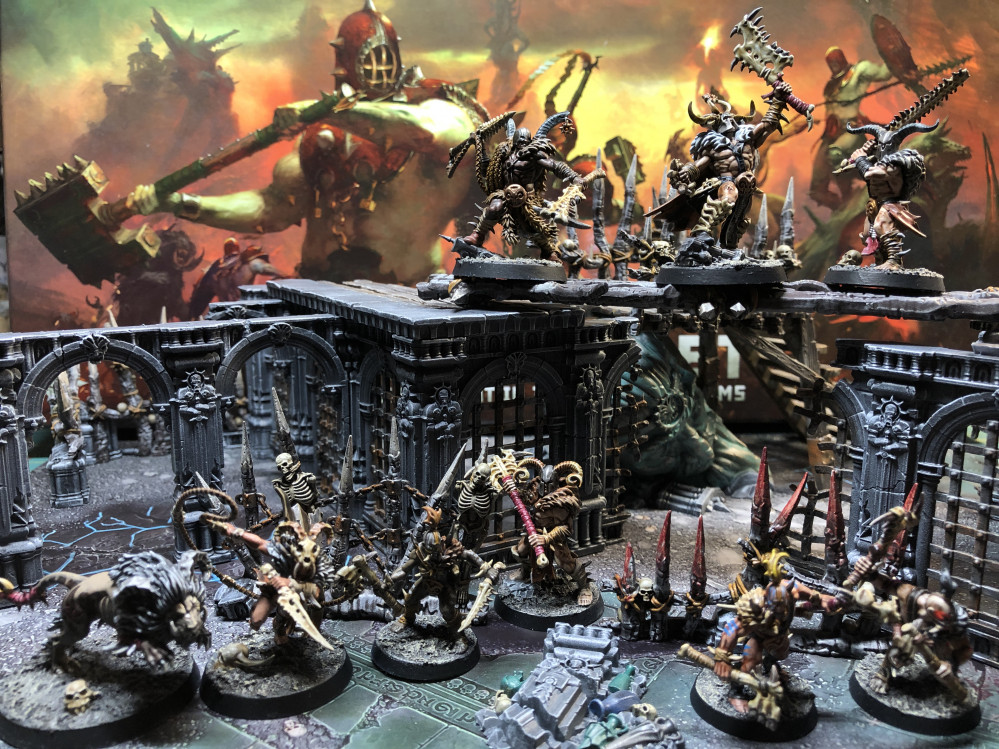
 Teeth are painted with Averland Sunset ot give them a nice yellow tone and then washed with Agrax Earthshade. They will be soon covered in gore!
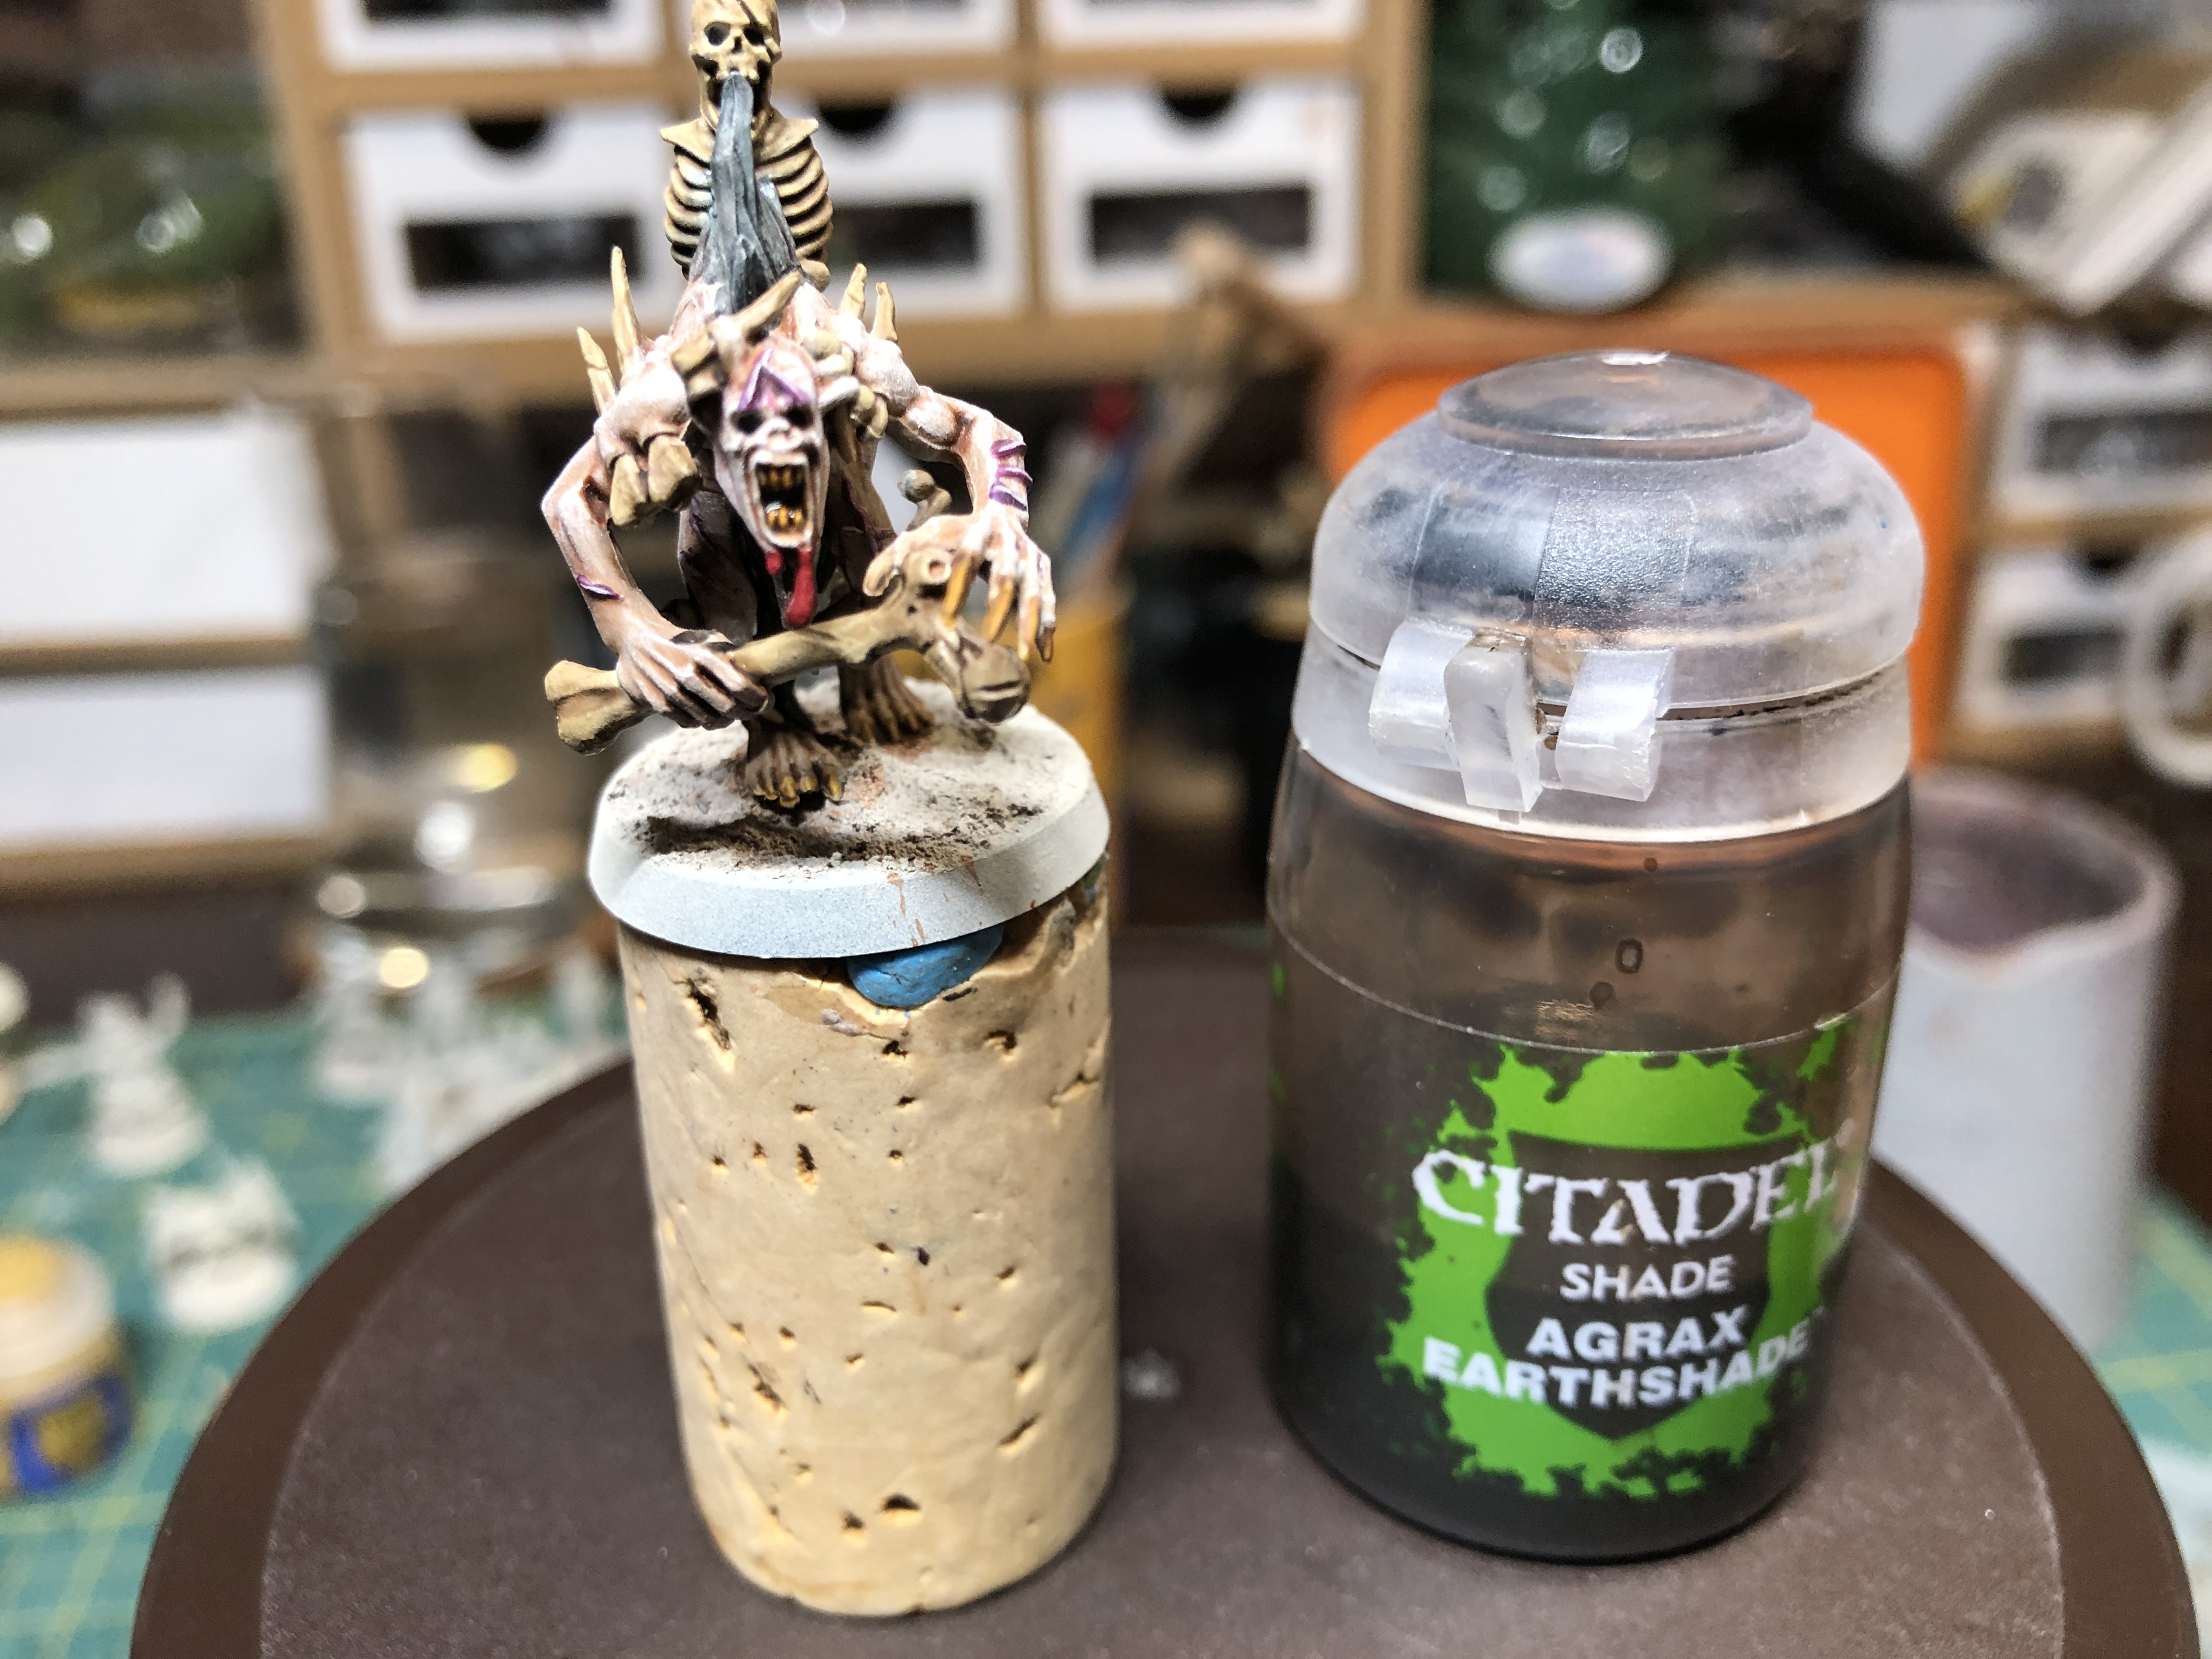
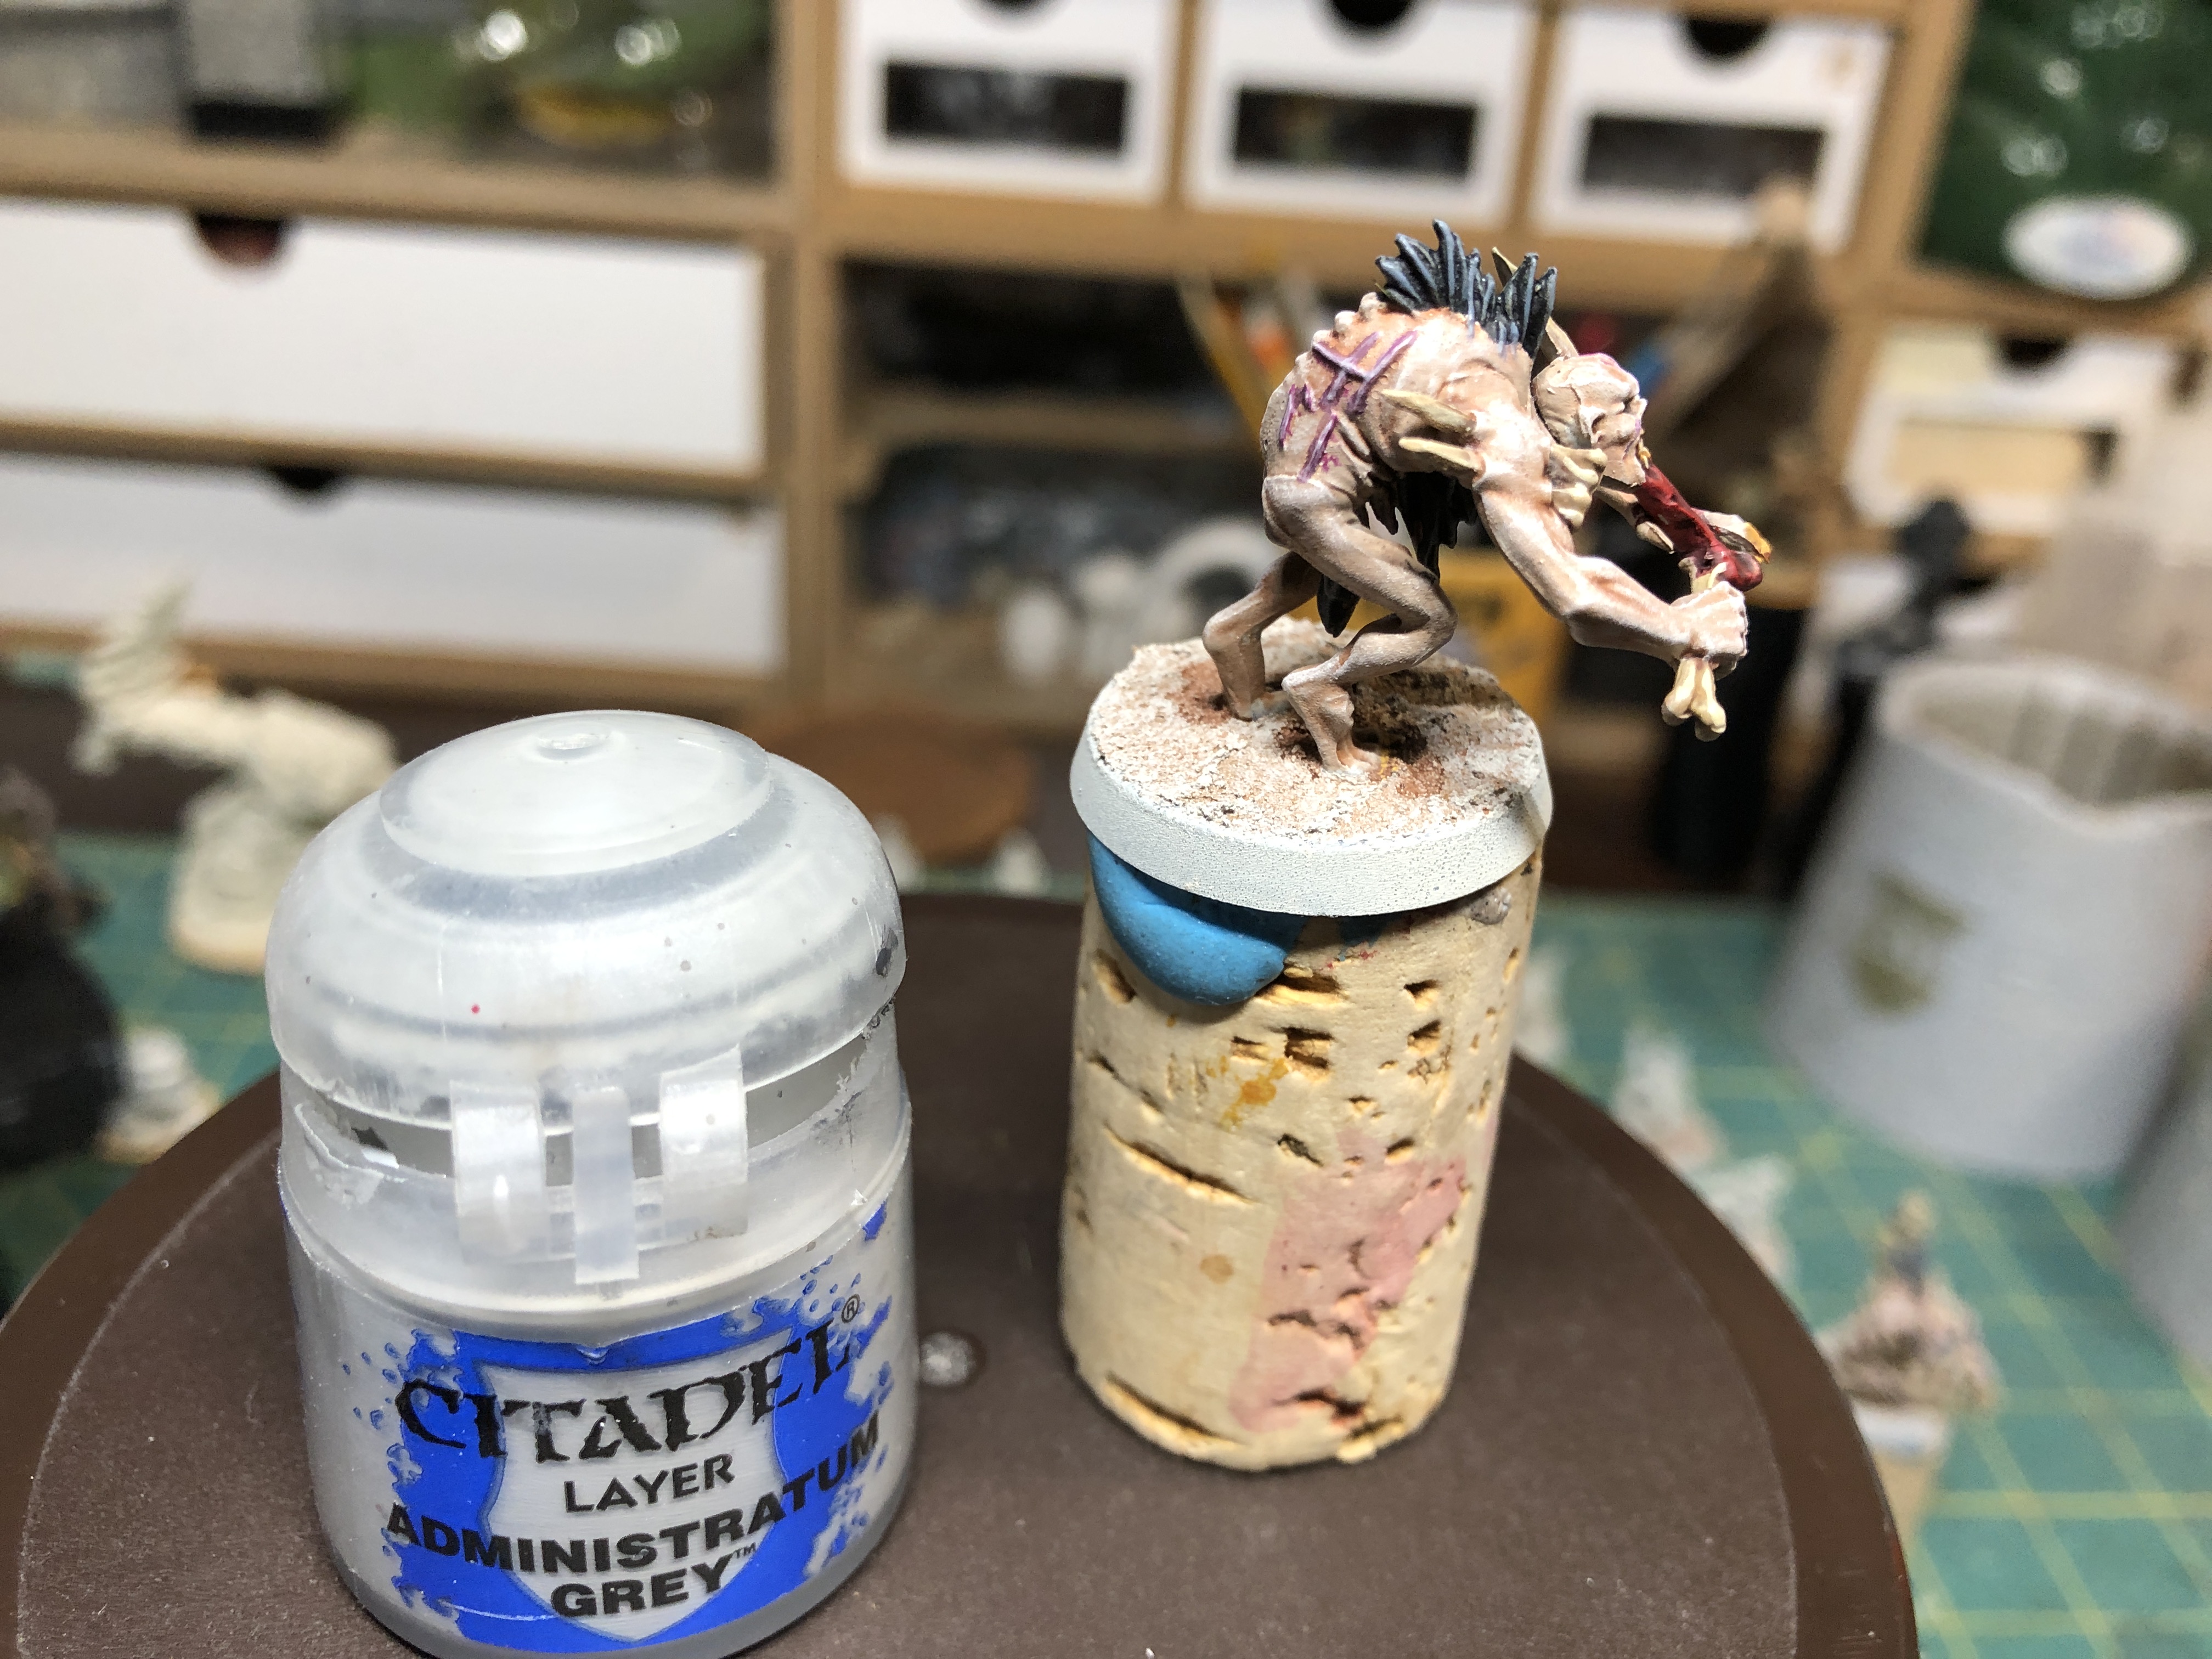 Hair is highlighted with Administratum Grey or any light grey.
 Then a final highlight is applied with white only at the tip or areas most exposed to zenithal light. I also chose to dot the eyes with white (when sculpted) for a quick and efficient look.
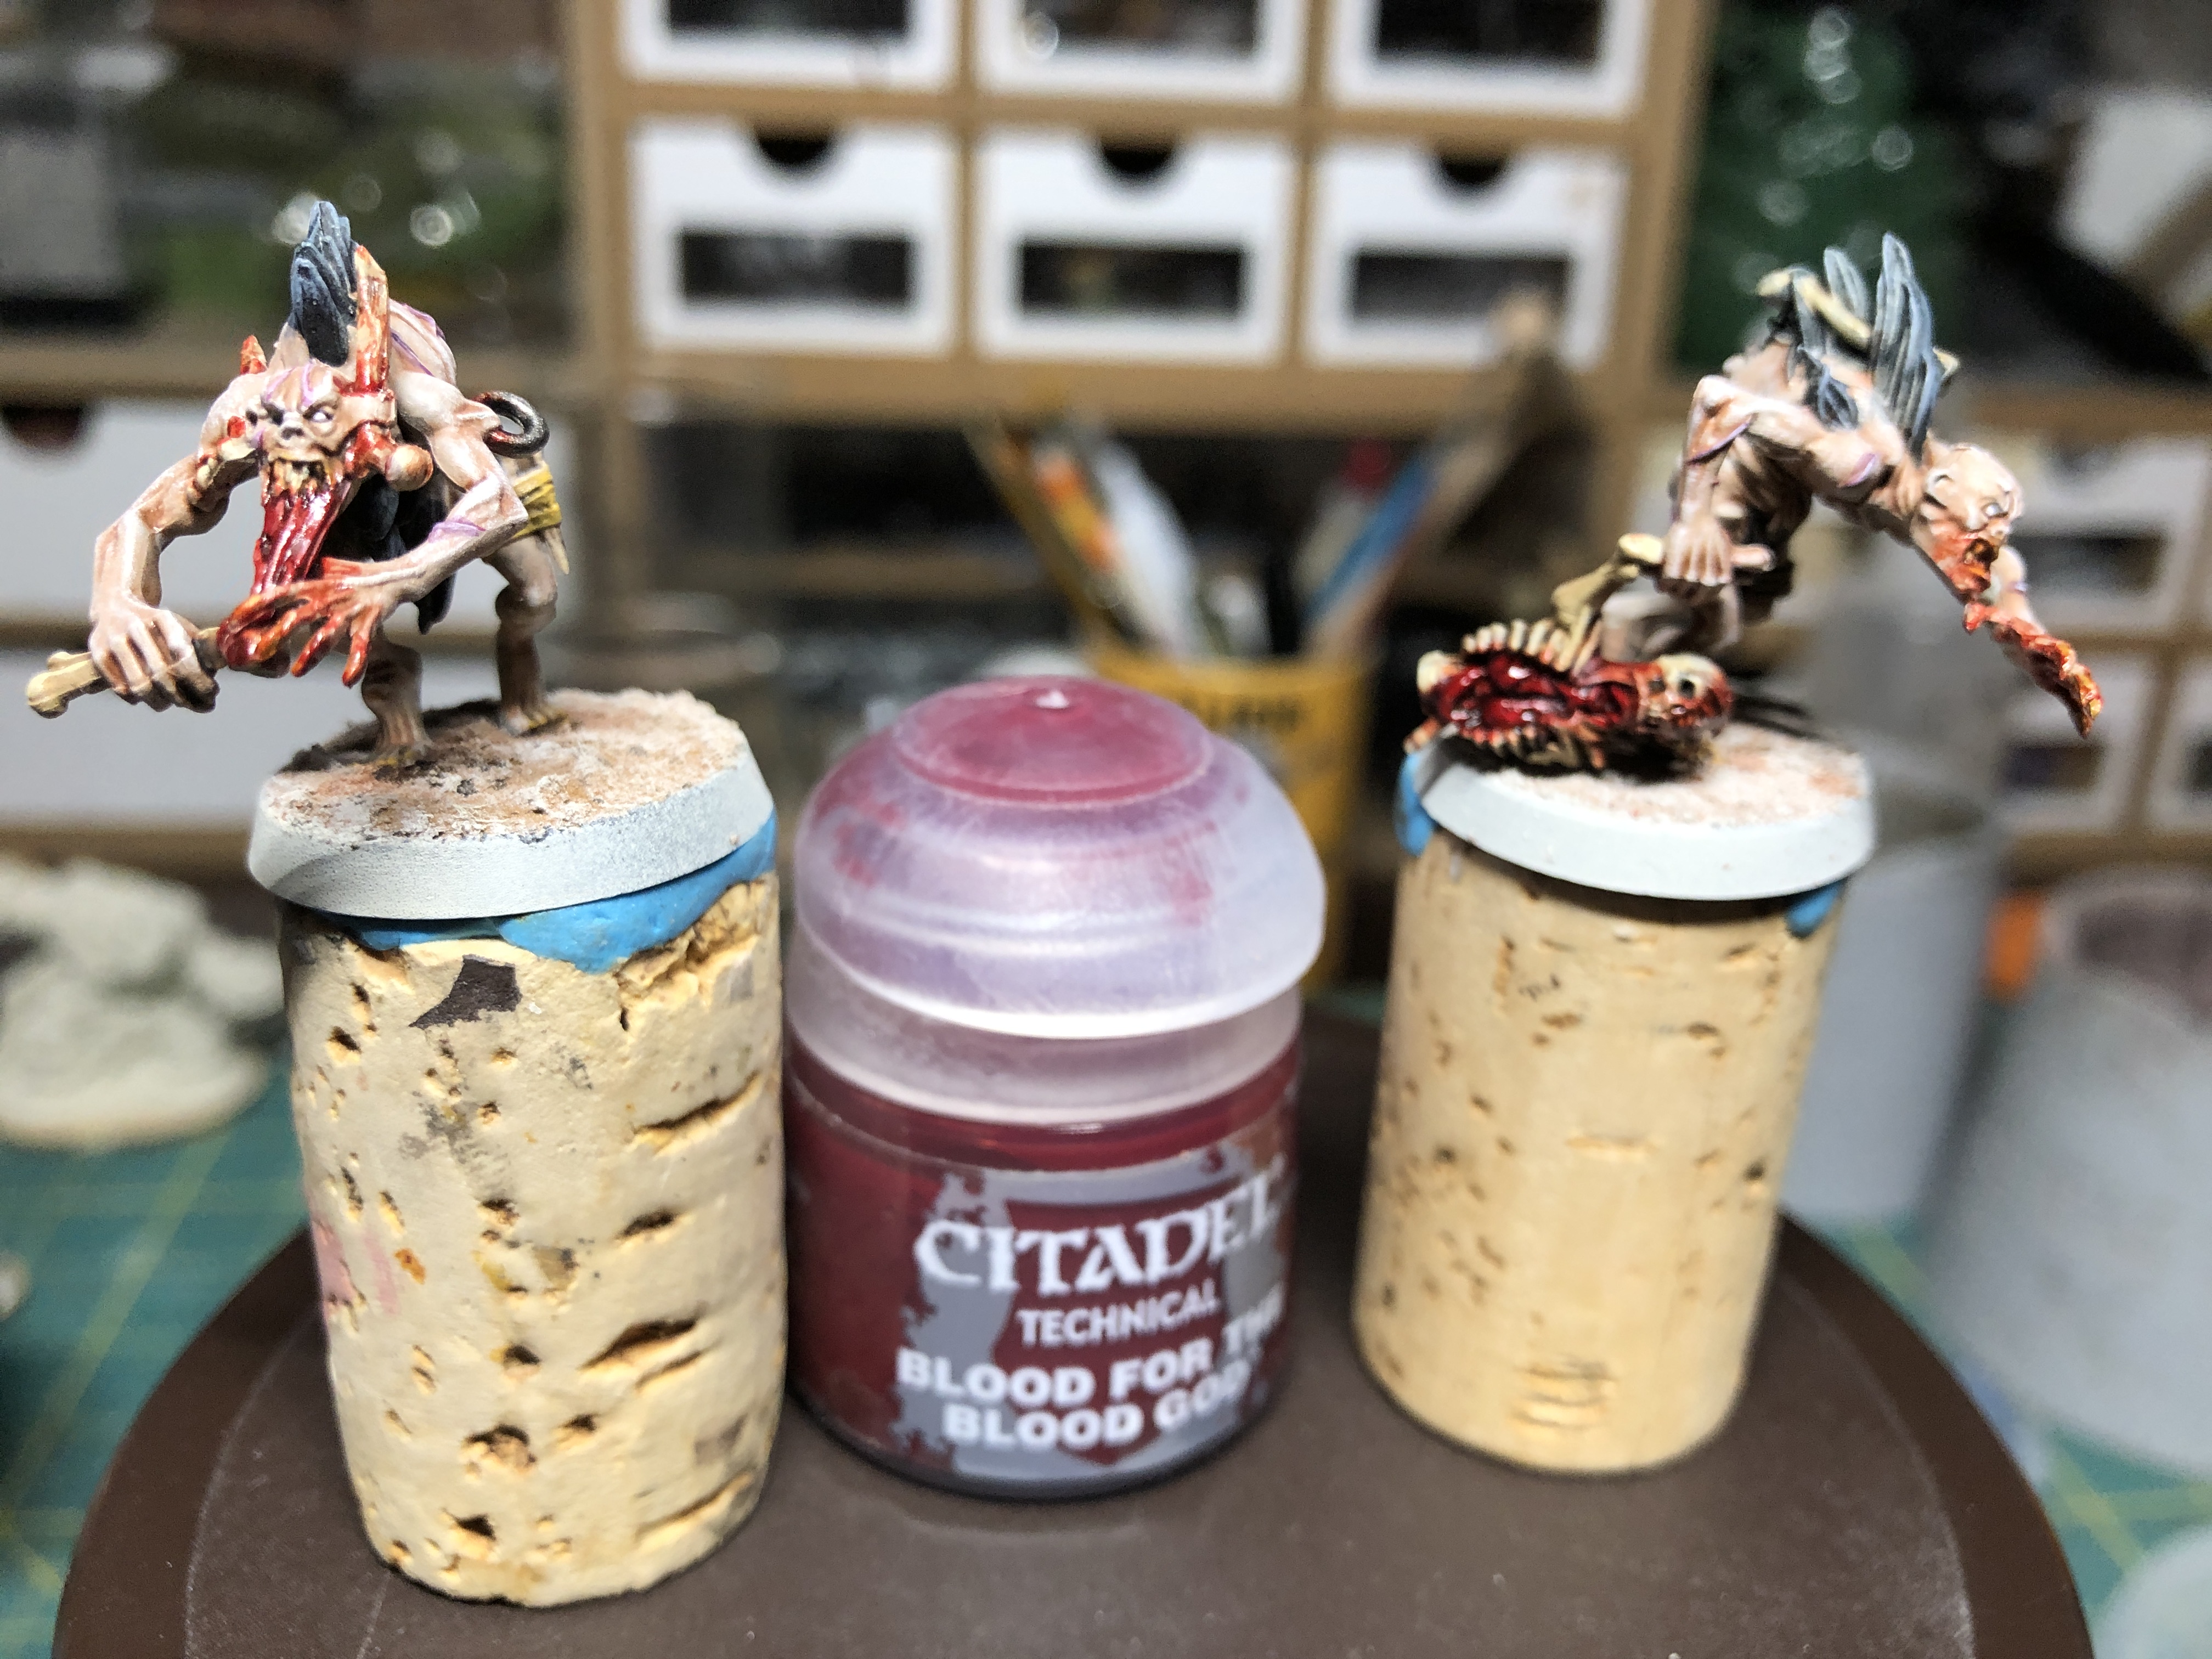 Finally, use Blood for the Blood God to add gore to the mouth, clawed hands, chewed flesh and to the wounds created by the bone piercings. Remember less is more!
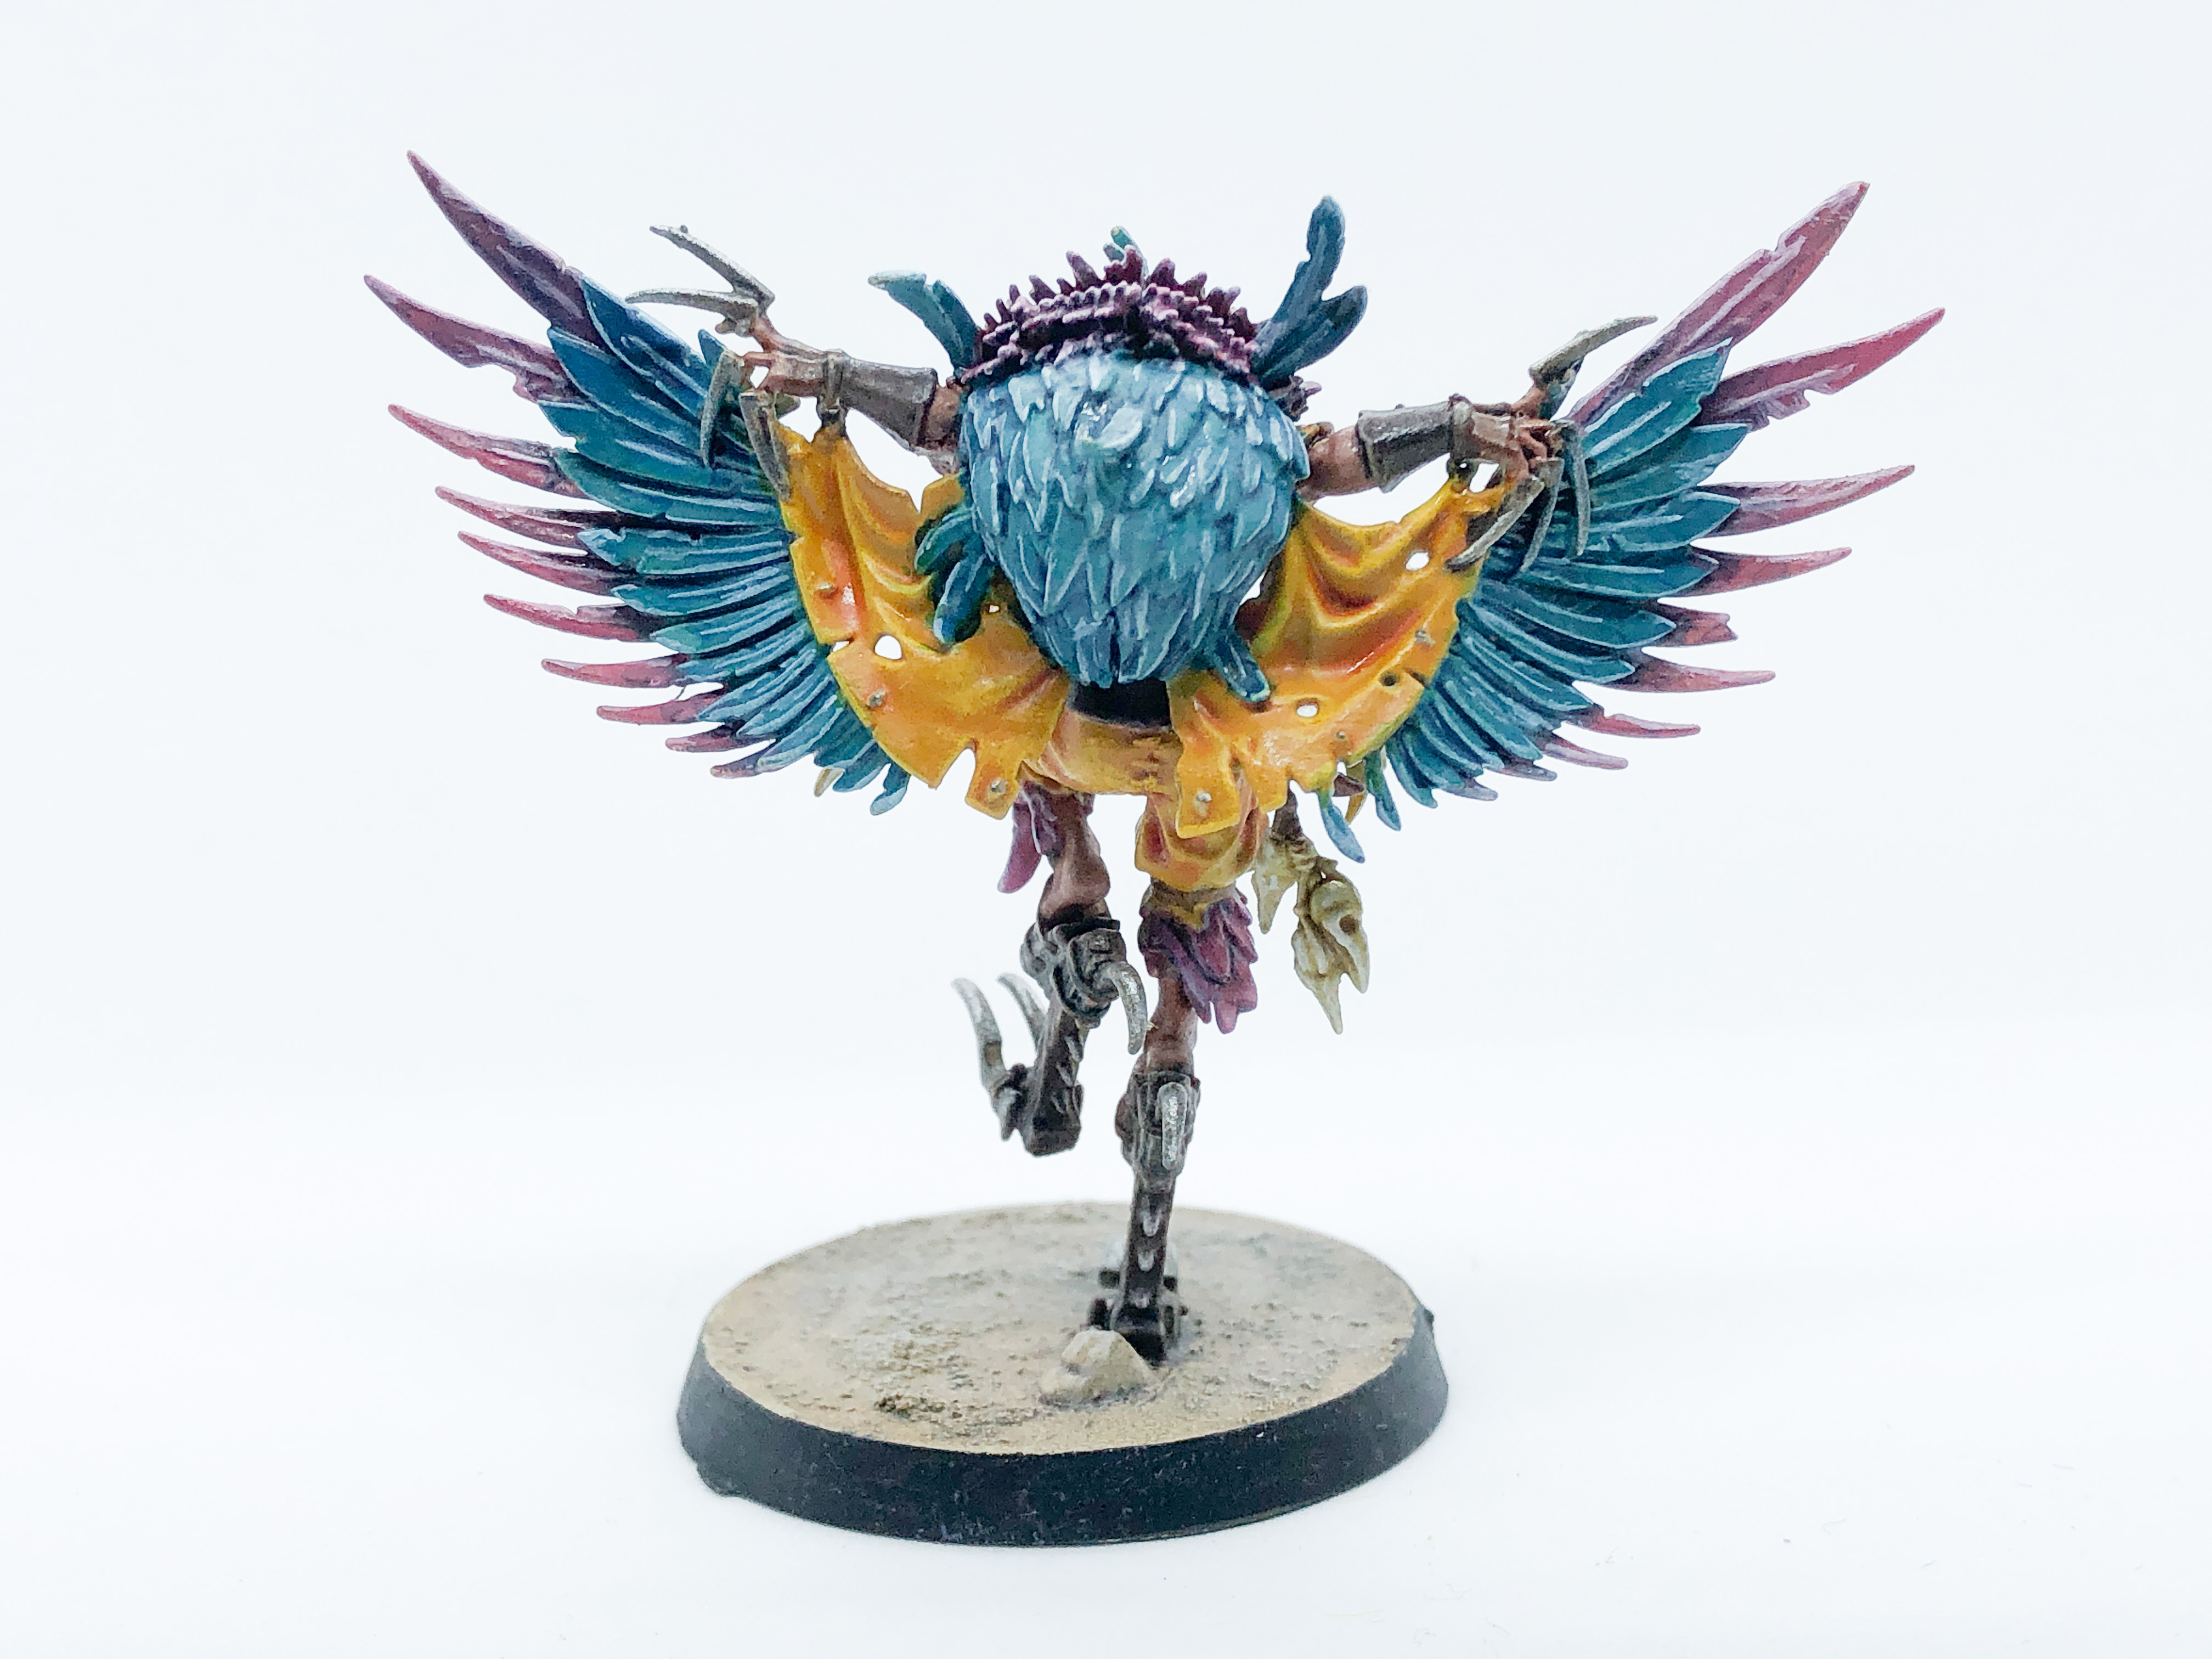
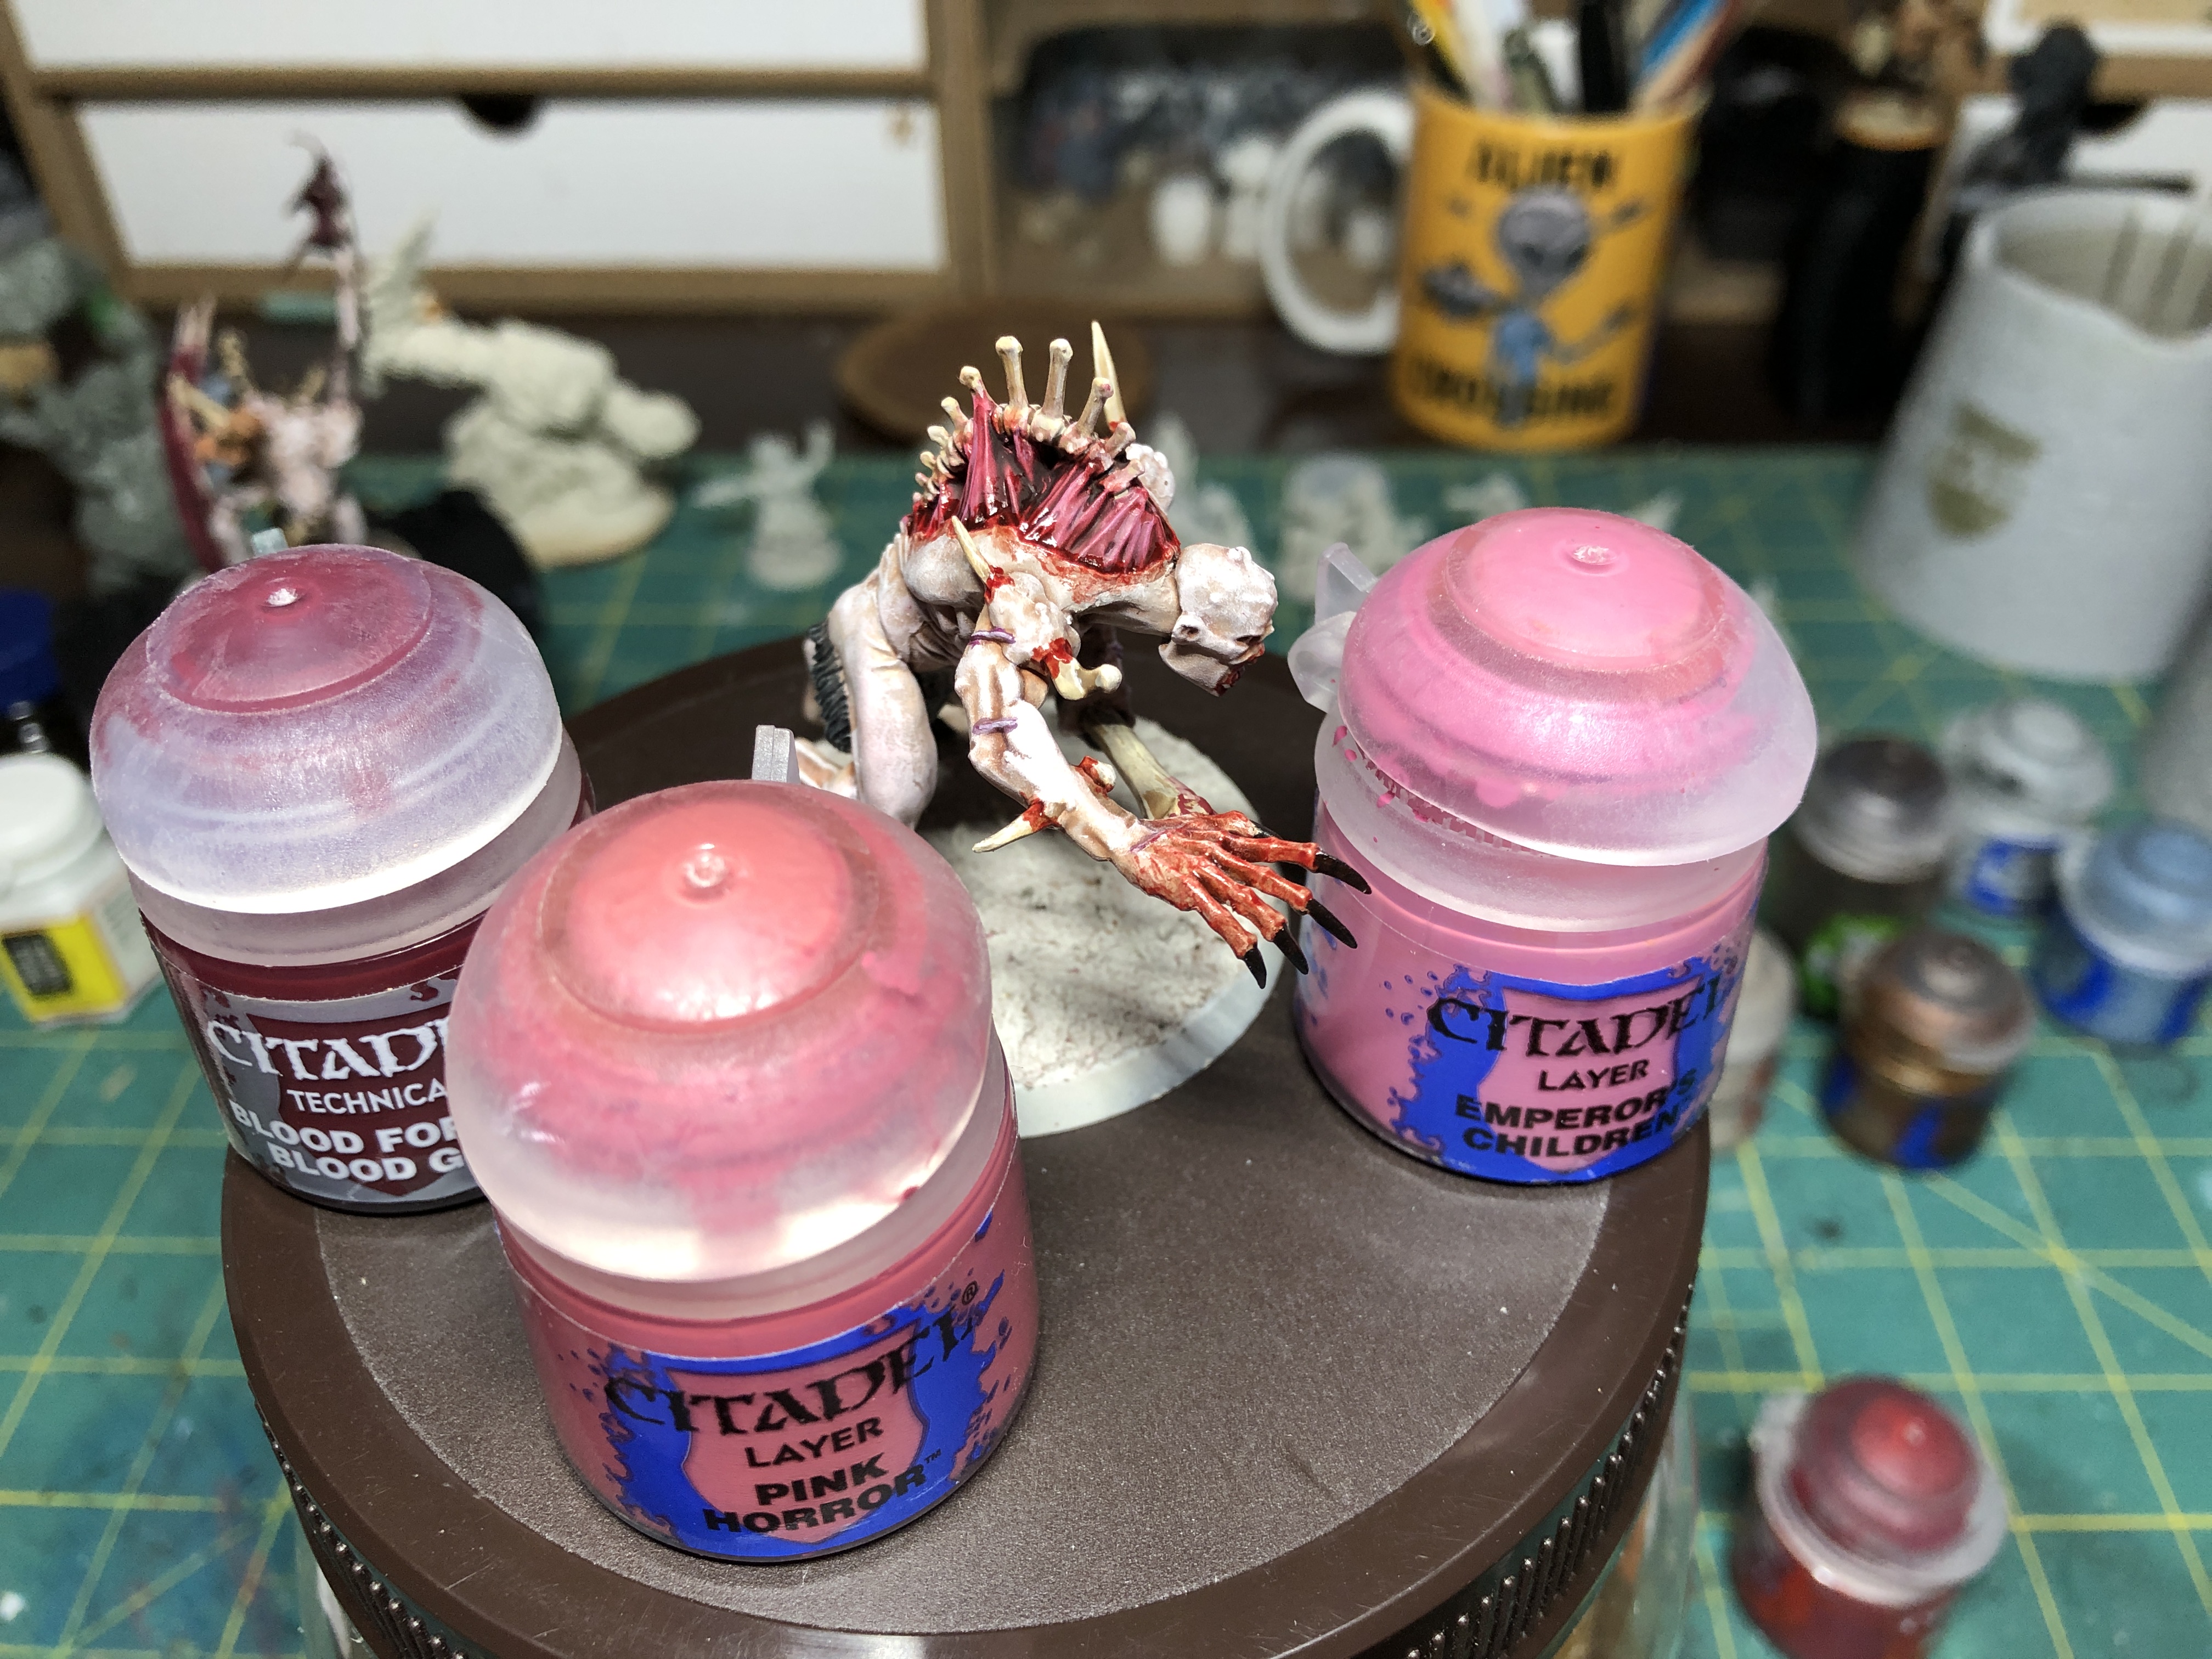 The back muscles and flesh are based in GW Pink Horror, washed with GW Blood for the Blood God and highlighted in GW Emperor Children
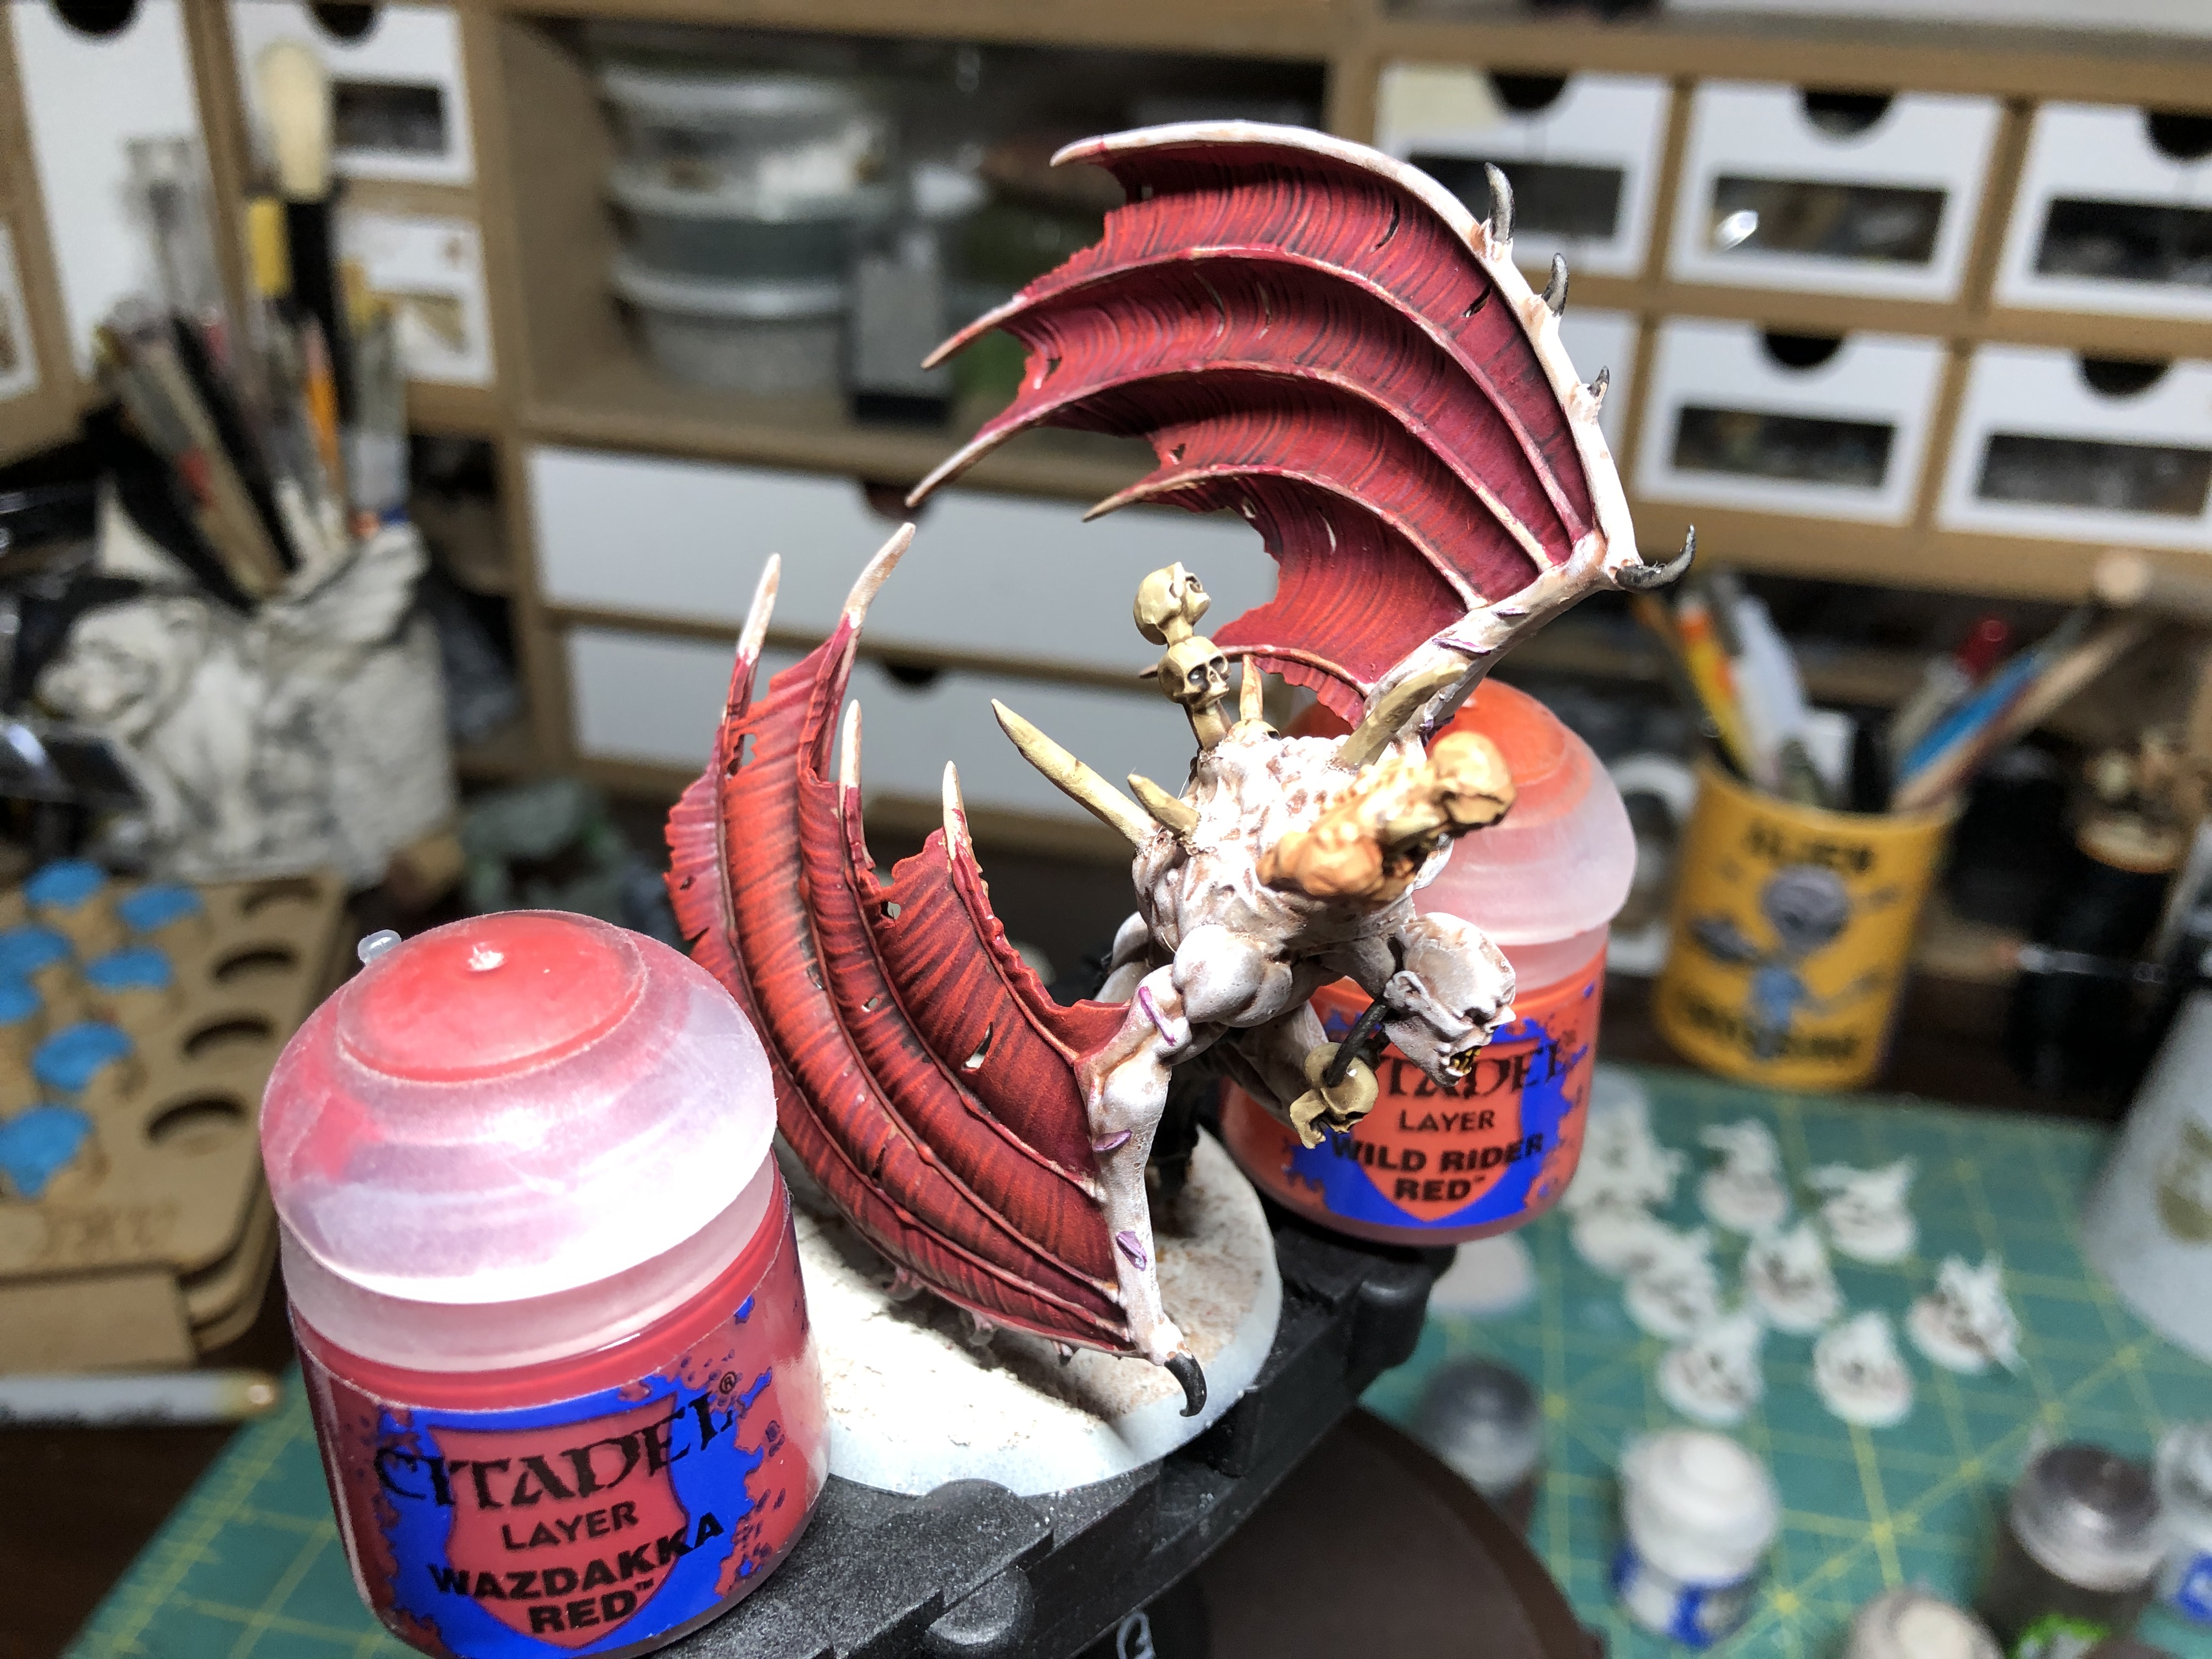 The Crypt Flayer's wings are highlighted in GW Wazdakka Red and Wild Rider Red. I suggest using a medium dry-brush.
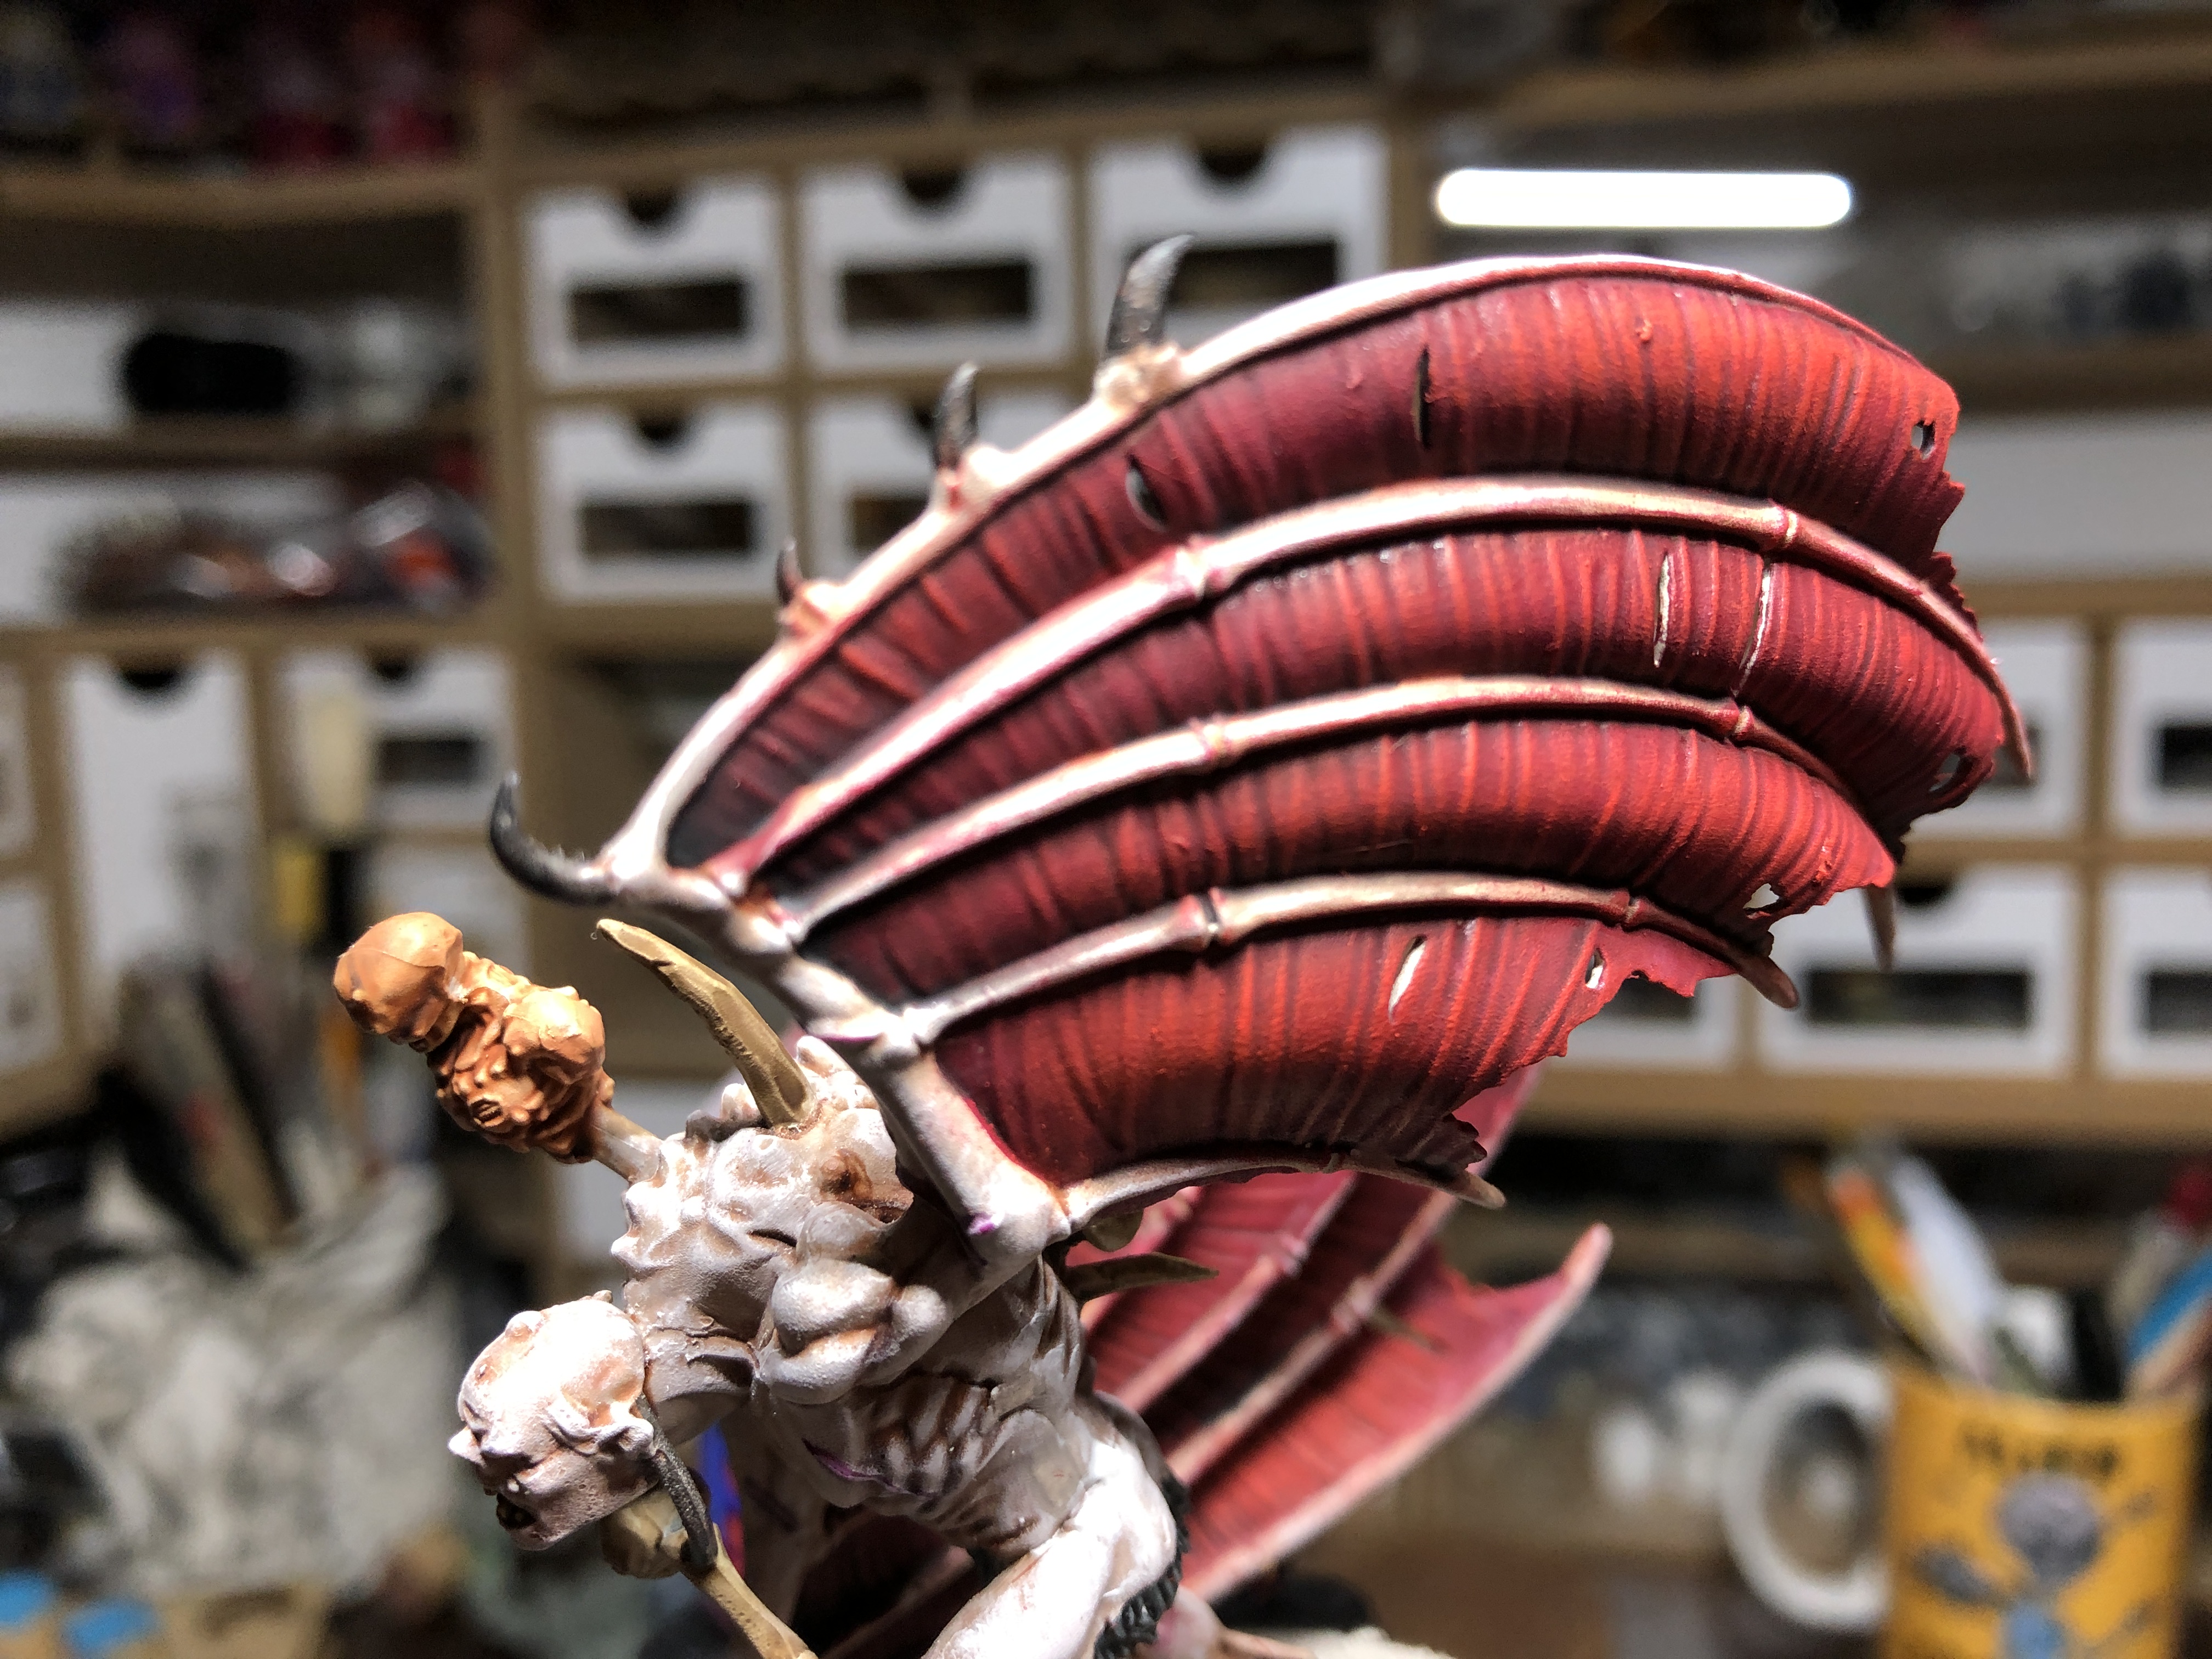 Crypt Flayer's wings details.
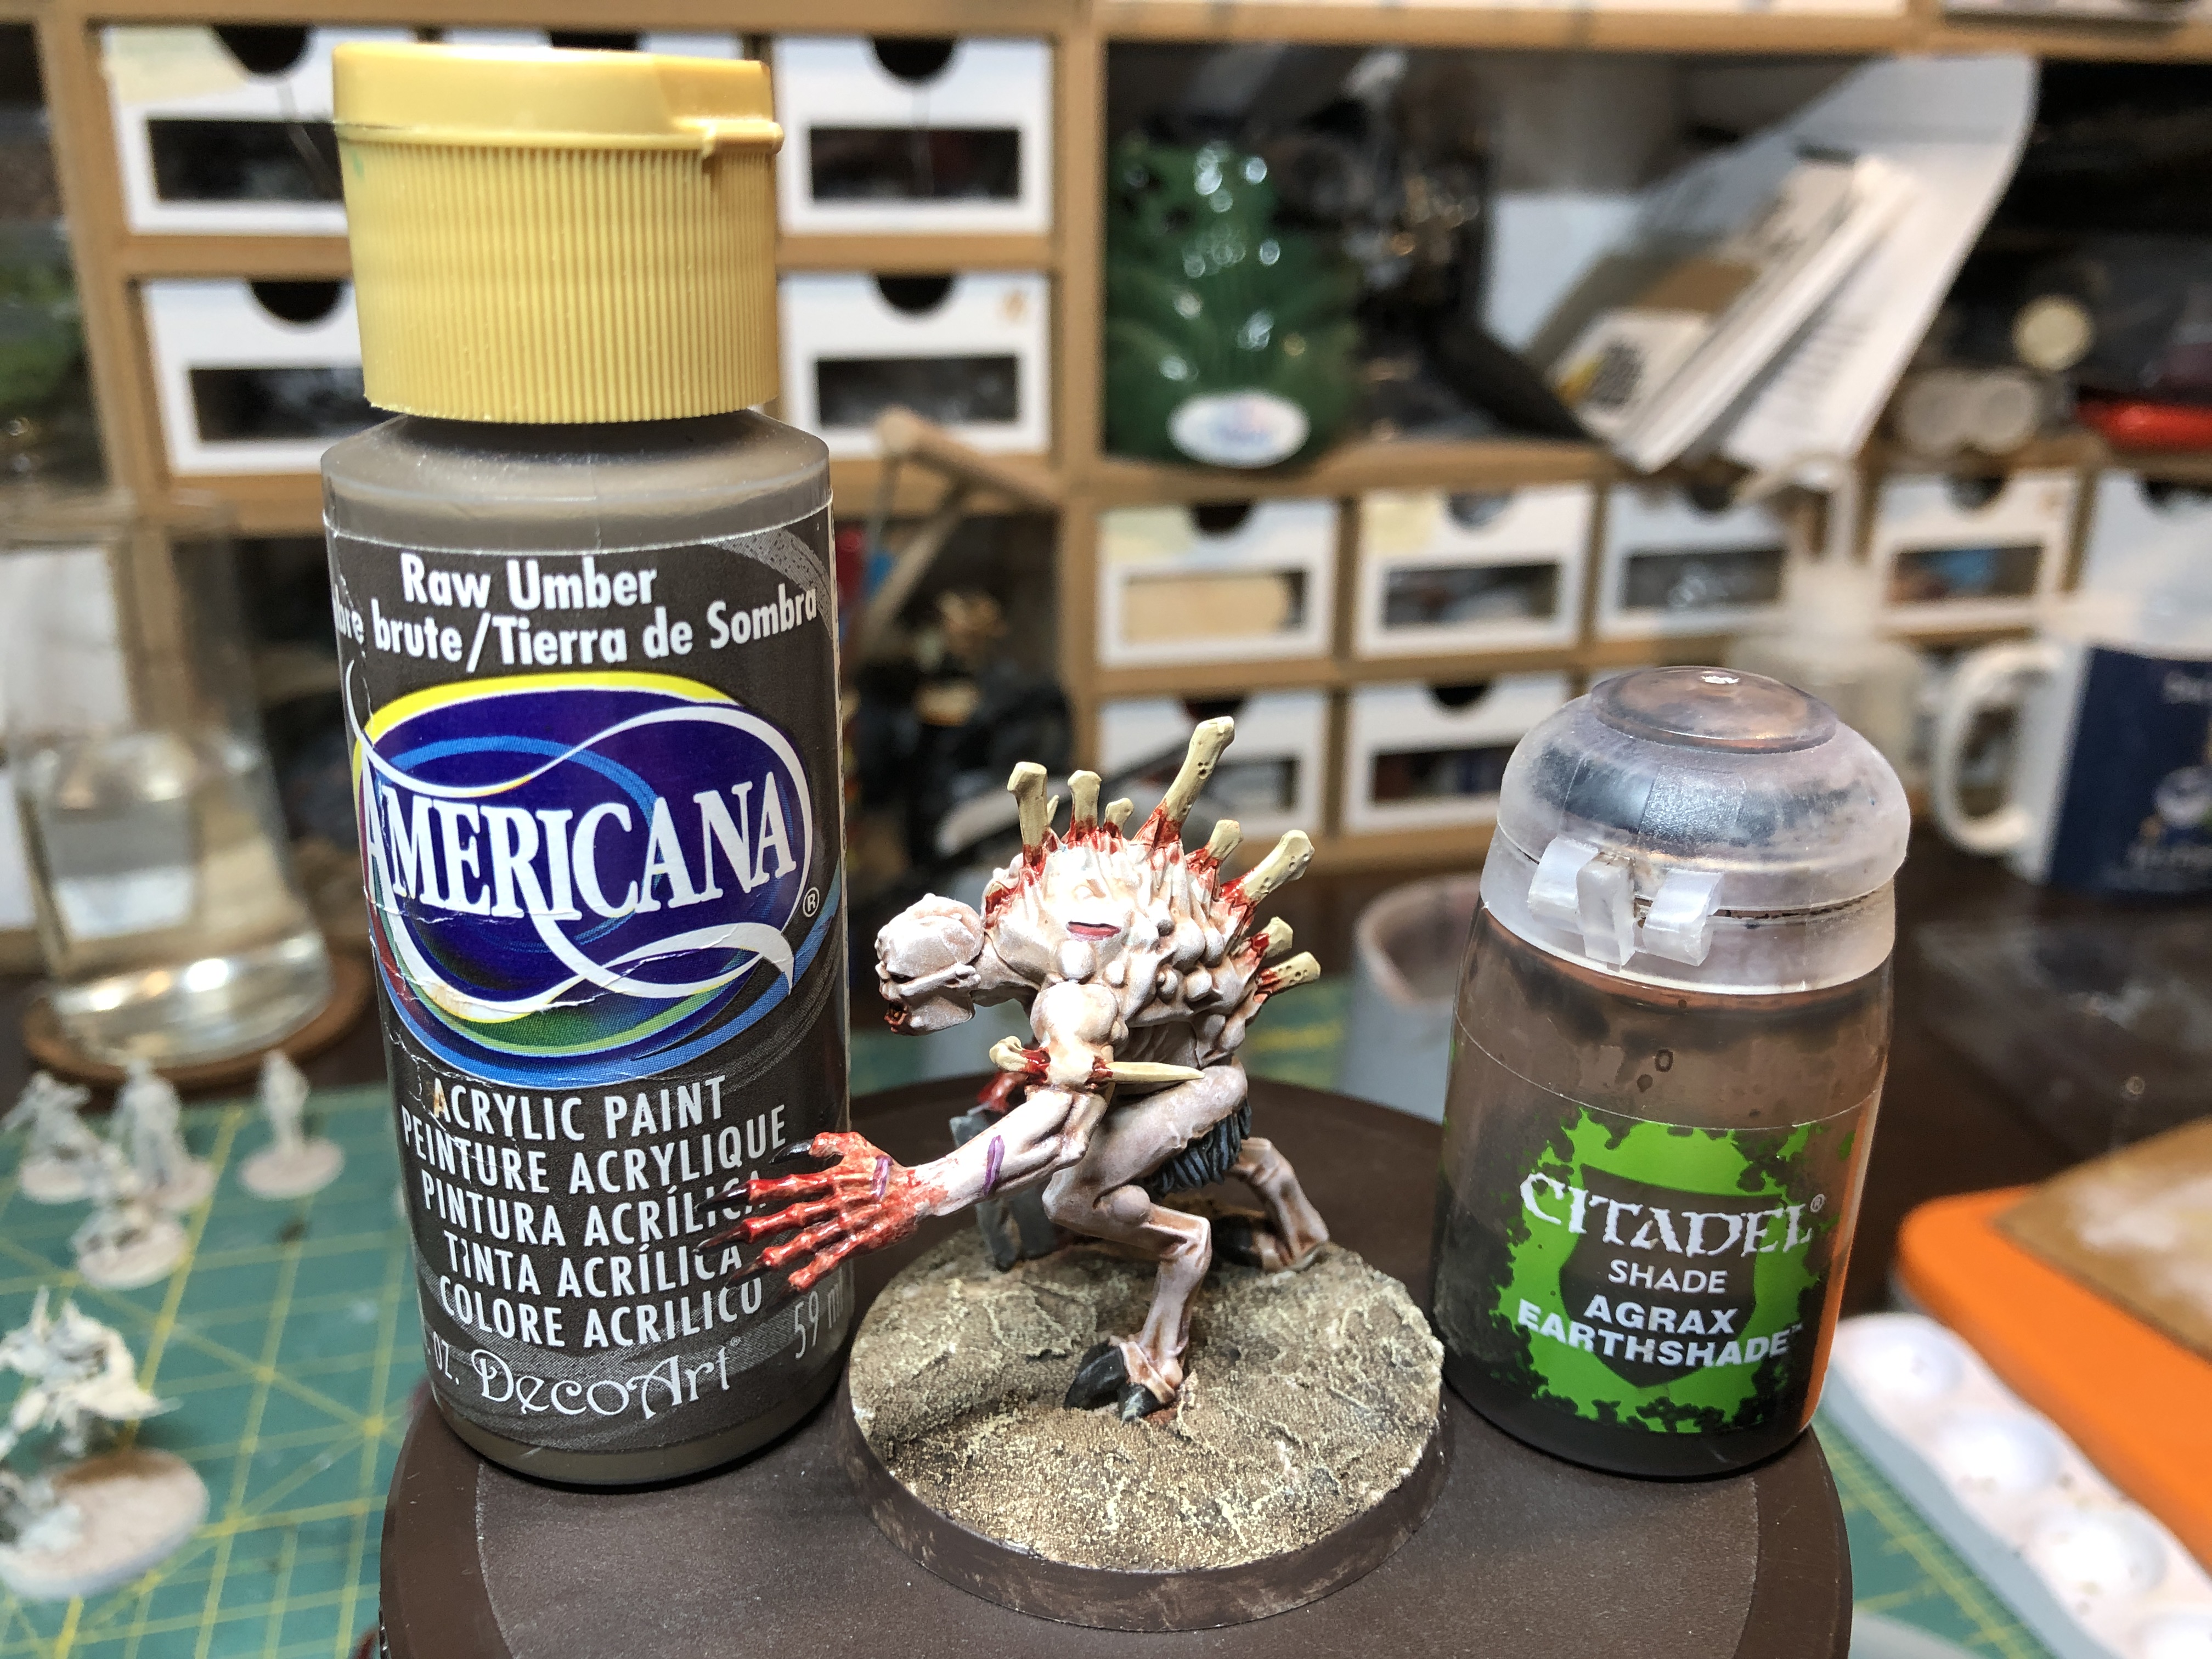 Basing is based in craft paint Raw Umber, washed with GW Agrax Earthshade. Leave the wash dry for a good 1/2 hour before applying the final dry-brush.
 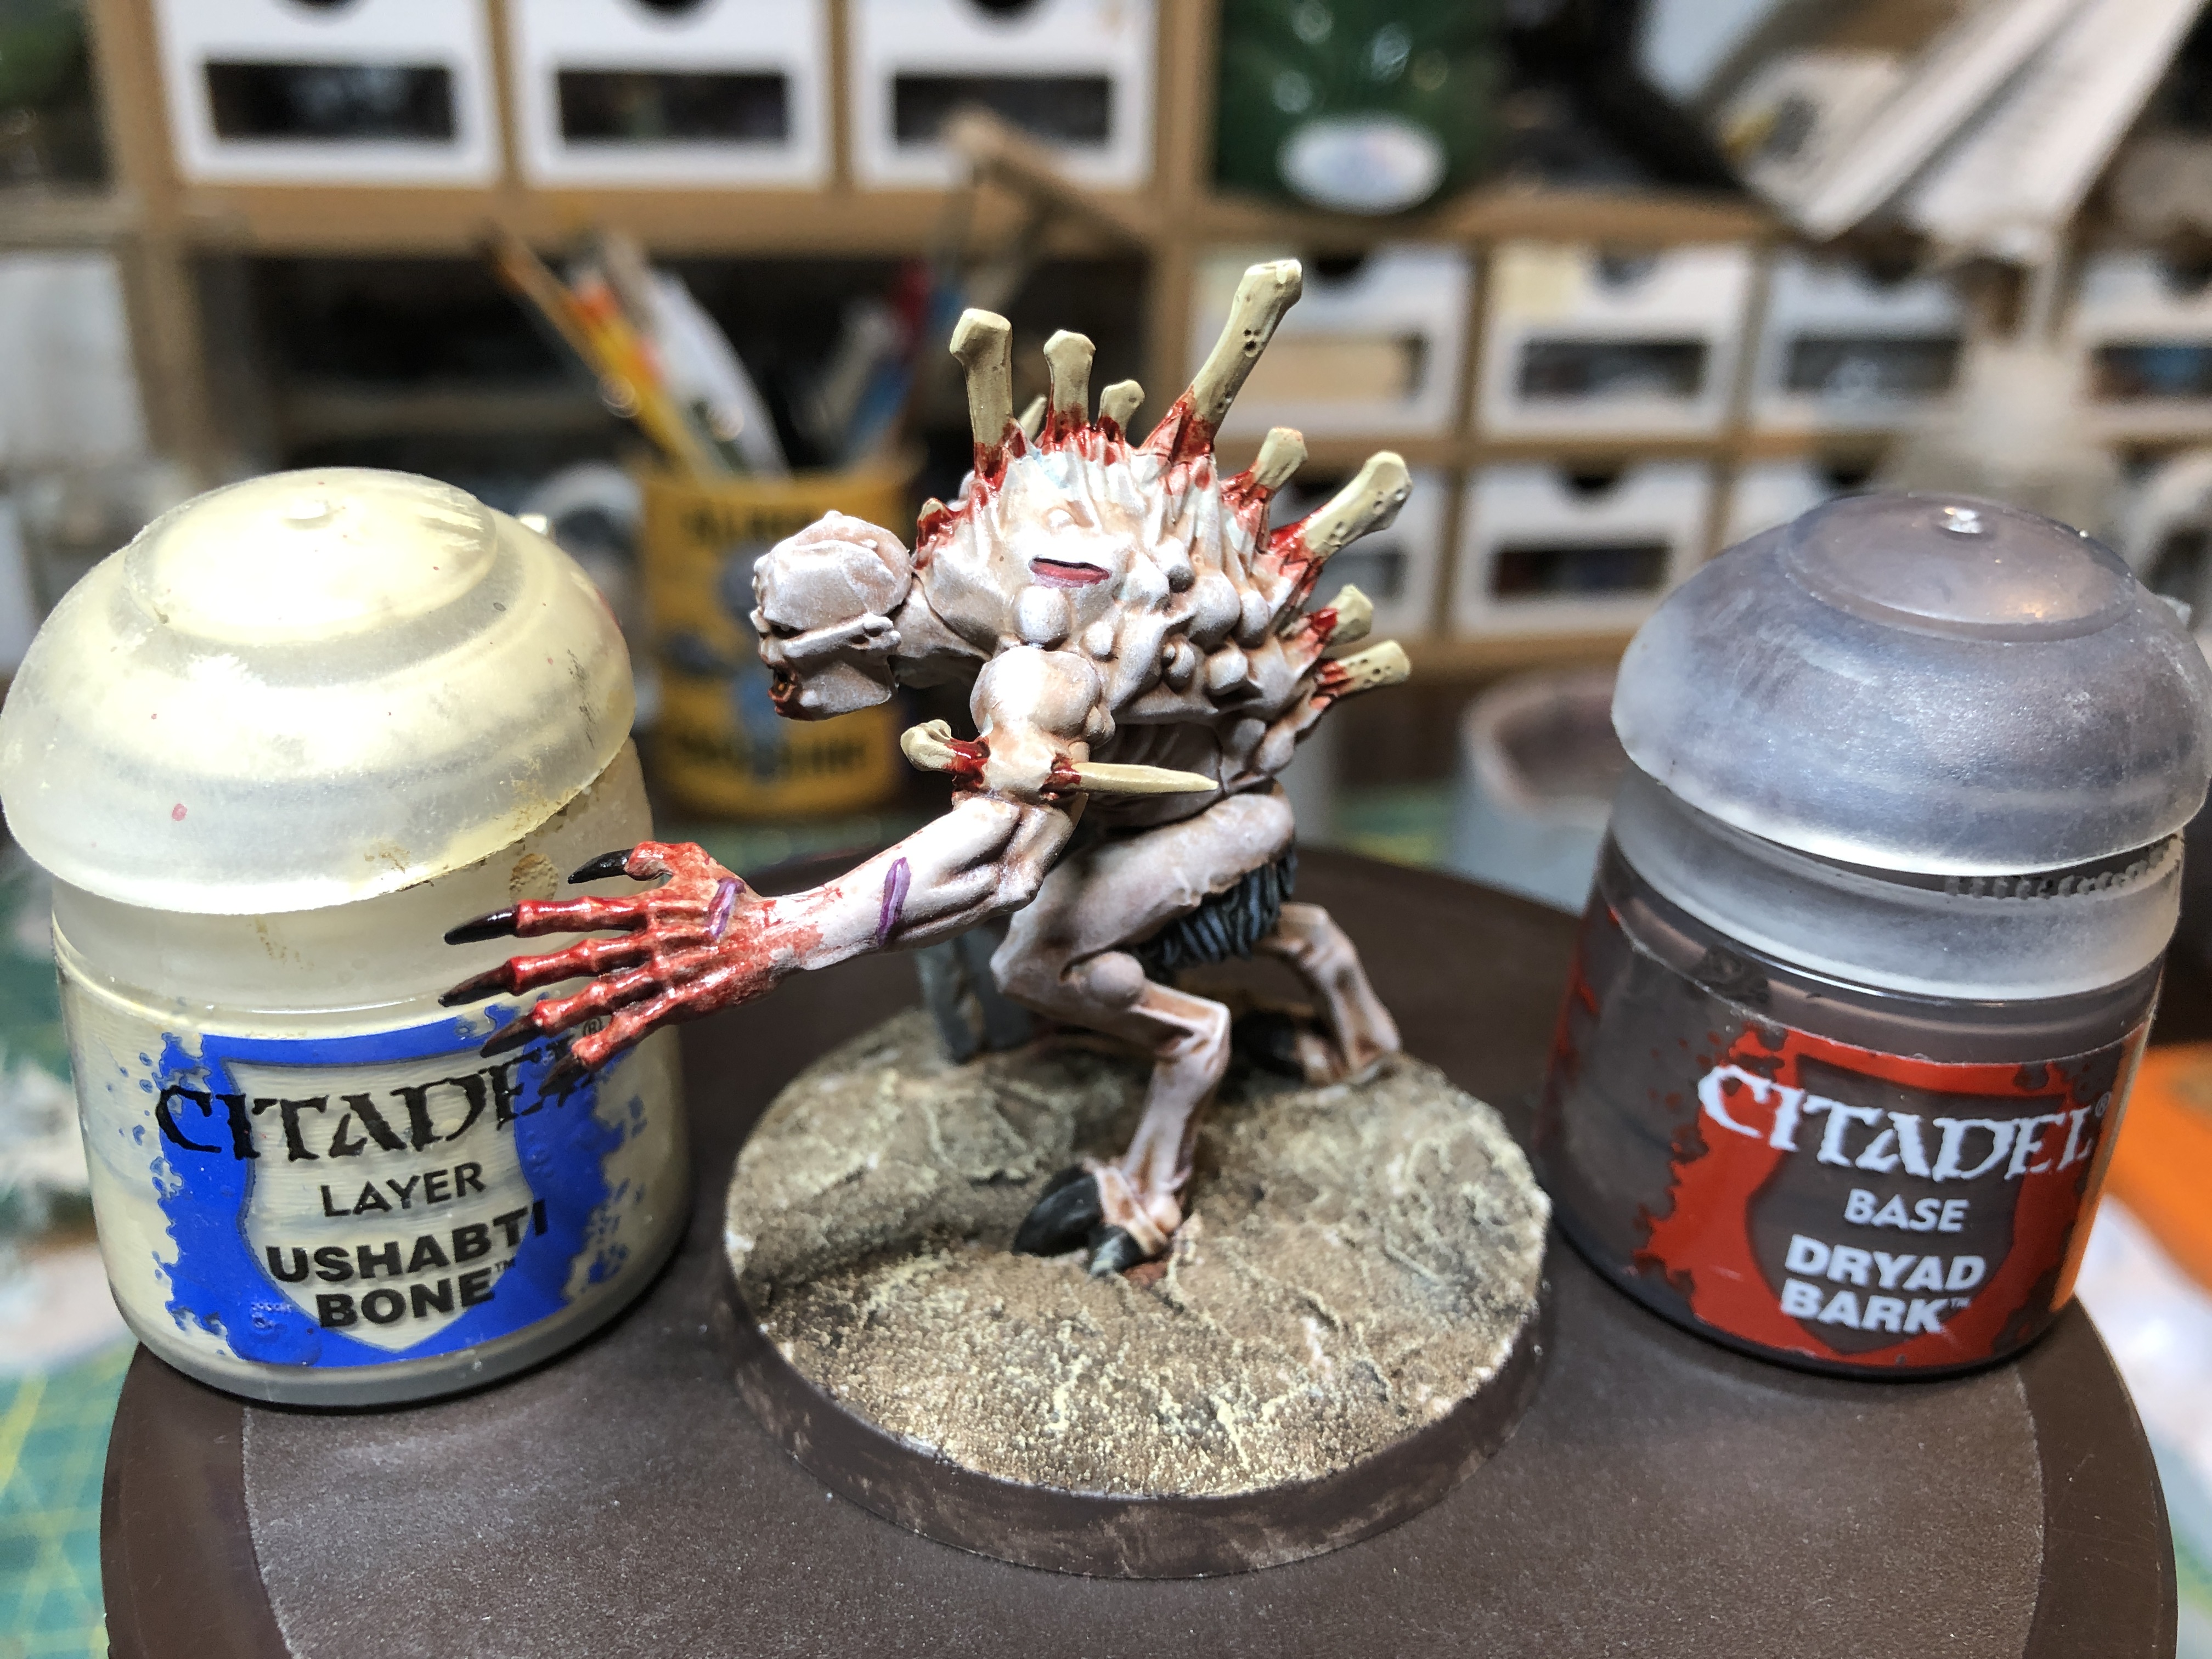 Finally highlight the base in GW Ushabti Bones and paint the side of the base with GW Dryad Bark. I decided to not have a clean coat of paint to match the dirty aspect of the base.
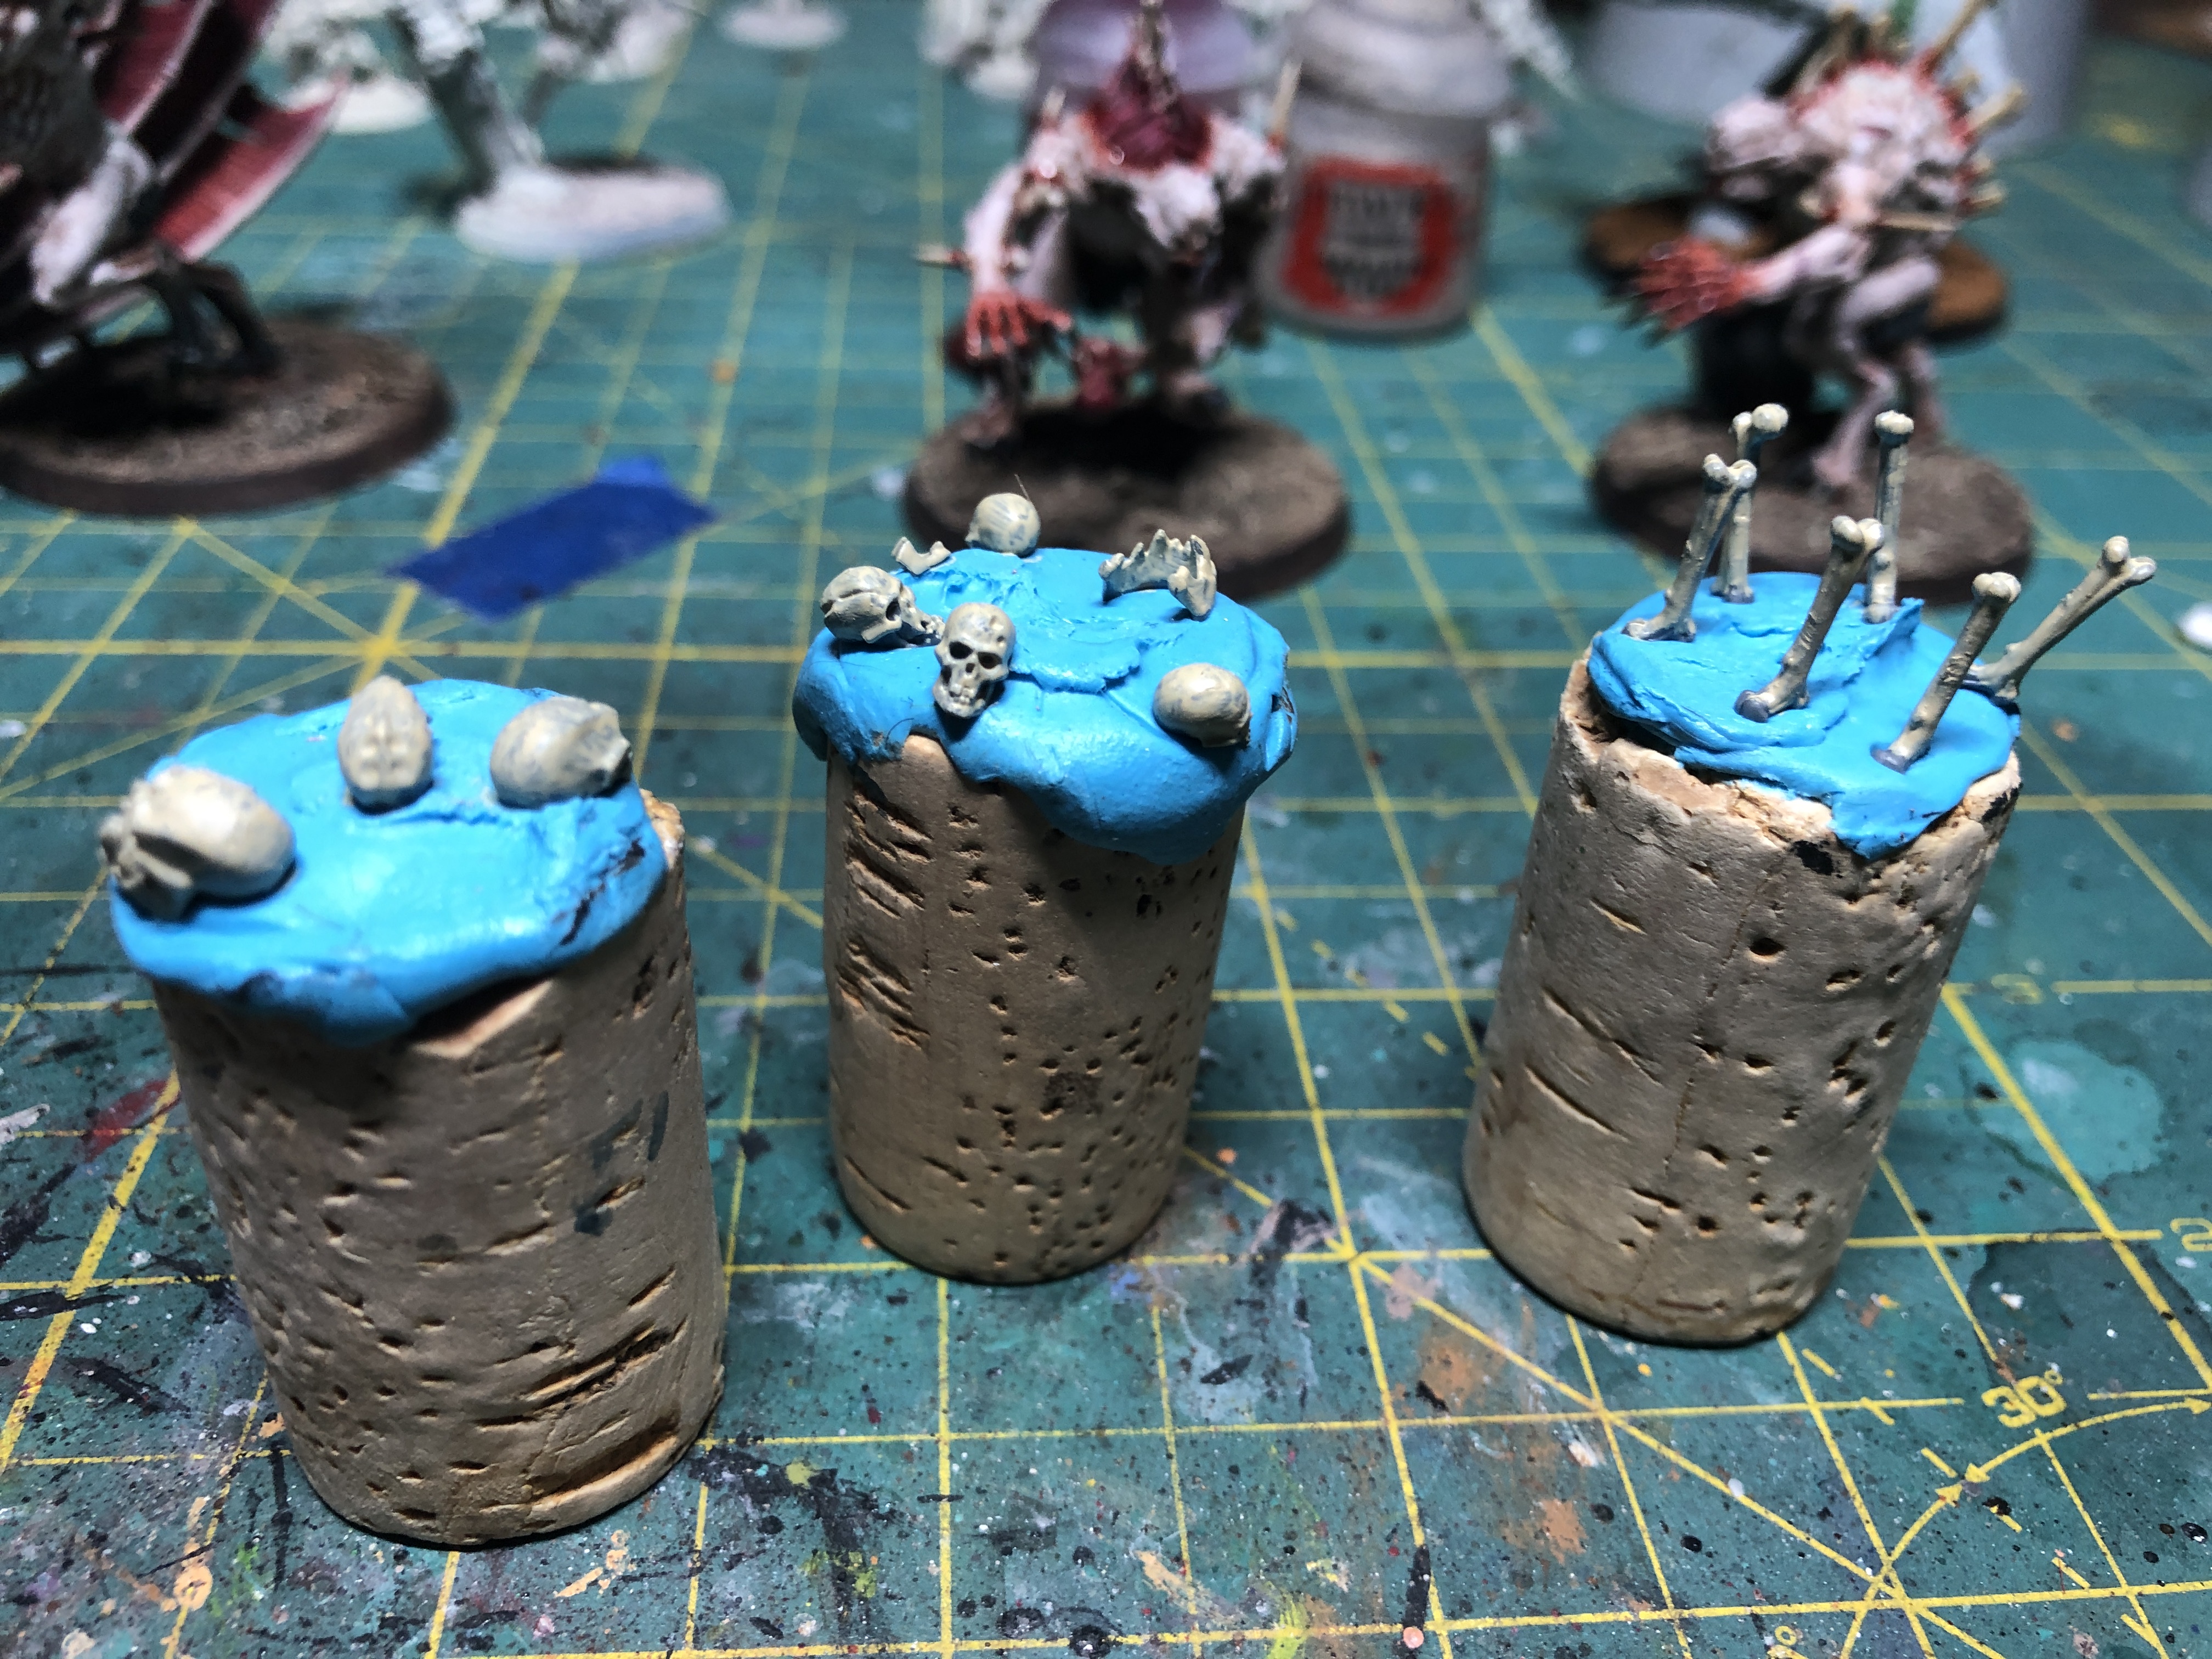 I chose to decorate the base further by using some of GW skull box (an excellent investment if you decide you will need a lot of bases with skulls and bones. Skulls and bones are applied a layer of Ushabti Bones BEFORE applying them to the base.
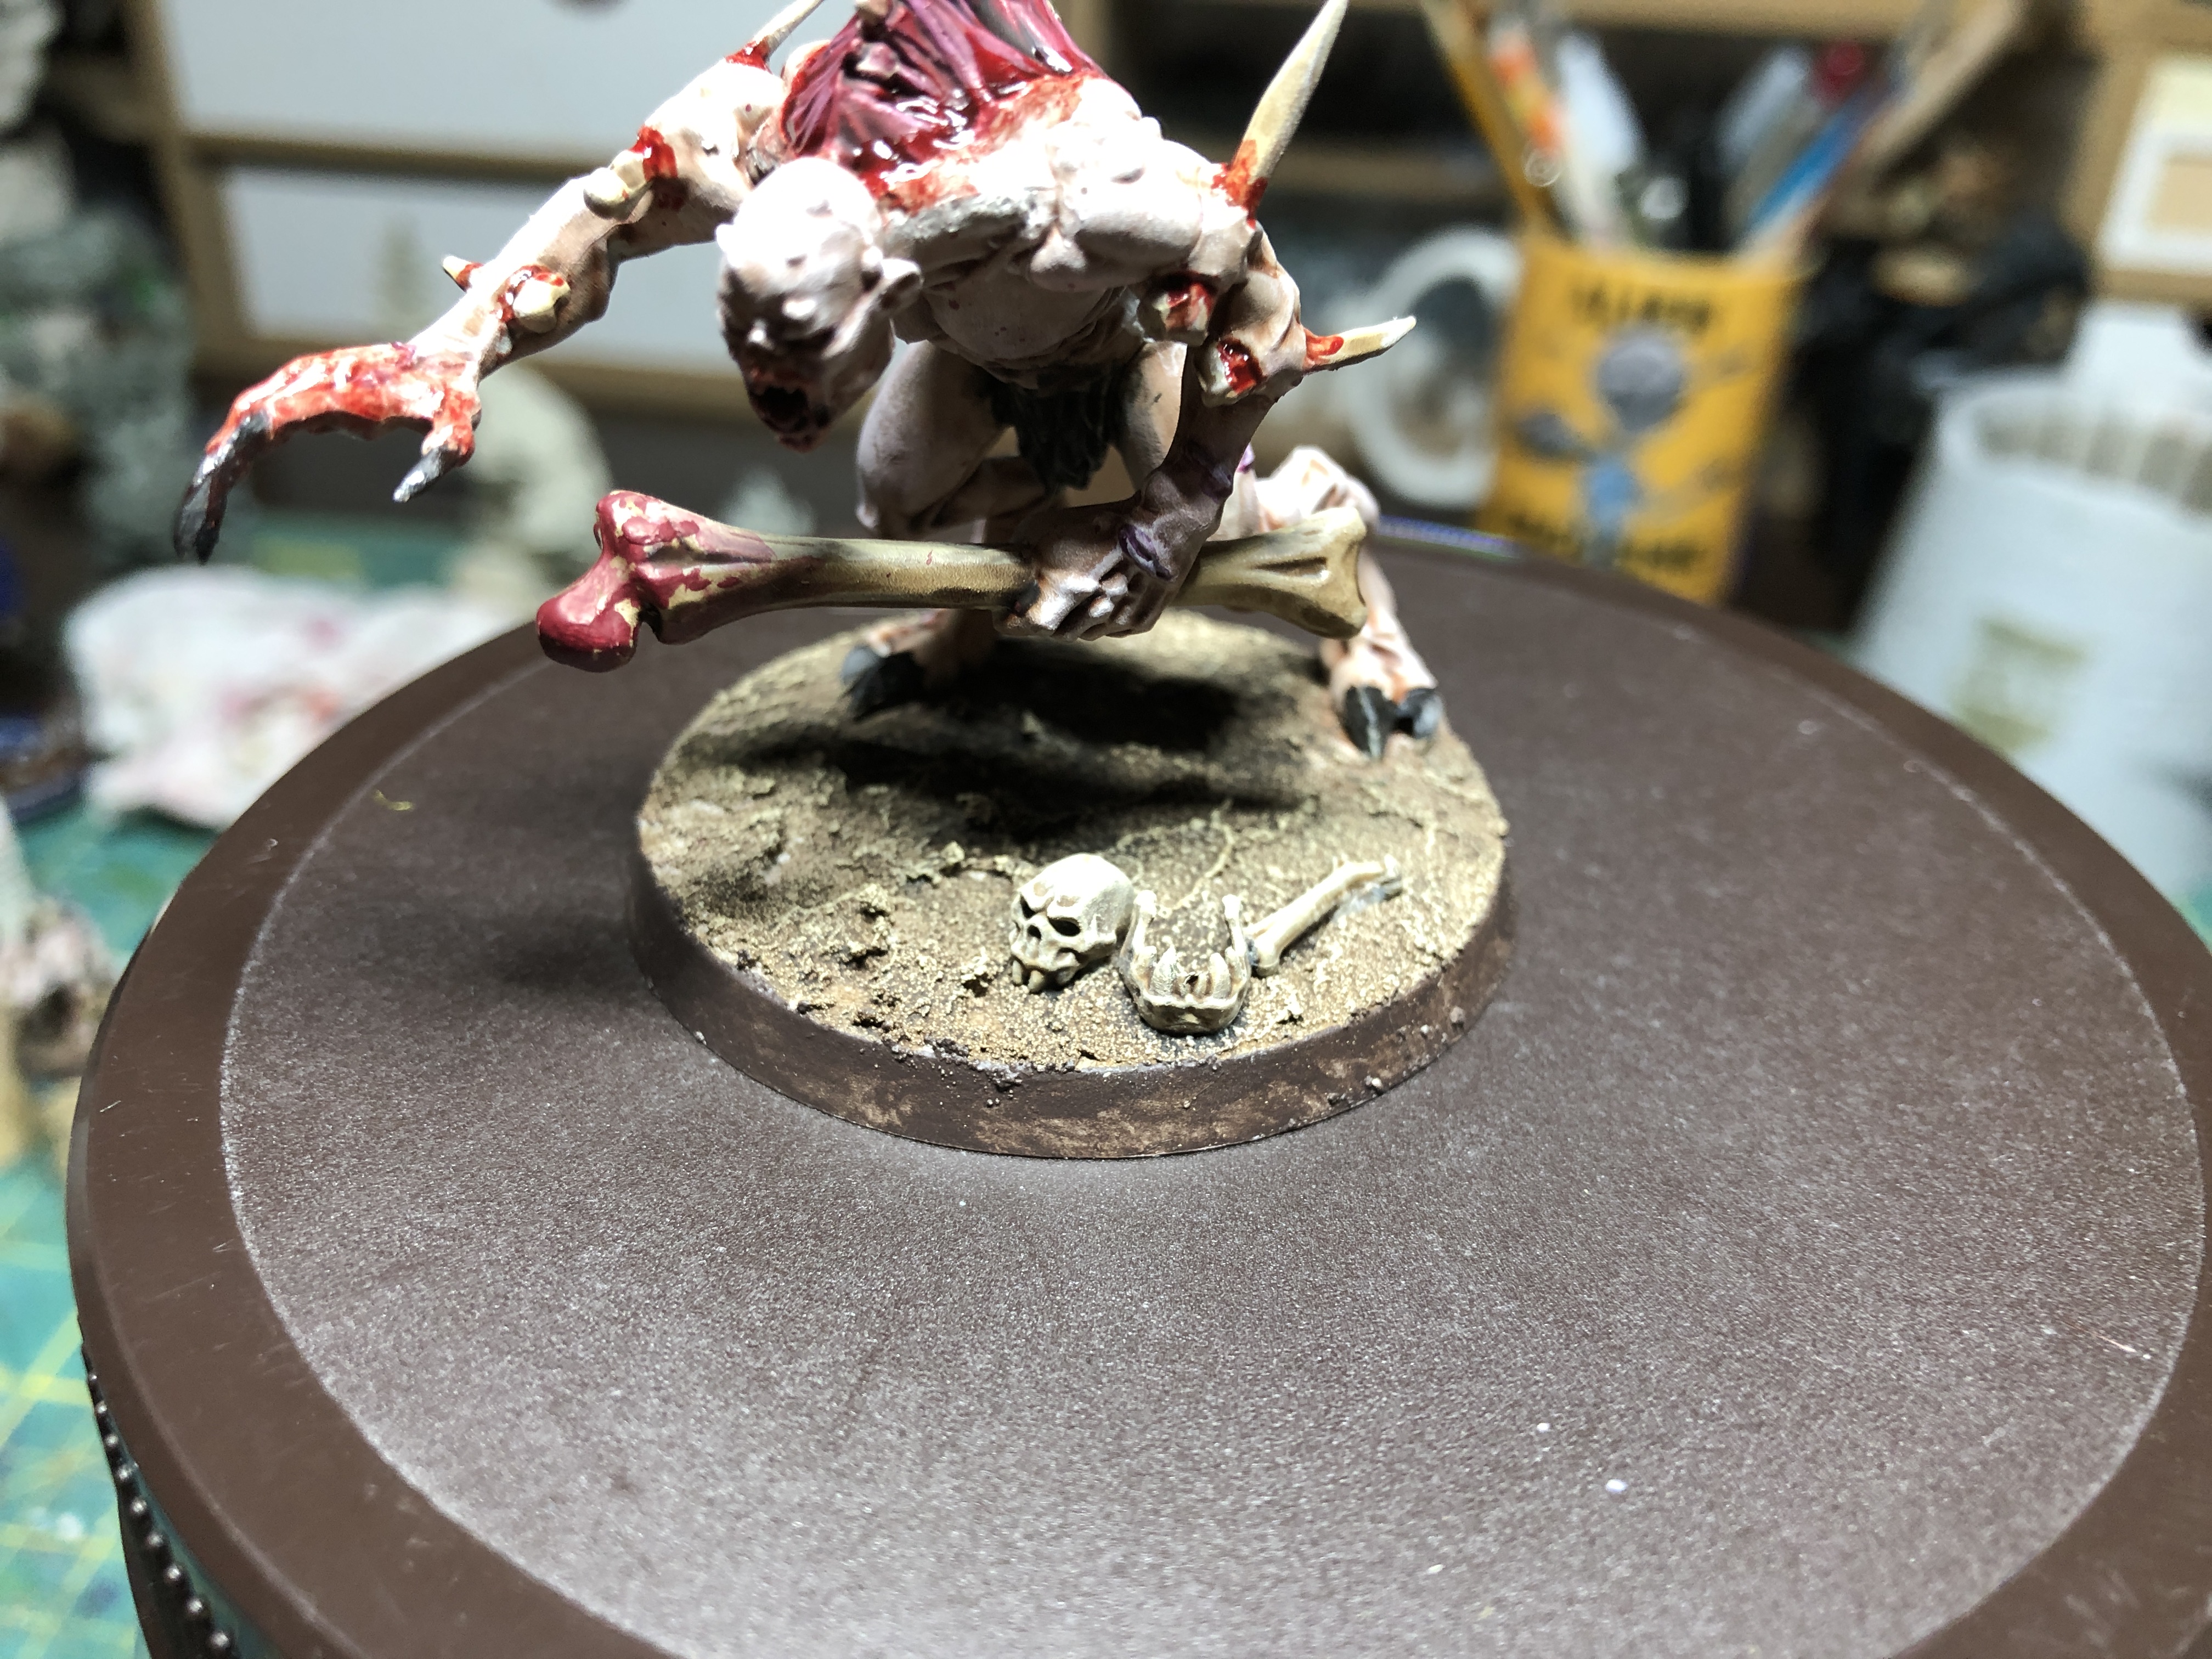 Once on the base, apply a wash of GW Agrax Earthshade, followed by a dry-brush of GW Flayed One Flesh (applied with a small dry-brush).
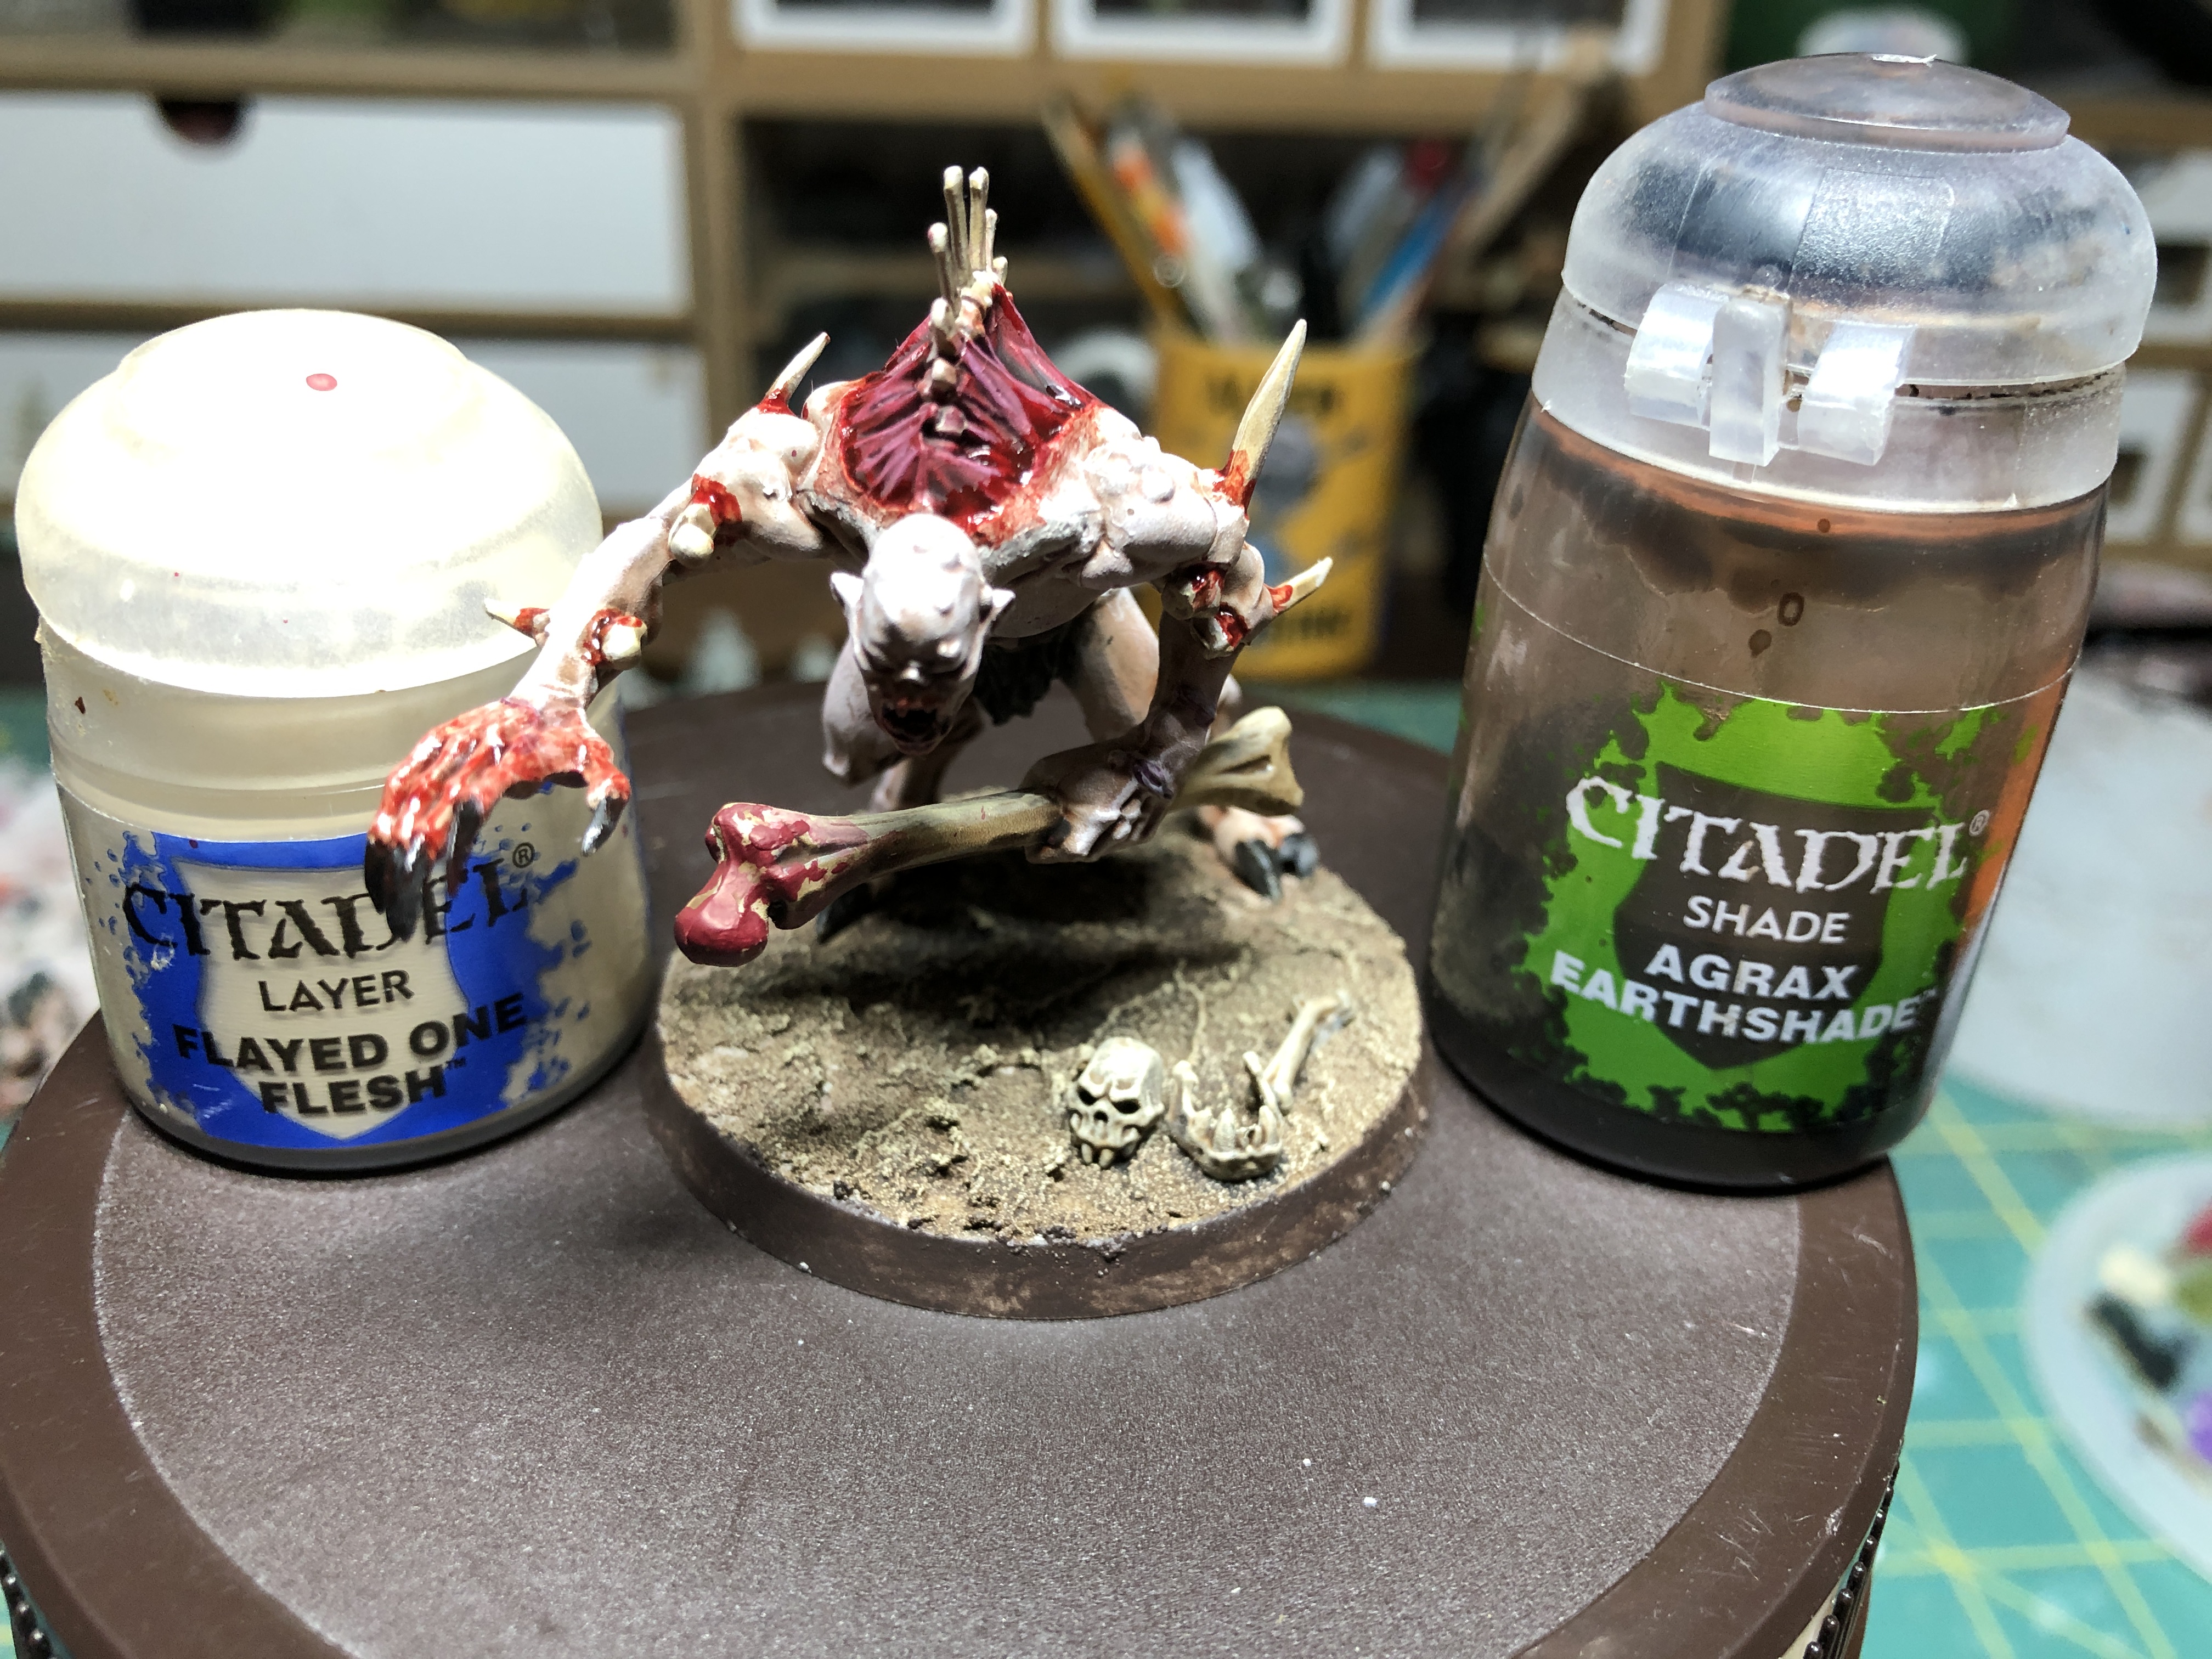 Final aspect of the Crypt Flayer base.
Warcry Flesh-Eater Court Warband - Part 2
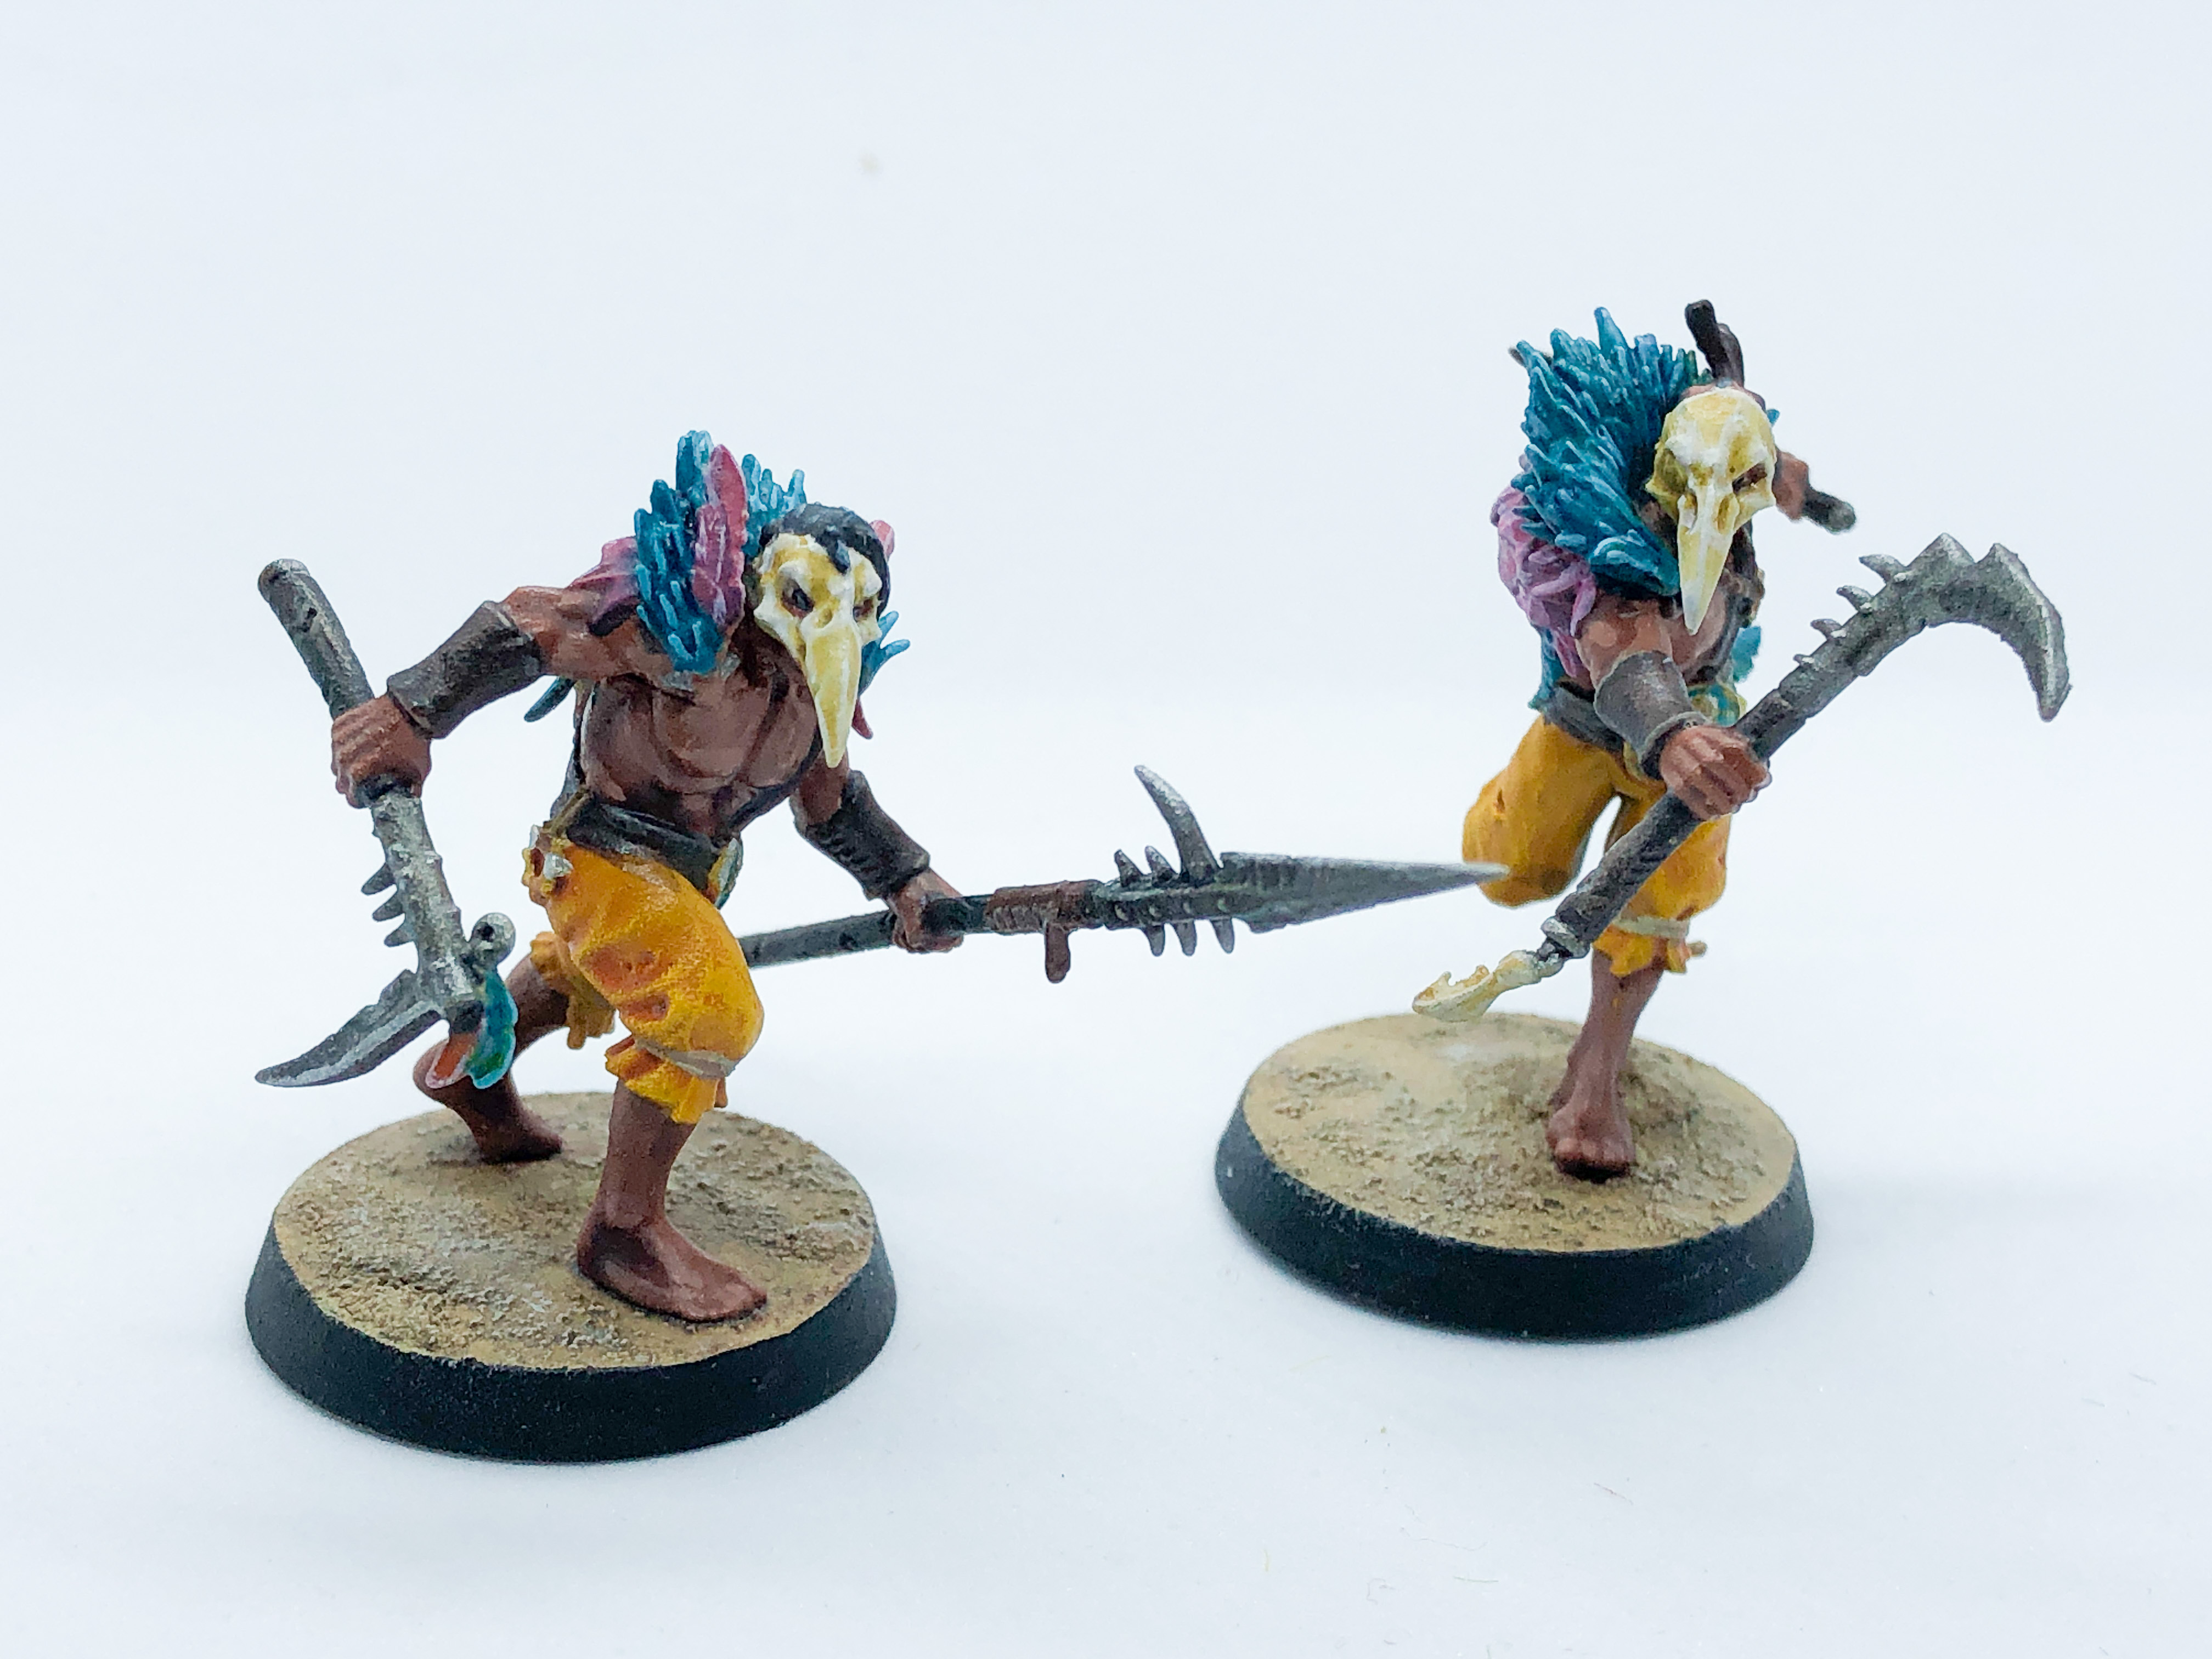
 I chose to prime all miniatures with Wraith Bone from GW and not zenital prime them as I intend on creating shadows on the skin with straight dry brushing.
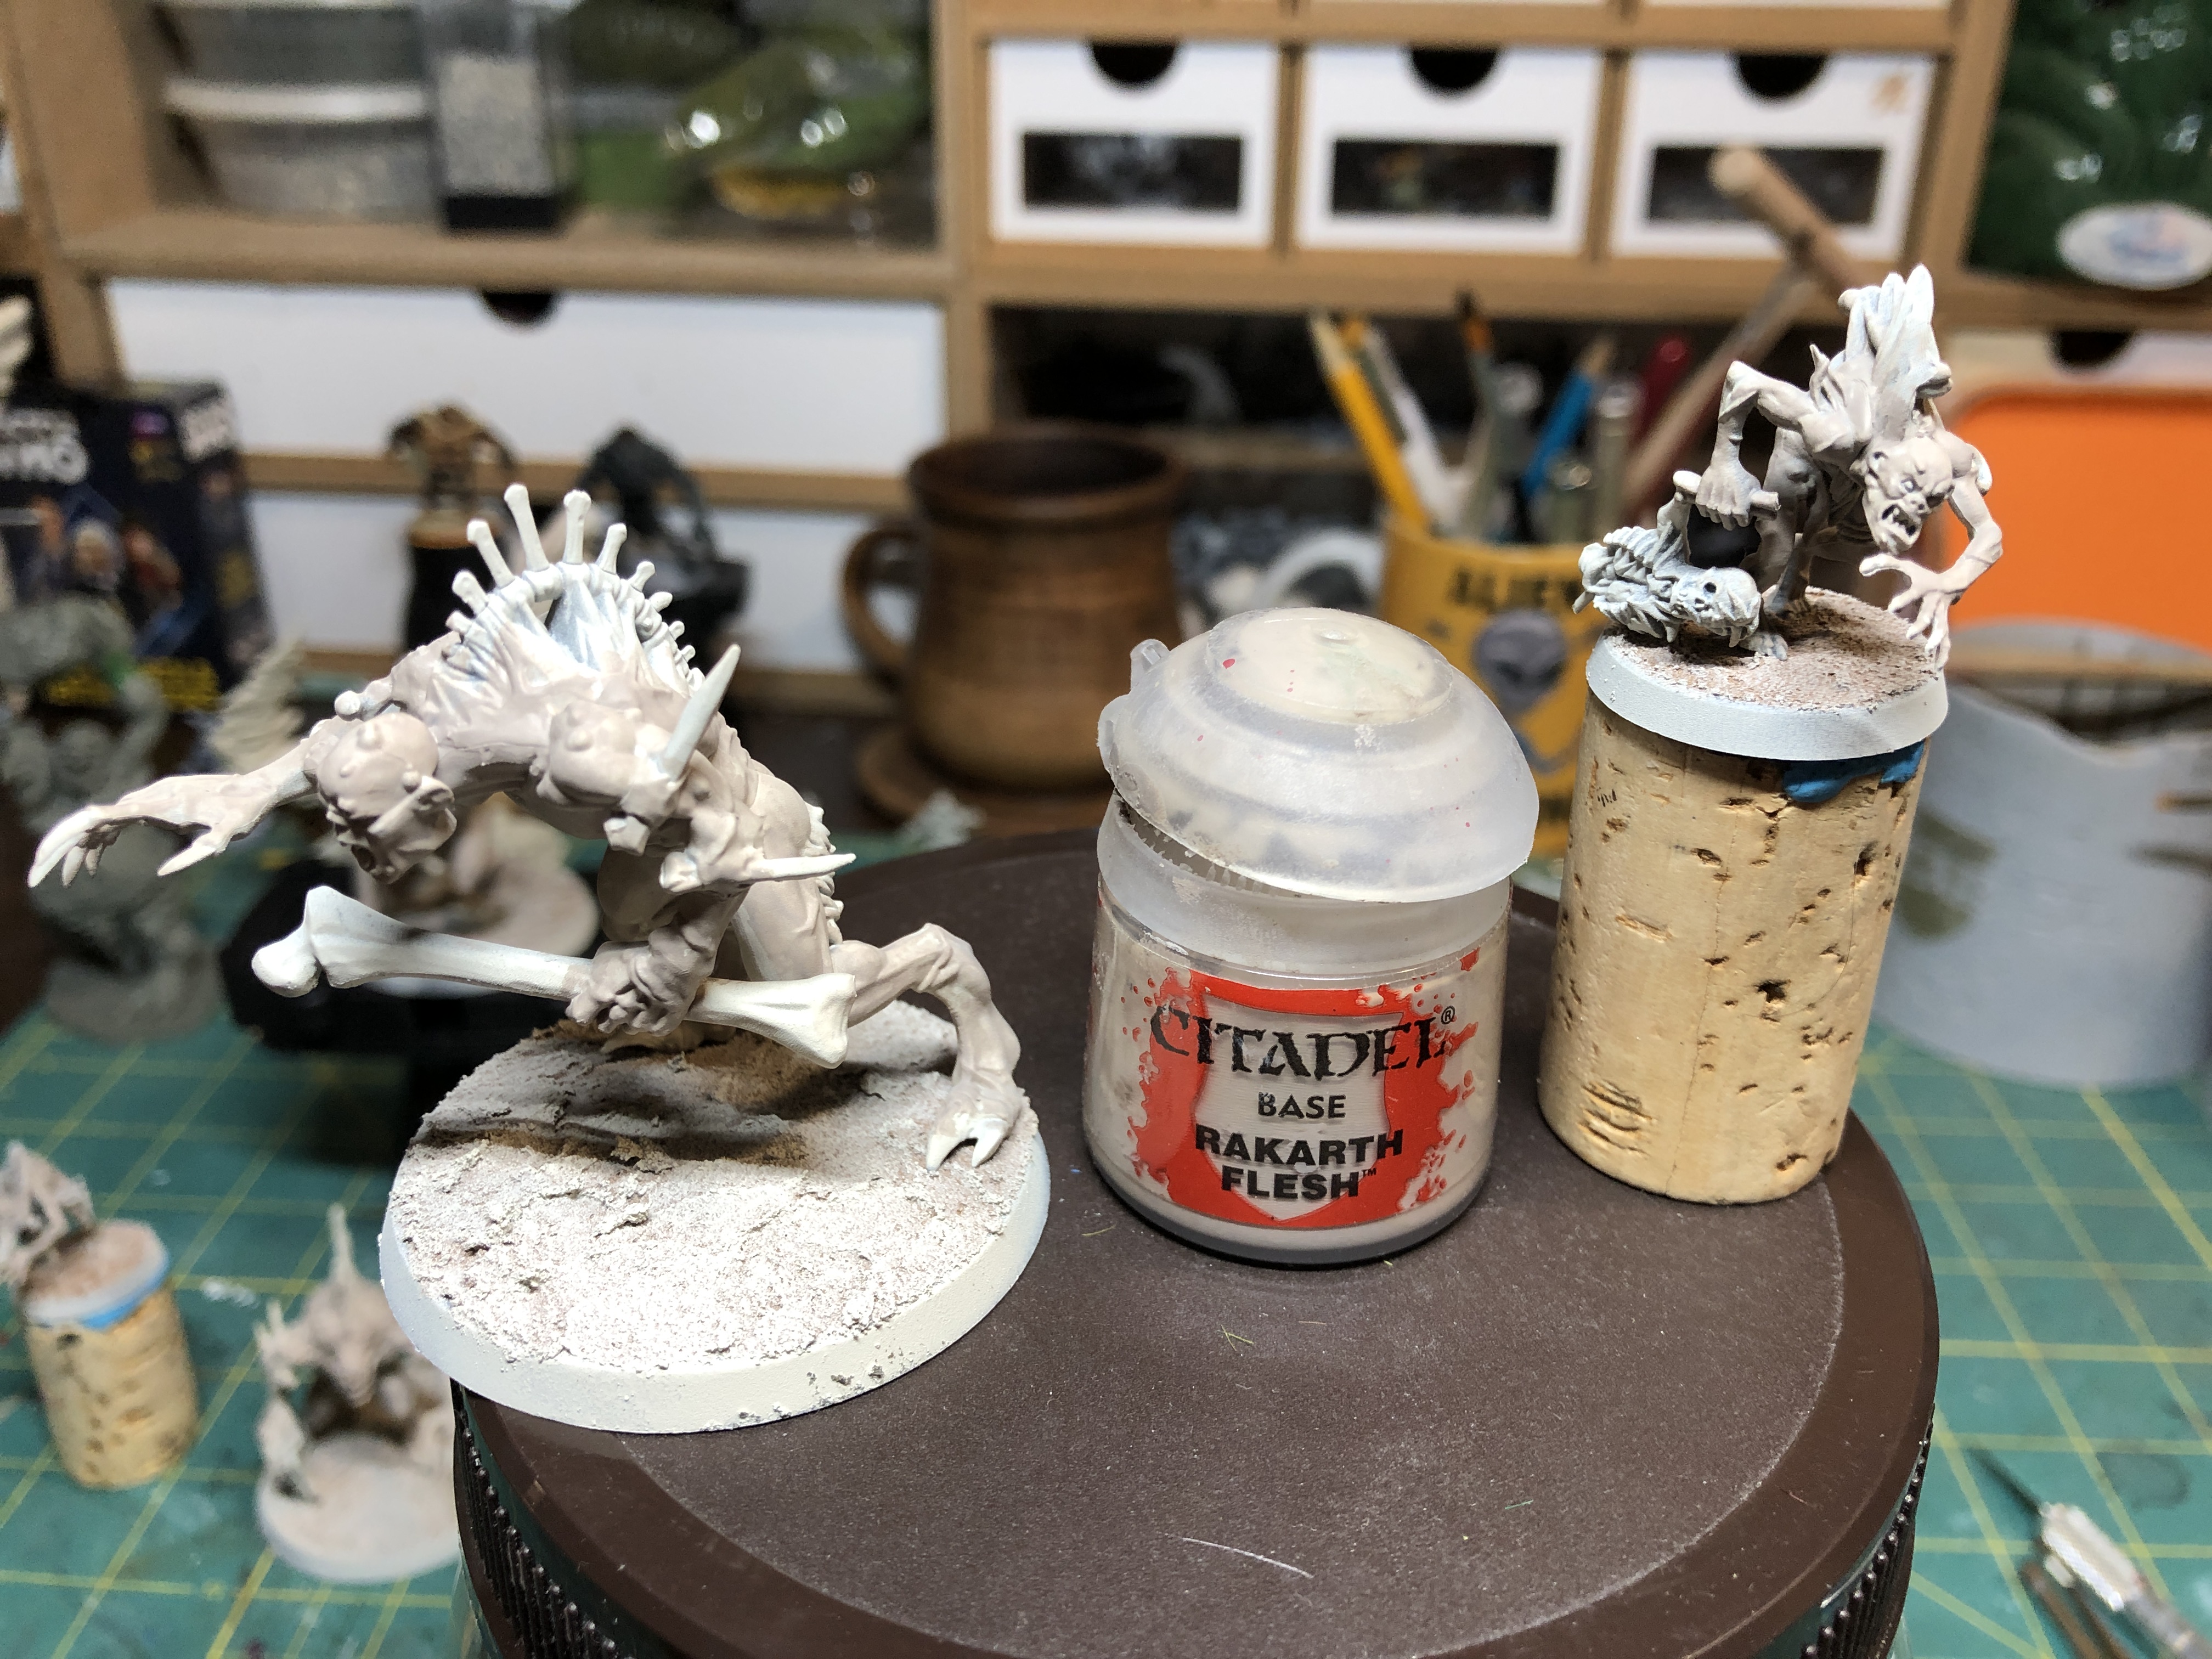 The skin is then painted with Rakarth Flesh from GW. Use a large brush as accuracy is not the goal here.
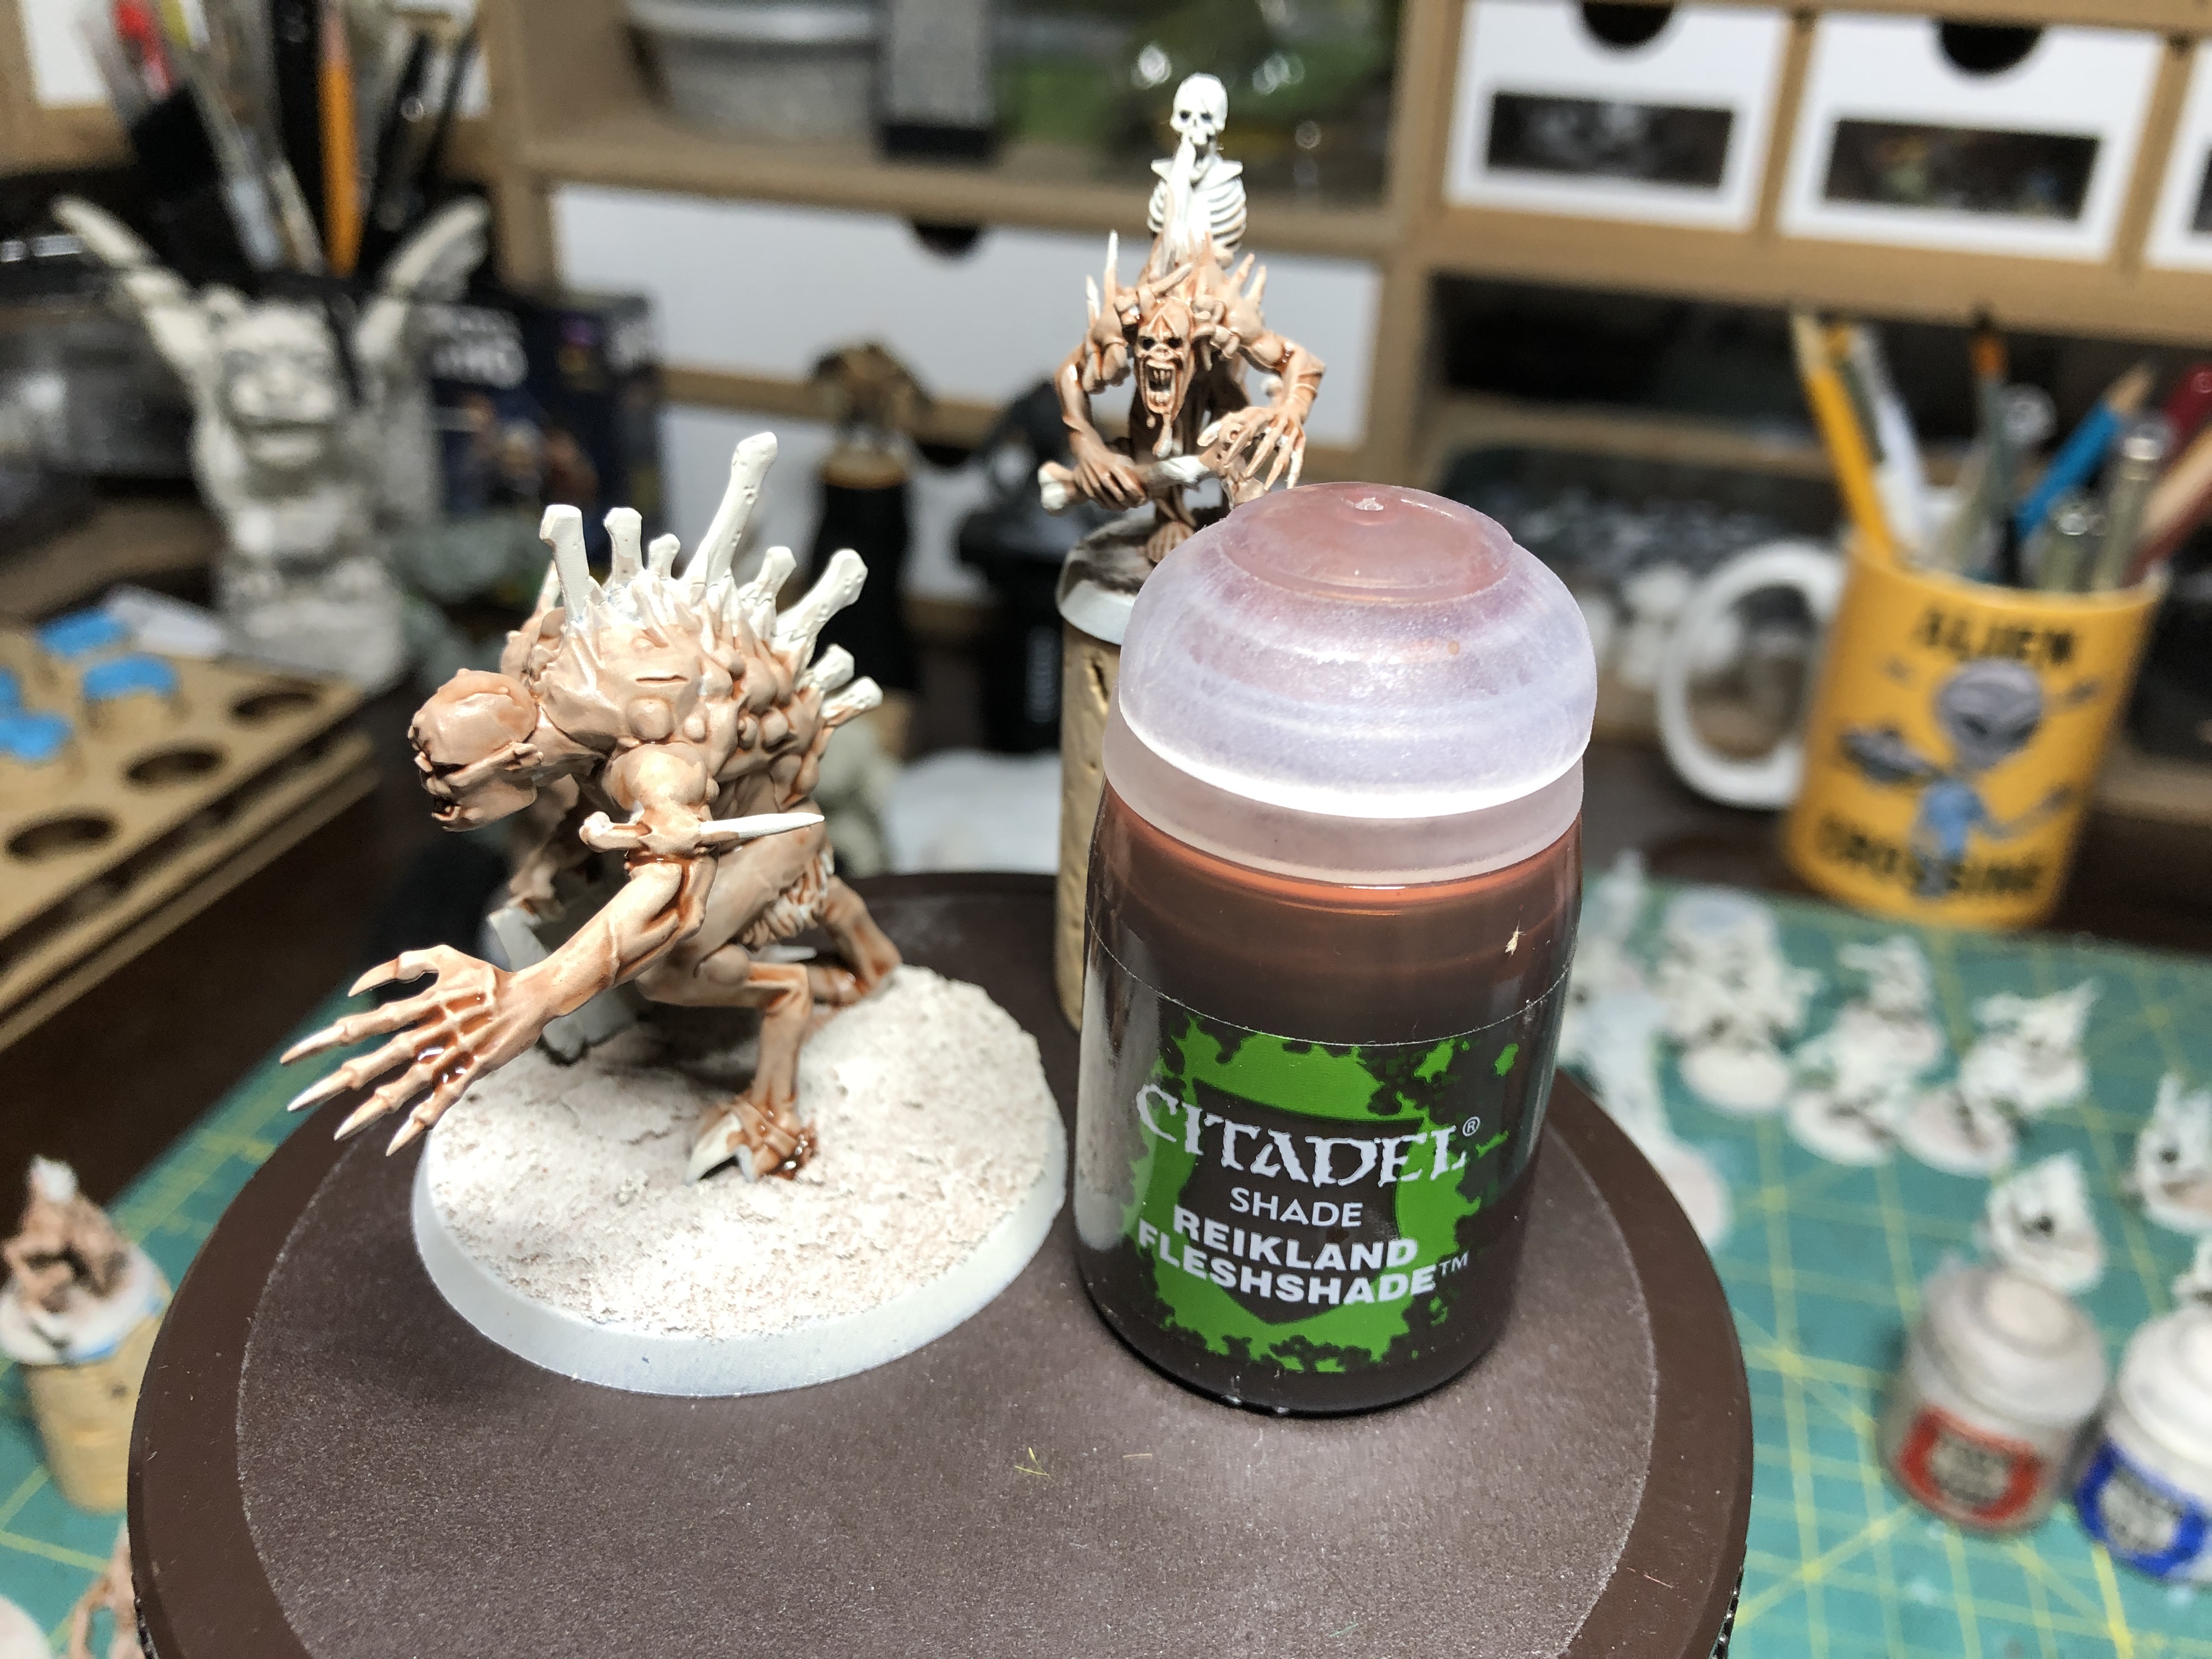 The flesh is then shaded with Reikland Fleshshade. I decided to break my usual pattern and finish the skin firsts as it occupies the majority of the miniatures' surface.
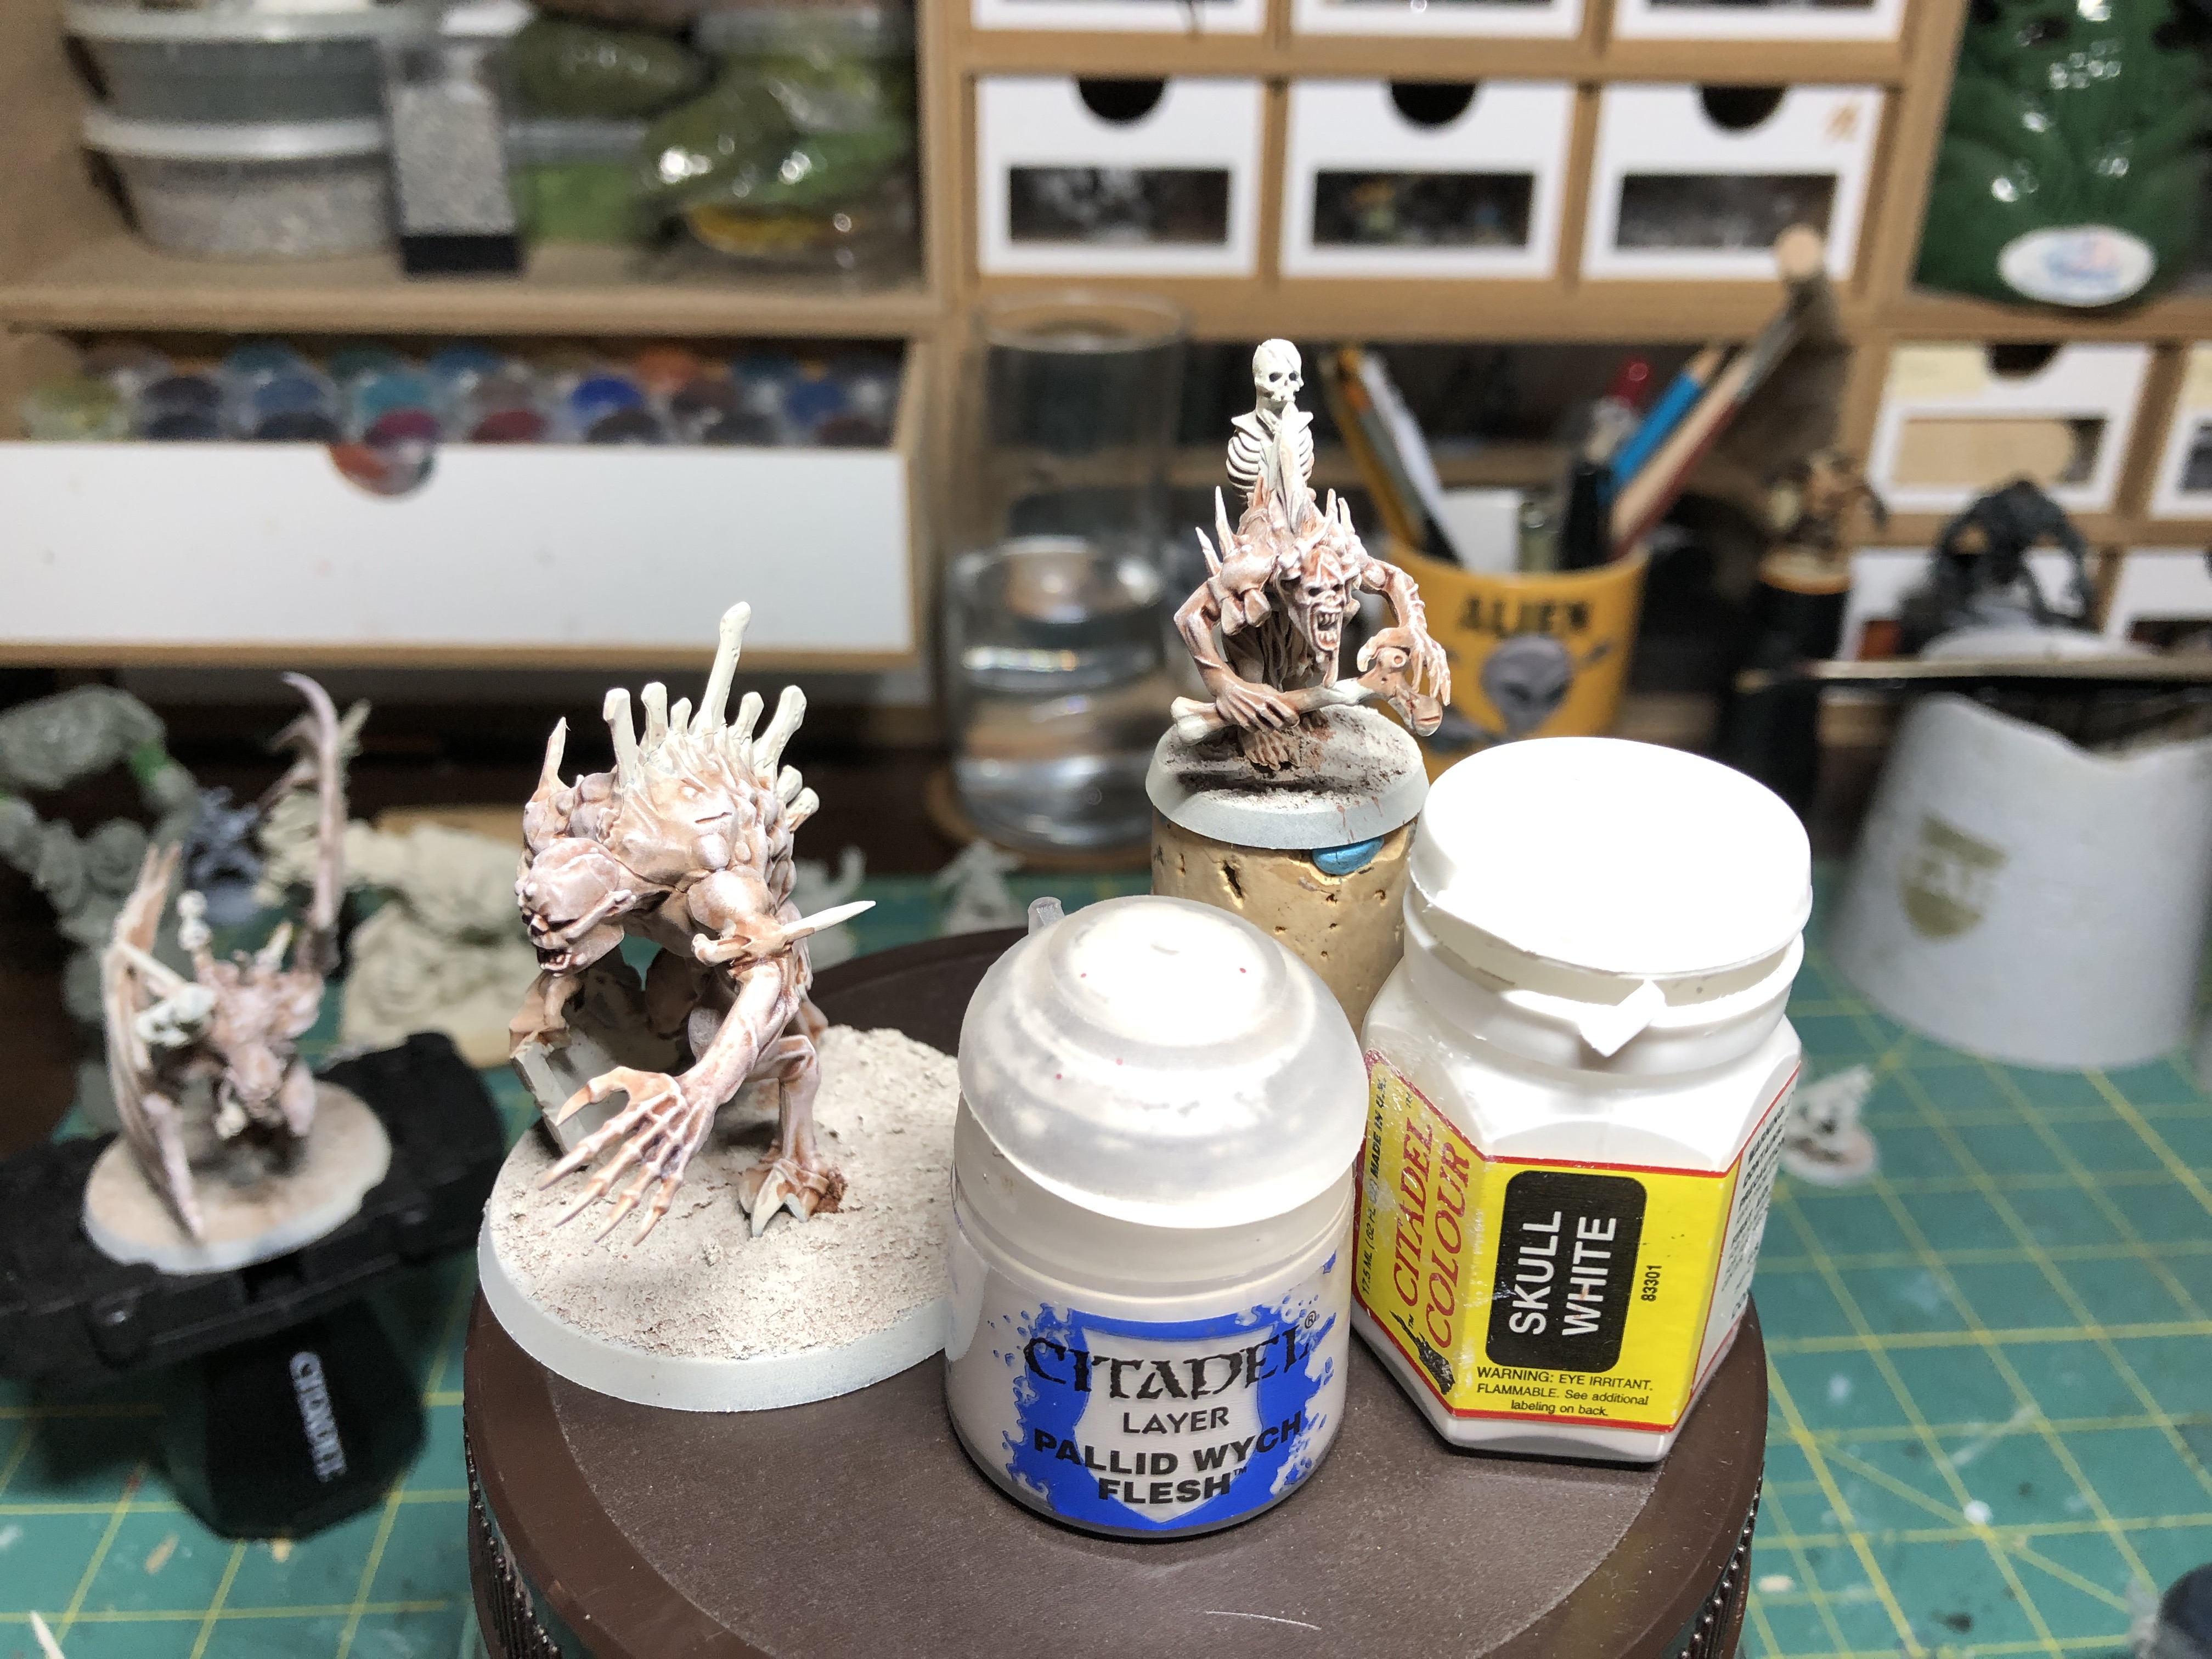 Using a makeup brush (for the smoothness of the strokes), apply two highlights, one with Pallid Wych Flesh and the second with pure white (using it very sparingly). Apply these dry brushed highlights in areas hit by the zenithal light.
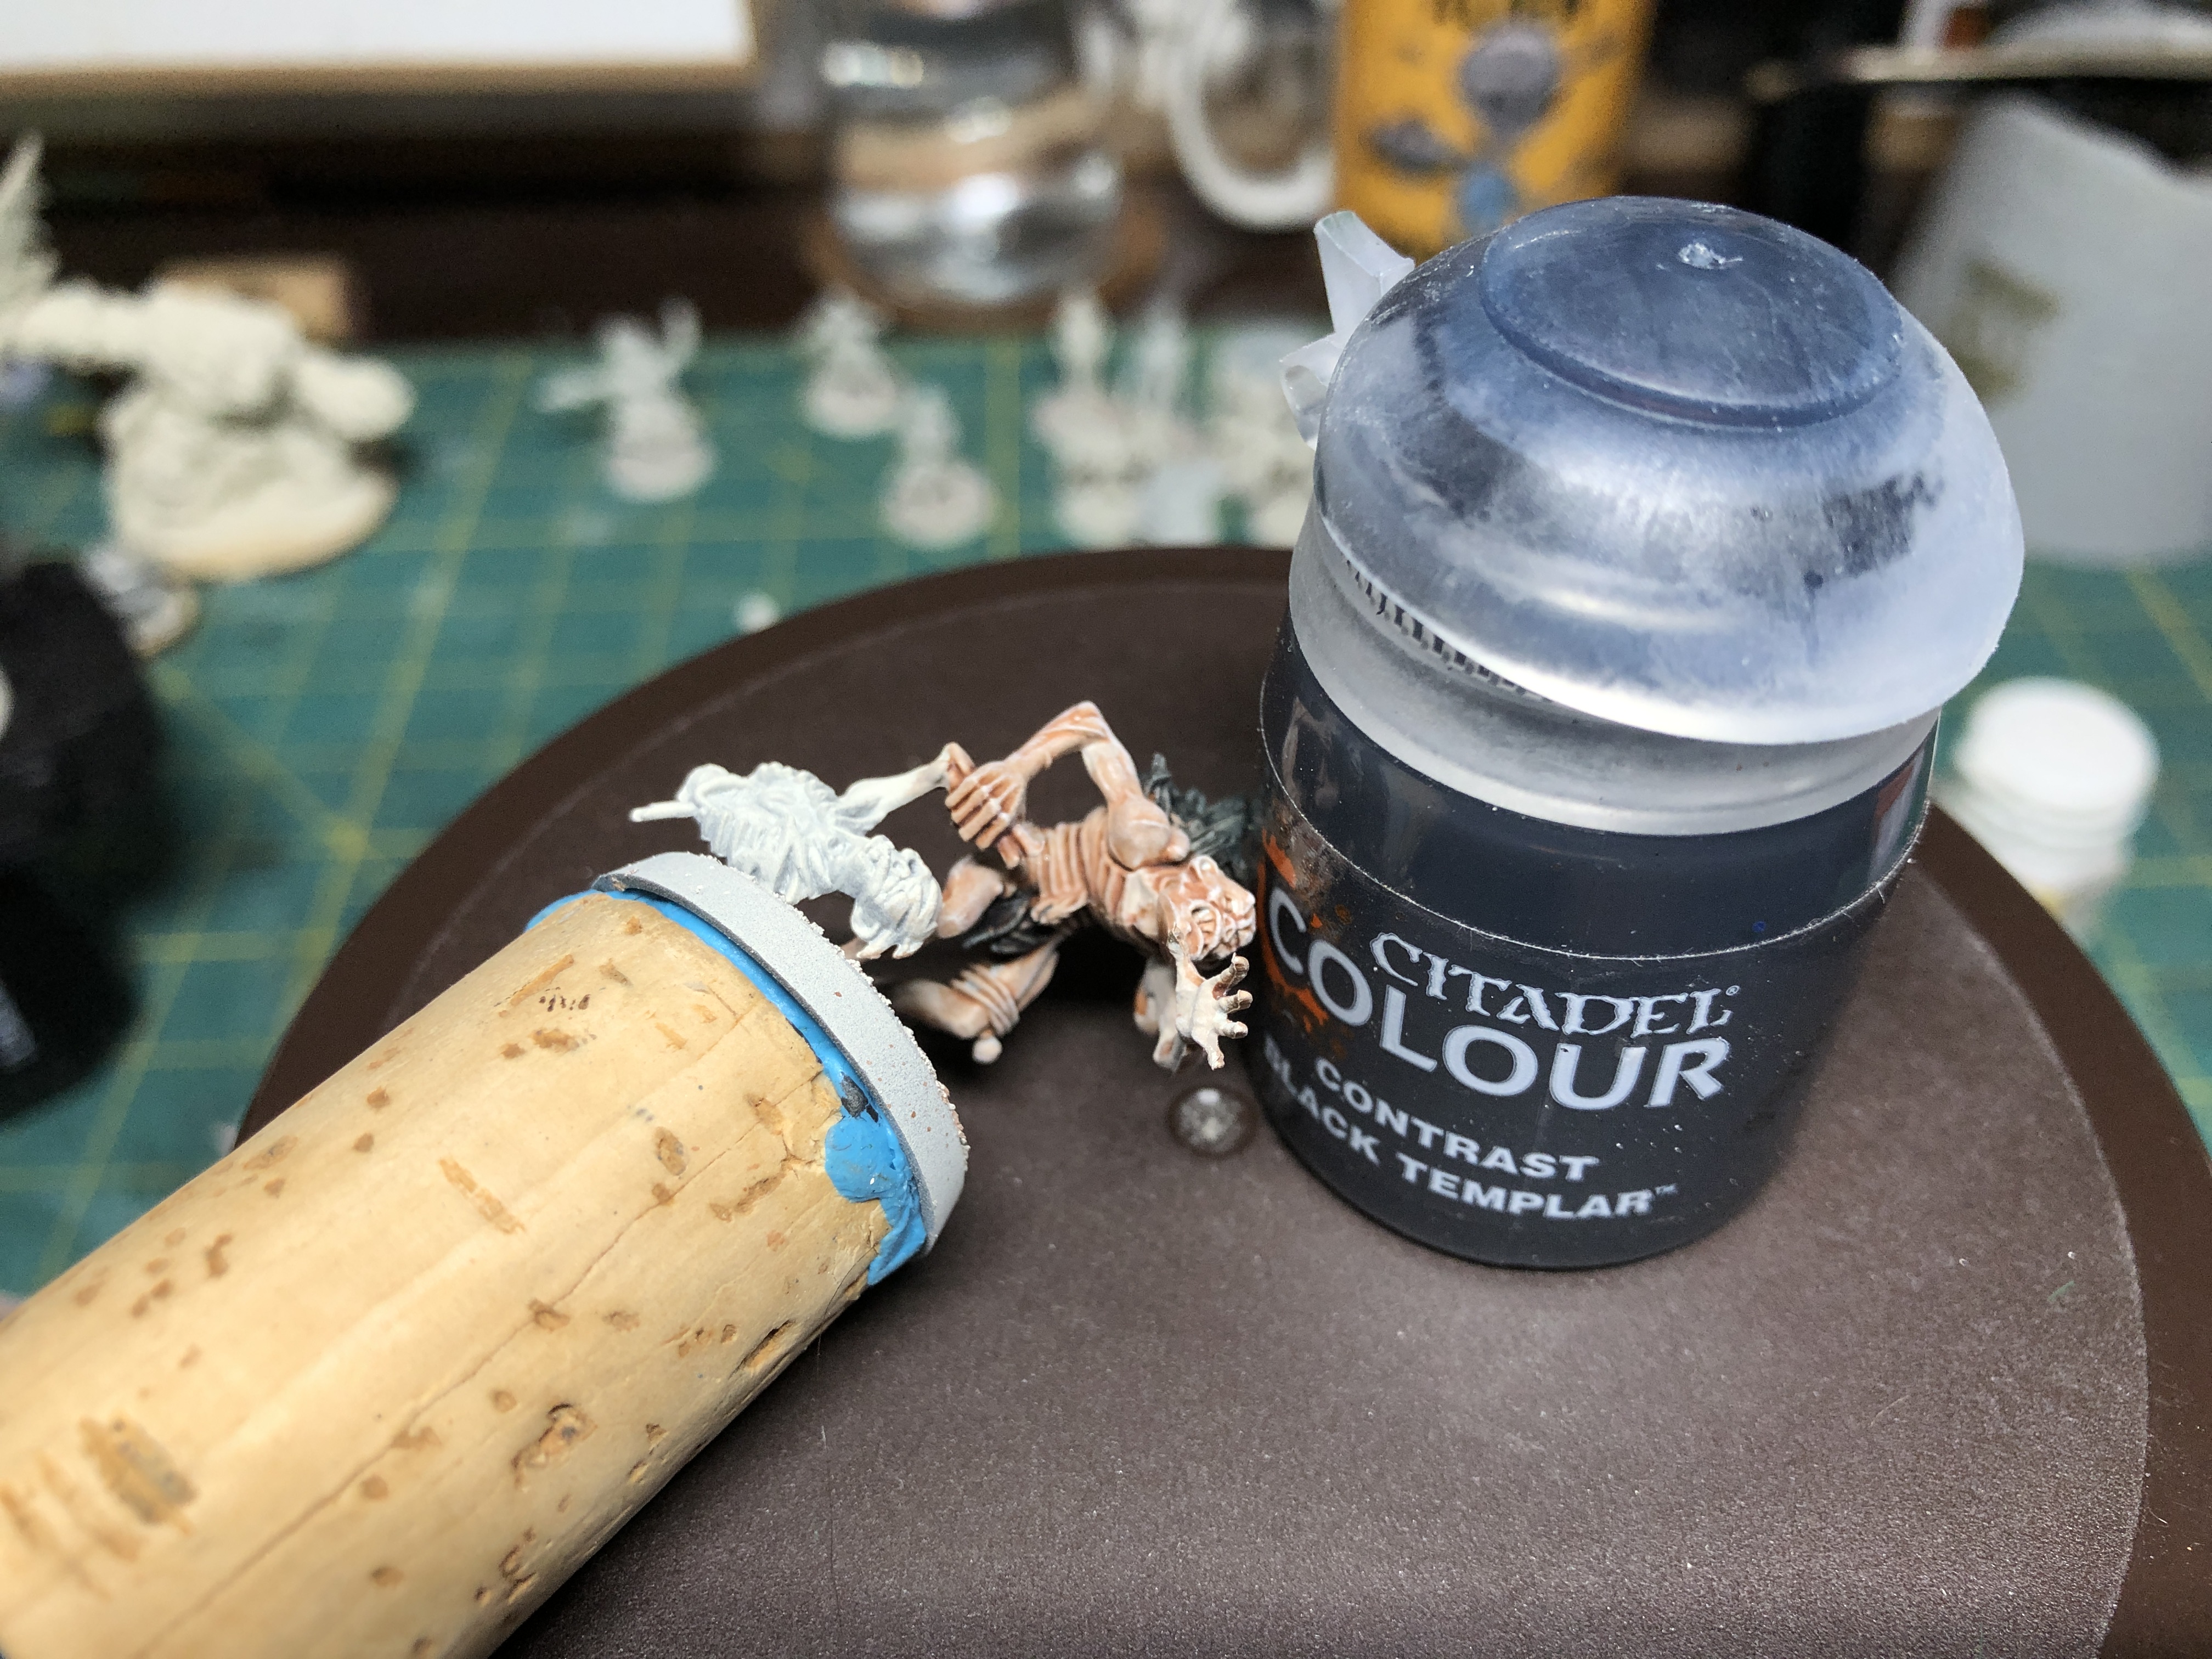 Hair is now given a layer of contrast Black Templar
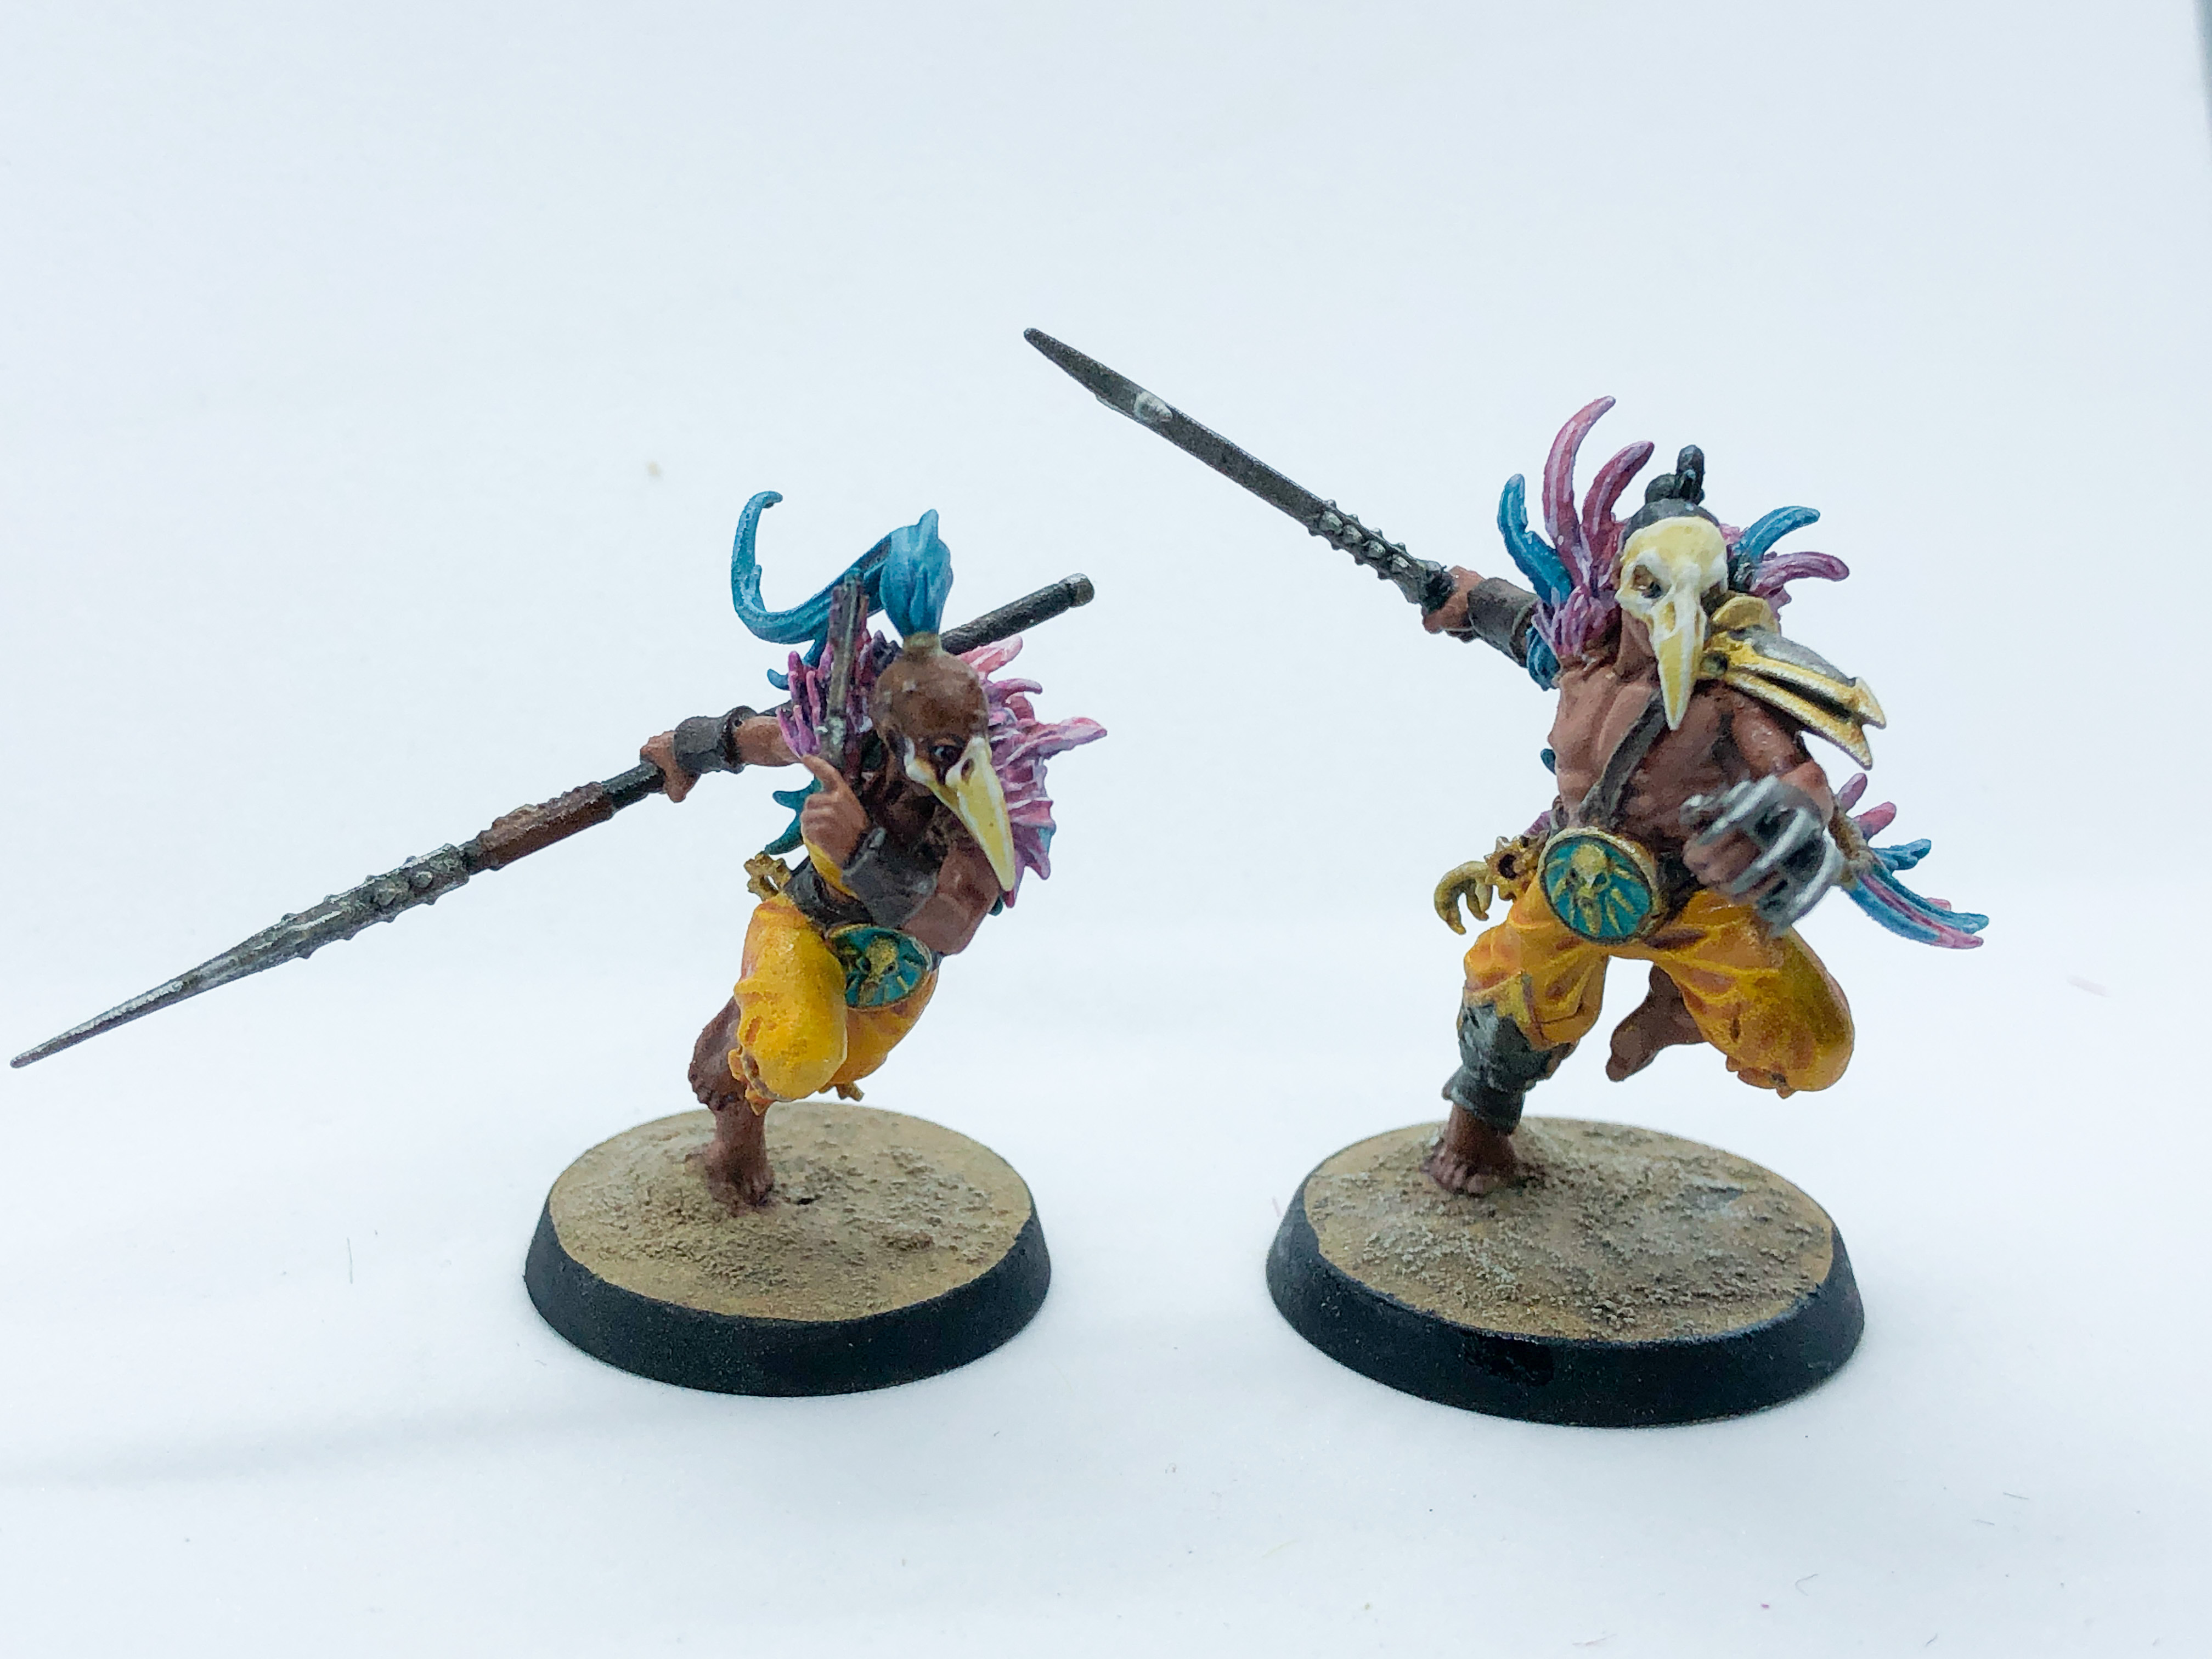
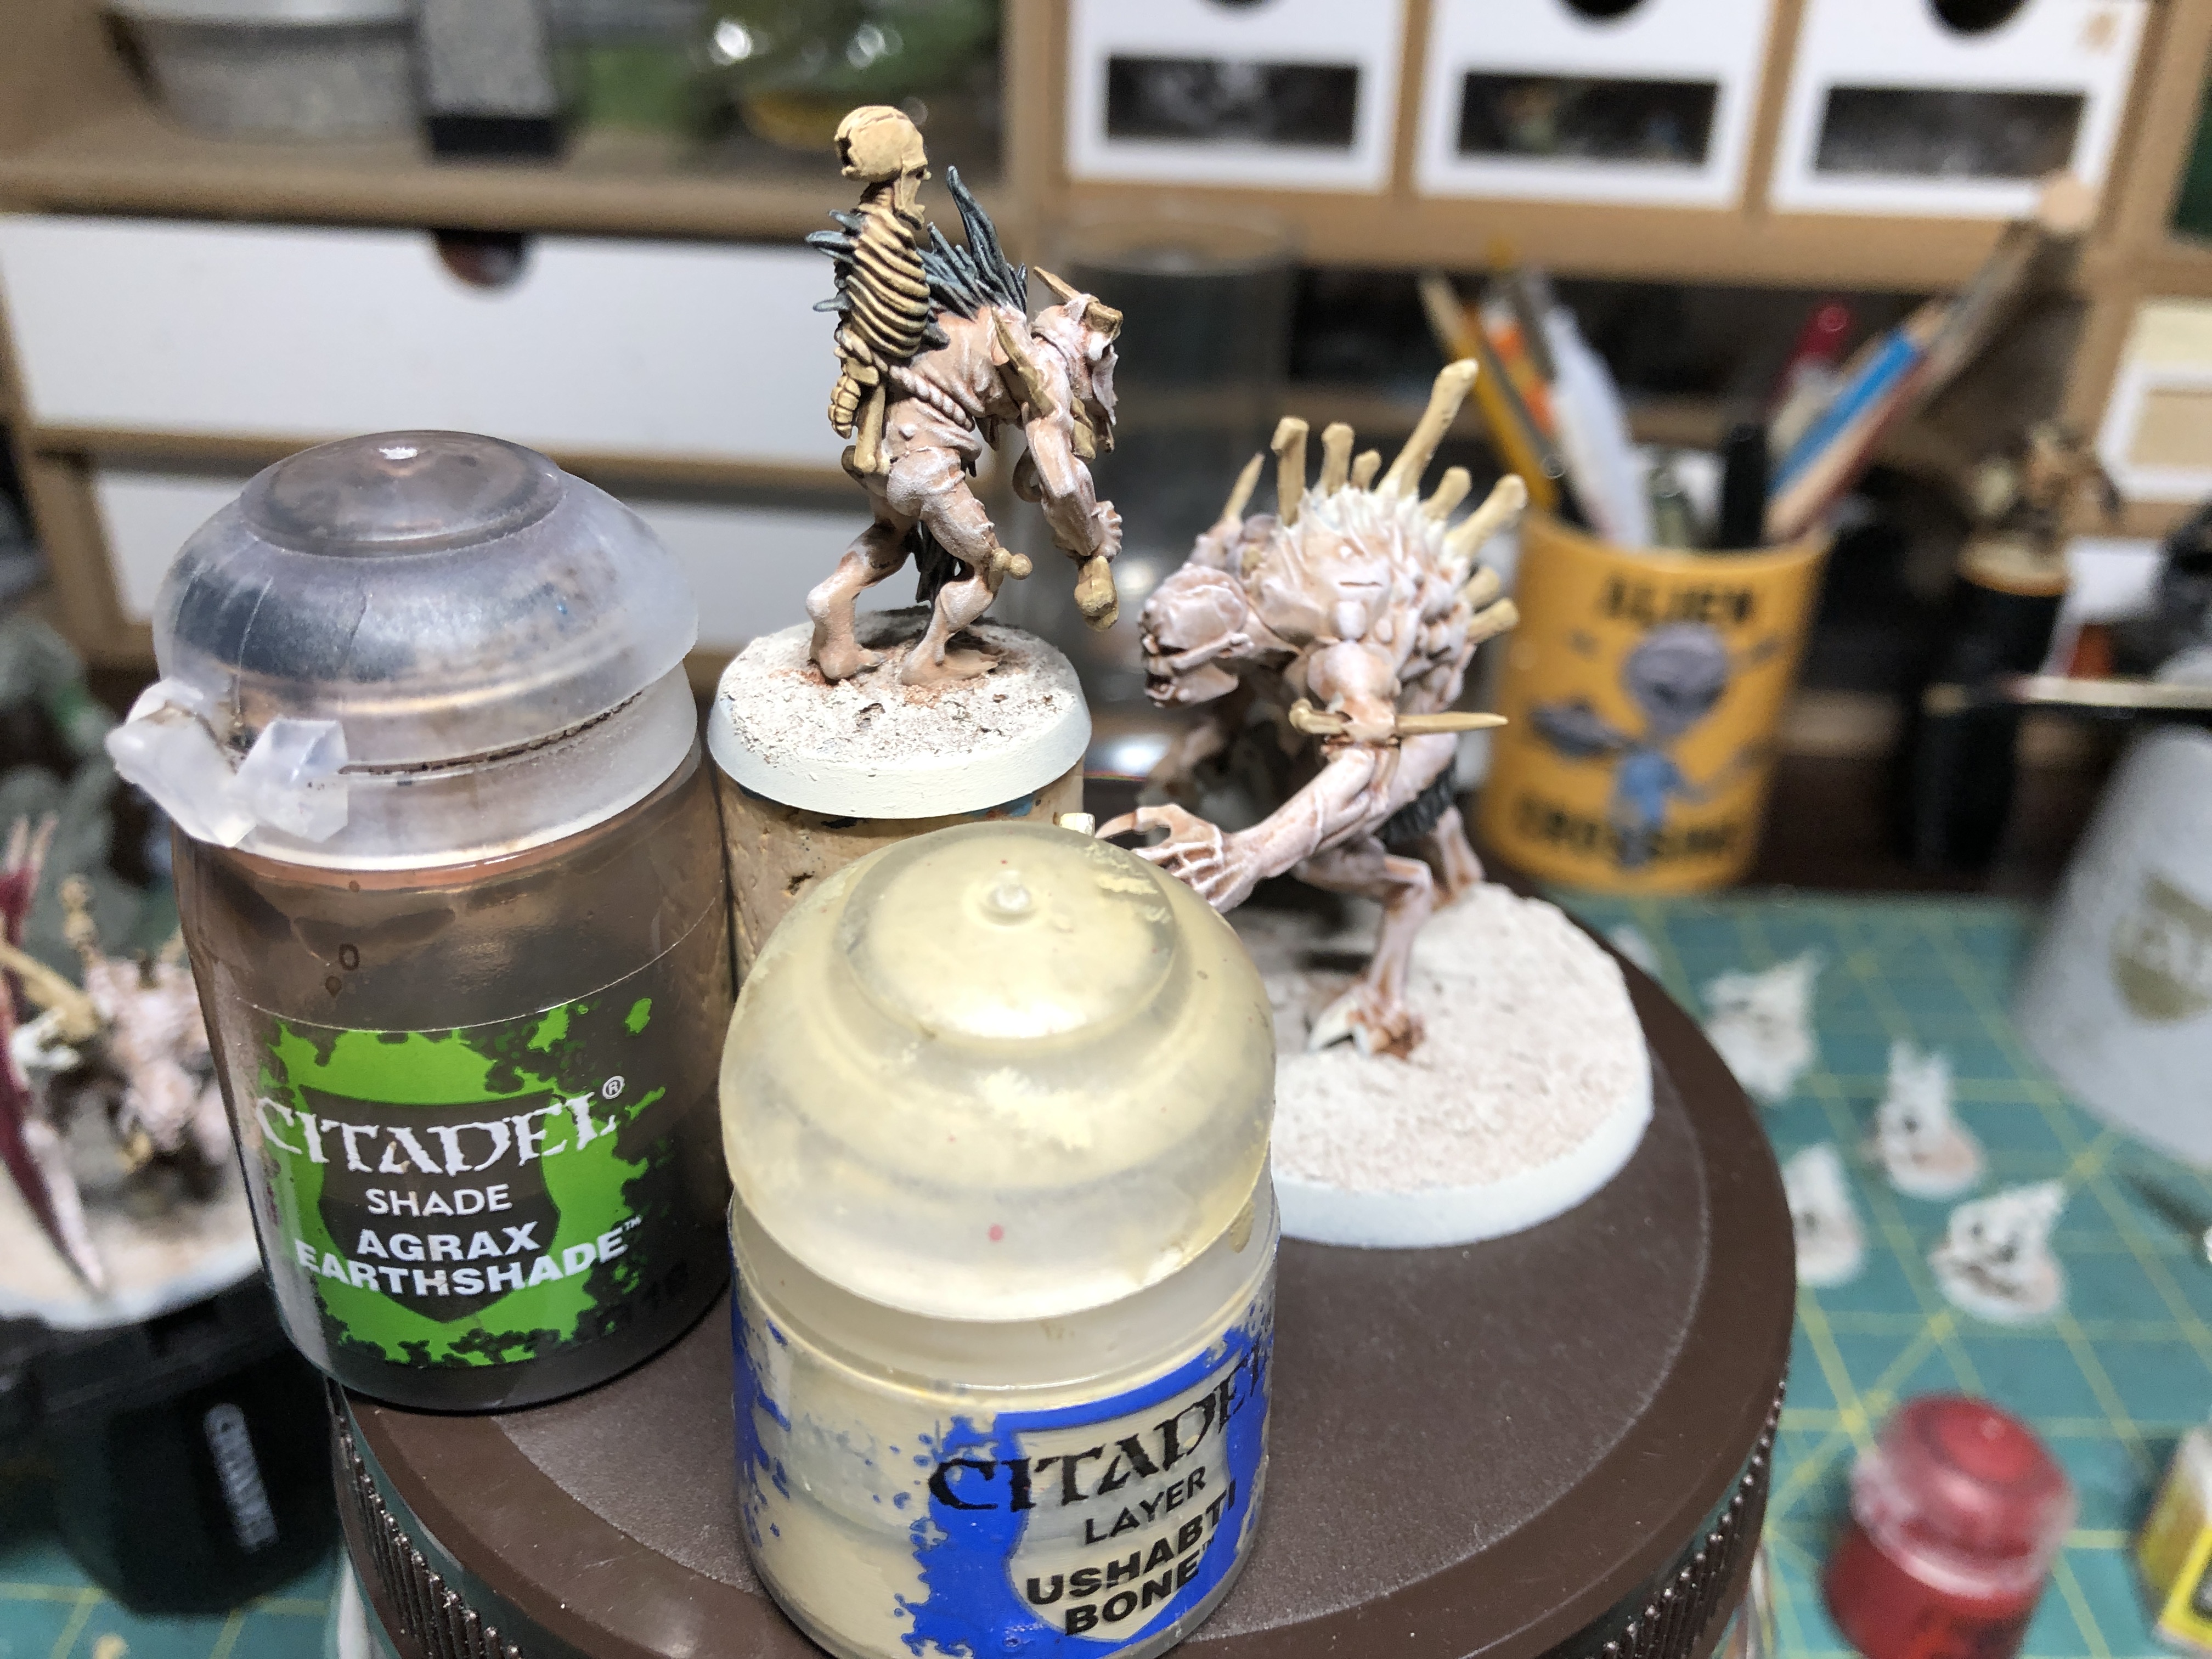 Bones, skeletons and spines are given a layer of Ushabti Bone and shaded with Agrax Earthshade. Do not use too big a brush as you do not want to affect the skin paint job. You may also use Ushabti bone for the ropes/ties or an alternate light brown color.
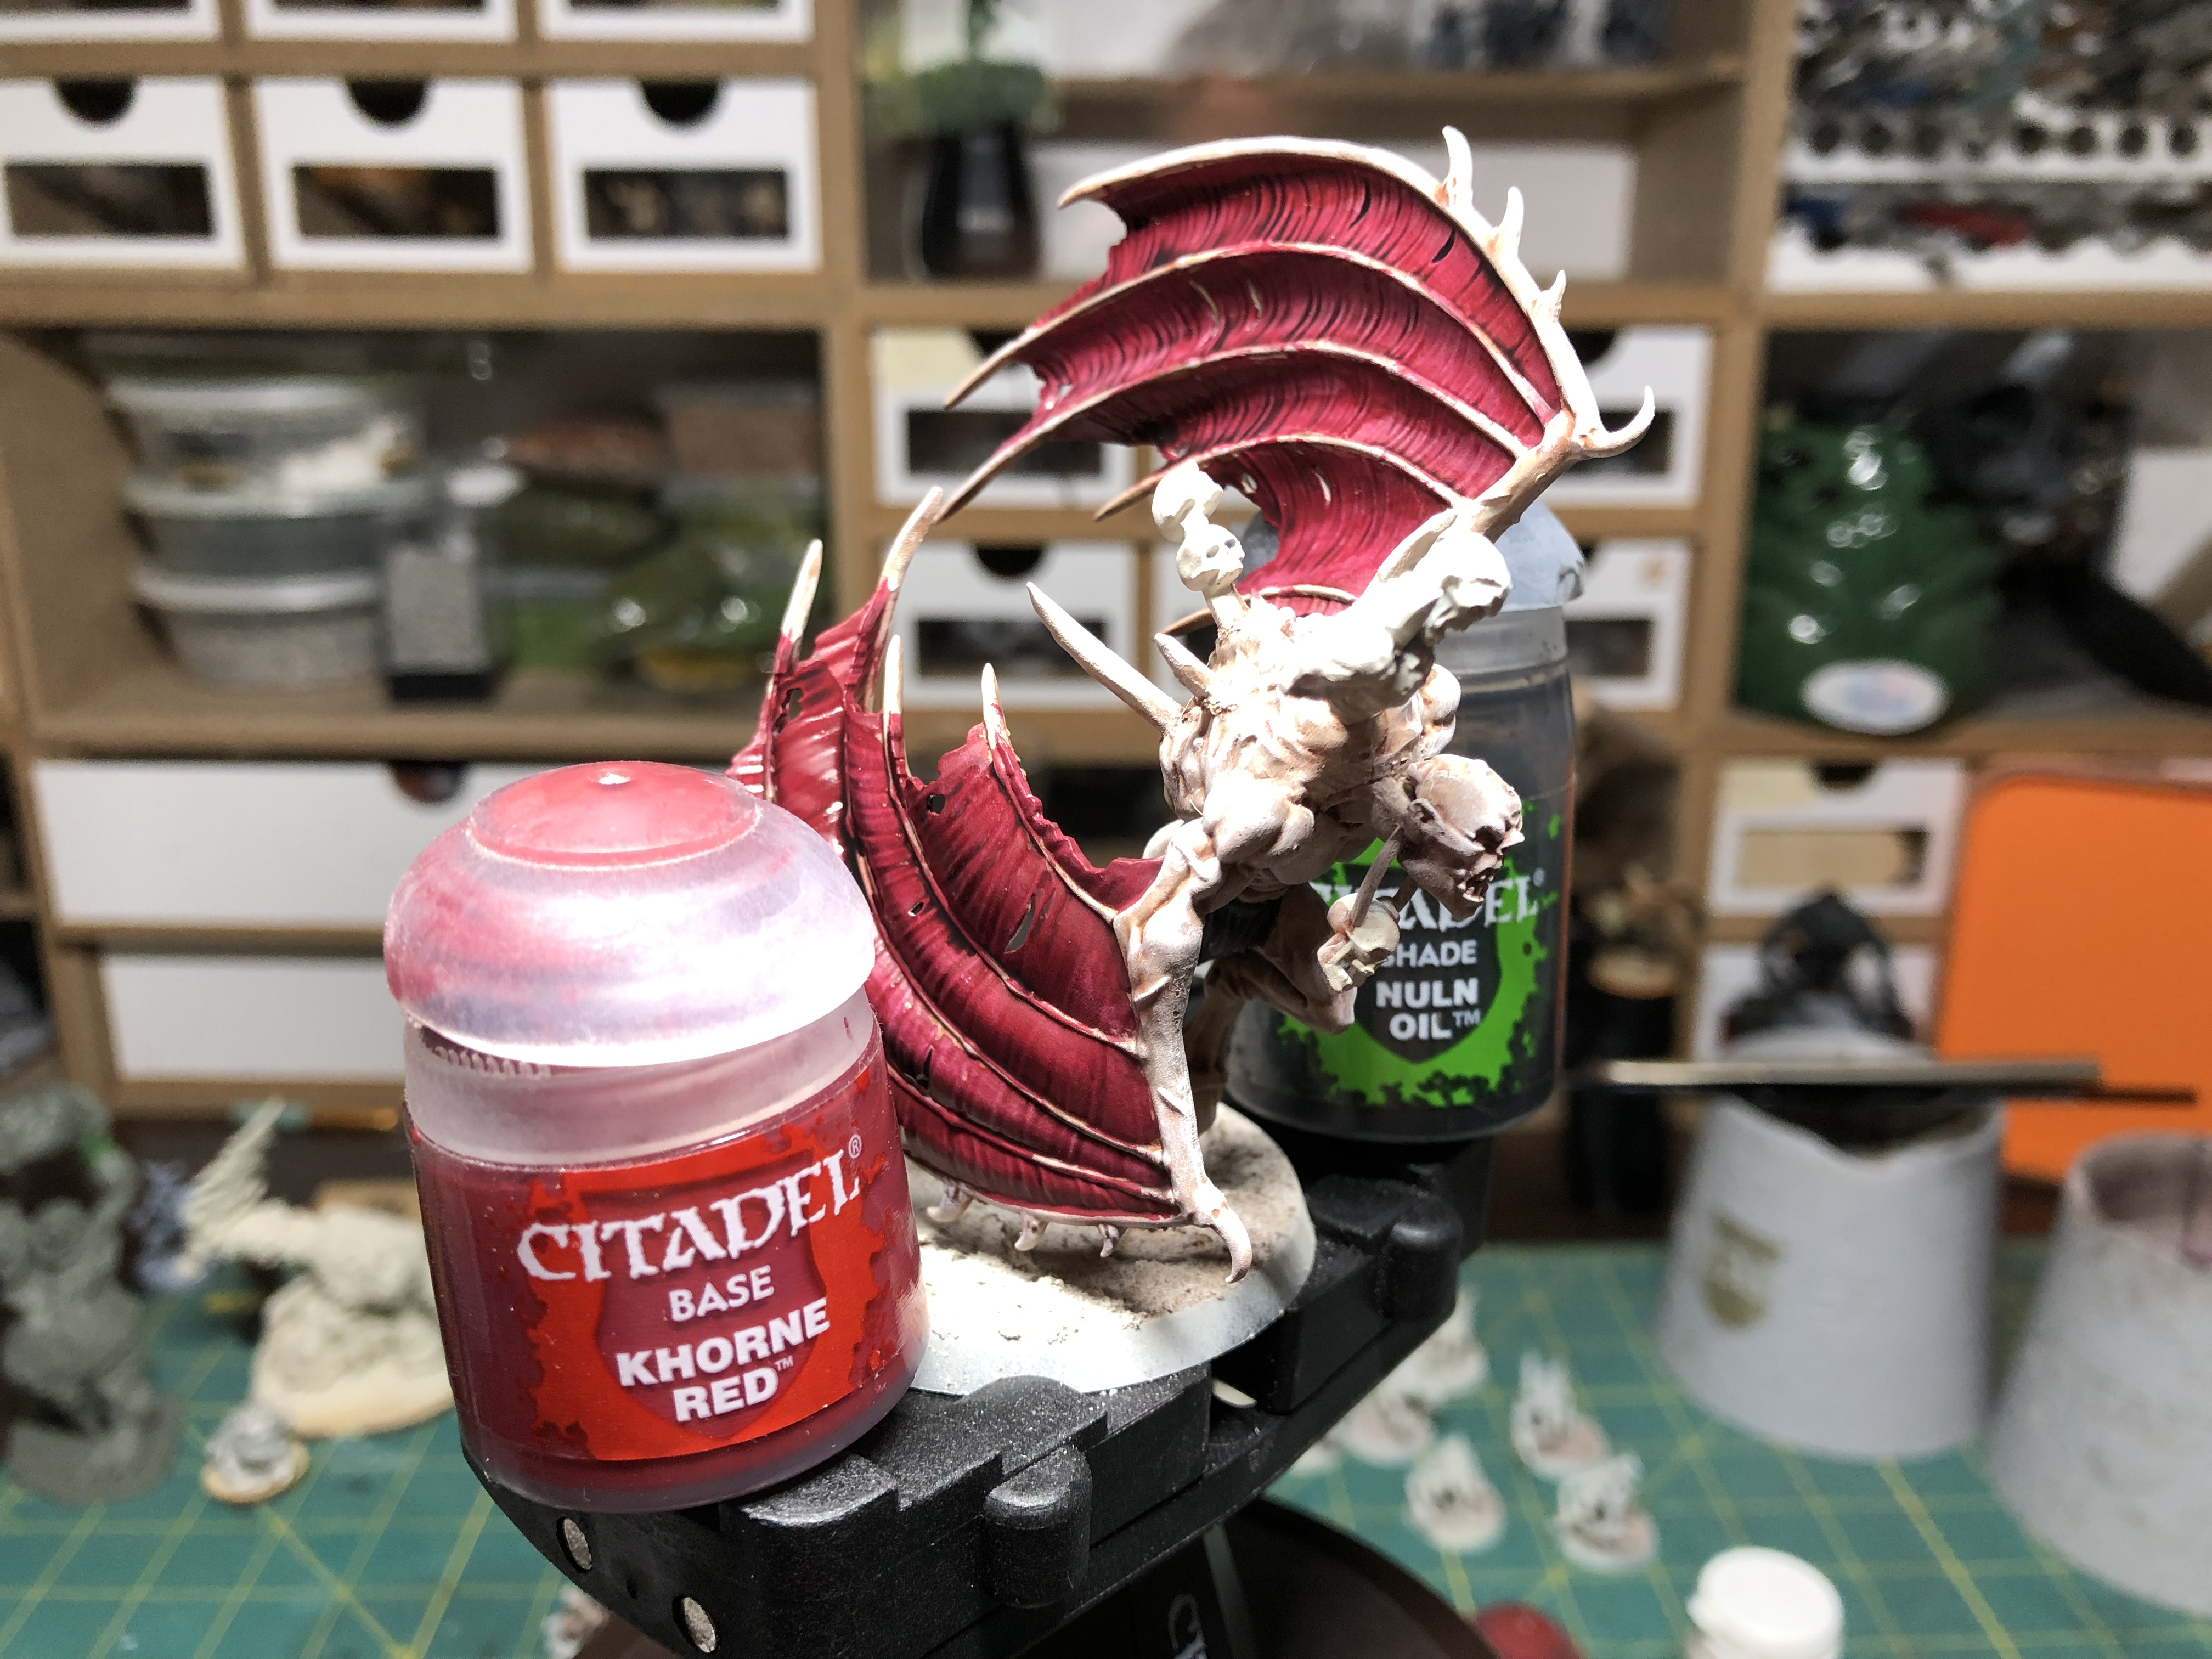 The Flayer's wings are painted Khorne Red, trying not to paint over the spinny areas (although you can easily go back over these afterward).
  Metallic parts are given a coat of Leadbelcher from GW.
 Scars (be thorough in finding them as they are numerous) are painted Screamer Pink with a fine brush. Bones meat and the inside of corpses are painted Mephiston Red for a first gruesome addition to the miniatures. These are ghouls after all!
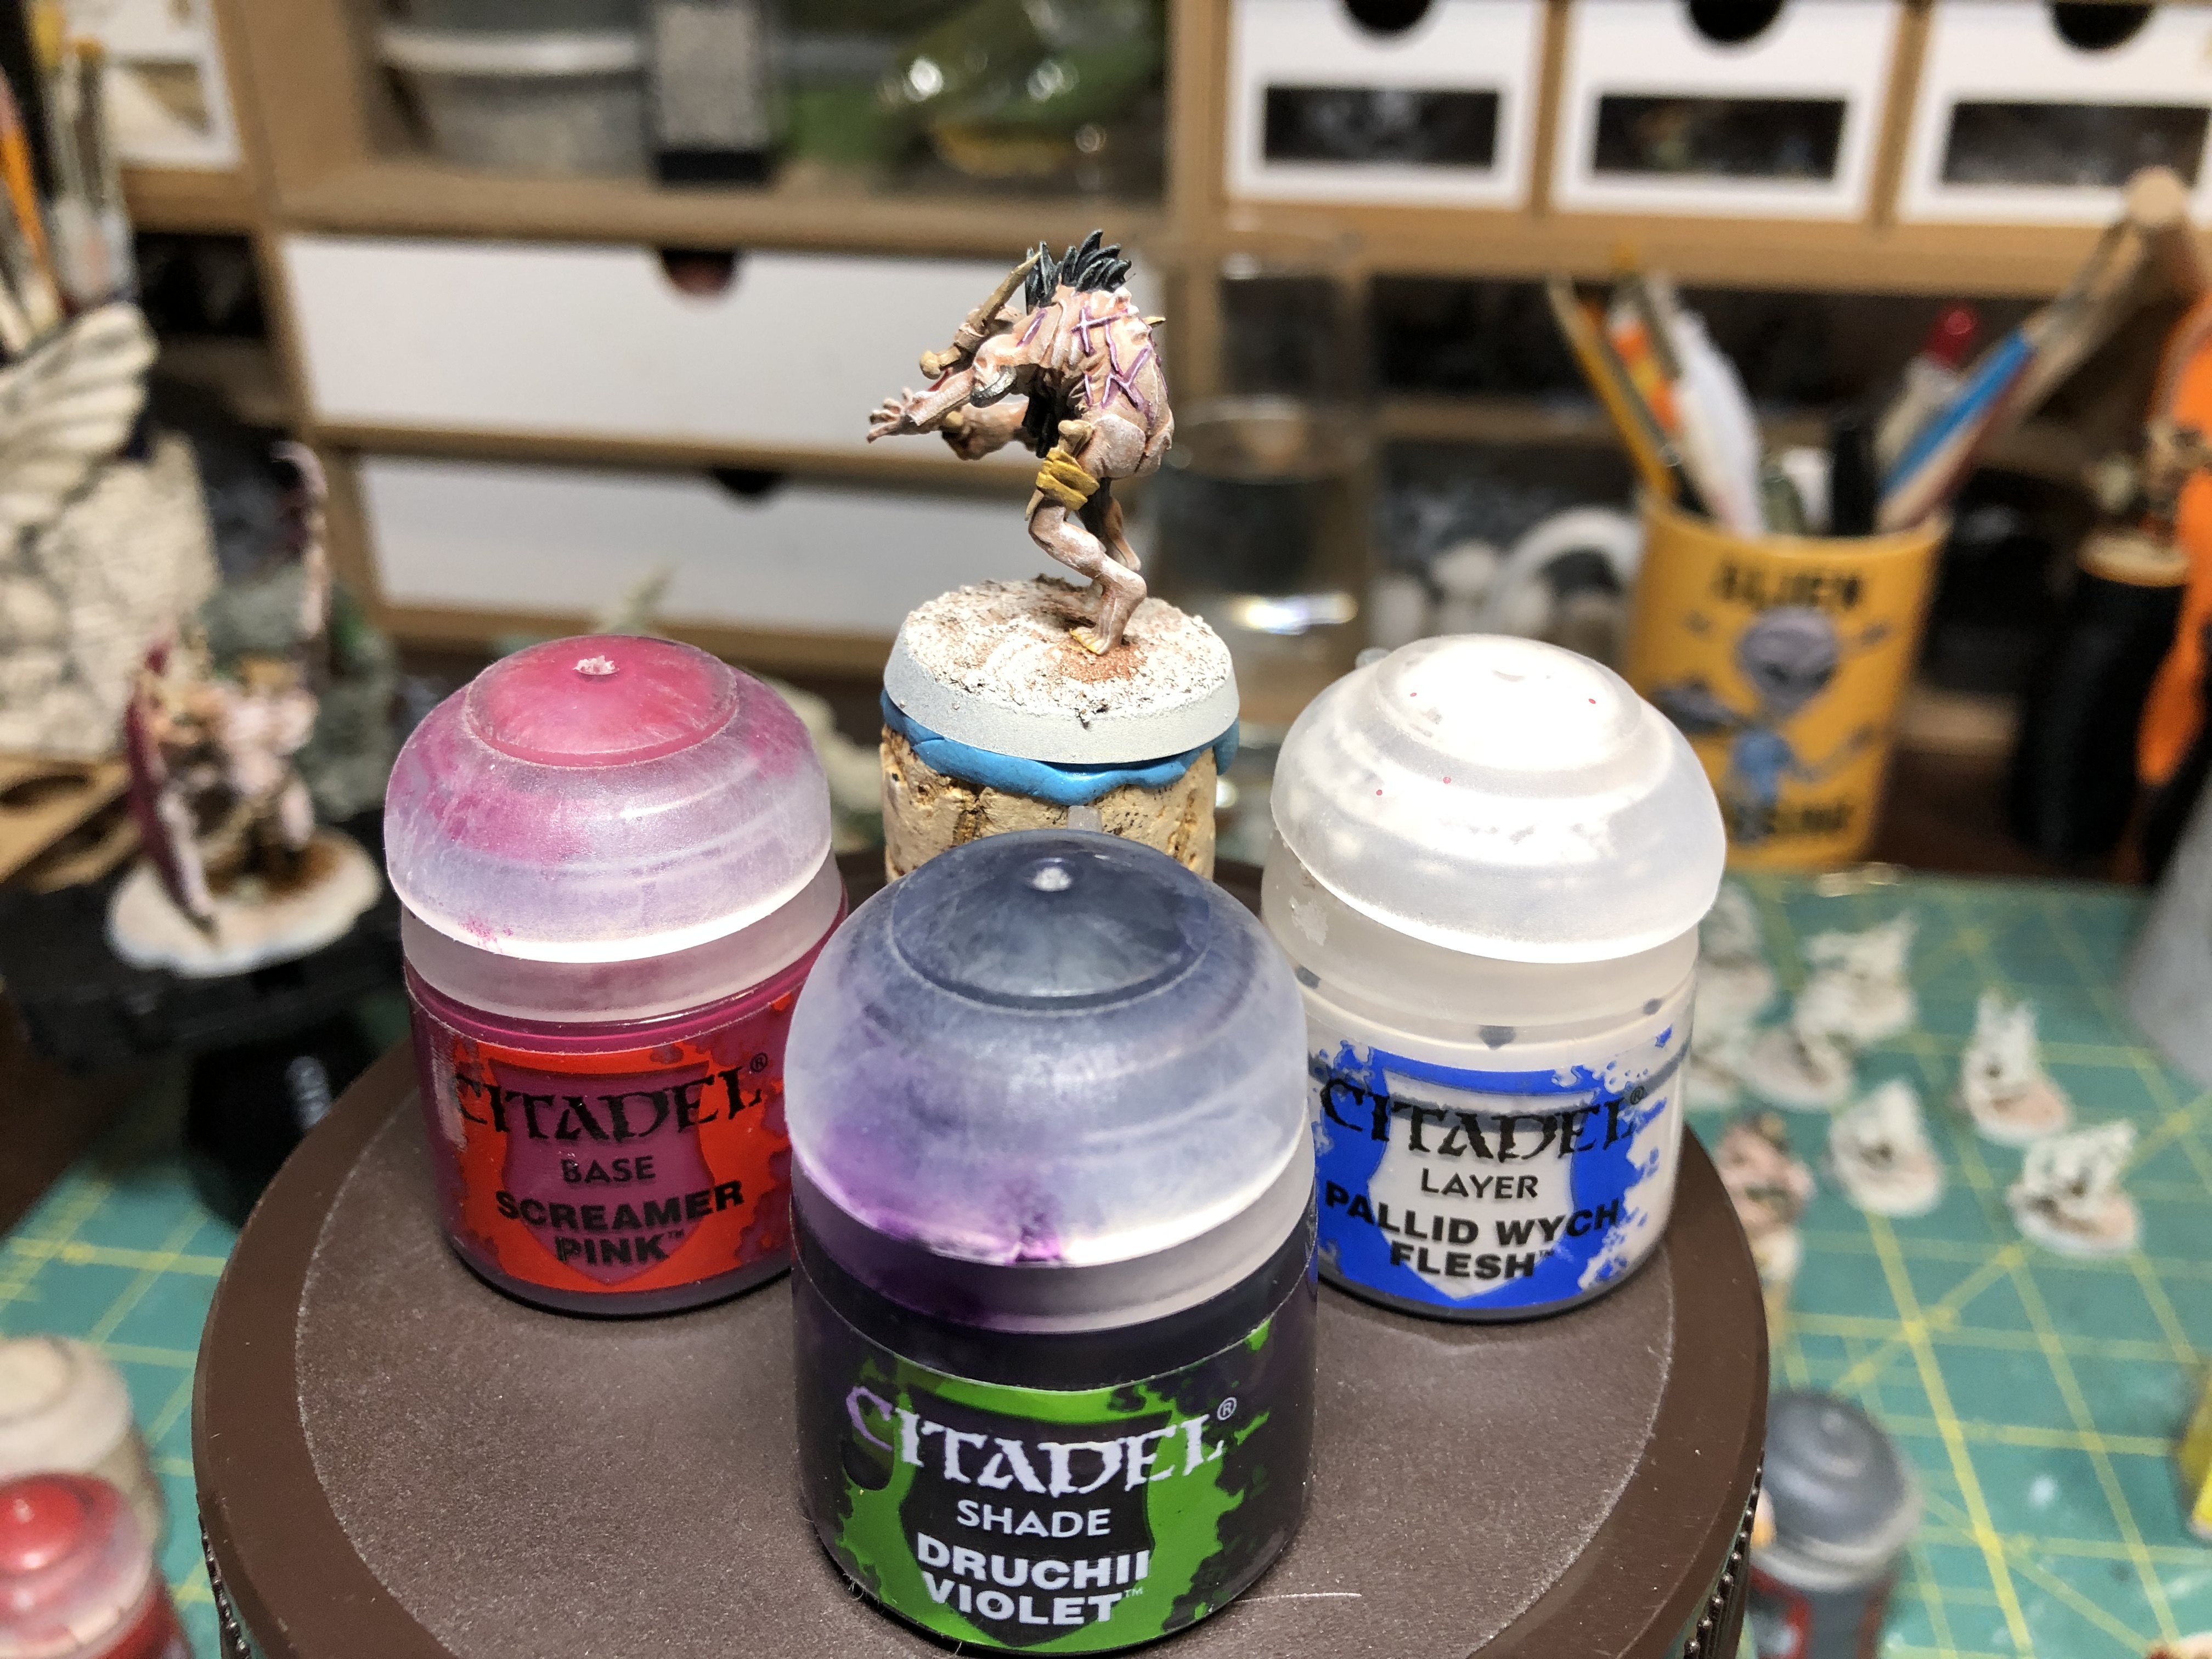 Scars are then washed with a thin application of Druchii Violet. Once the wash is dry, apply a thin line of Pallid Wych FLesh on the scar line.
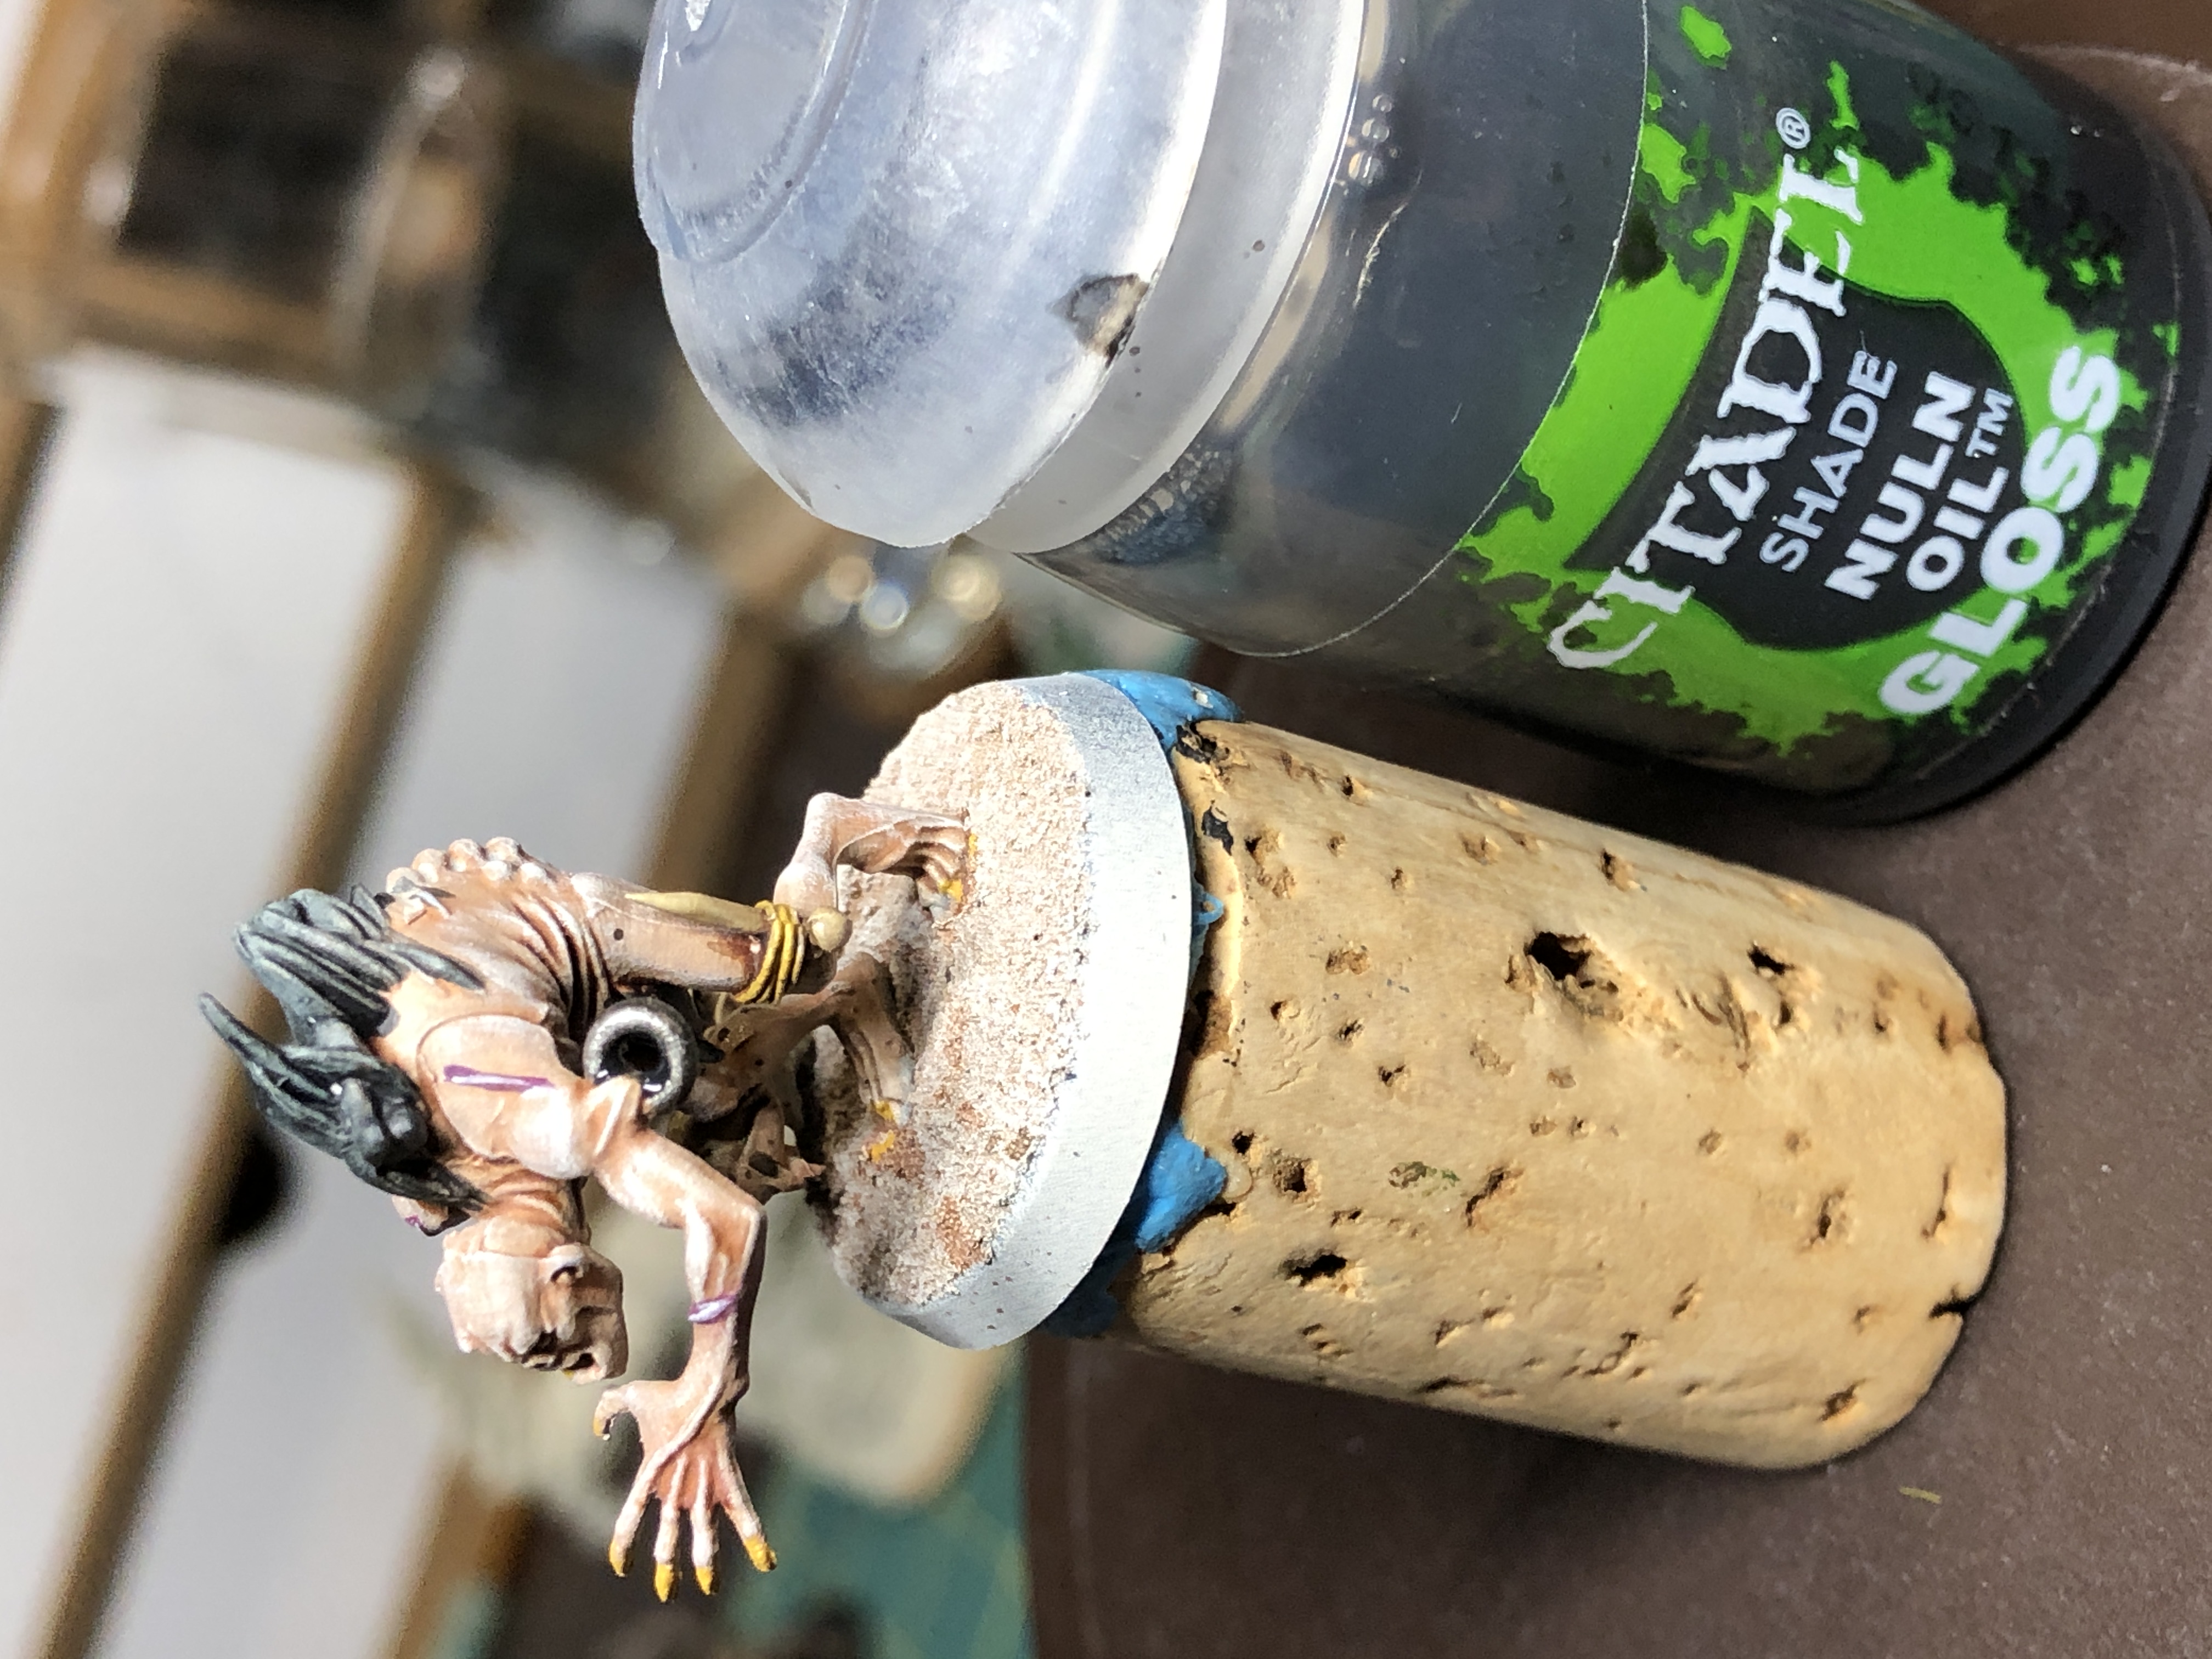 Metallic parts are given a wash of Nuln Oil Gloss, to reserve the shine of the metal (regular Nuln Oil dulls the shine).
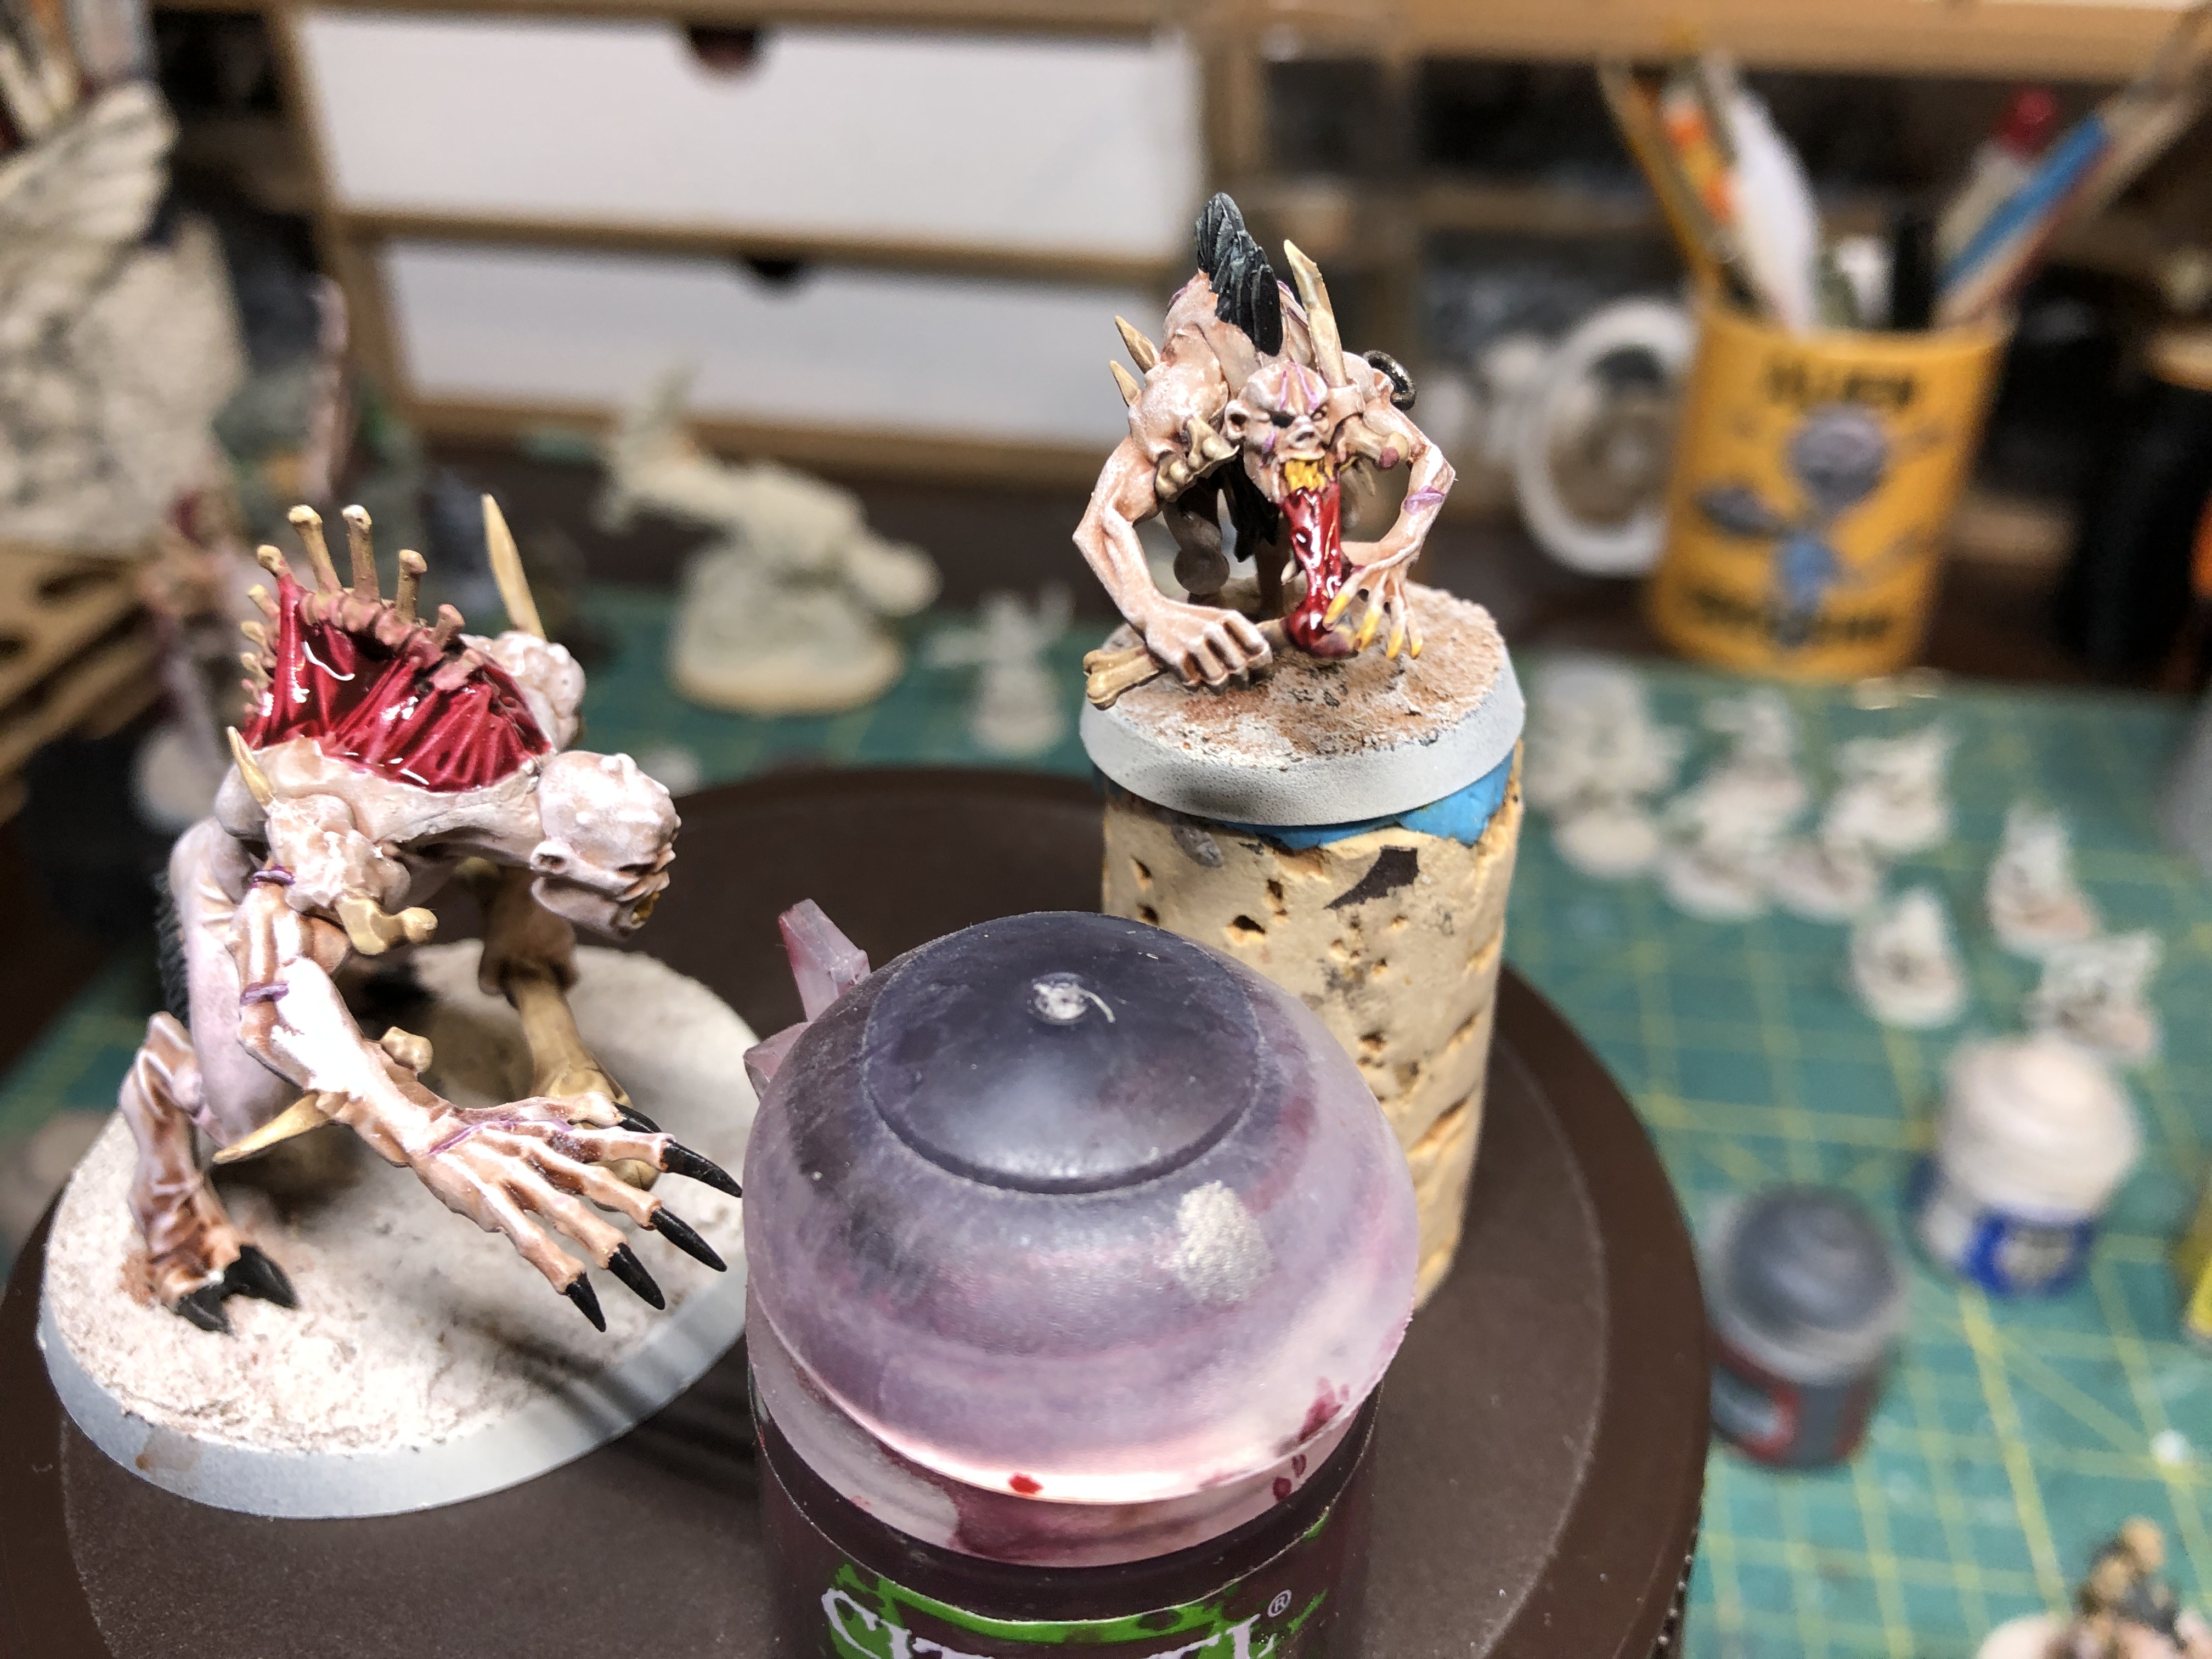 Bone meat and other exposed subdermal layers are given a wash of Carroburg Crimson.
Warcry Flesh-Eater Court Warband - Part 1
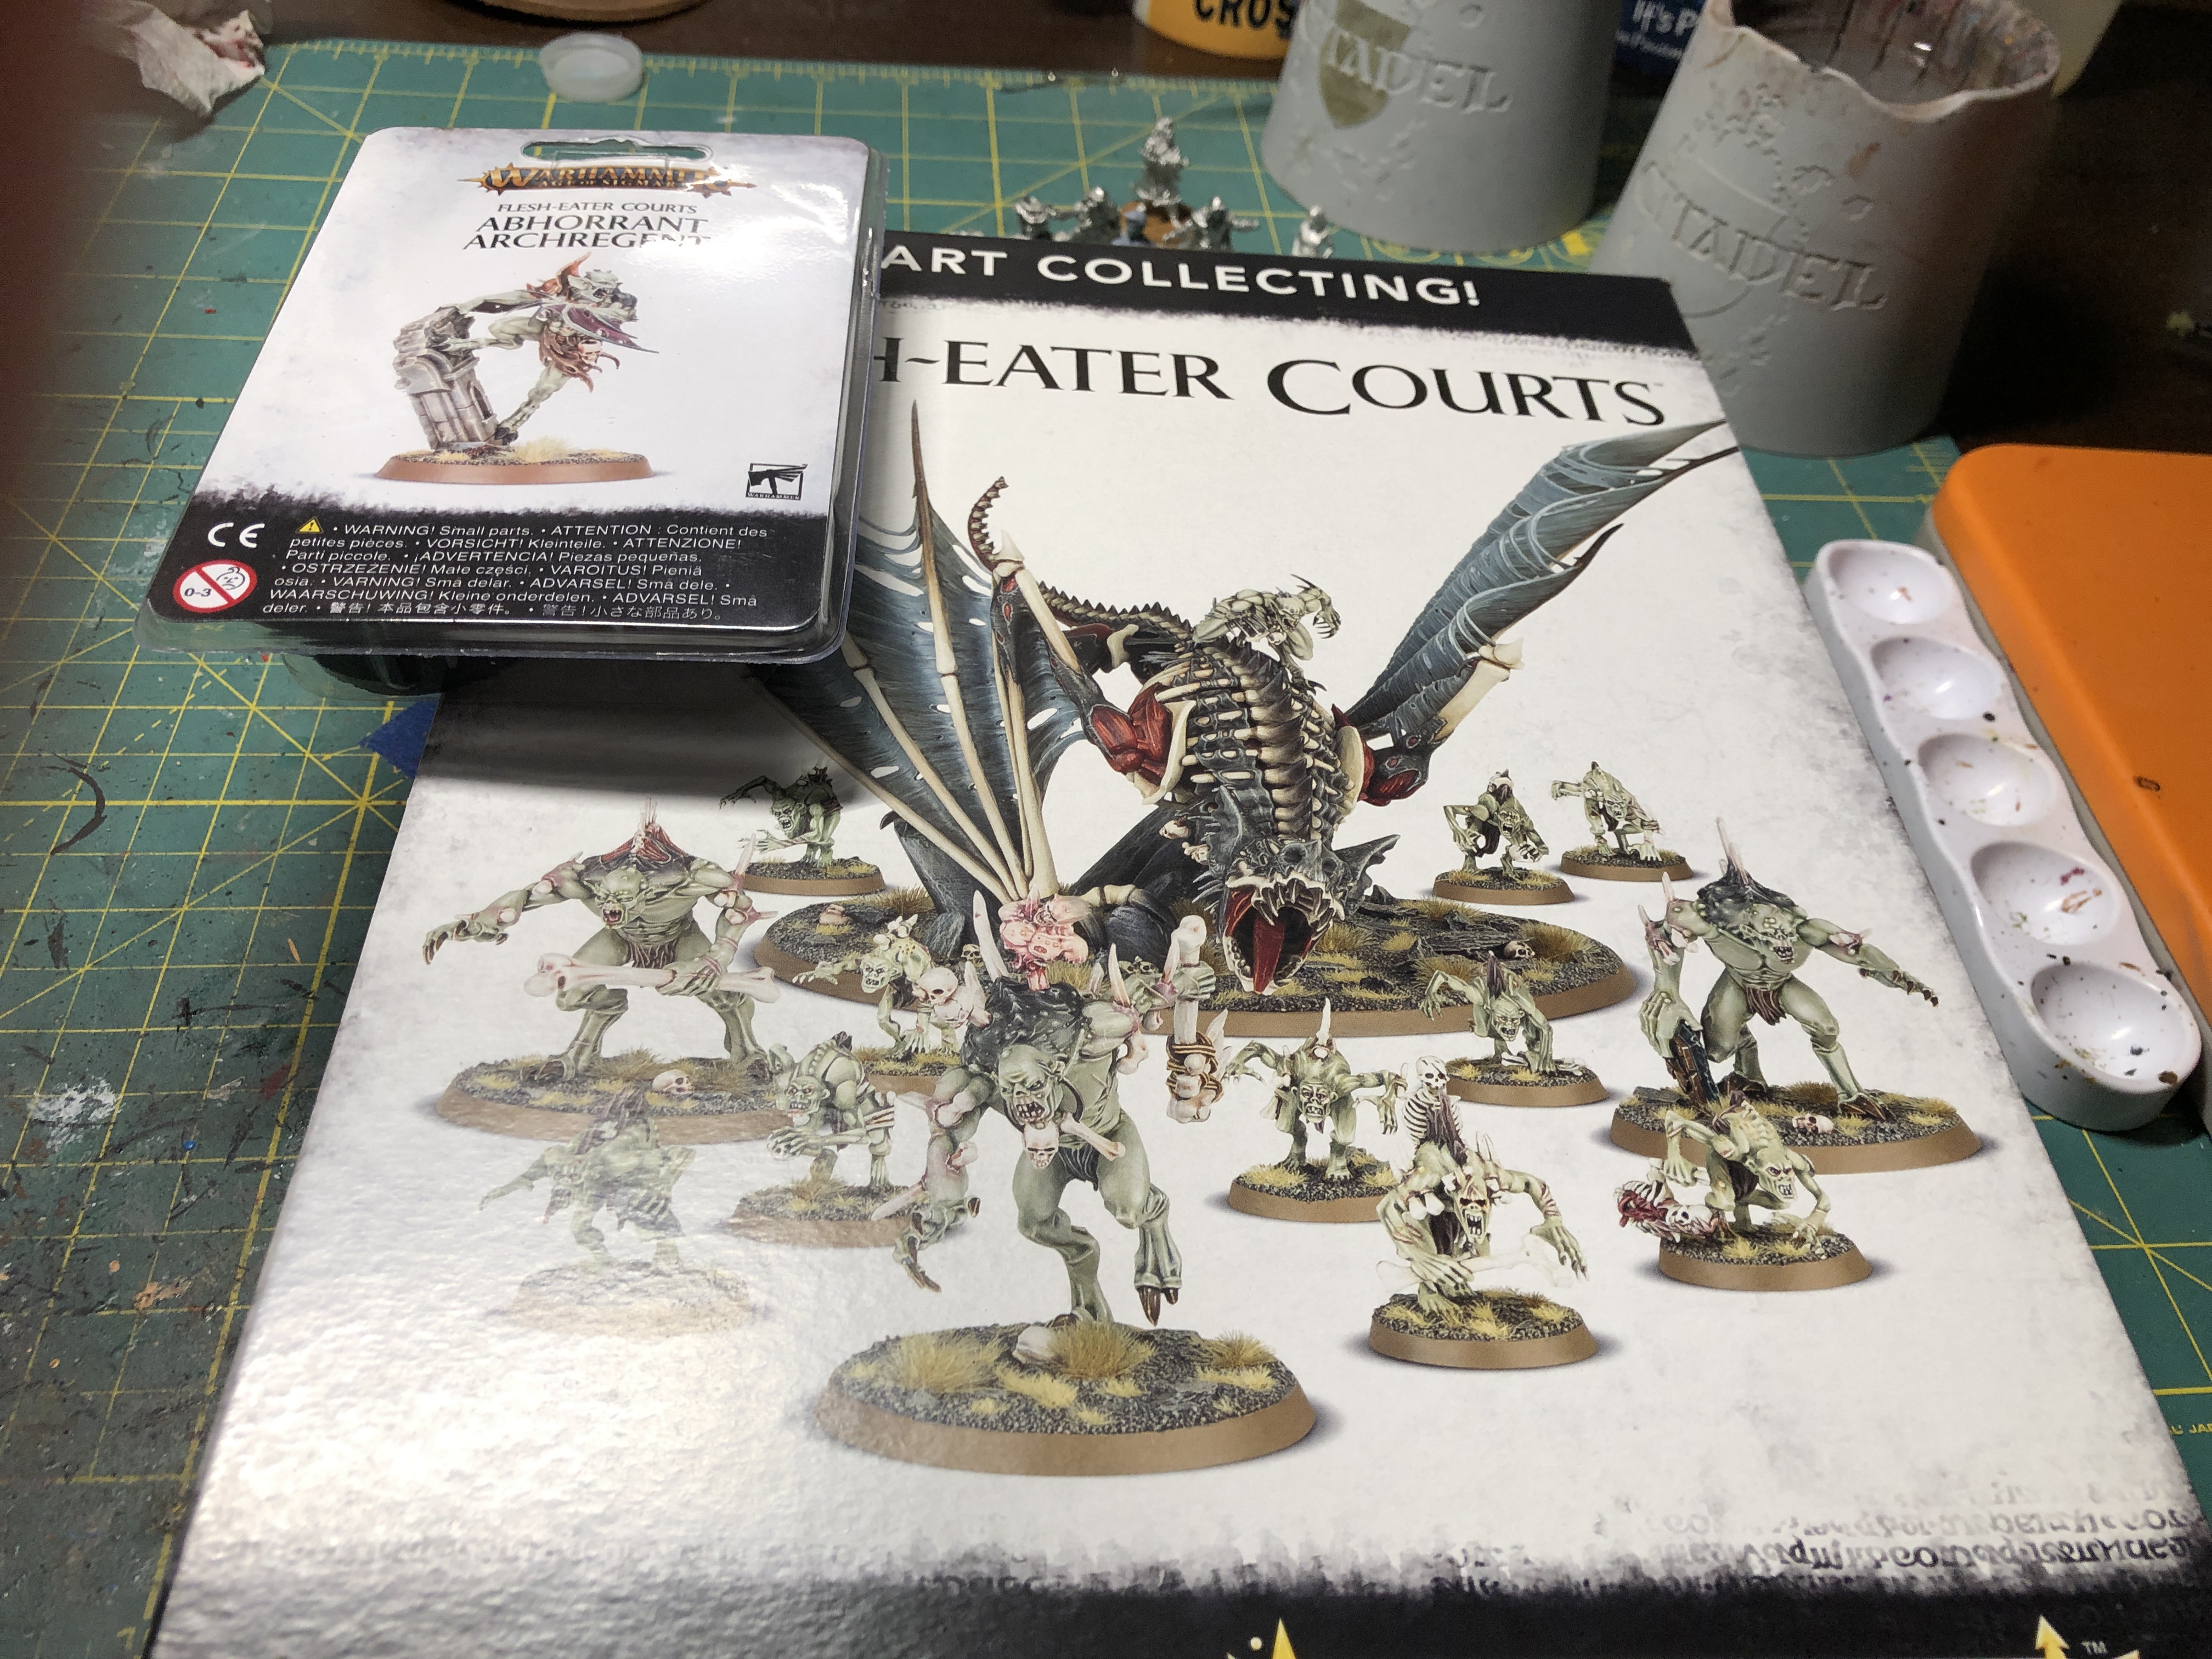
Having already painted 3 more or less traditional warbands (the Iron Golems, Untamed Beasts and Corvus Cabal), I wanted to start my 2021 effort with something different. The raw savagery and bestial aspect, not to mention the quite original lore behind the Flesh-Eaters Court appealed to me as a welcome change, and also a way to step into the Death Factions of Warcry. As I also wanted to acquire a monster, the ‘Start Collecting’ box offered a decent value, providing the majority of the warband and the monster for a very reduced price. Indeed, between the Crypt Horrors, Ghouls and the Terrorgheist, it would have been easy to pay at least $50 extra, should have I decided to buy them separately. Of course, one may argue I ahve too many ghouls but I will certainly be happy to add the extra ones to my Frostgrave monsters. Always plan for multi game use…
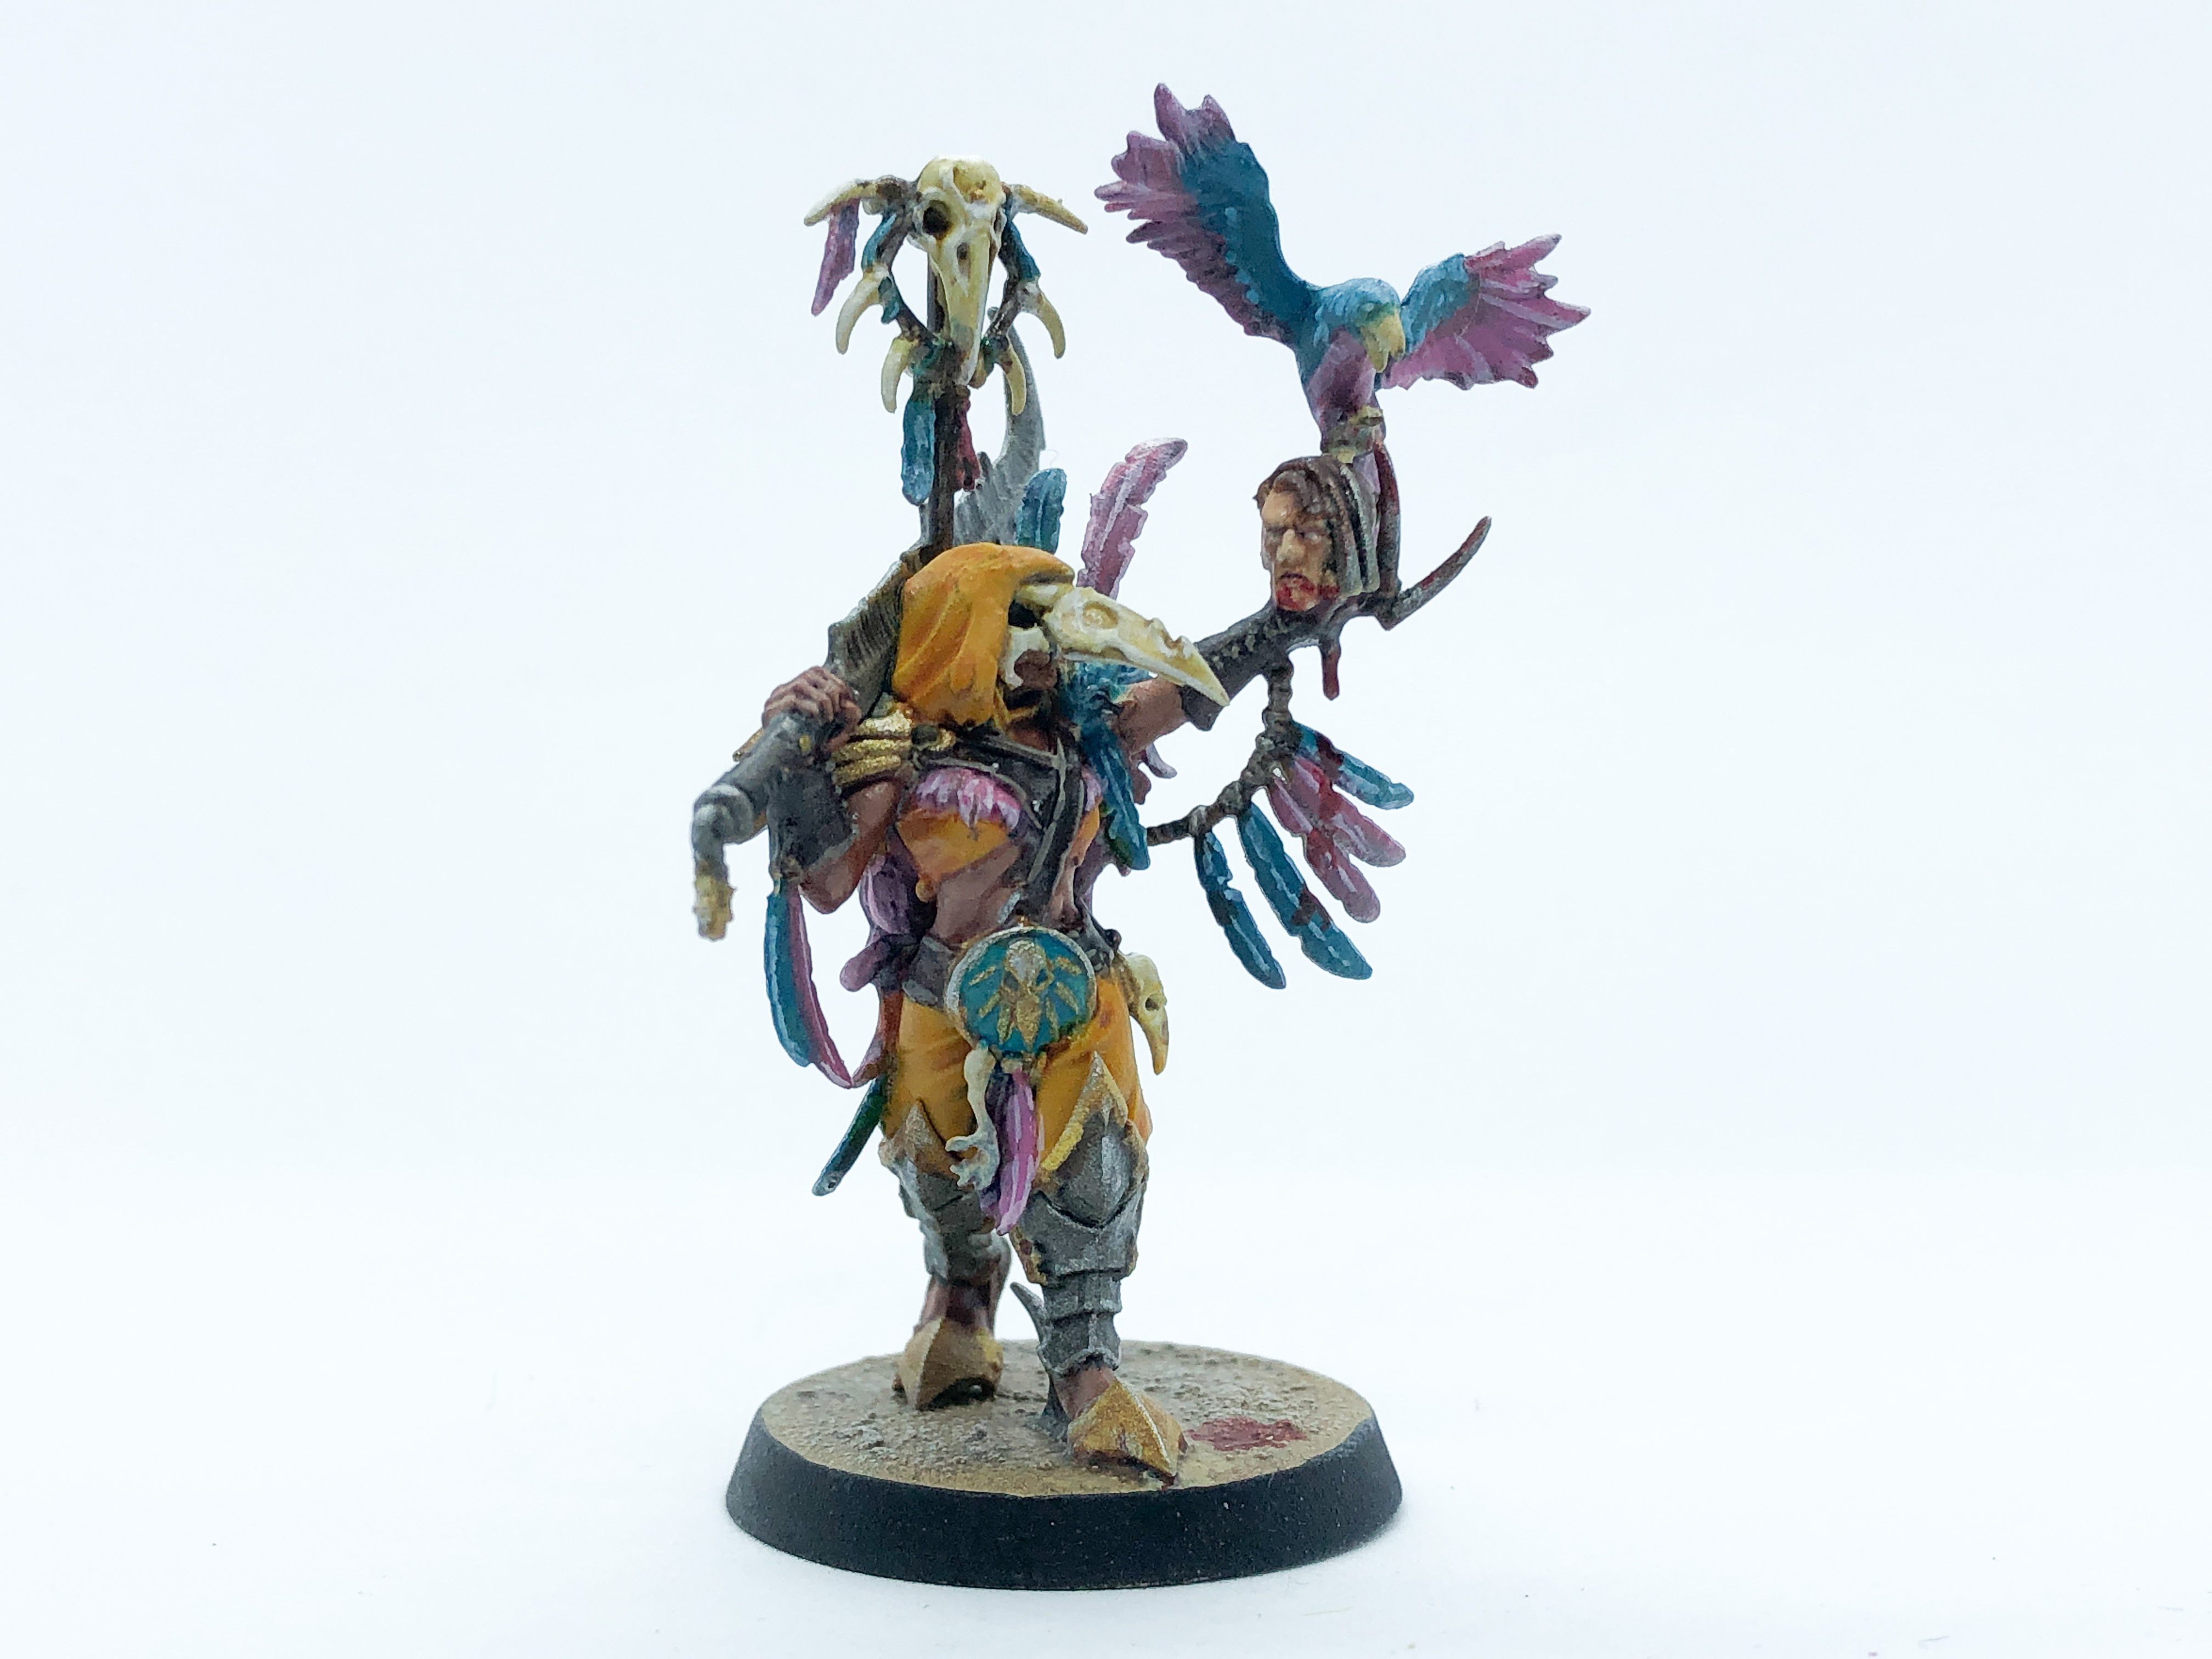
The Abhorrant Archregent
As the leader of my newly minted warband, I picked the Abhorrant Archregent, not necessarily for its characteristic, being a total Warcry newby and not much of a competitive gamer (narrative gaming is where it’s at for me), but for the amazing sculpts GW produced.
A a warning to newcomers to our hobby, I will say that the miniature, despite its amazing level of details and assembly quality, is not for beginners. The parts assembly is quite complex, although they are very well fitted (well except for the head but I will soon get to that). Pay very close attention to the provided diagrams and as usual always dry-fit twice, glue once.
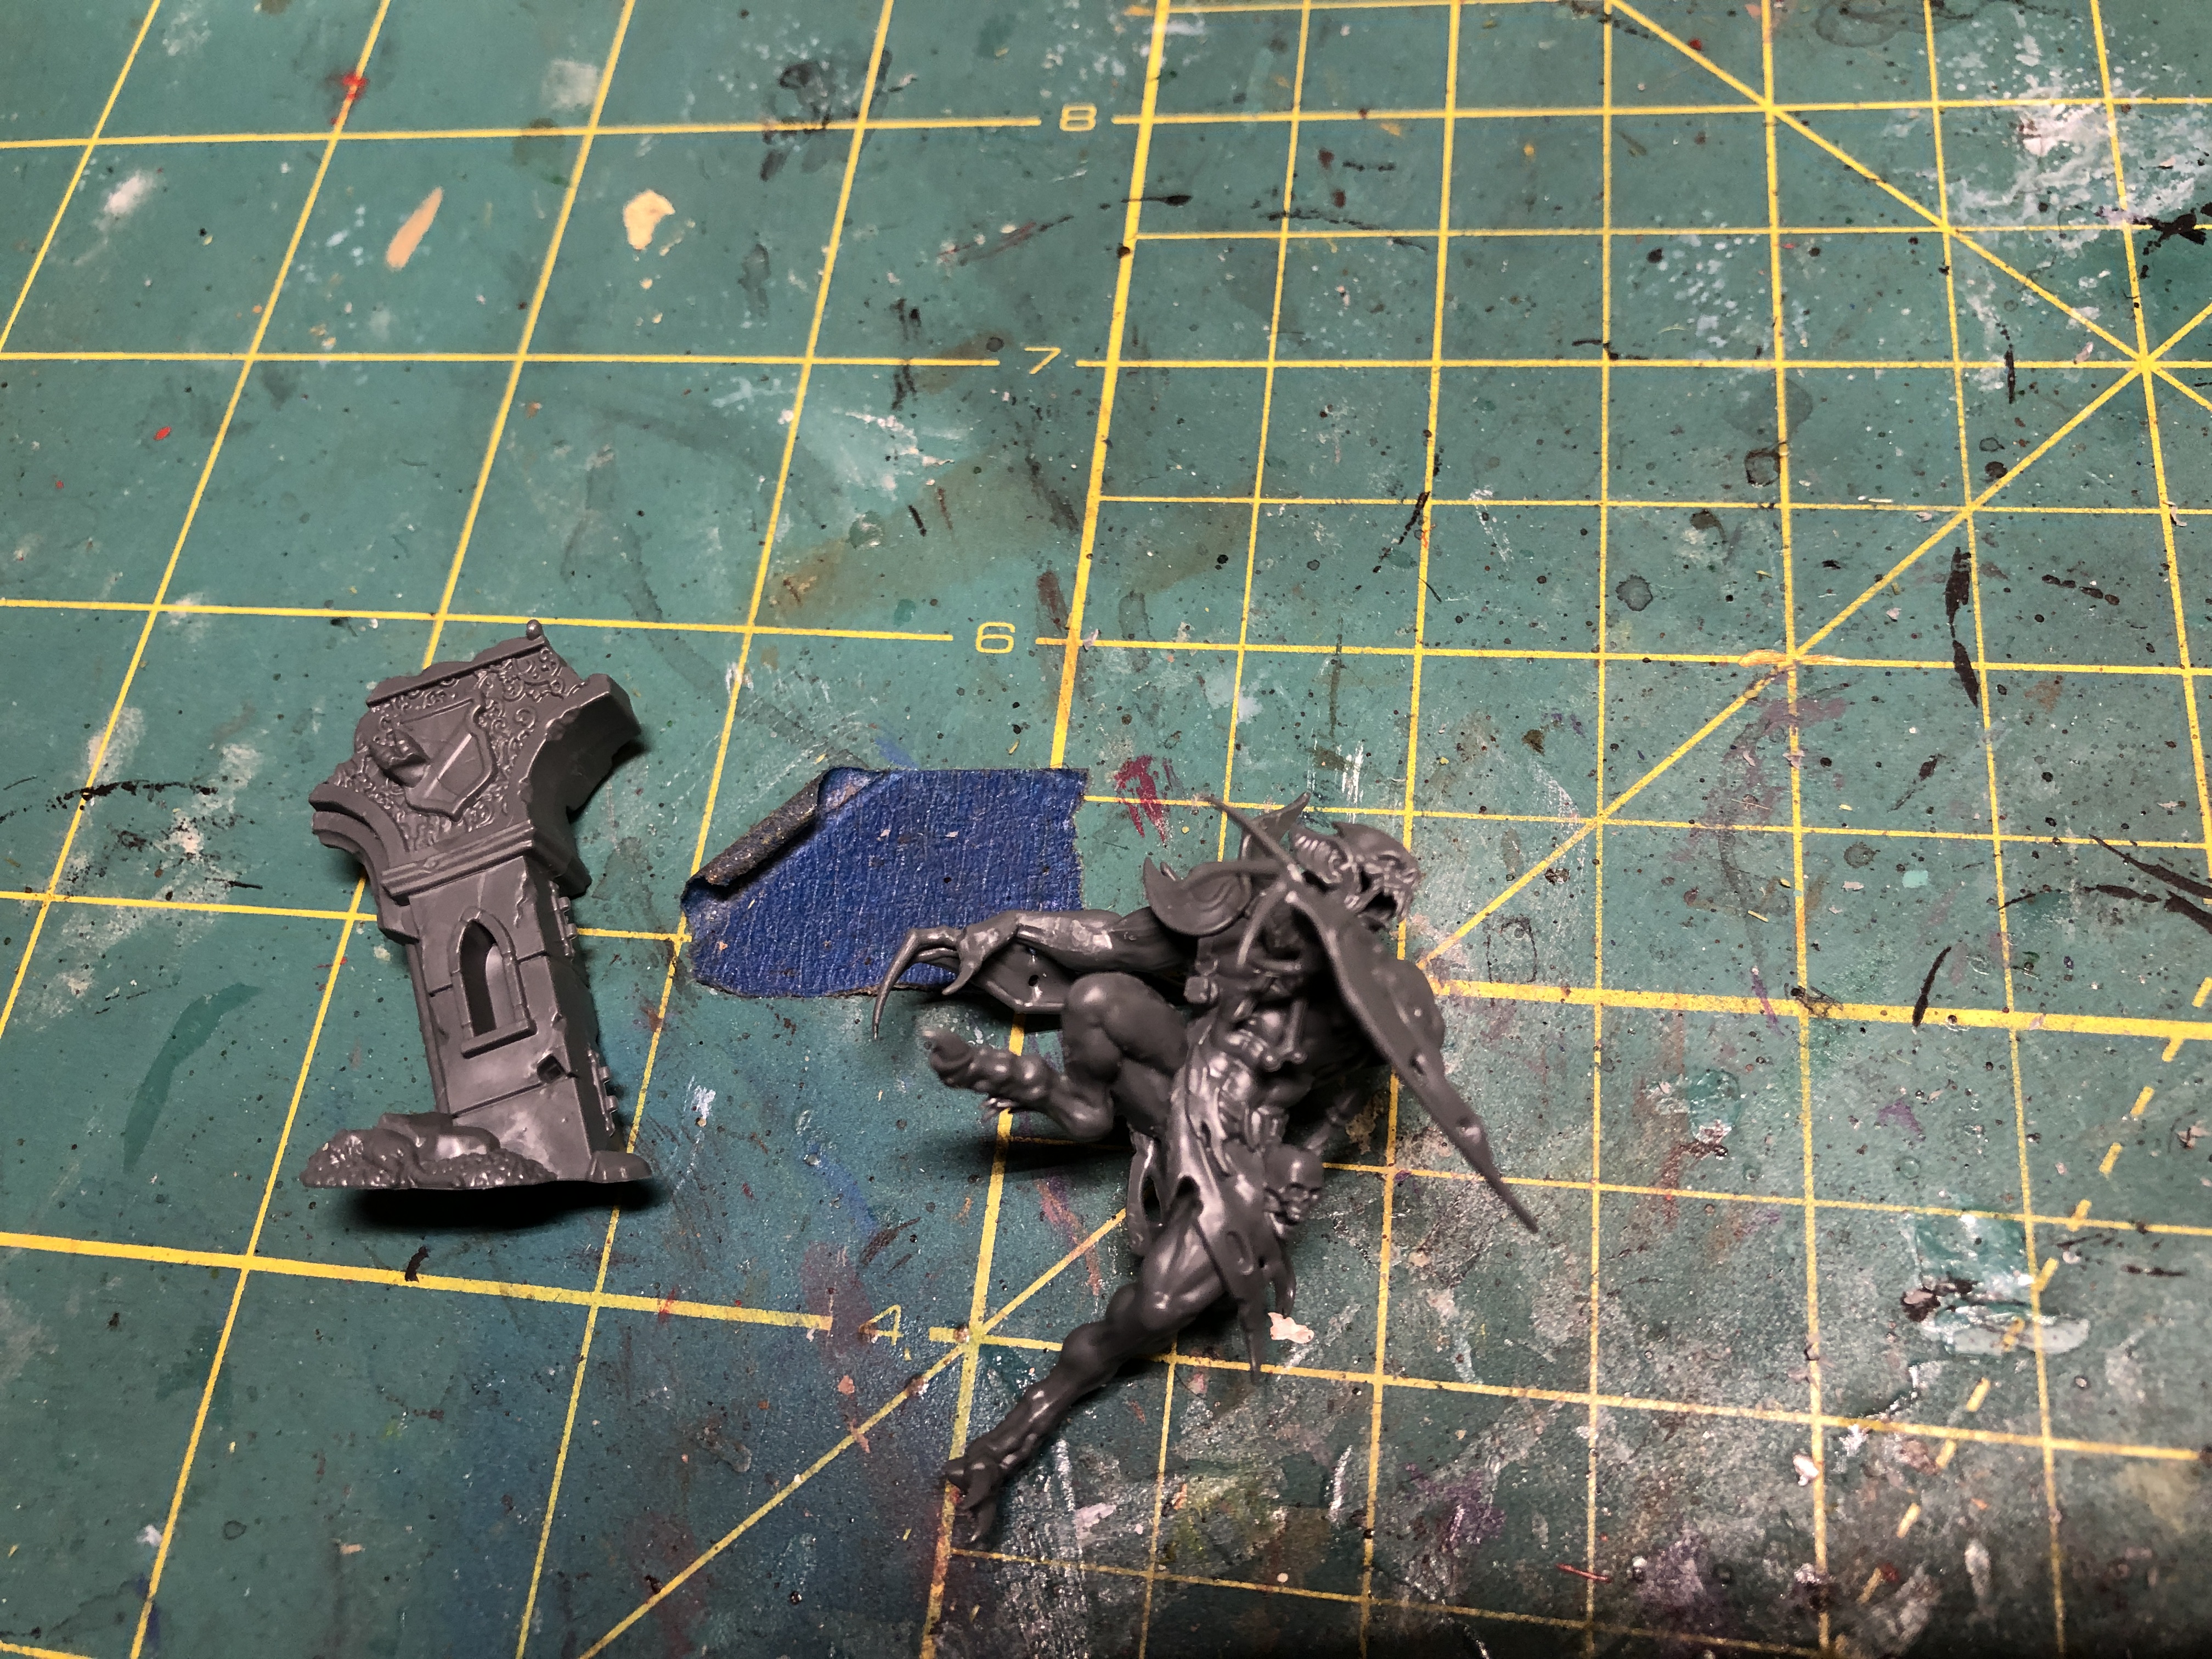 I highly suggest you do not attach the miniature to the provided column as it will make it much simpler to prime and paint.
Now for the bad part, or at least the ‘not so good’ part. The head of the miniature is divided in two halves, which of course causes an unsightly assembly line in the middle of the forehead. I will thus repat that this miniature is not for newcomers as a resolution to this issue involves the trusty green stuff and a fine sculpting tool. Green stuff should be applied to the forehead and to the chin and smoothed delicately so as not to obscure the exquisite facial details.
 After Green Stuff application, the face is now very presentable, well, for a bloodthirsty ghoul that is...
Flesh-Eater Court - Ghouls
The ‘start to collect’ box comes with plethora of ghouls, which would be a waste if I were not to plan on using many of them for another game – Frostgrave. I will document my adaptation of these miniatures to my Frostgrave table in another post, but consider this tutorial as valid for either game, save for the bases which I will detail in a future Frostgrave post.
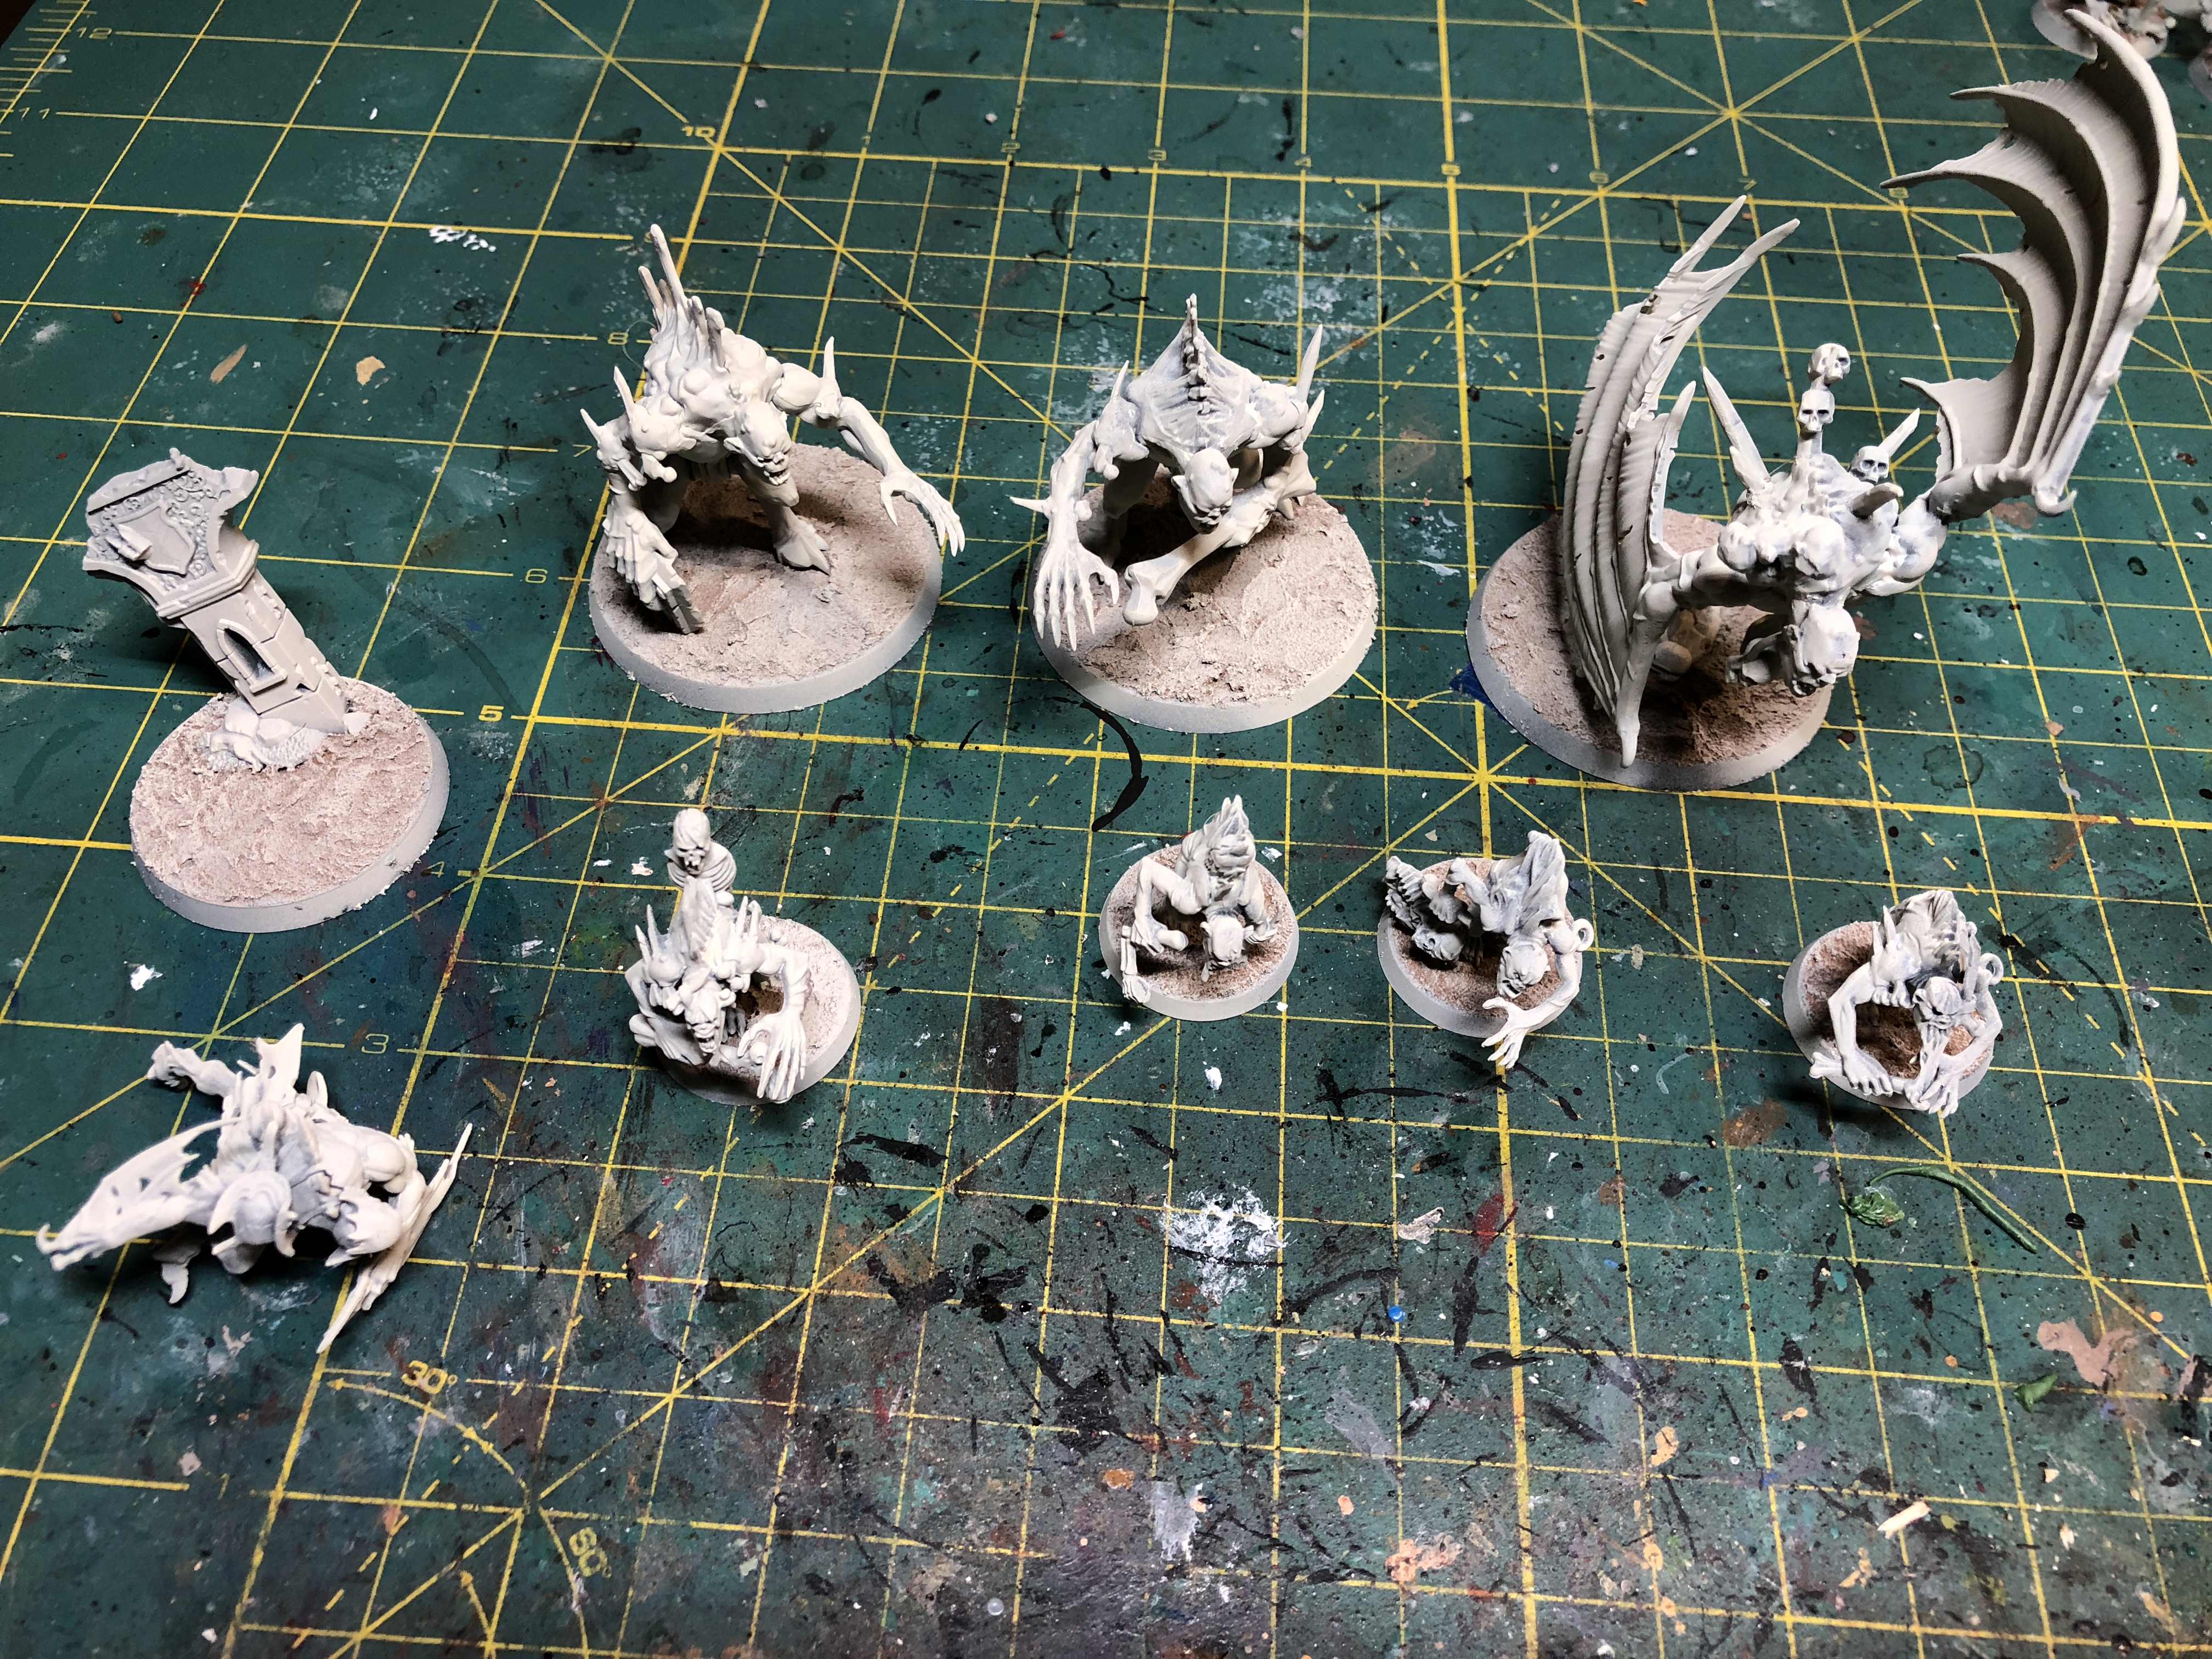
First of, the ghouls are not exactly beginner’s models ( a trend for the Flesh-Eater Court if you have already red my Arch Regent entry above). The models come together easily enough and each one of them has 5 parts (bottom – top – head – both arms) and i may suggest one uses fast drying glue to assemble them so as to avoid mishapping the limbs as they shift in the drying process. Also, and I am ware this is more of an advanced concern, the multipart build creates assembly lines which I was compelled to mask with plastic putty.
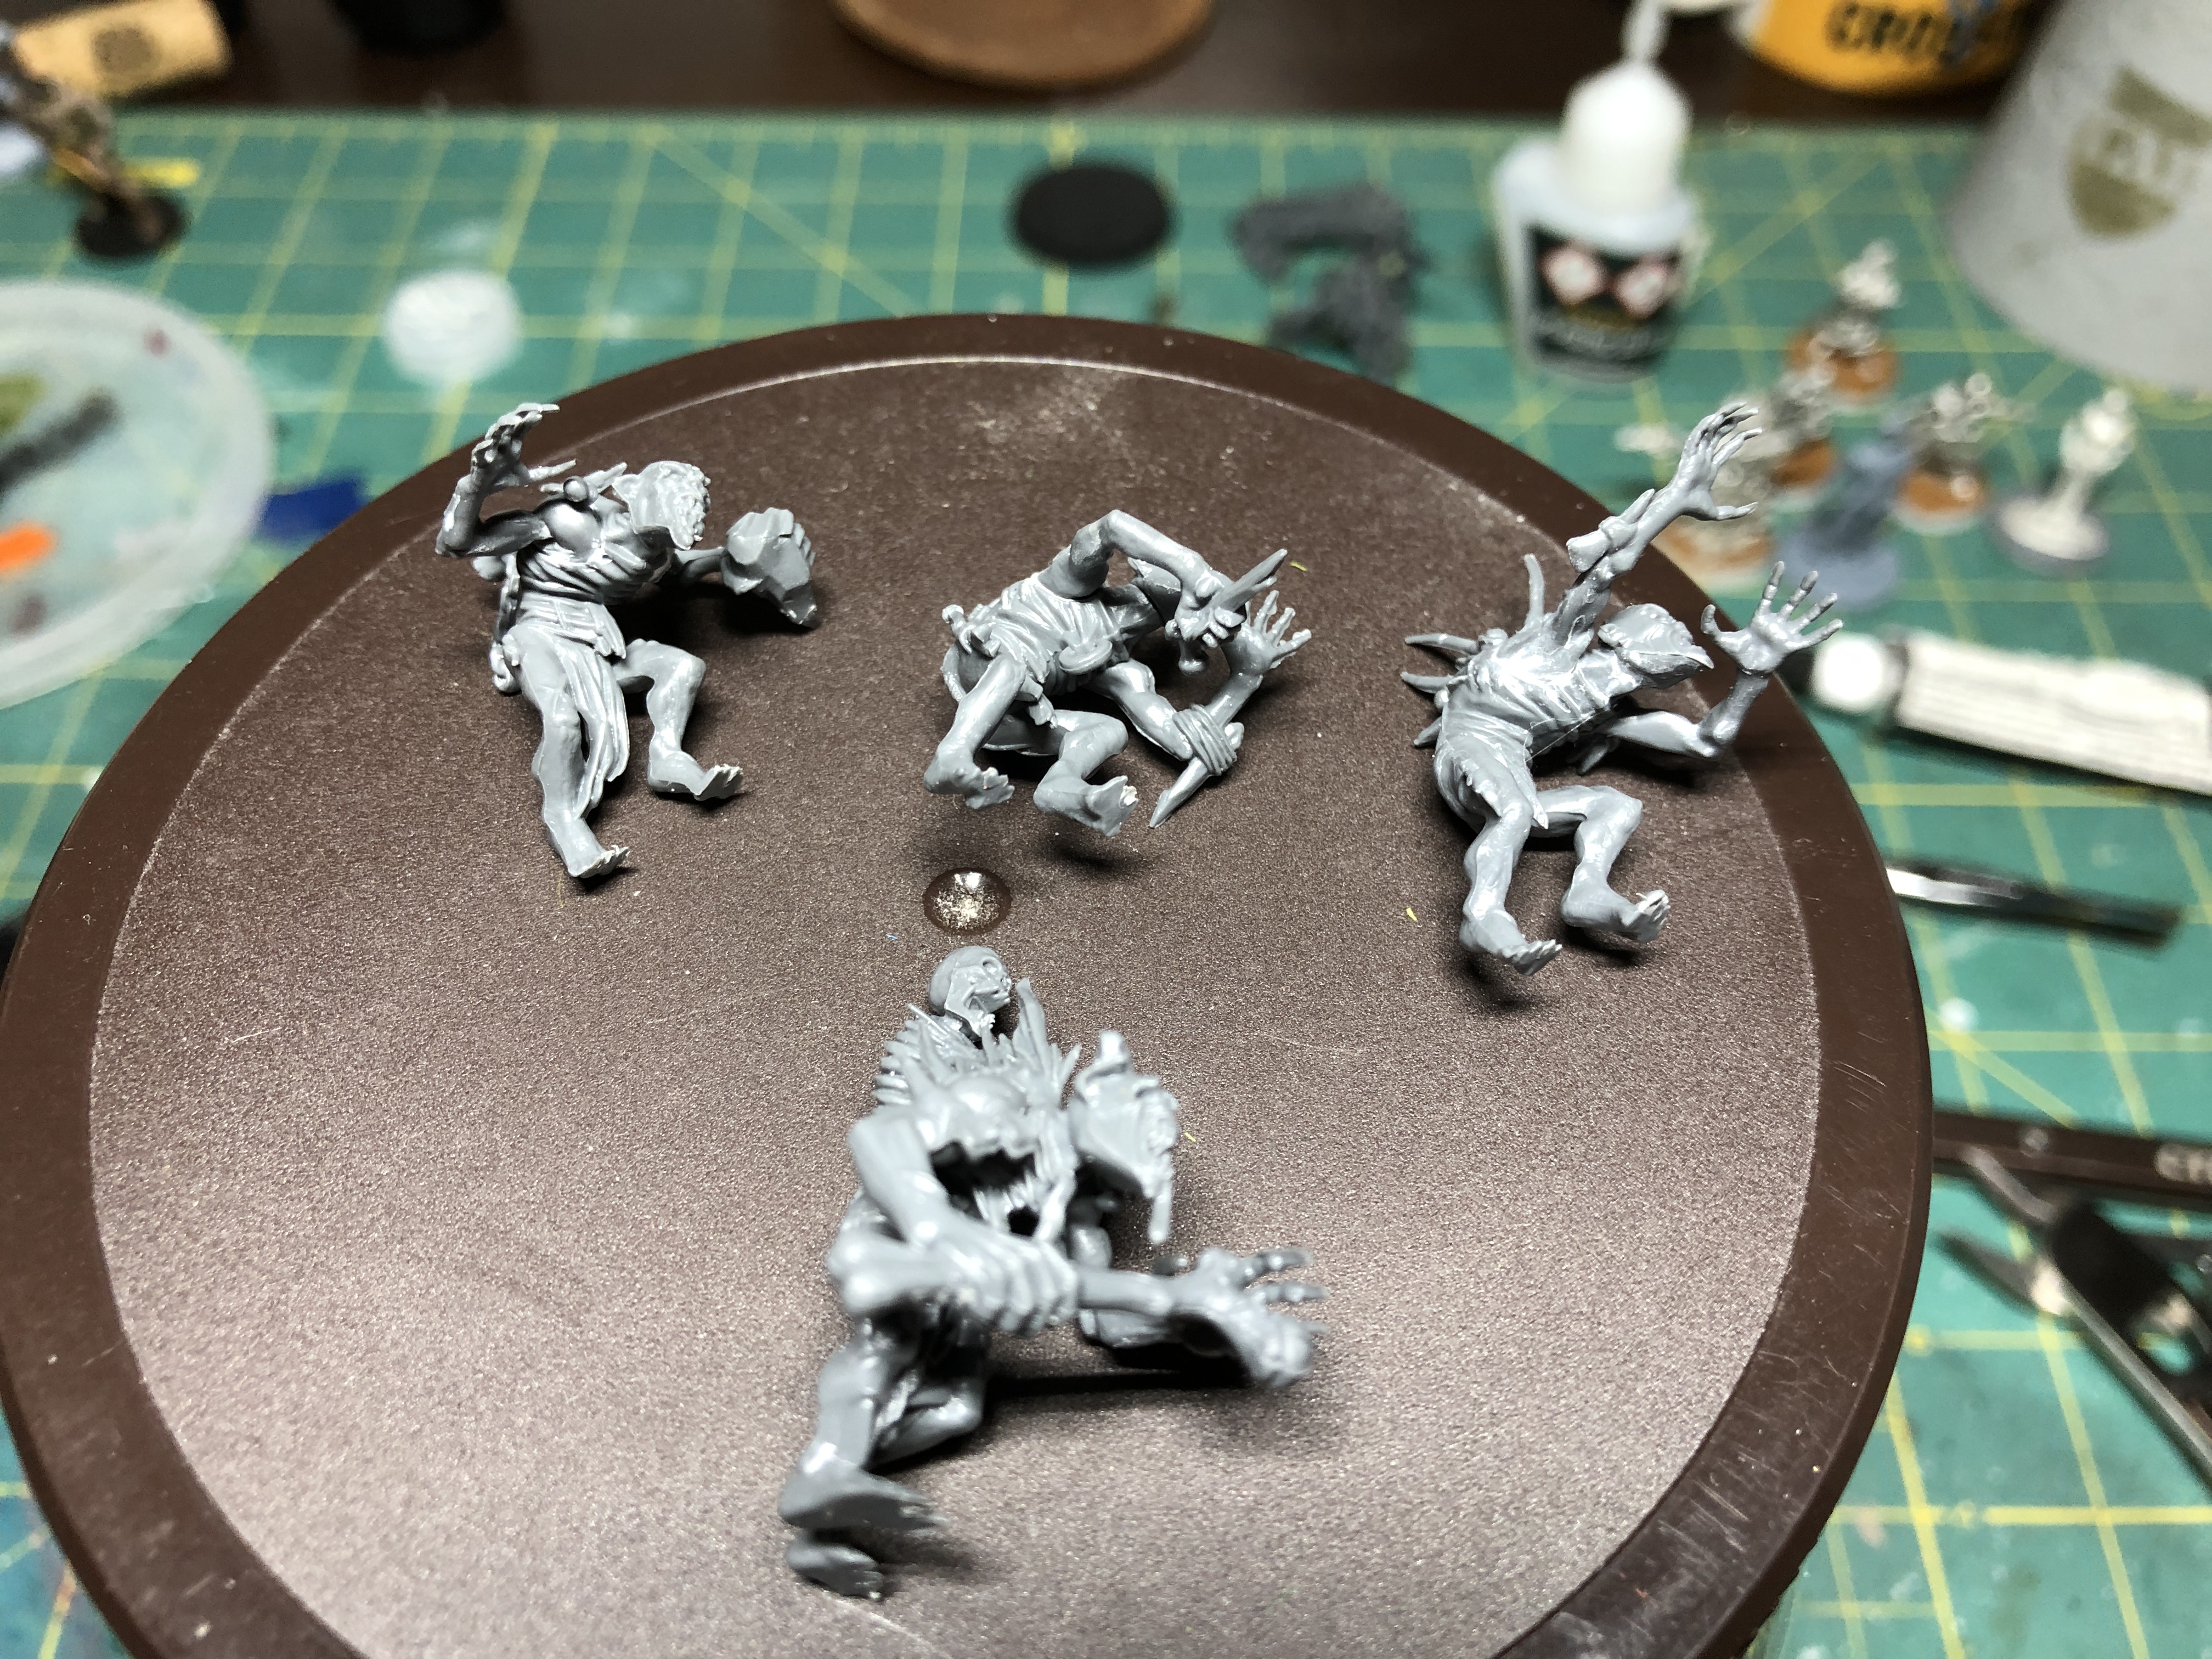 The kit allows you to build ghouls but also a ghast (or ghast courtier). BTW, the only difference between a ghast courtier and a ghast seems to be the base size, so i suggest not giving GW any more money and agreeing with your fellow players to have both occupy the same base space and play either in a warband, as long as it is clear before the game begins.
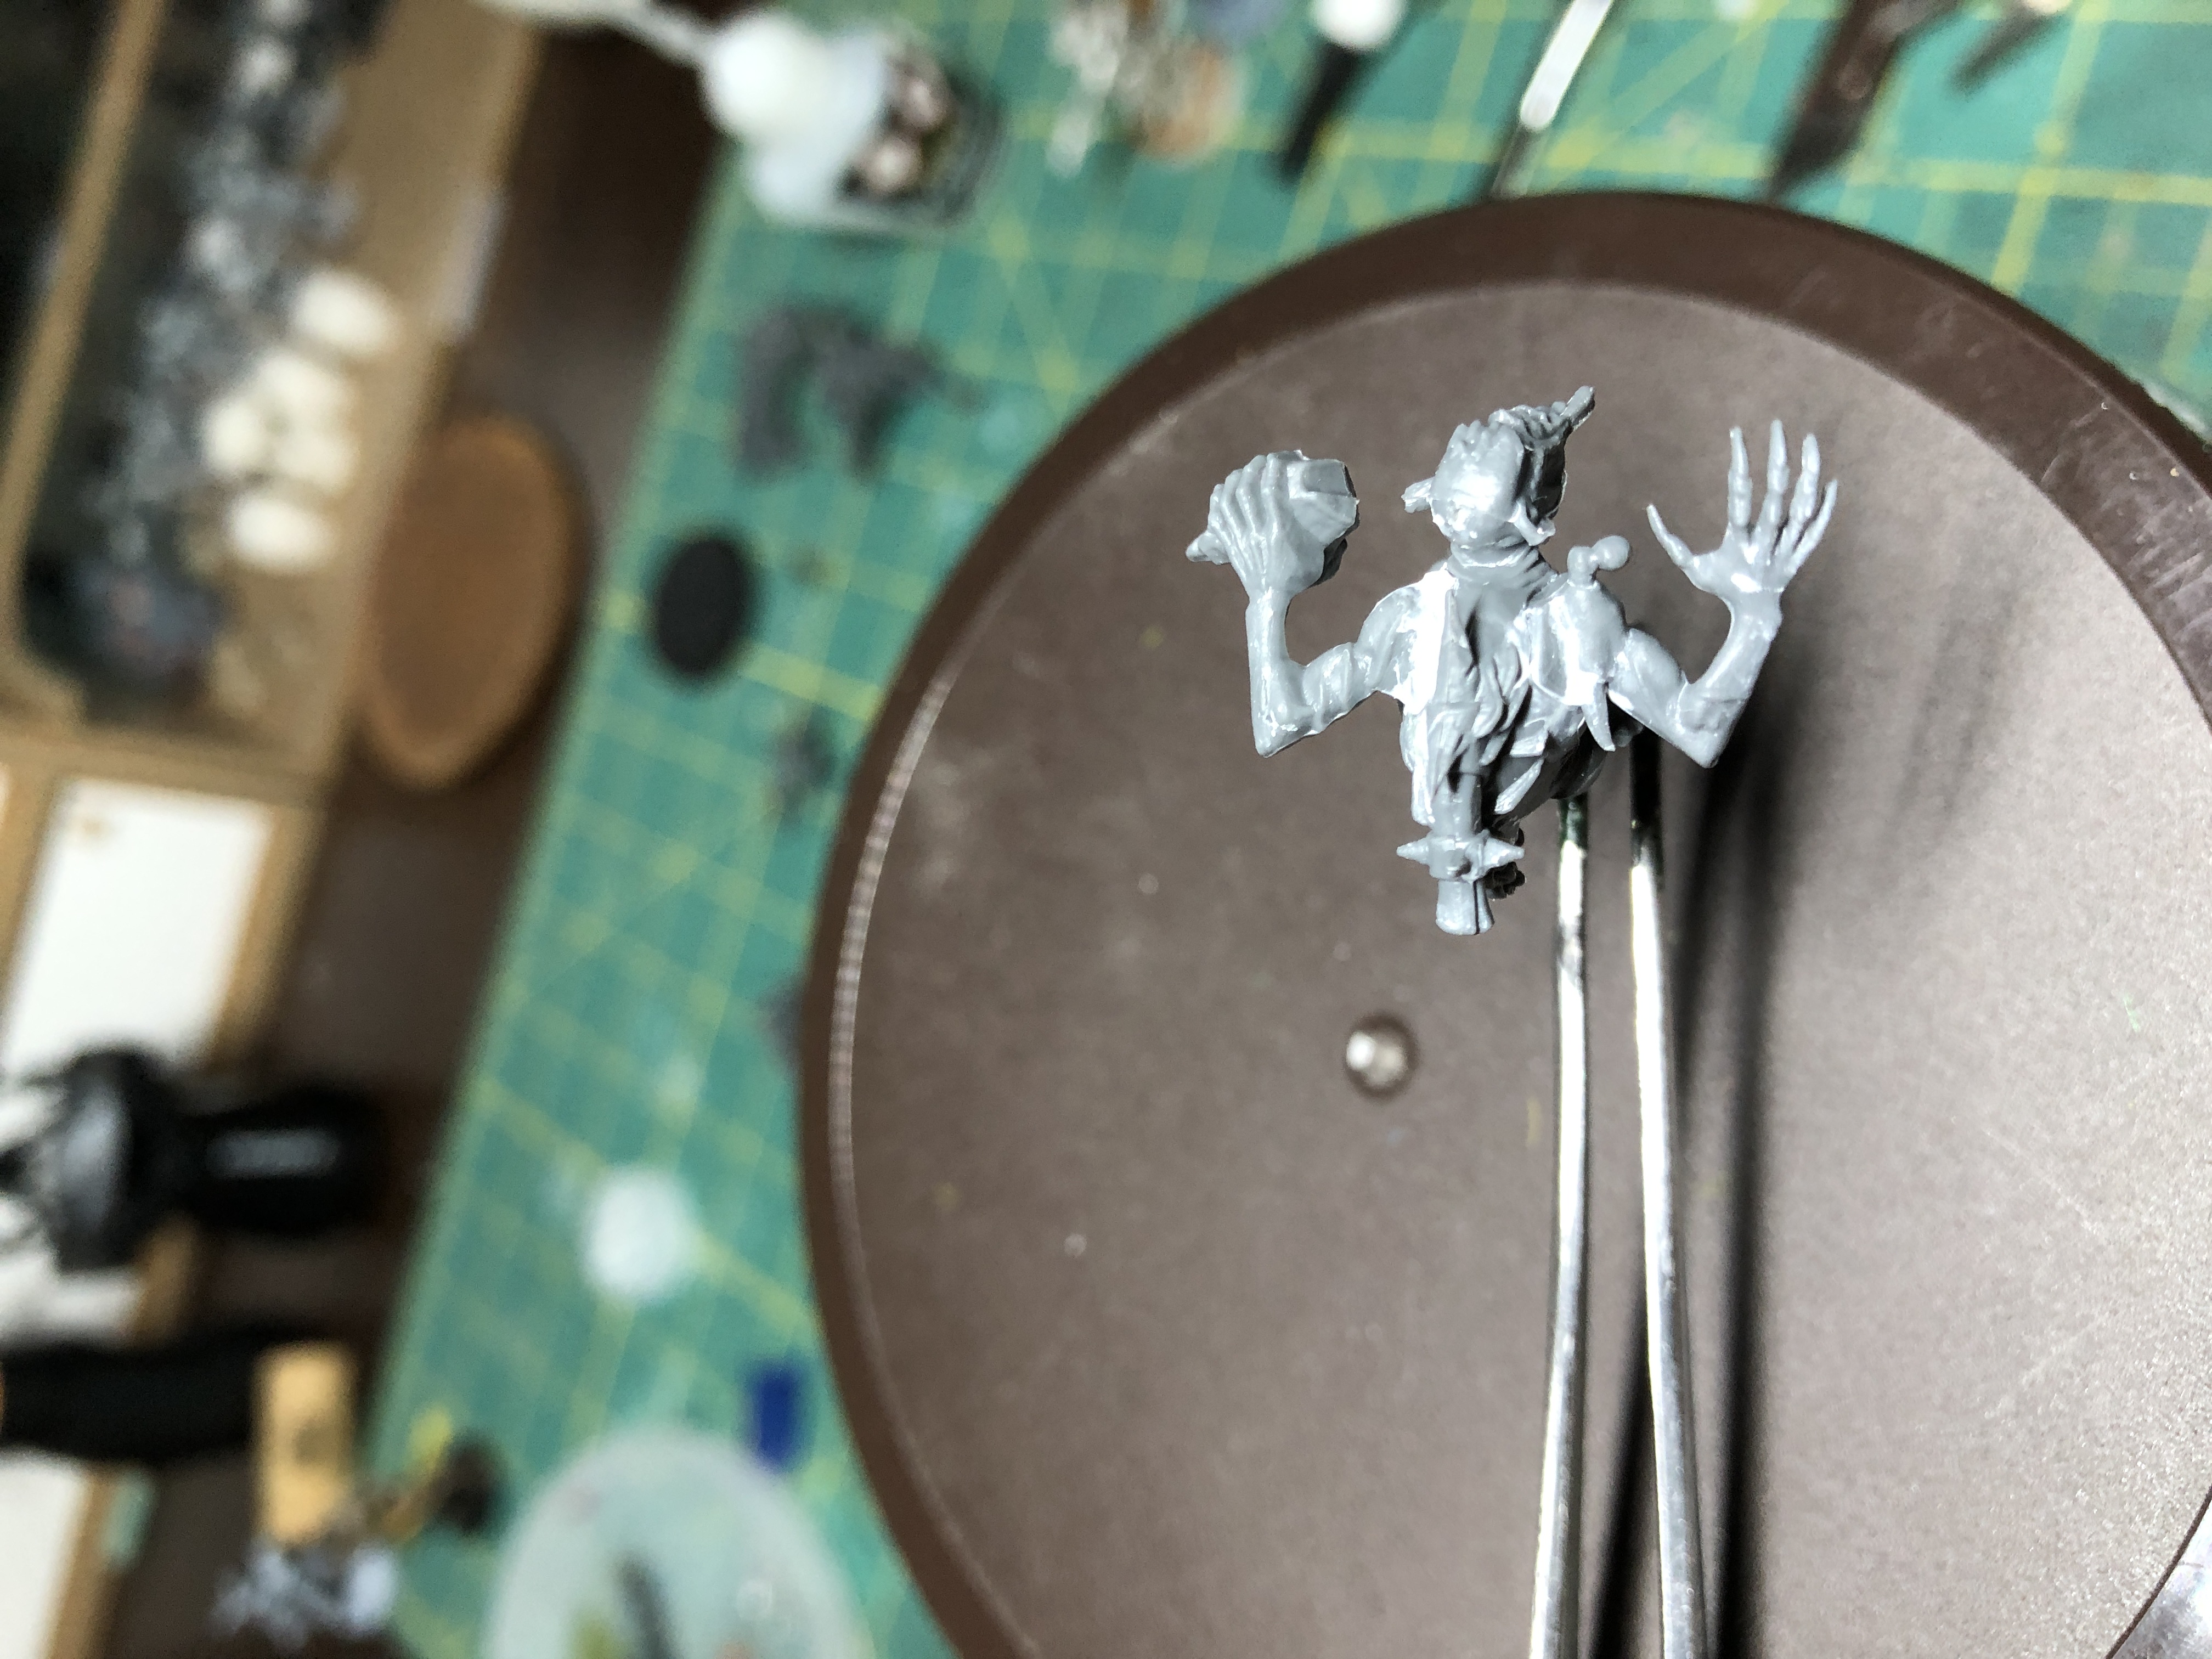 Quite a bit of plastic putty work is necessary to hide the arms and waist lines. I use Vallejo Plastic Putty which I apply with a fine sculpting tool and wet down to smooth it.
 Finally, I wanted an earthy aspect to the bases, such as freshly reopened grave, and uses Vallejo earth texture to cover the bases, including that of the Arch Regent (shown on the right).
Corvus Cabal
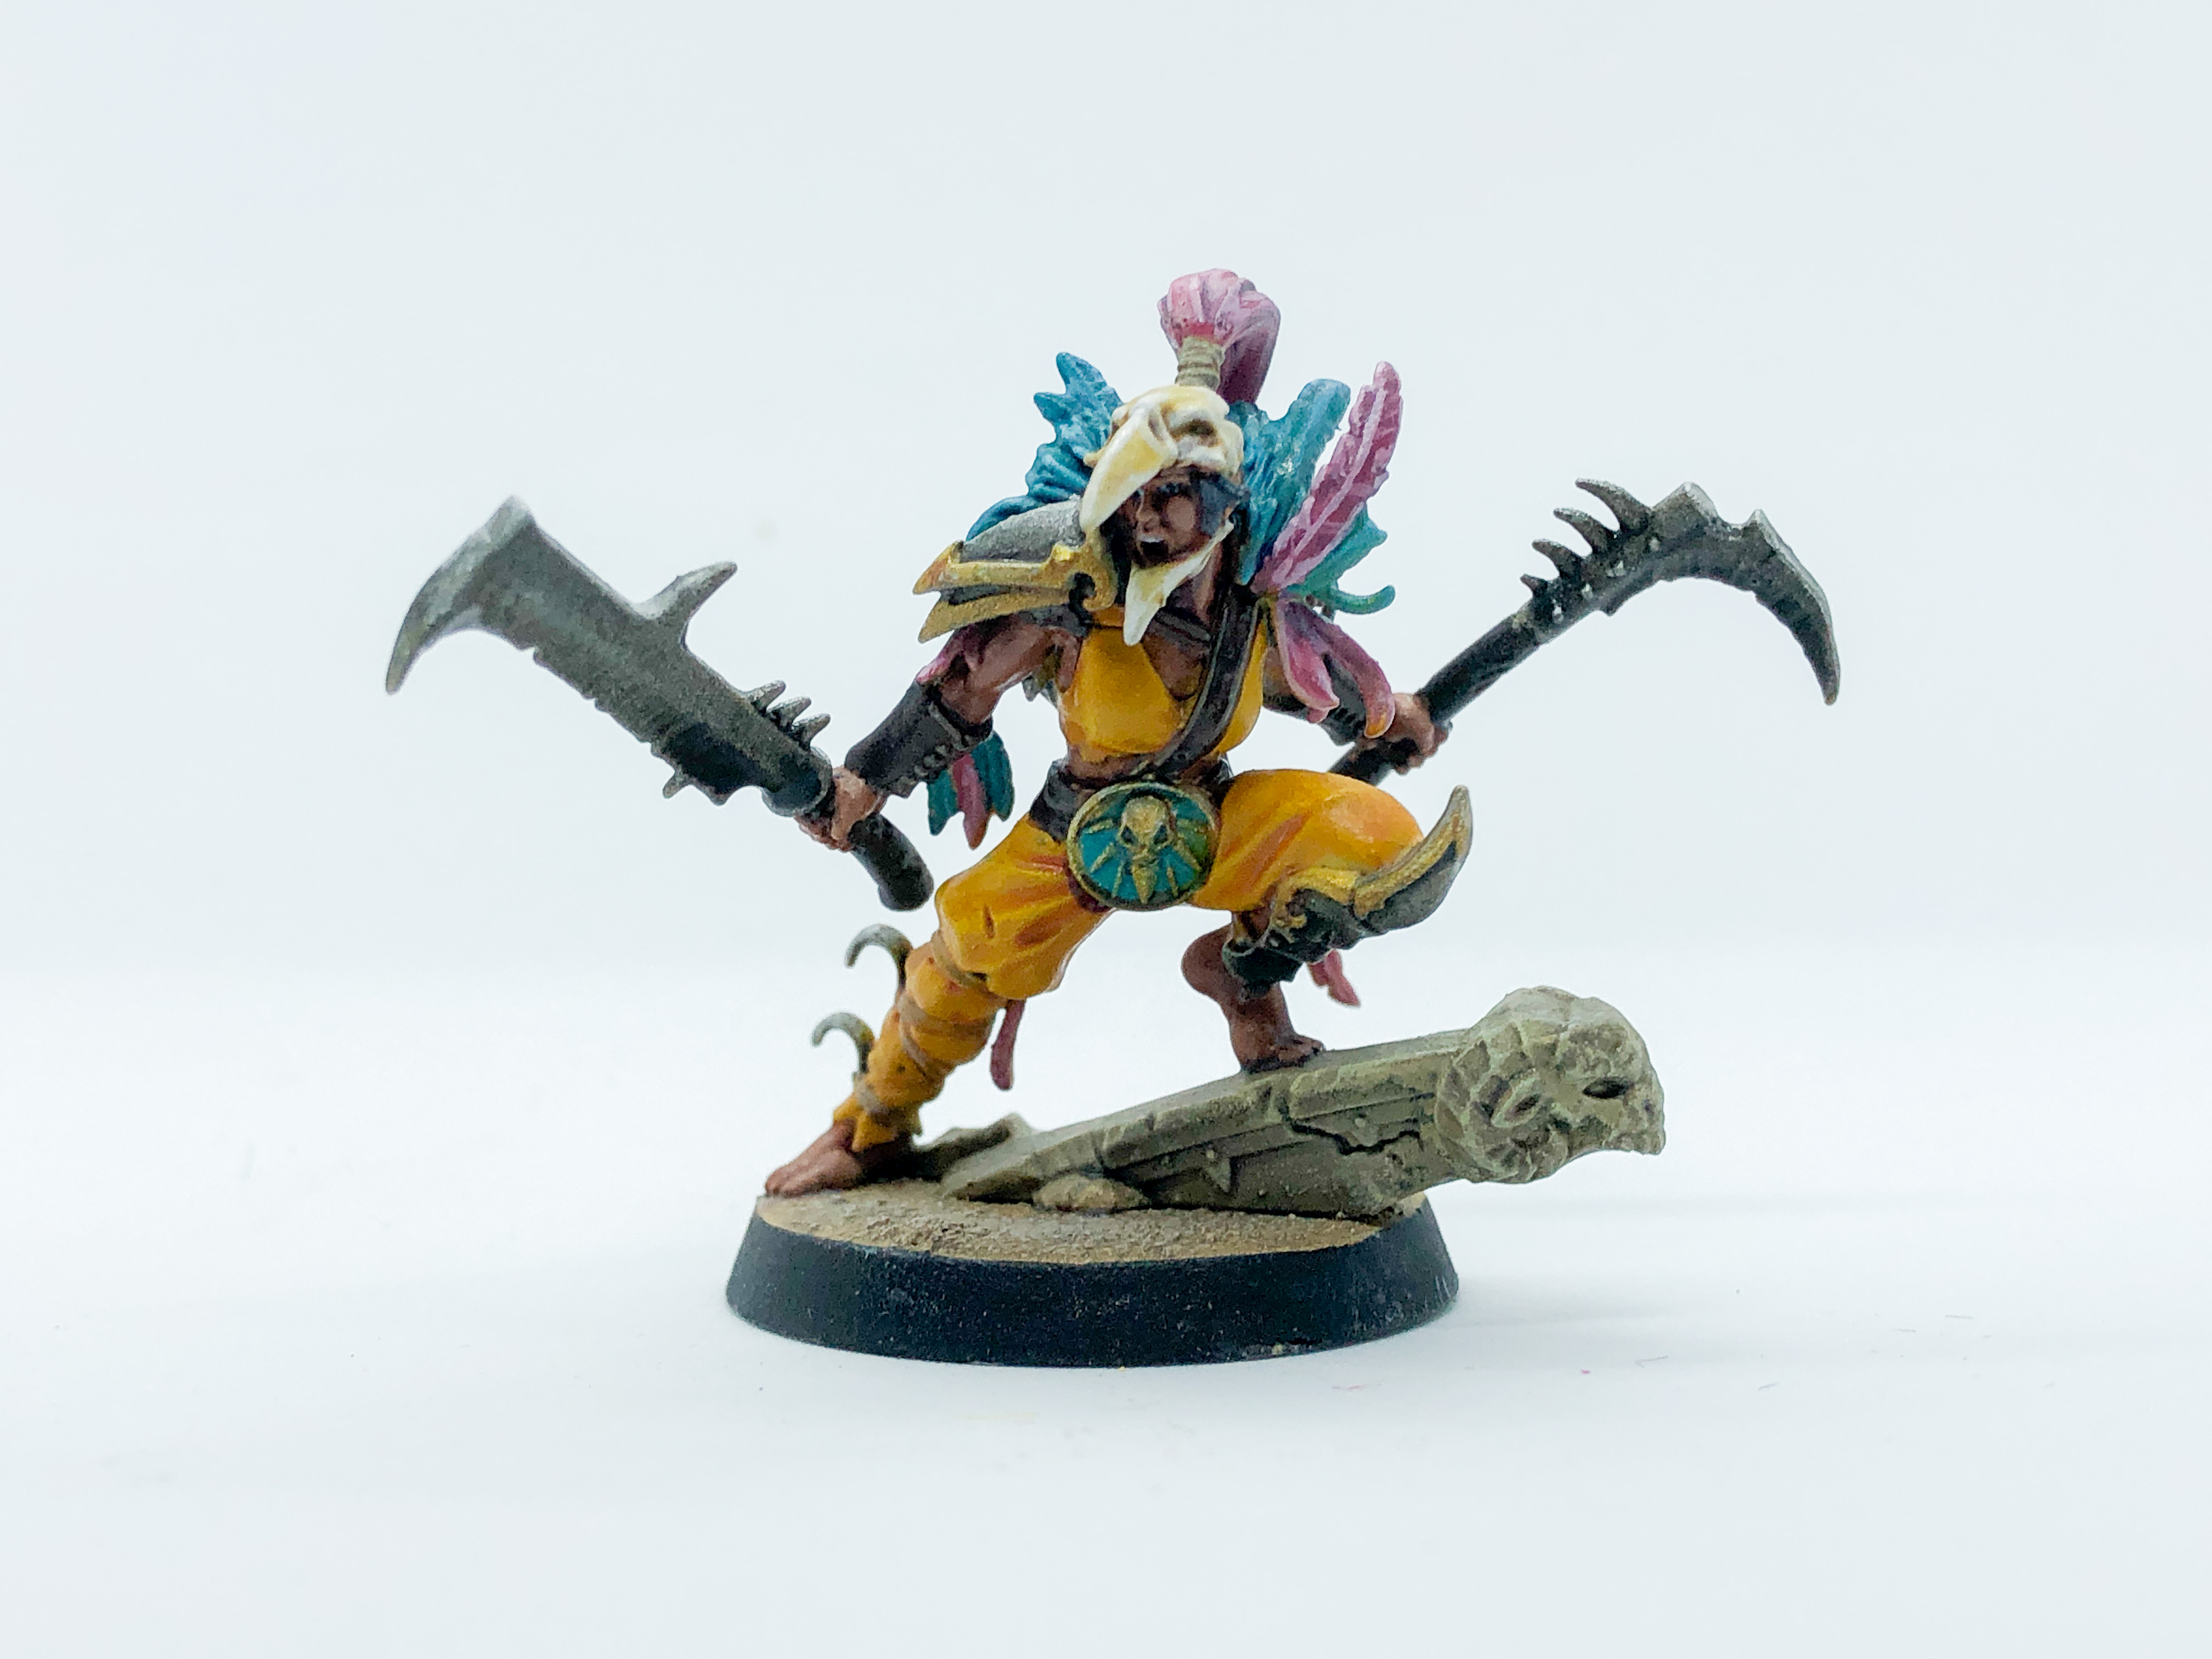
Corvus Cabal is now ready to enter the arena. These models were quite a challenge to assemble and to paint but I am quite satisfied with the end result. The color scheme was inspired by 2dorks1brush.


Razorgor Beast Stampedes Into the Scene
The Razorgor was one of the beasts introduced by Warcry first additional volume and proved quite a challenge to build. yet it offers very interesting painting opportunities and a solid learning experience.
Enter the Untamed Beasts !
The untamed Beasts are painted and varnished, ready to bring their faction glory on the chaotic battlegrounds.

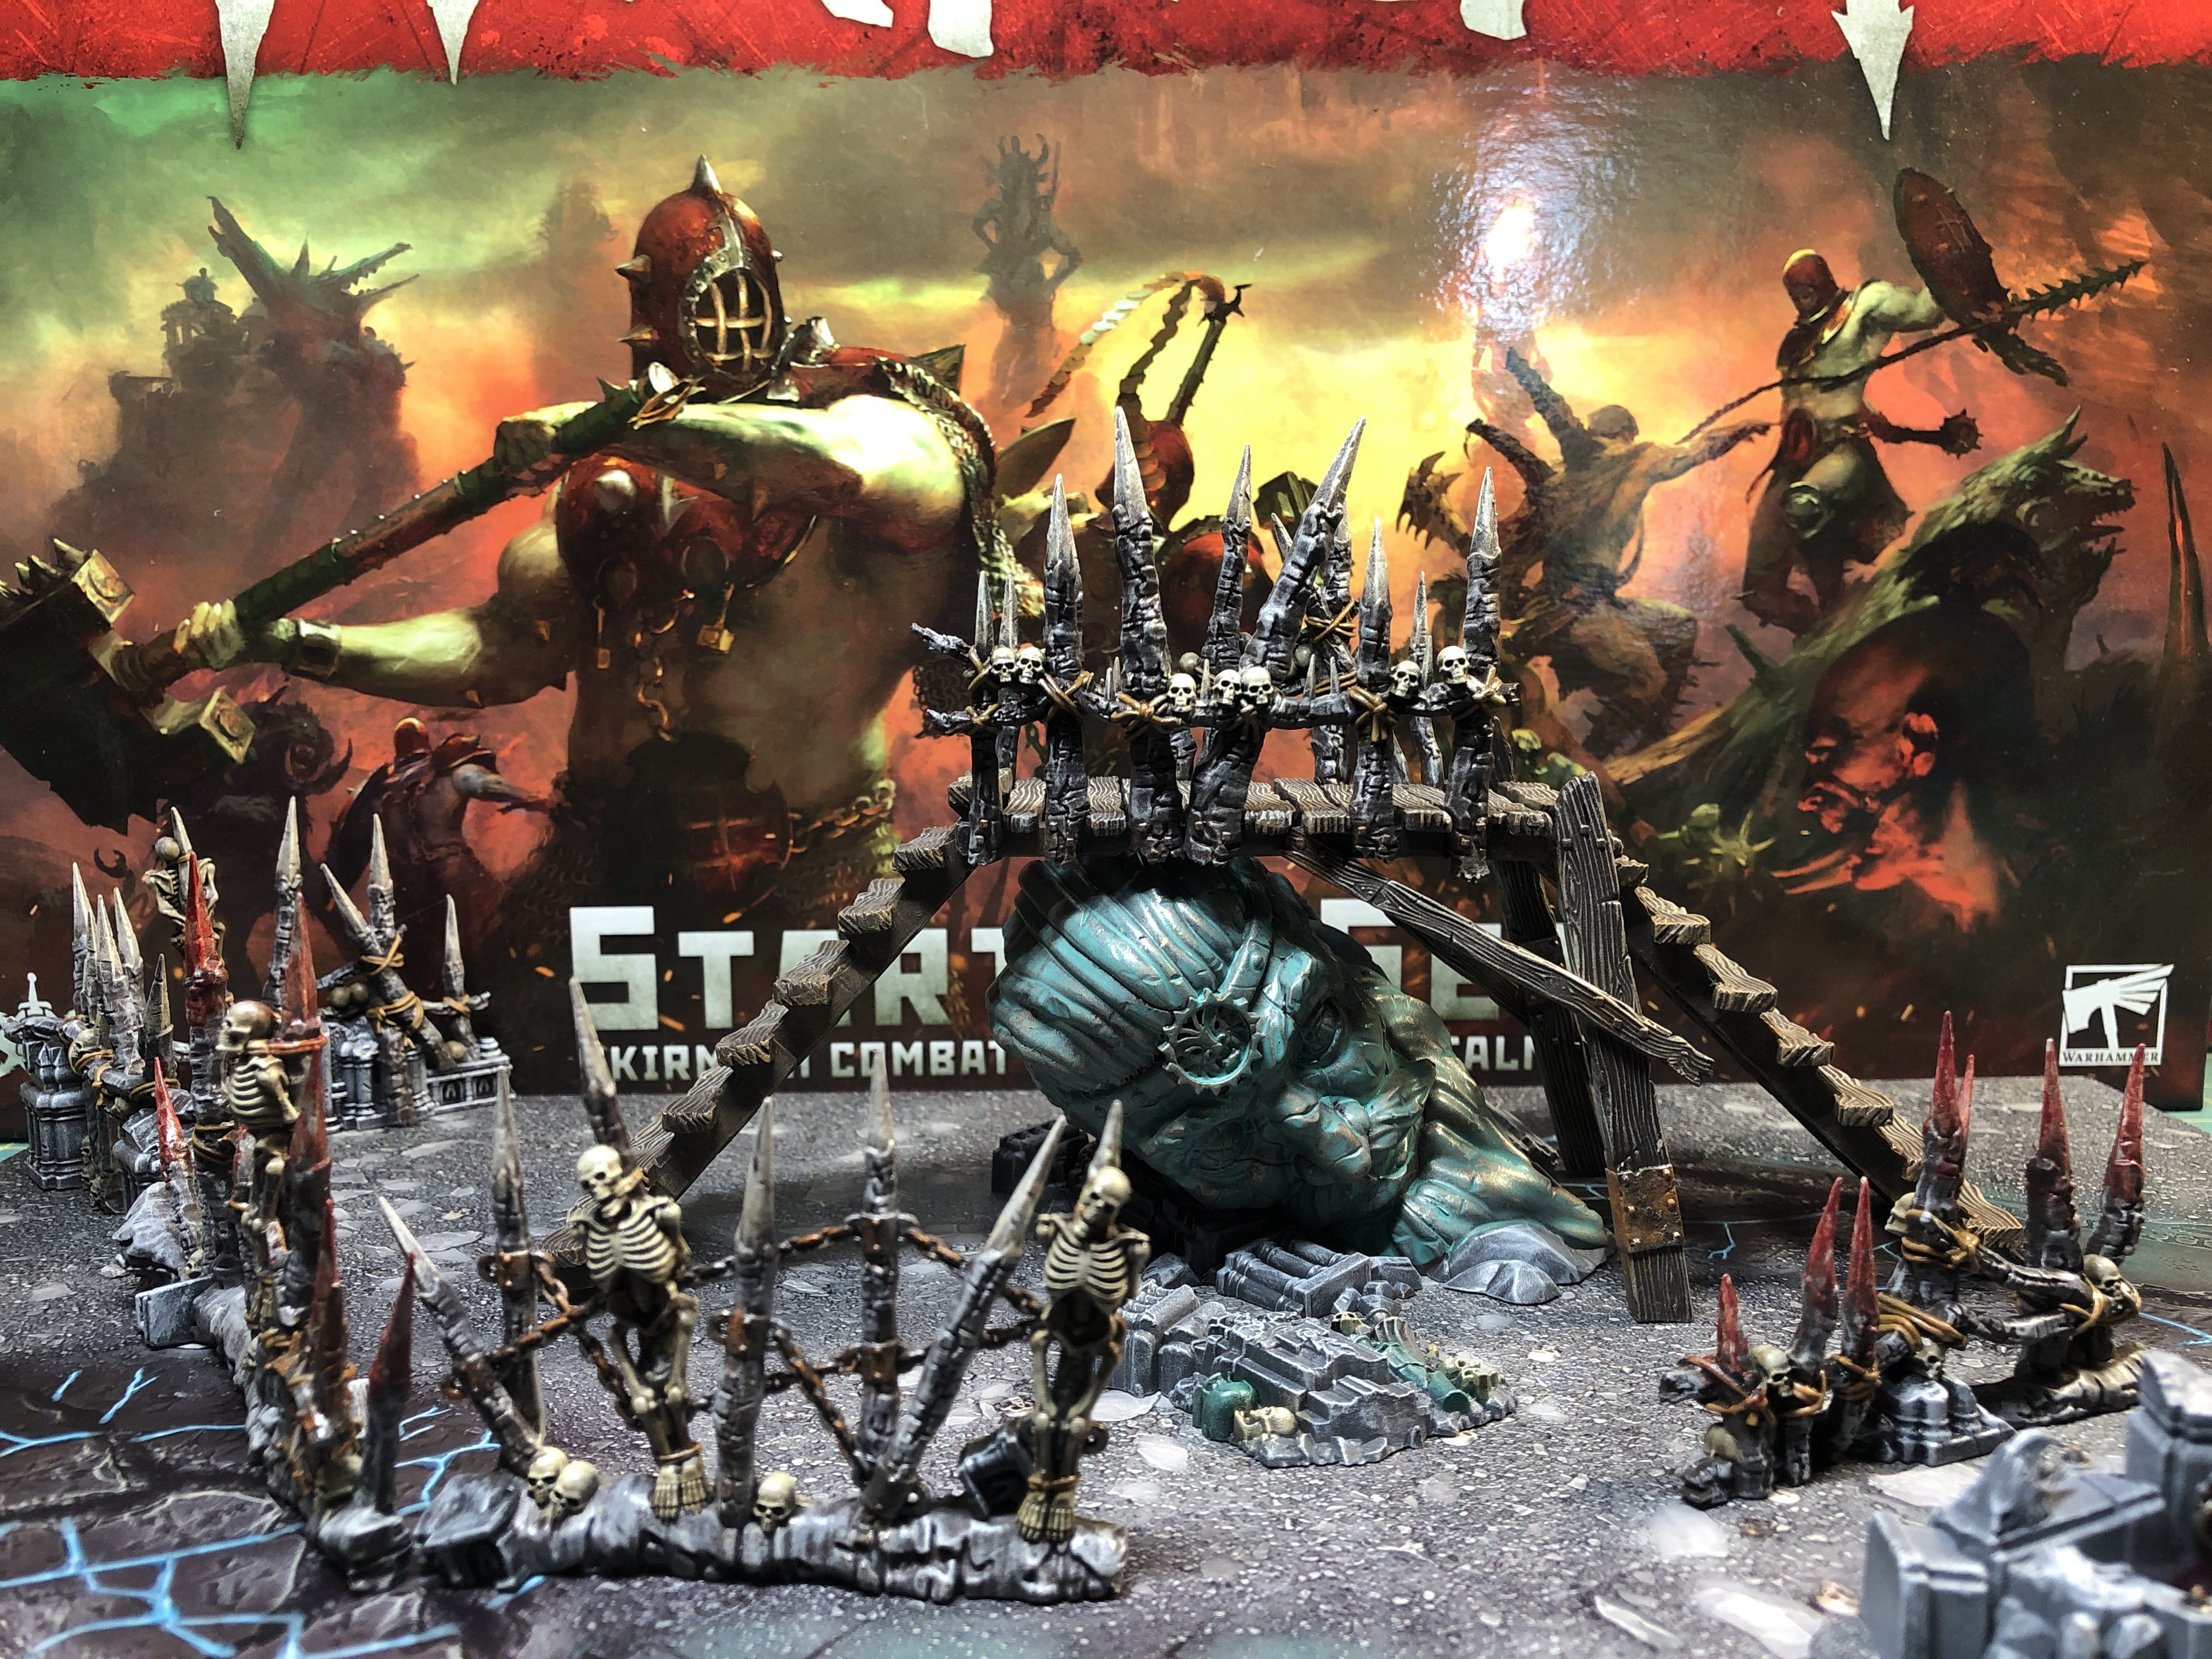
Barricades, Pikes and Sigmar Head, Oh My!
I finally got to paint and varnish the rest of the core terrain. A tutorial video is coming out soon. For now, here is a picture
Into the Ruins...
The terrain in Warcry core box is nothing short of stunning and, while it presents some subtlety during the building stage (see my first entry), painting it appropriately necessitates one strikes a balance between aesthetic and speed. This is what I have tried to do in designing these two instructional video that I hope will help you on your path to painting the perfect Warcry battlefield. Part one focuses upon the stone ruin proper…
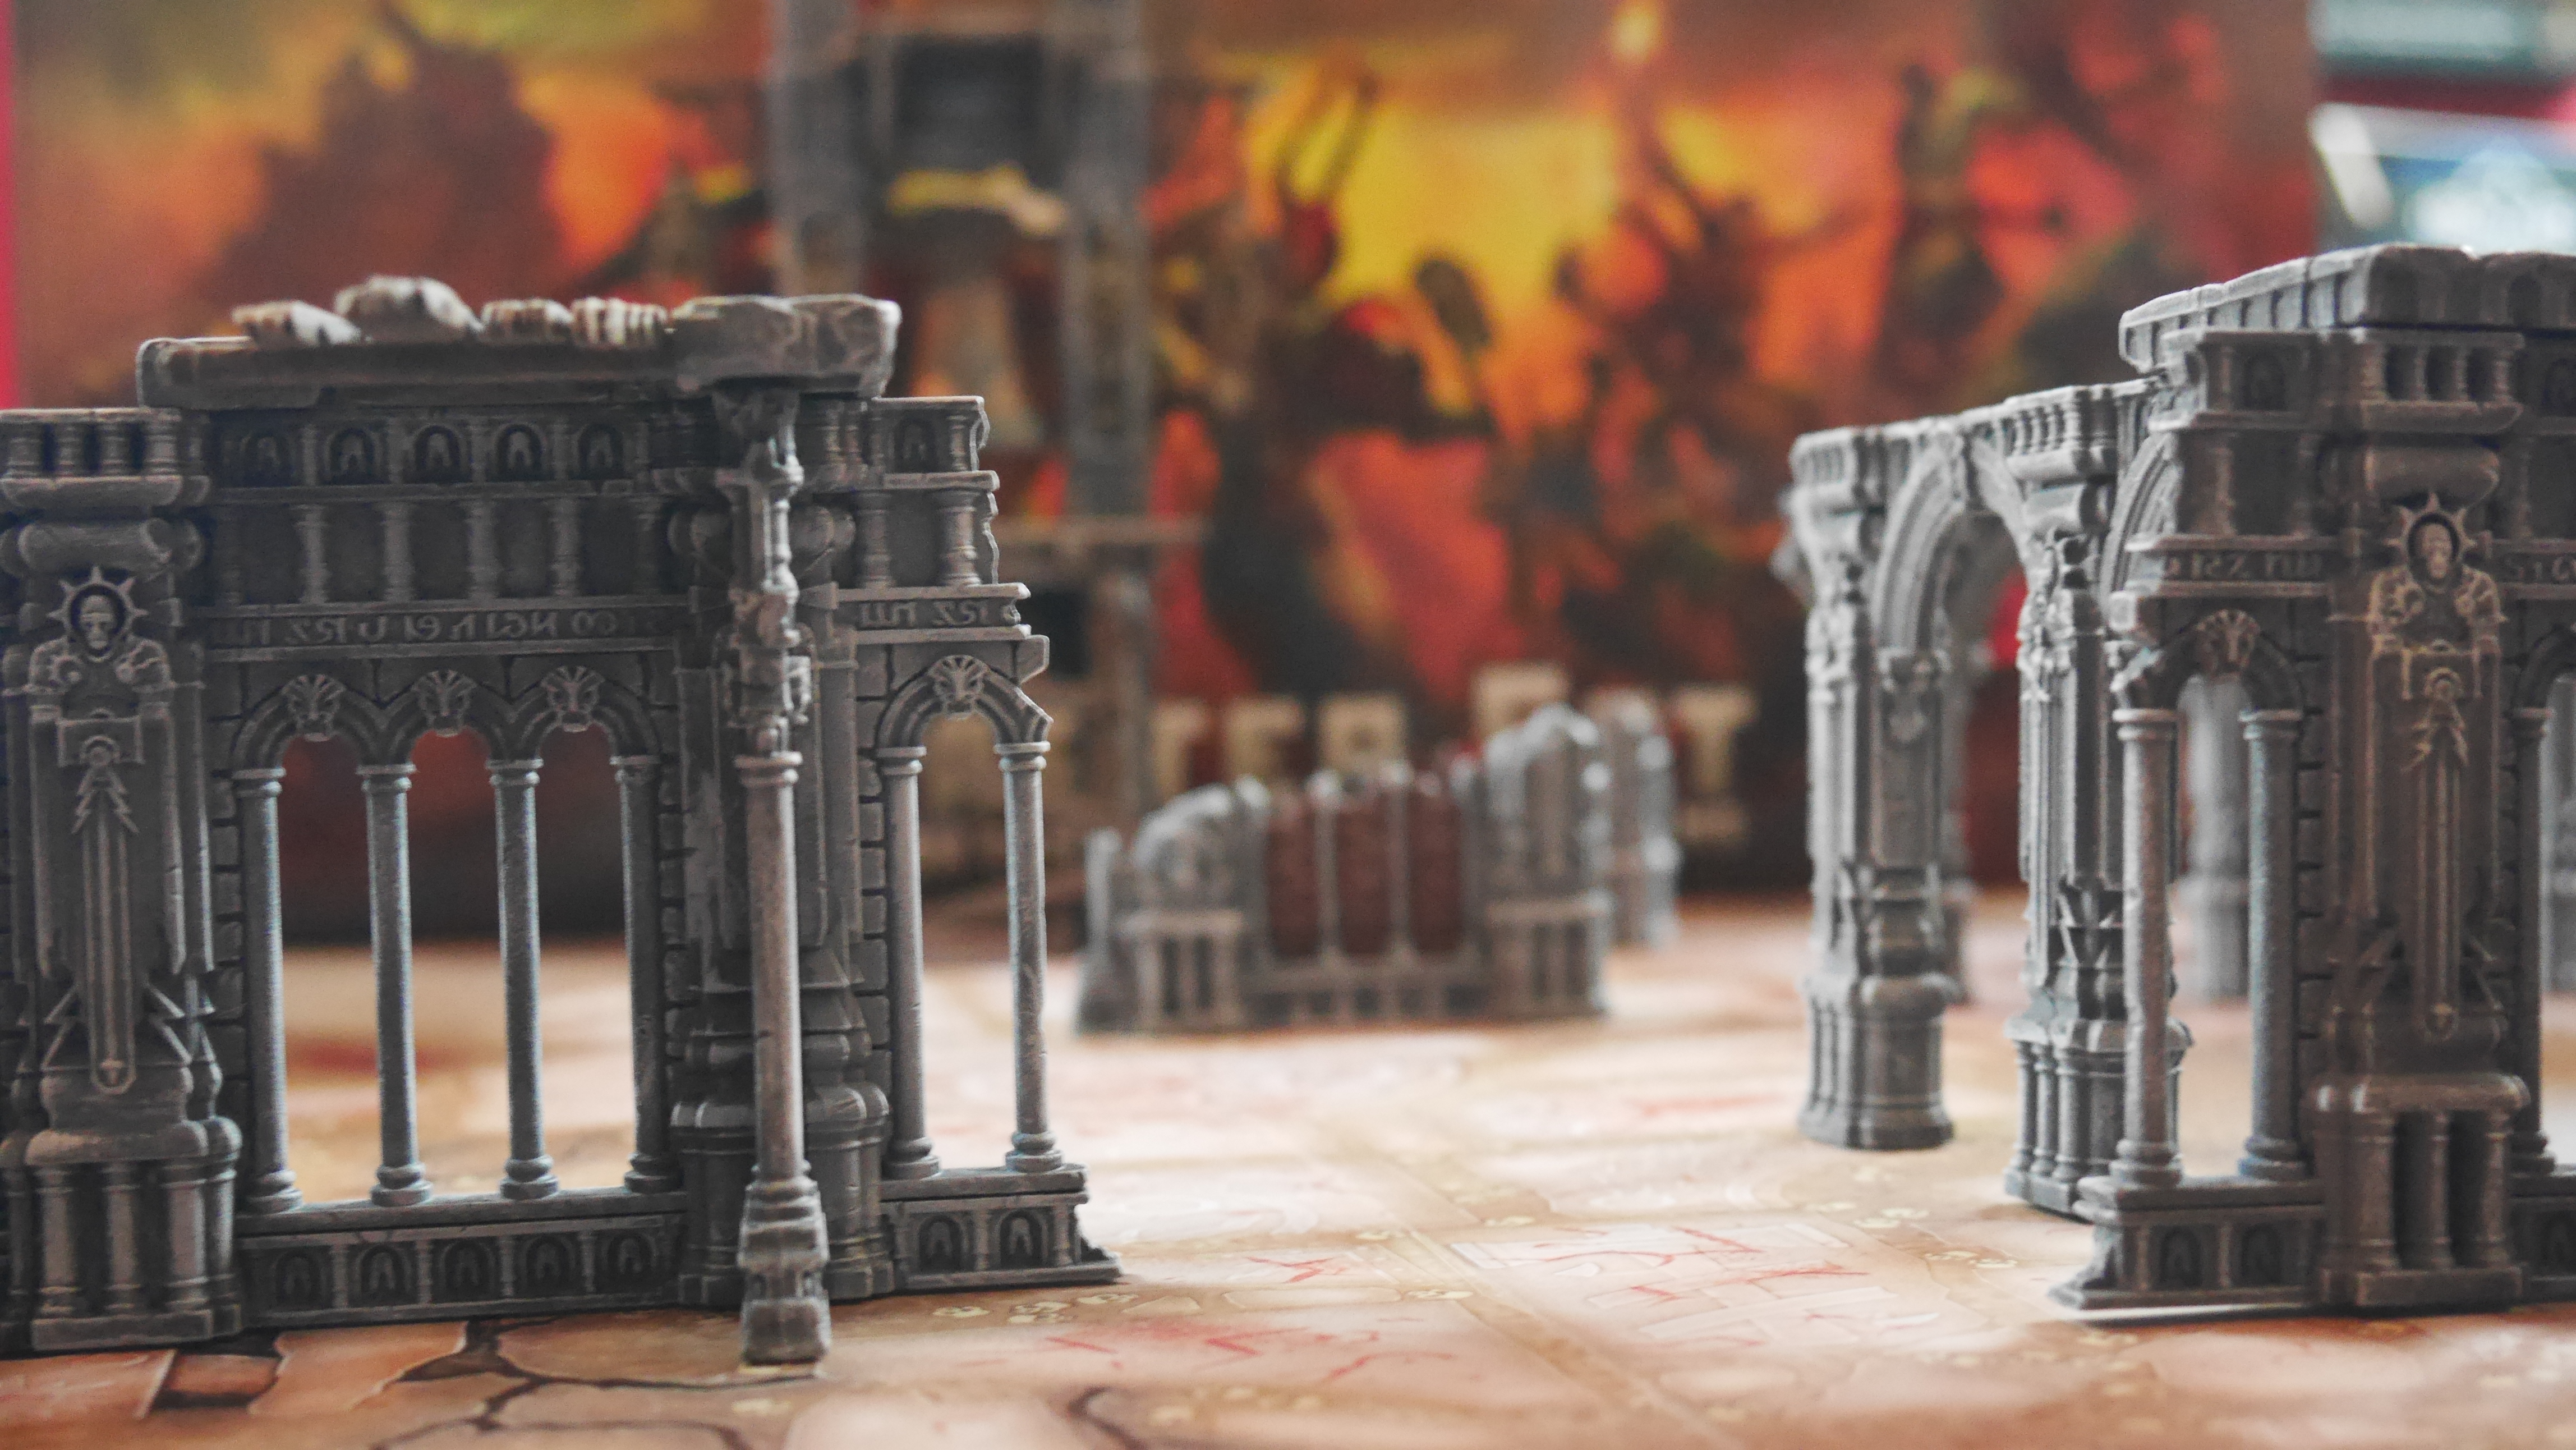 The ruins
Enter the Furies!
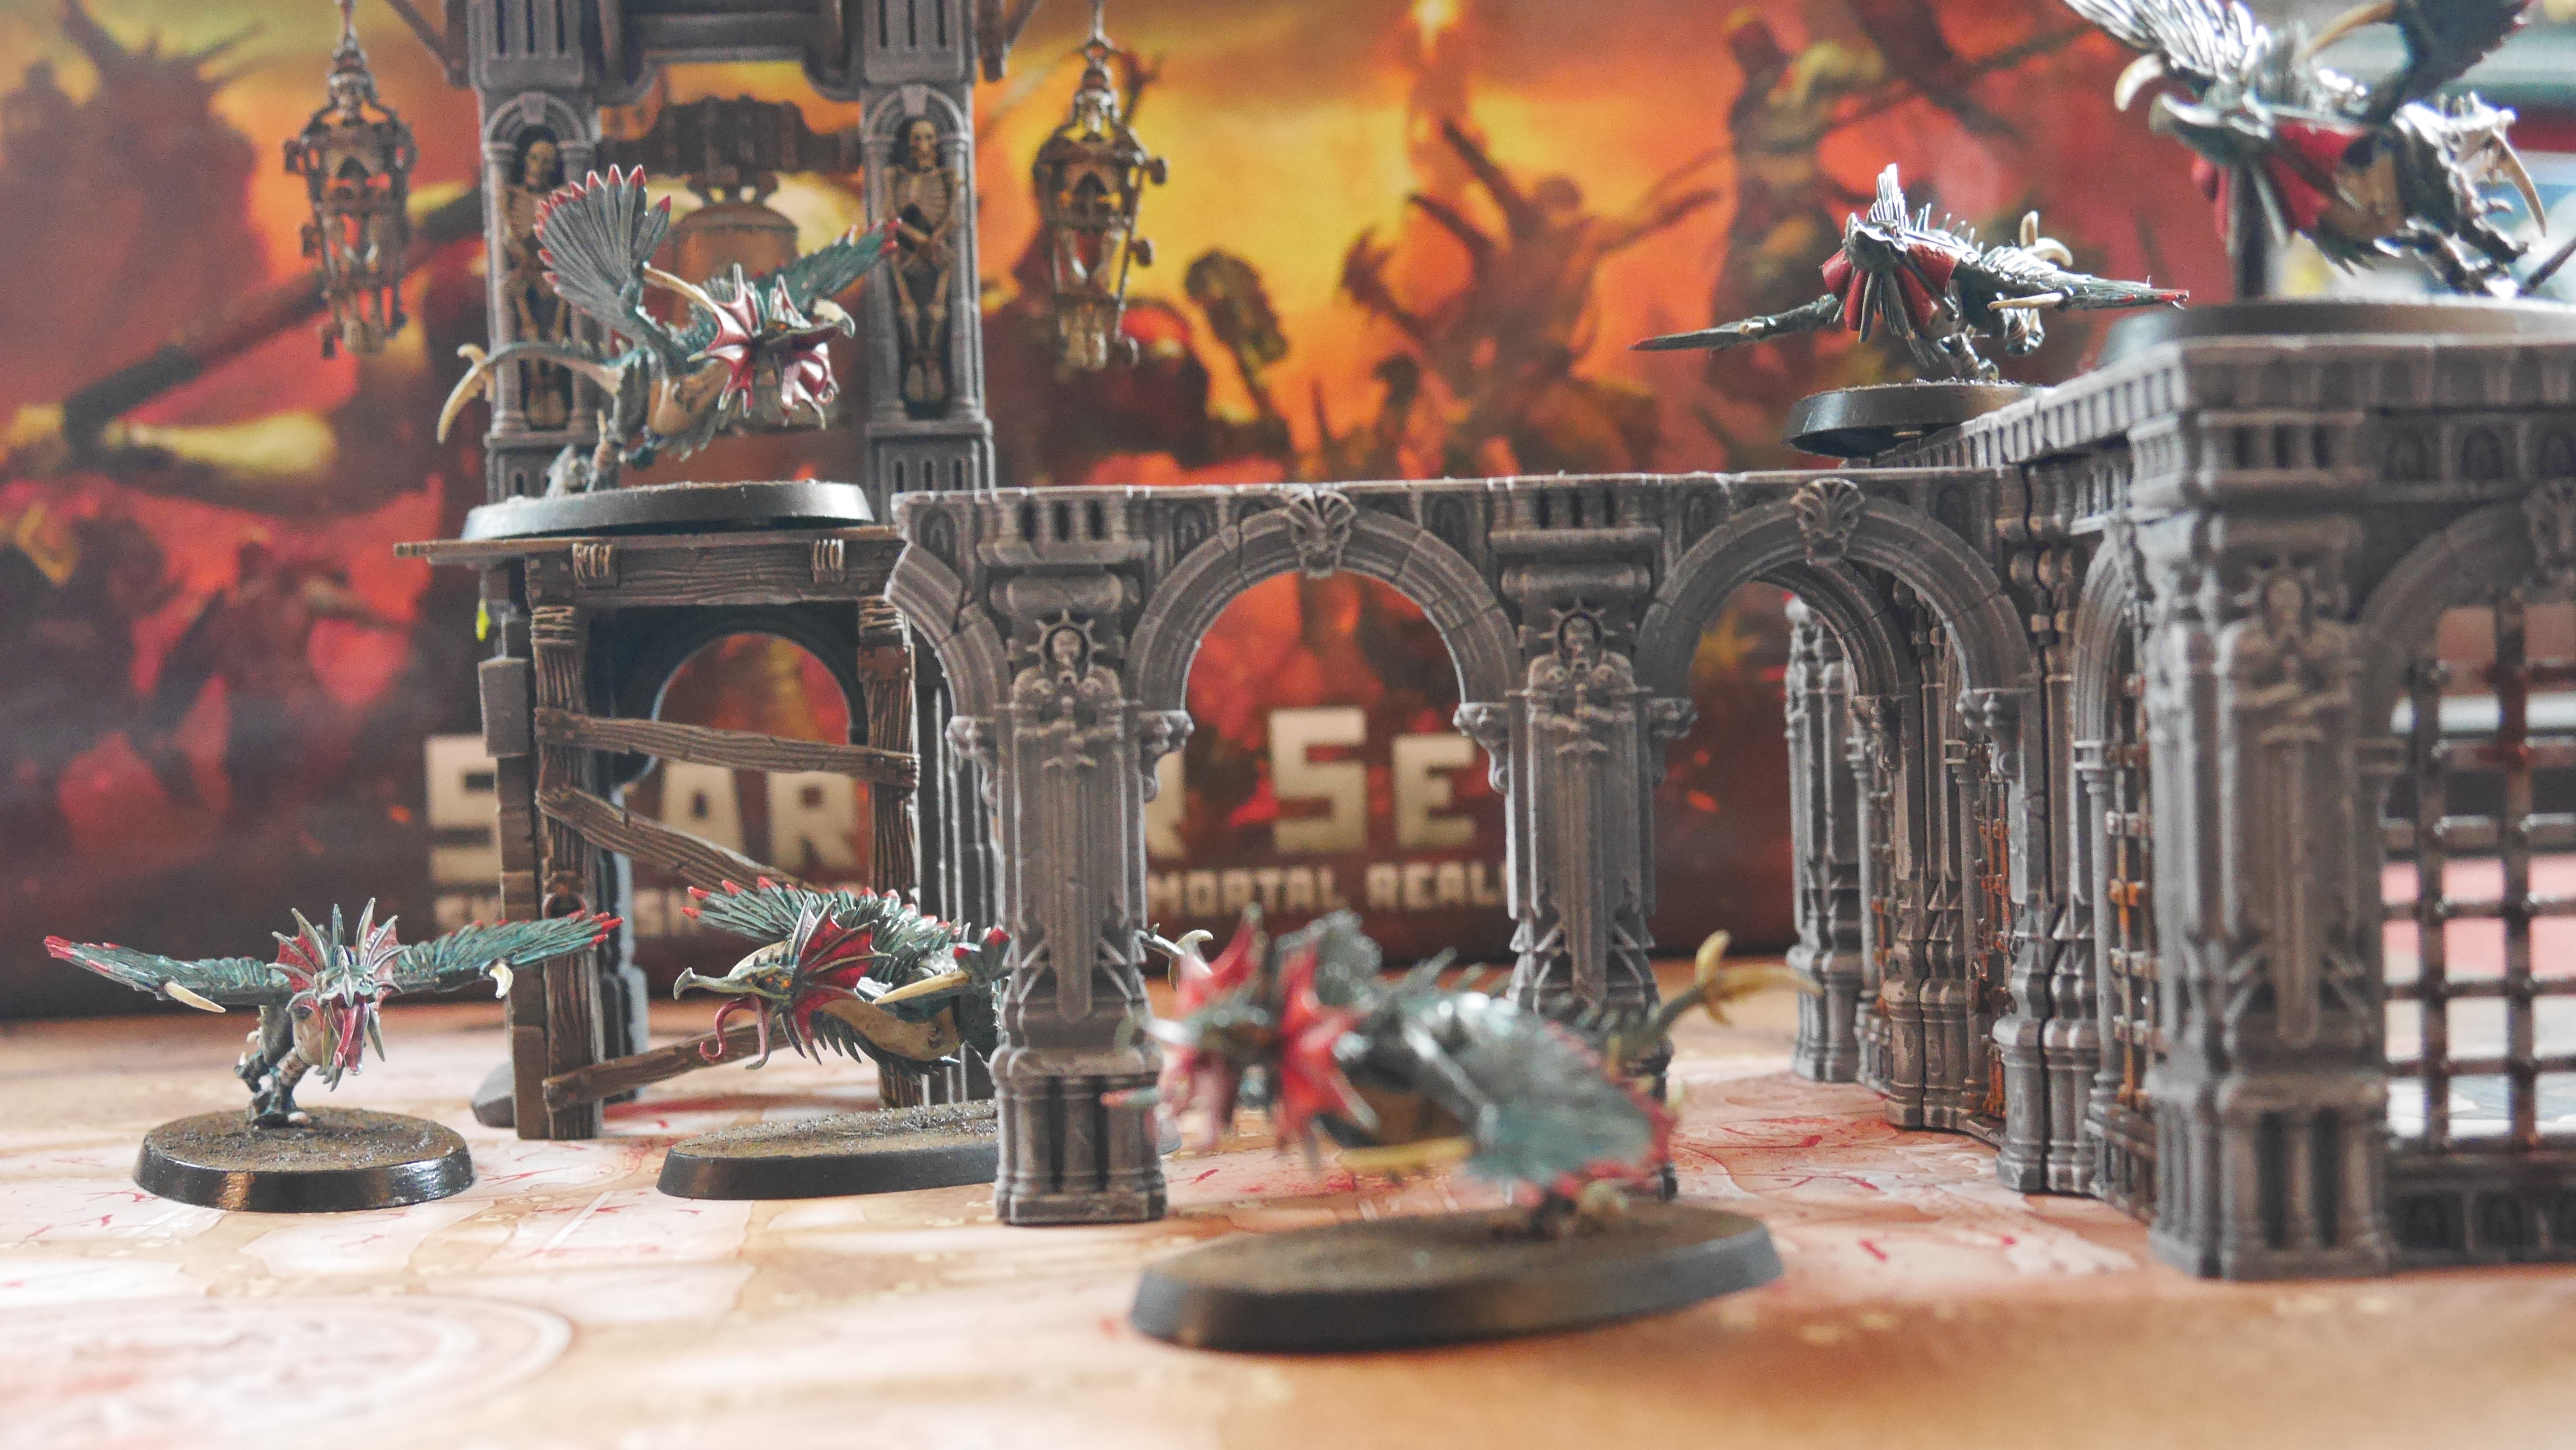
The next logical step, at least for one who loves critters the way I do, was to paint the Furies. The wings wee particularly fun. Of courses, I had to share my approach in a video which I hope will be useful to those who are starting with the game or just pondering on a way to paint these flying terrors.
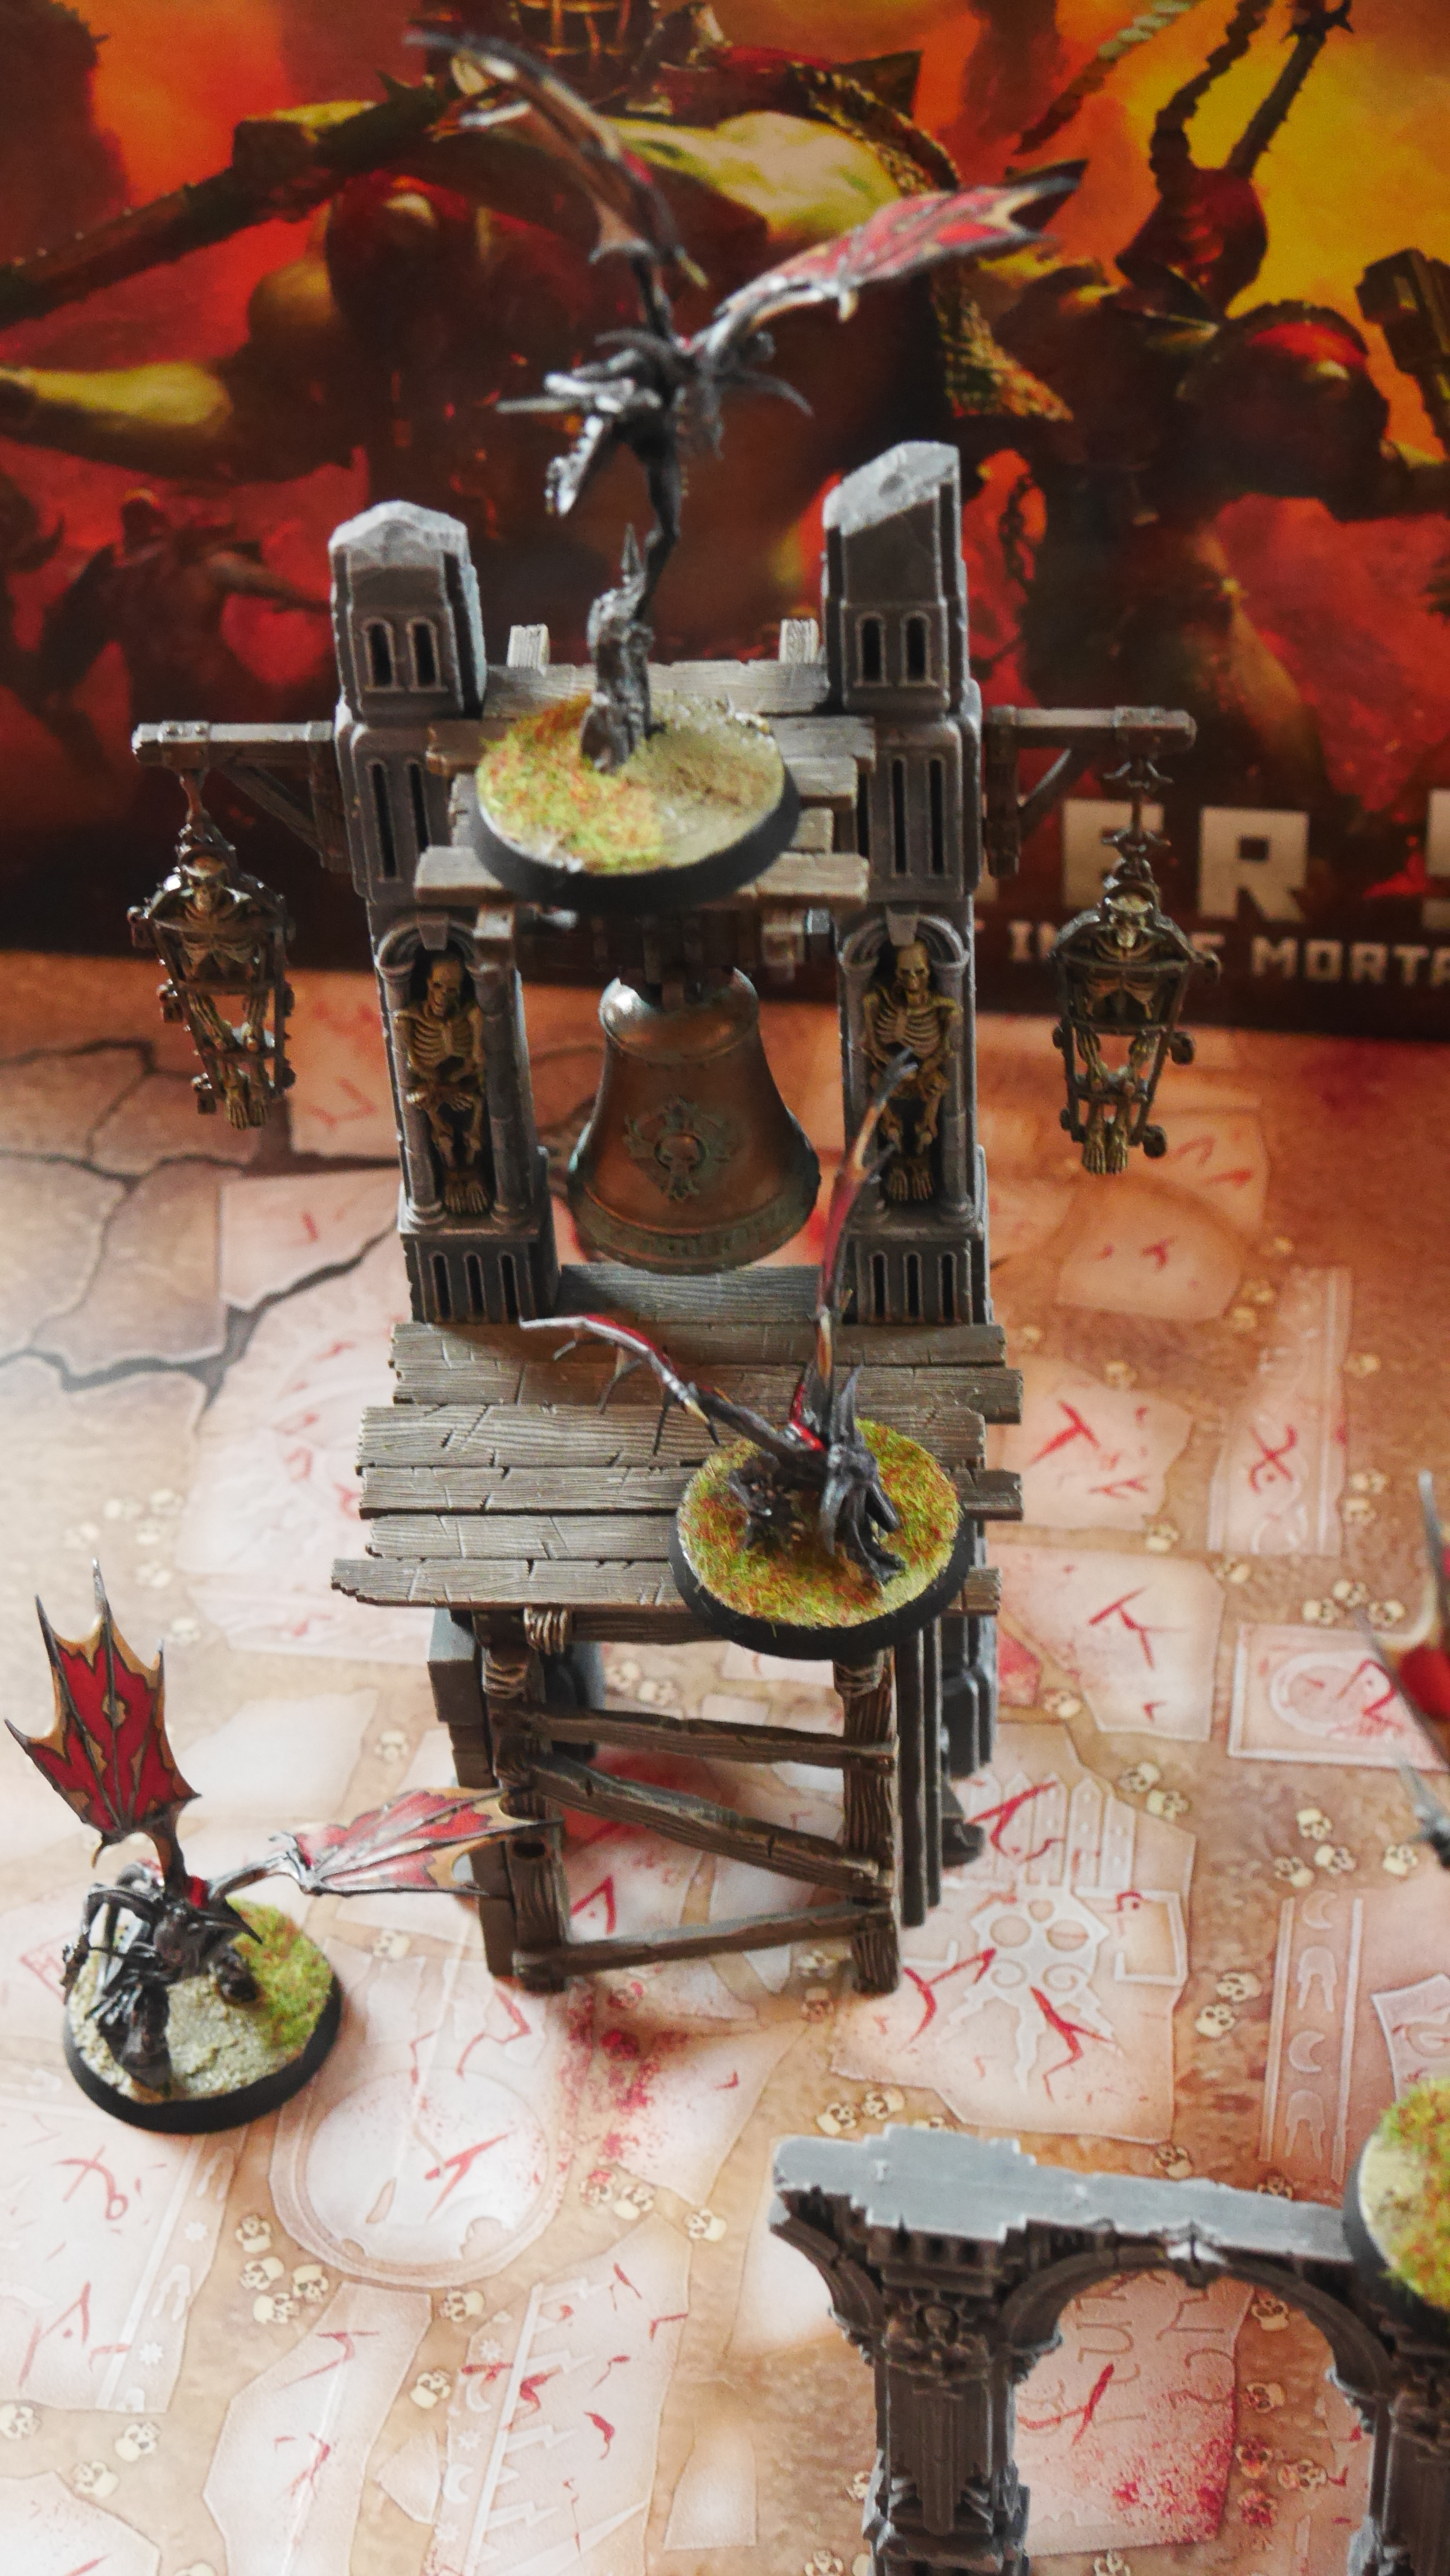 Furies on the bell tower
Fly of the Raptoryx
The first miniatures I decided to paint for Warcry were the Raptoryx as they appealed to me in a strange edgy platypus way. I pegged all of them as the dynamic pauses do not lend themselves to sturdy basing. As usual, I completed the process by publishing a painting video on the subject.
Build Your Terrain Carefully
When building your ruins and other terrain that comes with the WArcry core box, make certain you do so in the right configuration so as to ensure you will be able to play all the scenariis that come with the box. I created a a video following the excellent Way Walkers Studio article (found at https://waywalkerstudios.com/assembling-terrain-for-warcry/ )


