


Titan Forge Cyberpunk March Diorama


Recommendations: 208
About the Project
Every month, Titan Forge run a "Plastic Junkies" competition, to win a 3d resin printer. They invite patrons to create a diorama using their terrain pieces and choose the best one. Runners up prizes can win bottles of resin (to be able to print yet ever more miniatures!) I entered the February competition and was placed second (the winner created a pretty awesome looking terrain piece and deservedly took the top prize) but didn't really keep a build log. I'm a bit late starting my piece (it's already mid-way through March) but thought I'd document my build....
Related Company: Titan Forge Games
Related Genre: Cyberpunk
This Project is Completed
It's still progress, right?
It’s still hobby progress if you don’t do it yourself, isn’t it? My wife hasn’t been able to go to her weekly art classes so I convinced her to flex her paintbrush skills on something else this week.
Normally she paints on 3- or 4-foot canvases, daubing oil paints and pastels around (mostly with her fingers, looking at the state she sometimes comes home in!). So tiny 000 sized brushes and miniature acrylic paints were something of a challenge.
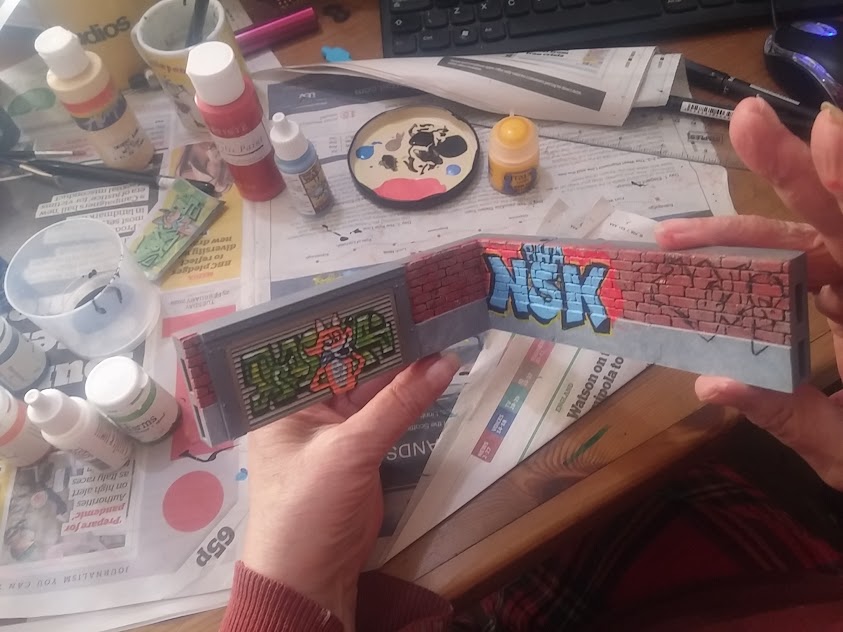
The open-lock tiles actually work really well as a brick wall and even with the brickwork and graffiti paint, they hold their texture really well.
My wife even said she quite enjoyed painting it.
If could just convince her that priming and block colouring two hundred tiny figurines is just as fun, I might make a dent on my pile of shame….
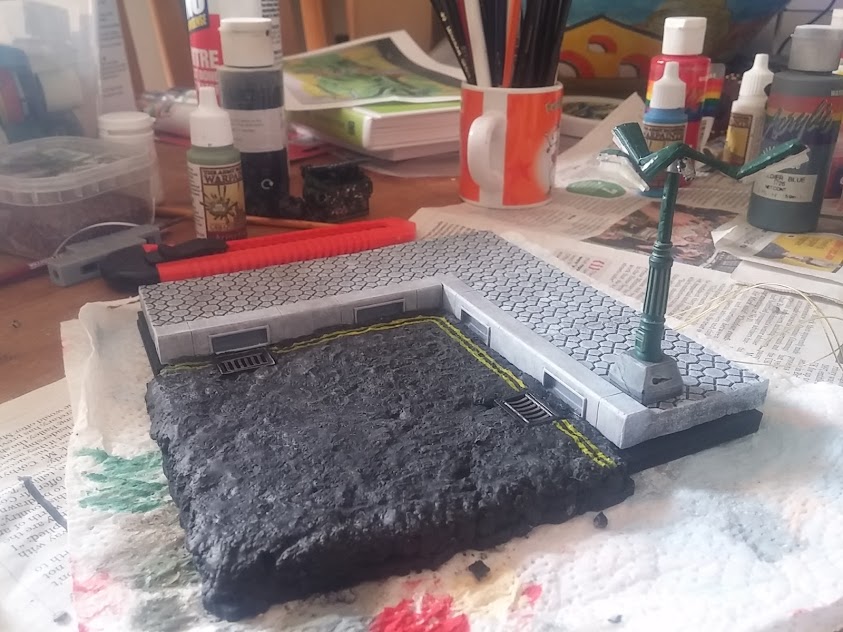
Making realistic tarmac
I’ve watched far too many Youtube videos lately about how to make realistic tarmac. Many of them involve sandpaper or a similar textured paper. I’d 3d printed some grid covers and thought I’d try something a little different:
I wanted a thick surface for my tarmac, so that I could embed the grids into the floor. At first I thought about using extruded polystyrene – by breaking instead of cutting the edges, I could create a rough, pebble-like texture which would capture the look and feel of loads of pebbles held together in tar quite nicely.
As it turns out, I couldn’t find a sheet of 6″ square polystyrene sheet for love nor money. And, given the current state of the country, with us all in “lockdown” sourcing some was proving quite difficult – it’s not like I could just pop along a local shop and ask if they had any spare packaging materials they were throwing out!
Once again, my wife came to the rescue.
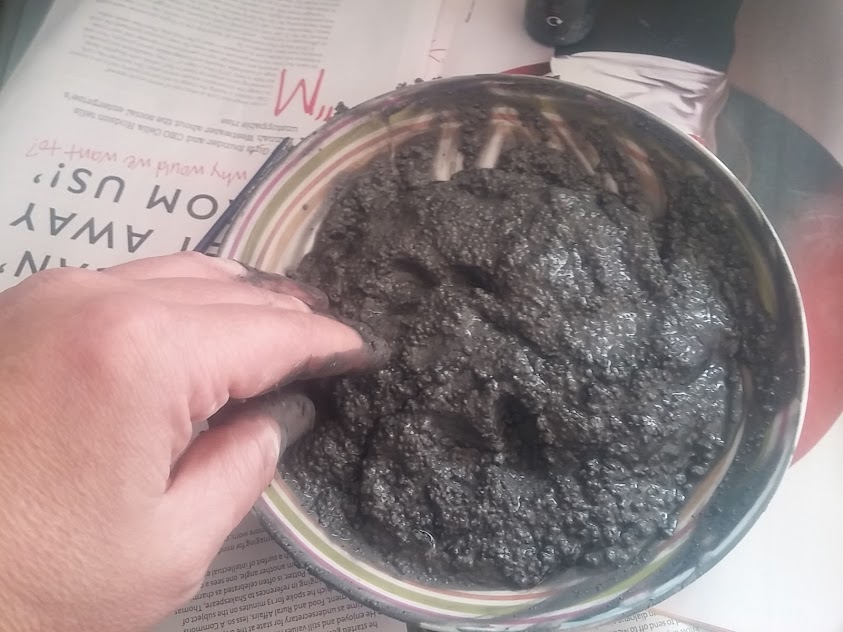
“Just make some tarmac” she said (as if it was the first thing I should have tried). I didn’t understand. So she went into the loft and came back with some plaster of paris, a small tub of Army Painter scatter grit (the stuff you glue onto the bases of miniatures) and some black acrylic paint.
The paint is to colour the entire mix, so that if it cracks or chips, you don’t see a stark white flash of plaster – it also means that cracks can be engraved directly into the surface, if necessary.
I mixed up some goop but it felt like it was missing something – it was almost there, but missing a little bit of texture. So she went and rummaged about in the kitchen cupboards….
Chia seeds (nope, me neither) not only added a great texture to the mix, but the little black flecks contrasted really nicely with the brown and white mix of grit already present, in the dark-grey slop.
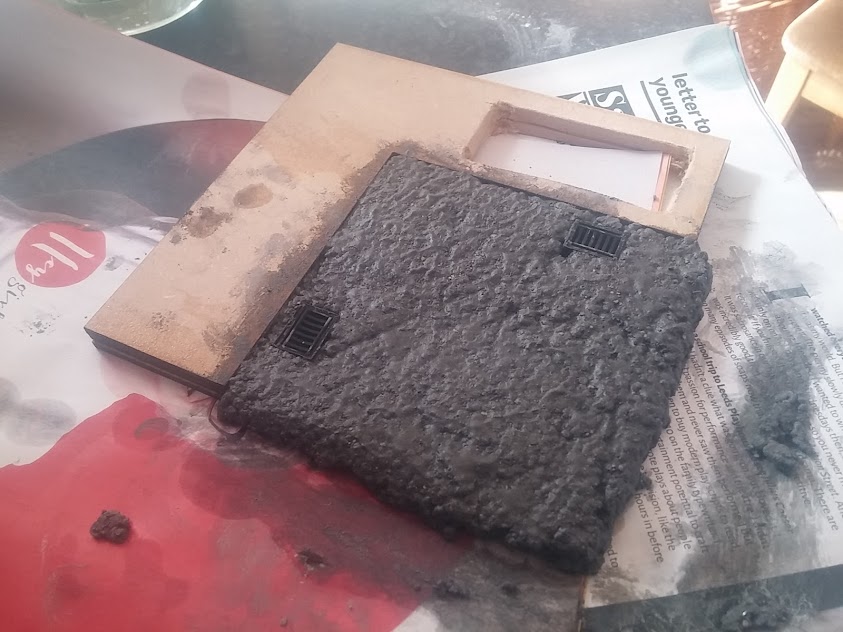
I put some little carboard collars around the grids, painted the base board black, then glued them down, before smearing the sticky porridge-like mixture all over the board.
The end result was surprisingly realistic! I’m currently waiting for the whole thing to fully dry (I reckon we’re looking at 24 hours or so at least) and it’s noticeable already that the final colour is going to be quite a bit paler than when it was first applied.
Tomorrow – all being well – I’ll add a liberal black wash over everything and a quick drybrush (to bring out the texture details). Then some broken double-yellow lines and I think we can call this bit done!
More tarmac progress
The black porridge took aaaages to dry (and even took about half an hour on a low heat in the oven to get full “hardness”) and as it did, the colour shifted from dark grey tarmac to a pale ash grey.
A quick coat of Citadels Black Templar Contrast paint and a drybrush of, ironically enough, Ash Grey, and the tarmac was complete.
Looking back, maybe I should have painting the double-yellow lines white, first, to make the colour a little more vibrant. I resisted, as I wanted the lines to appear patchy and broken. It sort-of works. I’m just not convinced it’s as good as it could have been!
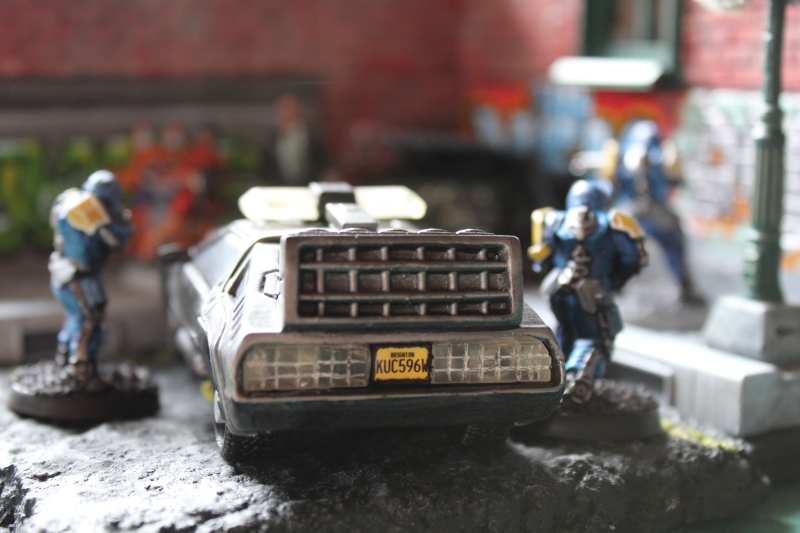
As the deadline for the Titan Forge competition looms, it’s time to stop fiddling about and decide what is good enough to call “done”; the basic premise is there now – hopefully I can get the finer details finished up and the miniatures painted fully over the next few days.
Here’s a sneak preview:
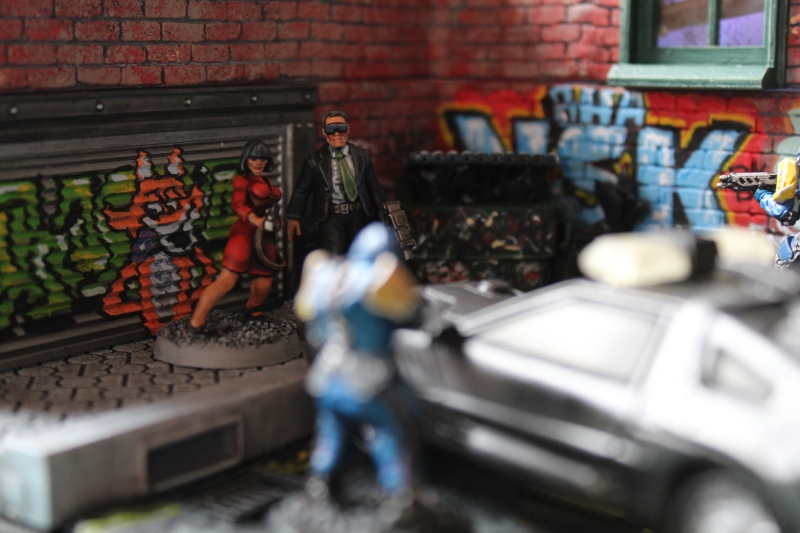
Contrast is everything
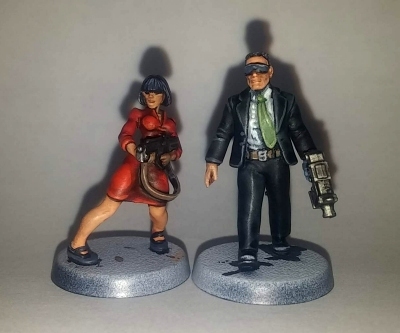
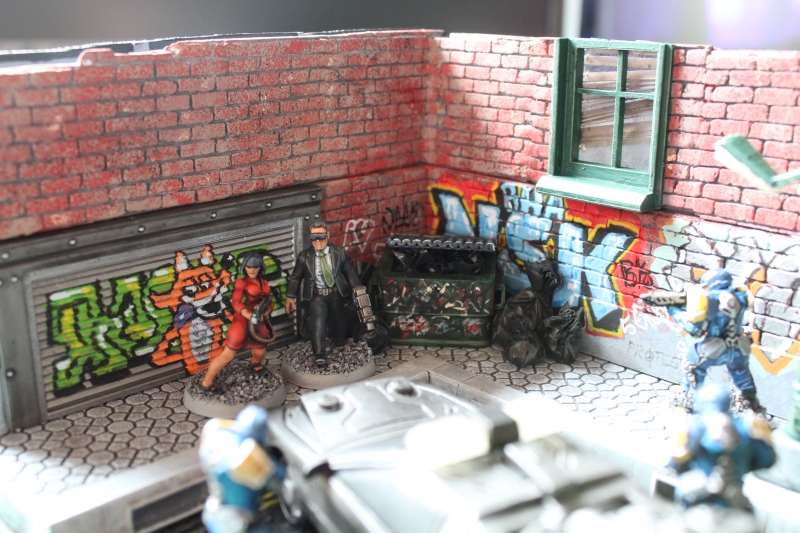
I’m slowly learning that contrast is everything in the miniature world; not just dark and light in the painting, but contrast adds interest in other areas too – a young woman and an older man, for example, immediately creates a “story” between the protagonists and invites speculation – who are they? are they related? father and daughter? colleagues?
I reckon these two are ready for basing – sometimes you need to know when to stop and call a model done!
Adding tiny details
In the last “diorama” I made for the Titan Forge competition in Feburary, I focussed very much on animatronics – making some bellows move and a couple of flickering LEDs look like a flame being fanned, and a tiny smoke machine blowing smoke out of the chimney….
Technically, is was quite impressive. But as a diorama it was a little… well, lacking, to be honest.
One of the things I’ve tried to focus on this time around is adding life to the model, by including little details that could otherwise be overlooked (I must admit to my wife being a massive influence and it’s she who pointed out this kind of stuff in the first place!)
For example, to me, a brick wall is a brick wall. You paint it red and maybe run a bit of colour inbetween the bricks to indicate motar. Easy peasy. And you’re done!
It was Nick that made me slow down, painting the brick wall in a series of layers – a grey base, with the brick surfaces lightly sponged with brown paint. Then a heavy “sponging” (that’s a word, right?) with a reddy-orange. Just when I thought it looked done, she insisted on a lighted coat of dabbed black and a final dusting, here and there, with cream.
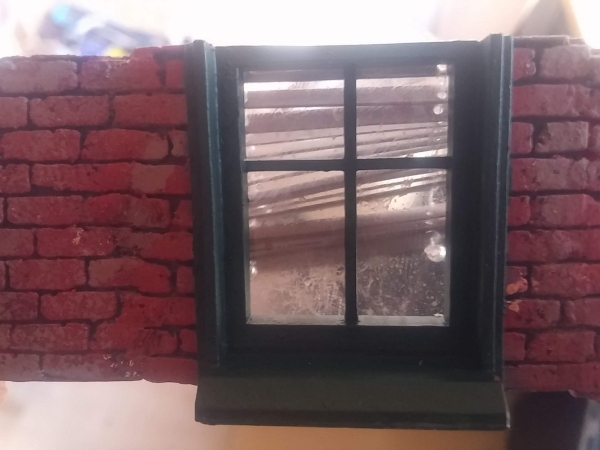
A brick wall isn’t necessarily just a brick wall, either: “Why not put a window in there? Just to break things up a little…”
So I printed a window frame. And painted it green. And added tiny details like edge highlighting; surely that was enough?
“Why not put some acetate on the back, so it looks like glass?”
So I did.
“Why not flick some ink at it, so simulate dirt and grime – this is an inner city diorama isn’t it? And that window is above head-height, so probably wouldn’t get cleaned all that often?”
So I did.
“Here, I built a little venetian blind you can hang in that window. It’s a bit run down and crooked, as I reckon the people who live there don’t take much care of the place anyway…”
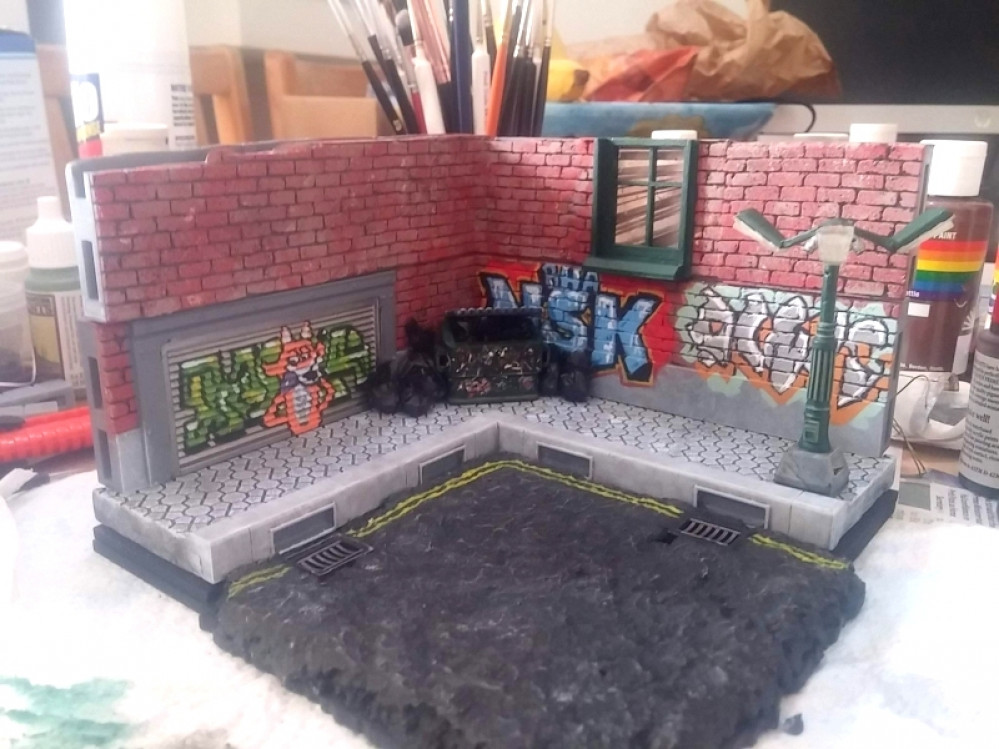
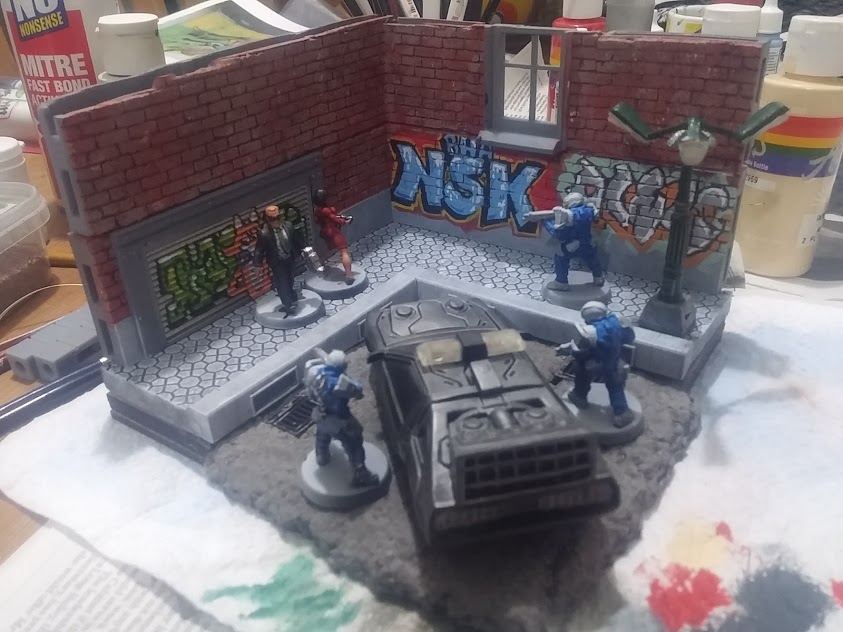
I’ve been learning this week that it’s the tiny details that create the story in any model world. If it were left to me, I’d have a diorama set in an inner city, against some brick walls.
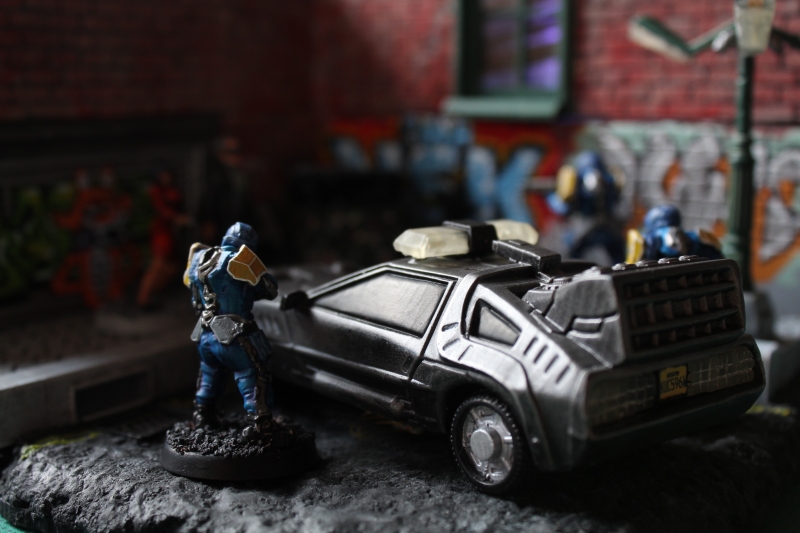
But, thanks to the influence of my wife, it’s set in a run-down part of town – the graffiti-strewn walls and piles of uncollected rubbish that litter the streets really set the model in an undesirable, slightly dodgy part of the city.
The grimy windows and broken blinds set it in an area where the neighbours have given up all pretence of aspiration – they are stuck in a run-down part of town and no longer care for the environment they are in. When characters are added to this diorama, these tiny little details all add – consiously or subconsciously – to their backstory, giving the scene extra depth and reason.
I feel like I’ve learned a lot this week!
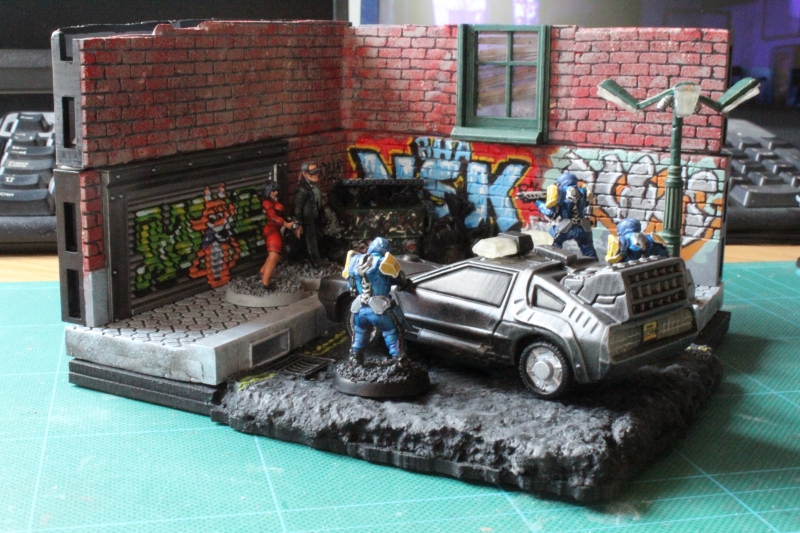
Adding the bad guys
I know, they’re law enforcement agency types. So, strictly speaking they’re the good guys. But there’s something about a hoodlum in smart office dress that makes you want to root for them.
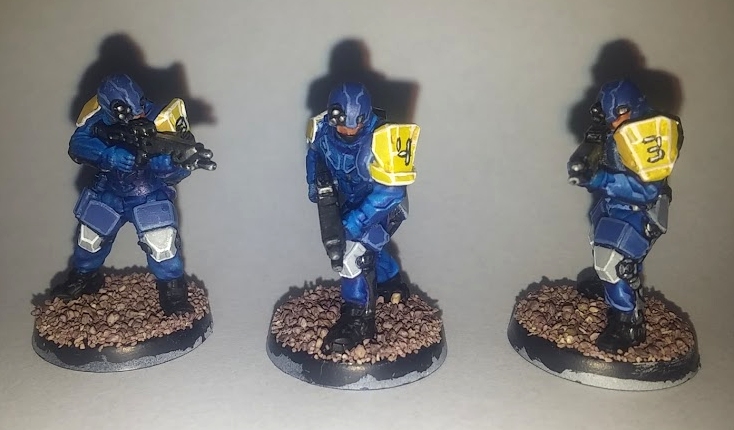
I’ve already decided that these guys are part of a privately-funded law enforcement agency that isn’t beyond the reaches of some real big-time crooks who have corrupted a load of bent coppers.
In fact, I reckon a couple of these guys are on the take….
Final video
So here’s the final video of this month’s Titan Forge competition entry. It’s been a blast – shoving all kinds of unnecessary tech into the smallest of spaces. The final diorama actually turned out better than I could have hoped for (thanks to my wife’s graffiti skills, admittedly).
Each element of the scene is modular, and connected using tiny three-pin connectors (power, ground and data). It means that they can be disconnected and used as terrain pieces in their own right.
But they can all be connected together and controlled through a single app too.
I might have to sit the next one out (tbh, some of the entries for this month are absolutely outstanding – I’m not sure I can keep bluffing it with technology in place of painting talent – so it’s a good job this one wasn’t about the winning…)
But apparently Vampires are the May release from Titan Forge.
I’ve already got a few ideas for the next project…


