Man O War Elf Fleet Print, Paint & Play


Recommendations: 520
About the Project
A friend and I have decided to return to a game we liked in our youth, quite some time ago. Both of us remember enjoying playing Man O War but can't really remember the rules. Having looked at the prices now of miniatures they are very expensive so we have looked at sourcing STL files that we can use as proxies. I wanted a High Elf Fleet and have found three lovely STL files for my ships. So with this in mind, we plan to play a game using everything available now to have the Dwarfs face off against the High Elfs.
Related Game: Man O' War
Related Company: Games Workshop
Related Genre: Fantasy
Related Contest: Spring Clean Hobby Challenge (Old)
This Project is Active
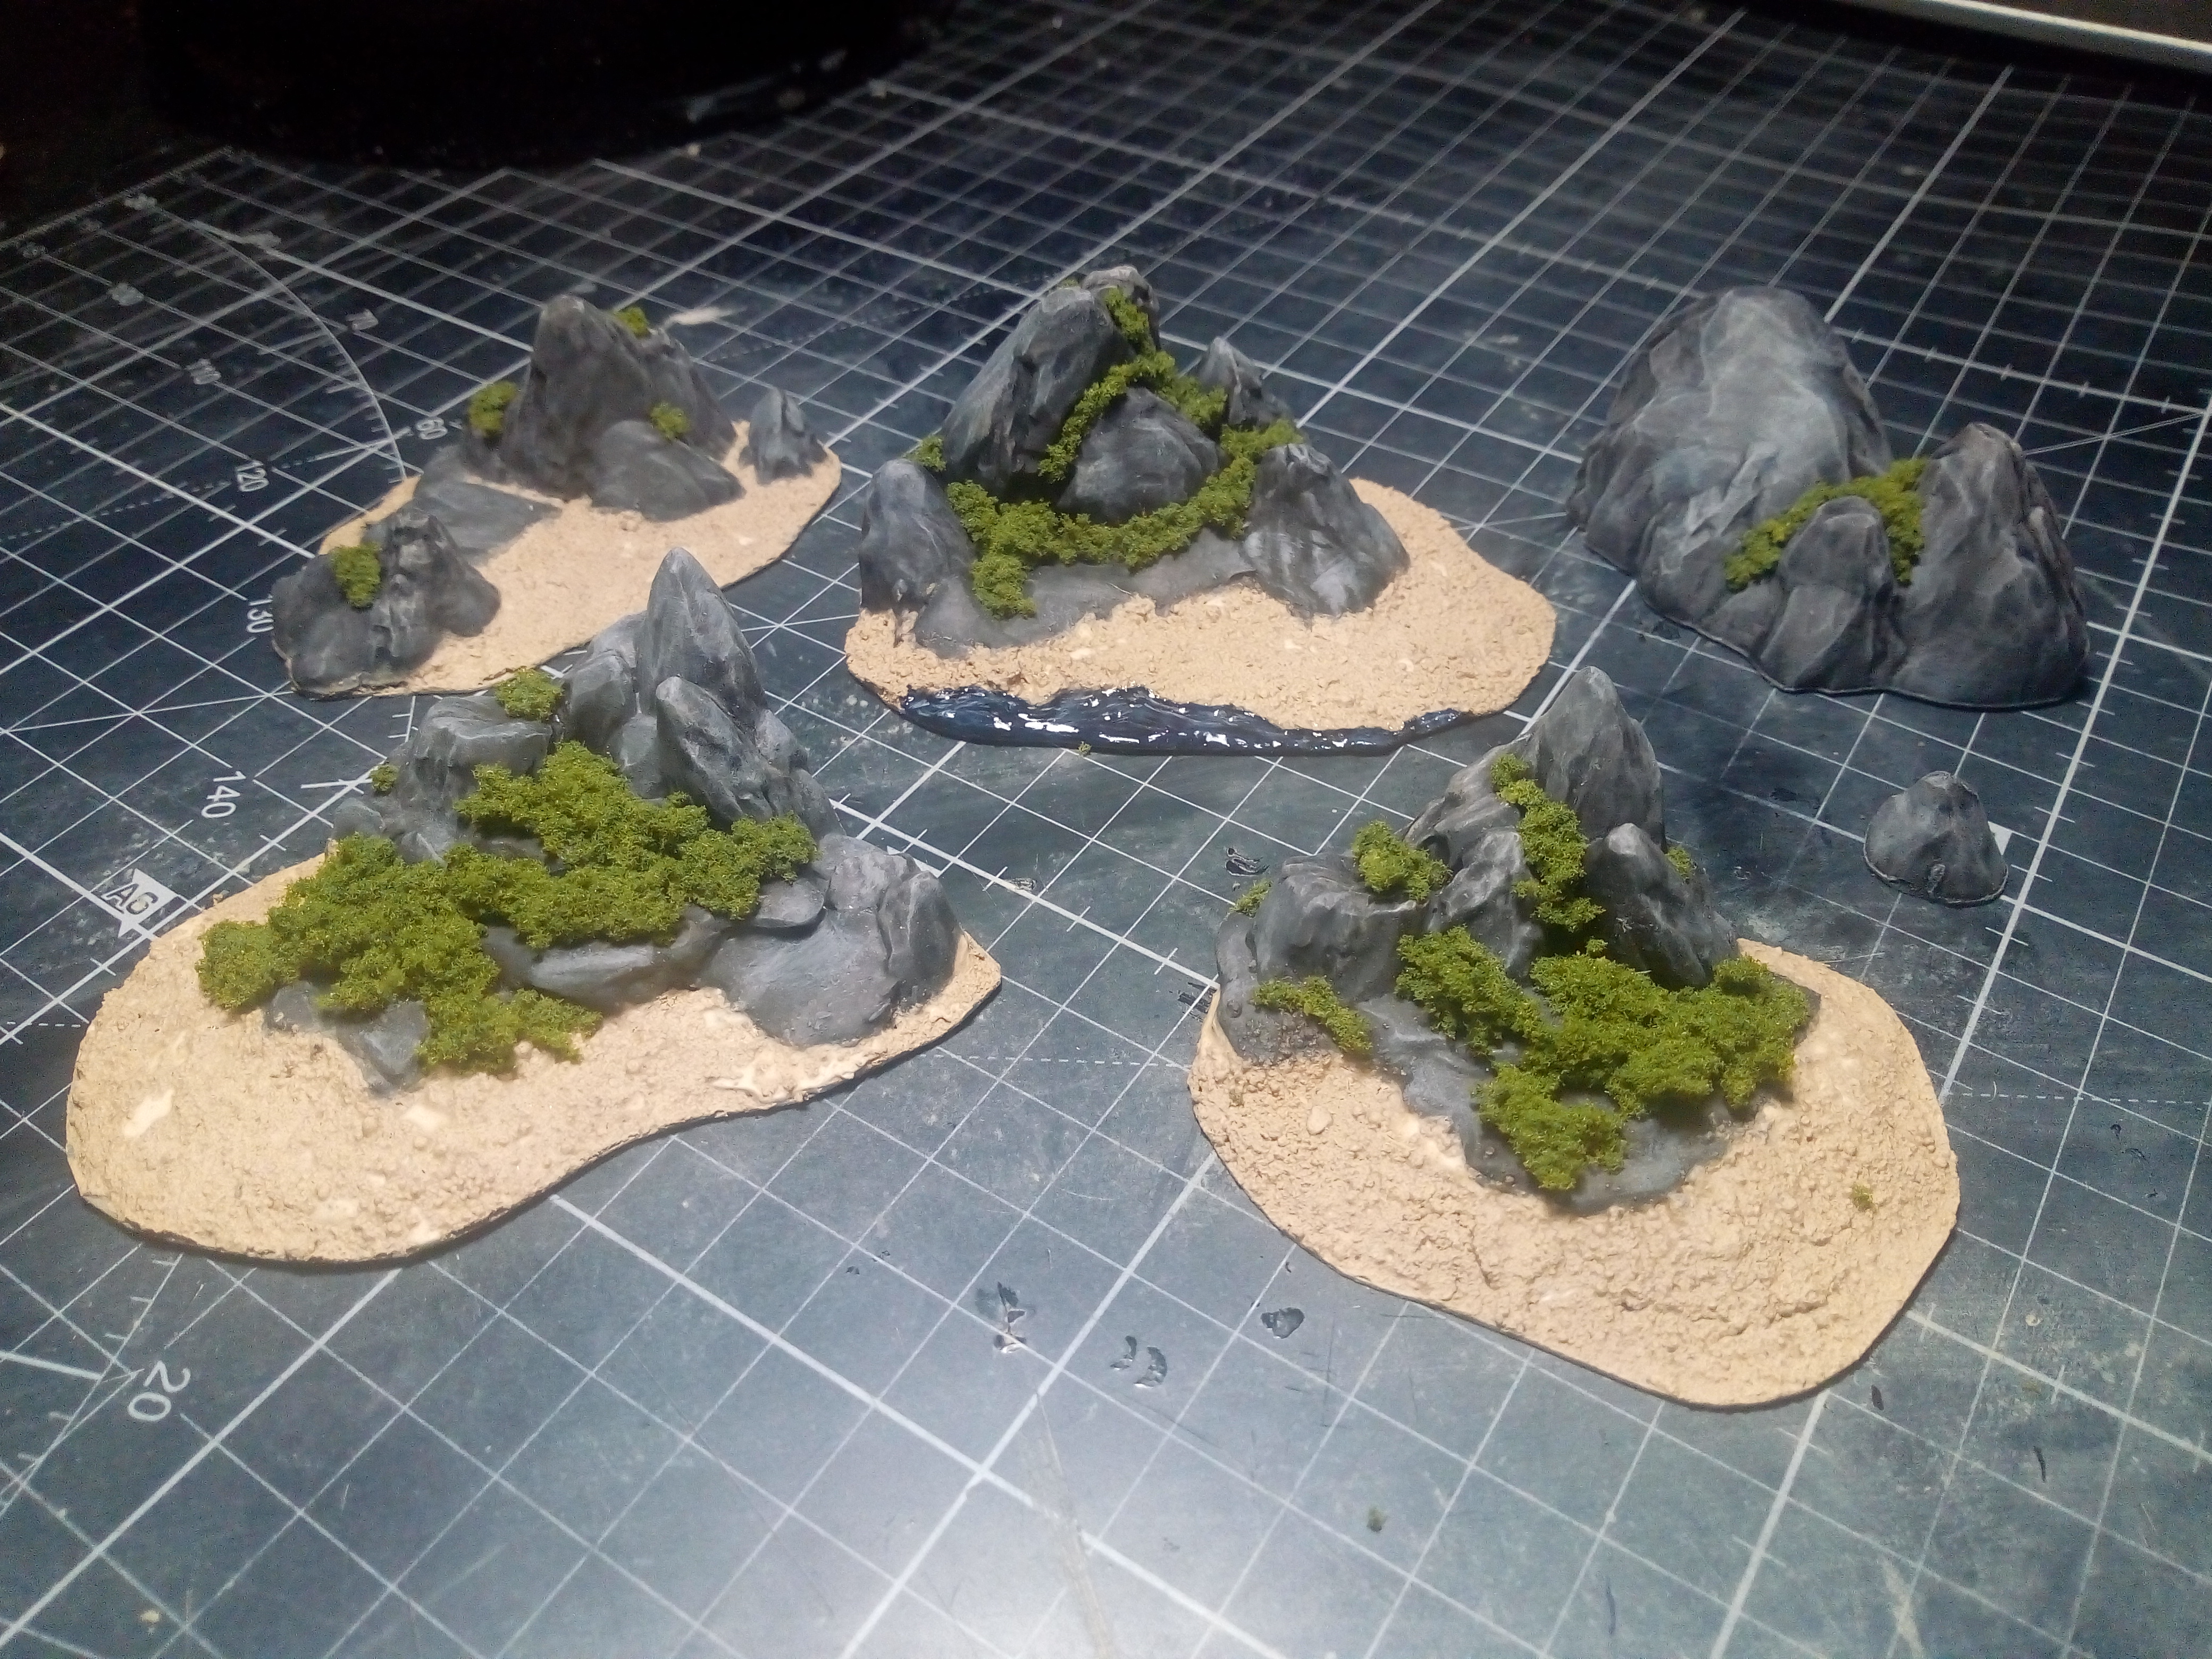
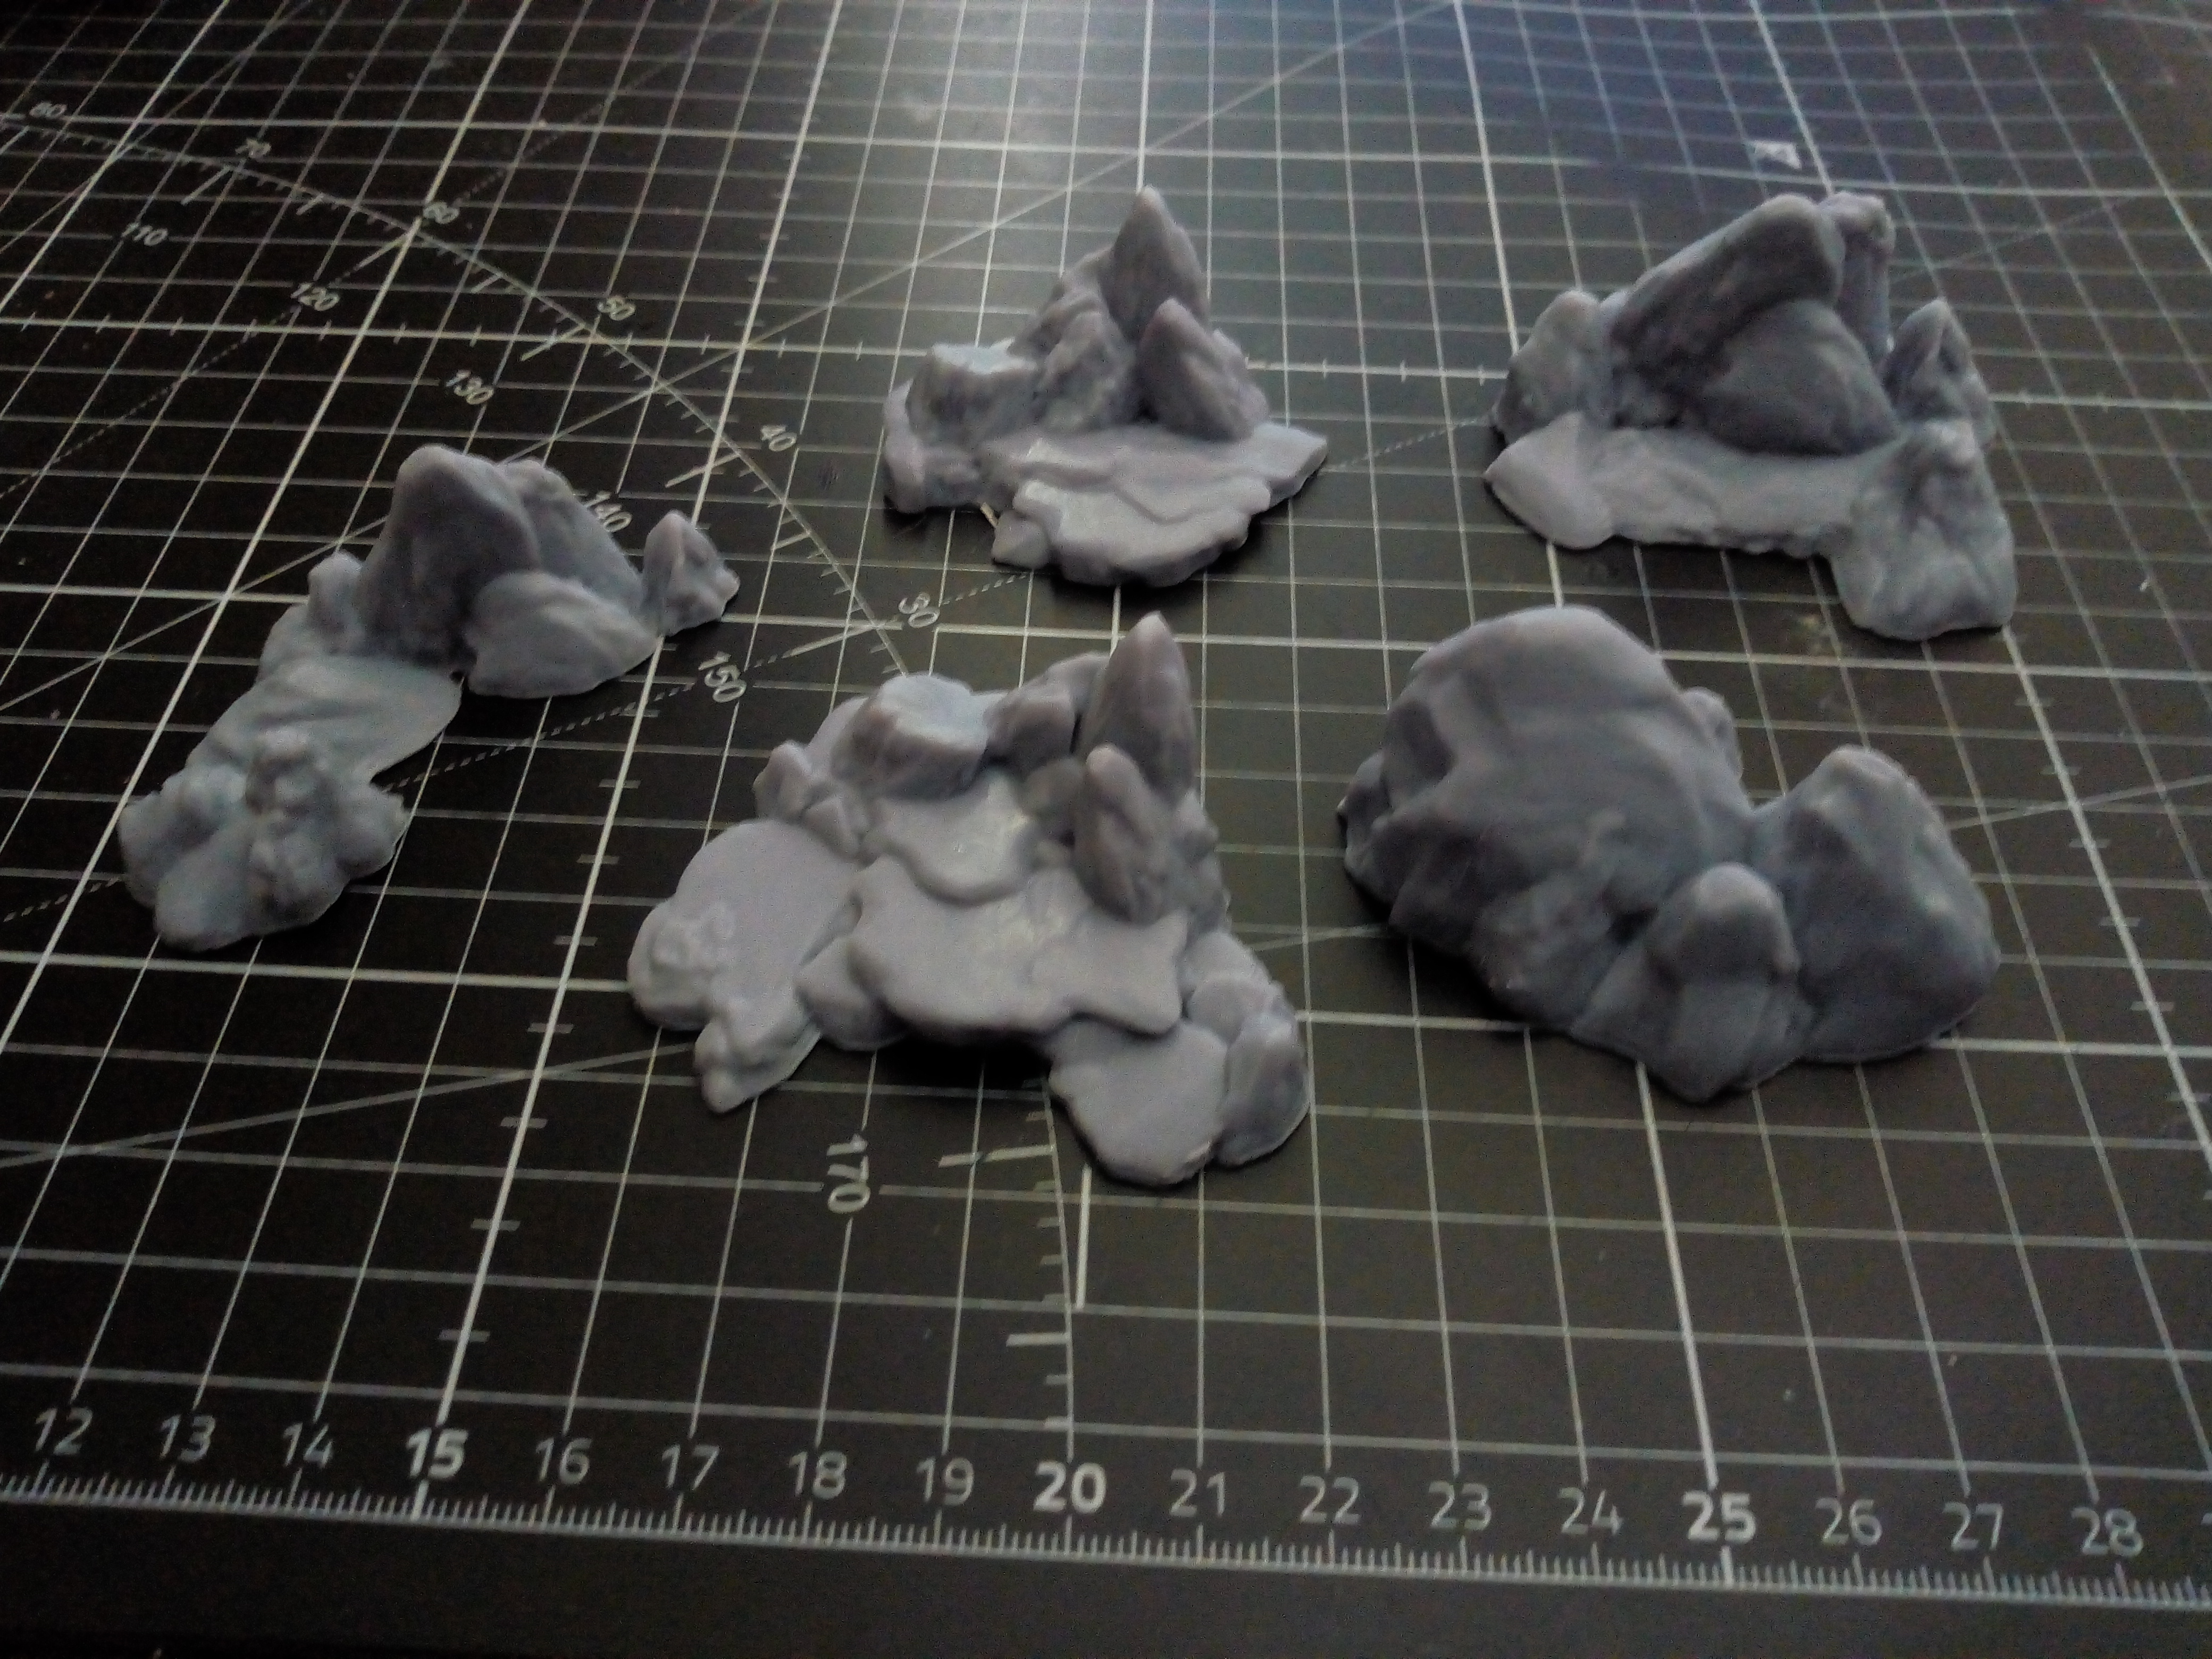
The small islands are finished
Finishing off the islands only required me to trim the sandy sections.
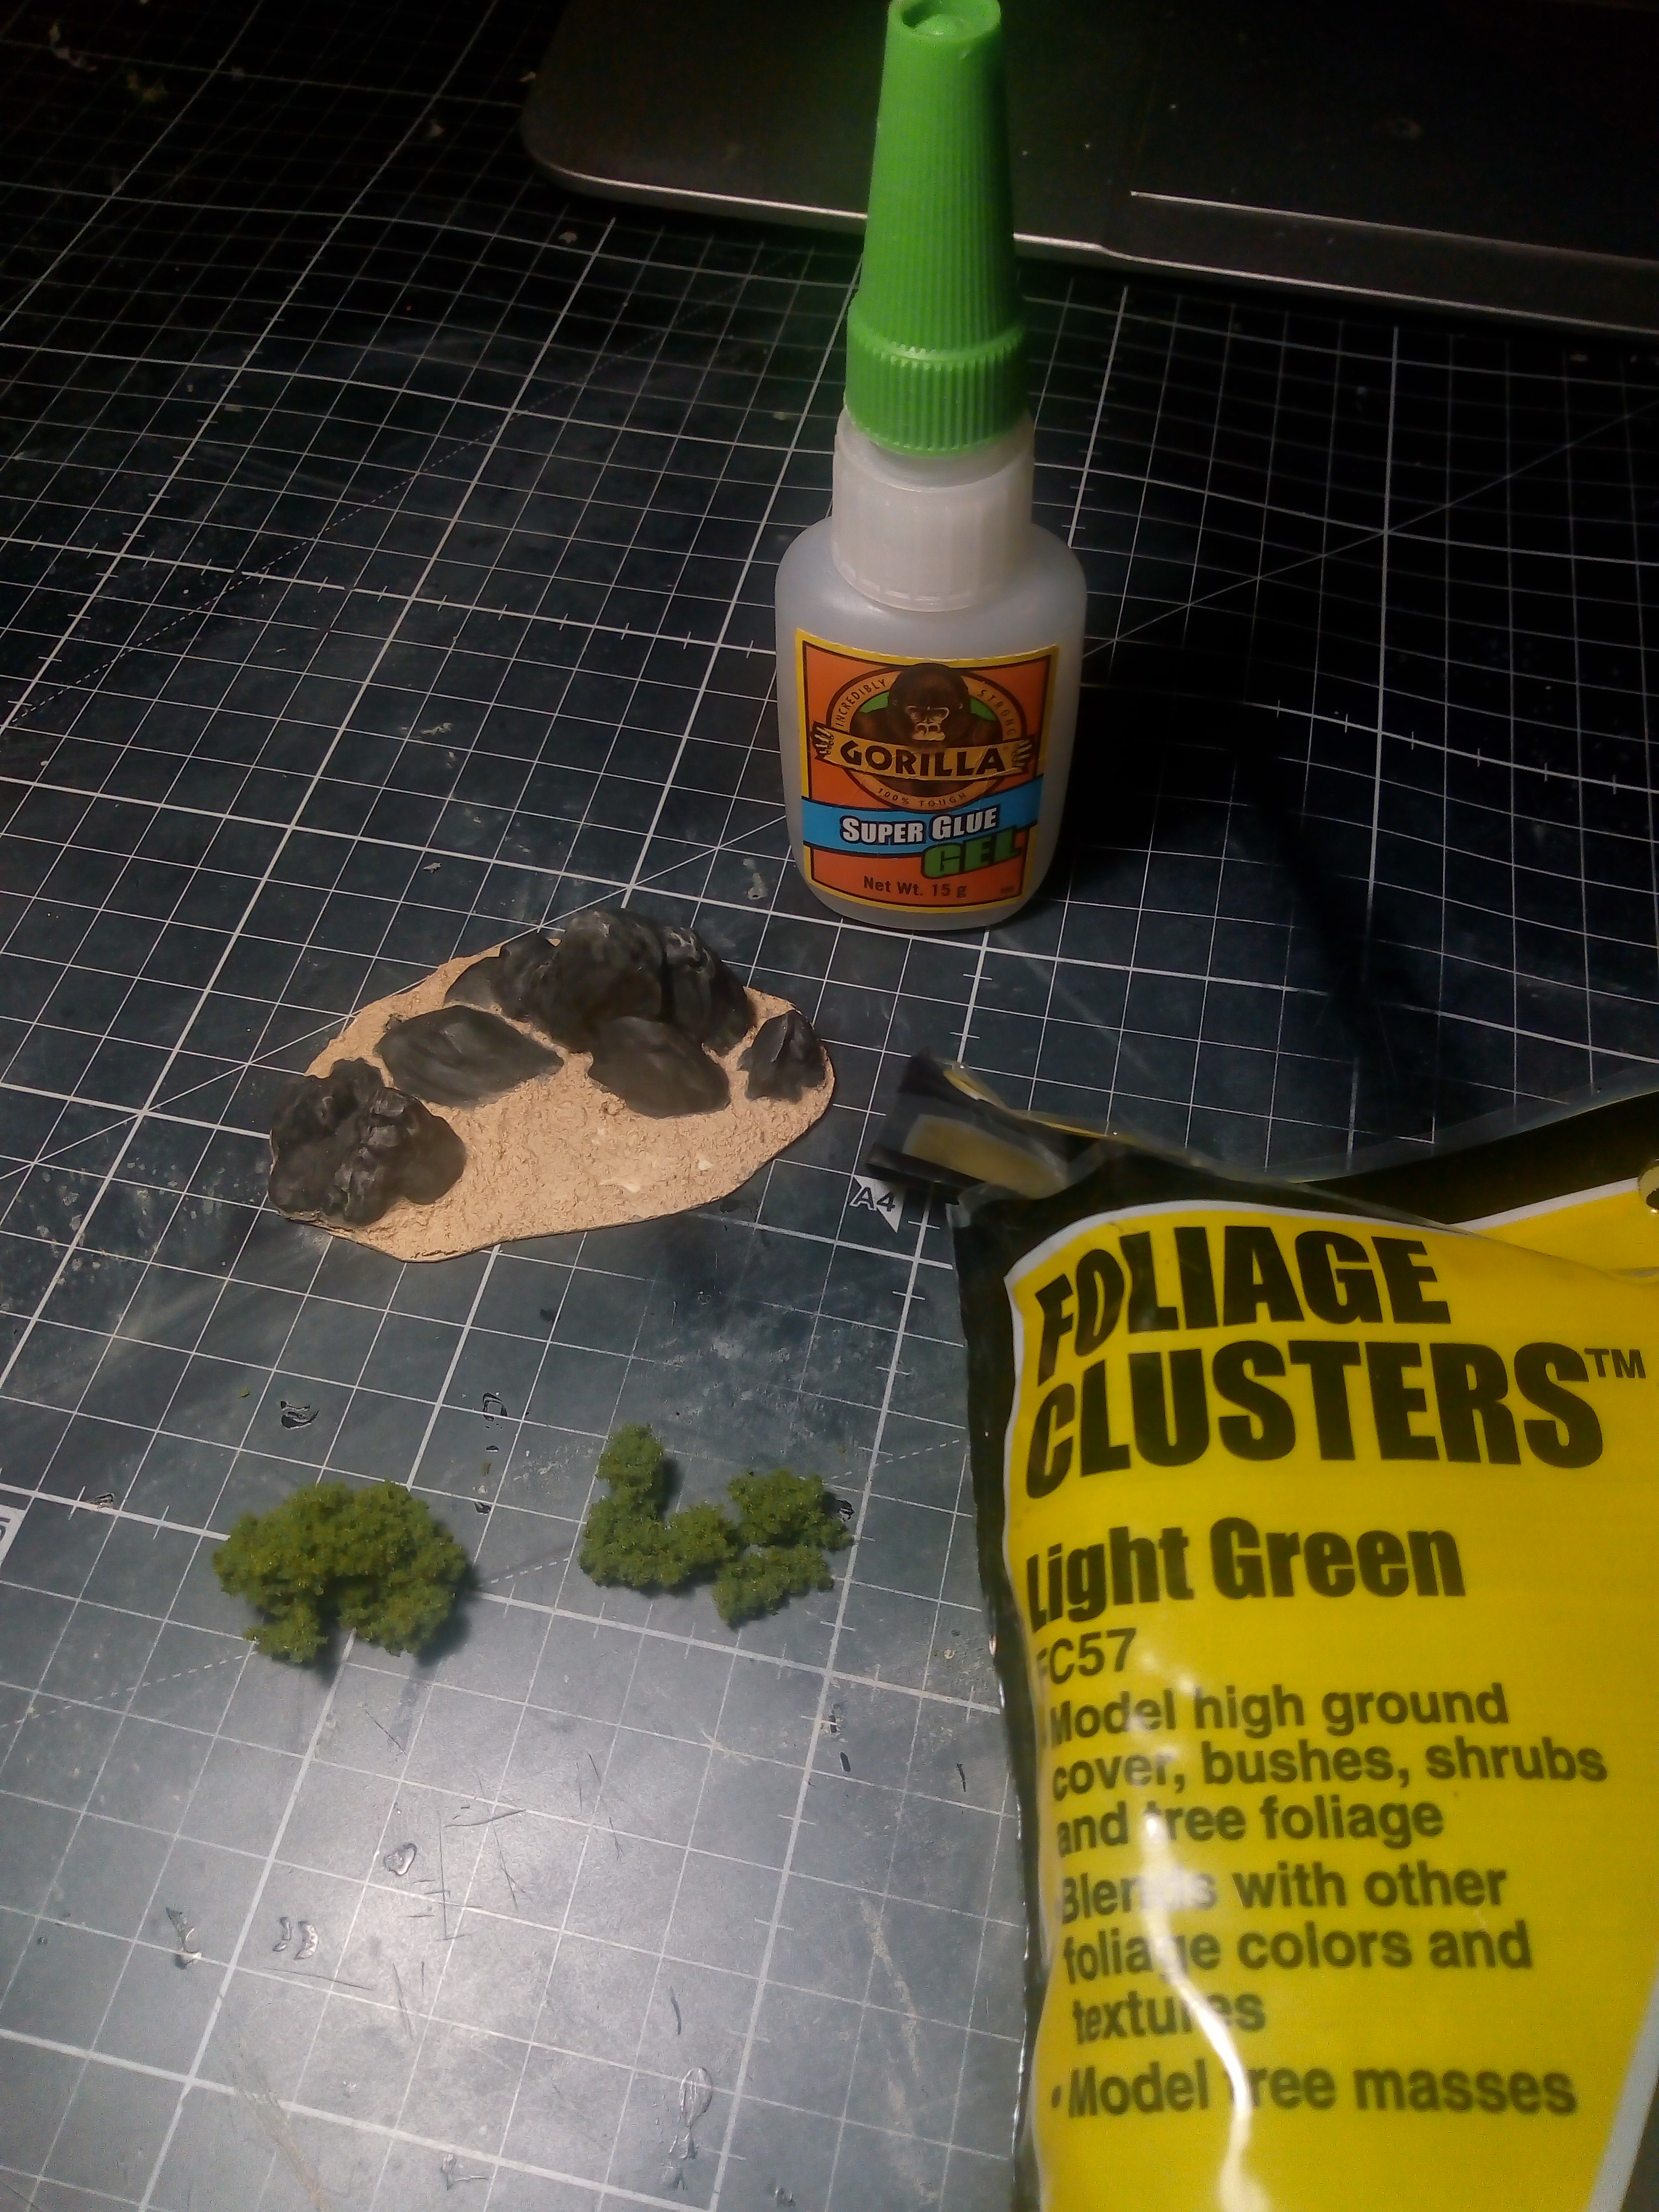
Once done I grabbed some of my clump foliage and a bit of super glue gel to represent trees or bushes on the higher ground.
Finally I drybrushed with Administratum Grey over the accessible rocky areas to bring up the contrast on those areas.
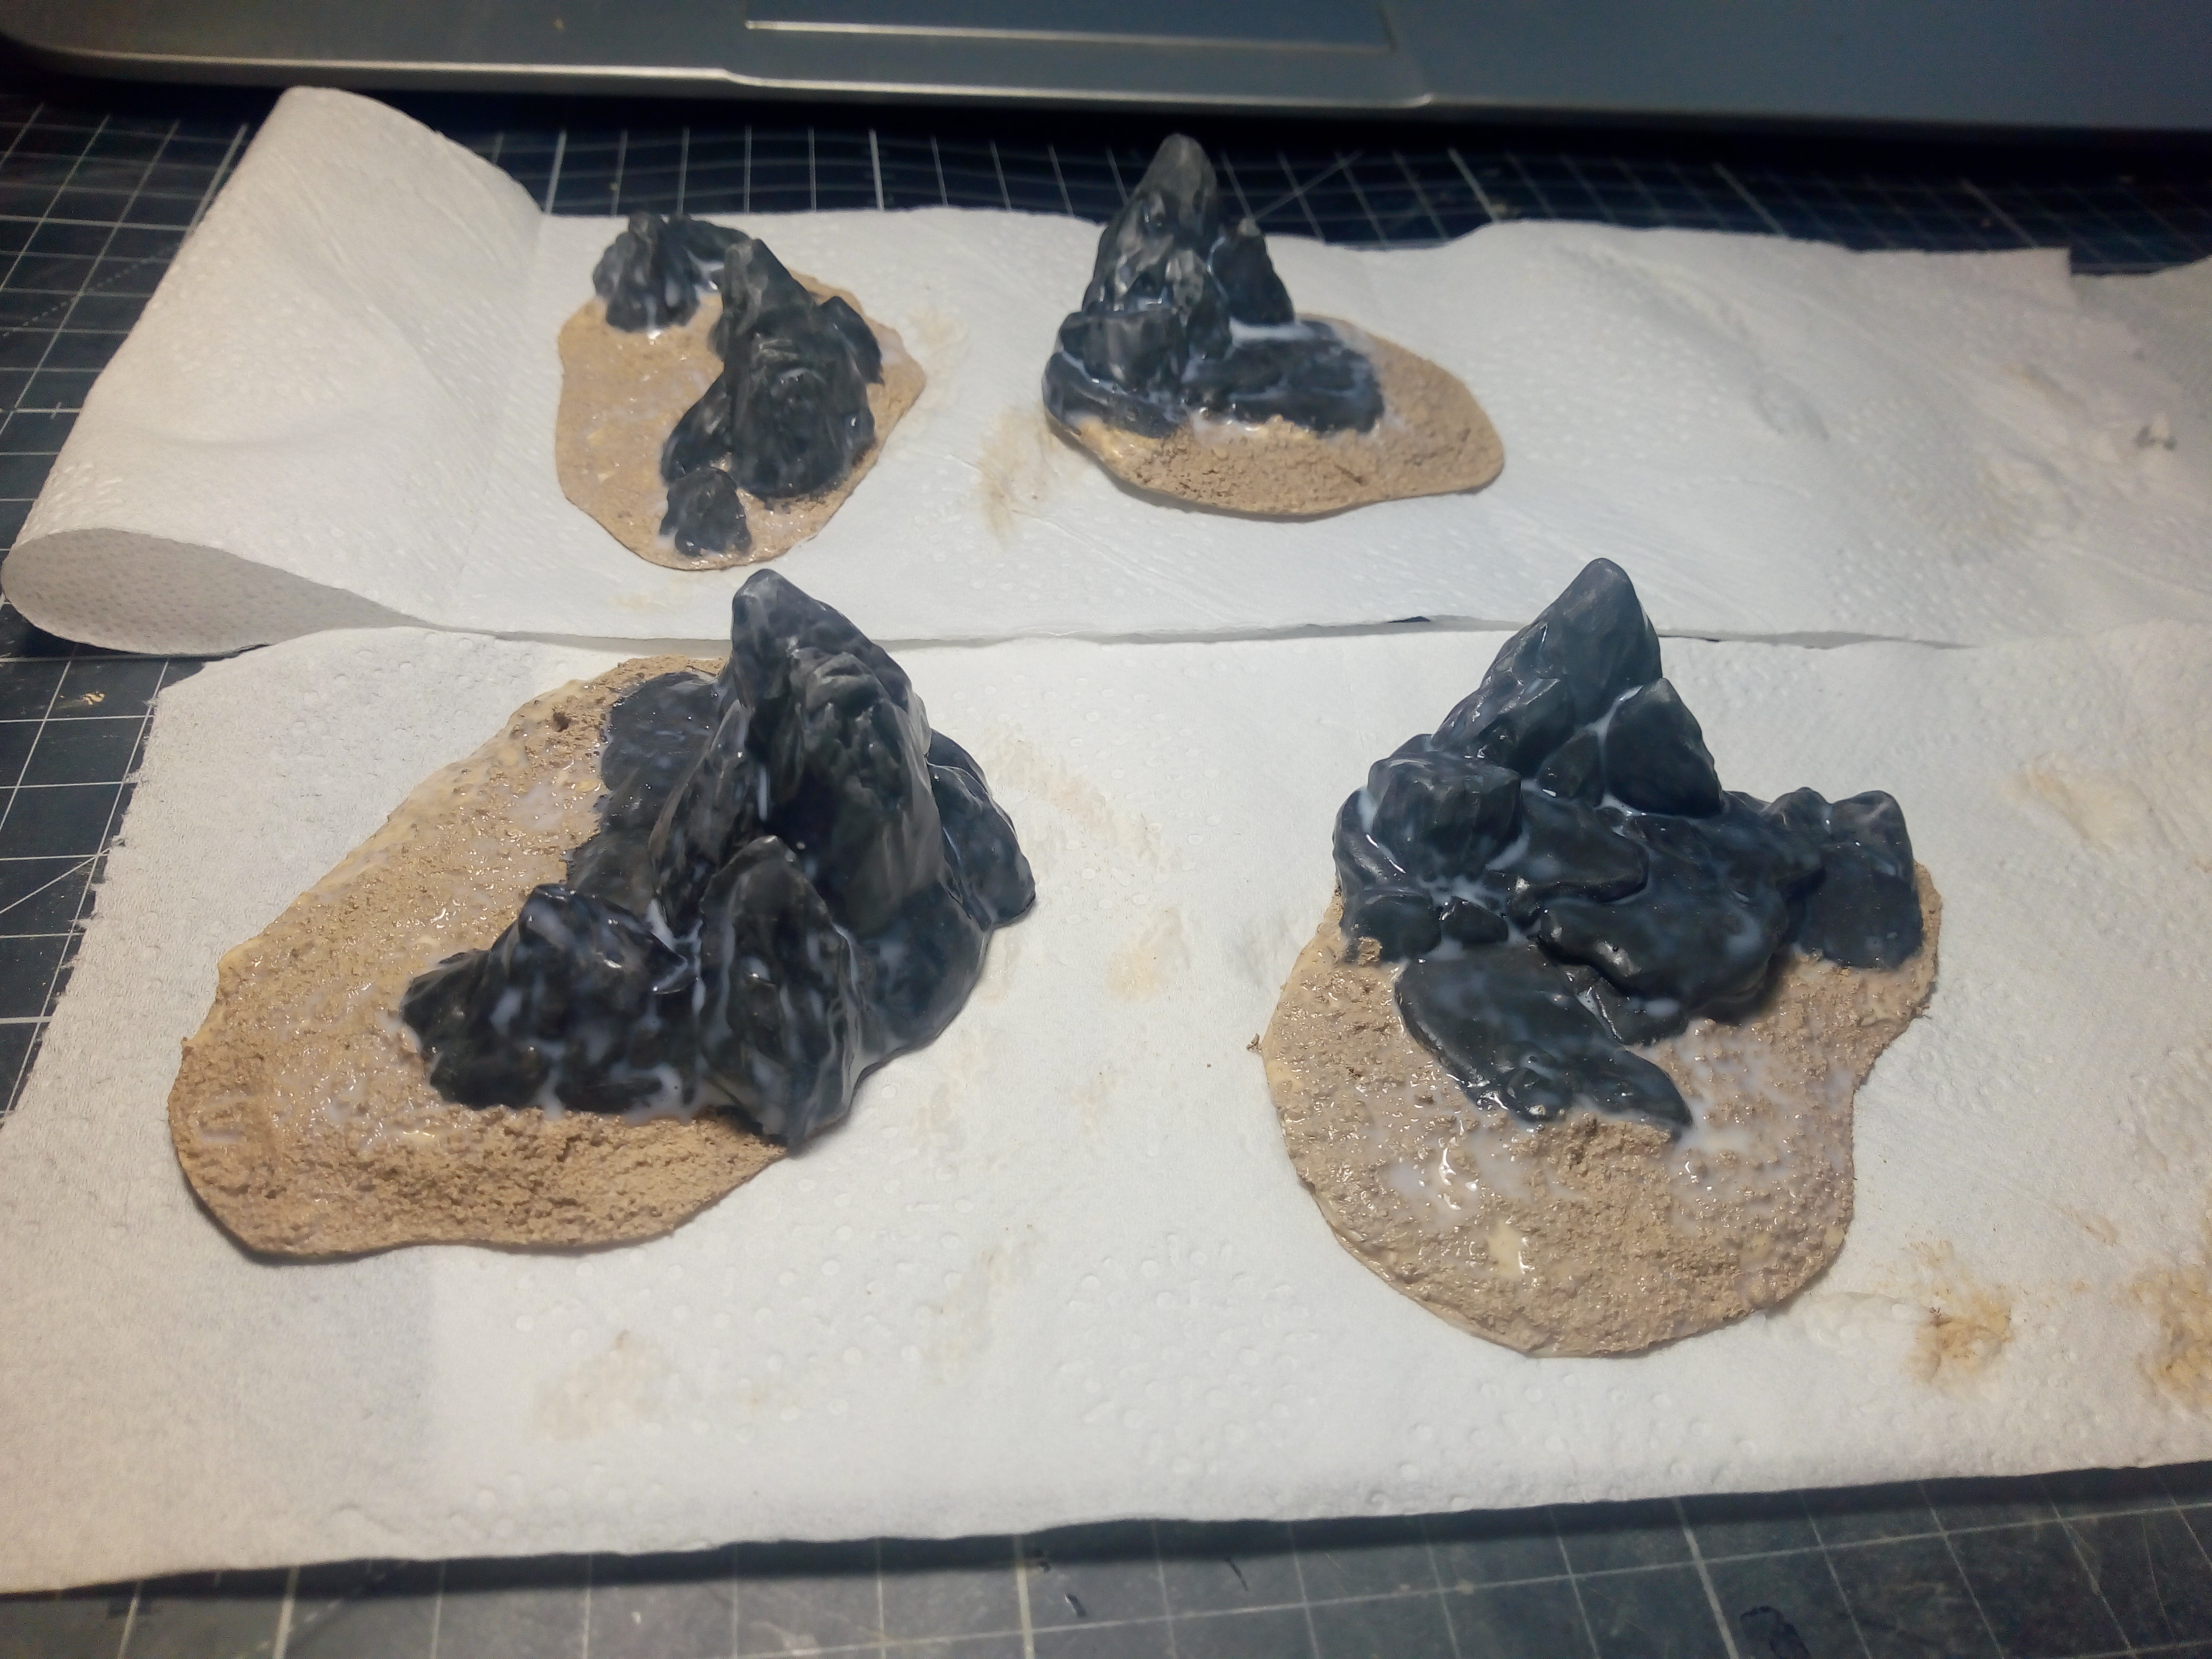
I accidentally rubbed off some of the sand on one of them whilst waiting for the PVA to dry during a previous step but rather than be upset I just used it as an opportunity to try some water effects.
It still had filler in that area so I applied Ardcoat to make sure I had a smooth finish and them applied a layer of Ultramarines Blue Contrast. This gave me a nice colour similar to my gaming mat. A few highlights with Pallid Wych Flesh and then a final second layer of Ardcoat and I was done.
I am very pleased with how they have turned out. Hope you guys like them and if you have any questions please feel free to ask.
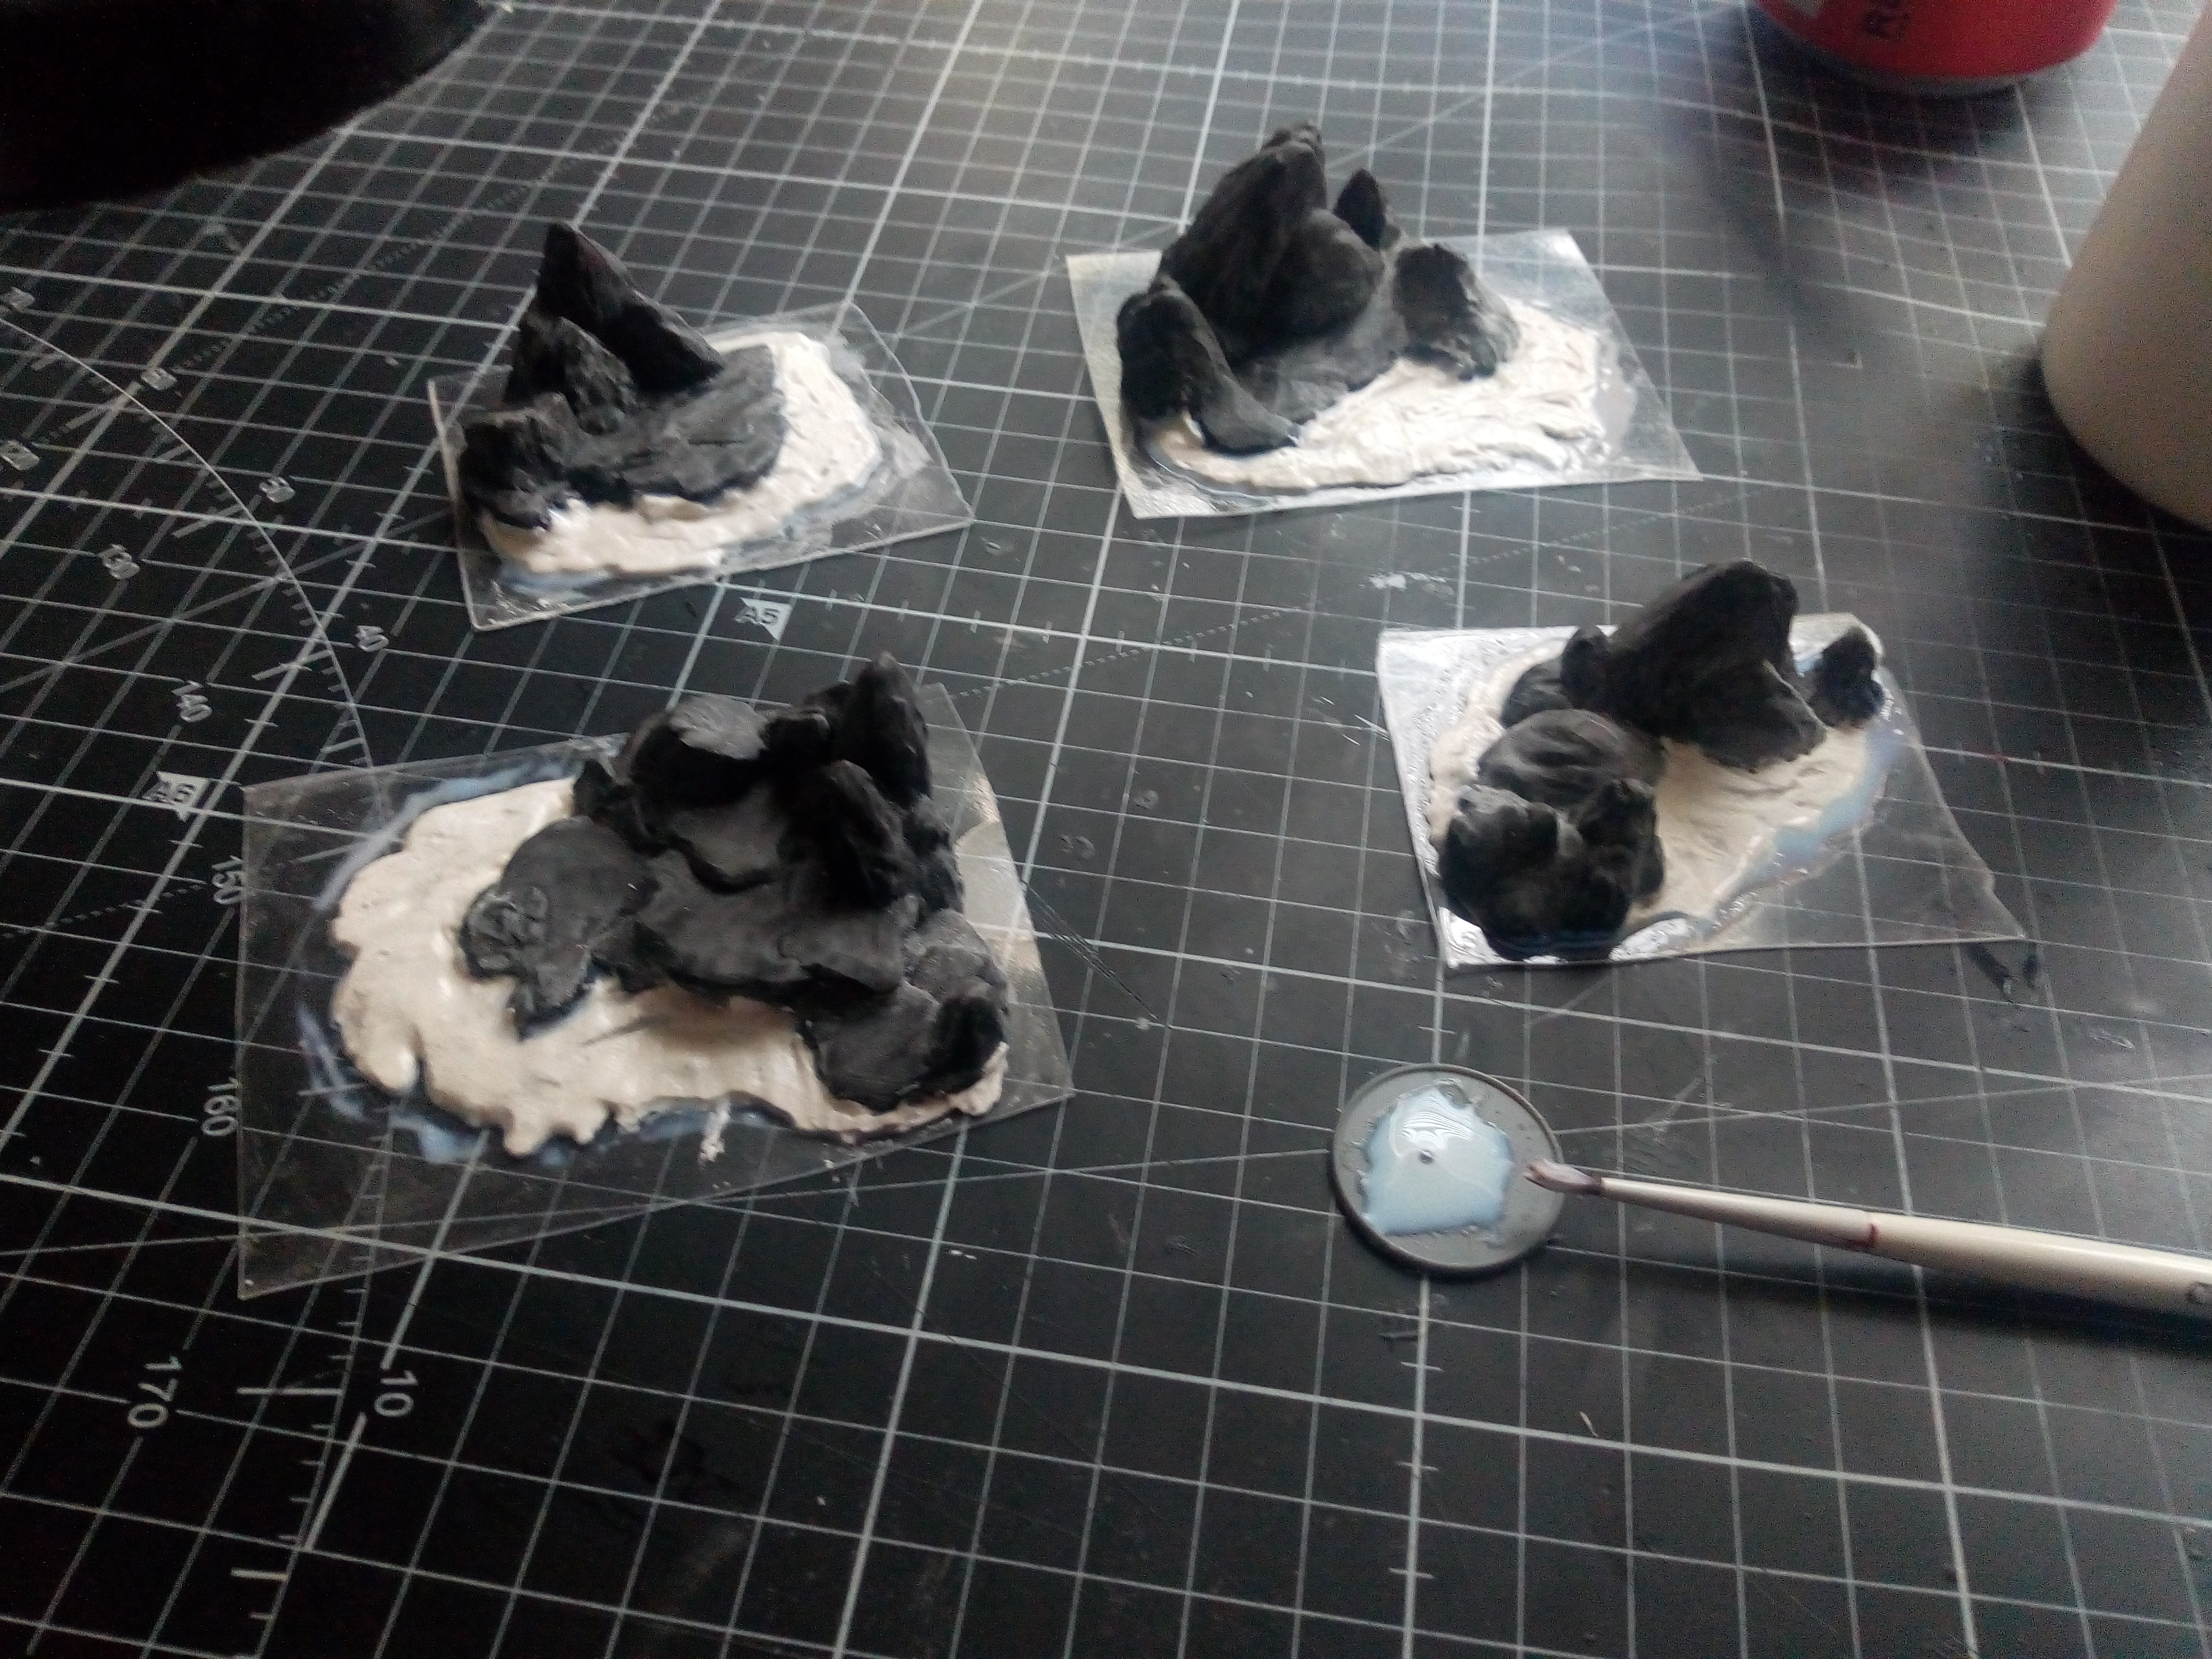
A bit more work this morning on the small island terrain.
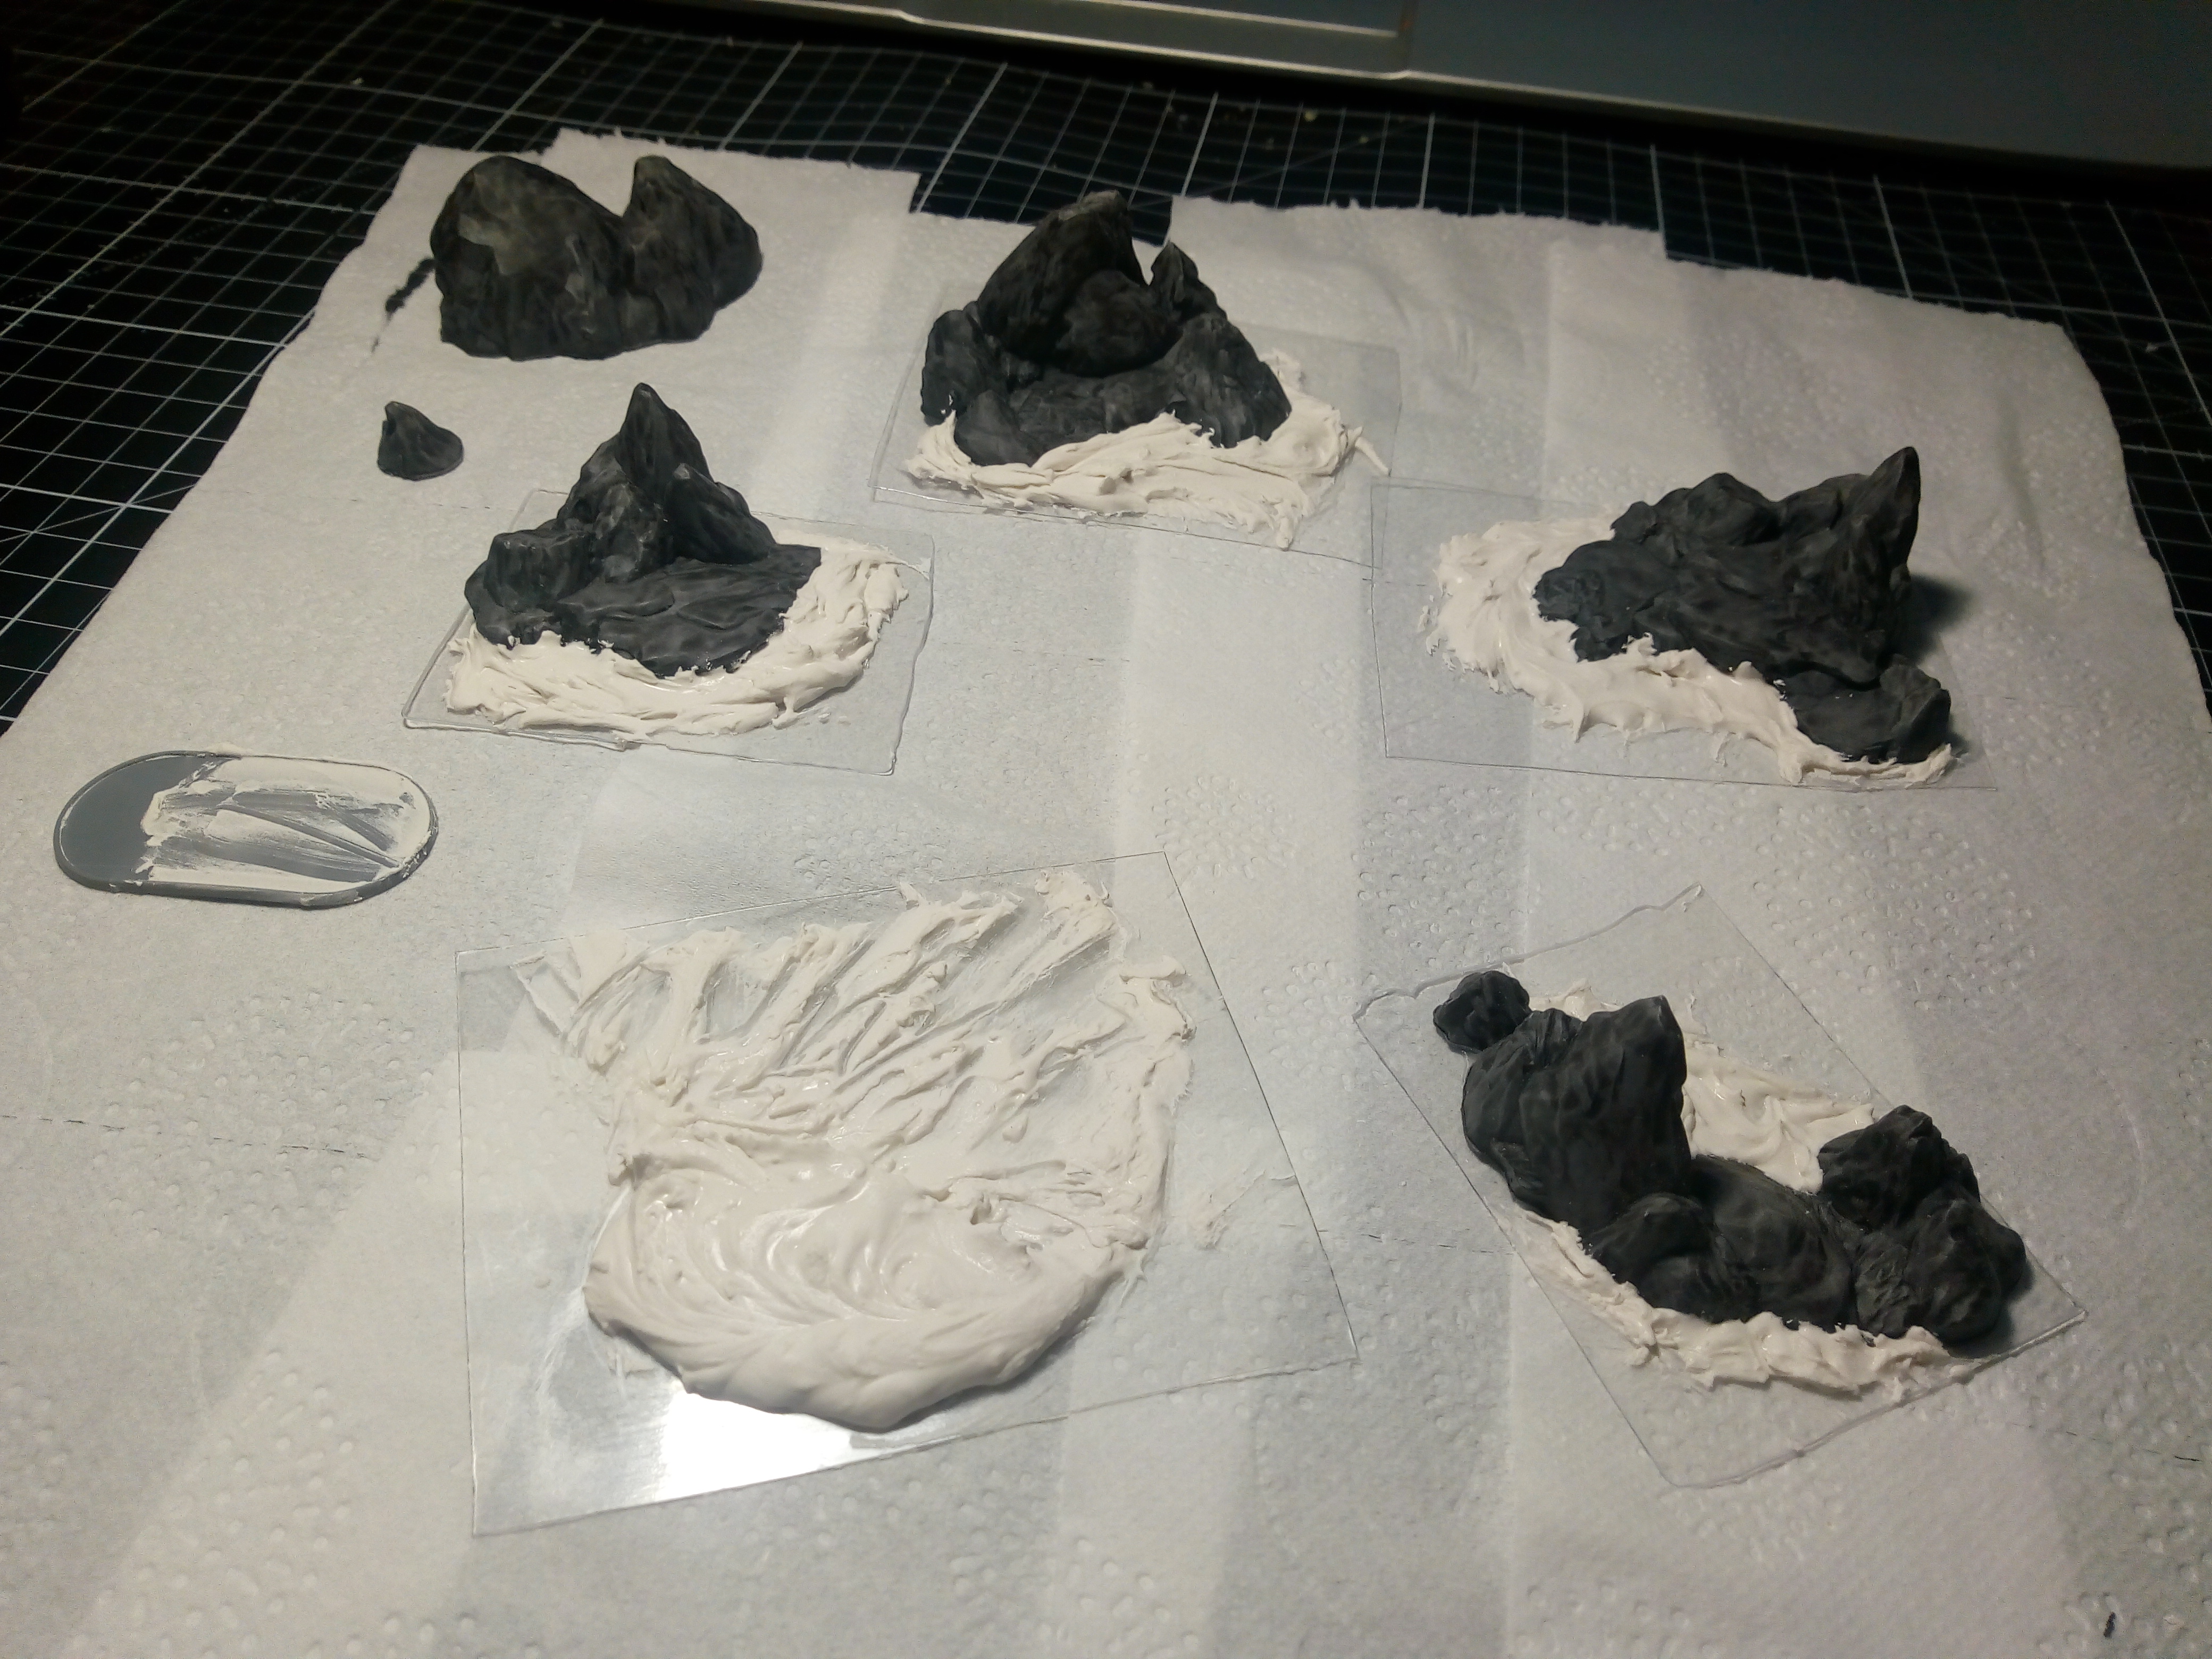
Hello guys,
Managed to squeeze in a little more work today on the small island terrain for our games of Man O War.
First of all, I glued the rock pieces to some clear plastic. It gives me a nice thin base but will show through the gaming mat’s water detail. I just snipped these sections from blisters.
Once done I used a bit of wall filler to give me a base for the sandy areas and tapered it to where the water would be.
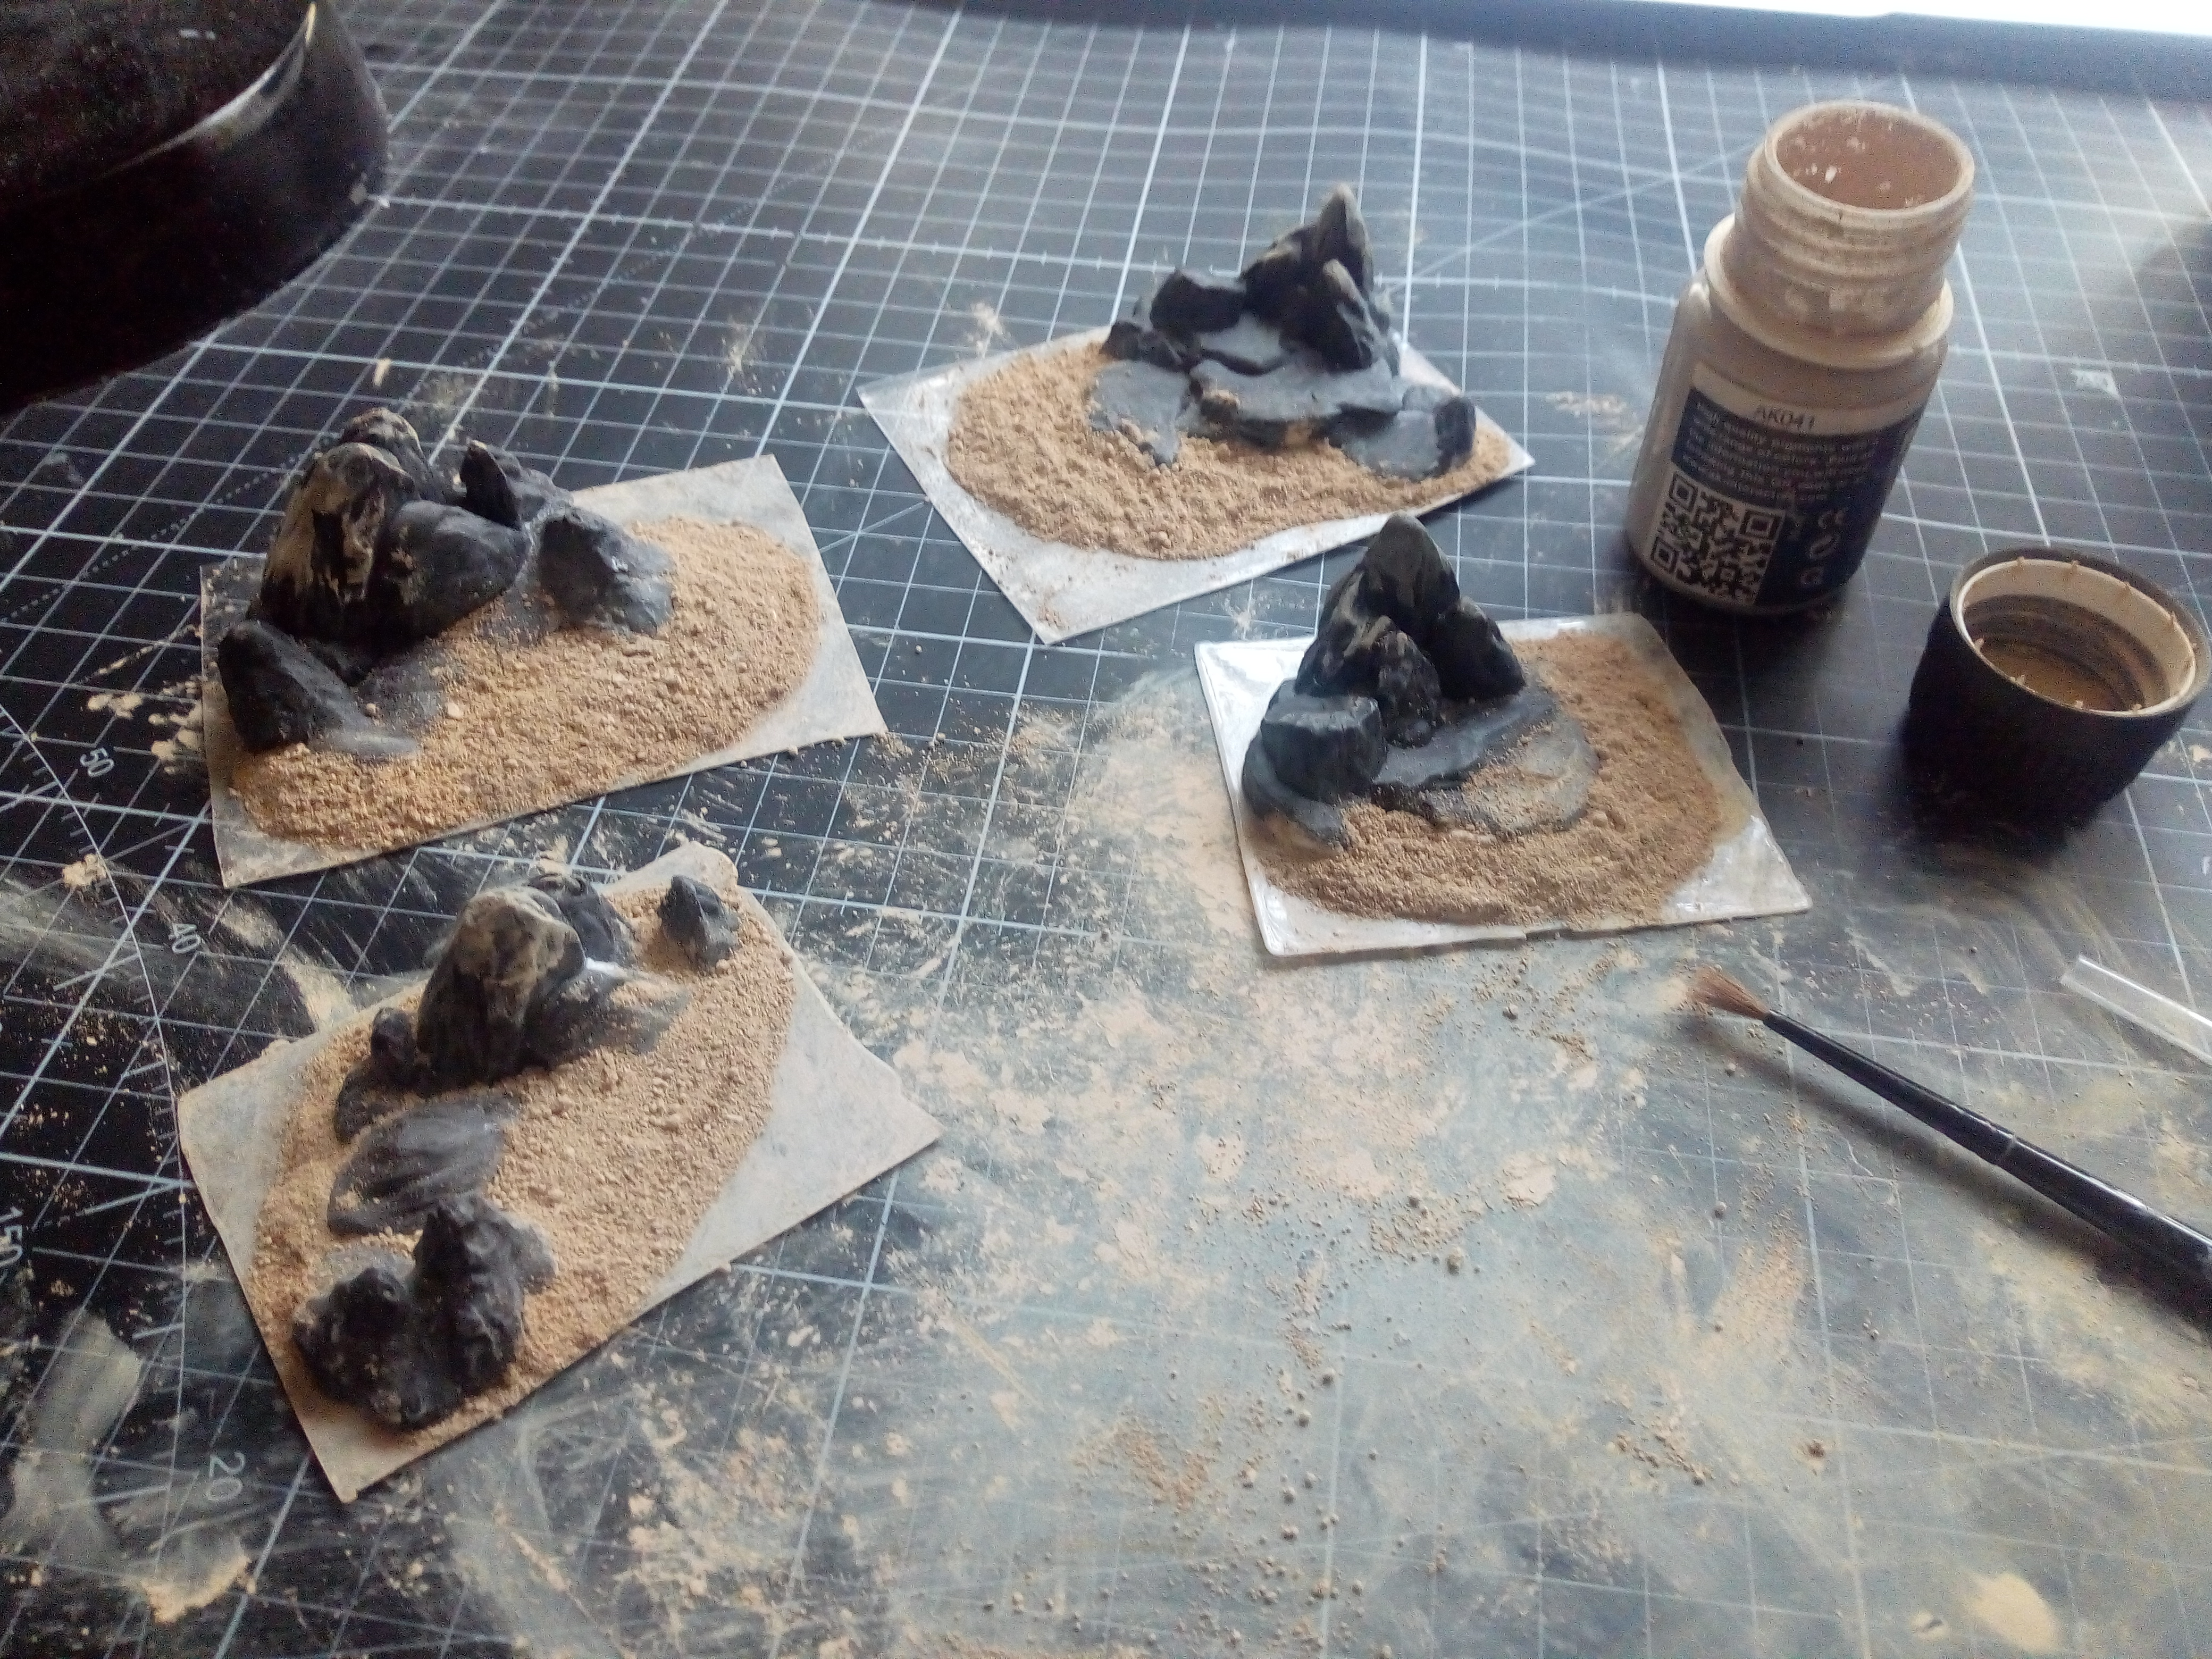
Finally this morning I have applied pigment powder to give me that sandy texture and started the sealing process with drops of thinners.
After it has dried I am planning to gently spray some thinned PVA to seal it before cutting the edge to shape it to the sandy sections.
Wait, what, we need tokens......how many do we have.....none, that could be a problem!
Hey guys, so we had planned to do our first game this week but due to my friend’s daughter having a temperature we have pushed it back which is kind of convenient as it seems we may be short a few tokens, a few being a lot…….well pretty much all of them…..okay all of them!
Now I have a cheap colour printer at home and there is some great resources on the Man O War FB group to help get you started and photos of the tokens. I had planned to print them out on paper and maybe stick them to card but after printing the first sheet they don’t look that great. I need a better printer.
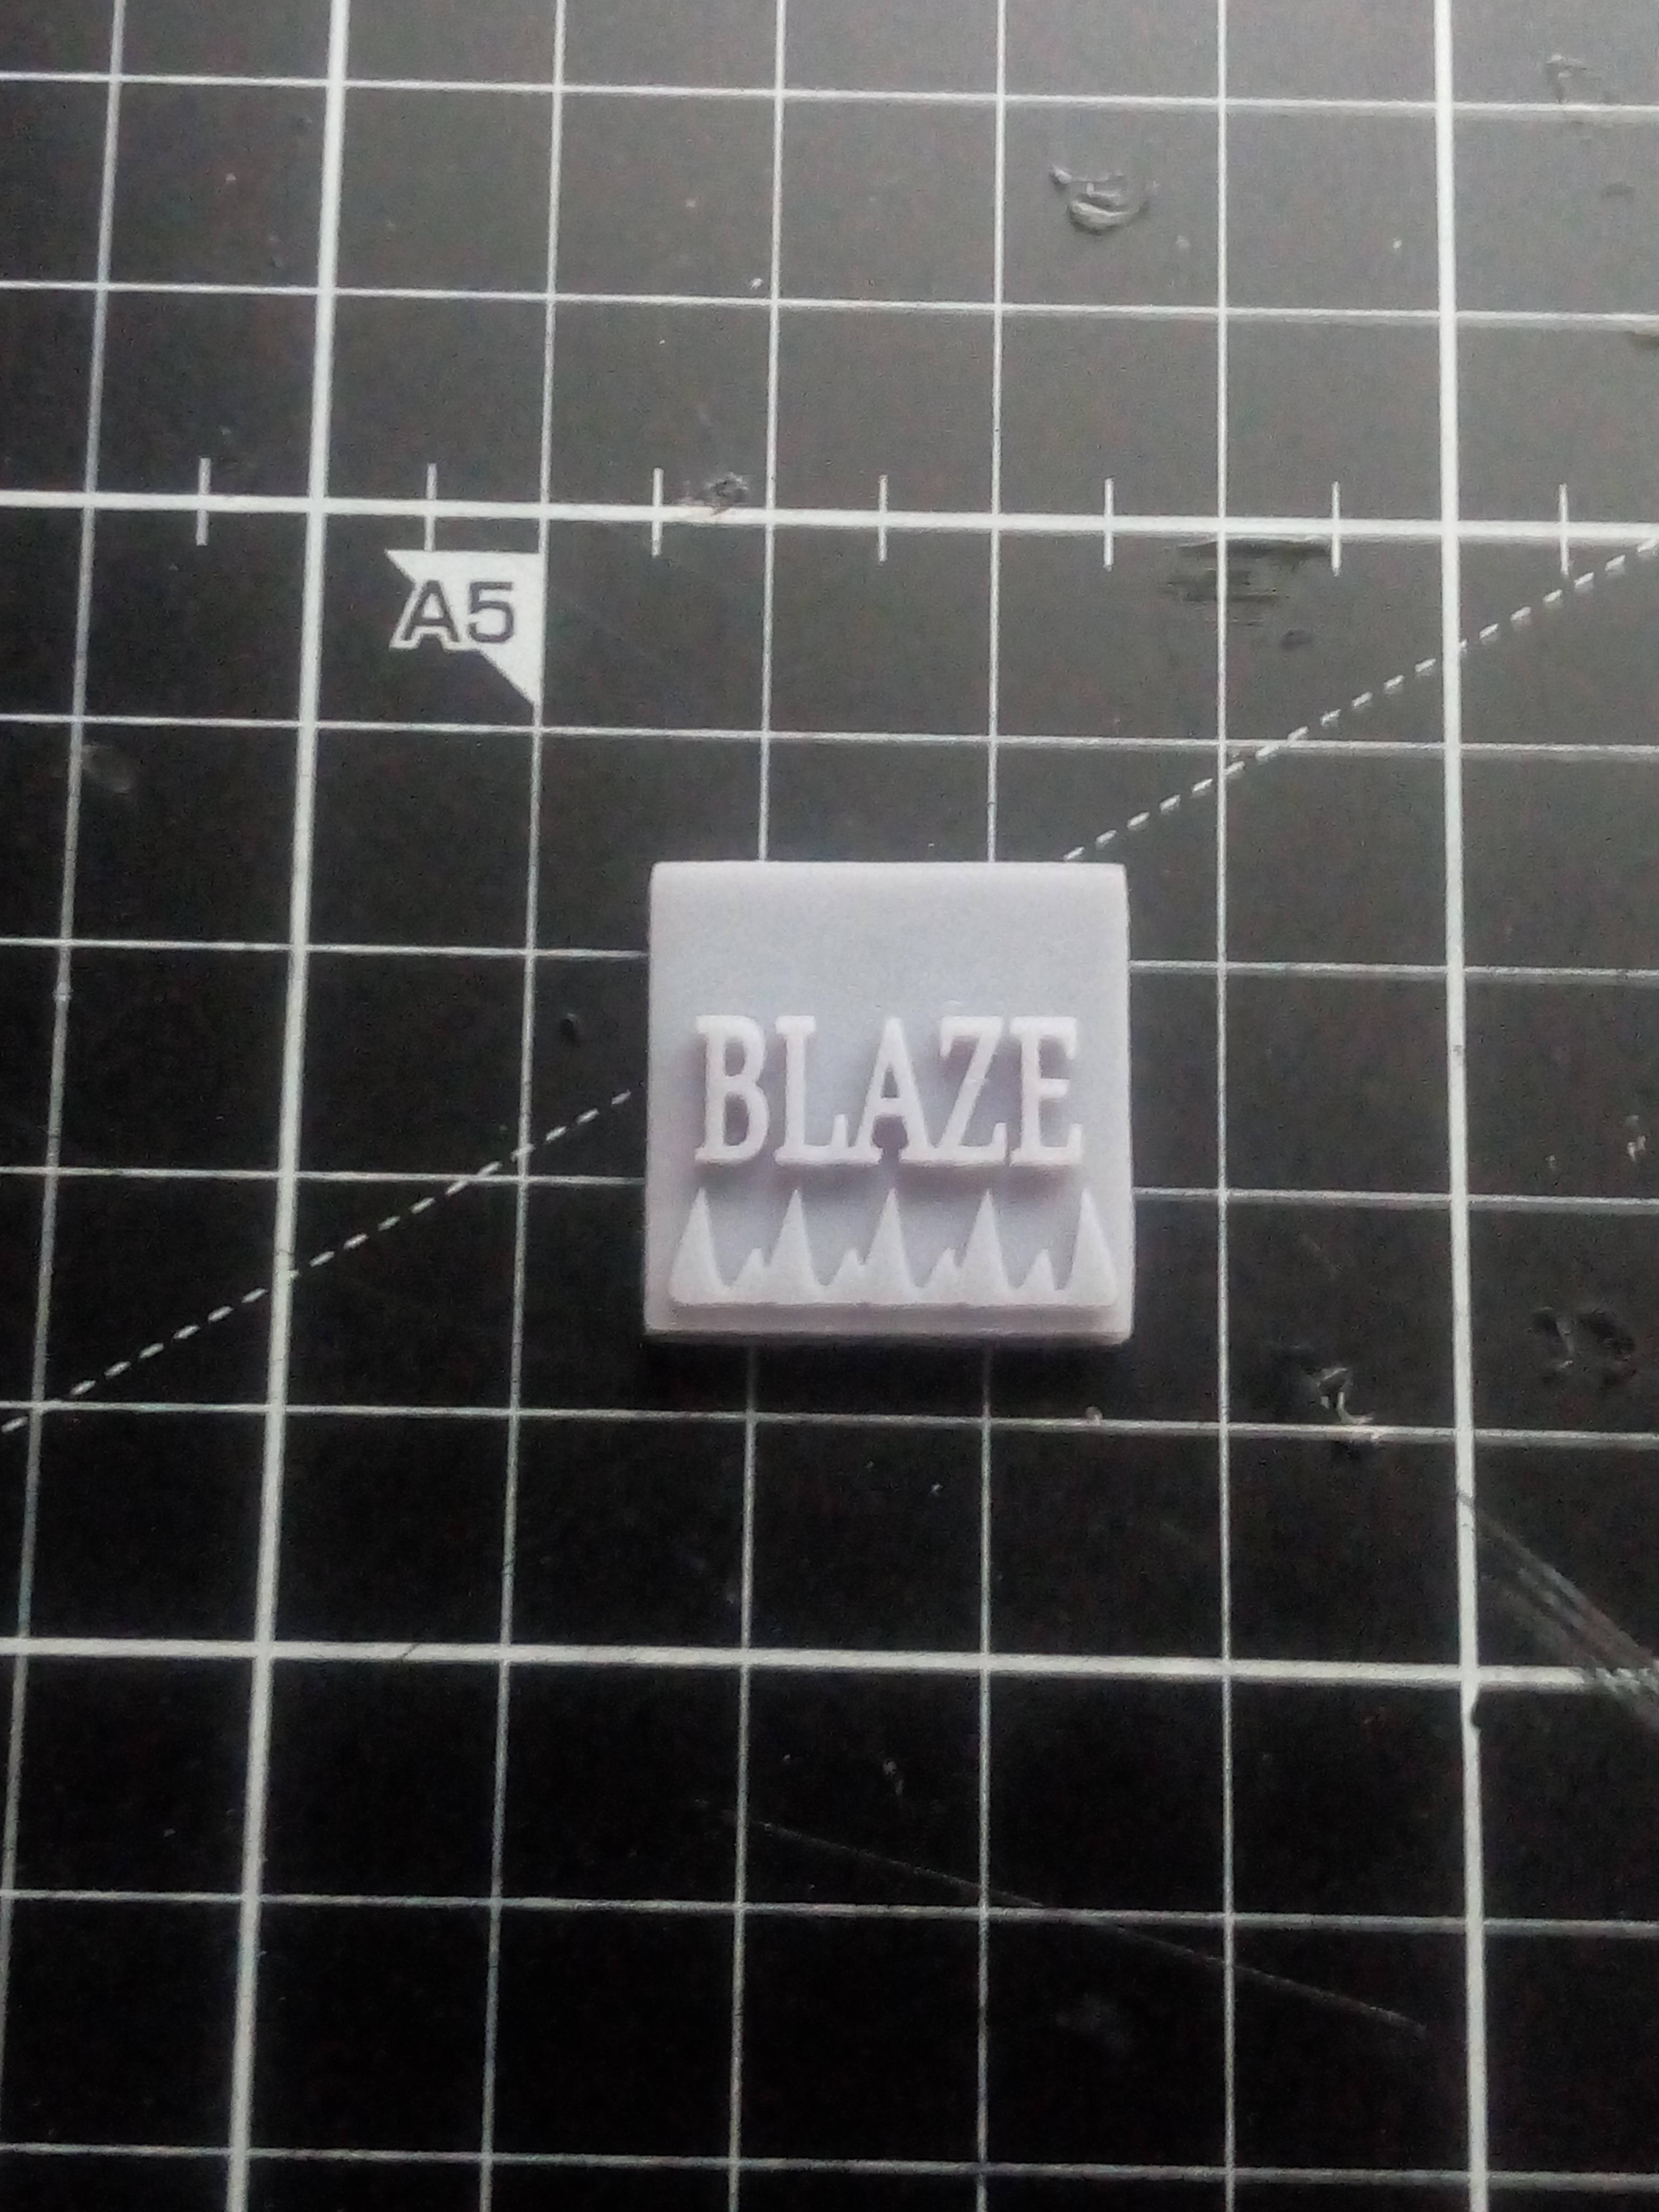
Sooooo I figured, maybe I could 3d print them. I looked around for some STL files of the tokens but sadly couldn’t find any and I figured well may as well keep going.
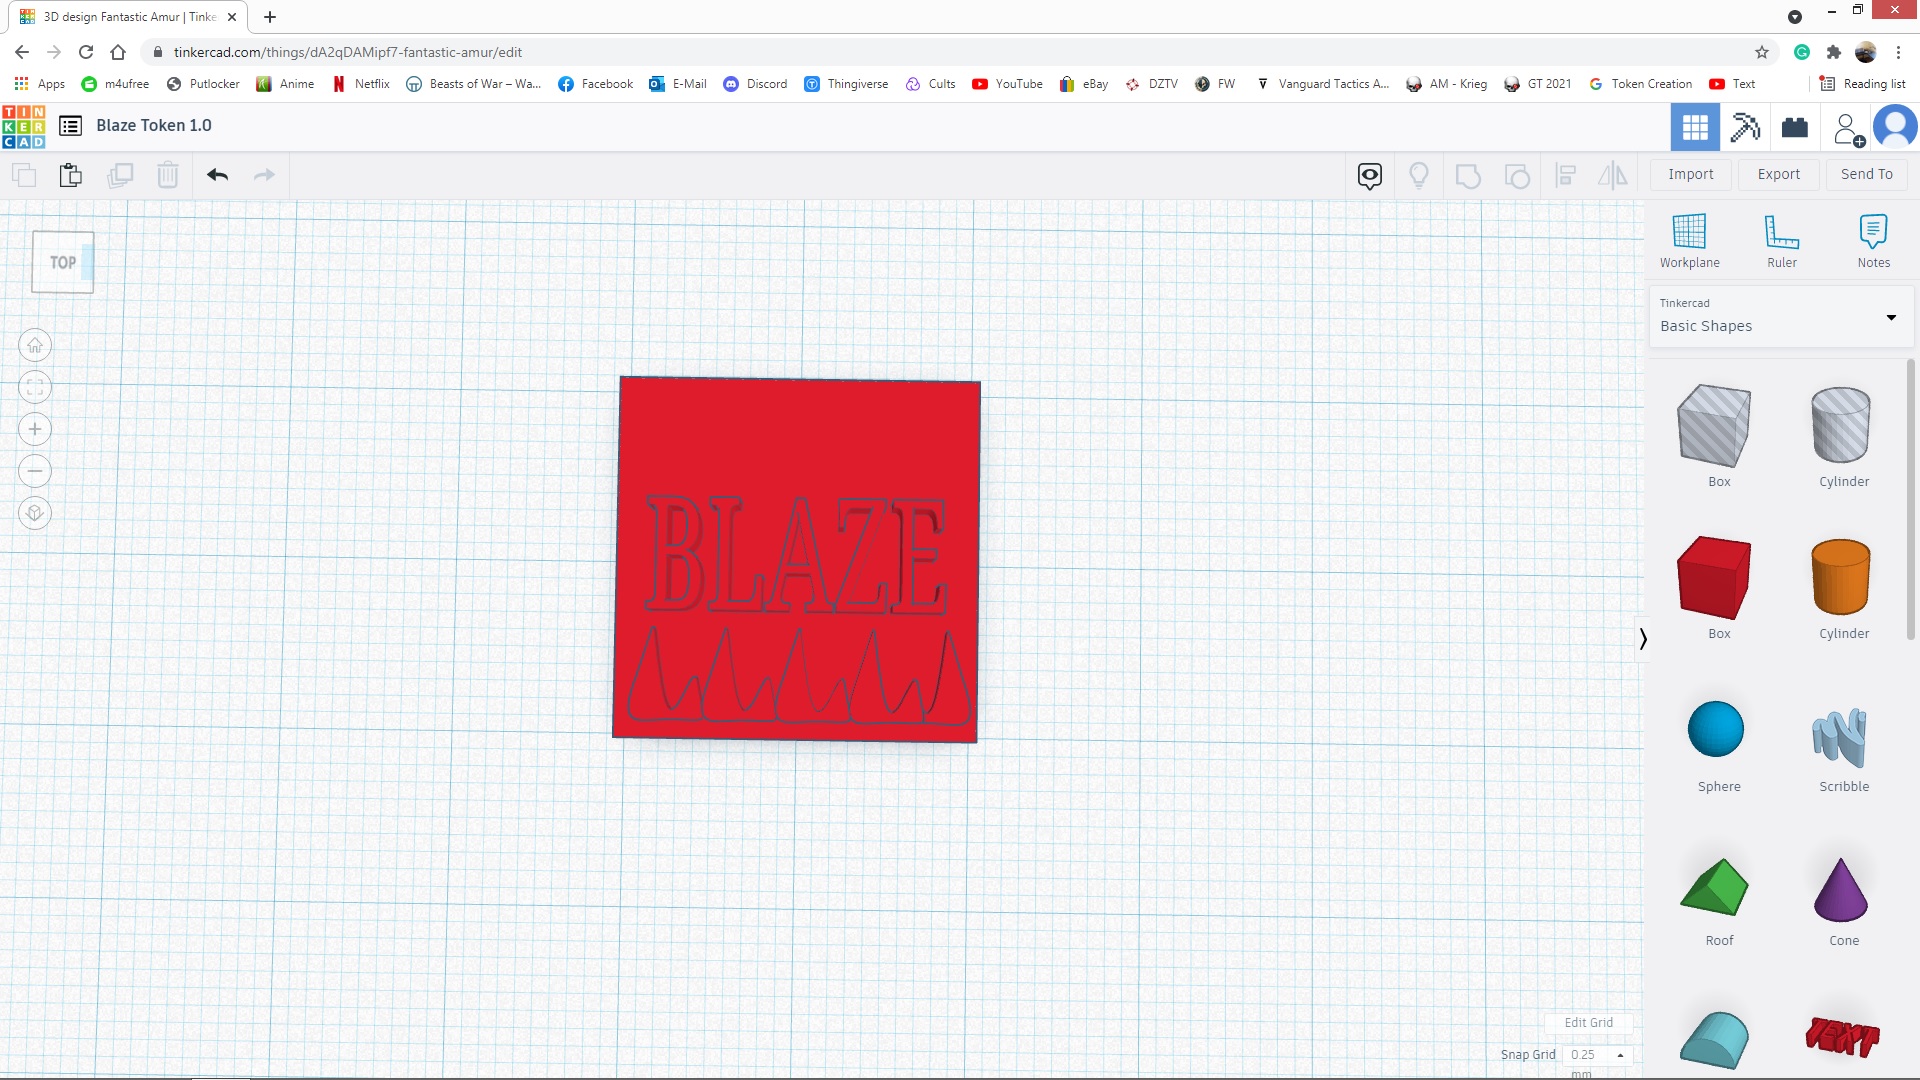
I did a search online to see what the best free software was for creating STL files and that could be operated by a ham-fisted idiot (ME). I settled on something called Tinkercad, it is well supported with intro videos and a quick look on YouTube showed plenty of content on there too for when I have a muppet moment.
I quickly got the software downloaded and started on a design. To be honest it is a great bit of kit. It is definitely aimed at those looking to start out into mixing and blending shapes and with its inbuilt templates is actually great for token design. From downloading and doing the lessons to mucking around with shapes it only took me about 40minutes to come up with a basic ‘Blaze’ token. I haven’t gone silly with the details yet as I wanted to see how this worked and if it prints okay. So the token is on the printer now and I will have my answer in around 45 minutes.
I have attached an image below of the basic design on the Tinkercad software and of the printed token which I am very happy with for a first attempt.
Every day is a school day and it seems my hobby keeps growing in new directions. The ability to make my own tokens especially for games that are no longer supported or to replace old tokens as they degrade is a really nice option to have.
Starting the scenery or the first pieces at least
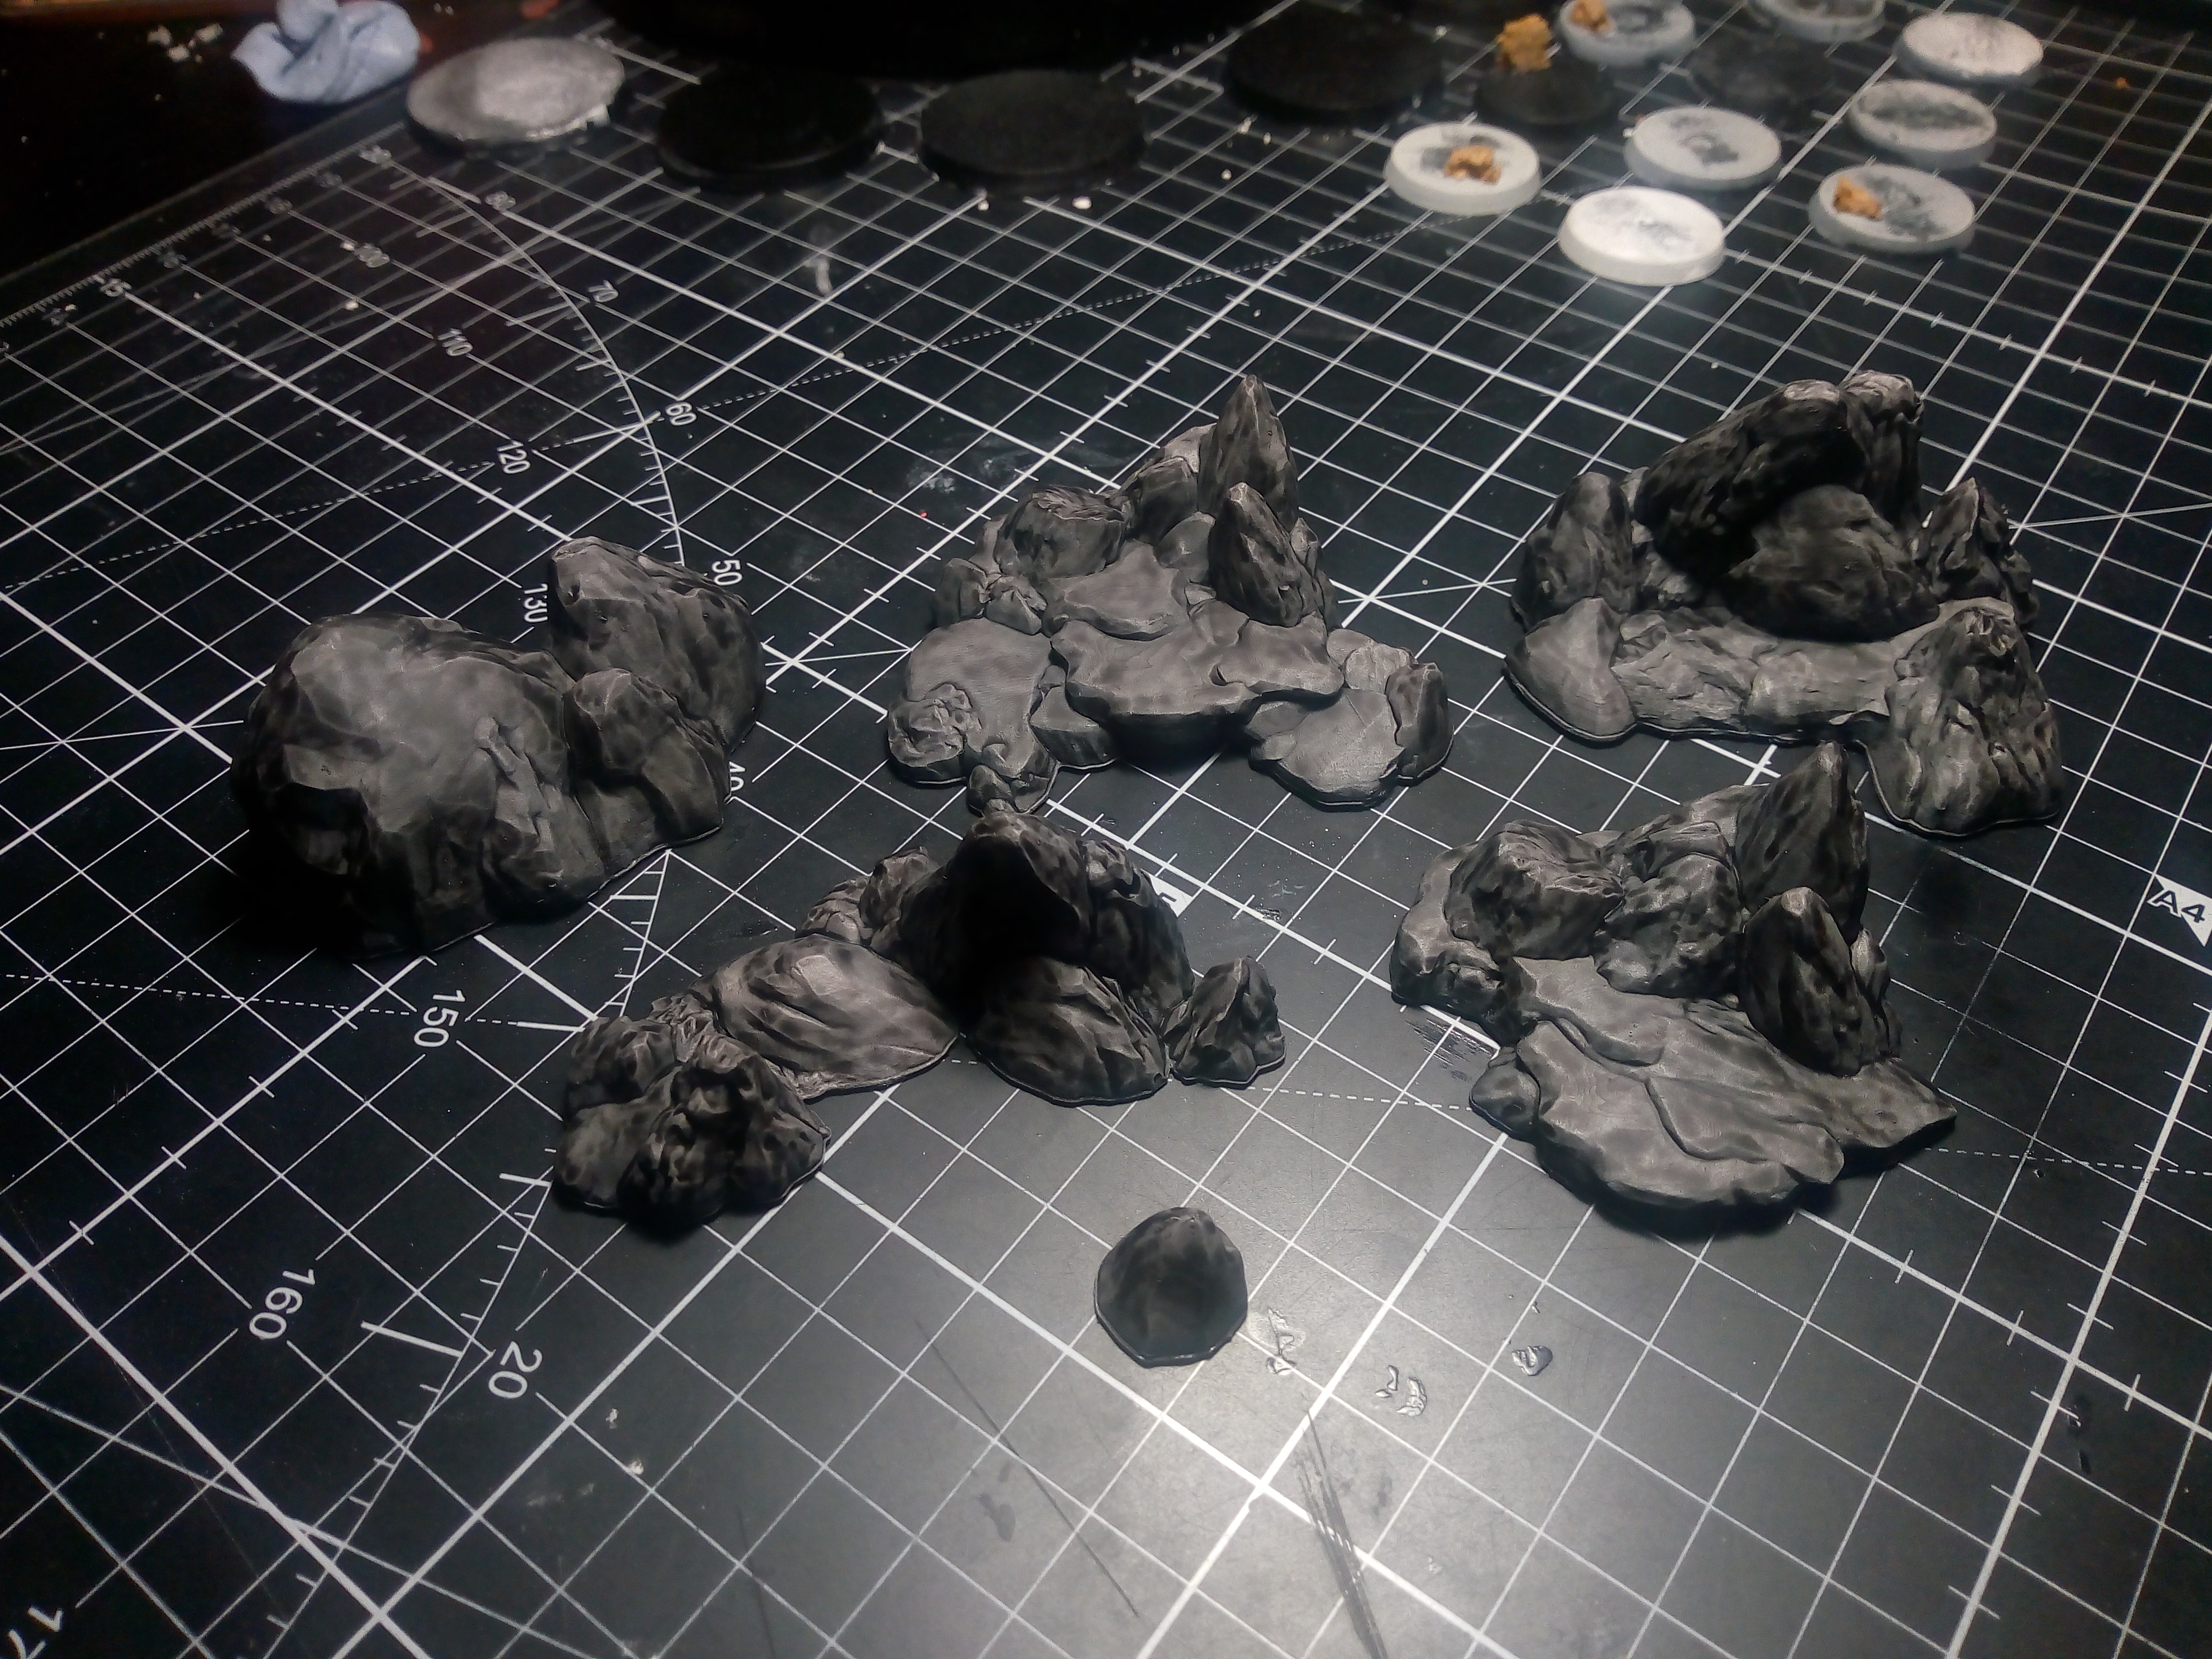
Heys guys, I have been jumping between a couple of personal projects recently but have also been busy with work. With these first items of scenery, I have done a basic zenith in the first photo using a new combo for me. I started off with Mechanicus Standard Grey followed up by Grey Seer. I then applied a single layer of Basilicanum Grey to help me see the shadow and highlight points.
I like the dark almost volcanic look of them but plan to bring them up further and am working out what foliage/tufts to use to represent small wooded areas.
I hope to have more done on these over this week and into the weekend and will post some images soon of these and the fleet all together.
Happy hobbying!
Some scenery next
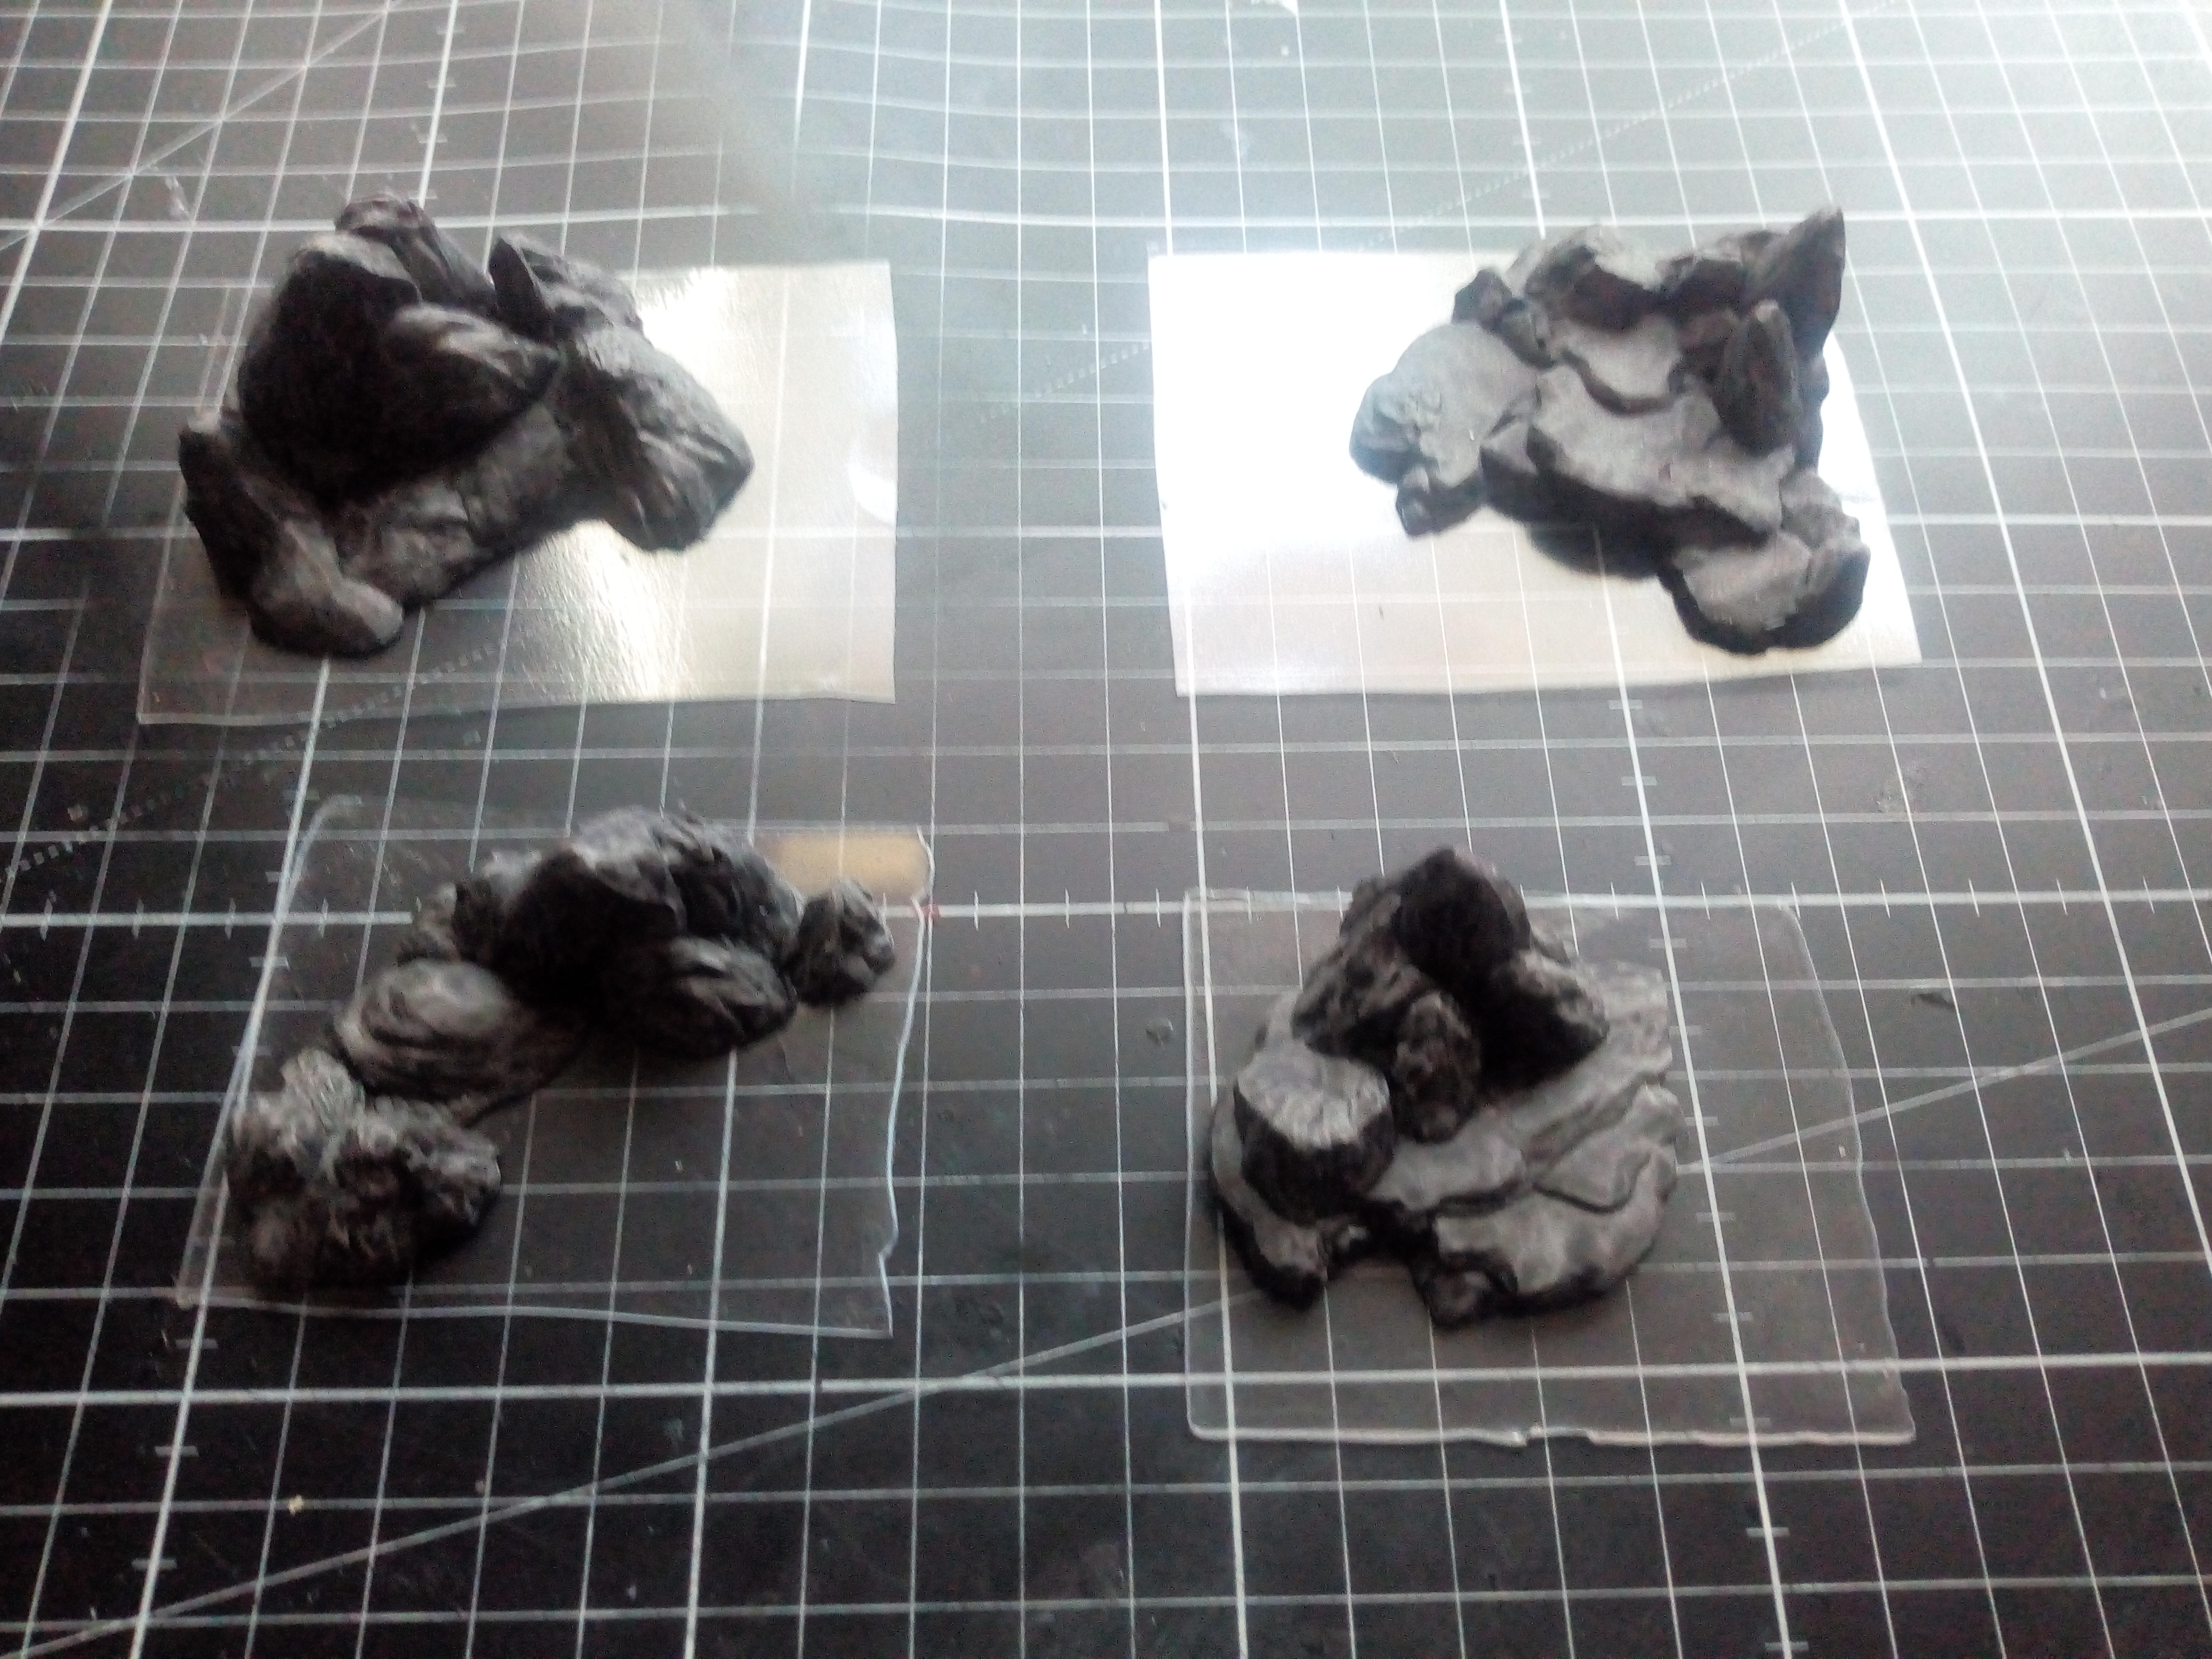
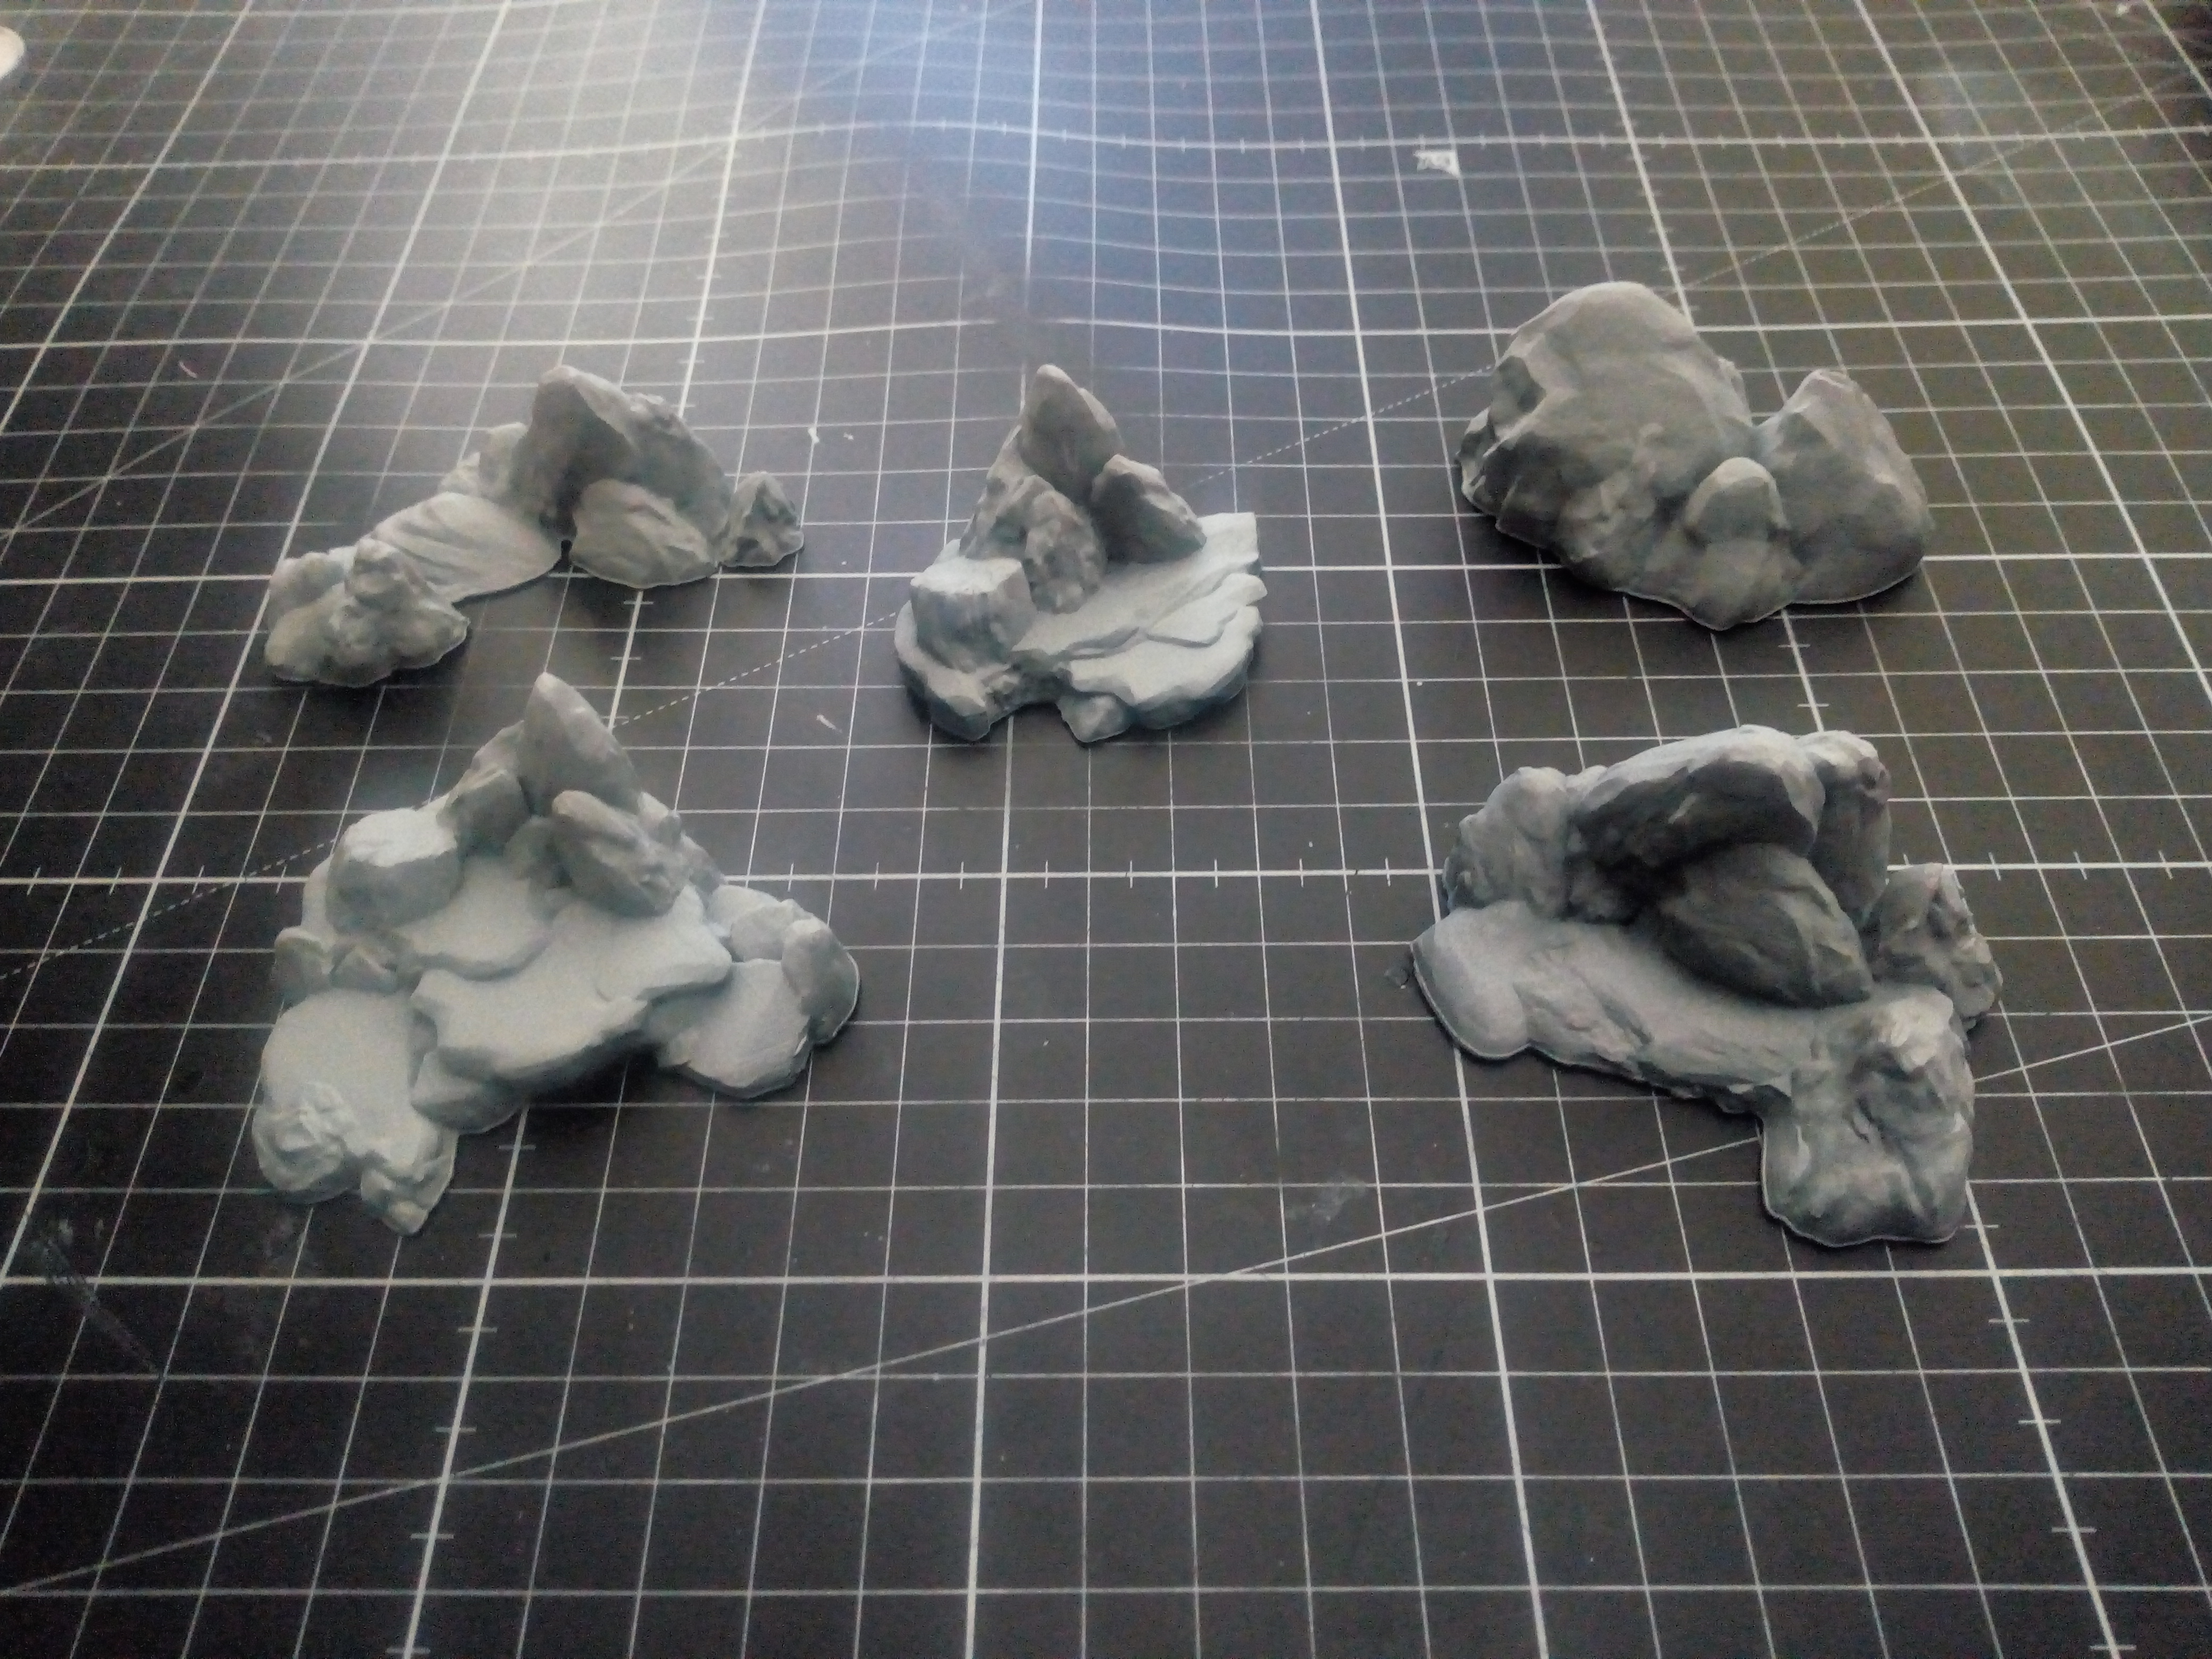
It’s taken a while for me to find time to come back to this project but this week I did. I had a search around for free STL files for islands but there really wasn’t much out there so I changed tack.
I searched instead for rocky terrain and found a file for 28mm scenery for just under £4. I liked the details I saw and figured I would give them a go.
With the files downloaded I put them onto my slicer and re scaled them to 30% for this initial print with some of the much larger ones down to 18%.
There are five different designs in the pack and here they are.
I am very pleased with how they have turned out and am looking forward to getting to work on them.
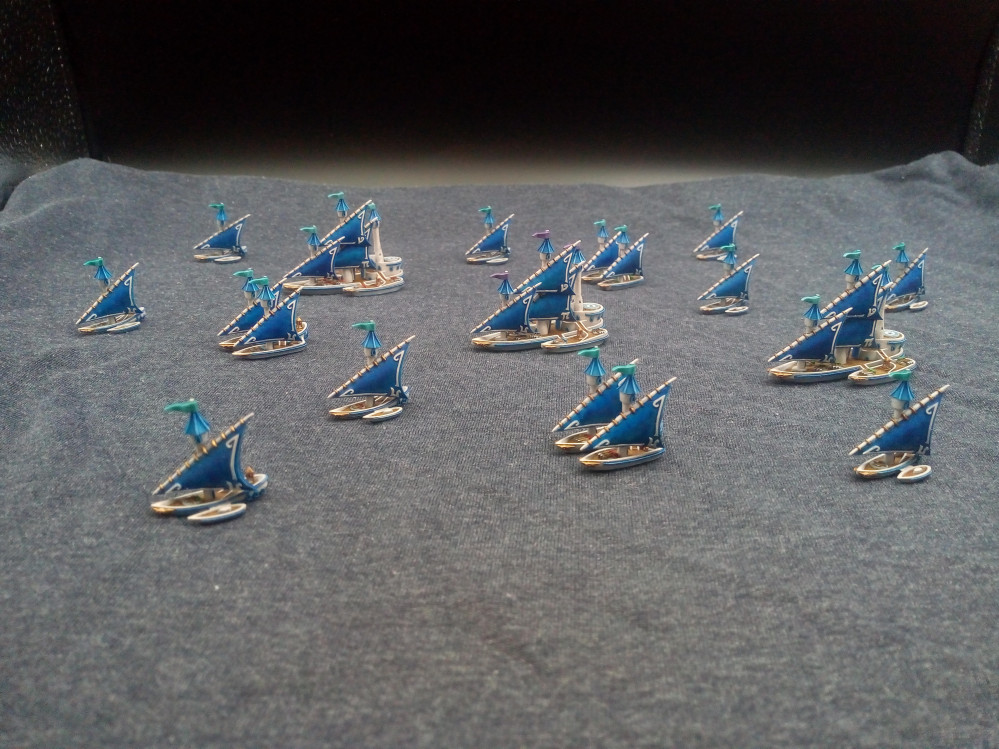
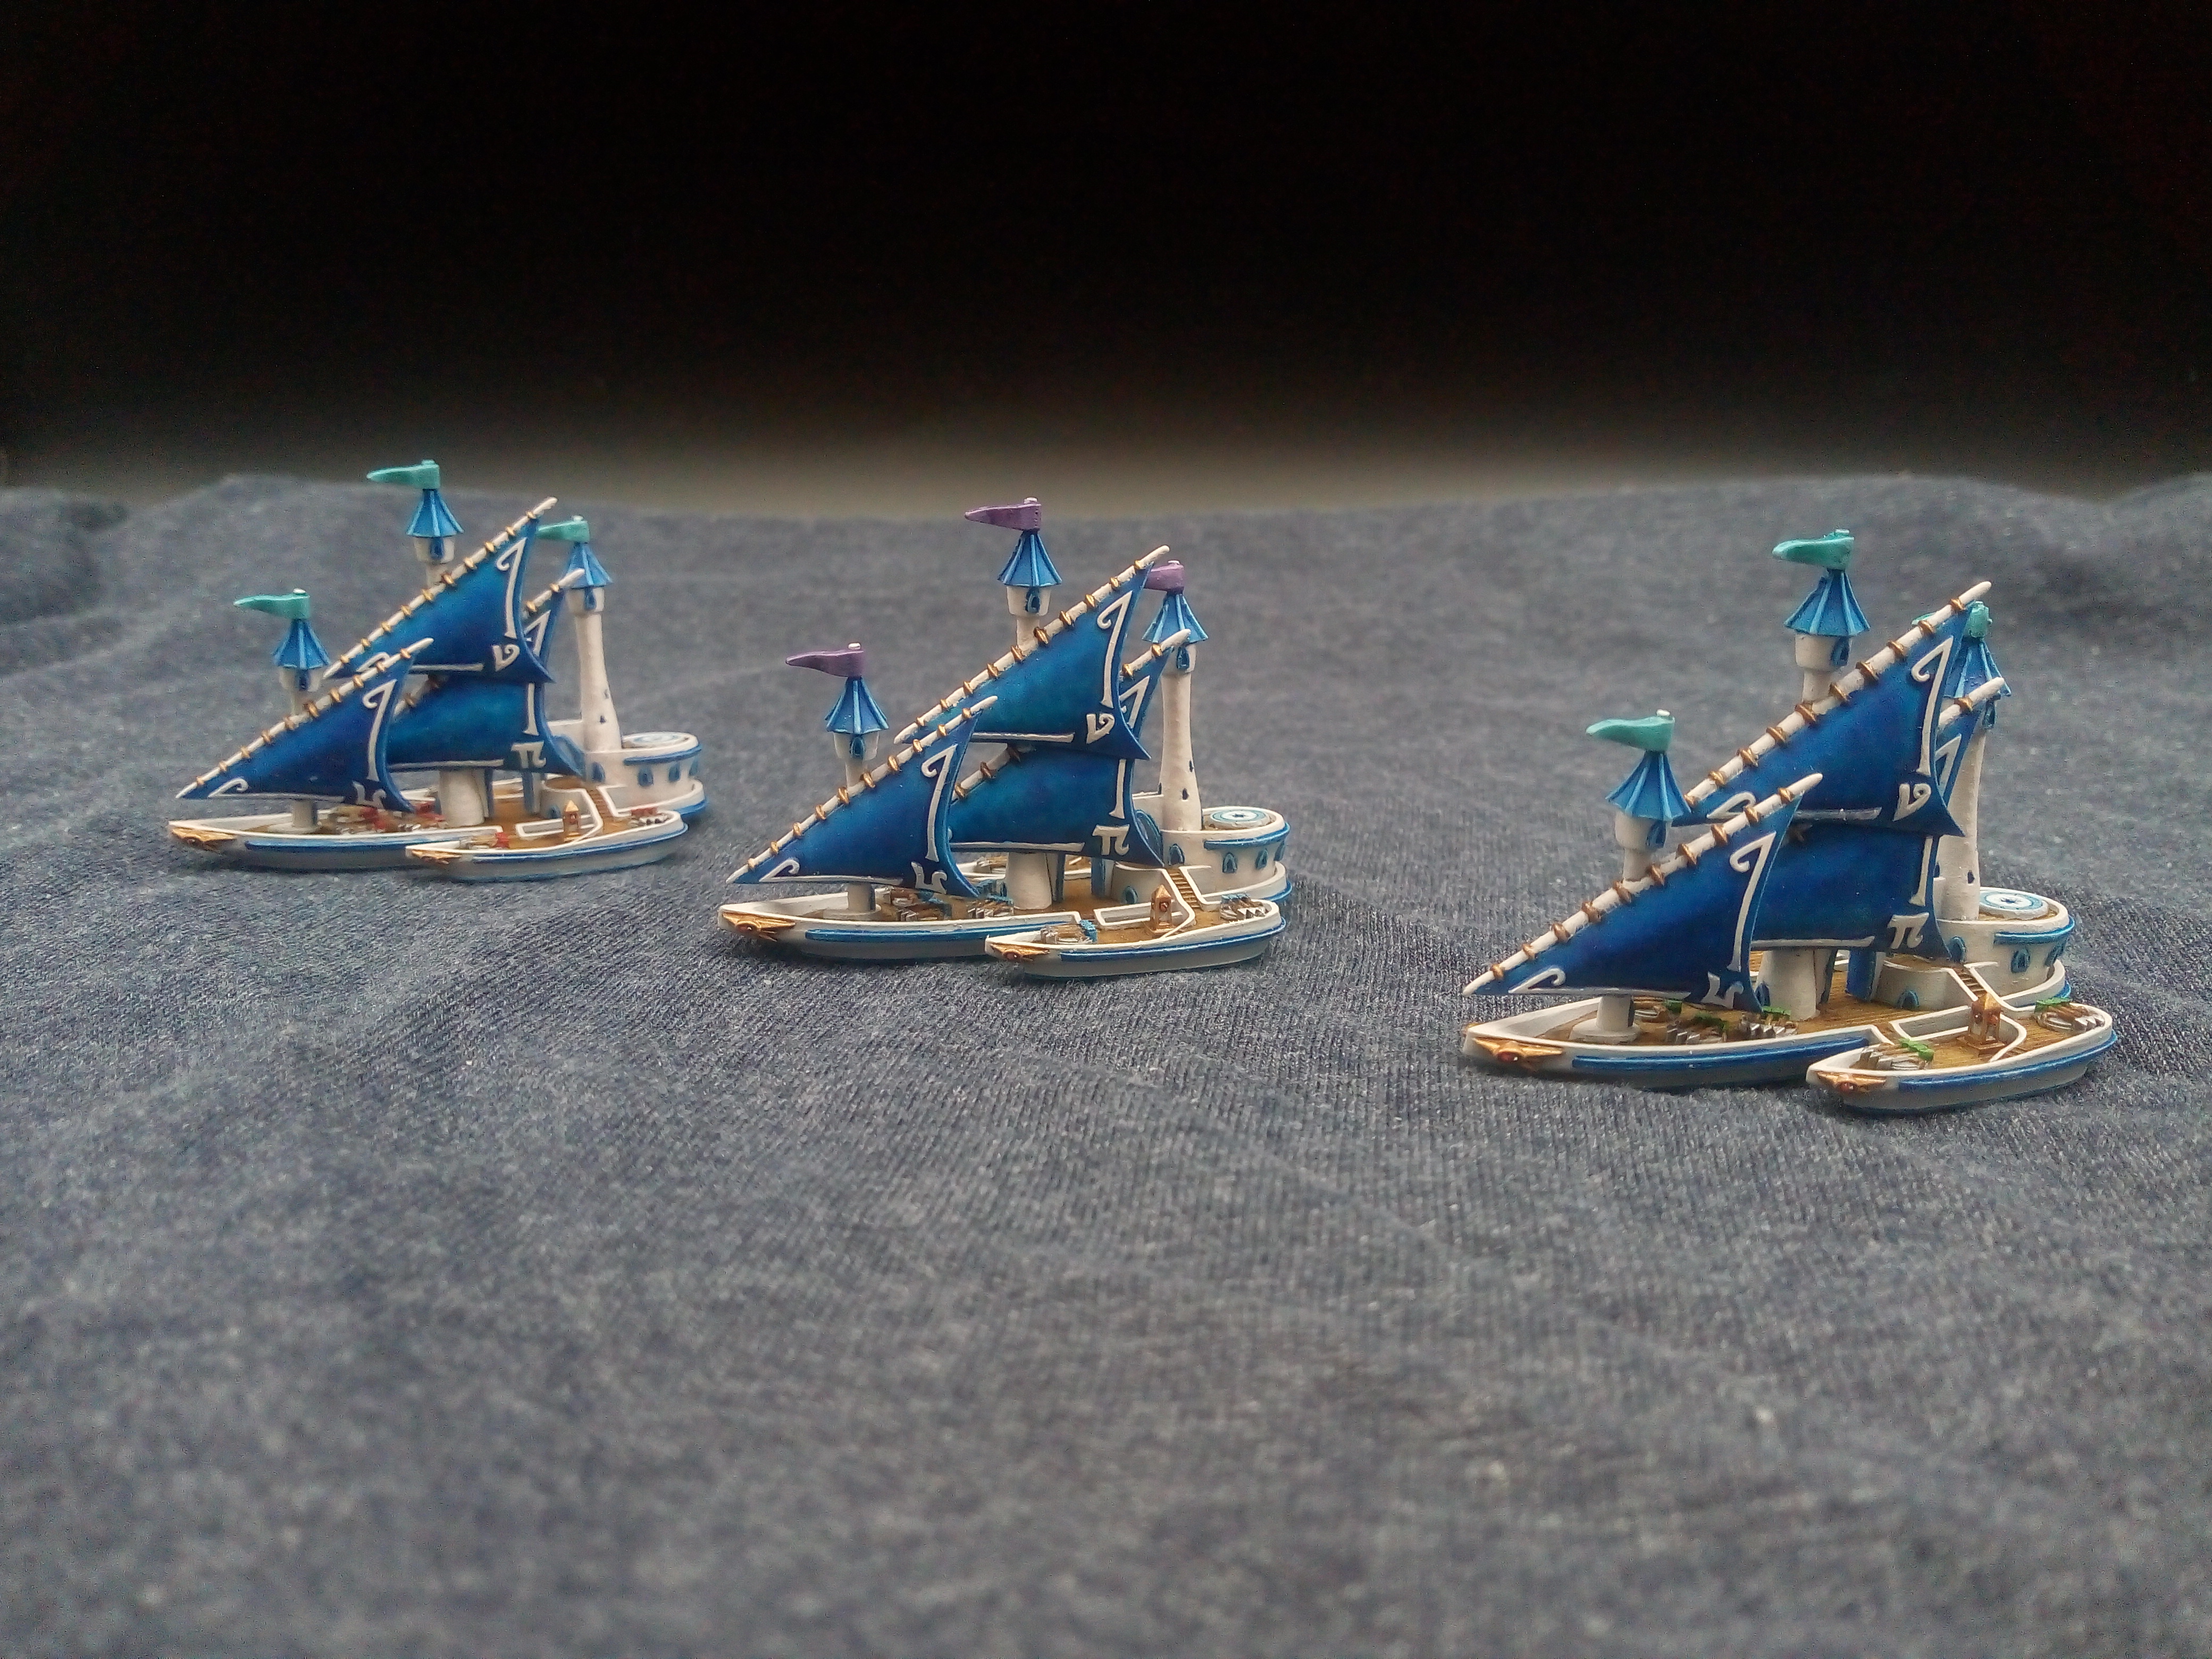
The Dragon Ships Leave The Docks Heading To War
Heys guys, well I am happy to say that I have finished the last of the ships for my fleet bringing the total points in ships alone to 1500. This can easily be made into a 2000 point force with just the addition of a Wizard Lord and some Wardancers for boarding actions.
I am super pleased with how they have turned out and I kept close to the colour scheme I saw online. I chose to use a purple flag to indicate the Flagship of the fleet and with it all laid out I really love how they all look.
This is the first fully painted, fully pointed force I have done in quite literally years and it feels really good and very motivating to finish this off and continue onto other projects.
I am not done yet though. So next I will be moving on to making some terrain for playing with. I have decided to pick up a 4 x 4 water-themed mat as they are so nice to use and protect the minis. I also have just purchased some STL files of rock formations for 28mm. The plan is to reduce these in scale, base them and make them look like small islands and such but gotta decide how to go about that.
Anyway here is my pride and joy, my High Elf fleet ready to sail to war against the stunties of my friend Tom.
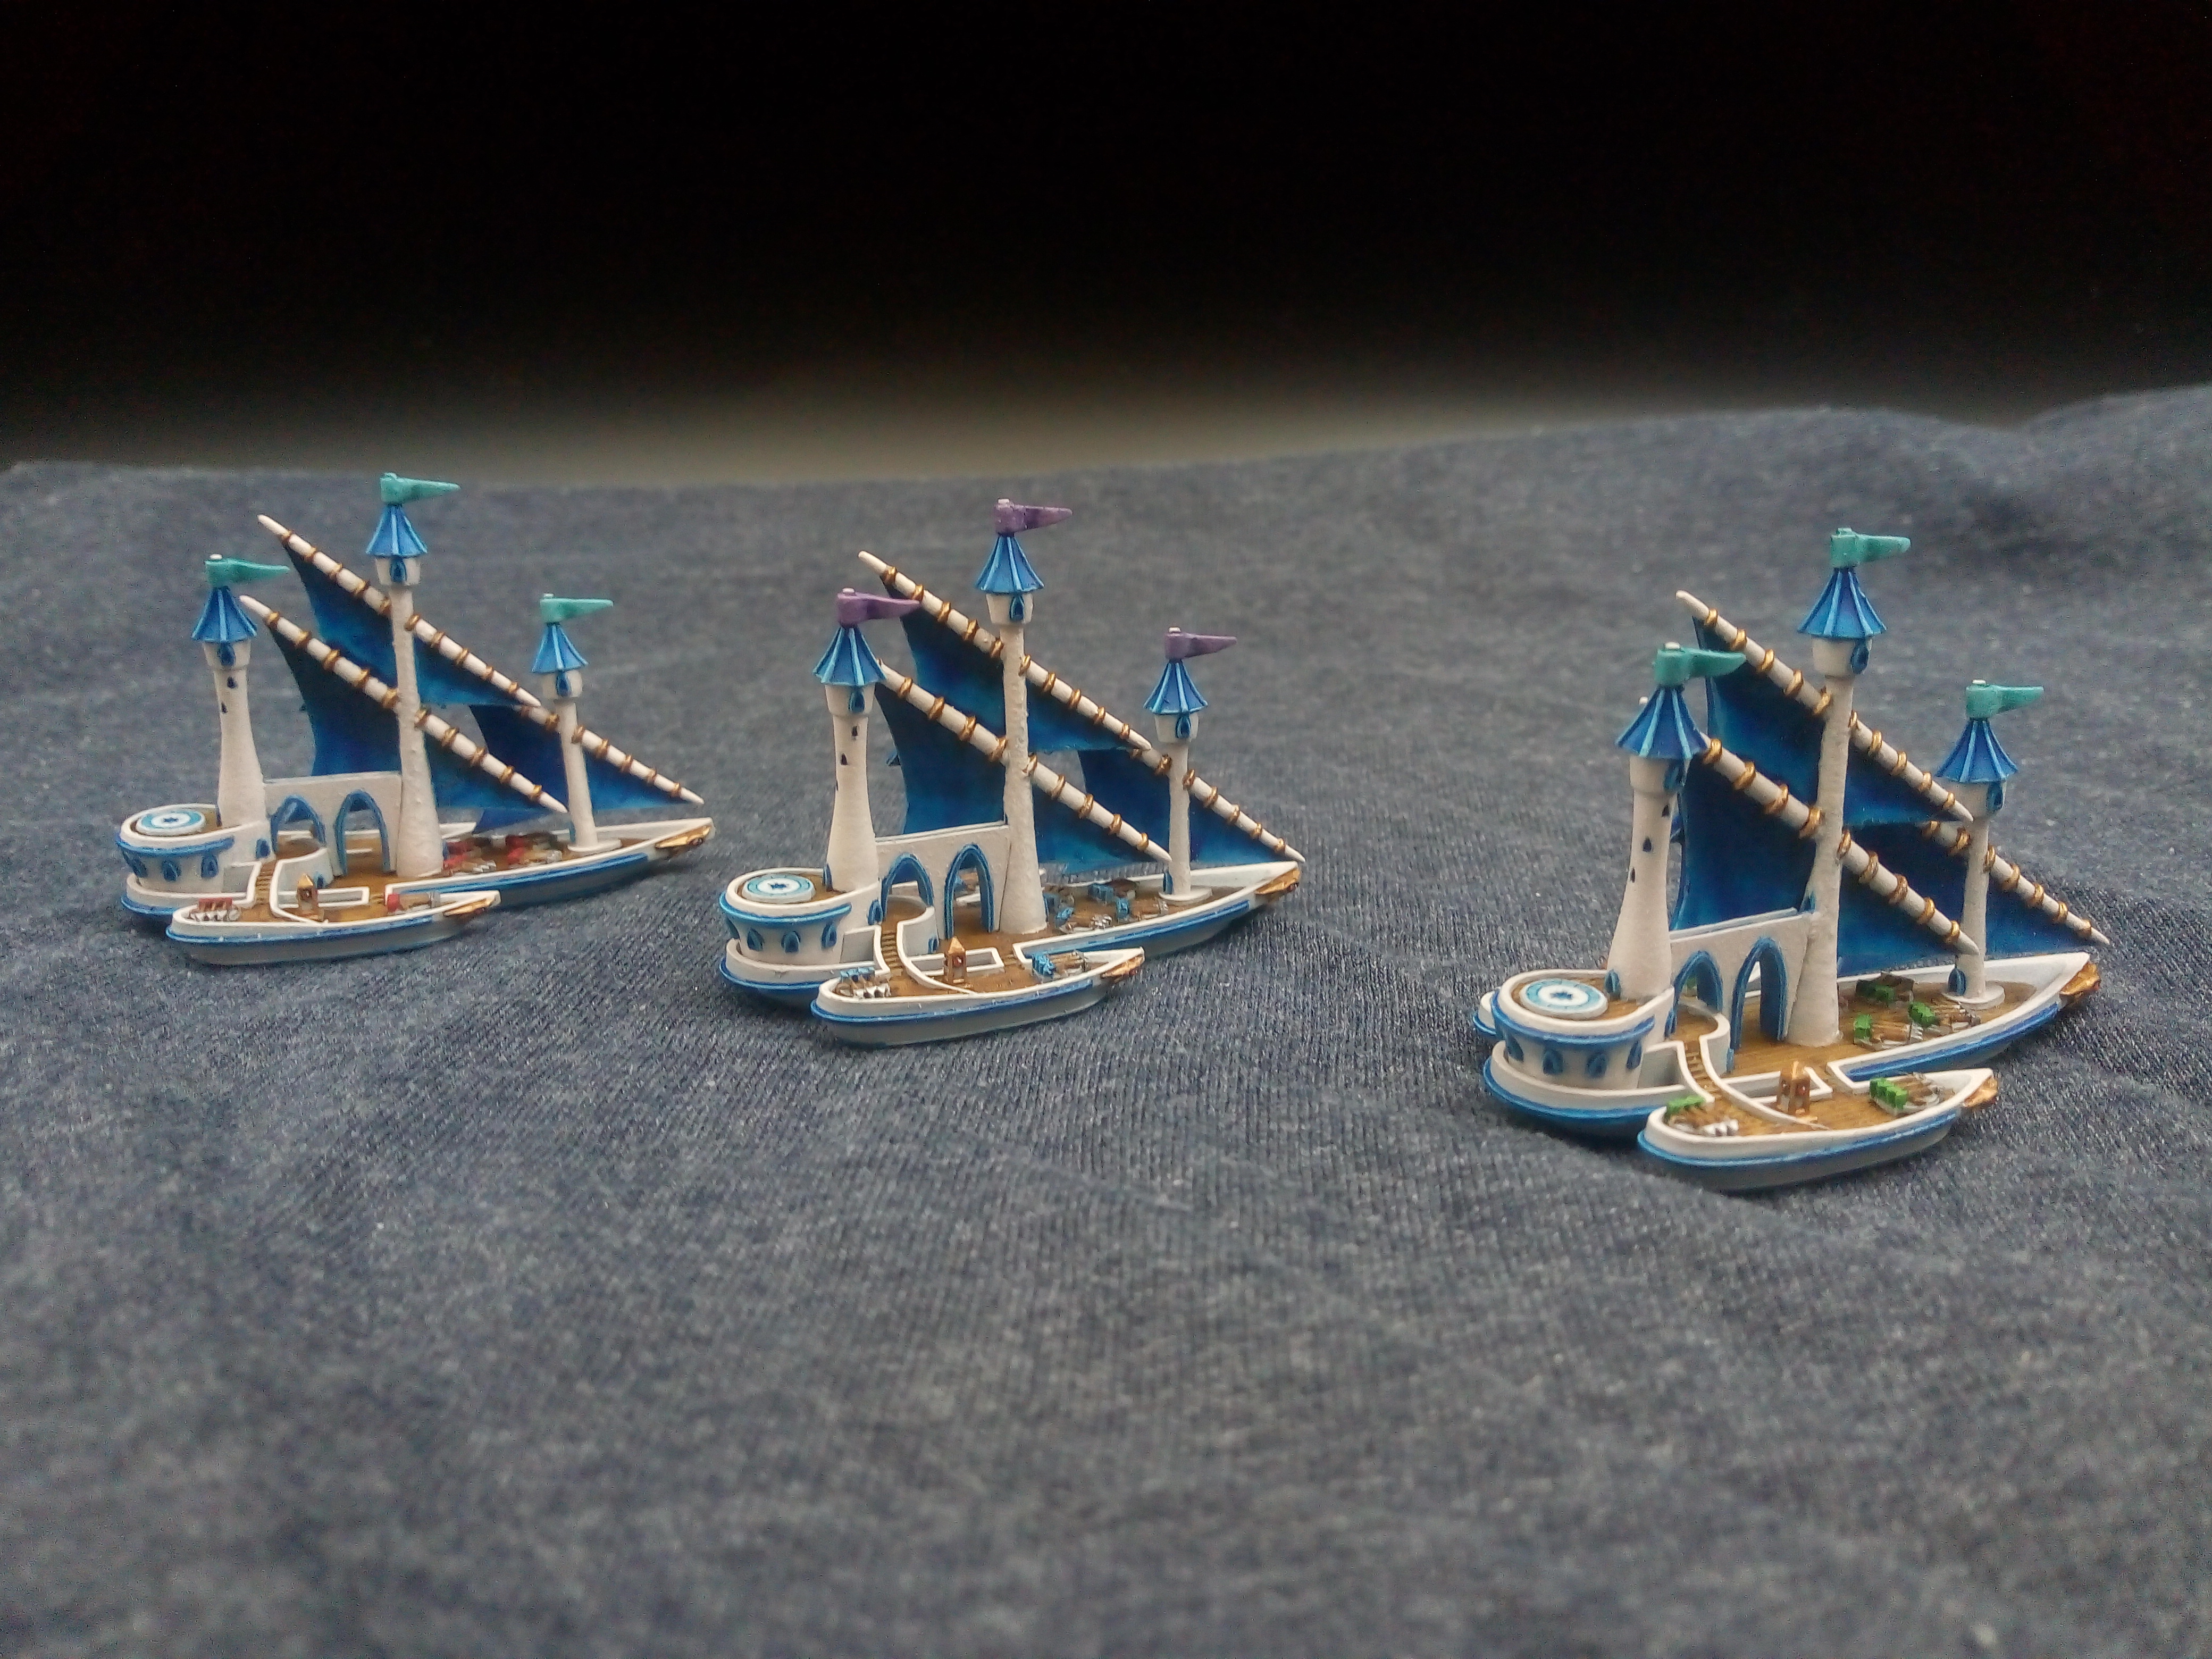

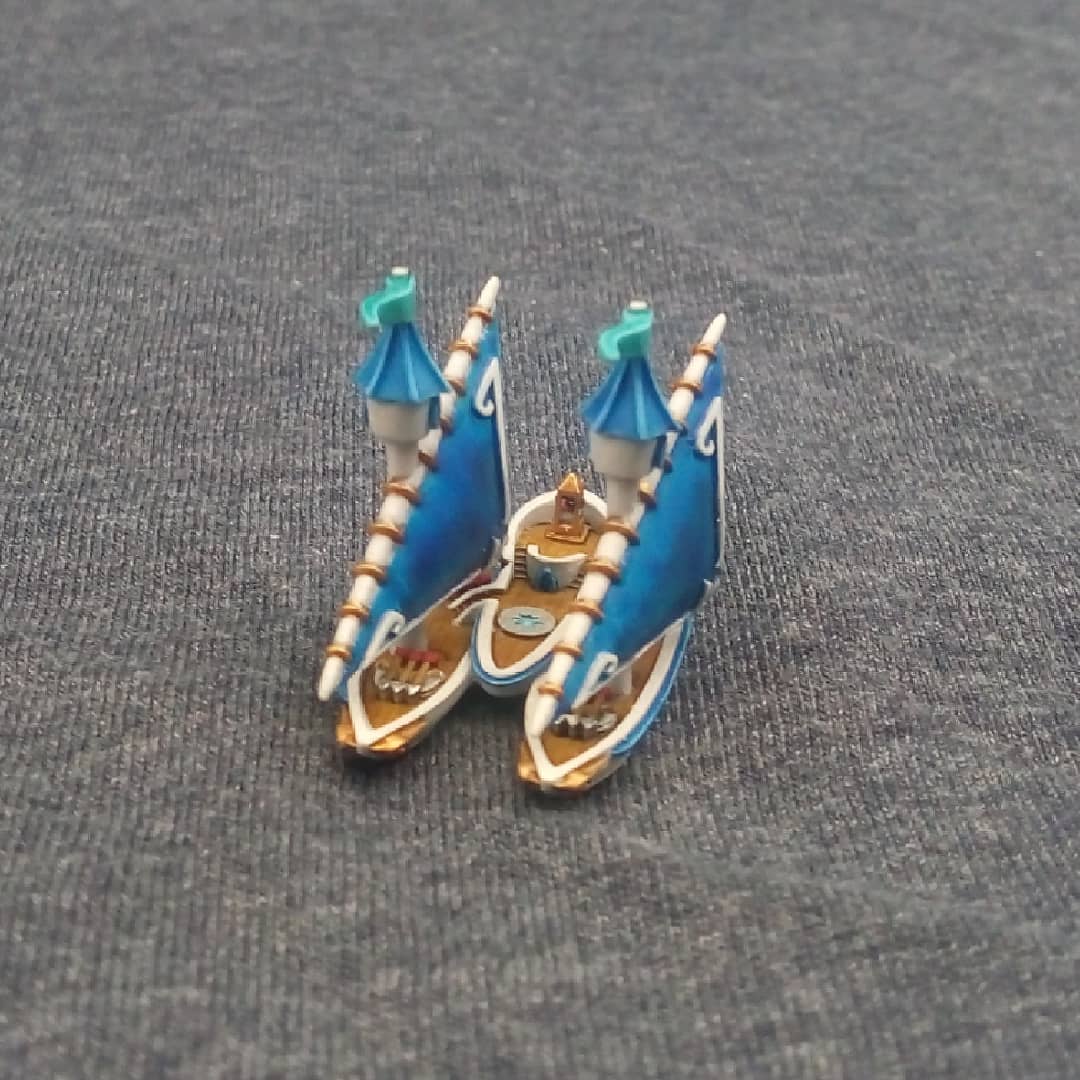
The Medium Size Ships Are Finished.
Hey guys, another update that just covers the completion of the ships I am using to represent the medium-size ships in my fleet as Eagle ships. You are allowed a single one of these per Dragon (large) ship you have in the force so I have only three of them.
The colour scheme is the same as the ones I have placed in the gallery with only the jewels not covered. I love the centre summoning/ magic circle on the models providing some character to the ships.
Next up I have the last of the ships in the fleet, the Dragon ships, these are definitely the big boys of the fleet and I plan to make one the flagship too but am still undecided on how to represent this.
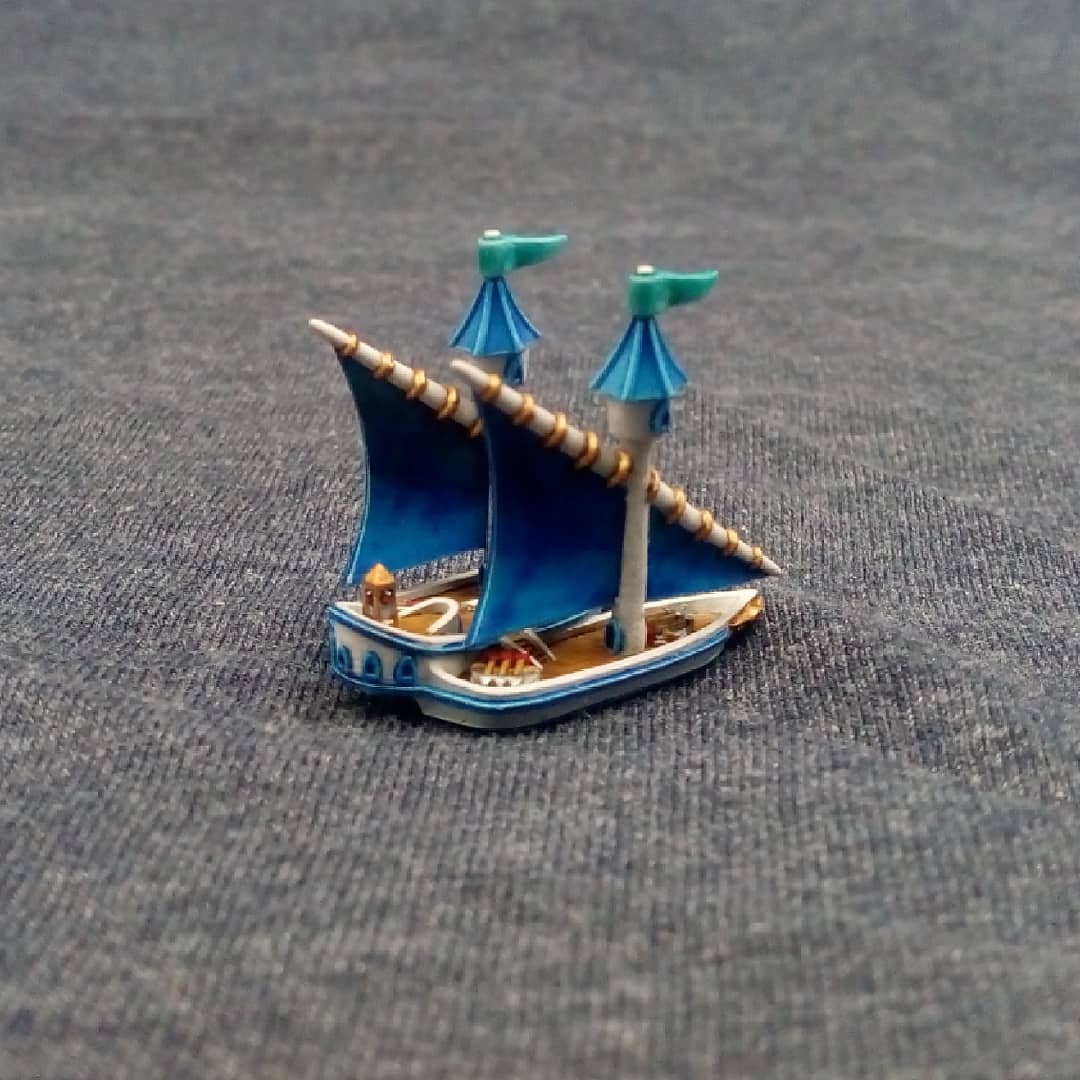
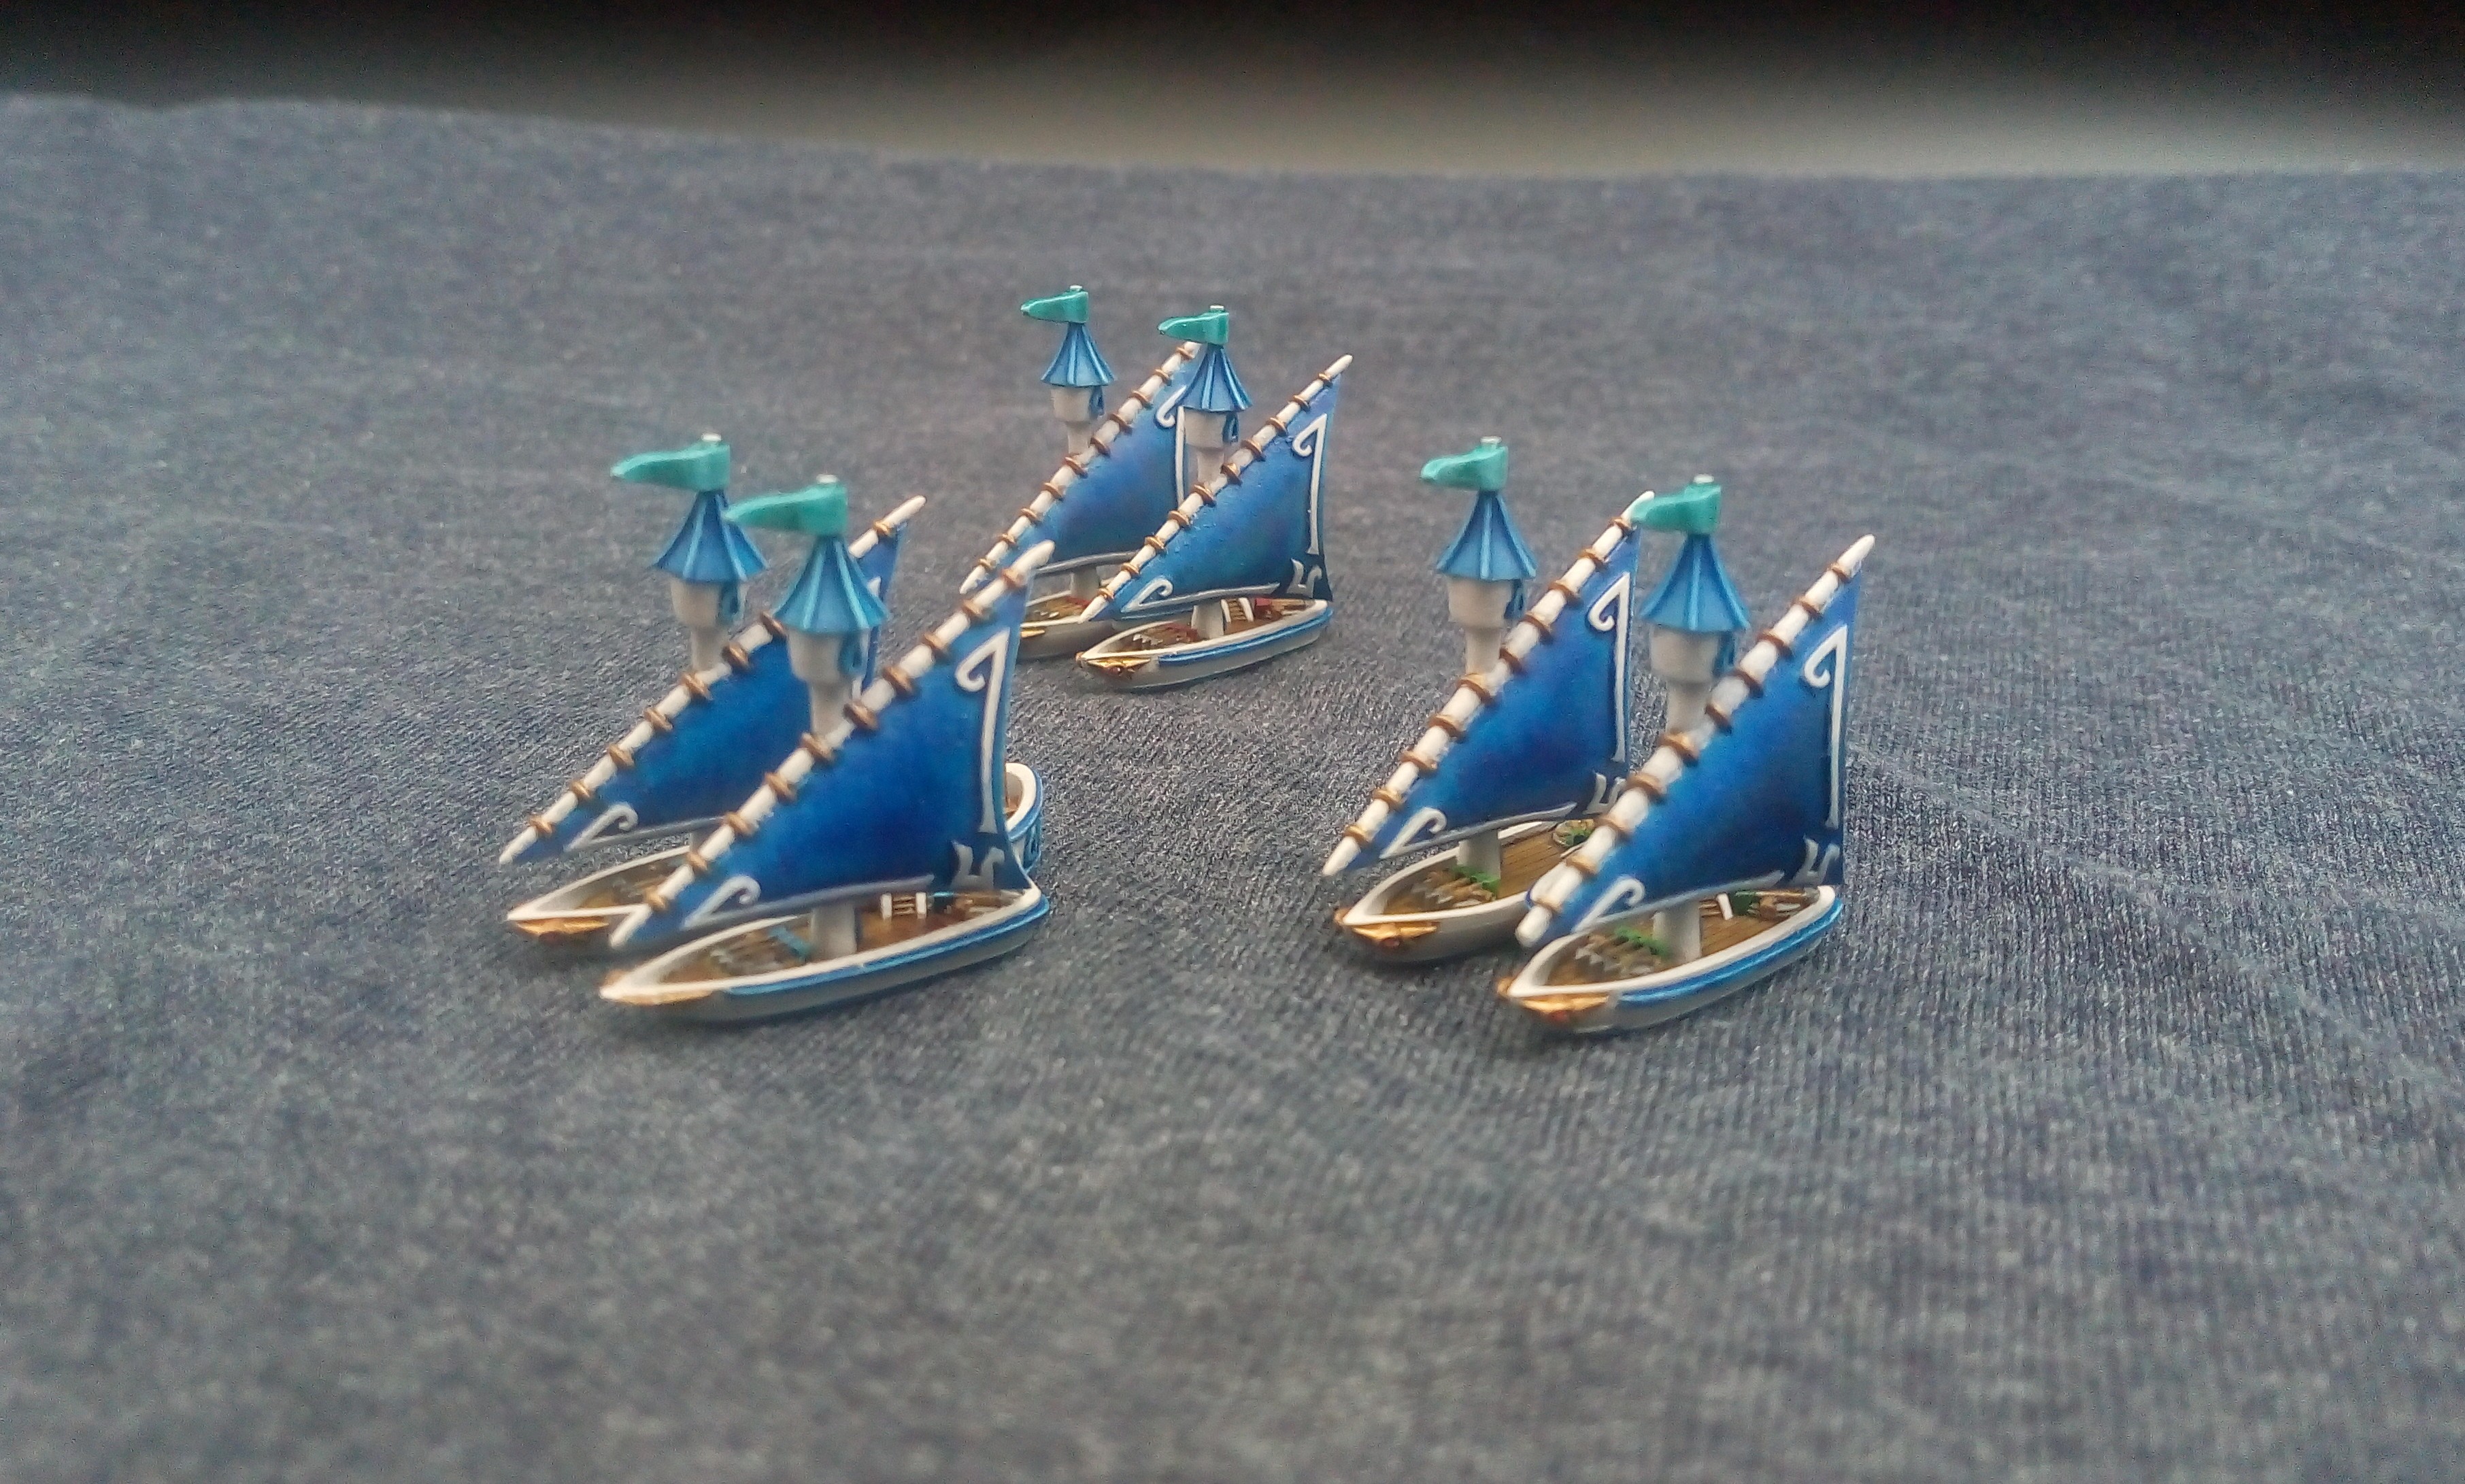 Eagle ship
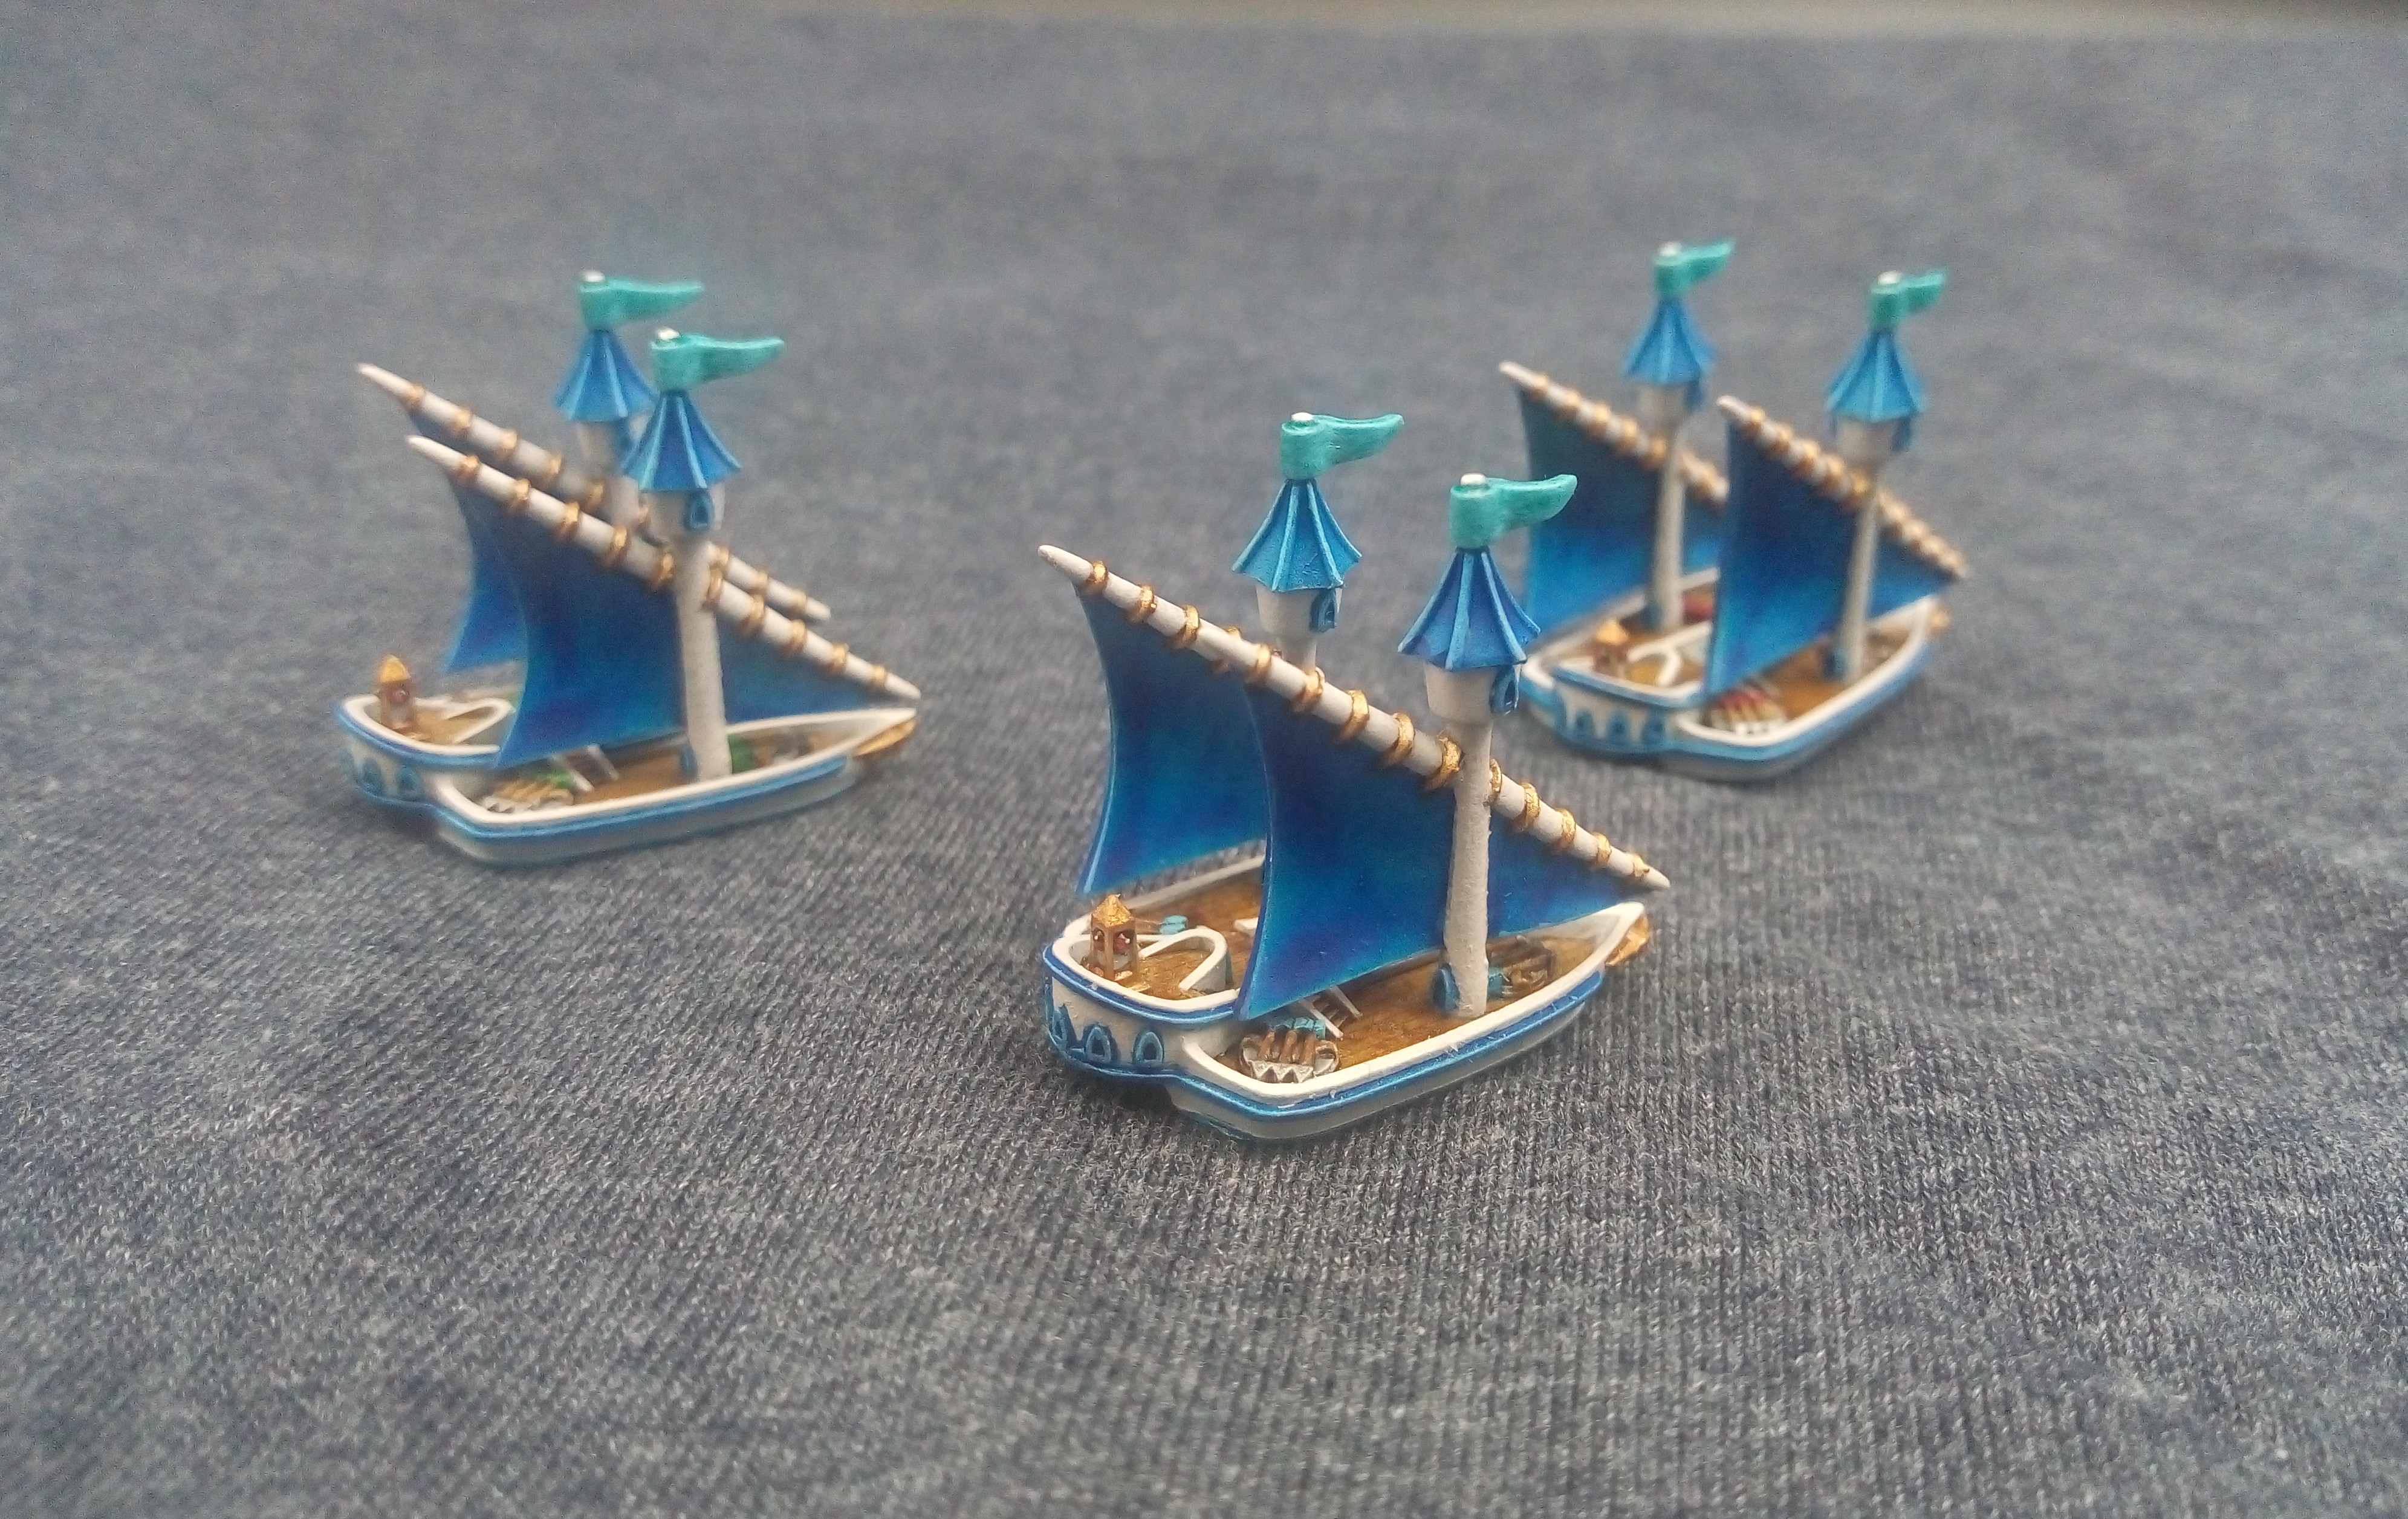 Eagle ship
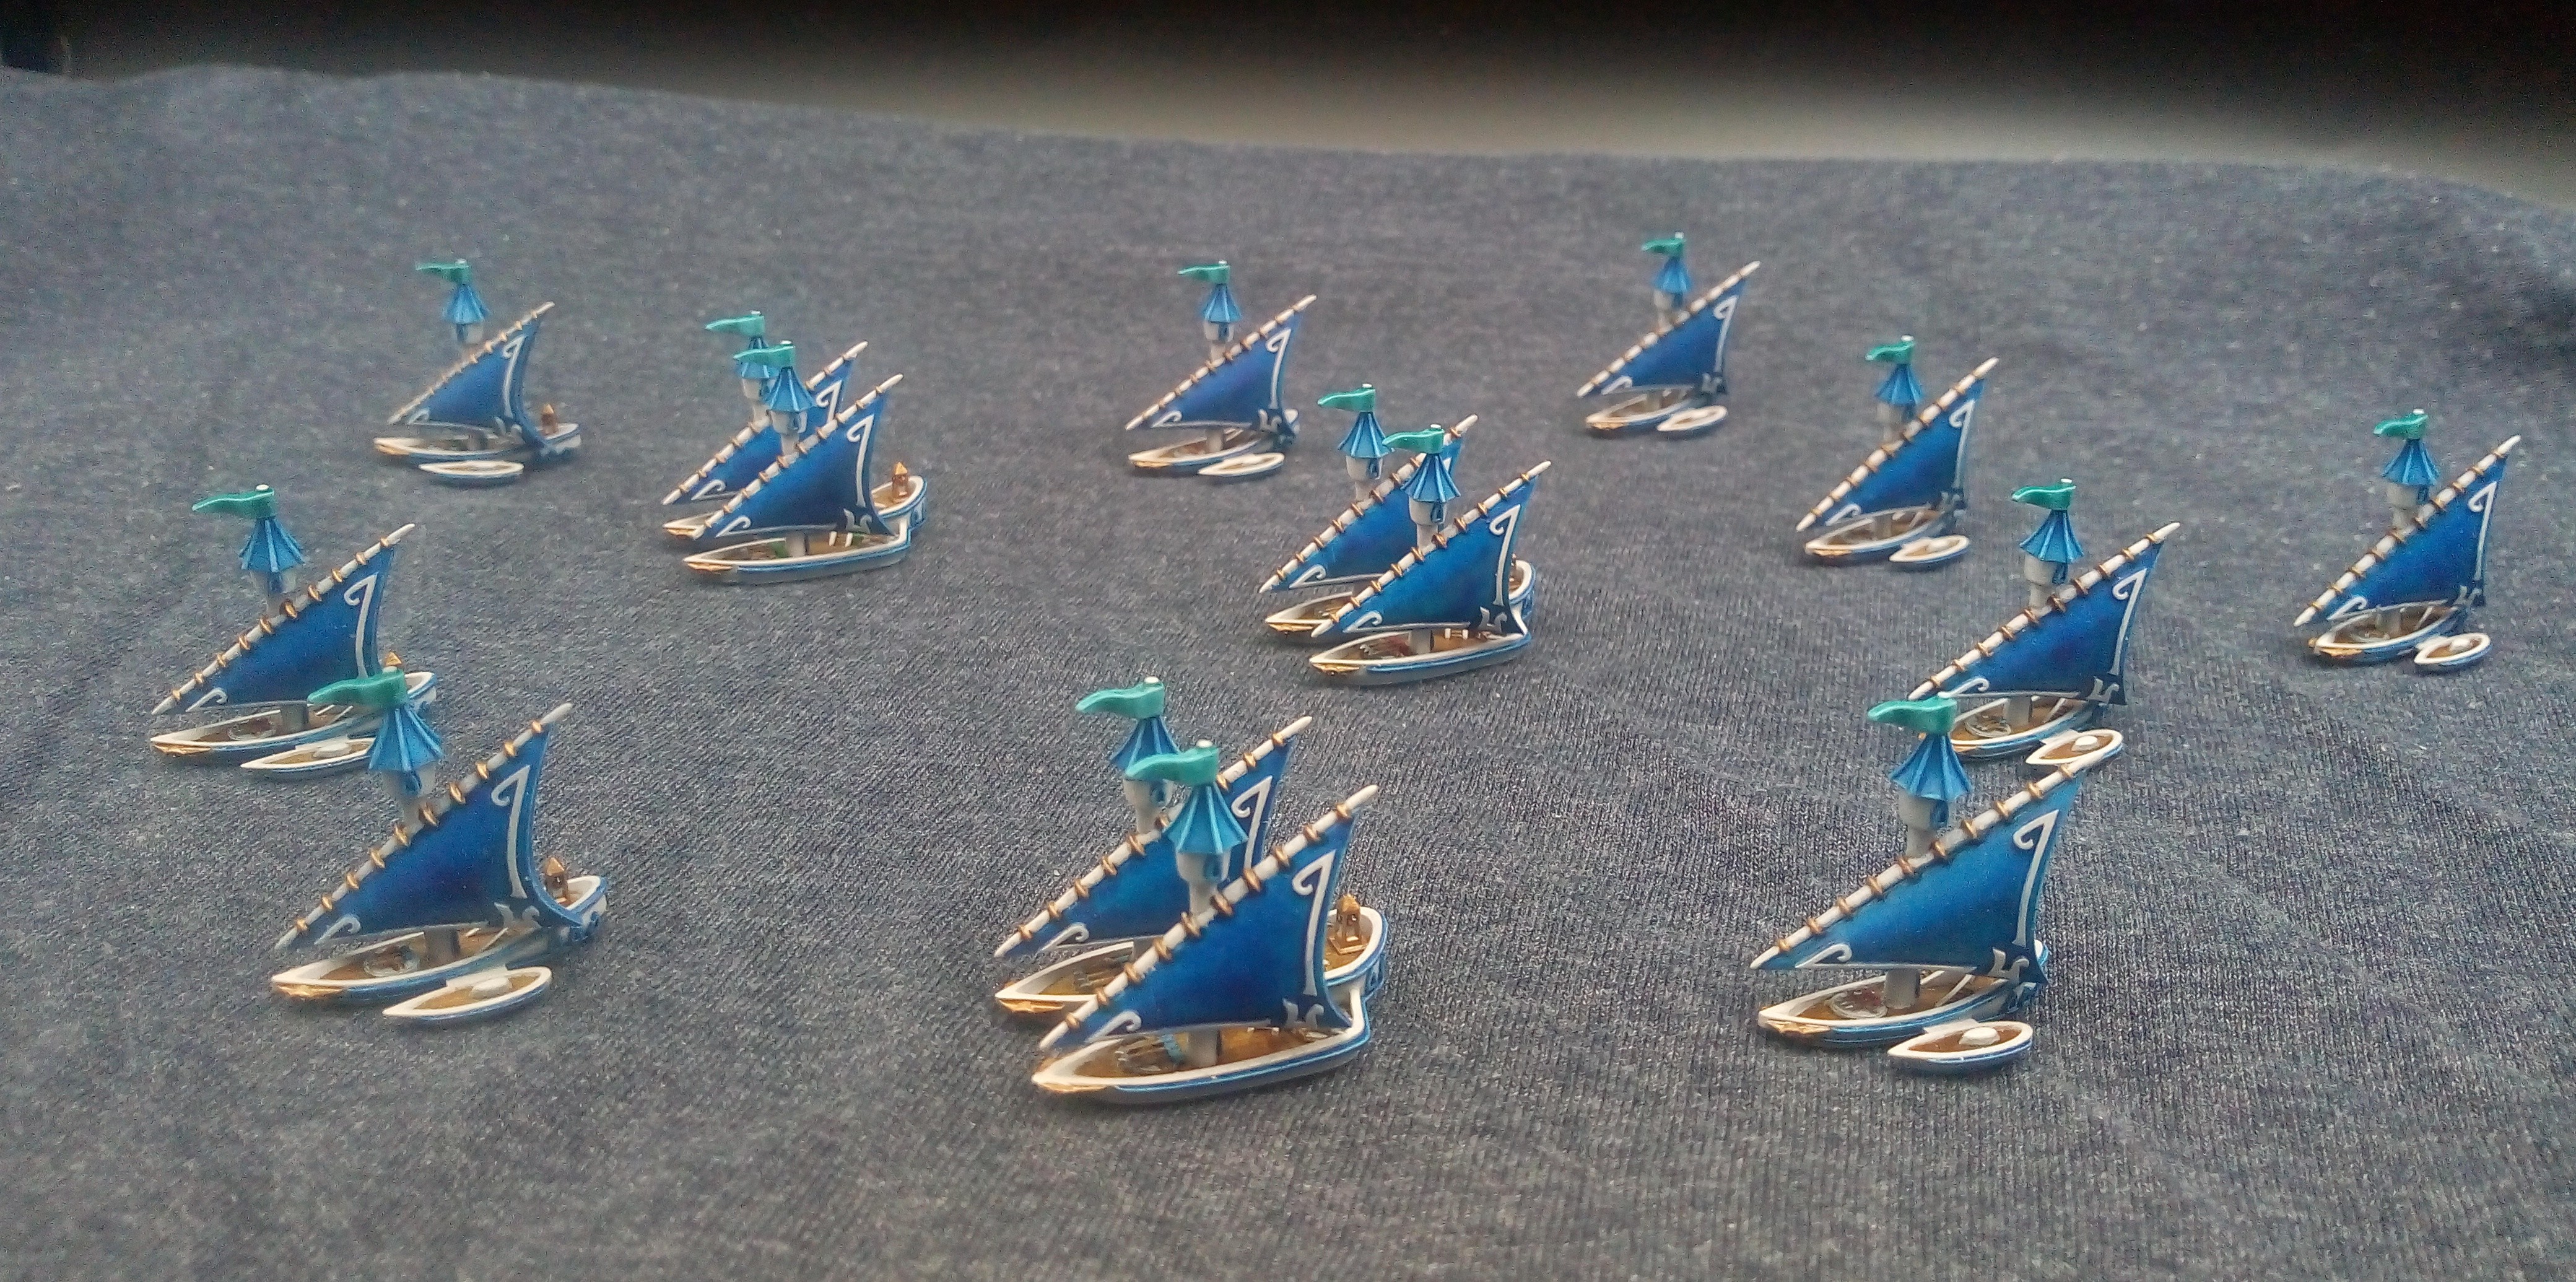 The fleet continues to grow
First Eagle Ship Sets Sail
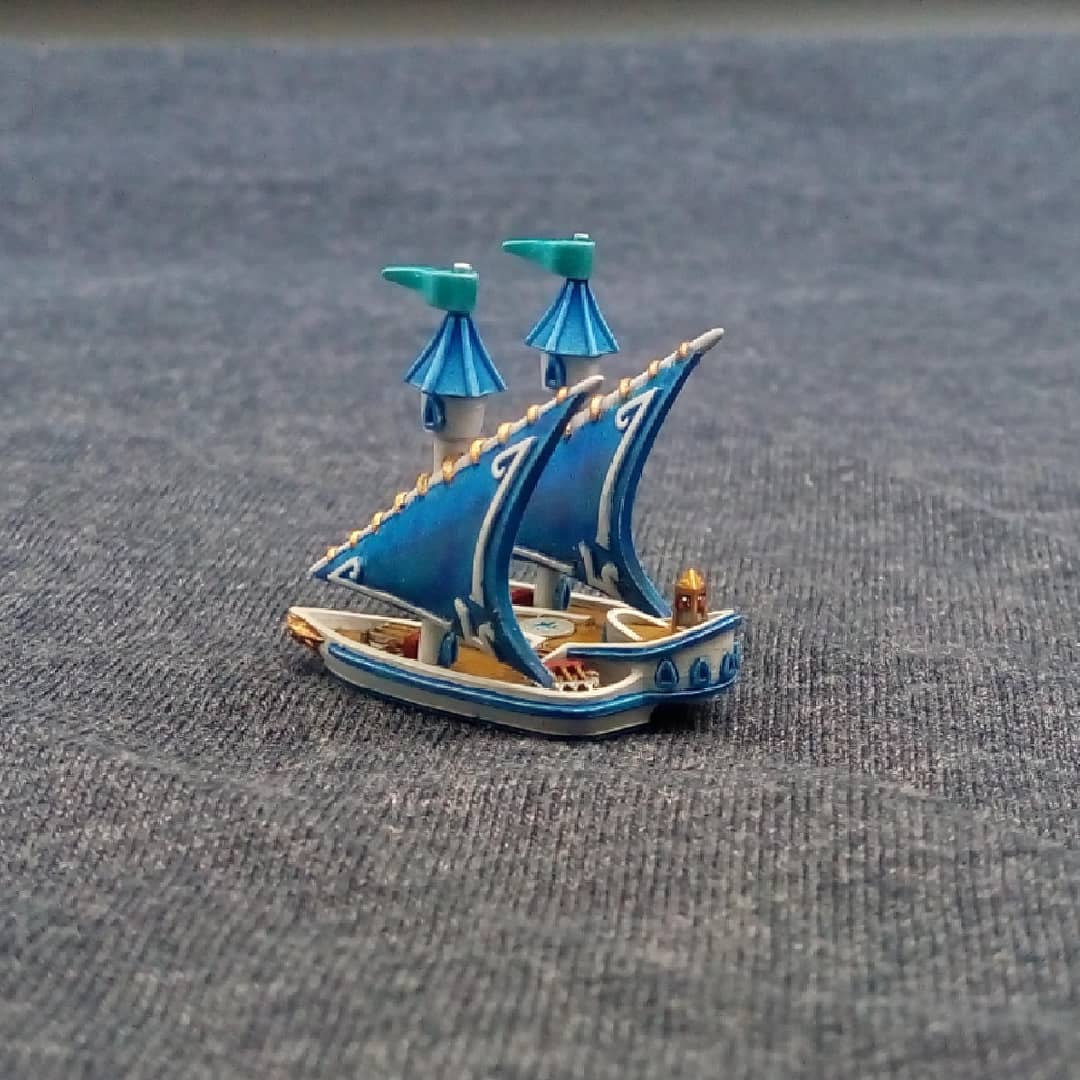
So managed to get the first of my Eagle ships painted up today using the process I have shown in the gallery below. Really pleased the colours worked nicely on this larger ship. I only have three in the fleet so a couple more to go. Will hopefully have them close to finished or finished by end of play tomorrow.