


![NO Weekender Or Cult Of Games XLBS This Weekend [Updated]](https://images.beastsofwar.com/2026/03/No_Weekender_and_XLBS_this_Weekend-225-127.jpg)


Bot War Painting Challenge 2021 – Atlanticans Rising


Recommendations: 597
About the Project
2021 Bot War painting challenge. To paint for 30 minutes daily for 20 consecutive days, completing at least 5 models during that time. This year, its the rise of the Atlanticans!
Related Game: Bot War
Related Company: Traders Galaxy
Related Genre: Science Fiction
This Project is Completed
Day 13...
Final week
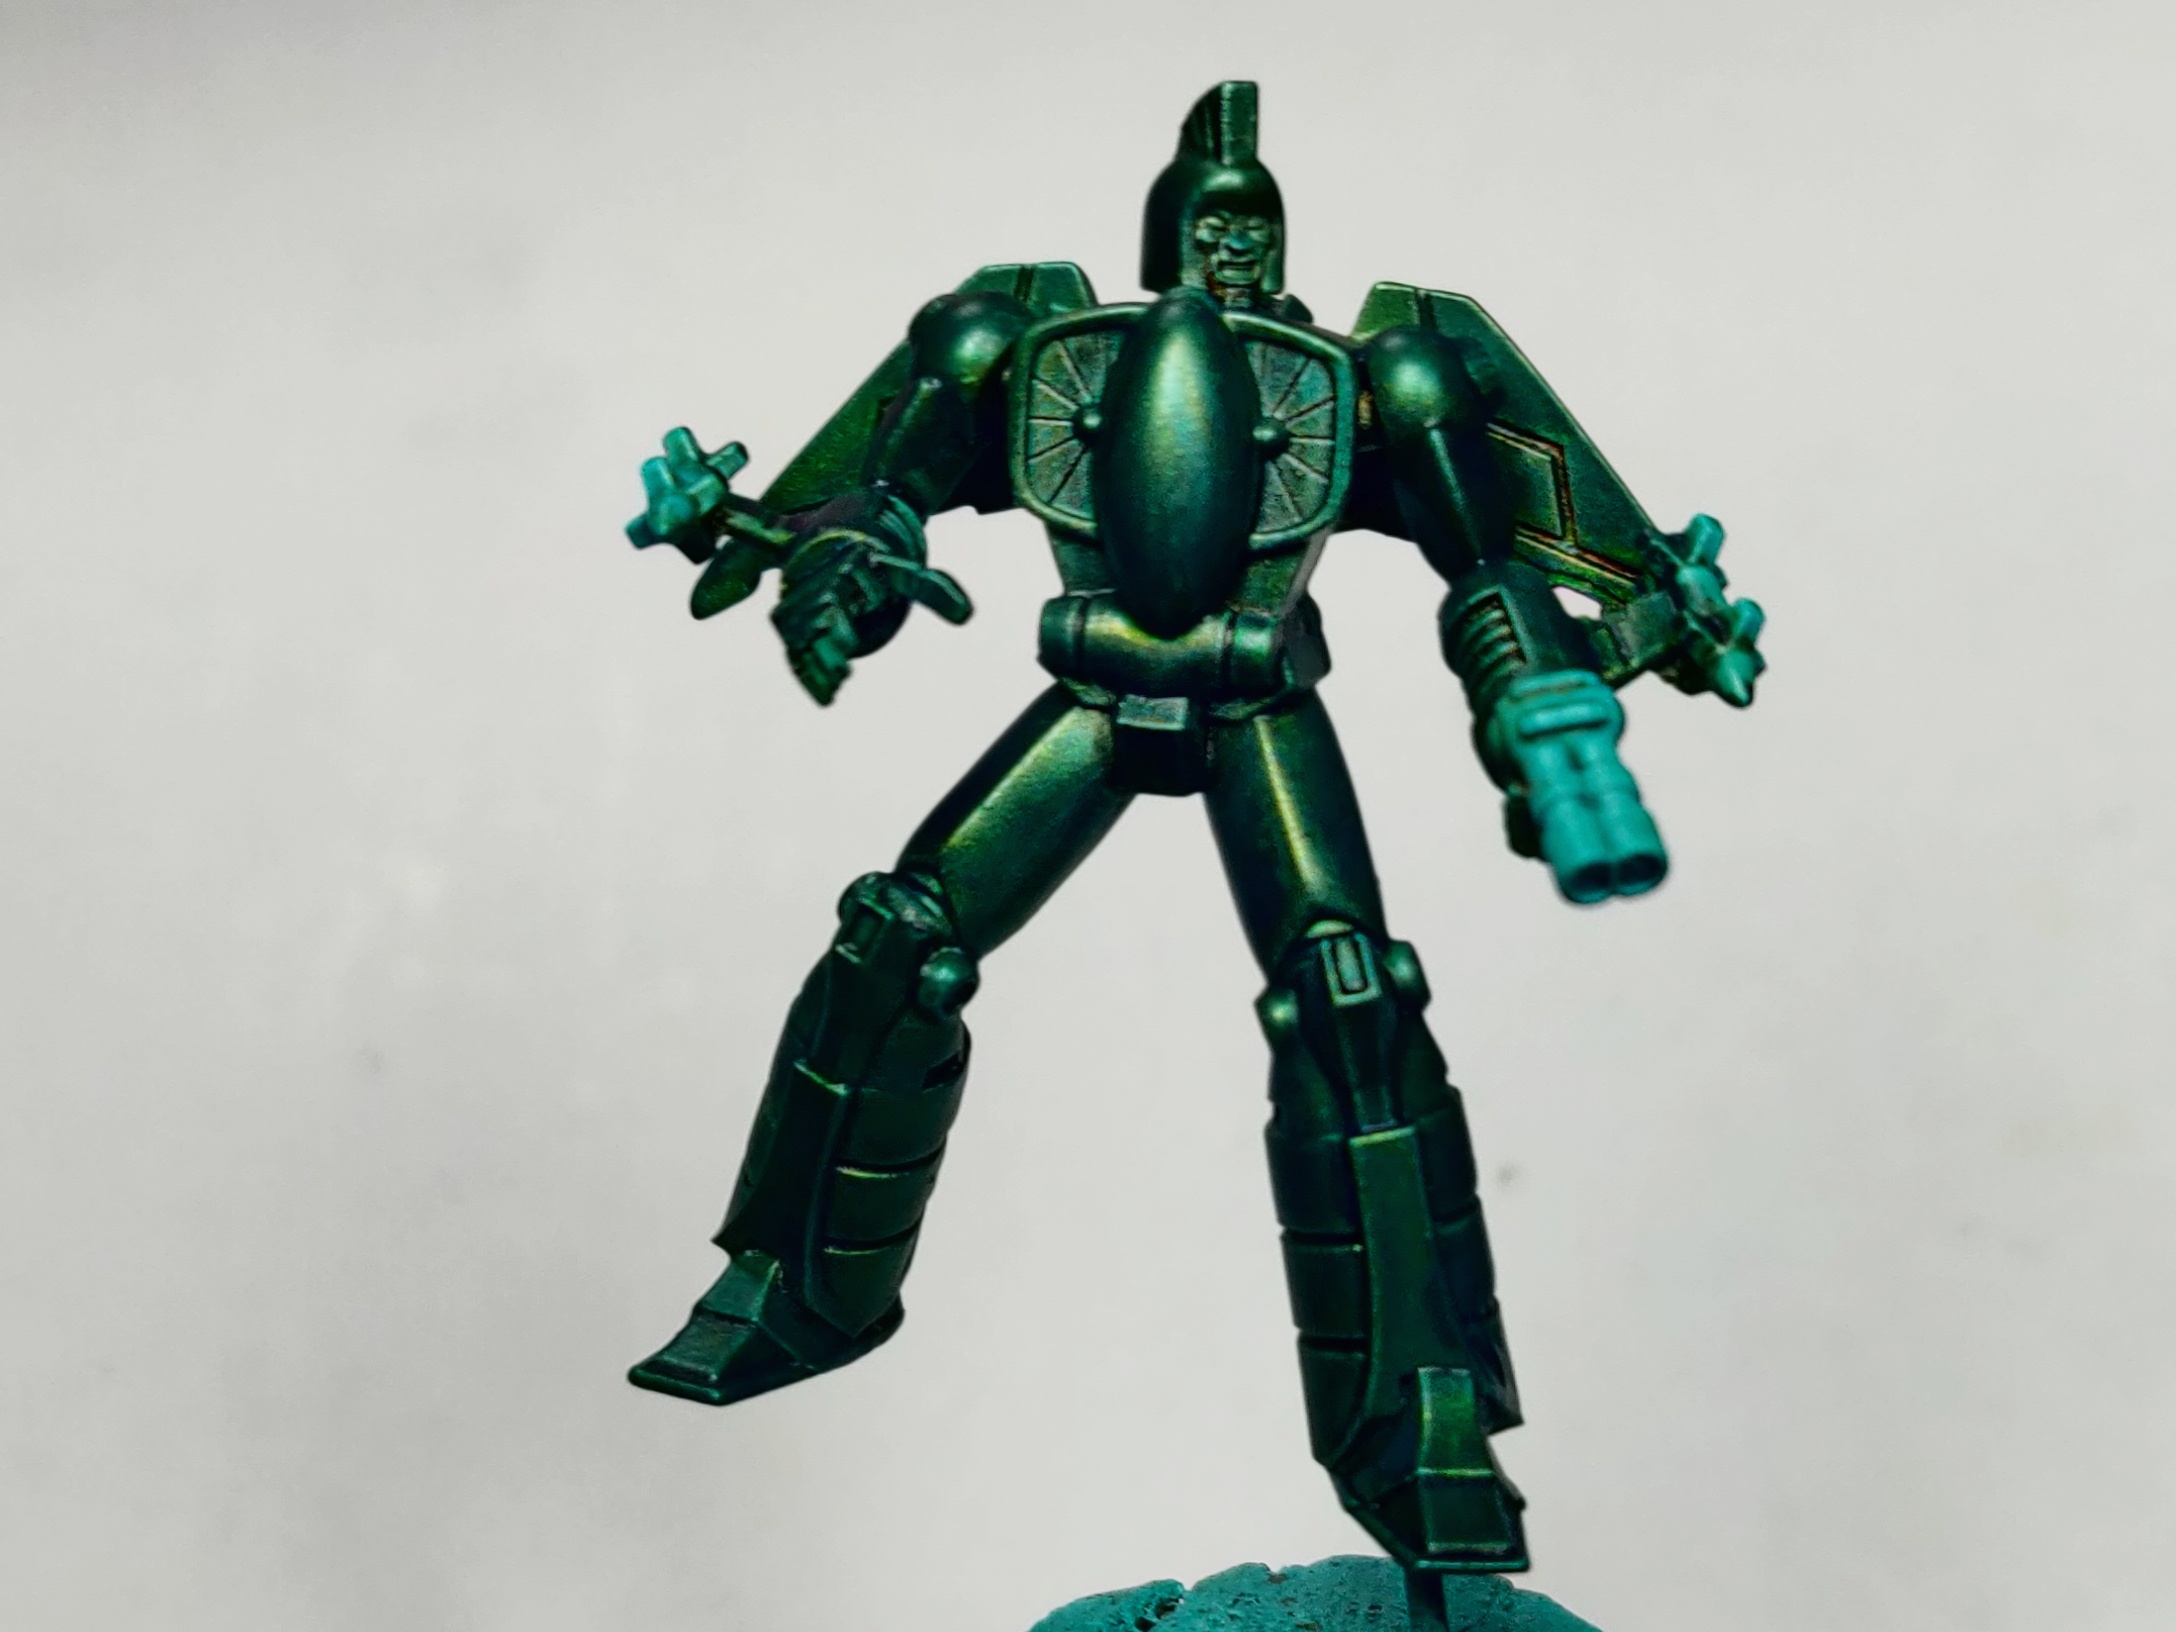
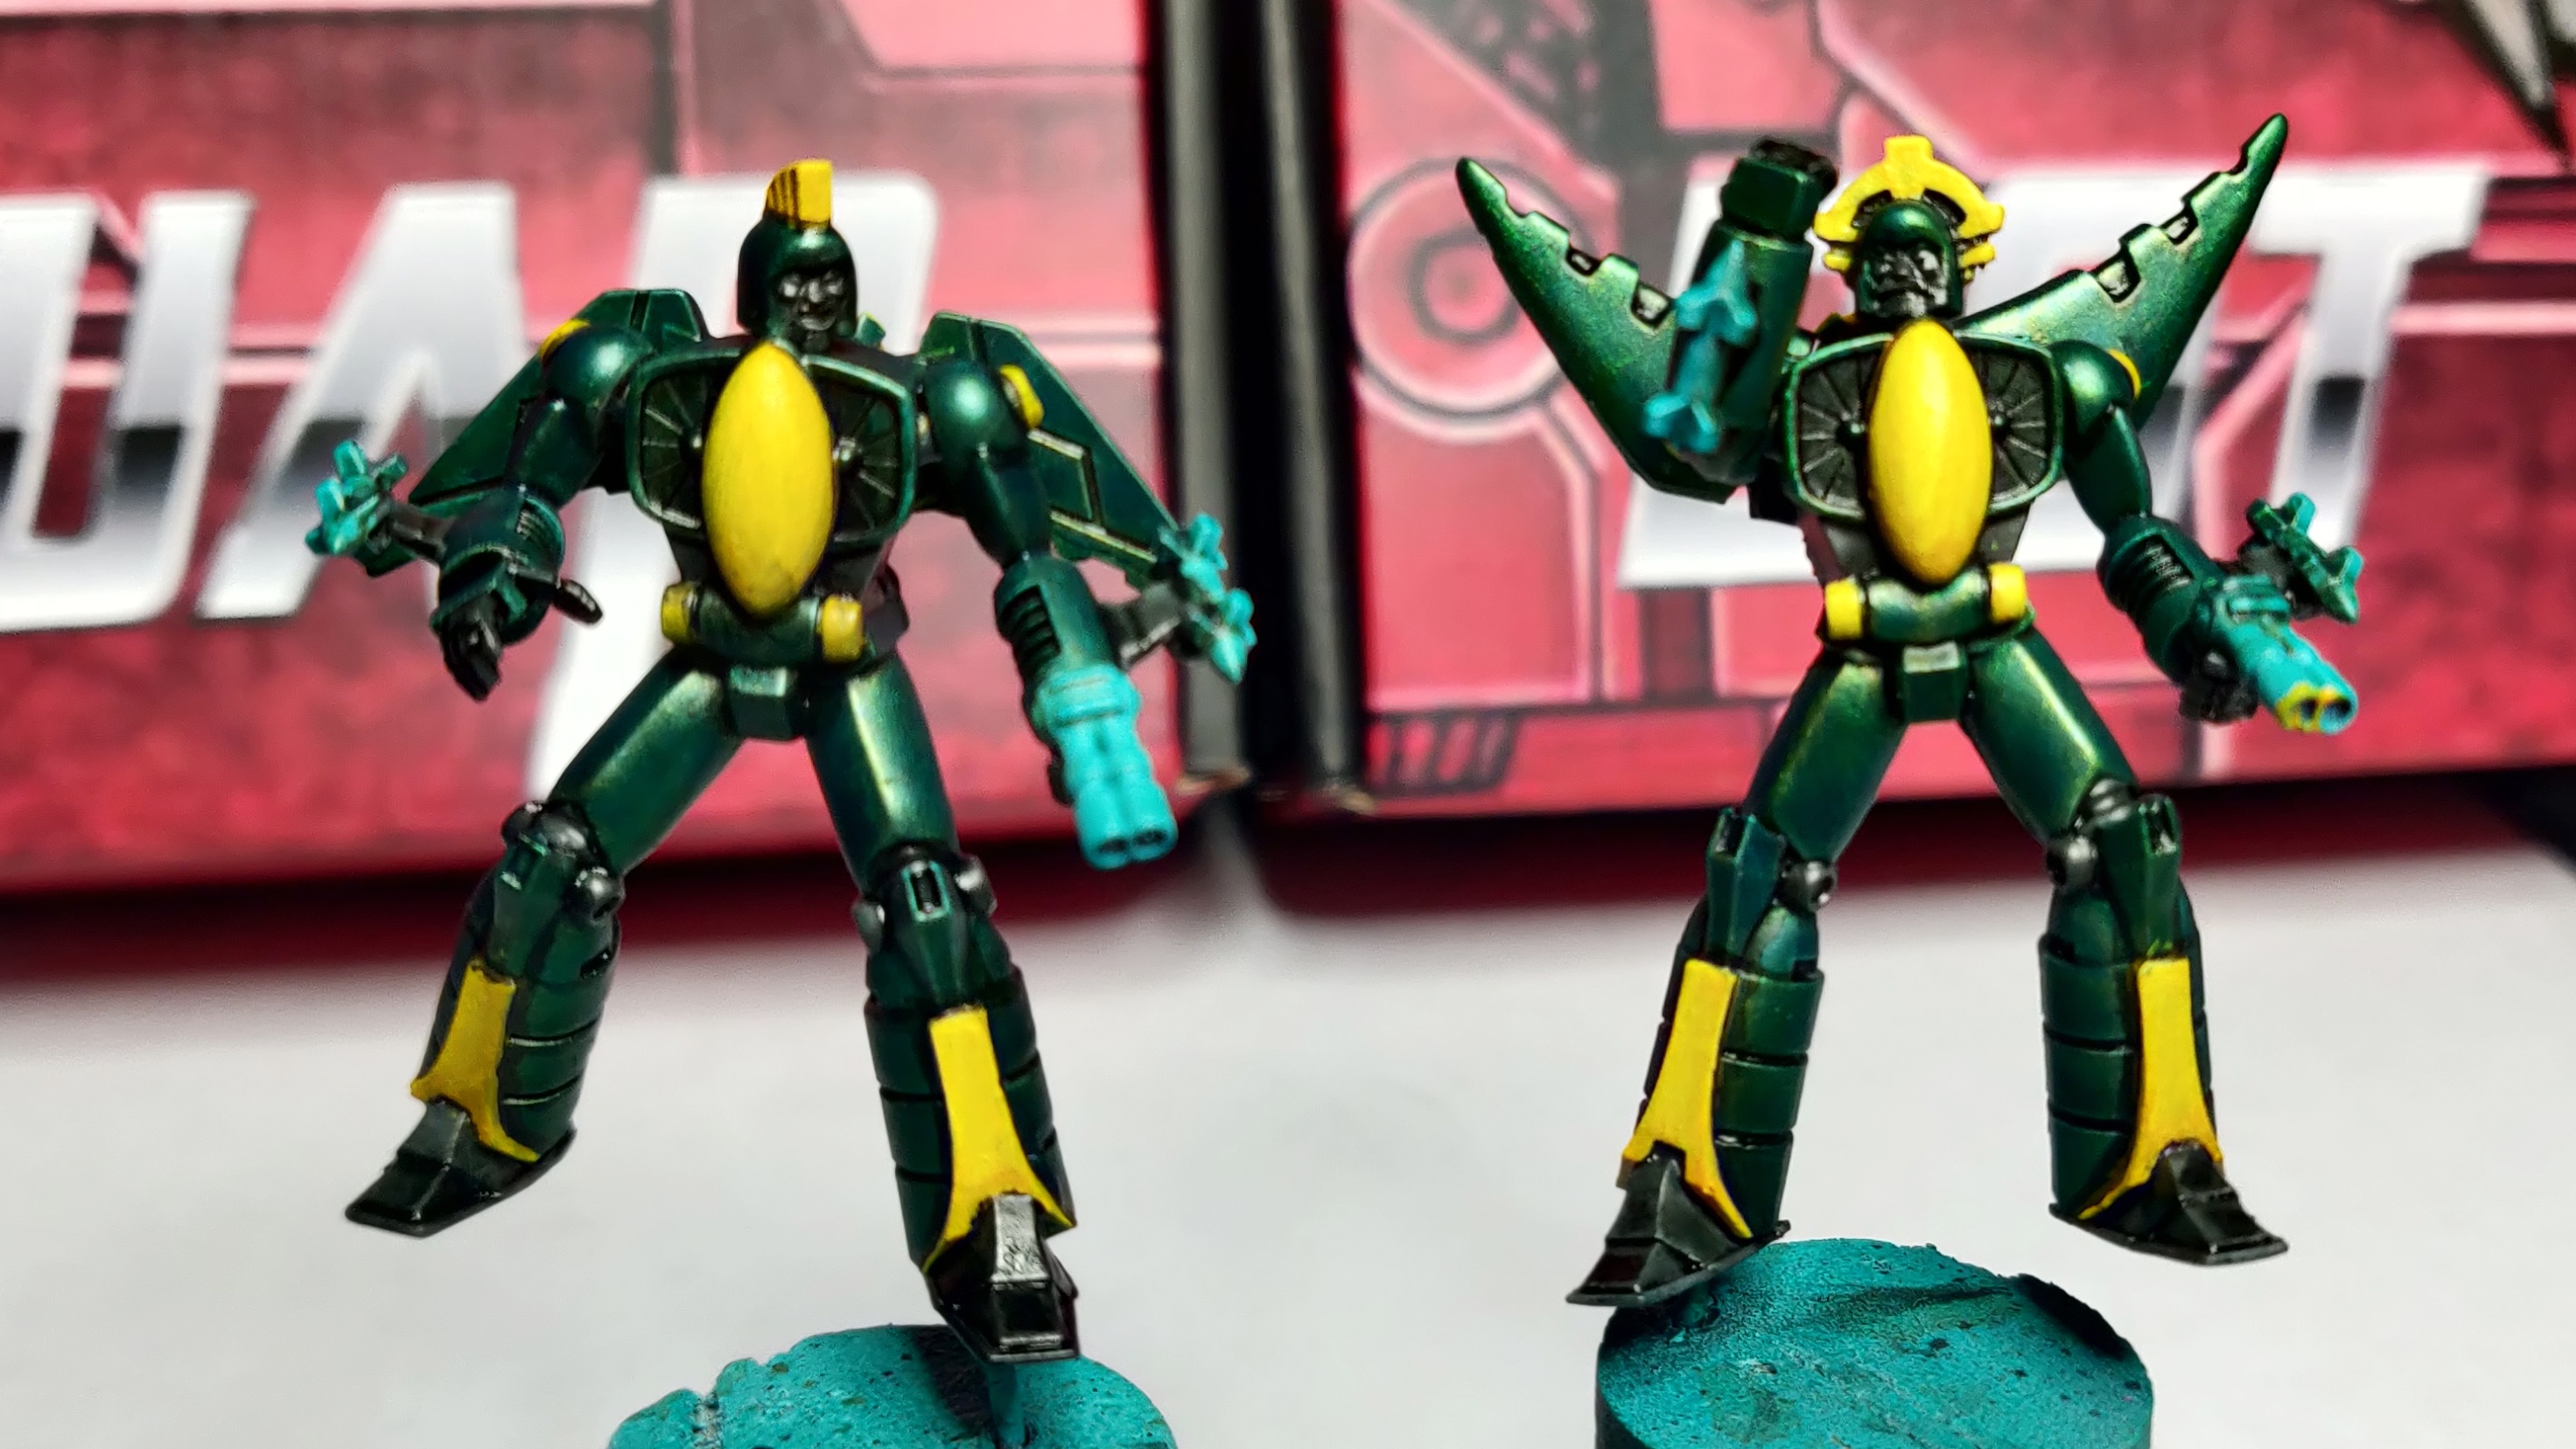
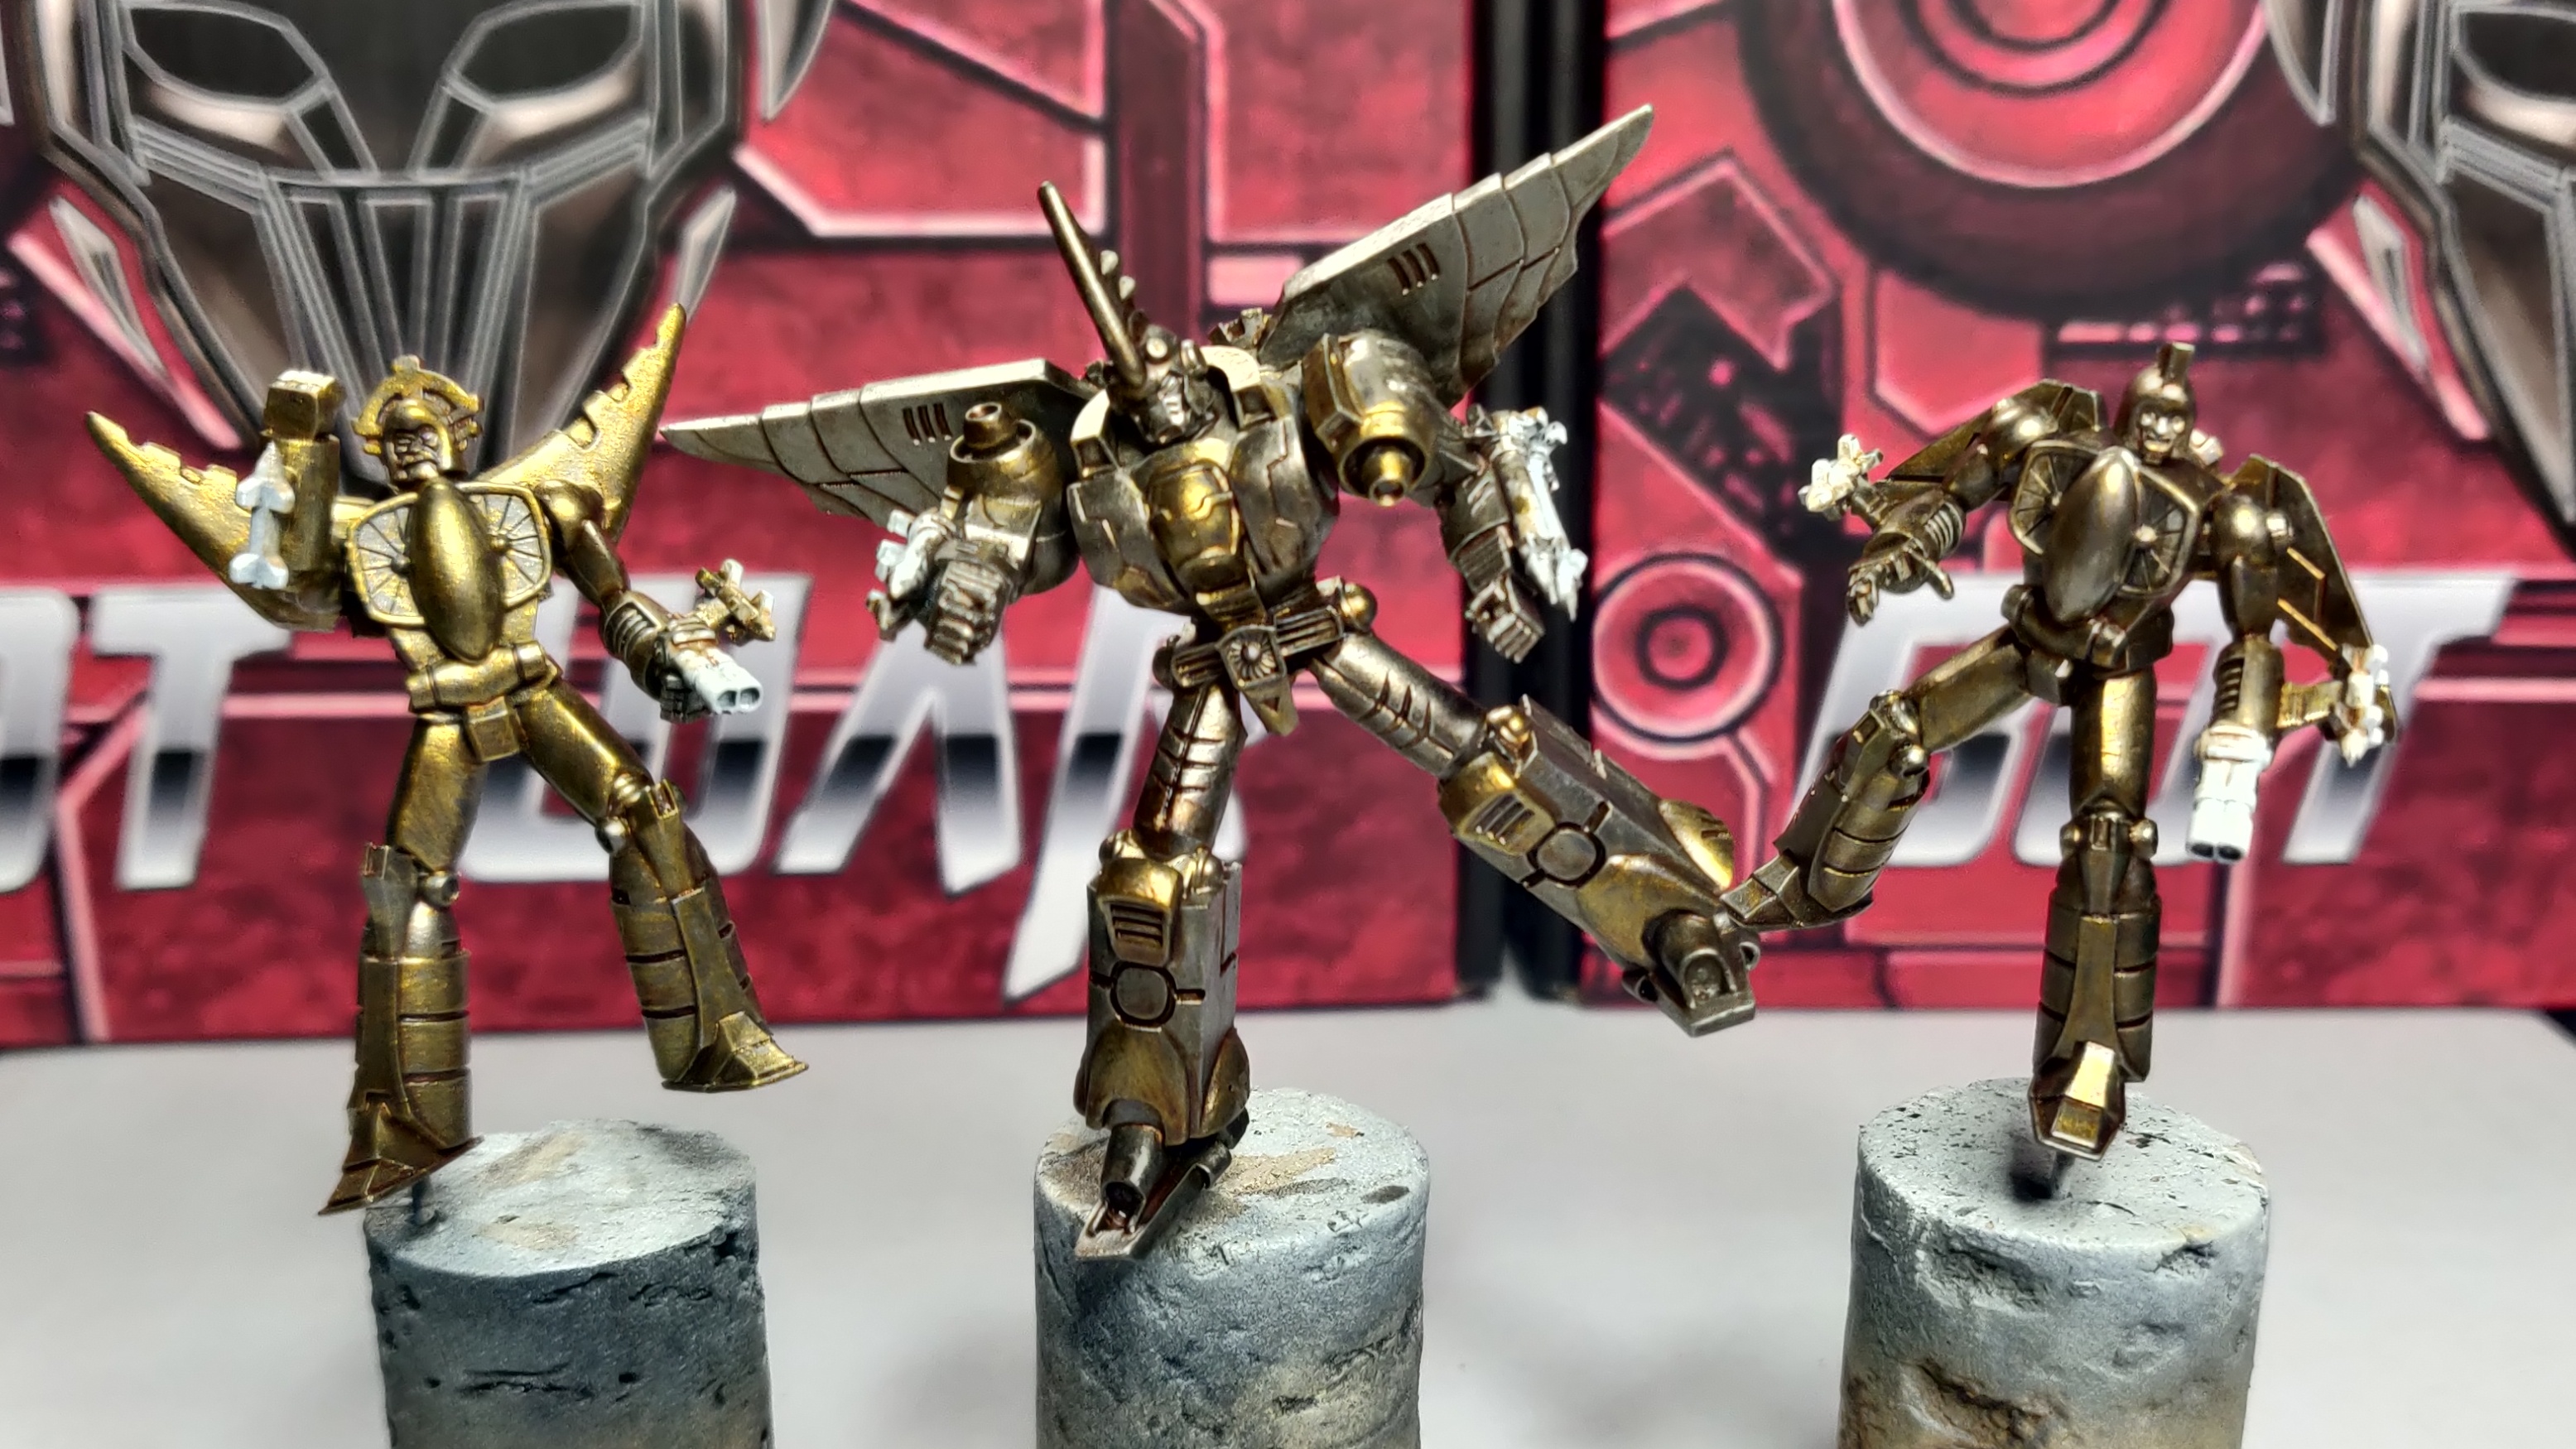 Air Warriors mustering for some air brush action
Air brushing the Air Warriors was the order of the day. I had a plan in mind but needed to make sure it would work. I had two options, yellow or turquoise, and this decision would dictate the rest of the project…. And if it went wrong I would have made a horrendous gamble.
With that in mind I did 2 things today, firstly I grabbed a test model I had laying around to experiment with, the second was to order more models as backup ??
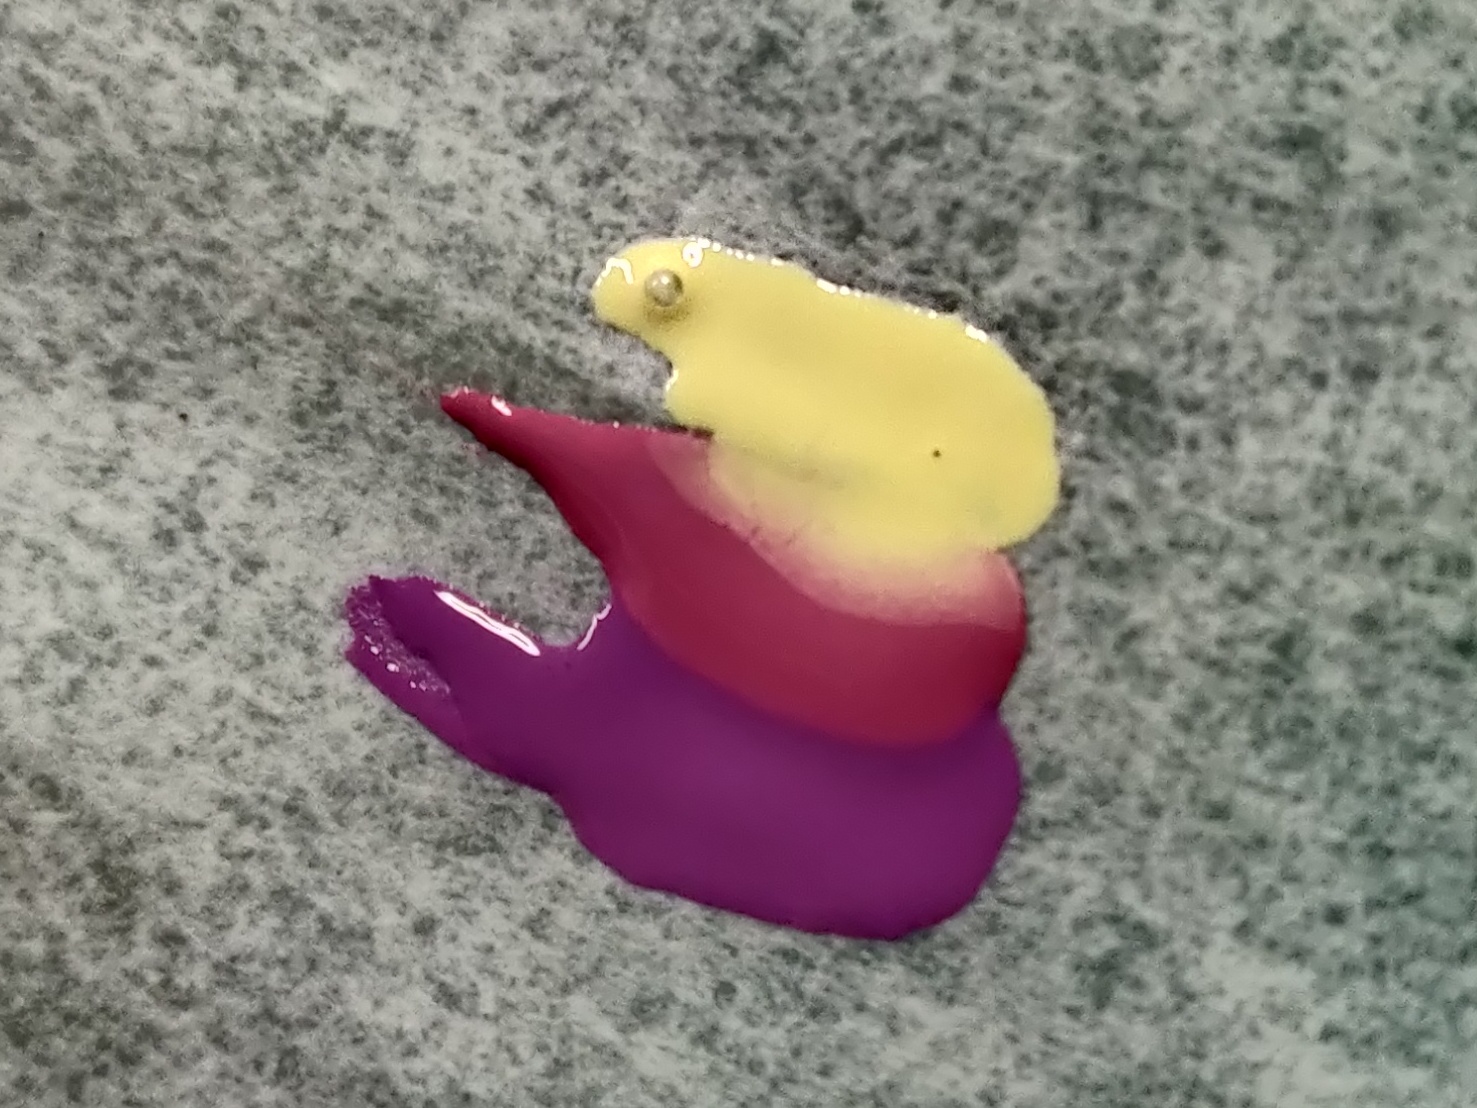
Experimenting
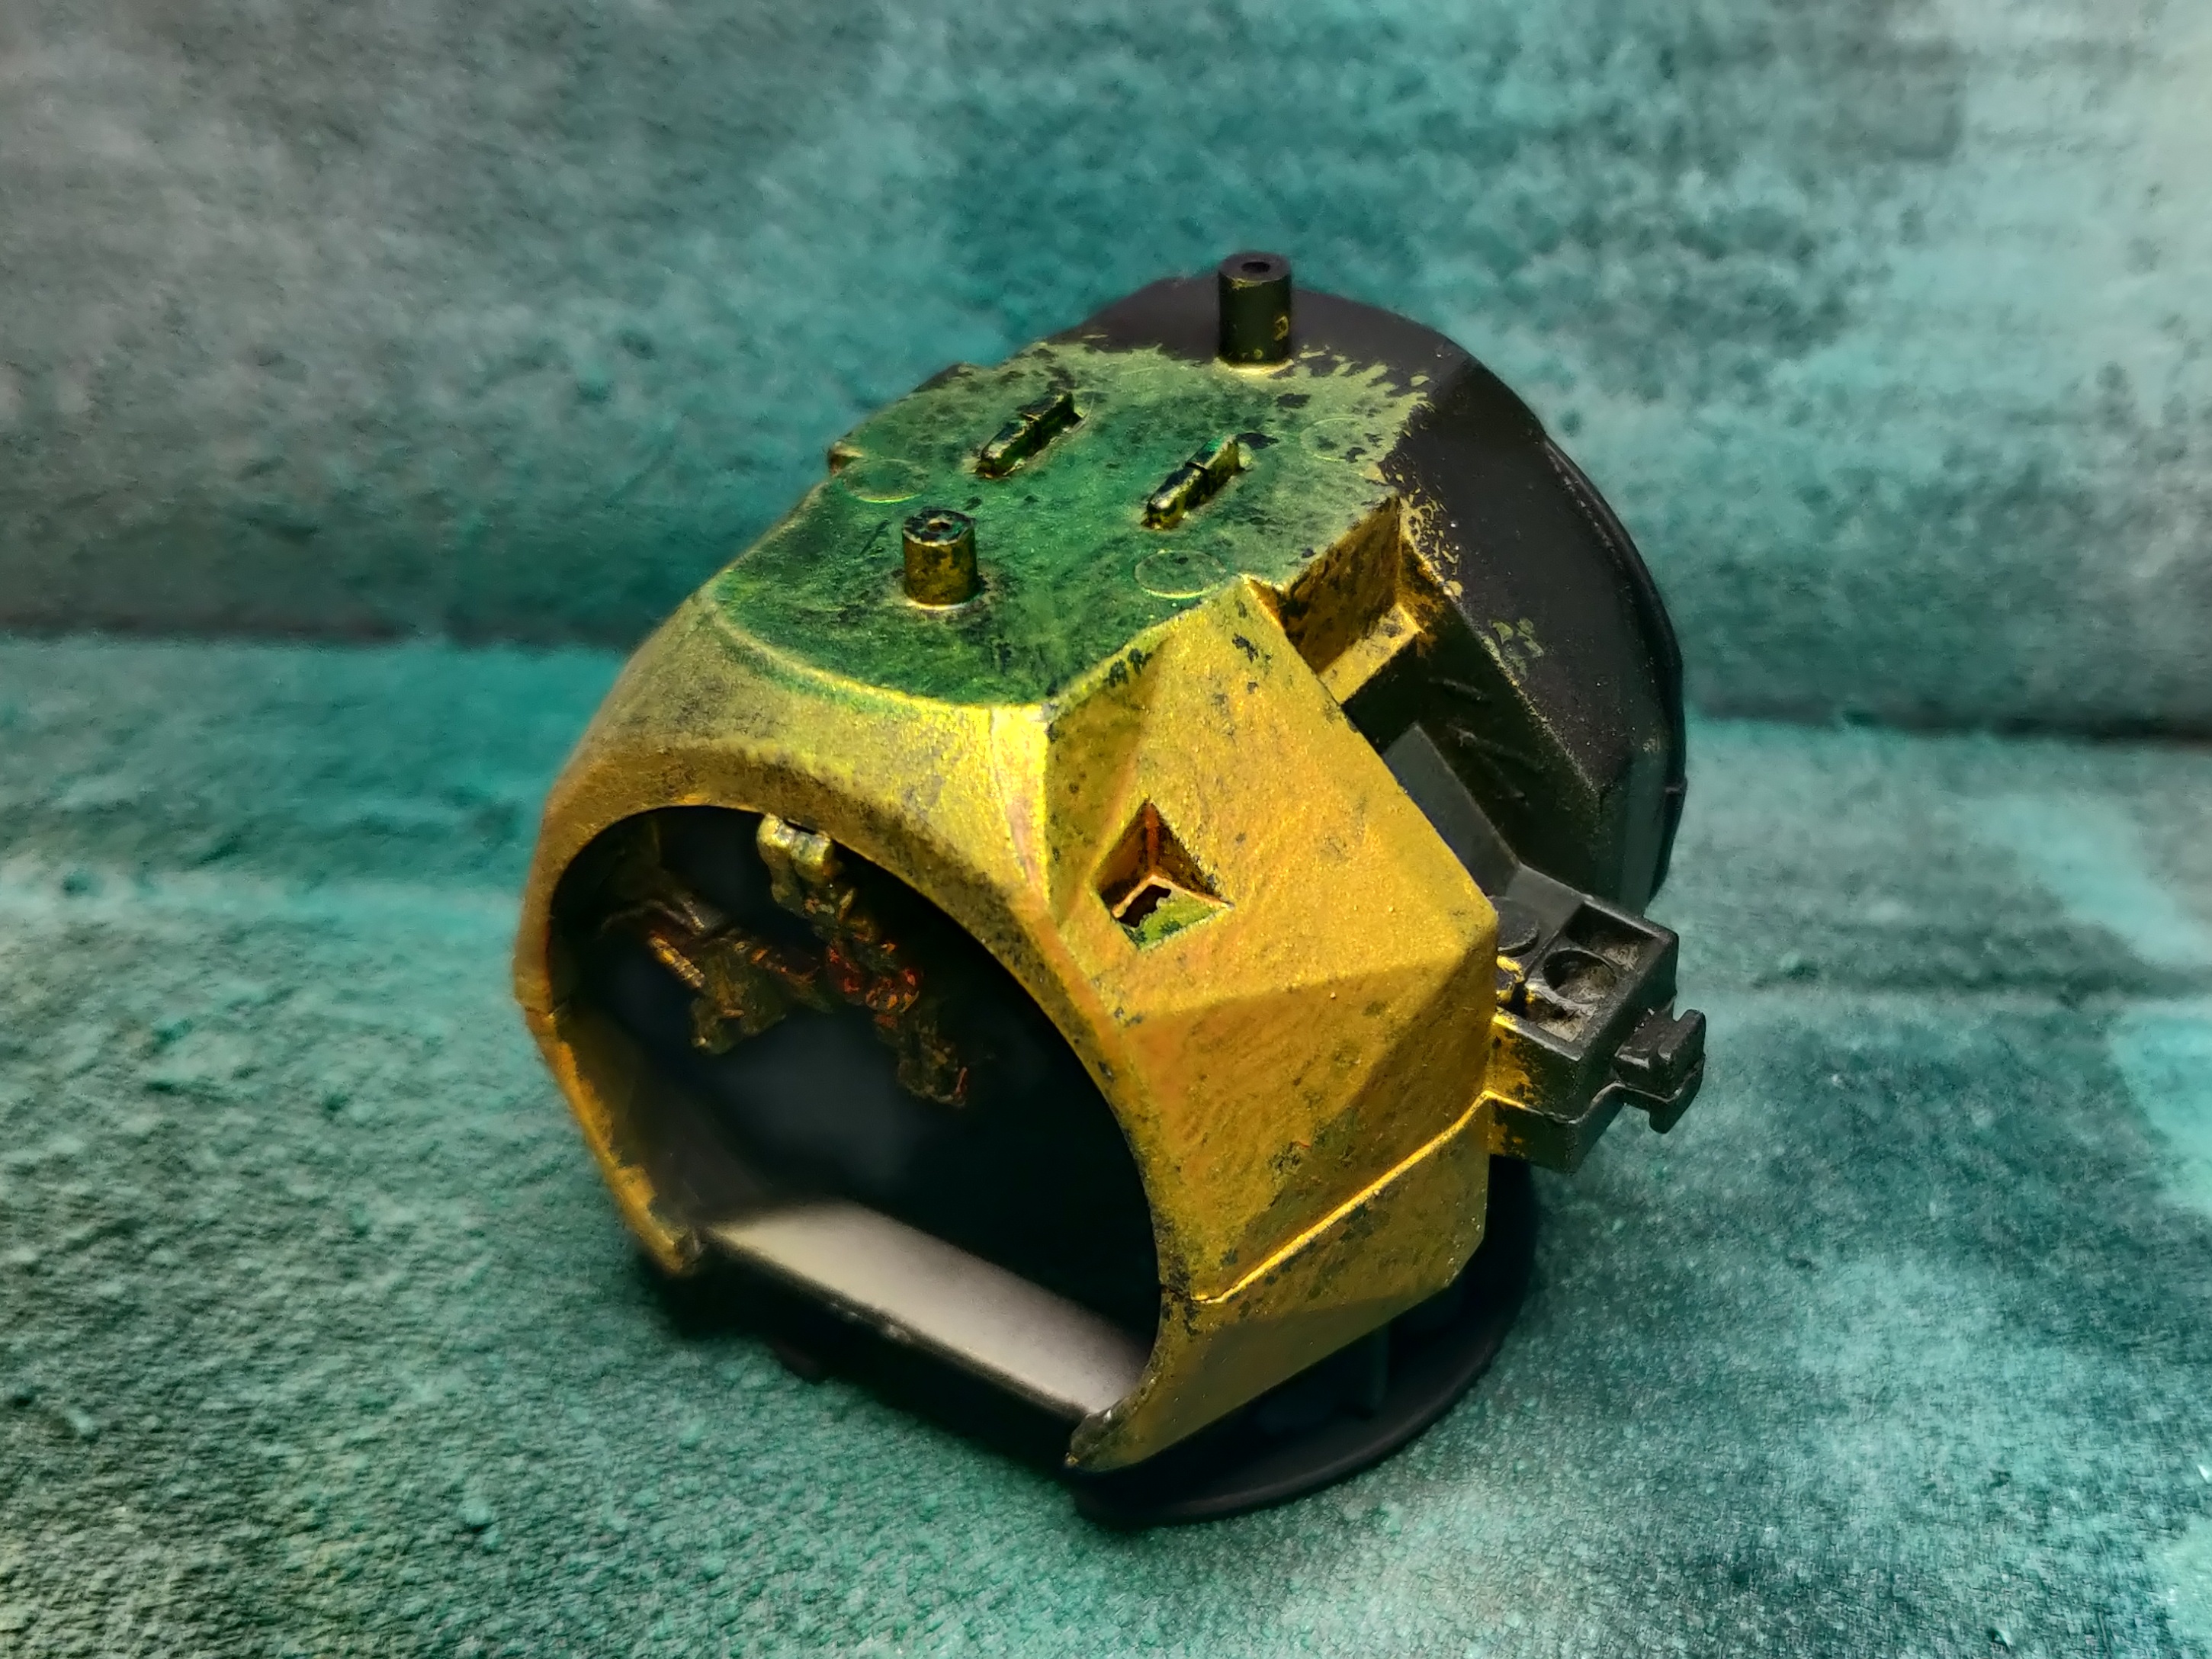
Grabbing a bit of old plastic model leftover from a previous kit bash (pic at the end) I painted it up roughly the same as the air warriors with a similar TMM base and brass finish.
Over this I used my airbrush to spray 2 Citadel Contrast colours on different sections, Iyanden Yellow on one and Aethematic Blue on the other. Depending how these worked out would help me decide the final scheme for the Air Warriors. I sprayed the yellow first and liked the result, it was a nice warm gold, with the hint of the metallic underneath, but as soon as I sprayed the the blue I loved the result, over the top of the brass it created a lovely green colour which would look great with the rest of the army, similar to them, but different to signify the different type of unit.
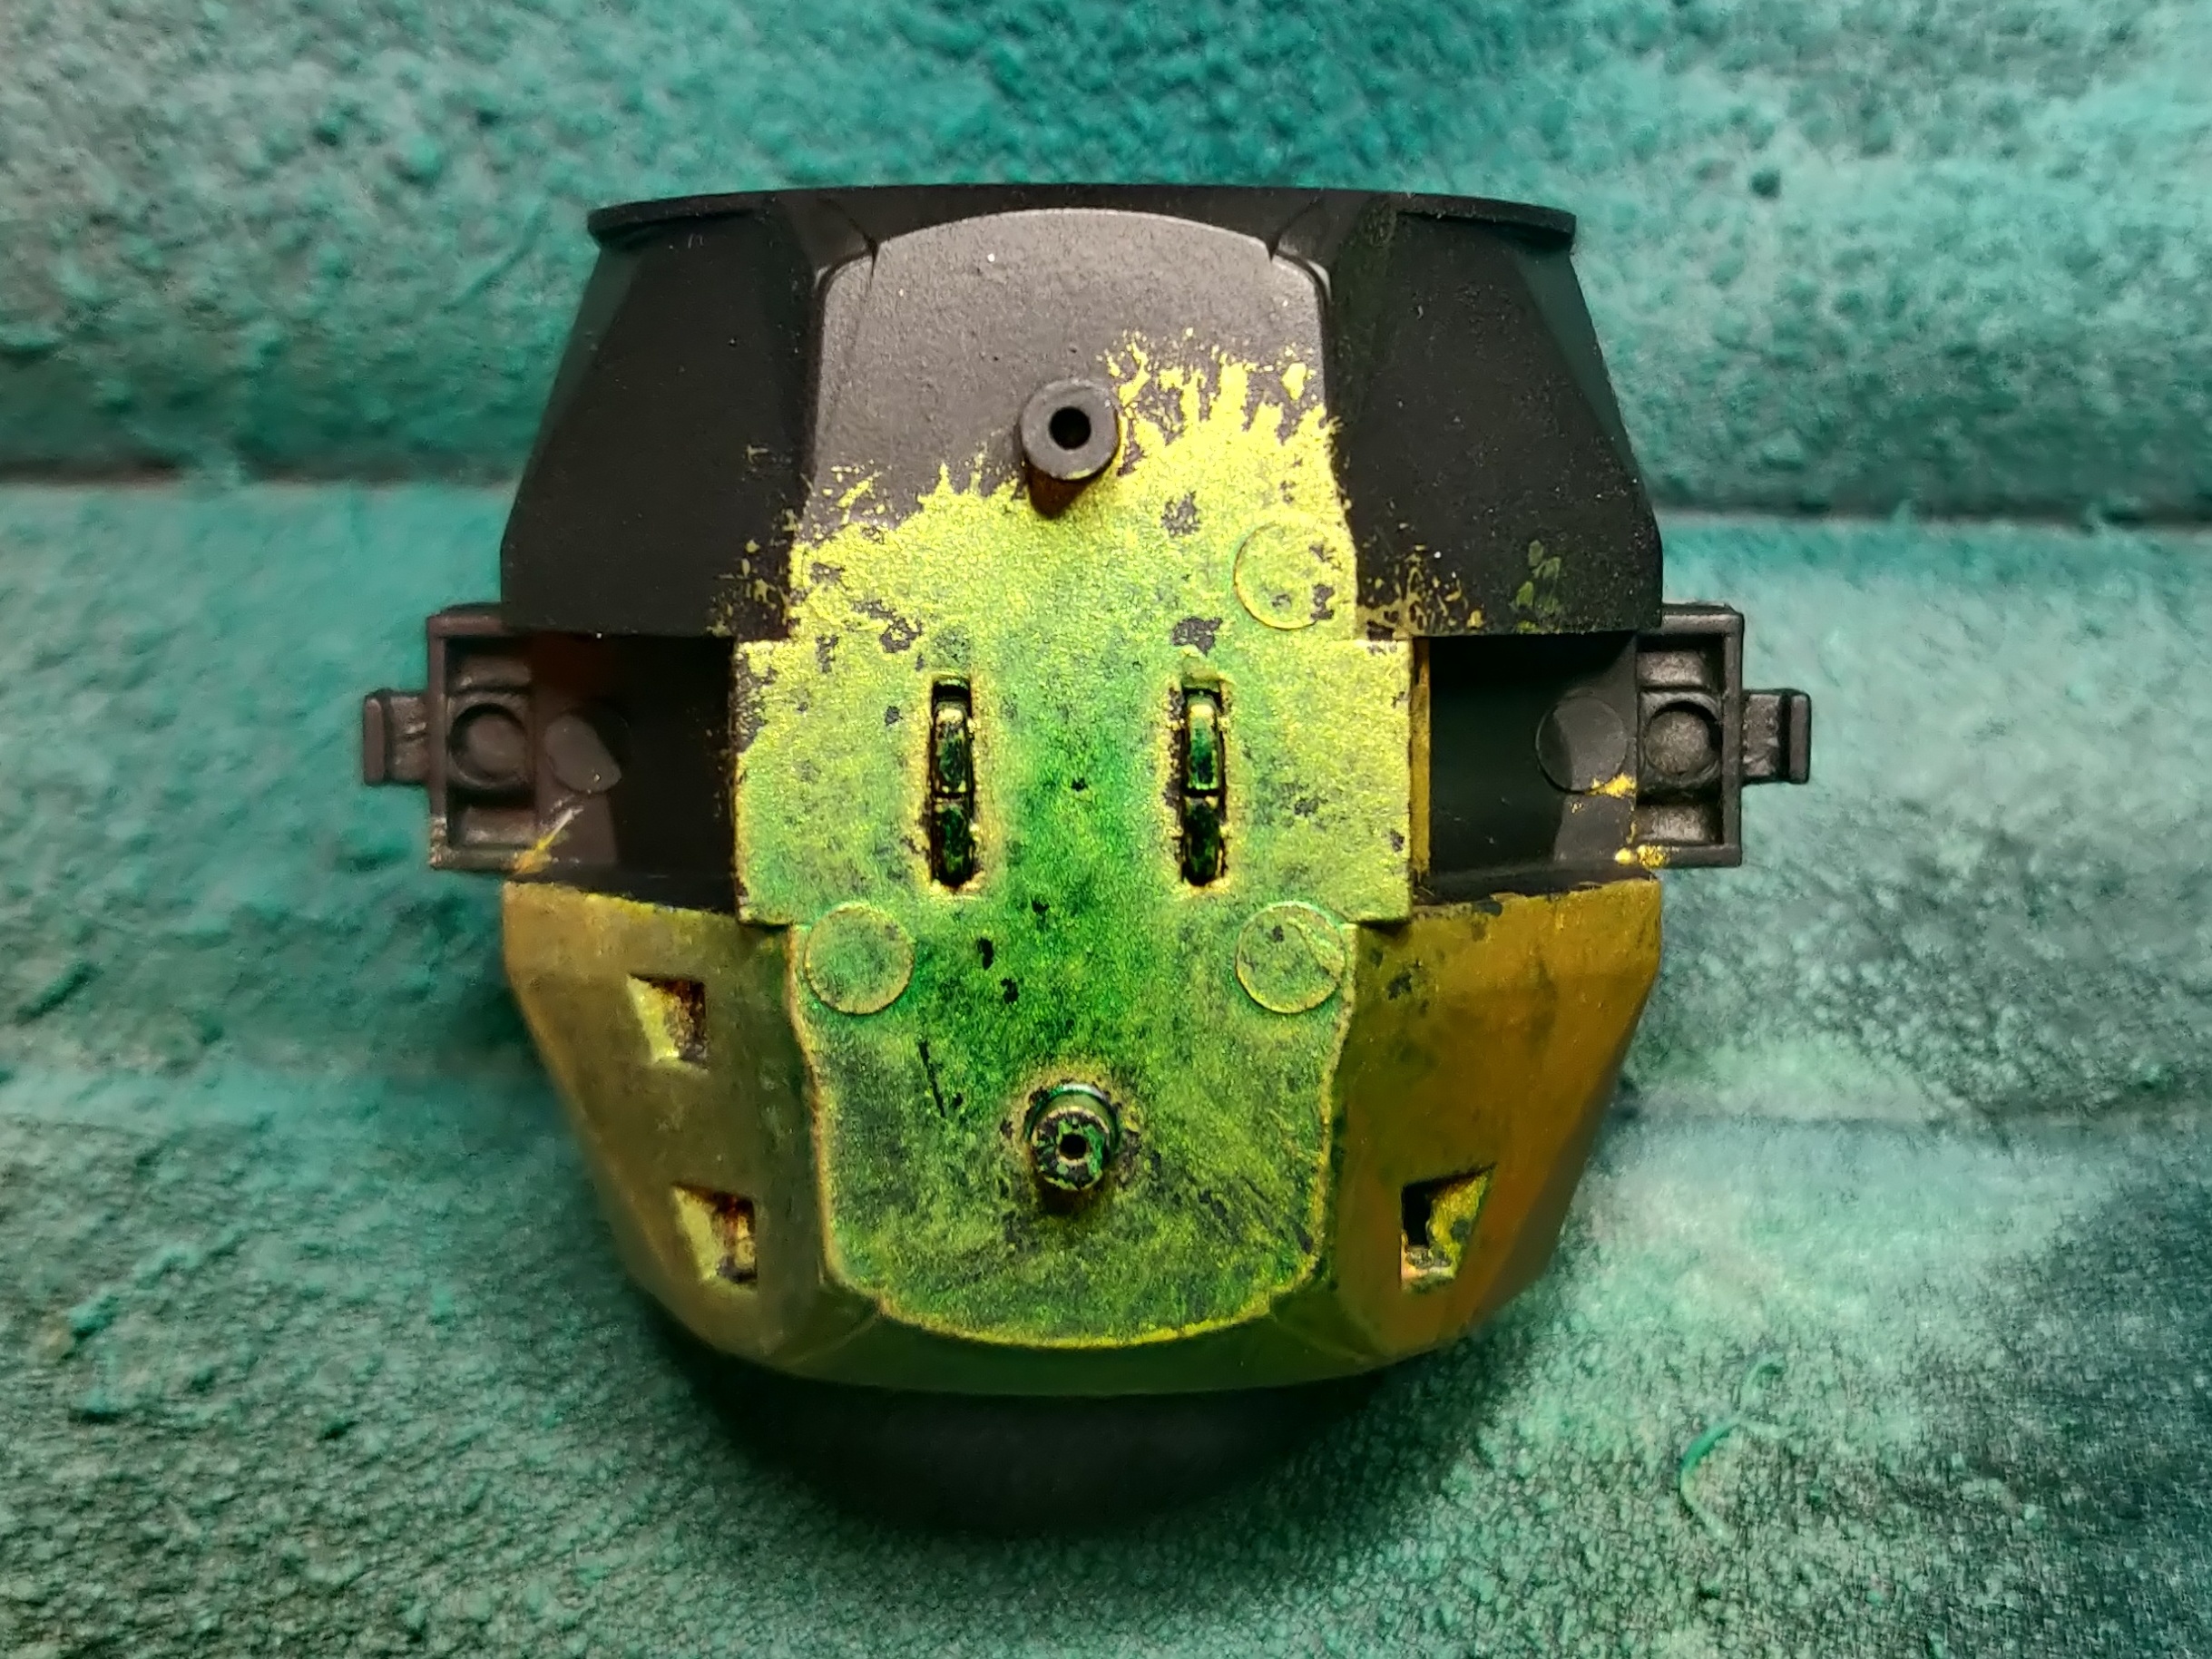 This was a no brainer for me
With the Aethematic Blue chosen I set to work with the airbrush to lightly spray a couple of thin coats over the bots, trying to make sure it didn’t pool as the brass underlayer was significantly brighter it was less forgiving then the chrome/gunmetal workup I had done previously.
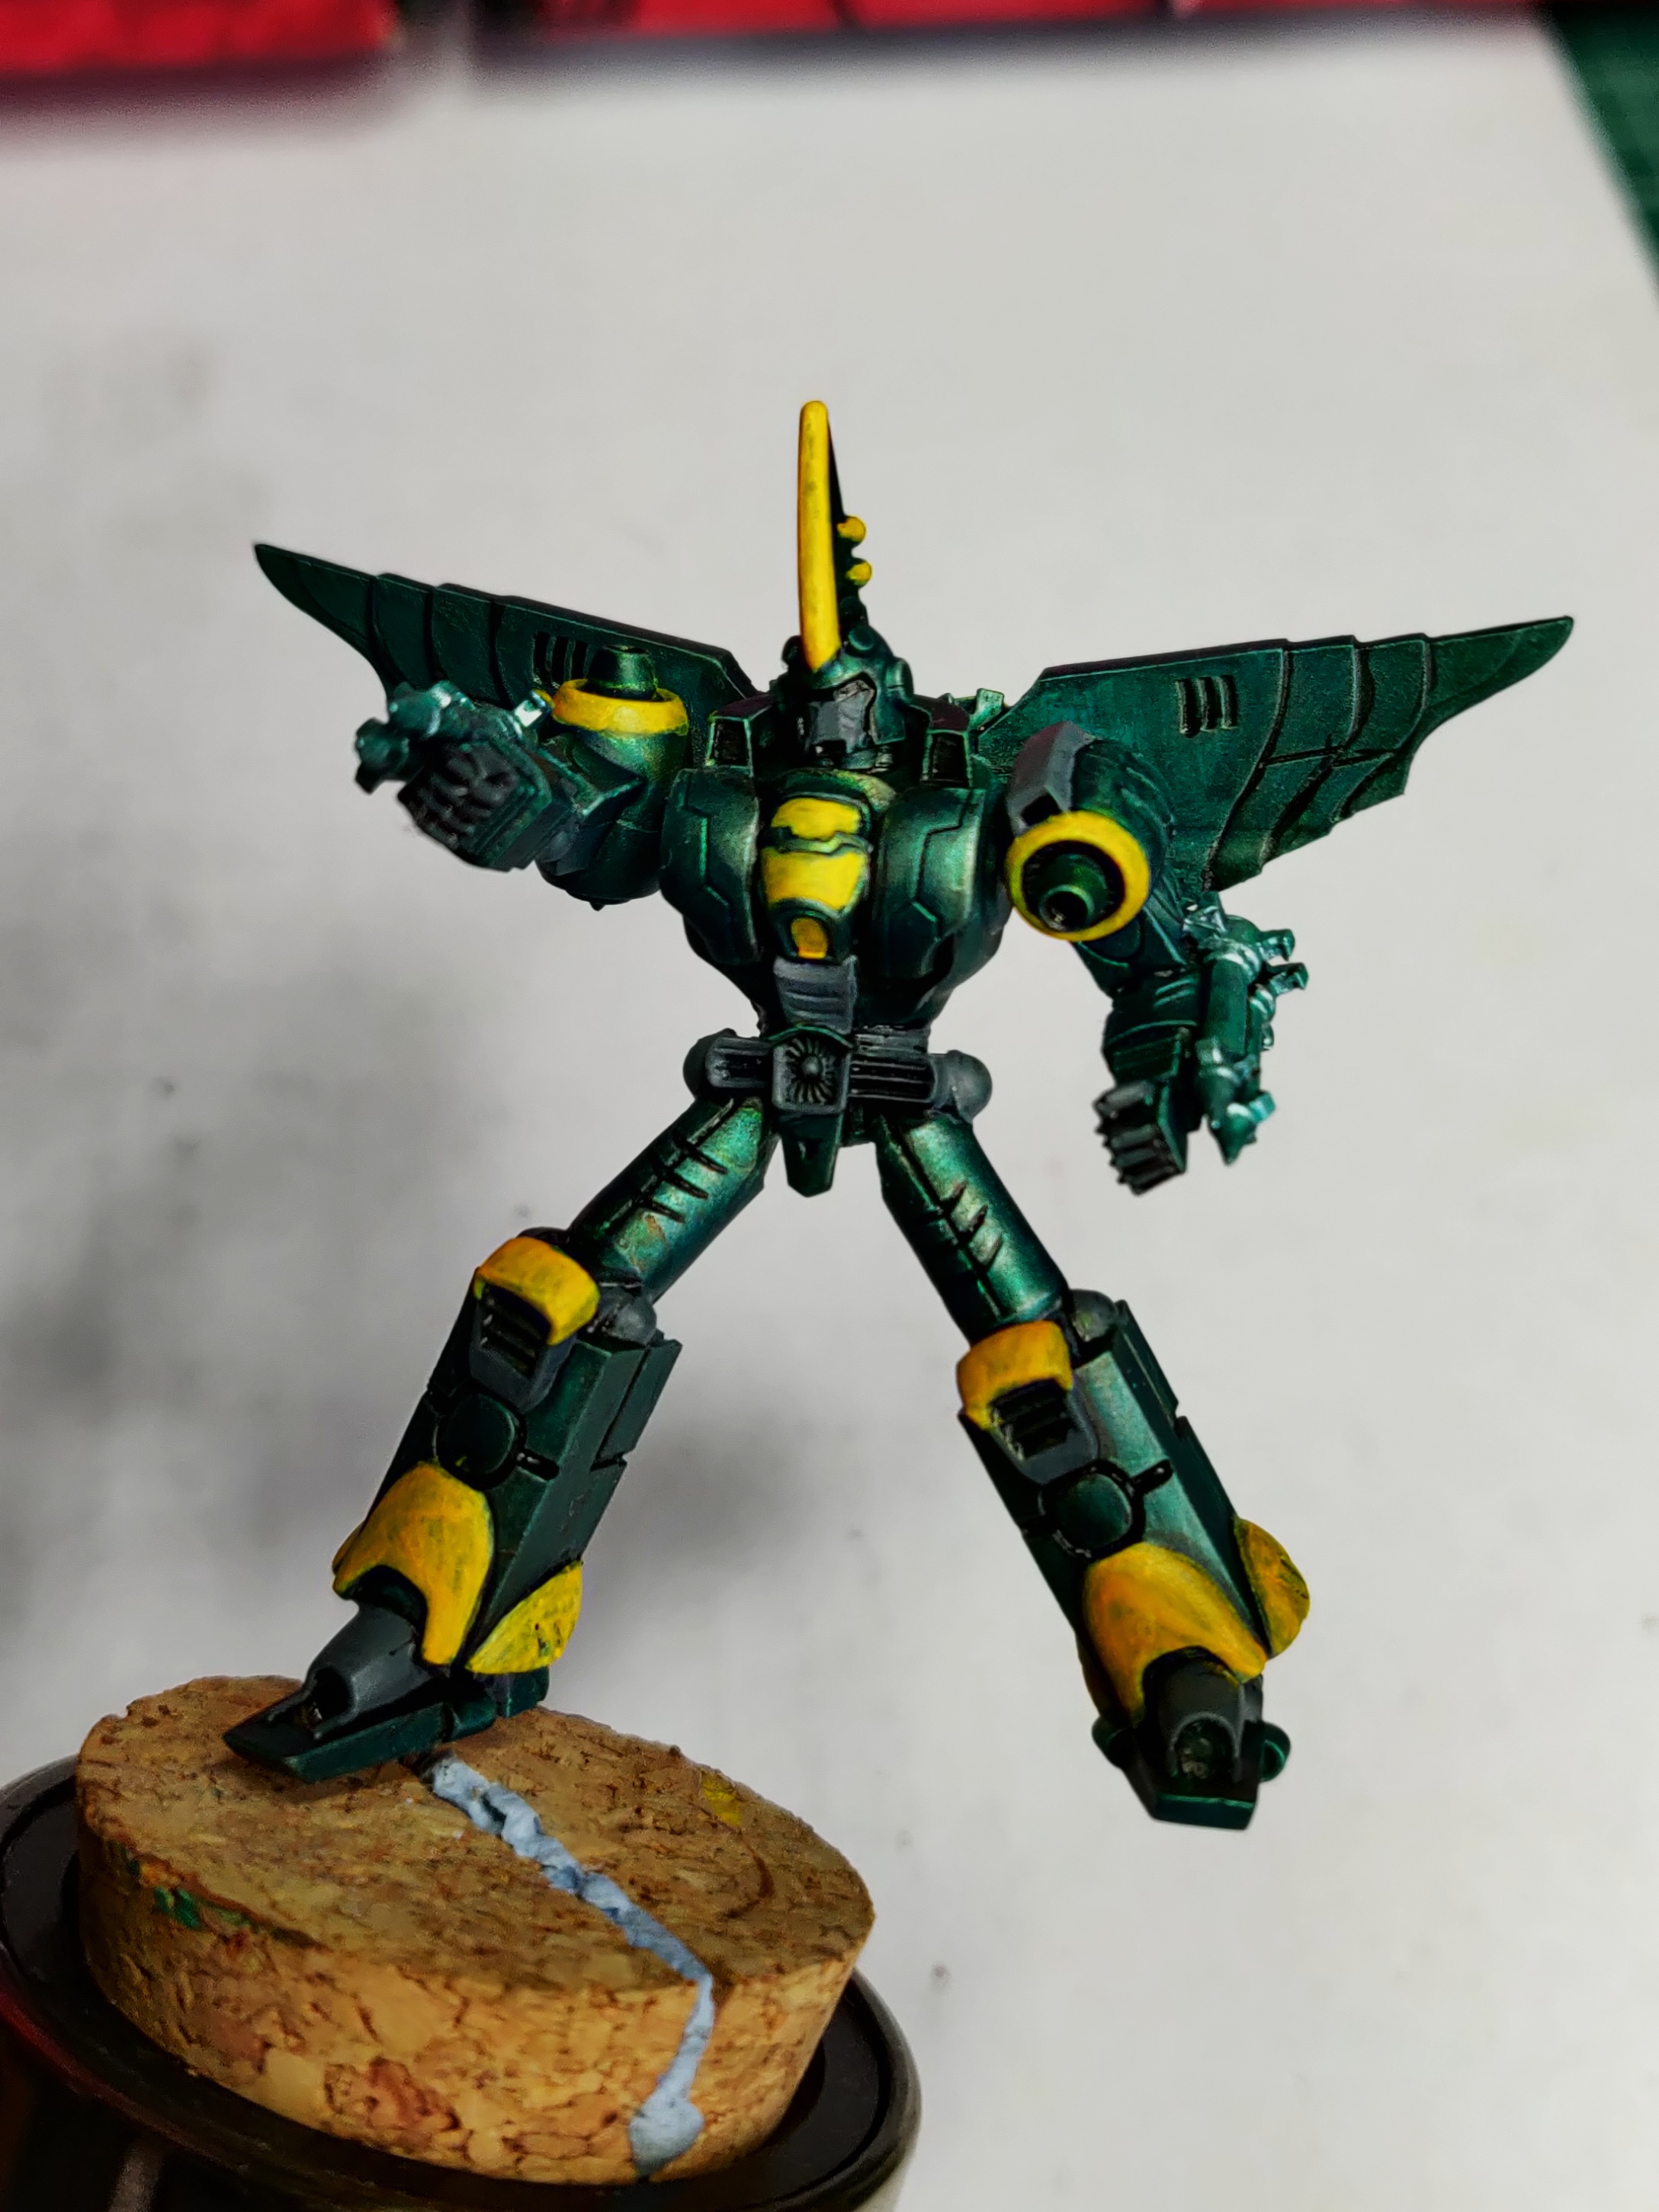
This looked awesome, especially on Kamen which you can see in the following gallery.
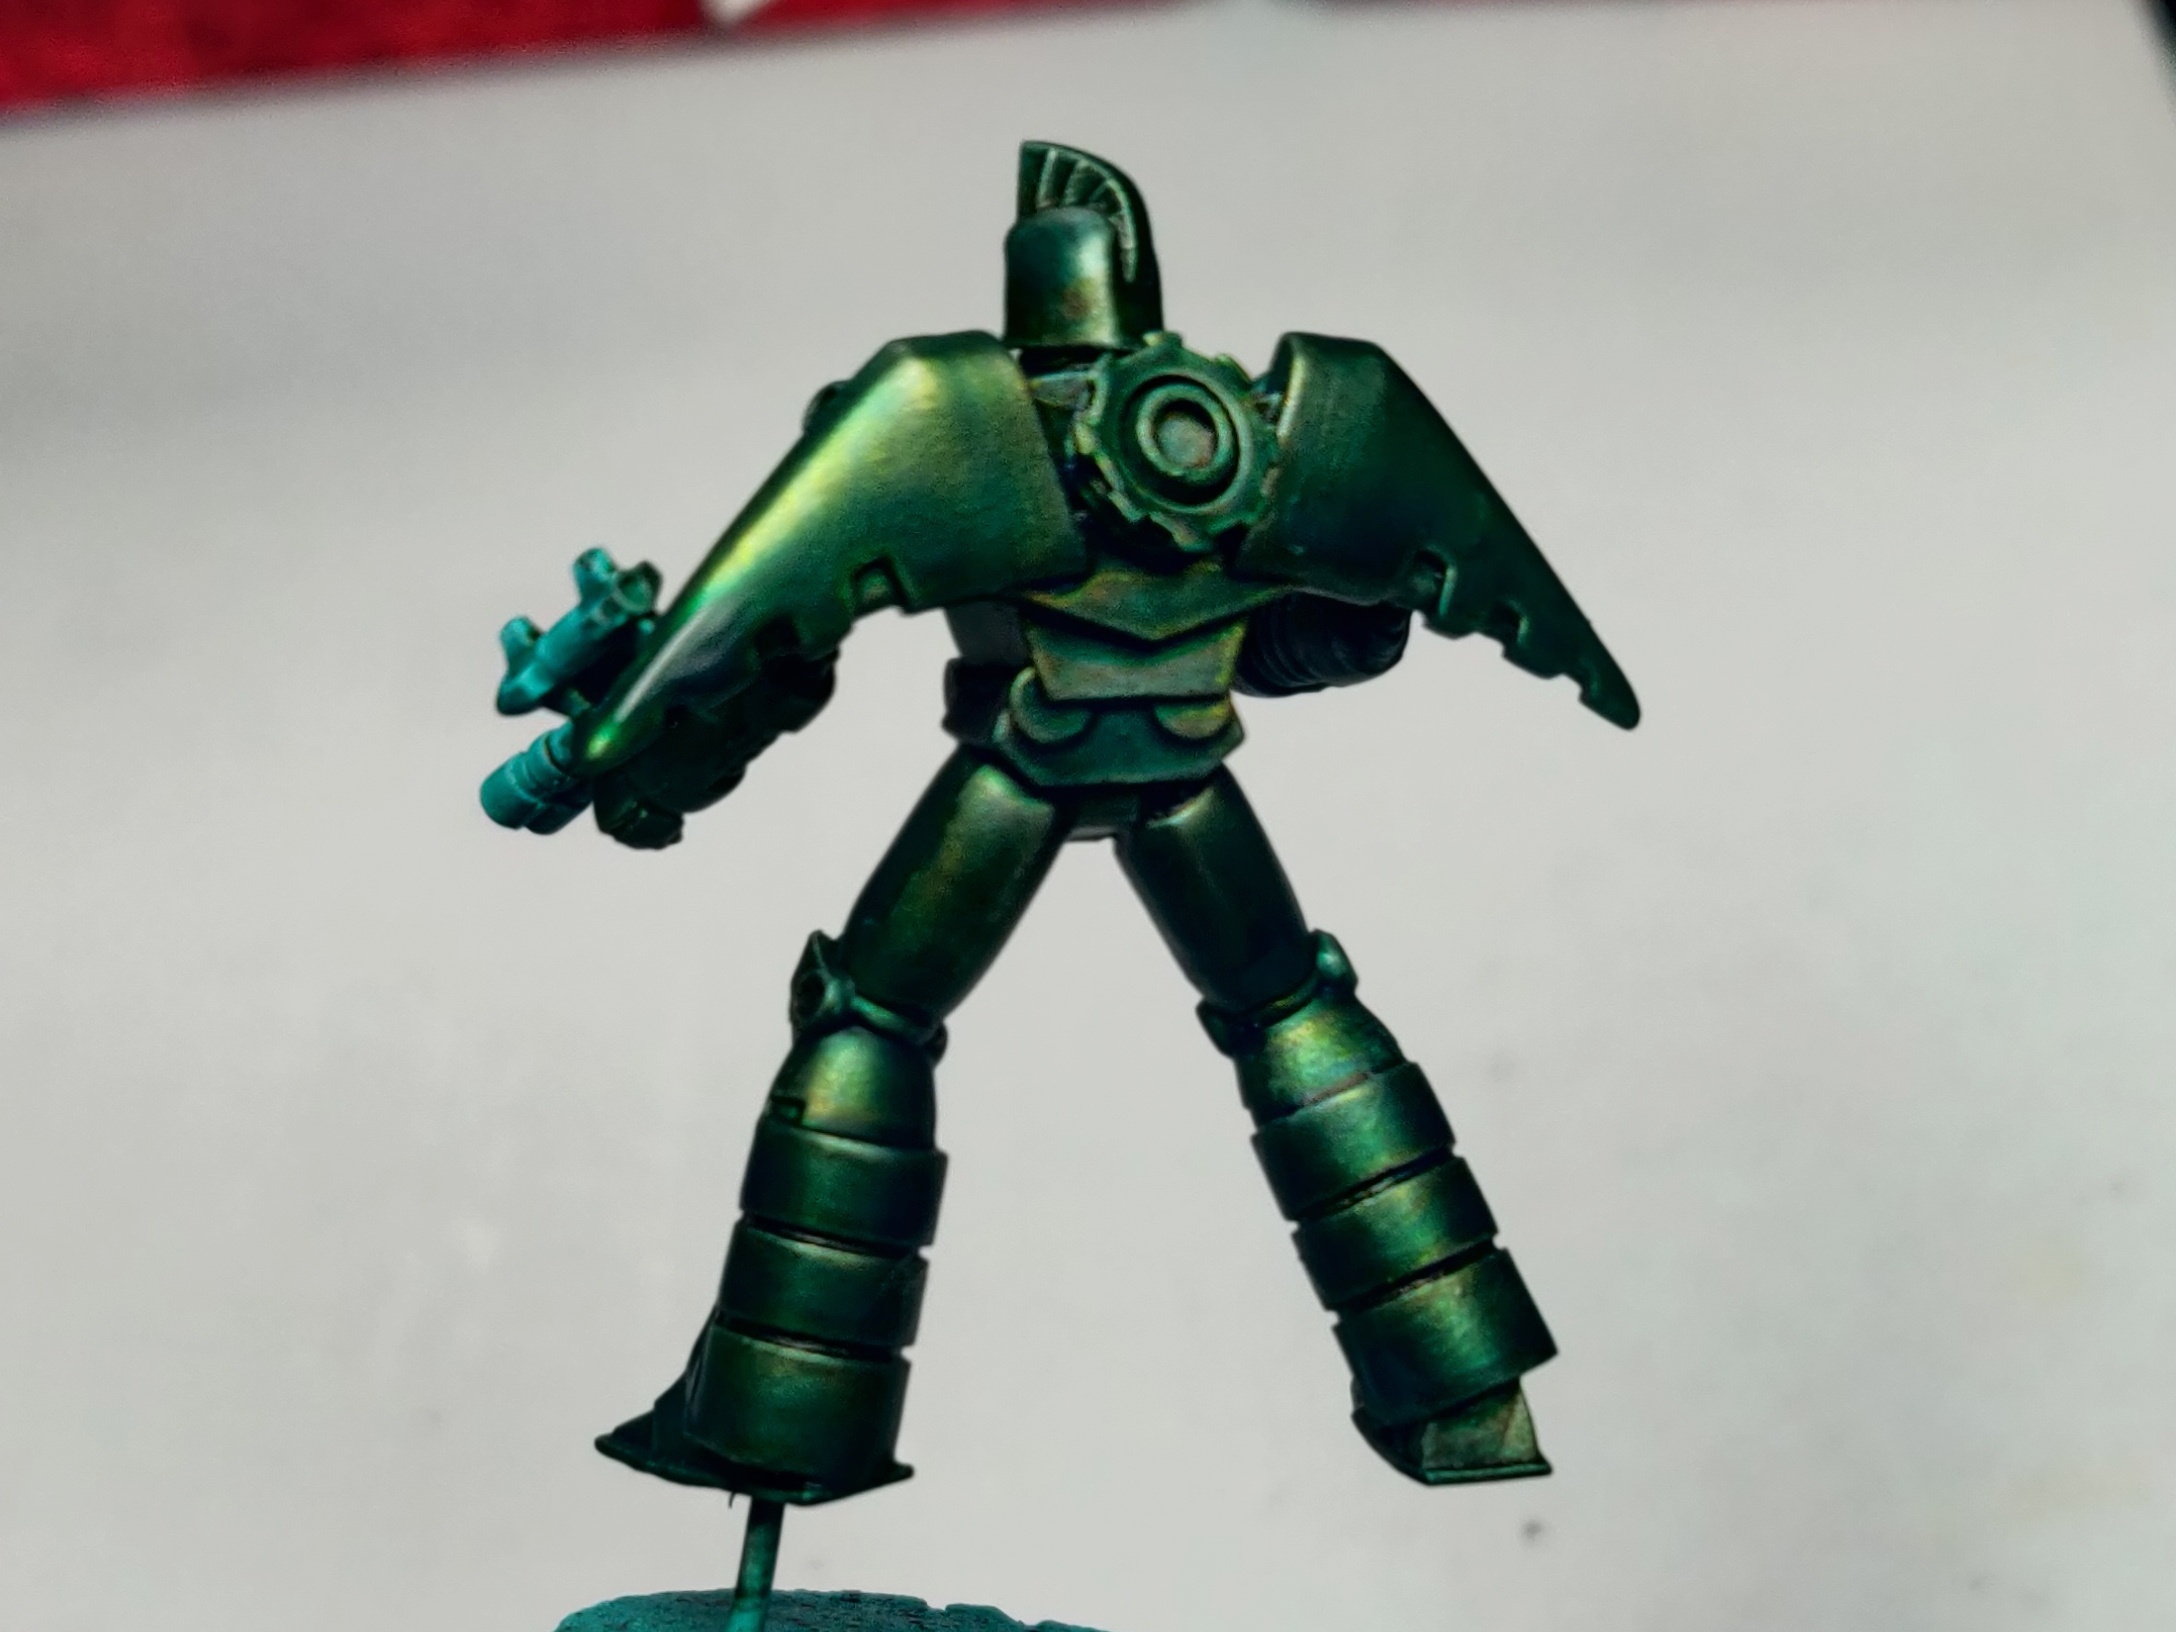

The final thing I wanted to do today was to block in some of the grey parts to help break up the bot’s armour and help me to visualise where I would then place the yellow spot colour details. This was done the same as before using a decent opaque coast if P3 Ironhull Grey. Unlike the mud warriors there was significantly less “joint” armour on the Air Warriors, so this was mostly in deep elbow/knee recesses, the face plates, waists, and fingers.
Tomorrow I will start the yellow details, but for now I’m very happy with my progress and the experiment. The bonus is I will also be getting some Atlantican reinforcements in the next couple of days to round out this force for a battle.
 Really happy with this result
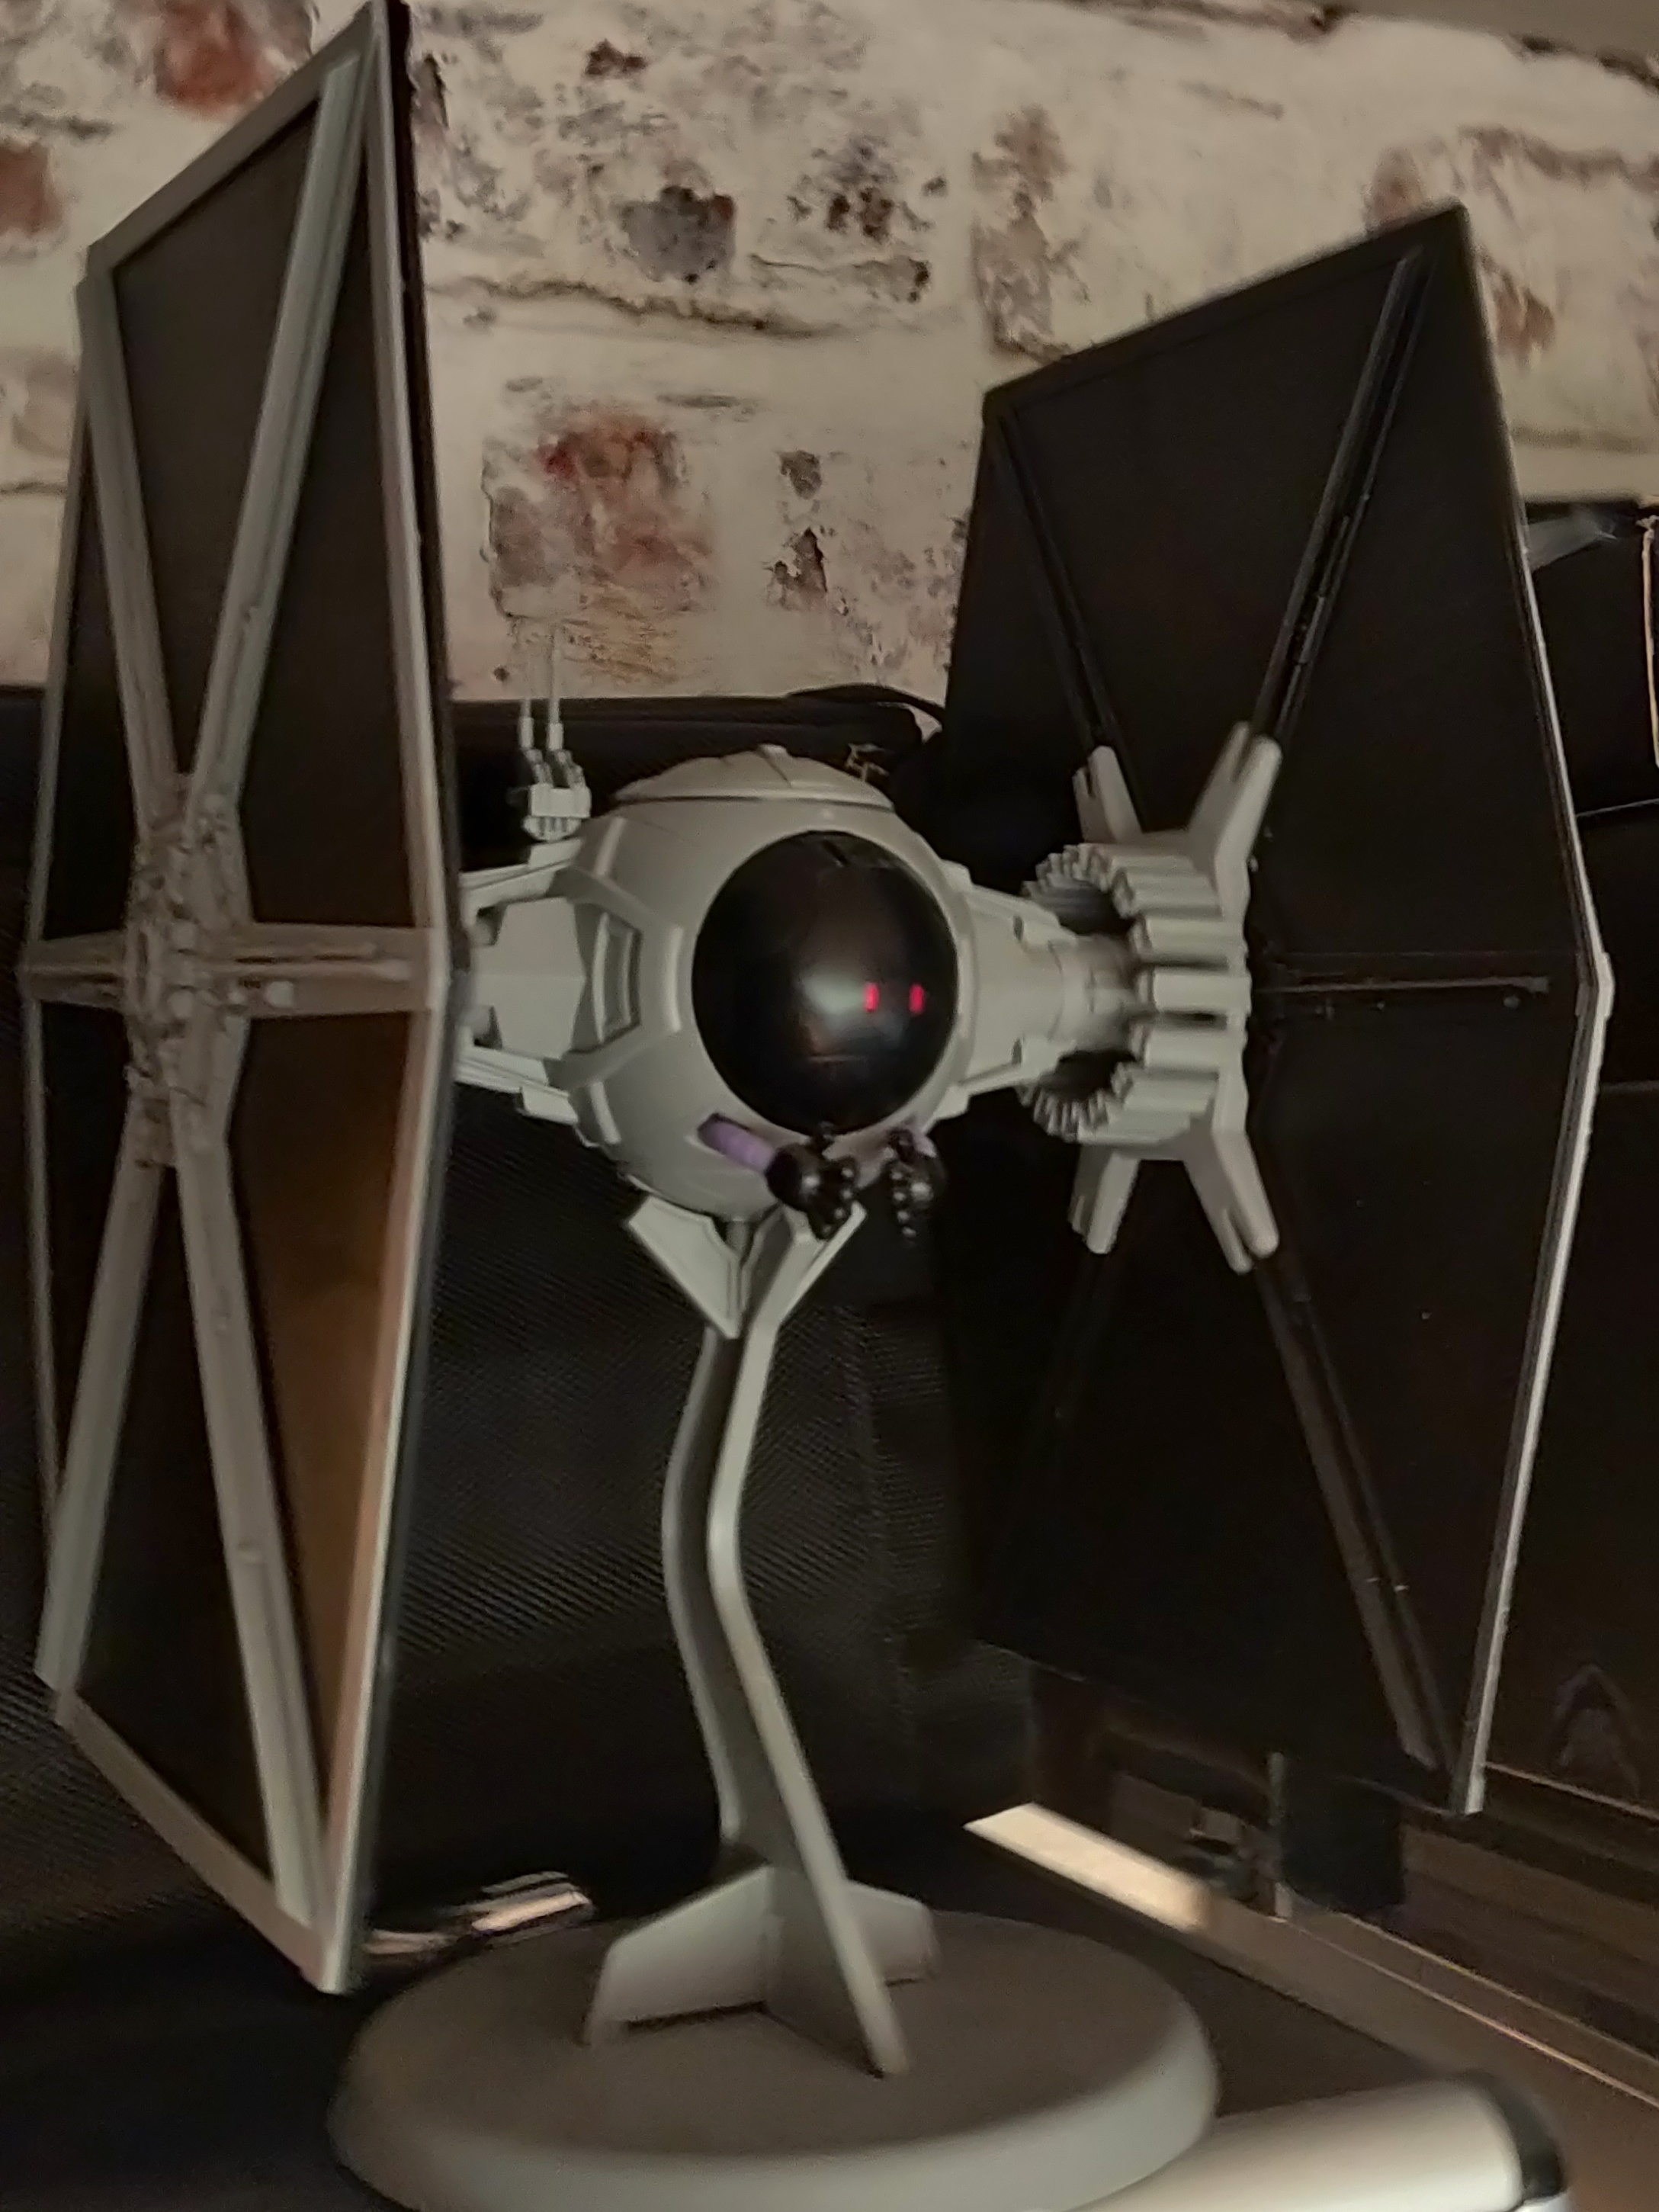 Bonus image, the experimental part was the internals of a Star Wars Tie Fighter kit, during the 2020 lockdown I decided to create a Haro Fighter using a Black Tri-Stars Haro ball from the Gundam series of kits. It was a long year.
 Day 14...
Getting the foundations down
Not a huge amount of progress tonight, nothing radical or experimental, just laying the foundations for the next couple of days.
Painting yellow details onto Stingray and Moray needed a few coats to get going. Working both Pro-acryl Golden Yellow and P3 Blazing Ink into the Transparent Yellow over several coats took a fair bit of time. I wanted to concentrate on getting these 2 worked up so I can then give Kamen a bit more attention at the weekend.
The other element I worked on was blacklining. This was achieved by mixing Liquitex Carbon Black ink with Instar Water+ in a 1:3 amount. It shows just how strong the ink is, but the water+ really helped it to flow into the recesses, and as it wasn’t a heavy mix I could easily use a clean brush to lift off or blend in any excess I didn’t want.
Tomorrow I can start to highlight.
Day 15...
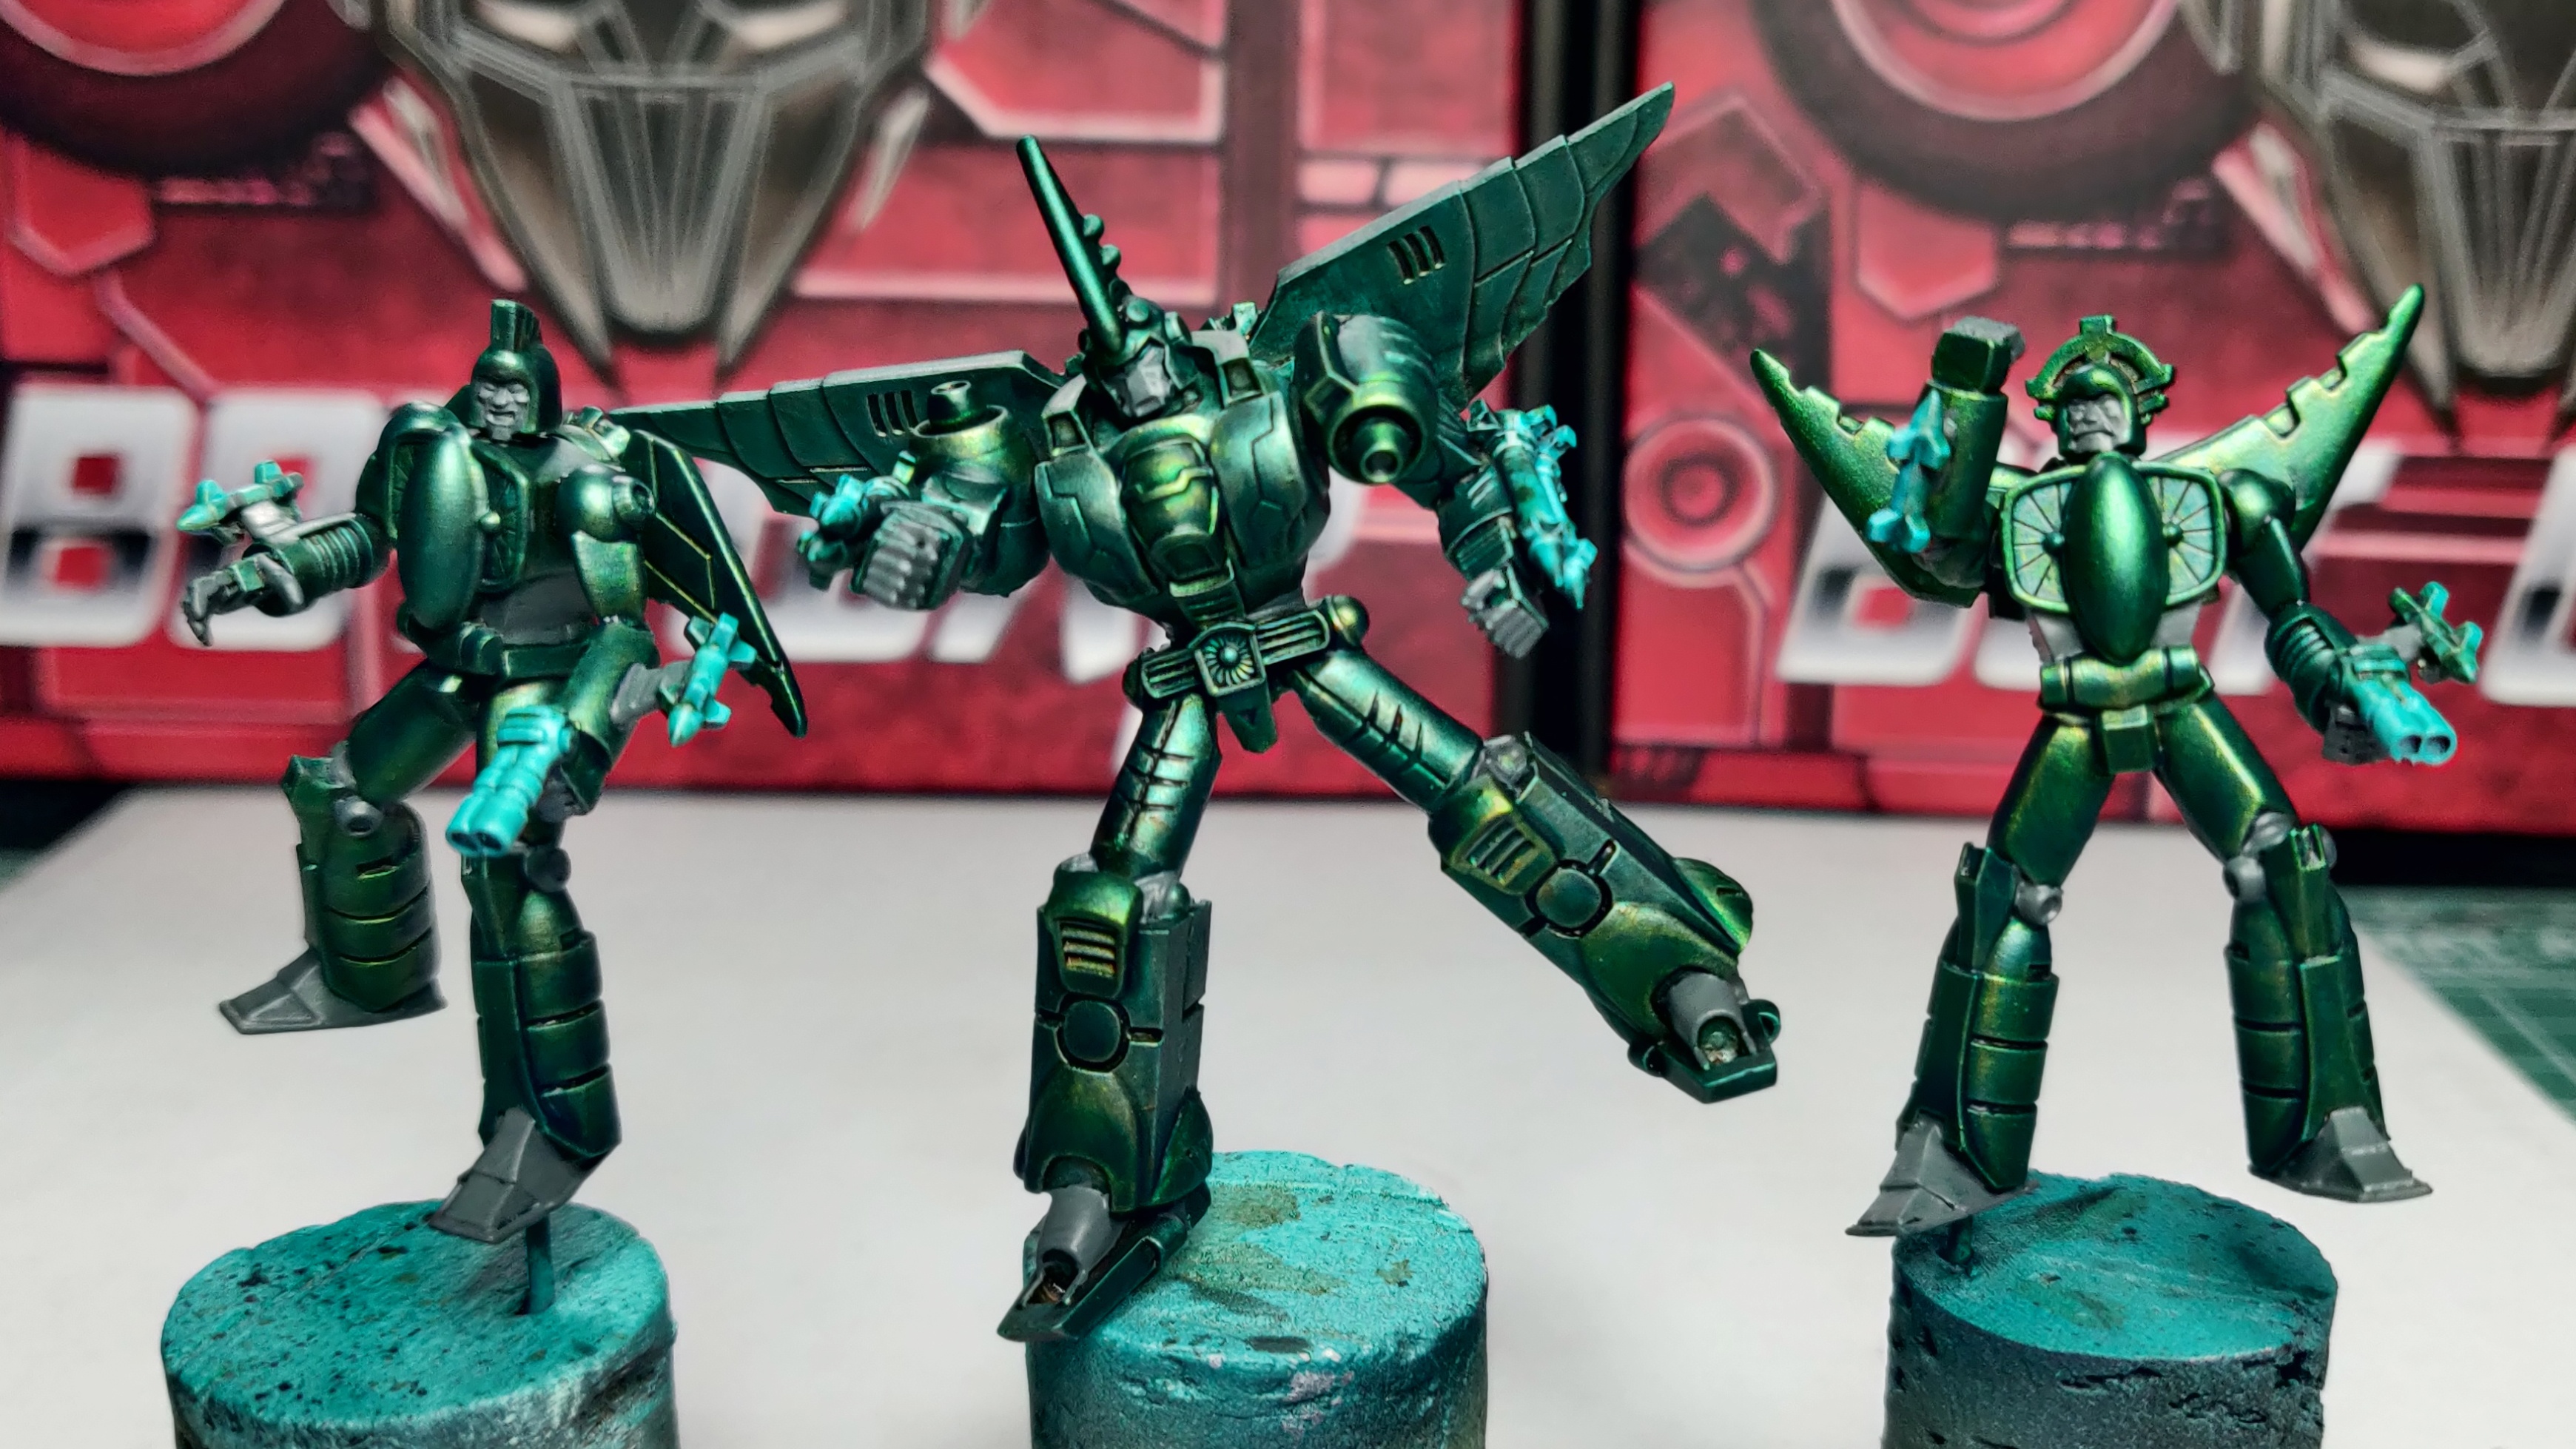
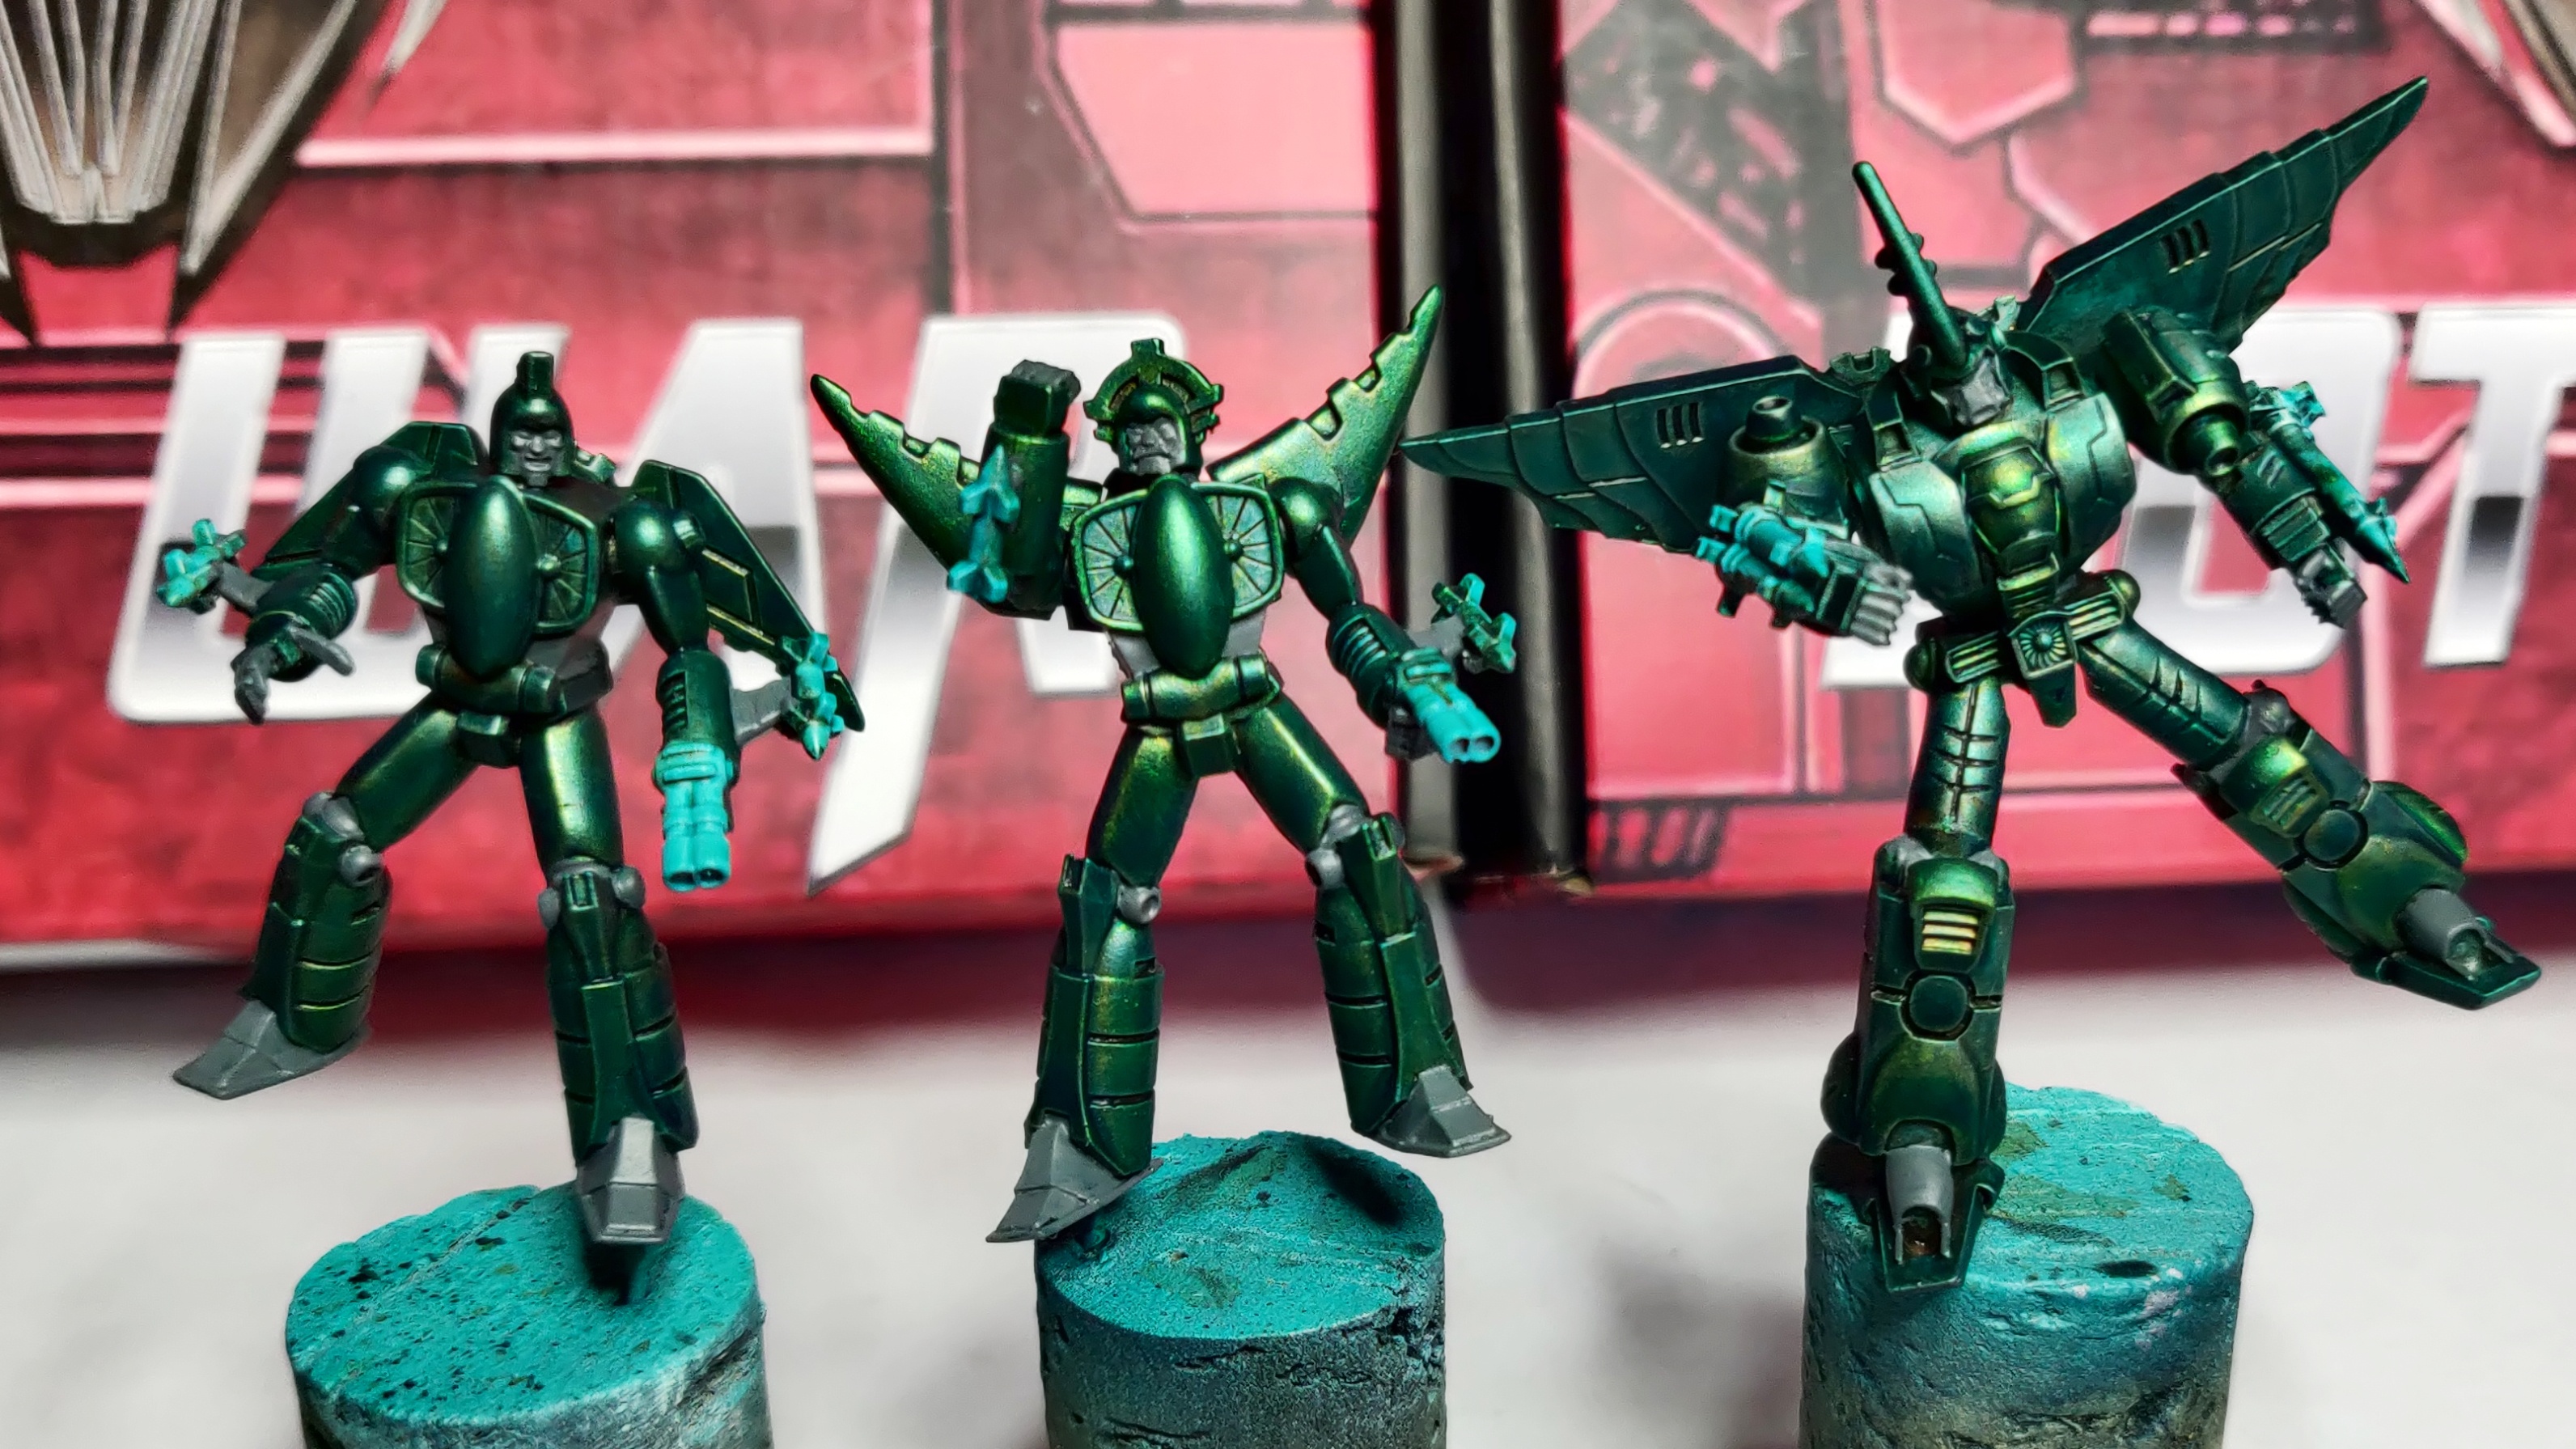
7 bots down, 5 days to go
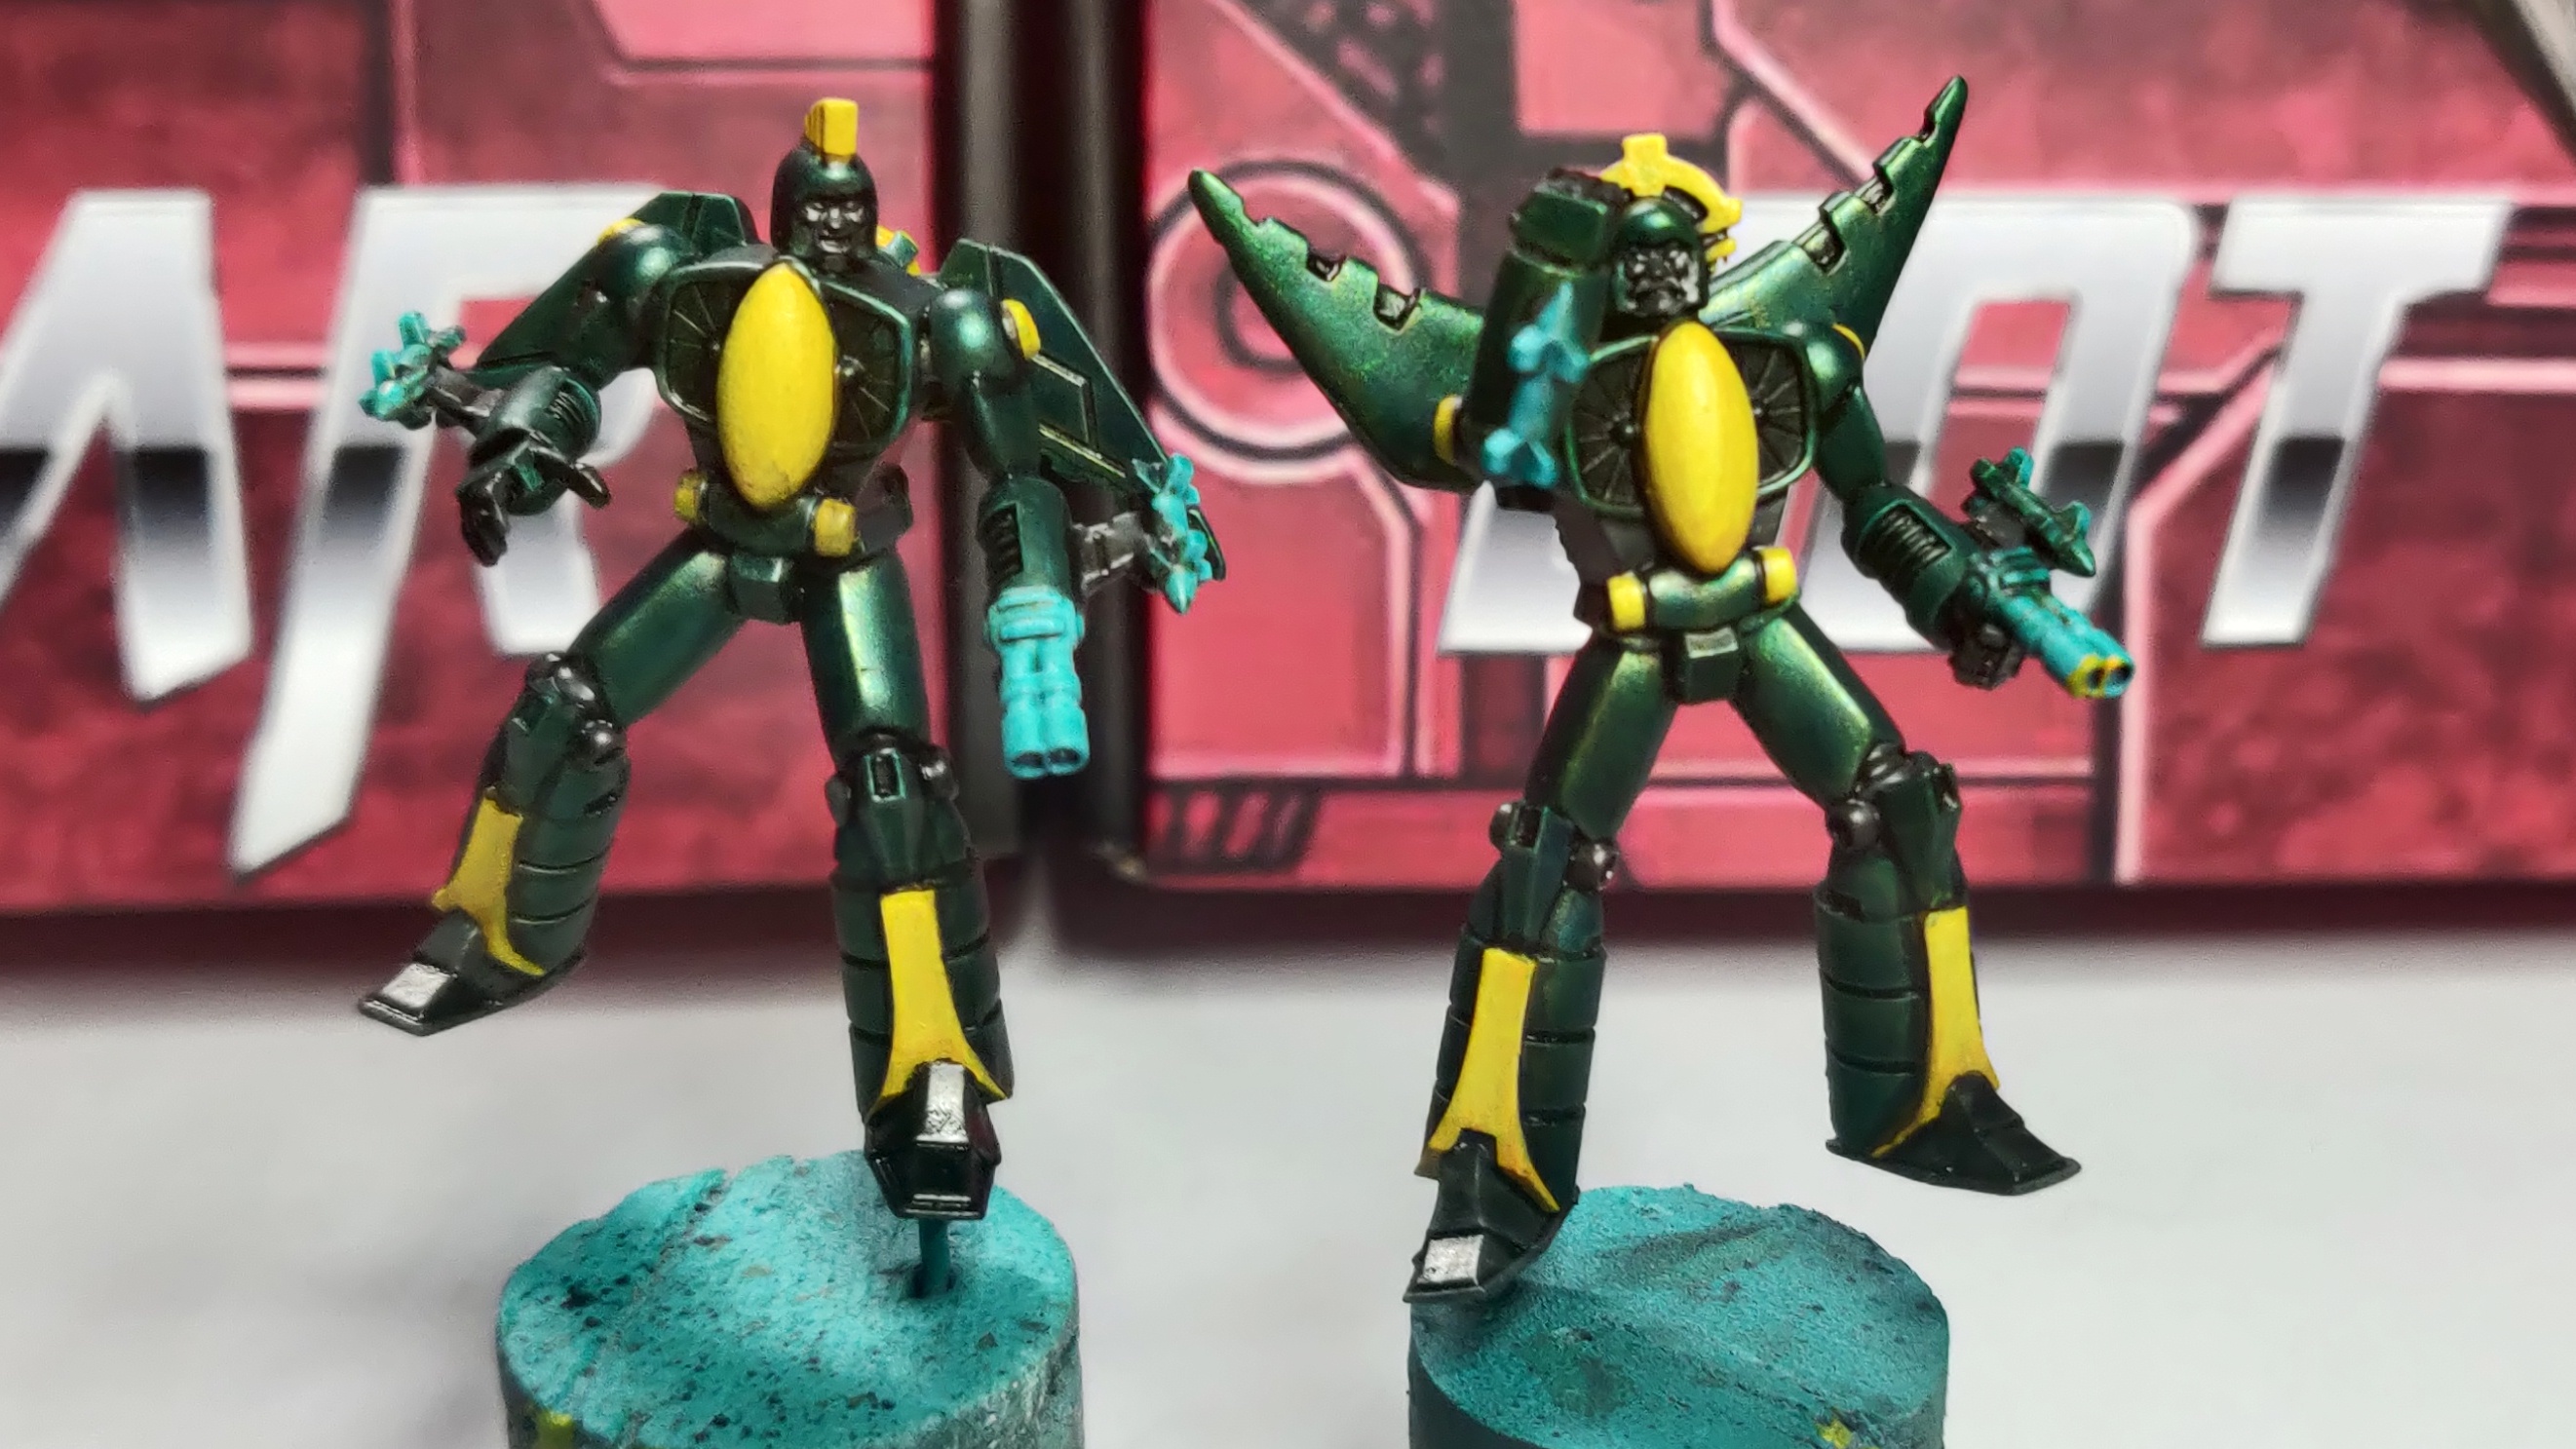 Stingray and Moray reading for a final push
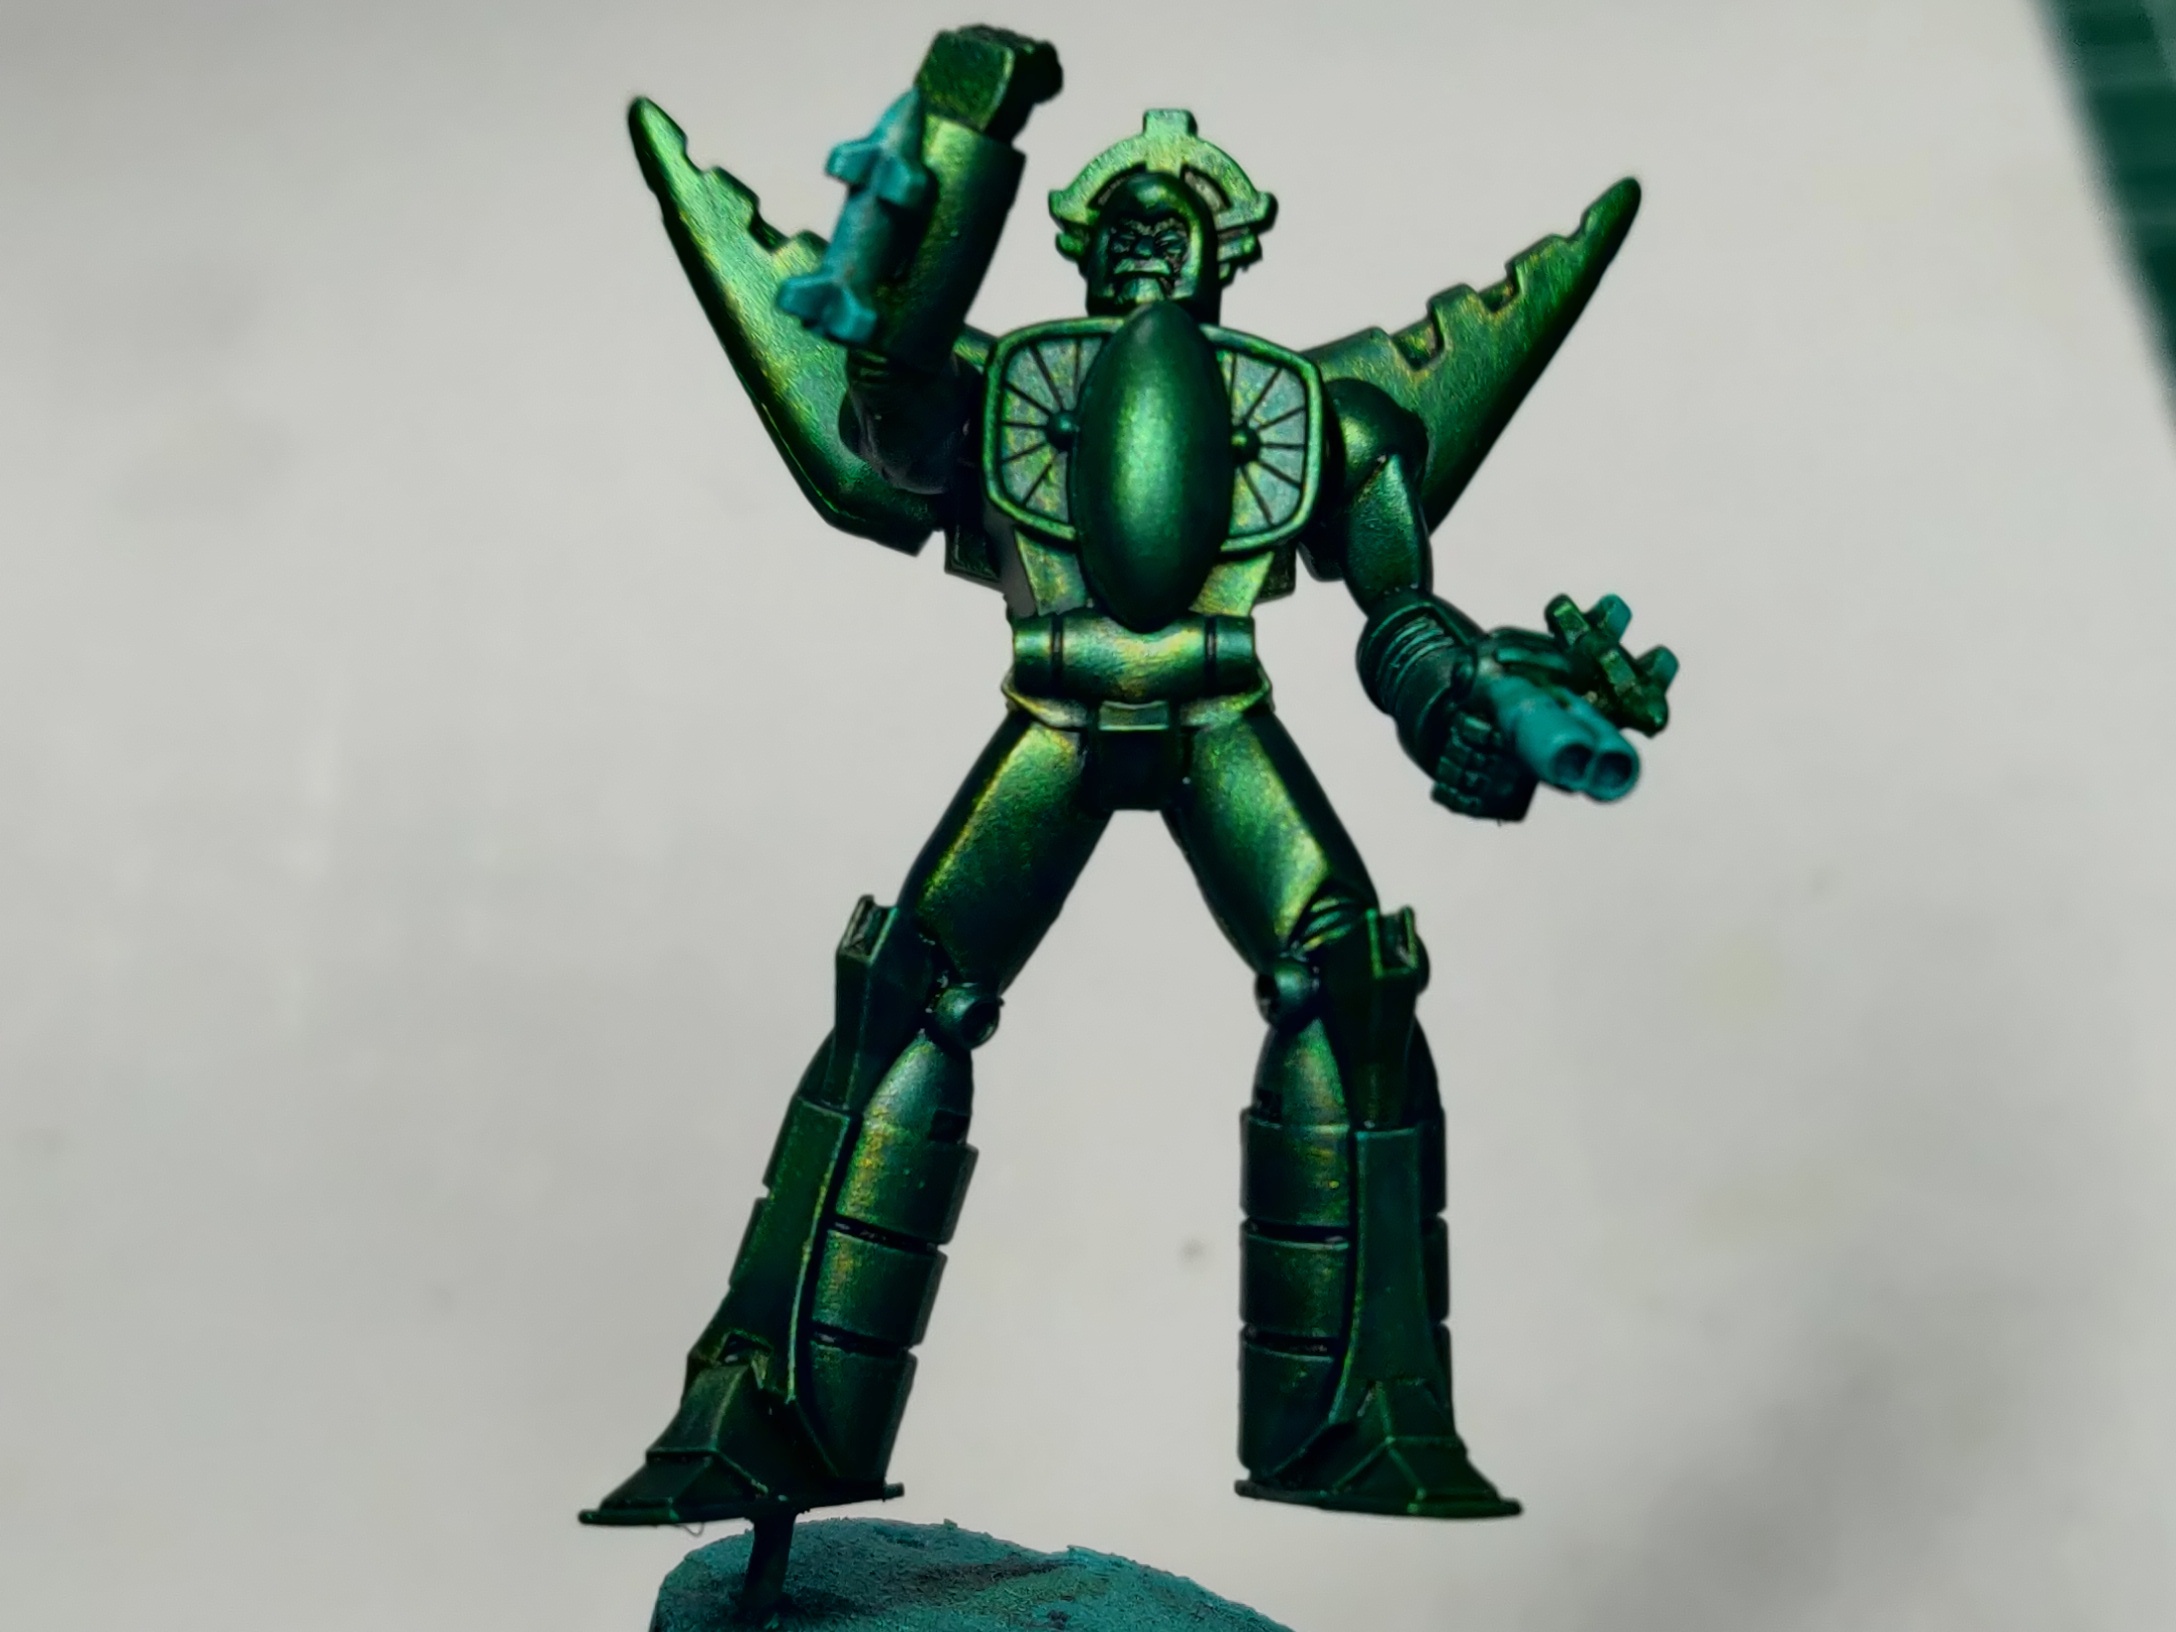
With the foundations layed yesterday today I was able to take the yellow through to its conclusion, working in glazes of blazing ink from P3 into shade, and Scale75 Hykey Yellow to the highlight. To match in with the other bots the Hykey yellow became a dominant hue desaturating the golden yellow and softening the overall look.
Edge highlights for the main armour was again completed with Scale75 Surfer Orc Green, whilst not the best match for the golden tinged green, it helped to bring cohesion with the other bots. Maybe I will switch it up for Kamen, perhaps mixing it with Hykey Yellow could be a possibility.
The grey joints and details like fingers and faces were picked out in Reaper MSP Foggy Grey, and then helped to harmonise and shade with some water+ thinned Dark Tone from Army Painter.
Finally the weapons were given a quick coat of Scale75 Emerald Alchemy before also getting a shade of Dark Tone to quickly increase contrast.
Only thing left to do other than base them is to paint the eye lenses which I will do tomorrow.
For now these bits are done, meaning 7 are completed with only Kamen and Leviathan to finish. 5 days to go.
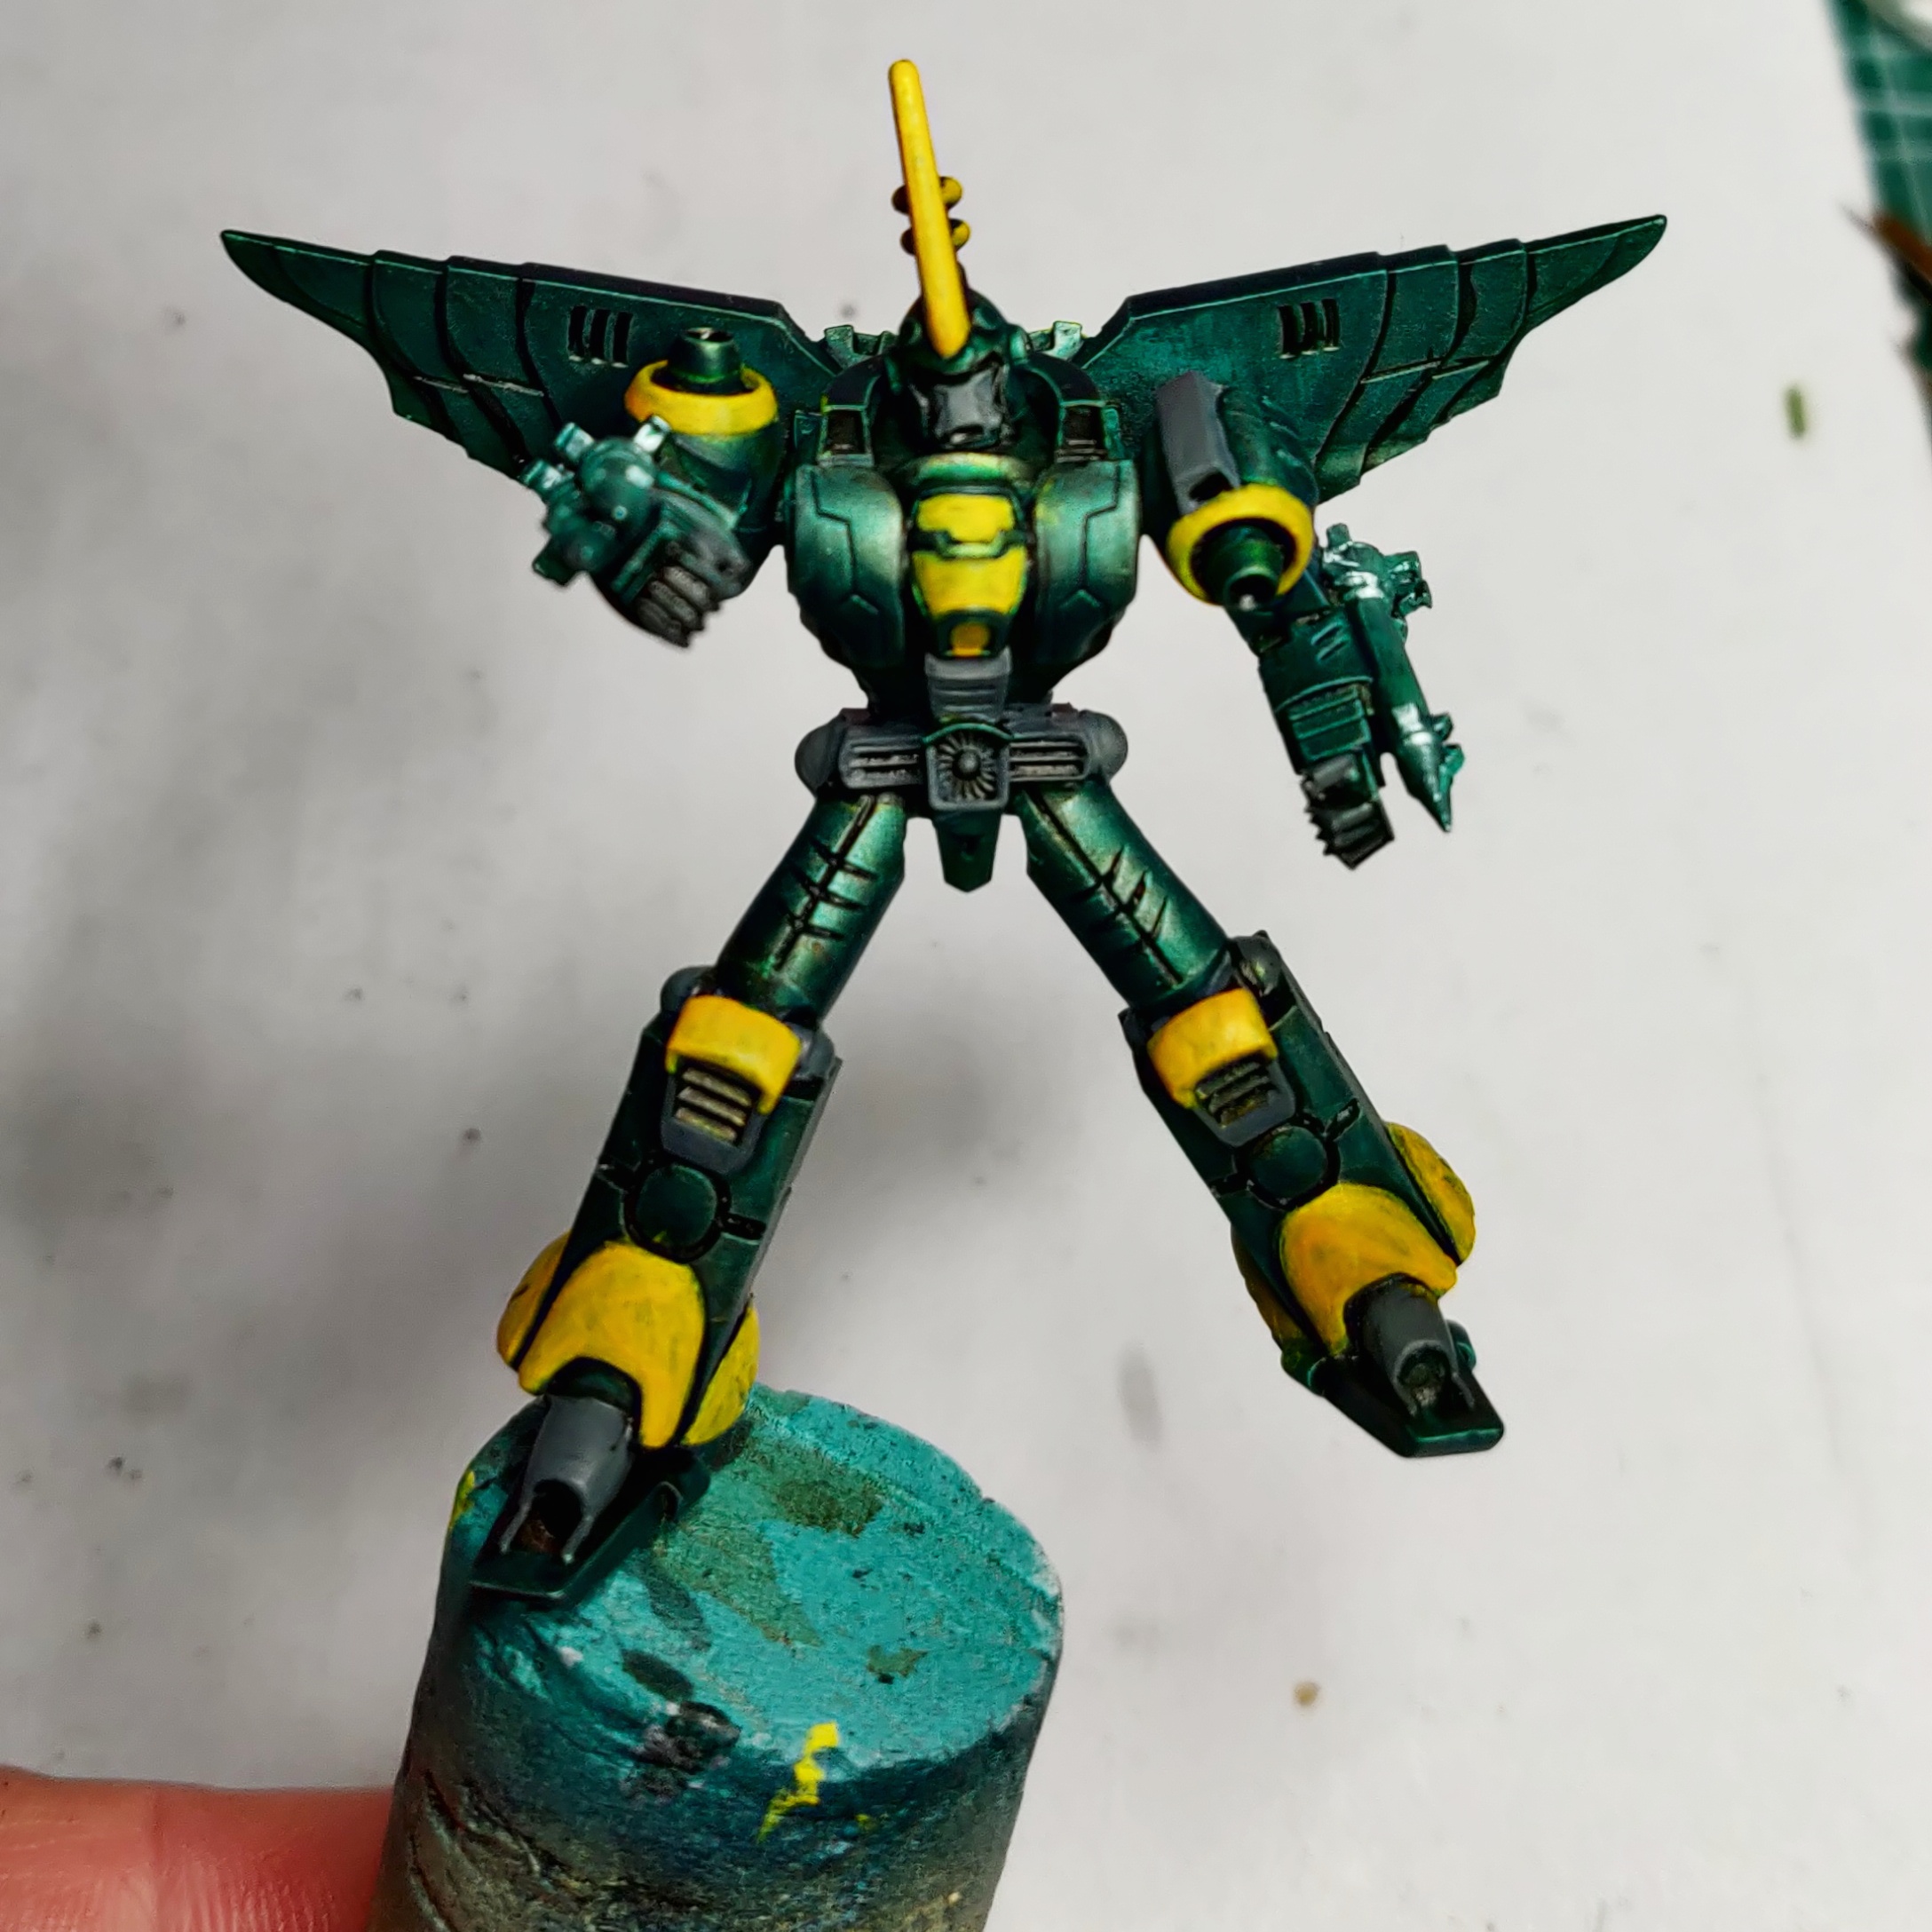
Day 16...
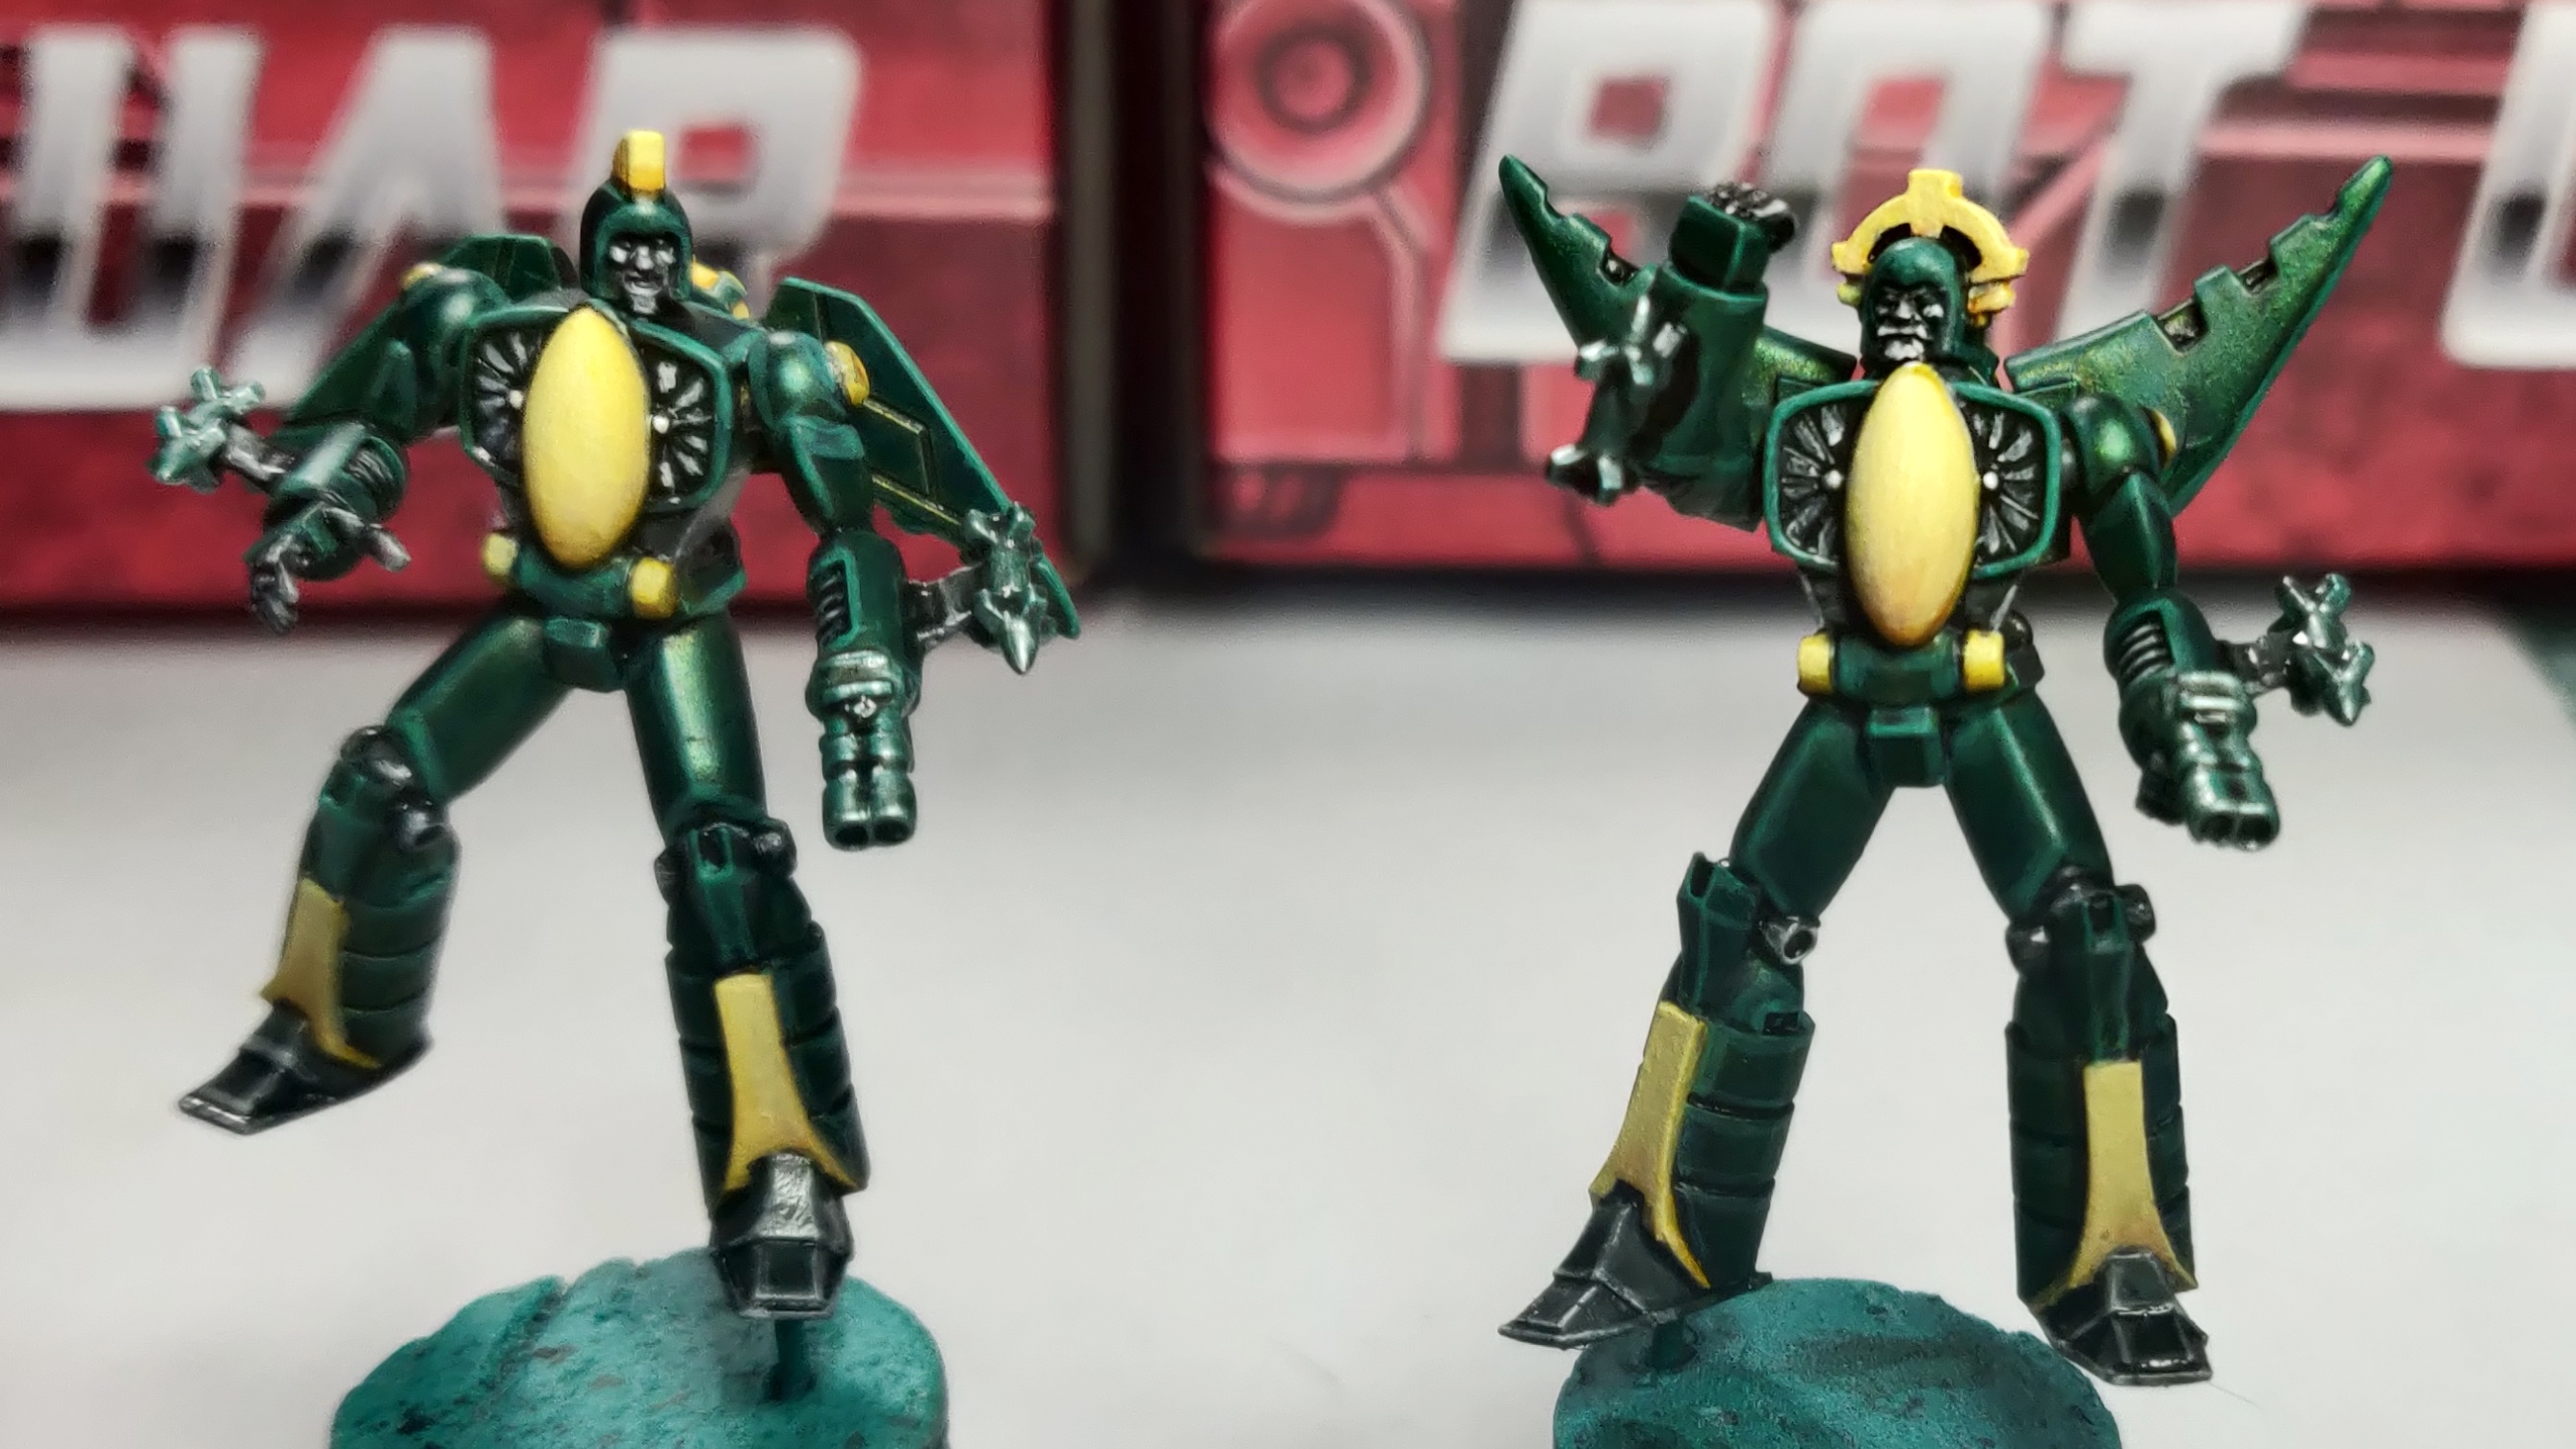
Kamen coming along
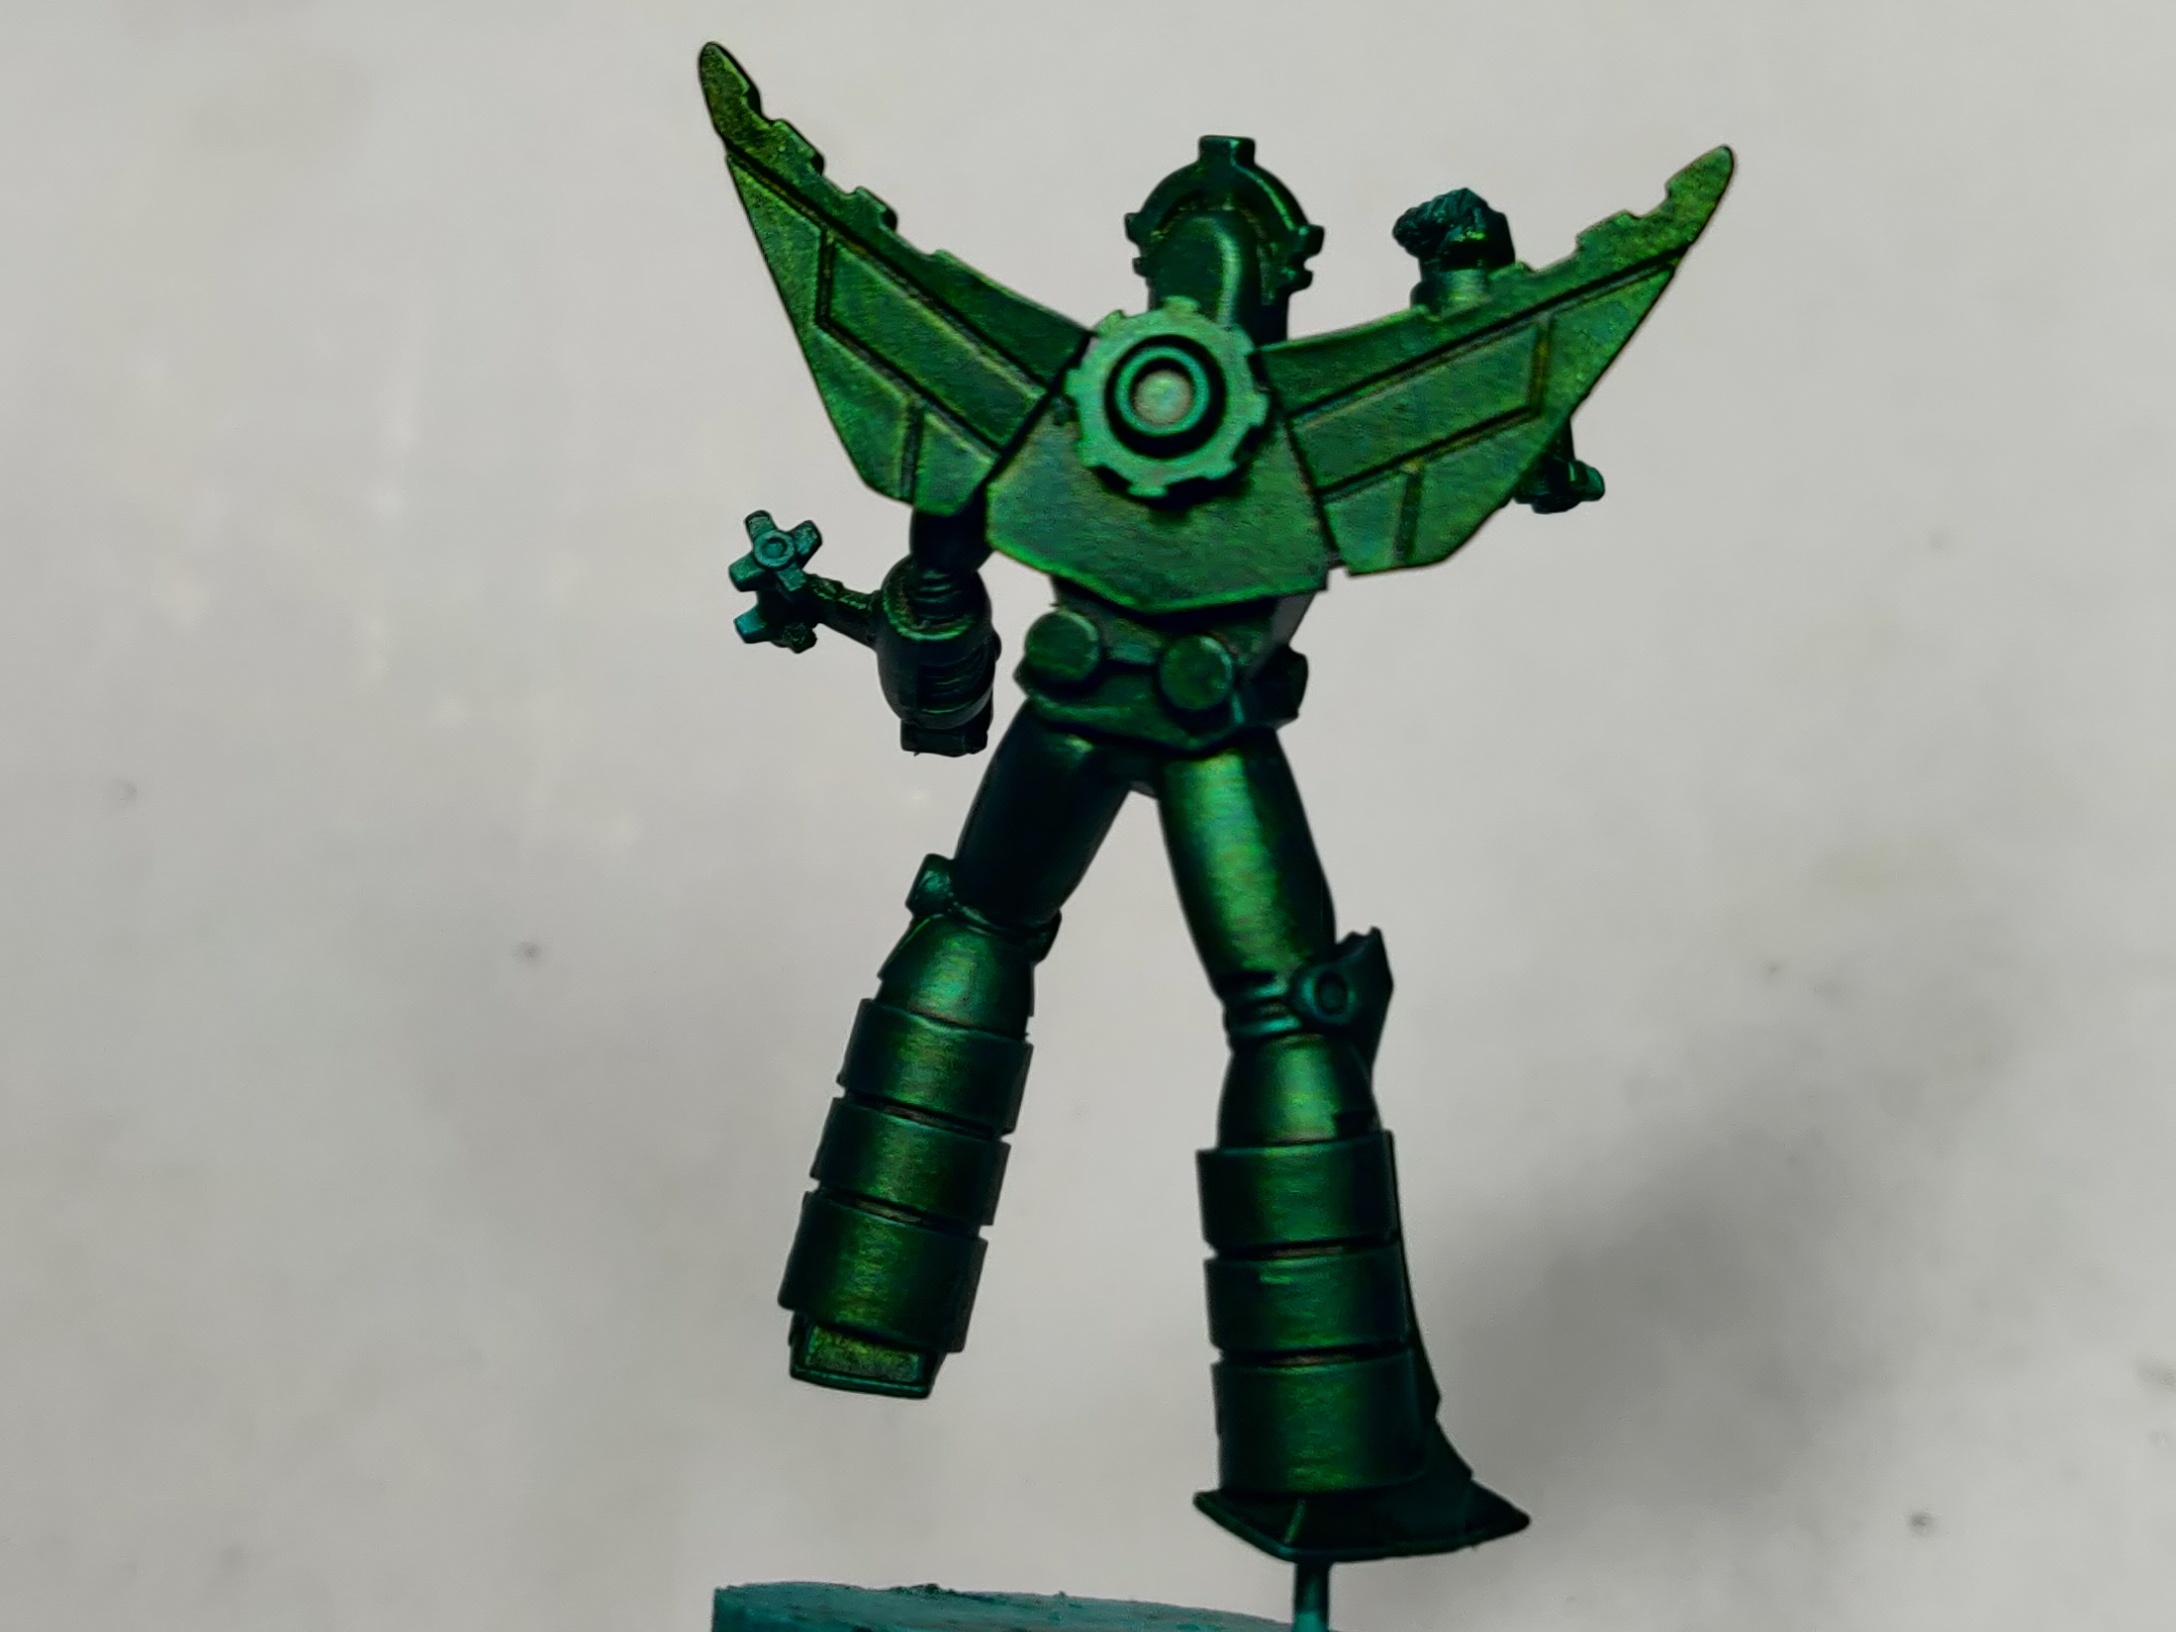
Today I finished up the final details of Stingray and Moray, painting the eyes and adding some more contrast points to weapons with some thinned down Army Painter Dark Tone.
The eye lenses were first painted in Pro-acryl purple, slightly larger than the eye detail to create a bit of surrounding glow, the detail was then painted on wyih Pro-acryl Magenta, and for a little highlight Scale75 Hykey Yellow was mixed into the magenta.
 Monument Pro-acryl Purple, Pro-acryl Magenta, Scale75 Hykey Yellow
 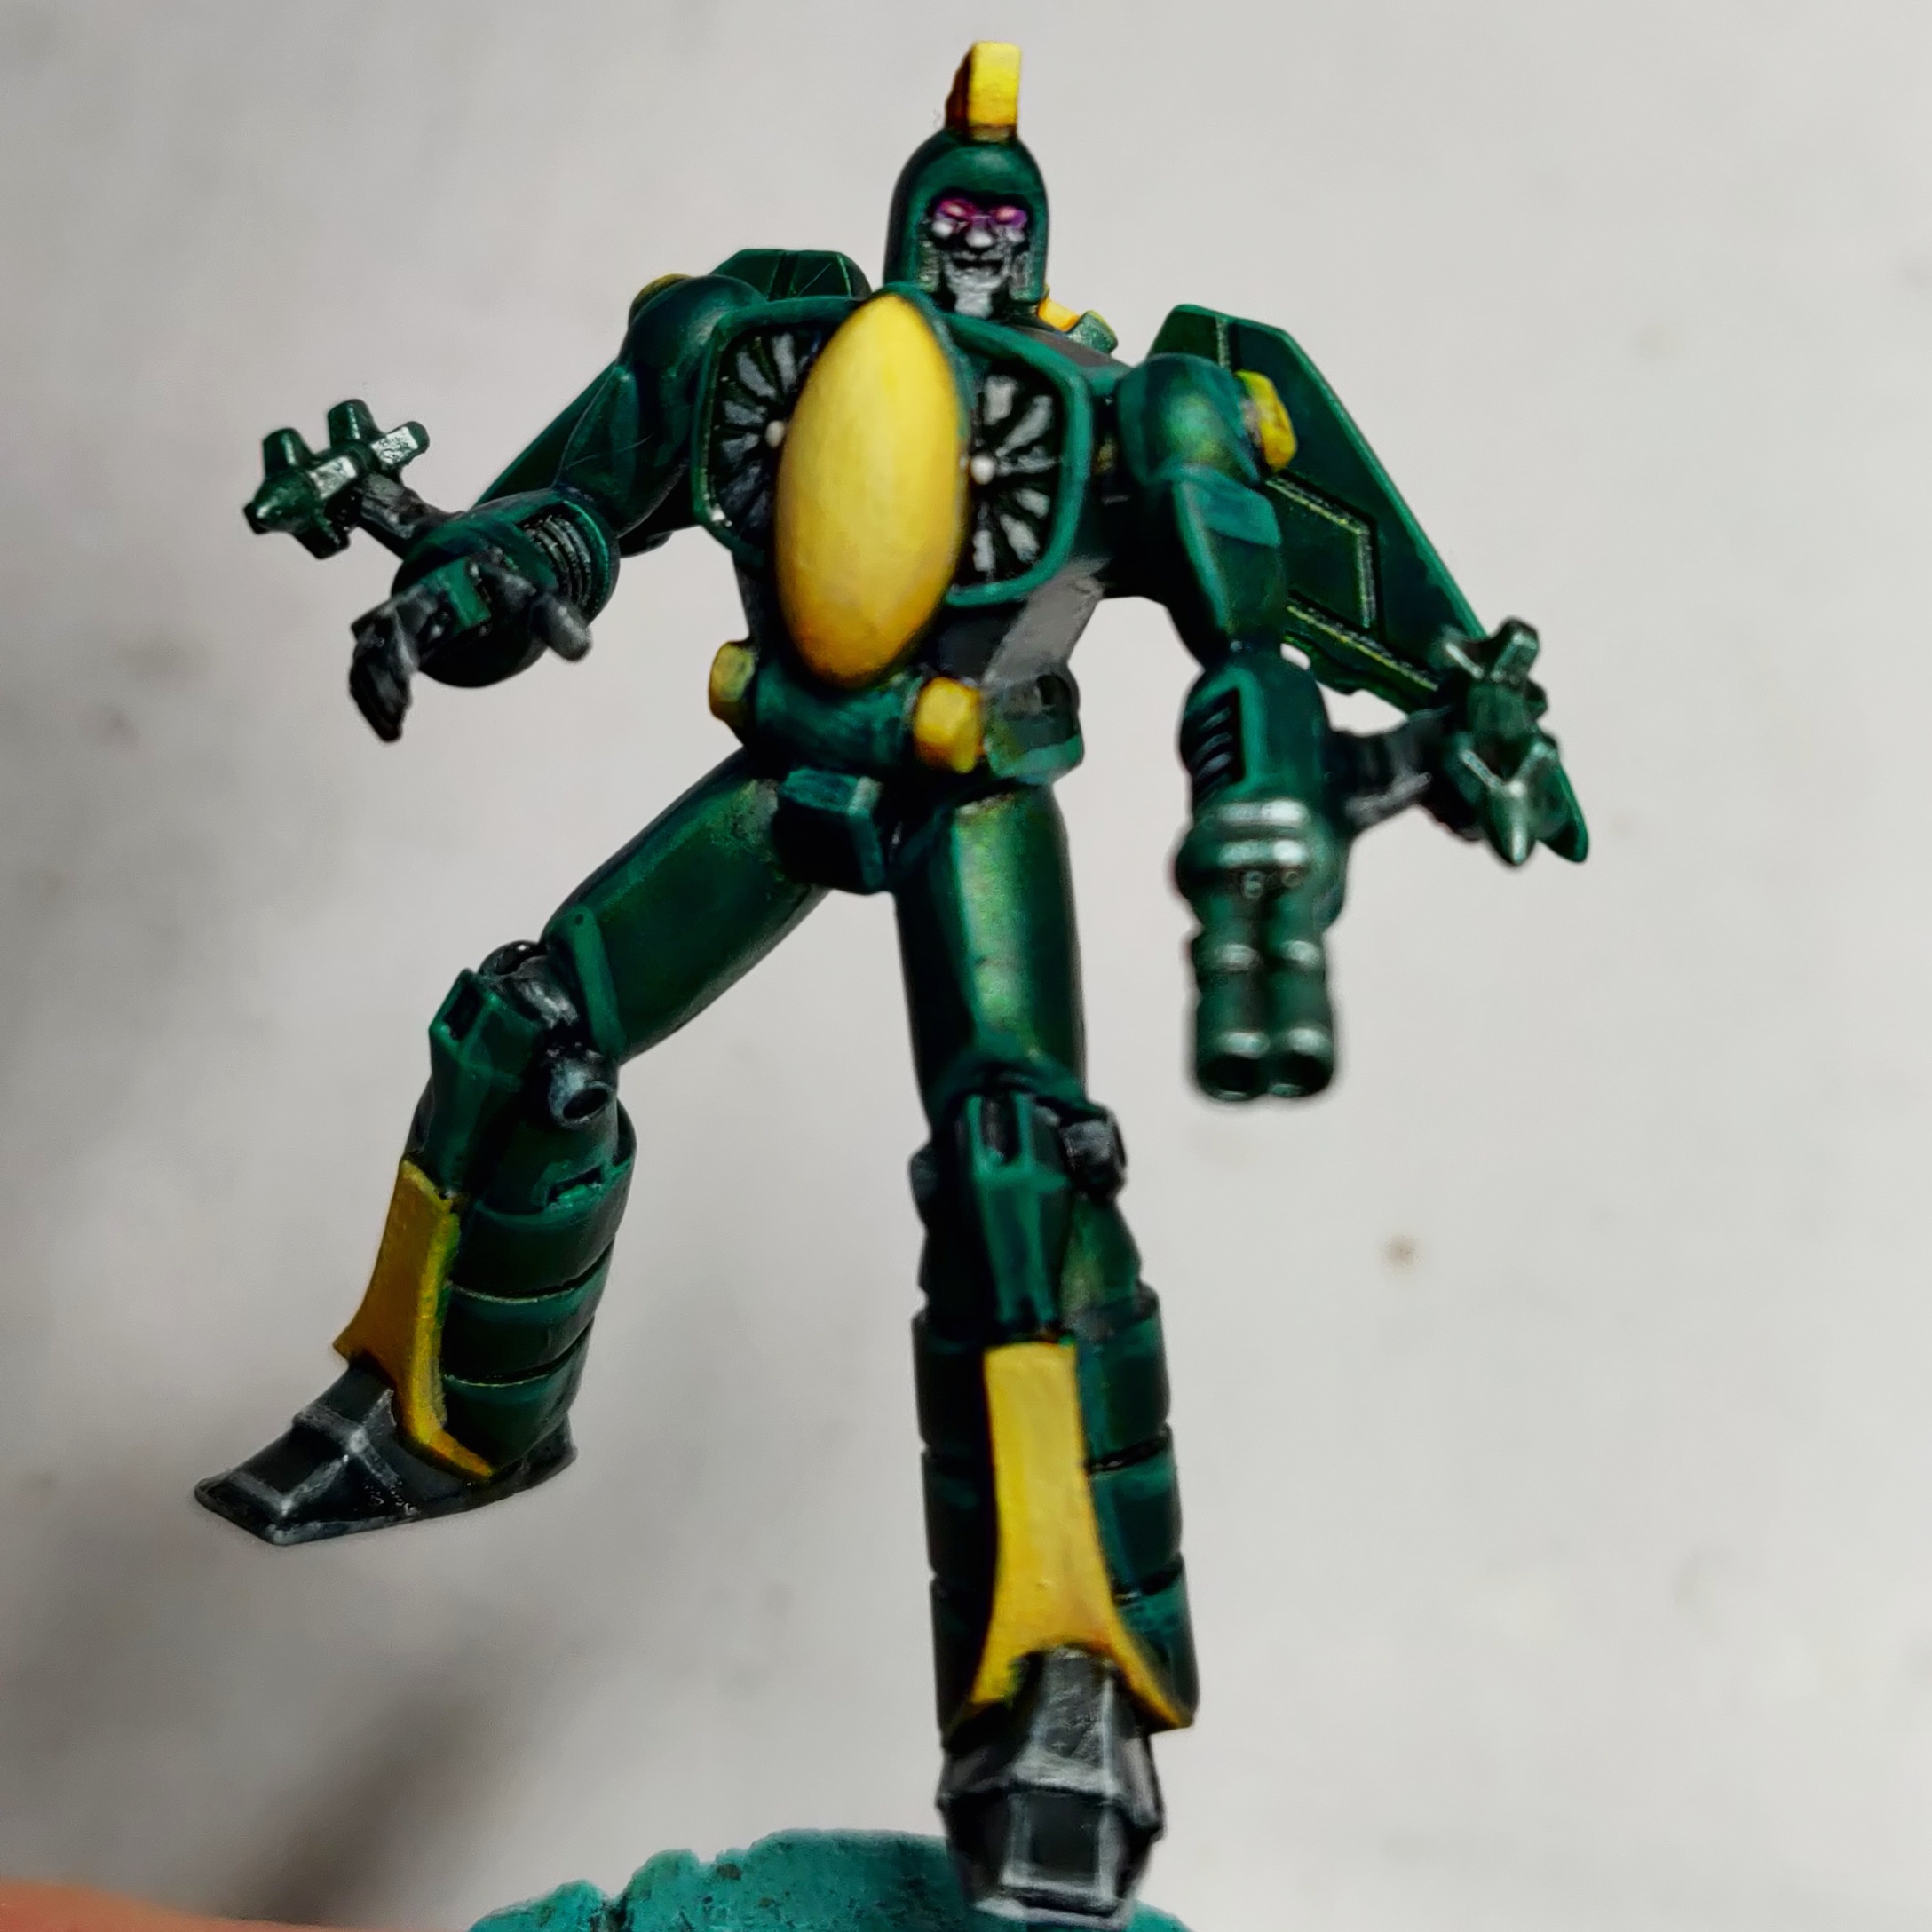 Stingray
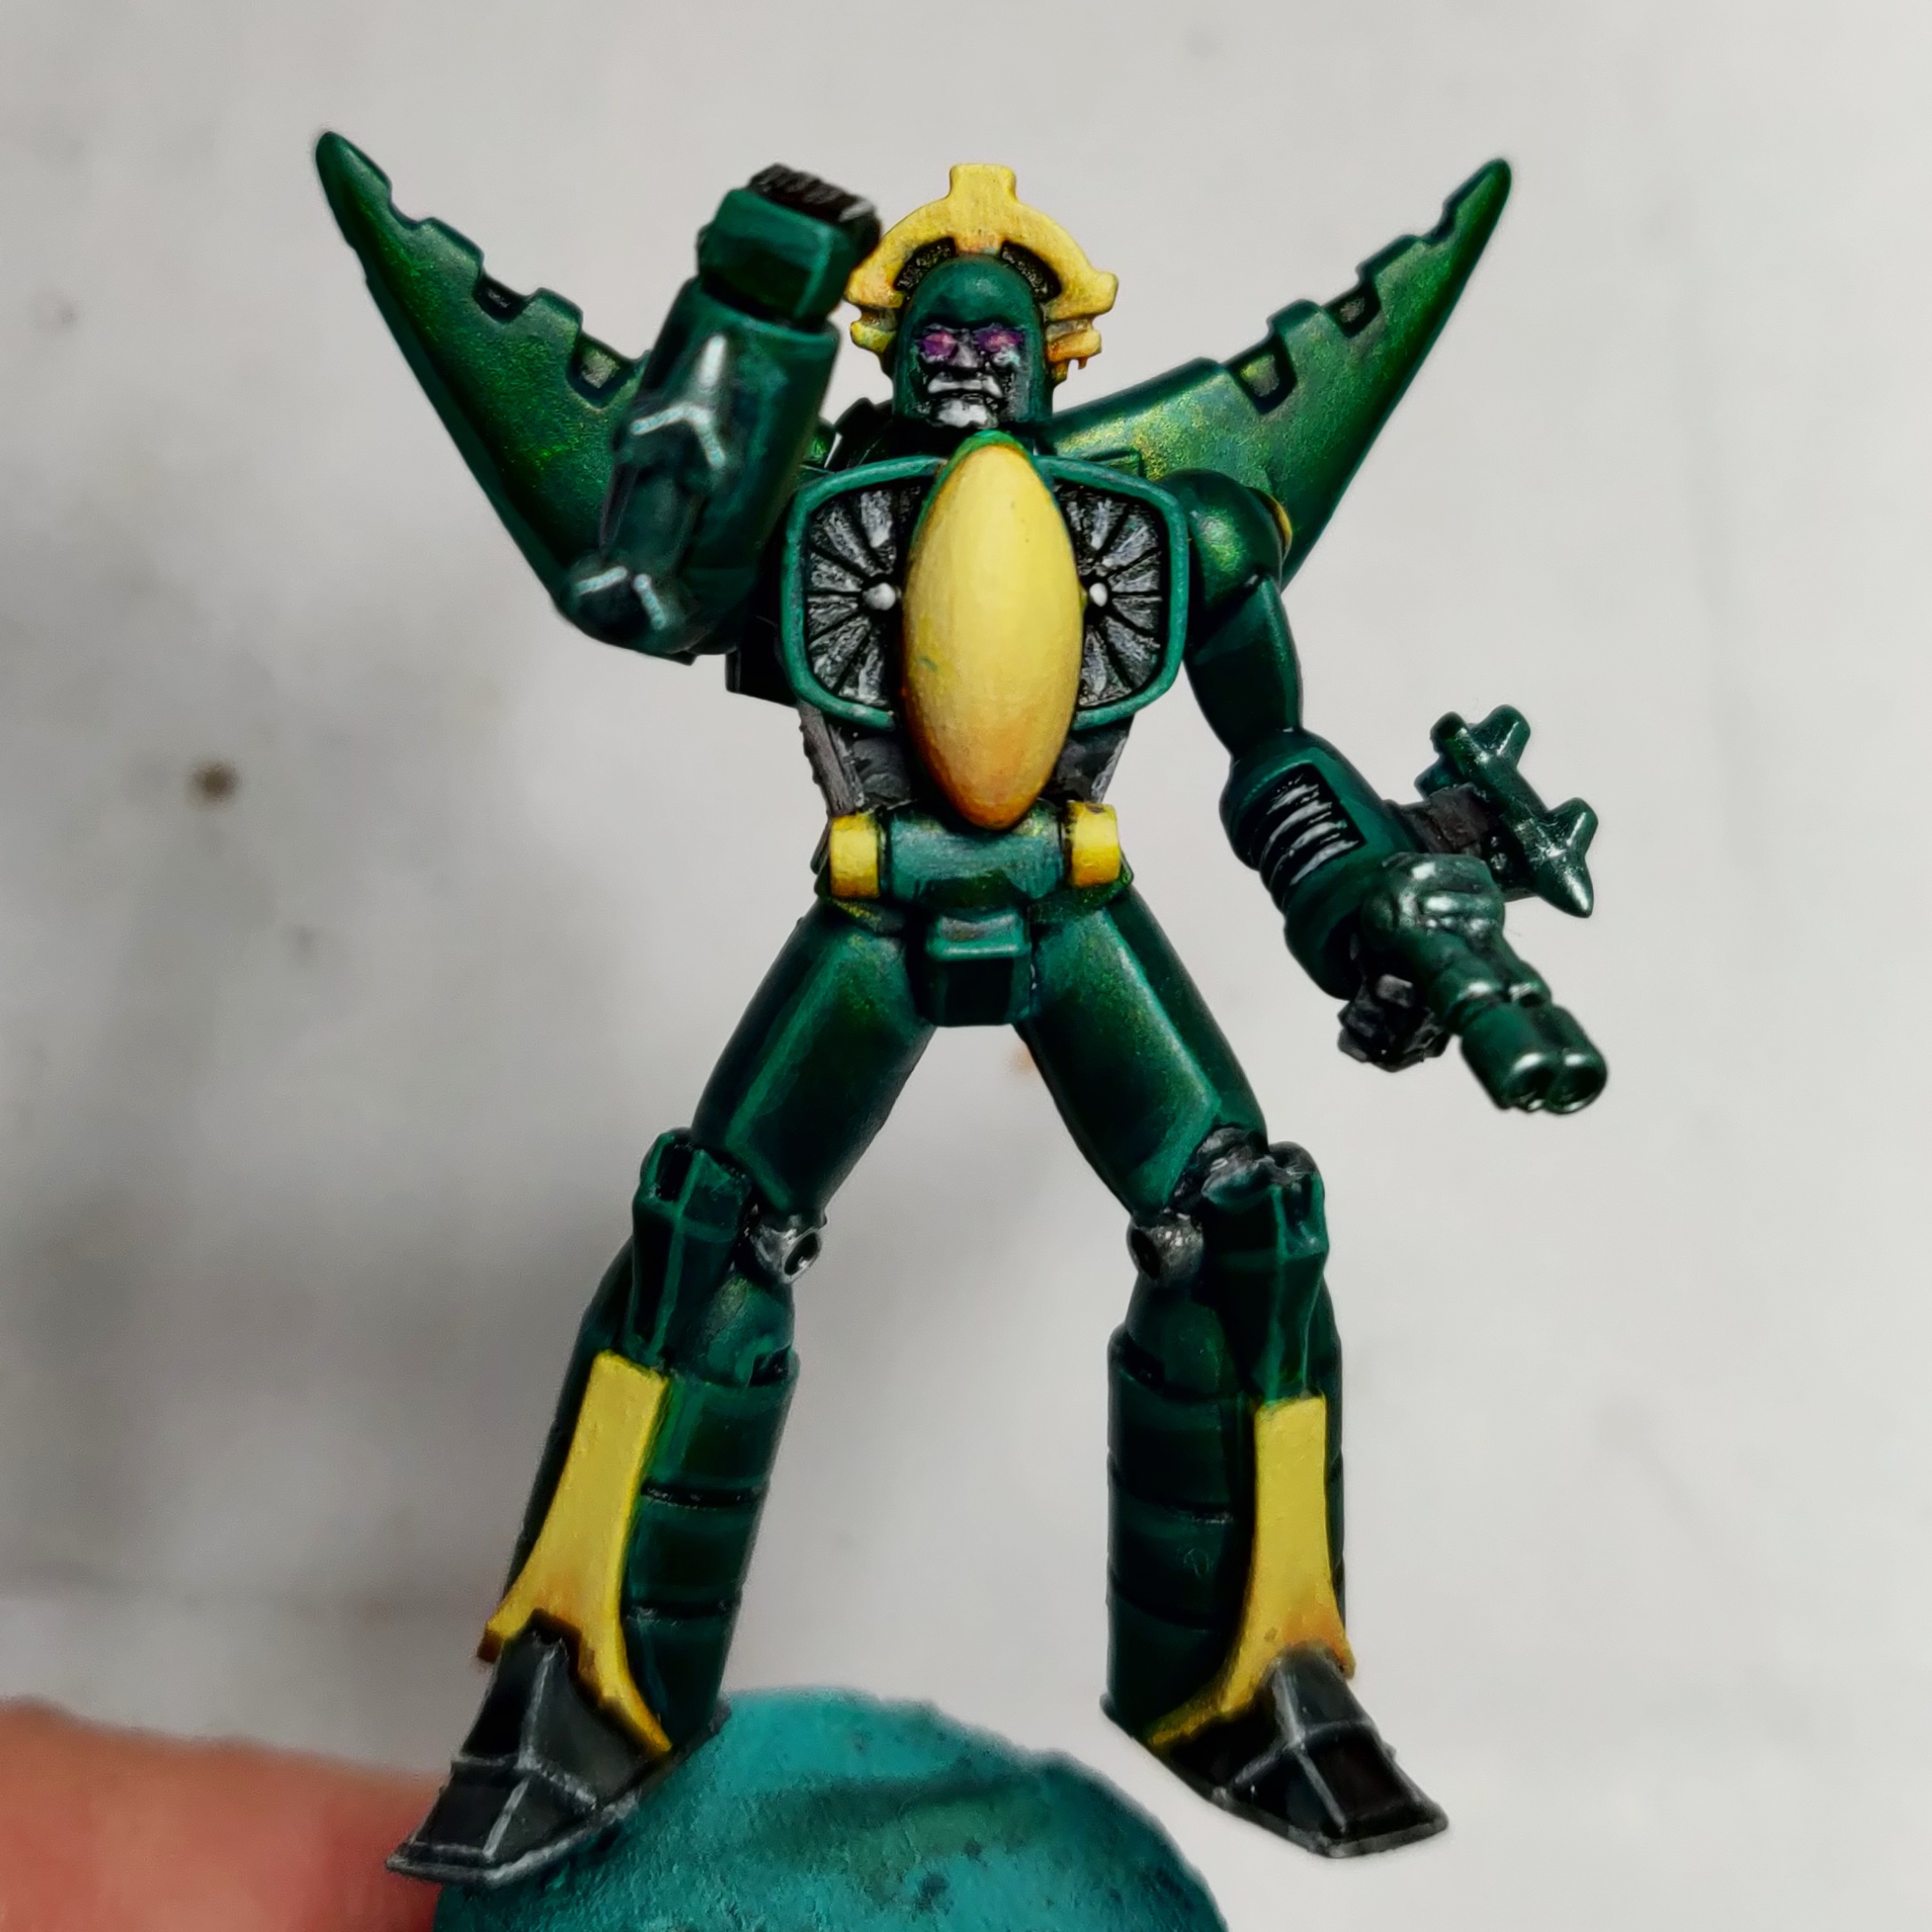 Moray
MorayFor Kamen, I began to block in the yellow details, with the Pro-acryl and P3 mix as normal. I may have gone a little overboard in picking out these areas, hopefully they won’t look to garish when I add the highlight and shade glazes tomorrow.
I also blacklined a number of details to help make the pop out from the main model. I actually did this before starting the yellow to try and reduce the amount of repainting I have to do when touching up areas. I could have been more careful, but time was not on my side today and I had to make a solid start to be in for a chance to finish him tomorrow, and get Leviathan done as well in the remaining days. Its going to be close
 Kamen supporting both the Wallabies and Green Bay Packers
 Day 17...
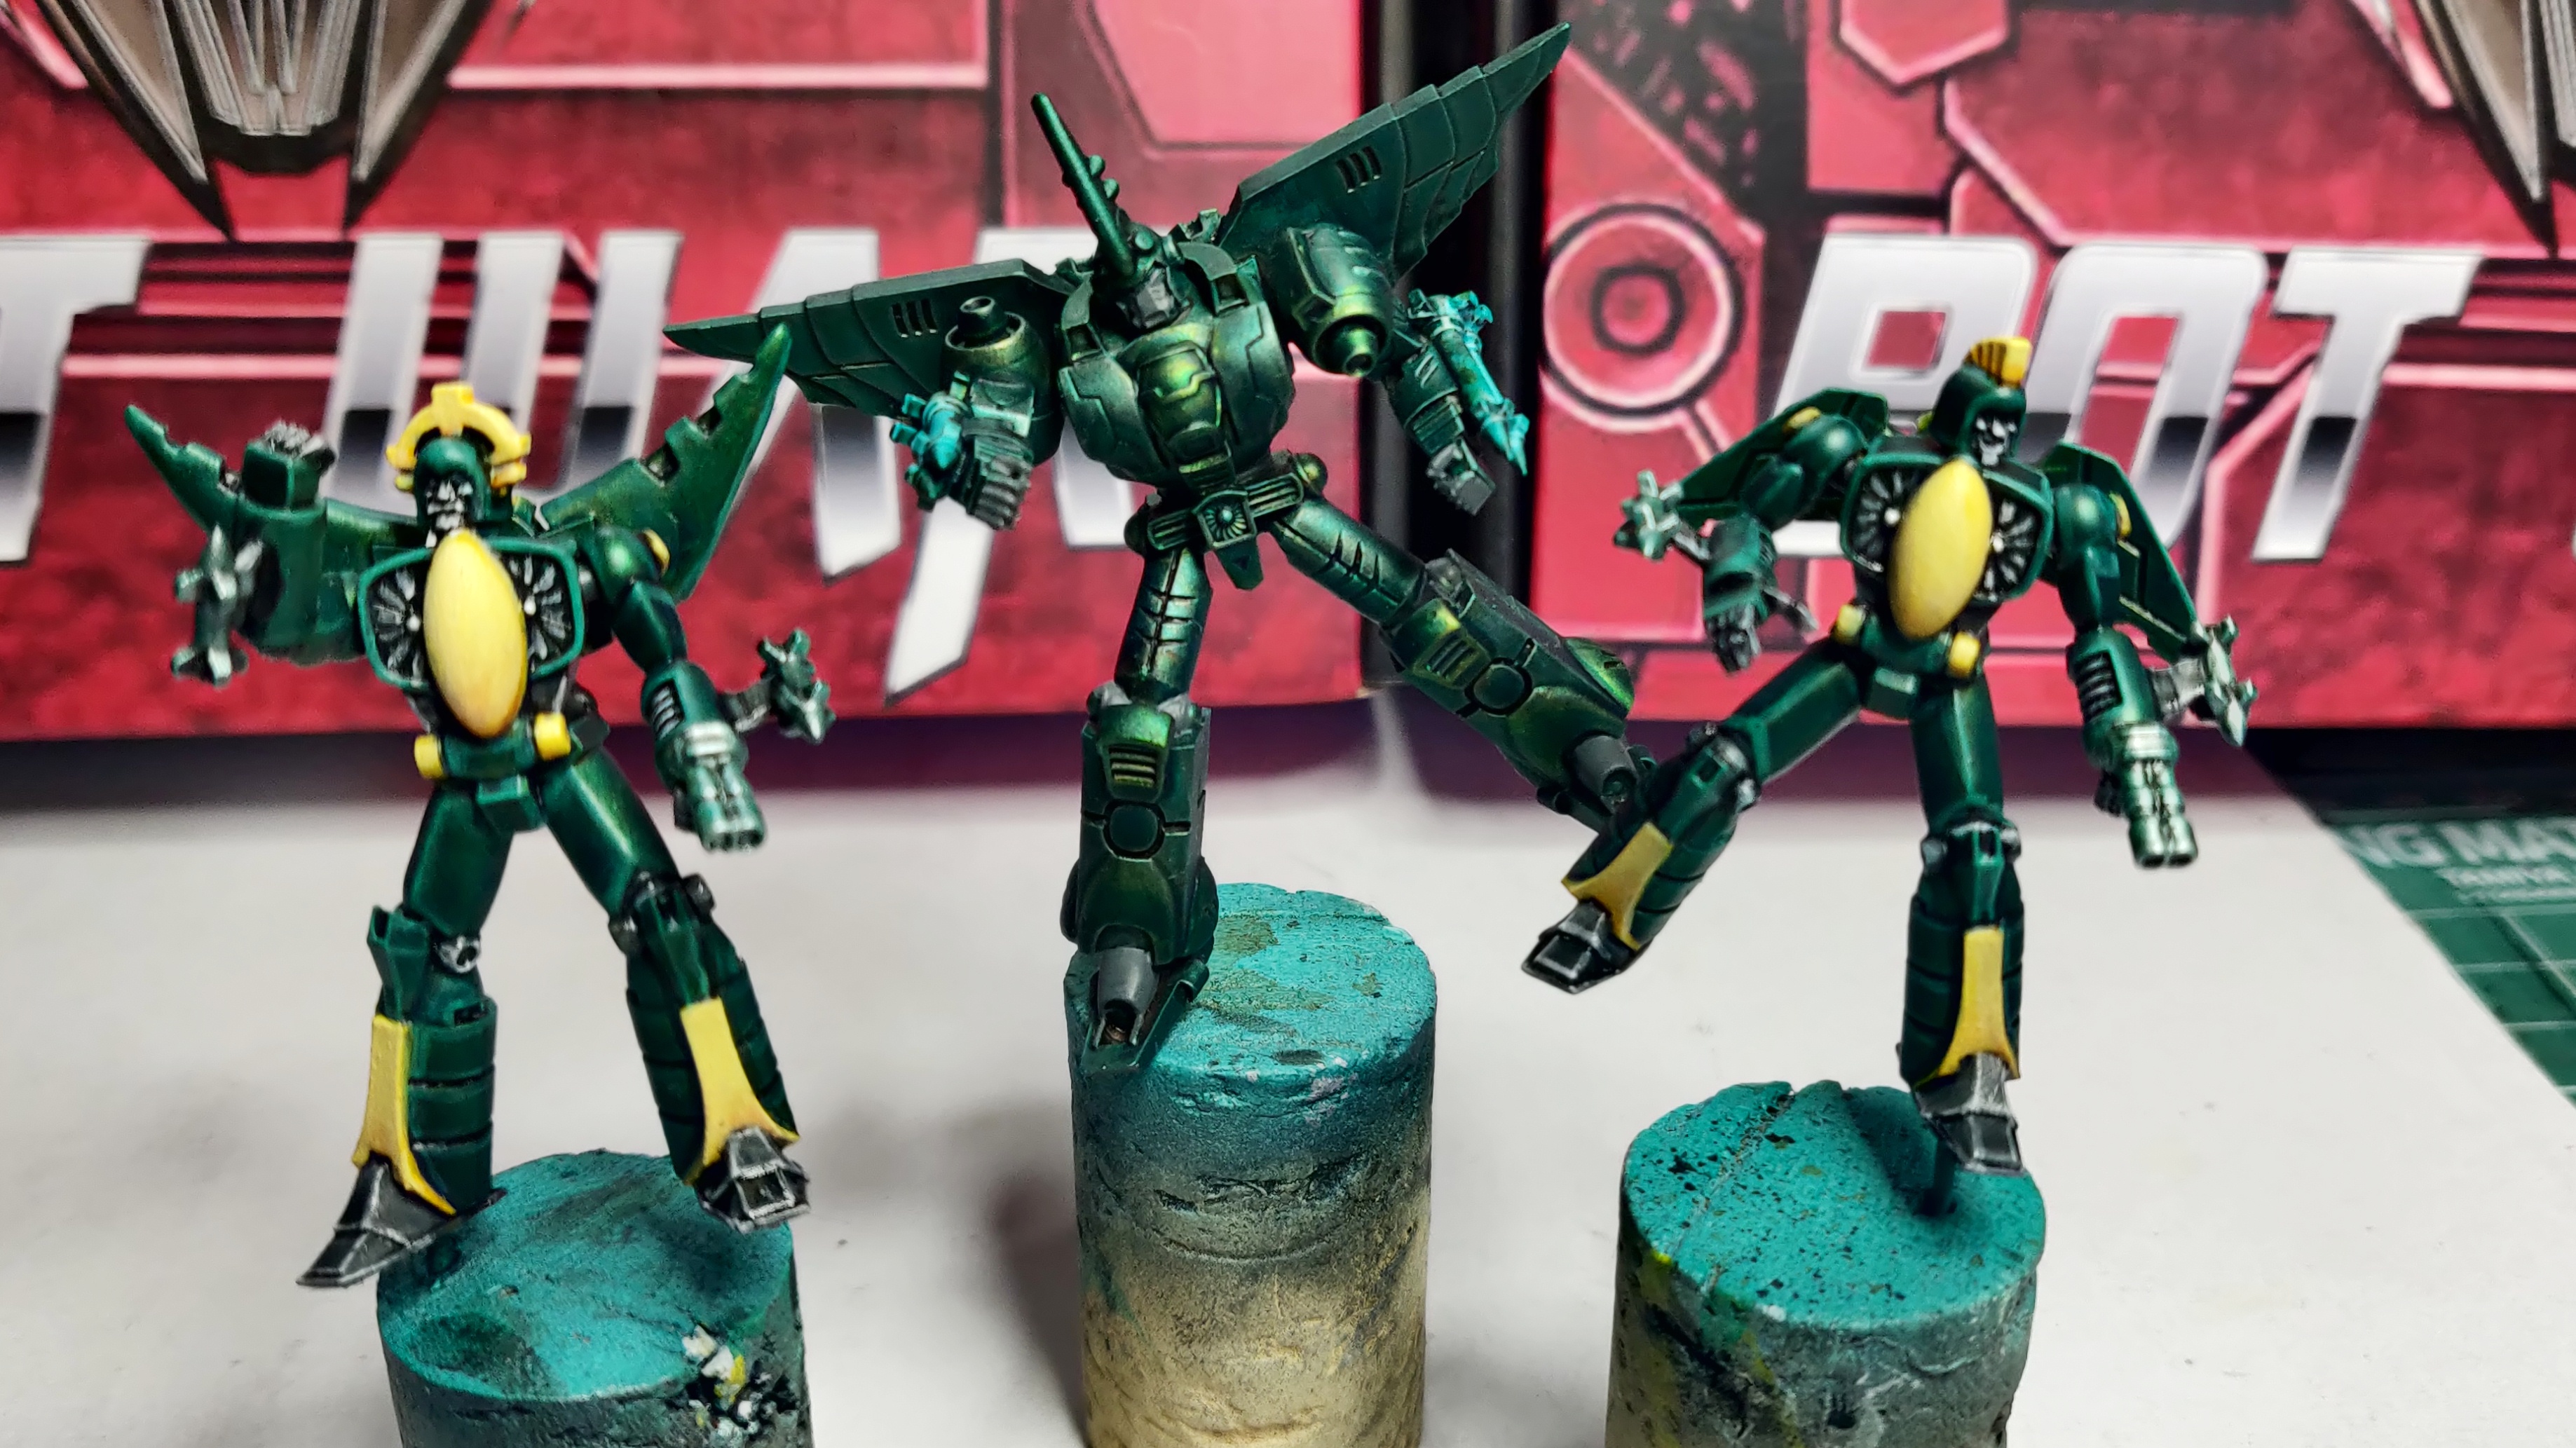
Kamen completed
 Starting position for today
 Wrapping up Kamen today will give me 3 days to focus on Leviathan. He’s a rather big chap but everything has scaled up so it should be achievable.
Kamen had some horrendous yellow foundations to work from, but this was the first thing I tackled, using P3 Blazing Ink to first draw glazes down towards the bottom of the details, then using Scale75 Hykey Yellow drawing glazes upward to finish at the high points. Increasing the amount of the Hykey Yellow glazes really helped to smooth out the transitions, and the effect was finalised with a small highlight of Reaper MSP Foggy Grey (as I had it to hand). This worked well in the central canopy details, the shin guards, and the head fin.
As with the other bots the main armour was edge highlighted with Surfer Orc from Scale75. I did have some issues with my detail brush and the edges did become messy (wings are a prime example of this), and not having a consistent base colour I could go back in and fix overspill or thicker edges, I did the best I could with some Aethematic Blue contrast paint to try and harmonise the colours.
Once all the remaining little details were added (like the eyes), I was happy to call this bot done.
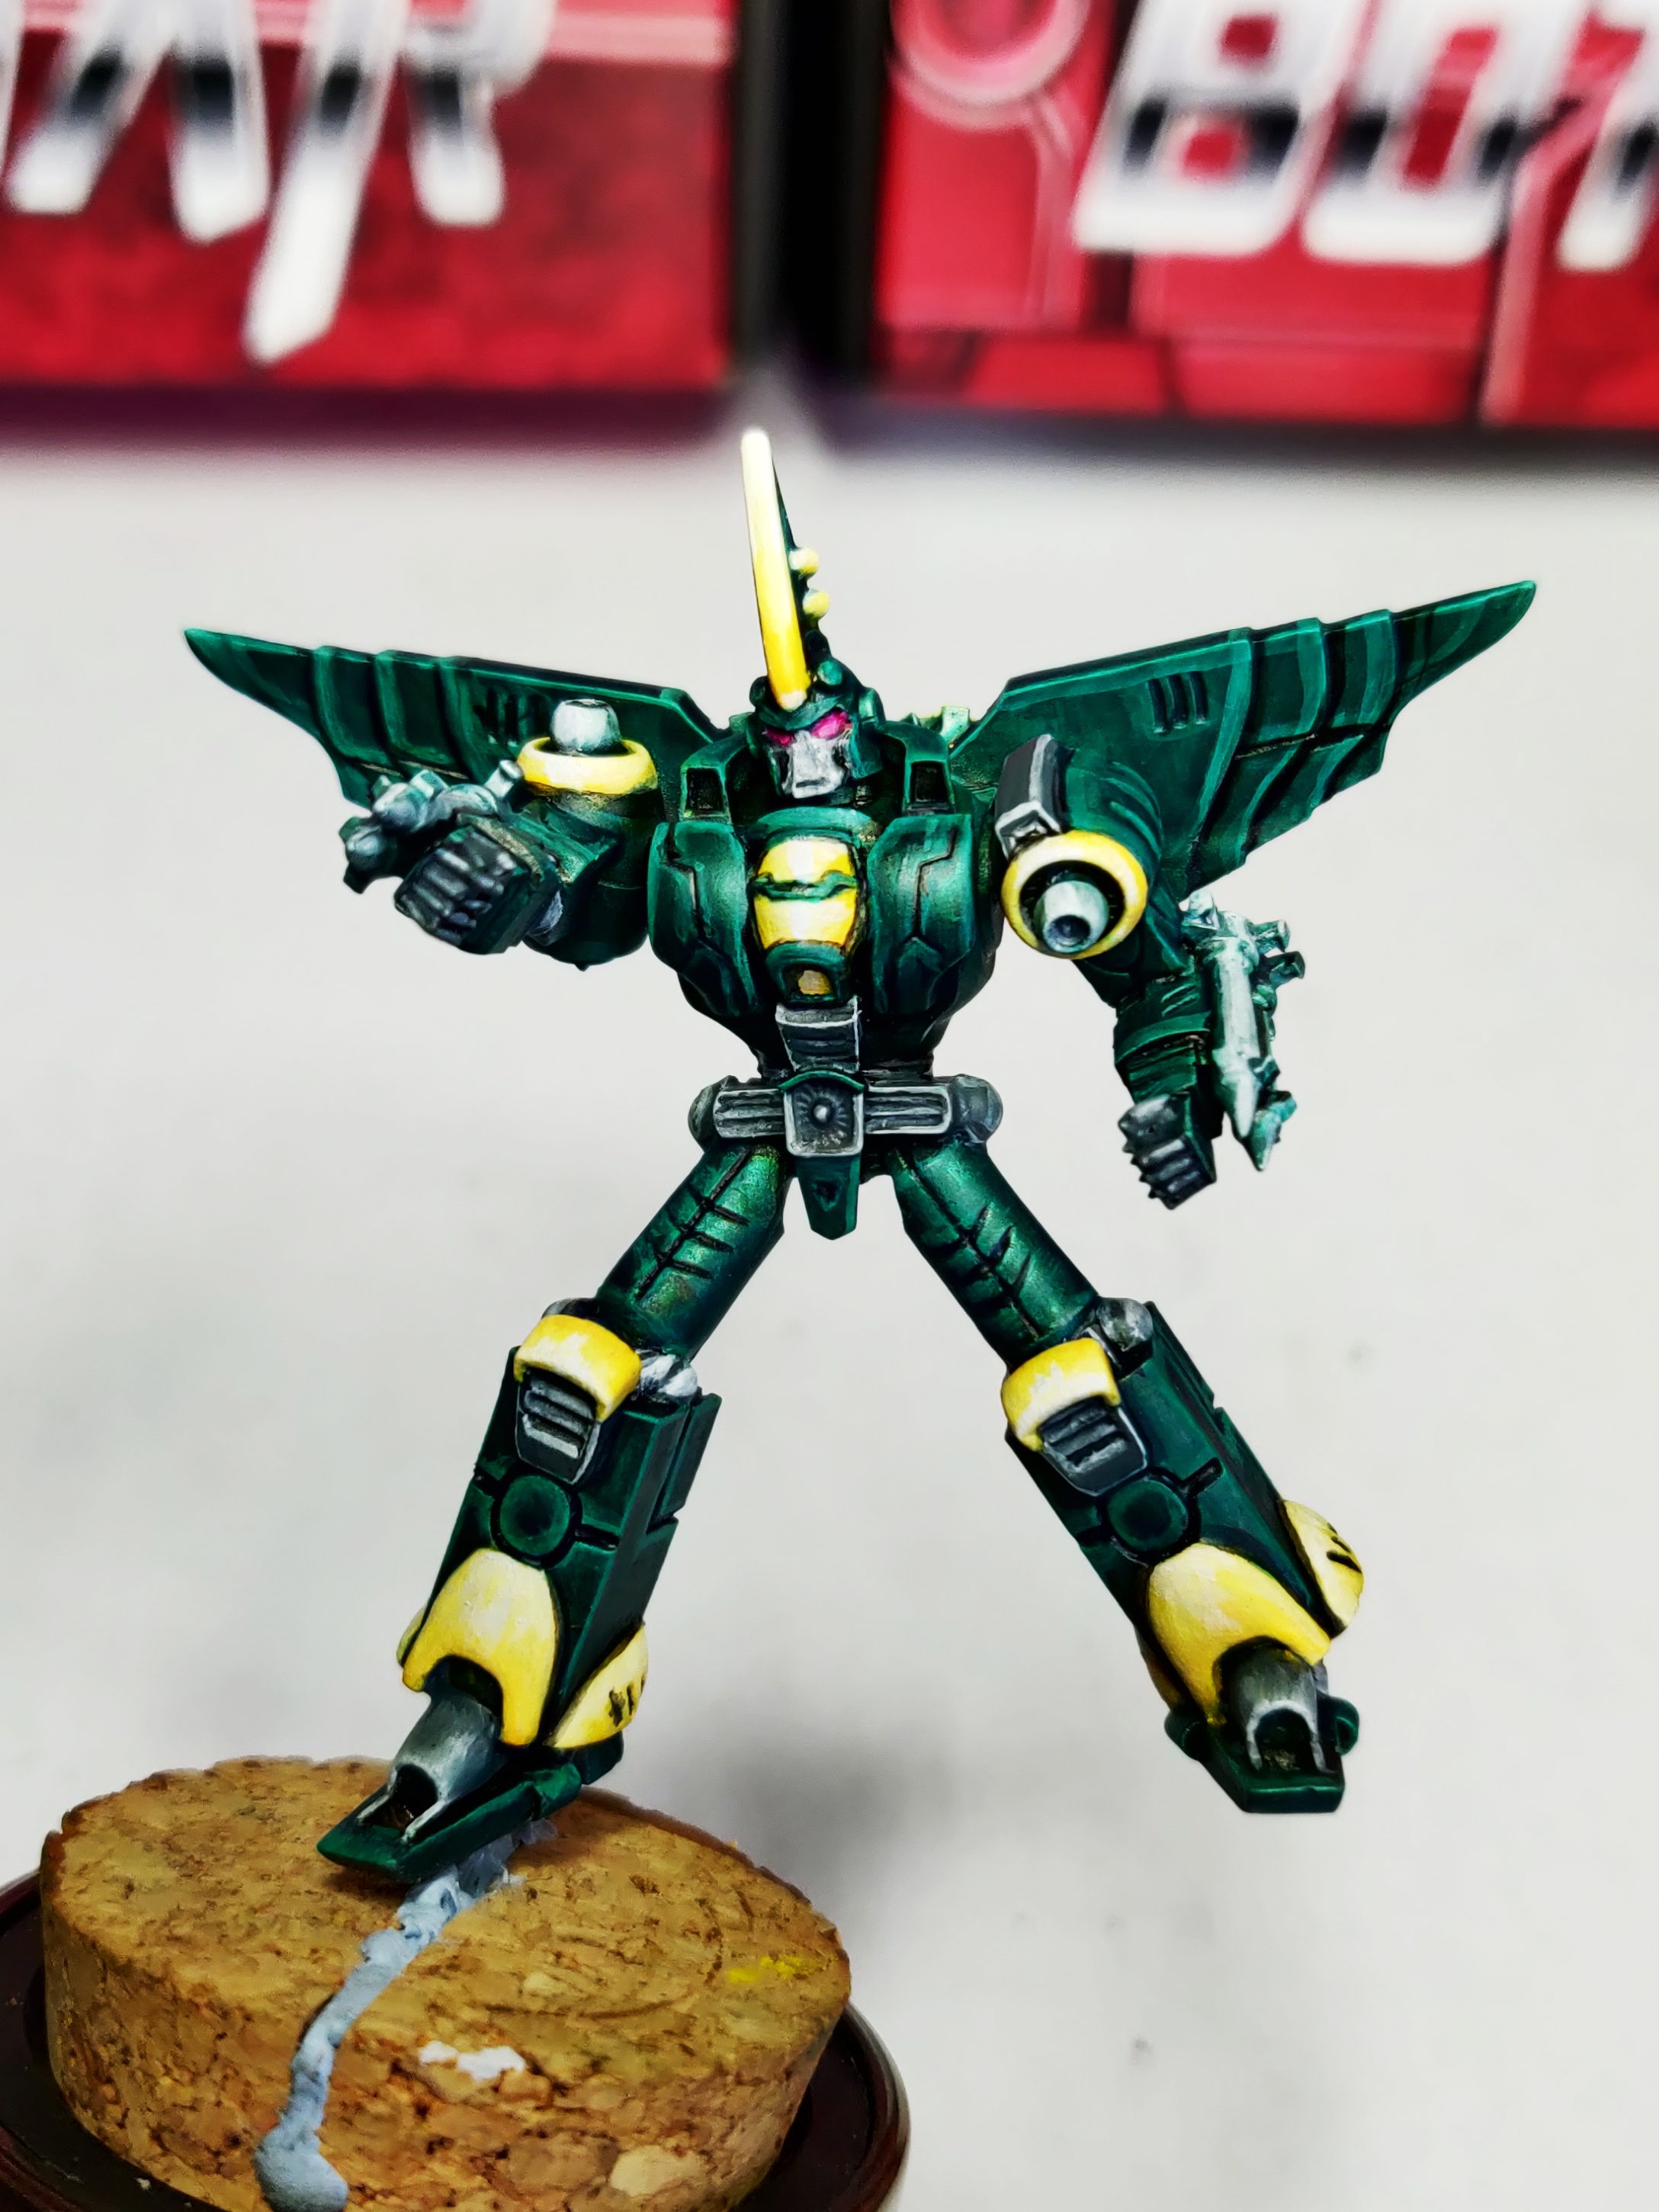 Done, not the best though
Day 17 part B...
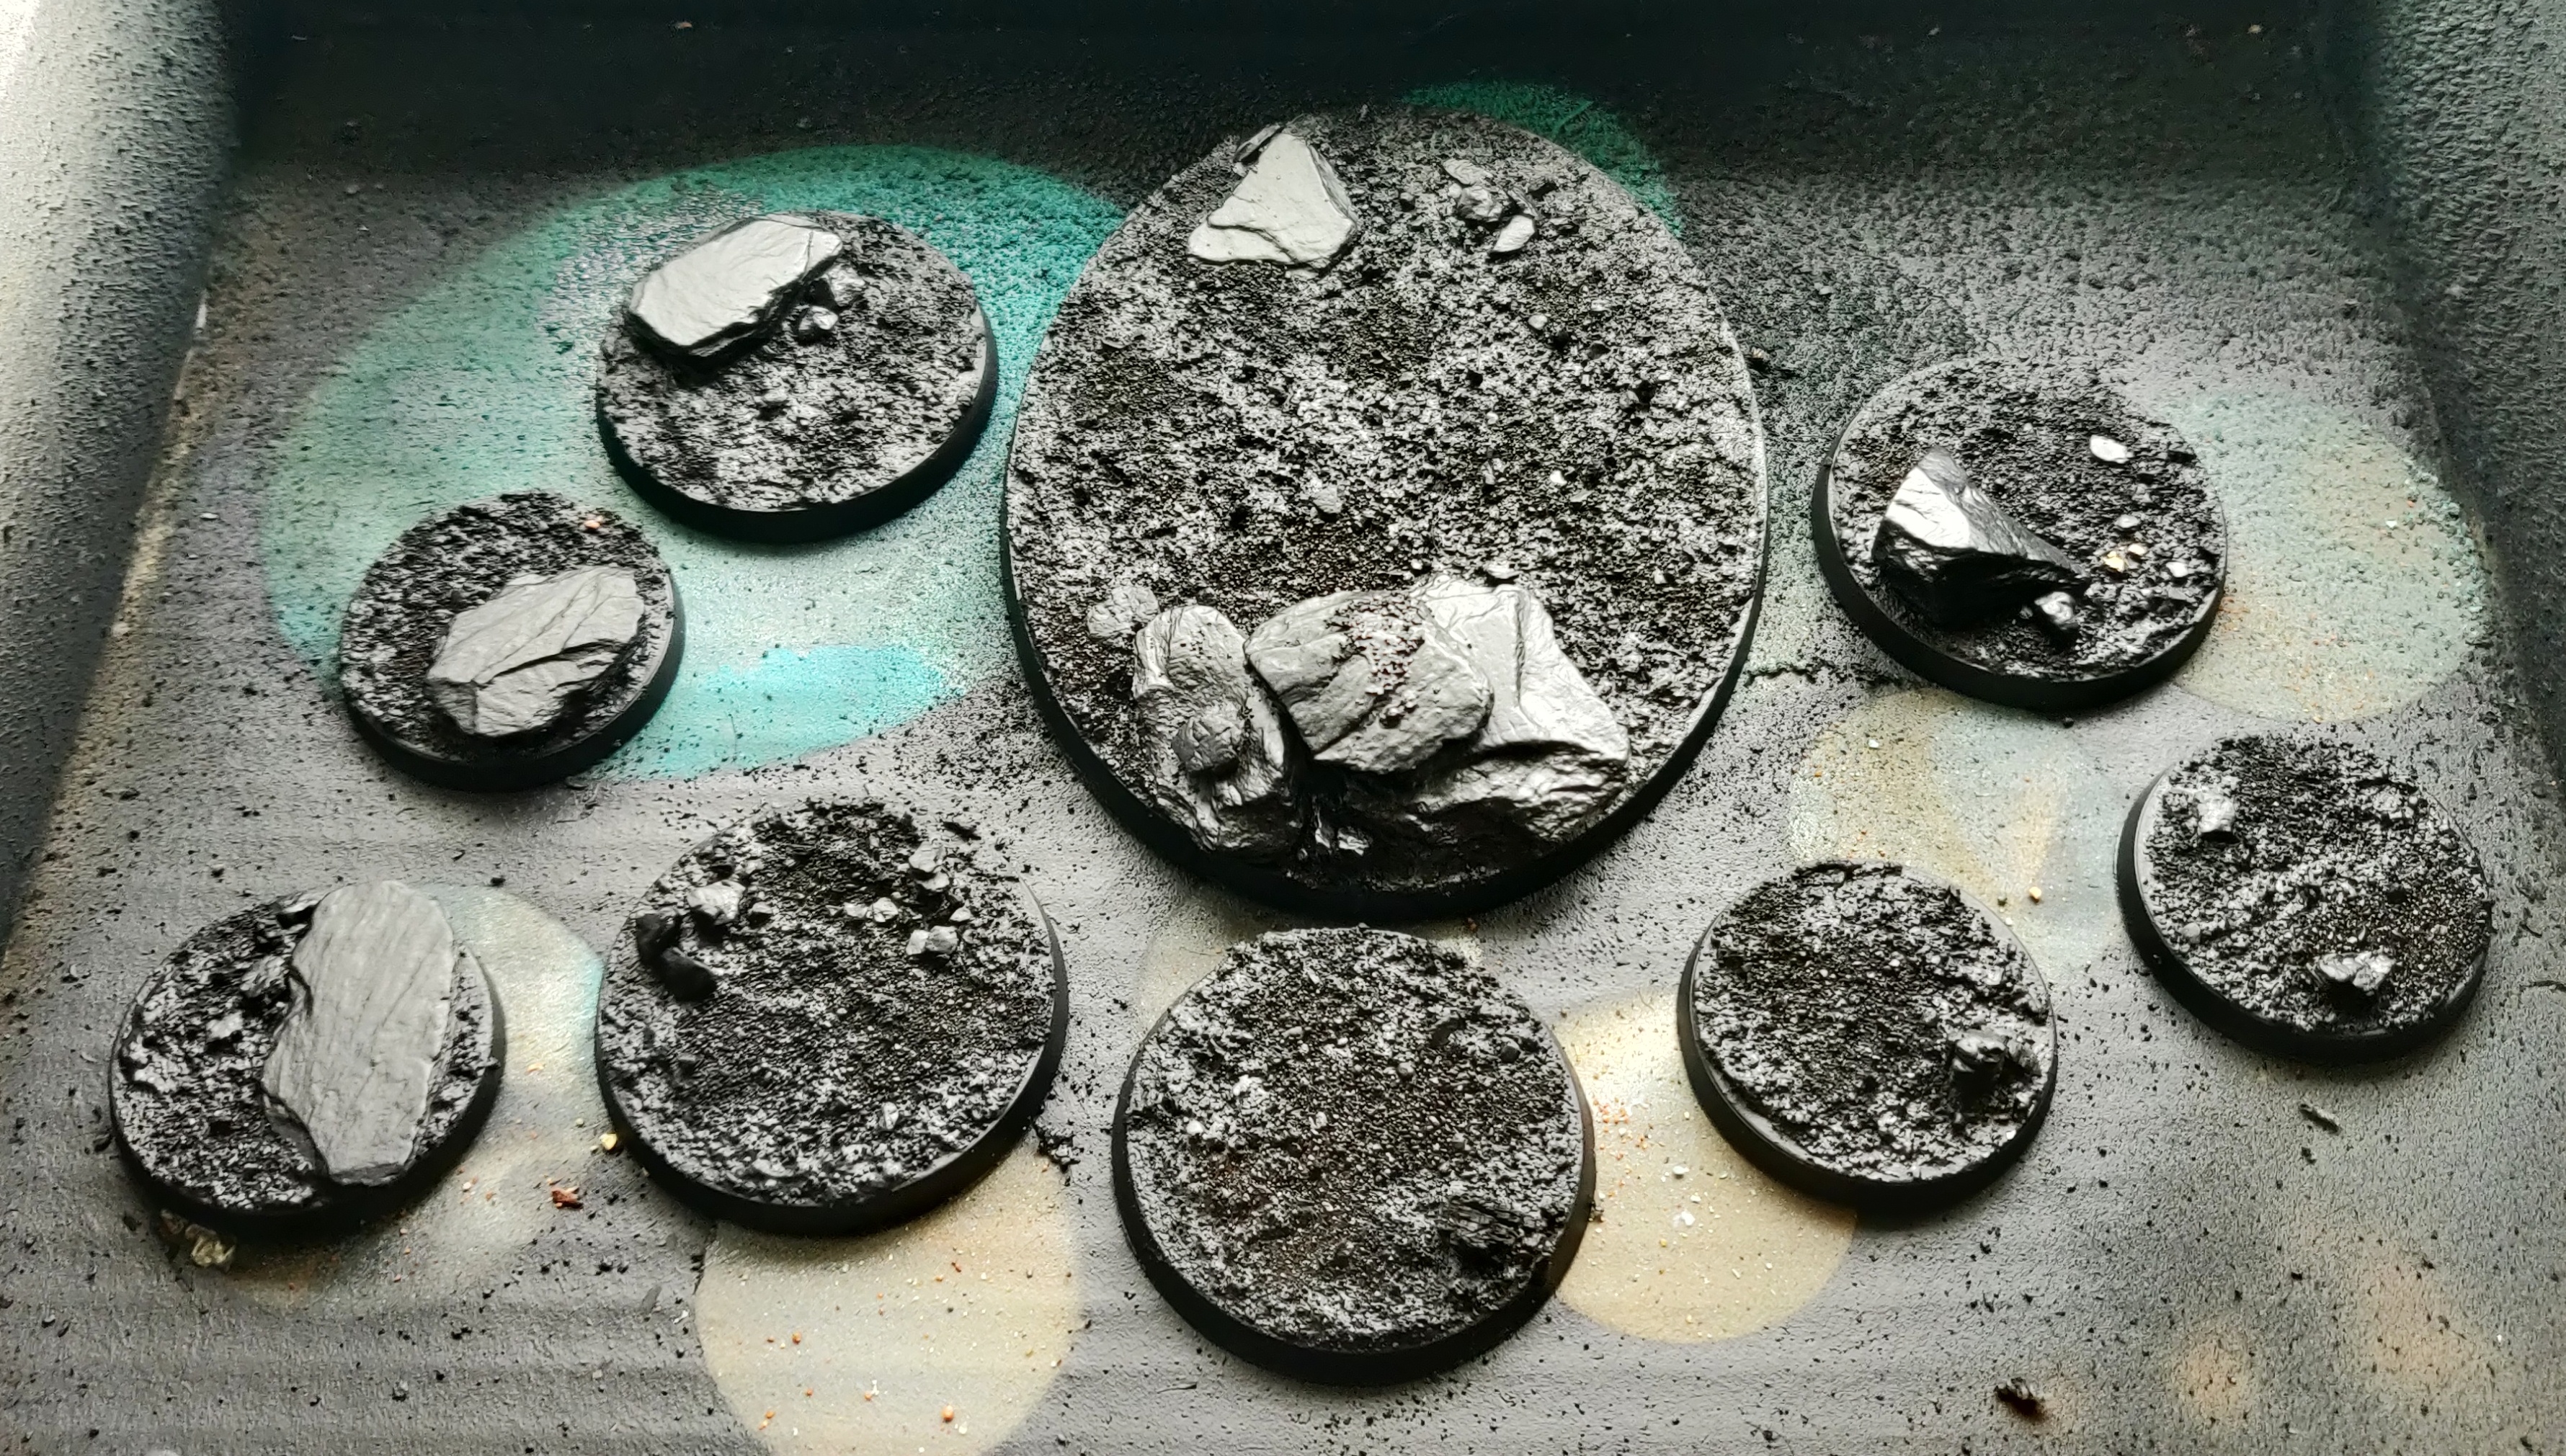
... for Basing!!
A bonus entry for today, as I need to make a start on the 9 bases so that they can set overnight and I can make use of the airbrush when I have it out tomorrow for Leviathan.
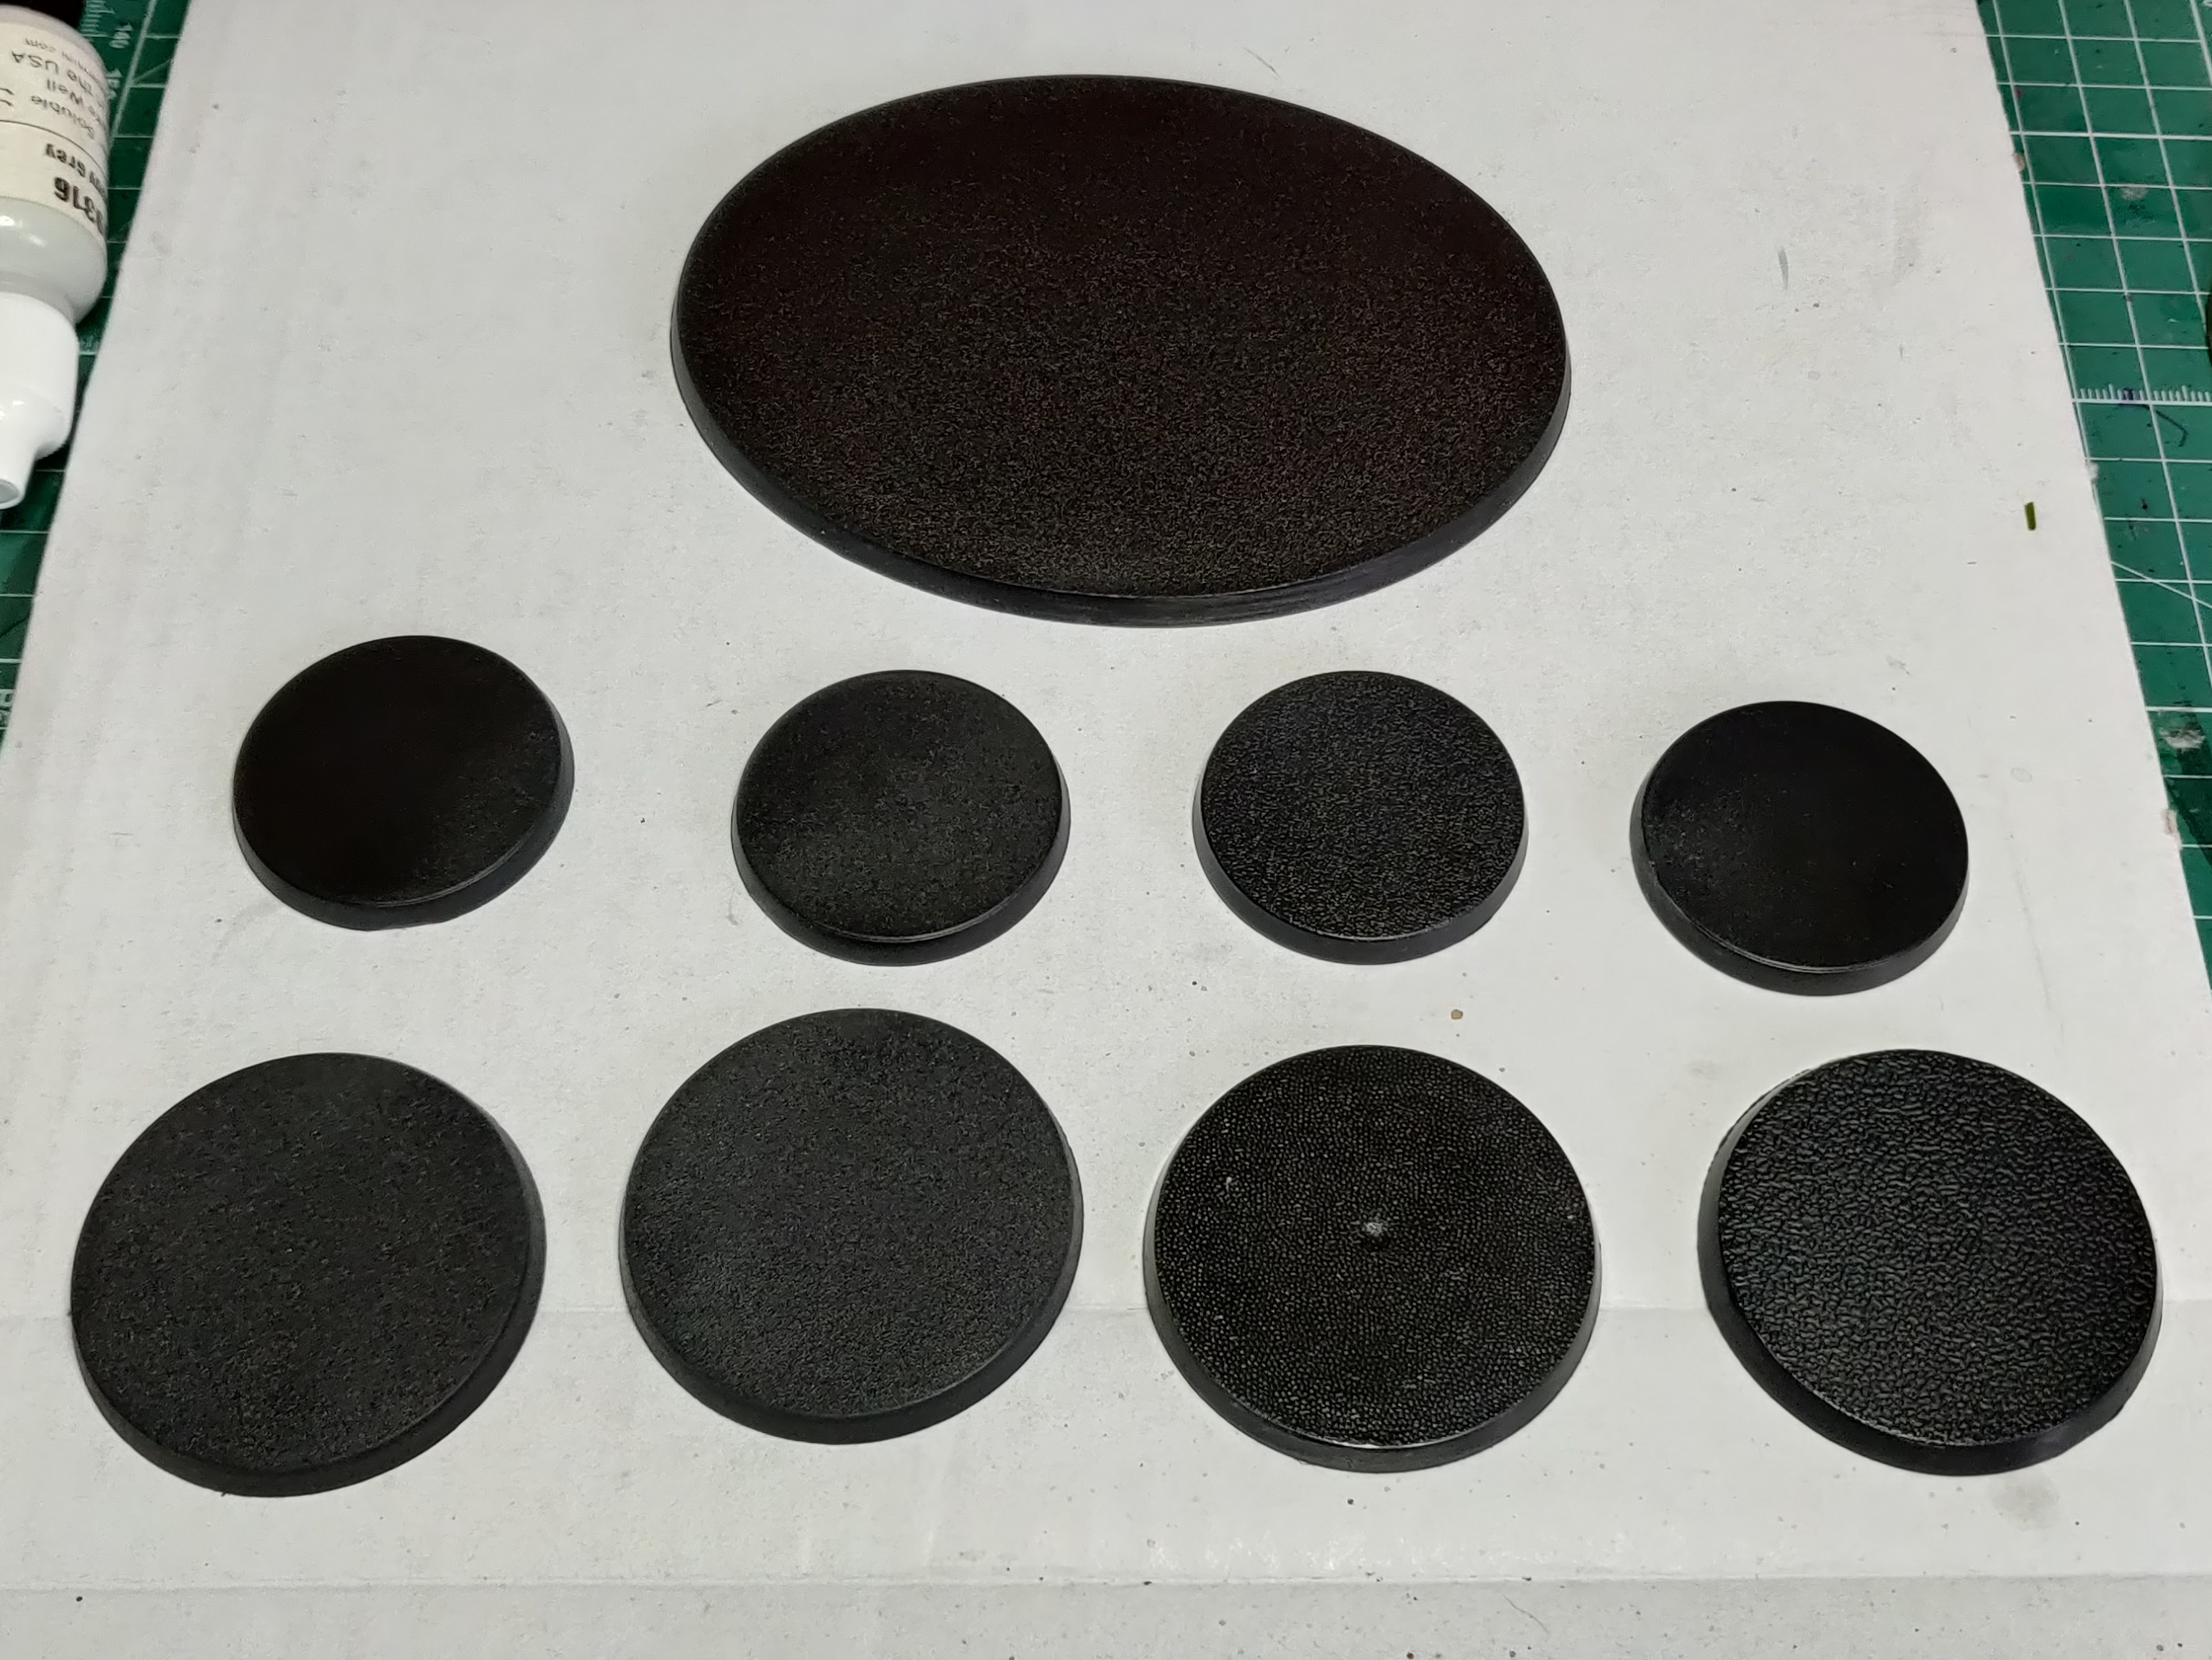
The bases I have to complete are:
- 4x 40mm (Mud Warriors)
- 4x 50mm (Kamen, Neptune, Moray, Stingray)
- 1x 100mm (Leviathan)
I have a fairly comprehensive tutorial for my Bot War bases in my previous Project, and these will be created in very much the same way.
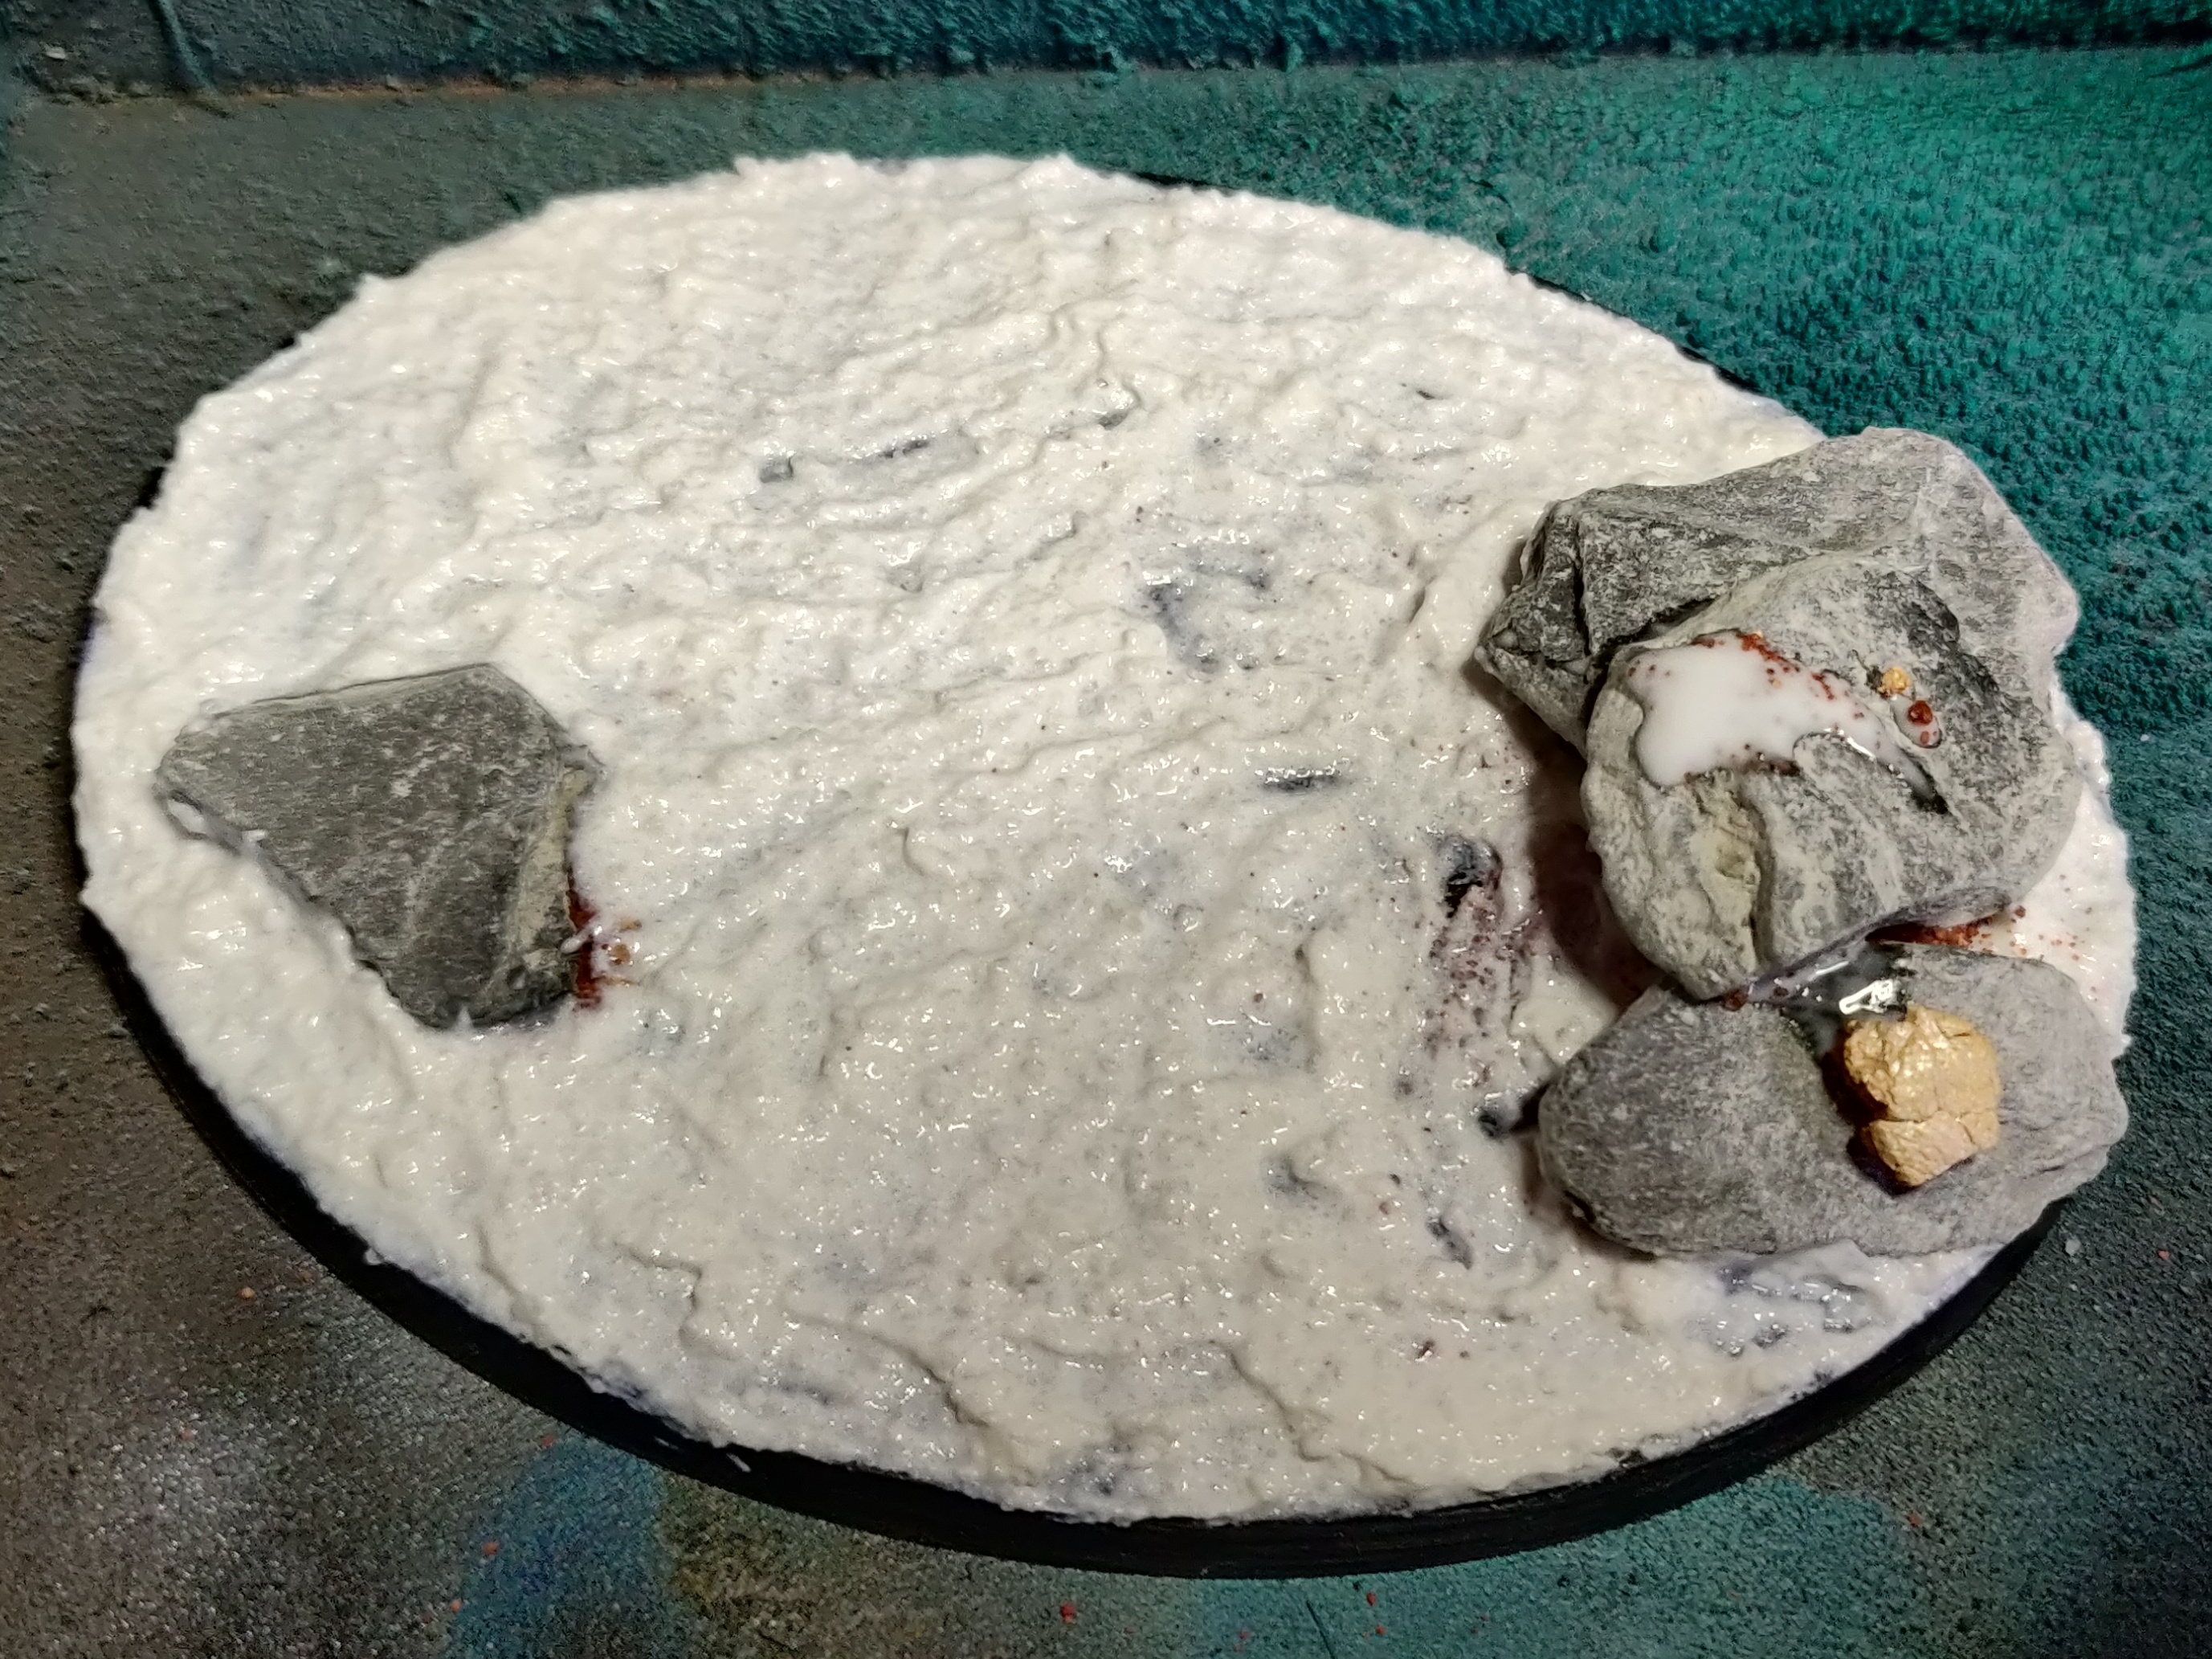
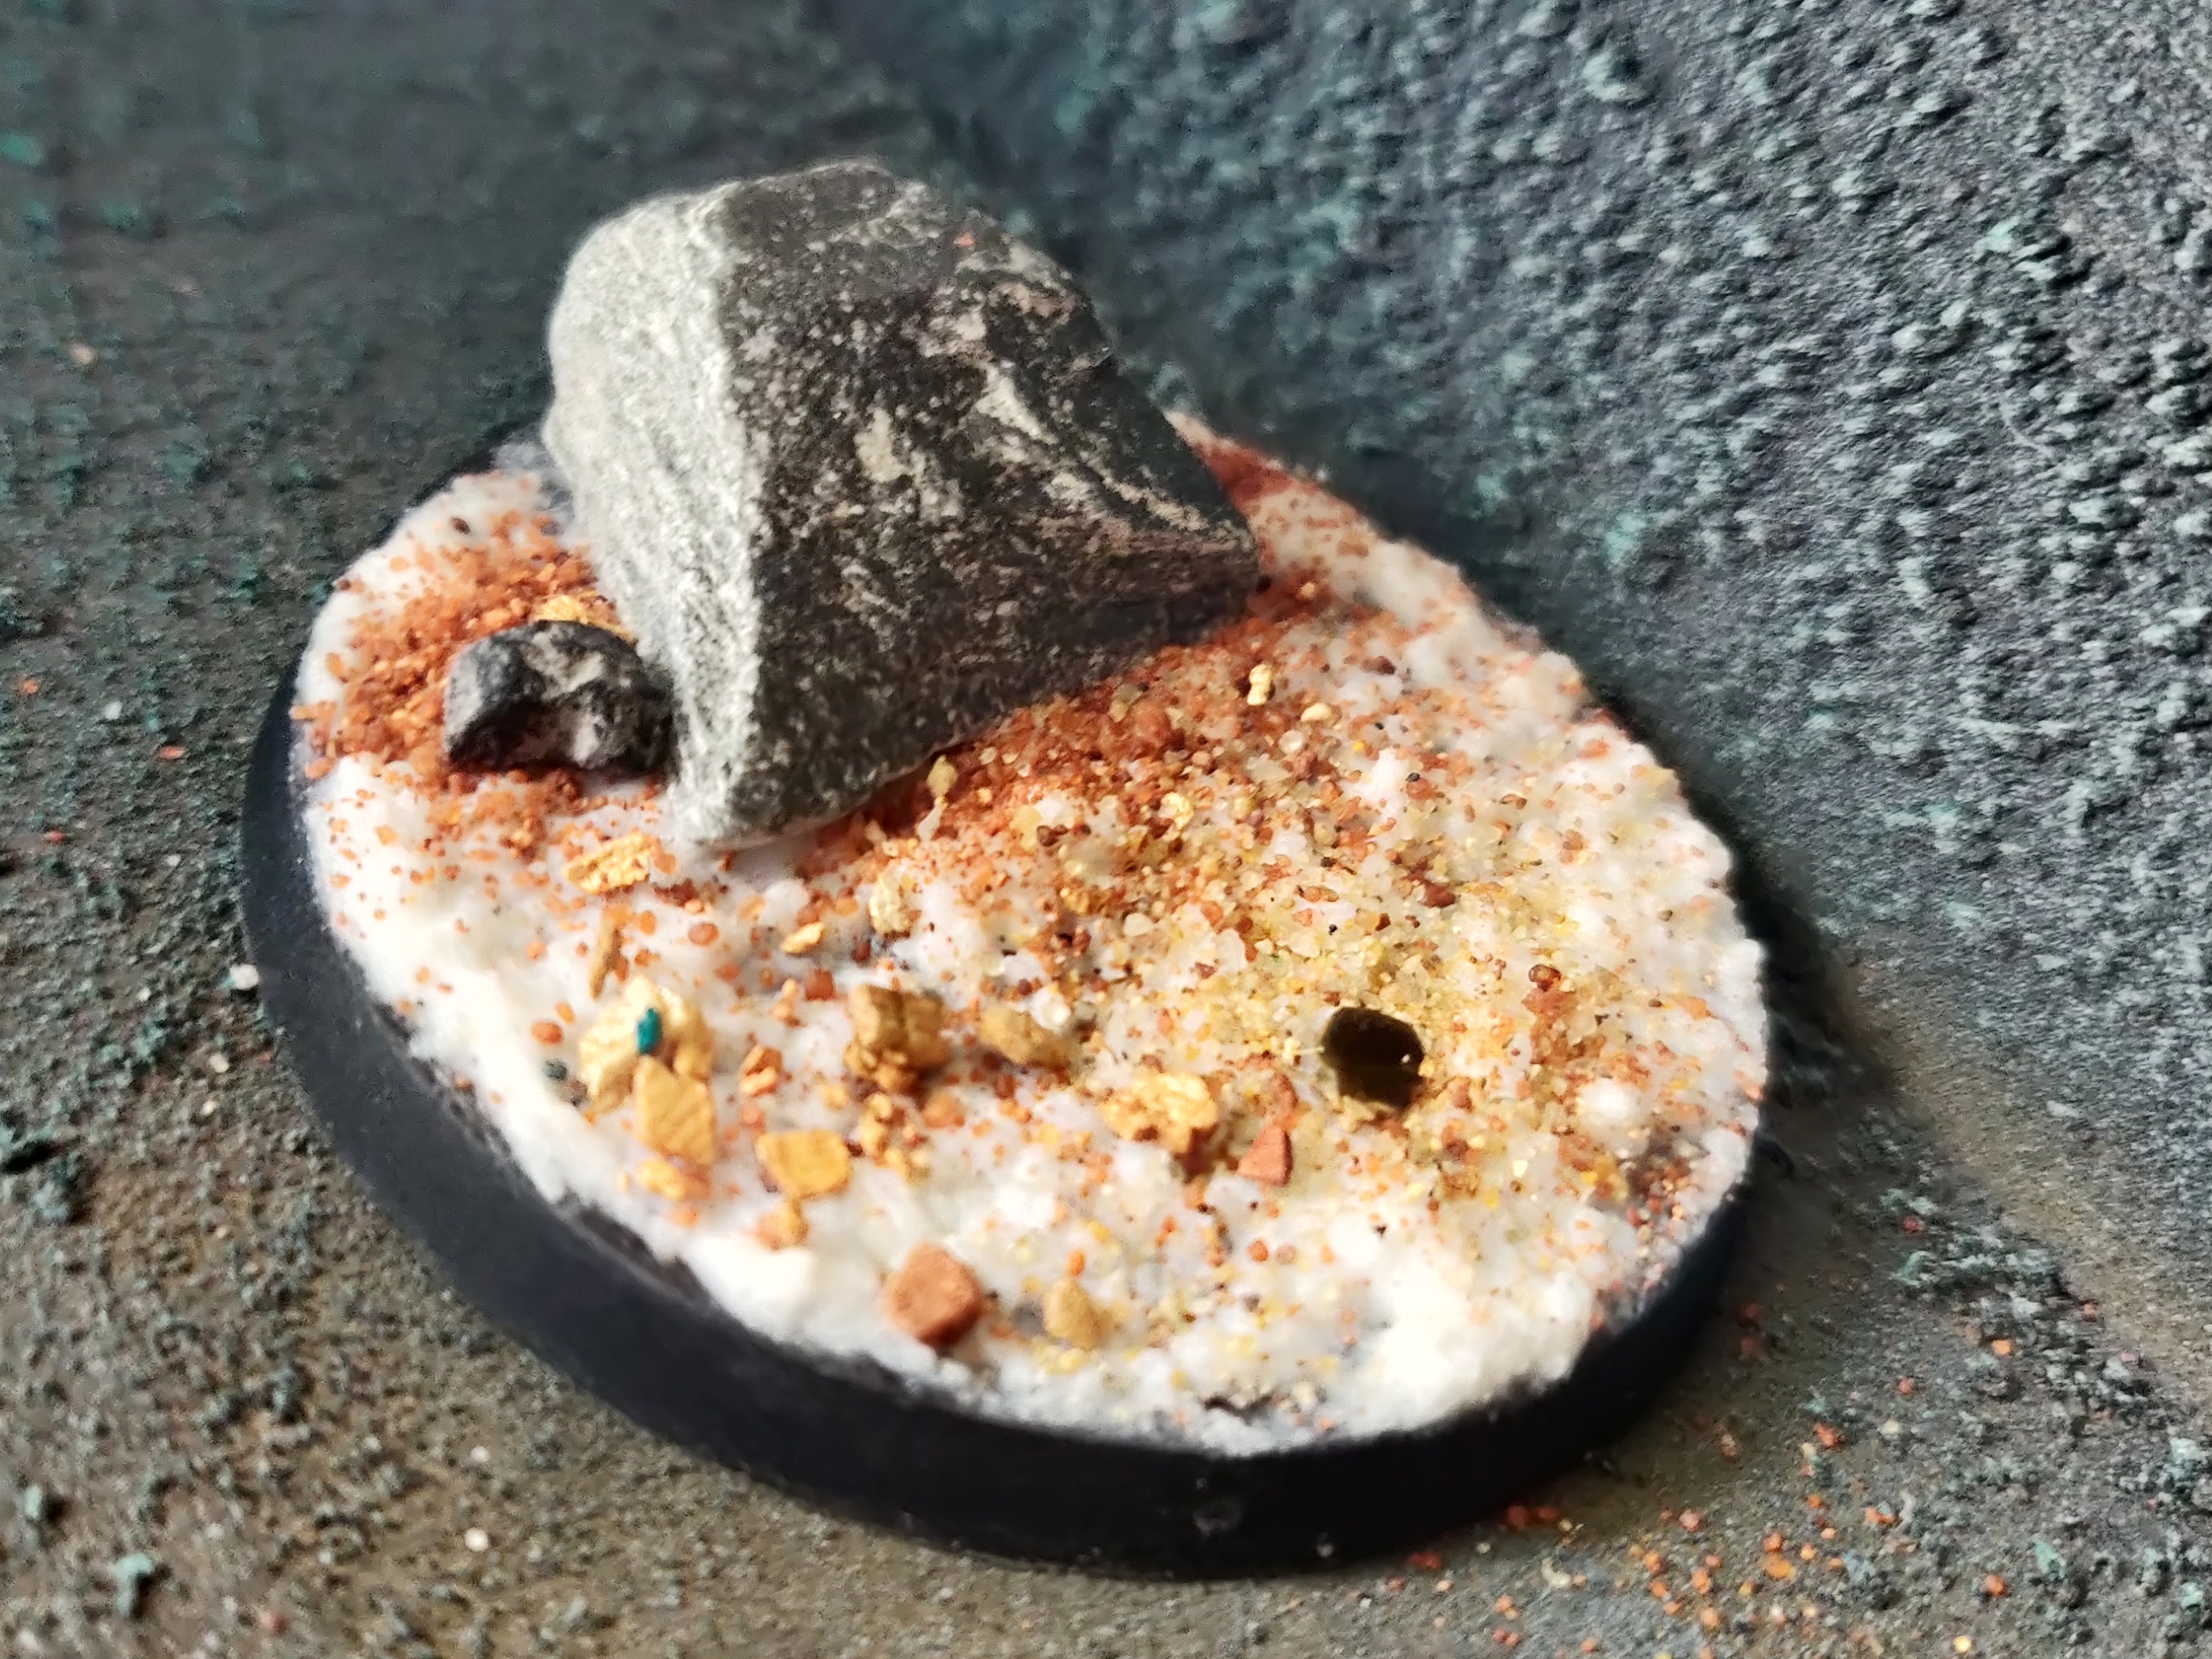
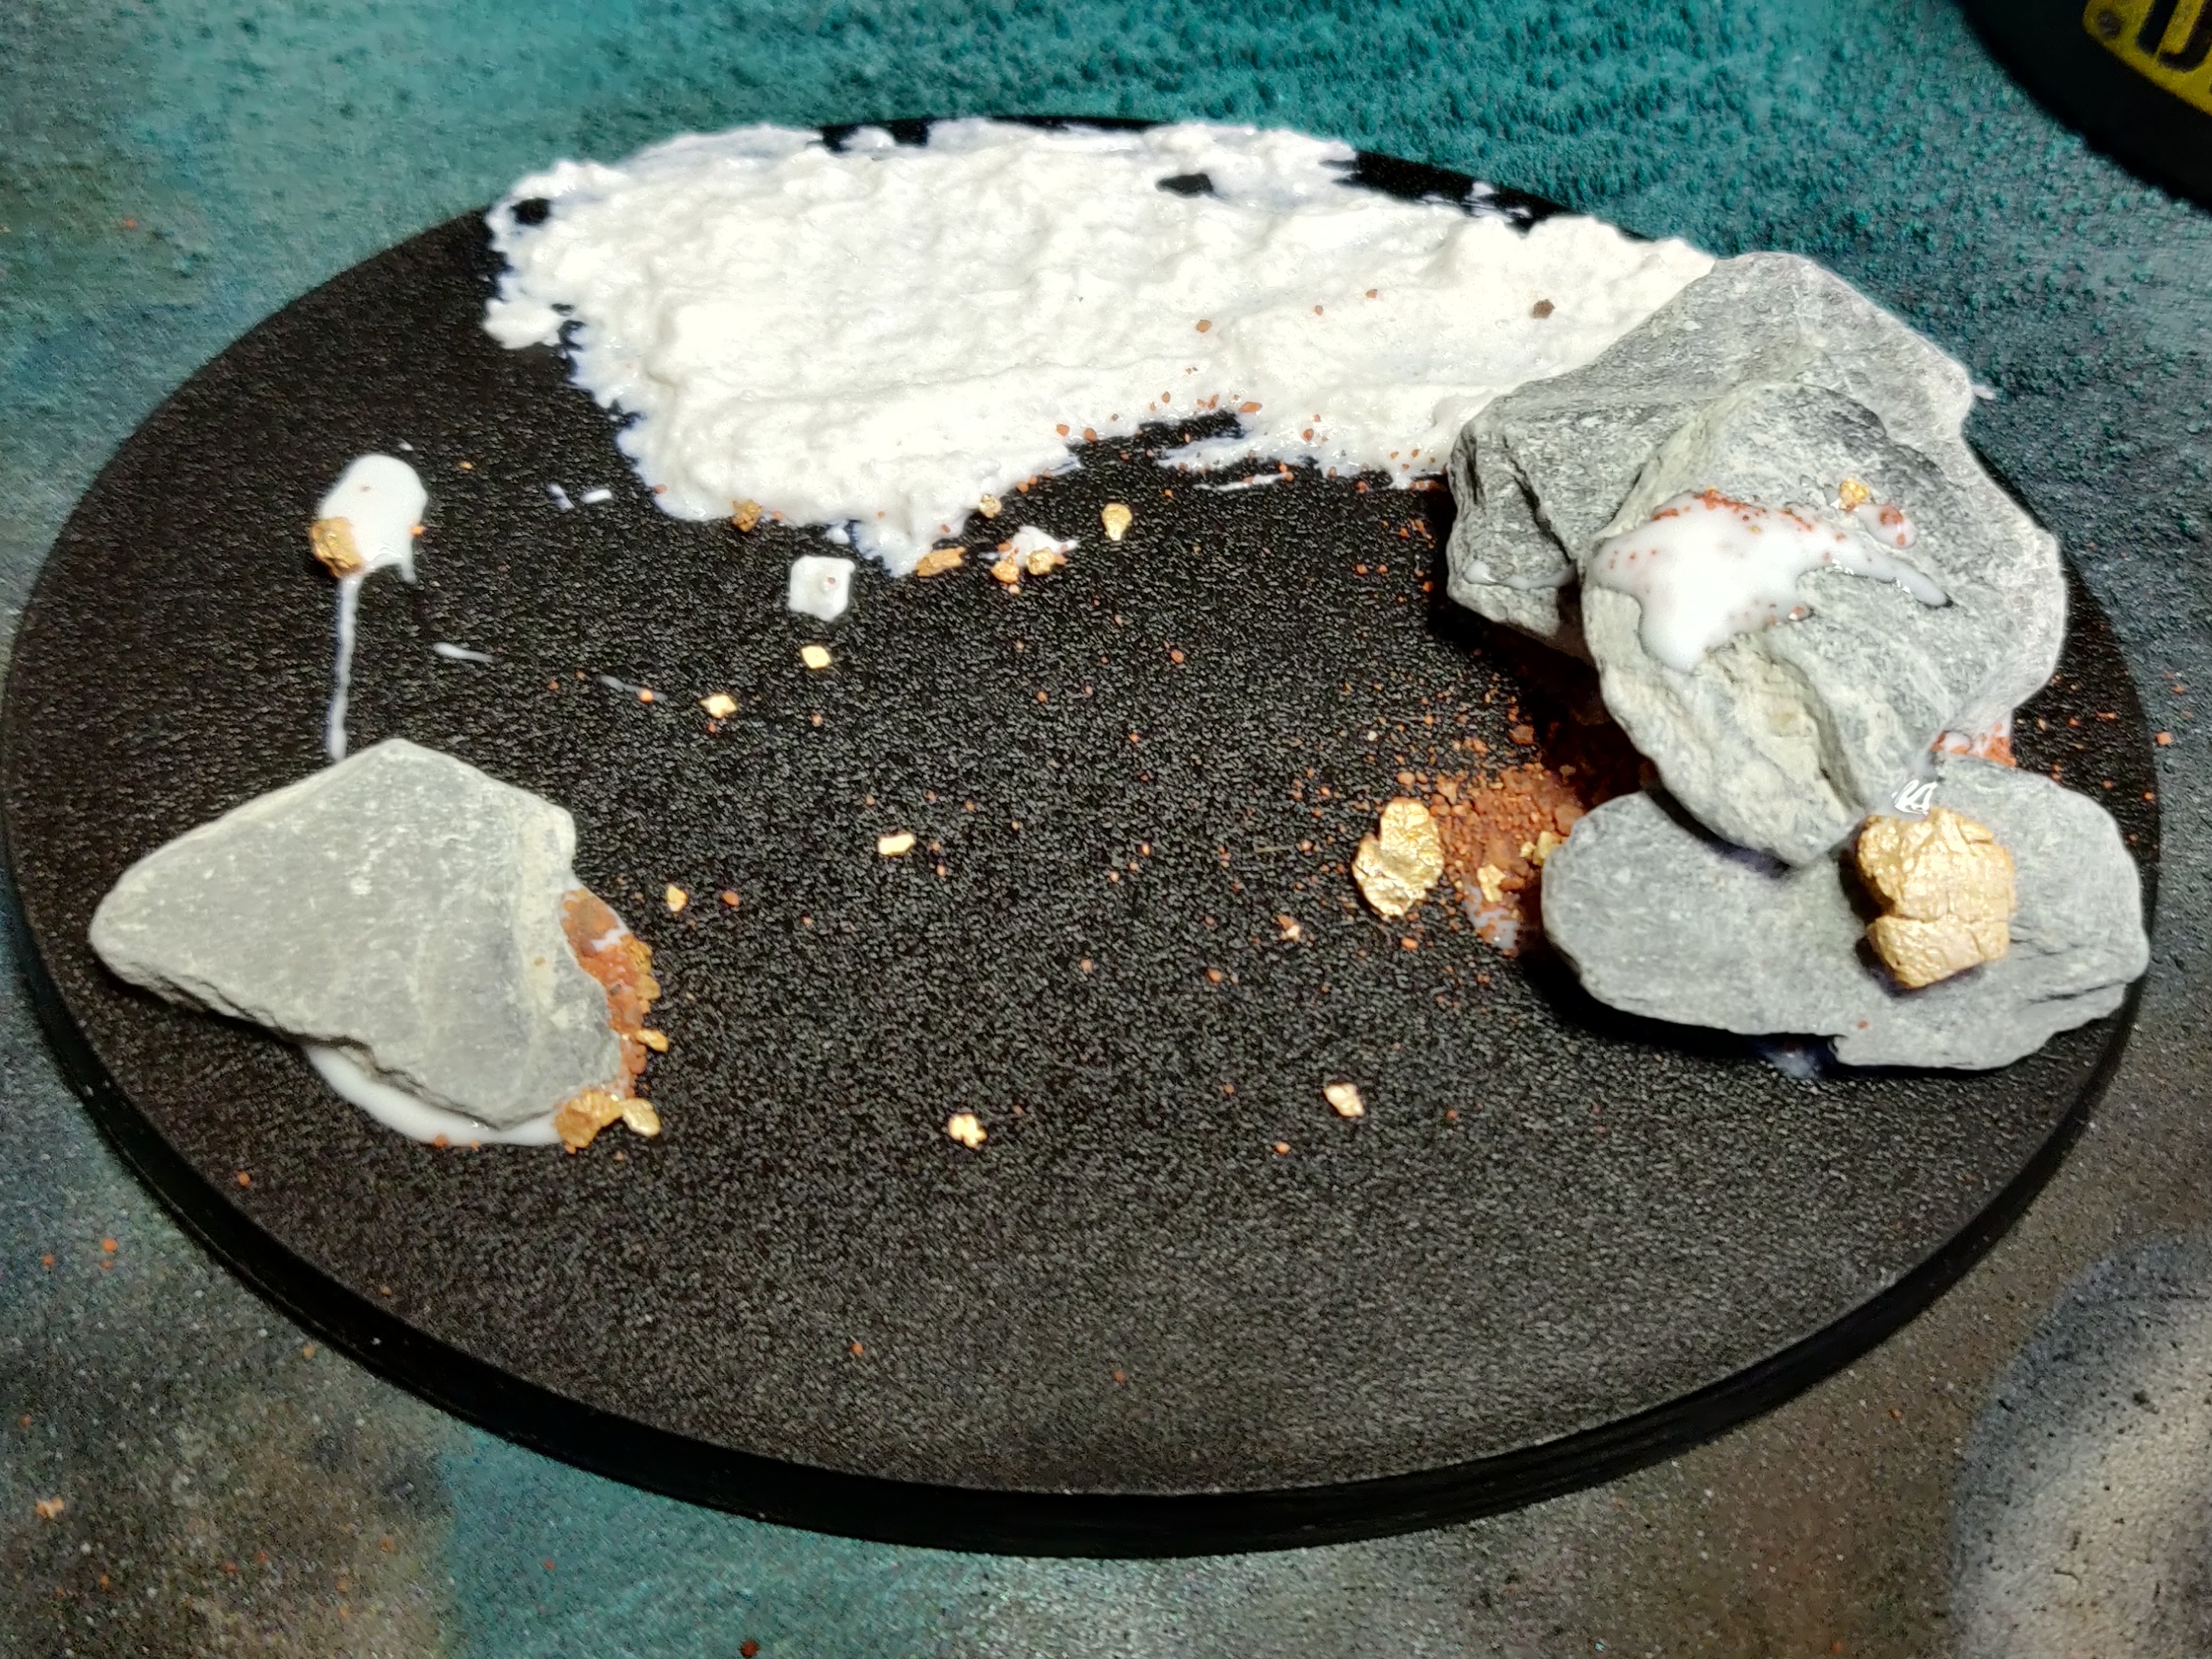 Leviathan's base
I wanted some interest on the bases, so I started off by gluing some slate chunks I had to the bases in random areas, but for Leviathan base I clumped a couple of pieces together, using ultra strong PVA to secure them together and to the base.
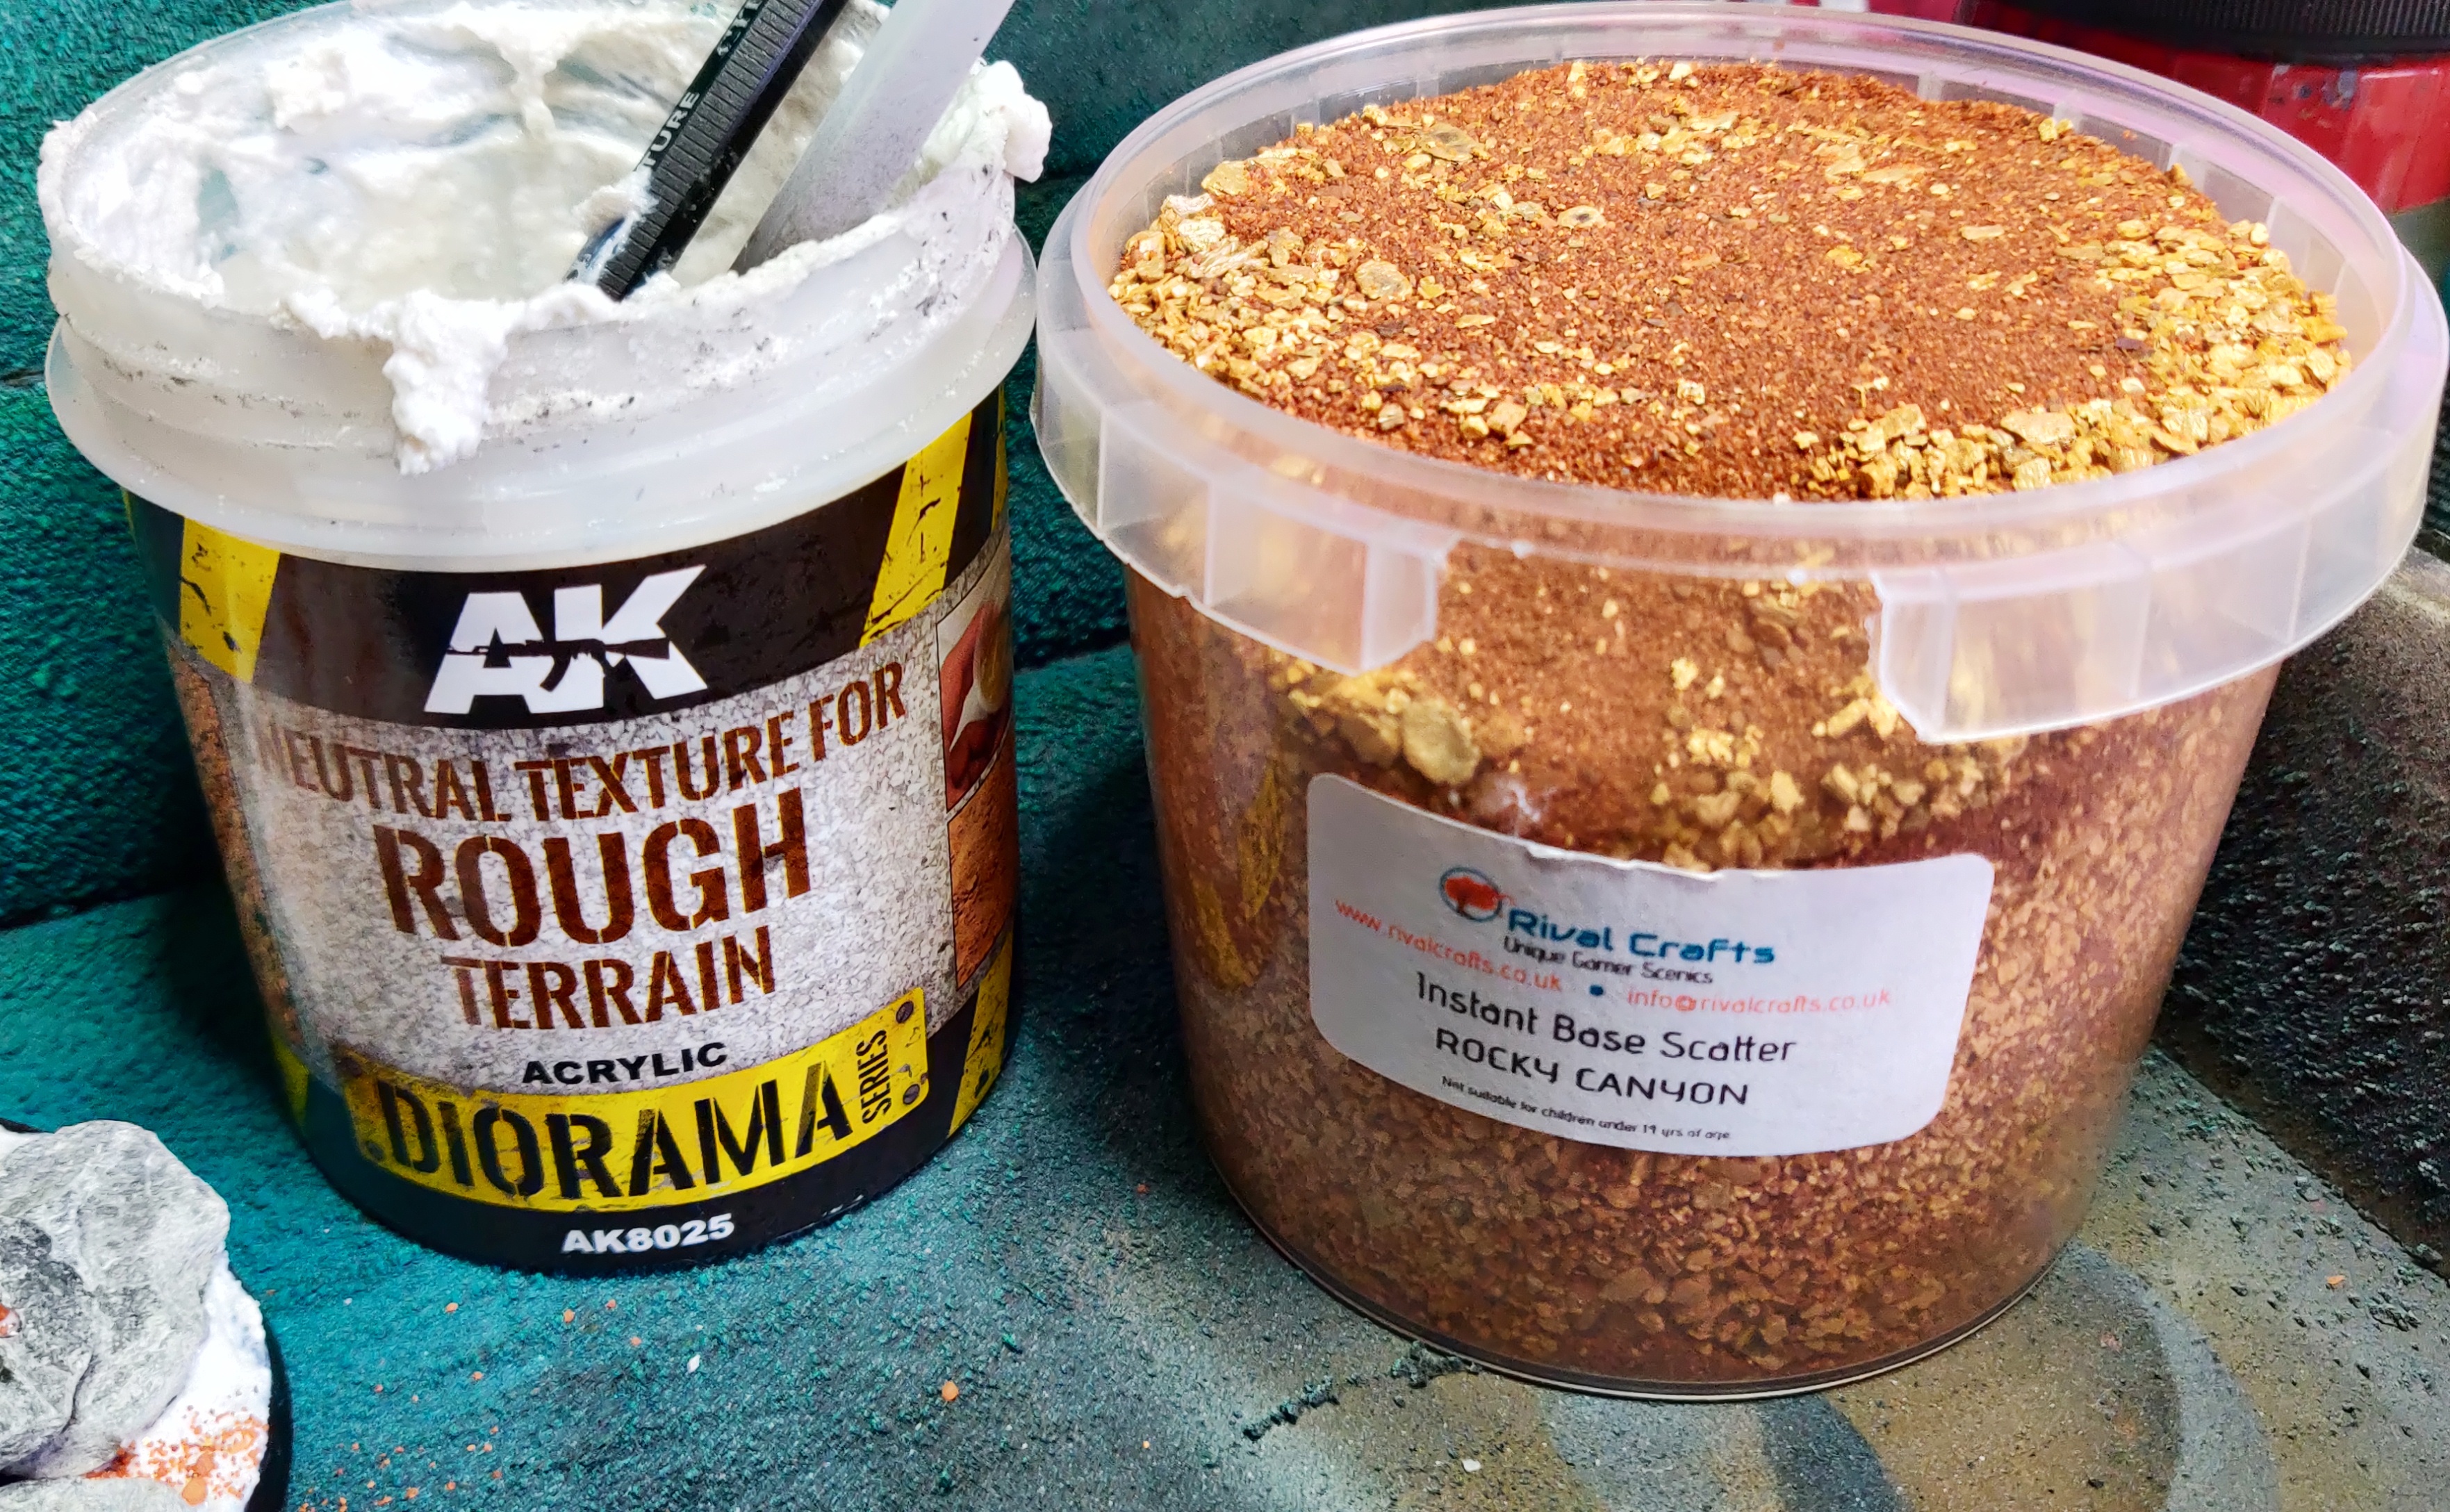 My 2 favourite materials to use when creating wargaming bases
These 2 pots give me a great amount of mileage, they’re both huge, don’t break the bank, and have great results.
The Rough Terrain pot from Ak-interactive is gritty paste, able to be scooped and spread over an area, and is tacky enough to help secure any scatter that you sprinkle over the top.
I like to use a plastic spoon to heal on enough to cover the base, and then use a small spatula to spread it out over all of the surface, making sure to not carve channels or leave obvious spread marks. Any overspill can easily be wiped off with a bit of damp kitchen roll as we want the base edges to be nice and smooth.
I work the Rough Texture into any gaps between rocks and around the bases to ensure that they have a better grip on the base once it cures, but also to help with the realism as the rocks would be protruding out of the ground as years of mud/dirt/sand would build up around the edges.
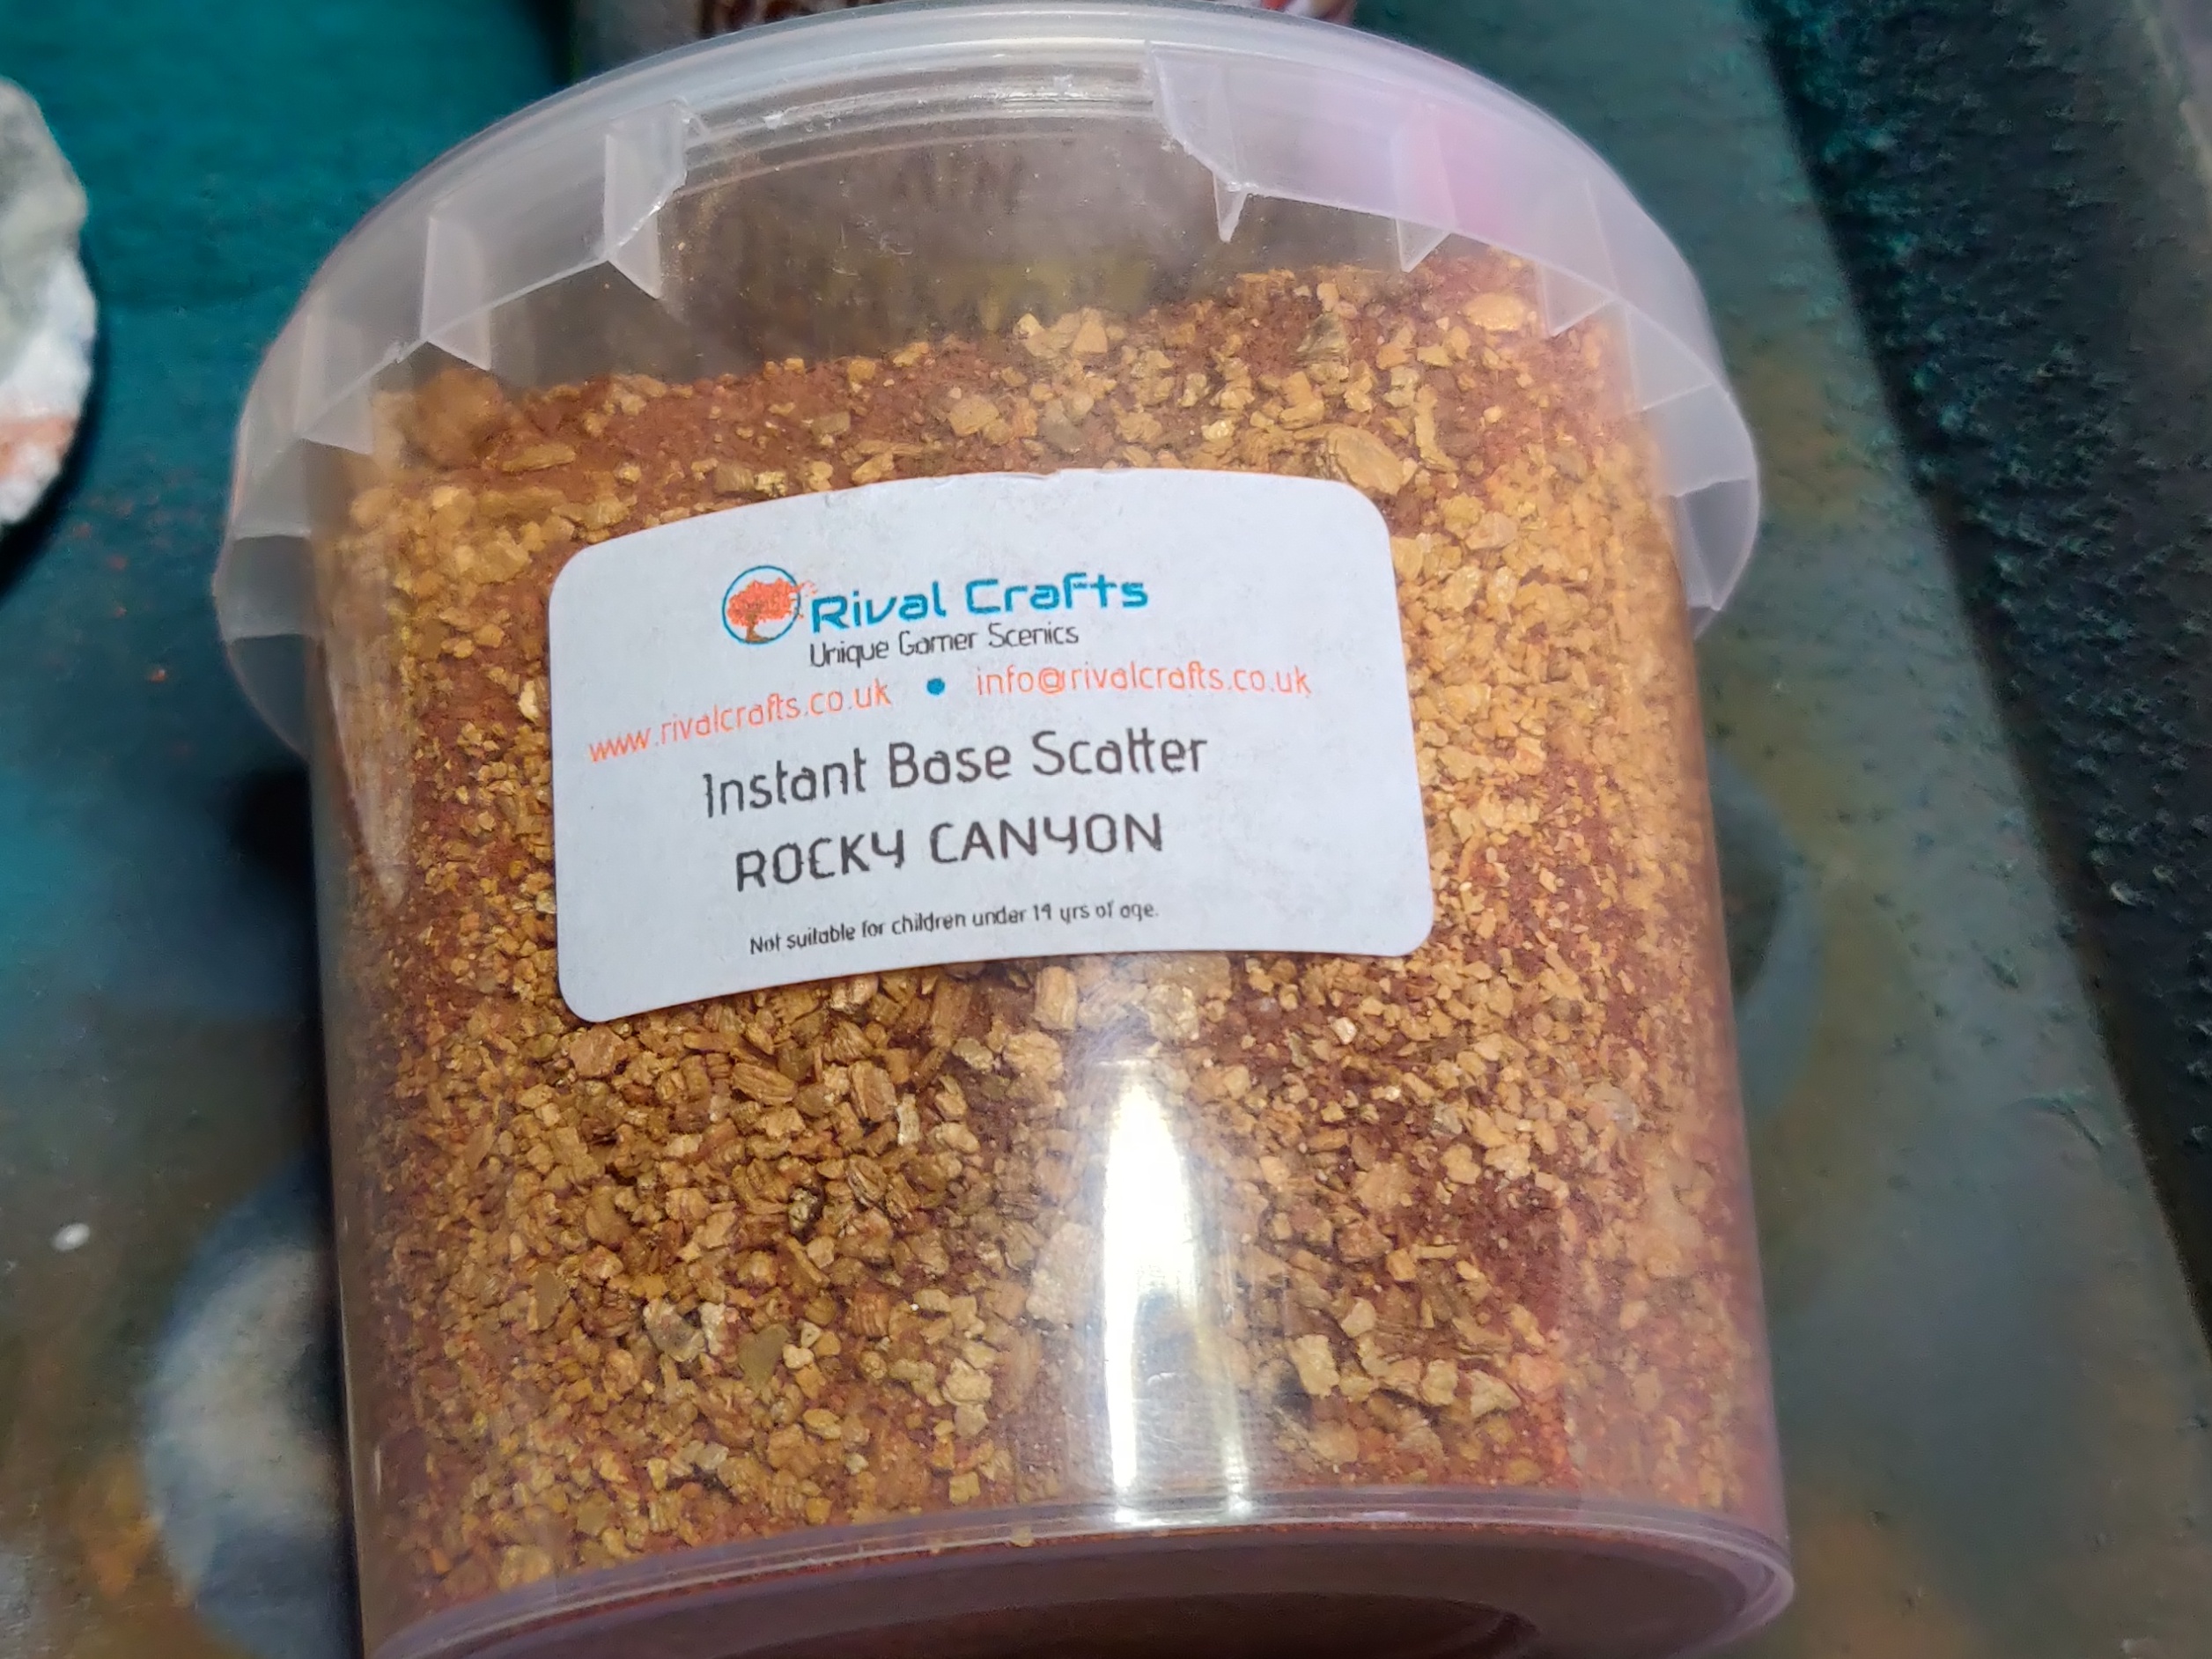
Once the base is coated in rough texture paste I use the Rival Craft Rocky Canyon scatter tub to sprinkle over a the wet paste a mixture of sand, grit, and small rock details. This range of tubs really are Instant Base Scatter as they work so easily on bases like this. I highly recommend checking out Rival Crafts for any basing or scenery project.

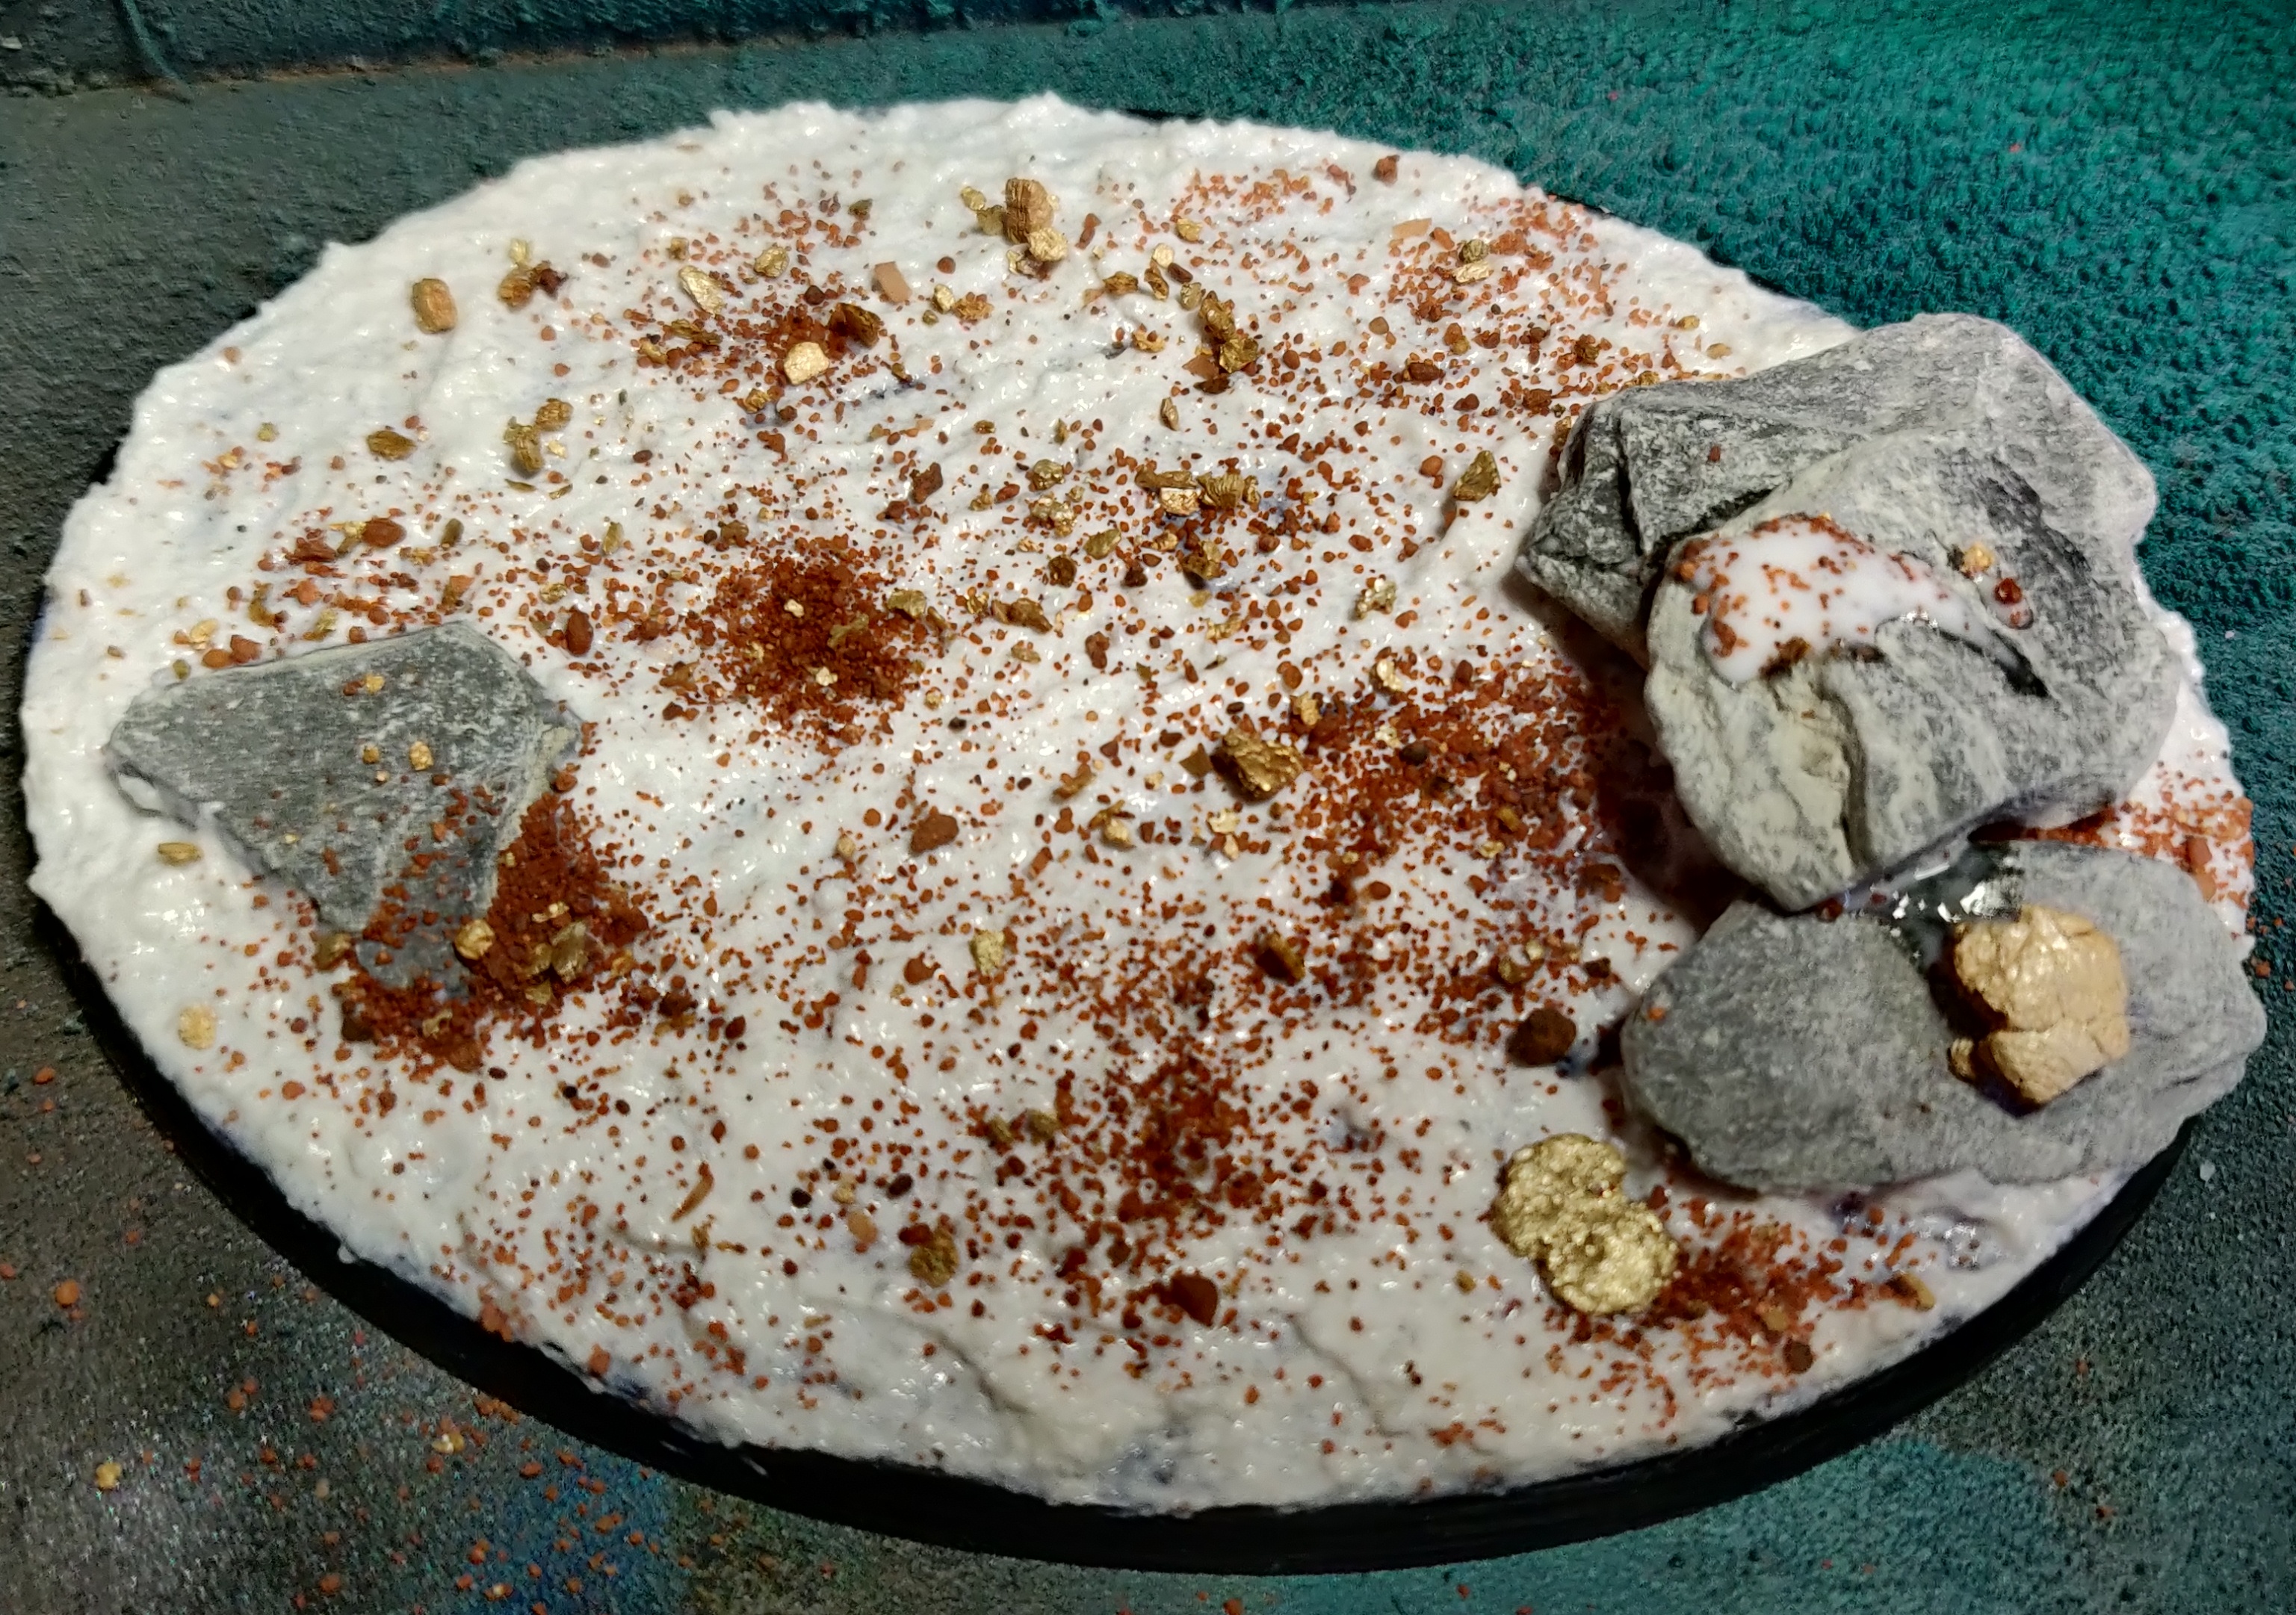
With all the bases worked on I will leave them overnight for the rough texture to set, and tomorrow I will then give them a blast of varnish to ensure the scatter is secure before painting.
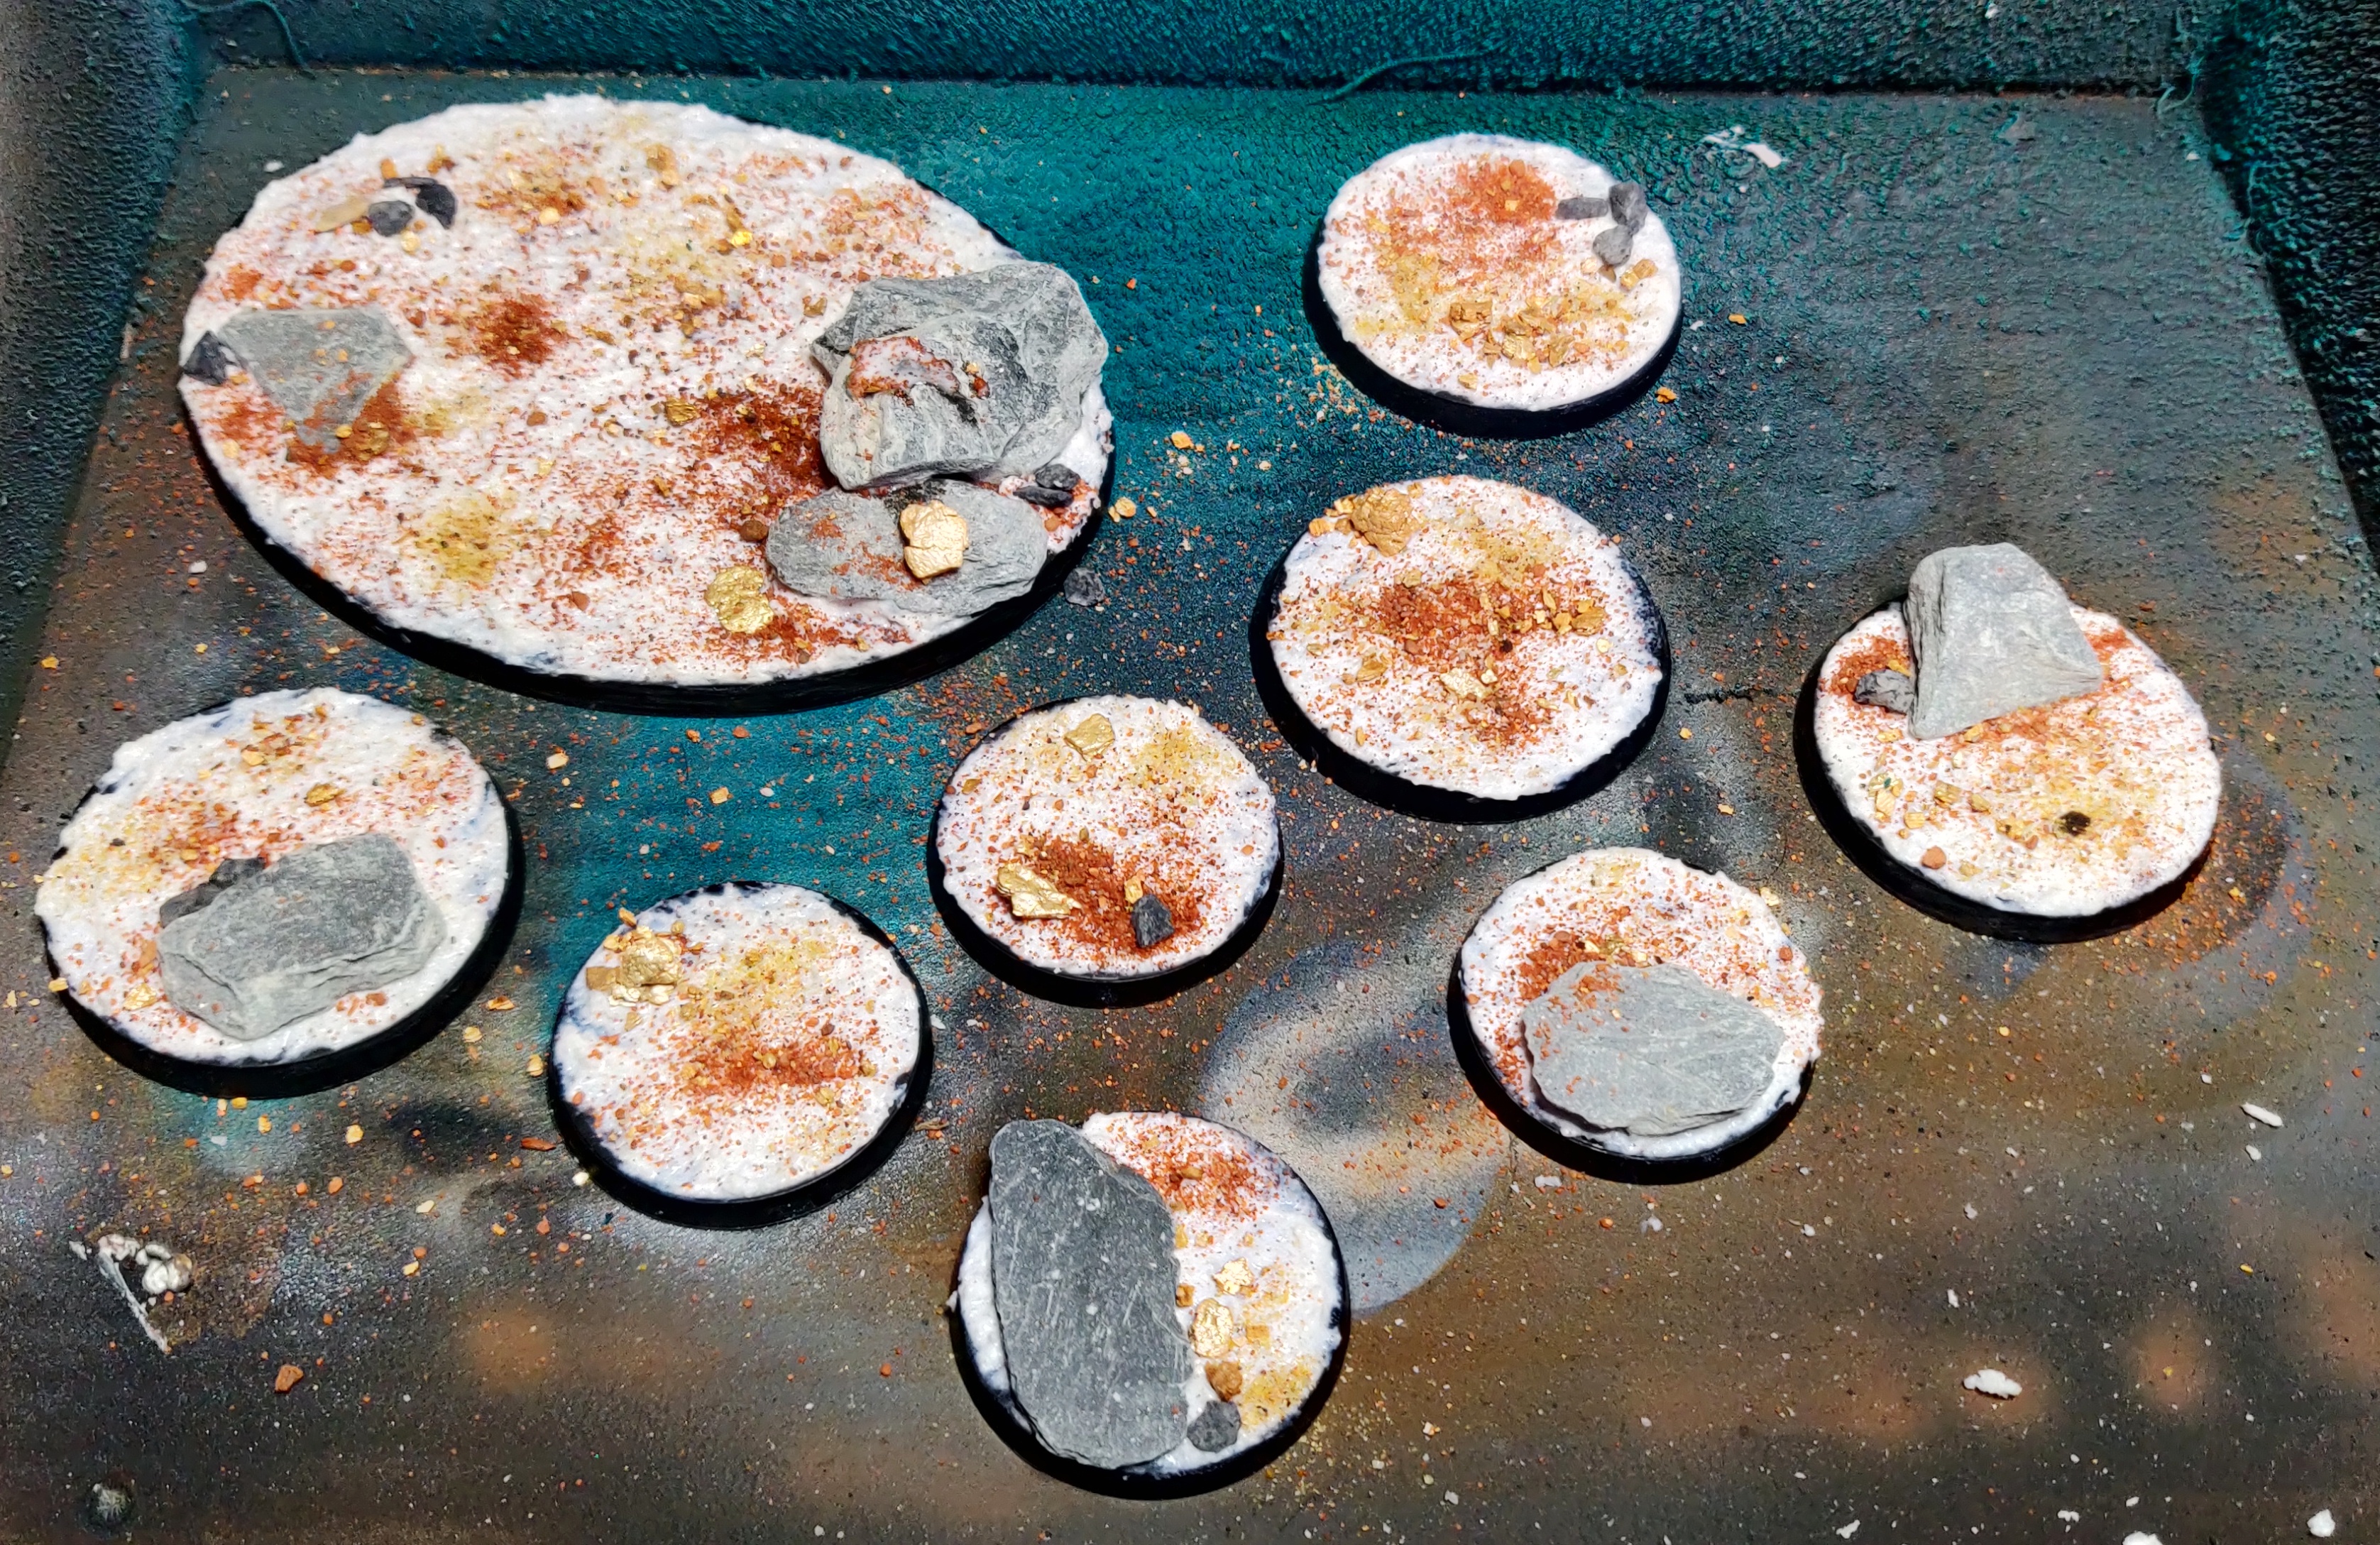 Leaving these to set overnight gives a solid platform to work with tomorrow
Day 18...
Big bot hits the painting desk
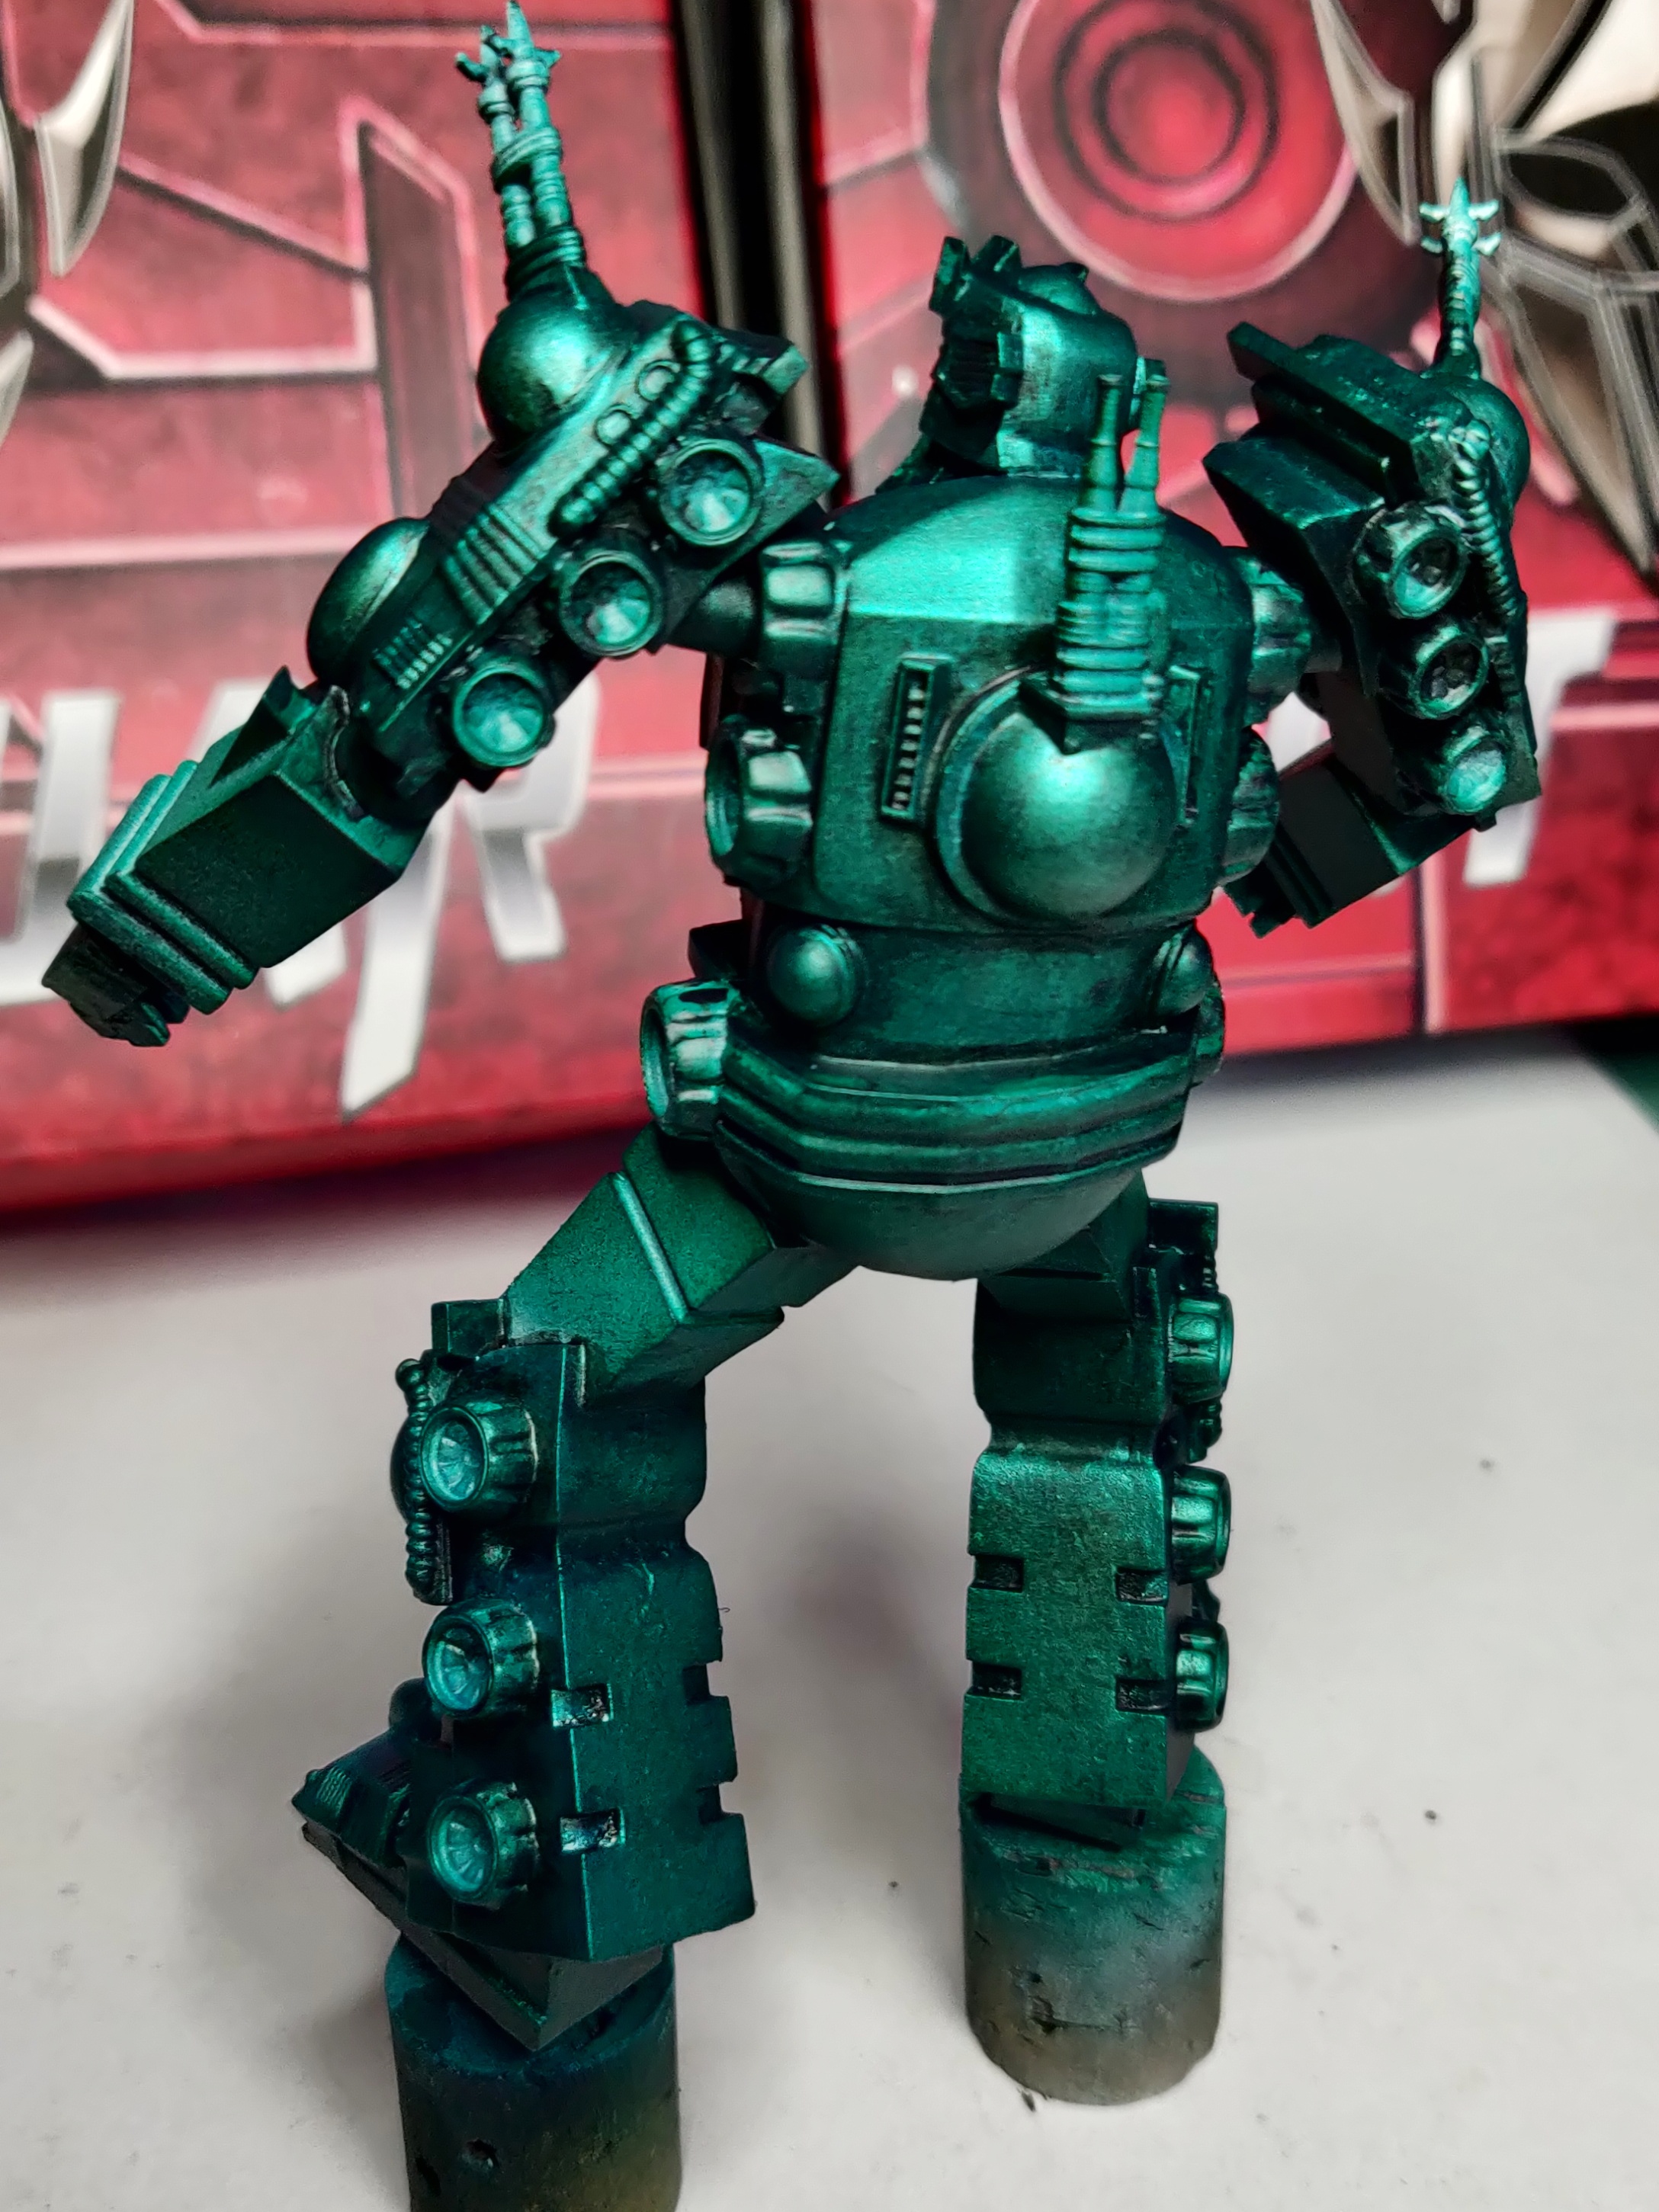
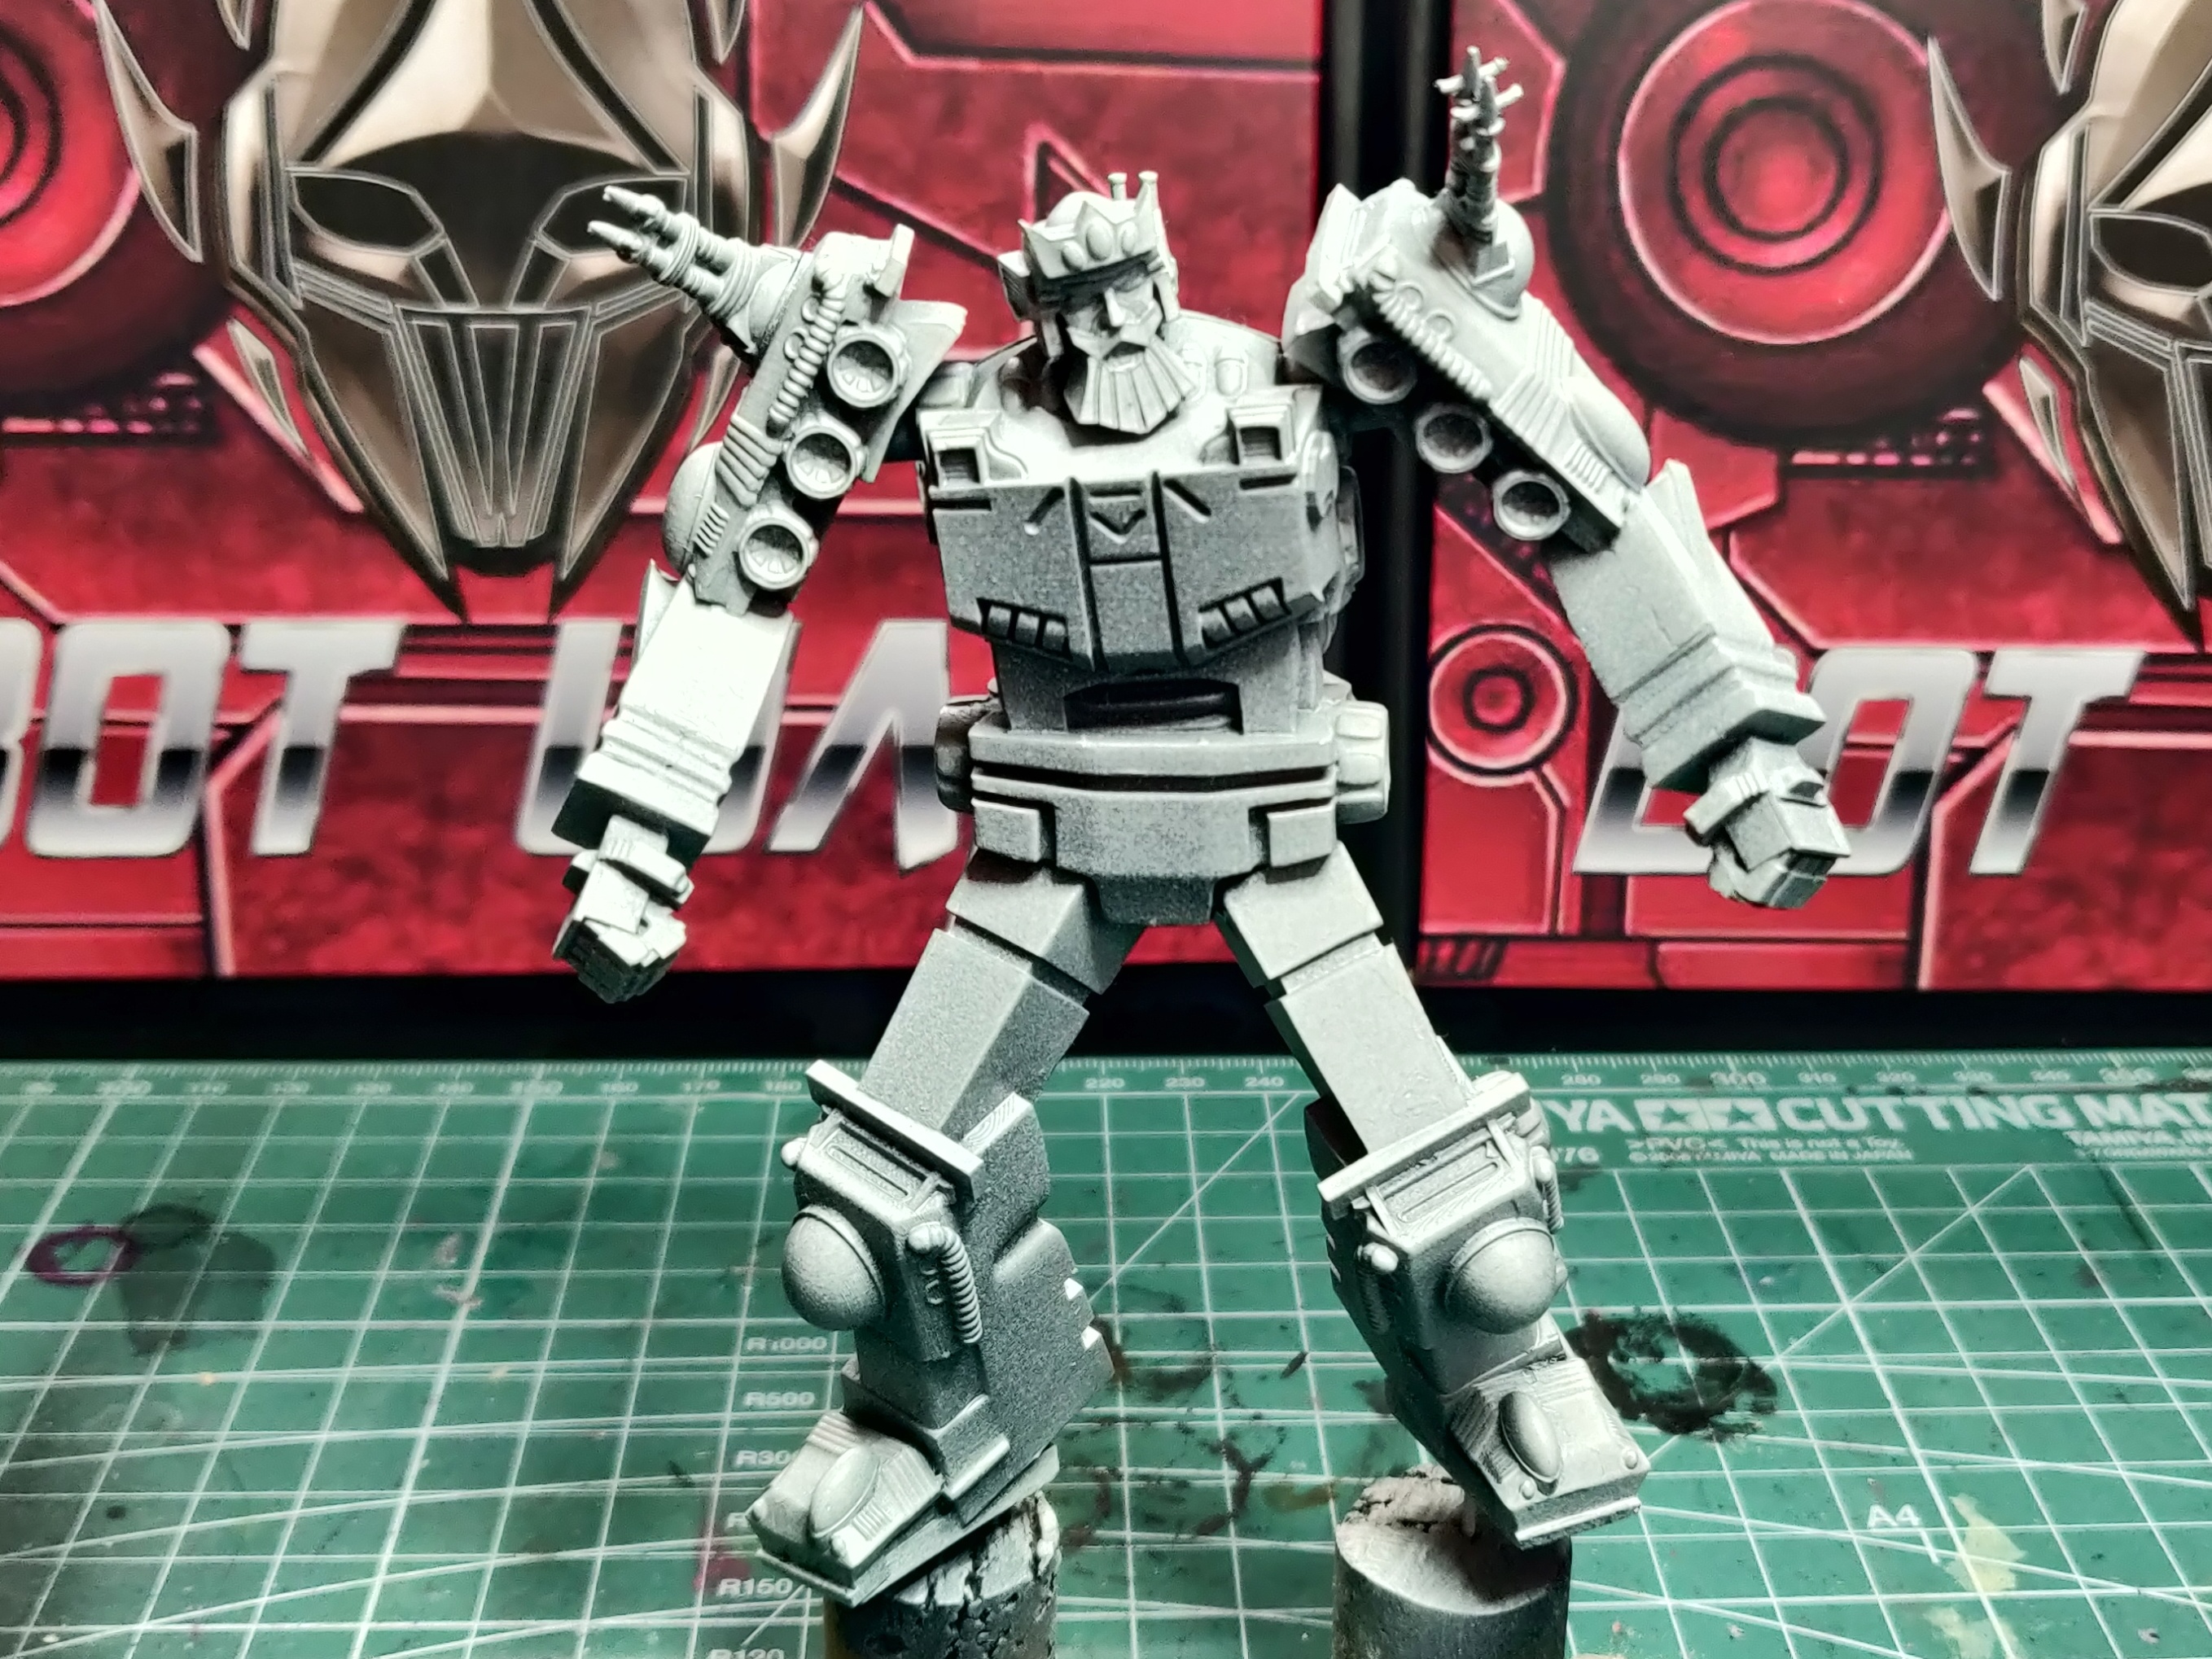 Leviathan with his black and ivory primer
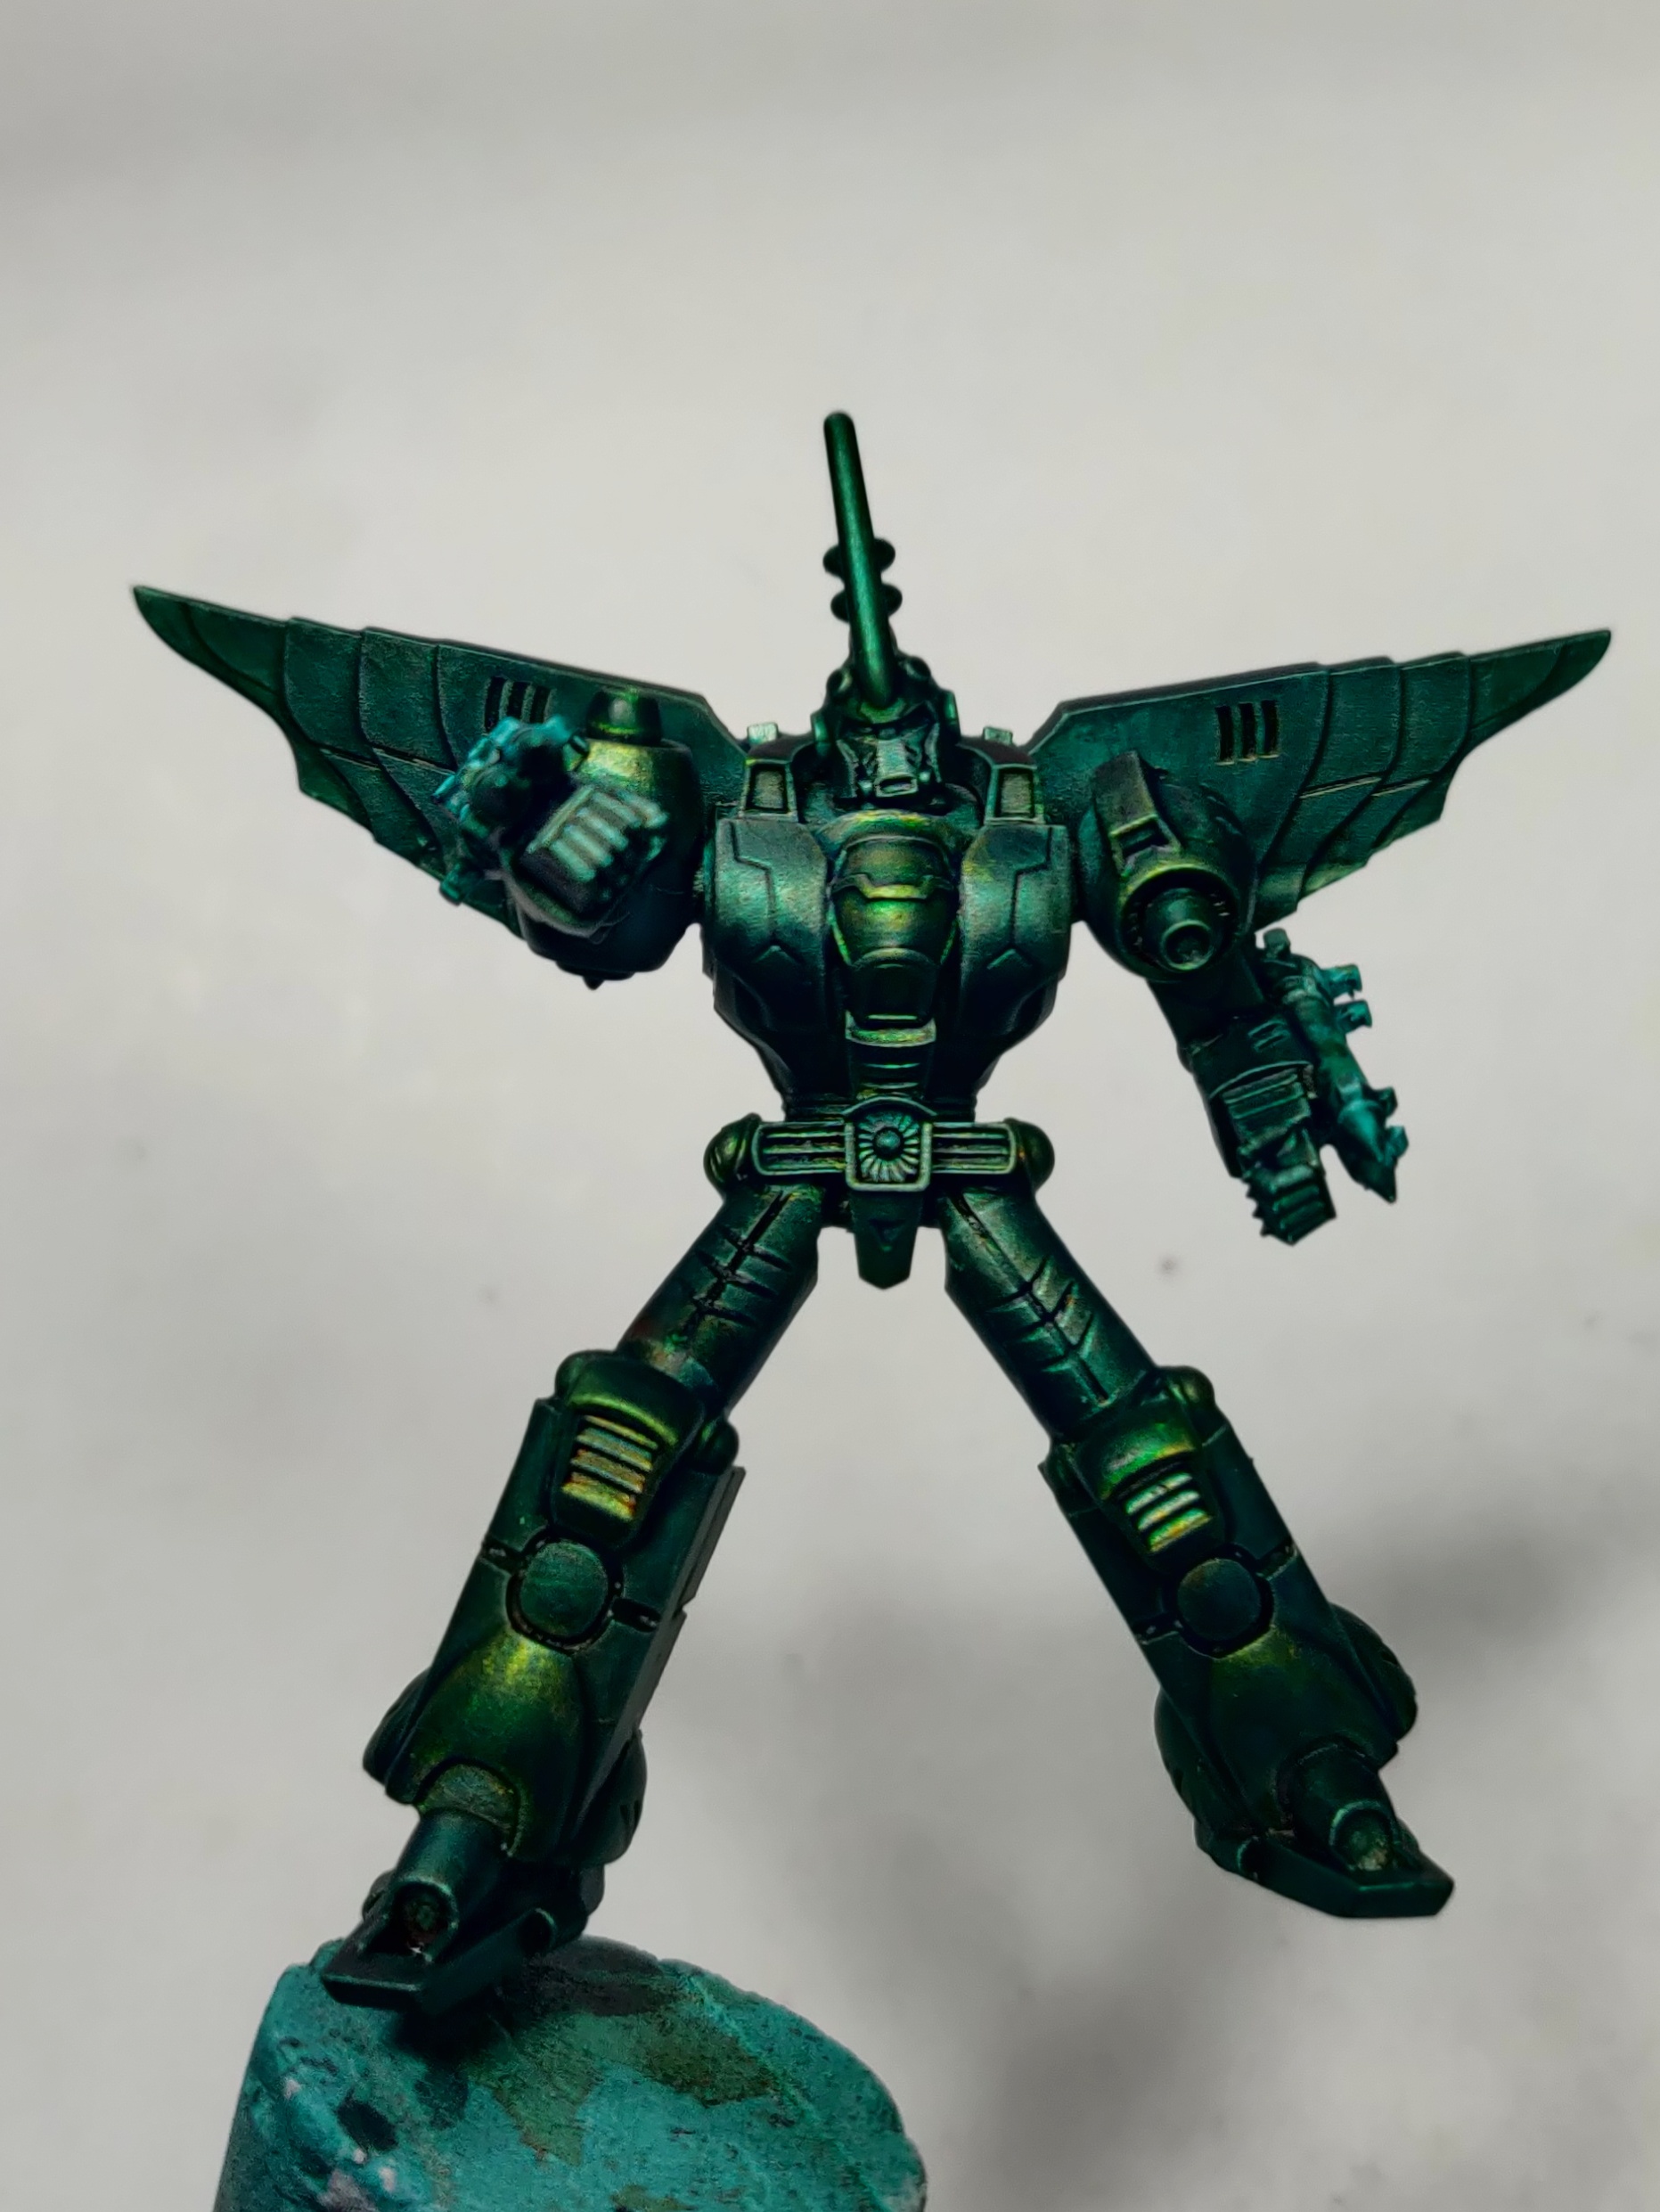
Today sees Leviathan get his first few coats of paint. Having primed him at the start of this project he has always just been sat to my side waiting patiently for his turn.
Leviathan is the combined form of 5 other bots, the 4 mud warriors I have already painted, and Octo, who I purchased during this project but didn’t get a chance to build him…. He will get painted very soon though or I won’t be able to use Leviathan on the table.
Metal coating
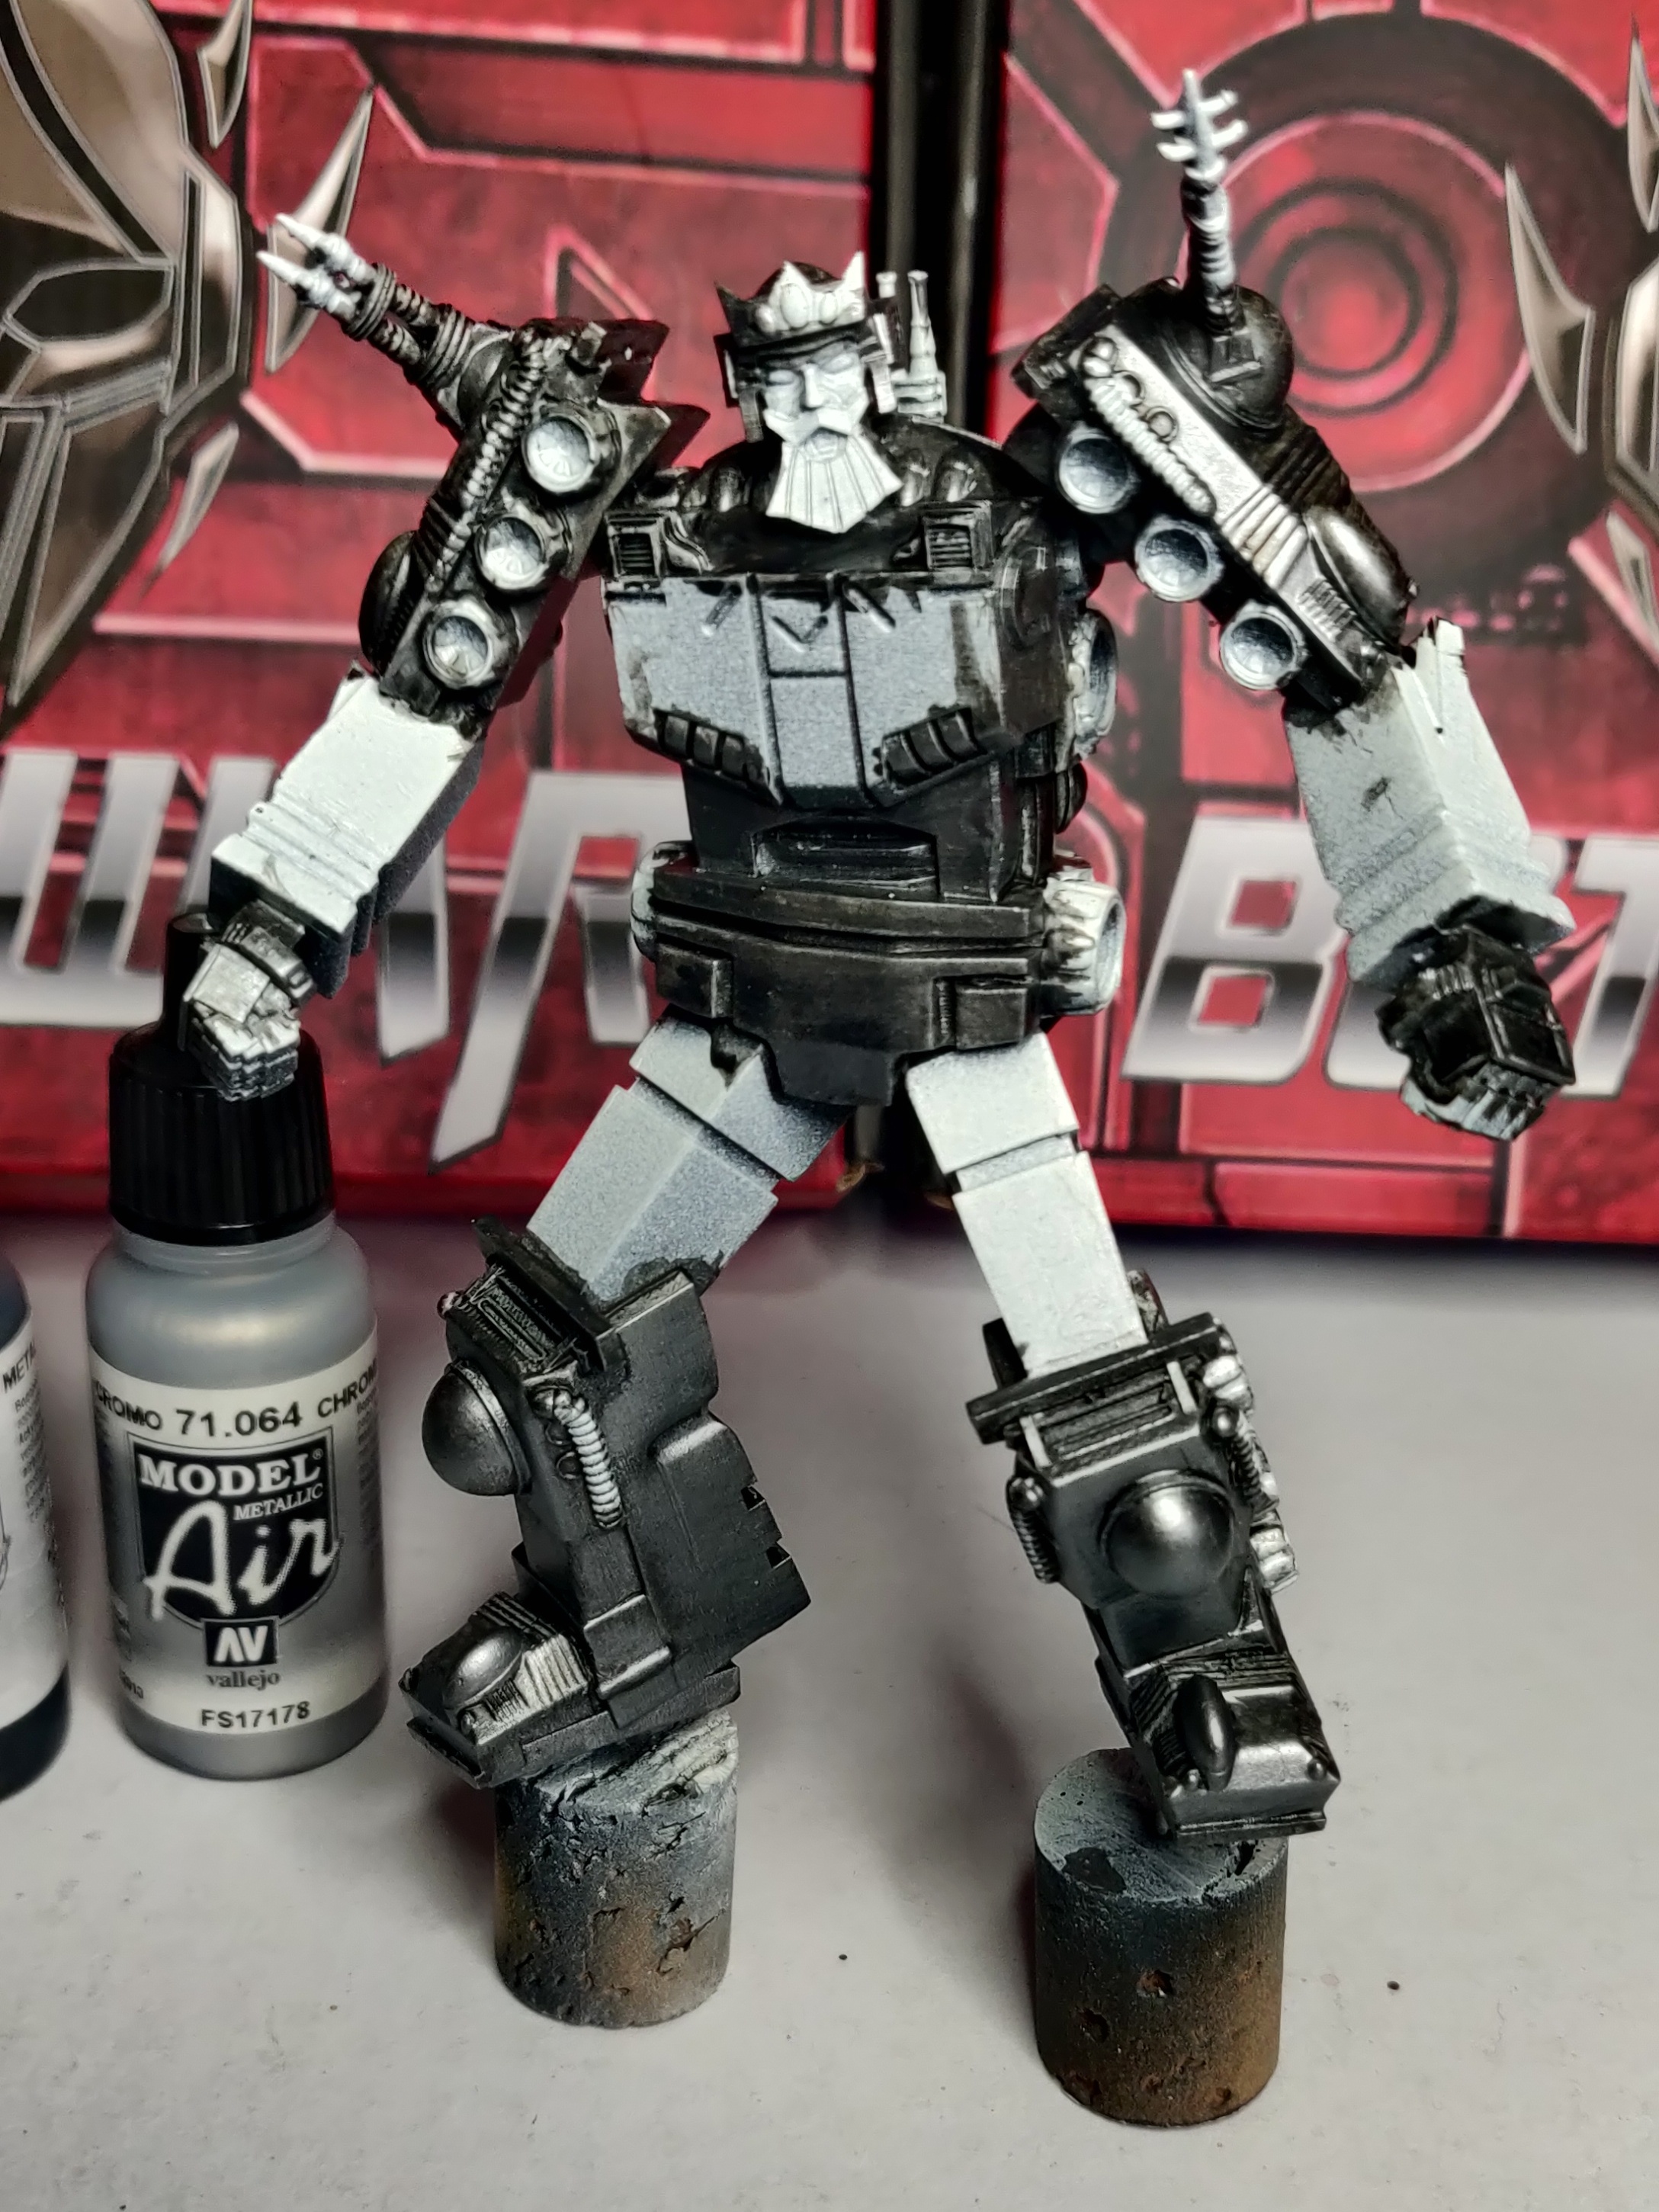
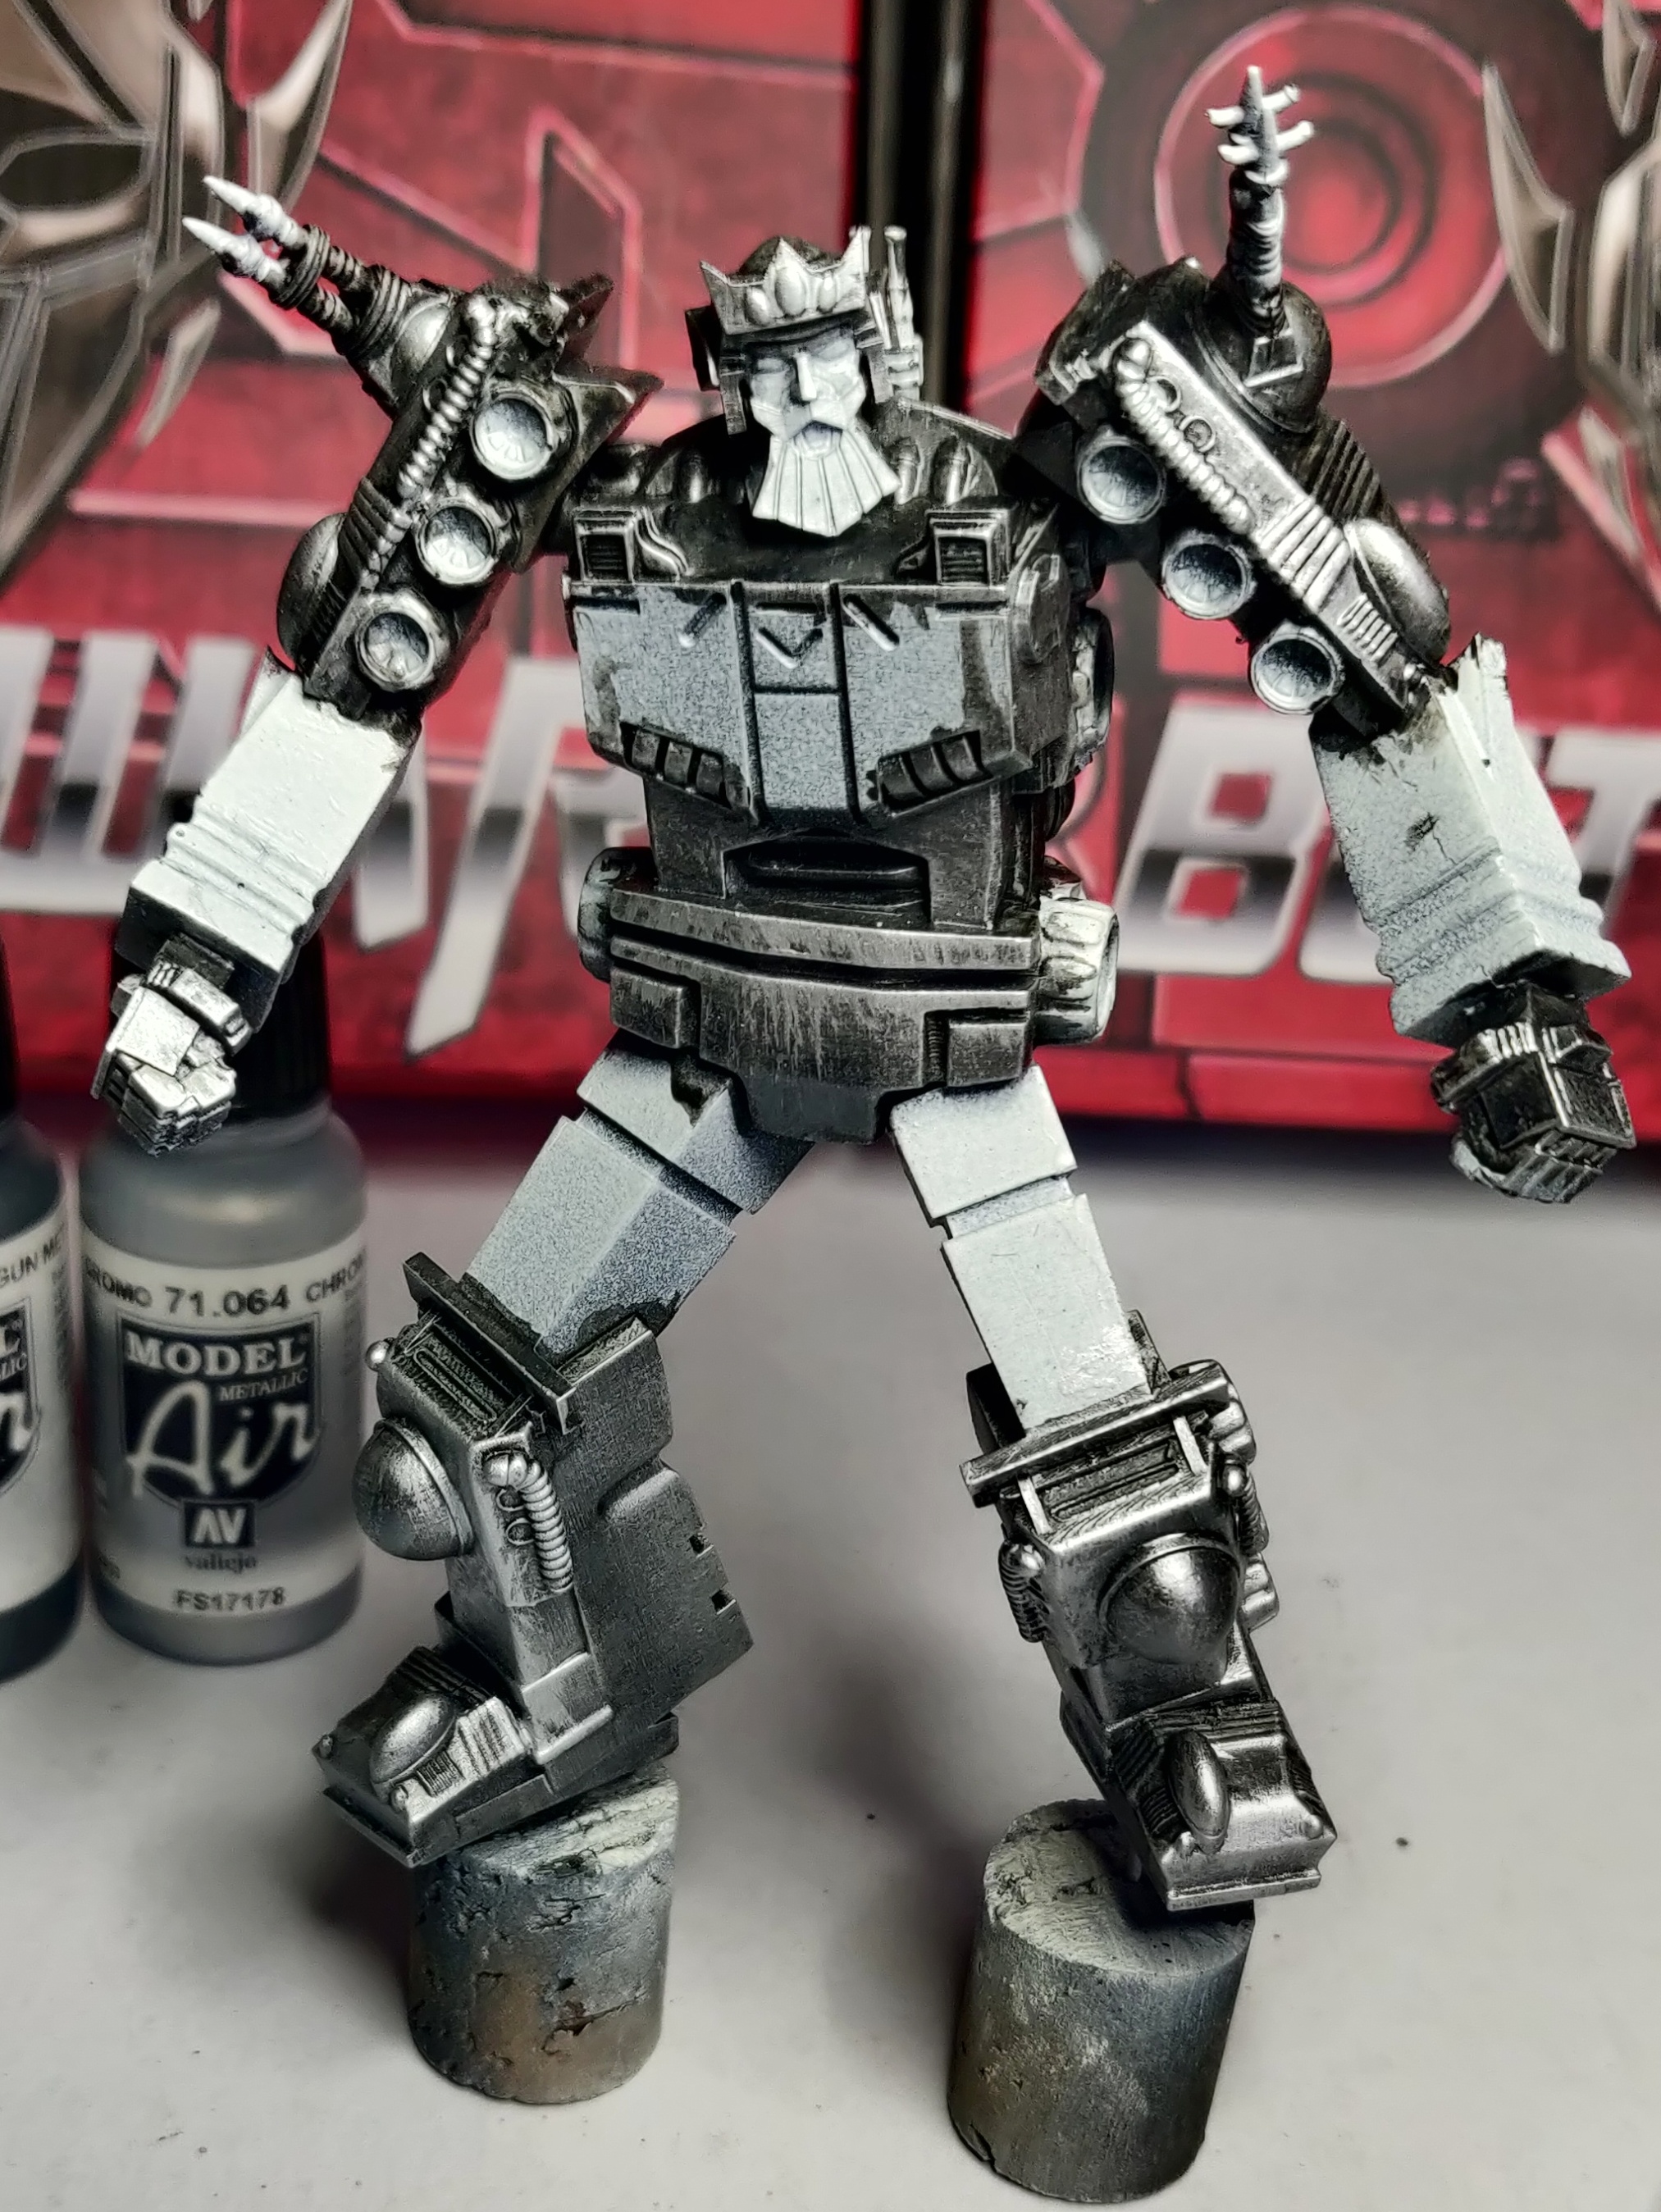
The basecoats started as usual with Vallejo Metal Air Black metal and then Gun Metal. This gives a solid base with dark recesses that I could then lay Chrome over for the topcoat, the photos above don’t have the chrome shown, but after I had finished the 3 colour workup I wanted to do something to help create contrast and interest.
Taking Liquitex Carbon Black and Dark Umber inks I added these to some Black Metal and thinned it with I star Water+, this created a nice bronze like shade.
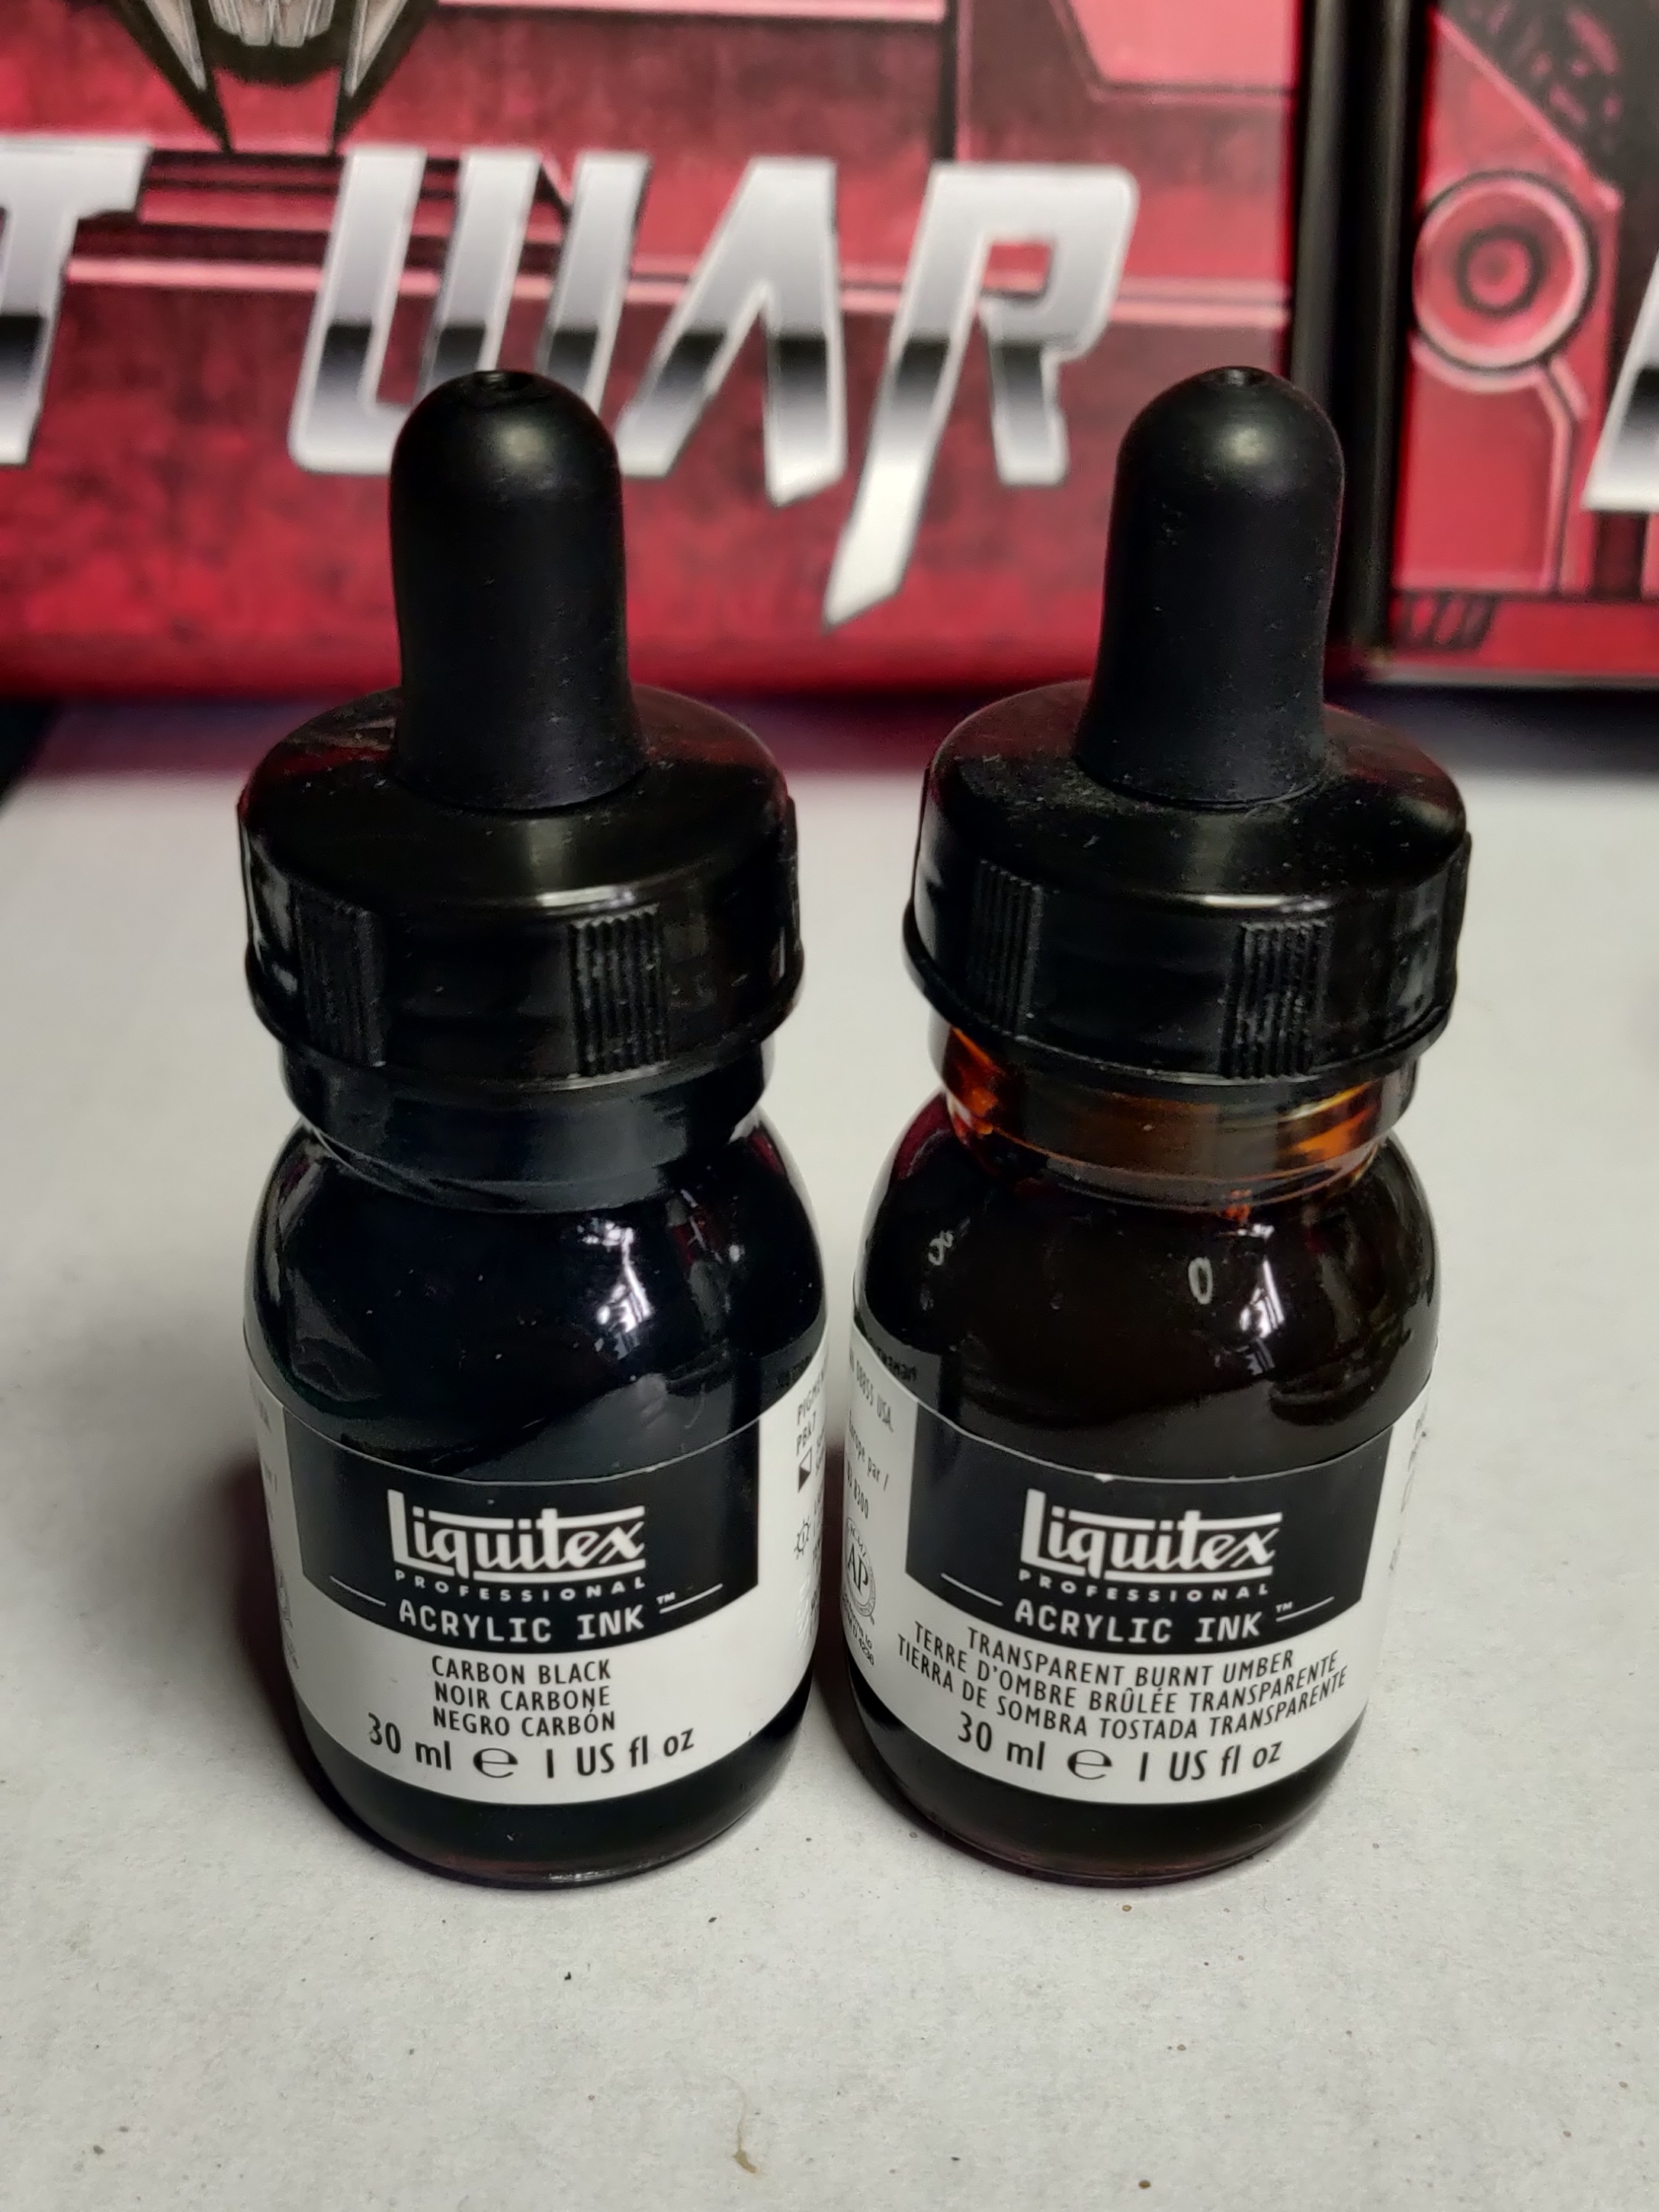
Painting this inky shade into the deepest recesses I then used a drybrush with Vallejo chrome mixed with a very small amount of the Umber to then buff in a slightly coloured highlight. You can see in the following photo the difference this makes, whereby I painted the left leg in this method, and the right is left with the chrome.
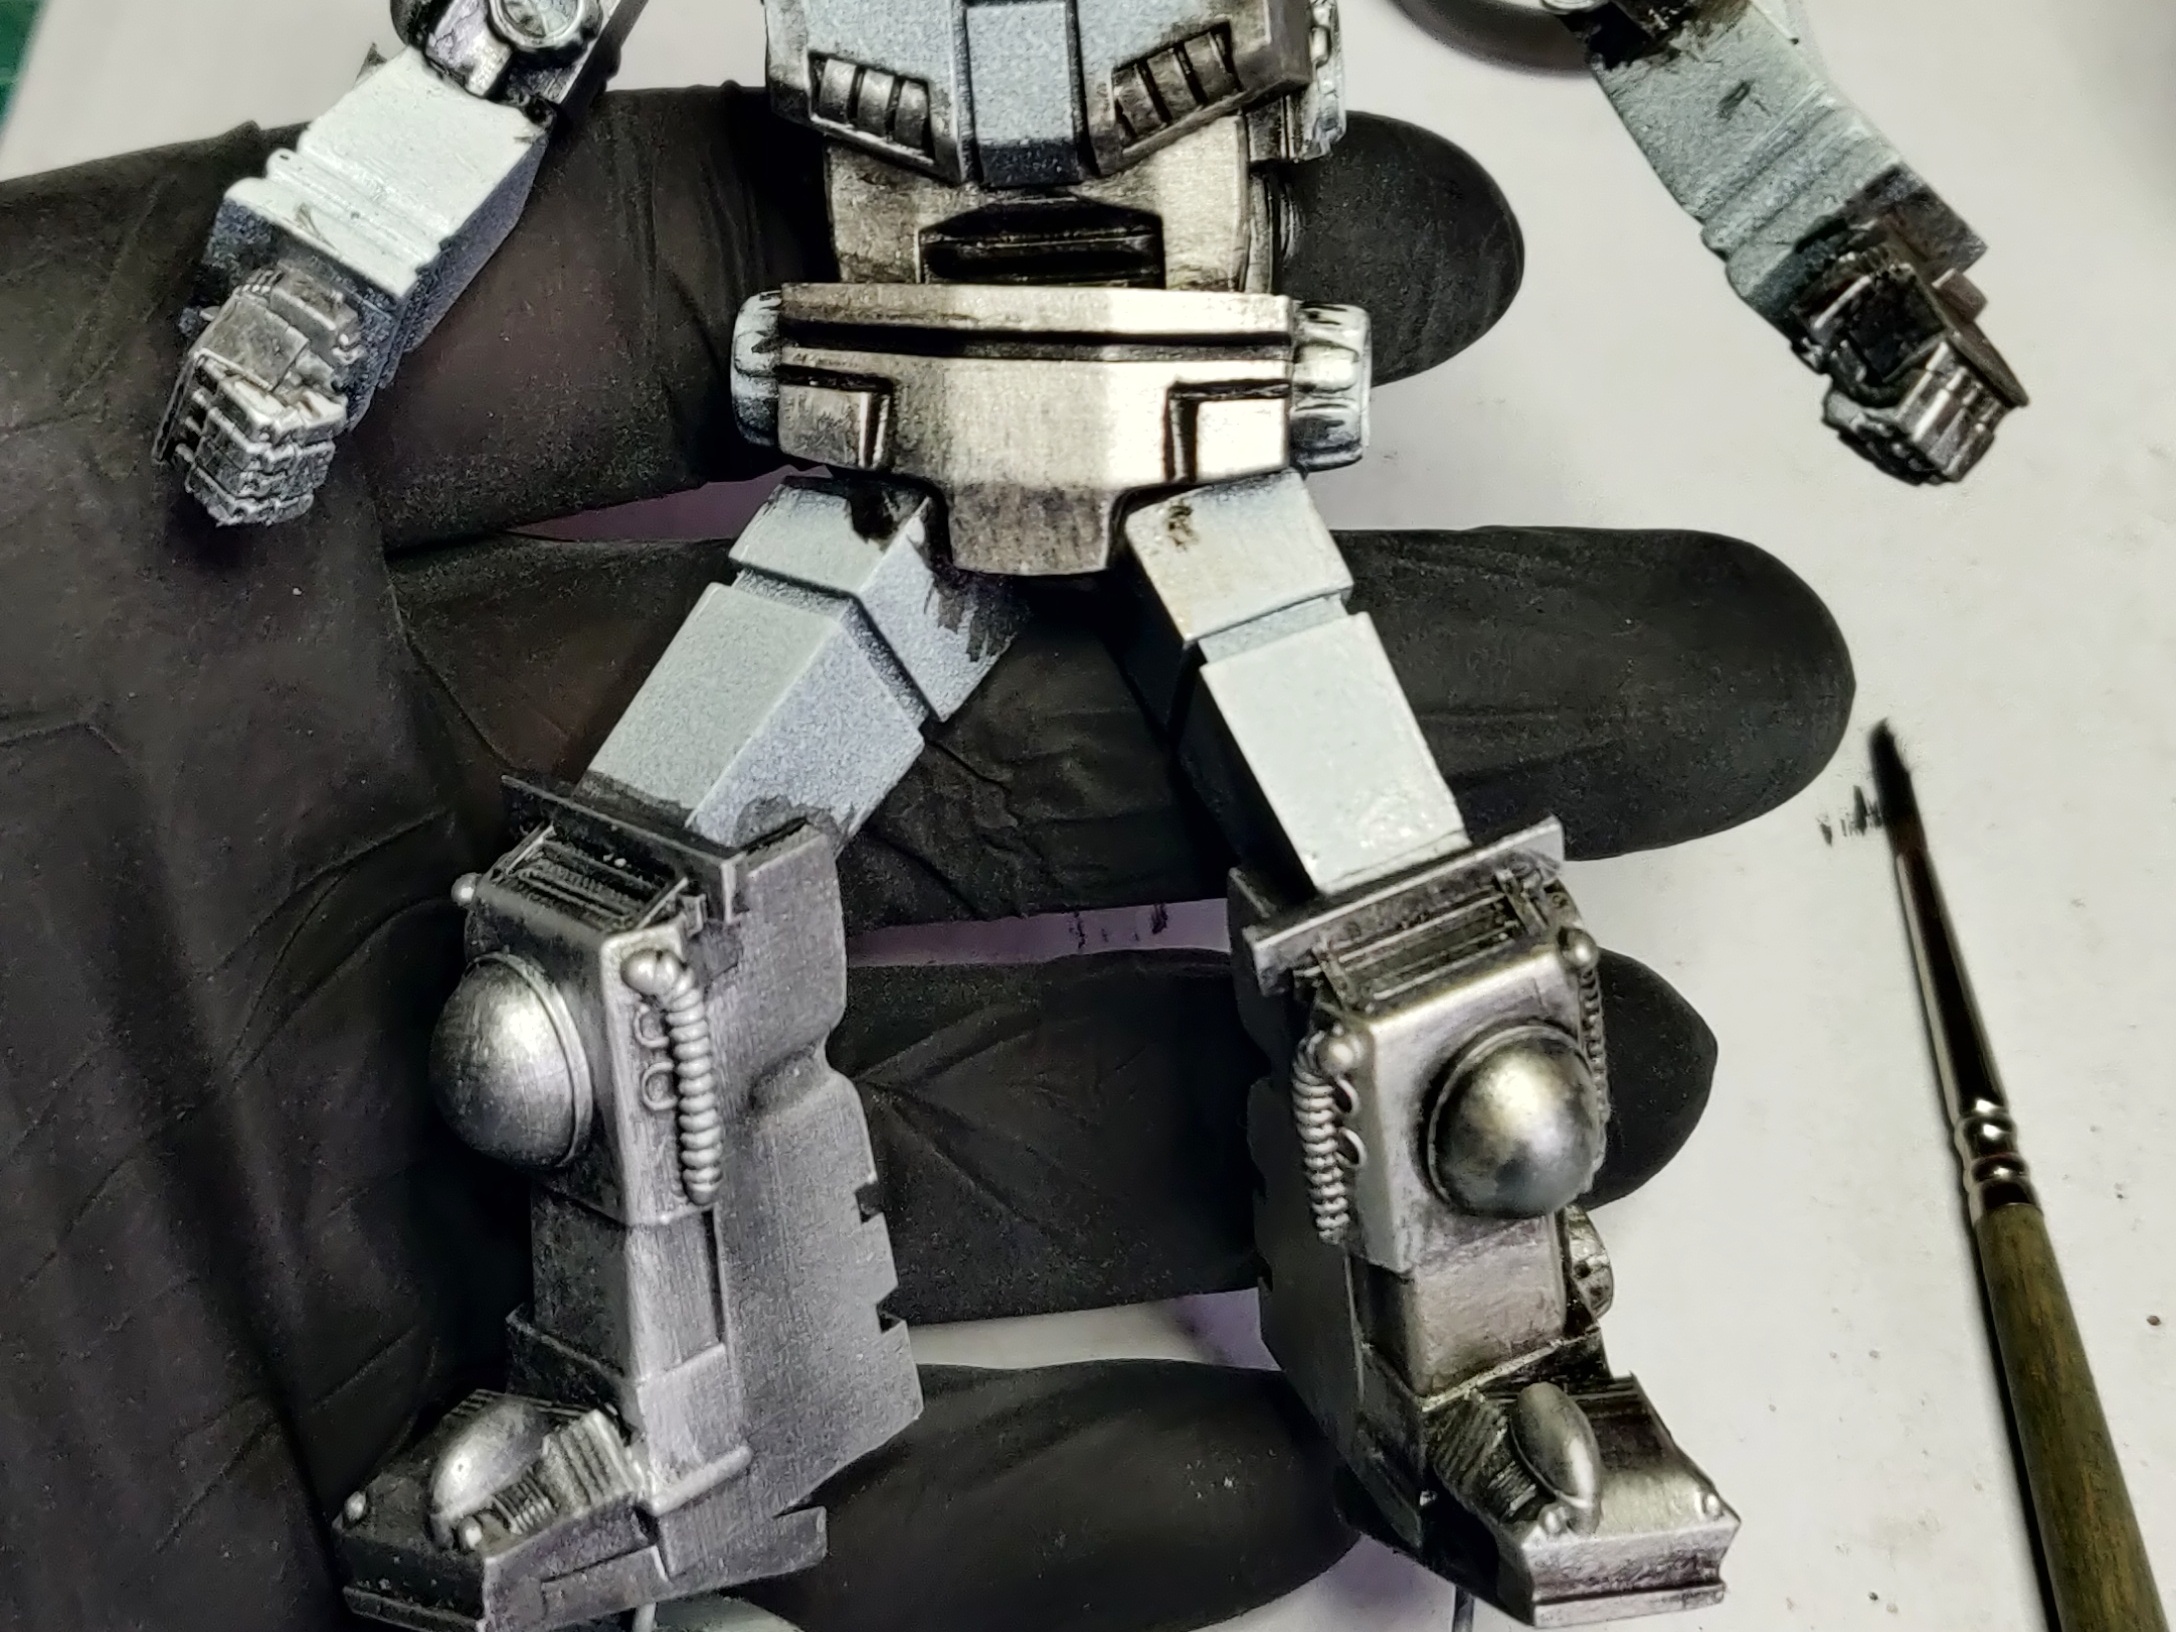 Right leg with the normal chrome, left leg and waist with inky shades and an umber chrome mixed highlight
Laying down the colour
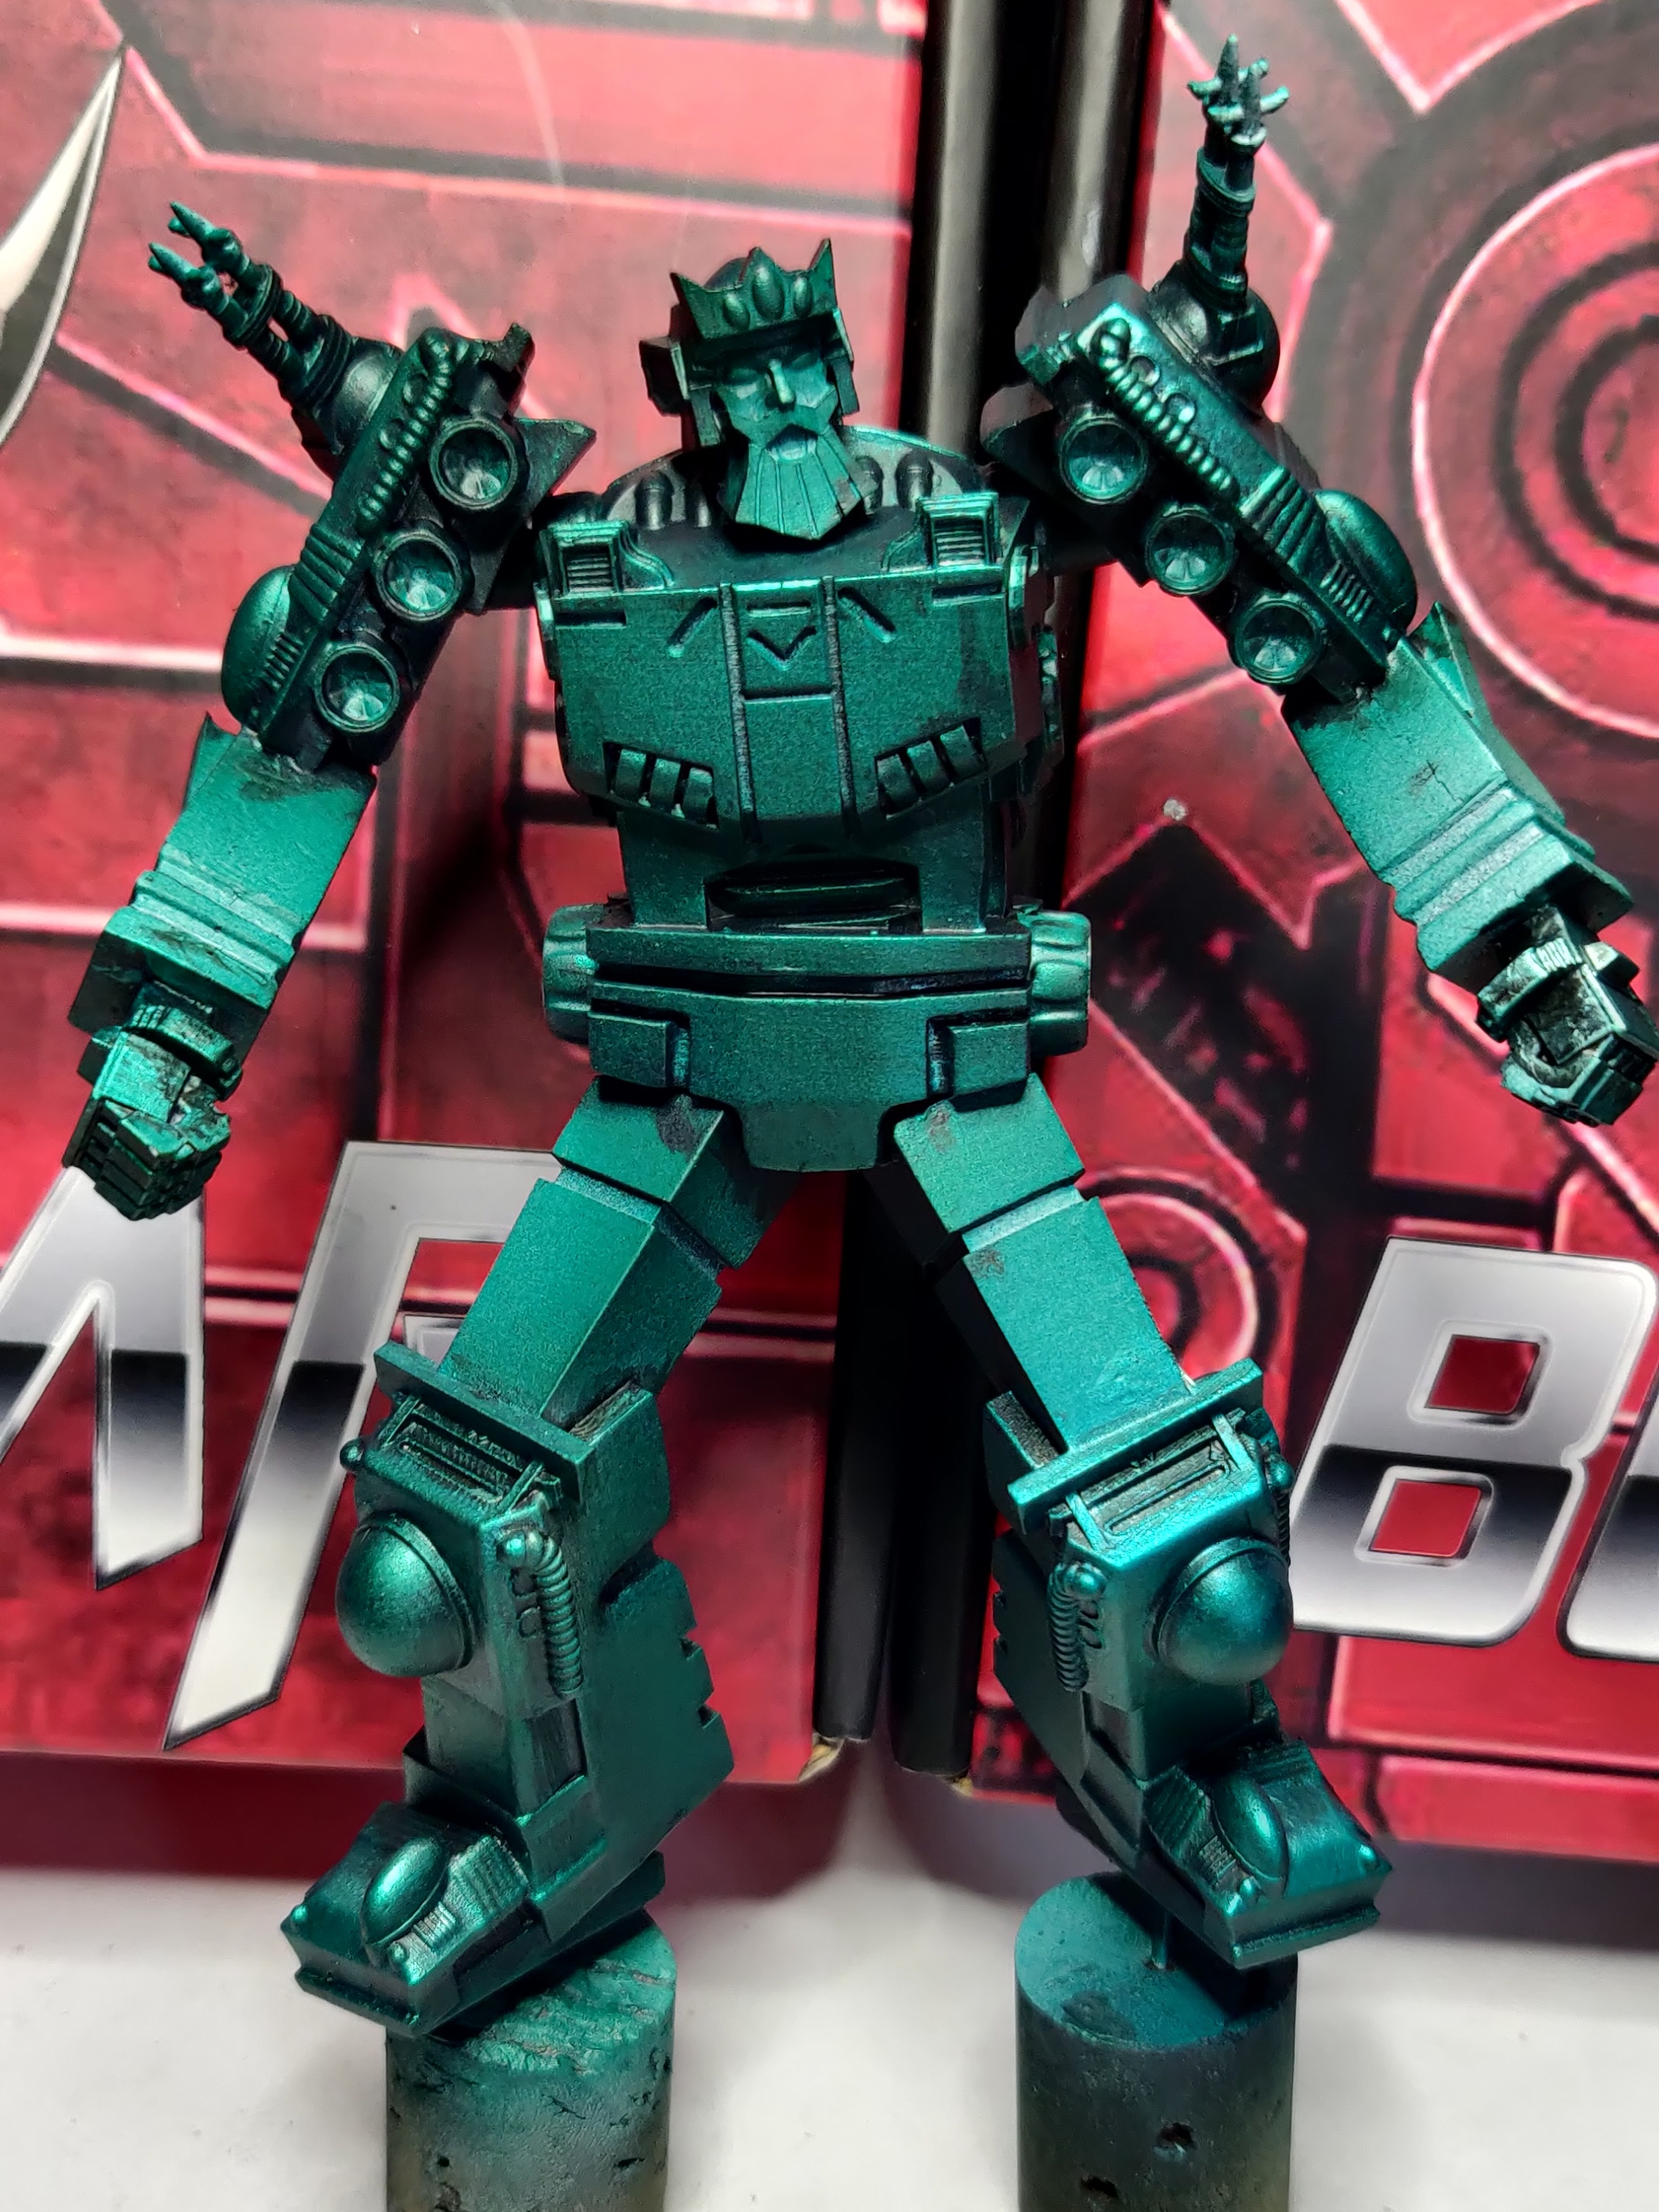
I liked the effect the Umber ink in the chrome created, it warmed the metals and I figured it would also mix with the contrast I’m about to lay over the top to give a nice colour.
Taking the same approach as the mud warriors I created a mix of Akhelian Green, Terradon Turquoise and Dark Angle Green Citadel Contrast paints, thinned with a little contrast medium and water+ so it’s ready for the airbrush.
Working my way gently over the model I applied an even coat of the mix so that all of the metal was totally coated, I didn’t mind about the non-metal parts as they will be painted separately so I didn’t need unnecessary layers to have to paint over later.
The overall effect of this has come out well. It’s not quite how the same as the other bots, they each have their own variation of this workup, but this version on Leviathan matches the same colours as the Mud Warriors just on a much larger scale.
And that’s it for Leviathan, this sets me up well for the last 2 days, one to paint the yellow and grey details, and then the final one to edge highlight myself into oblivion.
Day 18 part B...
 Yesterday's bases, set overnight, with a varnish coat over the top
Part 2 of the Part B updates, focusing on basing. Bases are very important, they frame a model, help convert a narrative, a setting, a sense of coherency.
Leaving the AK-Interactive Rough Terrain to set overnight gives a really rock solid layer to then work with. As the paste dries it compacts so any loose sand or grit over the top get trapped, and it hugs onto any rocks that were poked into it as well. Whilst I know this is enough to start painting over, as I was using real slate and rocks I wanted to give everything an even playing field, so I used some Army Painter Anti-shine matt varnish (rattle can) as I love the effect it has, and when I’m sealing bases I don’t care if it accidently frosts over due to humidity or other environmental factors.
You can see in the following images the compactness of the set rough terrain paste.
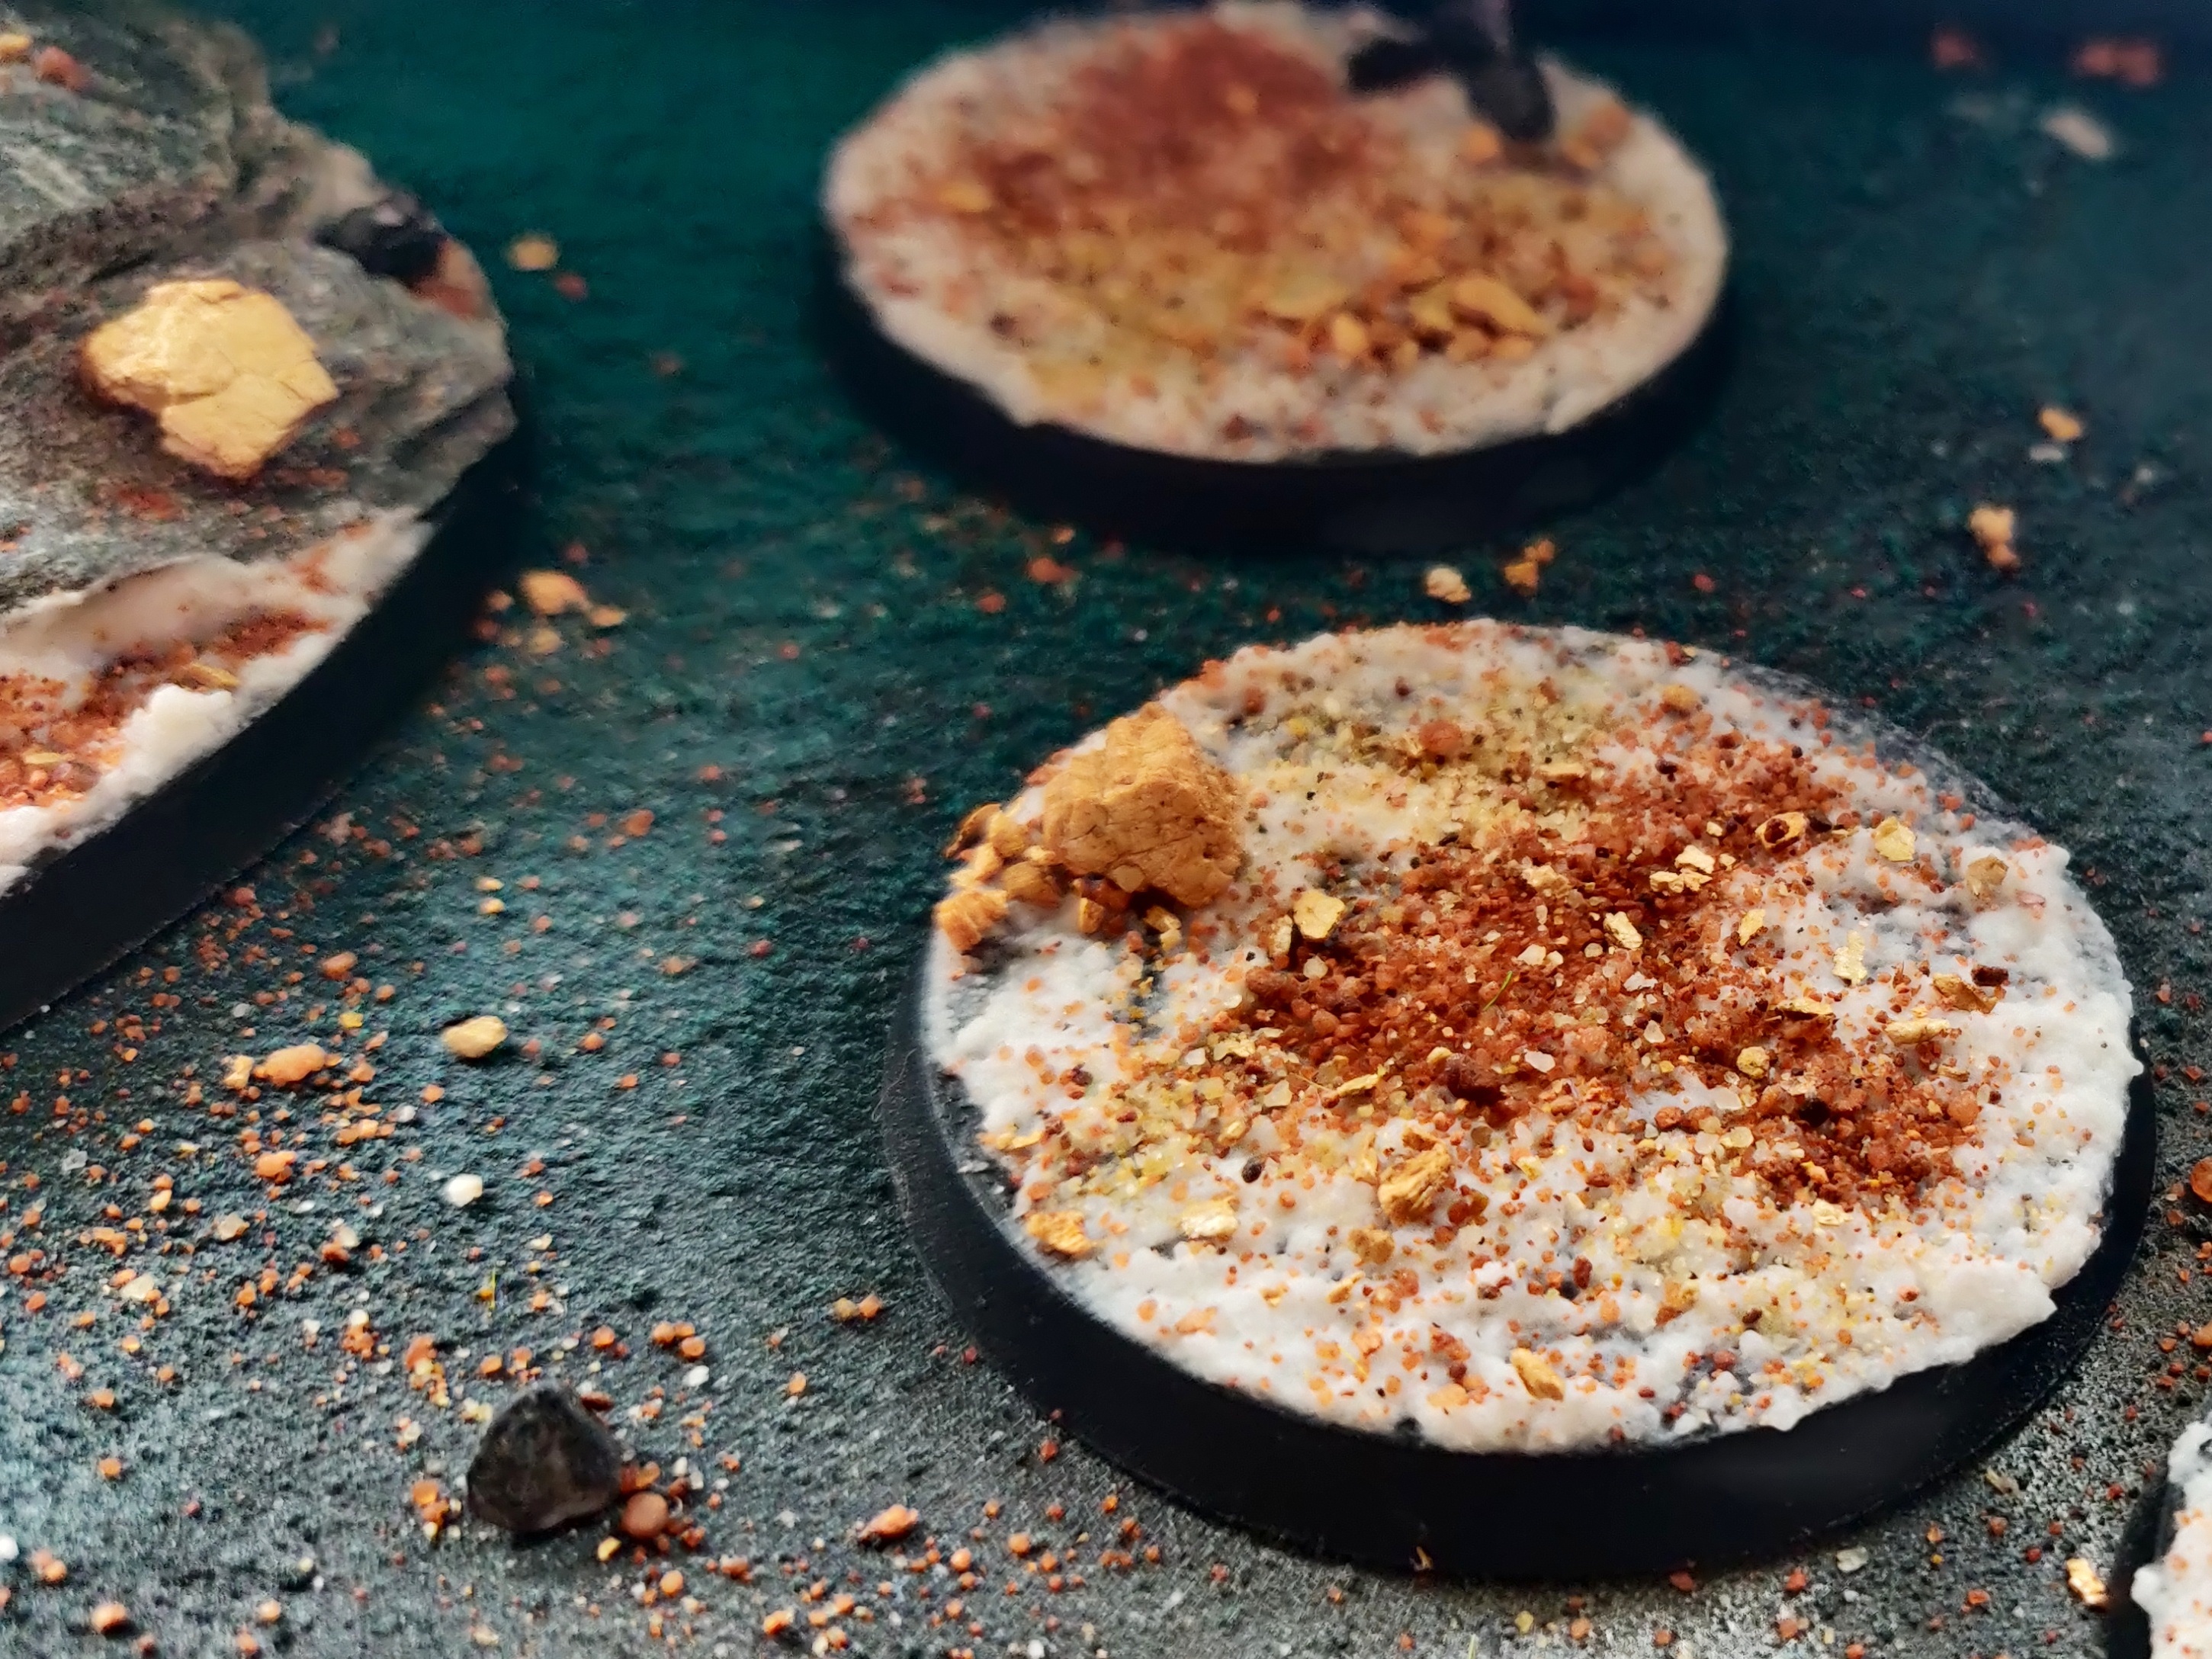
With the bases solidly set, I gave them a coat of citadel chaos back rattle can to get into all of the crevices, this is still one of the best primers going and there is nothing wrong with it other than the price.
As with my previous Bot War bases which are brown rock themed I created an airbrushable mixture of citadel Xv88 and scale75 Gibi Brown, thinned in a dropper bottle with water+ and vallejo flow improver.
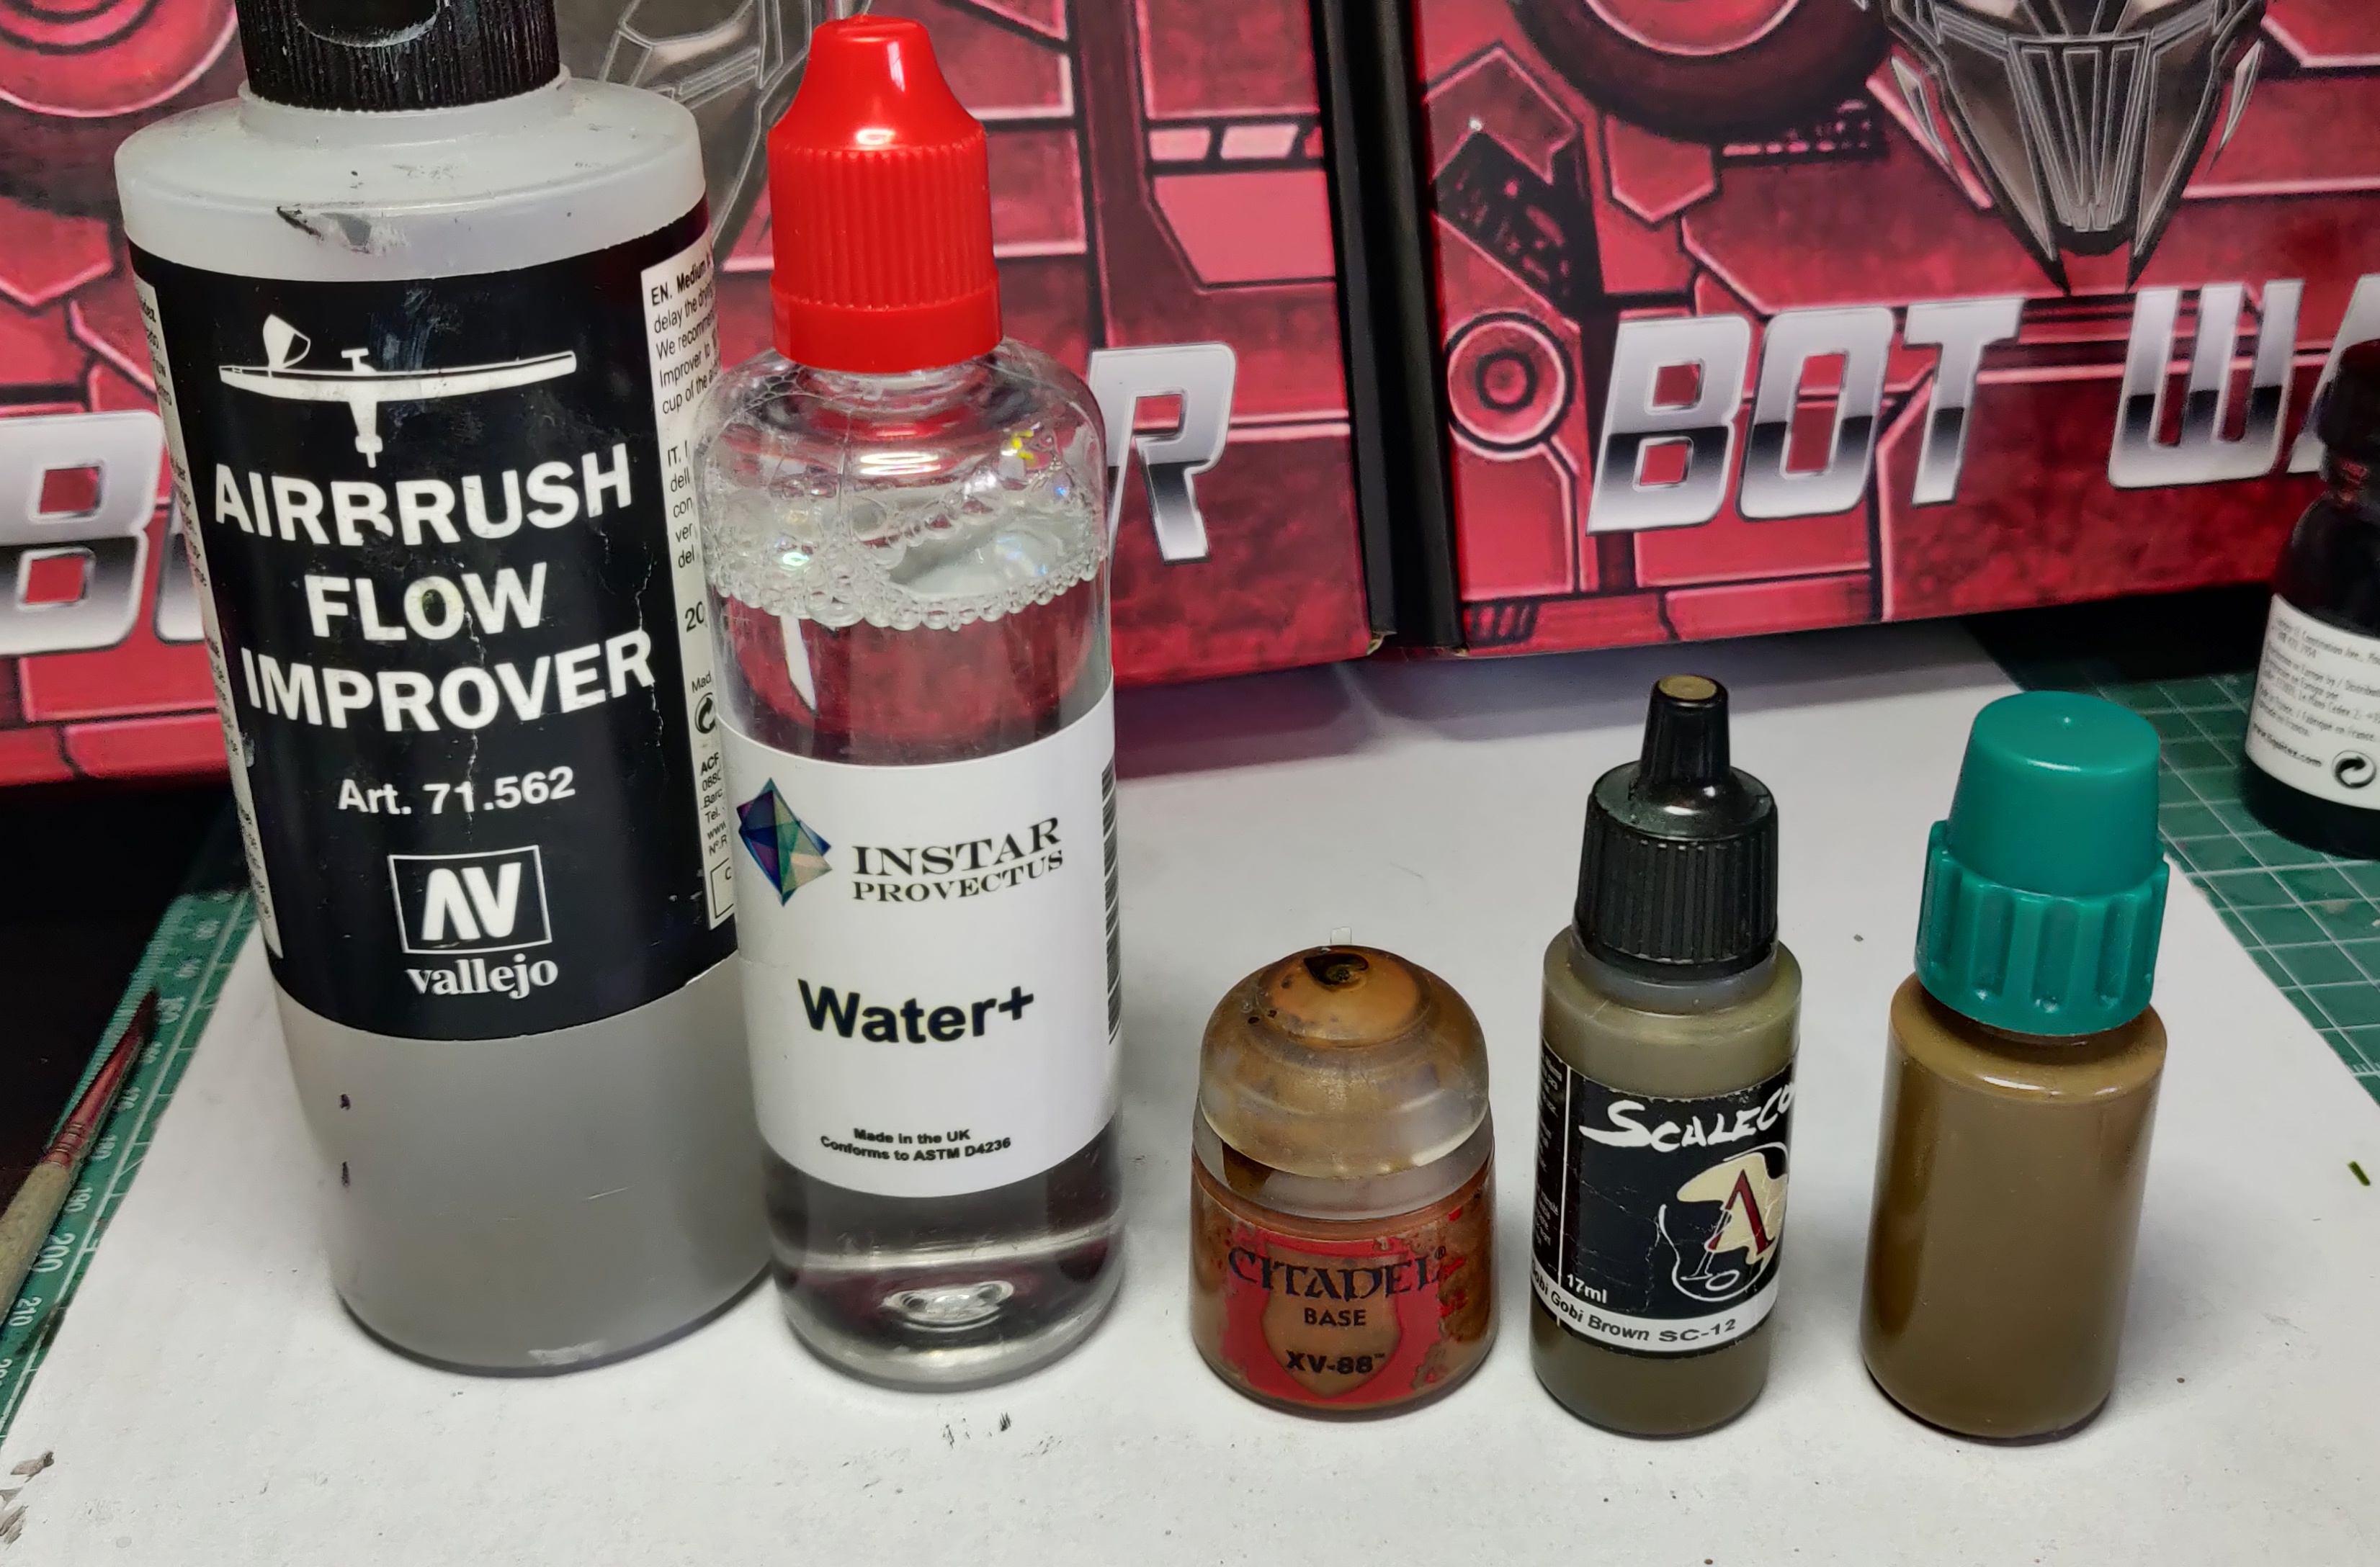
After a good shake in the dropper bottle I used this through my airbrush to give the bases a couple of coats from all directions to ensure everything had paint on and then left it to dry.
That’s it for today, another productive day over.
 Basecoats down
 Still to complete:
- Drybrush the bases
- Rim the bases
- Add tufts
- Paint the slate rocks
2 days to go.


