


![1918 Spring Offensive Wargame | Full Rules Overview with John & Gerry (WW1 Tabletop Game) [7 Days Early Access]](https://images.beastsofwar.com/2026/03/unboxing-warfulcrum-games-1918-spring-offensive-review-coverimage1-225-127.jpeg)


Egyptian Mythology Display – Spring Clean 2024


Recommendations: 510
About the Project
With pandemic lethargy setting in (I'm still not comfortable attending gaming clubs) I was looking for a different style of project. A also wanted to use my resin printer more. Marrying the two I decided to print off all the Raging Heroes' Gods and Heroes of Egypt models and produce a diorama/display with them.
Related Company: Raging Heroes
Related Genre: Fantasy
Related Contest: Spring Clean Hobby Challenge 2024
This Project is Completed
Inspiration and objectives
There were a number of reasons why I decided to do this project:
3D printing
I’ve had my Sparkmaker resin printer for a coupe of years and used it here and there but I really wanted to get into using it more. As it turns out it broke very early into the project so I had to replace it with an Elegoo Mars 2 Pro. This turned out to be a blessing as the new printer is far superior. For more details on my 3D printing I refer you to my project dedicated to the topic.
https://www.beastsofwar.com/project/1584420/
Produce a display
I’m very fortunate that my other half allows me to have two display cases in our living room where I can display my best models. However it has become a rather eclectic mix of models. What I would like to add is a dedicated display or diorama. We are low on floor space but we have plenty of bare walls I could place a display on. You might think I was inspired by Warzan’s shelf dungeon project, but to be honest I completely forgot about it. I in fact got the idea from a Youtuber I watch, Nerdforge, who produced a “shelforama”.
Experiment with gold leaf
There are a lot of models in this collection so I don’t want to get bogged down in painting them all in the traditional way. That many models could take me a year based on past similar projects.
The renders produced by Raging Heroes are very striking where most of the models could be bare resin but with certain colours picked out. This gave me the idea of using gold leaf on select areas of the models. I’ve never used gold leaf on anything before but I think its worth a try.
Put Mel the Terrain Tutor’s book to use
I bought and read Mel’s book but have yet to put any of it to use. The models will need to go on something (only if it turns out to be a fairly basic desert area) so when I get to it I’ll use the information in Mel’s book to up my game.
Starting with gold leaf
There are plenty of tutorials on Youtube about using gold leaf so I won’t bother to link to specific ones here.
The key steps are:
- Apply a suitable glue
- Wait for the glue to go tacky (timing depends on glue used)
- Place gold leaf over area and gently brush down
- Wait for glue to fully dry then brush off excess
- Seal with a varnish
Normally I would have gone to a local hobby store to buy this sort of thing but avoiding an un-necessary journey I bought everything from Amazon.
This is the glue I went with, chosen because I only have wait 30 minutes before applying the gold leaf. Some other glues had much longer wait times. https://www.amazon.co.uk/gp/product/B00J8Q0F84/ref=ppx_yo_dt_b_asin_title_o07_s00?ie=UTF8&psc=1
Shopping around I found that you can get coloured copper leaf. Not only is this cheaper than gold leaf but the variety of colours will allow me to apply all the different colours I want to the project.
https://www.amazon.co.uk/gp/product/B08HQS1F1G/ref=ppx_yo_dt_b_asin_title_o07_s00?ie=UTF8&psc=1
I’ll apply the glue with my usual paint brushes and apply the gold leaf with some cheap kid’s craft brushes. Once complete I’ll seal the models with the usual model varnishes.
First results with gold leaf
For my first attempt I used some misprinted parts from the large Apophis model. The model has a ridge of large articulated plates along the length of its snake-like body that are rendered gold in the Raging Heroes images.
I didn’t take photos but I learned something. These misprints had not been through the UV curing process and still felt a bit rubbery. This is enough for the gold leaf to stick to, so I had gold leaf on parts of the model where no glue had been applied. For the rest of the project I will have to put all the models through a UV curing process before applying the gold leaf.
Apart from that the gold leaf applied to the ridges seemed to look good. Applied to the whole model it looked like the results would be what I wanted.
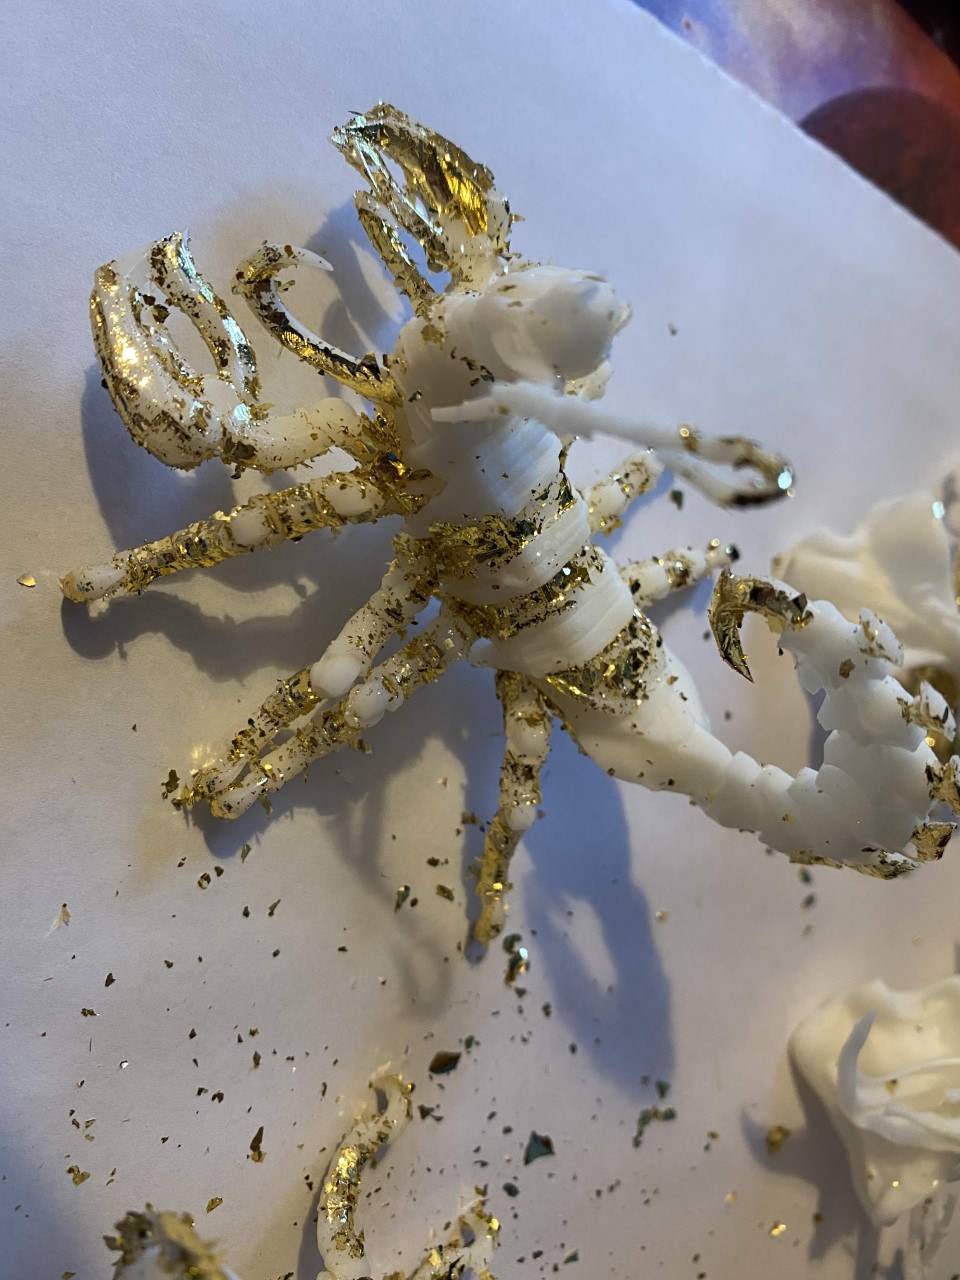
After purchasing a UV curing box and curing all the models printed so far it was time to try again.
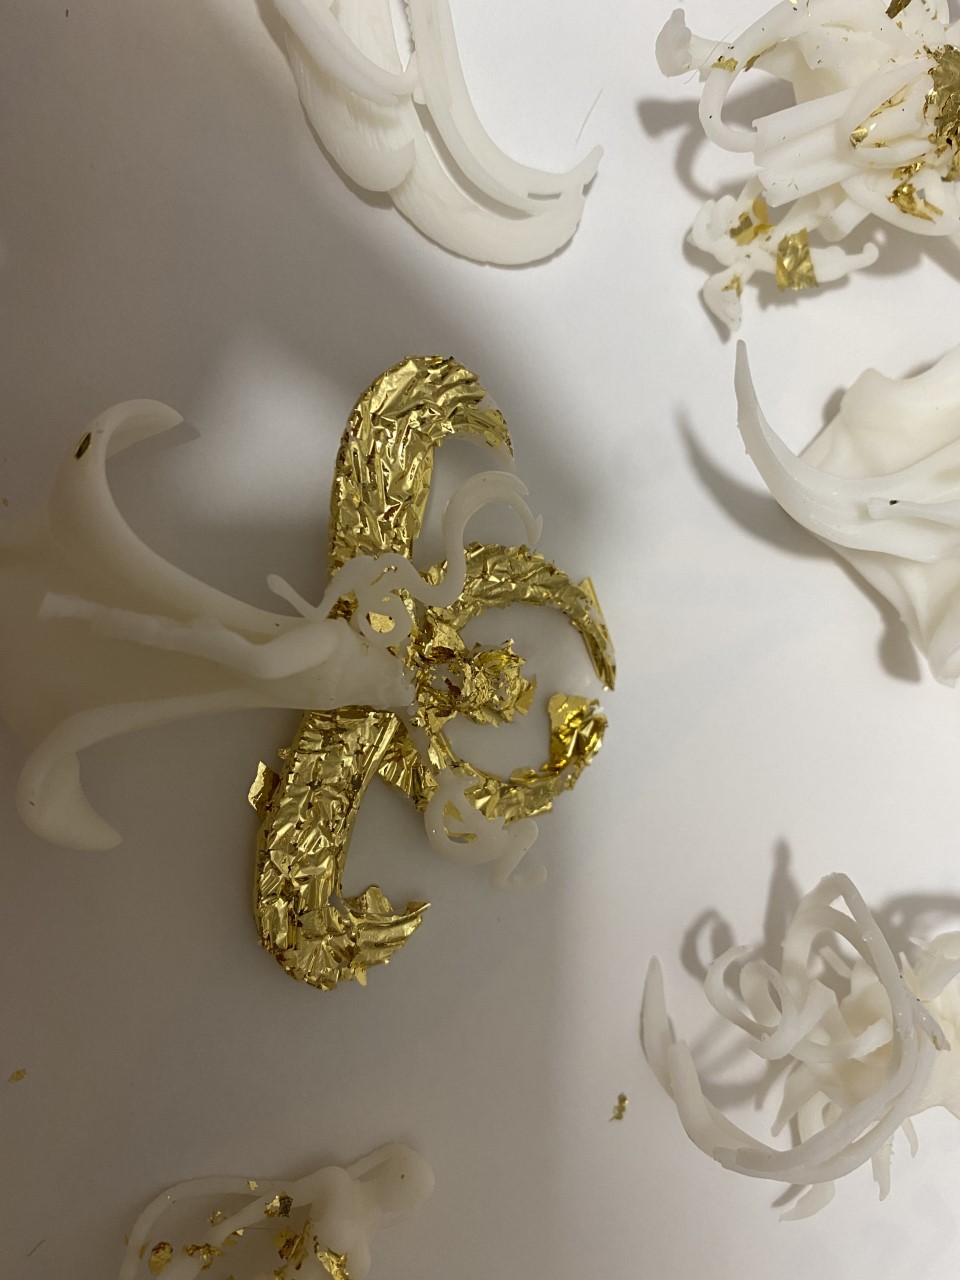

These models have had the gold leaf applied and have been left to fully dry. I have not yet brushed off the excess.
However at this stage I have run into some problems. I am finding it very difficult to apply the gold leaf except in relatively large flat areas. In hindsight this is not a great surprise as that is where gold leaf is traditionally used. The fine details of a 35mm mini is perhaps pushing the technique too far. That said there are a number of things that I could be getting wrong:
- The glue might not be great
- I might not have waited the correct amount of time for the glue to go tacky
- The kid’s craft brush being used to apply the gold leaf might be too stiff or too soft
- It might actually be going fine I just need to remove the excess then repeat the process one or two more times to get full coverage.
This is going to be harder than I thought...
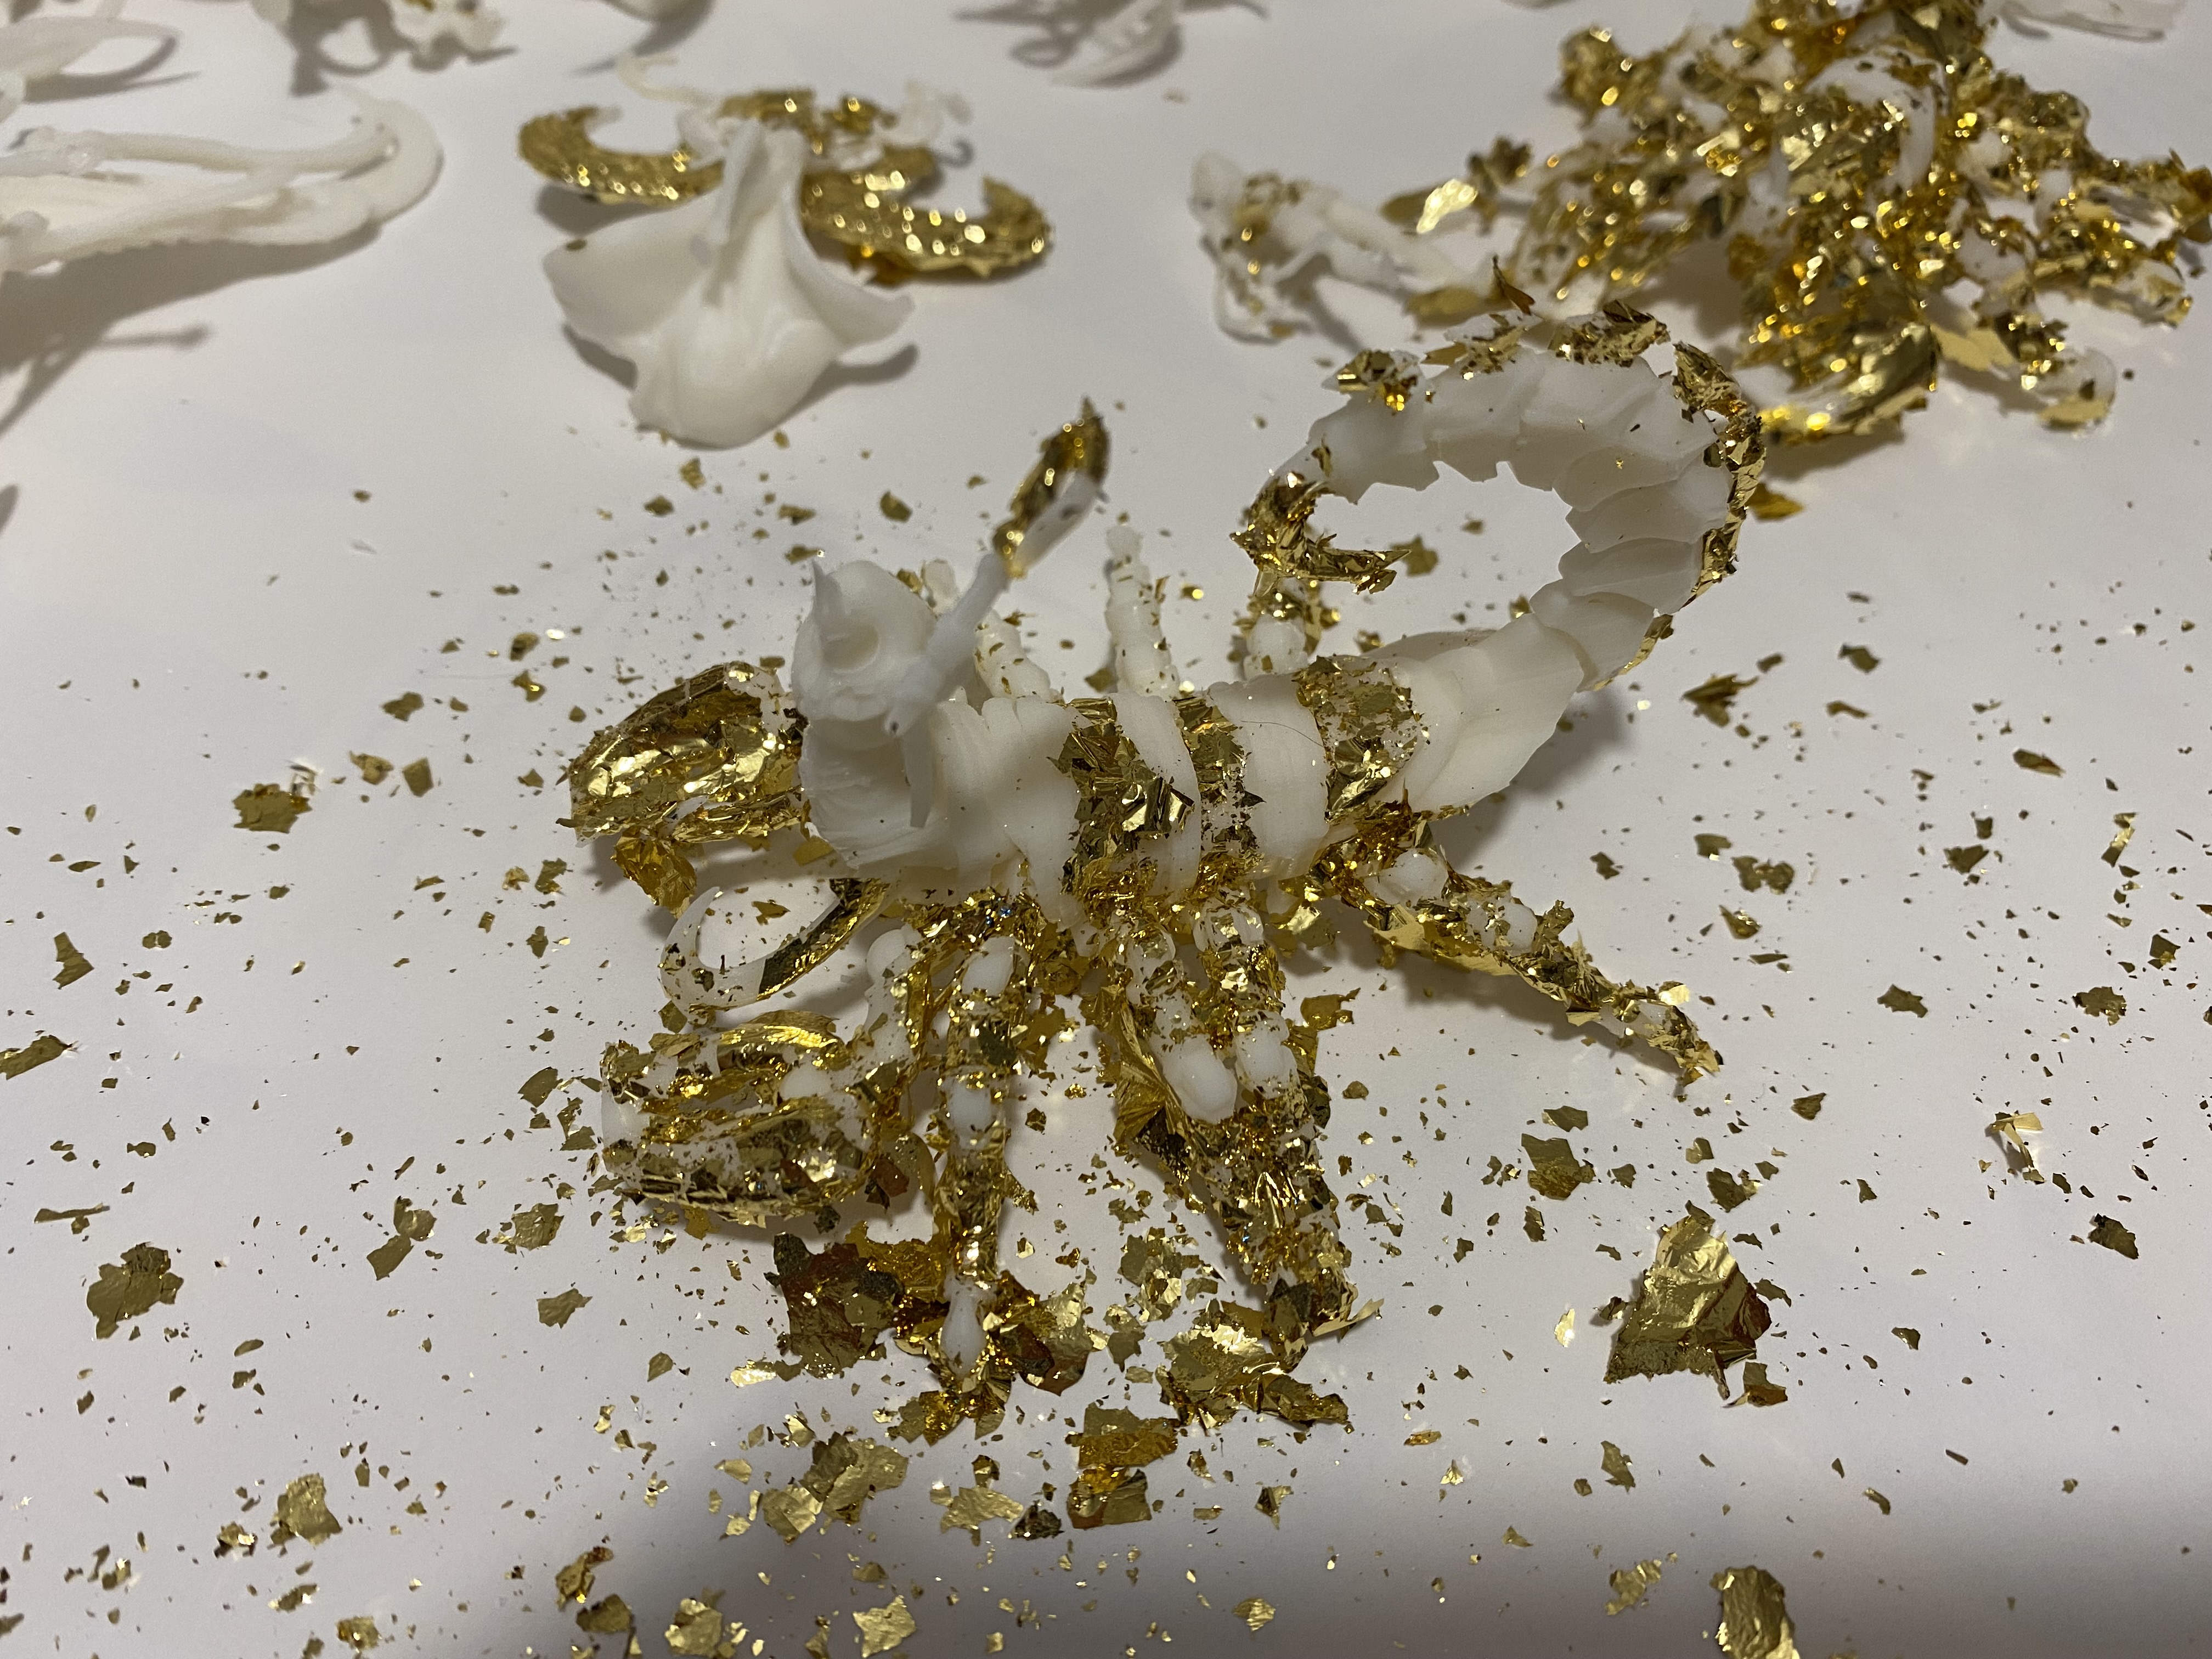
I bought a soft make up brush and after waiting 24 hours used it to brush off the excess gold leaf. It turns out most of it was excess. Very little had adhered to the models.
I am thinking this is because of one of two reasons – either the glue wasn’t used right, or the relatively complex shape of miniatures leads to problems getting the leaf in place and also in having to brush excessively to remove the excess. This causes a lot of the stuck down leaf to be rubbed off.
I still have about two or three weeks of continuous printing before the centre piece is completed. In the mean time I am going to experiment with the gold leaf on some 75m figures I have. Perhaps with practice I will get better results. If that doesn’t work I’ll change my plan to a quick paint scheme and use the gold leaf on the centre piece terrain (which is mostly flat surfaces).

Practice model

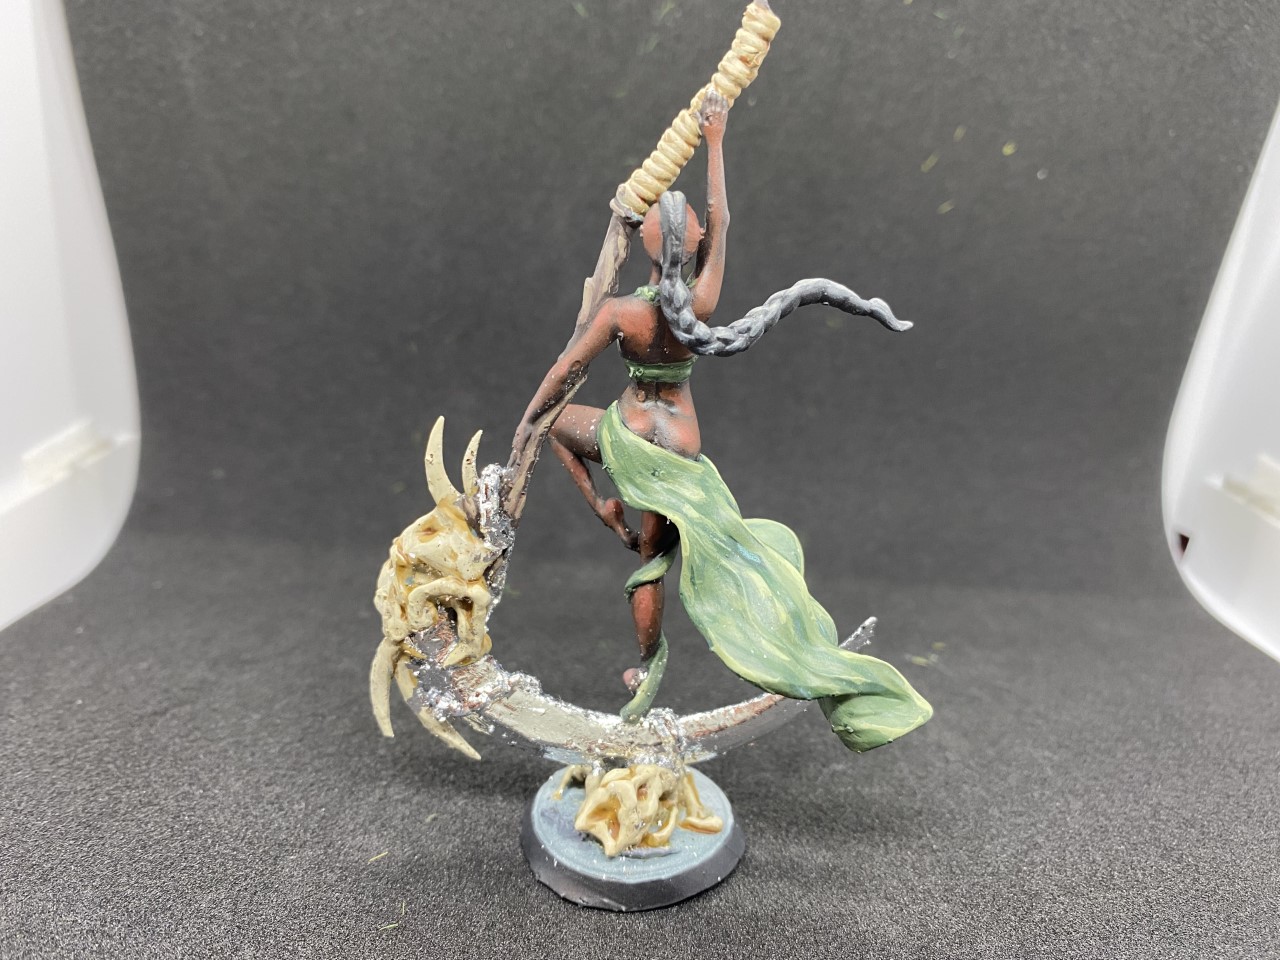
I wanted to practice applying leaf to another model so I painted up a 75mm mini (full details on painting can be found in my other project here: https://www.beastsofwar.com/project/1593676/).
This time I’m much happier with the results. The process I used was:
- Varnish model first to protect paint job.
- Apply glue on front of model.
- Wait ten minutes (not 30 as given in glue’s instructions).
- Apply leaf using kid’s paintbrush.
- As soon as leaf has been applied to all glued areas use a make-up brush to remove excess using swirling motion to ensure strokes come from all directions.
- Repeat above for rear of model.
- Repeat for any parts where leaf has rubbed off or glue was missed.
When I was finished there was lots of gold leaf on other parts of the model. I was able to gently blow most of it off. Once the glue has fully cured tomorrow I’ll blow a bit harder to get off the excess. Perhaps I will use a cotton bud to get it off. Then I can varnish the model again to protect the leaf.
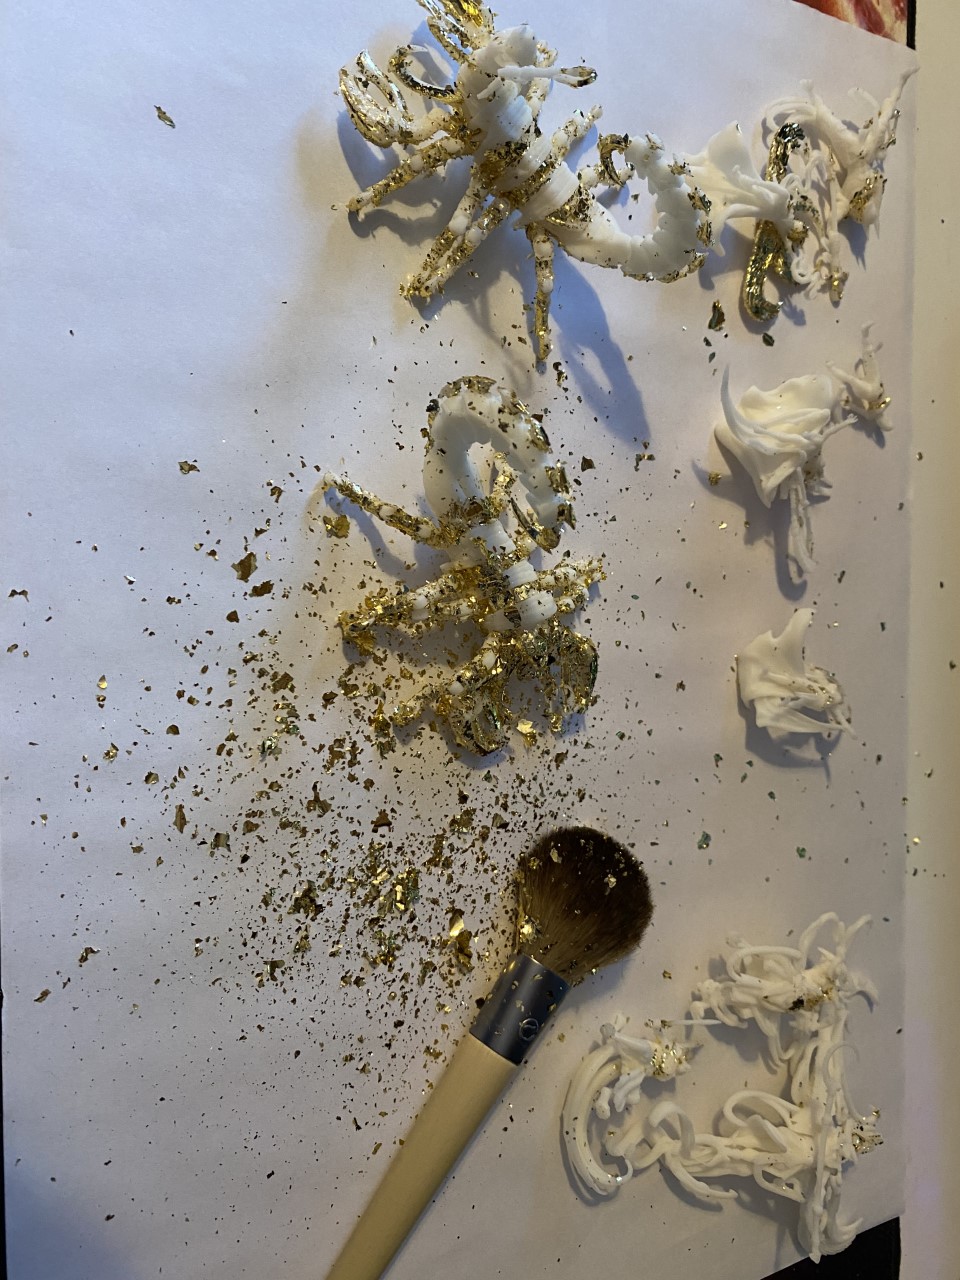
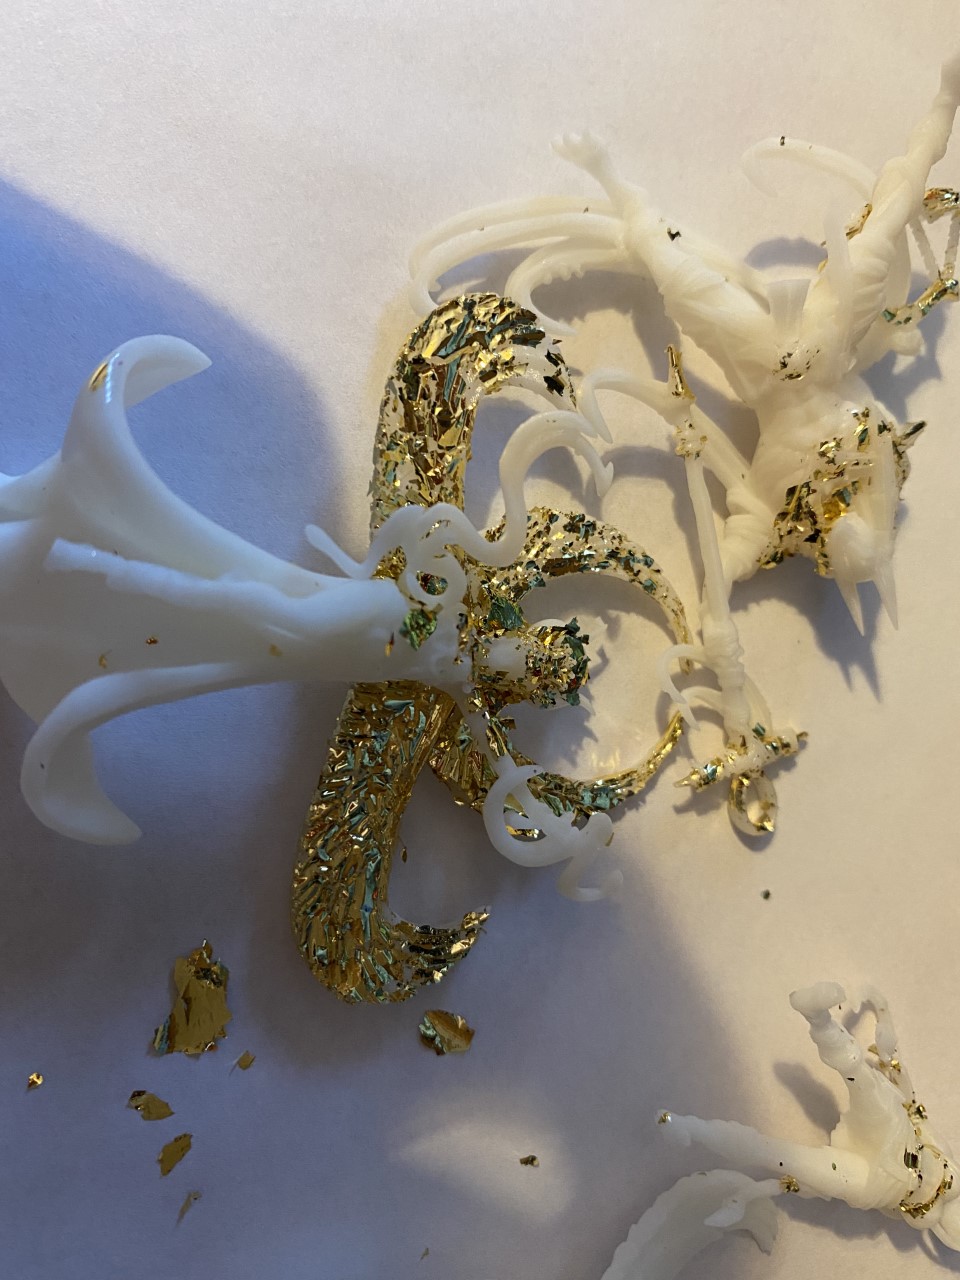
Testing with two colours
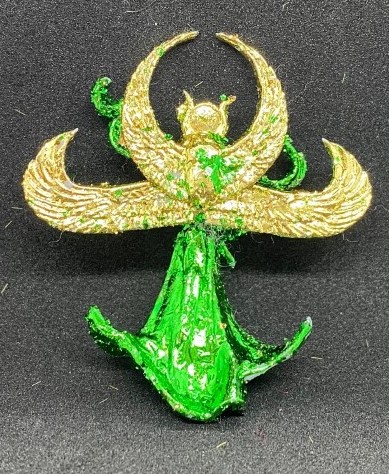

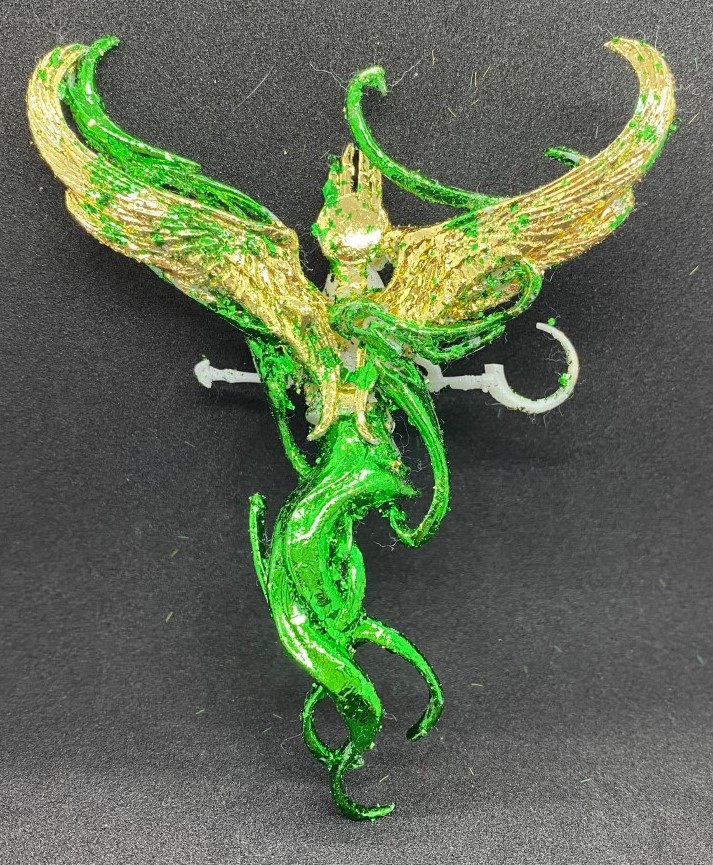
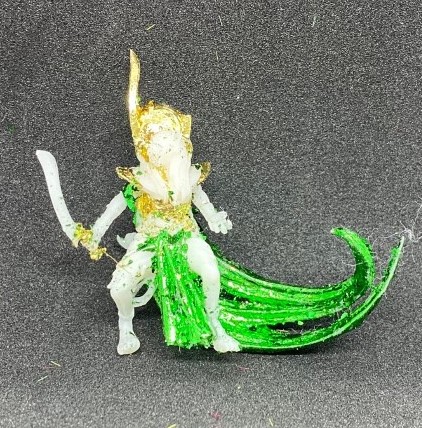
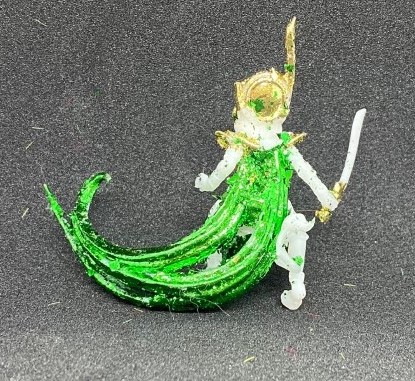
I’ve now applied two different coloured foils to these three models. Each colour takes two to three rounds of application front and back to get this coverage, and its still not perfect.
Here’s the key learning points:
- Even when I’m certain I didn’t apply glue over the gold leaf the green leaf can still stick to it and refuse to brush off.
- It can be incredibly difficult to apply the leaf to some areas of the models. E.g. in recesses.
- When holding on to the model to brush off the excess foil it is very easy to break the model. This is a particular problem for these Egyptian style models as they have lots of fine details.
- After leaving the models 24 hours I tried brushing off the excess with a cotton bud. That’s a mistake and is why you can see all the cotton fluff in the photos.
I think that if multiple foils are to be applied you need to fully apply one and then seal it with varnish before moving on to the next. This will make cleaning up the second foil without damaging the first easier.
Another problem I have is that the parts of the model I plan to leave as bare resin are too white. It is very difficult to pick out features. This makes it tricky to know where to glue to apply the foil, but also means the ends result doesn’t have definition.
I have an idea. The experiments shall continue…
Finished printing
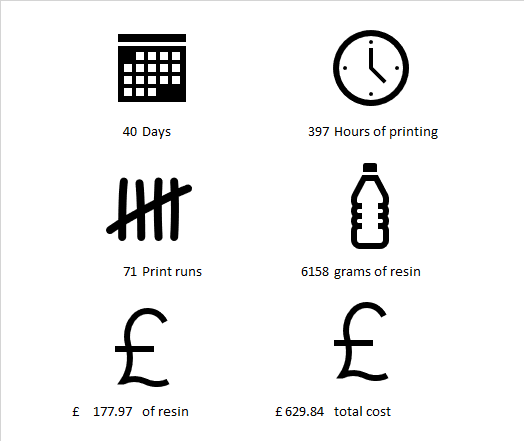
Today saw the last figures come off the printer so I have produced the above infographic to cover what has been involved in the printing.
It’s taken over a month to print all the stuff (and I didn’t print every unit in the Patreon) so there’s no way I could keep up with their monthly releases unless I had two printers running or I was getting up in the middle of the night to ensure the printer was running 24/7.
The 71 print runs only include six miss-prints which is not bad going. Certainly much better than the success rate I got with my first printer. These fails were all due to bad model alignment on my part.
The total cost factors in all the equipment and consumables I’ve bought for 3D printing, which I divide by the total amount of resin I’ve used since I started printing. This project accounts for about half the resin I have every printed, so about half the cost of both my printers, ultrasonic bath, UV curing box, and consumables are included in this figure.
The resin cost represents what I have actually spent directly on this project, plus the £12.50 for the month’s Patreon subscription.
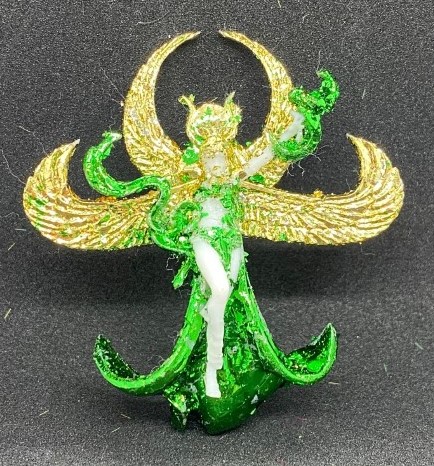
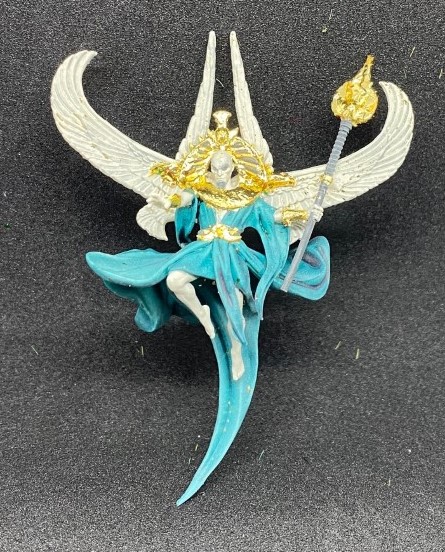
A recipe that works
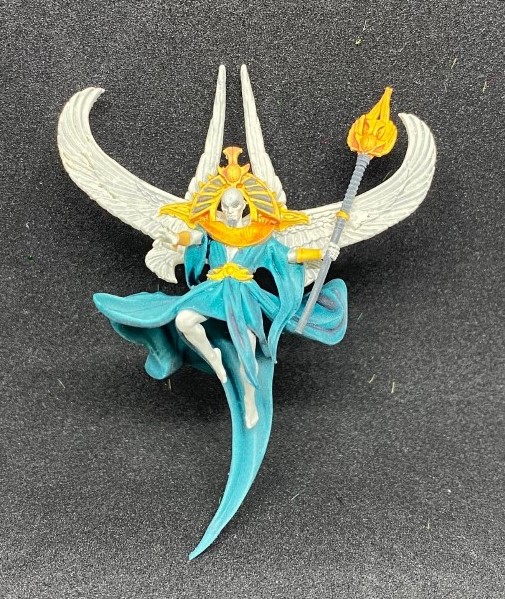

I had another go with a single model and I’ve come up with a scheme that I’m happy with.
The model was undercoated wraithbone. Then I used contrast paints to paint in the key colours: iyanden yellow for the gold, terradon turqoise for the fabrics, black templar for the black, and apothecary white for the rest.
I then applied a satin varnish to the entire model to protect the paintwork before applying gold leaf to the gold areas. Its very hot in the UK right now so I found the leaf had to be applied almost immediately after the glue, otherwise the glue would dry to much. It took two applications of gold leaf to get adequate coverage. The odd bit missing only reveals the yellow paint beneath so it’s not a big problem.
Once the glue is dry I need to blow off the little bits of leaf that are stuck to the model in the wrong places, then the model needs varnishing again.
This hole process took about an hour for the painting and half an hour for the gold leaf application.
Now I have an approach I’m happy with I can crack on a paint the rest the same way.


![StarCraft Tabletop Miniatures Game Pre-Orders Live Now [Updated]](https://images.beastsofwar.com/2026/03/starcraft-tmg-news-cover-600-338.jpg)


