


![How To Paint Moonstone’s Nanny | Goblin King Games [7 Days Early Access]](https://images.beastsofwar.com/2024/12/3CU-Gobin-King-Games-Moonstone-Shades-Nanny-coverimage-225-127.jpg)


Silver Bayonet


Recommendations: 1808
About the Project
Christmas list shared I hoped for the rules for Christmas and got them as a gift. I want to play the solo campaign with a British warband and a French warband and see if I can convince a friend to take charge of one or the other to play some full PvP games.
Related Game: The Silver Bayonet
Related Company: Osprey Games
Related Genre: Horror
This Project is Active
Prep for the game.
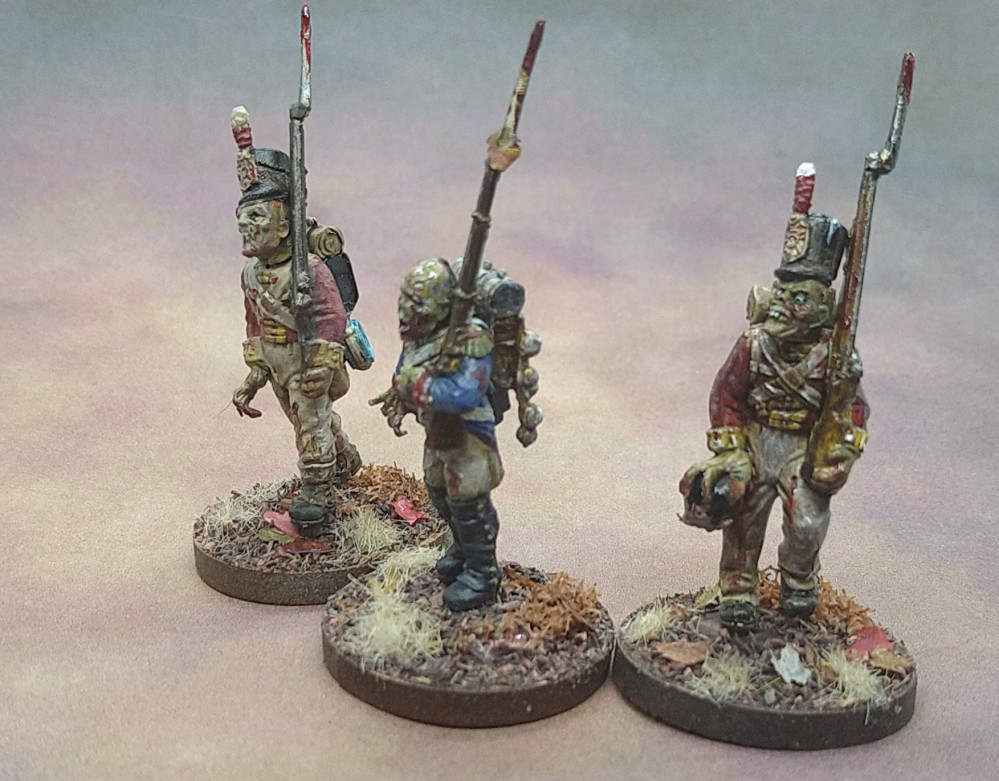
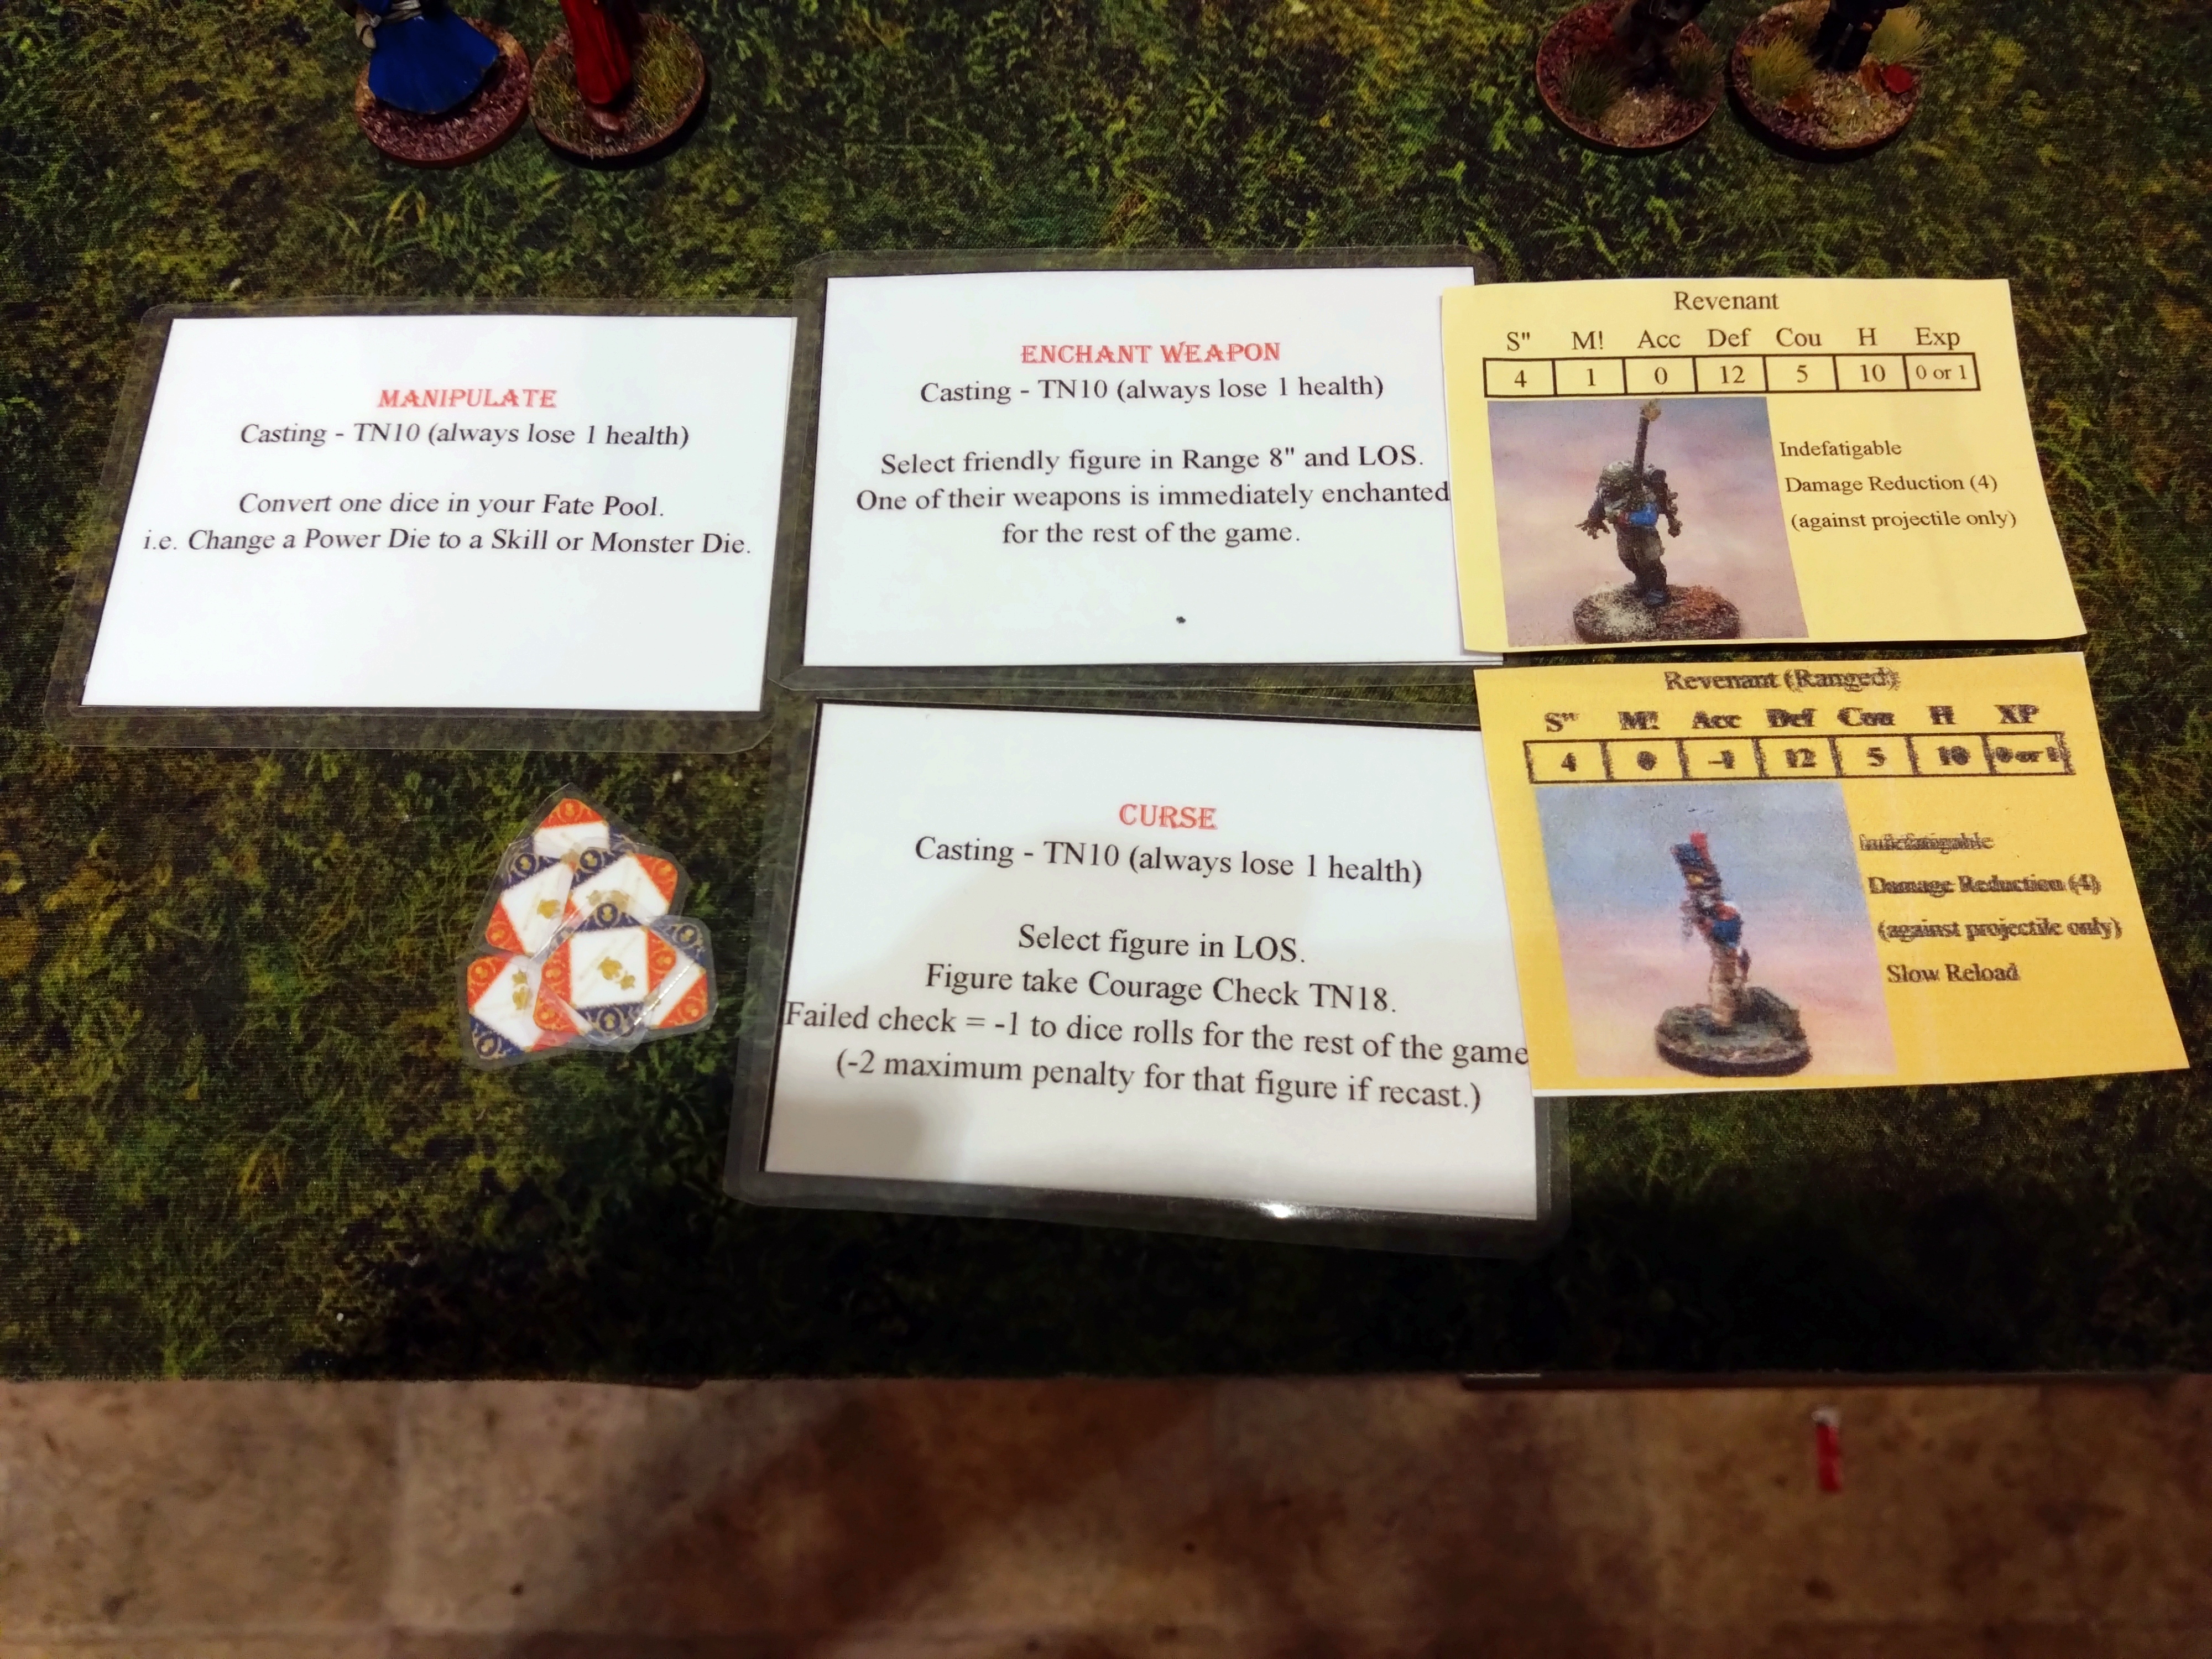 Made a new card for my ranged revenants. Will include just the two I painted and all additional revenants added at the end of turns will be standard ones.
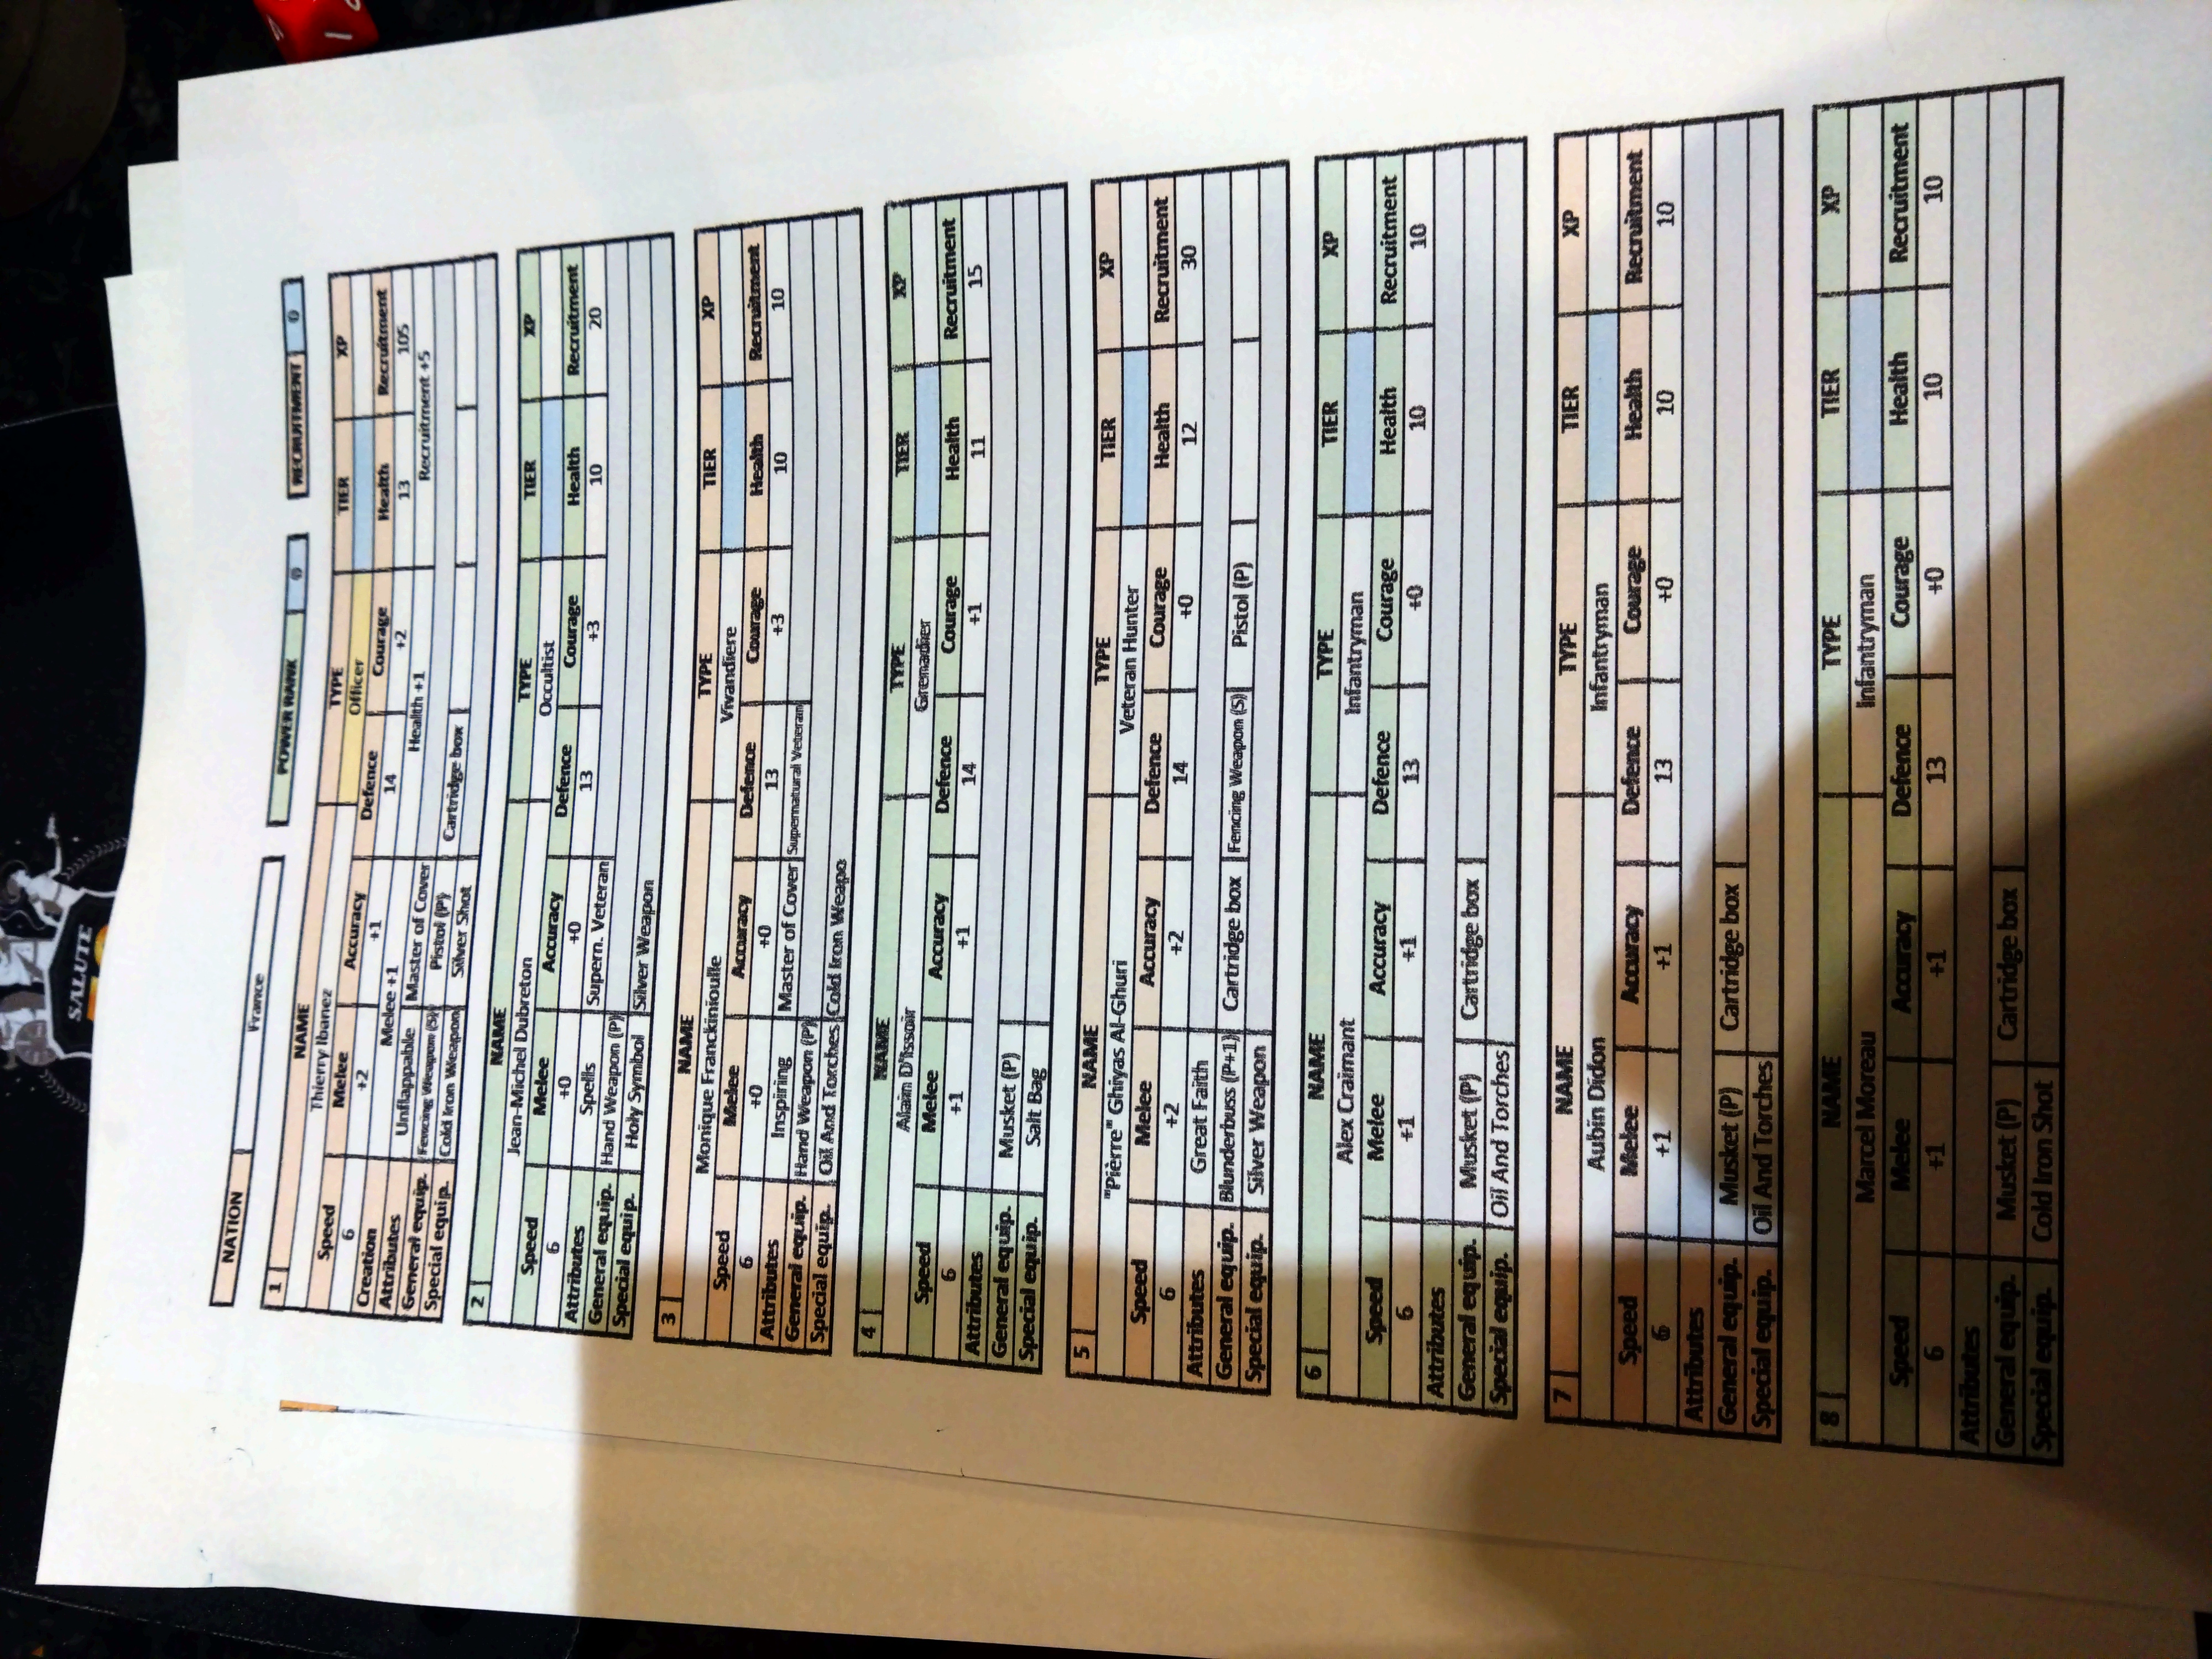 Had to get used to my French list again. Decided to drop my supernatural investigator and add a veteran hunter Mameluke instead.
The spells that my occultist has are not great for this solo game, but adding blessed to weapons or making an opponent have a permanent -1 to rolls could be handy in other solo battles.
With books on Egypt etc. on the horizon. I do think my occultist and Mameluke will look the part with fezz and hot climate robes etc. ?
Revenant shooters.
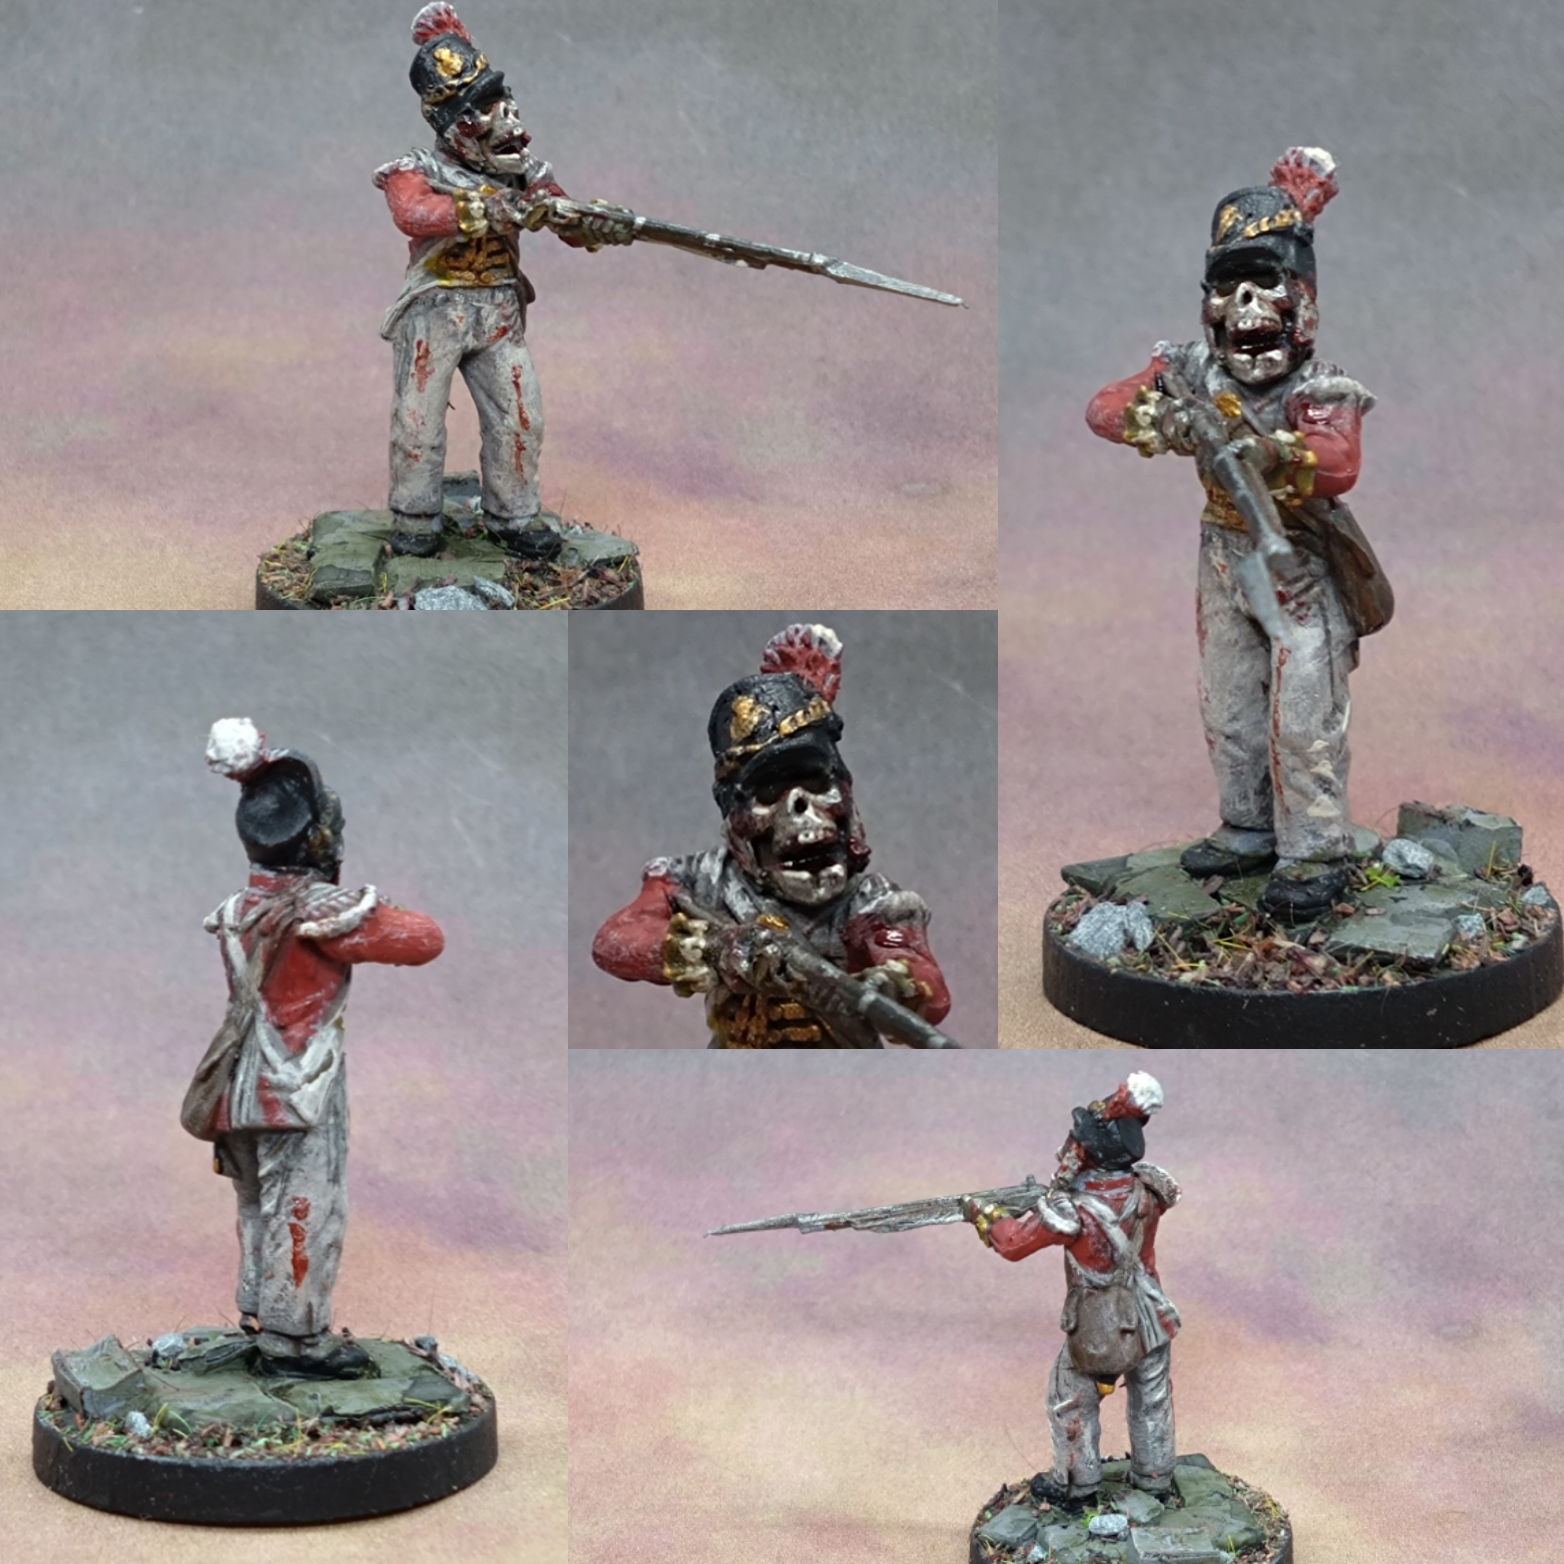 Suggestions came that the slow reload idea seemed to be appropriate, but that a -1 to hit makes thematic sense because the shambling rotters won't be steady or likely to produce well aimed shots.
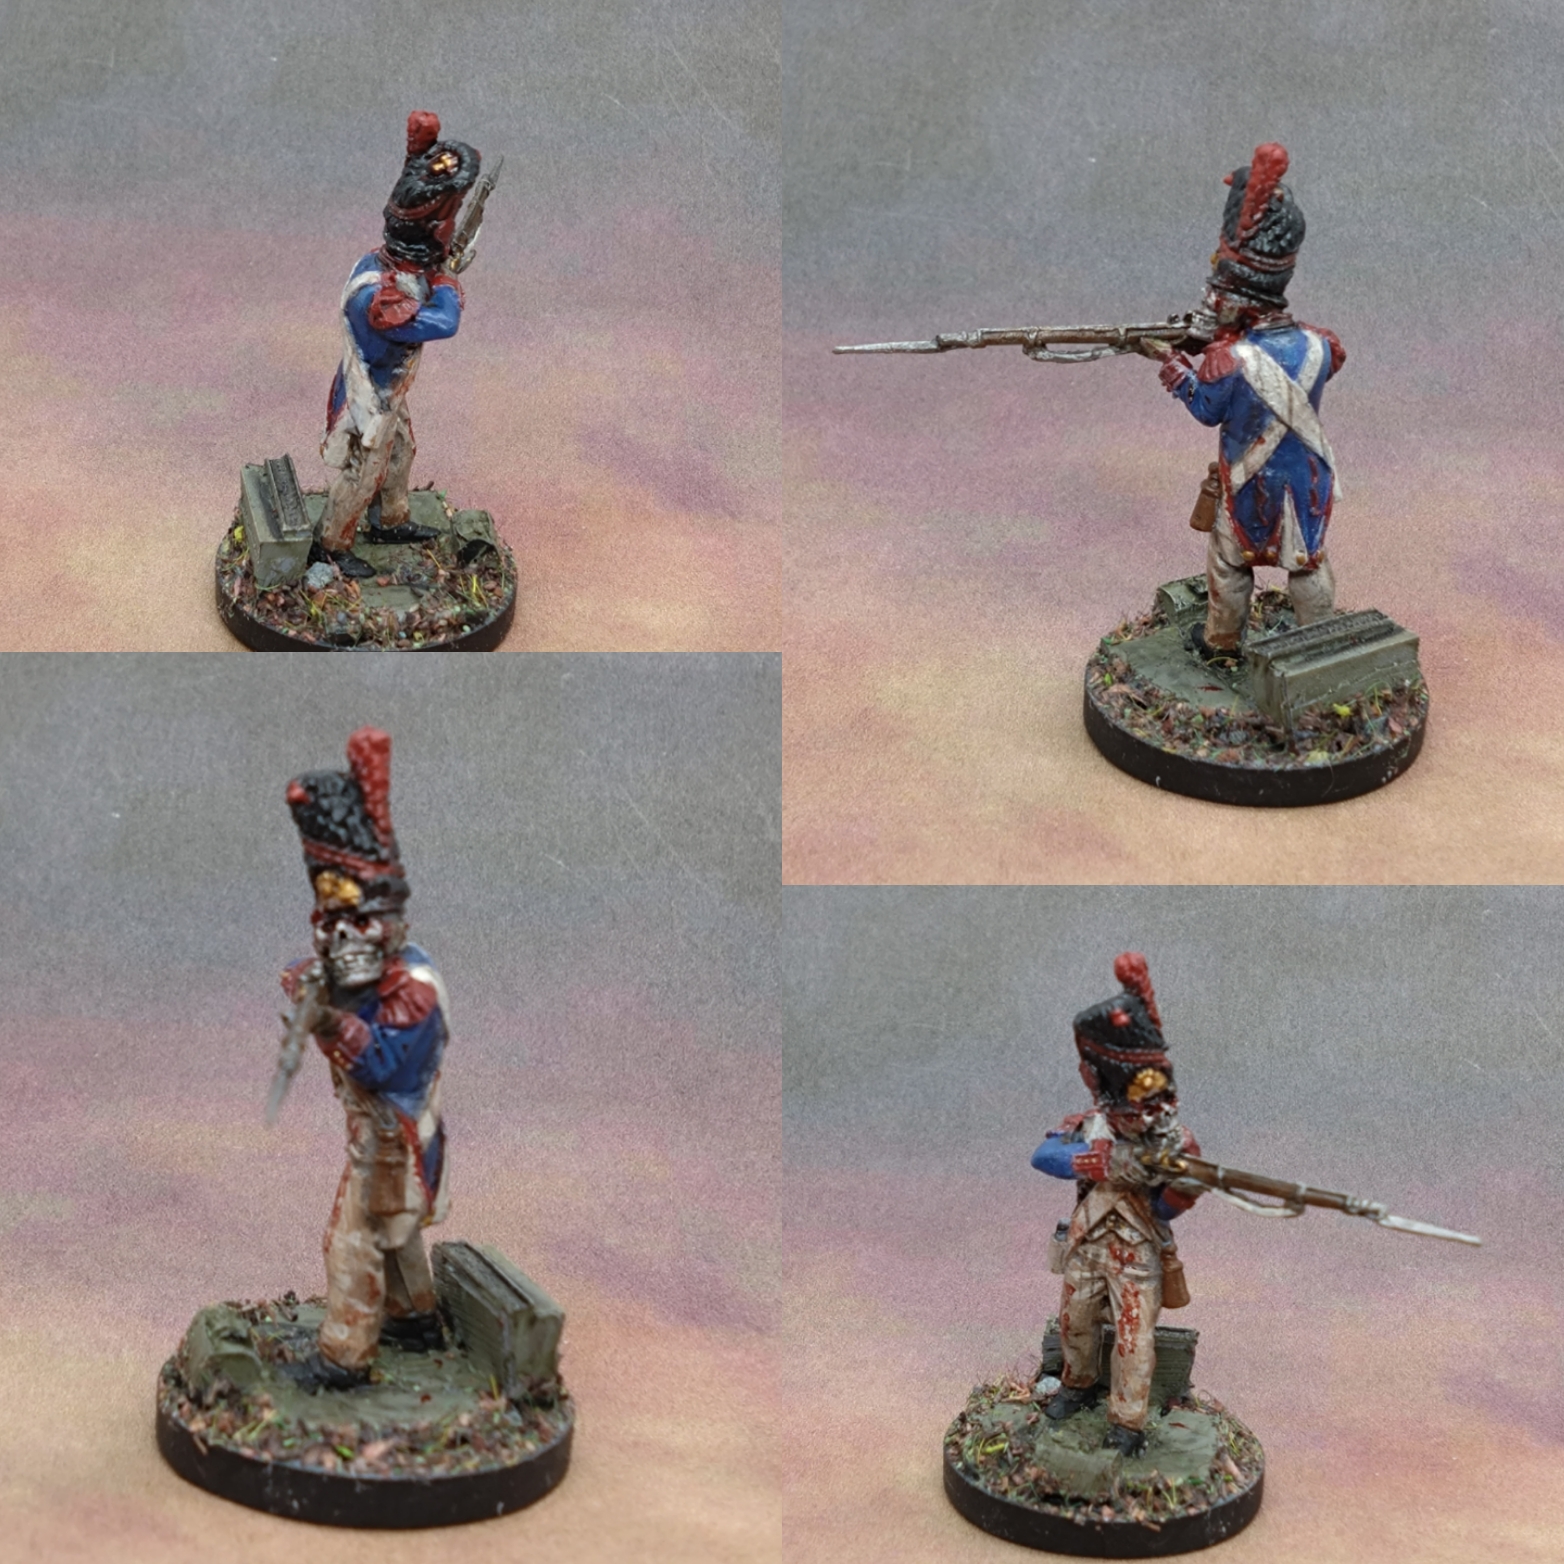 The necromancer is an equal opportunities undead animator and both and French and British corpses are fair game it seems.
 The aftermath... some tweaks to the scenario
 I won't award the scenario XP to my side on this occasion. I knew the game wouldn't necessarily be hard to complete generally, so I didn't give huge scores for success anyway.
I think the lack of out of action minis for my Brits by the end wasn’t down to skillful tactics by me, but more a lack of threat in the game.
Also the drummer boy was immediately compliant and following the Brits off the board. In The Troll Hunt mission I fould the 16+ Courage Check for the unit to wake up from their slumber at the fireside was frustratingly high. But the 12+ to get the drummer boy not to run away from you, was too easy. I may up it to 16+ just to make the rules where he runs away more likely to occur.
Revenants with ranged attack?
I have an idea for another brand of revenant that a necromancer has been able to animate into firing their musket. Rather than like the bandits on The Last Mile where they can reload and fire in one activation, I would make it so that they can return fire if fired upon, but once in the Monster Phase they either reload or fire depending on their musket’s status, or charge the enemy and melee if they are close enough.
Also the gravestones at the corners of the play area as a spawning point seemed like a good idea, but it seems sometimes they are too far from the action to be a telling factor. Maybe just using the gravestones in lines either side of the centre point seems like a better way to up the threat and make things more claustrophobic around the tokens they need to search. I am happy with the end phase 6+ to decide if more revenants arrive or not.
I will revise the scenario and play again. Will try a new French list just to be entertaining for me with the different soldier types and paint jobs.

Scenario play test - The little French Drummer Boy - Continued

Turn 4
First half of the unit activates…
Jobe sprints to support Doctor Bombay.
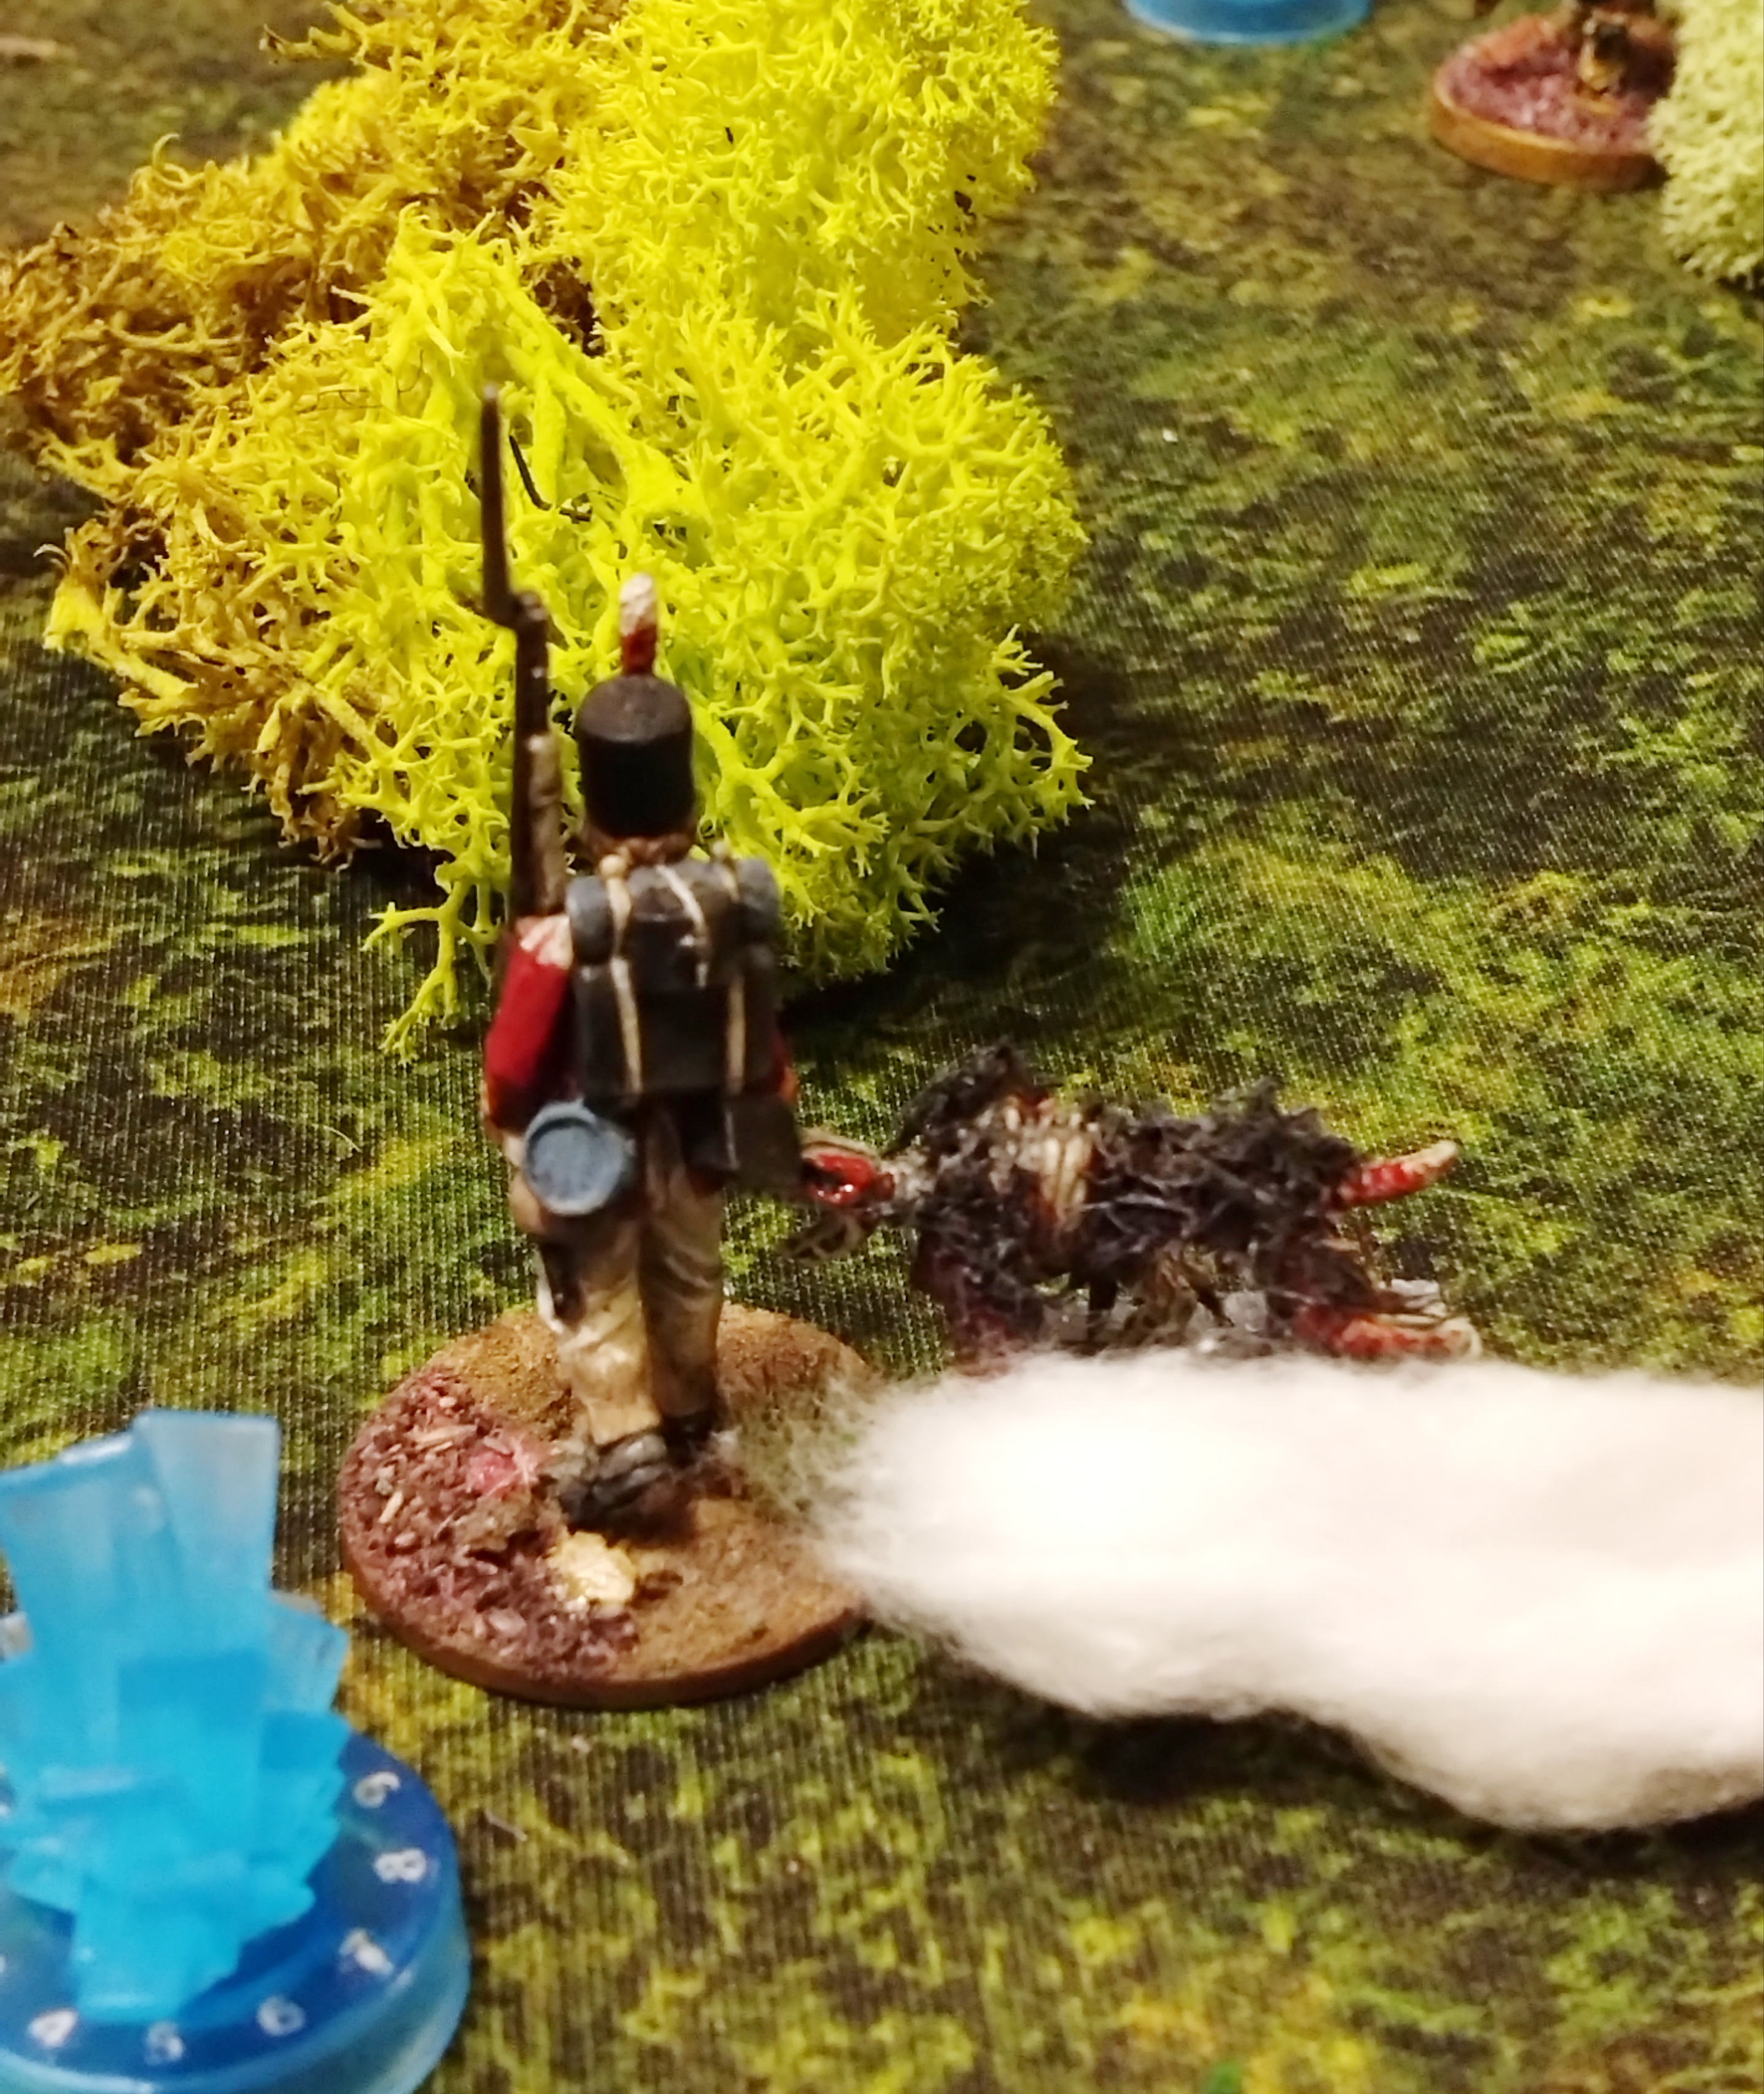
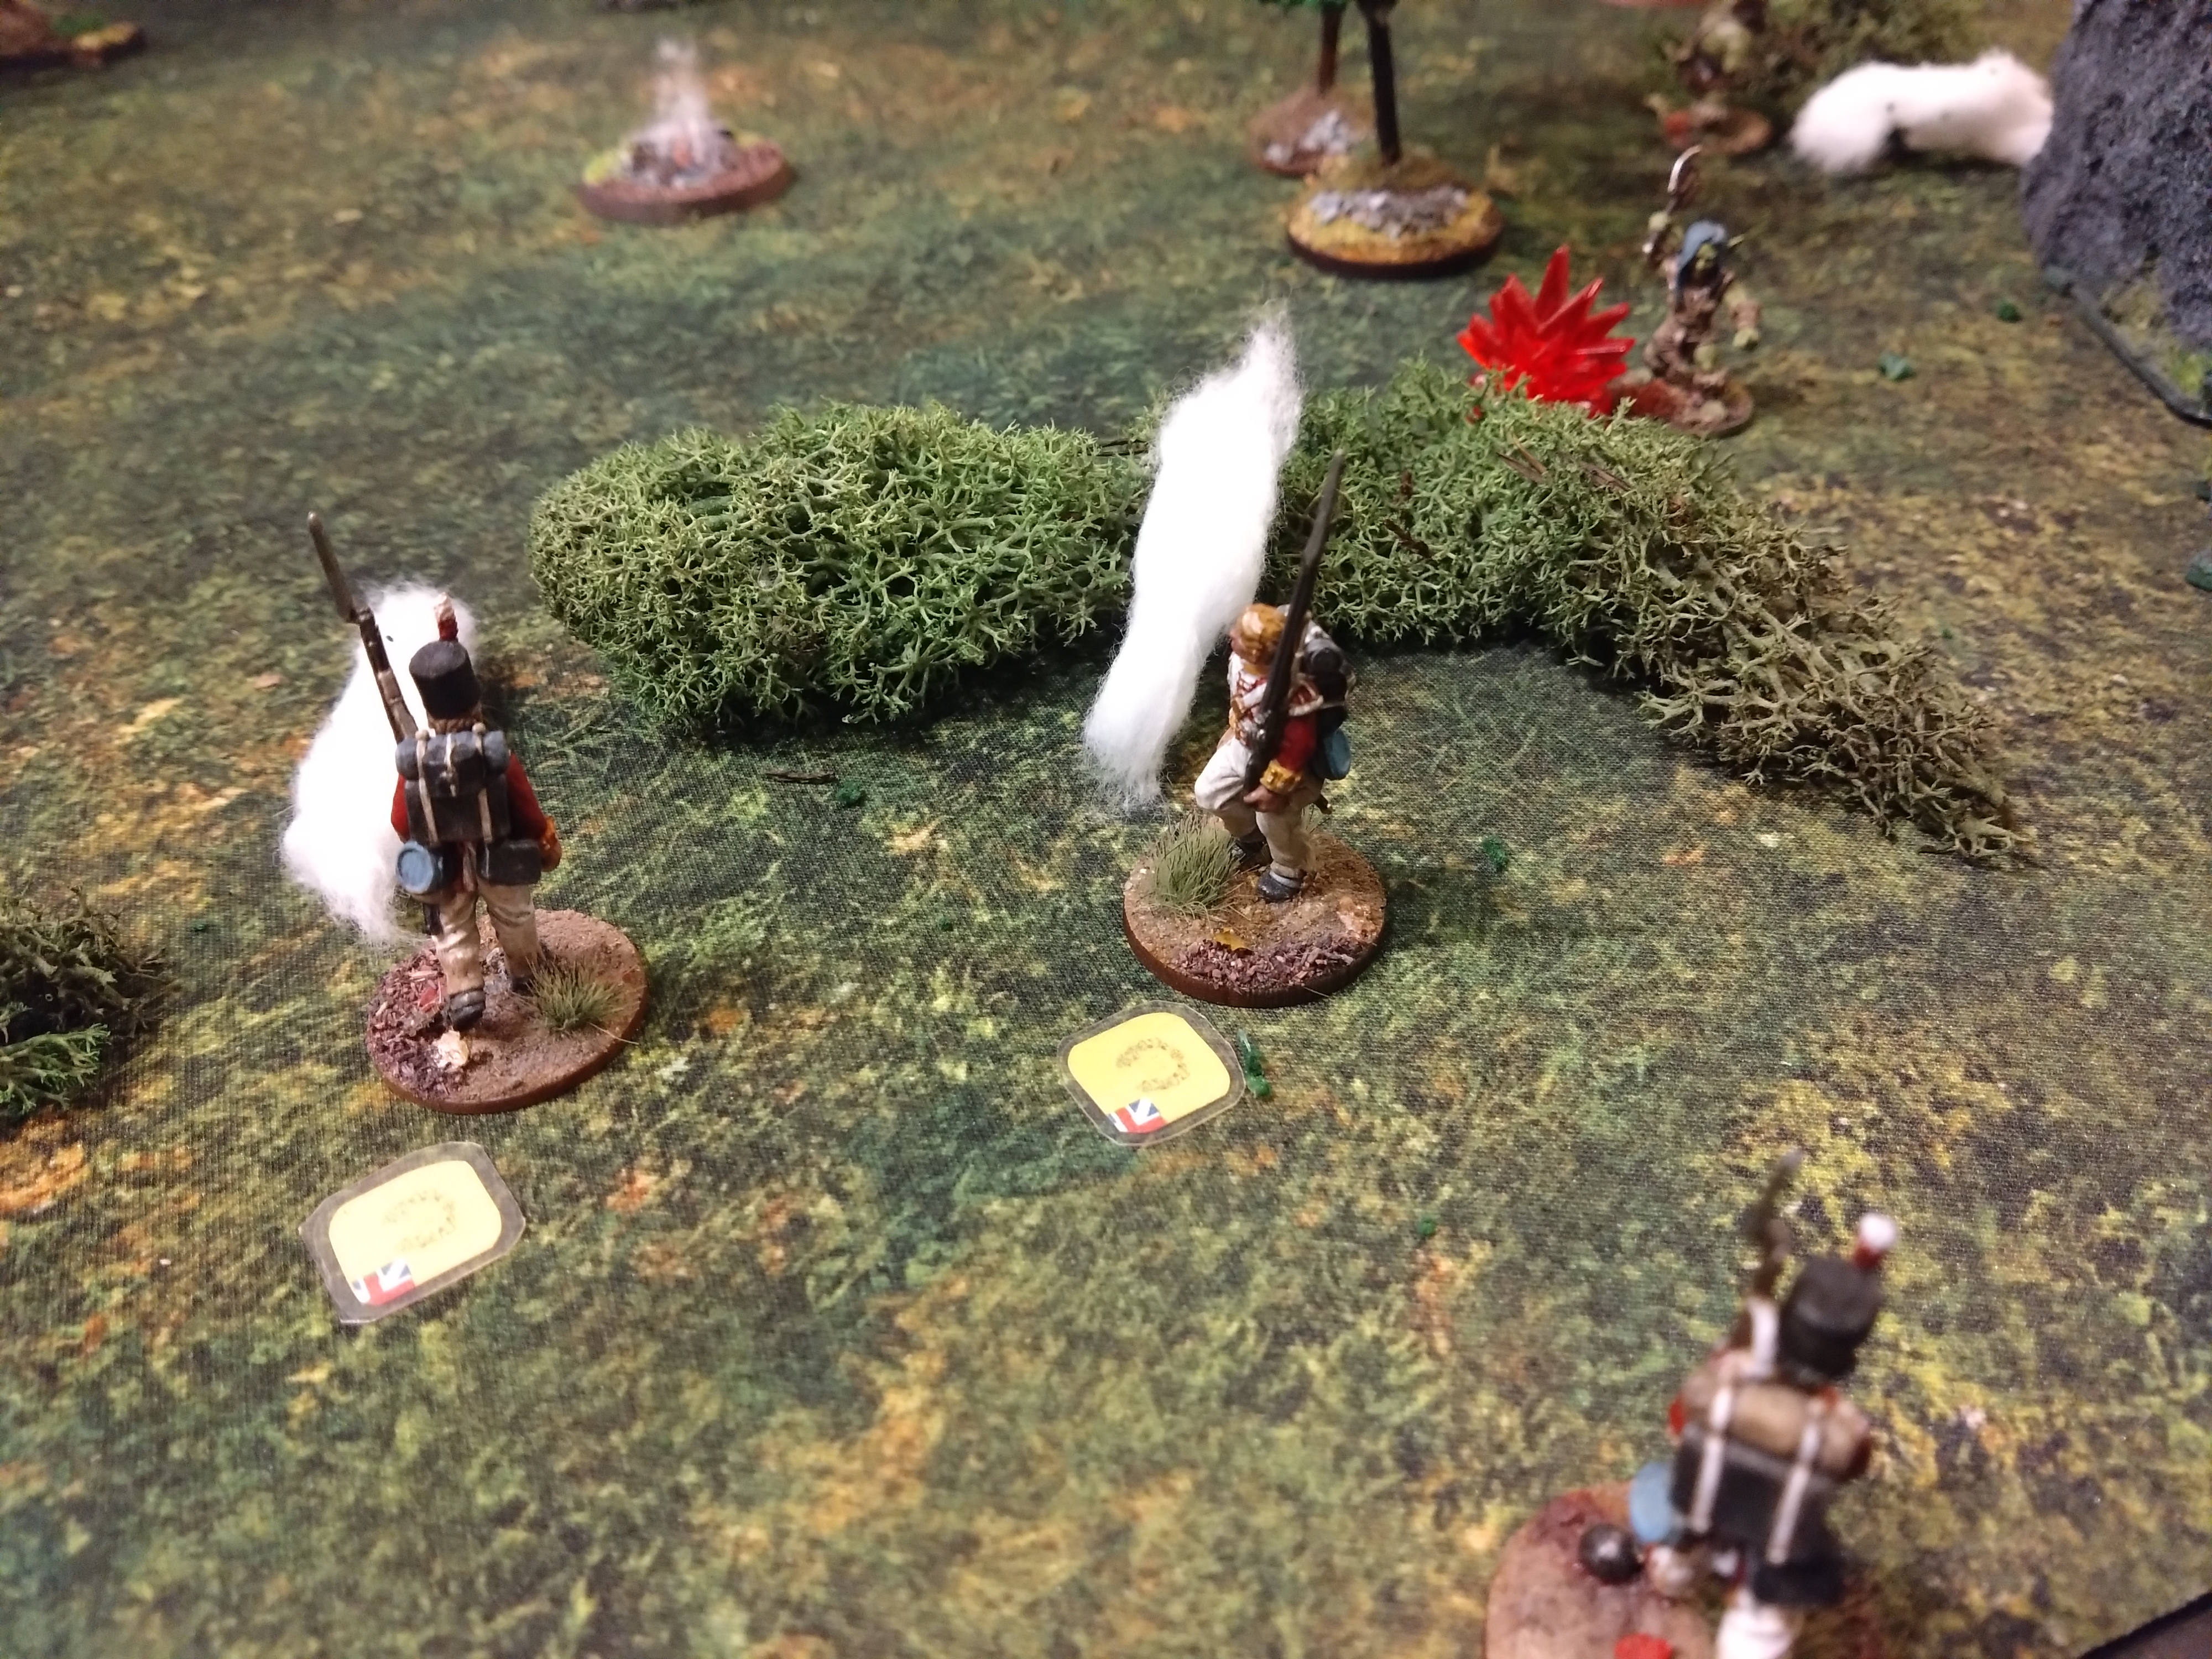
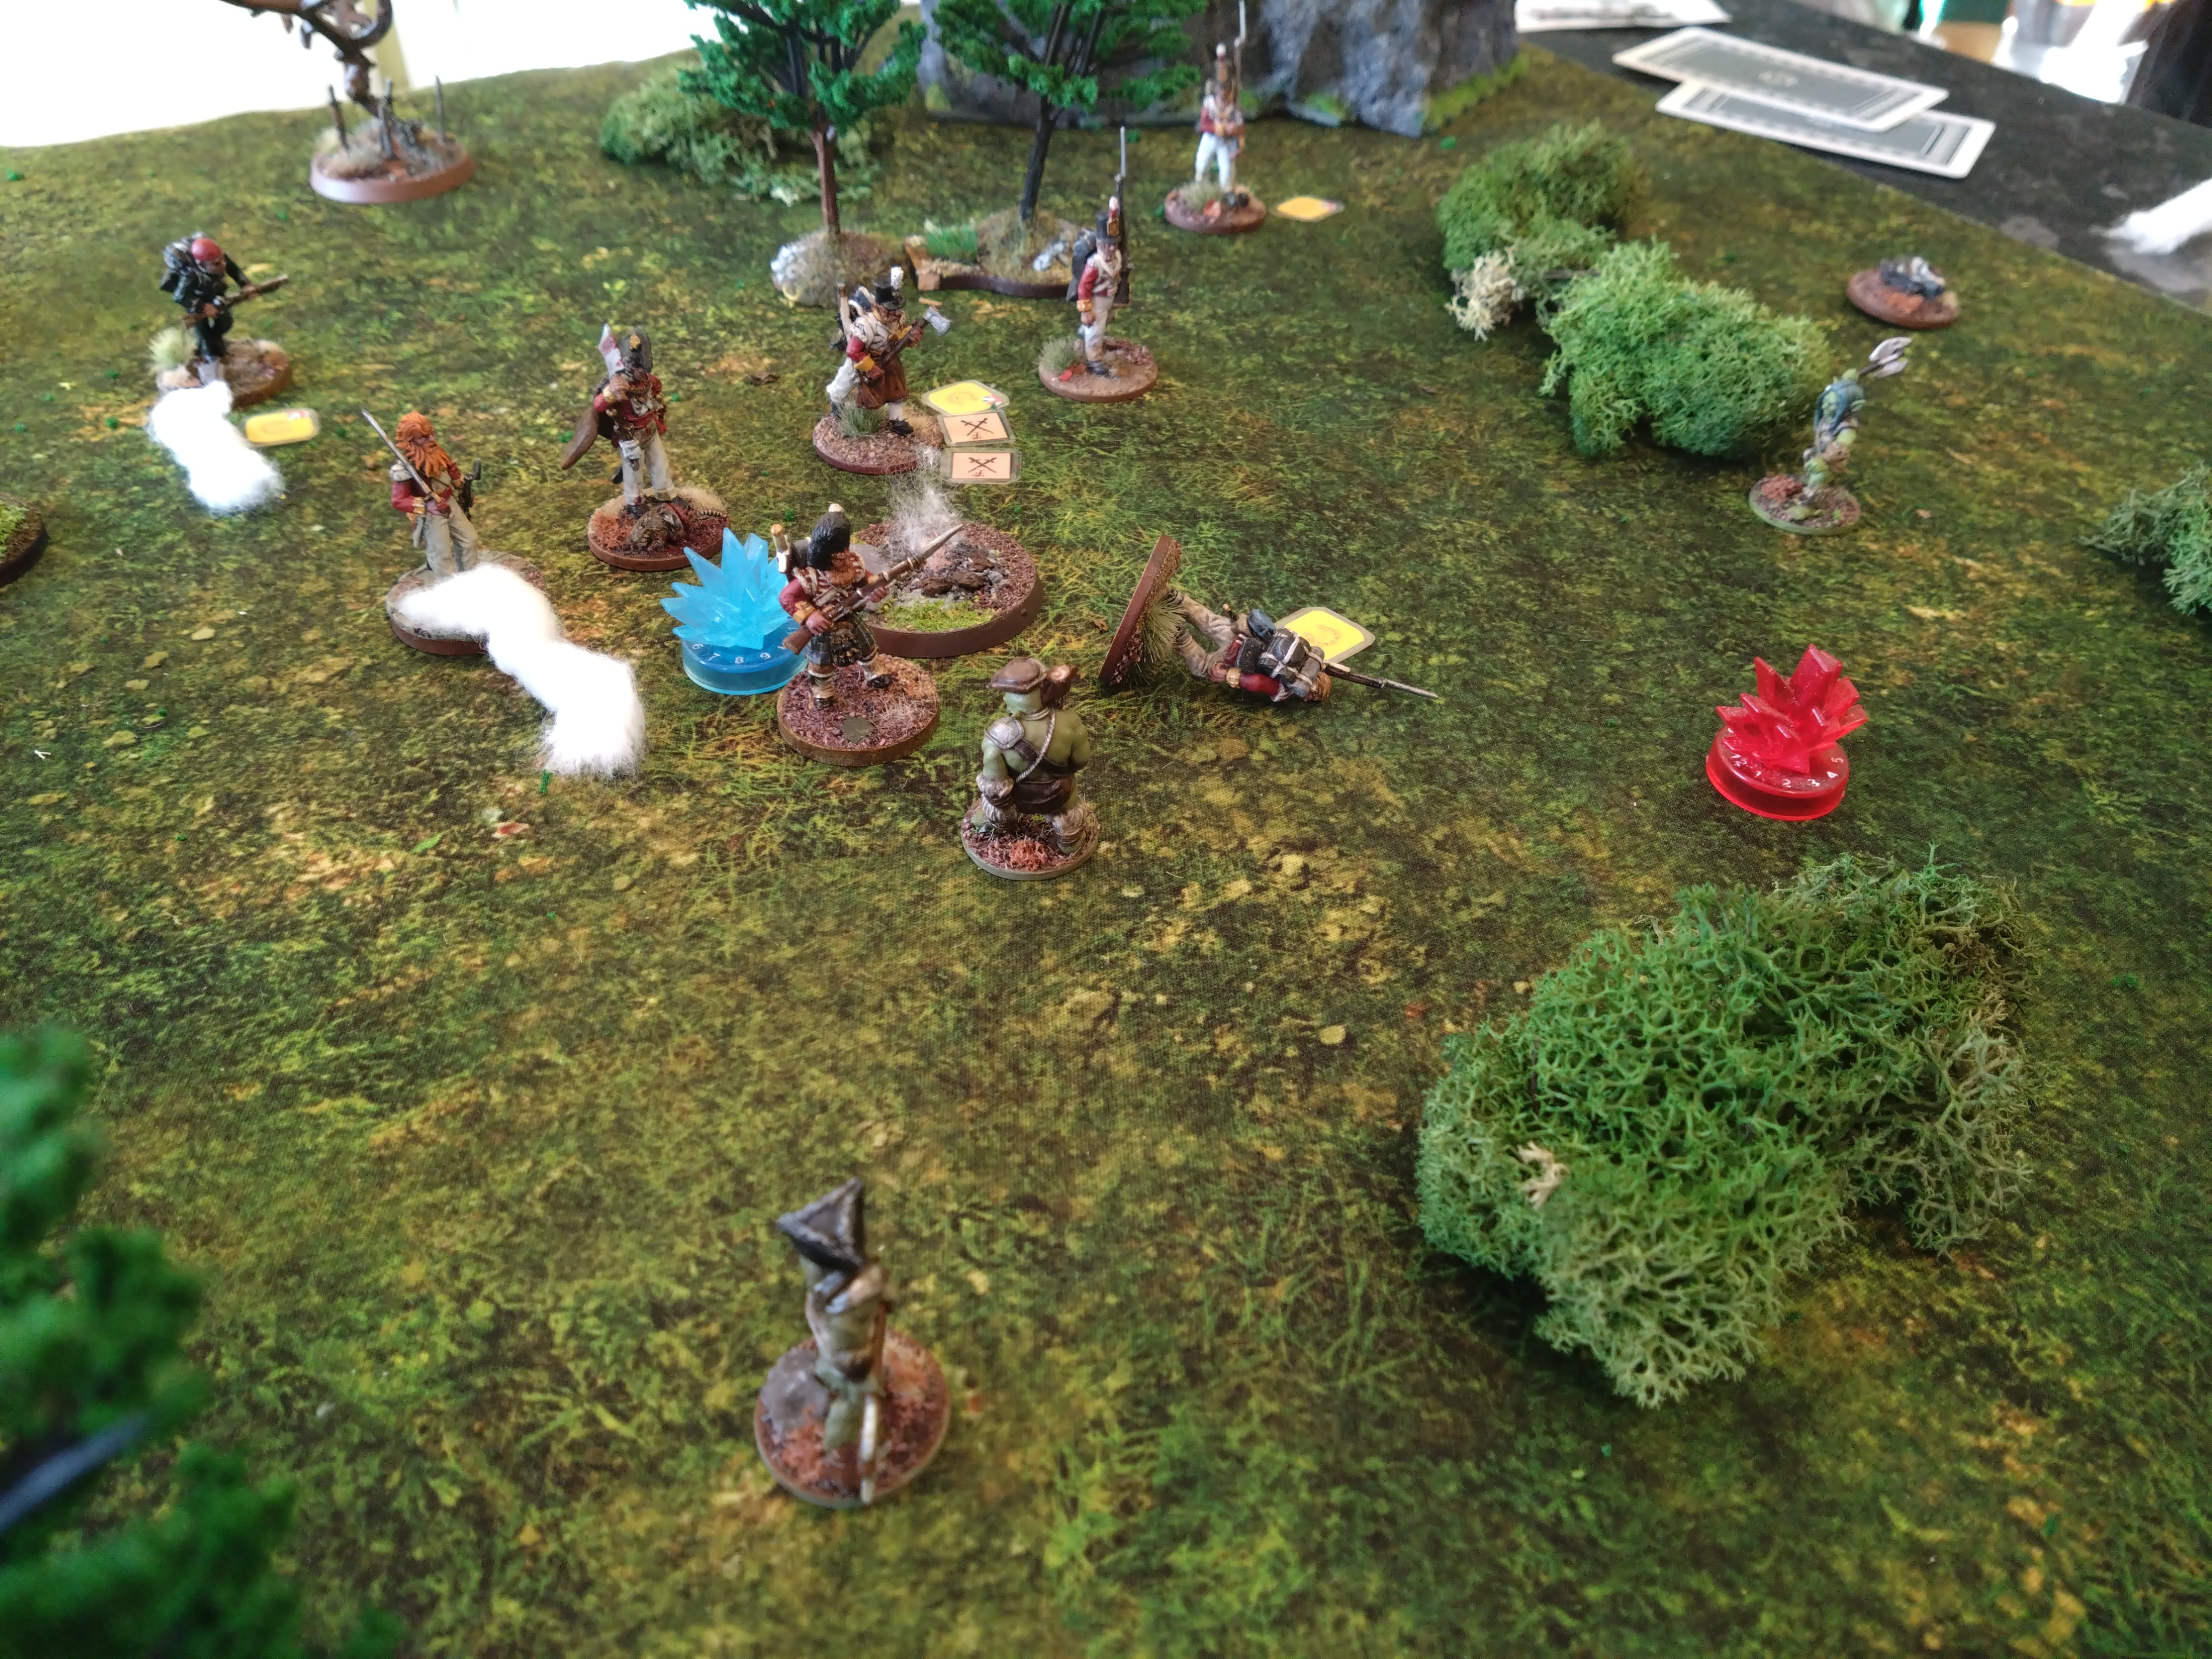
The Doctor decides to train his pistol on the revenant that nearly killed Peal and Jobe. The flash cough and bang of the pistol is followed but the gut turning gorey slap and skull crack of a headshot and the revenant collapses. The doctor checks for clues… But all he finds is fresh air and a moan on the wind announcing the arrival of another revenant.
Peal advances to one of the last places they could find the drummer and…. He finds a rabbits foot?
Monster phase…
Shambling and moaning heard from north and south…
Alistair is attacked but fends it off easily, whips around his musket and levels his attacker with a blow that would floor an ox.
Second half…
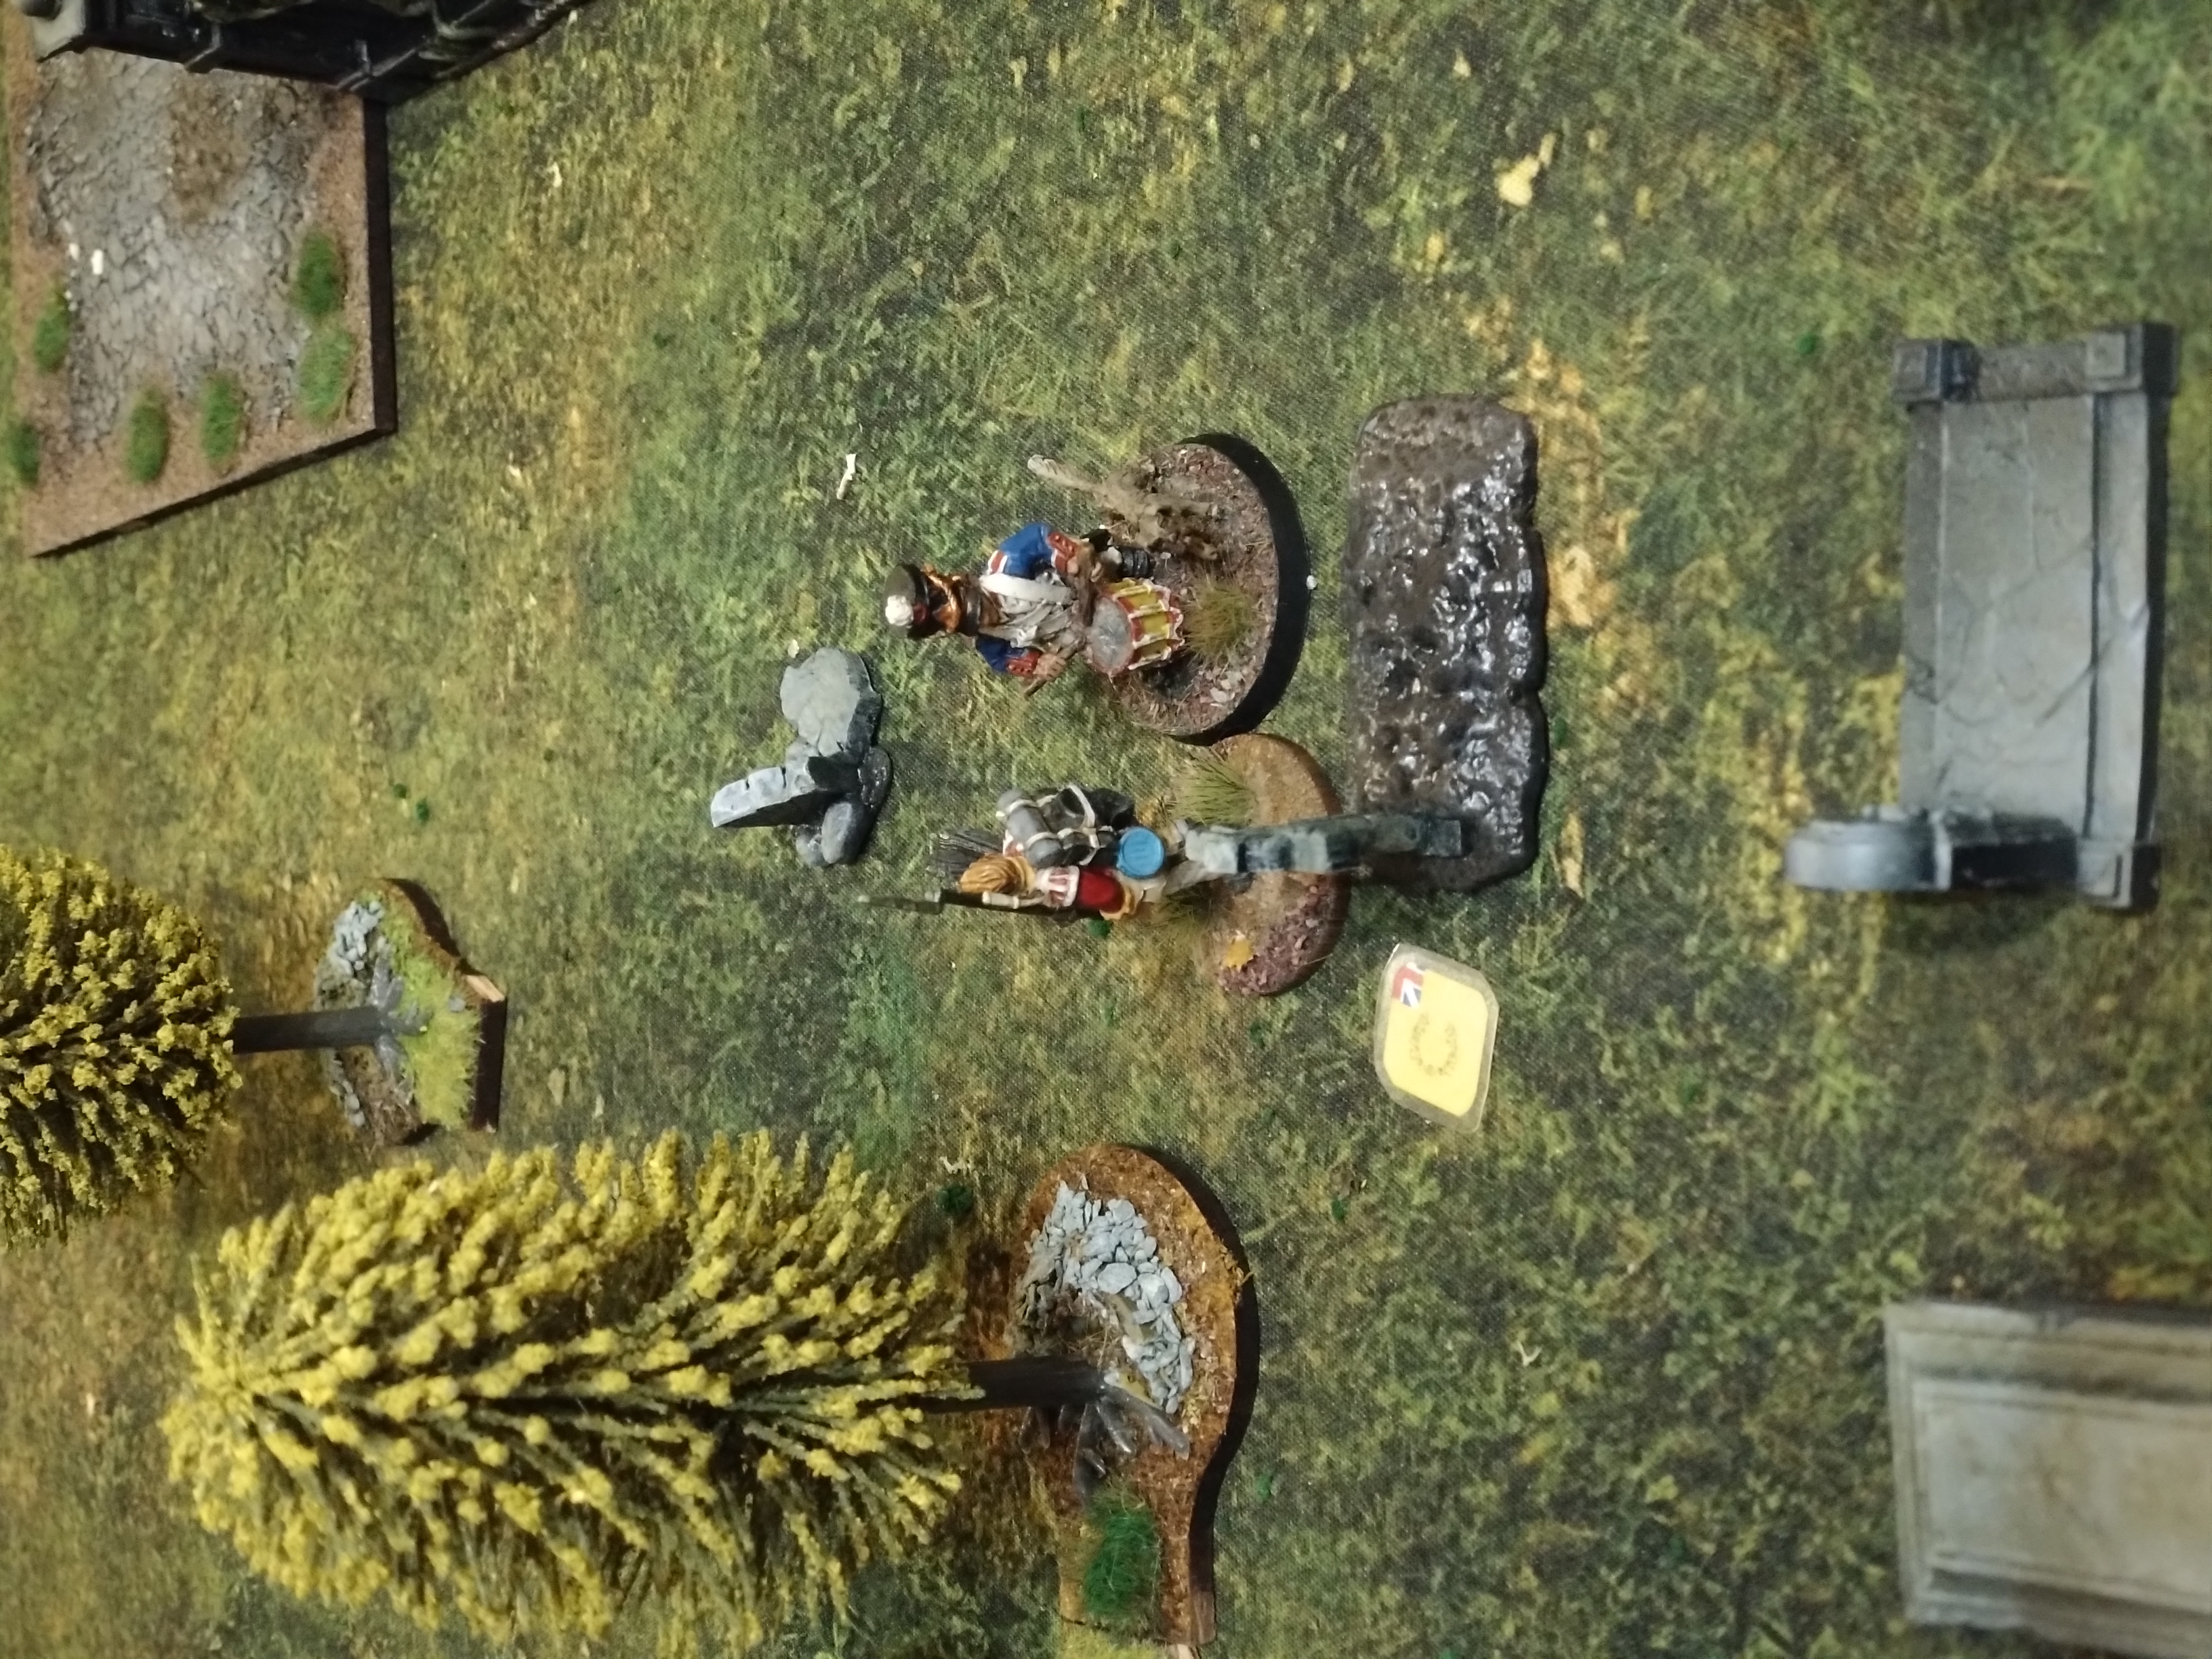
Craven advances and… finds the Drummer boy! And with his French phrases and the evidence that the Brits are clearly a better prospect than being eaten by revenants… The boy follows and the dogs licks Craven’s hand. (Courage check passed.)
Hatchett and Godalming advances to support Craven’s planned path of retreat and reload their weapons.
Bloggs advances, fires and wounds one of the last revanents.
End phase…
Drummer boy… No noise made with his drum.
6+ rolled so another revanent arrives.
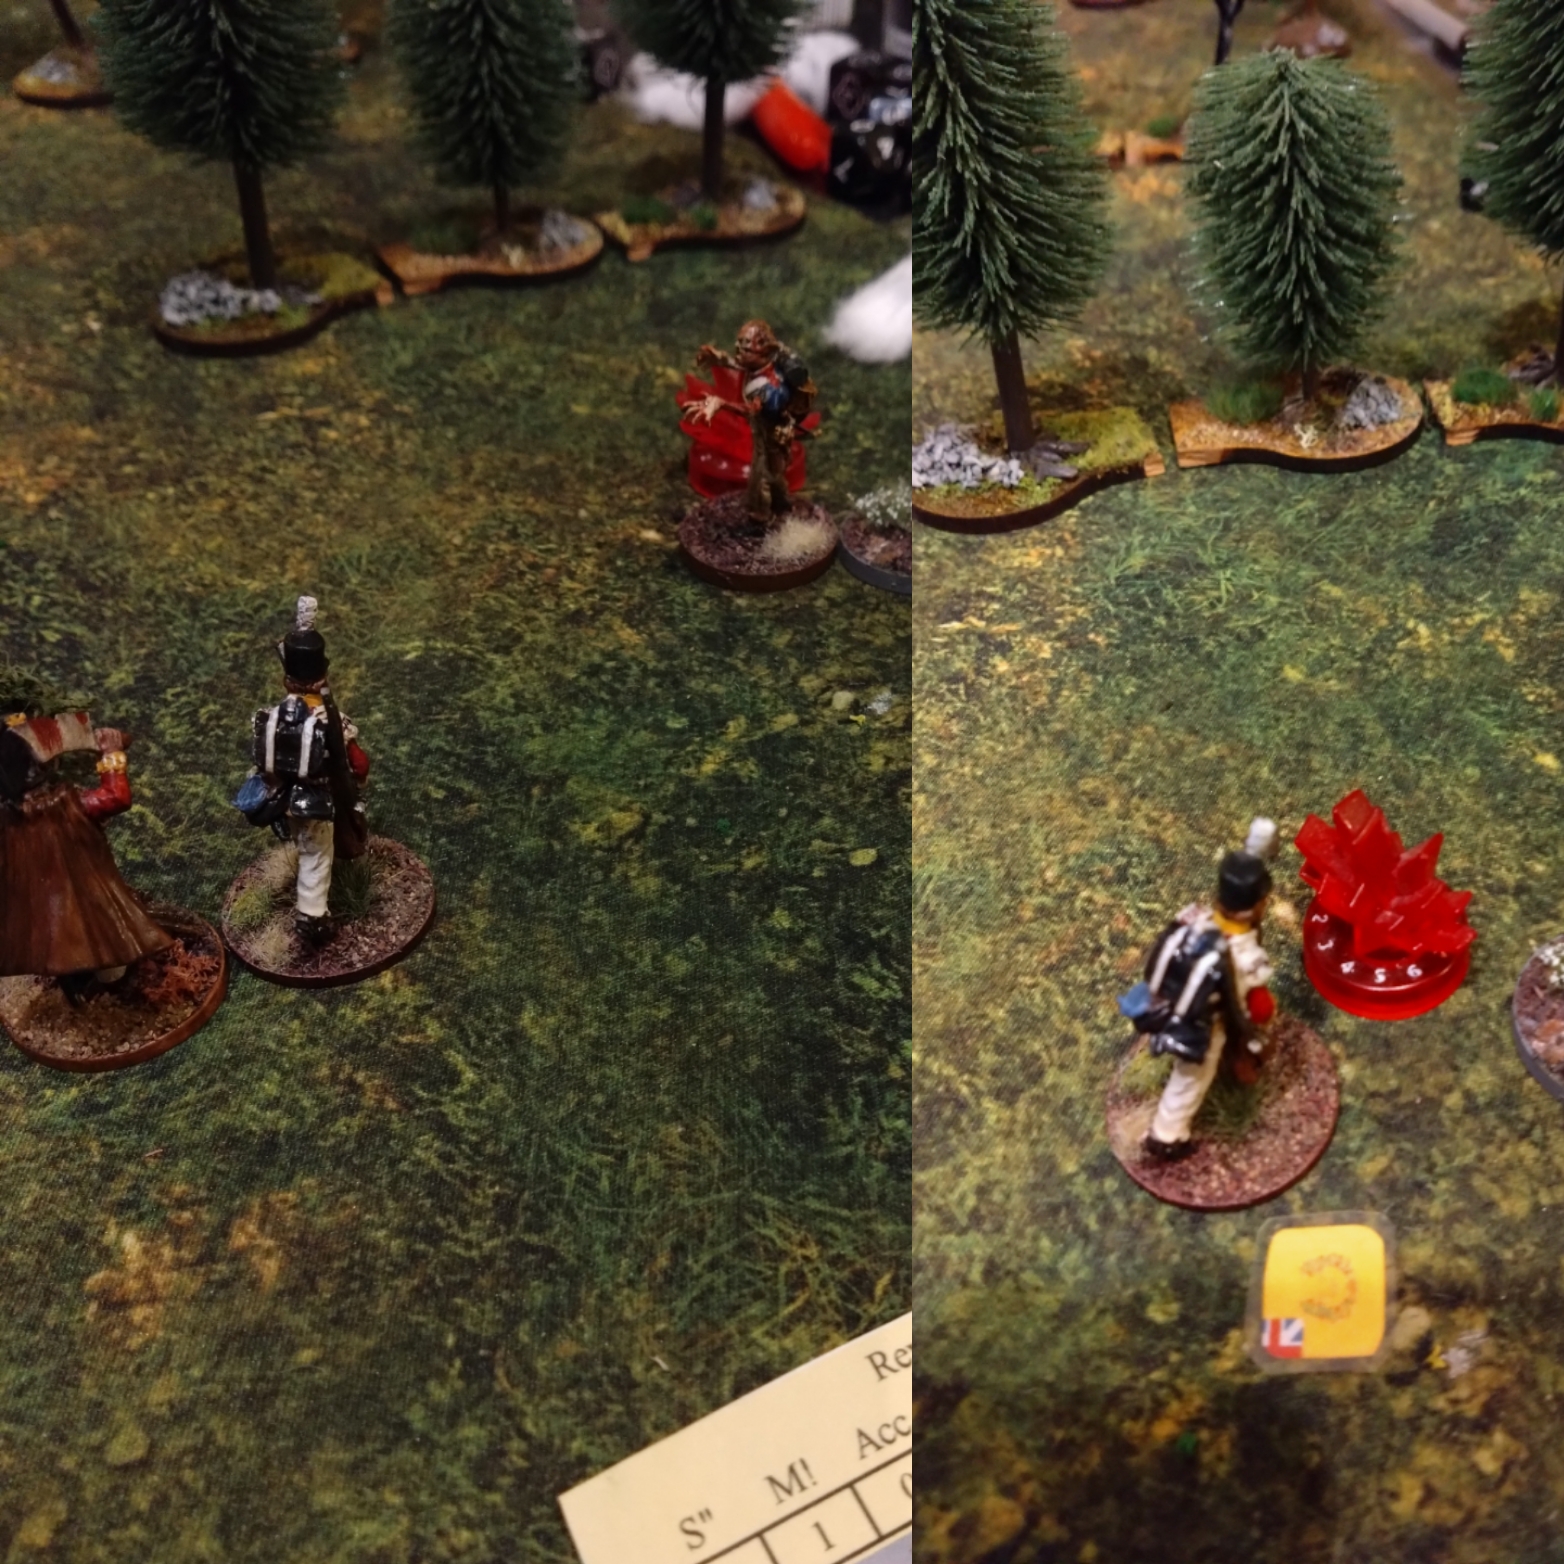
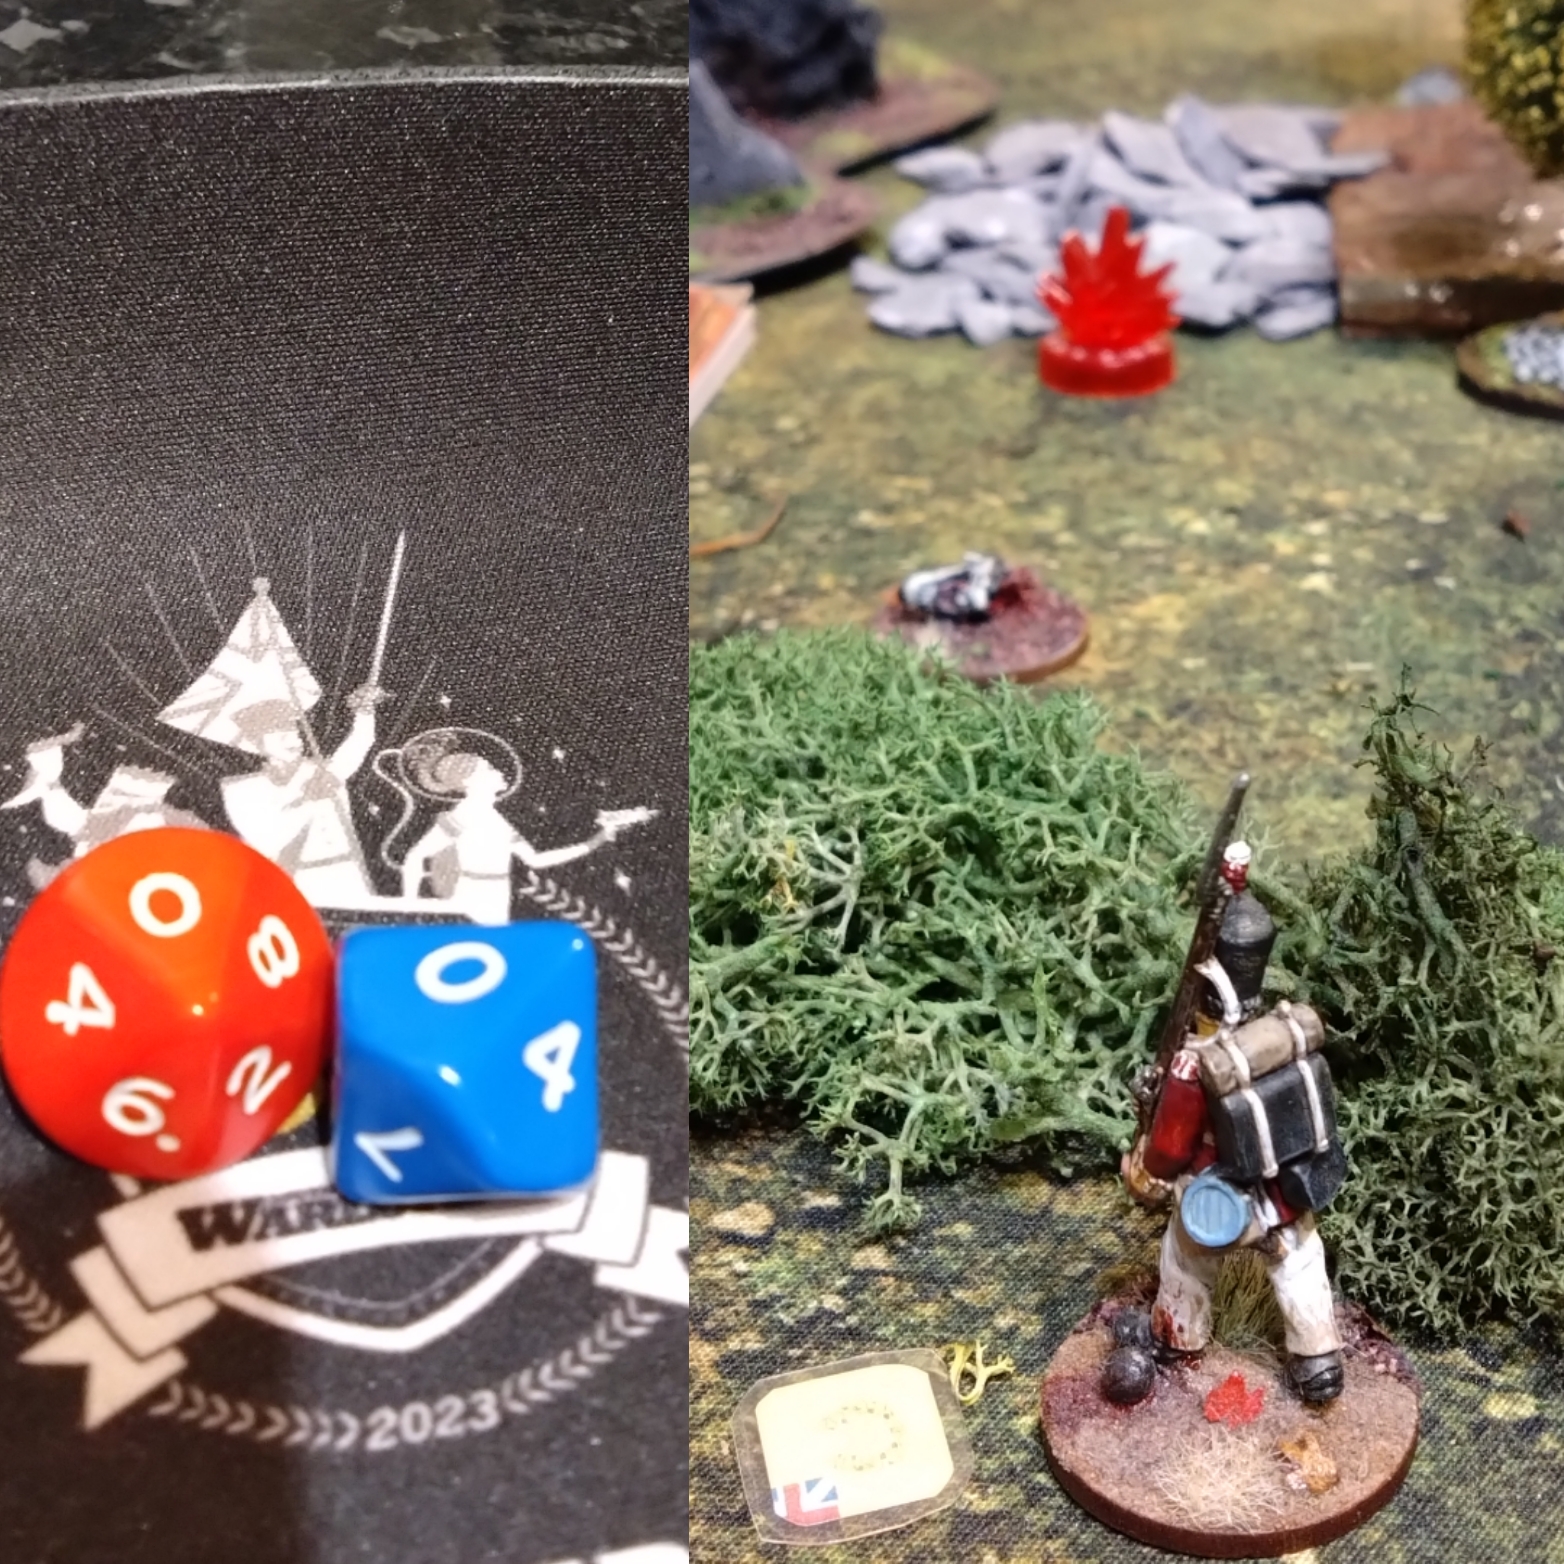
 Doc crit shot on Z causing wounds to Peal and Jobe. Doc checks clue marker...
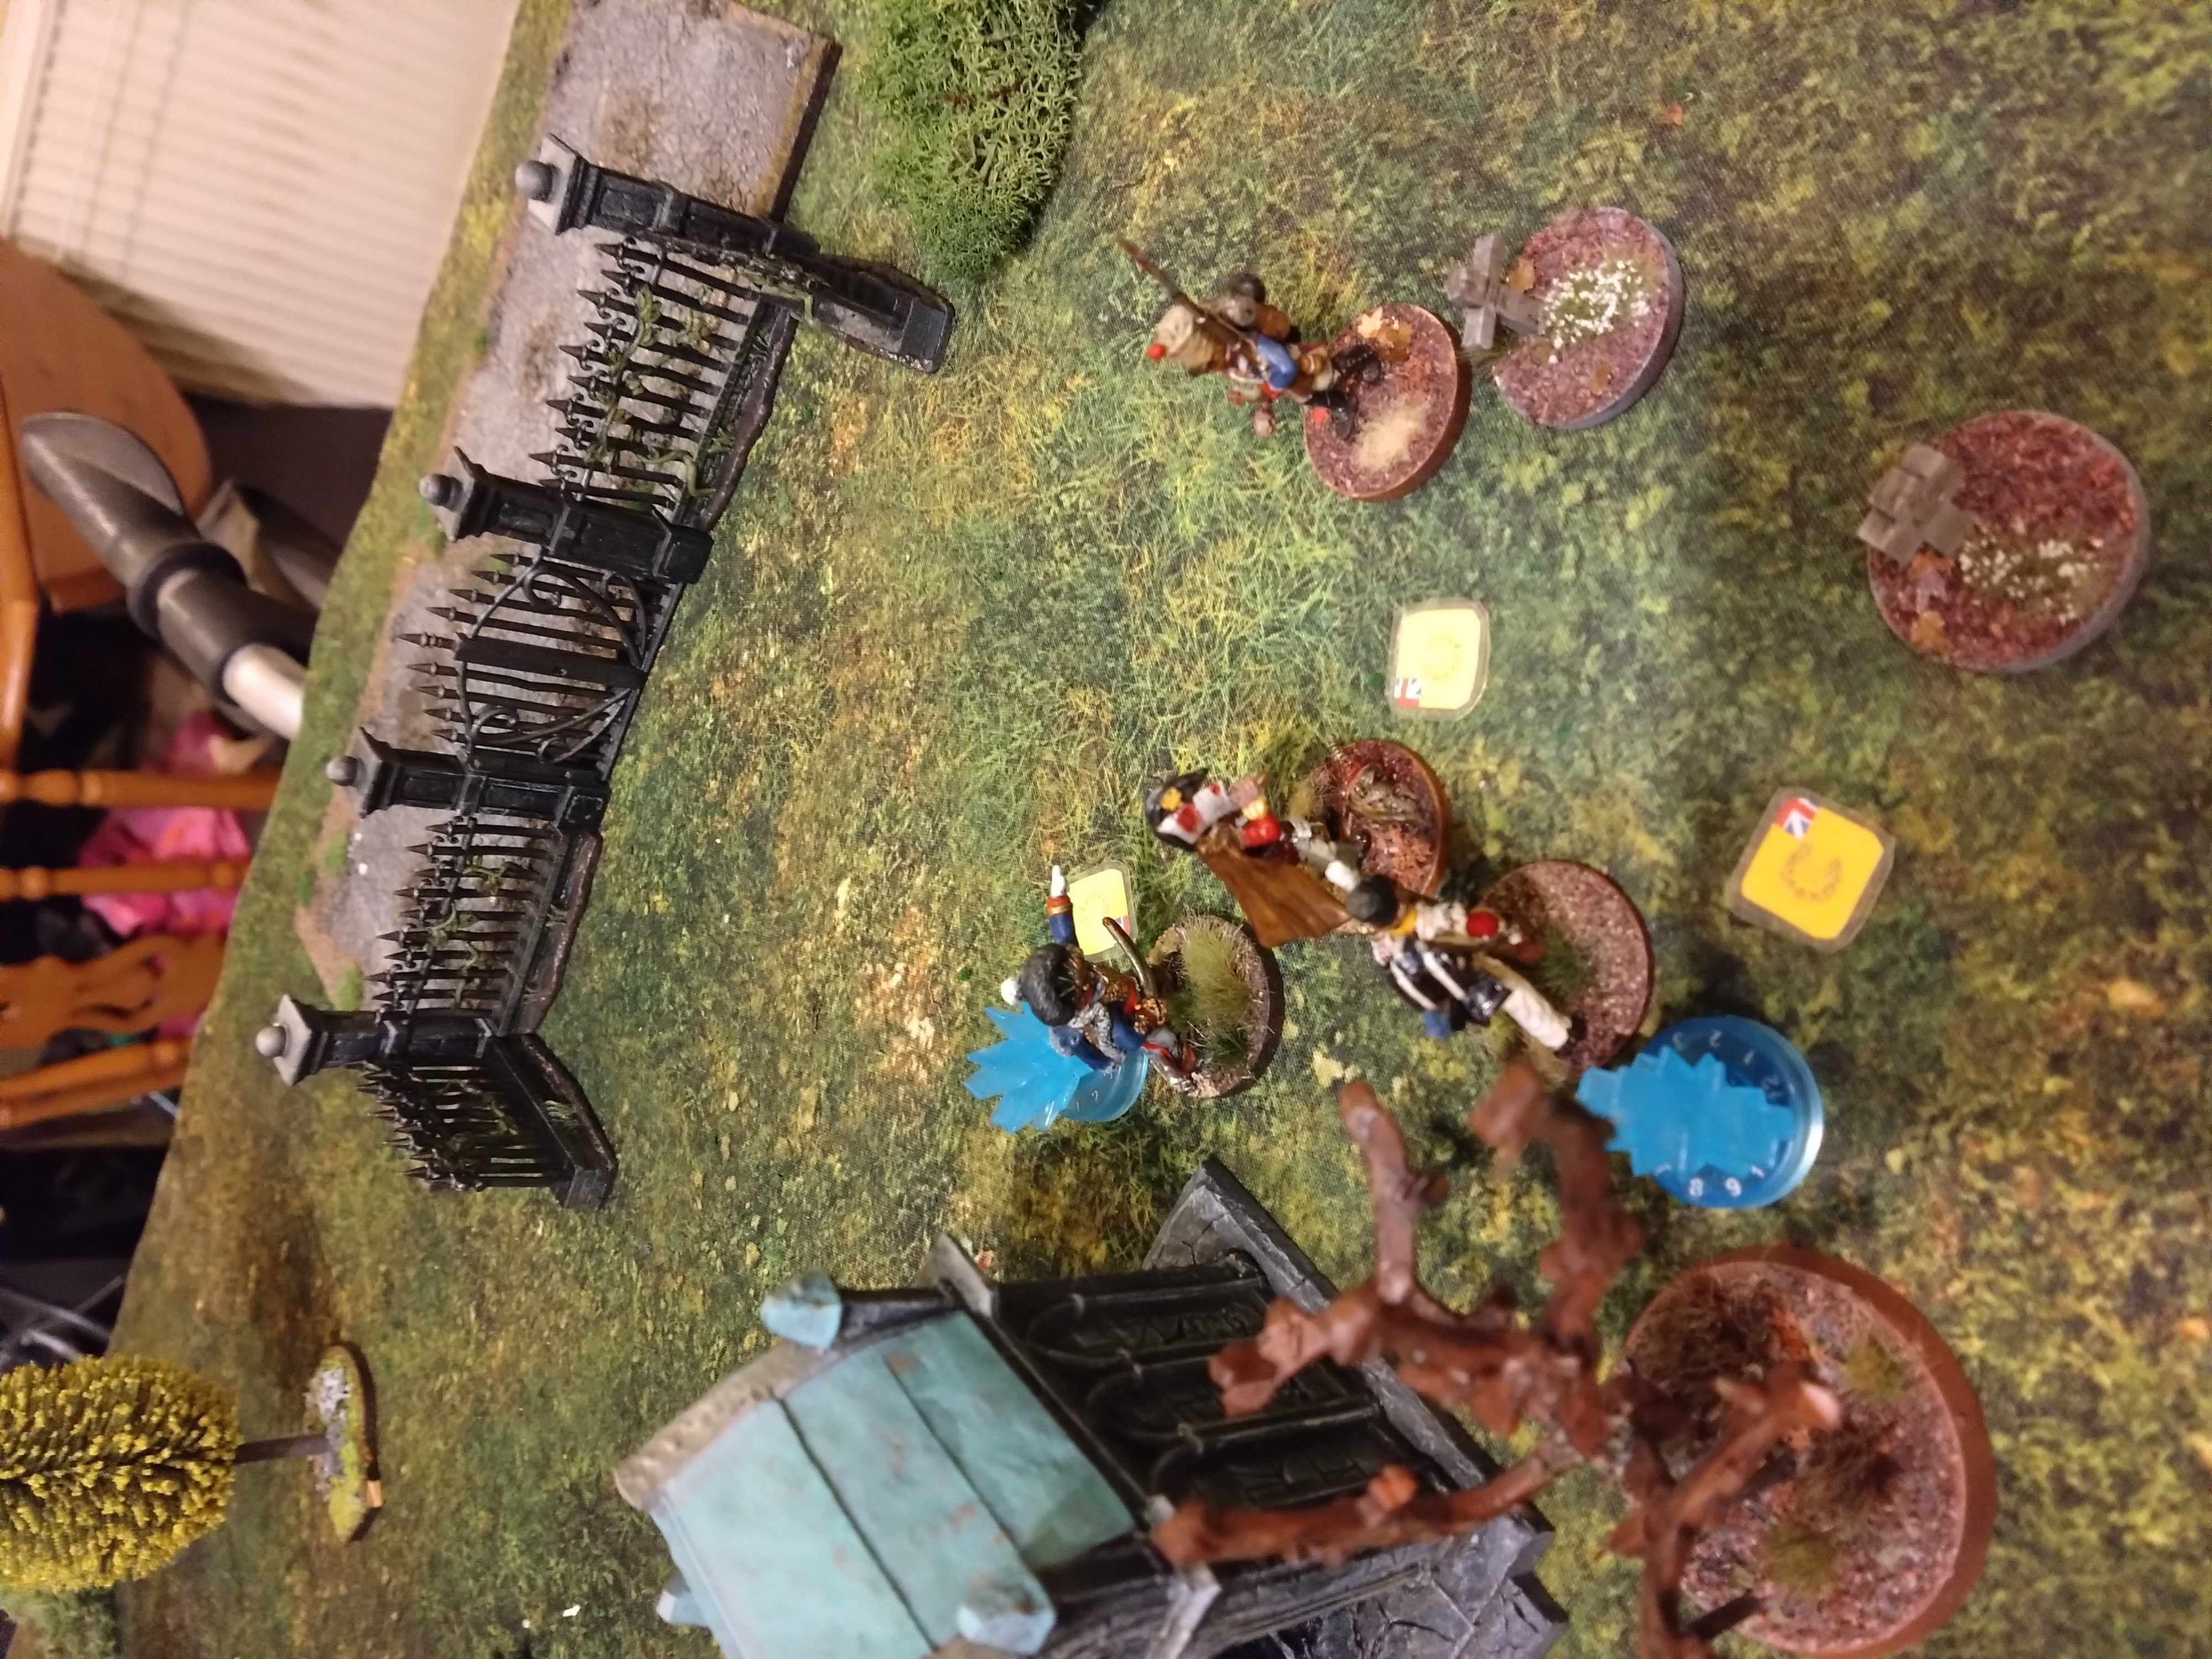
Turn 5
First half of the unit activates…
Craven takes the drummer boy west.
Peal advances up next to Doctor Bombay and reloads.
The Doctor heals Peal for 2 H and reloads his pistol.
Jobe advance next to the Doctor and reloads his musket.
Monster phase…
Some moaning and shambling but no fighting.
Second half…
Bloggs reloads and fires, and wounds a revenant to the South West.
Hatchett fires his rifle, misses and reloads
Alistair reloads his musket, fires and misses.
Godalming fires, misses, curses, rages and reloads.
End of turn…
No noise from the drummer boy
No new revenant arrives.
 The drummer boy escaping but not clear yet.
Turn 6
First half of the unit activates…
The good doctor heals Jobe for 2 Health and fires on and wounds the nearest revenant
Peal advance and fires, and sadly misses.
Craven advances West with the drummer boy… so close to exiting, but not just yet.
Hatchett fires his rifle, wounds a revenant and reloads.
Monster phase…
A revenant attacks Hatchett but the tussle is fruitless for both of them.
The wounded revanent attacks the Doc, but is met with a meat cleaver between the eyes.
The last revenant shambles forward but won’t be able to impact the unit’s and the drummer boy’s escape.
Second half…
Alistair reloads, fires and wounds a revenant near Hatchett.
Jobe advances, fires and kills the same revenant, the second musket ball sending the corpse cartwheeling away in a grotesque tumble to the floor.
Bloggs reloads, fires, and kills the last revenant and the graveyard falls eerily still.
Godalming advance south and orders the unit to retire to the South and West.
End of turn…
Drummer boy, noise created, but there are no revenants to attract
Revenant arrives at the bottom left gravestone.
Turn 7
Called it a day.
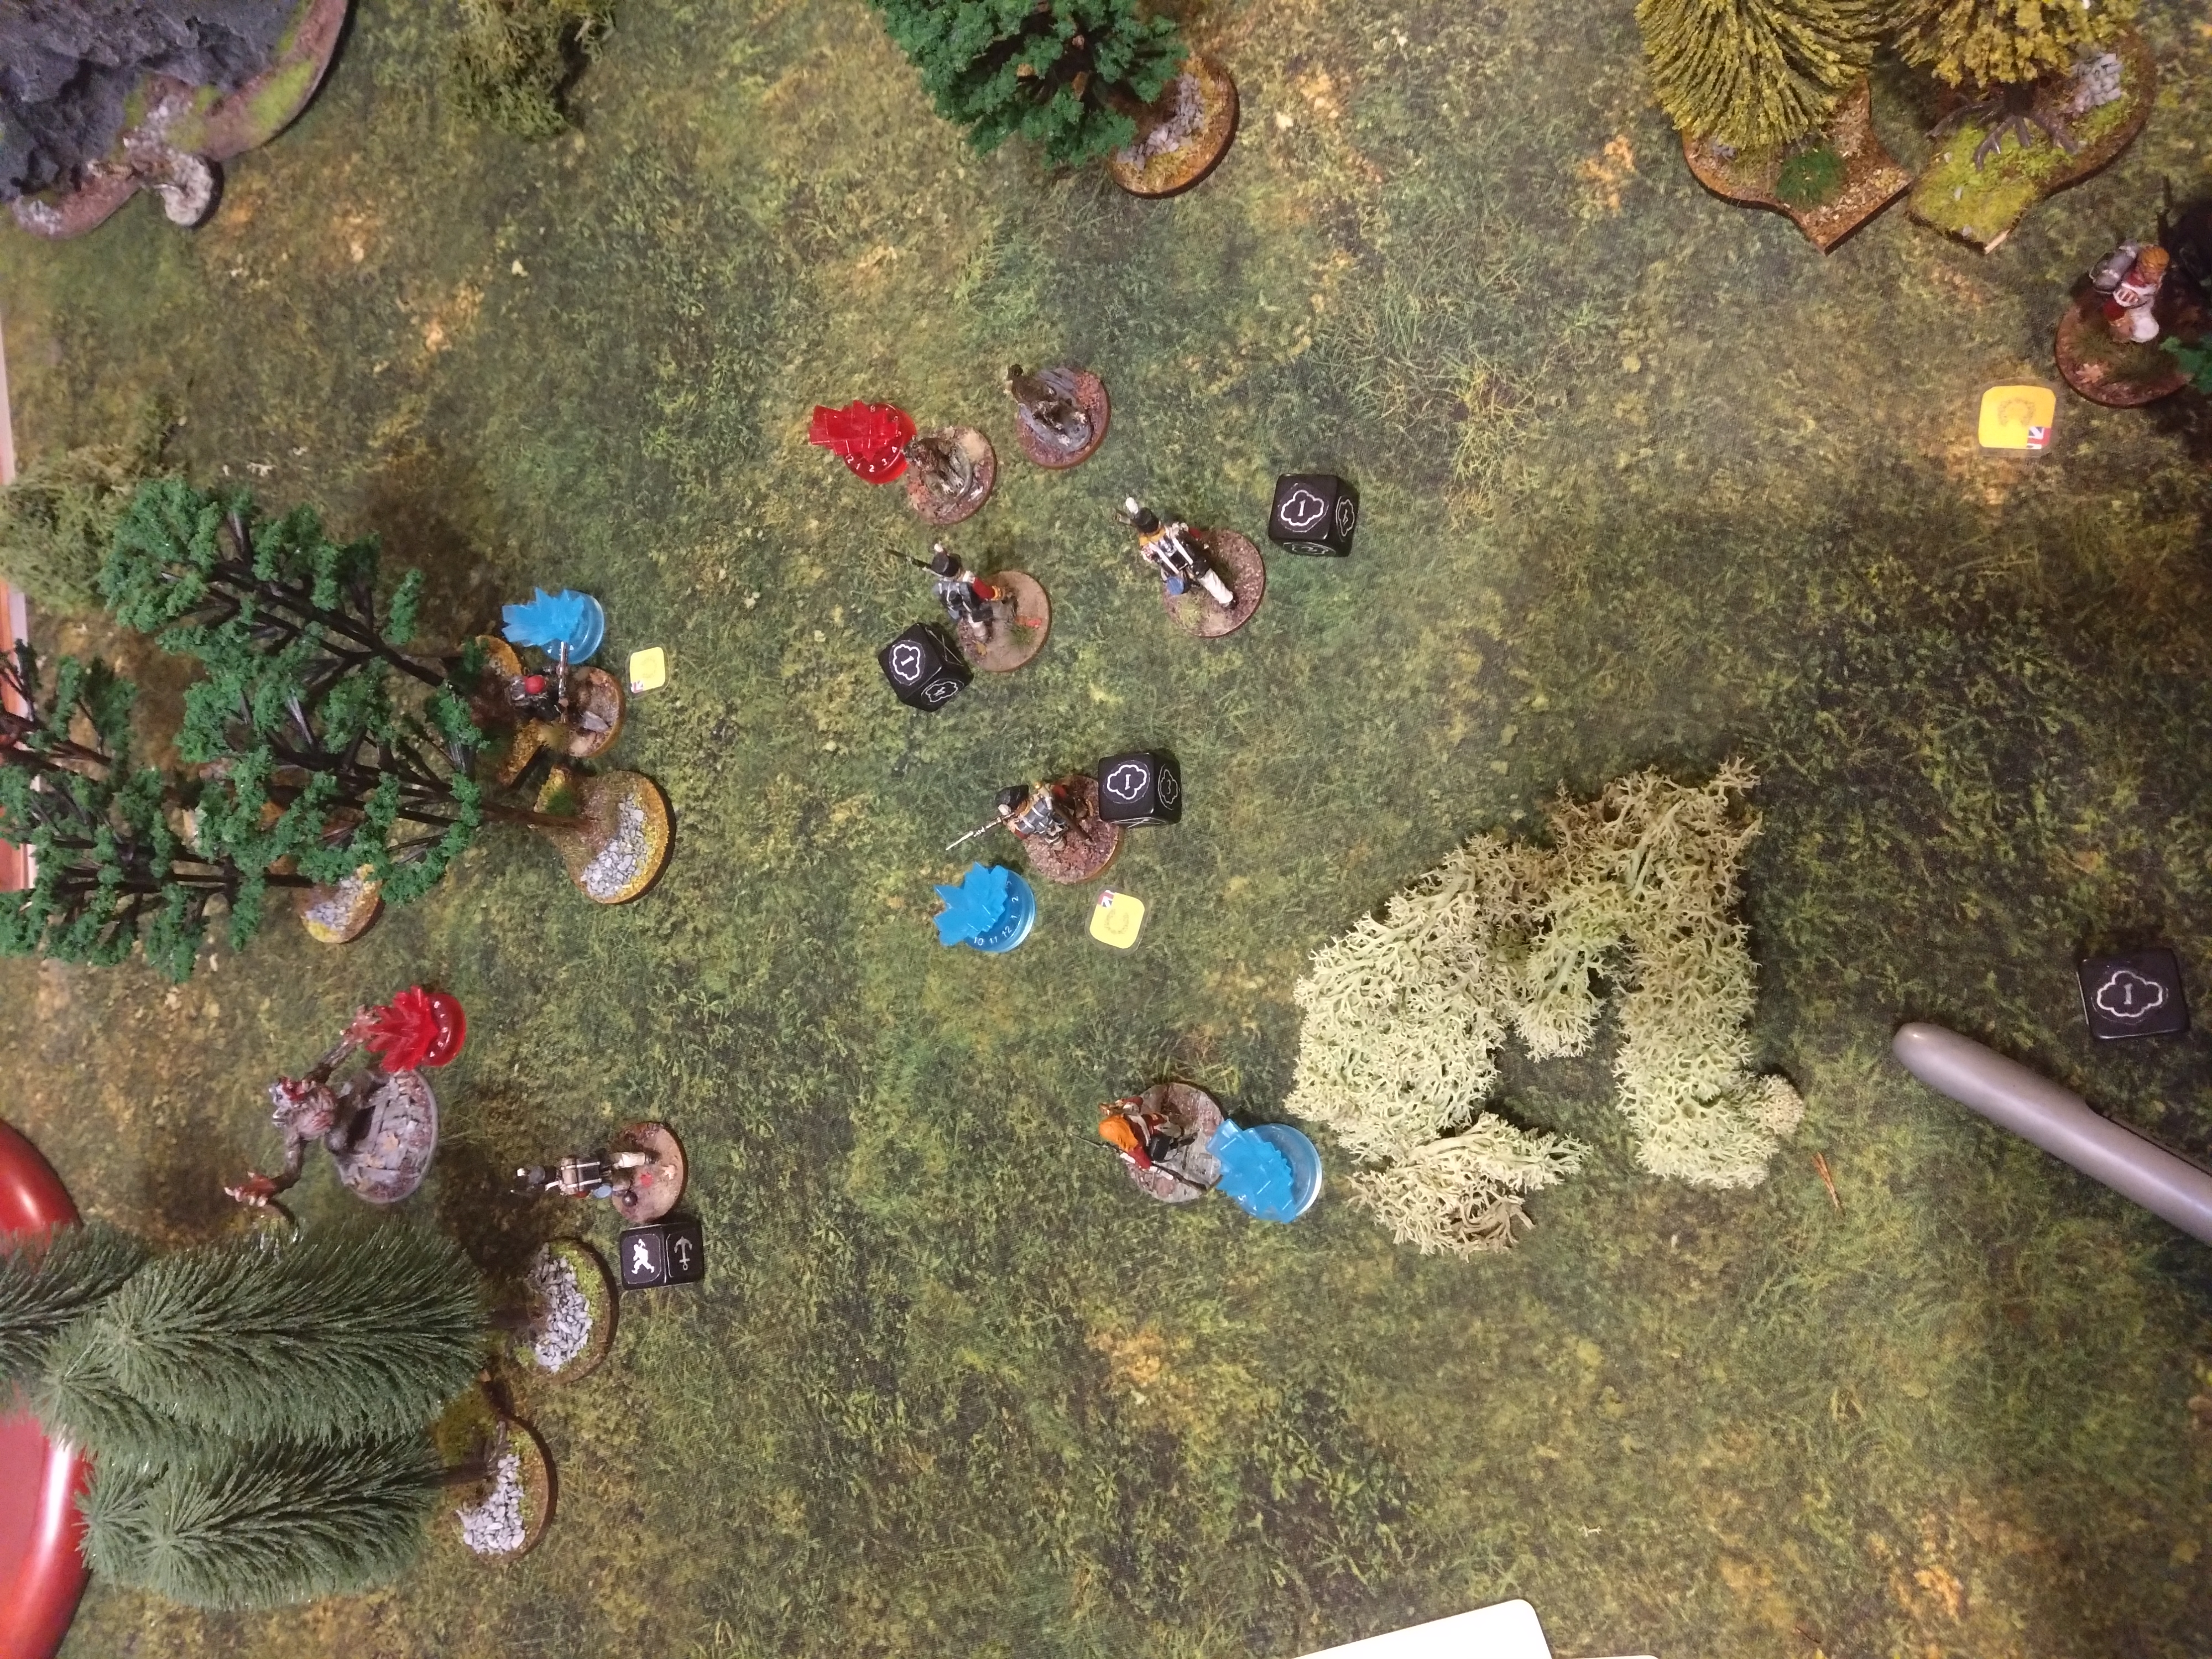
Scenario play test - The little French Drummer Boy
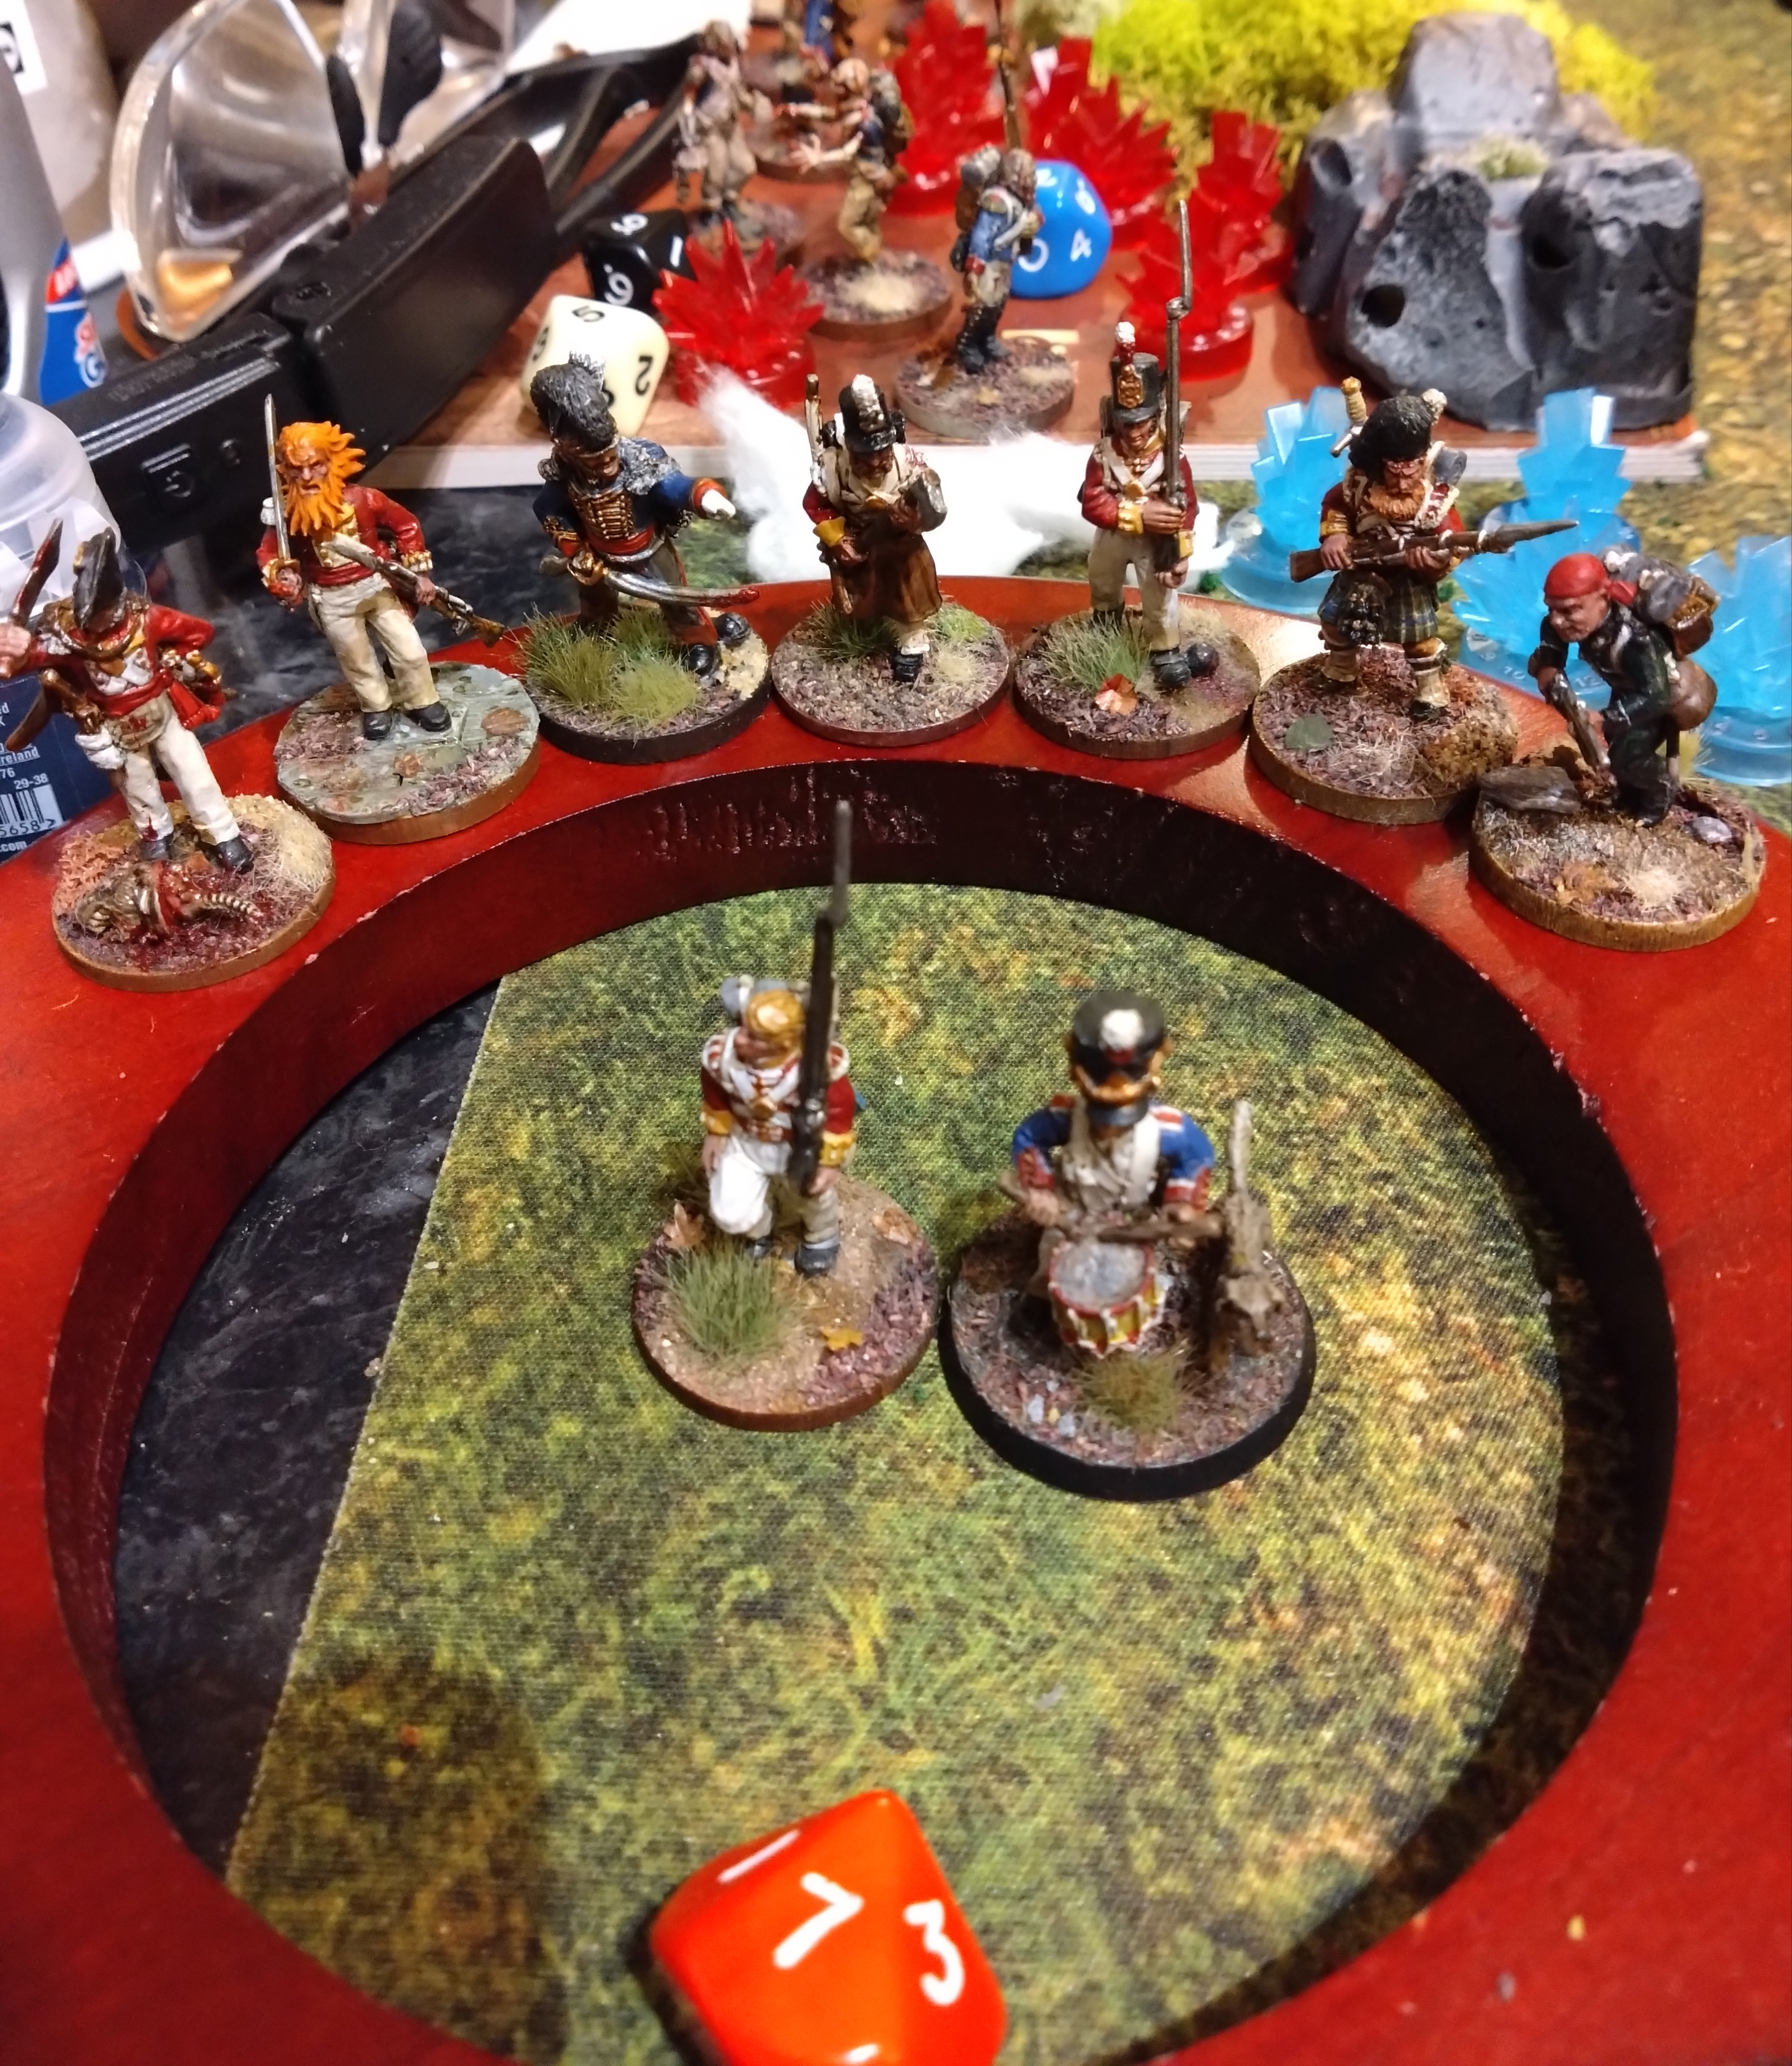
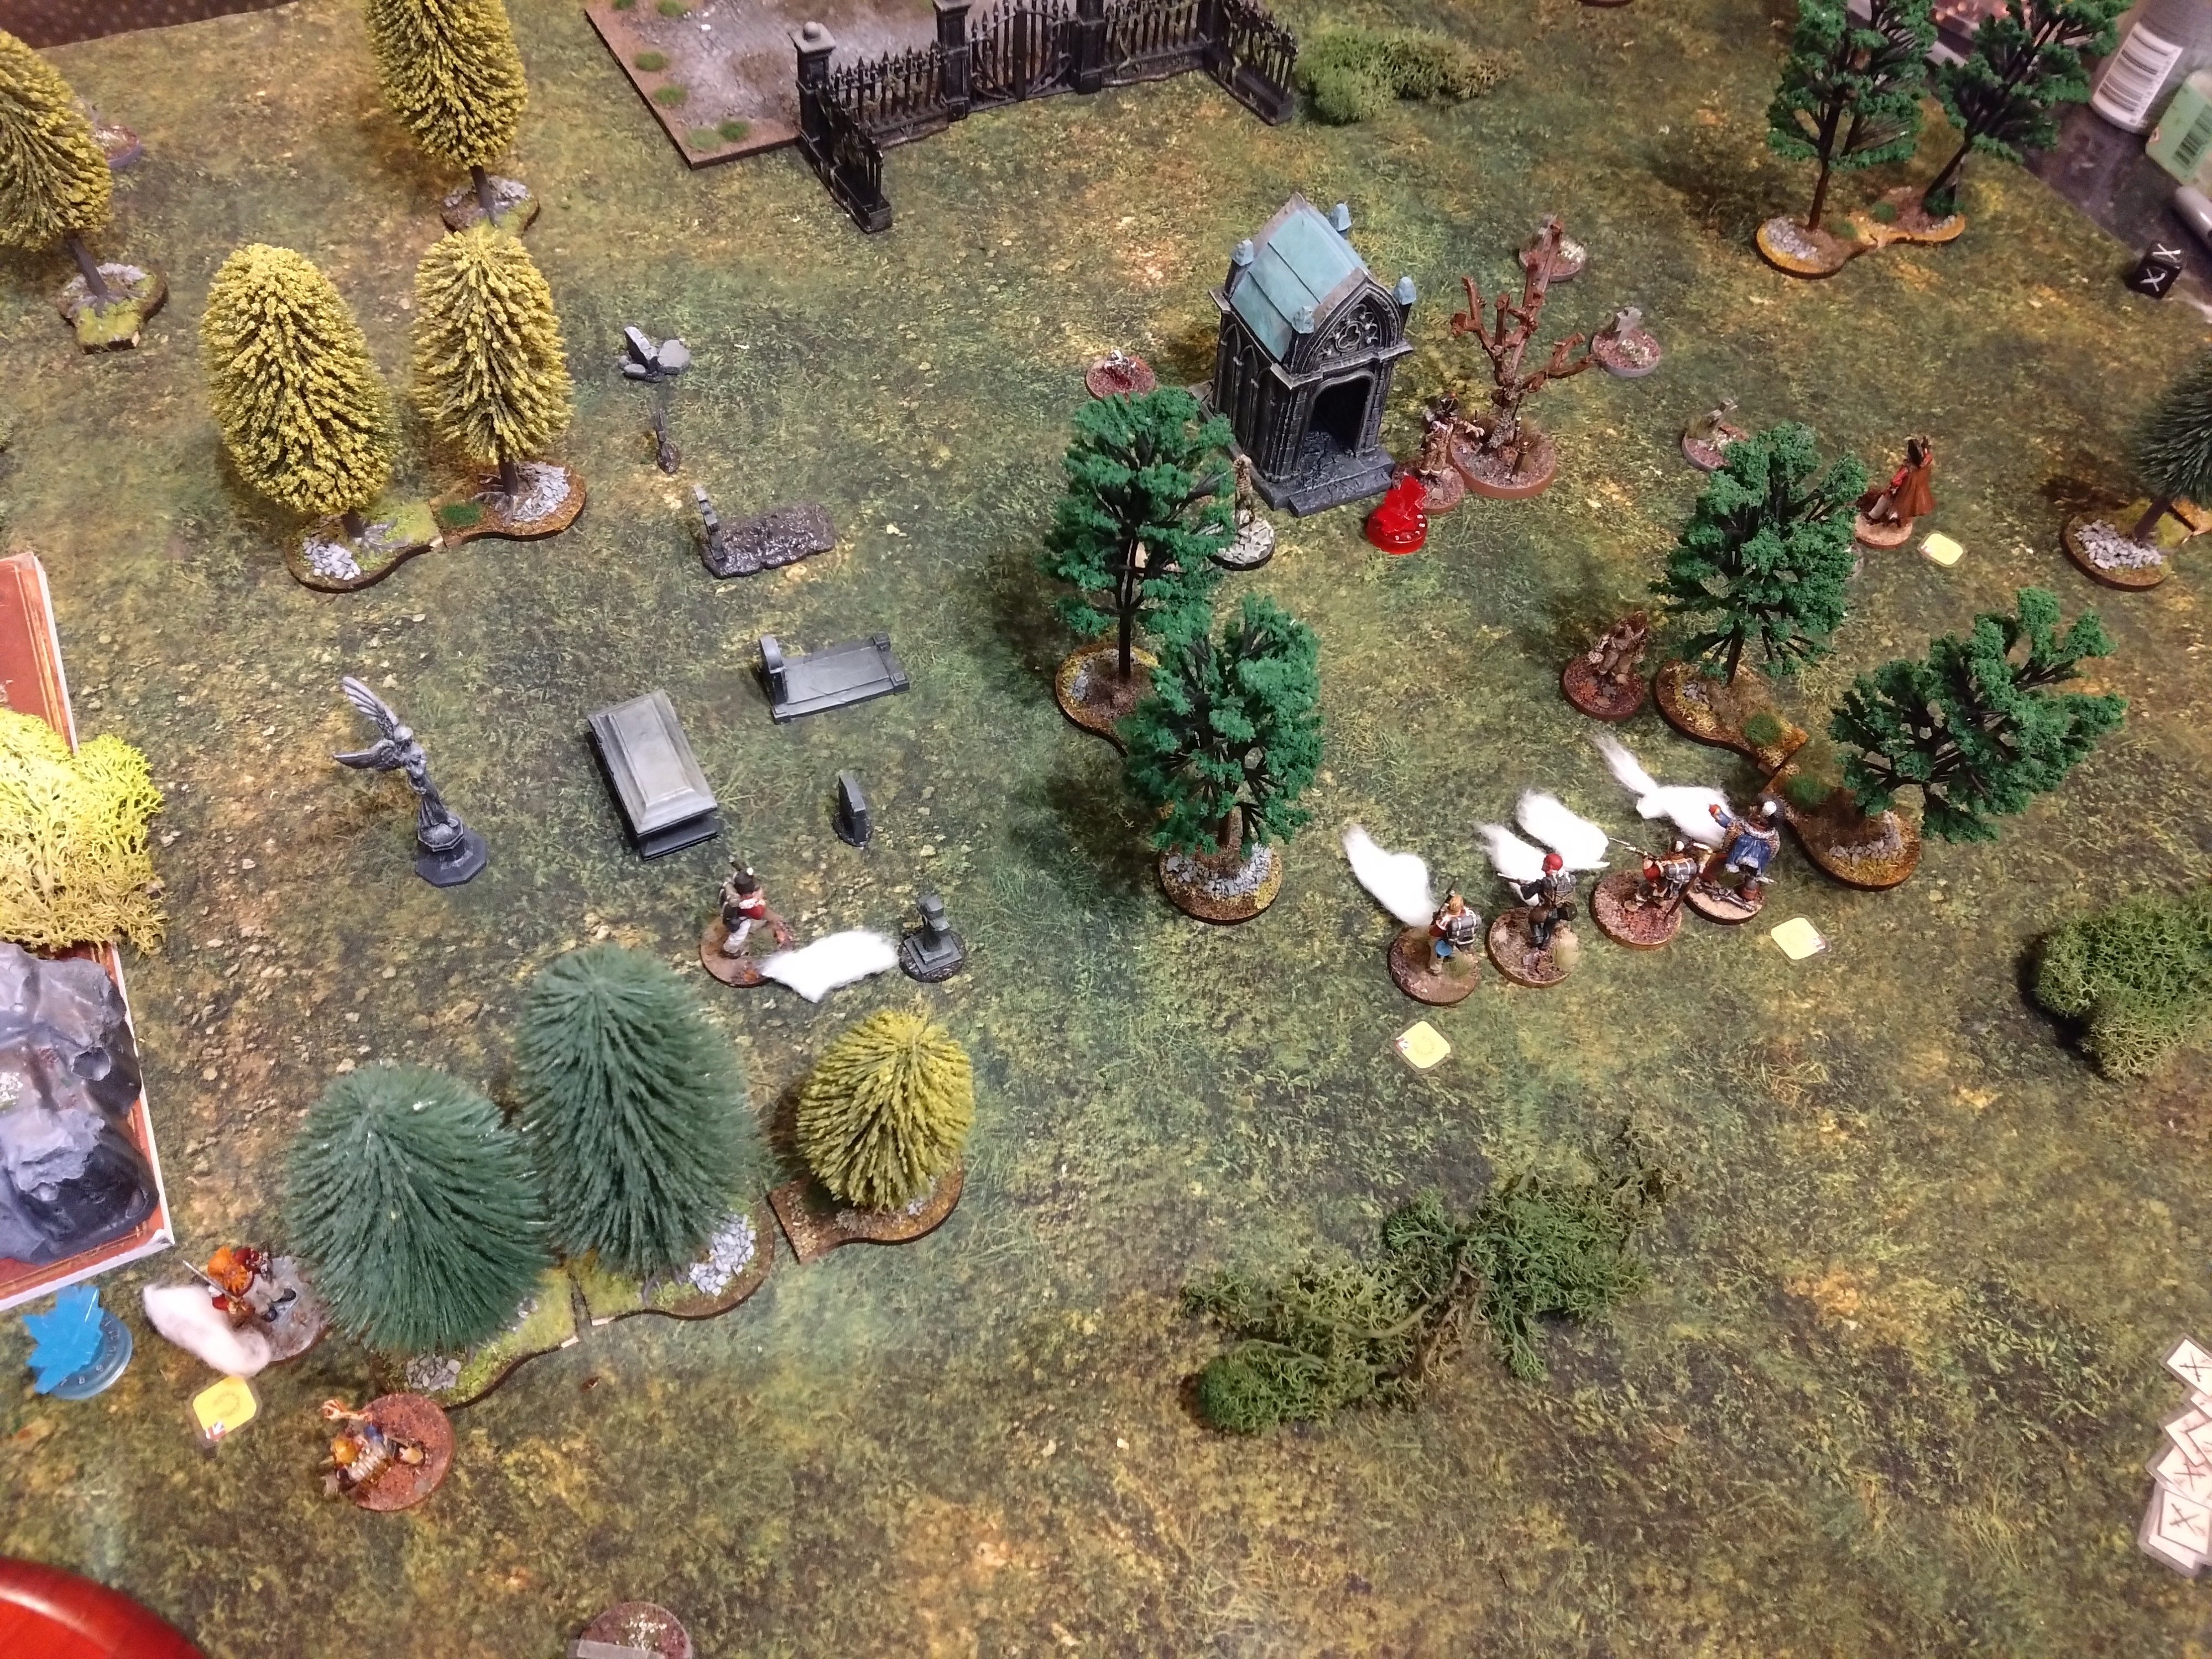
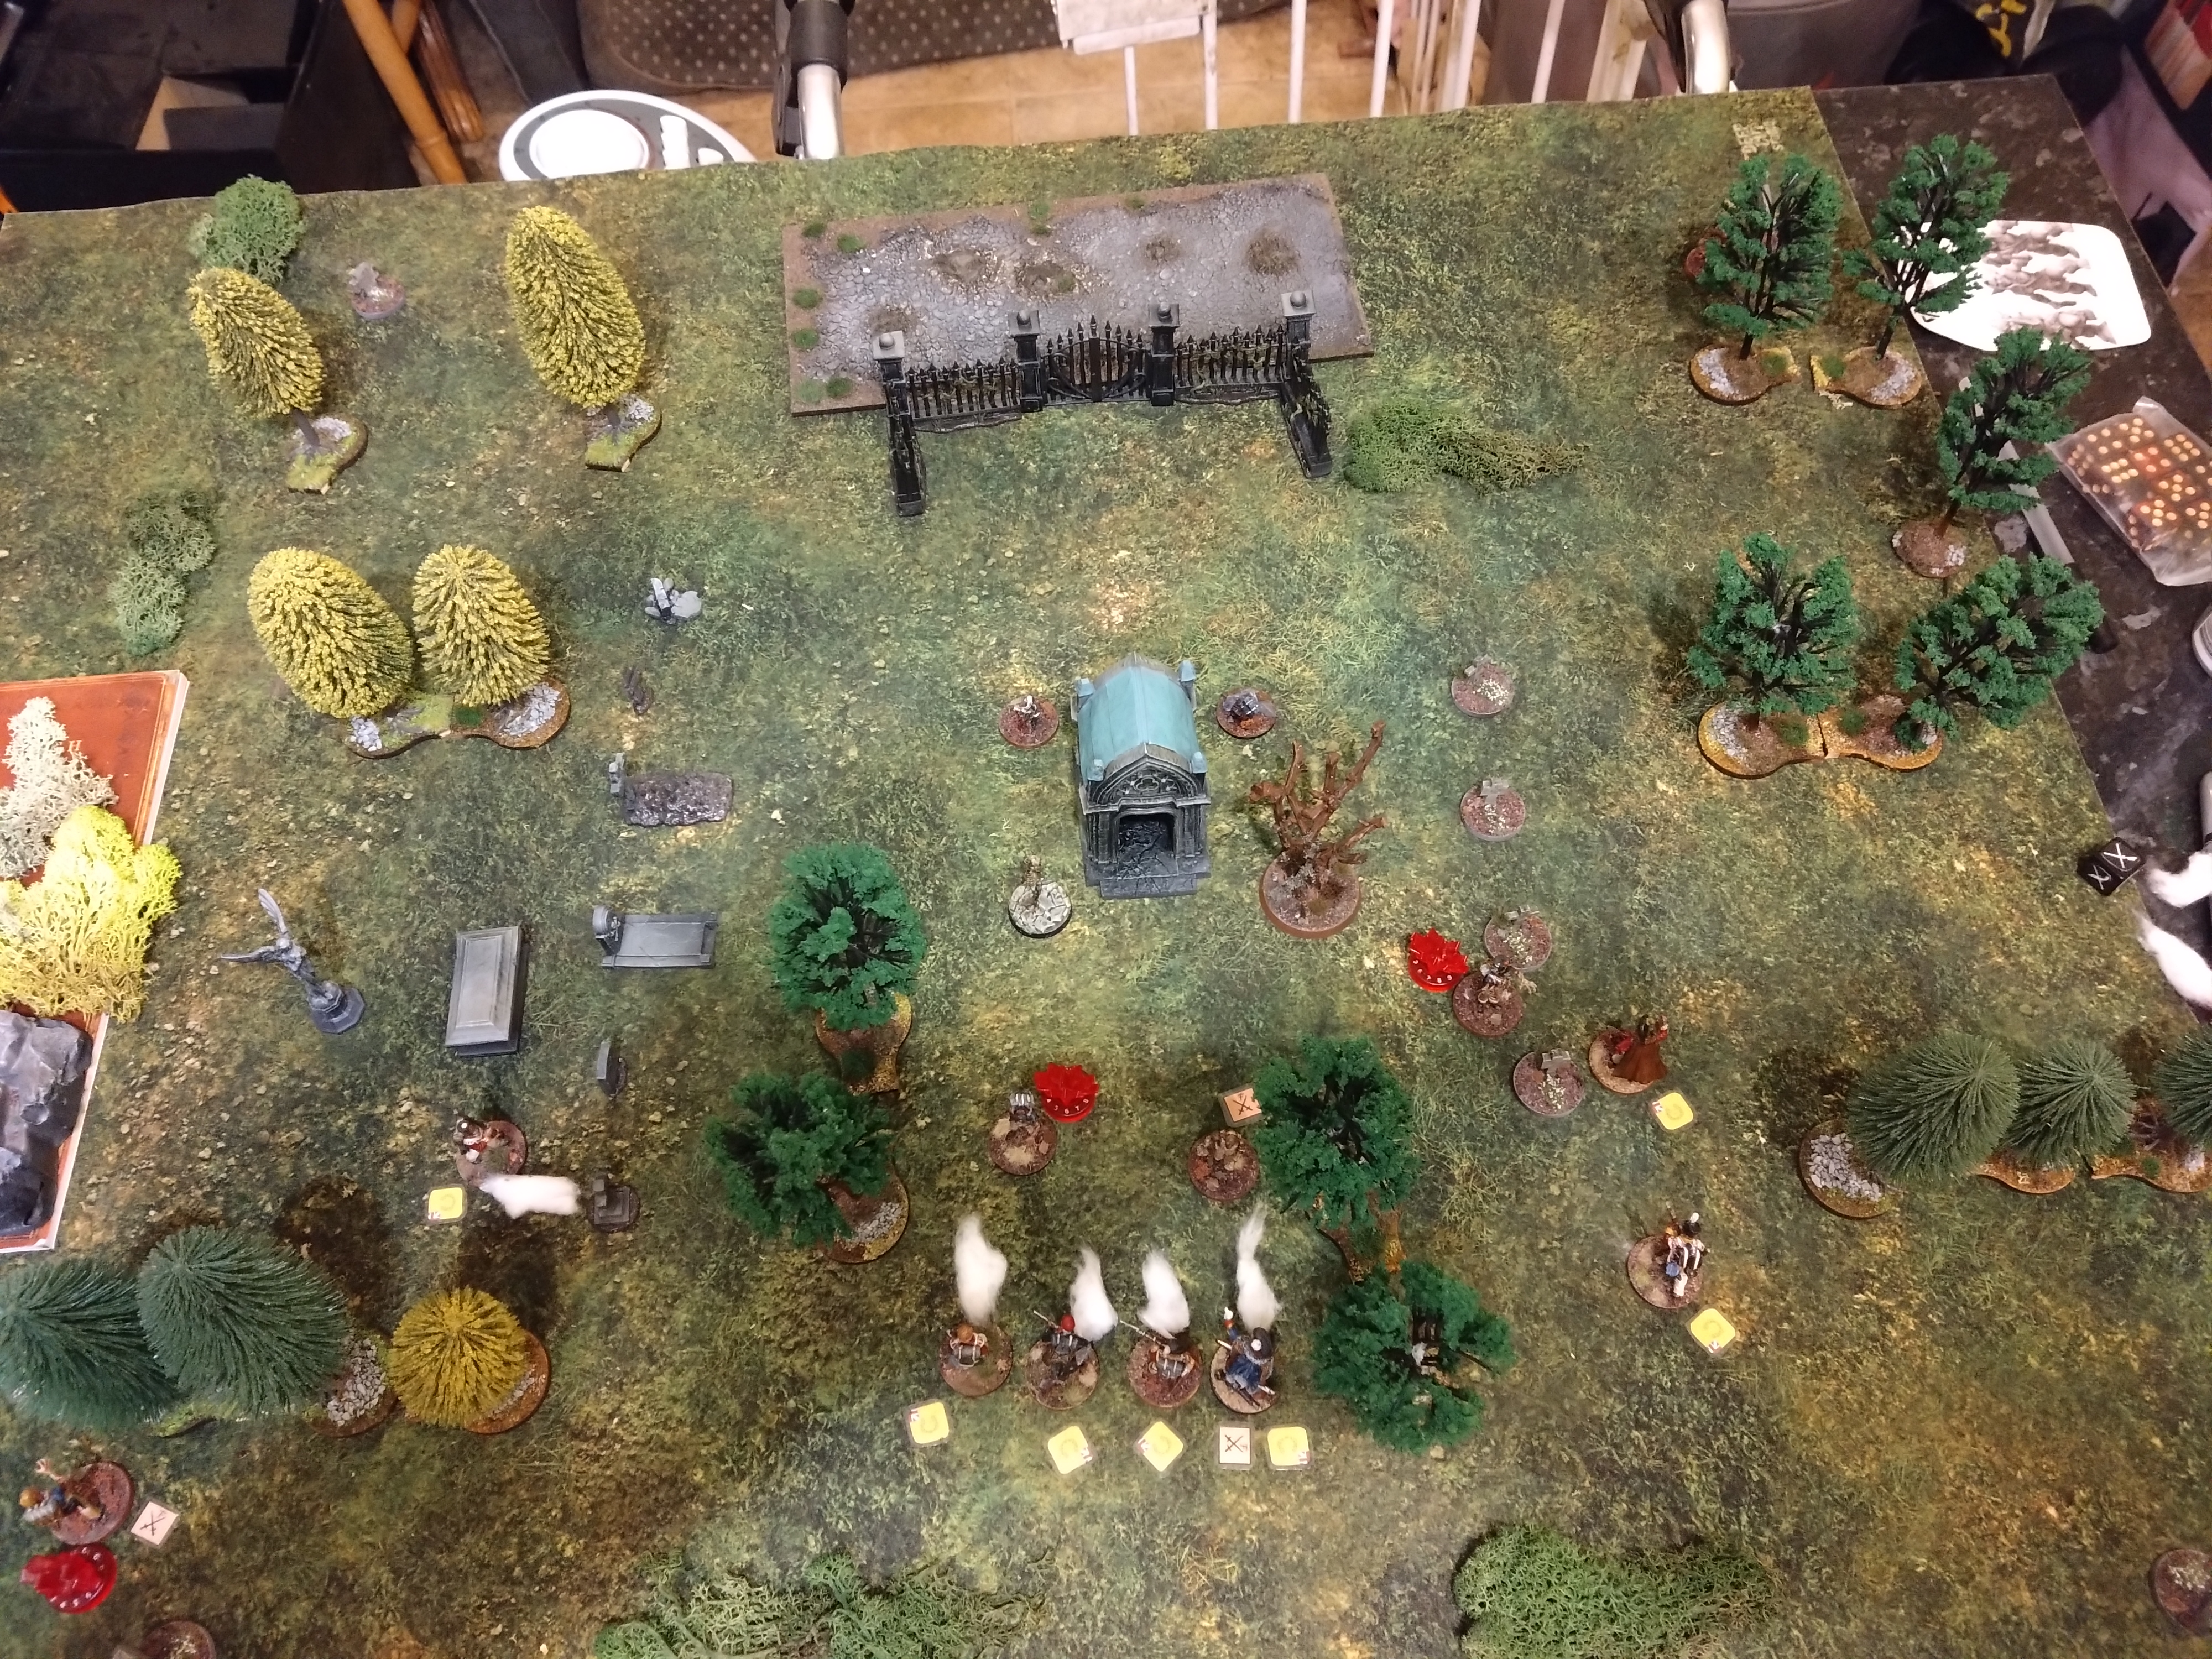
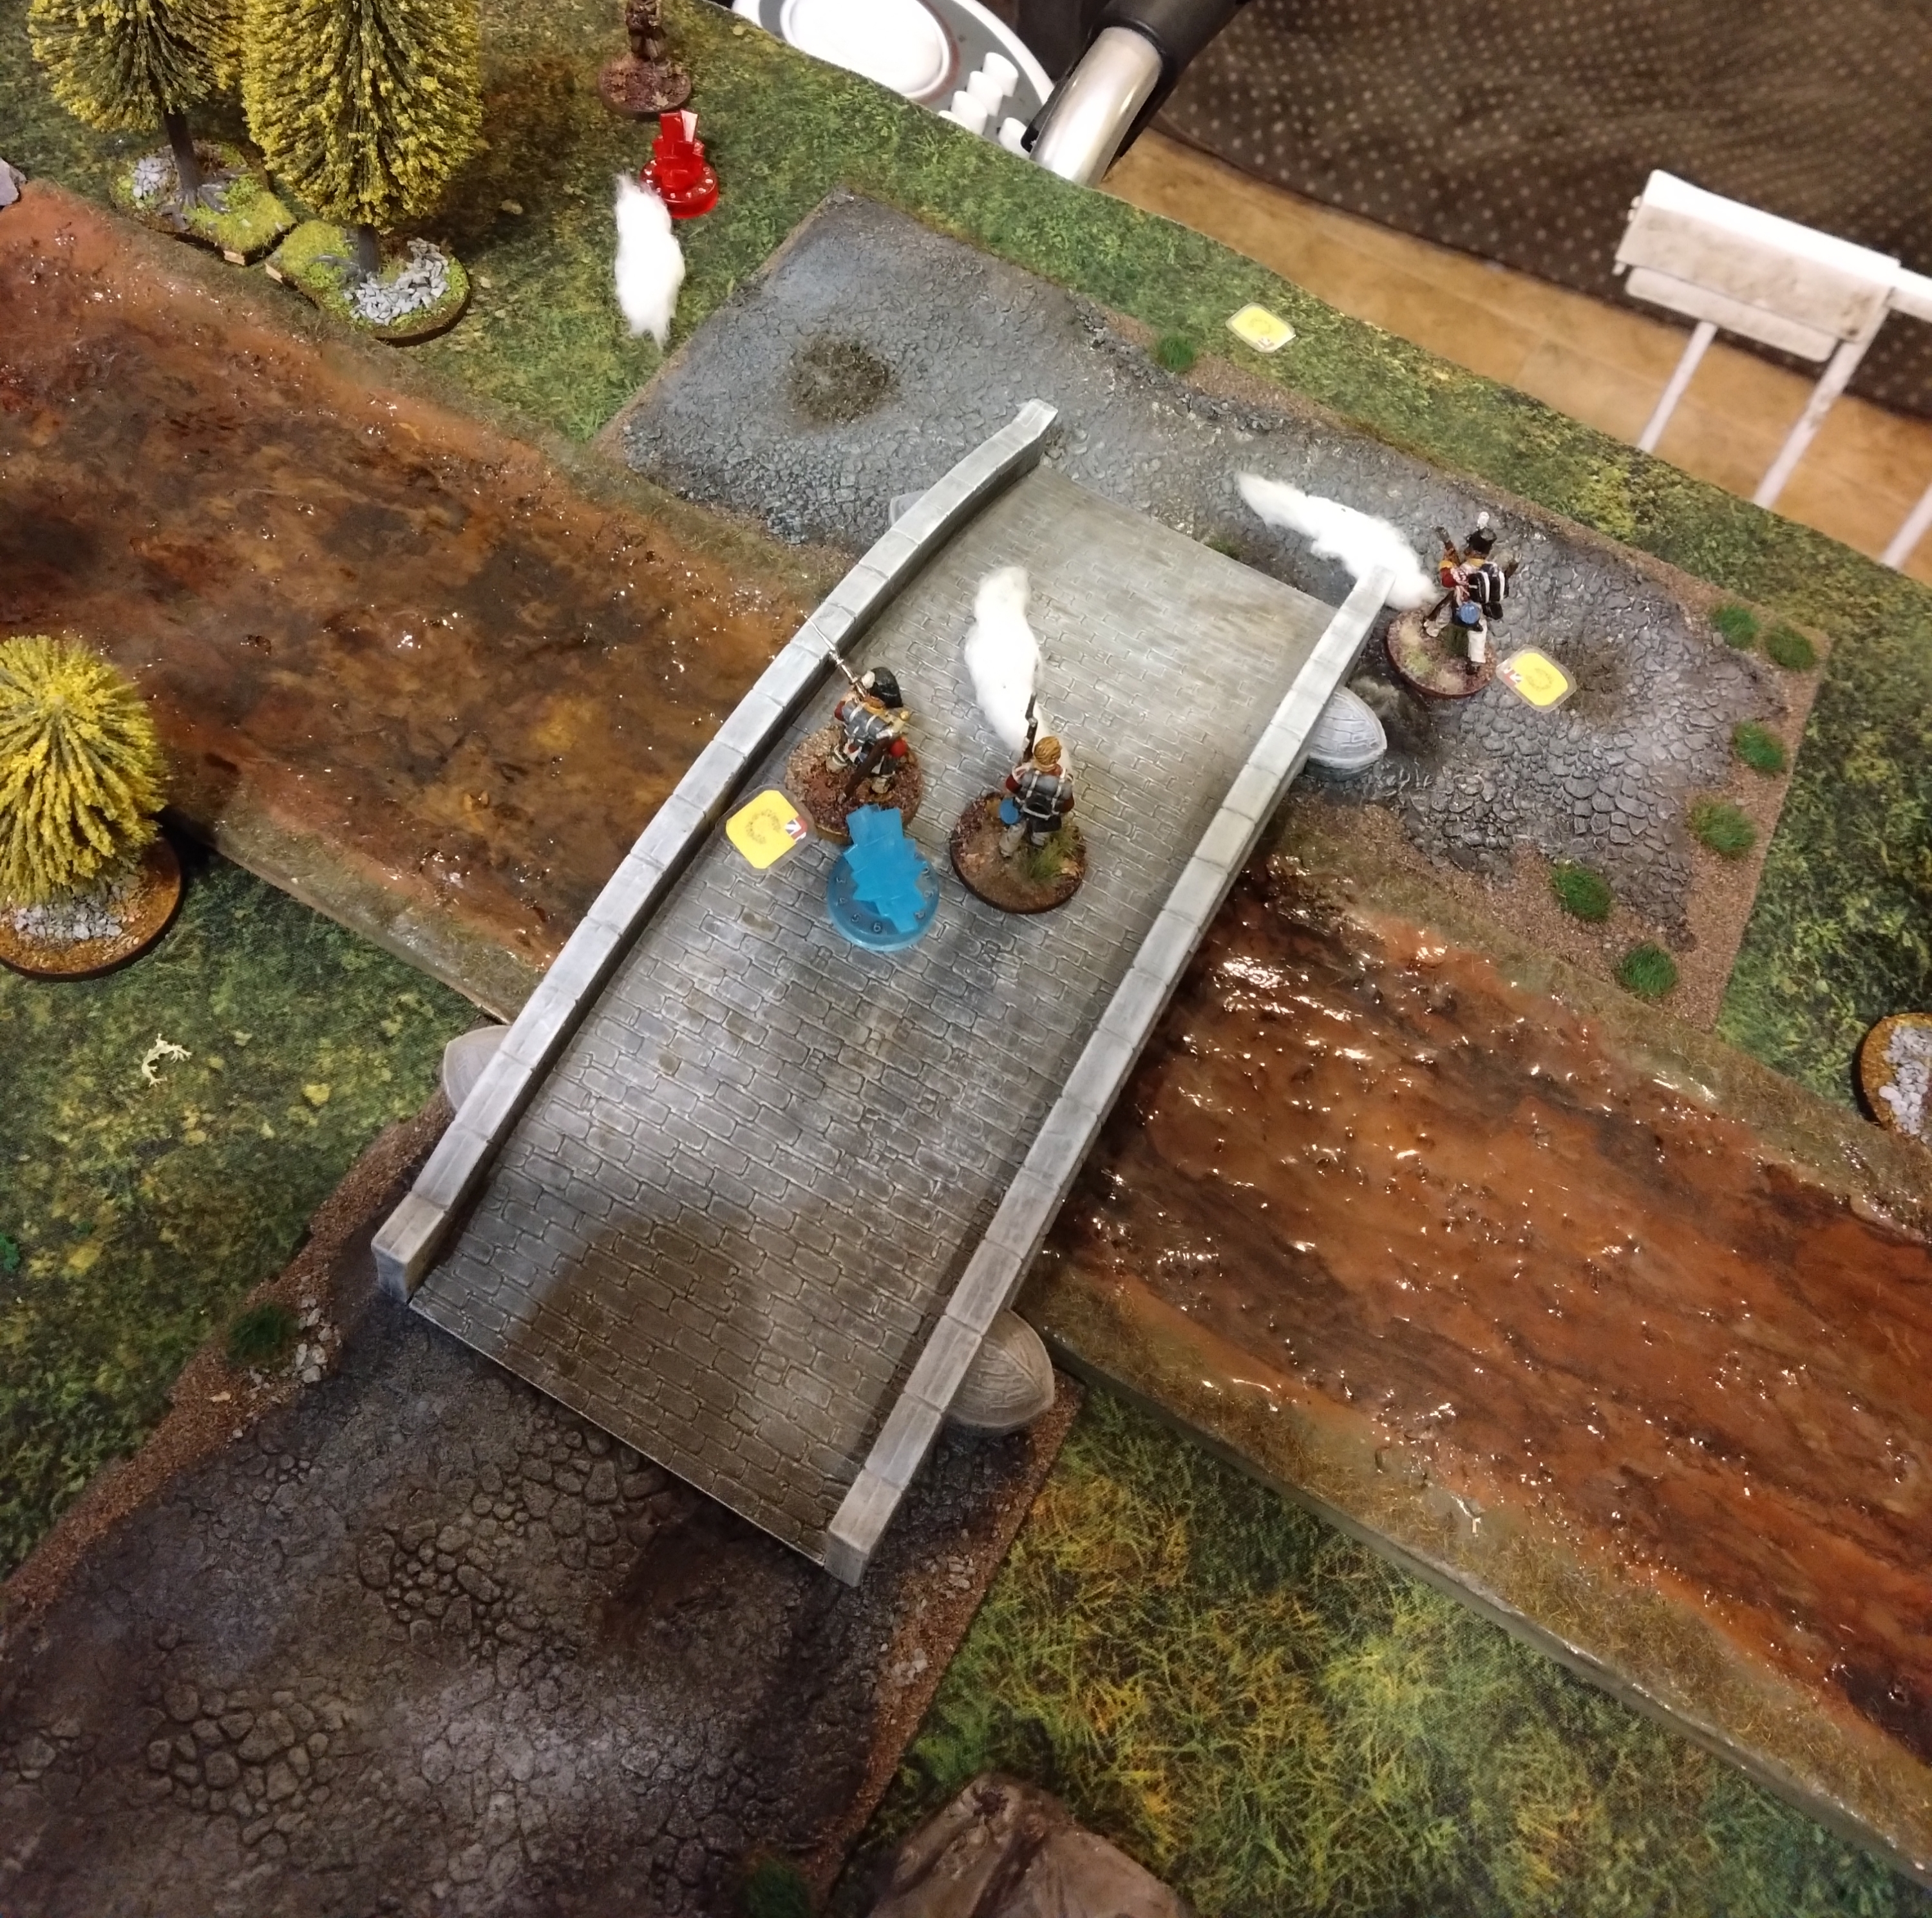
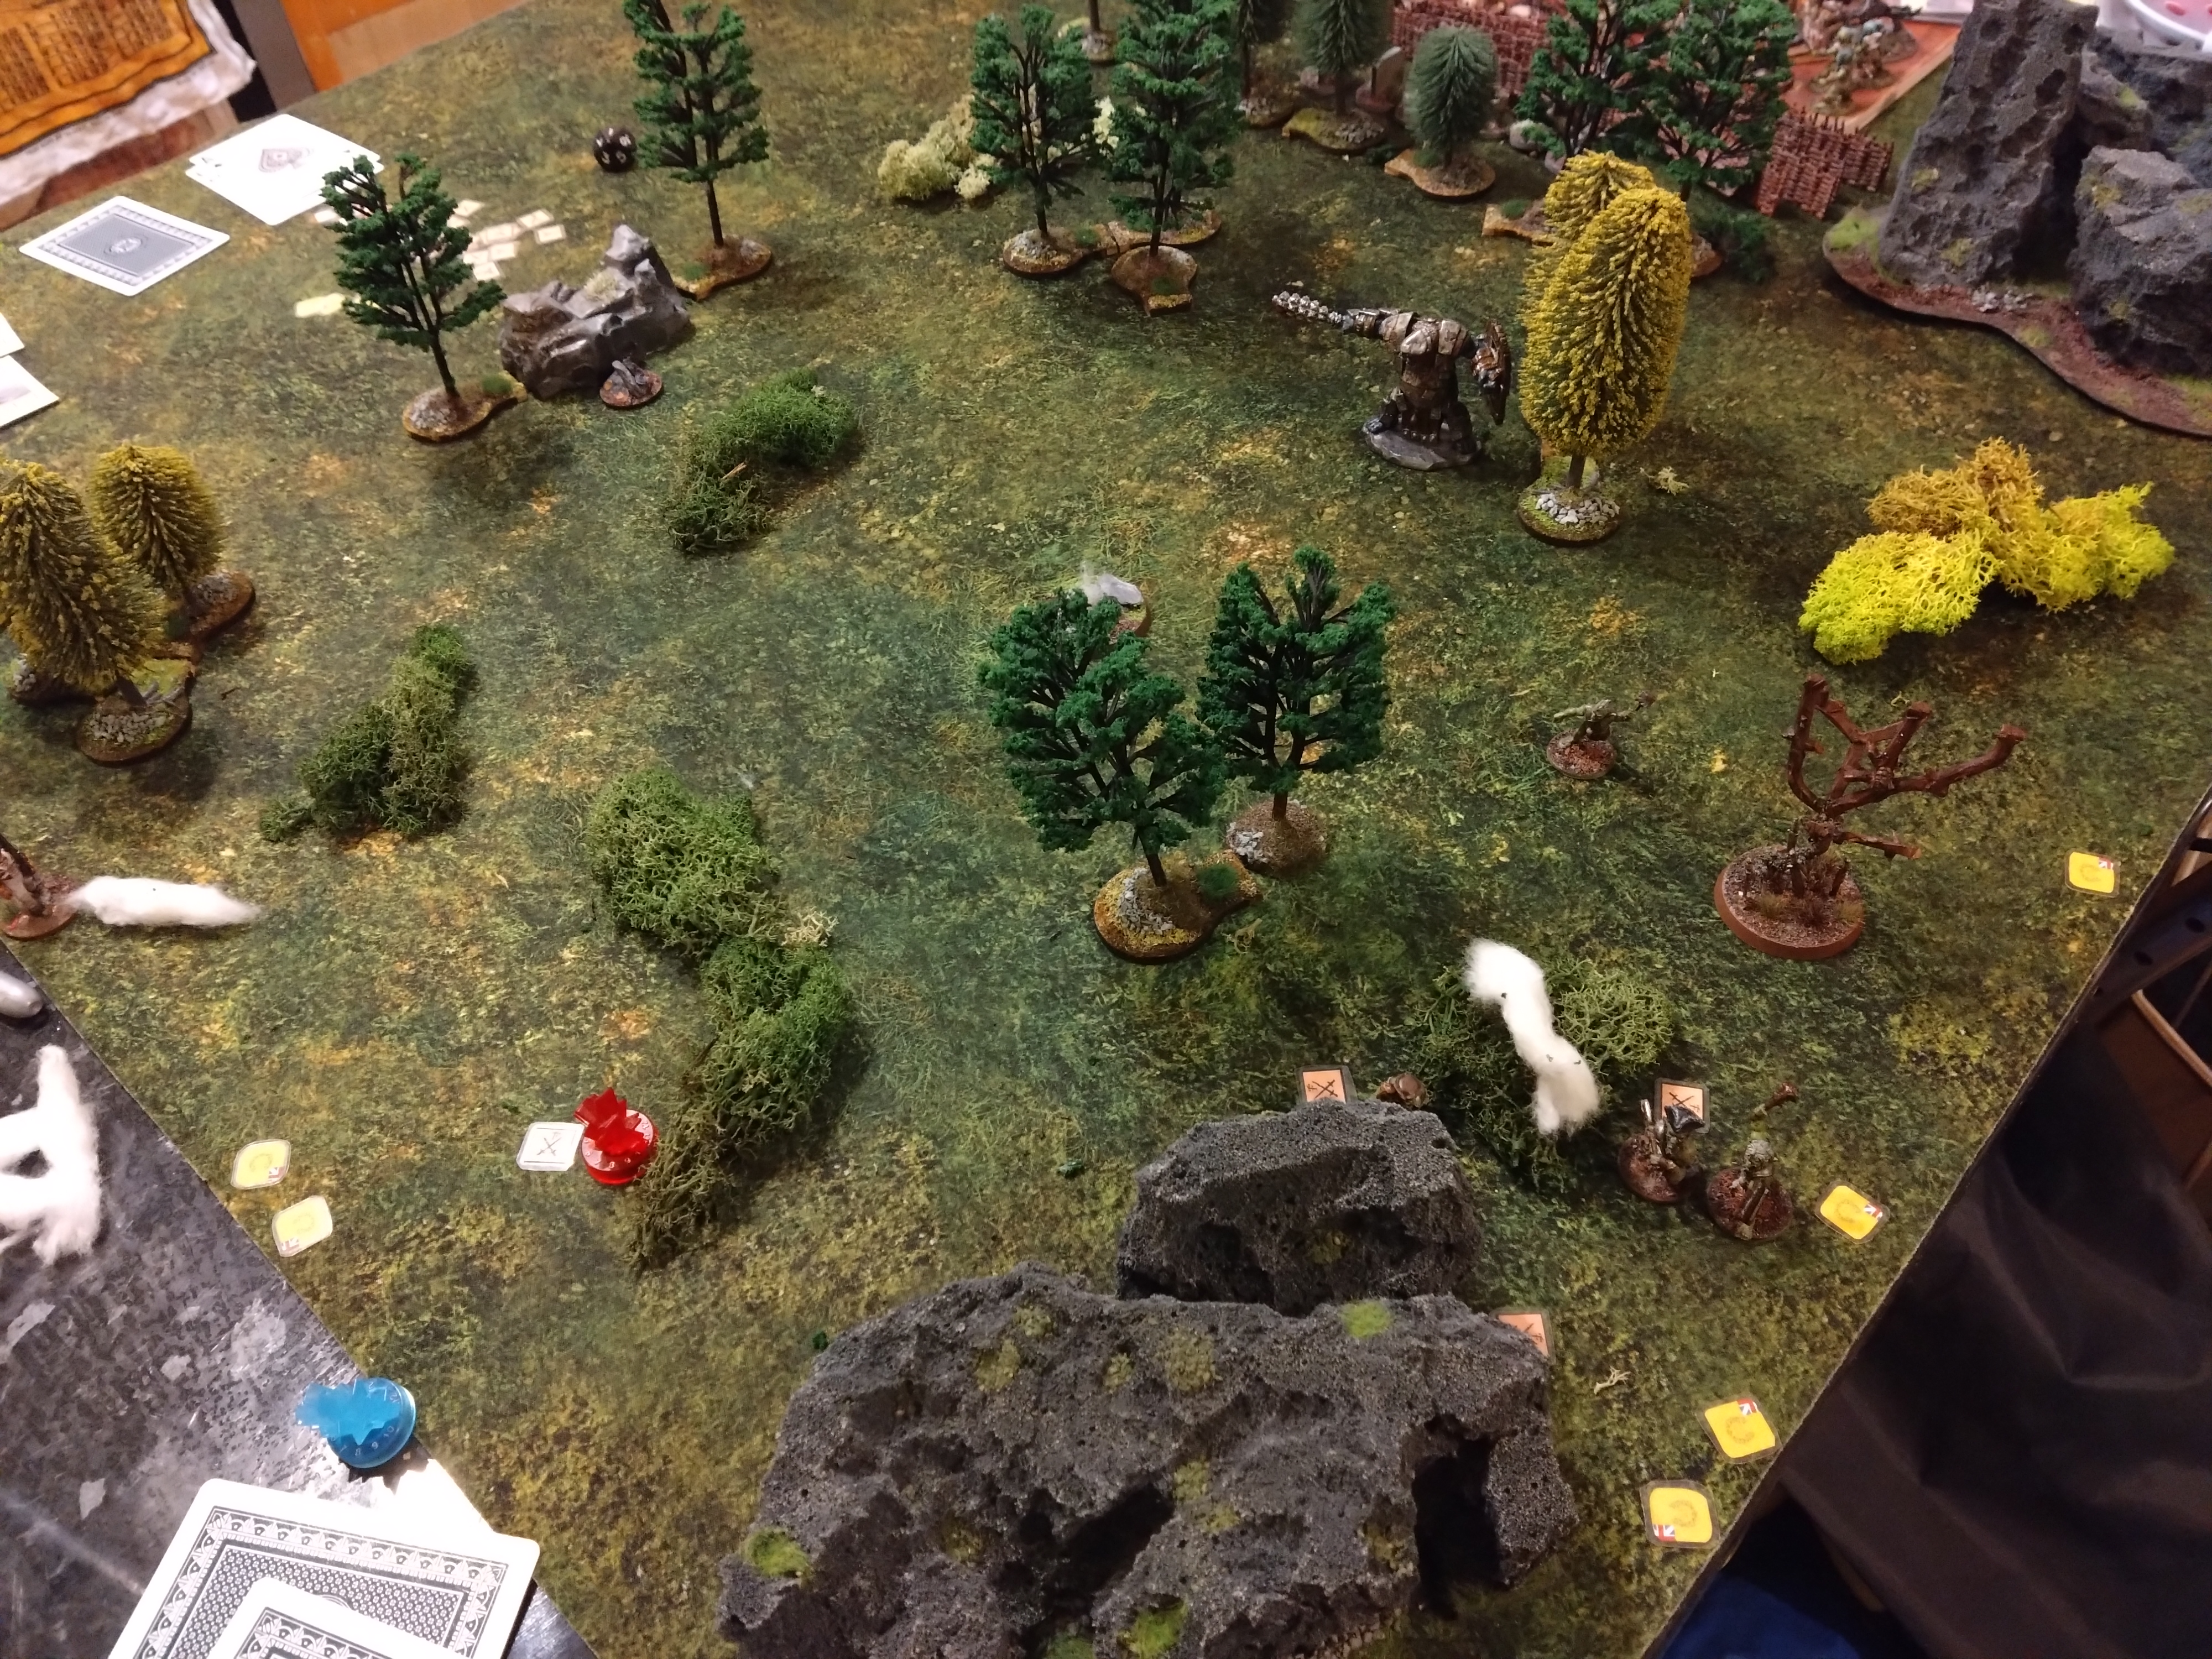
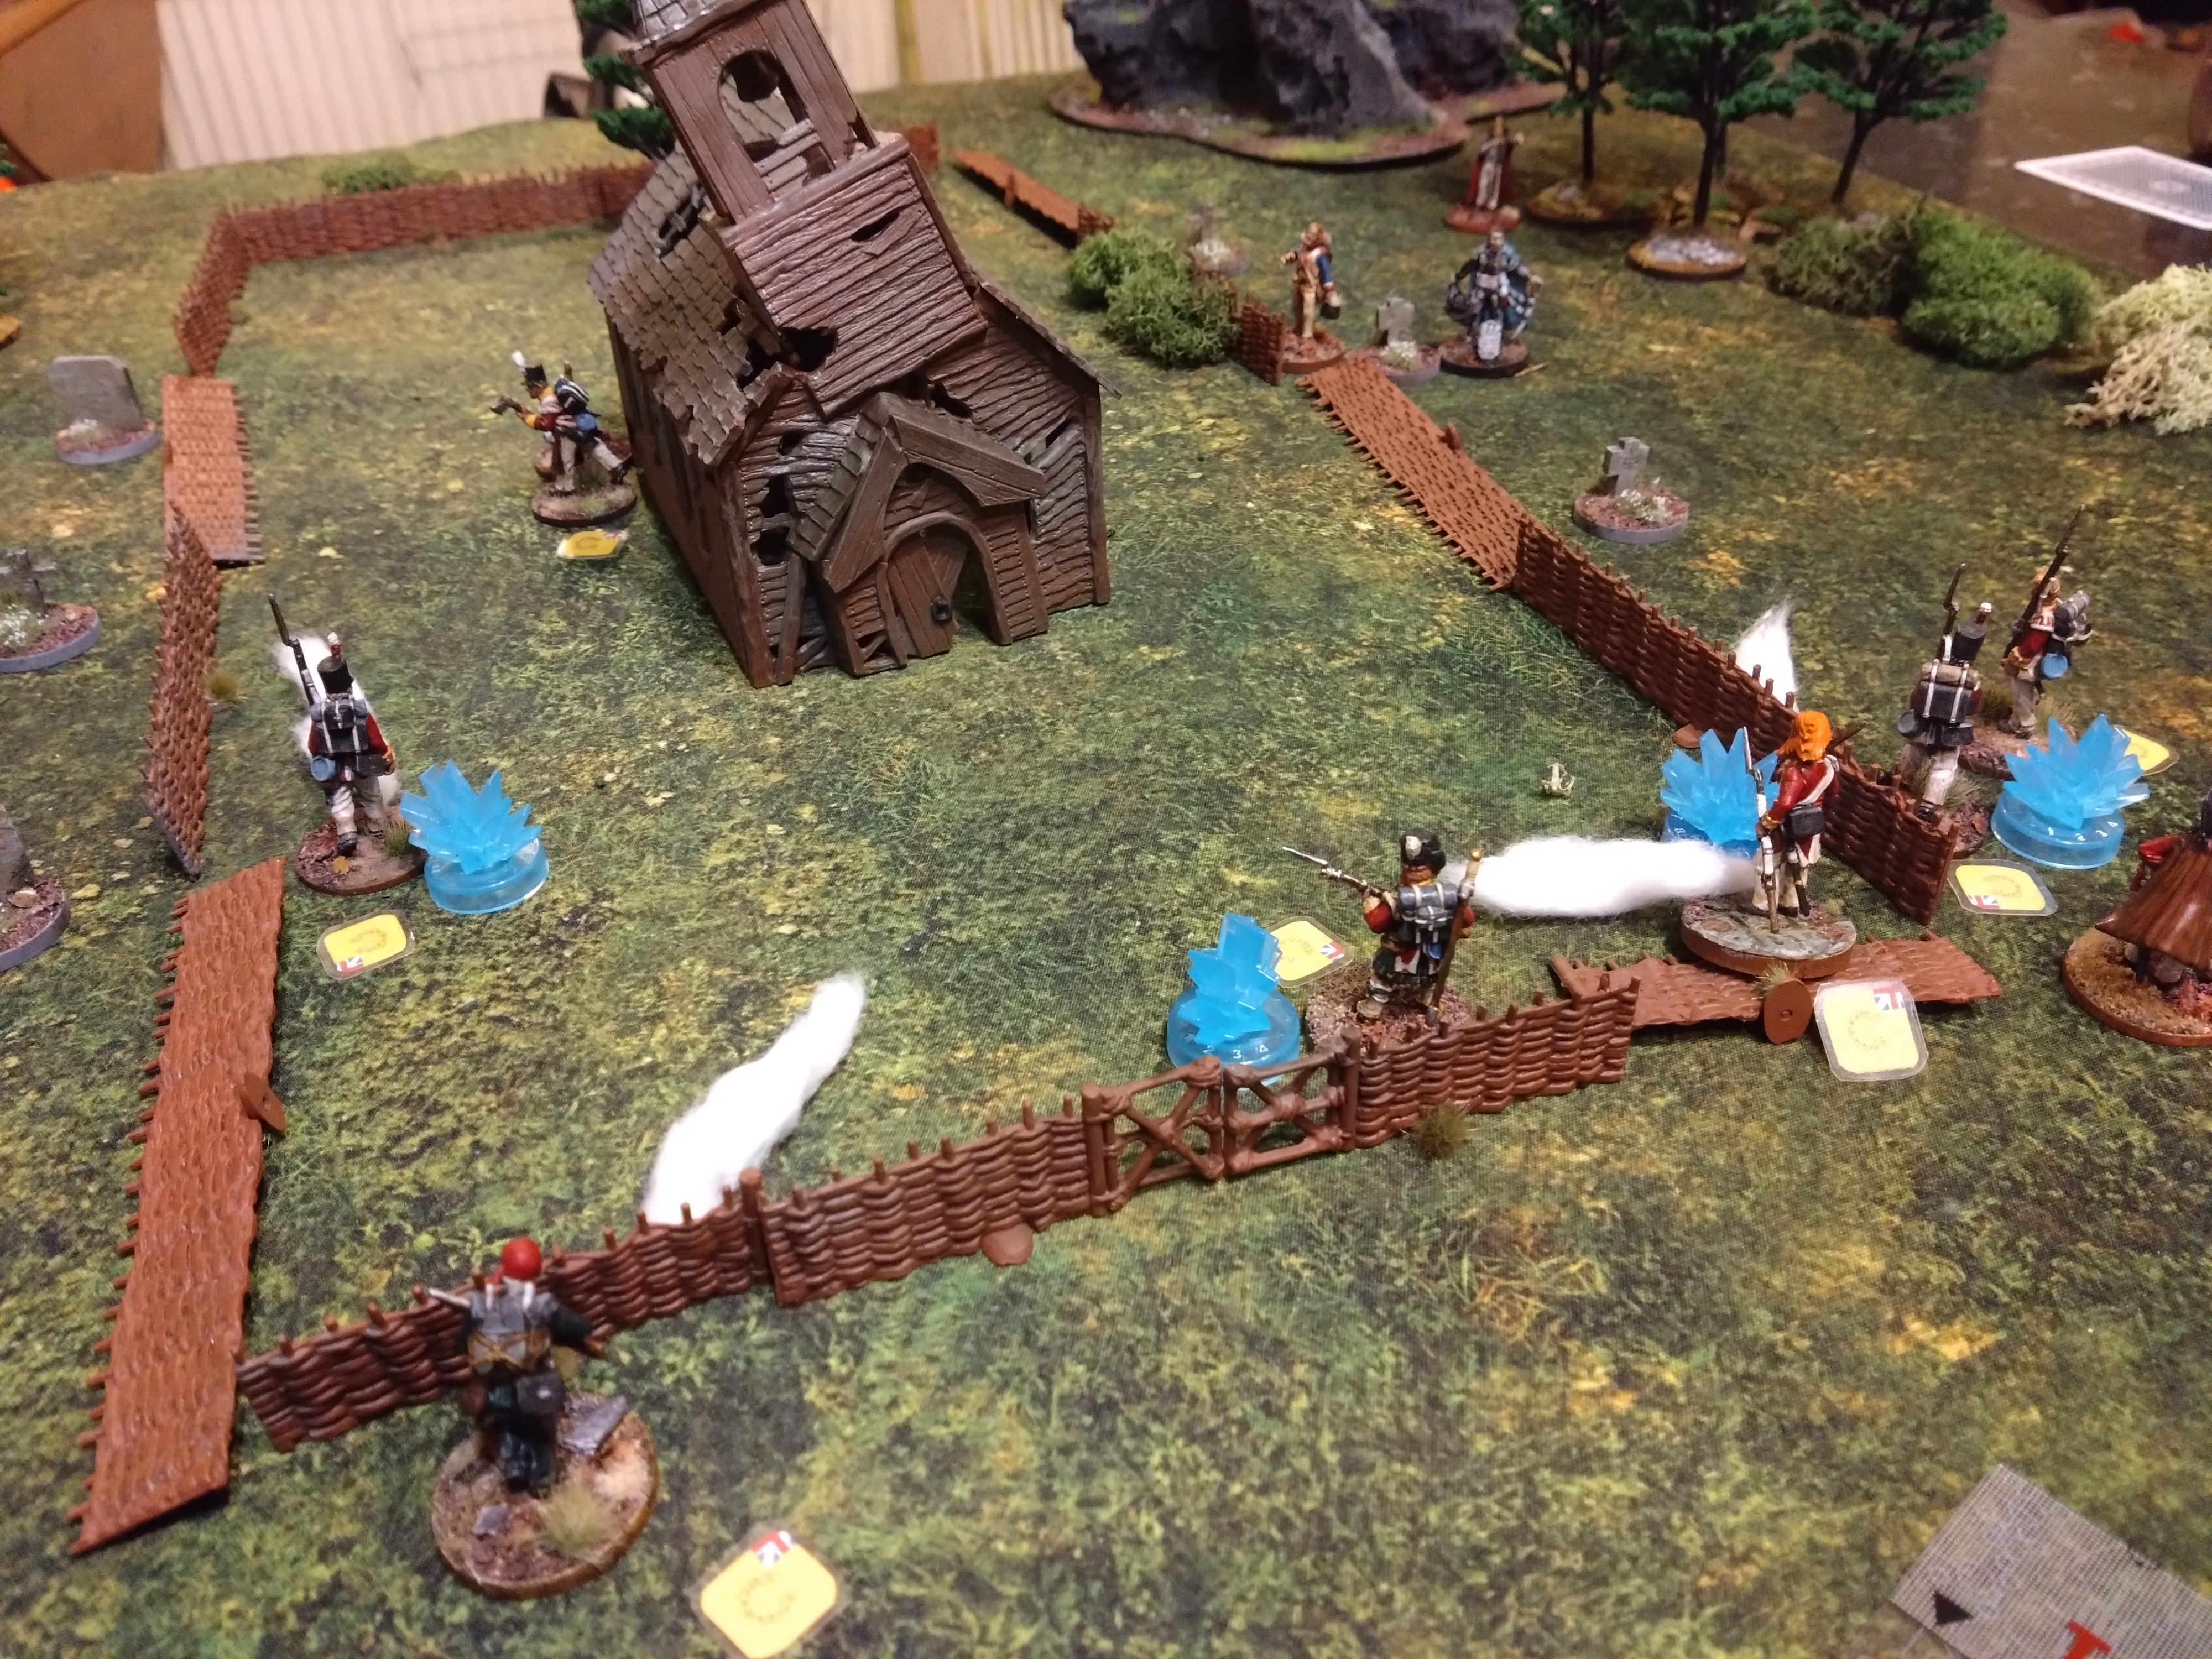
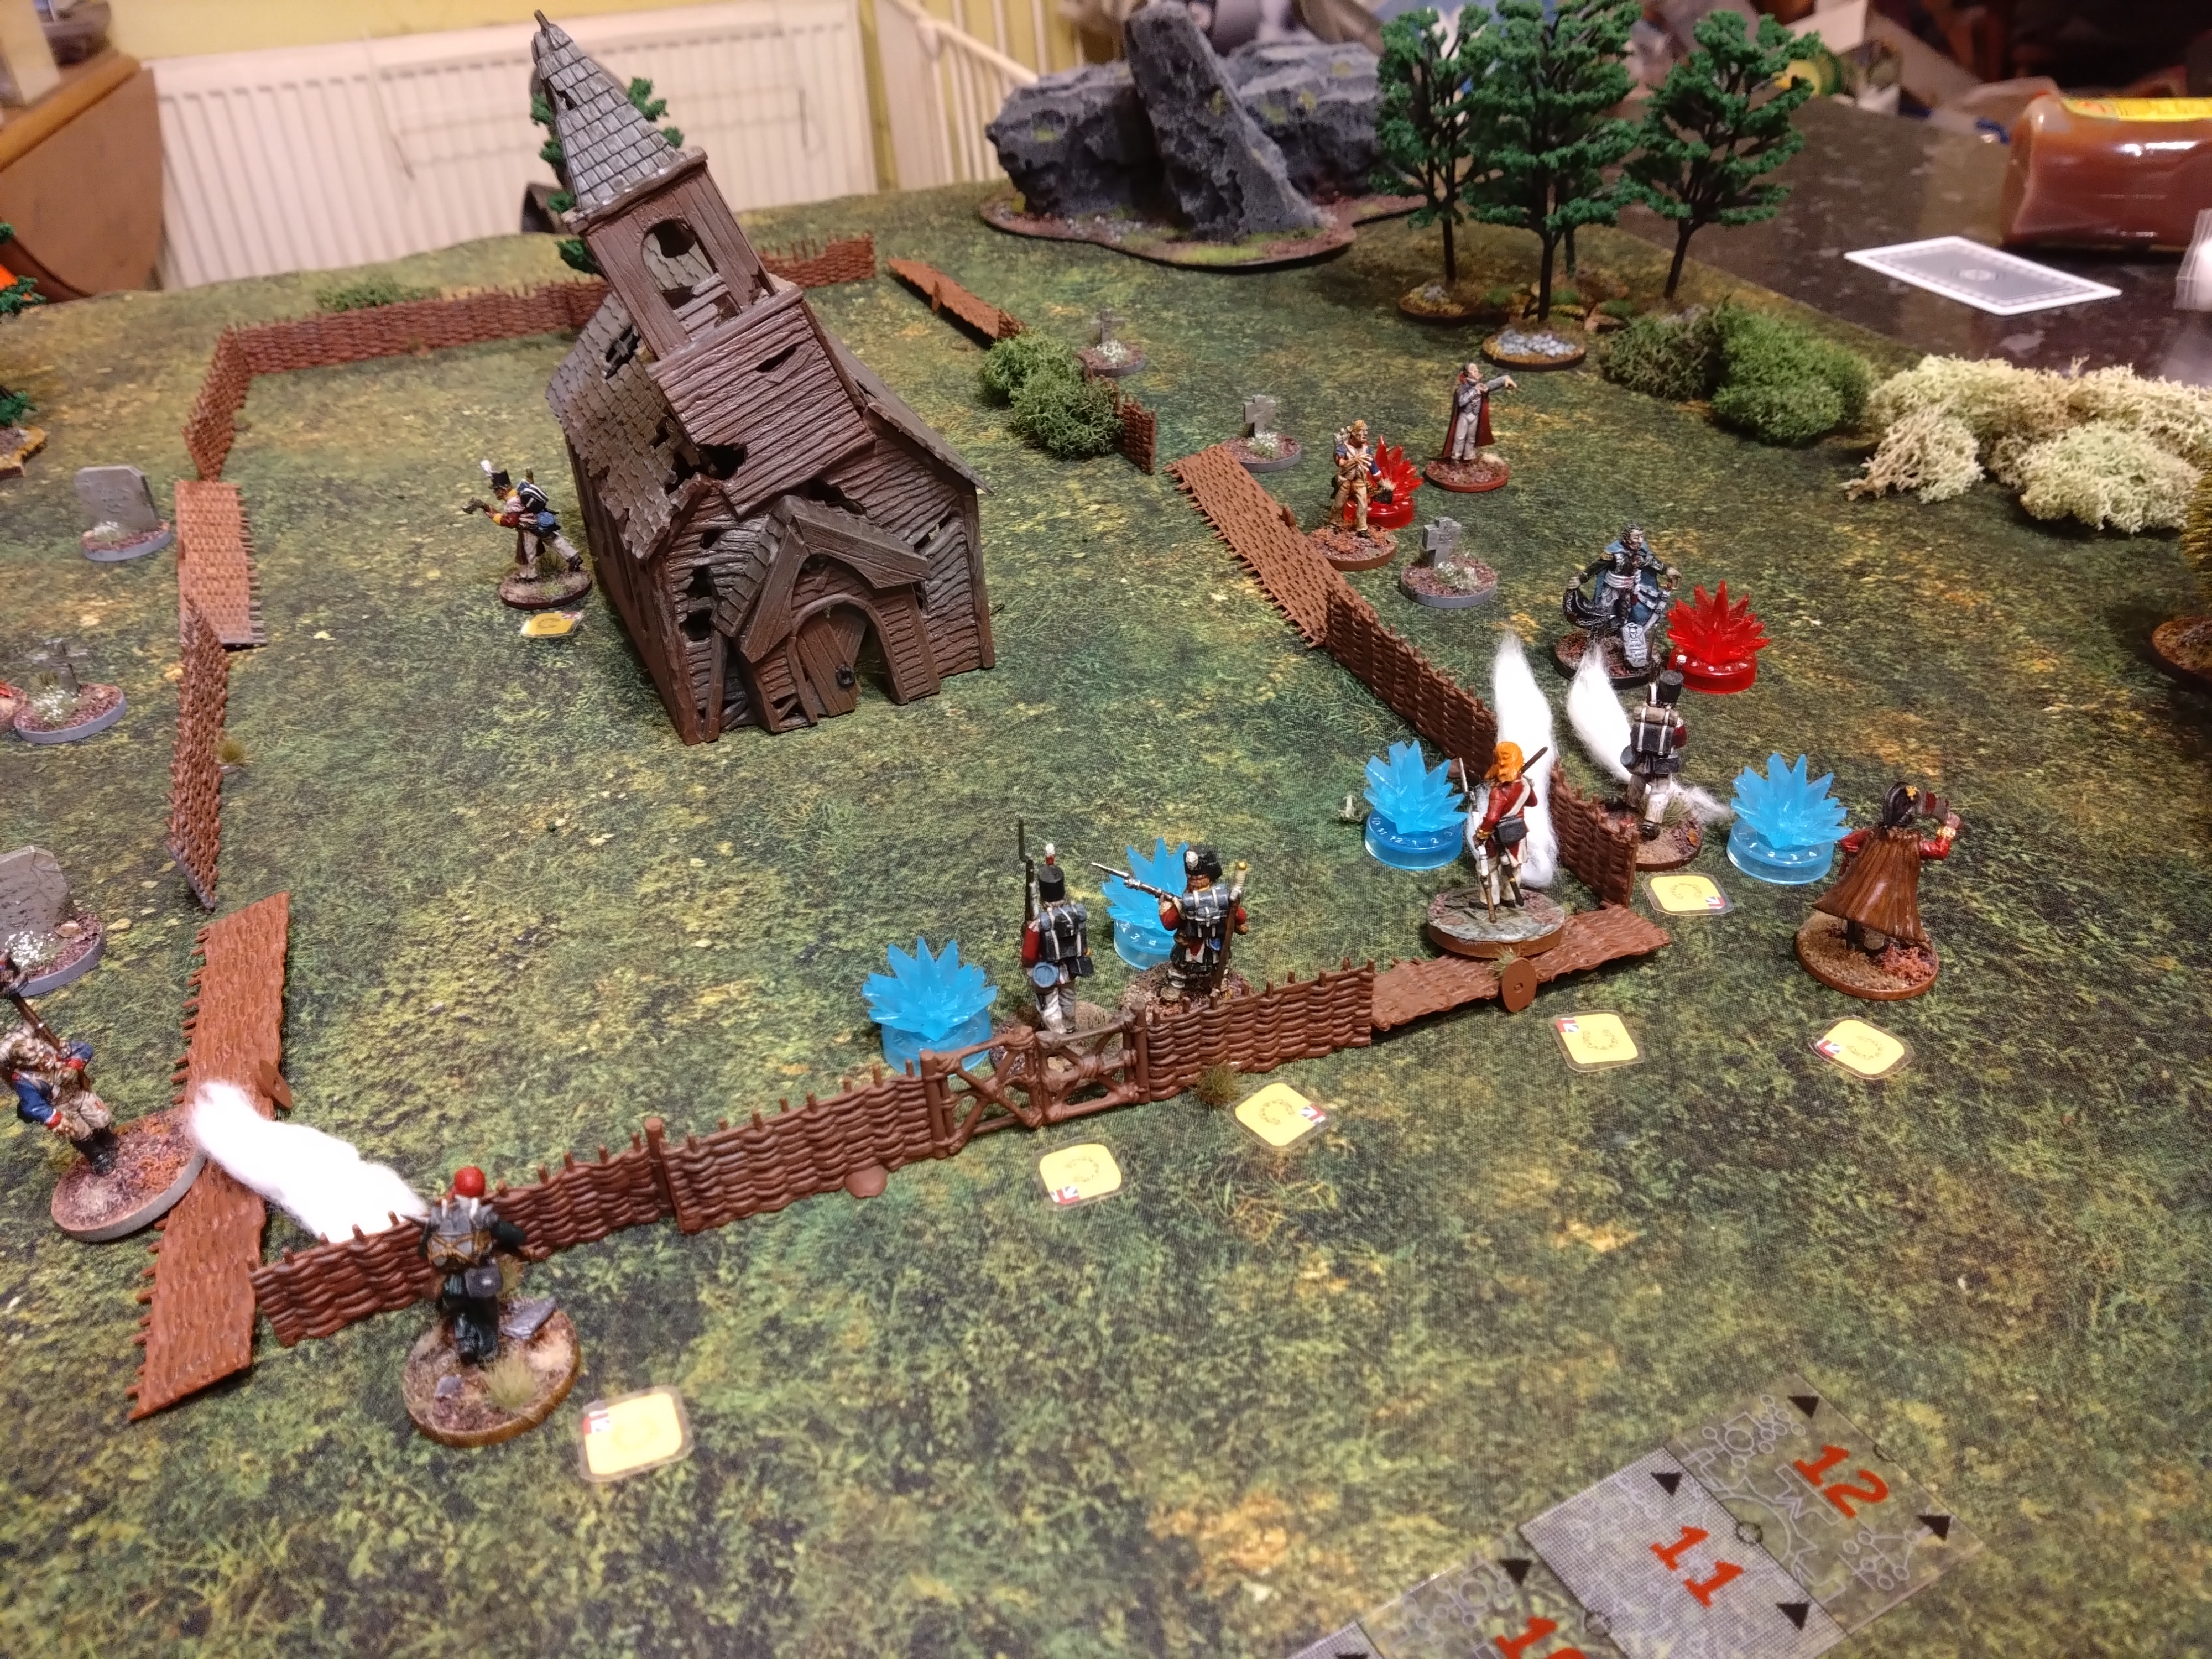
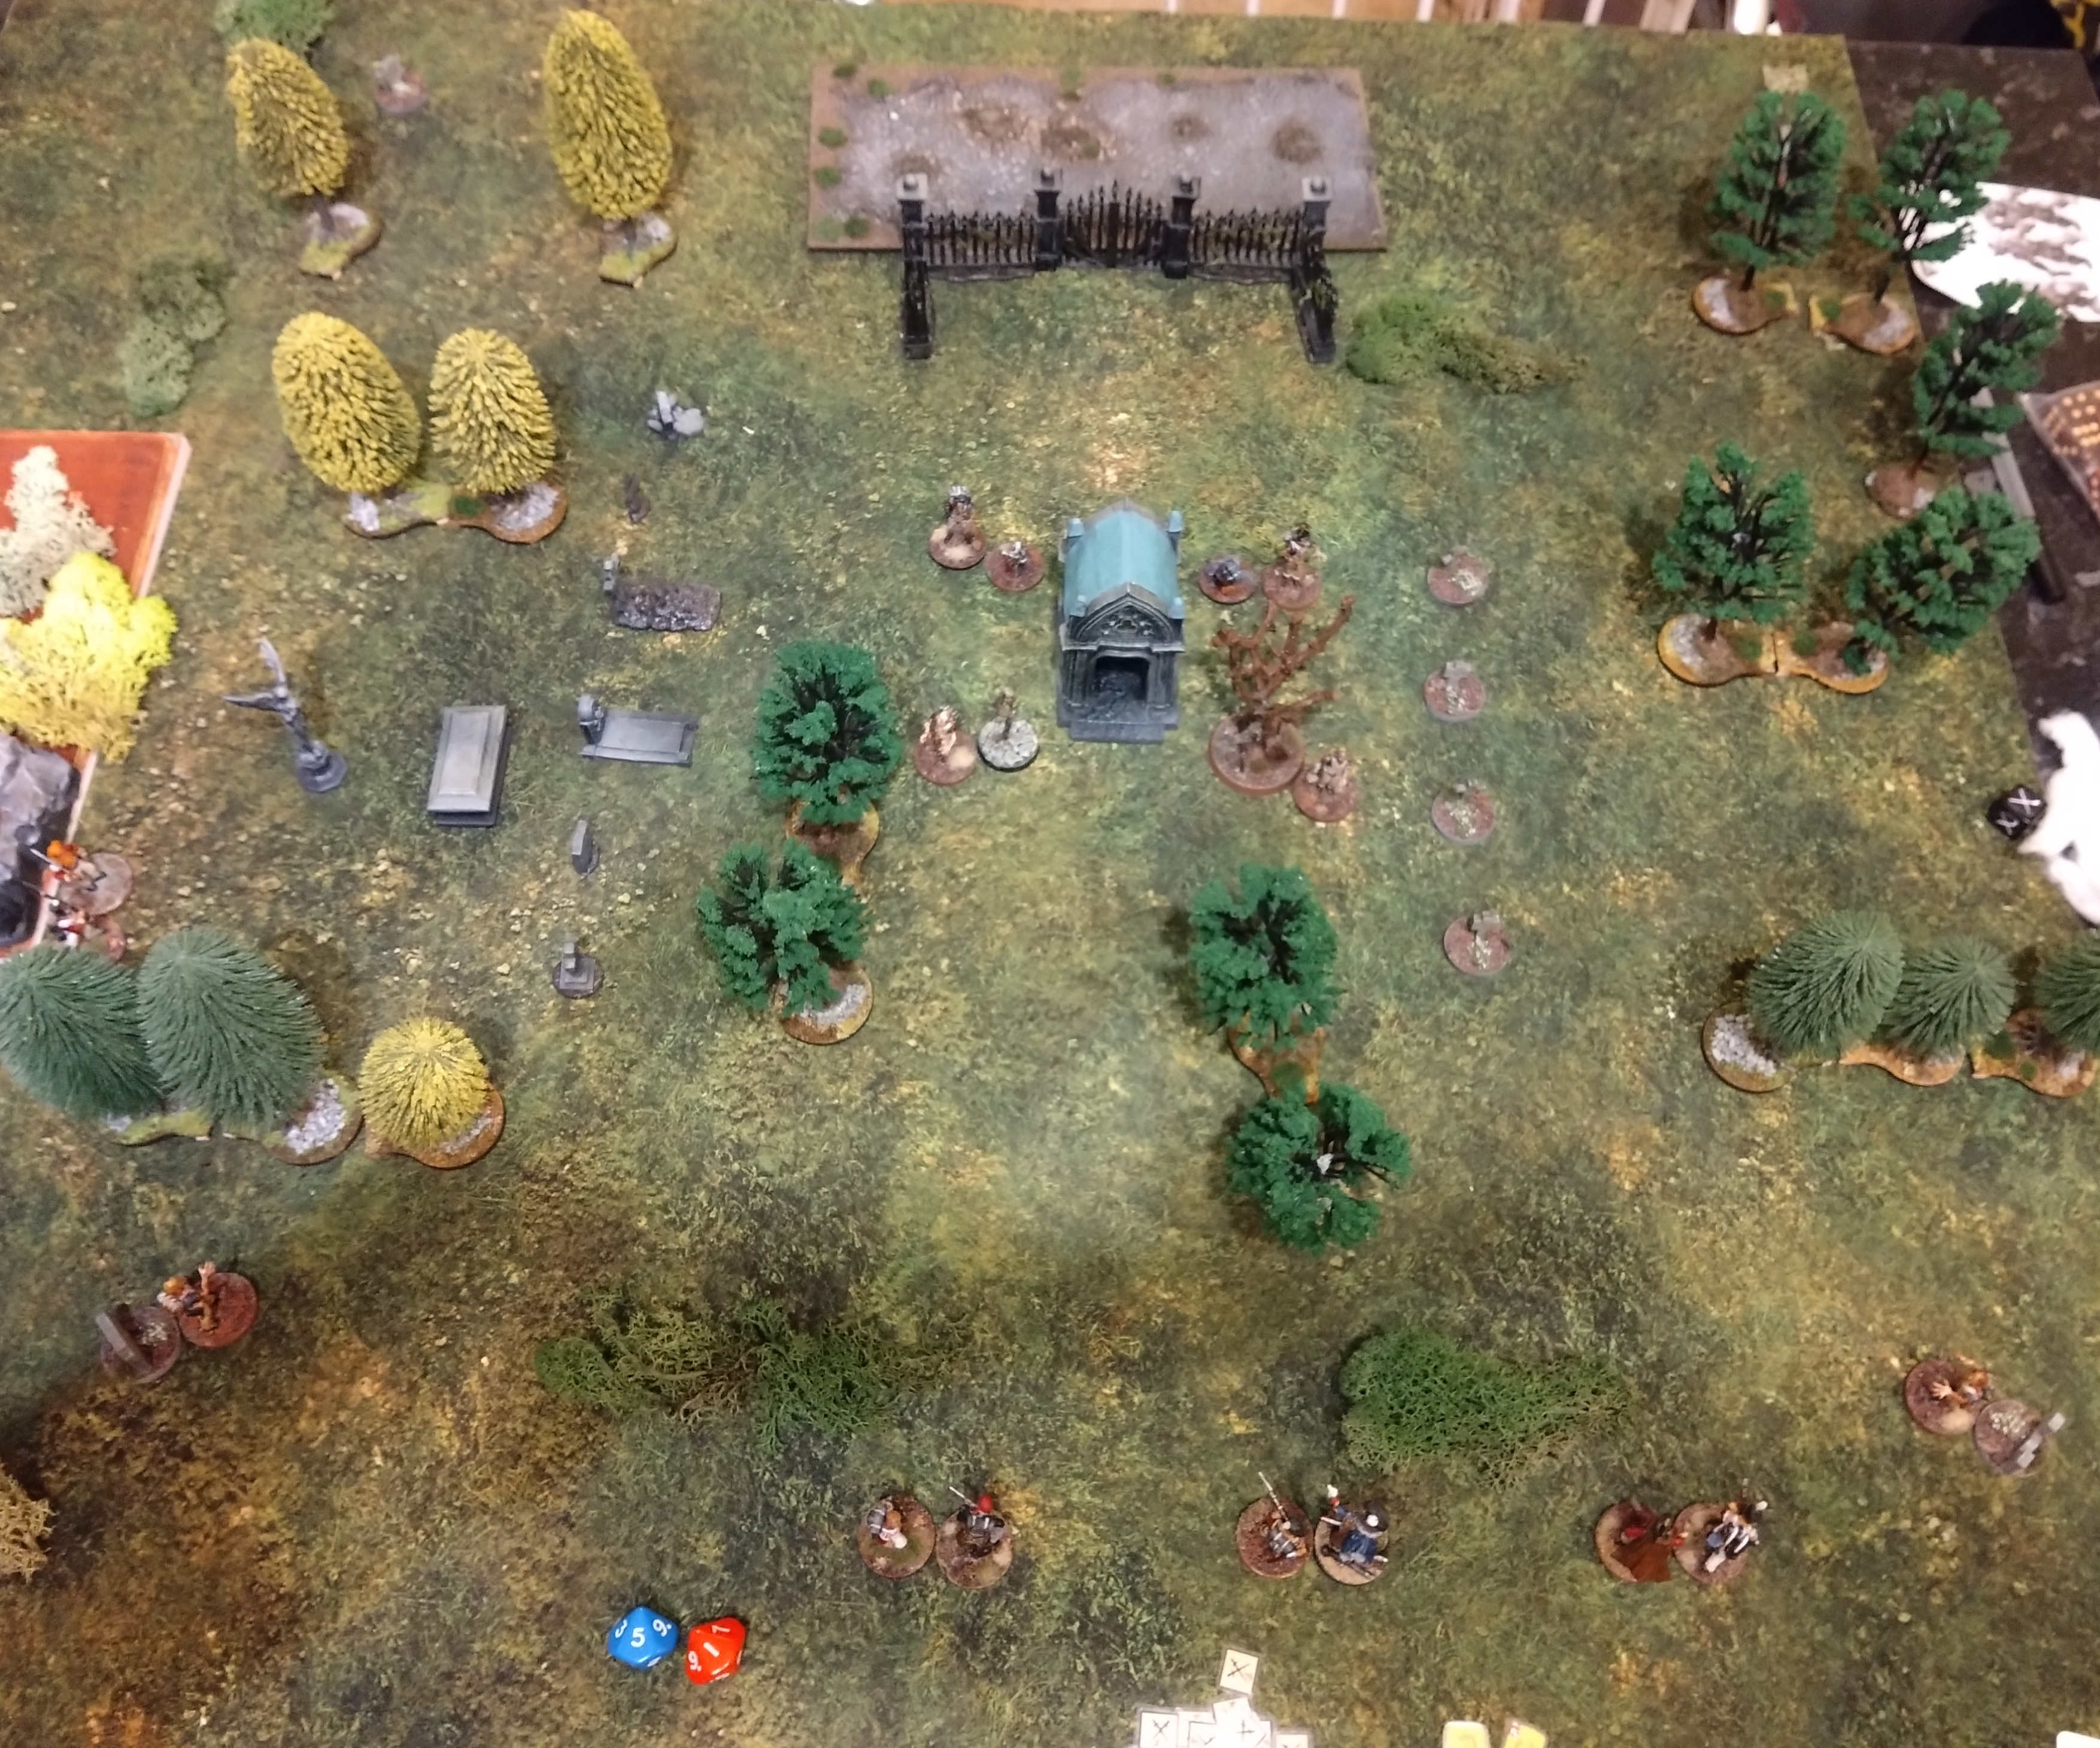 I chose to separate the players into twos and aim to thin out the revenants.
 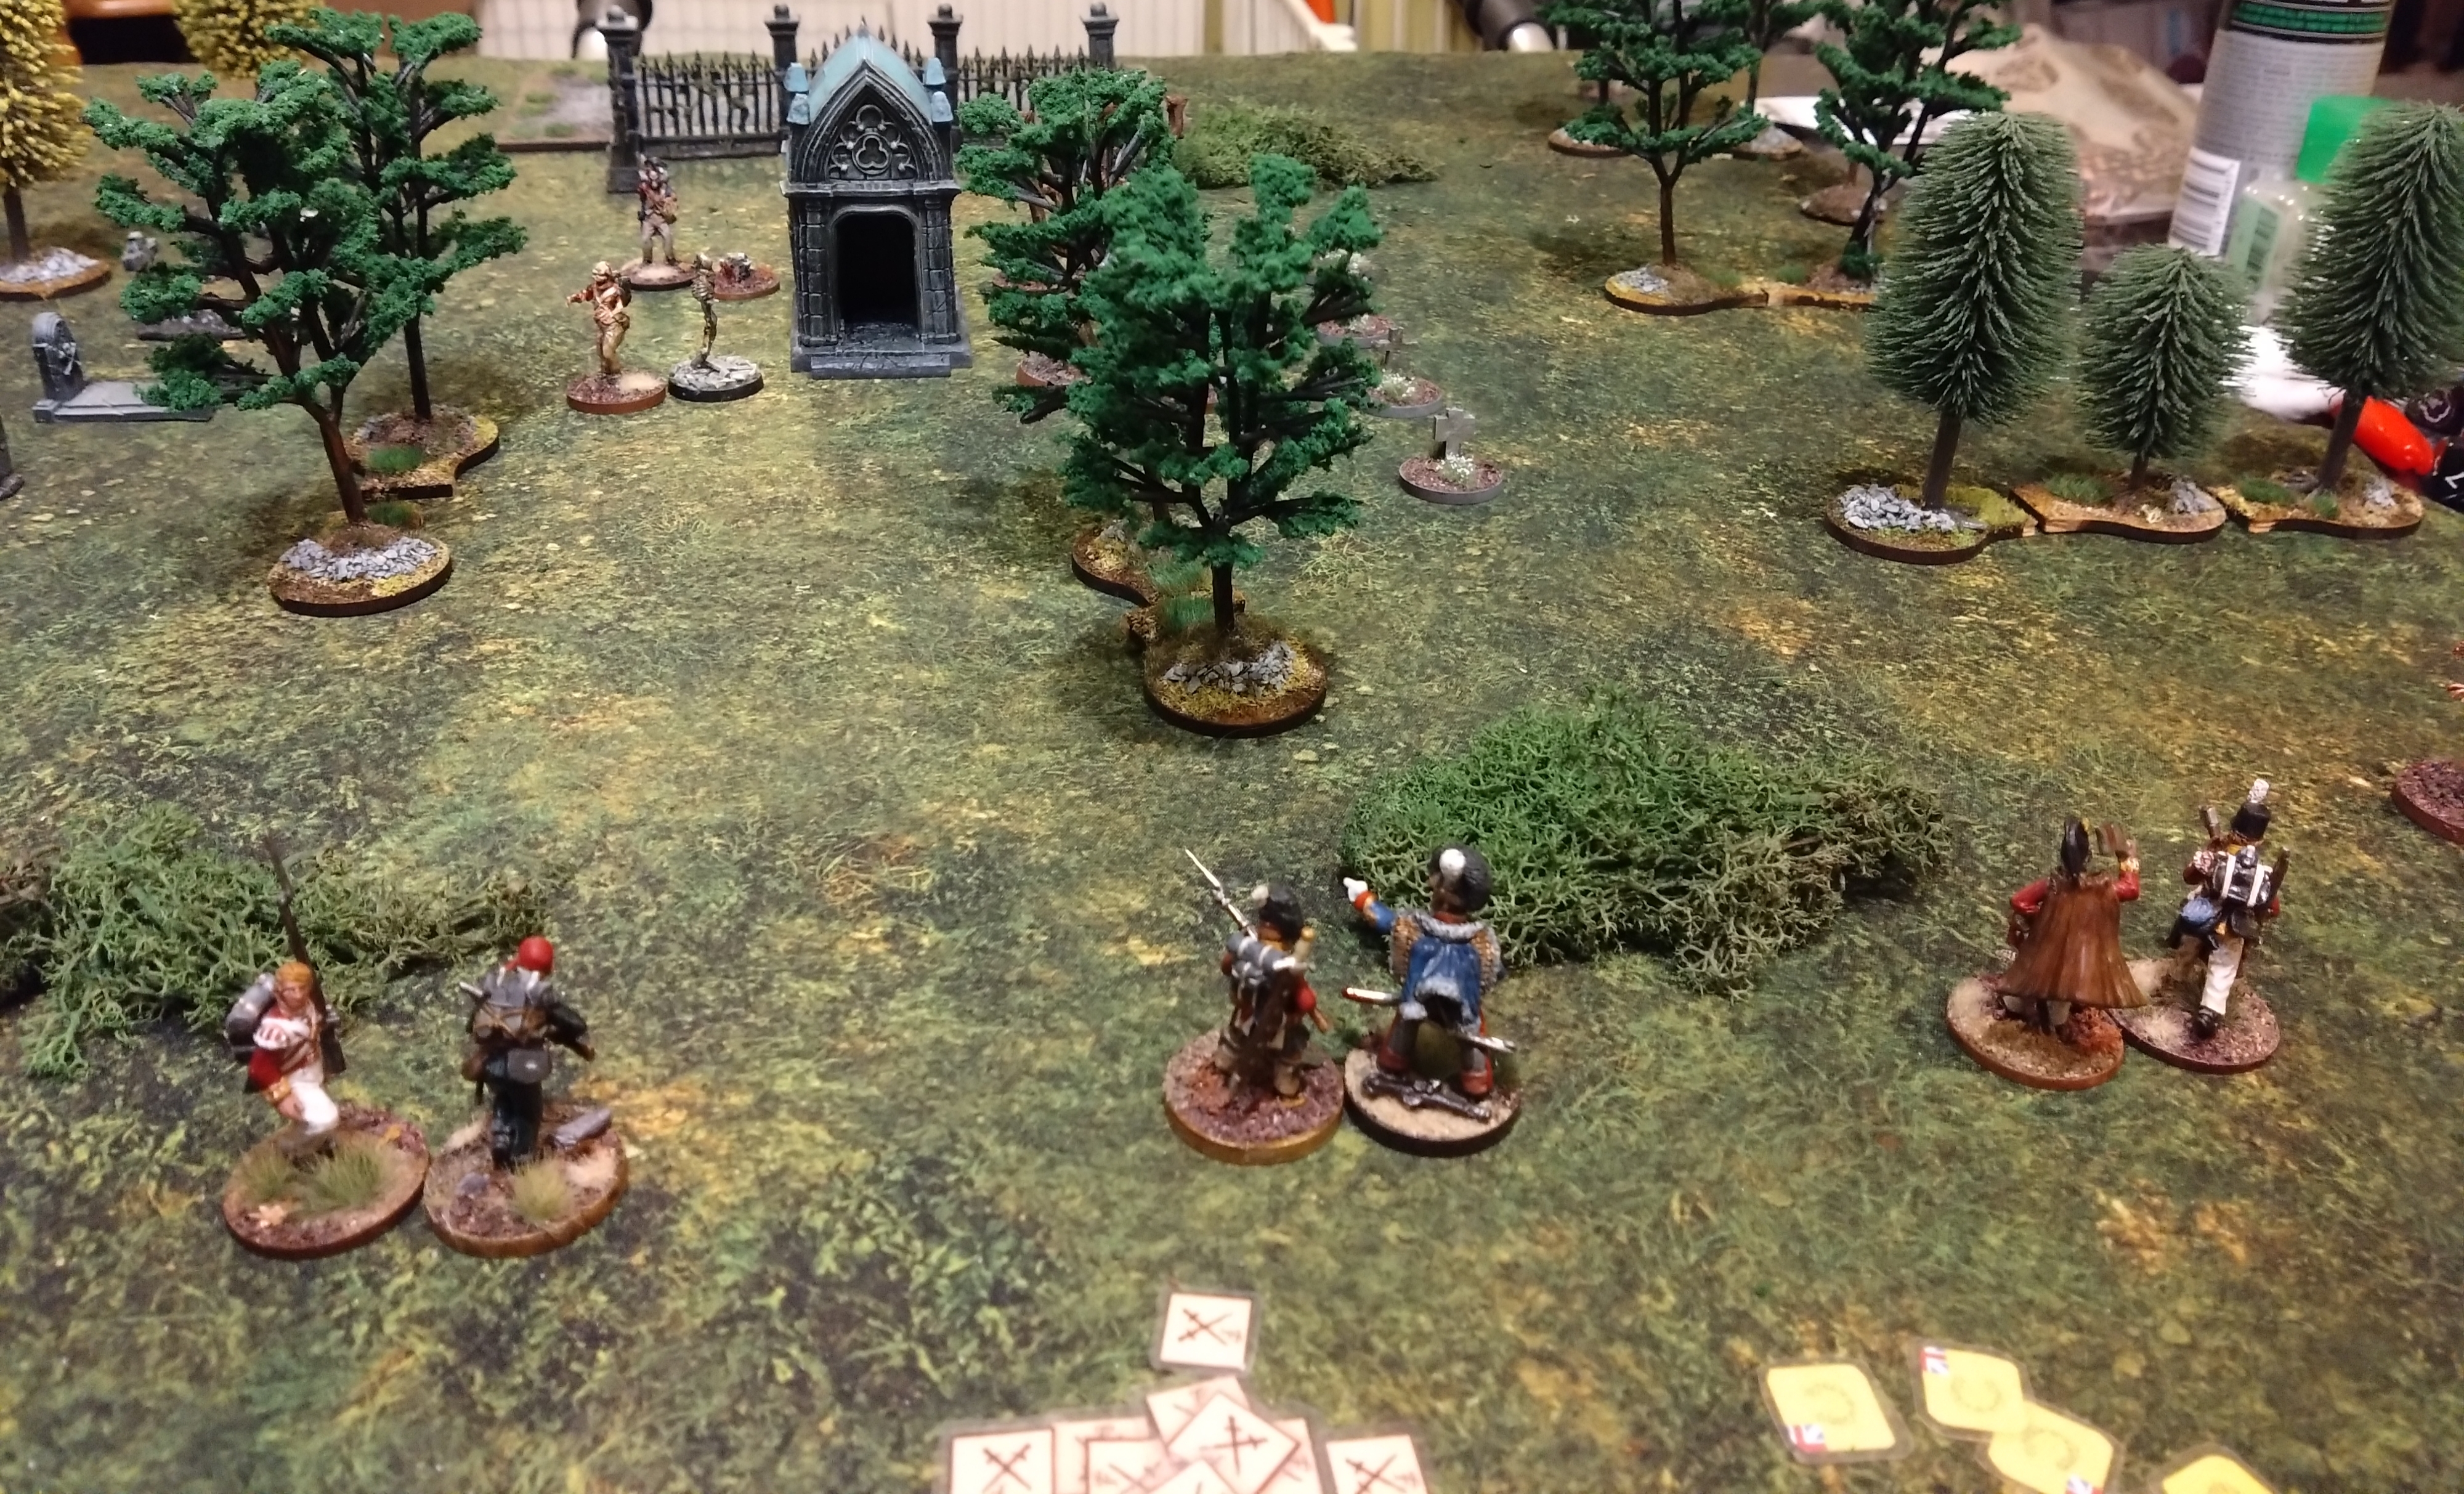 I like this layout. The graveyard terrain and my MDF off cut gravestones work out fine and set the scene.
 The clue markers are close together around the centre mausoleum, so I might need to up the danger by adding more revenants.
Scenario (solo) – The Little French Drummer Boy.
Turn 1
First half of the unit activates…
Rifleman Thomas Hatchett advances let’s off a shot from his rifle and the ball hits the nearest revenant.
Highlander Alistair Home advances and ploughs a shot into the same revenant, wavers but doesn’t go down.
Sapper Arthur Jobe lets off a shot with his musket, sees the beast recoil, wounded heavily by the ball, and Jobe rashly charges forward and kills the walking corpse with his axe.
Private Horatio Craven lets off a shot and misses.
Monster phase…
The smelly skellybobs shamble but don’t get into contact.
Second half…
Artillerist Gordon Peal advances, fires his pistol and kills the revenant that Hatchett and Alistair had managed to wound moments earlier.
Private Joseph Bloggs, fires and misses a revenant to the south and moves forward towards the revenants.
Ensign Brock Godalming fires at the same revenant emerging from the South but misses and calmly reloads
Doctor Herbert Bombay sprints towards danger, looking in the gloom for the drummer boy. Something about this mission has stirred the fatherly side in him and he wants to find the drummer boy.
End phase
Roll for an extra revenant, less than 6+ rolled so nothing appears from the most.
 Jobe fires, wounds and charges and kills a revenant in a charge that his Highlander comrade Alistair would have been proud of.
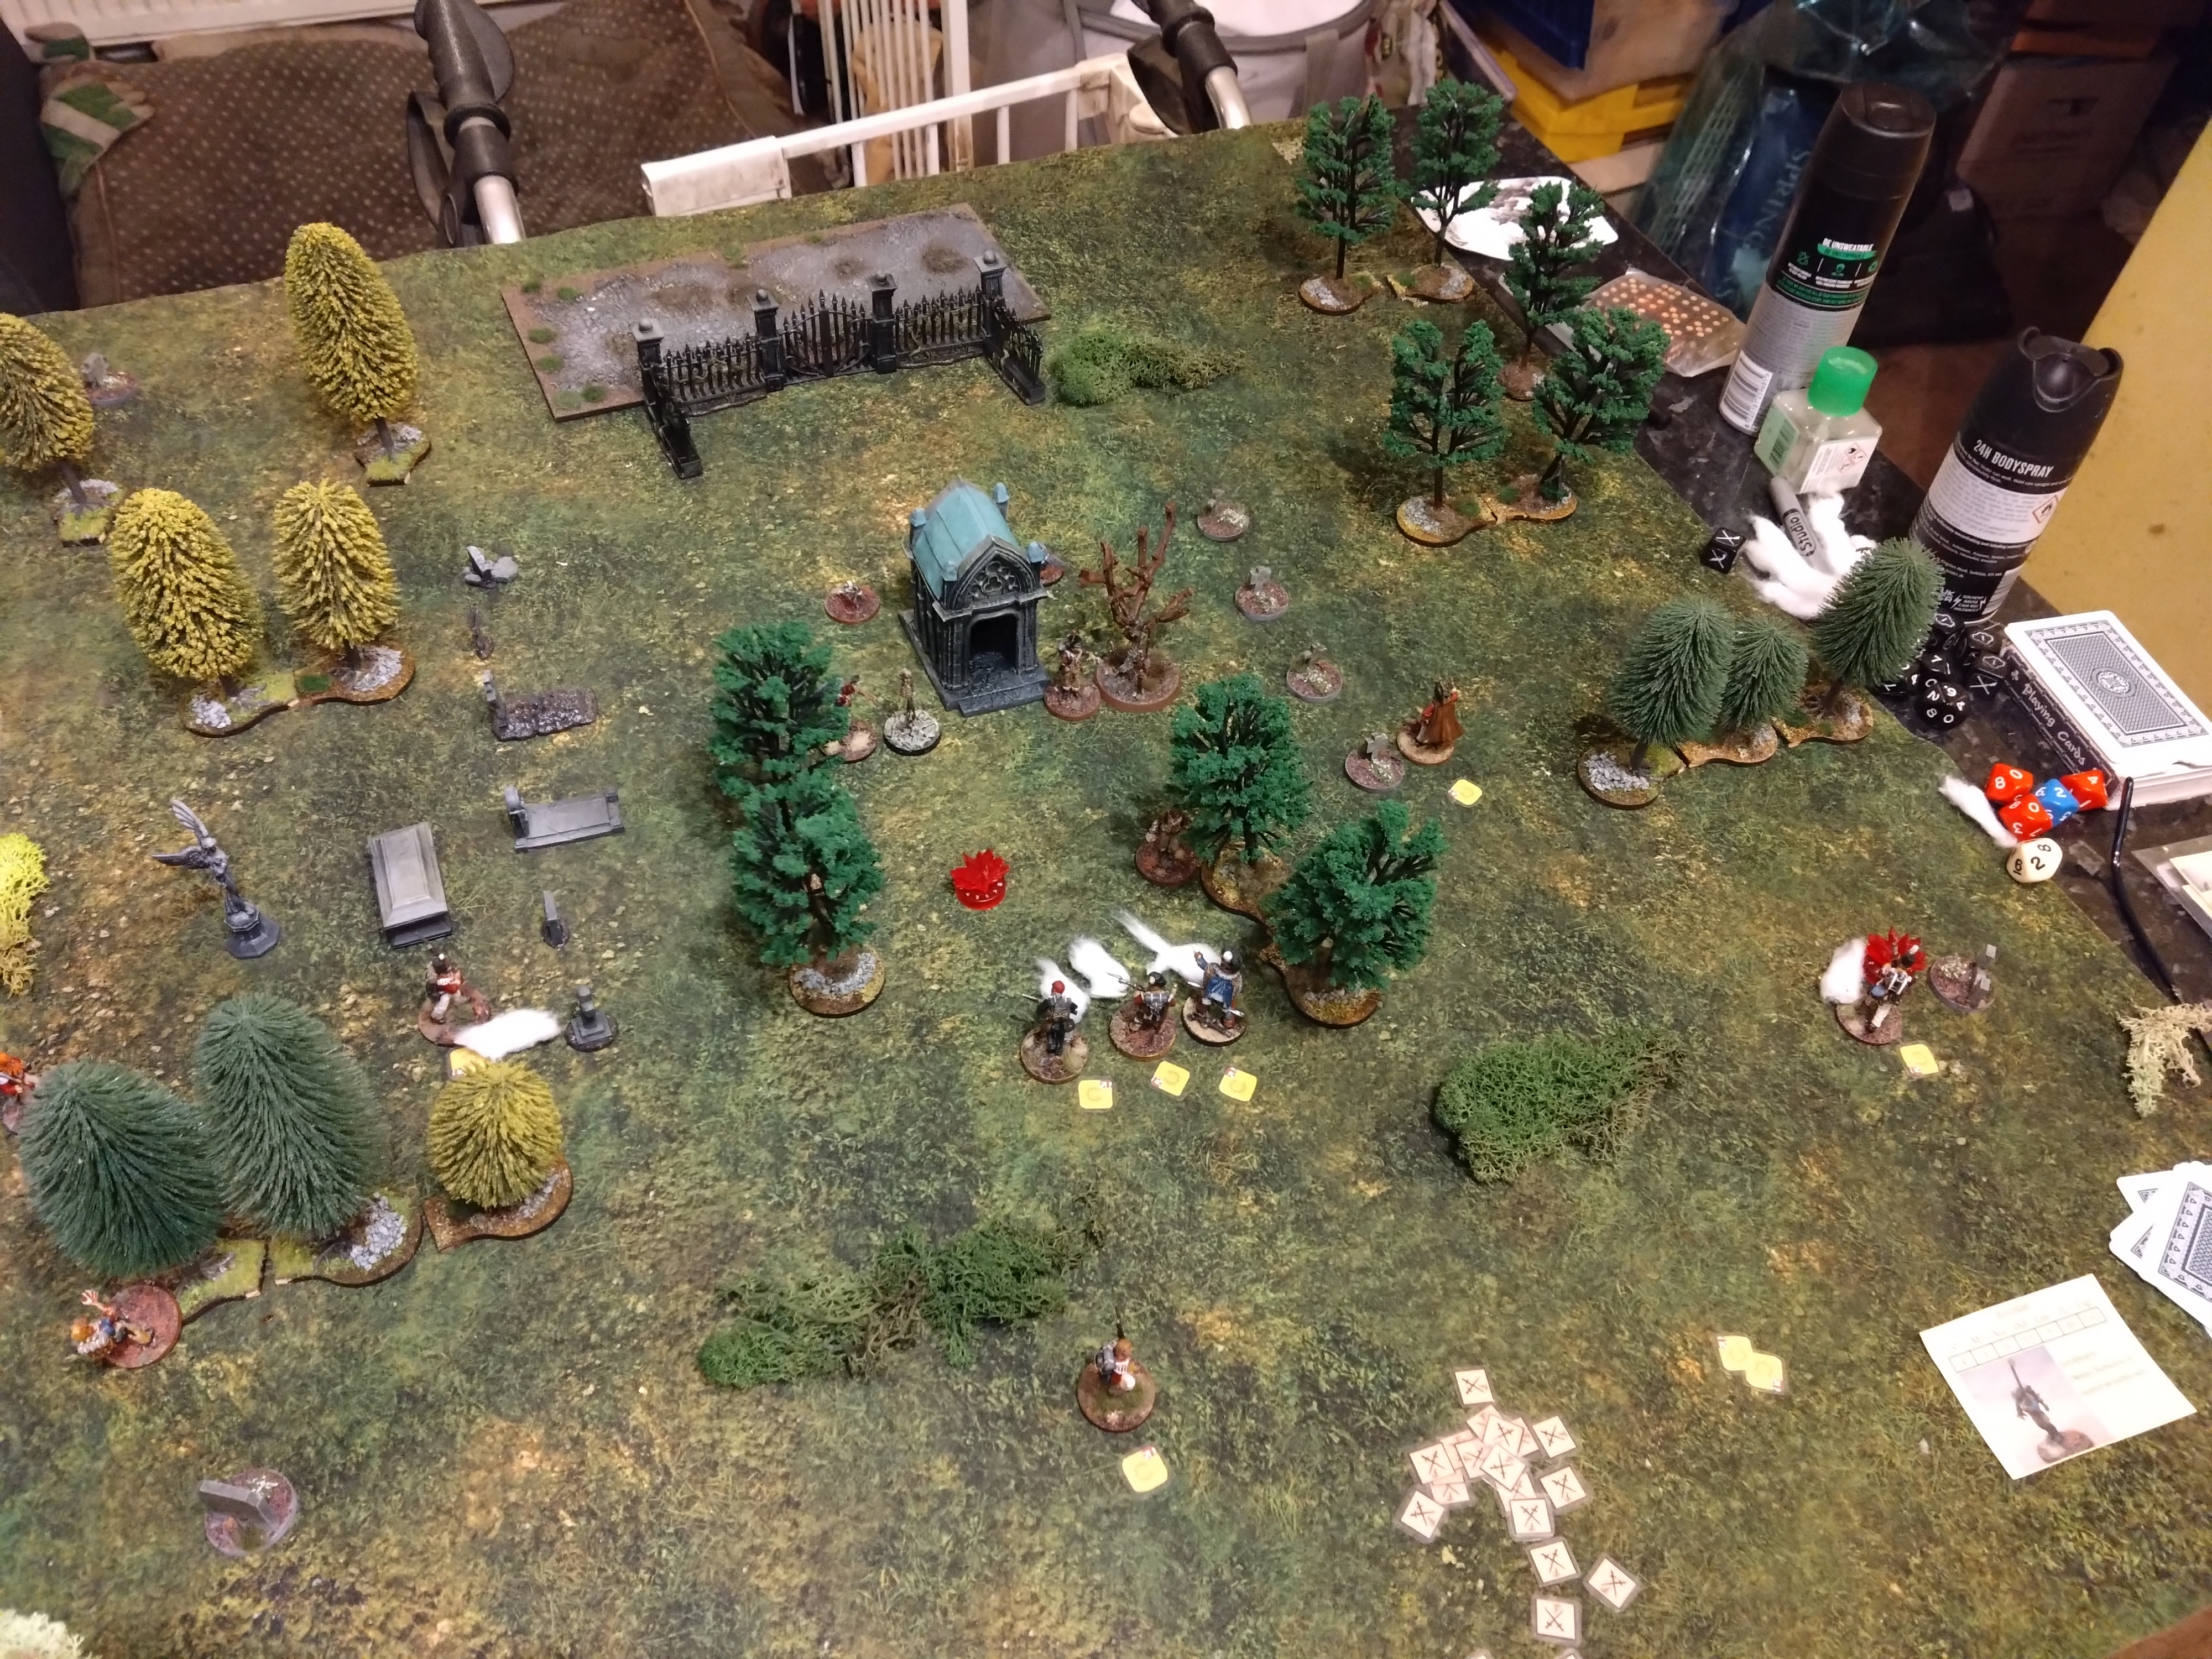
Turn 2
First half of the unit activates…
Godalming fires, misses and charges at the revenant sword drawn… But he fails to fell the beast, the revenant strikes back but fails to wound the wild eyed officer.
Doc fires his pistol, wounds the nearest revenant and reloads.
Craven advances up next to Alistair and Hatchett and opens fire at the nearest revenant and misses.
Peal reloads fires and misses the same revenant, seemingly living a charmed after life.
Monster phase…
The wounded revanent that the doc shot and wounded didn’t quite shamble fast enough to exact his revenge.
Revenant from the south attacks Godalming but the Ensign swats the grasping hands aside. Godalming strike backs and hacks a chunk out of the moaning beast but it keeps coming.
A revenant attacks Peal but he fends the fiend off. Peal strikes back but only gets a maniacal chuckle of a moan as a response.
Second half…
Jobe advances towards the doctor and reloads.
Alistair reloads, fires and misses the revenant at point blank range and alarmingly close.
Hatchett reloads, fires and misses with his rifle. Whether it’s the gloom, or the tension of the situation, but marksmanship doesn’t seem to be the call of the hour.
Bloggs reloads, fires and hits the nearest revenant hard in the shoulder.
End of turn
A revenant arrives top right gravestone.
Turn 3
First half of the unit activates…
Doc sprints to hunt for the boy, ignoring the moans of the risen dead around him.
Jobe fires, wounds and charges just like before, but this time the creature avoids the swinging axe. The revenant lashes out at Jobe’s head and stunning the sapper into silence (mitigated damage down to 2 H with a power dice else he wound have been downed.)
Peal advances towards the wounded Jobe and puts himself between the combatants and reloads his pistol.
Hatchett reloads, fires and misses.
Monster phase…
A revenant attacks Godalming with a bayonet, but though he’s wounded the worst of the blow strikes a hip flask (mitigated wound to drop to 11 H instead of far lower). Godalming rallies quickly, swipes the bayonet out of his assailants hand and cuts the beasts head in half. (Critical 10 on the skill dice.)
Revenant attacks Hatchett, fails to wound the rifleman and Hatchett takes his sword bayonet and removes the beasts head from its shoulders.
The revenant, seemingly enraged by his earlier wound lashes out at Peal and almost floors the artillerist. (Down to 1 H) in his wounded state his strike back fails to wound the shambler.
A revenant attacks Alistair, fails to wound the Scot, but Alistair slips and his strike back lacks precision and power.
Second half…
Craven advances to a dull leather bound clue in the grass… a french phrase book?!
Bloggs advances and reloads, looking to support his comrades.
Godalming wipes the revenant brains from his sword and sprints up towards Hatchett and Alistair where the fighting is fiercest.
Alistair reloads, fires and point blank range and rocks the nearest revenant with a well placed musketball… And it’s arm fell off but kept shambling.
End of turn…
No new revenant. (Less than 6+)

Prep for the scenario.
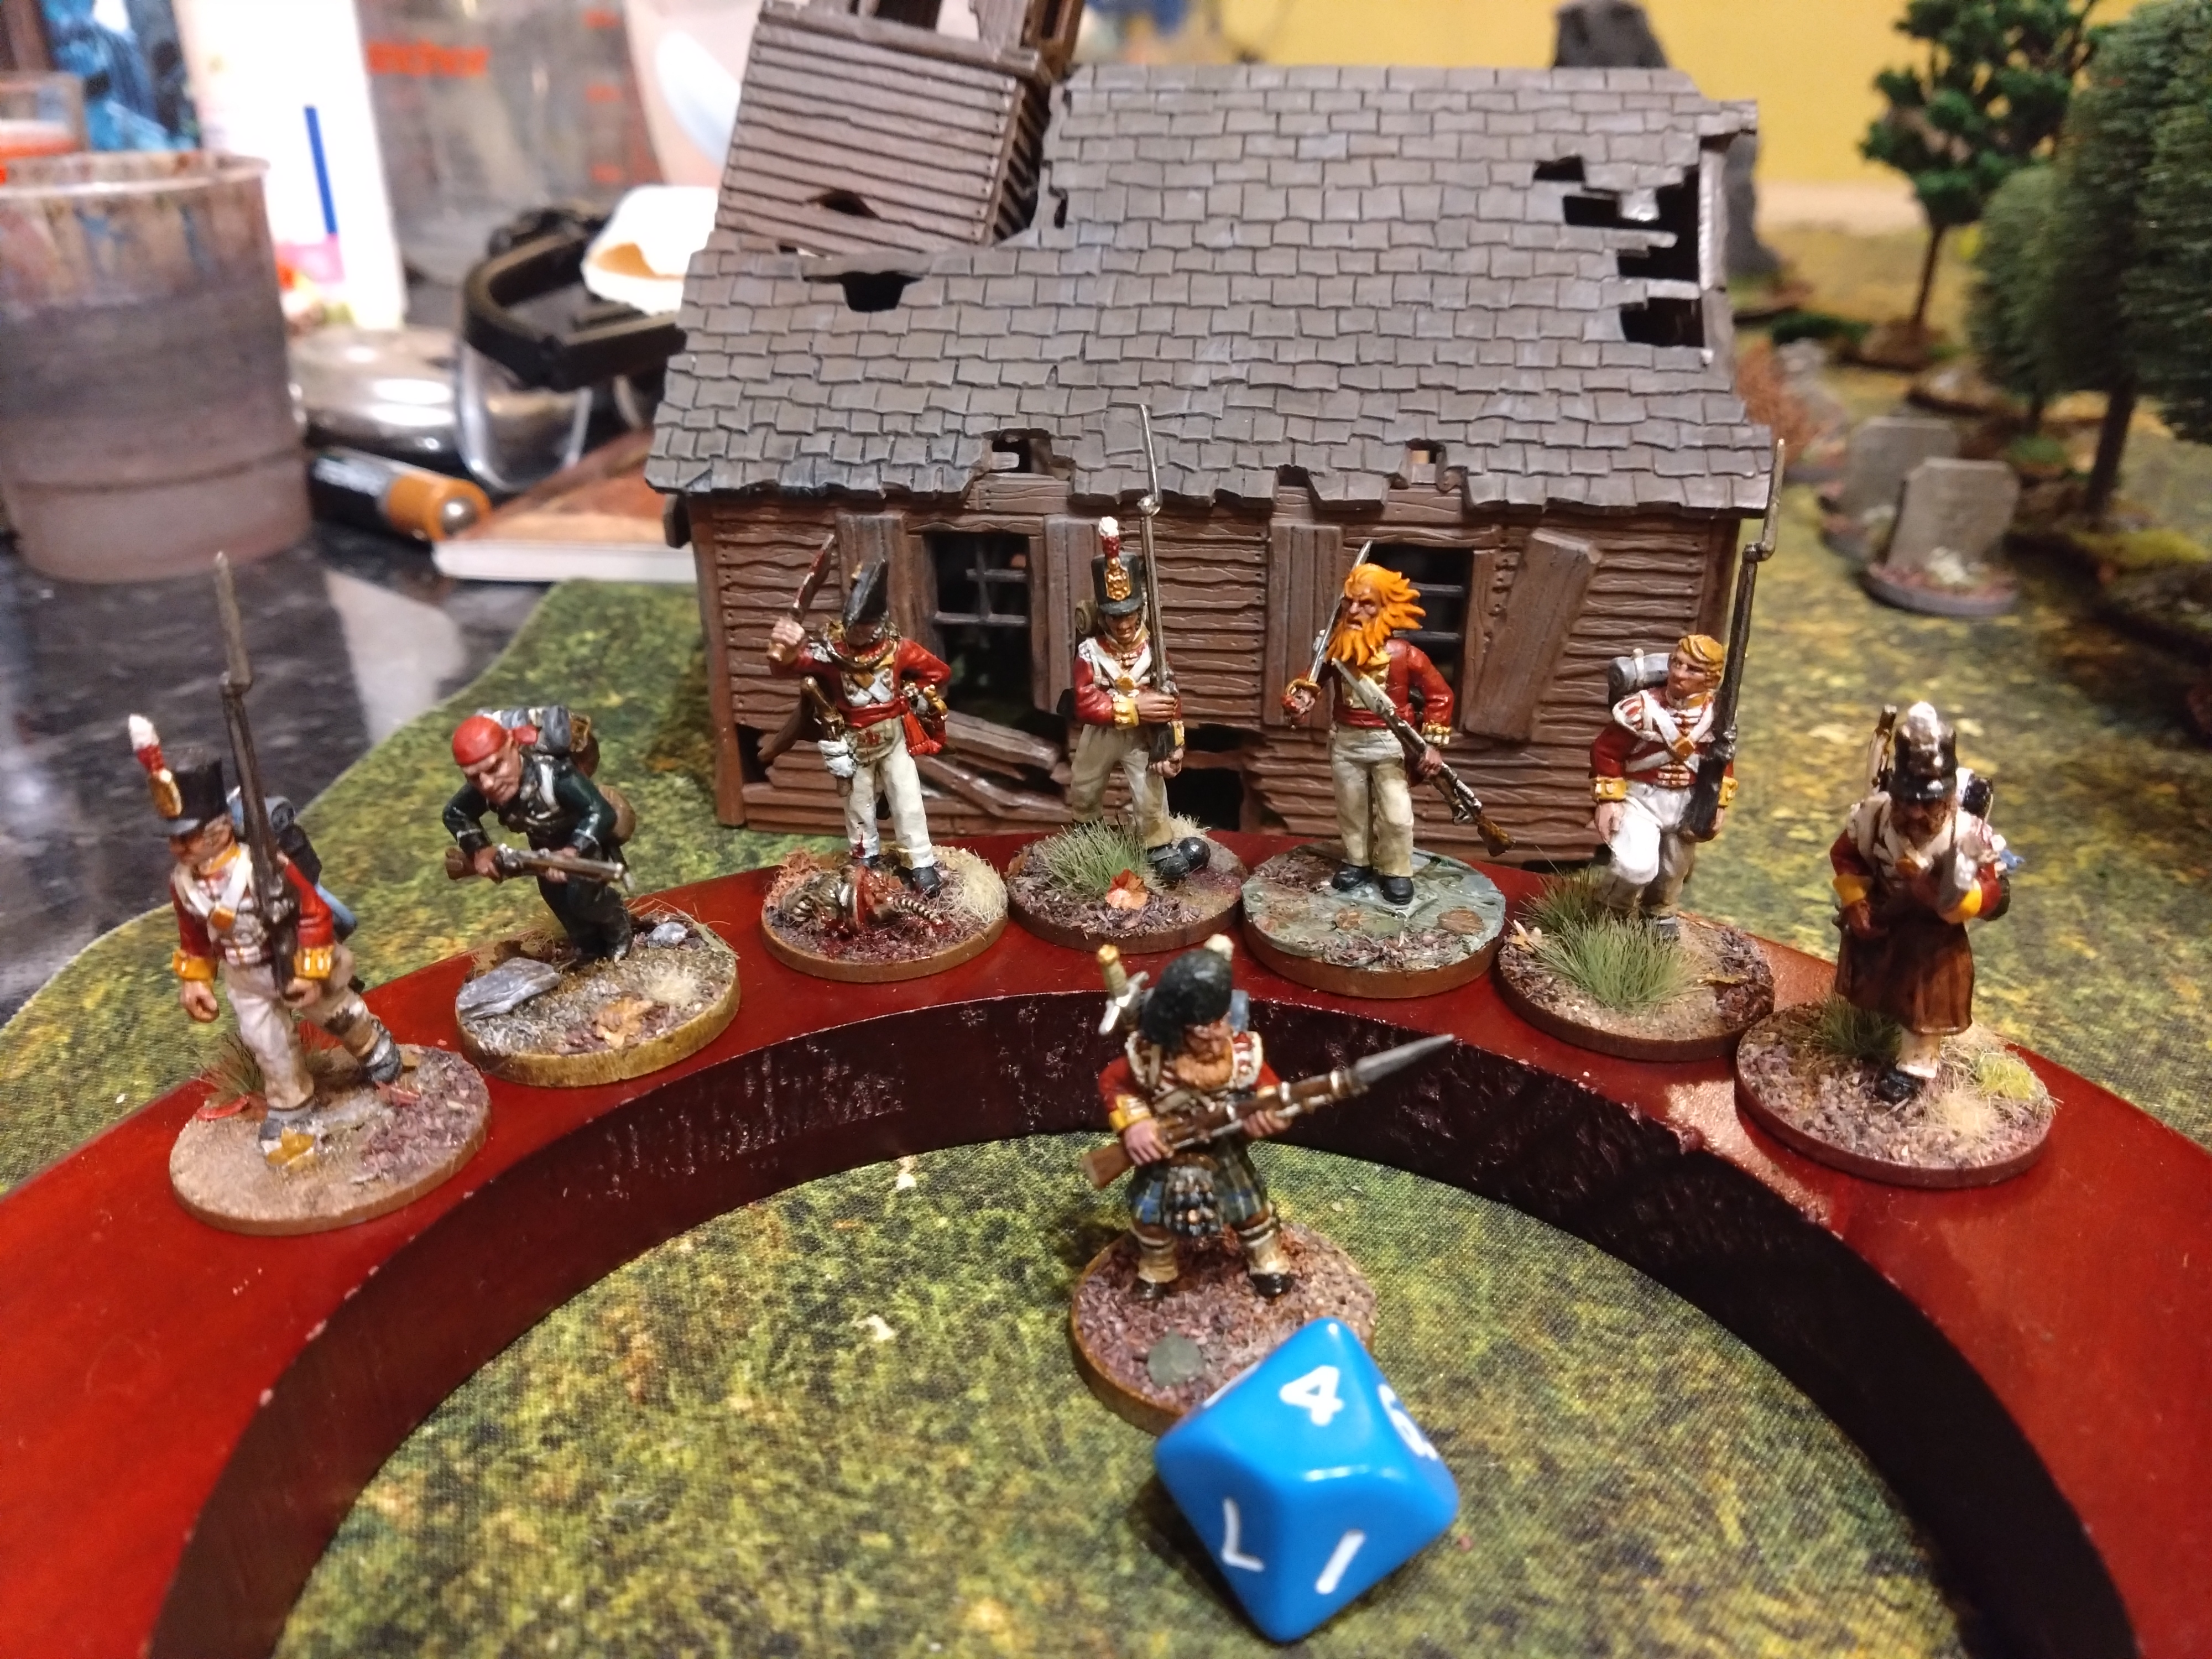
 Mantic Games graveyard terrain crate seemed to fit the bill for this scenario.
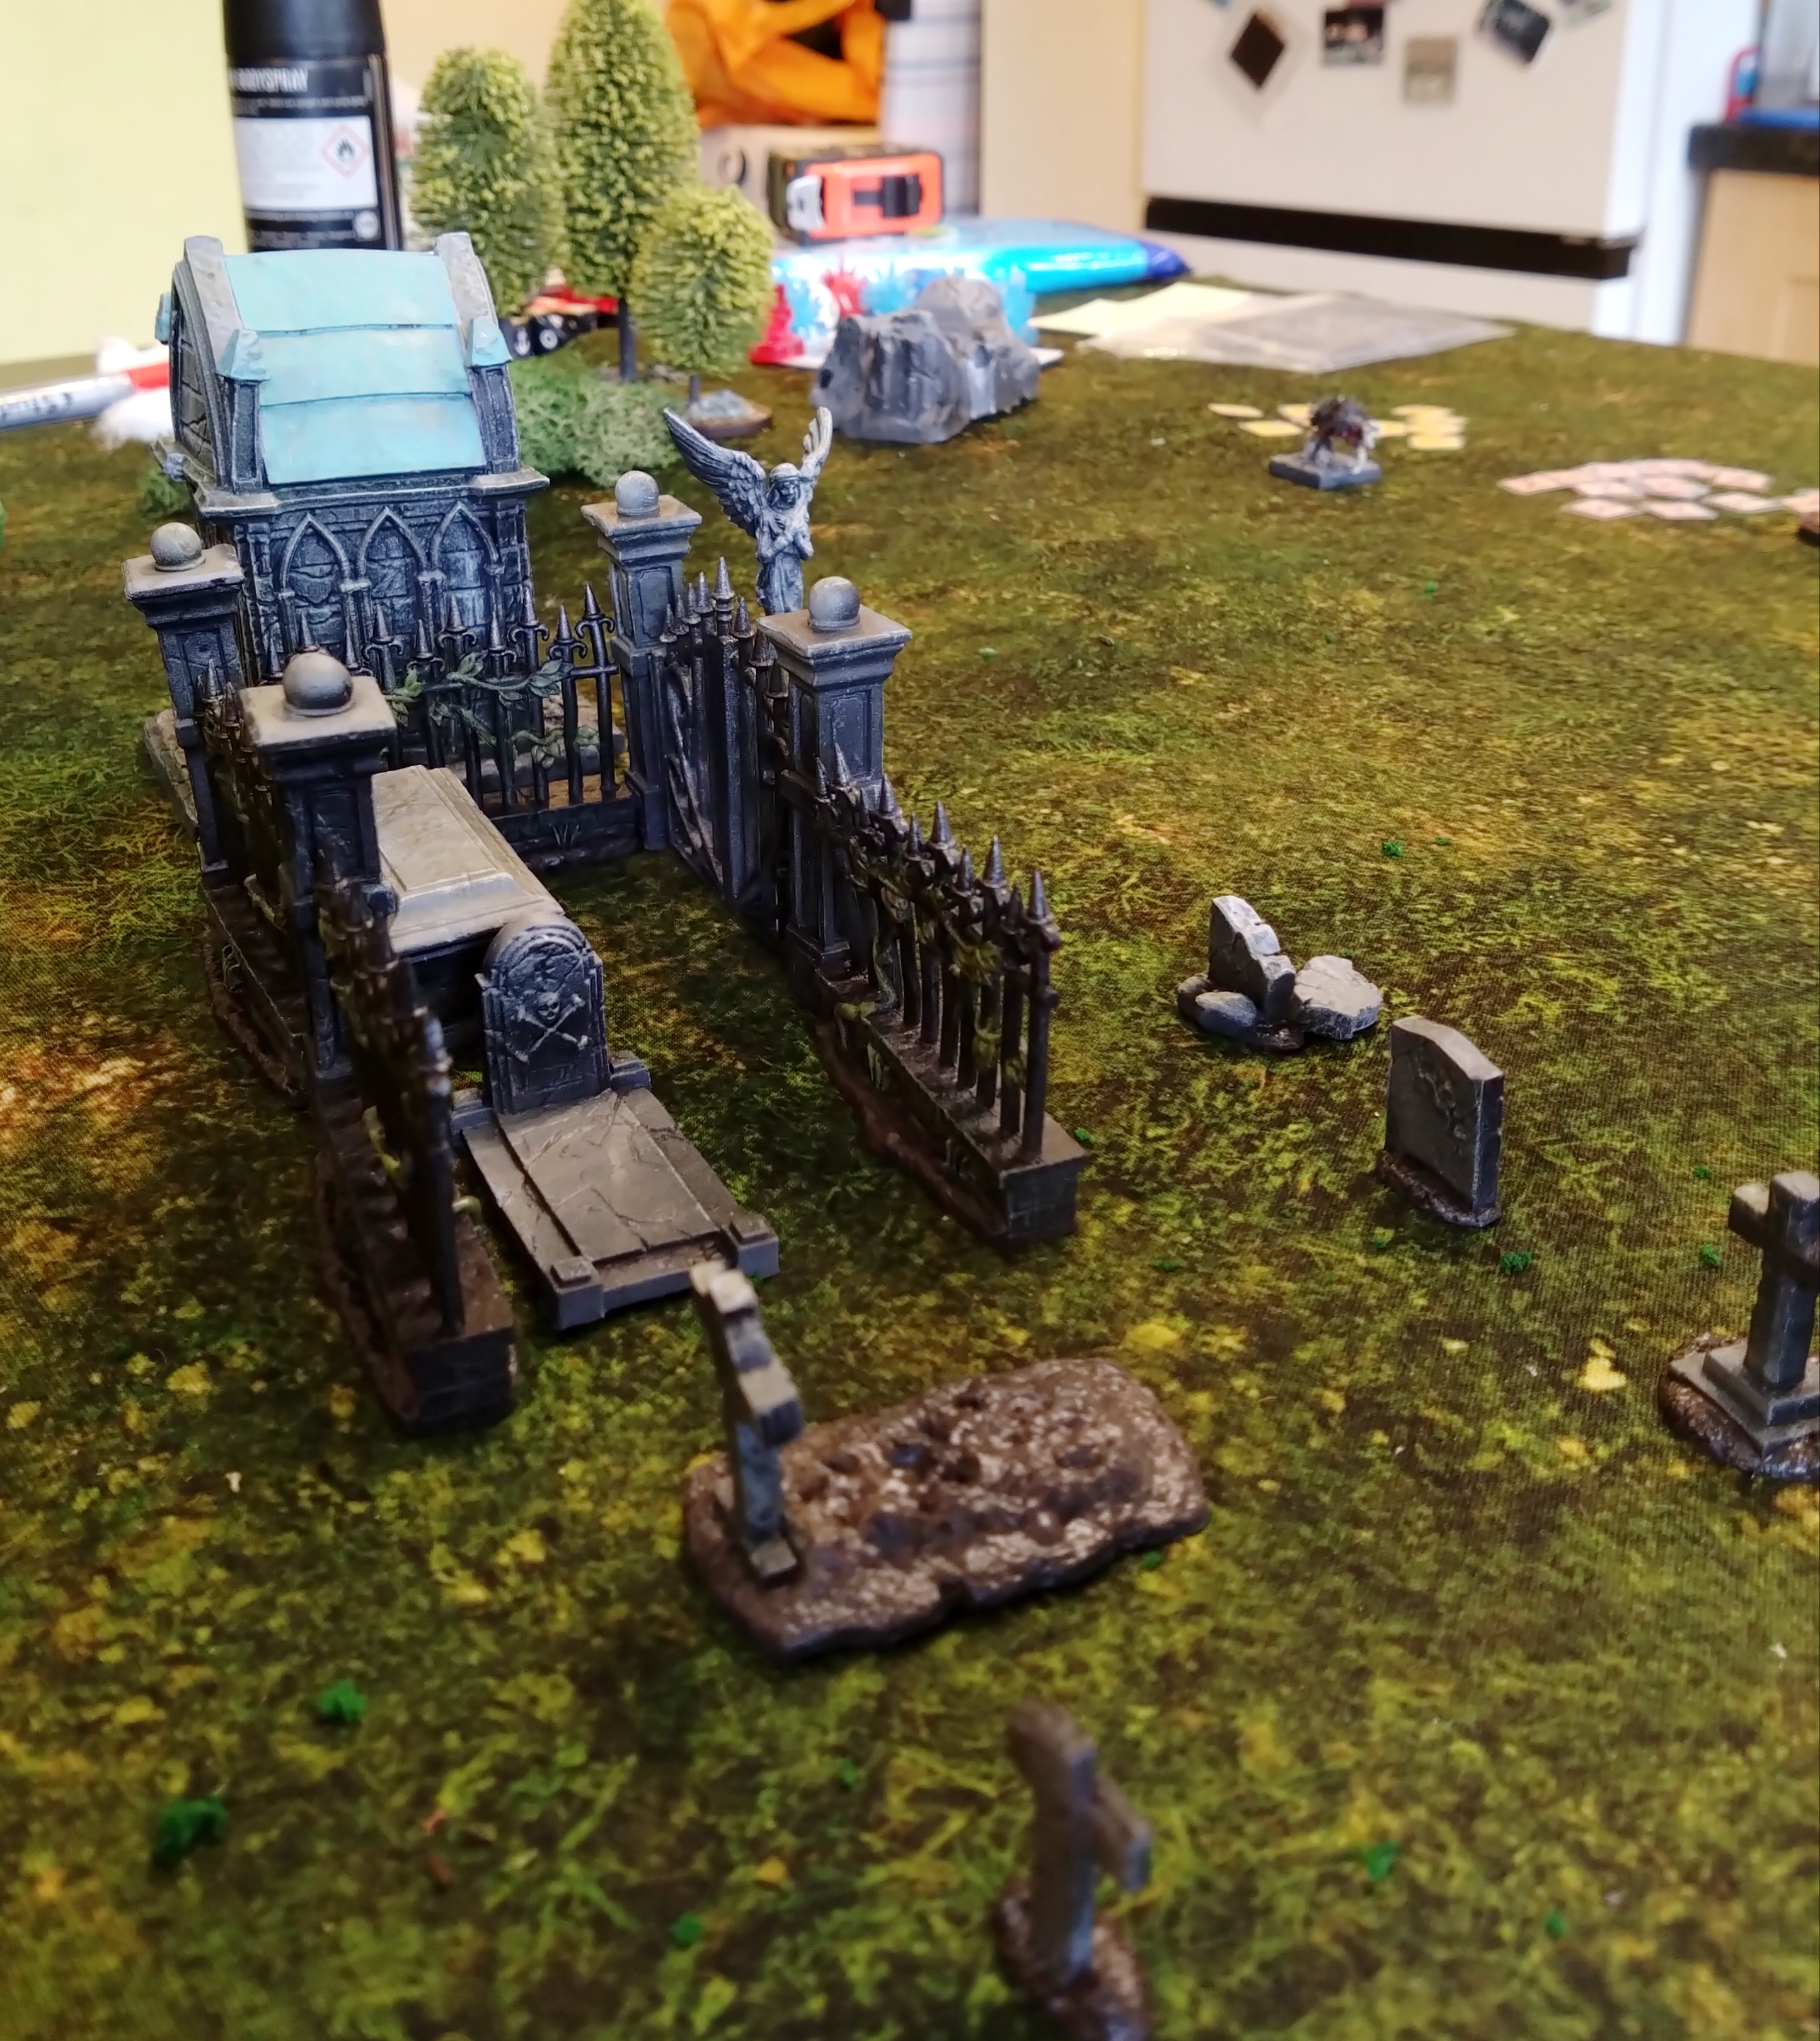 Nihilakh Oxide on the roof. Black prime and white drybrush did most of the work. Some Dryad Bark and Athonian Camoshade here and there but a heavy drybrushing cured most ills.
 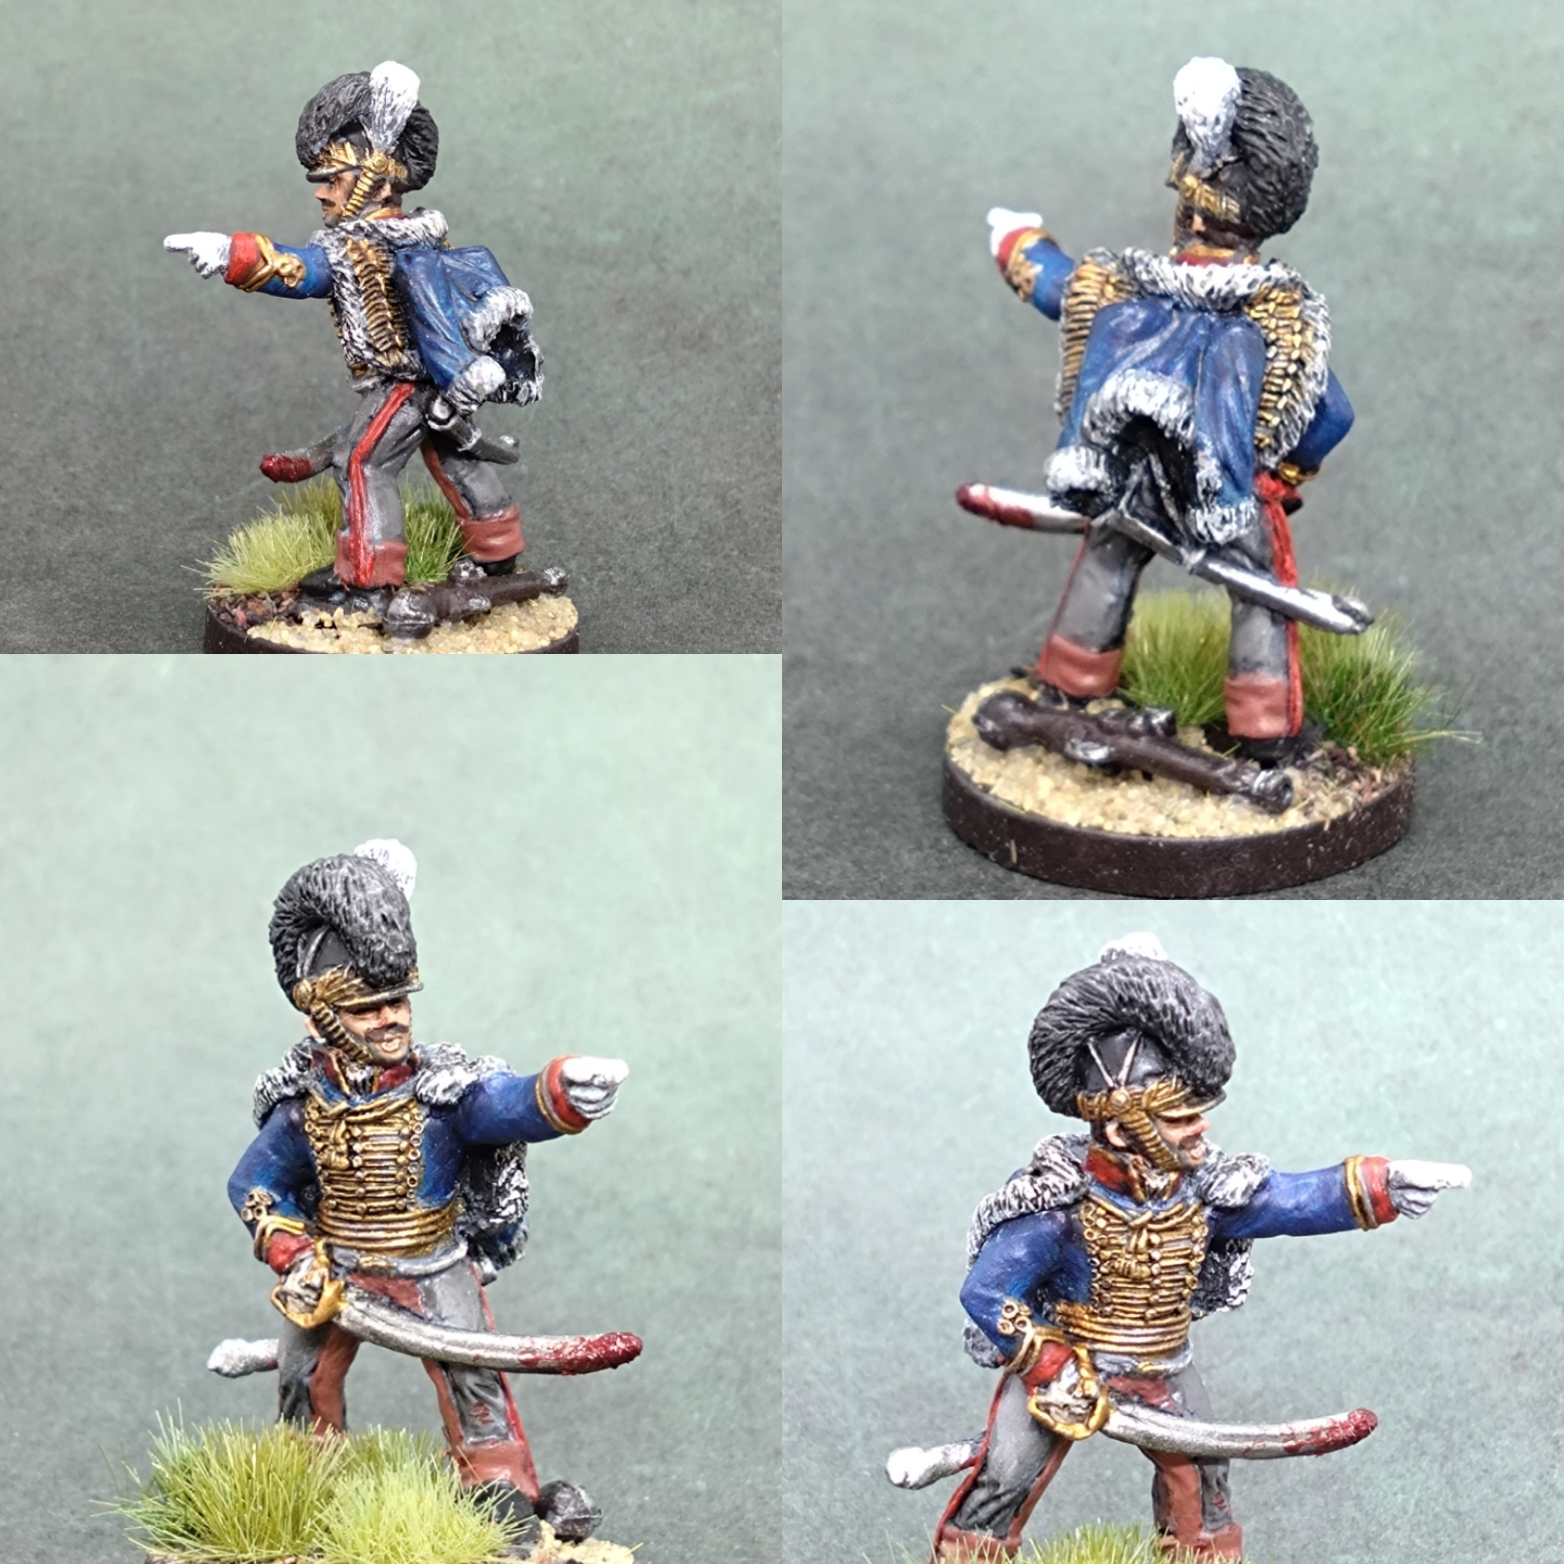 With Anderson honourably discharged through medical issues I needed a replacement. In walks Gordon Peal, ringing the changes, an Artillerist no less. Surprisingly only 10pts to recruit just like Anderson, just a pistol and sword instead of a musket.
The Little French Drummer Boy
 Based on the movie and video game troupe of people surviving zombie bites being hunted, and based on this mini, I wrote a solo scenario.
Solo campaign prologue
The prologue… It came to pass…
Godalming forces his men to march hard and they finally bump into the picket line of the main army and soon find themselves at a fire in the tent line to crowd around and finally rest.
An officer rides up on the unit and demands to know where their officer is. Godalming, tired and hungry and prone to spats of insubordination ignored the man and began sharing his meagre rations with his men. The man dismounts and shouts at Godalming to give his report.
“I have been out in the wilds to the south doing God’s Own Work. That work is classified and my men are weary. What would you have me share this late in the day?”
* “I know you Silver Bayonet types feel you are above the chain of command, but you sir are not. You are a mere Ensign and I am an Aide-de-camp and you will come with me to see The Field Marshall immediately.”
“Nosey you say?!”
The Aide bridled at the nickname for The Marquis of Wellington being used so flippantly… but Godalming cuts him off.
“Well why didn’t you say so? Sir Arthur and I have plenty to discuss. Lay on Macduff…”
The Aide, finally getting his way, but still cross, climbs back into his saddle and offers hand to help Godalming up to ride with him. Godalming pat’s the hand away.
“I am wounded, dirty and tired, but I’ll be buggered before I nestle my nethers to your arse on the back of that nag. I’ll walk to wherever I am needed with as much dignity as I can muster but I won’t ride sidesaddle with you… Sir.”
His men tried to hide their amusement but a badly caught snigger was heard by the Aide who spun around fuming… but he couldn’t tell who made the sound.
* “The Field Marshall is waiting a 5 minute ride to the North. I can’t wait around…”
“Then find me a horse! And a chef. And a wench would be nice.”
His men openly laughed at the last jest until suddenly they all jumped to attention in horror because The Field Marshal and a handful of high ranking officers rode into view, illuminated by the fire.
** “Jones!!? Is the good Ensign ready to receive his orders? I thought to ride to you once I found out he was back…”
* “I am afraid that Ensign Godalming has been less than compliant…”
Godalming finally couldn’t stand the pain of is wounded leg (a wicked musket butt blow from a bandit in their recent engagement) and fell to one knee. Doctor Bombay rushed forward to help his officer.
** “Damn your eyes Jones, can you not see the man’s injured!? Ensign Godalming?! You’re to rest and report to me at sunrise. Doctor?! Work your magic and I expect to see you both in the morning. Jones you really must use more common sense when carrying out my orders man. Come along.”
Jones tried to hide his embarrassment and straighted himself and yanked his reins to fall in line as the group of officers rode away.
The next morning Godalming and Doctor Bombay waited outside the tent until summoned. The pair were offered tea which they turned down and awaited their orders.
** “Godalming, you’re the sort of man that will rid me of this Havestman menace and I thank you for it, but if you could just learn a touch of civility around my staff it would be appreciated.”
“You have my respect and loyalty Sir. I will try to be more civil Sir.”
The Field Marshall looked at him sceptically for a moment, not convinced by the declaration, but then moved on.
** “The treasures and intel you unearthed is being looked at more closely by those best suited to such occult research, but I need you to head out as soon as you’re fit.”
Godalming hid a wince of pain that raced through his leg as best he could; his sense of duty driving him to get back to work.
“I can march this afternoon Sir.”
** “Capital. Excellent. Now the mission is this. Find a French drummer boy in this forest and return him back here to camp.”
The Field Marshall placed his finger on the map in front of him and the Doctor leant forward and appraised where he had placed the finger. Technically behind French lines.
“Permission to ask for a reason behind the orders Sir?”
** “Granted on this occasion.”
“What’s special about this drummer boy? Sir.”
** “There’s a chance that he has been bitten by a revenant and did not turn into a revenant or decay and die like everyone else that has received a bite of this kind. If there’s something special about this child we want to discover what it is.”
“There’s a lot of drummer boys over yonder Sir. What will make him stand out?”
** “Well his unit was killed by a rising of revenants and he and his regimental mascot are wondering these woods. He’s lost. Our spies would have picked him up but had to leave under pressure from enemy patrols and revenants roaming the woods. Puppy and the boy are inseparable by all accounts.”
“Won’t the revenants kill him or the French find him before we get there?”
** “There is a risk of that, Yes. We would rather we find this potential weapon against the undead than the enemy, but we need someone as experienced and skilled as your men and you to execute the rescue. If you say you can march this afternoon we’ll have to settle…”
“We’ll head out now Sir.”
** “That’s the spirit. I knew I could count on you Godalming. Go get that pup and his pup and get back to camp ASAP. God speed. Dismissed.”
The two men saluted and filed out.
Solo campaign - Scenario 4 - The Last Mile - Continued
Turn 4
First half of the unit activates…
Hatchett scales the high rocks and investigates the clue to find… A sack of moldy bread… Nothing helpful there.
Godalming fires at the last bandit on the bridge and his musket jams… (Rolled double 1’s) The bandit returns fire and misses. Godalming drops his musket, draws his sword and advances on the bridge…
Craven walks up to another clue, next to the road, and finds a rune covered knife (enchanted).
Bloggs walks away from the Black Dog and reloads his musket…
Monster phase….
The last bandit on the bridge, shaken by the missing head of his friend laying next to him and the wild-eyed officer approaching, reloads and fires on Godalming and misses at point blank range…
The bandit at the ford fires and misses Private Craven and reloads again.
The Black Dog bites poor battered Private Anderson and he screams and disappears in an icy puff of contorted mist. ?
Second half…
Jobe and Alastair fire on the bandit at the ford and miss. Her return shot almost takes Alistair’s shacko off. The doctor healed Bloggs as he ran from the Black Dog.
End of turn… a new bandit appears across the river…
The black dog found the scent of Hatchett on the wind from the high ground and for some unknown reason turns away from Bloggs and looks towards the high rocks…
 Poor wounded Anderson, caught and bitten by The Black Dog...
Turn 5…
First half of the unit activates…
Godalming attacks the bandit on the bridge… Almost gutted the man (down to one health), but he swings his musket around and wounds his attacker…
The doctor brings Bloggs up to full health…
Alistair reloaded his musket and headed for the road to the bridge.
Monster phase…
Somehow, through immense pain, the wounded bandit reloaded his musket and shoots at Godalming… Godalming dodges back a couple of paces as the ball misses him… And smiles, knowing that the bandit has probably fired his last shot…
The bandit at the ford misses a shot at Jobe.
The Black Dog scarily ignores the scent on the wind turns around and attacks Bloggs. But thankfully it misses its bite… Bloggs (having nothing enchanted or blessed to fight the dog back with) backs off from the fight as best he can.
Second half…
Bloggs walks up to the next hedgerow and kills the menace at the ford, the bandit toppling into the ford.
Craven runs up the bridge and bayonets the already mortally wounded bandit facing off against Godalming. Godalming nods his thanks to the younger man. No place for fencing or chivalry in the face of bandits and ethereal dogs.
Hatchett can’t get a shot on the last remaining bandit so comes down from the high ground.
Jobe sprints towards the bridge.
End of turn…
The Black Dog seems to smell the blood from Godalming and yet again heads for the bridge… No extra bandit appears.
 Bloggs takes down the bandit at the ford...
Turn 6
First half of the unit activates…
Bloggs hops over a hedge and finds a clue, a silver enchanted ring.
Alistair marches away from The Black Dog and opens fire on the last bandit and wings her in the leg. She fires back and misses wildly.
Hatchett finds a clue, a tattered book of prayers that makes him feel quick blessed.
Monster phase..
Bandit misses his shot… Craven fires back but missed. The Black dogy hasn’t caught up with Alistair.
Second half…
Craven reloads and fires at the last bandit… And misses. Godalming and Jobe sprint across the bridge. And the Doctor sprints up towards Bloggs in support.
End of turn….
Godalming’s blood seems to be the attractent for The Black Dog again… But he doesn’t go very fast to catch up. No more reenforcements arrive for the bandits.
 Craven saves his officer the trouble of running this wounded bandit through with his bayonet.
Turn 7
First half of the unit activates…
Jobe opened fire on the last bandit and missed.
Godalming, conscious that he had to complete his mission, headed into the woods beyond the river with the treasure under his arm…
Hamish marched up the bridge and reloaded his musket…
Monster phase…
The Black Dog headed towards Hatchett but didn’t get in range for a bite. The last bandit took a shot at Jobe, but they missed and Jobe took the moment to duck into the cover of the Bridge…
Second half…
Craven reloaded and fired and killed the bandit… Having an amazing day with the musket and the bayonet he gets a hearty cheer from his brothers in arms.
Bloggs rubbed his enchanted ring… (Oh err…) And shot The Black Dog and it whimpered in pain,…
Doctor Bombay found a tattered military book when unearthing a clue (an extra date pool dice).
Hatchett moved a few paces to get the best shot, reading a passage from the prayer book as he paced, dropped the book, pulled back the hammer of his rifle and fired pointblank into The Black Dog. Killing The Black Dog with a precise shot through the head conjured another cheer from the weary unit… The Dog howled and seemed to sink into the boggy ground next to the road… only leaving a frost-like stain on the ground…
 The Black Dog disappeared as quickly as he came when the rifle bullet struck home...
Aftermath…
As all the monsters are dead and I feel I can negotiate everything off the table, without much fuss from the occasional bandit from an end of turn roll of a 7+, that I called it a day for this scenario.
Anderson got another permanent injury… but I had a dice left in the fate pool to do a reroll. He got a slow recovery instead… -3 health when he fights next time.
I feel that with so many injuries perhaps we need to give him an honourable discharge and employ someone else.
This concludes the 4 main book solo mission campaign but I have a solo mission in mind of my own.
Solo campaign - Scenario 4 - The Last Mile
 Facing off against a band of bandits and The Black Dog of the bog.
 Had these kitbashed and painted for a while now and looked forward to getting them on to the table. This will feel more like the PvP game because of all the musket fire.
  The Brits need to get across the river without getting murdered by The Black Dog and the bandits
Scenario 4 – The Last Mile
Turn 1
First half of the unit activates…
Doctor Bombay redressed the head wound of Highlander Alistair Home, still suffering after their last fight.
Then Privates Bloggs, Anderson and Craven marched up to the nearest hedge and opened fire with a crushing volley, wounding two bandits. The bandits returned fire, but failed to hit one of the seasoned soldiers in front of them.
Monster phase…
The bandits opened fire and wounded Bloggs and Anderson quite badly. A shot rang out from the ford and clipped Alistairs head and sent him tumbling to the earth. The Doctor catches the fallen soldier in his arms.
Second half…
Thomas Hatchett fires his rifle and clips a bandit, surprisingly dressed in an old militia uniform, and moves a few paces forward to a treeline.
Arthur Jobe and Ensign Godalming (carrying the treasure) hop from hedge to hedge and open fire on the nearest bandit. Jobe striking the man in the shoulder and then Godalming kills the man with his shit, shattering his jaw and falling back under a gout of blood.
End of turn… no bandit reinforcements appear (only on a 7+)
 The bandits and Privates exchange fire with wounds shared by both firing lines.
Turn 2
First half of the unit activates…
The doctor wakes Alistair and gets him back to his feet. Anderson opens fire and kills a bandit on the high rocks overlooking the bridge. Bloggs opens fire on the old militiaman and kills him, an old warrior’s smile oddly plastered across his blood spattered face.
Monster phase…
Poor musketry from the rattled Bandits followed and no more wounds are suffered by our heroes.
Second half…
Alistair gingerly staggers a few paces, but can’t see straight enough to fire on a target.
Godalming and Craven reload and move toward the roadway leading up to the bridge.
Hatchett moves to a hedgerow near the bridge and reloaded his rifle.
Arthur Jobe fires on the bandit marksman at the ford and misses.
End of turn…
The Black Dog arrives on the bridge… And sprints at Rifleman Hatchett…

 The Black Dog appears!!
Turn 3
First half of the unit activates…
The doctor works on Alastair, but the confused dour Scot pushes him away and stumbles forward his musket raised and fires. The bandit ducks in the shallows of the ford and Alistair spits blood and curses his enemy…
Jobe joins his officer and reloads his musket…
Hatchett runs away from the Black Dog and sees a clue glinting on the rocks above him…
Monster phase…
Another poor round of shooting from the bandits…. This time Jobe and Godalming can fire back in reply… Jobe misses, but Godalming wings a man on the bridge… ’tis but a scratch though… the Black Dog charges towards Bloggs but falls short of biting range…
Second half…
Craven, in an act of bravery walks calmly up the main road, levelled his musket and opened fire on the bandits on the bridge. The shot took the man in the throat with such ferocity that it took the man’s head clean off…
Bloggs and Anderson sprinted away from the Black Dog at their hedgerow in the hopes that they may avoid his chilling bite….
Godalming calmly walks up next to brave Private Craven, pats him on the back for the fine shot and reloaded his own musket.
End of turn… no bandit reinforcements appear (only on a 7+)
The Black Dog pitches around and gives chase after Bloggs.
 Hatchett retreats in the face of the Black Dog.
 Craven kills one of the bandits on the bridge with a gorey decapitation.
Solo campaign - Scenario 3 - The Troll Hunts - continued
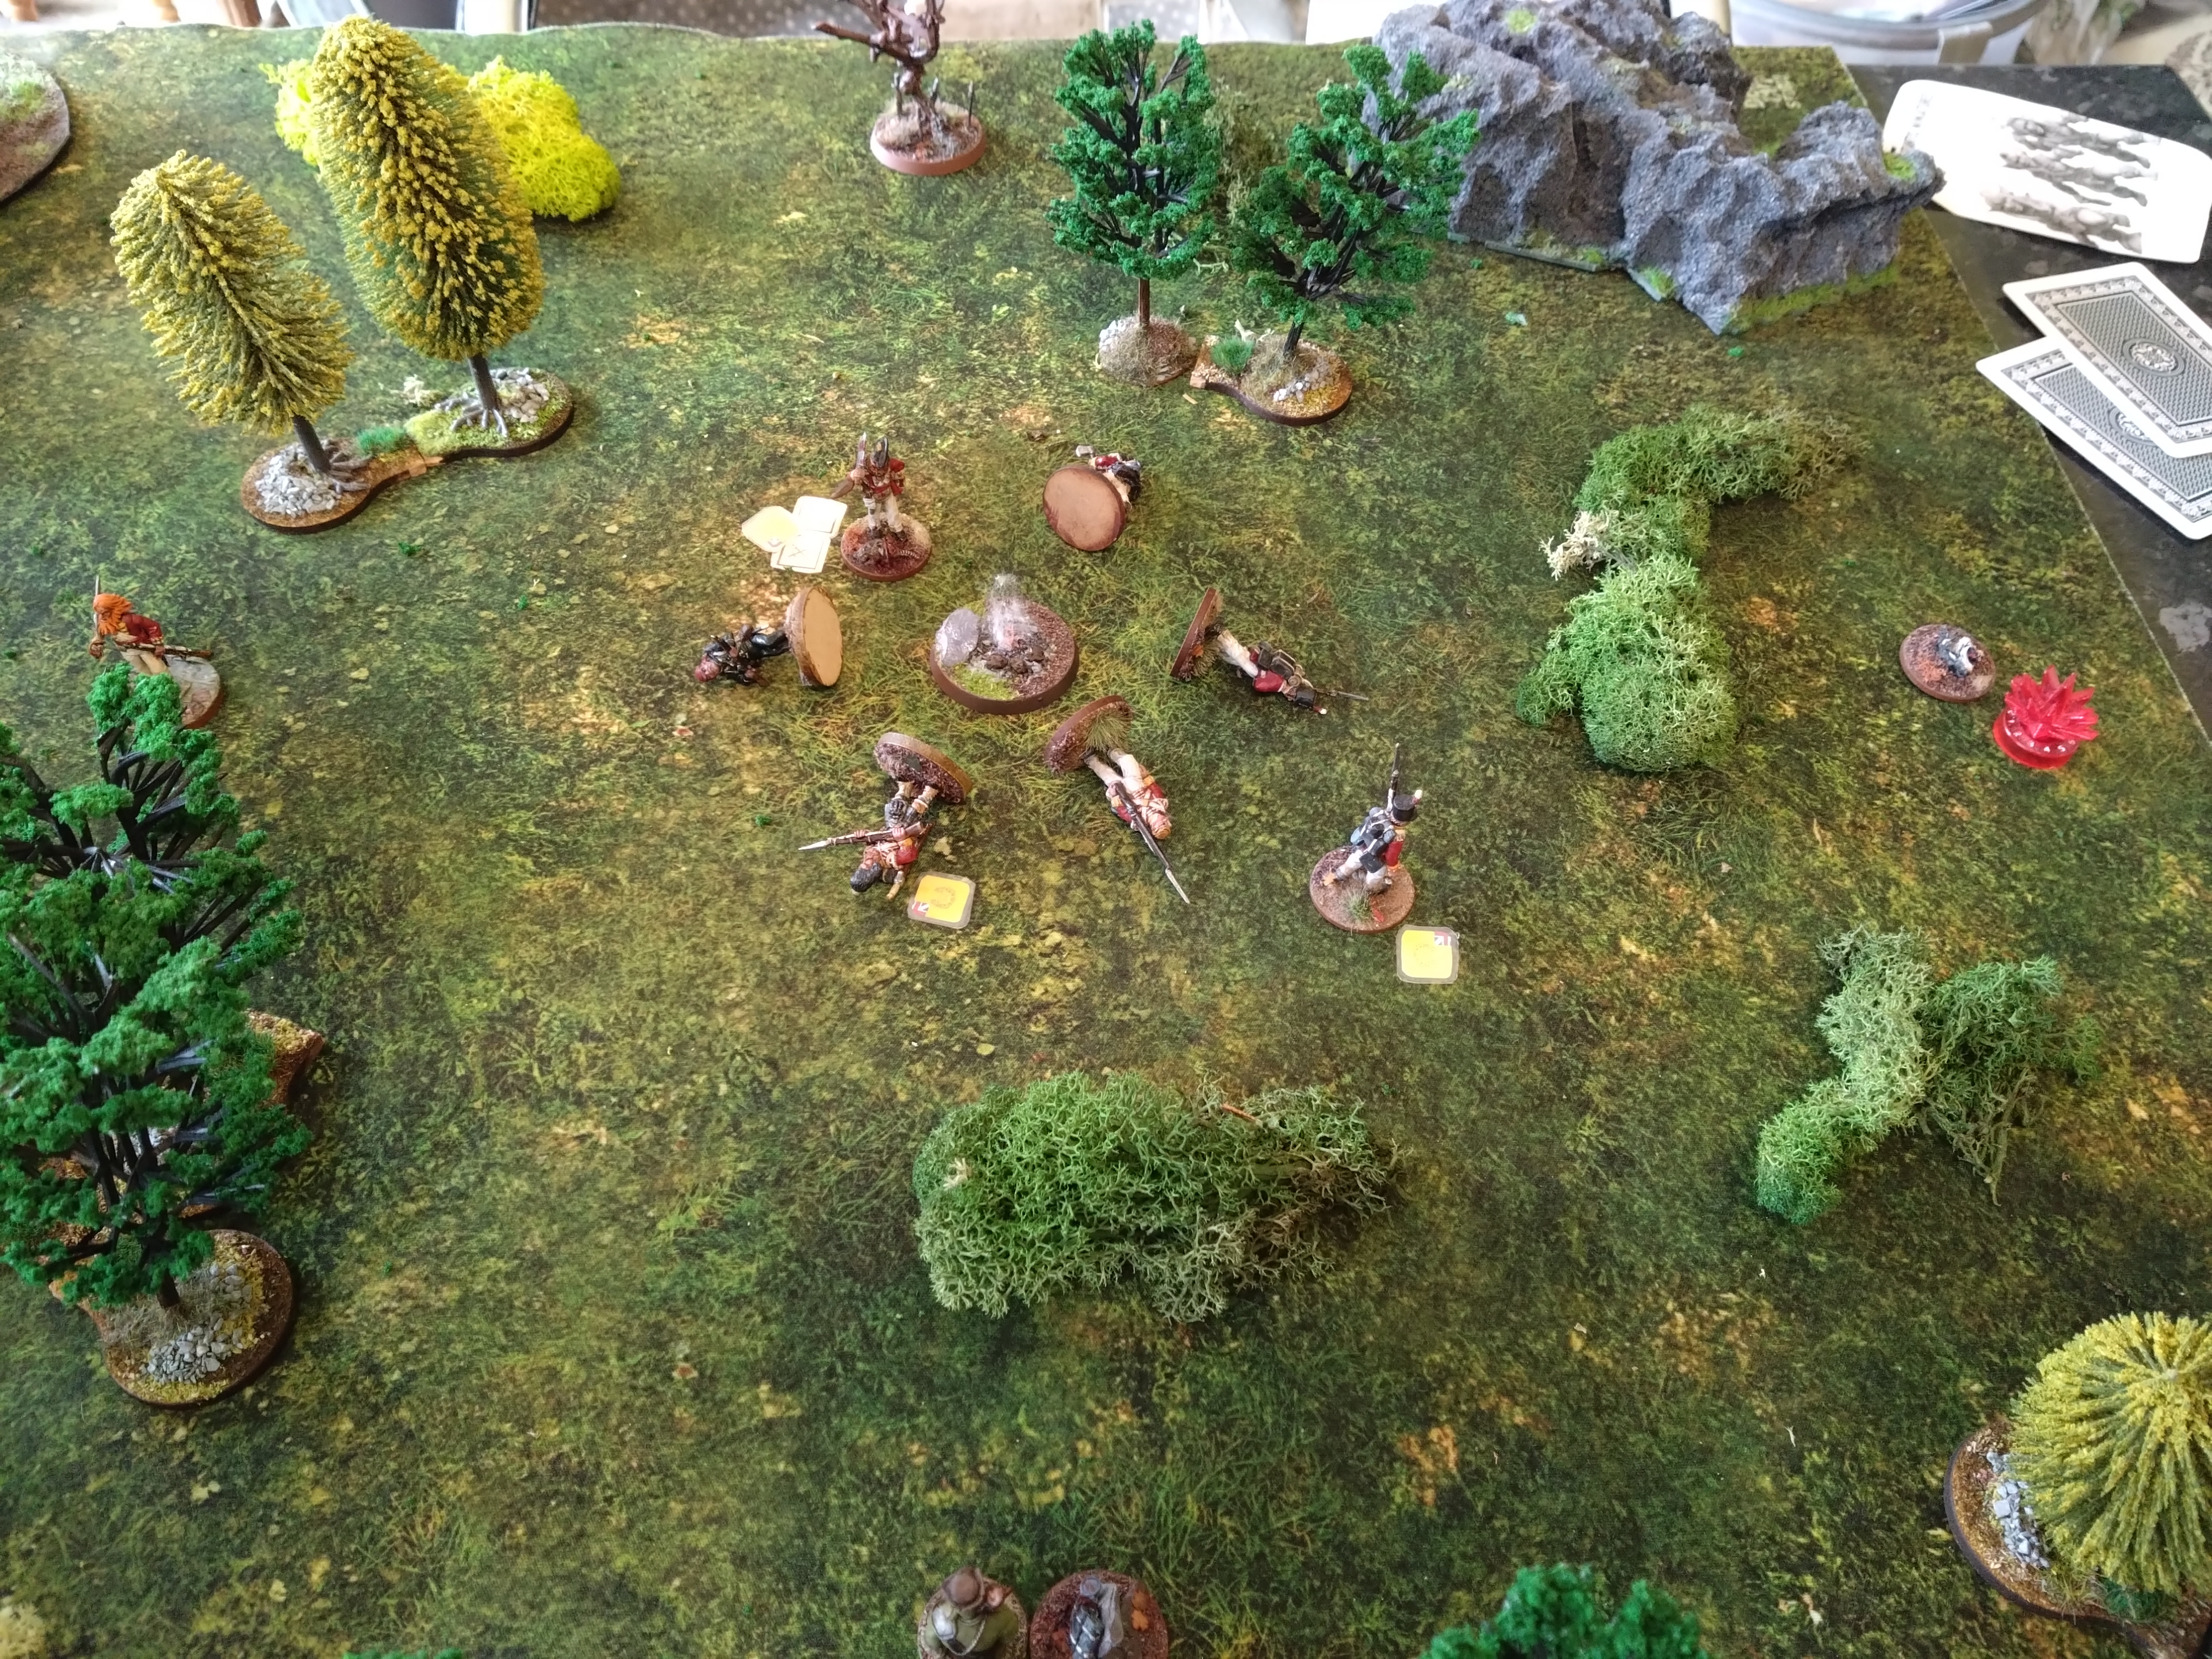
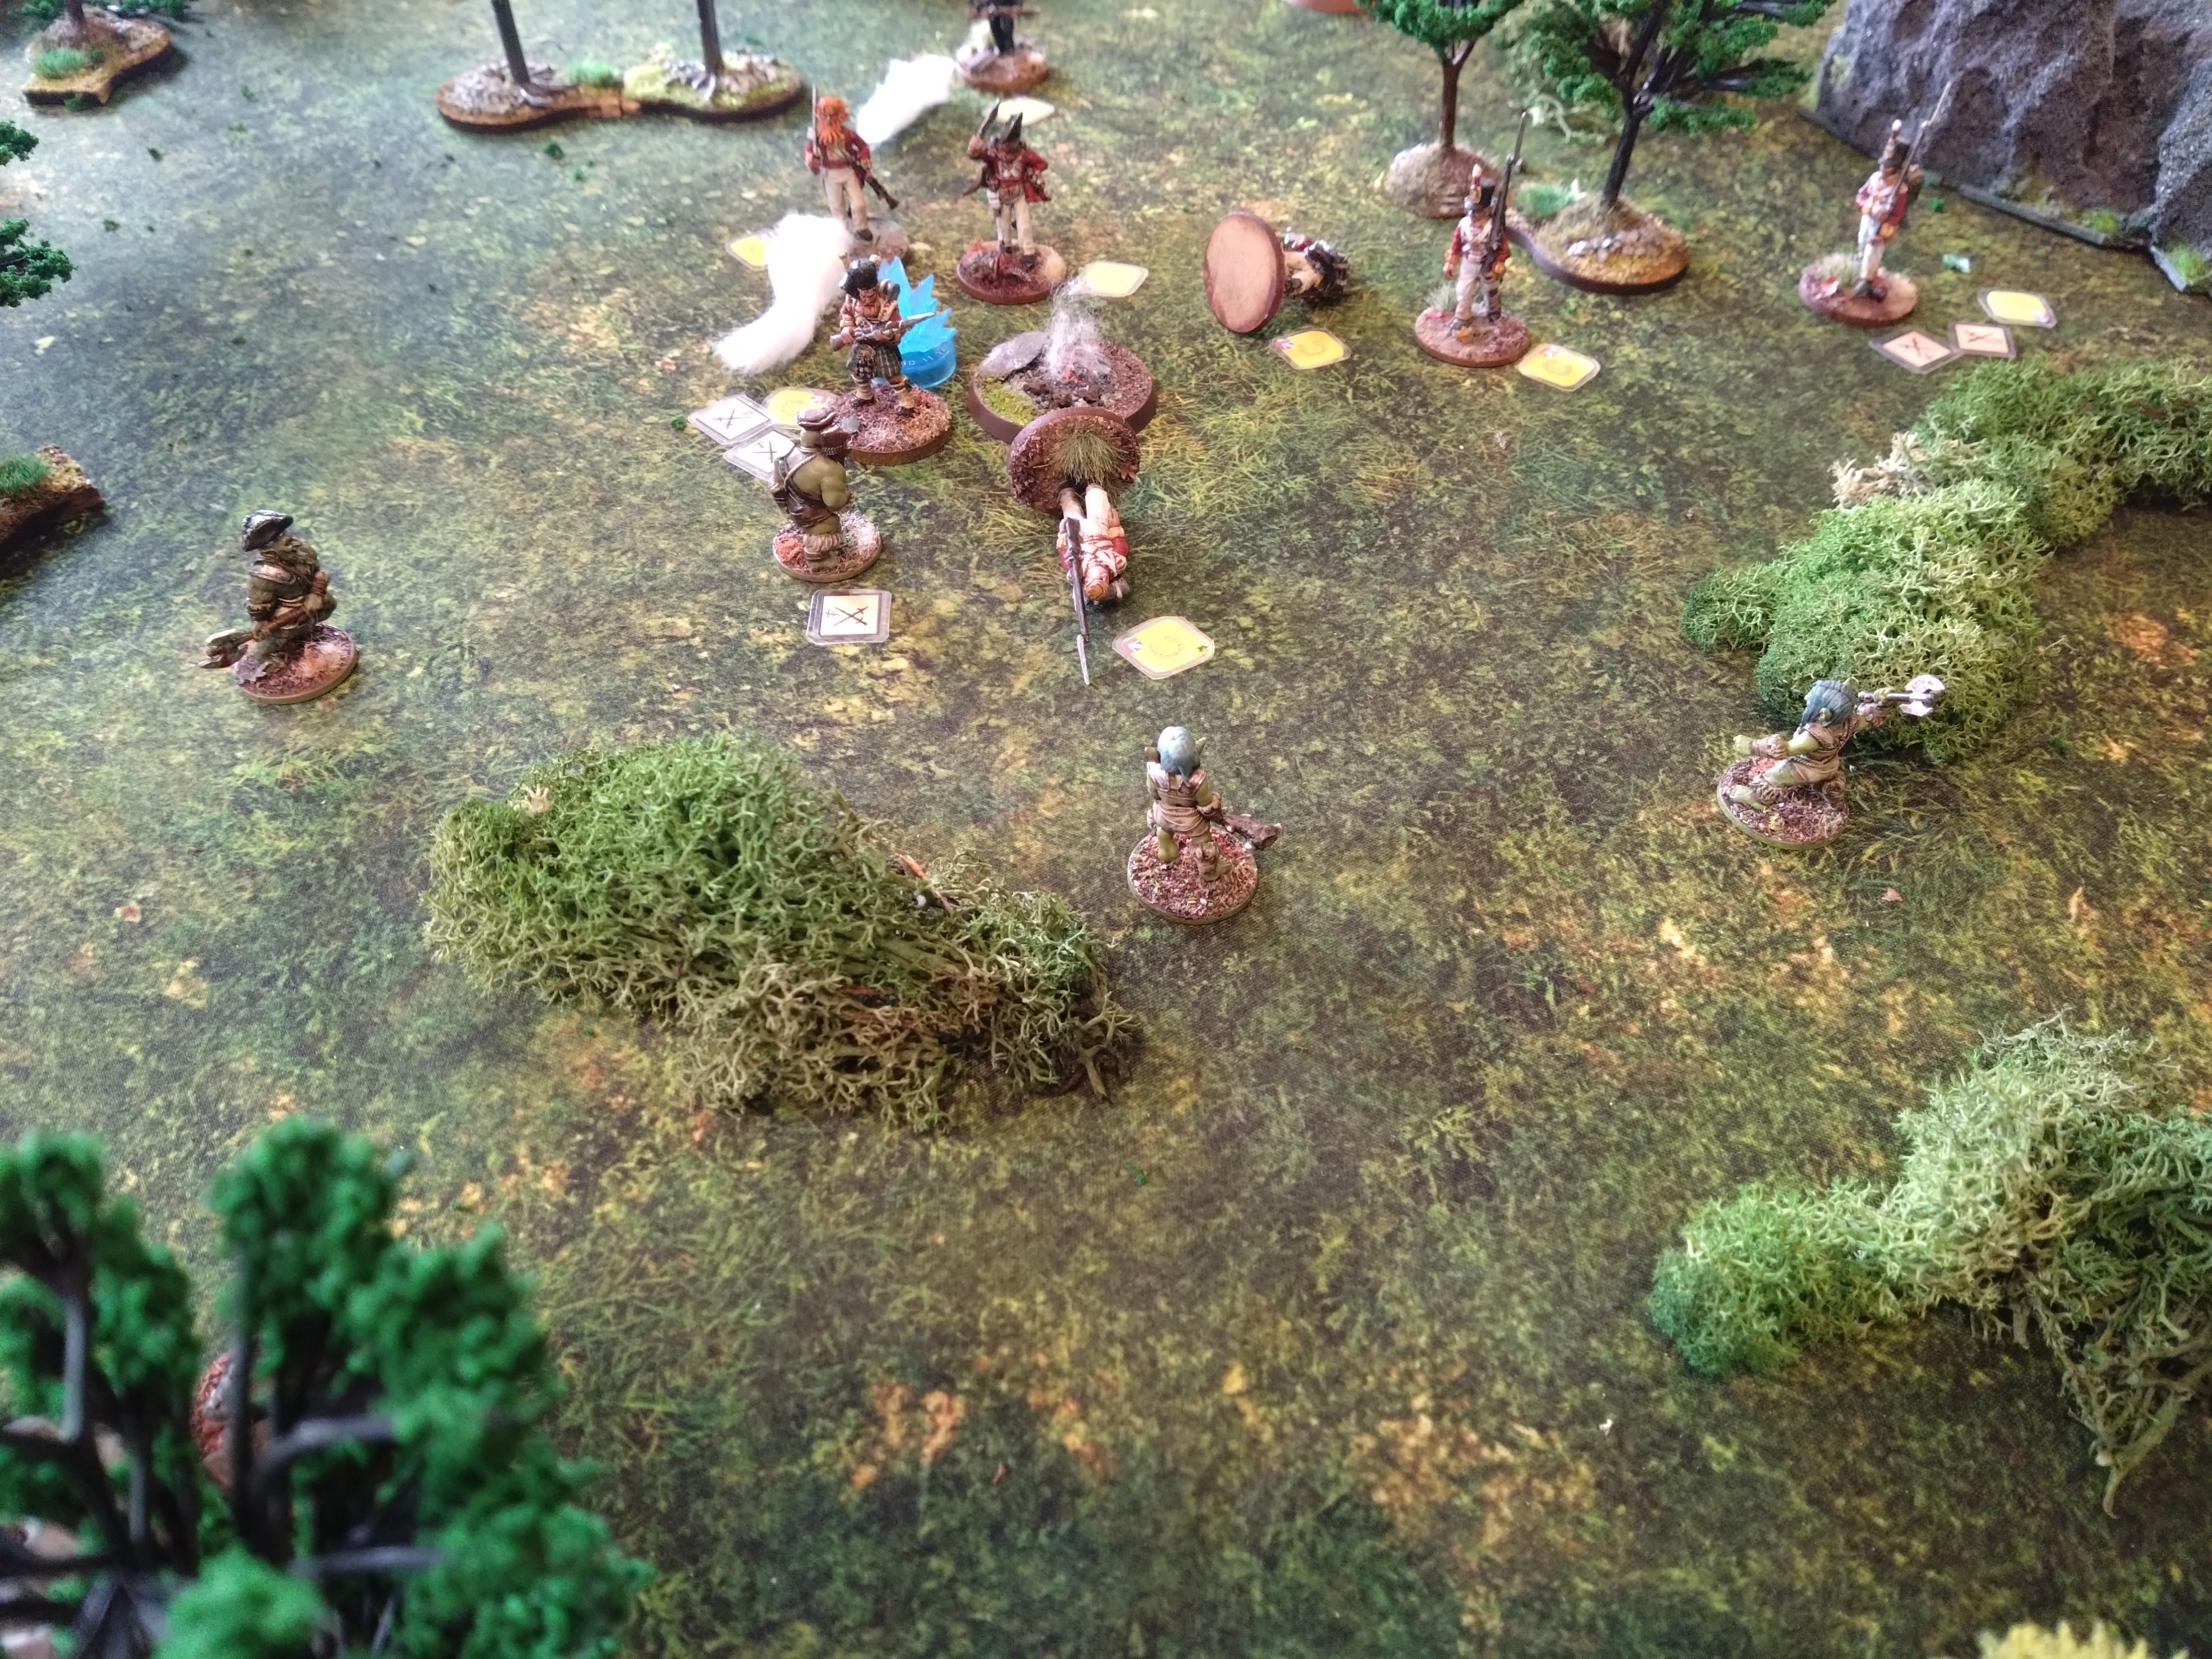
 The troll appears from the west.
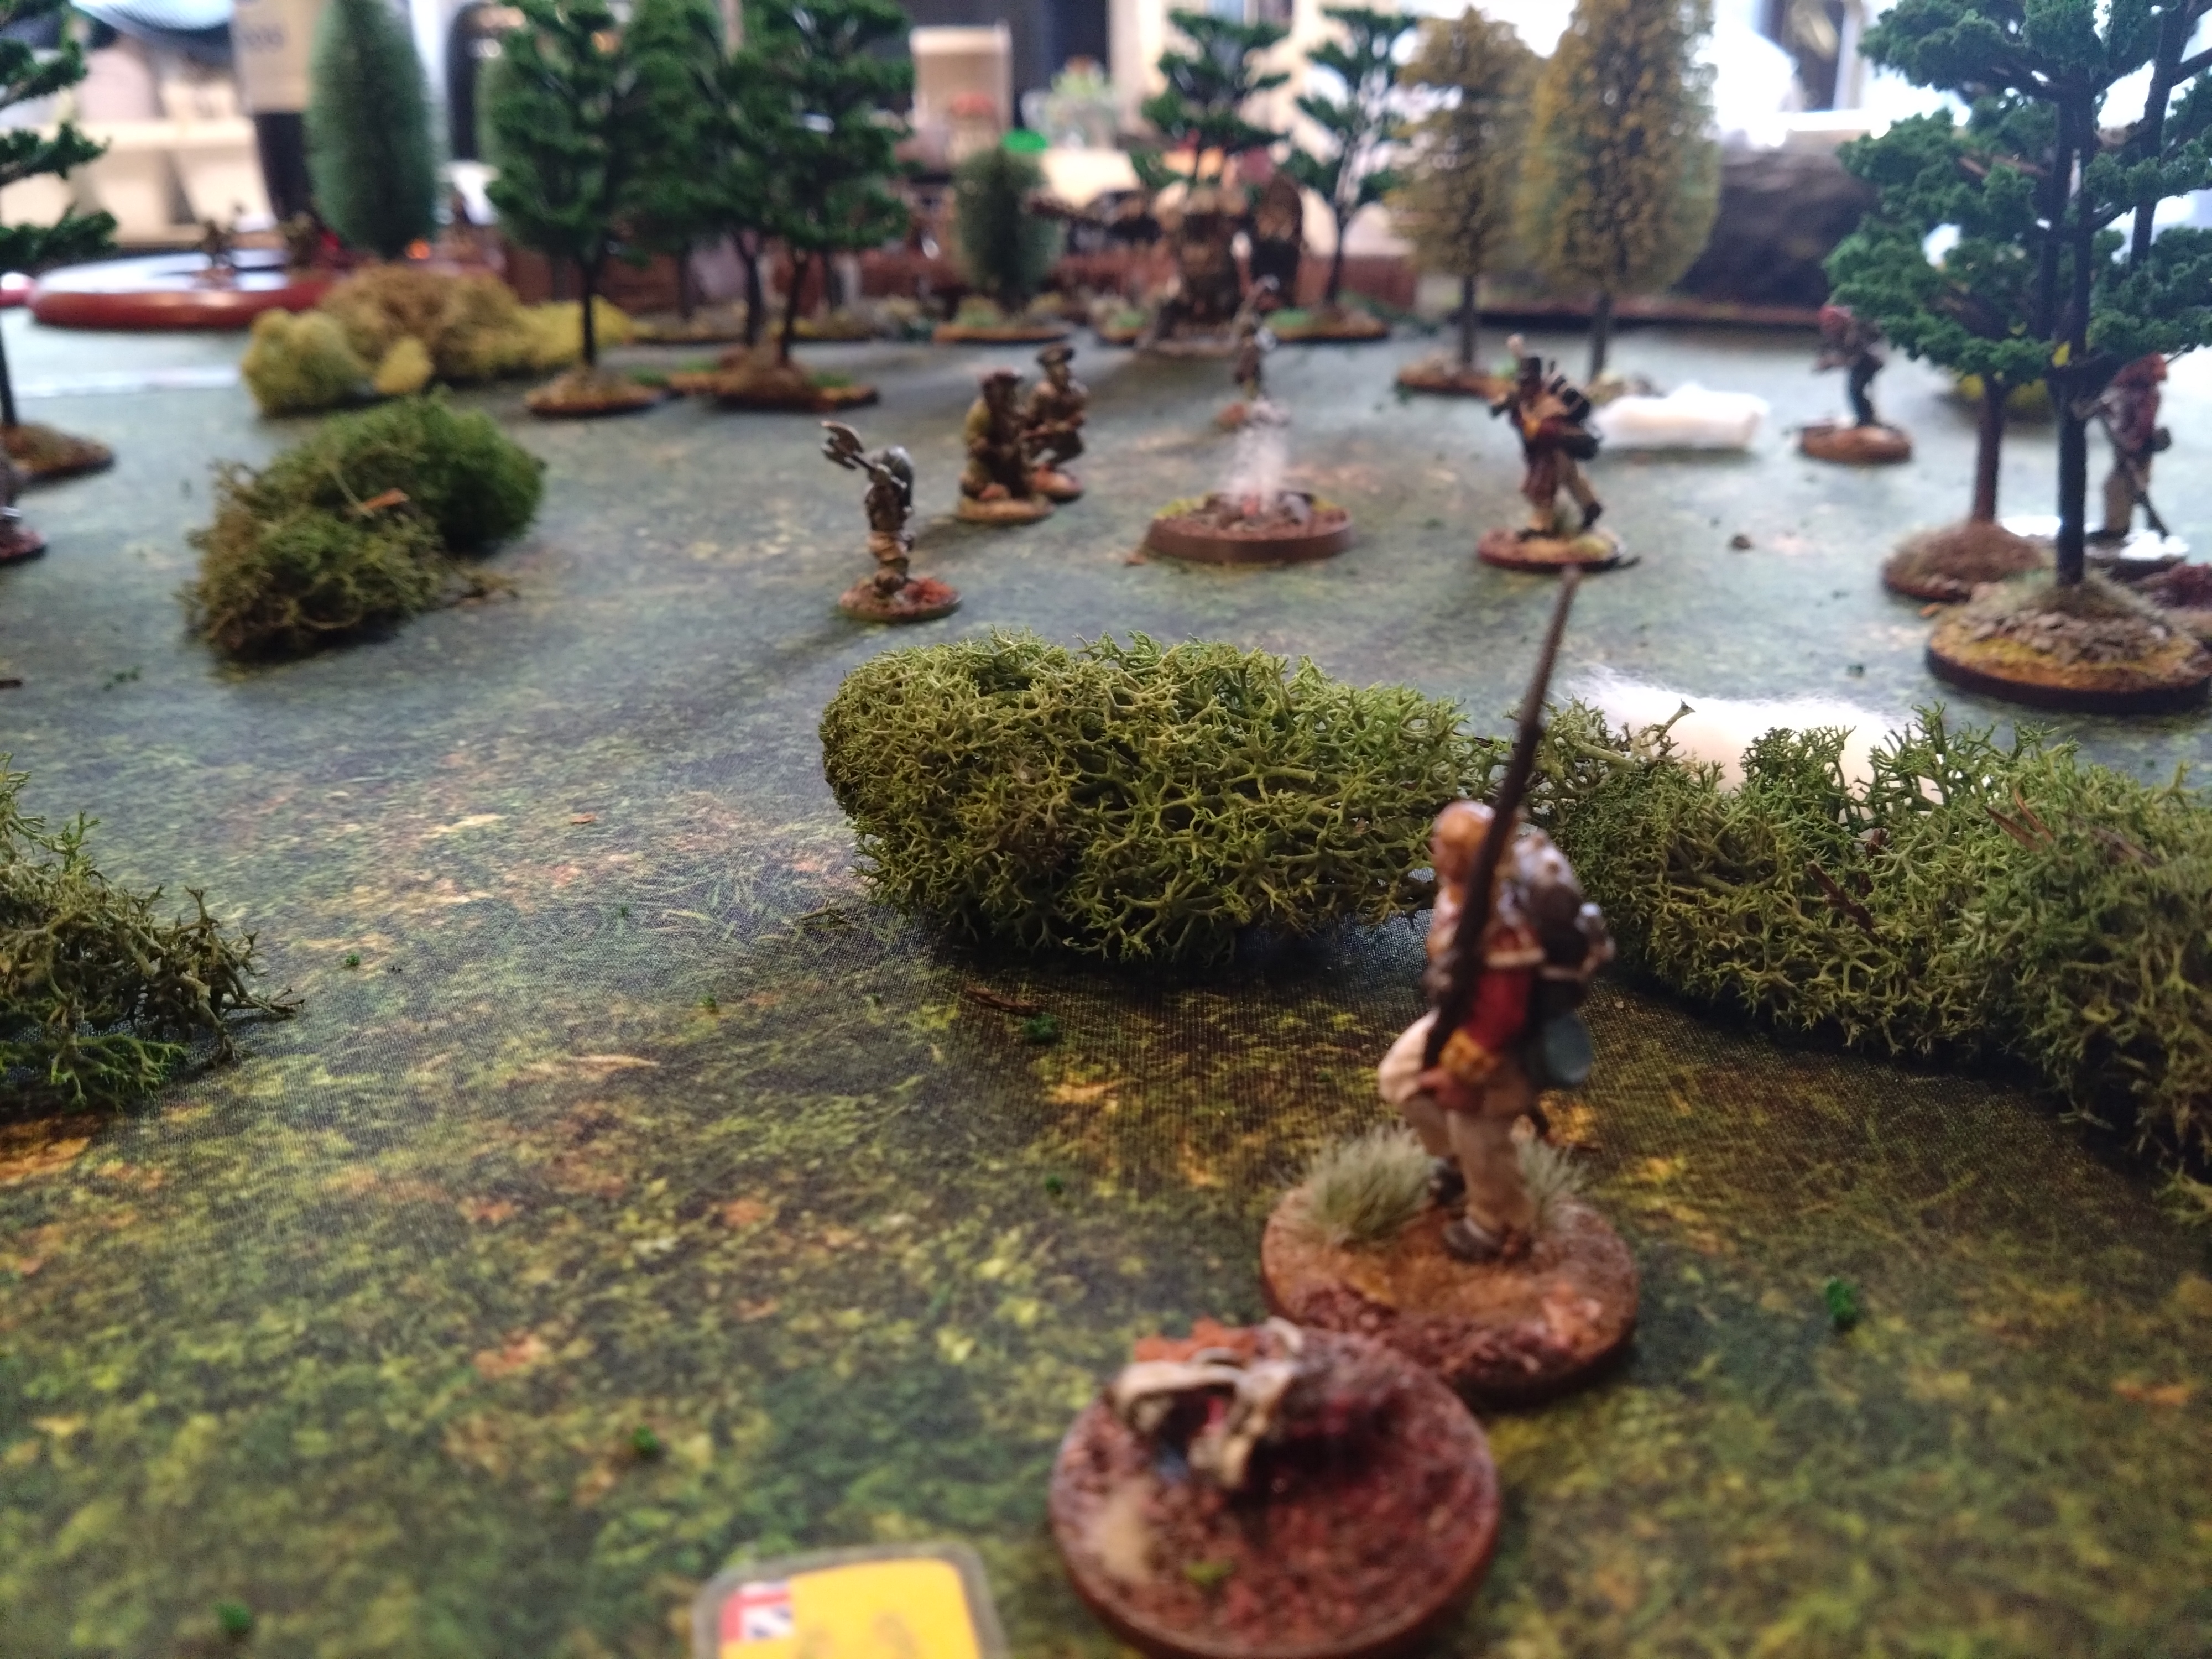
Turn 4
First half of the unit activates…
Godalming fires and reloads from the treeline, but unsuccessfully.
Doctor Bombay searches and finds a gold ring but the swords won’t budge and he paces over to his officer, away from the roaring troll that looms to the west. Craven remembers his training and recalls the need for cold iron against goblins and fire against trolls and sprints over to a clue to the east in the hope of finding something more deadly to tackle the enemy with.
Monster phase…
The nearest goblin struck Arthur Jobe and wounded him, but thankfully the blow with the axe bit into his pack as well as his shoulder and he was able to back off rather than strike back (another fate pool dice mitigating damage roll saved some of Jobe’s health.)
The next goblin charged in and failed to strike home, but rather than hit back Jobe backed off again, northward as ordered. His backing off out of each clash served him well because the next goblin couldn’t catch up with him. Another goblin took a swing at Rifleman Hatchett but the pair just parried and shoved at eachother with no injuries inflicted. The troll couldn’t make out a target clearly to throw a bolder at, so tossed it over his shoulder and bumbled forward looking to get a better opening
Second half…
The men of The 69th Silver Bayonet unit were told to follow orders but were given a lot of licence in how they followed them. Anderson decided to make a mad sprint around a hedge to the East rather than retire north. He saw an opportunity to get distance enough to have is musket work again, if not encourage some of the enemy away from his colleagues. Thinning them out might be more beneficial than just heading north to all be savaged together…
Bloggs paces northward away from the nearest goblin and kept checking his jammed flintlock until he felt it ease as the magic upon it waned in strength. He pops a cold iron nail down the barrel, brings the musket to his shoulder and fires. The goblin squealed in pain seemingly dying, but using their axe to steady themselves the barely alive goblin (1 health left) continued to chitter and whine at the retreating Brits.
Hatchett and Jobe retreated as far as the clearing would allow them to the north, then Jobe too finally felt his flintlock mechanism spring back into functioning. Jobe levelled his musket and fired. Sadly the ball whistled past a Goblins ear and heard the ball thwack into a tree. Hatchett quickly reloaded his rifle and hoped he would get a shot off before the goblin’s power of seemingly being inimical to the mechanism of his trusted Baker rifle yet again.
End of turn… One last goblin comes into the fray.
Turn 5
First half of the unit activates….
The doctor runs back to check on Jobe’s shoulder wound but things are too hectic to attend to him immediately. Godalming retreats back to a hedge and fires his musket through the trees but misses his target. Hatchett opens fire with his rifle but misses, and curses himself and reloads.
Monster phase…
The Brits seem to have retreated with just enough haste to keep out of range of the goblin’s screaming last charge. The goblins don’t pull any of the Brits into combat. The Troll has had enough of walking around and picks up a bolder. The nearest target is obscured by a goblin, but Havestman dark spells don’t overpower his natural hatred of humans. Any begrudged allegence to these goblins was exactly that… begrudged, so he throws the bolder anyway. The bolder missed both targets. The goblin looked back angrily and fearfully, unimpressed at the decision to put him in danger.
Second half…
Bloggs retreats Eastward and reloads his musket.
Anderson reloads and fires his musket without a successful hit.
Craven unearths some ideal firewood and perfect kindling to make any melee with the troll easier, though he didn’t feel in his sleep deprived state that this was a brilliant idea. Craven fires at the nearest goblin and fails to hit it. Jobe retreats, wincing with his shoulder injury, tucking behind the doctor and Godalming and reloads his musket.
Turn 6
First half of the unit activates…
Godalming orders Doctor Bombay and Rifleman Hatchett to leave and head north. They leave the field of battle as instructed.
Bloggs fires a parting shot at the nearest goblin but fails to hit them. Then Bloggs too leaves the battlefield.
Monster phase….
A goblin springs over a hedge and attacks Craven. She slashes the private open (down to one health) and Craven can only fend her off wildly in retaliation and clutches his wound in torturous pain. Two goblins attack Godalming but his marshal prowess is too much for them. Now they are in the shadows far from the campfire they have a slight advantage and are able to escape his swings back at them. The remaining goblins draw near but are too far away to lash out with their wicked blades.
The troll drags up another boulder, confident in his aim, but misses Godalming… burying the rock into a hedge between the pair.
Second half…
Craven escapes the field, determined to live and fight another day.
Bloggs begins to retire, but it rankles with him that the snarling wounded goblin just wounded his friend. He turns around and opens fire and headshots the fiend.
Godalming and Jobe decide discretion is the better part of valour and retire north, away from their viscous green pursuers.
Aftermath.
There was no point in playing out Turn 7 because Bloggs had already decided to retire as soon as he was activated so no further interactions with the green menaces and the troll would be possible to stop him.
Poor old Alistair Home has suffered a severe concussion and will start the next battle with -3 health. (Not a permanent, unhealable injury thankfully.)
5xp earned from the rewards. The only way to gain more points would have been to have killed the troll, but that was a big ask. And 7 of the unit got the standard 1xp each for the minis that escaped the battlefield.
The majority of the unit have now reached 5xp and over. The first campaign progression step on the xp rewards table. This gives them a +1 to all Courage tests.
Looking forward to the next scenario.
Solo campaign - Scenario 3 - The Troll Hunts
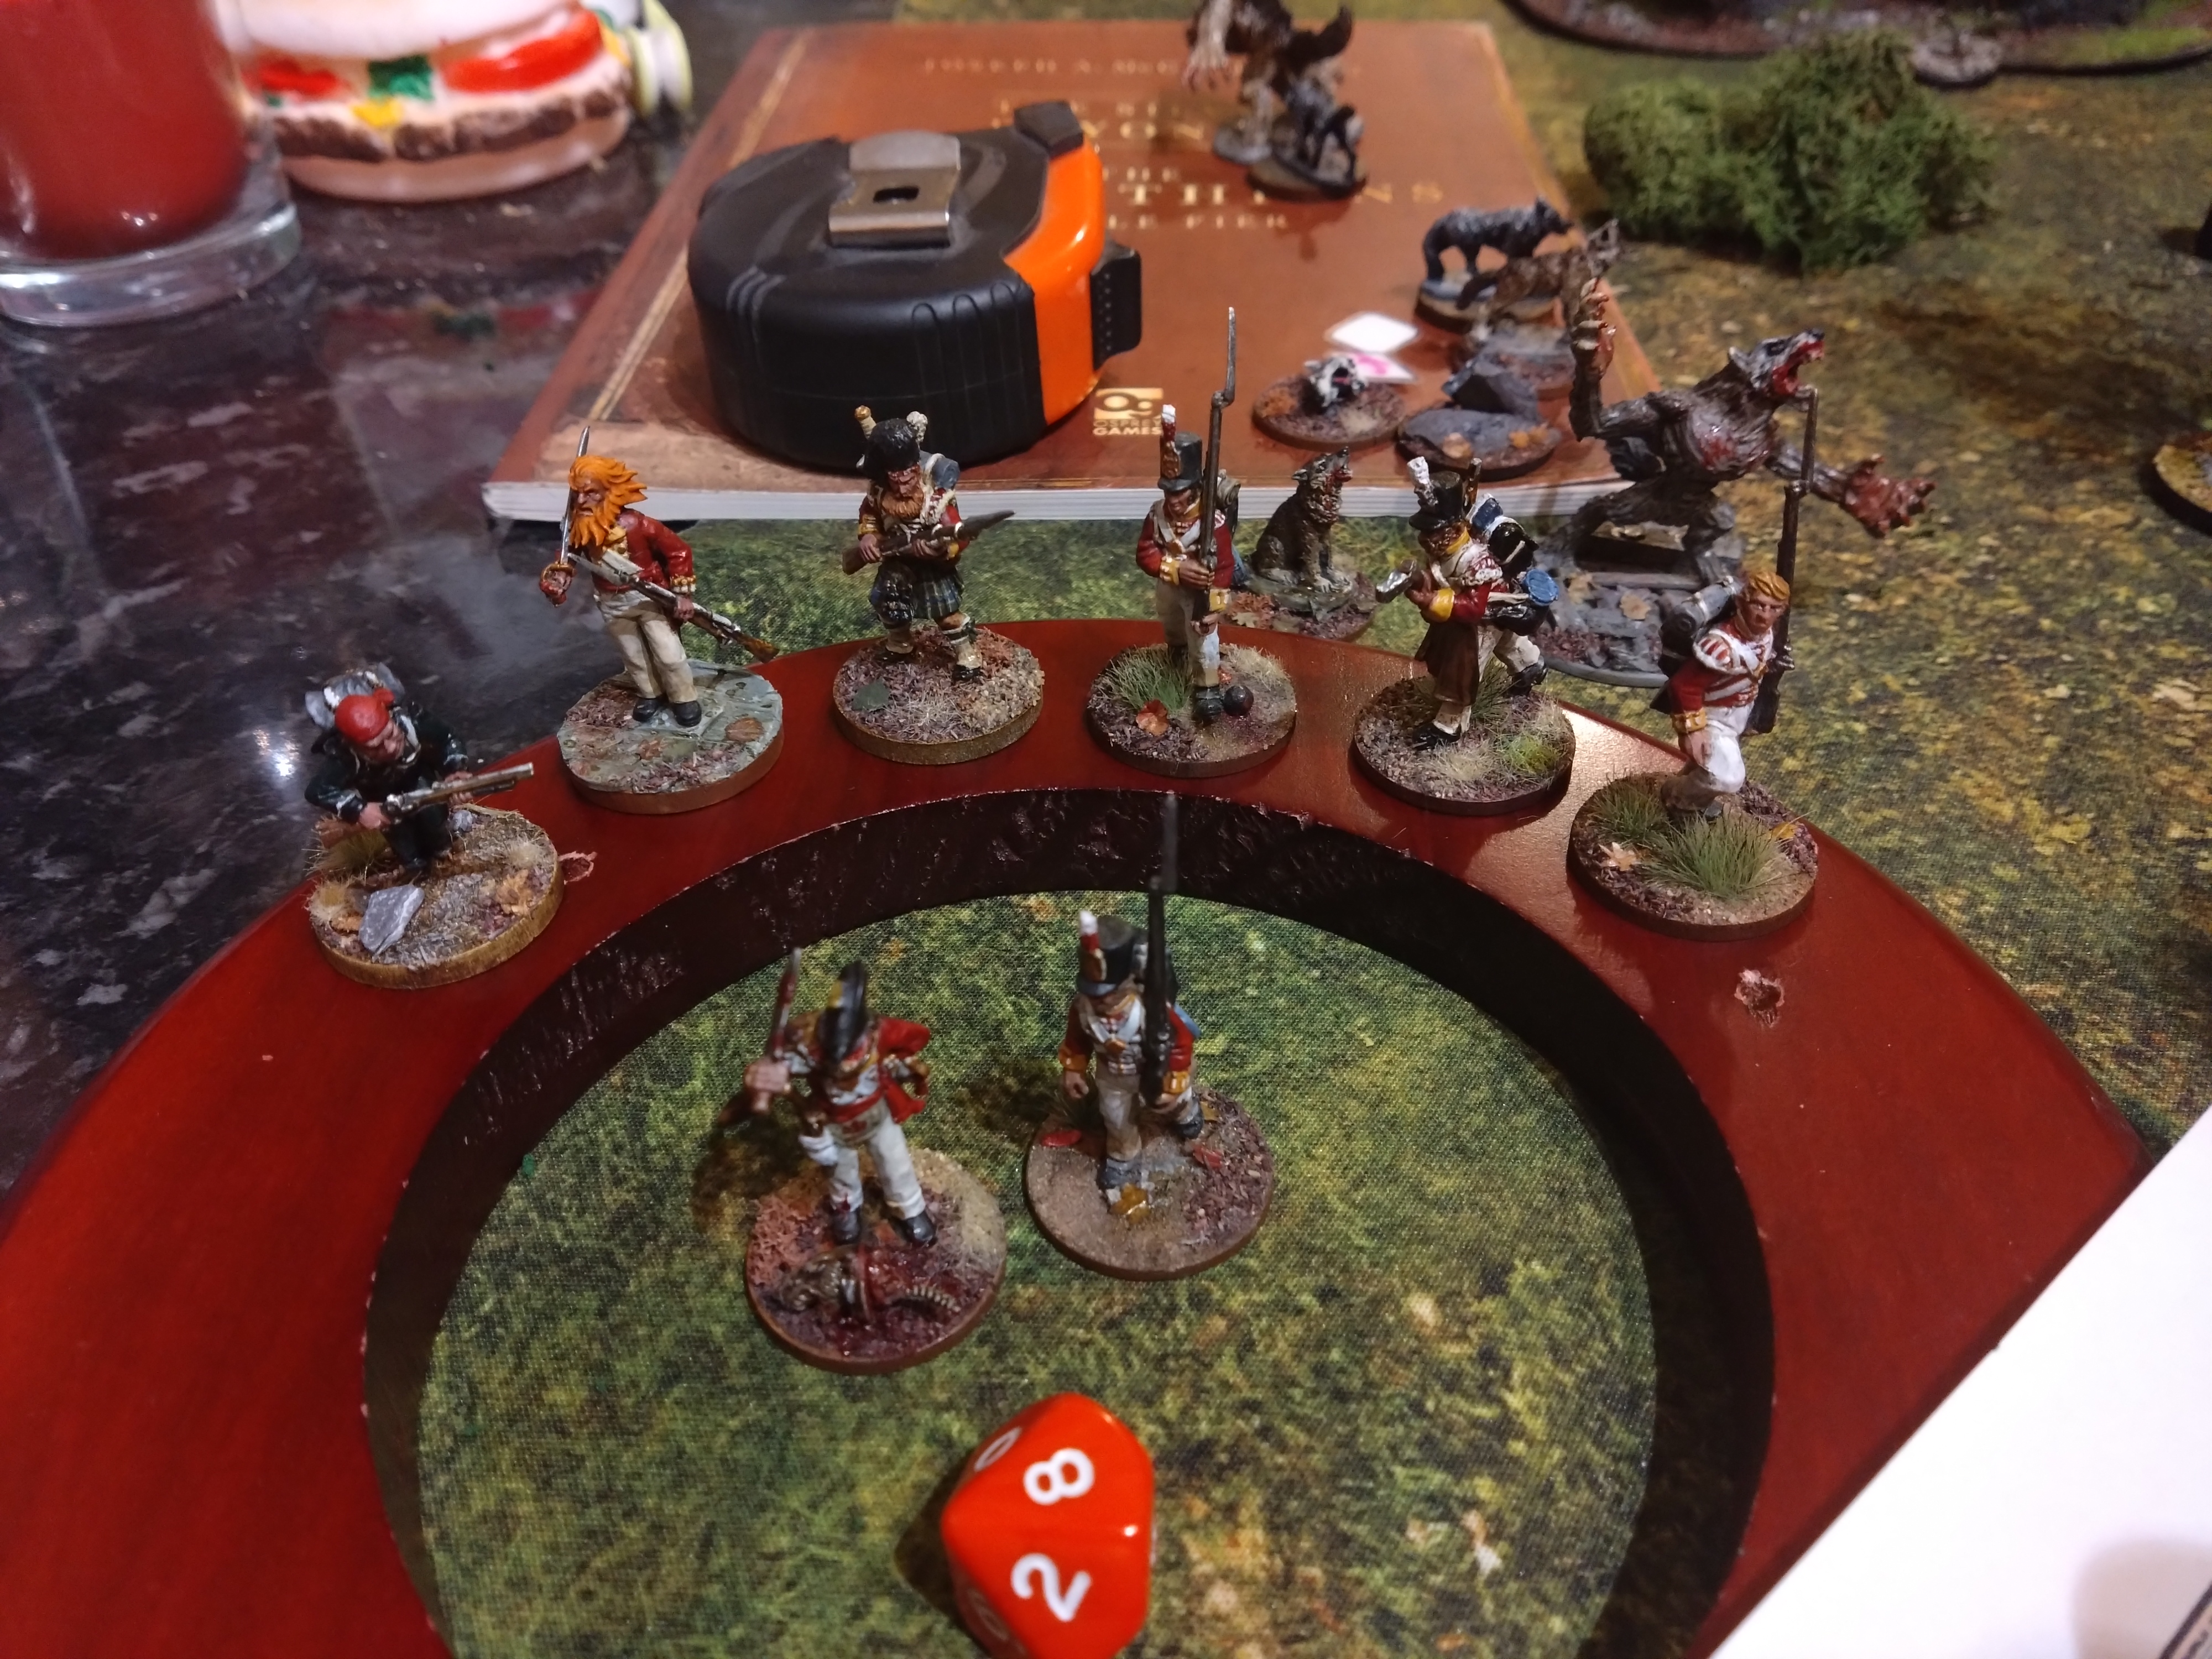
 The goblins and a Troll have been following The Silver Bayonet unit through the woods and have caught up with them just as they settle down to sleep for the night at the edge of the forest. If they don't catch them tonight they won't be able to stop them getting back to the safety of the main body of Wellington's army.
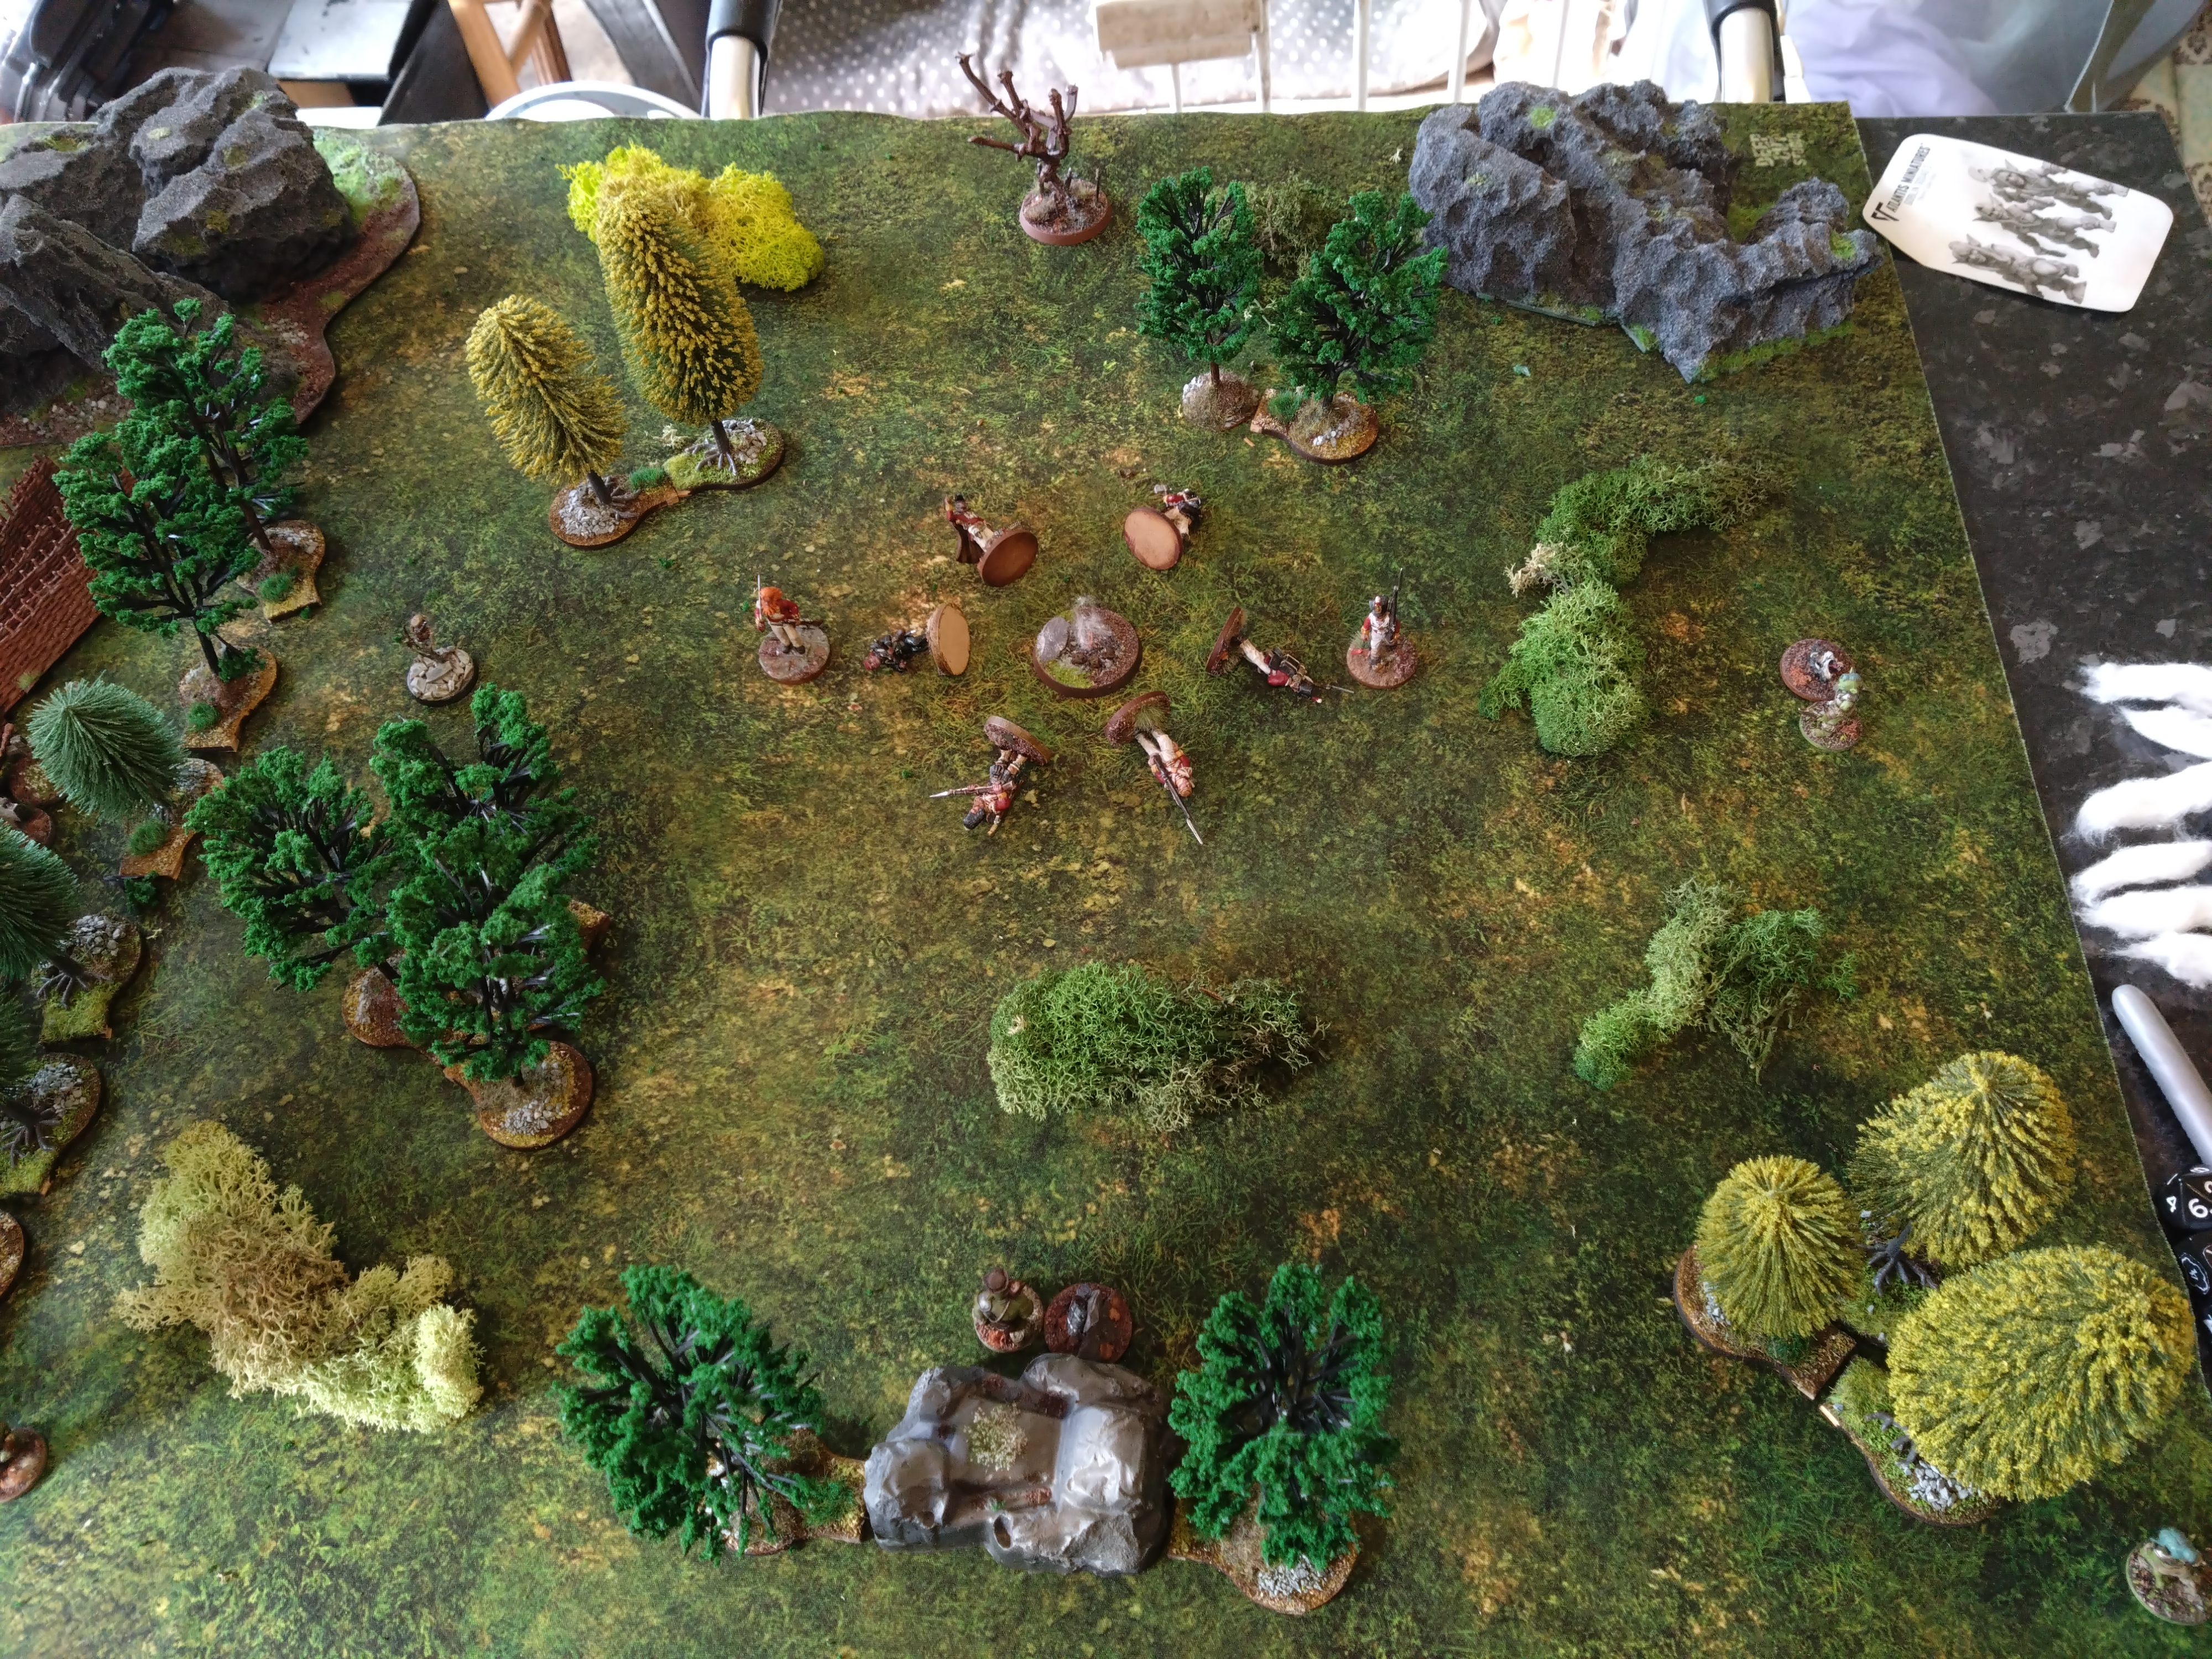 The setup. Two pickets are awake. The rest face a stiff 16TN wake up courage check to get up and fight. The goblins begin with two near random clue markers...
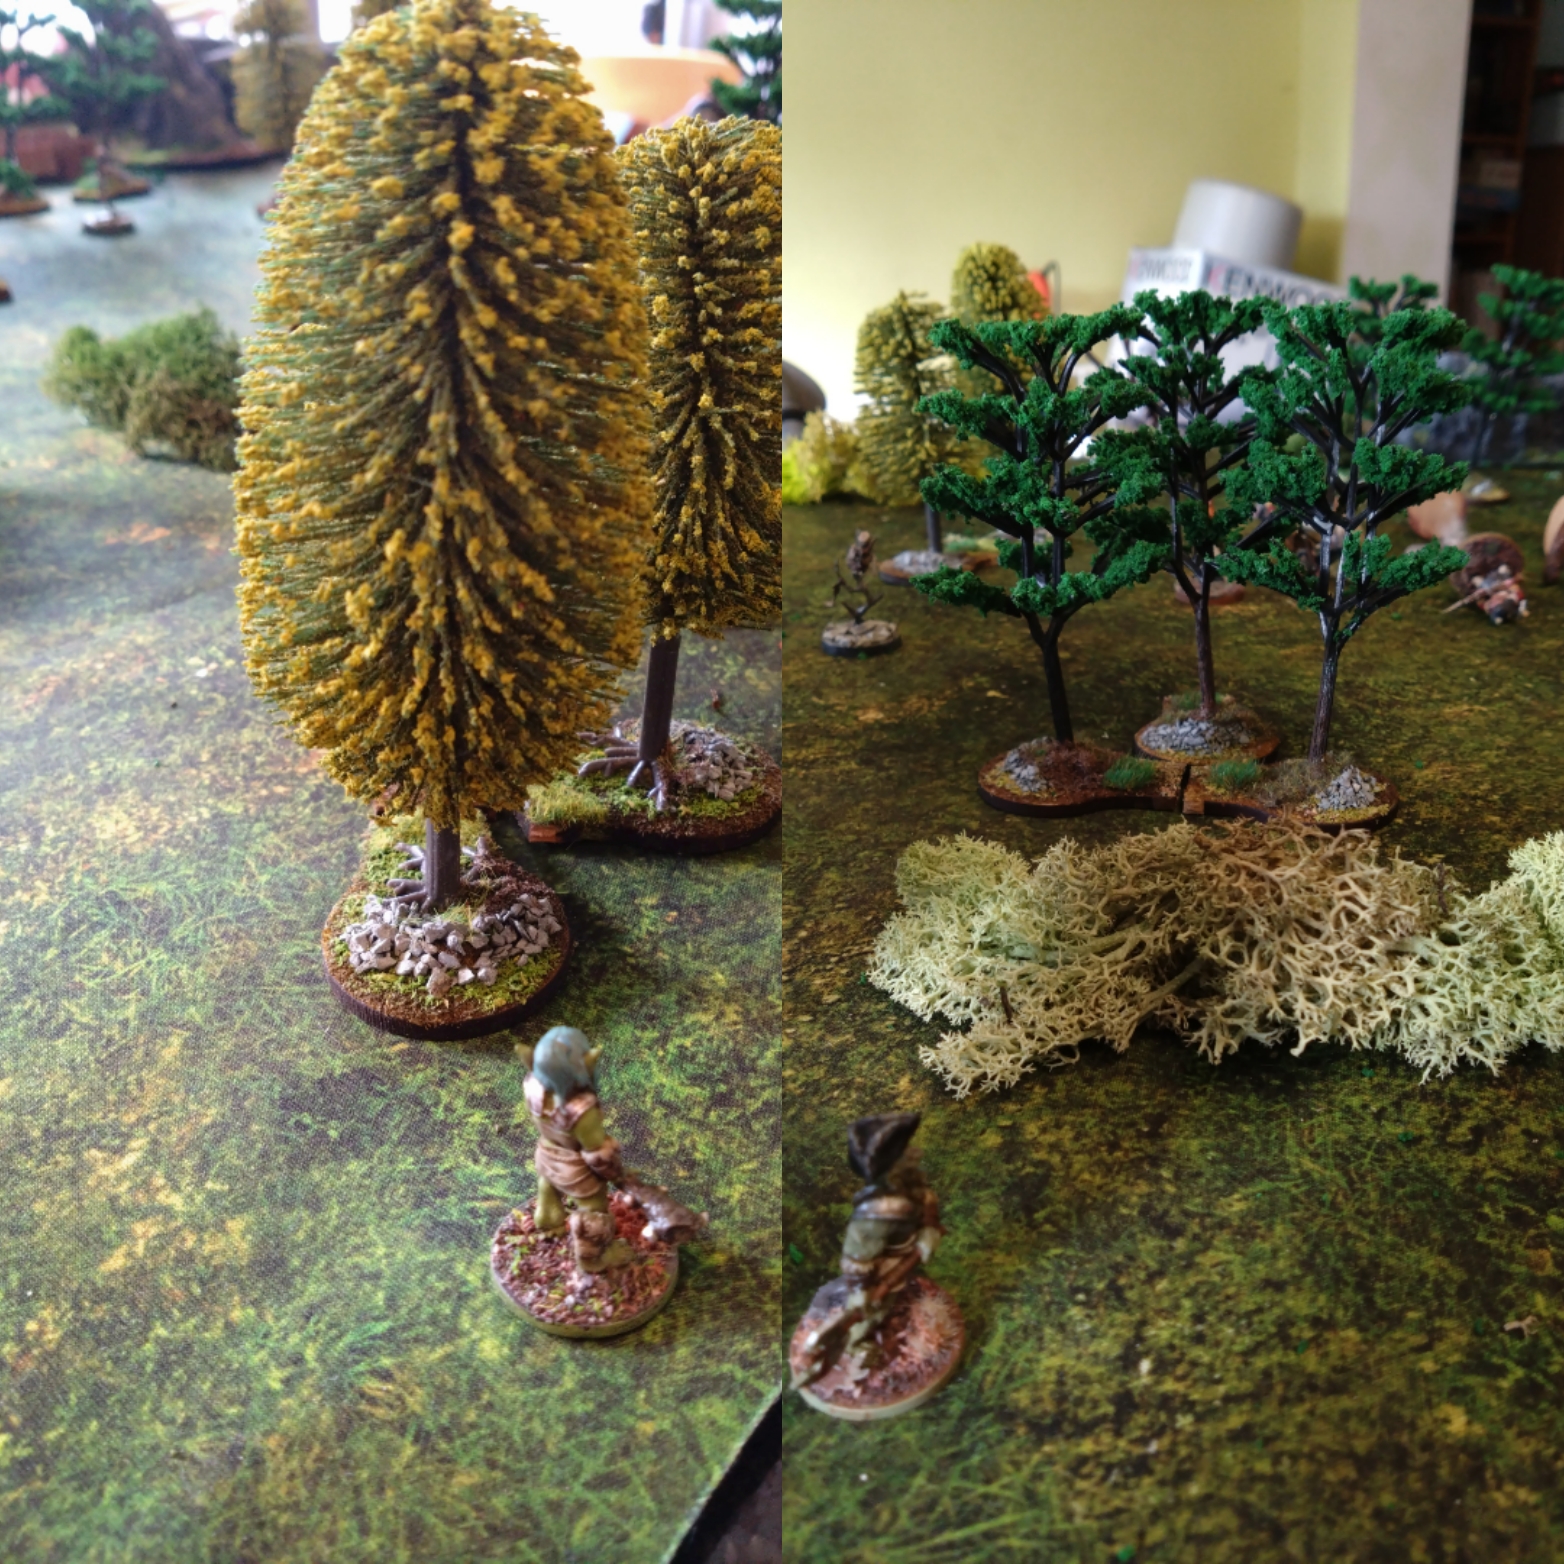 ... and two in random corners. Two to the south in our case.
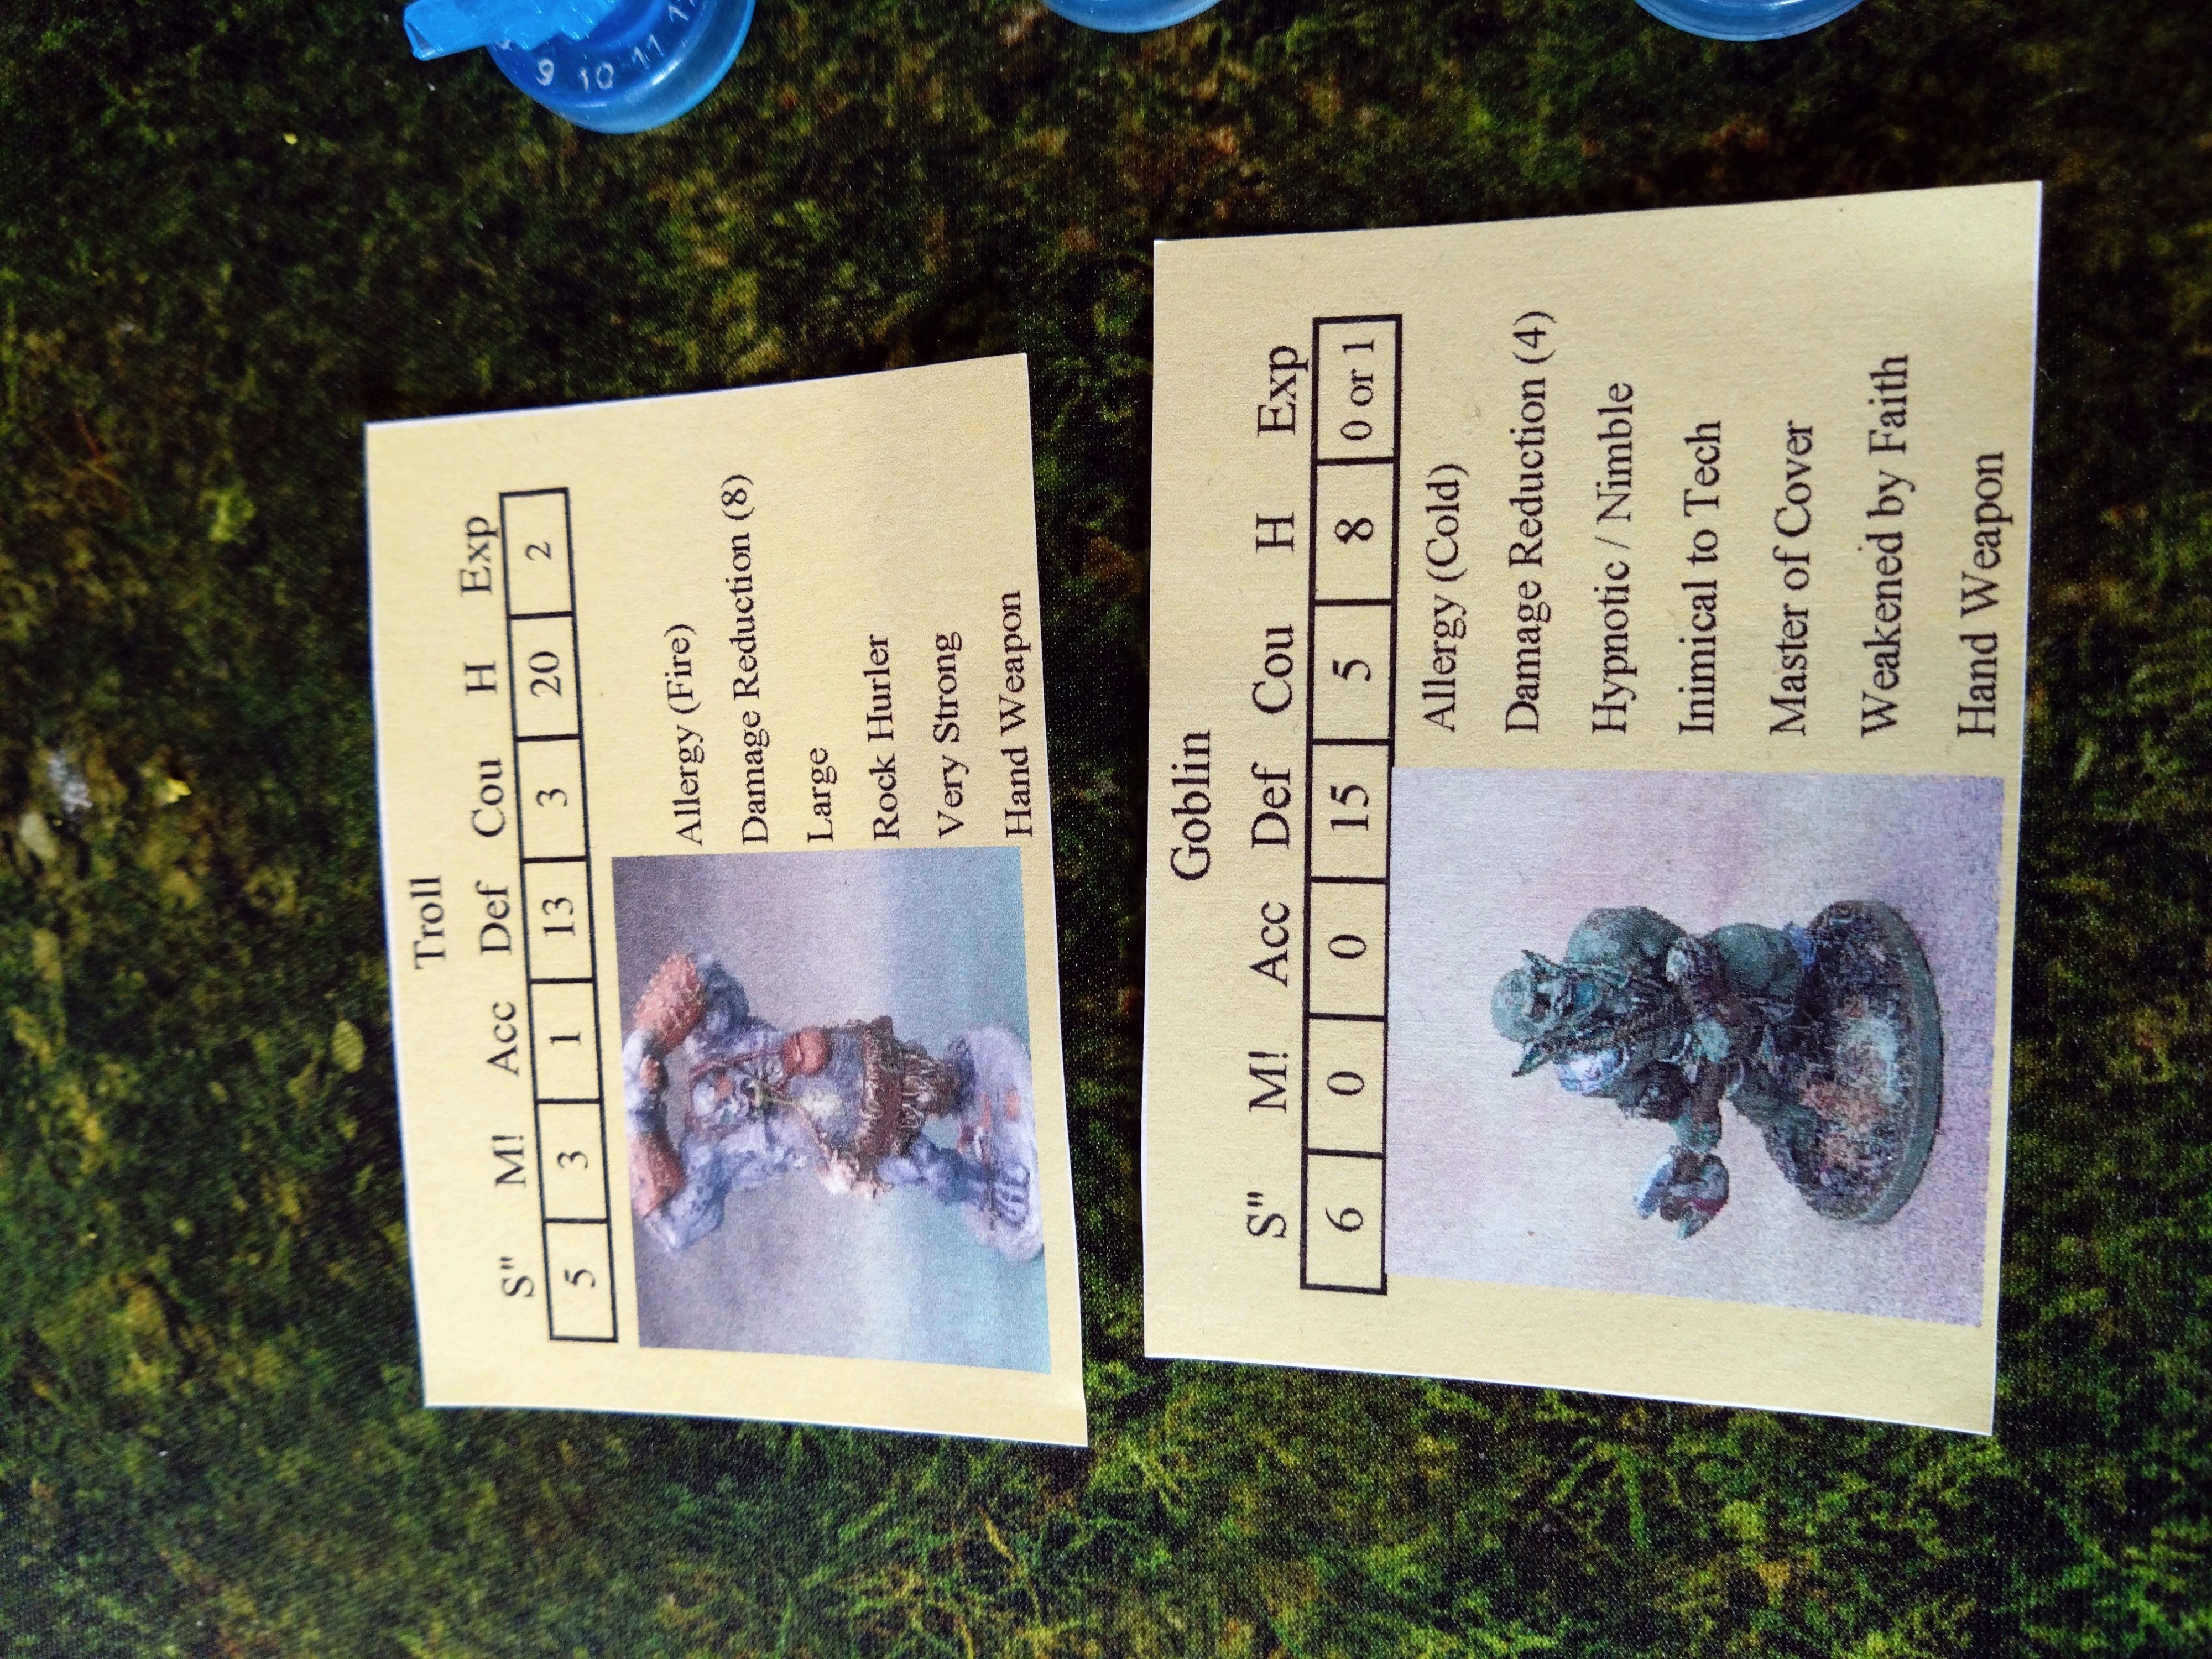 The goblins are hard to hit. (15 defense) allergic to cold iron, hypnotic and make all tech (including your flintlock mechanism) not work within 6" of any of them.
Turn 1
First half of the unit activates.
Godalming shouts at the light sleeping Doctor Bombay and he wakes instantly. There’s a chattering laughter that can only mean one thing to these paranormal veterans… Goblins. Godalming shouts at Highland Alistair Home, but he just grunts drunkenly, farts and rolls over.
Anderson, on watch with his officer paces further into the clearing and sees a goblin. His training seems to have been solid, rather than panicking and opening fire on site, he tosses some iron nails into the barrel then opens fire. The goblin screams and dies instantly as the musket ball and cold iron pieces smack home.
Godalming walks over to a clue, something dull amongst the glistening dew of the grass. It’s a bag of iron nails. The officer promptly tosses a couple into the muzzle of his musket and strains his eyes looking for a viable target.
Monster phase.
The goblins negotiate the hedges and trees in their way to close in on the unit sleeping by the campfire but don’t get into combat.
Second half…
Godalming bellows at Hatchett to get up… The gun shot and previous yelling had stirred him and now his officer barking at him prompted him to open his eyes. His first response was to grab his rifle and his pack and then he staggered a few paces in his foggy tired state away from the campfire. The rest of the unit struggle to stir.
End of turn… A goblin comes into view on a random board edge.

Turn 2
First half of the unit activates…
Hatchett fires his rifle but sadly misses, he retires north away from the campfire. Godalming fires his musket and cold iron nails, but misses, he paces back towards his men at the campfire… Godalming calls for his Highlander to wake up, but Alistair seemingly refuses to rise even though his nostrils flare at the smell of goblins only a few feet away and his mind begins to awaken to the stress and noise in the air. Anderson withdraws northward and reloads his musket.
Monster phase…
The goblins dash in, chittering and cackling as they go. The nearest goblin smashes down with his club on the sleeping Highlander… Thankfully for Alistair the Goblin hadn’t seen the log that Alistair’s head had been resting against and most of the blow struck the log (fate power dice damage mitigation coming to his aid on this one.)
Alistair stumbled up, nose bleeding, all swear words and venomous outrage in his harsh tones, he tried to strike the goblin with his fists, but it just laughed and avoided the flying fists.
The other goblins keep venturing into the campfire’s light from the south too close for comfort but not in the fight yet…
Second half…
Private Craven and Sapper Arthur Jobe fail to rise when called, stirring but not up yet, Private Bloggs does wake up and in the face of snarling goblins and his eyes still blurry he retires northward where he hears friendly voices. His body, on instinct, propels him towards anywhere where he can see red coats over green skin.
Doctor Bombay throws some smelling salts to Alistair to heal his stunned senses. The growling Scotsman takes a sniff and tosses it back the good doctor and says “next time throw whiskey you sassenach bastard.” Clearly feeling well enough to crack jokes now, Alastair reaches for his Claymore and grins back at the goblin that struck him rudely out of his slumber.
End of turn…. A goblin comes in on a random board edge.

Turn 3
First half of the unit activates…
Rifleman Hatchett reloads and fires, but misses.
Arthur Jobe awakens from a nightmare and finds himself in a fresh nightmare in reality. Jobe stands his ground, decidedly the worse for broken sleep.
Private Bloggs opens fire on a goblin with his cold iron nails and musket shot and kills the green skin outright…
Bizarrely Craven sleeps through the commotion all about him with a silly smile on his face.
Monster phase…
The Goblin that tried to do for Alistair doesn’t need a second invitation and smacks the giant man in the face and the Highlander falls to his back unconscious. The doctor looks hopeful that he would be able to get to his friend and wake him, but a second goblin rushes in and strikes the man around the head whilst he’s on the floor. Perhaps he’s not dead… But he’ll need more than smelling salts and TLC to get him back in the fight.
A goblin sprints in at the sleeping Pvt. Craven but stumbles and only proceeds to thump bodily into him and wake him. Craven squirms out from under the mess of limbs and swings his musket at the raging goblin but only fends it off for a moment.
Second half…
Godalming shouts at his men to head north, reloads his musket and moves rests by a tree looking for targets amongst the now well illuminated goblins in the campfire light.
Private Anderson heads north as ordered and opens fire on the nearest goblin but misses his mark.
Doctor Bombay, realising he needs cold iron for his pistol or a cold iron blade he sprints towards a mystical sword tree to the north and prepared to search for something of use against the surge of goblins.
End of the turn… “They have a cave troll”.
Prep for scenario 3.
I got the rules wrong with the keyword hypnosis. So perhaps the vampire should have had more opportunities to attack my men. I thought the rule just meant that the attack fails, not that the figure can strike you back.
Goblins are in this mission perhaps up to 7 on the table at anyone time.
So I painted more goblins from Blue Giant Studios. Lady goblins this time.
I also needed a campfire so I created one of those.
 I used Nighthaunt Gloom and Nihilakh Oxide on the hair over the Deathguard Green primer. Athonian Camoshade and Orruk Flesh to complete the skin. And Dryad Bark and Zandri Dust with dabs of white to highlight for most everything else. Used some Targor Rageshade (which is a less stark Nuln Oil) on a few bits that needed more definition.
 The shaving of red plastic that I took from some of the Warlord wound / panic token make up the flames. The smoke is cotton wool and I think it looks great.
 In scenario 1 I just used these dark wolves without basing or a proper paint job. Just black prime and grey zenith and the base painted brown. Happy with how they look now, but wasn't driven to do an amazing paint job. Just enough to call them done.
Solo campaign - Scenario Two - The Chapel - continued
Turn 5
First half of the unit activation…
Doctor Bombay patches up Godalming some more and has stemmed the bleeding.
Jobe uncovered a small icon (fate was on their side – in the shape of an extra power dice in the depleted fate pool)
Anderson retreated back toward Alistair and reloaded his musket.
Bloggs reloads and fires at another revenant. This shot clearly wounding his target but it wasn’t down yet.
Monster phase…
The vampires are now dangerously close. But not in combat.
Second half…
Godalming bellows at Craven to retire in the face of the impending clash with the nearest vampire. The man follows his orders though feels a reluctance in his heart as he flees the field.
Godalming fires his musket with silver shot and harms the hissing slavering vampire. But doesn’t kill it.
Alistair fires his pistol with silver shot at the same vampire but sadly missed. Hatchett fires his rifle at the nearest revenant and misses.
End of turn…A revenant appears at a random gravestone.

Turn 6
First half of the unit activation….
The blooded and beaten Bloggs is also ordered to retire so he limps away looking for Craven in the darkness.
Jobe sneaks around the corner of the chapel and finds a silver candelabra.
Godalming opens fire on the vampire closest to him. And misses.
Monster phase…
The vampire hurls himself at Godalming and attacks. The vampire wounds him terribly and causes a terror paralysis and he collapses.
A revenant attacks Hatchett but fails to wound him.
Second half…
The Doc can’t wake Godalming from his paralysis but he patches up a wound and hopes that he can snap out of the state sooner rather than later.
Alistair opens fire with his pistol with silver shot and the vampire dies in a cloud or firery dust. Alistair blows away the smoke from the end of his pistol and cooly reloads it.
Anderson rushes around to protect his downed officer and fires at the nearest revenant. The shot hits true but the corpse still walks. Hatchett fires at a revenant on his case but fails to hit it.
End of turn… A revenant appears at a random gravestone.

Turn 7
First half of the unit activation…
Godalming manages to pull himself out of his paralysis and is only shaken now and back to his feet and reloaded his musket.
Anderson fires his musket at the nearest revenant and wings it. Rather than reloading he switches to a flaming torch ready to fight the vampire if he has to. The doc patches up the brave Anderson, unsure if bravery will be enough this time.
Monster phase…
The nearest revenant, already struck a few times on his way into combat, is dispatched by the raging and frightened Anderson. Sadly the second vampire attacks poor Anderson and smashes him so hard he launches the Private head first into the chapel wall several yards away.
Second half…
Alistair levels his pistol at the vampire… And wounds the fanged fiend! As he’s about to reload Godalming tells him to retire from the field. The Highlander nods and heads off into the darkness.
Hatchett sprints around the nearest revenants to draw them away from Godalming and the Doctor.
Jobe hears the orders to retire and feels that’s probably meant for everyone, him included and sprints away from the nearest revenant.
End of turn… Another revenant appears at a random gravestone.
Turn 8
First half of the unit activation…
Godalming fires his musket at the vampire and retreats from the field… And the doctor follows suit and escapes as well.
Monster phase…
One of the revenants catch up with Hatchett but he manages to squirm free and rather than swipe back he slides further into the underbrush.
Second half…
Jobe sprints off the battlefield, well as fast as he can with all the loot and icons. The wounded vampire tries to give chase after the rifleman but the rifleman is too fast and he too retires into the darkness.
 Aftermath... Anderson suffered a second internal injury and now faces each encounter with only 8 health.
Solo campaign - Scenario Two - The Chapel
 The revenants and vampires needed for this encounter
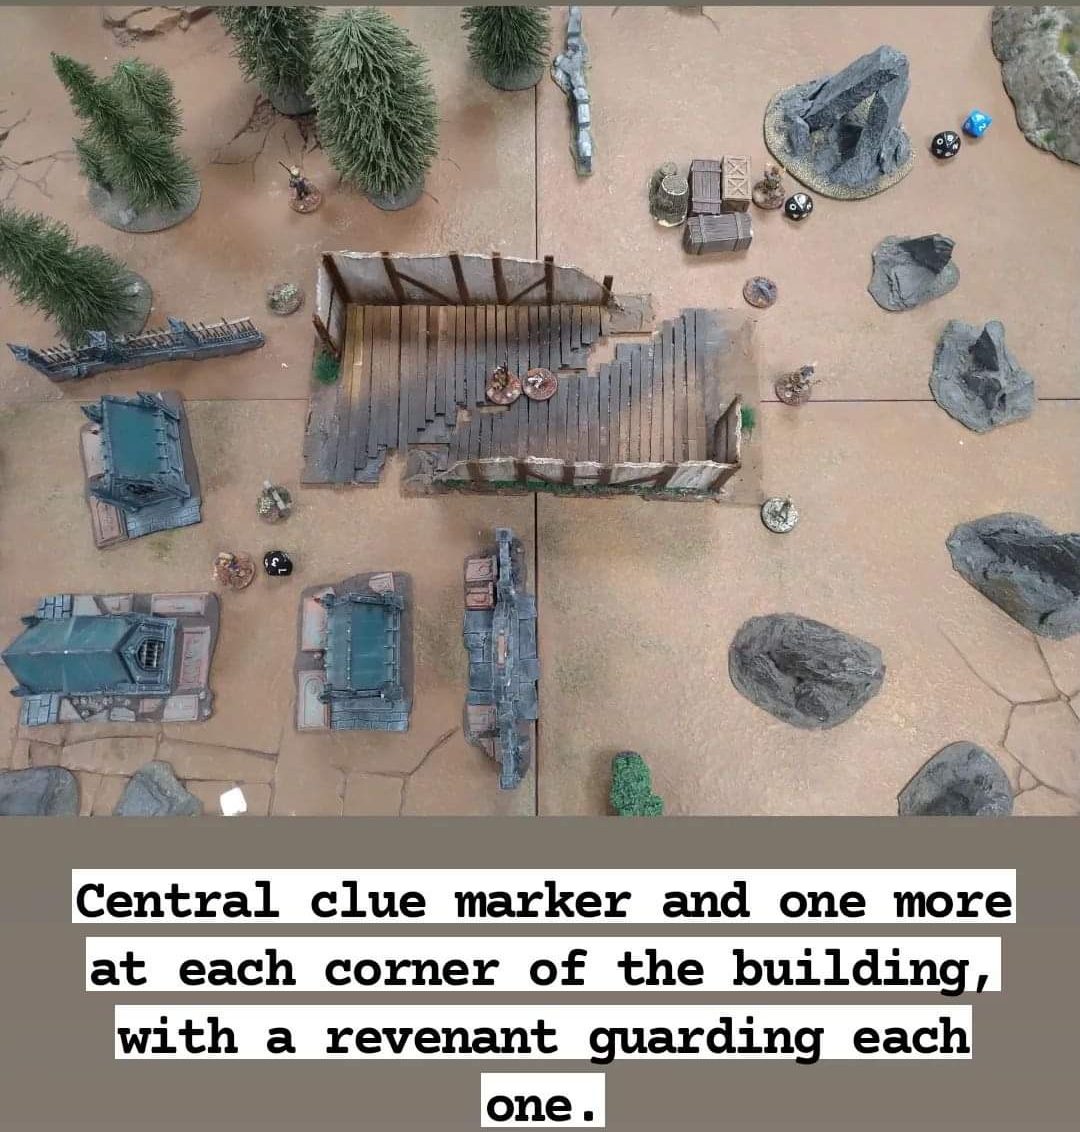
 The setup. A chapel, gravestones, a revenant at each and the Brits at one end. Investigate the clue markers around the chapel and get out of dodge.
Scenario 2
Turn 1
First half of the unit activates…
Sapper Arthur Jobe sprints to the chapel. Highlander Alistair Home walks up and blasts at a revenant with his pistol, the ball connects but the corpse kept moving.
Bloggs paces up and blasts away with his musket at the same revenant, but the walking corpse just moaned as the ball smashed home and limped onward, Rifleman Thomas Hatchett fires at the revenant behind Jobe and sadly missed.
Monster phase
The revenants shamble. The injured revenant attacks Bloggs, injures him and Bloggs fails to harm it with a bad back swing of his musket.
Second half….
Doctor Bombay races up to assess how badly Bloggs was injured (and if he was bitten?) Craven walks up in support of Bloggs and opens fire but he too fails to drop this tenacious undead fiend.
Private Anderson rushes forward with his fixed bayonet and fends the nearest revenant away but doesn’t injure it, Ensign Godalming charges in and cuts the same revanent savagely, but gets a vicious crack back and uses his sword to keep himself upright.
End of turn… Another revenant appears at a random gravestone.
A vampire comes into play on a random corner edge.


Turn 2
First half of the unit activation…
Jobe Investigates the clue and finds a silver dagger. He opens fire on the wounded revenant targeting Bloggs but misses.
Doctor Bombay bandages Bloggs arm quickly (and finding no bite marks he puts his butcher’s knife away)
Bloggs reloads and fires his musket but in his weakened state misses.
Godalming walks away from the revenant that harmed him and opens fire with his musket. The ball shattered the skull of the bag of bones, the corpe finally at rest (again).
Monster phase…
Meanwhile the revenant savages Bloggs again and puts him down. The corpse stands over his prey and screams his defiance. A revenant ploughs into Jobe clumsily, so clumsily that Jobe is able to rock back and swing his axe down in a savage head splitting blow and the corpse clatters to the ground. The vampire is seen through the trees approaching the Northside of the chapel.
Second half…
Craven lunges with his bayonet and finally the undead monster standing over Bloggs is dead. Craven is covered in stale greeny blood from the exchange but routinely finds his musket cartridge at his hip and reloads his musket, Alistair unsheathed his mighty claymore and charges at the nearest revenant. He almost kills it but the beast gets a parting shot that injures the Highlander as well.
Hatchett moves and takes a shot at the nearest revenant and knocks it down, but to their horror it gets back to its feet and keeps coming.
Anderson also blasts away with his musket but misses and he reloads quickly as the beast gets closer.
End of turm… Another vampire comes into play on a random corner edge.
Another revenant appears on another gravestone.
 Vampires approach from the north east...
Turn 3
First half of the unit activation…
The doctor manages to get Bloggs back to his feet though he’s the worse for wear.
Jobe moves to investigate the second clue and finds a jewel encrusted silver cross. Godalming retires towards the good doctor and reloads his musket. Alistair roars at the rev that injured him and cuts the thing in two with his Claymore.
Monster phase…
A revenant attacks Anderson but the Private parries the outstretched arms, rams the bayonet up under his chin and out through the top of his head, in a gore spattered blow that makes the usually robust man heave his guts up.
The remaining revenants and vampires shamble (and pace regally) towards the unit.
Second half…
Bloggs reloads shakily and fires his musket. To his annoyance the ball cracks a rib and flies straight through the rev without even changing the gate of its shamble.
Hatchet reloads and fires at a revenant approaching Jobe. The rev seemed to shudder under the impact and it’s pace slowed.
Anderson fired upon the same revanent missed, and frustrated and bloodlust up he charged in with his bayonet on the beast. He does appear to wound the revenant but the backlash almost kills Anderson.
End of turn… Another revenant appears at another gravestone.

Turn 4
First half of the unit activation…
Jobe walks down to another clue, but chooses to reload his musket instead. The Doc heals Godalming and the Ensign fires at the the revenant that just wounded poor Anderson and kills it with an impressive headshot at range.
Anderson gingerly reloads and opens fire on the closest revenant threatening Jobe and misses.
Monster phase…
The revenant closest to Jobe shambles towards him but fails to respond to the axe swinging wildly through the air and is cuts it from shoulder to hip and dies instantly.
The vampires get closer and a revenant attacks Alistair. Alistair avoids the grasping hands and wounds the beast and rocks back a pace to gather himself.
Second half…
The Highlander retreats towards his officer and reloads his pistol.
Hatchett reloads and fires his rifle at the revenant that Alistair had wounded, but missed. Bloggs fires and misses, broken by his injuries, just firing through drill and instinct but his accuracy is off. Craven takes aim at the same revanent and kills it.
End of turn… Another revenant appears at a random gravestone.
Solo campaign - Scenario One - Wolf Pack - Continued
Turn 4
First half unit activation…
Hatchett flees away from the Werewolf and reloads his rifles as he moves.
In spite of his injury Alistair blasts a silver bullet into the werewolf, but only appears to have wounded it (and upset it.)
Craven investigates the clue he found and… Found the objective!? The missing orders are found, so the squad can begin to retire from the fight.
Monster phase…
The wounded wolf comes again, this time at Bloggs but with less energy, an unnerved Bloggs tries to stab it again, but it wheels away beyond his glinting blooded blade.
The werewolf charges at Anderson and batters him into the nearest tree and Anderson is out for the count. Another wolf attacks Jobe and again he avoids the teeth. Jobe’s axe bites flesh but doesn’t fell the canine.
Second half…
Godalming gives the order to retire in good order, fires a silver shot at the werewolf and harm’s the beast wickedly and backs away into the mist surrounding their engagement…
Jobe and Bloggs begin to retire as ordered and reload their muskets.
End of turn wolf roll …
Another wolf arrives close, to the South.
Turn 5
First half unit activation…
Hatchett fires his rifle at the werewolf and retires to the North West hoping to circle around somehow later as his brothers in arms escape Eastward… Alistair heads off to support his wounded officer and disappears into the mist…
Monster phase…
Two wolves in succession attempt to harm Private Bloggs but even as he fatigues they fail to sink their teeth in. The werewolf roars, but he fails to catch up with the retreating Brits.
Second half… Private Bloggs finally puts down the wolf that had already been wounded and headed off into the mist… Arthur Jobe fired his musket at the Werewolf and the beast collapsed in a heap on the floor (the silver bullets that struck him earlier finally taking their toll most likely). Jobe vengefully spat on the earth, concerned for the health of Doctor Bombay and Anderson left behind, but he followed his orders as he too made his way into the fog.
Craven took one last shot at the nearest Wolf and ran to catch up with the others.
End of turn wolf roll… another wolf arrives to the South.

Turn 6
Rifle empty and wolves still on the prowl Hatchett escapes into the night and finds his way rather circuitously back to his comrades.
Mission completed…
The aftermath
Godalming is already dressing wounds, taking stock and considering the best path back to check on Doctor Bombay and Private Anderson. Reading the plans Craven found can wait until daylight to be read. The unit survived for the most part and no one is bitten or slashed by the werewolves, so things could have been a lot worse.
 The team got full XP for the mission. Anderson suffered a permanent injury, (internal injury = health -1) but the good doctor escaped with a concussion, no more serious injuries and helps patch up the wounds sustained by the others.
Solo campaign - Scenario One - Wolf Pack
 The unit was in the middle of the table, the wolves were spread around the edge. There were 6 clue markers to find a set of missing orders or find out what has befallen to the unit that had the orders.
 Still using these carwash sponge rocks as a fun obstacle and the sword tree gets a run out as a clue marker.
 I made my own stats cards for most of my bestiary. They came in handy.
Turn 1
First half of the unit activation…
Ensign Brock Godalming leads the way, opens fire on the nearest wolf hoping to frighten it away at the very least… but these dark wolves seem to know little fear…
One wolf soon falls to a musketball though, Alistair Home the Highlander takes aim fires and reloads like the professional he is.
Private Anderson sprints Southward to get to the first clue (something glinting in the full moonlight), Doctor Herbert Bombay heads South in support.
Monster phase
One of the wolves appears to morph into a Werewolf in the mist beyond the clearing, movement but no combat.
Second half…
Werewolf appears close to Godalming and the good doctor, but a nice shot from Private Craven wings the werewolf, Private Bloggs and Rifleman Hatchett let off shots but miss their targets… Sapper Arthur Jobe heads South towards the werewolf, hoping his Silver guilt axe will come of some use.
End of turn roll on the wolf table… A werewolf appears next to Anderson.

Turn 2
First half of the unit activation…
Anderson picks up the clue and is rewarded with a bag of silver shot, he roles a silver ball down on top of his loaded ball and fires, and the silver ball bites and takes 10 health away! The werewolf looks angrier and very much alive.
Godalming fires his musket at the newly appeared werewolf and misses, The Doc switches to oil and torch and runs at the werewolf at Anderson’s back, doesn’t hurt the beast, but the agile for his years doctor dives out of the retaliatory swipe from the werewolf. Jobe swings his axe at a werewolf, and nicks it, but the beast slashes back but apart from a torn epaulette survives the encounter.
Monster phase…
The werewolf near Anderson attacks Doctor Bombay and to all around looks to have killed him with a mighty swipe and the old man is cast aside, slamming unconscious or dead into the nearest tree. The wolves close in and the nearest Wolf took a bite out of Ensign Godalming, but the officer slashes back with his sword and almost kills it.
A wolf attacks Jobe, but gets a gash from the sapper’s axe for his trouble.
Second half…
Alistair paces up next to his wounded officer, calmly levels his musket loaded with silver shot and dispatches the werewolf that just did for poor Doctor Bombay.
Hatchett puts some distance between himself and the wolves approaching from the North and kills the wolf that wounded Godalming moments ago.
Private Bloggs drops his unloaded musket, lights a torch and charges at the werewolf. He sets the wounded beast ablaze and the werewolf screams a half human, half wolven scream and runs away into the night mortally wounded.
Craven reloads and fires and takes down the nearest wolf.
End of turn wolf roll…. No event.
 Doctor Bombay in the foreground seconds before he is smashed into the nearest tree by a werewolf.
Turn 3
First half of the unit activation… Craven sprints to the next clue beneath a tree, but doesn’t have time to investigate straightaway.
Hatchett makes it to a clue and reveals … A werewolf!…
Bloggs, buoyed by his killing one werewolf with fire, charges across to try and support Hatchett, but is too far away to engage immediately. Godalming retreats holding his wound and manages to reload his musket
Monster phase…
The wolves from the north catch up with Jobe and Alistair. Jobe fends off the attack with the haft of his axe and swings it around and decapitates the beast. Alistair gets bitten, fails to harm the beast in retaliation and edges away clutching his wound.
Hatchett takes a terrible blow from the Werewolf he disturbed and slashes back with his short sword rifle bayonet, but the wound was superficial.
Second half…
Jobe reloads and fires his musket and only wings one of the slavering wolves at his back, Alistair reloads and fires at the wolf that just took a bite out of him and blasts its head off into a sudden red mist.
Anderson fixes his bayonet and runs at the wolf that Jobe just winged with his last shot. He savages it with his bayonet, but the beast is still in the fight…
End of turn wolf roll…. Two wolves appear on the far north east corner of the wood.
 What looked like a furcoat... Turned out to be a slavering werewolf... Which was nice.
Indi of the week inspired purchases - Gringo40s.
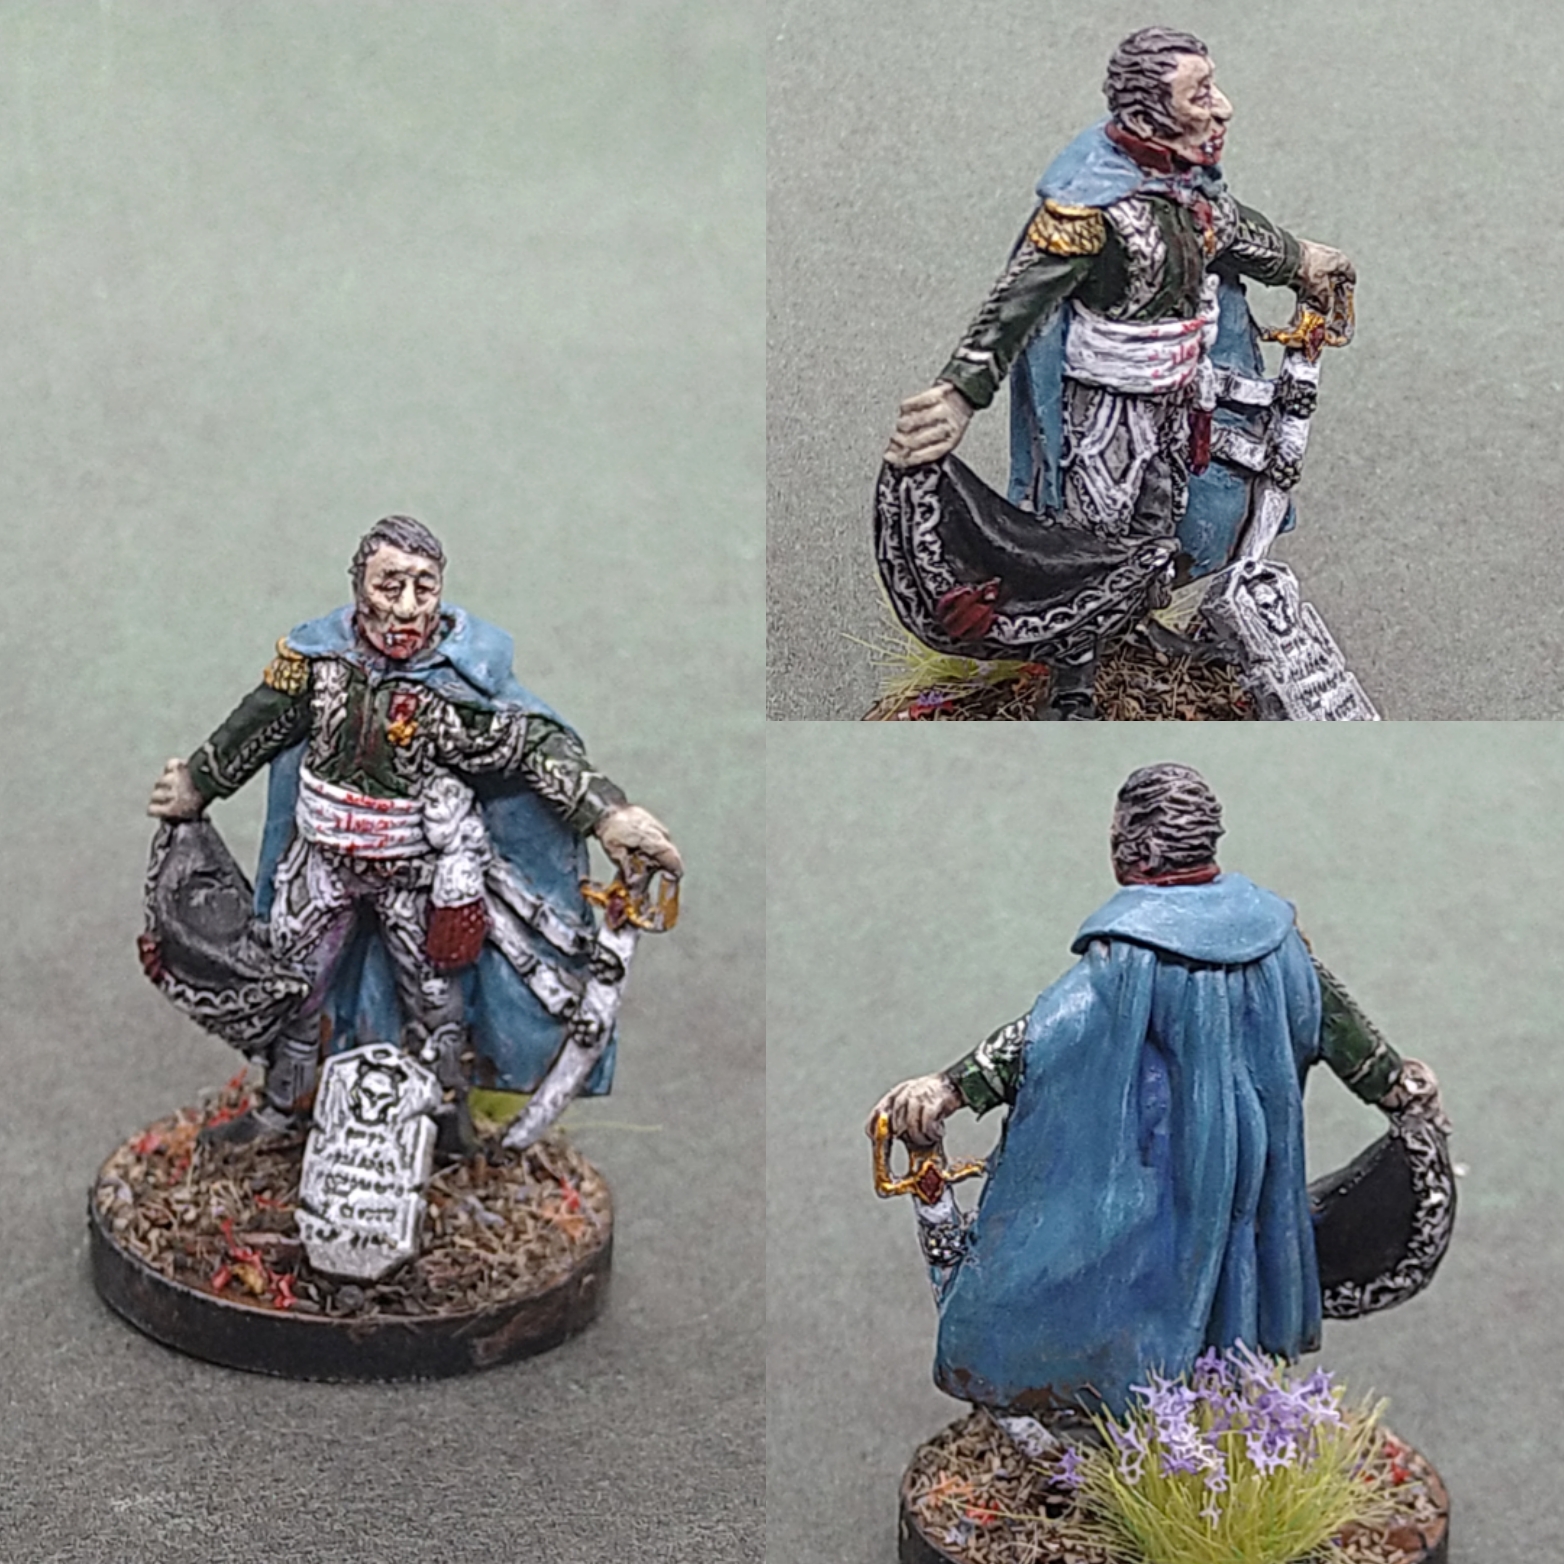 General Grouchy from the Gringo40s range looked immediately like a vampire to me. So I picked him up as part of a small batch of Silver Bayonet options from Gringo. I like how he turned out and think the nondescript coloured uniform helps make him stand out as not a warband member but a bad guy encounter mini.
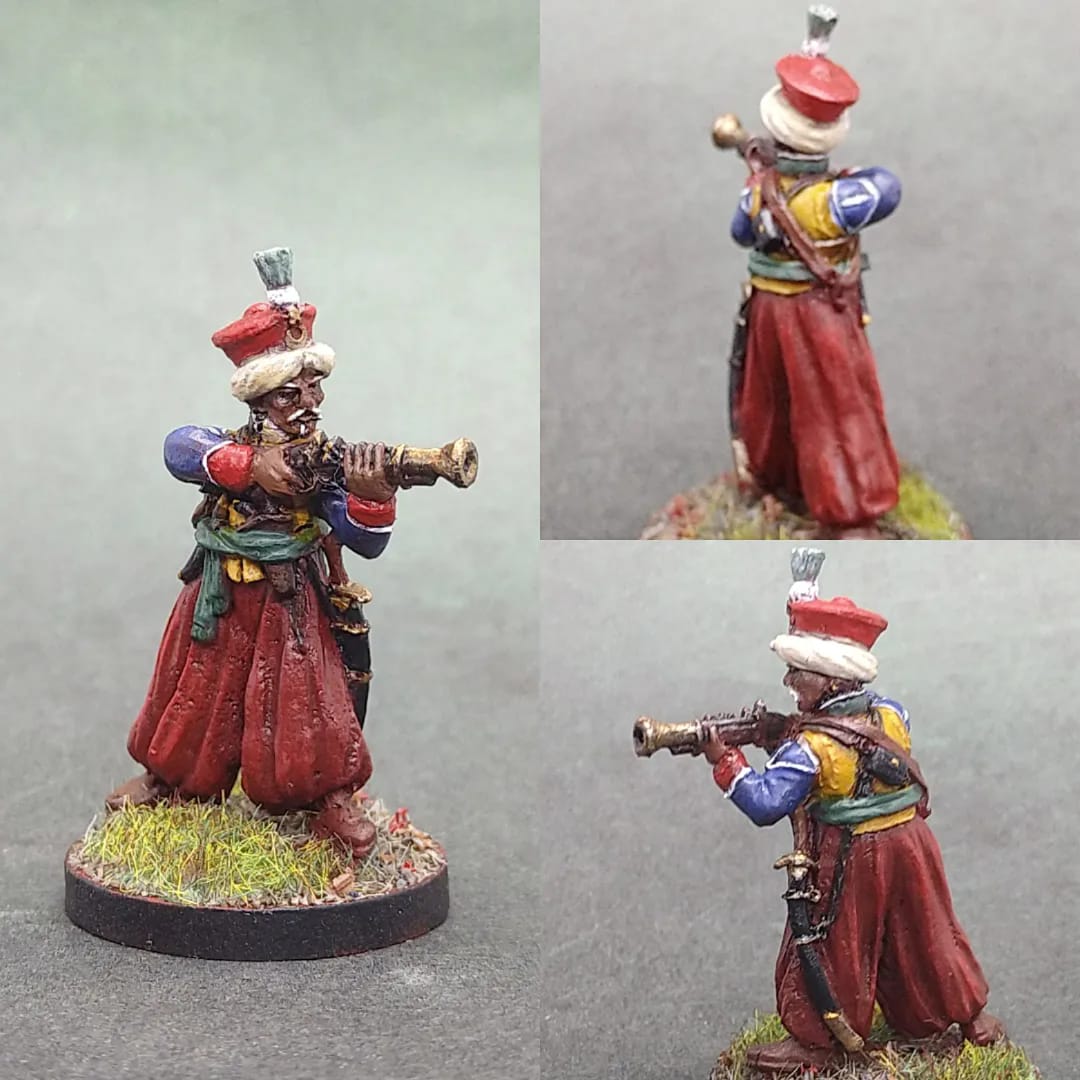 My mum got me the Silver Bayonet rules last Christmas and sadly she passed away two weeks ago. But I think she would appreciate the fun... We both loved a pun. "Mameluke. Mama Looook... I painted a Mameluke." Thanks for introducing me Gringo40s. They do great 28mm Napoleonics.
The battle report!
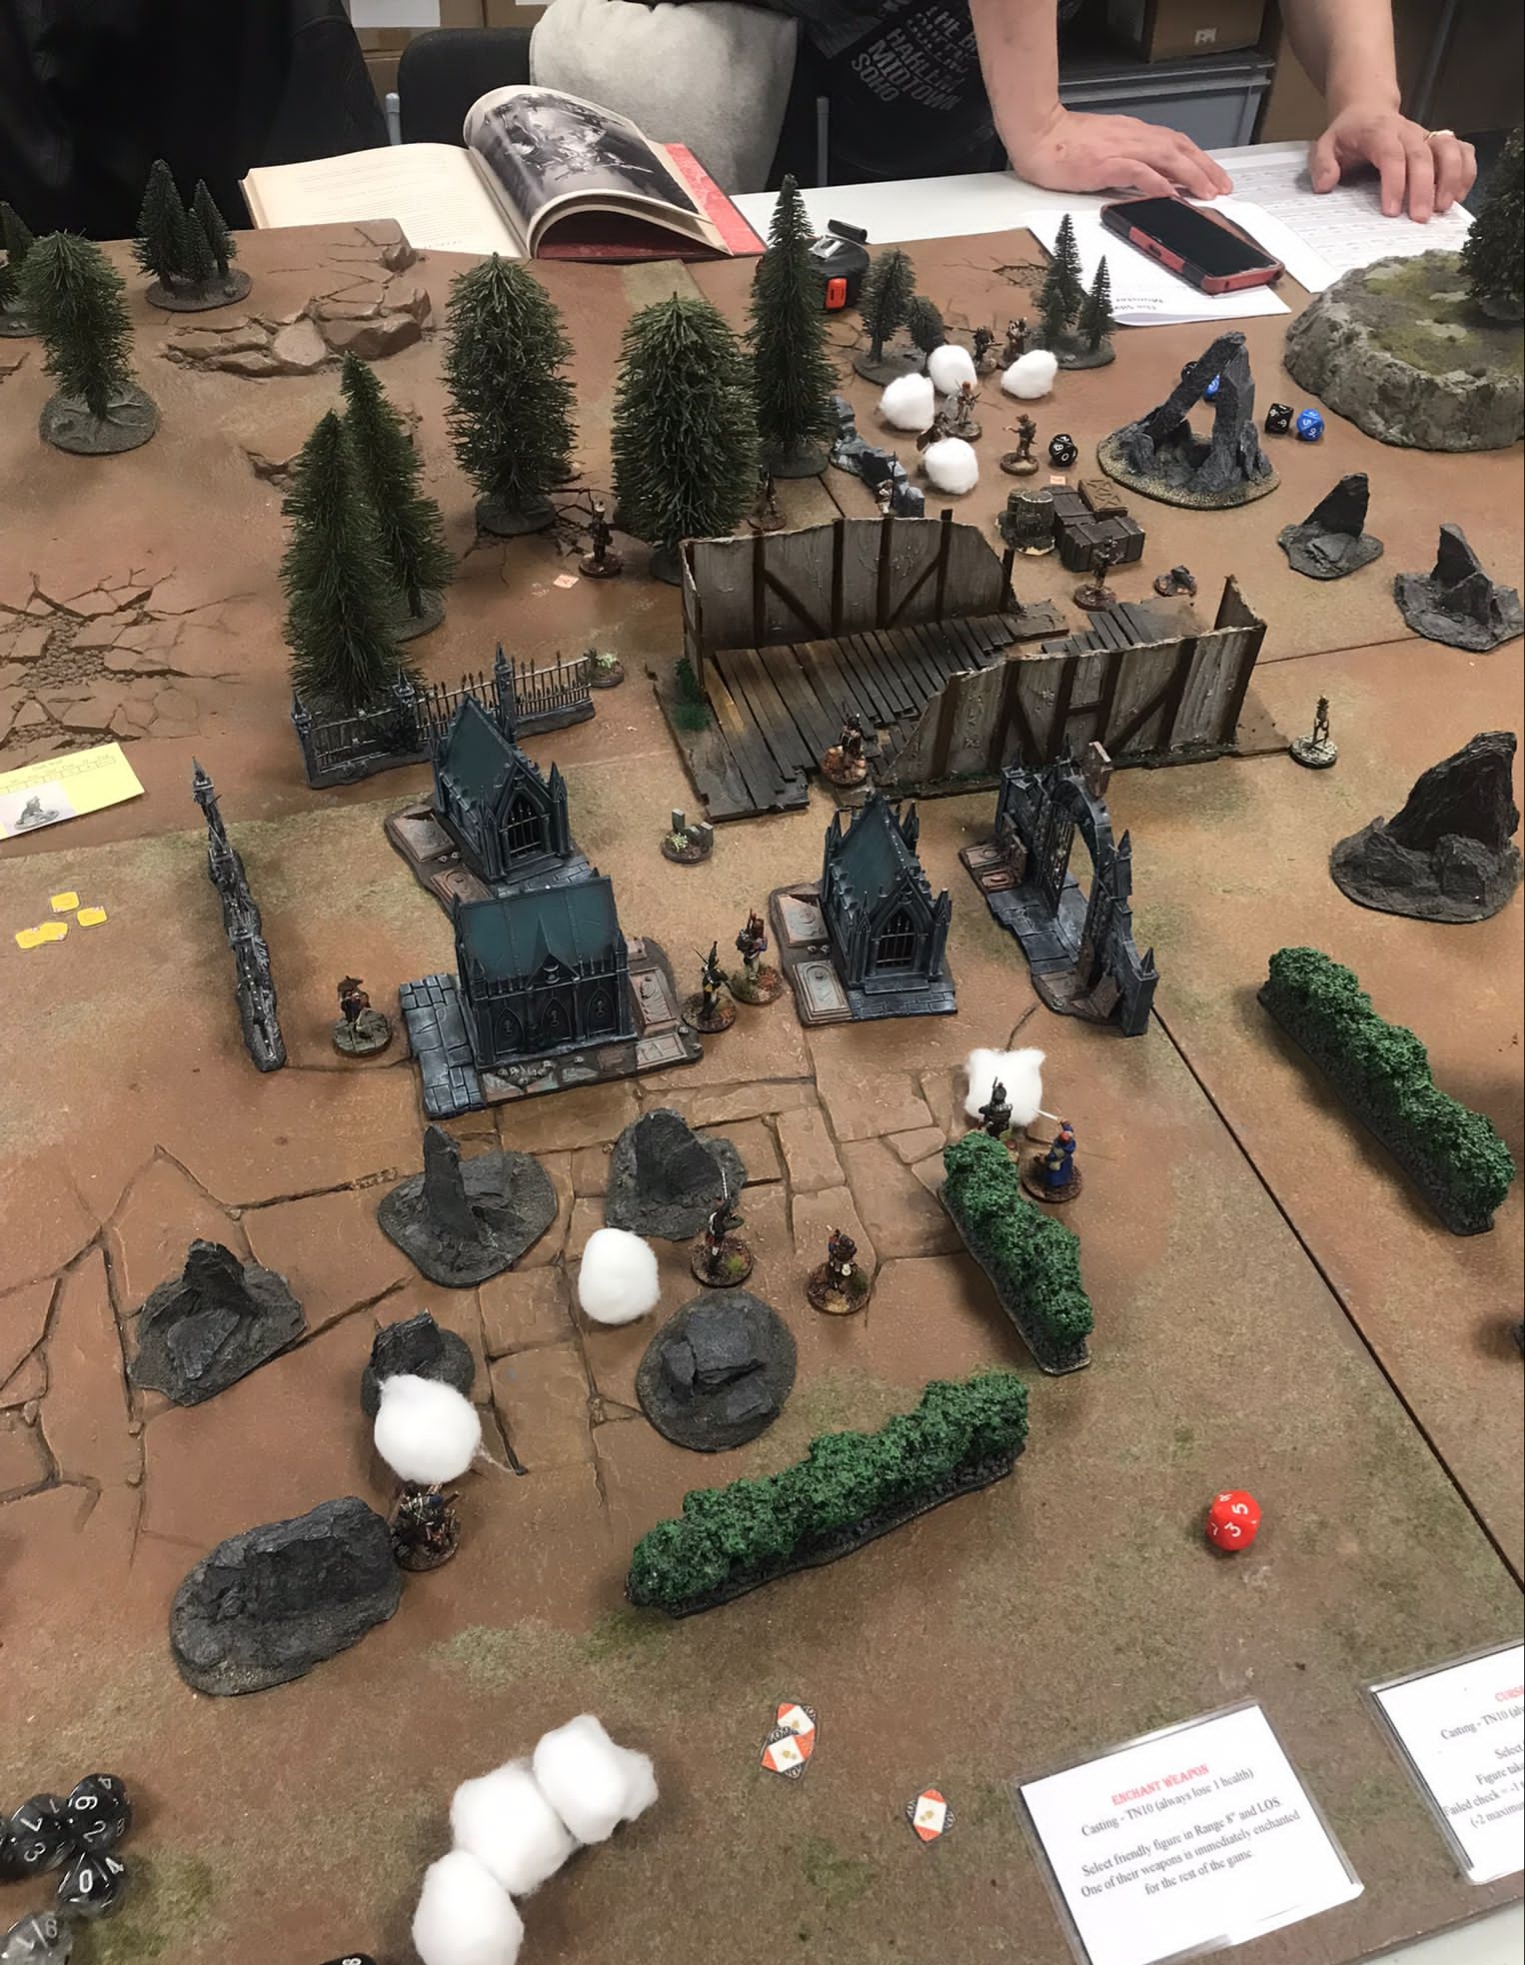 Had a great time playing our first game. We played scenario 2 The Revenants. We set up at Dark Sphere in London Shepherd's Bush. I provided the painted minis and the burnt out building and the shop provided the rest of the terrain. We dipped into the books plenty, but the book is pretty well laid out and we both really enjoyed the experience.
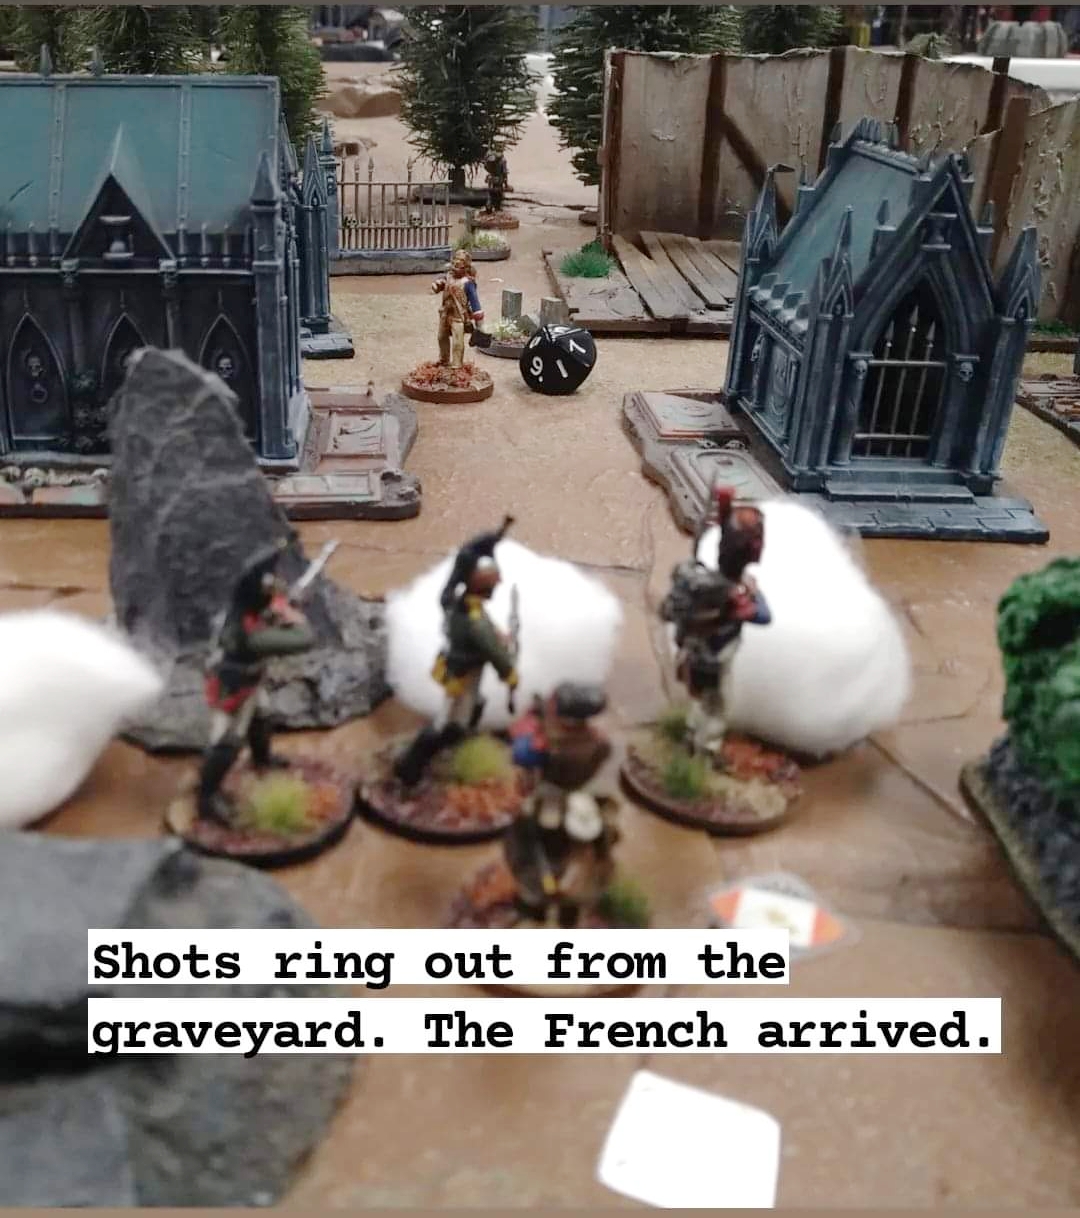
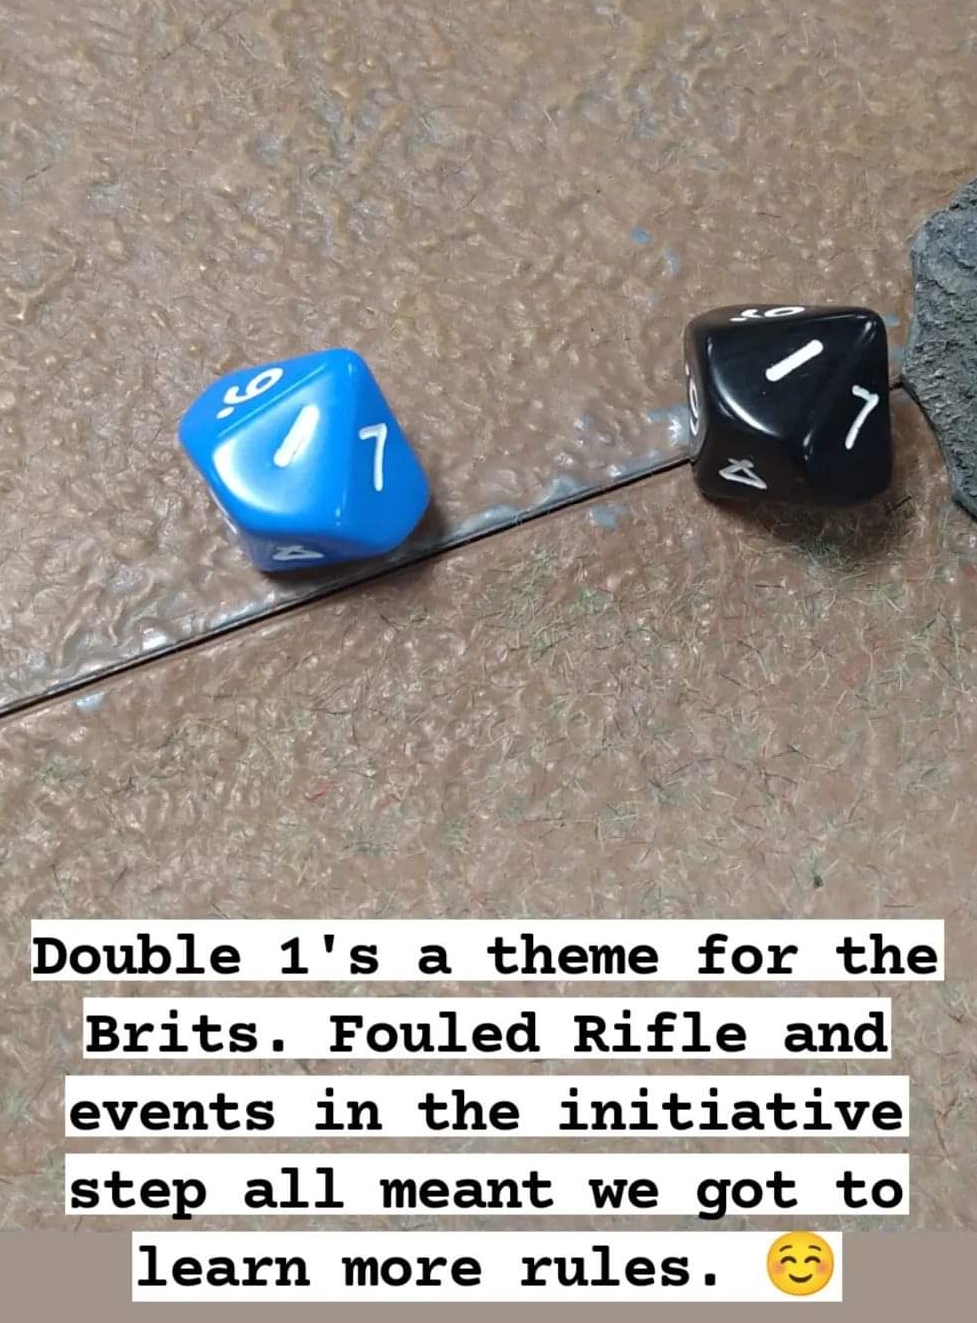
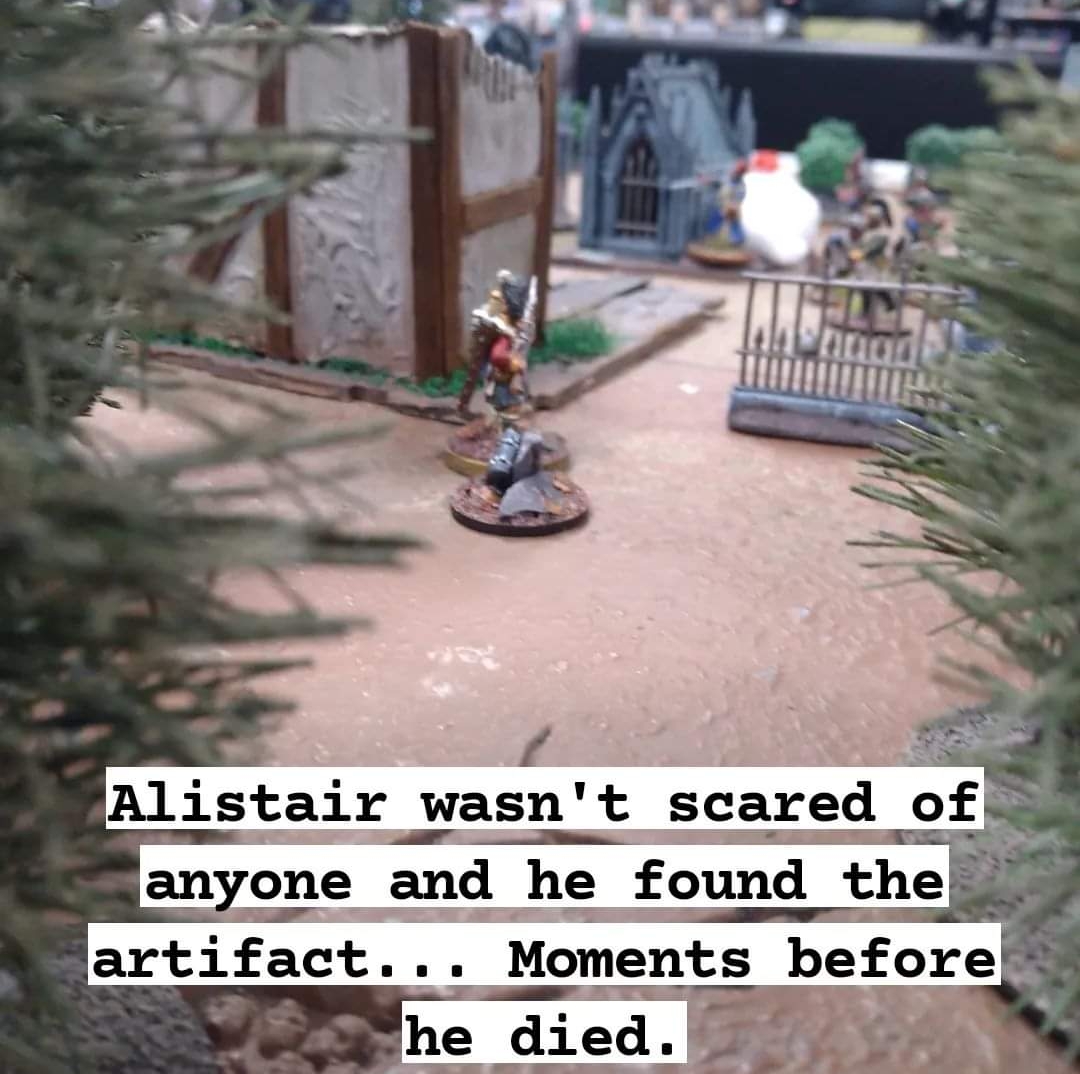
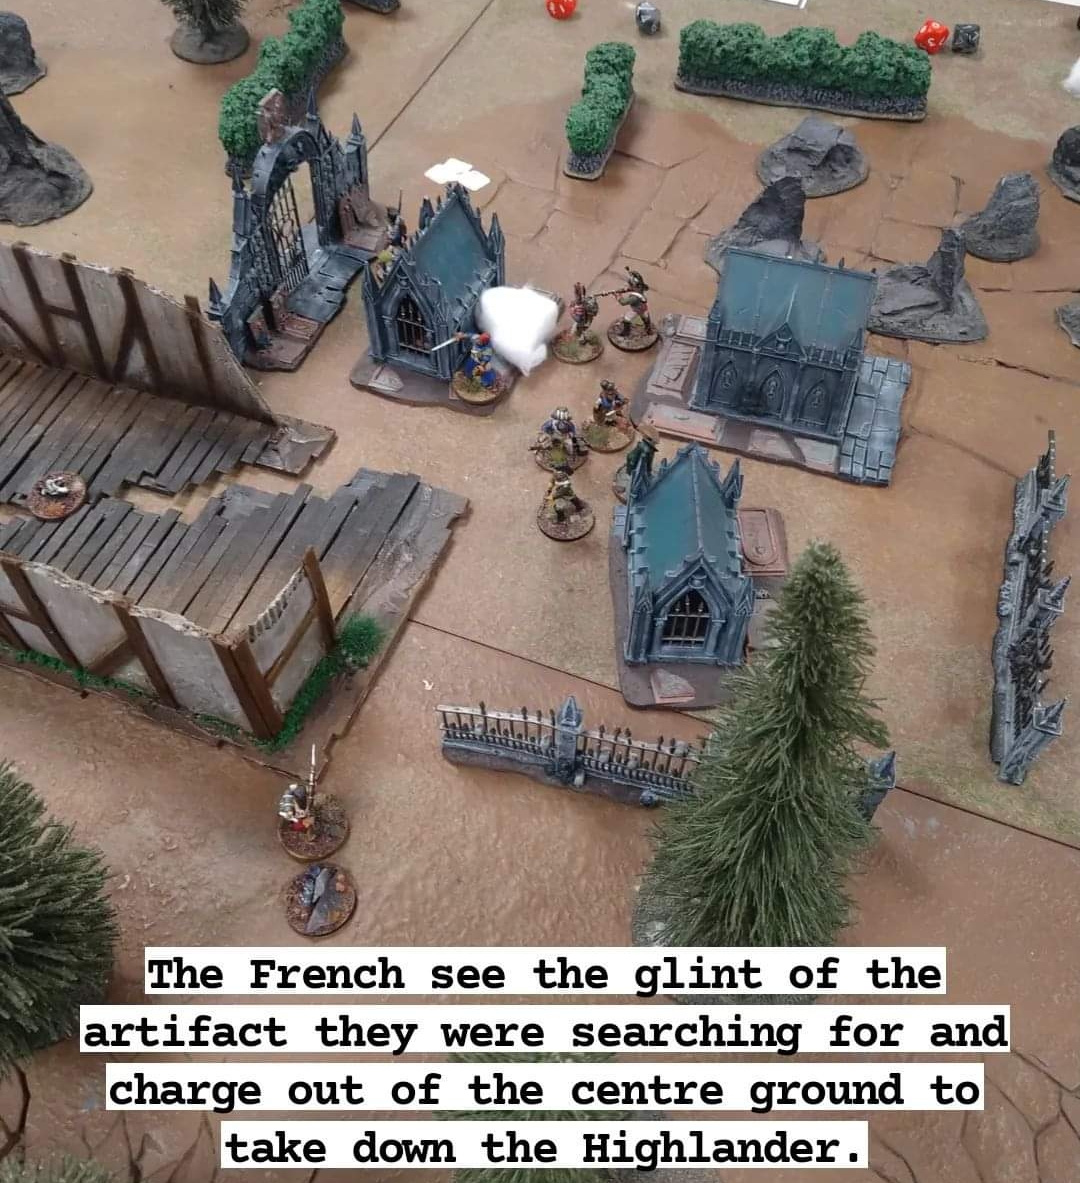
 Took way too many risks with my British force and it ended in a massacre stood over the artifact. Awful dice rolls throughout. Double 1s on my Rifleman. Officer knocked out on turn 2. Messy loss, but so much fun and minis and the terrain looked cool. Can't wait to play again.
Clue Marker
 The bits box contributions from a friend have been amazing help, but I have no idea where it's from. I imagine this poor soul has been displayed here as an offering to the dark side?
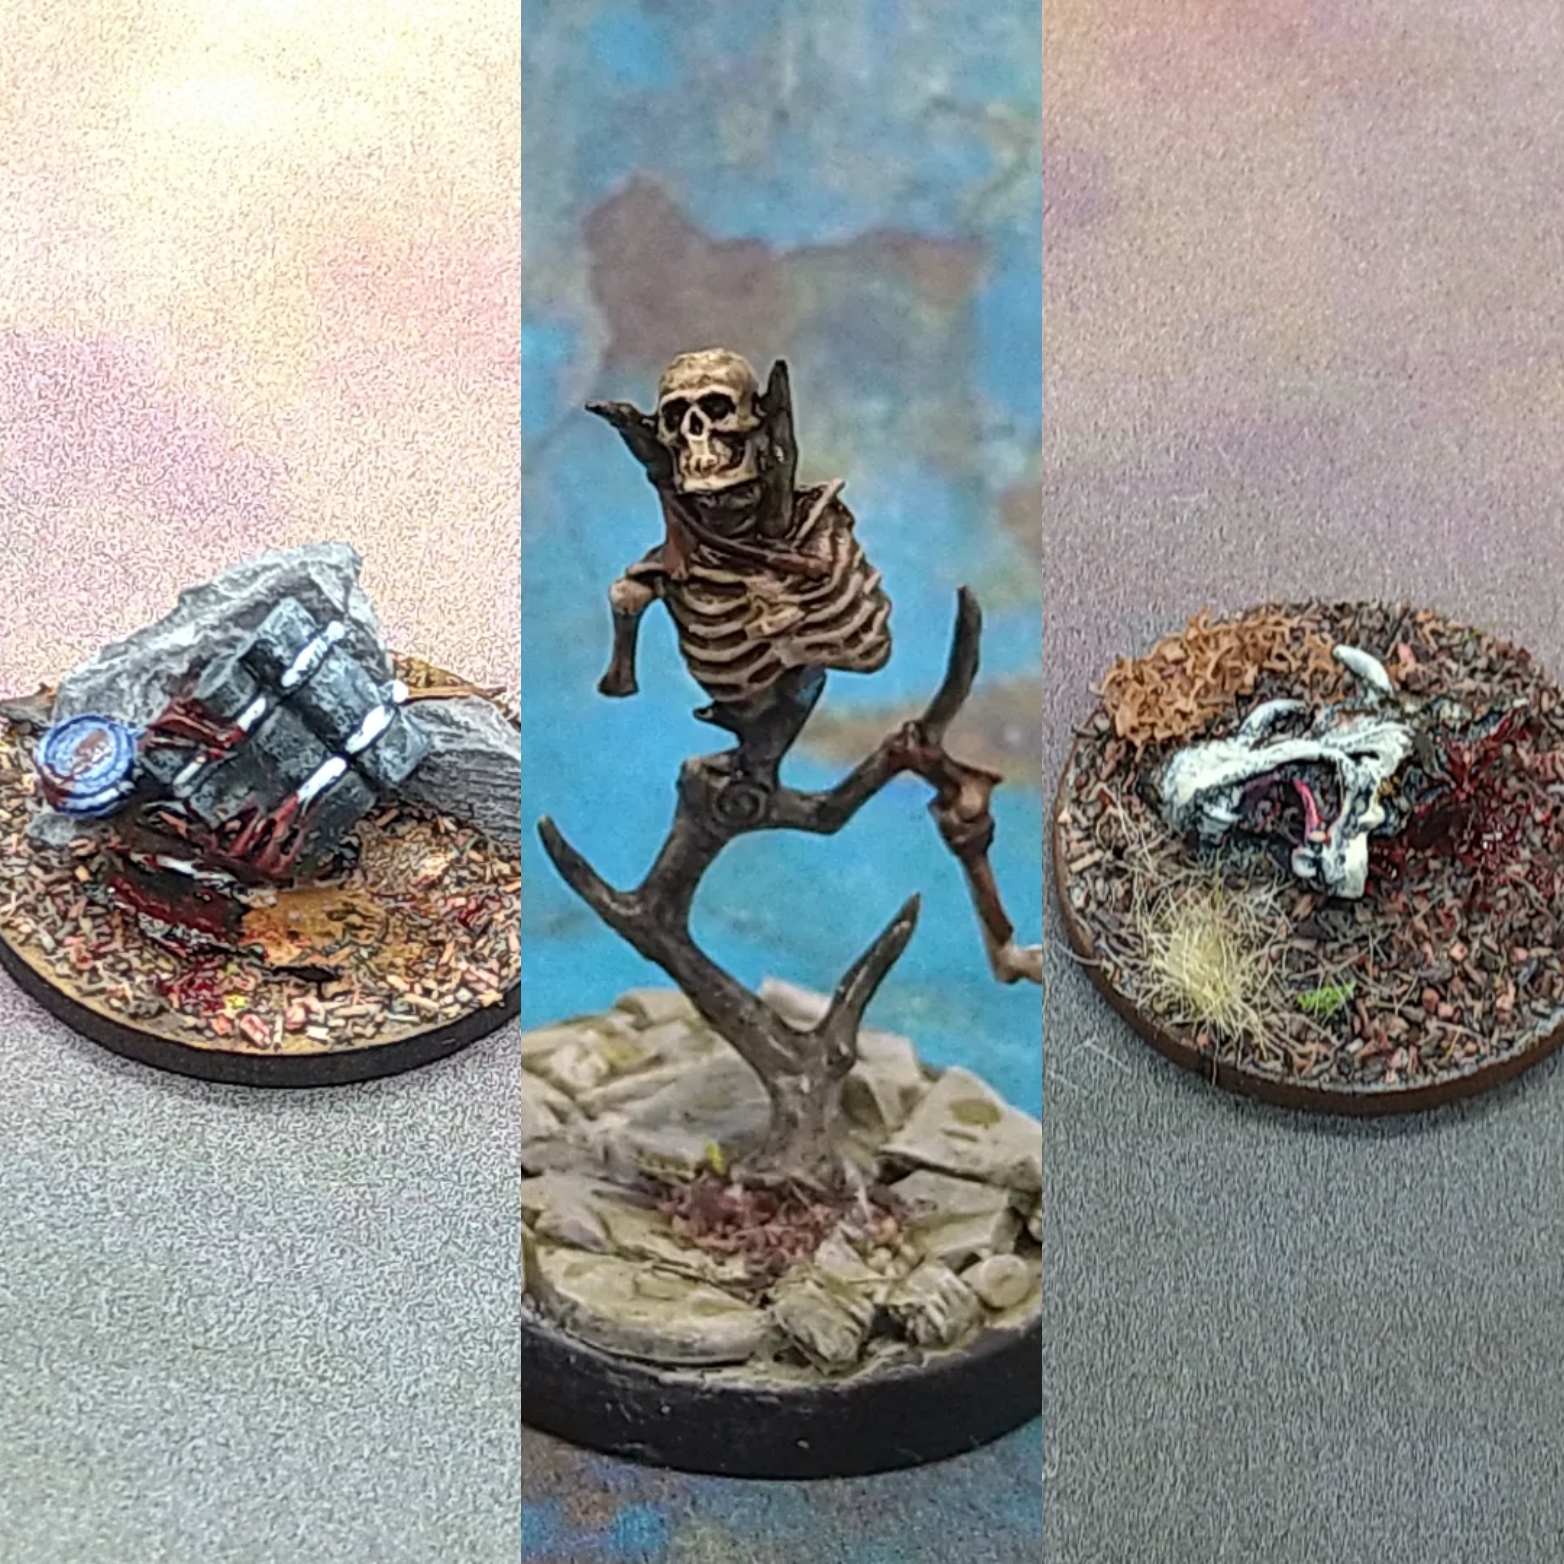 Just used these and a couple of my headstones as clue markers for our first game, but will probably conjure up a couple more ideas hopefully strictly set to the era a bit more.


