


“Über die Brücke” (A Spring Cleaning Challenge – 30 years late!) with Zebraoutrider


Recommendations: 161
About the Project
I created a diorama in 1992 for the International Model and Engineering Exhibition but it was never entered because they scrapped the fantasy and sci-fi model competition classes. That was a real shame because I’d managed to get a Highly Commended, Silver and Gold medals in previous competitions. So the diorama was left to gather dust in the loft. I’ve pulled it out now with the aim of restoring it to its former glory as my OTT/BoW Spring Clean Challenge 2022.
Related Game: Warhammer Fantasy Roleplay
Related Company: Games Workshop
Related Genre: Fantasy
Related Contest: Spring Clean Hobby Challenge (Old)
This Project is Completed
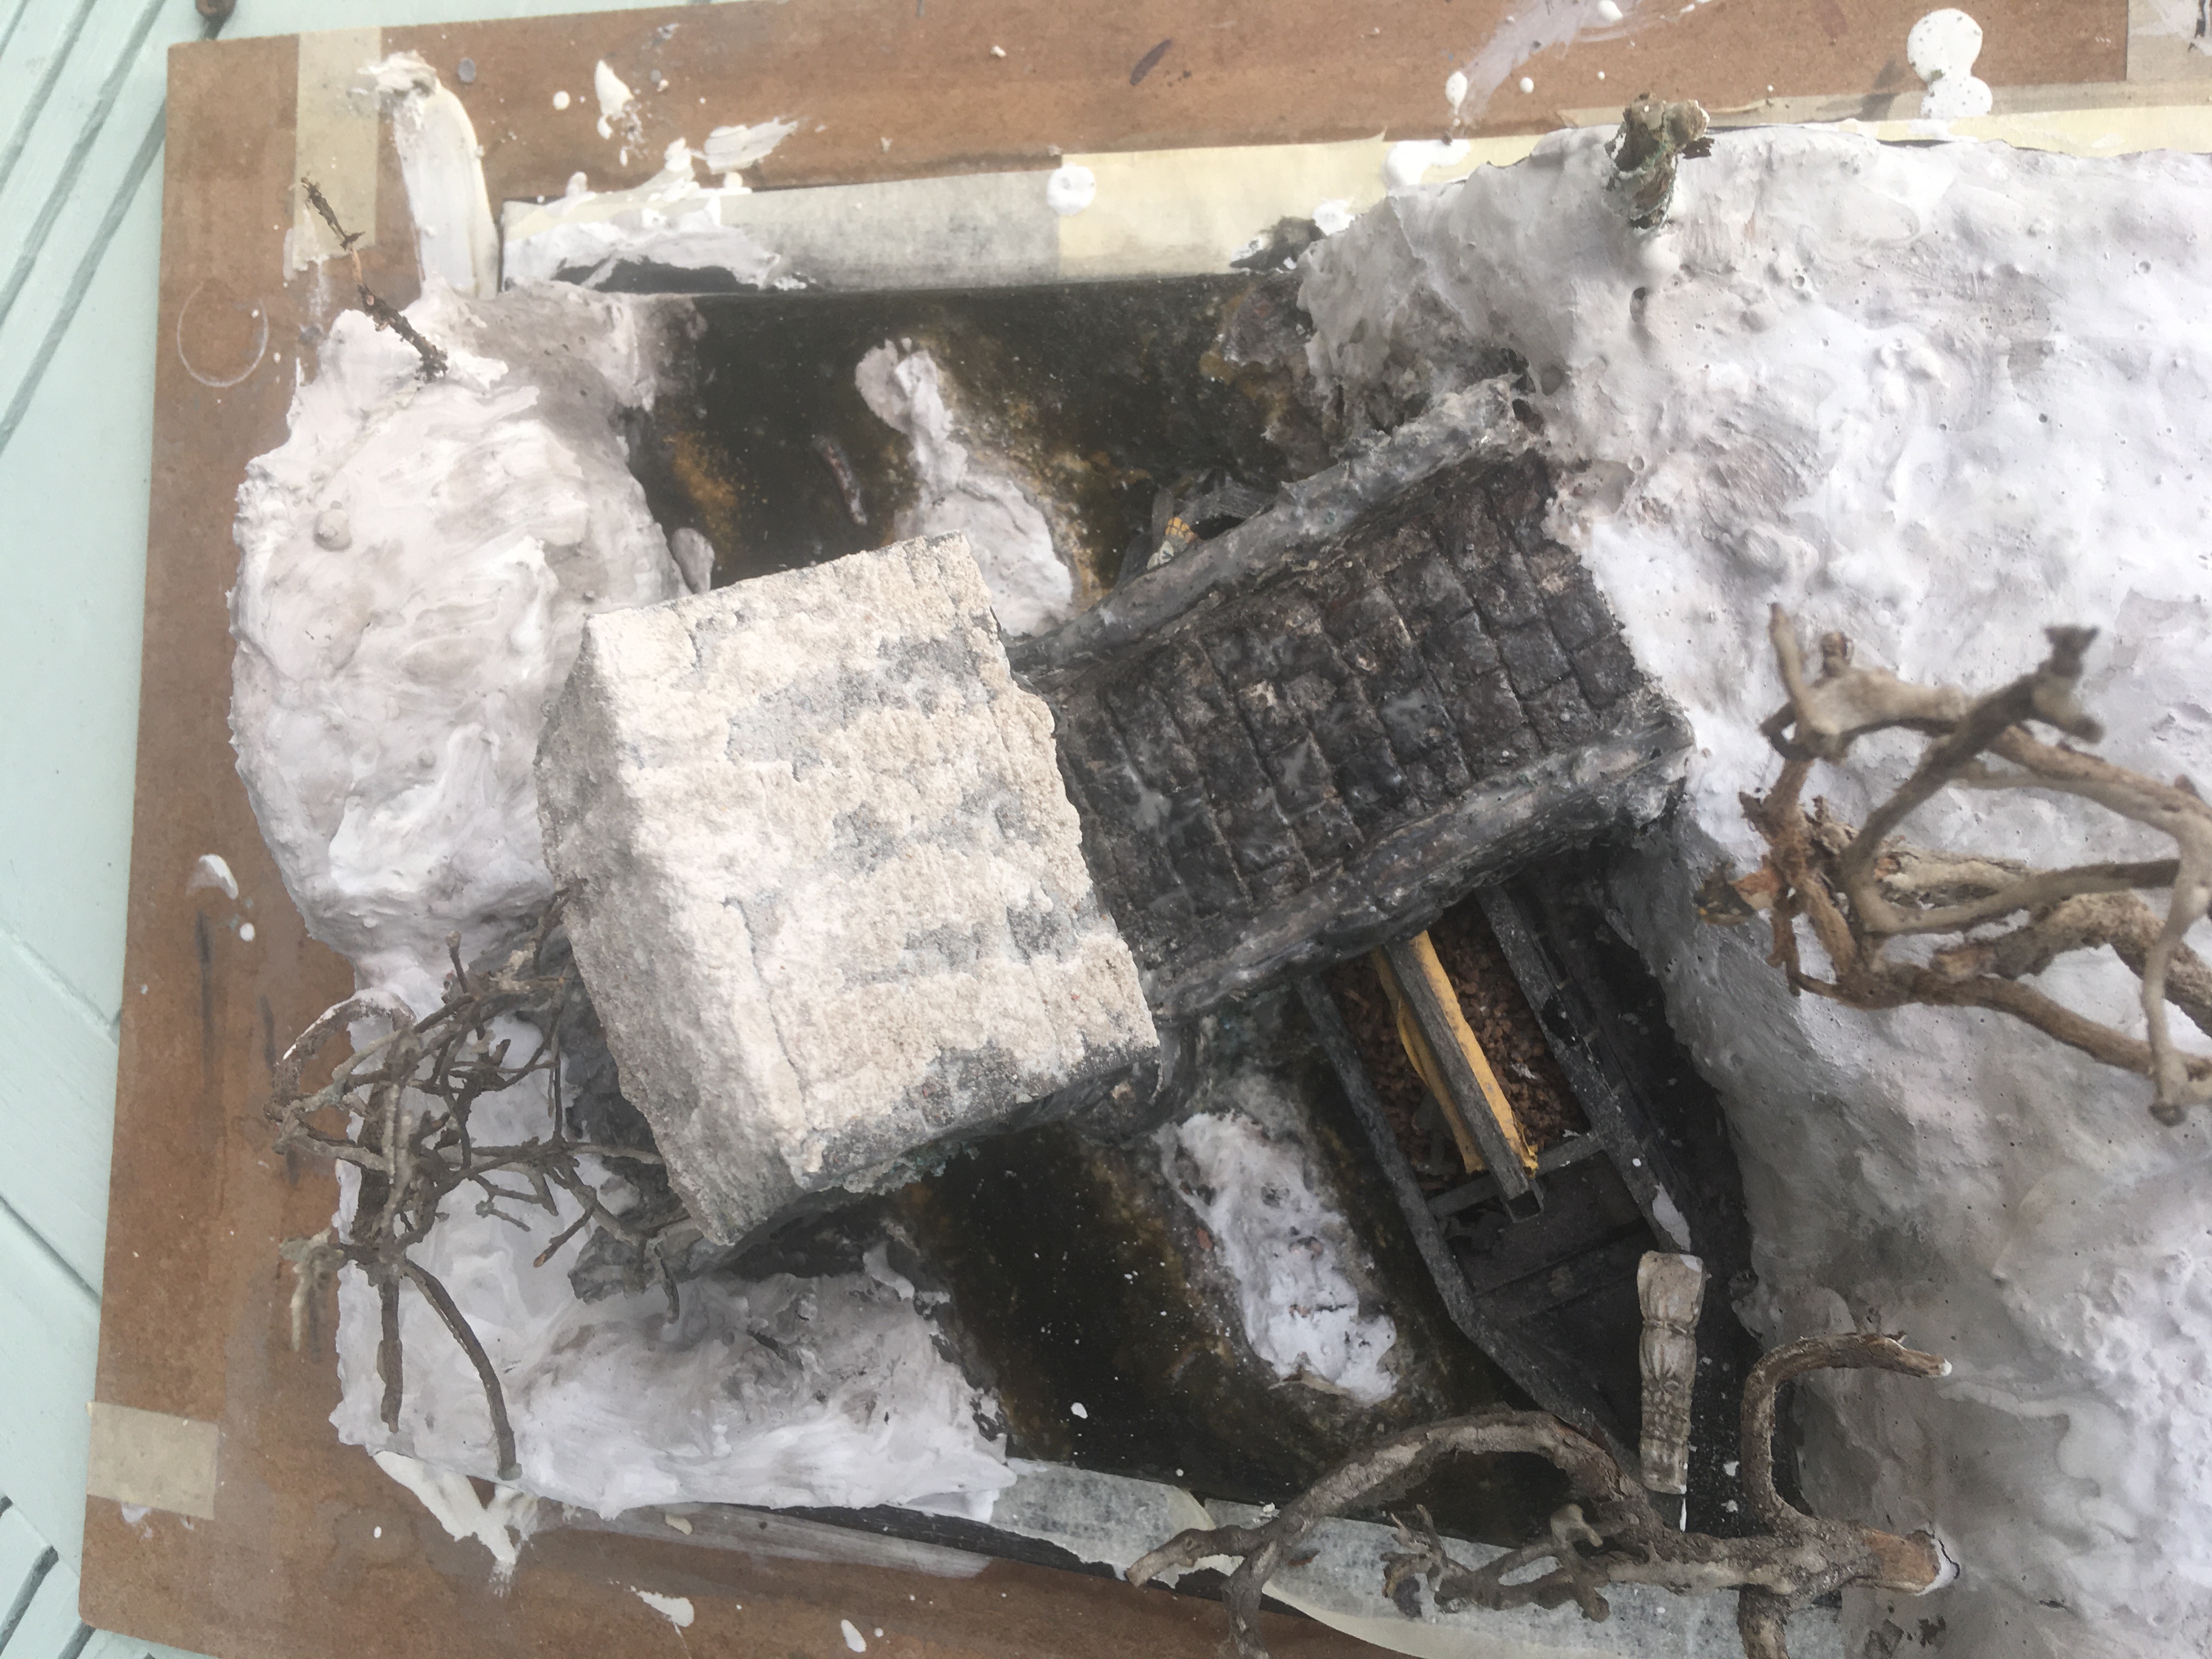
What a mess!
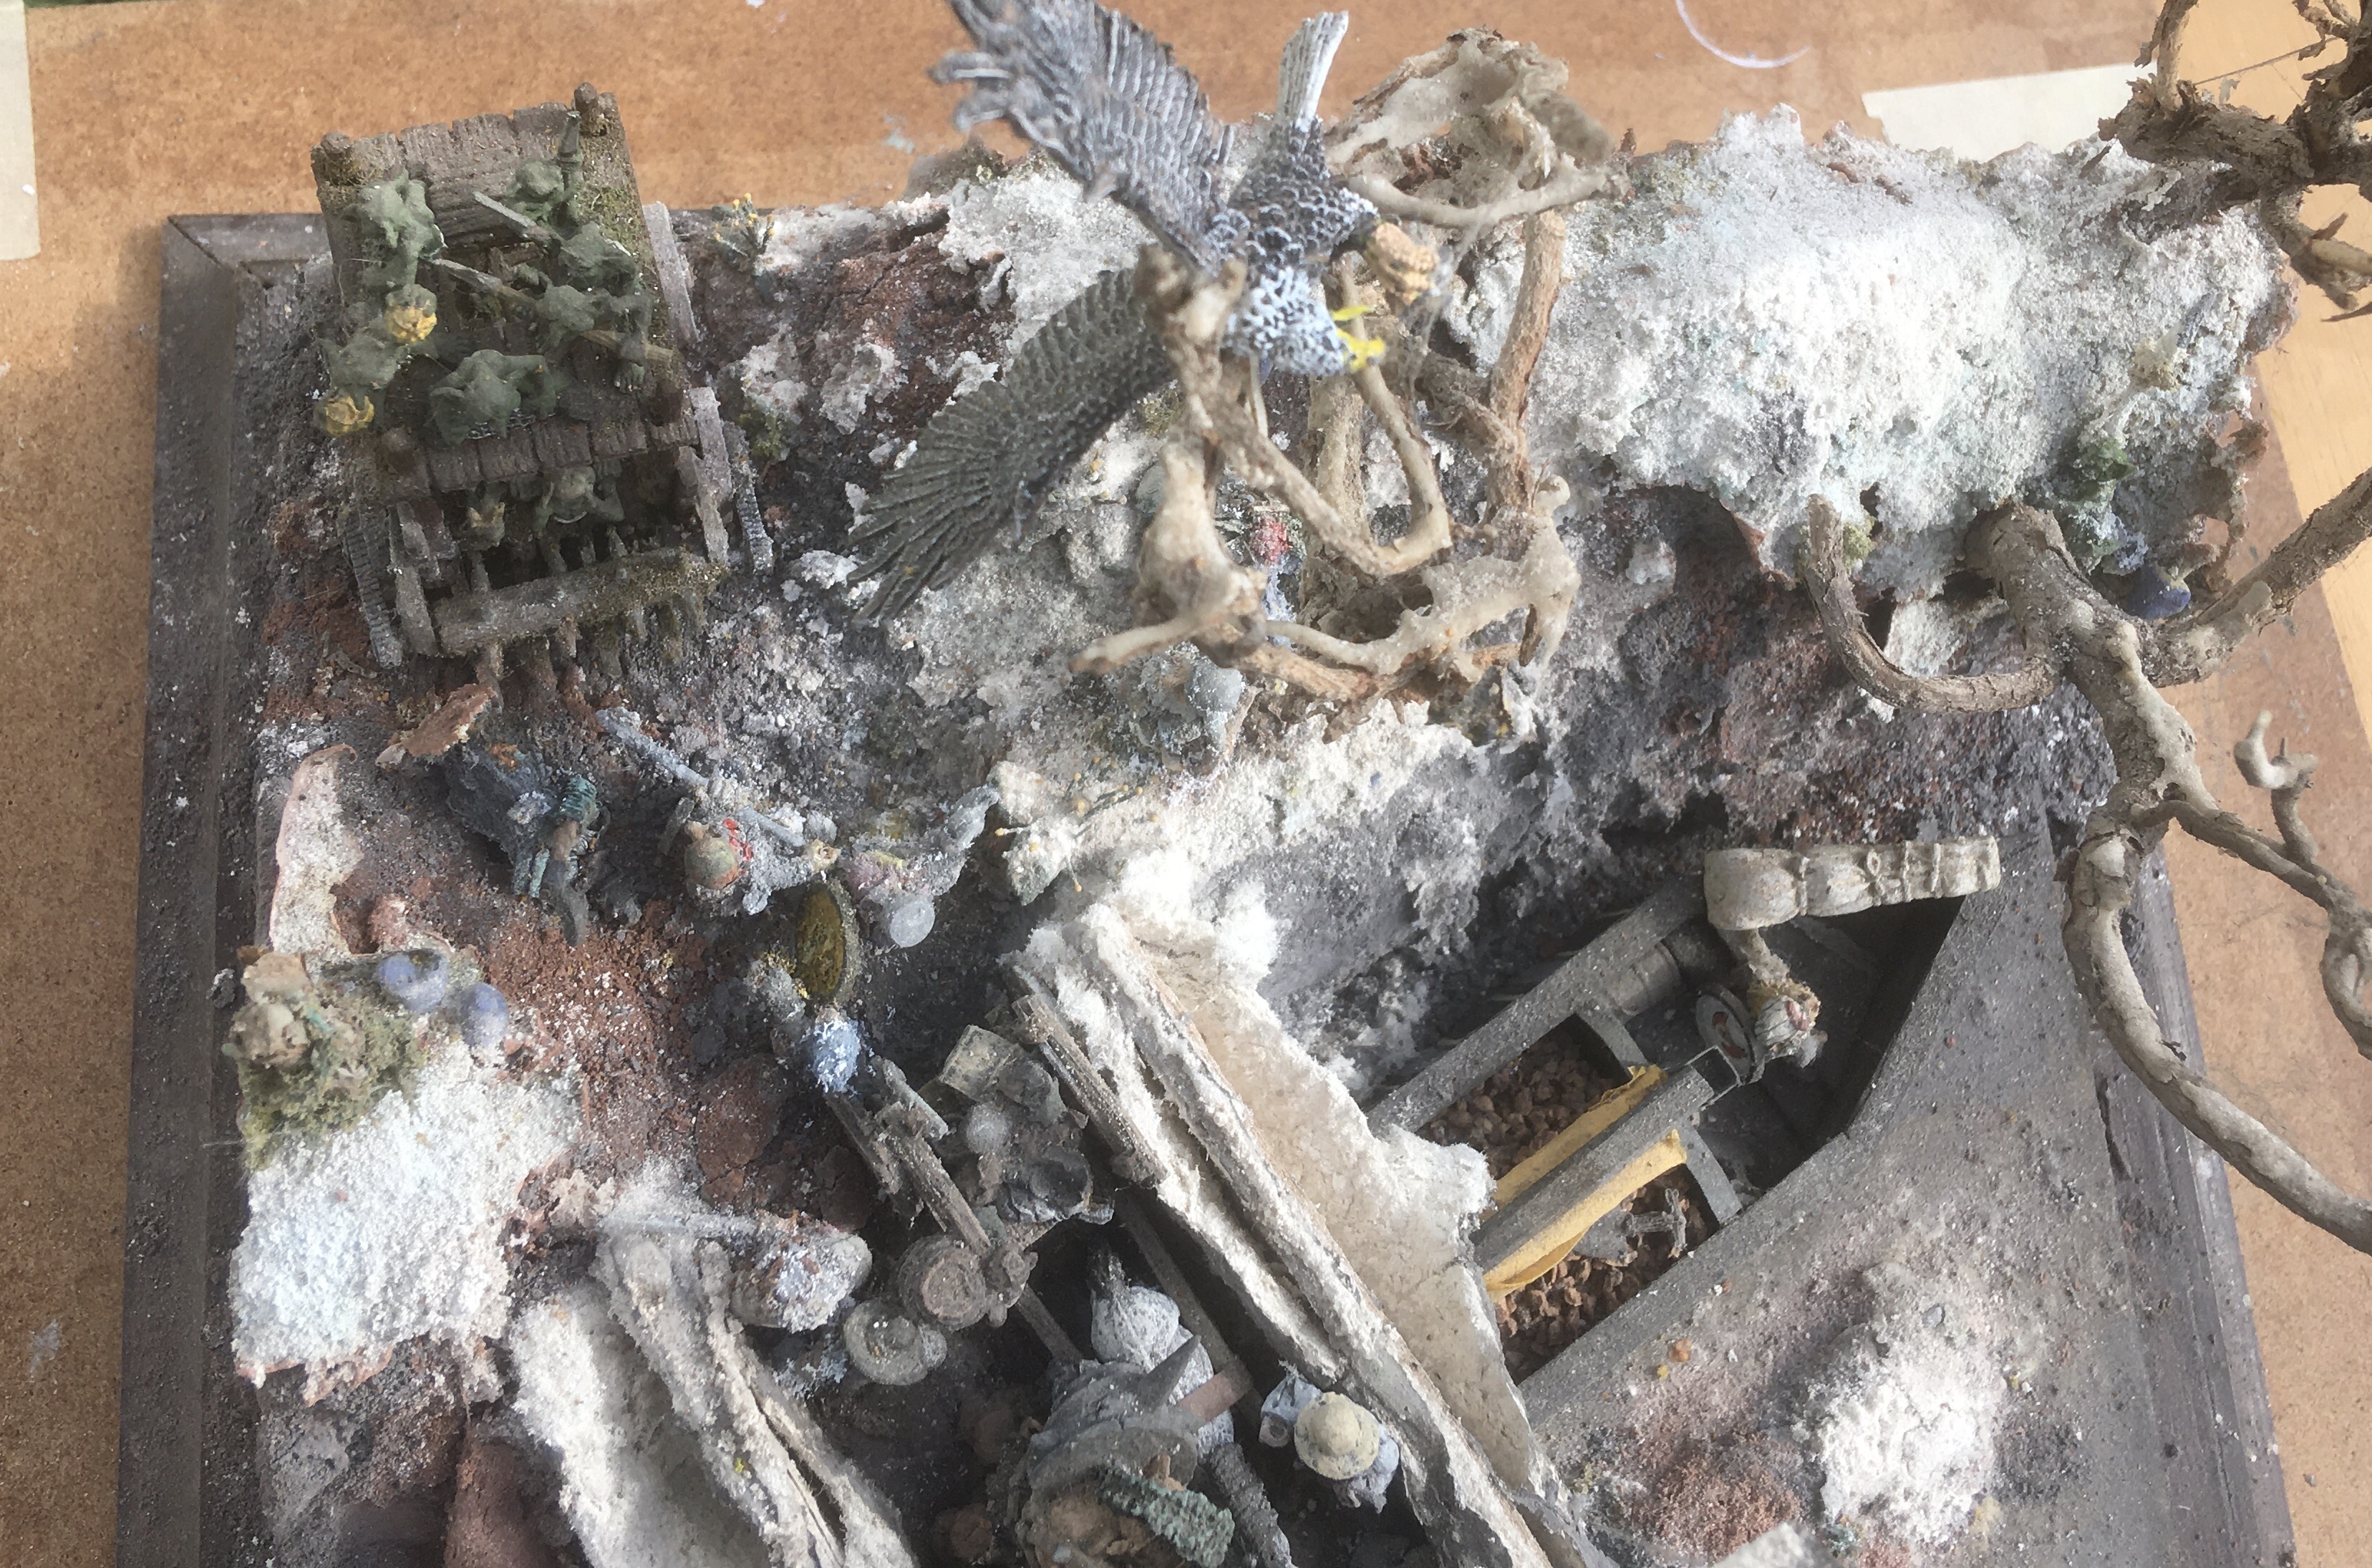
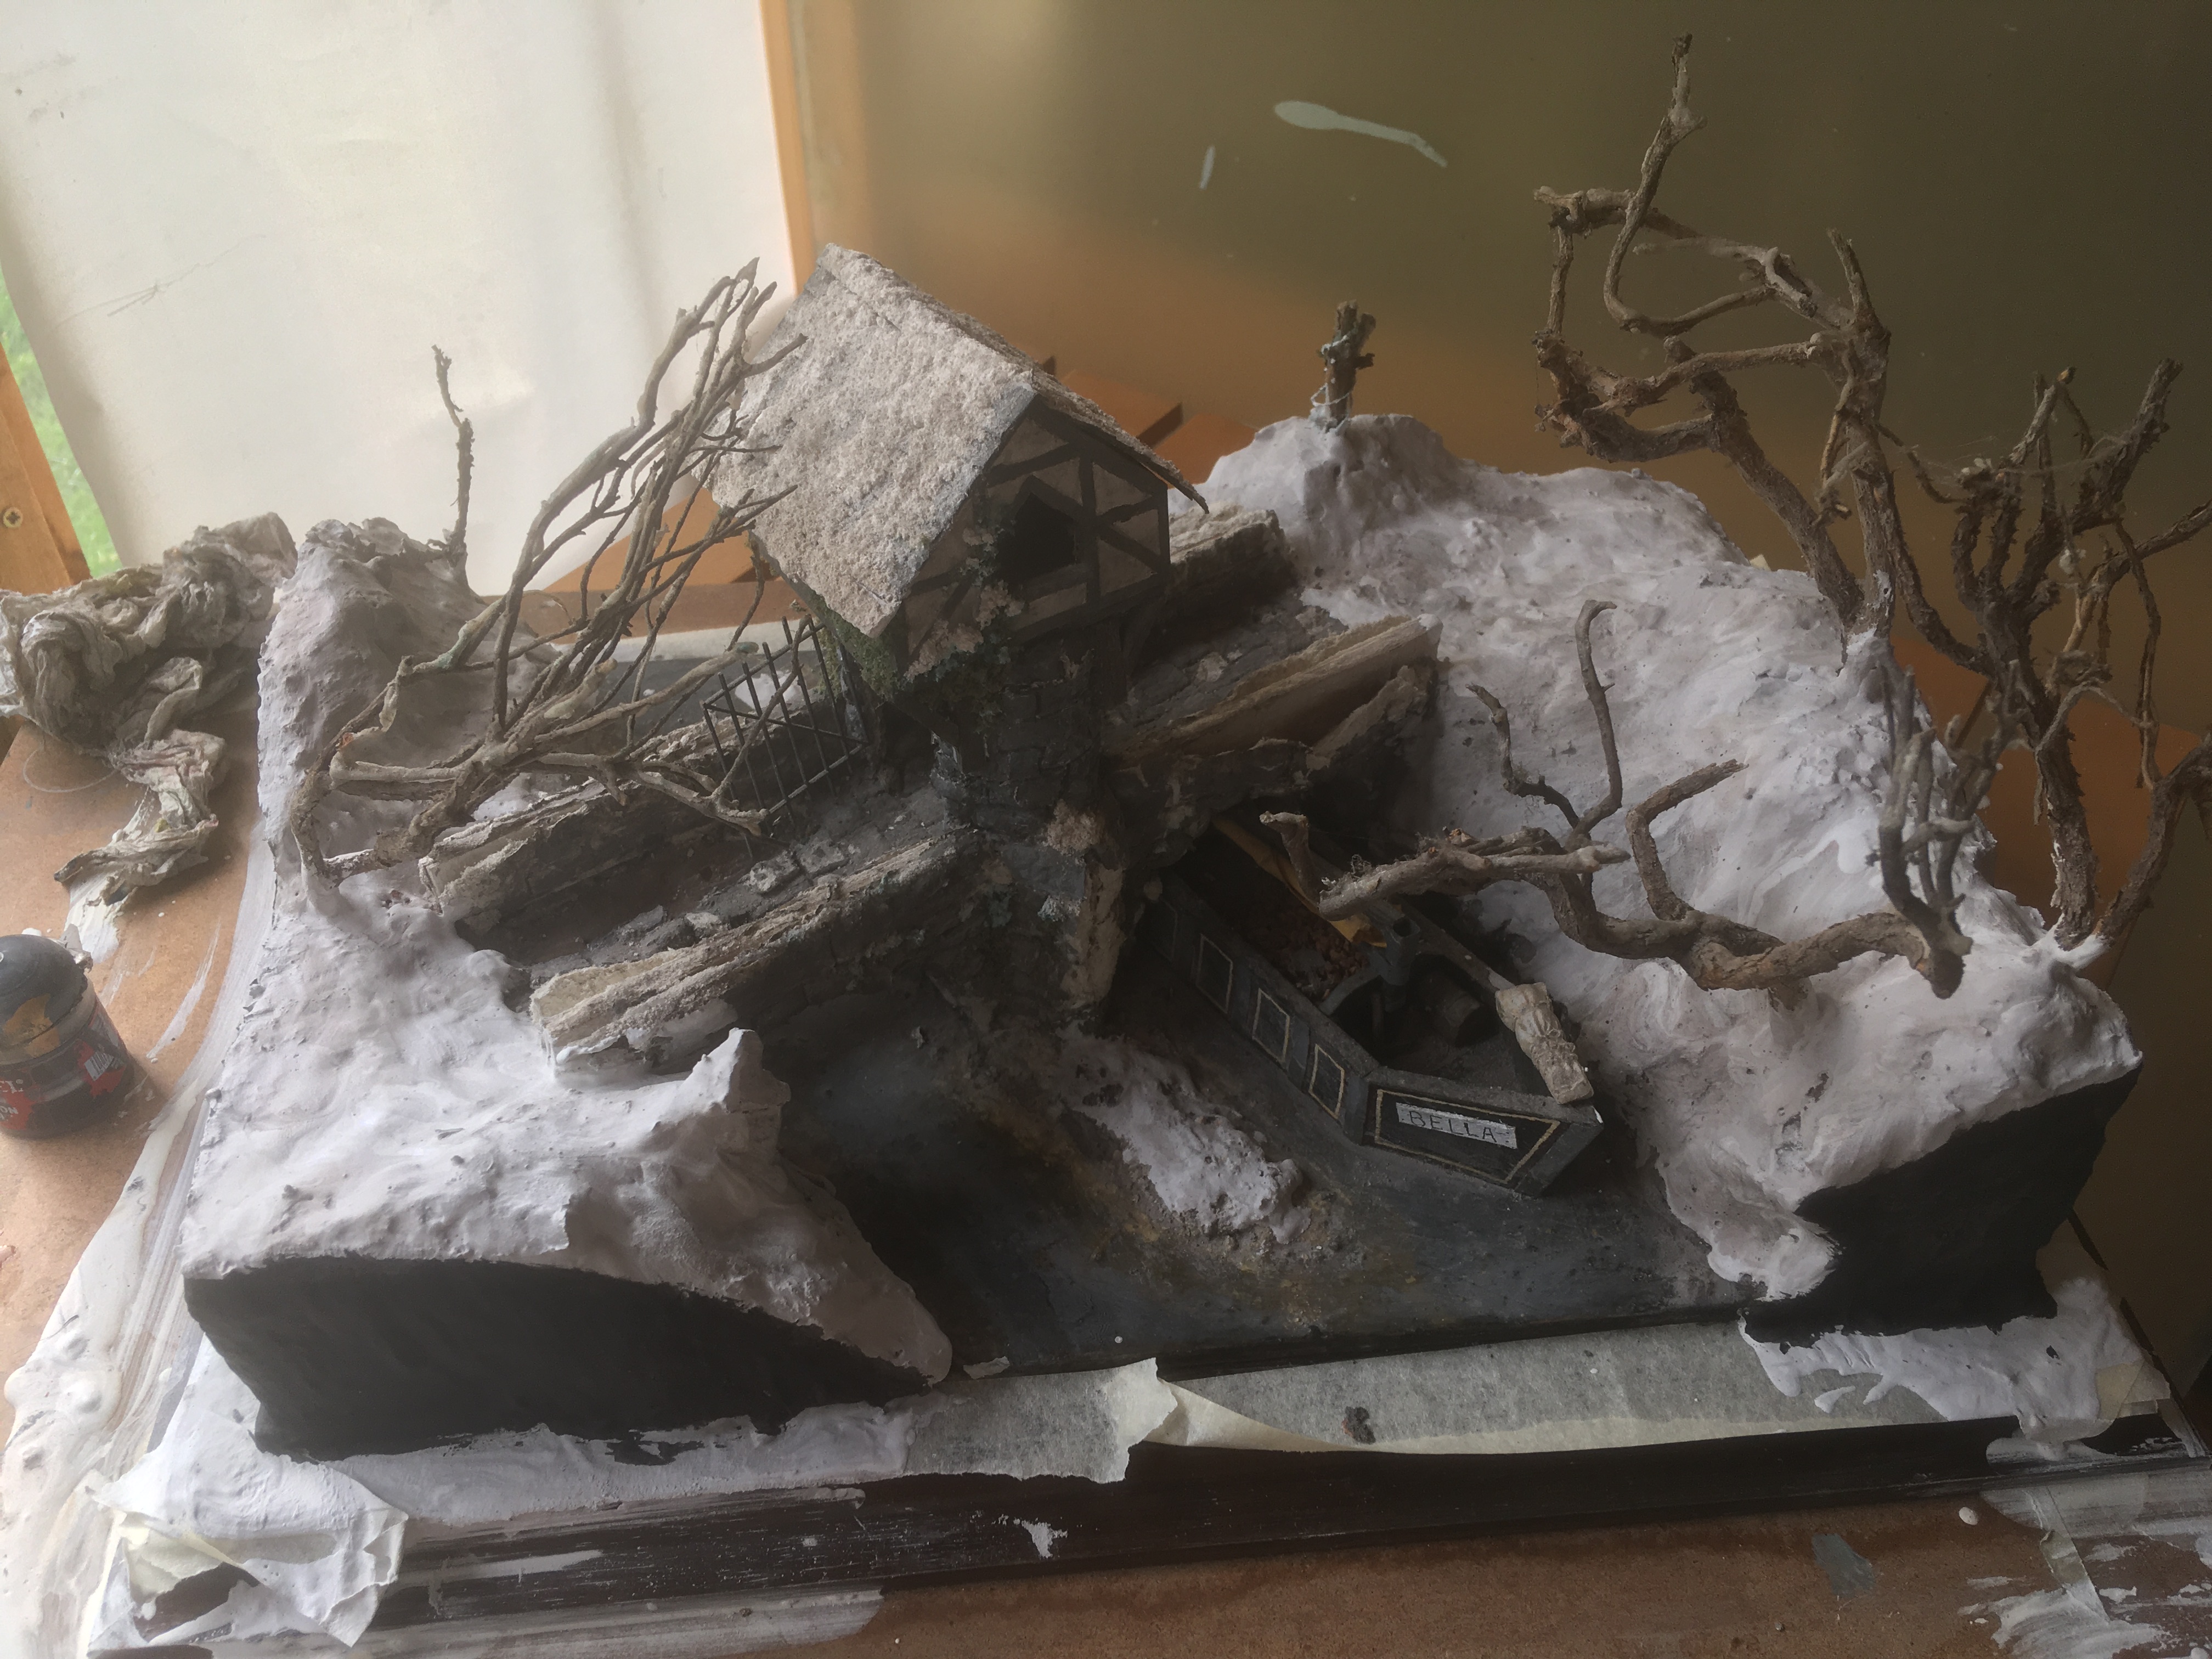
 I created a diorama in 1992 for the International Model and Engineering Exhibition but it was never entered because they scrapped the fantasy and sci-fi model competition classes. That was a real shame because I’d managed to get a Highly Commended, Silver and Gold medals in previous competitions. So the diorama was left to gather dust in the loft. I’ve pulled it out now with the aim of restoring it to its former glory as my OTT/BoW Spring Challenge 2022. The diorama was inspired by Warhammer Fantasy Roleplay, which I was really into at the time and obviously used many Citadel Miniatures, although there is a classic Iron Dragon from Grenadier Miniatures hidden in there!
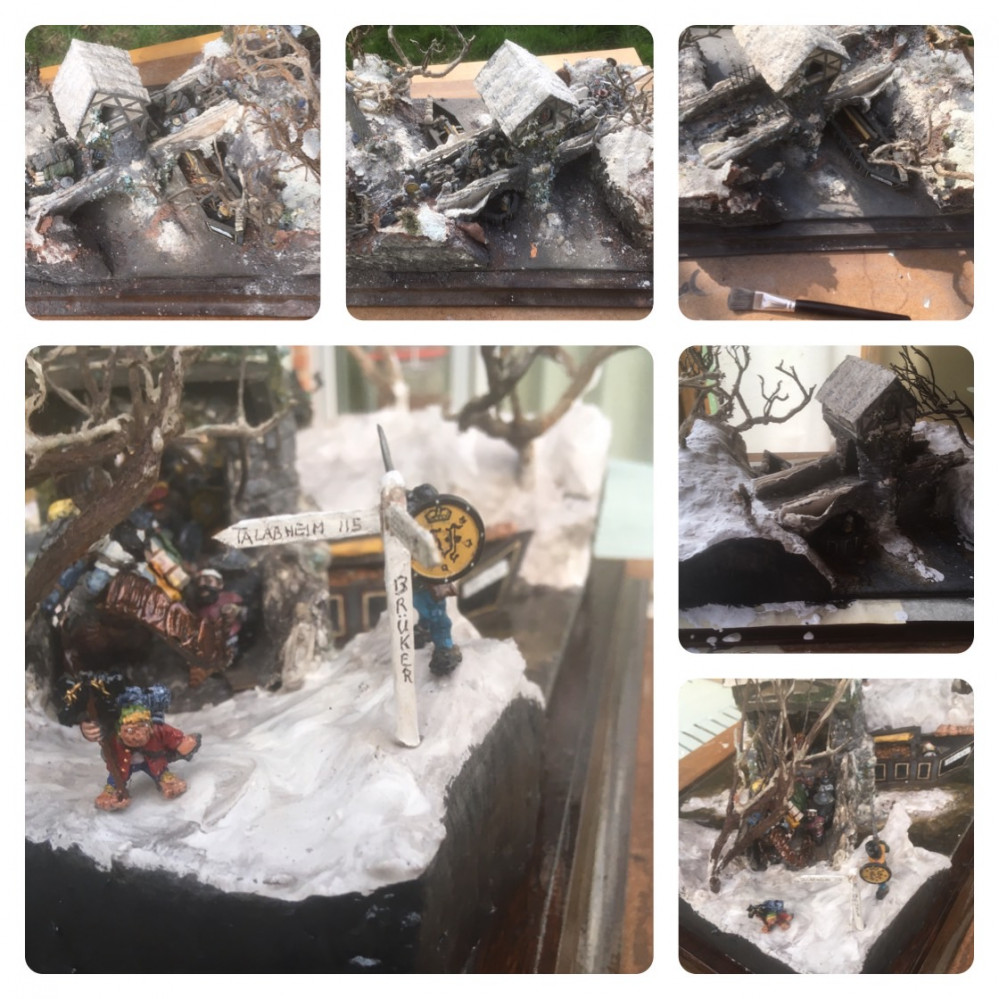
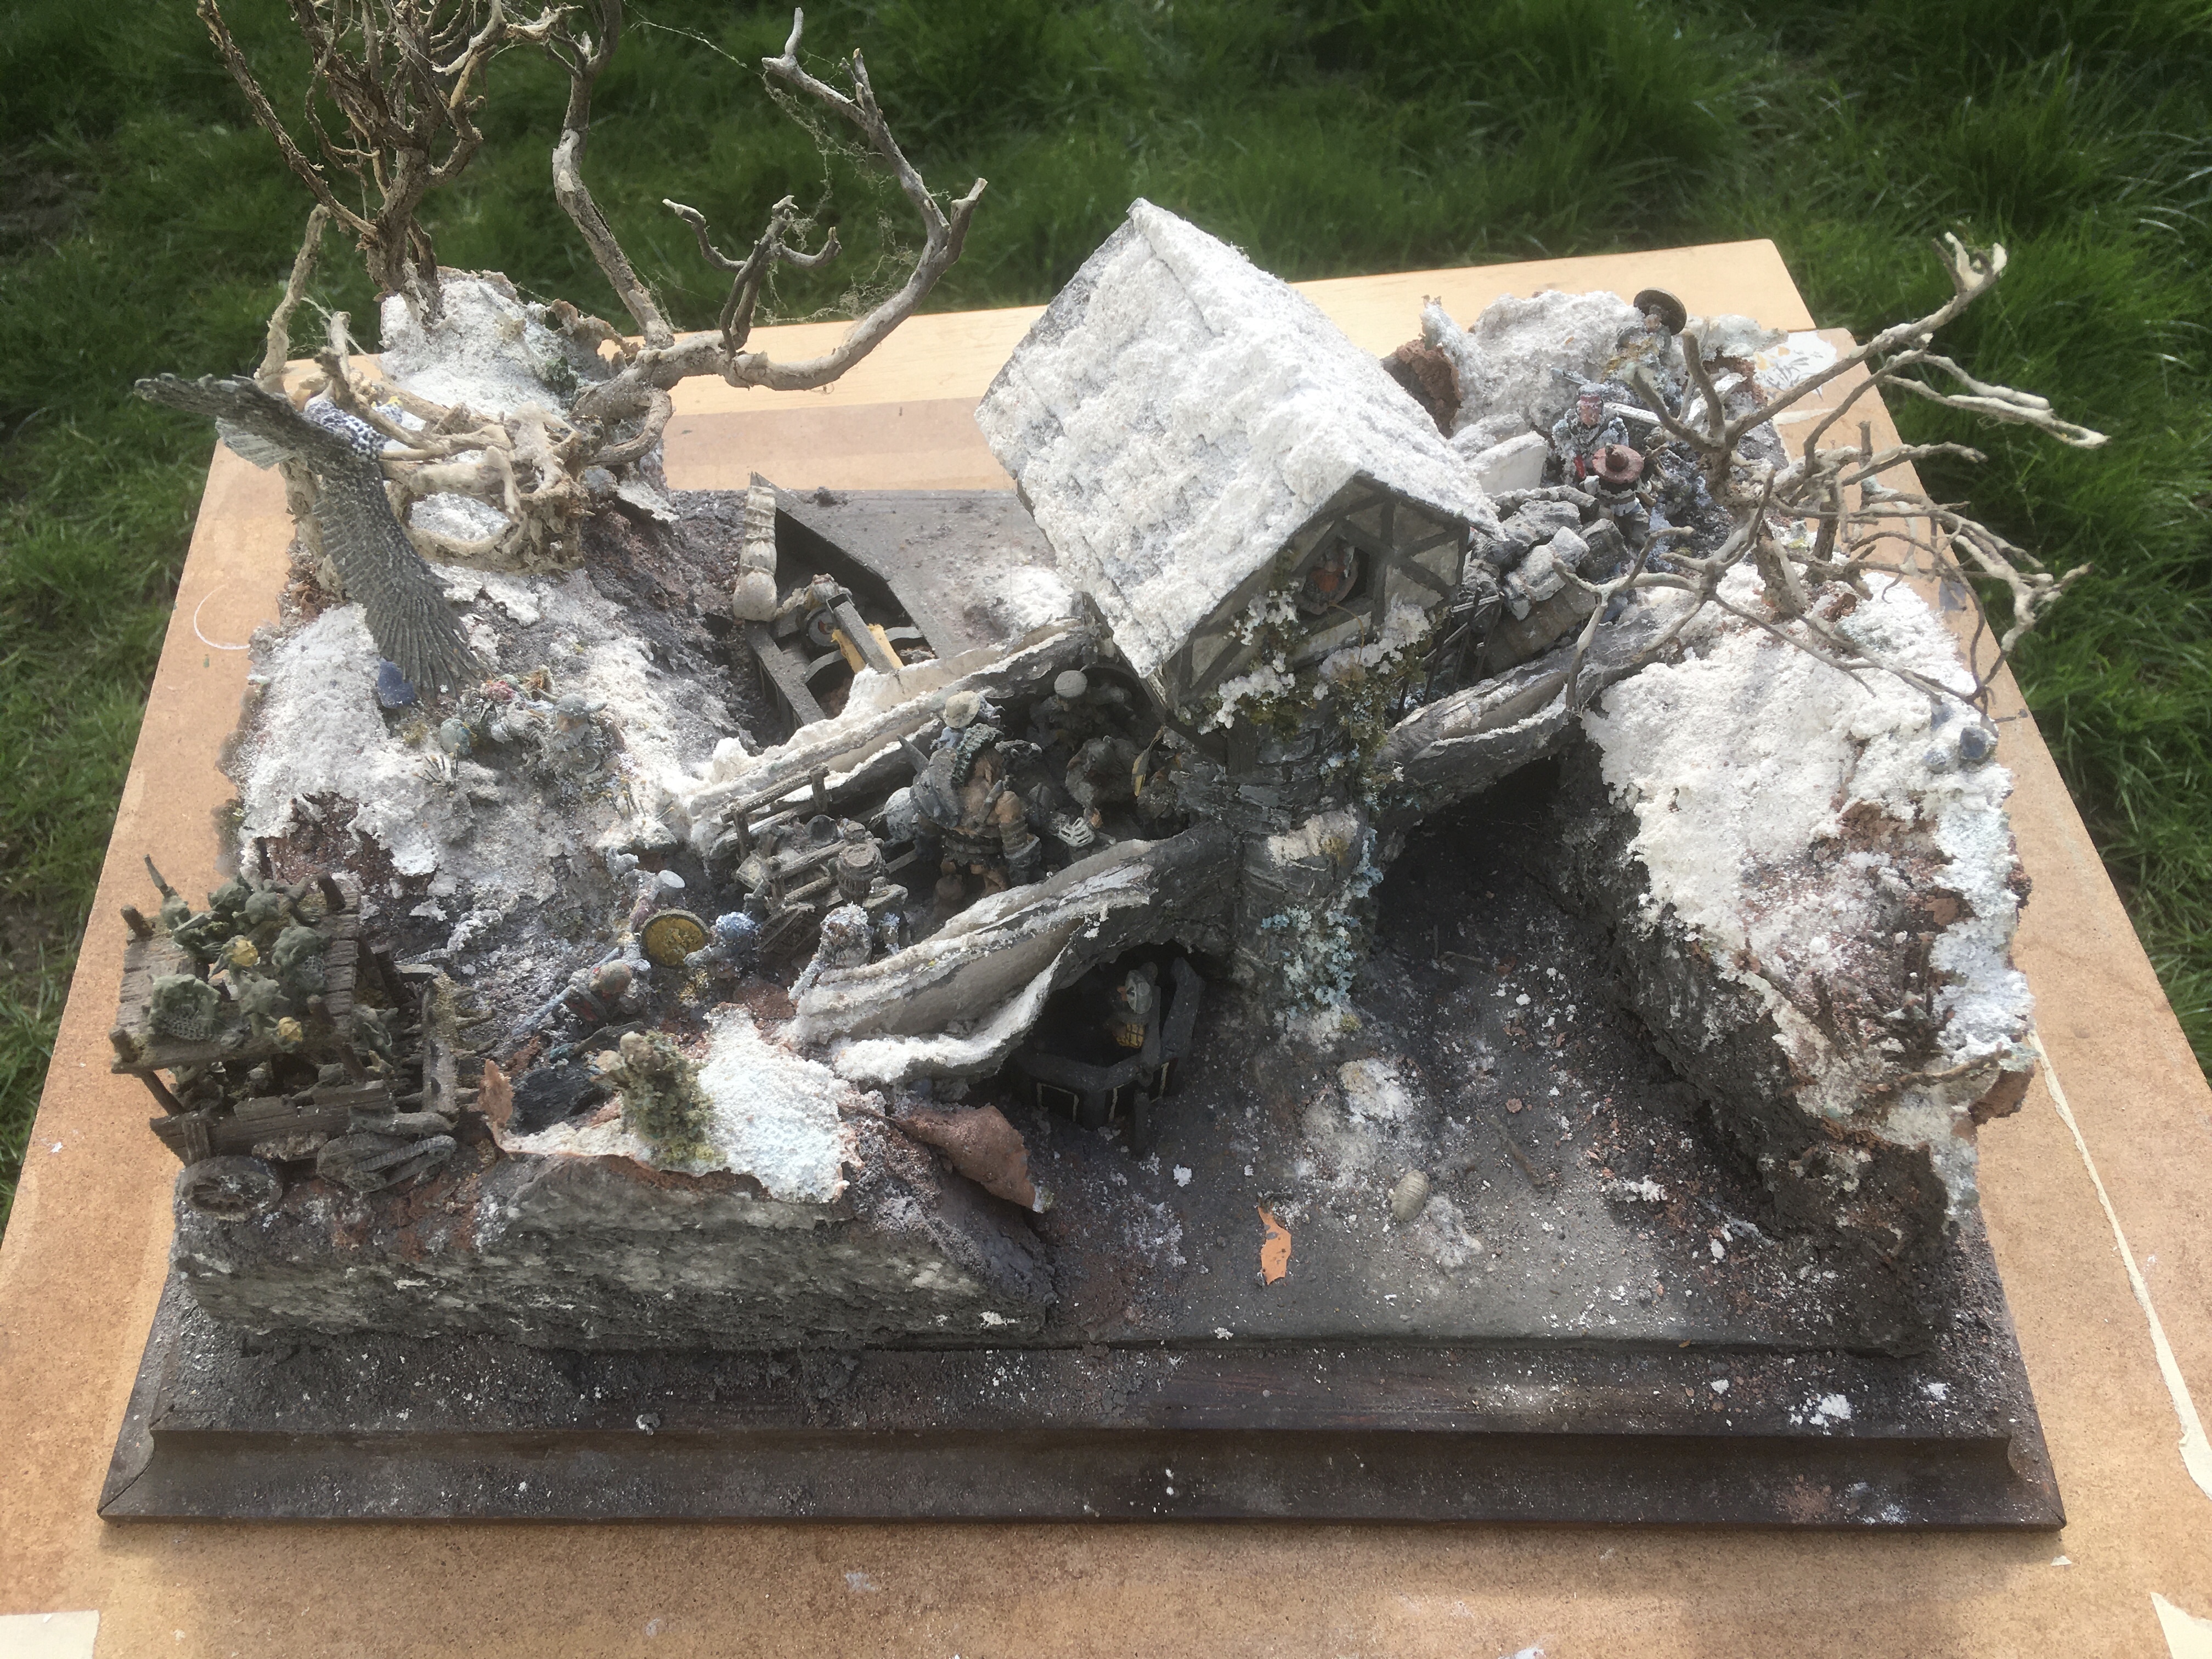
 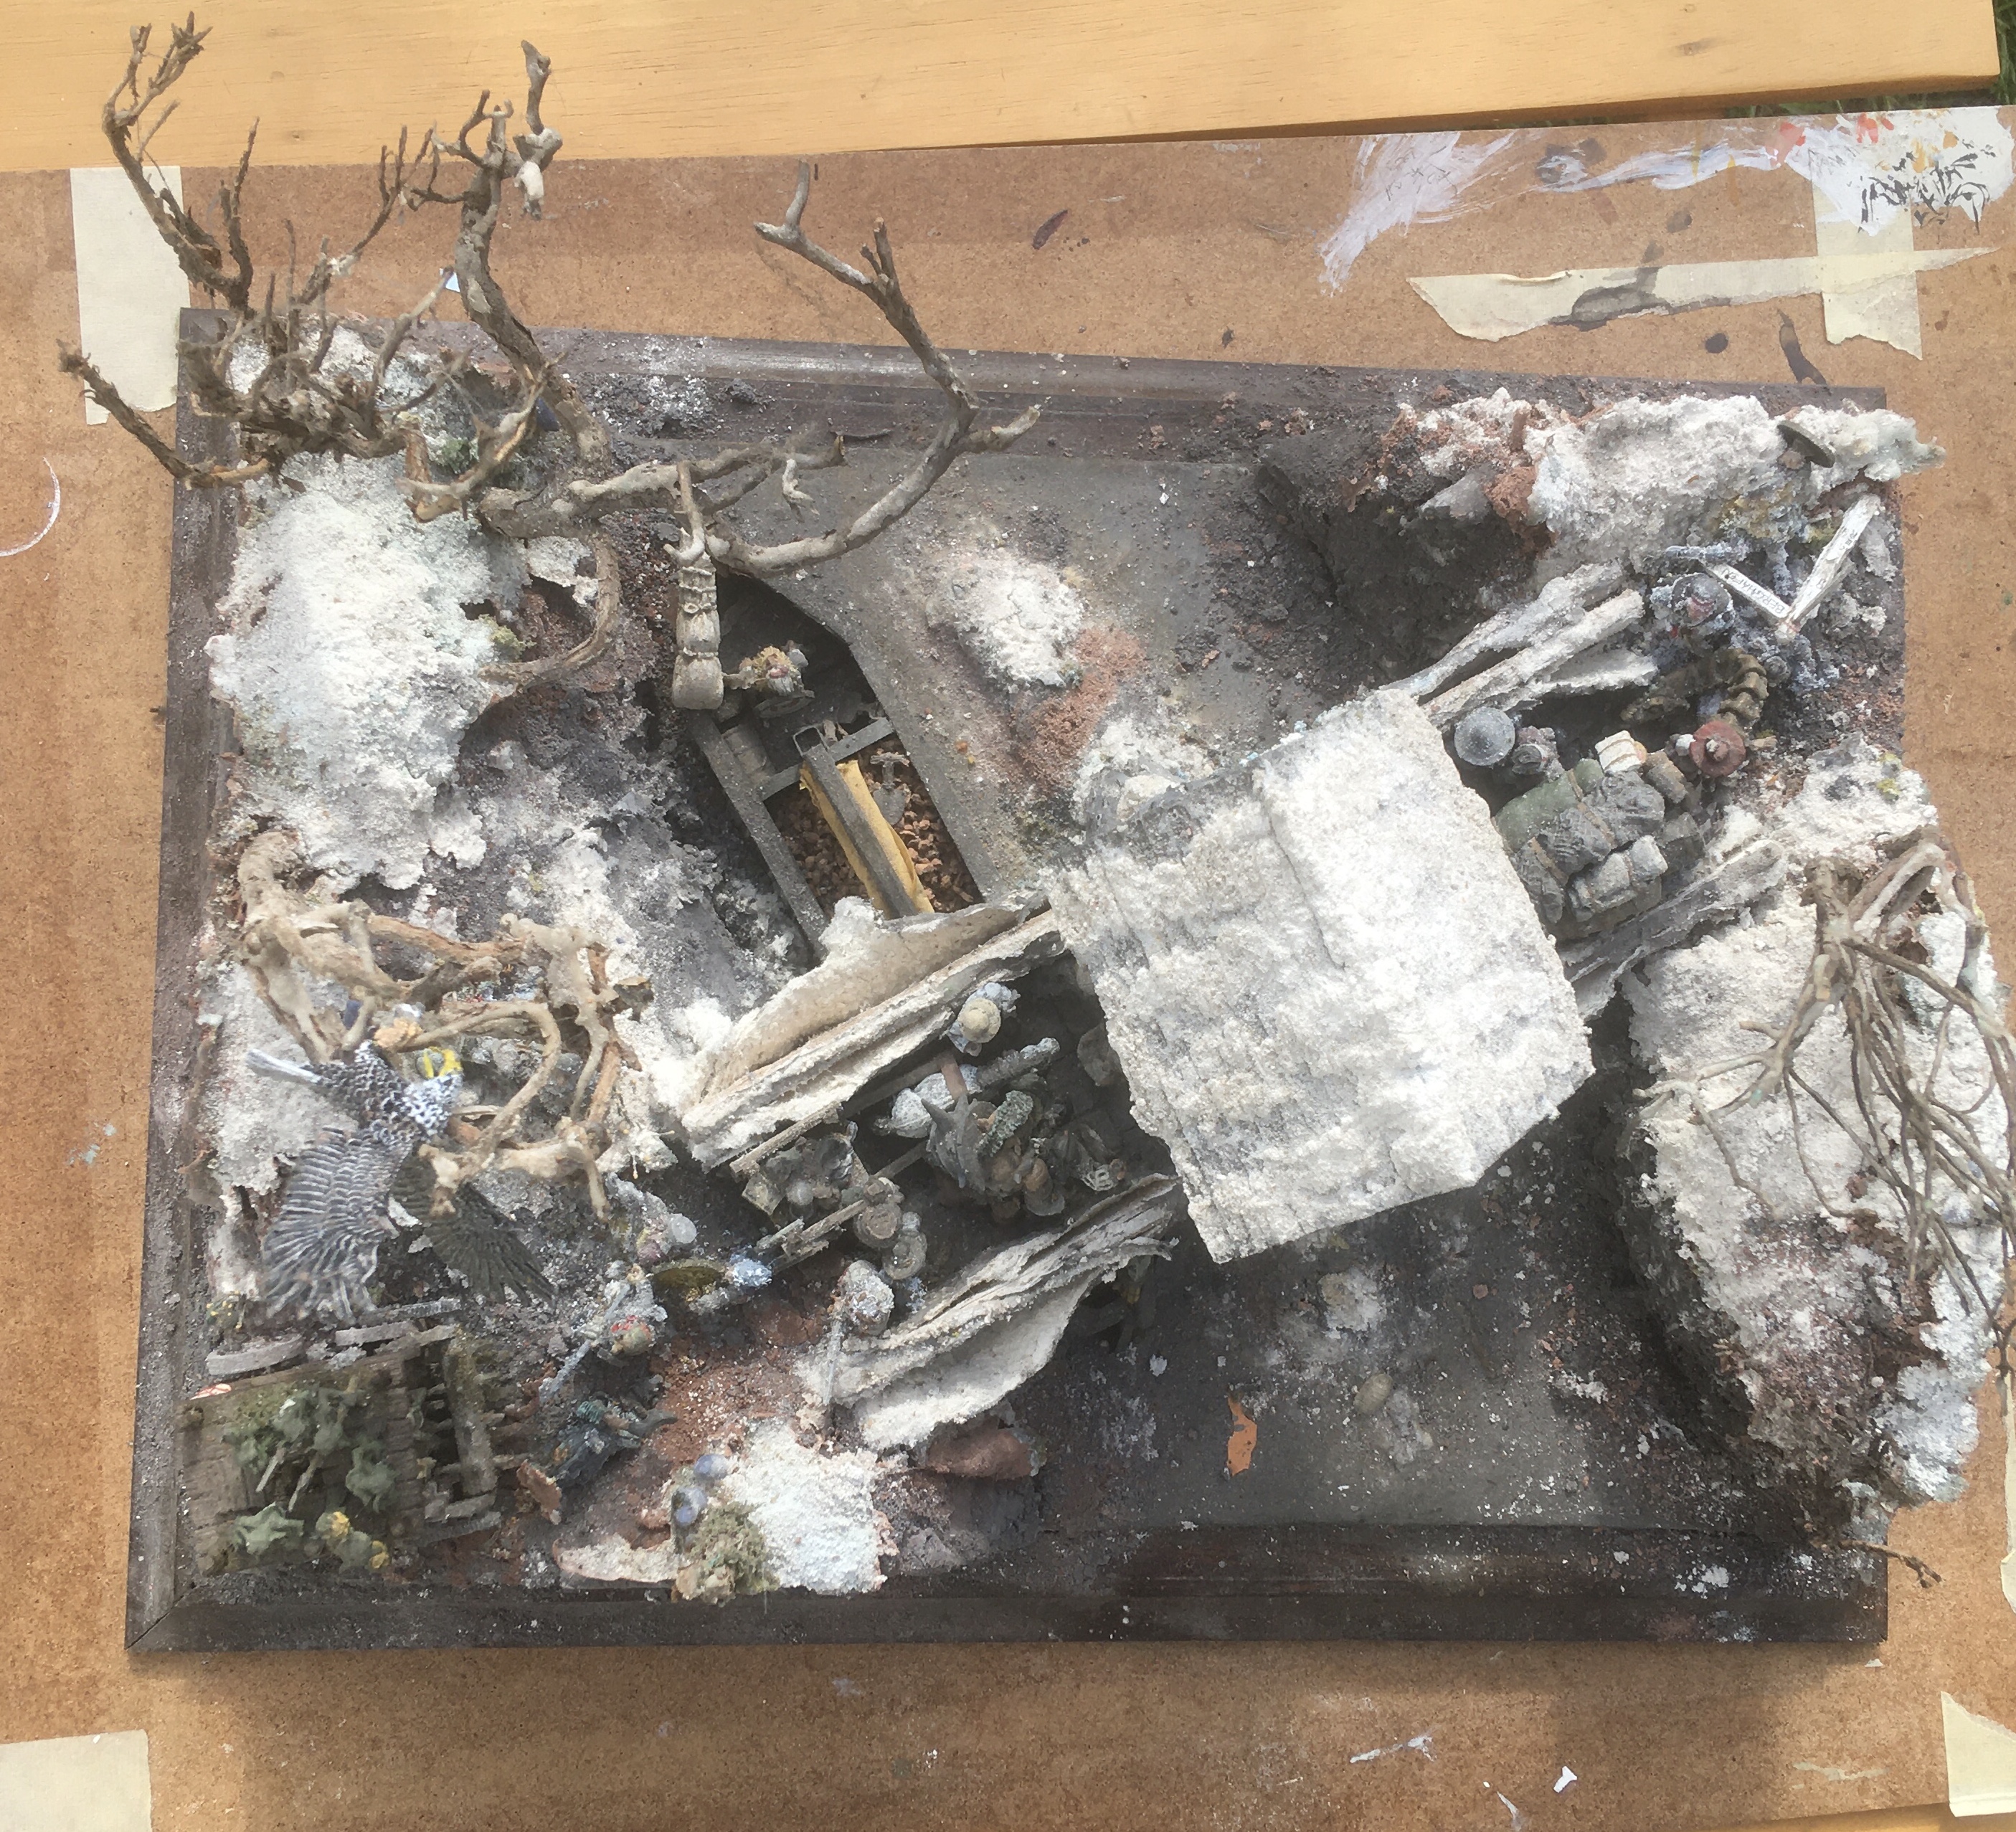 The diorama base was handmade. The main construction was from polystyrene blocks carved to make the river banks. This was then coated in plaster mixed with powder paint and white polyfilla for the snow effects.
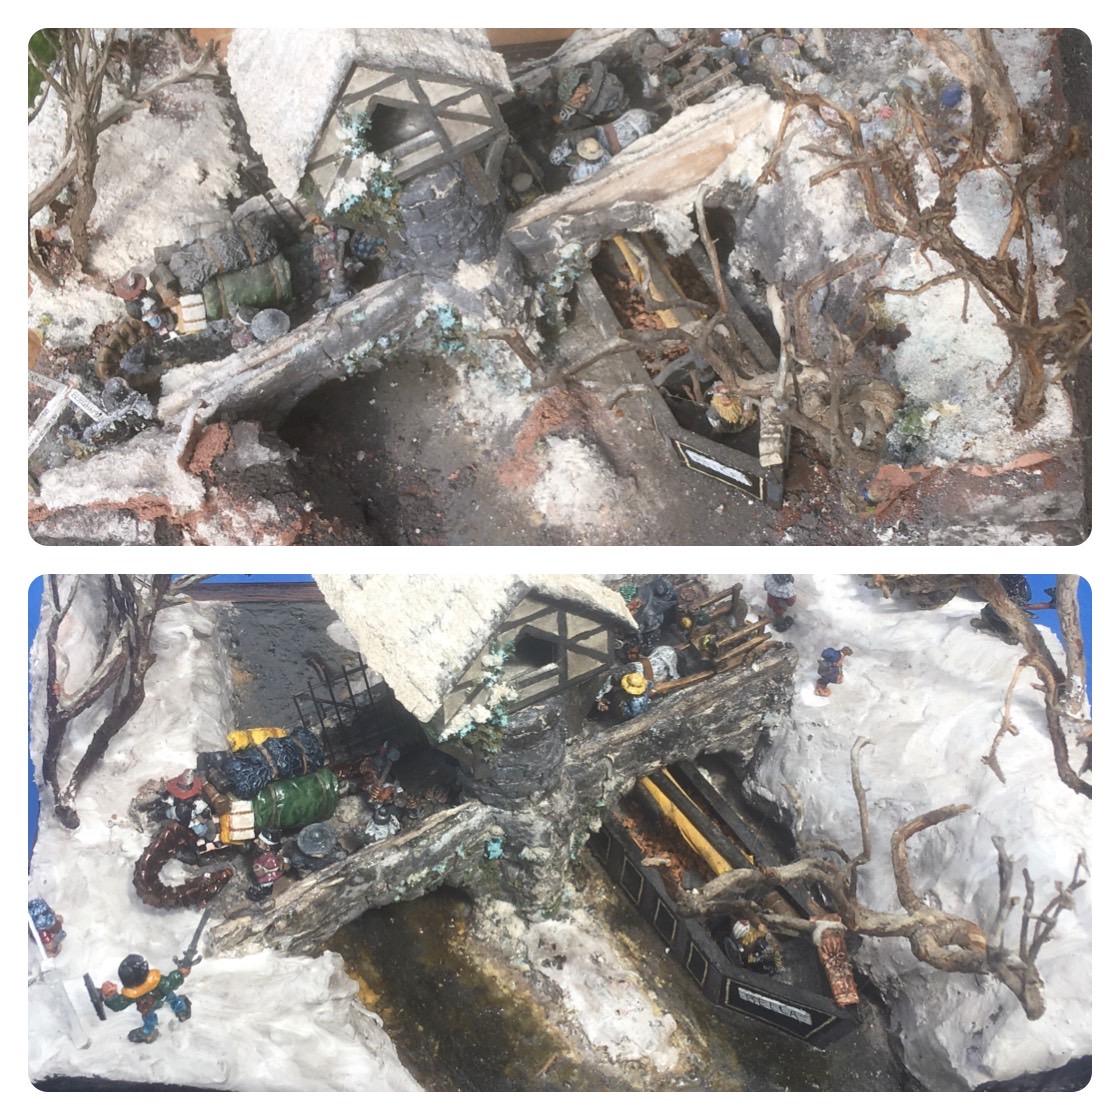
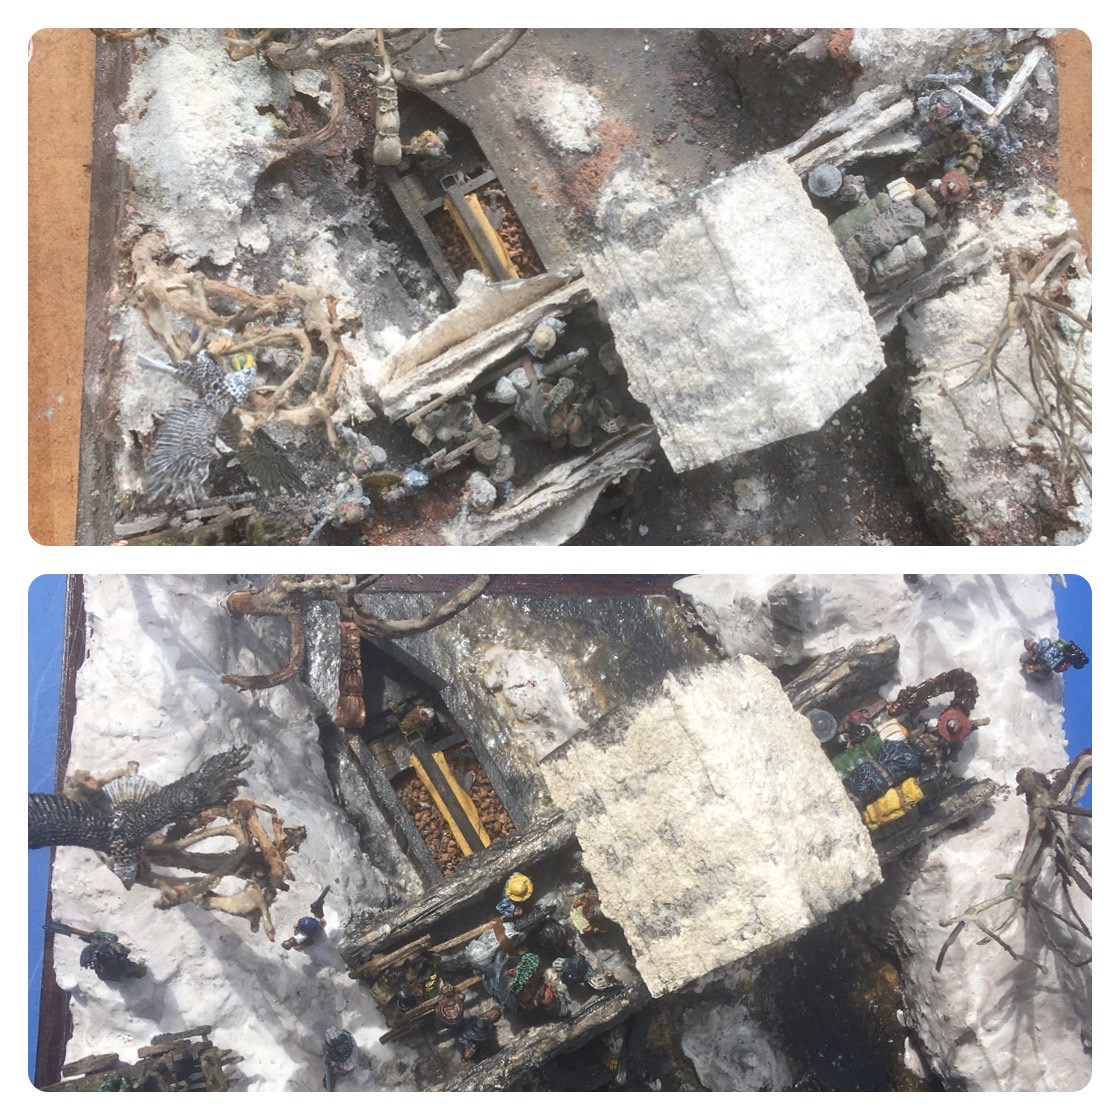
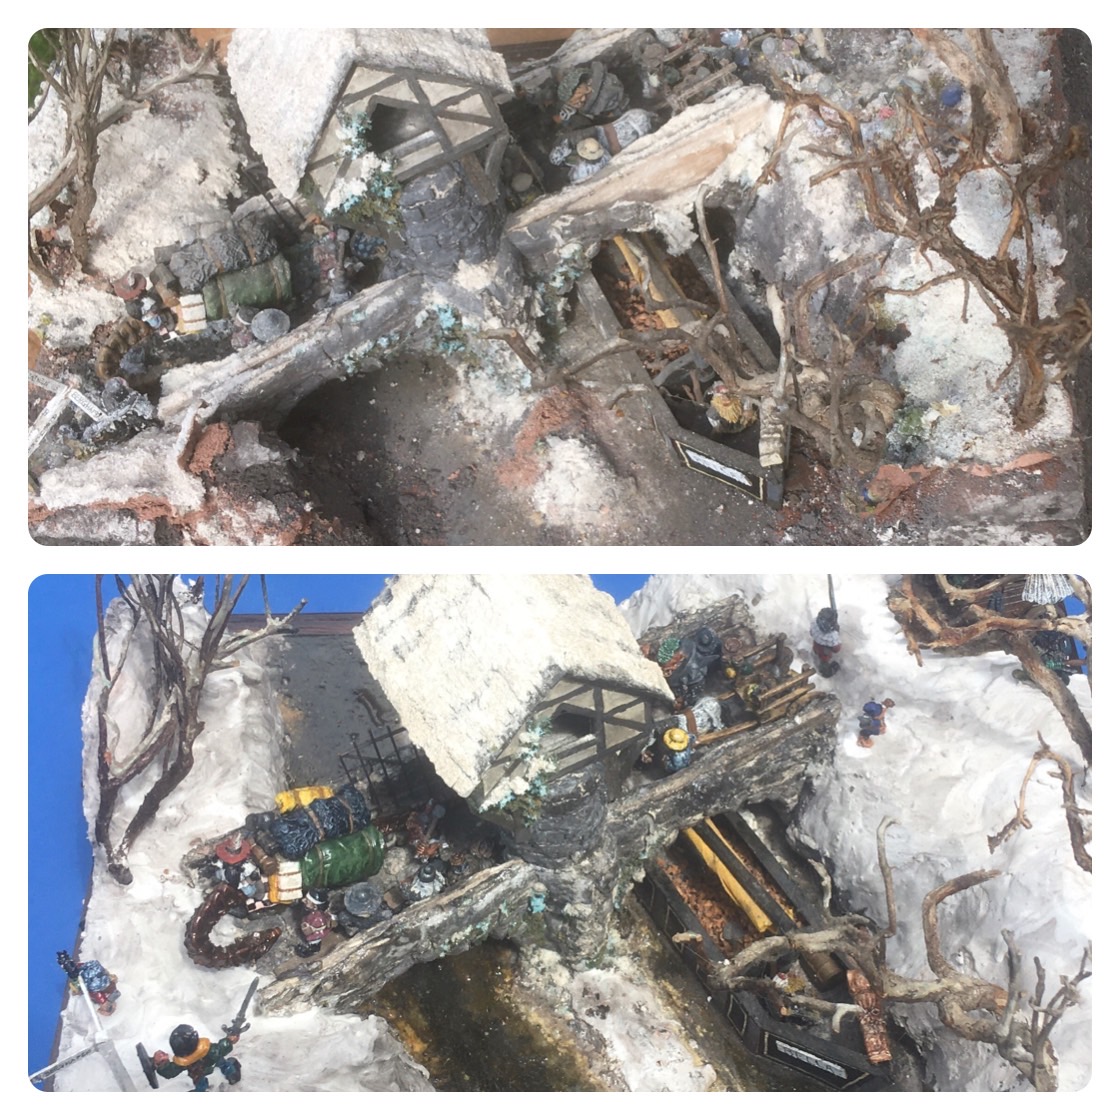
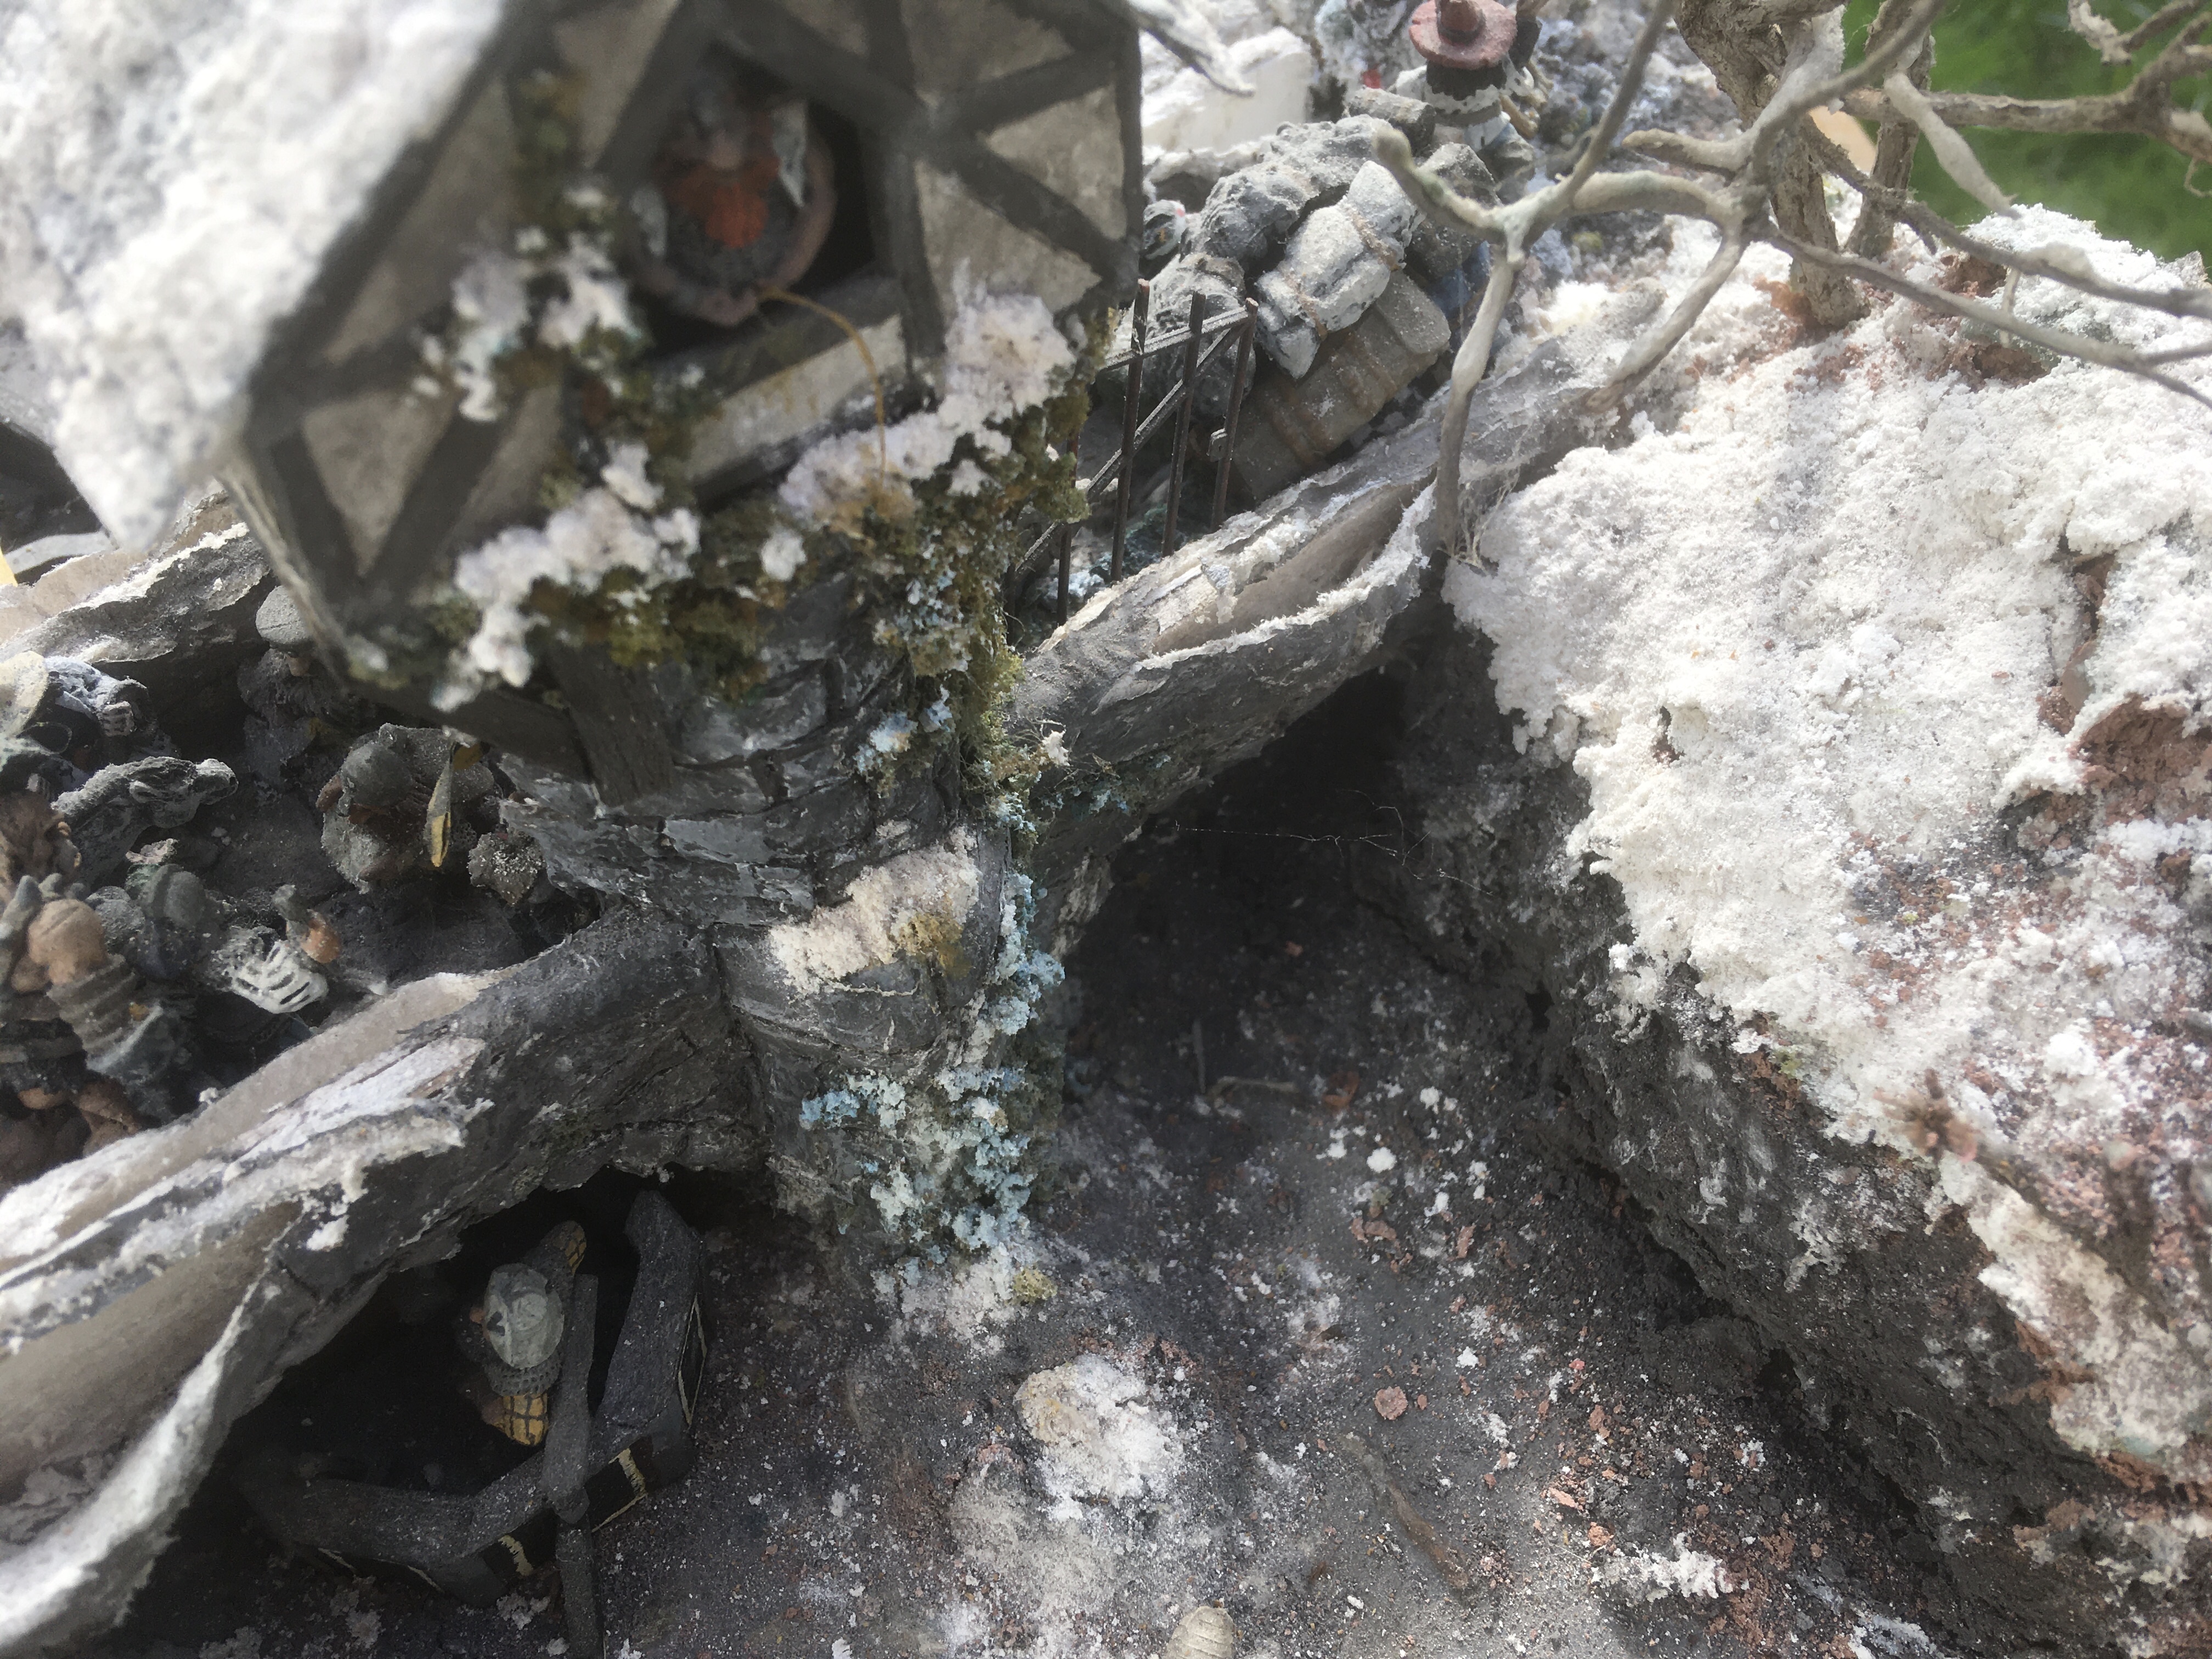
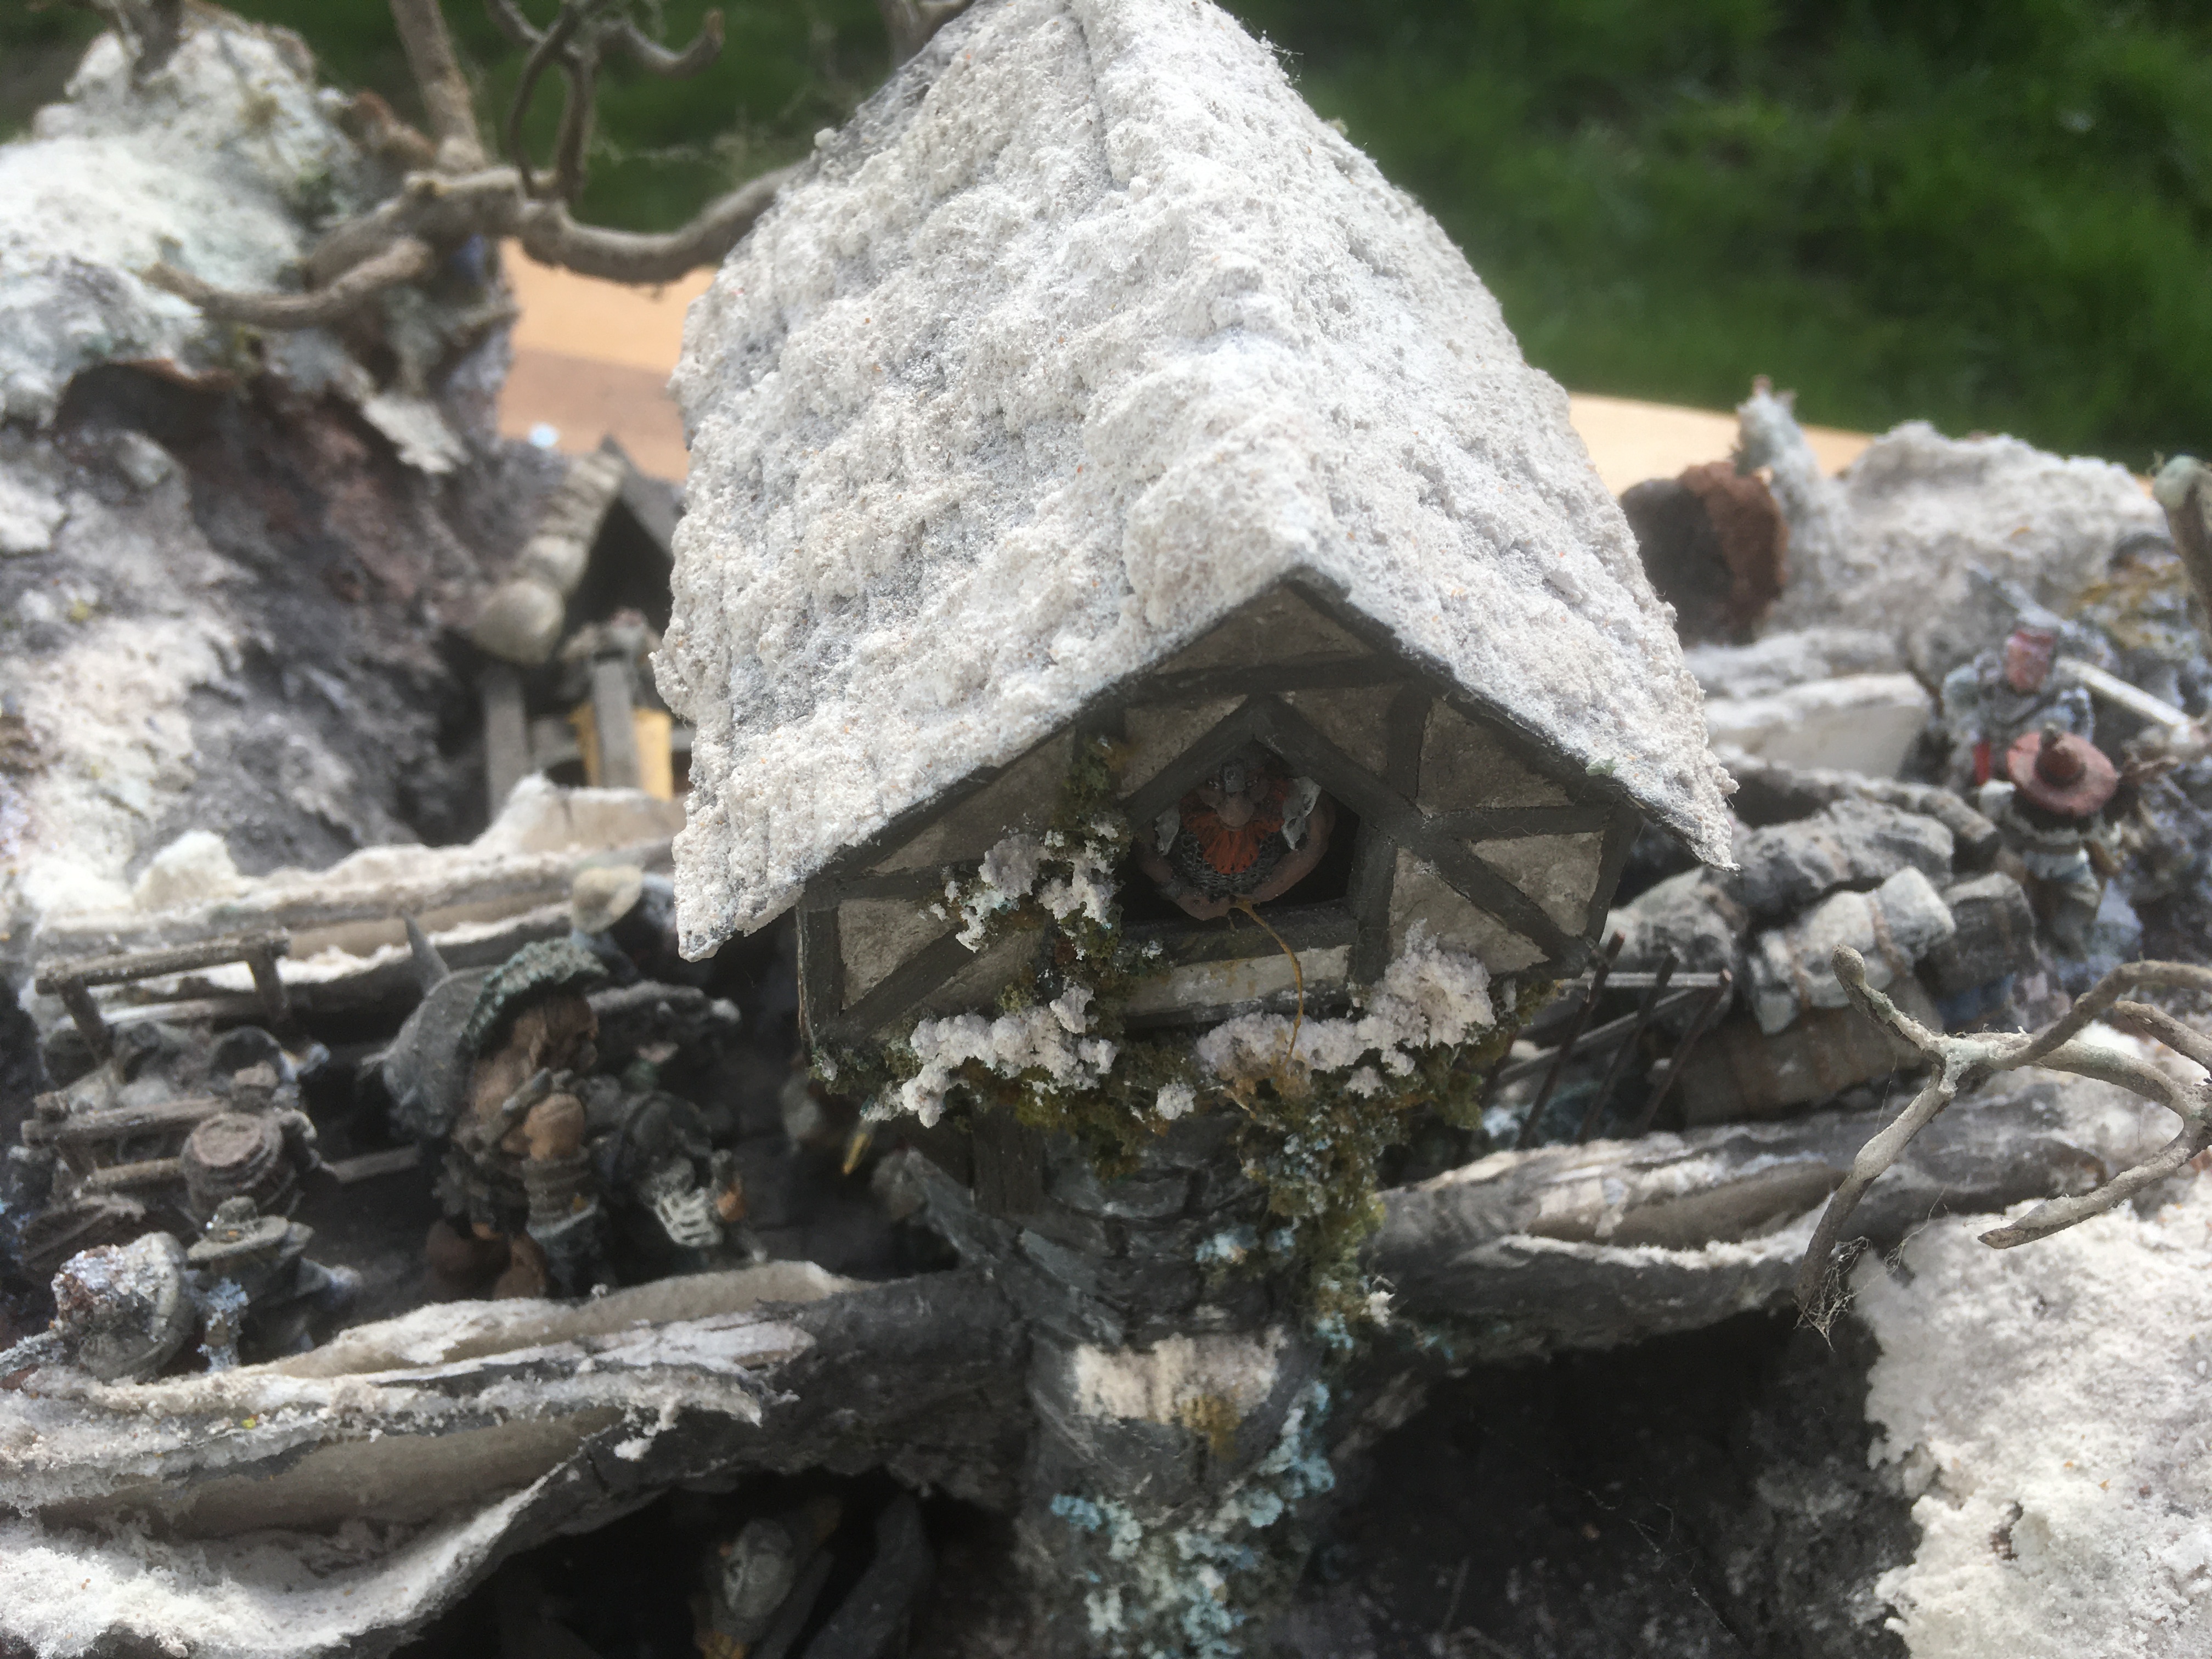
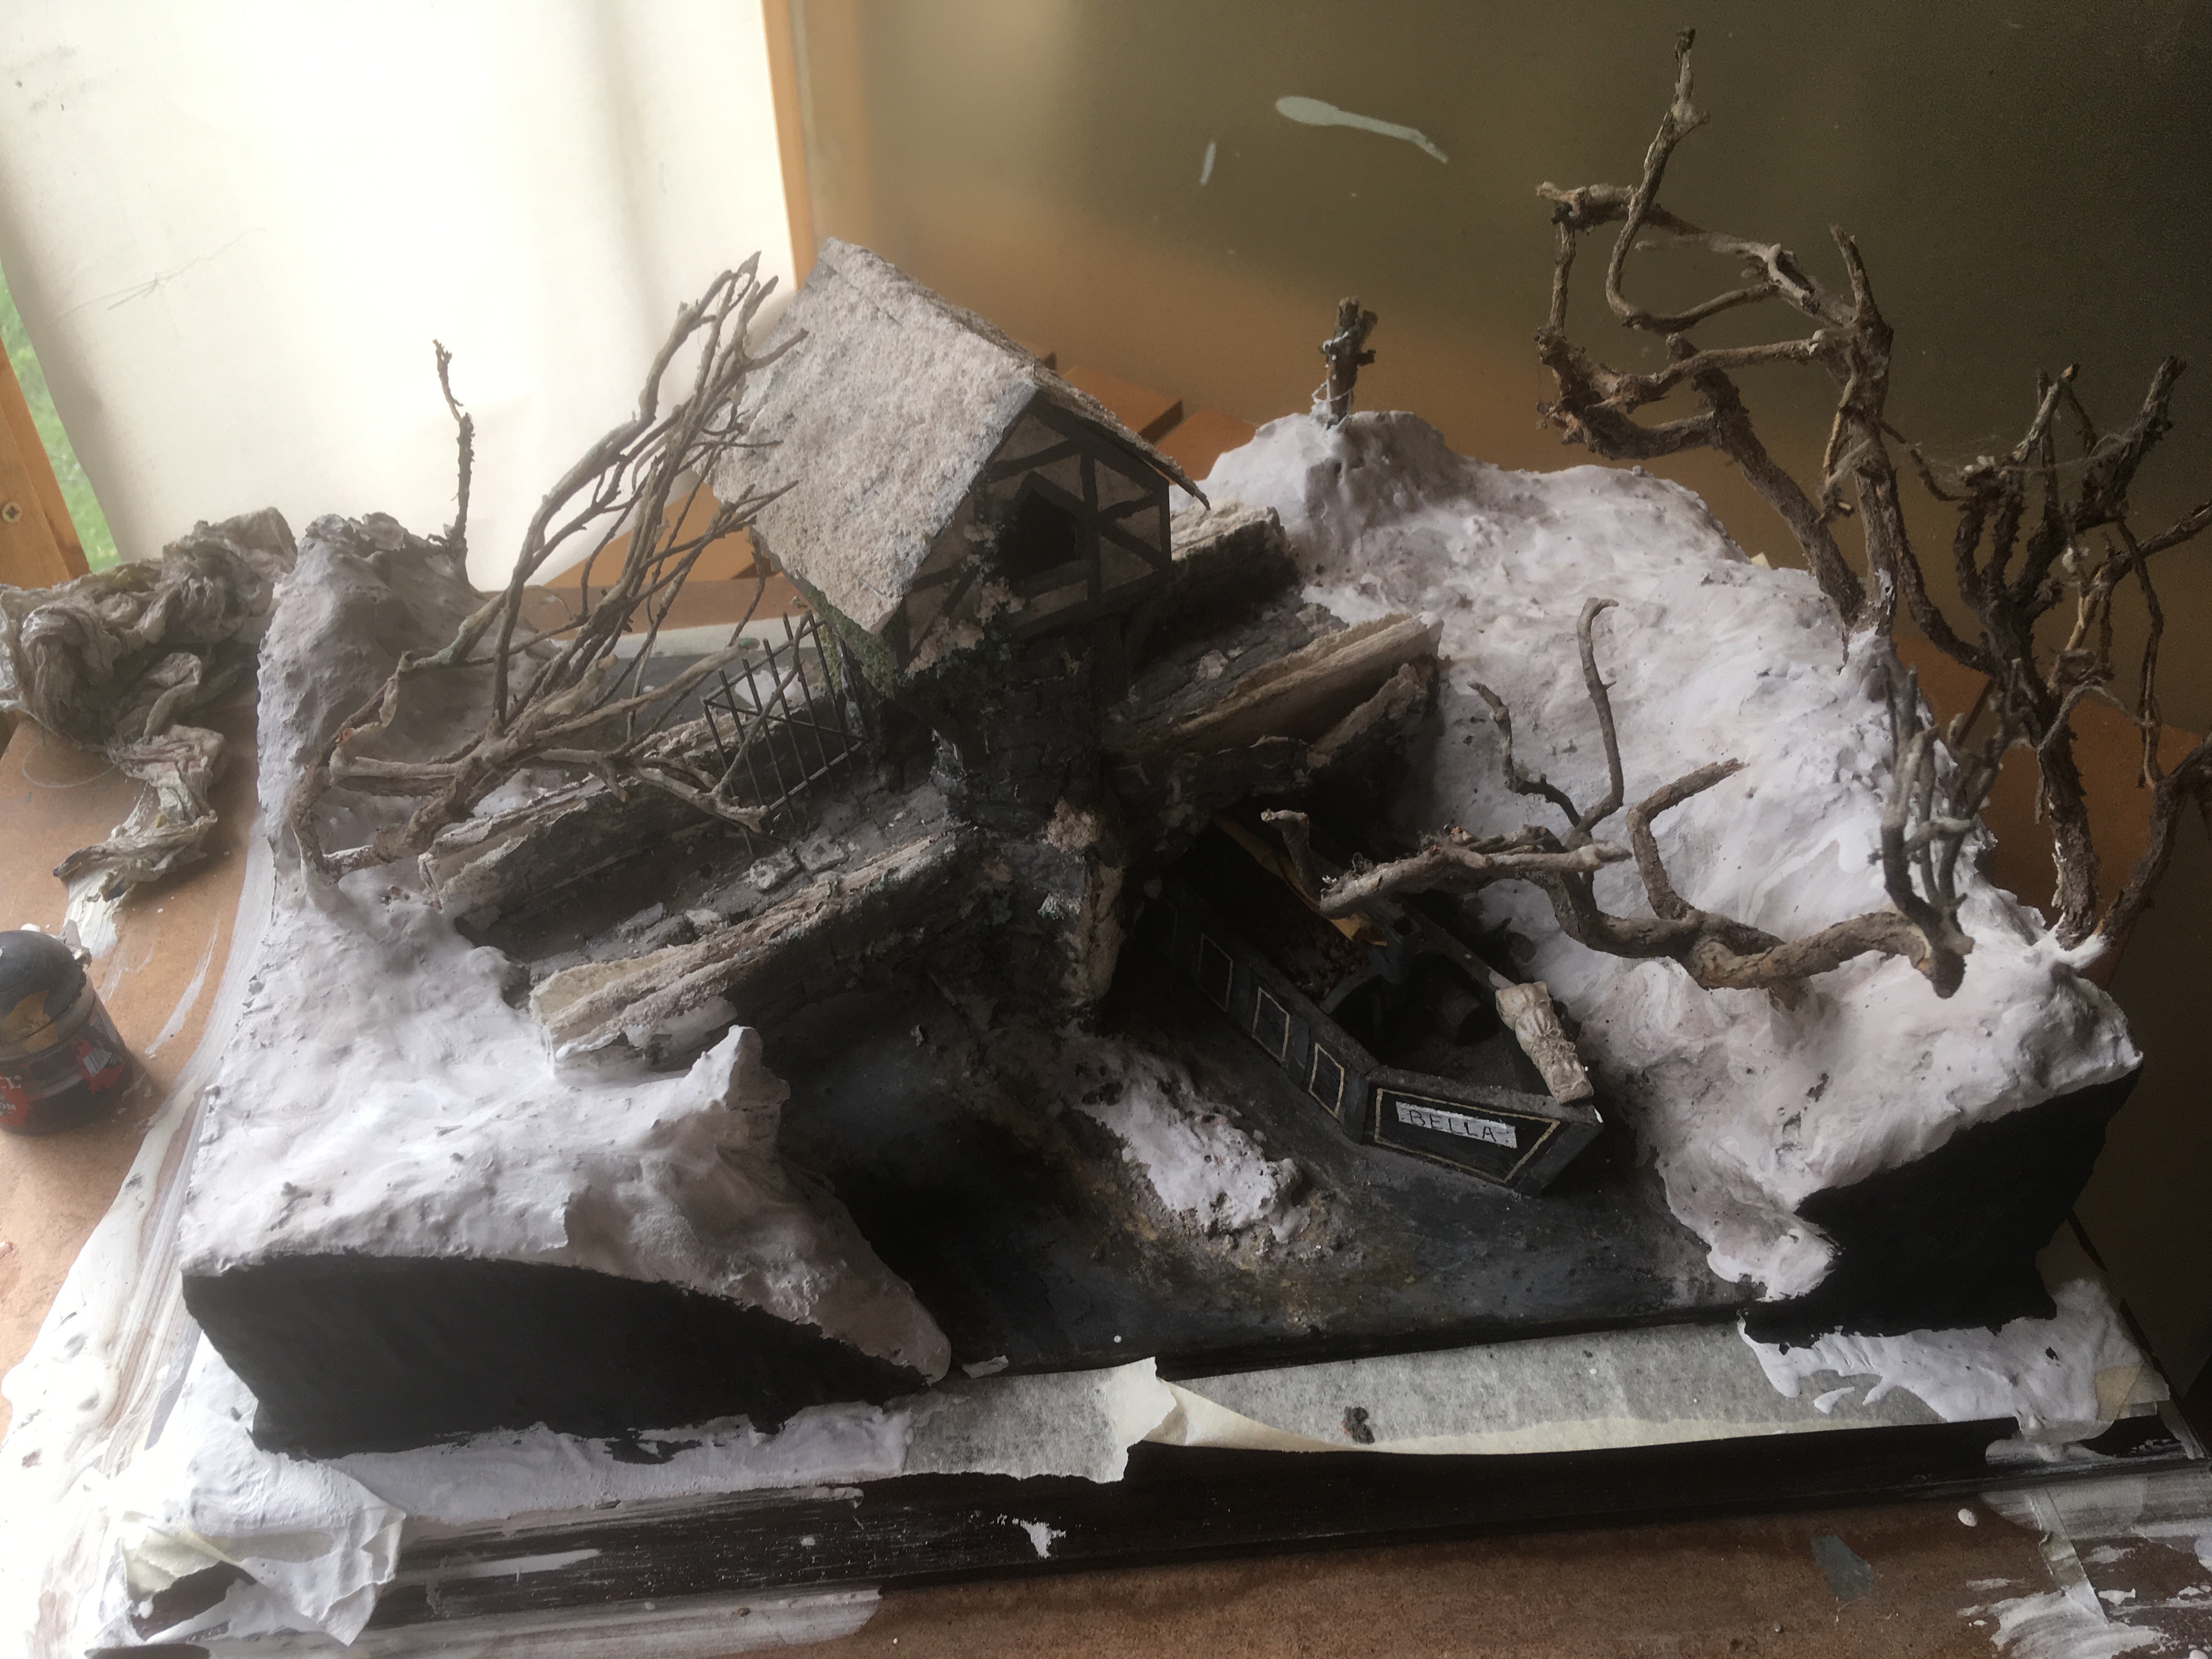
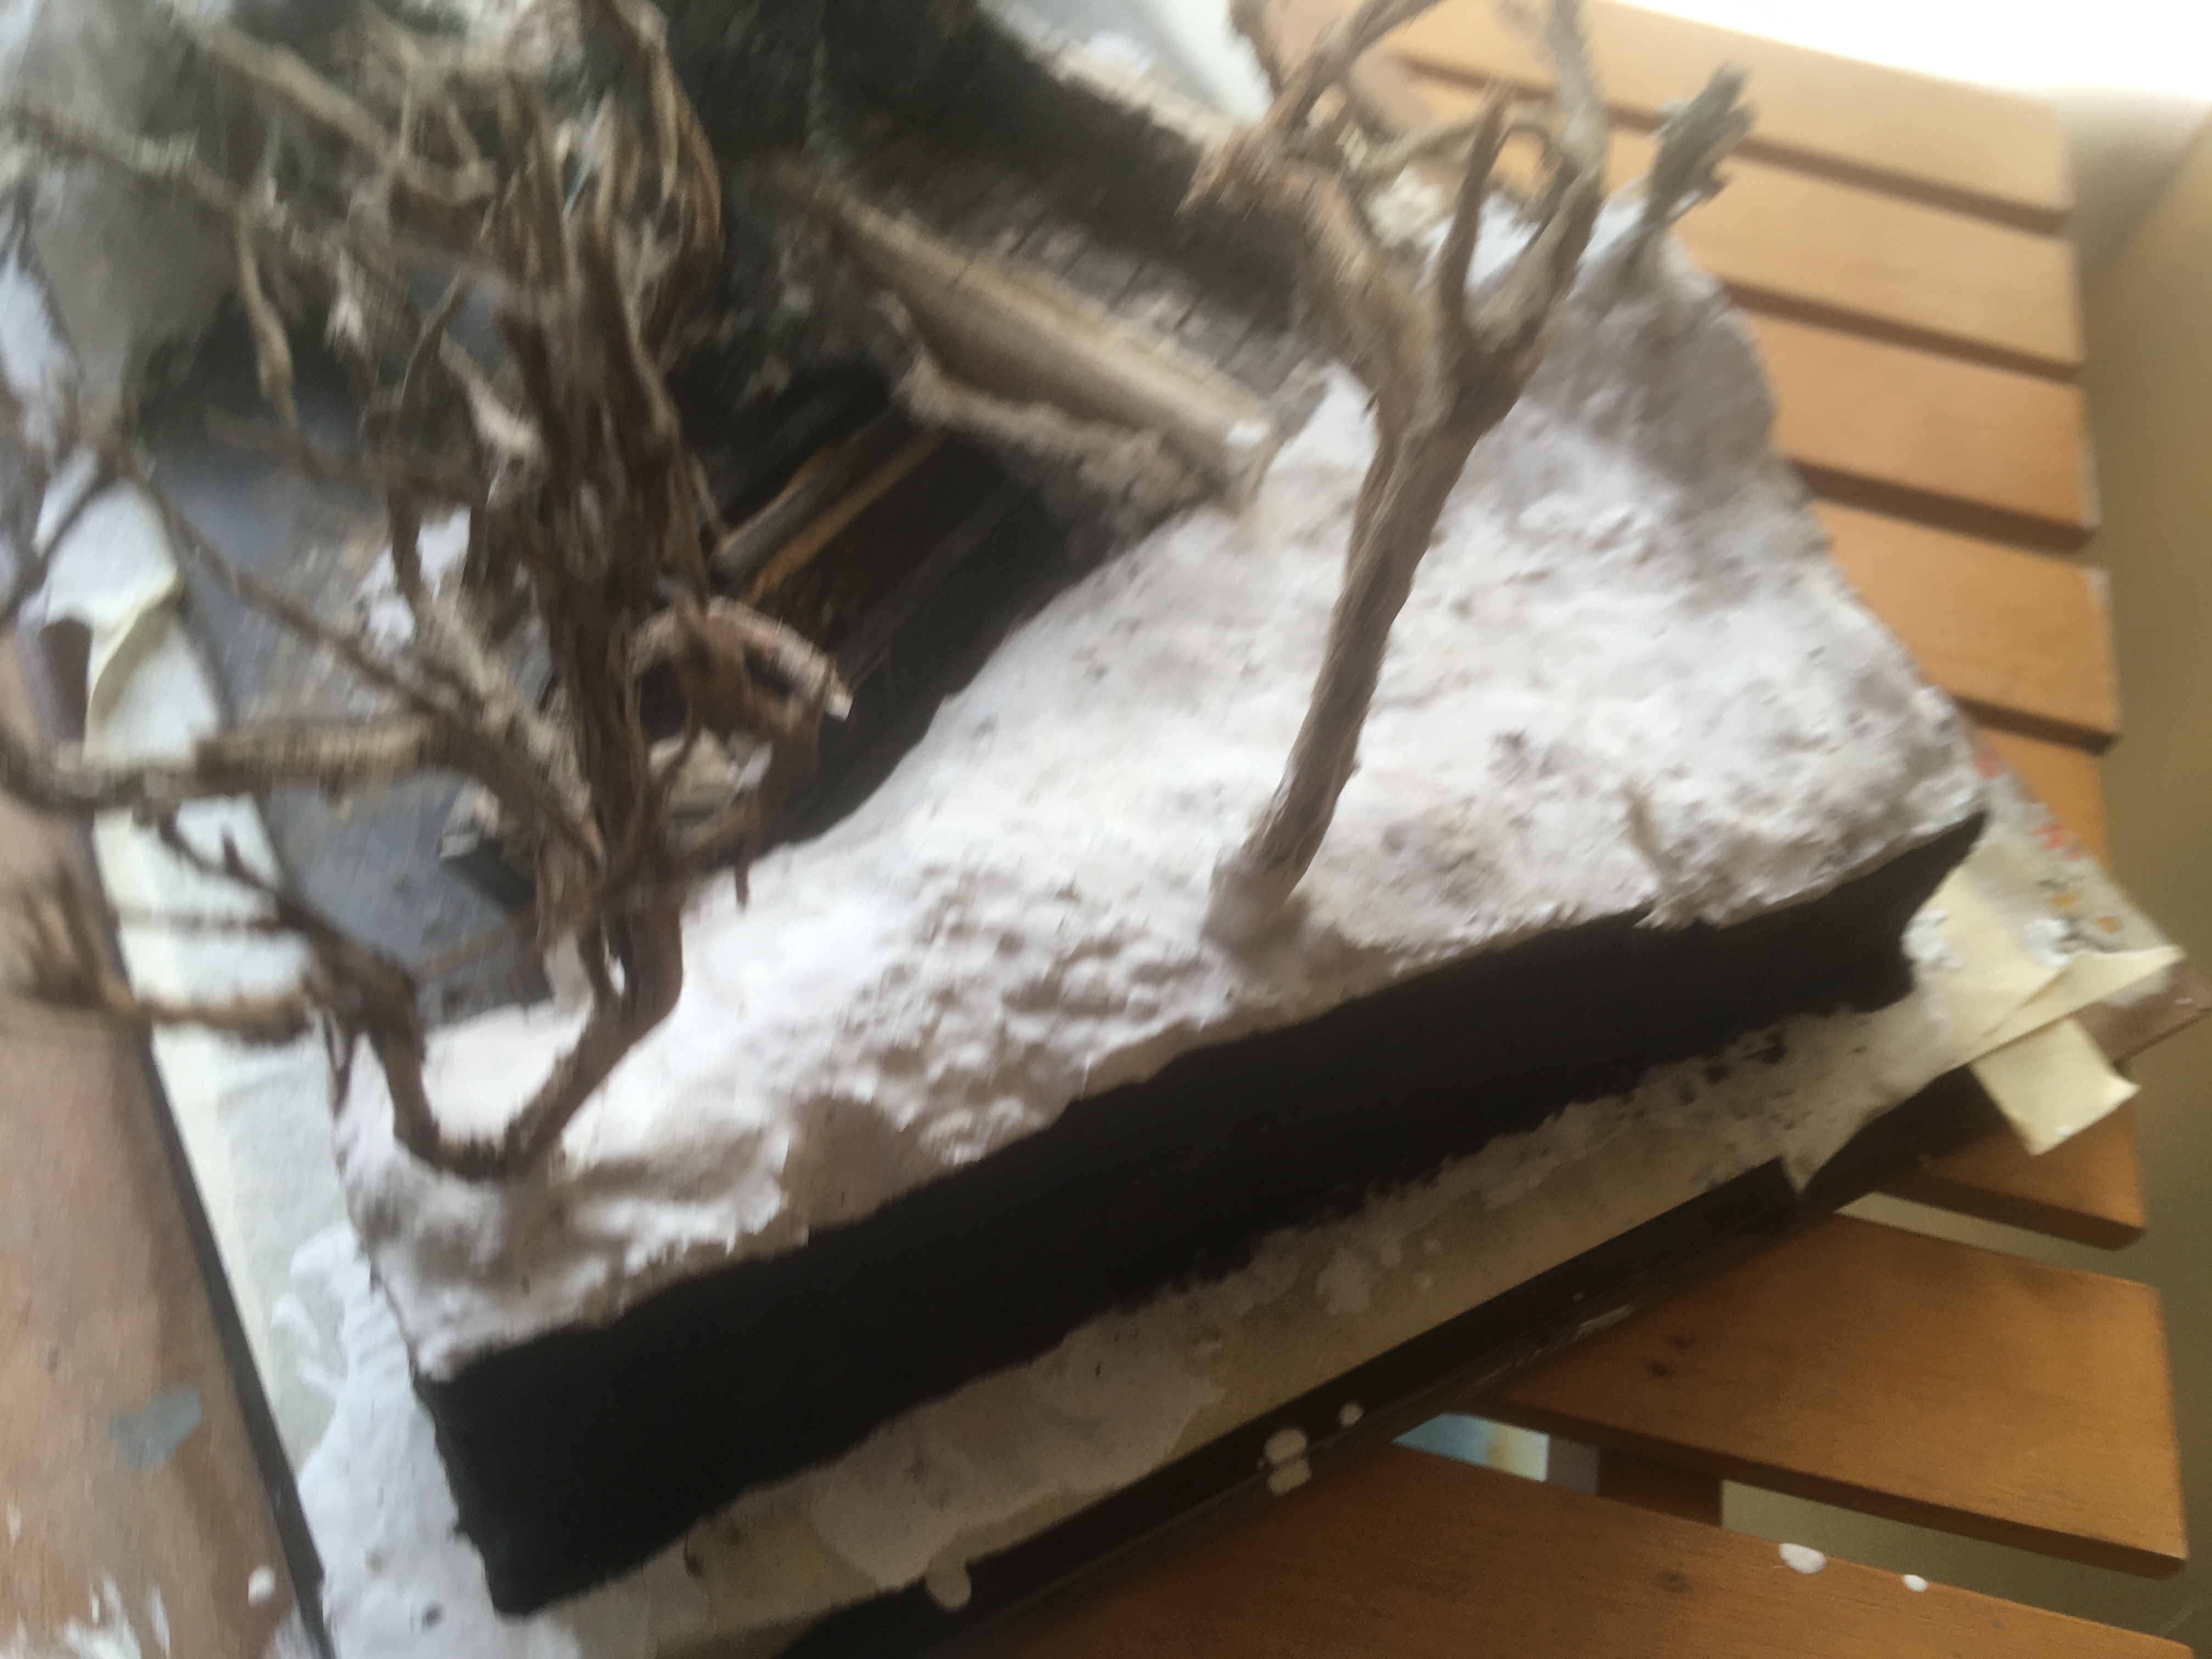
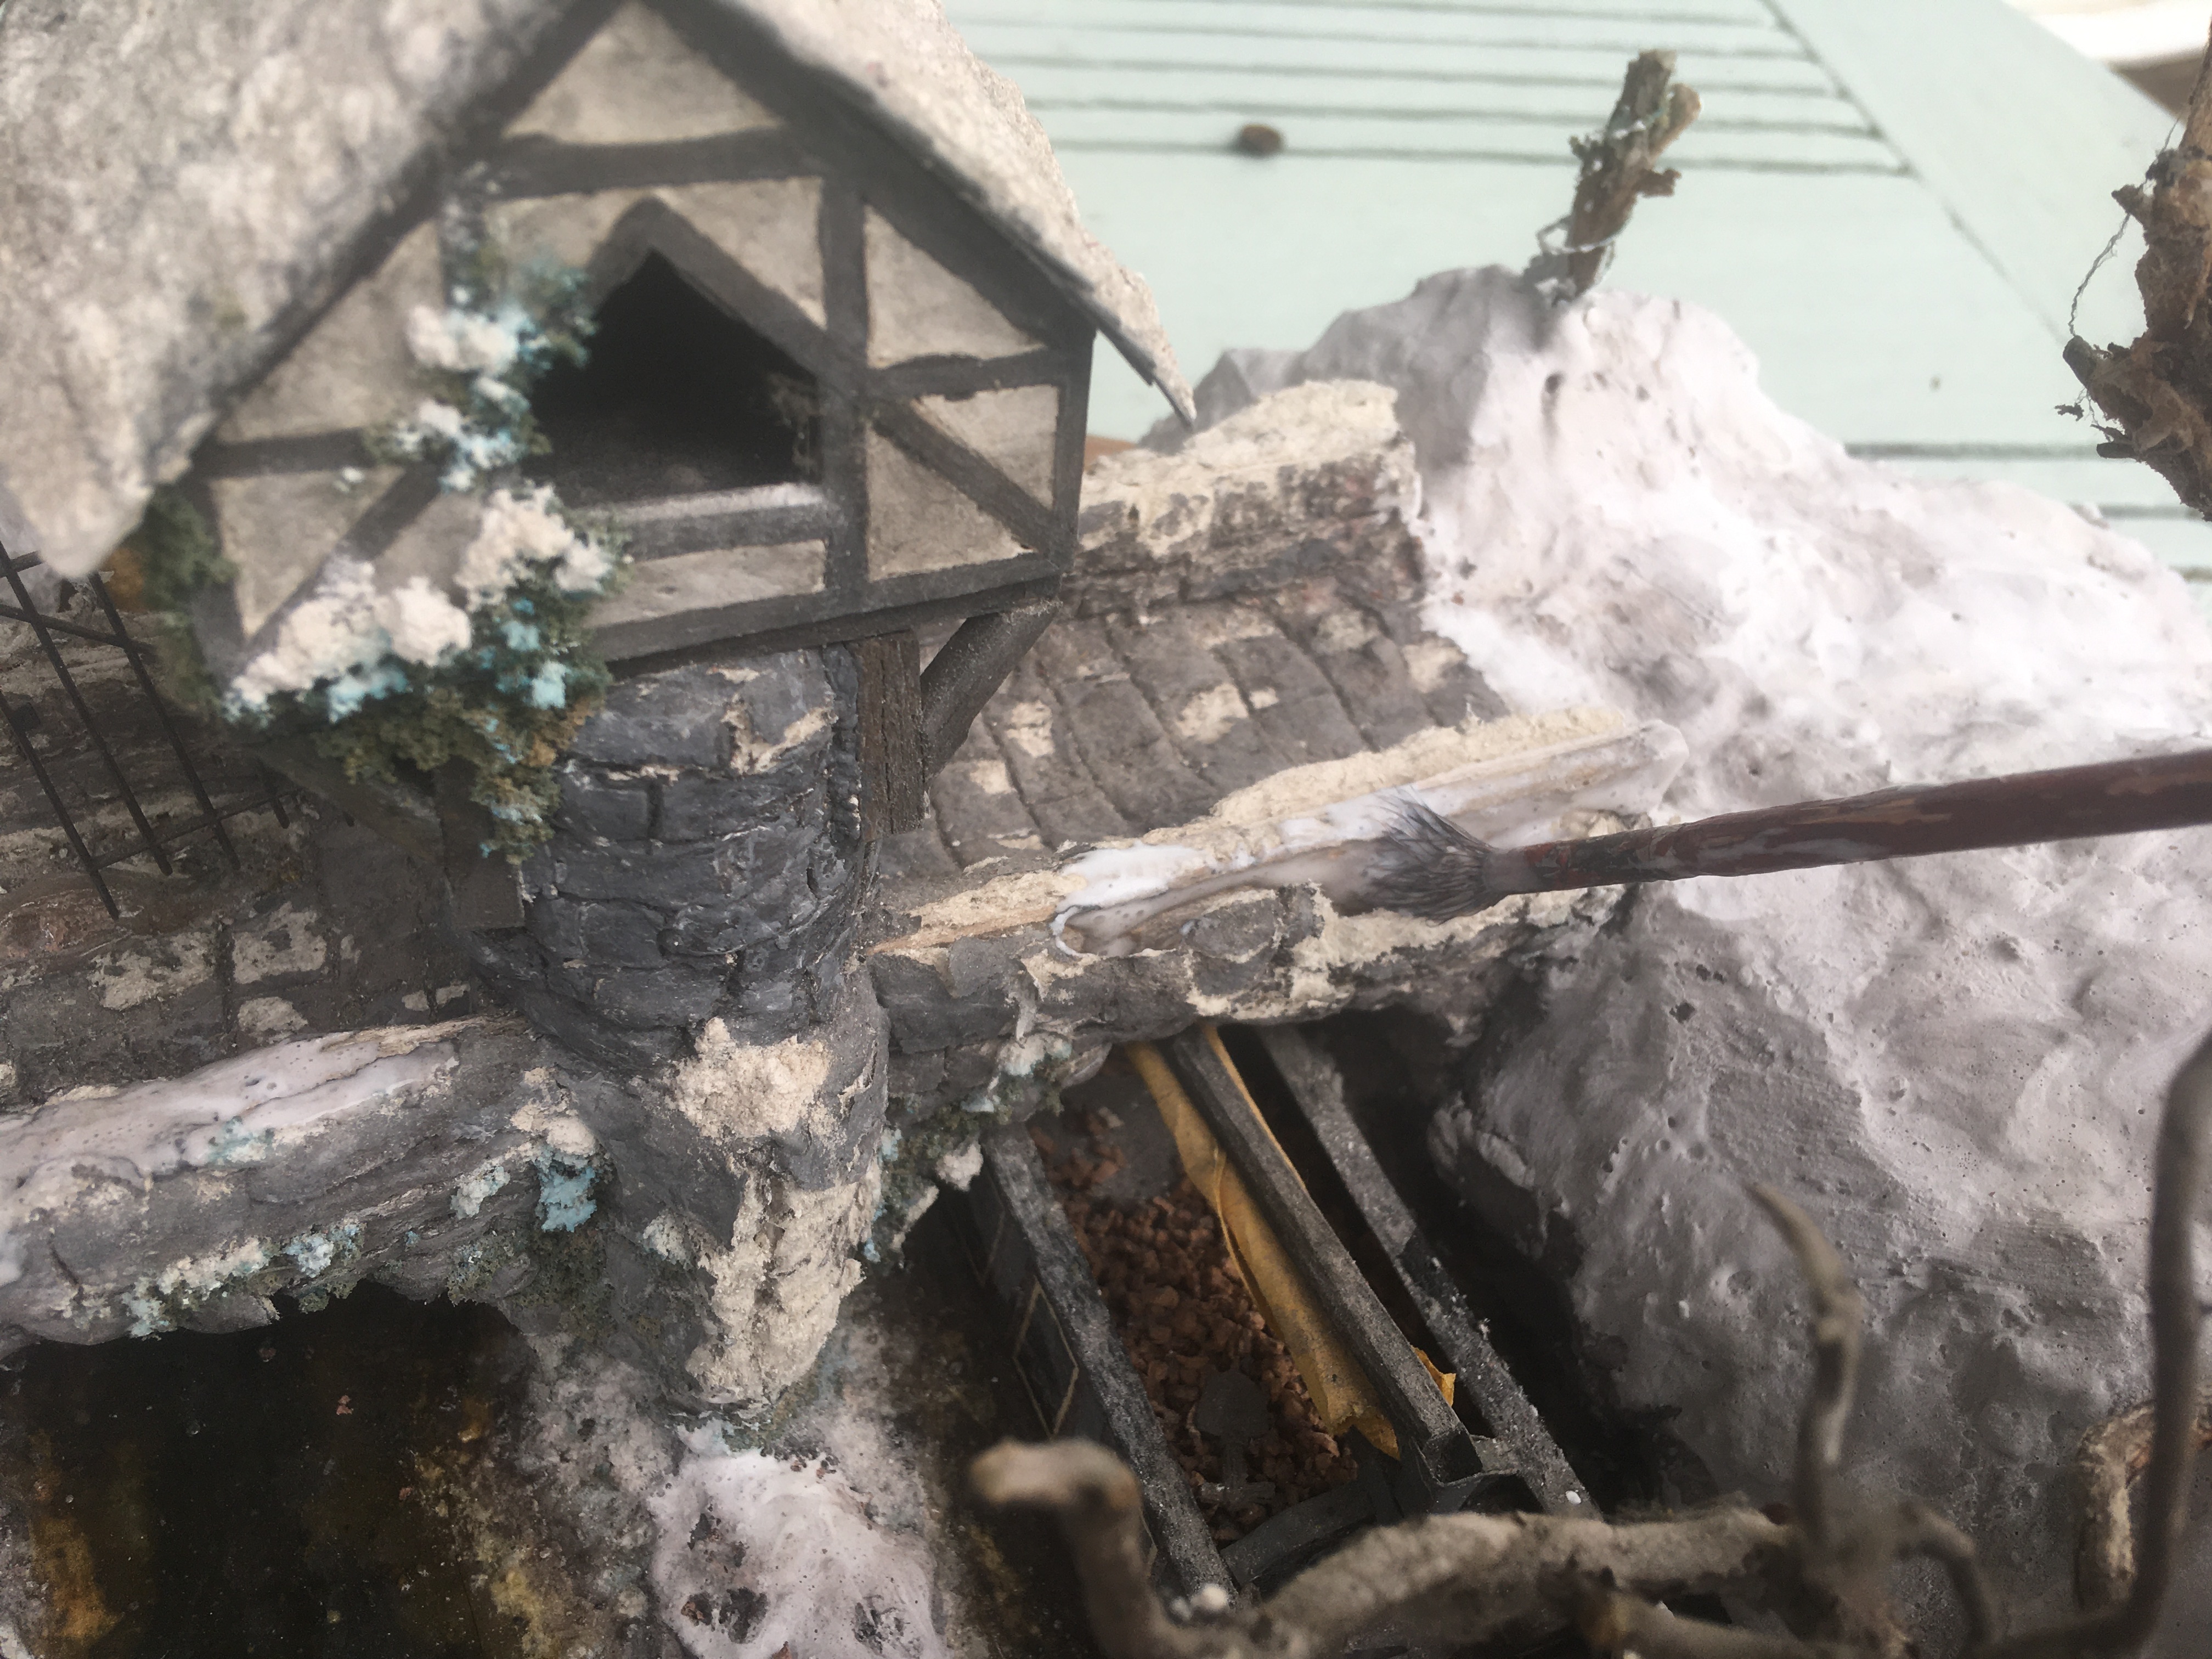
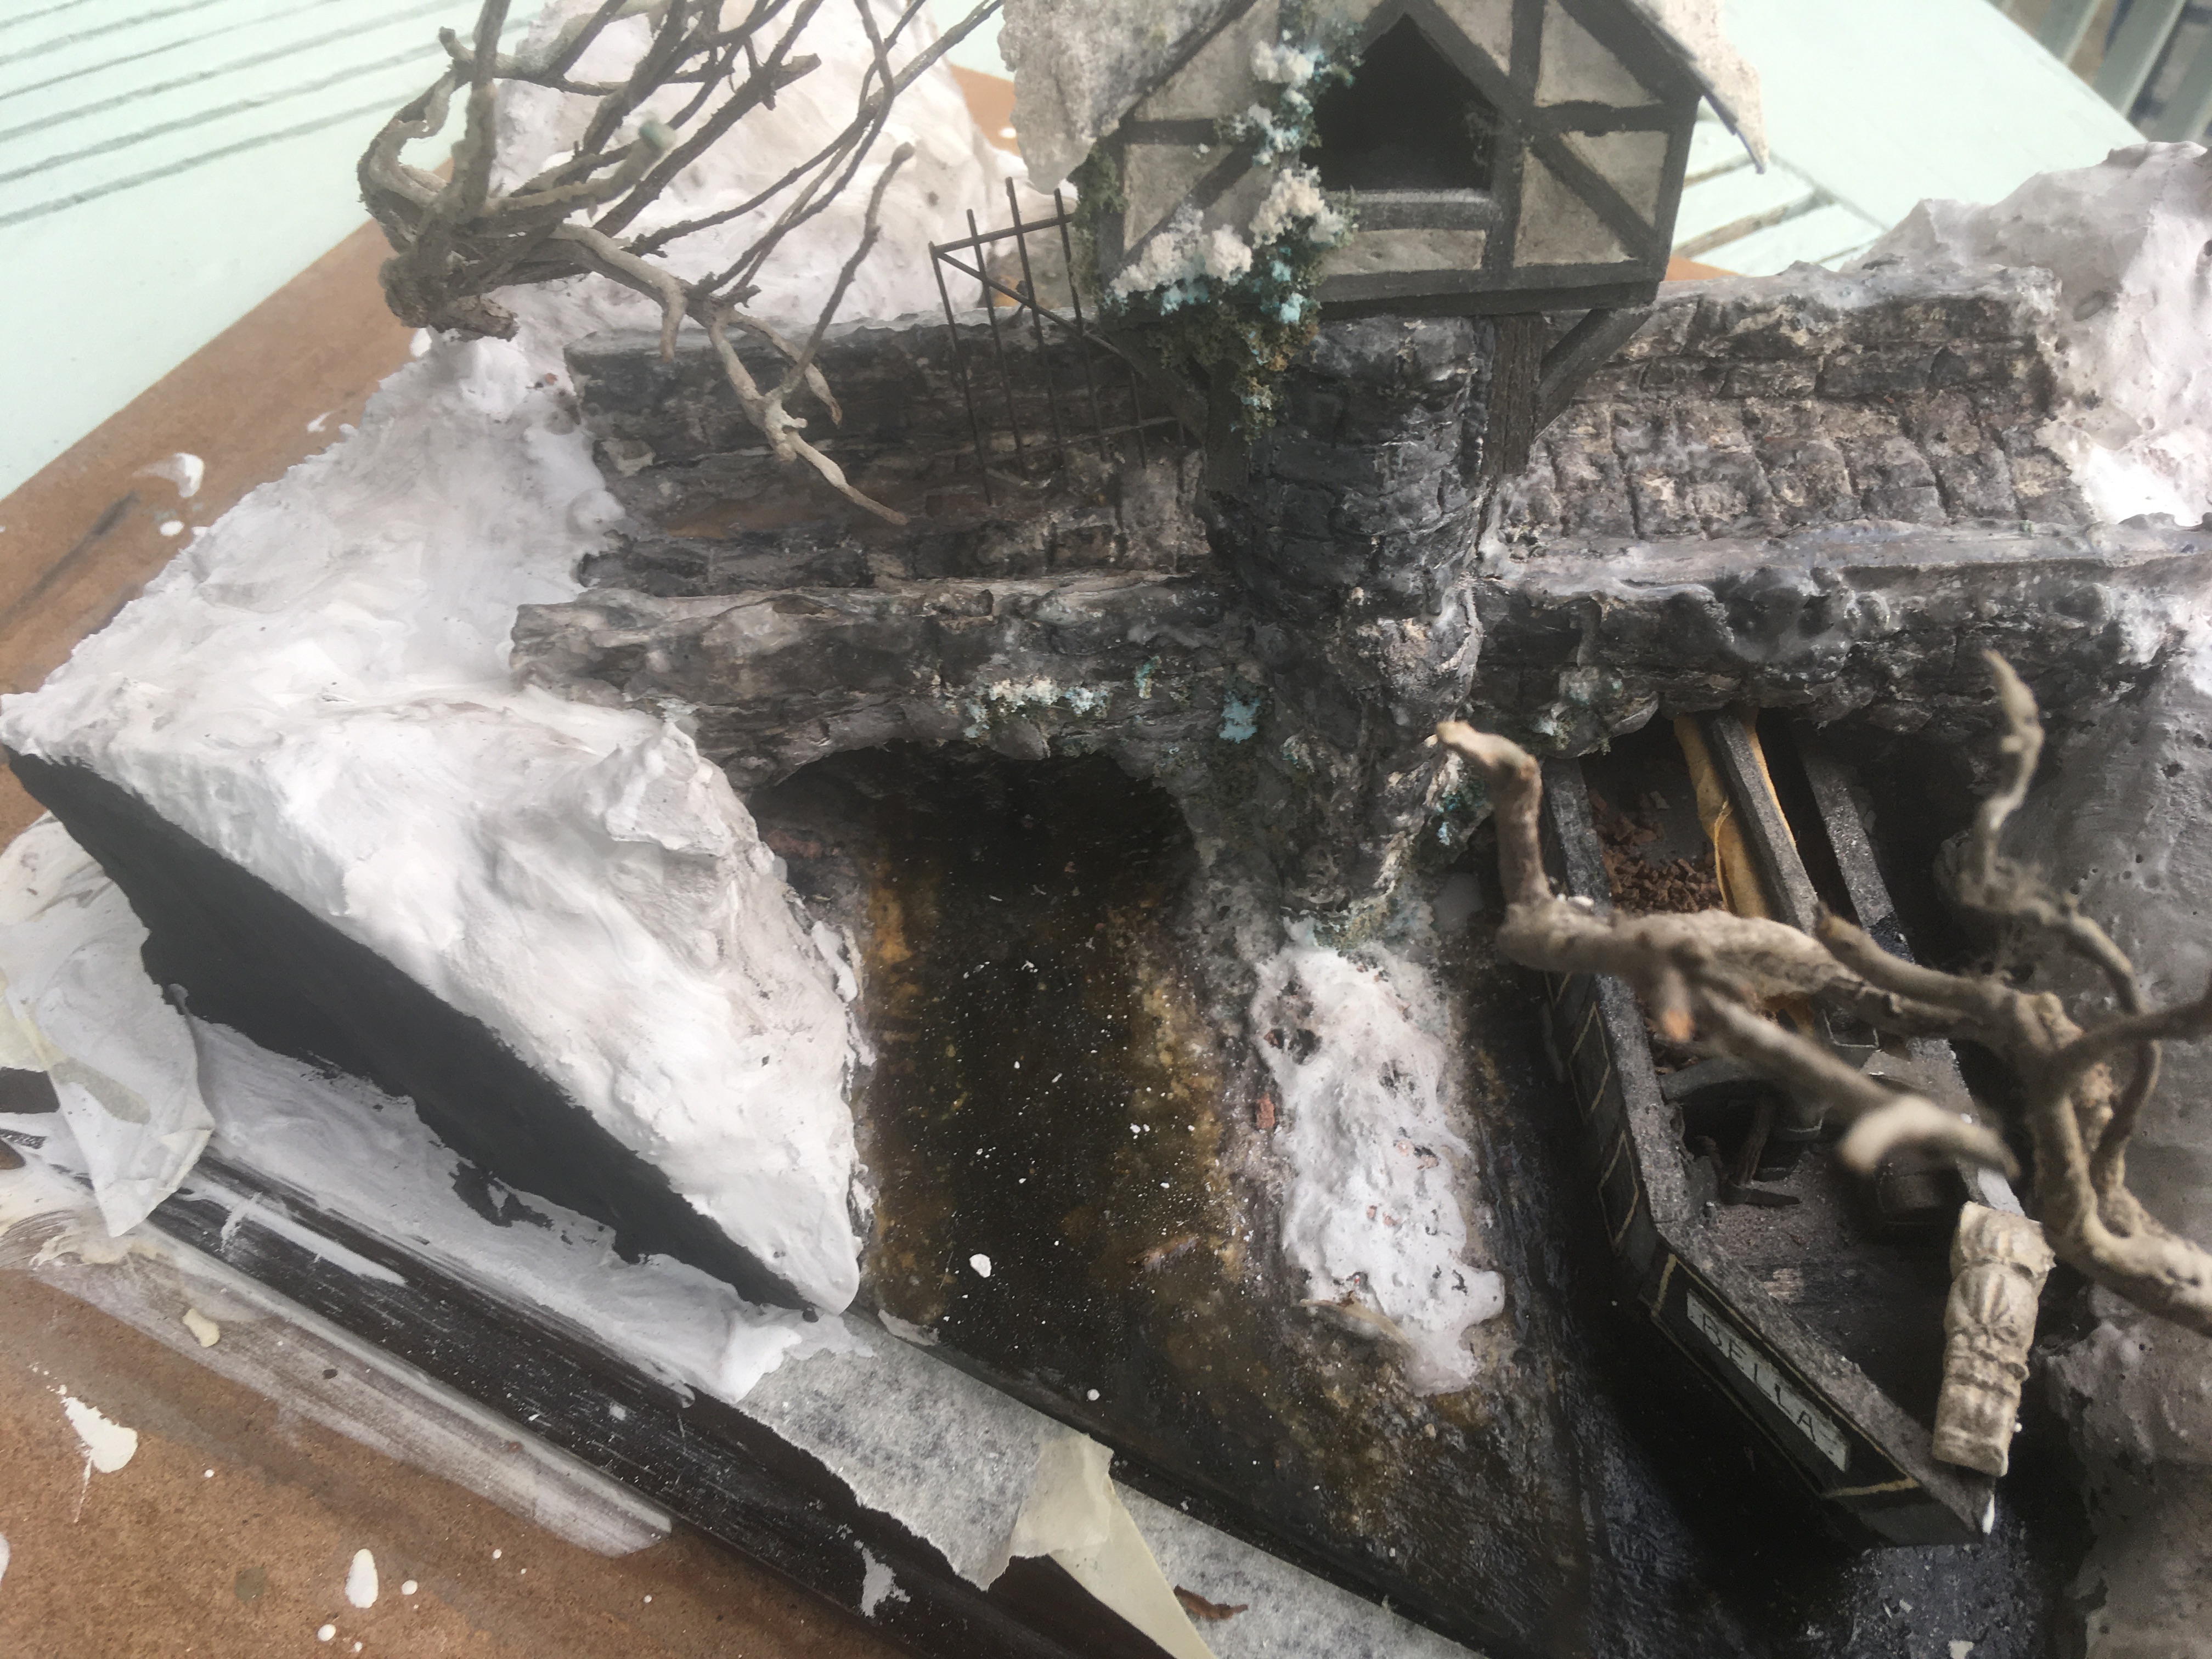
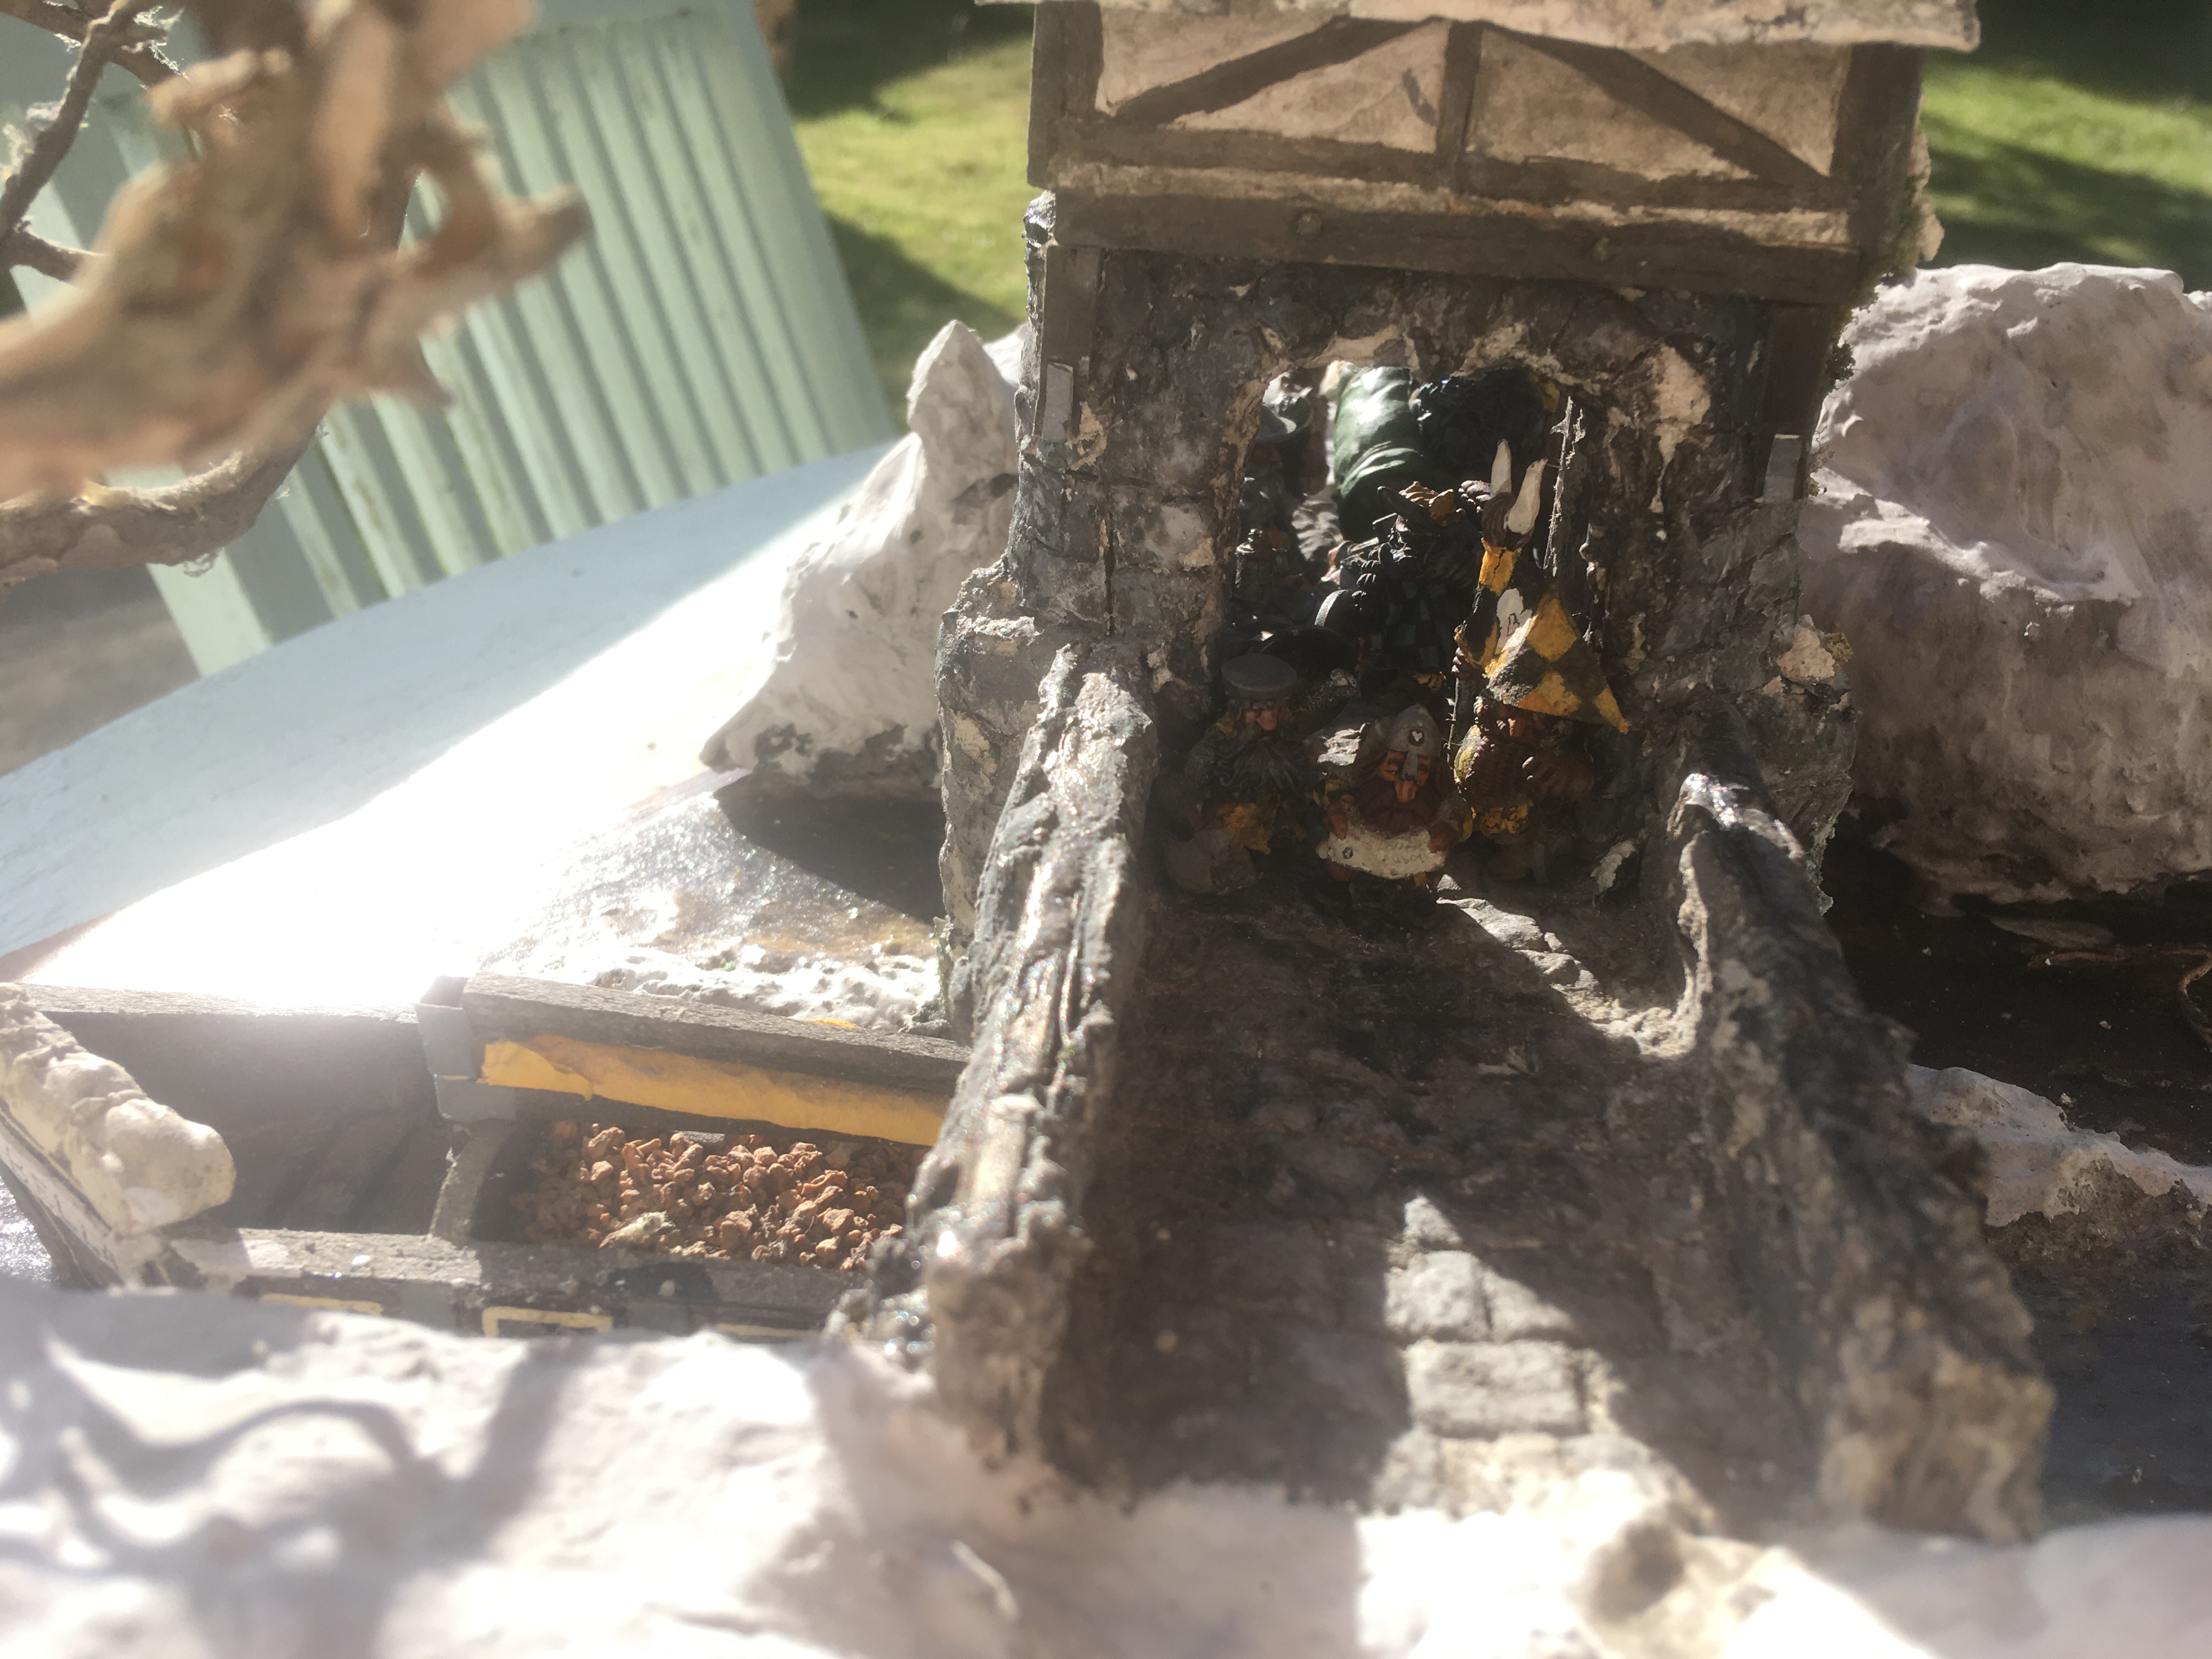
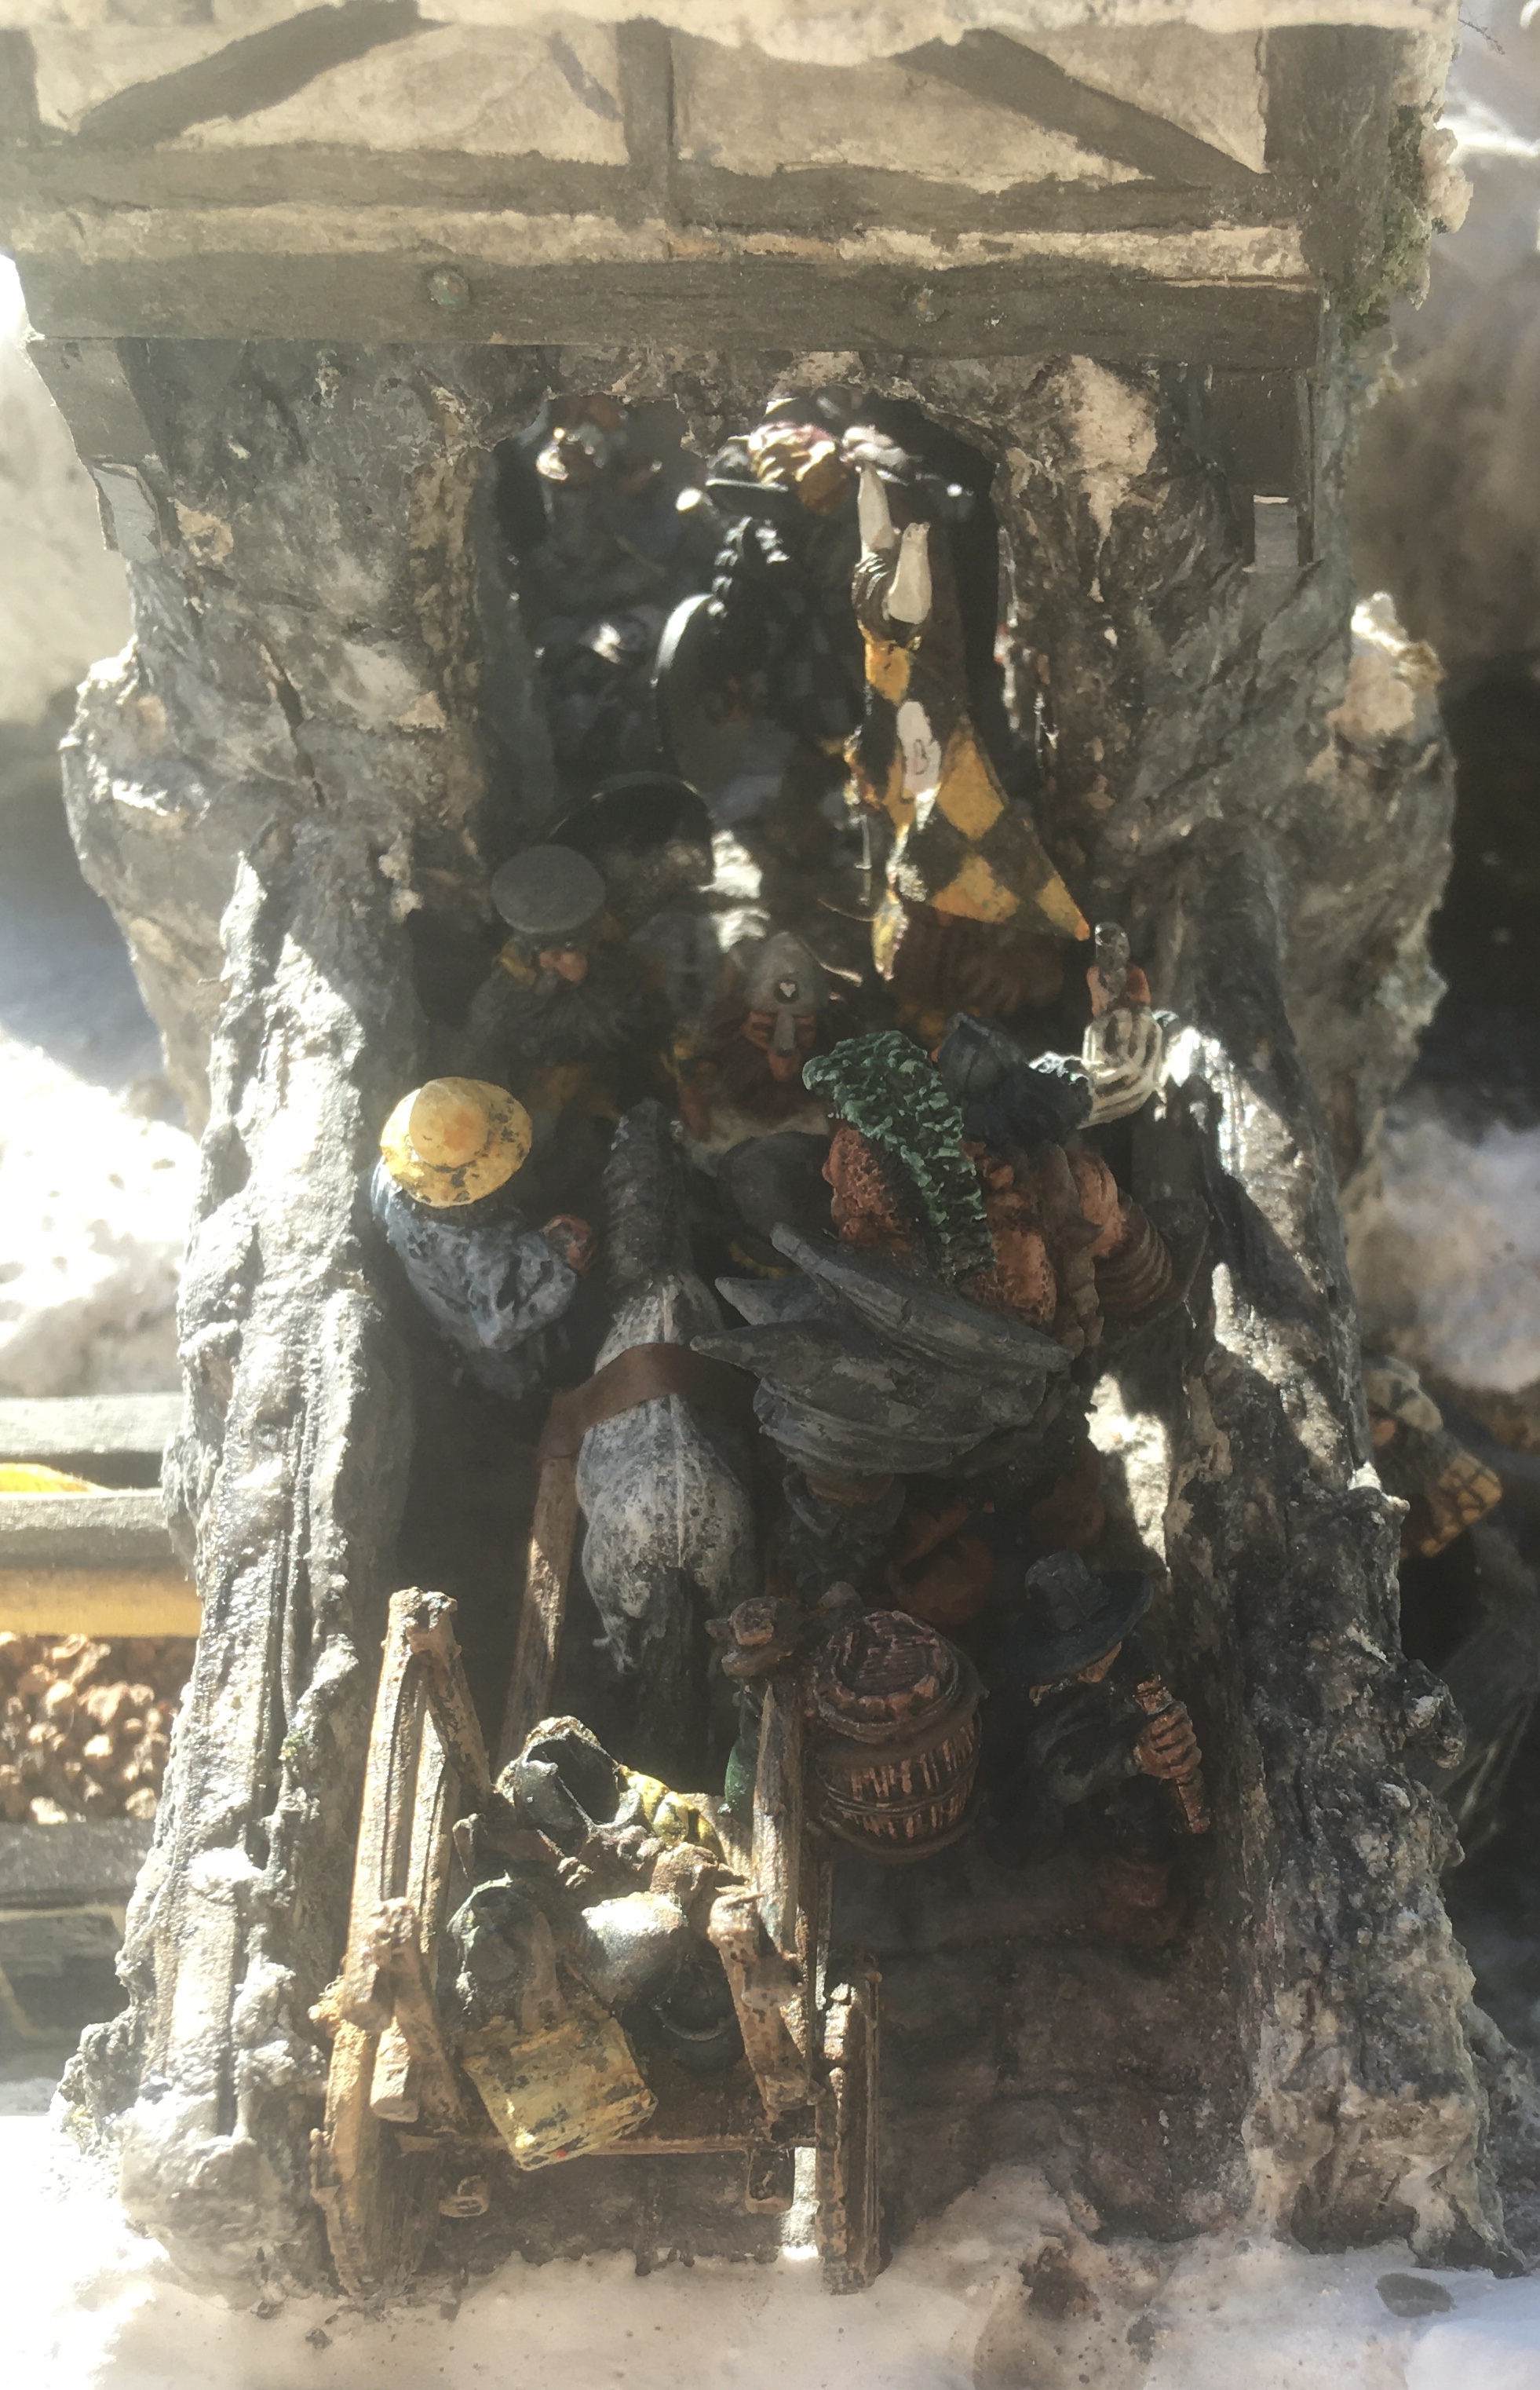
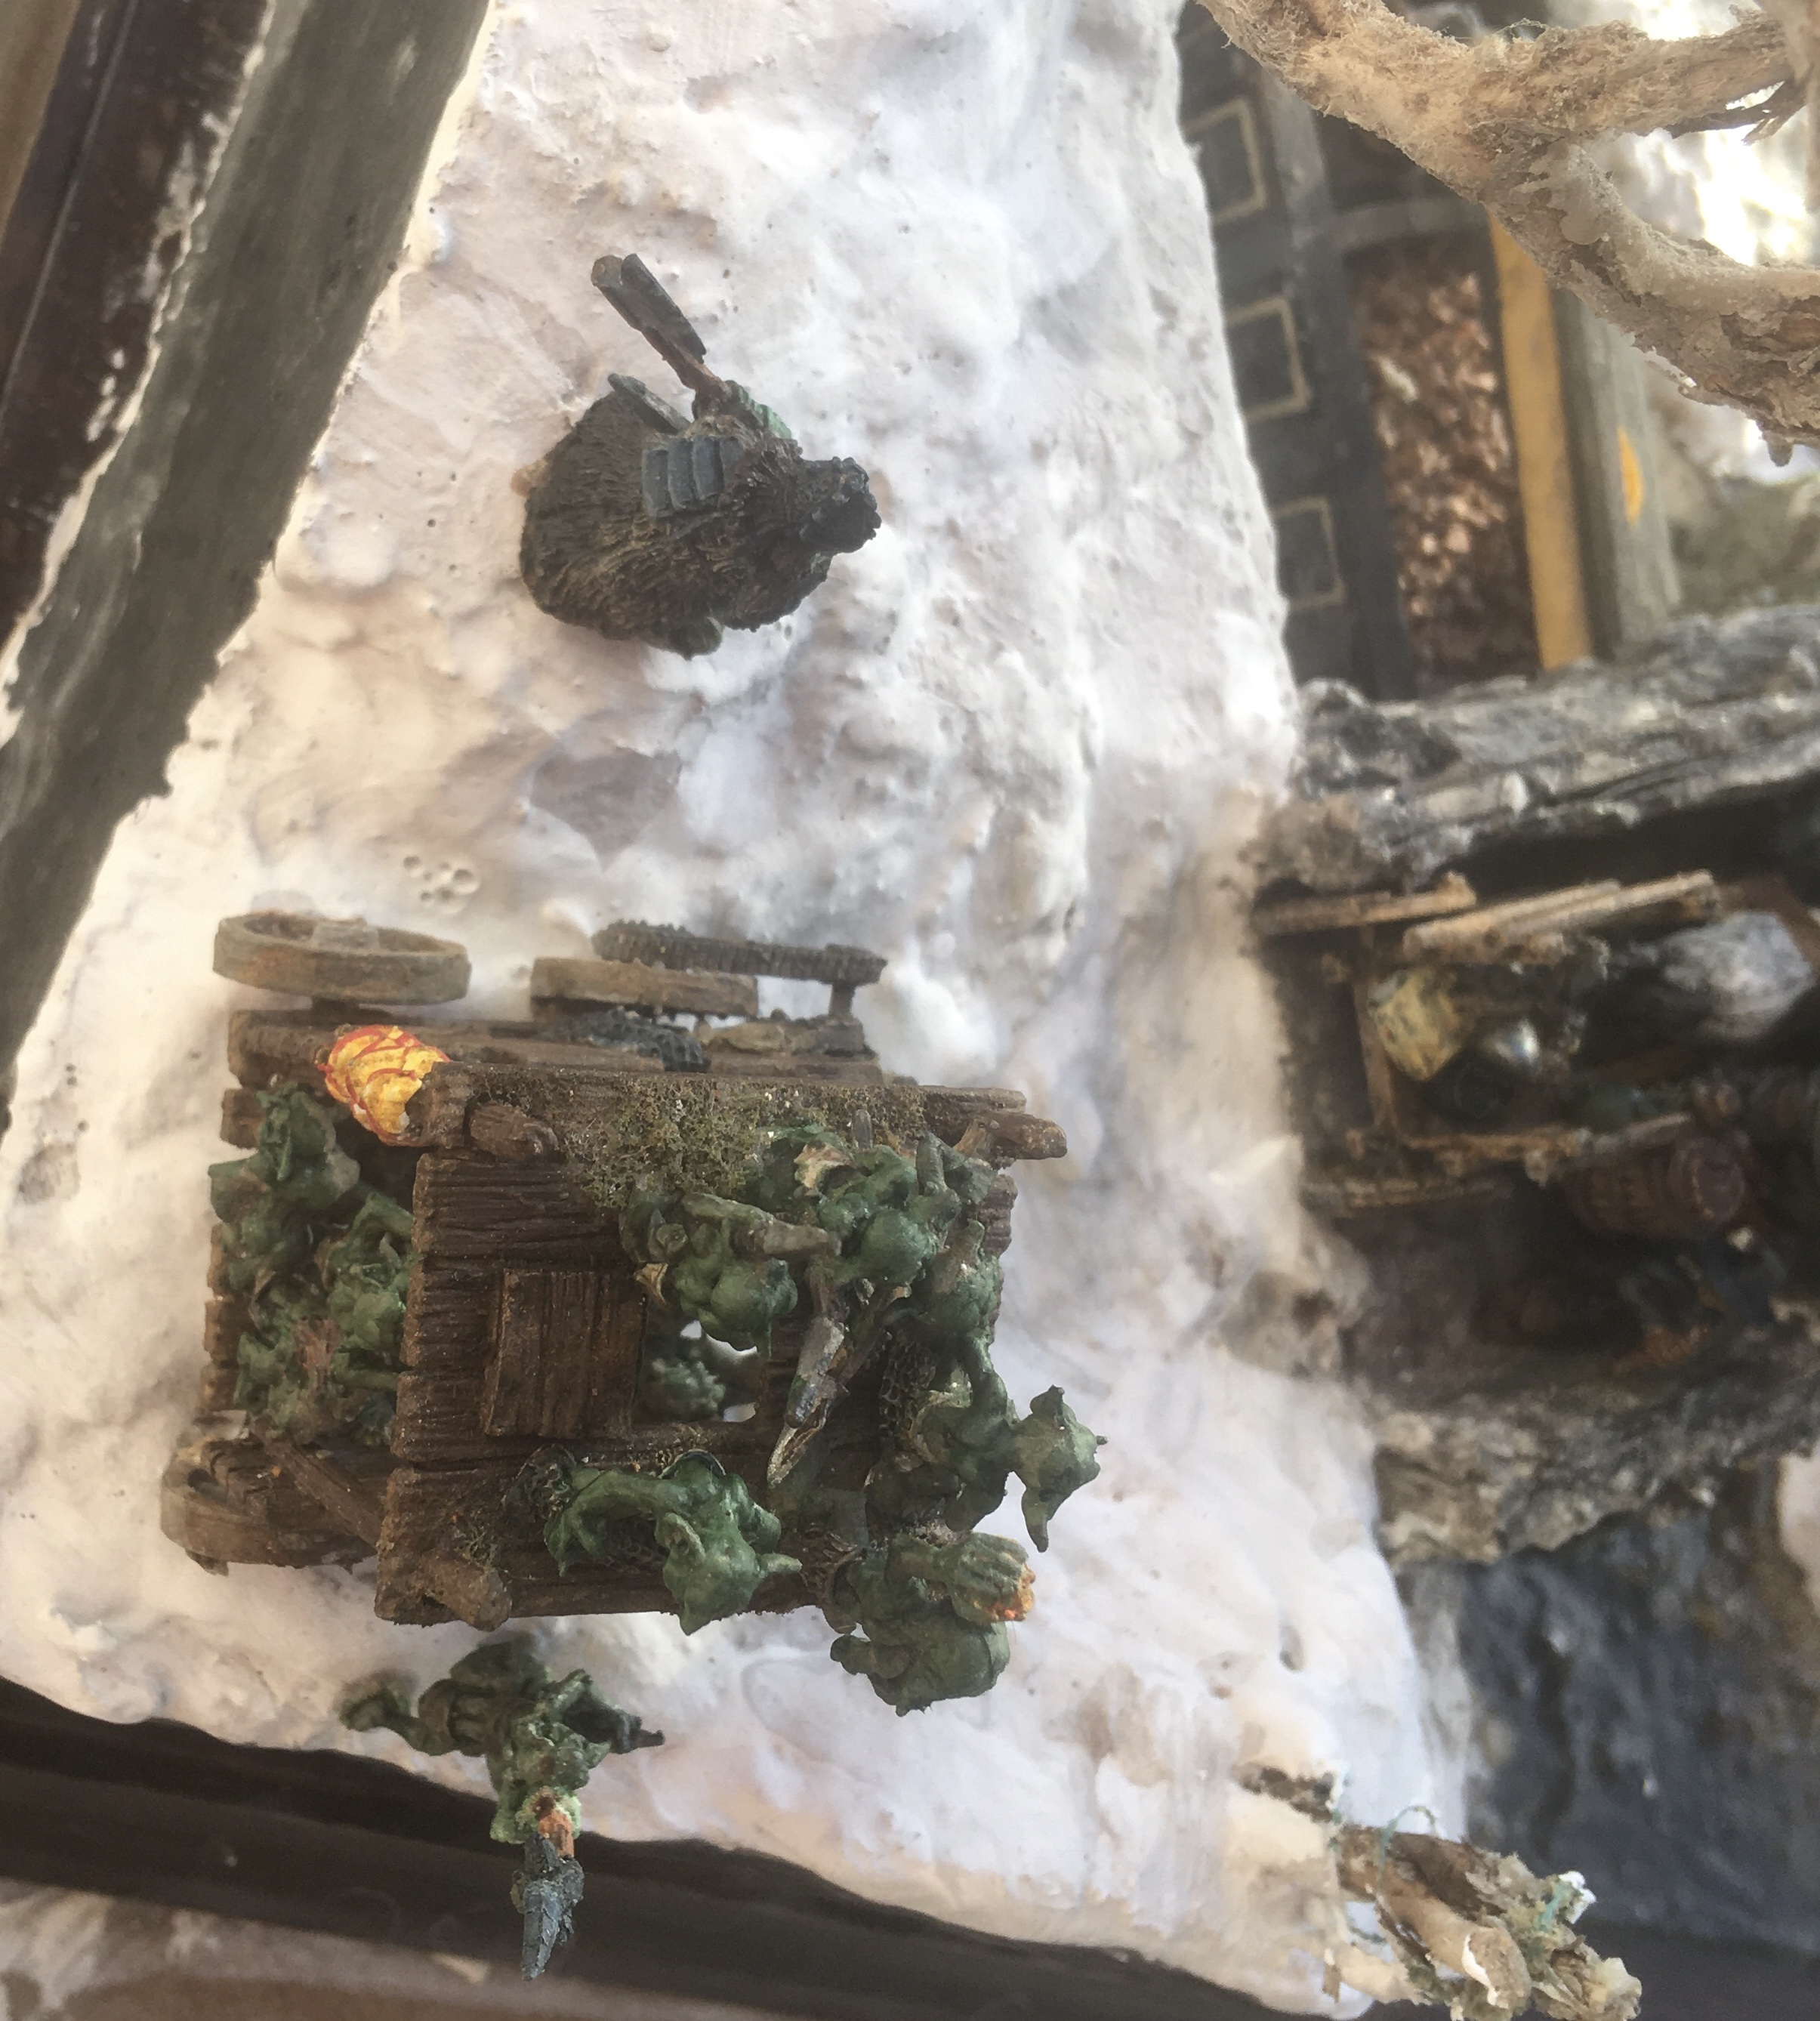
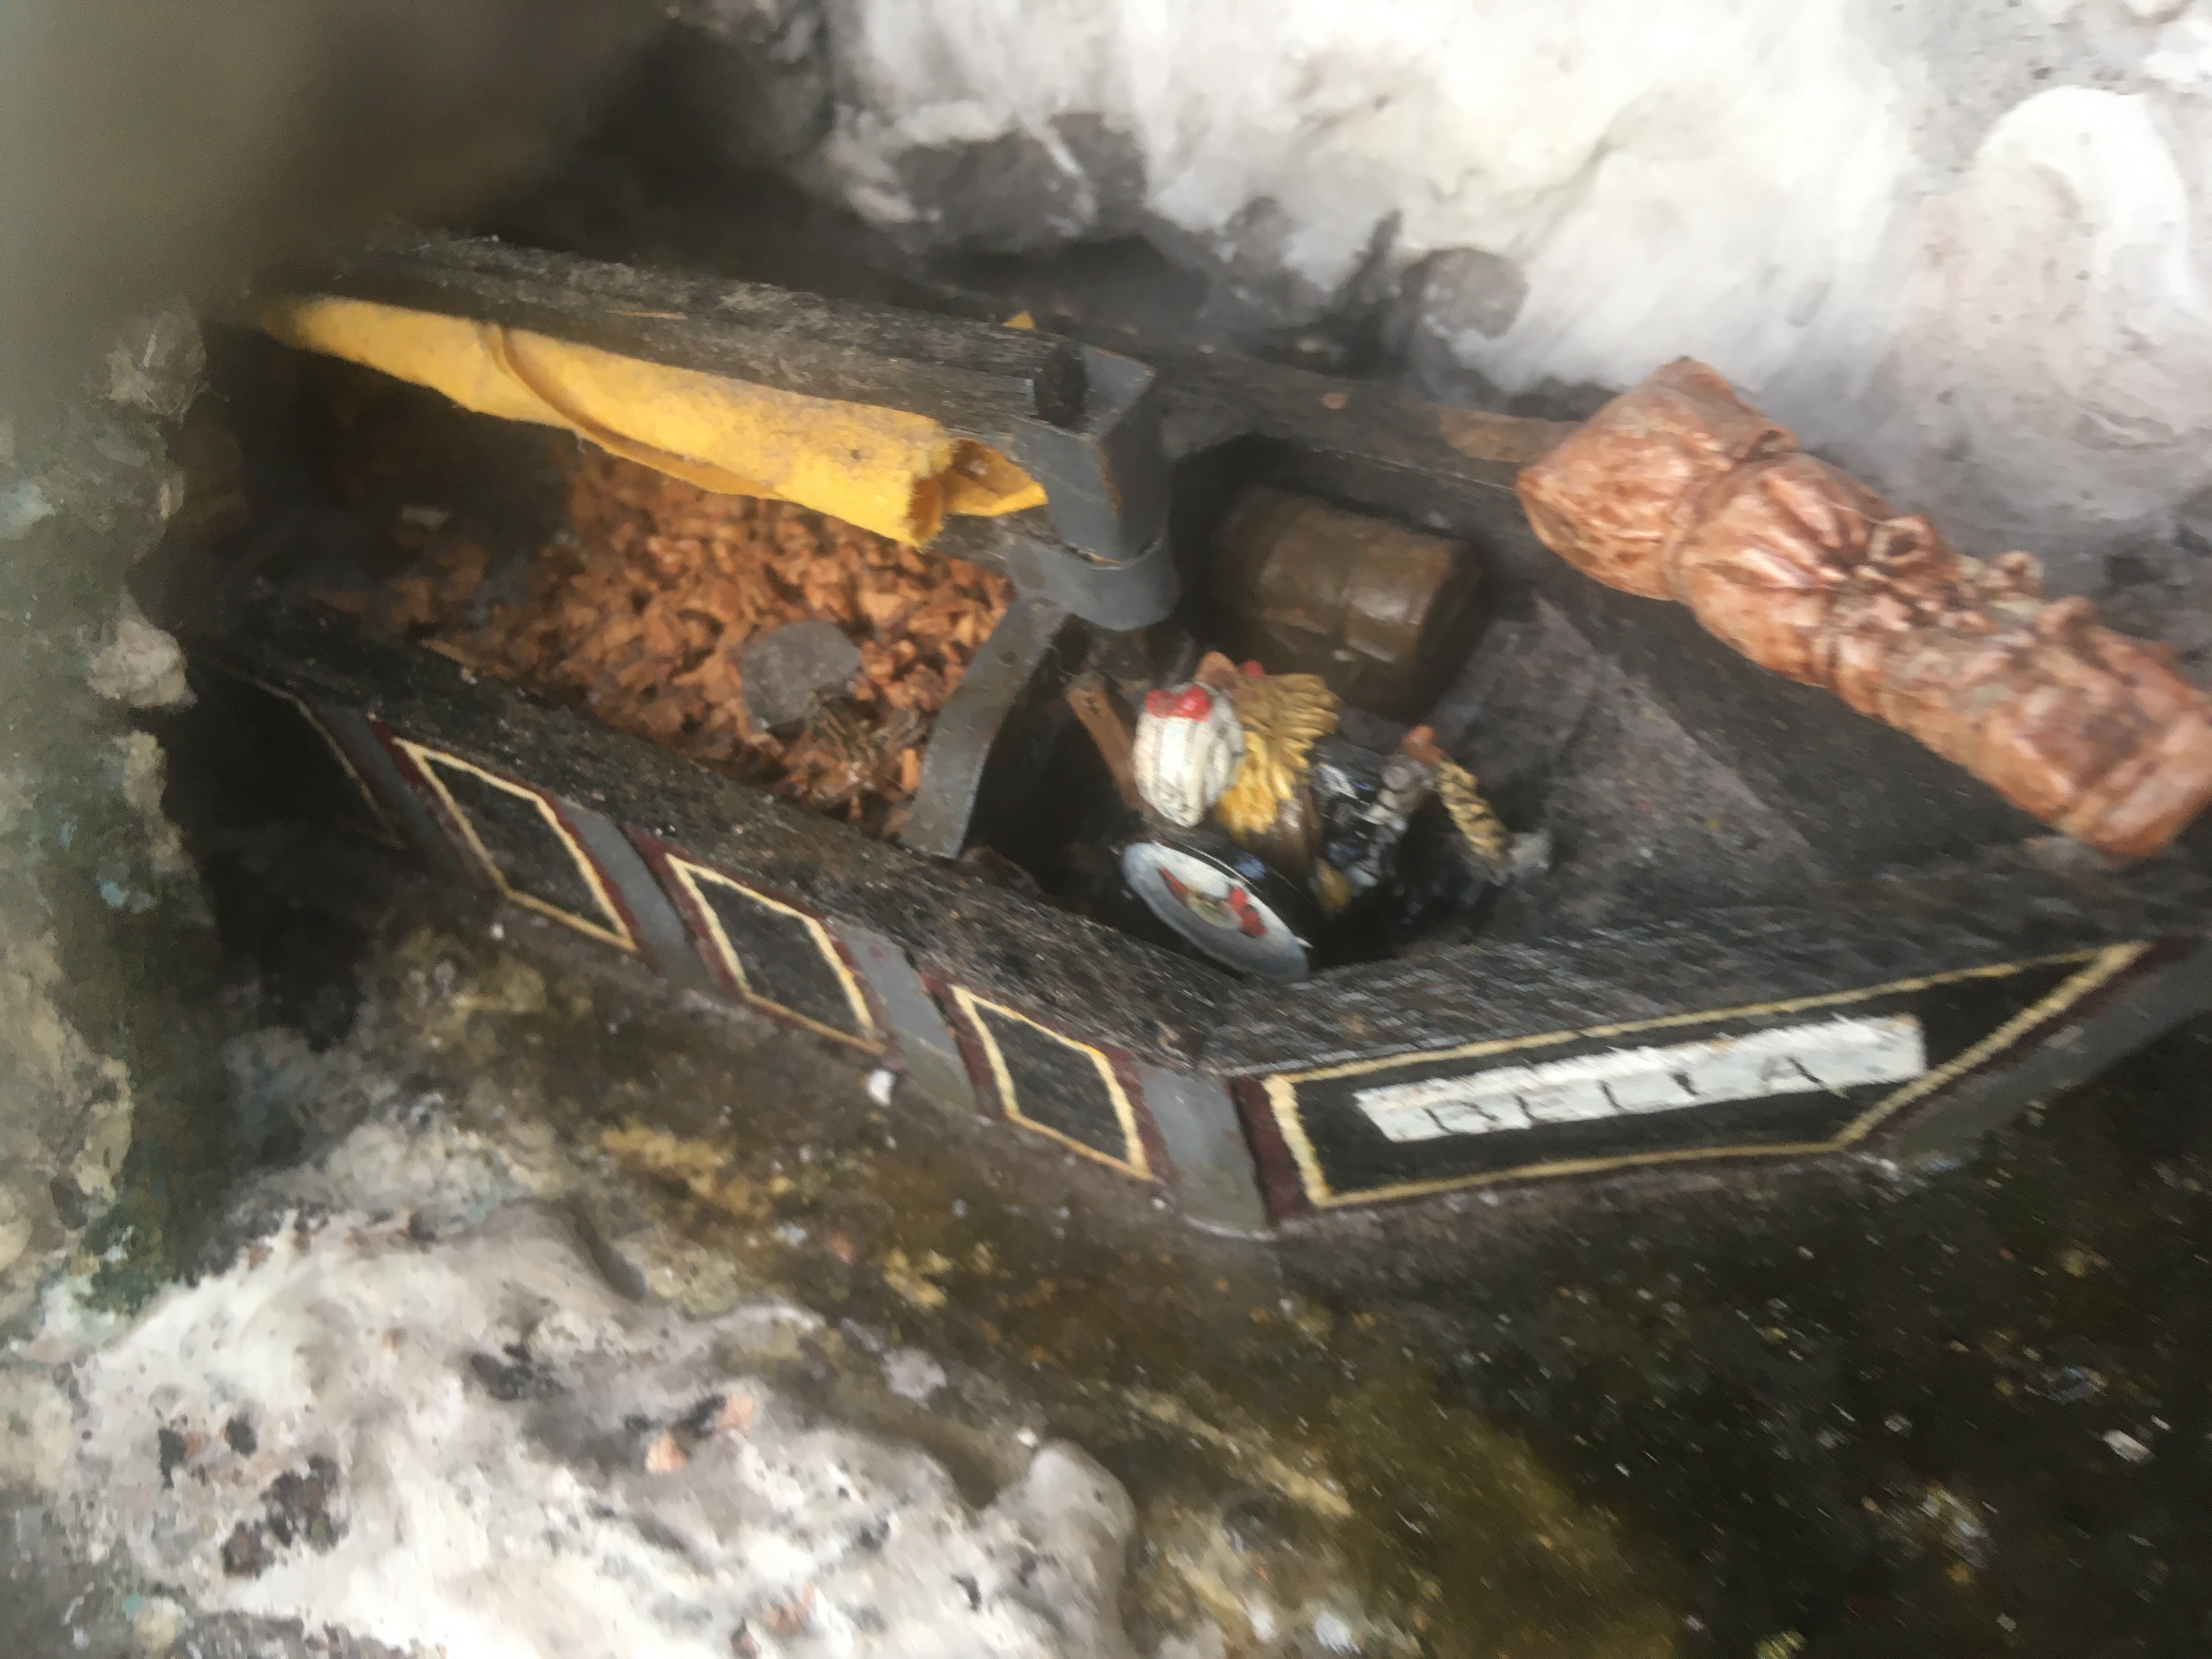
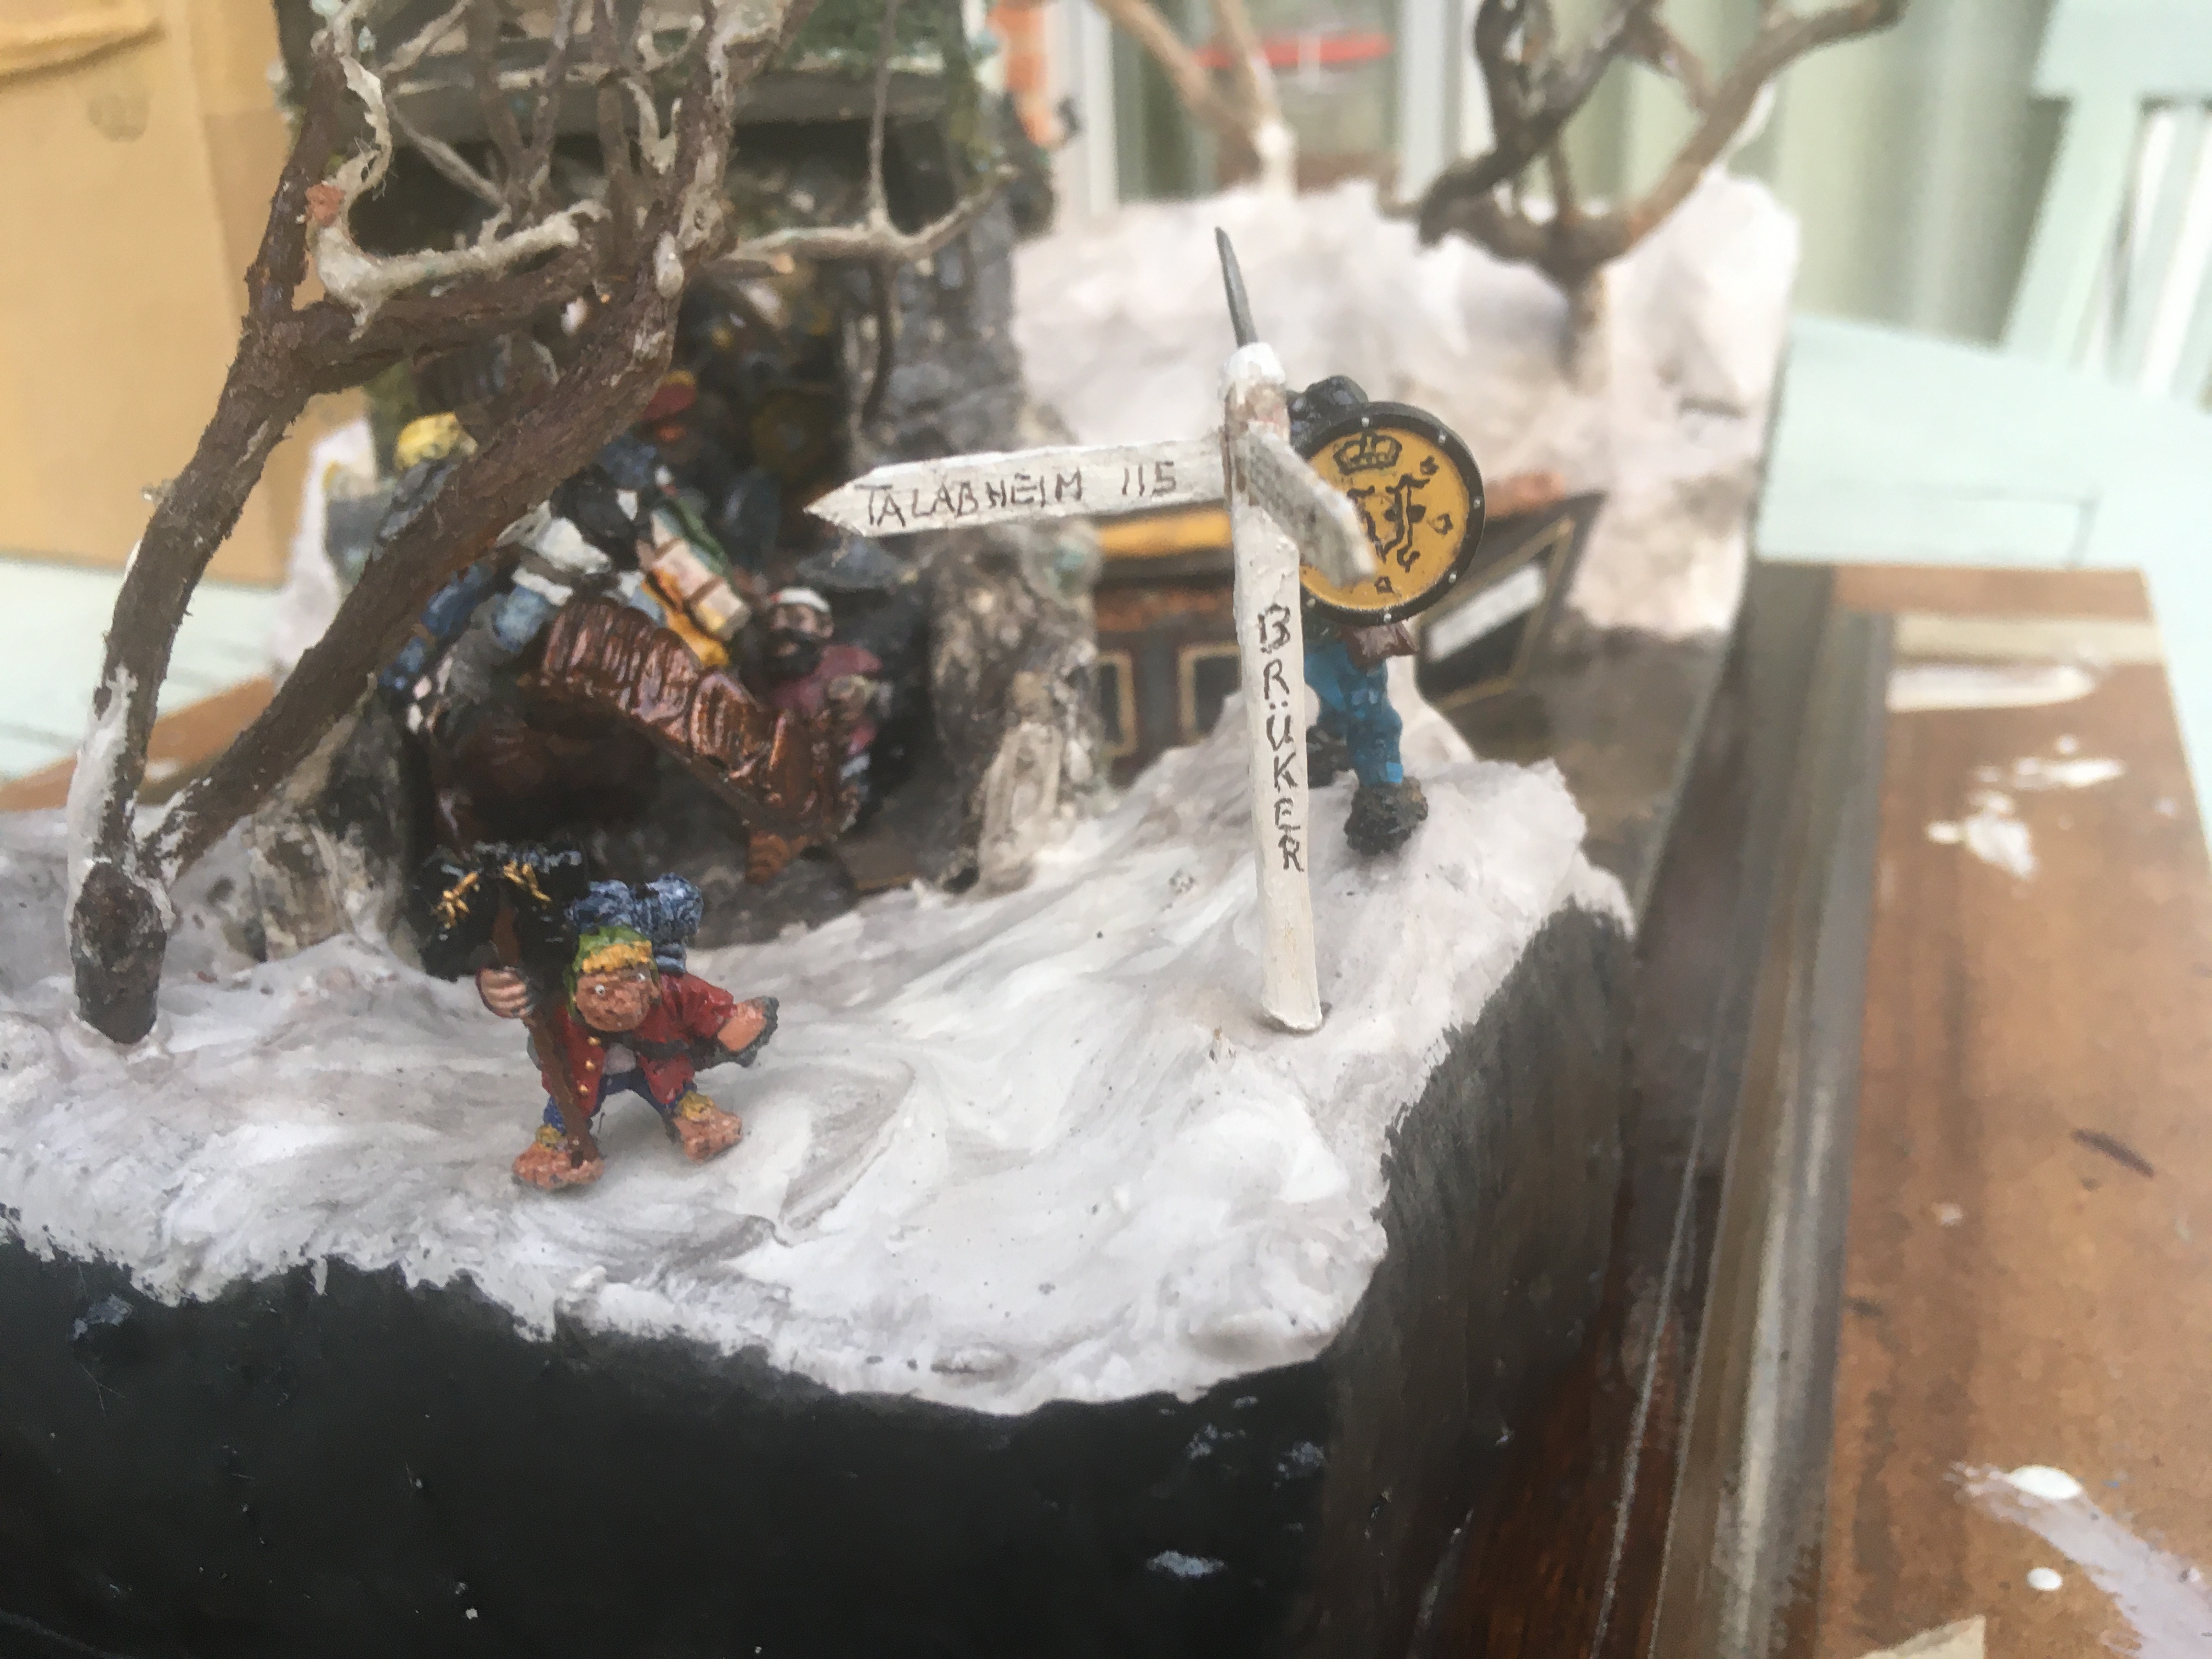
 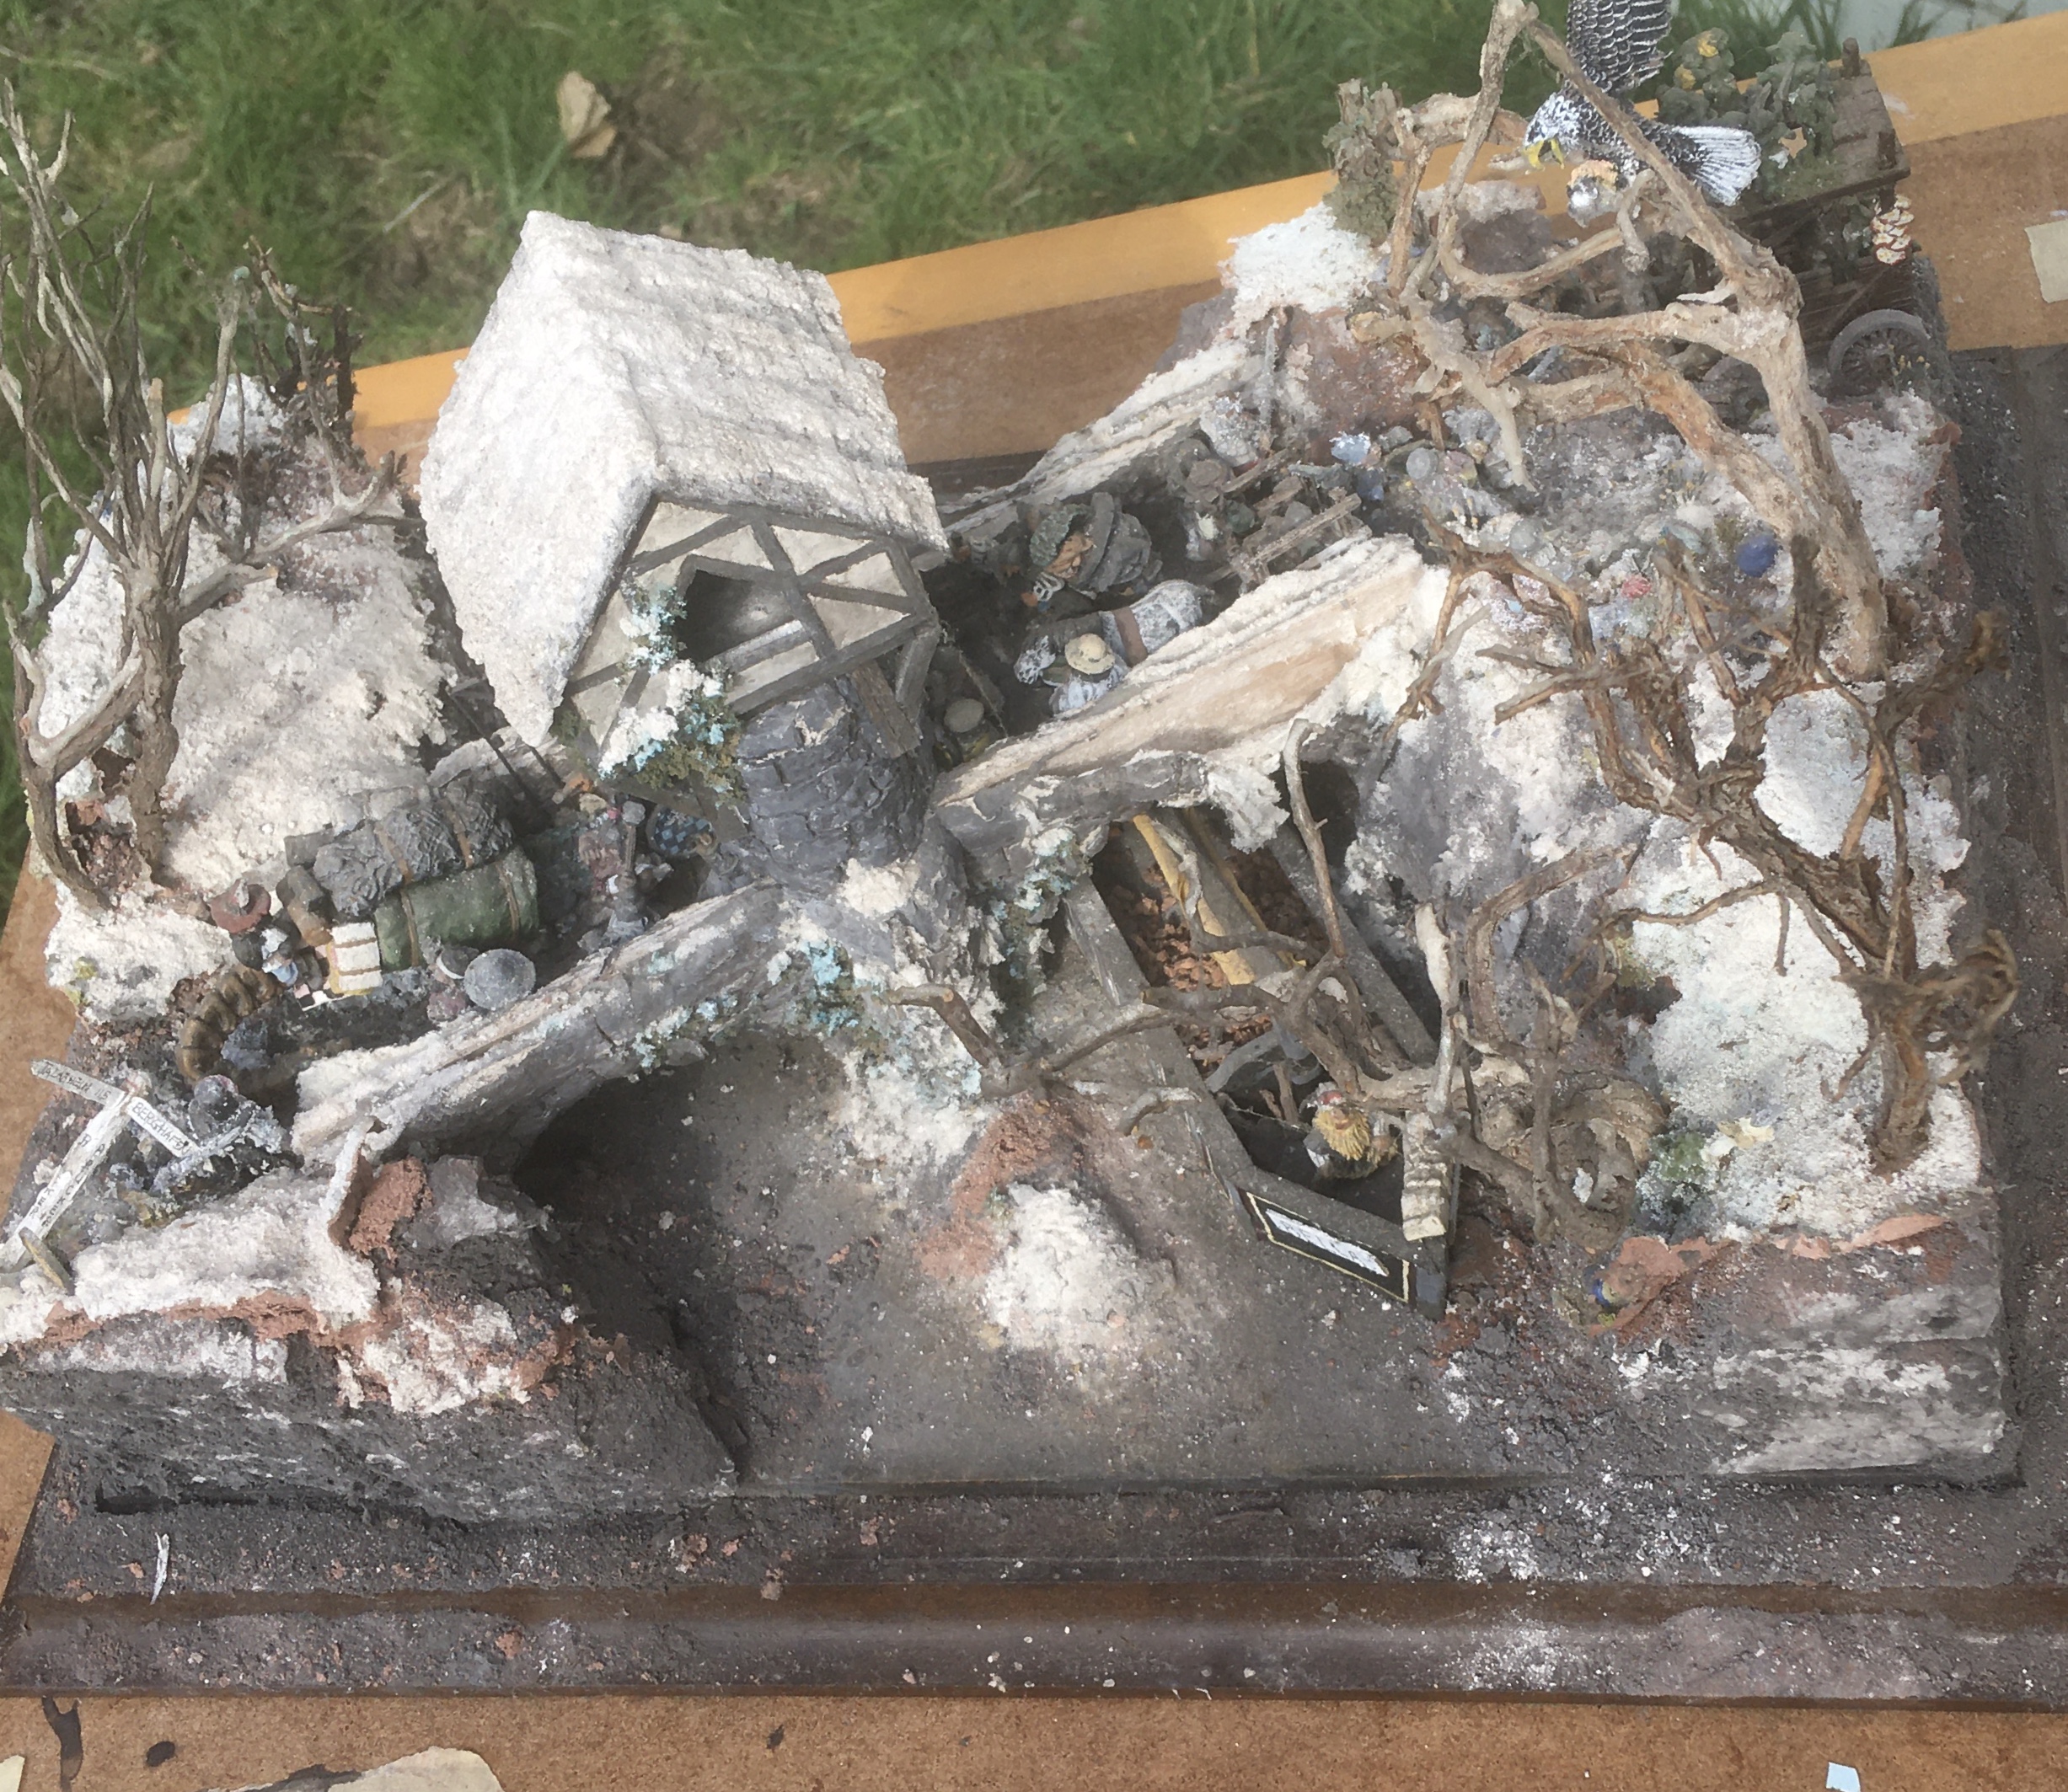 The trees are old dead, Welsh wild heather branches. The bridge is constructed from balsa wood with brickwork made from Das Modelling clay. The barge was scratch built from balsa wood with cork chunks for its cargo. The Toll House roof is made from card.
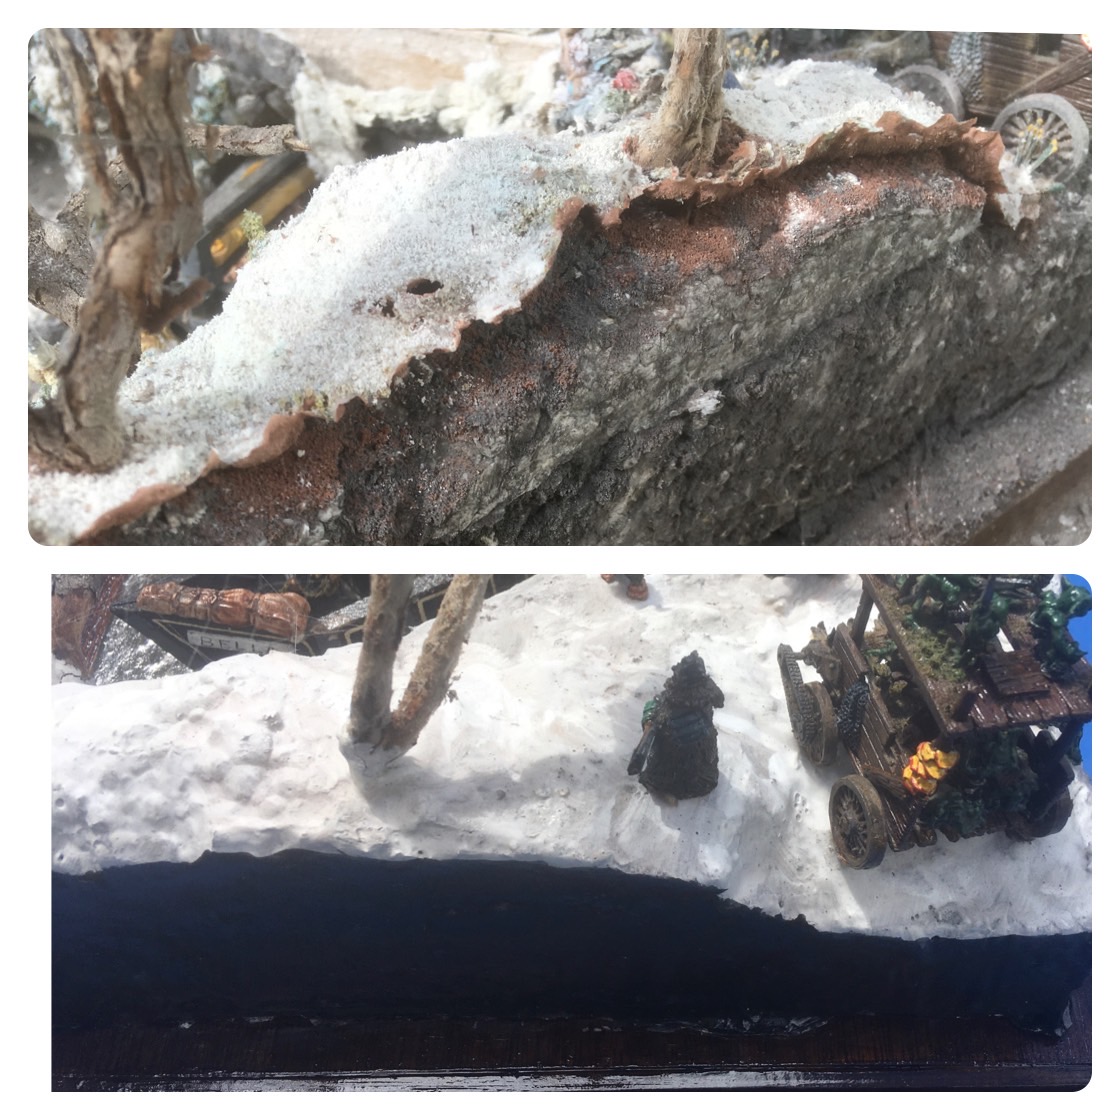
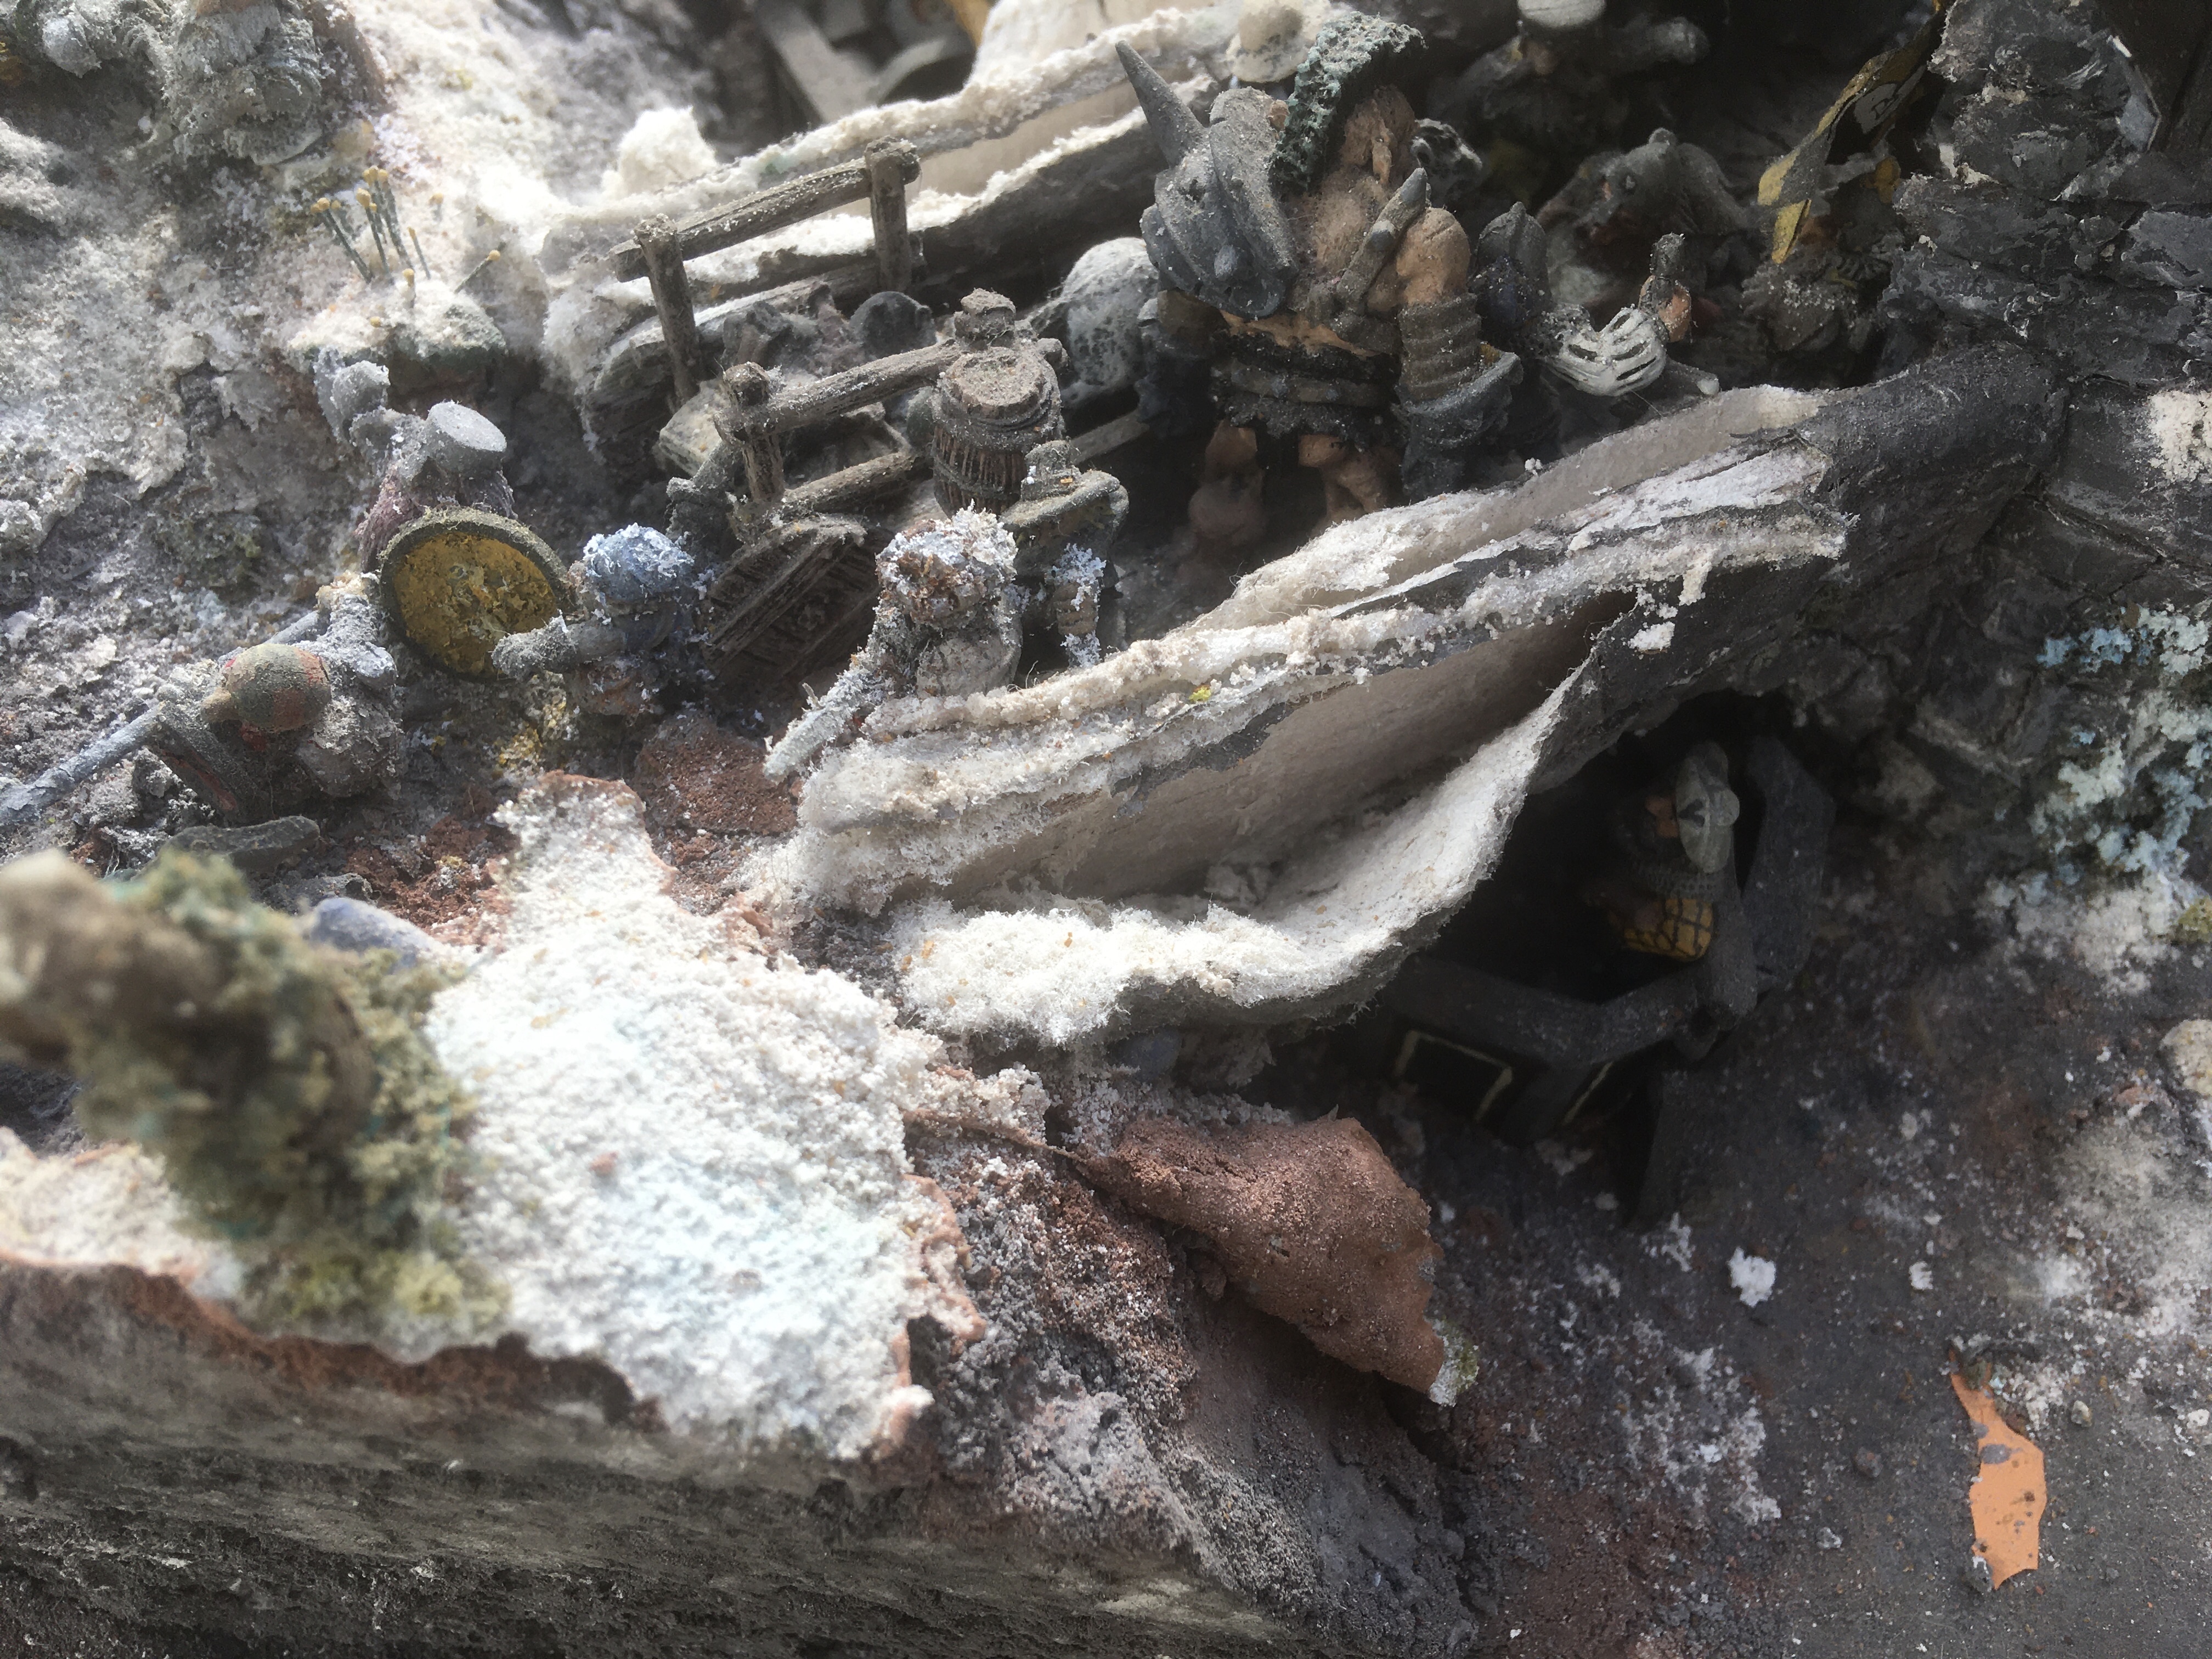
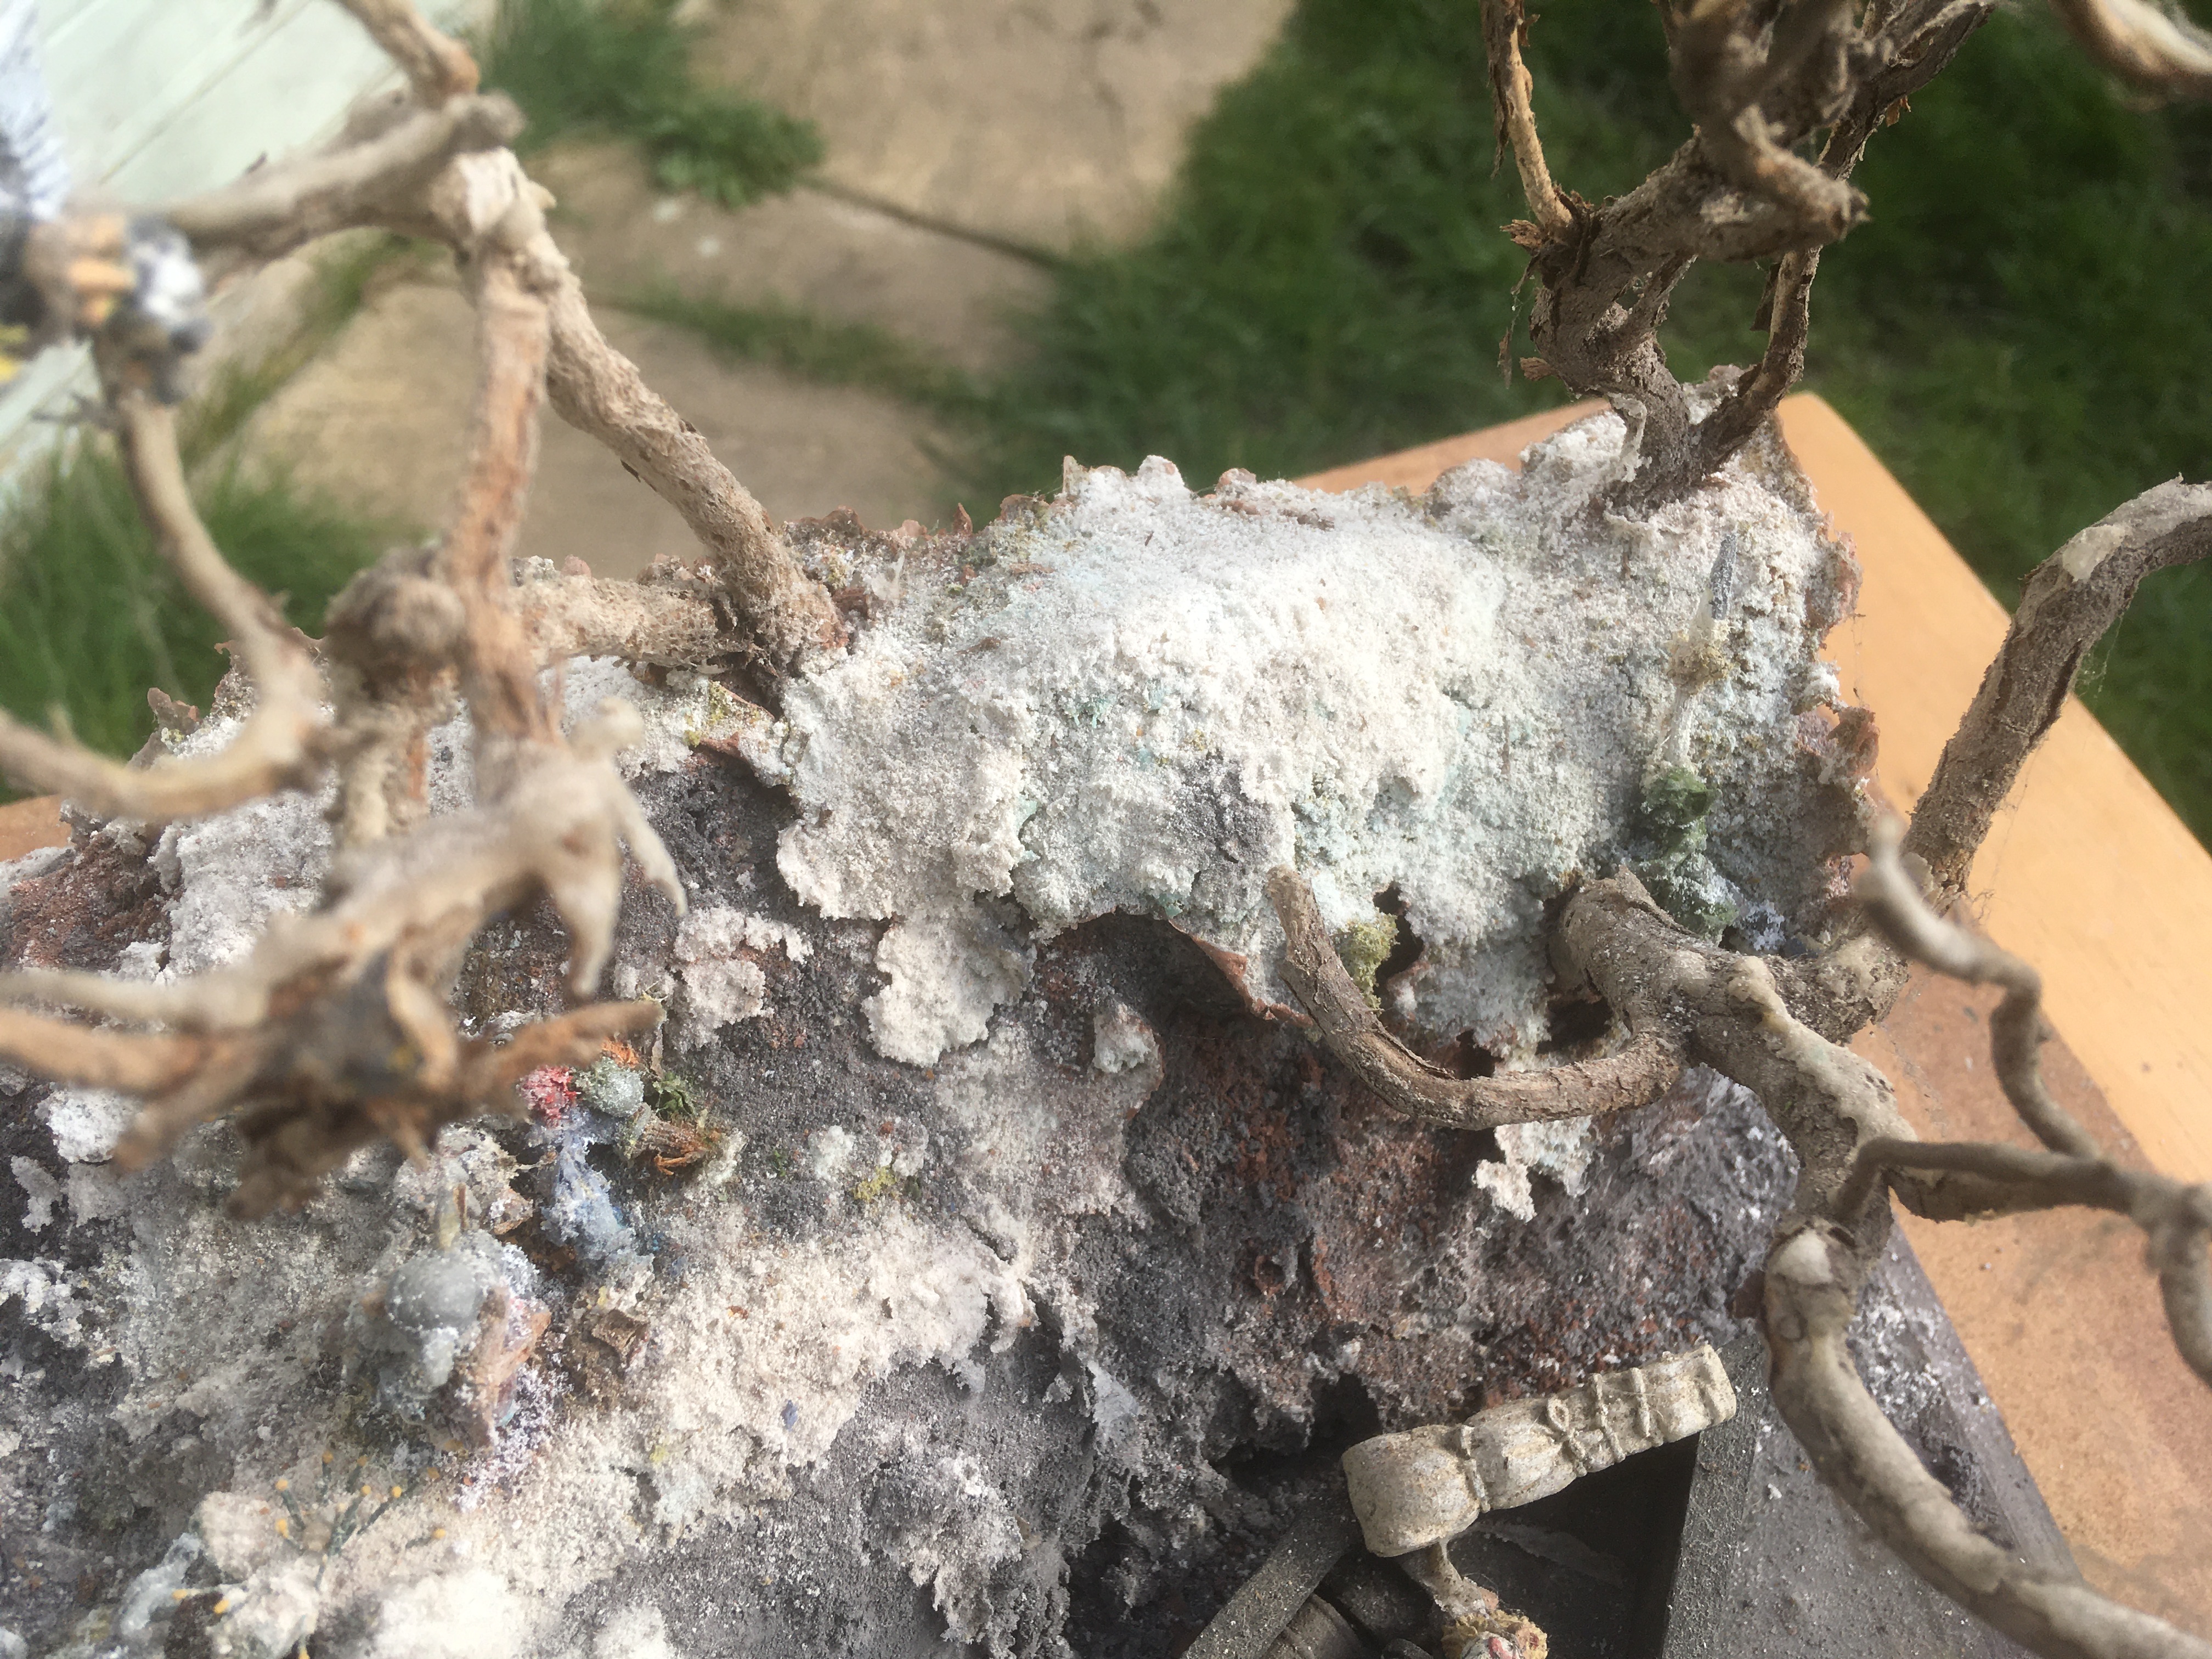
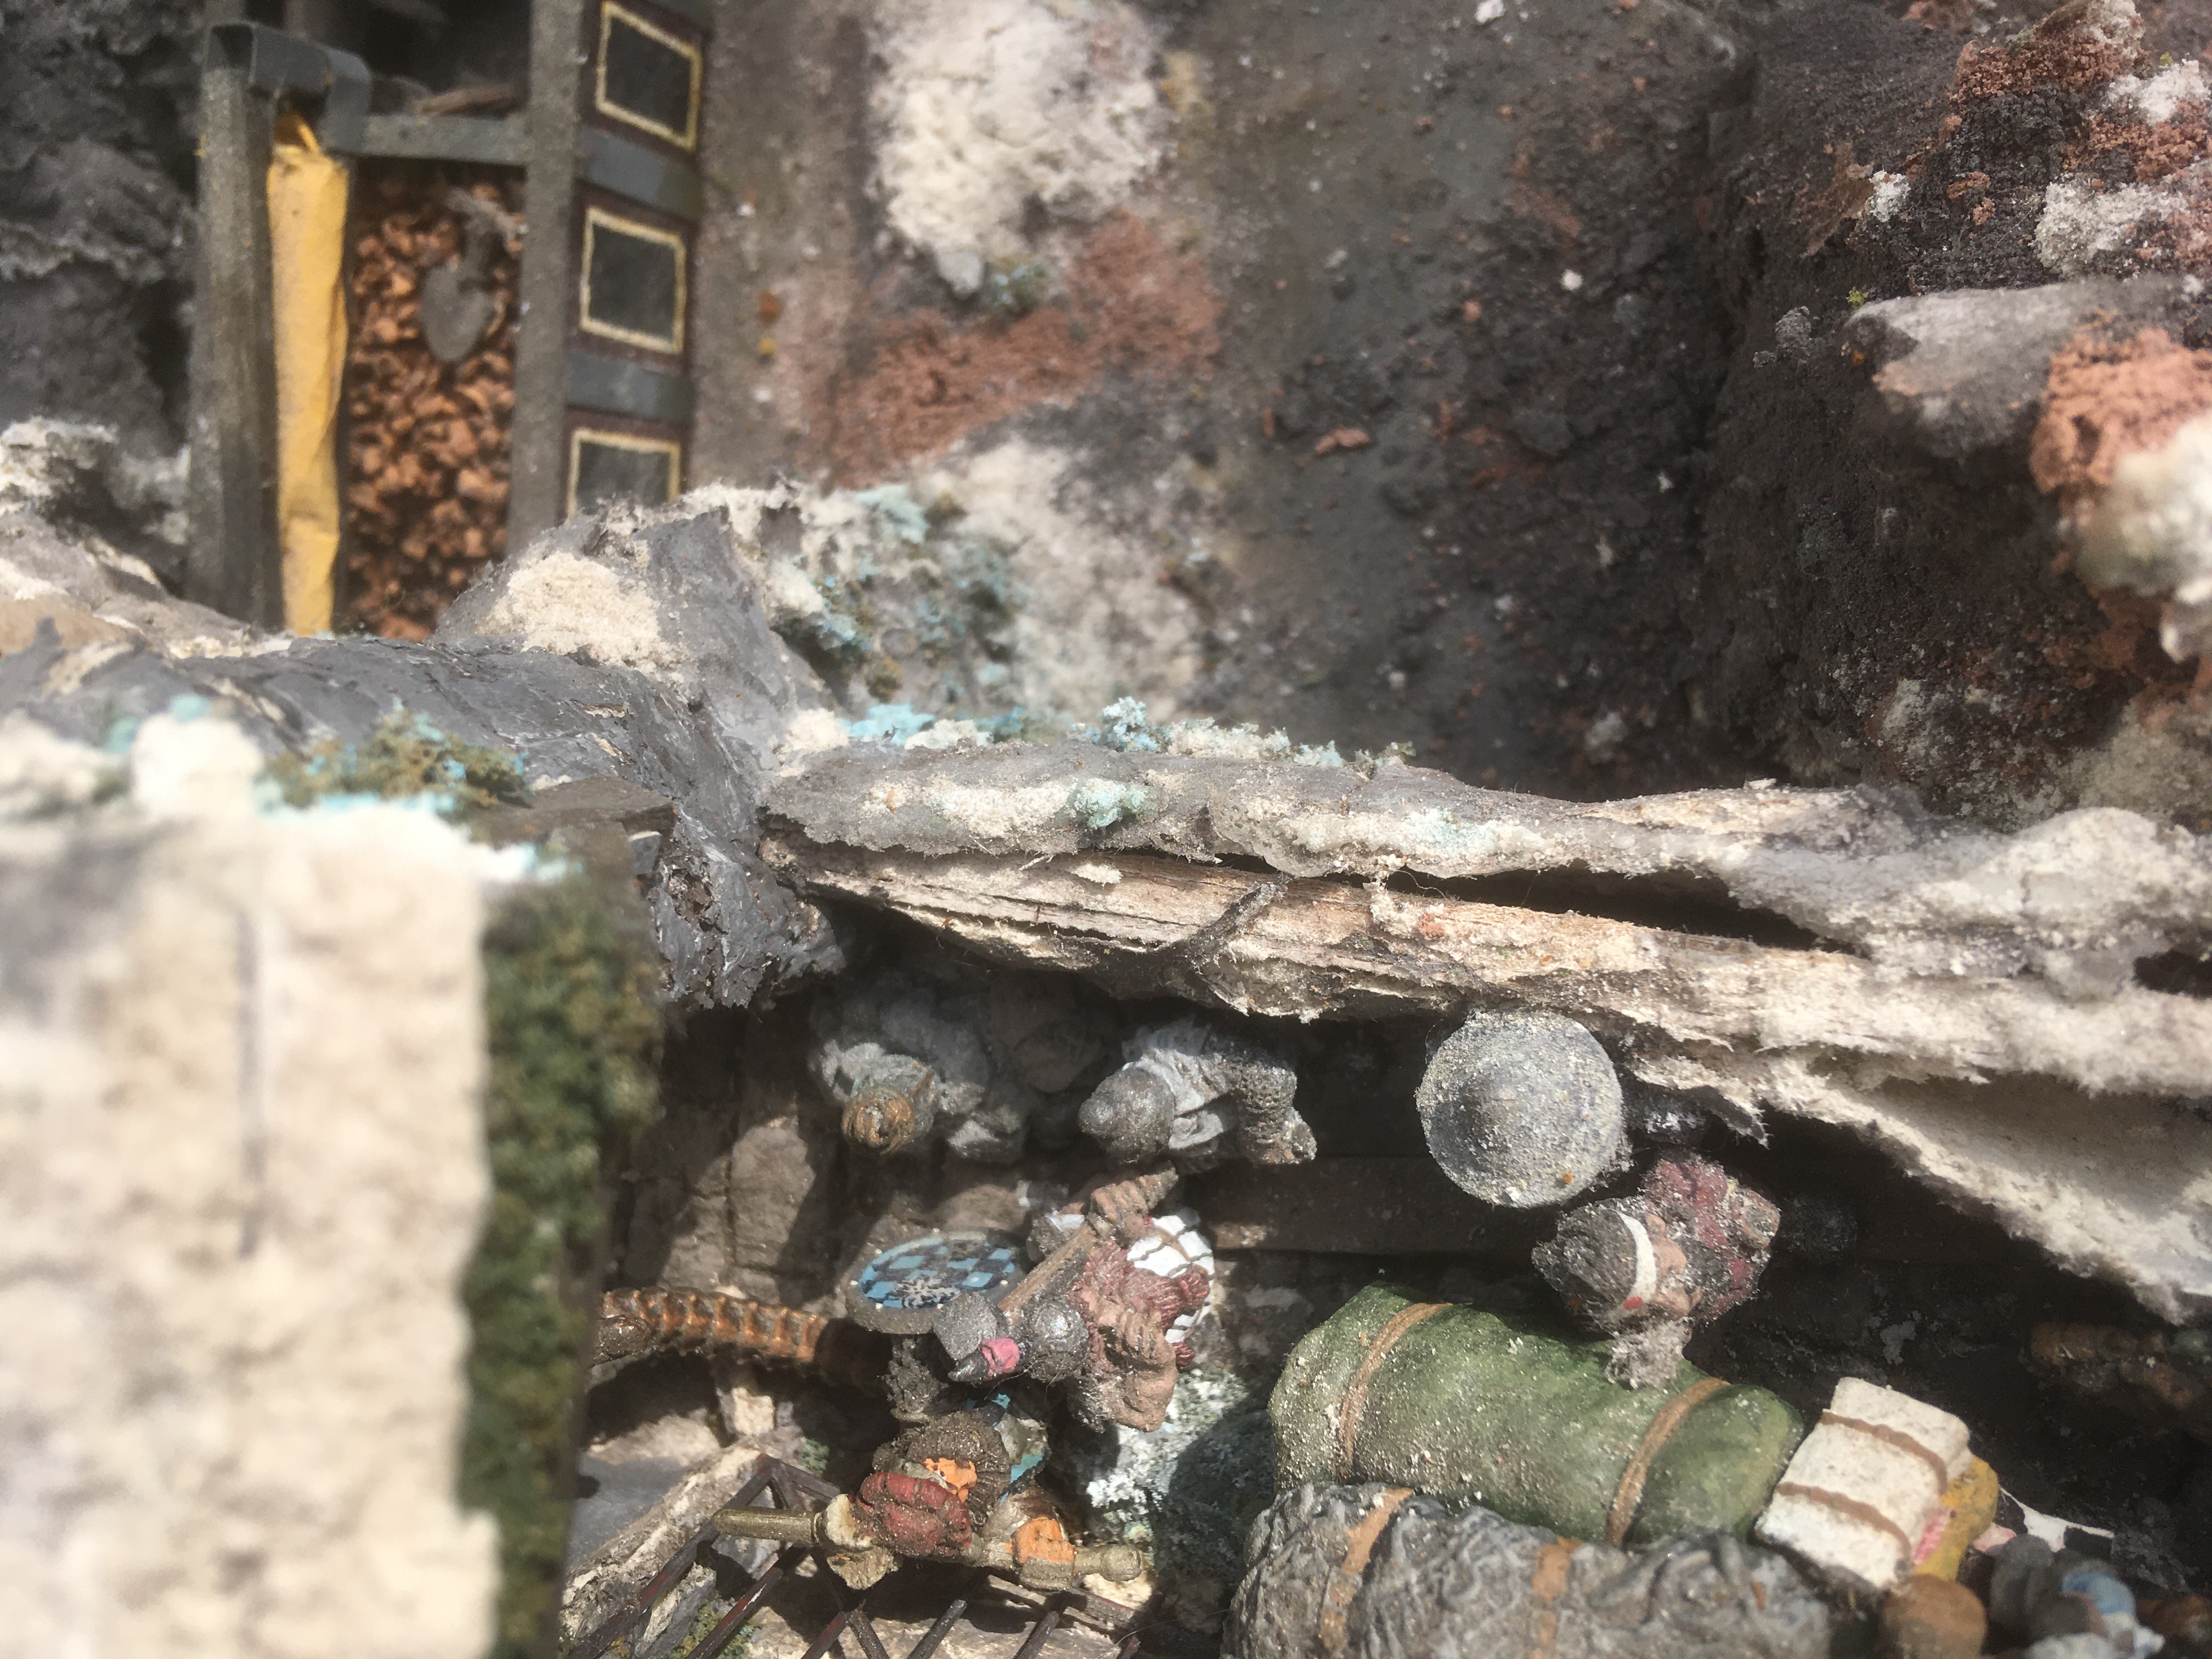
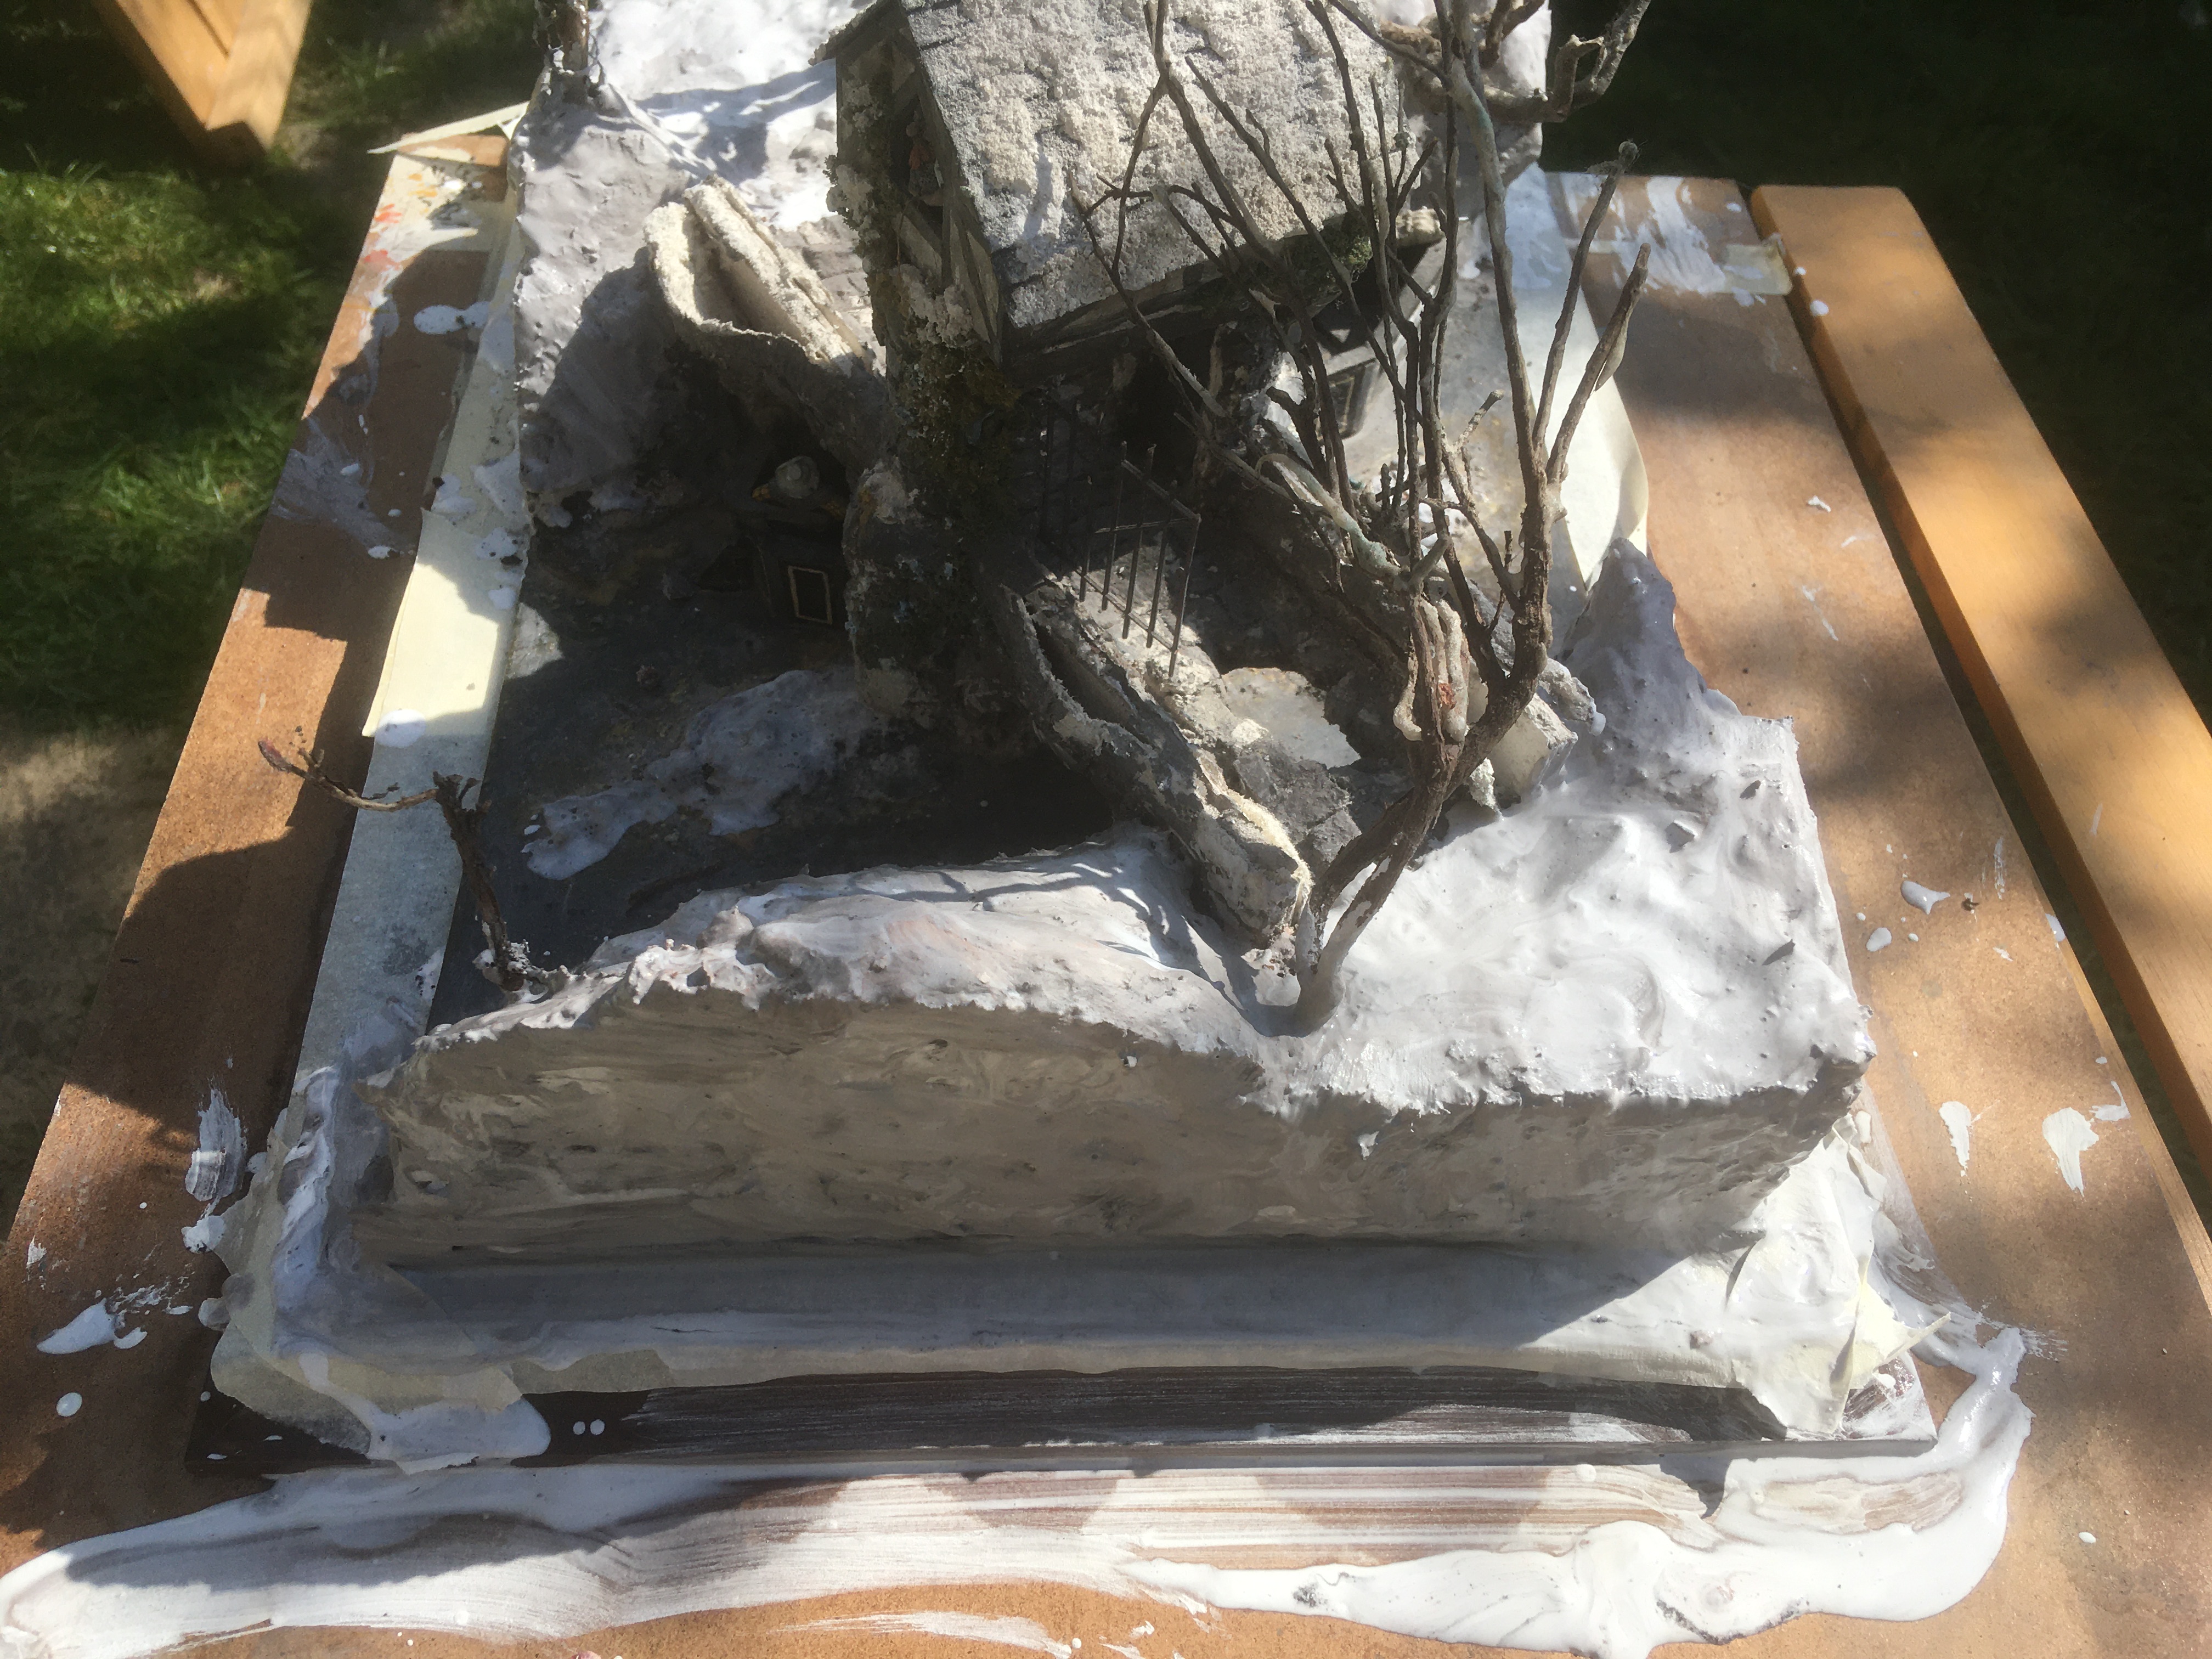
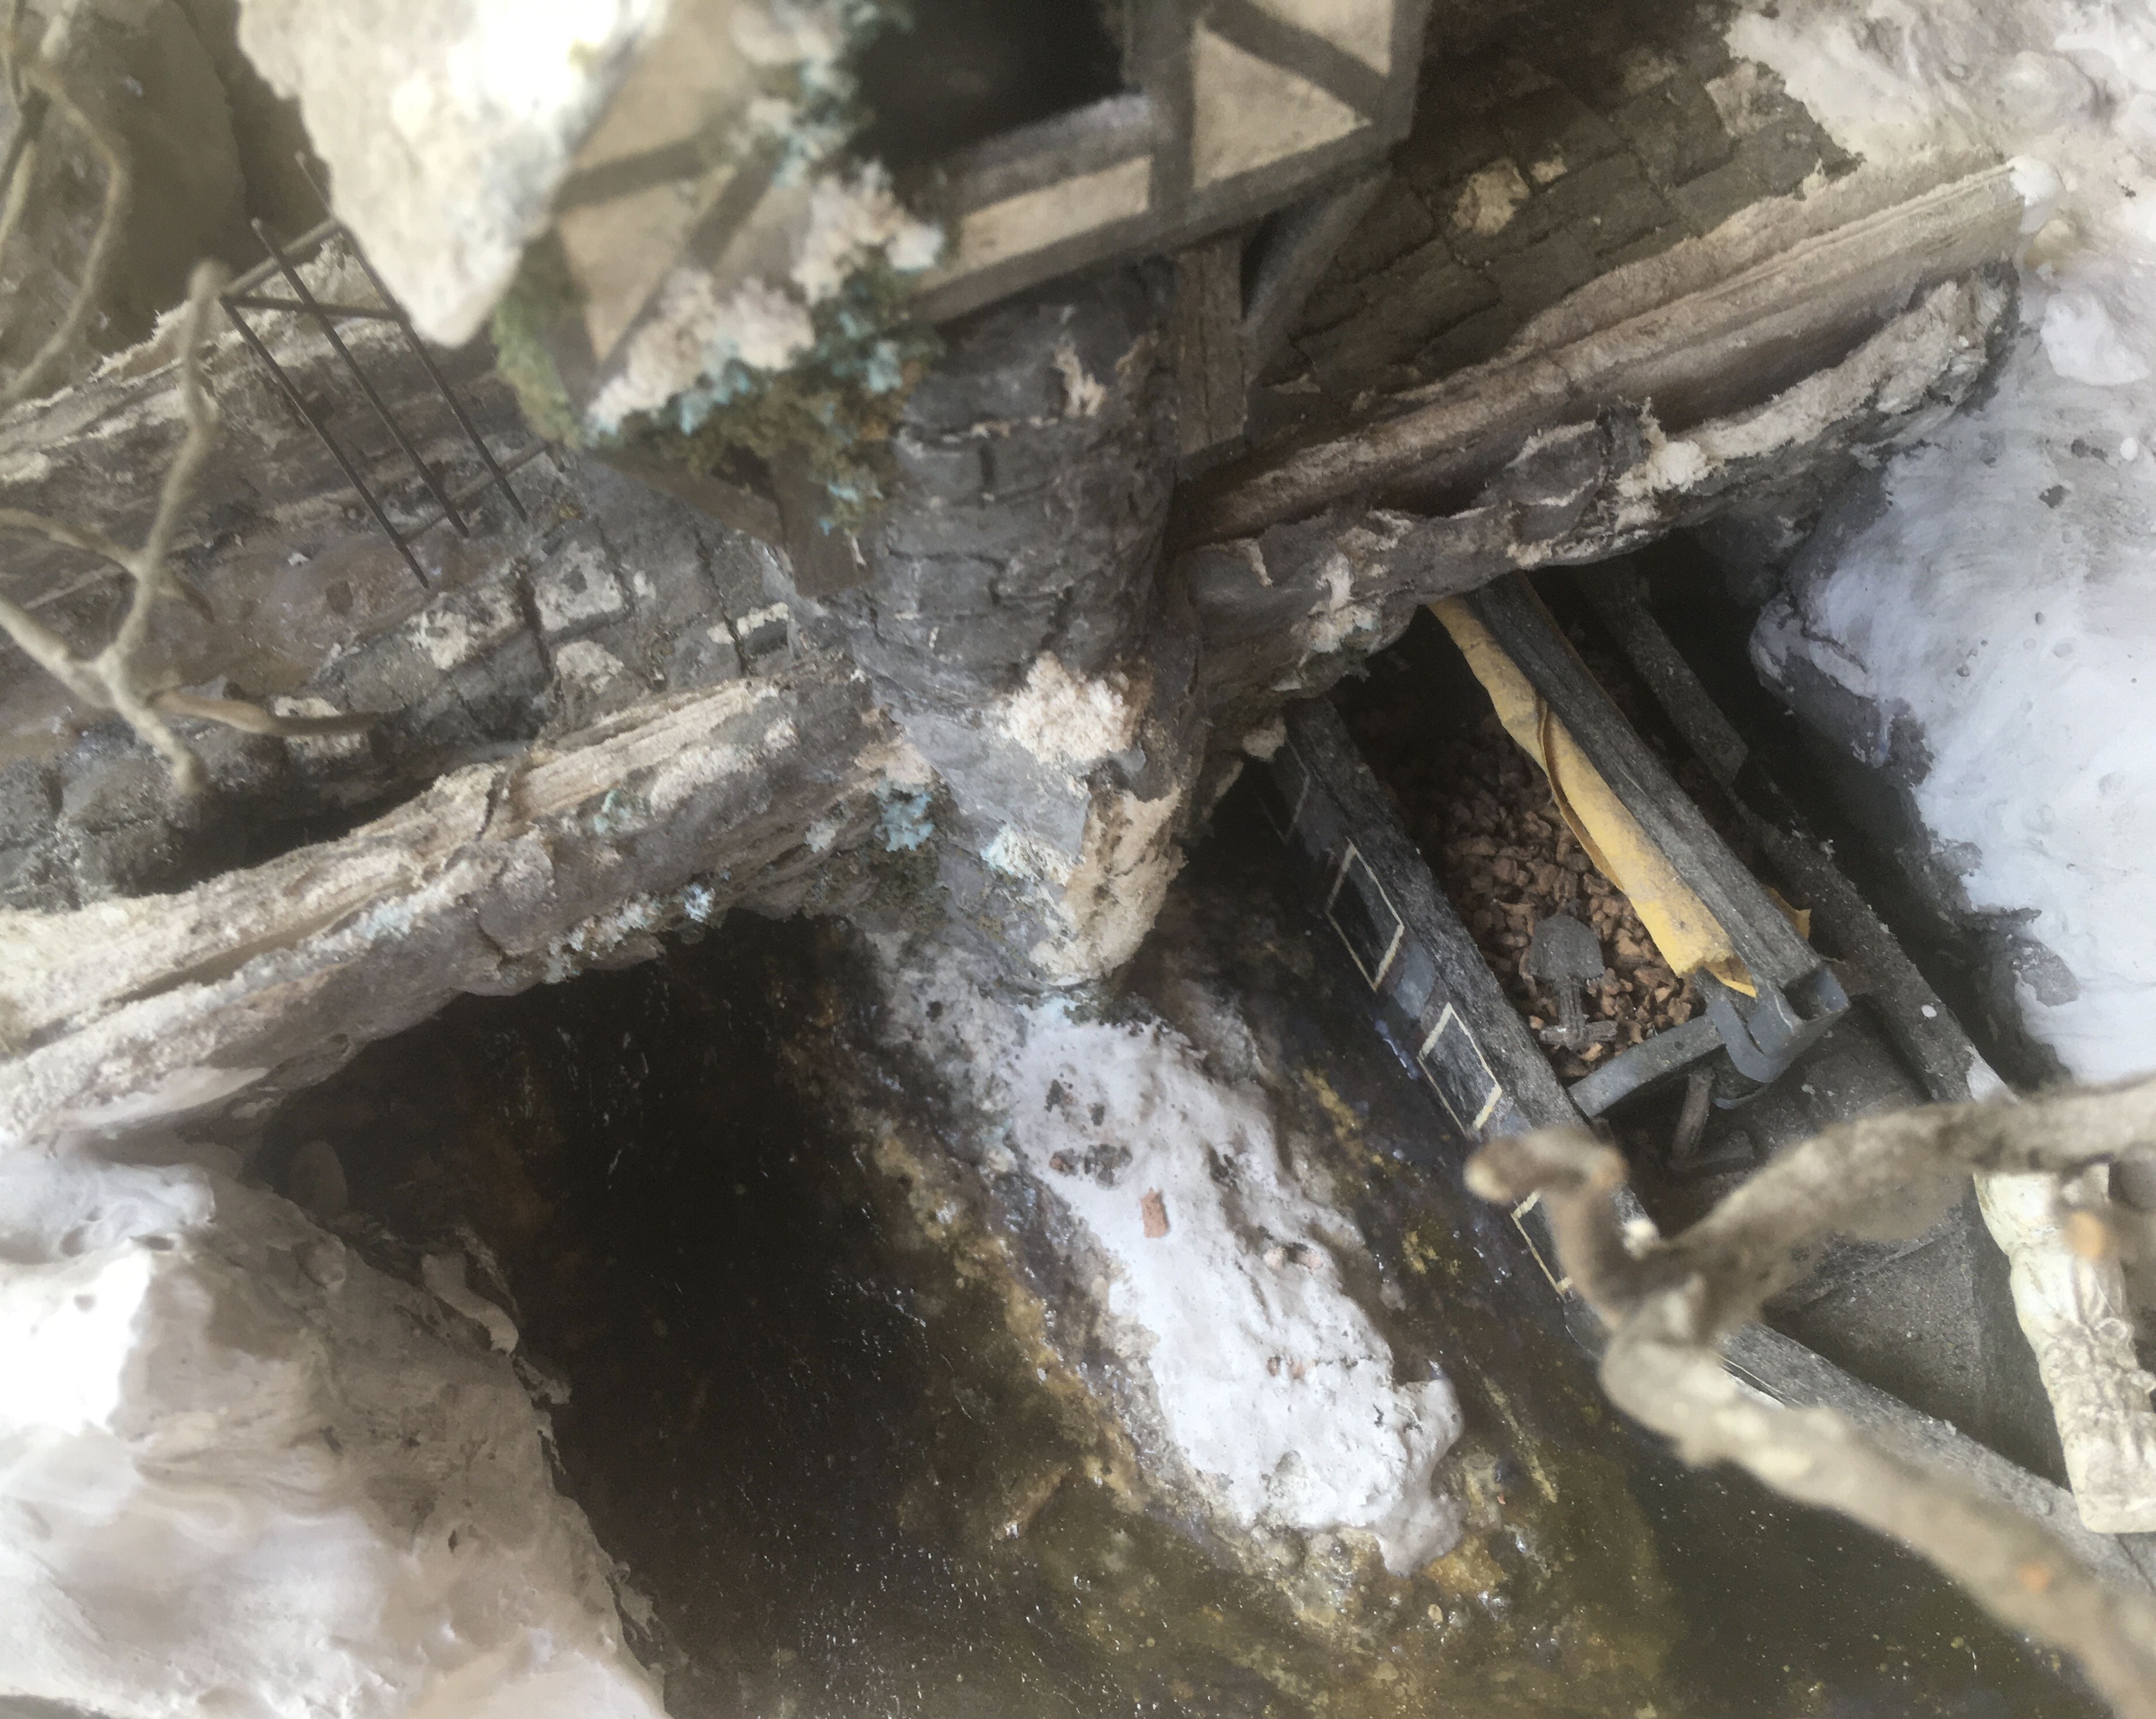
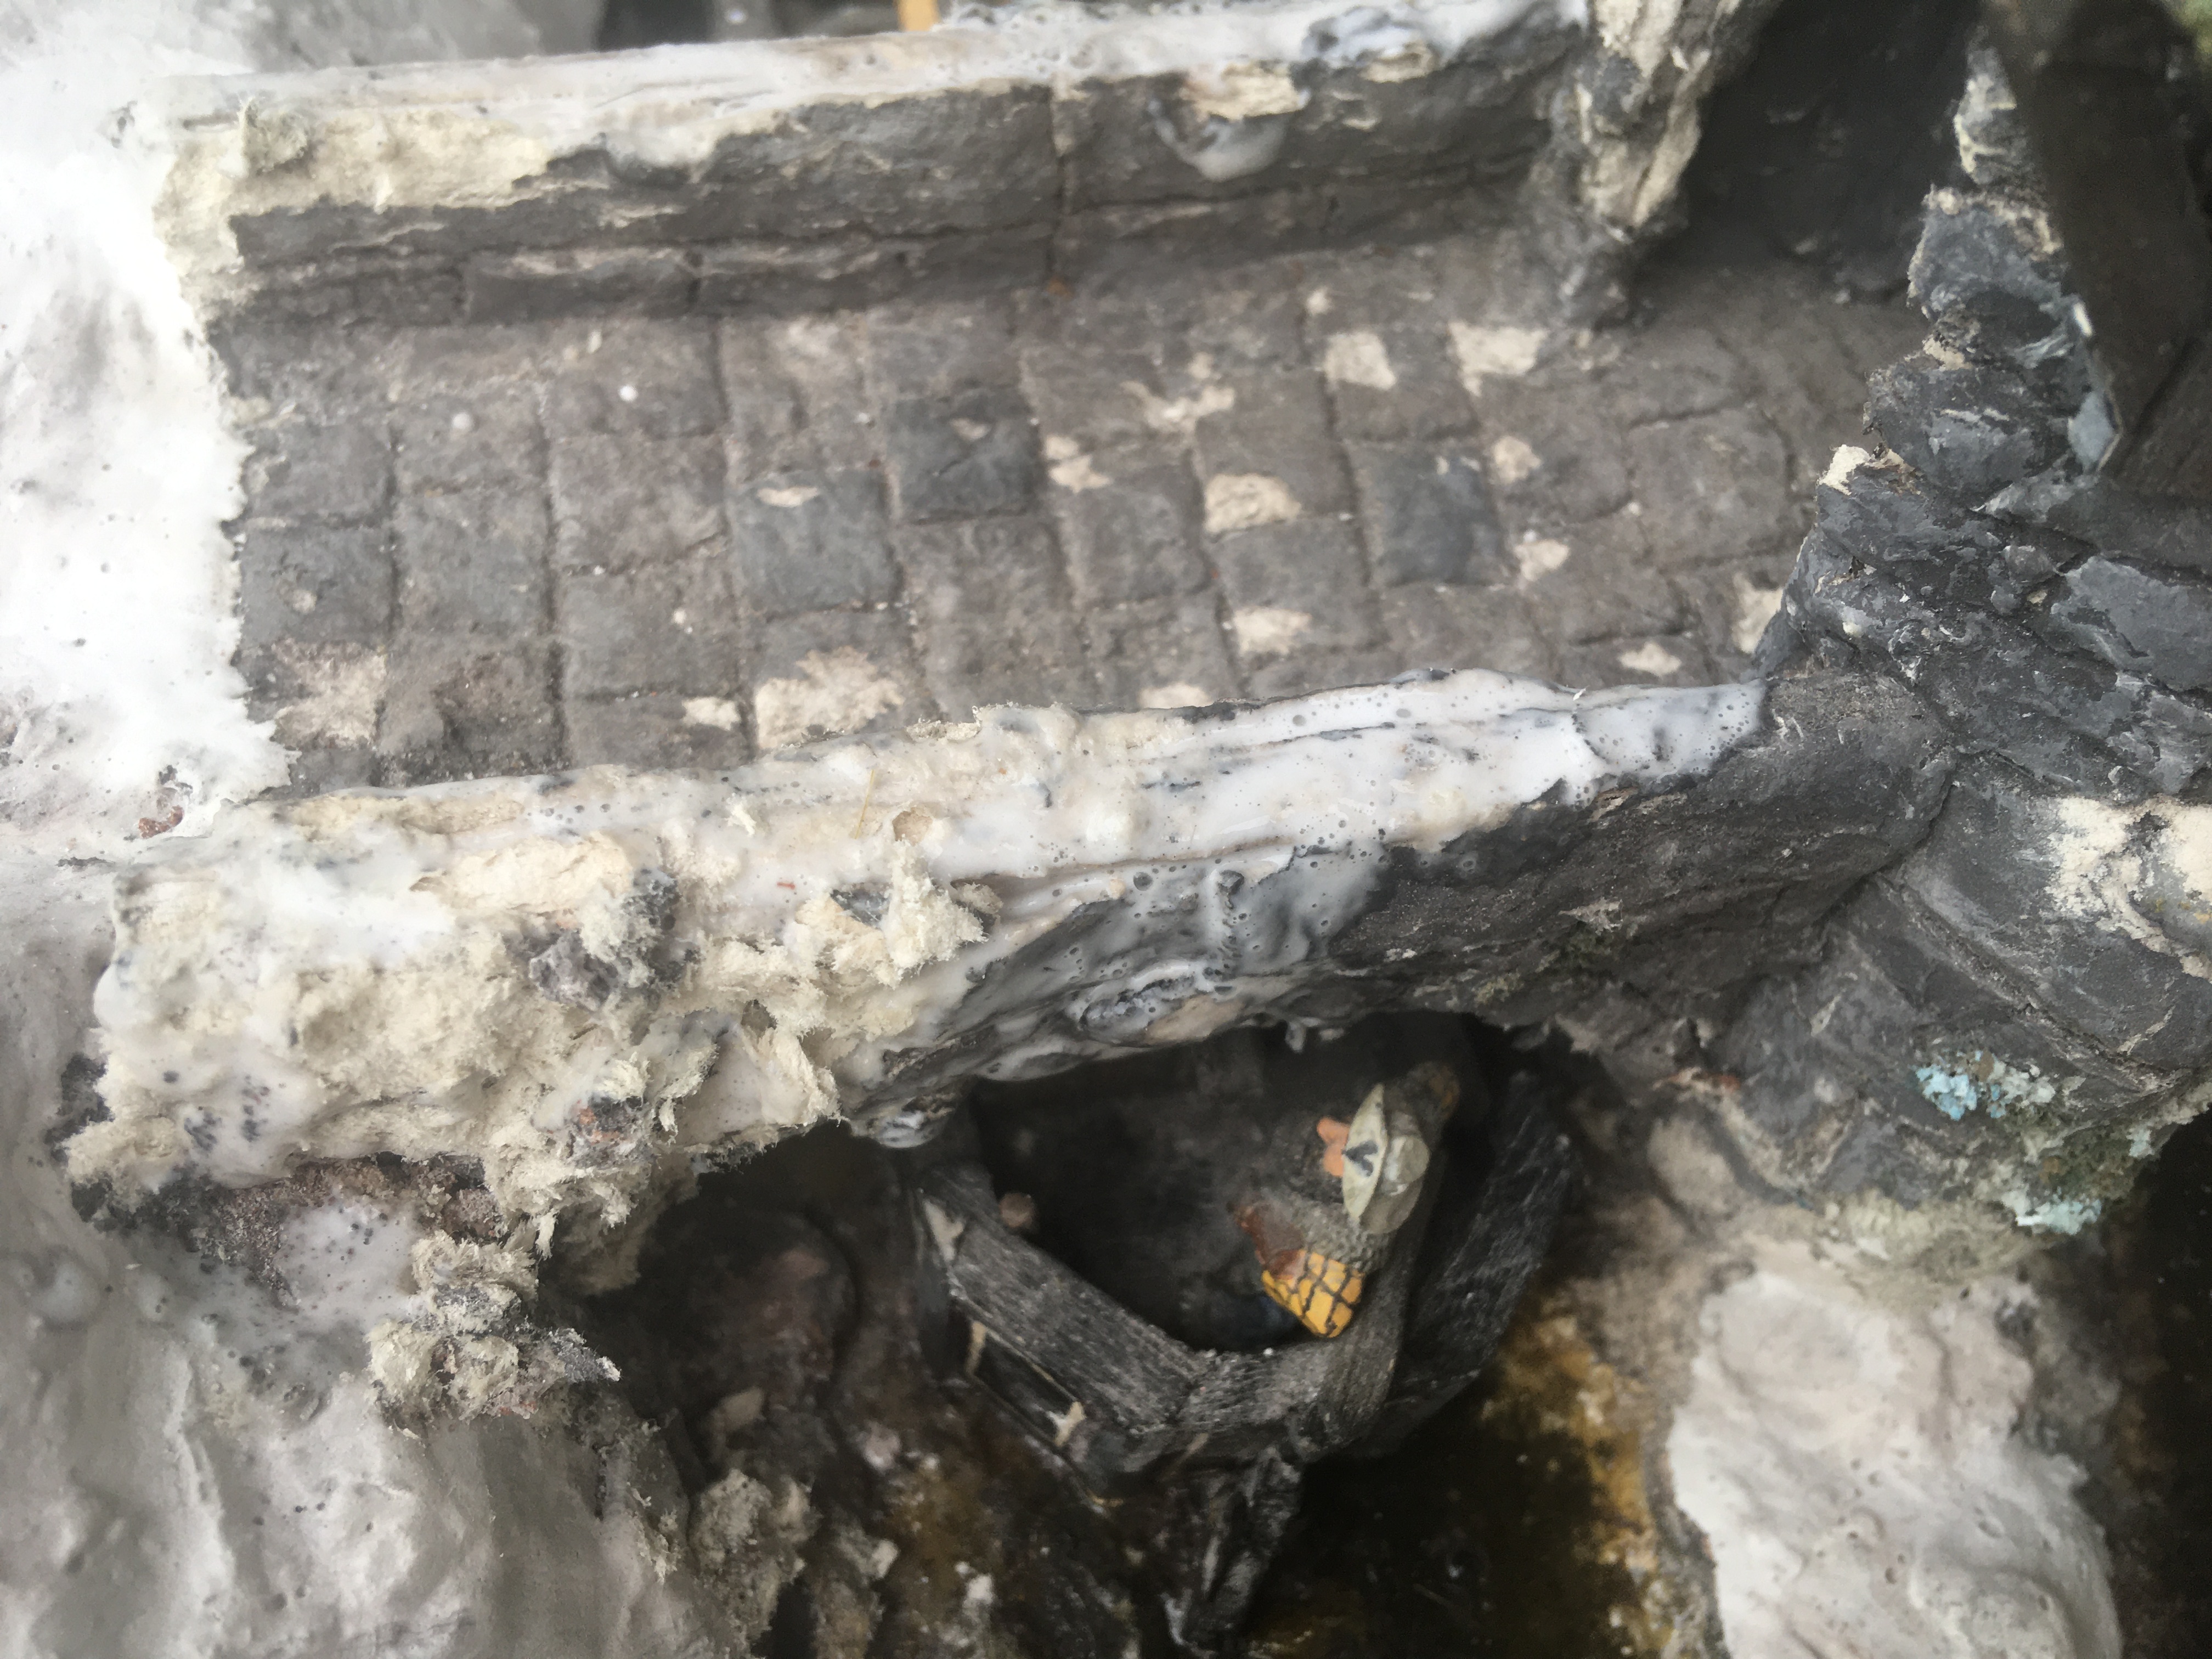
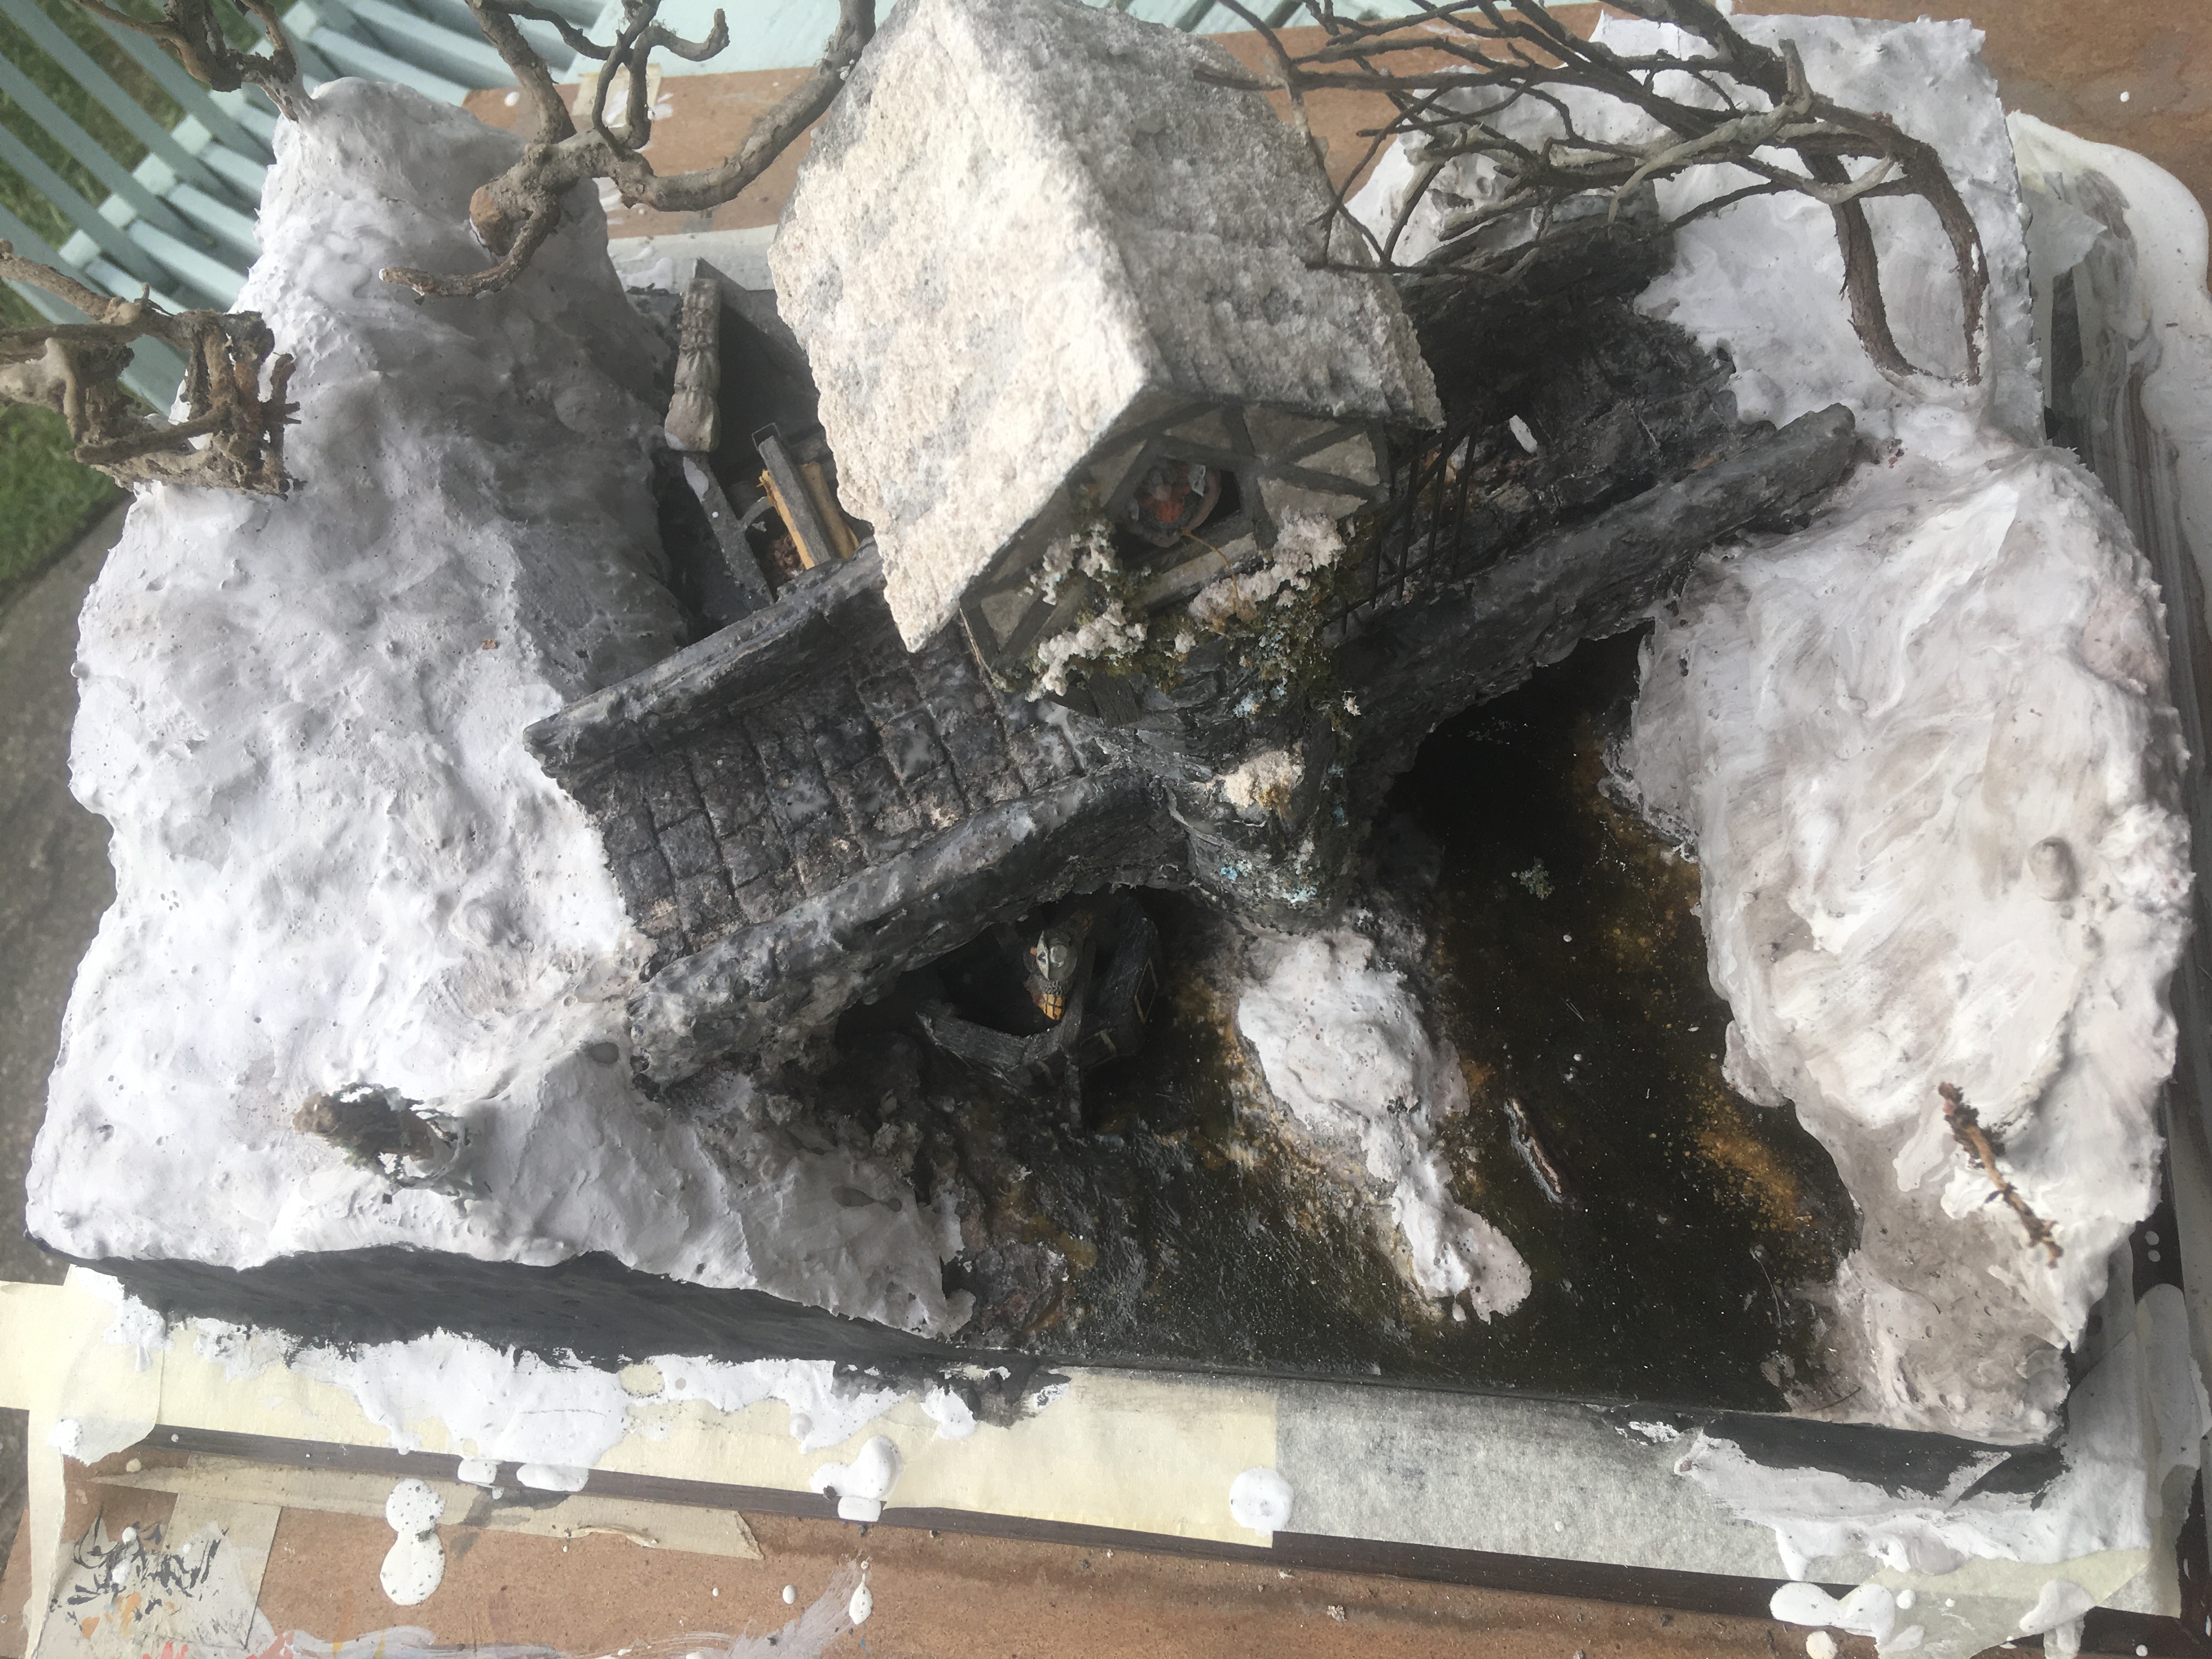
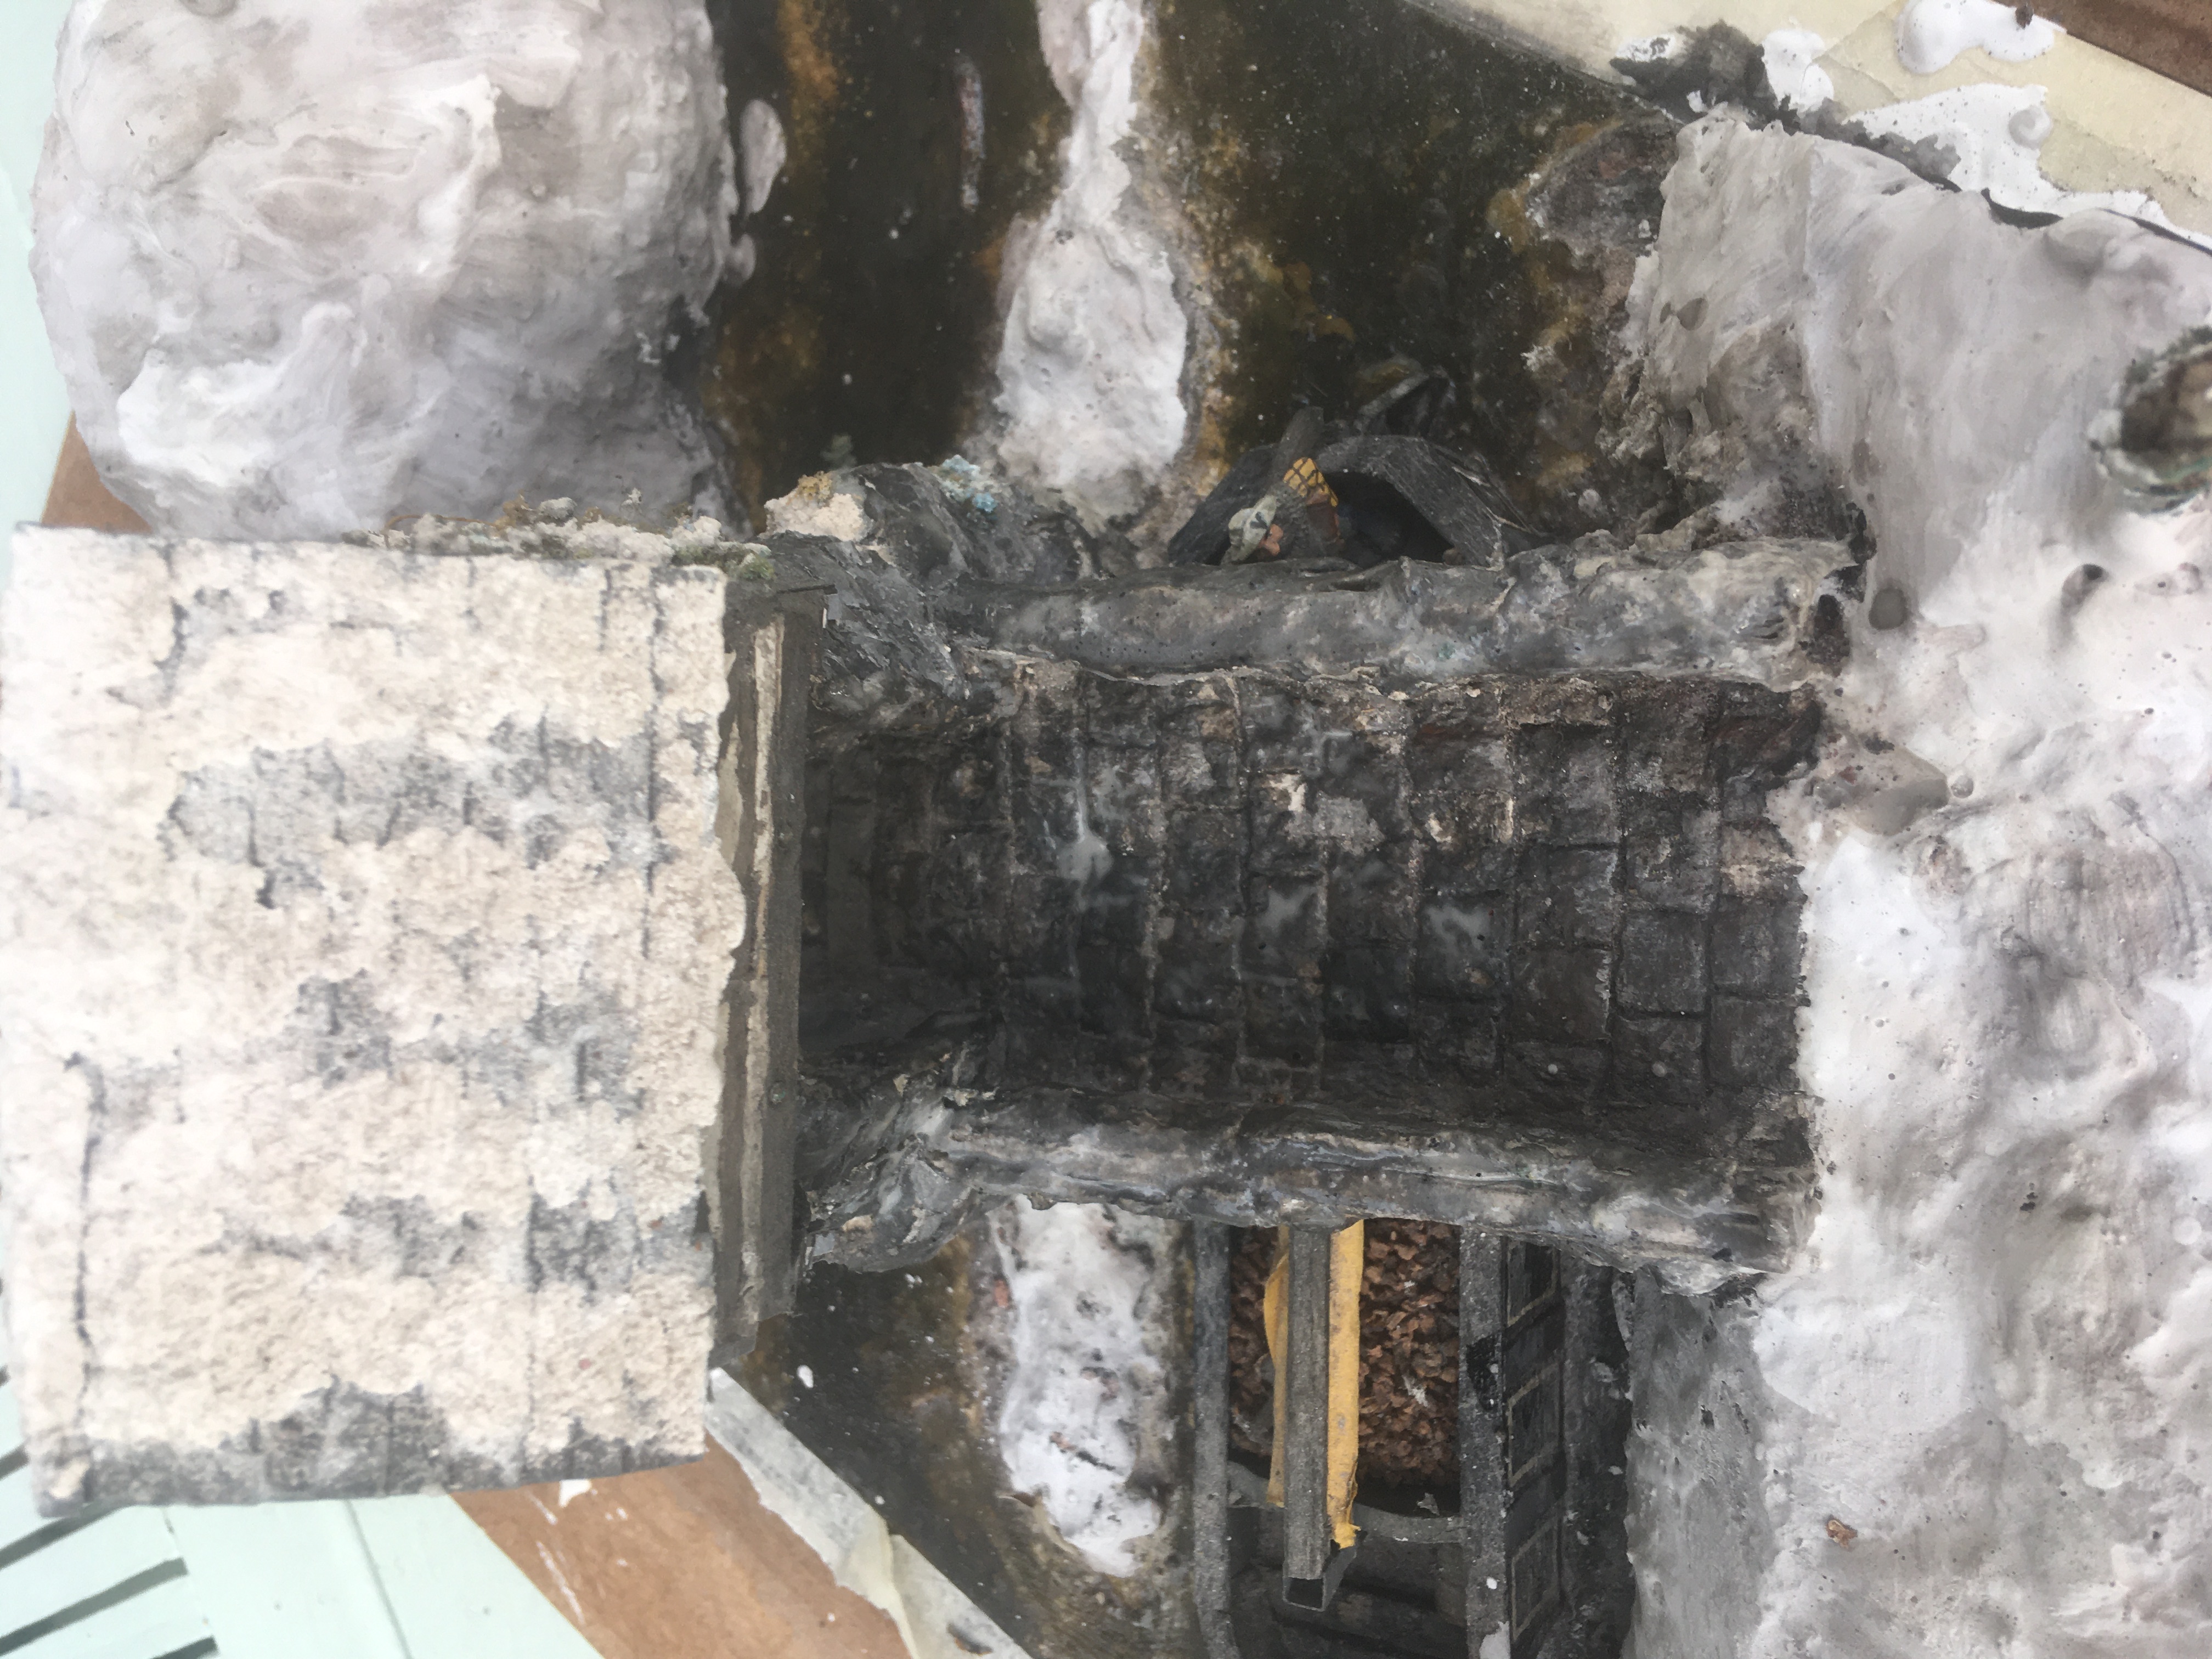
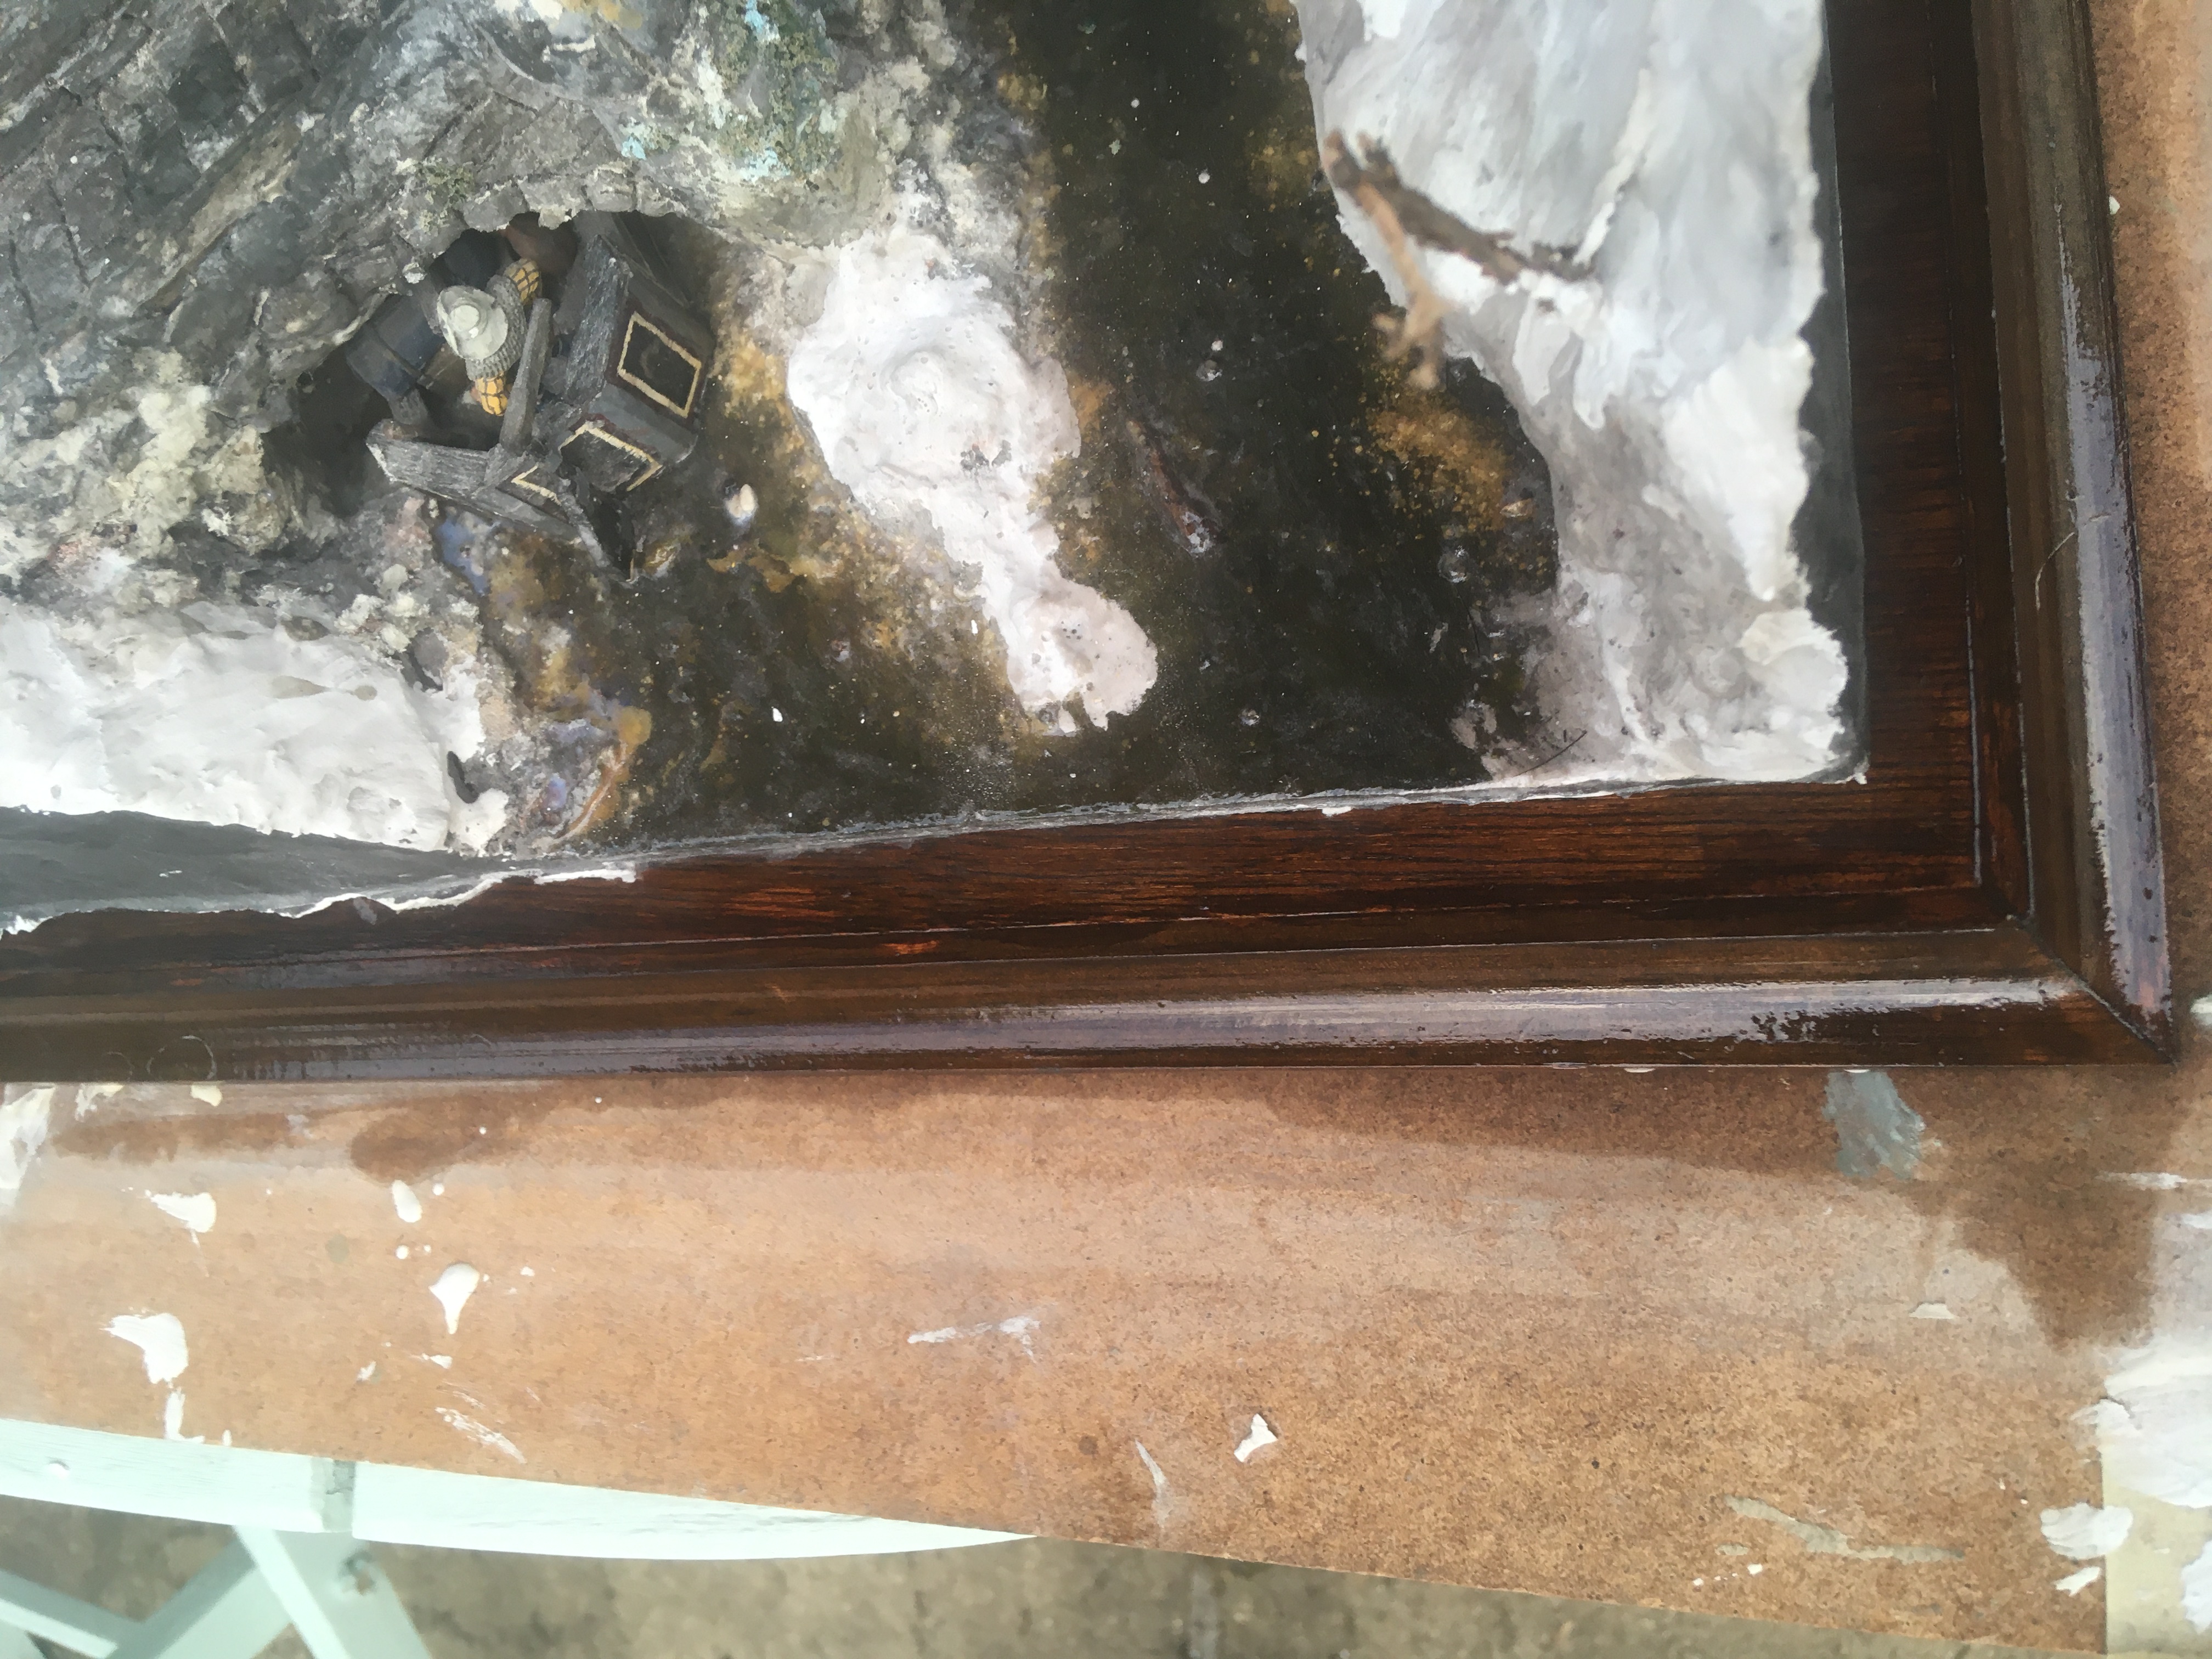
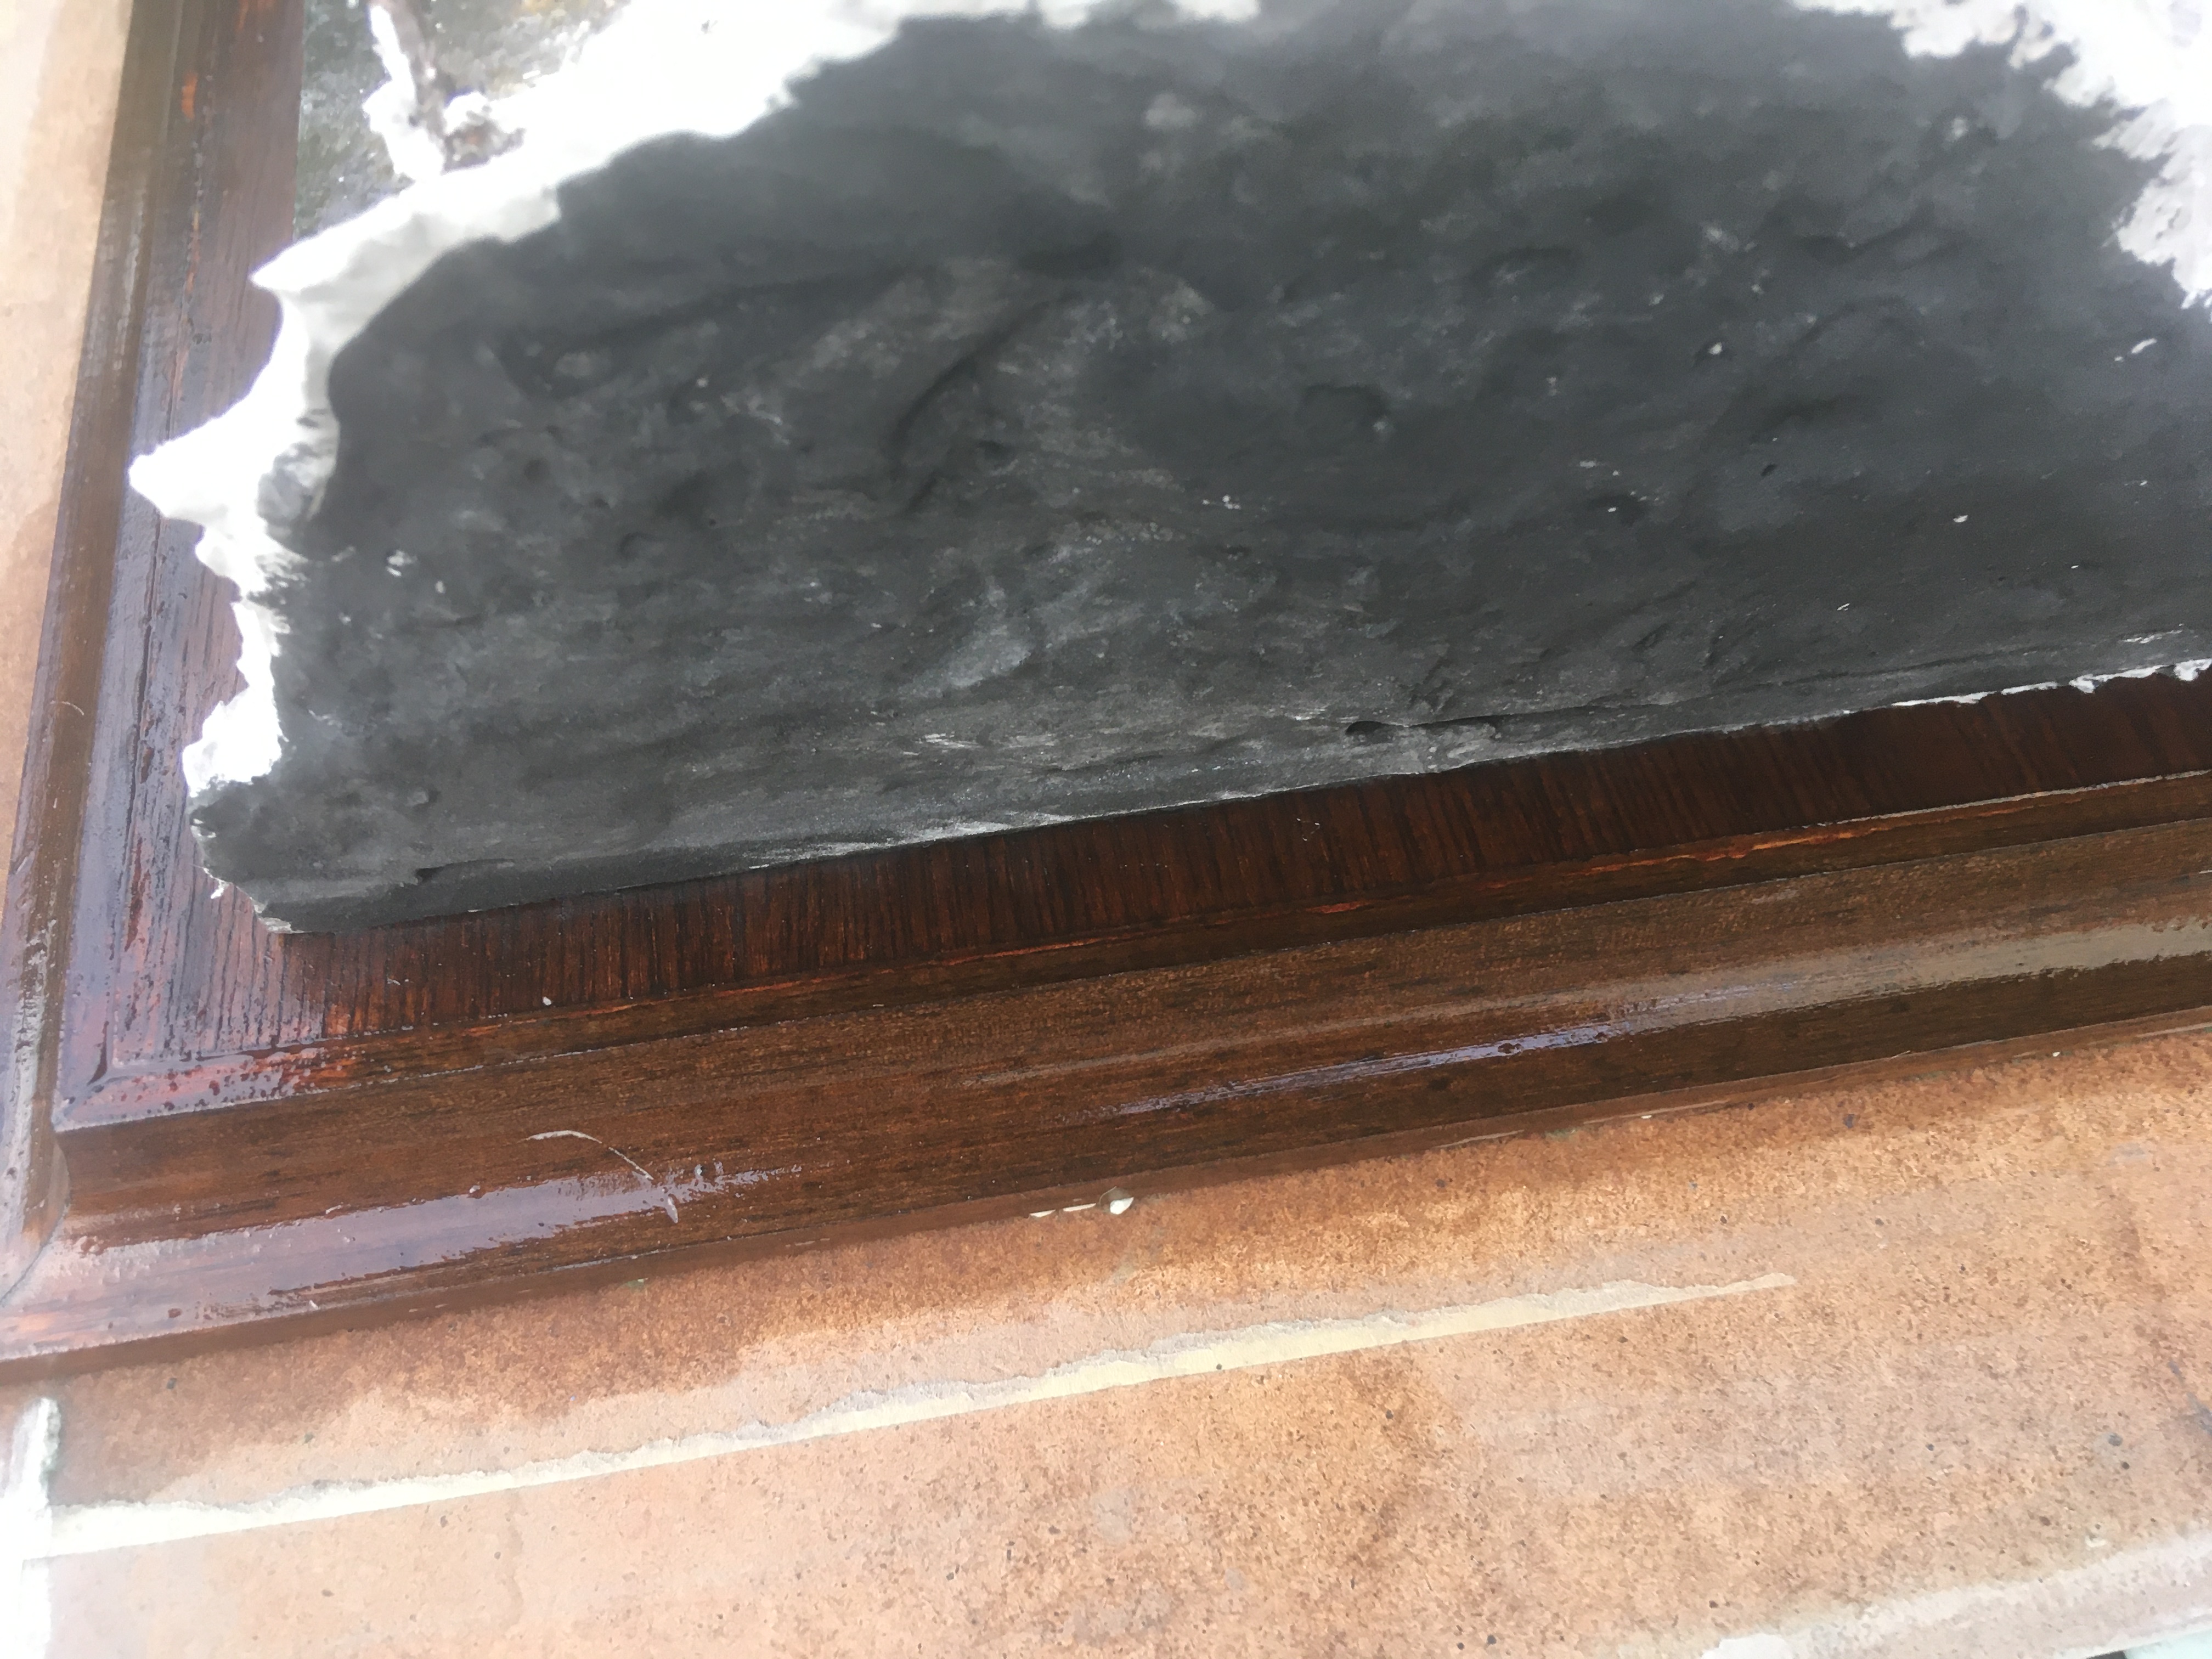
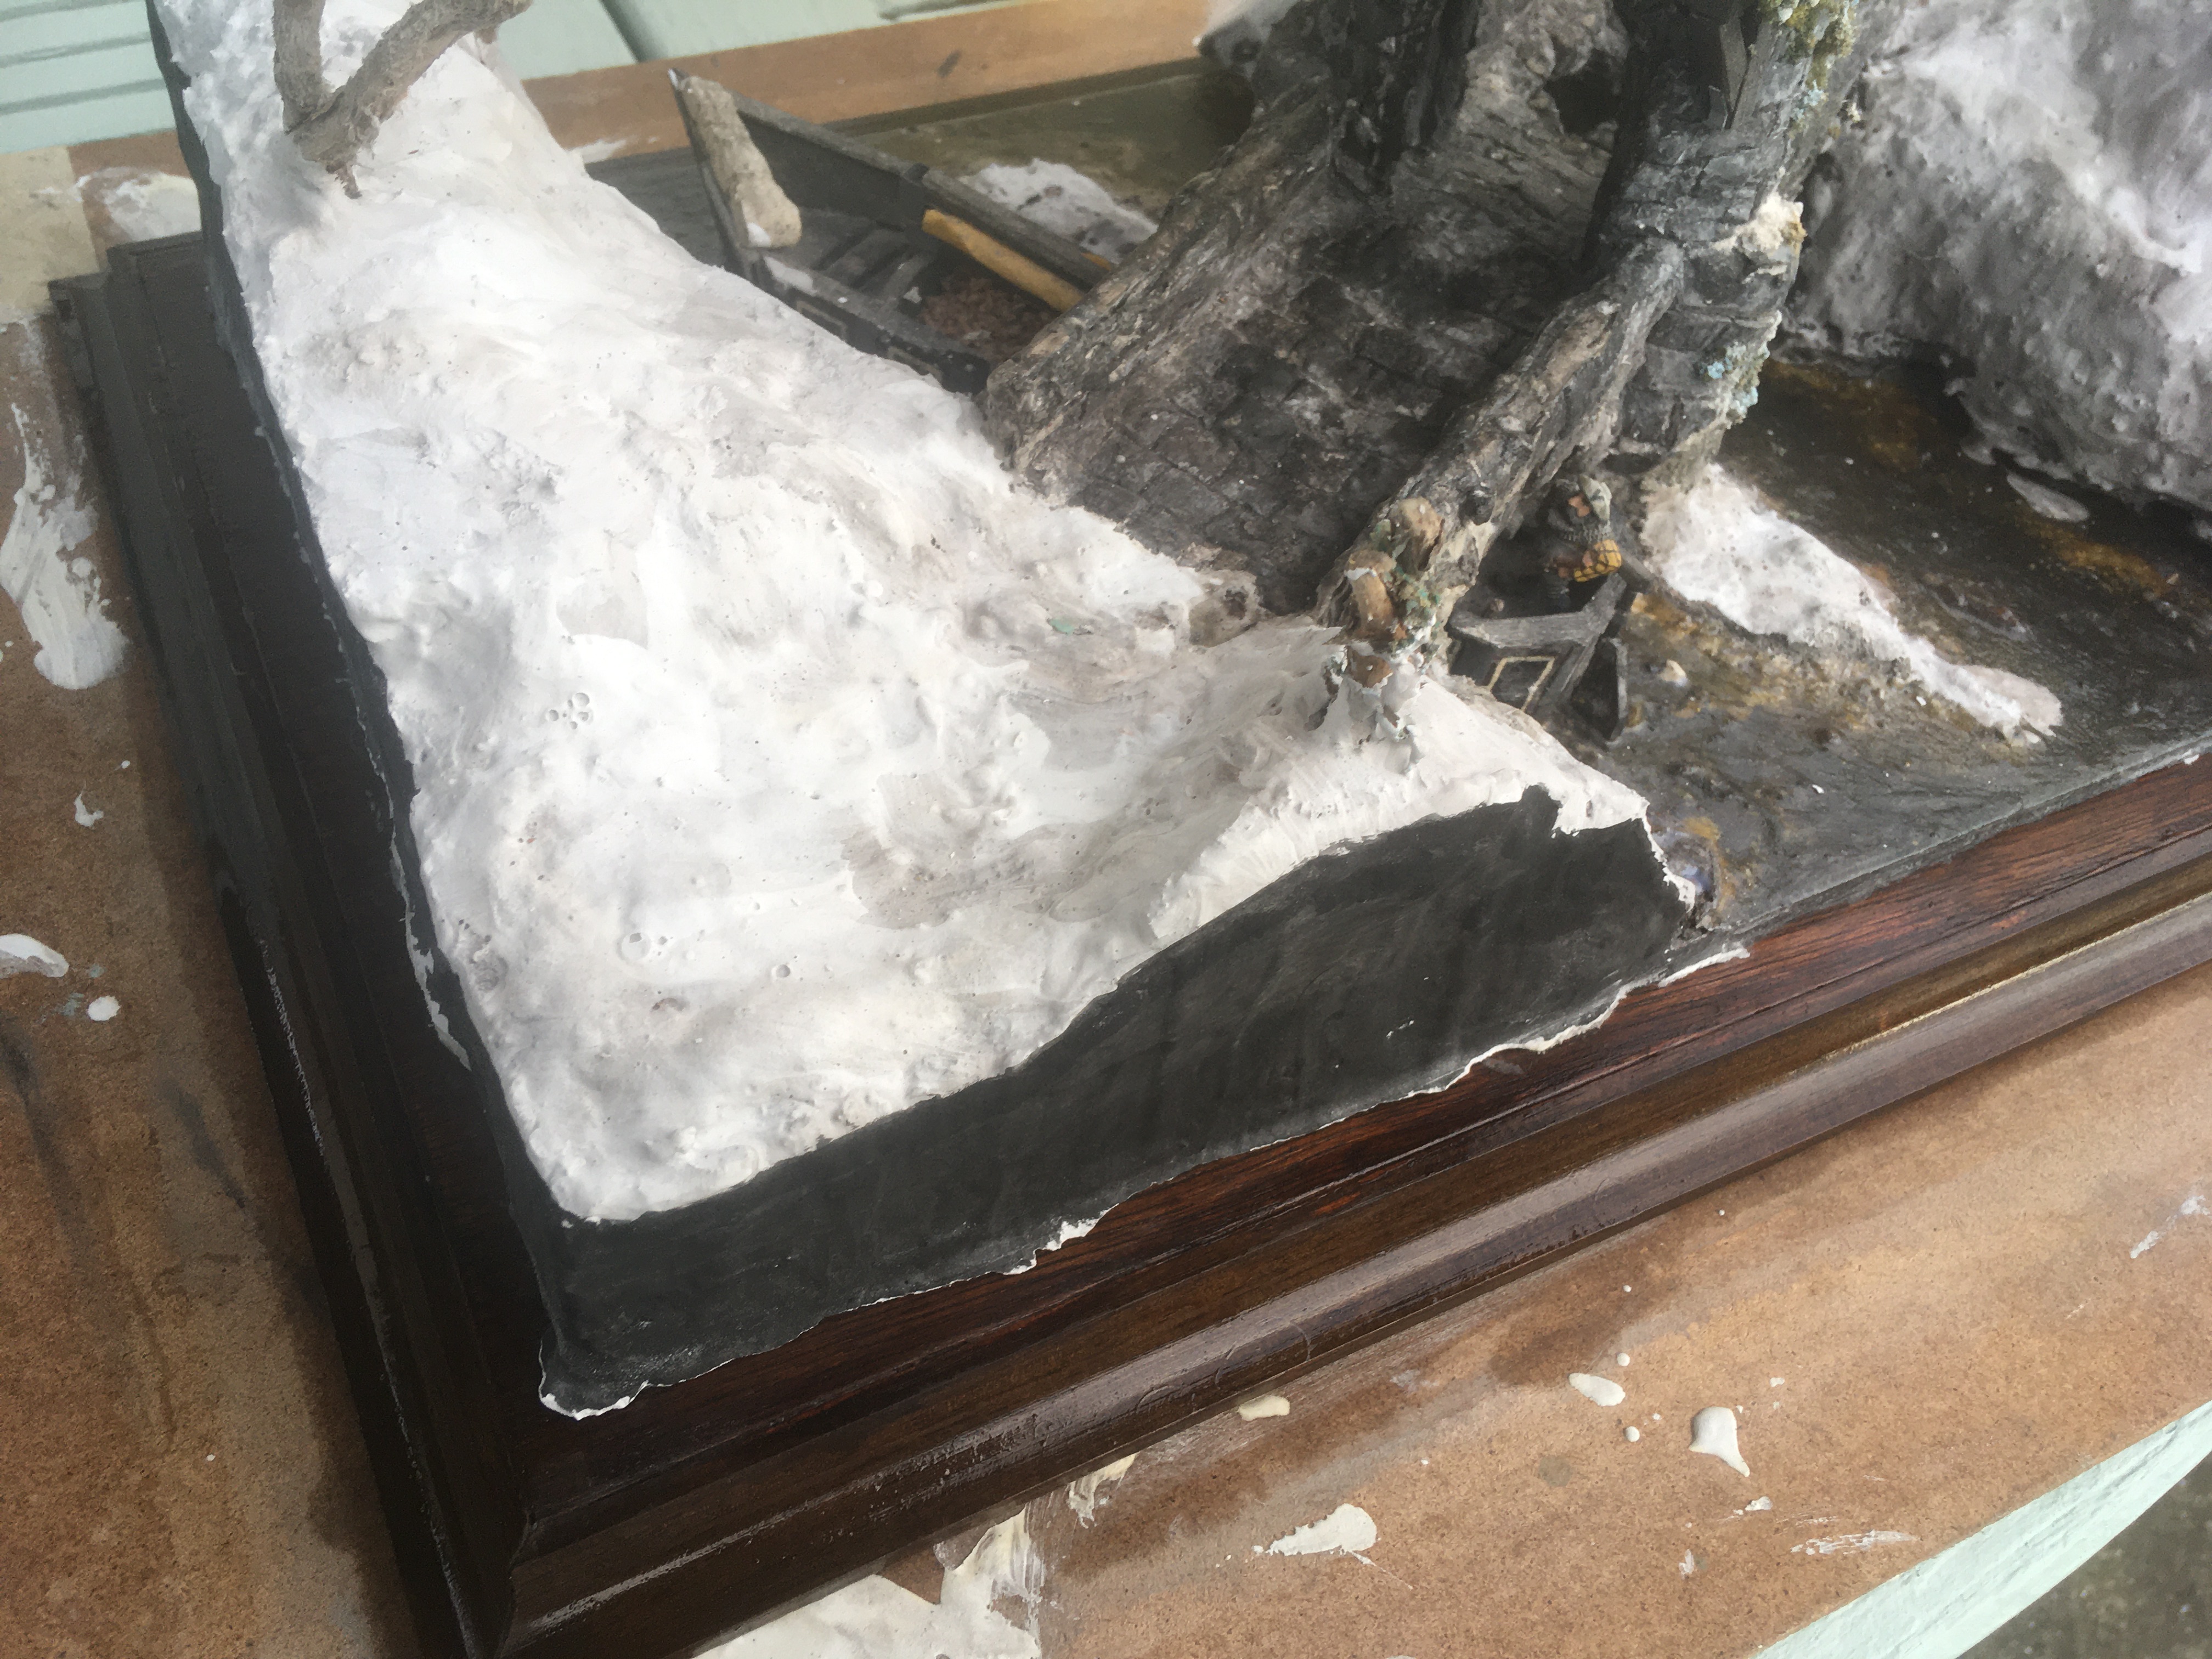
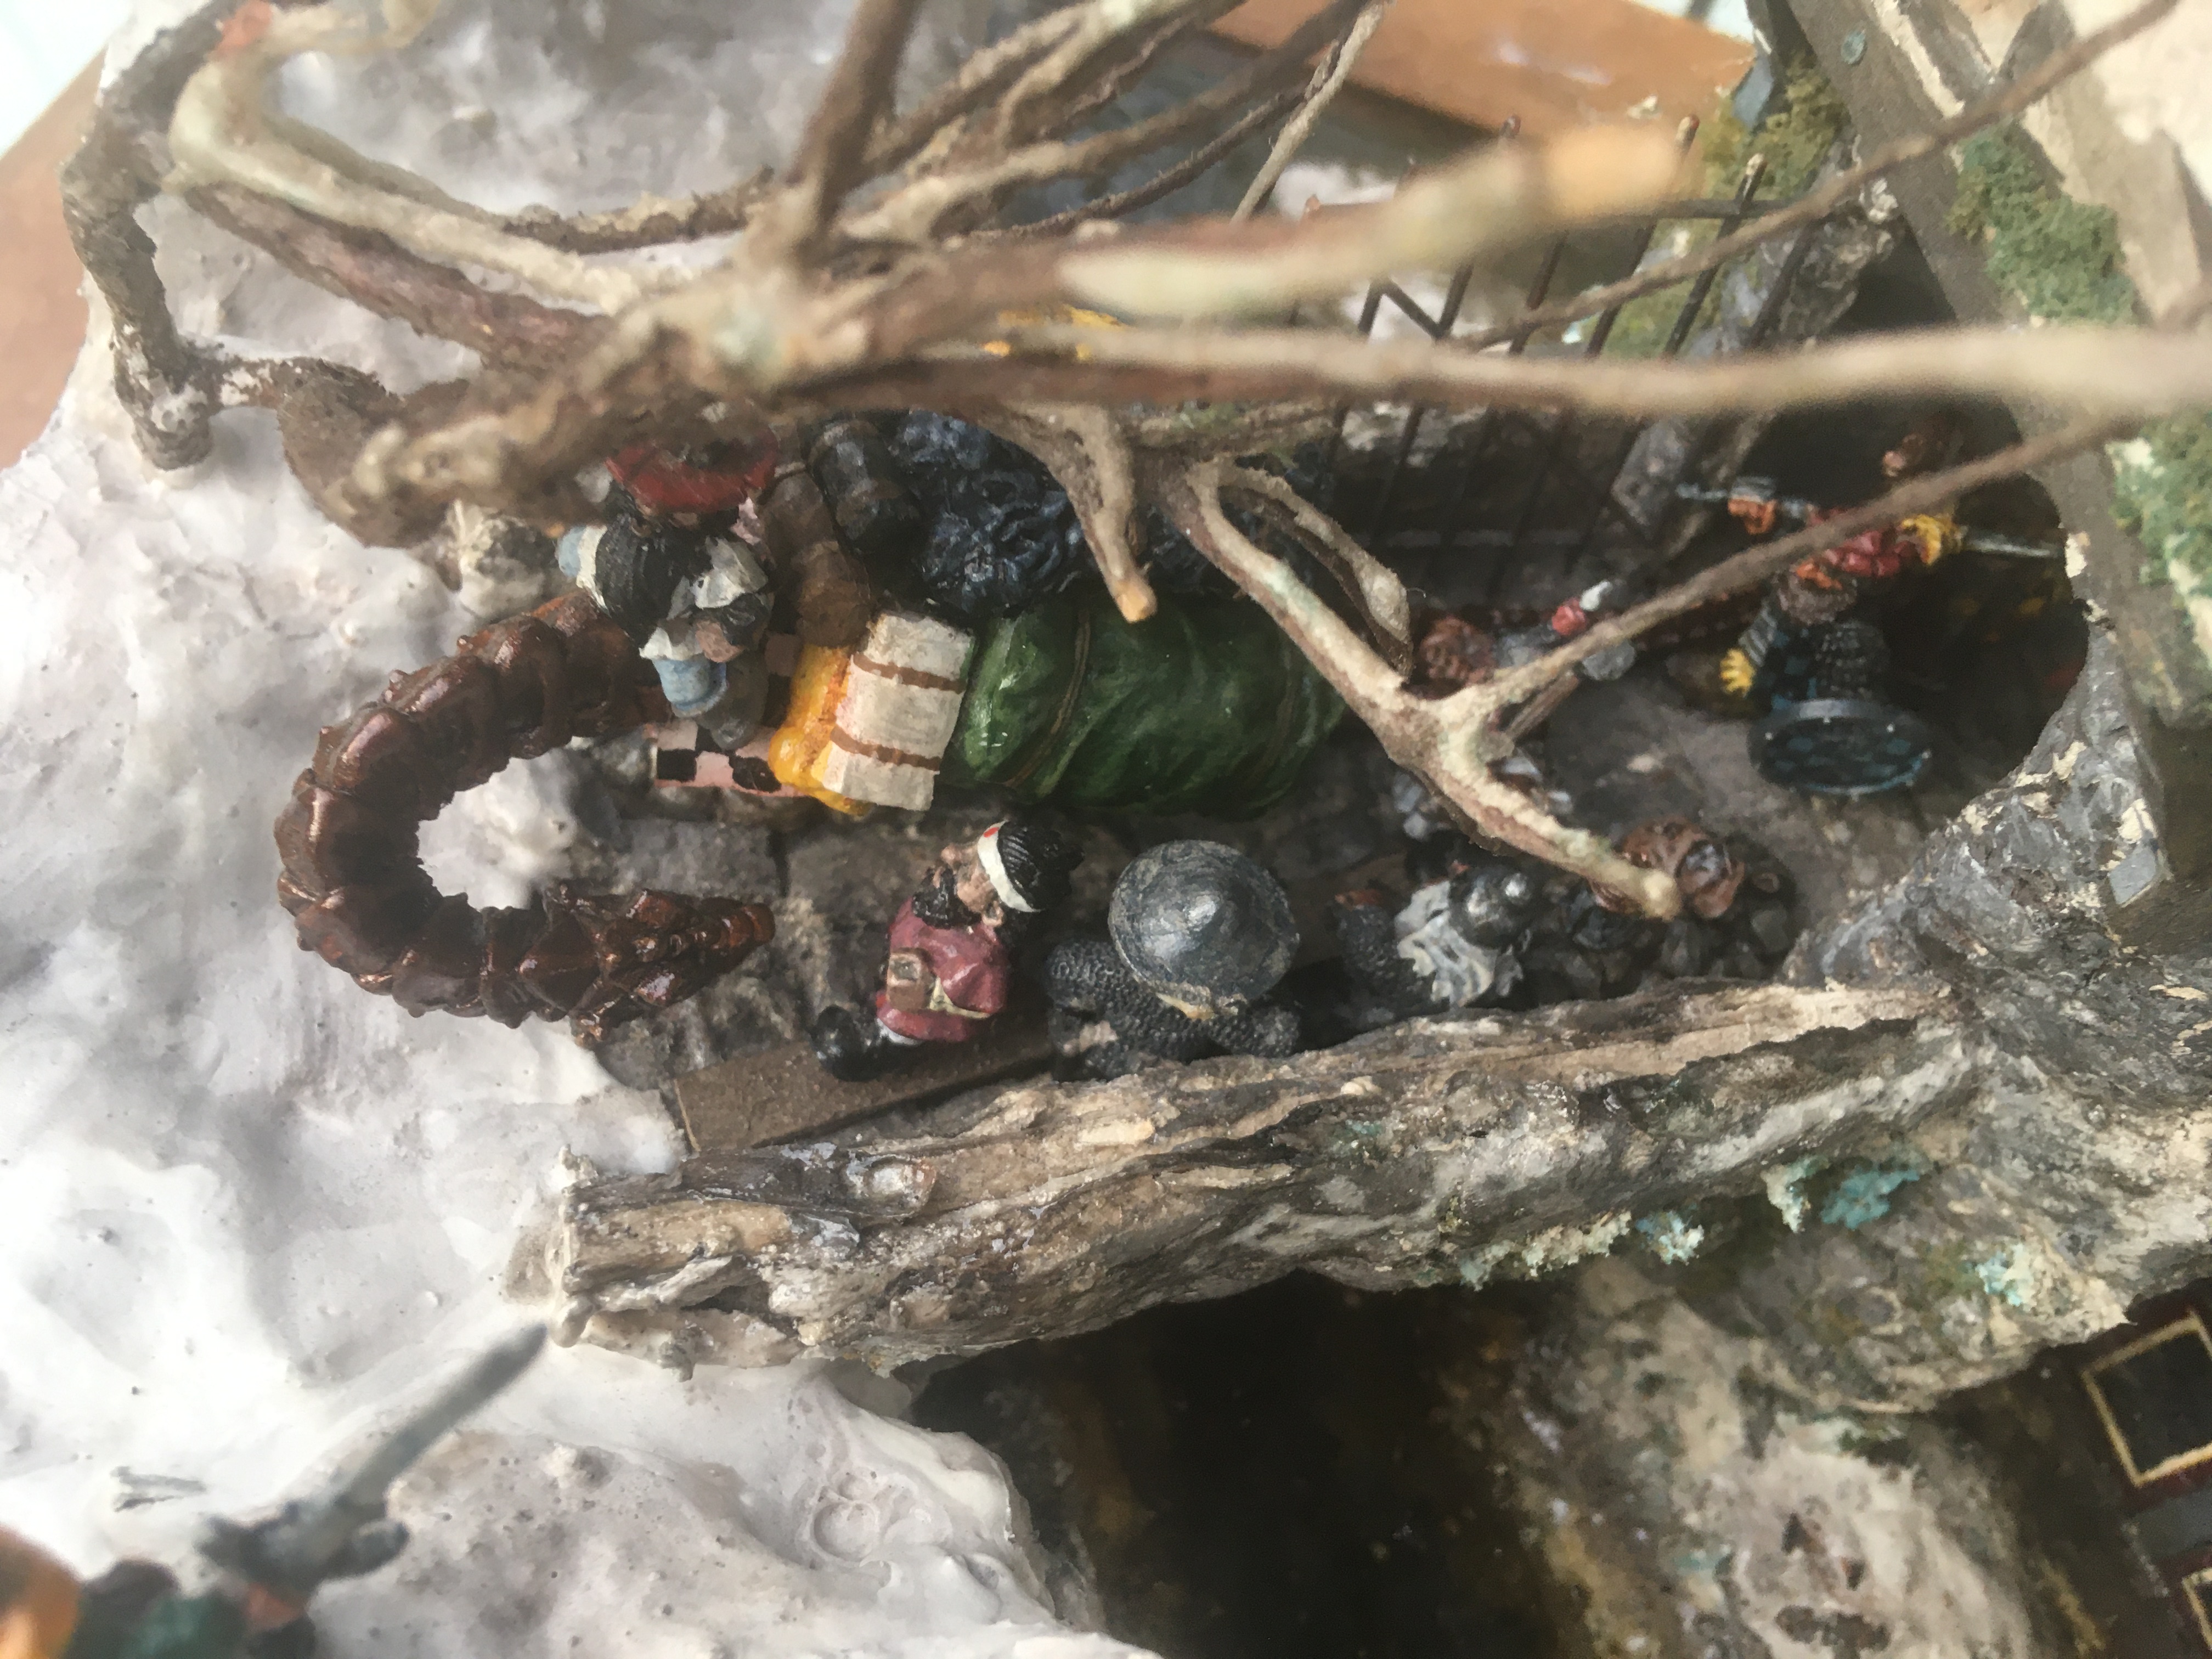
 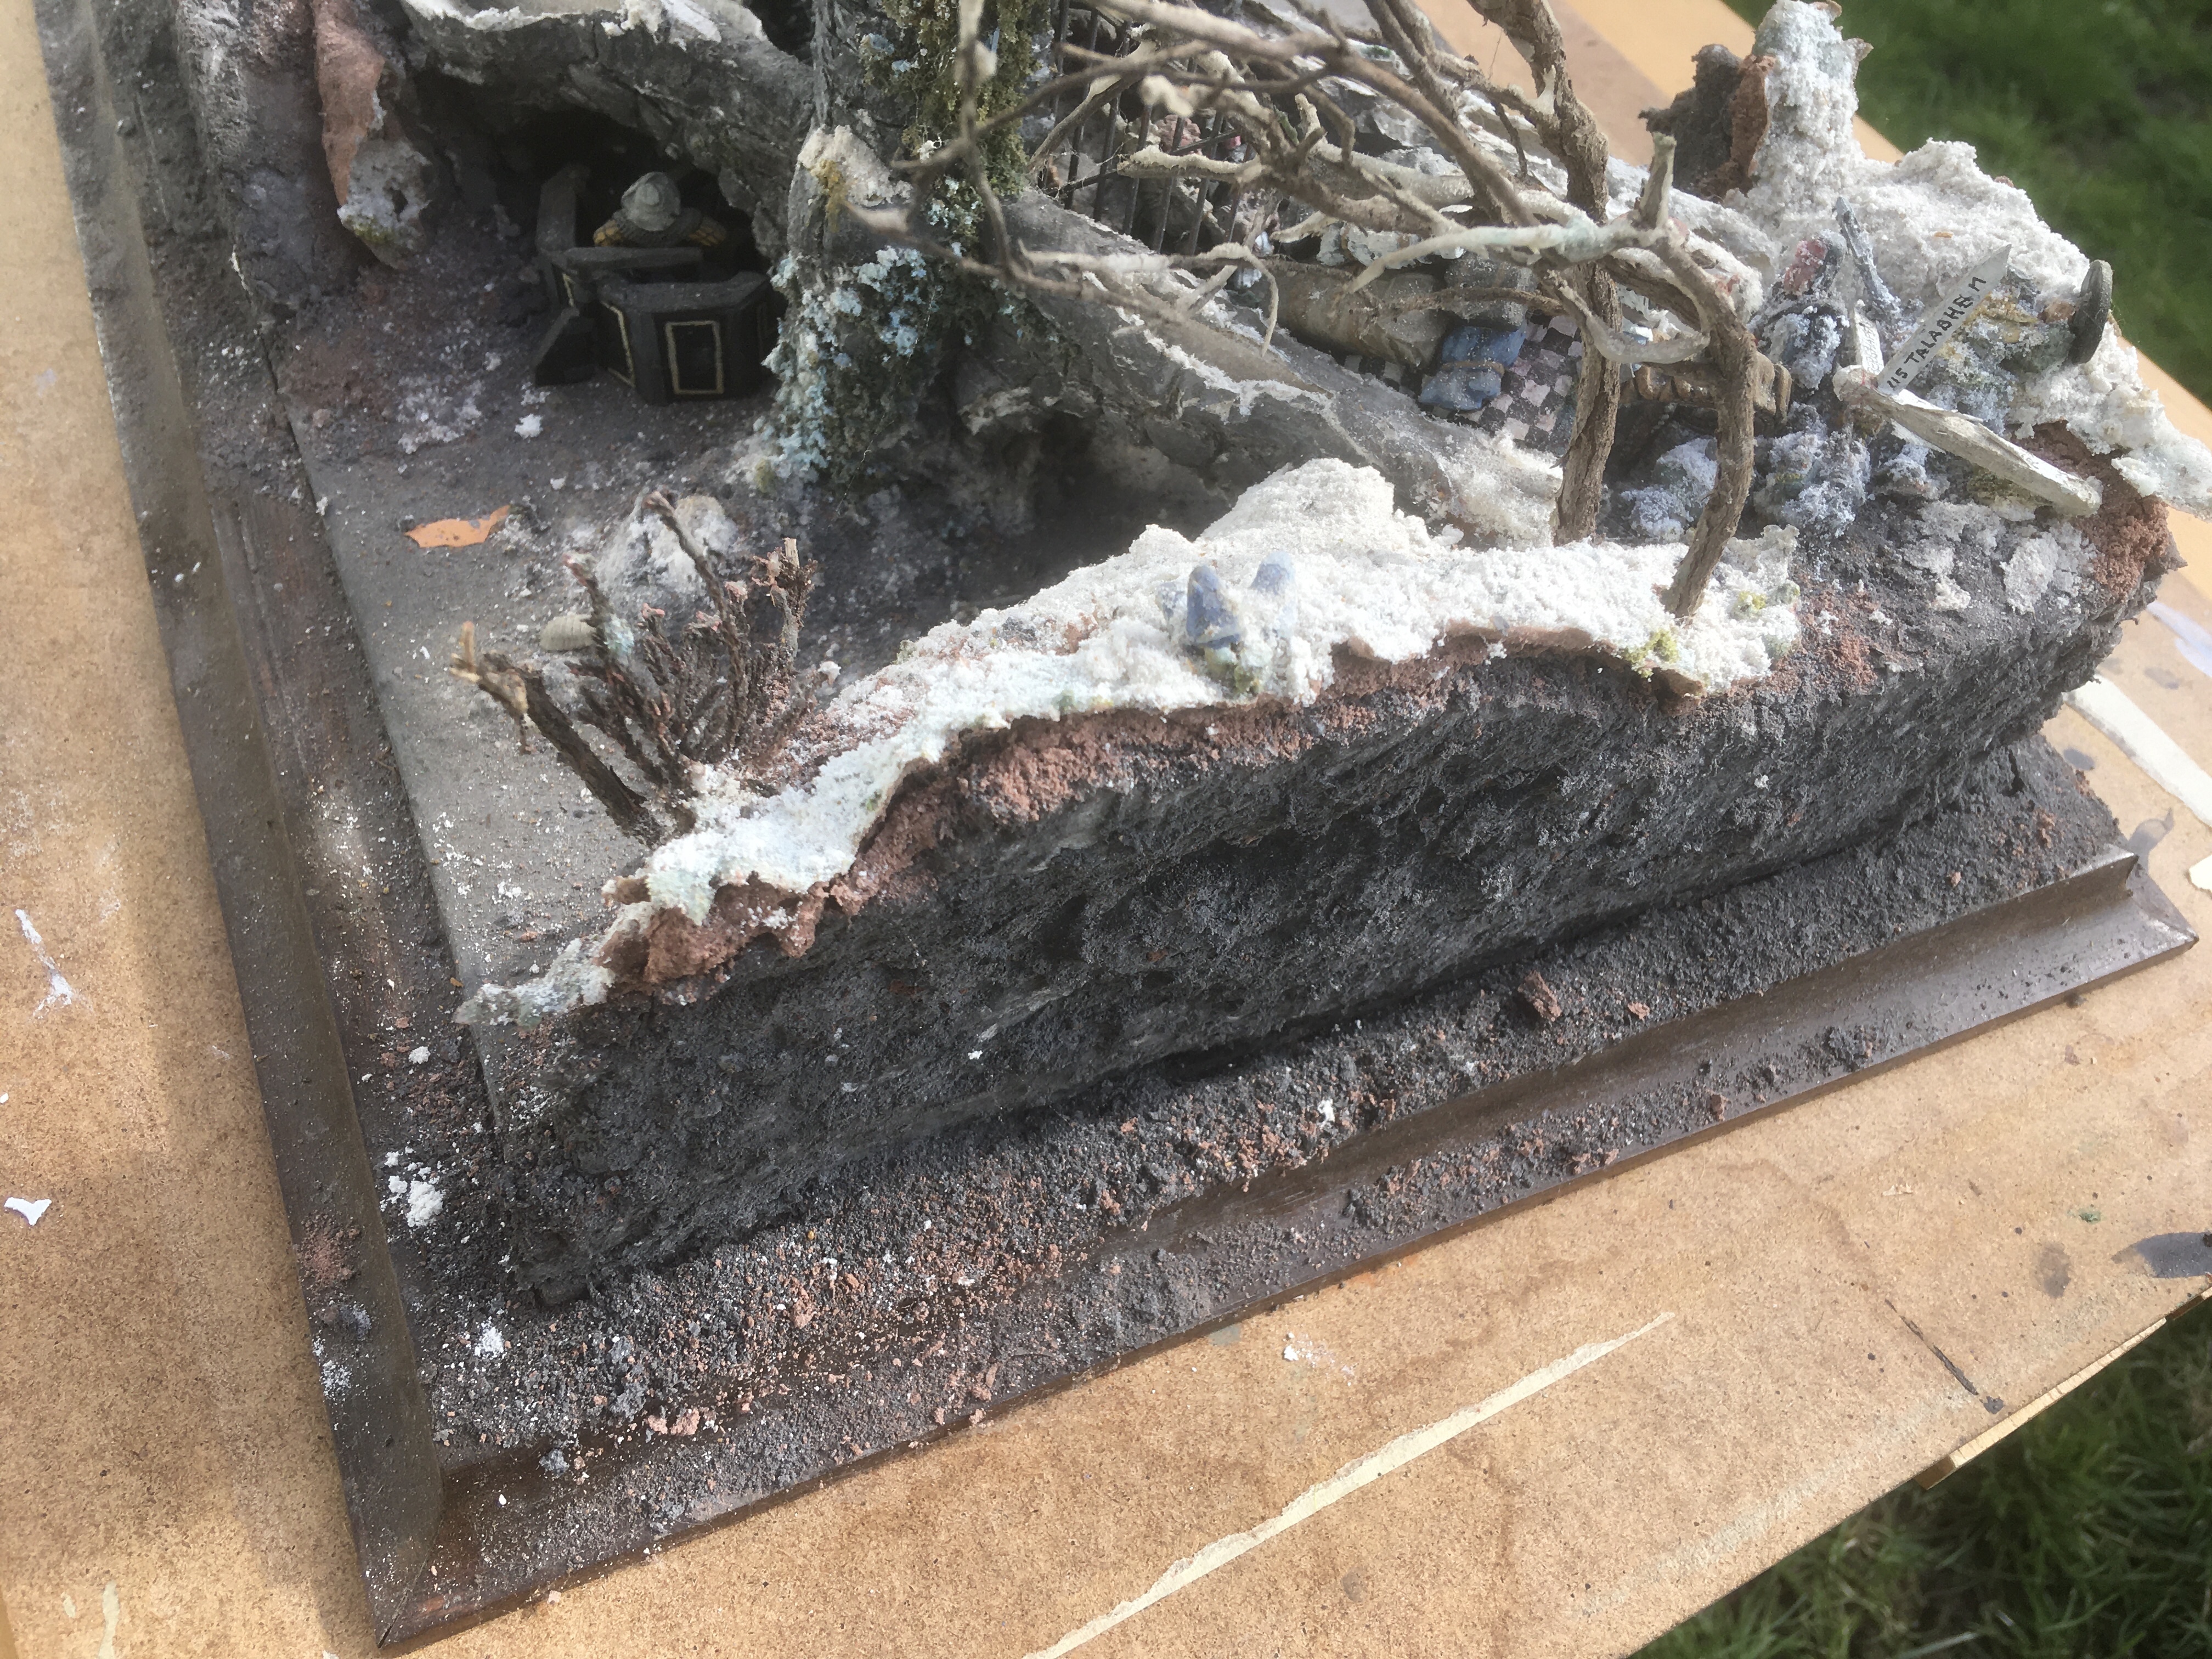 All the plaster has deteriorated due to varying temperatures and humidity whilst in storage so that the base is covered in dust and plaster powder. The modelling clay has also separated from the superstructure of the bridge. Some of the miniatures have now become unstuck and embedded themselves in the detritus.

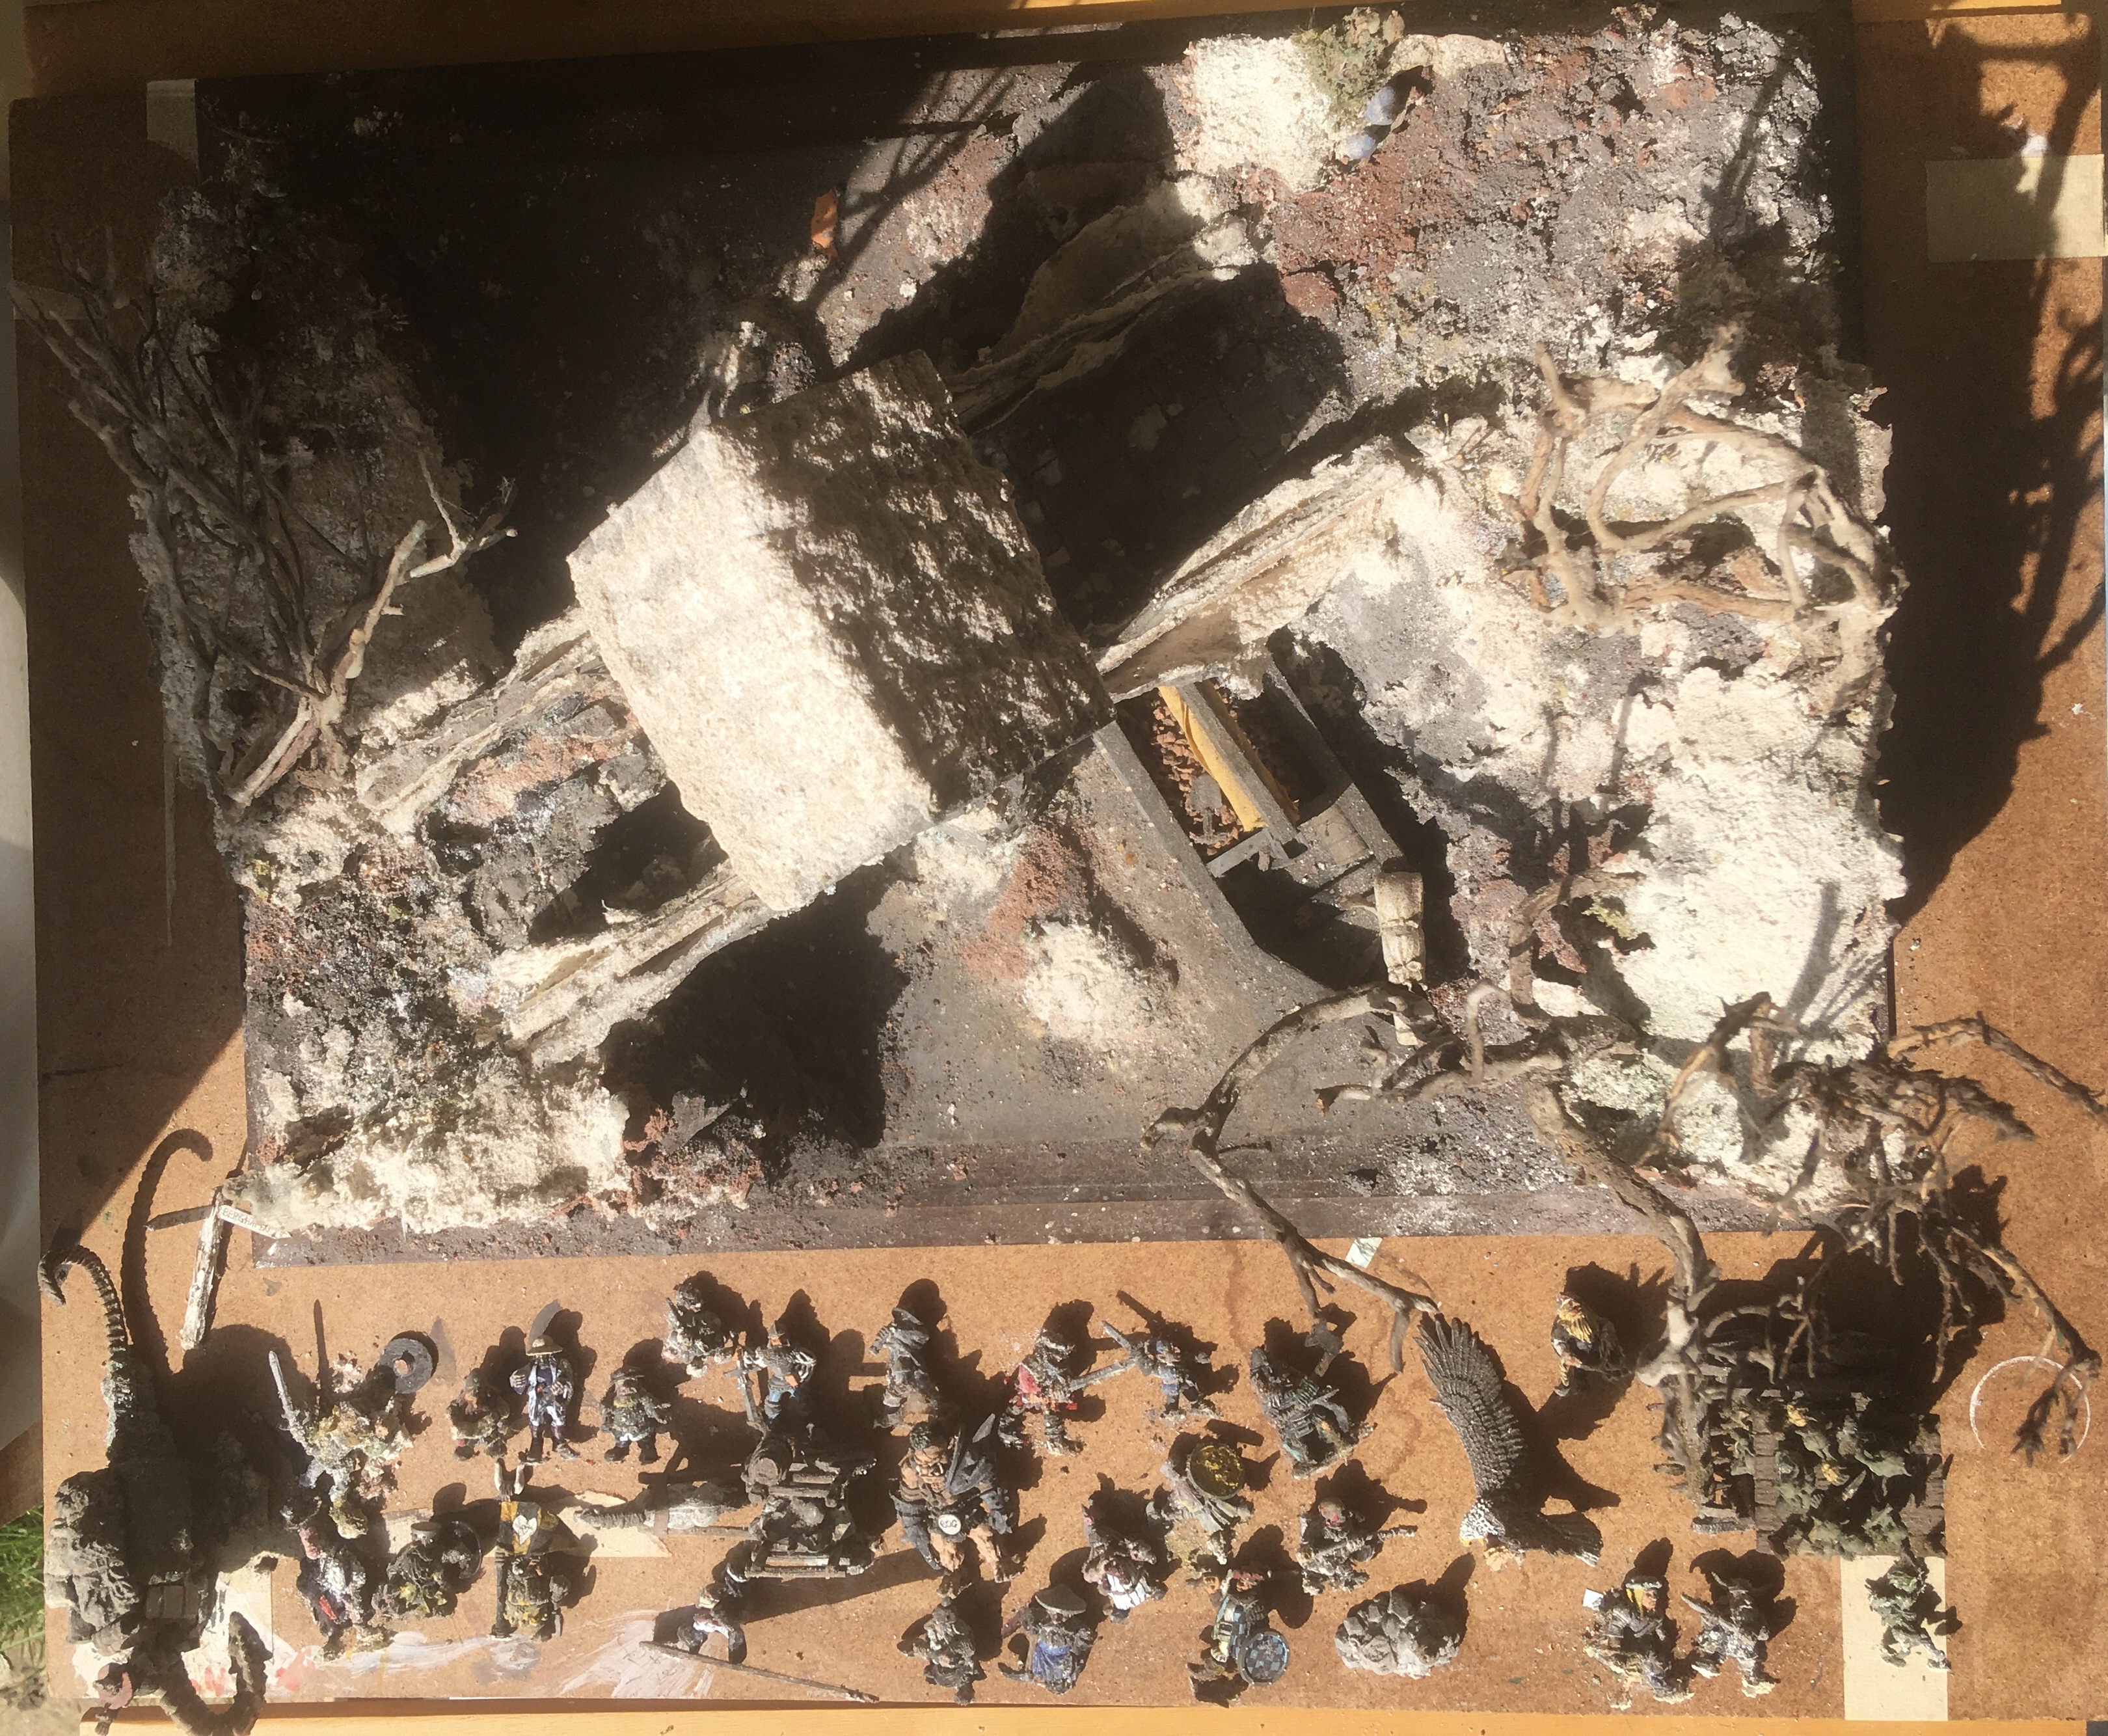
 First up will be the careful removal of the miniatures and inspection for damage. I will put them then aside so that I can inspect the state of the main bridge structure and river banks prior to cleaning.
 Phase 1 - Cleaning and Removal of old plaster
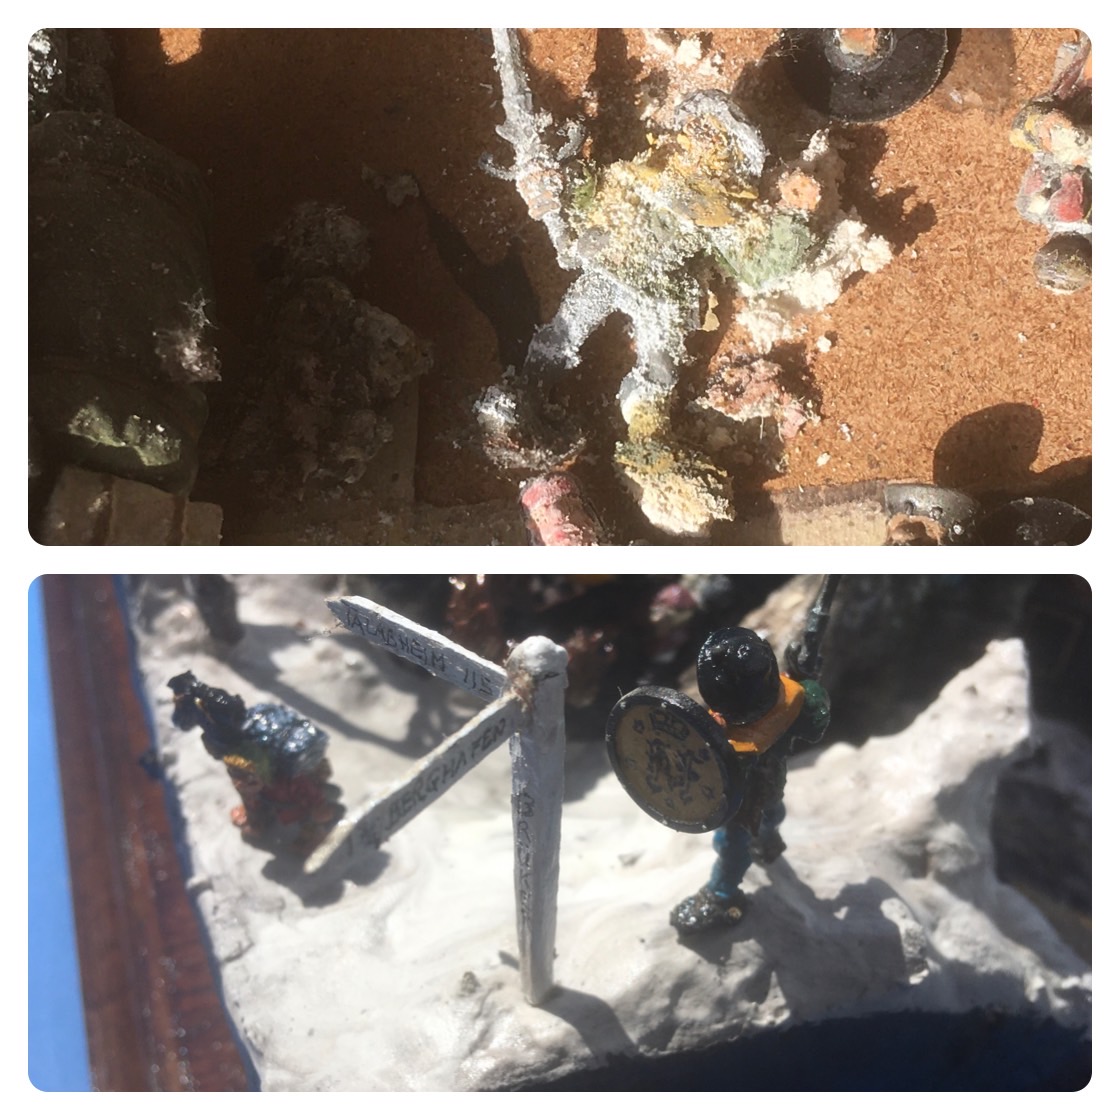
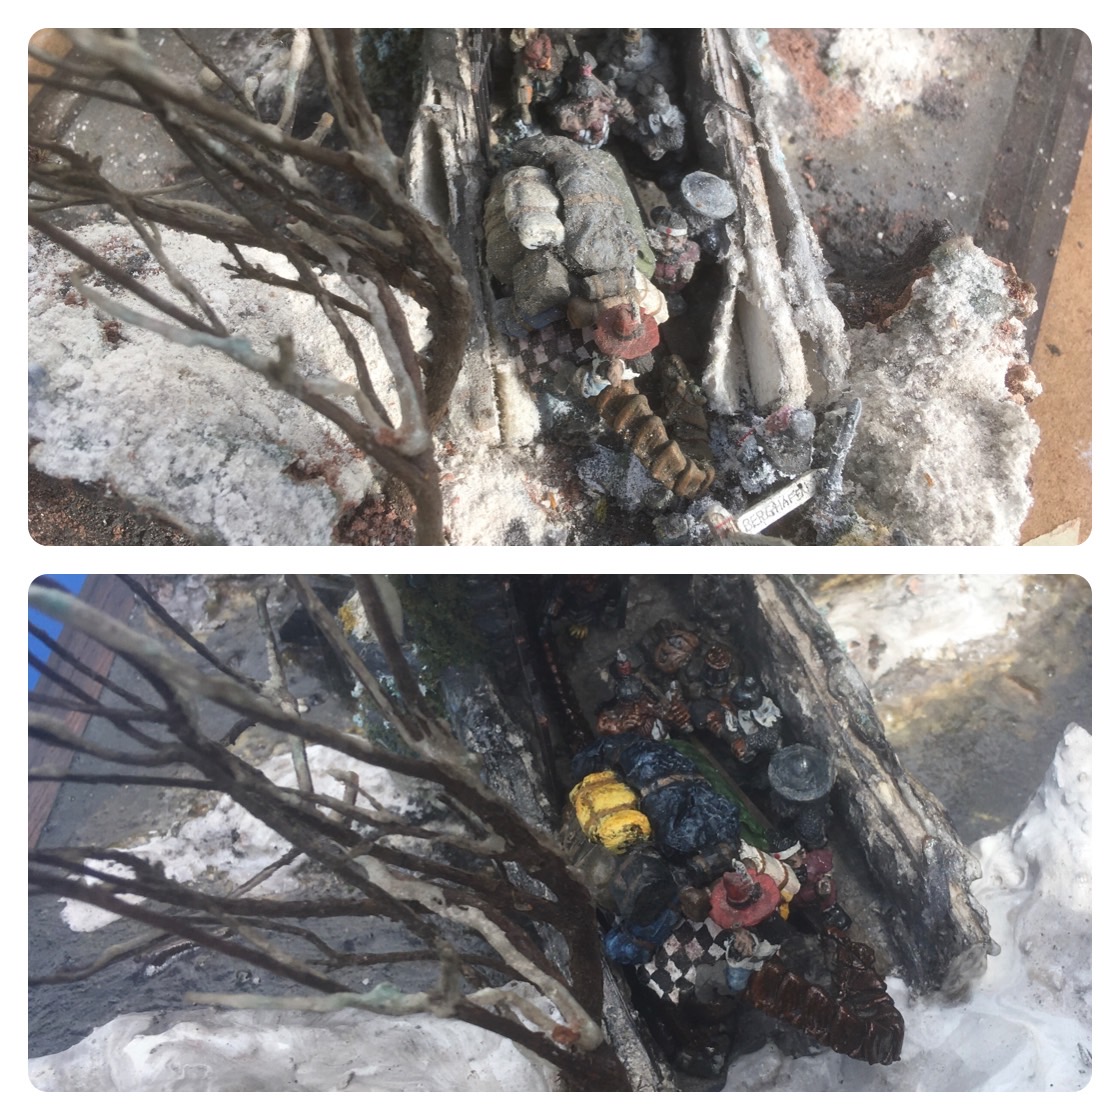
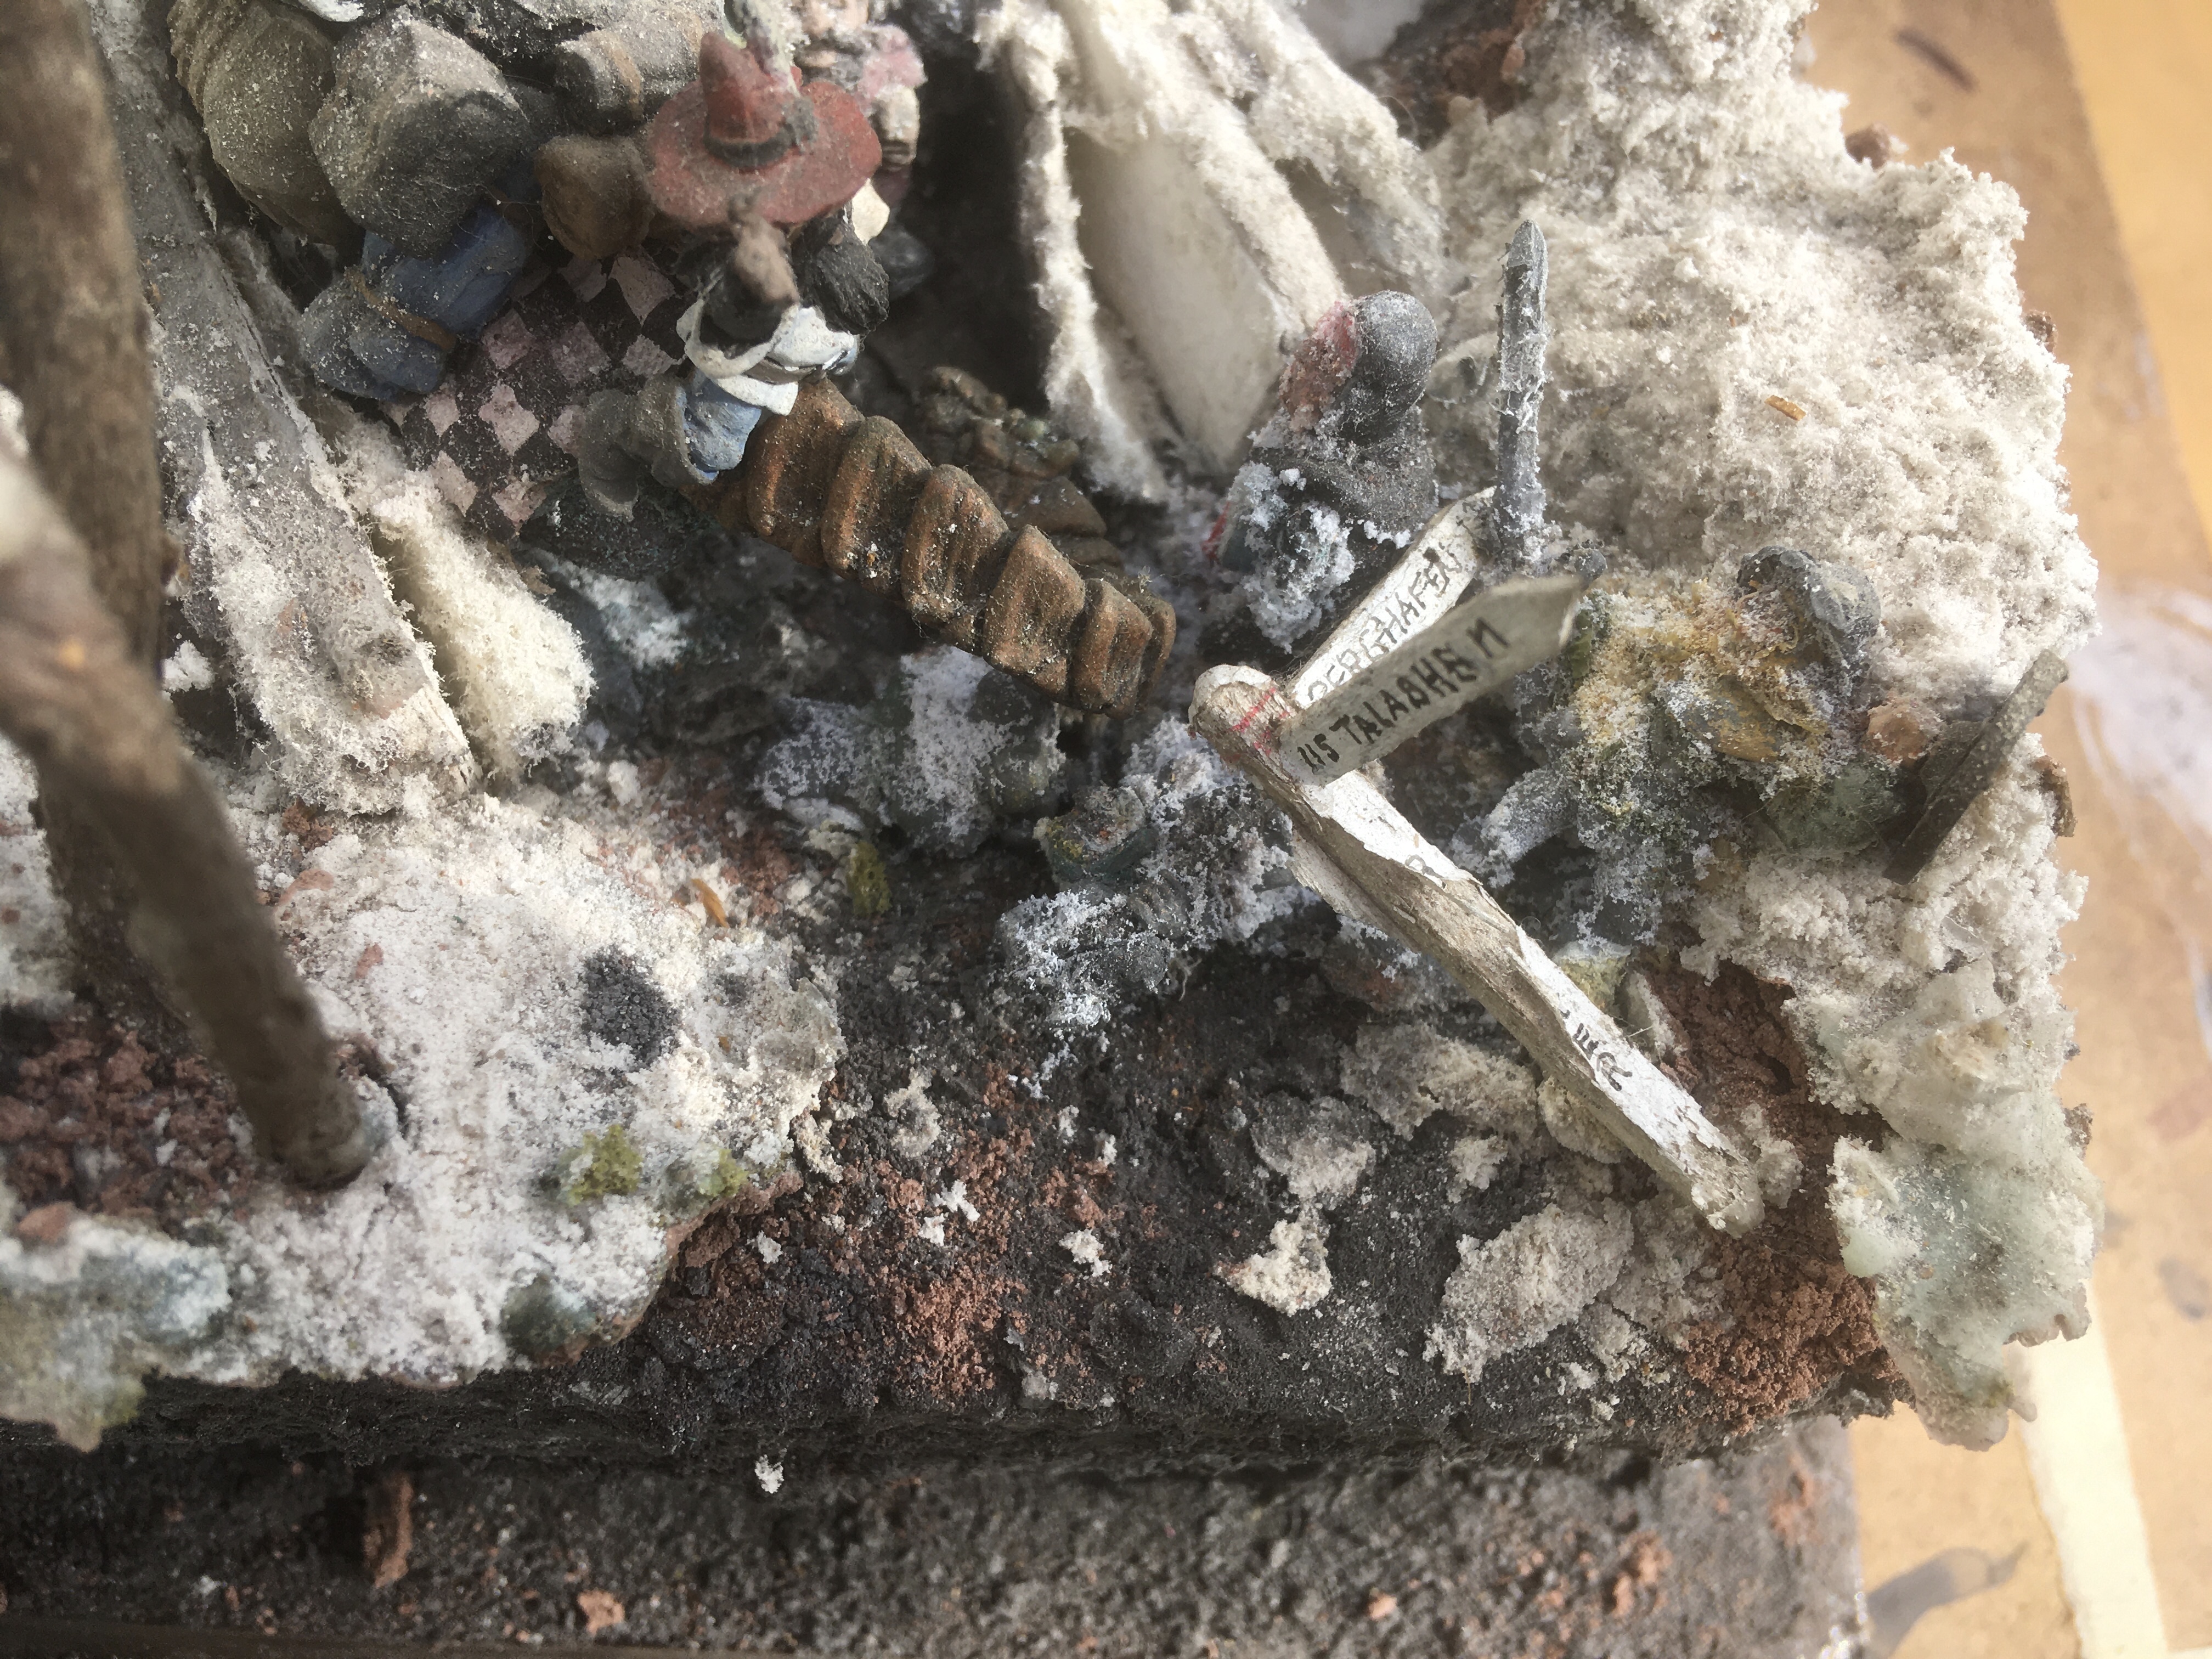
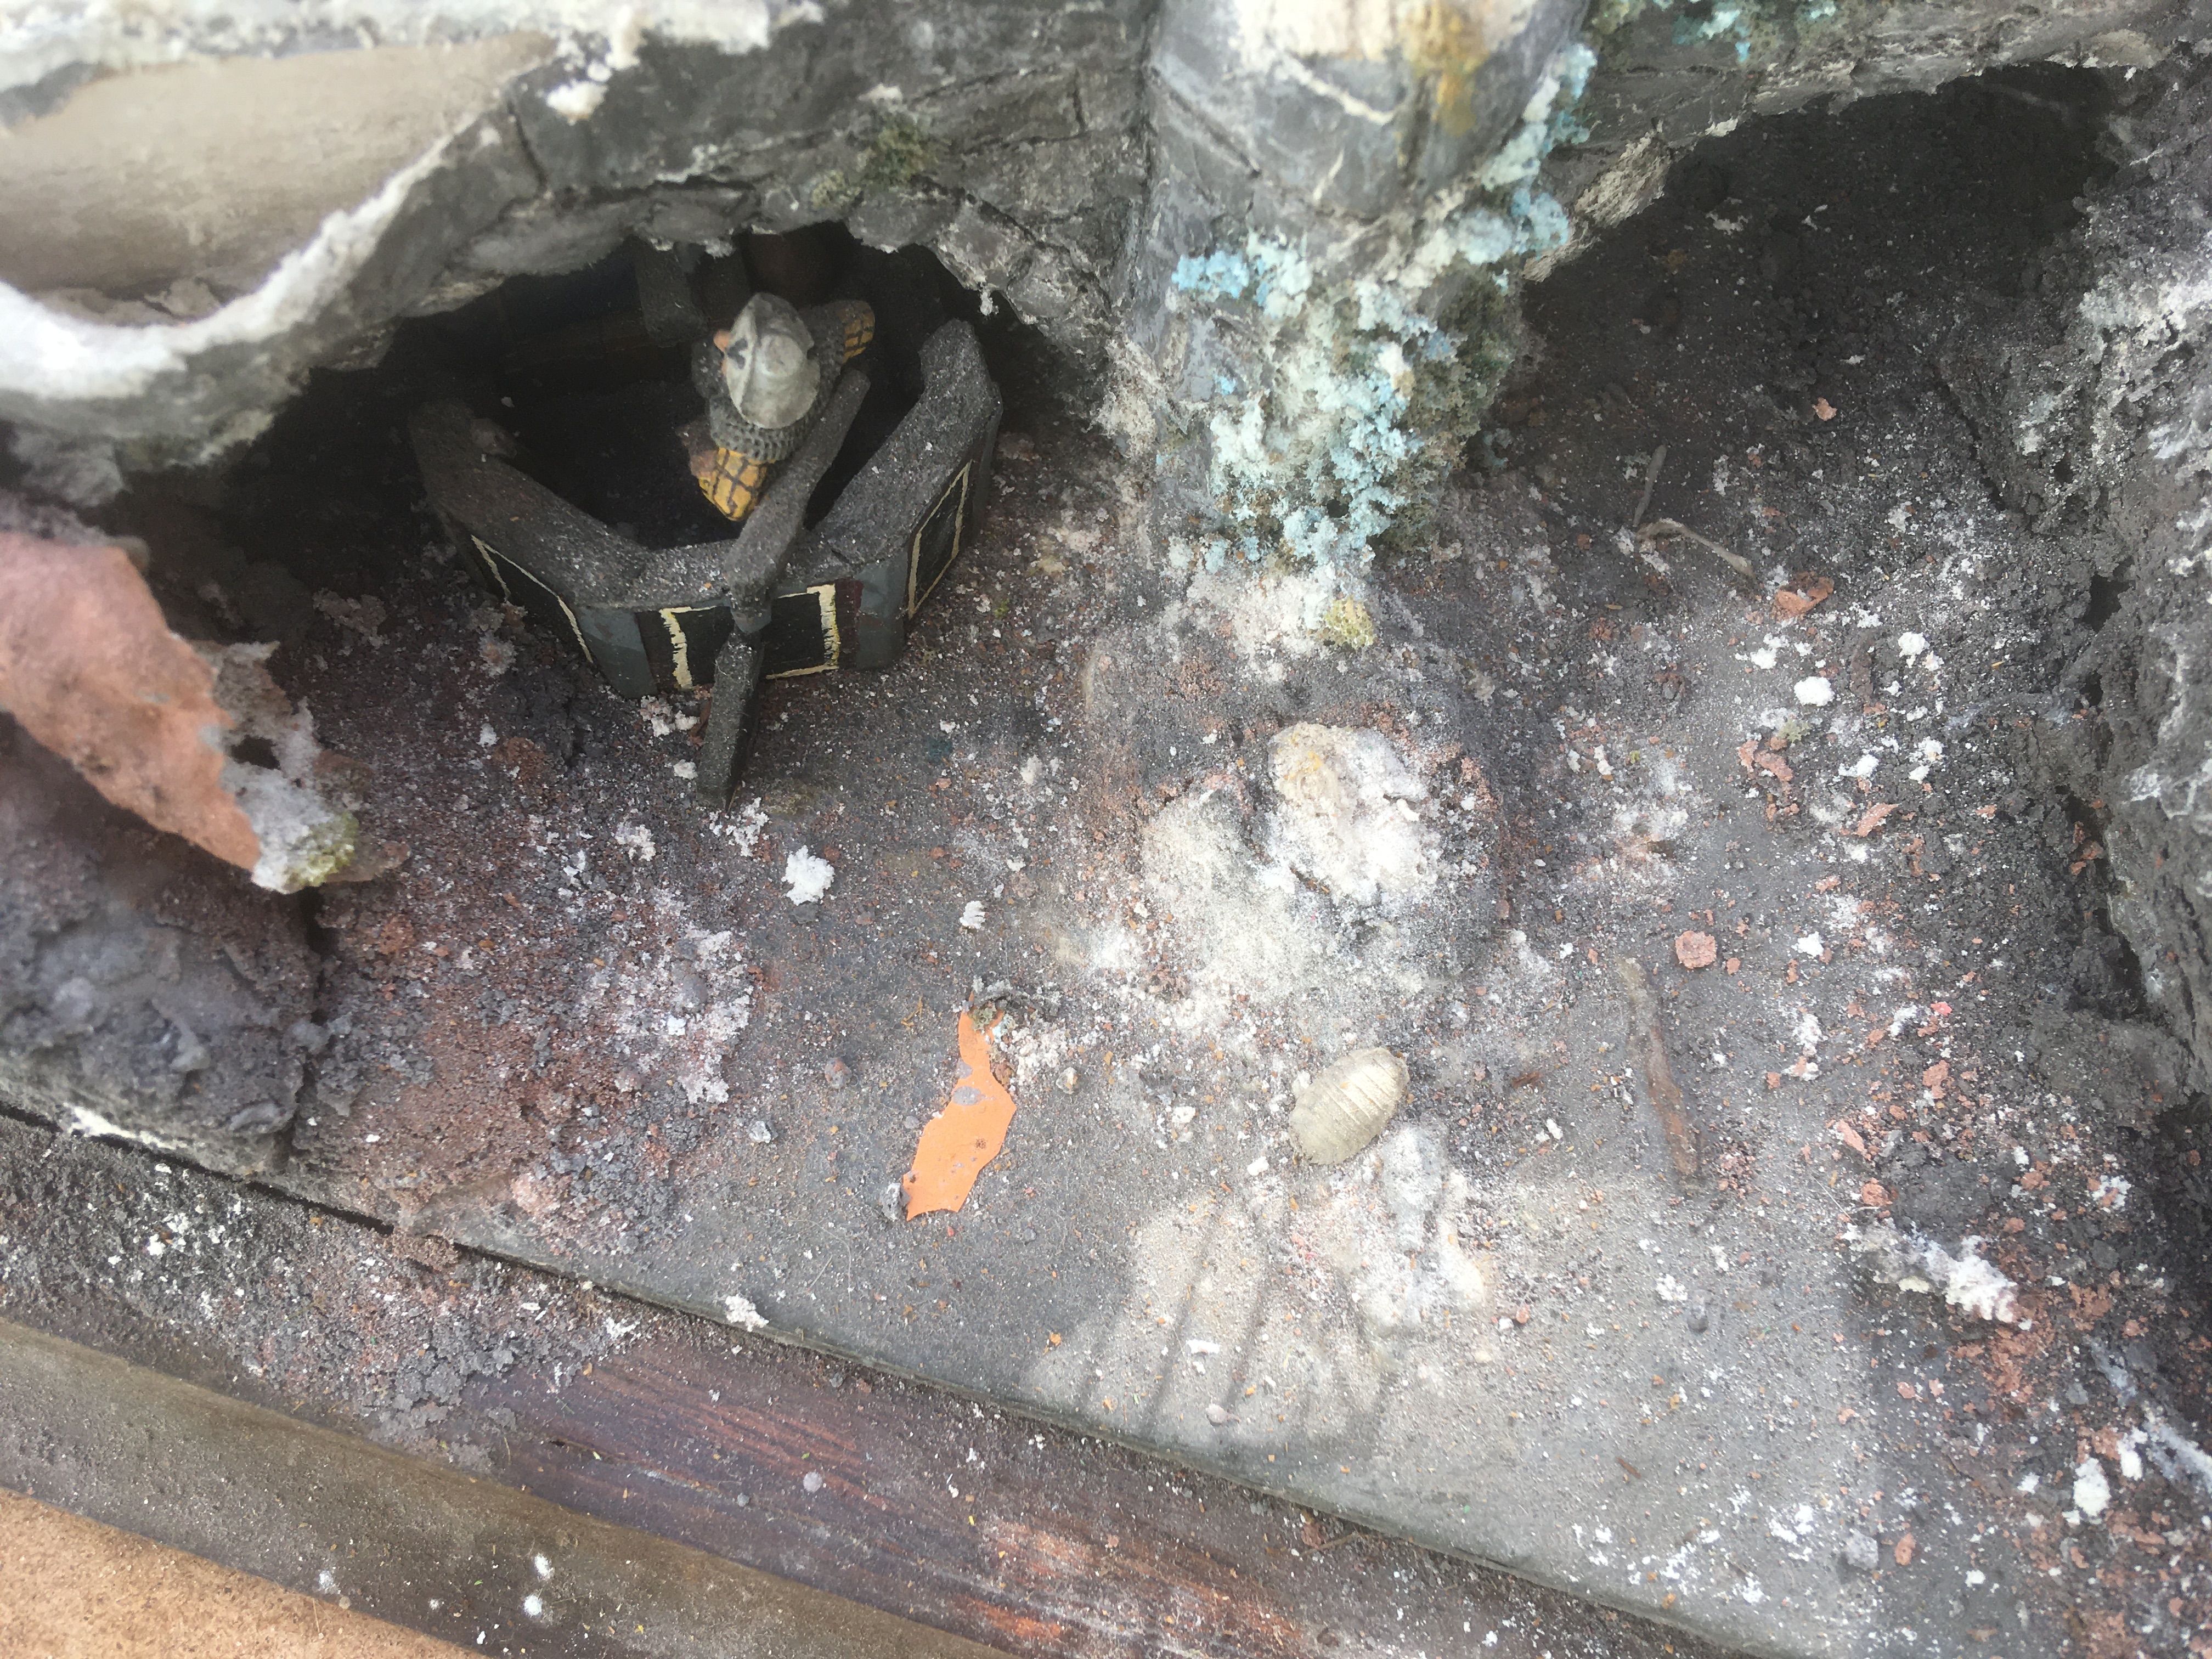
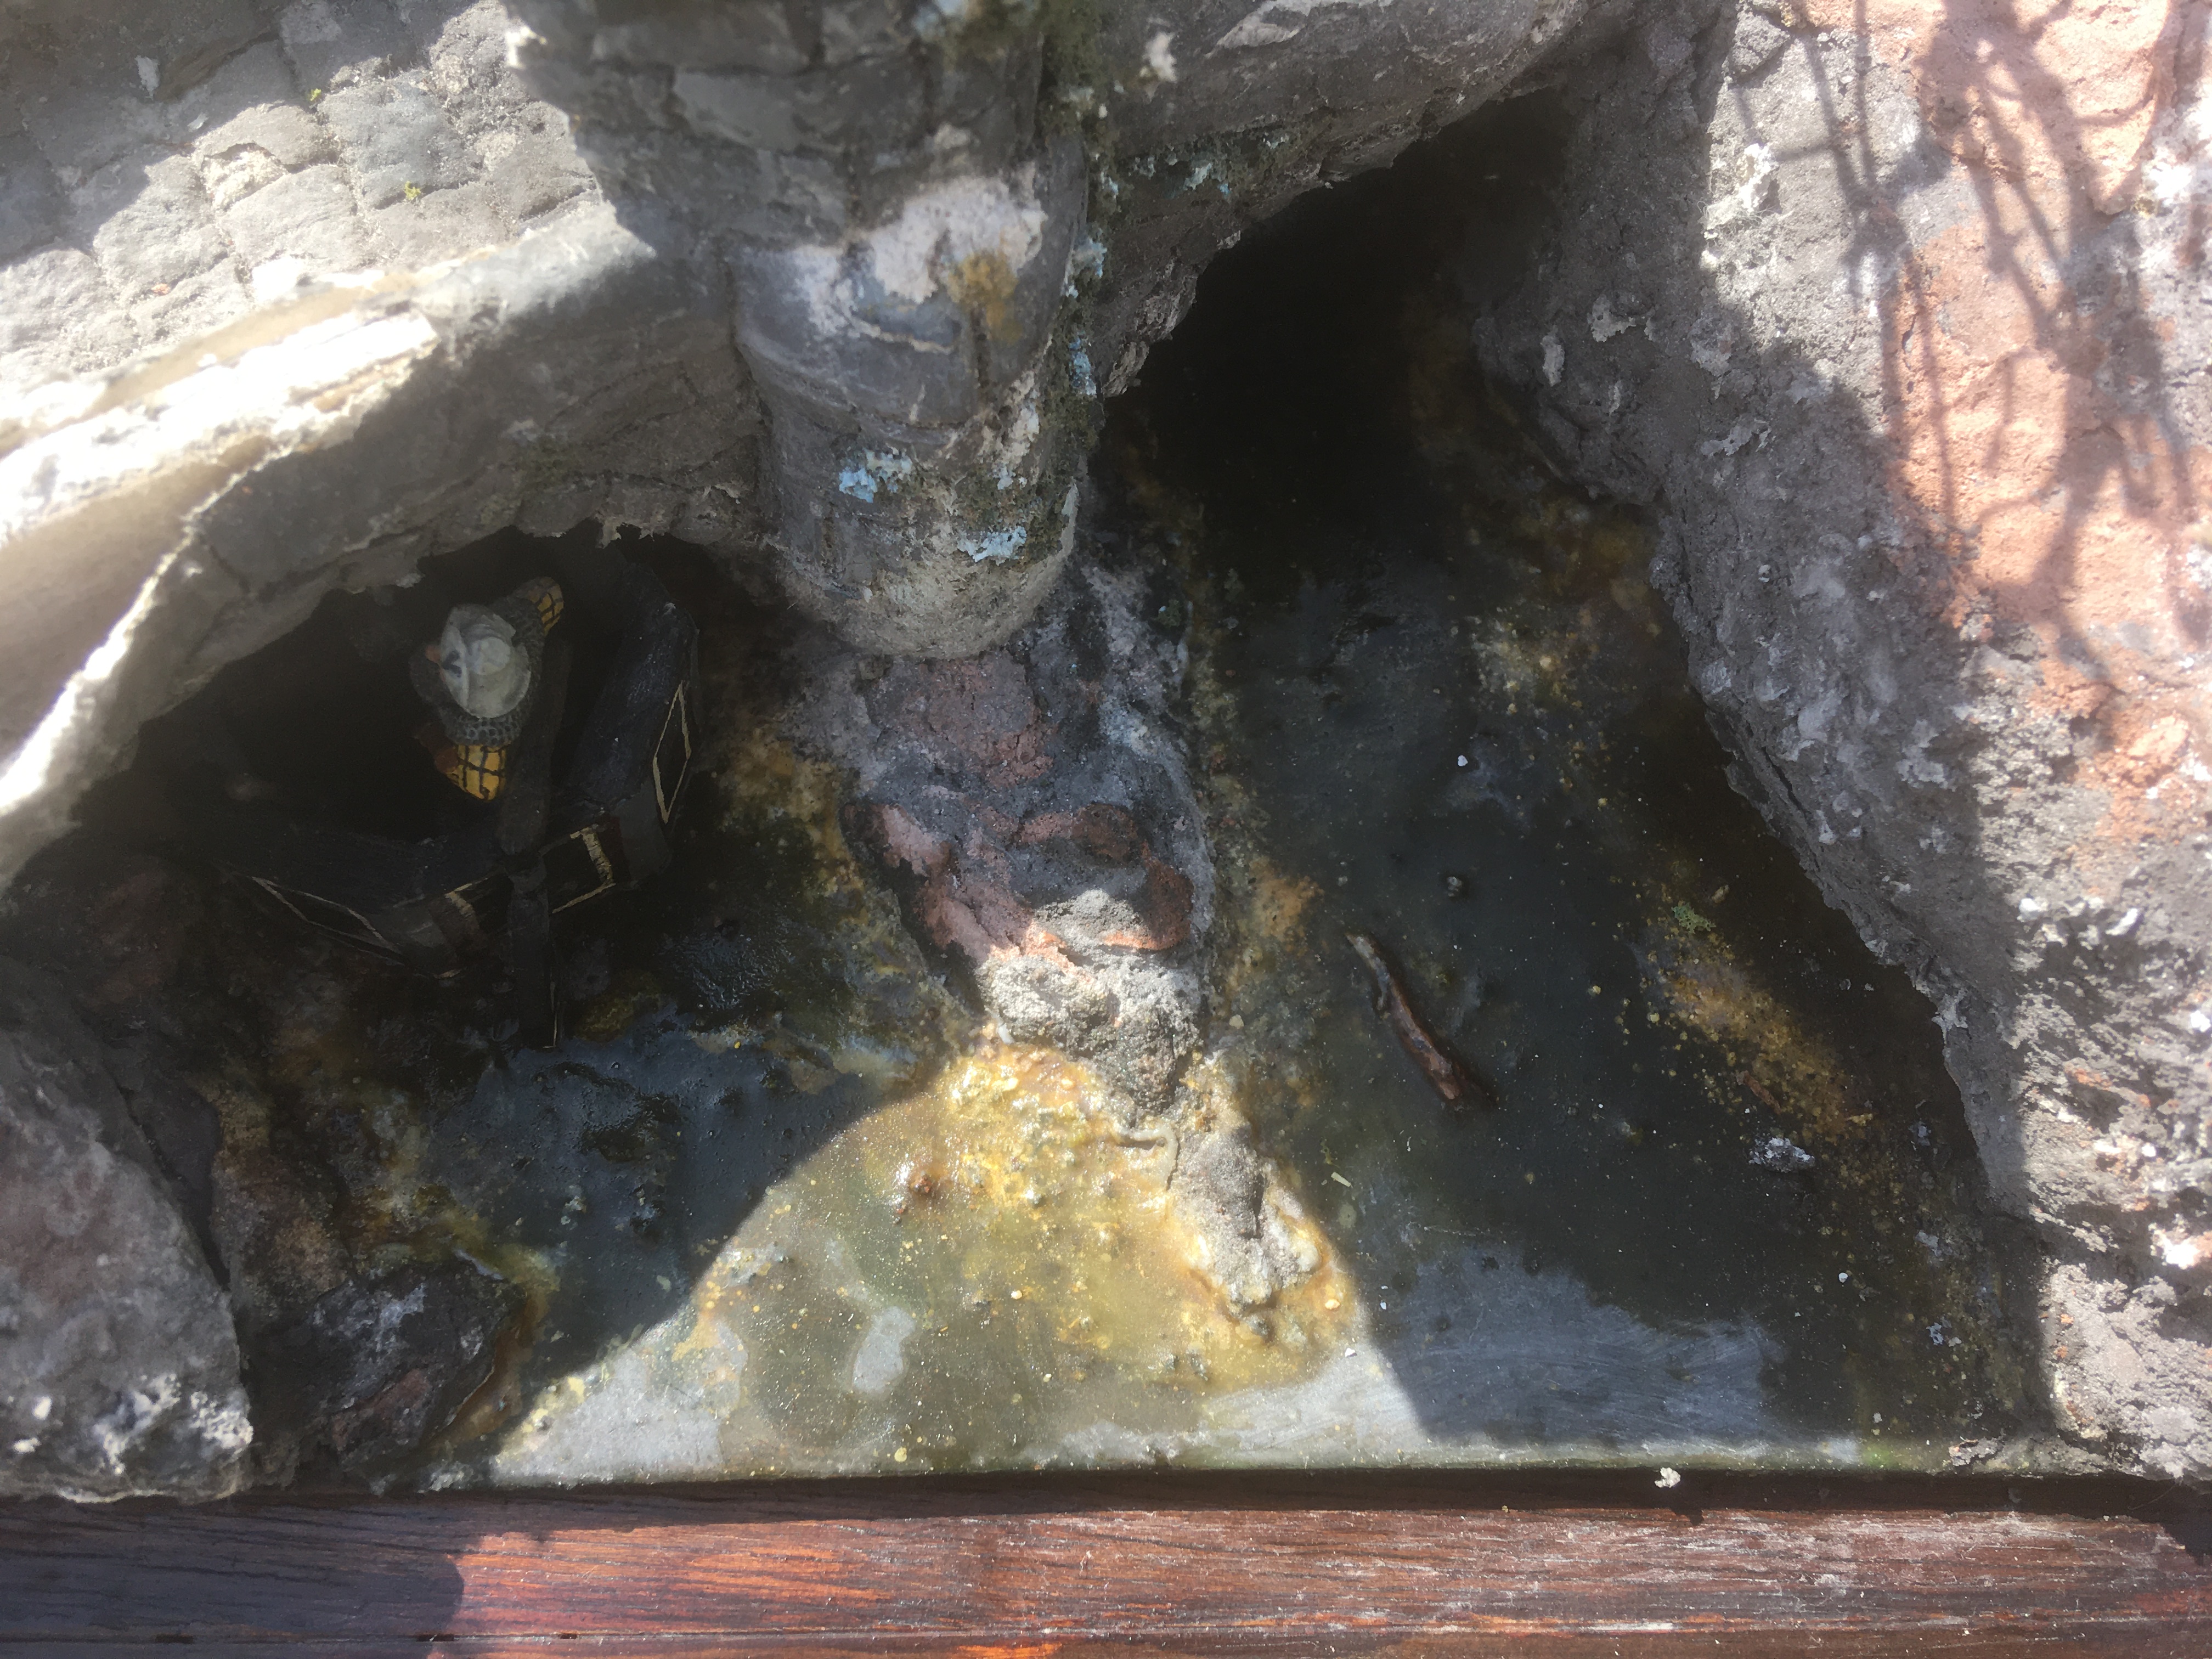
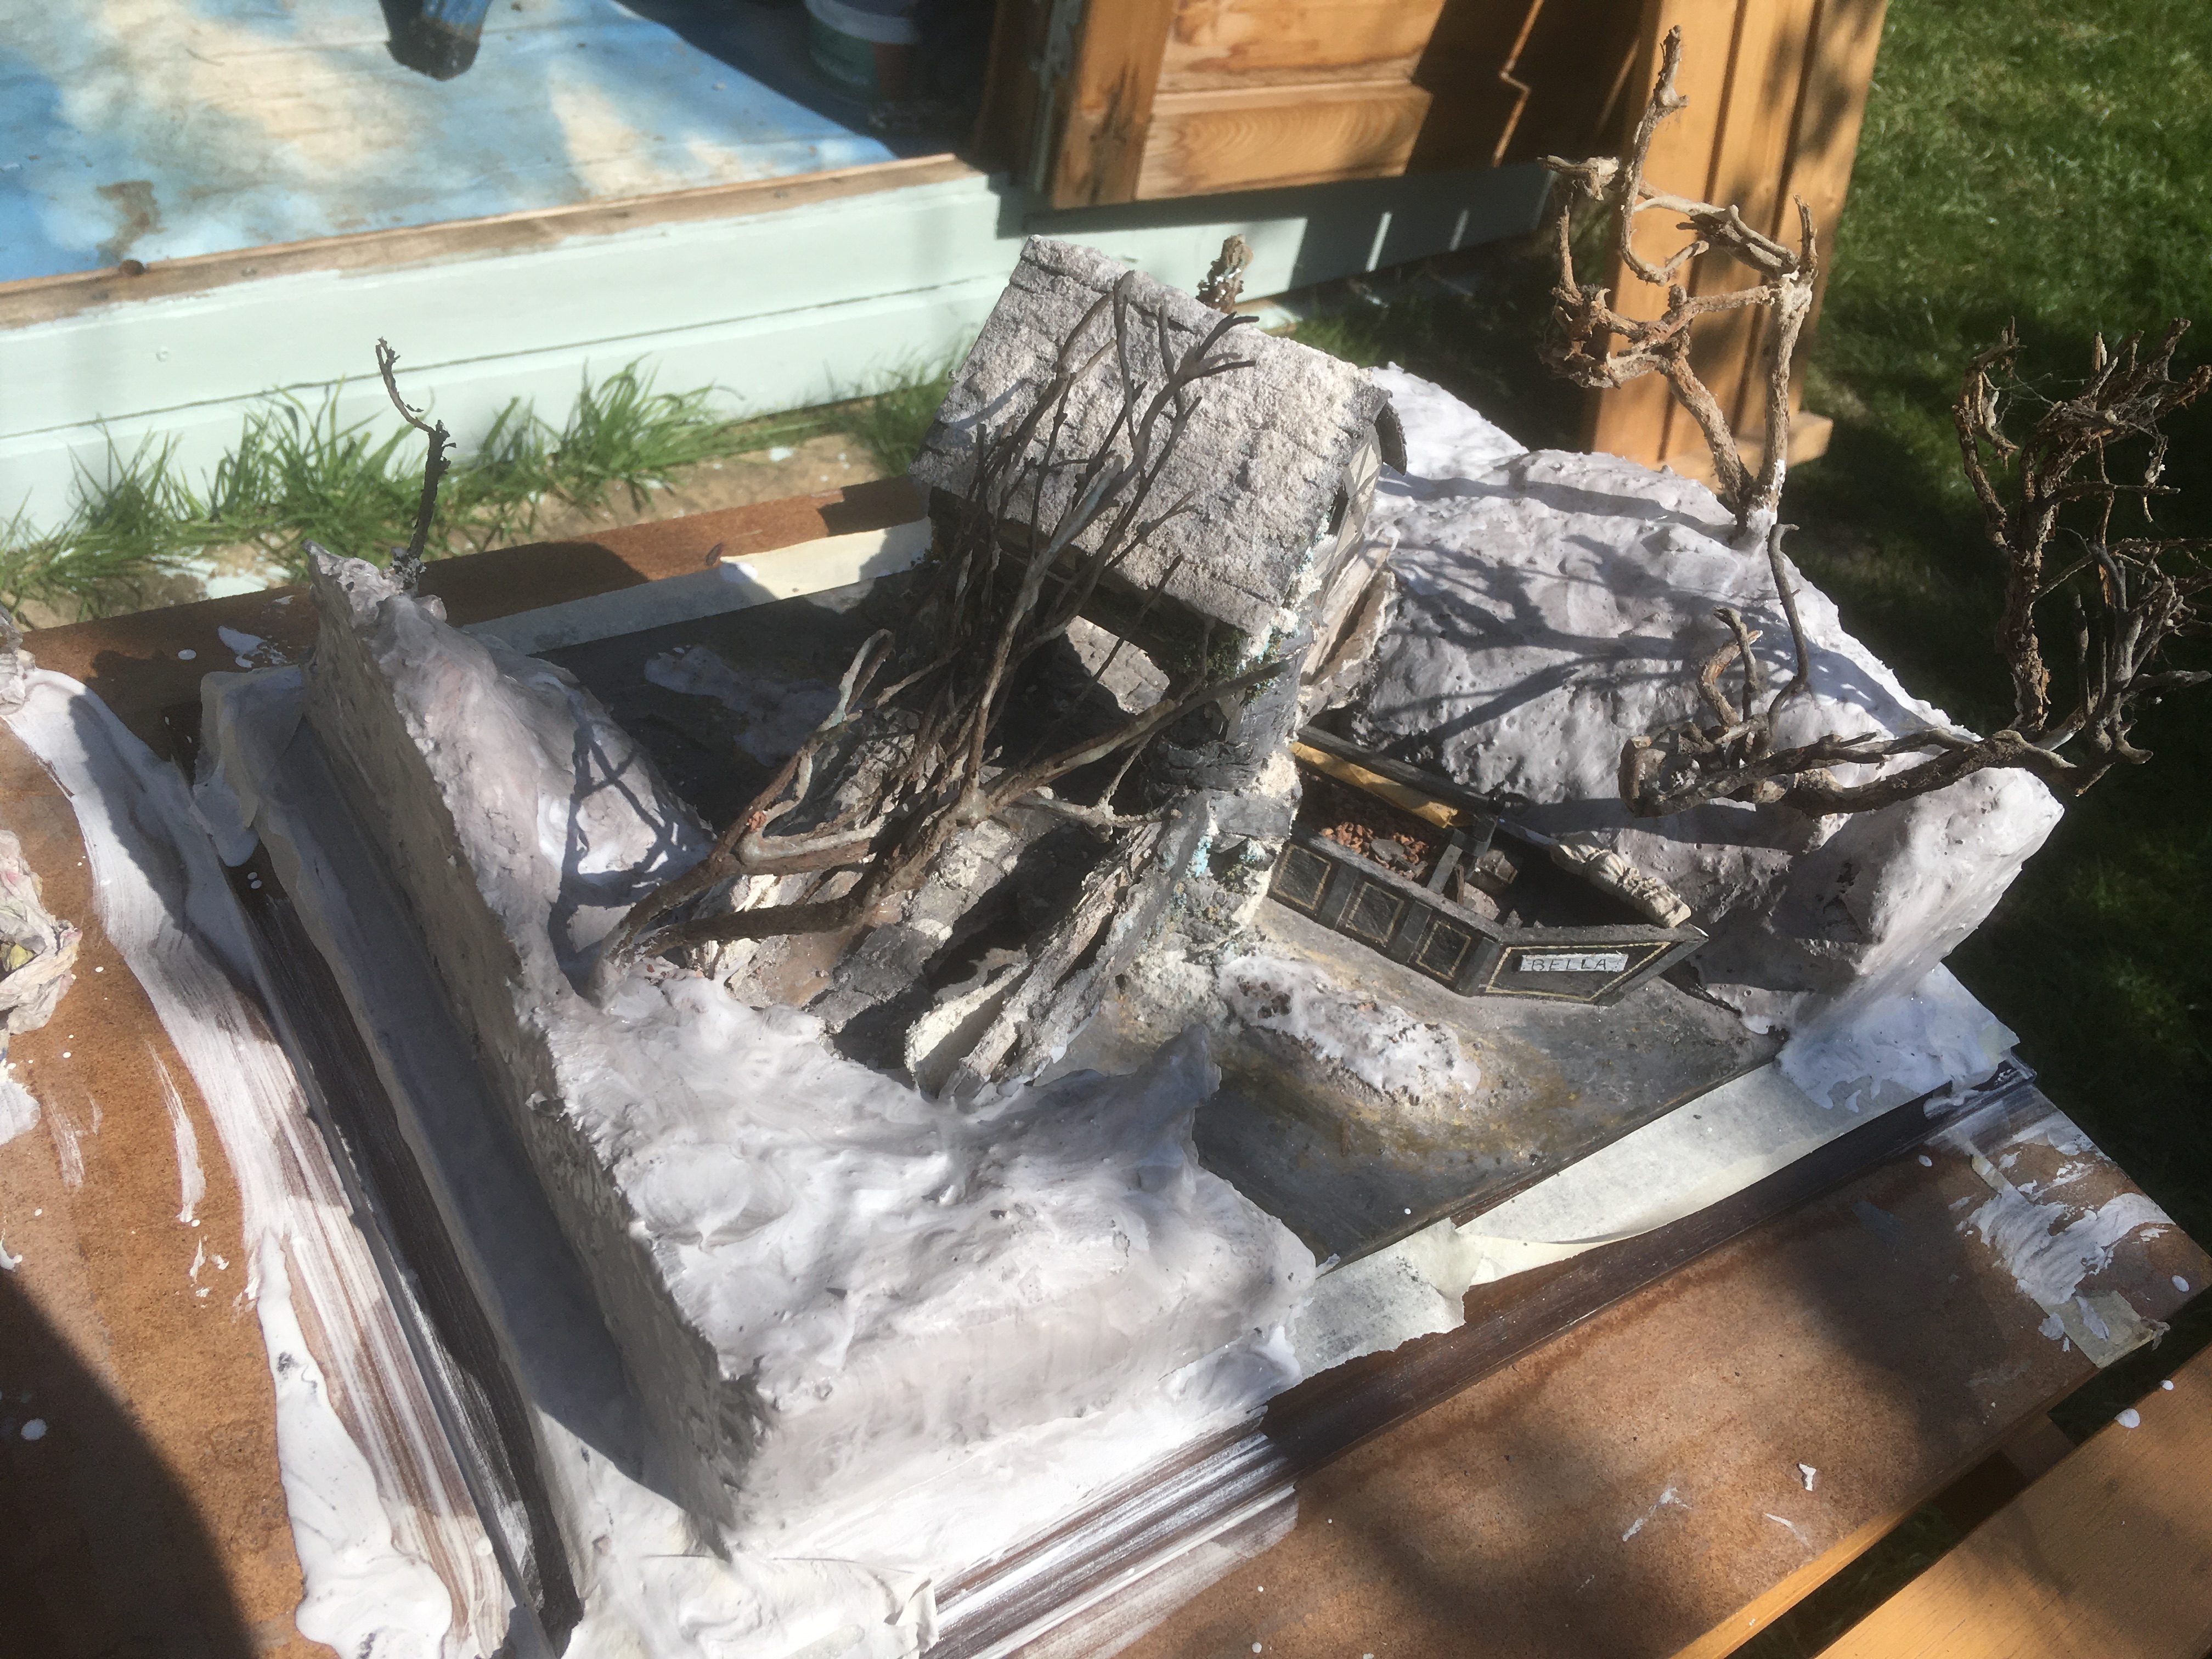
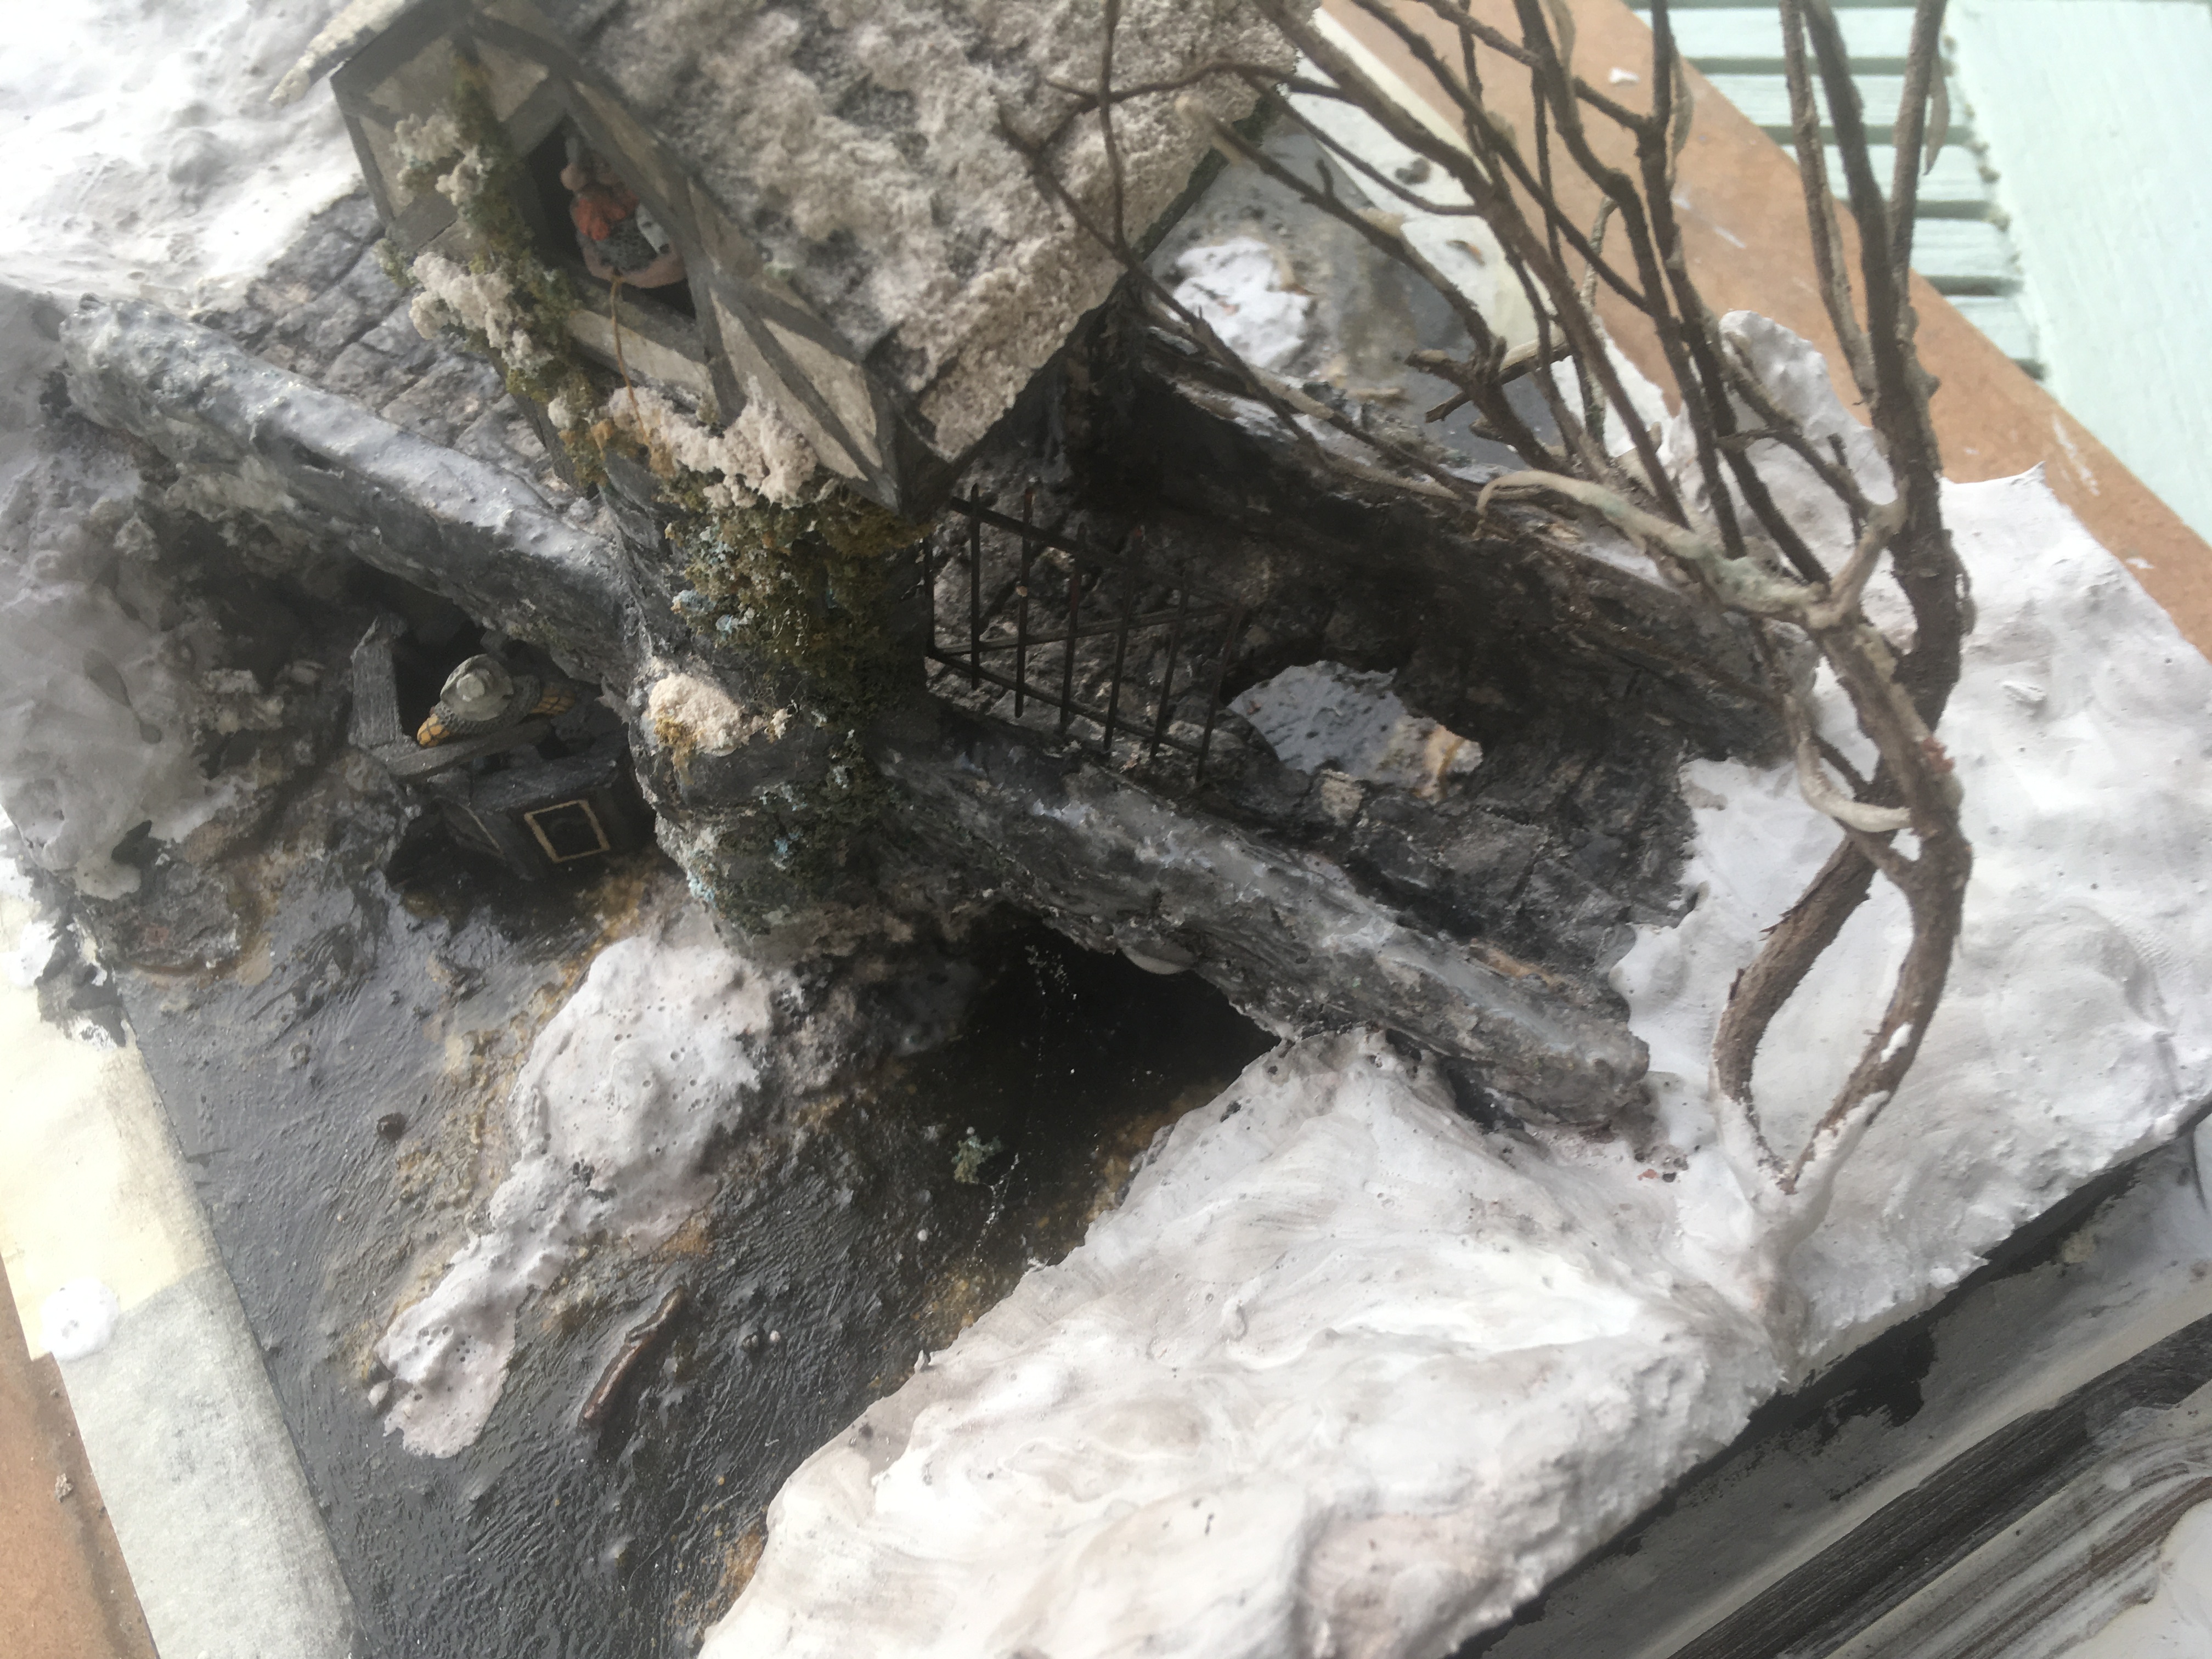
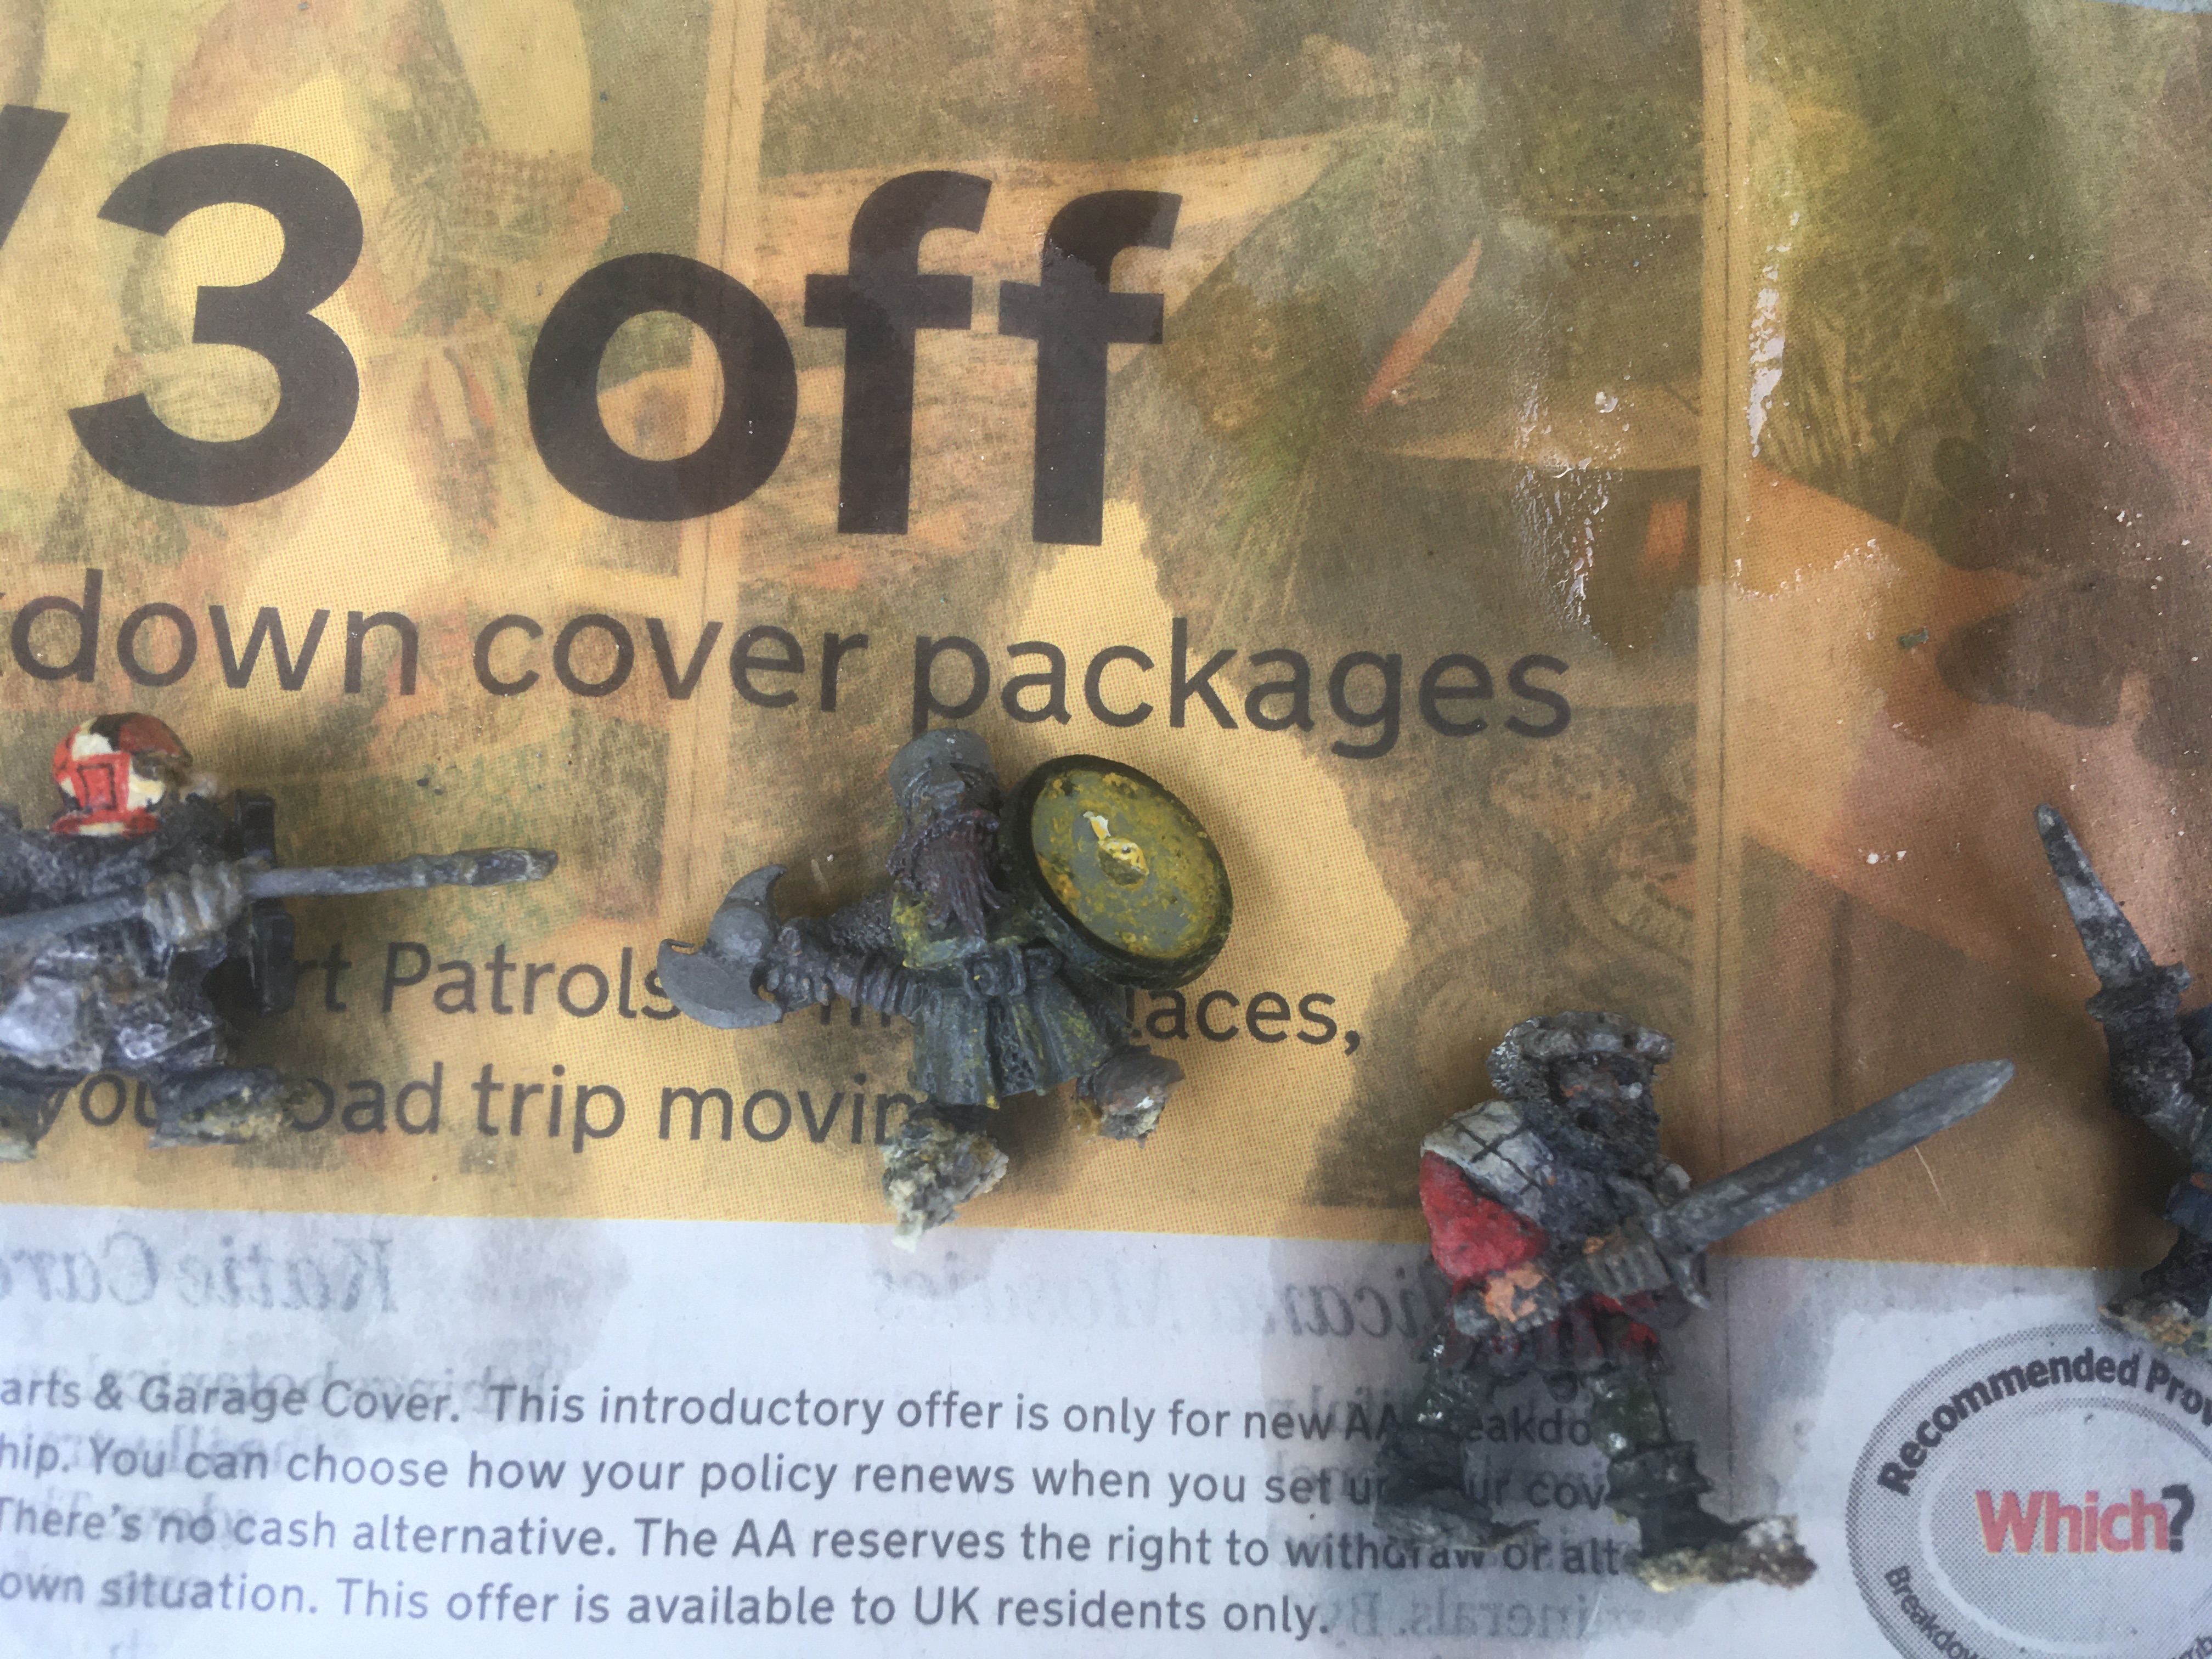
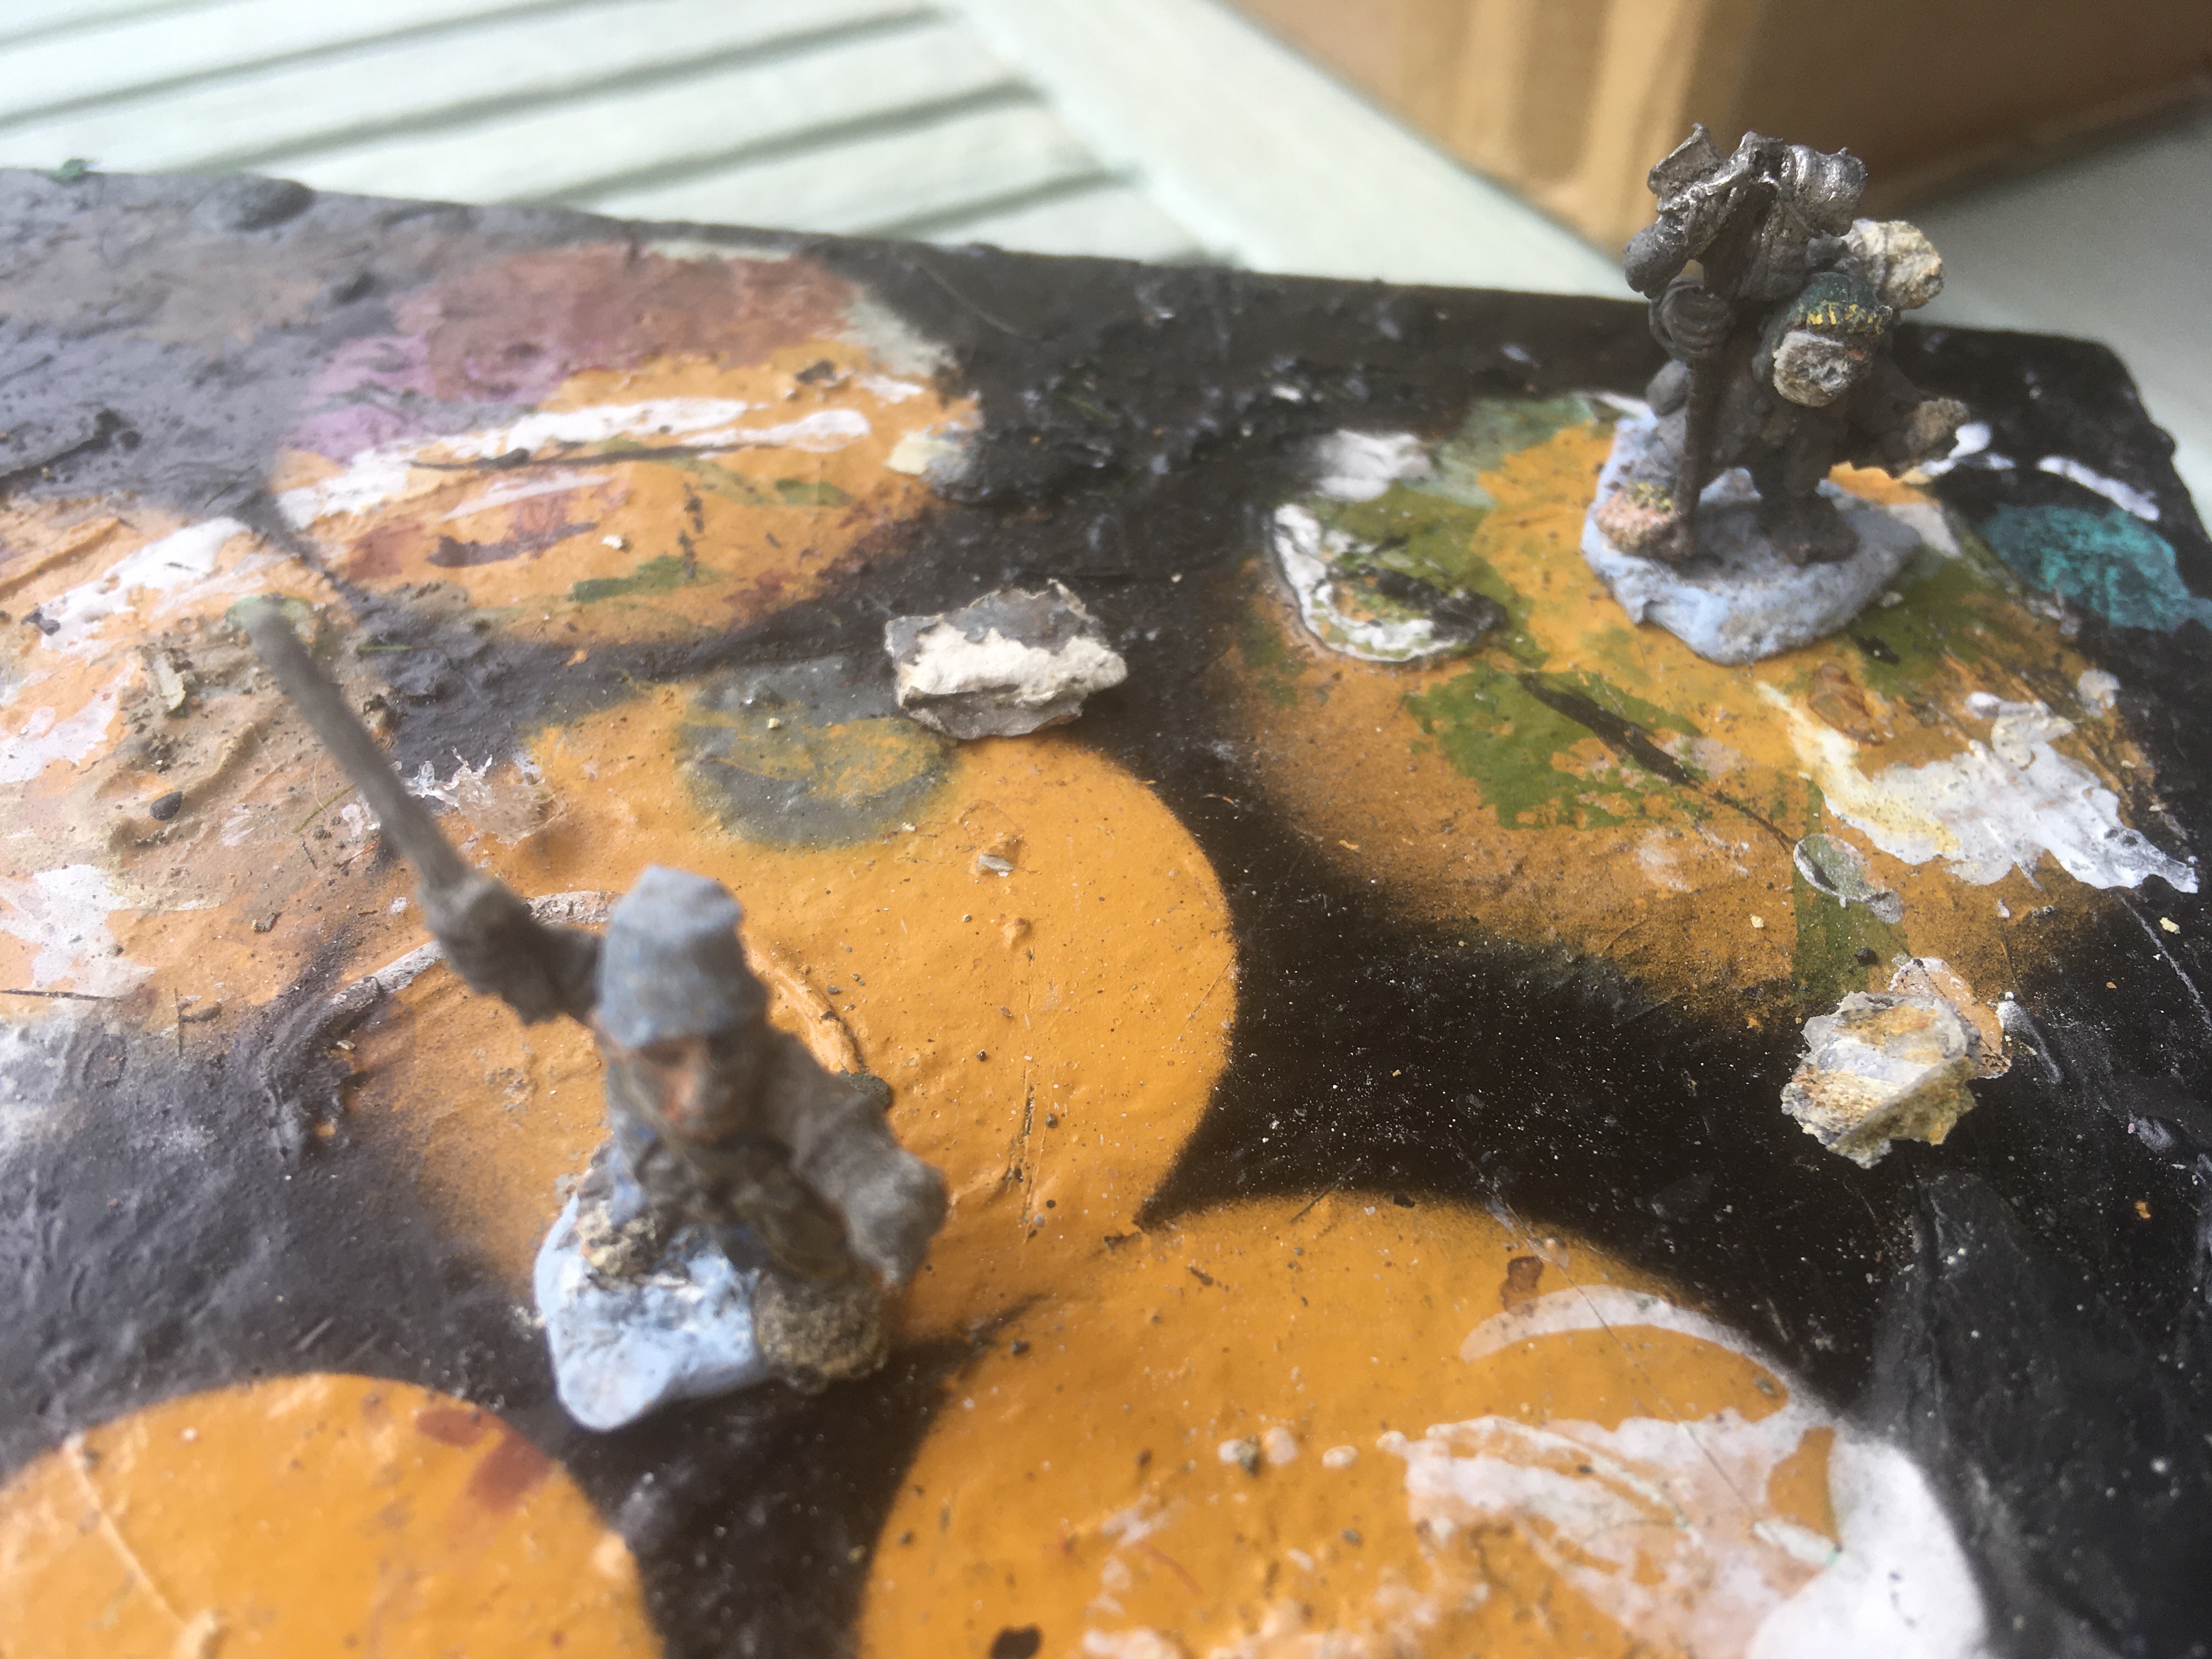
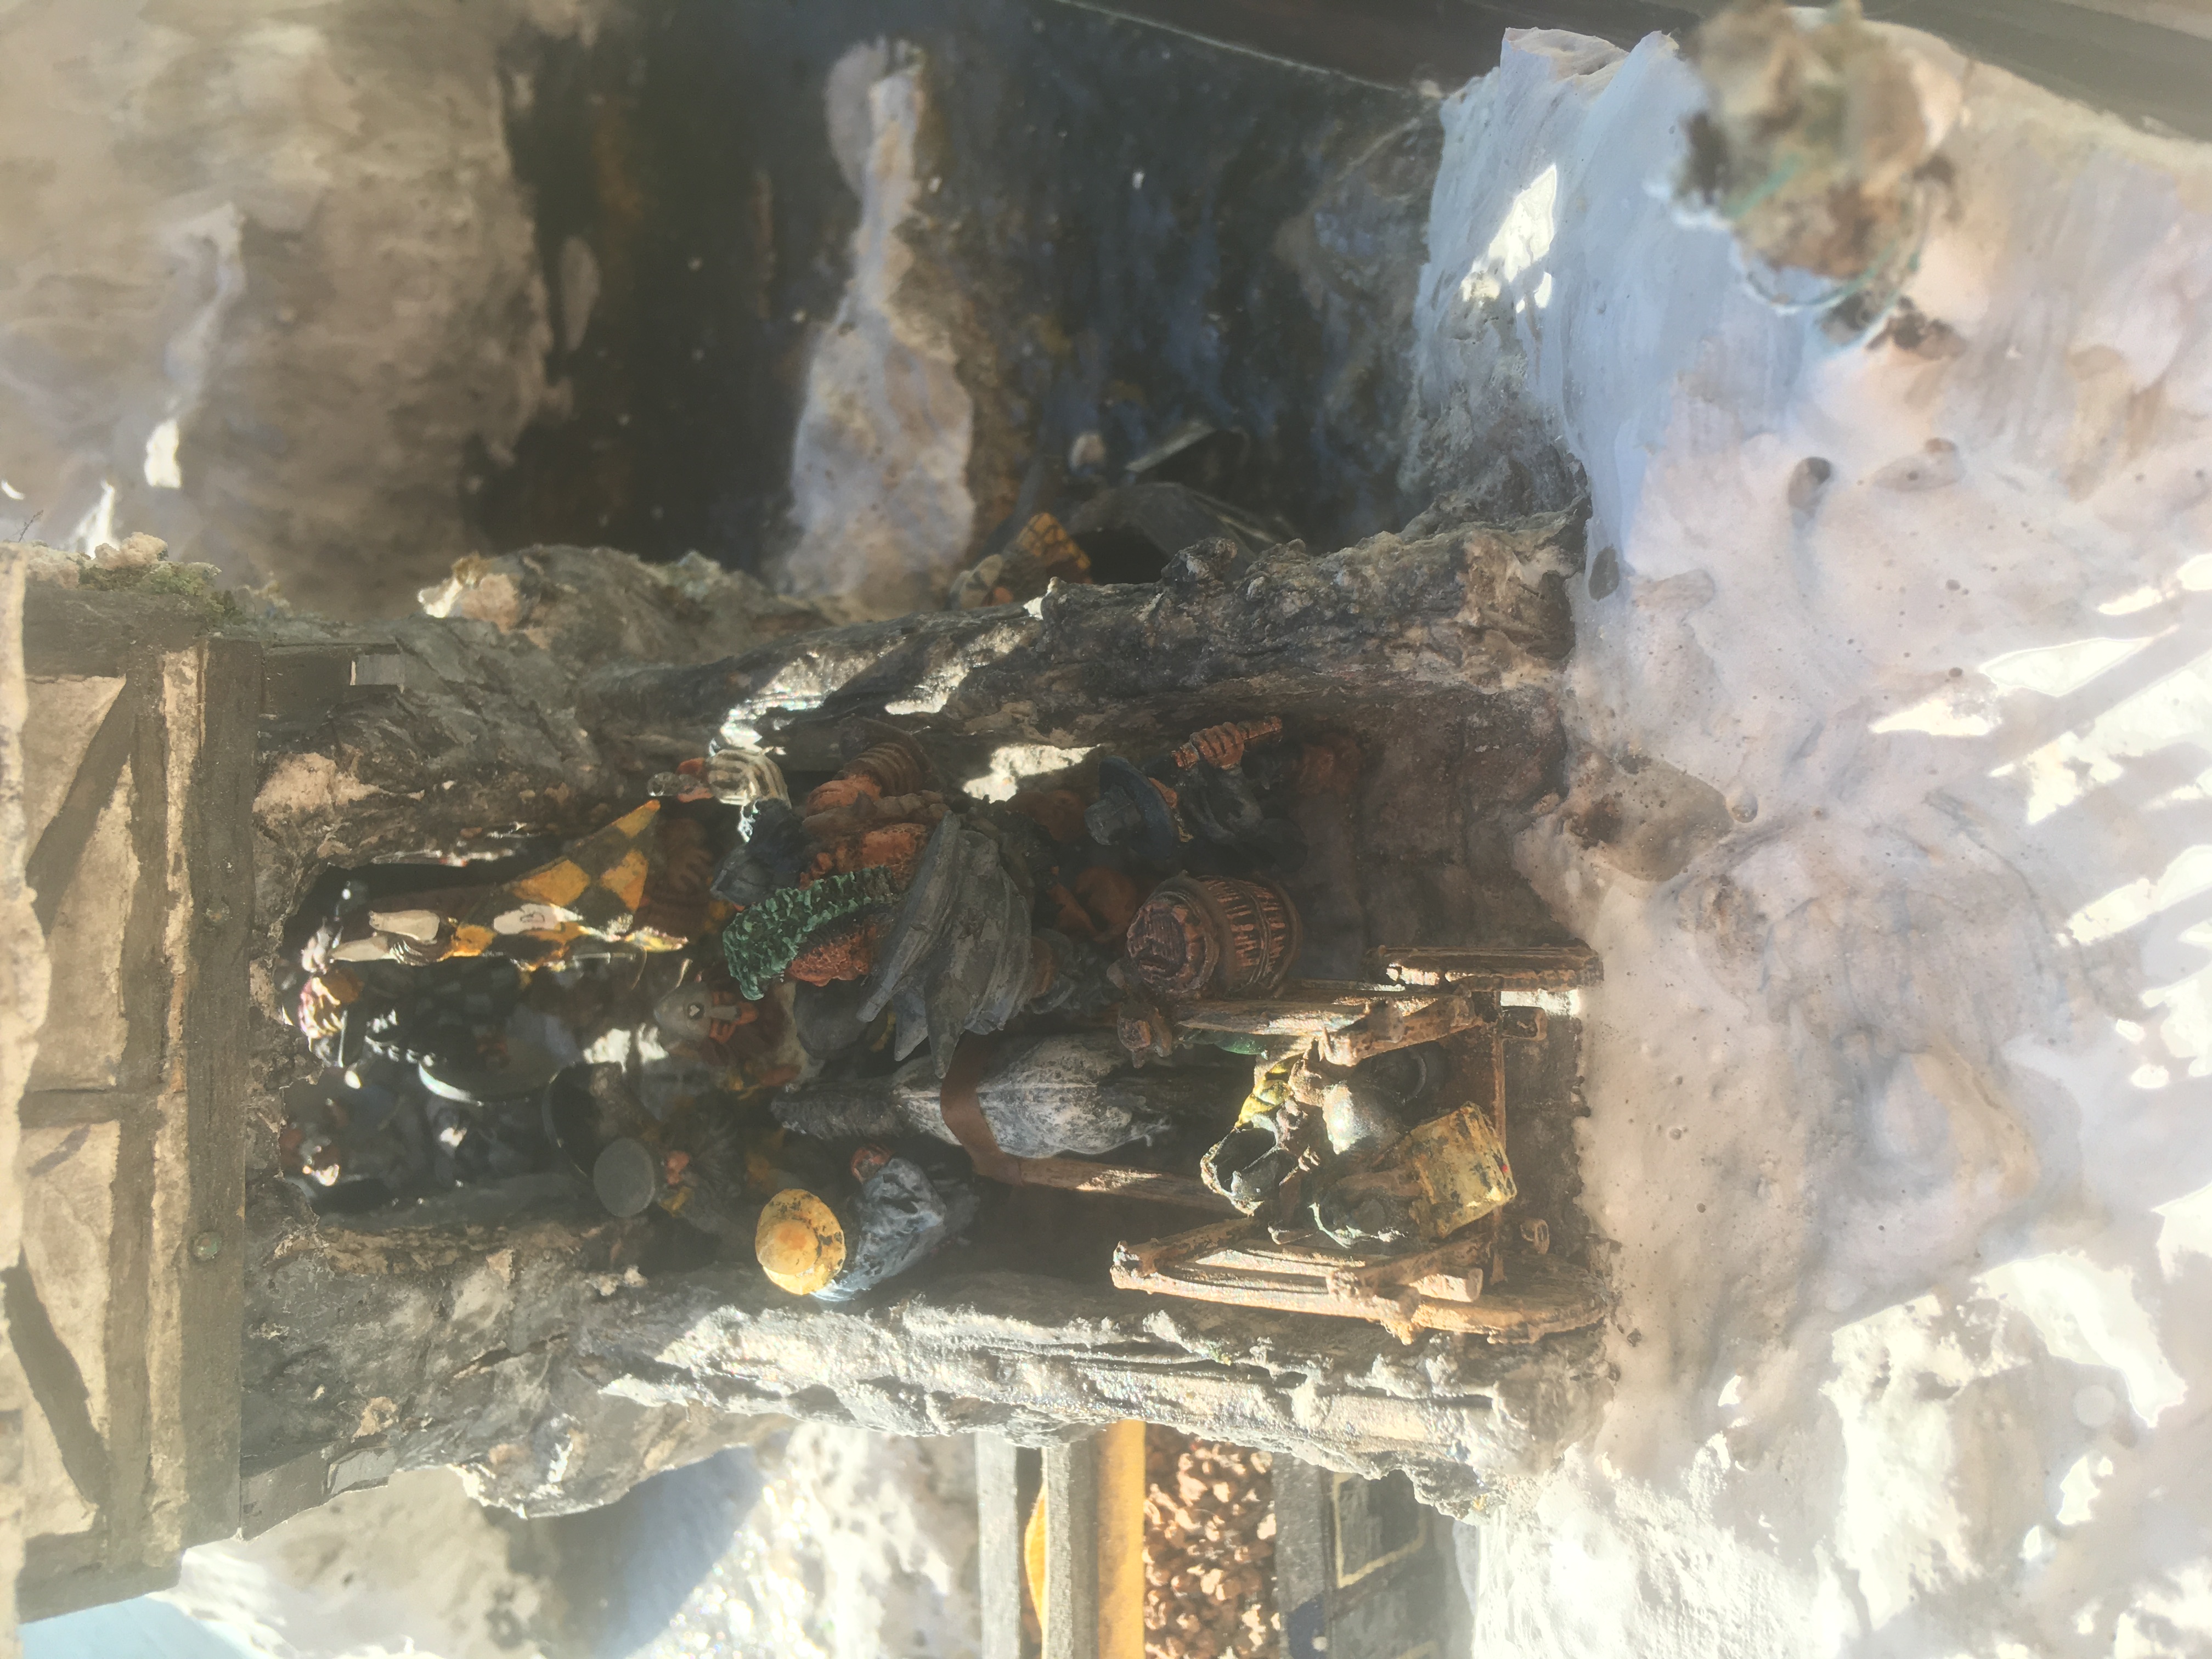
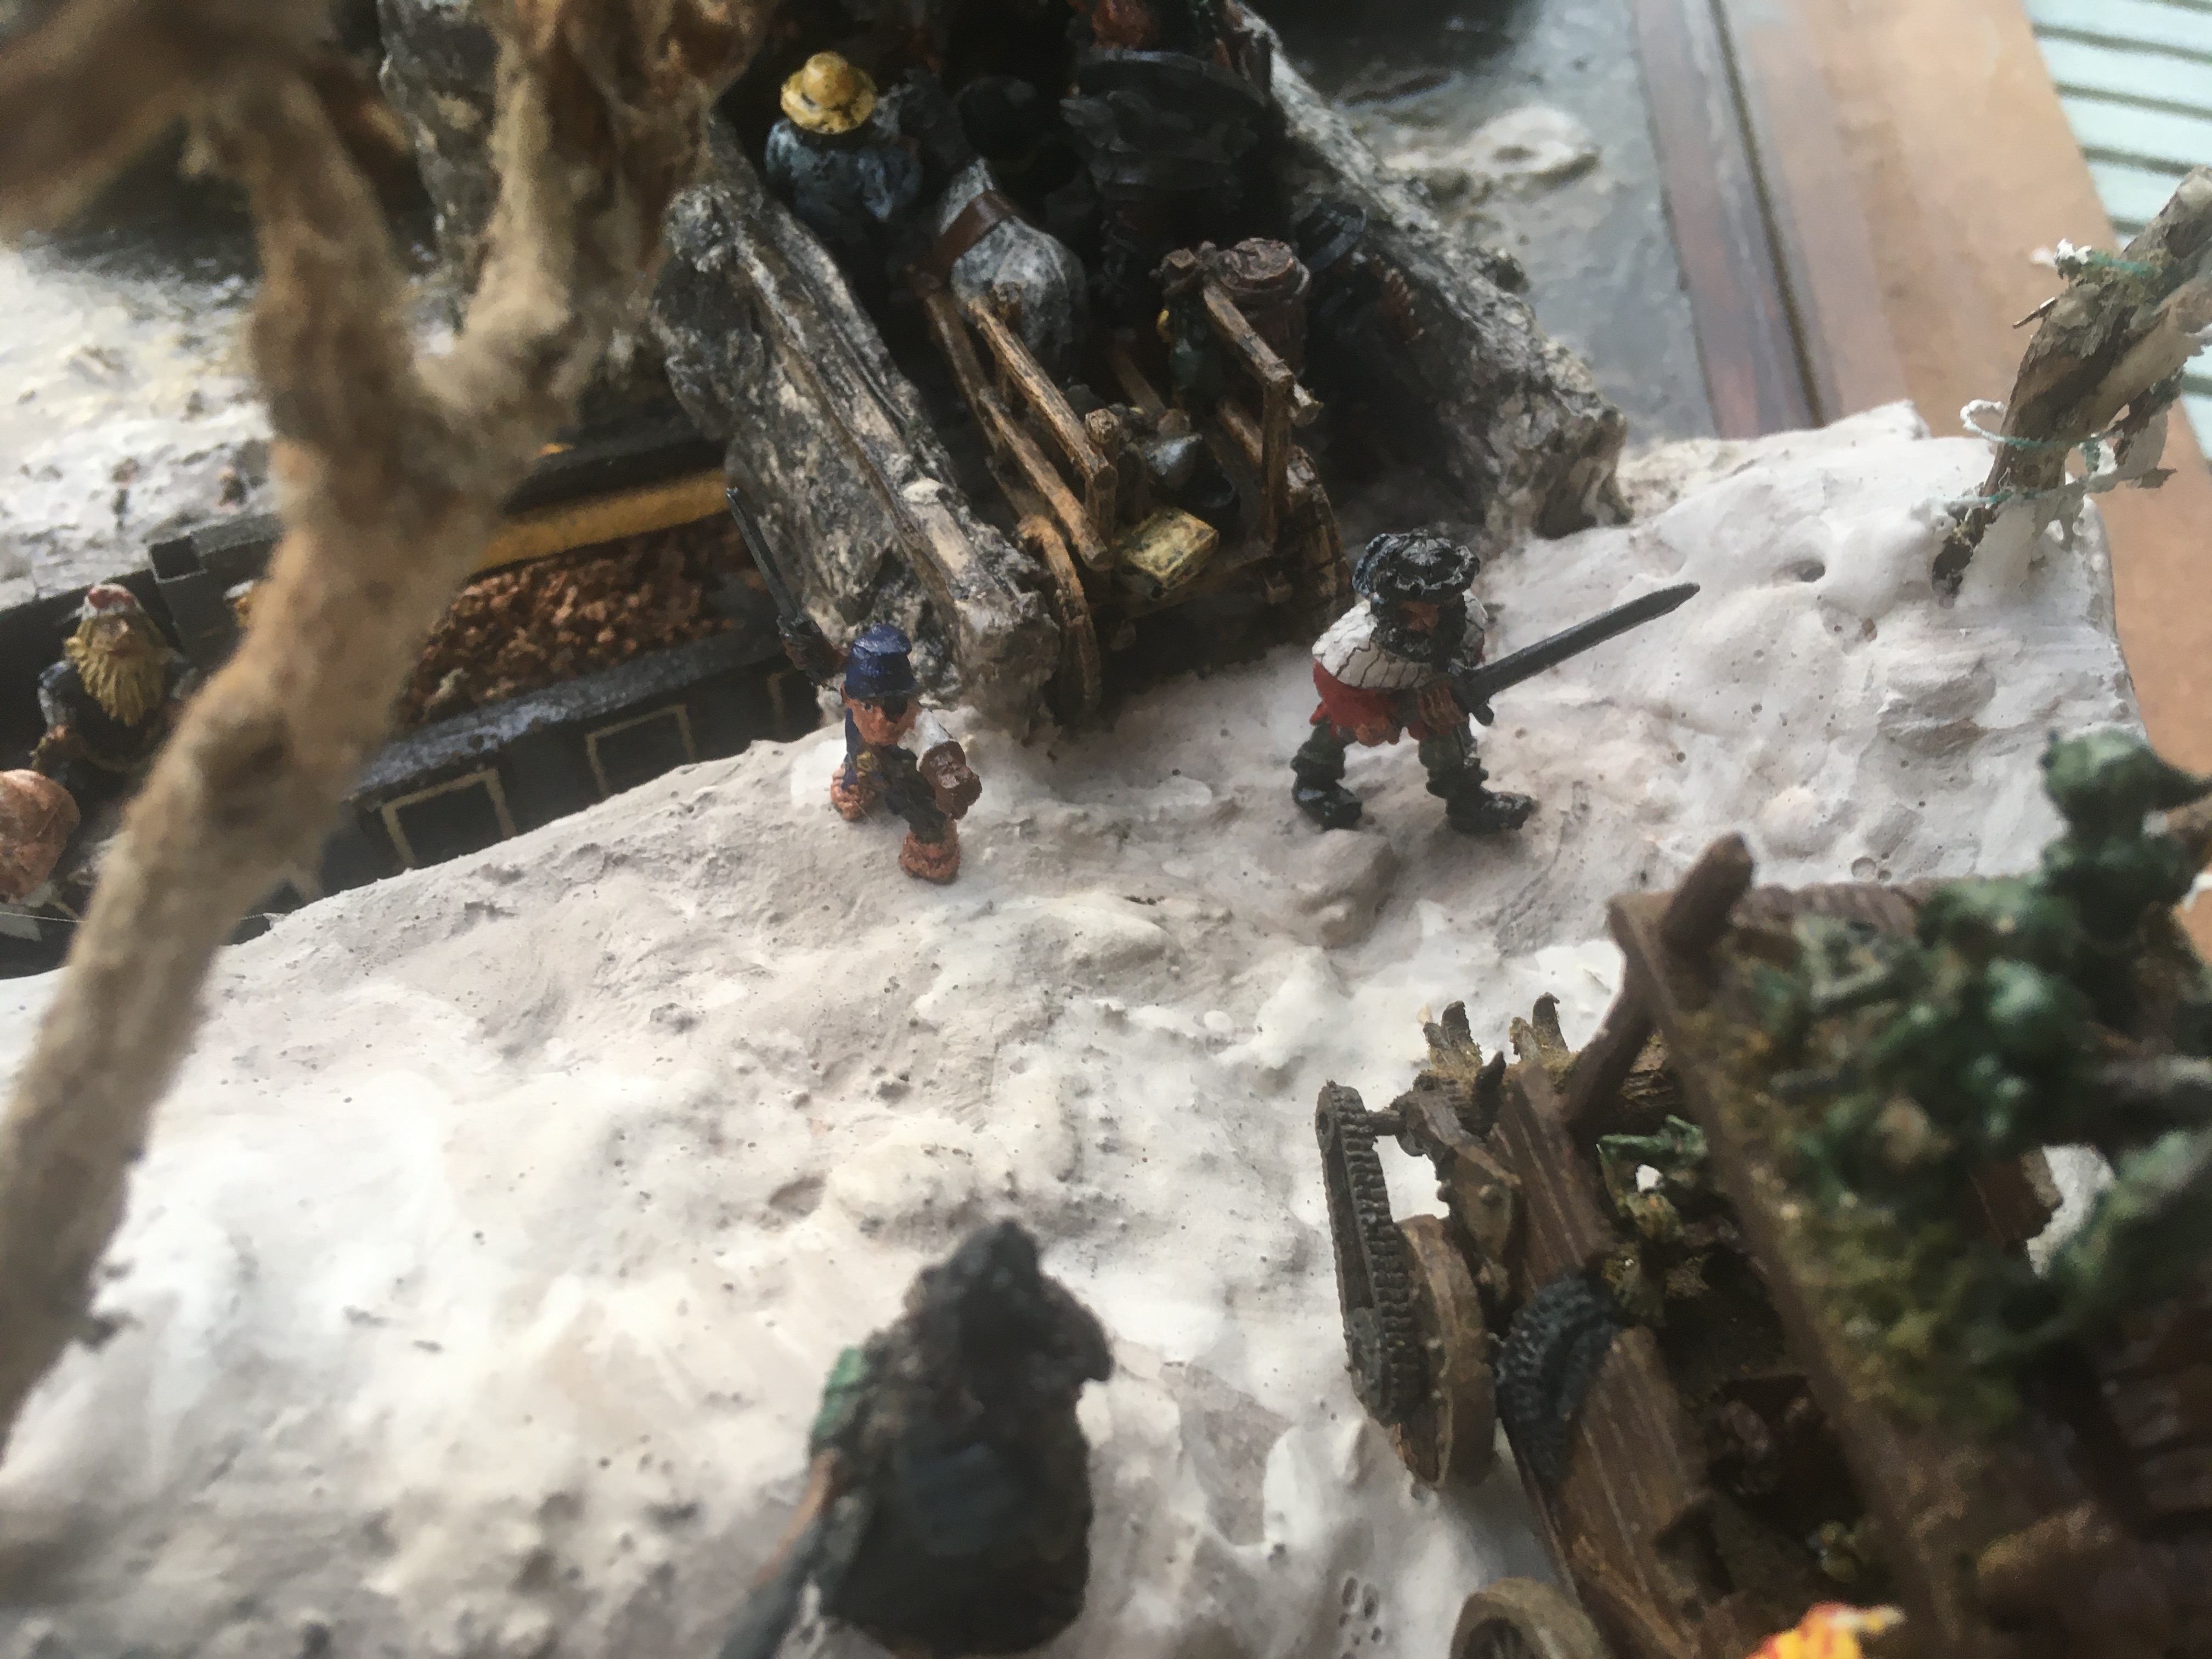
 First thing to do is remove the miniatures. The original glue had lost its tack and so all minis came away from their locations pretty easily. The only one to retain any scenery was a Dwarf Runner stuck on a plank of wood. Some miniatures are in better condition than others and will need carefully cleaning before returning to the diorama.
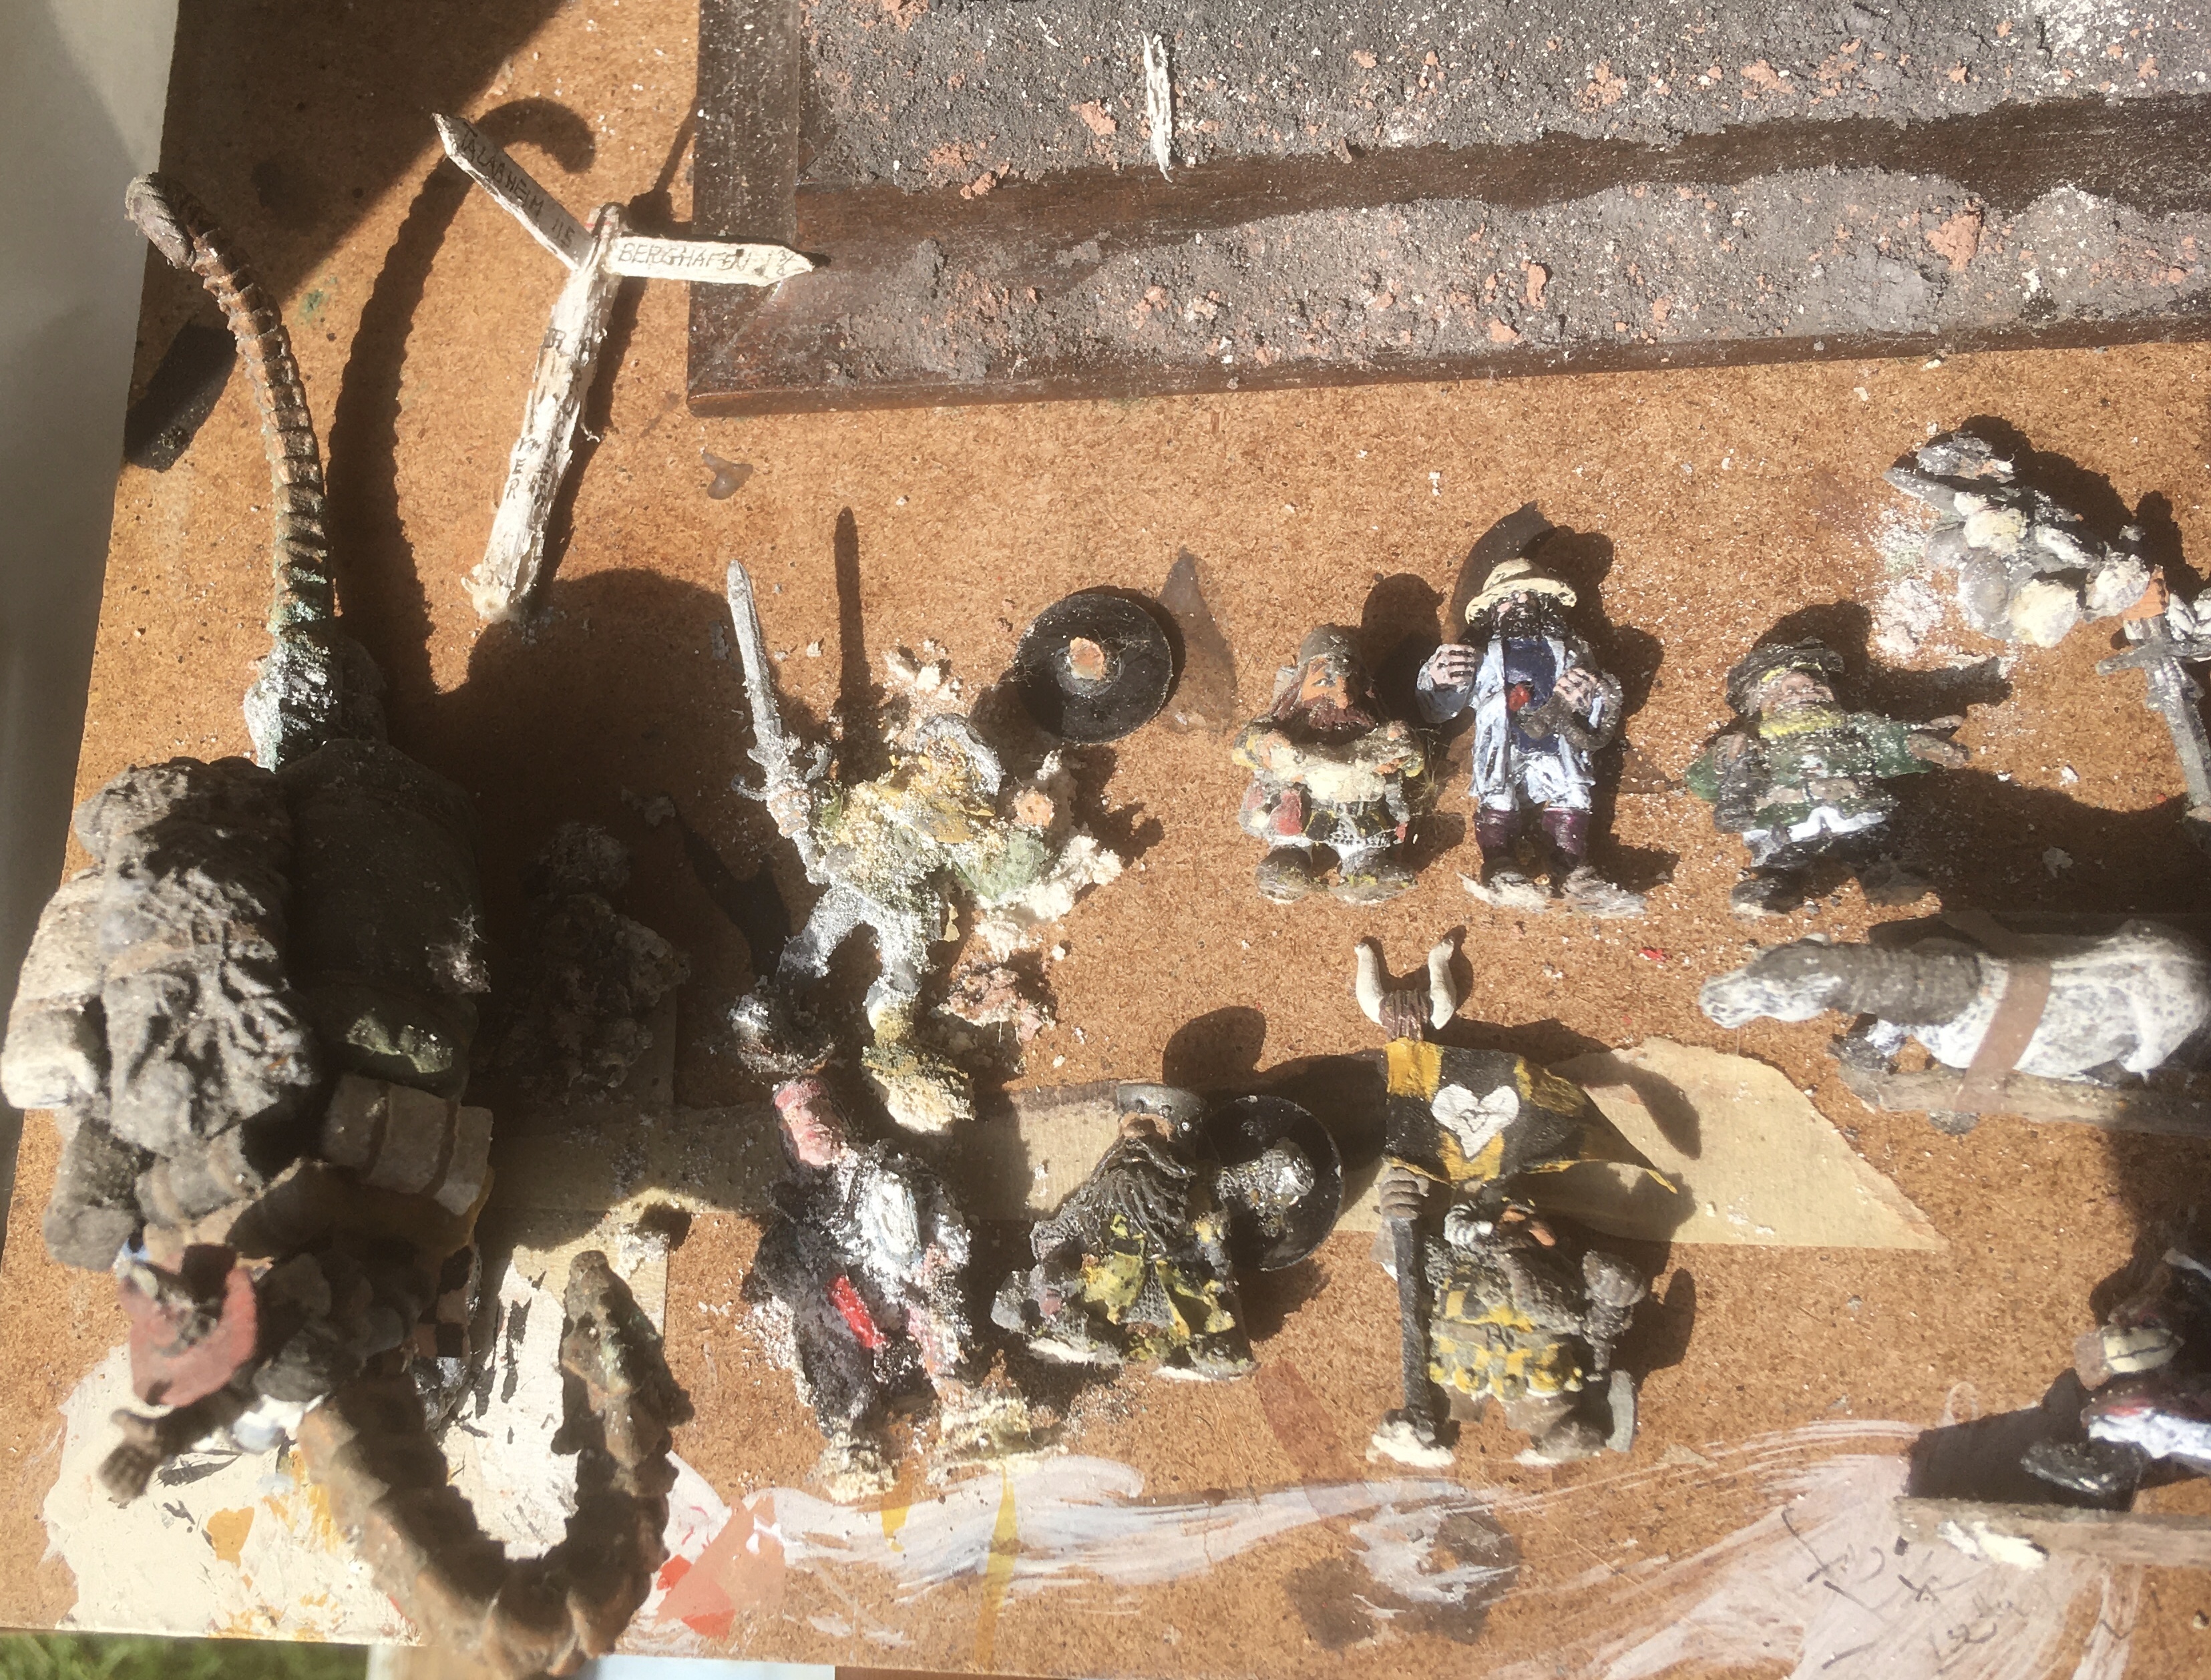
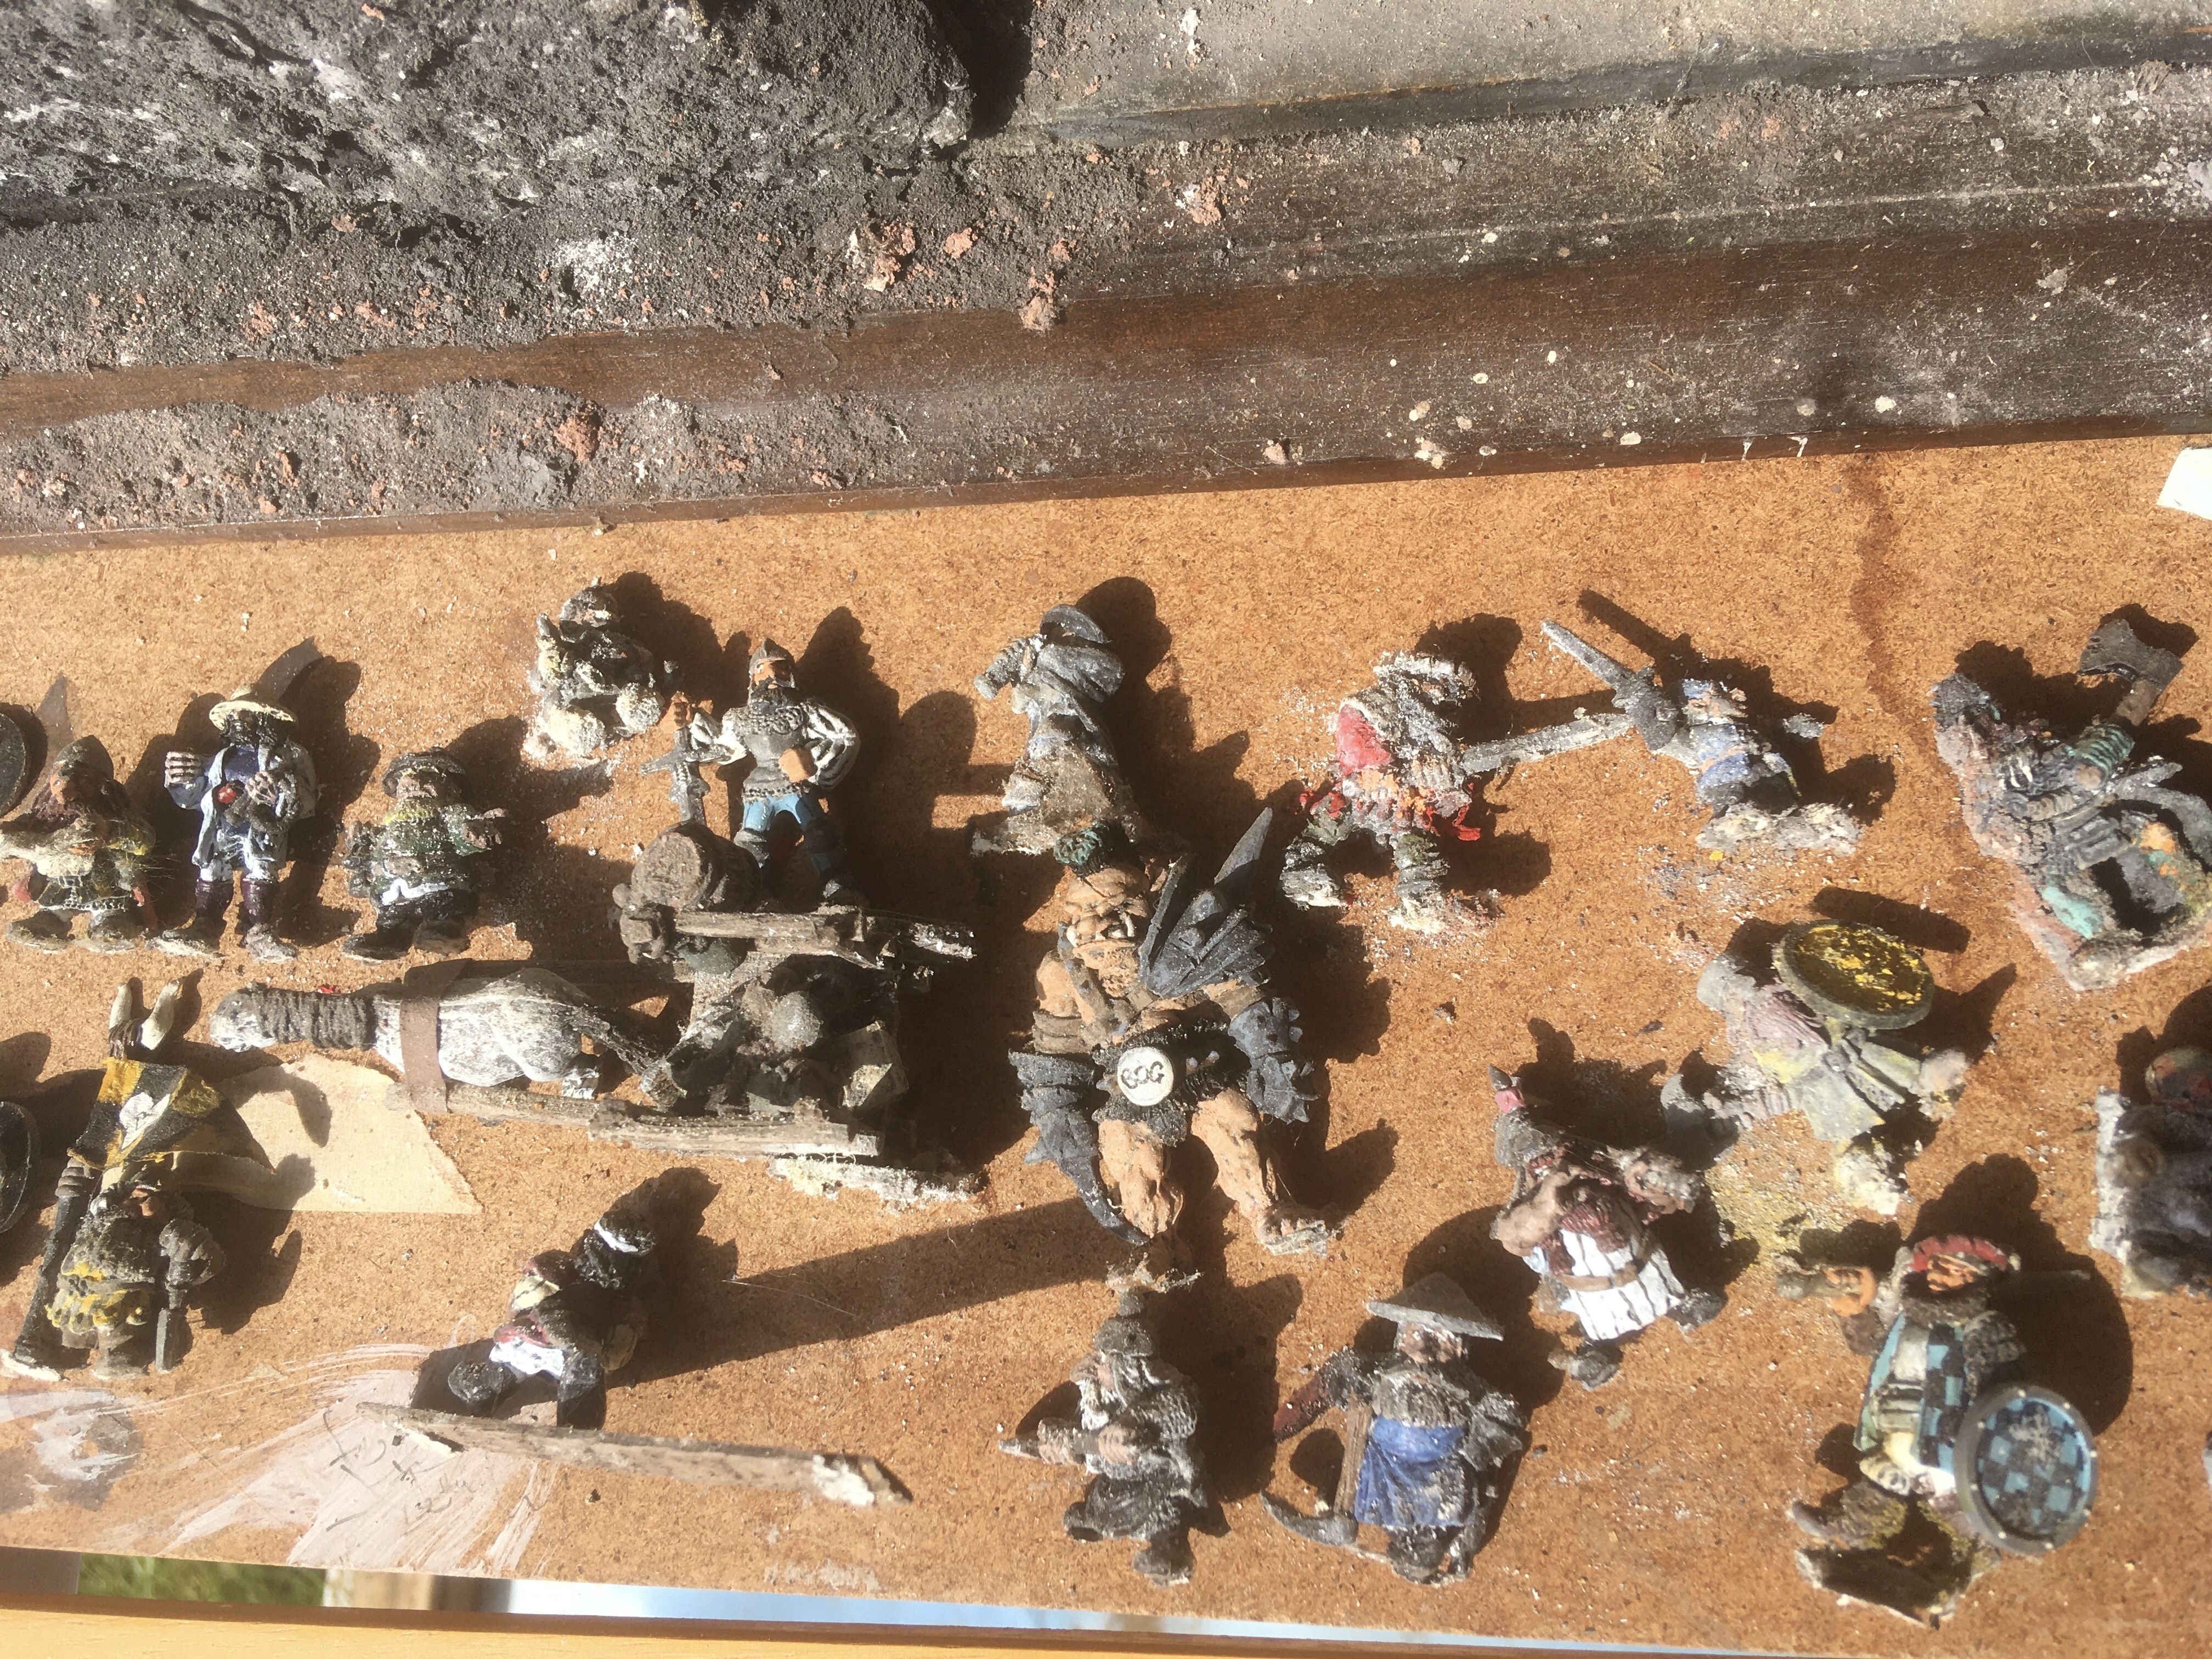
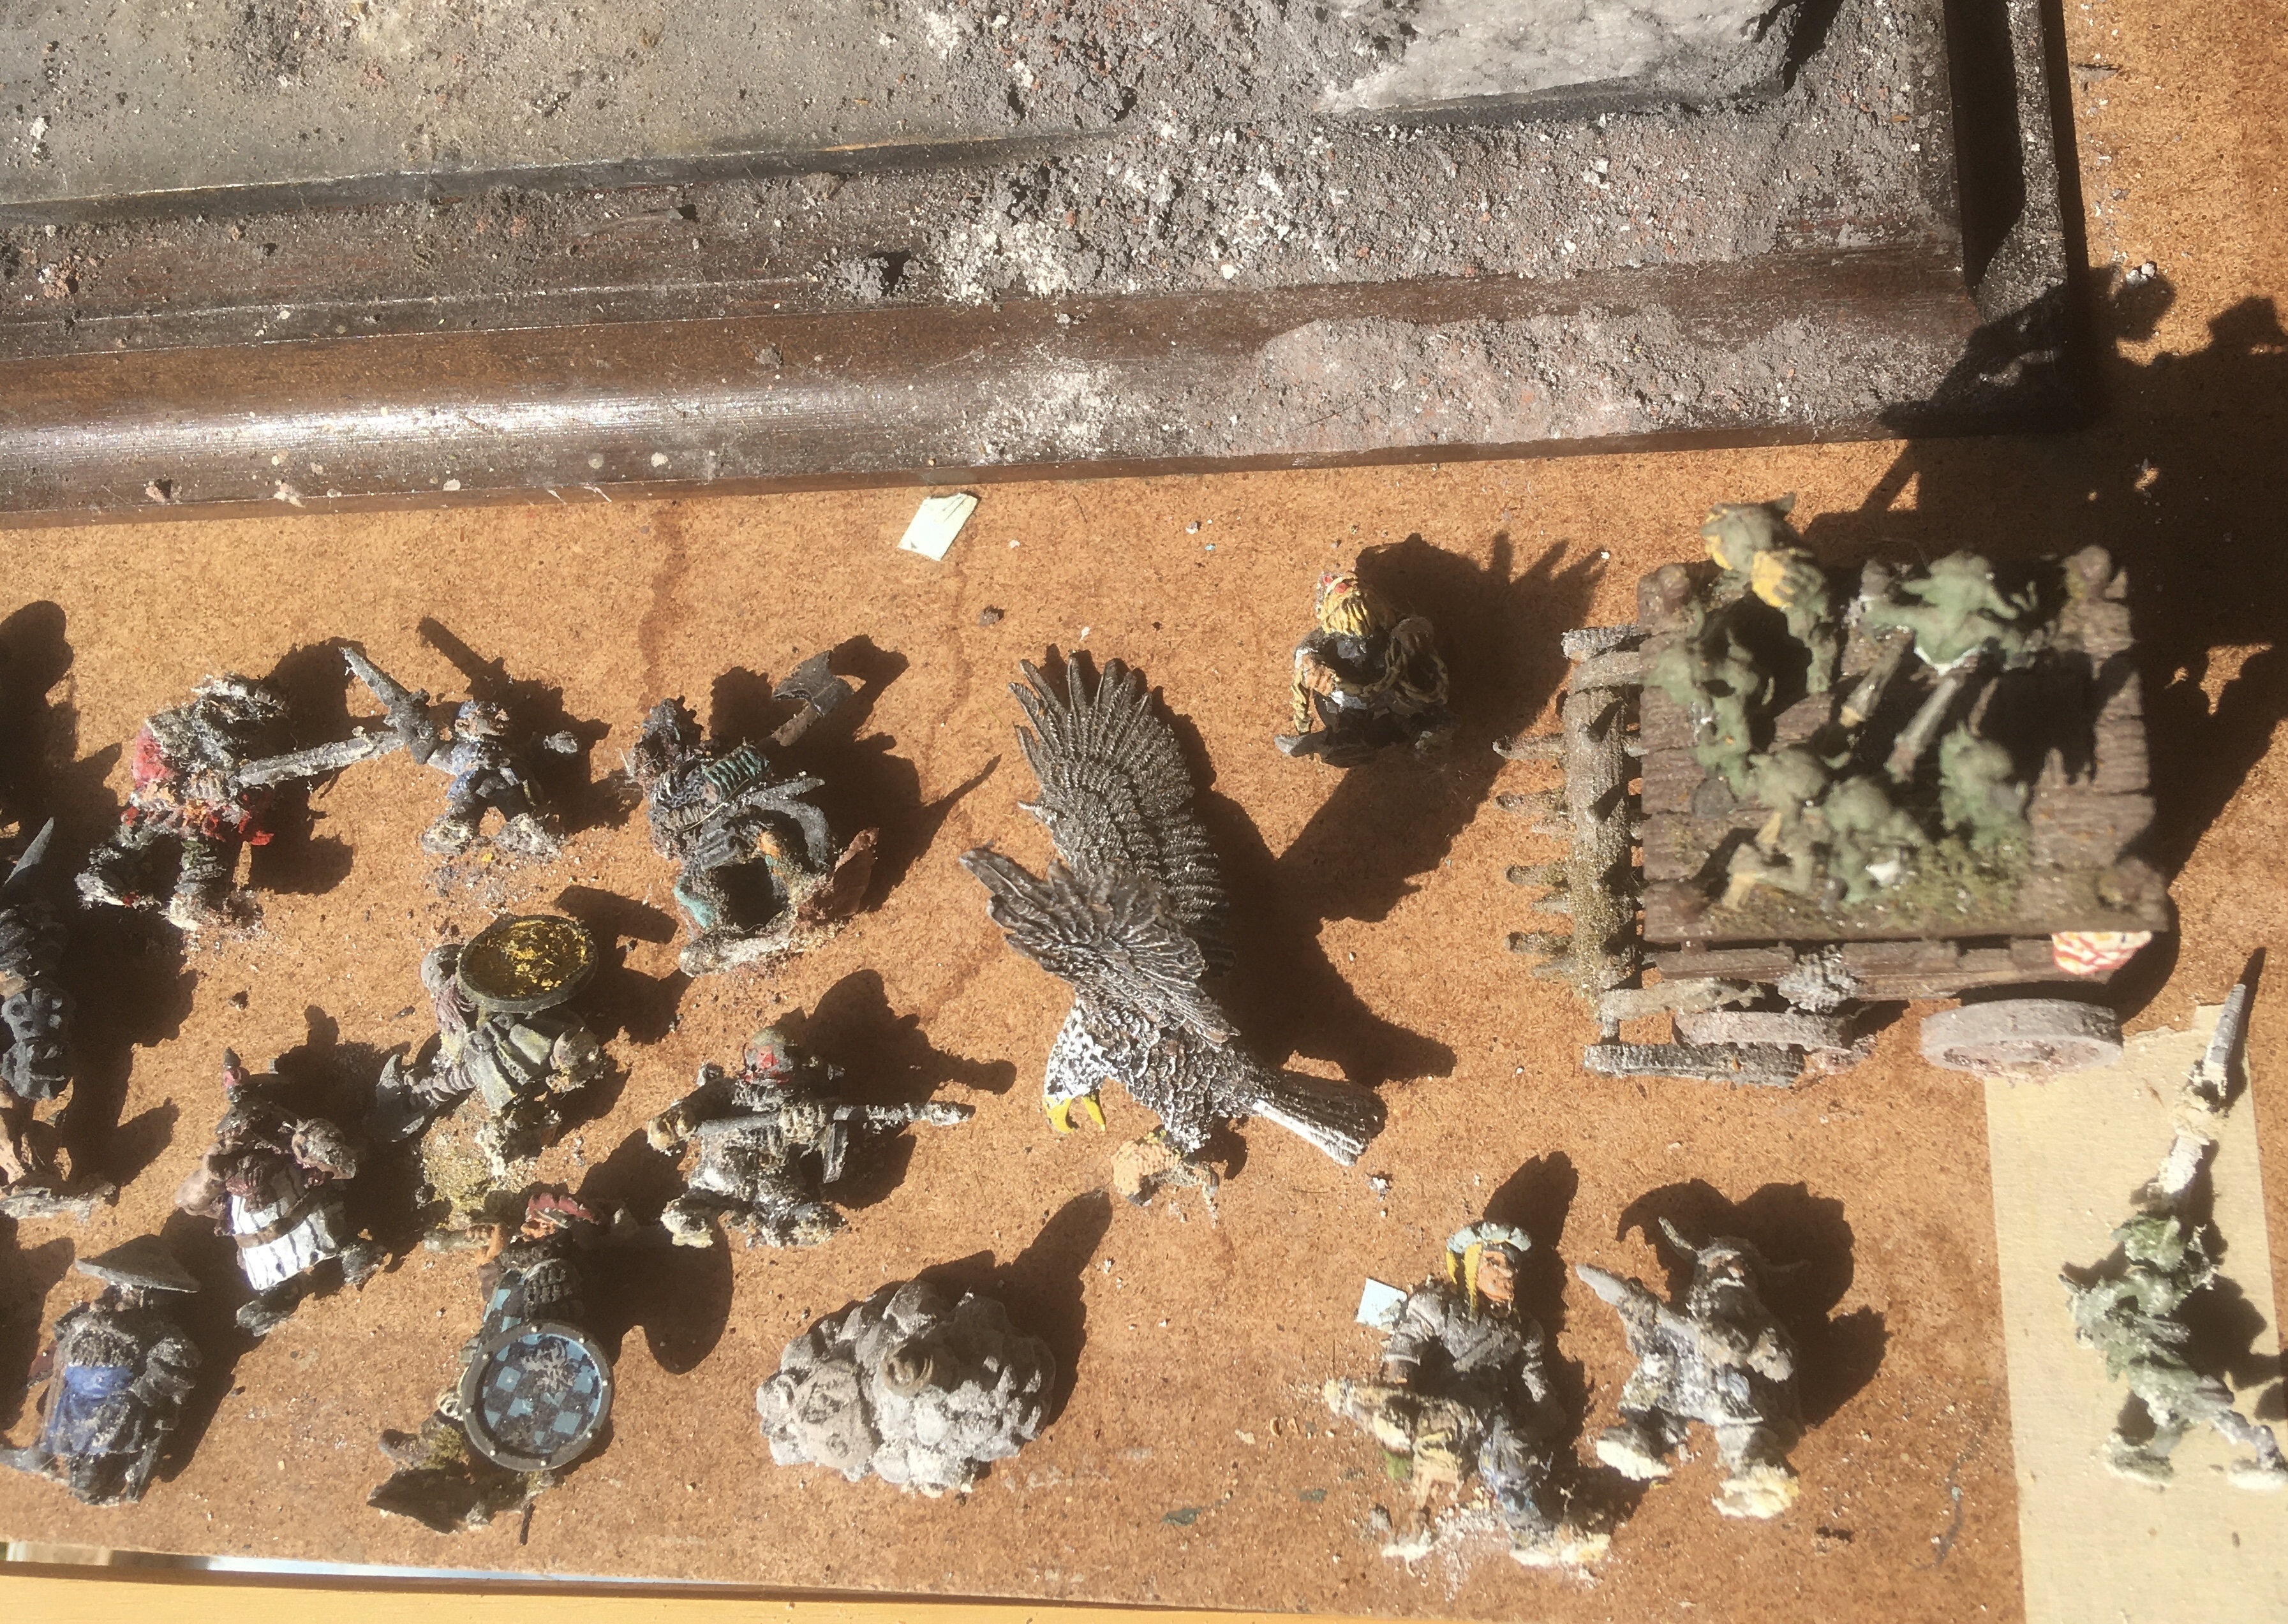
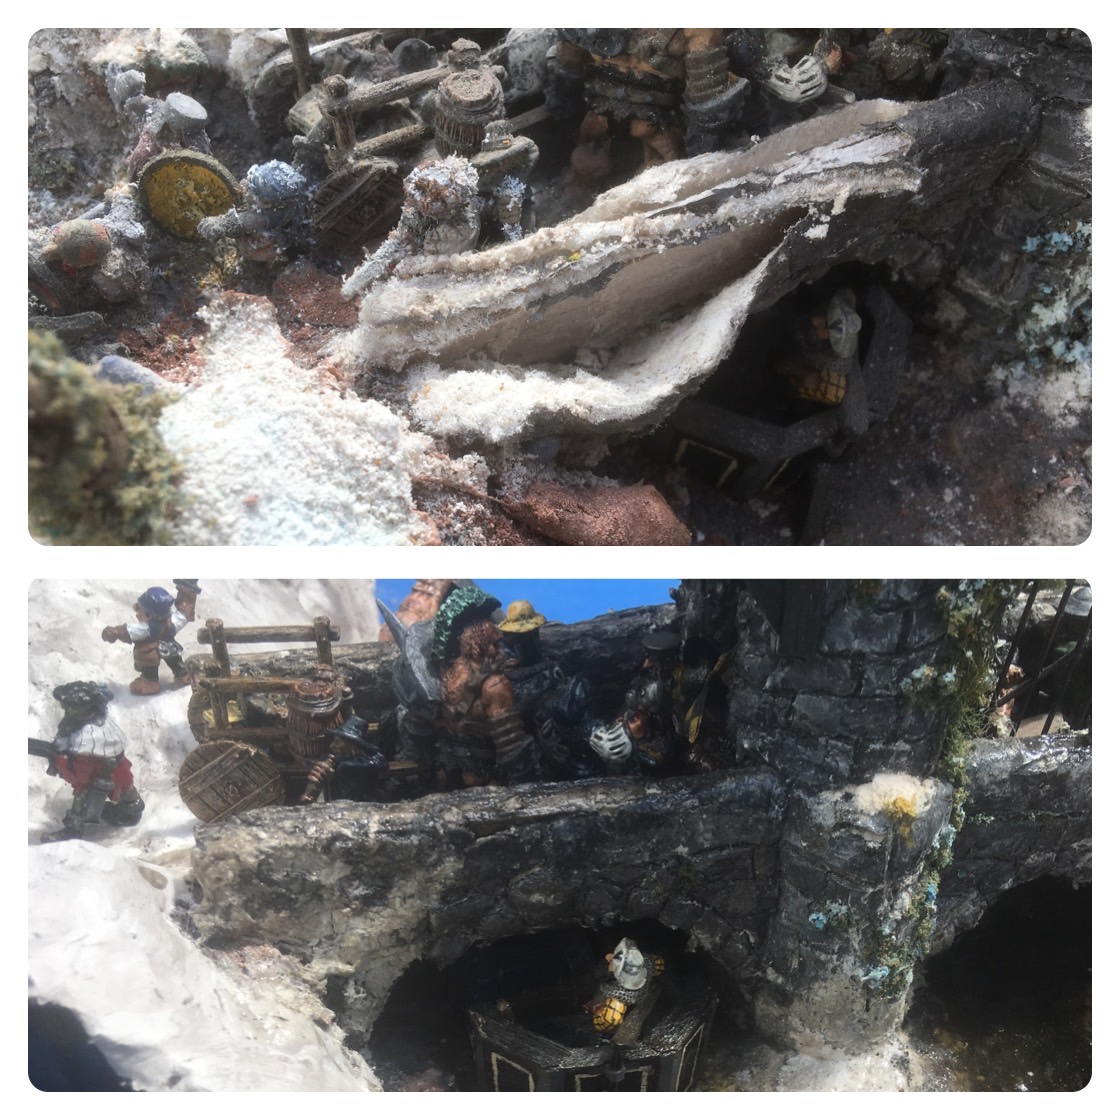
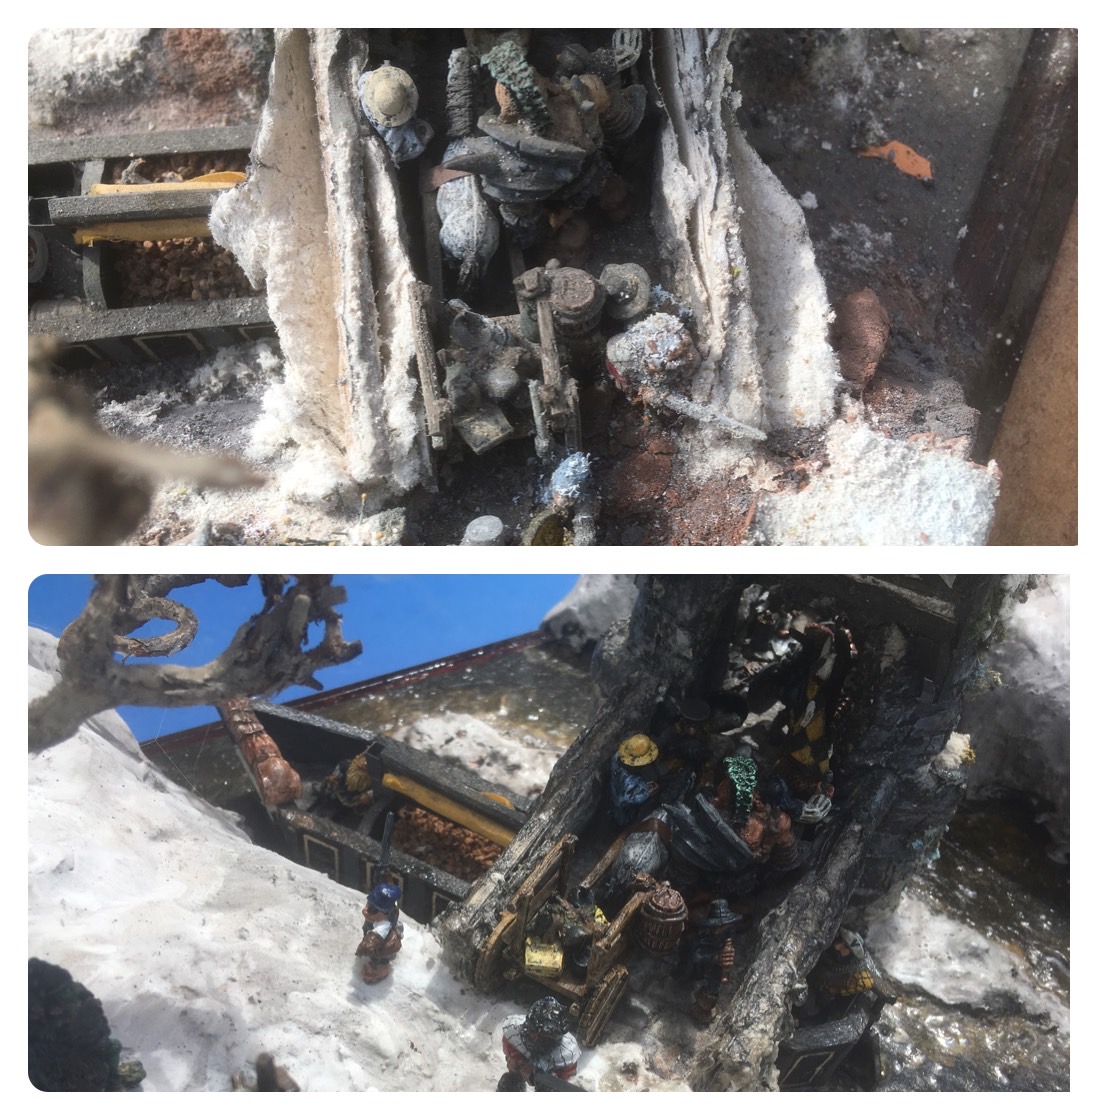
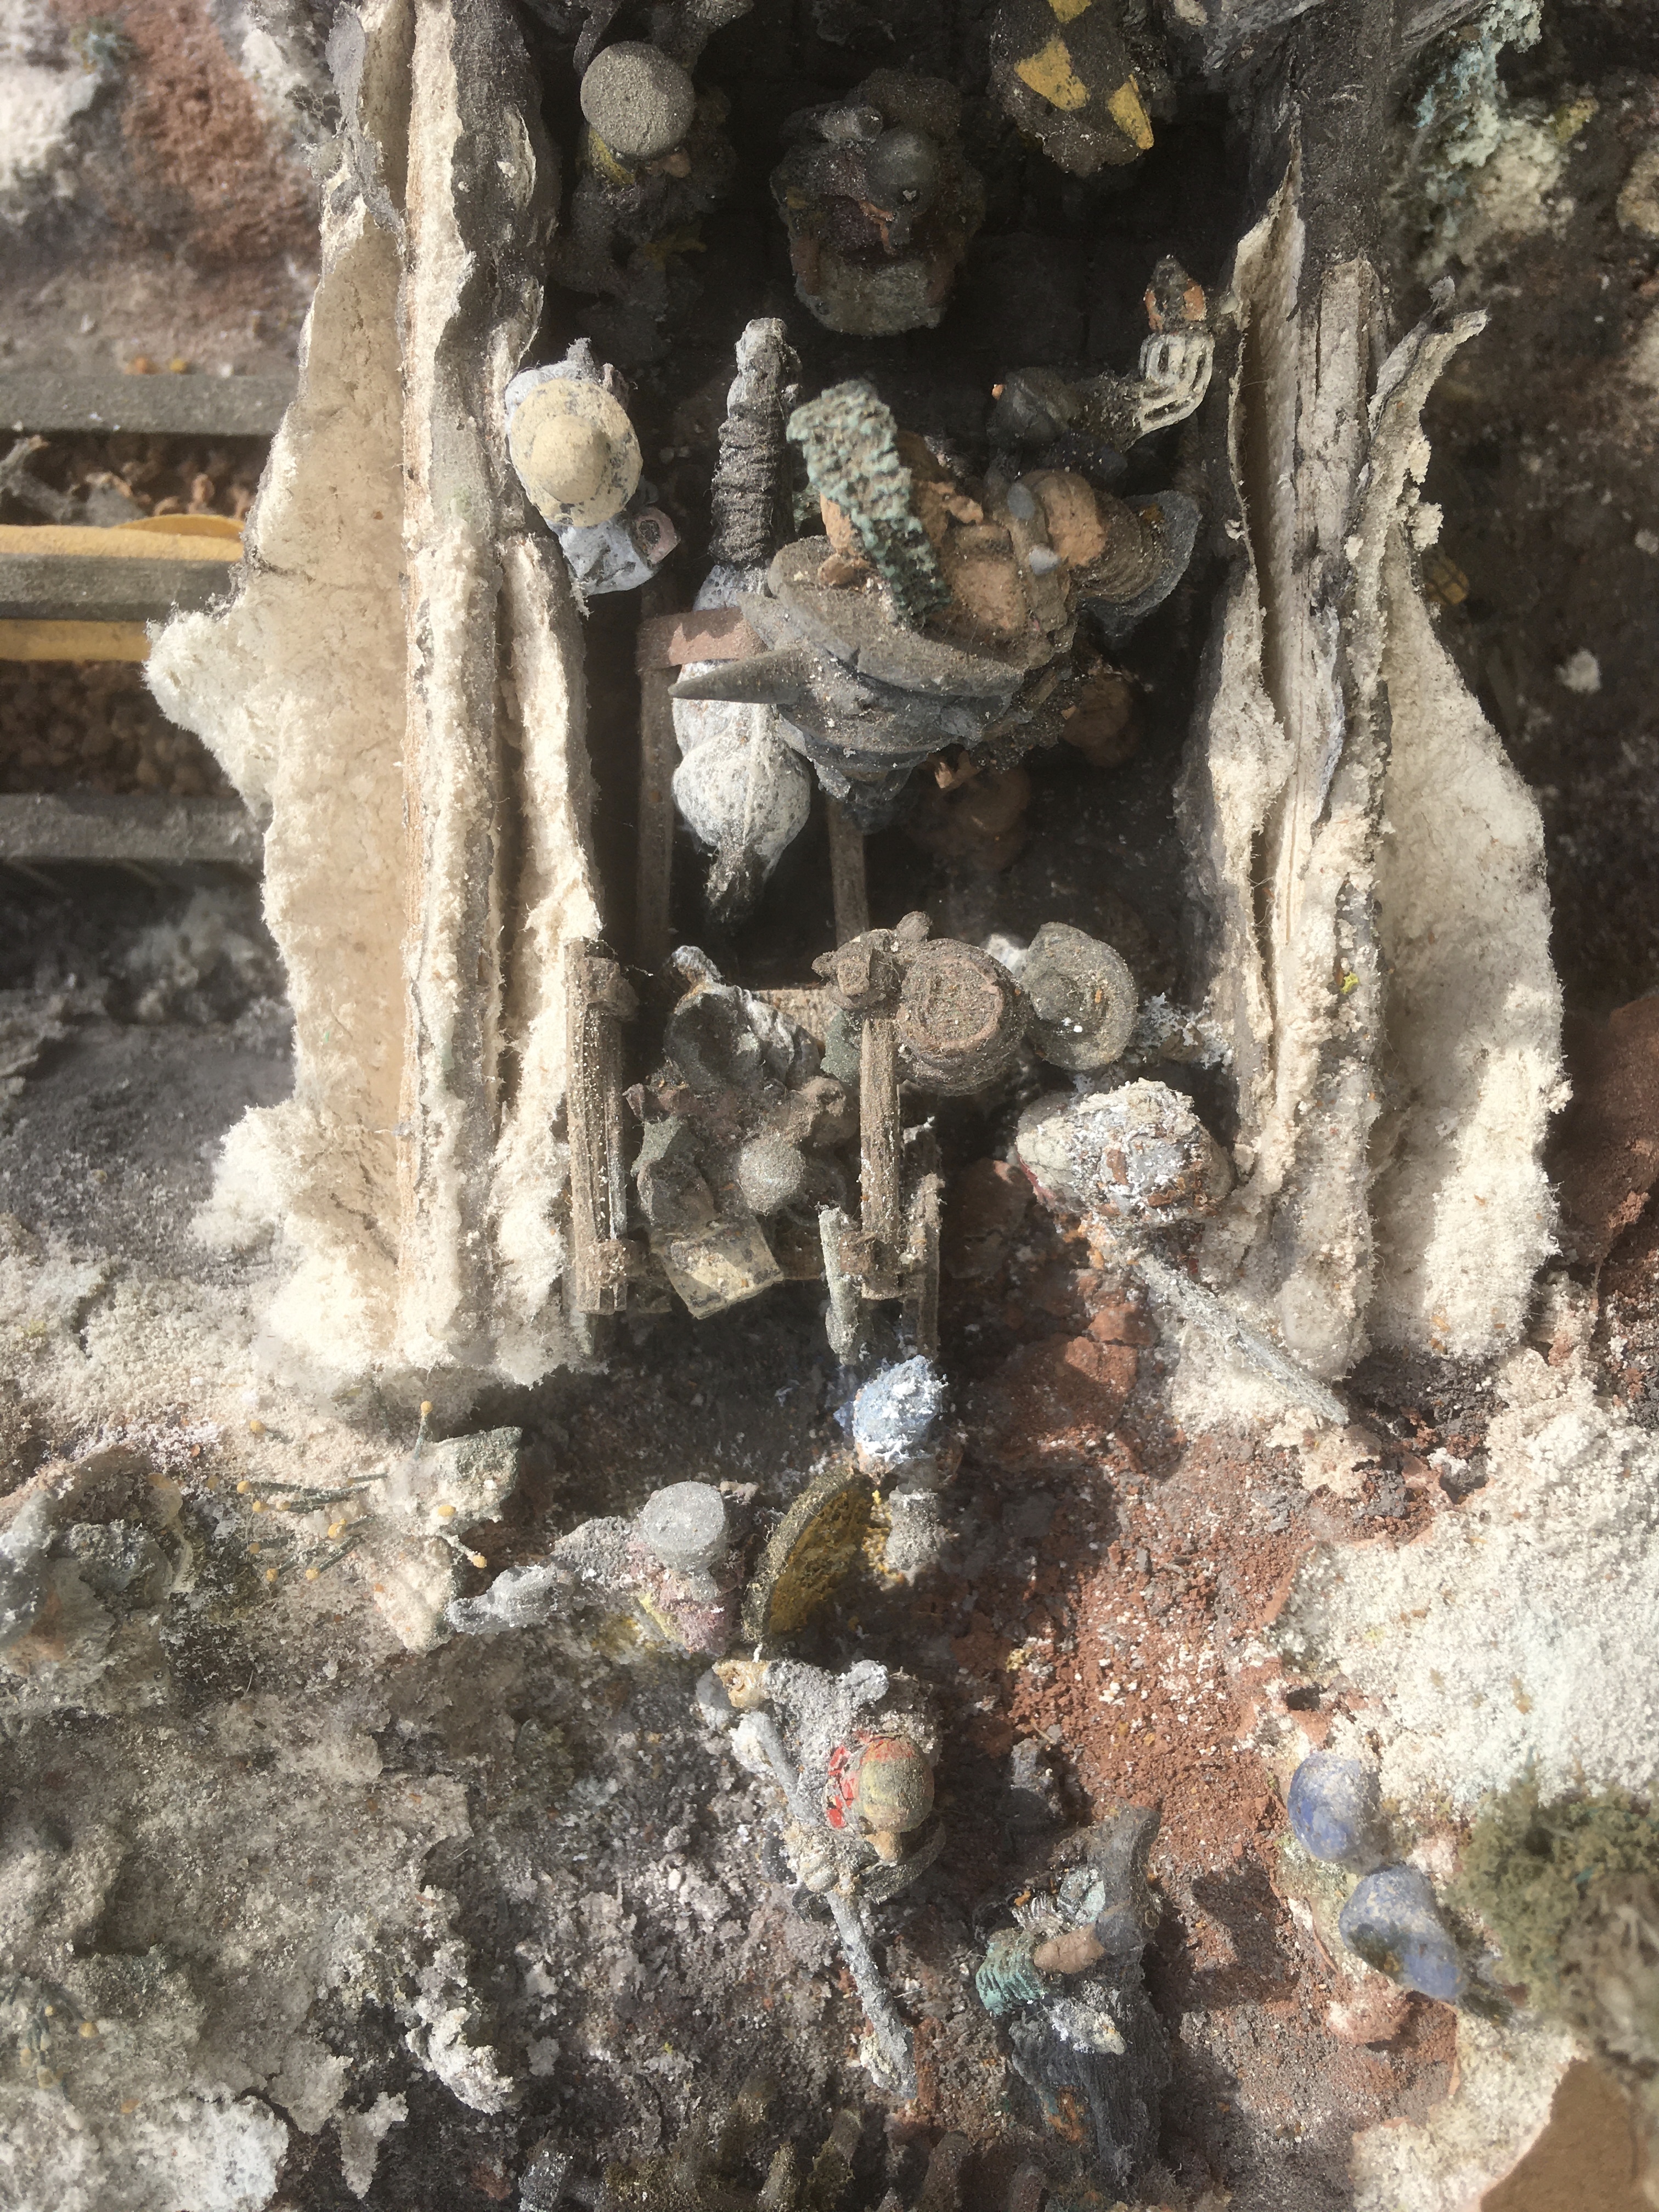
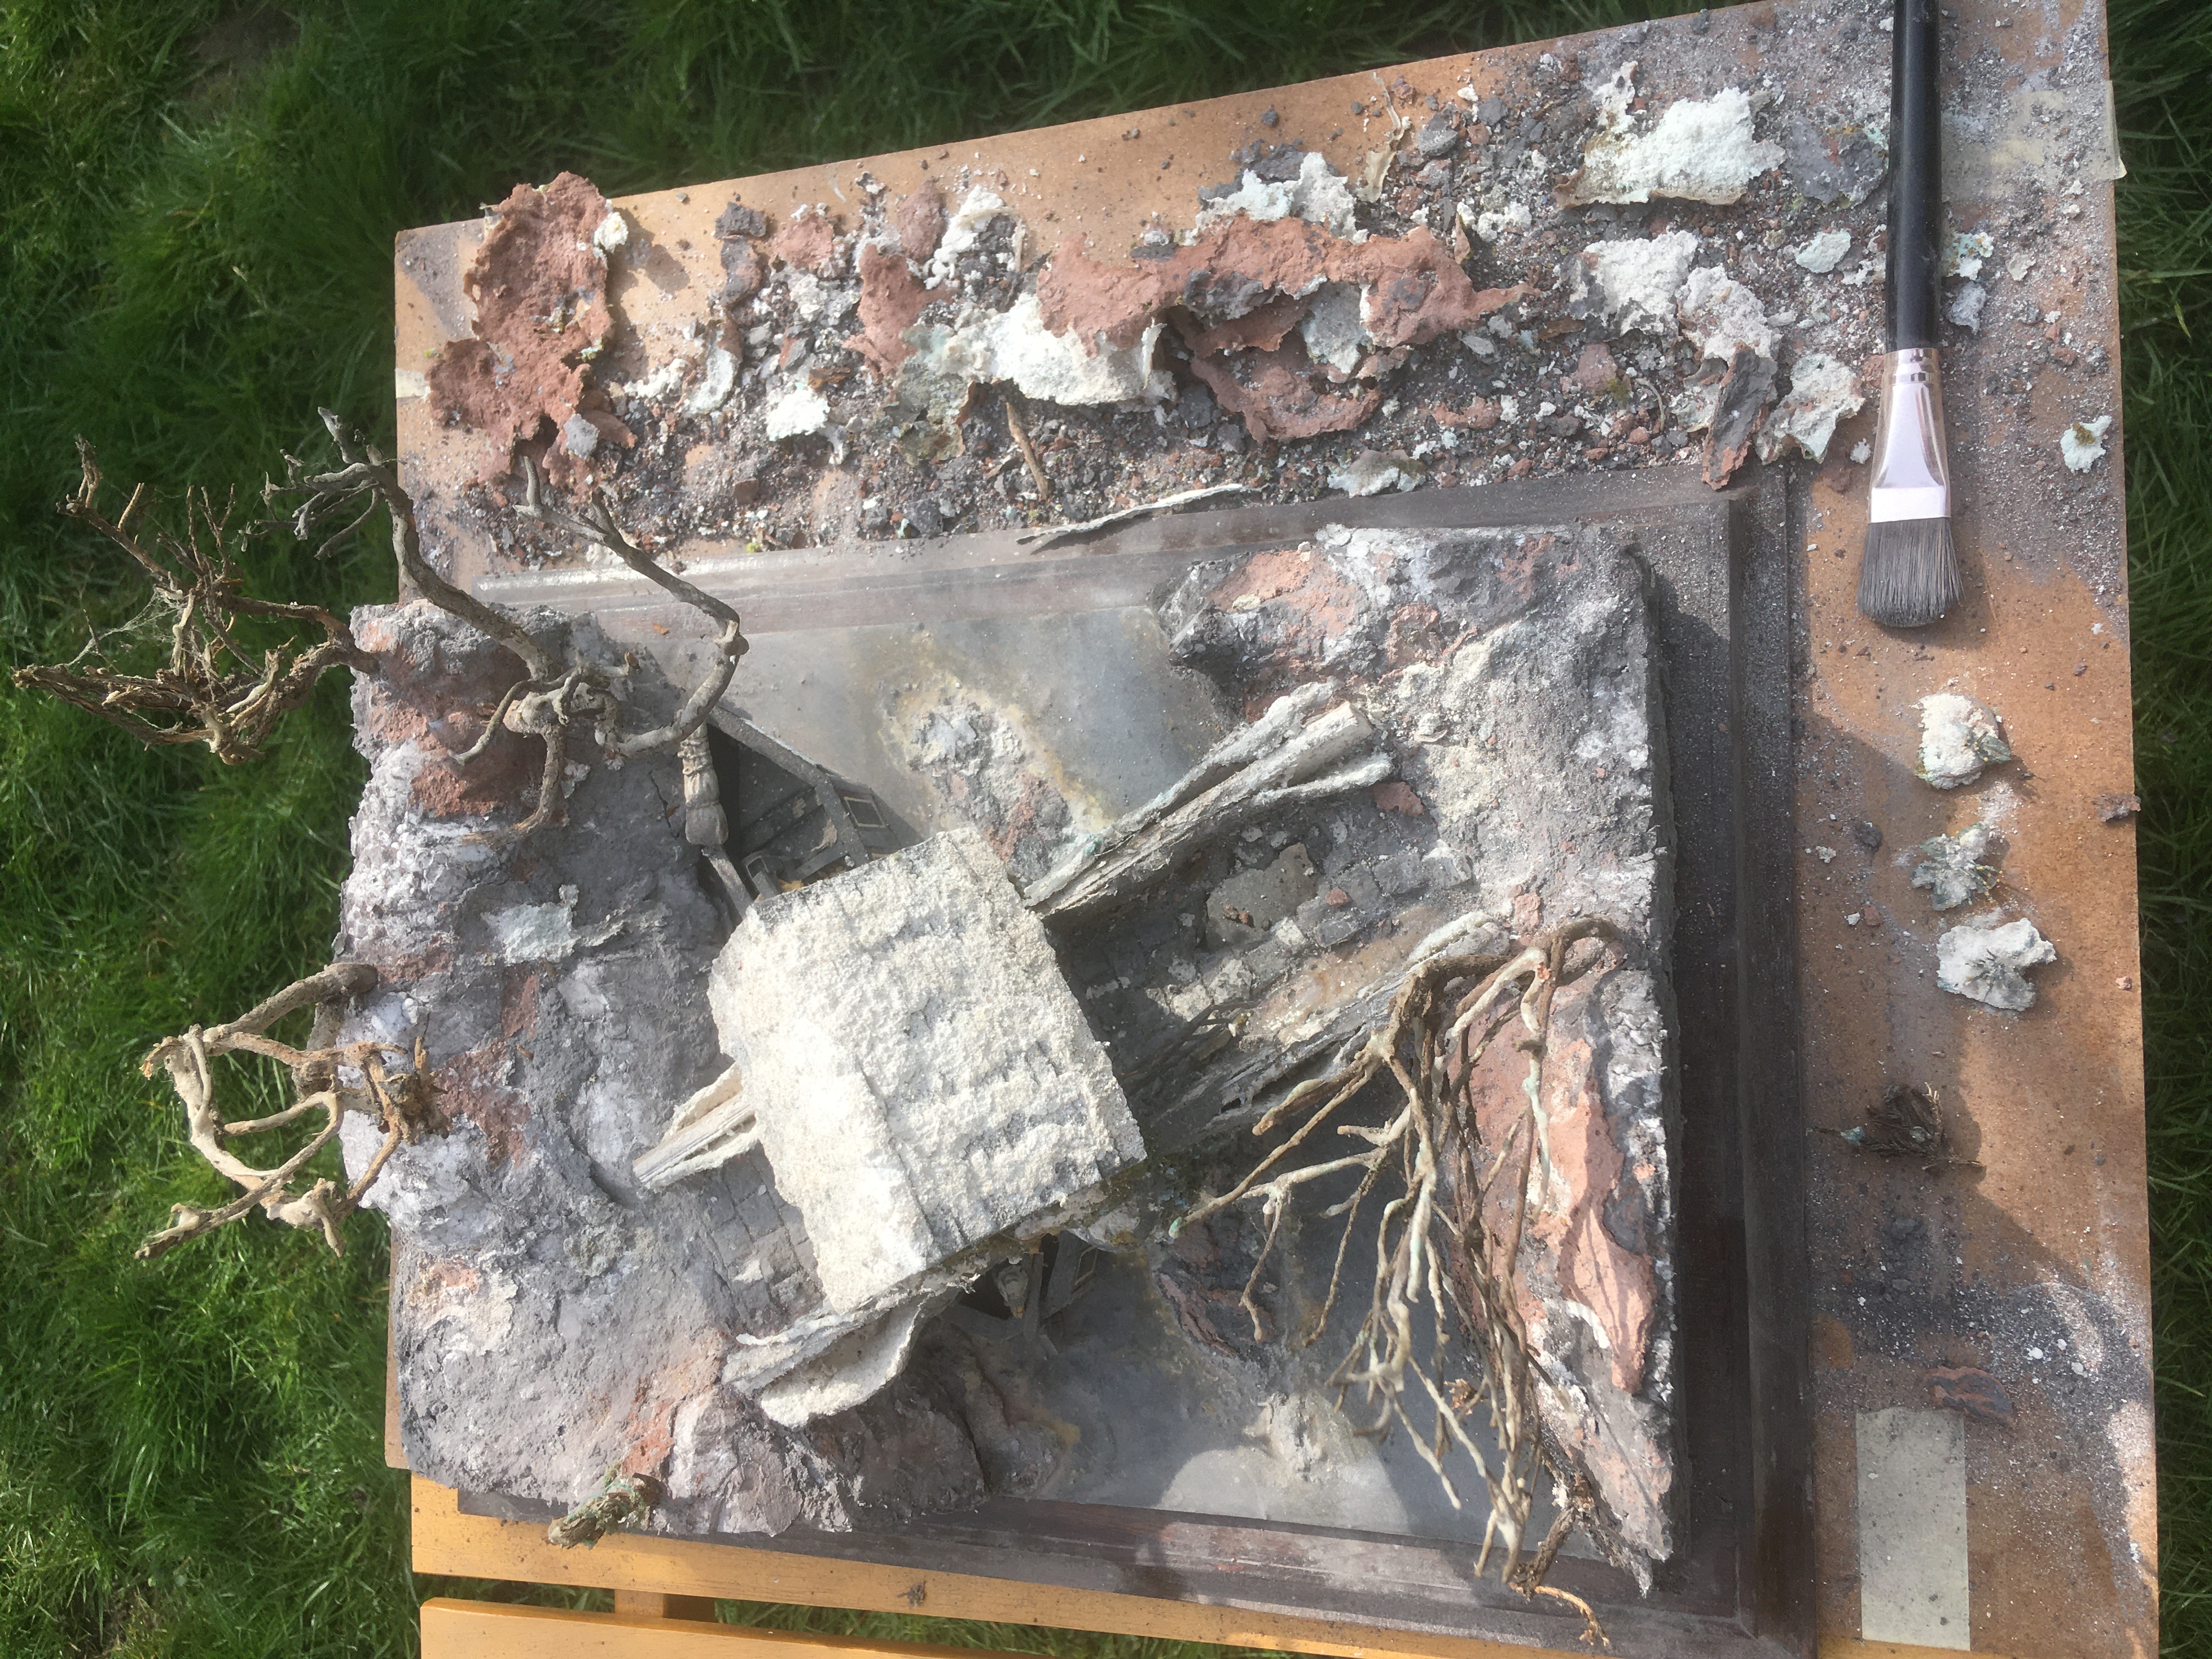
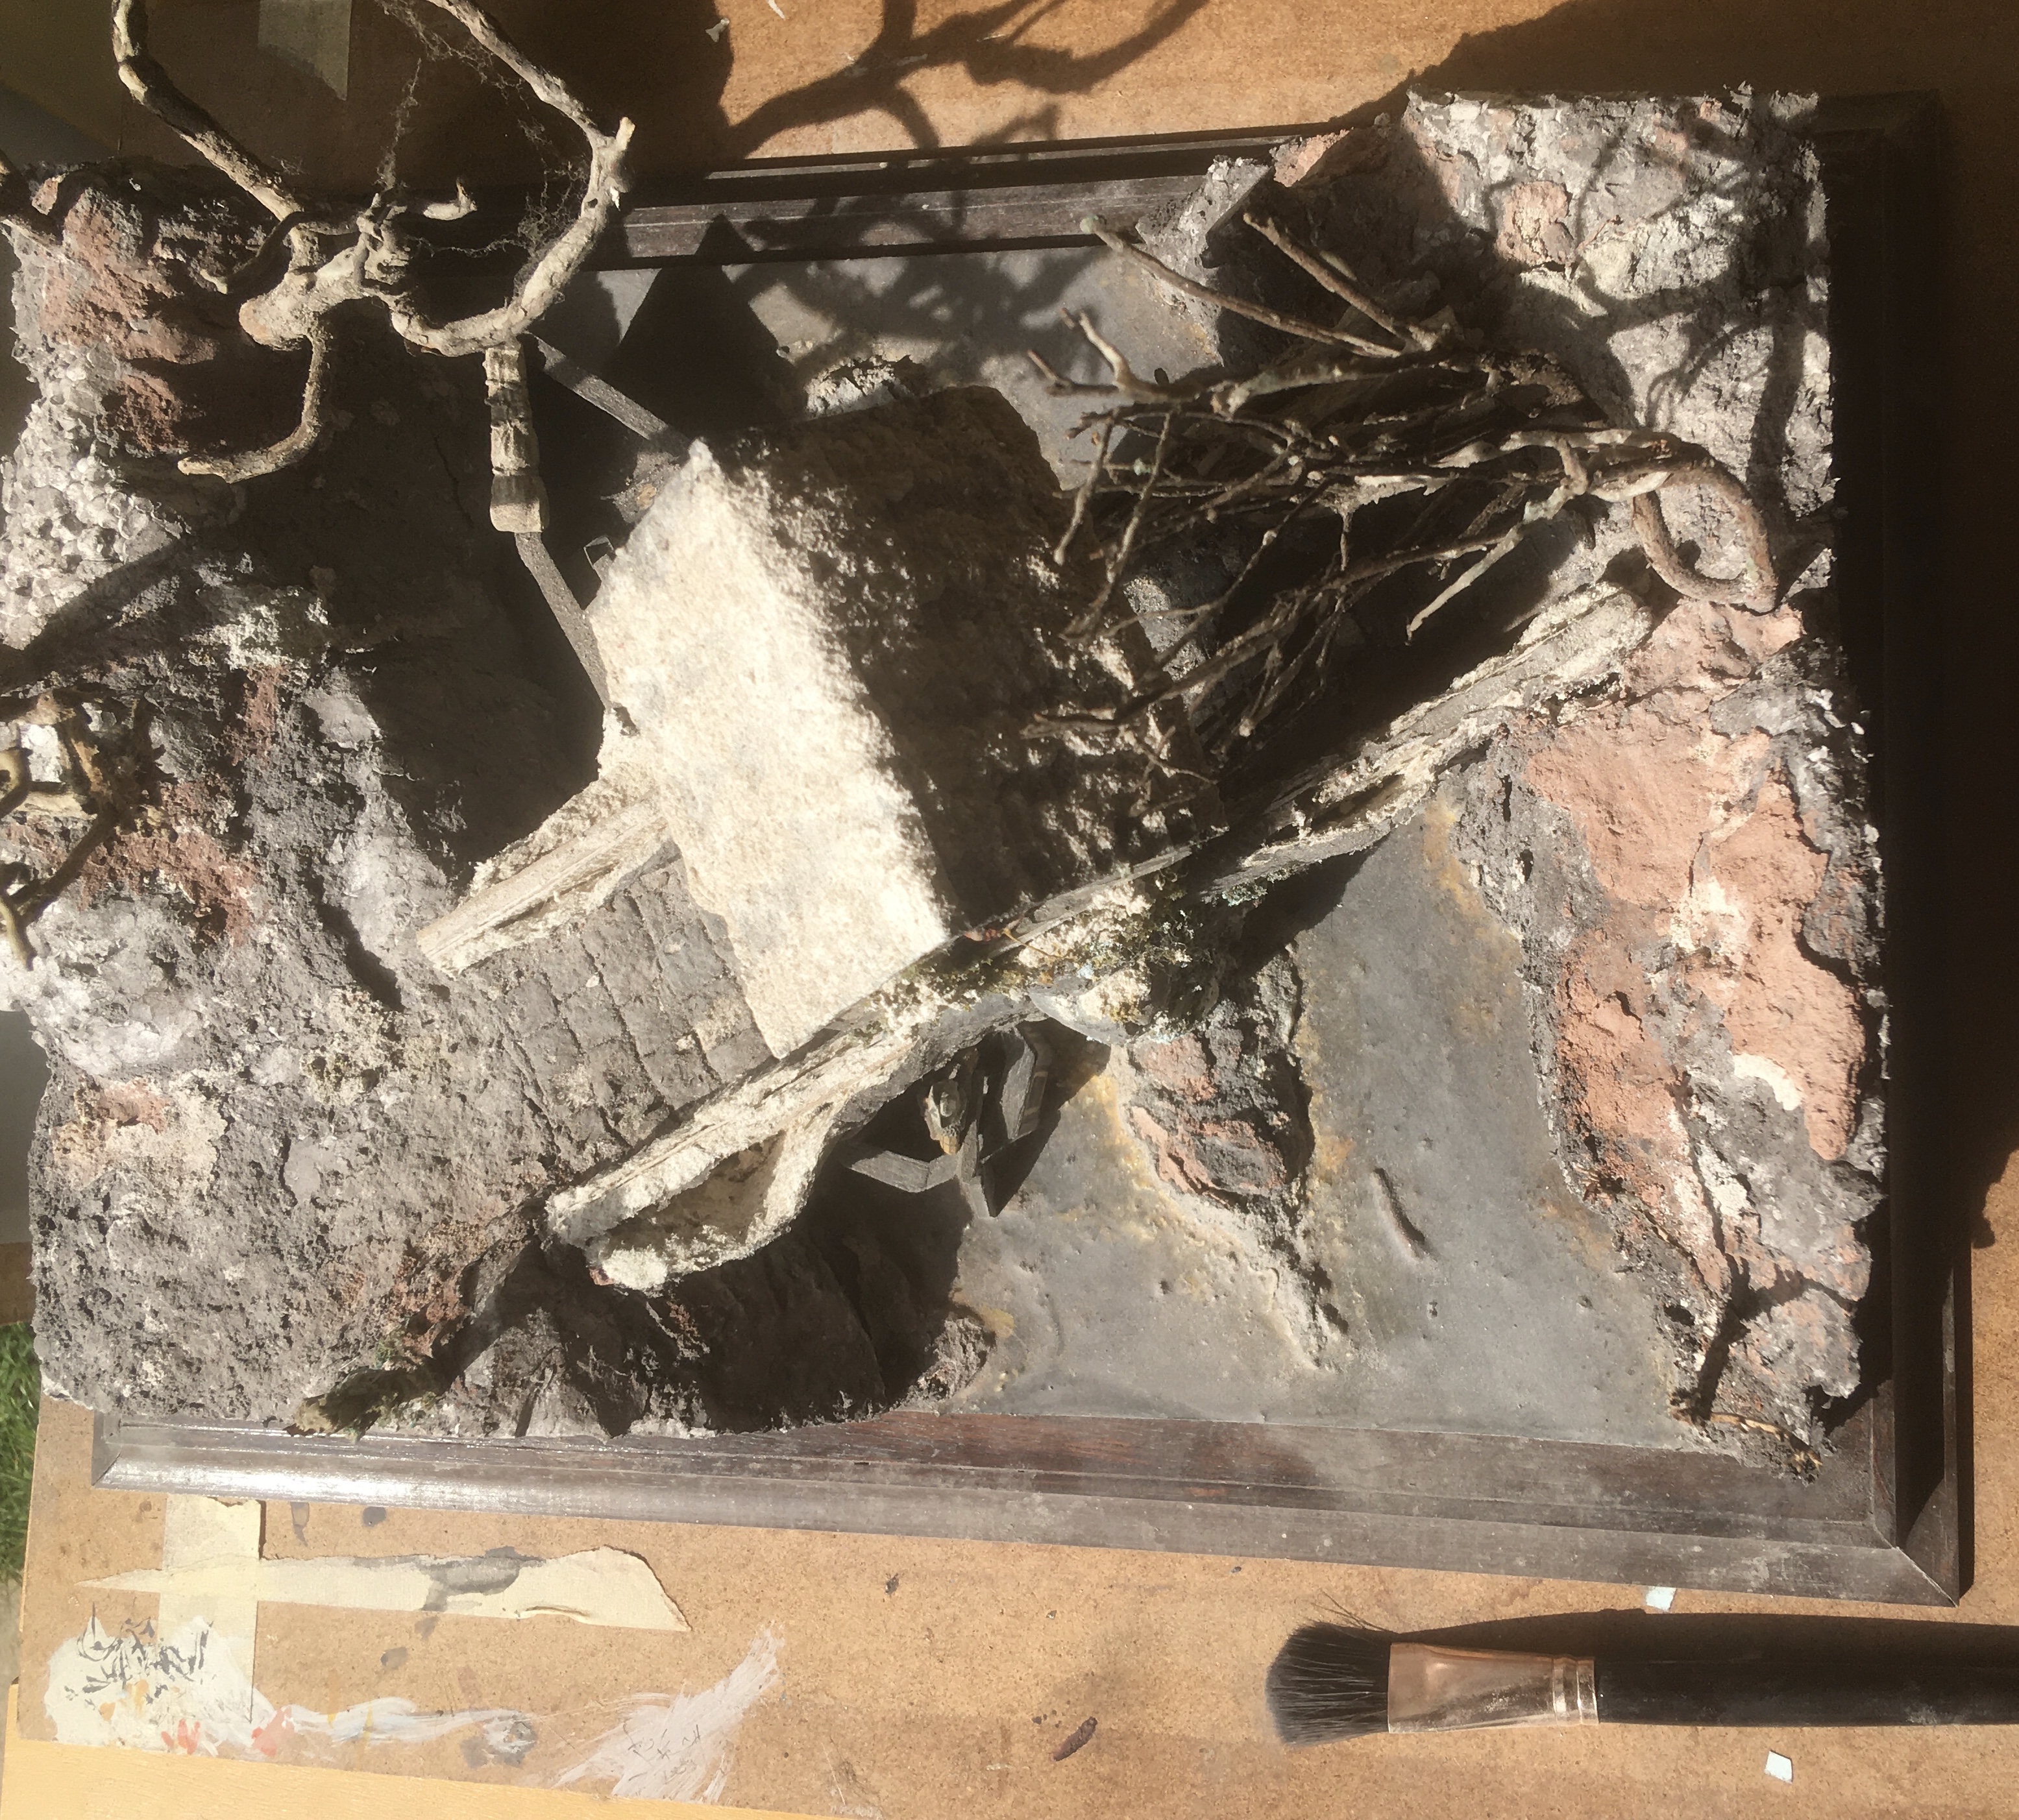
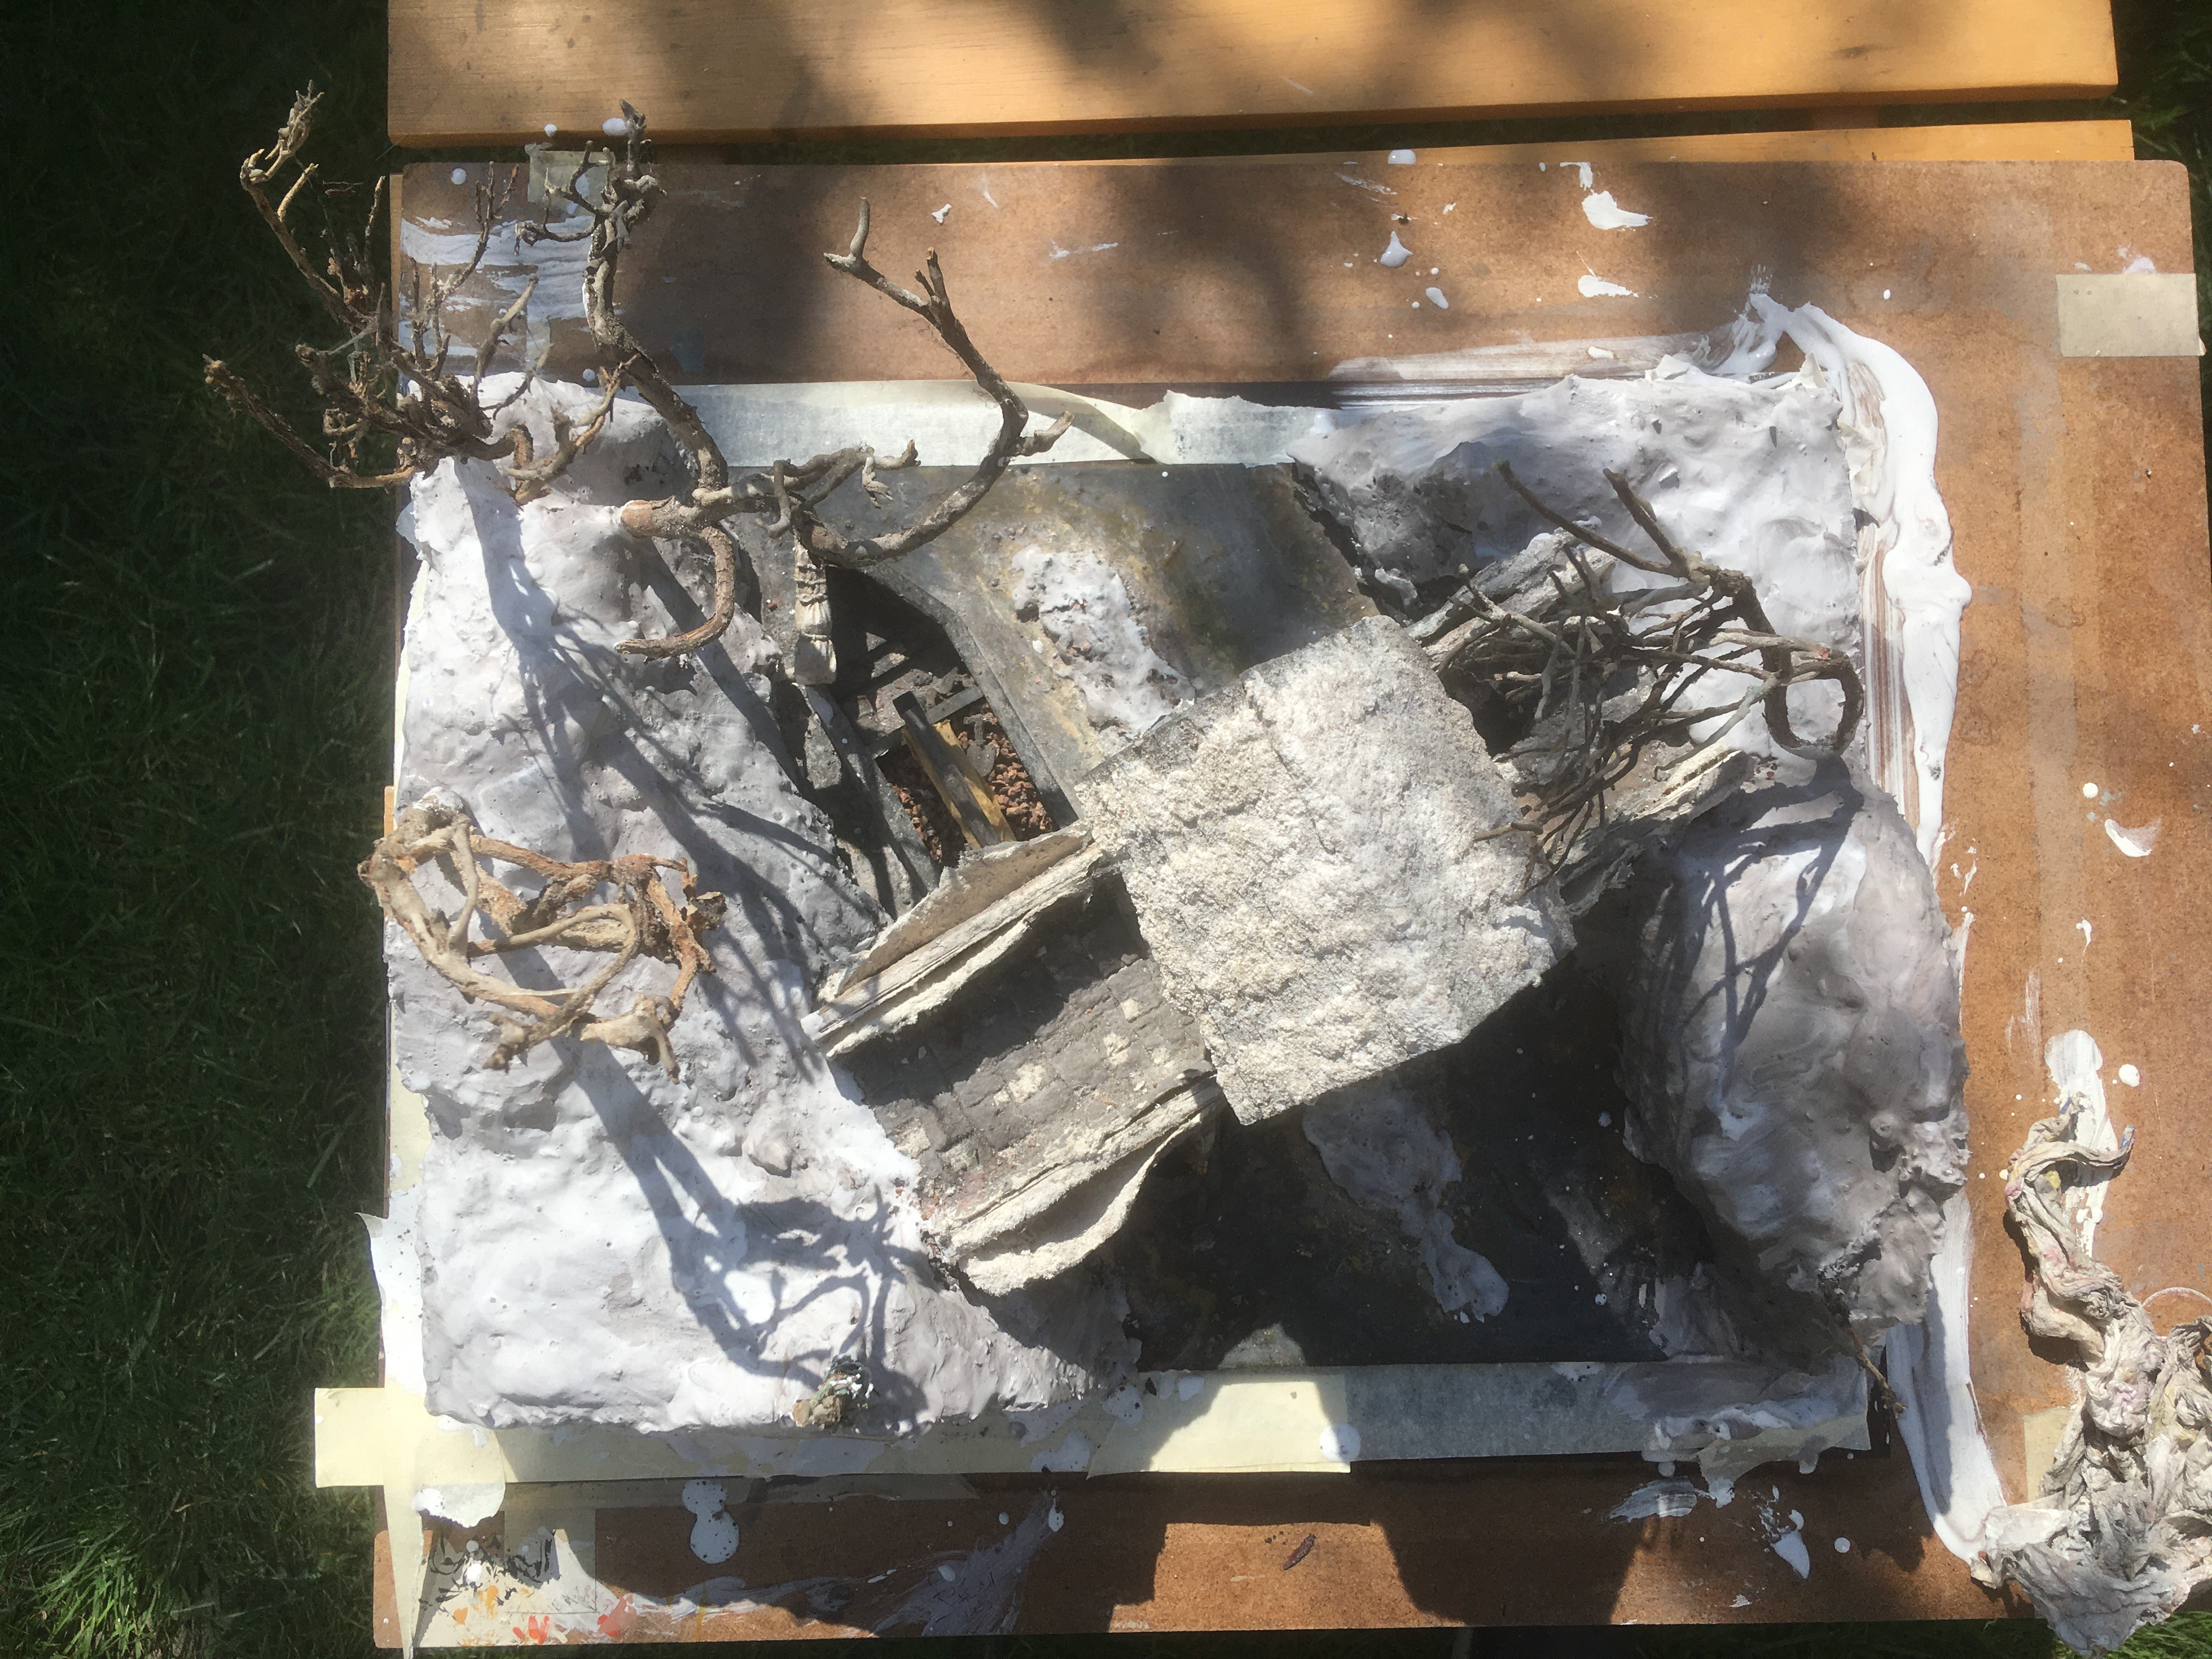
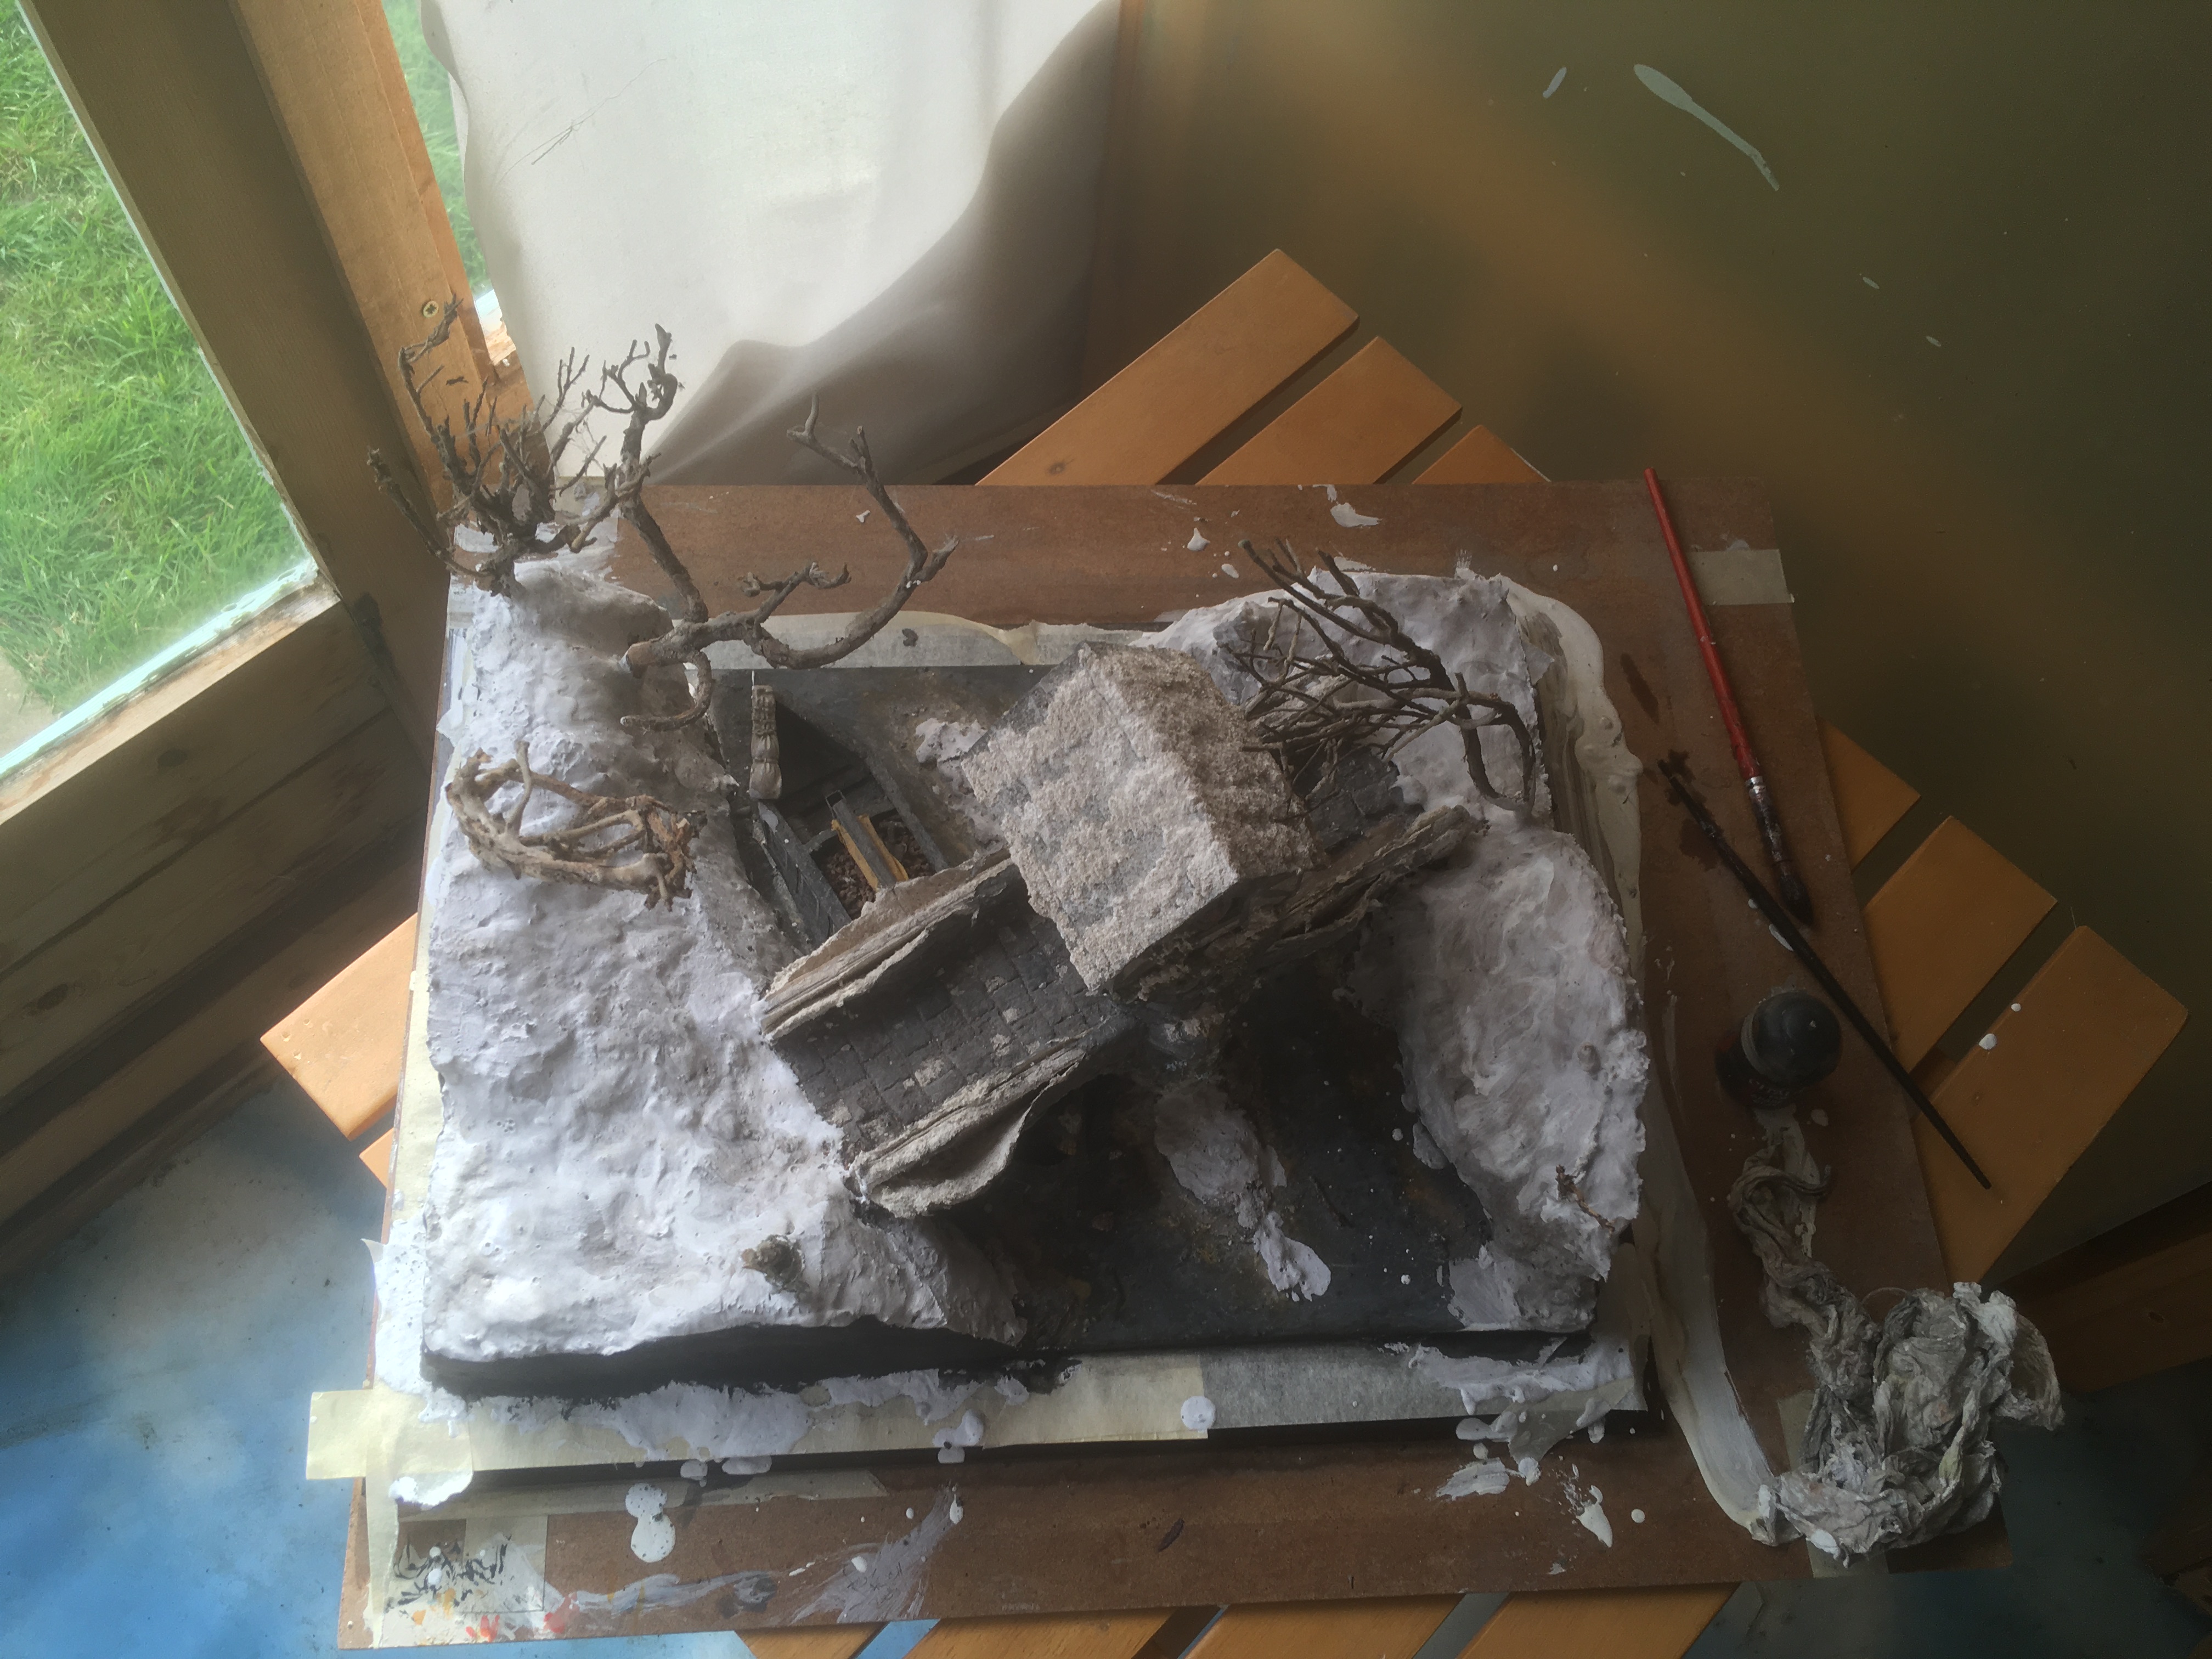
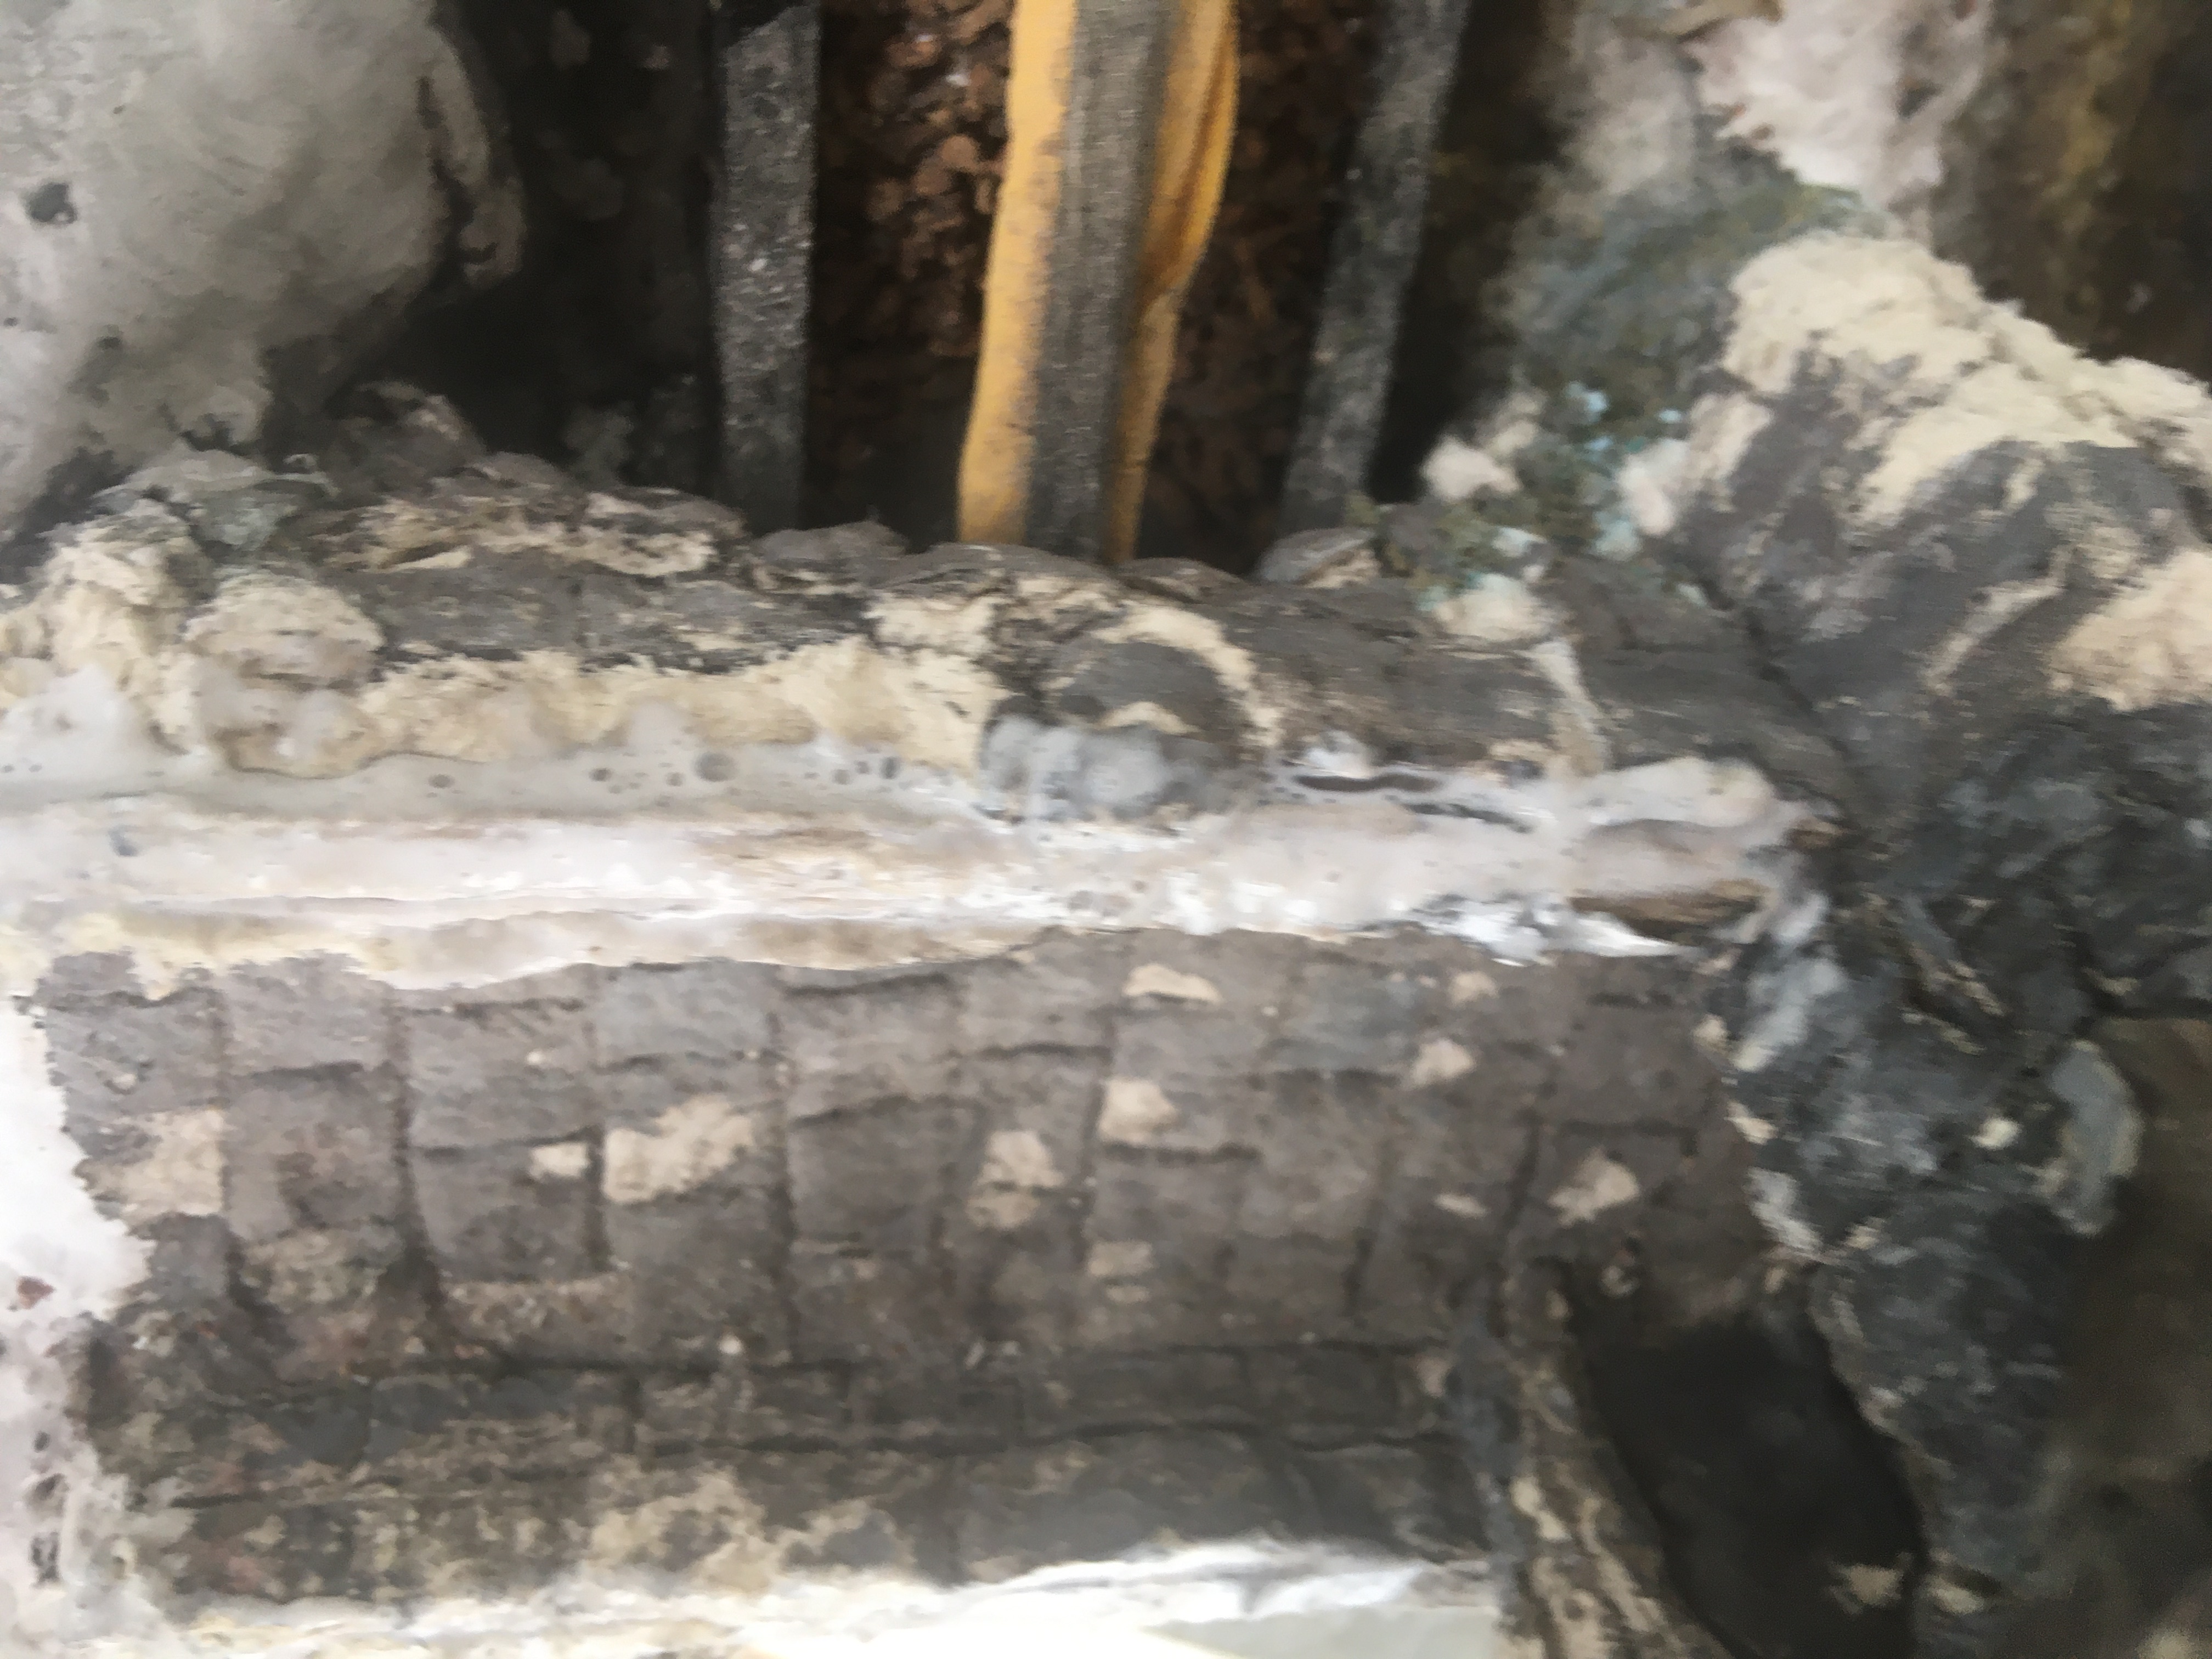
 Once the miniatures had been removed, I could see that the main superstructure of the bridge was still fairly sound bar the peeling brickwork. The plaster, on the other hand was very powdery below the top crust.
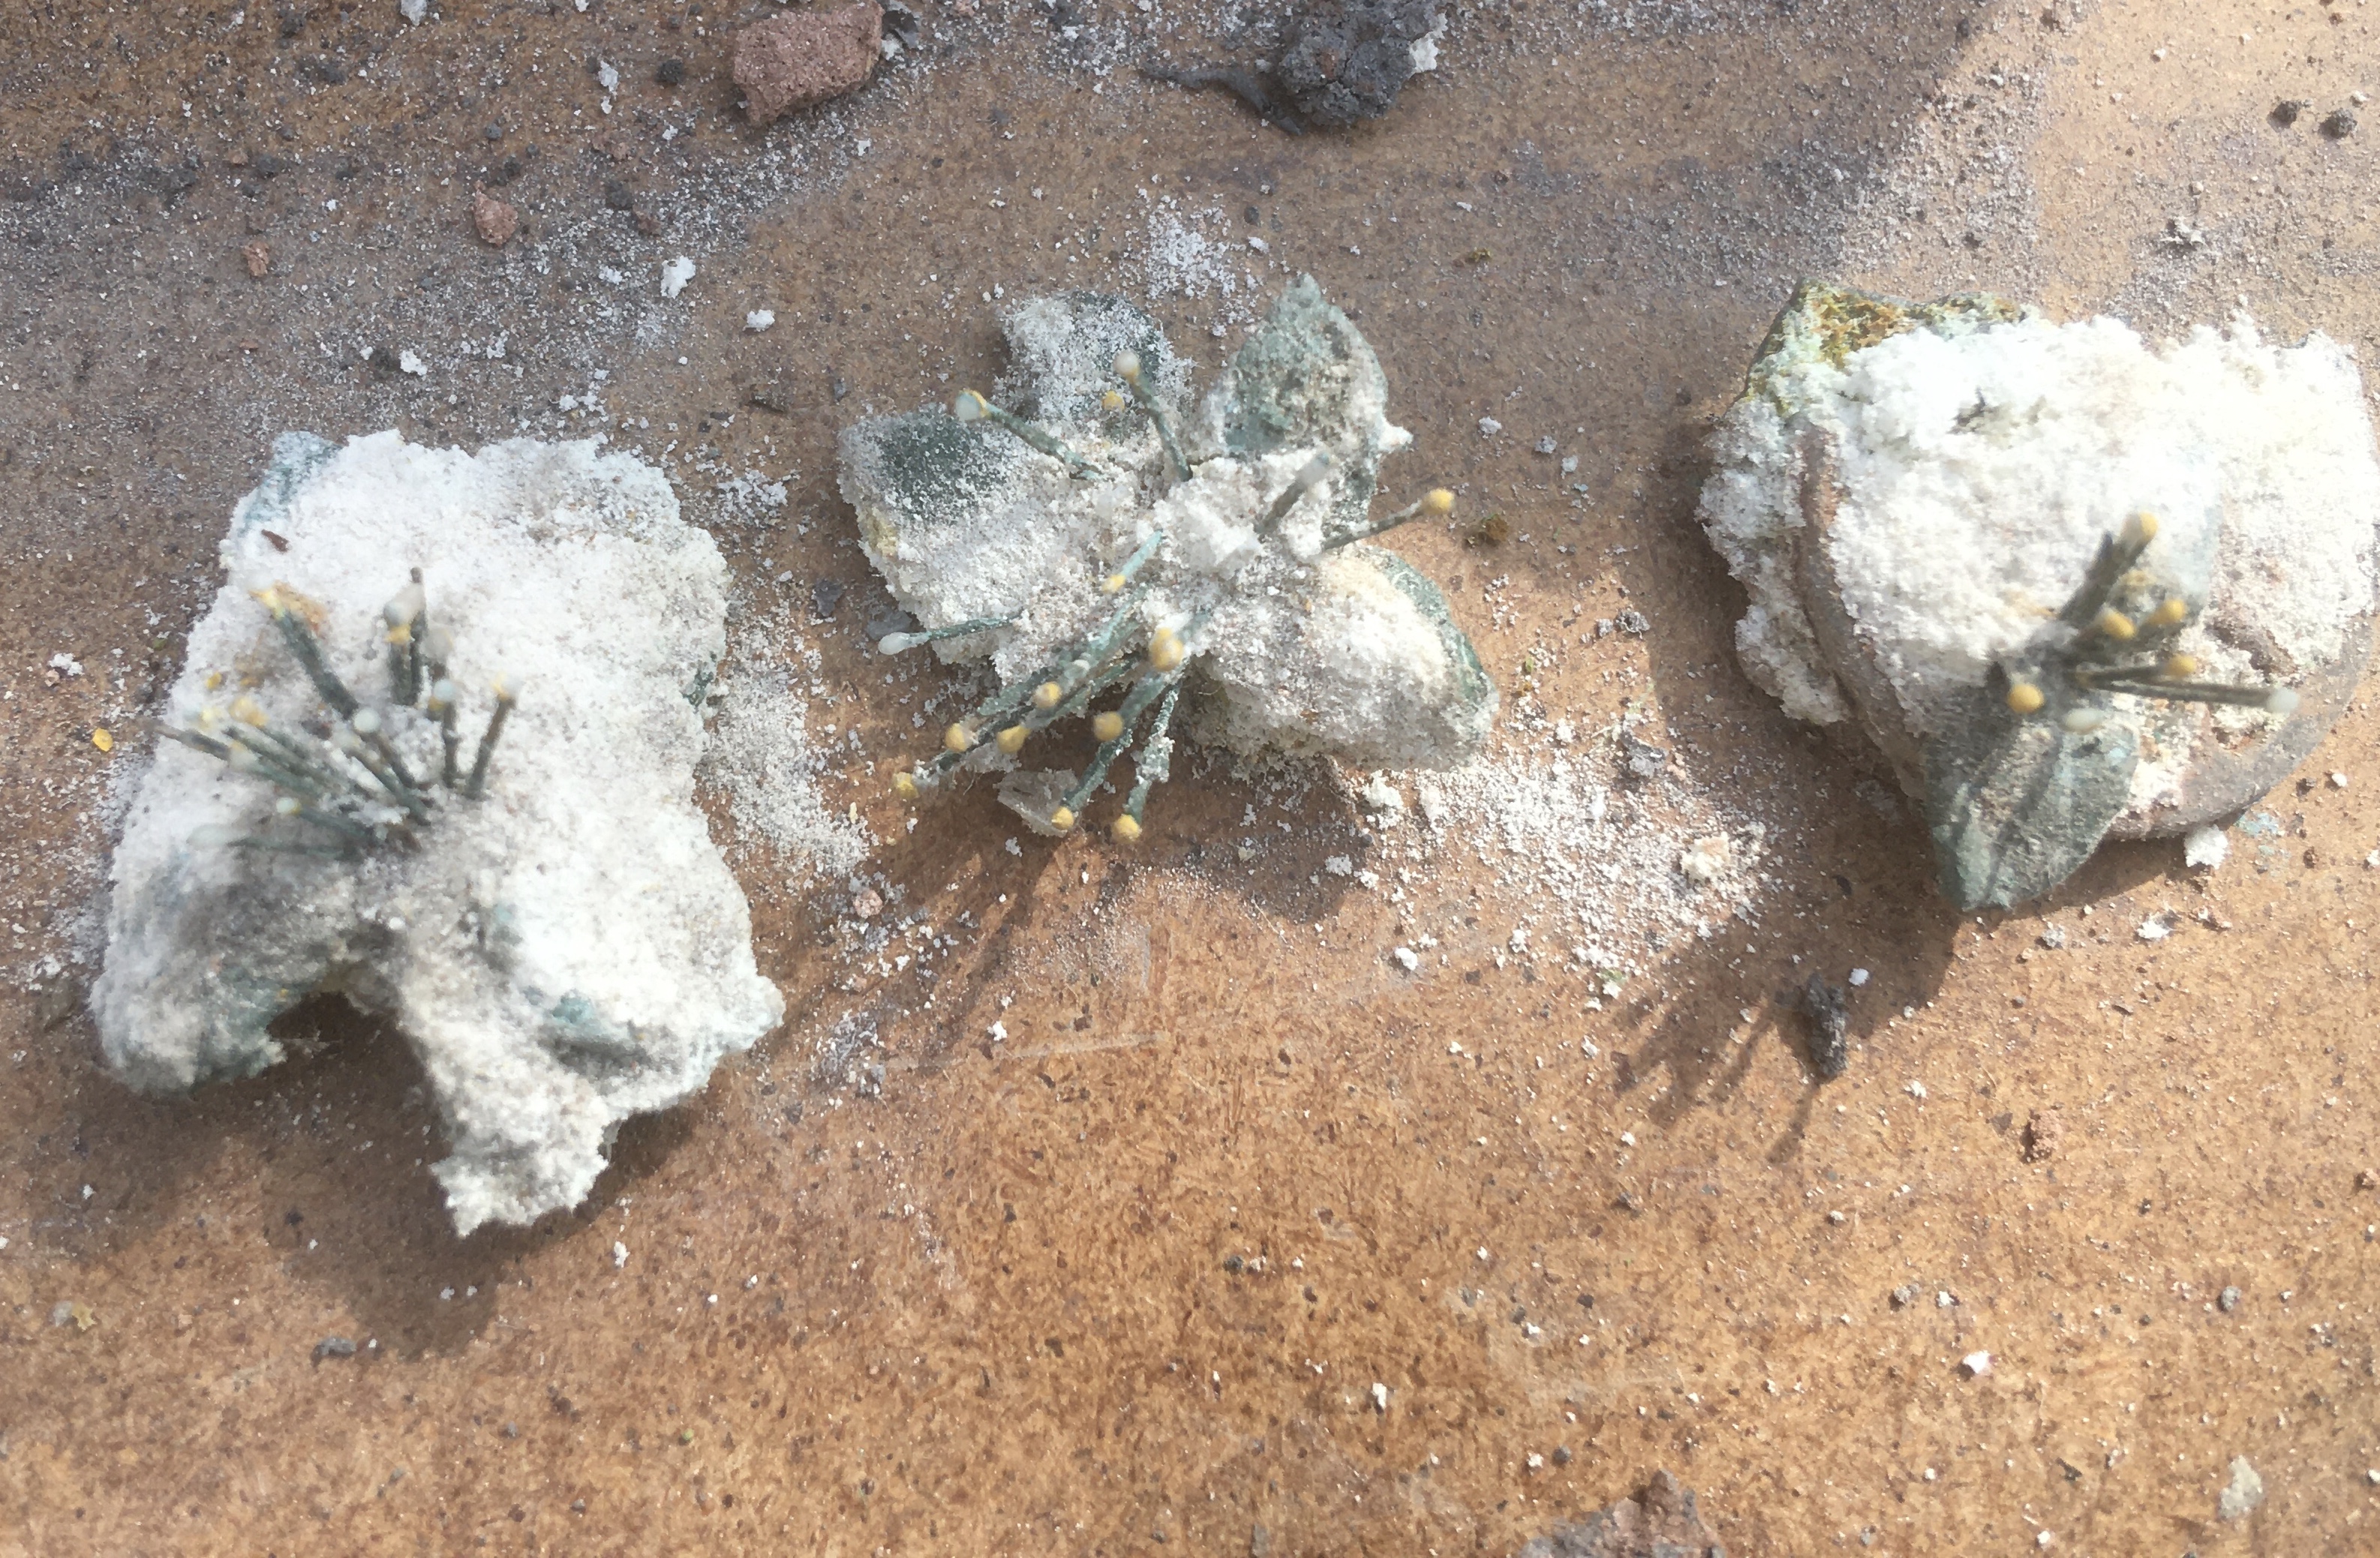
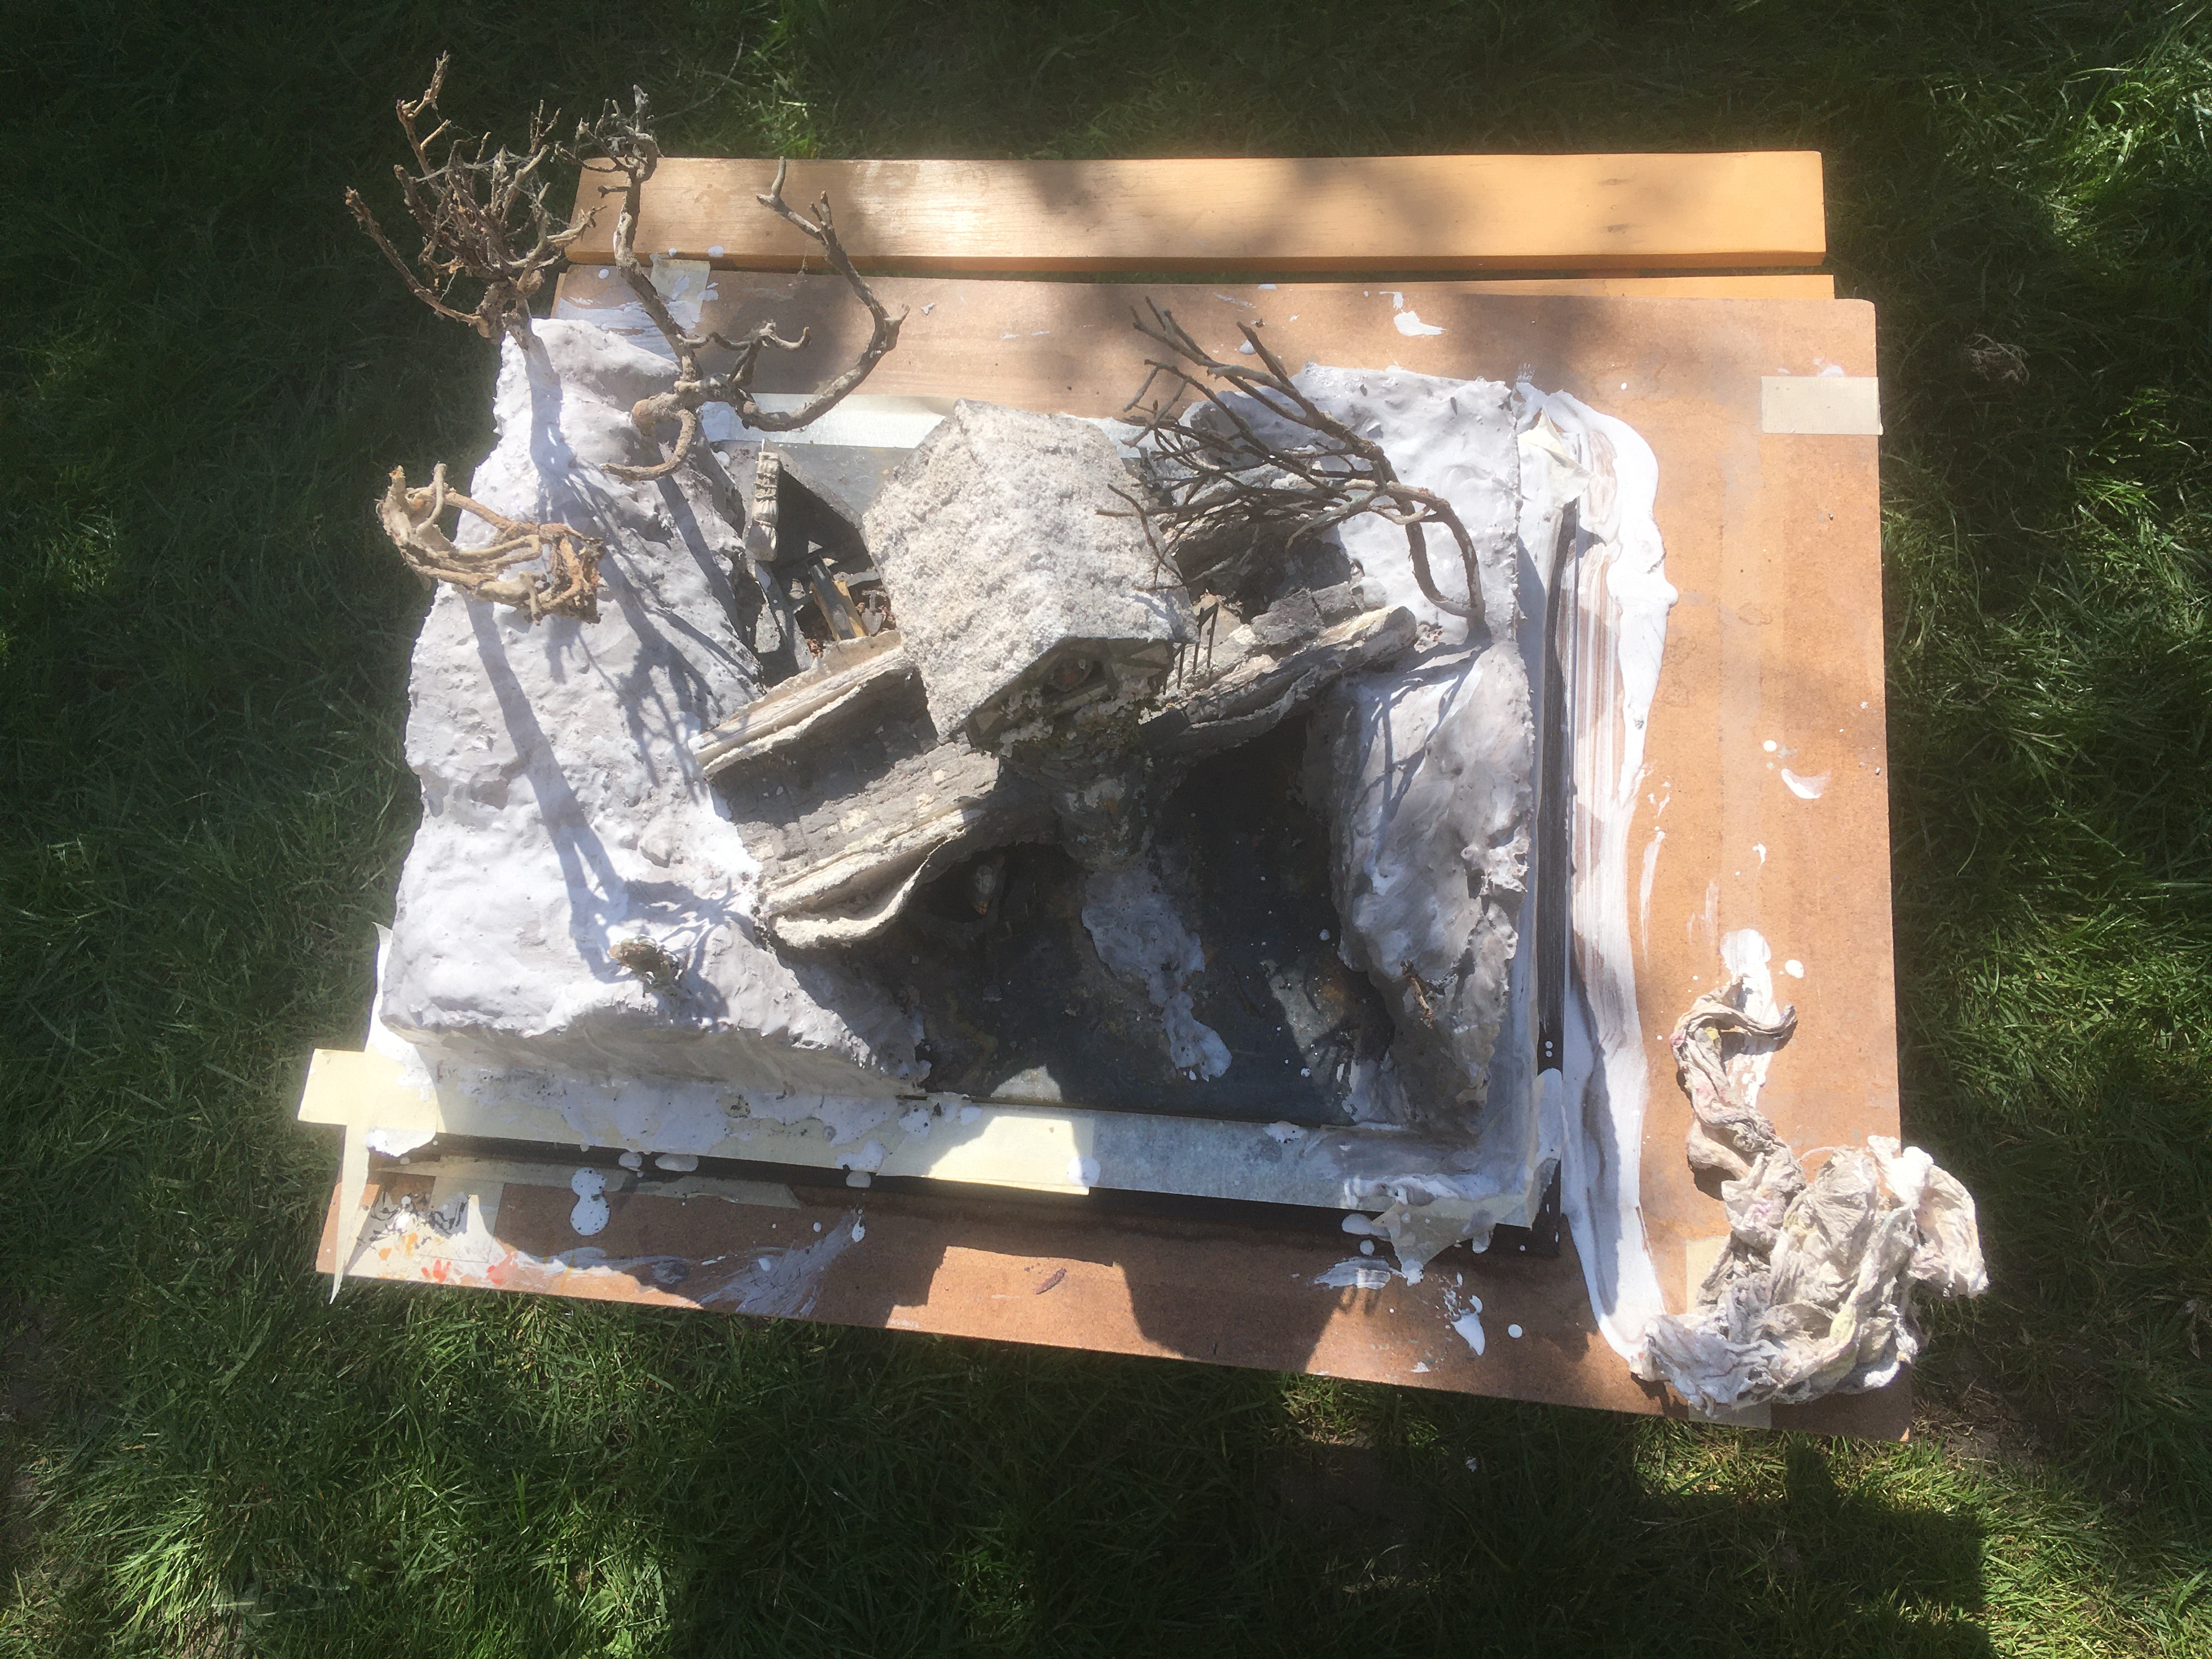
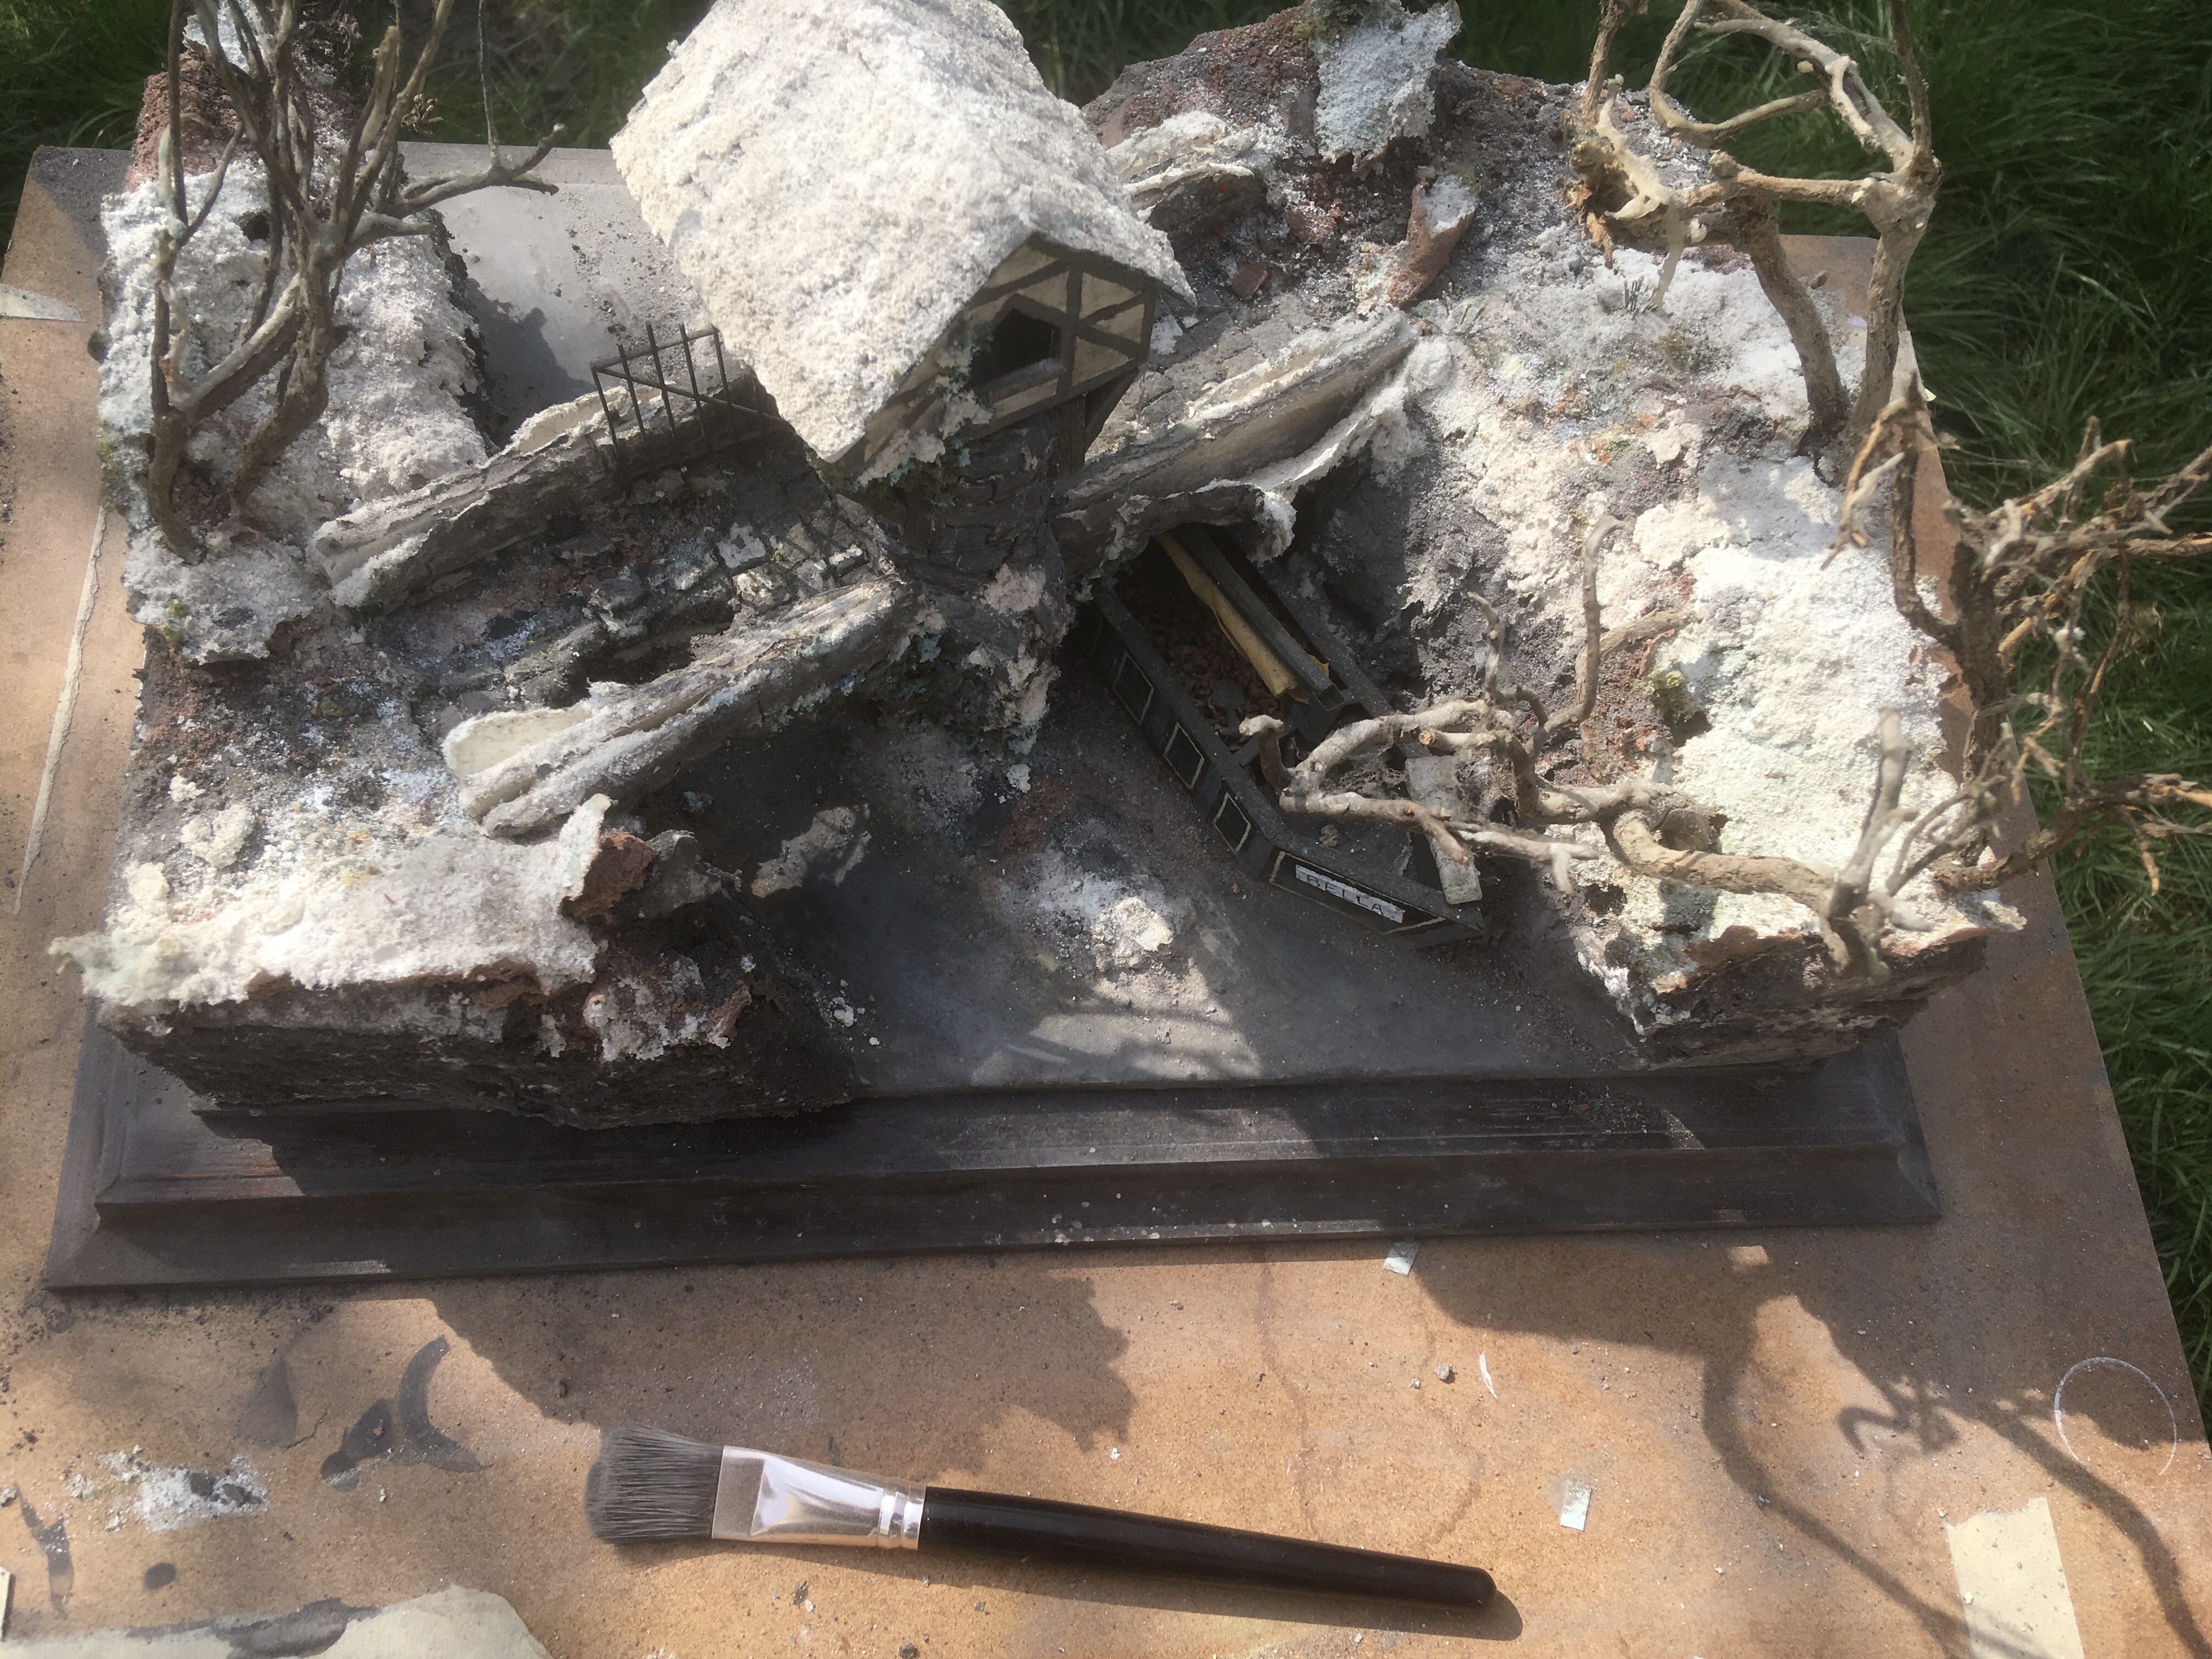 Using a soft-headed one inch make-up brush, I began the careful extraction of the plaster powder. I took care not to damage the bridge, barge, trees and polystyrene rock superstructure. I managed to recover some fantasy toadstools and plants made from Green Stuff and toothbrush bristles. Once the first stage of cleaning had been completed, I could next look to covering the base frame and start the re-plastering of the rocks. As the re-plastering will get a tad messy, another cleaning phase will be required later on.
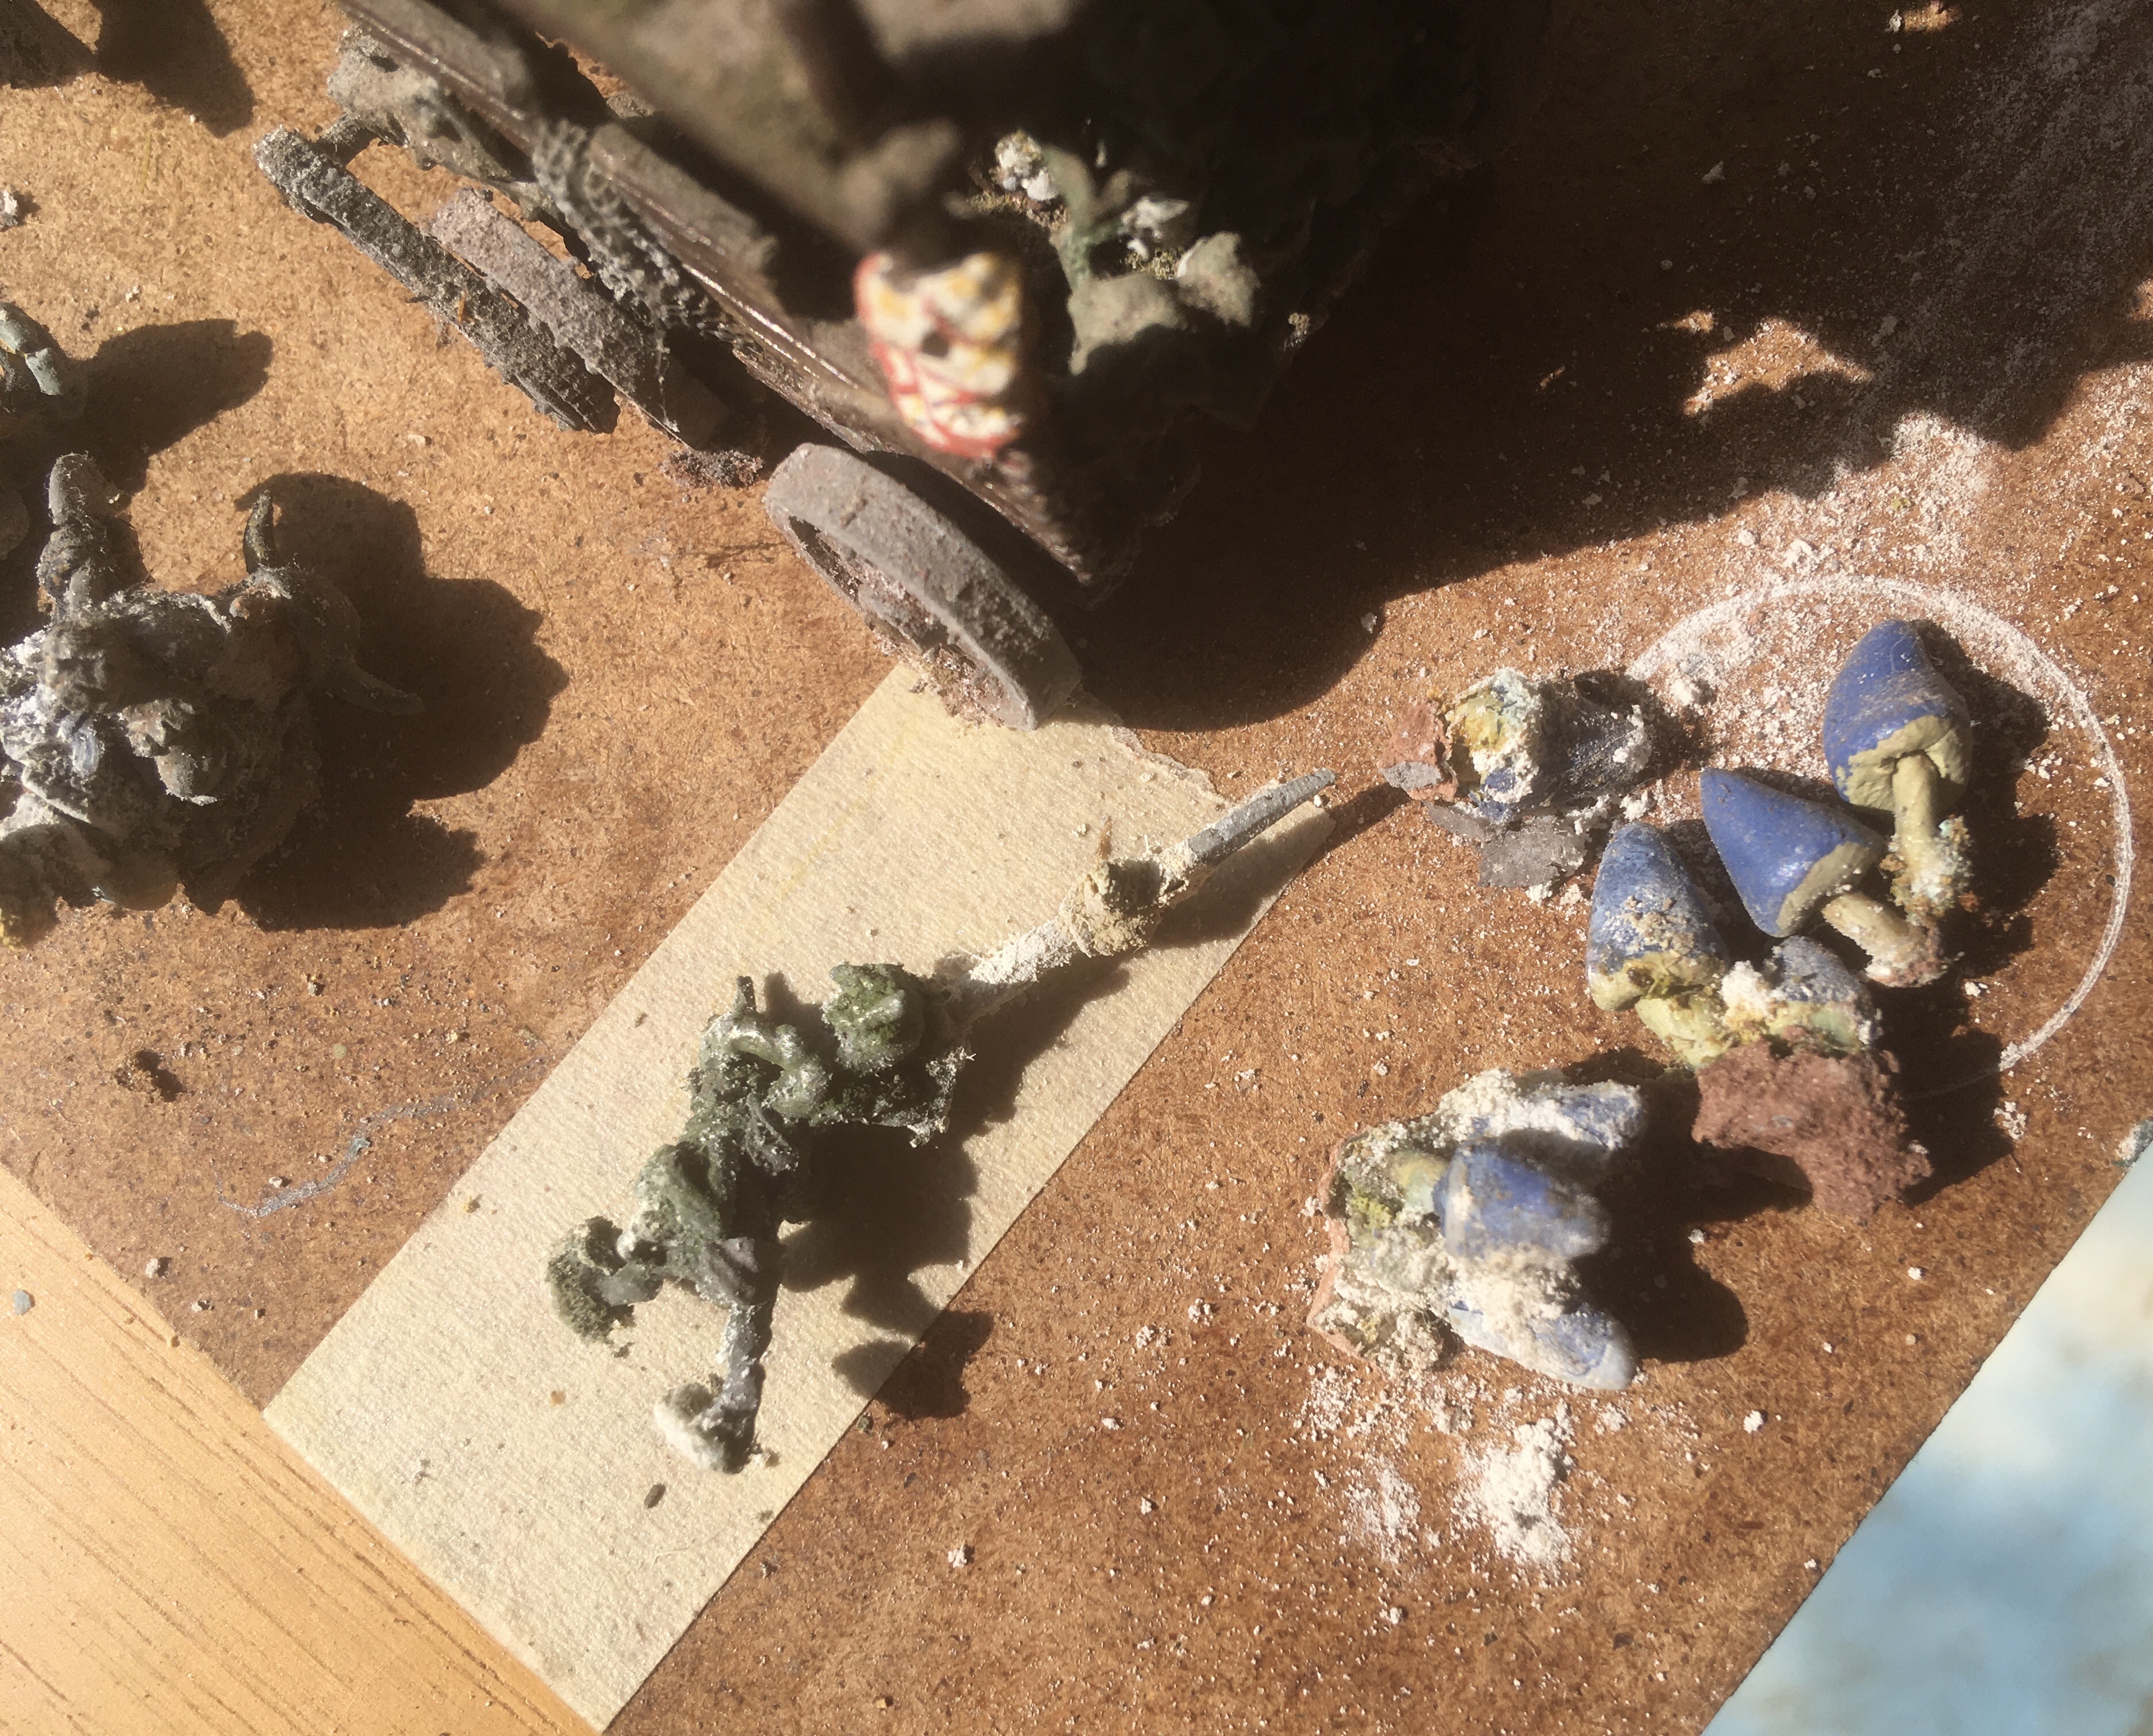
Phase 2 - Getting plastered again!
 After a delicate soapy wash to remove dust and detritus from the base frame and river, it was time to turn to replastering. However, I needed to protect the woodwork frame with some masking tape before applying the ready made plaster with a trowel and the top surface with a watered-down plaster base using a large but soft brush.
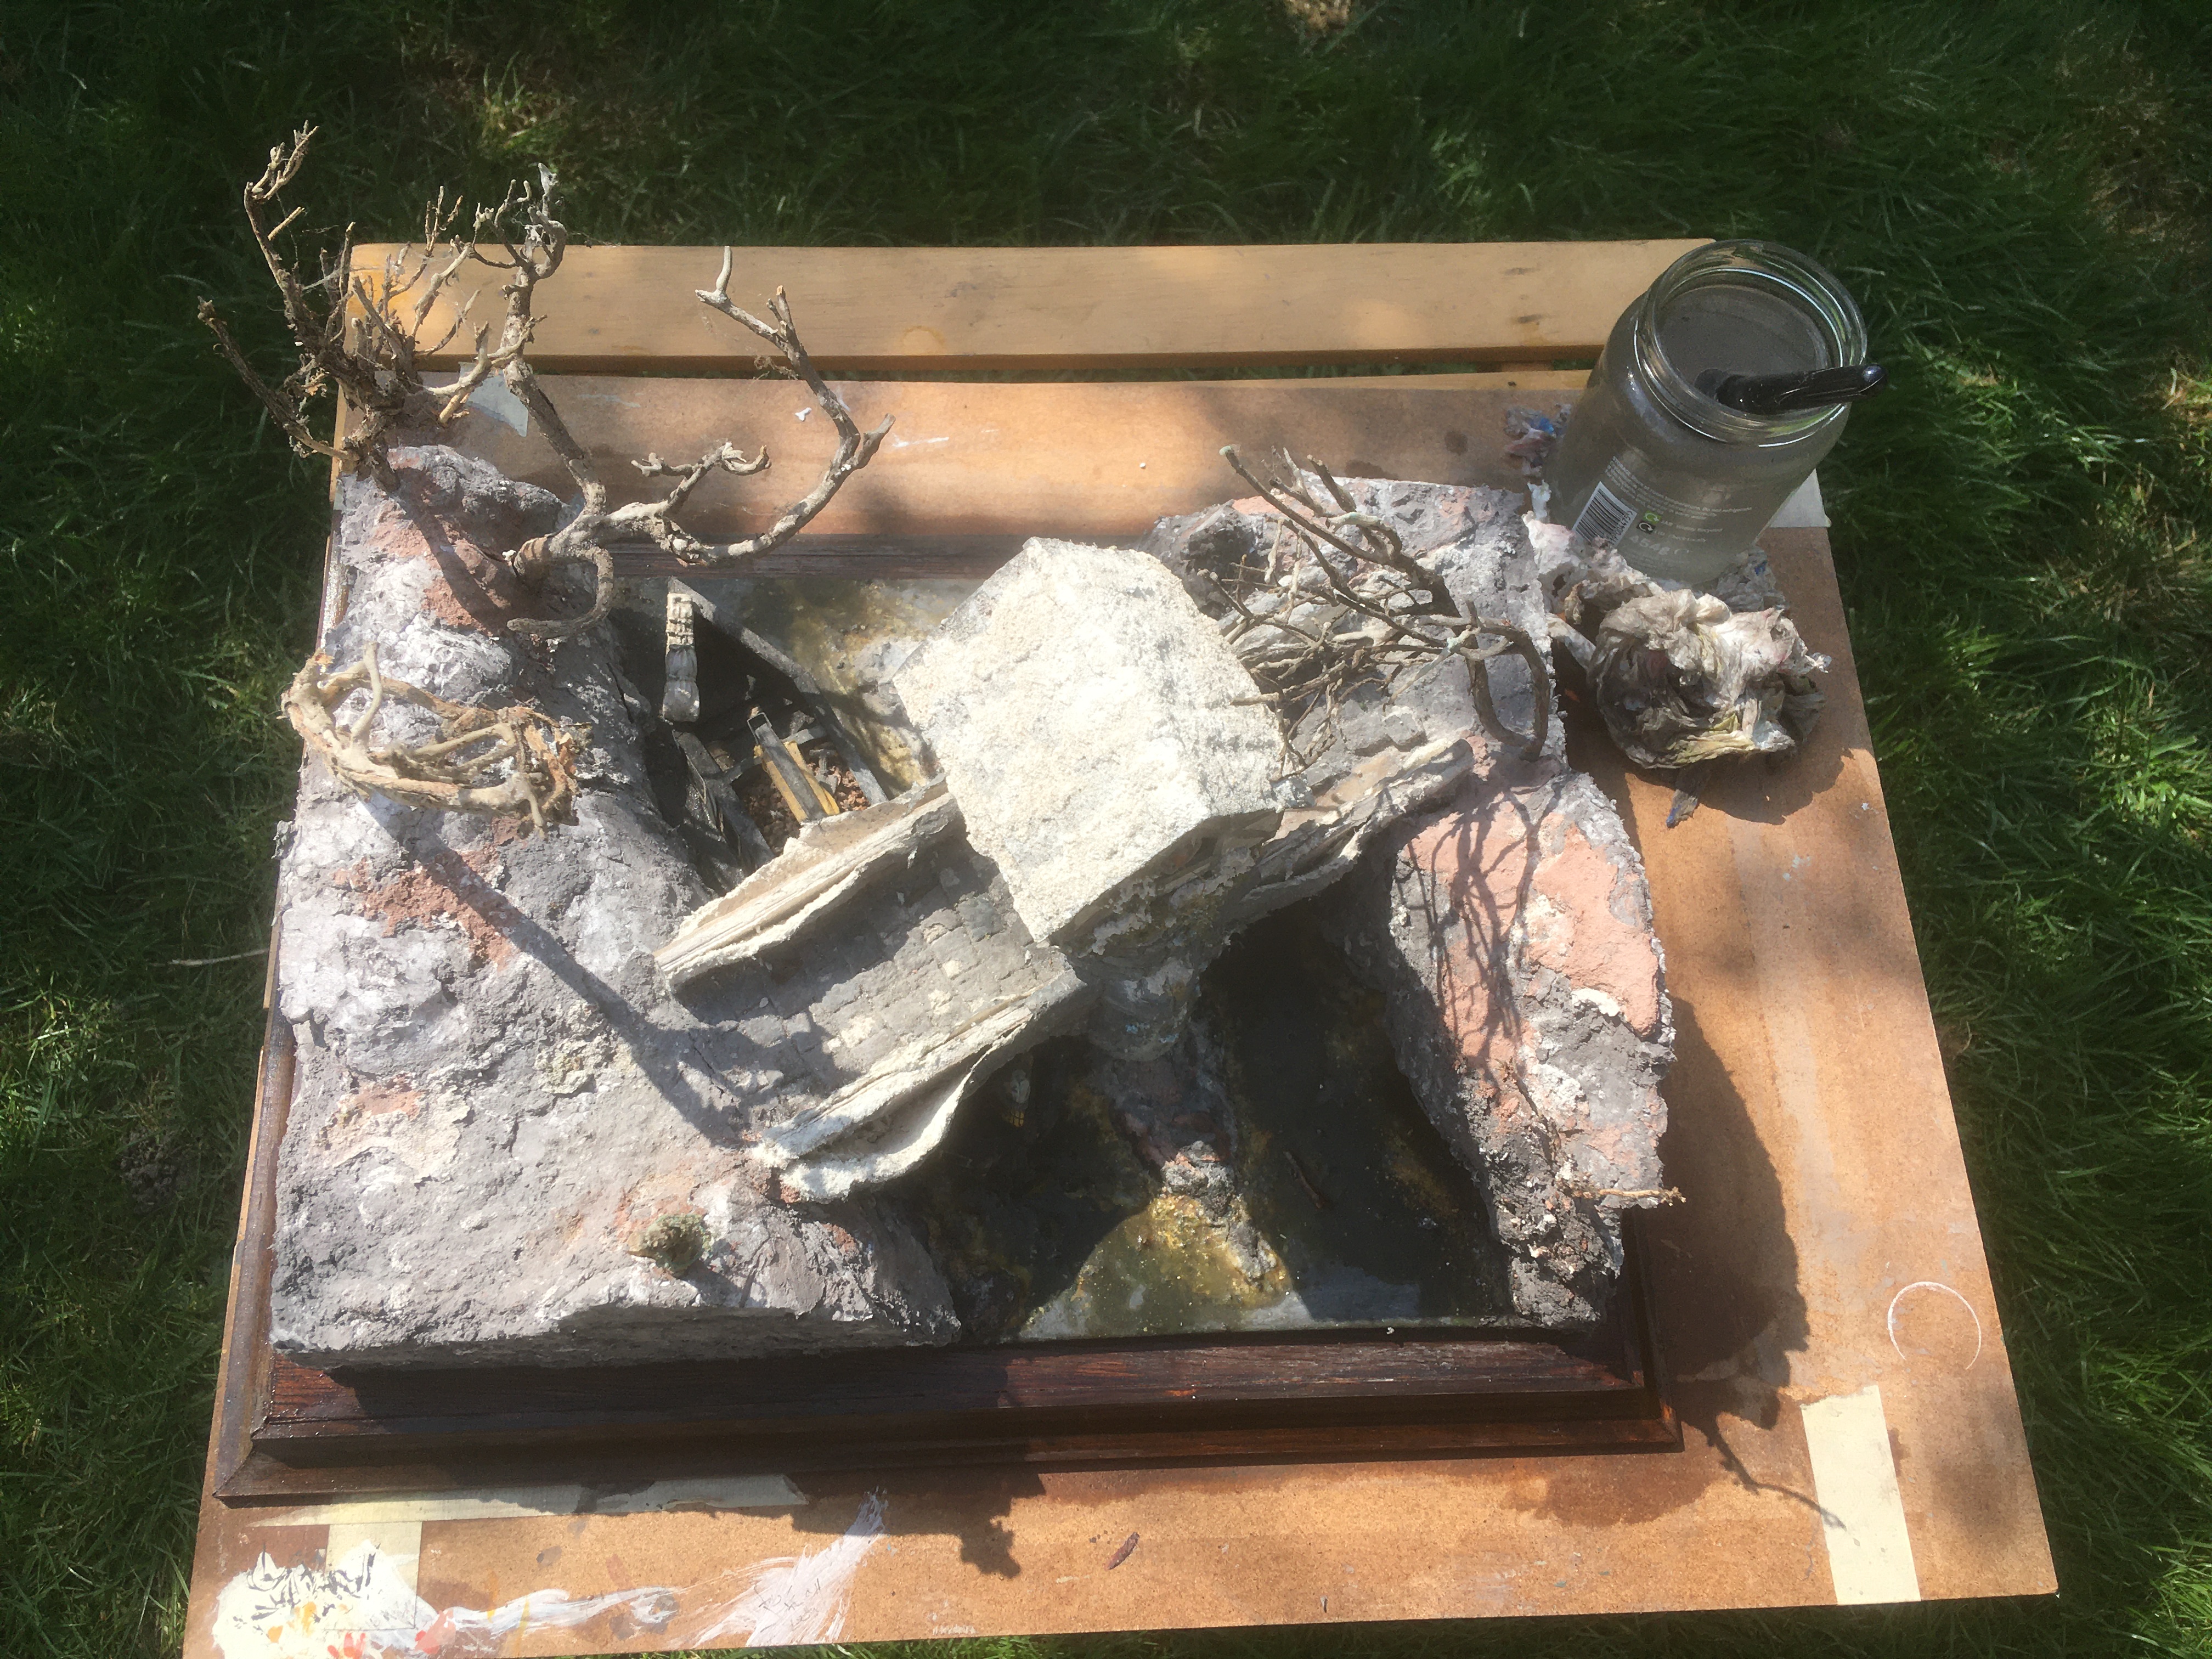
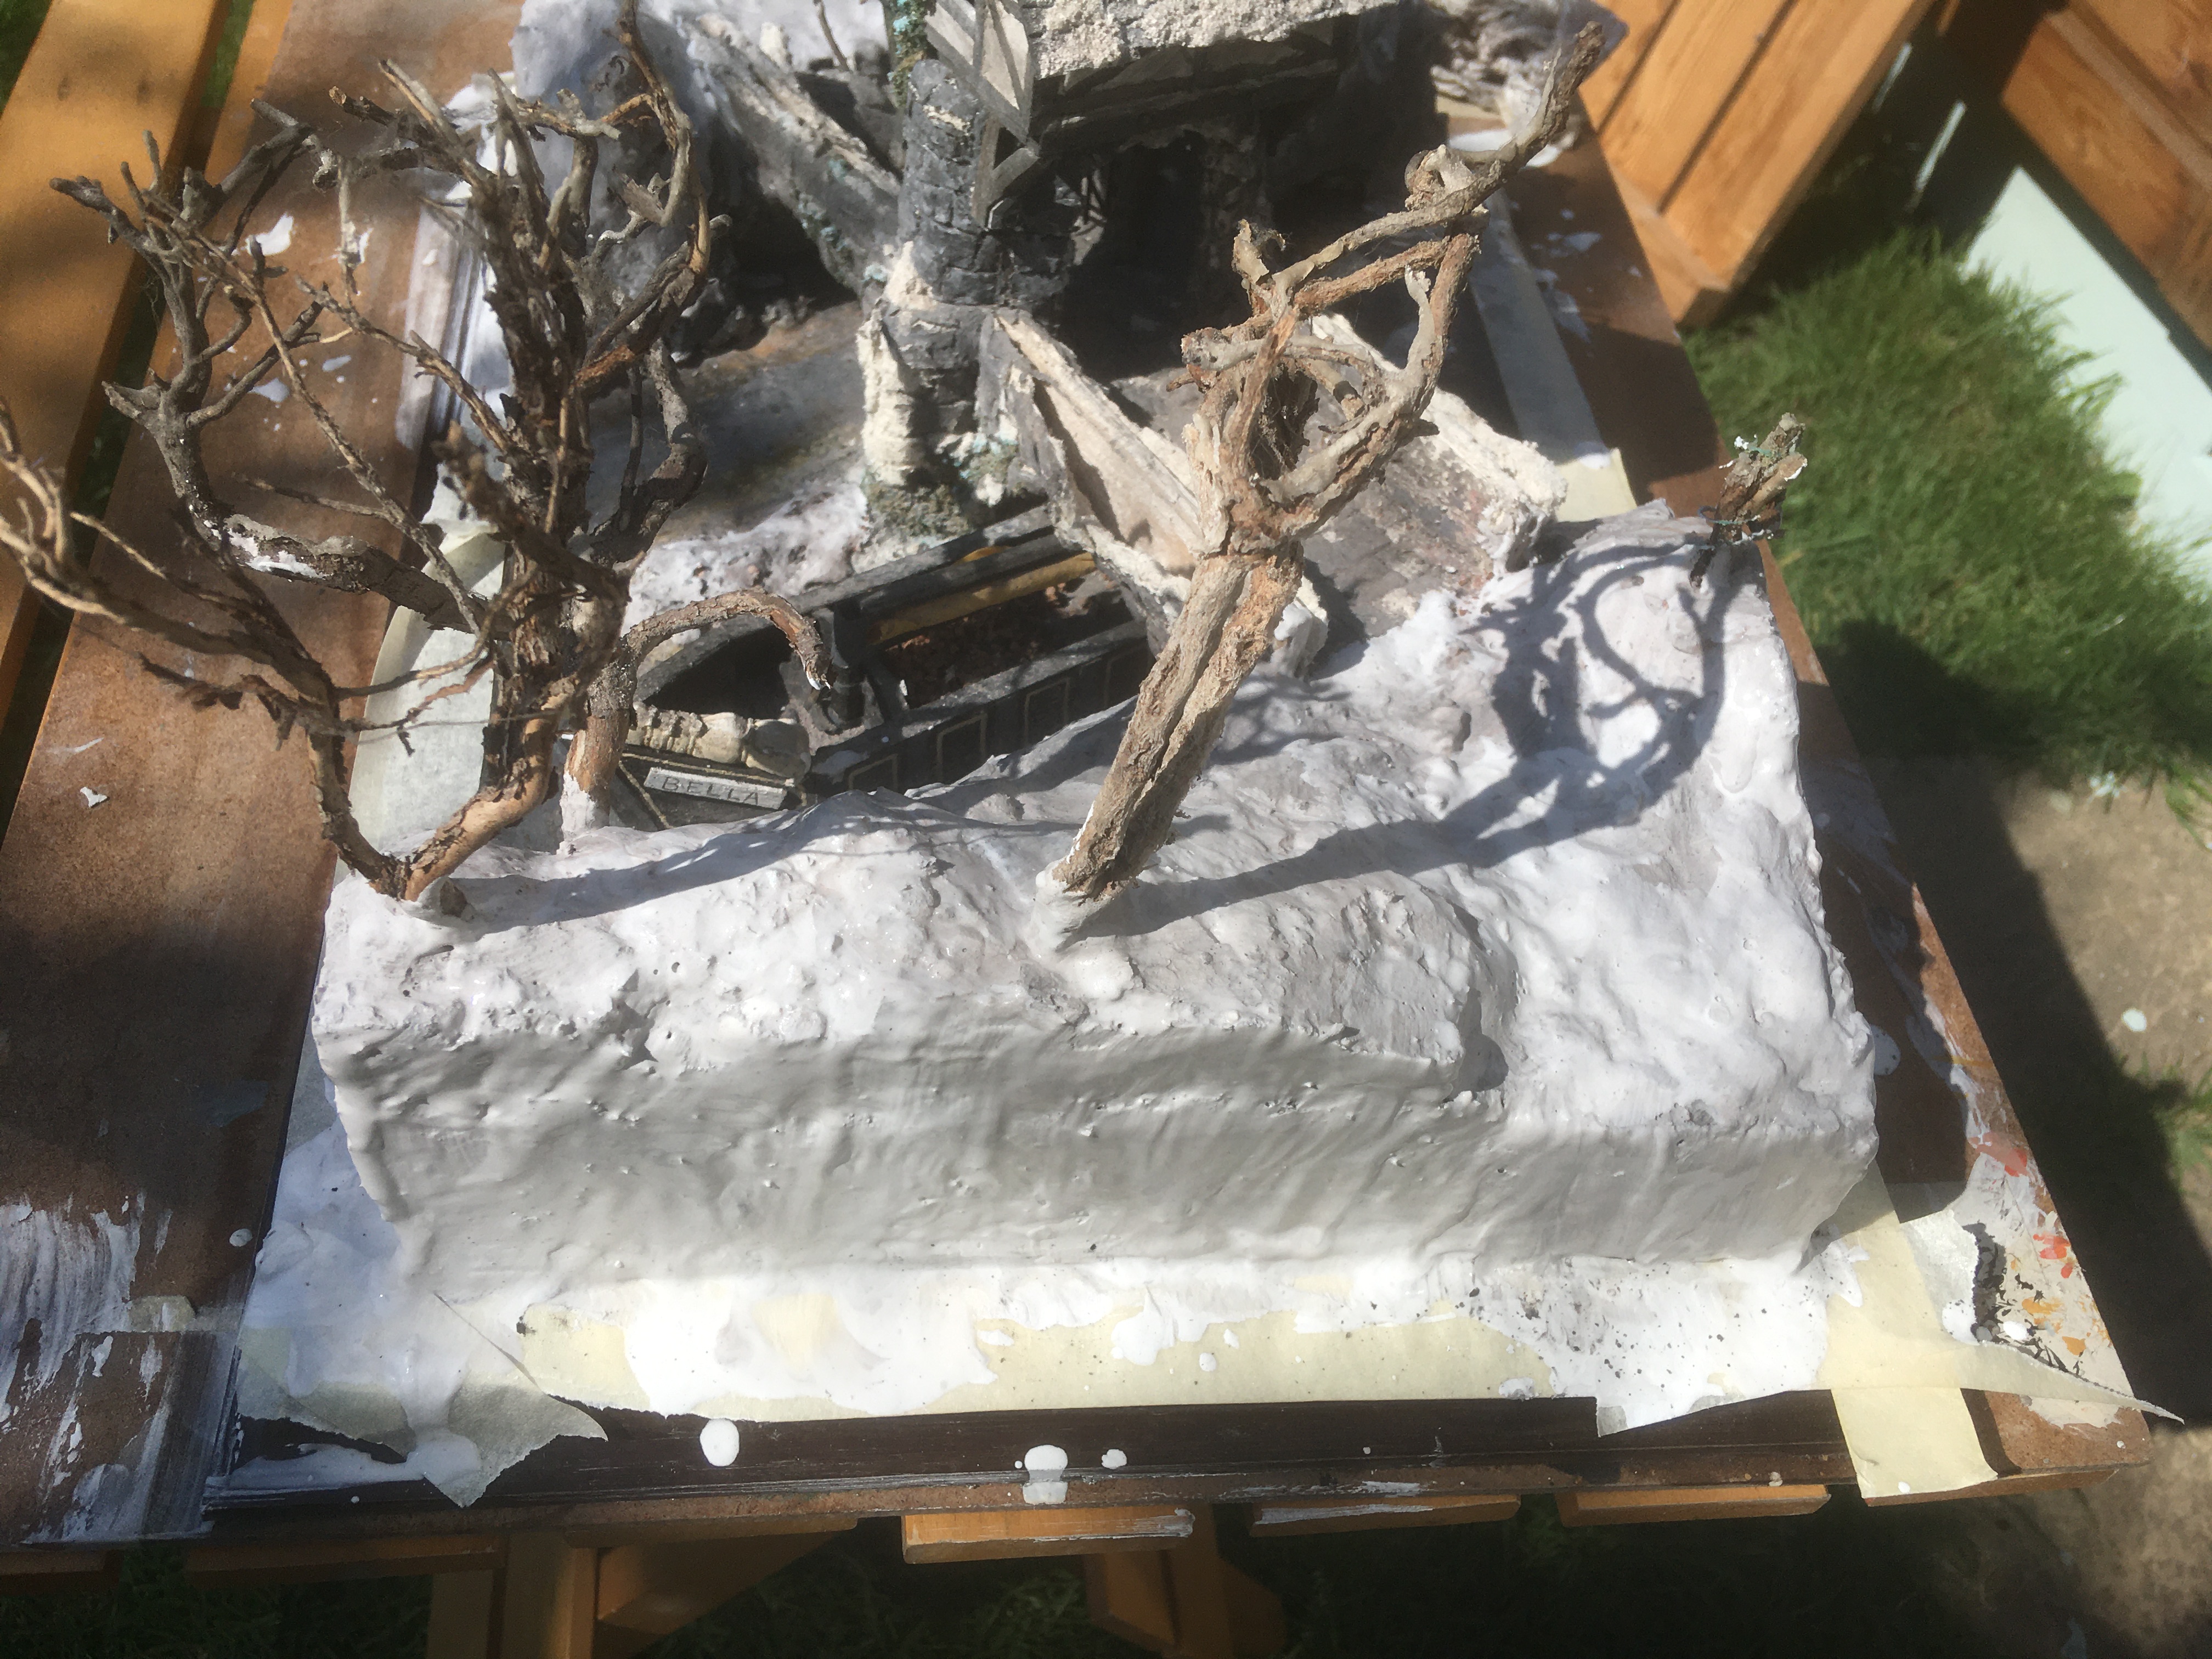
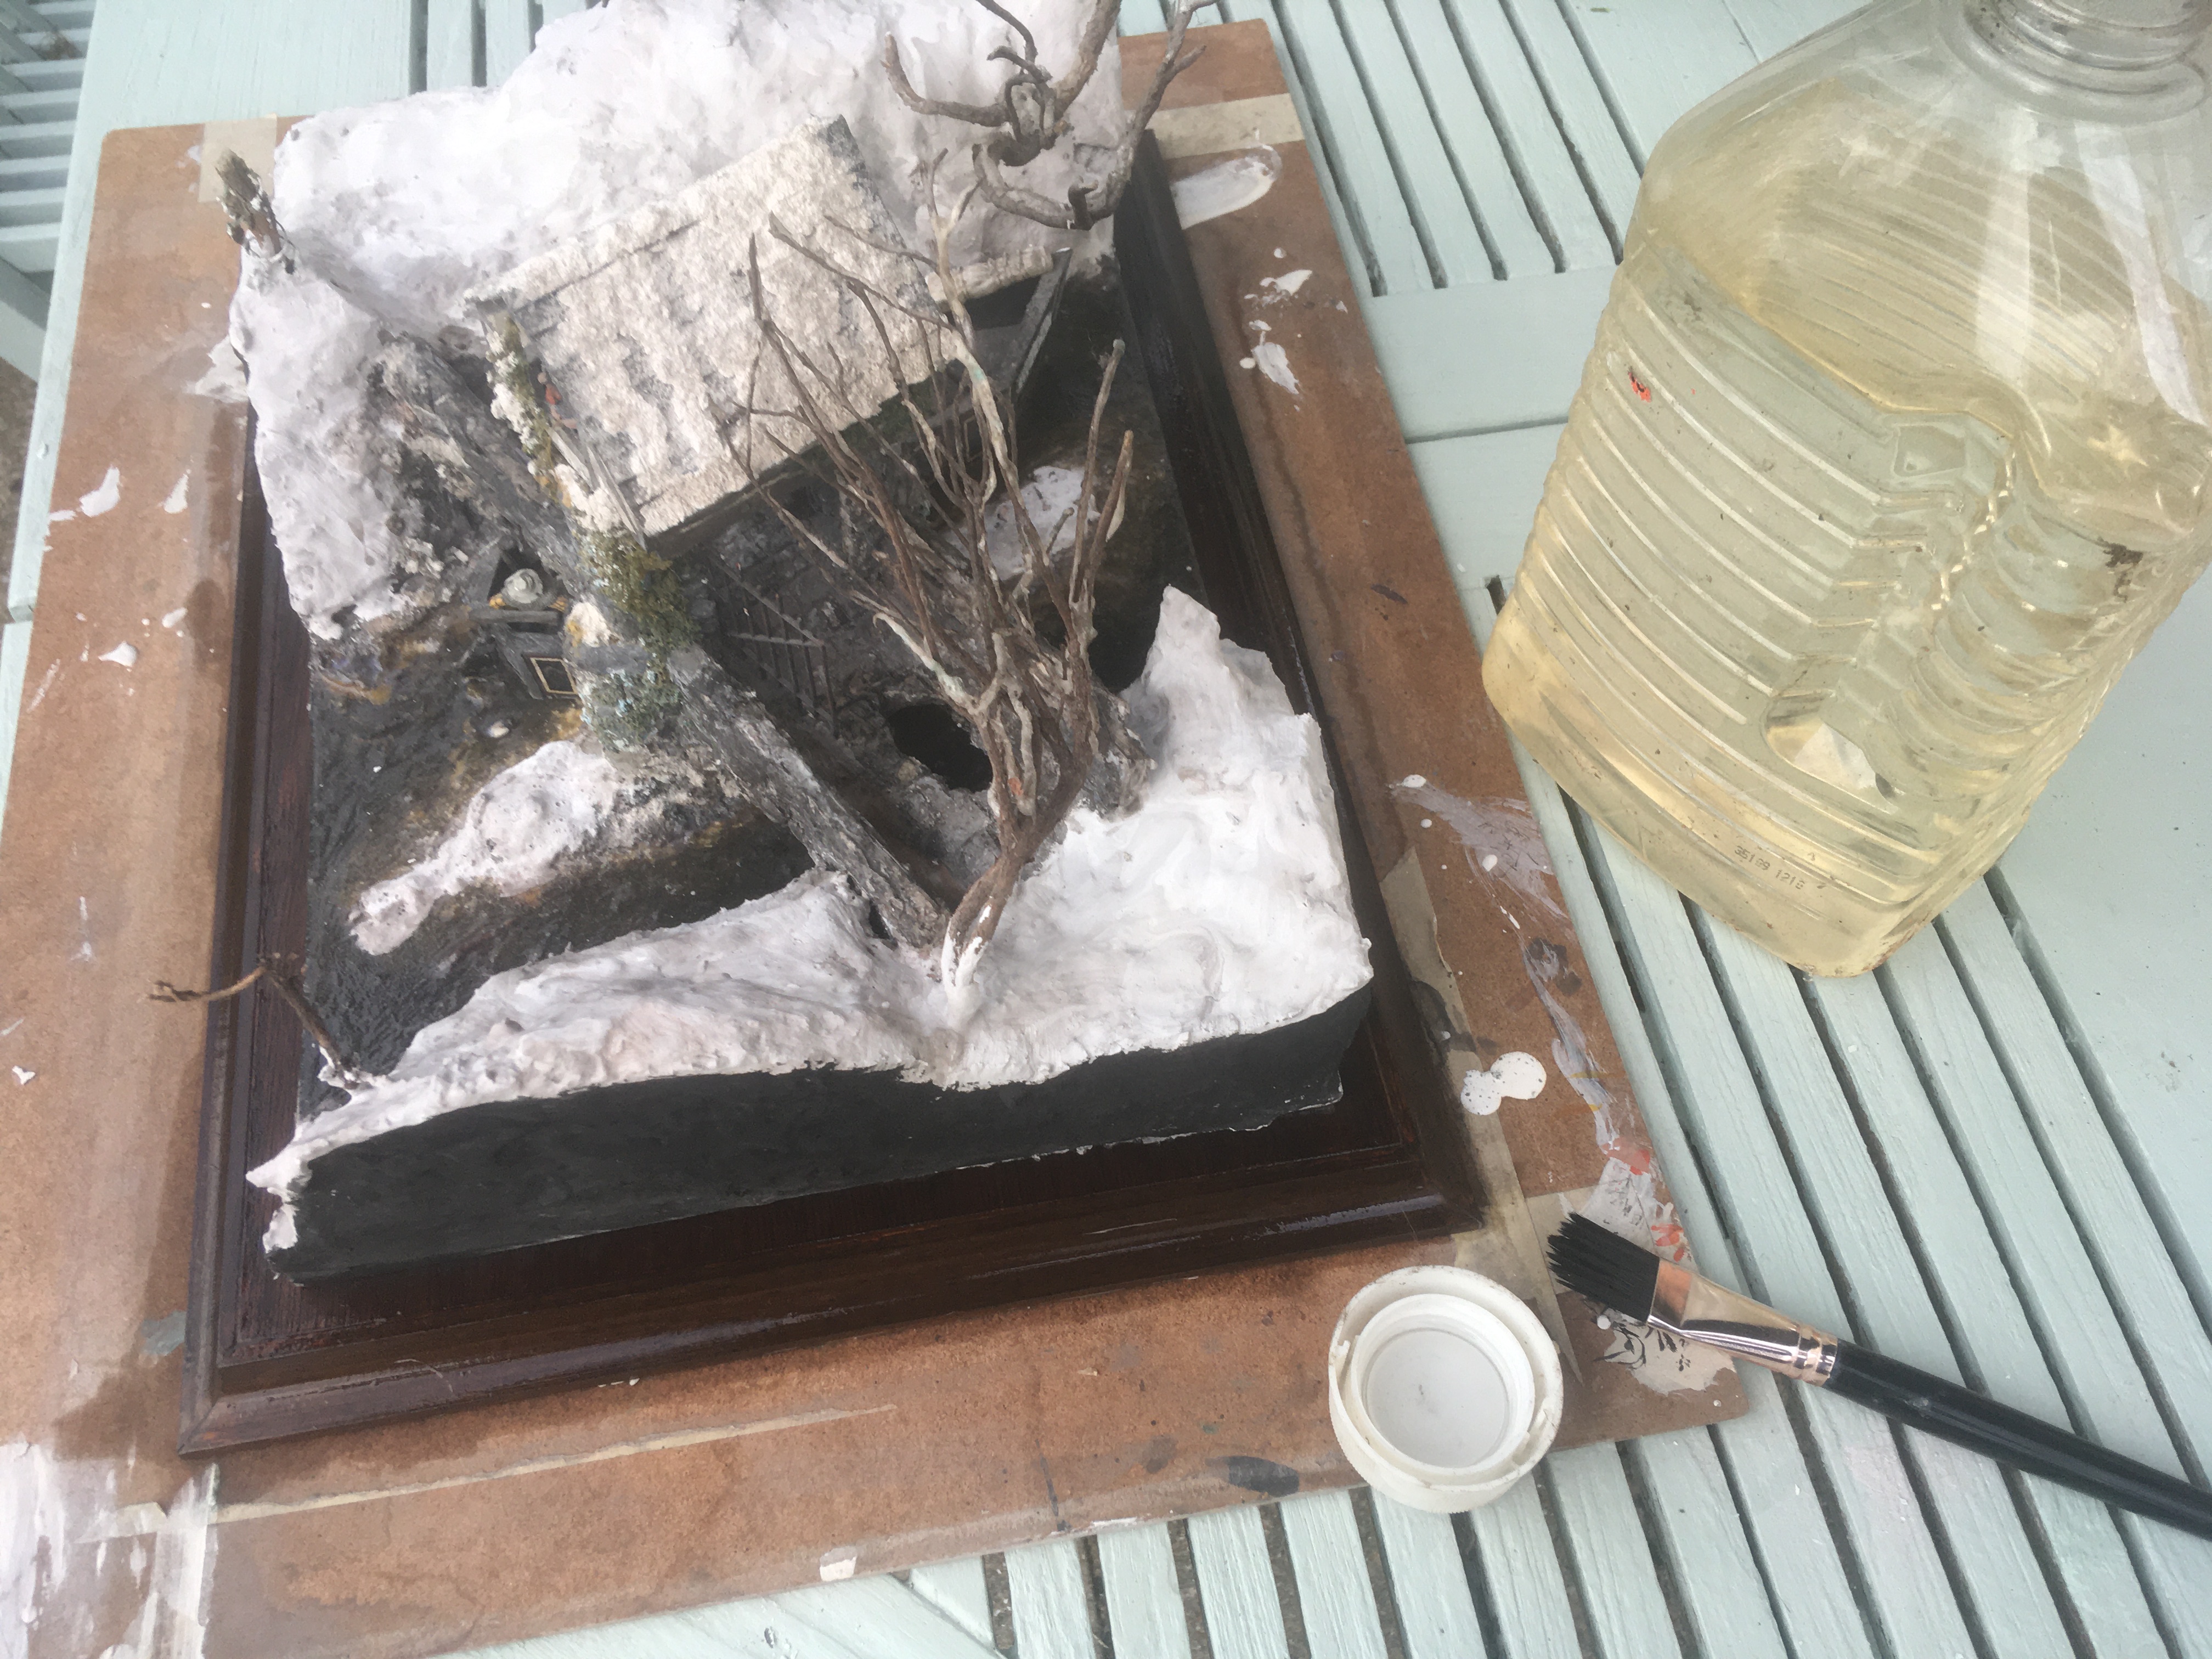
 After leaving to dry for 48 hours, the exterior sides of the diorama were painted with Abaddon Black using a largish, pointed brush and edged with a small, fine brush. Next up will be to repair the brickwork on the bridge.
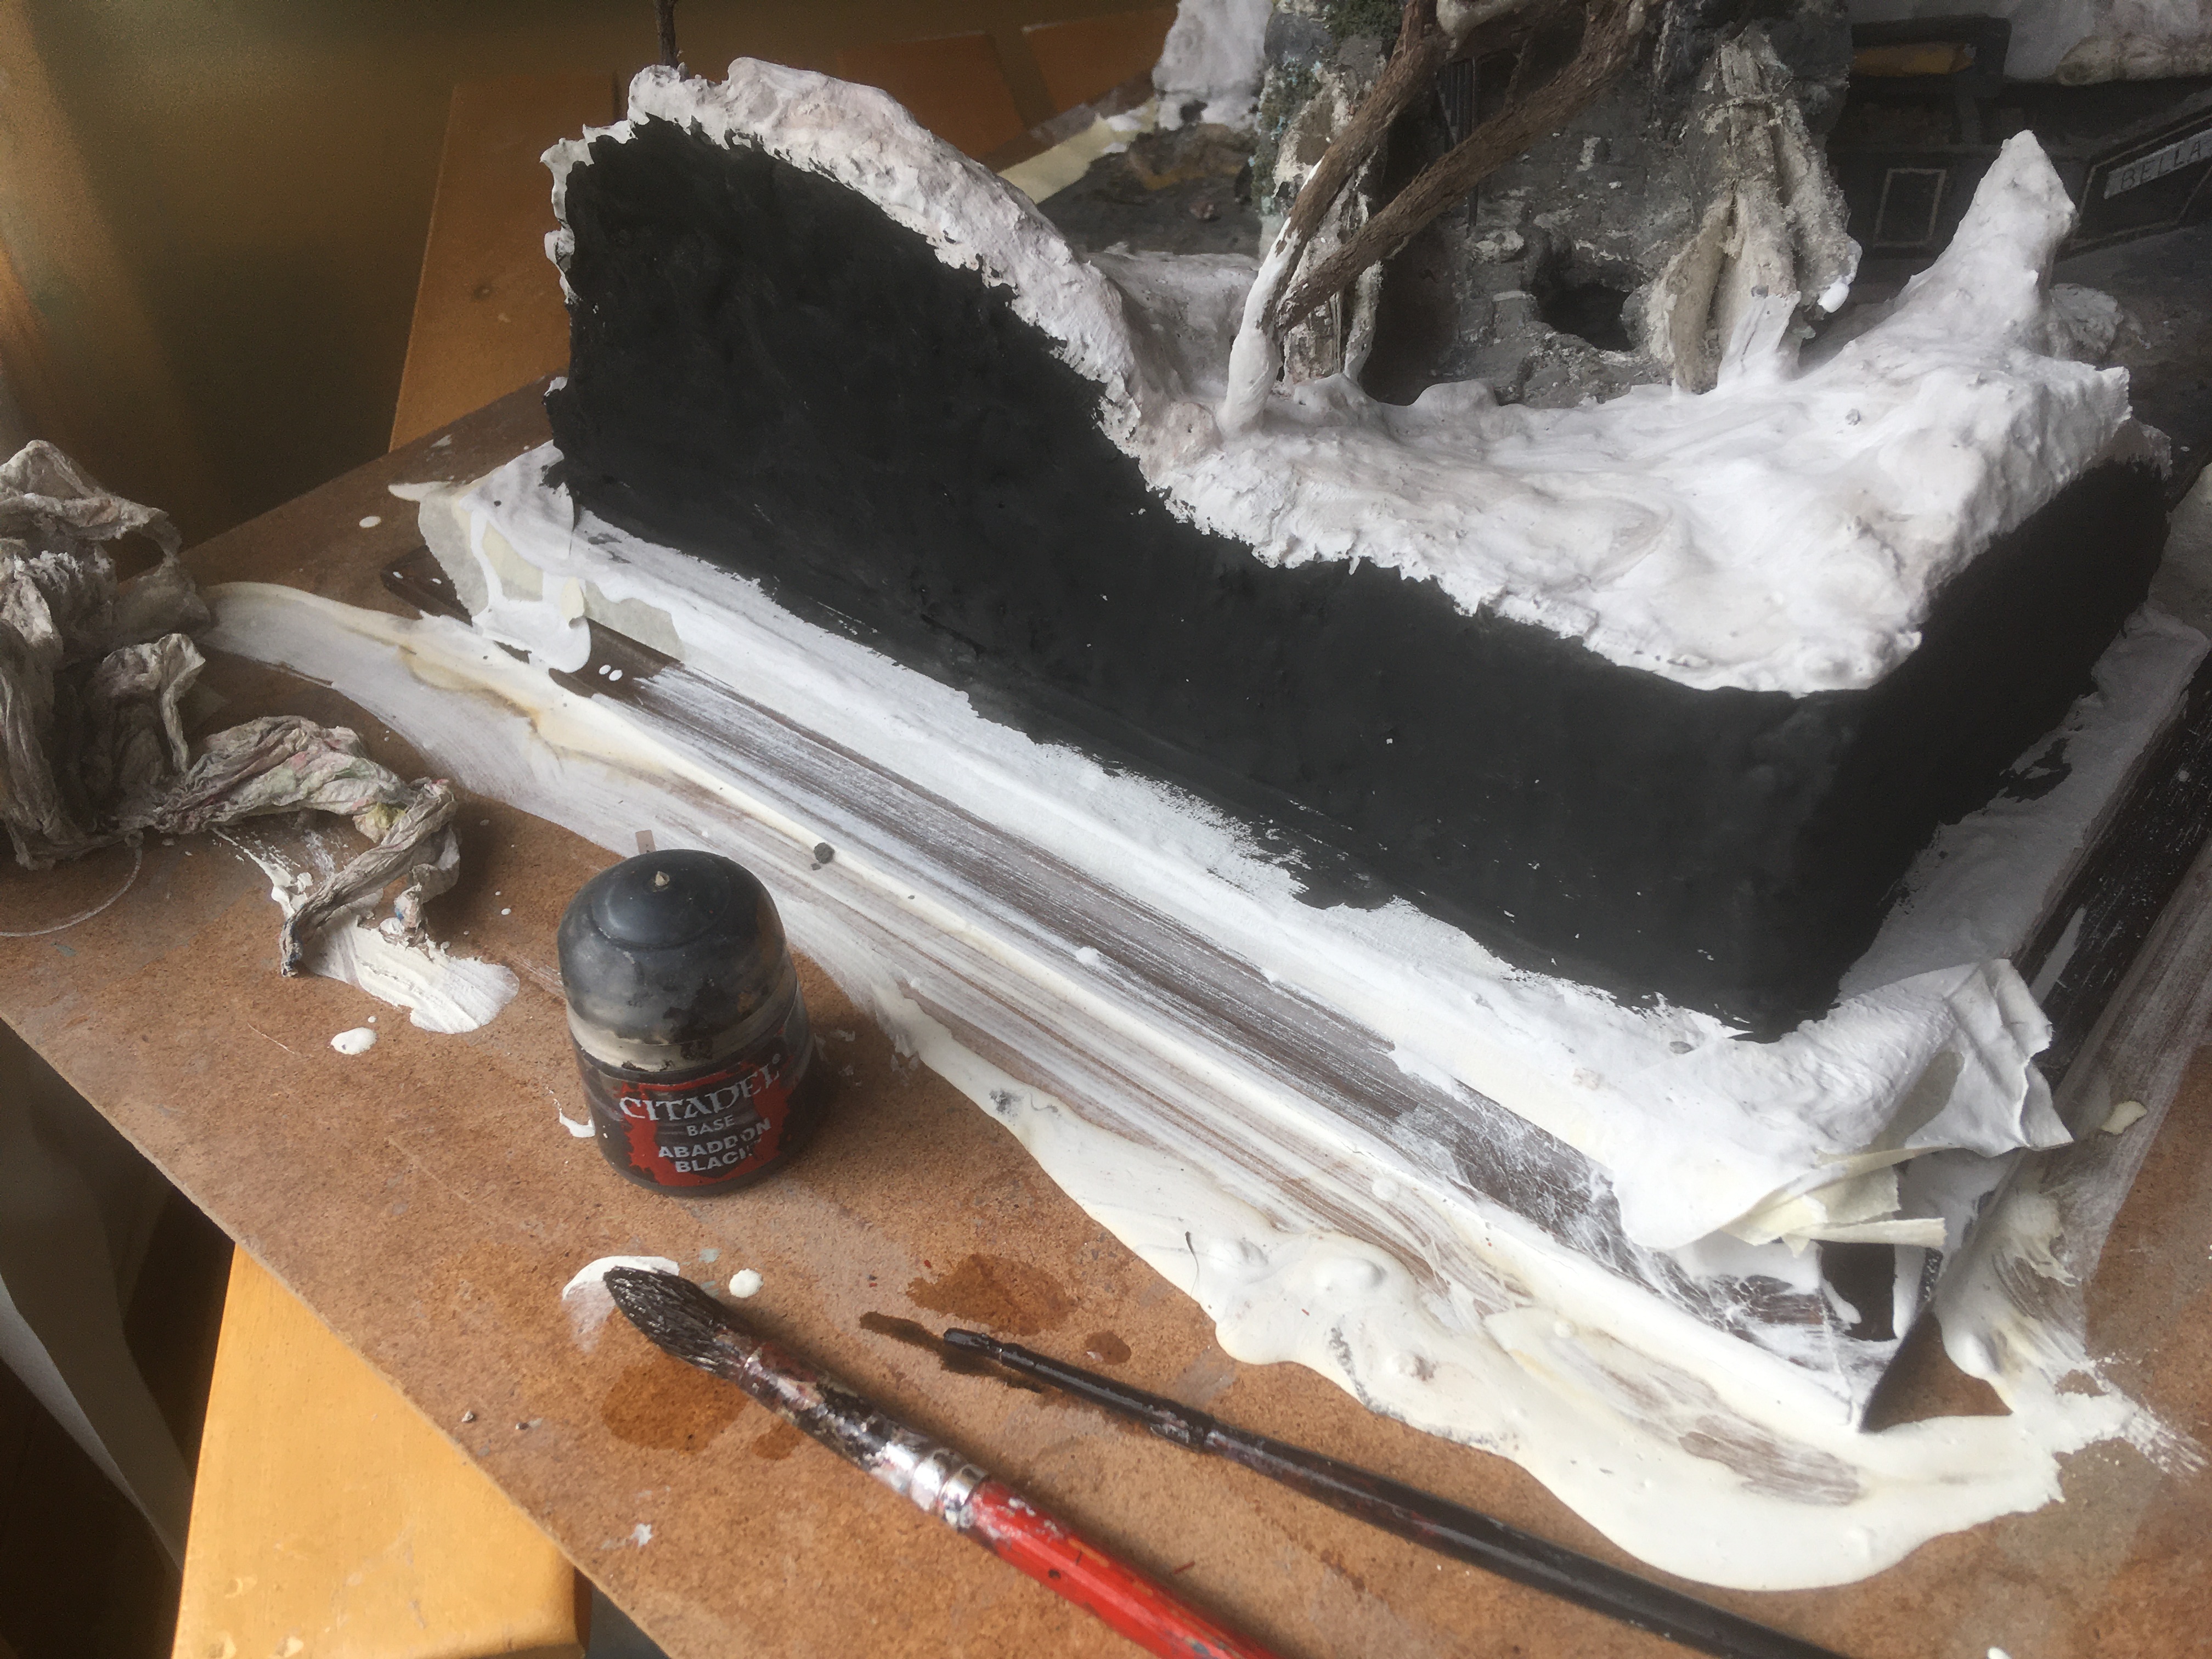


Phase 3 - Making the Water flow
 Having cleaned the river bed and removed the dust by blowing it away and umpteen brushing manoeuvres, it was time to give the water a bit of sparkle. In this case, I used Technical ‘ardcoat from GW and a large brush.
 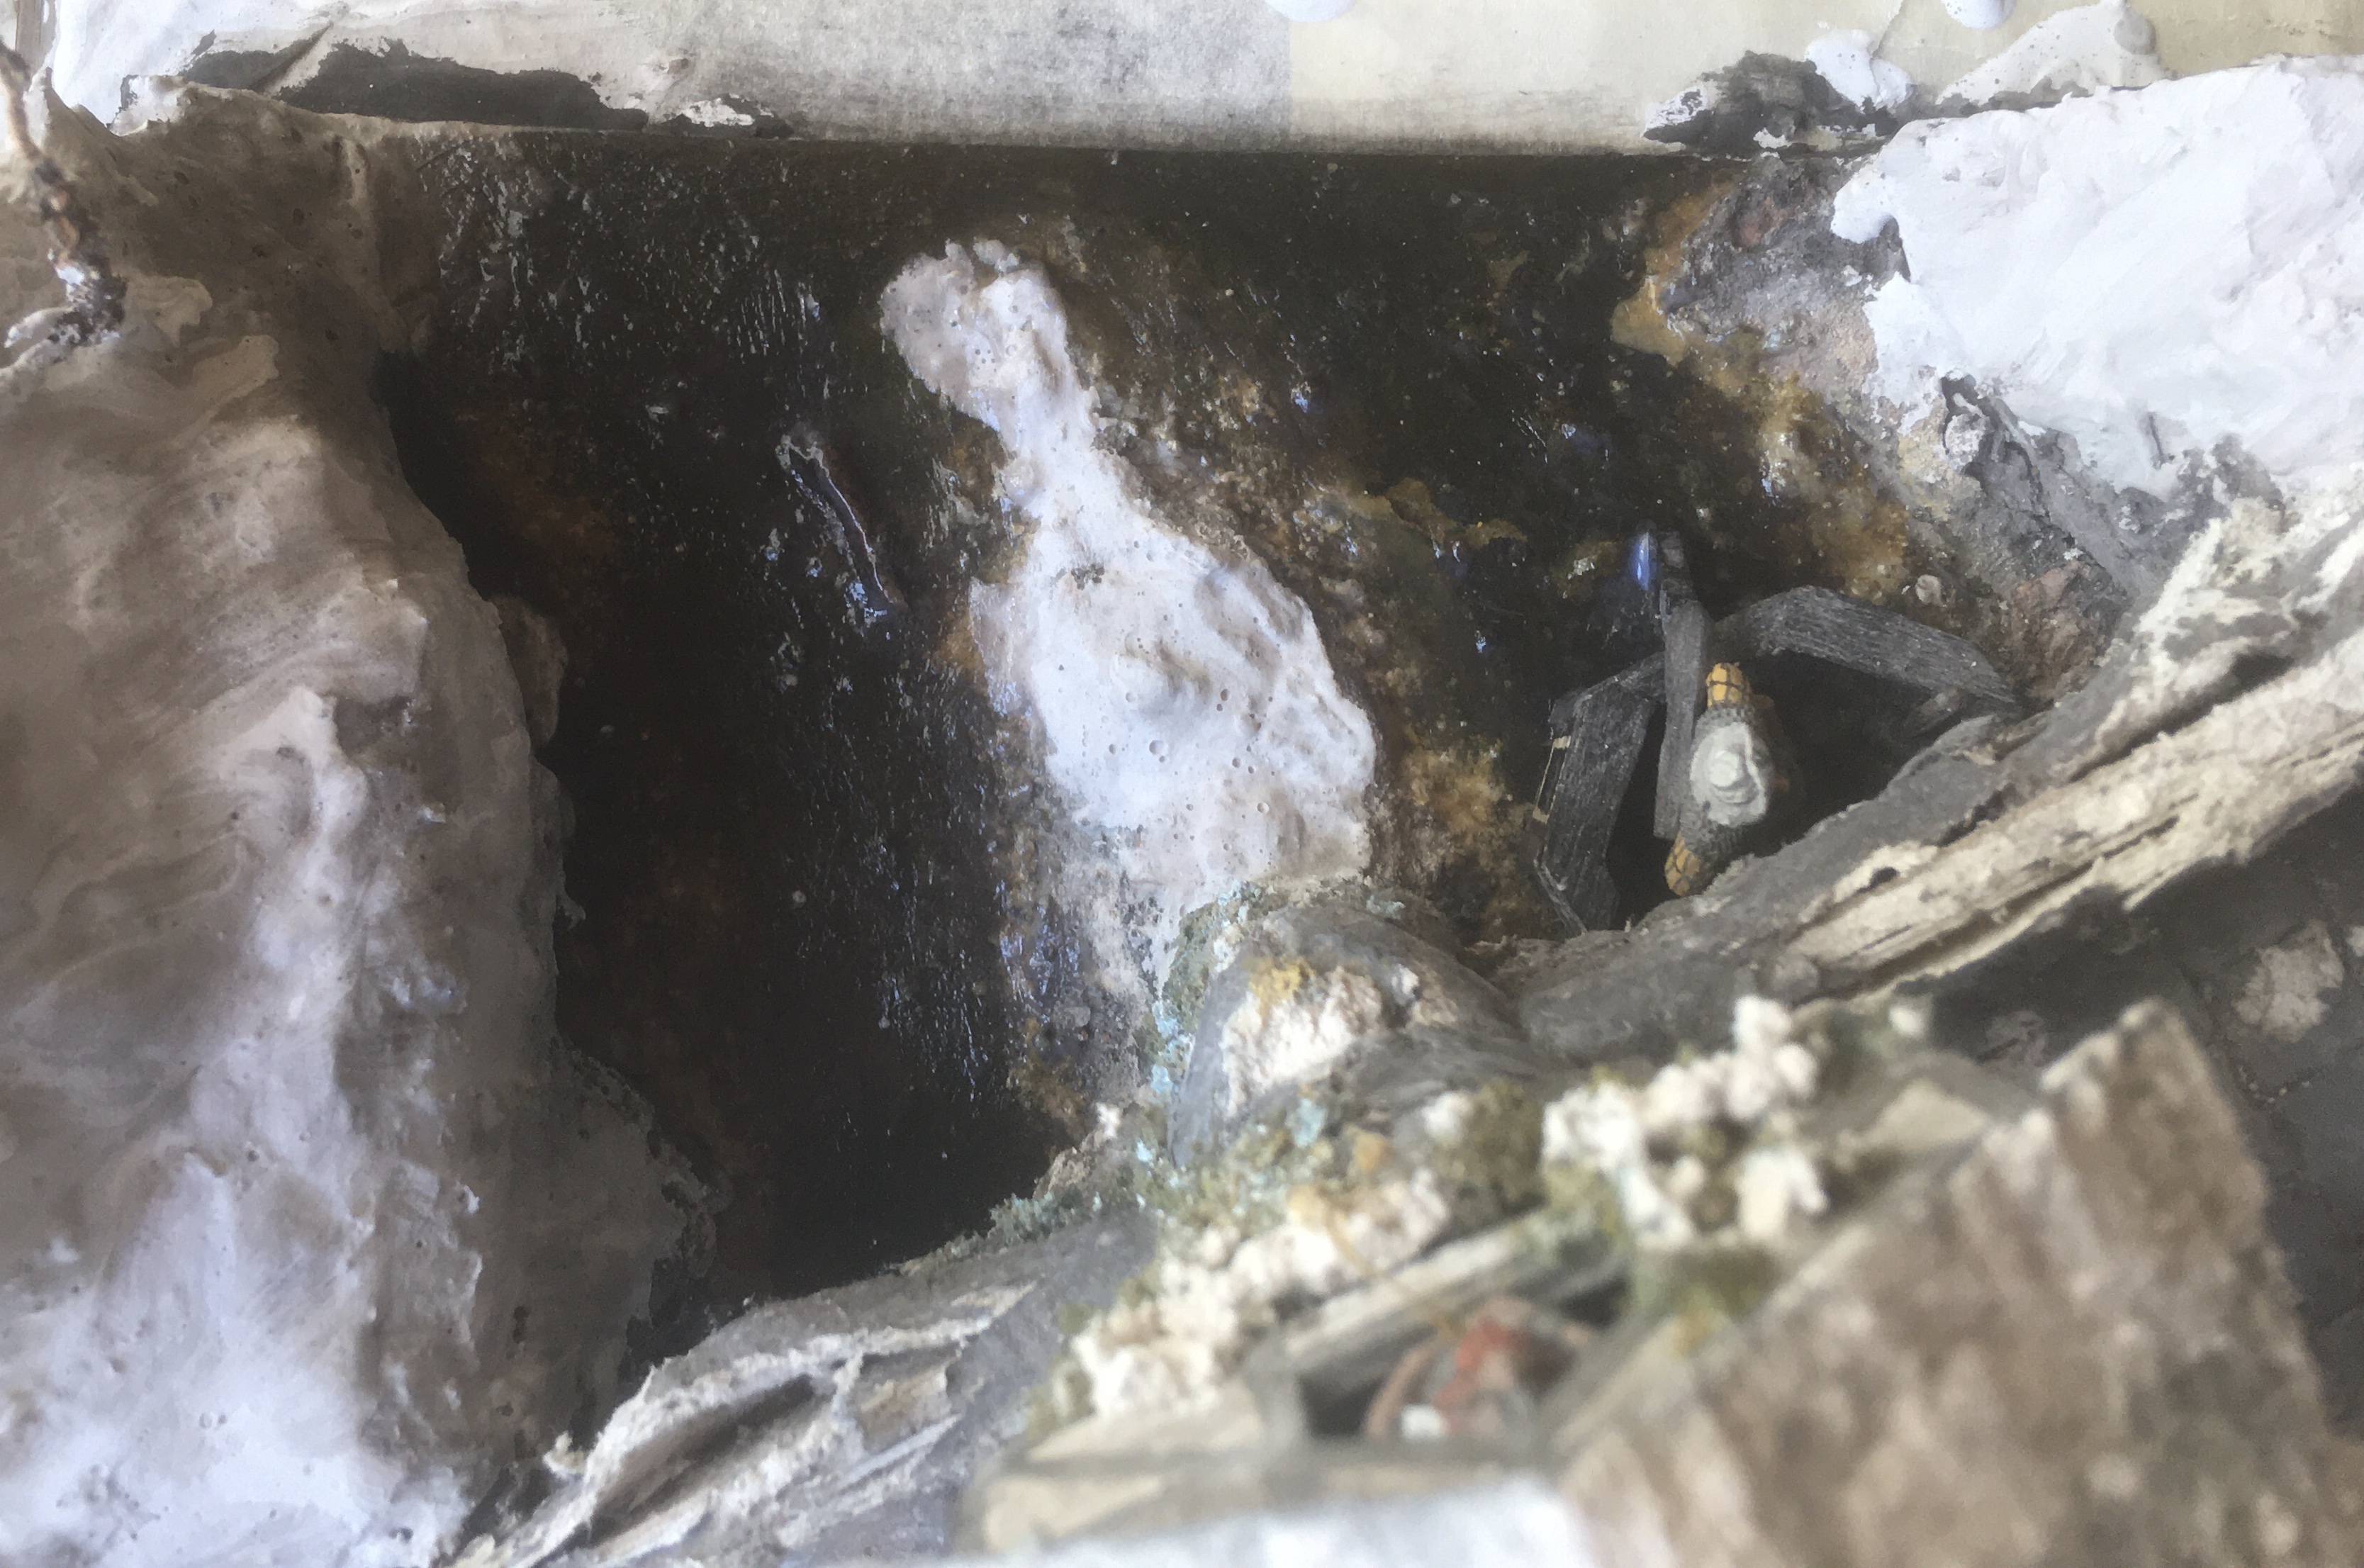 Three coats of gloss varnish appears to give the appropriate shine, although I may add a further coat or two as the rest of the scenery progresses.
 Phase 4 - Rebuilding the Bridge
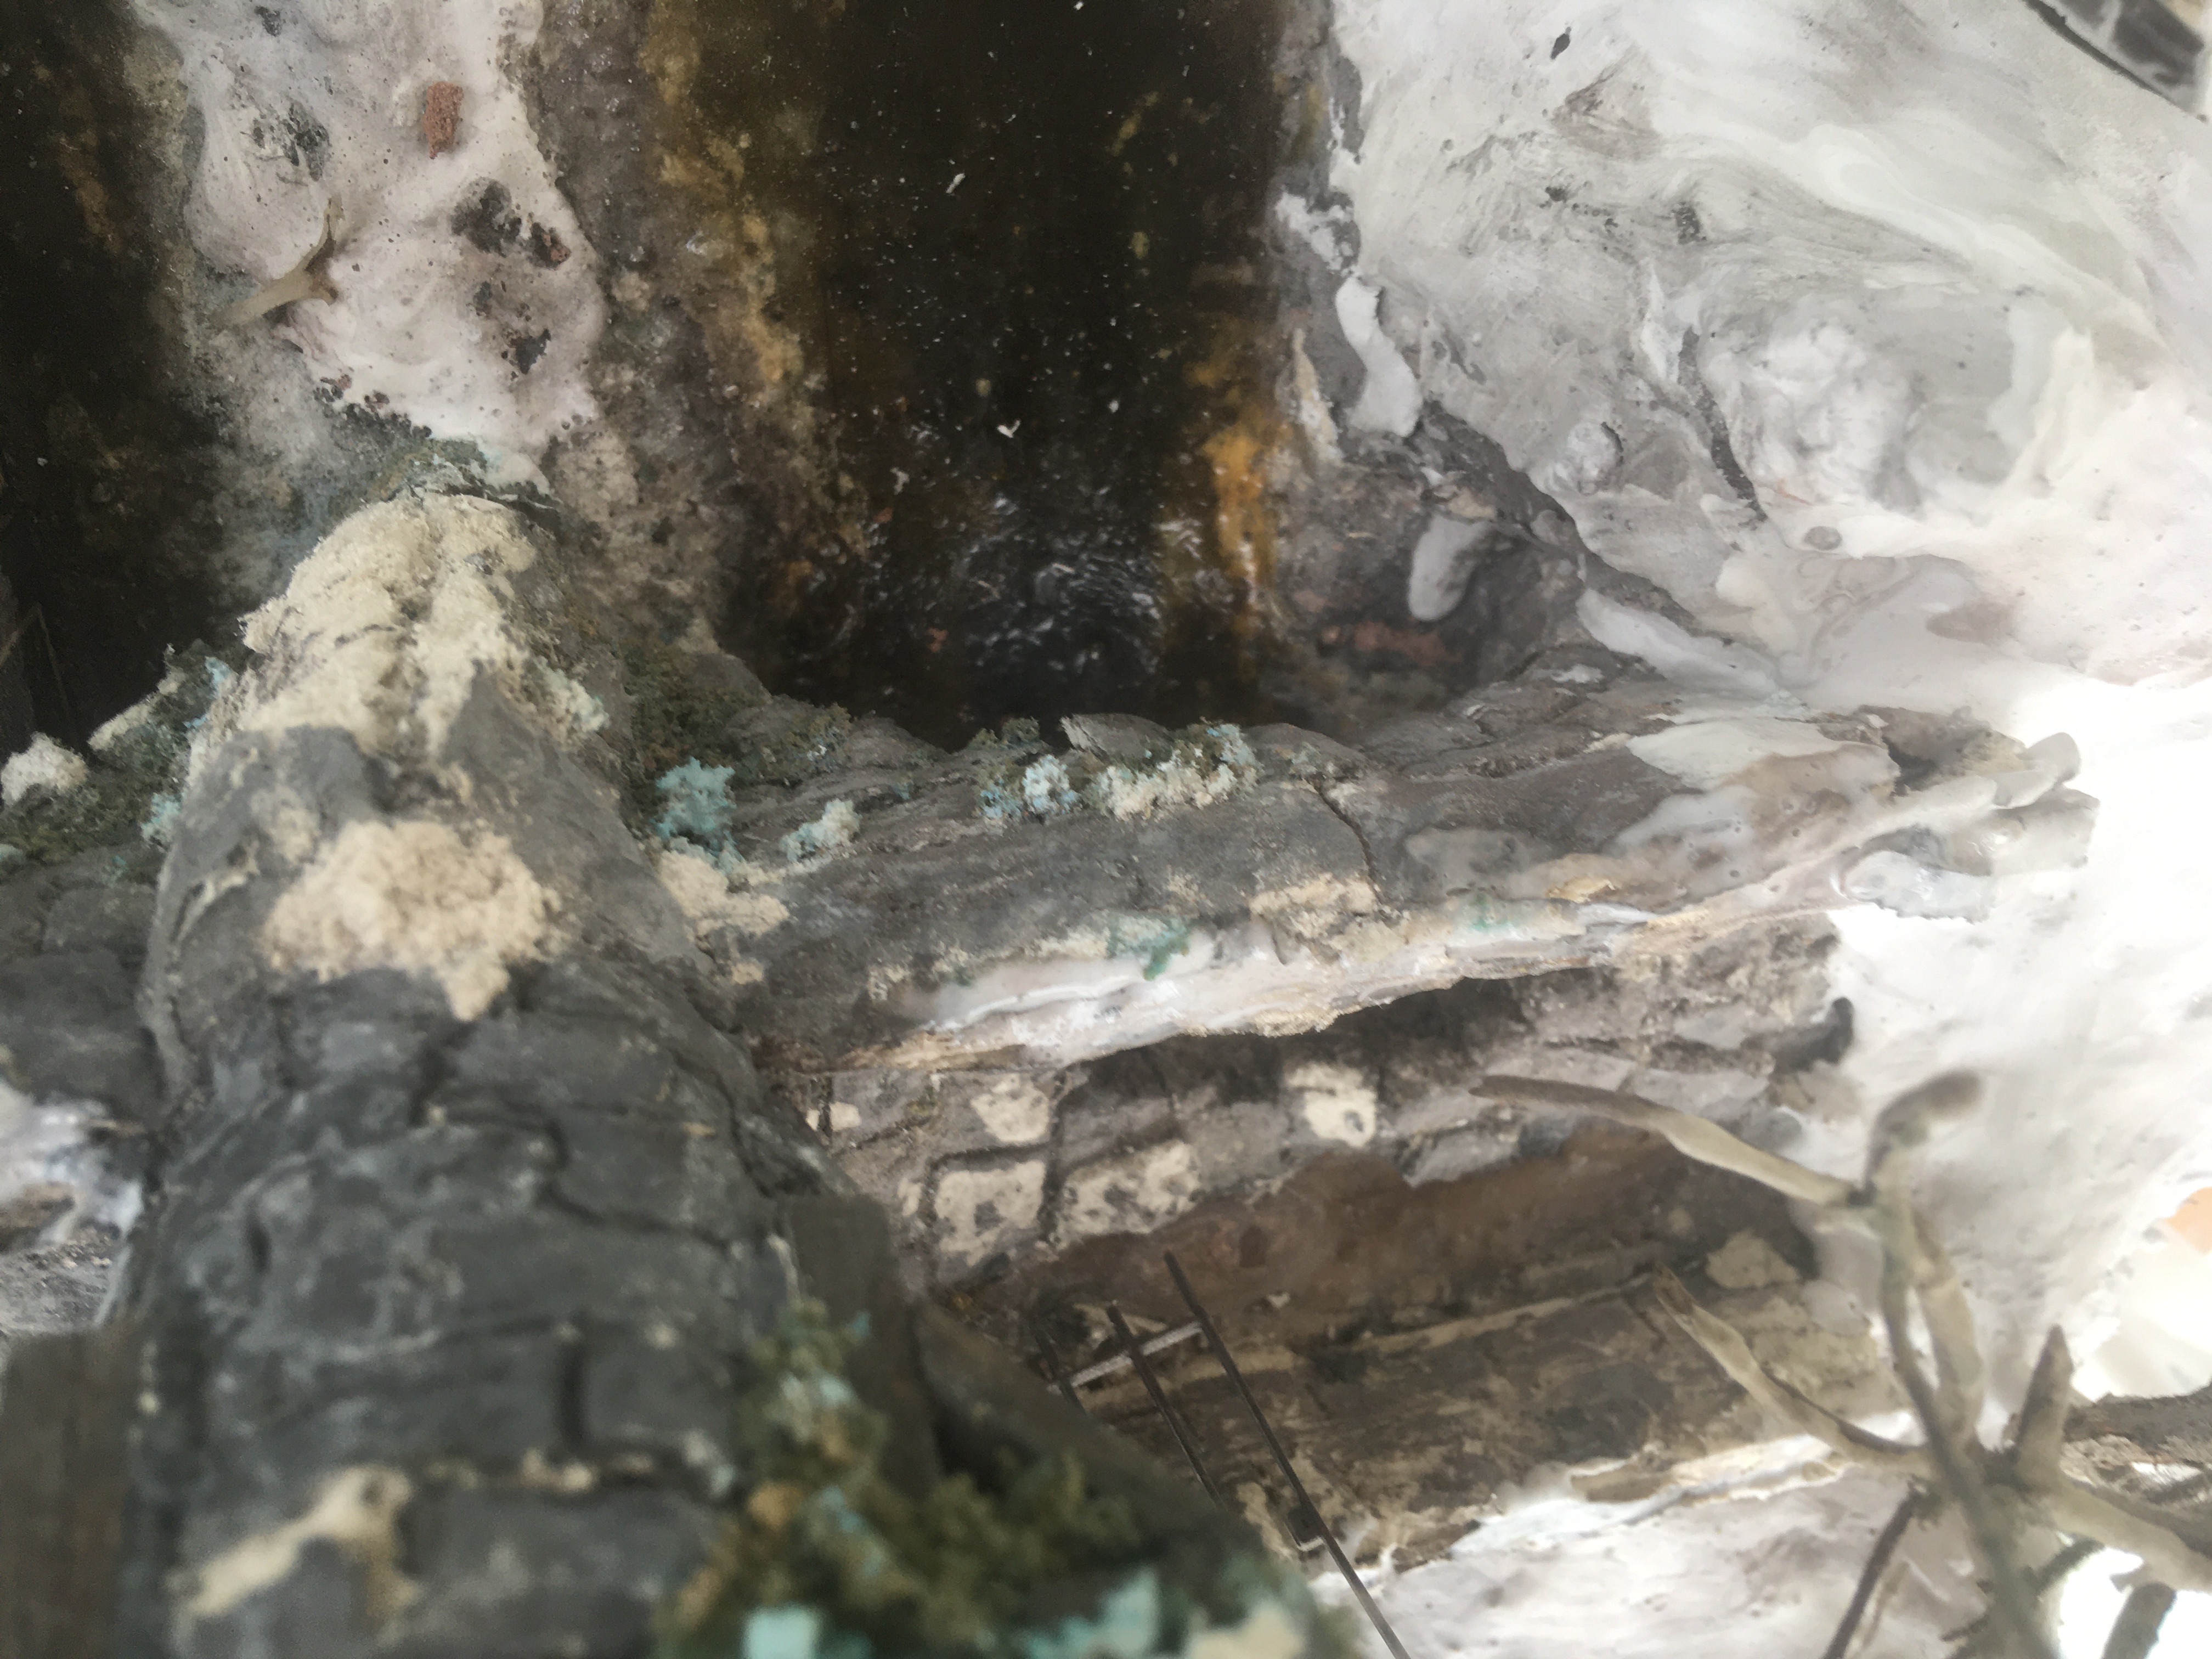
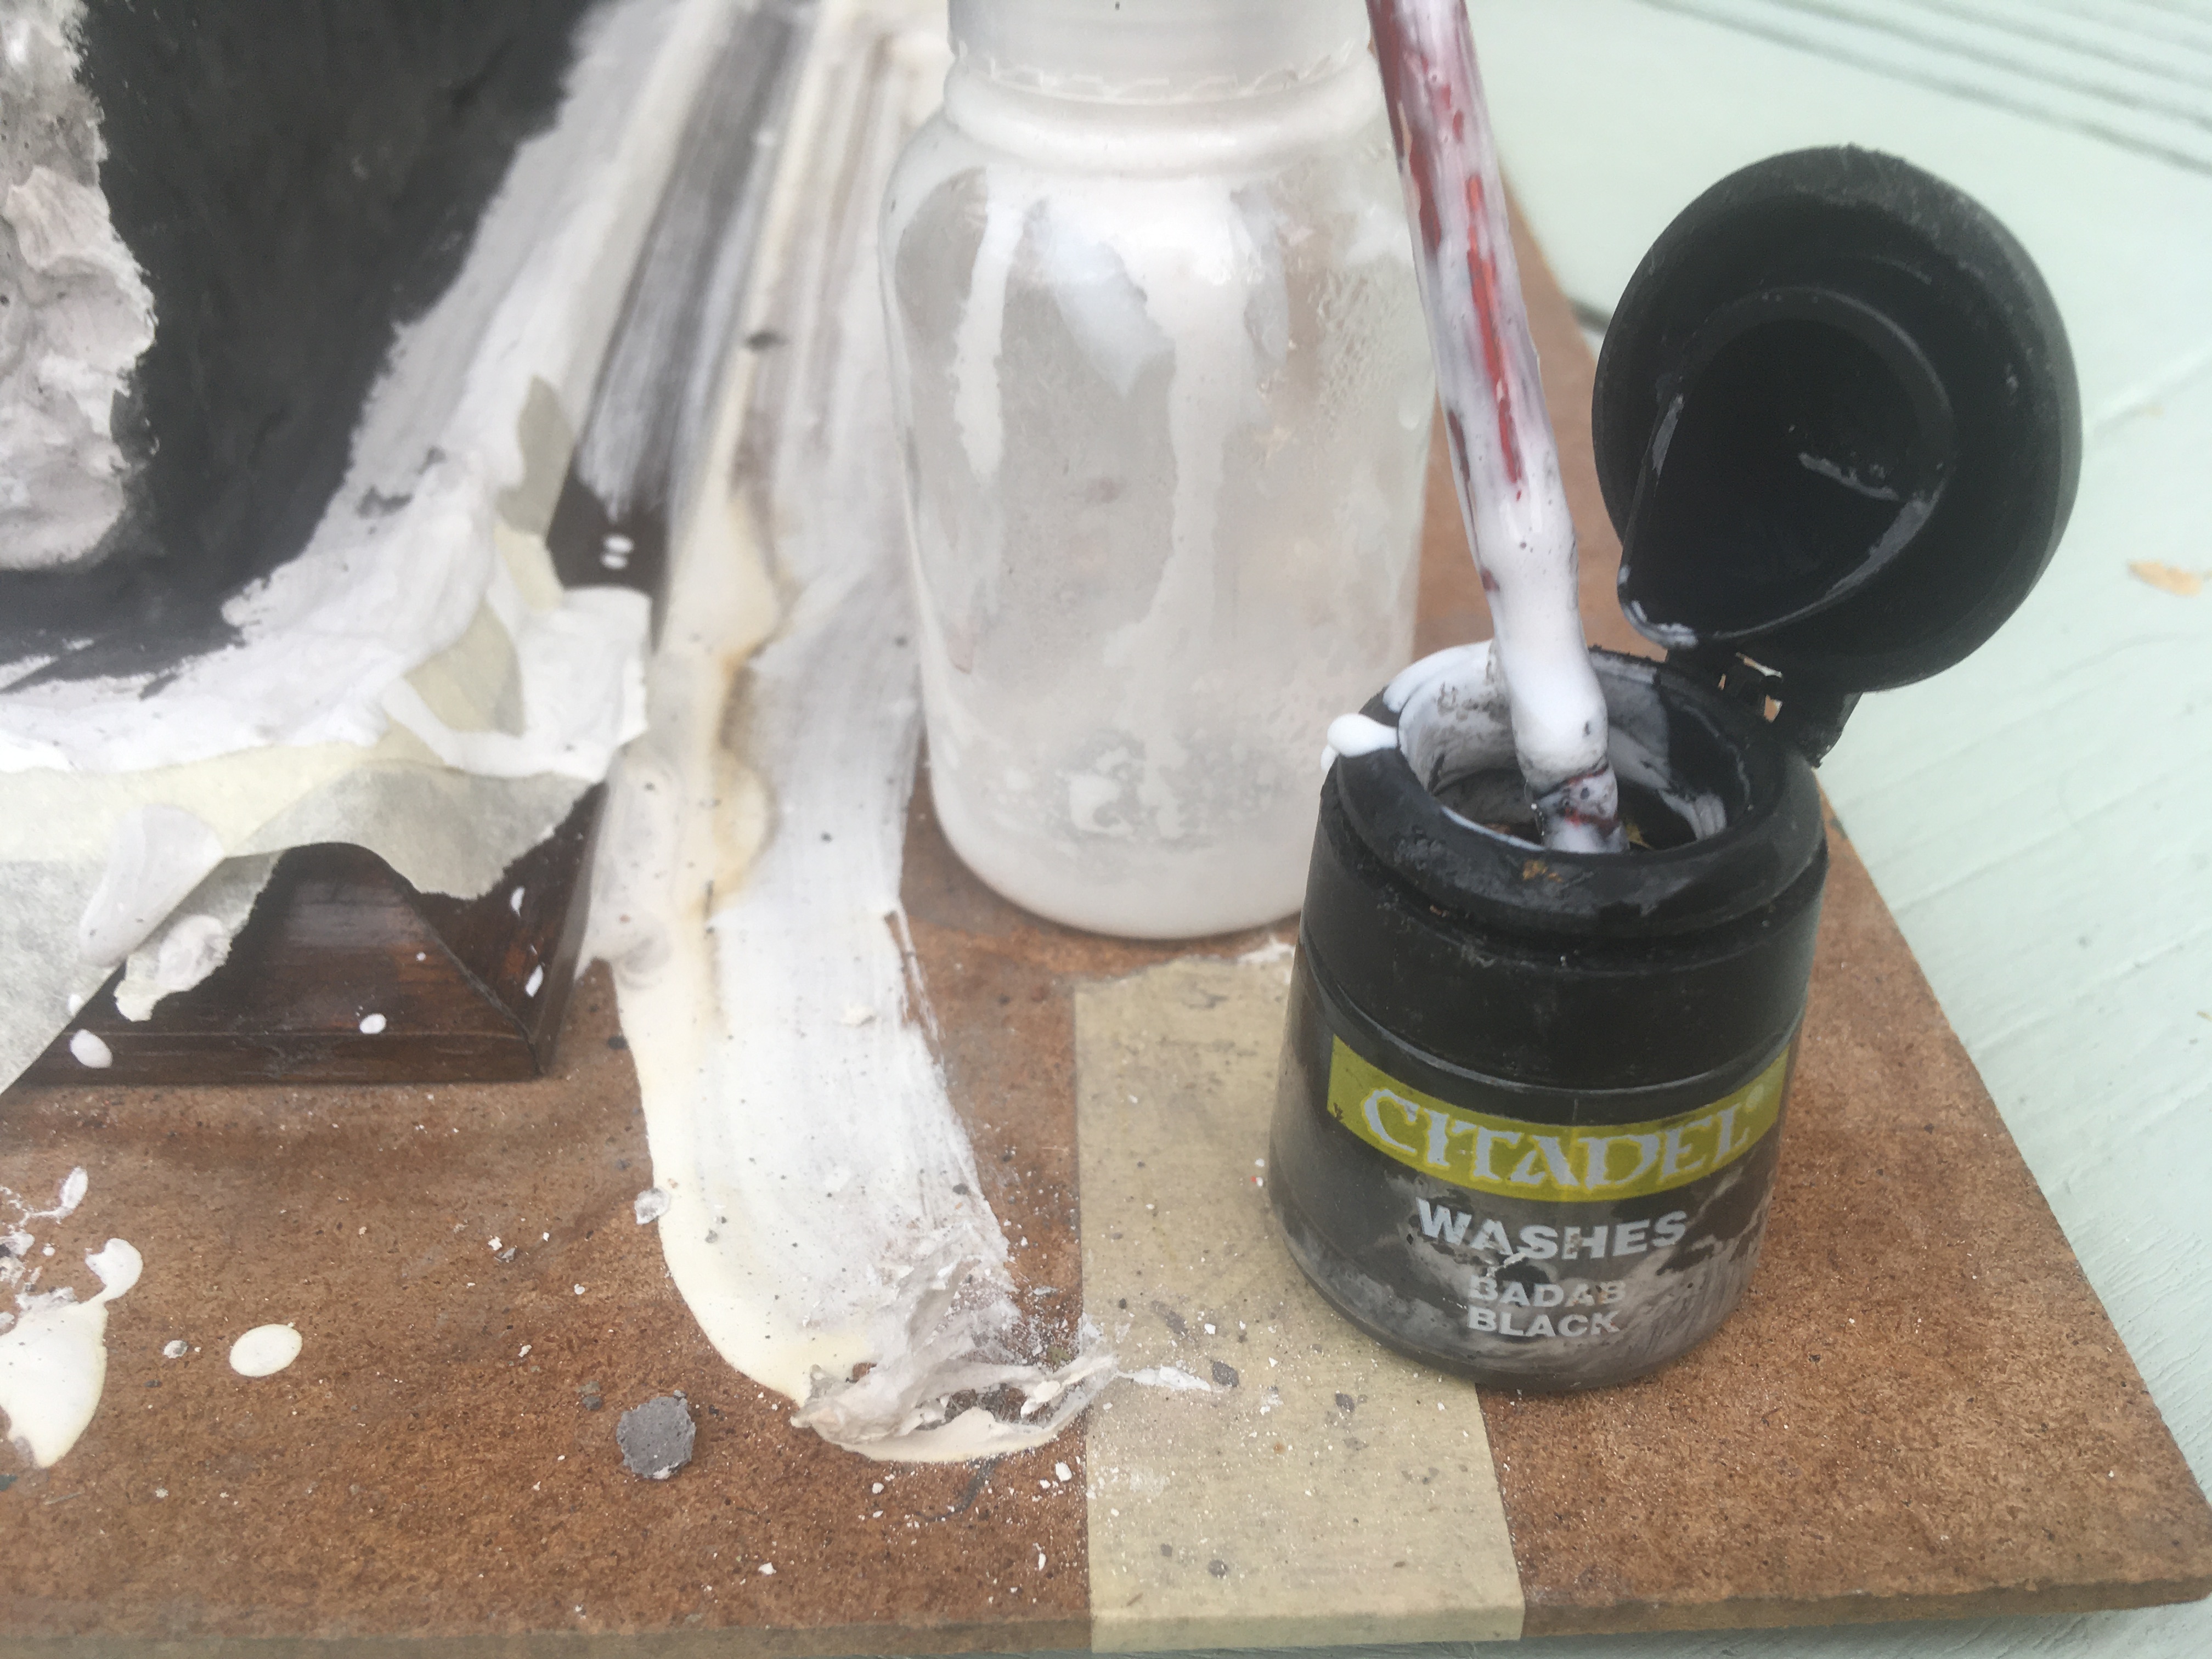
 After initially gently, pushing back the powdery modelling clay onto the bridge superstructure using neat PVA glue, it was time to add a bit more robustness by using a mix of 3:1 PVA glue to Babdab Black wash. The idea here is that the plaster will absorb the glue mix and provide more strength than it originally had whilst the grey colour will blend the stone work together.
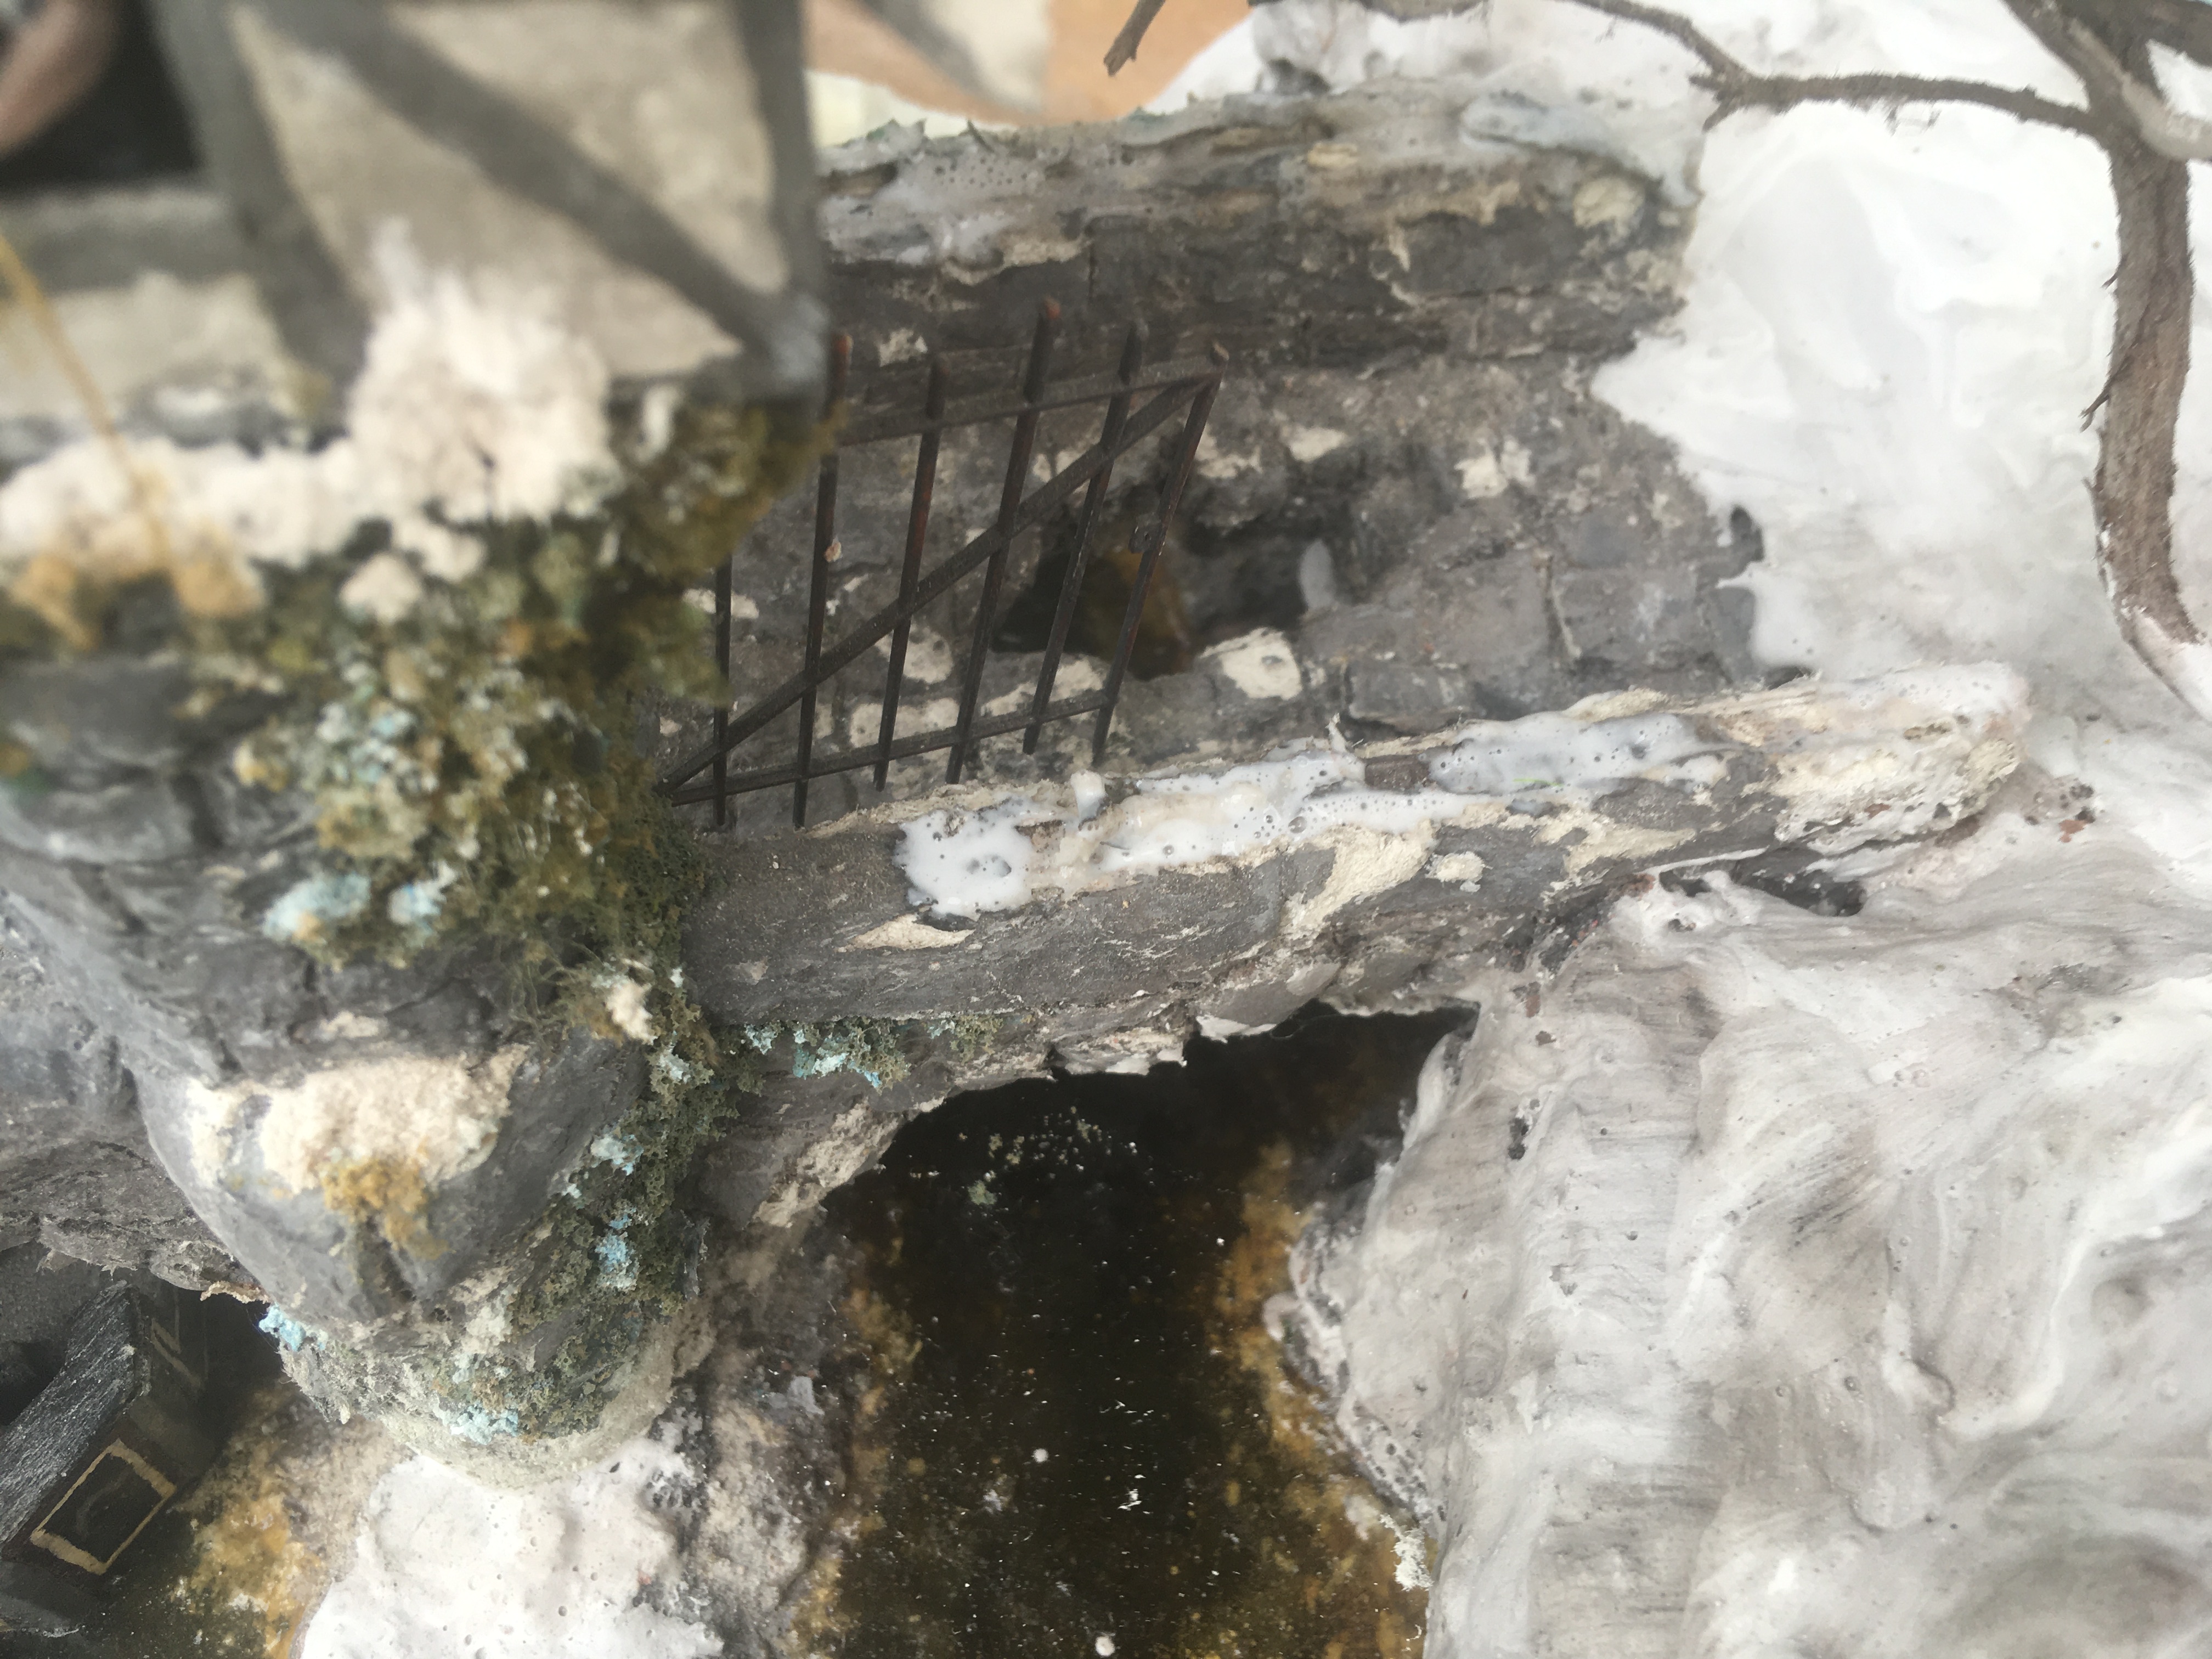
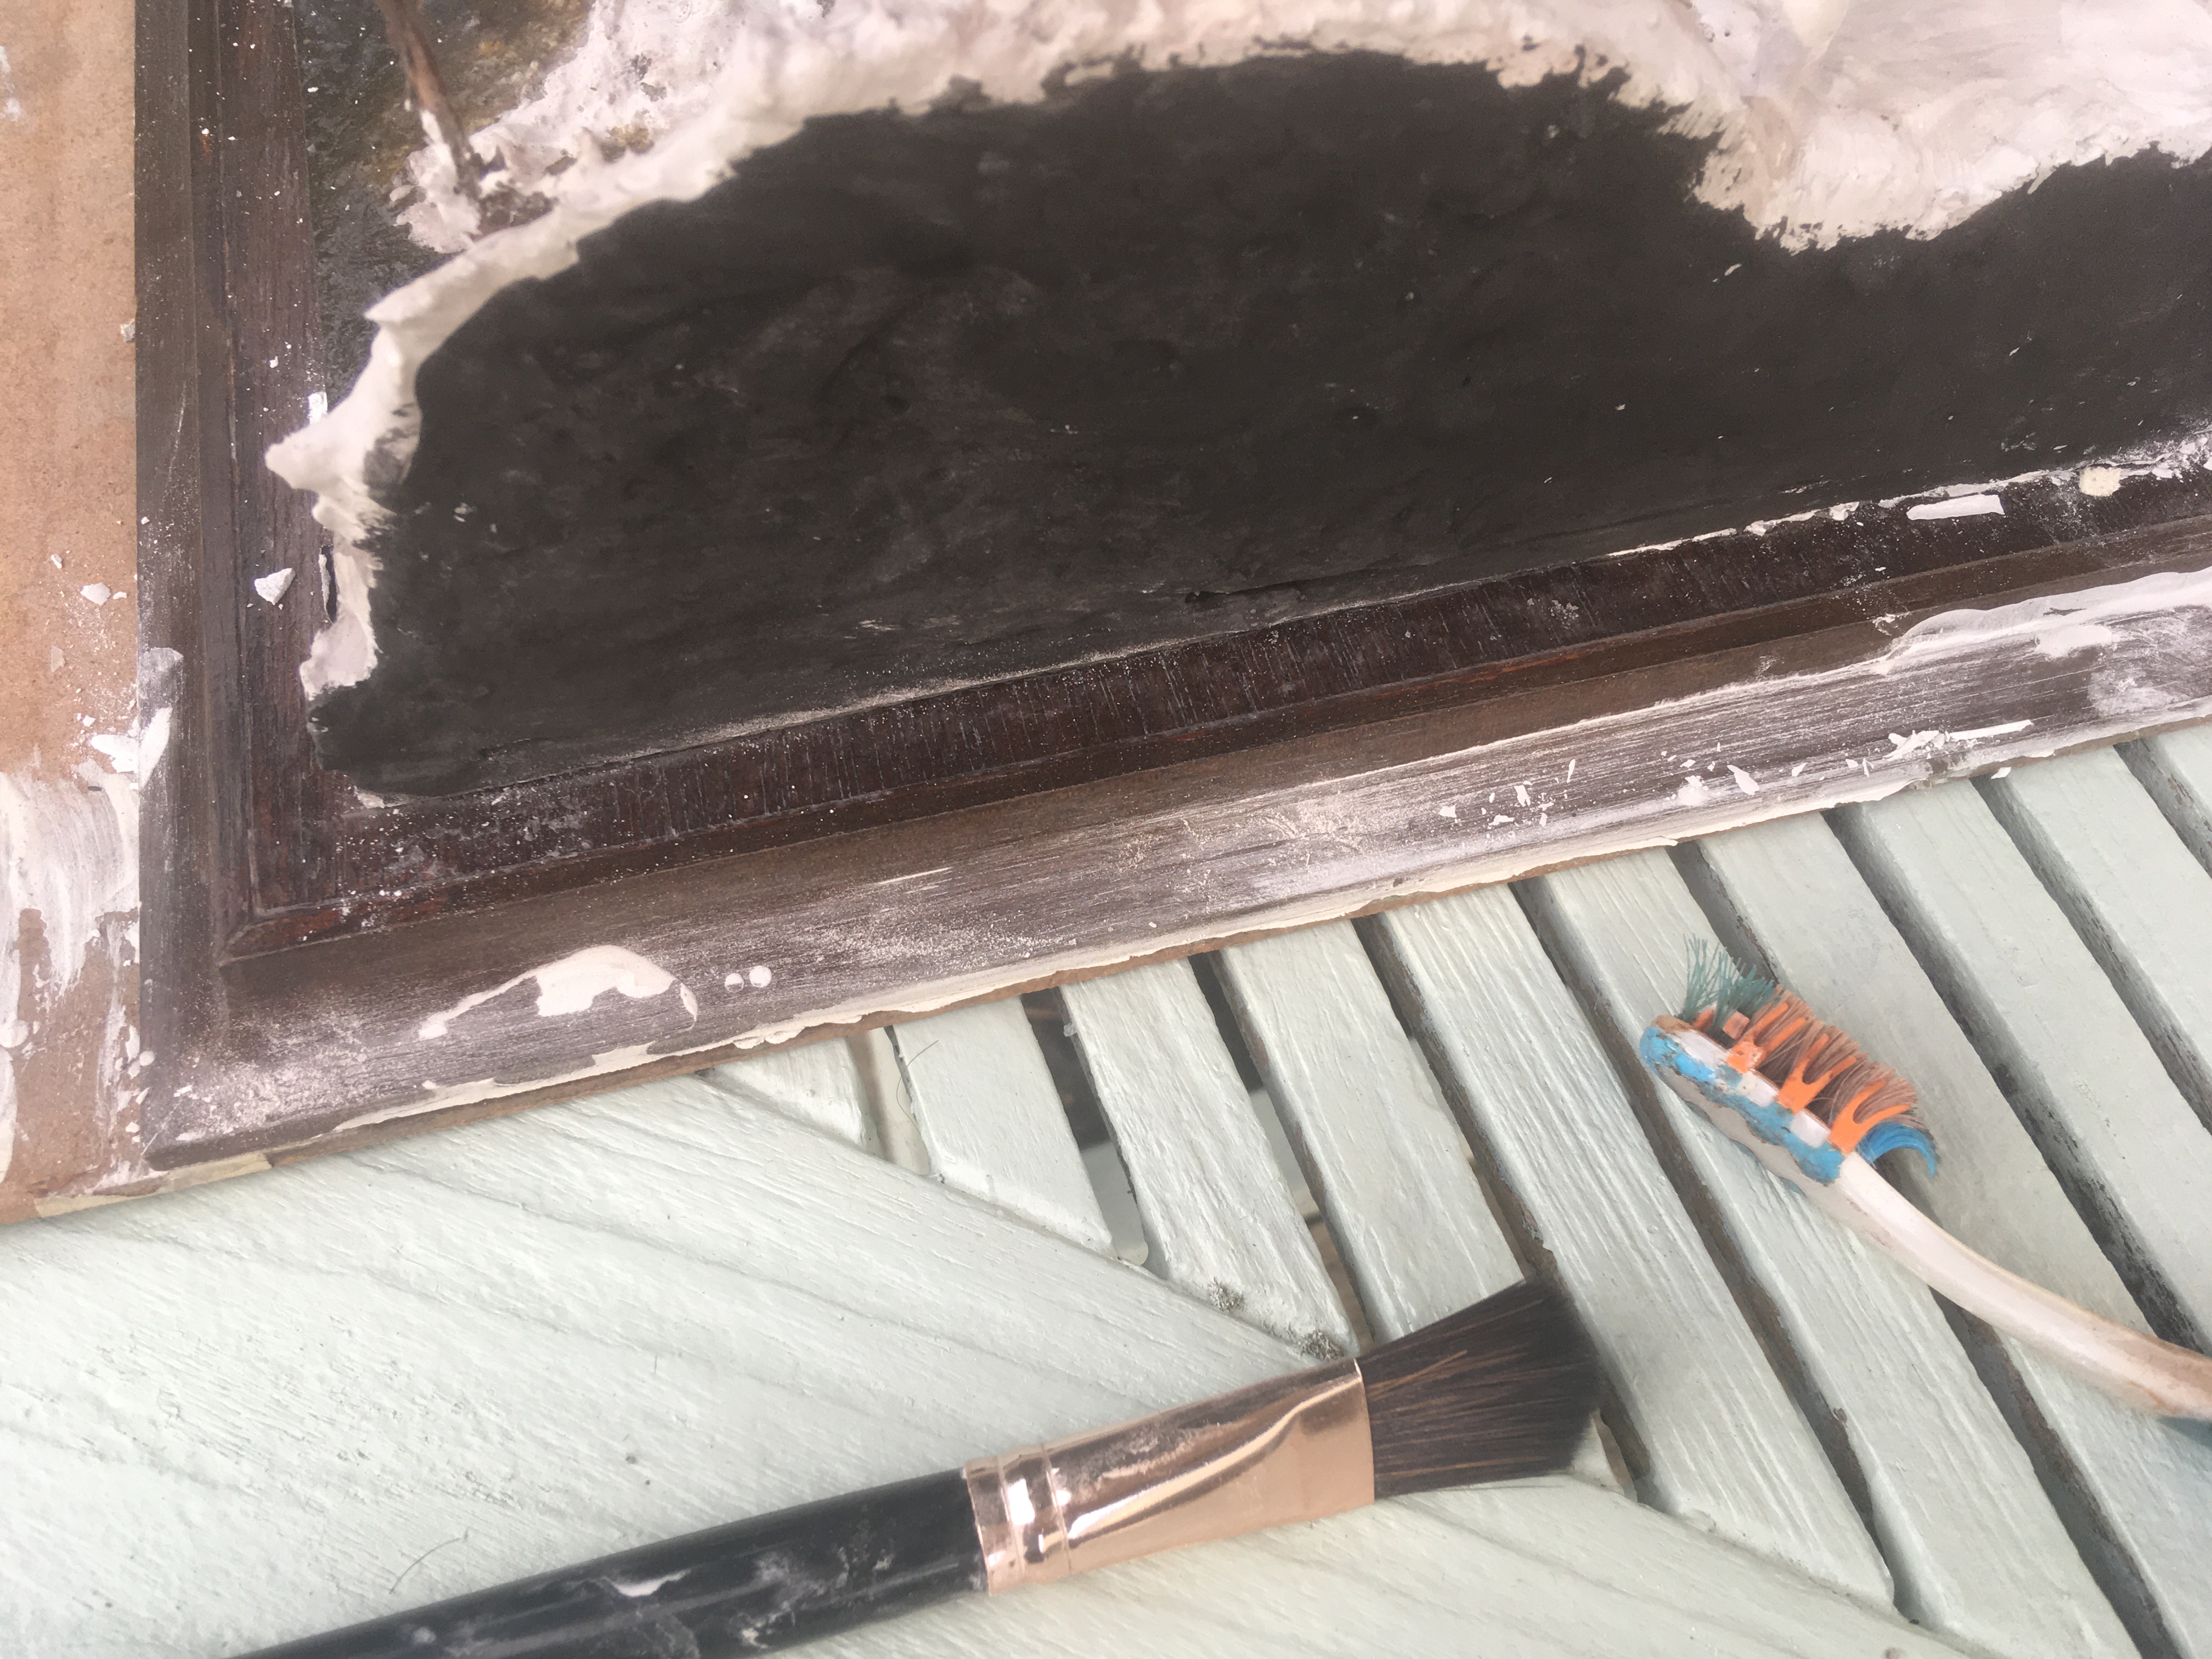 After removing the masking tape from the display base, it was necessary to clean up the woodwork using an old toothbrush and white spirit (I didn’t want to use any more water just in case it warped the wood).
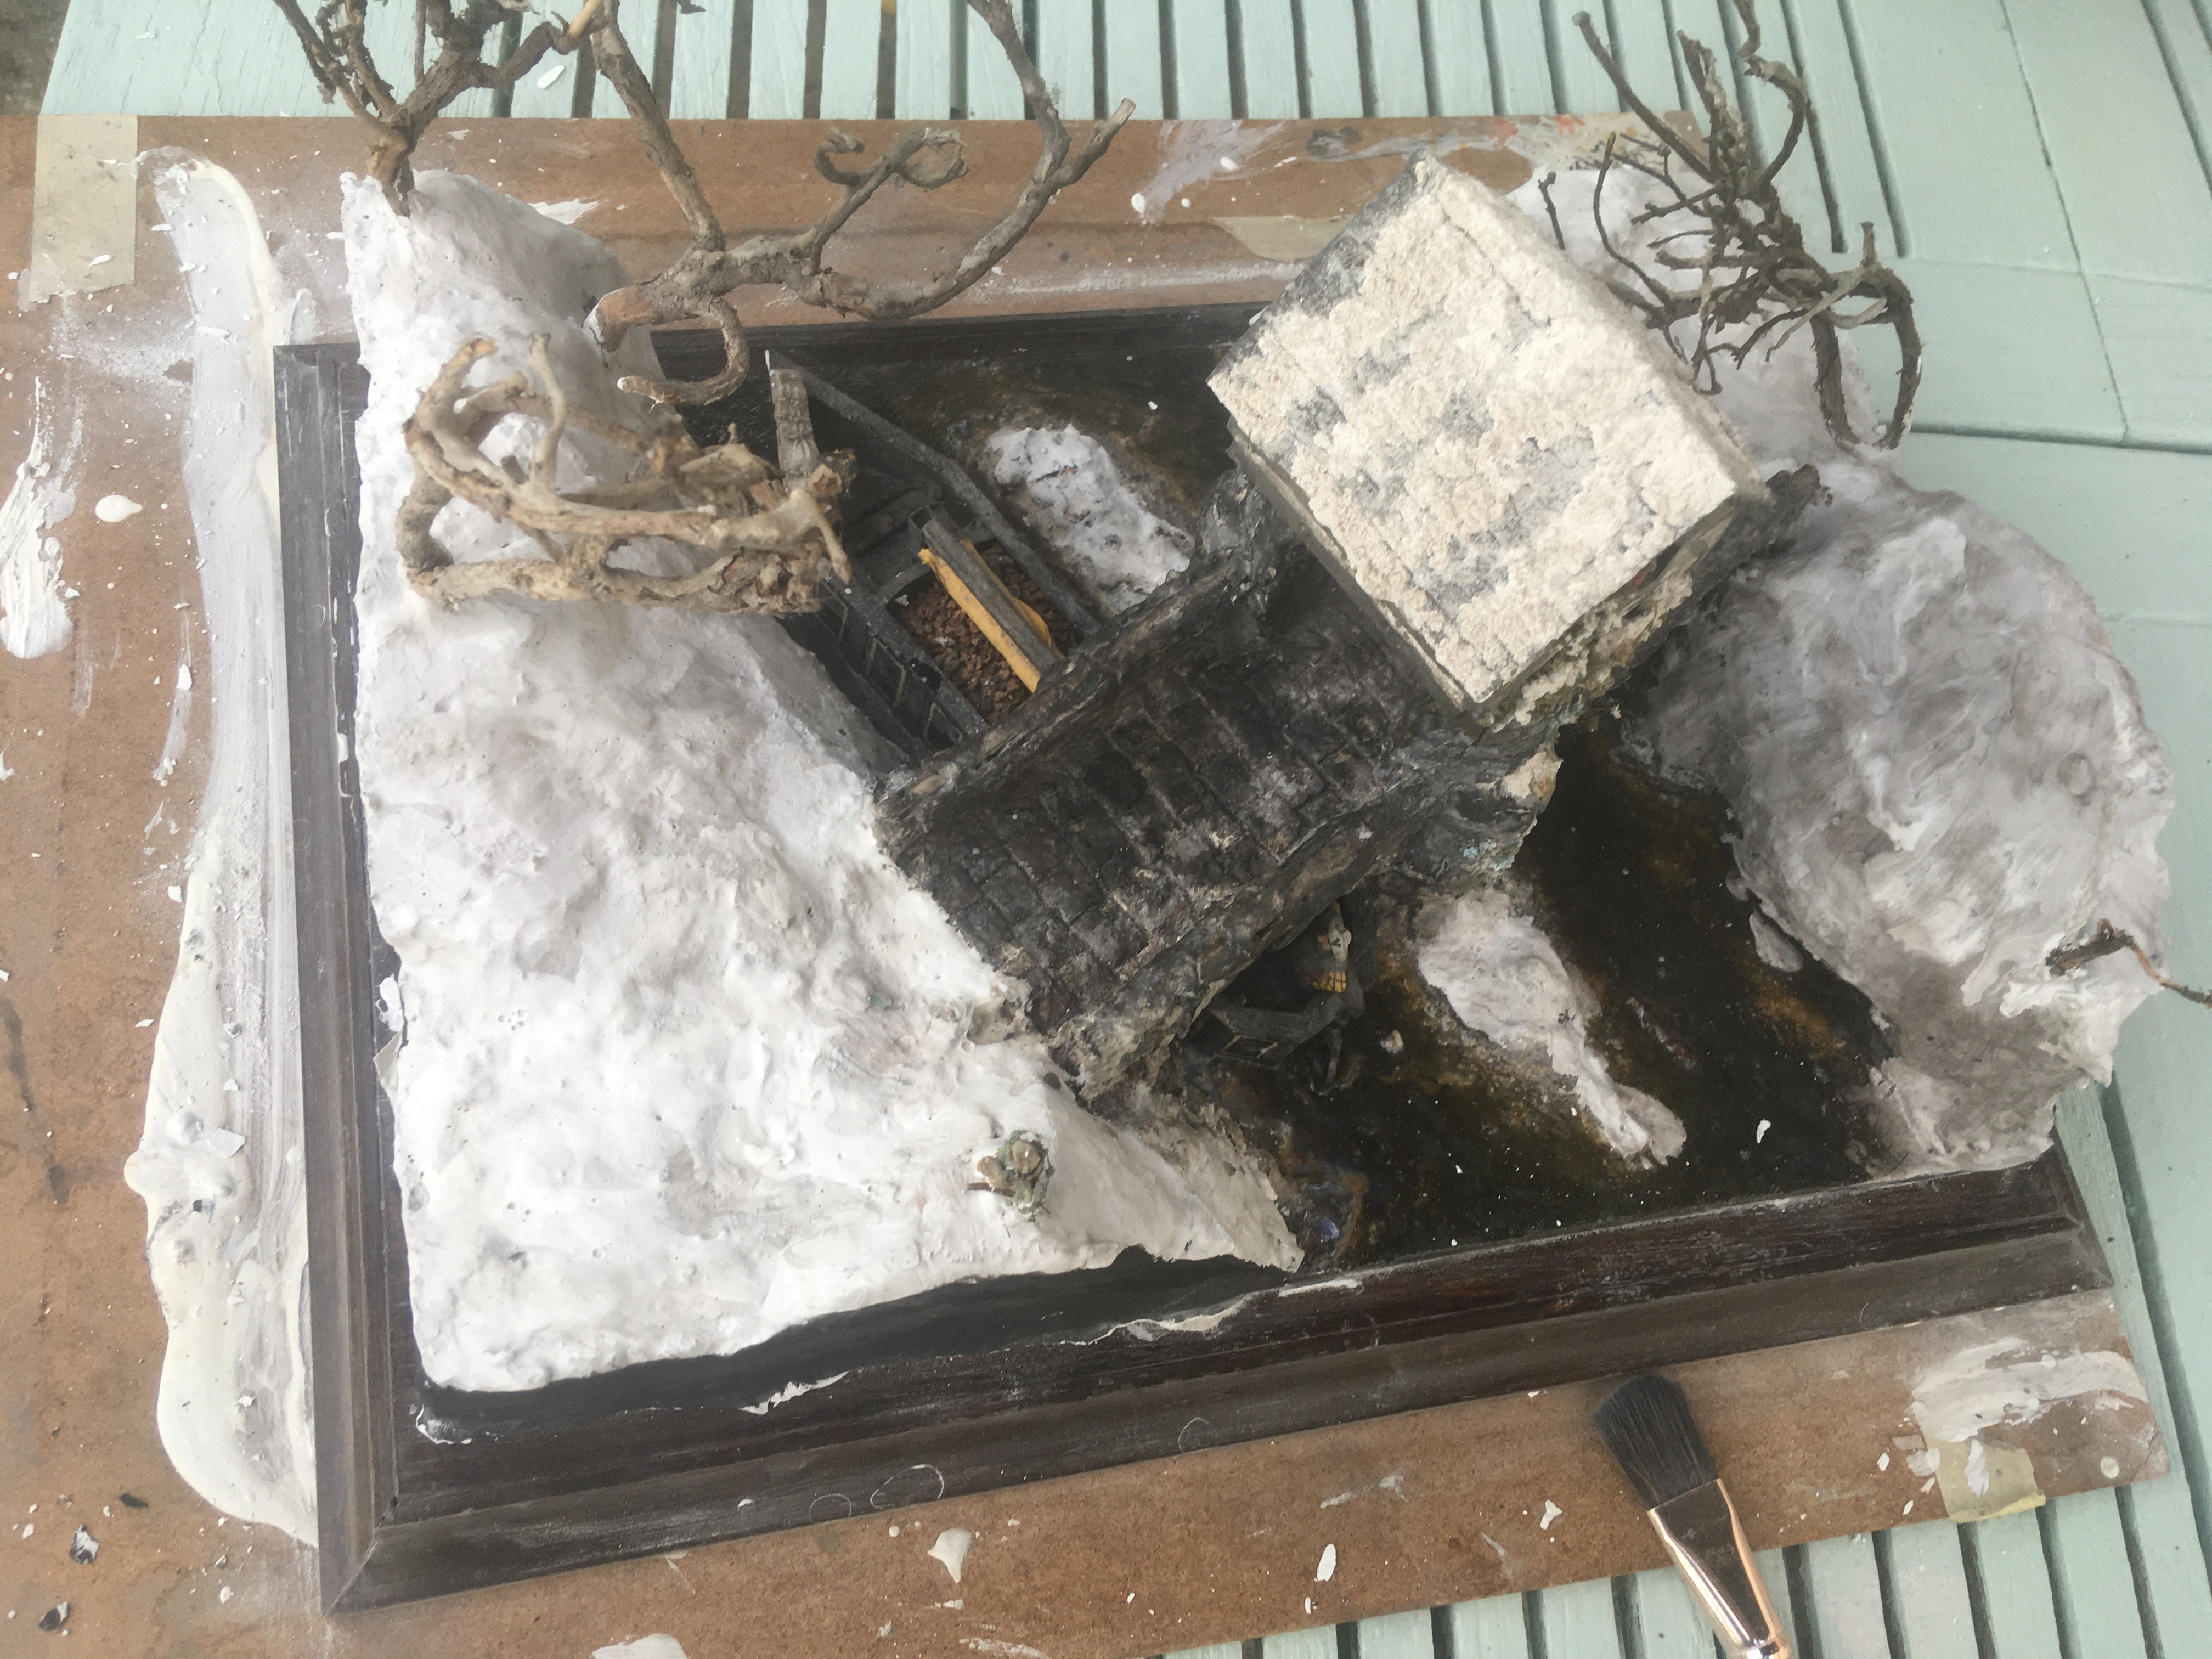
Phase 5 - Restoring the Miniatures
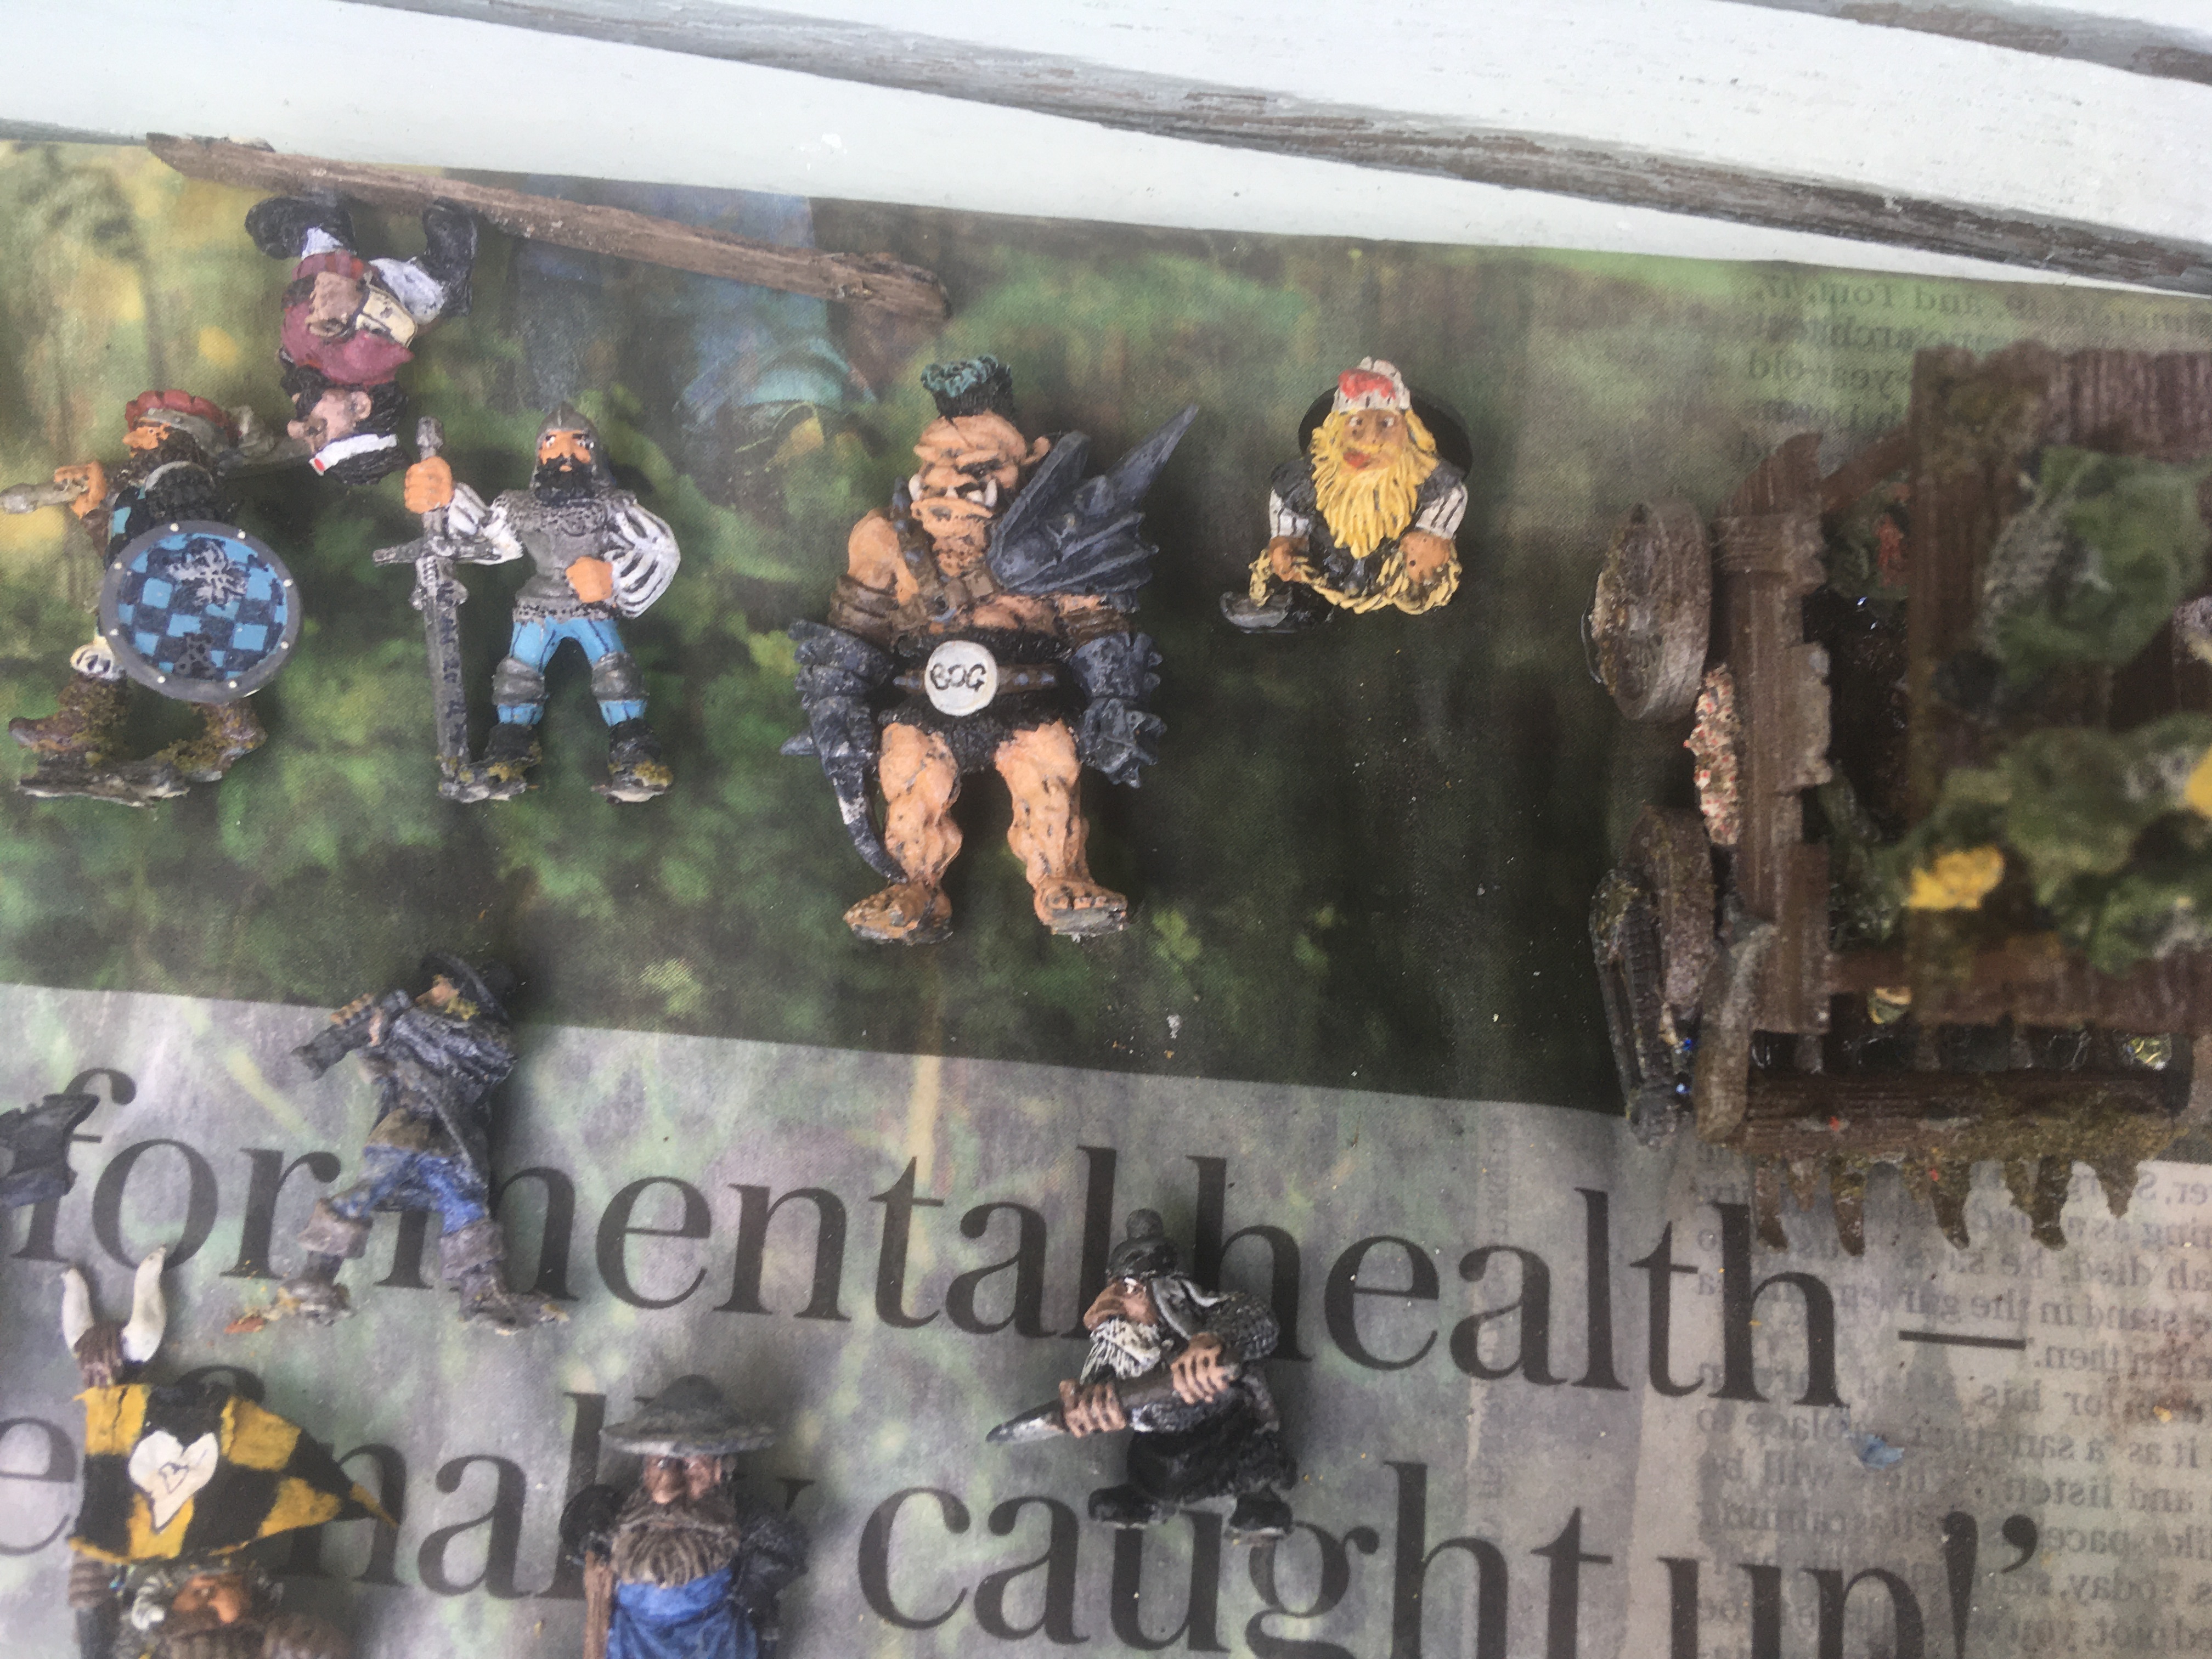
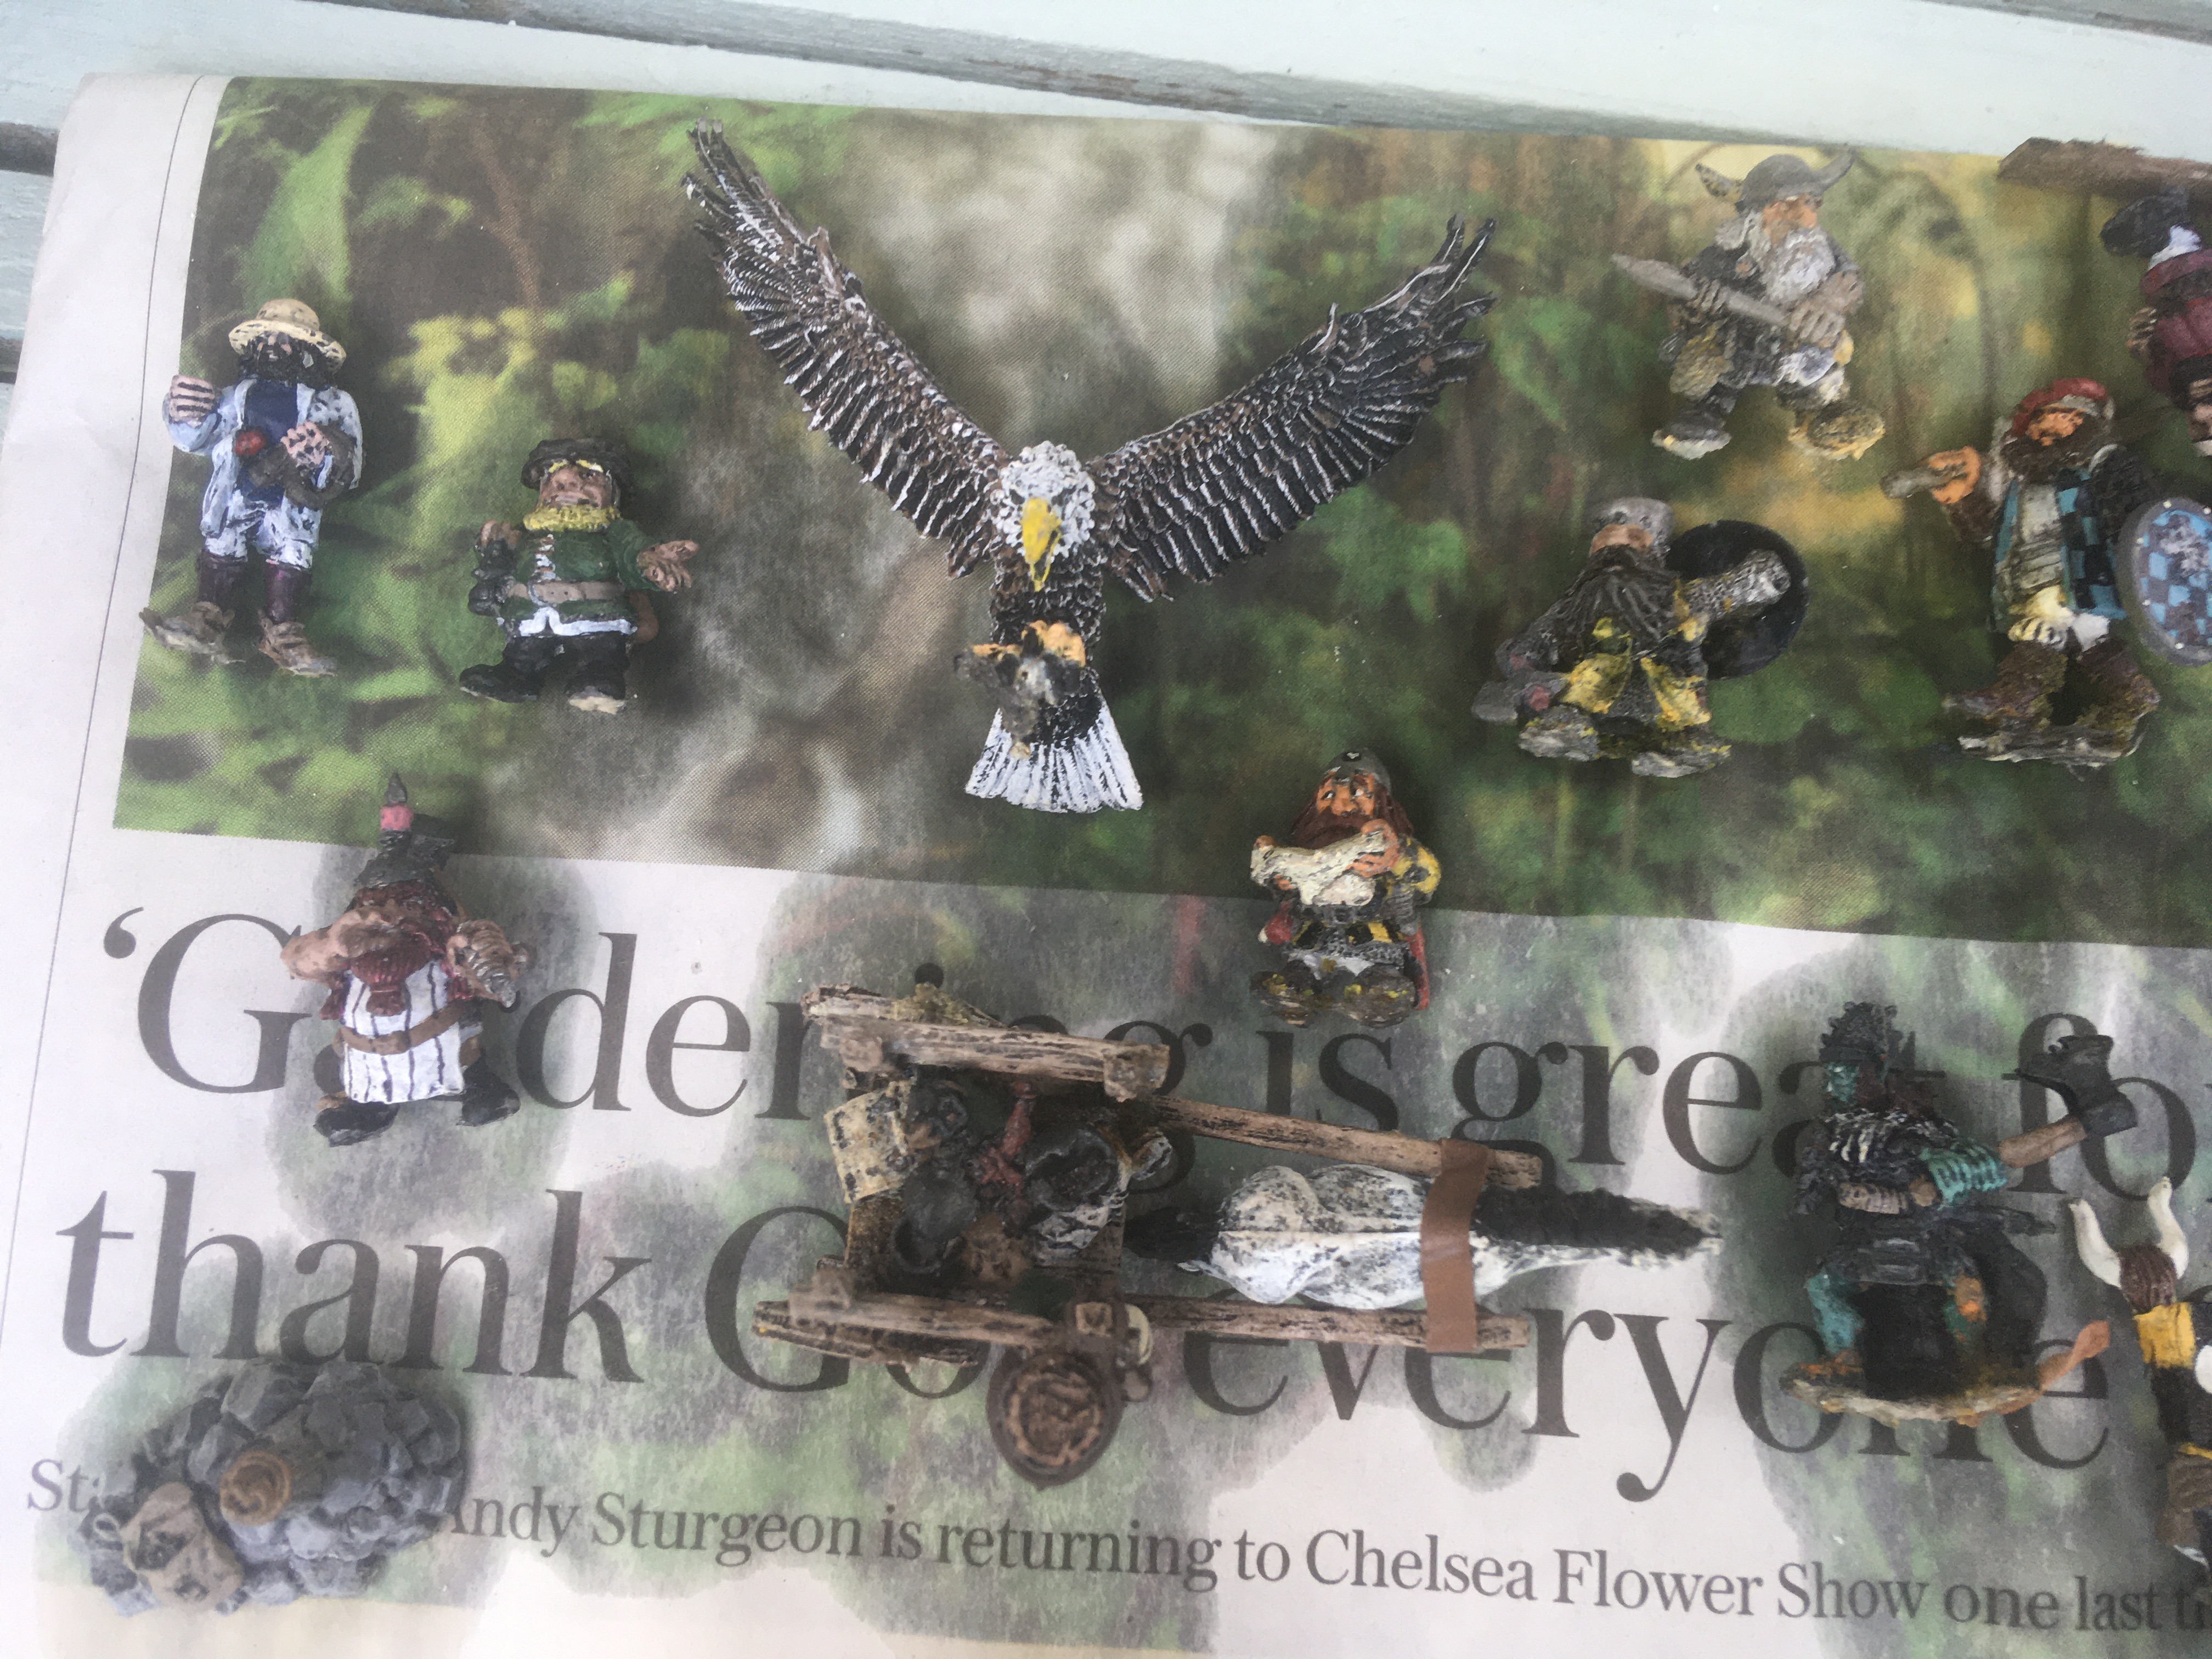
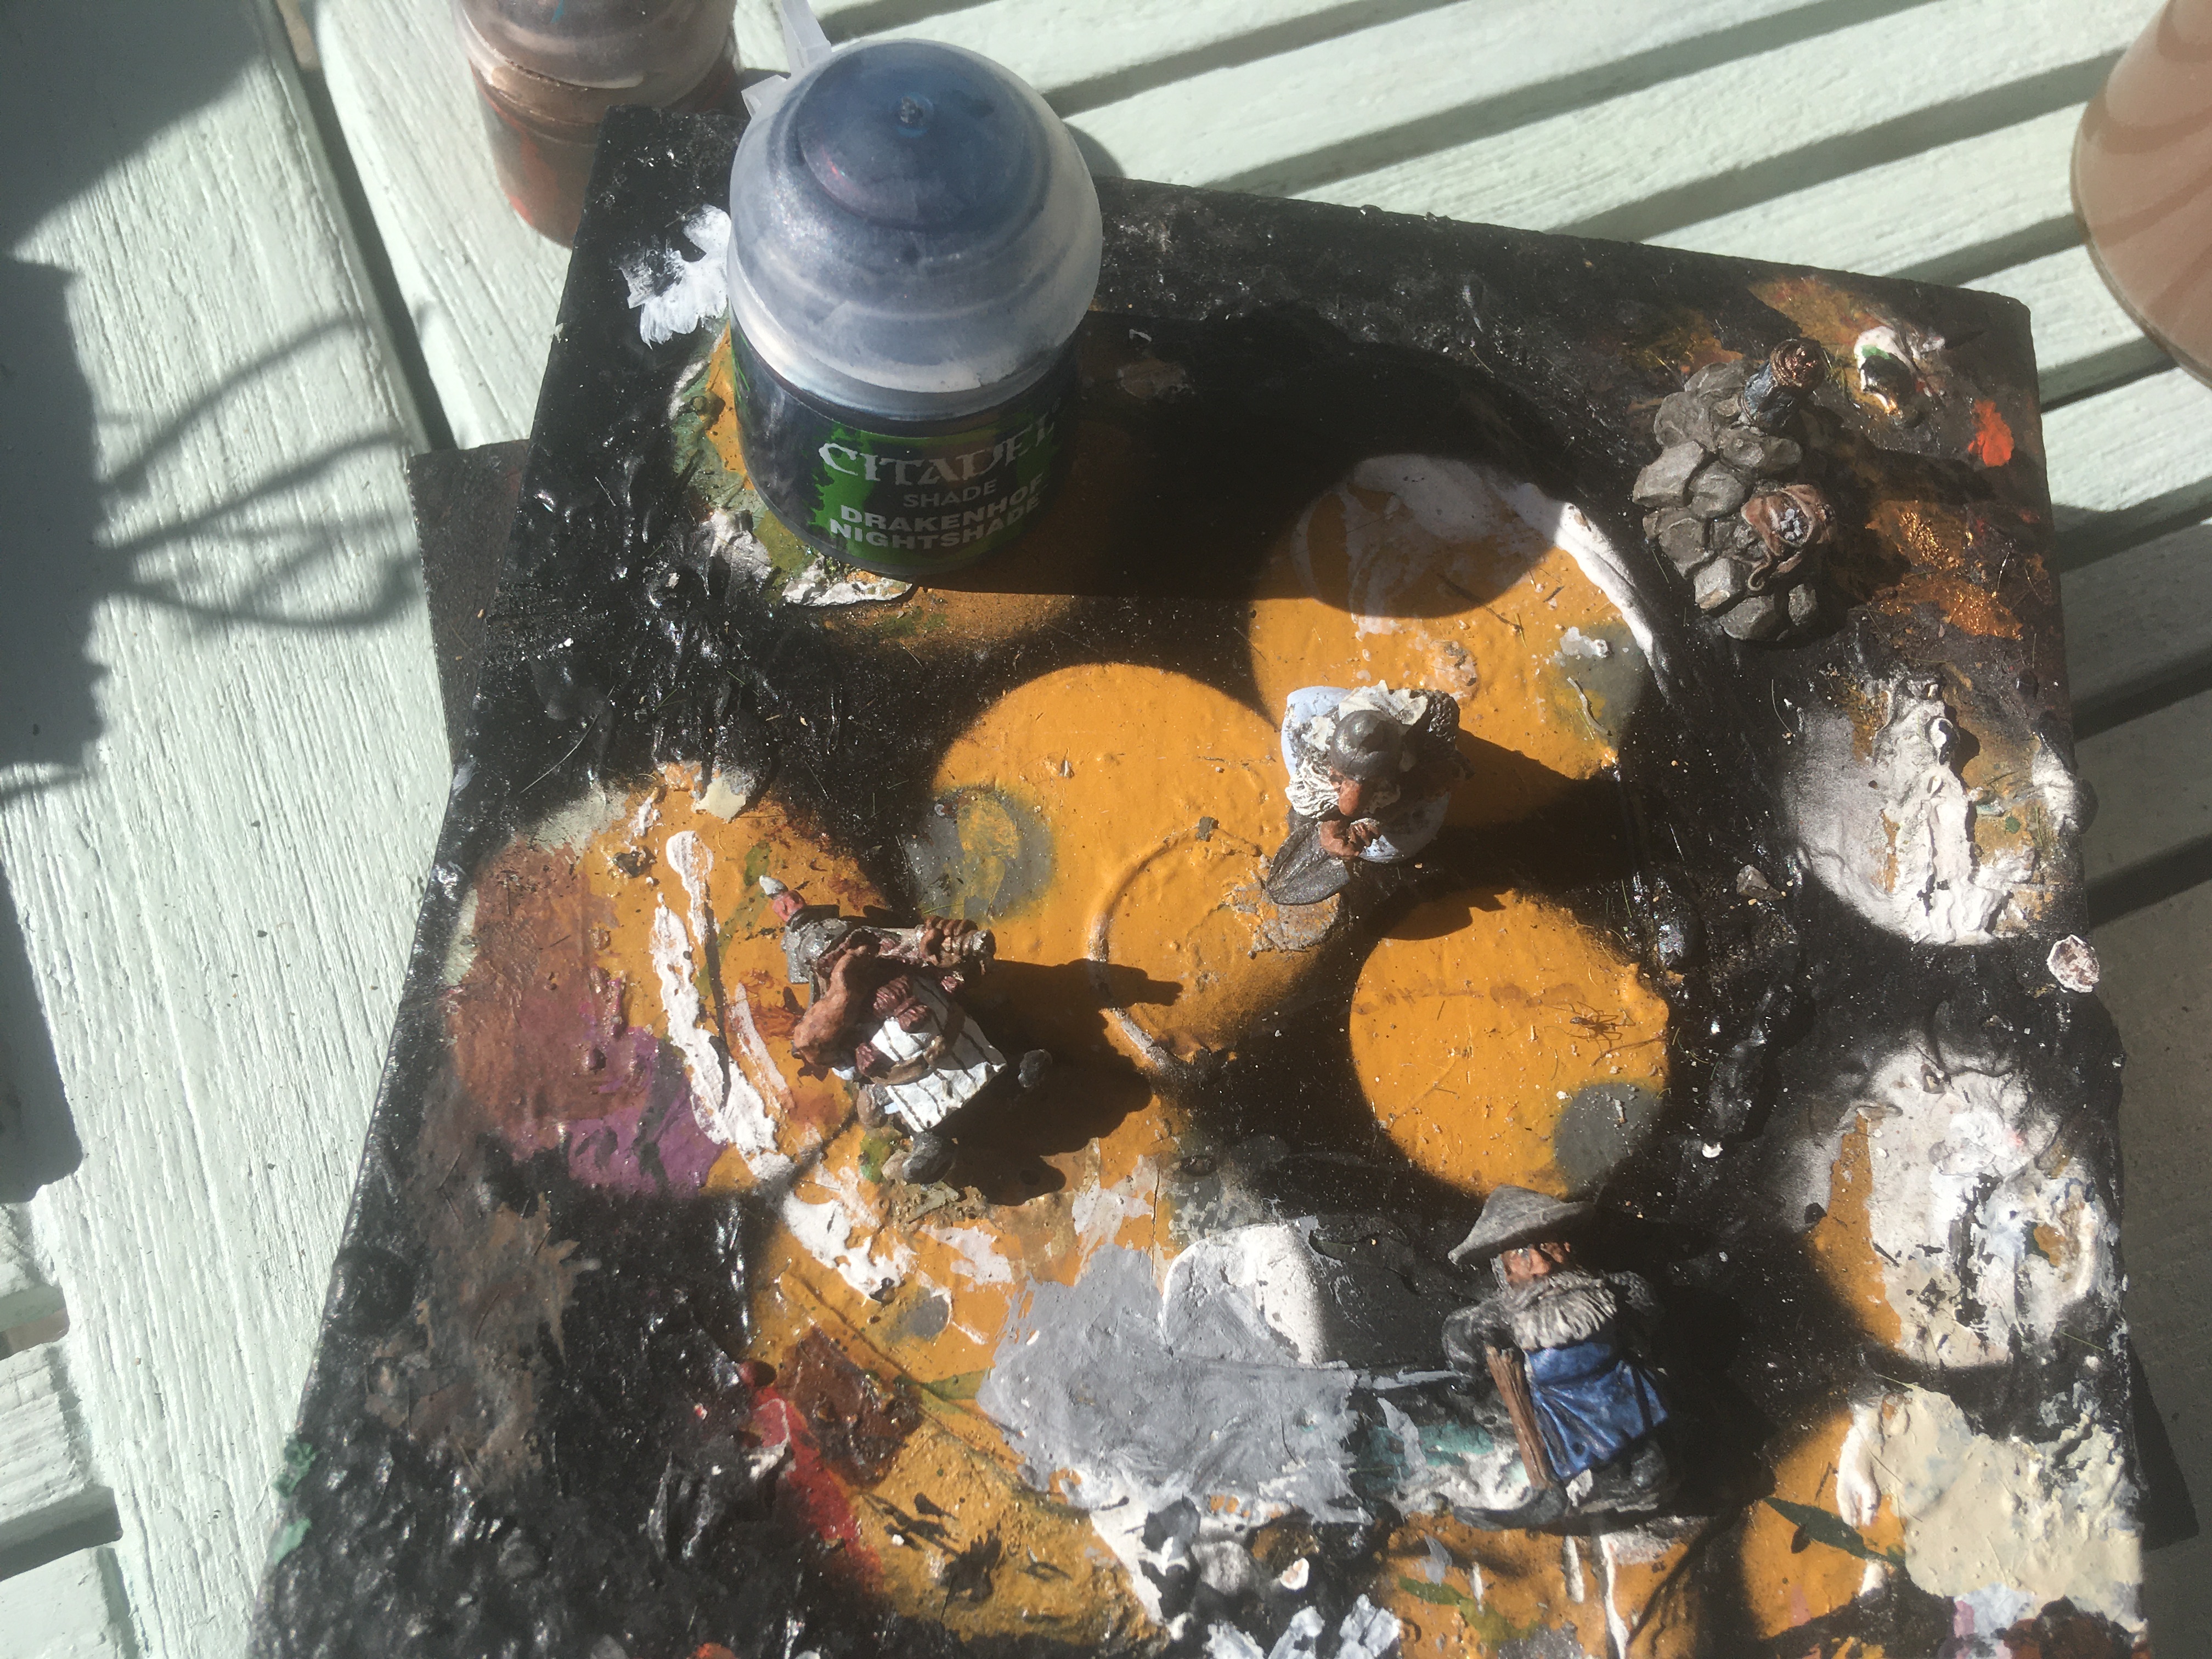
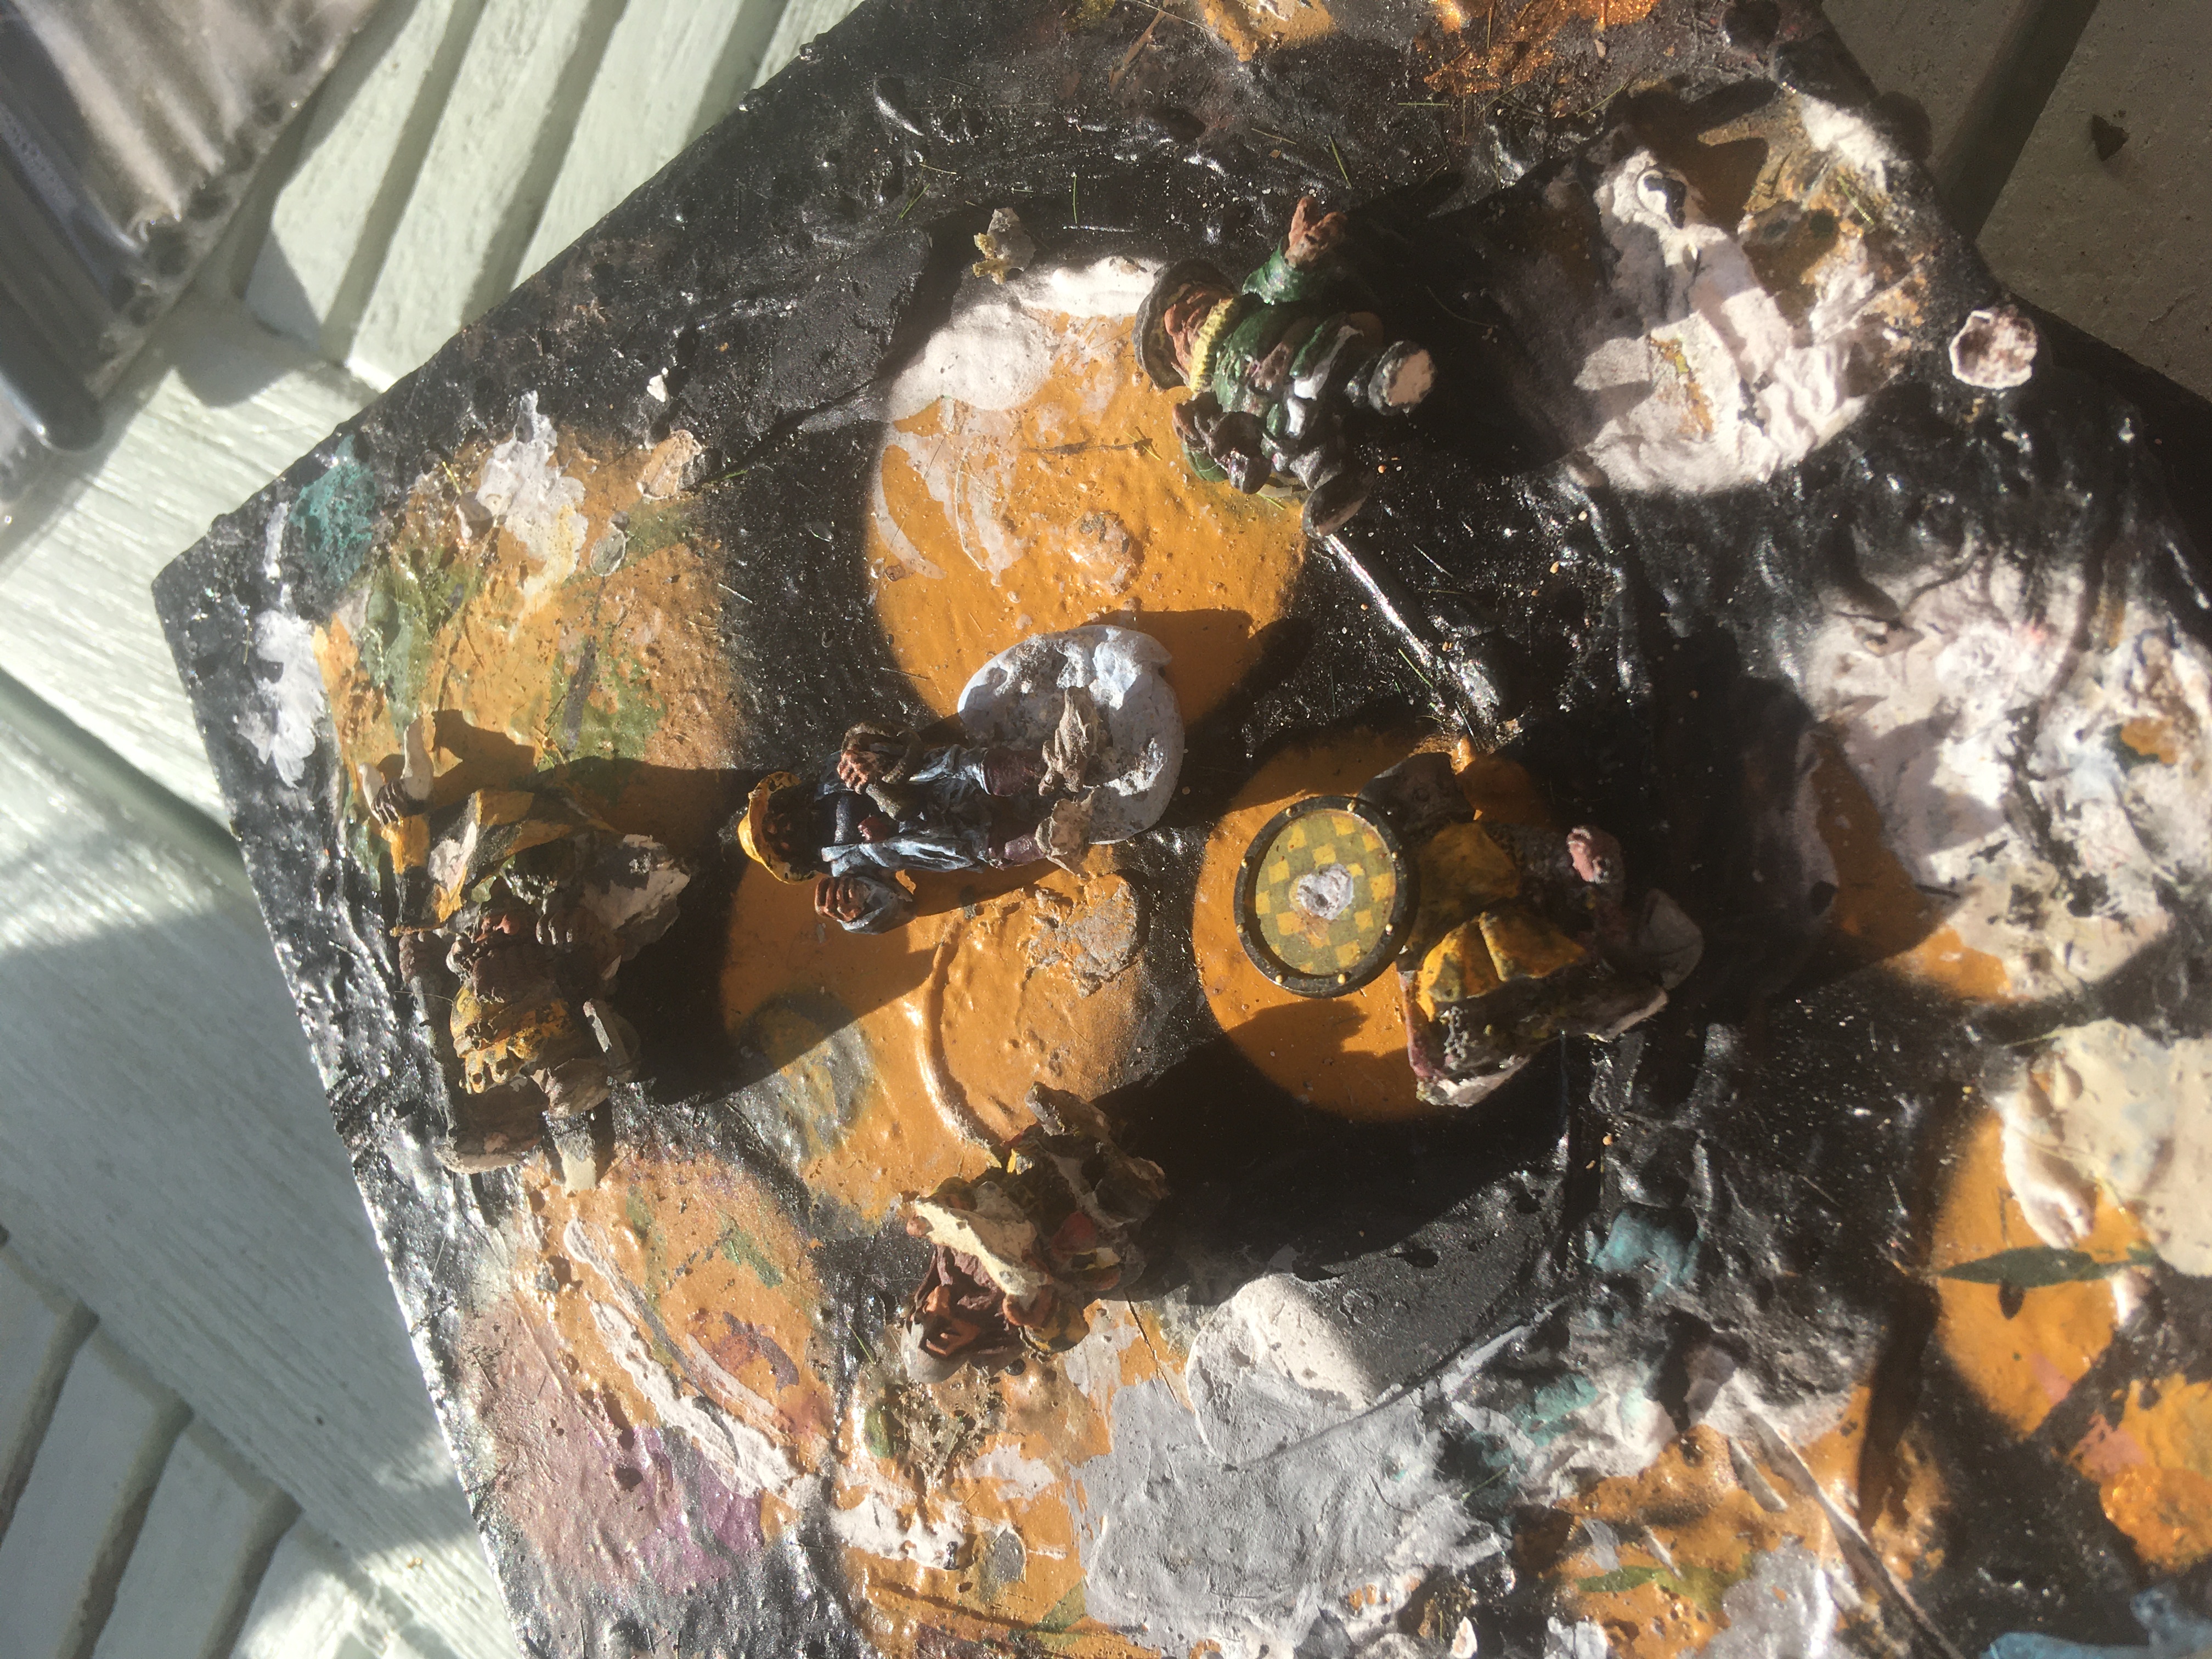
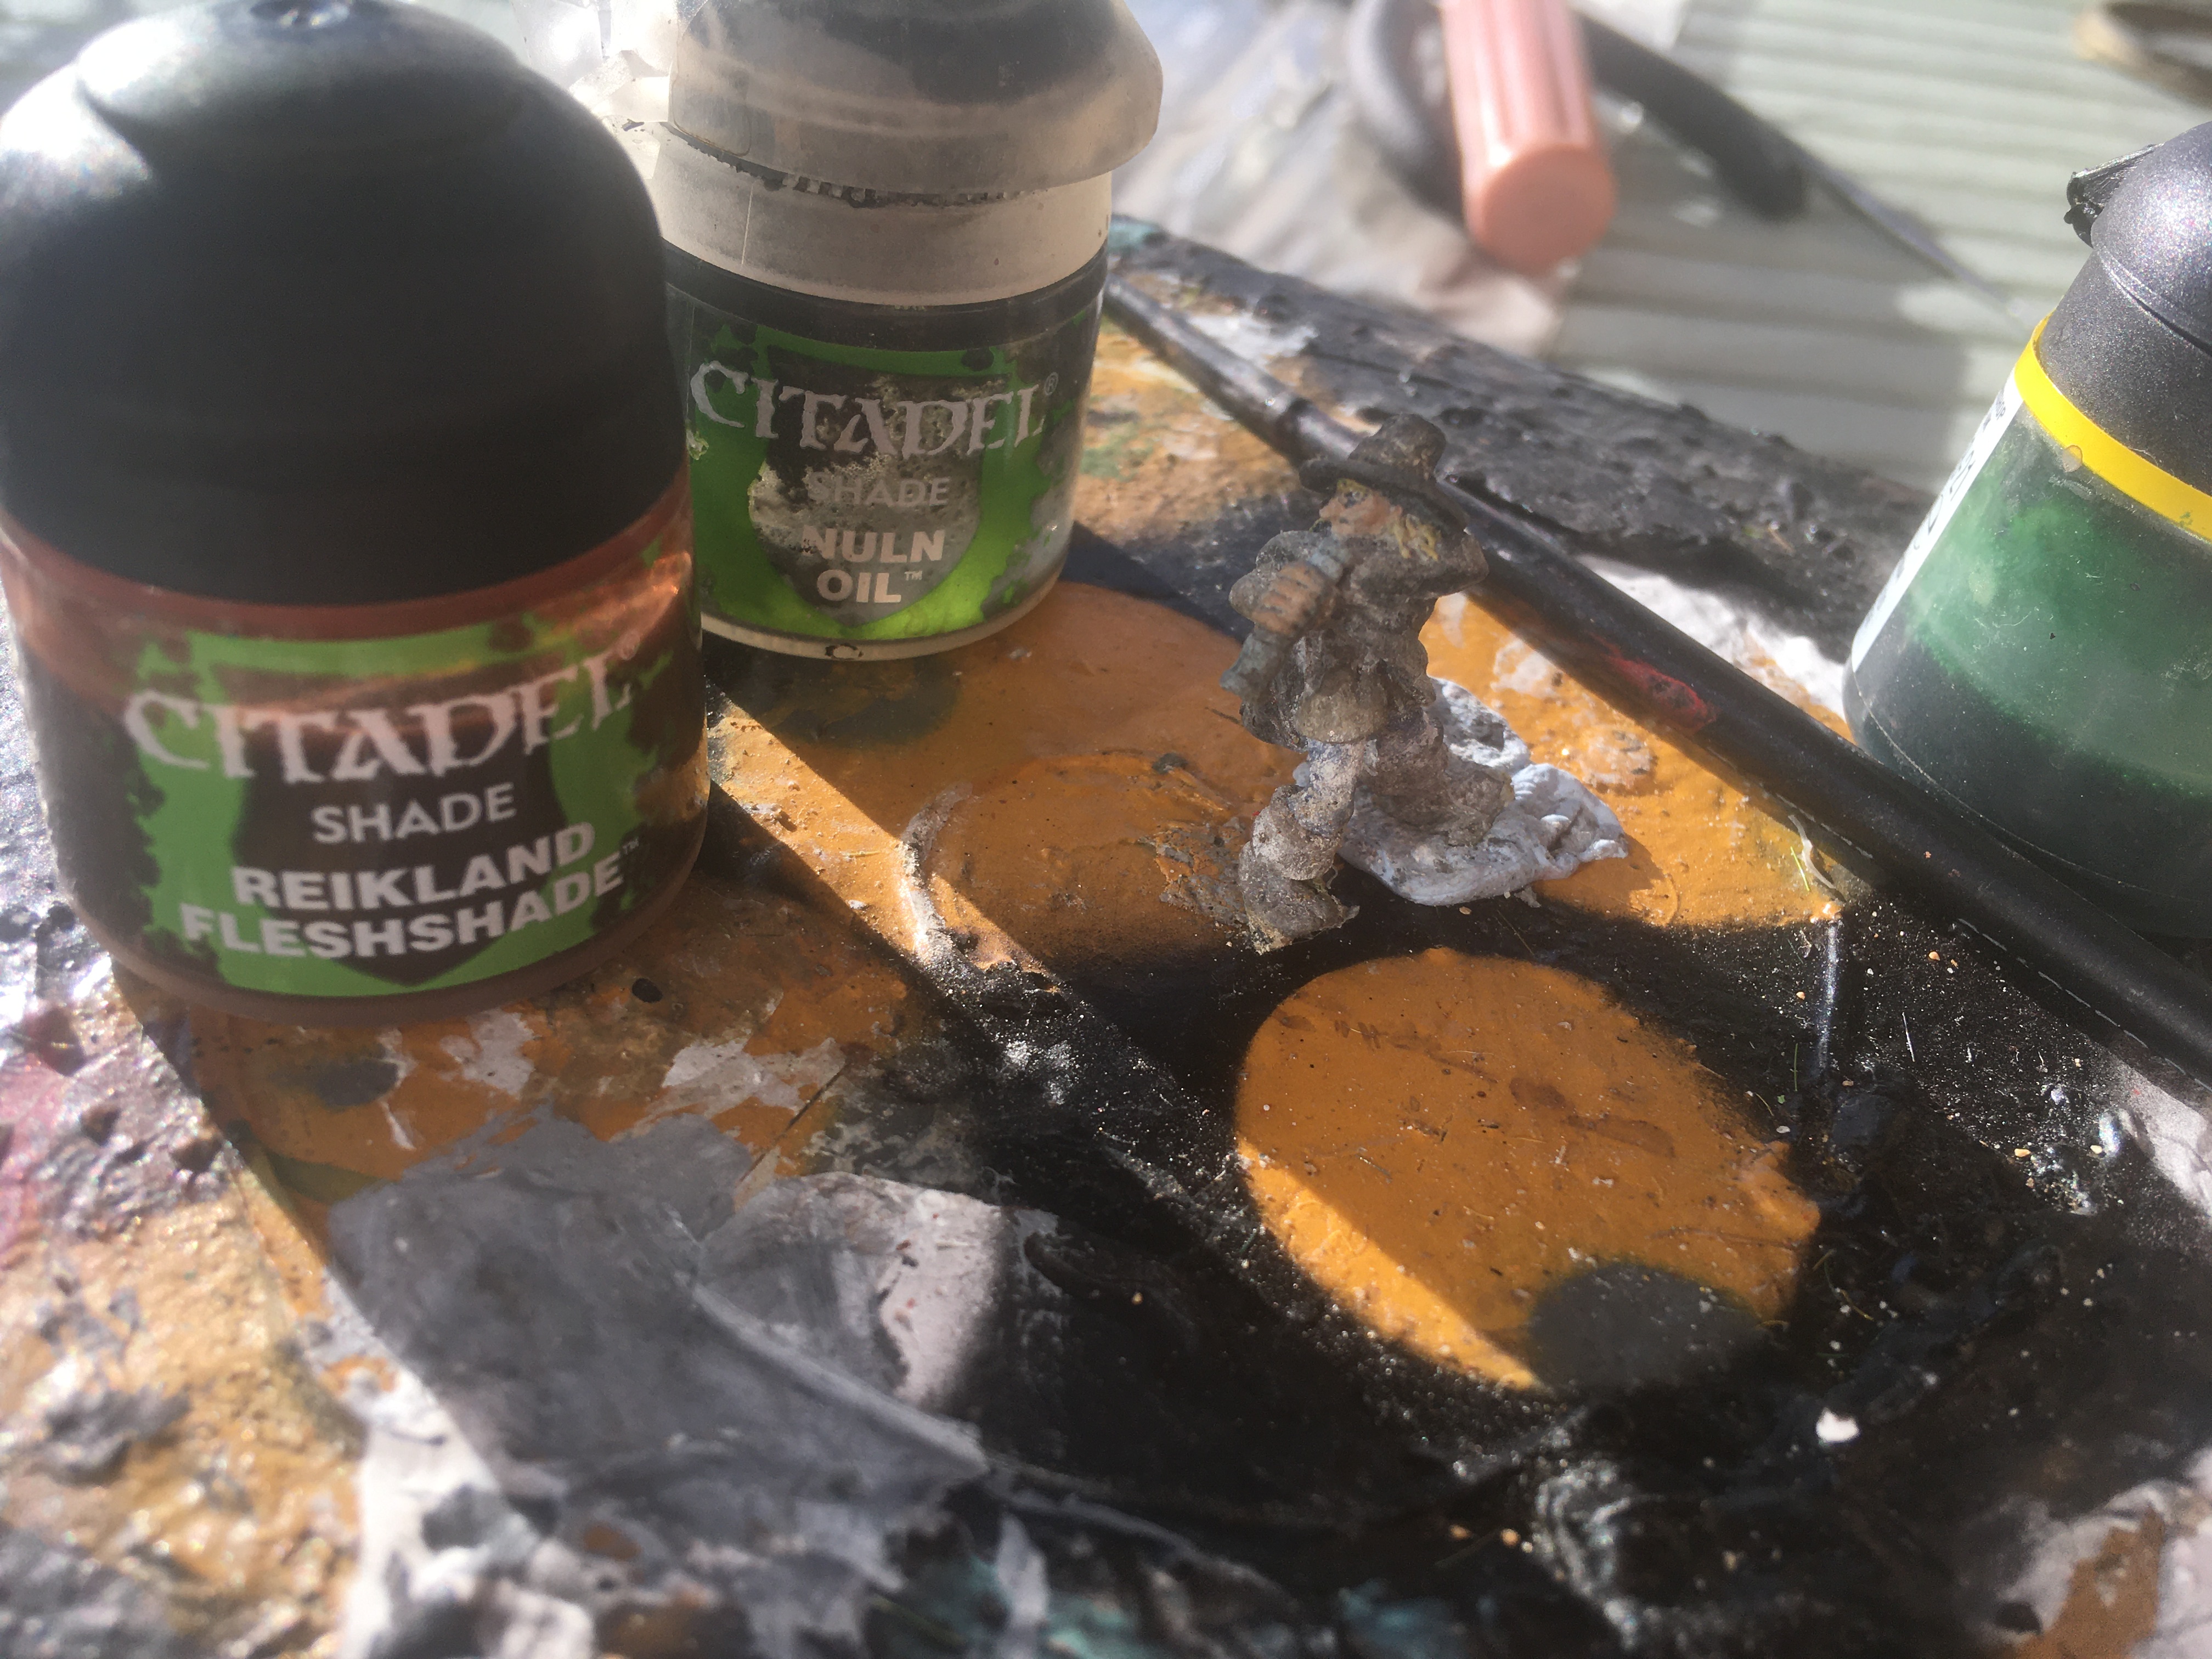
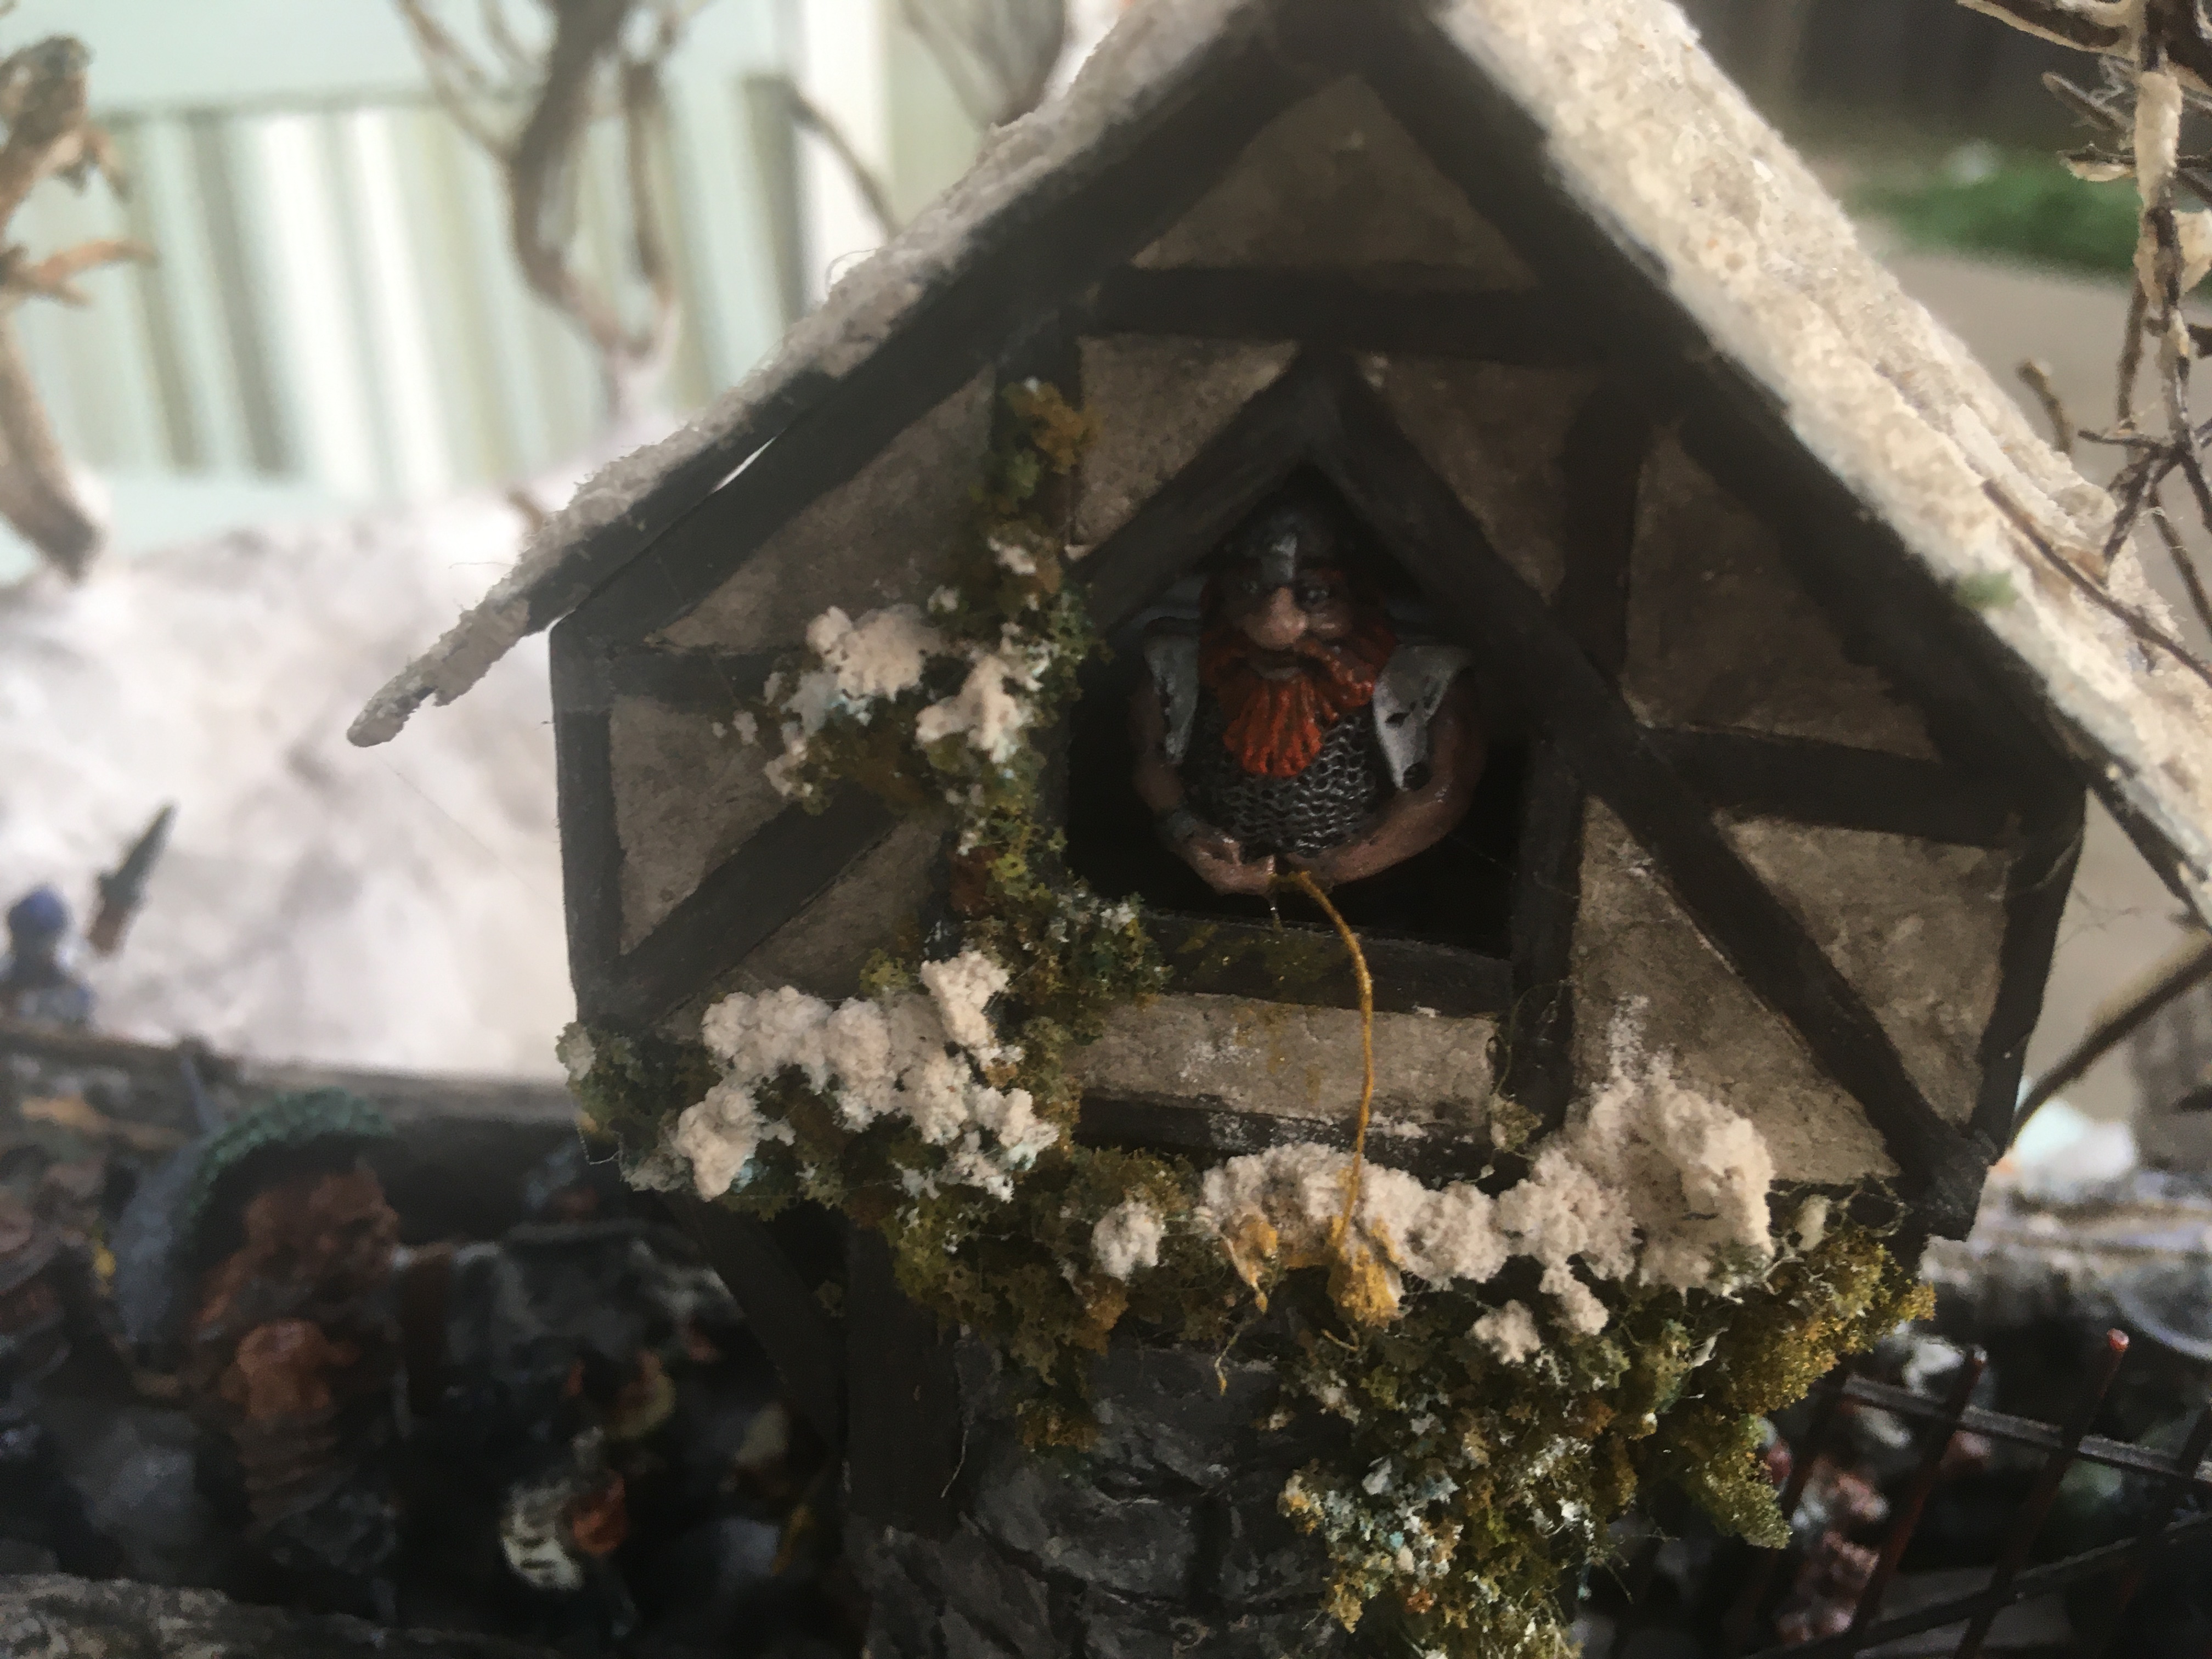
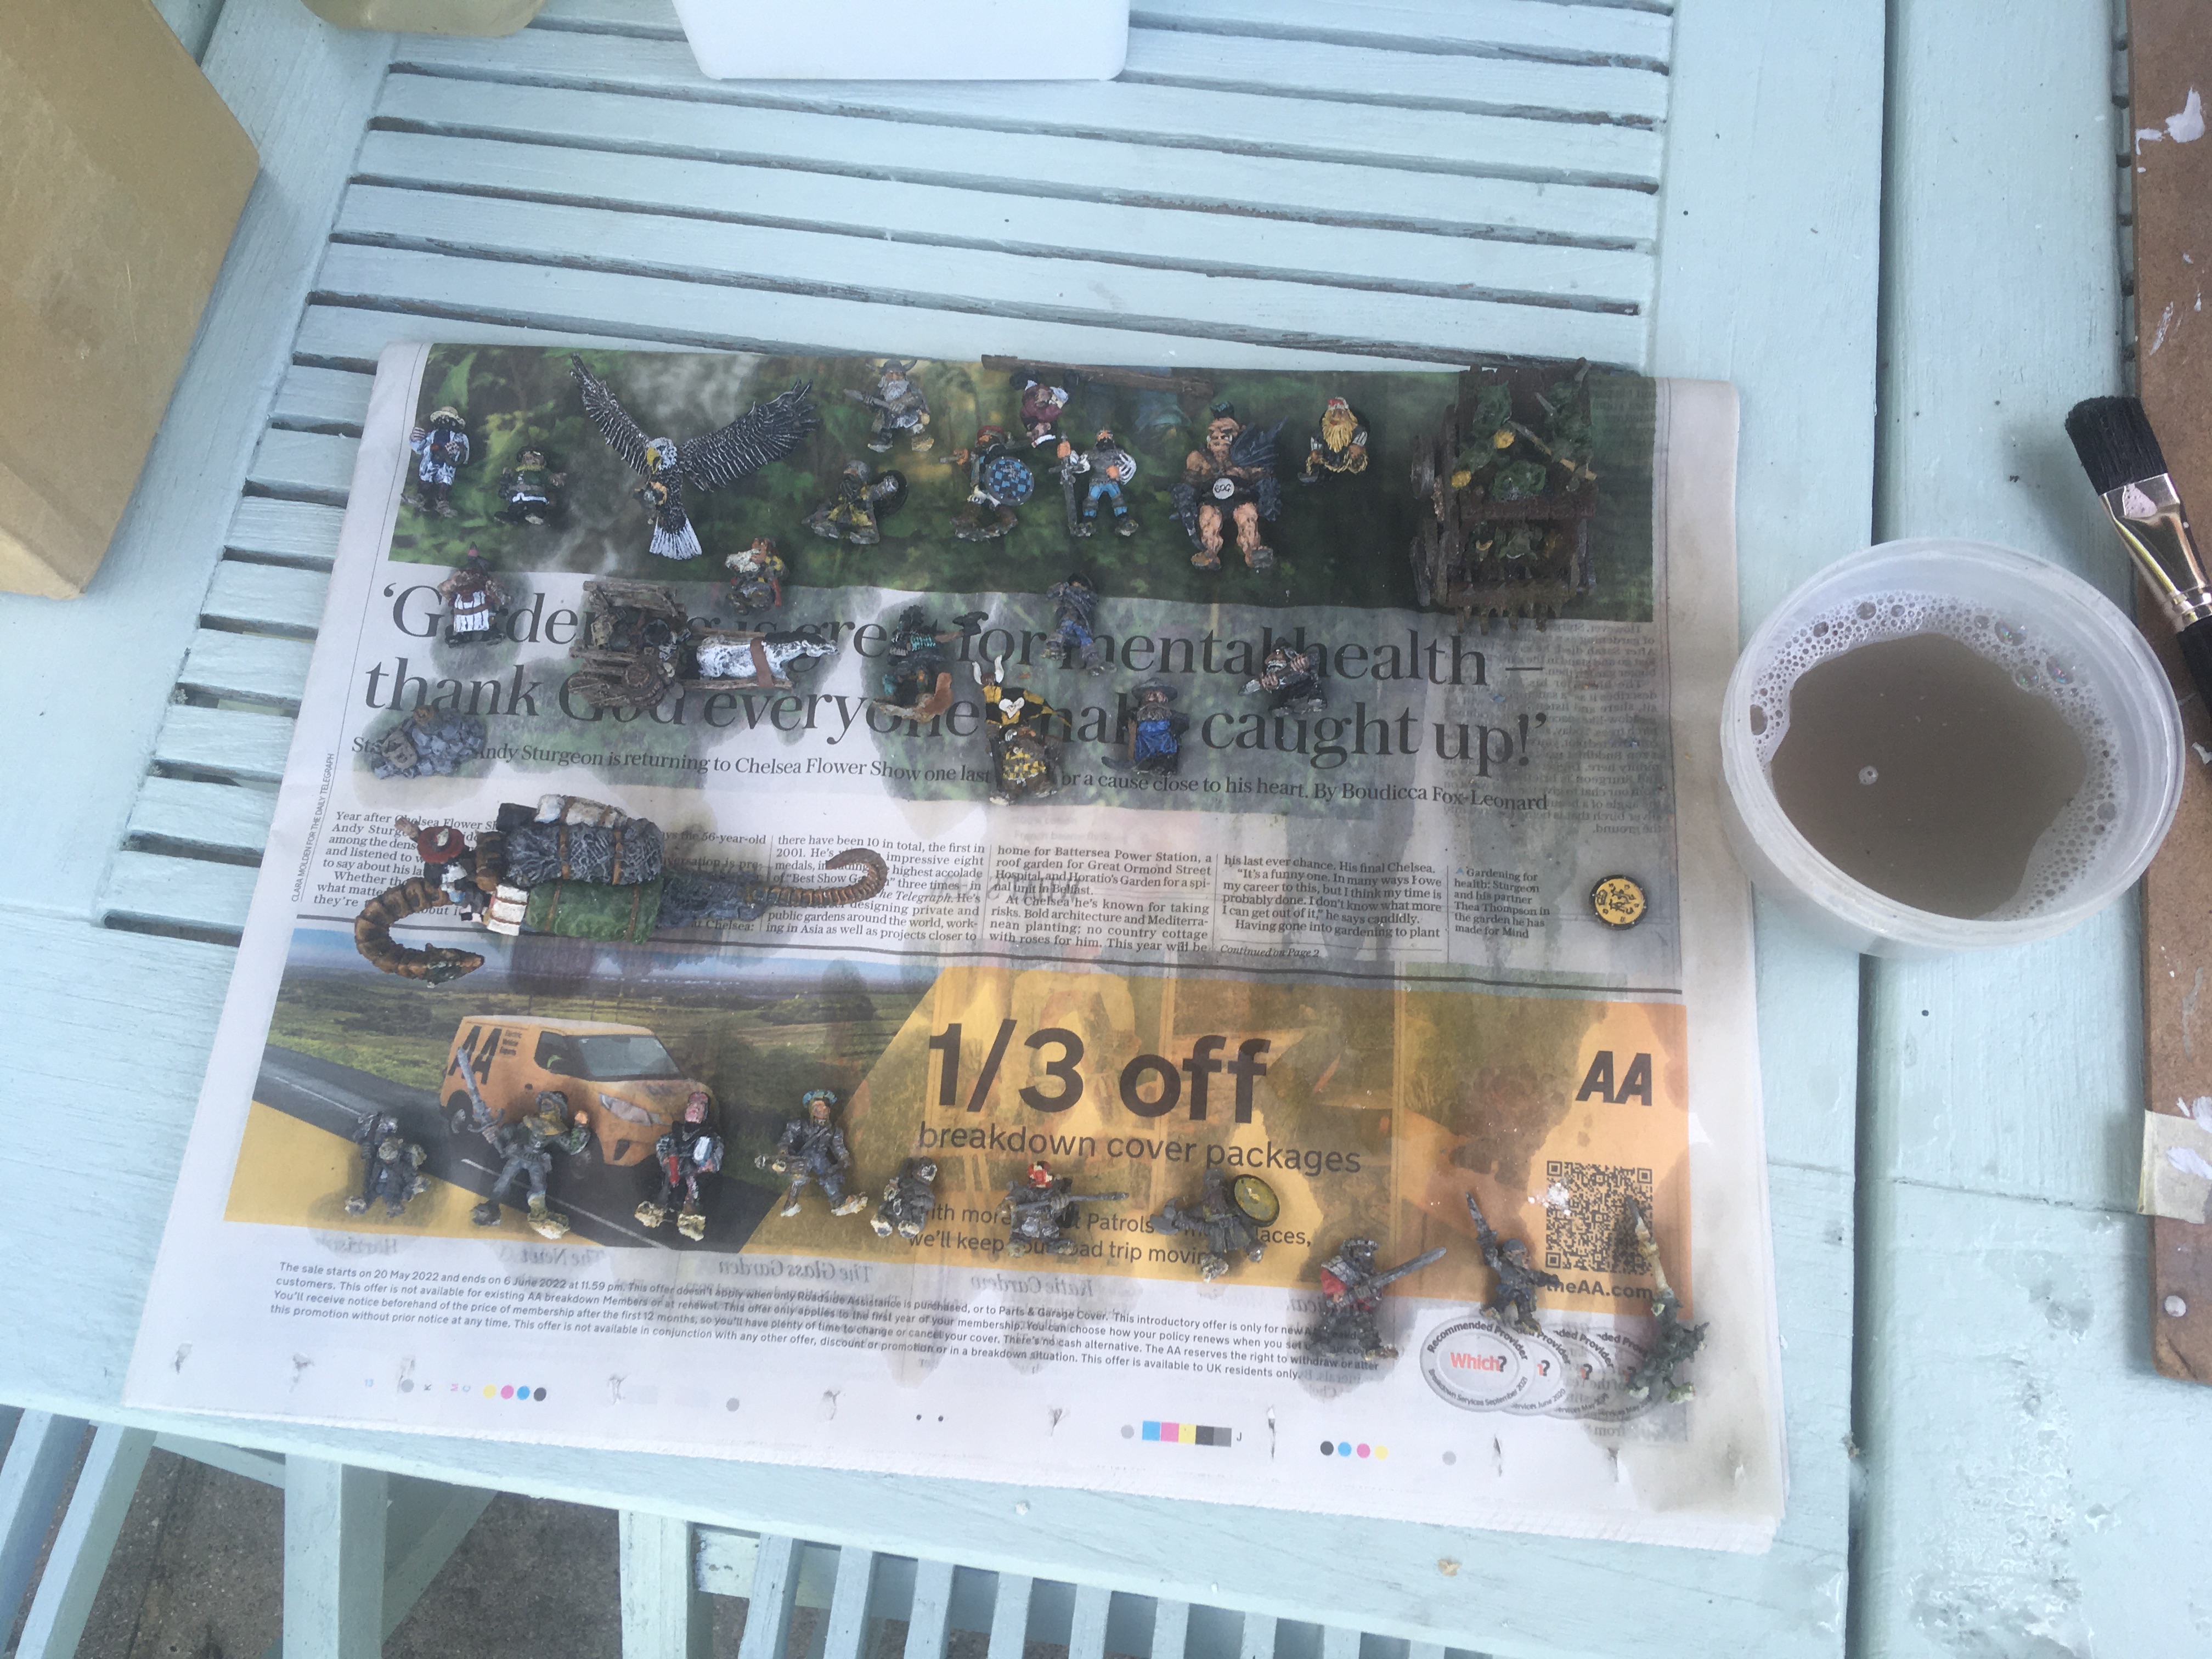 The miniatures that I had removed earlier were carefully washed in warm soapy water. Unfortunately there are a number that will need total repainting whilst for some there actually appears to have been metal fatigue - NB these are all lead from the 1980s/1990s so I suspect the temperature variations and some corrosion has damaged some of the miniatures. It means that I’m not going to put back some miniatures, but for all the others I’m going to do a sympathetic touch up using washes and repaint those miniatures I feel integral to the story unfolding on the bridge.
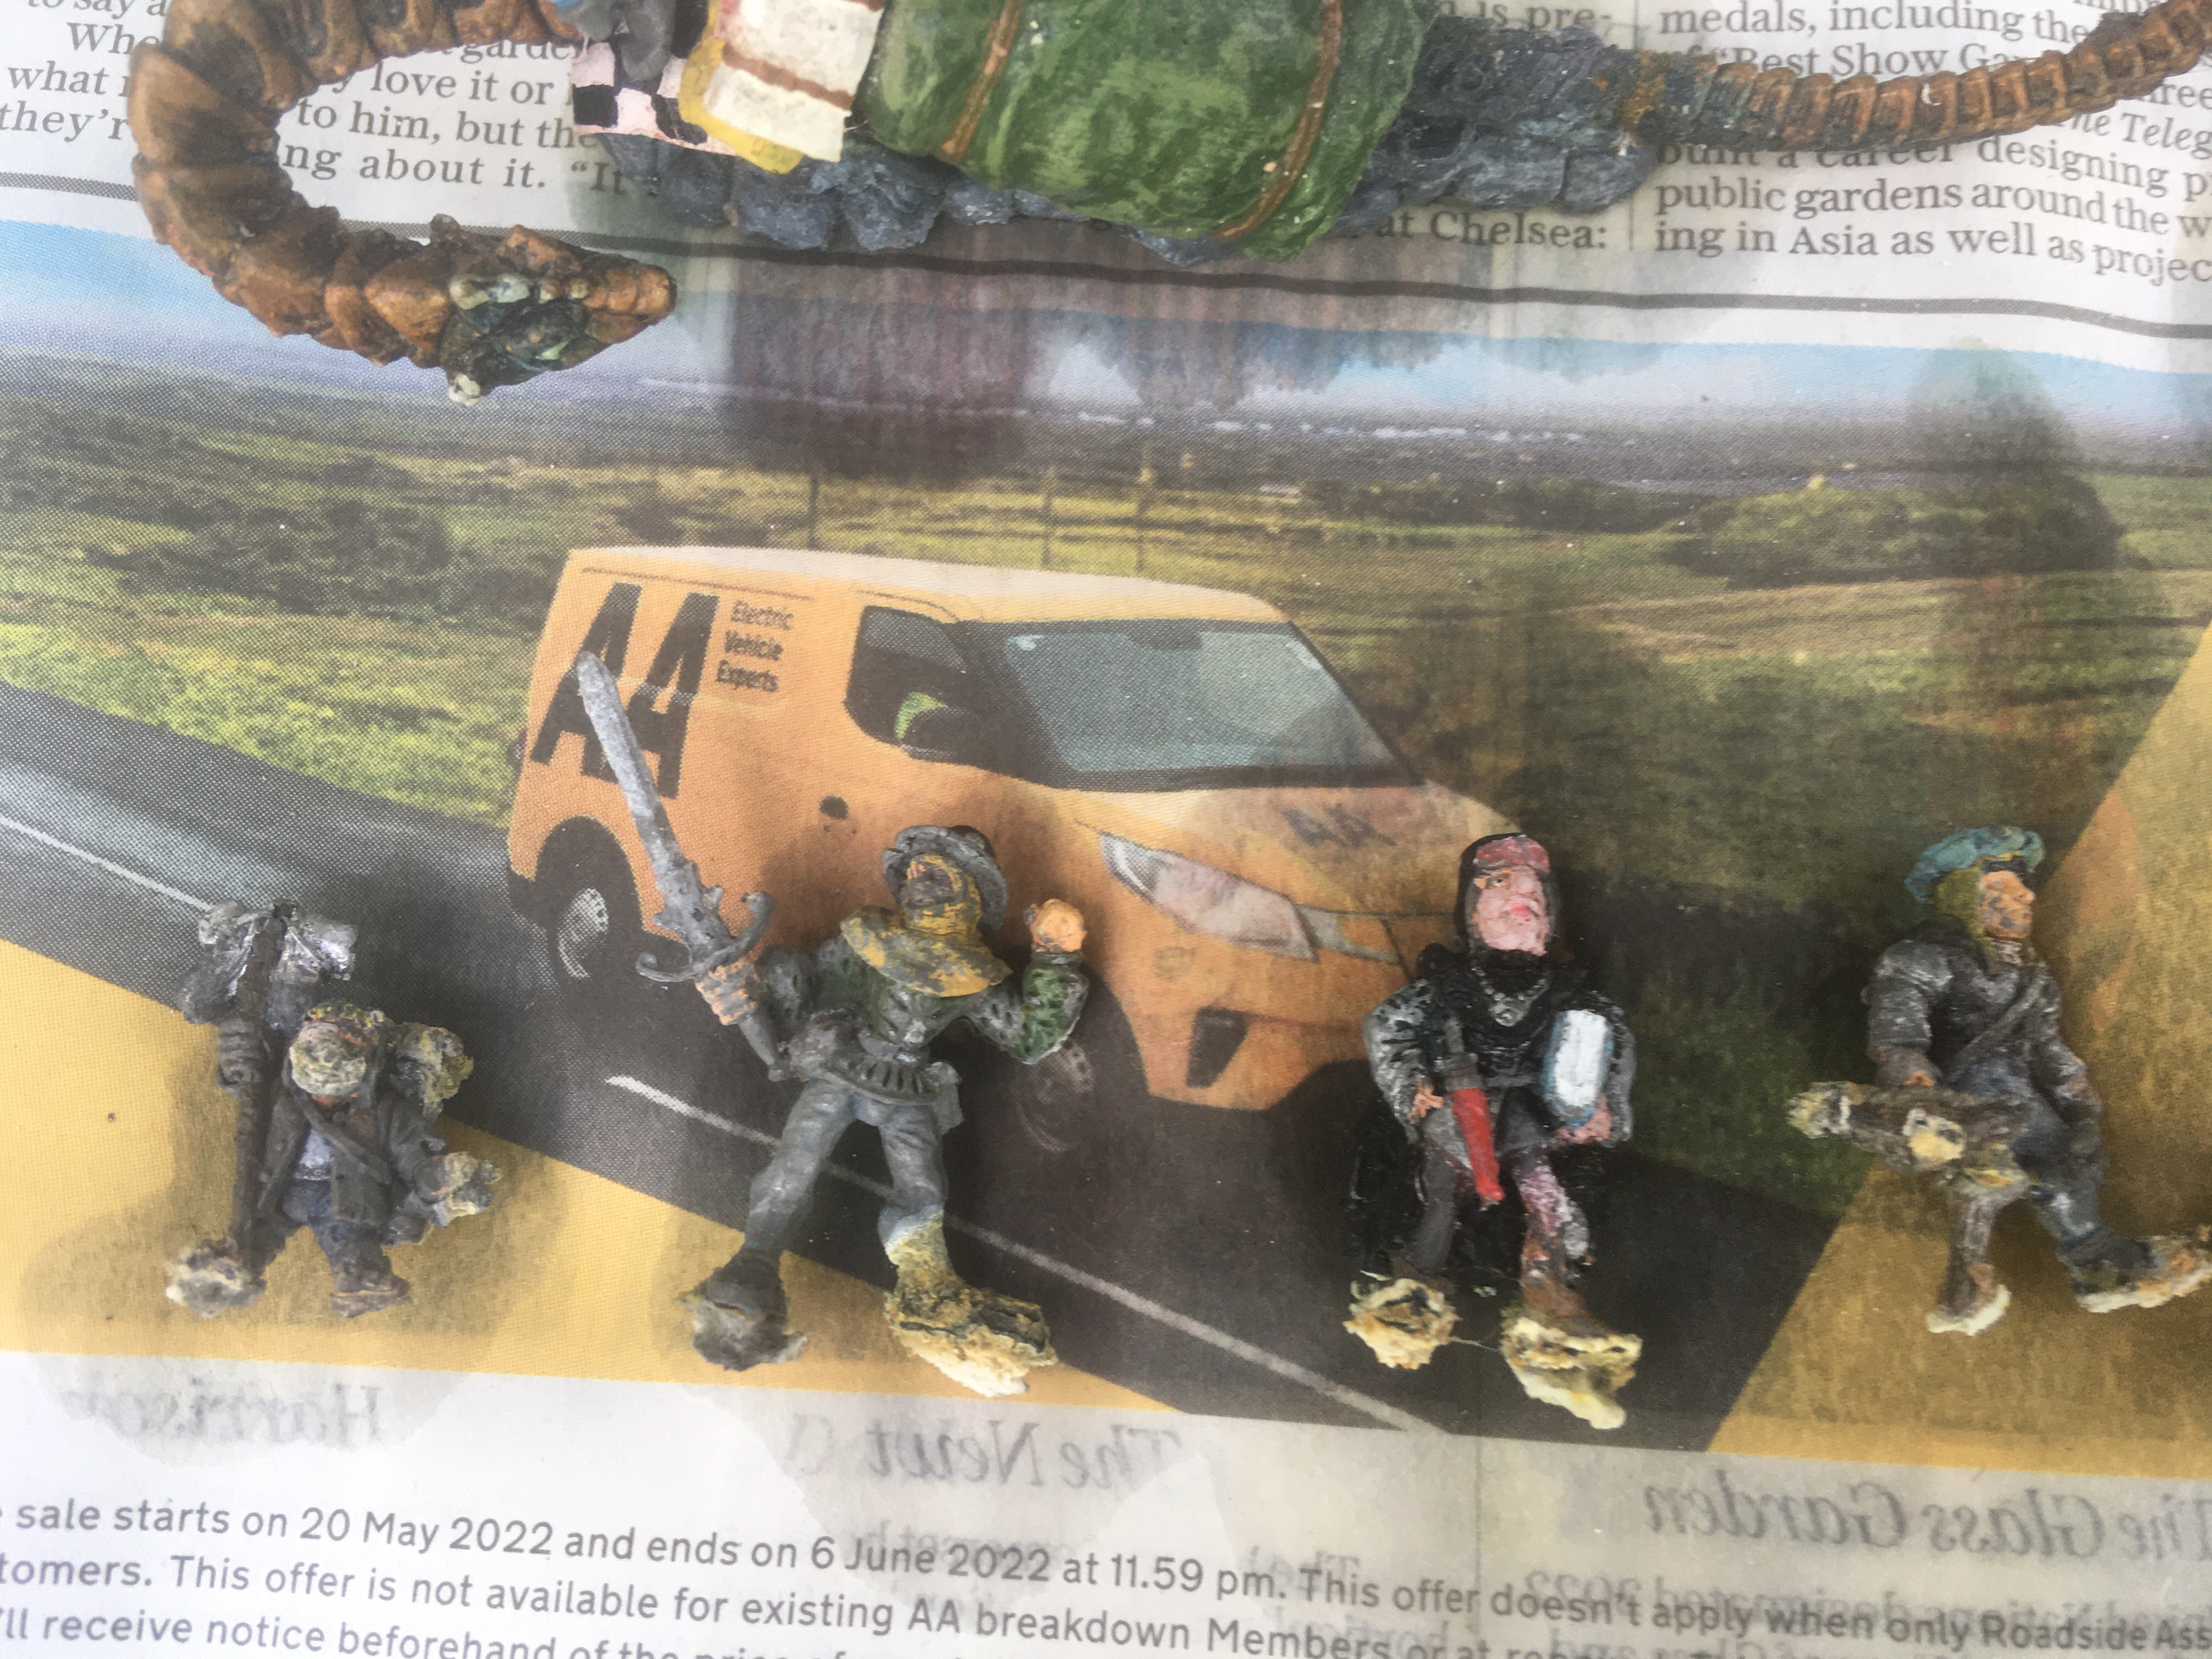
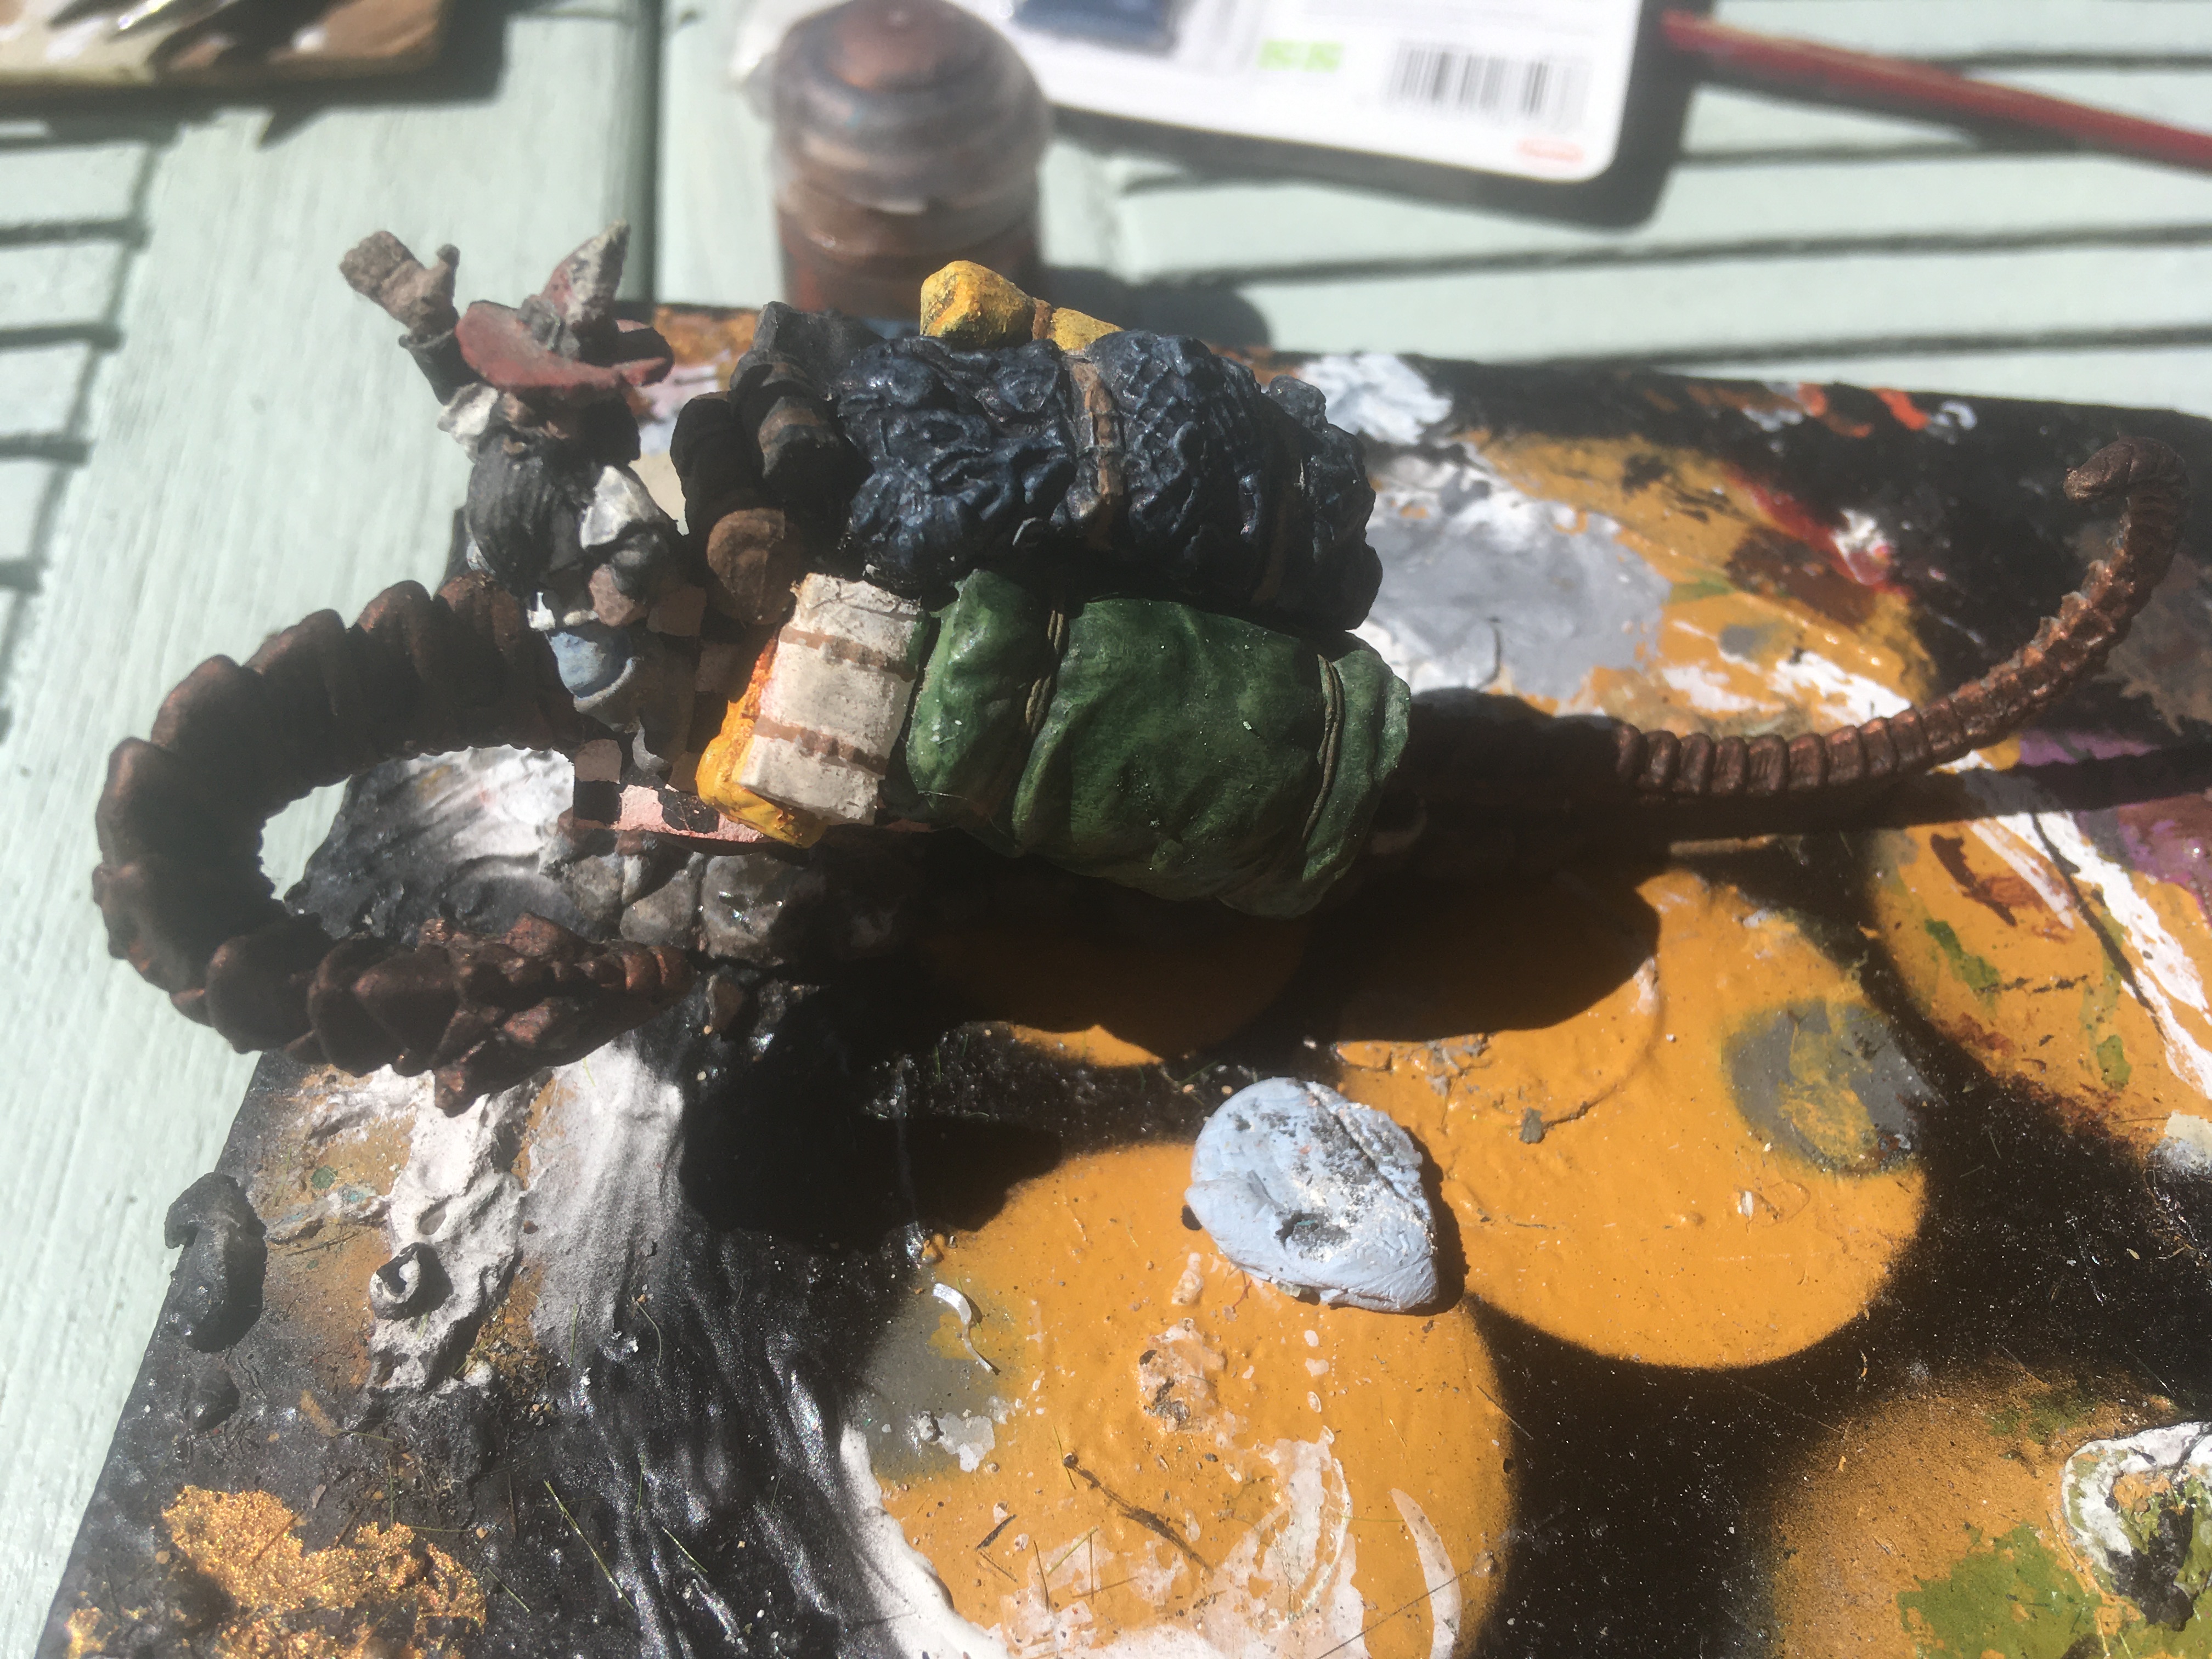
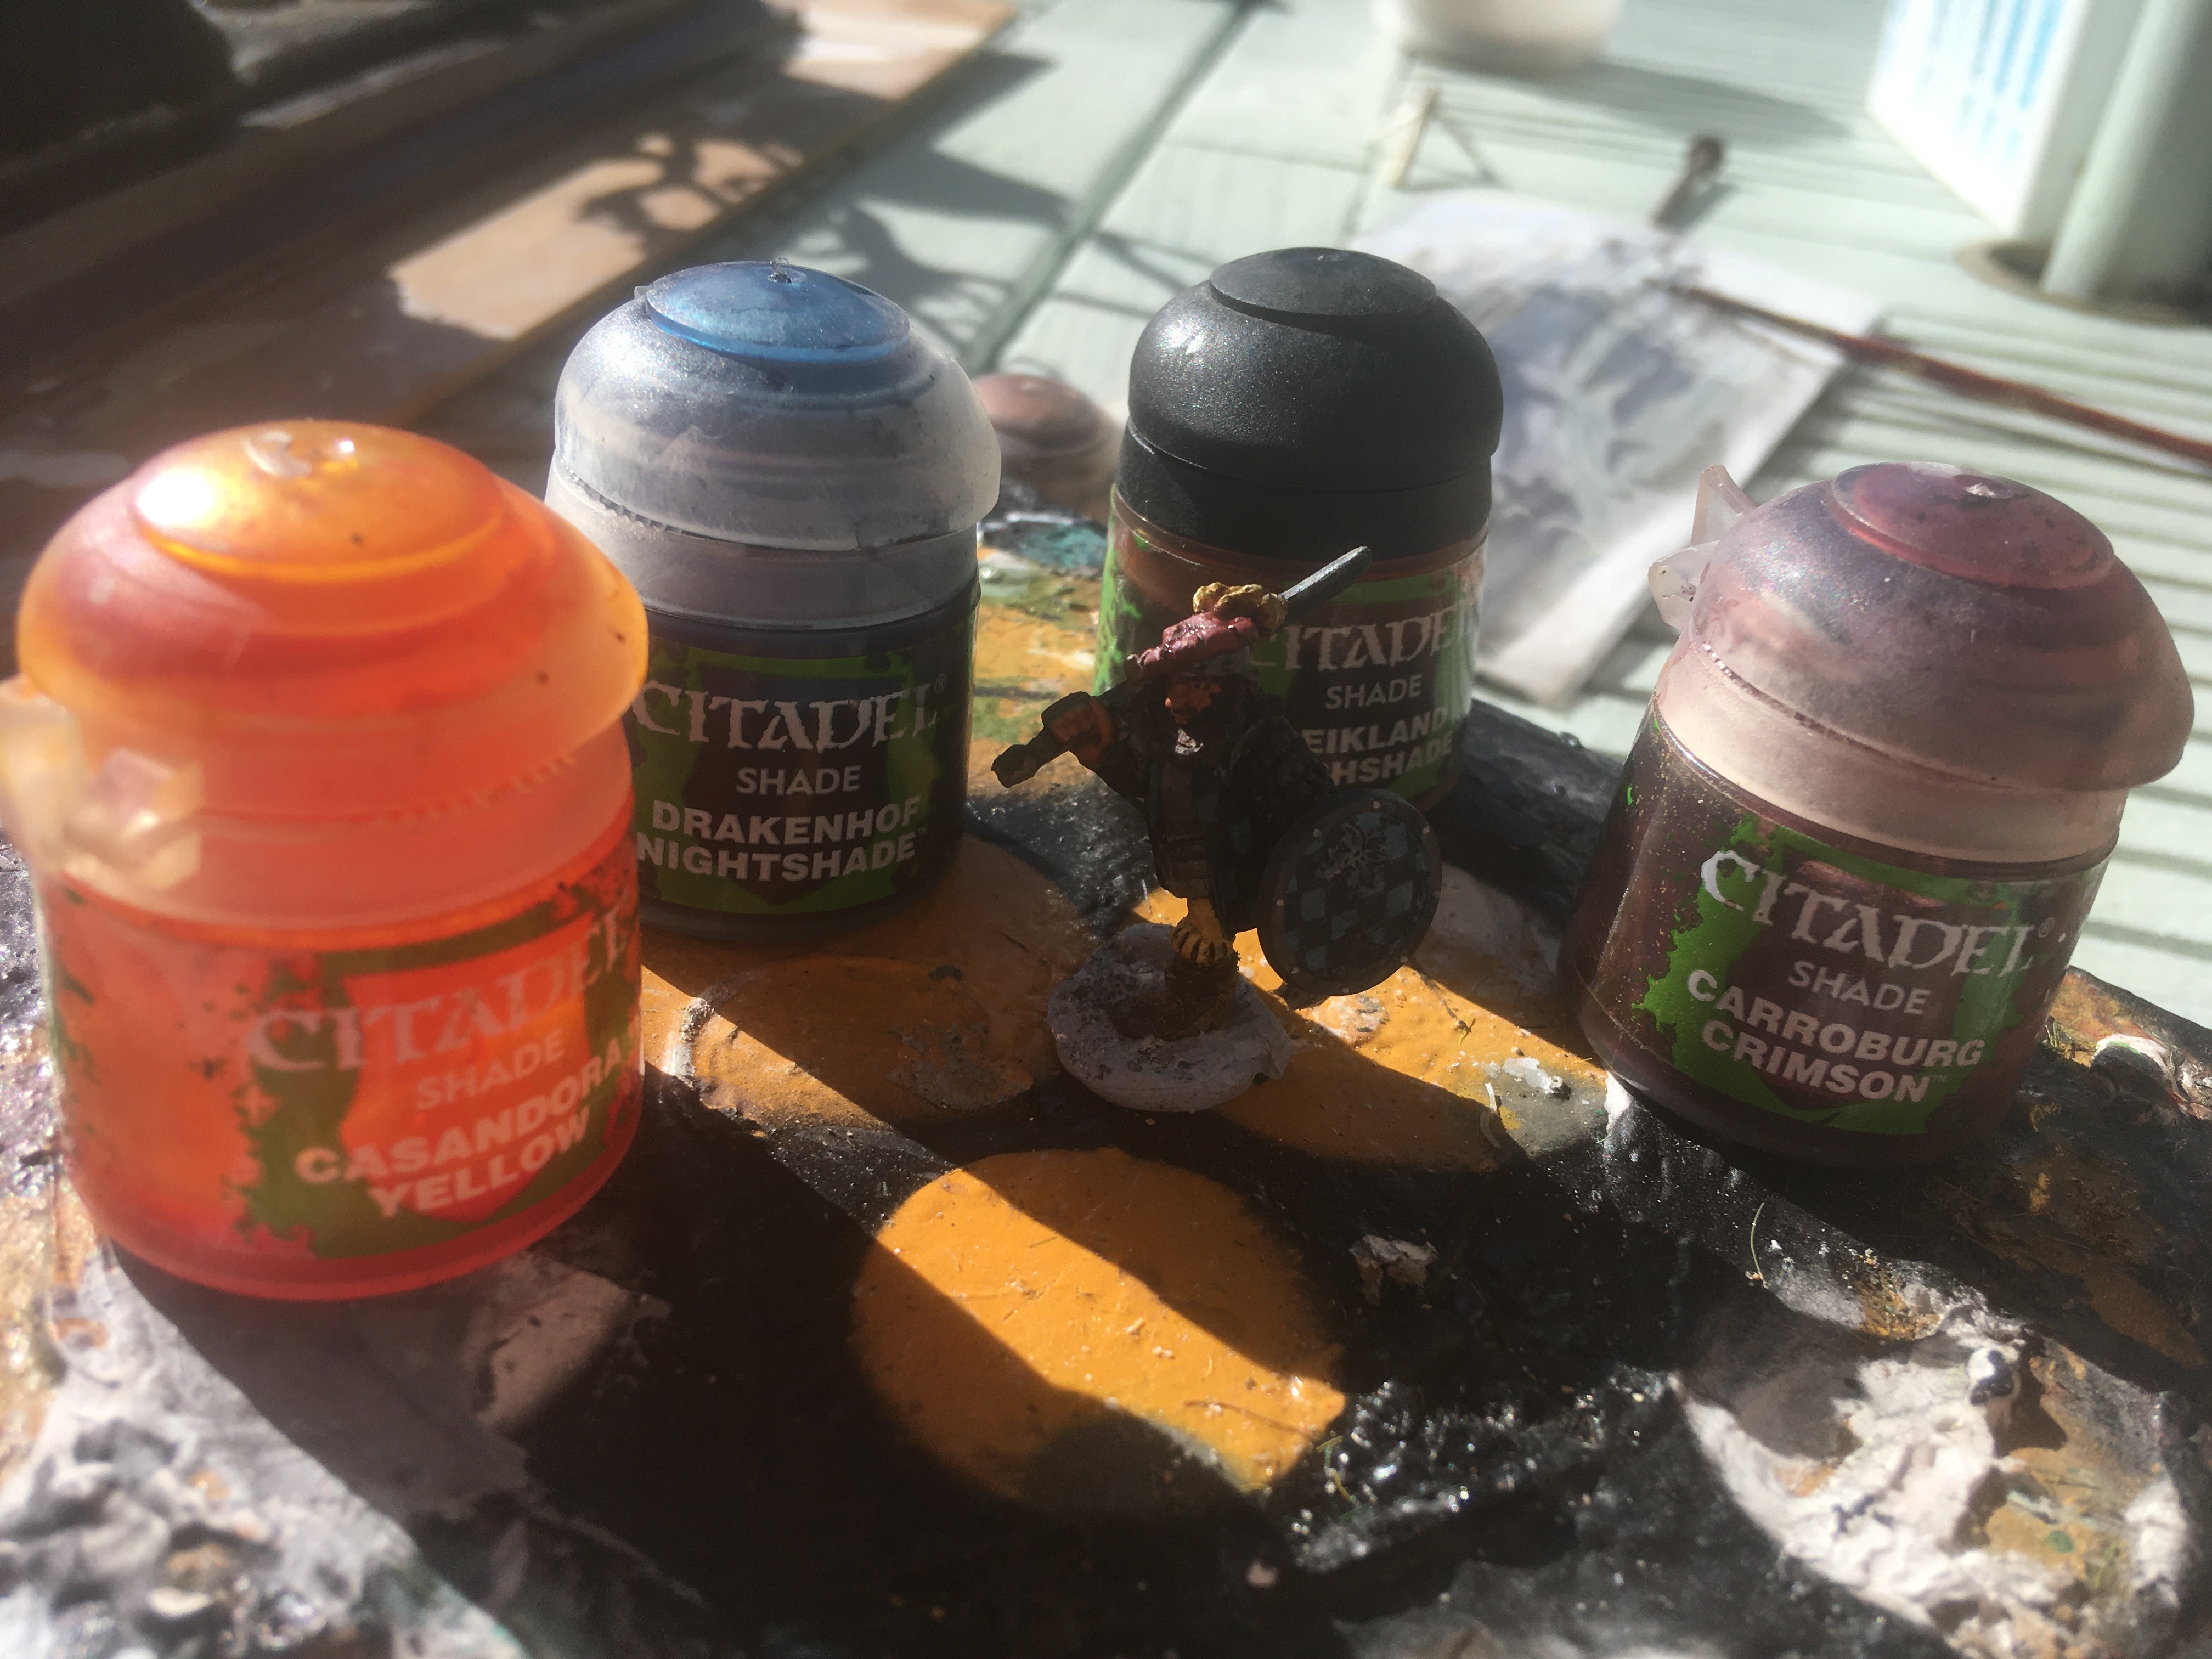
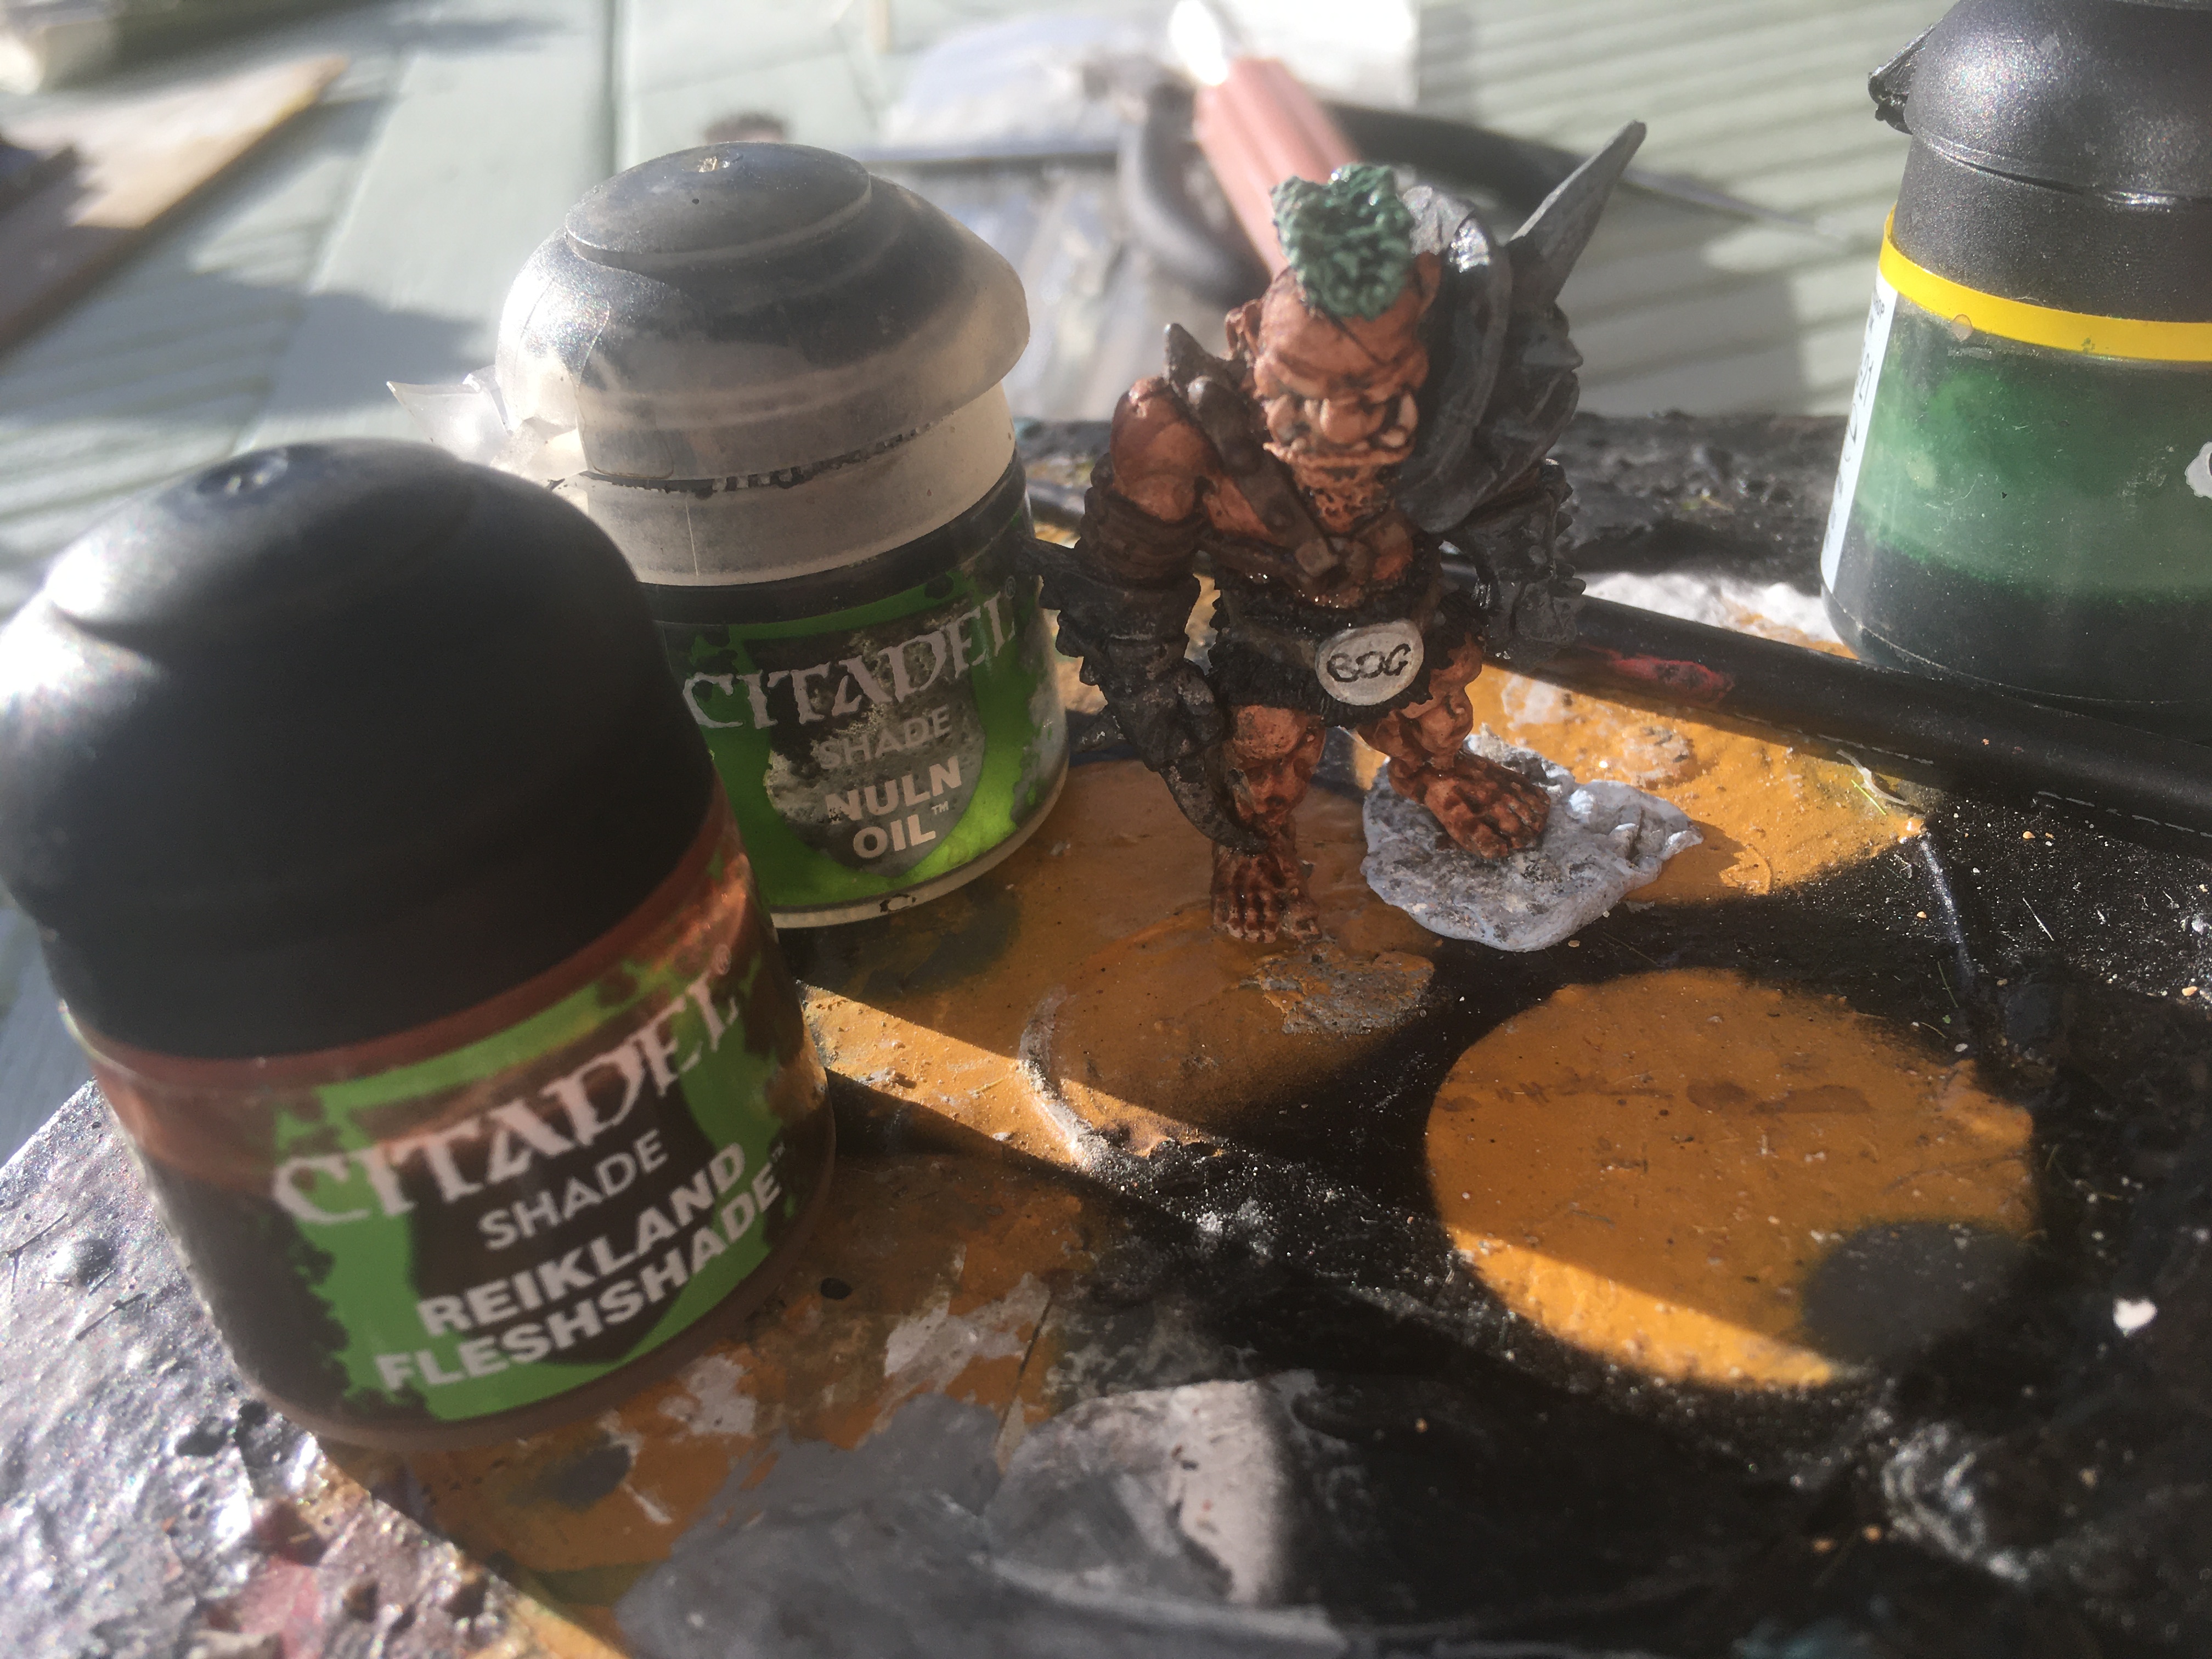
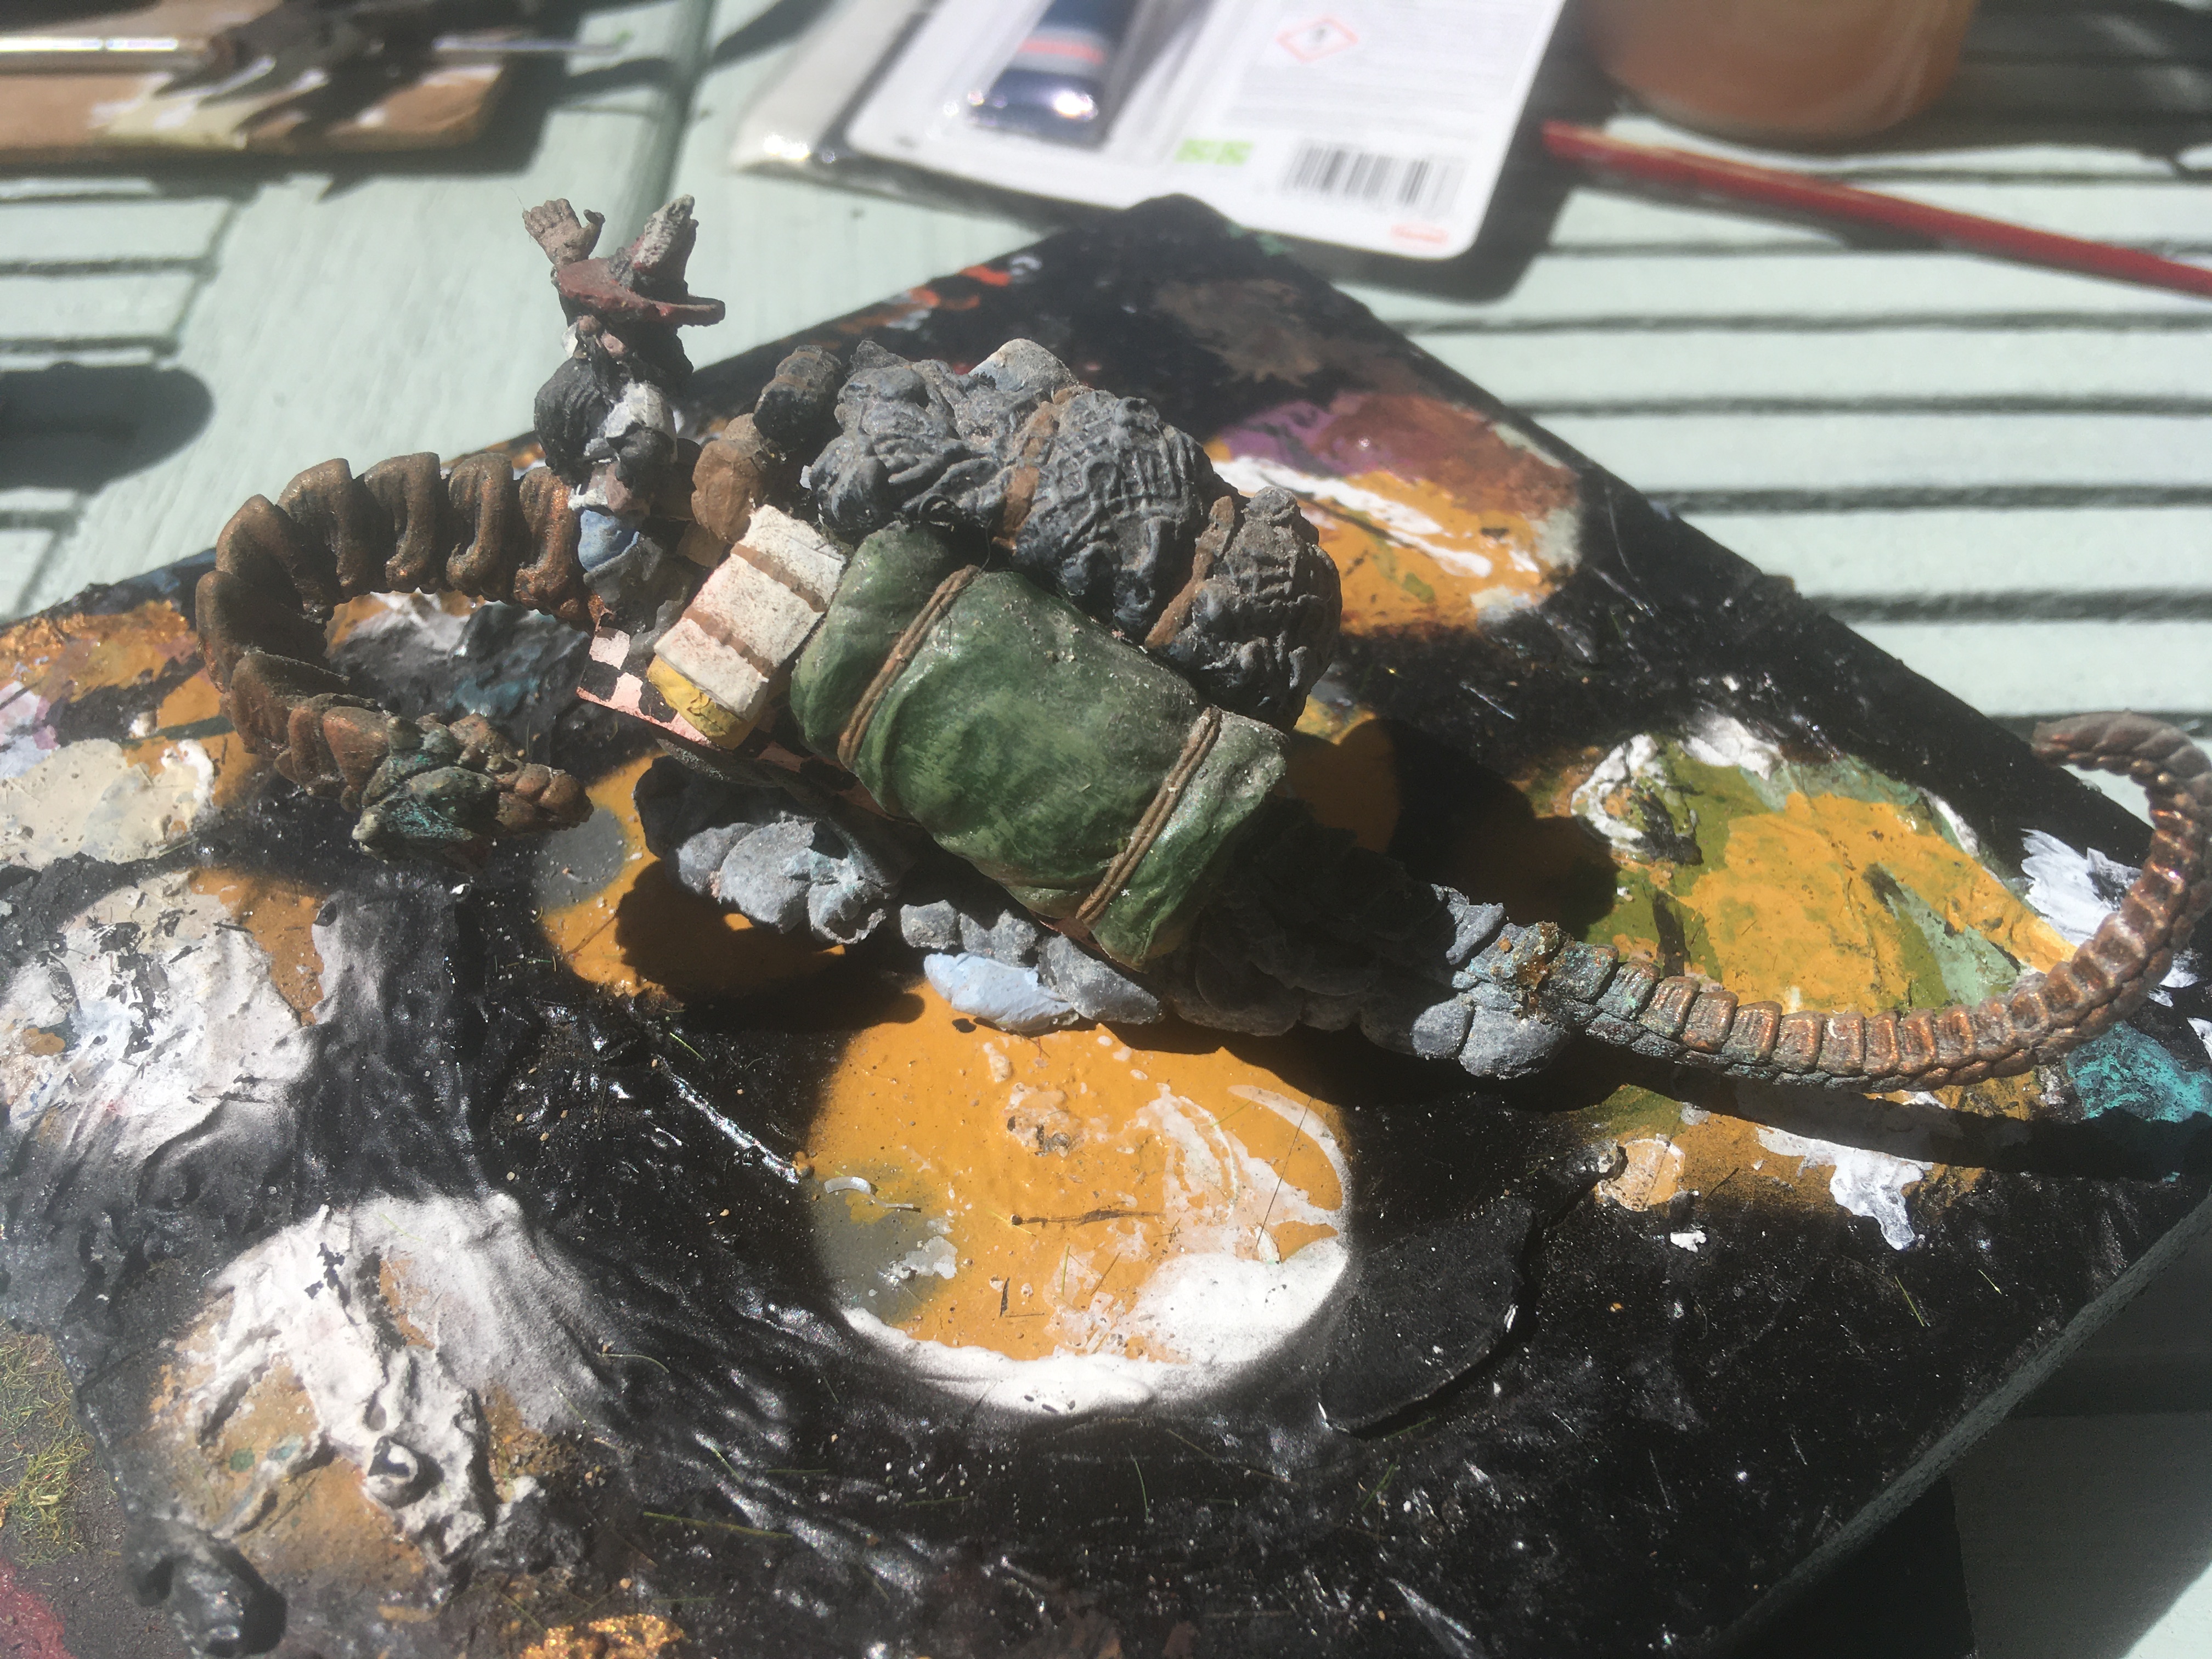 First up to the painting turntable in the Grenadier Dragon Lords Iron Dragon. There is deterioration to the tail, so the nearest match is GW Tin Bitz followed by a wash of Reikland Fleshshade. The baggage was refreshed with Thaka Green, Casandora Yellow, Carroburg Crimson, and Drakenhof Nightshade. The rocky base was refreshed with Declan Mud Wash.
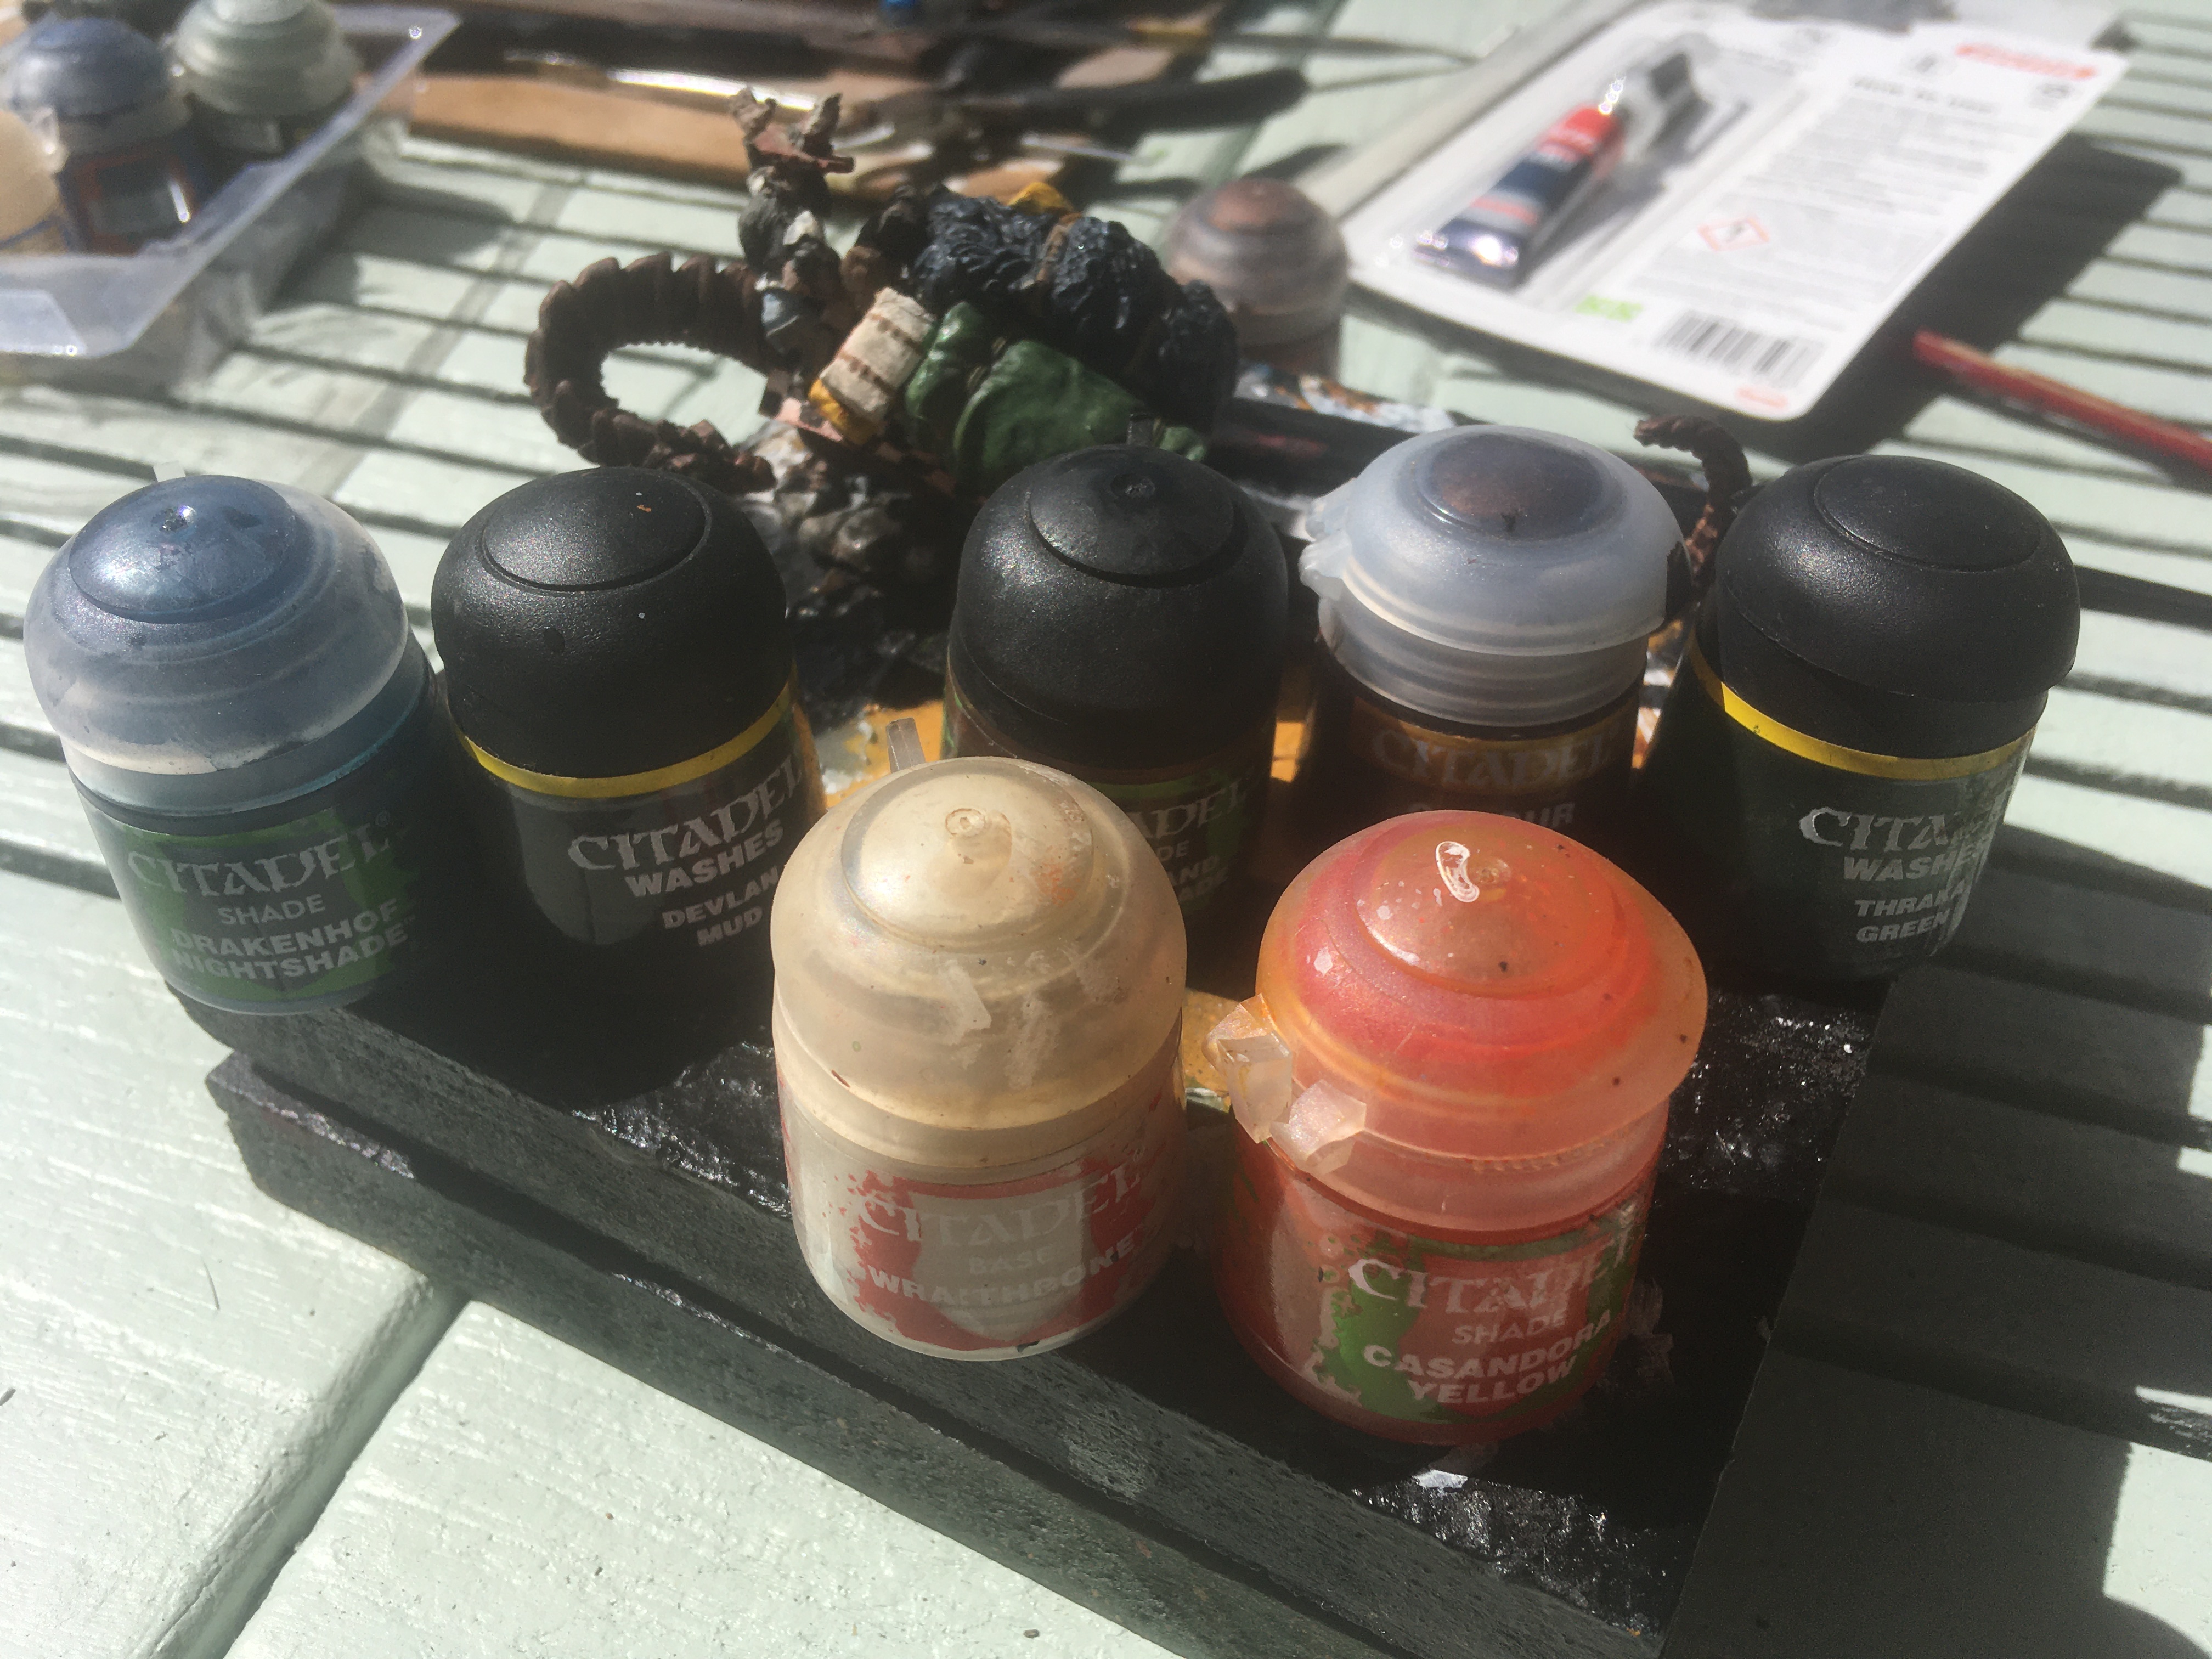

Phase 6 - Repositioning the Miniatures
 A slow process, but with a dab of Superglue each miniature was repositioned to start to tell the story.
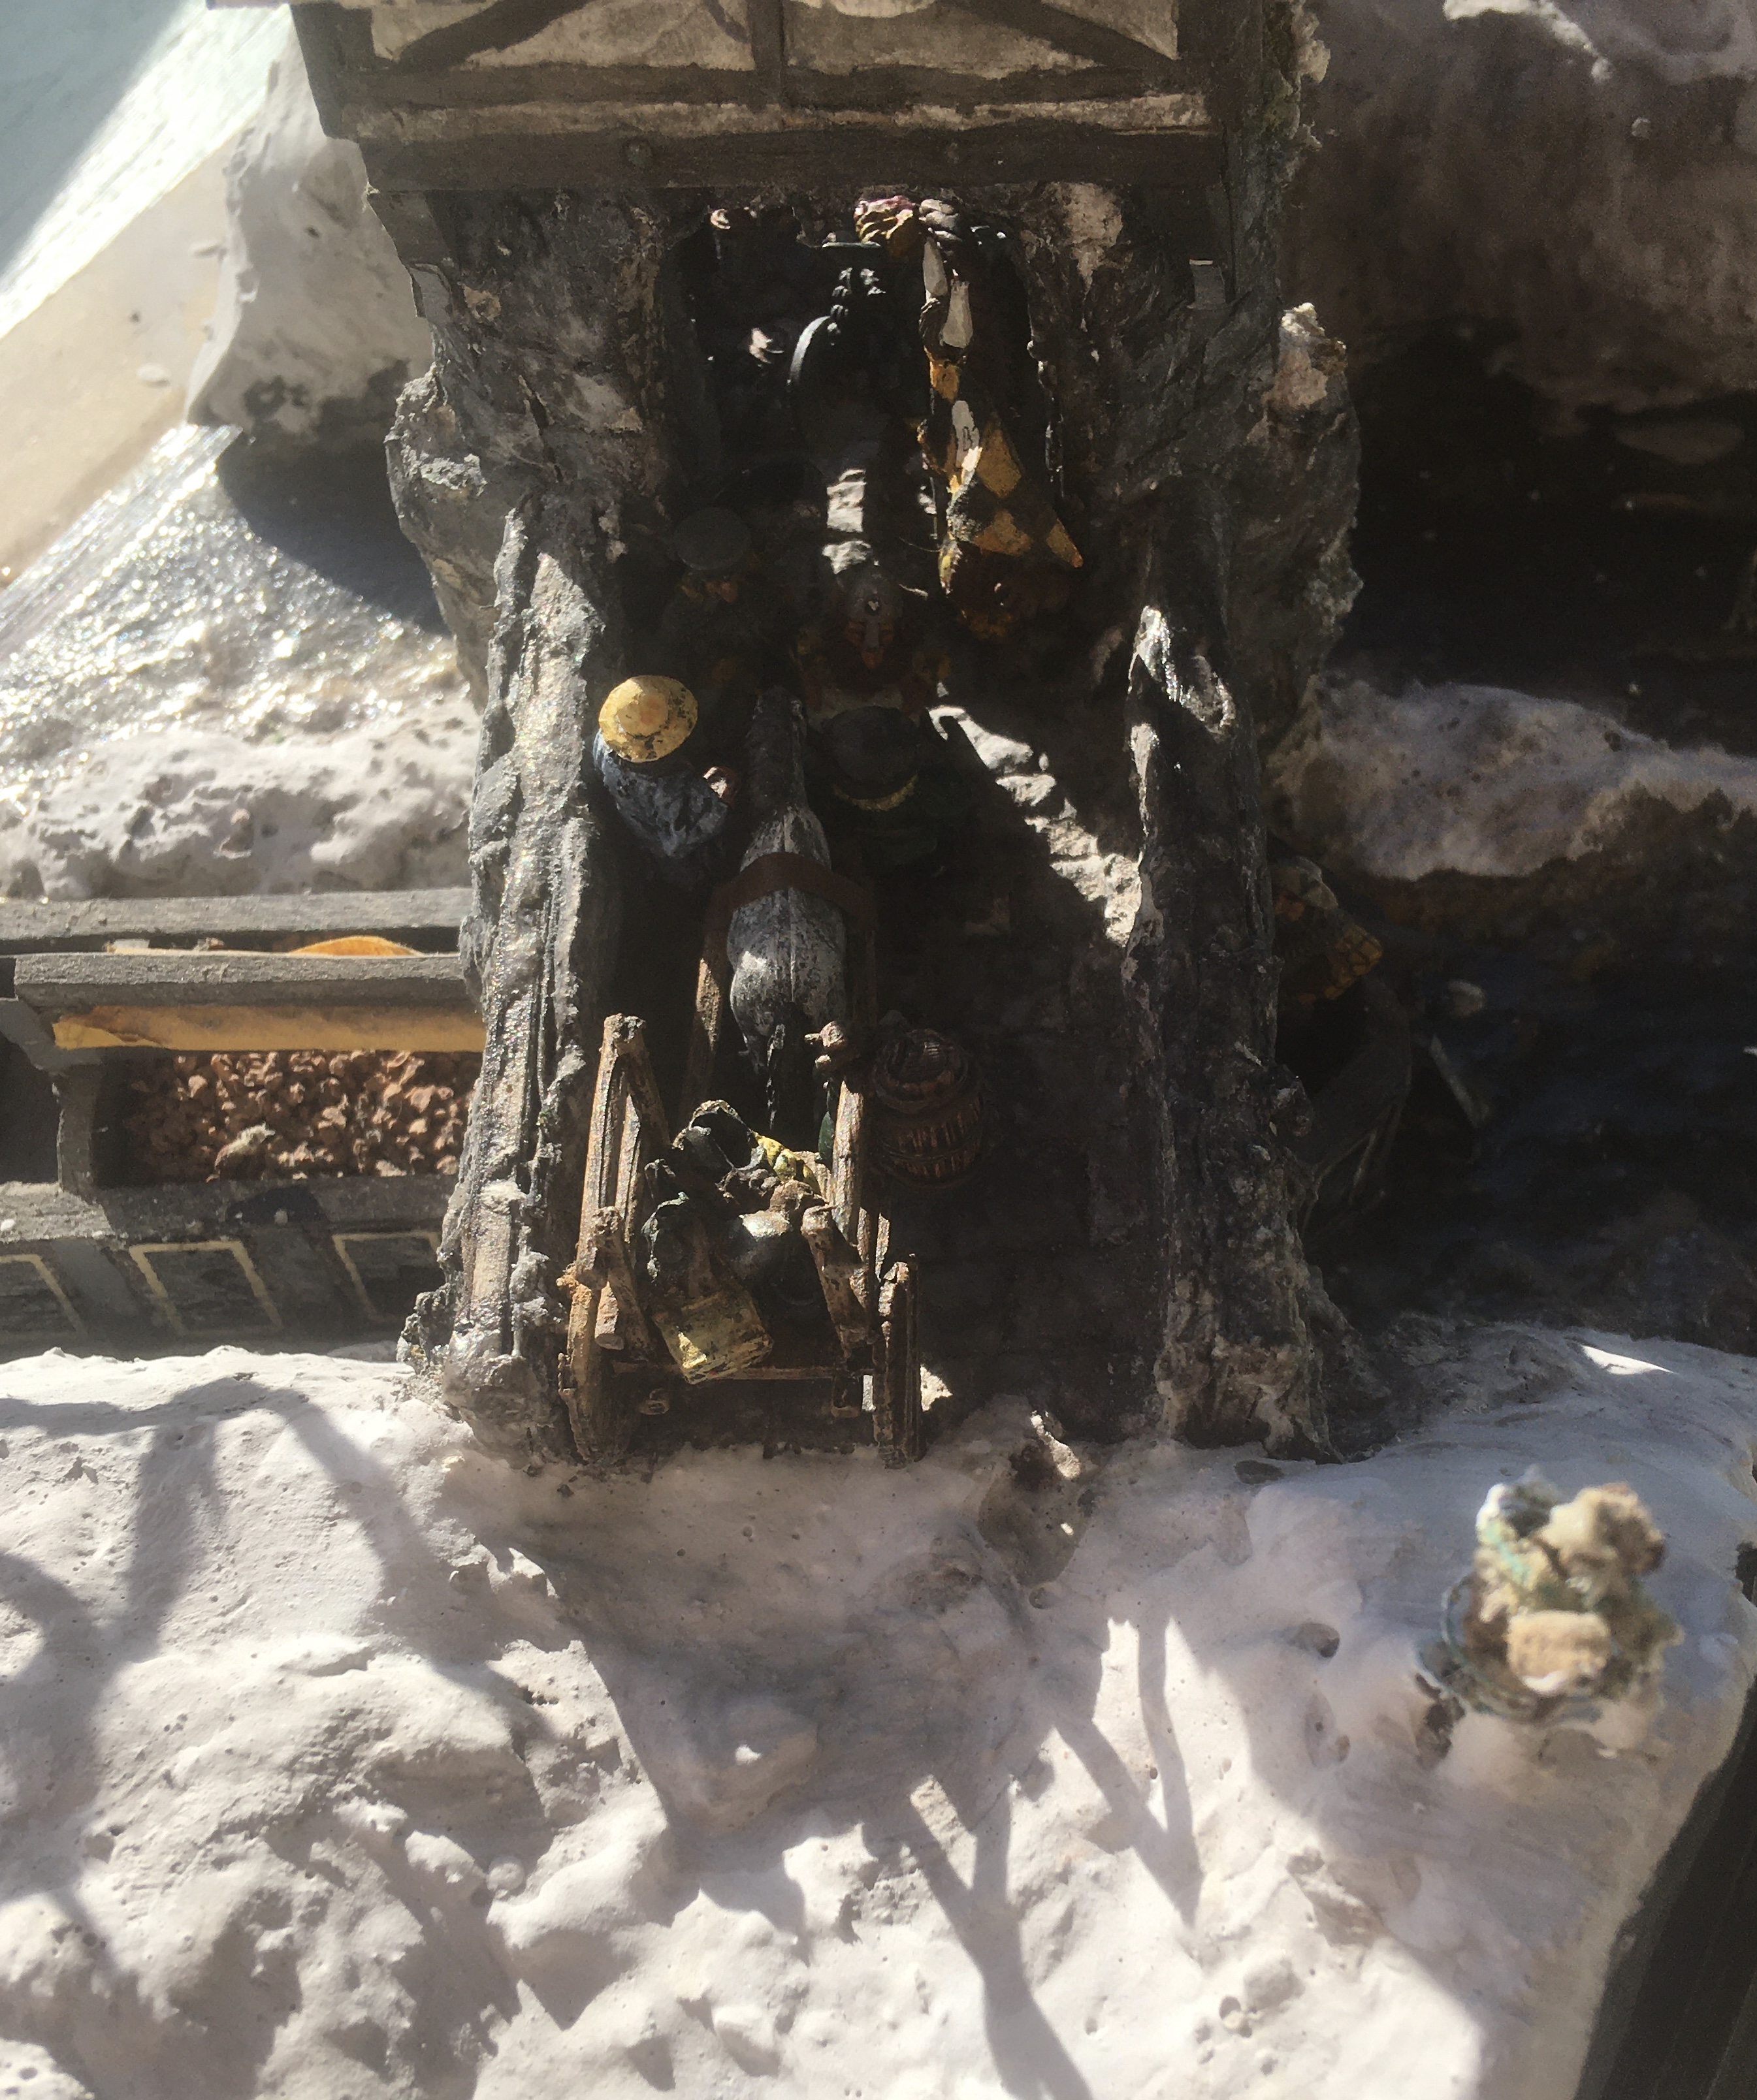


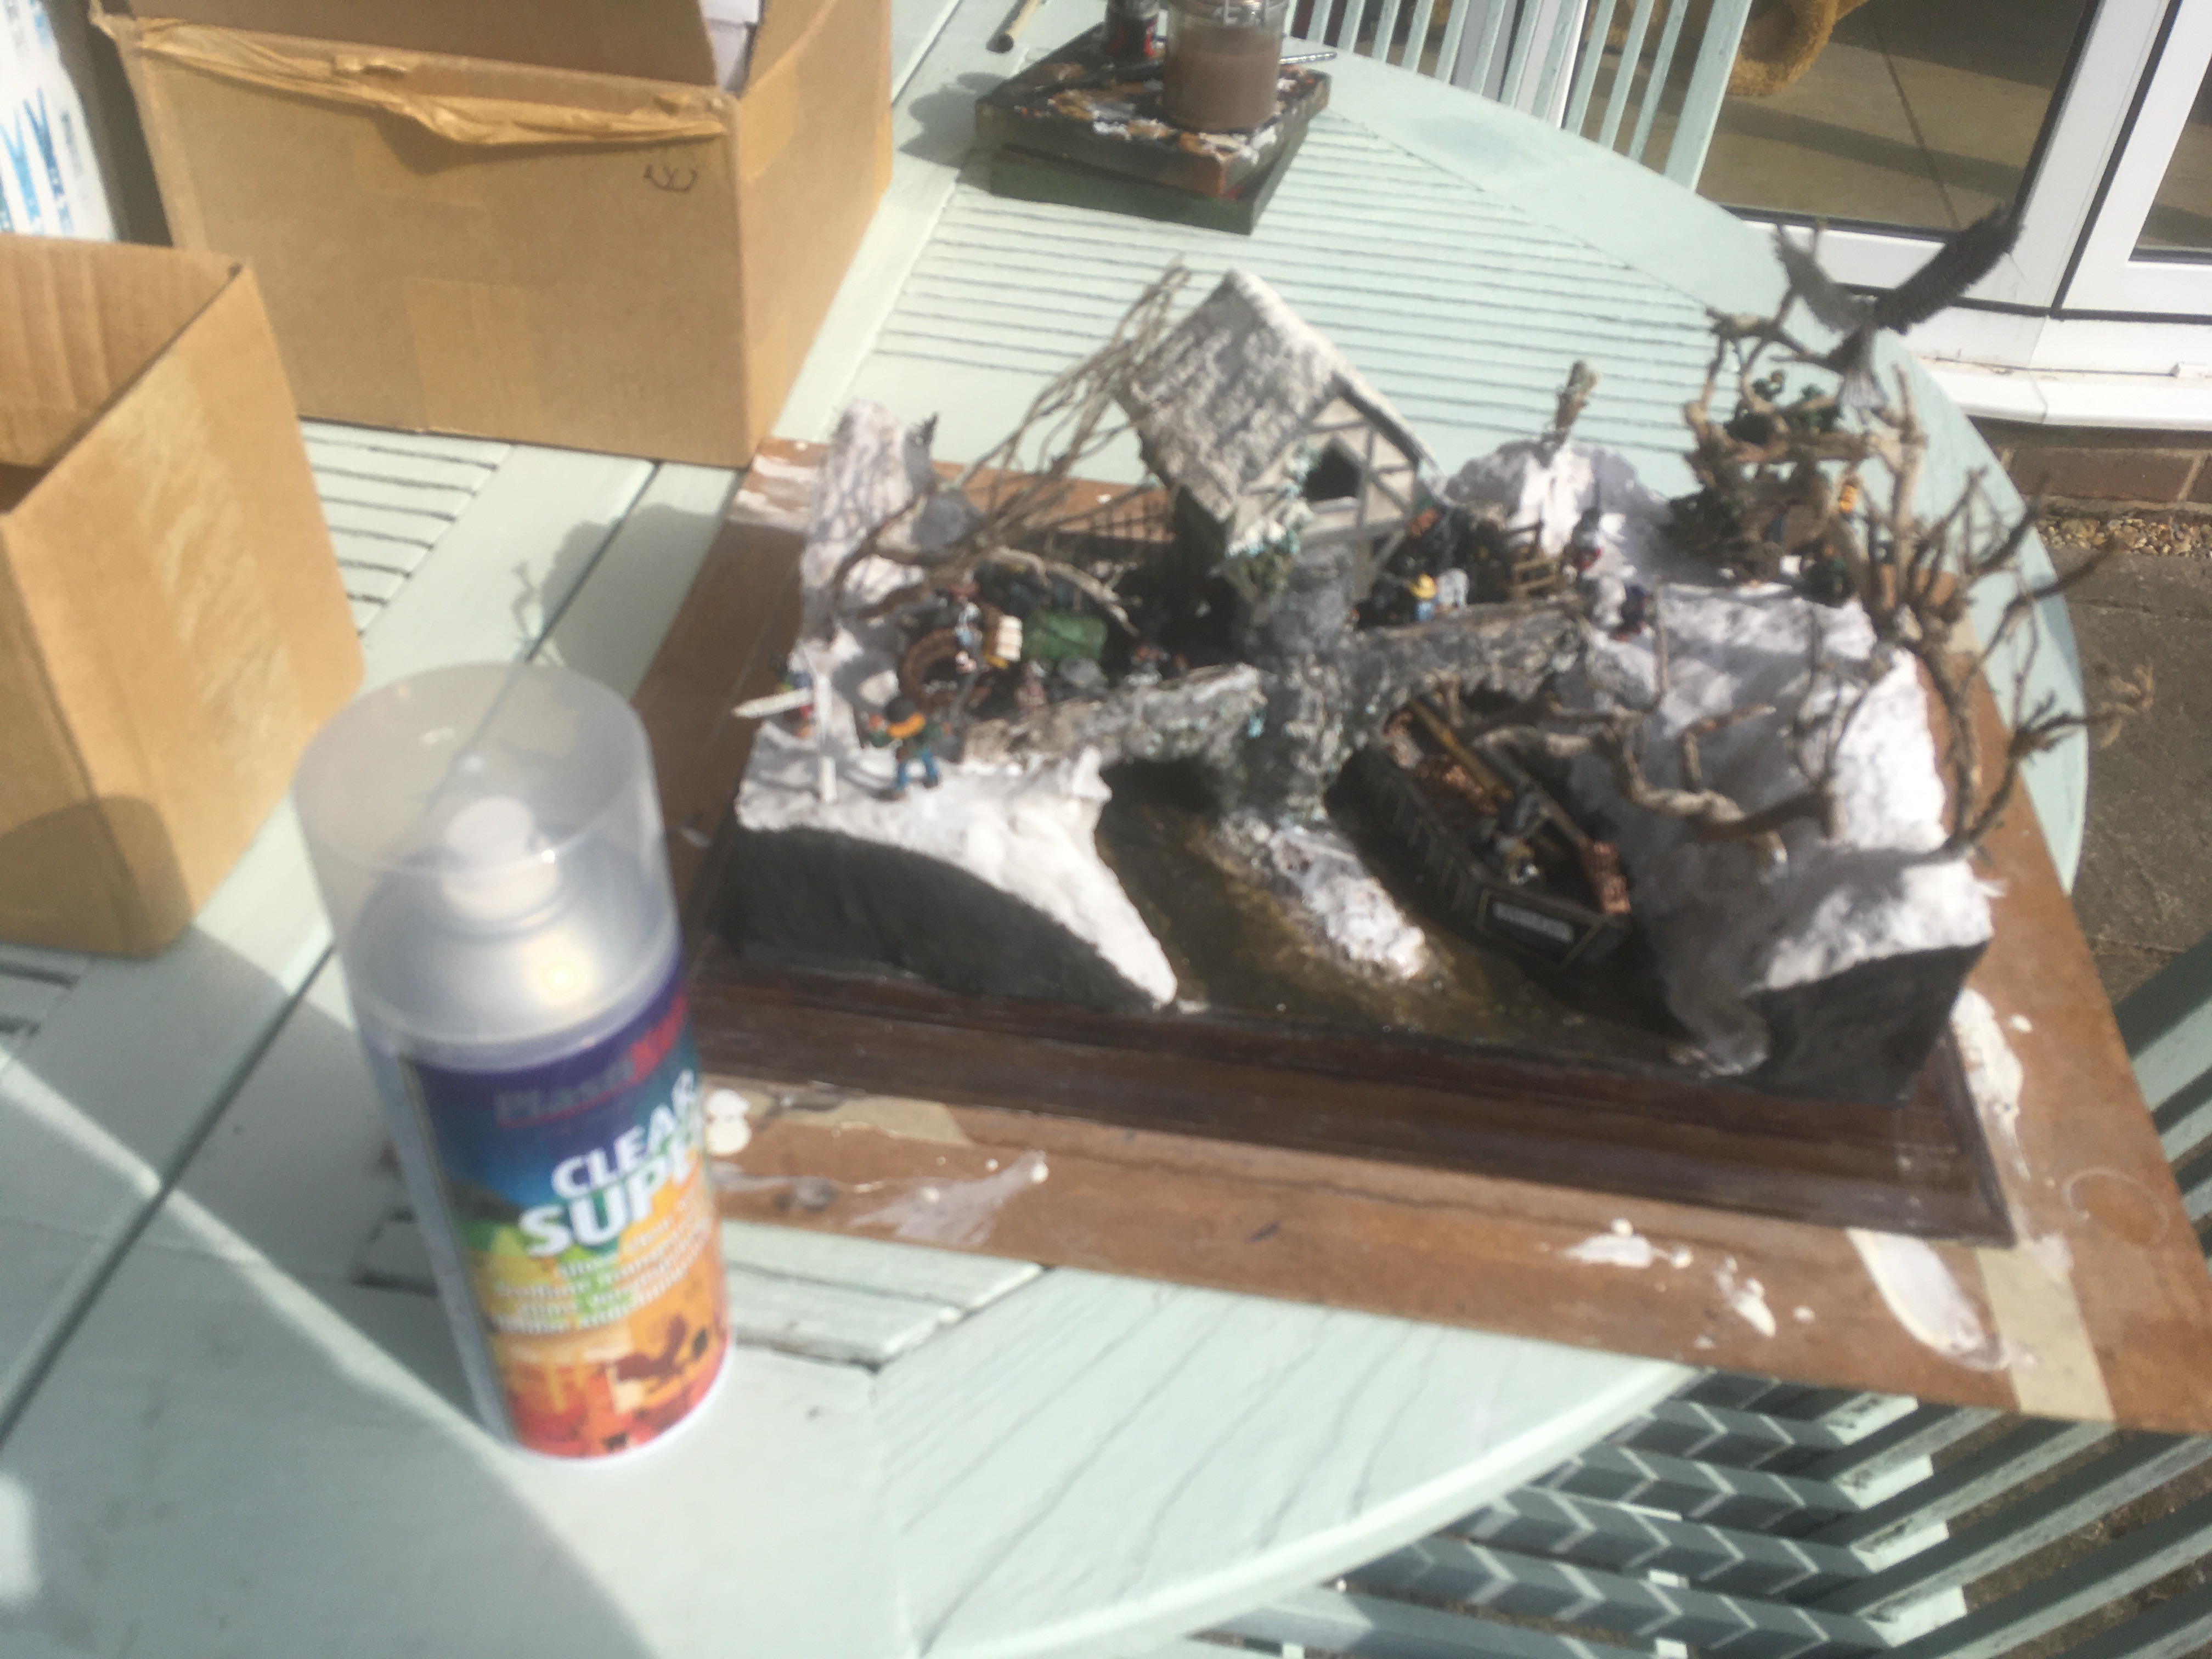 To protect the miniatures better this time, the whole diorama has been sprayed with Gloss Clear PlastiKote. The plaster and paint will protect the polystyrene superstructure which normally melt if sprayed and the gloss will give a fresh glint to the wood display base.