


![1918 Spring Offensive Wargame | Full Rules Overview with John & Gerry (WW1 Tabletop Game) [7 Days Early Access]](https://images.beastsofwar.com/2026/03/unboxing-warfulcrum-games-1918-spring-offensive-review-coverimage1-225-127.jpeg)


Marvel Crisis Protocol by Lawnor


Recommendations: 166
About the Project
I've got a bunch of naked MCP stuff, and it's time to get it table ready. My friends are getting in to it so I need a squad ready to go ASAP.
Related Game: Marvel Crisis Protocol Miniatures Game
Related Company: Atomic Mass Games
Related Genre: Pulp
Related Contest: Spring Clean Hobby Challenge 2023
This Project is Completed
Introduction and Planning
Introduction
I’ve been interested in trying MCP since it first landed, but with no one to play I’ve avoided buying in to it. Recently my friends have started playing so I’ve finally picked some up, thanks to eBay, and a £50 OTT voucher from last years Spring Cleaning Challenge. It’s time to start work on it all so why not gather all my plans and progress and eventual paint recipes all together in one place, and maybe win another voucher if I’m very lucky?
My Best Tutorial 2022 project:
https://www.beastsofwar.com/project/1381664/
OTT challenge winners announcement weekender:
https://www.beastsofwar.com/featured/light-up-tabletop-terrain-challenge-winners-ottweekender/
My bit of the video:
https://www.youtube.com/watch?v=6zDRBzU3F3E
Targets
So what are my goals? I want to get a playable team painted and built. I believe the expectation is you turn up at a table with 10 models, but only pick 6 to play with, based on the points limit of the scenario (Please correct me if I’m wrong). So I need to get 6 models minimum done, but ideally 10 before I can get distracted. I also have a big distraction on the horizon. Diablo 4 is due 6/6/23 and I expect it to swallow me whole, at least until I’ve completed the core campaign. Any time sensitive hobby I want to get done, should be done before that happens. So here is my goal:
Tier 1: Get at least 6 characters from the core box done before 6/6/23
Tier 2: Get all characters from the core box done by 6/6/23
Tier 3: Start work on the terrain and explore other options for this
I’ll be aiming for “best bang for your buck” level of painting. Squeezing out the best quality I can, without sinking too much time or effort in. I’ve still got a backlog of other stuff to catch up on, and more kickstarters due later this year. I can always take more time over later models, once I’ve got a playable force.
My Stuff
Currently owned:
- Core Set (eBay bargain)
- Hulk (Thanks to OTT Voucher)
- Black Panther and Killmonger (Thanks to OTT Voucher)
- Shuri and Okoye (They seem to be moving towards 4 model affiliation packs, so seemed wise to buy this now before it goes out of production)
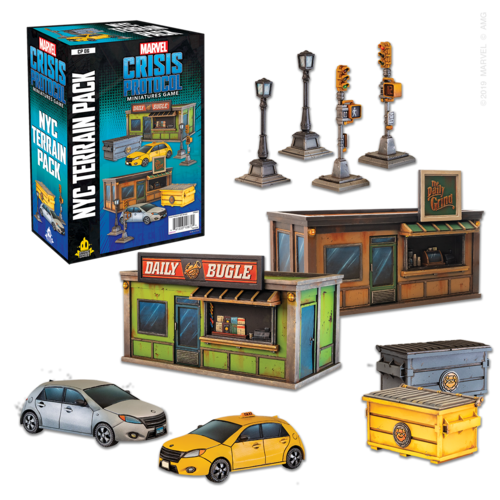
- NYC Terrain Pack (It was less than half price where I bought Shuri from, and pushed me up to qualifying for free delivery. A cracking bargain!)
If my maths is correct, that’s 34 models to get painted. I don’t plan on painting widgets.
Planning and Inspiration
I’ll be looking at the videos of a few Youtubers, but probably not following their guides to the letter in most cases. Exceptions will likely be things like Captain America’s shield. I’ve no idea how to paint that so it looks shiny, without it looking wet.
Youtube channels with helpful MCP guides I’ll be looking at:
If you can think of more reference material please let me know. There are a few OTT projects I can look in to, too. I’d be particularly interested in guides covering those buildings. Does anyone have opinions on if any of the terrain is better painted before or after assembly? Tyres might be better done separately. The lights etc are probably fine to just build. Dunno if those buildings are better to have some bits done as sub assemblies.
Given I’ll be starting with the core box characters, lets assemble a gallery if images in one place so I can see at a glance what’s what, and hopefully save time by painting different but similar models at the same time as each other.
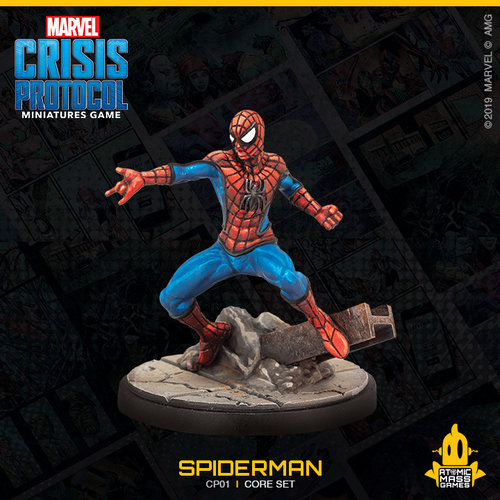
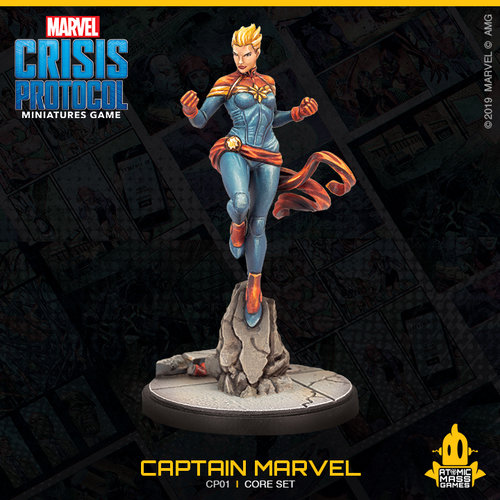
At a glance we can see a few things:
- There are 3 models that are 90% red and blue so can be painted together
- There are 3 models that are mostly black so can be painted together
- These galleries are capped at 9 images in size, which is annoying when I only meant to post pics of 10 characters
- I clearly have time on my hands right now and nothing more productive to do with it
I’m feeling a lot better about my deadline now I’ve done this. You can paint 3 similar models in about the same time you can paint 1, if you’re not going overboard.
If anyone has some appropriately scaled printer ready newspapers, leaflets etc they could send me to help decorate those bases, I’d be grateful. They come with disposable cups for this, but I’m not sure I want them everywhere. I don’t want to paint 3mm tall Starbucks cups with logos, and if everyone has a red solo cup then are they all alcoholics? I don’t know if anyone has modded the minis so they’re all drinking, perhaps calling it Marvel Crisis Partytime?
Evenings 1 &2: Preparation
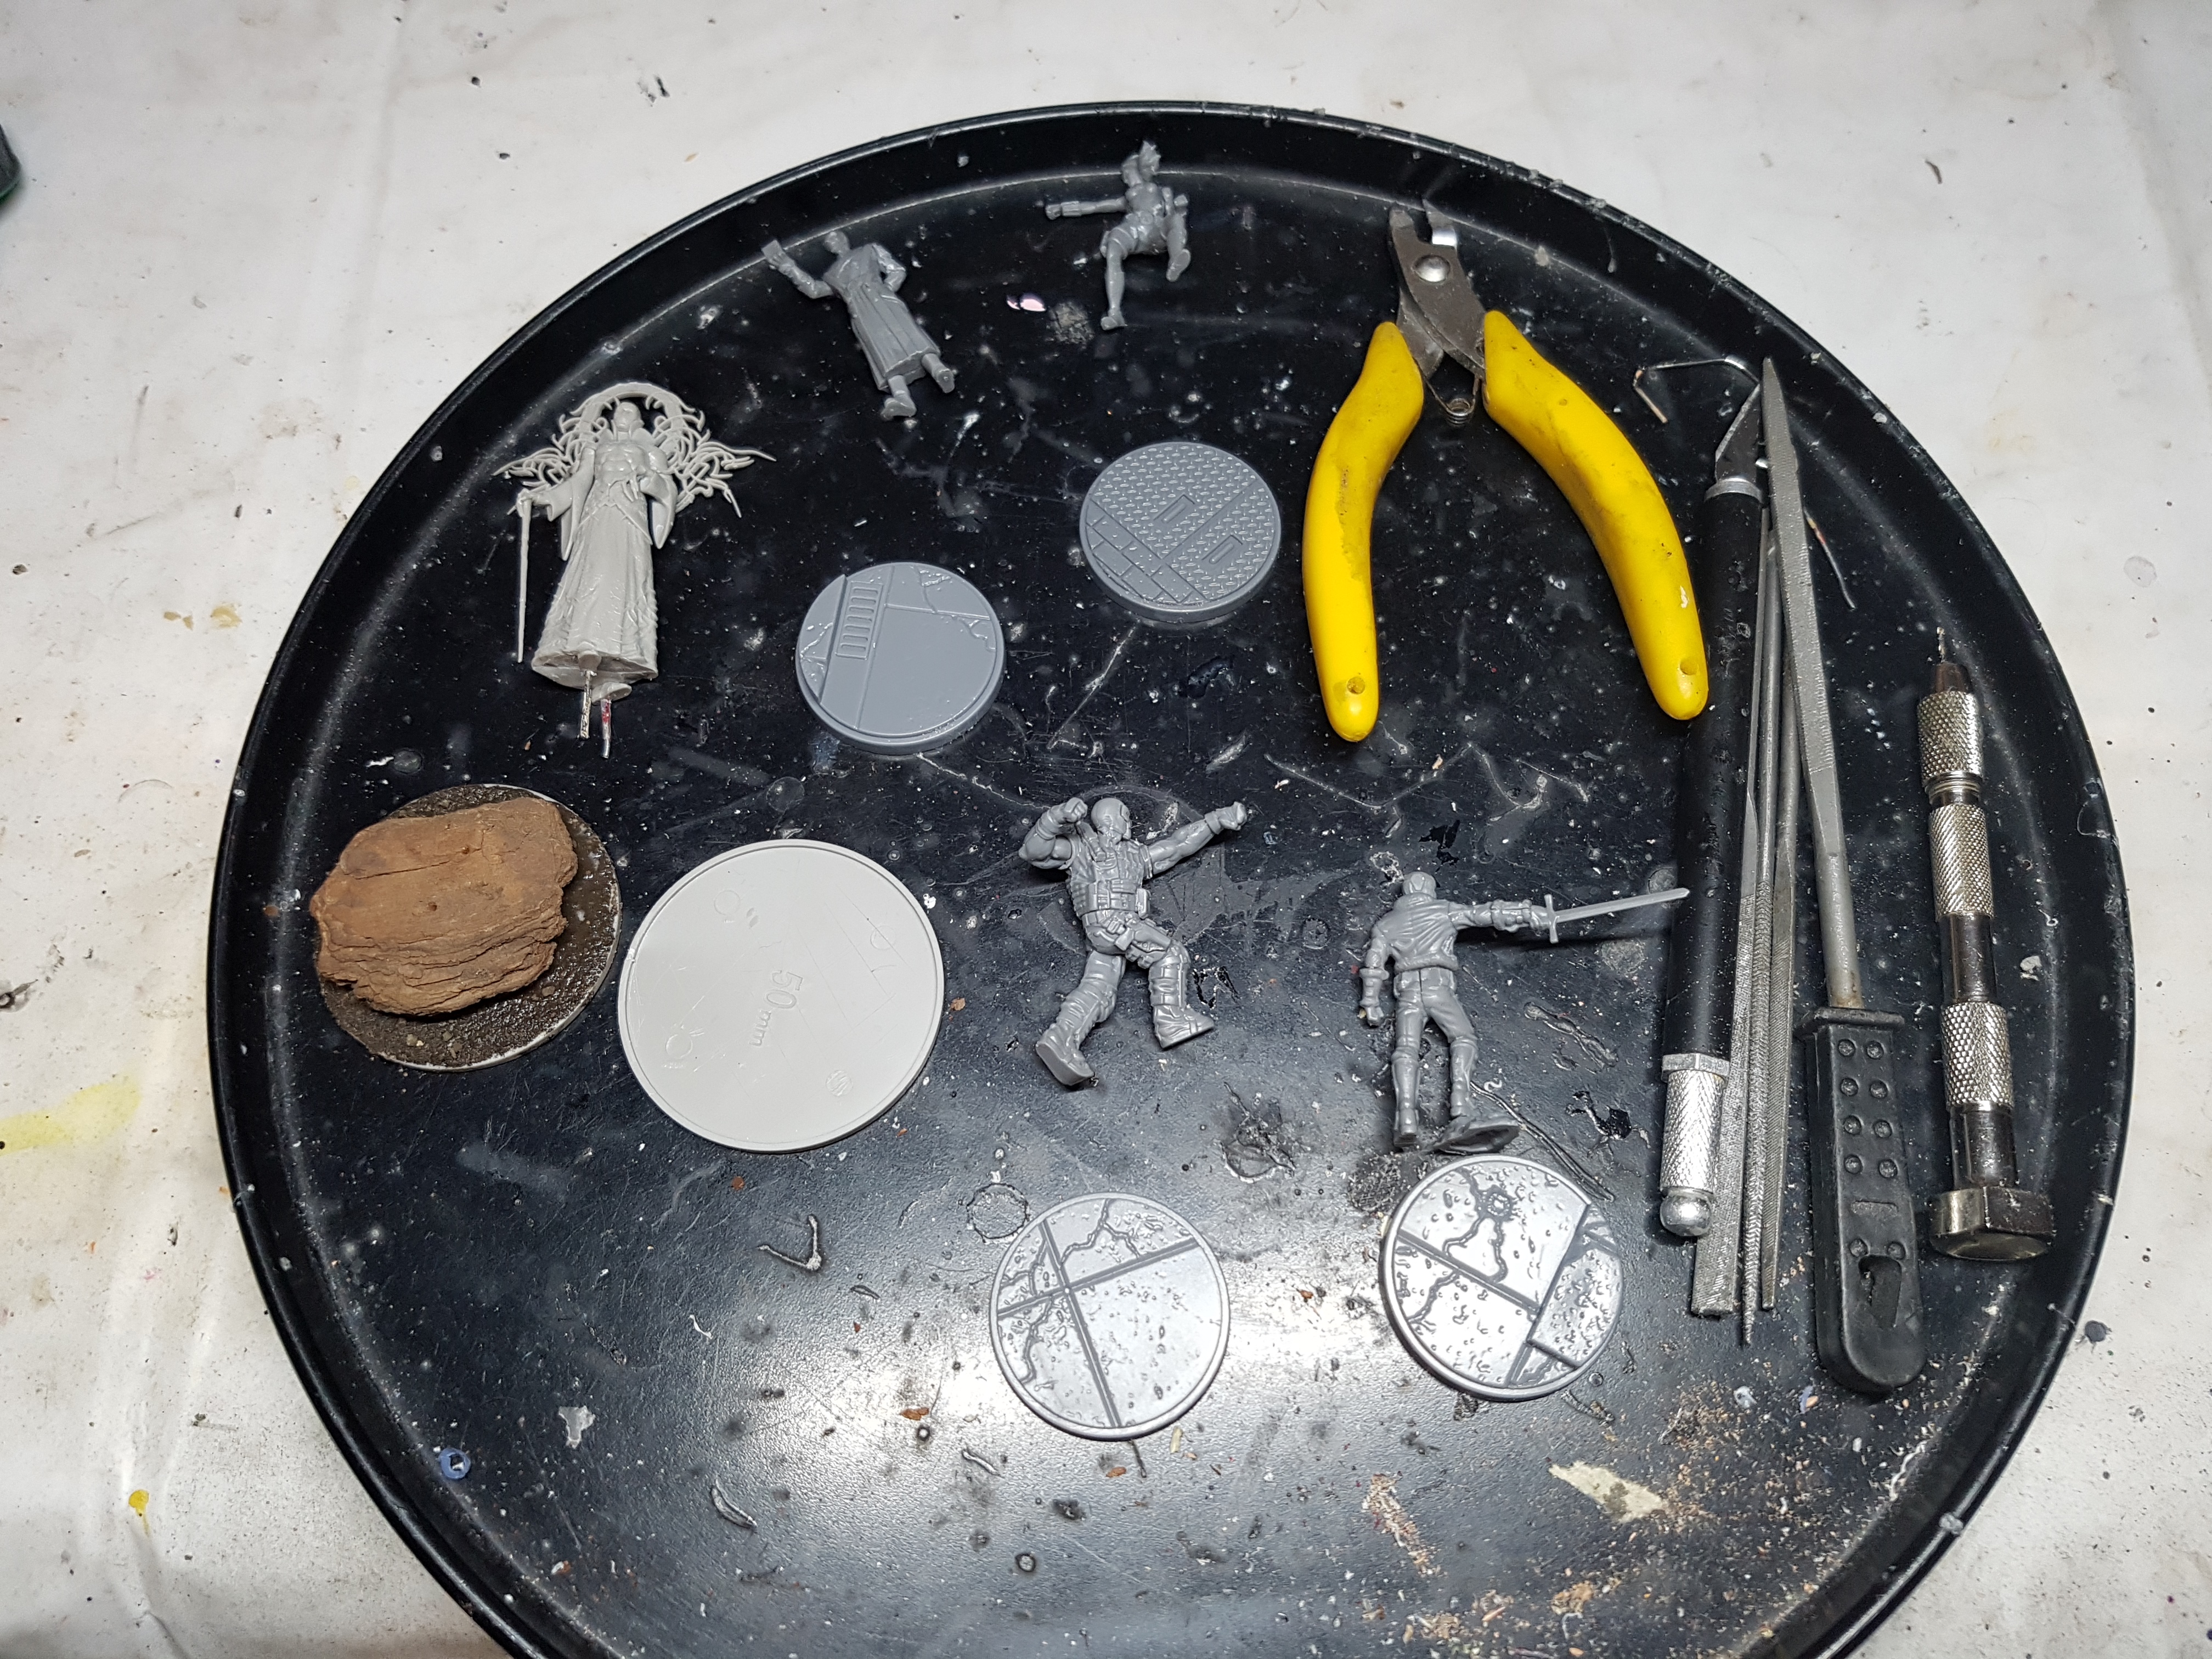
Everything was washed in warm soapy water and left to air dry the moment it entered the house a month or so ago. There’s no reason not to do this with any model. No matter the material or production method, so you may as well always do it. If you run in to issues and you didn’t, you’ll regret it. I’ve had problems in the past.
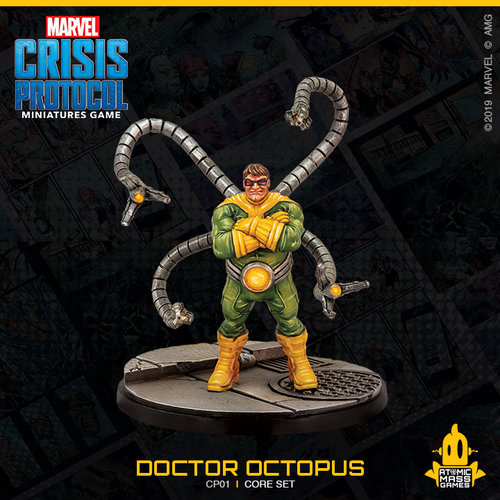
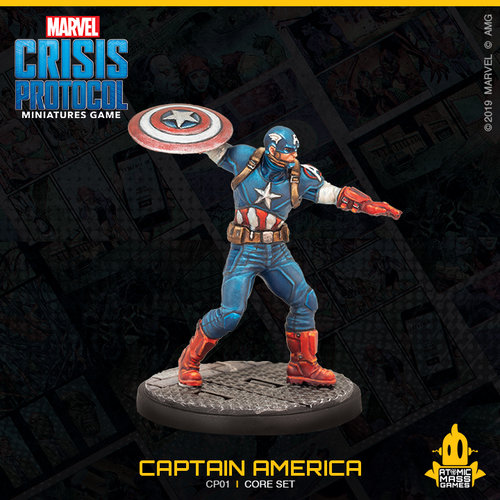
My core box was second hand so Doc Ock, Spiderman, Ultron, Iron Man, and Captain America were preassembled, and Captain Marvel was mostly built too. I finished of building the set, but did not glue anyone to their bases. I prefer to paint people separately. It allows better access to the model, and you can be messy with the base without risk to the character. I did put pins the models feet and drill matching holes in their bases. These pins will also be used to hold them on to milk bottle tops for painting. They’re a lot cheaper than hobby holders. This all took about one evening after work one day. I’m only working on the characters for now.
I also prepped the Tyrant for Kingdom Death while I was working on this.
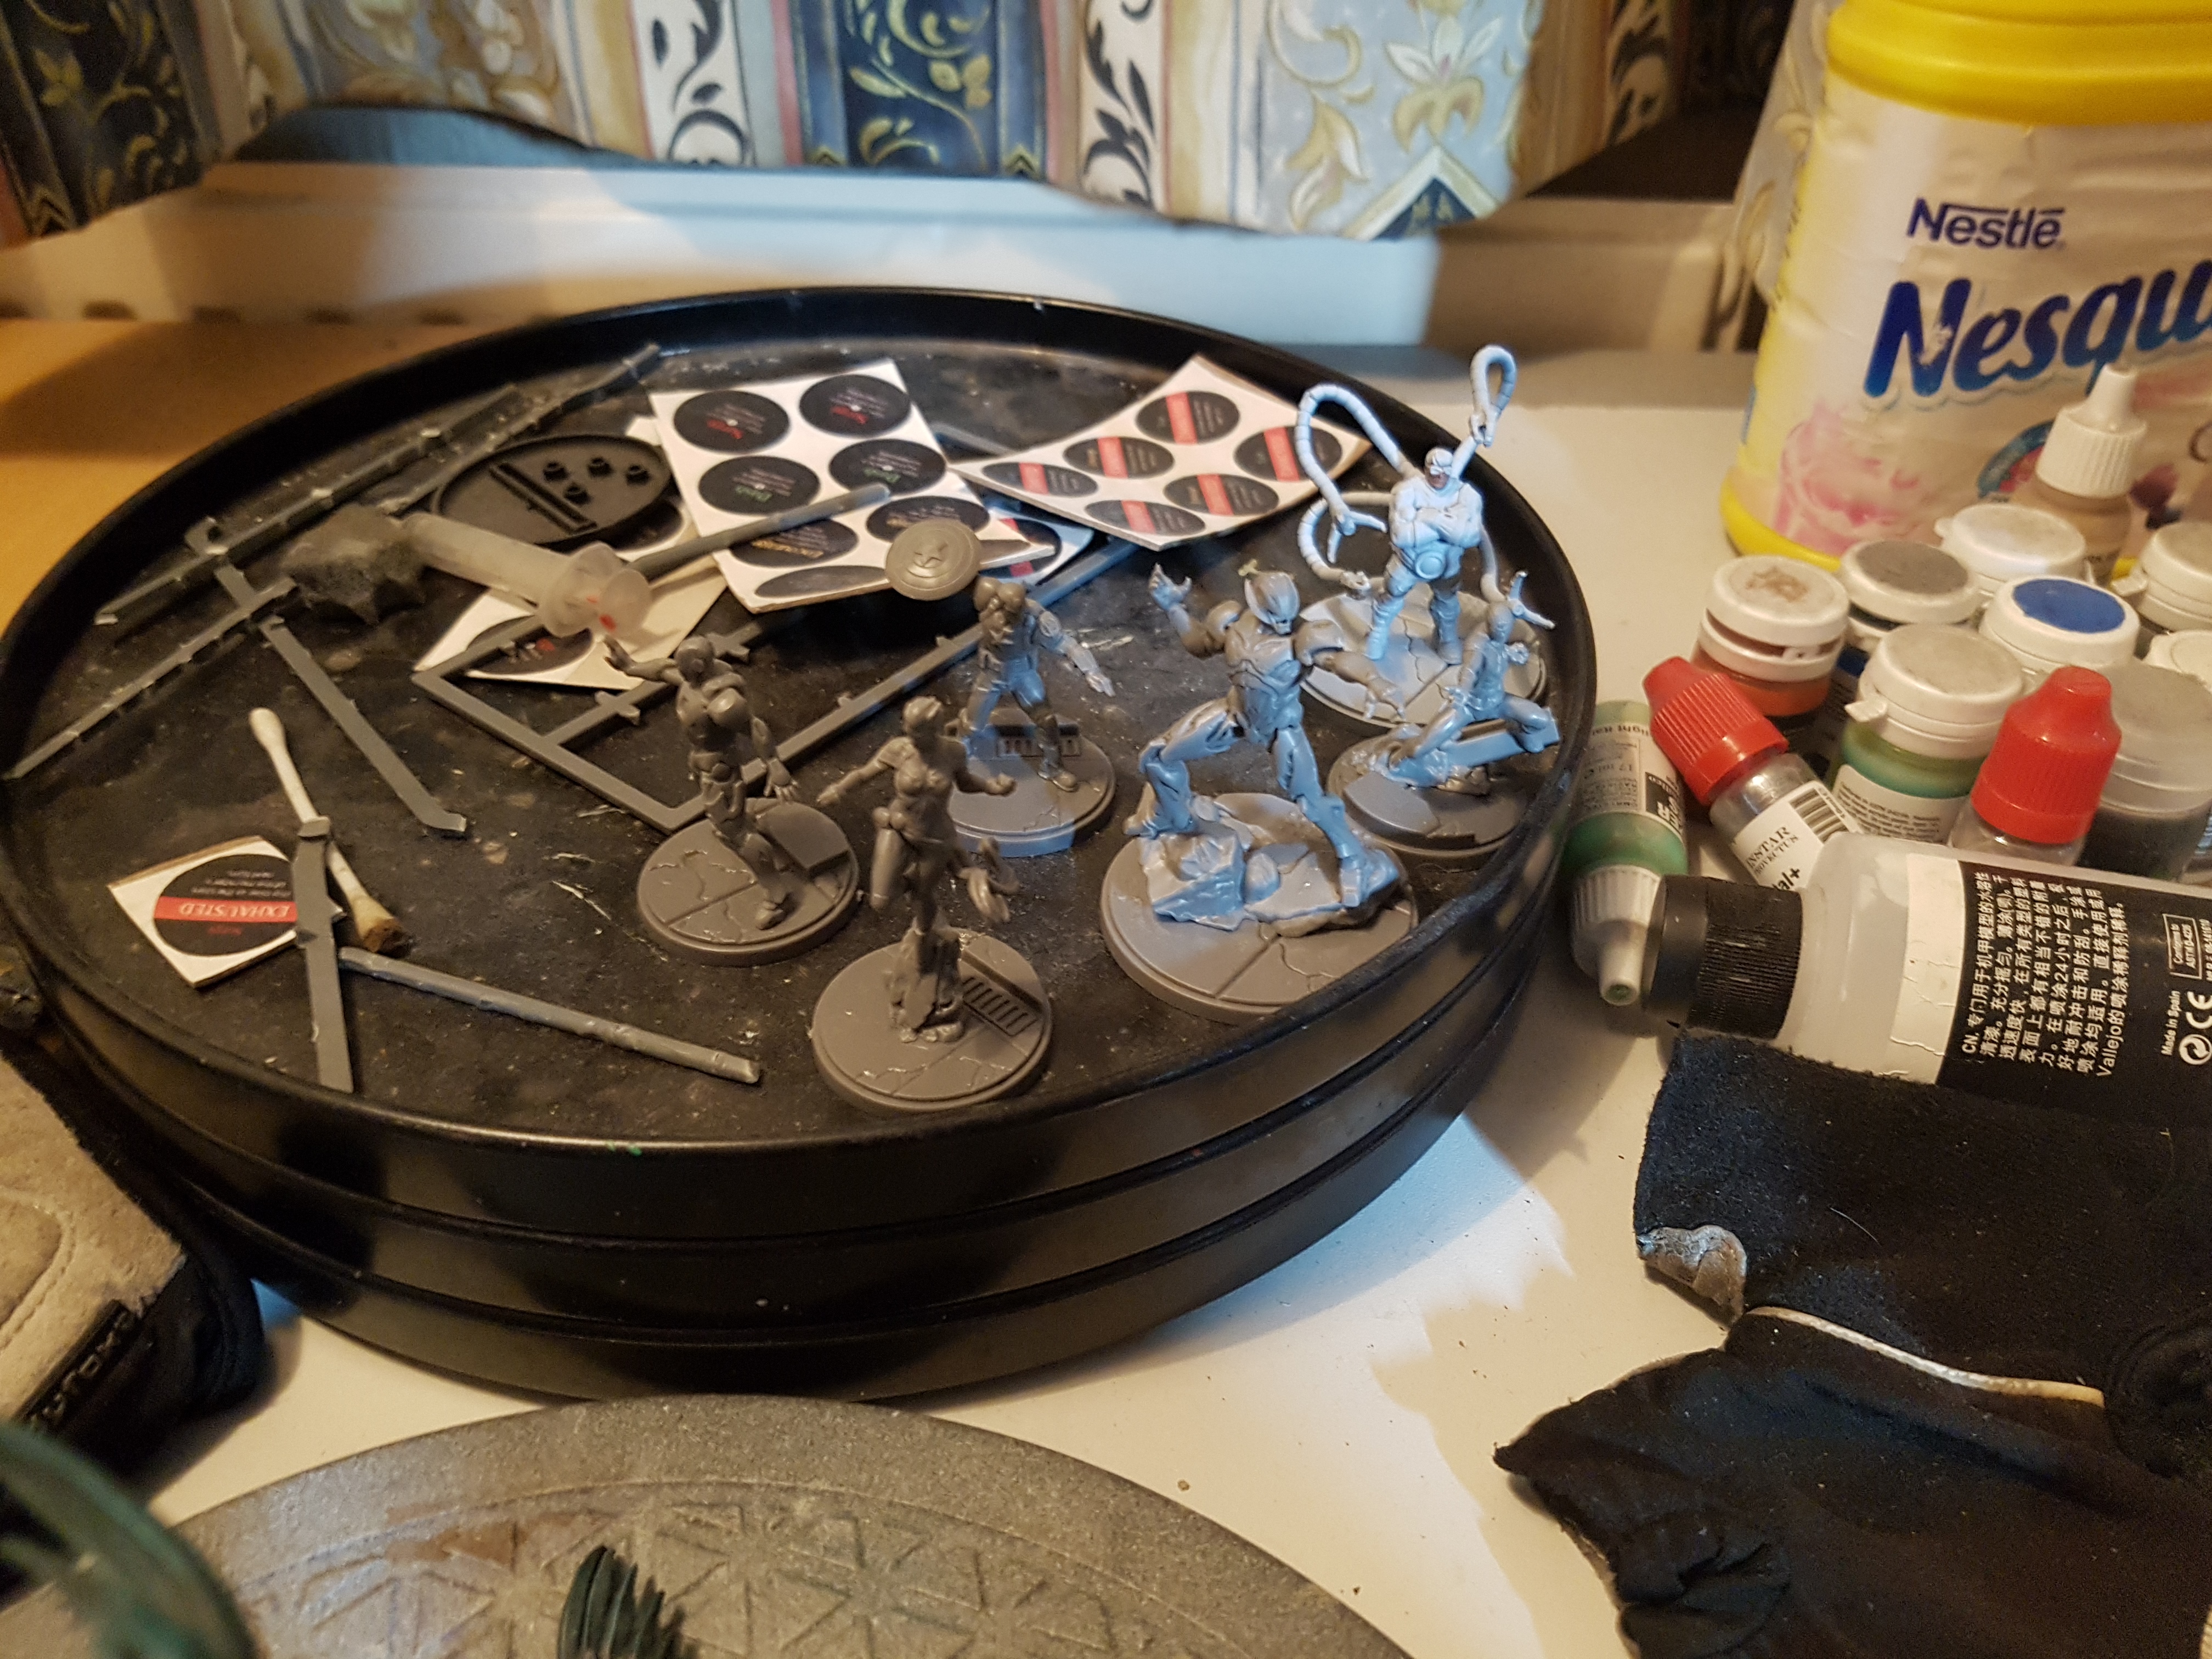
Everyone got pinned or blu taked on to bottle tops and was then primed black with Stynylrez black primer and a little airbrush thinner (3-4 primer : 1 thinner. I put 10 drops of thinner in the cup and then fill it most of the way with primer, then mix). The models going metallic or black were then put on one side and I then tried to zenithally prime the rest with Vallejo Grey Primer 72.601. My airbrush was playing silly buggers though and was just spitting, and when it sprayed, it was all going at a funny angle. I sorta coated everything though and it’s good enough for my purposes here. That’s another evenings work all done.
My airbrush then spent a long while in an ultrasonic cleaner, and a few hours in a fresh batch of cleaning solution (Water, with a little dish soap and a large squeeze of Airbrush Cleaner). My airbrush has been having issues lately. I was afraid this was then end for it. I’ve had it for 8 years and it’s done a lot of heavy lifting. Had it work out? I’ll find out tomorrow.

Evening 3: Post-Primer Airbrush Ground Work
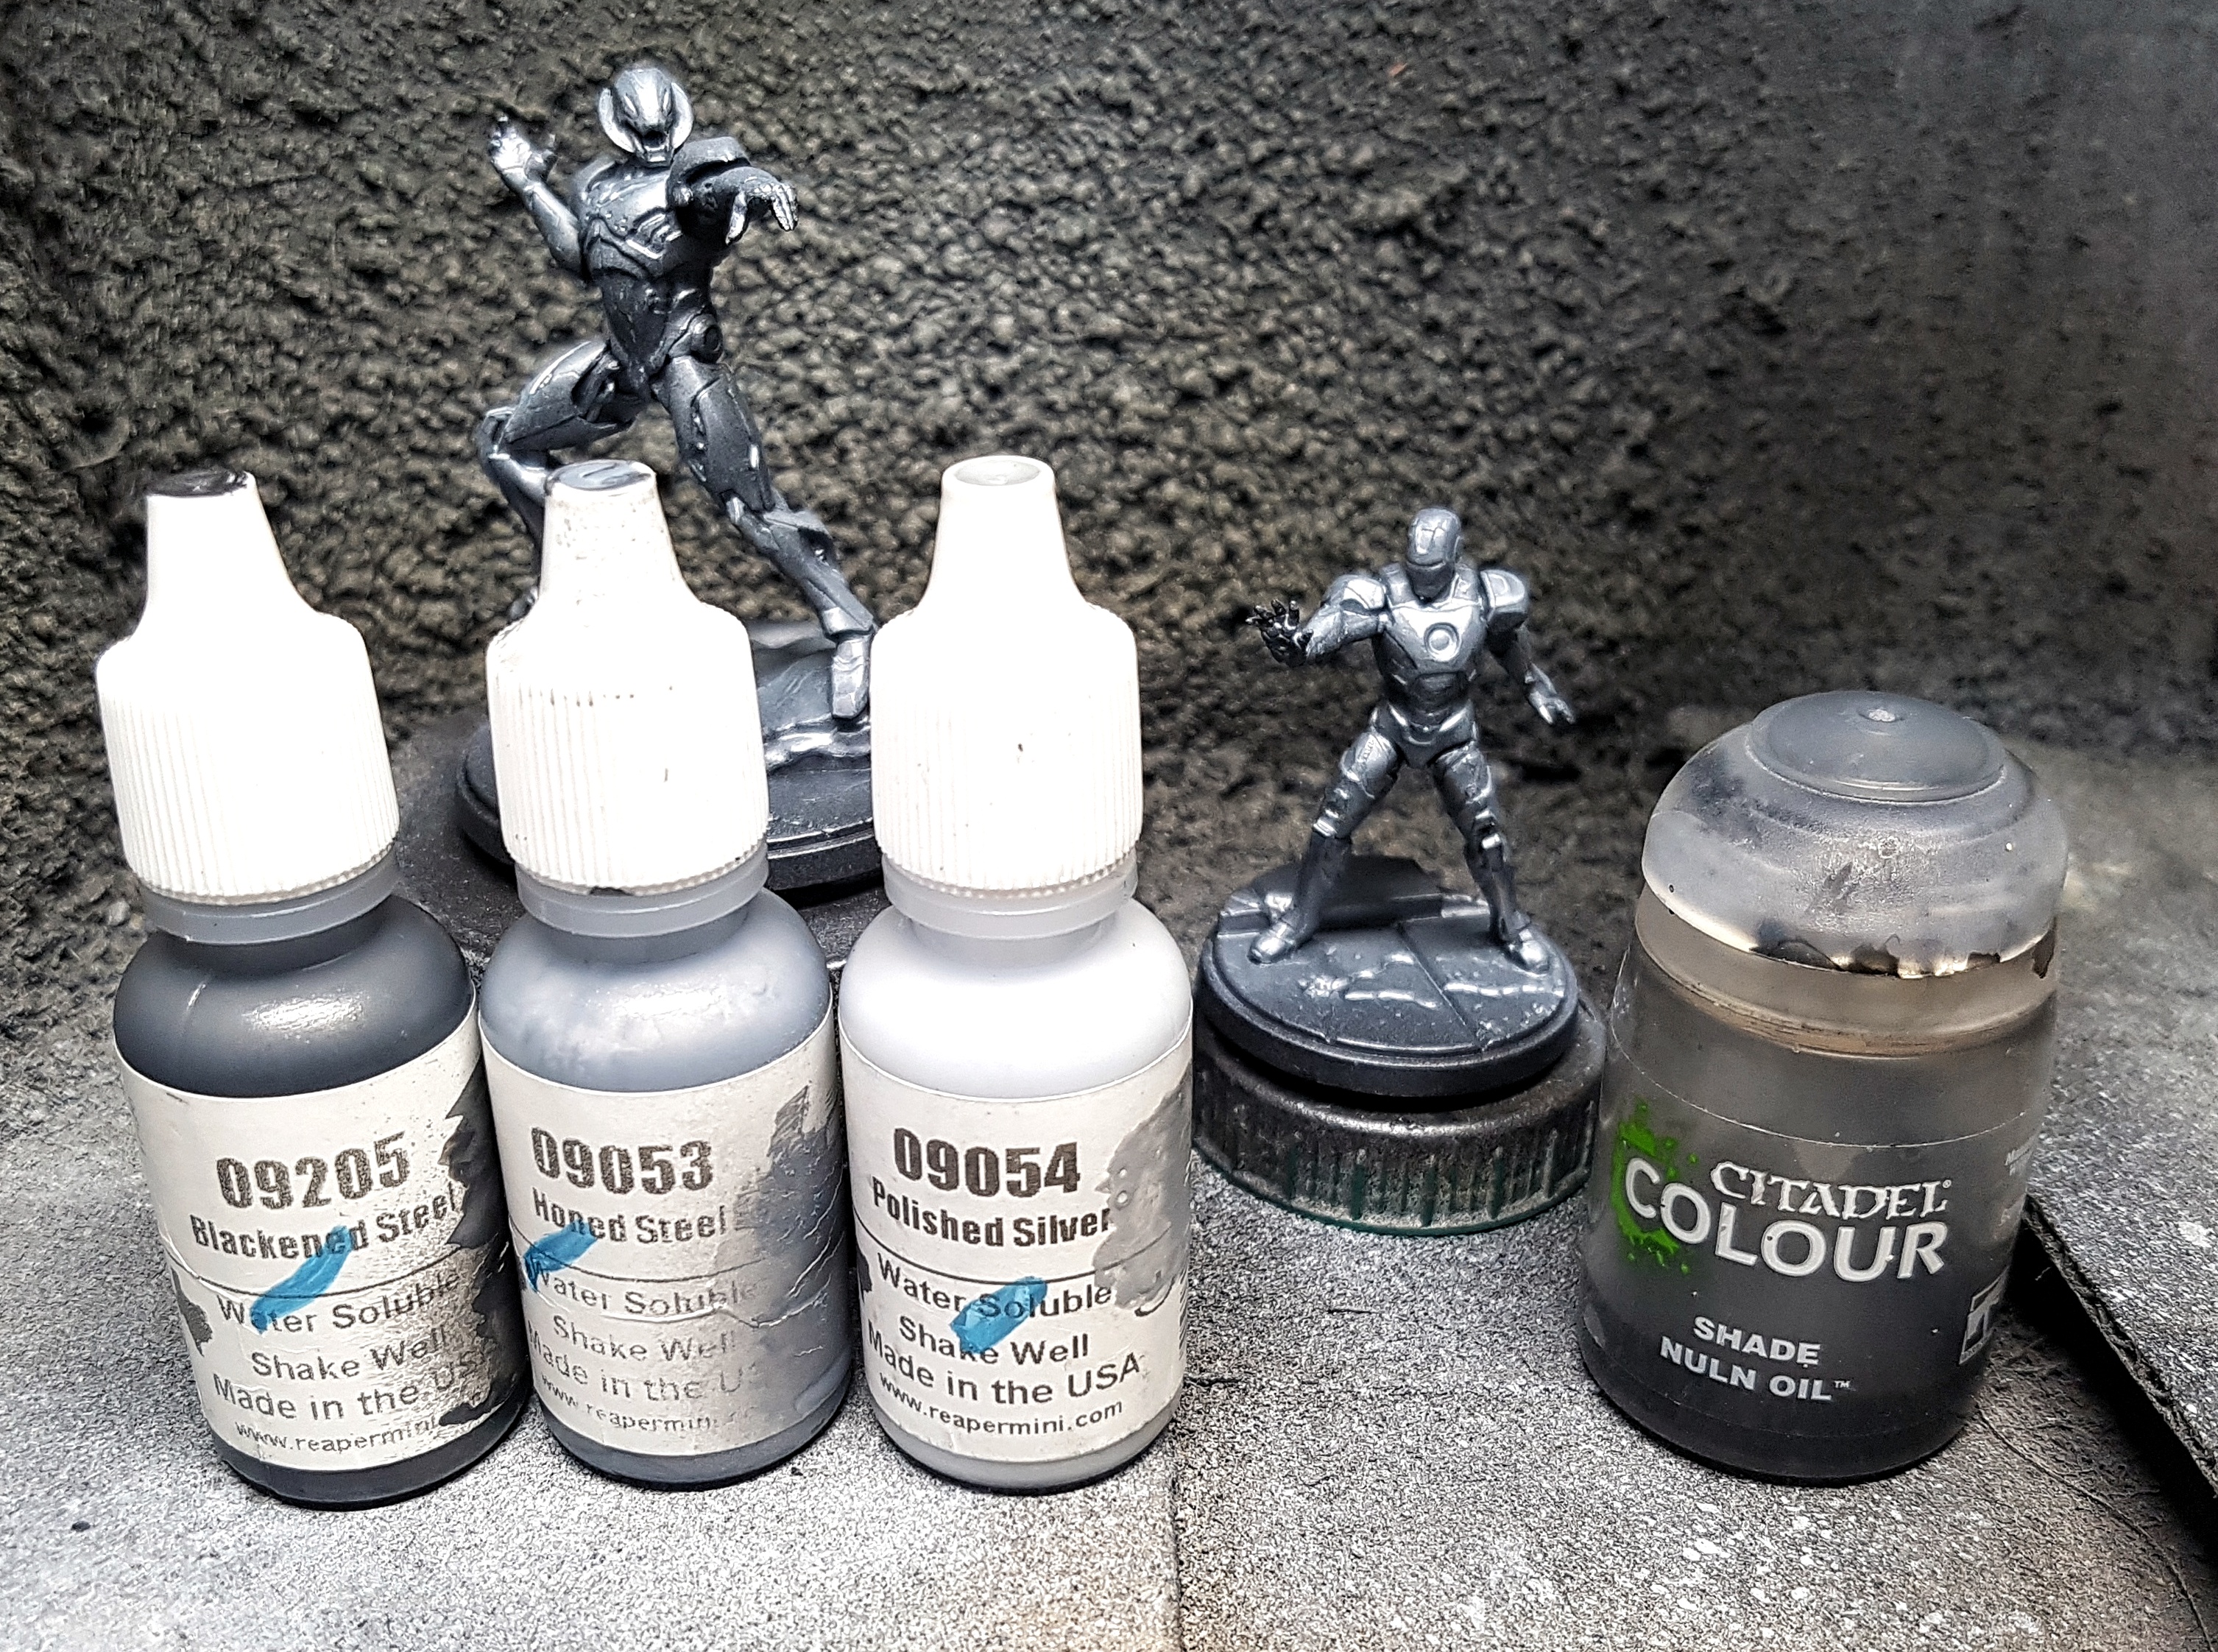
It’s Friday evening and it’s time to test my airbrush and it works better than it has in a while! Brilliant! I have plans for it. First up, the metallics on Ultron and Iron man. I have a copy of Reapers Hammer and Anvil paint set which I don’t use often. I’ve found they airbrush well, but I haven’t had good coverage through a regular brush so I don’t use them often. I thought this would be a good time to use them.
Dark: Reaper 09205 Blackened Steel
Midtone: Reaper 09053 Hones Steel
Light: Reaper 09054 polished Silver
Pinwash GW Nuln Oil
I began with a single all over coat of the dark colour, allowing it to be thin and transparent from the underside. I then went in for another coat or two from the sides and above only. I want it to look more black from the undersides.
I then mixed in a little of the midtone and did a lateral and zenithal spray, leaving some of the previous layers showing. Then came a more targeted layer of just the midtone, then the midtone with some light, then just the light. The next day, once it was all dry, I pin washed with some GW Nuln Oil to provide deep shading.
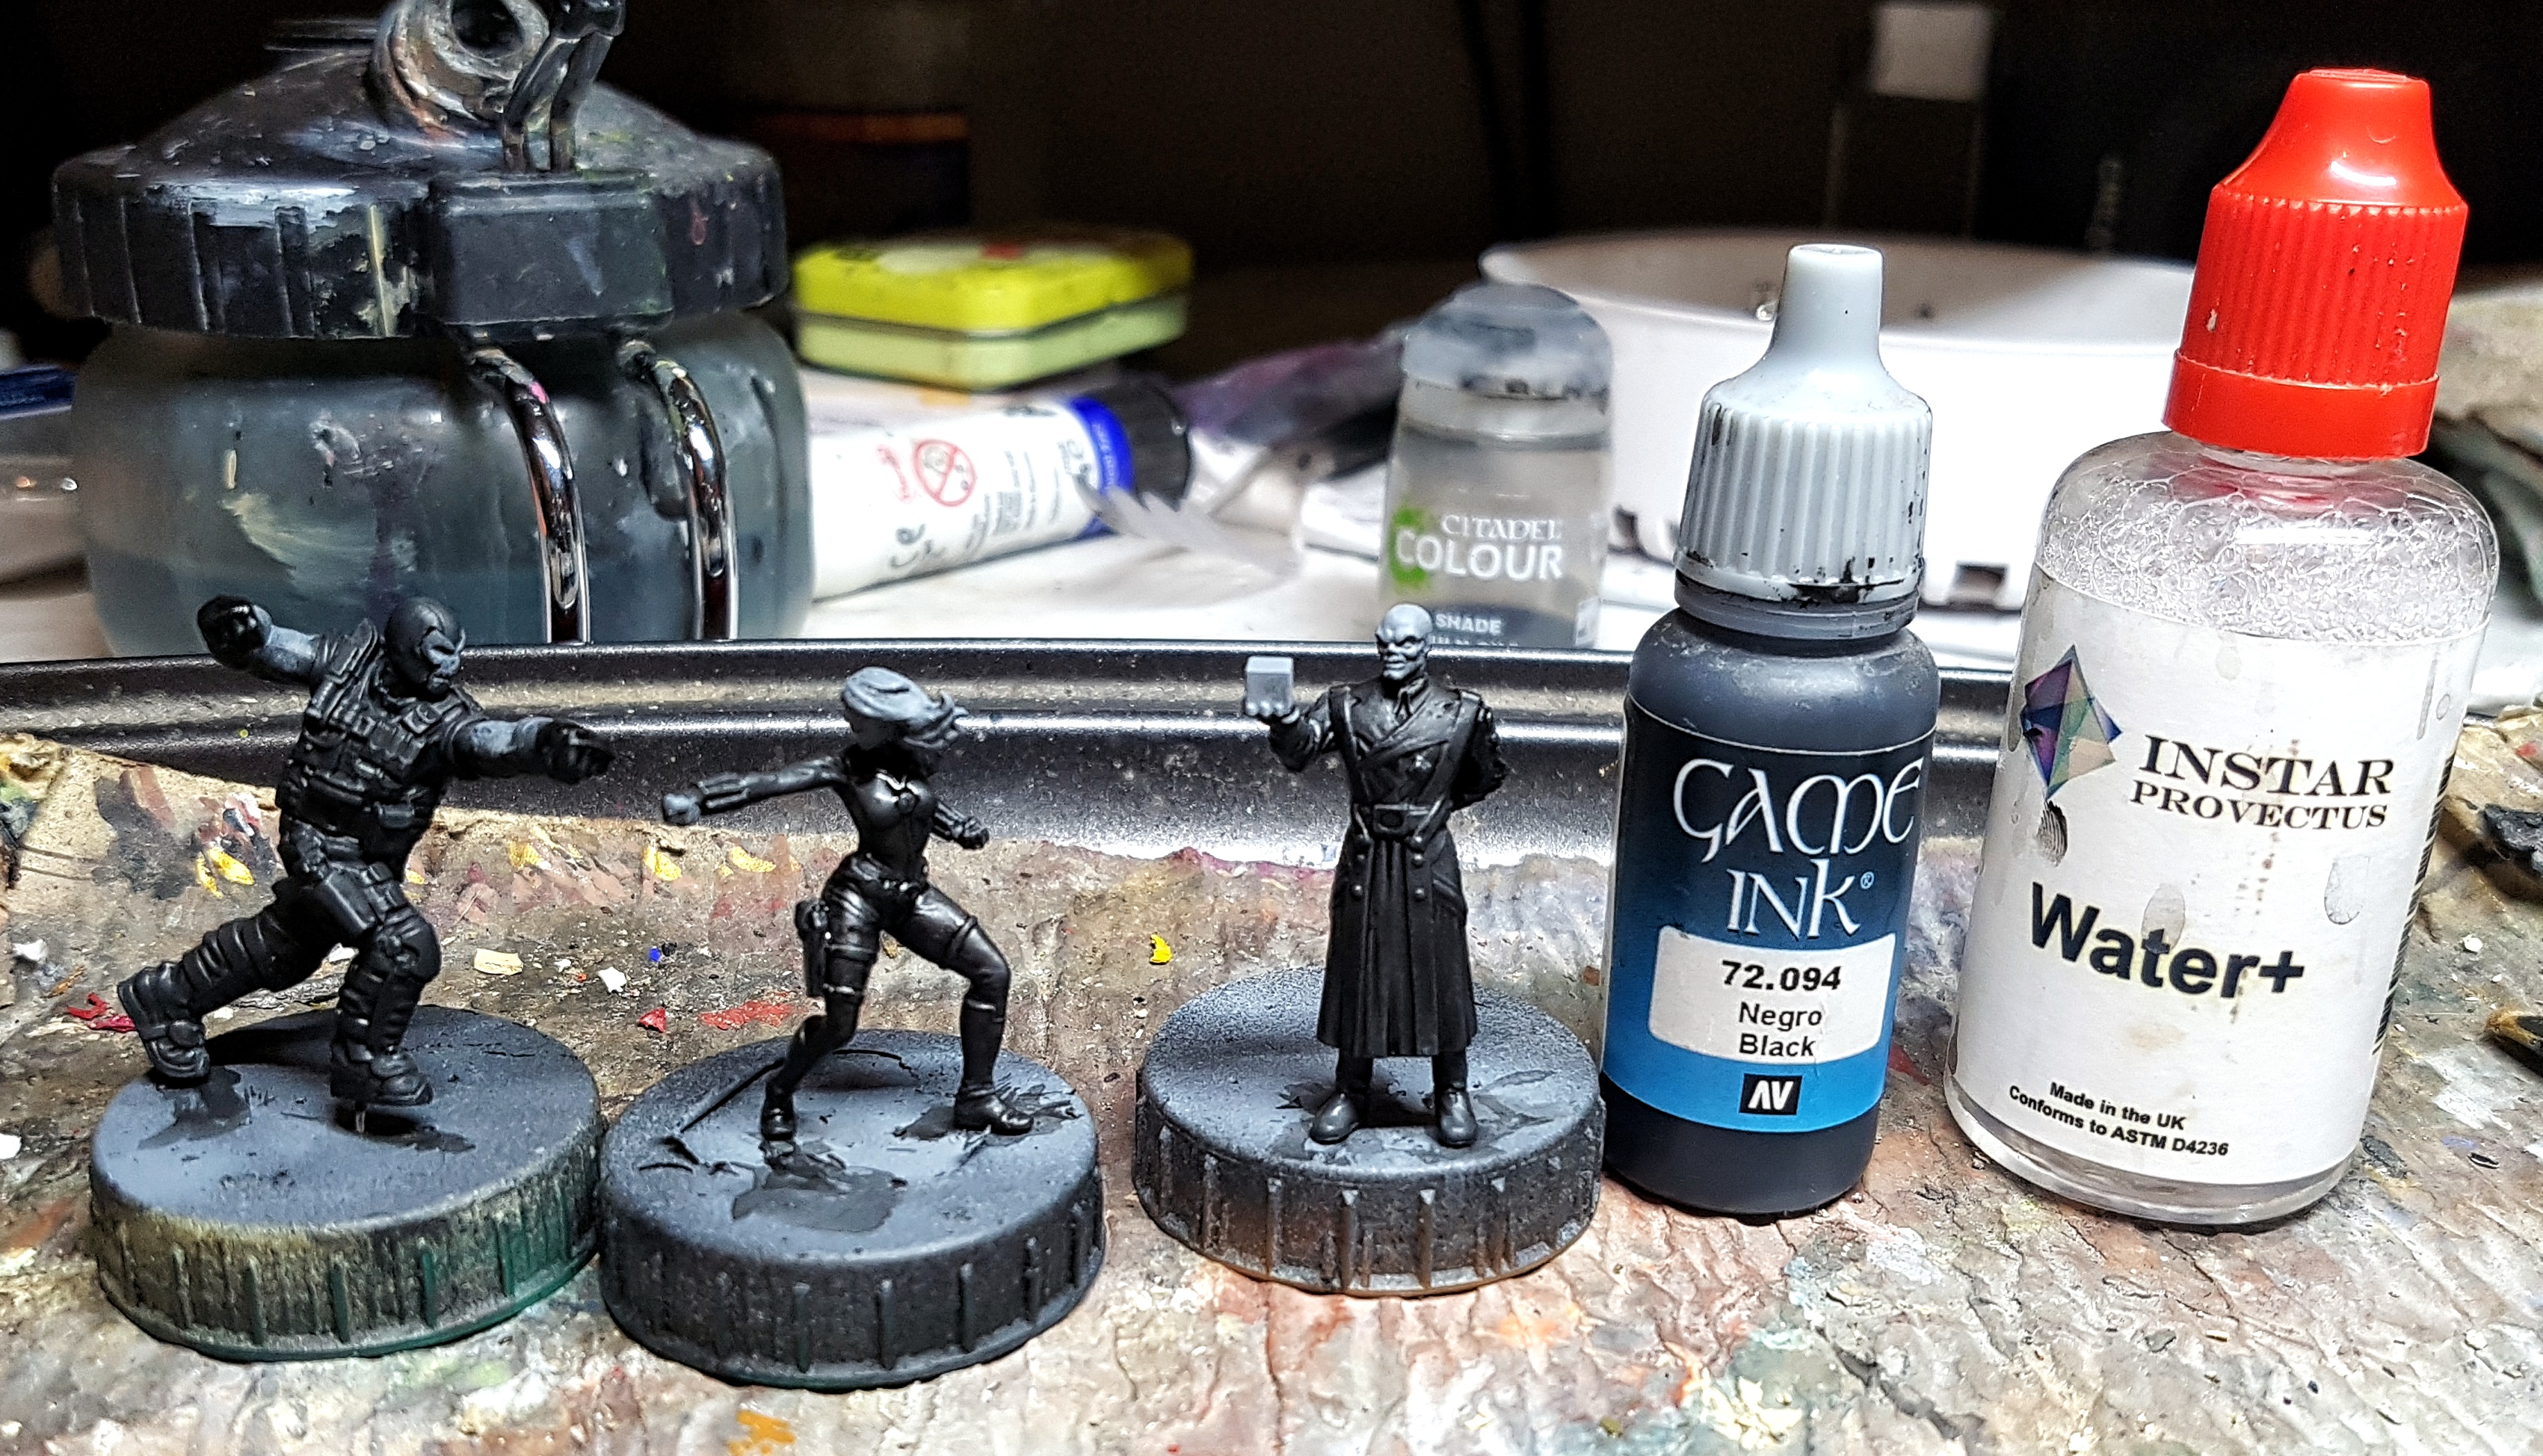
 This pic was meant as a reminder to me only. I didn't think about sharing these pic until later so they don't focus so much on the minis just yet. They will later on.
The blacks were the other airbrush mission. I’ve a triad of paints for this from an old Asset Drop box:
Dark: Revell Tar Black 36106
Midtone: Revell Gunship Grey 36174
Light: Light Grey 36176
Wash: Vallejo 72.094 Black Ink mixed with Instar Water+
I repeated the same method as with the metallics above. I didn’t worry about pushing the blacks too white as they’ll get knocked back down after, although I never airbrushed pure Light grey.
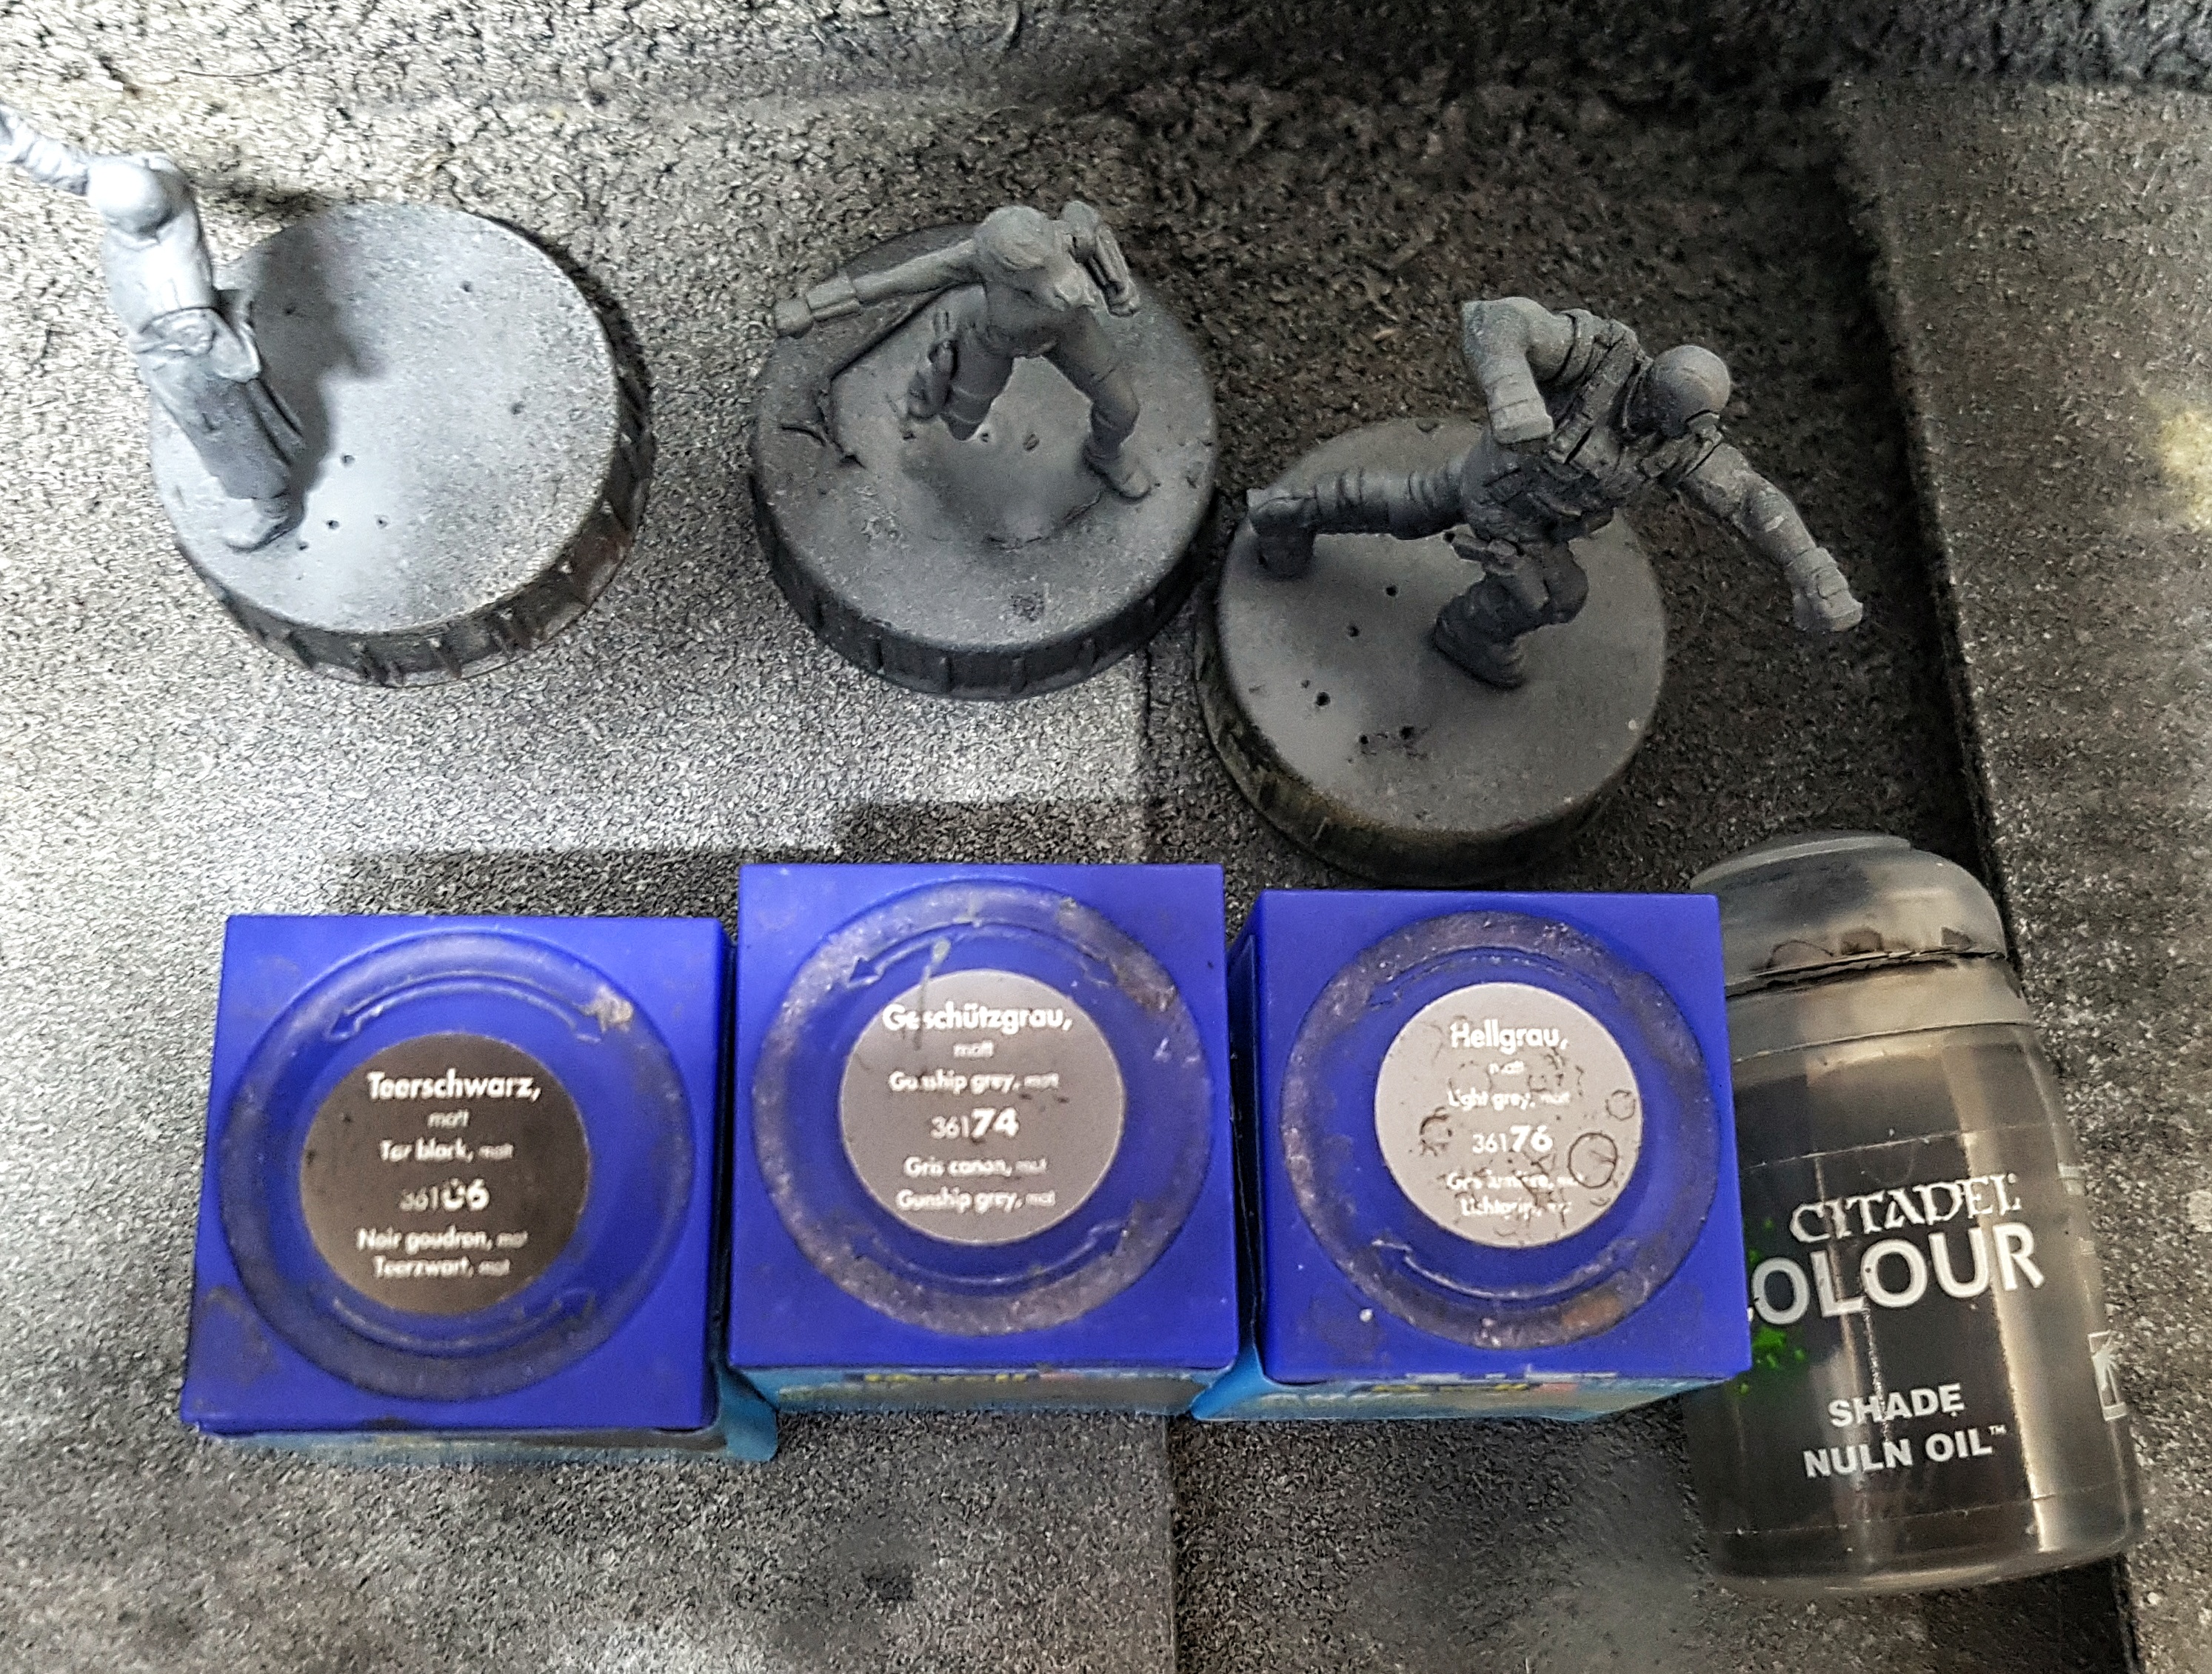 I didn't use that Nuln oil, after all.
 Once they’d been left overnight to dry (I’ve had issues with airbrushed paints reactivating in the past so I’m a little paranoid / overly cautious) I went for the wash. I’ve been told that adding water to a wash leads to tide marks, so I thinned down some black ink with Instar’s Water+ instead, maybe to 50/50, but probably favouring the ink more. Everything got a coat and was left to dry. I decided they needed a second. Your mileage may vary.
I’m now 3 evenings and an extra hour-ish and I’ve gone from sprues to having a lot of work done, ready for hairy brushing. It’d likely be 4 evenings if I’d had to build everyone.
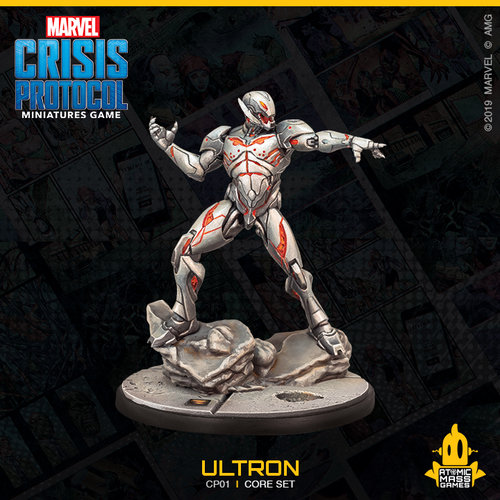
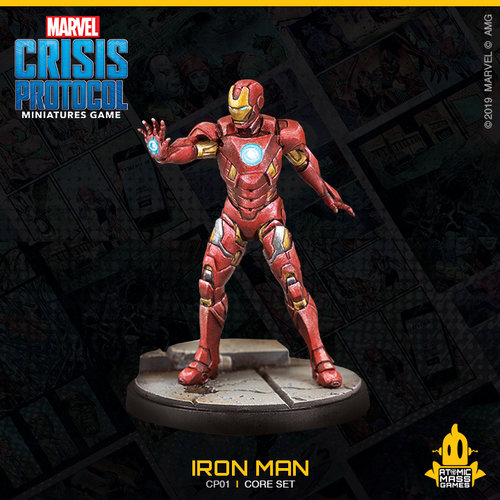
Evening 4: Ultron and Iron Man
It’s Saturday now. My mission for the weekend is to try and play through the final 6 missions of Gloomhaven Jaws of the Lion, and enough MCP painted to have something to type about here. I got 2 games in on Saturday, and 2 more on Sunday, keeping the evenings free for painting. I get to finish JotL this weekend and then start playing Aeon Trespass: Odyssey.
I started my evening off by applying the washes I’d discussed in my last post, and left them to dry while I ate dinner. Looking at my work Ultron is 95% done so it makes sense to finish him off. It’s glowing lights time.
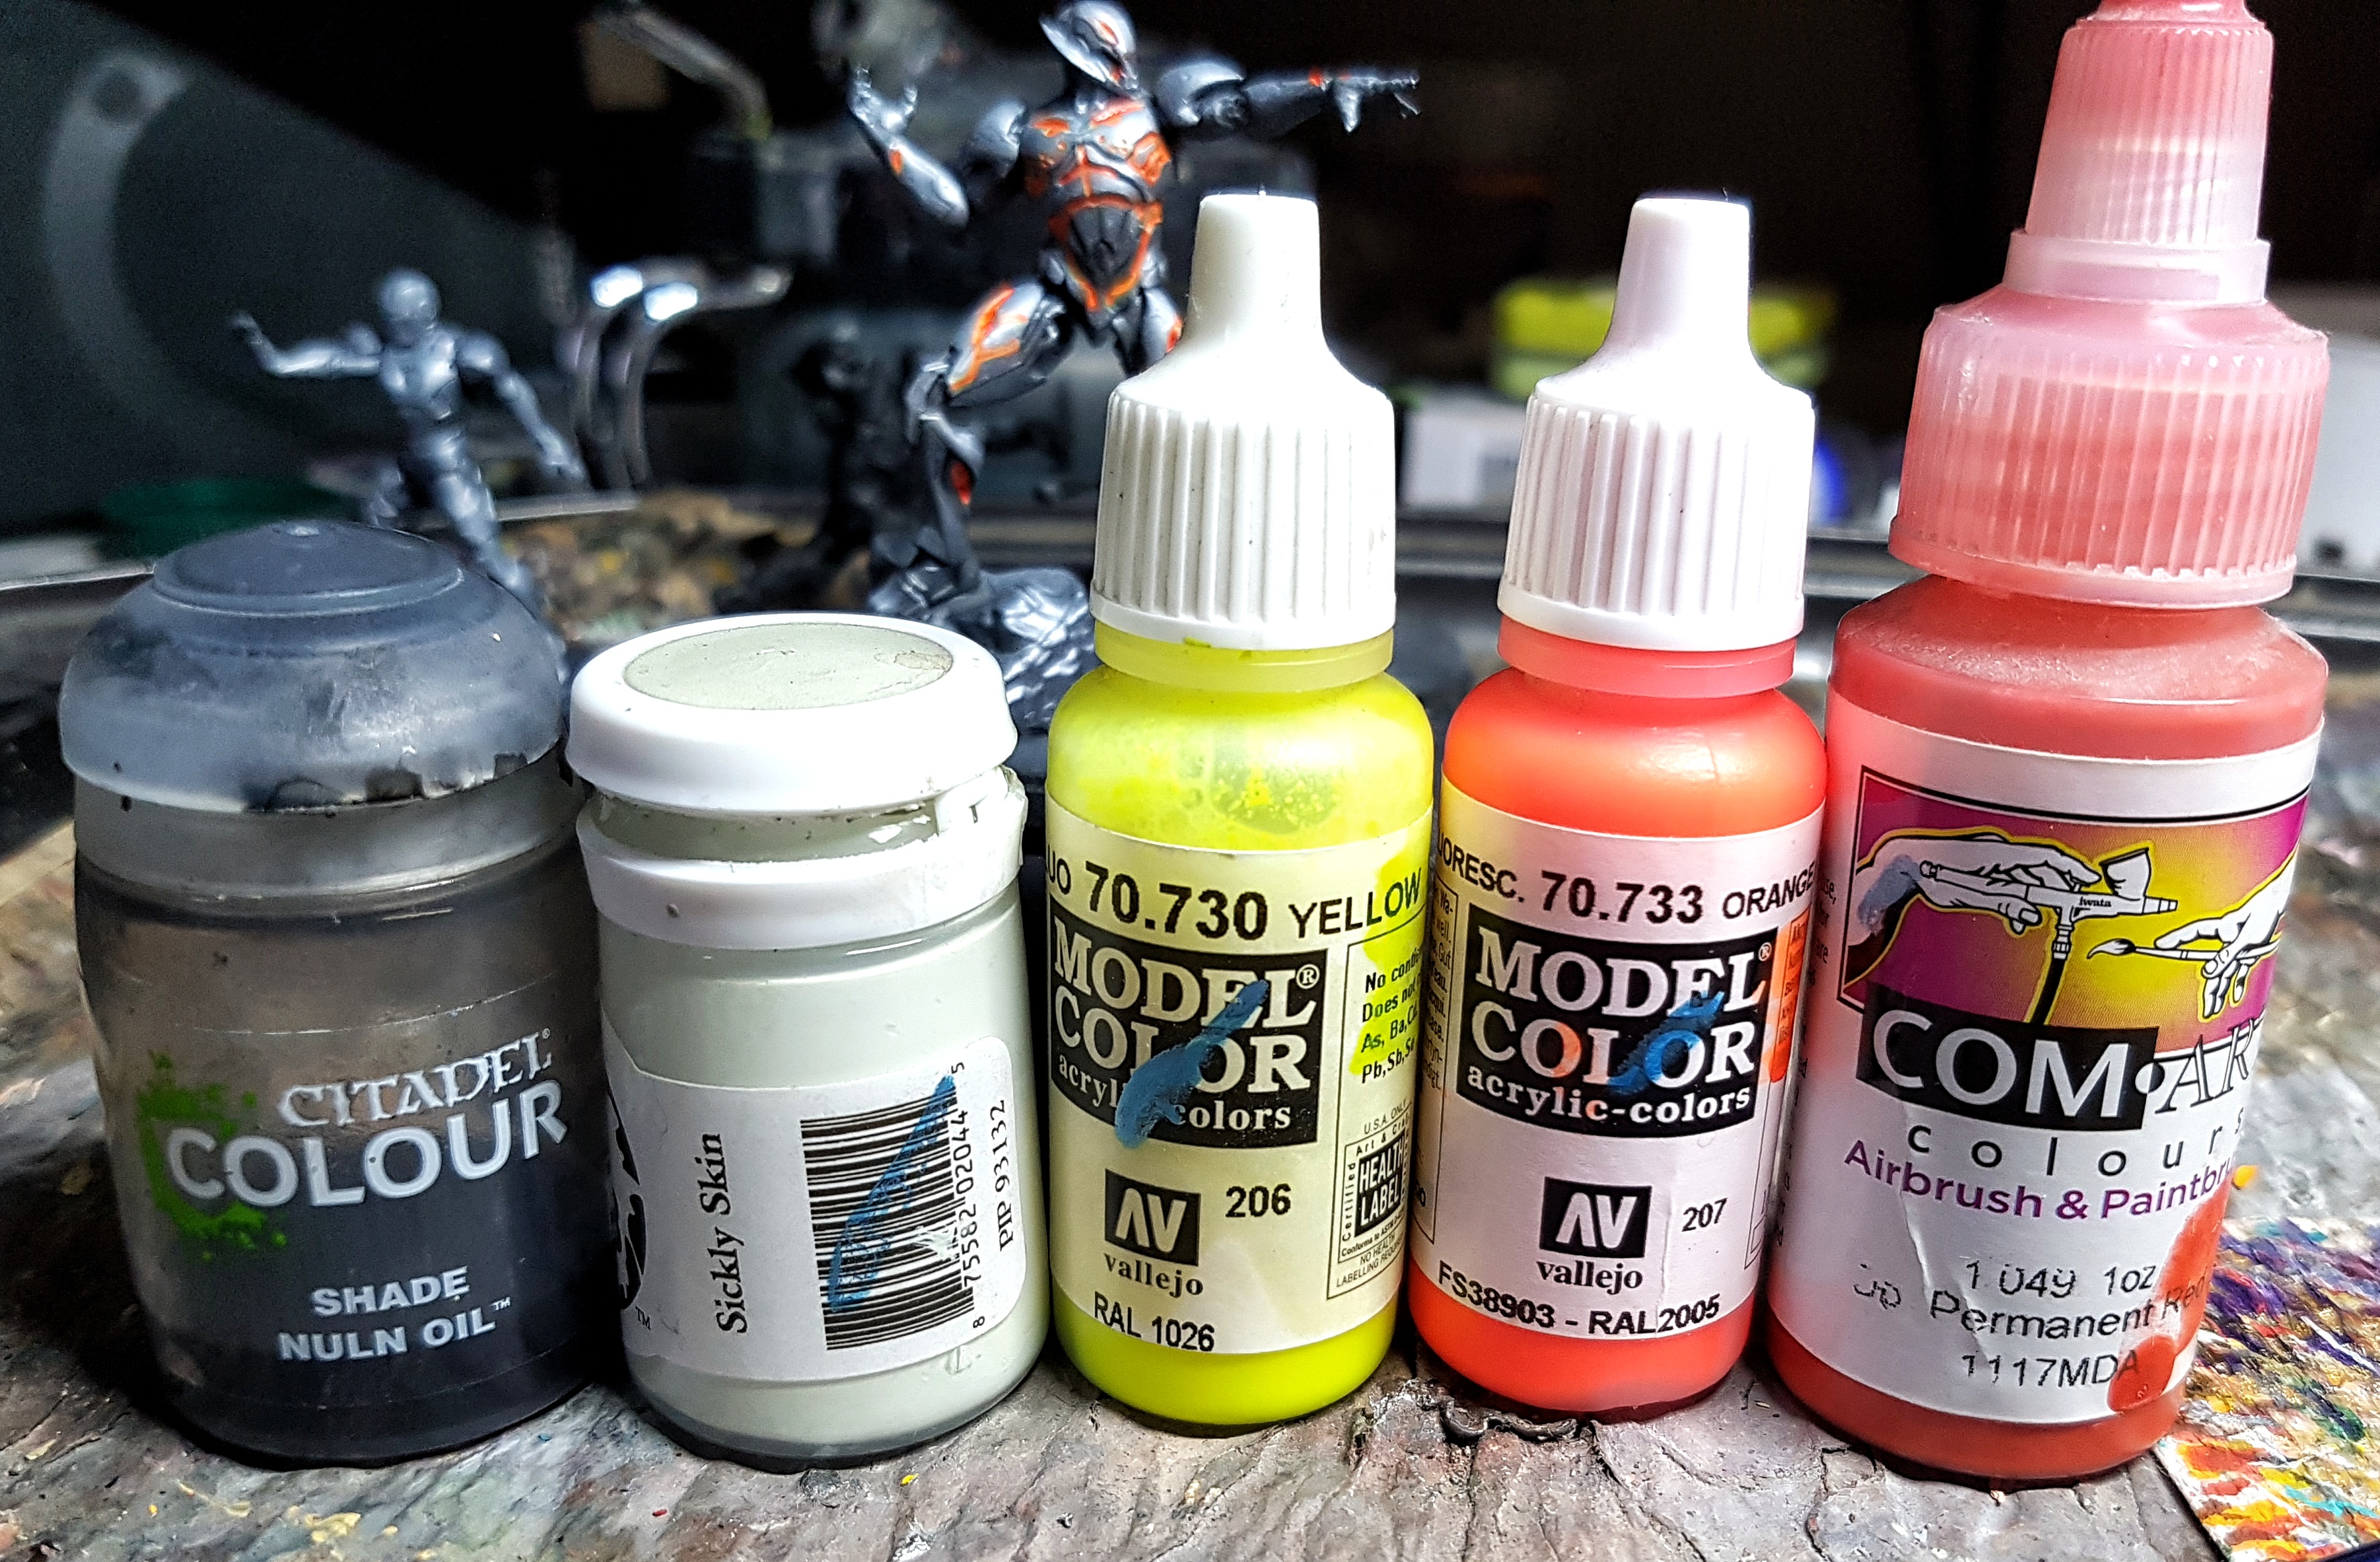
Undercoat Wash: P3 Sickly Skin (Any white or off white will do)
Base: VMC 70.730 Yellow Fluo
Main Colour: VMC 70.733 Orange Fluo
Tint/Shade: Com-Art 1.049 Opaque Permanent Red
I’ve been unable to pick up a fluo red. Every time I look for some the shop had ran out. I guess it’s a popular colour?
All paints were thinned enough to let them flow in to the crevices and recesses. First I undercoated with an off white because this will reinforce any vibrant colour I put over it. I’d watched a youtube video on painting Ultron and the guy mentioned he’d painted the lights fluro yellow first, presumably so provide some tonal variation, so I thought I may as well and see what happens. Two coats of Fluo Yellow were followed by two coats of Fluo Orange. I didn’t have any Fluo Red so I grabbed the pot of Com Art stuff. I don’t use it often because it’s so very thin. It doesn’t feel like paint, or ink, or a wash. It’s somewhere in the middle. I really need to experiment airbrushing it lightly over a preshade one day. Anyway, it’s thin enough that I could use it straight out of the bottle to provide some dots of strong red to the orange. It was applied before the orange had fully dried to allow natural transitions.
I was working from the studio painted pics for this and I couldn’t help but notice that they painted light that I couldn’t find on my model. Maybe they weren’t there on theirs either, but it does lead me to think the painted pieces they’re showing off are different to the ones they’ve sold us plebs. That’s just cheating. Some rear shots (robo-booty!) would have been nice too.
 Again, I was only taking pics to remember what colours I'd used. I start taking better pics soon.
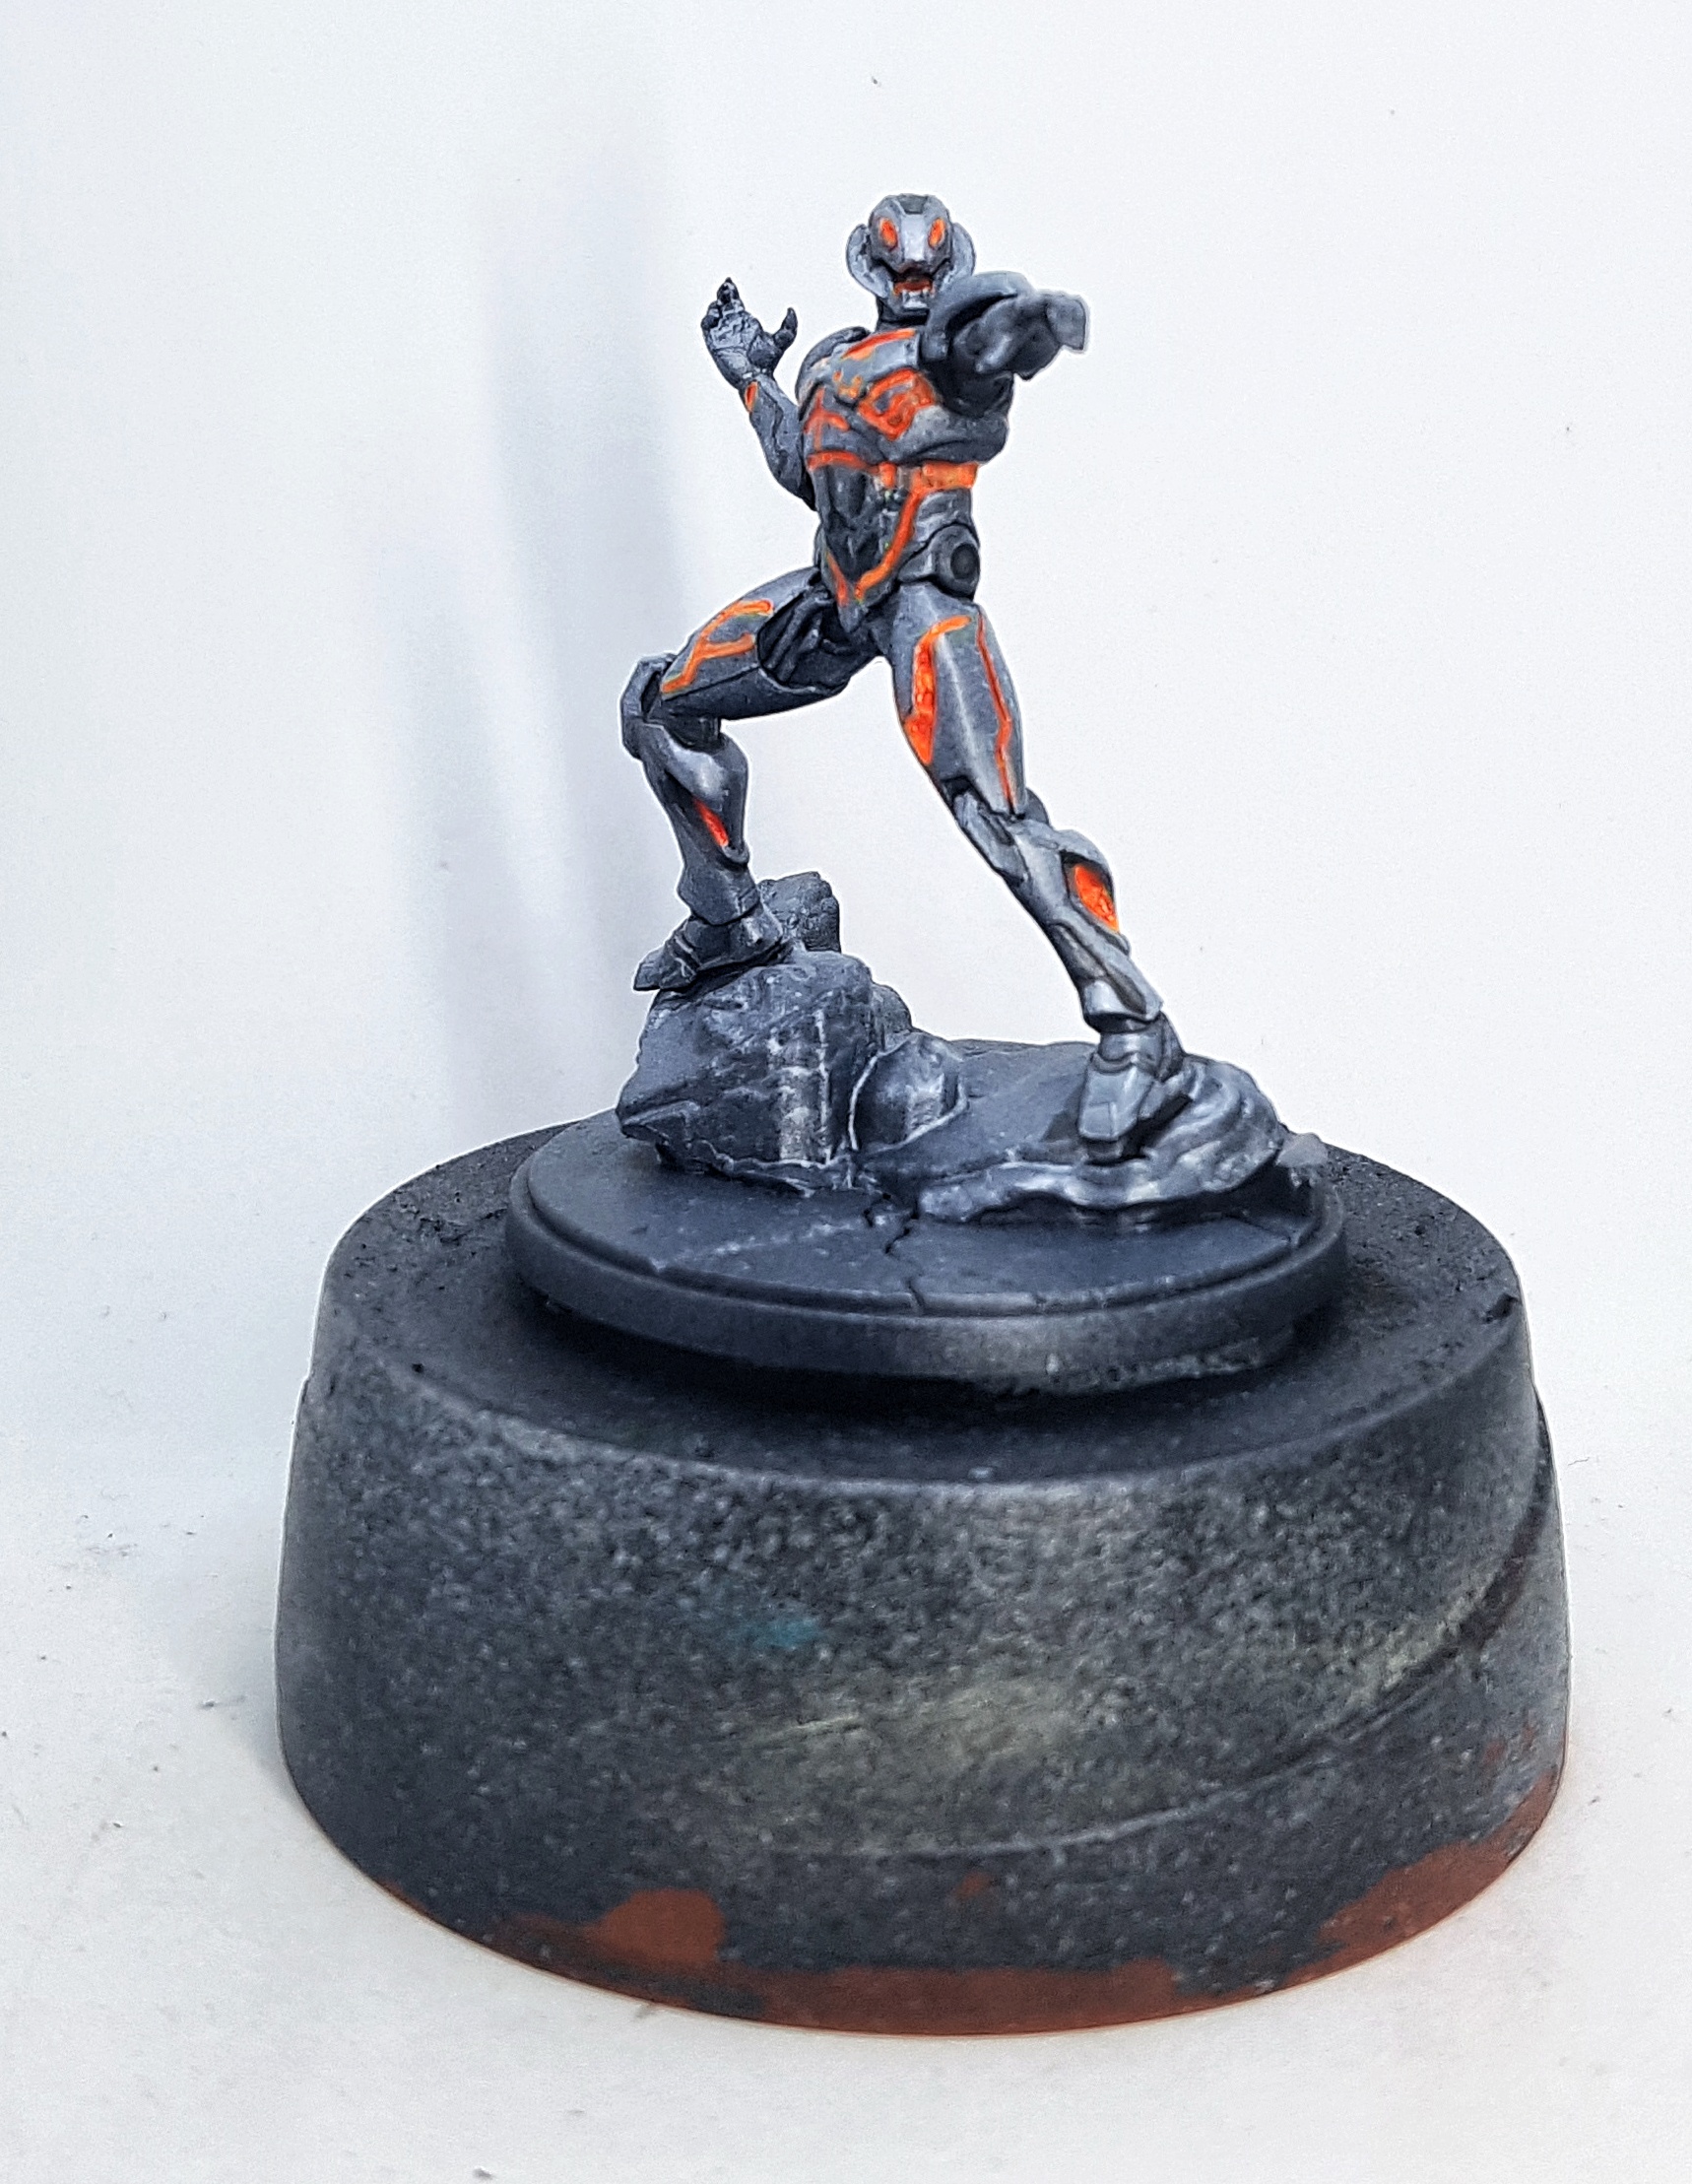 Here's a better pic of Ultron
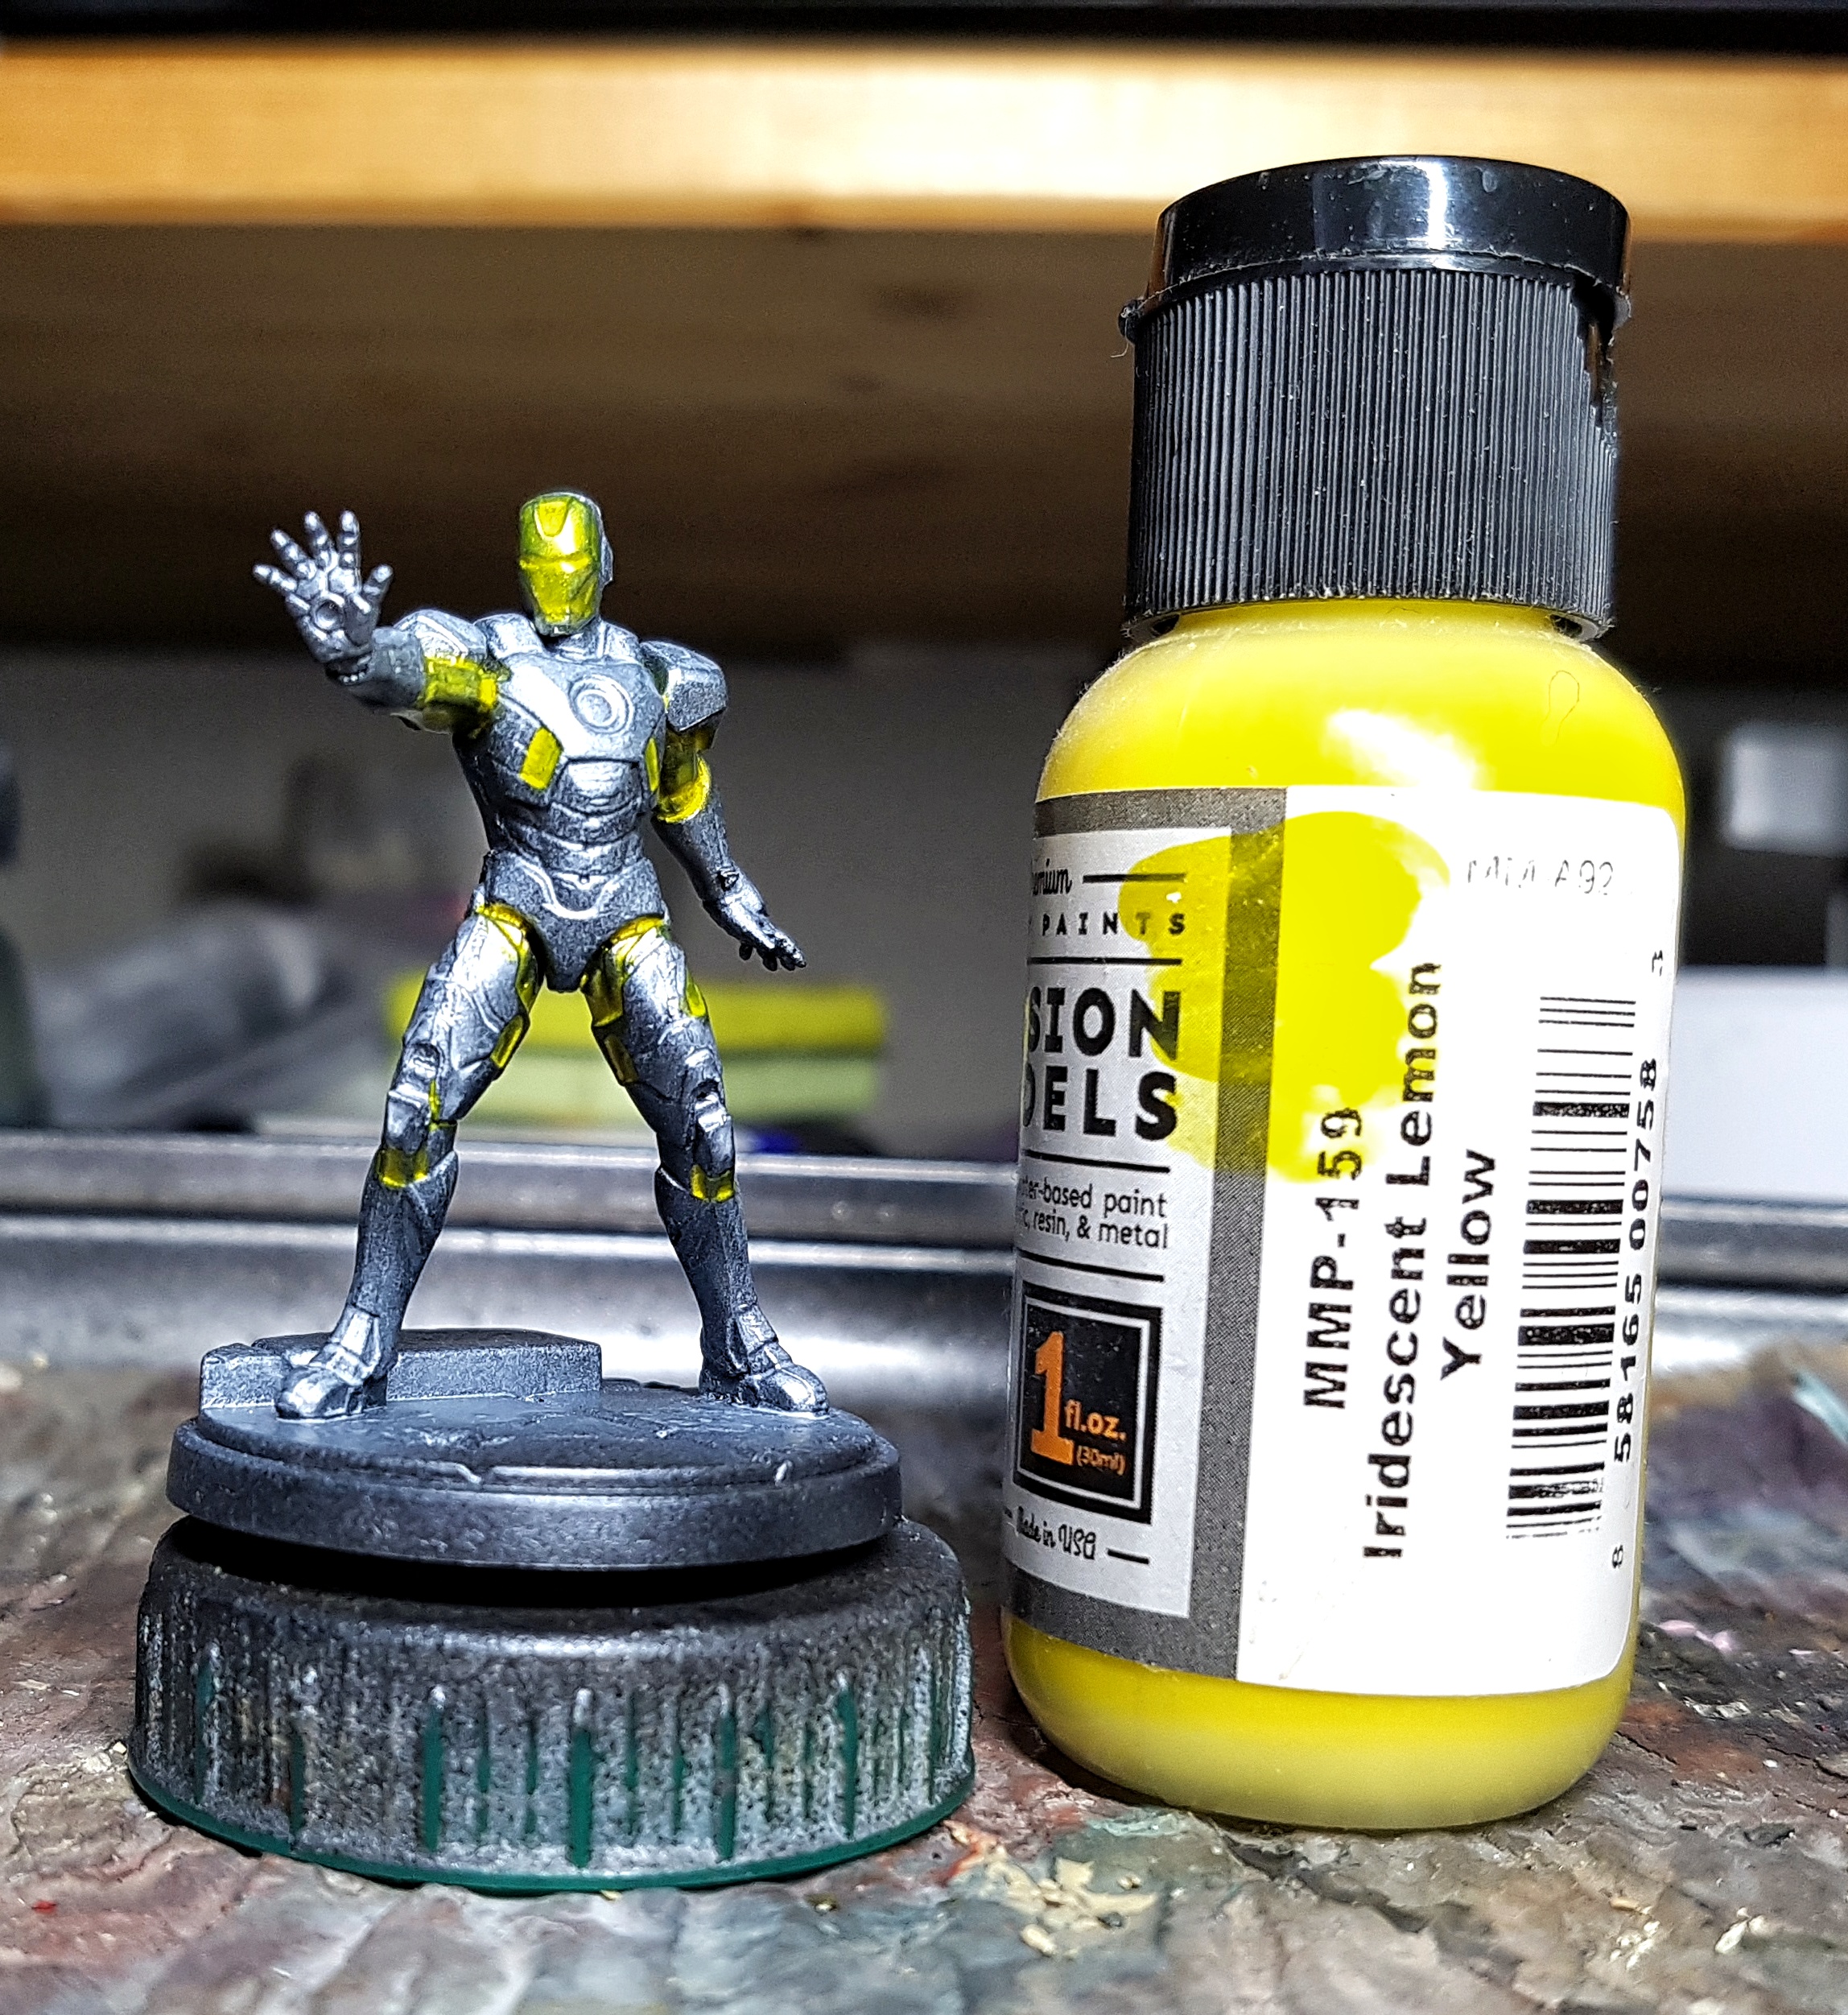
That’s Ultron finished. Well, except for the base. let’s not worry about that for now. I can do all the bases together later, or do a batch if I want time to think about how I’ll be painting something before I commit. Anyway, I know how I want to paint Iron Man and I’m curious to see if it works or looks ugly. He’s yellow and red, but they’re shiny polished colours. Not exactly metallic, but also not flat colours. I’ve two pearlescent paints that happen to be red and yellow, again from an old AssetDrop box. Let’s see what happens.
Yellow: Mission models MMP-159 Iridescent Lemon Yellow
Red: Mission Models MMP-148 Pearl Red
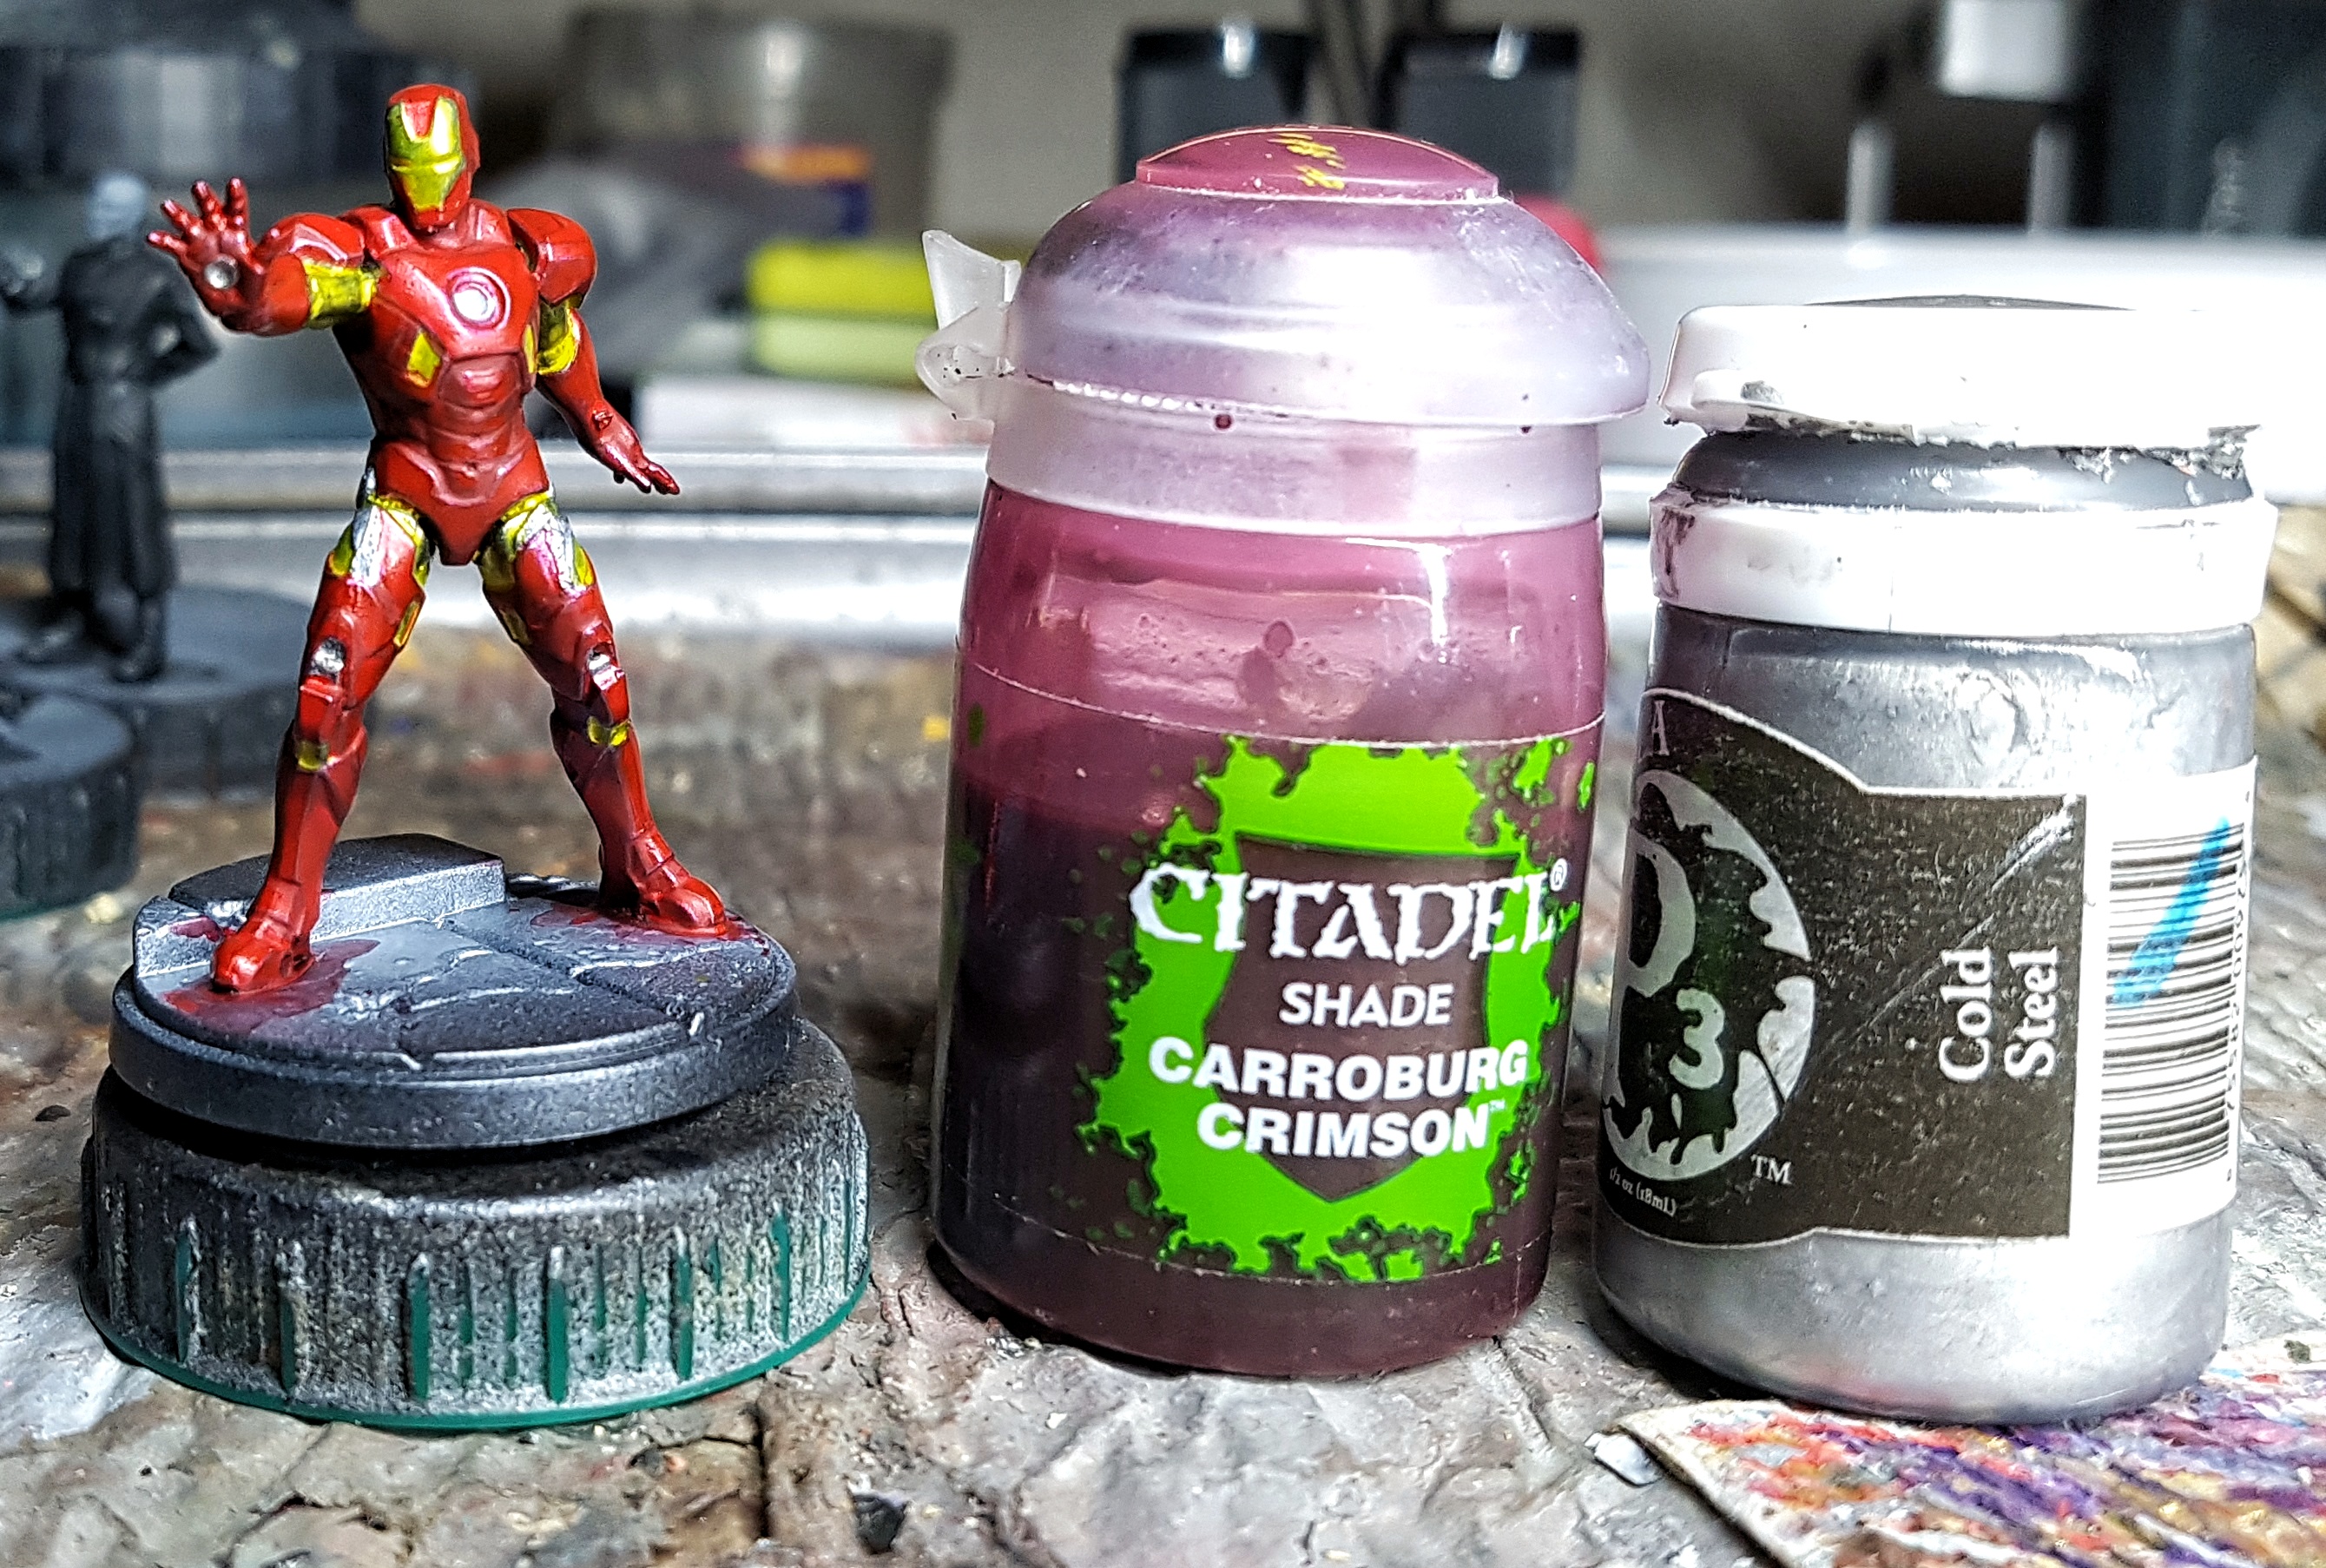
Red Pinwash: GW Carroburg Crimson
Steel Highlight: P3 Cold Steel (I also reclaimed the repulsors on his hands with this)
This was all brushed on. The Mission models paints took quite a few layers, and still doesn’t have 100% coverage on the hard edges. I’m happy to call that shading and natural wear and realism. Any more layers and I’ll start losing detail. I’ve airbrushed them before, but I wanted to control the coverage and thickness so the steel undercoat would hopefully influence their vibrancy and provide natural shading. I’m not sure that’s worked out but he looks ok in person, and will hopefully look better once his base is finished and providing him with a frame.
 See? I said I'd start taking better pics for you.
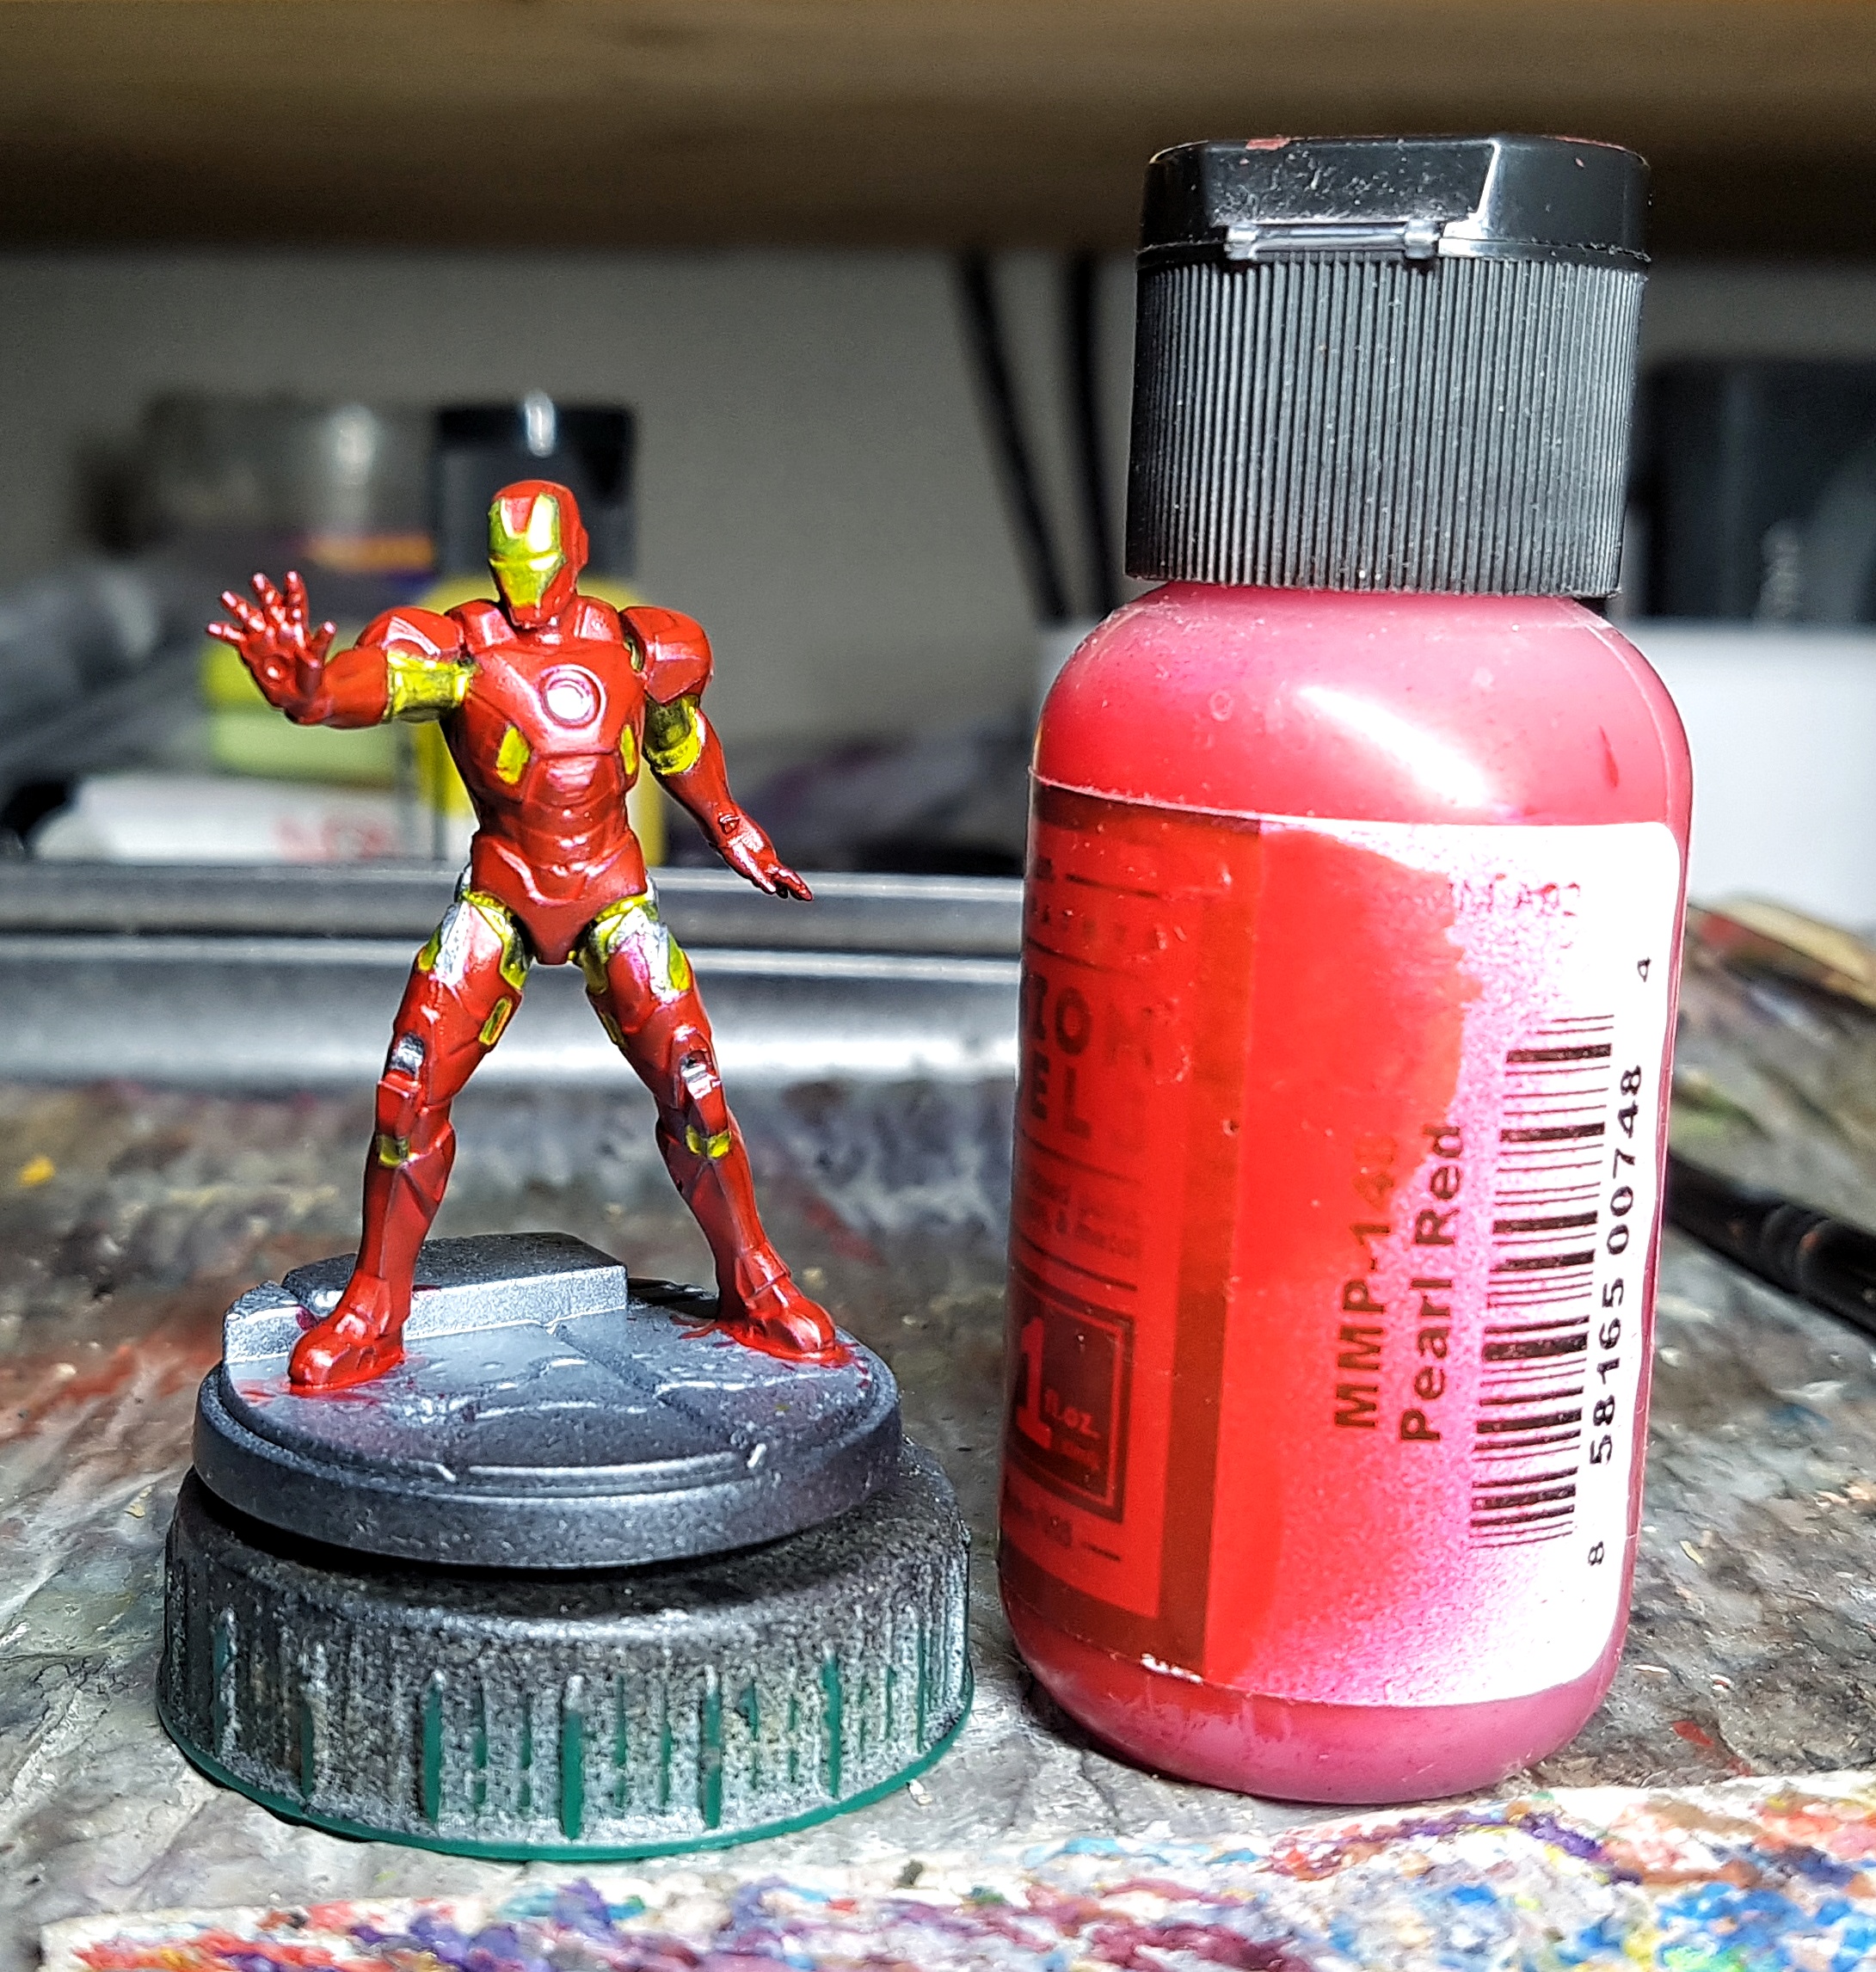
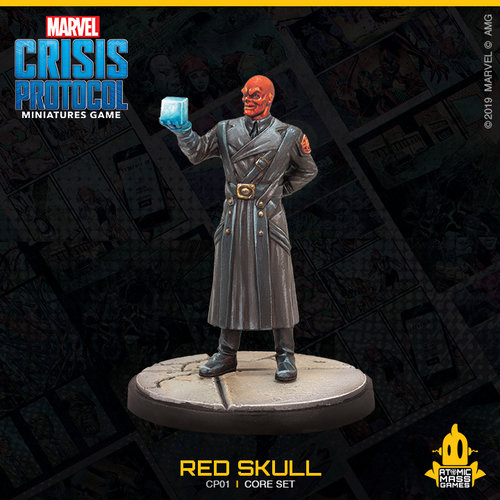
Evening 5: Iron Man and Red Skull
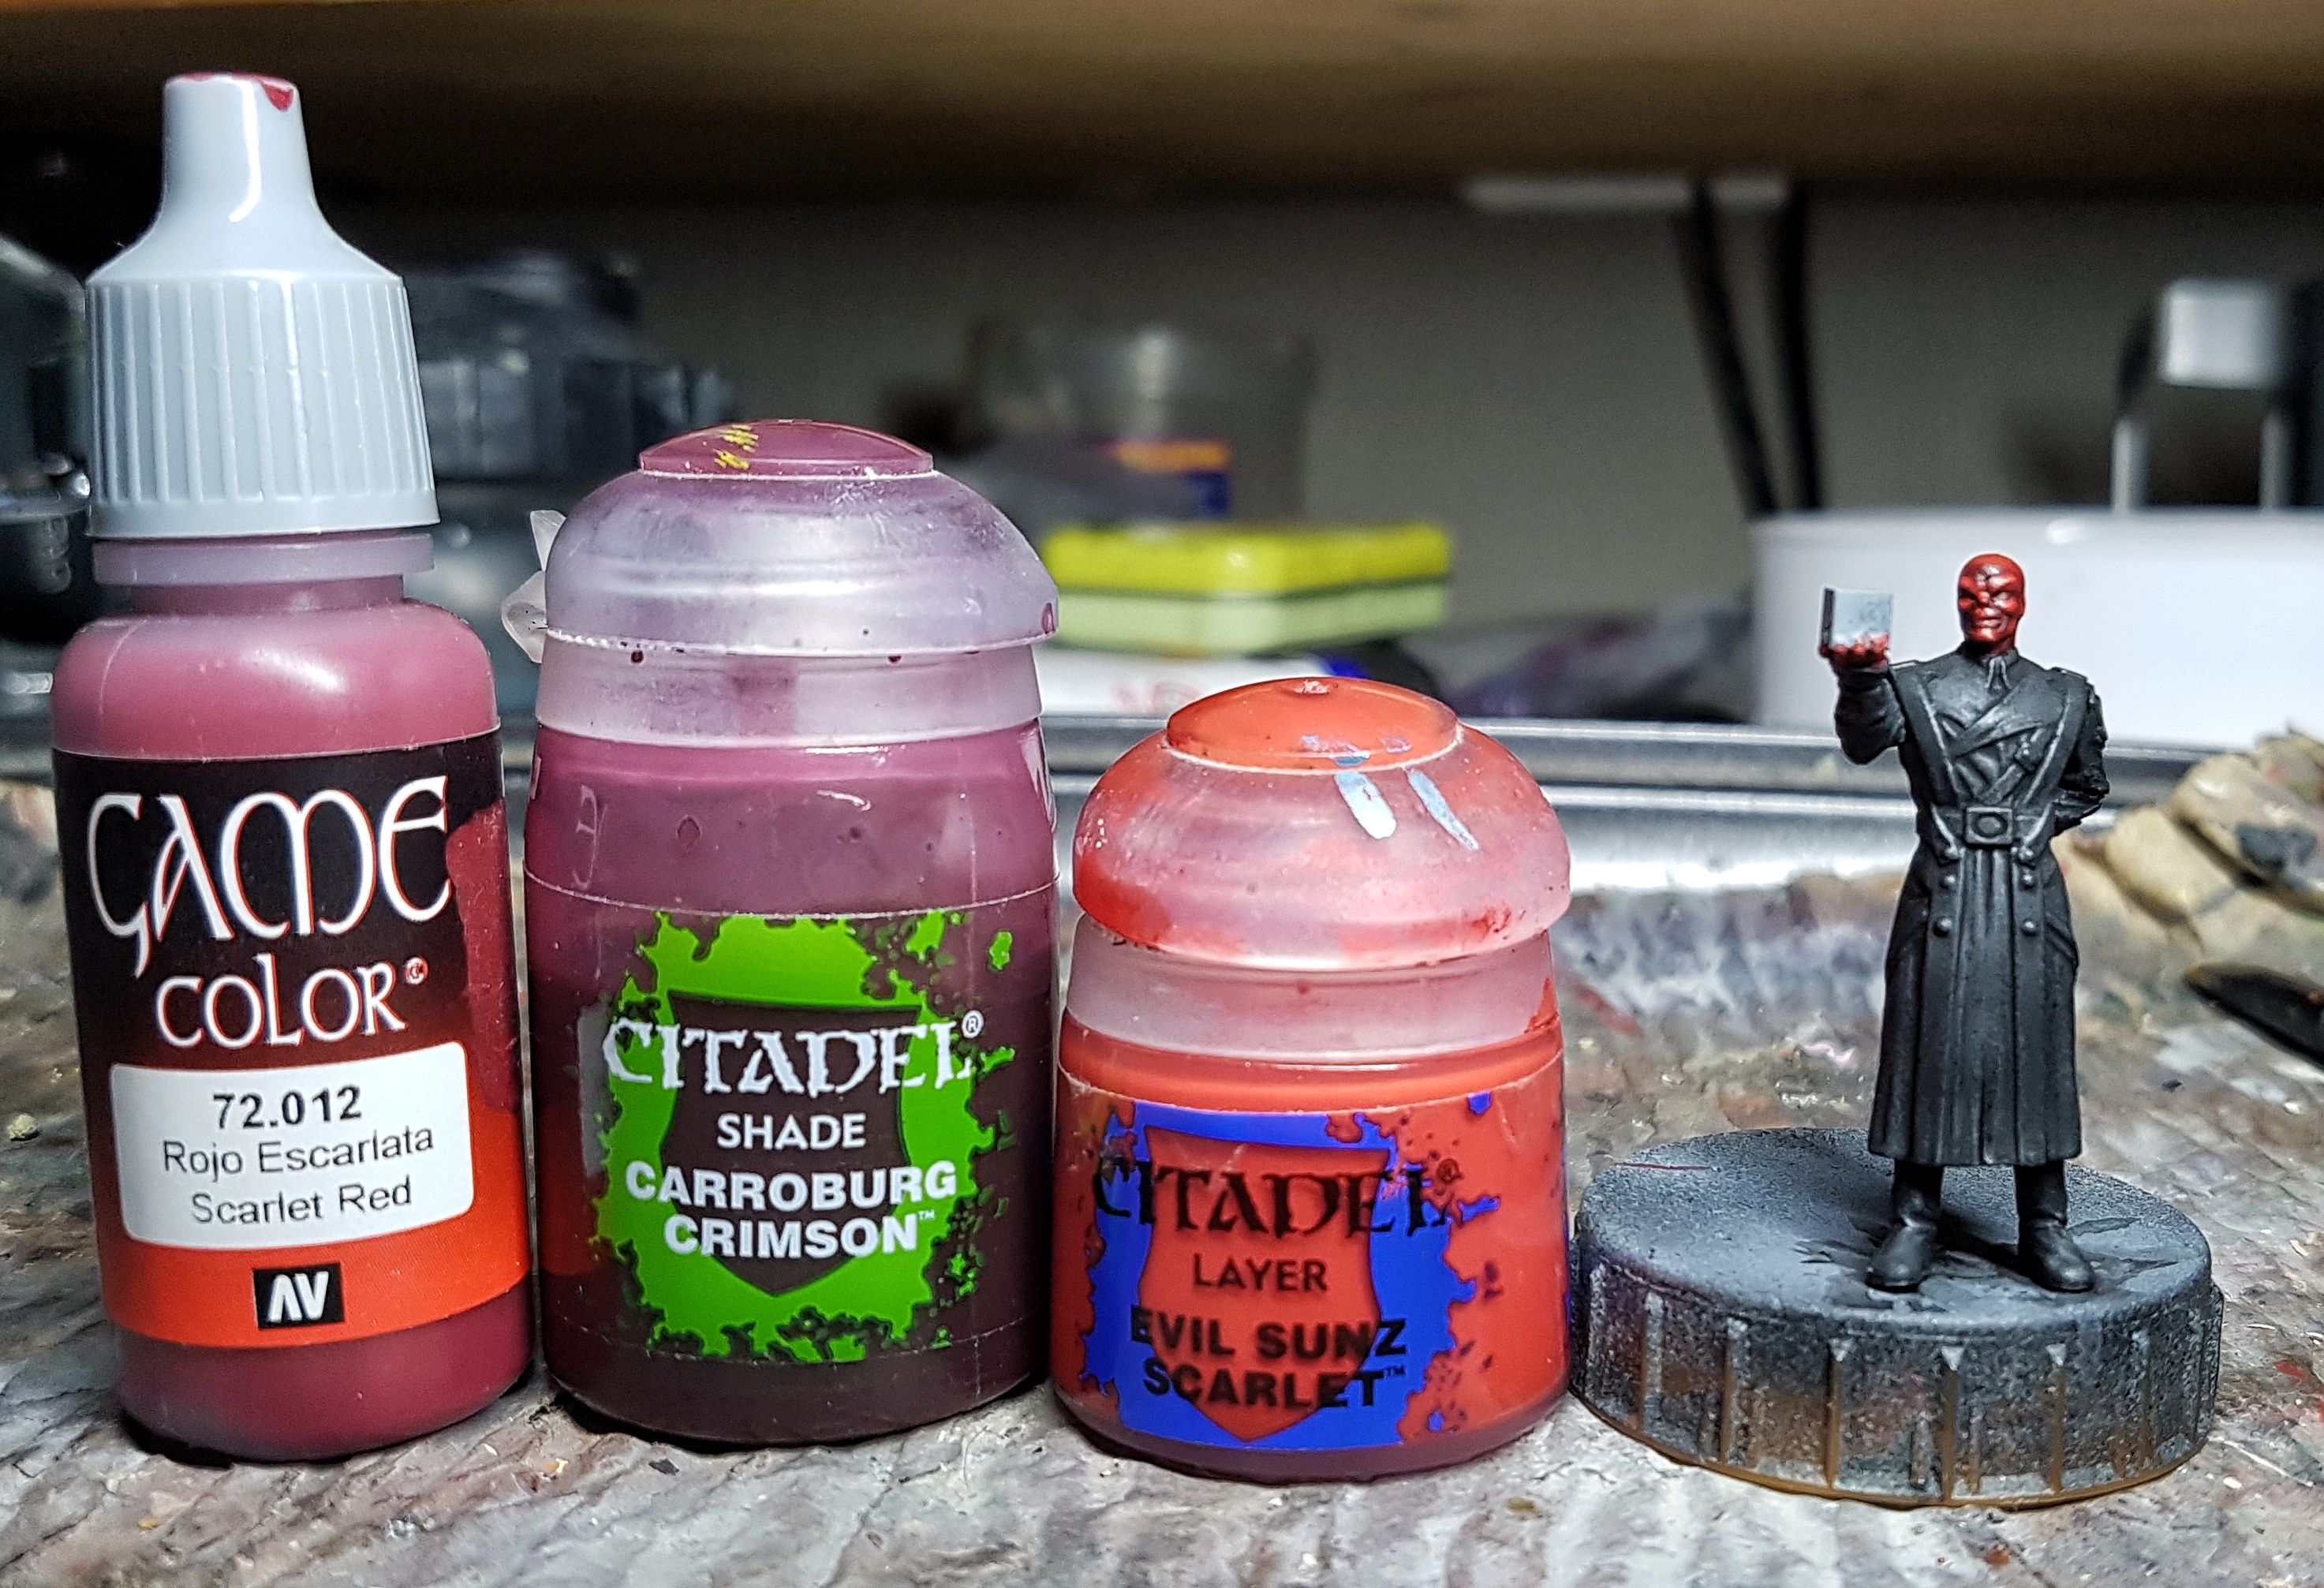
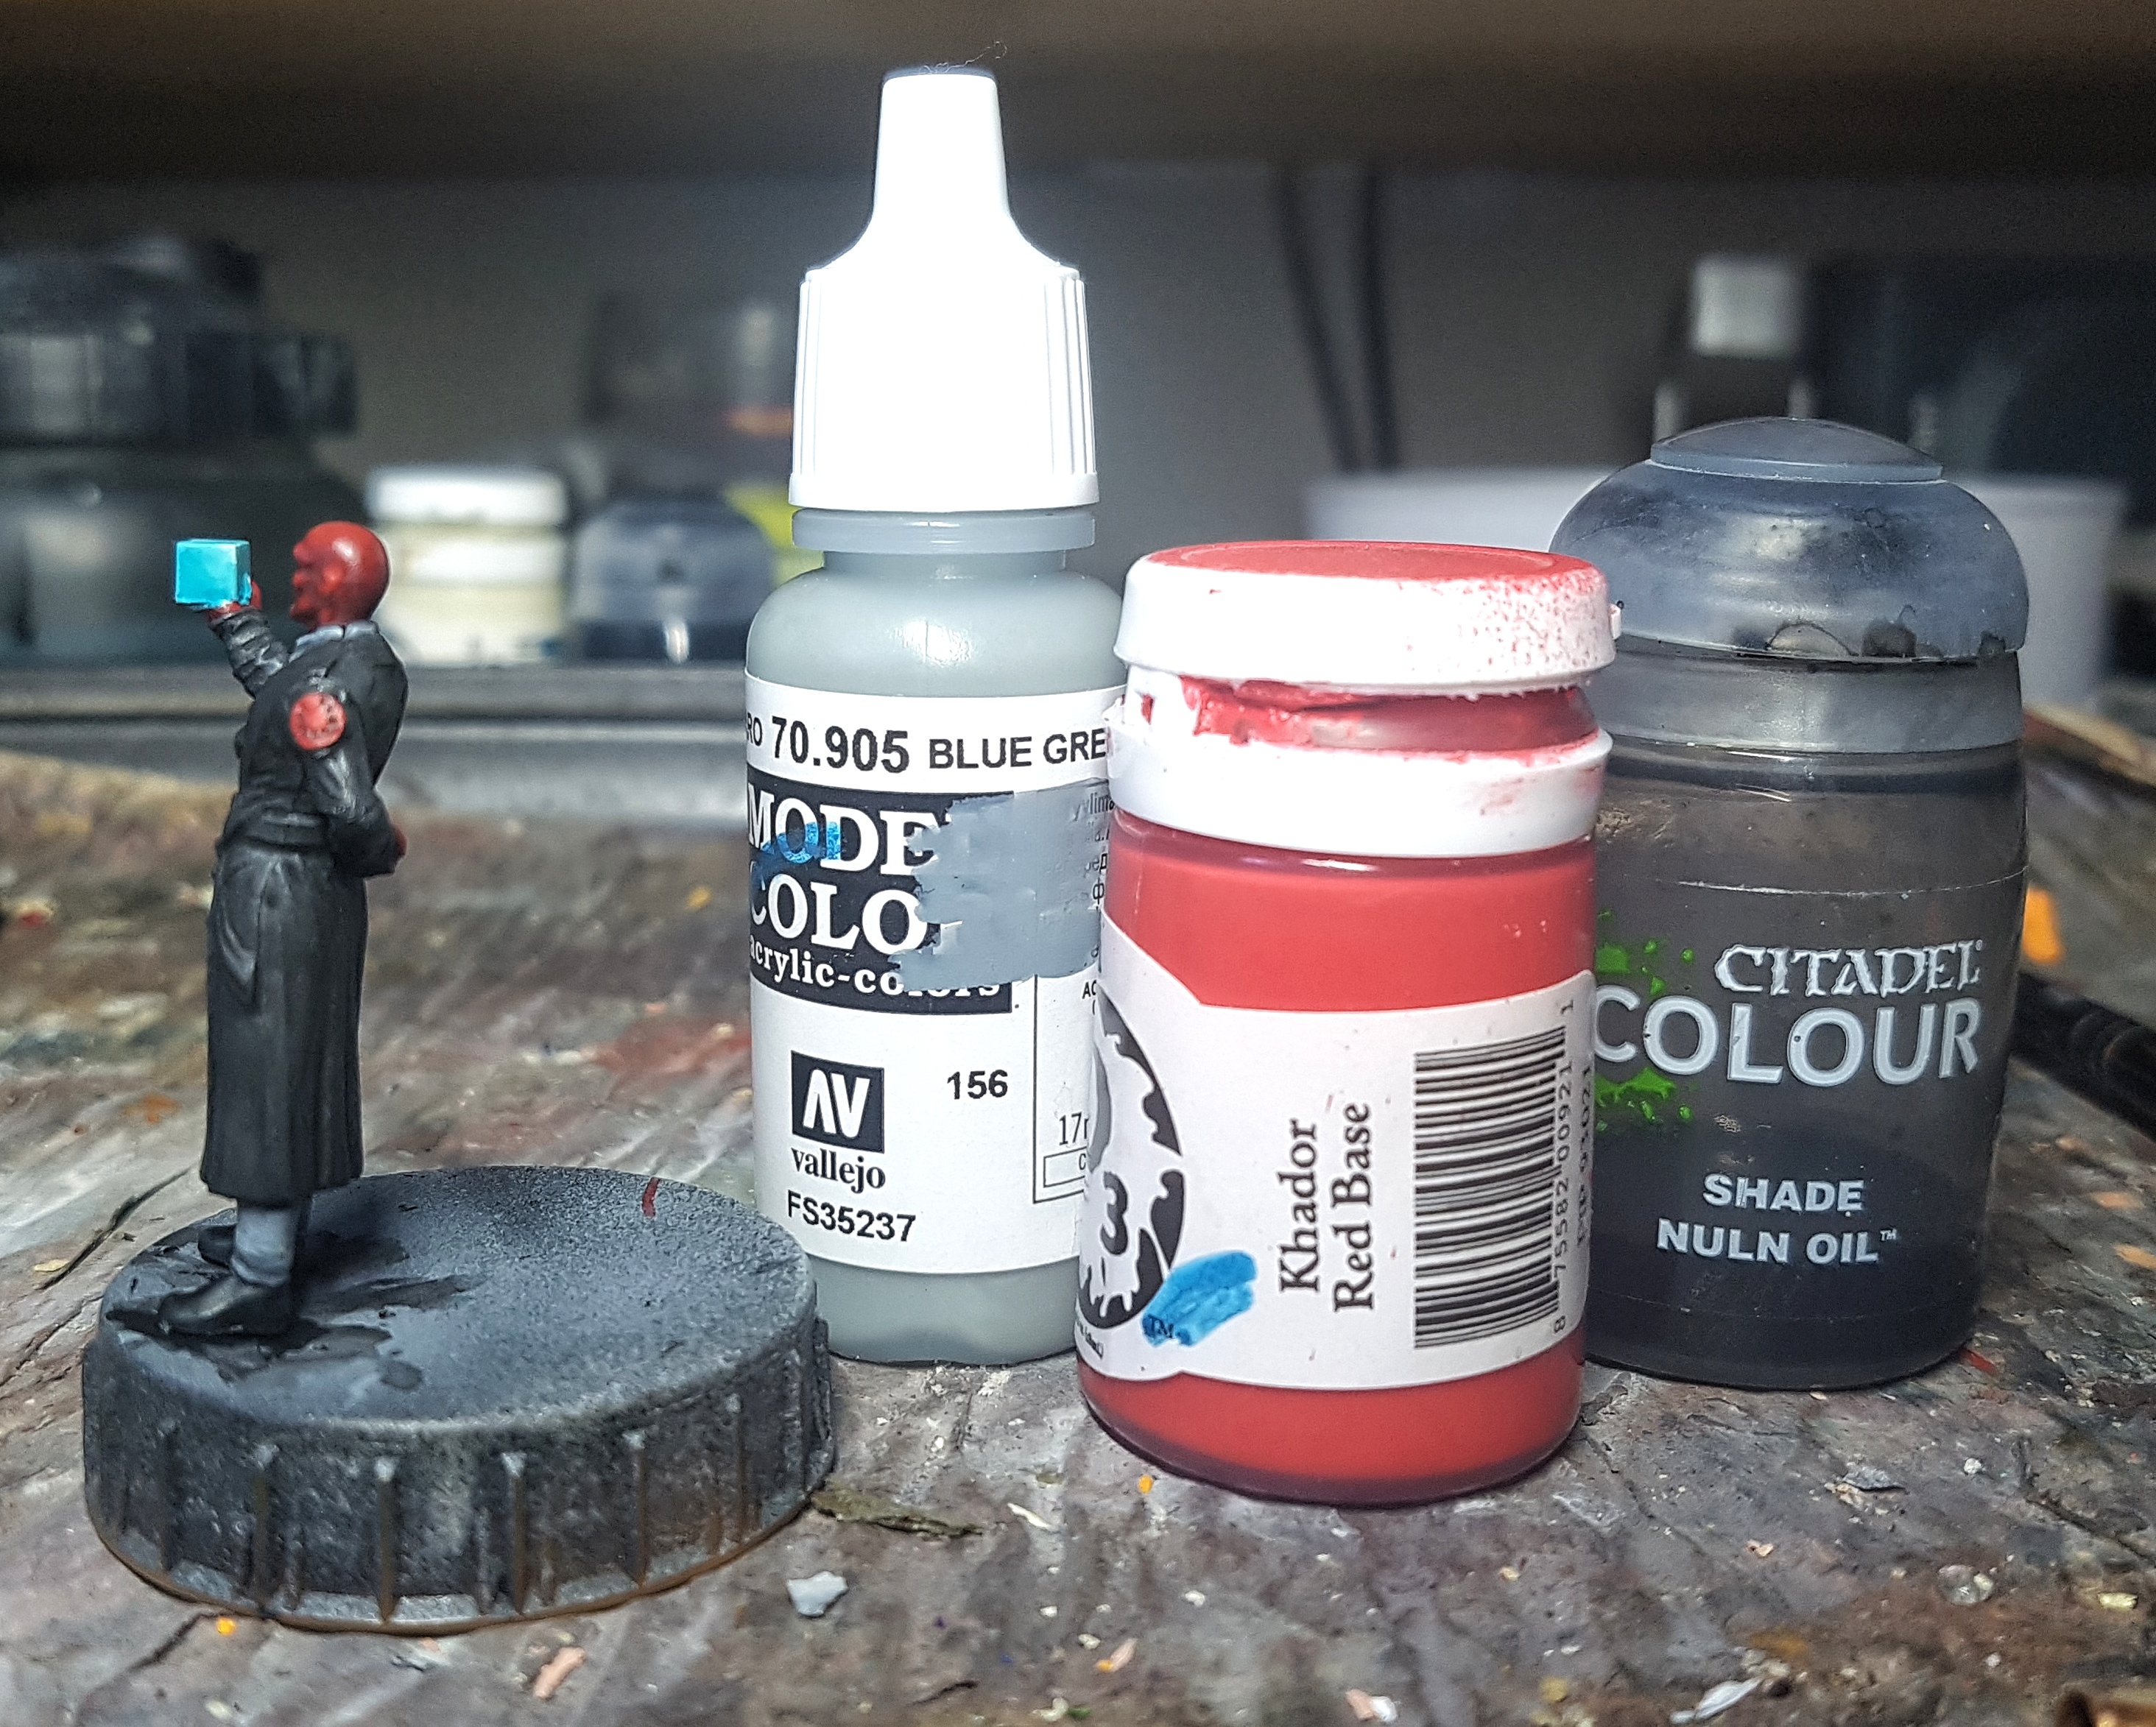
The final stage on Iron Man is the blue glow. Red Skull also has some blue glow on his Cosmic Cube so lets do him at the same time. This means ditching Iron Man for now, and painting red flesh.
Base: VMC 72.012 Scarlet Red
Shade: GW Carroburg Crimson
Reclaim base
Highlight: Base mixed with GW Evil Sunz Scarlet
Highlight: Evil Sunz Scarlet
This is my Khorne Bloodletters Flesh recipe, although there I might push it a little higher and there’s a lot more dependence on drybrushing. I’d usually be painting it on 30+ models instead of one. I’ll do all the eyes on everyone together later on, I think.
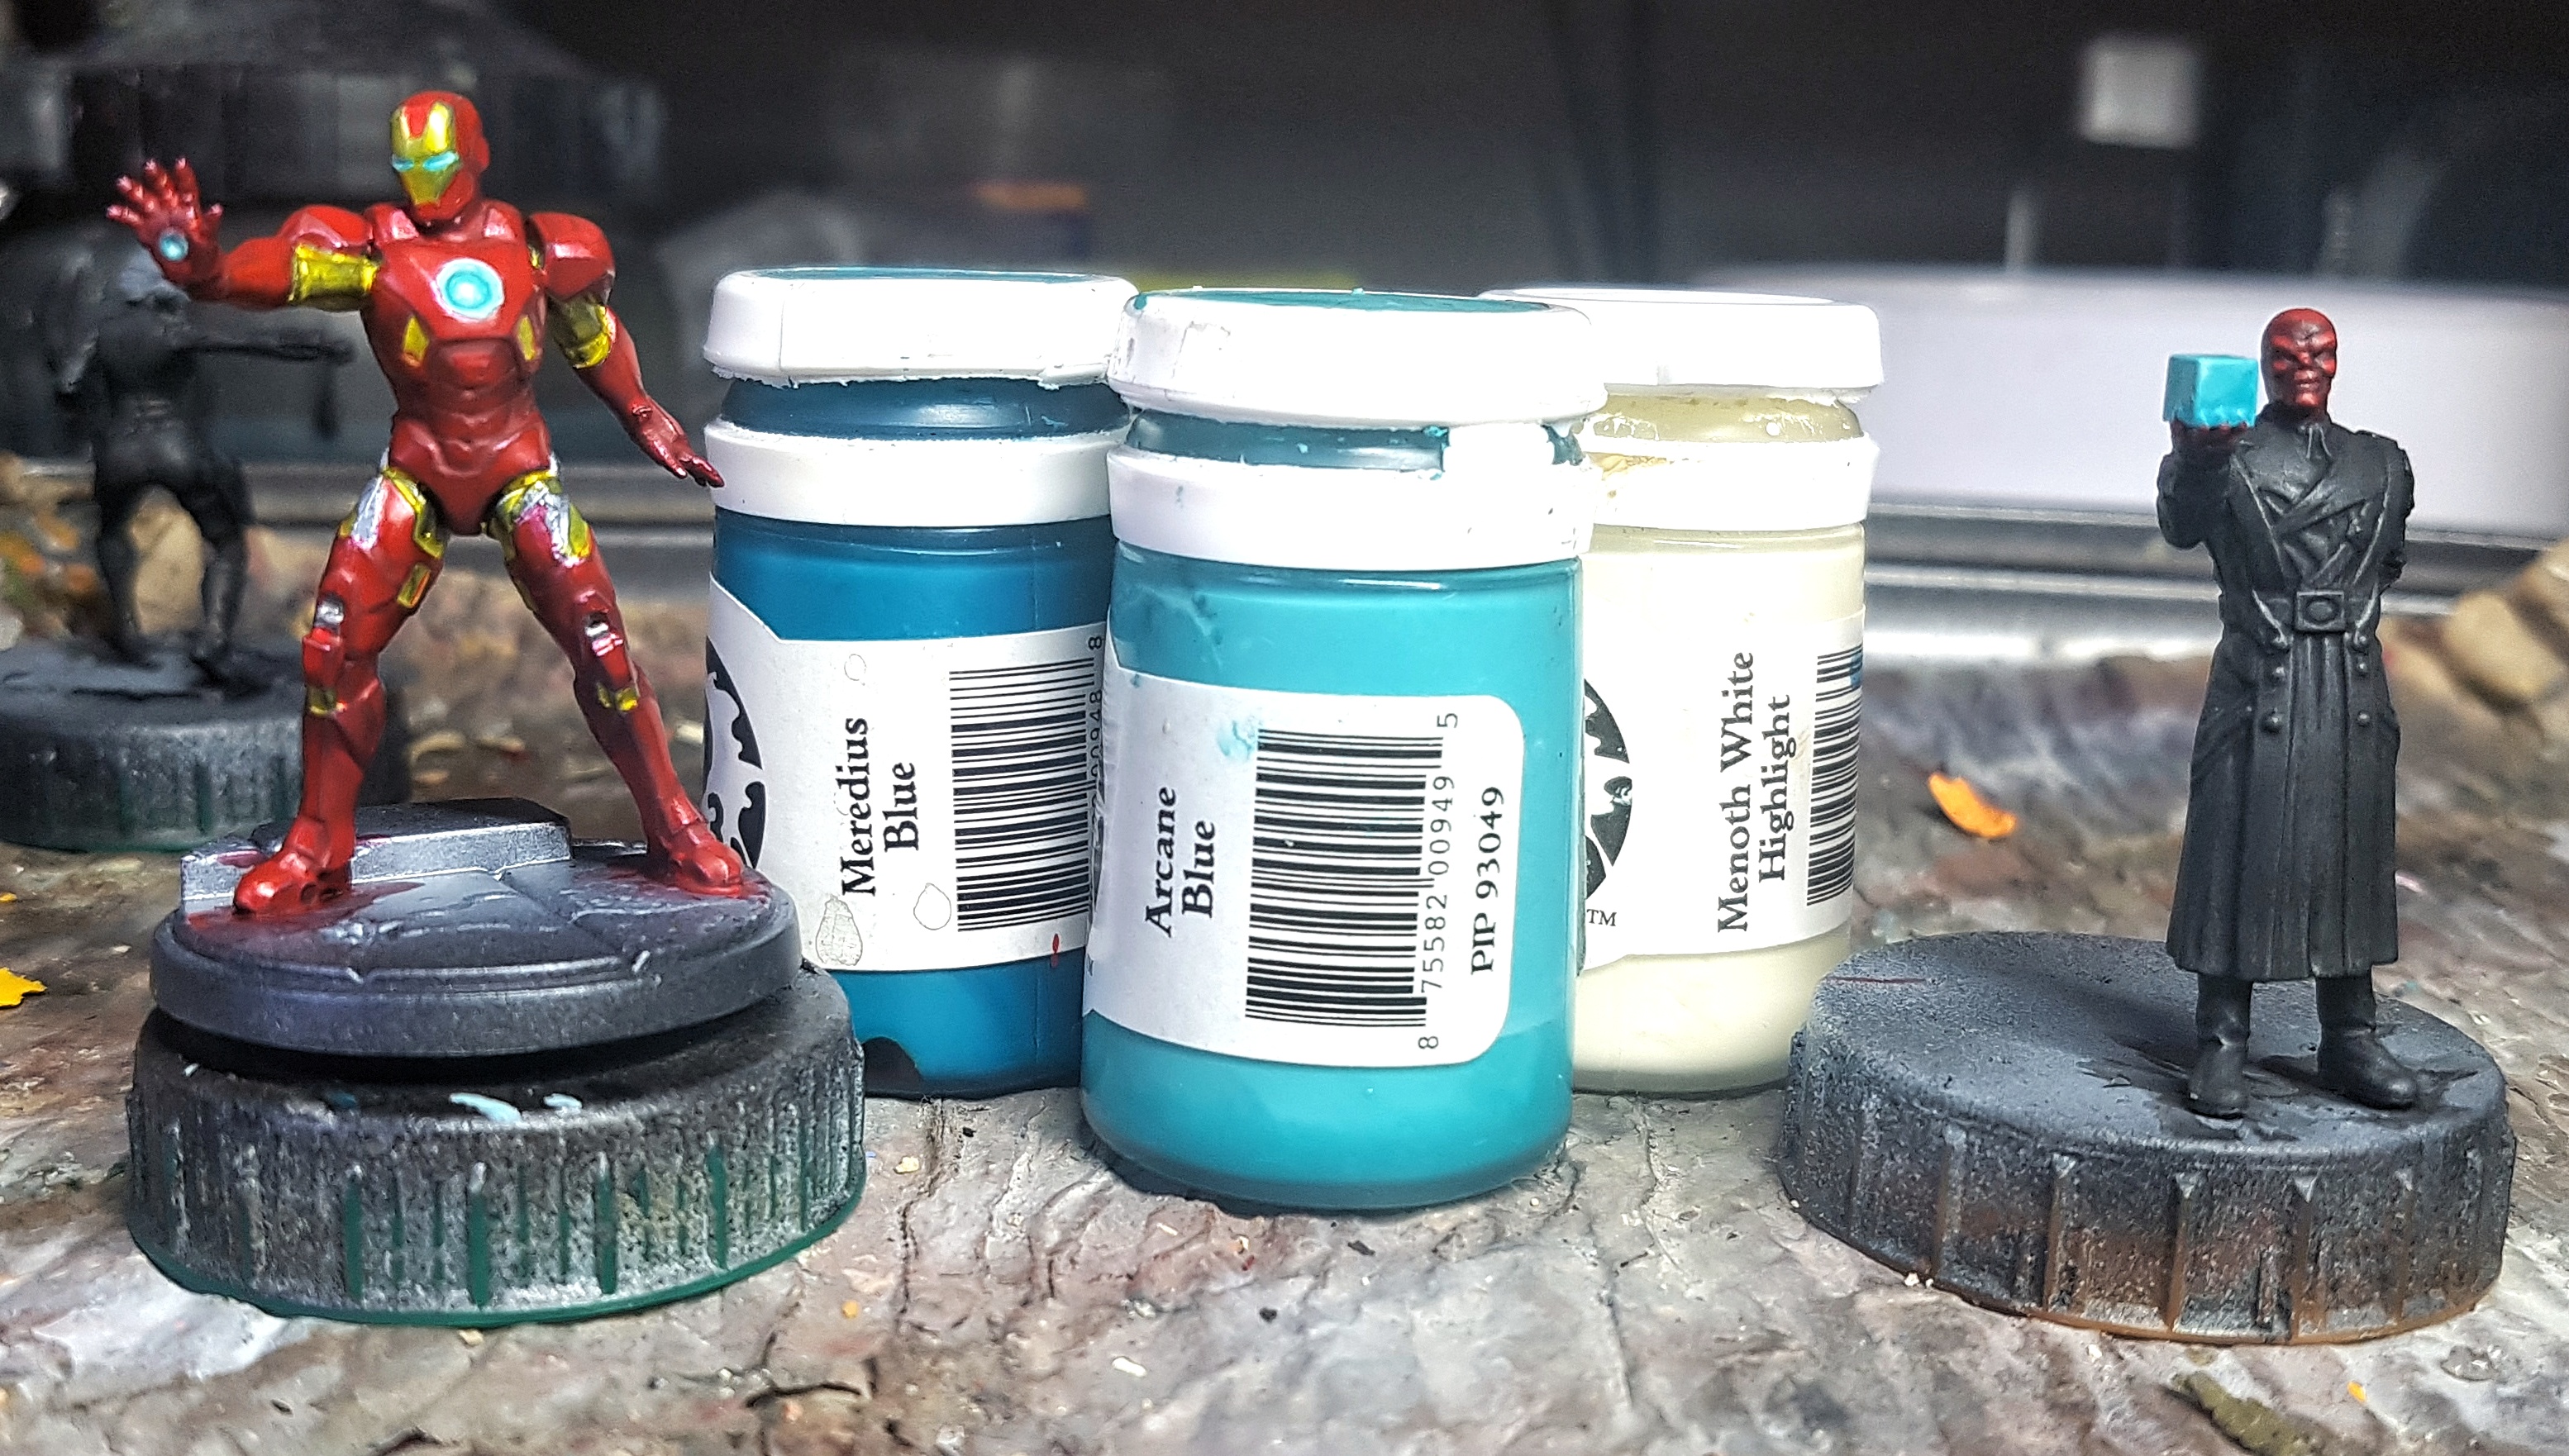
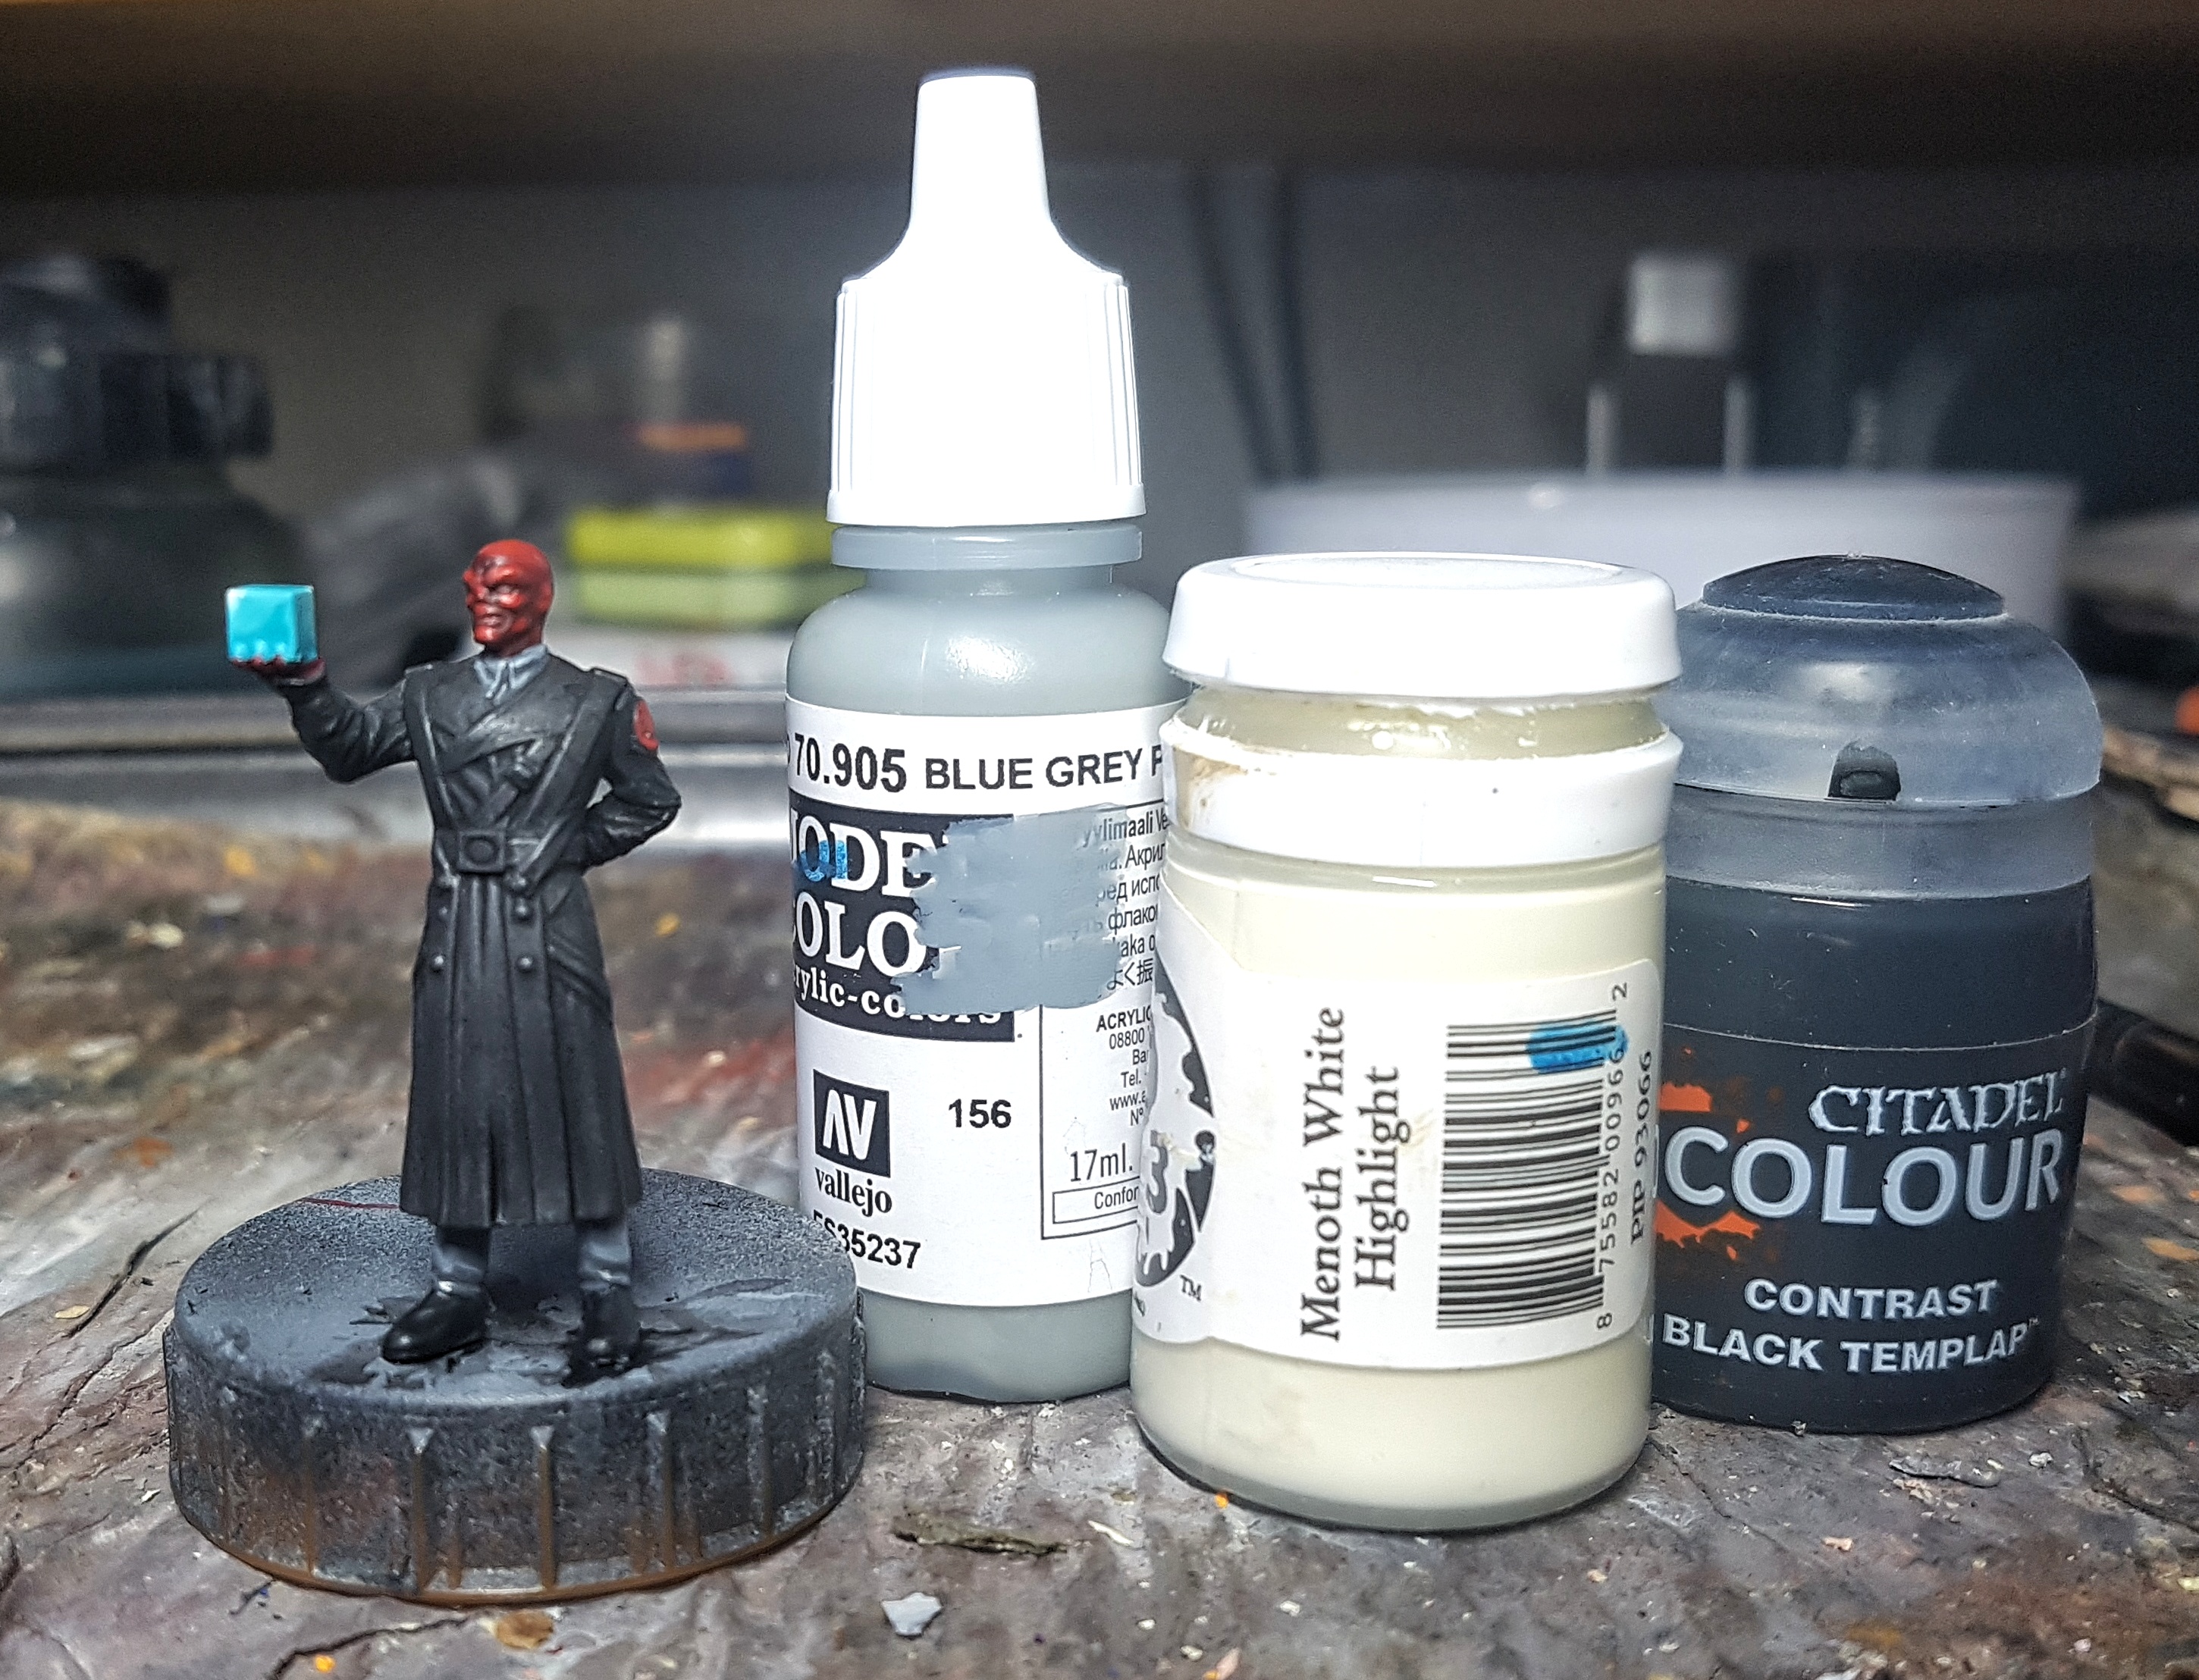
It’s now Sunday evening and time for the blue glow
I started with undercoating the areas with an off white. Any vibrant colour wants this or it’ll never get it’s full brightness.
Undercoat: P3 Menoth White Highlight (Get this even and complete, not too patchy)
Base: P3 Arcane Blue. Can afford to be a little patchy, but not ugly. Tonal variation can come across as variable moving light
Shade: P3 Meredius Blue
Highlight 1: Arcane Blue mixed with Menoth White Highlight
Highlight 2 & edge highlight: as 1, but let the MWH dominate the mix
Corner Highlight: Pure MWH
Once the base colour was down I mixed up a little of the different shades and highlights and kept them to hand. A ring of the shade was applied to iron mans chest light, and a dot to the nose end of each eye. Following the studio piece, I decided the front facing corner of the cube would be the lightest part. I then applied an L of the shade in the opposite corner of each facing. Once that had dried I applied a second coat over the top and some of the base colour next to it and ran them in to each other. Once that was dry I did the same thing, but with Highlight 1 and the base colour. A little Highlight 1 and then 2 was also applied to the outside of Iron Man’s eyes. Edge and then corner highlights were then applied to the cube.
I could have added just a touch of P3 Coal Black or VMC Periscopes to the shade colour to get an extra darker tone.
Iron Man is now done, and Red Skull looks most of the way there. Let’s focus on him next. Looking at the studio pic, he is wearing all black, but it’s different blacks. I’ve the Vallejo German Field Grey set within arms reach. Let’s look at what that says. It feels appropriate here.
Paints Used
VMC 70.868 Dark Seagreen
VMC 70.905 Blue Grey
P3 Thamar Black (Any black will do)
The trousers and shirt were based with Dark Seagreen. Blue Grey was then used to highlight them. Some half and half tones may have been used too. While it was out I also base coated the shoes. I’ll come back to them in a minute. A little black was added to the Dark Seagreen and this was used to shade shirt and trousers.
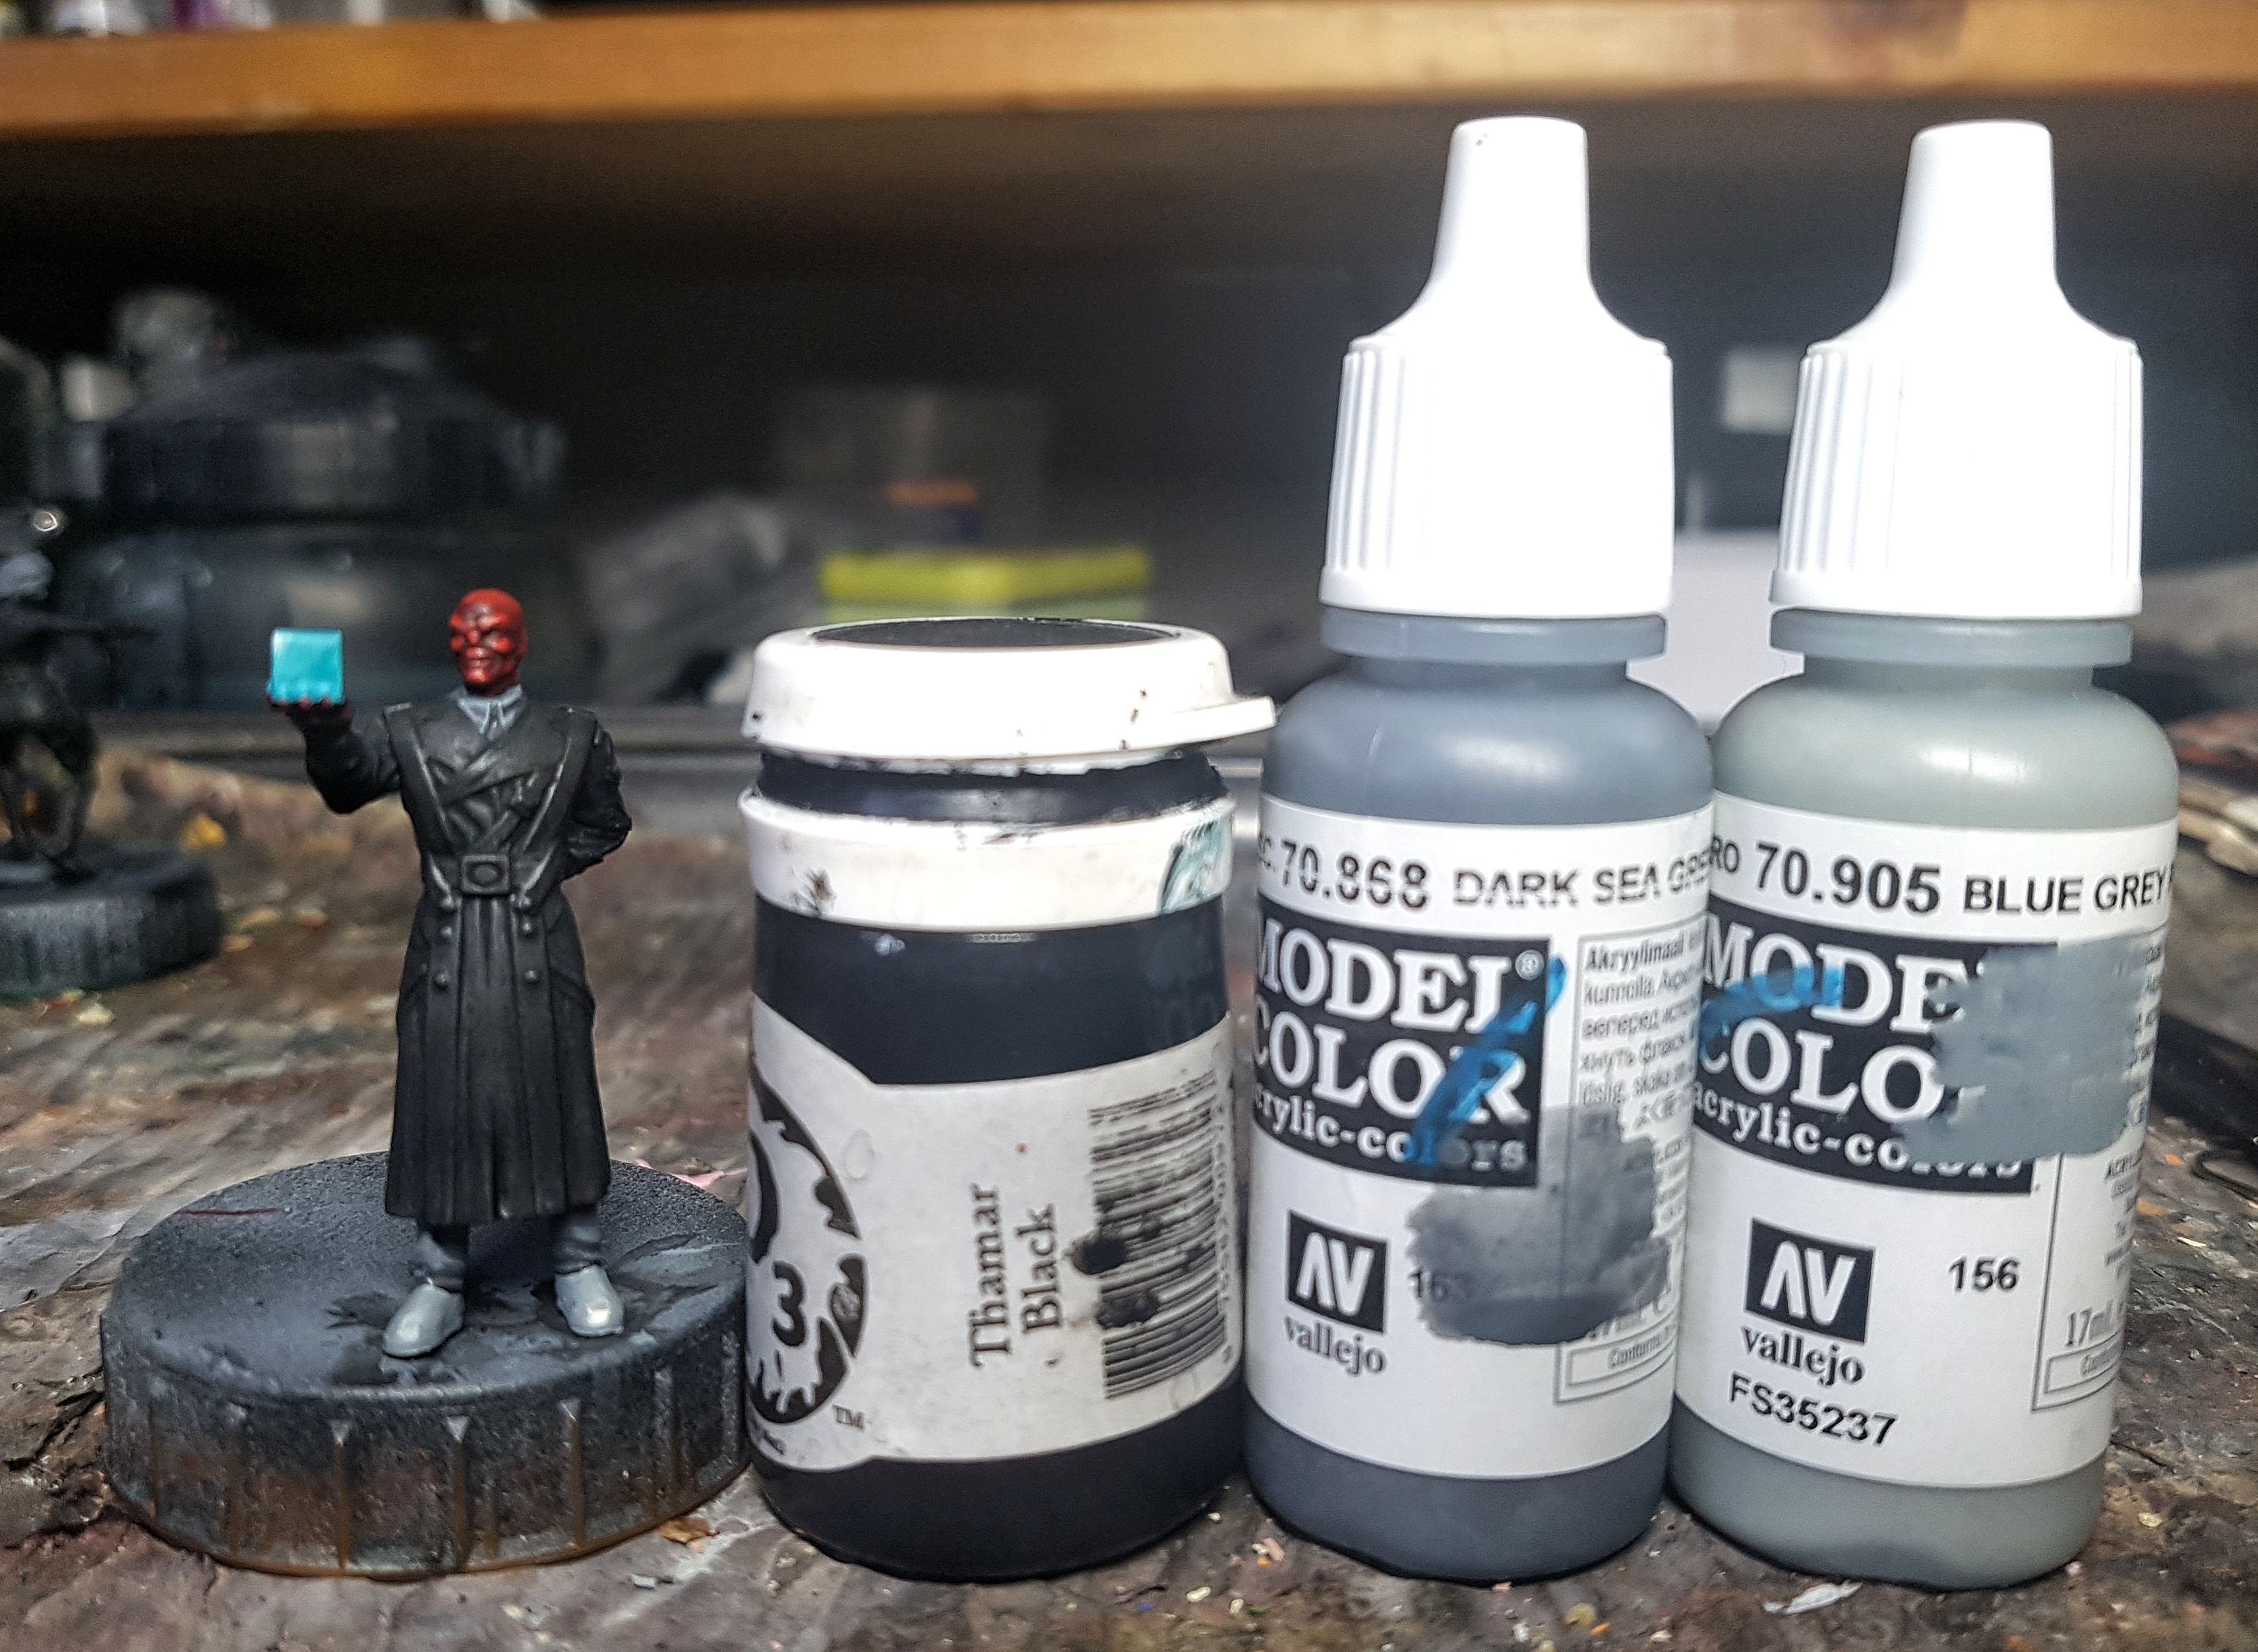
The shoes were then given a sloppy highlight of a blob of P3 Menoth White Highlight where the shine on the toes would be. This gives me a lazy man’s zenithal preshade. They were then coated with GW Contrast Black Templar.
He’s got some Hydra emblems on each shoulder. I don’t know if it’s just me, but they seem to be lacking most of their detail. I went lazy on them because of this.
I gave them an undercoat of VMC Blue grey because it’s already on my palette and much closer to white than what’s already there. I then carefully put on a couple of coats of P3 Khador Red base, aiming for a different brighter shade of red than his skin. I did my best to but some GW Nuln Oil in what recessed of the emblem made it through the printing process (unless my airbrushed primer and base coats are to blame?)
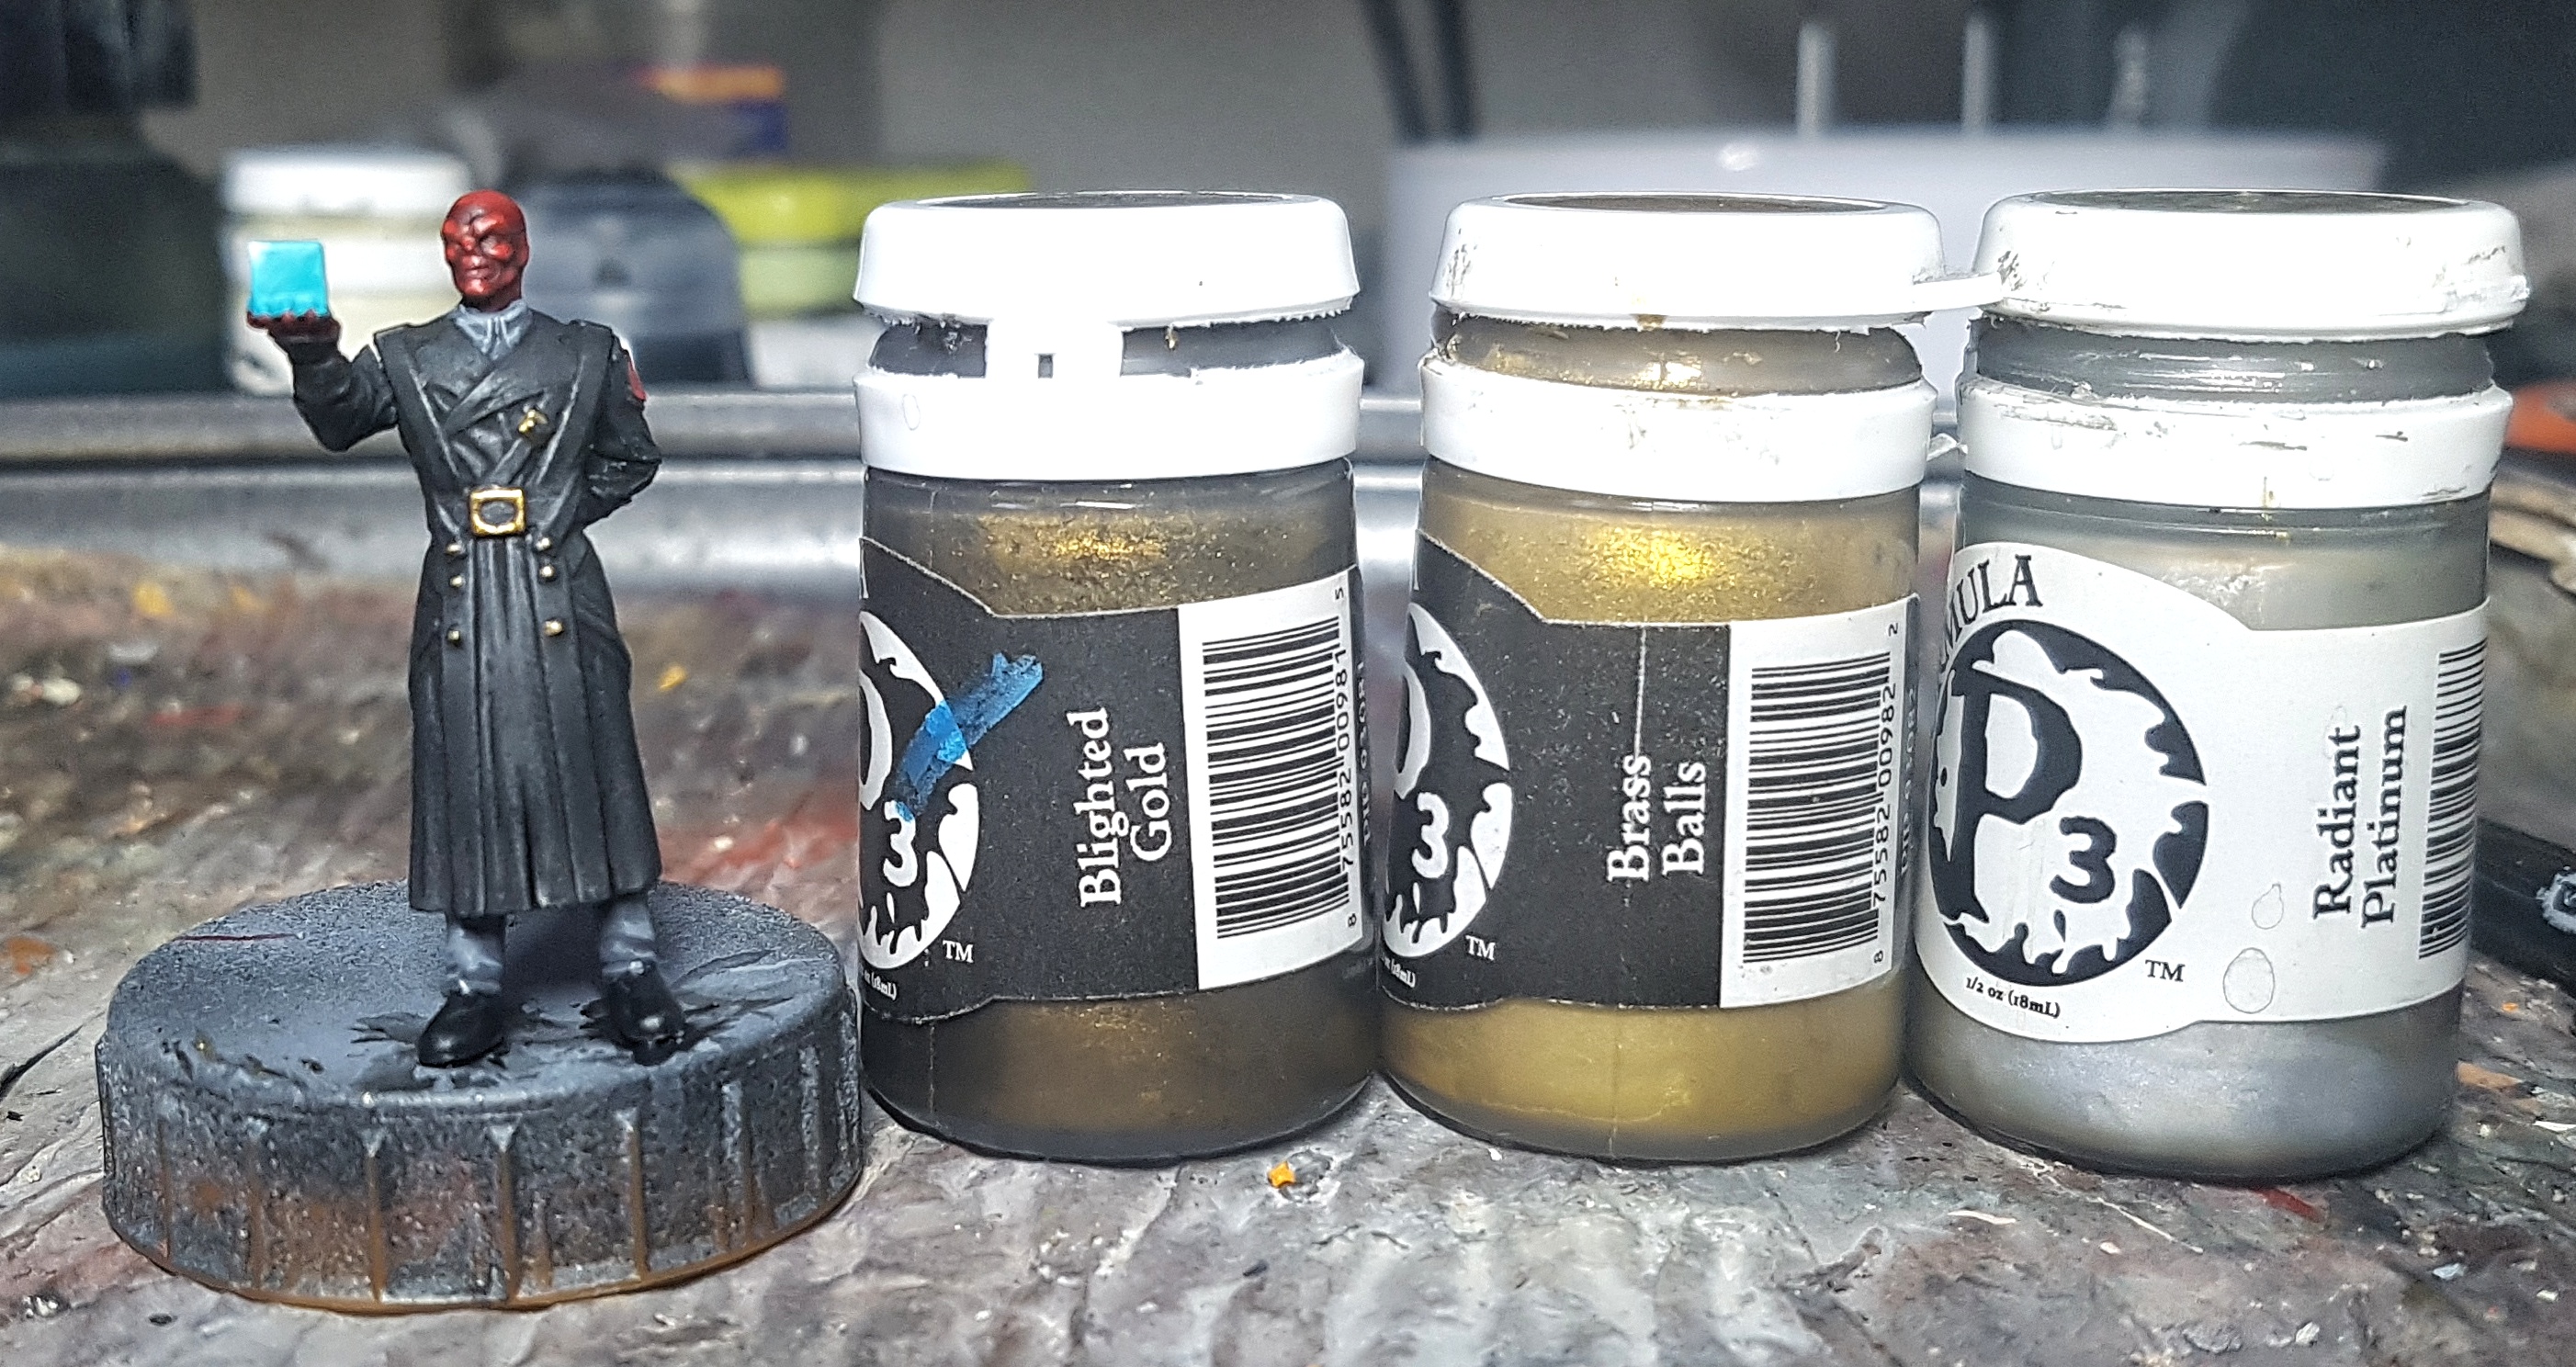
This just leaves the gold buckle and buttons.
Base: P3 Blighted Gold
Highlight 1: P3 Brass Balls
Highlight 2: P3 Brass Balls mixed with p3 Radiant Platinum
Reclaim the darker areas with some of the base
I wasn’t sure what to do next so I thought I may as well paint the Caucasian flesh on everyone who needs it. Before Sunday evening was over I’d based and shaded it. I’ll cover this in my next entry, once it’s finished. Plus, I’m at my post limit for this entry.
I’m 5 evenings in since I was holding untouched sprue and I have 3 models ready for basing and varnish, and strong progress made on a bunch of other models. I’m amazed at how quickly and easily this is all flying together. I should have this done much sooner than I expected. I’ve also done some work on that Kingdom Death mini from earlier in the same timeframe, when i had my airbrush out last.
I’ve got some thoughts on alternate terrain I can use or make, including mats. I’ll make a post on the subject later, once I’ve finished my research and have some pics to show off. I have, or expect to soon have everything I need for two thematic tables, and at least the basis of a third: A roadside diner, a Martian outpost, and a (possibly medieval) graveyard. With comics your heroes can fight anywhere, and anywhen so it’s all valid.
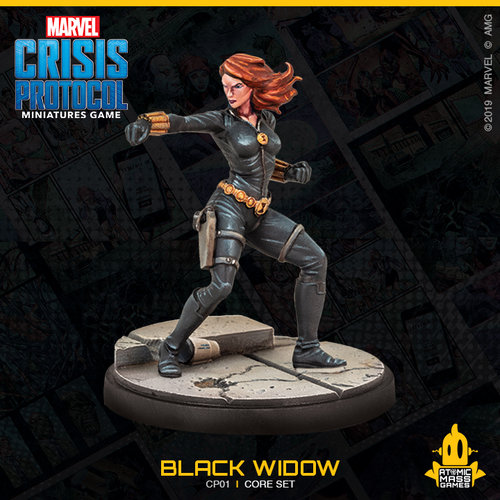
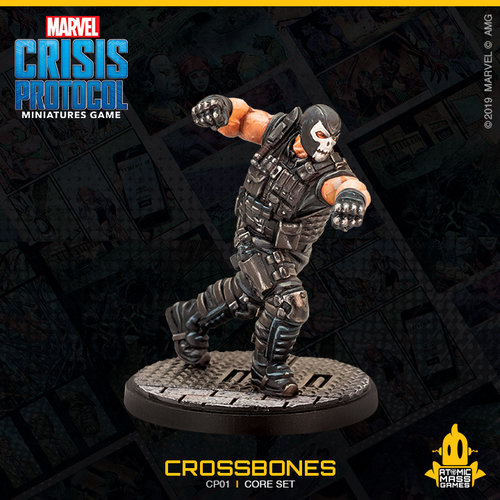
Evening 6: Crossbones, Black Widow, Captains America and Marvel
Time to get all the Caucasian flesh done. Doc Ock came with his face painted so I left that alone. I should probably have painted it though. I went for the Cygnar flesh scheme from Forces of Warmachine – Cygnar, by Privateer Press.
Base: P3 Midlund Flesh
Wash: Midlund Flesh mixed with P3 Skorne Red
Wash: Midlund Flesh mixed with Battledress Green
Wash: Skorne Red mixed with Battledress Green, aiming for the deeper areas only
Highlight: Midlund Flesh
Highlight: Midlund Flesh mixed with P3 Ryn Flesh
Highlight: Ryn Flesh on the peaks / glint areas only
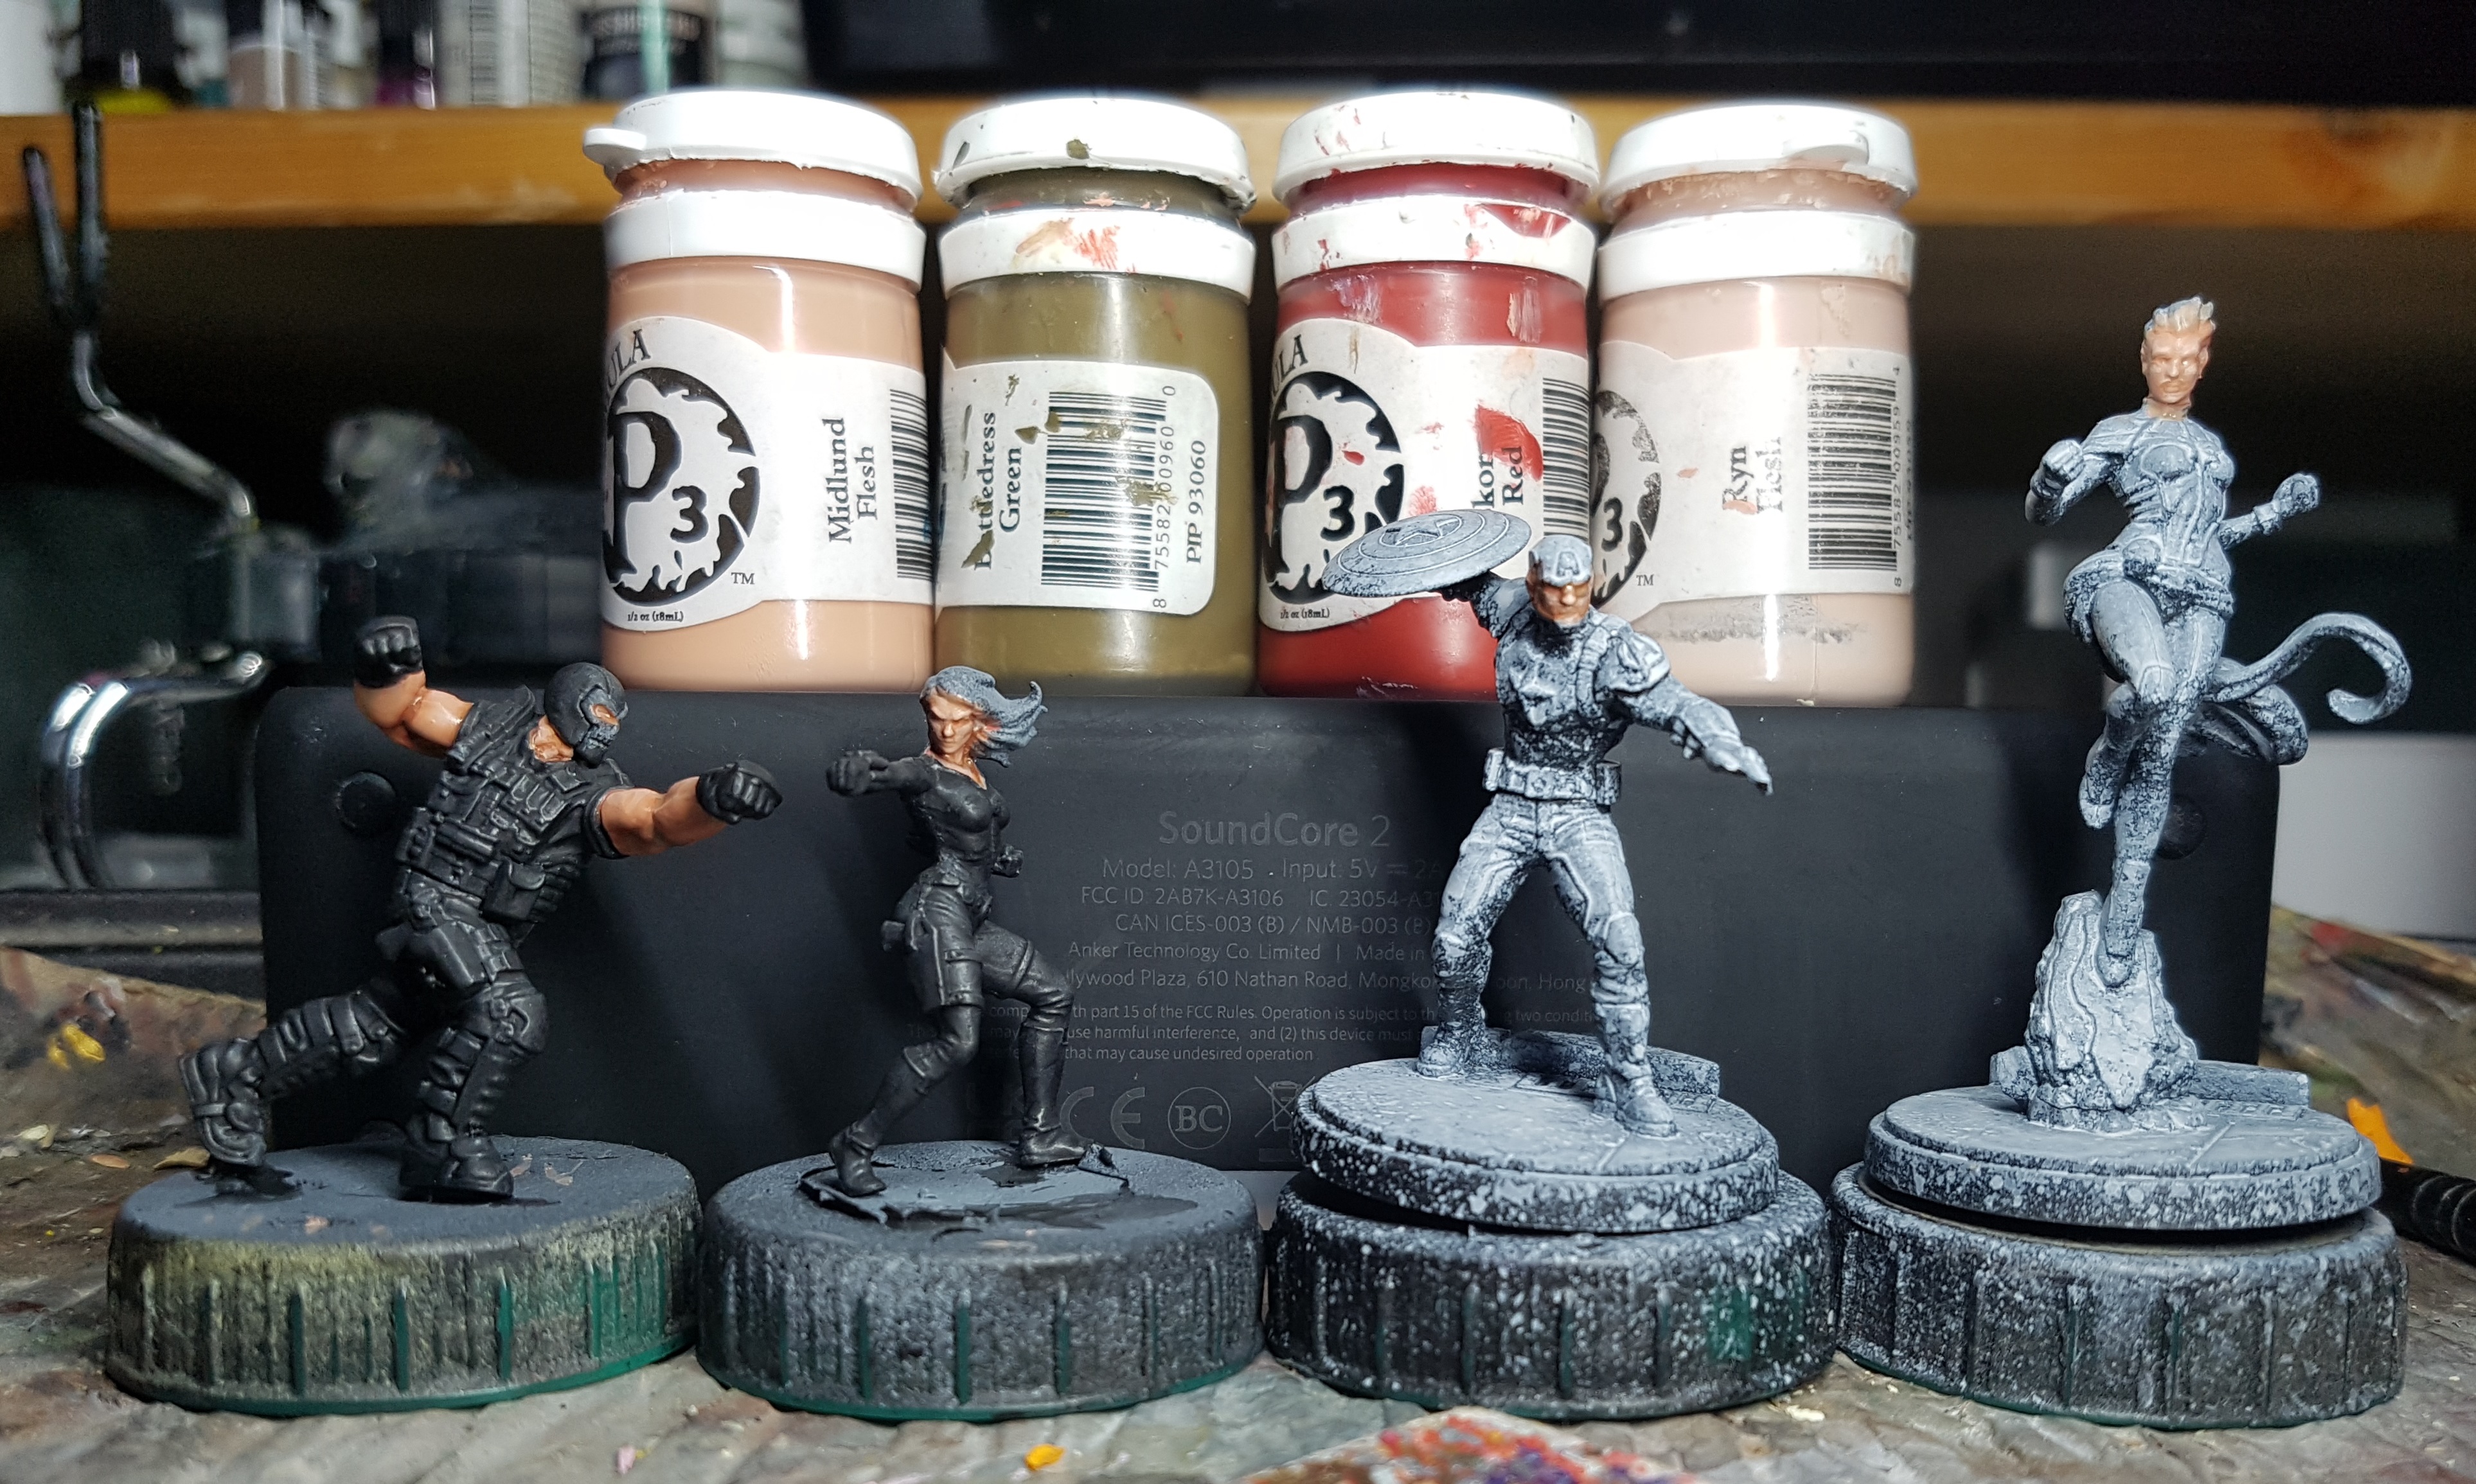
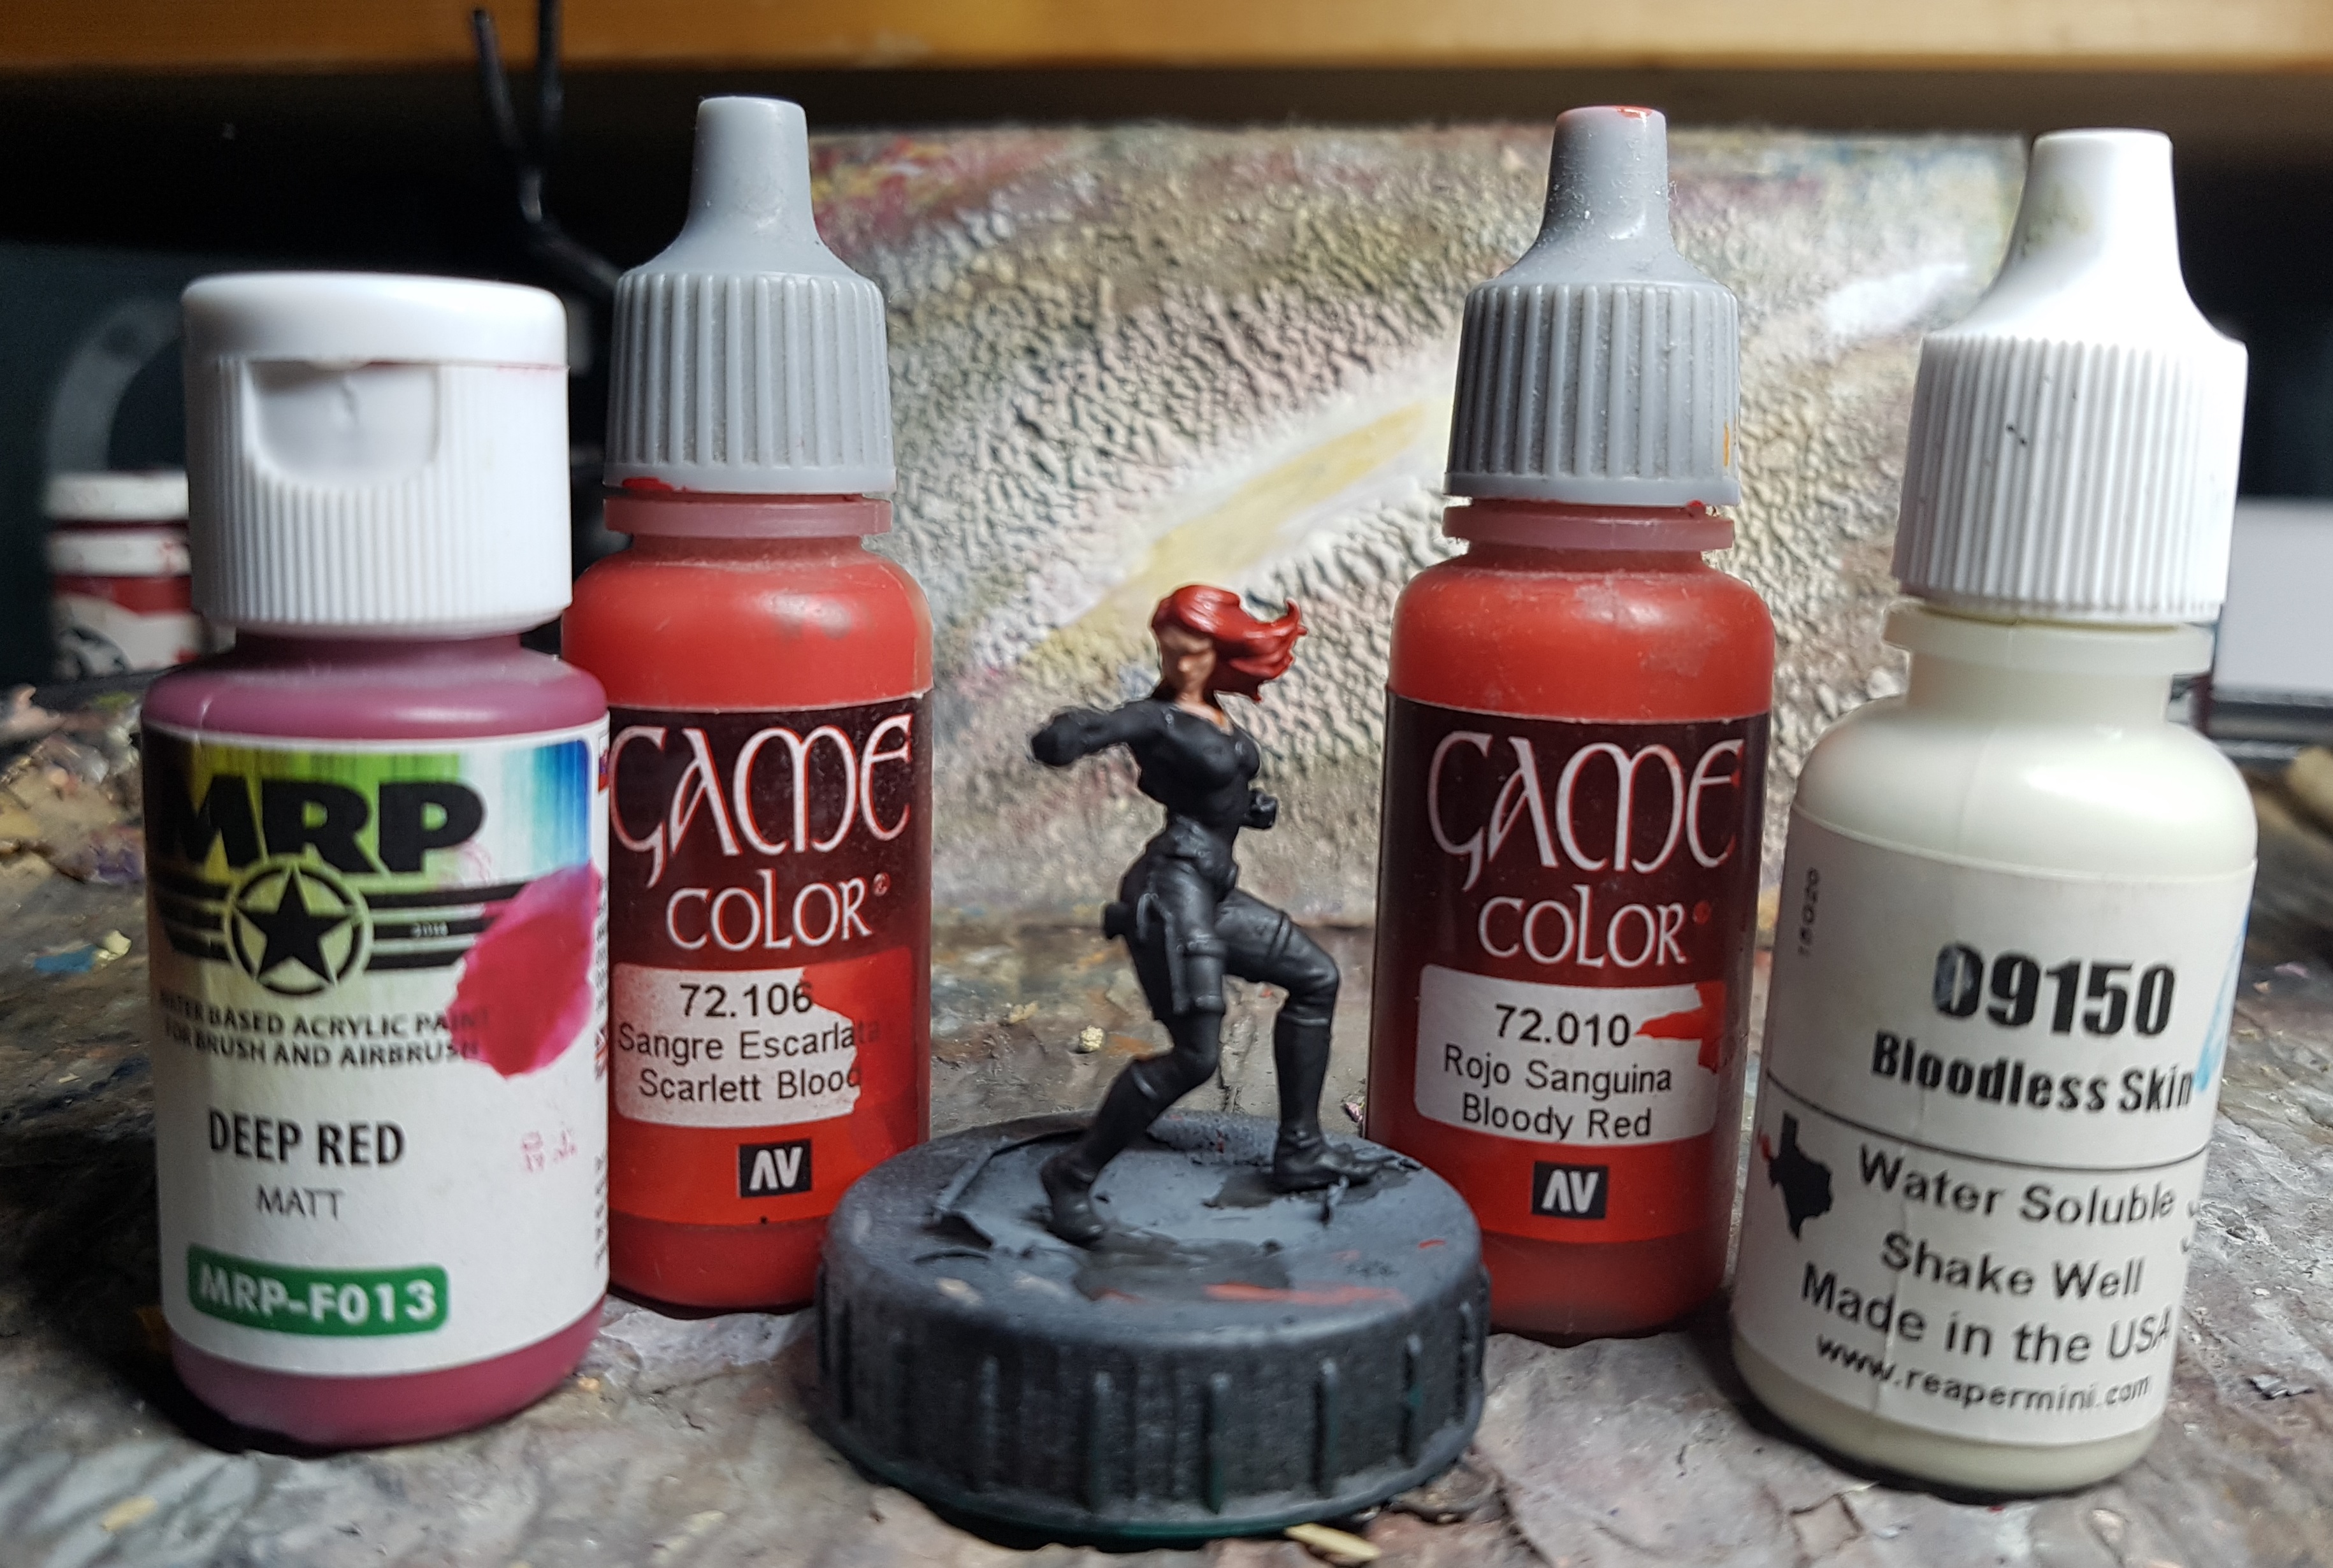
It was too early in the evening to quit, but bedtime was on the horizon so I went for a quick task: Black Widows hair. on the box art its a reddish brown. I wasn’t overly keen on this. I have a good recipe for a very orange ginger hair, but it didn’t feel right. I googled for comic pics of her and she has vibrant scarlet red hair. Lets do that. She needs some colour to her.
Base: Mr Paint MRP-F013 Deep Red
Layer Highlight: VGC 72.106 Scarlett Blood
Layer Highlight: VGC 72.010 Bloody Red
Layer Highlight: Bloody Red mixed with a little Reaper 09150 Bloodless Skin
Layer Highlight: Add a little more Bloodless Skin
Layer Highlight: Add a little more Bloodless Skin until it’s almost pure white and use for glints.
That’s 6 evenings work invested on this project. She’s nearly finished so next time I sit down I’ll finish off her holster and her belt and that’ll be one less in my painting queue.
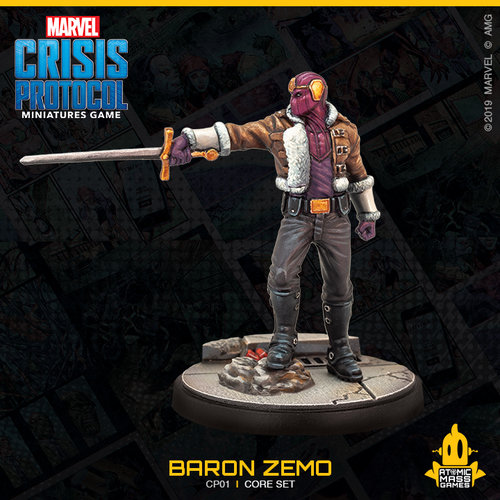
Evening 7: Black Widow, Baron Zemo, & Crossbones
Zemo’s trouser colour will work for Black Widow’s holster, and Crossbones’ vest so lets do all that at the same time.
Base: P3 Thornwood Green
Drybrush and edge highlight: P3 Hammerfall Khaki
Wash: GW Agrax Earthshade
Revisit the highlight to taste
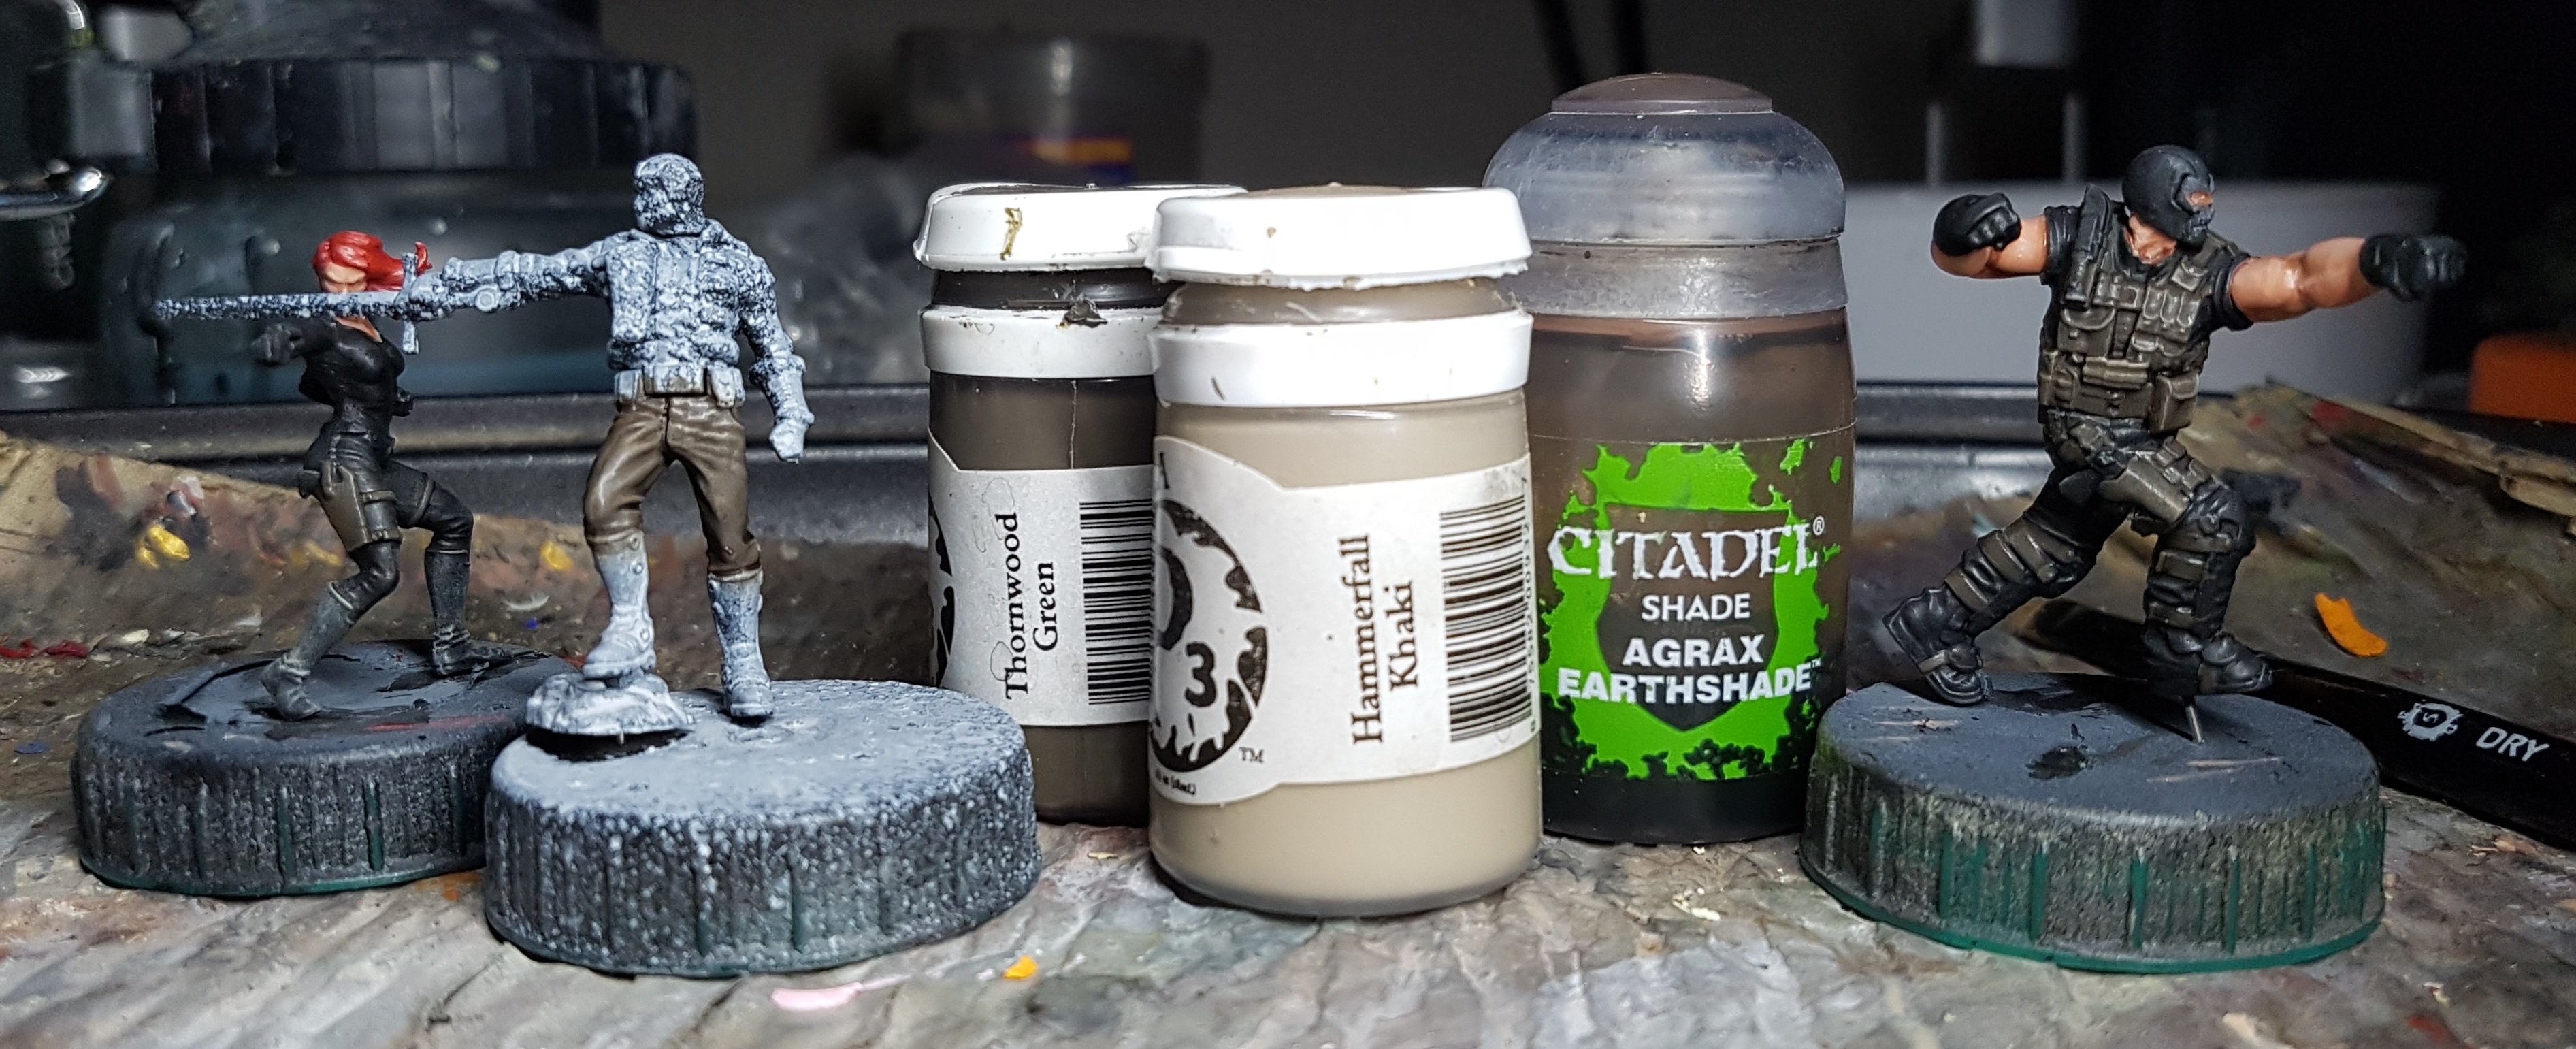
I was going to paint the black leather on Zemo and Crossbones, so I thought why not do that for Widow’s boots too, and at least give all that black a second shade of black? I heavily drybrushed her boots with P3 Menoth White Base and then used GW Contrast Black Templar over them, and the black leather areas of the other two.

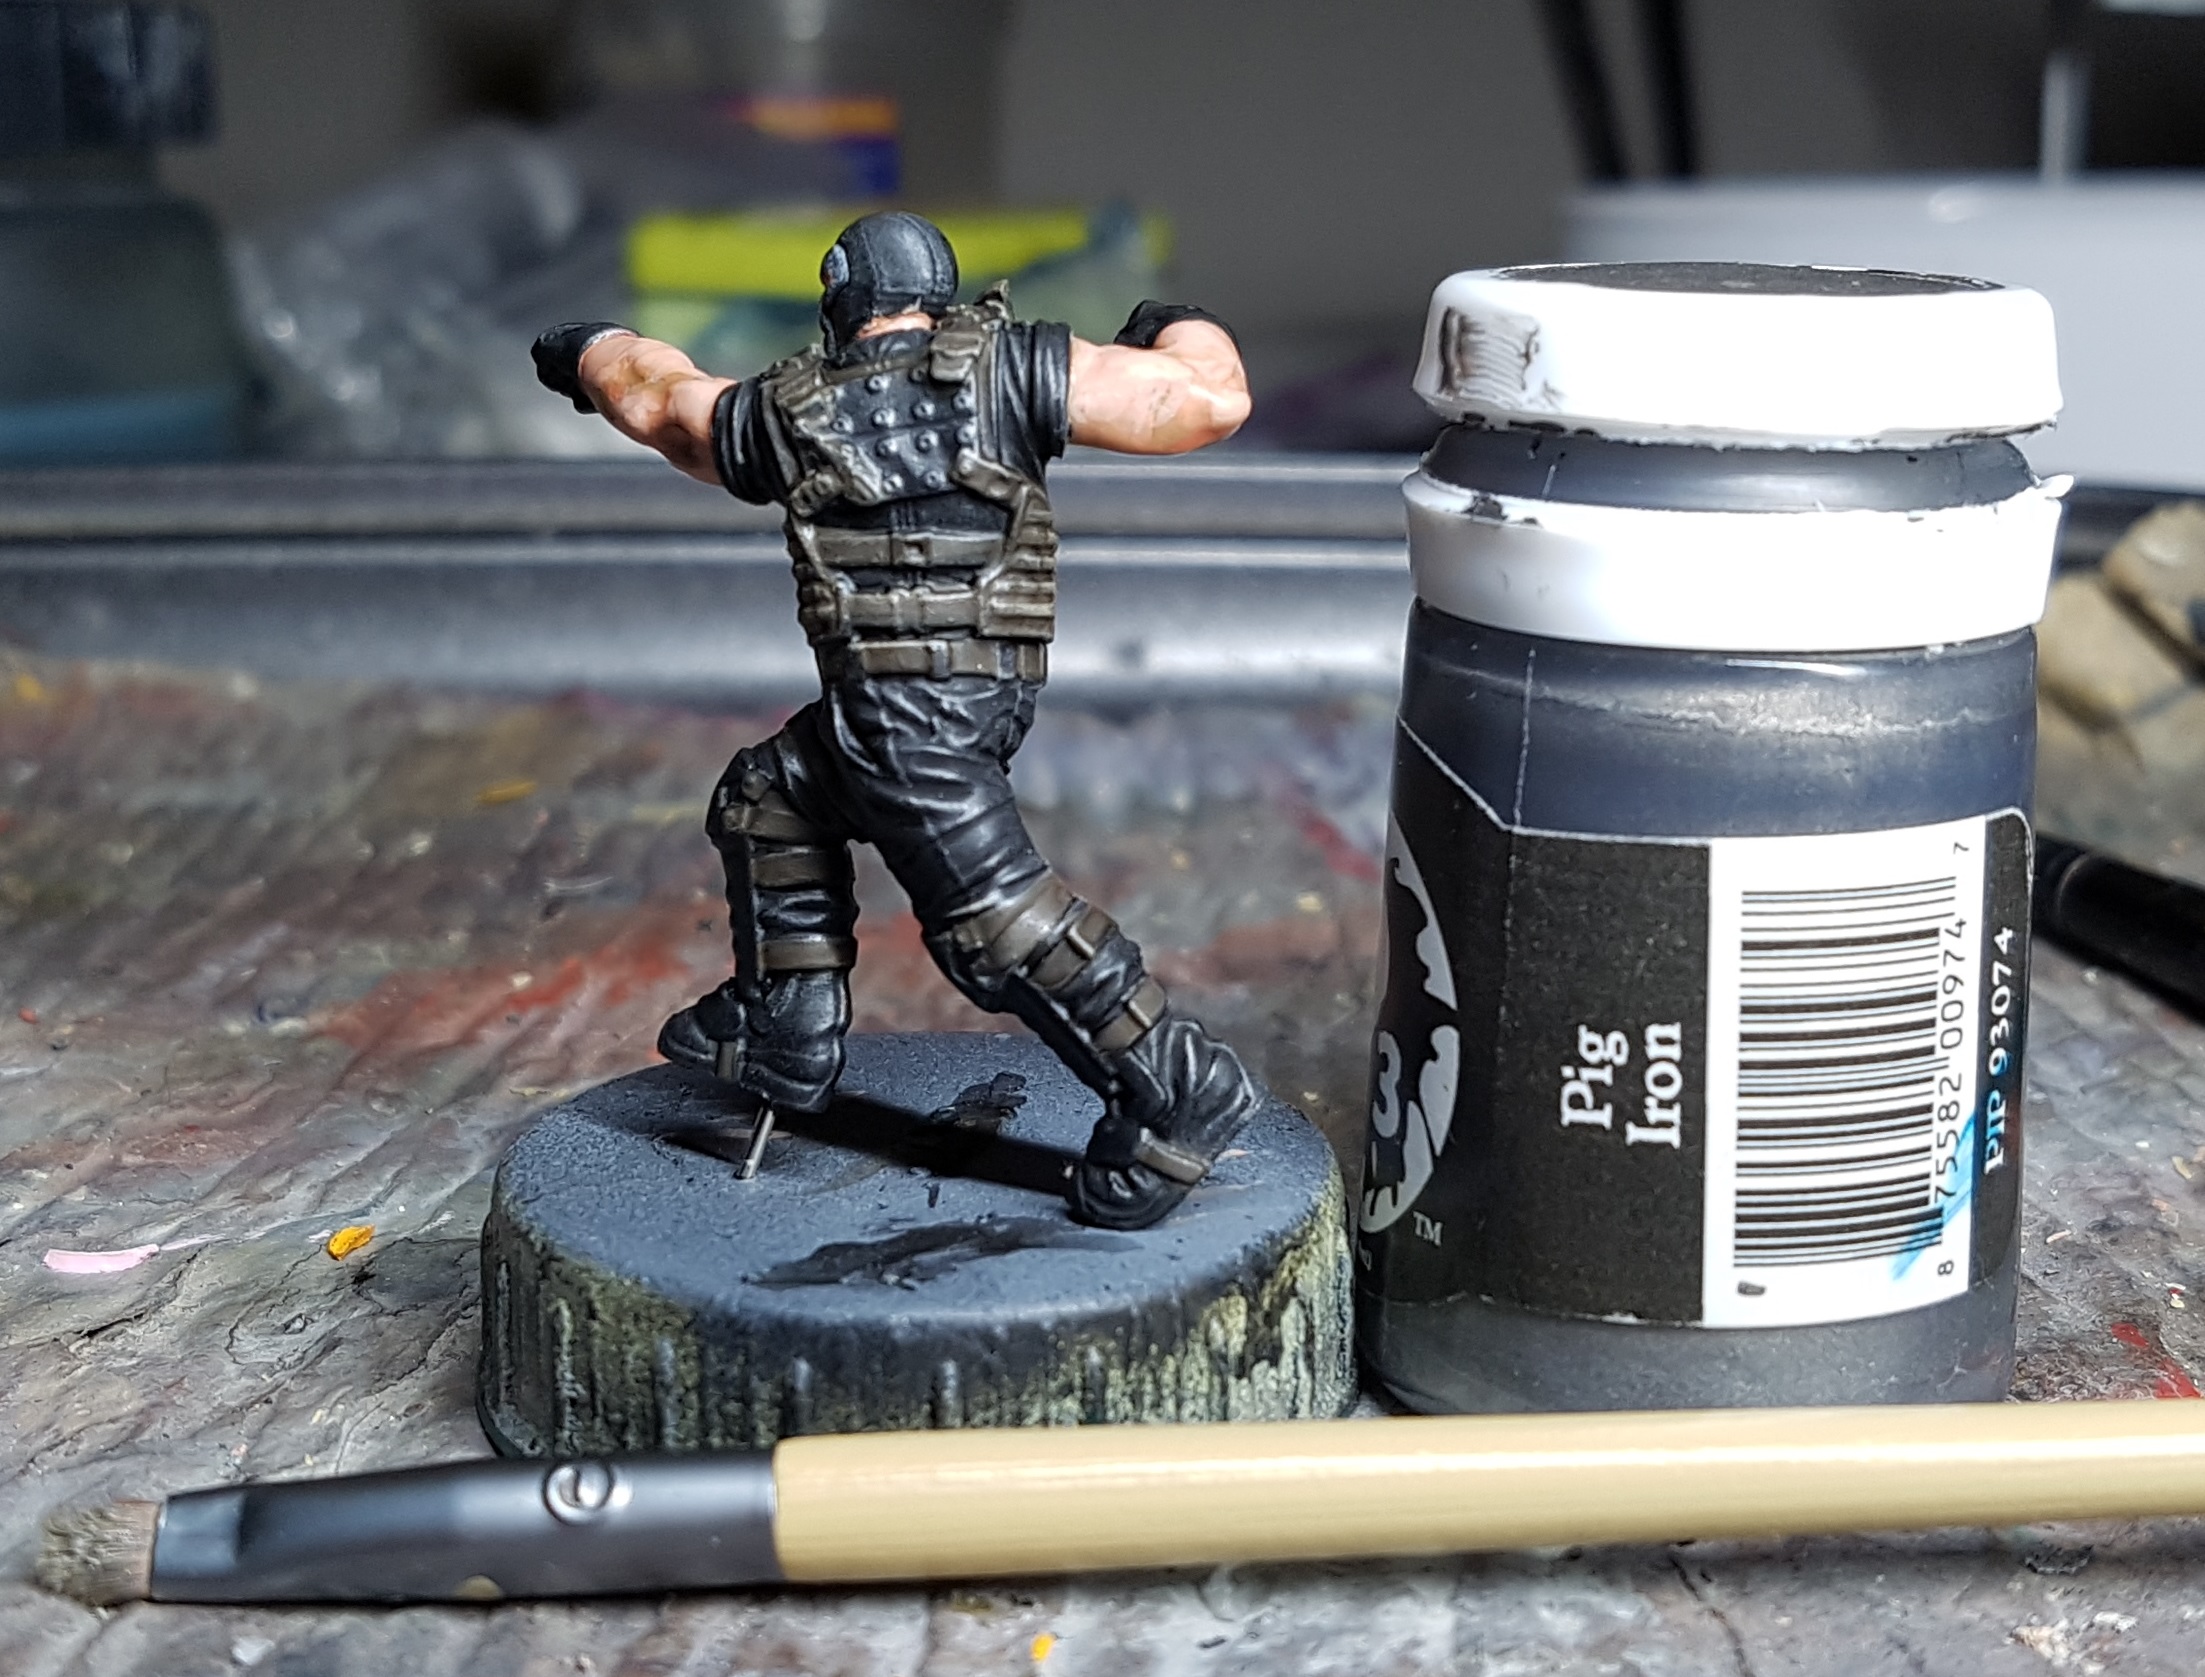
The evening is almost over, and Crossbones is almost finished too. I’ll leave his mask until I’m doing the white on Captain America, and I’ll do his steel when I paint Zemo’s sword, but that leaves his knee pads (Bronze?) and that armour plate on his back. I gave it a drybrush with P3 Pig Iron, leaving a lot of the black showing through to give the idea that it was metal painted black, and the paint has worn. It’s better than another area of black on him.
That’s the 7th evening over. Time for bed.
Evening 8: Crossbones and Zemo
It’s the first day of the 4 day Easter weekend. I’ve spent most of the day playing Gloomhaven and doing chores (Adulting sucks!), but I’ve got a long evening just for me to paint. Once I do Crossbones’ knee pads and steel he can go back in the queue, so let’s do his knees quickly and then get Zemo up to the point where I’m doing his steel.
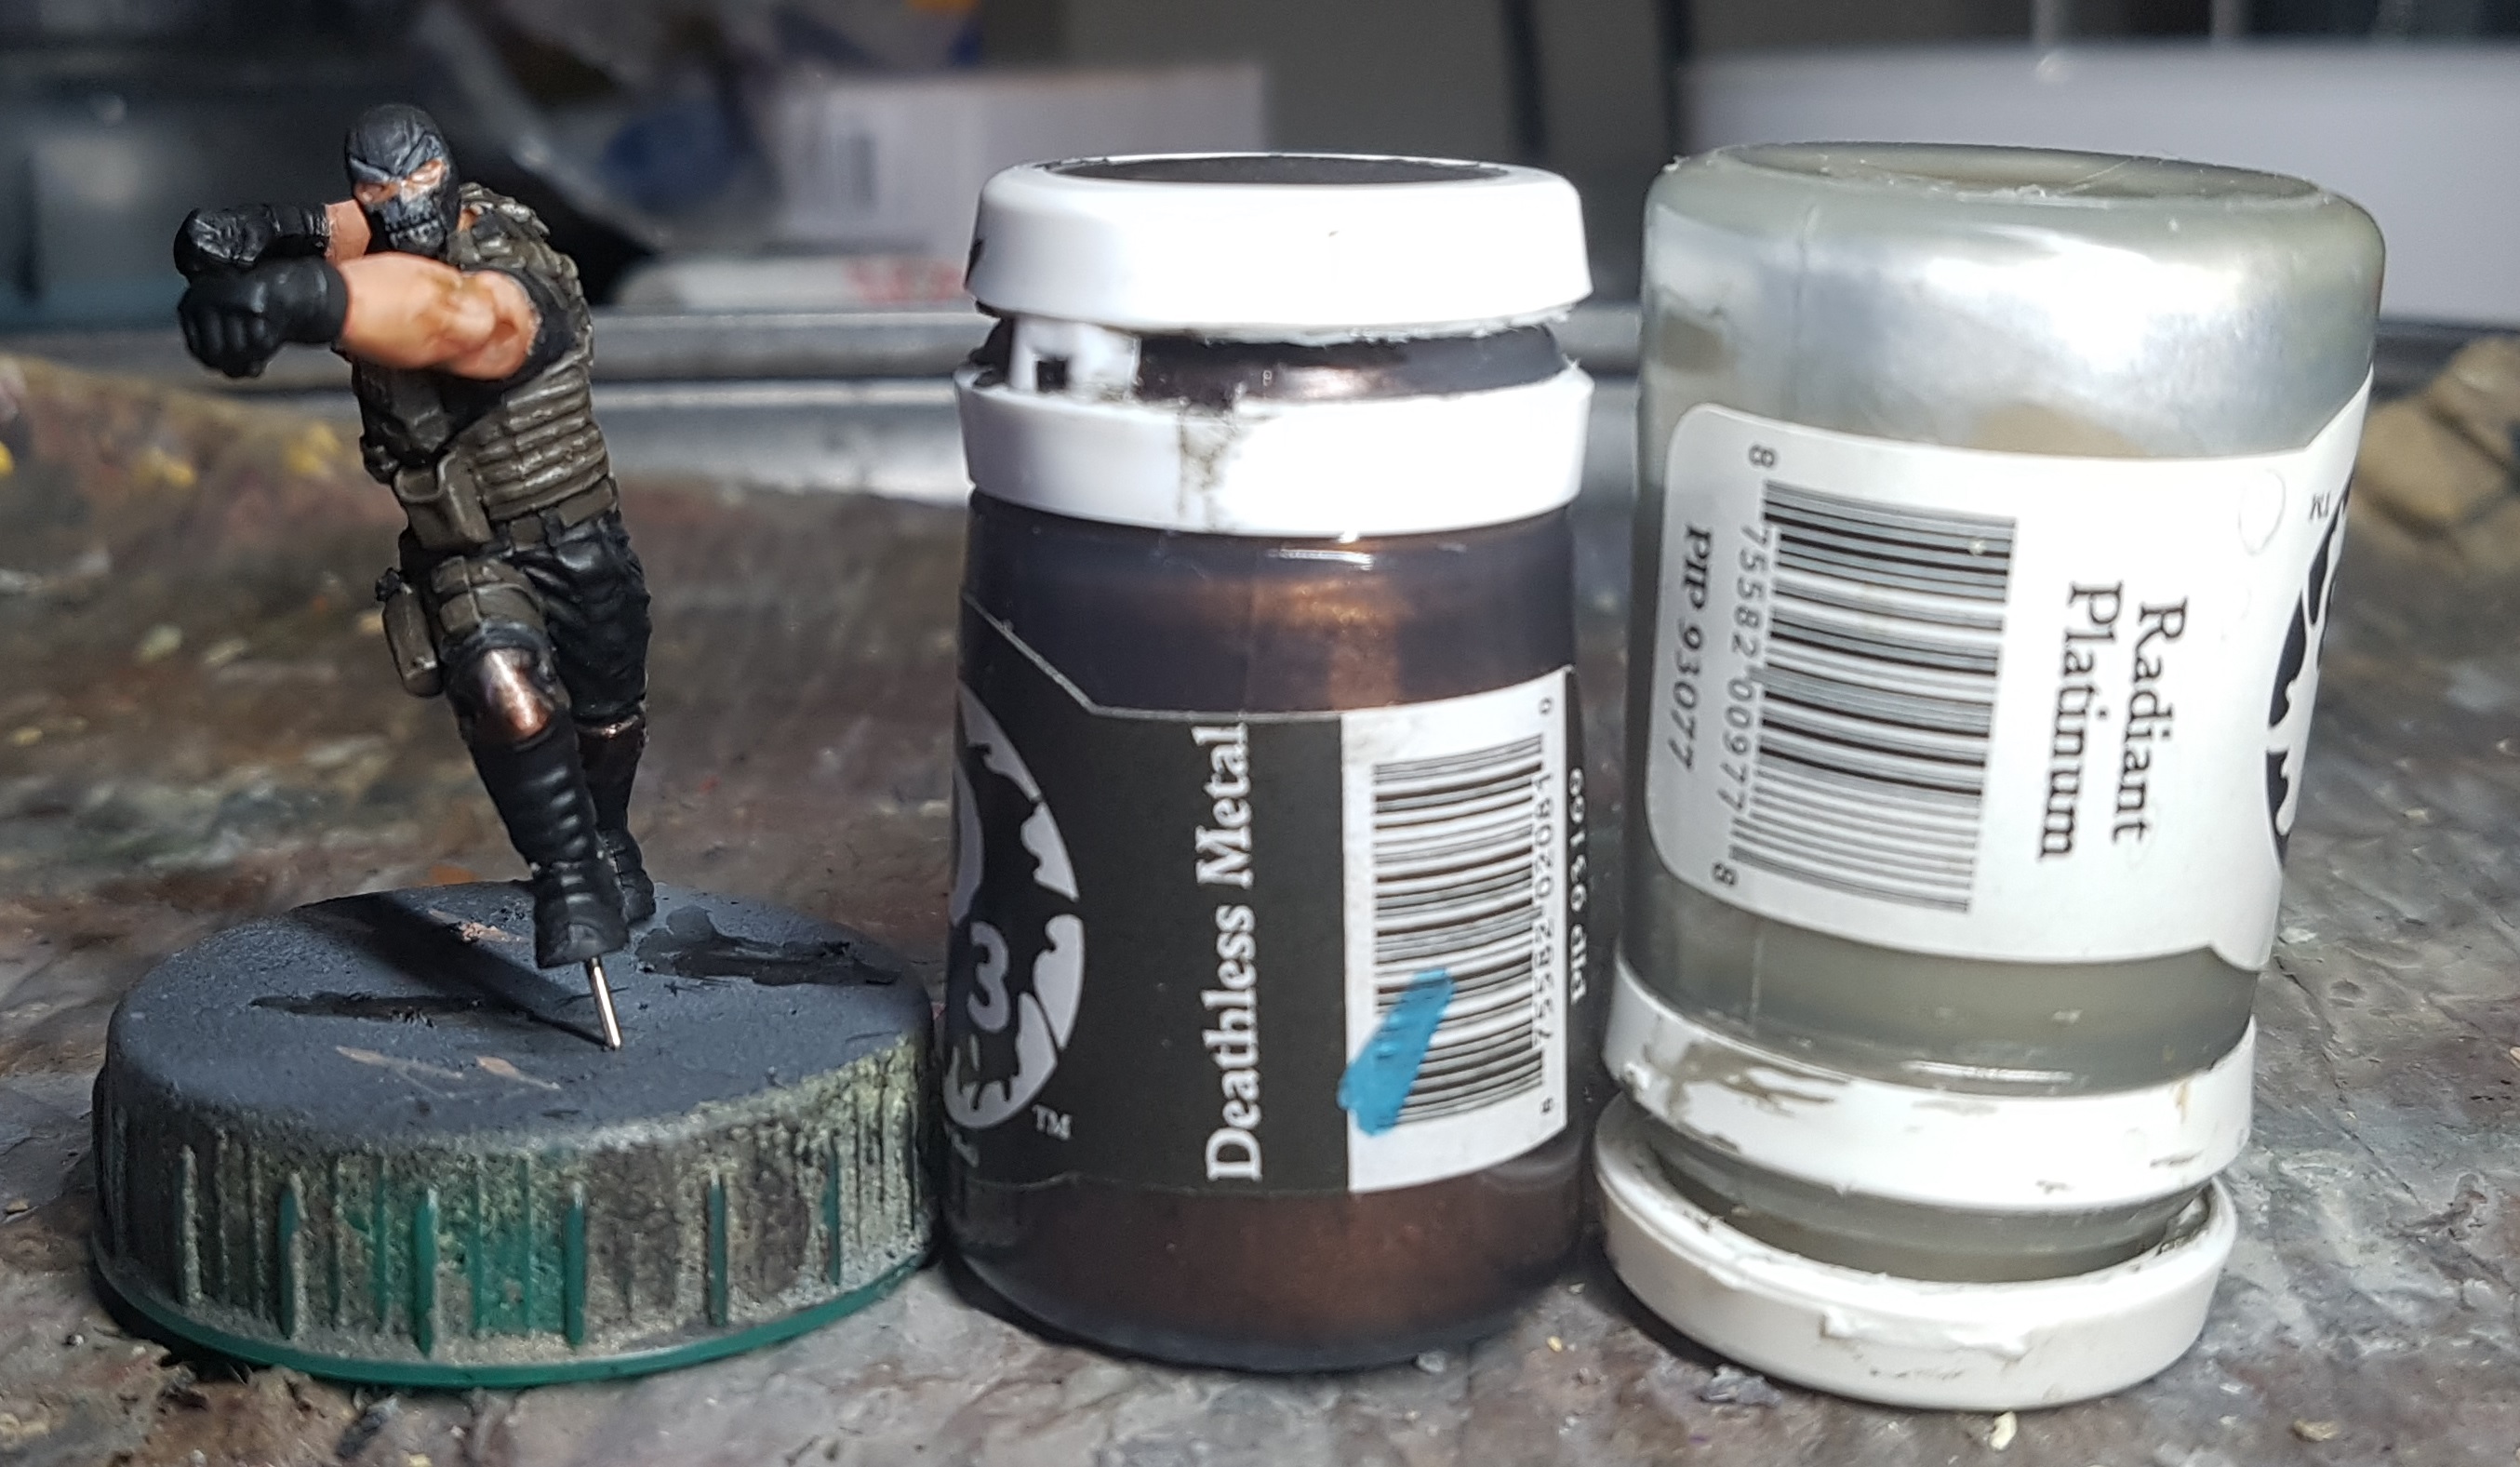
Base: P3 Deathless Metal (My pot has always separated out whenever I try and use it and a good solid shake has never fixed this. It’s a good colour so I’ve made a point of giving it regular shakes, some stirring, and regularly inverting it over the last few weeks. It seems to have done the job as I actually got paint out, and not just tinted medium.)
Highlight: Deathless Metal with a little P3 Radiant Platinum. Allow the Deathless to dominate the mix
Highlight 2: add more Platinum
Highlight 3: Add more Platinum
There may have been more layers. Highlight to taste, perhaps with pure Platinum as a glint colour
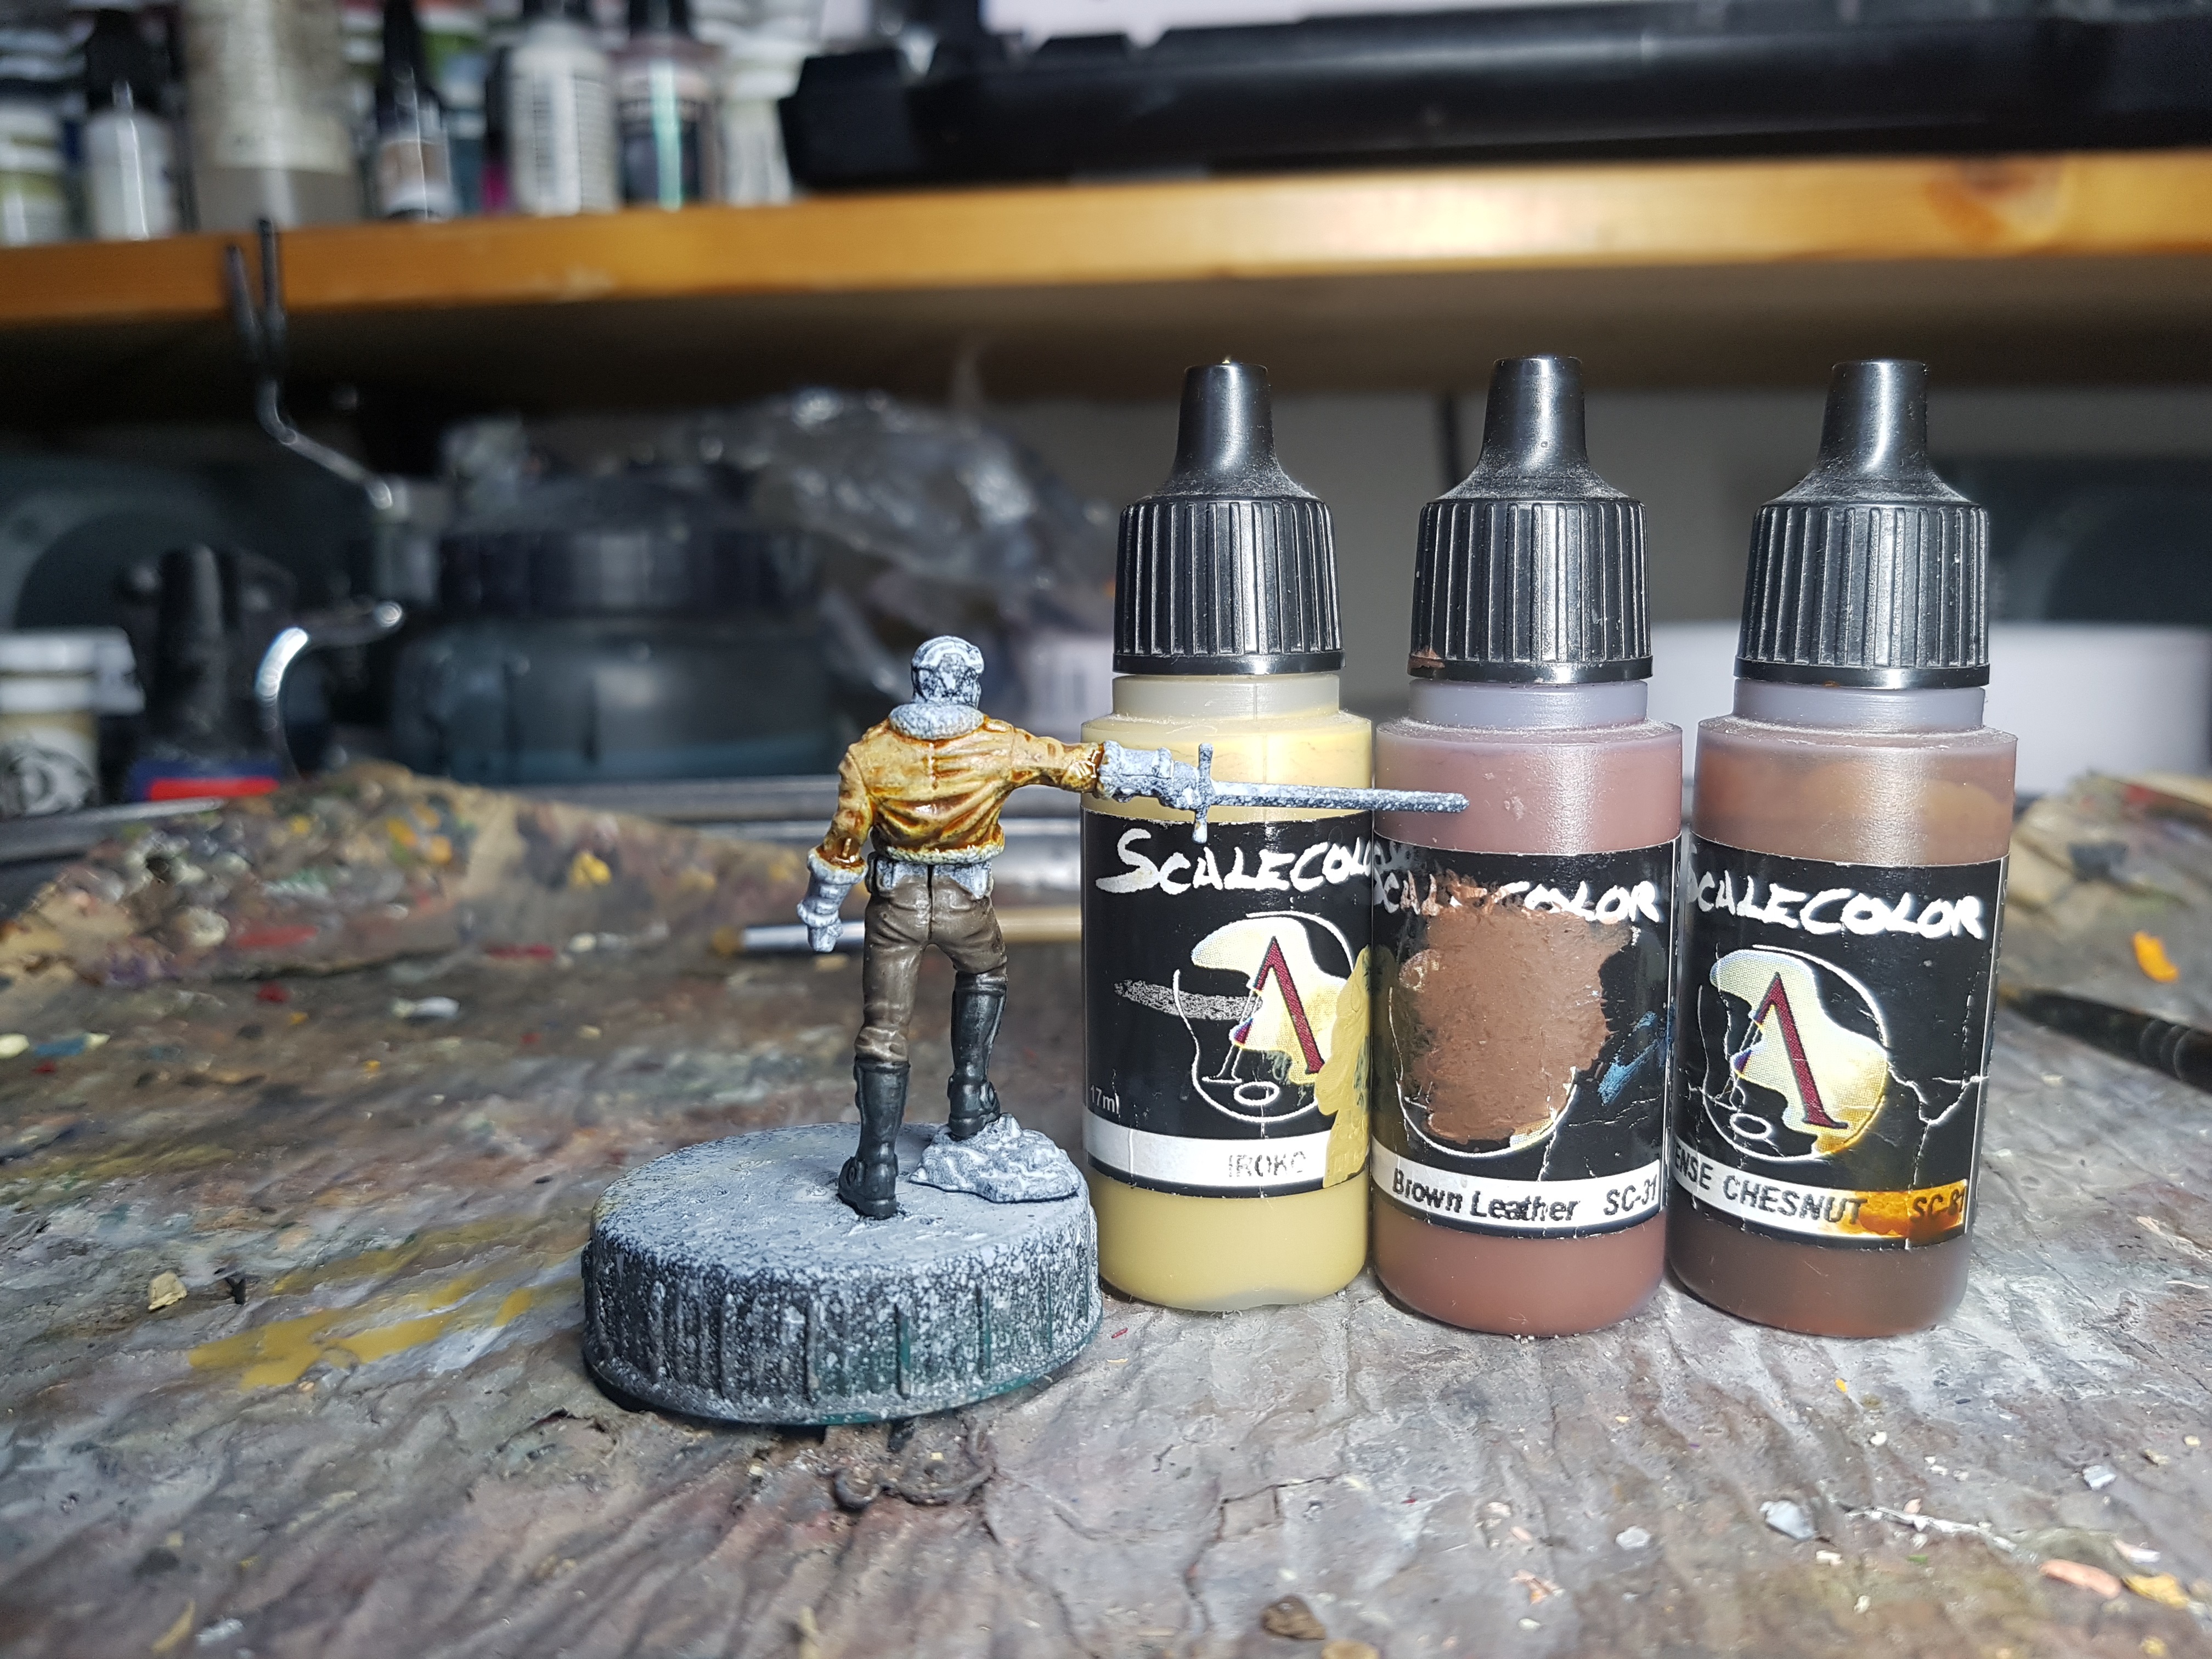
Over to Zemo. His jacket is a potentially messy job so lets get that done while I can muck up the surrounding areas.
Undercoat: Zenithal prime!
Drybrush: Scale75 Iroko
Stipple: Iroko
Stipple: a very little Scale75 Brown Leather
Wash: Scale75 Inktense Chestnut mixed 2:3 with Instar’s Water+, or just water
Add a second layer of the wash to the deeper and darker areas only
Drybrush: Iroko to the more worn areas
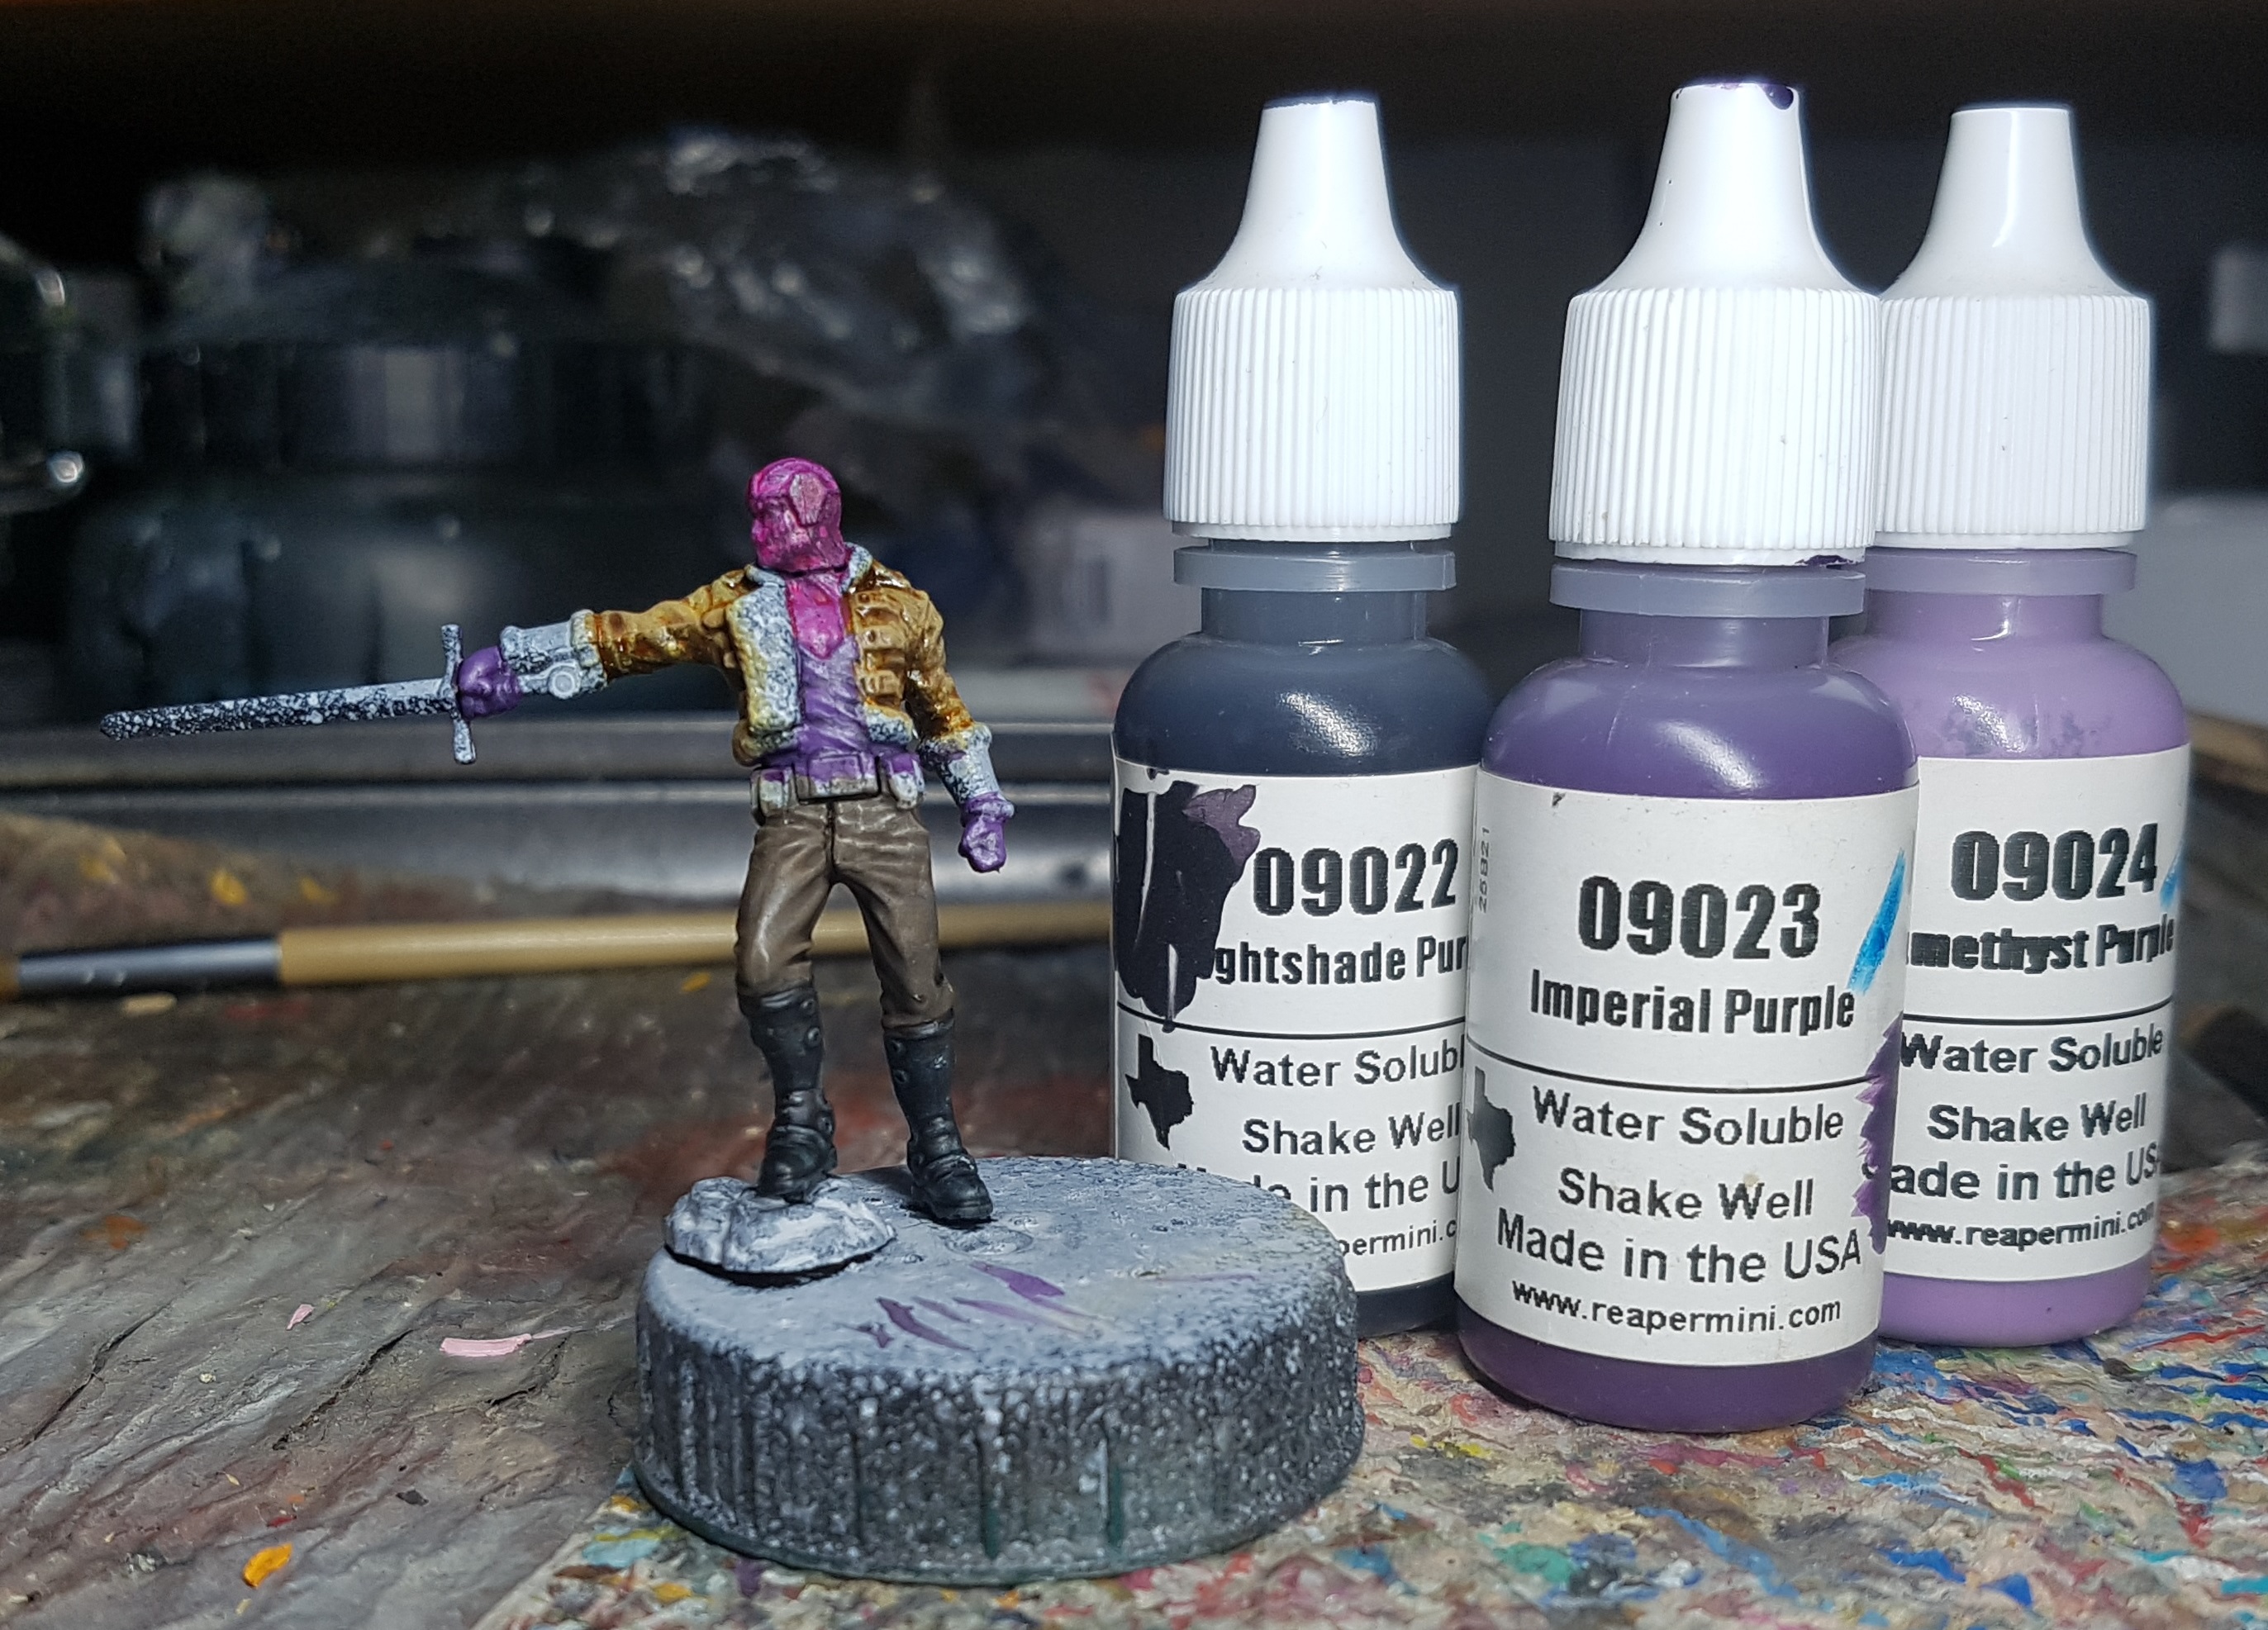
Let’s do Zemo’s inner layers before I start on that wool lining. I don’t want to have to fix that white if I get purple on it. First, his vest and gloves.
Base: Reaper 09023 Imperial Purple
Shade: Add some Reaper 09022 Nightshade Purple to the previous purple and shade down. use differing amounts to provide different tones. I don’t think I ever went pure Nightshade.
Highlight: Add some Reaper 09024 Amethyst Purple to Imperial Purple, and then add more for further highlights
Final highlights with pure Amethyst purple
 I forgot to take the pic before starting on his balaclava
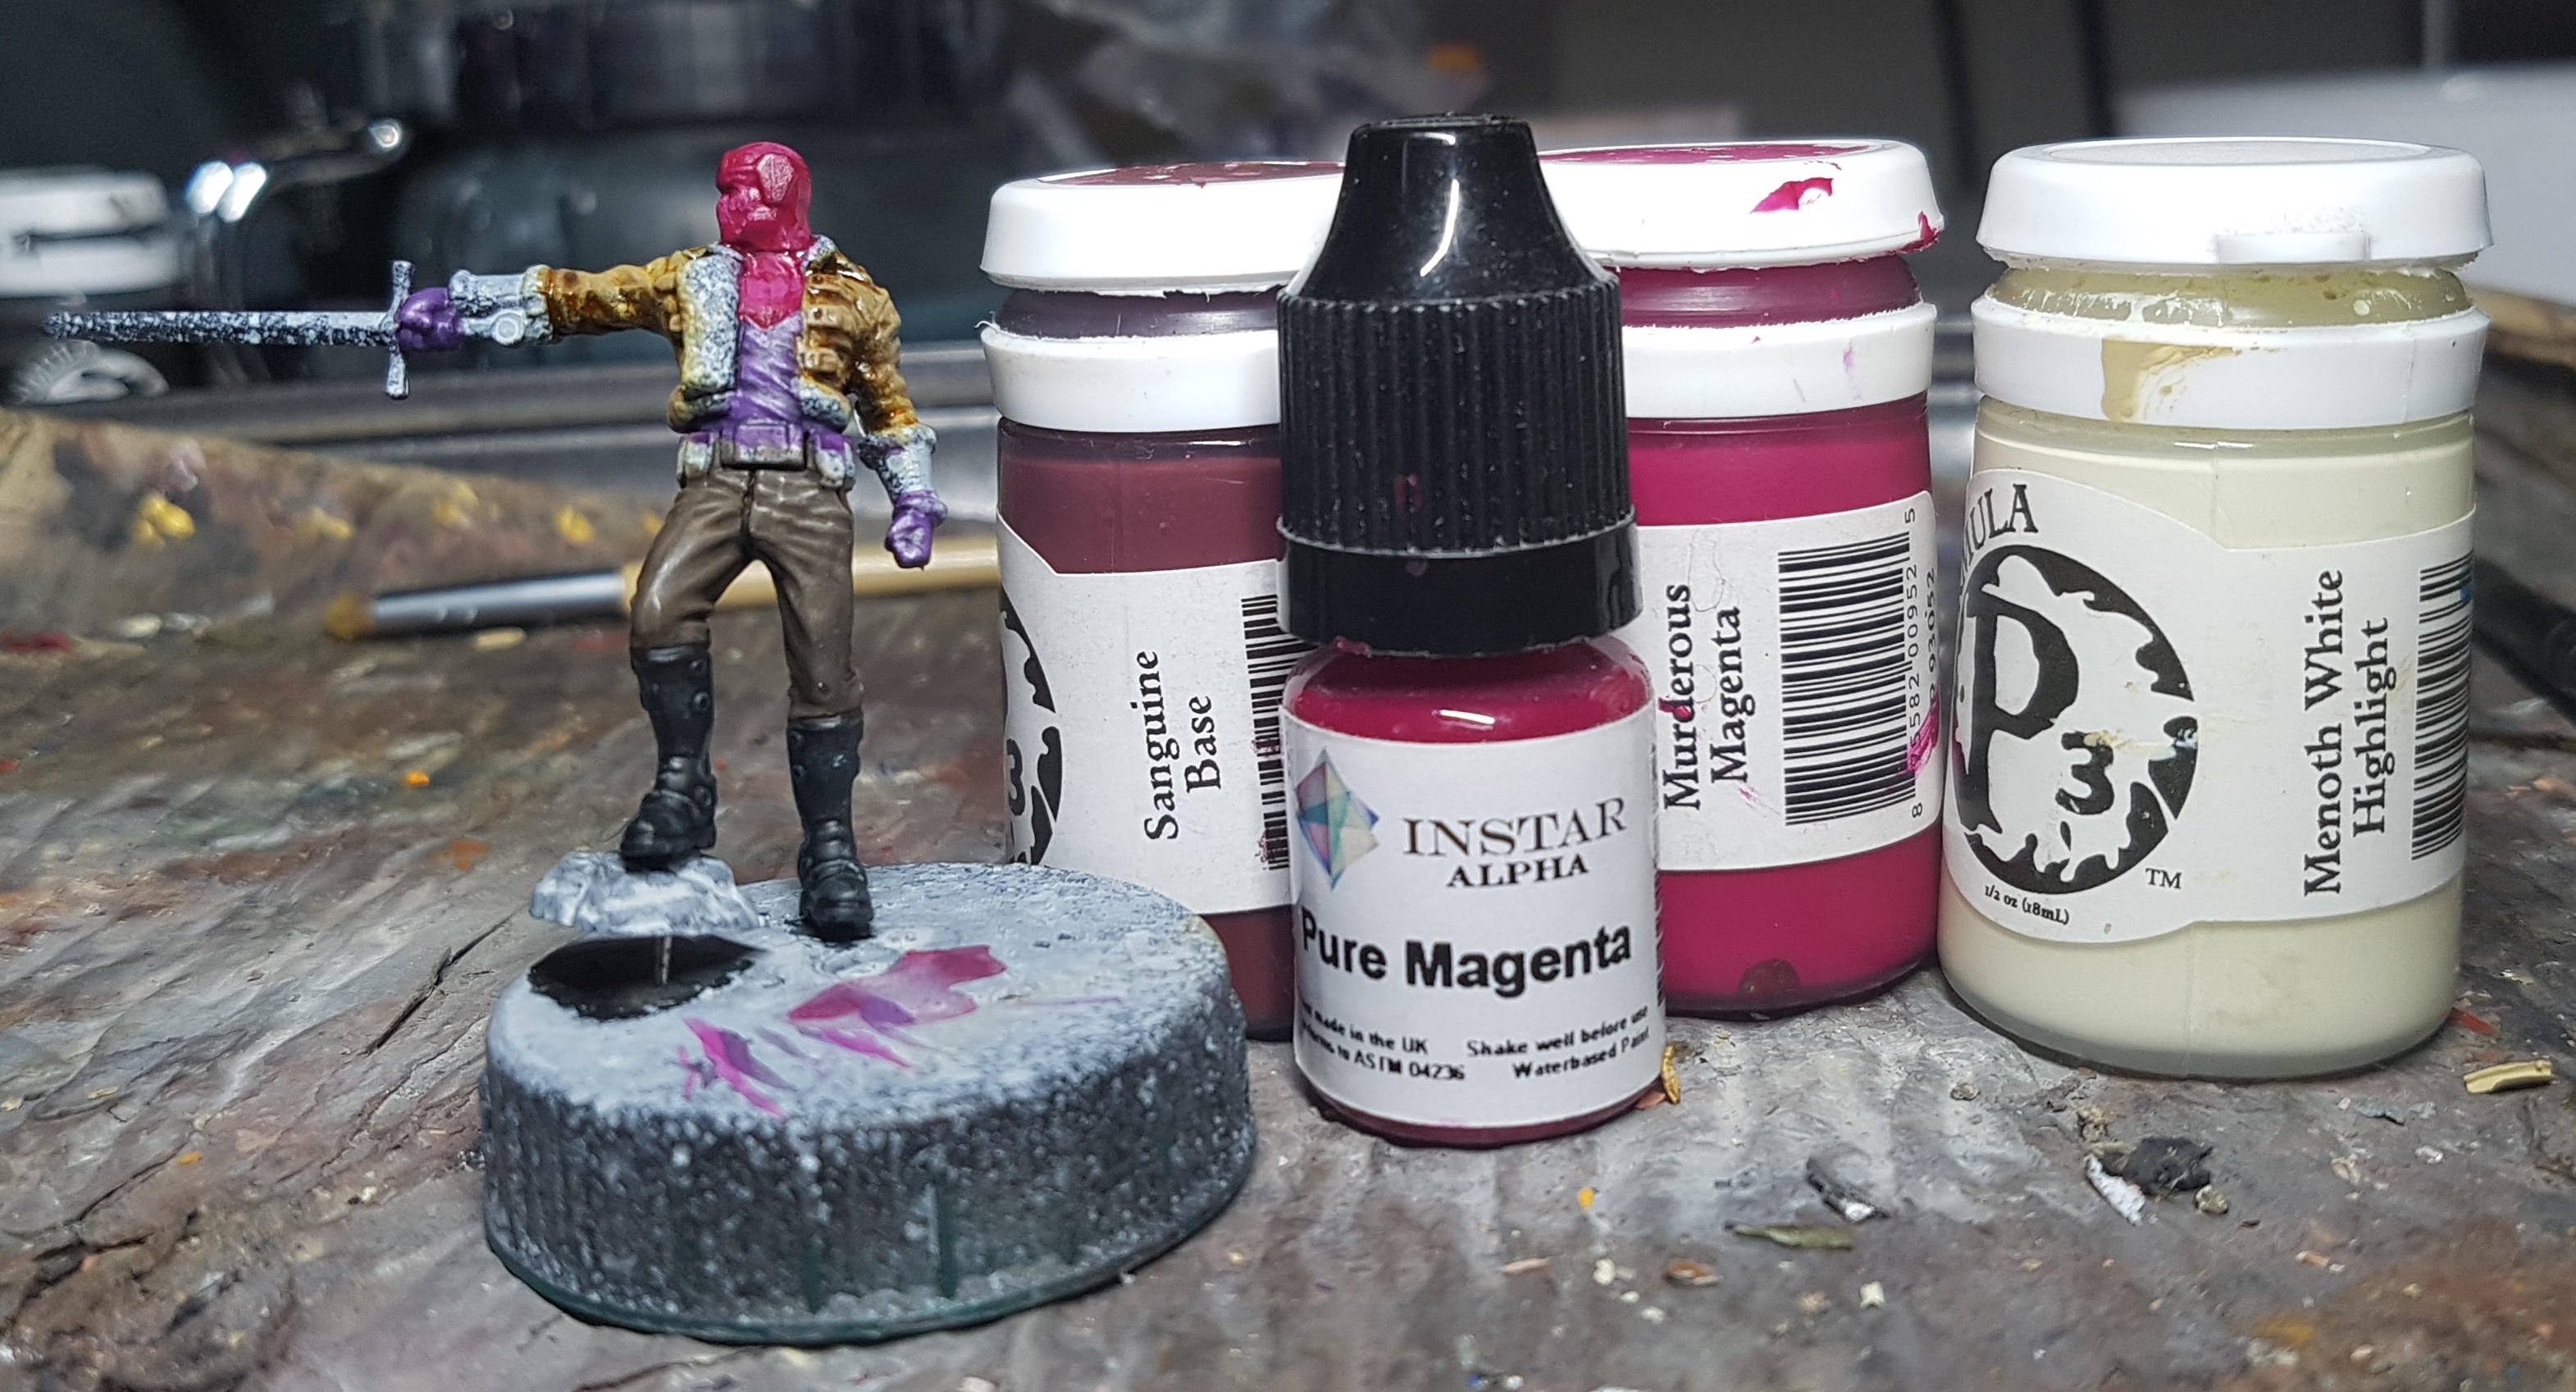
On to his mask. I wasn’t sure what I was going to do so there were points I was just throwing paints together to see what it gave me. Here’s what I think I did.
Base: P3 Murderous Magenta
Wash: P3 Sanguine Base mixed with Instar Alpha Pure Magenta
Highlight: Murderous Magenta mixed with a little P3 Menoth White Highlight
Highlight: Add a little more Menoth White Highlight, being careful not to go too white
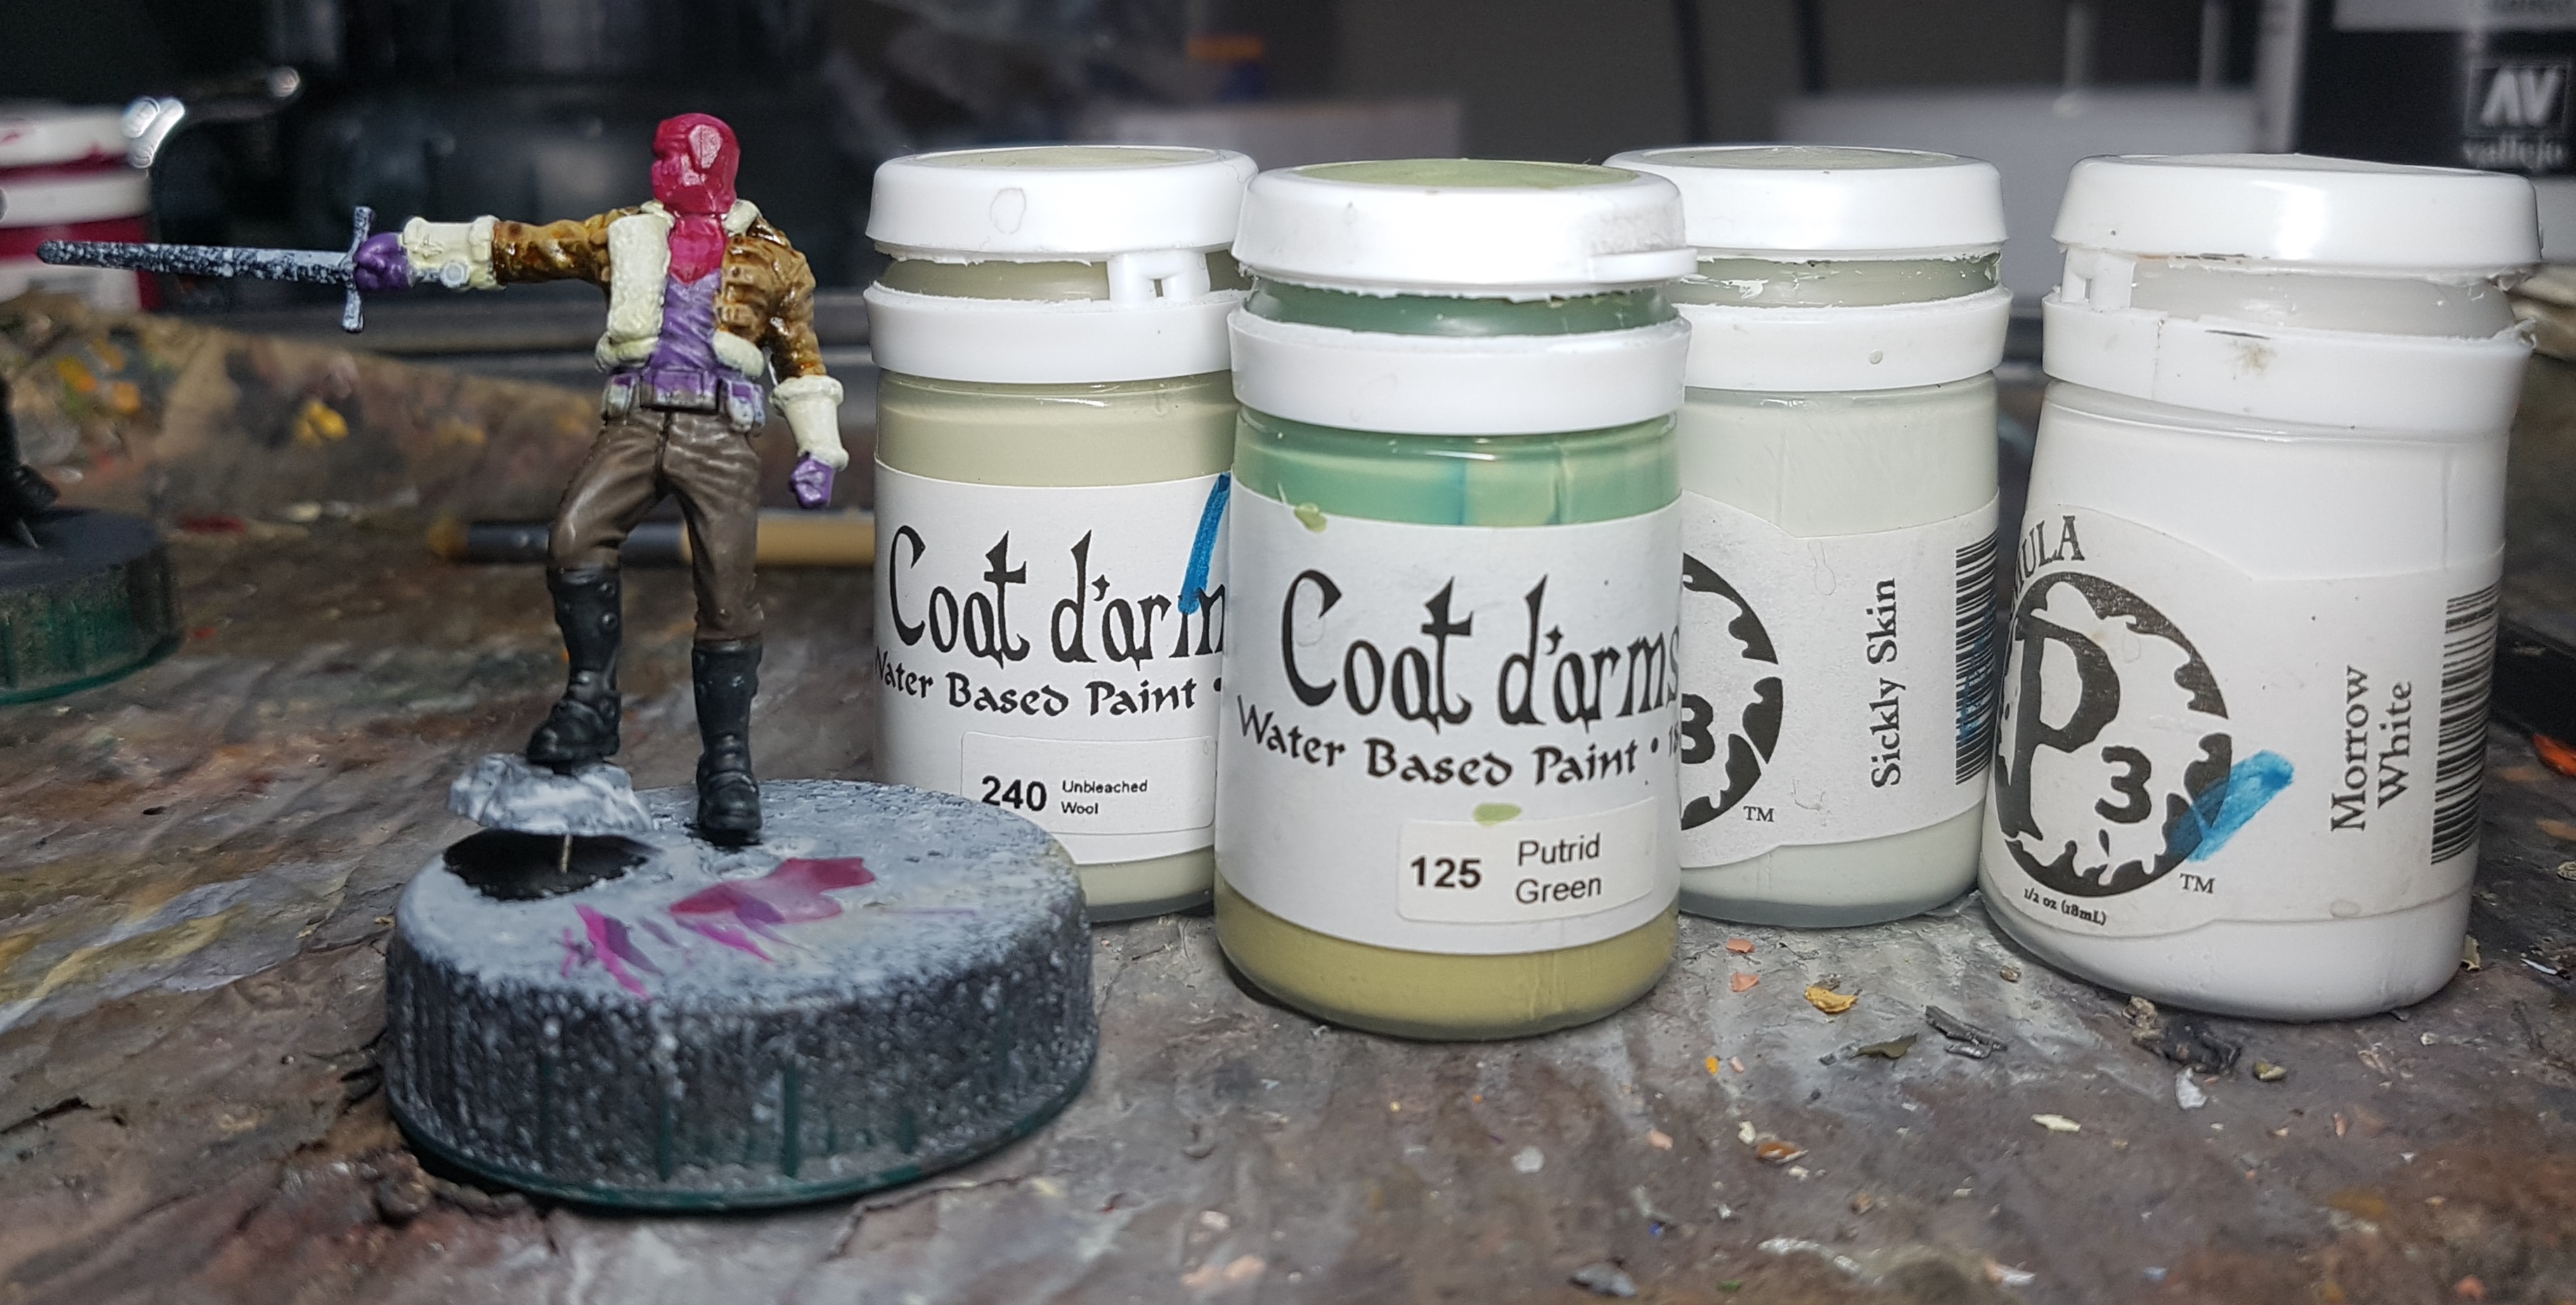
Let’s get that wool done, and preferably without mucking up the purple or the leather I’ve just finished! The wool and the bracers were painted as follows:
Base: Coat d’arms 240 Unbleached Wool (It seemed like an obvious choice)
Wash: Coat d’arms 125 Putrid Green (it came with the Unbleached Wool for this very purpose)
Drybrush: P3 Sickley Skin
Drybrush: P3 Morrow White very carefully. This should not dominate the colour. Never go full pure white or black!
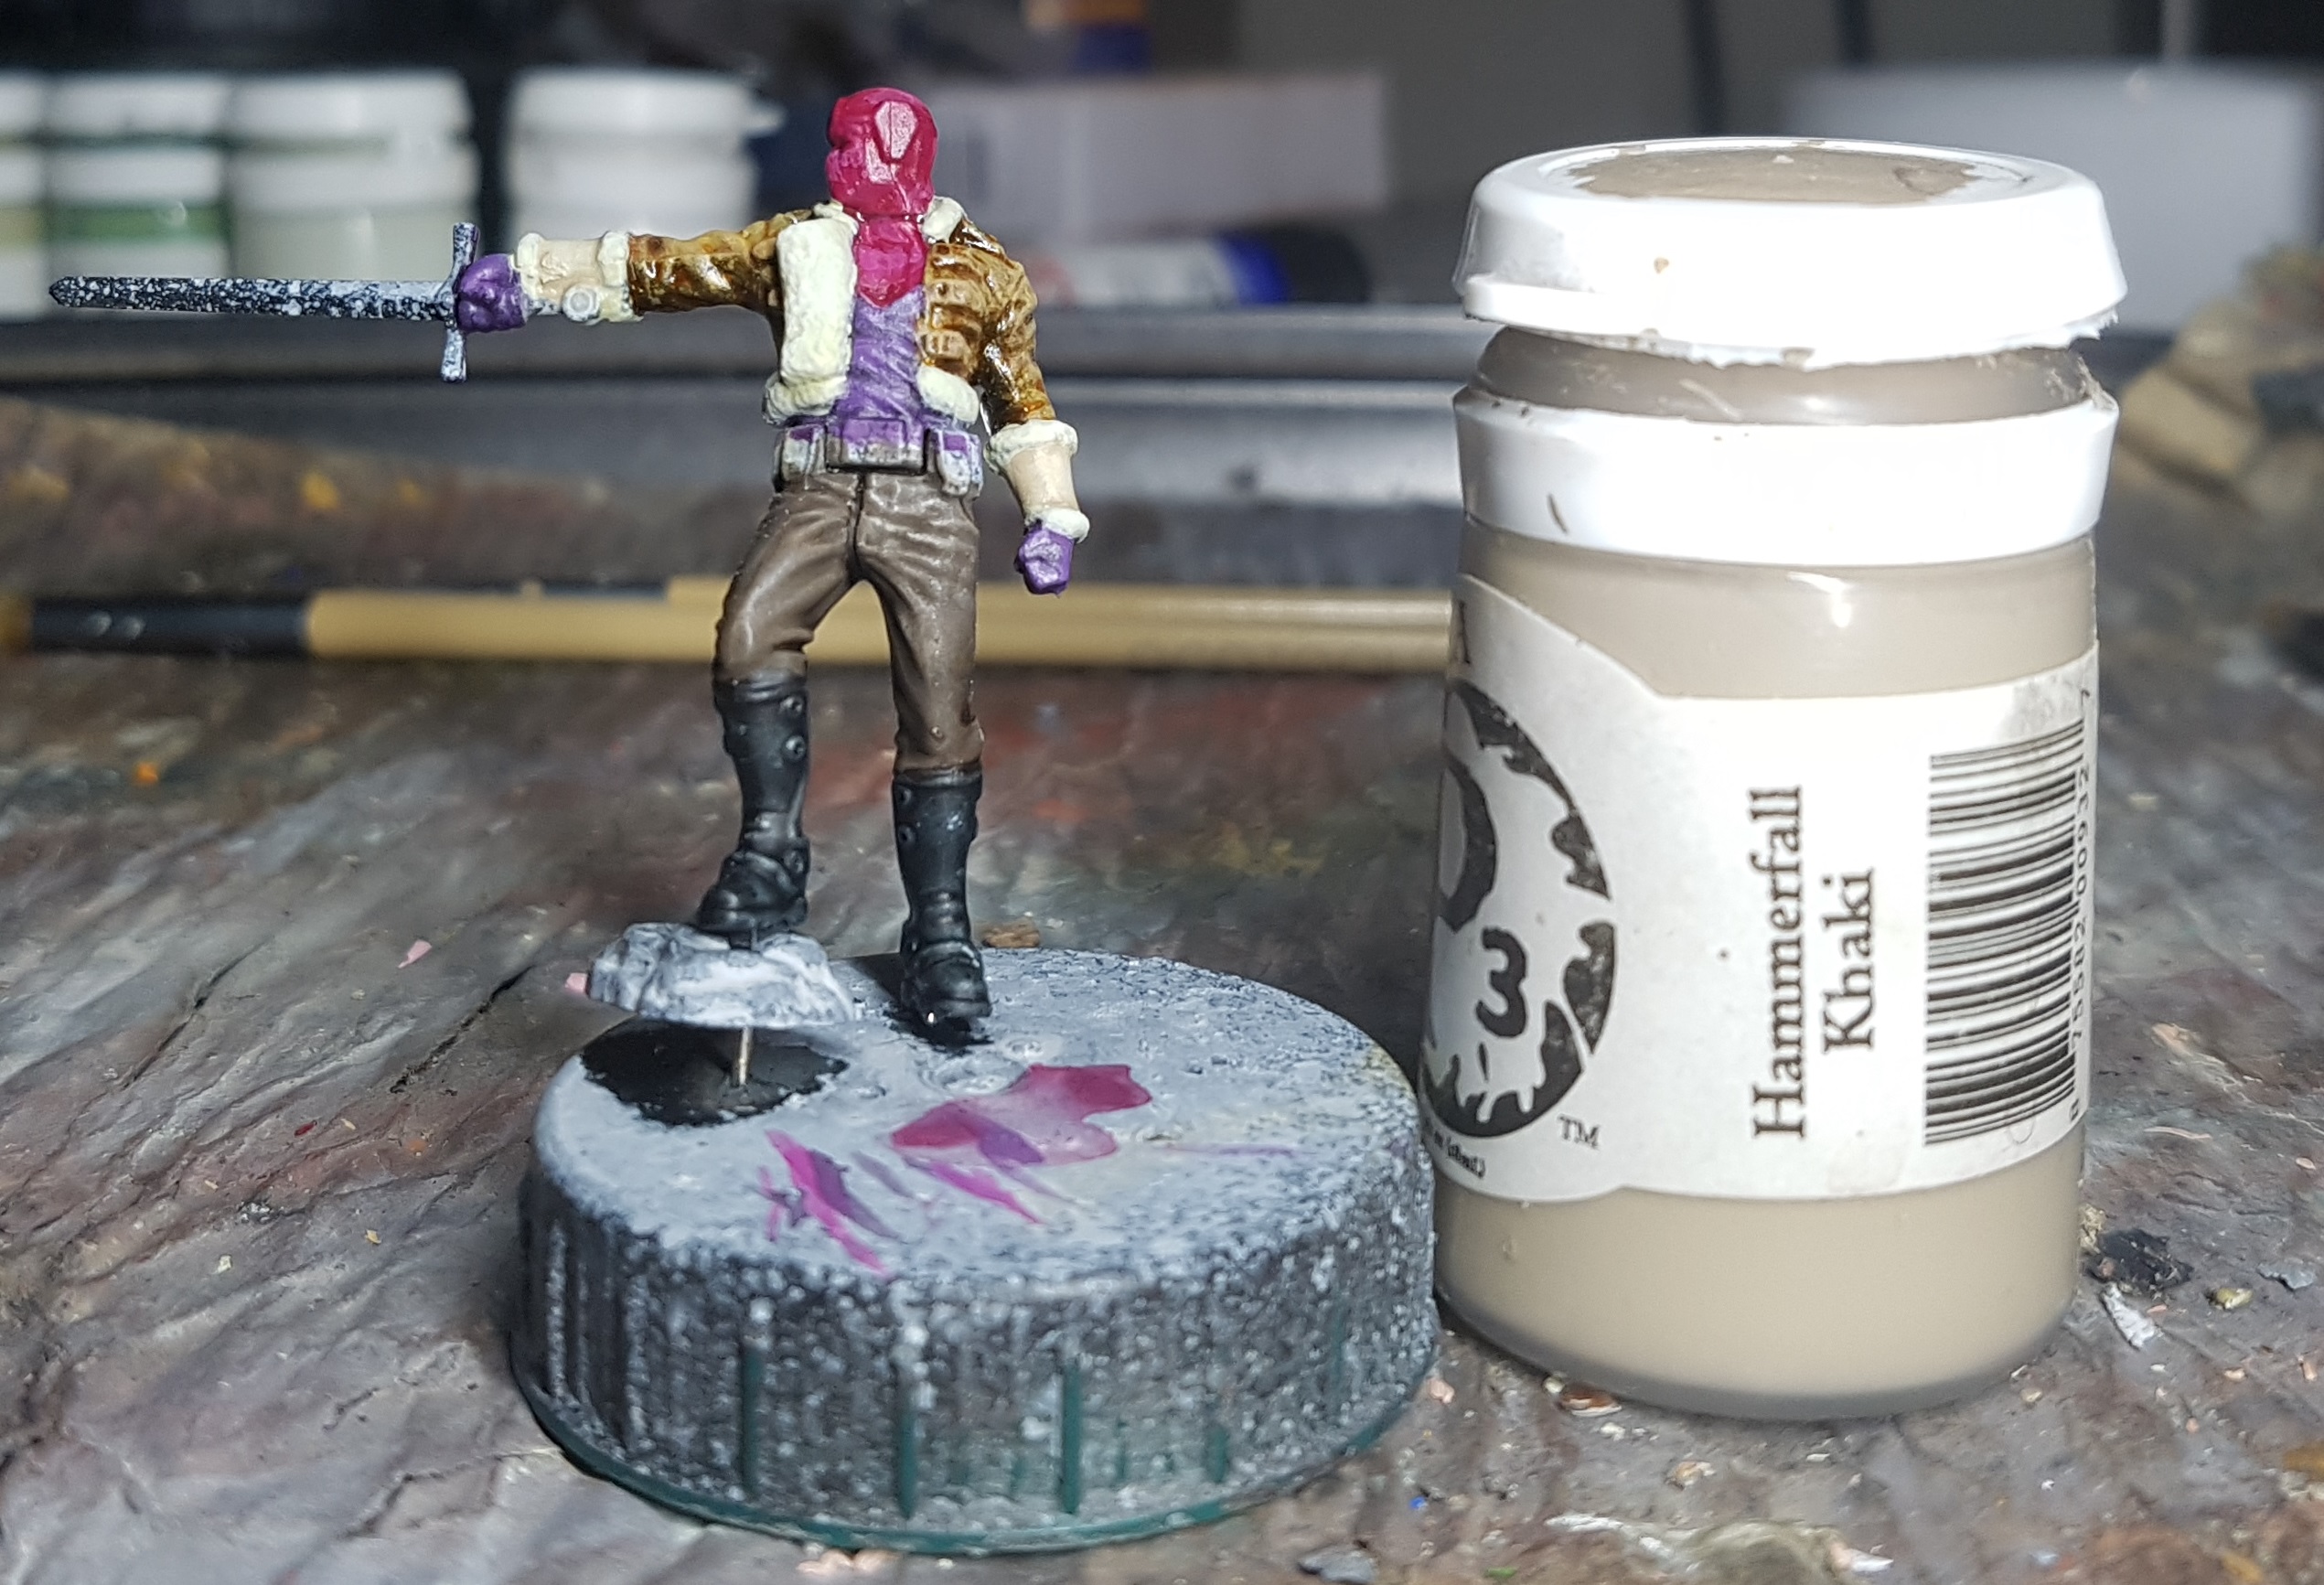
At this point I had just been including the bracers to give them a white-ish undercoat, and because they were in the line of fire anyway. I figured they were almost as I wanted them, I just needed to tint them to make the different to the wool. I tried a glaze or two of P3 Hammerfall Khaki and was happy enough with the results.
I’m getting there with Zemo. Time for the black cloth. I can undercoat his sword while I’m doing this. The metallics will thank me later. It’s getting late in the evening and if I do this just before bed then the black wash can dry naturally. Also, if I stop now there’ll be time for a movie in bed. I’ve somehow never seen Galaxy Quest and I’ve got that queued up for a watch tonight. (It was a good film, but could have done with a longer runtime allowing for 1-2 more events to happen to explore the concept and not make it feel like only an hour of their lives too. I’d happily watch this explored a a limited series too. I think there’s a good few hours of solid content could be got from this idea)
Anyway, back to the painting chat:
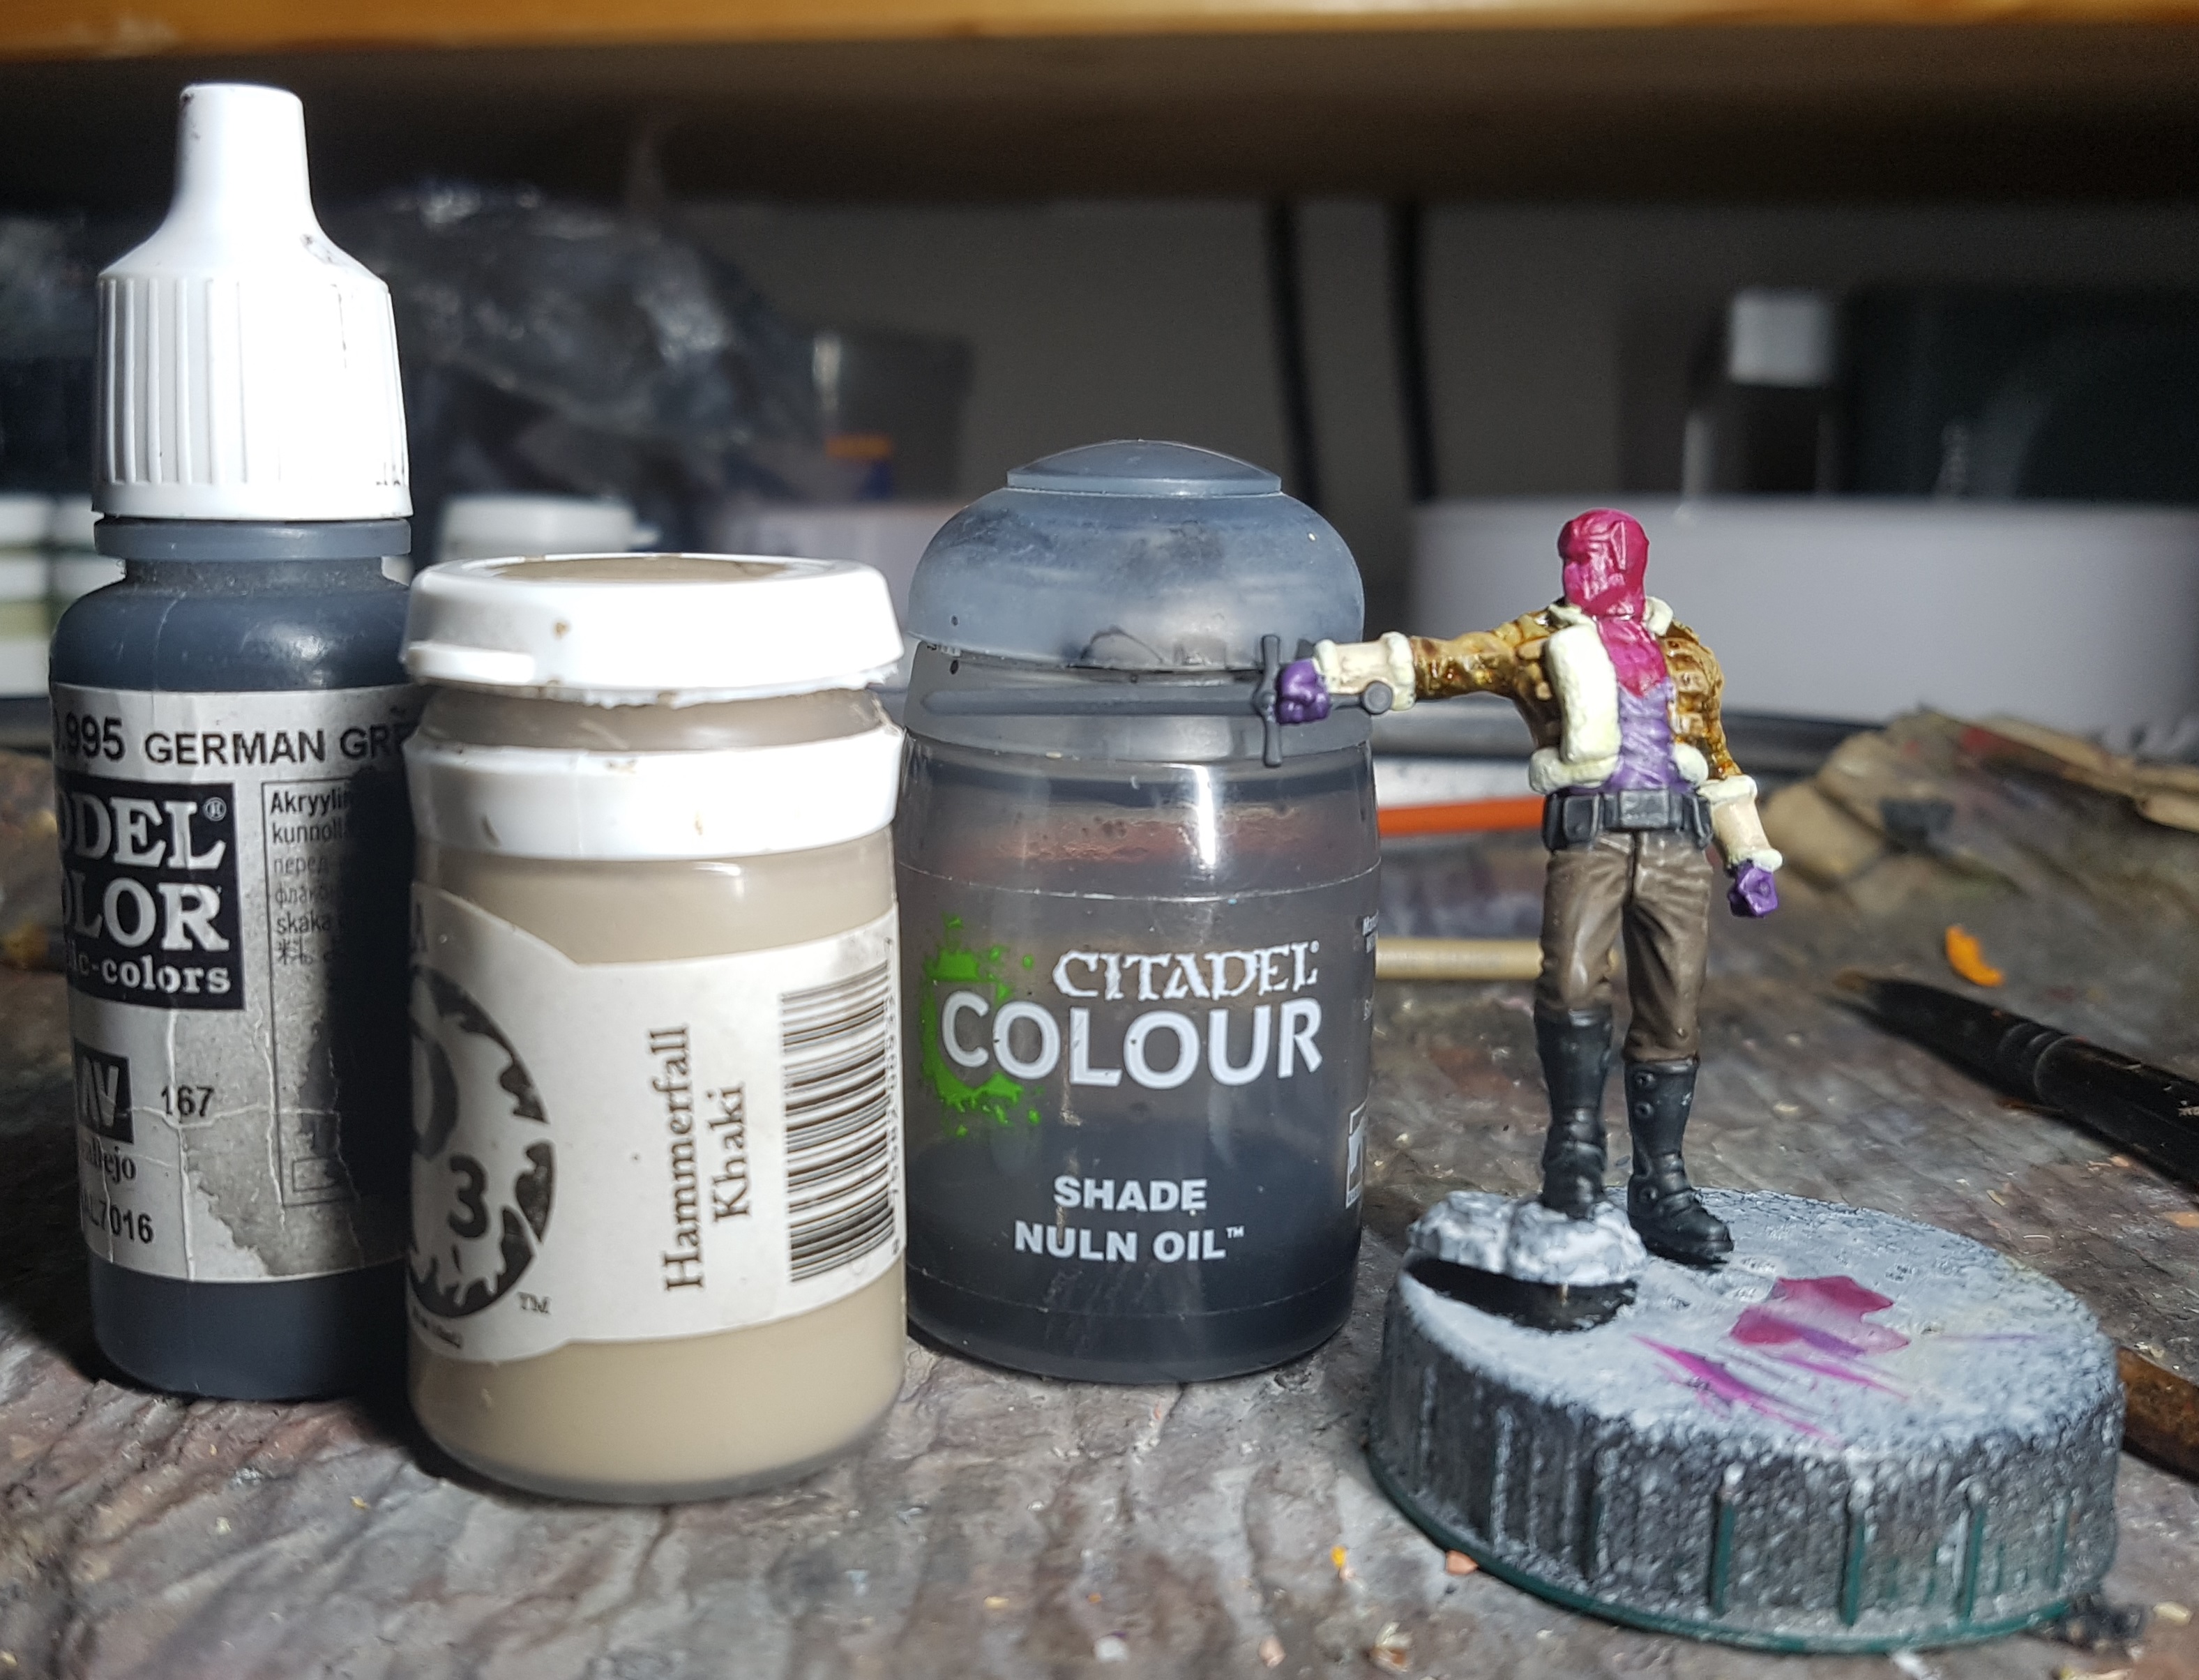
Base: VGC 70.995 German Grey
Drybrush and edge highlight: P3 Hammerfall Khaki
Wash: GW Nuln Oil
Go to bed with a movie
That’s 8 evenings work so far.


![StarCraft Tabletop Miniatures Game Pre-Orders Live Now [Updated]](https://images.beastsofwar.com/2026/03/starcraft-tmg-news-cover-600-338.jpg)


![Mounted US Cavalry On Kickstarter For Dead Man’s Hand! [Updated]](https://images.beastsofwar.com/2026/03/us-cavalry-main-600-338.jpg)
