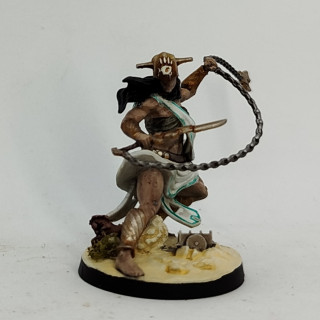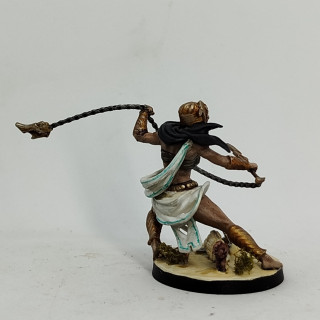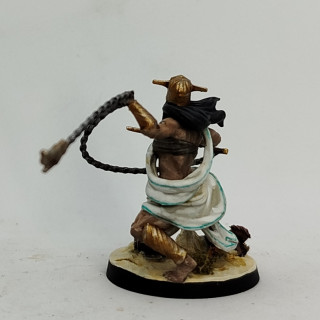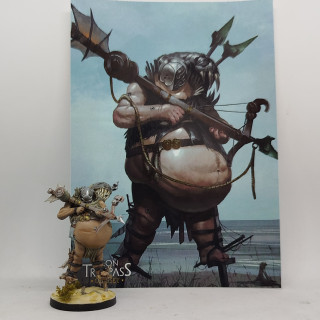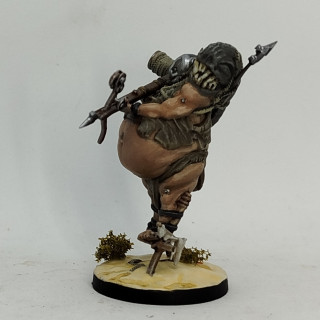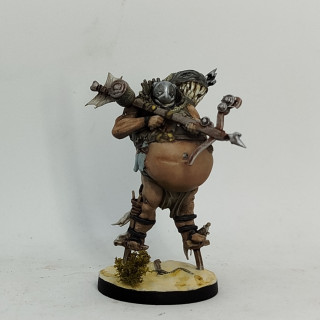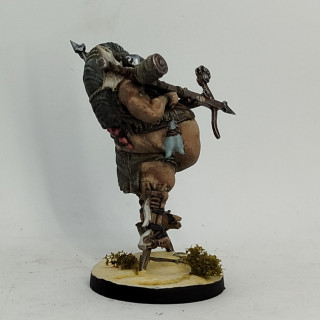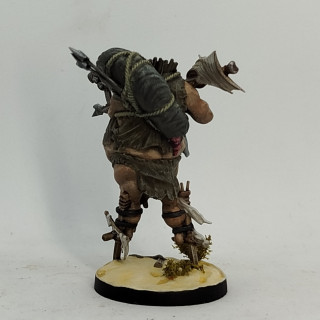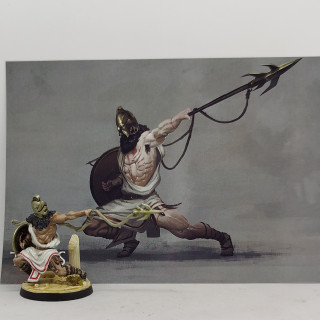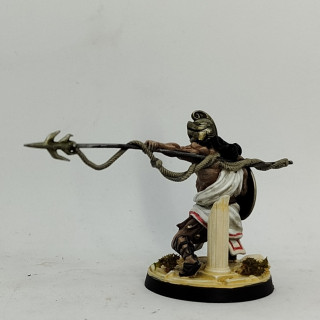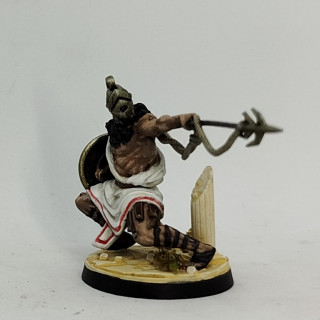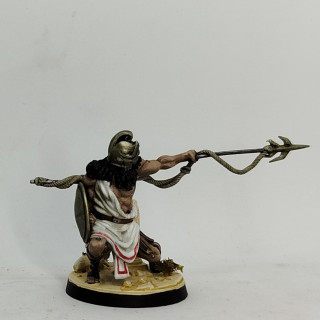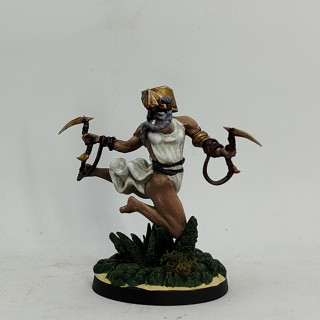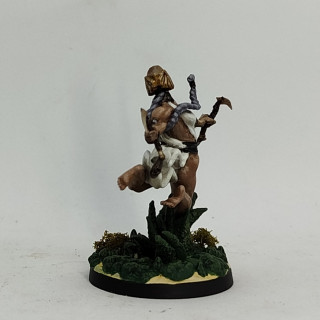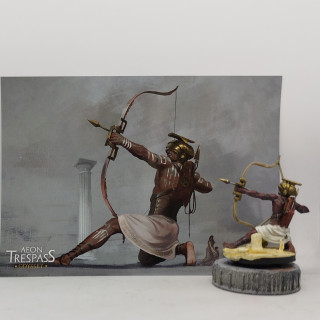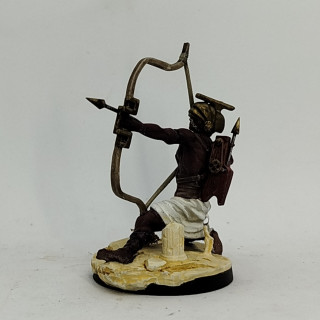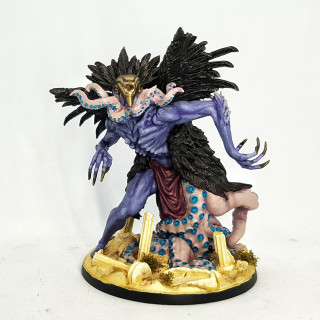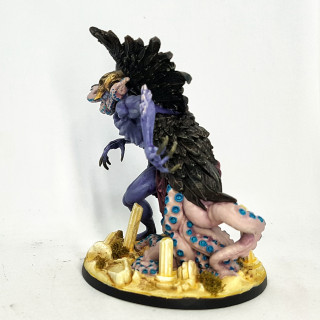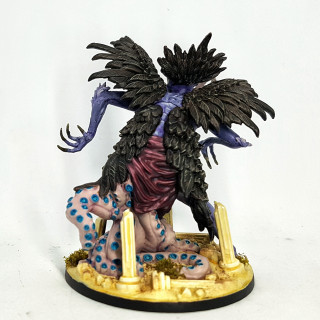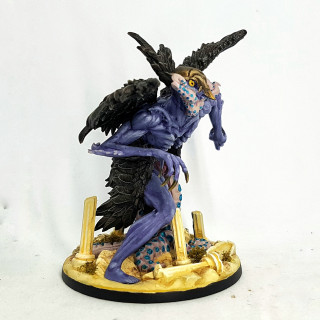
Aeon Trespass: Odyssey (ATO) by Lawnor
Recommendations: 357
About the Project
Aeon Trespass: Odyssey, by Into the Unknown. It's a Kingdom Death-esque board game with a world/map exploration phase. Stuff gets painted, and maybe even played with. KS link: https://www.kickstarter.com/projects/kingdomsforlorn/aeon-trespass-odyssey
Related Game: Aeon Trespass: Odyssey
Related Company: Into The Unknown
Related Genre: Fantasy
Related Contest: Spring Clean Hobby Challenge 2023
This Project is Active
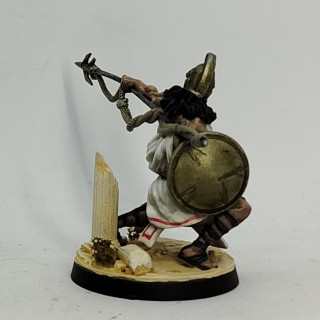
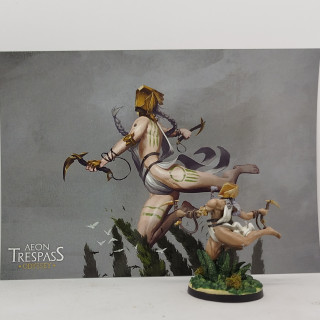
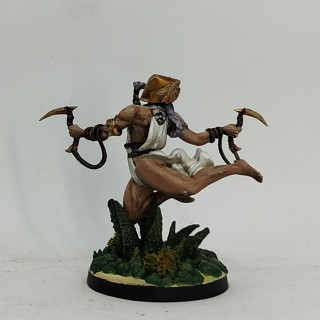
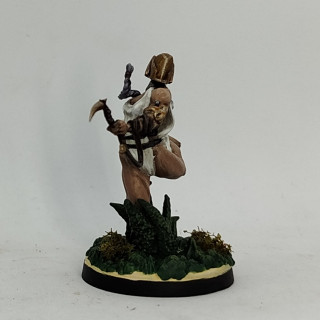
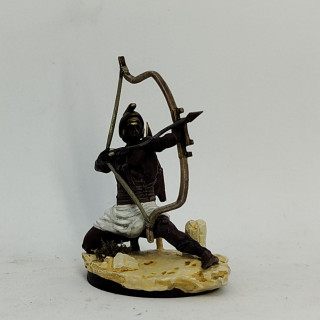
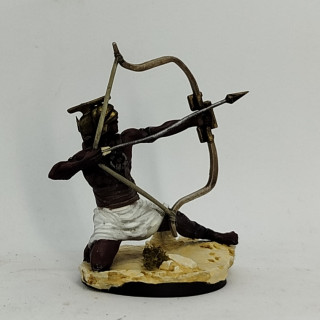
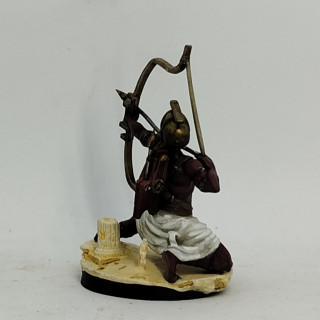
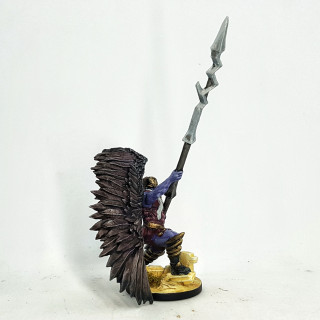
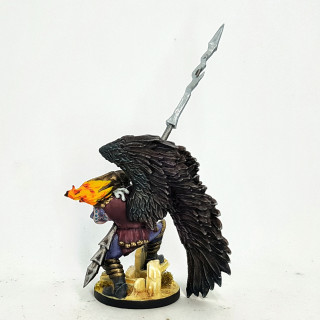
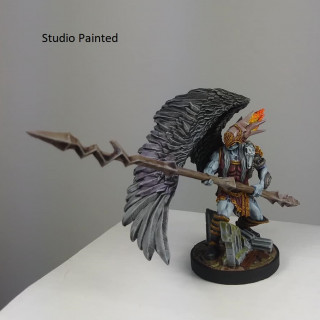
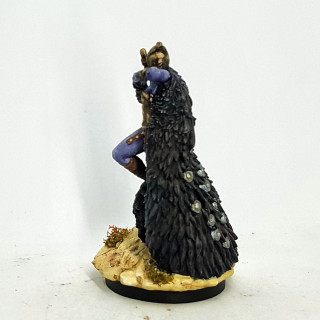
New Titans: Corona, Harbinger, Meleager, Porphyra, and Zeno
They released 5 new Titans on their web store. Rules-wise they appear a little disappointing. Little more than alt sculpts for the base level titans, but holding different weapons. Last time, it was a whole new special titan with it’s own rules. This time we just got a few new gear cards. Maybe I’ll be more impressed once I get playing again. If they do this again I likely won’t buy them.
I rushed then through so they’re ready for the table as soon as Wave 2 arrives. it docks near the local distribution hub this Saturday, in theory.
Corona Titan
Harbinger Titan
Meleager Titan
Porphyra Titan
Zeno Titan
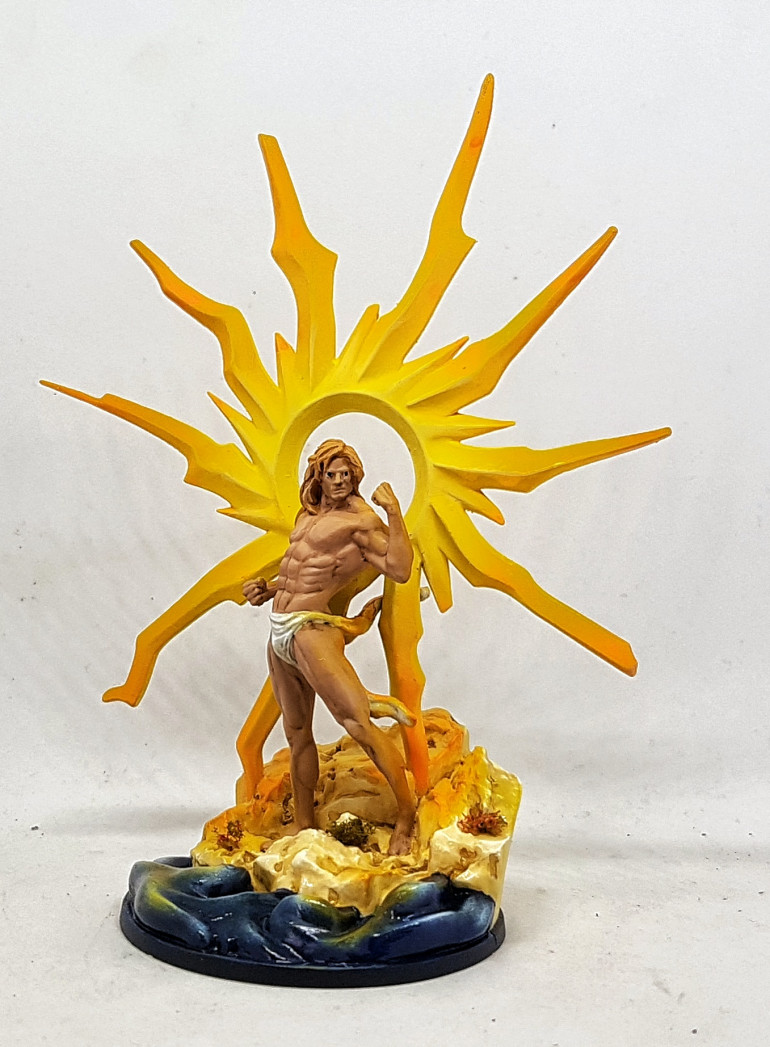
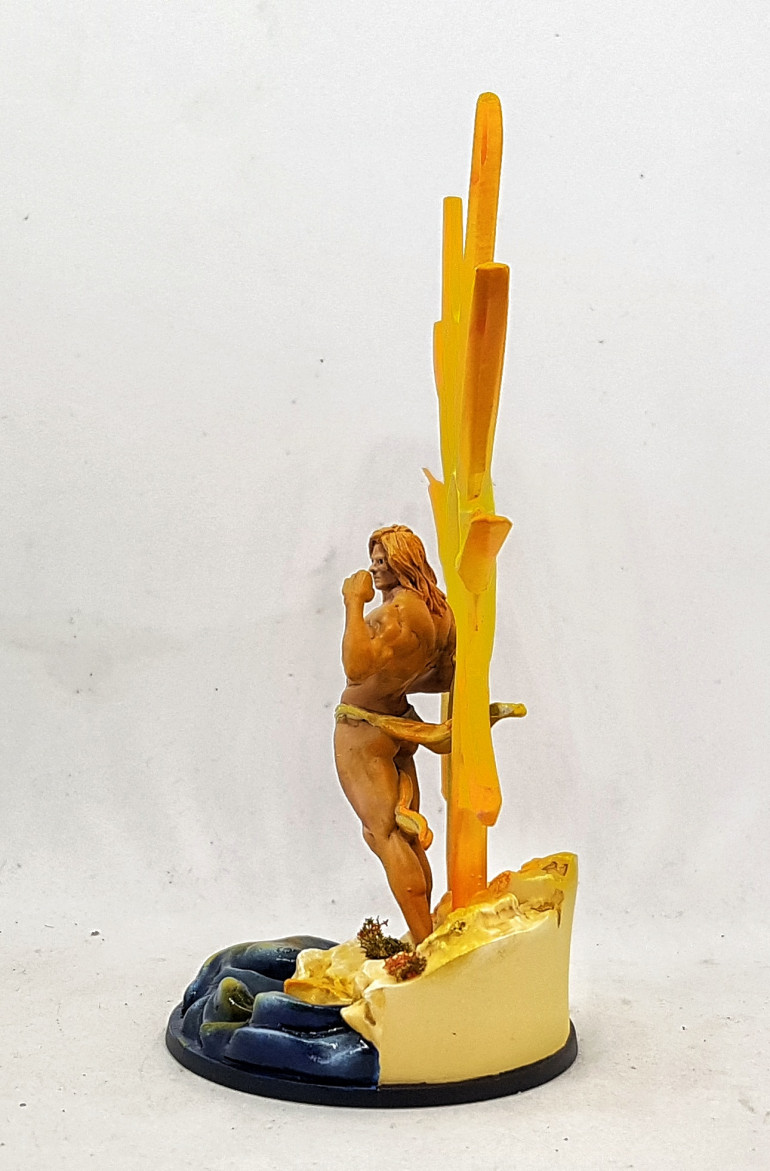
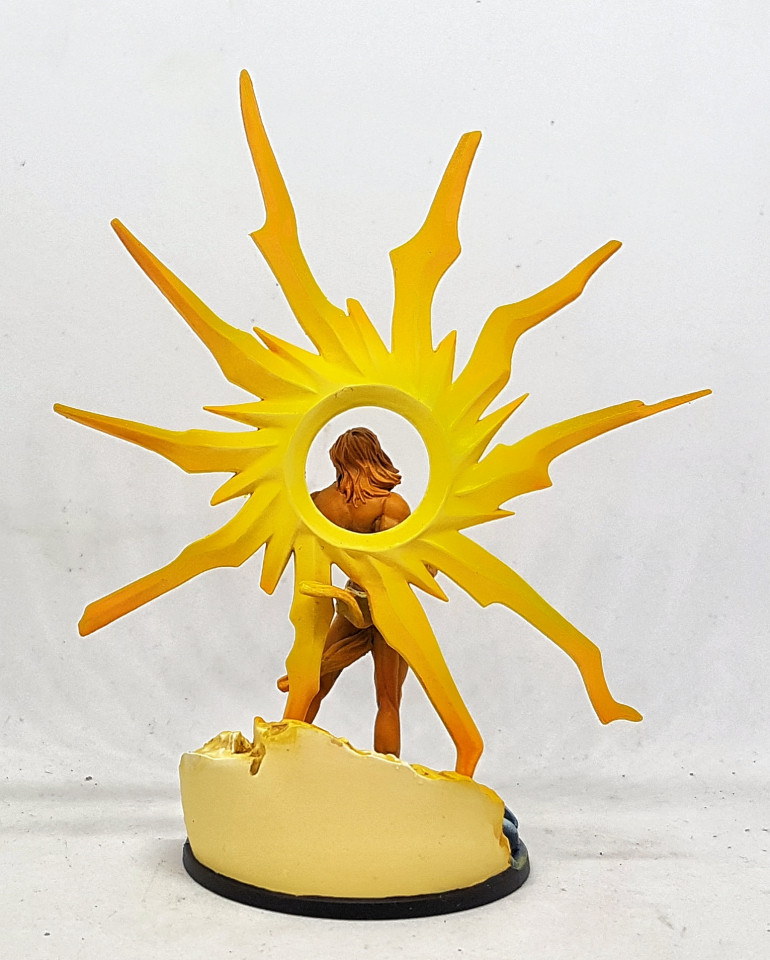
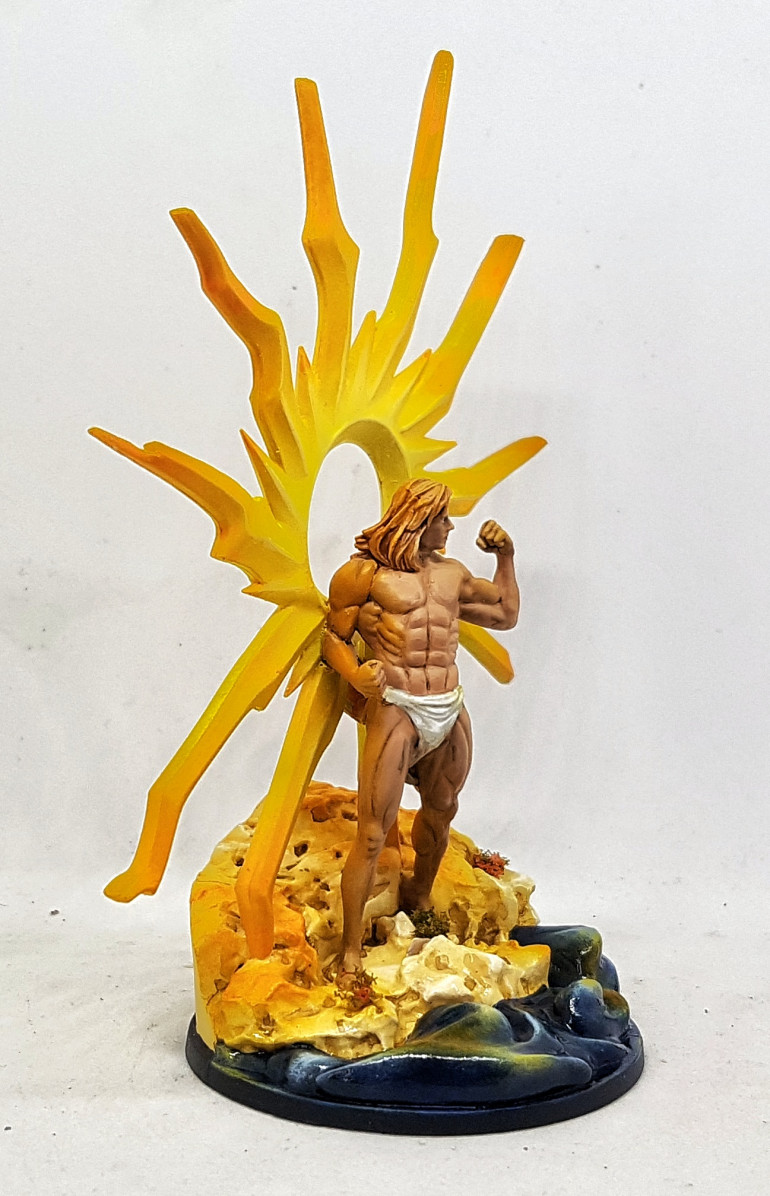
Helios
With Wave 1 finished it was time to put the box away until Wave 2 arrives, but I can’t do that until I paint the last mini. That meant it was time to work on Helios, god of the sun, and the most knock-overable first player token ever made. The sun part was mostly airbrush work, finished off with some brushwork.
Cycle 3 Finished: My Heroic Mode rules
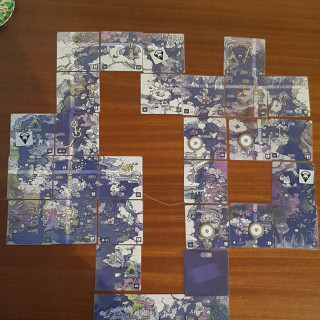
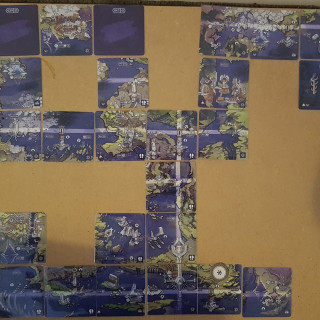
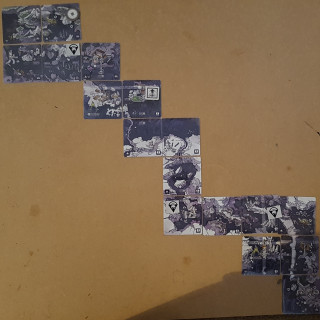
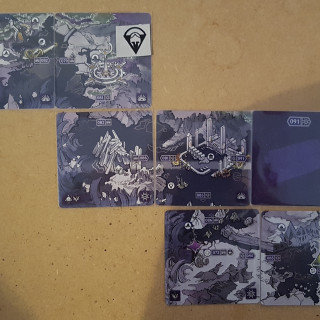
WARNING! The pics below contain heavy spoilers of the maps. Do not look closely at them. They are for my benefit later
I finally finished all the available content last week! It only took me about a year. 30 fights in C3, 32 fights in C2, and at least 25 fights in C1. Wave 2 (C4+5) are hopefully shipping Q2, as of last weeks update, so I hope to get started on this soon. I may detour to KDM briefly while waiting for delivery and painting up what I need to get started on cycle 4.
Cycle 2 was all about being outclassed and struggling to overcome overwhelming odds. Cycle 3 drops that (To some extent. It’s still hard. More on that later), and instead focuses on time travel. The land is stuck in a series of time loops, and now so are you. One of the monsters will switch you to a timeline you’re already dead in, if you don’t move fast enough. This mechanic is interesting, and a fun challenge once you get used to it, but I found, especially early on, that it was far too easy to pull the wrong card at the wrong time and just erase all your titans. That was a horrible experience and lead to me embracing my own Heroic Mode rules, which I’ll come to soon.
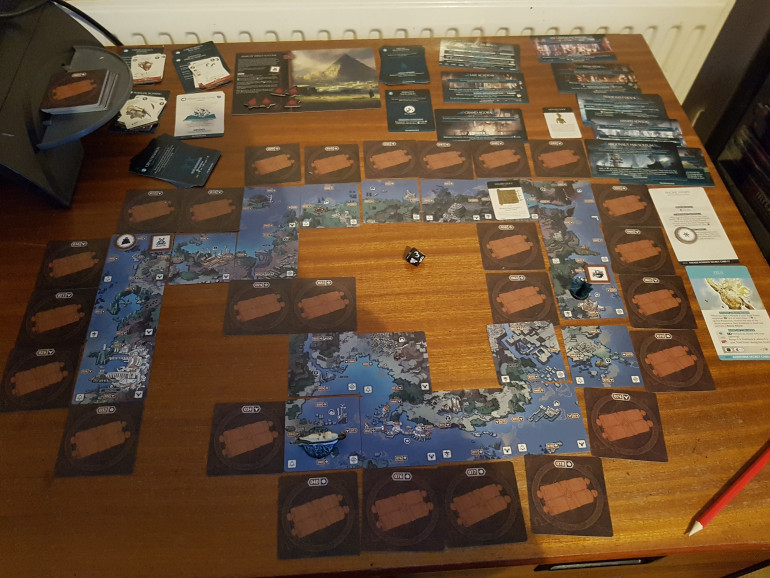
This game has always taken up a lot of space. I have it set up with the battle board taking up a whole 6×4 table, and the world map and tech cards filling up a desk. C3 laughed at that. You think it’s got a world map? A single world map? Pah! I ended up with 4, over 3 different time periods. I pulled out a 2×4 board and rested it on a spare bed, and even then I had trouble fitting my extra maps on in. I then had guests stay over in that spare room a few times. They kept having to step over my map board, and avoid my map desk. It must have been odd for them.
The game is hard and has issues, but I enjoyed it once I tweaked the rules a little. Cycle 3 really blew my socks off though. The finale for C3, the cliffhanger for Wave 1 was truly epic. It was a moment that stands out for me. One of my high points in gaming from the past few years. I cannot discuss it because Spoilers, but it was really well done, and really special. It makes me really excited to see where the story is going, and how they are going to change the game going forward. I really wish I could talk about it. I was buzzing for a couple of days. 11/10 would recommend. If you don’t mind playing a long hard game to get there.
Hero Mode
I’ve worked my way through two cycles, occasionally bending the rules because of negative play experiences and the game being pitched far harsher than I want, i.e. They don’t mind if you wipe and start again from the very beginning. Not terrible if you can play the whole thing in a month or two. Soul destroying if you lose nine months of progress and you’ve still got 9 more months to go even if you’d survived. I don’t mind a hard game, but I want a game I can complete before the heat death of the universe. I’ve other things I want to get done.
Cycle 3 added in some new mechanics for its fights that meant I could die instantly regardless of my health, and I decided this was just too much. Time to dial it back a notch and make it so I stood a chance and enjoyed myself. I tweaked rules as I played the cycle and I’m calling it my hero mode. I’m formalising it here for the benefit of others. Losing a Titan isn’t too bad. Losing 1-2 every fight (minimum 1 fight every 5ish days, often 2-3), and then taking 9 days to grow back a replacement, and you can only grow one from each generation at a time quickly leads to you running on Dreamwalkers only, and they seem to be terrible once the cycle gets going. At least that’s the impression C2 gave me. This will lead to an attrition loss pretty quickly.
Maybe none of this would be needed if I was smarter. Maybe none of this would be needed if I wasn’t playing solo and I could keep track of everything better, and had a second opinion on rules I might be playing wrong.
1: Lesser Toying (Stolen from the Hermesian Persuer. Some people play full Toying at all times). All Primordials roll 1 less dice to hit, and you ignore the first increase in Danger from them evolving. Minimum roll of 1 dice.
2: If you reveal an instant death card before you’ve even had a chance to make a choice, put it back in the deck and draw again.
3: You can spend Fate to shuffle and redraw Obols. You can spend Fate to reroll an Awakening test.
4: All instant death cards and effects force an Obol draw instead. If this is a phased effect that has a Obol draw option a stage below (ie for one successful hit, draw an obol, for two you die instantly), add an extra “You Died Horribly card” and draw.
5: Argo Abilities and powers like that, that grant a very limited number of uses in a fight can be applied after you roll the dice. Argo Trireme Abilities do not count against your AA limit, but you can only ever bring one.
6: Rerolls: Rerolls from Spiral or Black tokens are a separate thing from generic rerolls, so those dice can be rerolled for each of those effects. Black tokens can also be spent to apply their Break token effect without rerolling that dice.
7: Sisyphean Tokens can be spent to redo any instance of RNG, even after you’ve seen how it all plays out. If this is a card draw, shuffle the old card back in the deck before drawing again. Time is limited. Why redo the whole fight, when you just want a redo of the last disaster?
8: Argo Fate. If you’re going to reduce yours and your characters would know this (i.e. they can see a fight about to happen), feel free to ignore the voyage sequence briefly and spend any fate you want to make use of this change. Fate is so limited. Don’t waste it.
9: Spending Fate to gain nodes or train titans. Mark it on the timeline, but don’t pick who or what is getting the benefit until the time comes. It’s no fun when they’re dead or retired by the time it comes up.
10: Argo Bred. This isn’t a balance rule. This is just about me hating this term. In the rules “Argo Bred” refers to Non-Dreamwalkers, whether they were bred on the Argo or not. Titans who were bred on the Argo do not count as Argo Bred. This drives me crazy. I play that any titan bred on the Argo is Argo bred, along with the Non-Dreamwalkers.
11: When you spend fate to reroll any dice you can chose to just add 1 to it instead. This will never make it count as a critical.
12: Loot gained by critical hits. I did not play with this rule, but I’m very tempted for C4. The first time you encounter a monster go through its BP deck. Make a list of every card with loot that can be gained by critting it. Every time you wound that card put a tally by its name. Every time you roll to hit that card, add the number of tallies to your roll. If it is 10+, it counts as a crit, but only for the purposes of earning that item. You gain no other crit effects, unless you rolled a natural crit normally.
13: Memnos Nodes. When earning nodes, I don’t distinguish. Anything that can gain you a Memnos Node could also gain you a Fated Memnos node
14: If you would gain a titan or a resources from an icon on the world map, but you are already at max, leave a token there. if you end up back there later (You won’t) you can collect it then. I recommend printing your own tokens for everything.
15: Once you max out your Argo knowledge through Inwards Odyssey, keep track of extra gains. Every extra point you scored can b cashed in during the following Onwards Odyssey to extend the timeline by one, or can be spent instead of an Argo Fate. You can still use all your tech and abilities during the onwards Odyssey to grow new titans, train them up, and improve your Argonauts etc.
Hypertime Oracle:
1: The timefront does not advance faster as he evolves.
2: If you retreat the timeline beyond the board edge, keep track of these spaces and knock them off of it’s next advance
Harpy:
1: The Bleed effect that happens at the start of the each fight shouldn’t trigger any negative rules you might have about gaining more bleed tokens. Dying, or being pushed to the brink of death before the fight starts is no fun.
If I remember more, I’ll come back and update
Once again, SPOILER ALERT: Do not look closely at these following pics. They are for my benefit so I can restore my map once Onwards Odyssey arrives.
Talespinner Titan
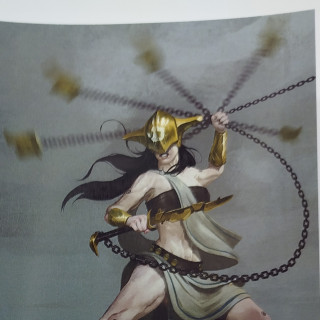
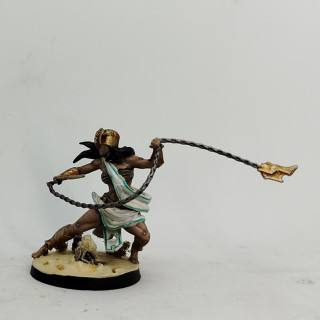
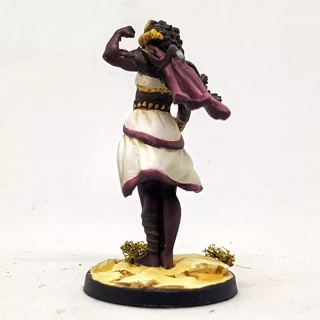
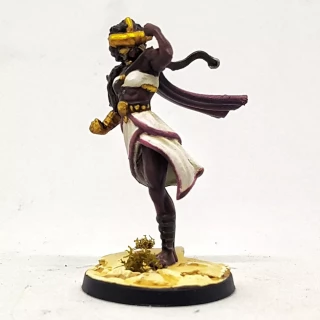
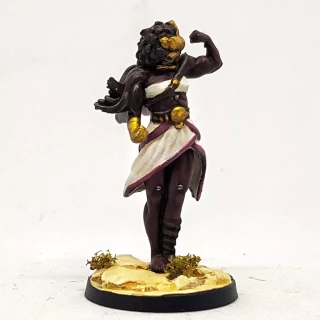
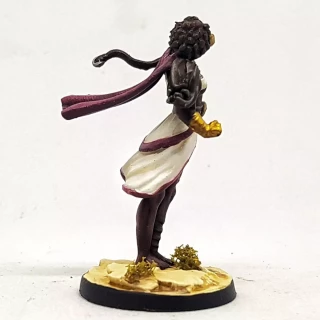
I ordered this lady during Essen, and she’s finally painted up. They say she’s unbalanced un early cycles, but I’m not seeing it. Her unique ability looks like its great for getting a good strike in when the Kratos Pool is empty, but it still leaves the next guy without any tokens. I think she’ll still leave some from items I suppose. She might be Good, but I’m not seeing Great.
The one great thing I am seeing is how you make her. All other named titans require 7-10 days to grow. She doesn’t have that. you can spawn her at a moments notice, and the resource she uses is rare, but its not used for anything else at all. This means when you’re low on good titans and in trouble, she’s always an option. She might surprise me anyway, and could be a superstar in Sins of Herakles. Who know?
House Rules / Hero Mode / Lawnor Cheats
As discussed in my last post and in the chats beneath it, this game is aimed a little harsher than I want for a game that will take me two years to play through. I don’t want to have to wipe and replay two months of content when I feel I’ve not done anything stupid or wrong, and it’s just the game demanding I’m both smart and lucky. I don’t mind losing a game. I don’t mind having to replay content. I just don’t have the lifespan to redo a 2 year campaign because the dice turned against me. A 2 month campaign perhaps, but this thing is too big for how easy it is to lose and either start from the beginning, or restart losing your progress/story and being handed a randomised one instead.
It does feel sometimes like they’ve play tested fights and mechanics, but not had the time to repeatedly playtest the five cycle campaign as a whole. How could they? Who has that kinda time?
As such, there’s a few rules I’ve taken to bending, changing, or occasionally ignoring. There’s some I’m starting to rewrite for my solo play purposes. I’m going to compile a list below over the next few days, and probably keep adding to it when I get back in to playing C3 regularly. Please comment below with your opinions on these, and your own house rules.
For extra context for all this, I am playing solo so I might be misunderstanding some rules, and I definitely make mistakes as I play. I misread stuff. I forget stuff. I get caught up in trying to keep track of everything and don’t see things I would have if I was one of 4 players at the table. As a general rule I allow myself the “I’d have seen that if I was only controlling one titan” rewind/reset a lot of the time. I only have one brain and it’s kept very busy, and it’s probably not up to code to begin with!
Things I definitely do
Trireme Argo Abilities
These are a type of Argo Ability. You’re capped at how many Argo Abilities you can take in to a fight, and you’re also capped at 1 Trireme Argo Ability. I assume your Trireme Argo Ability is supposed to count against your Argo Ability limit, but I’ve decided to not count it as such. Their effectiveness (so far. I’ve just finished C2) is very limited, and there’s very few fights they can be used in, so I don’t see the harm.
Argo Ability Tokens
You get some Argo Abilities and other powers that let you buy rerolls or add tokens to the Kratos pool a very limited number of times per fight. You’re usually supposed to declare all of this before rolling your first dice. It feels really bad when you blow your load and it affects nothing. I try to play this by the rules, but on tougher fights I usually talk myself into making all my rolls first and applying the tokens once I know if they’ll be useful.
Black Tokens
These give you a reroll and apply a break token to the rerolled dice. The rules say all rerolls happen at the same time, but these feel different. They’re tokens you spend from the pool which feels like it has a different timing, even if this is never clearly stated. I imagine they want them to count as standard rerolls, but I usually apply them separately, allowing me to potentially reroll the black tokened dice a second time. I also allow myself to apply them as a break token while skipping the reroll part.
+1 to all tests
I misread some rules during C2 and made some of my voyage phase tests easier than was intended. I’m pretty sure if I’d played them properly, I’d have lost the campaign halfway through. I have decided that from the start of C3 I will be meeting the rules halfway, and giving myself a +1 bonus to all voyage phase tests, maybe including adventures.
Trireme Scout
Losing them is very expensive. Argo Fate is far too expensive a resource for this. I have decided the chance to recall the trireme is 100% if I’m on the same map tile. I might boost it a little under other circumstances too.
Mnestis Theatre rewards
The Mnestis Theatre gets far too hard very early. It is not meant for people who want to play the campaign. It is meant for people who want to bang their head against a wall repeatedly, grinding the same fight again and again until they find the right mix of gear, tactics, and luck. Some of the rewards from it do help with the game though, so I have decided that every 5 days of the campaign I can unlock the next line of rewards from the Mnestis tree. You should probably play to unlock the Skyseer normally, though. I got a little past that point naturally.
Mnestis Ascending Rewards
I forget what they’re called, but you get tokens from the Mnestis theatre that you can attach to equipment to ascend it. They’re supposed to then be locked to that item. There’s a house rule on the ATO discord that lets you swap these tokens around at will between fights. I think this is a good idea.
AB Titans
I usually rule that any rule that calls out Argo Bred Titans applies to any titan I bred on the Argo, along with all special titans.
Finding AB Titans vs Capacity
The rules state that you can never get rid of a titan you own by choice, so if you find a better one when you’re at capacity you cannot keep it. This also means that if you’re at capacity and remove one to turn it in into a special titan in 10 days, but then find another before then, you cannot keep the special titan. I ignore this. I can always set a titan free to keep a special titan.
Inwards Odyssey tokens
I finished C2 with an Inwards Odyssey score of 46ish, but it’s capped at 40 in C2. I decided that for each point over the cap I’d allow myself to extend the Onwards Odyssey mini campaign by 1 day, or buy an extra Argo Fate.
Sisyphus Tears
These are supposed to be spent to let you reset and retry a fight. I don’t need an in-game mechanic to let me do that. I’ll do that anyway if I think things have gone horribly wrong through my lack of knowledge on rules or boss mechanics, or the RNG really skewing against me. I have decided that I will allow myself to use these to draw again when a titan pulls a card that kills it (it might be a trauma card, an obol, or perhaps I decide it’s the fault of the AI card). I’ll put the offending card back in the deck and reshuffle before drawing. Tears are super rare so I almost never get to apply this rule. I think I only have 6 after two cycles and I’ve only done this a couple of times.
Round 1 Insta Death
Sometimes the monster will activate and give your titan a paper cut and you draw a card that just kills it outright and you haven’t even activated that titan yet. No roll to avoid, no chance to redraw. You’re just dead. It feels like you’ve lost the fight and you haven’t even started playing it yet. At times like this I decide I could just reset and start again, or I could skip all the work and just draw a different card. I don’t spend a tear for this (See above). It’s a freebie because I hate this mechanic. It’s a negative play experience with no interaction. It’s the game telling you you don’t get to play it.
Pygmalion Stones
These things are rare and they’re the only thing that stops you losing your best titans for ¼ of the campaign when things go wrong. You earn 1/3rd of a stone every time an Argo Bred titan dies, but you really don’t want the AB titans to die. These stones are to prevent that. I count the deaths of Dreamwalker titans I bred on the Argo towards earning more stones, and I still only have 5 and I may have spent as many as 1. I save them for emergencies, and saving long growth time titans.
Memnos Draw Deck
Memnos’s (menoses?) are geared towards their cycle and can feel useless in the wrong cycle. When I’m told to draw a Memnos at random from my draw deck I restrict my draw to ones for the current cycle, if available.
Argo Fate for Memnos/Mausoleum
Sometimes I’ll spend an Argo Fate to gain a Memnos on a certain Argonaut in a week, and then they’re gone by then. When this happens I let myself pick a different Argonaut. AF is too rare to let go to waste.
Things I’m thinking about doing
Crit locations for special items
There was a discussion on their discord a while back about how sometimes you just can’t get the interesting items from critting the right BP cards. I proposed this rule and it got a lot of appreciation. I might test it out in C3.
“How about a house rule where every time you damage a BP with an item from a crit make a tally mark of it on the back of your campaign sheet next to the BP card name. For the rest of the campaign whenever you attack that card again add the number of tallies (or half?) to your to hit roll on the crit dice. This new value only counts for purposes of seeing if you qualify to get the item. It won’t make a miss a hit, and it won’t earn you any other bonuses. It could represent your past experiences with the monster letting you get better at grabbing that thing you saw last time. It’s not like you go through the whole BP deck every fight and I’m guessing most of these items will be on higher BP cards, and so be seen less, and be less likely to get damaged. I’d reset the tally marks between successes, if you can get multiple items from a single card.”
Reducing cooldown on AB titans?
The conversion time for making special titans makes me reluctant to risk them sometimes. I made it through C2 without it actually becoming a serious problem so I’ll leave it alone for now. If it does become an issue I might reduce the cooldown, or allow multiples from the same timer to run in parallel.
Extra cores from kills
I feel like I’m not quite getting enough cores to use them as much as the game allows. It’s close though, so this rule doesn’t want tinkering much. I’m considering a house rule where I roll a d10 after killing a primordial. If I wounded more than 1 BP3 card I add 1 to it. If I successfully used Carving I add 1 to it. if the result is 10+, then I can gain an extra core. It shouldn’t come up much. I’d eyeball around 1 in 7 fights. That would have given me around an extra 4 cores from C2 I think.
Toying
One of the popular house rules I see on the Discord is to apply the Hermesian Persuers “Toying” ability to everything. I’m not doing this, but if things become unreasonably tough it’s an option. I definitely turned this on for the tougher Mnestis theatre fights I tried.
Wandering Titan tokens
I’m considering making up a handful of Titan tokens for use in the voyage phase. Any time I find a wild titan and I can’t pick him up because I’m at capacity I can drop the token down. If I end up back on their tile later I can then collect them if they’re useful. I could go one step further and have them move one tile randomly at the end of each day. They move across land so don’t need rivers, and they wouldn’t step in to the ocean.
Advice
Saving Progress in their App
When you move the campaign along in the app it doesn’t create a new entry like I thought it does. It overwrites your current save slot. You will lose some information you might want later. If you wipe and want to reset back to the start of the campaign then you have no save slot to revert to. I suggest making a whole new entry in the app and manually importing your information and using one as a backup save and the other as your current saved game.
Tech Trees
Go to Board Game Geek and grab a tech tree. Mark off what you’ve already got, and make notes on it about the things your aiming for (“This breeds titans”, “This is next quest goal”, “urgent” etc). It’ll make life a whole lot easier.
Double Size Timeline sheet
Print the timeline sheet at double the size. It’s hard to make legible notes on the one they give you. It’s too small and cramped. Then document everything. You never know when it’ll be useful.
Keep all dead/retired Argonaut sheets
When someone dies or retires, mark off what happened, when and why at the top of their sheet and save the sheet. They will be relevant later on. Don’t assume that you can wipe the page and reuse it. You will regret this.
Retirement is good
I didn’t understand this at first. I would try and progress both Memnos on my characters to unlock their abilities. This is a waste. if you have to pick one to spend points in, go with whatever has the most. When you max out the Memnos your character will retire. This is a good thing. You’ll gain something, and put a tick on the choice matrix. Who knows what you’ve unlocked, or when it can come back to reward you? Also, Memnoses are geared towards being useful in the cycle they are from, so you want all the C1’s removed from the deck so they’re not getting drawn in C2.
Fighting the Adversary resets fate
During C1 I spent a lot of time fearing the adversary, mostly because it cost 2+ hours of my time when I was trying to progress the plot. It took me a while to understand that the Adversary is often a good thing. The only way to lower your AF is usually to fight something. The Adversary is an extra chance to fight. It can be worth throwing away a few Dreamwalker titans to get some AF back and reset your dials. Don’t underestimate the importance of this.
Timeline Flow Chart
Edit: 09/11/23
Voyage Phase Progress Tracker
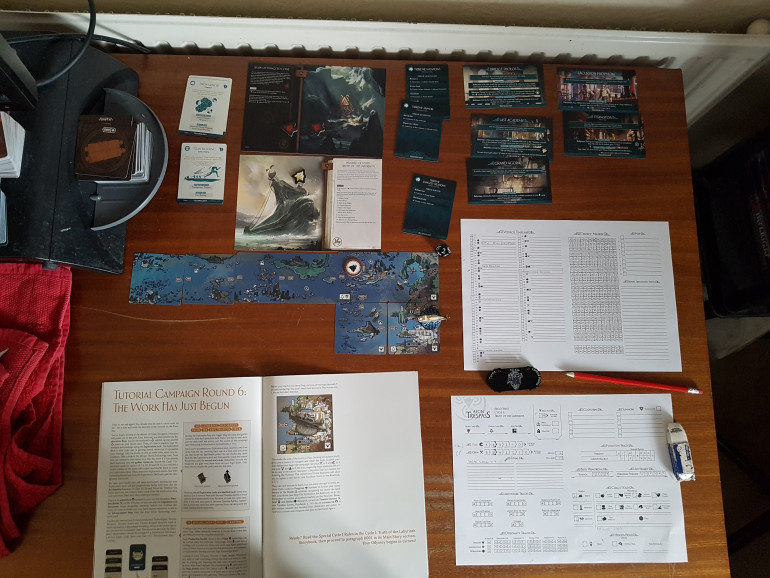
I leave my game set up. I usually stop playing just as a new fight triggers so I can start the next session with a fight. There are a few different stages in the turn sequence a fight can trigger, and I don’t always stop before a fight. This means when I get back to the game I’m not always sure what stage in the turn I’m actually at. When playing you can trigger events and unlock things midway through a story event and it’s easy to forget them. To help with all of this I mocked up this voyage phase sequence tracker, and printed out a photo of my Argo as a token to move along it. I leave my Argo on the last resolve step, and put tokens in some boxes as reminders to resolve stuff when I get there.
I’ll likely revisit this post in the future as the game progresses.
Cycle 2 Finished
Cycle 2 does an amazing job of expressing it’s themes through gameplay. It goes all in on “show don’t tell”. This is great game writing. However, it’s themes are hopelessness, powerlessness, and being overwhelmed. That doesn’t lend itself to a “fun” game experience. Once I was deep in the cycle I got in to it though, so it’s not bad, just tough.
Right at the start of the cycle (with my choices, at least. I assume this holds true for everyone?) the game took all my toys away and punished me hard. It made it very clear I could not hold my own and the final boss was going to just murder me effortlessly any time he turned up. In C1 the boss turned up 3-5 times before the final battle, so I’m left with a feeling like this bully can turn up at any point and kick my teeth in and steal my lunch money. It’s great for stressing the theme, but left me stressed and demoralised. I’m writing this while I’m in the start of C3 and I’m putting off playing for fear the game is about to do something similar and any choice I make now will be the wrong one. It took me 65ish days of the 80 day campaign to recover from that initial battle.
I’m moaning, but once I got my teeth in to C2 I did enjoy the ride. I misread some rules though, which did make it easier. C2 introduces the Ascendency rule. When ascendency is in play all C1 items are less effective unless they are ascended. Its worded in an ambiguous way in the book. It says to only apply ascendency when we’re told to, then introduces it half way through a fight. I thought it ended when the fight did, and would get turned back on and off during future fights. I was half way through the campaign before I found out I was cheating accidentally. and once it’s on, it’s on forever.
The Chimera was an interesting opponent. I avoided fighting it at first because it has a lot of extra rules and I thought it would be very hard. A level 1 chimera basically sits there and lets you kill it. As you fight higher level versions it gains more abilities, coats you in its slime, and that slowly burns you to death across a battle. It mechanically sells the idea of the classic Blob movie. It starts off small and weak, but grows and grows, until it swallows Manhatten and the army are powerless against it.
Cyclonus was more in line with what we’d seen before, but posed extra challenges. He has cages strapped to him with people in. Sometimes damaging him will kill someone in a cage and cost you Humanity. What humanity does and how it will interact with the game is not explained. it’s a threat looming over you the whole campaign. How far are you willing to push your humanity? What will the consequences be? Cyclonus also increases your Rage against your will, giving an alternate type of damage to the battle.
The Burdon is the Adversary that replaces the Hermesian Persuer, once you finally beat it. The Burdon plays out like clockwork pinball. You don’t really want to fight it. You start at the bottom of a cliff (left side of the board) and have to get to the top (The right side). Every time the Burden attacks it stands to the right and does knockback and you bounce off lots of terrain. Fall off the bottom and you die. Make it to the top and you escape. He is way too hard to fight in C2, but he’ll be back in C3.
C2 was tough and intimidating, but enjoyable. I do think they could do with dialling back the difficulty a smidge. I’ve had a little contact with them and seen some of their chats with the community. They seem to be of the opinion that losing a cycle and starting again is normal, to be expected, and not a problem. It feels like they expect people to lose even if they’re making good choices. They seem to have balanced the game around this viewpoint. I don’t think they fully appreciate how long it takes normal people to play this game around having a job and a family etc. I’ve been playing this game for 6ish months and I’m 2 cycles out of 5 in. If I buckle down I might finish the game late next year. If a game takes 2 years to play through it should not be normal and expected for people to wipe and start again from the beginning unless things have gone very wrong, and yet they don’t want anyone creating a reset point. If you wipe you either start C1 from the beginning, or you restart the current cycle with random ticks on the choice matrix and default crew and item loadout. No thanks.
I do enjoy the game, but I think I’m going to look for ways to take the edge off the challenge. I think I’m going to lower the difficulty of all the voyage phase tests by 1. Some people apply the Persuers “Toying” ability (-1 attack dice, -1 damage to each attack) to all Primordials. I’m not going to do that yet, but it’s a consideration. I want to experience the content and go play other things. I don’t want to wipe 18 months in to 2 years of game, and either reset or quit.
I tried my hand at the Mnestis Theatre (It’s like the X-Men’s Danger Room). The earlier level fights are manageable, but it quickly ramps up to silliness. The Mnestis theatre is not meant to be beaten casually. you’re meant to spend a few days bashing your head against each monster, trying to work out the perfect combo of gear, titans, tactics, and luck required to win. It is not meant for people with limited time who want to make progress. You should definitely do what’s required to unlock the Skyseer as soon as possible, but otherwise maybe skip this, unless you’re a glutton for punishment. I’m thinking that every 5 timeline days I’ll allow myself the rewards of the next level of the Mnestis tree.
For anyone curious about such things, Across C2 and the Mnestis theatre I was involved in 32 battles, and spent 4-5 hours working through Onwards Odyssey C2 after the campaign. That makes this about 85-101 hours of play, give or take.
The C1 map is more or less square, but the C2 map is a lot taller than it is wide. Plan your table space around this. I’m told C3 is 3 maps, each smaller than what we’ve previously seen.
Onwards Odyssey
I’ve been hooked on Diablo 4 since it’s release a couple of weeks ago. I’ve had no free time for anything else. Sunday morning I decided I was going to put the game down and do some painting. It turns out it was so hot that paint was drying on the model before I could work with it so I packed up and went back to Diablo. They were having a DDoS attack so I couldn’t play that, so I went back to ATO. Cycle 1 was finished and I’ve been putting off Cycle 2 as I’m going to need the table space in two weeks. I’ll start up again after that. There was one more thing to finish of before I pack up Cycle 1 though: Onwards Odyssey
Onwards Odyssey was an optional extra they sold after the KS ended but before wave 1 arrived. It’s two mini campaigns set between Cycles and 2, and 2 and 3. The physical books and tokens will arrive with Wave 2, but they released a PDF when Wave 1 shipped. Given I already had the world map set up, it only took 2-2.5 hours to learn the new rules and play through the mini campaign. It didn’t add as much as I might have liked to the game, but it was worth doing. It was world exploration without the risk. All the fights have been removed, although I had the opportunity for one, but I preferred the other story path. I suspect there’s a second fight to be found, too. It’s a chance to uncover a few more things before you leave Cycle 1 behind. I gained a pet dog. he acts like a piece of equipment, but doesn’t take up an equipment slot. I also added a few more ticks to the ongoing Choice Matrix.
My ship is now fully restocked and ready for what happens next. The timeline for this was too tight for anything other than strictly efficient navigation. I would have preferred a few more opportunities to interact with the story. It adds two new adventure hubs, and a collection of standalone events on the map, based on your existing Choice Matrix. I found these were outside of my best path and not worth (From what little information I had about the anyway) steering towards, although I would have loved to. It was a shame to miss them. I hope they’ve had a chance to learn from this before writing the versions for between later cycles.
Golden But-But-Ding
This was a total surprise at the weekend. I was watching the XLBS and the com spots came up and I hadn’t posted anything for a week or so so I knew it couldn’t be me, then mine was the first name the mentioned. Total shocker! Thanks guys!
Community Spotlight: Gods And Titans, Nerfing Necromunda & An Odd Chaos Army
XLBS video starts at 59.53
Cult Of Games XLBS: A New Perspective – What’s The Focus Of YOUR Hobby?
To the Spring Cleaning judges: Please note that at 1hr 5 mins 13 seconds Ben clearly says, “if you’re going to give a tutorial [golden] button to anybody I think it would be Lawnor”. Pretty sure this means he’s saying I should be winning the Spring Cleaning Tutorial prize for this project.
He also coined the phrase, “Gone very Lawnor” which I hope is a compliment?
And Yes, Gerry, I have put up a review on OTT.
Cycle 1 Finished
I finally finished Cycle 1 last night so I thought I’d come back with my thought and impressions. Let’s start with a quick bit of maths:
Value for Money?
I’ve spent around £370 on this game so far, throughout the life of the first Kickstarter, with a whole lot more going in to the second (Which ends tomorrow!). That’s a lot of money for a board game. I’ve a simple metric to help me feel better about spending money on big boy toys: Does it cost less than time at the cinema? If so, it’s earned it’s keep and proven its value. Around £10 buys around 2 hours at the cinema, or at least it seemed to when I came up with this a few years back. So If I can get an hour’s worth of fun from something for every £5 it cost, It’s broken even and it’s worth it’s price.
So how is ATO doing? Cycle 1 has provided 74.5 hours of fun, and I’ve still got the Onwards Odyssey stuff to do before I start Cycle 2. £370 sets the bar at 74 hours to break even. I’ve crossed that line after 1 of the 5 cycles, and I’m pretty sure the Mnestis Theatre will add another cycle or two’s worth of fun to the game, now I’ve unlocked it.
Assuming 5 cycles provides 5 times the amount of enjoyment, I’ll have got £1,862.5 worth of value from this, or have paid about £1 per hour of fun.
That’s the boring maths out of the way, so here’s a picture to break up a wall of text.
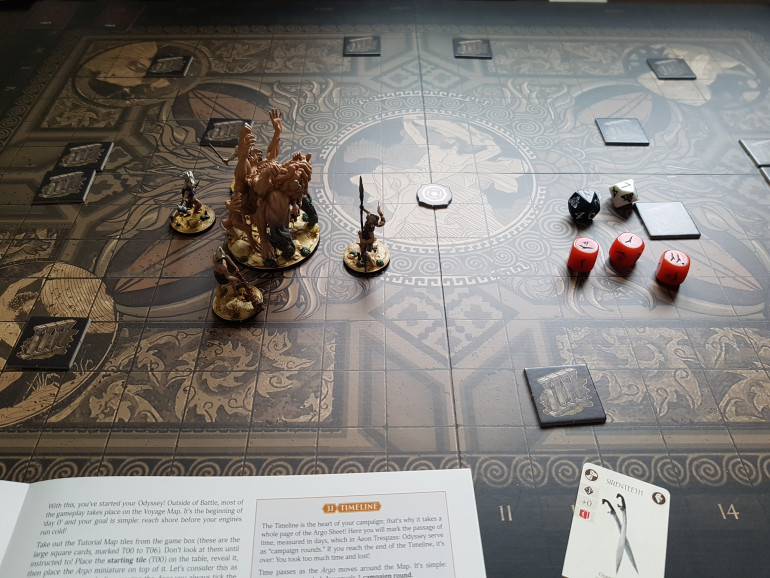
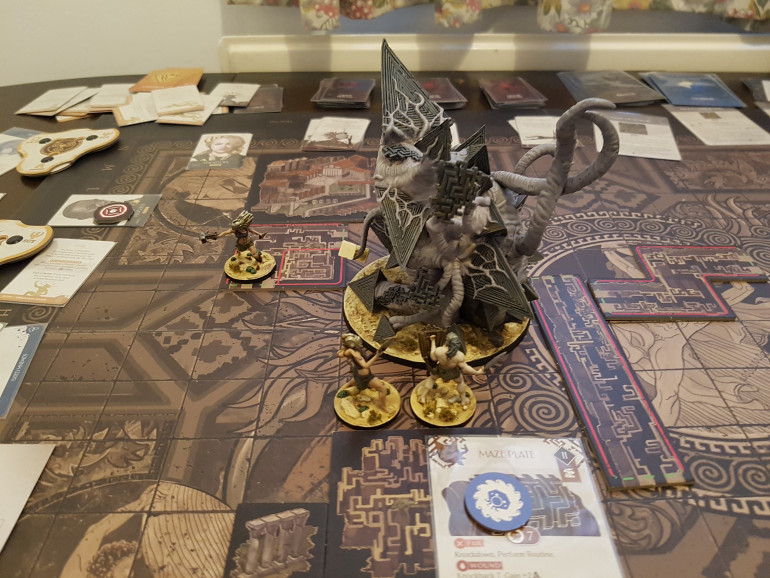 Temenos, getting his teeth kicked in during the final fight of Cycle 1. One of my guys was already dead, and boat shield guy had just climbed up the monster and dealt the killing blow from on his back
Thoughts and Opinions
So how did it actually play? The learn was steep and slow. It’s a huge game with a lot going on so I spent a lot of time going back to the rulebooks to look stuff up, and asking questions on the discord, (if that link expires ask me for a fresh one. it should last) where they’re super helpful (Thanks guys). The game also takes a while to sink it’s teeth in.
To begin with, you fight a monster, then move a handful of map tiles, then fight another monster when you’re told to. Lather , rinse, repeat. This is the game loop. You don’t really feel in control, or like you’re making choices, and the map feels like it’s just a pretty version of what could just be a random events table. However, as you progress the story the map itself becomes fare more relevant, and your choices more engaging and meaningful. It just took a while to get there. It didn’t help that to begin with I could get one game loop done across a day, maybe 2. I did not have the practise or knowledge to progress with enough speed to get to the meat with any pace. I was enjoying the game, but it needed a little something more. I was also distracted by trying to hit hobby goals for the Spring Cleaning Hobby Challenge.
Once that was out of the way and I could embrace ATO and got in the middle of the story I was hooked! I hit a point where I needed to get to certain places and get stuff done before deadlines, while being chased by the Persuer, who was beating me every time. Meanwhile my Argo Fate was threatening to end the campaign, and I had no idea how many Doom tokens it would take to kill me (There are 4 story cards in C1, but only 3 Doom Cards. DO NOT run out of Doom cards!). There is the right amount of tension and pressure and I could see my next goal constantly just a few map tiles away, but then a story would trigger a surprise fight, and the Peruser would catch up to me and what looked like 20 minutes of sailing would turn in to a days worth of combat, and a cascade of story events.
The combat was really interesting. I love the AI and Body part deck escalation mechanic (As you wound the monster you remove the weaker parts and attacks and add in tougher ones, increasing the threat), and that as the fight goes on you also become more dangerous.
The Trauma decks for damage to heroes is really nice 99% of the time too. I love how being hit can do good or bad things. However I think it swings too hard sometimes. It is possible to lose a hero on the monsters first attack before you get to do anything. You can draw a card that says “You just die”. no roll. No draw an Obol (the most dangerous of Trauma cards. 50/50 death chance, but you might turn in to a god for 2 rounds before dying). You do need to have been hit for 4 Danger though, and there are technically items that let you discard them to draw again, but they’re taking up a slot you want better armour in and they’re rubbish otherwise.
This happened on my final boss fight. Round 1 my heavy hitter died before I got to do anything. I knew I couldn’t win after that so I reset the fight and started again and had much more luck. He still died, but he got in a few hits first, and got to add two more ticks to his Evolving weapon (No idea what it’ll become, but curious to see. It’s 6 of 9 ticks now and claims to be a Cycle 2 item, but the game told me to have it).
There is a mechanic in the game to allow resets like this. You can earn “Tears of Sisyphus”. I think I found about 5 across the whole Cycle. Consume one to reset a fight without consequences. I can do that anyway. I’ll create a save state in a campaign game by taking pics of everything. I hate feeling like I’ve lost 40+ hours of work because something unpredictable happened and now I’ve lost too much or something I cannot replace. I’m tempted to house rule that the Tears can be used to redraw from any Trauma deck, but you have to put the last card back in and shuffle first. With their rarity I won’t use them lightly, and using them on Obols would be a waste. Titans are usually a consumable resource. I don’t mind losing one or two in a fight, but there are key fights or key moments where it matters a whole lot more. There were times I started fights planning on losing everyone, but I wanted to go in to get what resources I could before dying.
The Trauma deck can swing the other way though. you can be on the brink of a full wipe, get hit bad, draw a card and suddenly you’ve got an interrupt attack, or your knocked down guy gets to stand up and do things he wasn’t going to be able to, or you just turn in to a god for two rounds and fry the monster with lightning.
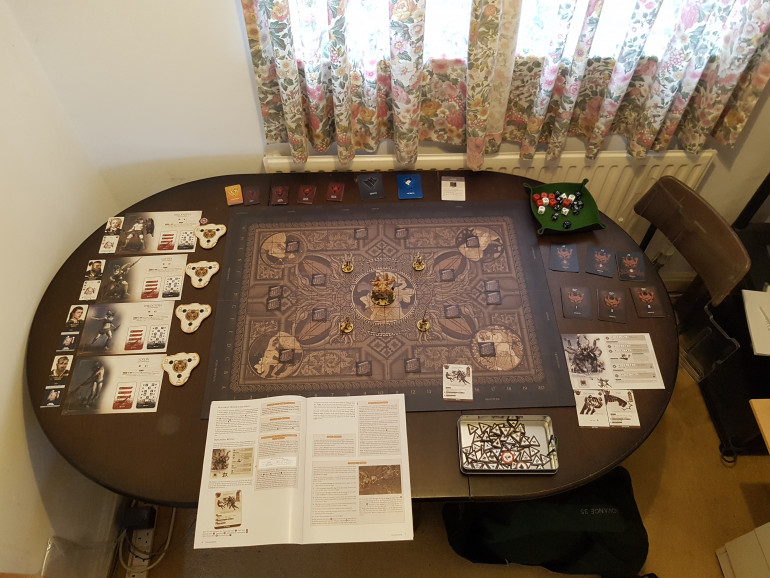
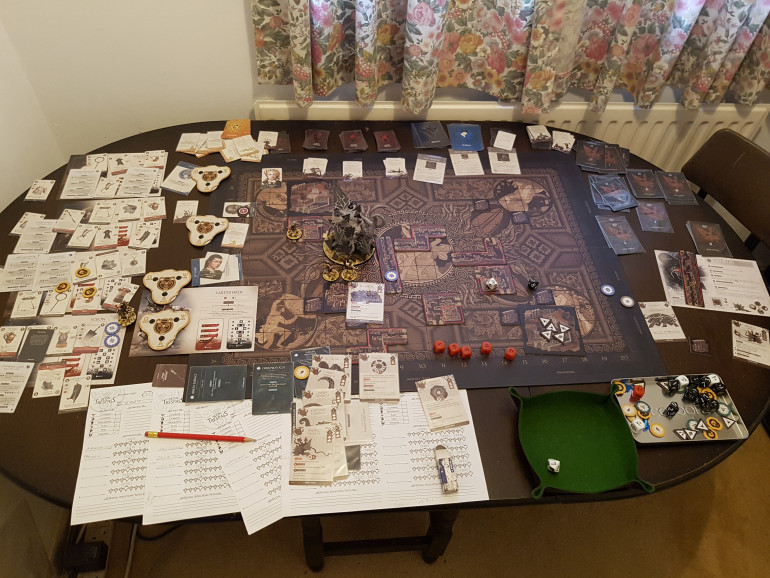 Have another pick before I waffle on any longer. Here's my final table state, with the corpse of Temenos in the middle. This is only my battle table. There are two other tables!
The game has a lot of unlockable secret information in it. This is great. You’re exploring and discovering things. Some things are only relevant during certain story stages. other stuff you need the tech to understand. Great. However there are times this doesn’t feel good. In Cycle 1 there are a few map tiles with icons that look like a bulls head on top of a tower. This icon does not appear in the map tiles section, or the icon reference section. Does that mean it’s secret information to unlock, or does that mean I’m not looking in the right section of the book? Who knows? (google knew in the end. It was secret information I hadn’t unlocked yet).
Another thing it does is give you notes to write down that might only last for one fight, or might last forever. It might give you an Affliction or a Boon, which are not listed or defined in the rule book. You just have to trust that when they become relevant the game will tell you, because there’s nothing to look up. Sometimes it gets it wrong. I had a Boon at one point and nothing triggered it. I found out many fights later that it meant I should have attacked before the monster, but the game didn’t tell me that at the time. I hope that future products contain a reference sheet of information that is secret so you can tell it’s secret. I hope it also contains page references for if you need to look it up anyway (For example, I knew I’d seen that bull tower symbol before and I couldn’t remember if I had been told what it meant).
I’ll freely admit that some of the above problems might be a Me thing. I was playing solo and there’s a lot to keep track of. Maybe I had been told more things and they just got lost in the confusion of it all?
The game takes up A LOT of space. Mine takes up a dining table, a desk, a 2×4 on top of a chest of drawers, and 4 small shelves. It’s a sprawling mess. it is not a game you want to be packing up between sessions either, if you don’t have to. You could, and I’m sure there are things the space deprived could to (Like putting the battle board on top of the map and swapping the map minis for tokens). Just know what you’re getting yourself in to, space wise.
C1 Final Thoughts
So is it worth it? I think so. I’m really enjoying it and I’m looking forward to starting Cycle 2 after a short (??) Diablo 4 break (It’s been out for 11 hours right now). Just know what you’re getting yourself in to. It’s huge, and can be slow to get in to, but once you’re there it’s really worth it. A lot of the story plays out like a Fighting Fantasy book so consider if you and your group want to sit there and have one of those read to you for chunks of the game. I don’t know how well that would work in a group.
If you have any questions please feel free to ask. There are 29 hours left on the current kickstarter. I have gone all in on it and if you think you might like it I recommend picking up the core set, with the option to add more through the pledge manager later.
Return to Kickstarter
It’s back on Kickstarter for a second printing, and a standalone expansion. If anyone is curious, now is the time to get involved. There’s 7 days left at the time of posting. I’m happy to answer any questions about the game I can. I’m currently about 60 hours deep in to Cycle 1 of 5, with the end of C1 in sight. I think? it took a little while for it to sink it’s teeth in to me, partially because I was distracted by hitting hobby targets, but I’m really enjoying it now. I really need my job to stop getting in the way of my playing it.
Early Playthrough Thoughts and Opinions: Battle Report Adjacent Content
I’ve just had a week off work and one of my missions was to get enough games in to know if I want to spend more money on the next KS in a few weeks. I played through the tutorial early in the week, and here’s my thoughts. I’ll be comparing this to Kingdom Death as the parallels are obvious, KDM is fairly well known of, and it’s my only similar experience. It’s an acceptable benchmark.
There will likely be some spoilers below. You have been warned. I’ll keep story stuff out of it.
Day 1
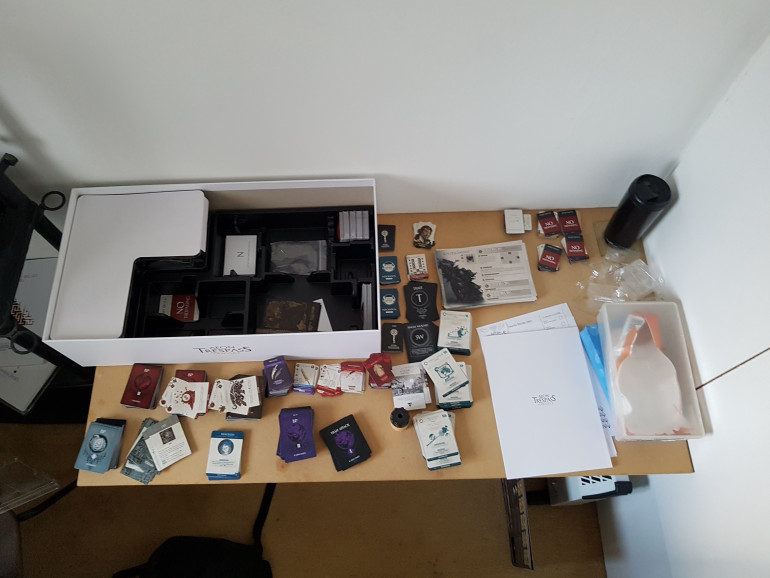
Monday after lunch I got up from my painting desk and started setting up the game to play. The tutorial teaches you how to play, without expecting you to read anything before hand. That’s what I like. It starts with reading a bit of story and then jumping straight in to a fight against the Hekaton. Simple enough. Let’s jump right in there. That’s what we want. Except it wasn’t that simple after all. The game comes with 4 different sizes of cards, split over something like 20 cellophane wrapped bundles. Typically card decks were packed together, but not always. Some decks had a “Do Not Trespass – Secret Deck” card at one end, making me reluctant to open them. Turns out that was just 5-10 cards at one end and the rest of the deck is safe, if not essential.
There was no “Start Here” bundle of cards. the cards you need for that first fight are scattered randomly through all those bundles. There’s no in-box guide to where they are, or what they look like, or what size cards you’re looking for. No dividers were provided so there’s no guide as to how to organise the cards before play. You have to figure this out over a few games.
I could not find all the cards I wanted. It took ages. It was really frustrating and gave me a headache. I really could not find the Routine card for the Hekaton. I’d seen one for another monster so I knew it said Routine in big letters on it’s back. I’d been through every deck 3 times but no luck. I asked on the discord and they pointed me towards an official 14 page Getting Started PDF they made after the game came out telling us where every card is and how to find them. This should have been in the Tutorial. It is essential. it turns out the reason I could not find a Hekaton card with Routine written in big letters on its back is because there isn’t one. His card is double sided and I’d seen it plenty of times already. This would go on to be a running theme throughout the tutorial, and in to the early game. The game would tell me I get something, or I should put something in play, and give me no clue to if it has a physical component, and if so, what it looks like.
Some friends popped round briefly half way through all this to drop off some stuff. by the time they had gone and I actually had the game set up it was nearly dinner time and I was frustrated with the game, and had the beginnings of a headache, so when I had finished setting up the first battle I went to cook and settled down to paint.
Day 2
I did some airbrushing in the morning, but after lunch it was back to learning the game. Time for the first battle. The first round or two is largely pre-written, with instruction like, ” We’d normally draw an AI card at random, but for now just draw Card X”. That’s fine. It helps teach clearly. Once you have the basics it lets you complete the fight on your own. Here’s where I ran in to another problem that keeps cropping up throughout play: The game uses a lot of symbols, but has no exhaustive symbol chart. It doesn’t always tell you what the symbol means or is called so when you find one you don’t recognise and it isn’t on the partial chart at the back of the book you can’t even look it up in the index. It’s frustrating and brings the game to a halt when it happens. I’ll be going to BGG to see if someone has made a full symbol chart very soon.
My fight went well. No one died. It is very similar to Kingdom Death, but it handles damage to you and the monster quite differently and interestingly.
Monster Damage
Each monster has 3 AI decks and 3 Body part (BP) decks, levels 1, 2 and 3, with 6 cards in each deck. The dame starts with Decks 2&3 put on one side. When the monster activates he draws the top AI card. Simple enough. When you hit a monster you draw the top BP card and resolve it. If you wound you claim the card and replace it with a card from the next level up deck. You also remove an AI card of it’s level and replace it with a higher level AI card. Both decks get shuffled. This is called Escalation and is quite interesting. Higher level cards are harder to hit, but can have better rewards. Level 3 BP cards are worth double damage. You can always see the level of the AI card that’s about to hit you and the level of the BP car you get to attack next. This will affect the choices you make. Do I wound him now knowing that AI 1 card is the last 1 in the deck, or do I let him attack me with it, instead of the lvl 2 or 3 beneath it?
Character Damage
When you get hit you don’t exactly take damage. Your Danger goes up from 0-9. Every time you take damage from an attack you increase your Danger and then draw a Trauma card from one of 4 decks based on your Danger level. The worst deck has 2 cards in (You live and You Die). Quite a few of these cards are beneficial, granting you interrupt attacks, or some healing etc, but some will kill you outright, or knock you over, or apply Fear, etc. It’s a great mechanic. I’ve won fights when the monster is doing scary attacks on me because I’ve been hit and got a surprise reaction attack and killed him. Likewise, I’ve had Titans die when their Danger wasn’t all that high. As the game progresses you will find ways to mitigate the randomness of these decks. A few games later I found an item that lets me redraw once per battle.
With the battle over, it was back to the voyage. Again, there were issues with symbols and not knowing what I was looking for in the box, but I’m getting used to it now, and more experienced and knowledgeable. Again, everything was predefined and there wasn’t any real choices to be made in this part of the tutorial.
The timeline for ATO is different from Kingdom Death. One Turn/Lantern year is not Settlement and Fight. One Turn/Day is a cycle through the voyage phase. You can move your ship one tile. You interact with what’s on the tile, and get a little basic loot from exploration. The timeline has defined points on it where you just get to perform a research action (KDM equivalent would be innovation, or building a new location). It also has fixed points when fights occur. You will experience story as you move about and that can trigger extra fights at unexpected times.
I’m not sure how I feel about the timeline. It feels like its taking away a lot of my interaction by telling me when to do things. I’m not choosing them or earning them. However, in theory, this means everything should be easier for them to balance. When I backed the game I figured everything would be triggered by my choices or by exploring and experiencing story. Some of that holds true, but not as much as I’d expected. Maybe that’s on me, or maybe it wasn’t made clear in the KS.
The tutorial’s Voyage phase lasts for 7 days and has no real choices in it. the map get’s replaced once you move to the full game.
By this stage I sorta knew how to do things well enough to know what it was I needed to look up every time I did anything. I wasn’t hooked yet. That’s fine. With KDM it took until I was going in to the second fight and seeing the consequences of my choices that the game got it’s hooks deep in me. I haven’t really made any choices here yet, and I’ve only had one fight. I’ll come back tomorrow and play some more.
Day 6
I played at least 1 fight and did some voyage every day for the rest of the week. it took a few more fights for the game to grab me. I’m not as hooked as I was with KDM, but this is a good game, with a slow, badly organised painful learn. If/when I teach this to other people I’ll smooth all that over by having everything ready before anyone arrives. I like the monster damage mechanic. It forces choices about whether or not I want to attack. It might be nice to have something else to do with my action though. I guess options will present themselves later. The trauma cards are exciting. You never know what’s going to happen and you can never count a Titan out, until they’re actually dead. Anything can happen.
The voyage phase can go really quick, or take forever, depending on what you trigger, which can make it hard to plan your time. I think I have accidentally gotten really lucky on the central plot quests and gotten much further ahead than they expected me to at this stage. I just had an encounter that expects me to have reach and ranged weapons. I haven’t discovered reach weapons yet and I’ve not built any ranged as the basic ones didn’t look that good. There was no option for what to do if I don’t have any. I think I had the option not to trigger that story just yet so I’ve rewound a smidge and I’ll restart it once I’m a little further up the development tree.
I am definitely enjoying the game. It took a lot longer for ATO to get me than KDM did (3-4 fights, or about 10 days in to the Cycle 1 timeline), but it is a good game and I’m keen to see what treats it has in store for me. Right now I’d say KDM is the better experience, but I may change my mind by the time I’m done, and even then it would be a personal choice based on what you want from a game. There are lots of times when ATO becomes a choose your own adventure style game. I’m not convinced that’d work well when one person is reading to three others. I don’t think I’d be able to keep up. I’m already having to reread a lot of stuff to keep it straight in my head. Maybe that’s just me though?
My plan was to play 2-3 games and then switch back to KDM until Wave 2 dispatches. That’s not happening. I’m at least playing out Cycle 1 now. KDM can wait. That’s go to say something about the game.
Box Layout
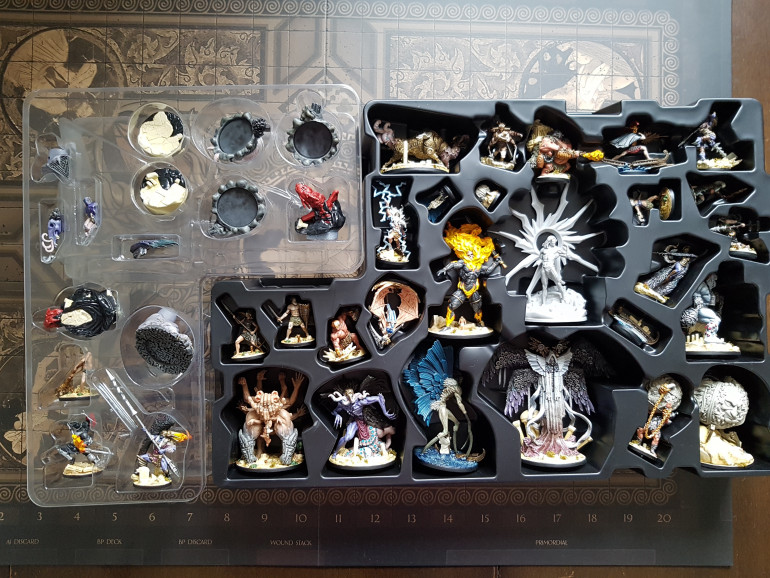
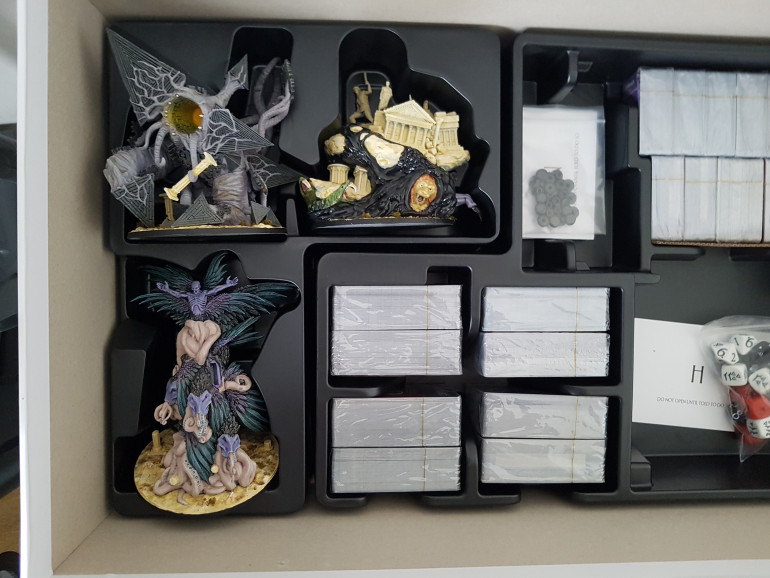
This post is as much for me as anyone else. We all know once those minis come out I’m never going to remember where they belong. here’s two pics for everyone trying to fit the minis back in the box.
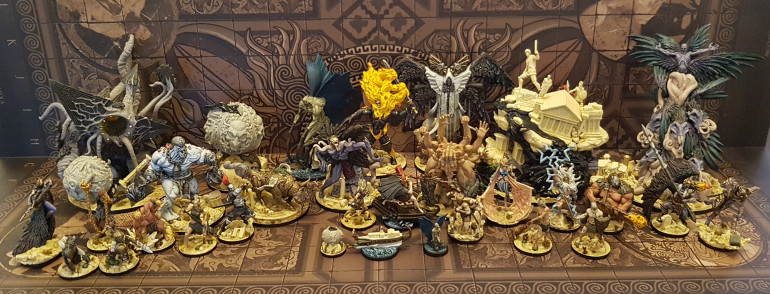
Group Shot
Here’s a group shot of all the finished minis. I got them together to demo some games over the 4 day weekend, but I seemed to get allergic to something in that room while I was finishing off Gloomhaven Jaws of the Lion. I decided to let the room air and paint instead, but I did get as far as taking this pic. Dry itchy eyeballs and a runny nose destroyed my motivation. I’ve had the windows open at all times. Hopefully that’s cleared the air in there enough?
I’ve the coming week off work and it’s one of my goals to get this game played enough to form an opinion before the kickstarter starts in a few weeks.
Cycle 3: Sun Descendant
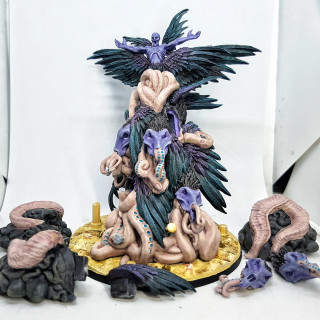
Here we go. The final game piece from Wave 1. Wave 2 is due later this year, but we all know kickstarters always suffer delays. I think that’s 31 models and 12 plug and play parts finished. I’m leaving Helios unpainted for now. He has no in game use and is just an extra for painting. They suggest using him as a first player token, but he’s way too tall and would get knocked over every time someone reaches across the table. Plus, I don’t want someone constantly handling my paintwork. It’ll chip and wear off quickly. I’ve got models that need painting before they can be built and put on the table. I’ll come back to Helios once they’re done, or if Helios gains some rules.
Purple Flesh
This scheme is looted and modified from Vallejo’s Non-Death Chaos set. For some reason, theirs looks blue even though it’s painted using purple paints. I swear they cheat.
Zenithal Preshade
Wash 2:1 VMC 72.048 Sombre Grey: VMC 72.016 Royal Purple (My zenithal blacks were too dominant, so I ended up applying something thicker than a wash to cover this up, and probably 2-3 coats. Ideally, you want a smooth black to white transition before you begin, and then use a very thin wash over it to tint it. I learned from doing this on the Harpy and applied a smoother zenithal prime, but I still didn’t thin my wash down far enough. I’ll have to look for a smaller model to really experiment with this later, when I’m not pushing to Get Stuff Done.
Shade with Royal Purple
Highlight with base
Highlight with base with increasing amounts of VMC72.003 Pale Flesh
Feathers
Base with a single coat of thinned P3 Umbral Umber and mixing medium (Almost a wash this time. Thinner than on earlier models) over a zenithal prime. I could see lots of the white showing through, but it was tinted brown.
Wash with Vallejo Black Ink thinned about 2:6 with Instar Water+. It’s like water, but better. Don’t ask me how. All I know is everyone swears they won’t go back to water after. Using water in a wash can lead to tide marks and I wanted to avoid that.
Drybrush with P3 Frostbite, and then selectively with White.
Mix up 2:3 glazes of P3 Turquoise Ink and Water+, and Vallejo Violet Ink and Water+, keeping you 2:6 Black Ink mix to hand
Glaze on the colours where appropriate, allowing them to mix a little where they meet. Apply another coat of the black ink wash anywhere not getting colour, again allowing transitions to blend.
Tentacles
Tentacle Flesh:
Base: P3 Troolblood Highlight, P3 Ryn Flesh & P3 Carnal Pink
Wash: Base +Traitor Green
Wash: Above+ Beaten Purple
Highlight: Ryn Flesh, Carnal Pink, and P3Menoth White Highlight
Blue Suckers:
Base: VMC 70.866 Turquoise
Highlight middle with VMC 70.808 Blue Green
Highlight middle by adding more and more Reaper 09150 Bloodless Skin or any other off-white to the Blue Green
Teeth
Based with P3 Menoth White Base
Washed with GW Agrax Earthshade
Reclaimed with P3 Menoth White Base
Highlighted with P3 Menoth White Highlight
Human Flesh
Based with P3 Midlund Flesh
Highlighted with P3 Ryn Flesh
White Cloth
Base with Reaper 09149 Mouldy Skin
Highlight with P3 Morrow White (Or any pure white)
Wash with Reaper Mouldy Skin
Grey Stone
Base: VMC 70.869 Basalt Grey Airbrushed on for transition. Do after flesh base colour but before detail so you can fix unwanted overspray
Drybrush: P3 Jack Bone, maybe even P3 Menoth White Base
Wash: GW Nuln Oil
Revisit drybrushing if desired
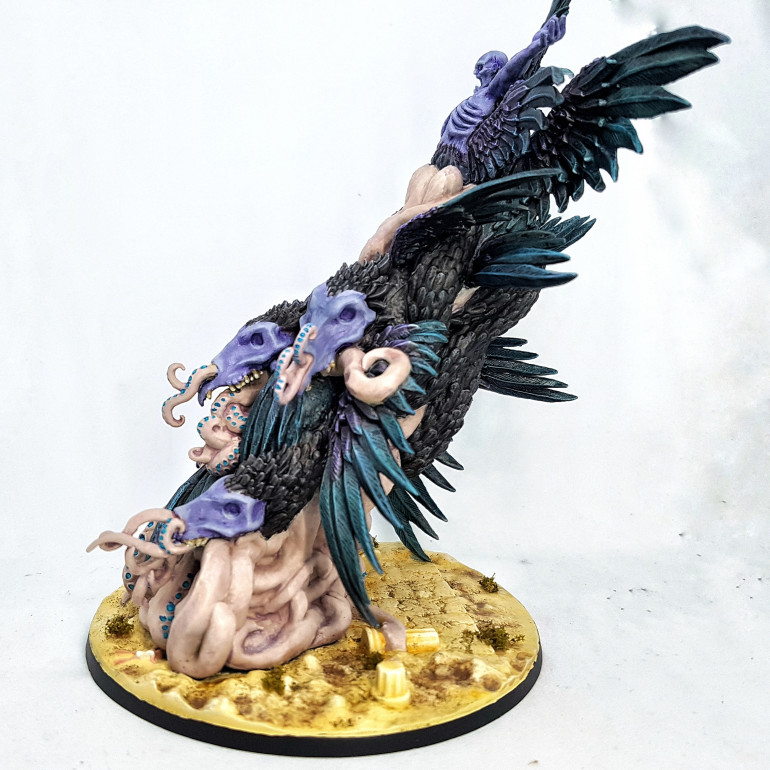
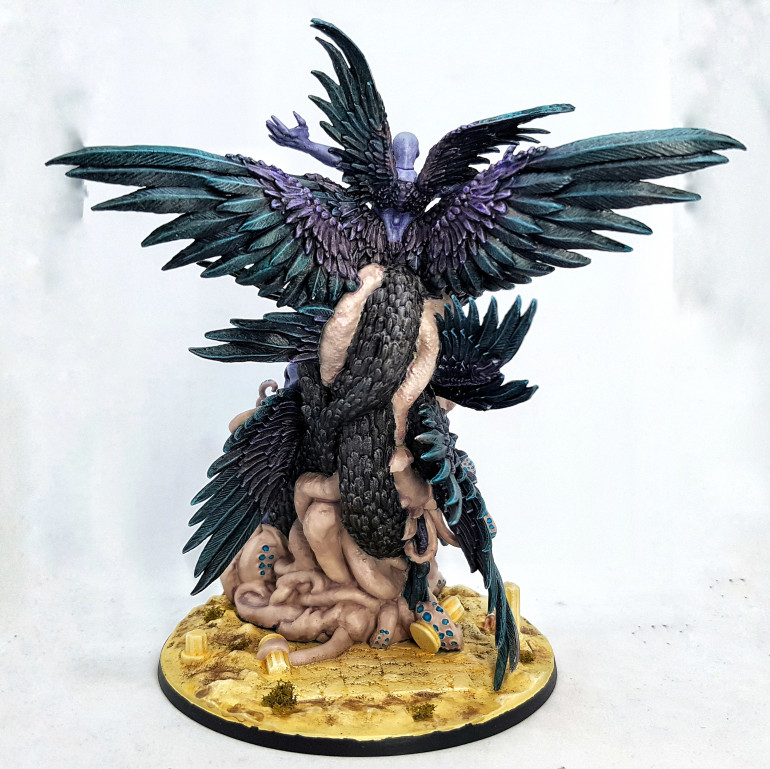
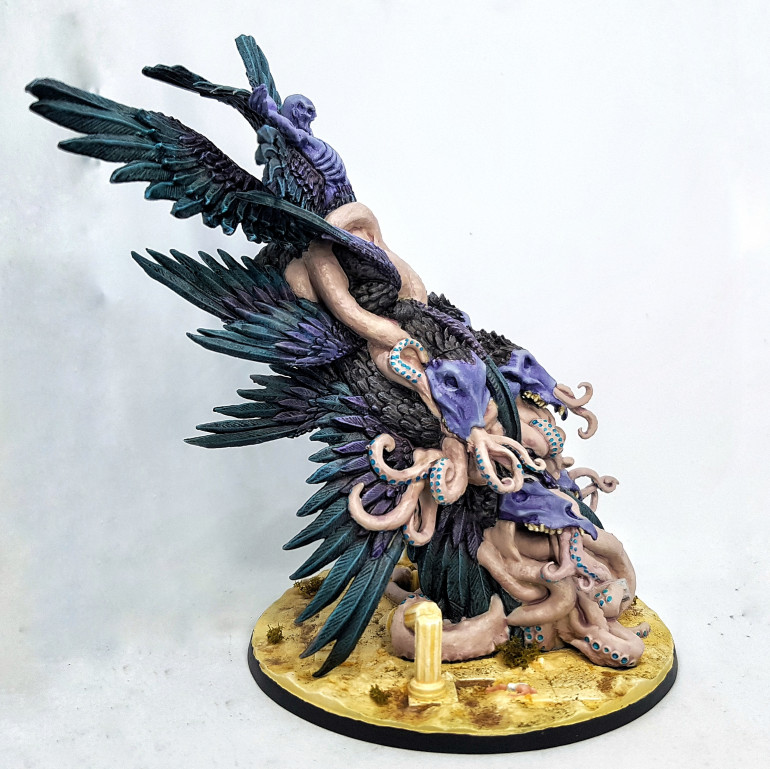
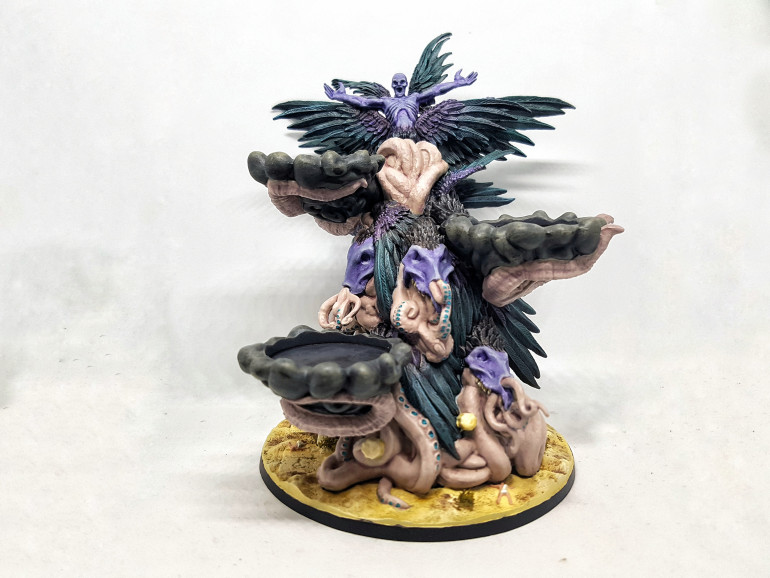
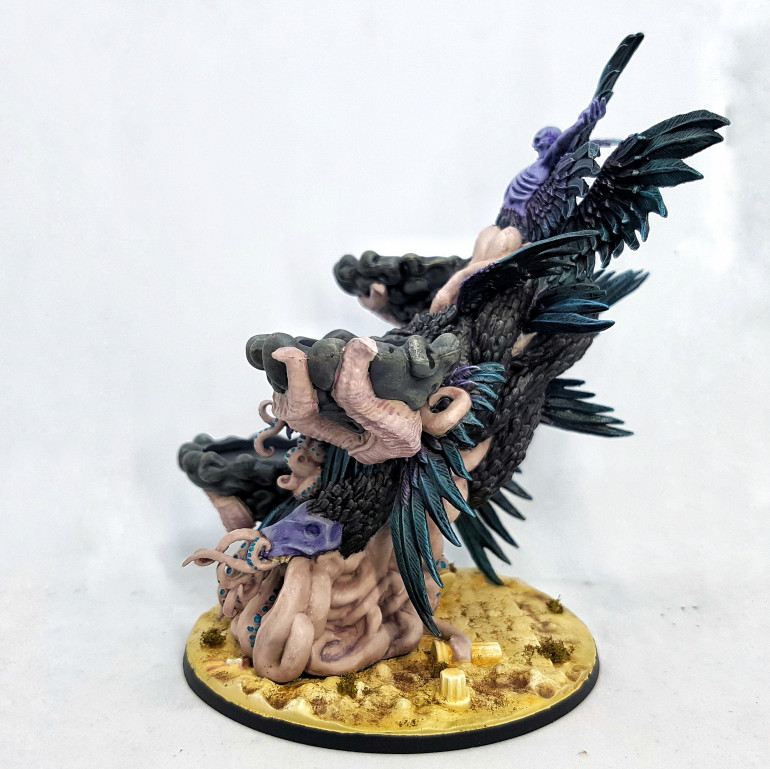
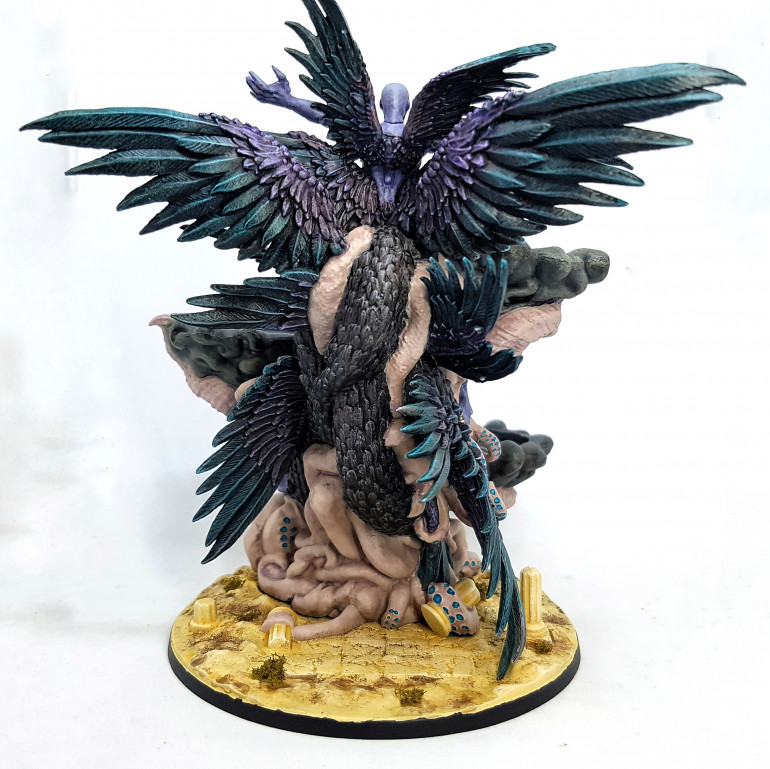
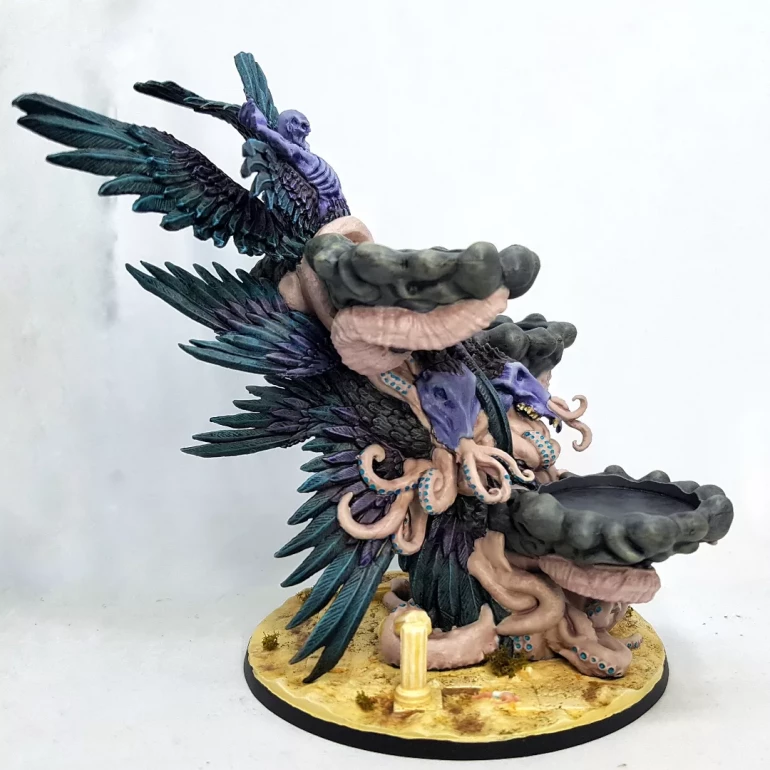
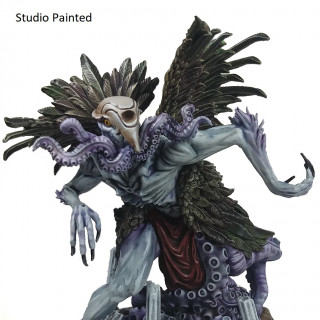
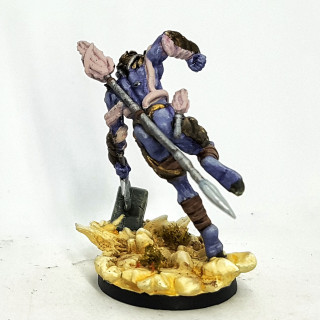
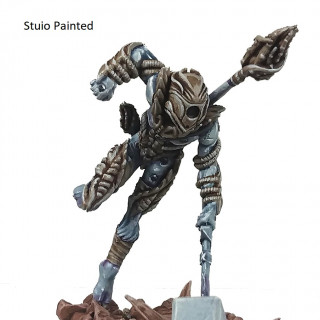
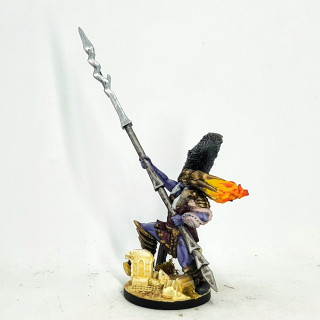
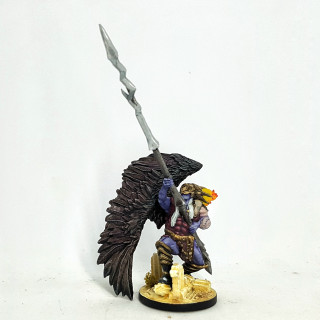
I deliberately did not paint the eyes. I don’t think it has any we can see. I suspect the human and animal parts are not real. Some animals have fake eyes and faces on the decoration to scare off predators or distract prey. I think that’s what’s going on here (I’ve not read it’s lore). I think prey is supposed to be too busy making eye contact with one of those purple faces to not notice the lower wings and tentacles opening up to reveal a face with an octopus beak, or rows and rows of teeth that the tentacles lash out and pull you towards.
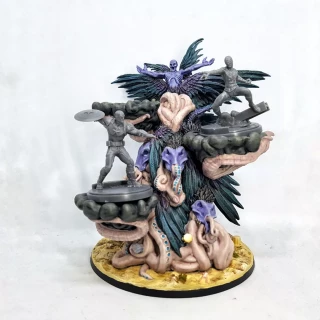
Once again, this guy comes with plug and play platforms. See pics below bot with and without them.
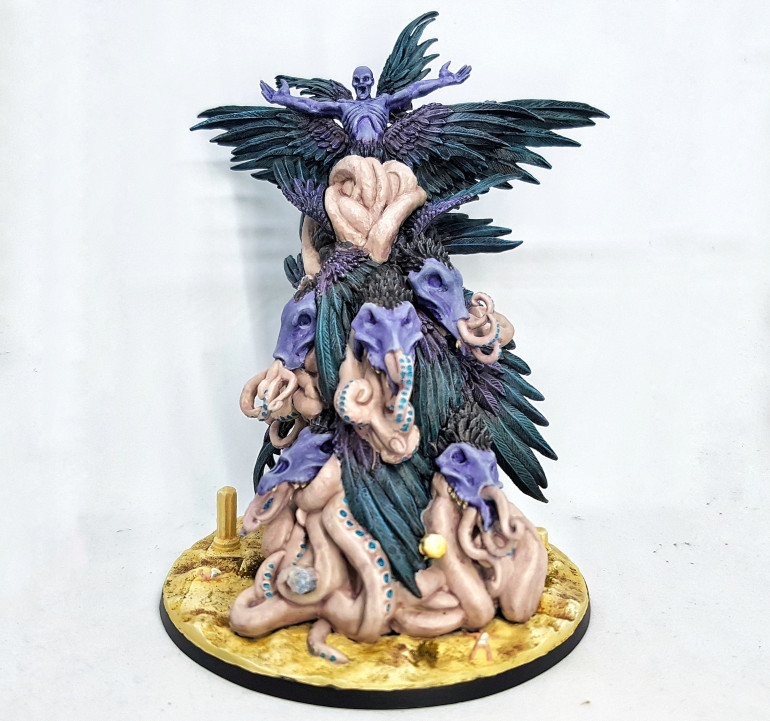 I did notice that unpainted pillar and have since painted it, but the updated photo is not as good. See the below image with the platforms as evidence
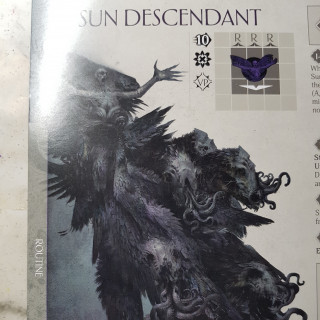
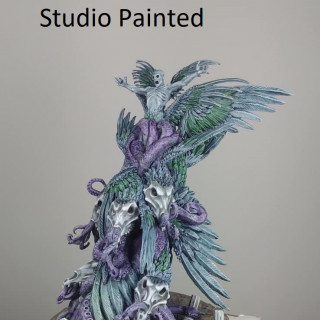
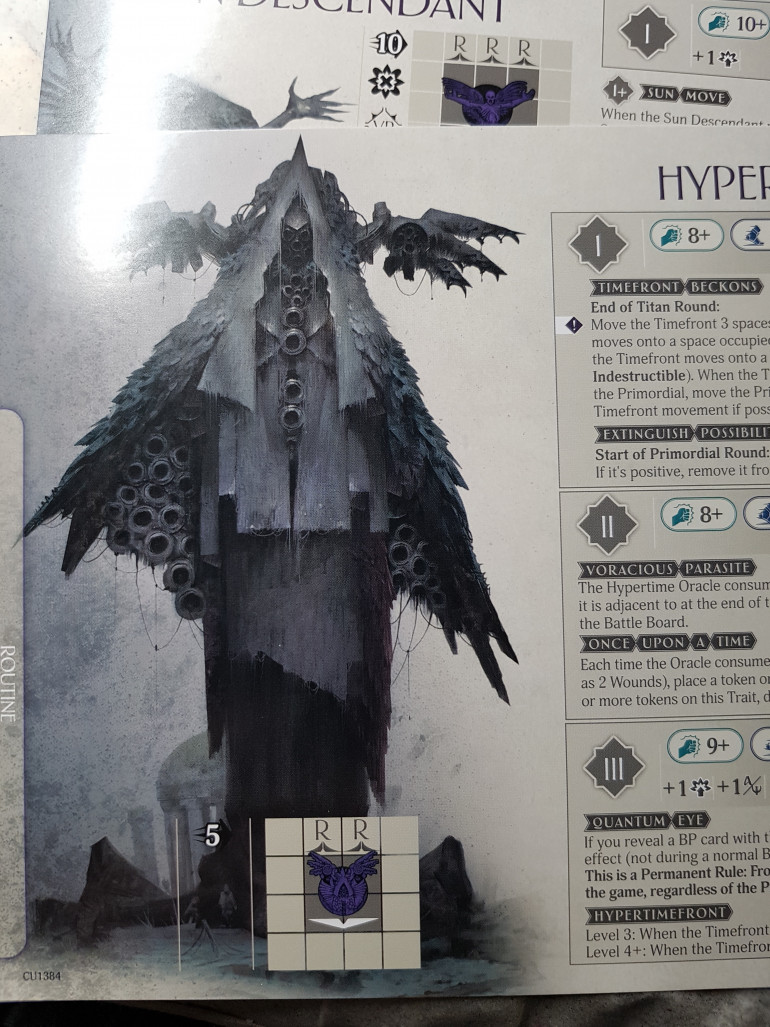
The last 4 pics in the gallery show him with the modular parts detached, with the platforms on and some MCP models using them (They were the only models nearby), the art from his stat card (All darkness and shadows. Moody and cool, but not super helpful for working out what’s what, or suggesting what colour anything is supposed to be), and a pic of a painted piece I think I got from their Facebook page?
ATO is returning to Kickstarter on 16th May 2023 for a second printing, if anyone is interested:
Just a reminder! Aeon Trespass: Odyssey returns to crowdfunding May 16th 2023! Mark your calendars! The campaign will encompass a second printing of the Core Game, its Expansions, all original add-ons, and much more!
There will be new add-ons (Obol dice for card haters ;p), as well as new gameplay content. As mentioned above, there are no major rules revisions planned, there is not much to fix or re-balance! We’ve made a hell of a robust game! If nothing changes, the few errata-ed game components will be simply offered to the original backers for free or bundled with something fun!
My plan is to play through the Prelude intro module over the 4 day Easter weekend so I can work out if I want to throw more money at this before the KS goes live, and decide if I want extra dice and perhaps the luxury tiles. I need to finish the final 6 missions from Gloomhaven Jaws of the Lion first. Gonna try for that this weekend now I’m all done with this and it’s not freezing in my games room anymore (stupid winter, stupid UK government, and stupid corporate greed!) There will be another KS later on for the Expandalone, ATO: The Twelve Sins of Herakles.
If you want to follow them on KS so you get notifications of these projects, the link is HERE.
I’ll be back on this project after Easter with some group shots of the minis, pics of the game in use, and my opinions on the Prelude module and the game. I don’t plan on getting deep in to the game until Wave 2 is at least on the boats. I don’t want to have months, perhaps years between cycles 3 and 4 as I’ll “lose my place” in the story, and forget how things work. I also suspect there might be some elements yet to arrive that can be accessed during Cycles 1-3. I wonder if this will be a game I’ll only want to play through once as it’s so narratively led so I may as well make sure I have all my content available so it’s not missed or wasted. I do want to go back and play more Kingdom Death campaigns, but that’s far more sandboxy so it’s a different exprience.
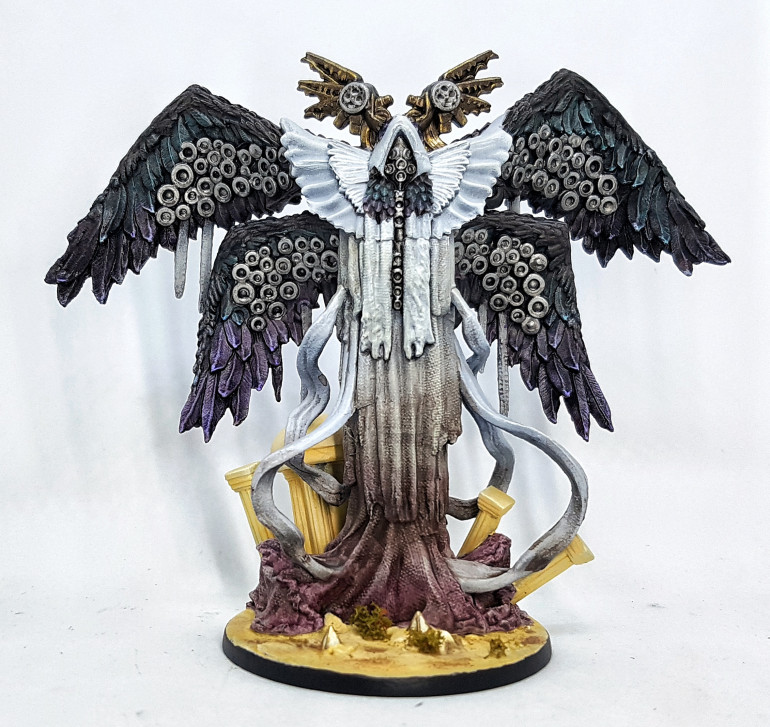
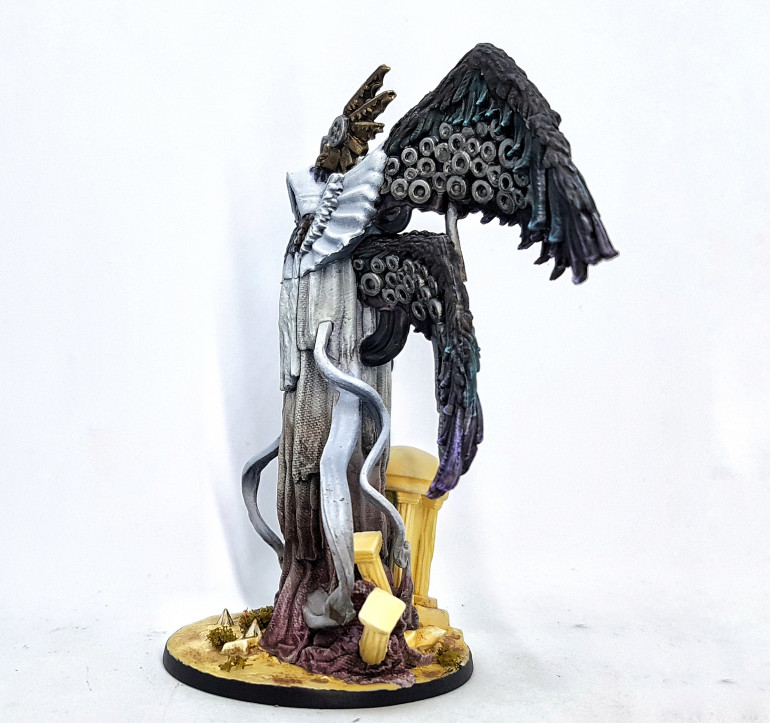
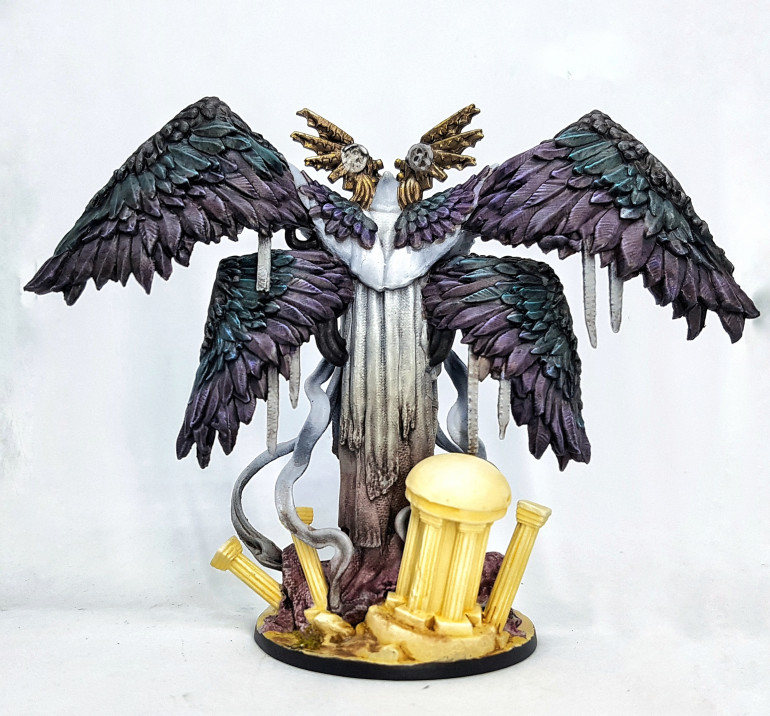
Cycle 3: Hypertime Oracle
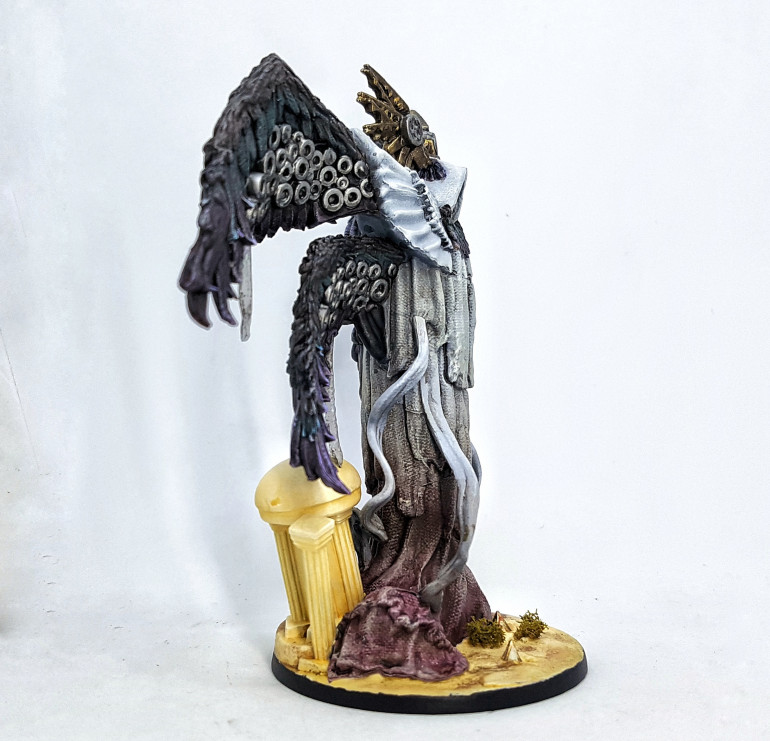
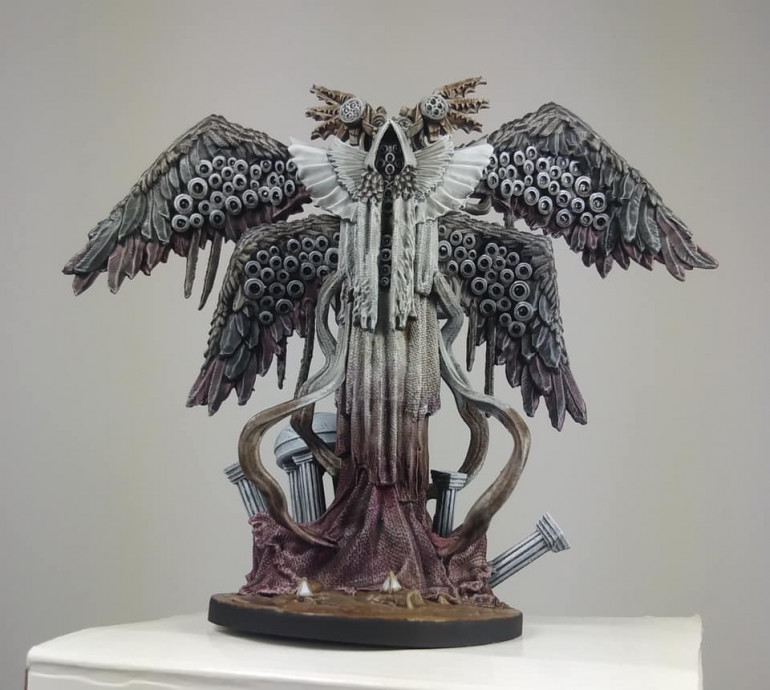
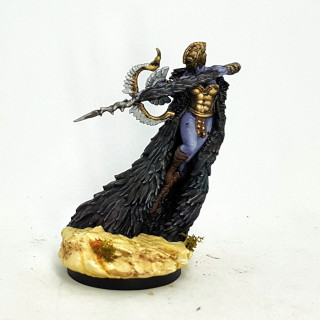
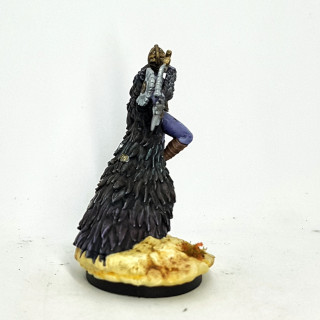
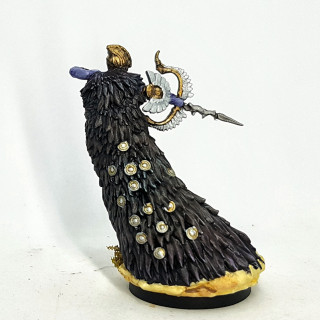
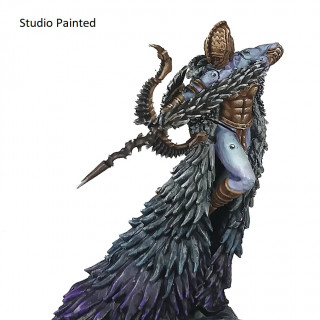
This is definitely an interesting design. I’ve still no idea what those circles are on the wings. I wasn’t sure if they were more tentacle suckers, but they look metal on the studio version. Are they walls of speakers? Portals through time and space? Or is he just trying to sell you a watch in a back alley? I’ve no idea yet.
Just one more game piece to paint and Wave 1 is completely table ready. I hope to get started over the Easter weekend or soon after. I’ve 6 games of Gloomhaven: Jaws of the Lion to finish first though. I suspect a battle report won’t work so well for this but I’ll likely be back here with pics and opinions soon after.
Dirty White Cloth
Start with a zenithal prime
Zenithally airbrush VMC 70.990 Light Grey
Zenithally airbrush VMC 70.990 Light Grey Mixed with VMC 70.951 White
Zenithally airbrush VMC 70.951 White
Pinwash shade with VMC 70.994 Dark Grey
Mix up a wash of P3 Sanguine base mixed with just enough p3 Battlefield Brown to darken it
Prepare some Italeri Wash Oiled Earth 4953AP wash
Apply them both where you see fit, sticking to the textured linen/canvas sections, and avoid the smooth cloth. Allow them to bled in to each other then dry them off.
Keep applying them one at a time, mostly drying between coats. Build up layers and layers of dirt this way
Throw in a single layer of GW Athonian Camoshade at the dirtiest point
Put a single layer of GW Carroburg Crimson towards the bottom where the red would be the dominant tone
Work with the two original washes until you are happy. I’ve no idea how many layers I put in, and their placement varied each time.
When you’re happy, gently drybrush Reaper 09149 Mouldy Skin over the lower/dirtier parts
Gently drybrush Reaper 09150 over the cleaner and higher up dirty regions
Drybrush pure white as a highlight over the clean white areas.
Wings
Same as earlier, but the darker colours were thinned further
Base with a single coat of thinned P3 Umbral Umber and mixing medium (Almost a wash this time. Thinner than on earlier models) over a zenithal prime. I could see lots of the white showing through, but it was tinted brown.
Wash with Vallejo Black Ink thinned about 2:6 with Instar Water+. It’s like water, but better. Don’t ask me how. All I know is everyone swears they won’t go back to water after. Using water in a wash can lead to tide marks and I wanted to avoid that.
Drybrush with P3 Frostbite, and then selectively with White.
Mix up 2:3 glazes of P3 Turquoise Ink and Water+, and Vallejo Violet Ink and Water+, keeping you 2:6 Black Ink mix to hand
Glaze on the colours where appropriate, allowing them to mix a little where they meet. Apply another coat of the black ink wash anywhere not getting colour, again allowing transitions to blend.
Gold
Base Darkstar Blackened Bronze
Wash GW Agrax Earthshade
Highlight with base
Highlight with base and Darkstar Royal Gold
Highlight with Royal Gold
Highlight with Royal Gold mixed with Darkstar Pale Gold
Highlight with Pale Gold
Mini pyramids on base had their middles painted with Reaper 09150 Bloodless Skin
Iron
Base P3 Pig Iron
Wash GW Nuln Oil
Highlight Pig Iron
Highlight P3 Cold Steel
Highlight P3 Cold Steel mixed with Quicksilver
Highlight P3 Quicksilver
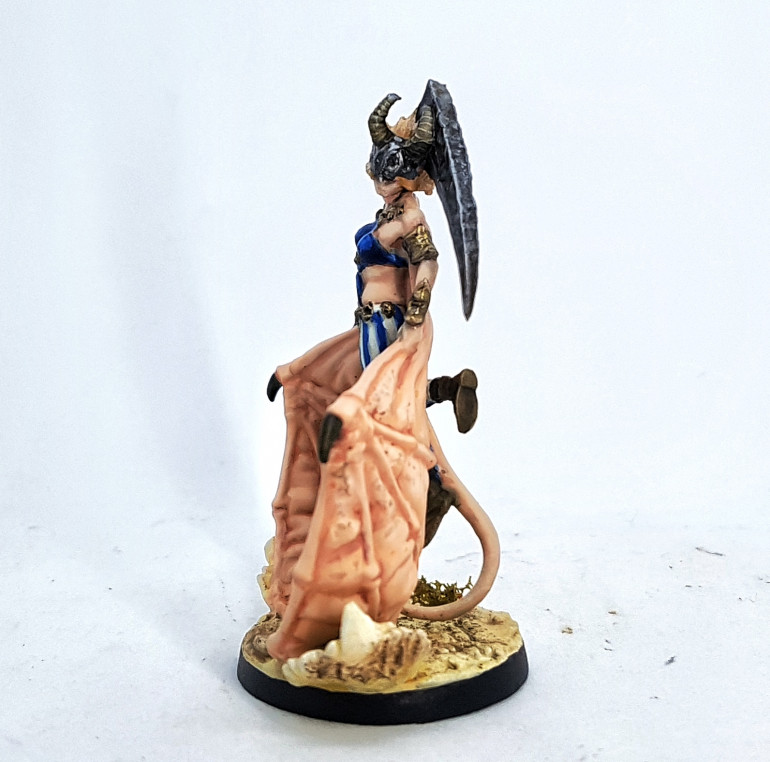
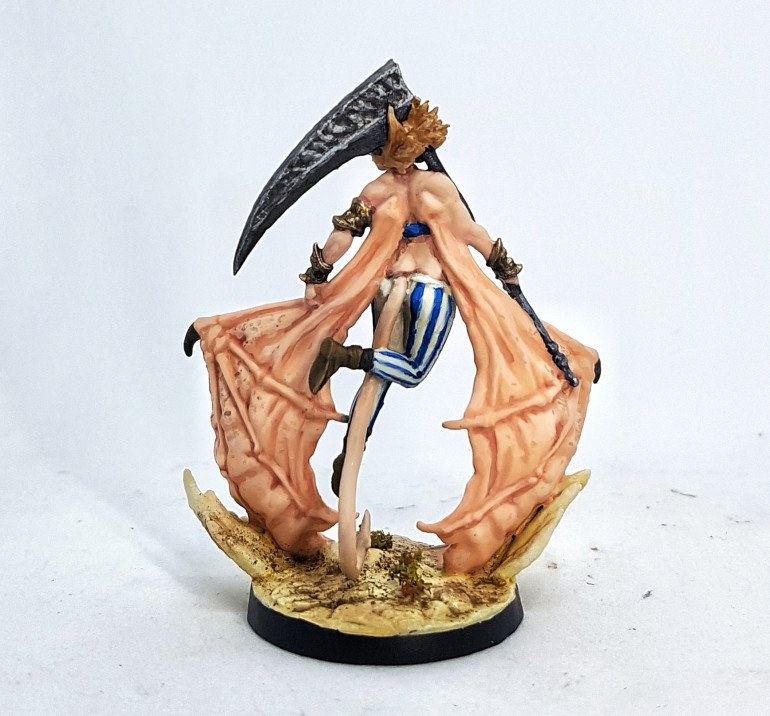
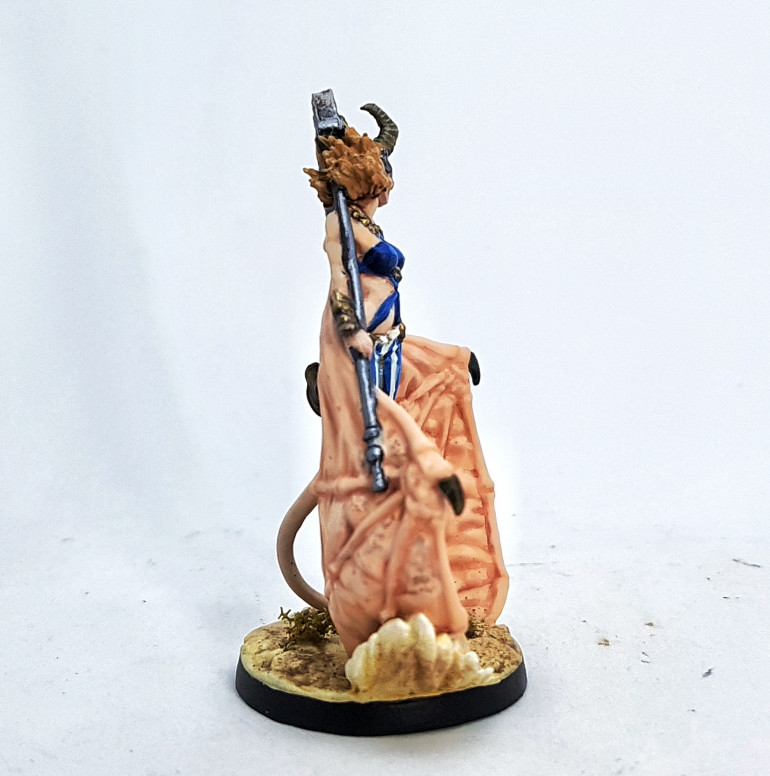
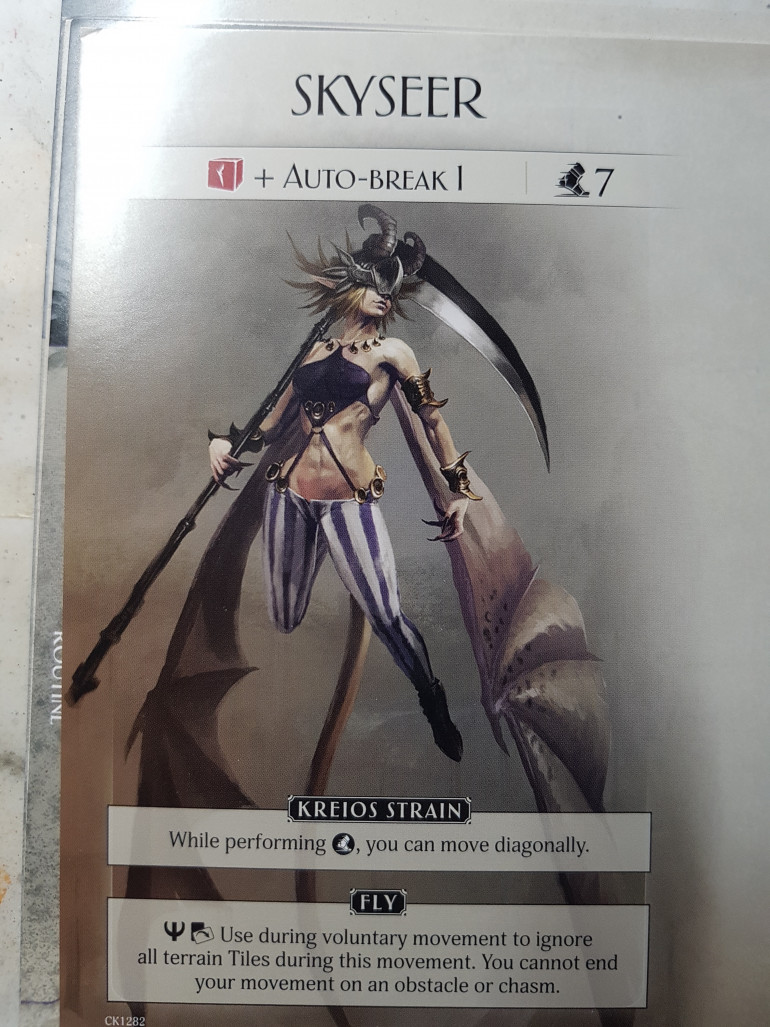
Cycle 3: Nyx Skyseer Titan
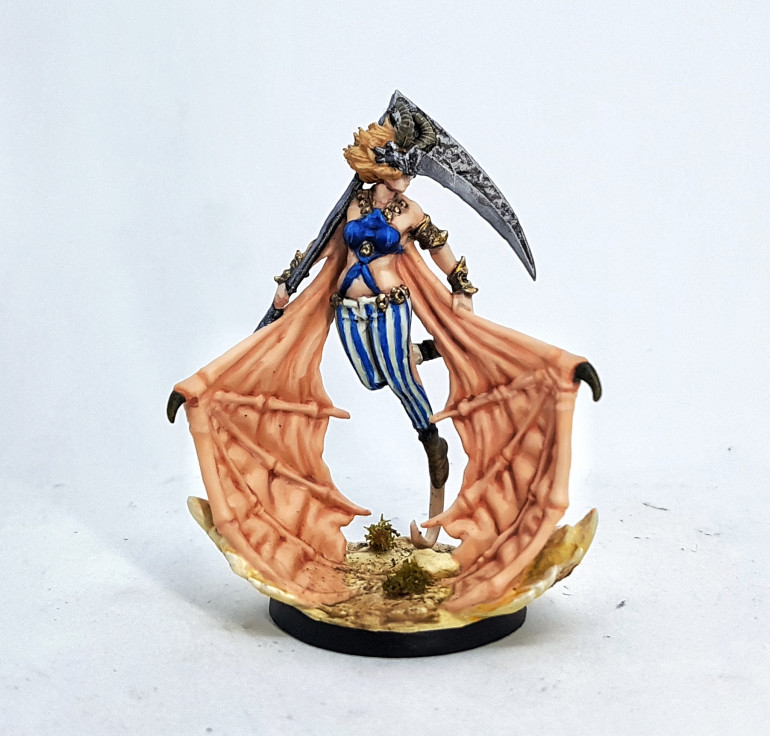
This is a cross promotional model with a game called Midara I don’t know anything about. It’s a nice mini. I think I heard that completing it’s story in ATO might allow you to influence a game of Midara you’re also playing?
Wings
Undercoat P3 Ryn Flesh (my bottle of Elven Flesh had por coverage. I think it had been sat on my shelf for too long and just wasn’t mixing properly)
Base GSW 1845 Elven Flesh
Shade GSW 1827 Blushing Flesh
Highlight GSW 1844 Pale Flesh
Spots: Careful dots of GW Agrax Earthshade, GW Athonian Camoshade and Coatd’Arms 133 Ink Flesh Wash
Gaze the dots with thinned GSW Pale Flesh
Torso
Base P3 Ryn Flesh mixed with P3 Menoth White Base
Wash with base mixed with a little P3 Sanguine Highlight
Wash with base mixed with a little P3 Battledress Green
Targeted wash of Battledress Green mixed with Sanguine Highlight
Highlight with base
Highlight with base mixed with P3 Menoth White Highlight
Highlight glints with Menoth White Highlight only
Blonde Hair:
Base: Reaper 09256 Blond Shadow
Wash: Coat d’Arms Flesh Ink
Drybrush: Reaper 09257 Blond Hair
Drybrush: Reaper 09258 Blond Highlight
White Trousers
Base: Andrea Color White 1 Base
Shade: Andrea Color White 6, 2nd Shadow
Highlight: Andrea Color White 1 Base
Highlight: Andrea Color White 1 Base and P3 Morrow White
Highlight: Morrow White
Blue Cloth
Base with P3 Cygnar Blue base
Shade with VMC 70.899 Dark Prussian Blue mixed with P3 Coal Black
Highlight with base
Highlight with base mixed with P3 Cygnar Blue Highlight
Highlight with Cygnar Blue Highlight
Highlight with Cygnar Blue Highlight mixed with P3 Frostbite
Die inside a little then repair white stripes
Die a little more and repair blue stripes
Deep breaths. Continue
Socks and Boots
Socks: VMC 70.994 Dark Grey
Boots: P3 Battledress Green
Drybrush Boots with P3 Rucksack Tan
Wash both with GW Agrax Earthshade
Gold
Base Darkstar Blackened Bronze
Wash GW Agrax Earthshade
Highlight with base
Highlight with base and Darkstar Royal Gold
Highlight with Royal Gold
Highlight with Royal Gold mixed with Darkstar Pale Gold
Highlight with Pale Gold
Irons
Undercoat black
Base Mission models MMM-002 Cold Rolled Steel
Highlight with Base mixed with VGC 72.056 Chainmail Silver
Highlight with Chainmail Silver
Highlight with Chainmail Silver mixed with VMA 71.064 Chrome
Highlight with Chrome
Targeted wash with Italeria 4953AP Oiled Earth wash
Claws
Base P3 Cryx bane Base
Drybrush P3 Hammerfall Khaki
Wash GW Athonian Camoshade (Can skip. Didn’t do much)
Wash GW Seraphim Sepia
Cycle 3: Icarian Harpy, and Ascender, Dawnburner and Returner Titans
I took a weekend off painting to play games with friends, but now I’m back with 4 more finished models. This leaves only 3 more game pieces to paint and I’m done. I’m going to book a week off in April and I’d like this finished before then. Even if I do one model a week I should be done before then.
Harpy Flesh
This scheme is looted and modified from Vallejo’s Non-Death Chaos set. For some reason, theirs looks blue even though it’s painted using purple paints. i swear they cheat.
Zenithal Preshade
Wash 2:1 VMC 72.048 Sombre Grey: VMC 72.016 Royal Purple (My zenithal blacks were too dominant, so I ended up applying something thicker than a wash to cover this up, and probably 2-3 coats. Ideally, you want a smooth black to white transition before you begin, and then use a very thin wash over it to tint it. I failed at that by not reading ahead when priming. Next time I hope to remember and try this guide properly.
Shade with Royal Purple
Highlight with base
Highlight with base with increasing amounts of VMC72.003 Pale Flesh
Burgandy
Base P3 Sanguine base
Wash Sanguine Base mixed with P3 Exile Blue
Wash with above with a little P3 Coal Black
Highlight with base
Highlight with P3 Sanguine Highlight
Highlight with P3 Sanguine Highlight mixed with p3 Menoth White Base
Nails
Base P3 Cryx Bane Base
Drybrush P3 Thrall Flesh
Drybrush P3 Menoth White Base, avoiding near the flesh
Drybrush P3 Menoth White Highlight towards the tips
Wash GW Nuln Oil
Eyes
Base with P3 Heartfire
Pupil is any black
Harpy Wings
Base with a single coat of thinned P3 Umbral Umber over a zenithal prime. I could see lots of the white showing through, but it was tinted brown.
Wash with Vallejo Black Ink thinned about 2:3 with Instar Water+. It’s like water, but better. Don’t ask me how. All I know is everyone swears they won’t go back to water after. Using water in a wash can lead to tide marks and I wanted to avoid that.
Wash with GW Athonian Camoshade. it’s a dirty green. I want swampy dirtiness.
VERY lightly drybrush with P3 Thrall Flesh (Zombie skin)
Titan Wings
Base with a single coat of thinned P3 Umbral Umber over a zenithal prime. I could see lots of the white showing through, but it was tinted brown.
Wash with Vallejo Black Ink thinned about 2:3 with Instar Water+. It’s like water, but better. Don’t ask me how. All I know is everyone swears they won’t go back to water after. Using water in a wash can lead to tide marks and I wanted to avoid that.
Very lightly Drybrush with P3 Frostbite, and then selectively with White.
Mix up 2:3 glazes of Black and Water+, and P3 Turquoise Ink and Water+, and Vallejo Violet Ink and Water+
Glaze on a band of the purple around the bottom of the cloak.
While still wet, glaze on a band of black above it, encouraging the two to mix
Repeat with the turquoise
Repeat with the black
Tint with turquoise and then purple around the collar, never letting any of it dry before the next glaze.
Leather
Base P3 Bootstrap Leather
Drybrush/layer P3 Hammerfall khaki
Wash GW Agrax Earthshade
Gold
Base Darkstar Blackened Bronze
Wash Secret Weapon Sewer Water
Layer Blackened Bronze
Layer Blackened Bronze mixed with Darkstar Royal Gold
Layer Darkstar Royal Gold
Layer Darkstar Royal Gold mixed with Darkstar Pale Gold
Layer Darkstar Pale Gold
Iron
Base P3 Pig Iron
Wash GW Nuln Oil
Layer P3 Cold Steel
Layer P3 Quick Silver
Steel
Base VMC 72.063 Chainmail Silver
Wash Chainmail Silver mixed with P3 Pig Iron
Highlight with base
Highlight with VMA 71.064 Chrome
Metal disk things on back
Base VMC 72.063 Chainmail Silver
Wash GW Seraphim Sepia
Highlight with base
Tentacle Flesh:
Base: P3 Troolblood Highlight, P3 Ryn Flesh & P3 Carnal Pink
Wash: Base +Traitor Green
Wash: Above+ Beaten Purple
Highlight: Ryn Flesh, Carnal Pink, and P3Menoth White Highlight
Blue Suckers:
Base: VMC 70.866 Turquoise
Highlight middle with VMC 70.808 Blue Green
Highlight middle by adding more and more Reaper 09150 Bloodless Skin or any other off-white to the Blue Green
Fire:
Undercoat: White
Base: Mr Paint MRP-F005 Deep Yellow
Highlight: Deep Yellow and Mr Paint MRP-F008 Fire Orange
Highlight: Fire Orange
Highlight: Fire Orange and Mr paint MRP-F013 Deep Red
Highlight: Deep Red
Apply Coat d’Arms Ink Wash Yellow to recesses to brighten further
Glaze thinned white carefully to the hottest recesses
Just before varnishing I got some Kromlech Soot Black pigment on a finger and touched it gently to the model to add some just to the high points. The varnish then sealed this in.
Grey-White Hair
Base: P3 Morrow White and Reaper 09148 Ghoul Skin
Wash: Ghoul Skin
Highlight with base and then add more and more white for further highlights
——————————————————————————————-
Icarian Harpy
Ascender Titan
Dawnburner Titan
Returner Titan
Cycle 2: Chimera Metastasios
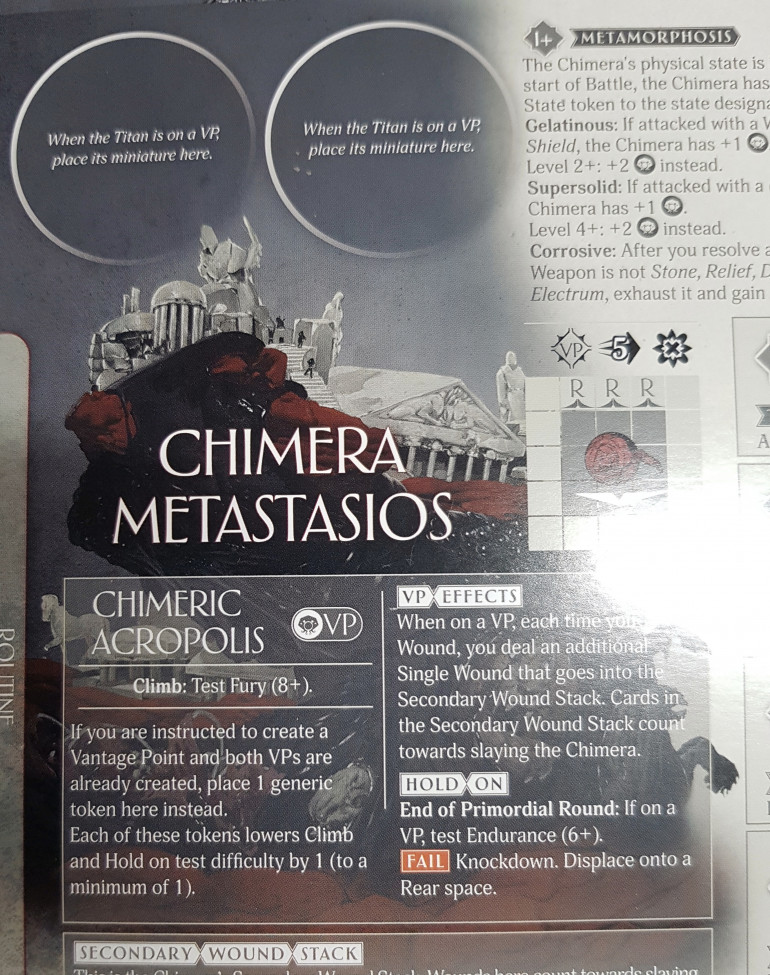
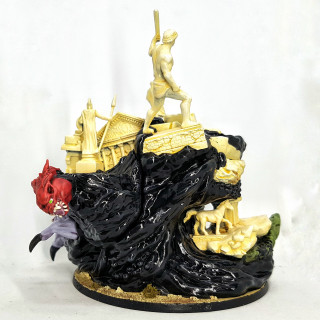
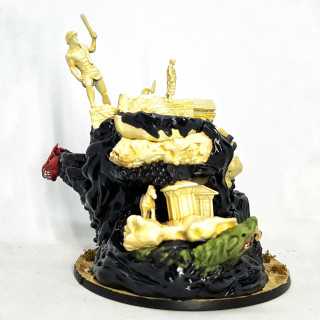
I hate this piece. It’s a mess. It’s hard to look and and hard to understand what’s going on. Plus, this is the only piece of art I can find for it. How helpful is this? They’ve hidden everything useful under all that text. It may as well not have a picture.
So let’s turn to the fluff to try and understand what on earth is going on here:
“Chimera Metastasios is what happens when you store too much volatile black ambrosia and monster parts in one place. The Chimera is a gelatinous slime that consumes all biological matter it comes in contact with. Hunger is all it knows, so it’s drawn to cities, cemeteries and battlefields.
For such an enormous creature, the Chimera is great at hiding: it uses ruins as a shell and camouflage and moves under the cover of night. A creeping city that can crush you in your sleep, what a tarrying though.
The Chimera has a variety of caustic attacks, some melee, some ranged, it can also use the abilities of the half-digested mythological creatures still trying to break free from the slime. The Chimera’s body dissolves metals as easily as flesh, rendering most weapons one use only and can harden to become solid matter.”
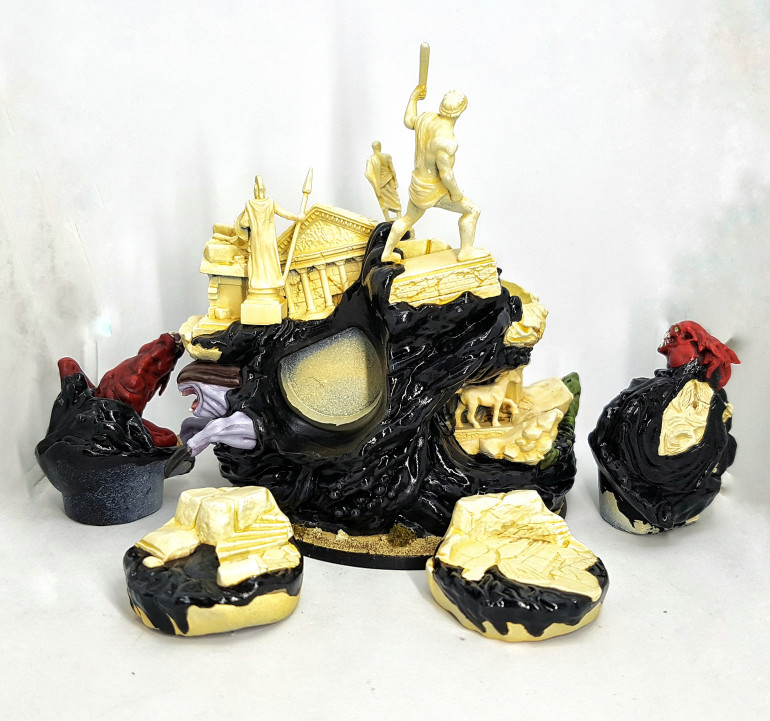
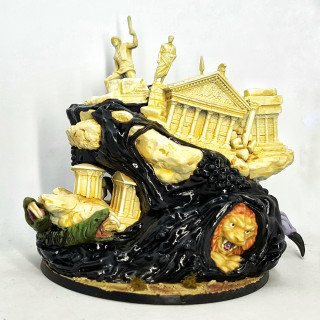
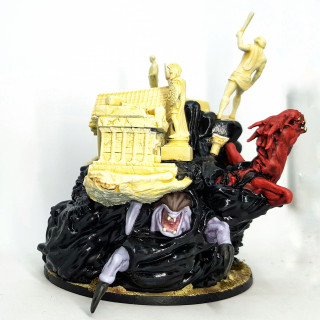
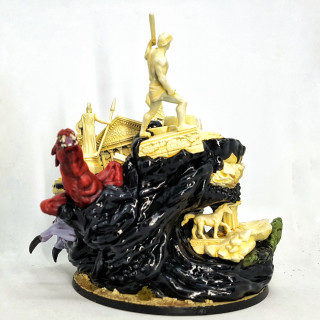
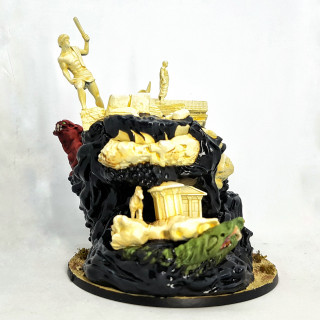
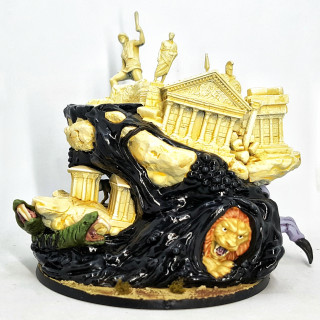
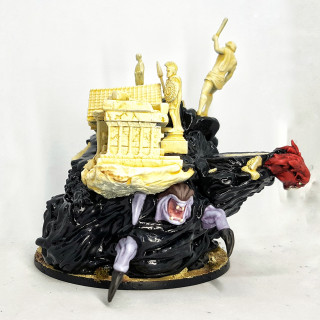
So basically it’s a huge gelatinous cube? I can work with that. It’s still overly busy. I really don’t like all those statues in different scales so close together. Even if the buildings have been dragged closer to each other it doesn’t work for me. Why is the lion the size of a building? Are there lions that big? Same for the snakes. What are the other two creatures? I’ve seen nothing to explain what they are or how they should look. They didn’t even bother to texture the base. It’s got smooth flat areas around it I had to texture myself. Not an issue, but they didn’t do this for other models.
I hate this piece. It has no focus and is just a mass of busyness and distractions.
Anyway, on with the paint scheme.
The stone was painted first using my standard basing method described earlier in this thread. I left the black ooze until last as it would have great coverage and also be harder to paint over. This lets me be a little messy with the other paint jobs. It also means that any black I paint will be on top of everything else, which reinforces the idea that the ooze is swallowing it.
Snakes
Base: 2 parts P3 Cryx Bane Base, 2 parts P3 Wurm Green, 1 part P3 Cryx Bane Highlight
Wash: P3 Ordic Olive mixed with P3 Armour Wash
Drybrush: Wurm Green
Drybrush: Wurn Green mixed with P3 Thrall Flesh
Lion
Base: 2 parts P3 Mouldy Ochre to 1 part P3 Thrall Flesh
Wash: P3 Rucksack Tan
Reclaim with base
Highlight: Base mixed with P3 Menoth White Highlight
Highlight 2: Add more Menoth White Highlight
Wash/glaze hair: P3 Skorne Red mixed with P3 Bloodstone. Do 2-3 coats as needed. Re-highlight and apply wash again. Maybe repeat until happy.
Bug Legged Thing Flesh???
Base: P3 Frostbite with just a dot of P3 Exile Blue and P3 Skorne Red. Just enough to tint the final colour so it’s still light blue but you can “feel” both the red and dark blue at the same time.
Wash: base with a little more Exile Blue and Skorne Red
Recess only Wash: Skorne Red mixed with Exile Blue
Highlight: reclaim with base
Highlight: Base with P3 Morrow White
Highlight: Push up to pure Morrow White on the sharpest edges only
Bug Legged Thing Carapace???
Base: P3 Battlefield Brown, P3 Umbral Umber and P3 Gun Corps Brown
Wash: P3 Thamar Black, P3 Brown Ink and p3 Red Ink
Highlight: Reclaim base
Highlight: Battlefield Brown and Hammerfall Khaki
Highlight: above with more Hammerfall Khaki
The other Monster Thing I Painted Red
Base: VGC 72.012 Scarlett Red
Wash: GW Carroburg Crimson
Drybrush: GW Evil Sunz Scarlet
Drybrush: GW Wild Rider Red
(I just wanted this done at this point. I should have been layering and gotten brighter tones)
Basecoat Eyes: P3 Menoth White Highlight
Pupil: P3 Necrotite Green
Mouths
Wash insides GW Carrouburg Crimson
Base Teeth: P3 Menoth White Base
The snakes had a thin line of GW Seraphim Sepia painted between their two fangs to separate them
Highlight: P3 Menoth White Highlight
Give the insides a coat of gloss varnish once all other varnishing is finished.
Black Ooze
Base: Revell Aqua Colour 36106 Tar Black
Drybrush: Tar Black with a little Revell Aqua Colour 36174 Gunship Grey
Drybrush: Above mix with a little Revell Aqua Colour 36176 Light Grey
Drybrush: above with more Light Grey
Glaze with GW Nuln Oil to smooth the transition out and add depth
Give it a coat of gloss varnish once all other varnishing is finished.
I should have pushed the highlights further with a drybrush of pure white. Most of the highlights got lost in the wash, leaving the gloss varnish to do all the heavy lifting. Had I cared for this model and wanted to sink the time in I could have tried for layering the highlights.
Here it is, with all the pure monster non-platform modules attached
Here he is with all the platform modules attached
That’s the last of Cycle 2 done. There are 7 models in wave 3, and an 8th model in the box, purely for painting. The end is in sight. I haven’t made a decision on how to paint the feathers on the Cycle 3 minis yet. perhaps I need to google for “Cthulu feather wings” and see what comes up?
Cycle 2: Cyclonus
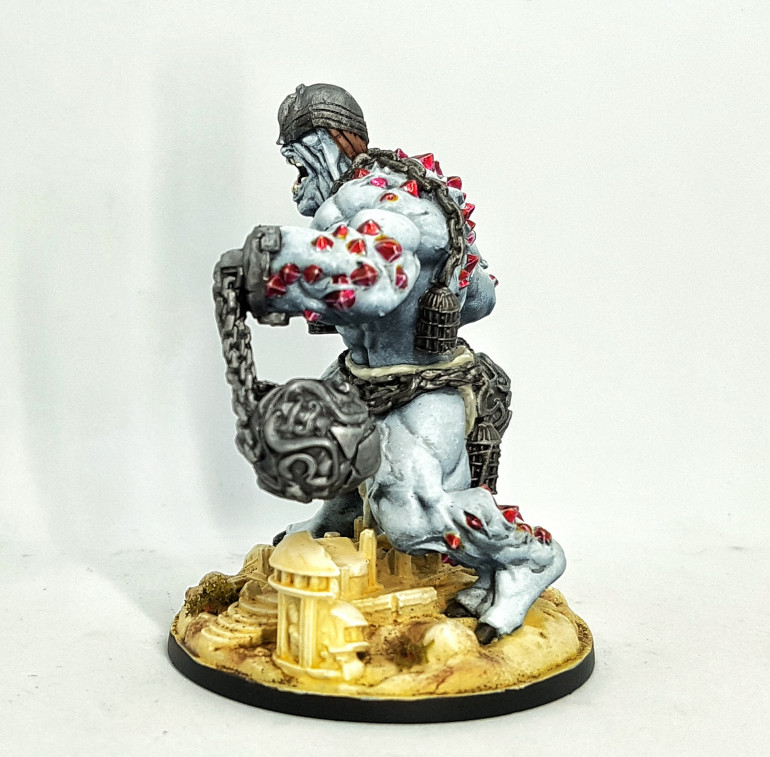
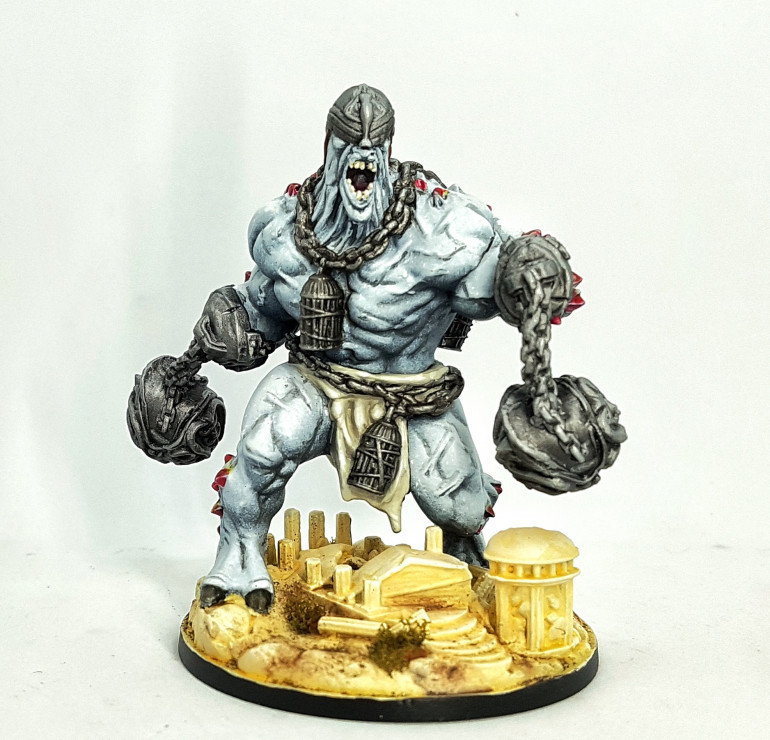
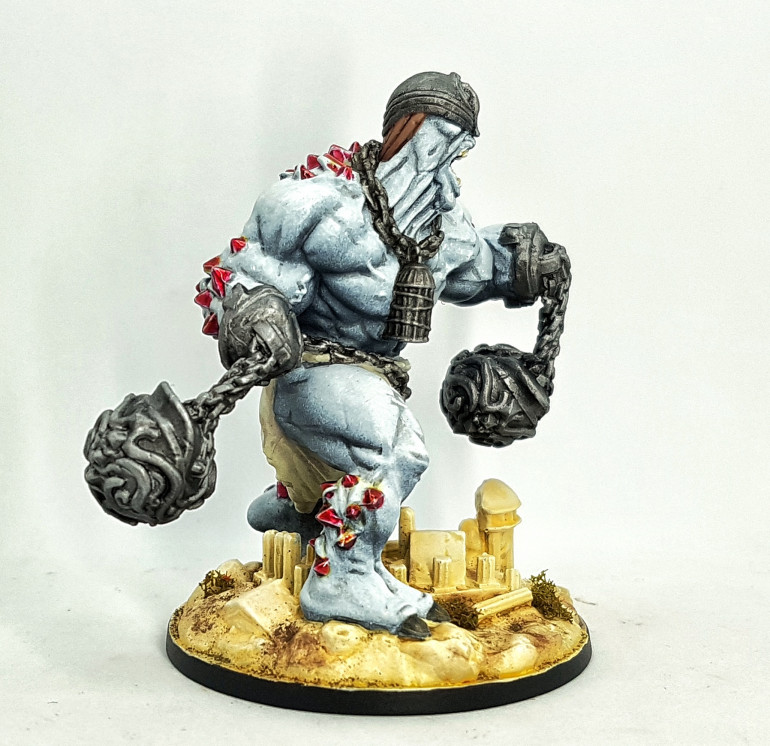
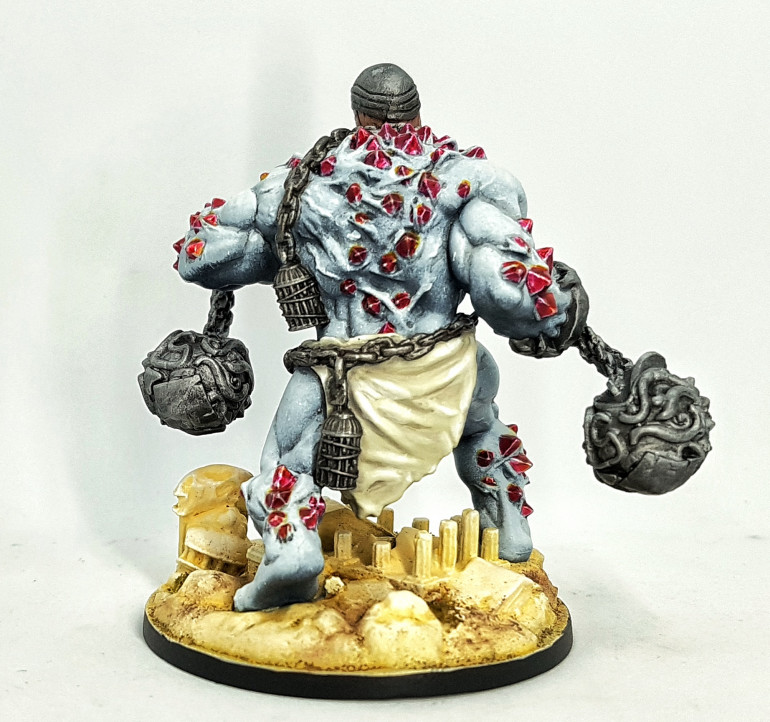
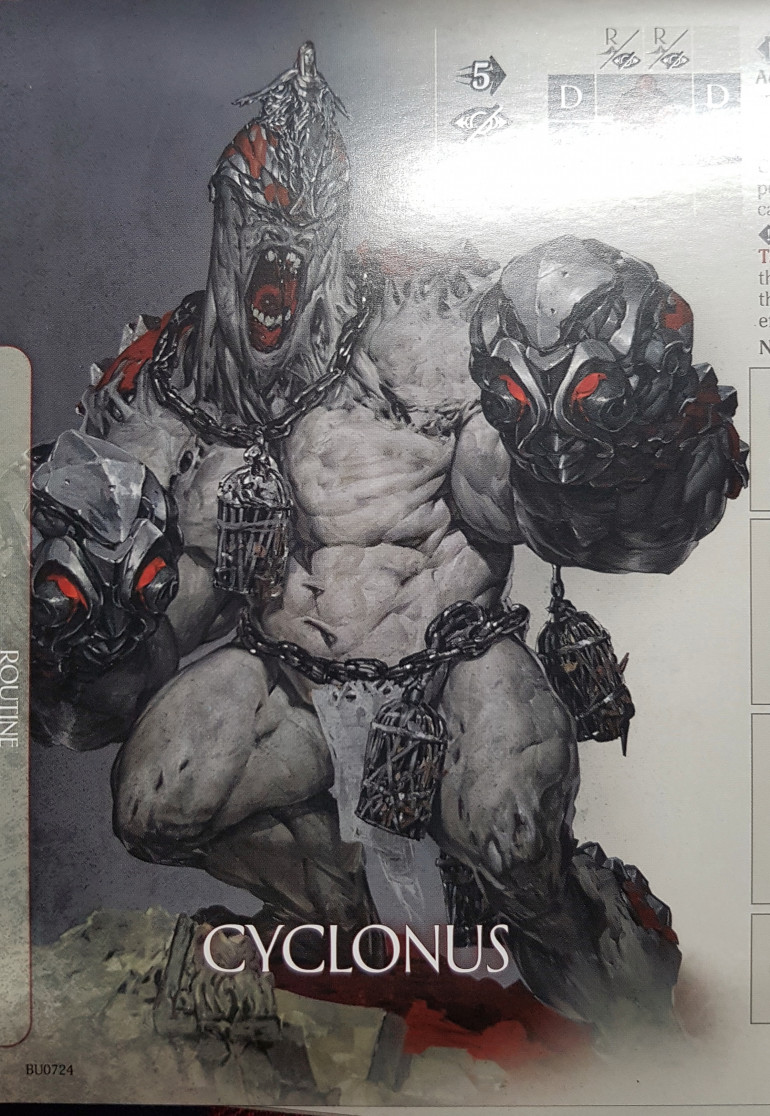
Not a bad model. I couldn’t figure out what all the red pieces on the art related to on the model, so I went with the spirit/feel of the art, rather than translating it literally.
White Flesh
Airbrush: VMC 70.904 Dark Grey
Airbrush: Above with VMC 70.906 Pale Grey leaving only the deepest recesses and undersides
Airbrush: Pale Grey, leaving more of the undersides alone
Airbrush: Pale Grey and VMC 70.951 White for more of a zenithal prime
Airbrush: above with more white and more zenithally
Airbrush: Just white and just from directly above
Pin wash/shade: Dark Grey
Layer & edge Highlight: White
Toe nails
Base: P3 Cryx Bane Base
Paint thin lines of thinned P3 Hammerfall Khaki
Paint thin lines of thinned P3 Thrall Flesh
Paint thin lines of thinned P3 Morrow White
Wash with GW Nuln Oil
Wash with GW Seraphim Sepia
Red Gems
Base VGC 72.056 Chainmail Sliver
Glaze many times with A.MIG-093 Crystal Red
Glaze upper surfaces with A.MIG-097 Crystal Orange
Leather Hat
Base: P3 Bootstrap Leather
Wash: GW Carroburg Crimson
Layer then Drybrush: P3 Hammerfal Khaki
Steel Balls
Base: Mission Models MMM-002 Cold Rolled Steel
Wash: Jan’s Magimix (6-8 Parts GW Nuln Oil, 6-8 Parts GW Agrax Earthshade, 5-6 Parts Lahmium Medium, 2 parts Athonian Camoshade. Thanks, Januinevision)
Drybrush : P3 Pig Iron
Drybrush then edge highlight: P3 Quick Silver
Mouth
Wash inside: Carrouburg Crimson
Base Teeth: P3 Menoth White Base
Highlight Teeth: P3 Menoth White Highlight
Iron Chains and Cages
Base: P3 Pig Iron
Wash: Italeri Wash Oiled Earth 4953AP 2-3 times (I was testing it)
Wash: GW Nuln Oil
Wash: Italeri Wash Oiled Earth 4953AP over cage insides to reclaim some grime
Edge highlight: P3 Cold Steel
White Cloth
Base: Andrea Color White 1 Base
Shade: Andrea Color White 6, 2nd Shadow
Highlight: Andrea Color White 1 Base
Highlight: Andrea Color White 1 Base and P3 Morrow White
Highlight: Morrow White


