![How To Paint Moonstone’s Nanny | Goblin King Games [7 Days Early Access]](https://images.beastsofwar.com/2024/12/3CU-Gobin-King-Games-Moonstone-Shades-Nanny-coverimage-225-127.jpg)


Desparate Deals


Recommendations: 143
About the Project
A small concept brewed in my mind, this project will hopefully be the manefestation of this onto my worktop
Related Genre: Fantasy
This Project is Completed
Beginnings
As with all ideas, some are discarded and some build momentum.
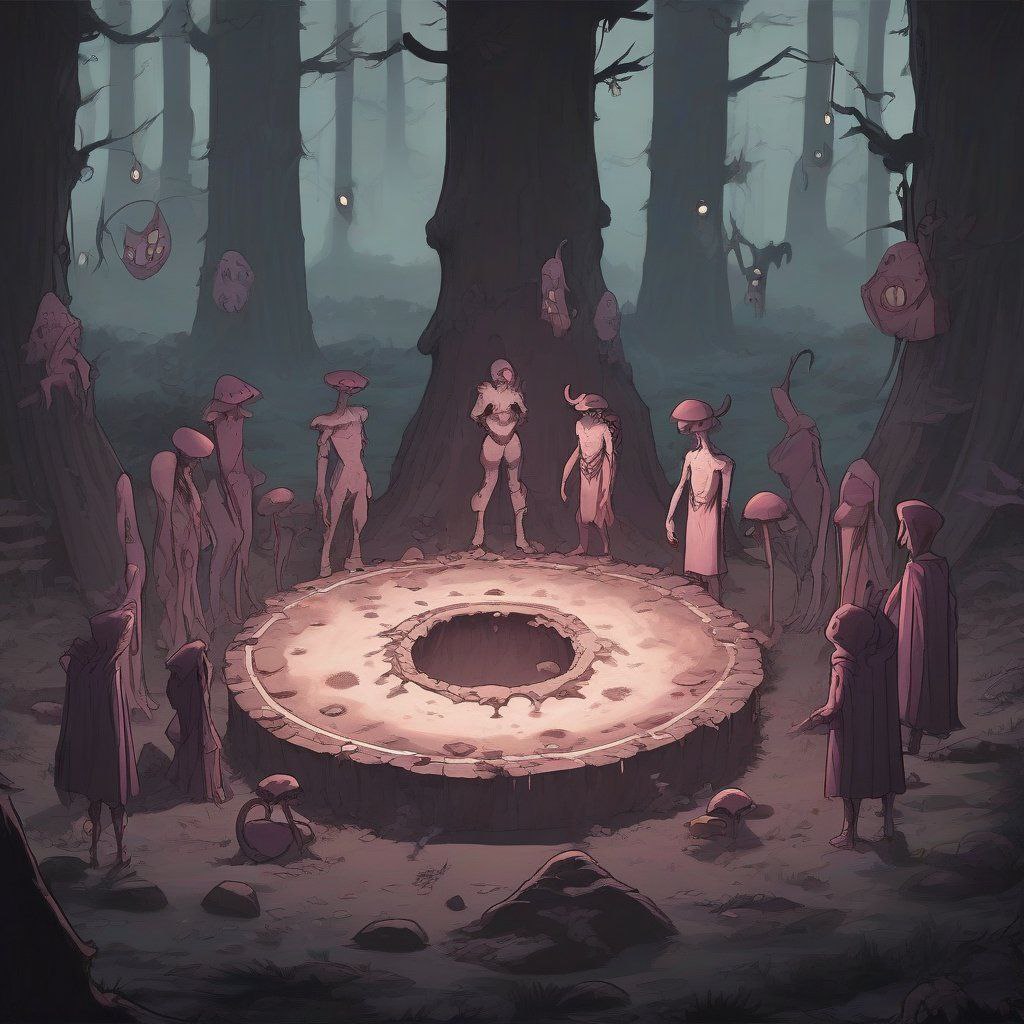
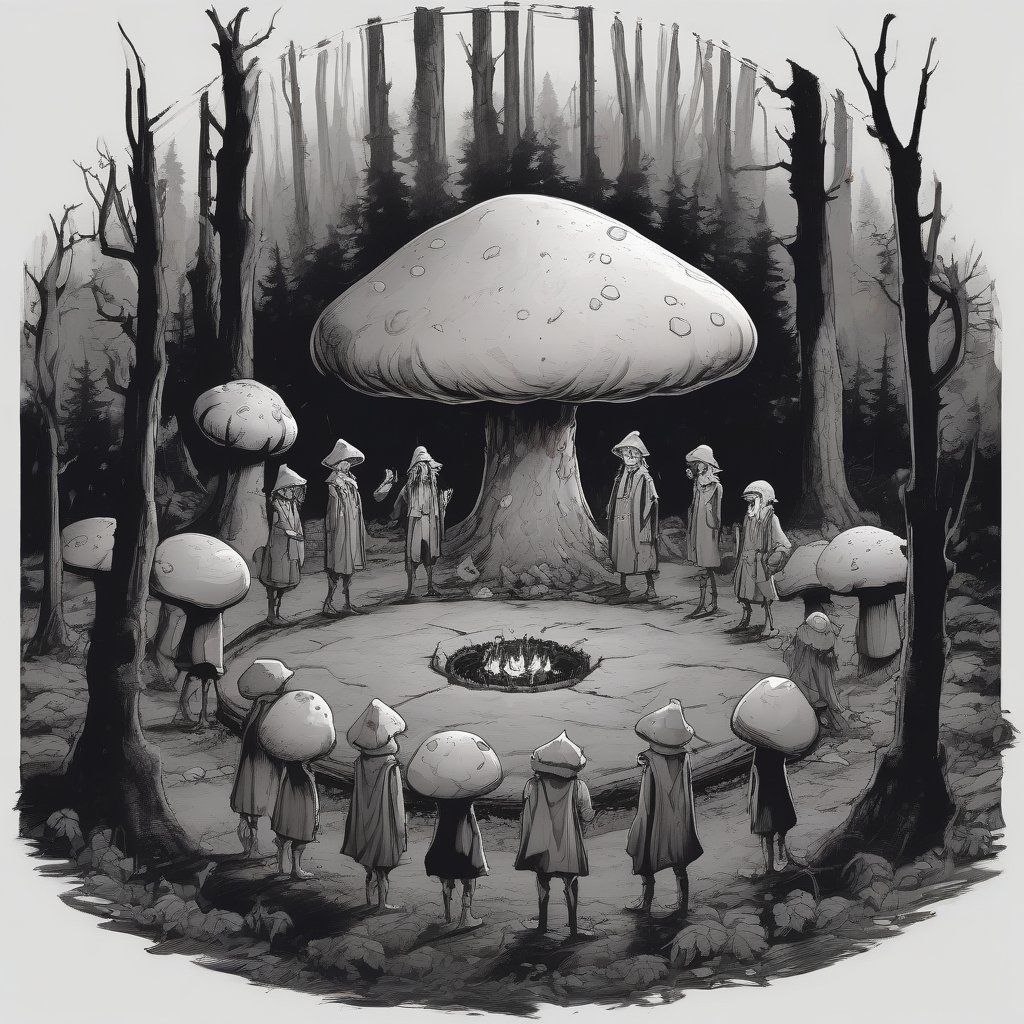
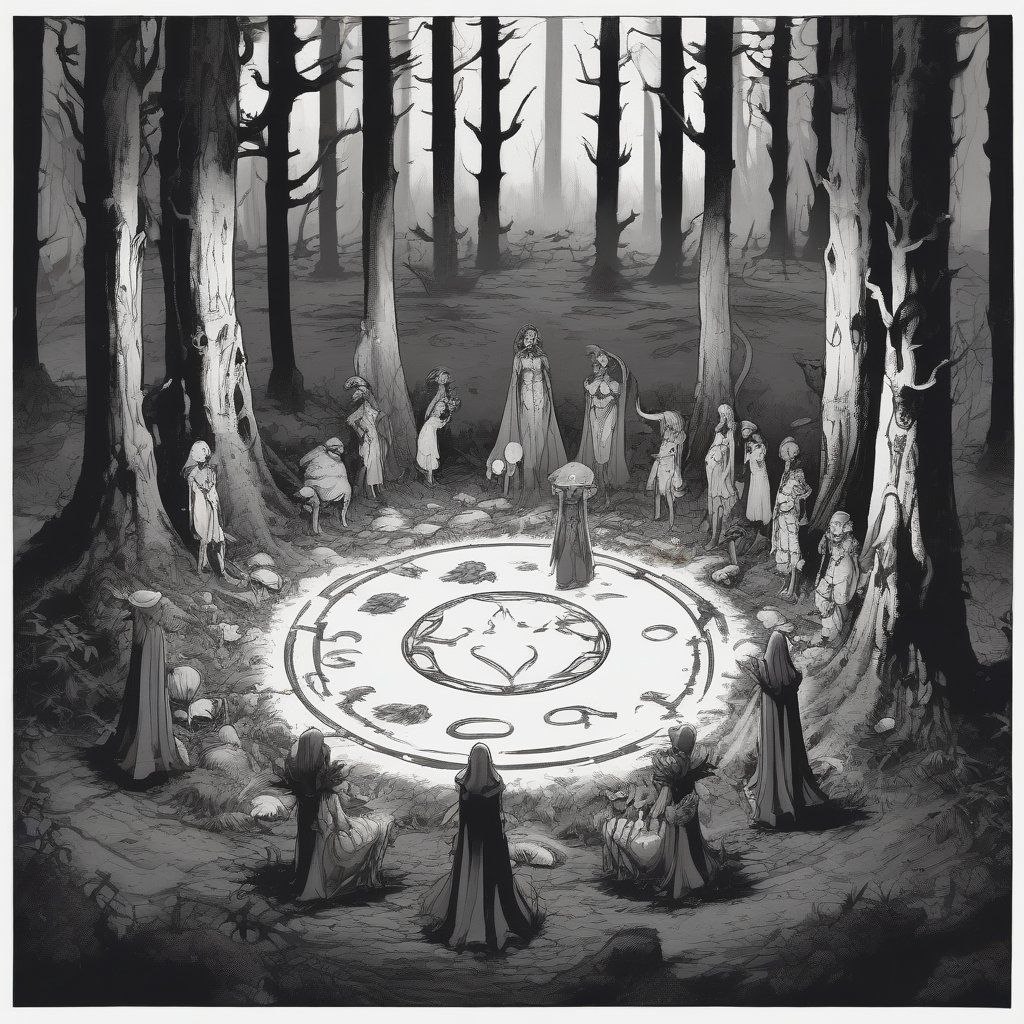
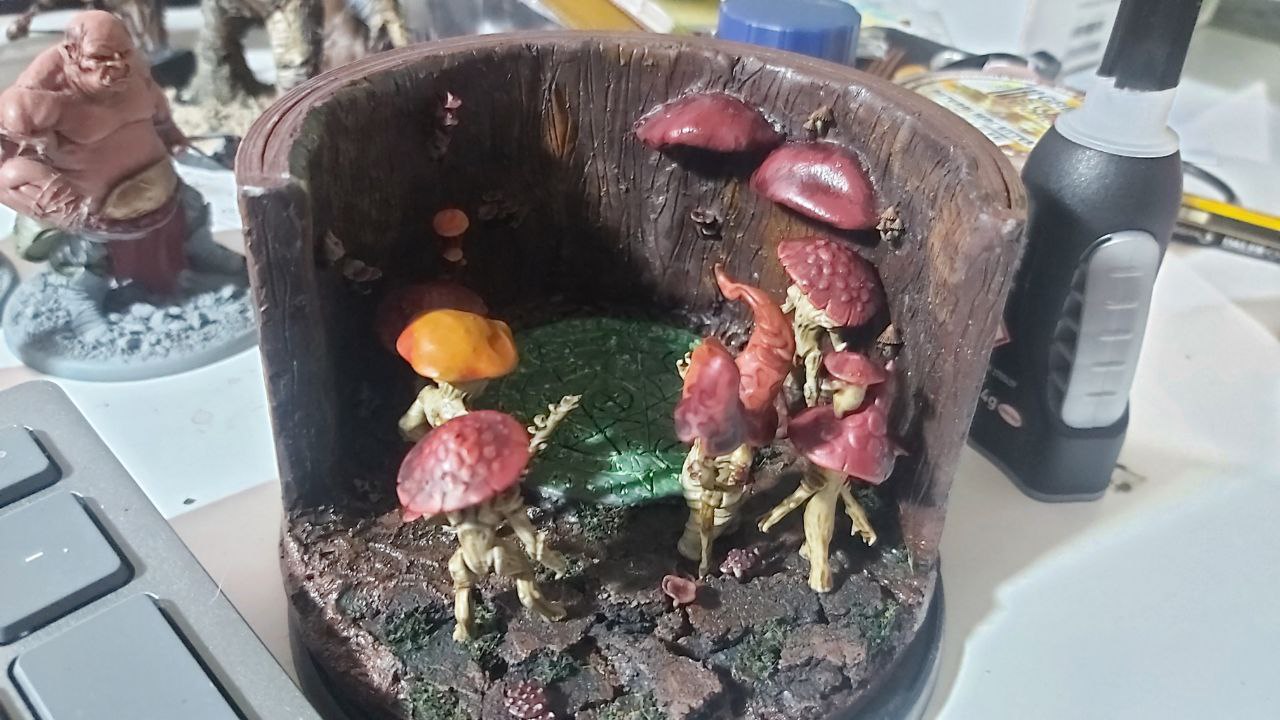
this is the latter. the idea of a group of mushroom men, or myconnids, gathered around and discussing some major issue.
This then evolved to them gathering to summon some form of help in a desparate ritual, perhaps a devil or demon.
Finally, this became the ritual, happening in the hollow of a large dead tree.
After playing around with Bing AI image generator, I pulled these from it, not quite what i was after but close enough to give me motivation and encouragement.

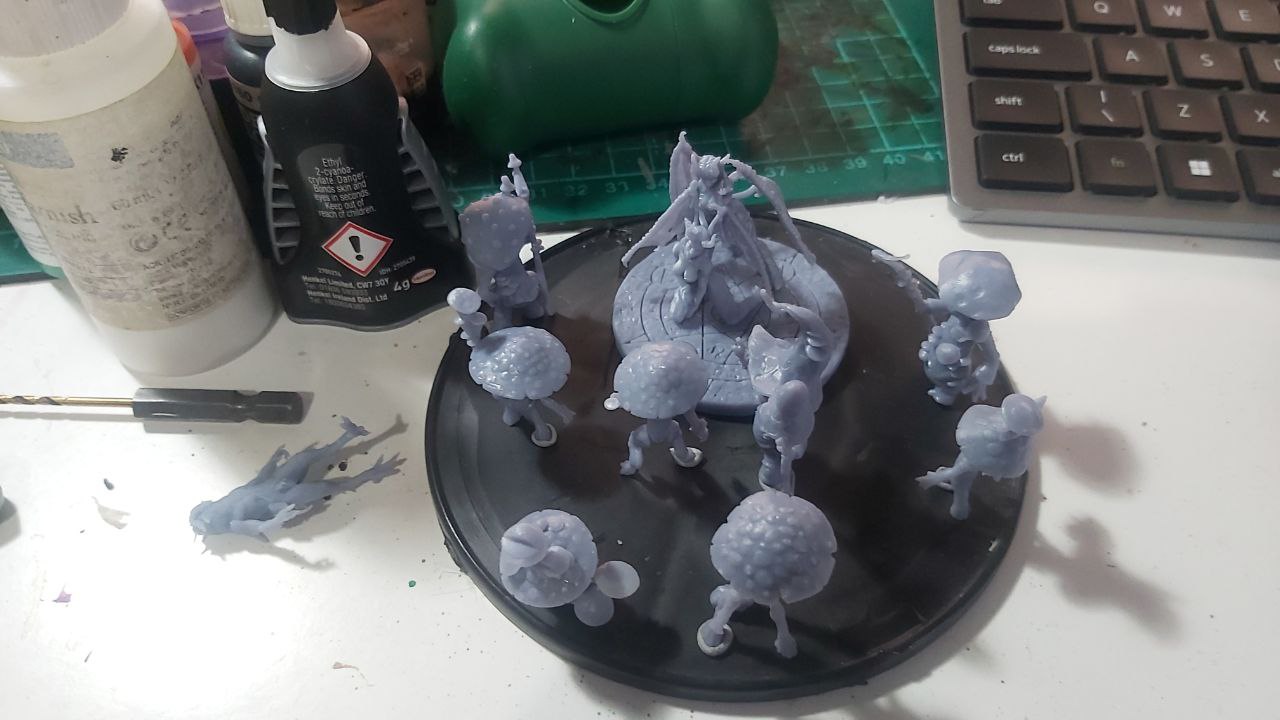
Basic layouts
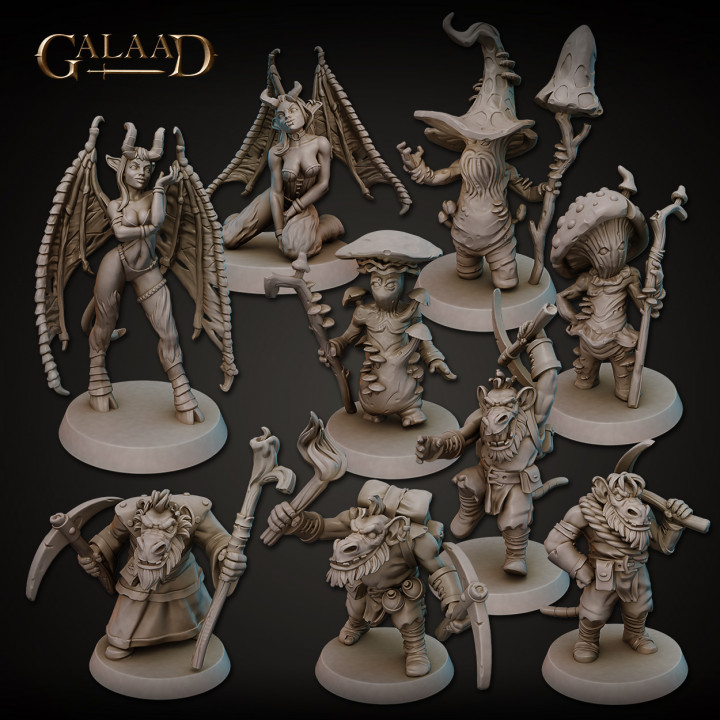
AFter taking a look through my physical stash, I had no myconids to use, so looking online and seeing Galaad Miniatures ones, they hit the spot.
The release also included a set of sucubbi too, as an option for the summoned being.
Printing these out, as well as a free summoning circle I found on MMF I started playing with layout on a 120mm base that was laying around, but more on that later.
Next up, framing…
The Framing
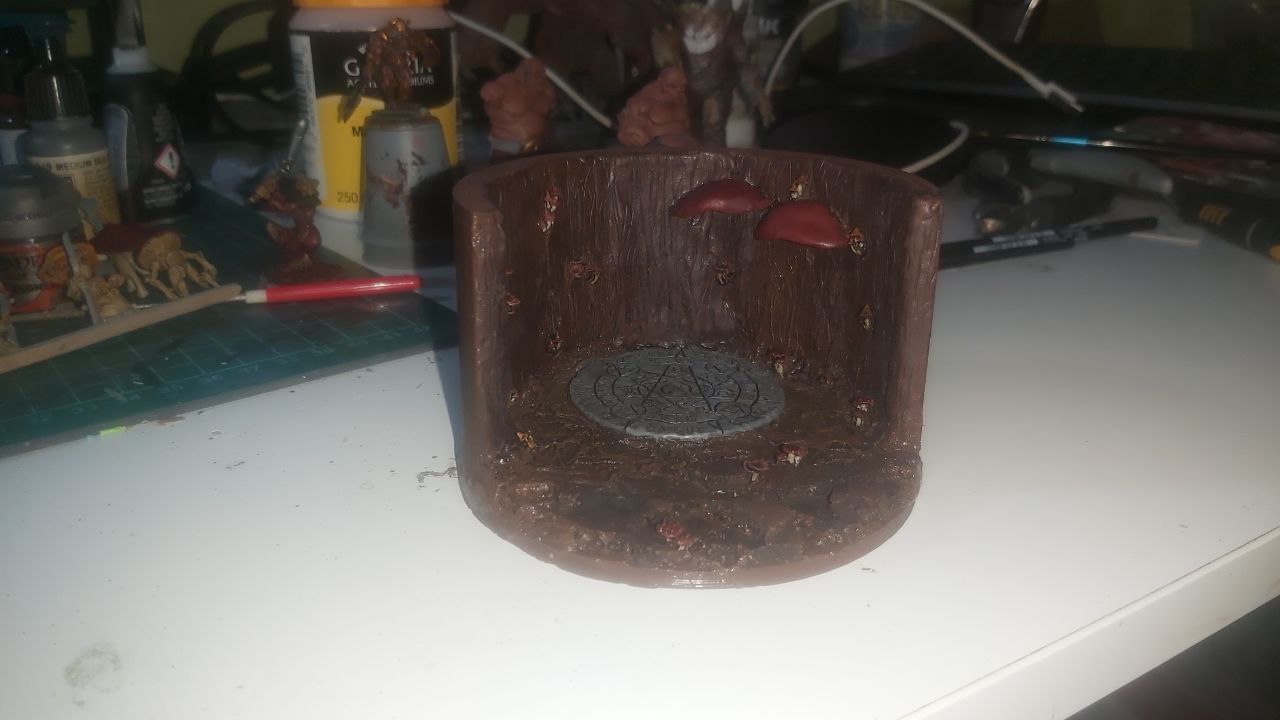
As mentioned before I am looking at the setting being the inside of a tree, like to the Great Hollow in Dark Souls 1, or at least that gist.
To save time I used Tinkercad to make an cylindrical enclosure with a domed roof, split to add the roof on later.
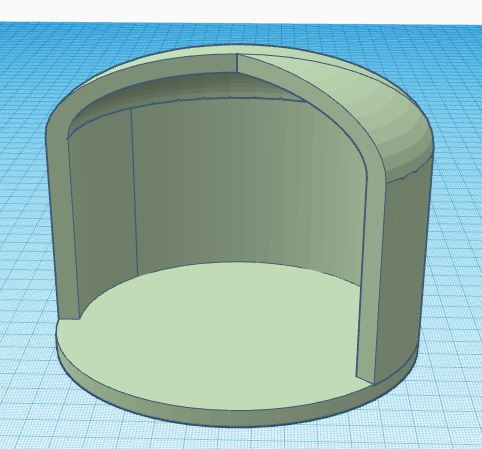
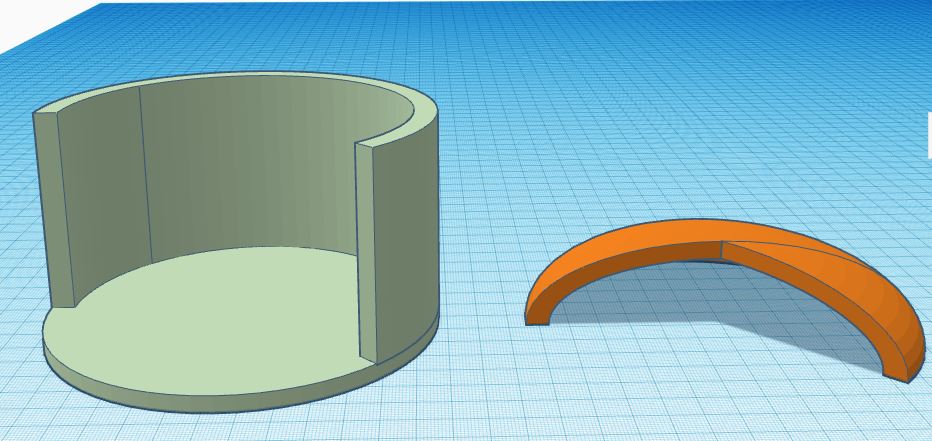
I then printed this out….
…with a diameter of 100mm.
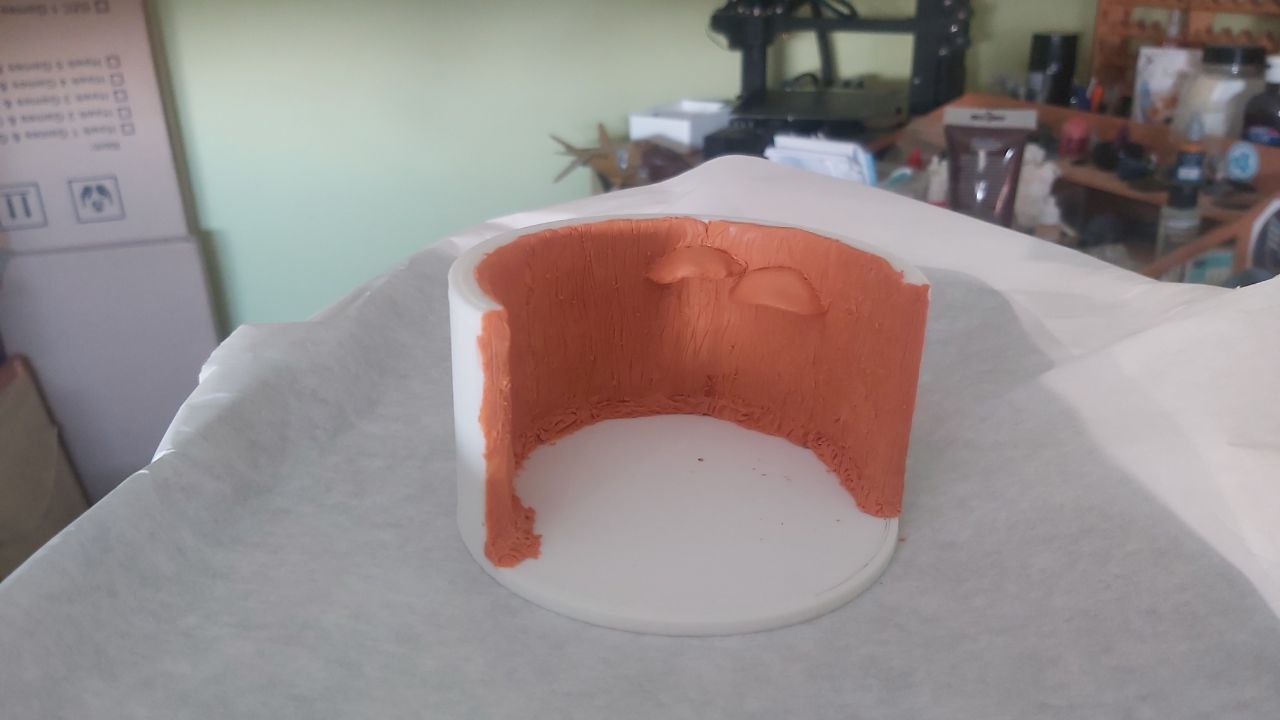
I had thought when doing the original layout te base was 100mm, small mistake but the decreased size made it seem more claustrophobic, adding to the feeling I was going for.
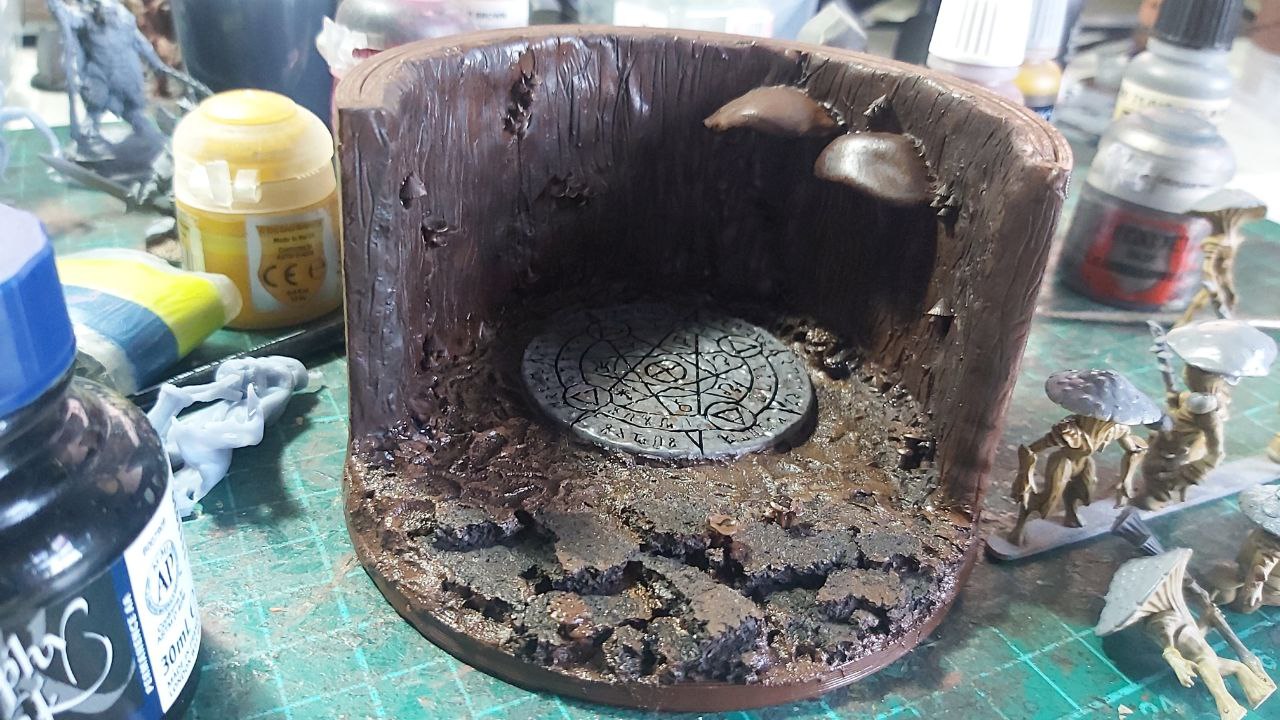
Next up was the addition of tree trunk texture, for this I used FIMO Soft, not my smartest choice as this then requires baking.
Adding a tin layer of Fimo in strips around the walls of the frame, and a mound at the bottom I then added some texture for the tree. I also added a couple of larger mushrooms with a bit of leftover clay
Next up was the baking, to bake, I used an oven set to 100C for 1 hour to cure it properly. Looking back, air dry cure should have been used, but I was working with what I had.
While the 100c was below the glass temp of the PLA+ the frame was printed in, the clay curing had shrank, and had warped the base.
To solve this I printed a 100mm disk 5mm thick and glued it to the bottom of the frame. I did this after cutting away some of the warped base to add a secondary layer and a bit more depth to the scene.
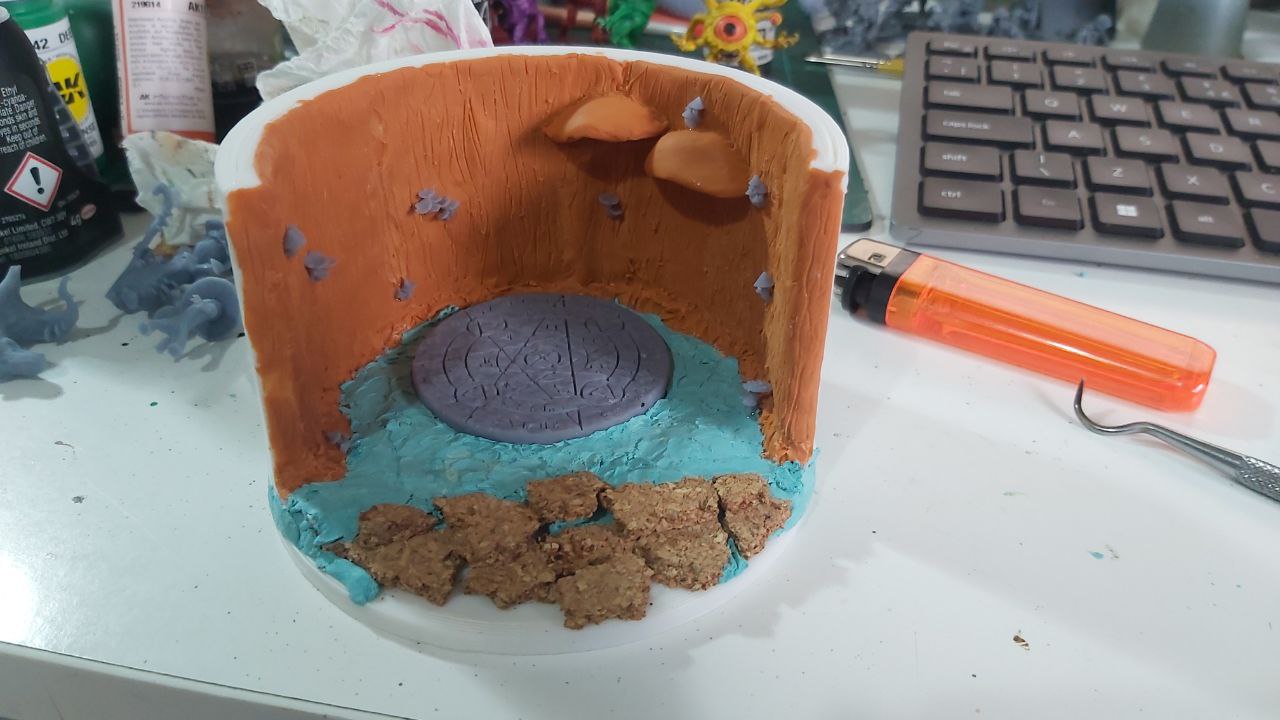
I then glued on the summoning circle where I wanted it, as well as some cork to the front.
To add the rough base texture, I used Milliput Turquoise, air drying 😉
I also used this to fill in the gaps between the disk and the warped base.
Next up was the detailing stage.
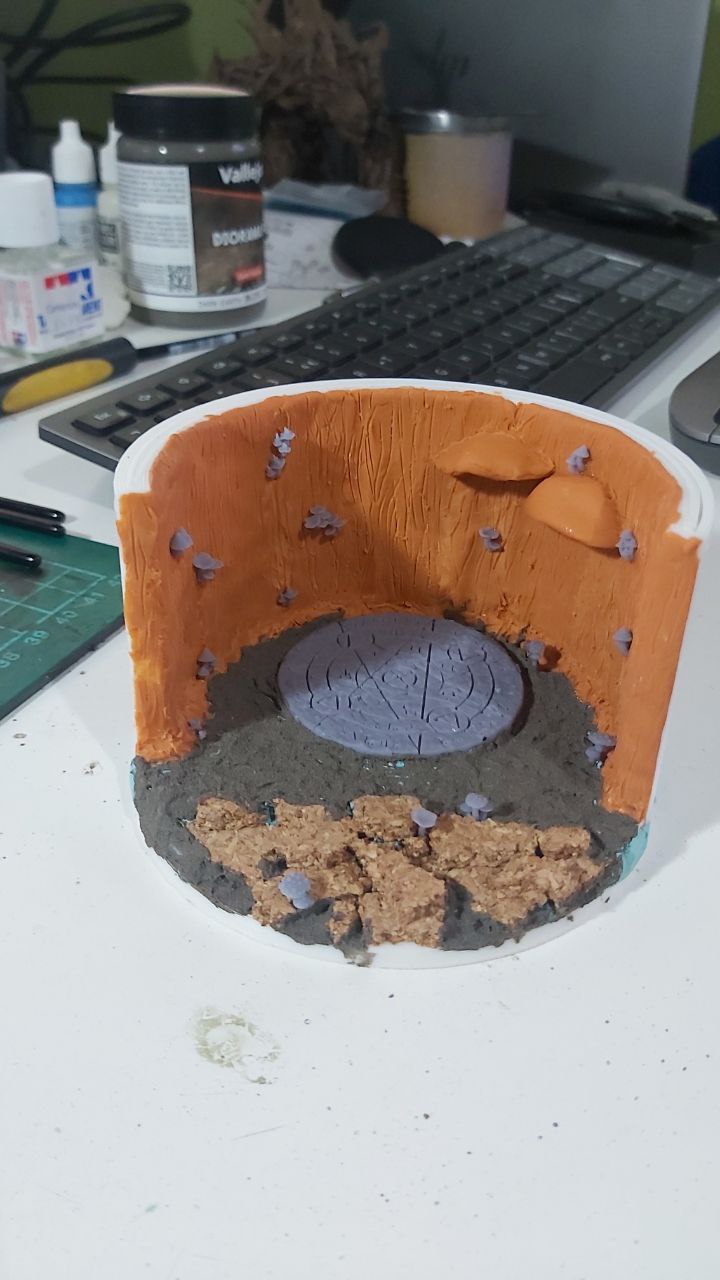
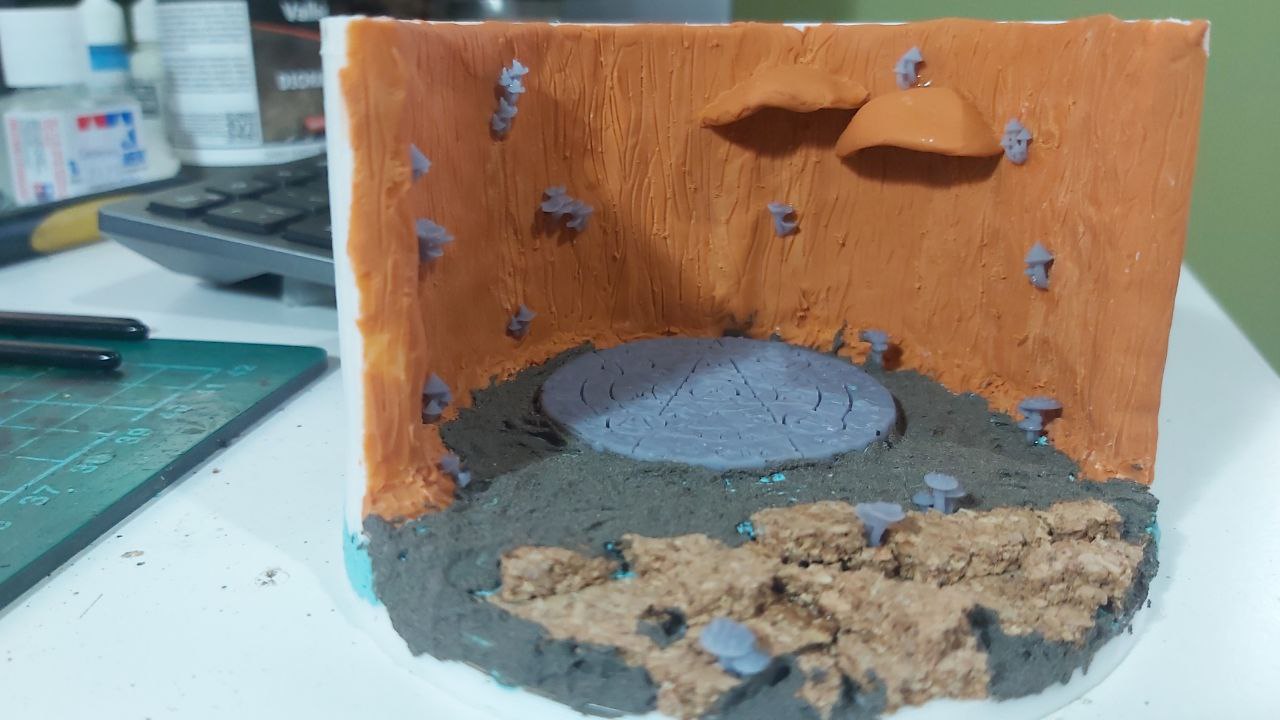
I added some printed shrooms to push that them, and used some Vallejo Diorama Fix to add a soil like texture over the miliput.


Painting Starts
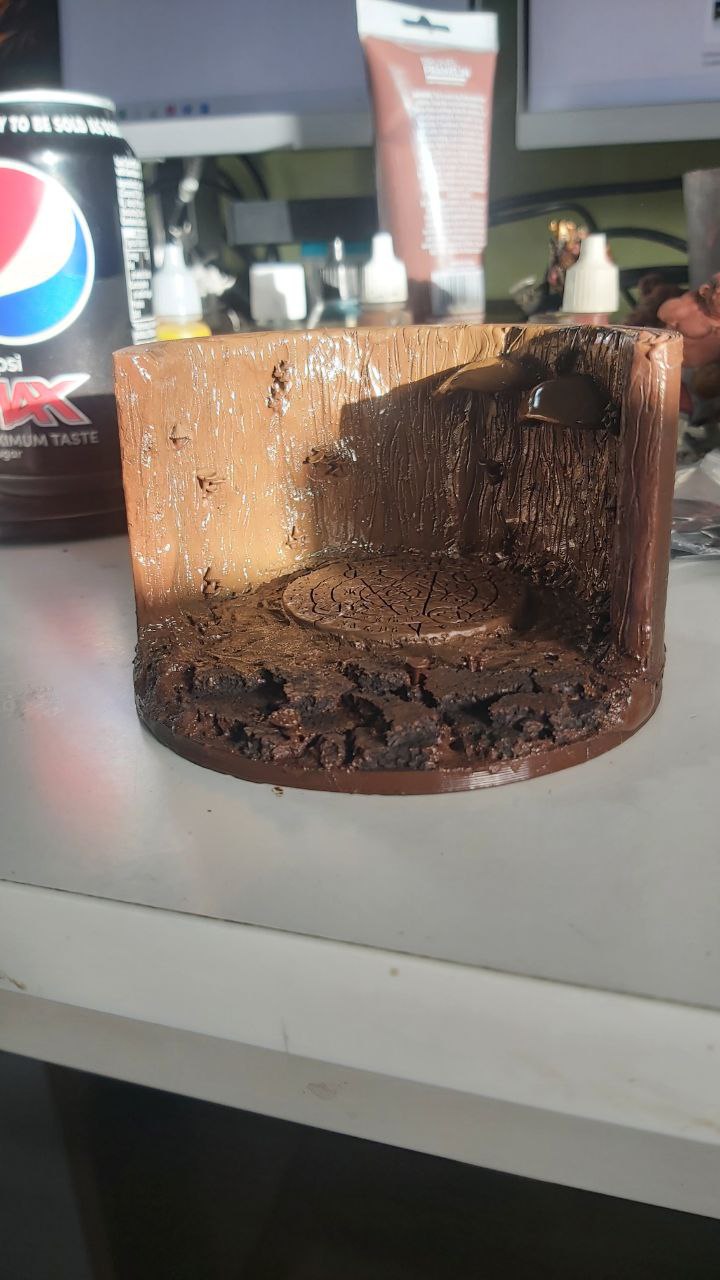
Started to paint the scene I discovered that Fimo and spray paint don’t mix, the paint goes tacky and doesn’t cure correctly.
Joy.
I had primed the whole thing in brown, for it to start tacking after an hour or so. A week indoors did nothing, and most crafting sites suggested either stripping it or redoing the clay part.
not wanting to do either unless I had to, I coated it in cheap artist paint from B&M.
This removed the tacky-ness.
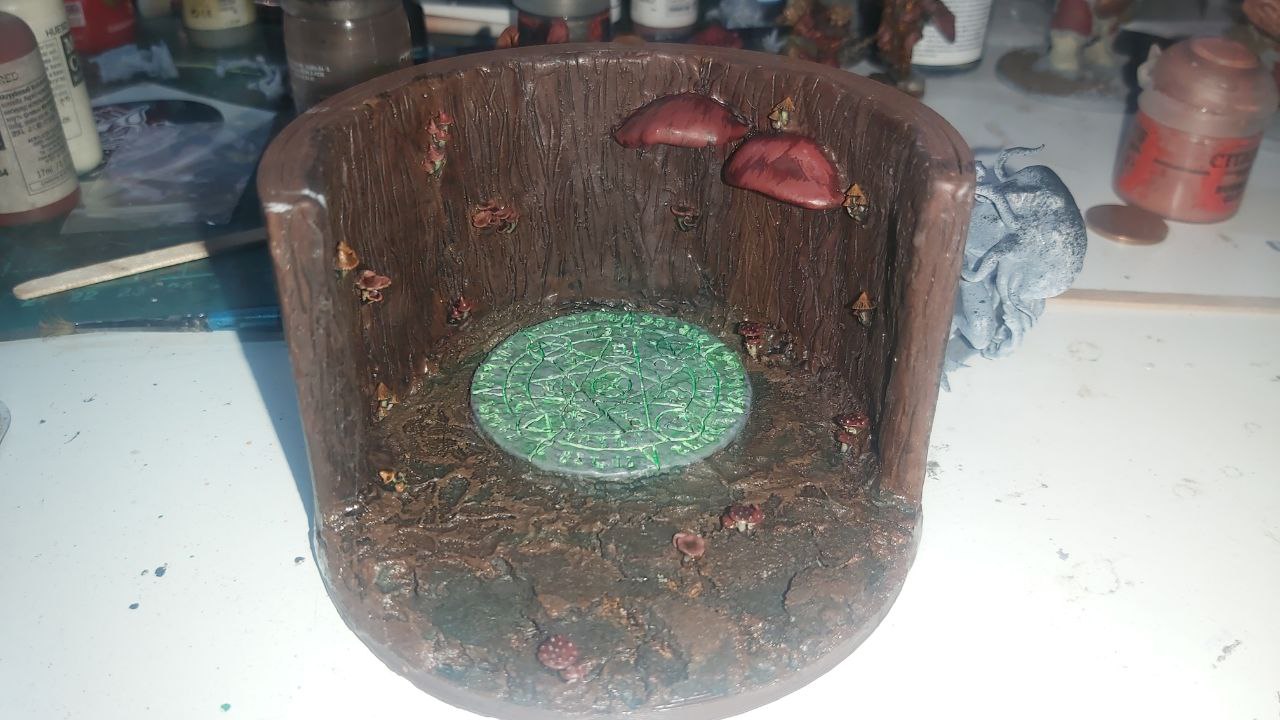
Adding more browns to form a dark wood, as well as darker colours for the mushrooms added to the walls, so as to not draw attention away.
The stone summoning circle was coated a medium gray before a home made black wash was applied to the whole piece.
Everything was brought back up to the muted colours with drybrushing and selective highlights before work started on the magic circle.
A diluted white paint was applied twice to the markings of the circle, before a florescent green was applied.
This immediately draws the eye to it, so I consider it a success.
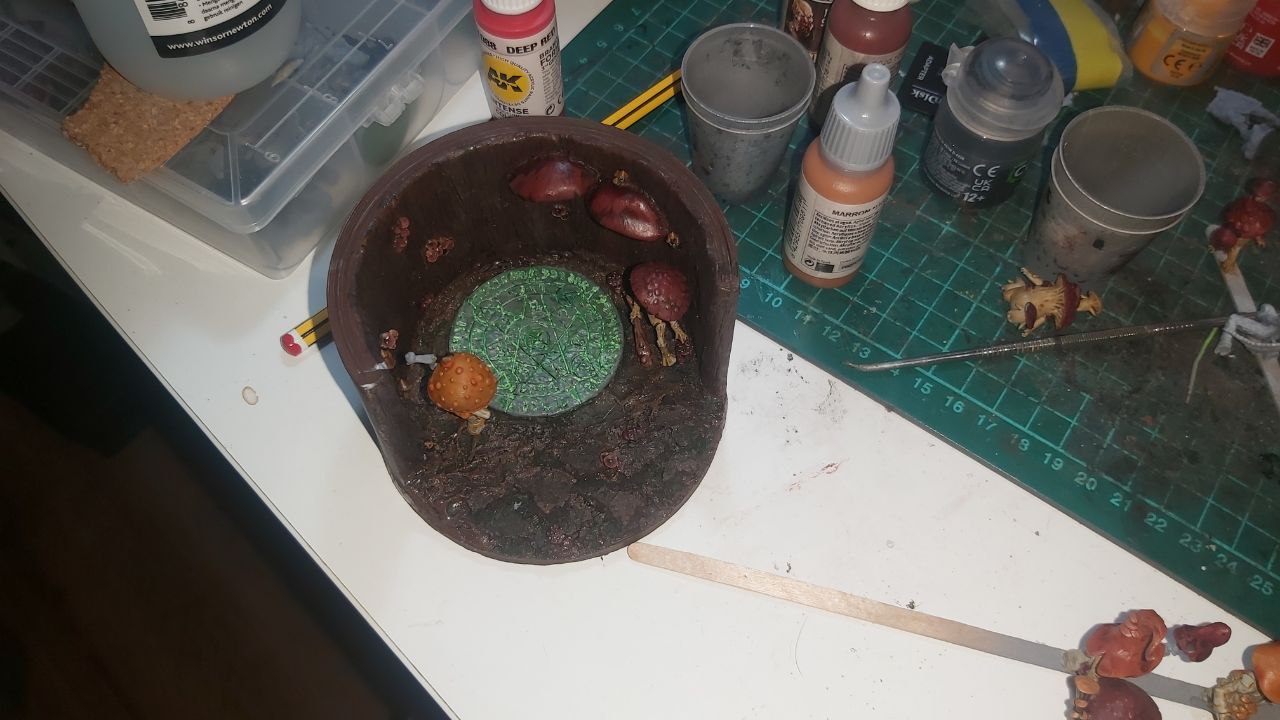
I painted the mushroom men/women and forgot to take pictures, but used similar reds and muted oranges for them too.
Before gluing them in place I added some moss flock around the crevices, as well as selective green washes around the floor of the diorama
If you are interested, the ratio I used for the was is as follows:
- 1 ink
- 2 medium
- 12-15 water
- Smidge of dish soap
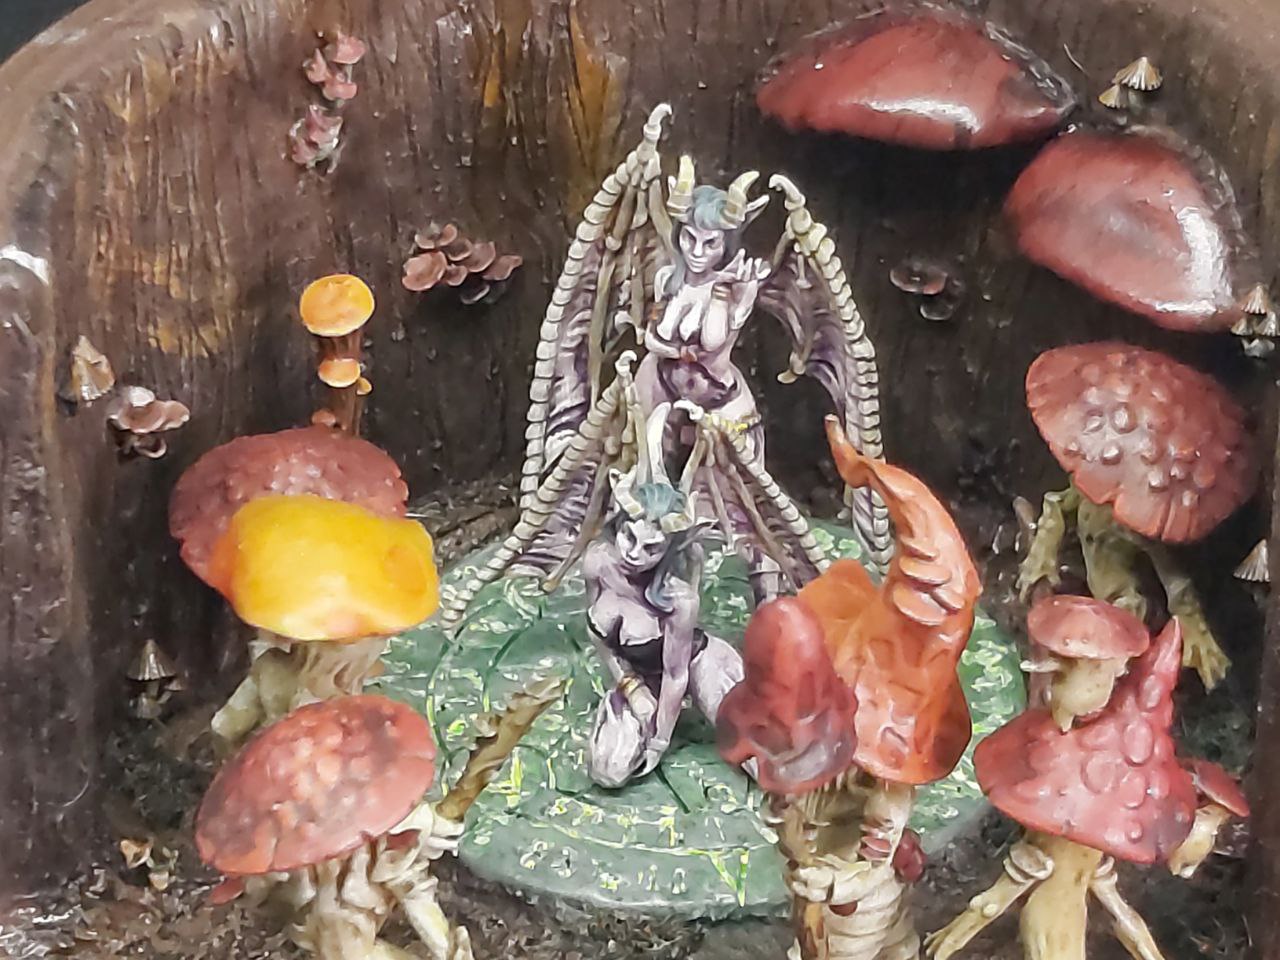
Summoned beings
Two succubii summoned for help…
Part of my 2024 personal goals is to be able to take better pics of minis…
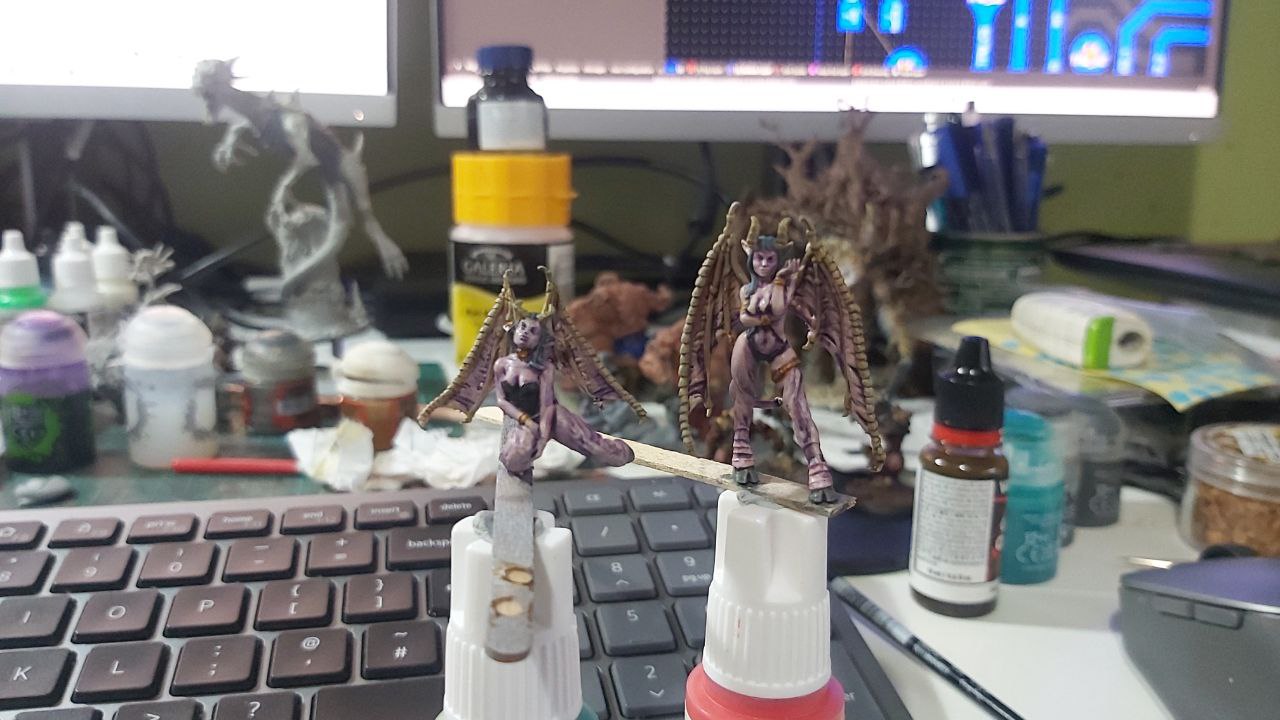 loosely based on Morrigan
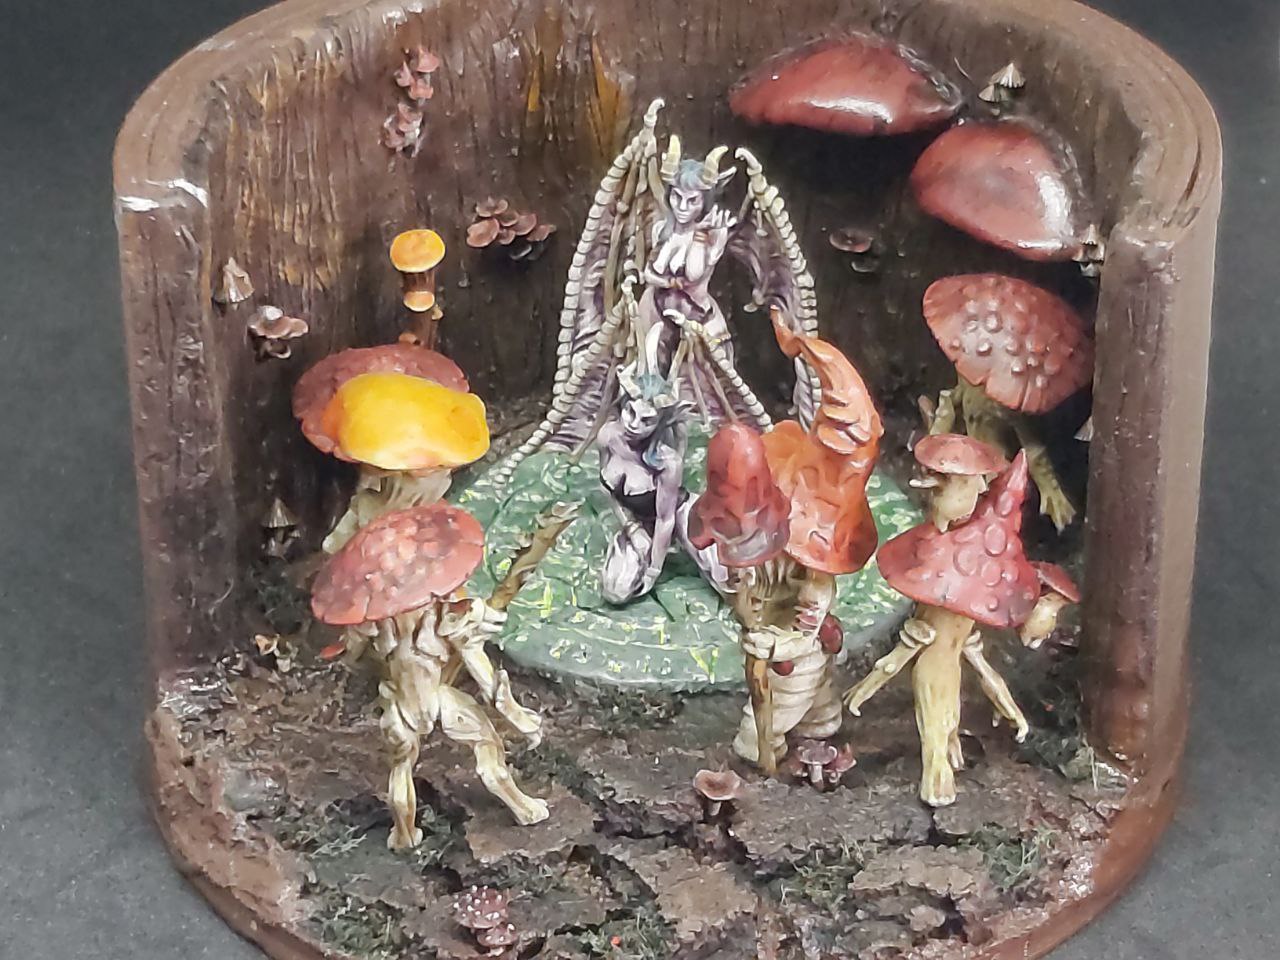
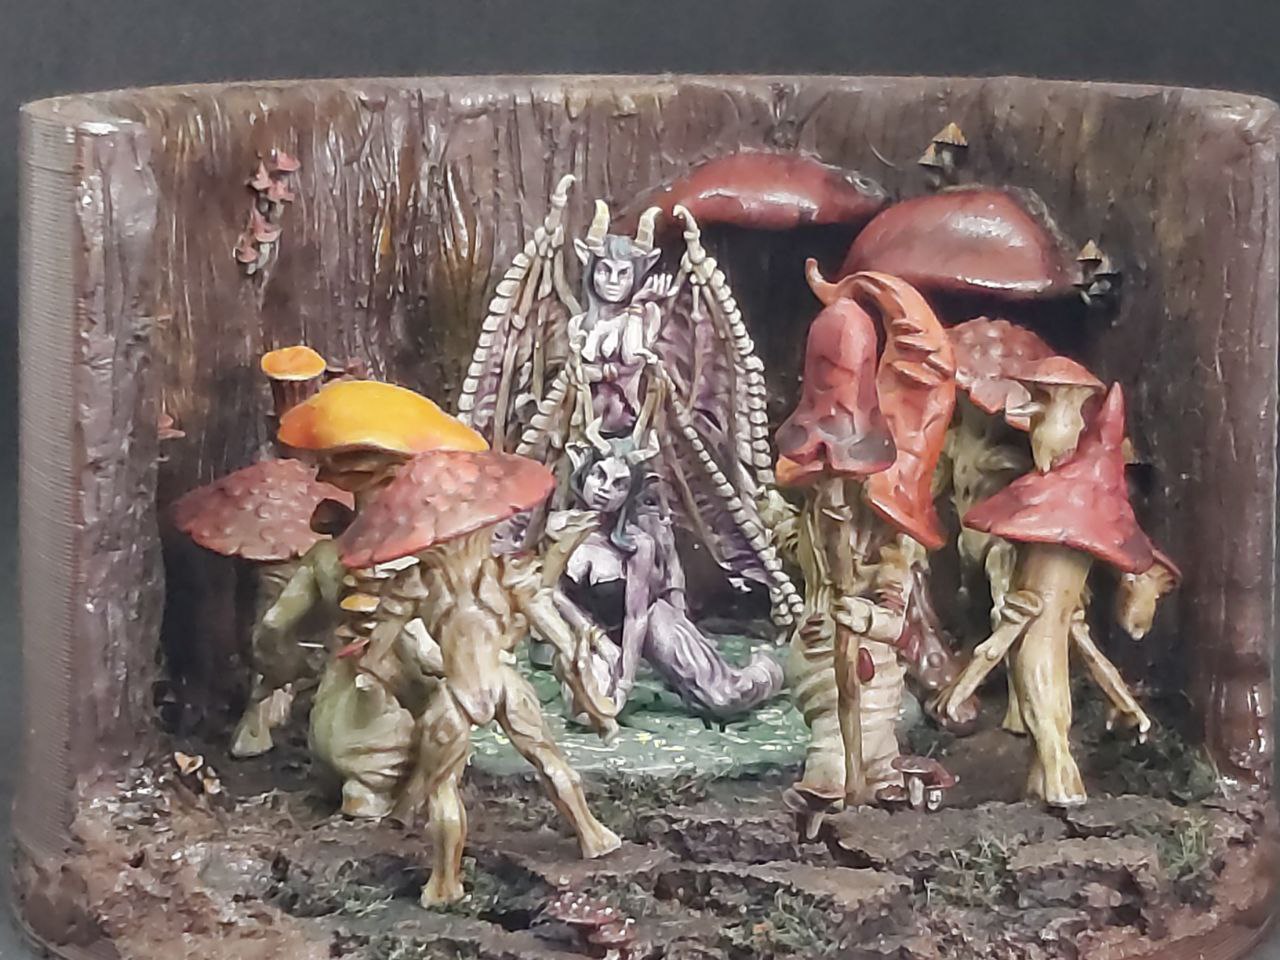
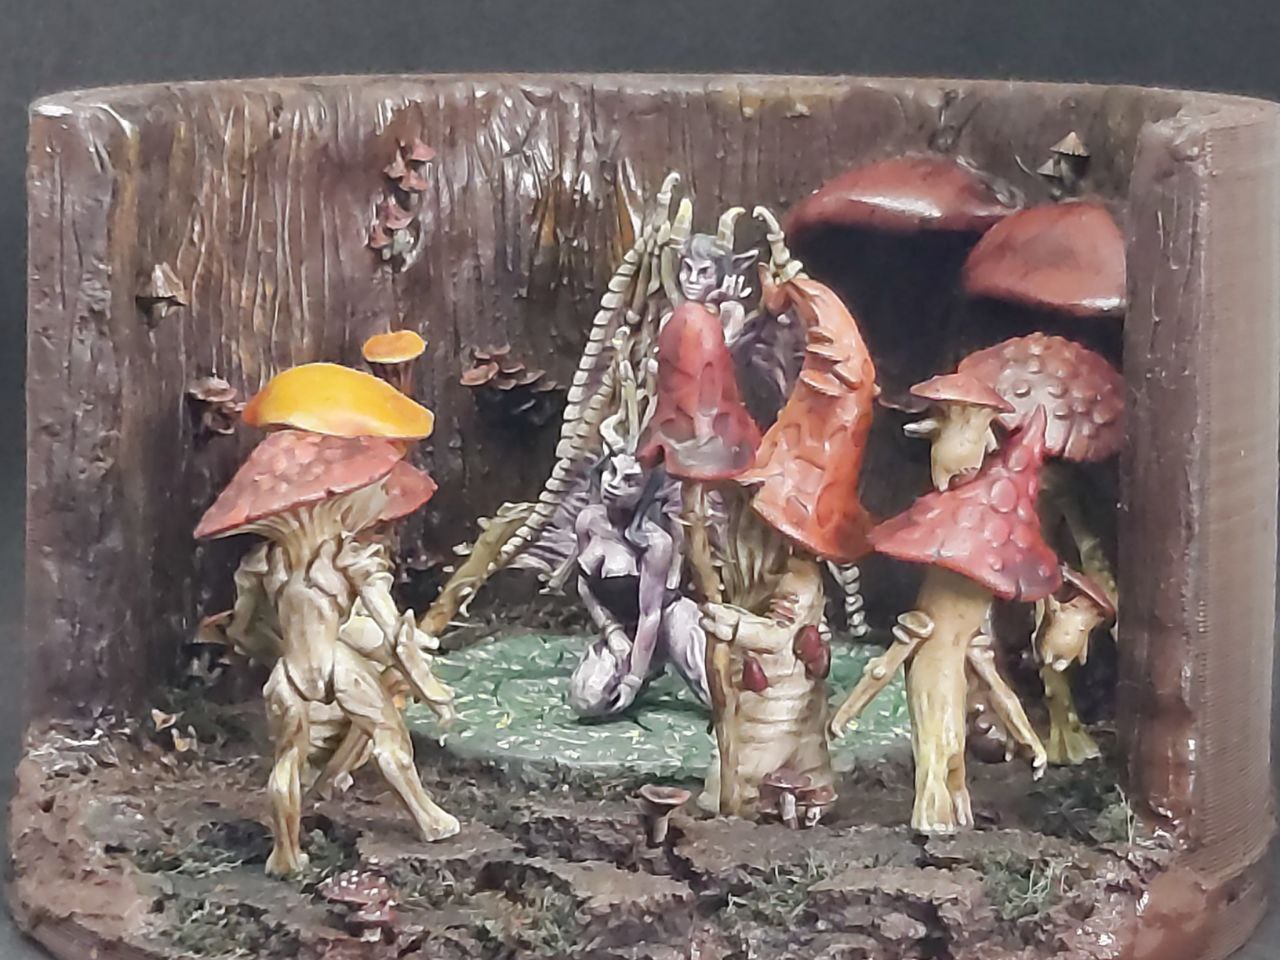
Finished Piece photos
These are the finished photos, near the end I had to take a break and subsequently lost some mojo.
Rather than let it languish on the desktop for years, I powered on.
not as finished as I would like, but it is finished.