


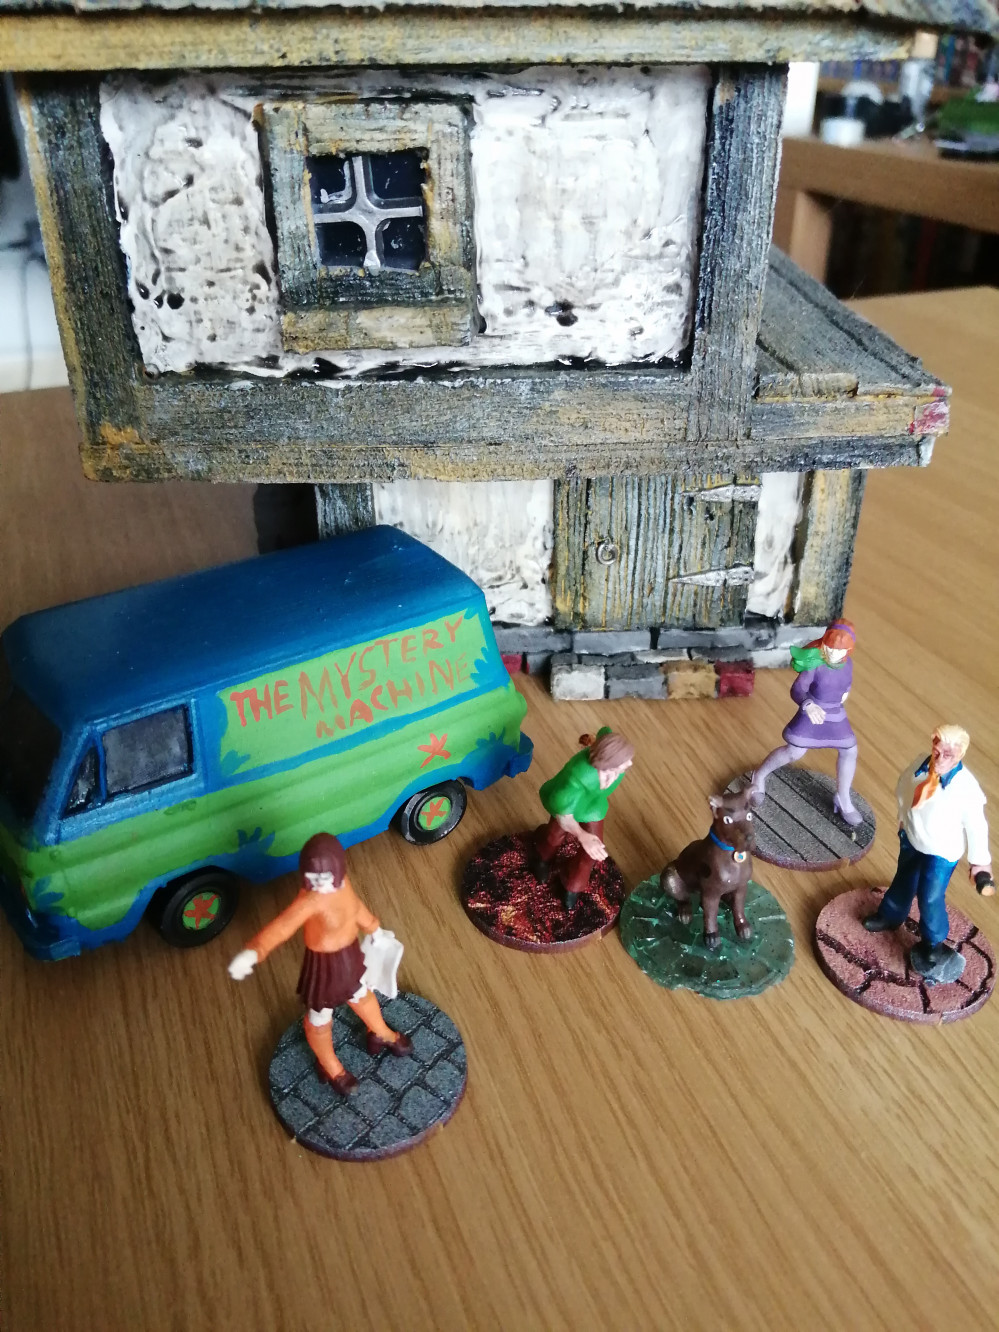
SCOOBY DOO AND THE MYSTERY OF THE MESMERISING MANSION


Recommendations: 167
About the Project
A set of modular tiles and accessories to use for a Haunted House/Mystery Mansion/Zombie Hunt. These will initially be themed around a scenario for a Scooby Doo game I am currently working on.
Related Genre: Murder & Mystery
Related Contest: Dungeonalia 2023
This Project is Active
A word about the foam
In the UK getting sheets of XPS foam thicker than 5 mm is, to say the least difficult. We can not just pop down to the local DIY store like our friends in the US, Canada and Sweden, we have to order ours on line and most suppliers only sell this in bulk or we can order small sheets of Blue Foam (which is now grey). The blue foam is quite fibrous along some of the sides which can be a bane or a boon depending on how you want to texture it, however it does have the advantage of being able to hold indentations really well, which was great for my curtain texture.
I have recently found a few suppliers where you can buy single large (1200 x 1200 mm) sheets in an a assortment of thicknesses although I have not yet tried these out but will be buying from them when I come to build my Carnnevale board.
https://www.cosyspace.co.uk/product/insulation-board-xps-1200x600mm-6mm-10mm-20mm/
https://www.easycomposites.co.uk/xps-extruded-polystyrene-foam
Hallways lead to this
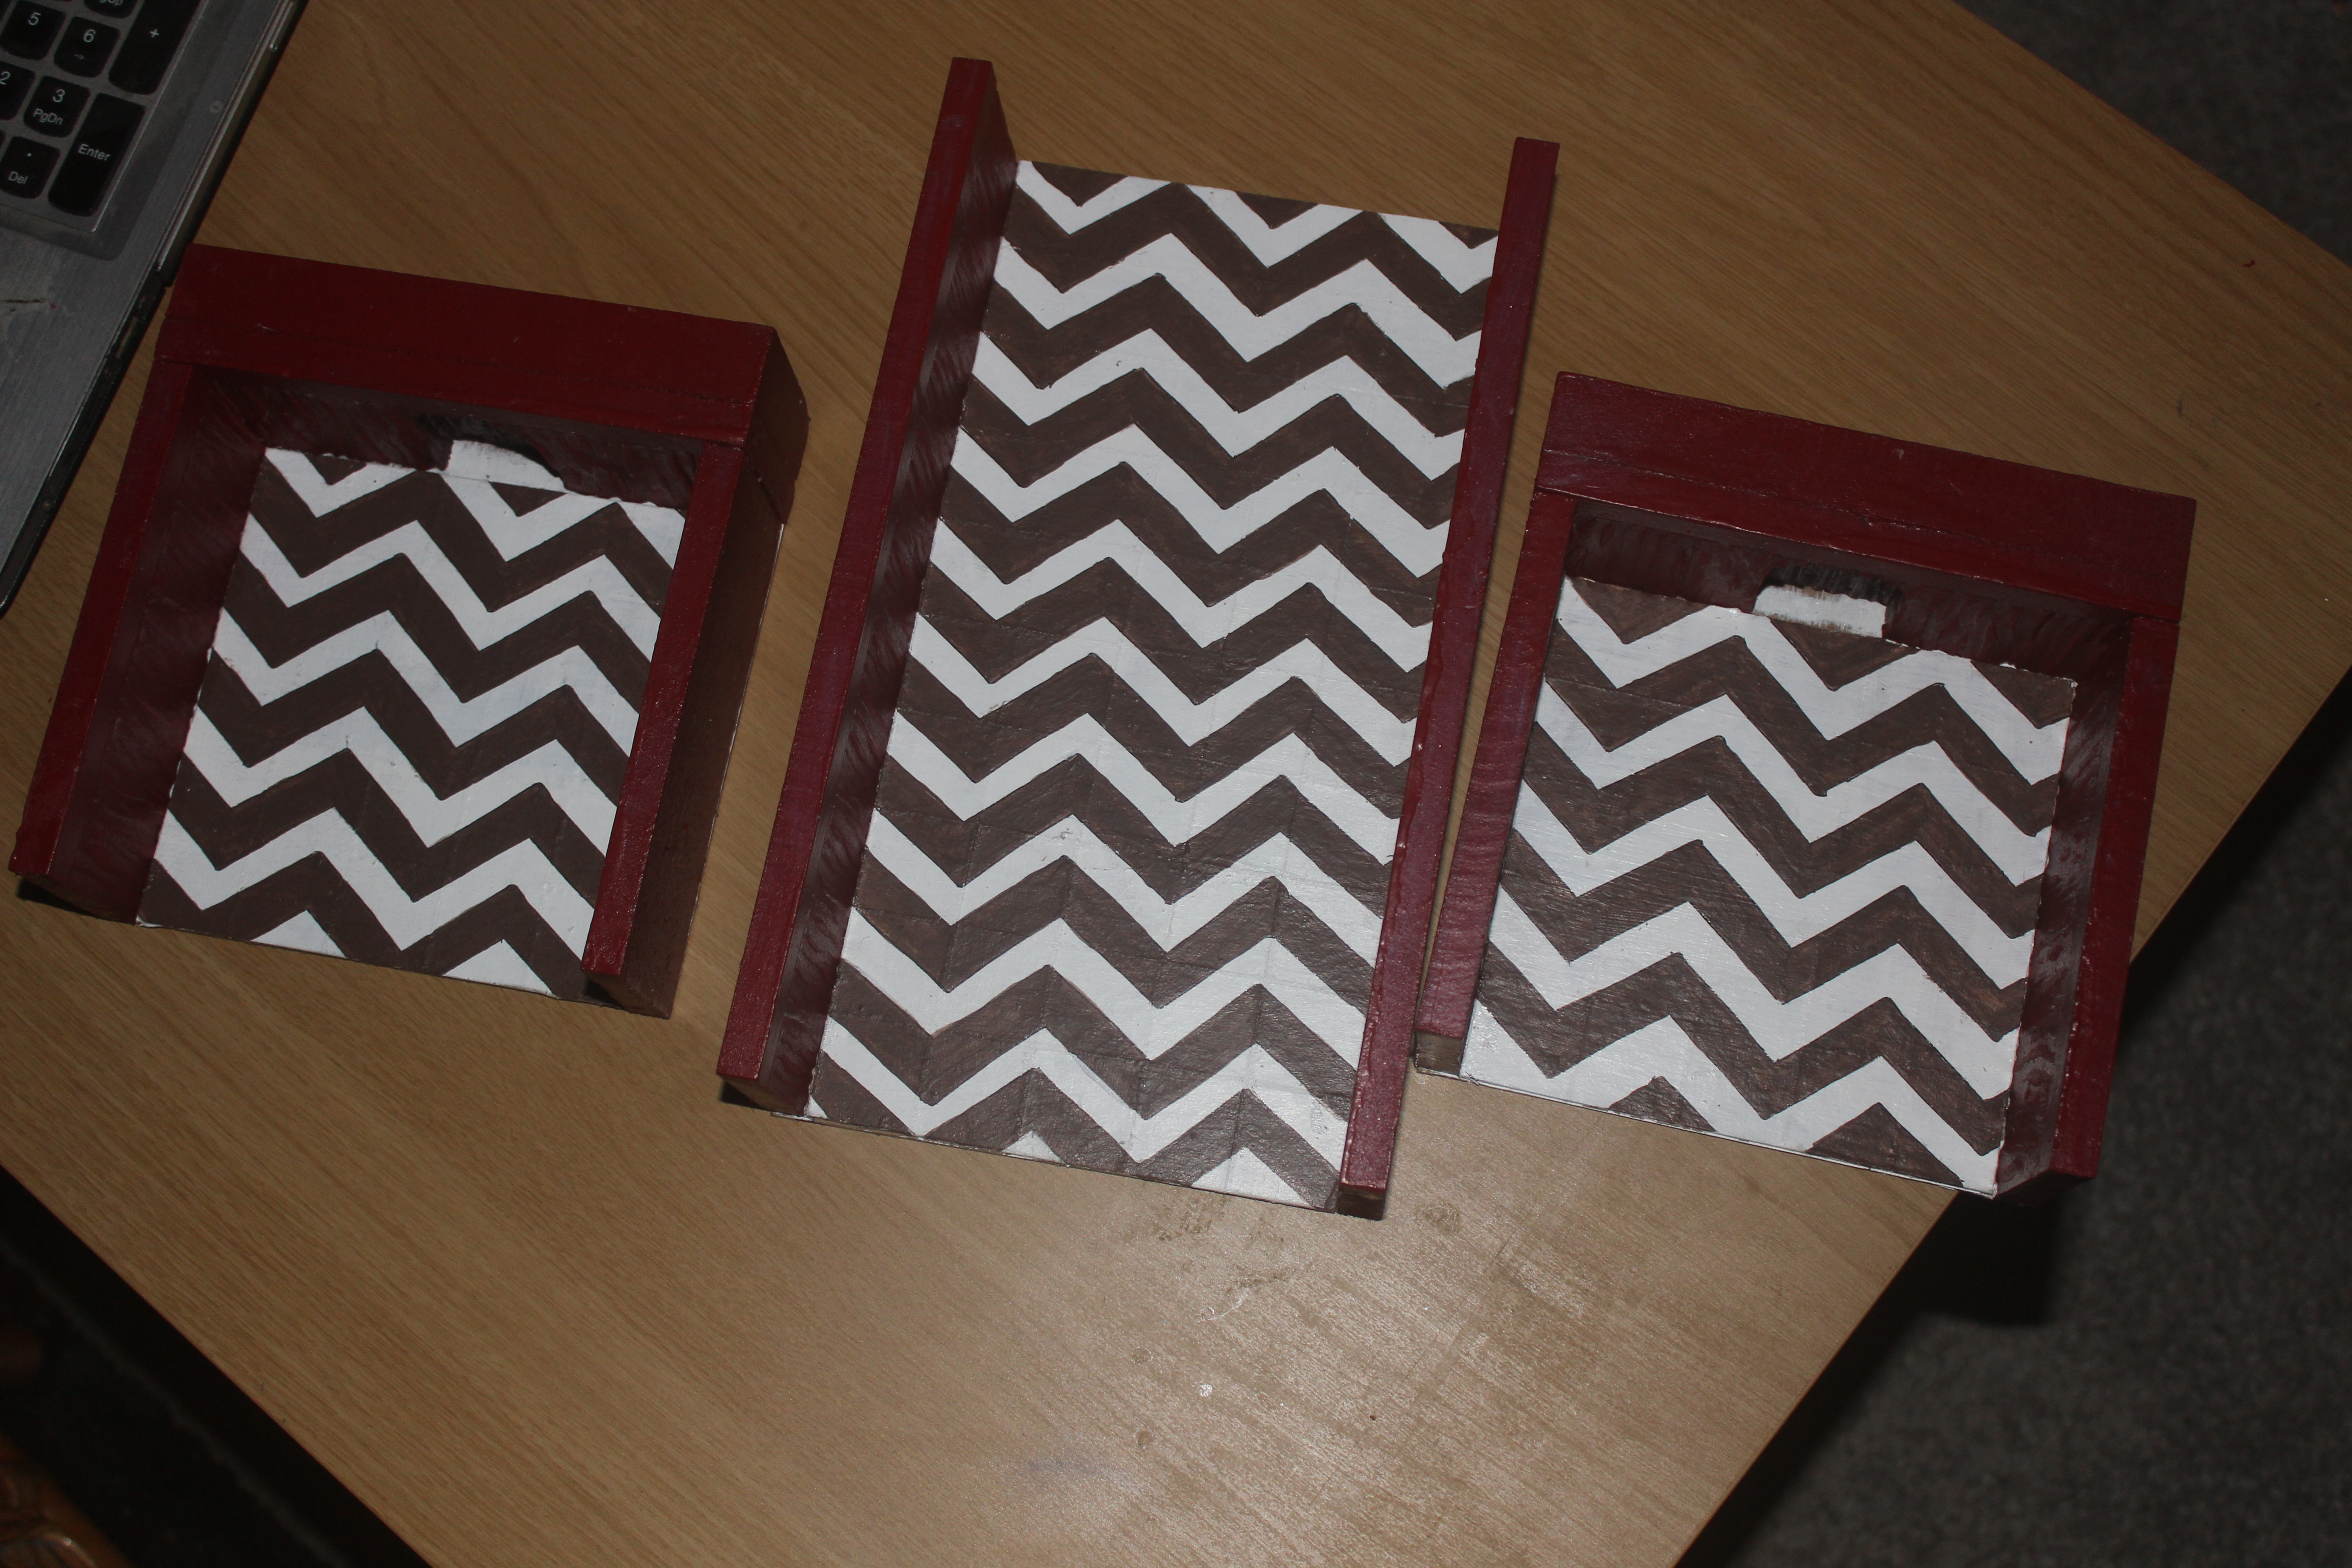
This is the largest/longest room in the Mansion and is being constructed in 3 sections.
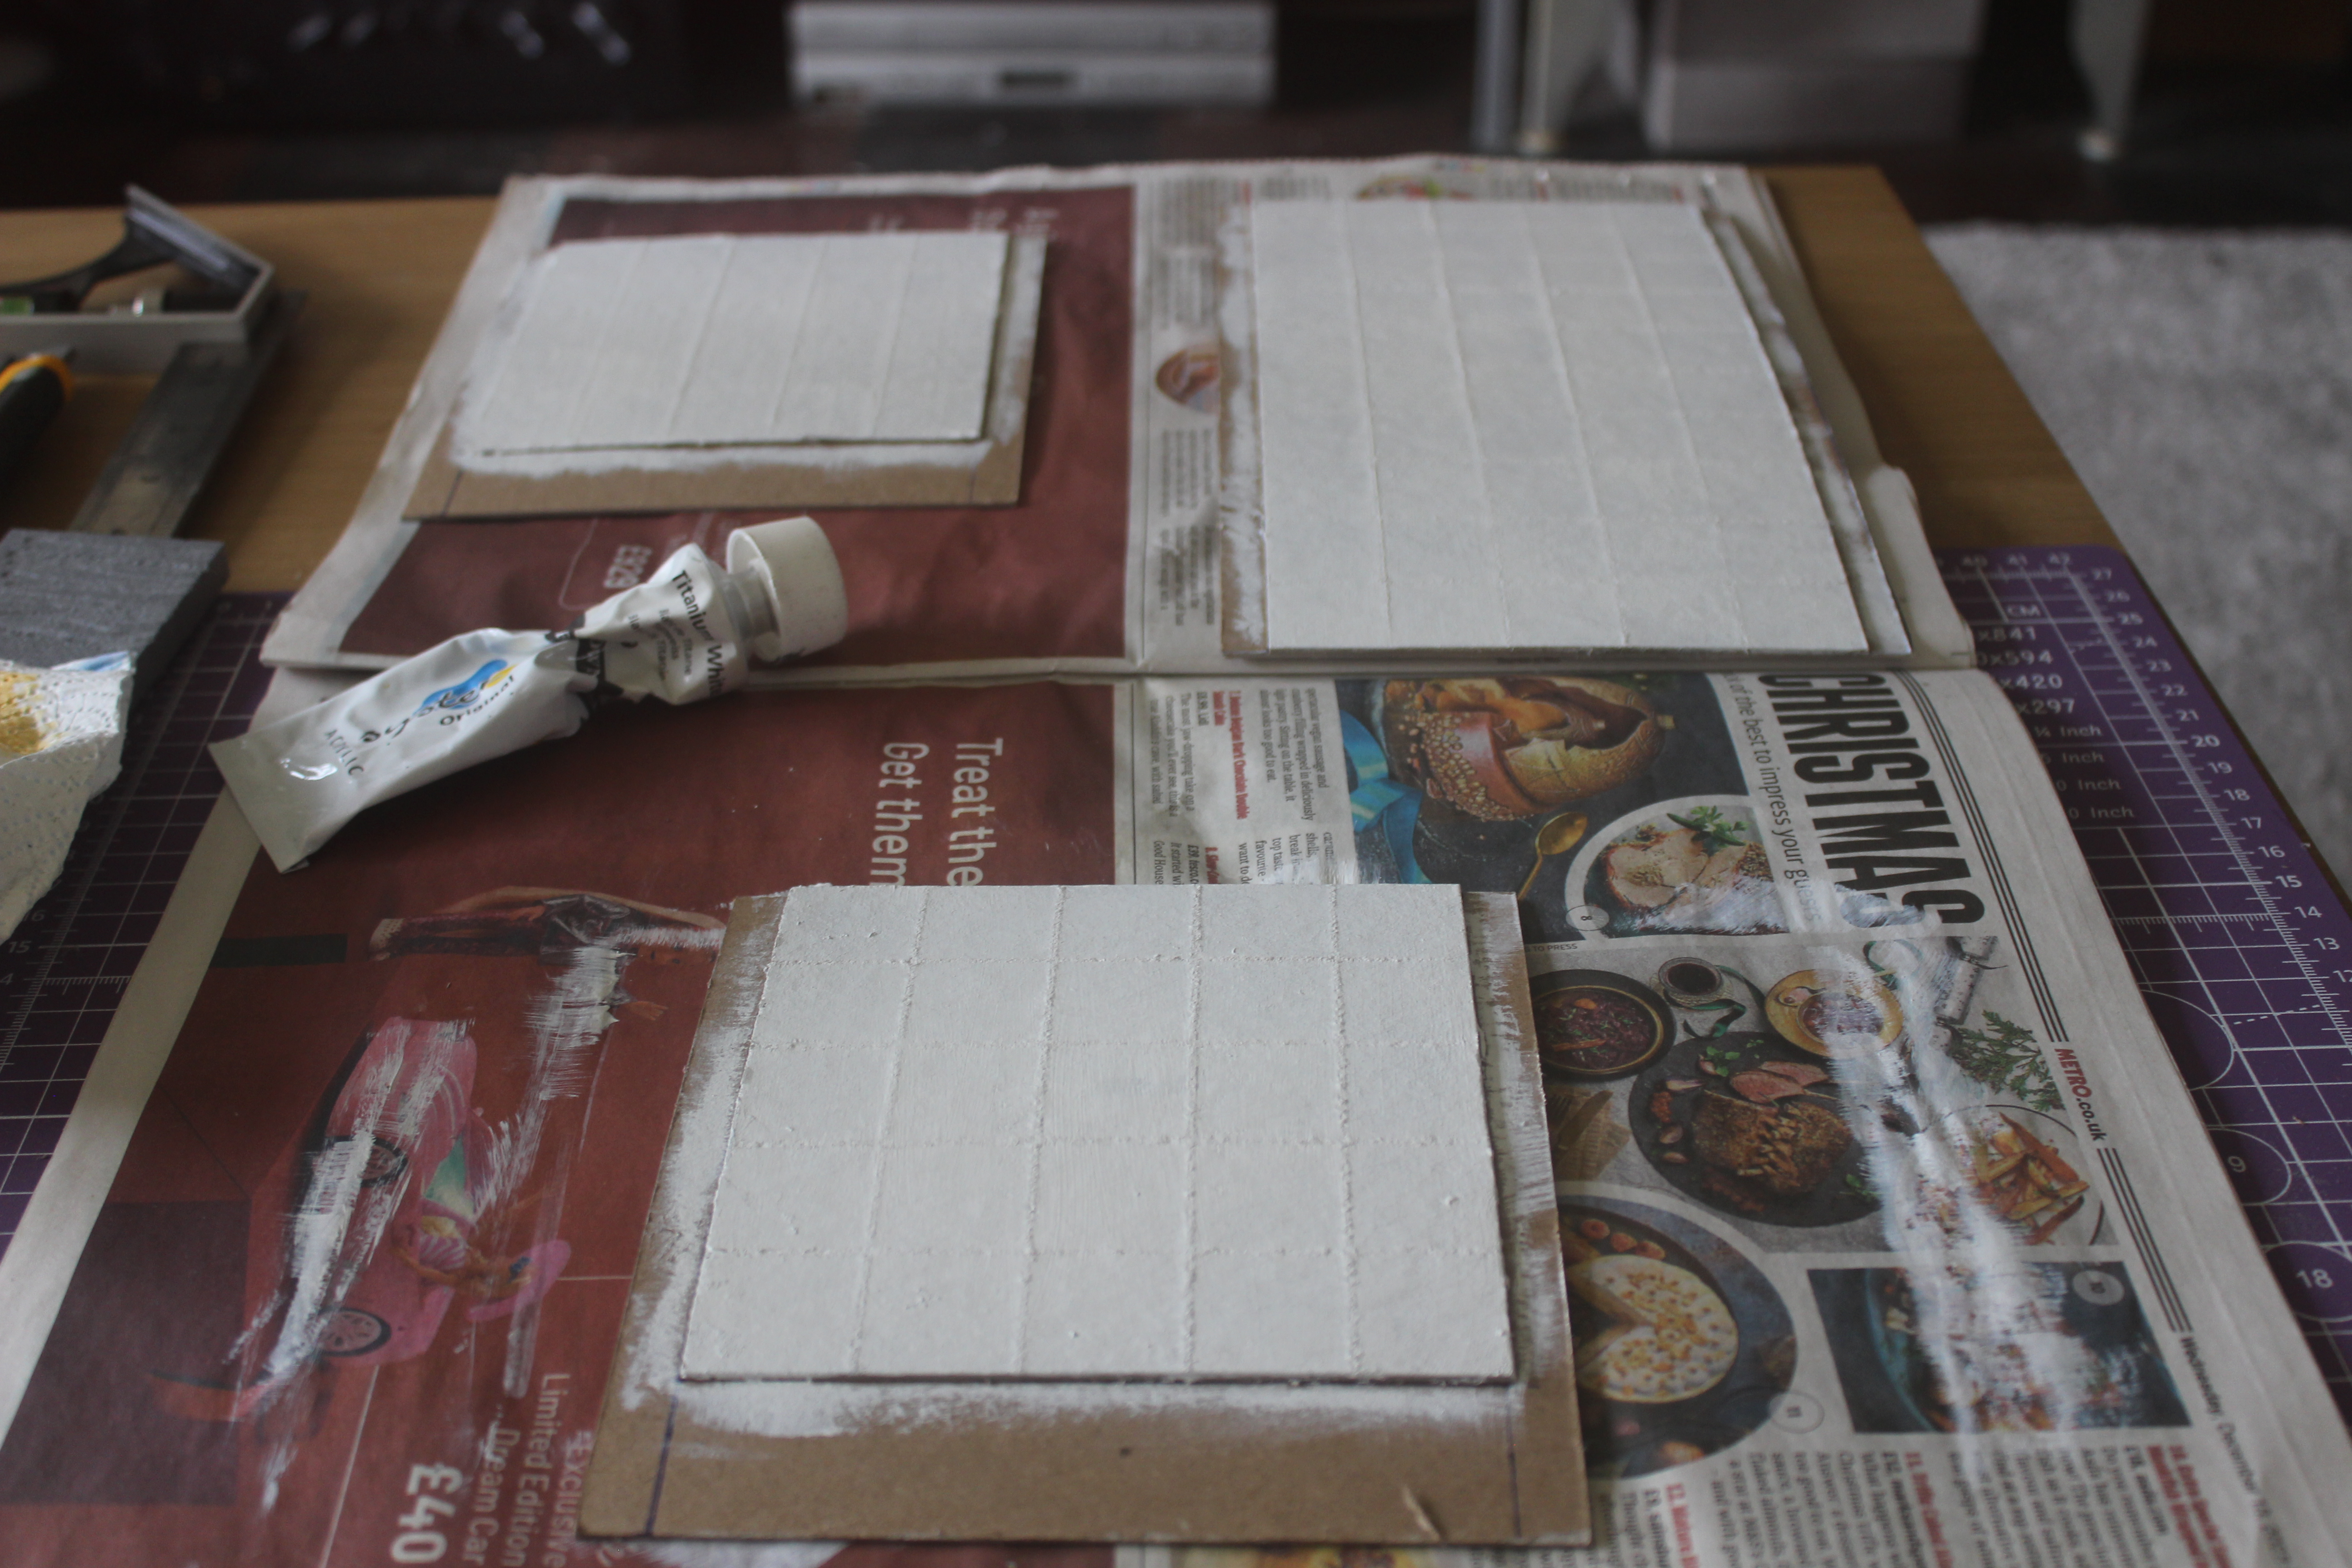
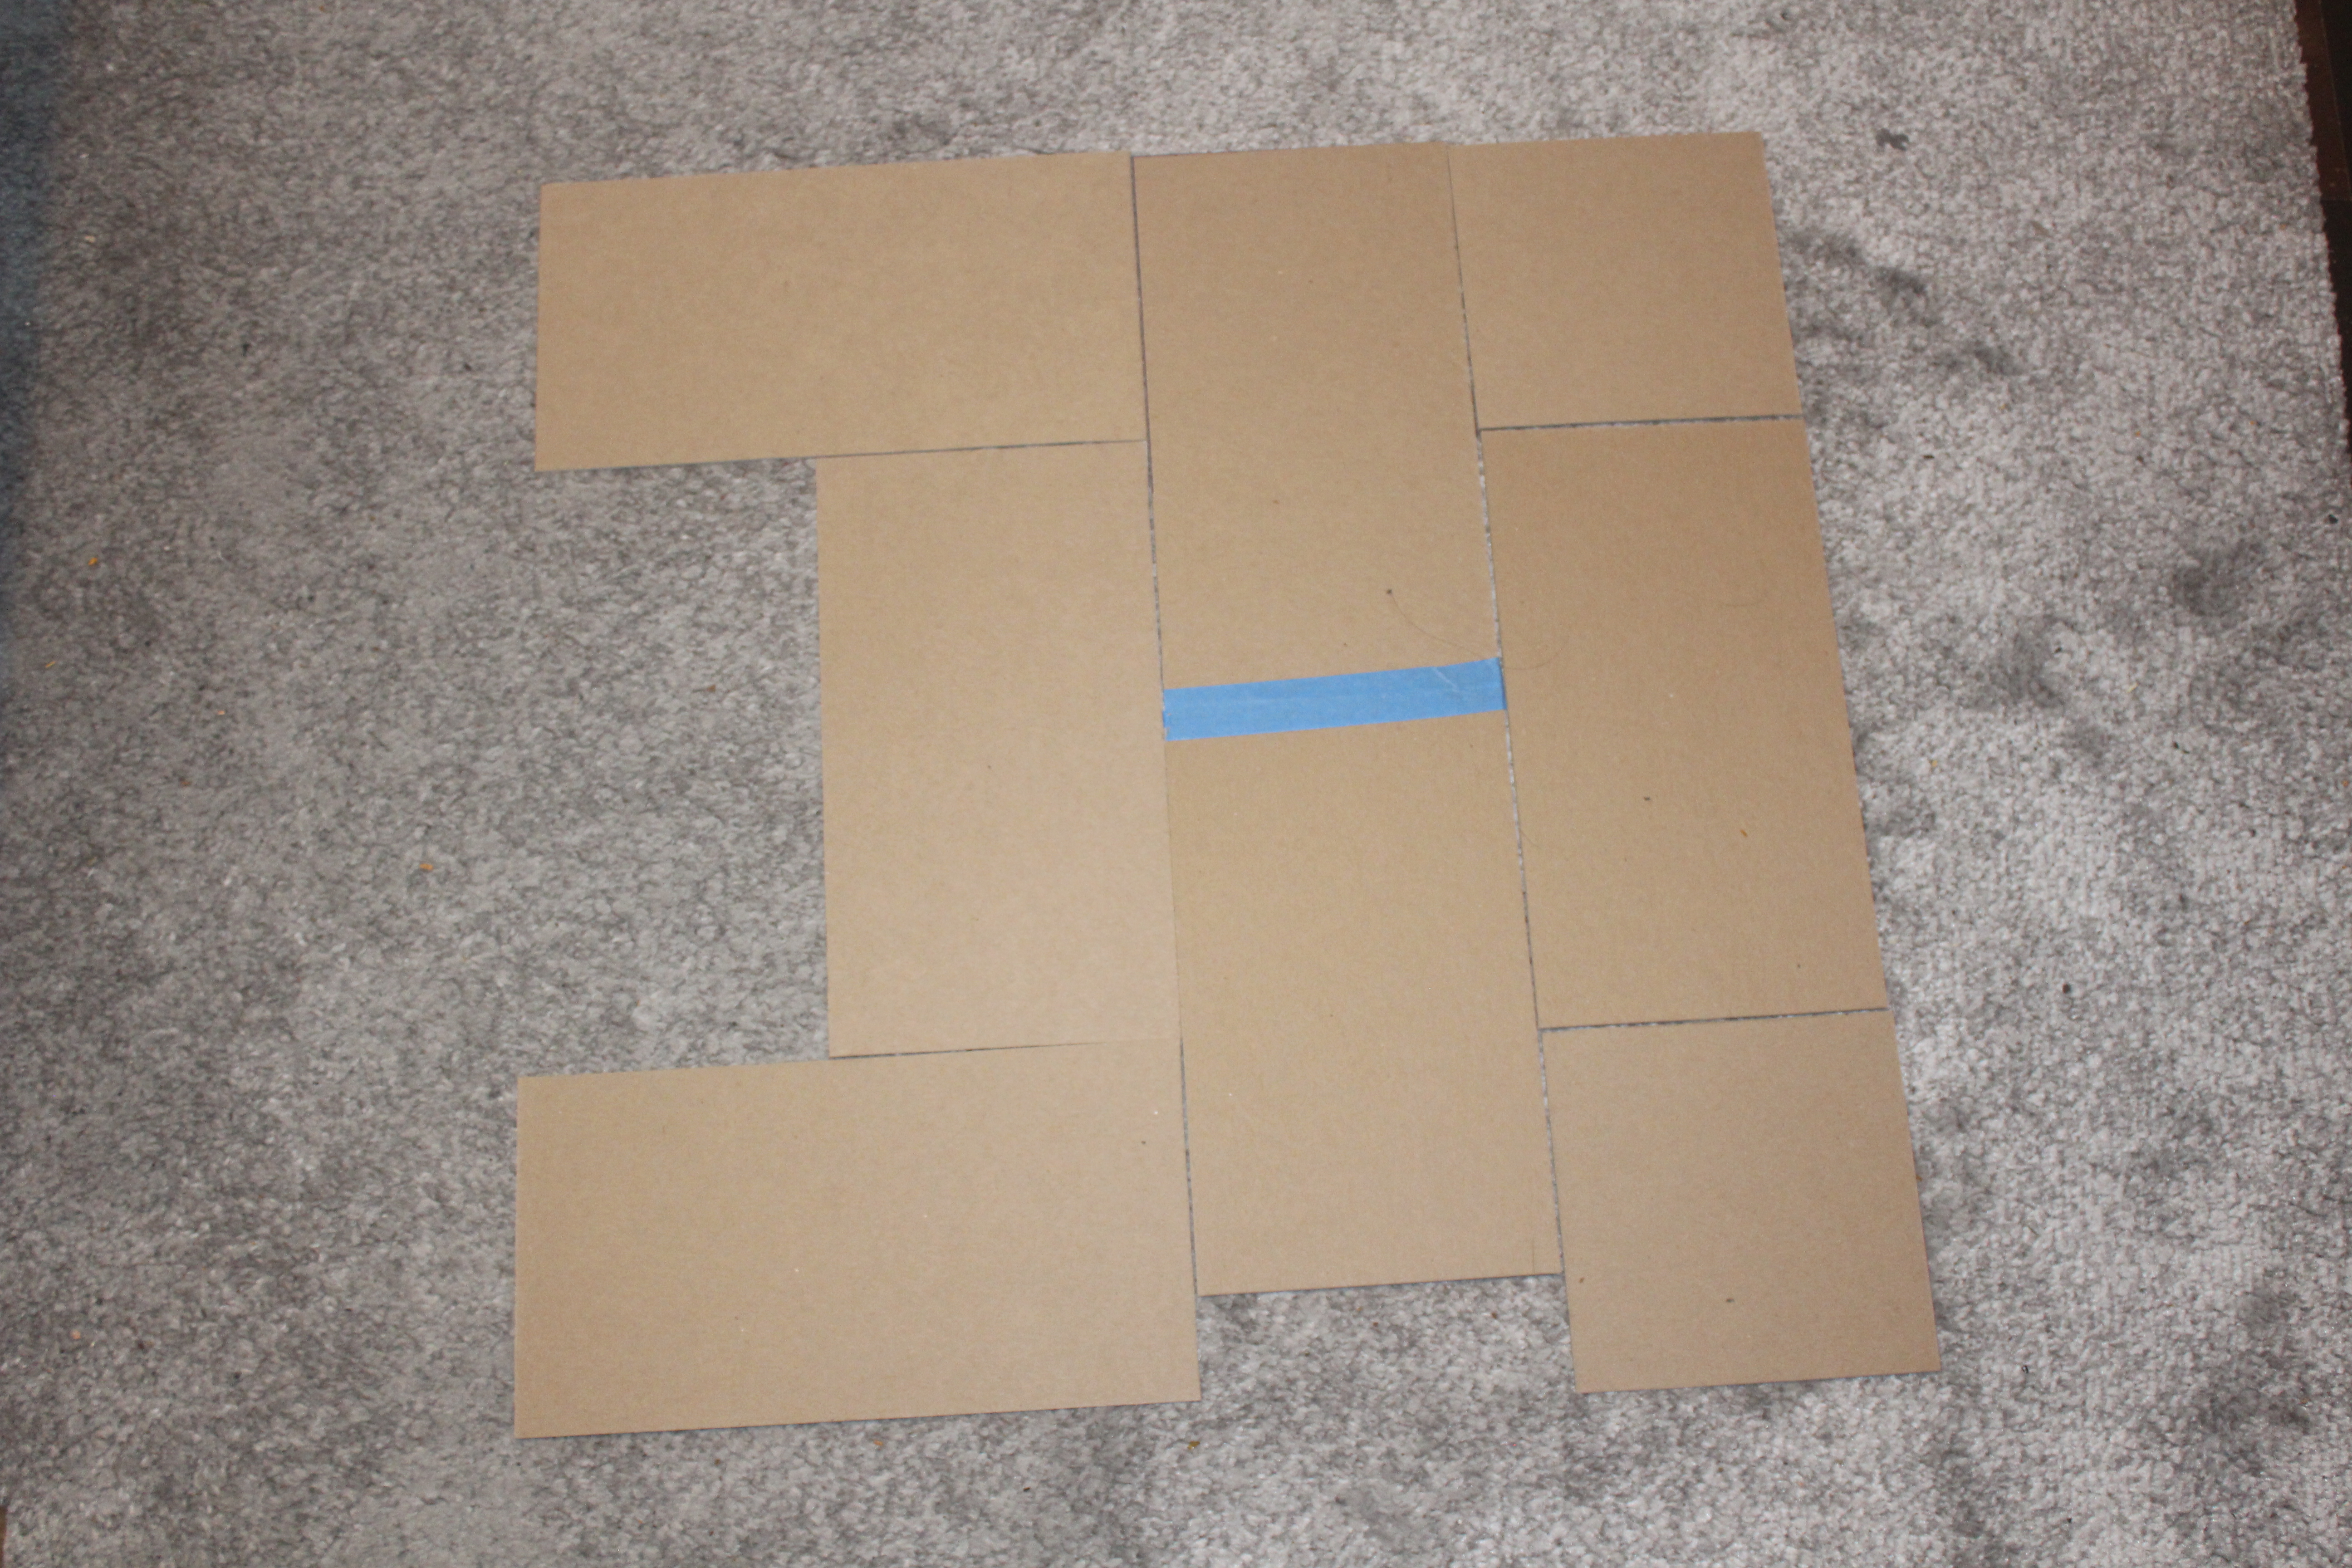
I first cut some pieces of the chipboard to fit inside the walls so basically two 5 inch square and one 10 x 5. I scored these to mark out the playable grid.
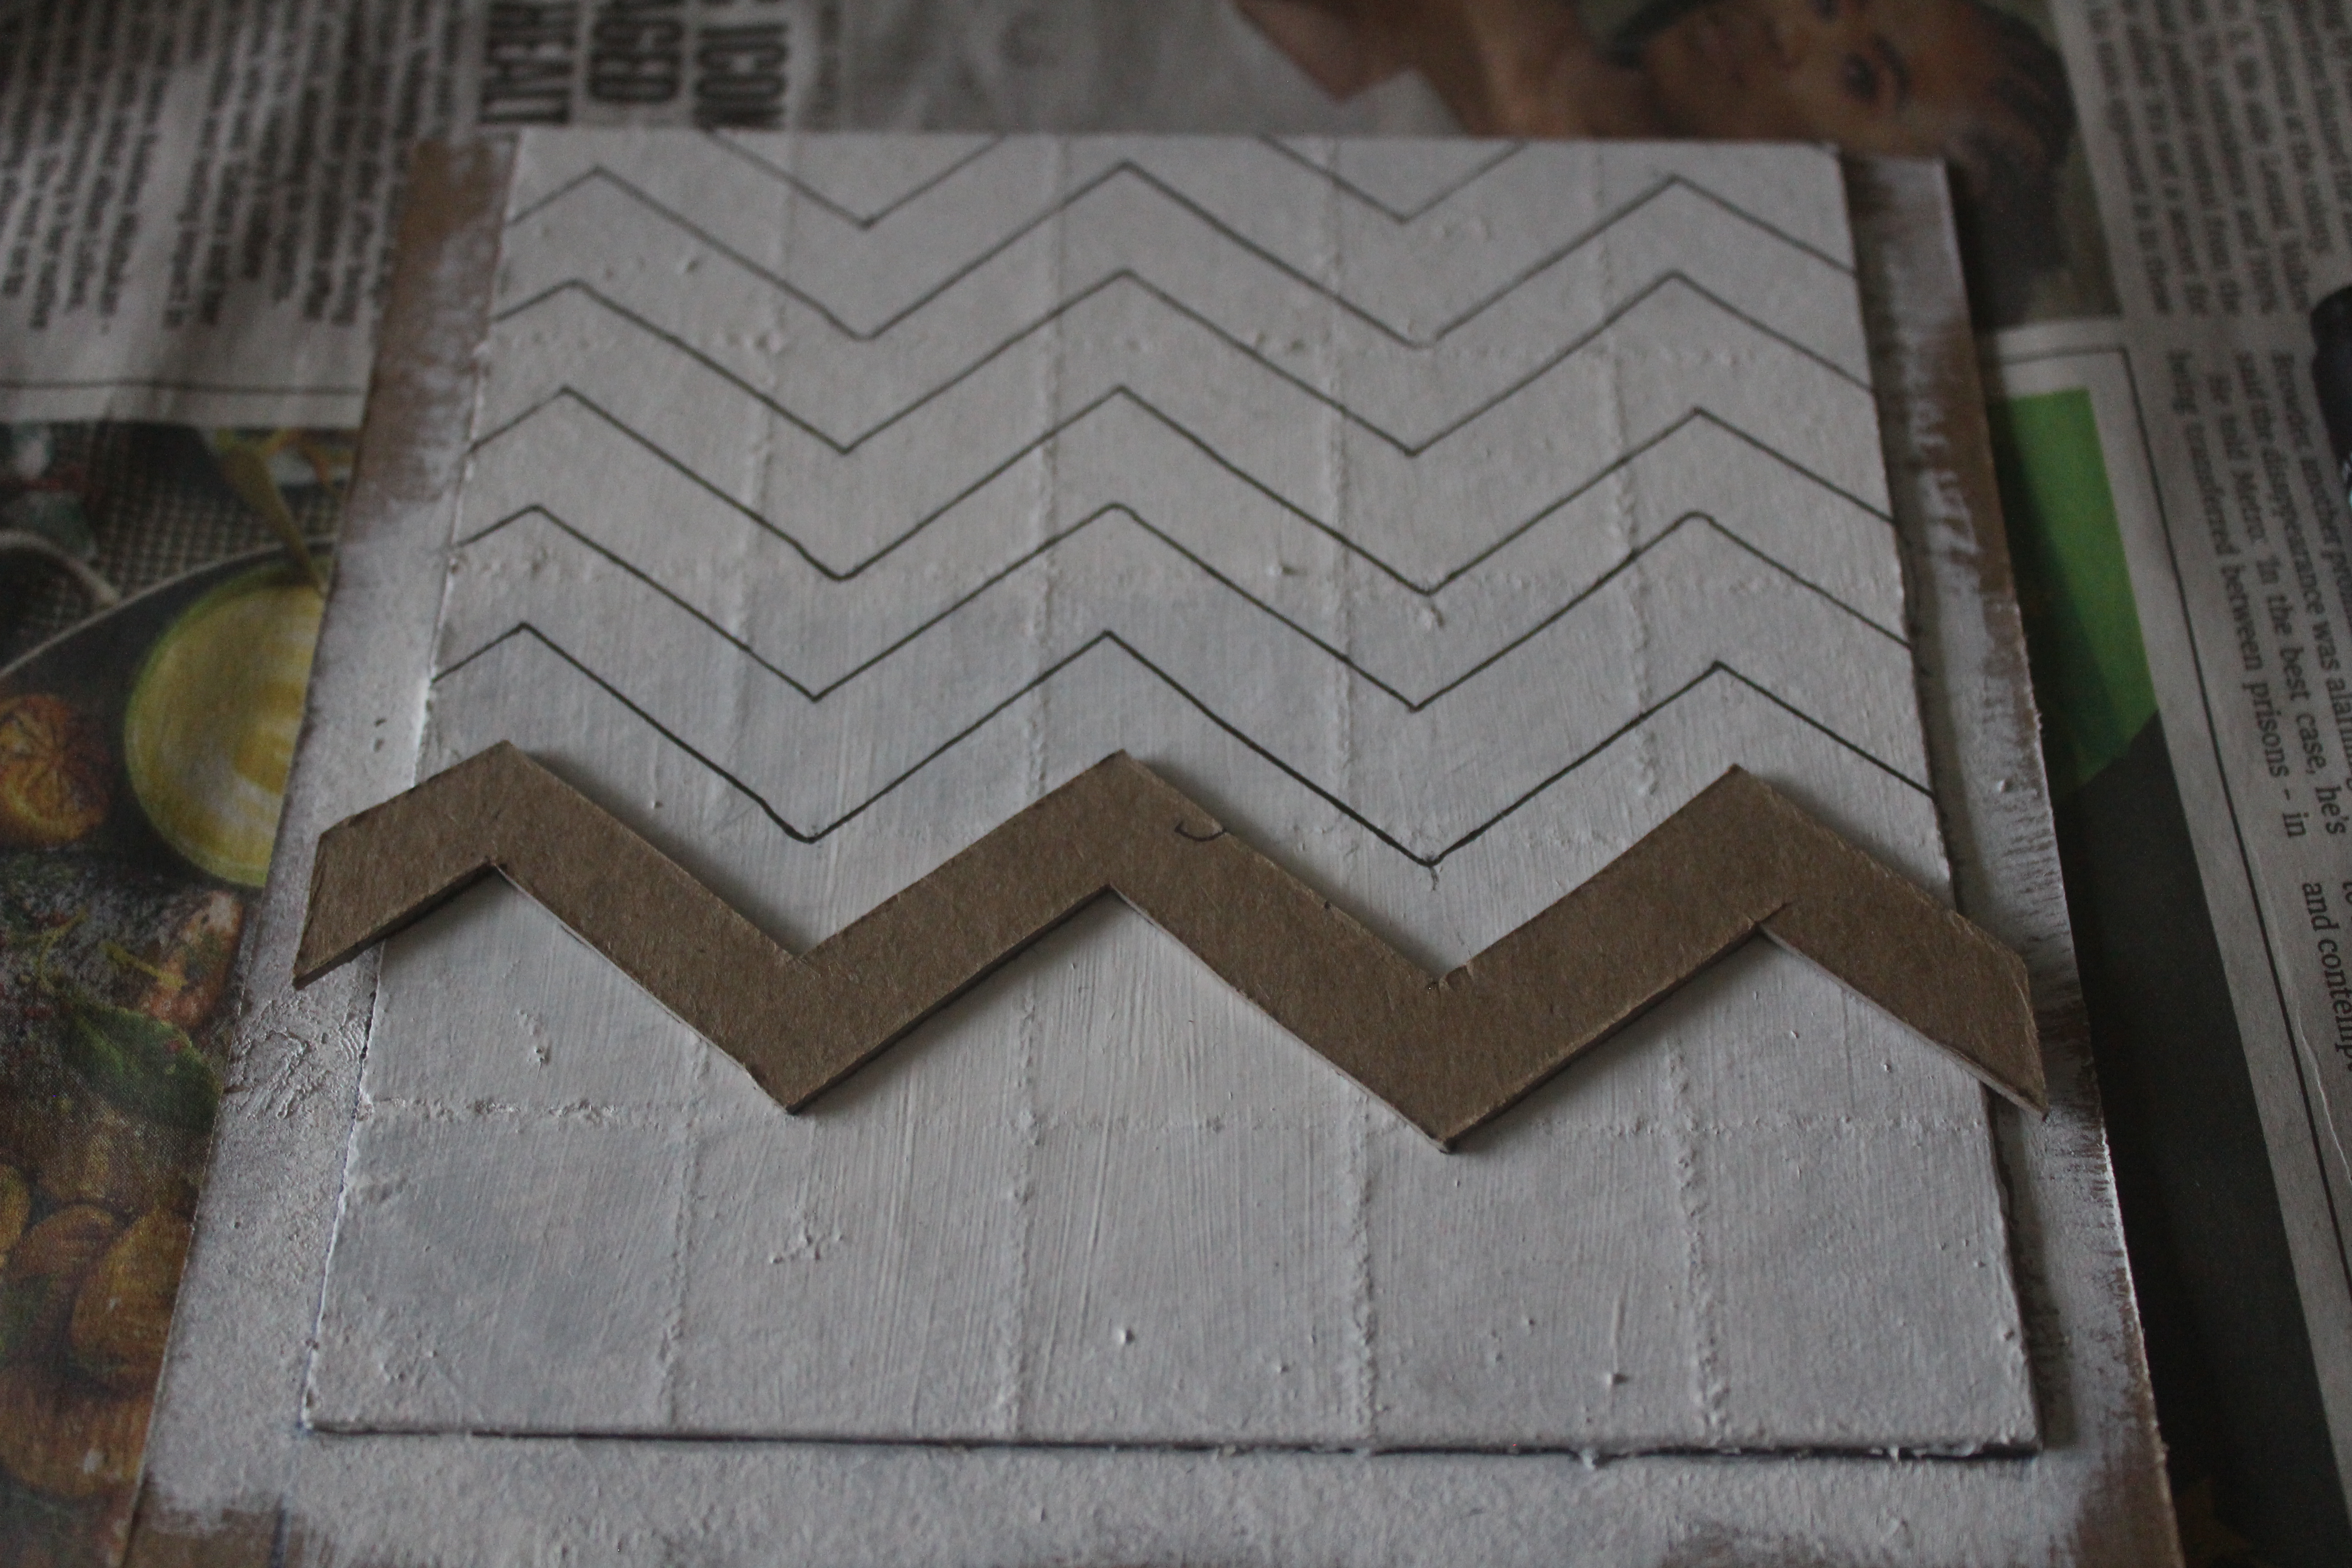
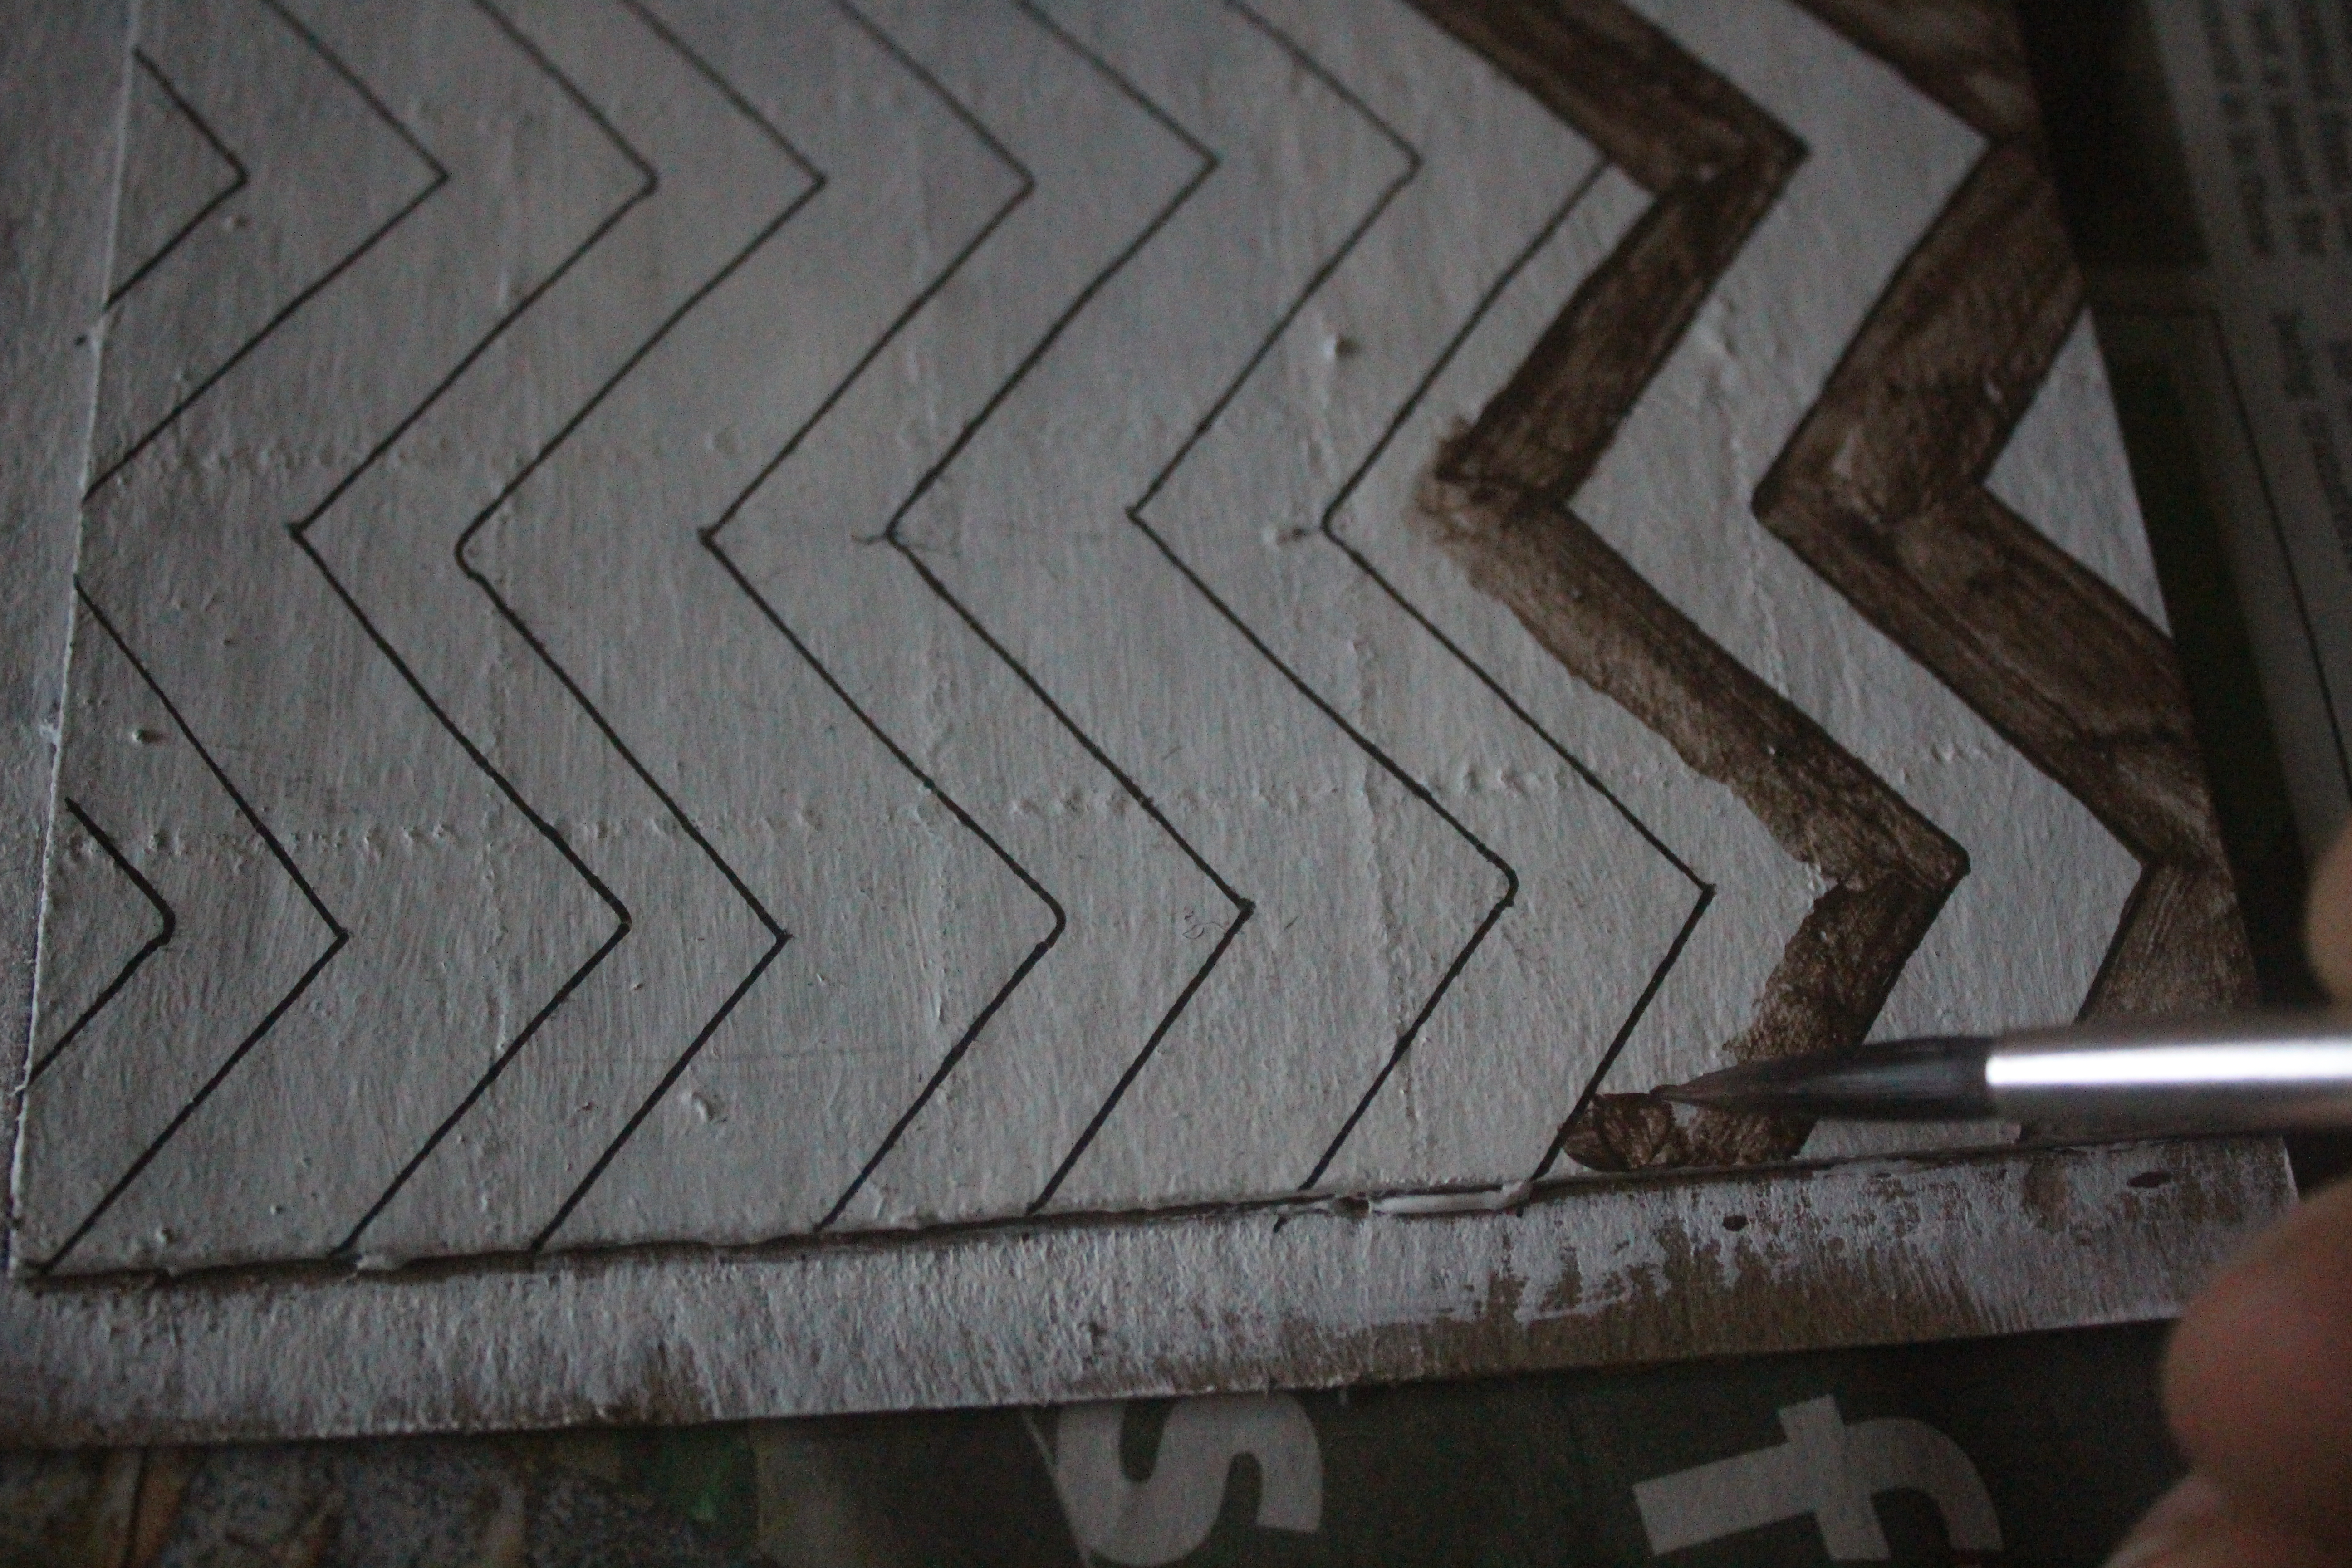
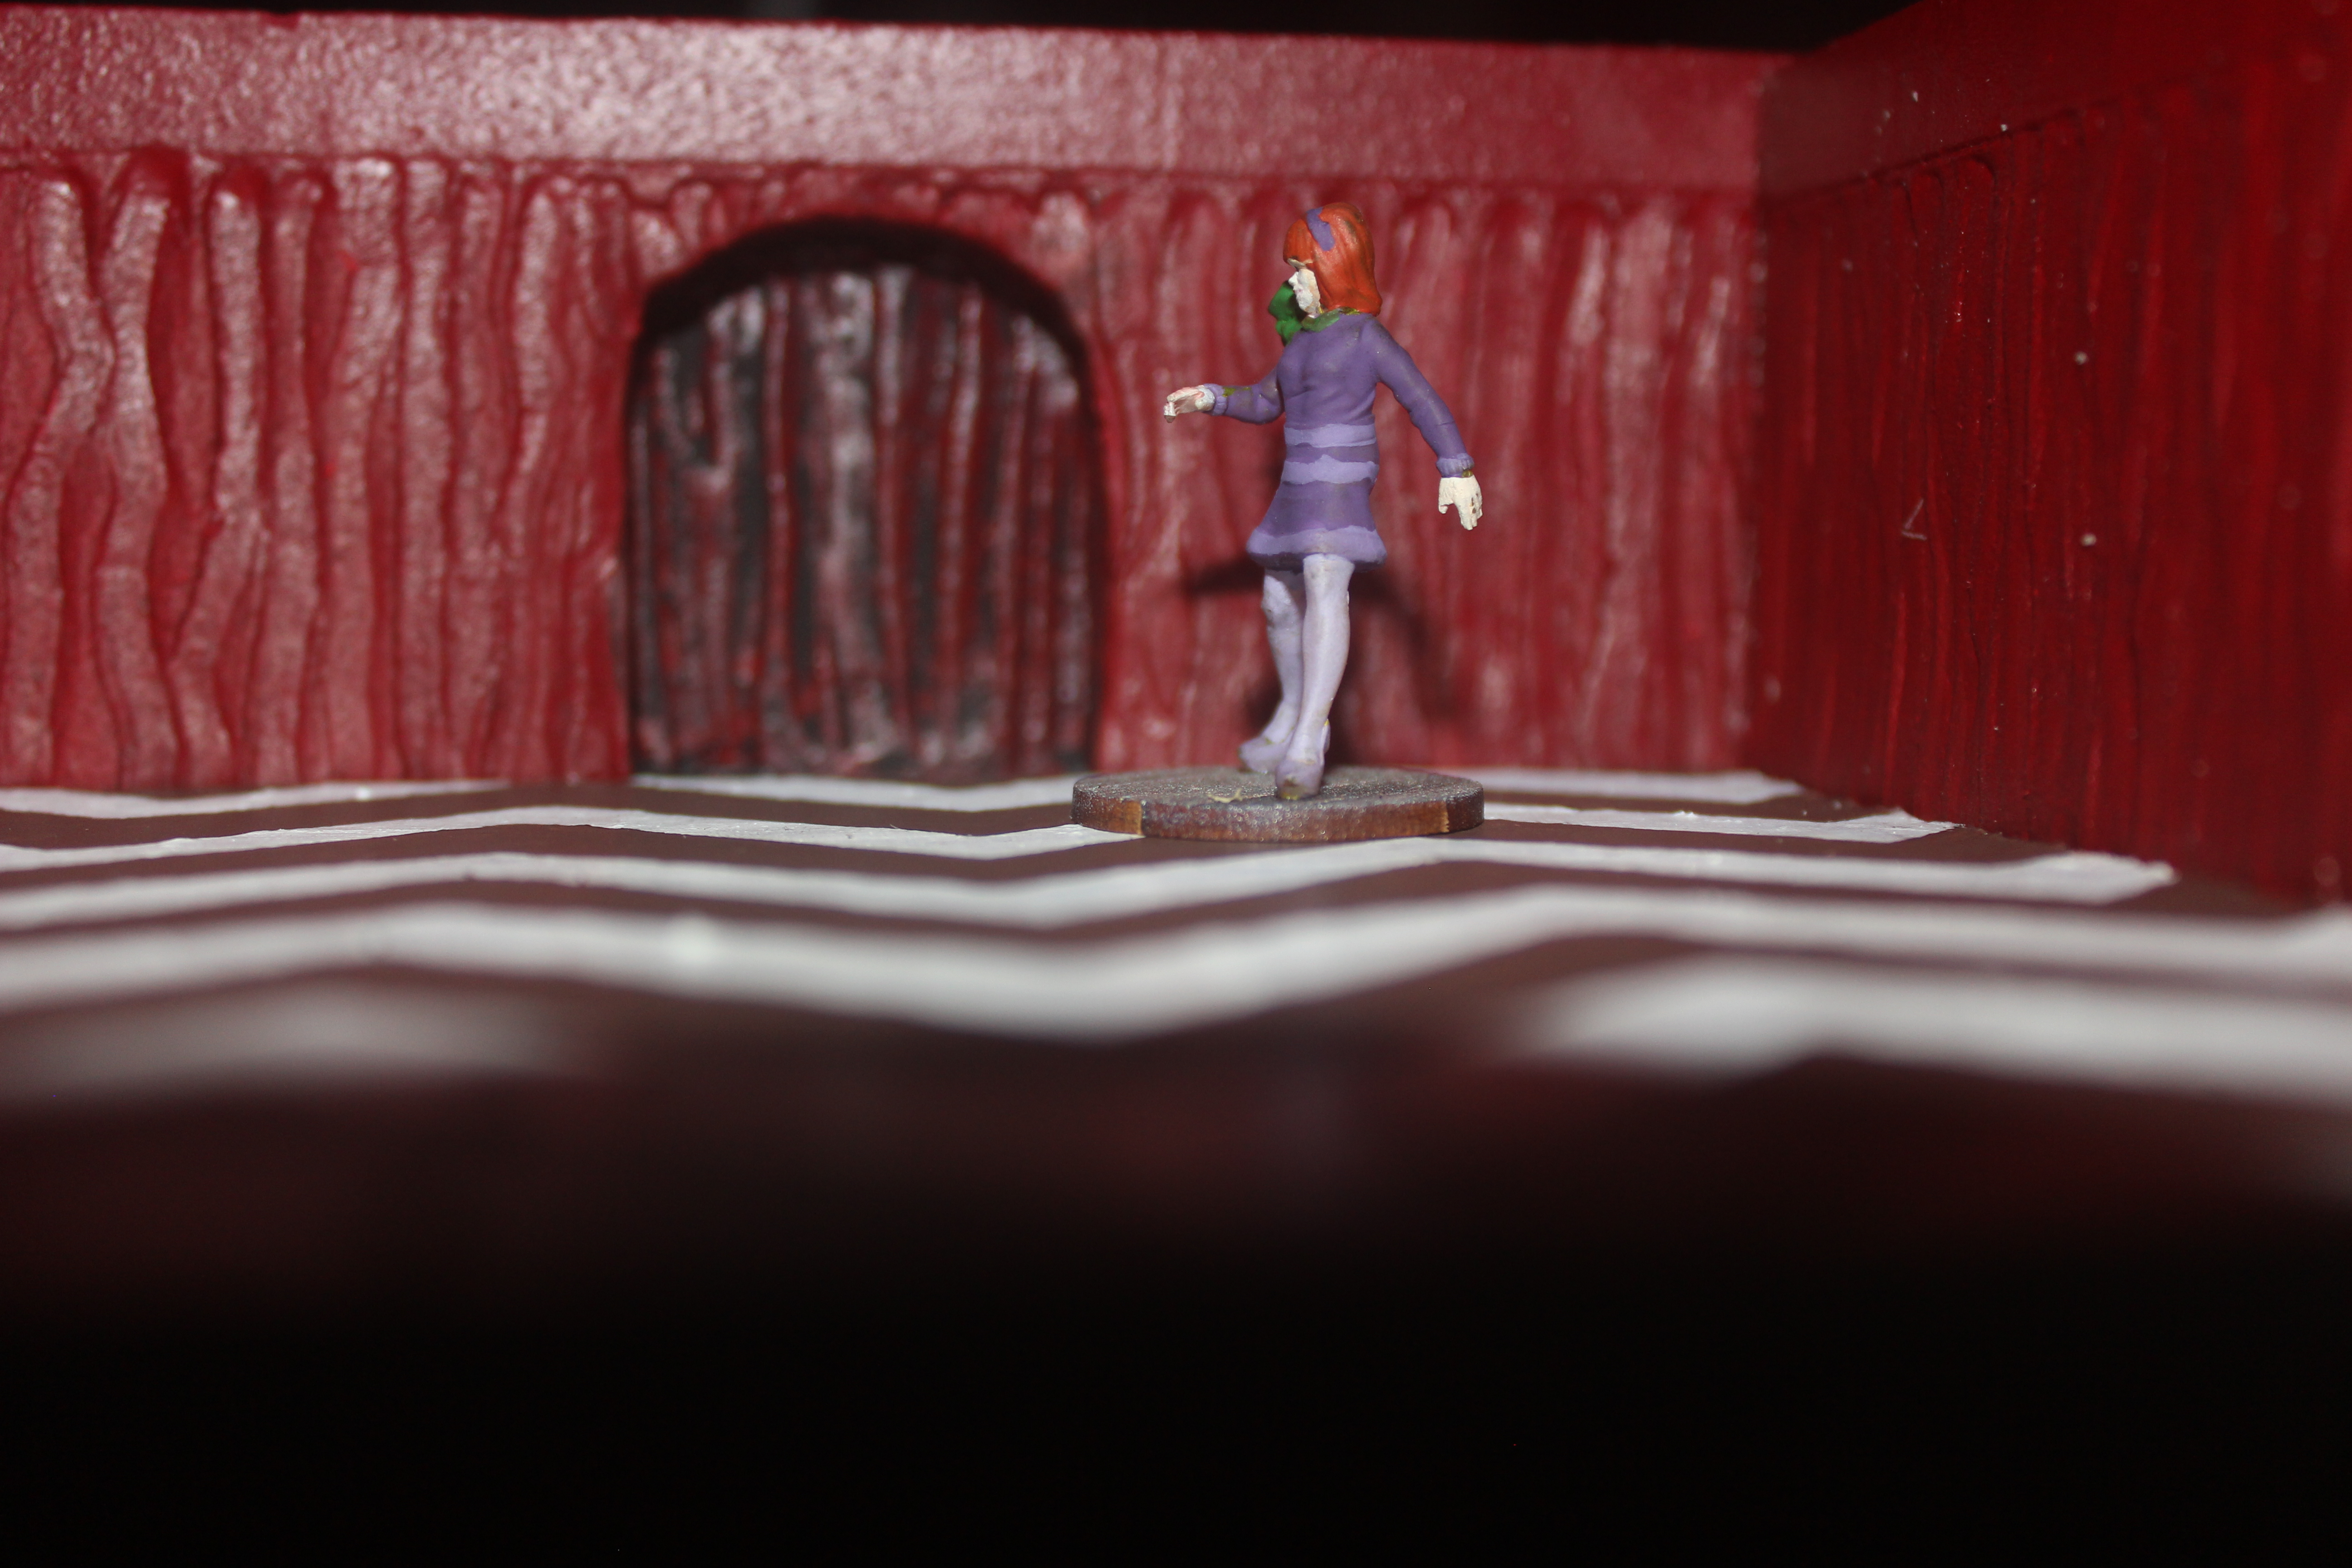
I decided to theme the hallway on the Red Room from the Black Lodge in Twin Peaks (and also the dream world in Mystery Incorporated), something I would regret. I first of all painted the floor with some white artists acrylics then tried to make a stamp for the brown zig-zags. This failed miserably leaving a blotchy brown mess so I had to paint over this again with the white.
In the end I cut a template from card, drew round the outline and painted each zig and every zag – twice as the brown paint didn’t give full coverage with just one coat.
In the end the pattern drifted slightly but overall I’m pleased with the result, although I felt a bit sick after staring at that pattern for so long (I can see why Lynch used it)
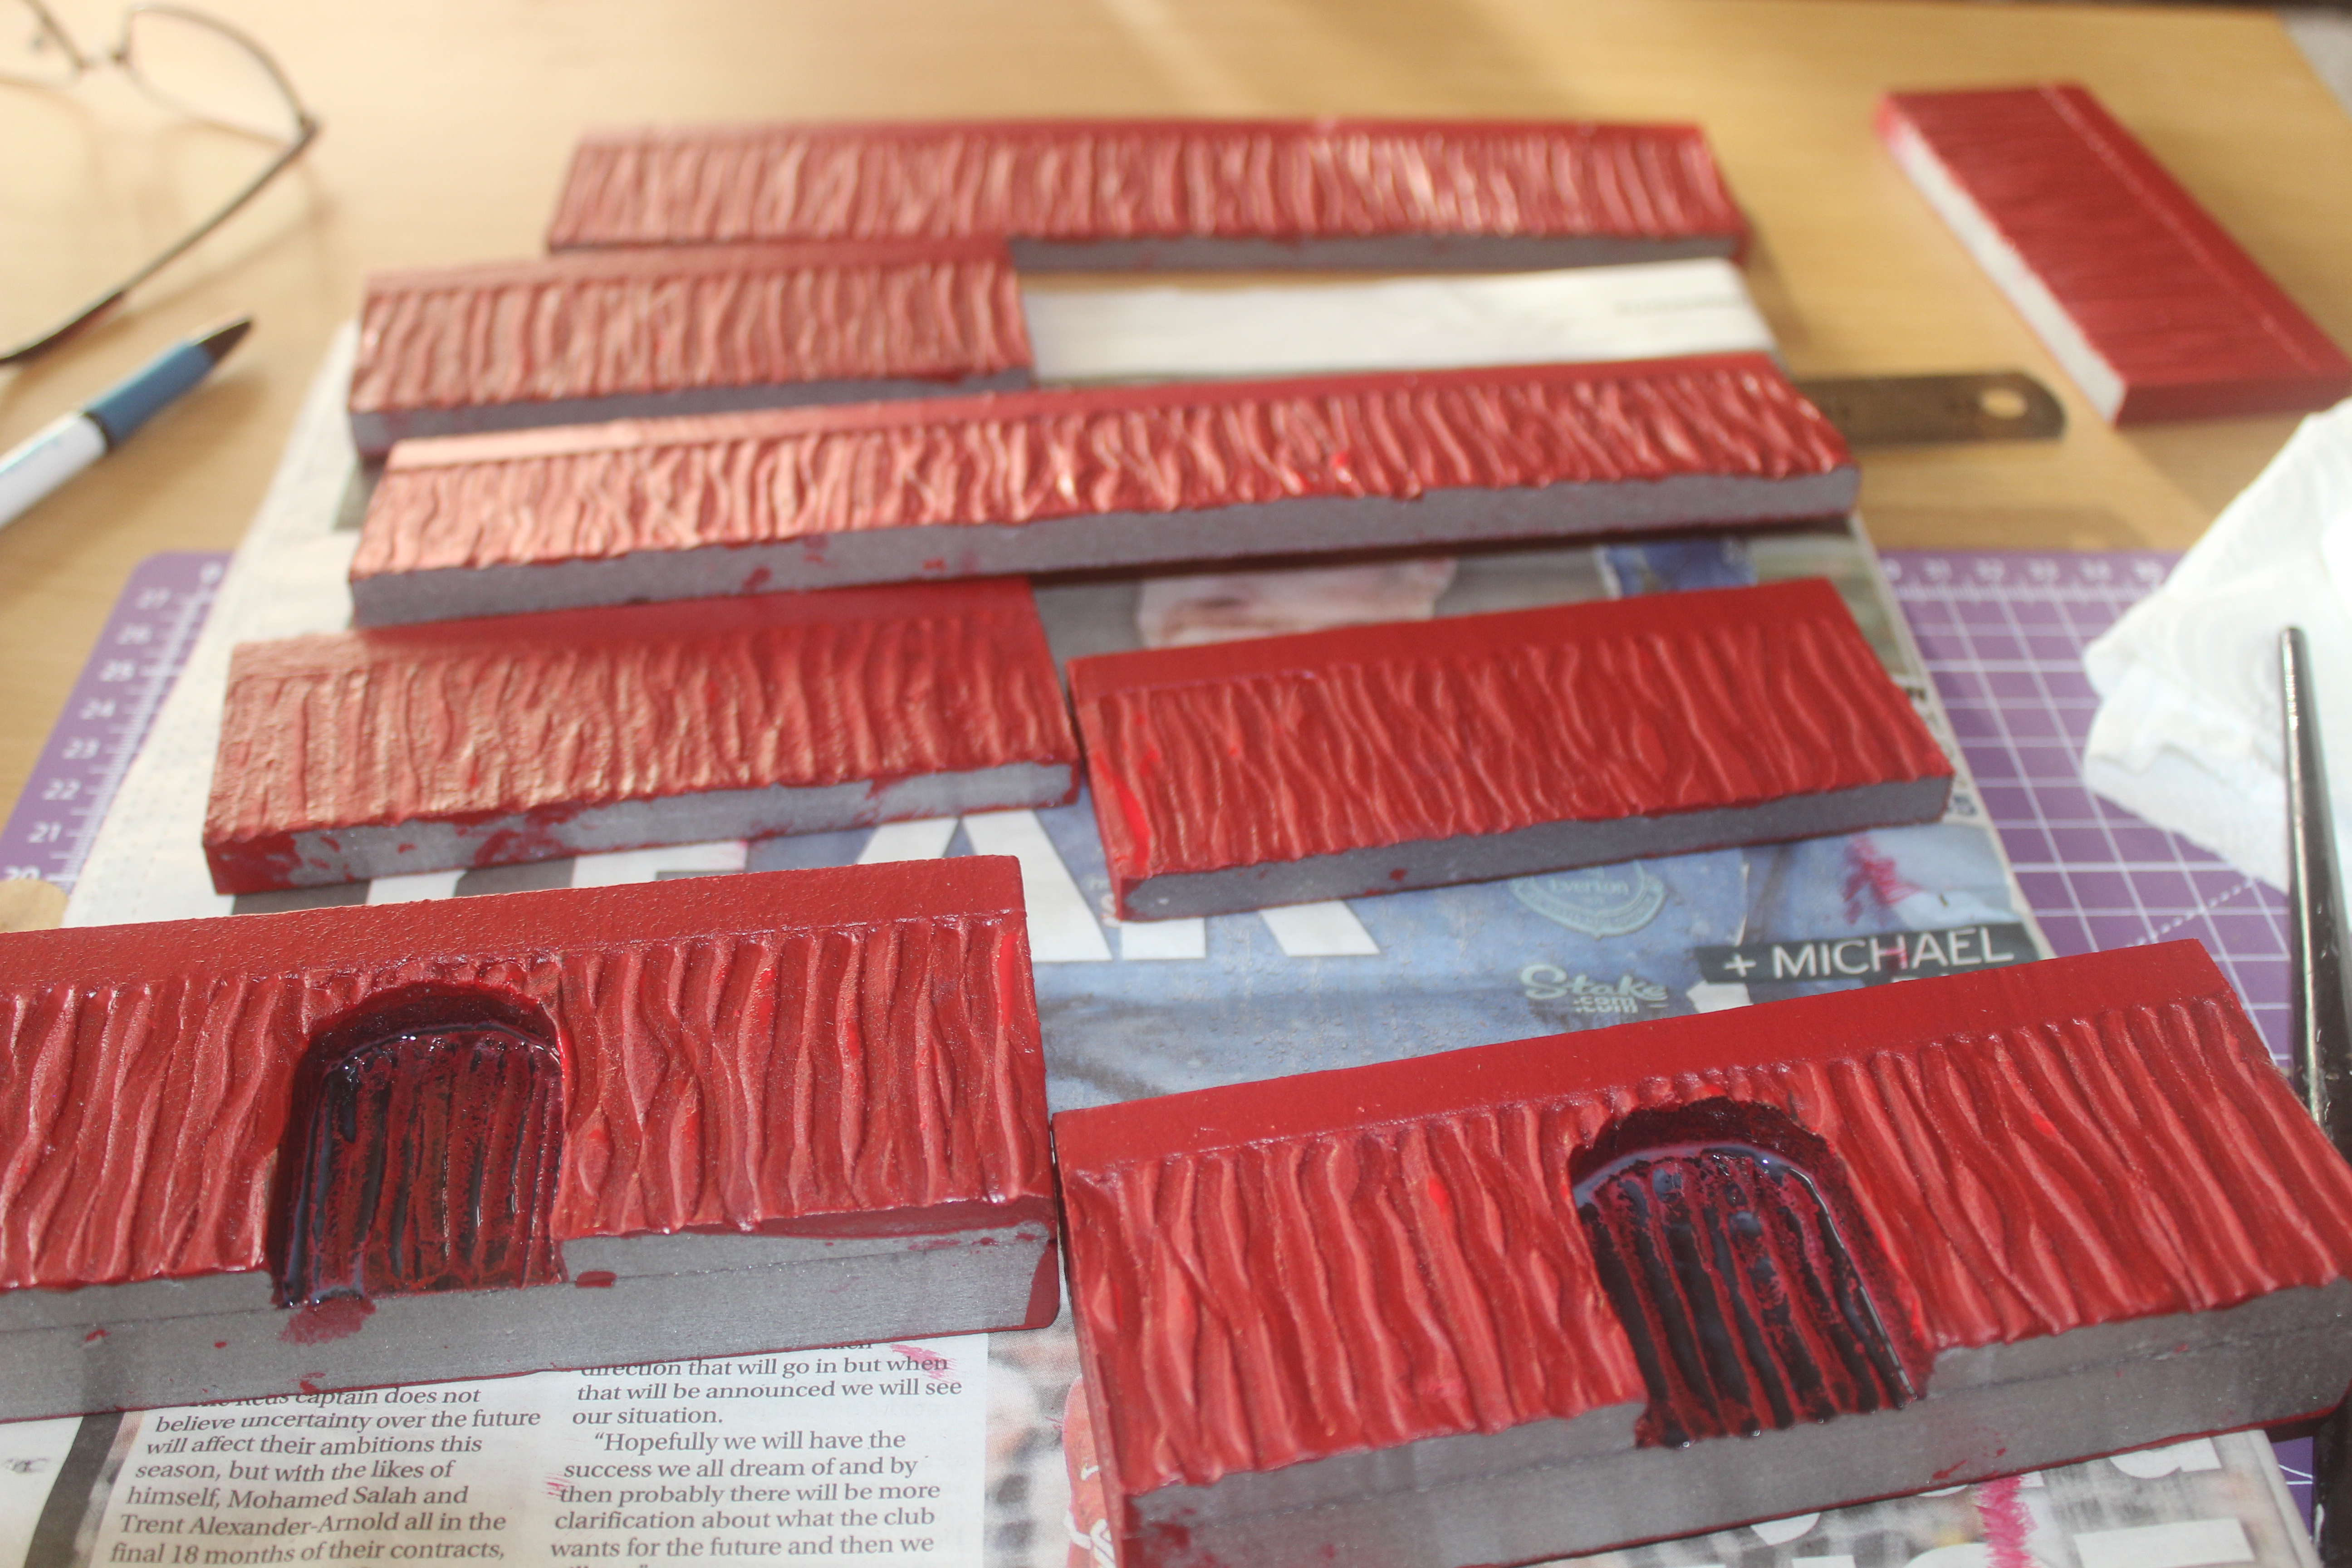
The other defining feature of the Red Room is the red curtains instead of walls. For this I used a long spoon-like sculpting tool to push into the foam creating wavy patterns close to each other to look like the folds of a curtain. This was then painted using a mixture of mod podge, red craft paint and a touch of brown darken it down. After a couple of coats of this all over, I used the pure red just to add a touch of highlight to the top folds of the curtains.

Finally time to glue all this together, the long section was the trickiest as it was important to have them aligned with the 2 end sections with no spacers or supports.
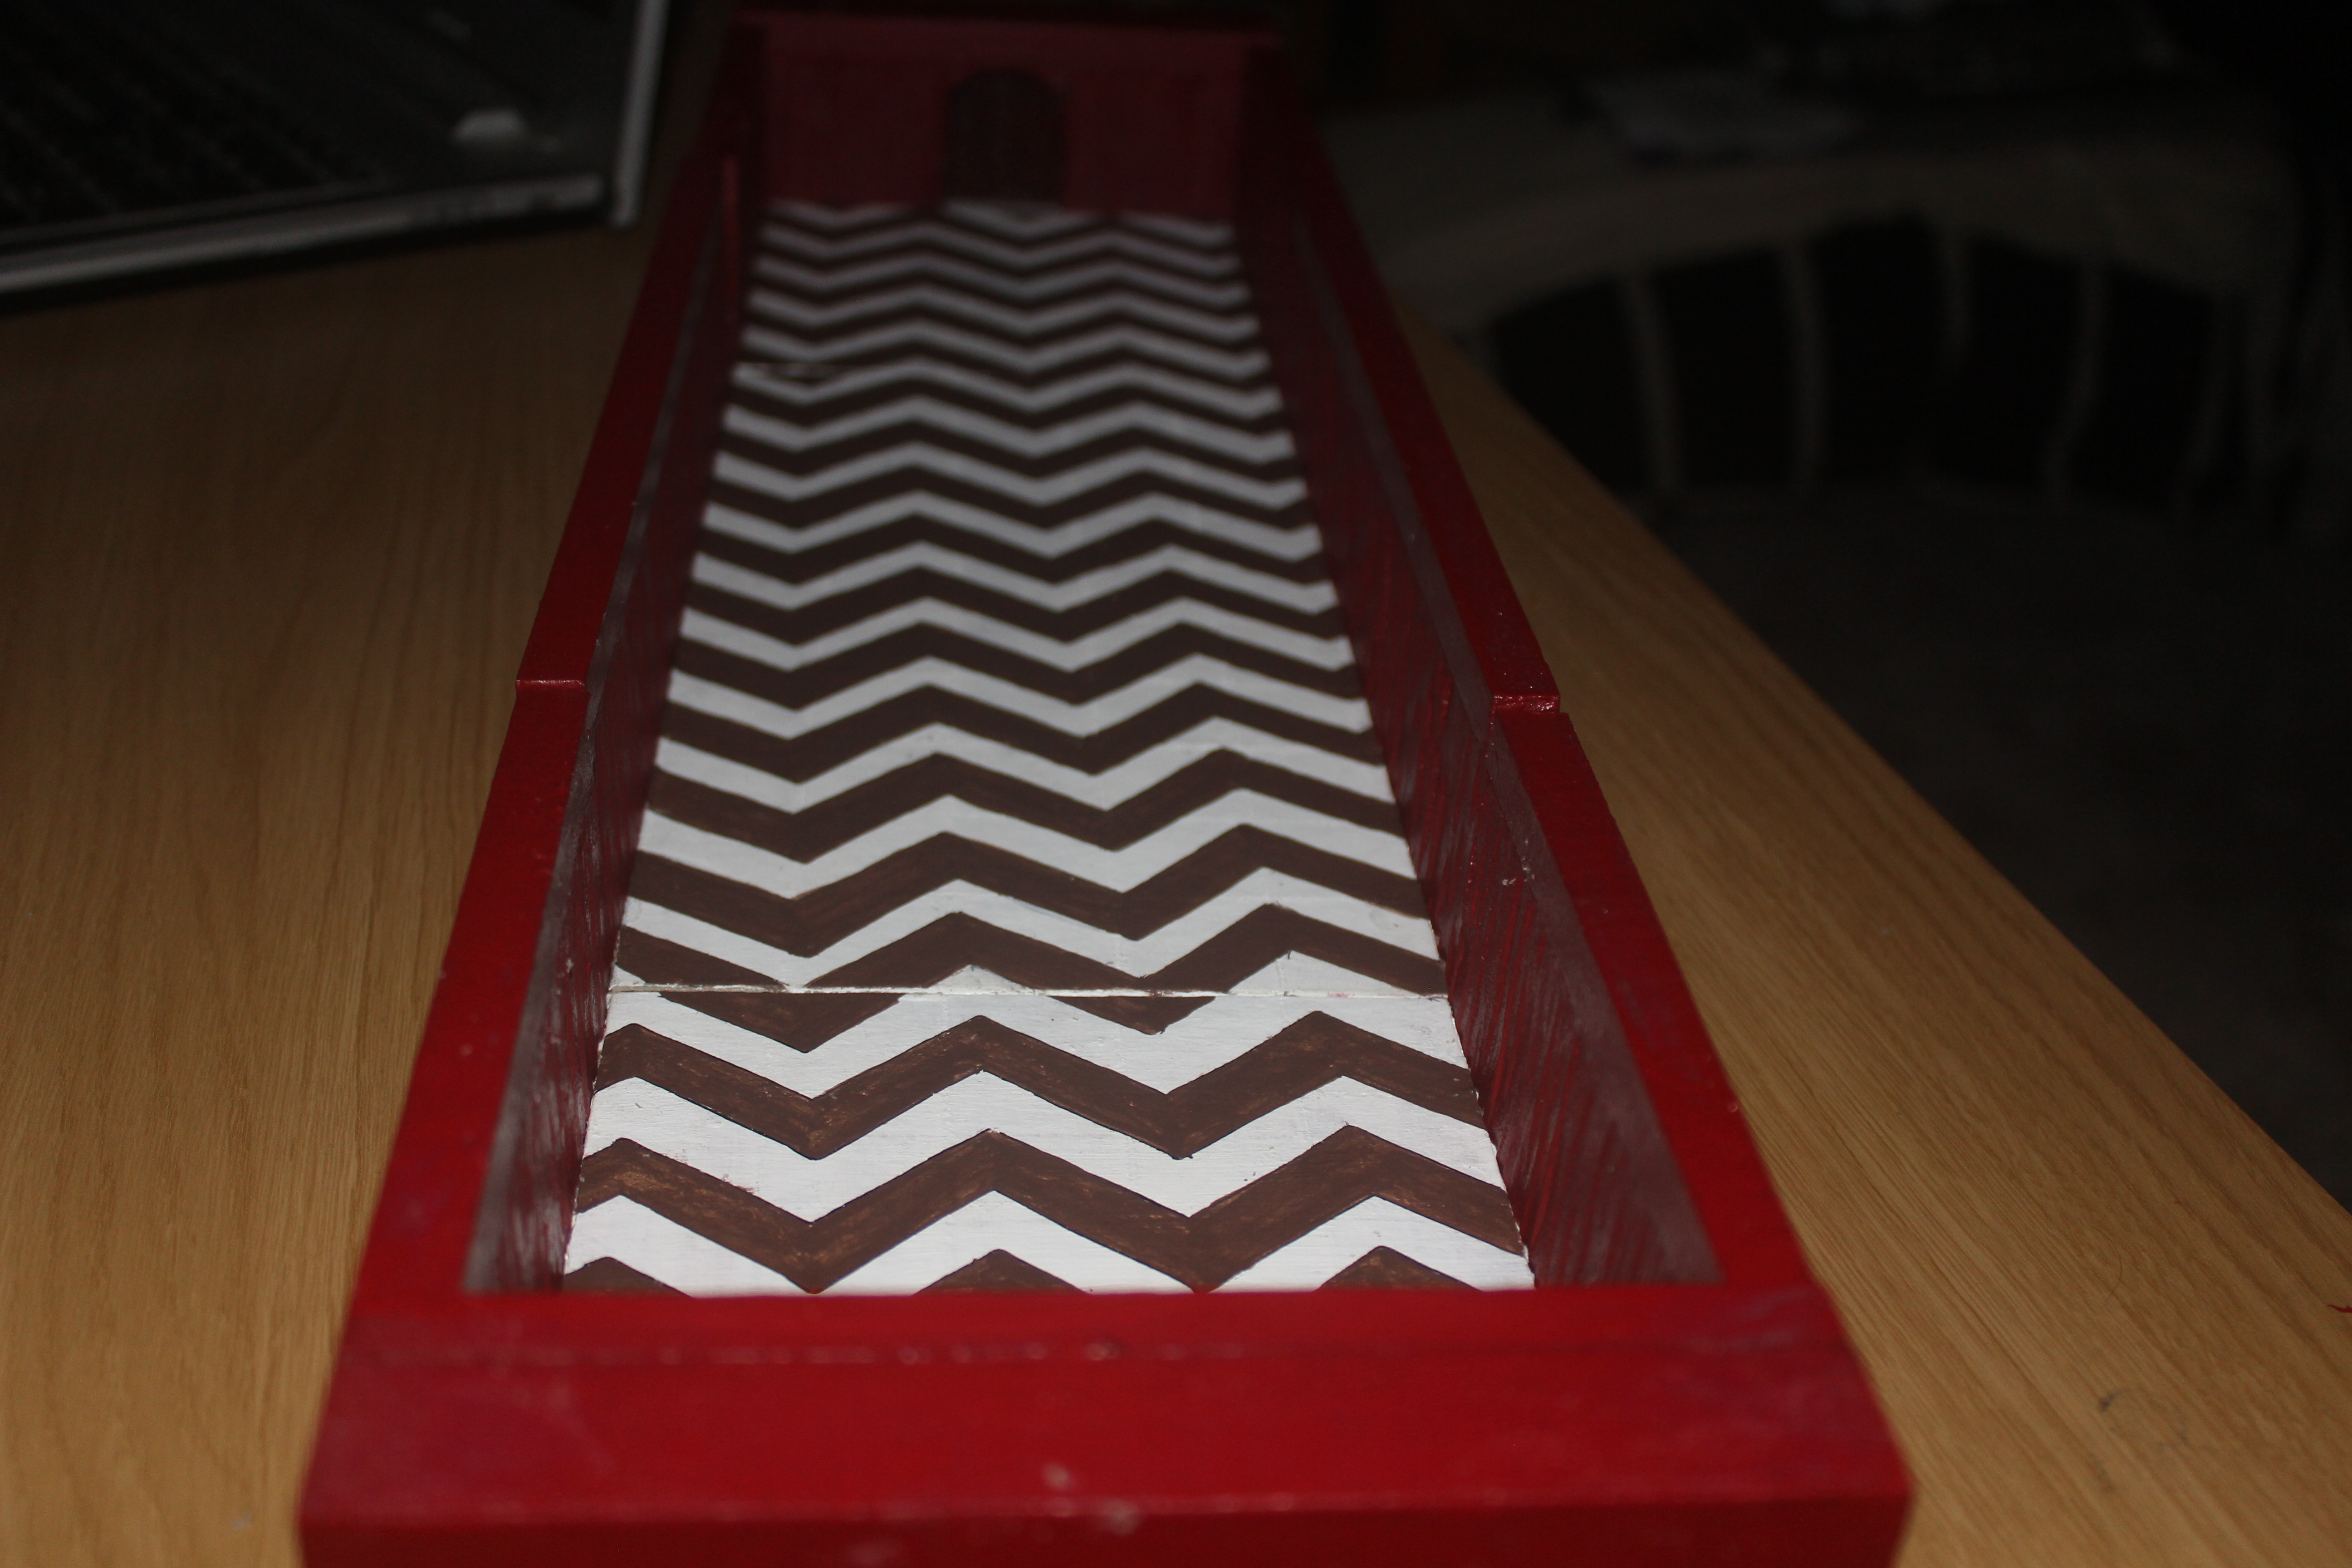
And the dice tell me that the next room is the Kitchen.
Quick aside
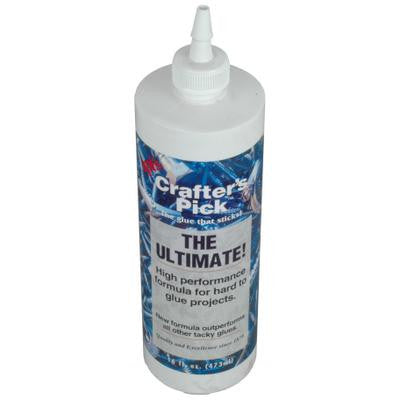 Just thought I would give aa quick shout ouot to the glue I have been using, Crafter's Pick The Ultimate. Sounds like a bold claim but this is a fast drying, water based glue that can be used as a liquid glue (it is much thicker than standard PVA) or as a contact adhesive if you coat both surfaces allow to dry clear then push together. 2 bonuses, it is available in the UK and I have had my bottle for over 5 years and it still works fine.
Welcome to the Mansion
With all the foam sealed and dry I gave the wall sections a dry brushing with a True Ochre and a Bleached Sand craft paint followed by a black wash (water and acrylic artist paint) to bring down the brightness of the paints and emphasis the wood grain and panel lines. In the corners of the walls and along the top and side edges I applied a touch of almost pure black and used the wash to blend this into the rest to give a darkened shadow.
For the floor I decided that a dirty, patchy look would fit an old Mansion that had perhaps been subject to water damage either from leaks or flooding. For this I made a wash with the True Ochre and applied a bit less dilute wash around the edges and in various spots, making sure to leave the tide marks in this case, to show the extent of the water damage.

And finally time to raise the barn or at very least put it all together.


Which room to build next – well there are 6 left so I’ll let the dice decide.
- Dining Room
- Living Room
- Library
- Kitchen
- Study
- Hallway
And the dice says – Hallway.
Grand Designs or How to Build a Mansion Entrance Hall
I am going to take it one room at a time from now on and what better place to start than with the entrance hall.
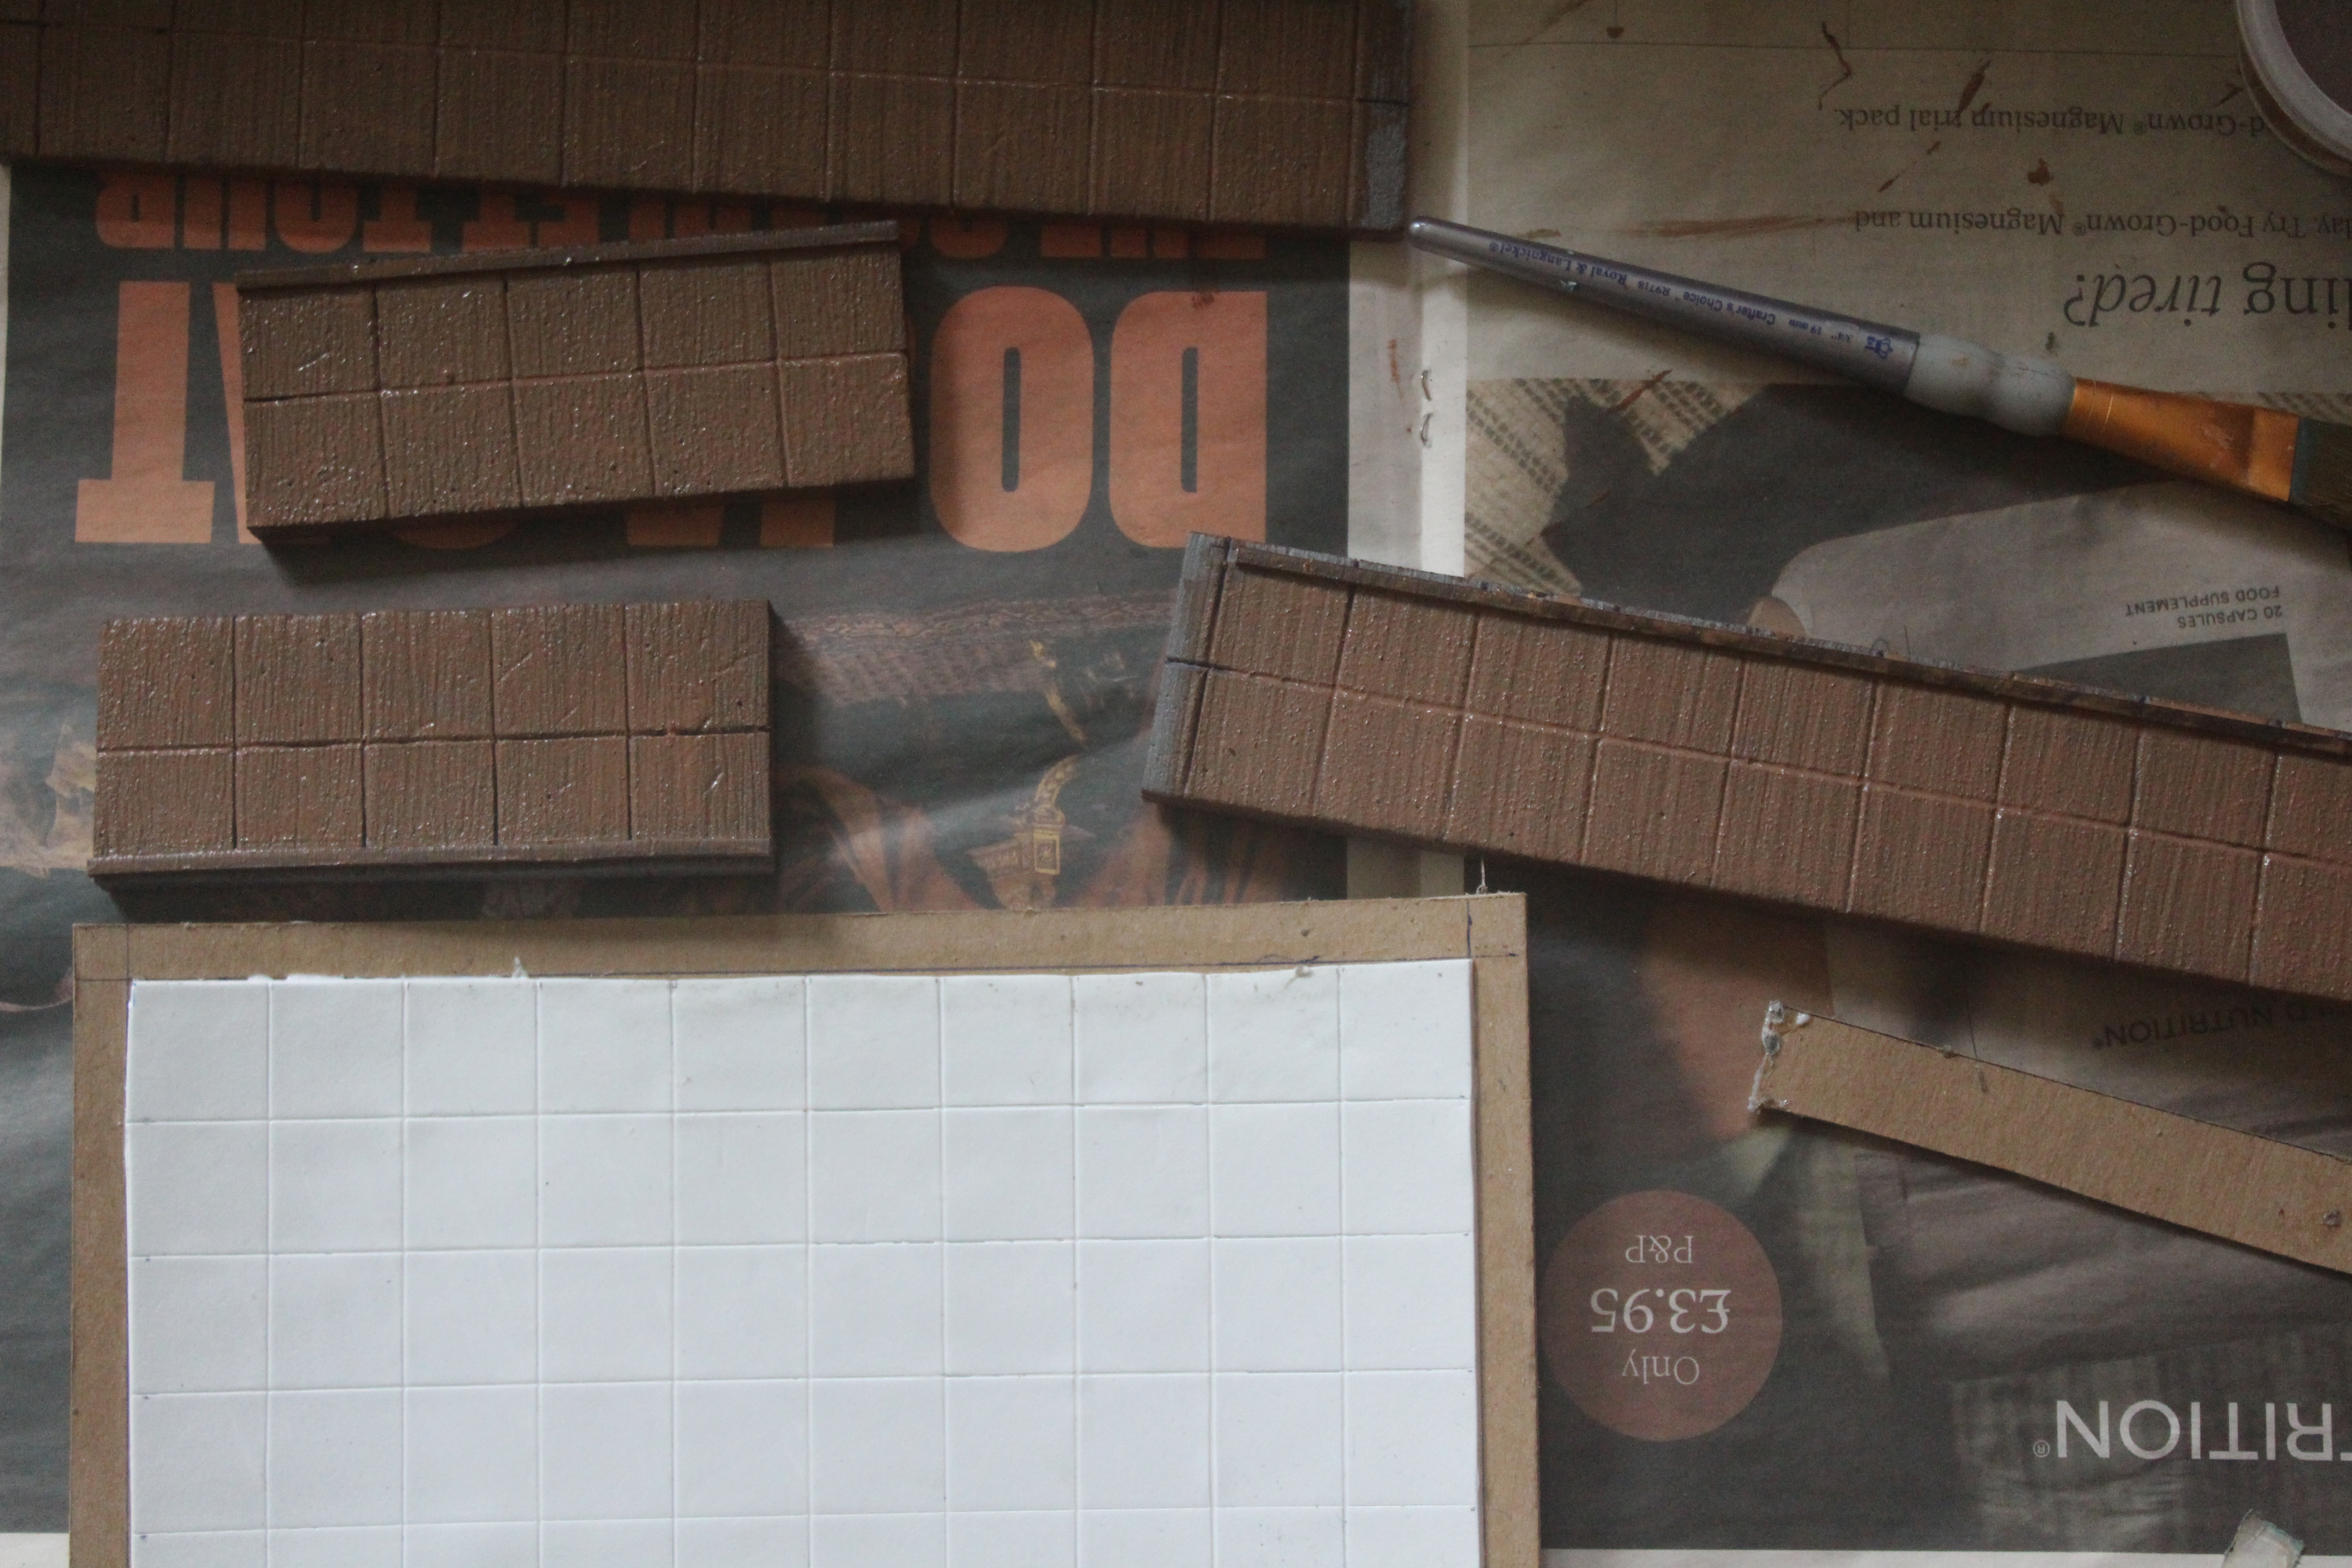
My plan for this room is to have wood panelled walls with a tile floor so the first thing to do is to add the wood grain texture to the foam walls. This meant taking out the wire brush and dragging it top to bottom along all the walls. I also added the panels using the tried and tested method of scoring the foam with the craft knife before opening out the grooves with a ball point pen.
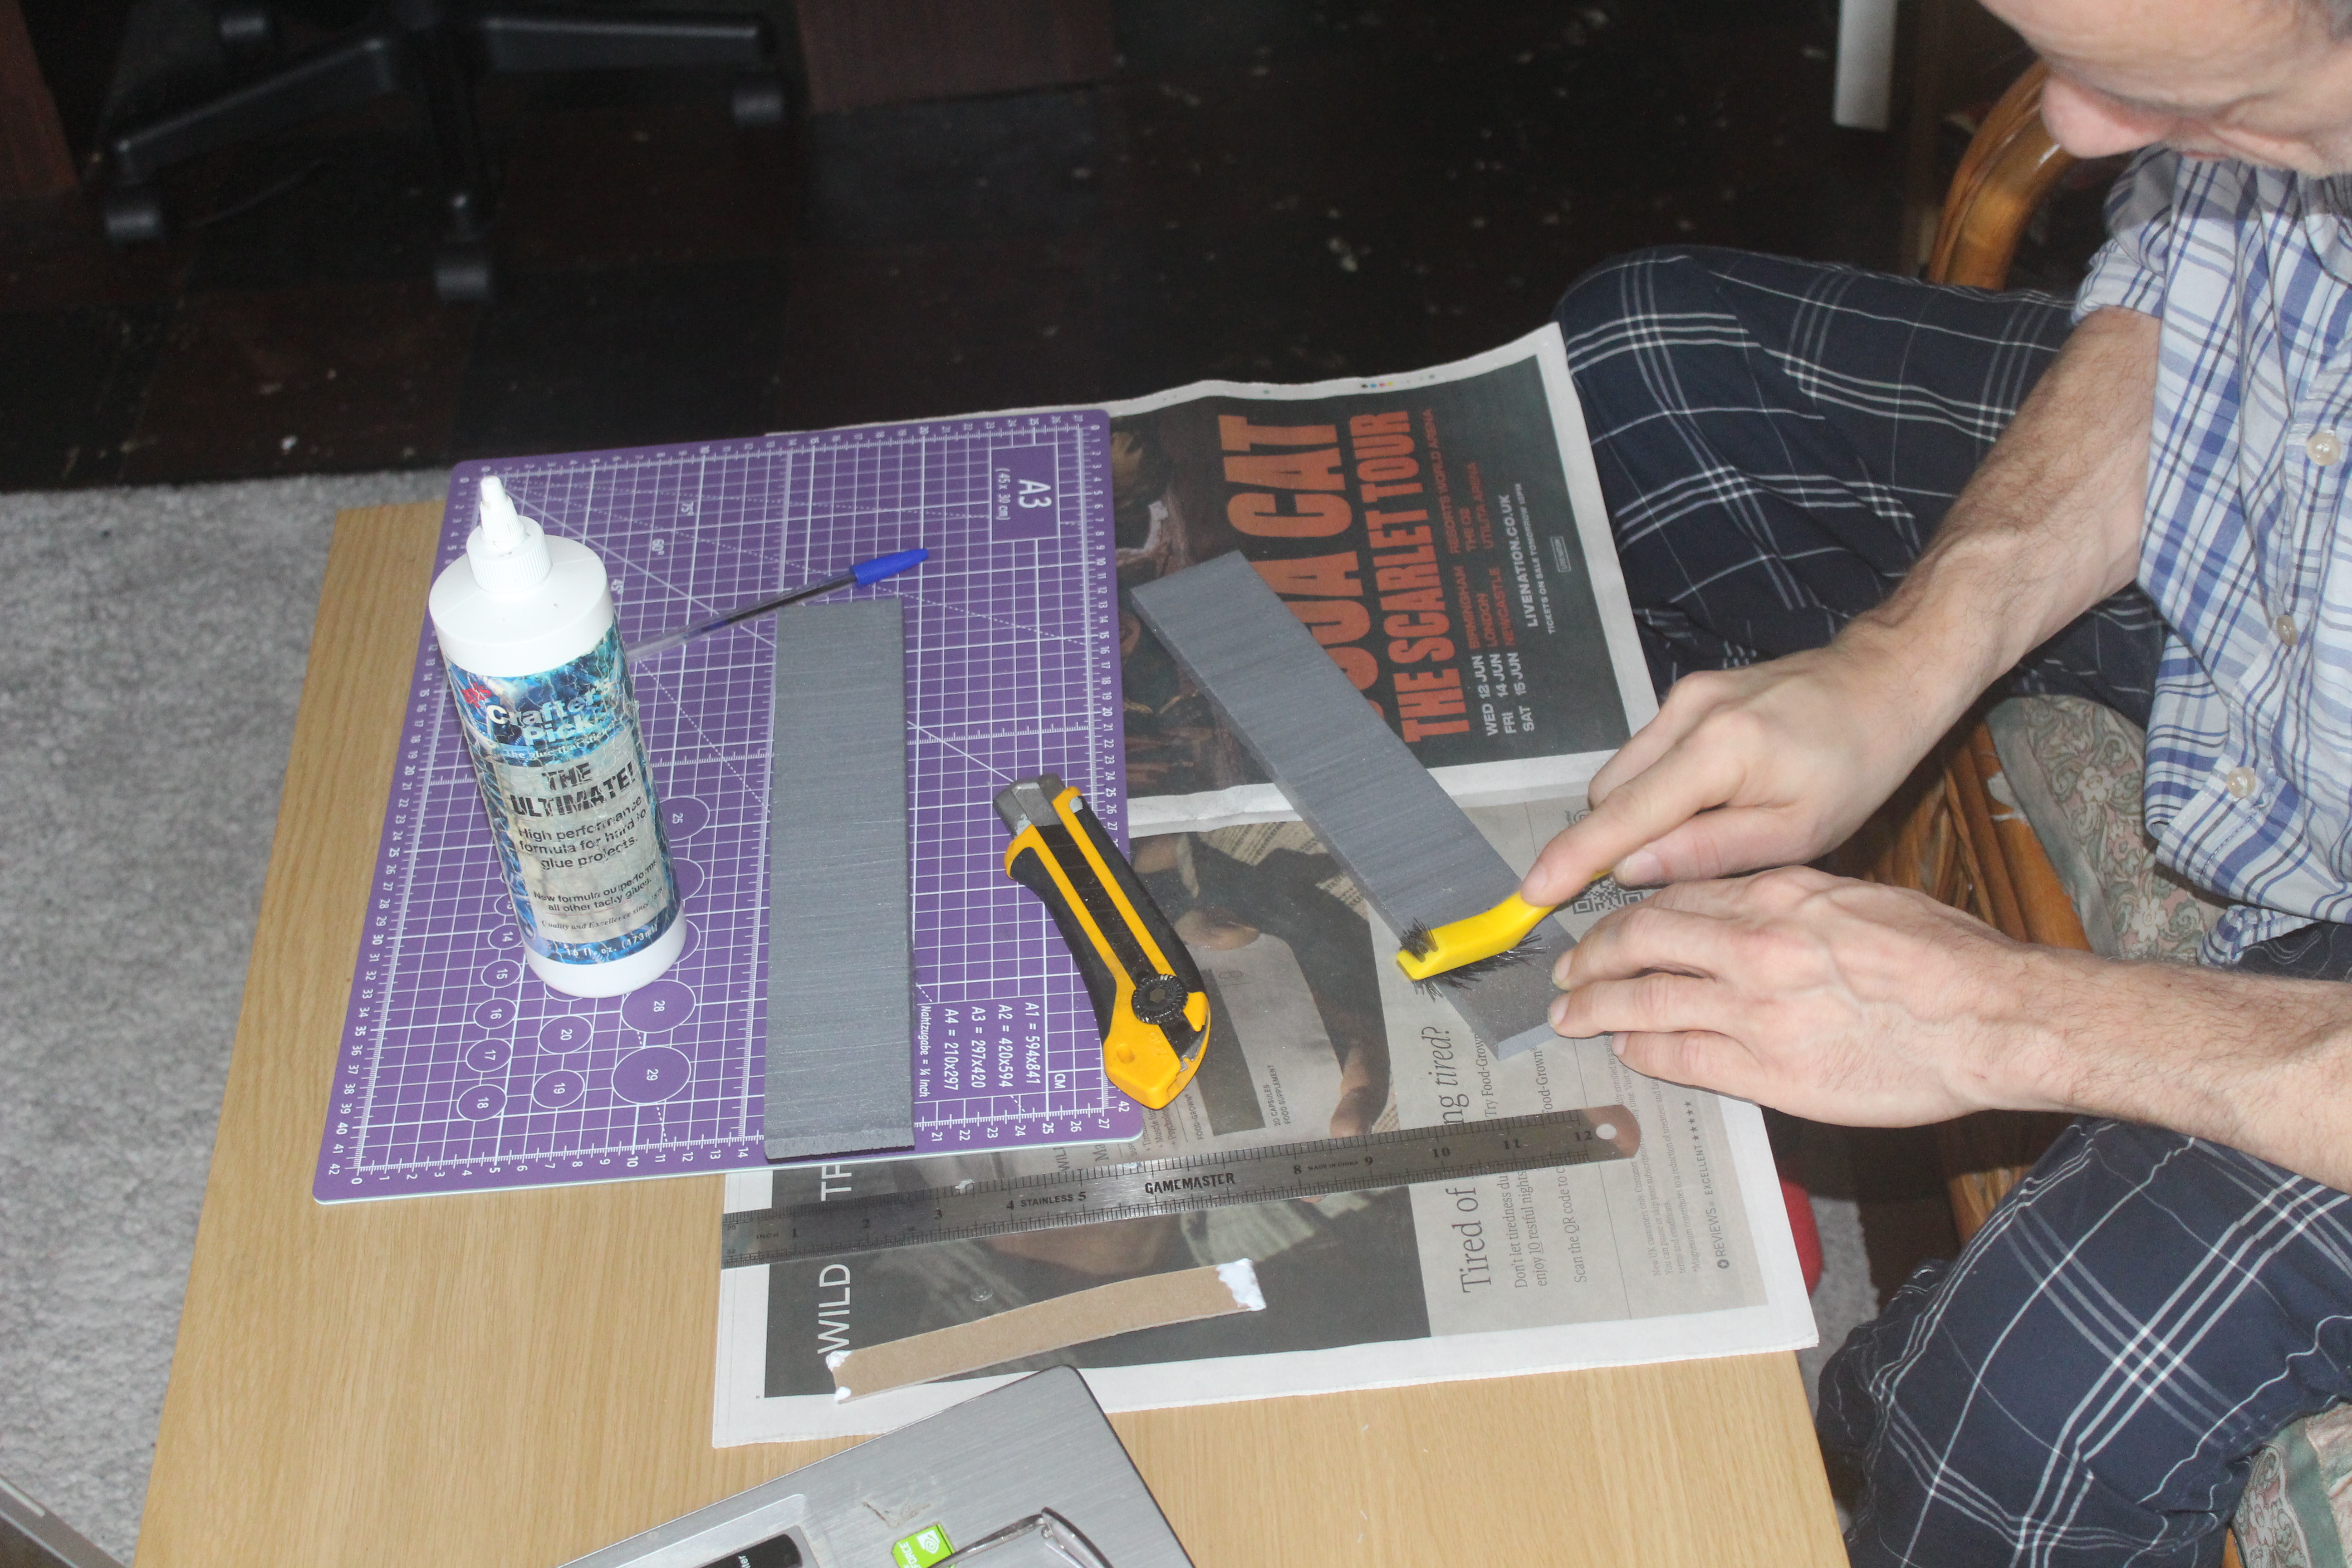
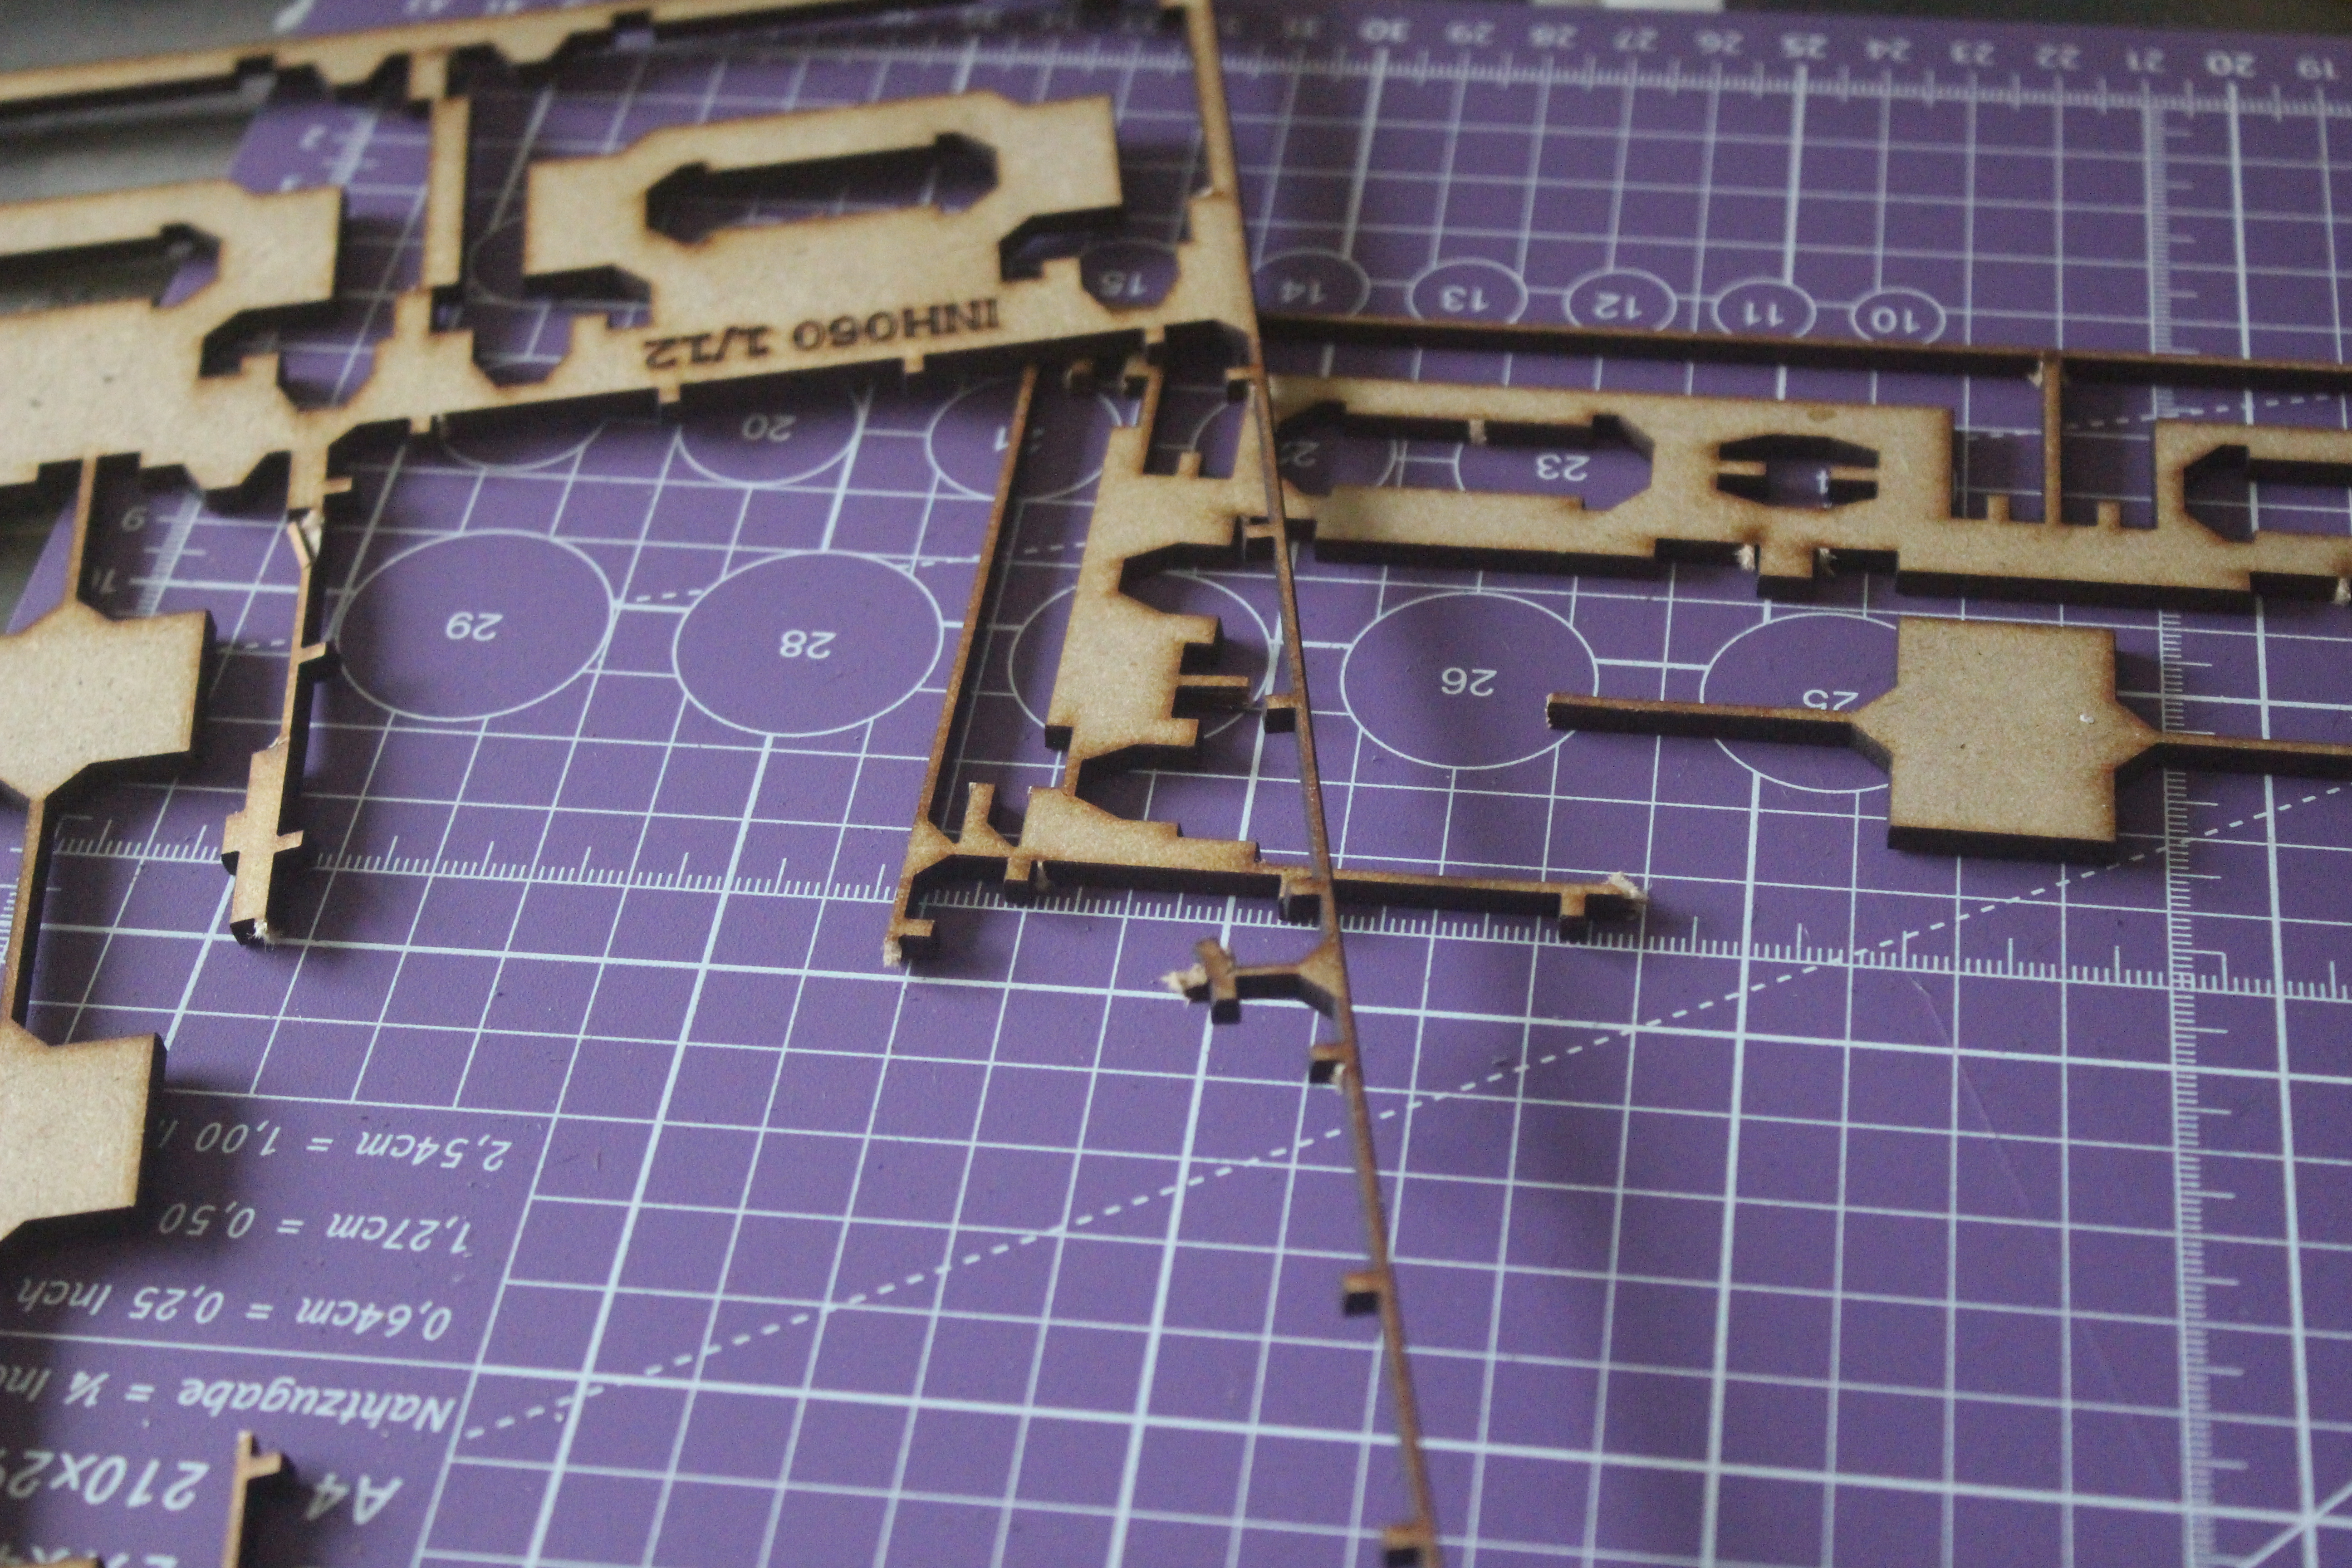
I also decided that a skirting board would suit the look of this room and this is why you never throw anything away. Specifically in this case the bits you push your MDF kits out of, some of the strips are the perfect thickness for the skirting and just need to be trimmed down and patched to get the correct lengths with no nubs.
These were glued to the walls with a fast drying PVA using a piece of 3mm EVA stuck to a piece of the base chipboard to ensure that it would leave the correct gap at the bottom of the wall to fit against the floor.
This does mean that any door clips I make will have to stop short of the floor but as we will be looking down on this at an angle I am not concerned about this.
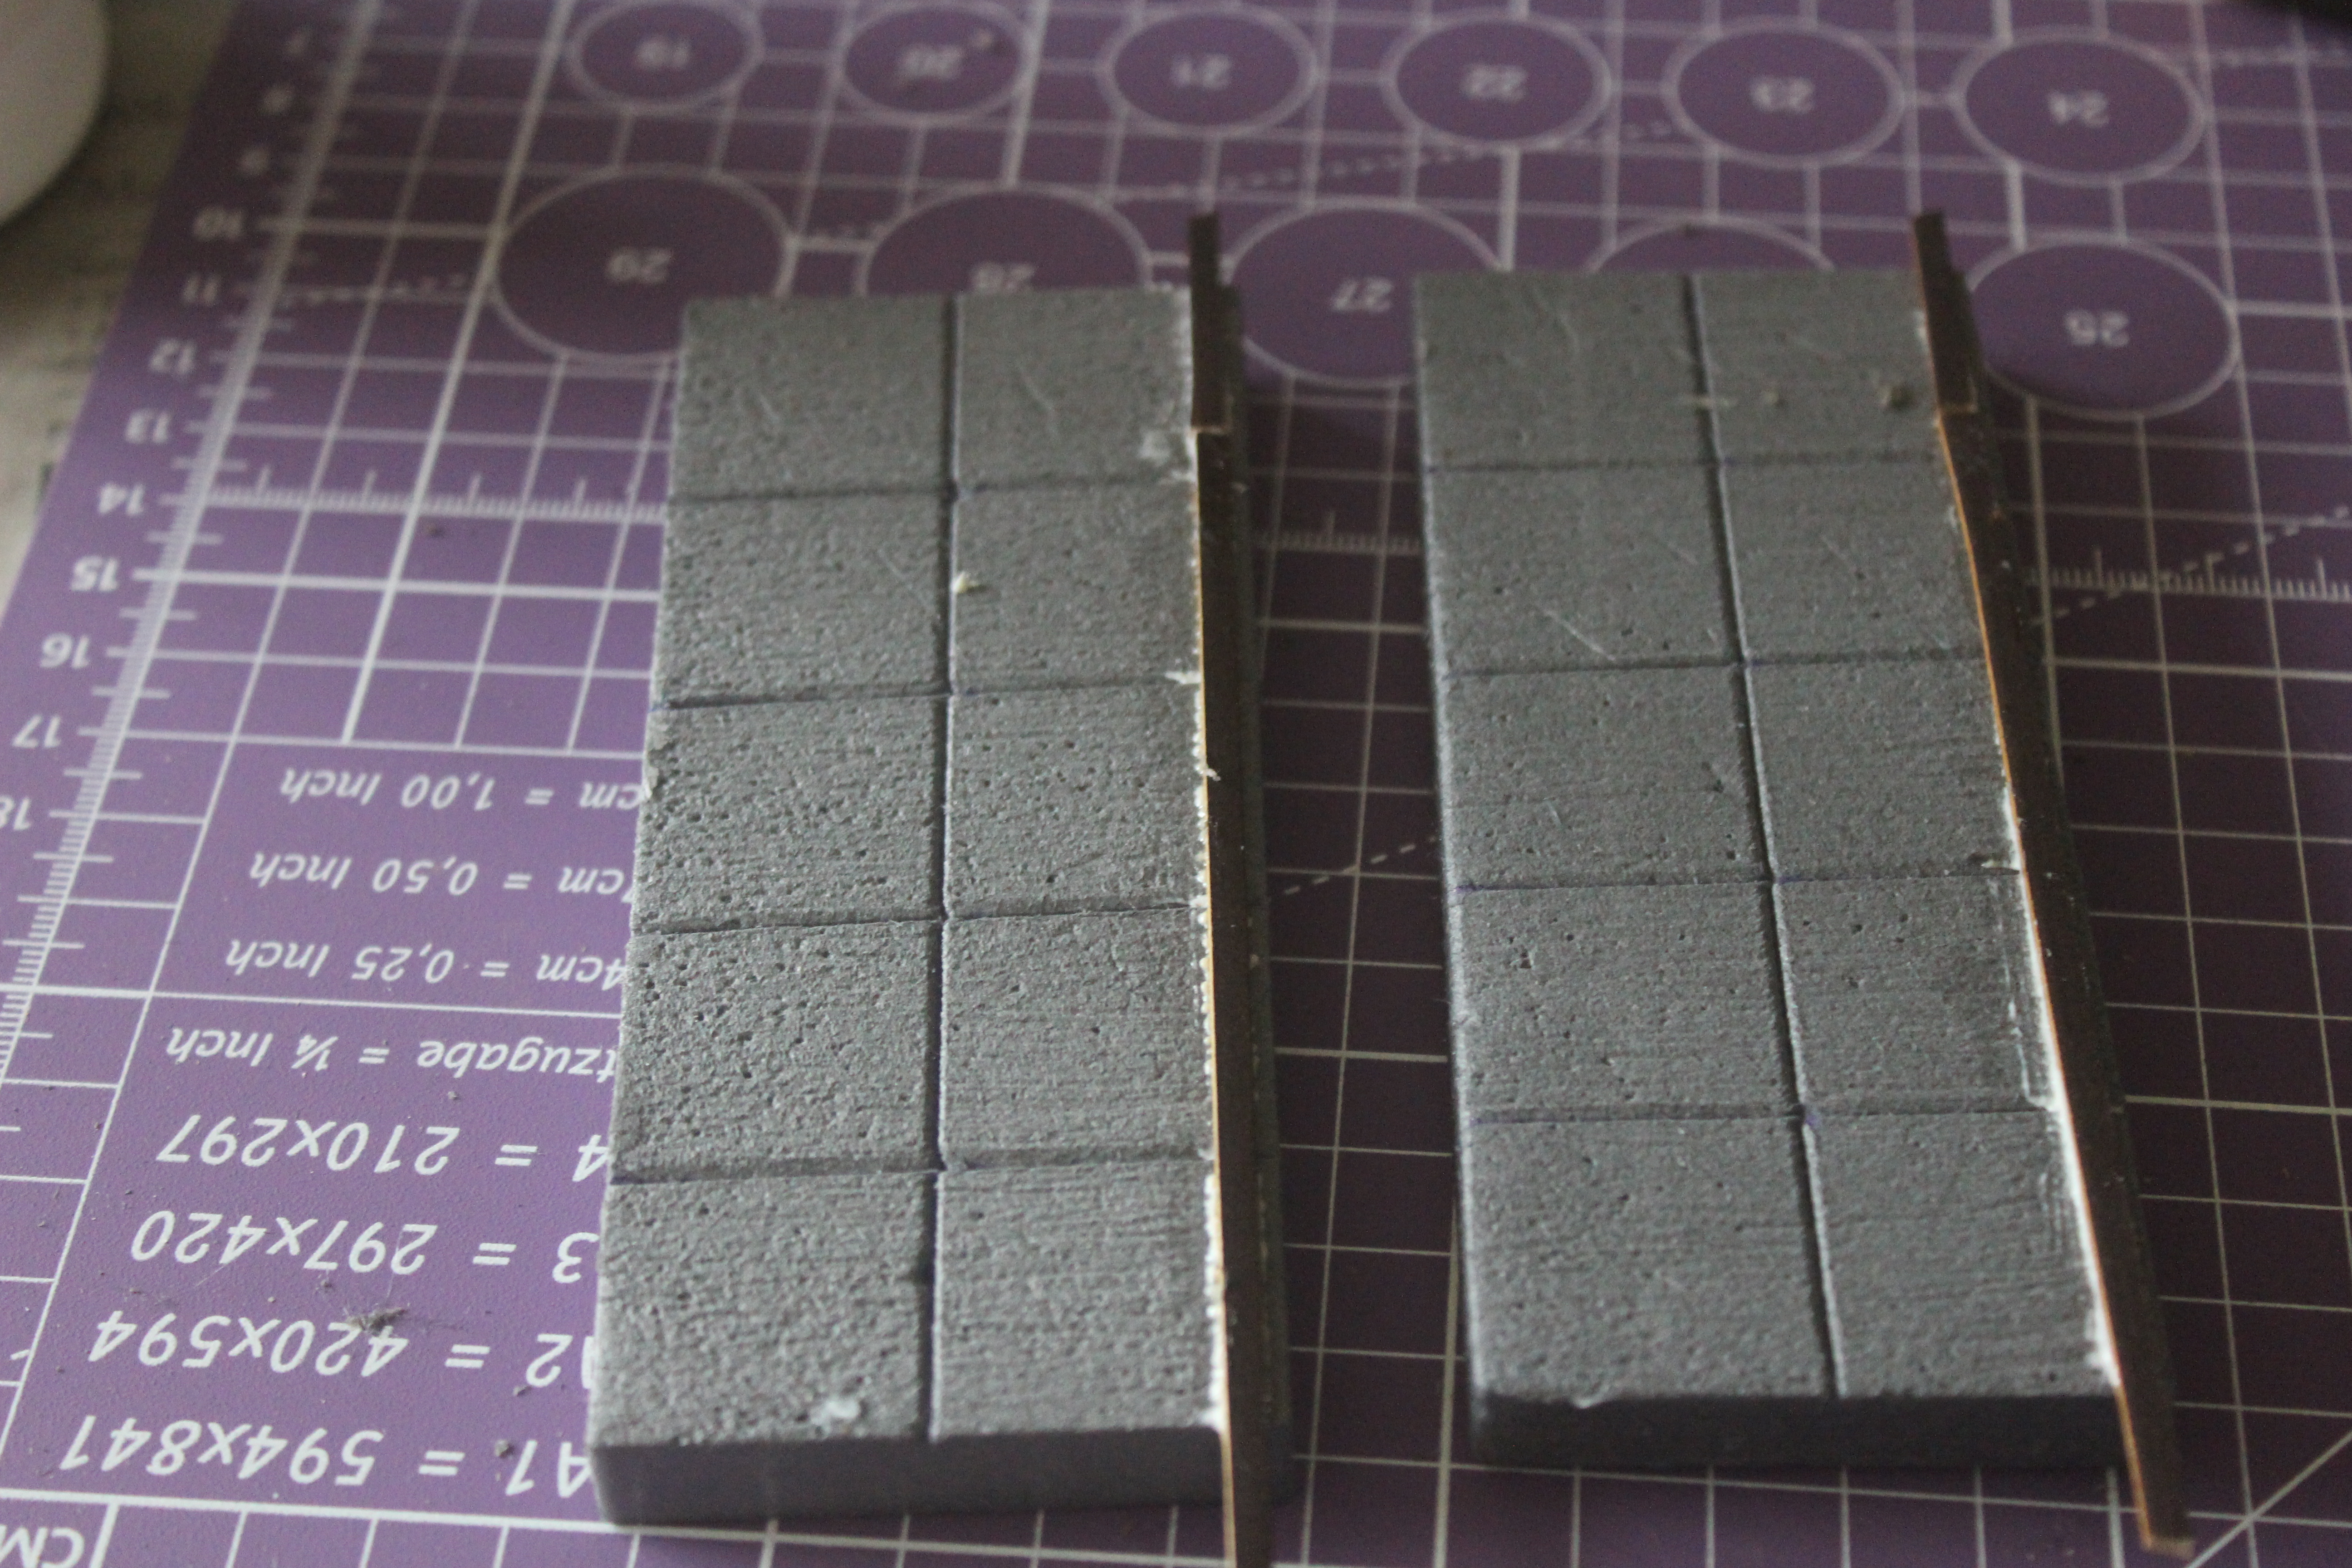
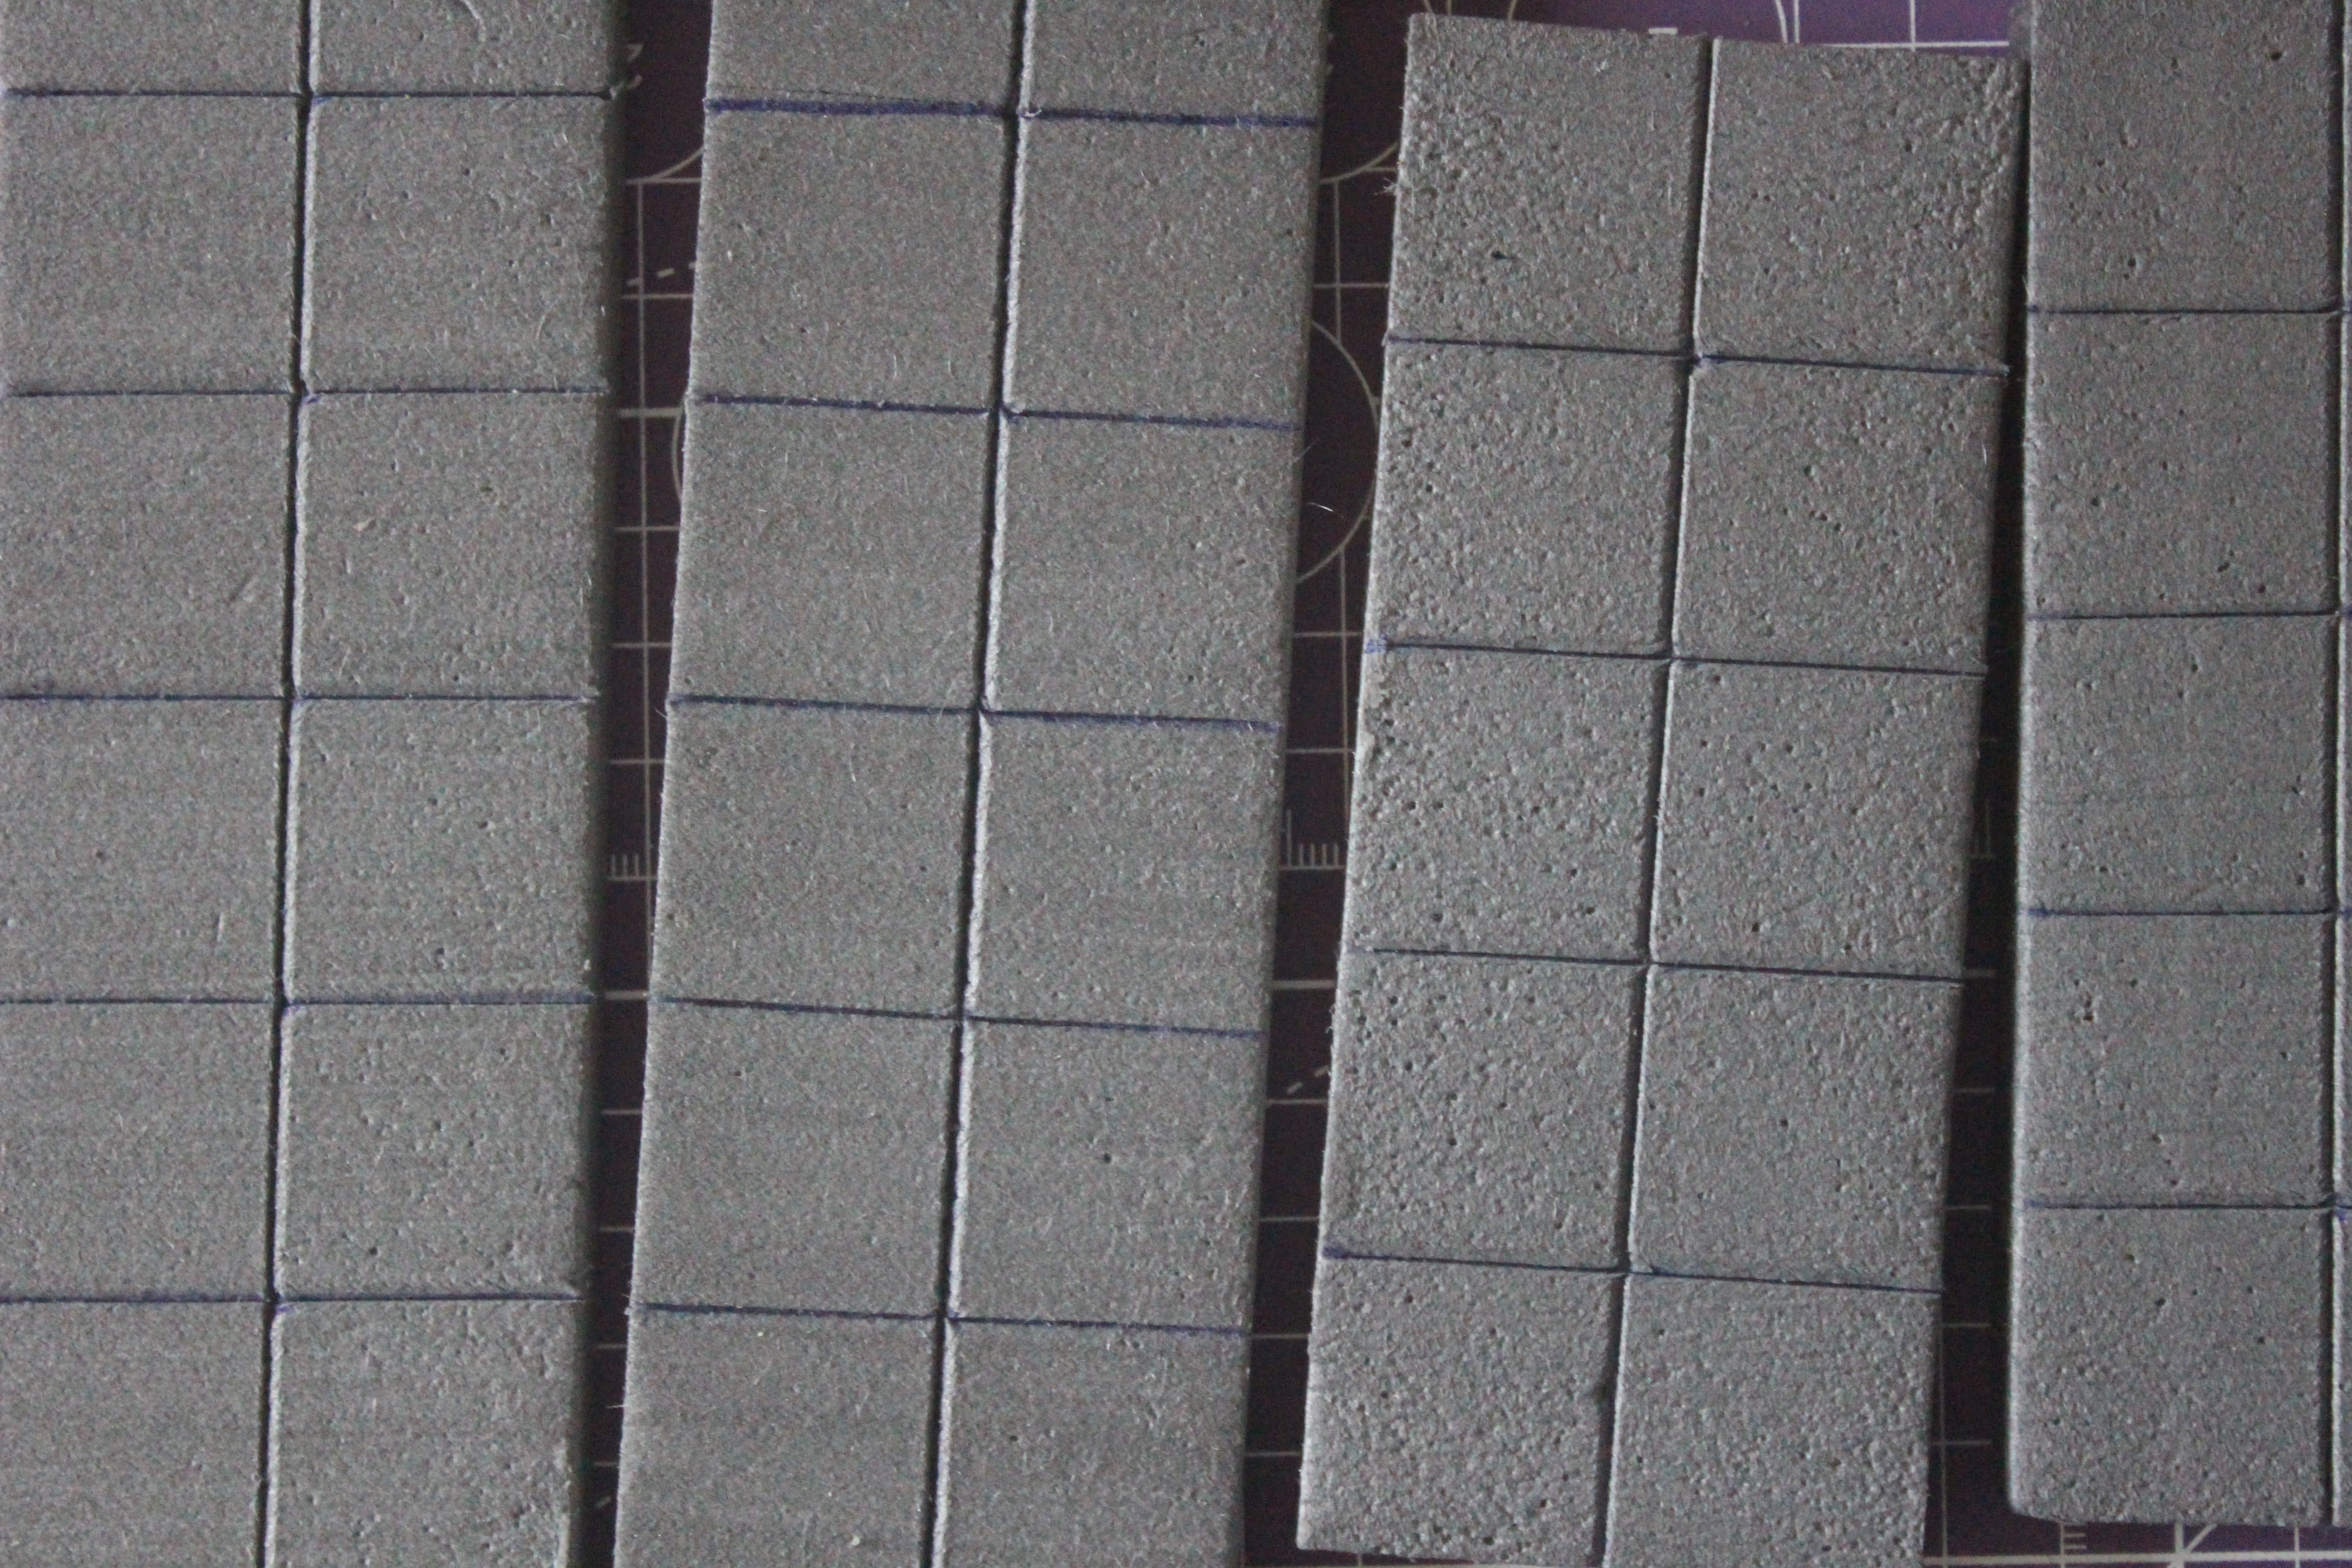
For the floor I decided to use 3mm EVA foam (craft foam from the hobby shop in this case) as it has a smooth texture and has the added advantage that when scored with a knife and heated gently with a a heat gun the scores open out to make clearly defined gaps between the tiles. It also allows the ties to double as the 1 inch grid.
Disadvantages of 3mm EVA, it tends to pull with the knife blade so getting perfectly square corners is almost impossible and if you linger too long with the heat gun it will start to bubble and warp ie. melt. This did happen to me on one edge but I think I have rescued it.

Next it was time to seal and prime everything, as I used white EVA for the floor and at least some of the floor will be white, I used straight Mod Podge to seal this. I am still undecided whether to leave the floor all white, alternate with black or just add a wash. I do feel like the corners and edges should be darkened down a little to add a more creepy atmosphere.
For the walls I mixed in some brown craft paint, this means I will not need the extra step of base coating the walls and should be able to get away with a dry brushing and wash to bring out the wood grain.
 I will also seal the backs of the wall and floor to give more strength to the structure.
FOAM - OH or how I hit my second problem
Well, I pulled out my box of XPS only to realise I only had 1 A3 sheet of 10mm foam left. I did have 4 5mm A3 sheets and 3 20mm A4 sheets so I had the option to glue together the thinner sheets or rip the thicker sheets in half and with the unreliability of the Proxxon gate both of these presented issues. One involved twice as much cutting and the other involved splitting a sheet into 2 equal widths.
I decided using the 20mm was the better option as it meant that for every cut I was getting 2 identical lengths and there was also no waiting for glue to dry, but how to deal with that wobbly gate? That’s where Ikea and Lidl came in.
 Simple solution to wobbly Proxxon gate, Ikea Coffee Table and Lidl clamp.
I’d picked up a couple of clamps from Lidl (not sponsored) a few months back with no idea what I would use them for but it turns out they are perfect for clamping the loose end of the Proxxon gate to my Ikea (not sponsored) coffee table. So with careful measurement at either end of the gate – Pro Tip, don’t trust the measurements on the Proxxon bed and when ripping a sheet in half test your measurements on a scrap of foam – I was able to get fairly accurate cuts, at least as good as my failing eyes allow me to read the ruler (this is why I need an XTool D1 but not for DIY Laser Eye Surgery !)
 20mm XPS vs 10mm XPS just in case you where unsure.
I was originally going to bevel the foam to give a hidden external corner but as it is the interiors that will be used I decided this was unnecessary, although I may still add brick/stone texture to the exterior depending on how much of a masochist I am feeling. This did make things easier as no messing with pesky angles on the Proxxon.
Using a flat bed hot wire cutter did make this a relatively quick job and never let anyone tell you that the Proxxon foot pedal is a waste of money, being able to turn off the wire between each cut without fumbling for the switch is brilliant.
For the ends of the hallways I used on 20mm thick wall and freehand cut an arch into another 20mm piece before ripping it to give me the extra 10mm for each end. You may notice in the next picture that I left the central hallway piece as a single 10 inch length, this was because I forgot I intended to make it 2 5 inch lengths until I had put away the hot wire! I may cut it in half later.
Anyway as they say en Francais – La Grande Revelation (so far)
 4 Large Rooms, 2 Small and a Modular Corridor waiting to be assembled.
Next Steps. Texturing walls where necessary prior to assembly, the different rooms will be distinct so for example wood panelling for the Entrance Hall, tile for the Kitchen etc. but all these need to be 2d to allow for the placement of door clips etc.
Ten there is the flooring which needs to go down before the walls are attached and again will vary between rooms.
So until next time – good building.
First cut is the deepest or Woodn't you know it I hit a problem - or 2
Well first problem came when I pulled out my wood (oh err missus). Seems my high quality 3mm beech ply purchased from one of those sellers known for their high quality timber (ebay or Amazon, I forget) is warped and would not lay flat for the base of my rooms so it was on to my fall back plan, Wyloch’s second favourite, Grafix medium weight chipboard.
 Can you see what it is yet? (Are these references allowed yet?)
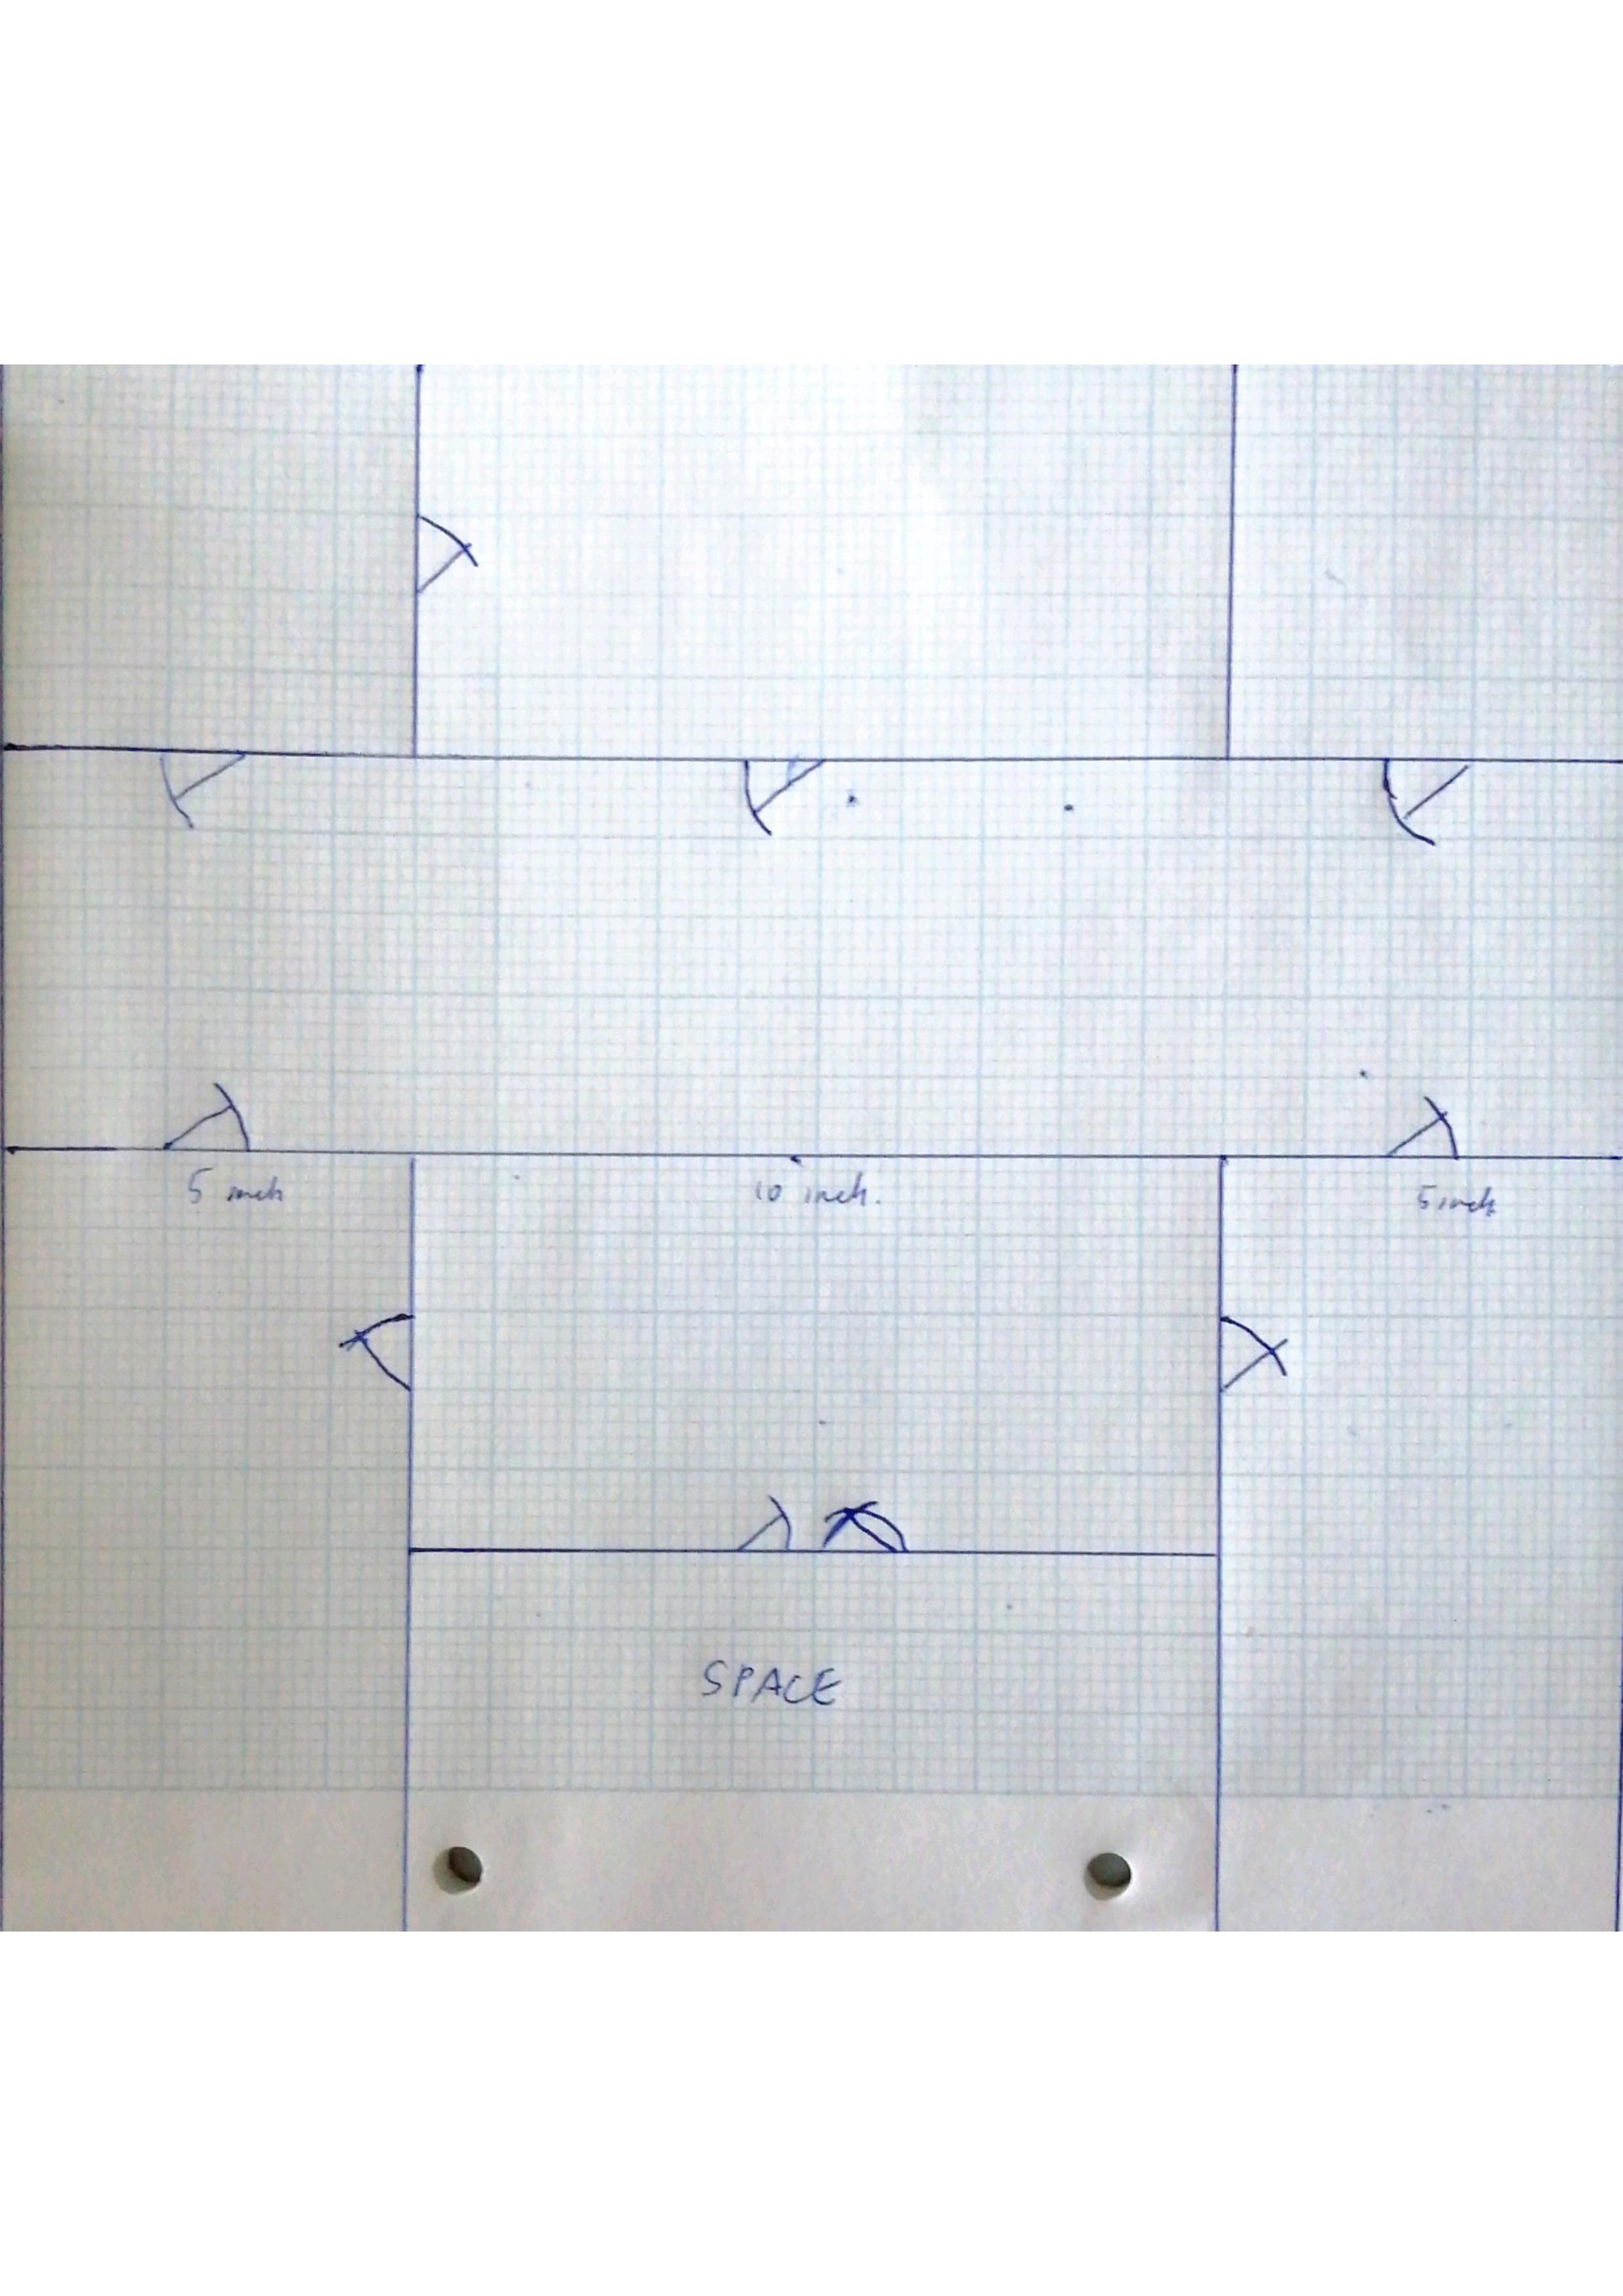
Turns out all my careful pre-planning and calculations missed an important factor. The playable area of each room was calculated on multiples of 5, so 5×5, 5×10 and 20×5 for the corridor. I did remember to include the thickness of my walls in the base of each room so using that peculiar measurement standard now known as ‘imperiametric’ the dimensions all work out at 5 inches and 2cm, 10 inches and 2cm and 20 inches and 2cm – nope that last one is wrong.
Turns out if it is to run between 2 sets of rooms with a combined playable length of 20 inches, adding 2cm for the end walls wasn’t enough as there are 4 extra internal walls so to run the full length it would need an extra 4cm adding, thus ruining my factor 5 plans (I knew this would cause me to get burned!)
So here are my options.
- Add the extra 4 cm and not worry about the 20 inch playable area.
- Stick with the 20 plus 2 and have all the external walls not line up, lets face it mansions have weird external structures, but would keep the playable area in the multiples of 5.
- Add the extra 4cm but make the end walls 3cm each, making the external walls match up. To stop this looking too weird these end walls could become non-playable alcoves or window seats, just something scenic.
- Make the corridor modular, 2 5inch plus 2cm pieces with end walls and one 10 inch plus 2cm open ended piece and again forget the 20 inch playable area. This would make it easier to create different layouts if I decided to build extra rooms and different open ended corridor sections.
- A combination of 3 and 4. Modular but with thicker end walls, my feeble brain tells me this would mean the end pieces would be 5 inch plus 3cm long and the open ended section would be an even 10 inches, thus giving a 20 inch playable length (that’s what she said)
I’m thinking this last option is the preferred one and even going so far as to make the open ended section 5 inches long to give increased modularity. For these to work any ‘building’ would have to be 3 rooms wide as each additional room adds an extra 2cm to the overall length and similarly going to 2 rooms wide would remove 2cm.
And why is the factor 5 important I hear you cry. Because I have decided that the playable space will be on a 1 inch grid for movement as trying to get a tape measure into such small spaces would be tricky.
Now it’s time to think about walls and floors and stuff.
Mansion Layout and Construction Plans
 Mansion Layout
The plan for this is to make each room individually utilising 3mm ply, foam and cardboard. The walls will stick to a variation of the 2.5d format in that they will be a bit higher than usual to allow for some more detail and the clip on doors will be double clips to allow two rooms to be connected together. Well that’s the plan.
Oh and I basically have 2 weeks to do it while I’m on holiday from work!