


![How To Paint Moonstone’s Nanny | Goblin King Games [7 Days Early Access]](https://images.beastsofwar.com/2024/12/3CU-Gobin-King-Games-Moonstone-Shades-Nanny-coverimage-225-127.jpg)


Revisiting Warmaster – Spring Clean 2024


Recommendations: 307
About the Project
Revisiting building a Chaos army for Warmaster, an idea that never really got going 20-odd years ago. A second chance for second hand miniatures.
Related Game: Warmaster
Related Company: Games Workshop
Related Genre: Fantasy
Related Contest: Spring Clean Hobby Challenge 2024
This Project is Completed
The End of the Beginning
Like quite a few people, my hobby journey is a tale of two halves. Imagination captured as a youngster, but drifting away from the hobby around the time I headed off to university, before rediscovering the joy in collecting, painting and gaming quite a few years later.
Warmaster was pretty much the last game that captured my attention before I stopped my first hobby era. The smaller scale figures and design of the game was really interesting at the time, but came a bit too late as I was already losing general interest in the hobby. The army that appealled the most was Chaos, and I got as far as buying a few packs and painting up one unit of Knights. That unit was pretty much the last thing I painted before resuming the hobby 20-odd years later – it marked the end of the beginning of my hobby journey.
Fast forward to about a month ago, OTT community member Nogbadthebad posted up some packs of Warmaster Chaos units for sale on Discord. I noted the post, thought nothing about it, but a seed had been sown. That seed grew over a couple of days – this was a chance to revisit the last abandoned project of my younger self. Nog’s post was responded to, and I had a Spring Clean Challenge ready to go.
This project is all second hand original Warmaster figures, all being given a second chance. I’ve got ten units to paint, including my original Chaos knights. I hope I can work through them at a rate of about a unit a week, so it shouldn’t be too much of a challenge to wrap this project up within the Spring Clean window.
Here’s a list of the units that I’ll be working through over years next few weeks:
-
2x Marauders
-
2x Chaos Warriors
-
2x Chaos Knights (1 unit to be stripped and re-painted)
-
Chaos Hounds
-
Harpies
-
Chariots
-
Marauder Horsemen
-
Character set
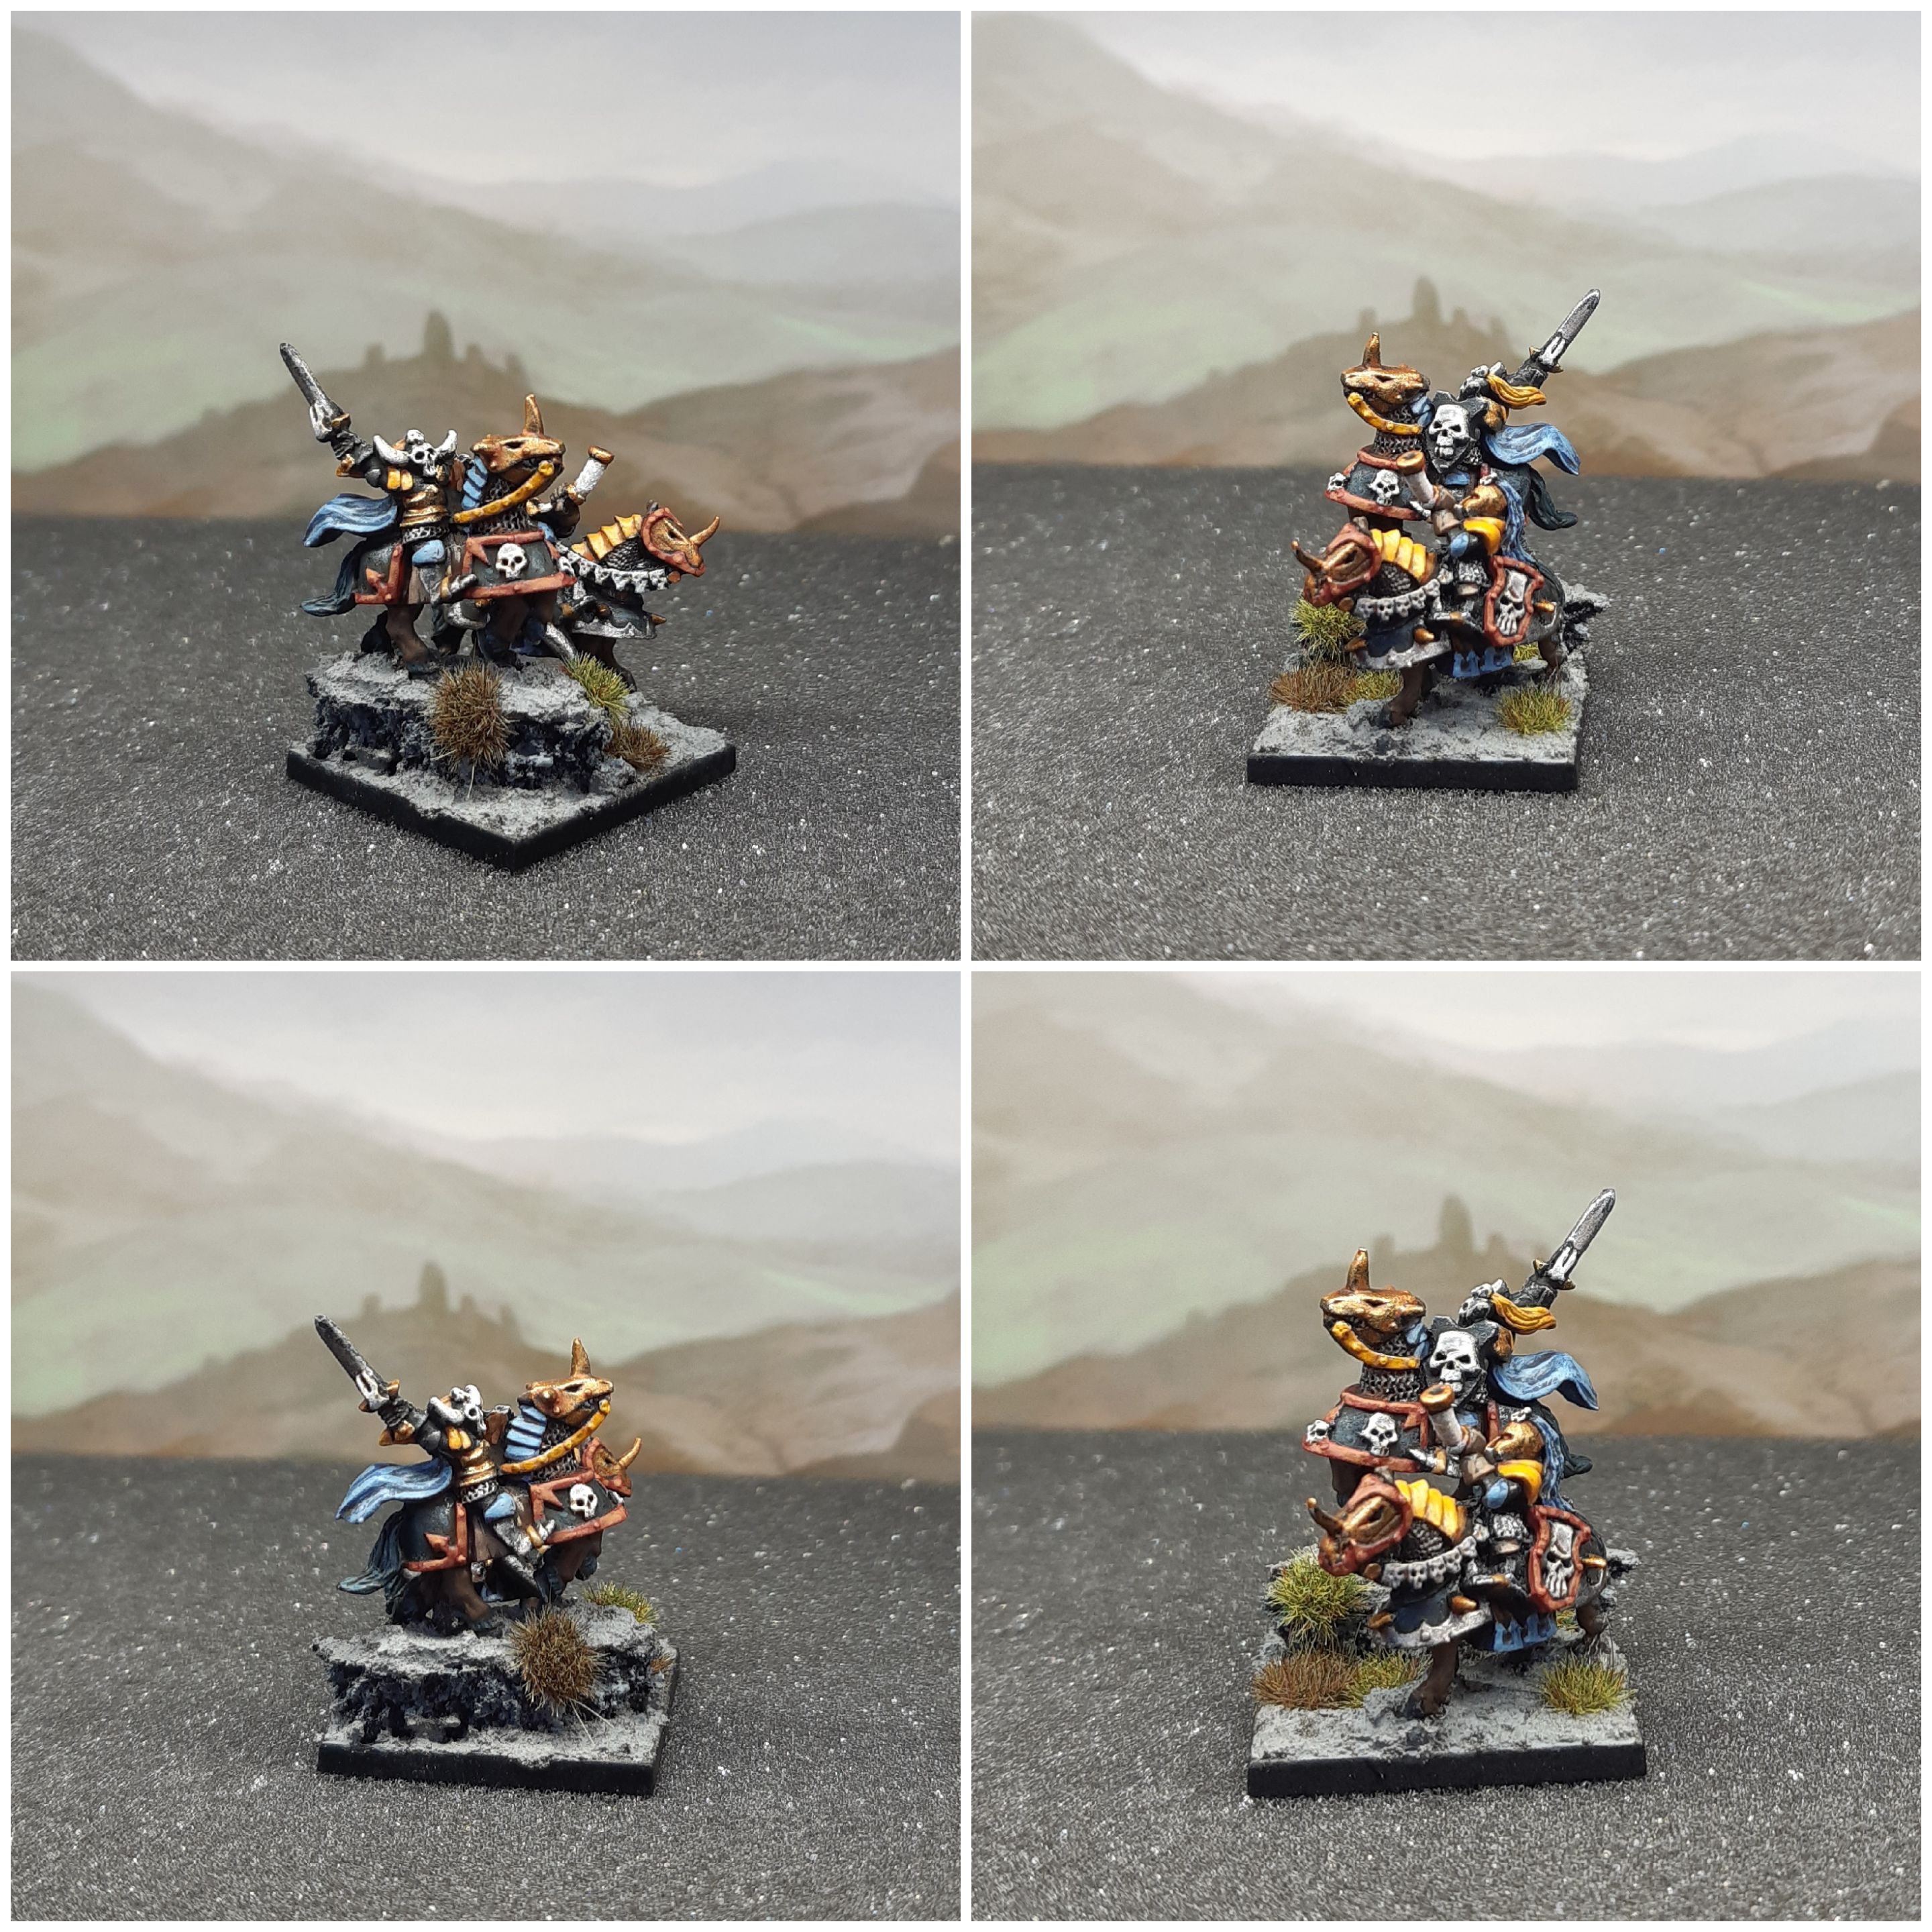
 My original Chaos knights. These are probably going to be the last thing tackled. I'll certainly be adopting a completely different colour scheme...
Selecting Colour Schemes
The starting place for any new project is working out a broad colour scheme. Historical projects are nice as the heavy lifting has already been done, but the choice of, well, anything you want for fantasy and sci-fi projects can be a bit of a stumbling block for me.
I knew I didn’t want to use the black/red/brass colours I went with for my knights back in the day. I had a look through a lot of different things to get some inspiration, and settled on a blue/yellow/brown scheme I previously used on some cultist figures by Meridian Miniatures. This scheme would hopefully give some nice bright colours that help make smaller scale models pop, whilst still retaining a bit of the grim dark feel of the Warhammer setting.
 The colour scheme for this project was based around one I had previously used for this 28mm figure.
Painting a Test Unit
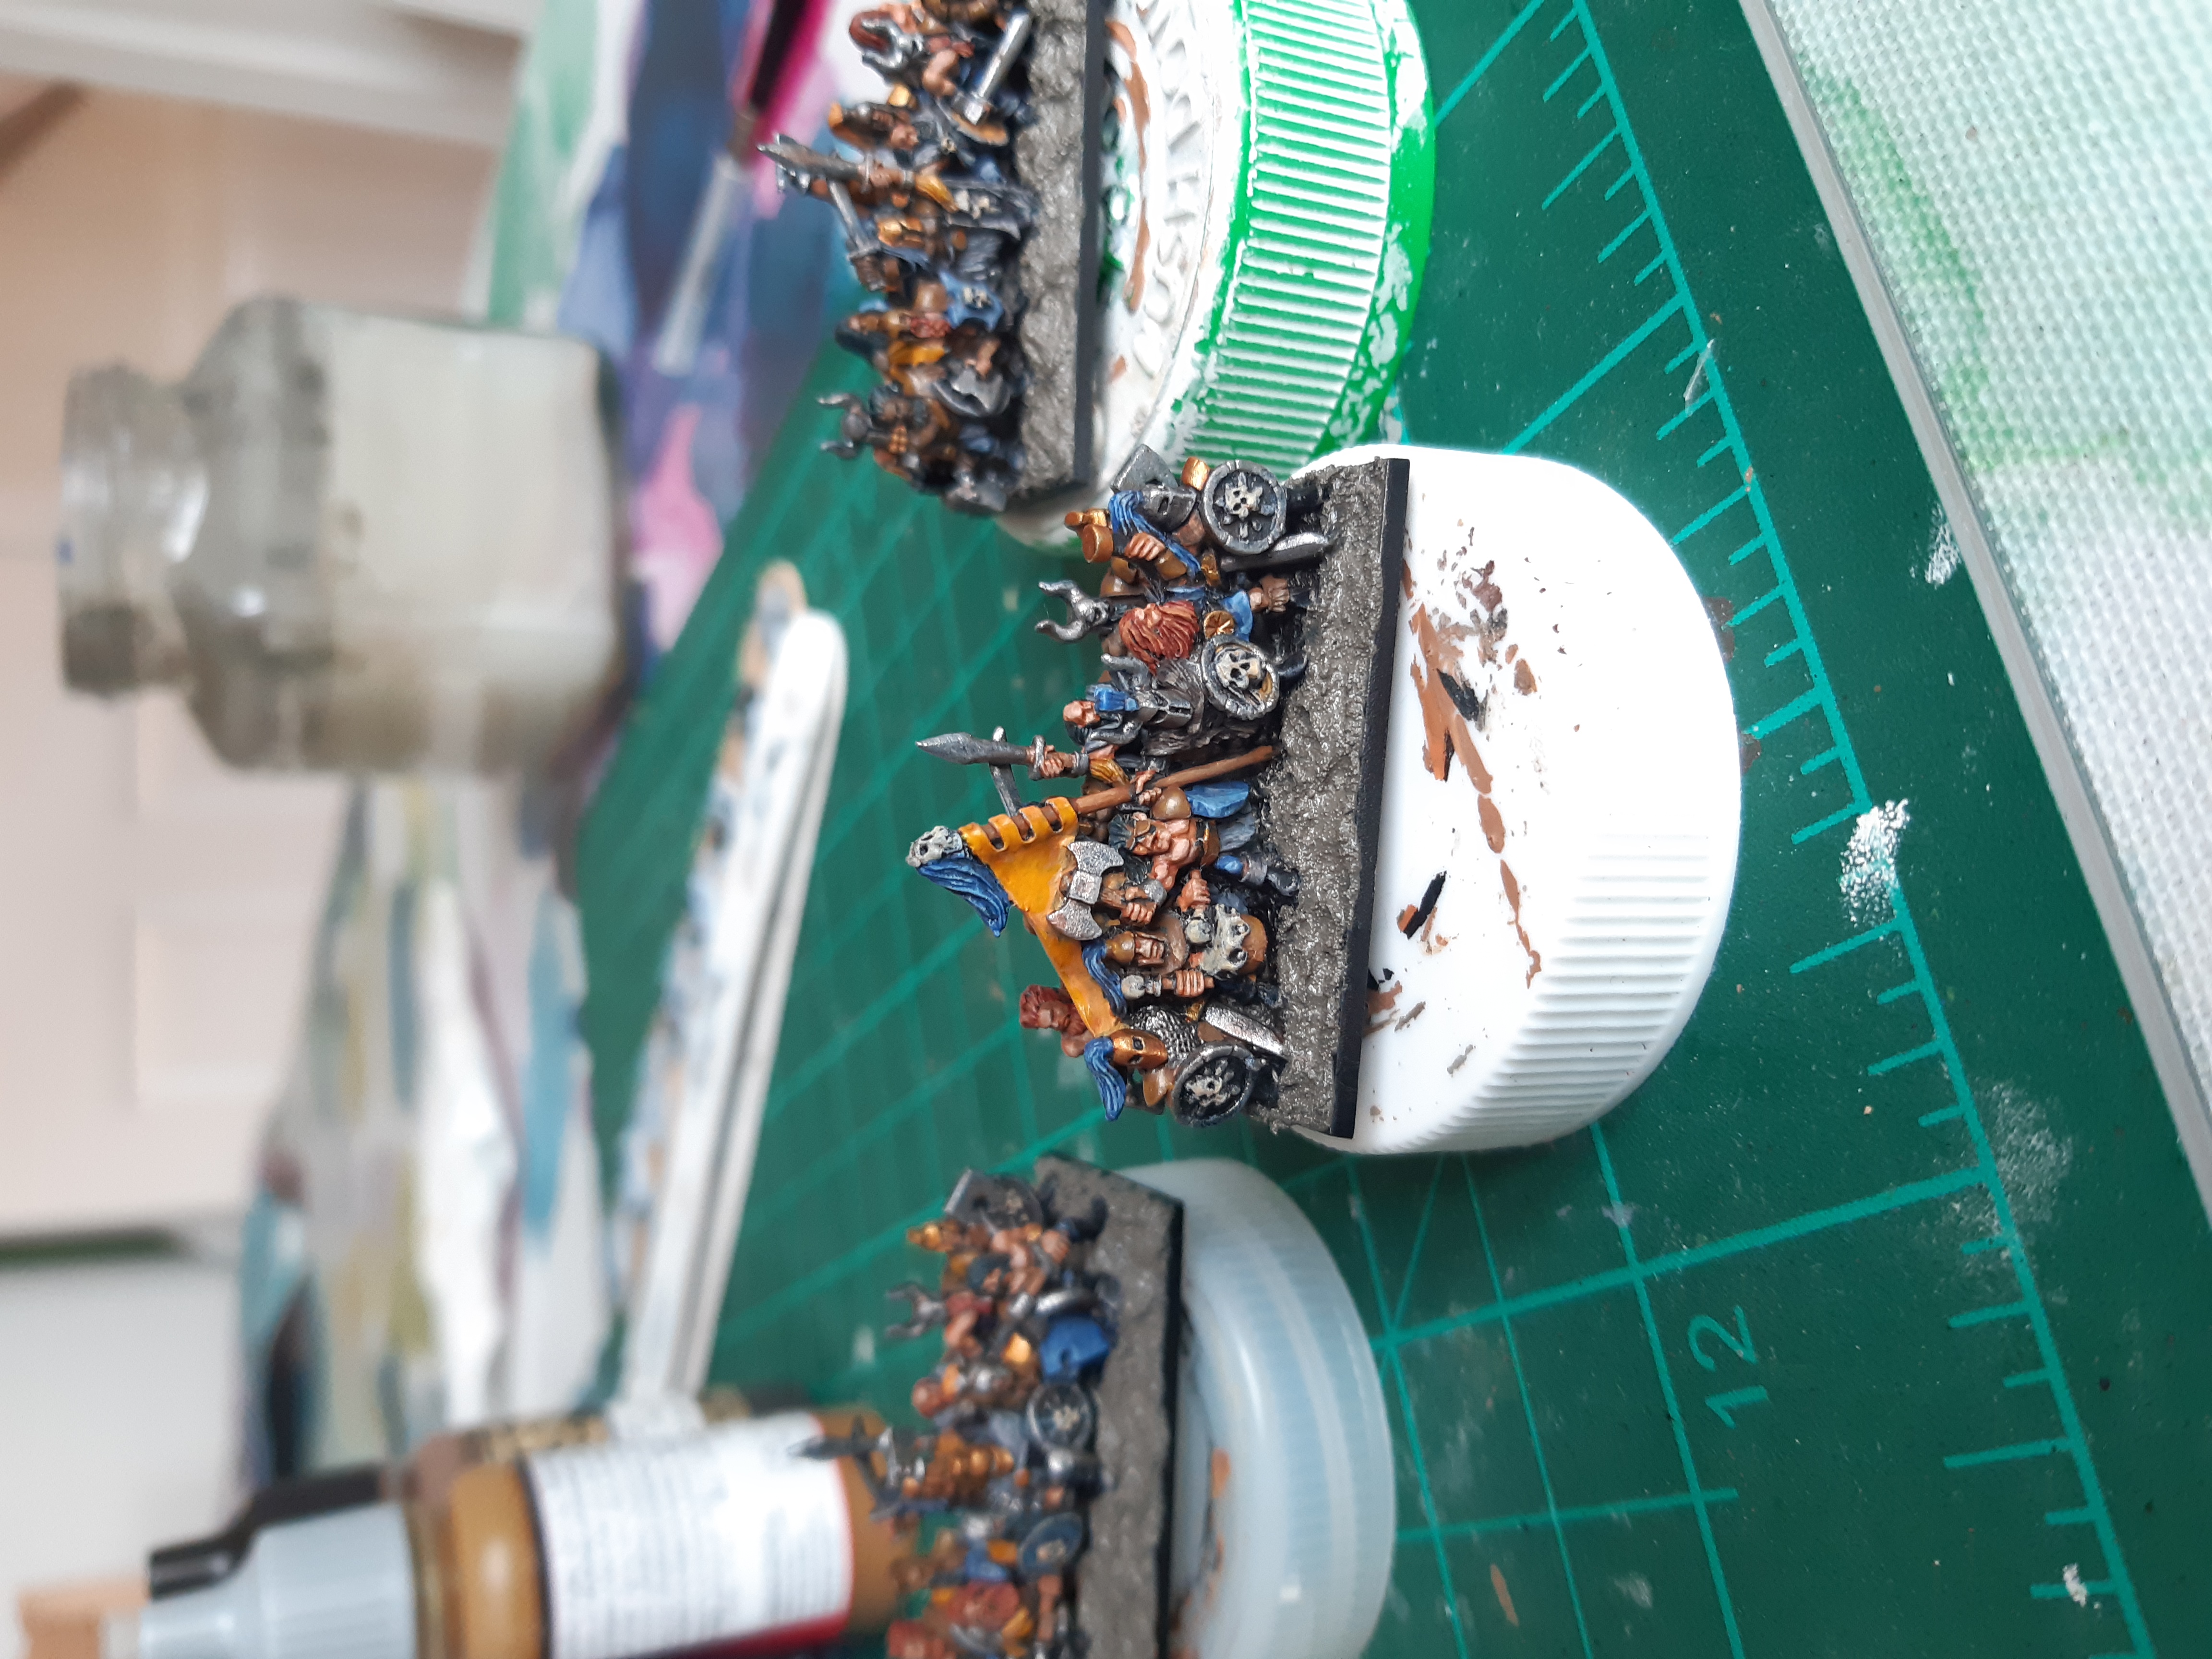
Having an idea of a colour scheme is one thing, but it needs to be tested on a few figures to see if it really works. I grabbed one of the Marauder units to trial my paint scheme. I didn’t want to go too overboard with these 10mm models. A basecoat, maybe a wash and then a single highlight was the aim.
First, the strips were primed black (using Colour Forge matt black spray), and then lightly drybrushed with a white paint to help pick out the details.
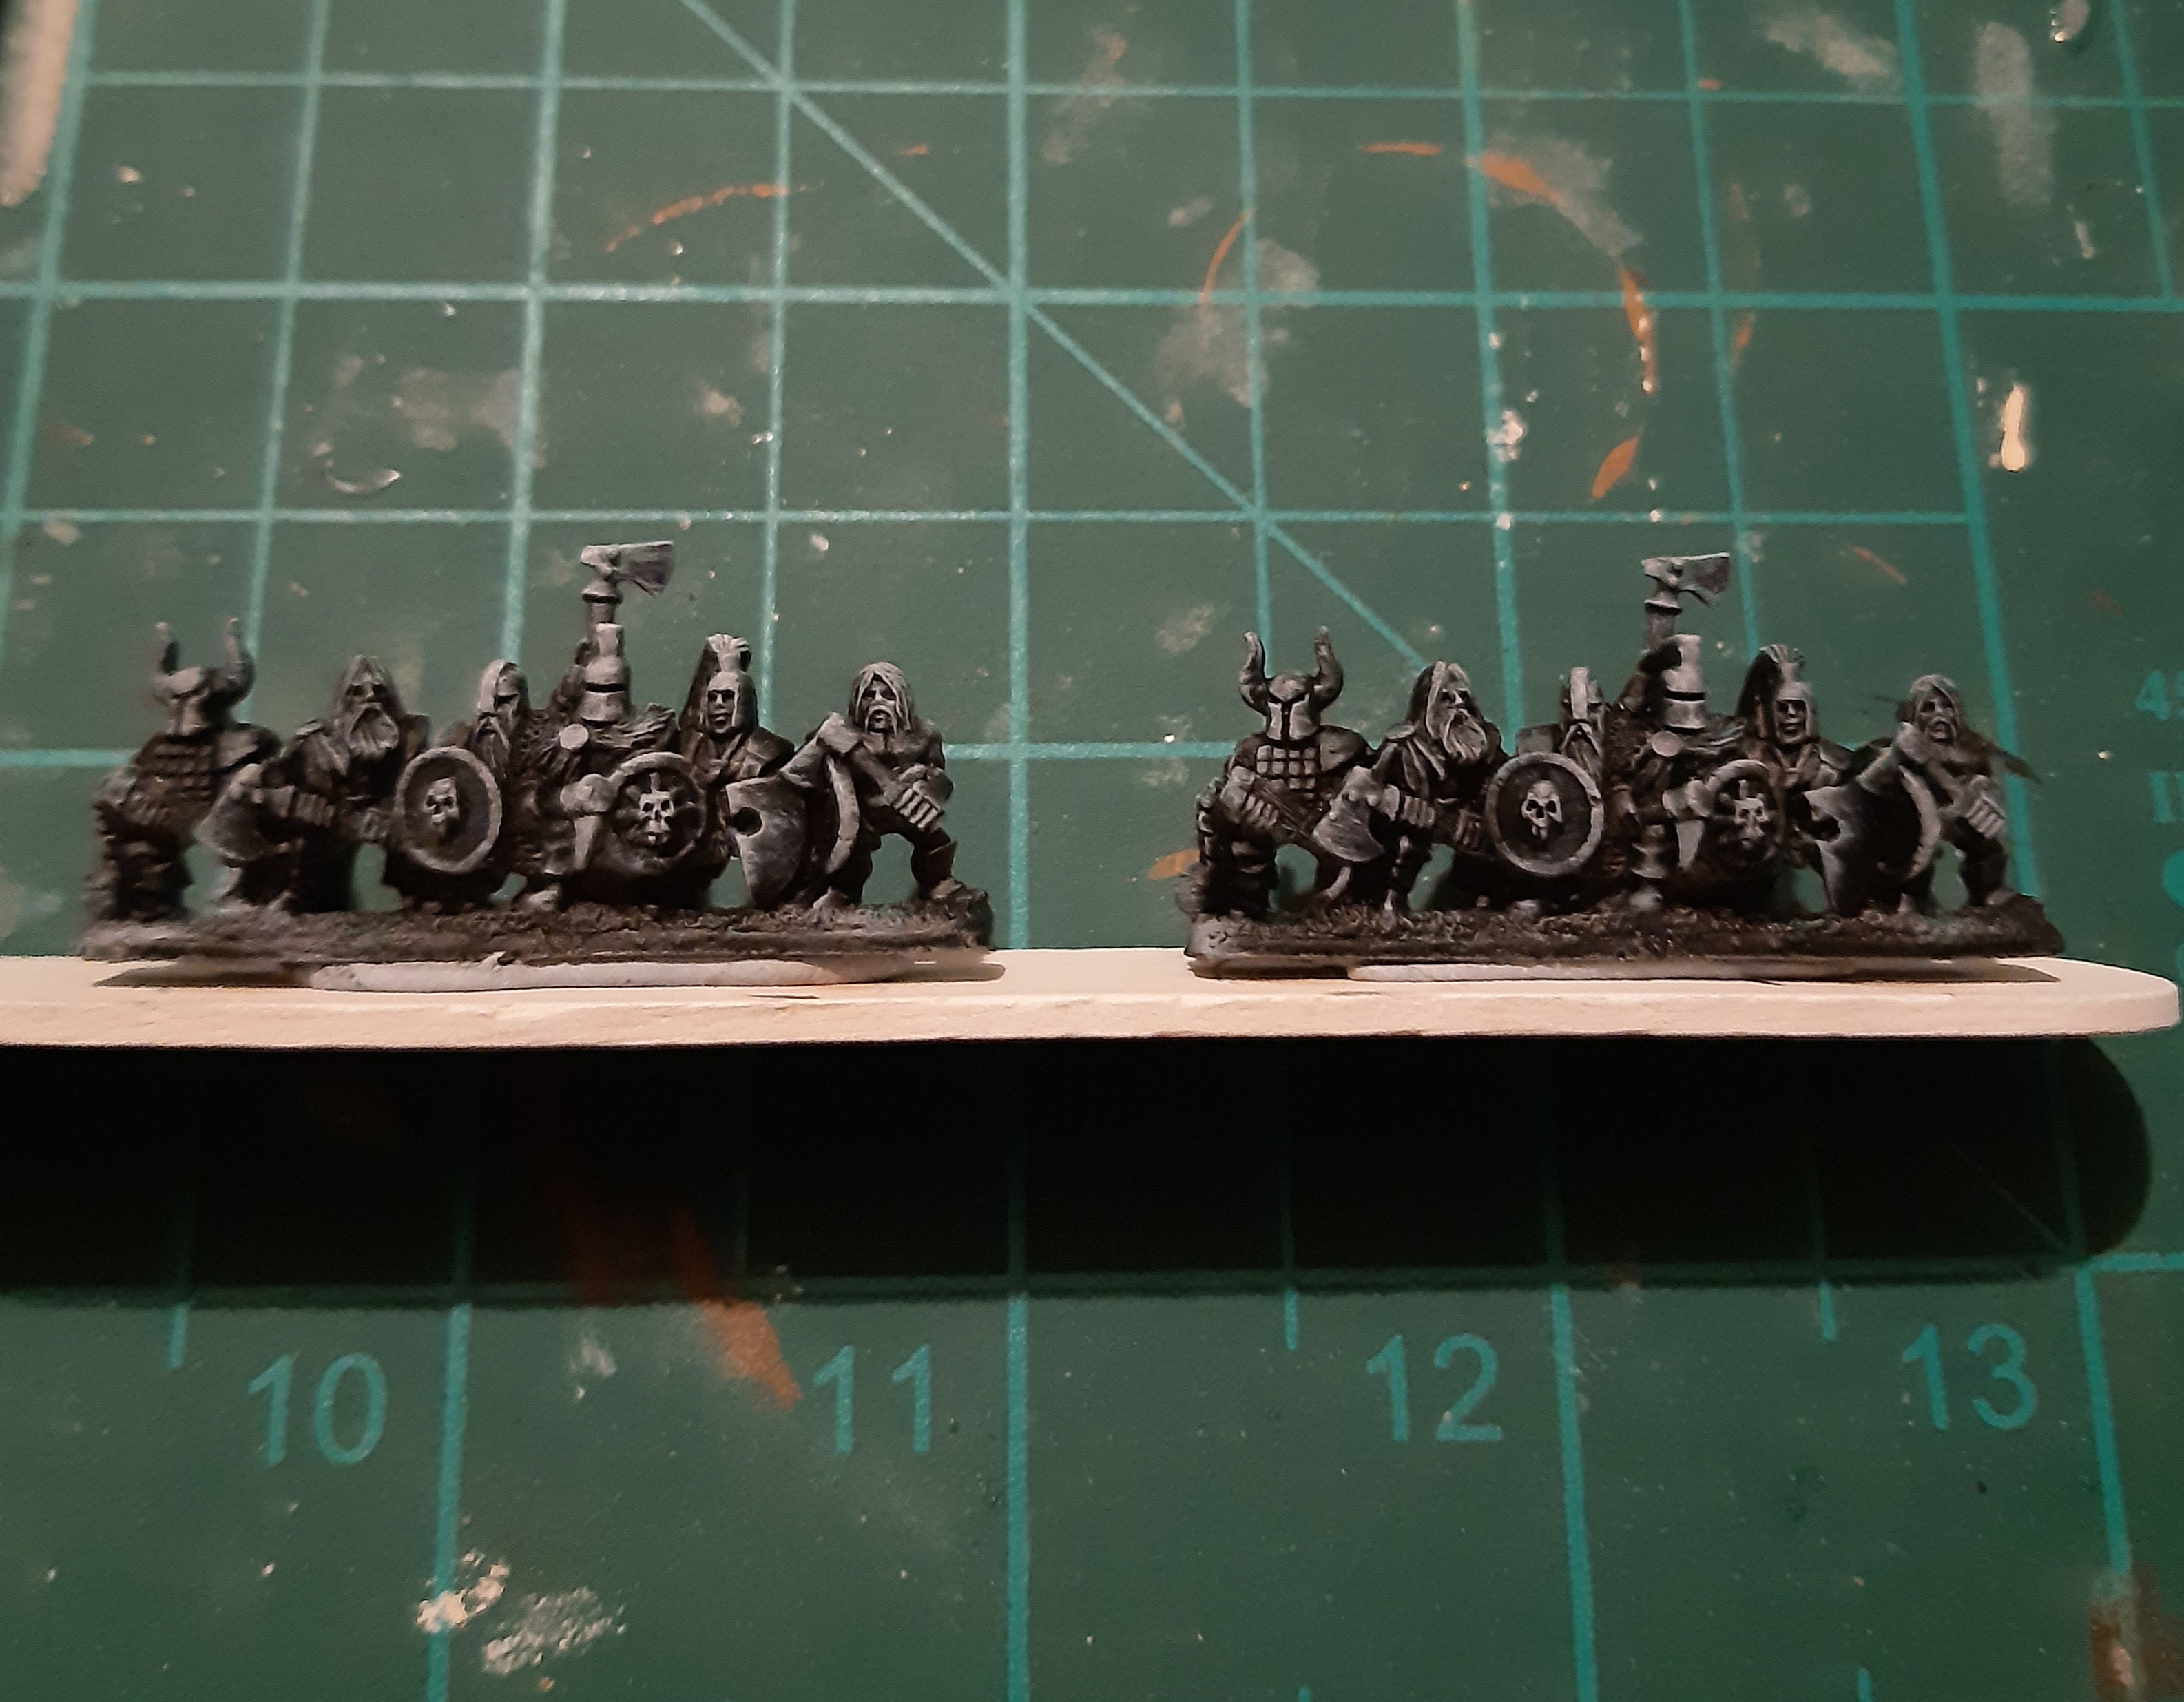 Primed and drybrushed. Love these characterful figures
Next, basecoats. Paint brands are going to be shortened as follows: CT – Citadel; VMC – Vallejo Model Colour; VGC – Vallejo Games Colour.
- Skin – CT Ratskin Flesh or VMC Burnt Umber
- Blue fabric/armour – CT Altdorf Guard Blue
- Yellow fabric/armour – VGC Bronze Fleshtone
- Grey furs/fabric – VMC London Grey
- Leather – VMC Flat Earth
- Wood – VGC Beasty Brown
- Brass – CT Retributor Armour
- Steel – VMC Oily Steel
- Red hair – VMC Cavalry Brown
- Black hair – VMC Dark Sea Blue
- Brown furs – VMC German Camo Black Brown
- Bone – VMC Buff
A few things (like boots) were just left the primed black colour. The blue and yellow colours were spread around across the strips, using different skin tones and hair colour to add a bit of variation.
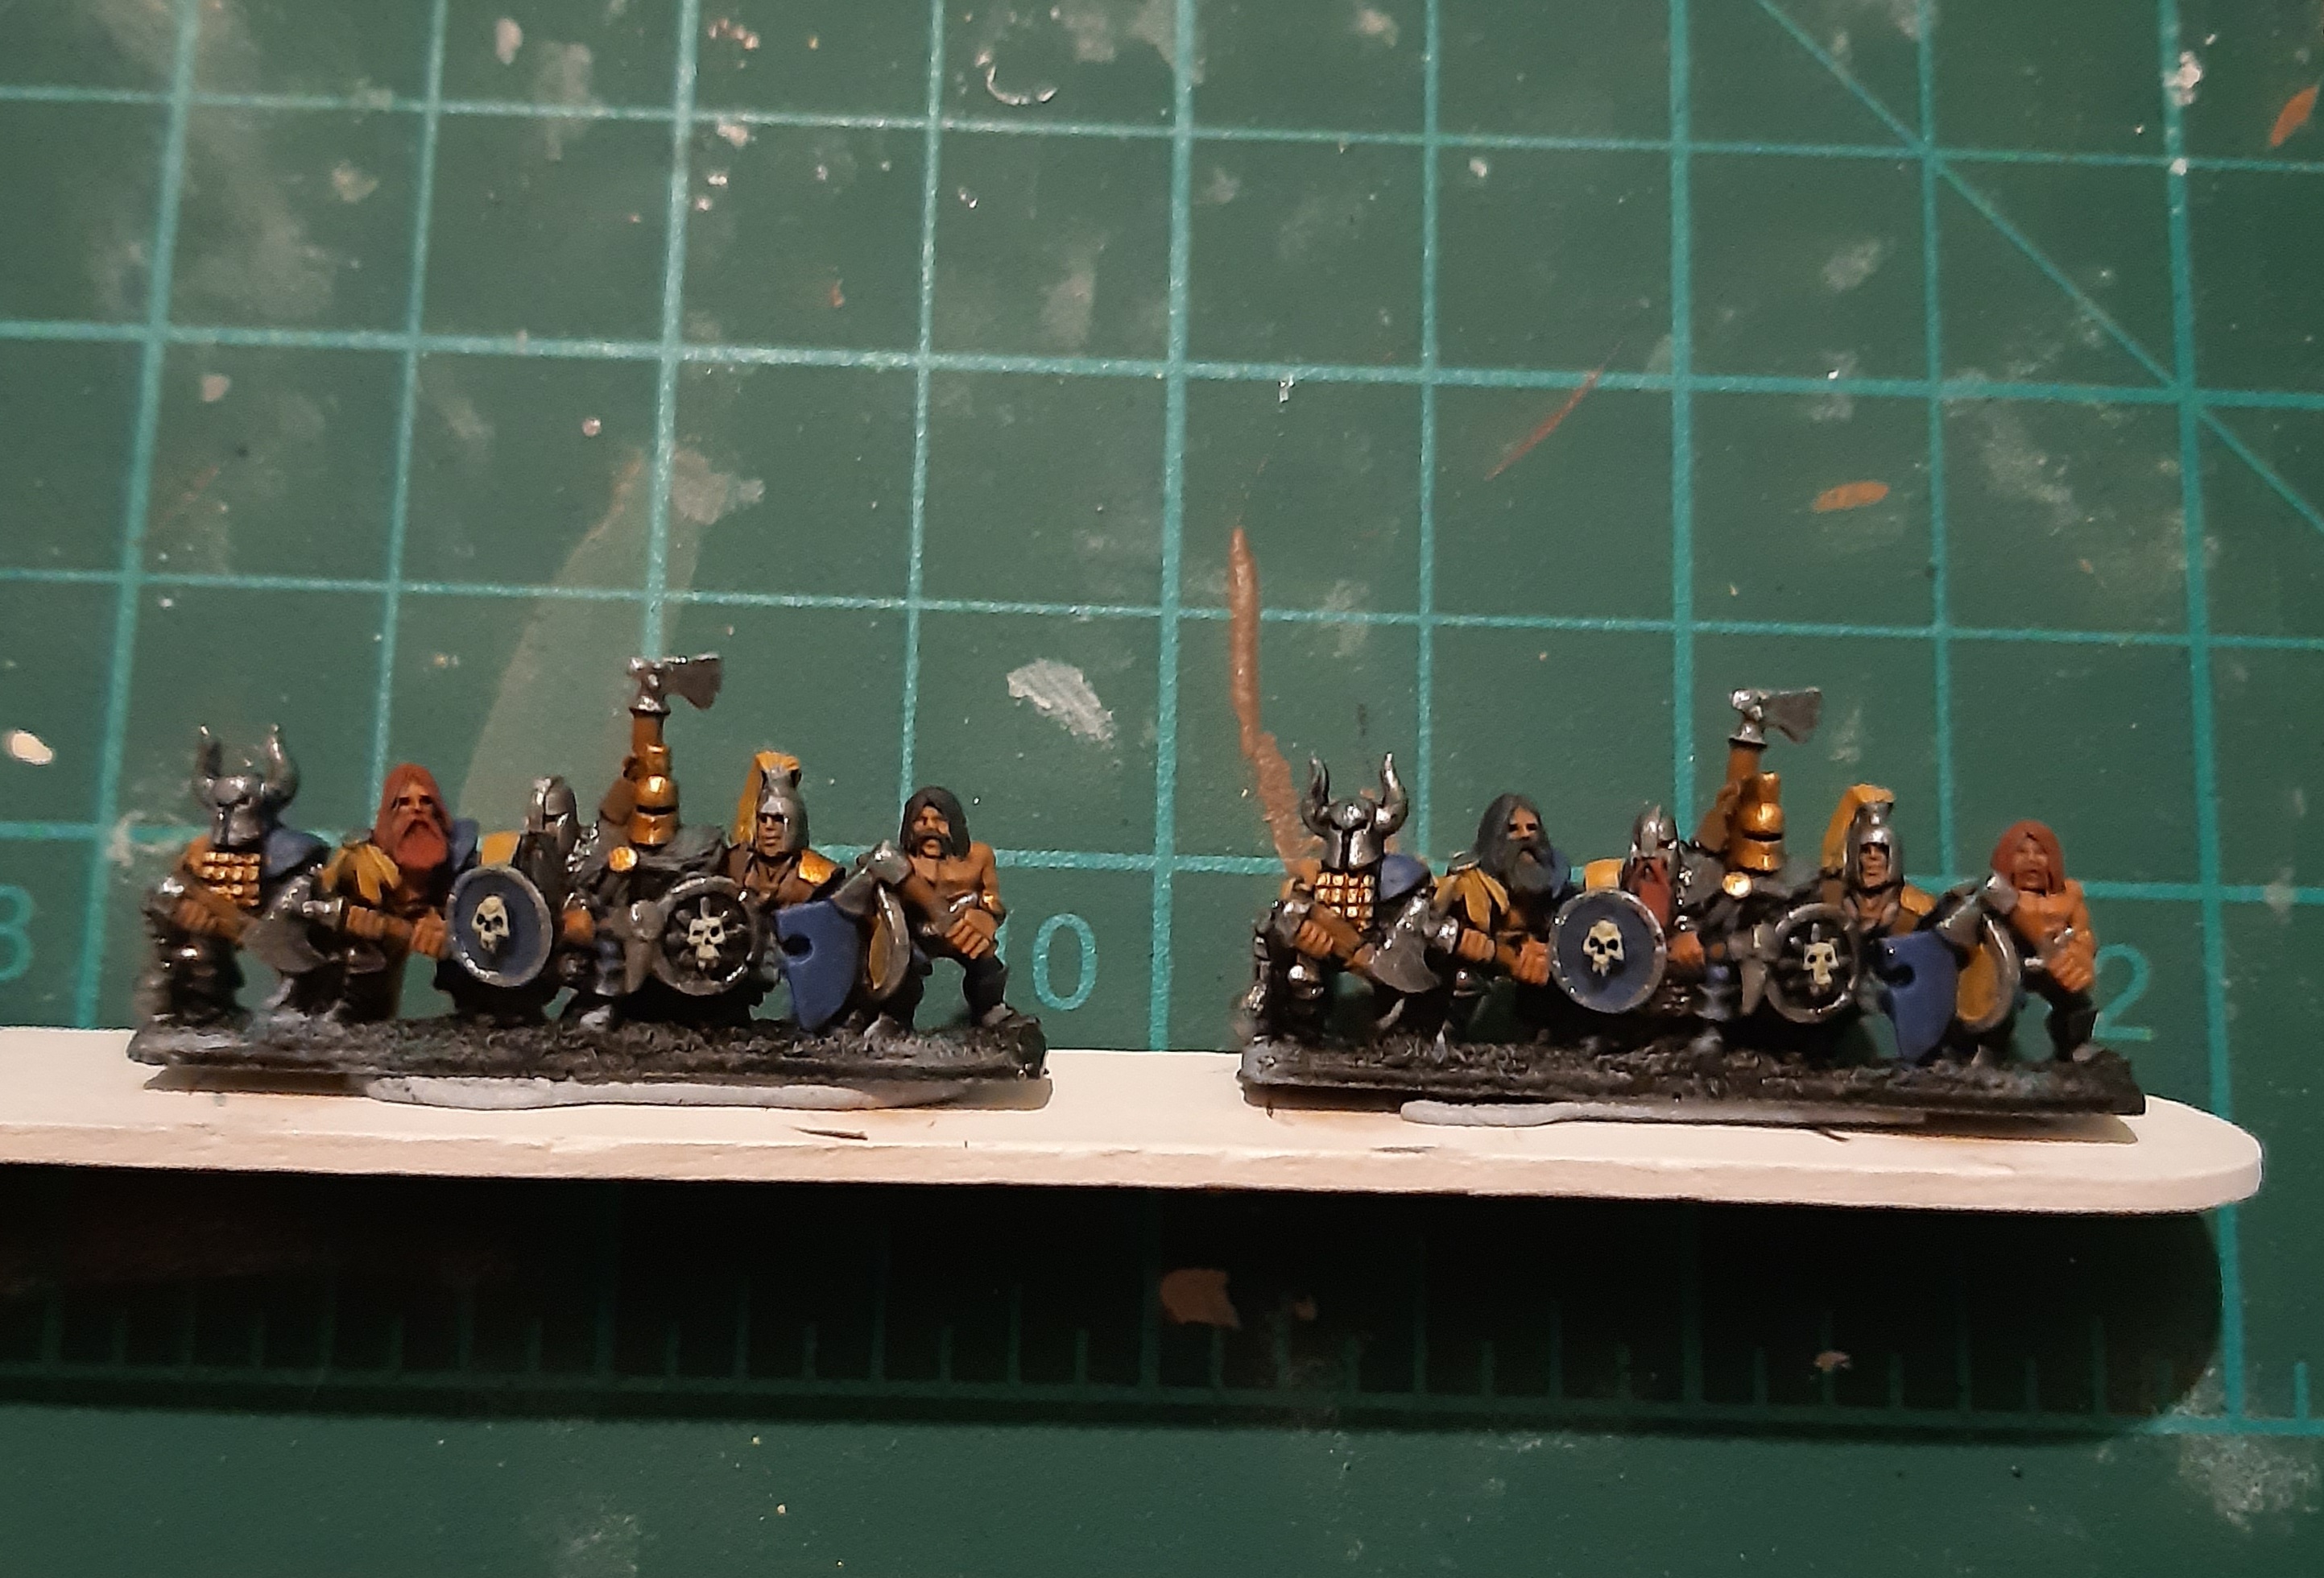 Basecoats done. Fairly poor lighting on this photo, but you get the general idea
Next a wash all over the strip using CT Reiksland Fleshshade. This helped to reinforce the darkness of the recesses, and add some grimy depth to the metallics and shade the colours a little.
 The difference between this and the previous image is not very clear thanks to the poor lighting.
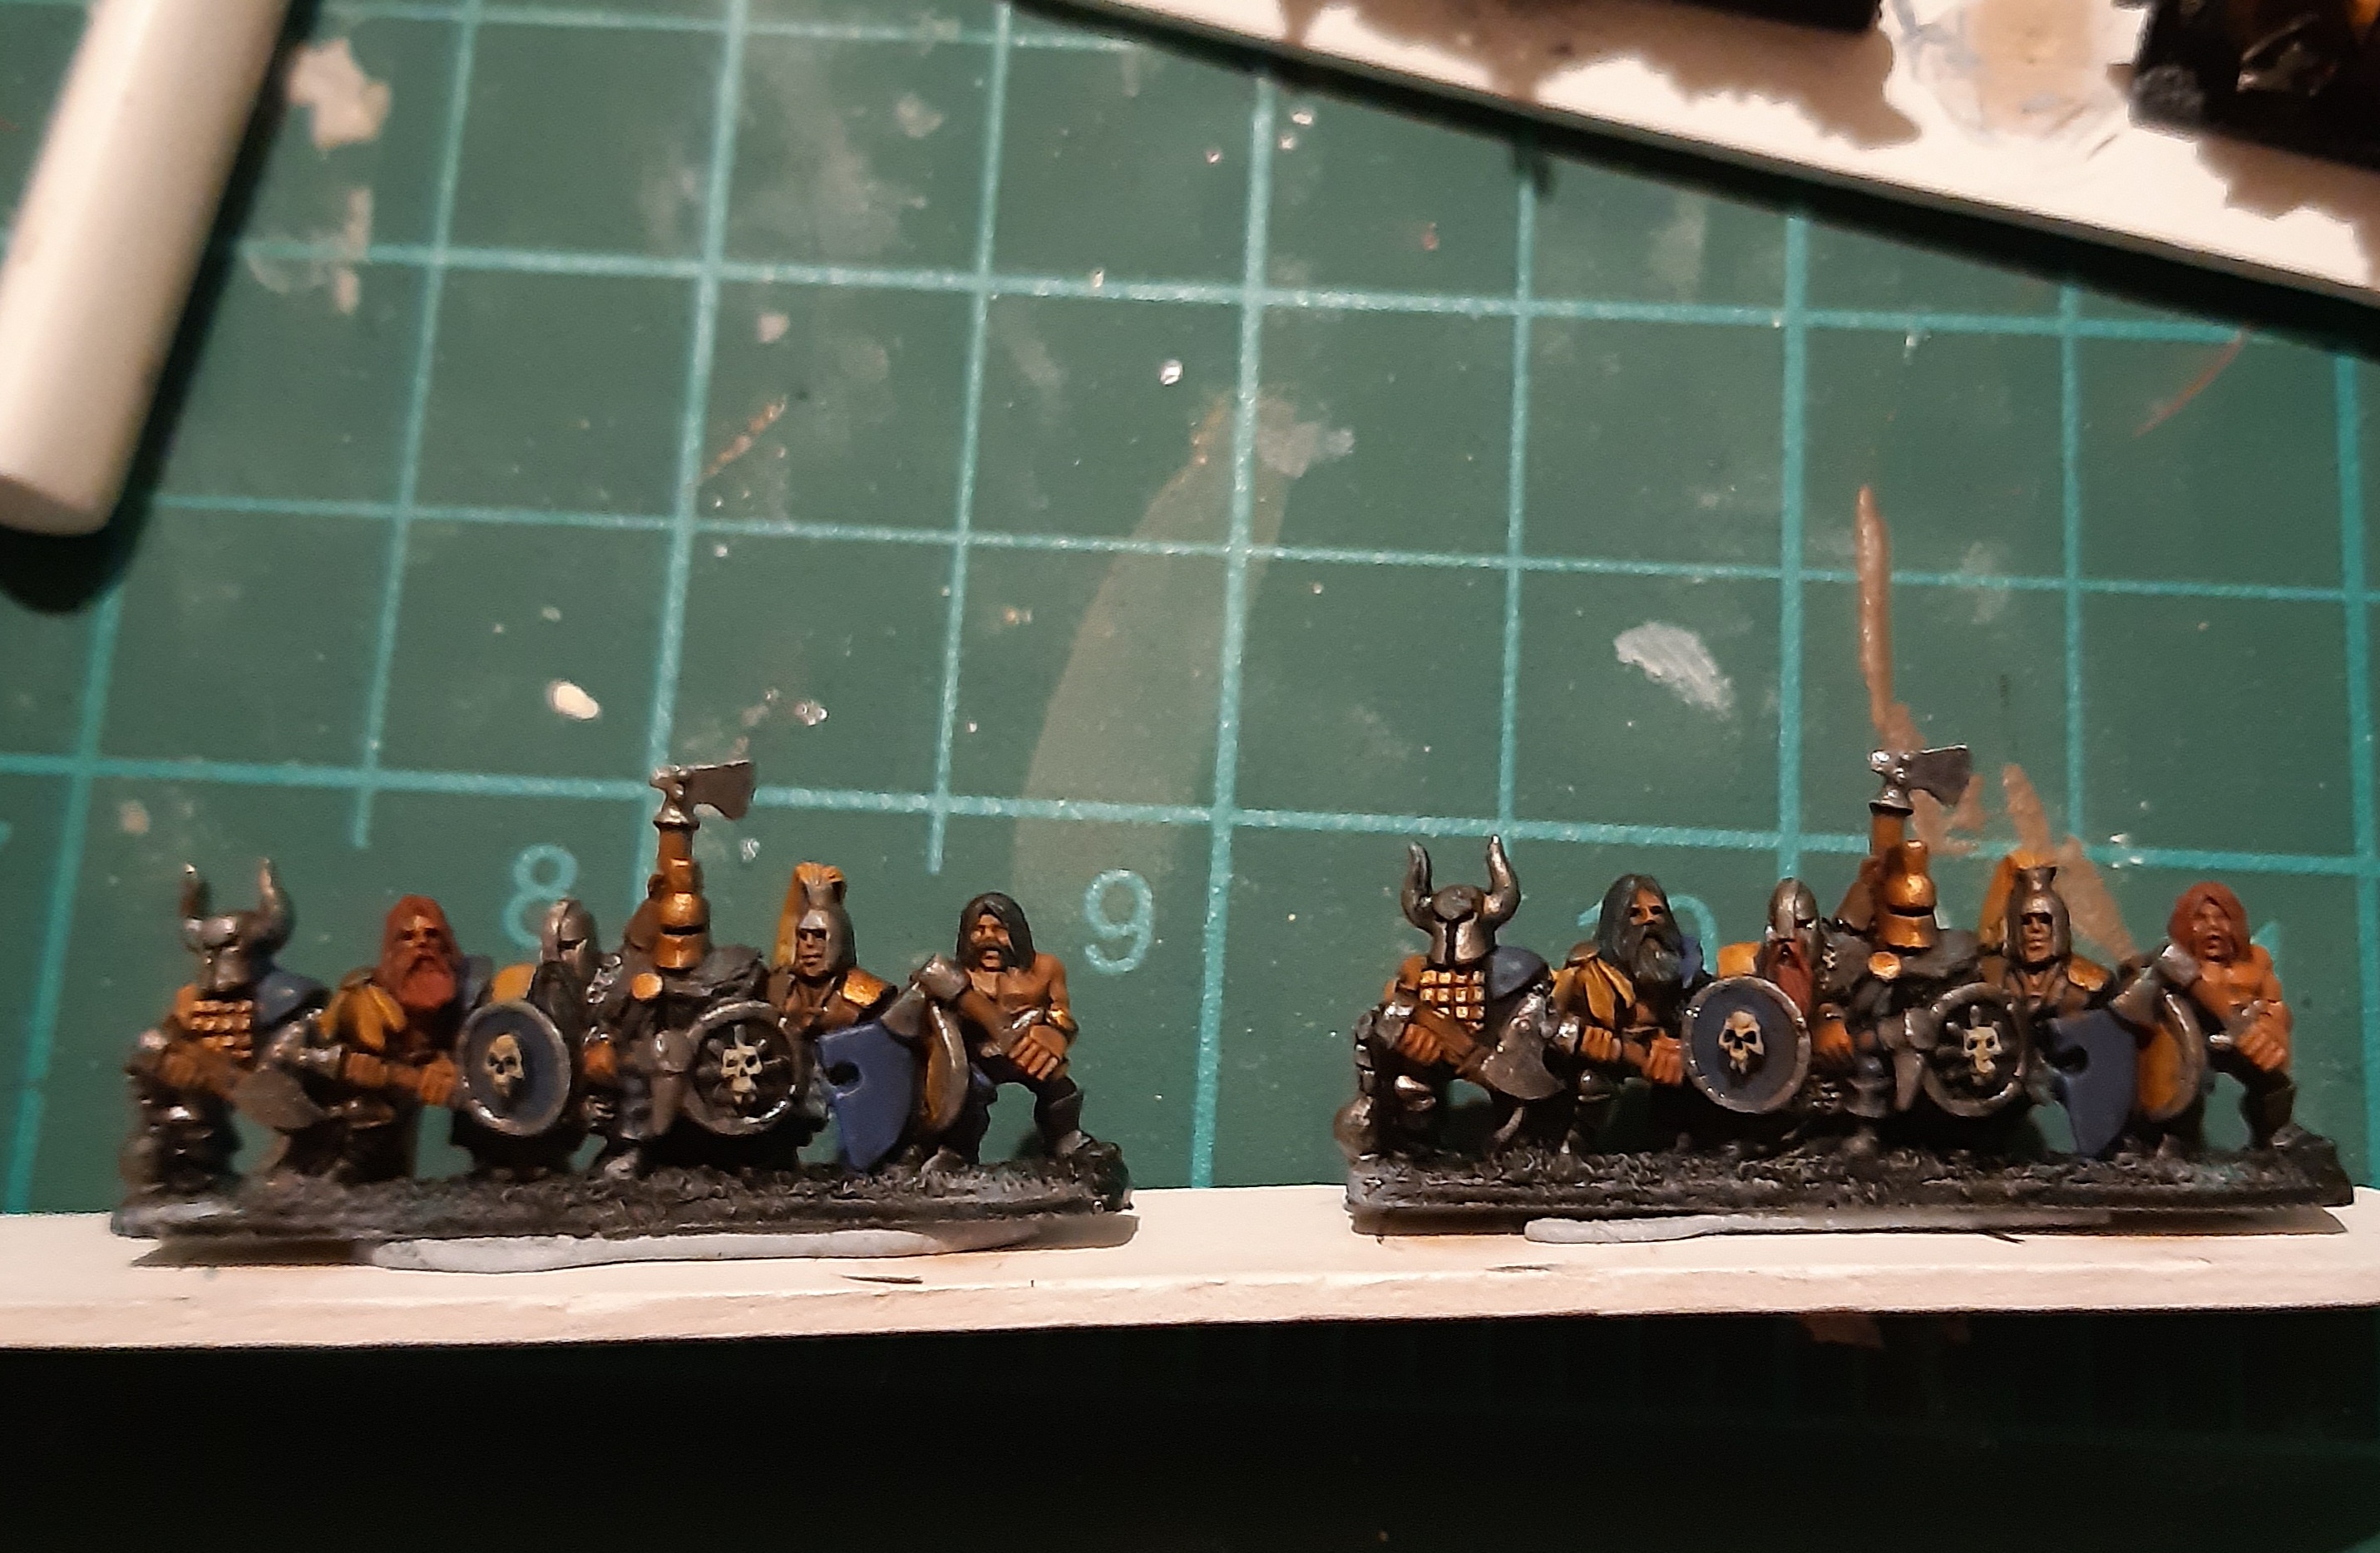
Finally, a single highlight was added:
- Skin – CT Kislev Flesh or Kislev Flesh mixed 1:1 with VMC Burnt Umber
- Blue fabric/armour – VMC Pastel Blue
- Yellow fabric/armour – VGC Sun Yellow
- Grey furs/fabric – VMC Medium Sea Grey
- Leather – VGC Leather Brown
- Wood – VMC Light Brown
- Red hair – VMC Orange Brown
- Brown furs – VMC Brown Sand
- Bone – VGC Dead White
Metallic areas and black hair were left as is, with no highlight applied. For the furs, the highlight colour was stippled over the surface.
 A completed strip of Marauders. Now onto basing.
Basing
I struggle I little with basing models. I’m fully aware that the base can make a huge difference on the end result for any model, but once I’ve painted a figure, I find it a bit of a chore. Therefore I tend to be a bit lazy and look for fast and simple ways to base my figures. Applying a texture paste and giving the base a quick drybrush before adding a few tufts is about as complex as I like to go.
Big issue with that approach for Warmaster minis is any careless drybrushing will really be noticeable, and there’s no realistic way to get between the two strips on each base. I therefore thought about using a wash over a texture paste instead, and made a couple of test bases to try out different combinations of base colour and wash.
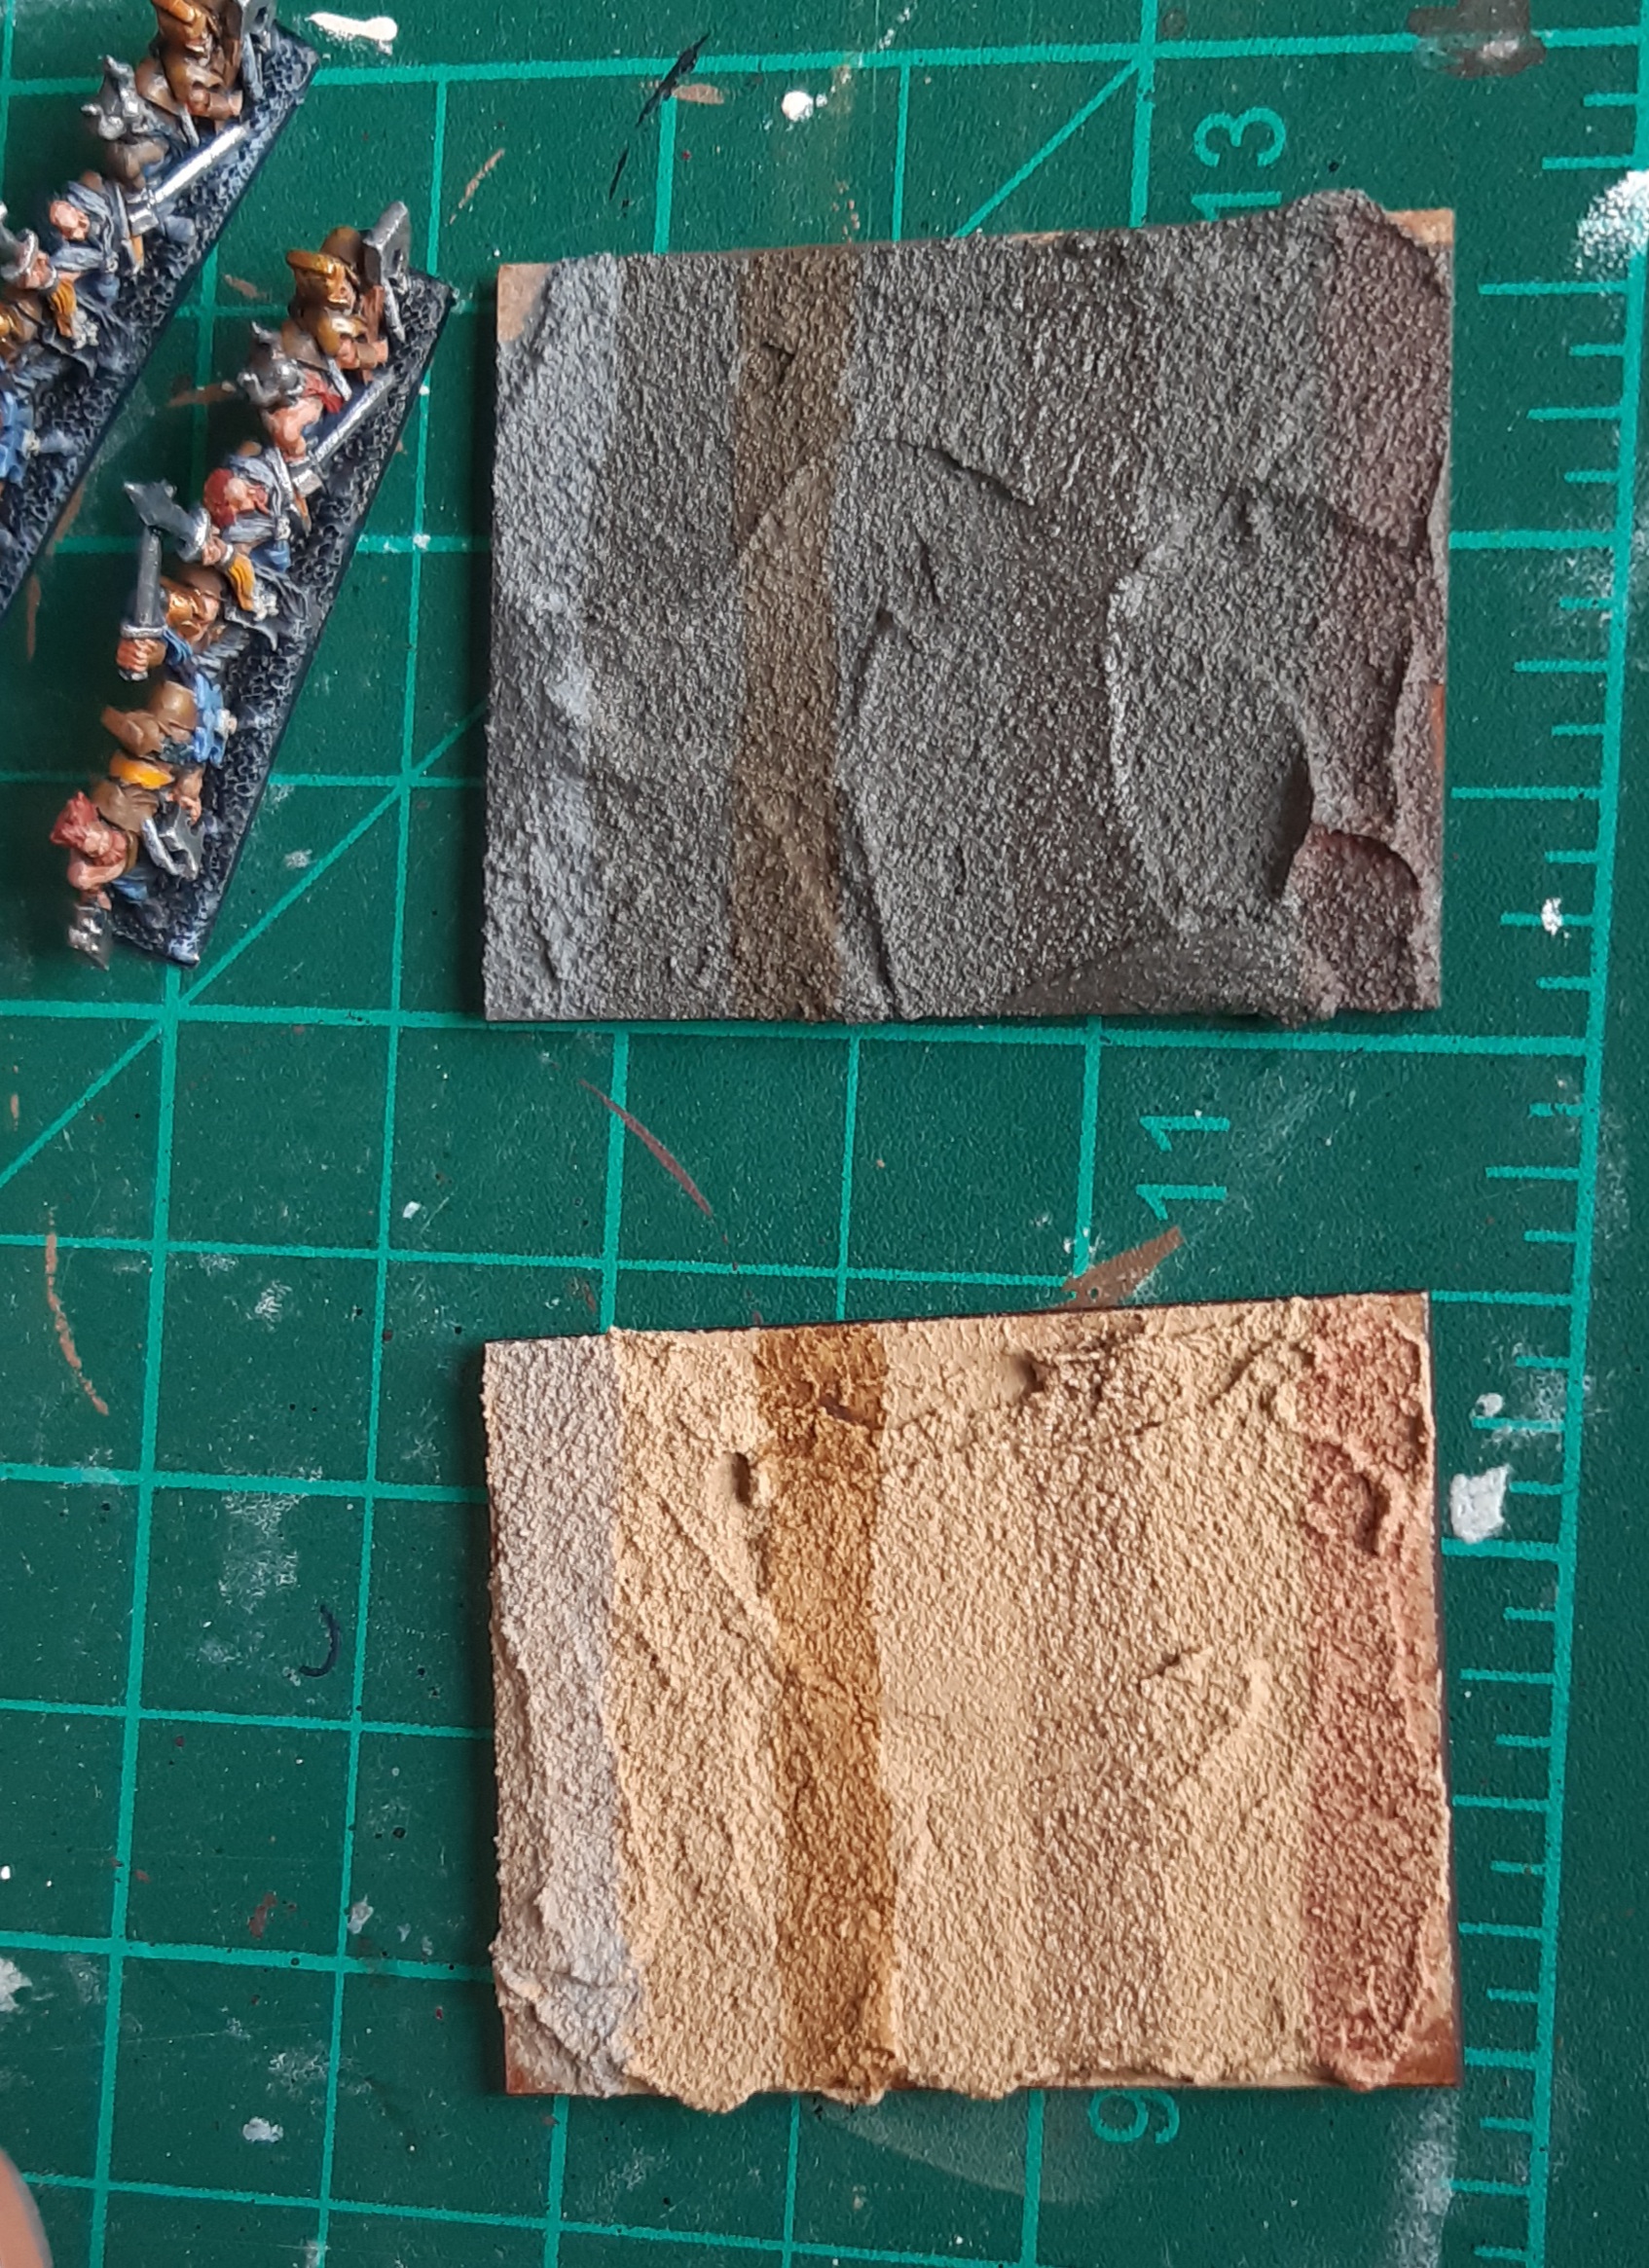 My test bases. The two texture pastes were Vallejo Dark Earth and AK Desert Sand. A band of four washes was applied to both - Vallejo Grey, Flesh, Umber and Sepia washes.
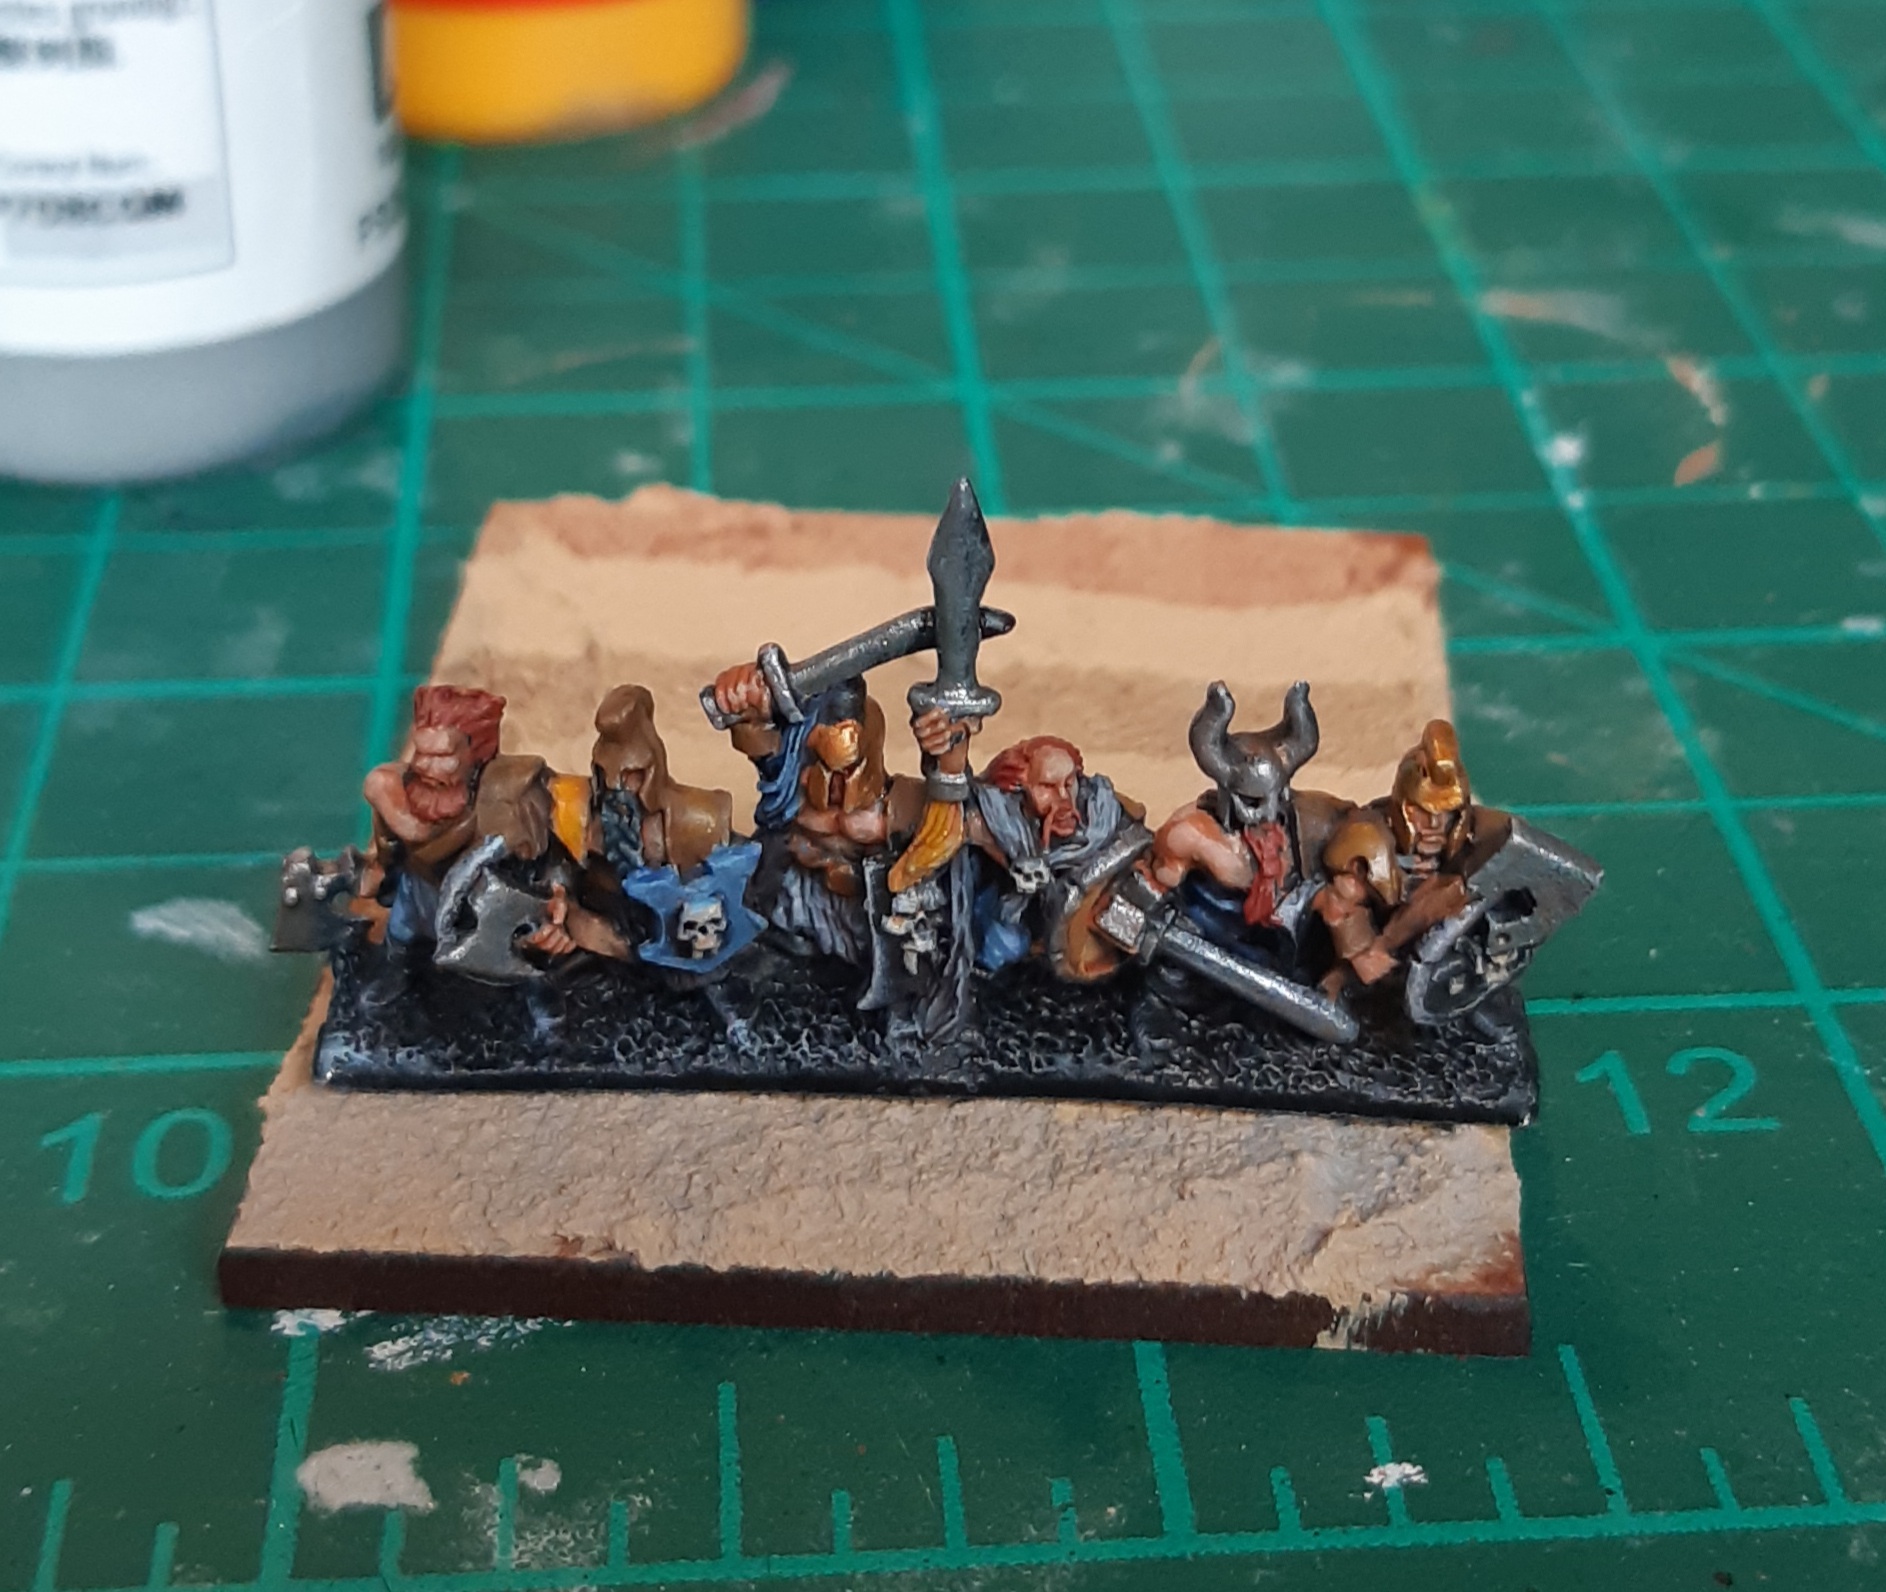 I then put a strip in front of each section to decide what felt/looked best. I decided on the Vallejo Dark Earth with the Grey wash, as it felt like an appropriate cold/wasteland cover, and gave some nice contrast to the colour scheme
The front strip was glued onto each base, and then texture paste added around using an old brush. A fair heap was piled behind, the idea being to slide the second strip into place and just smooth the paste down, and then add more a finish at the back.
Once the paste was dry, the wash was added, followed by tufts from Tajima1.
First Finished Unit

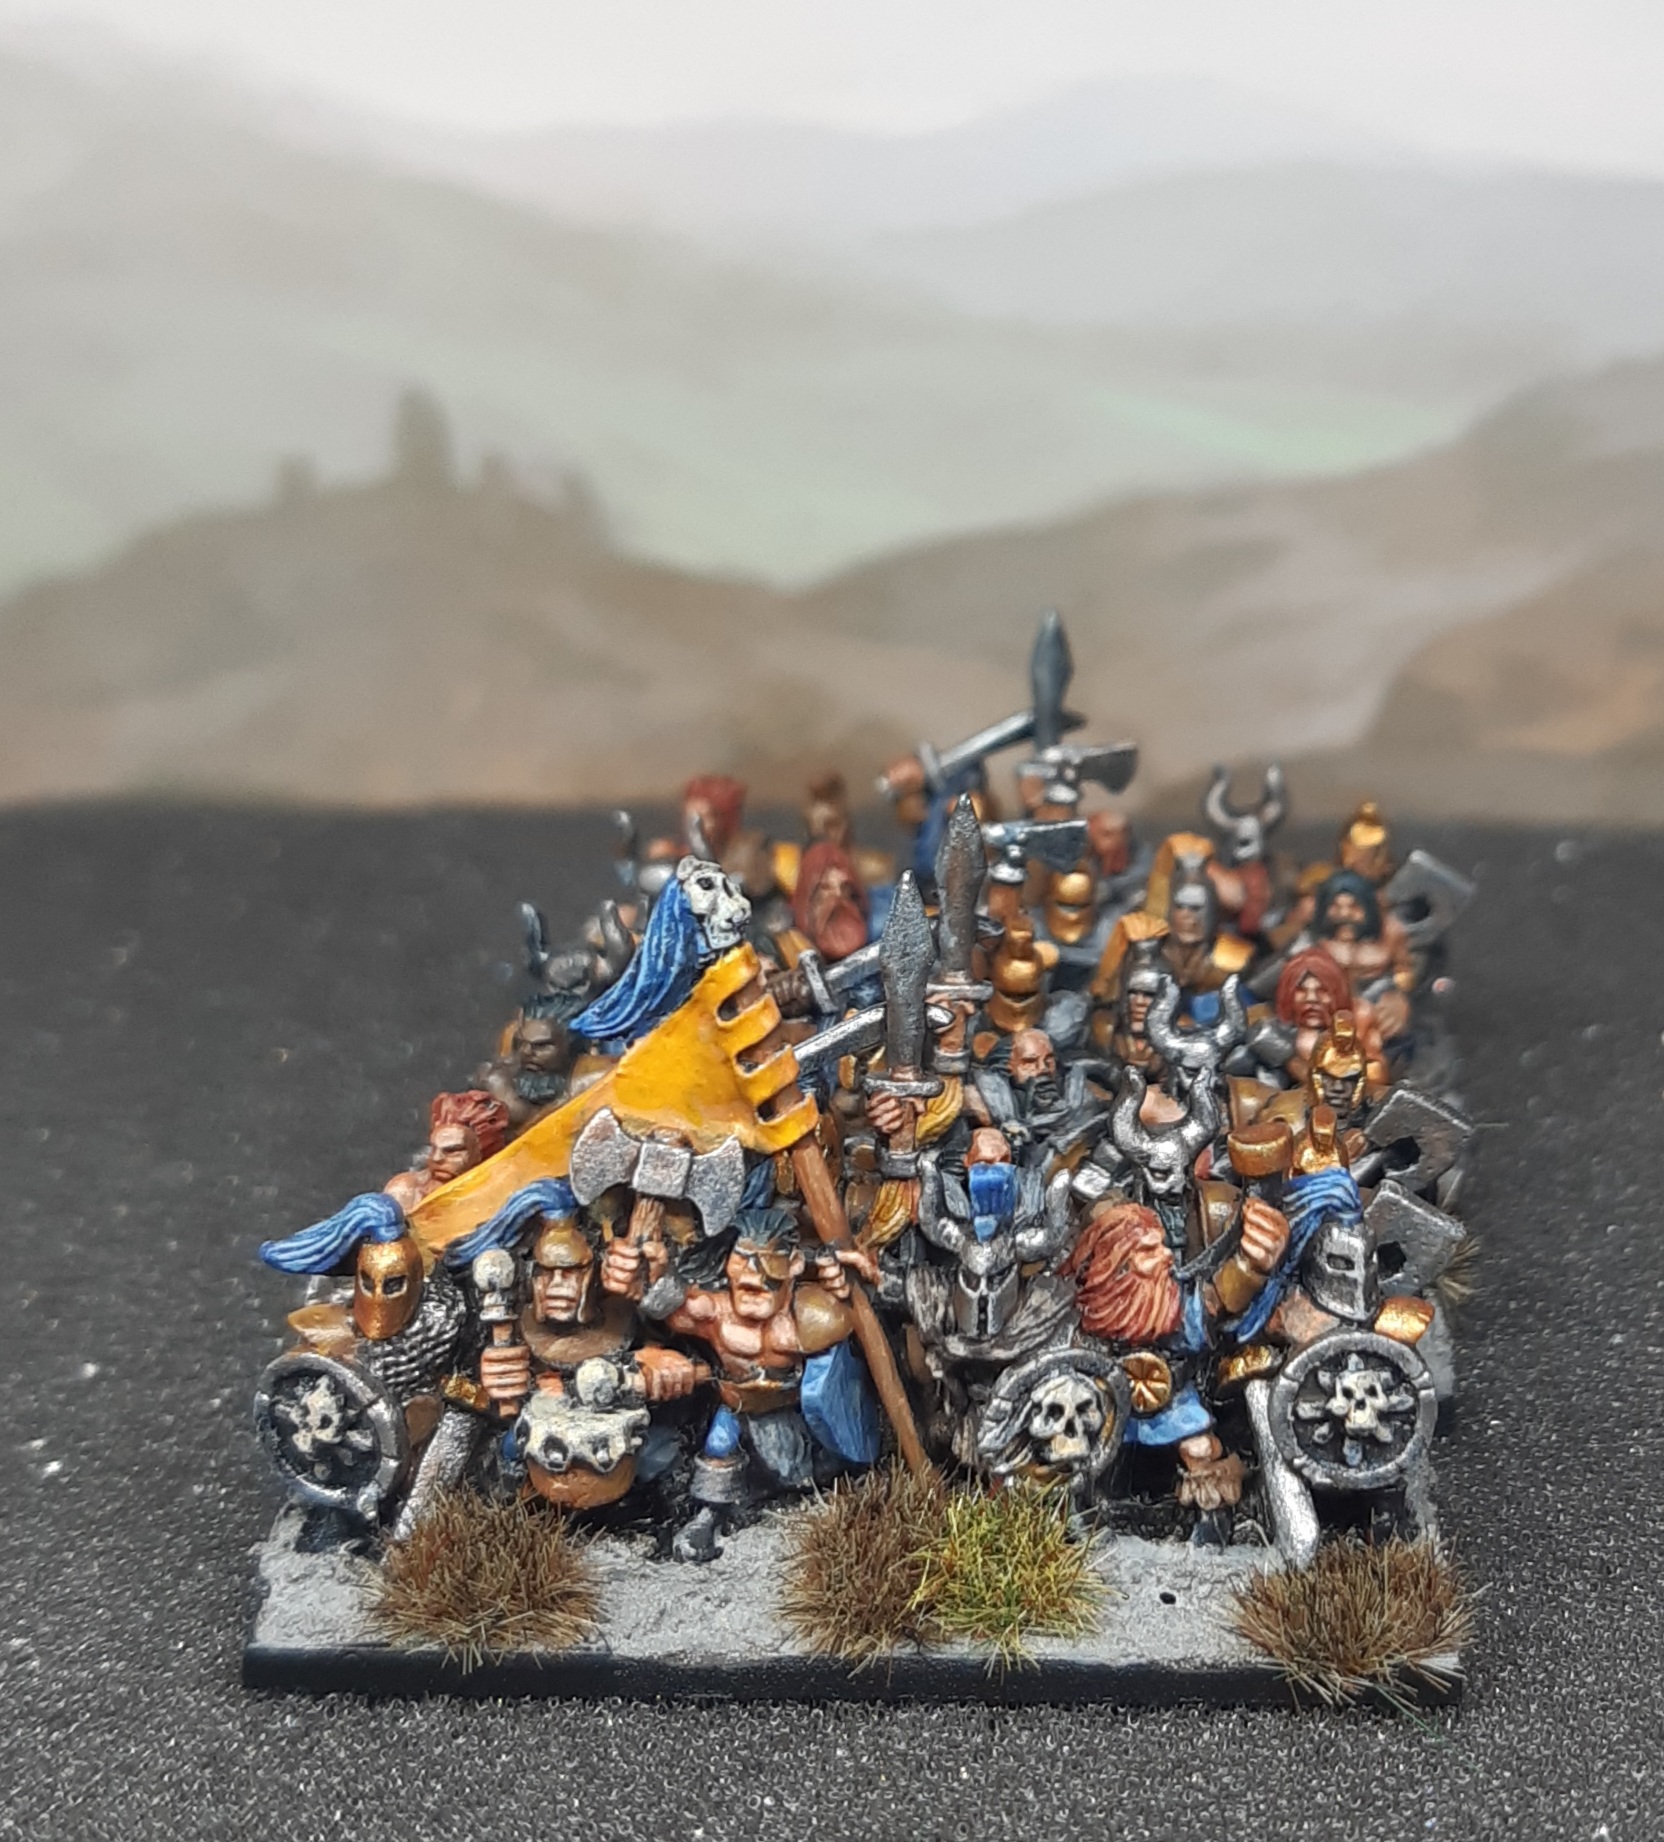
Finishing the basing completes the test unit, and I’m pretty happy at how they look – time to get started on the rest of the models.
More Marauders
The second unit of Marauders quickly followed the first, not really that surprising since it’s almost a repeat job bar the odd different strip. The basic colours are the same, but with varied placement compared to the first unit. I should be able to mix stands between units without any jarring visual differences.
 The army starts to grow.
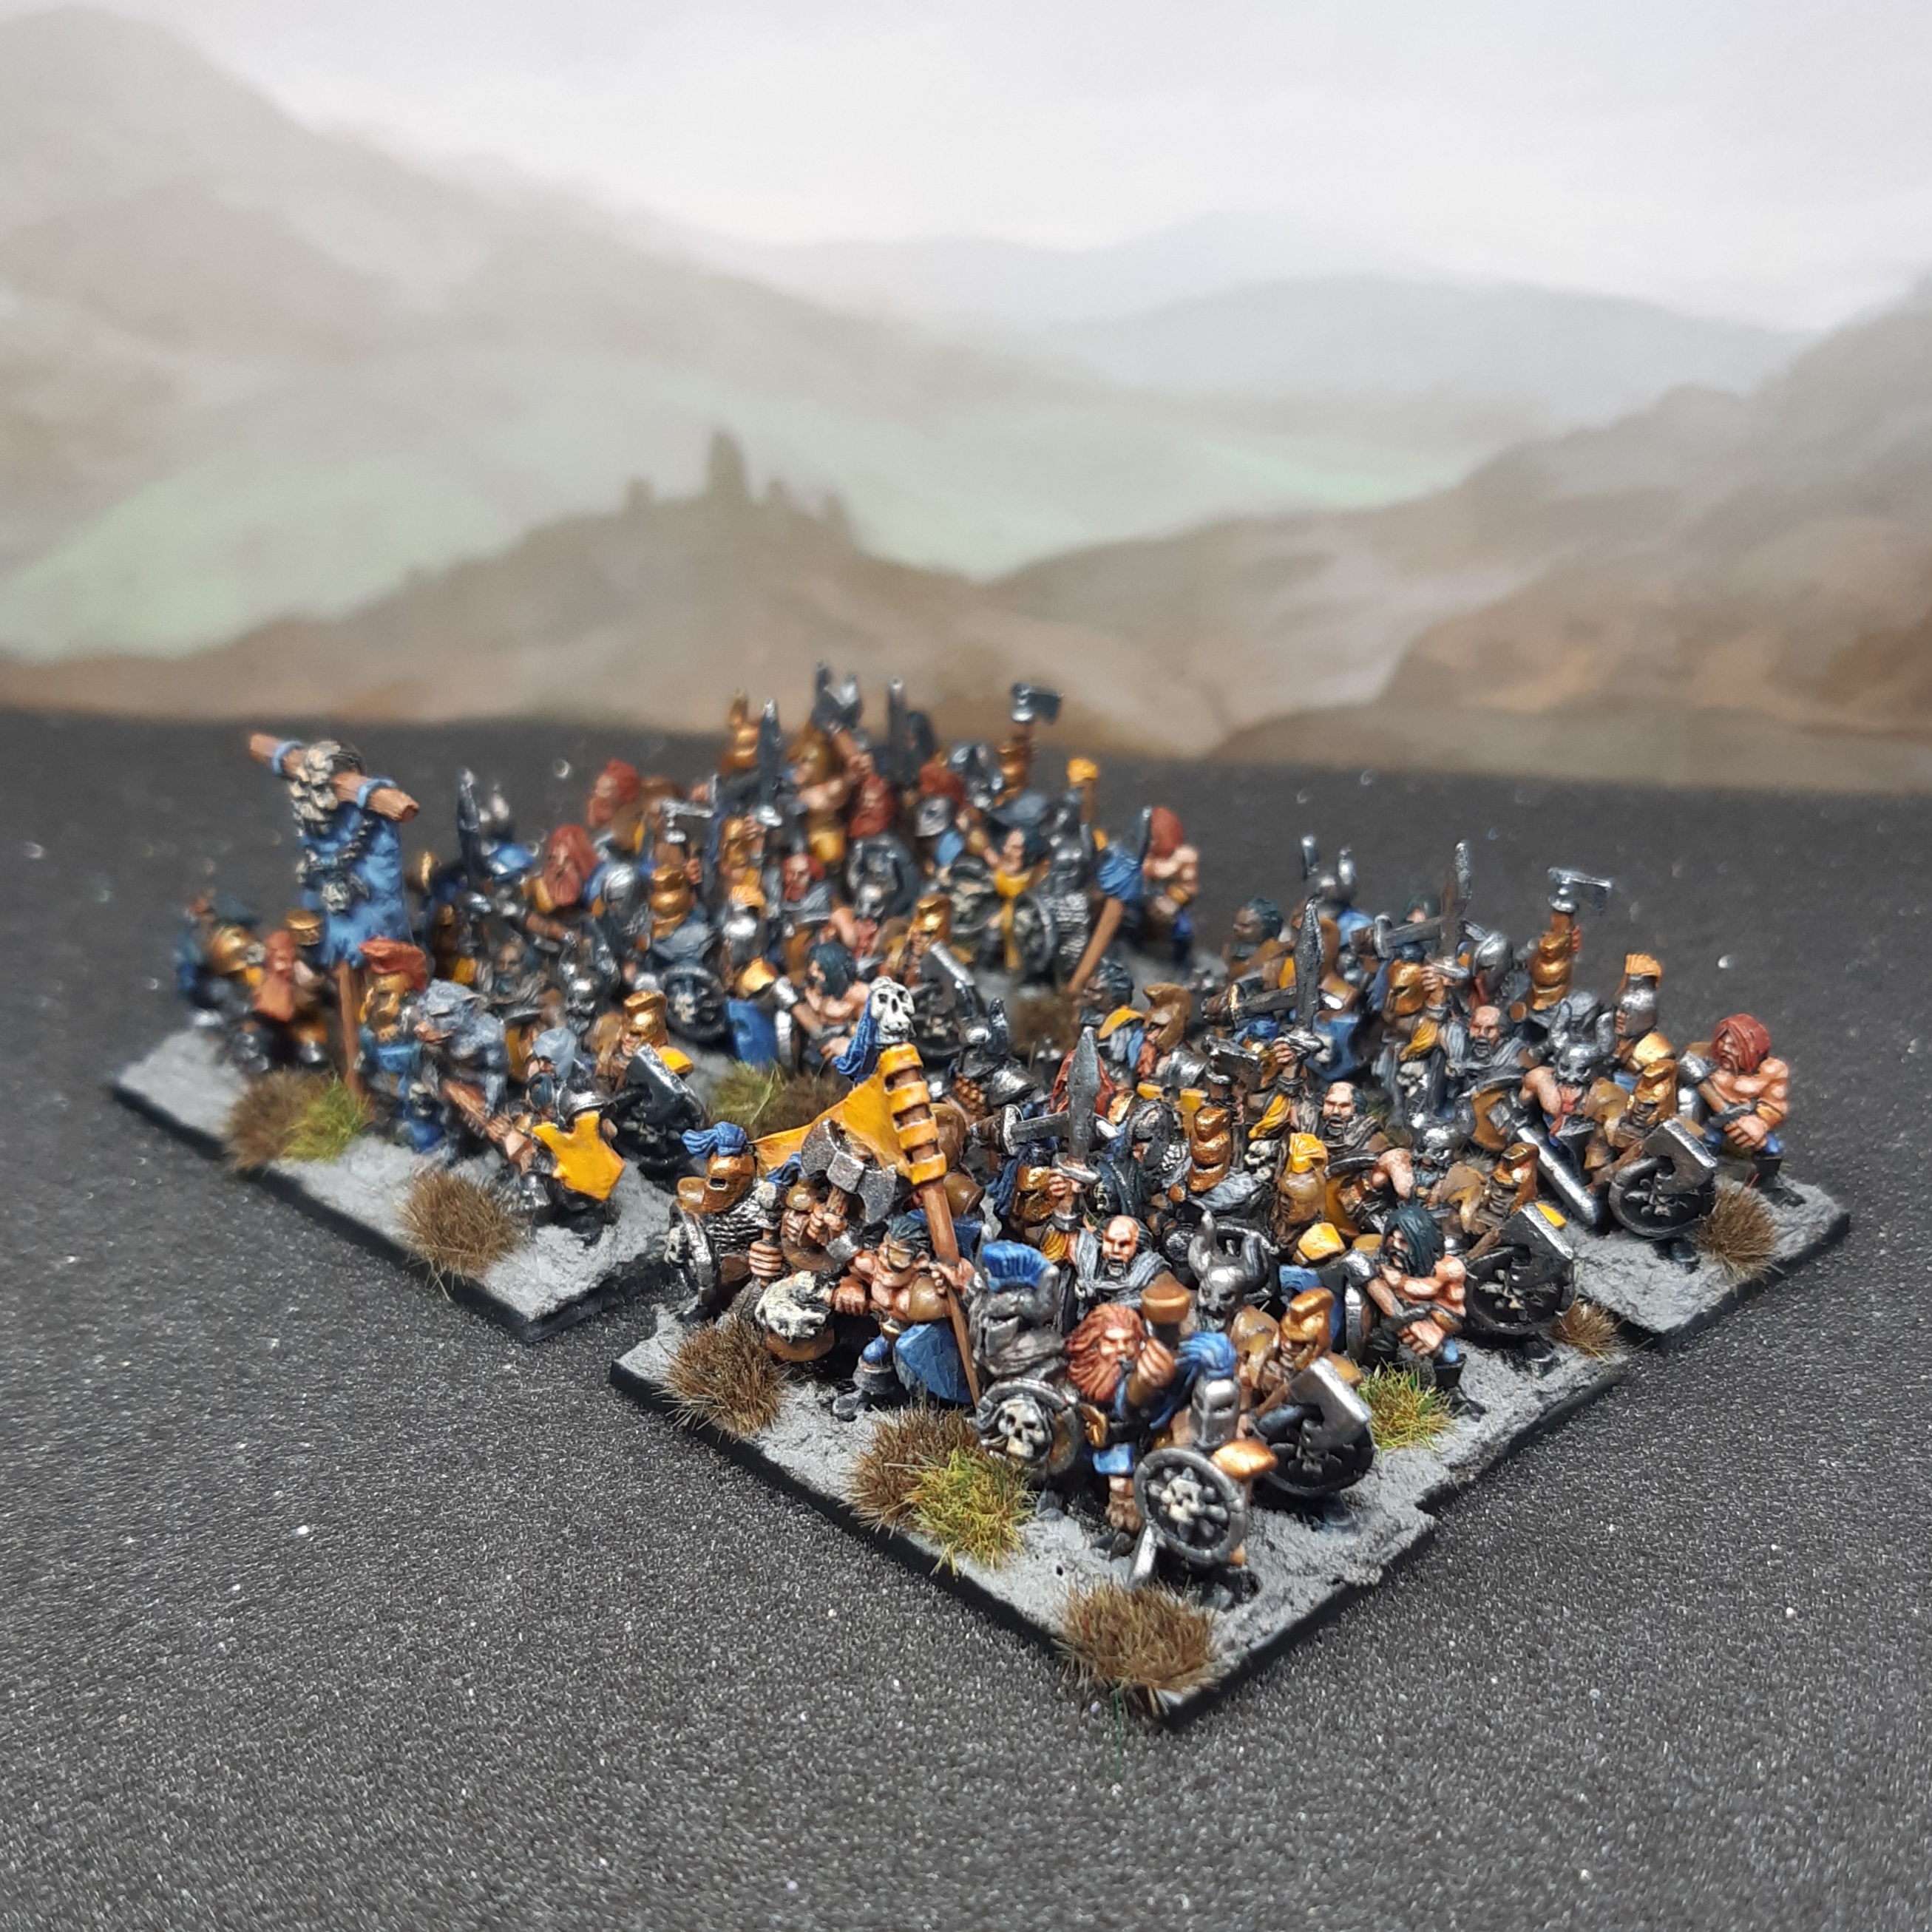
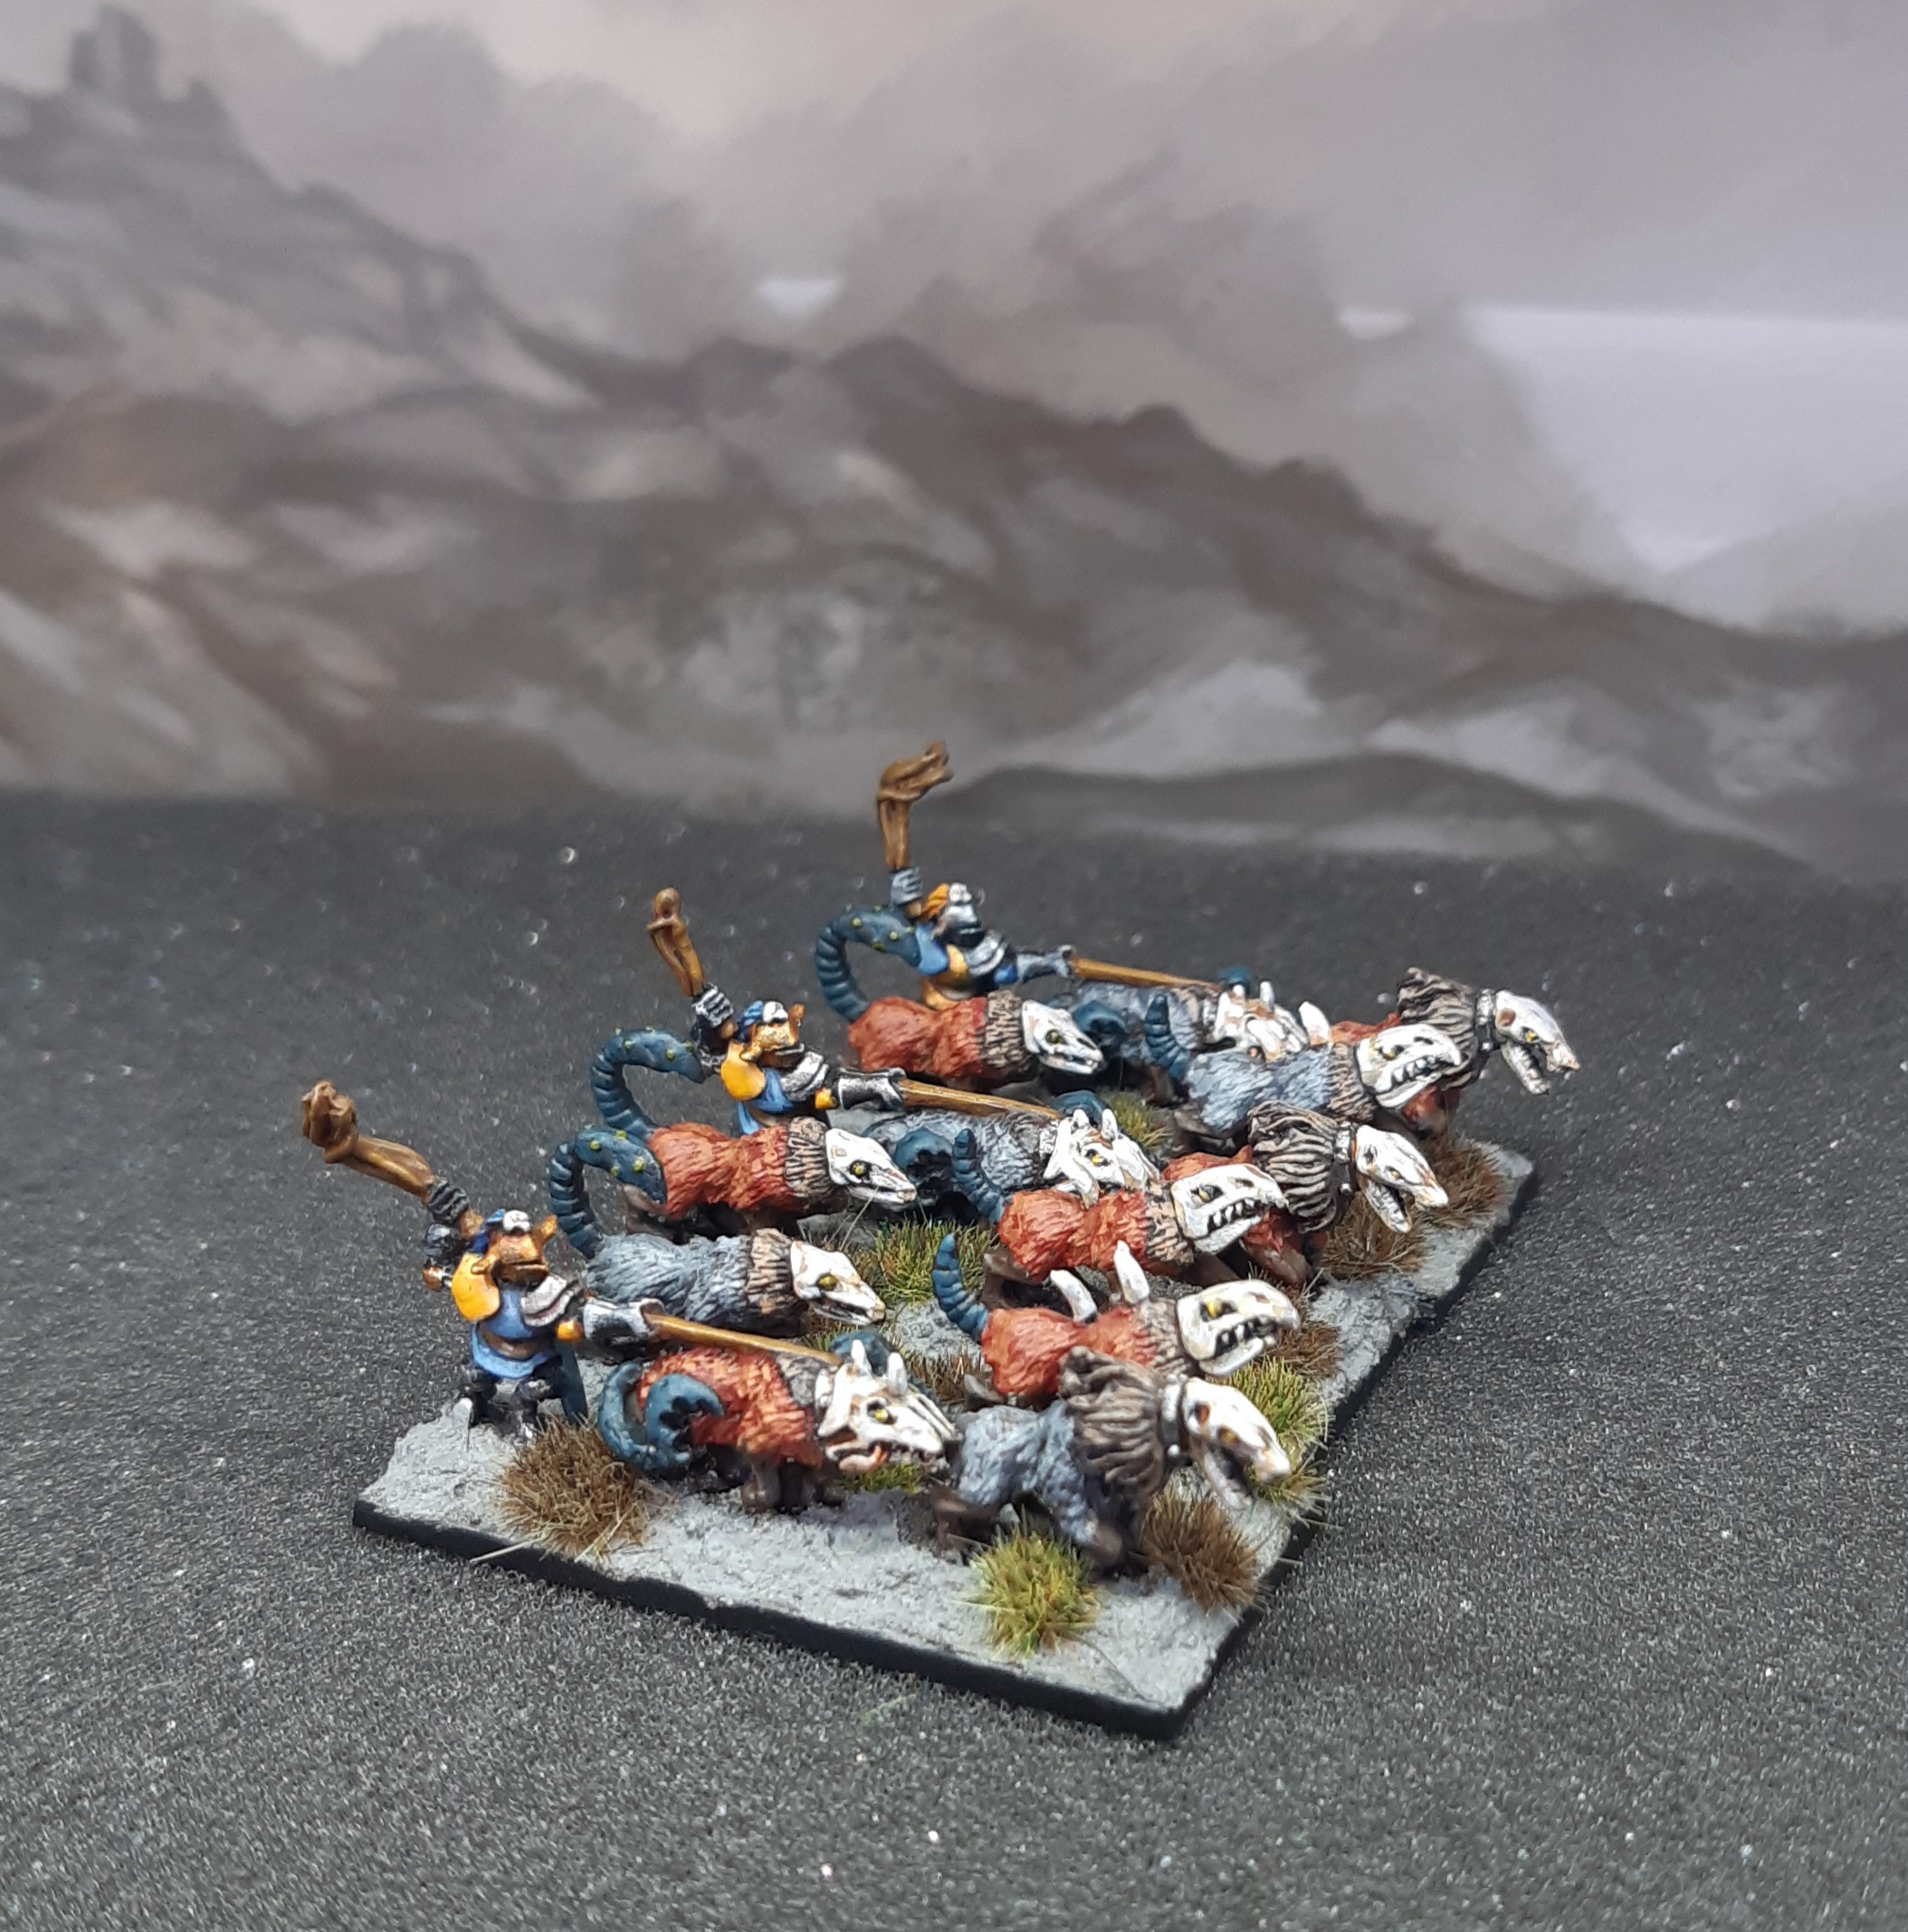
Chaos Hounds
Next finished unit is some Chaos Hounds. Not much to write here, as I used exactly the same paints as for the marauders, with dark brown fur for their manes, grey fur and the paints used for red hair for their bodies.
These were nice and quick to work on, exactly what was required to get this project going again after a few days away for Easter. When working on a project, I quite like to identify what might be the easier/harder things to complete, and tackle them according to whatever else I have going on. After a bit of a pause, a quick kill like these Hounds helps pick up the overall project momentum again.
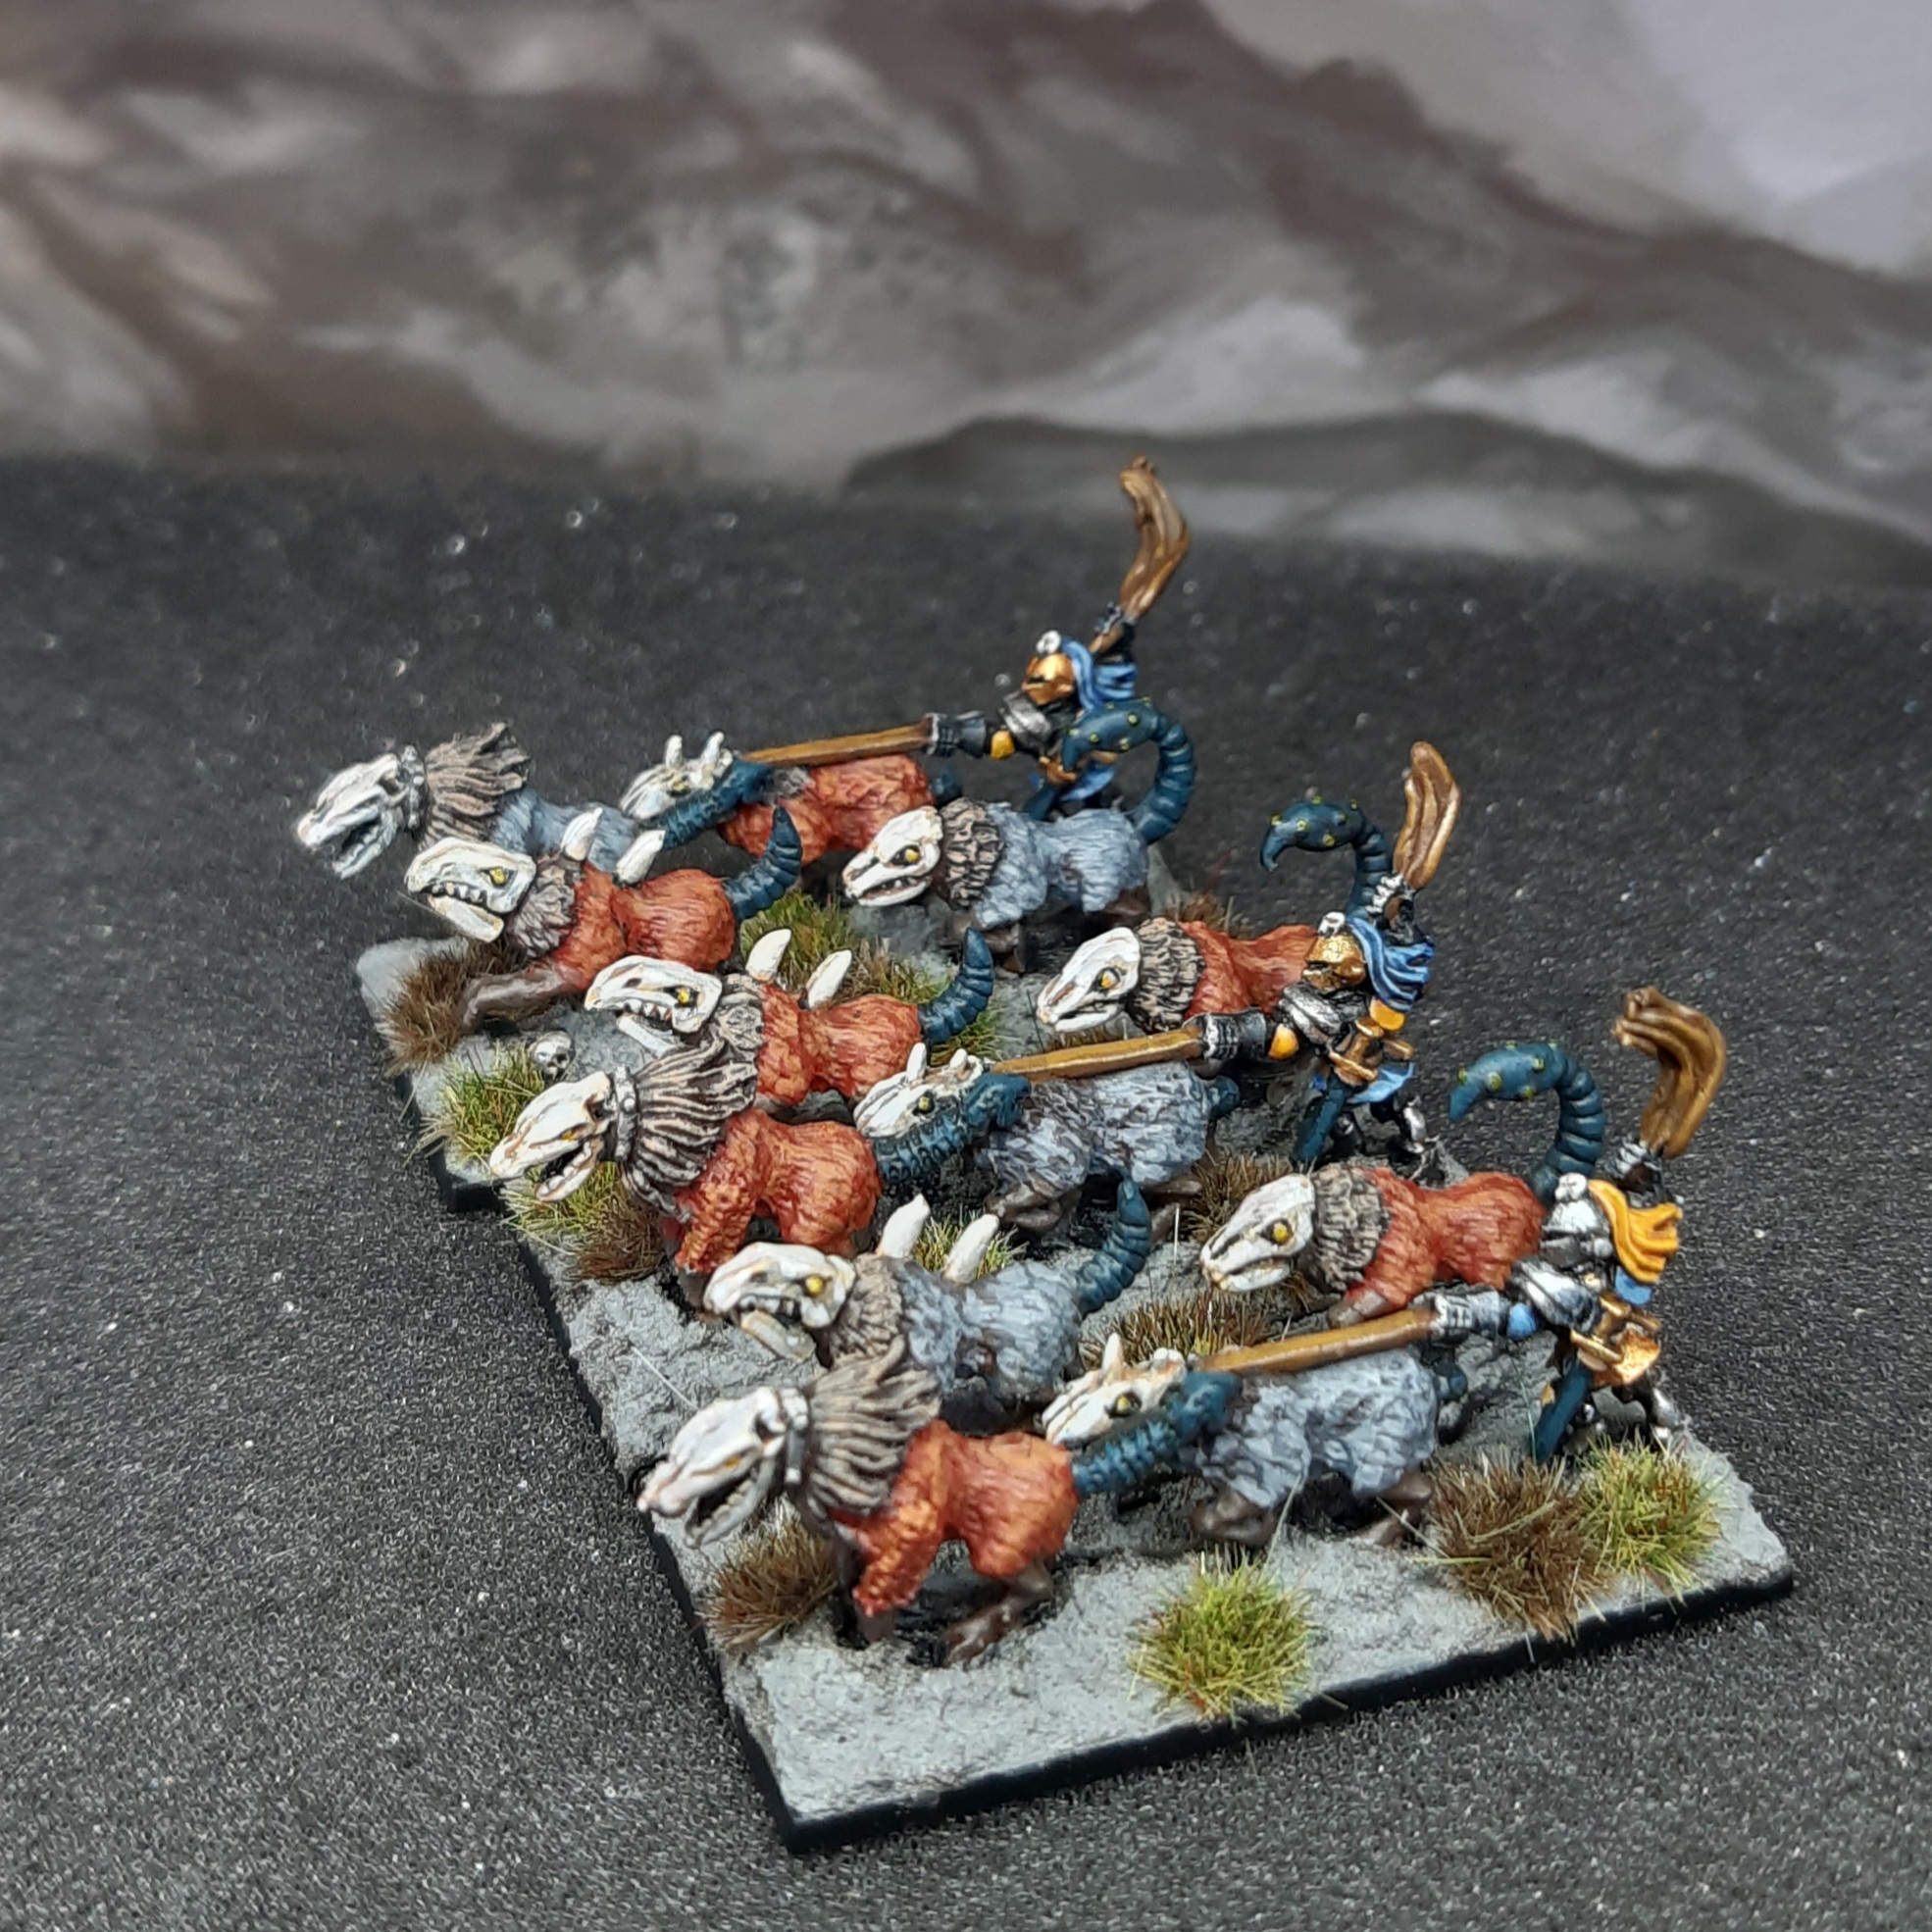
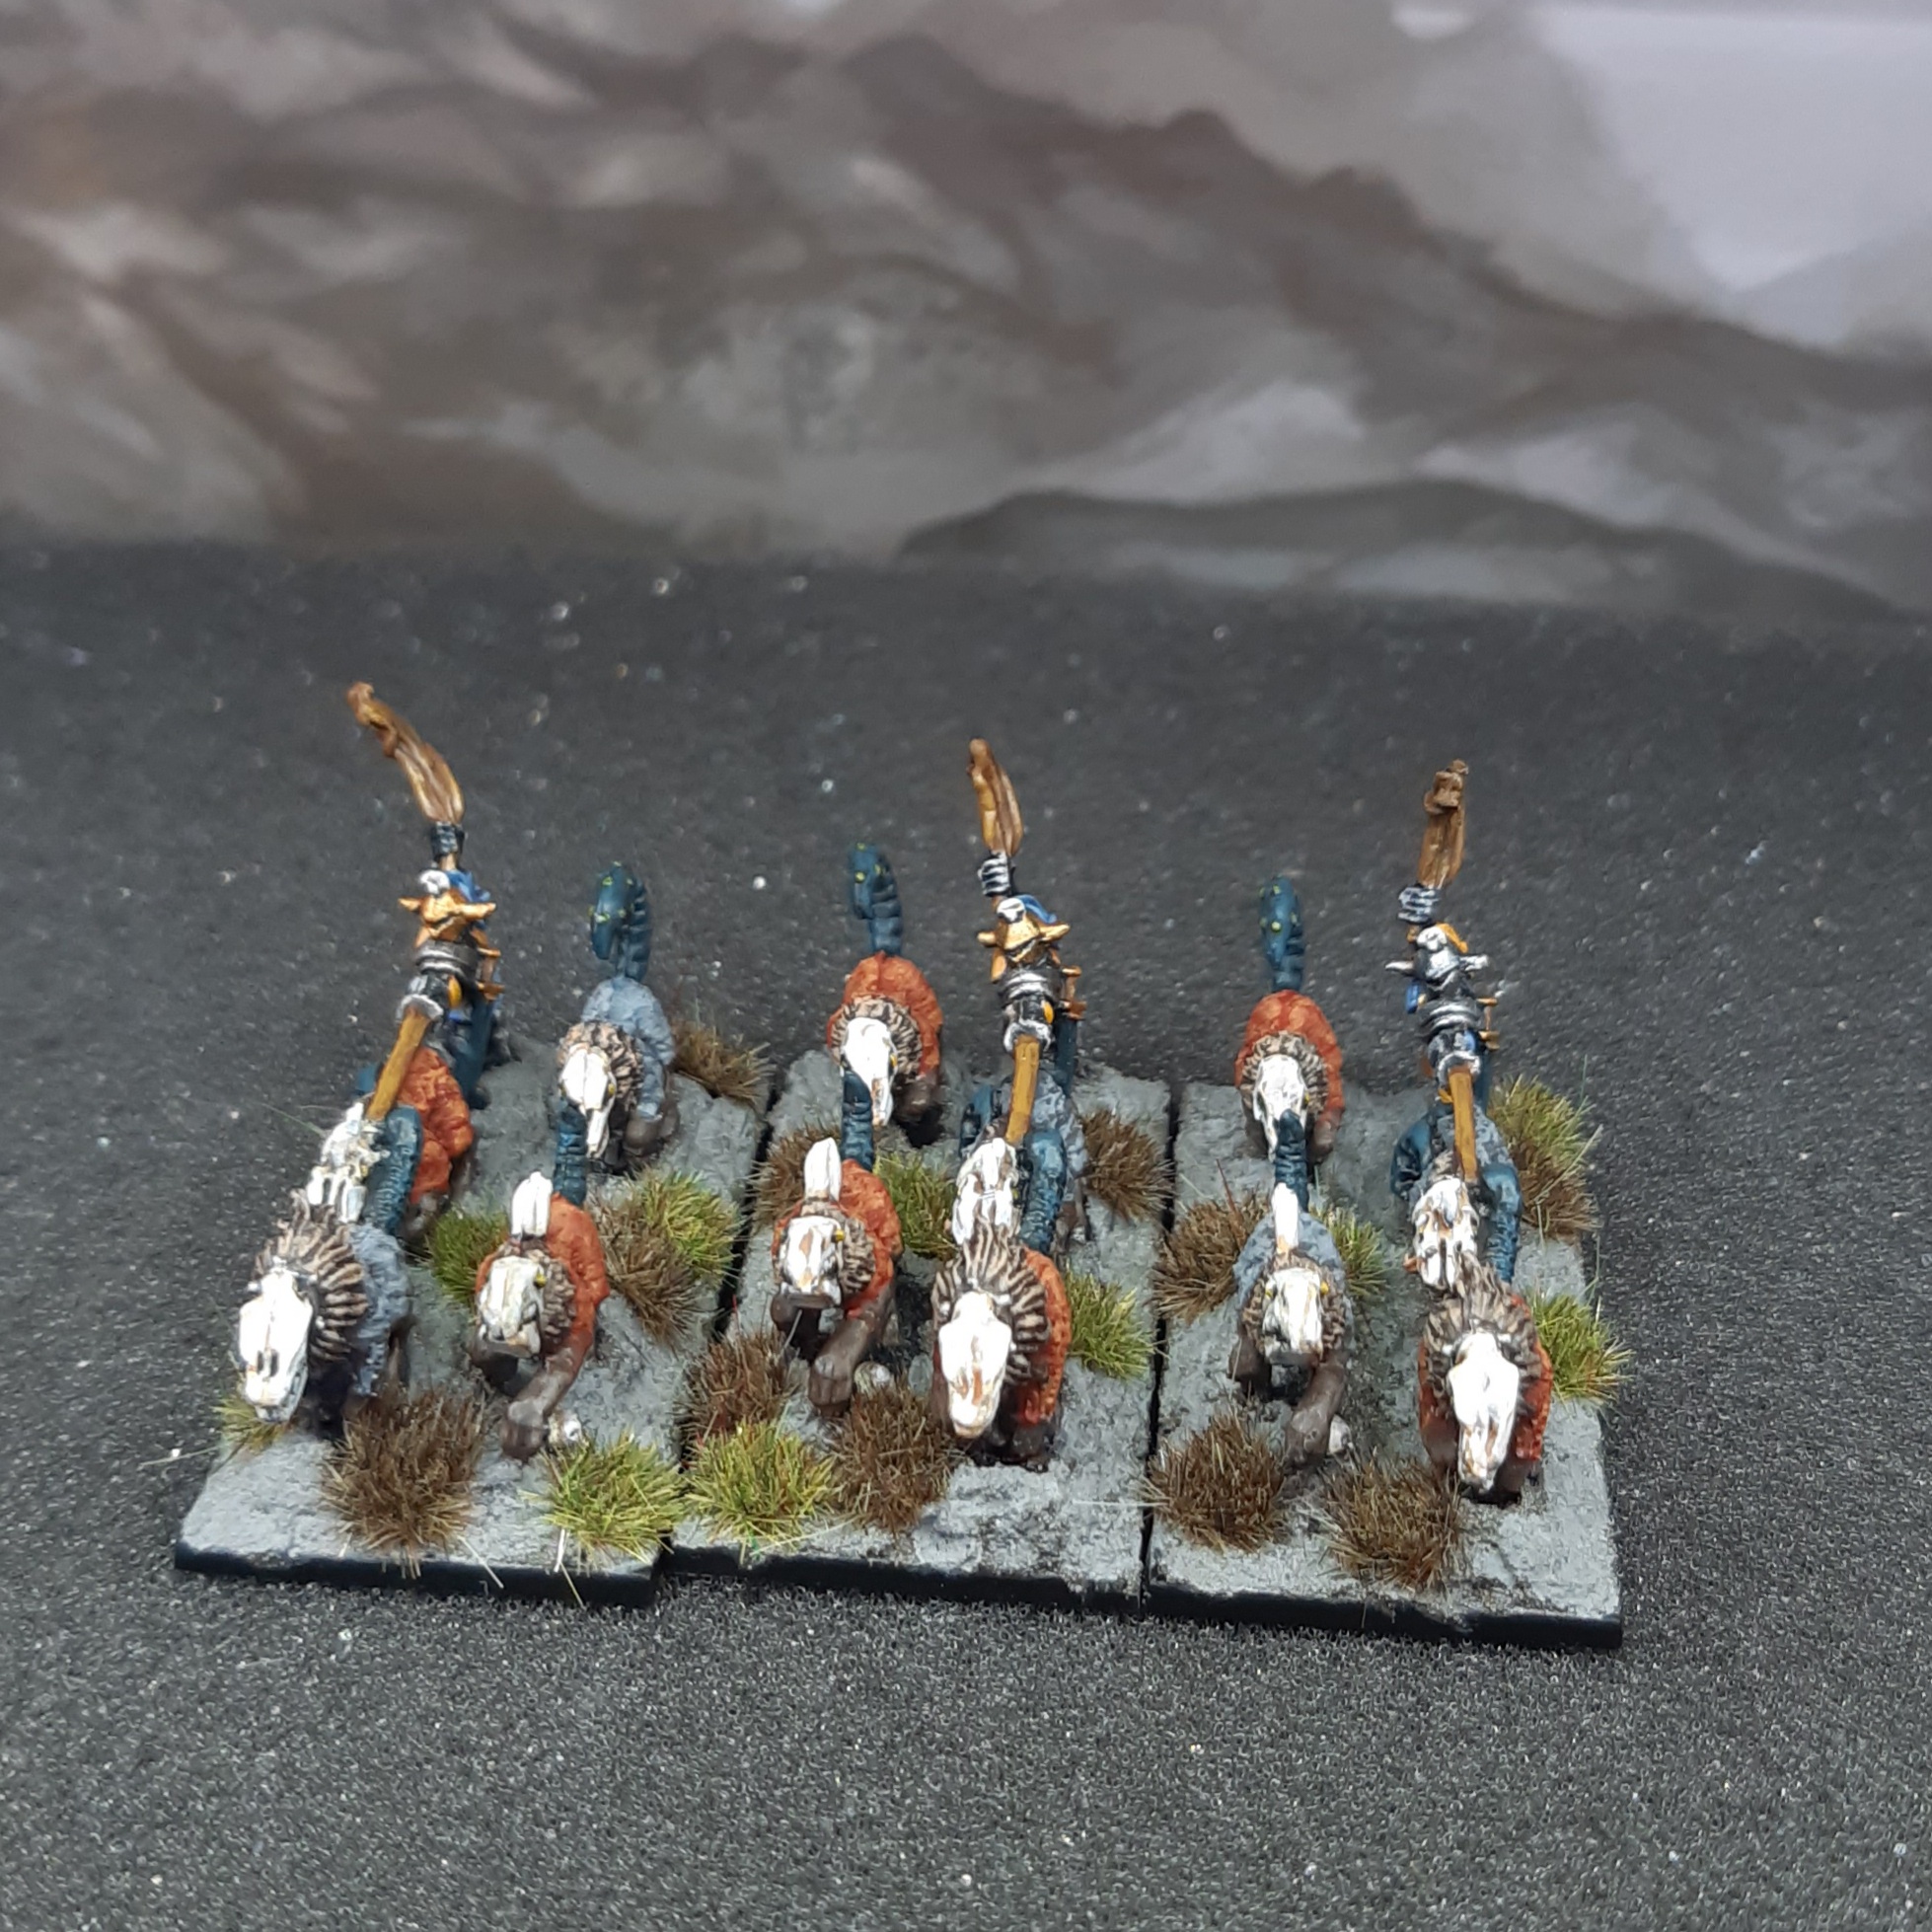
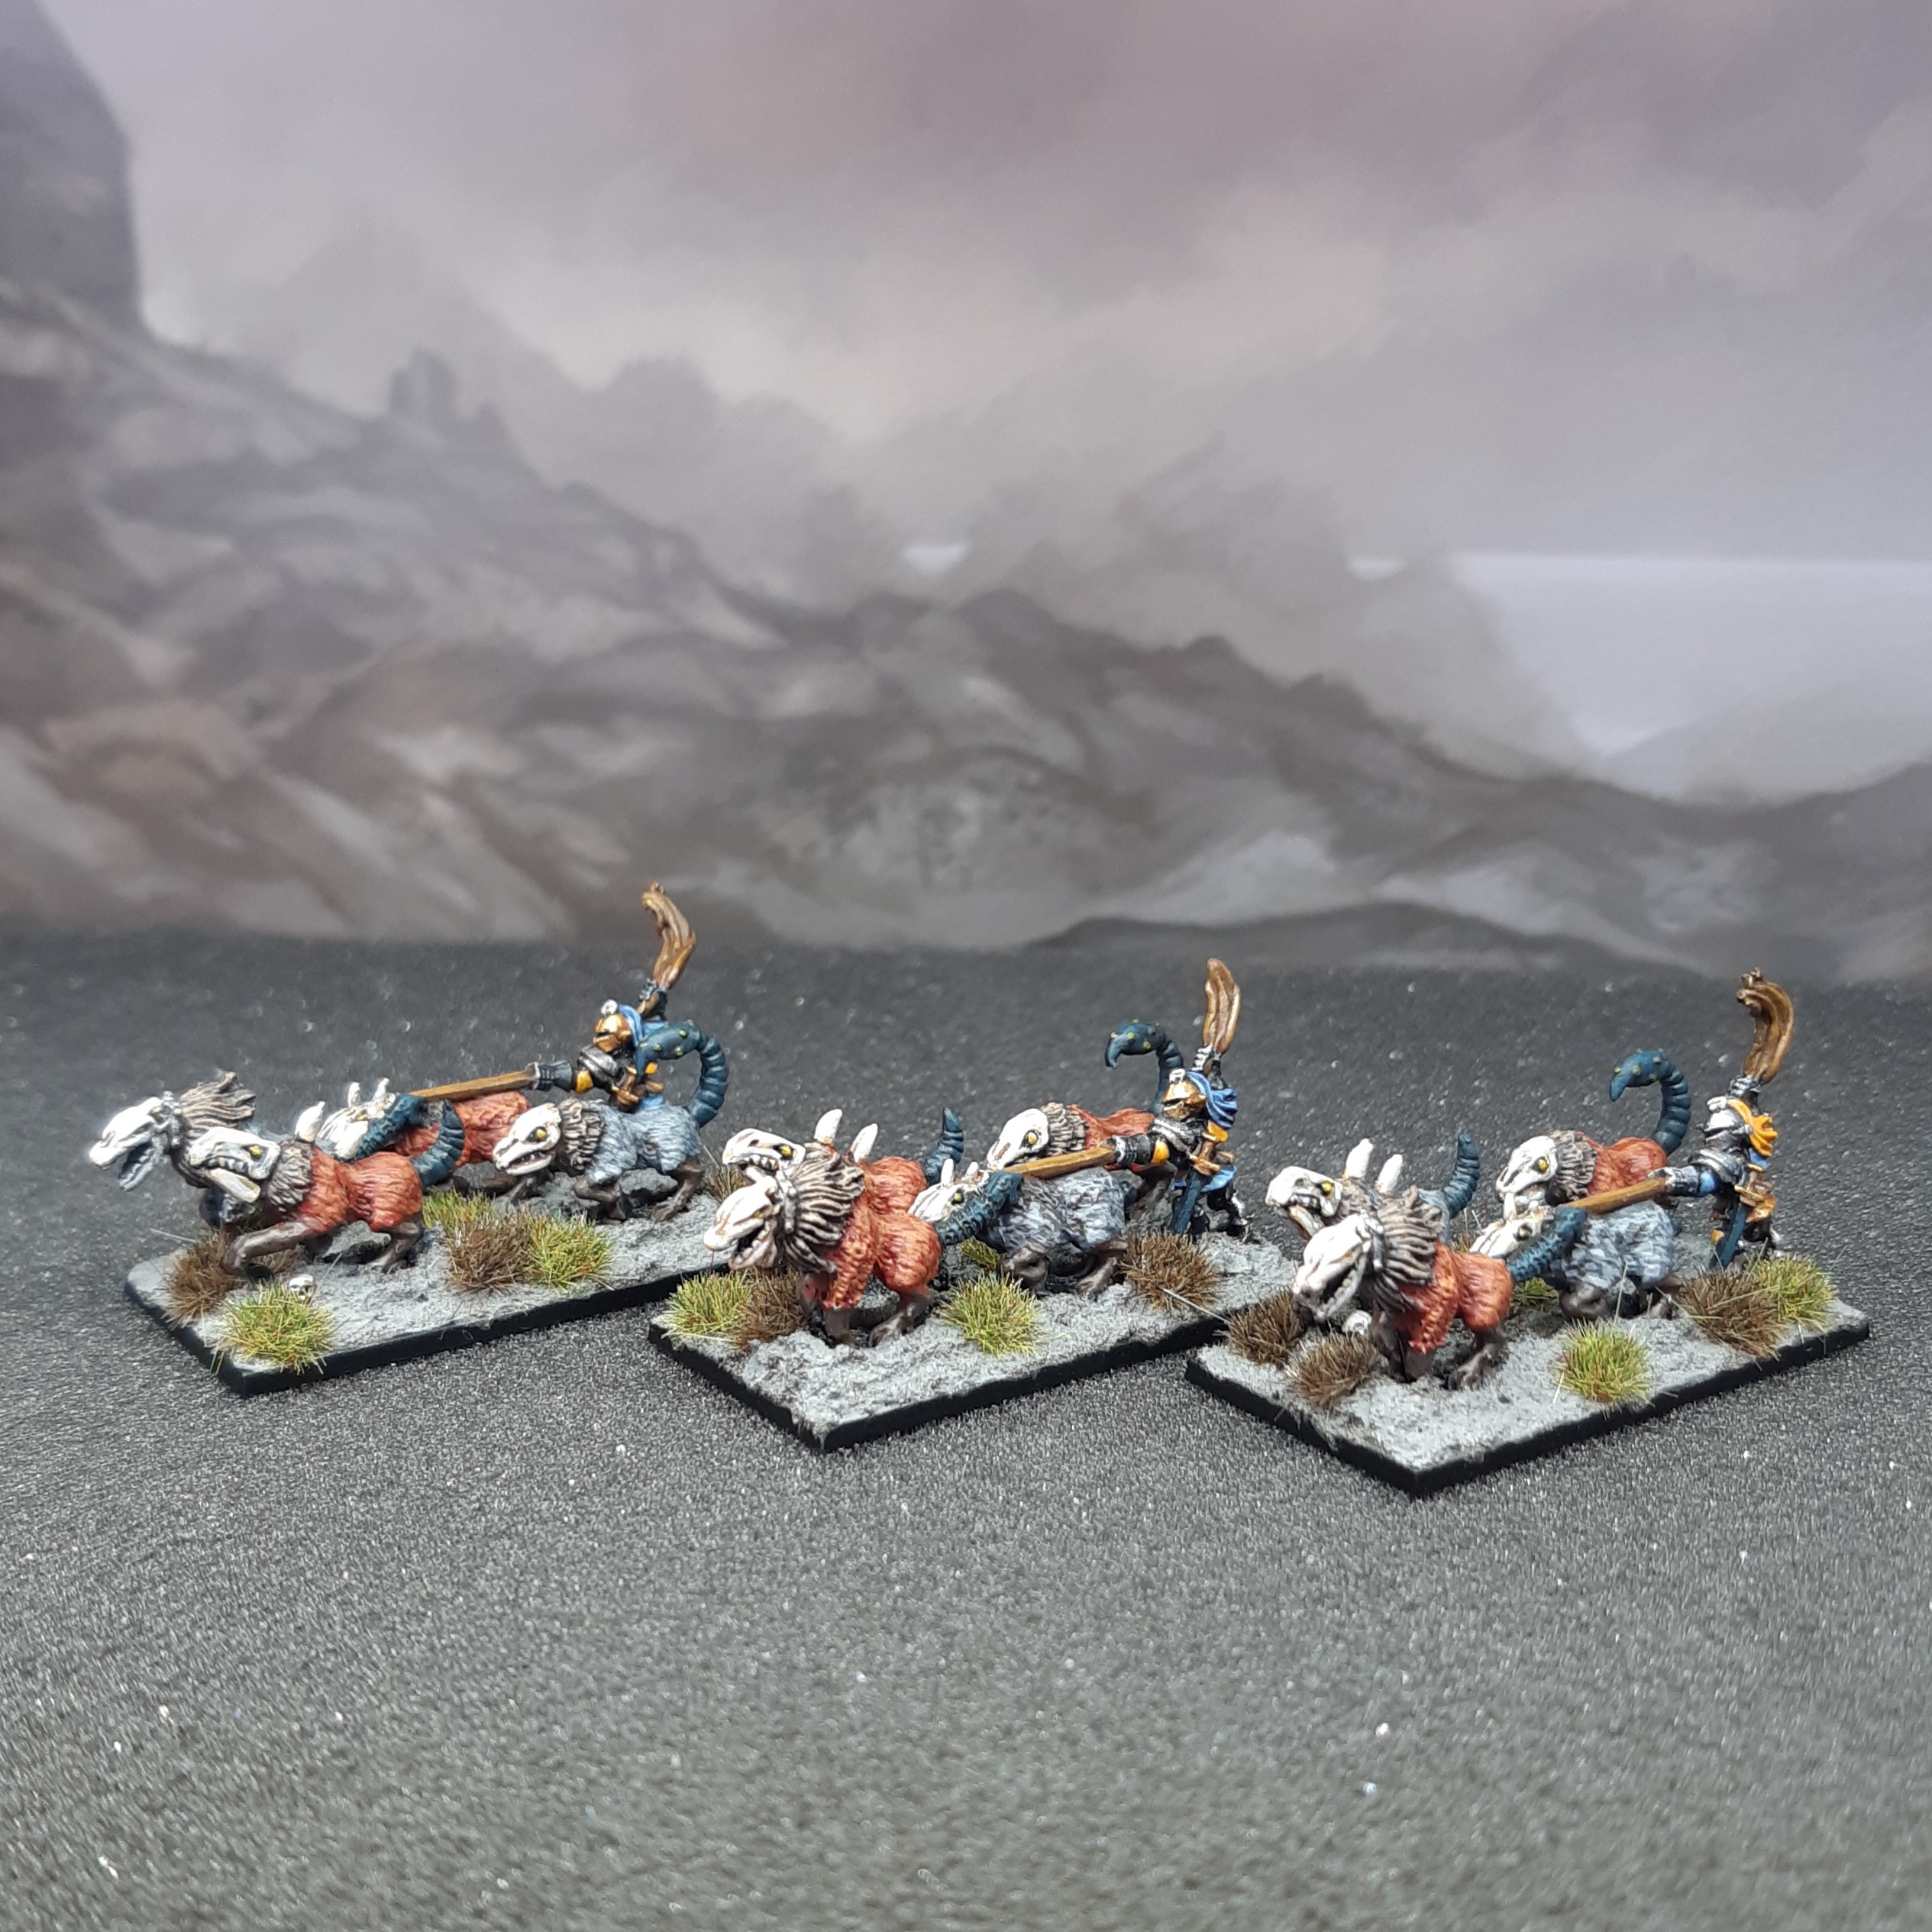
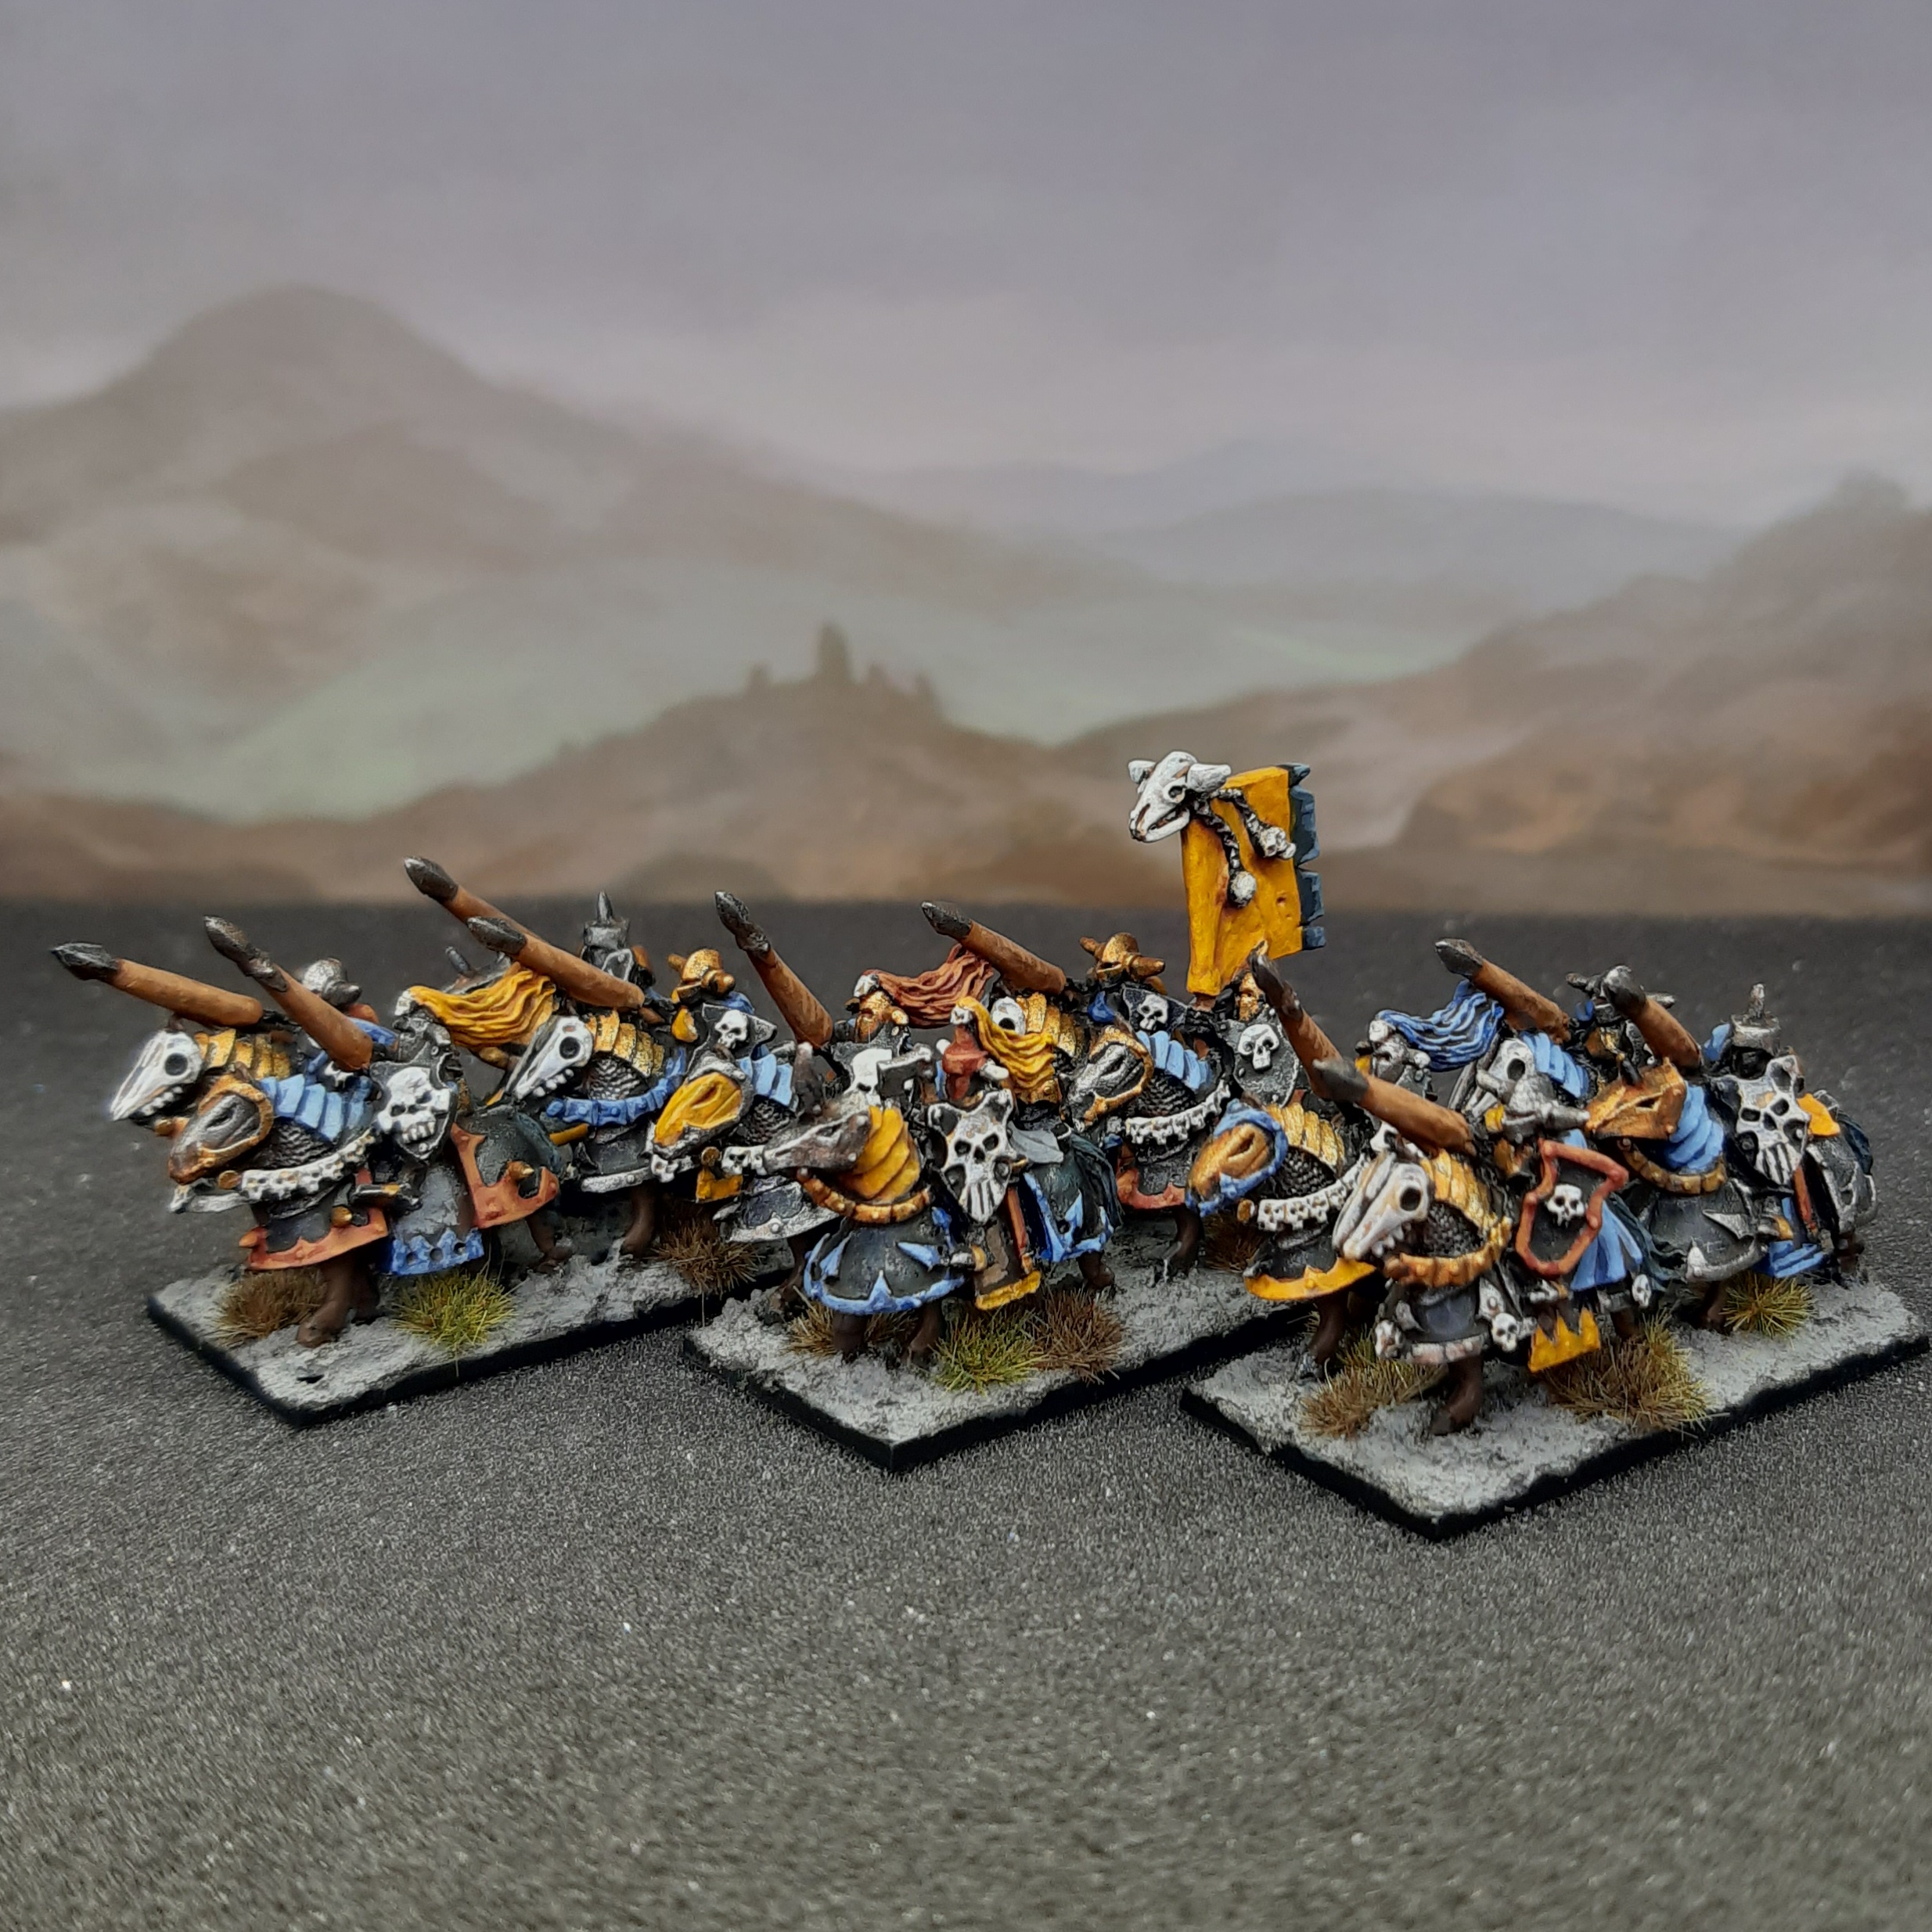
Marauder Horsemen
I wrapped up these Marauder Horsemen whilst enjoying the Salute 51 coverage. The riders followed the same paint scheme as the Marauders on foot.
For the horses, I base coated the flesh in Vallejo Model Colour (VMC) Cholocate Brown, and the mane/tail/feathers in VMC Dark Sea Blue. The horses were then washed with Vallejo Umber wash. Flesh was highlighted with a 1:1 mix VMC Chocolate Brown : Vallejo Game Colour Beasty Brown. I added a small dot of white to lighten VMC Dark Sea Blue to highlight the horse mane/tails/feathers.
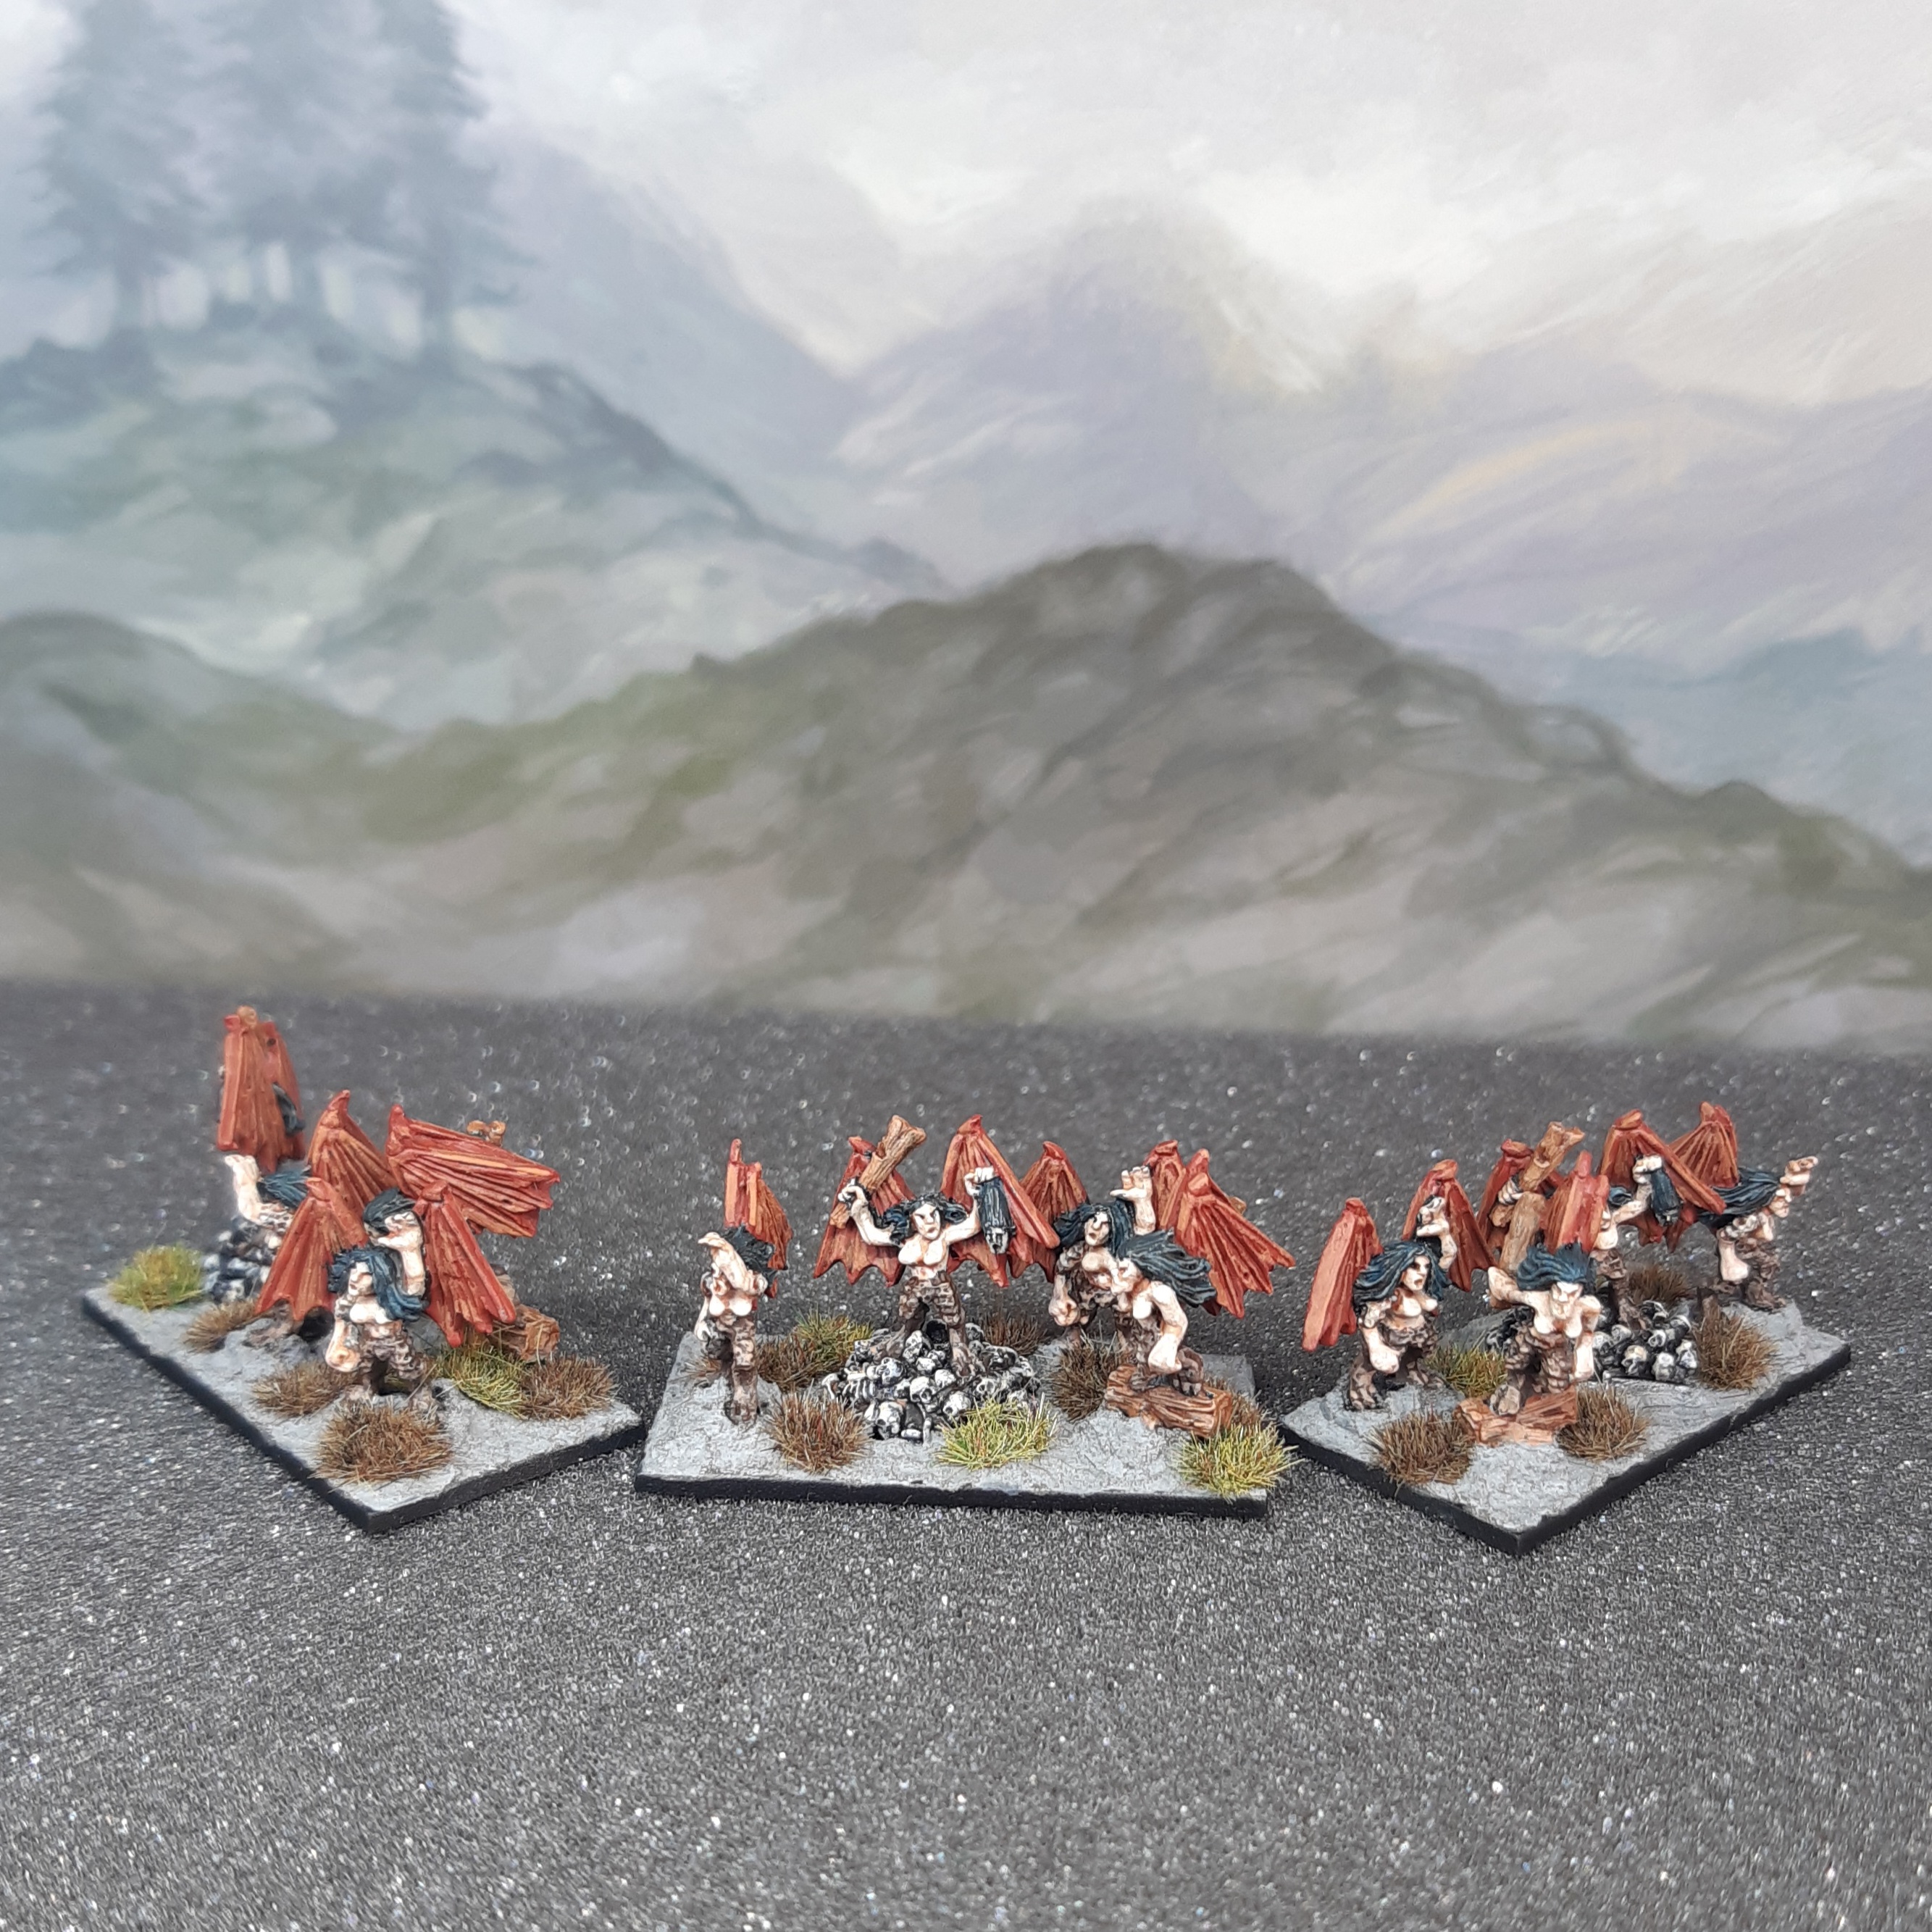
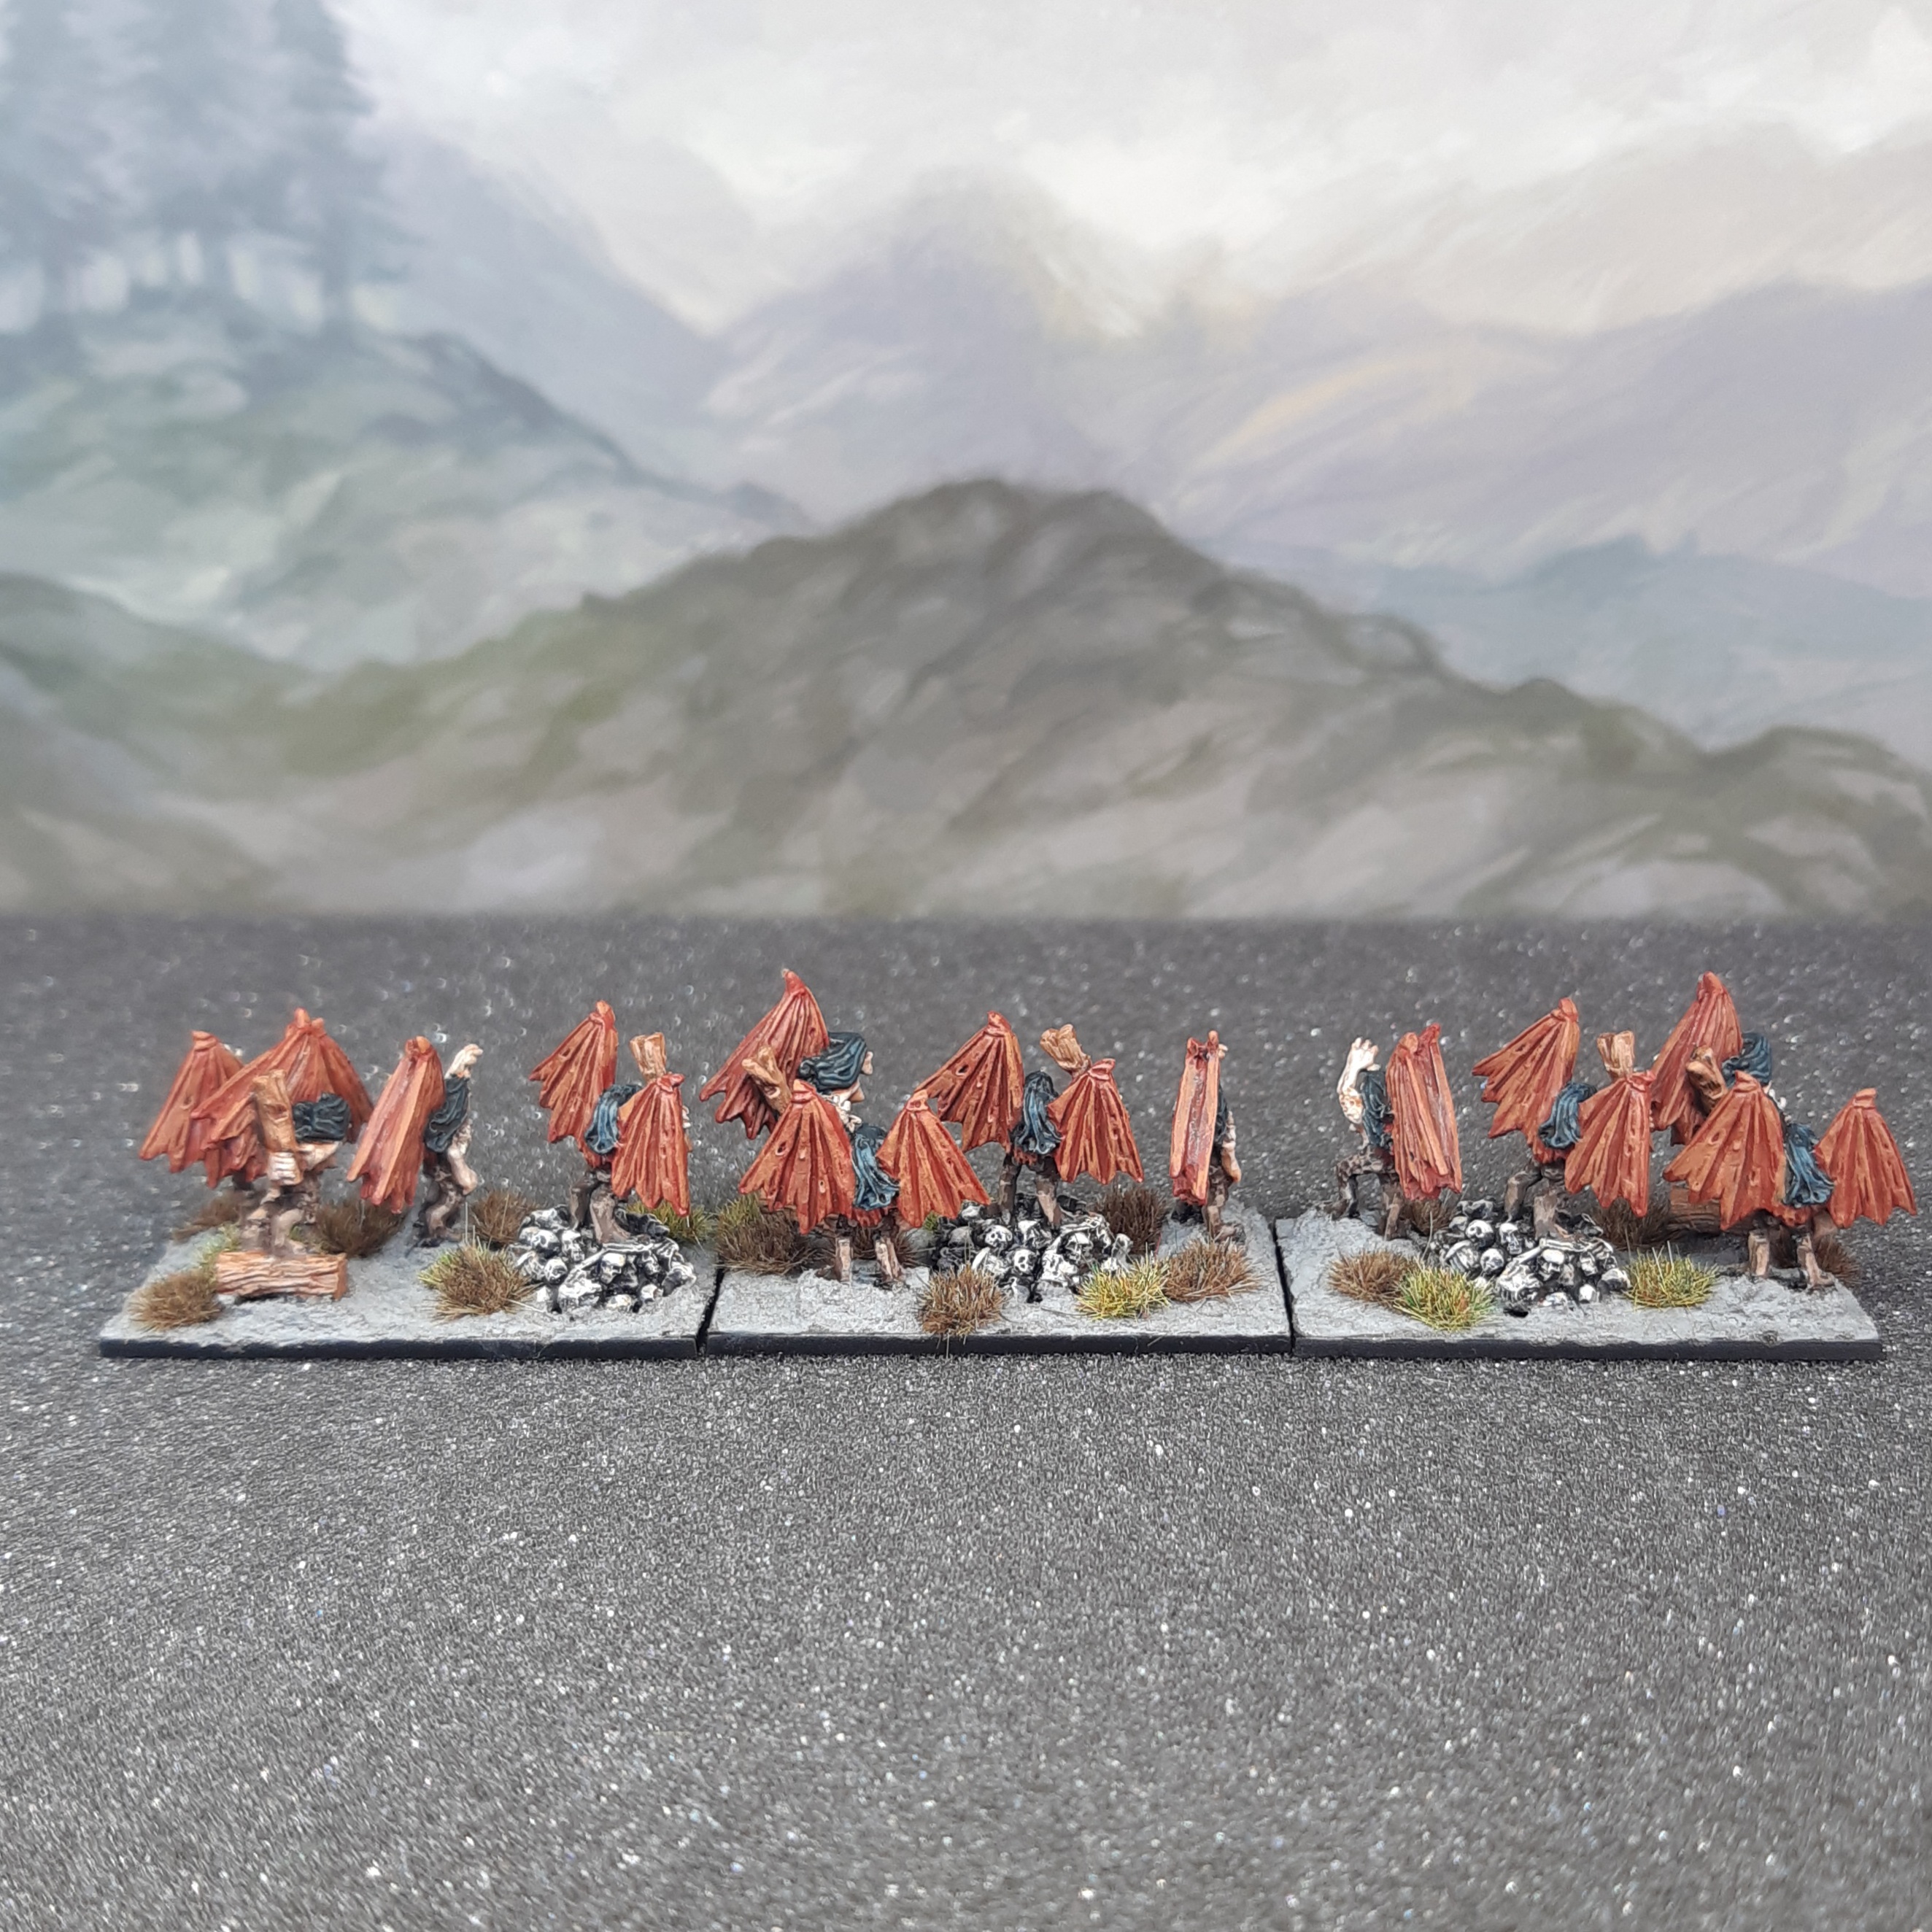
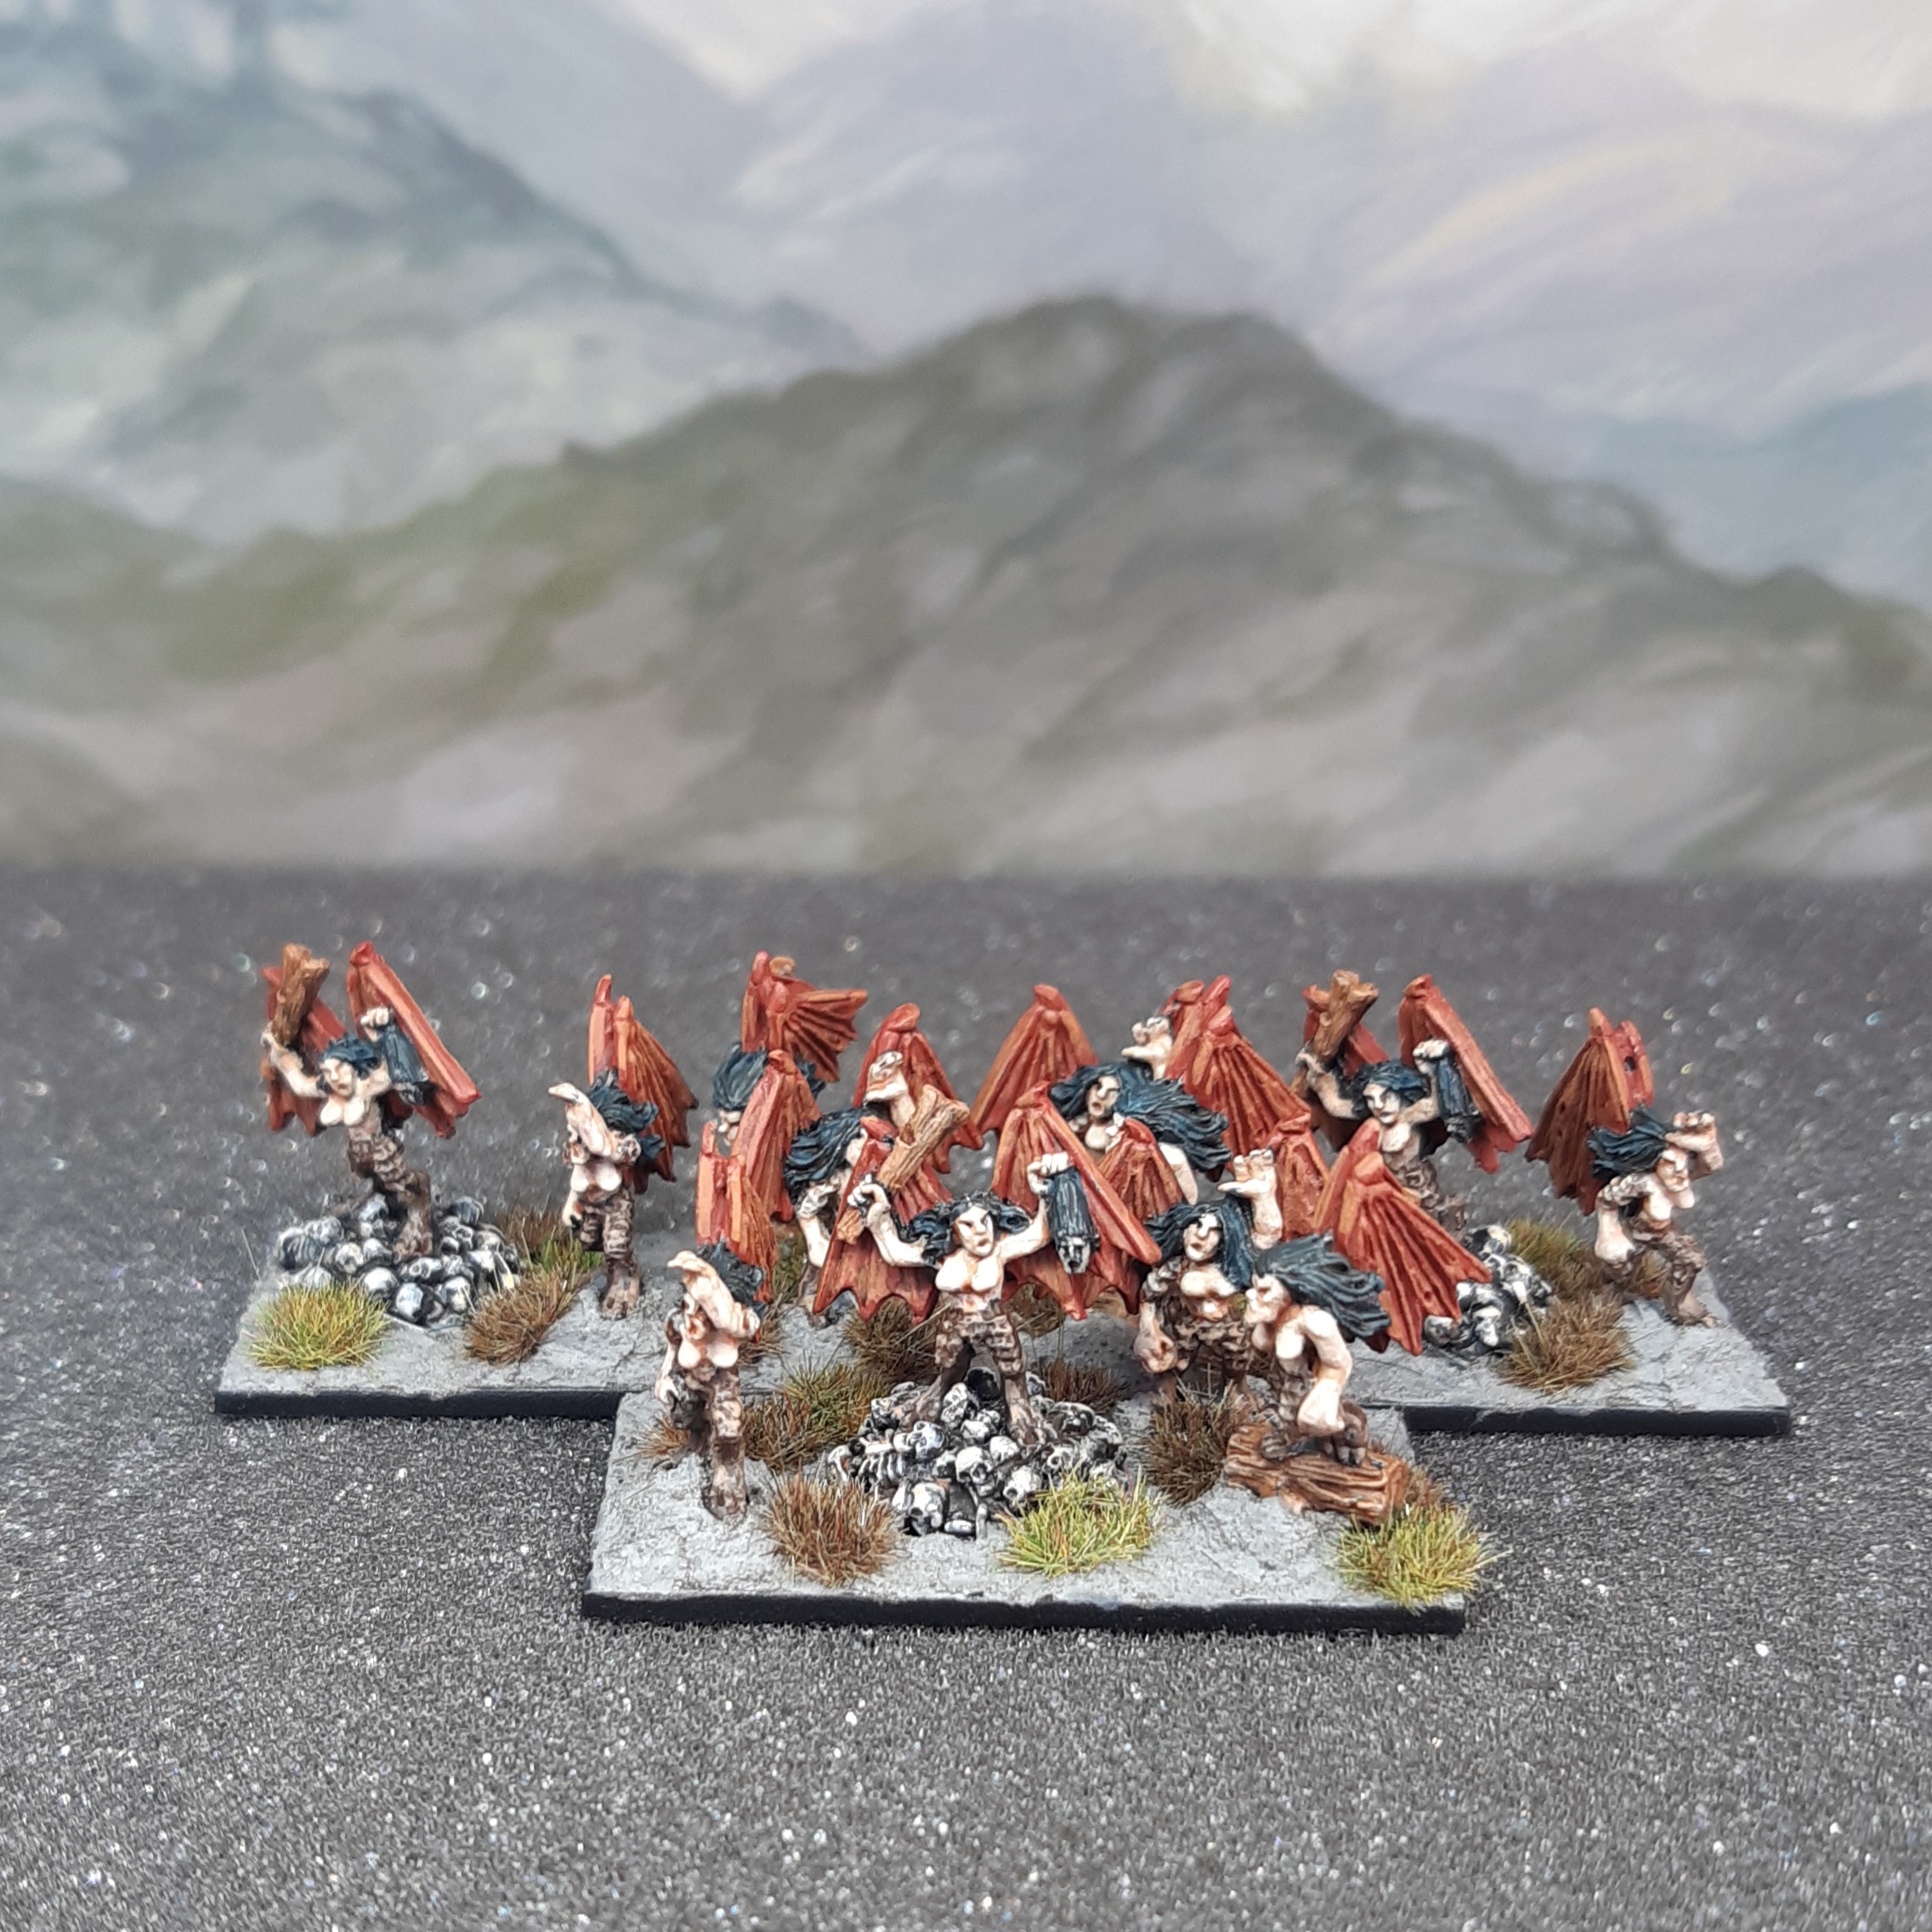
Harpies
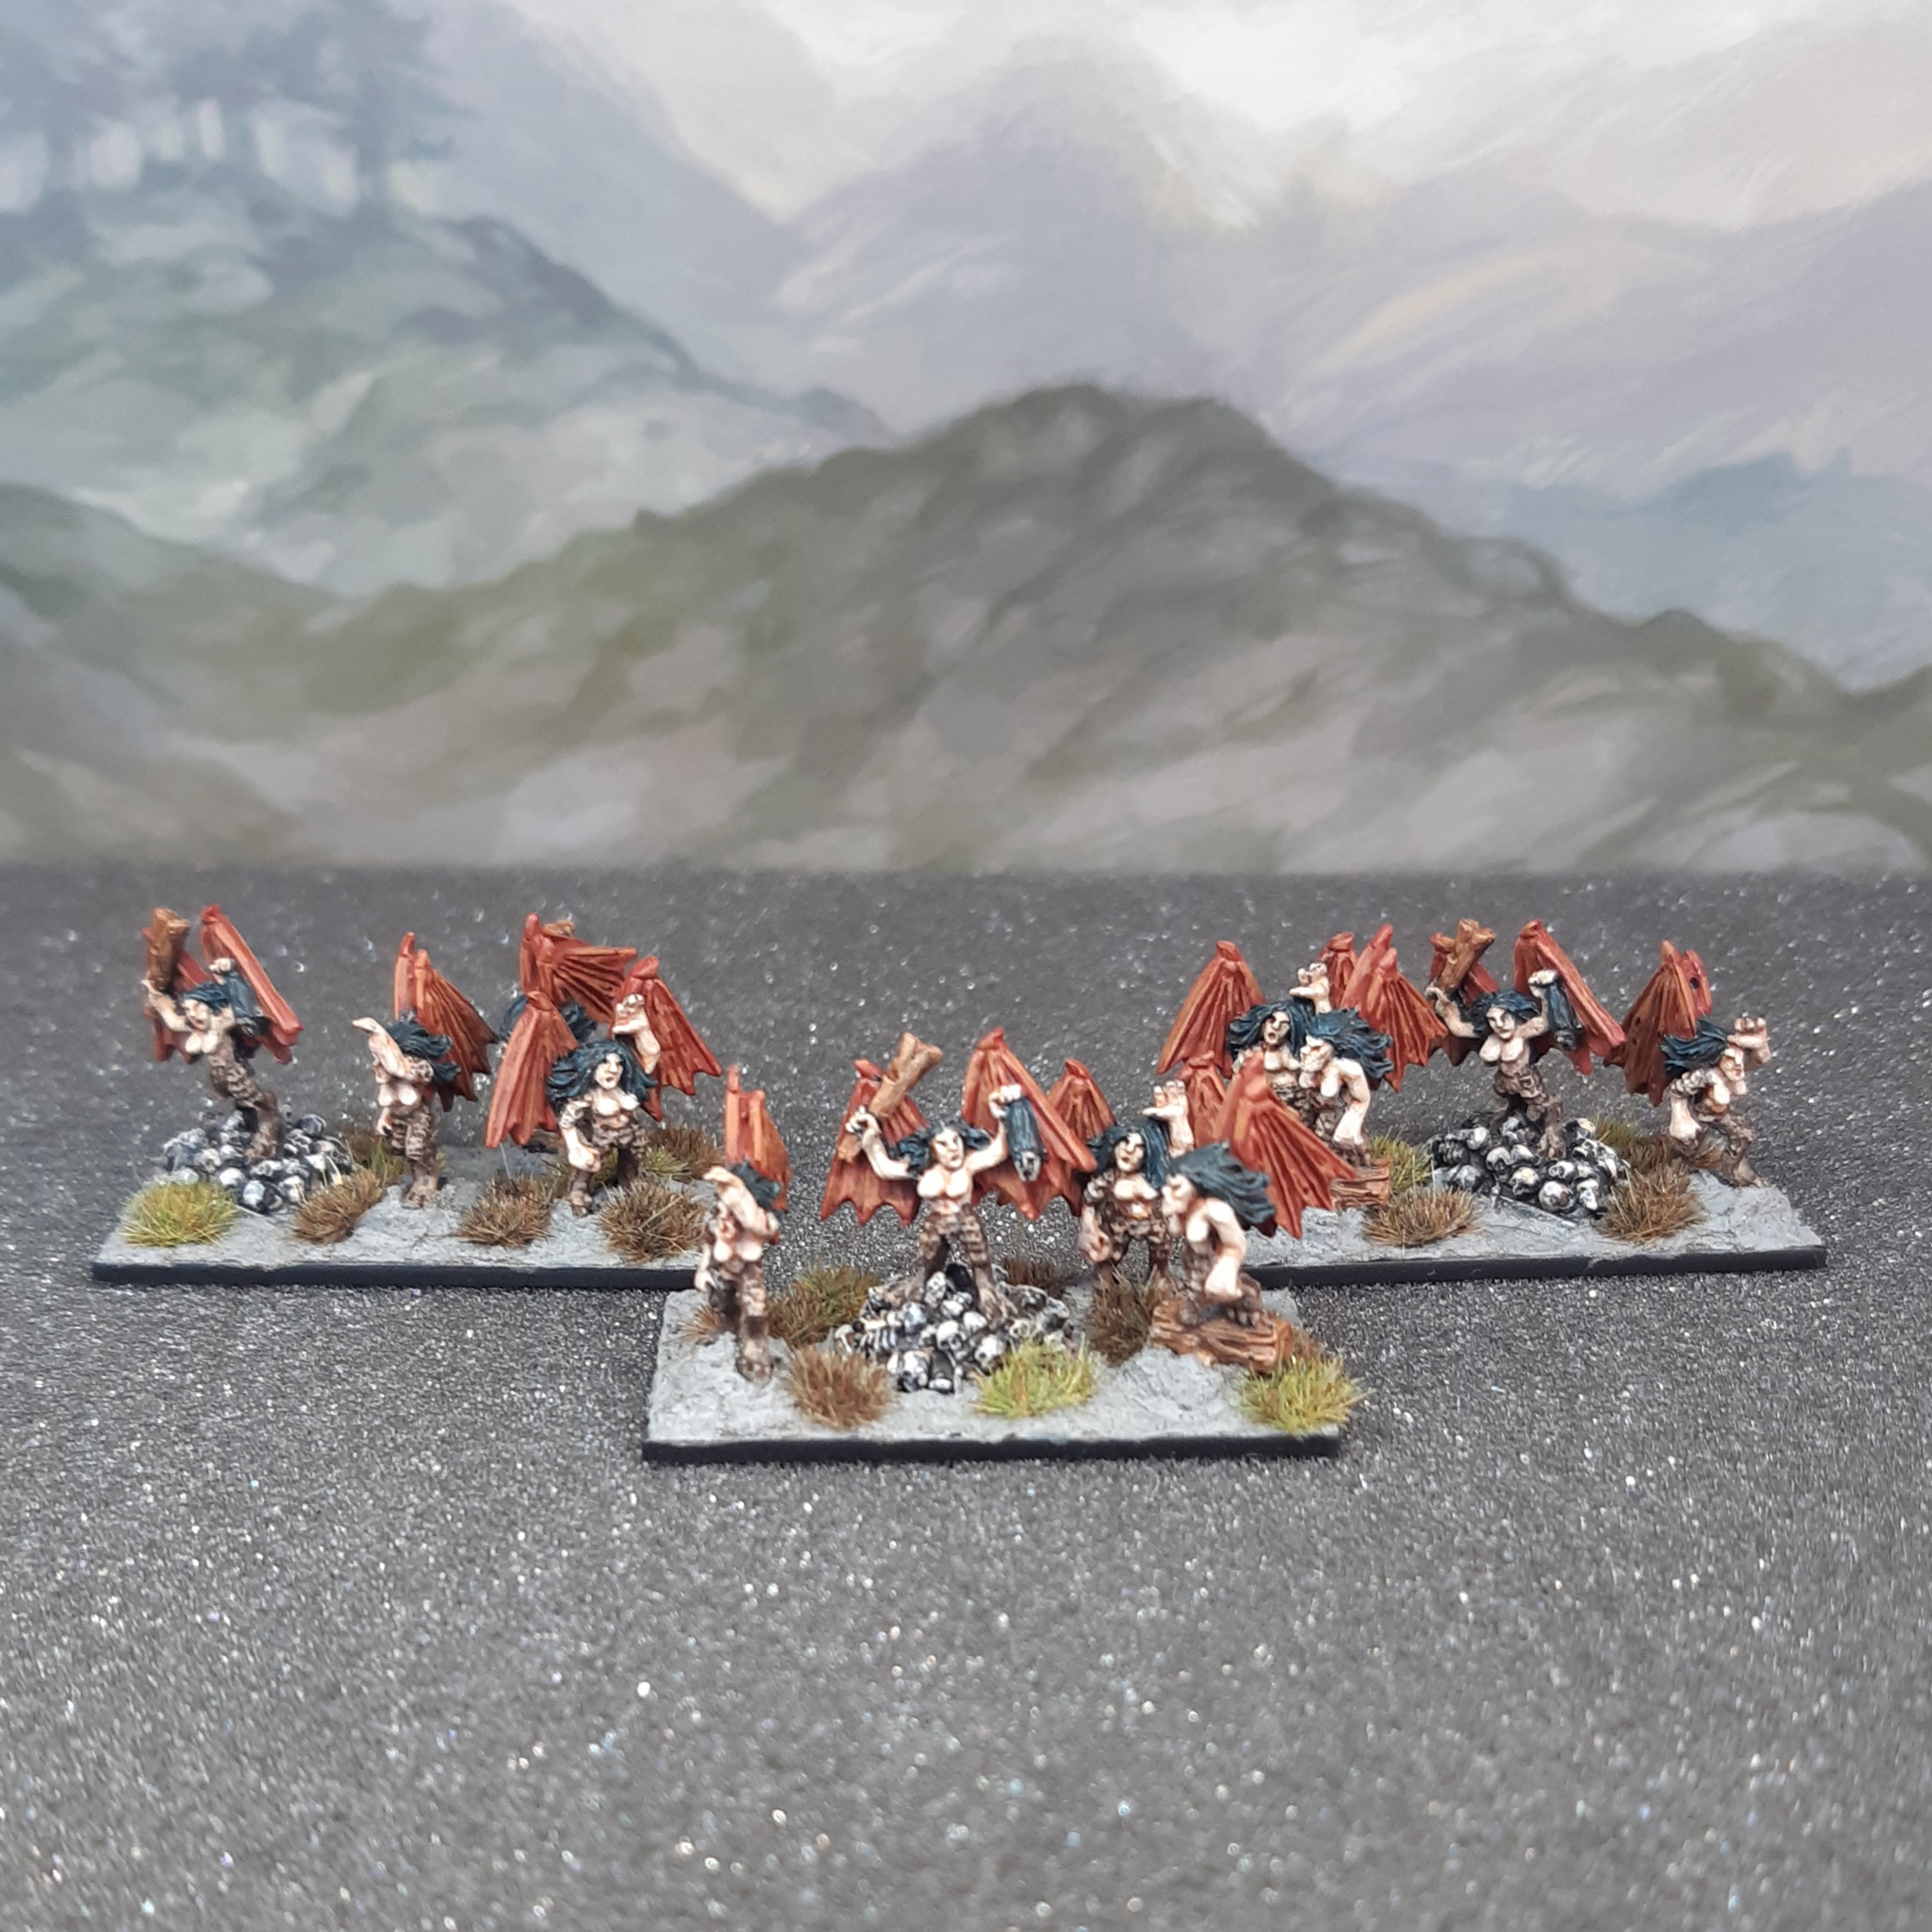
Harpies were next on the painting table.
I wanted to go a little lighter on the skin colour for these harridans, so used Citadel Kislev Flesh as the base colour, with Citadel Flayed One Flesh as the highlight after a wash with Reikland Fleshshade.
The other colours are the same as used elsewhere in this project. Wings followed red hair/fur, the lower legs brown fur/hair. There wasn’t really a good opportunity to tie in the yellow and blue colours on the Harpies, but they echo the Chaos Hounds quite well.
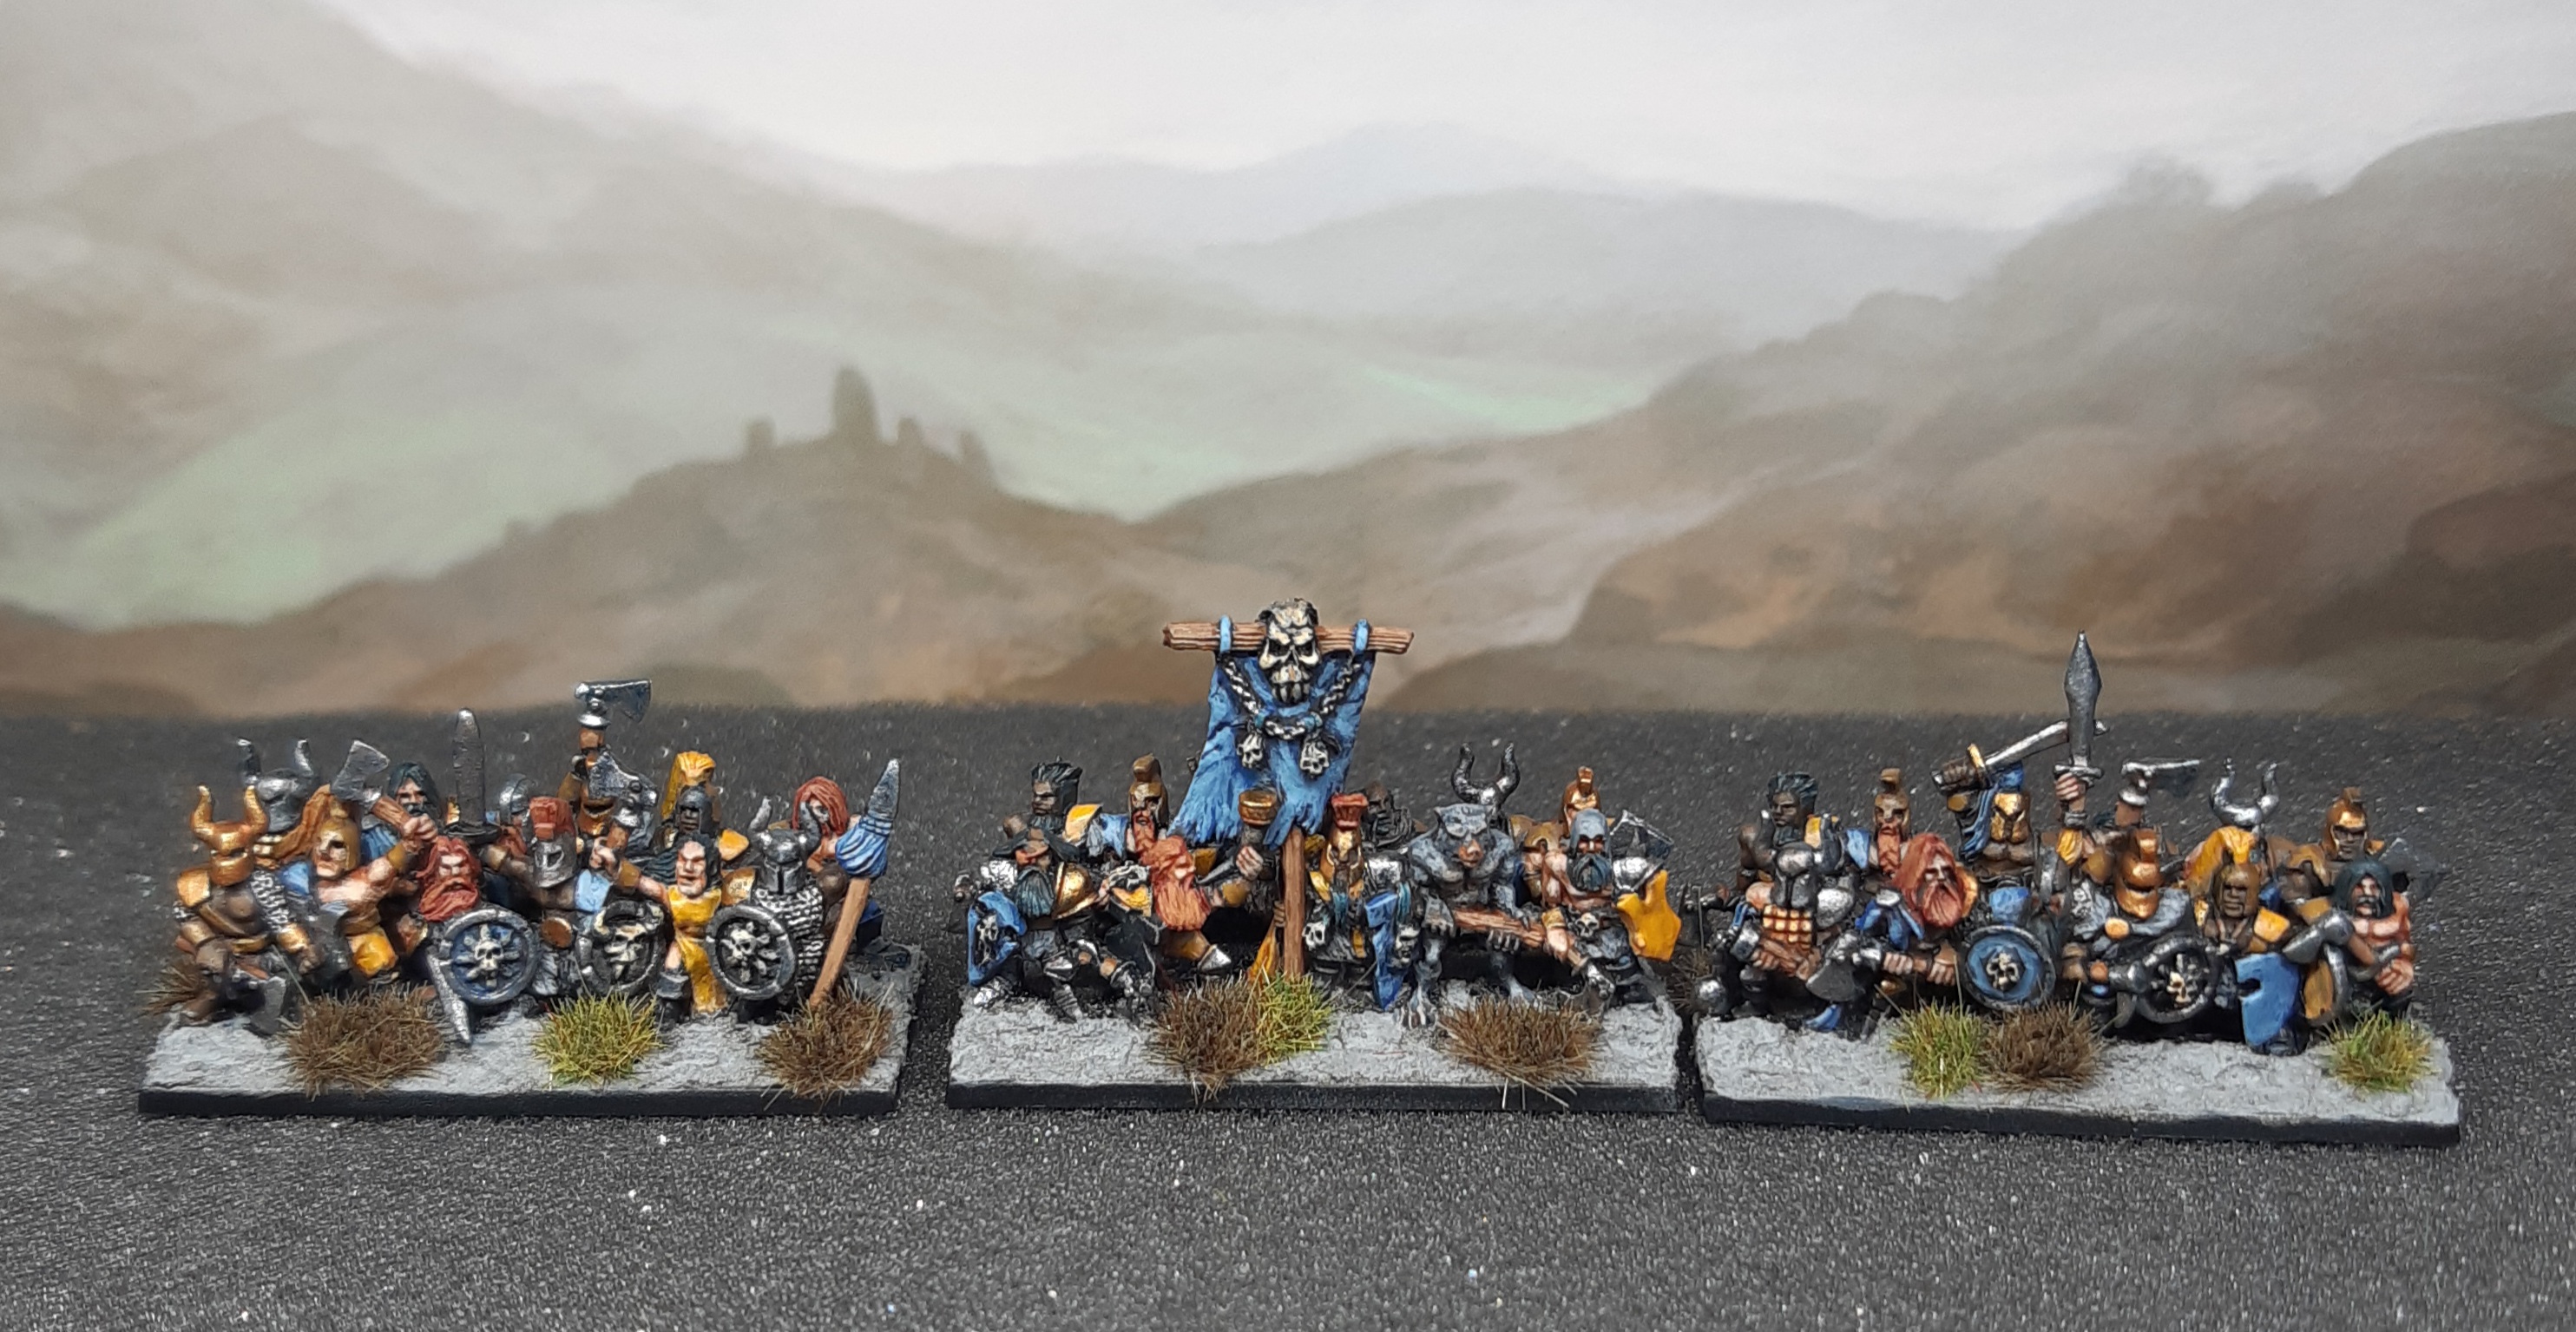
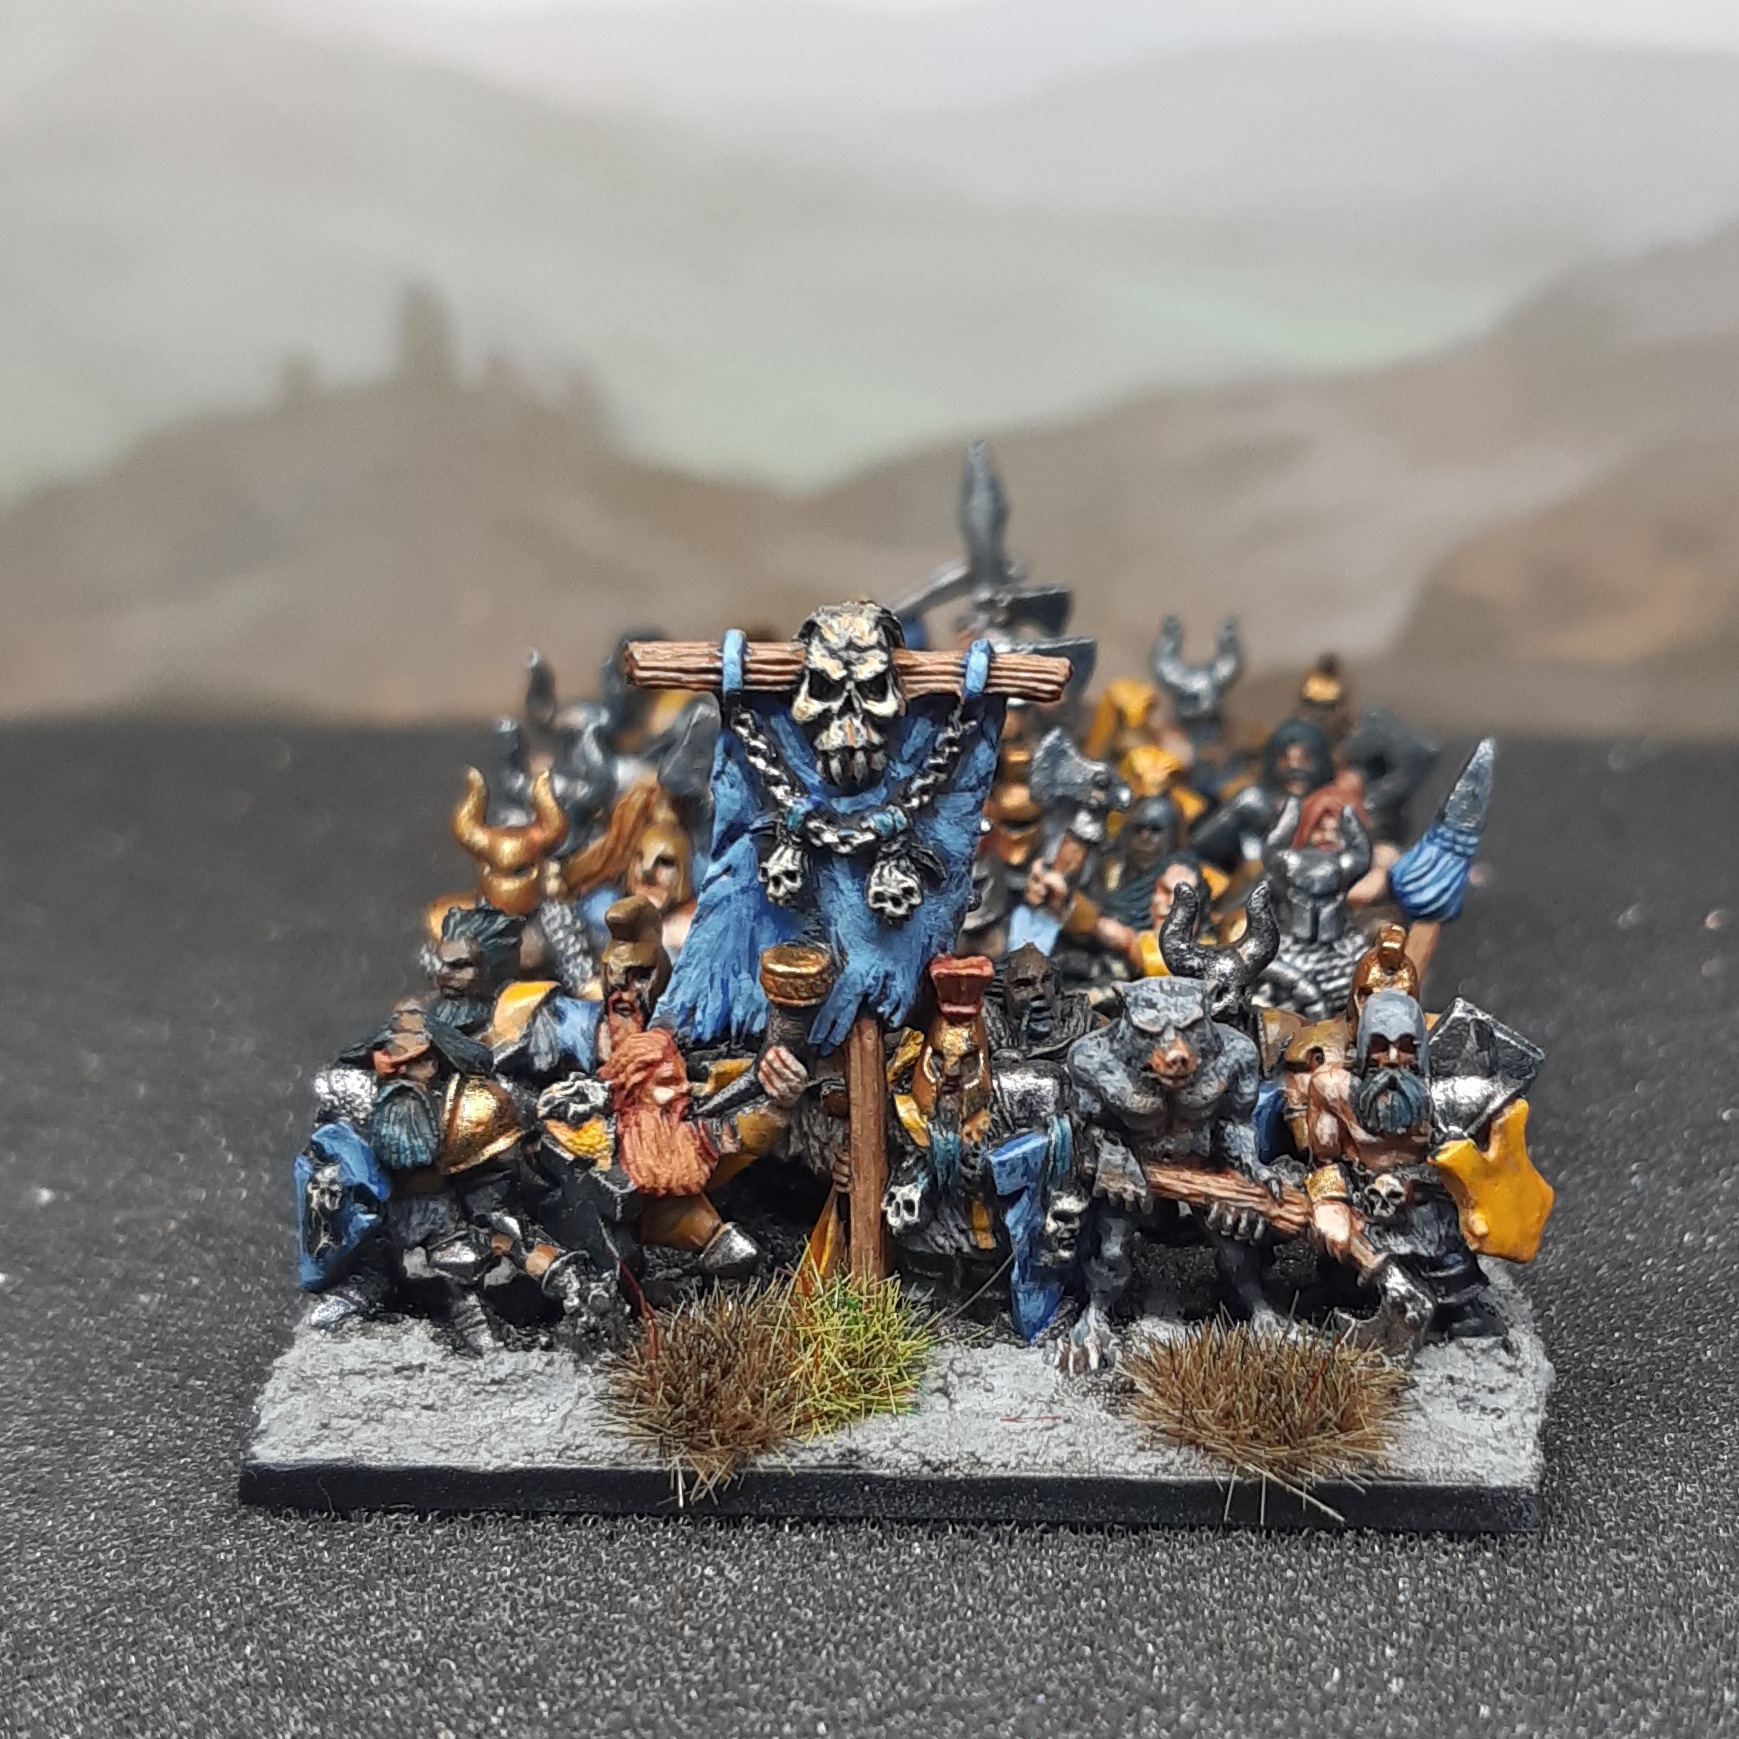
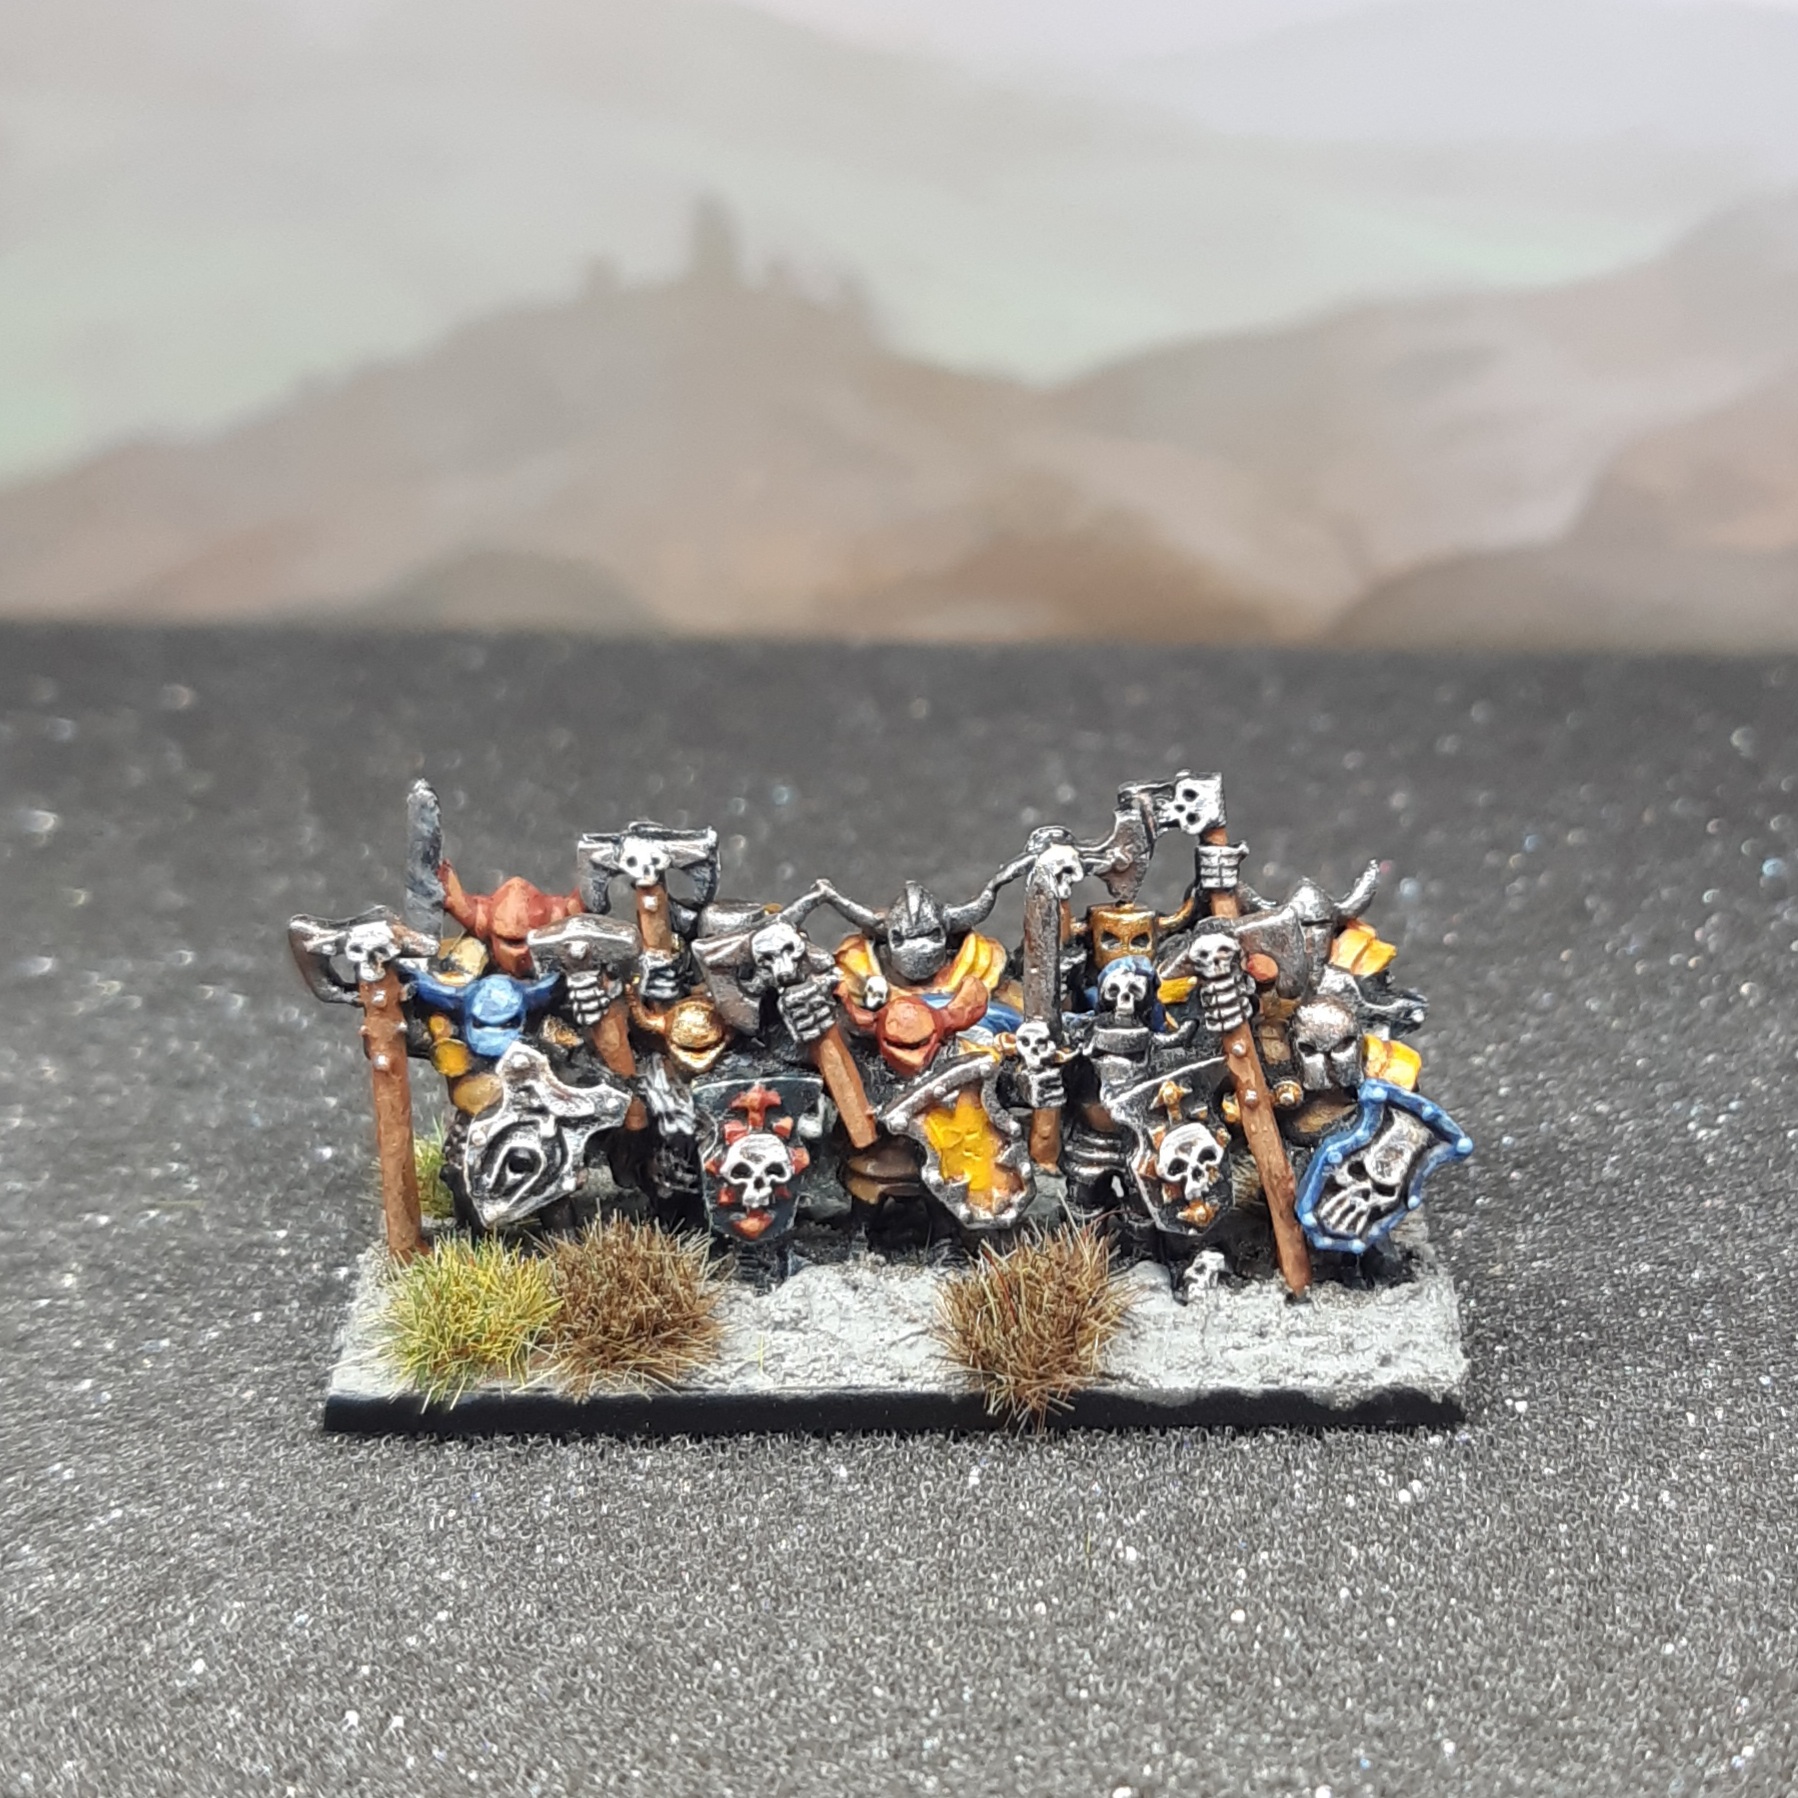
Chaos Warriors
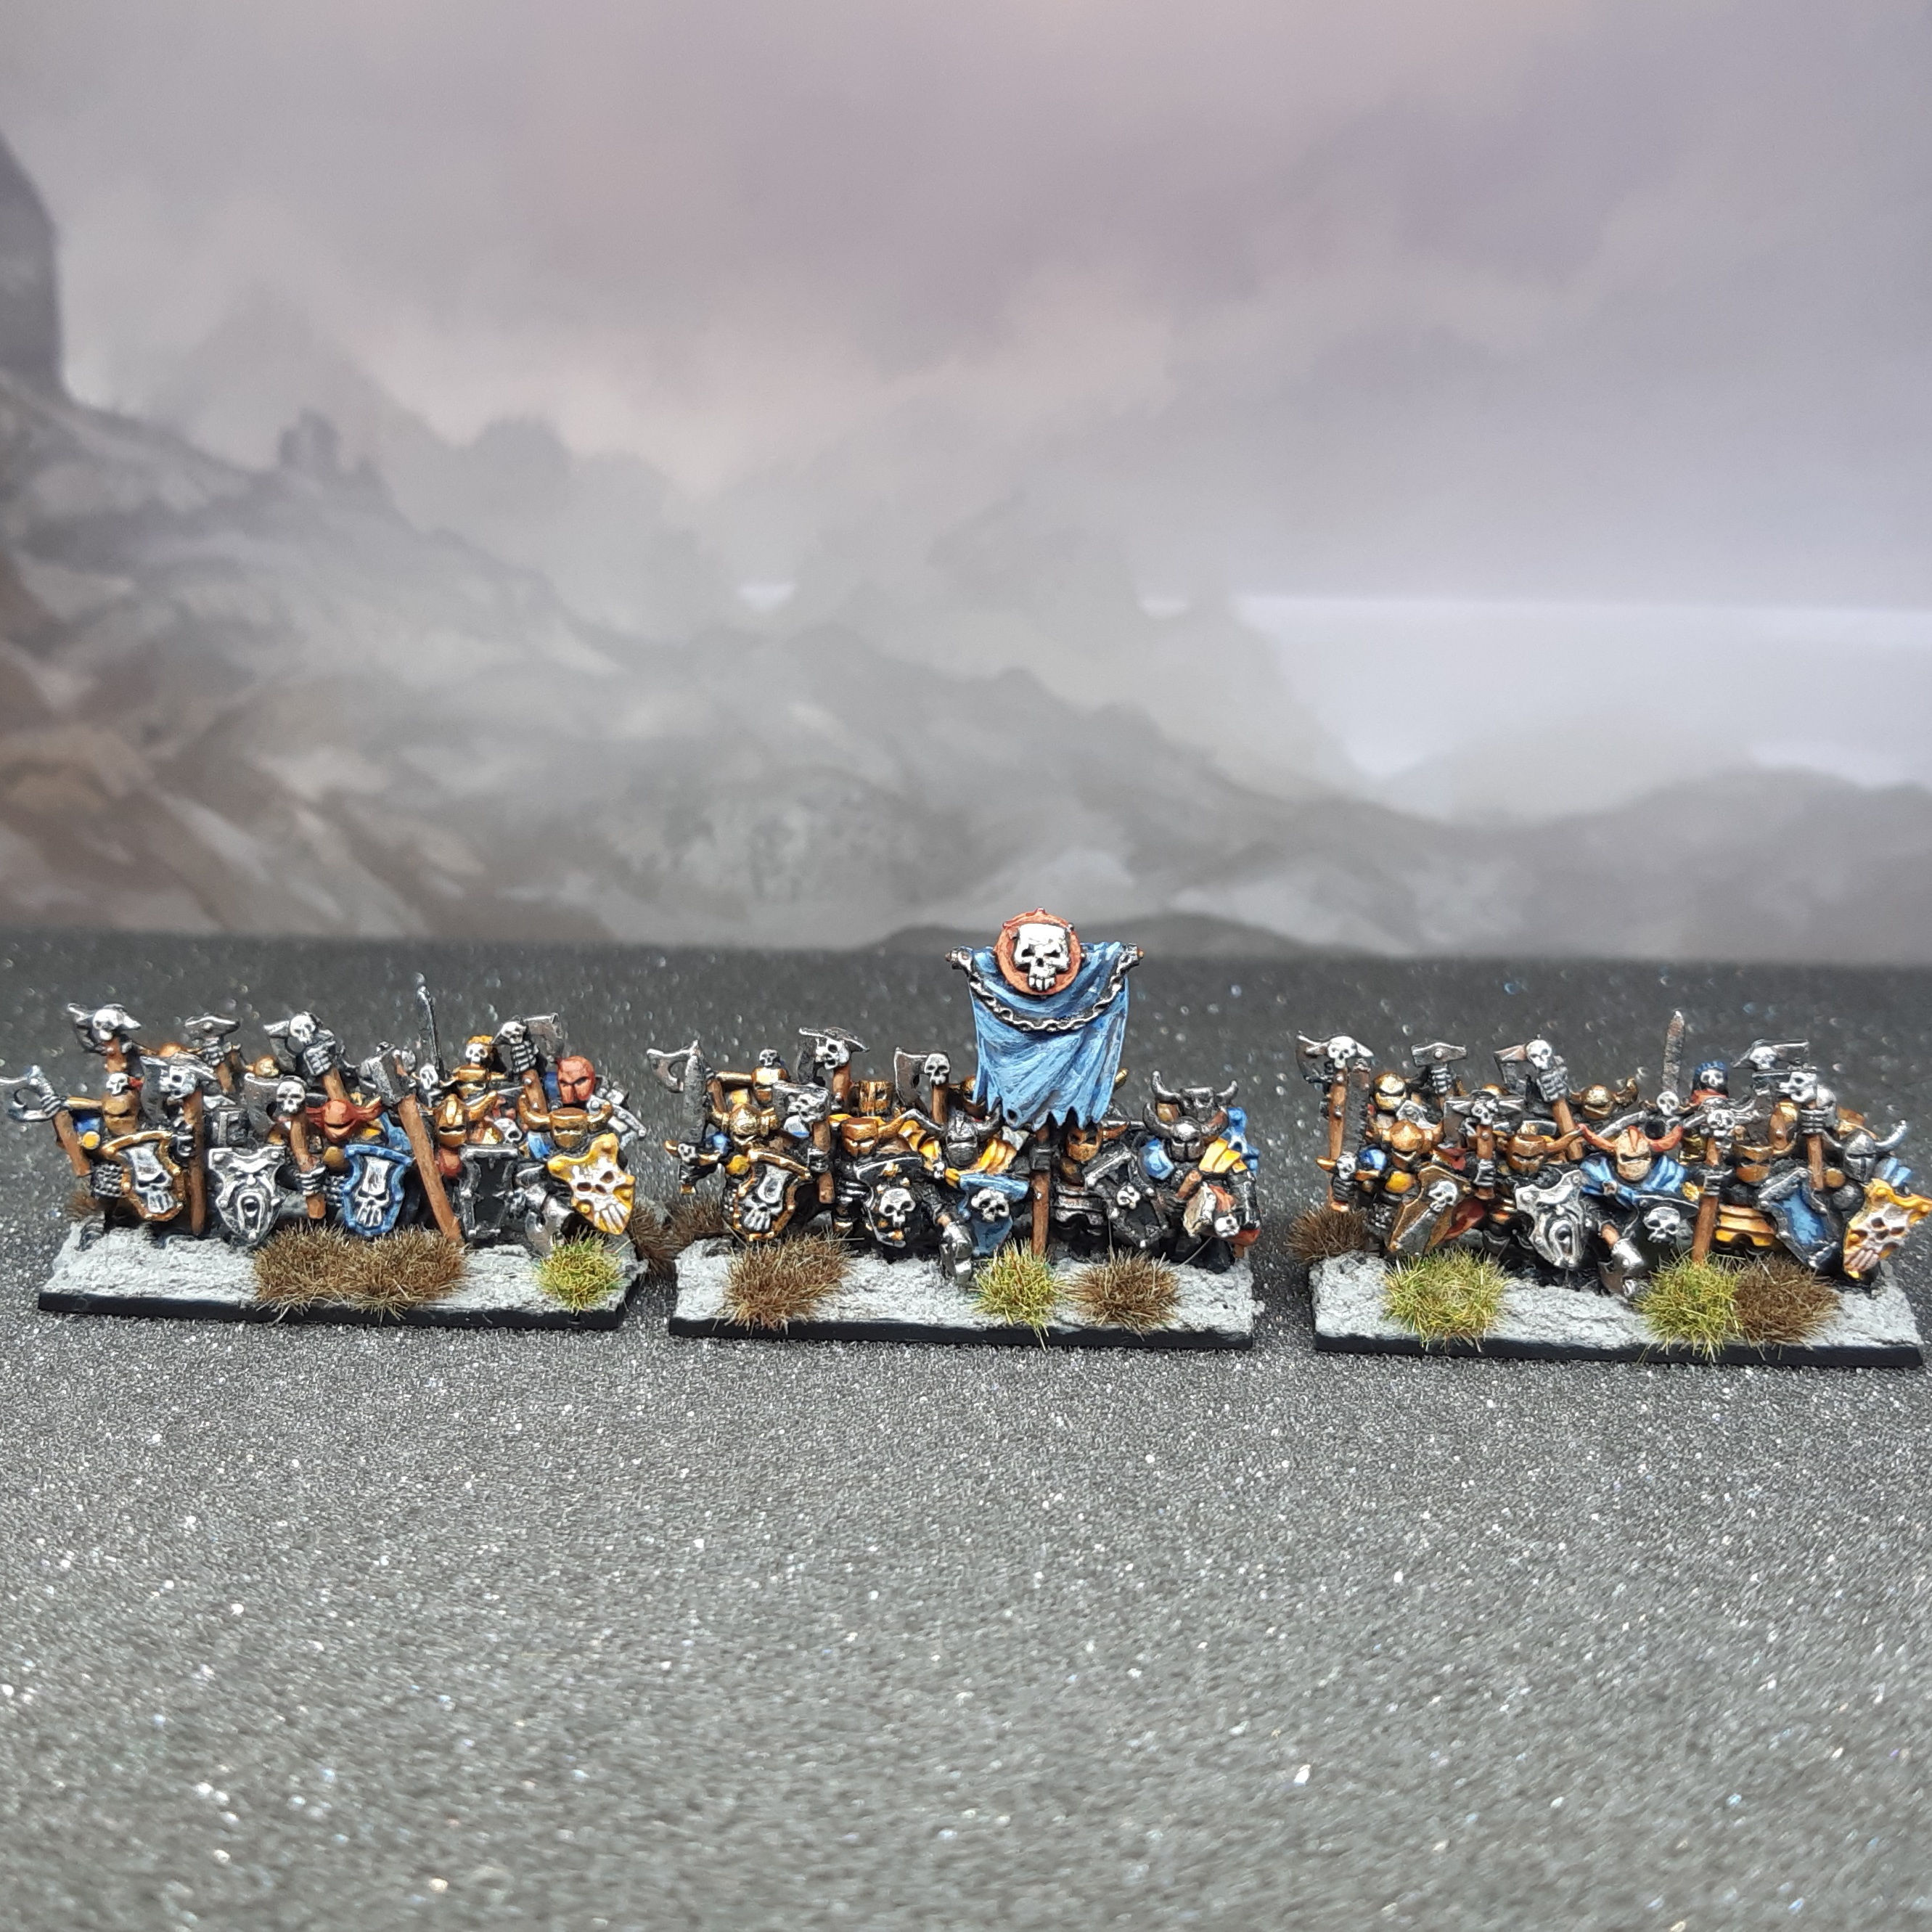
Having finished up most of the lighter units, I’ve mainly got the heavily armoured units left – the Chaos Warriors and Knights, plus some chariots.
I was a bit worried that my chosen colour scheme might not work very effectively on the armoured guys – there’s a lot of metal plate that if I lean too hard into the blue/yellow might end up looking too much like heraldic knights, but I also don’t want too much plain metallics, as its just a bit boring.
I grabbed one of the Chaos Warrior units to paint up and see how things went. First step was a little repair work to give one chap a replacement sword blade. The original had snapped off just above the hilt at some stage and was no where to be found, so I greenstuffed a new blade. A bit rough and ready, but not noticeable when painted up.
I carried on with my established paint scheme, and was pretty happy with the end result. I think leaving the metals at the wash stage with no highlight helps with the overall darker and grimmer look of the models.
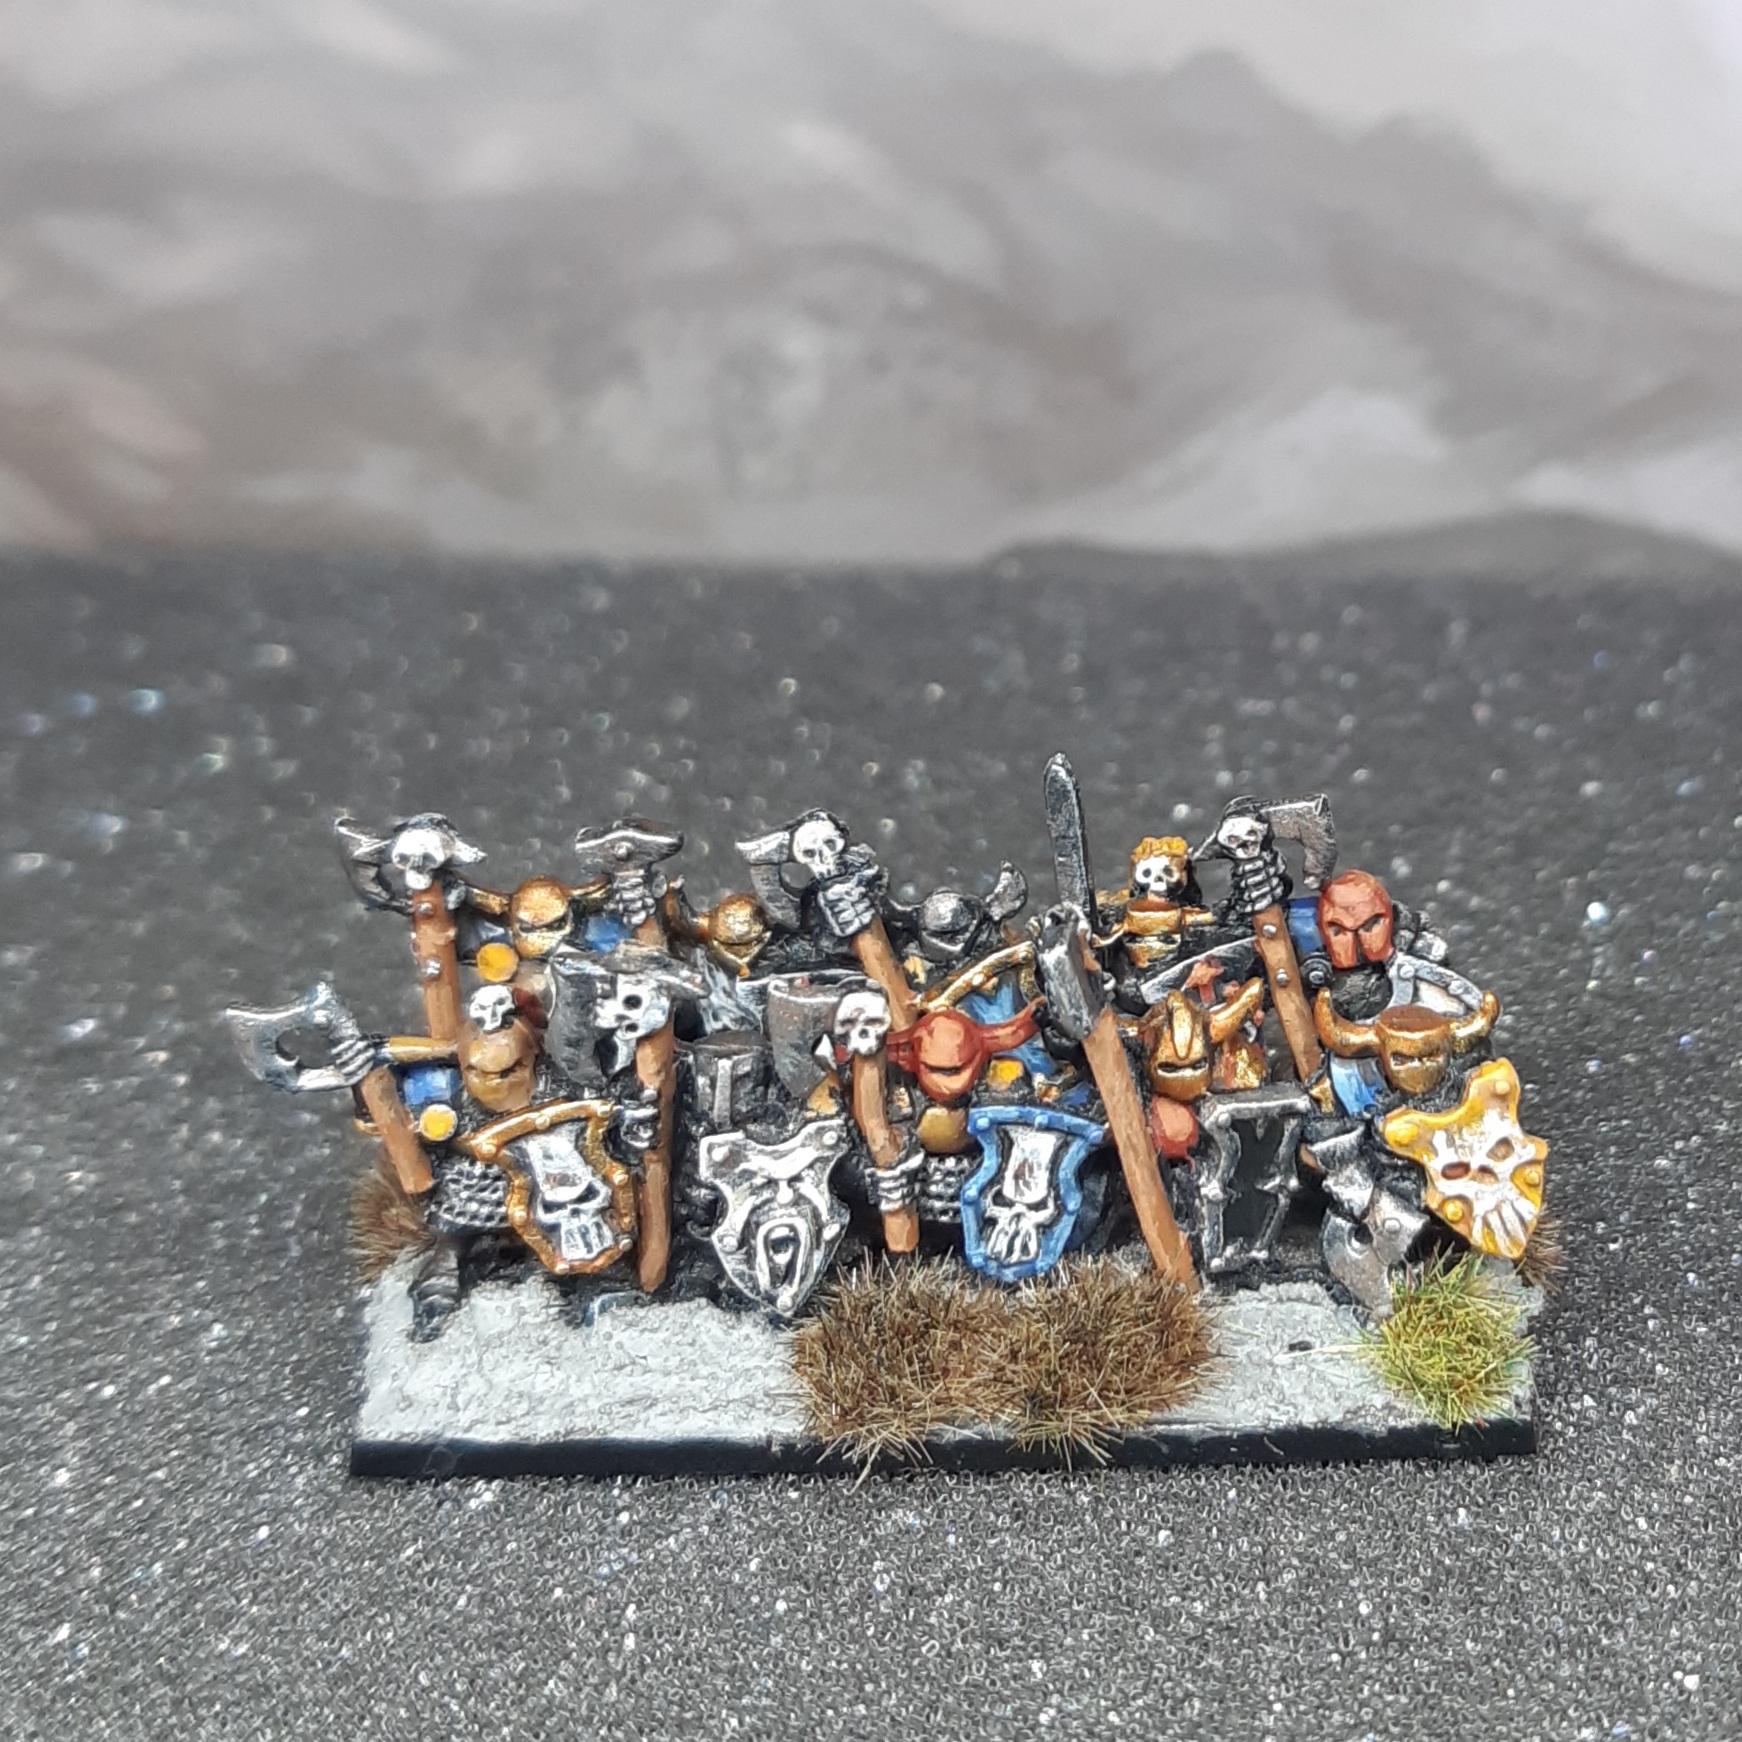
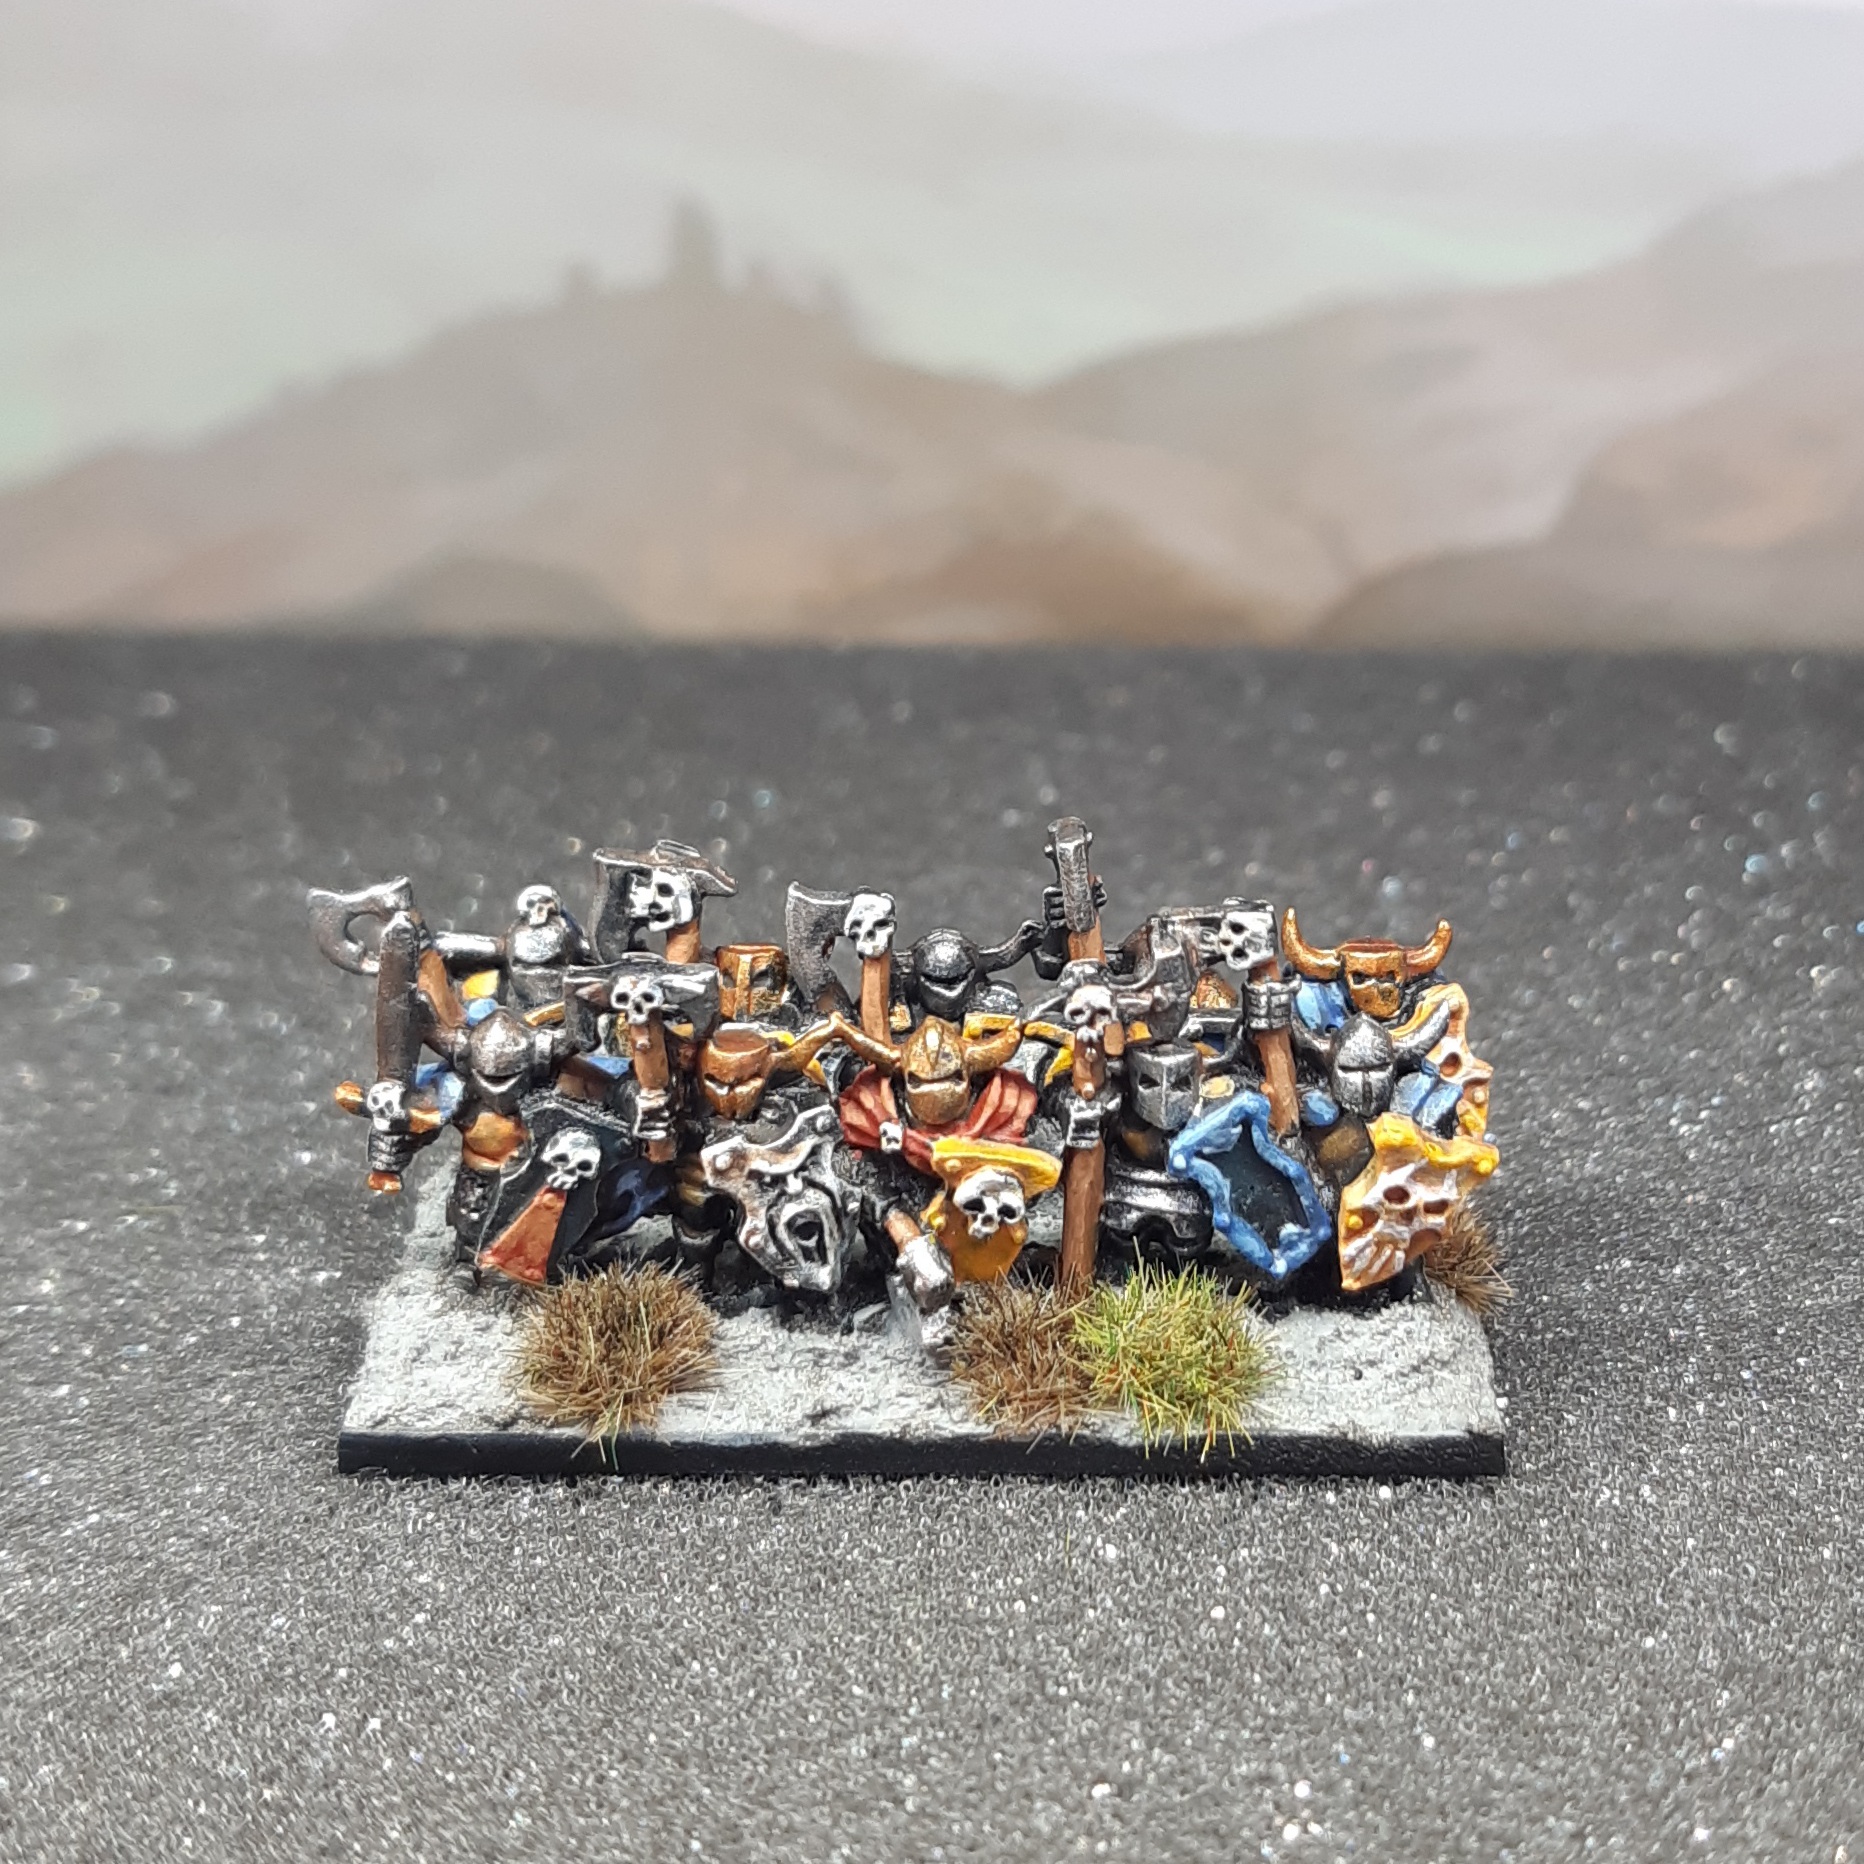
More Chaos Warriors

A second unit of Chaos Warriors all finished up. Basically just a repeat of the last unit but changing around the colours for some things to add variety.
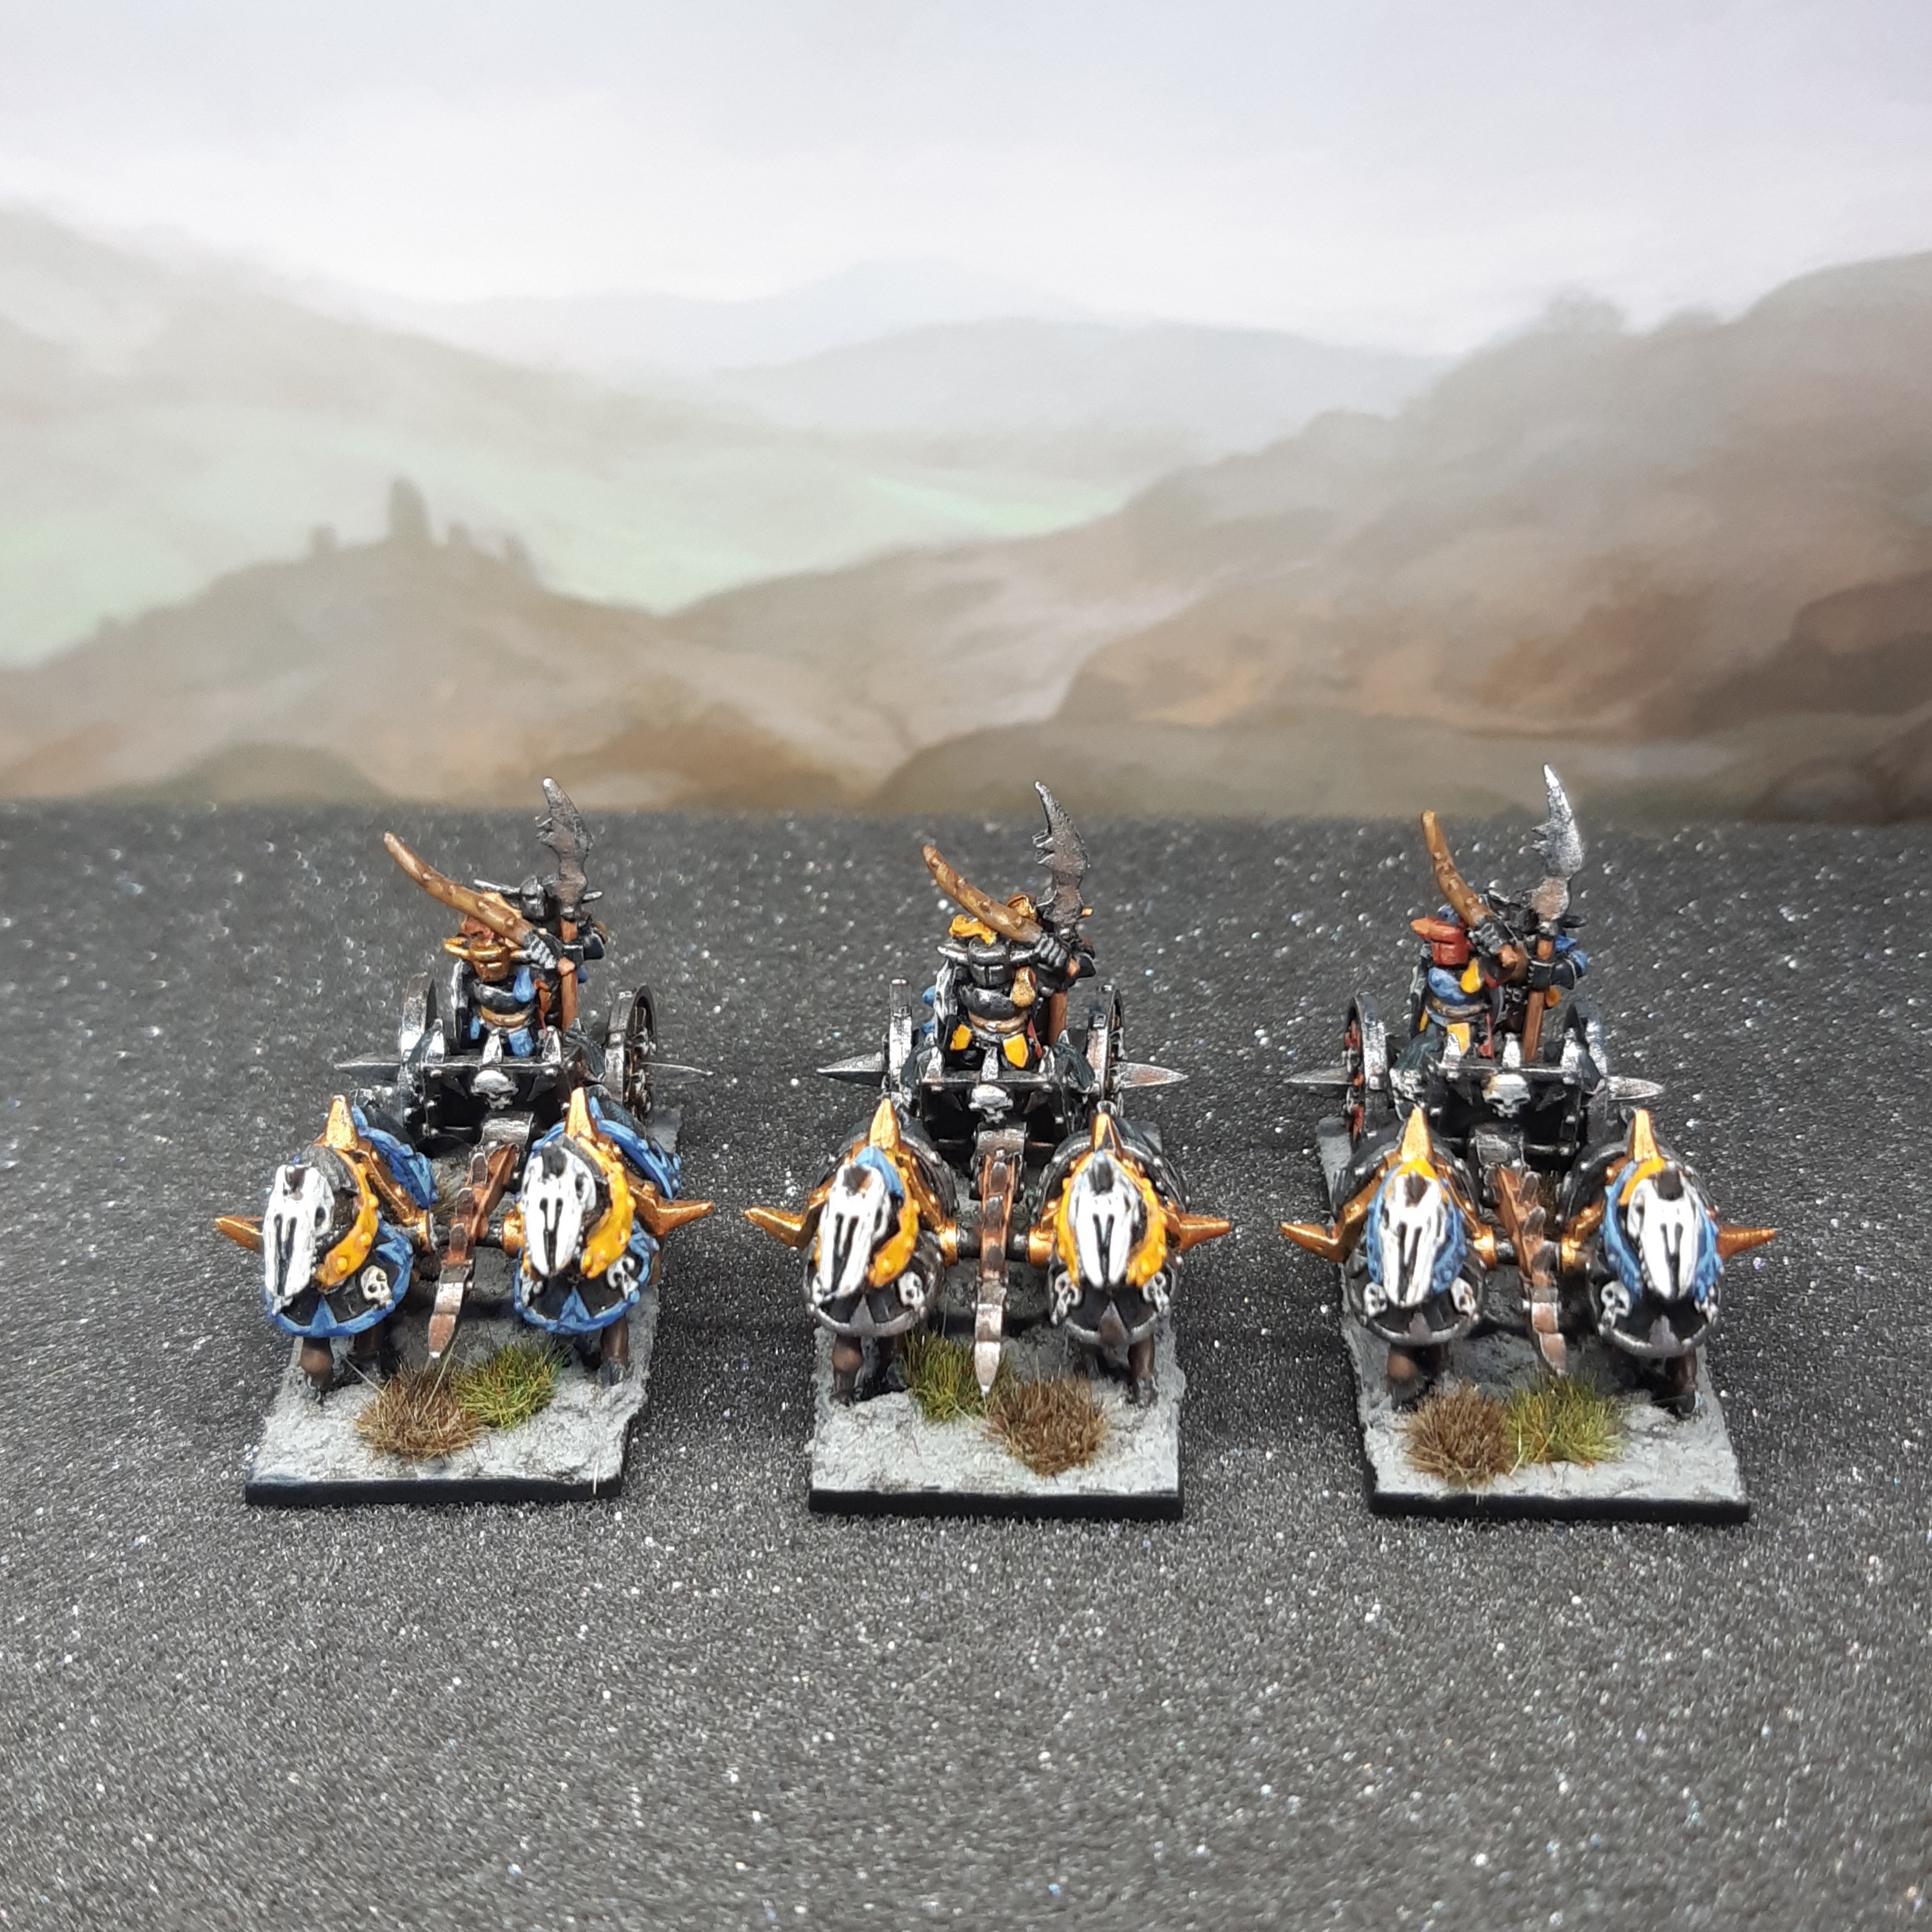
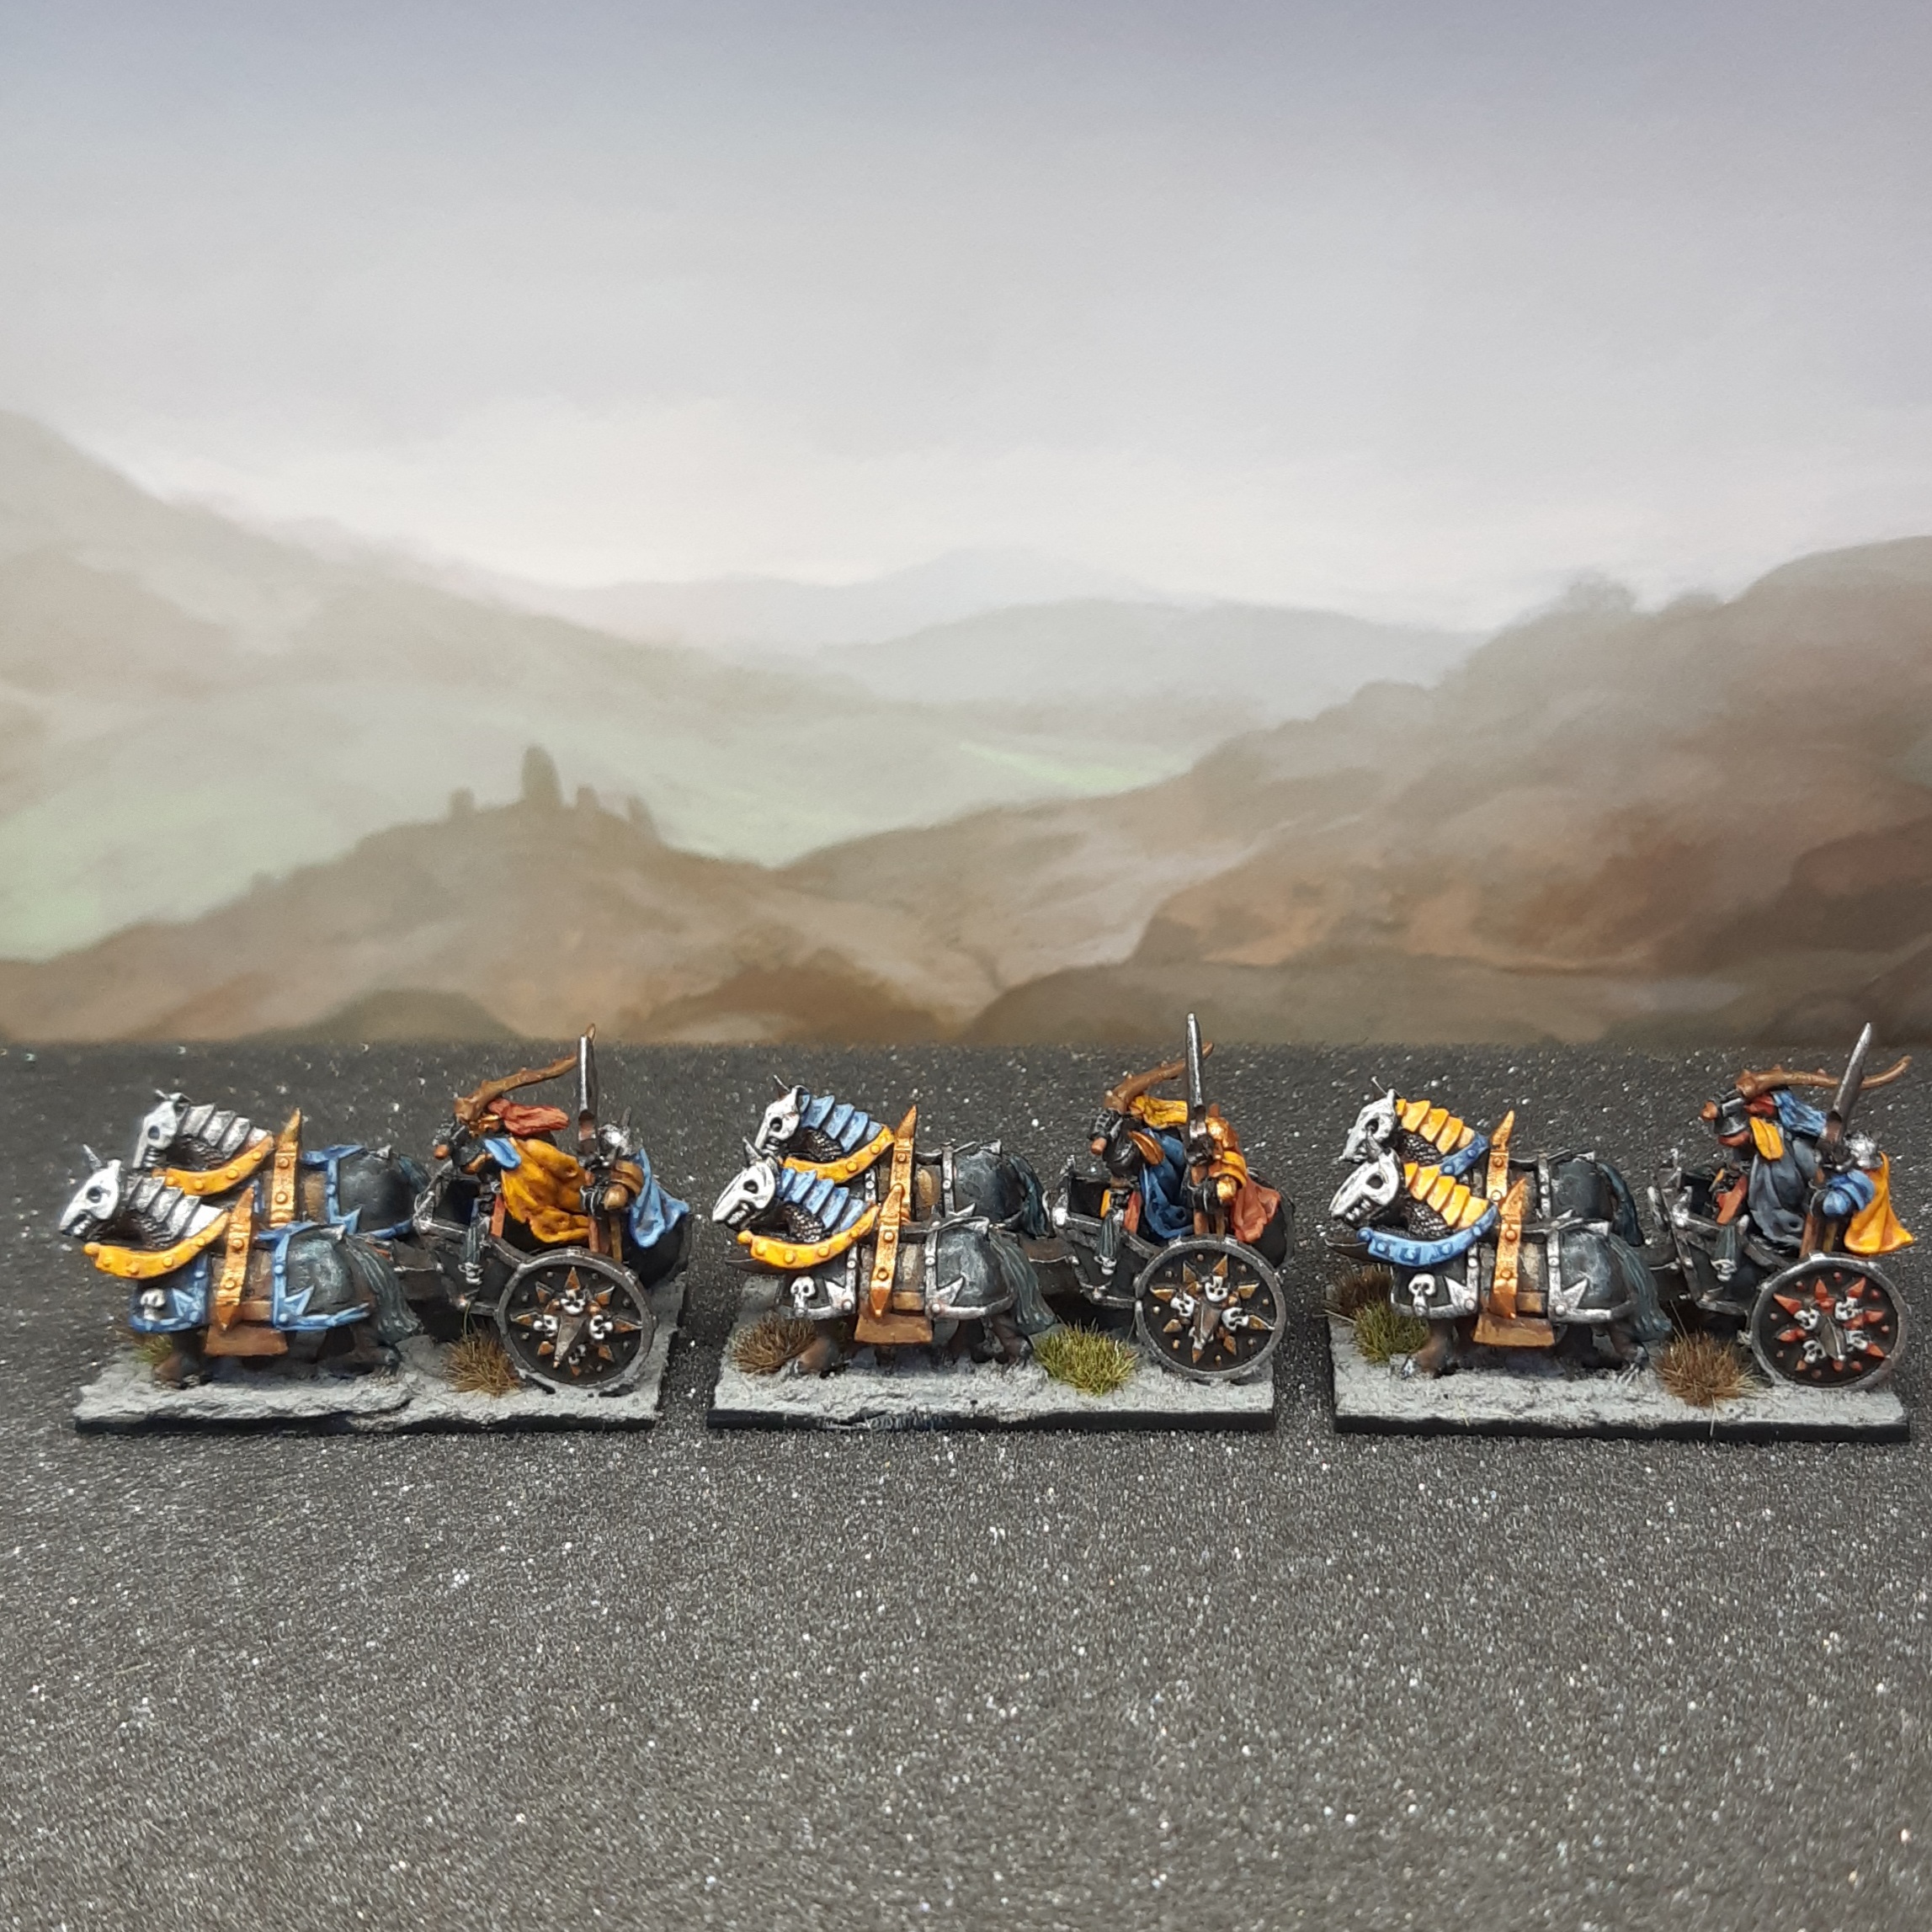
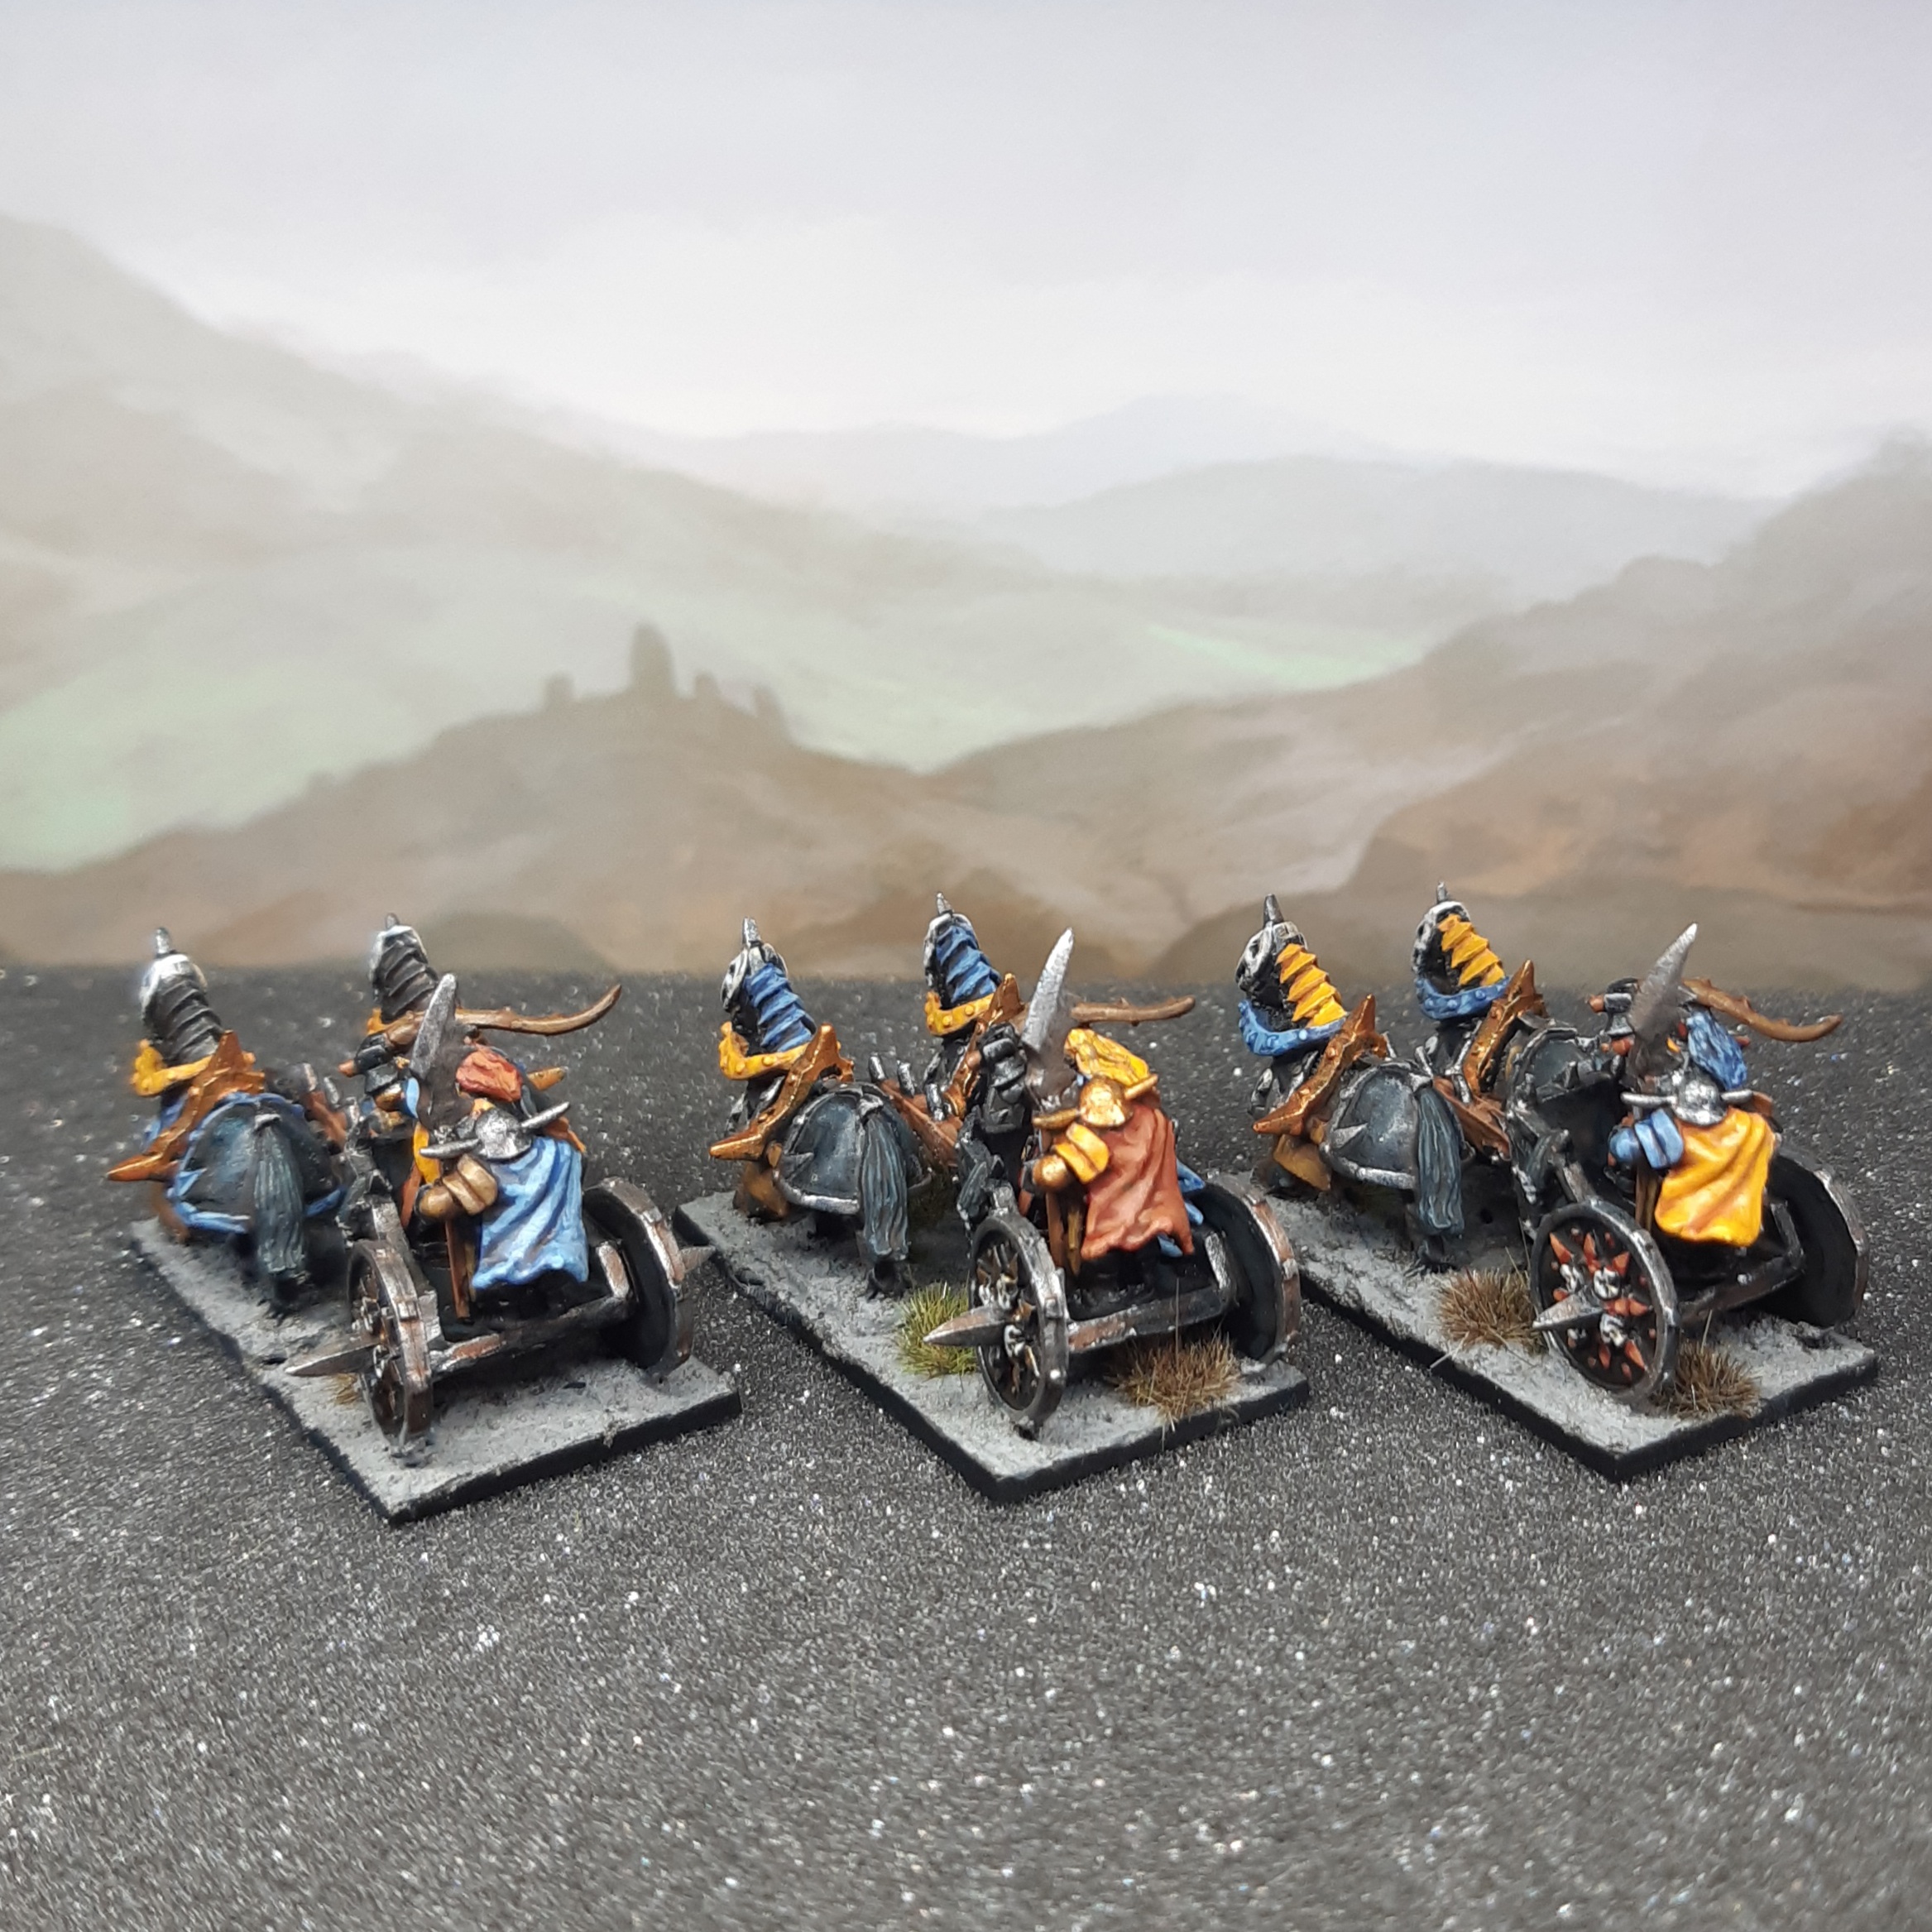
Chariots

In many ways, these chariots are the antithesis of what I really like about the Warmaster range. Rather than single piece, cleverly sculpted strips, they are (by necessity) fiddly little multi-part models. The big spikes on the yokes mean that they overhang the bases so they can’t be ranked up nicely too.
Still, they look the part, although I ended up leaving a bit too much black rather than leaning into something more visually interesting. Still no socks on the horses. Selective breeding in the wastelands eliminates such patterning.
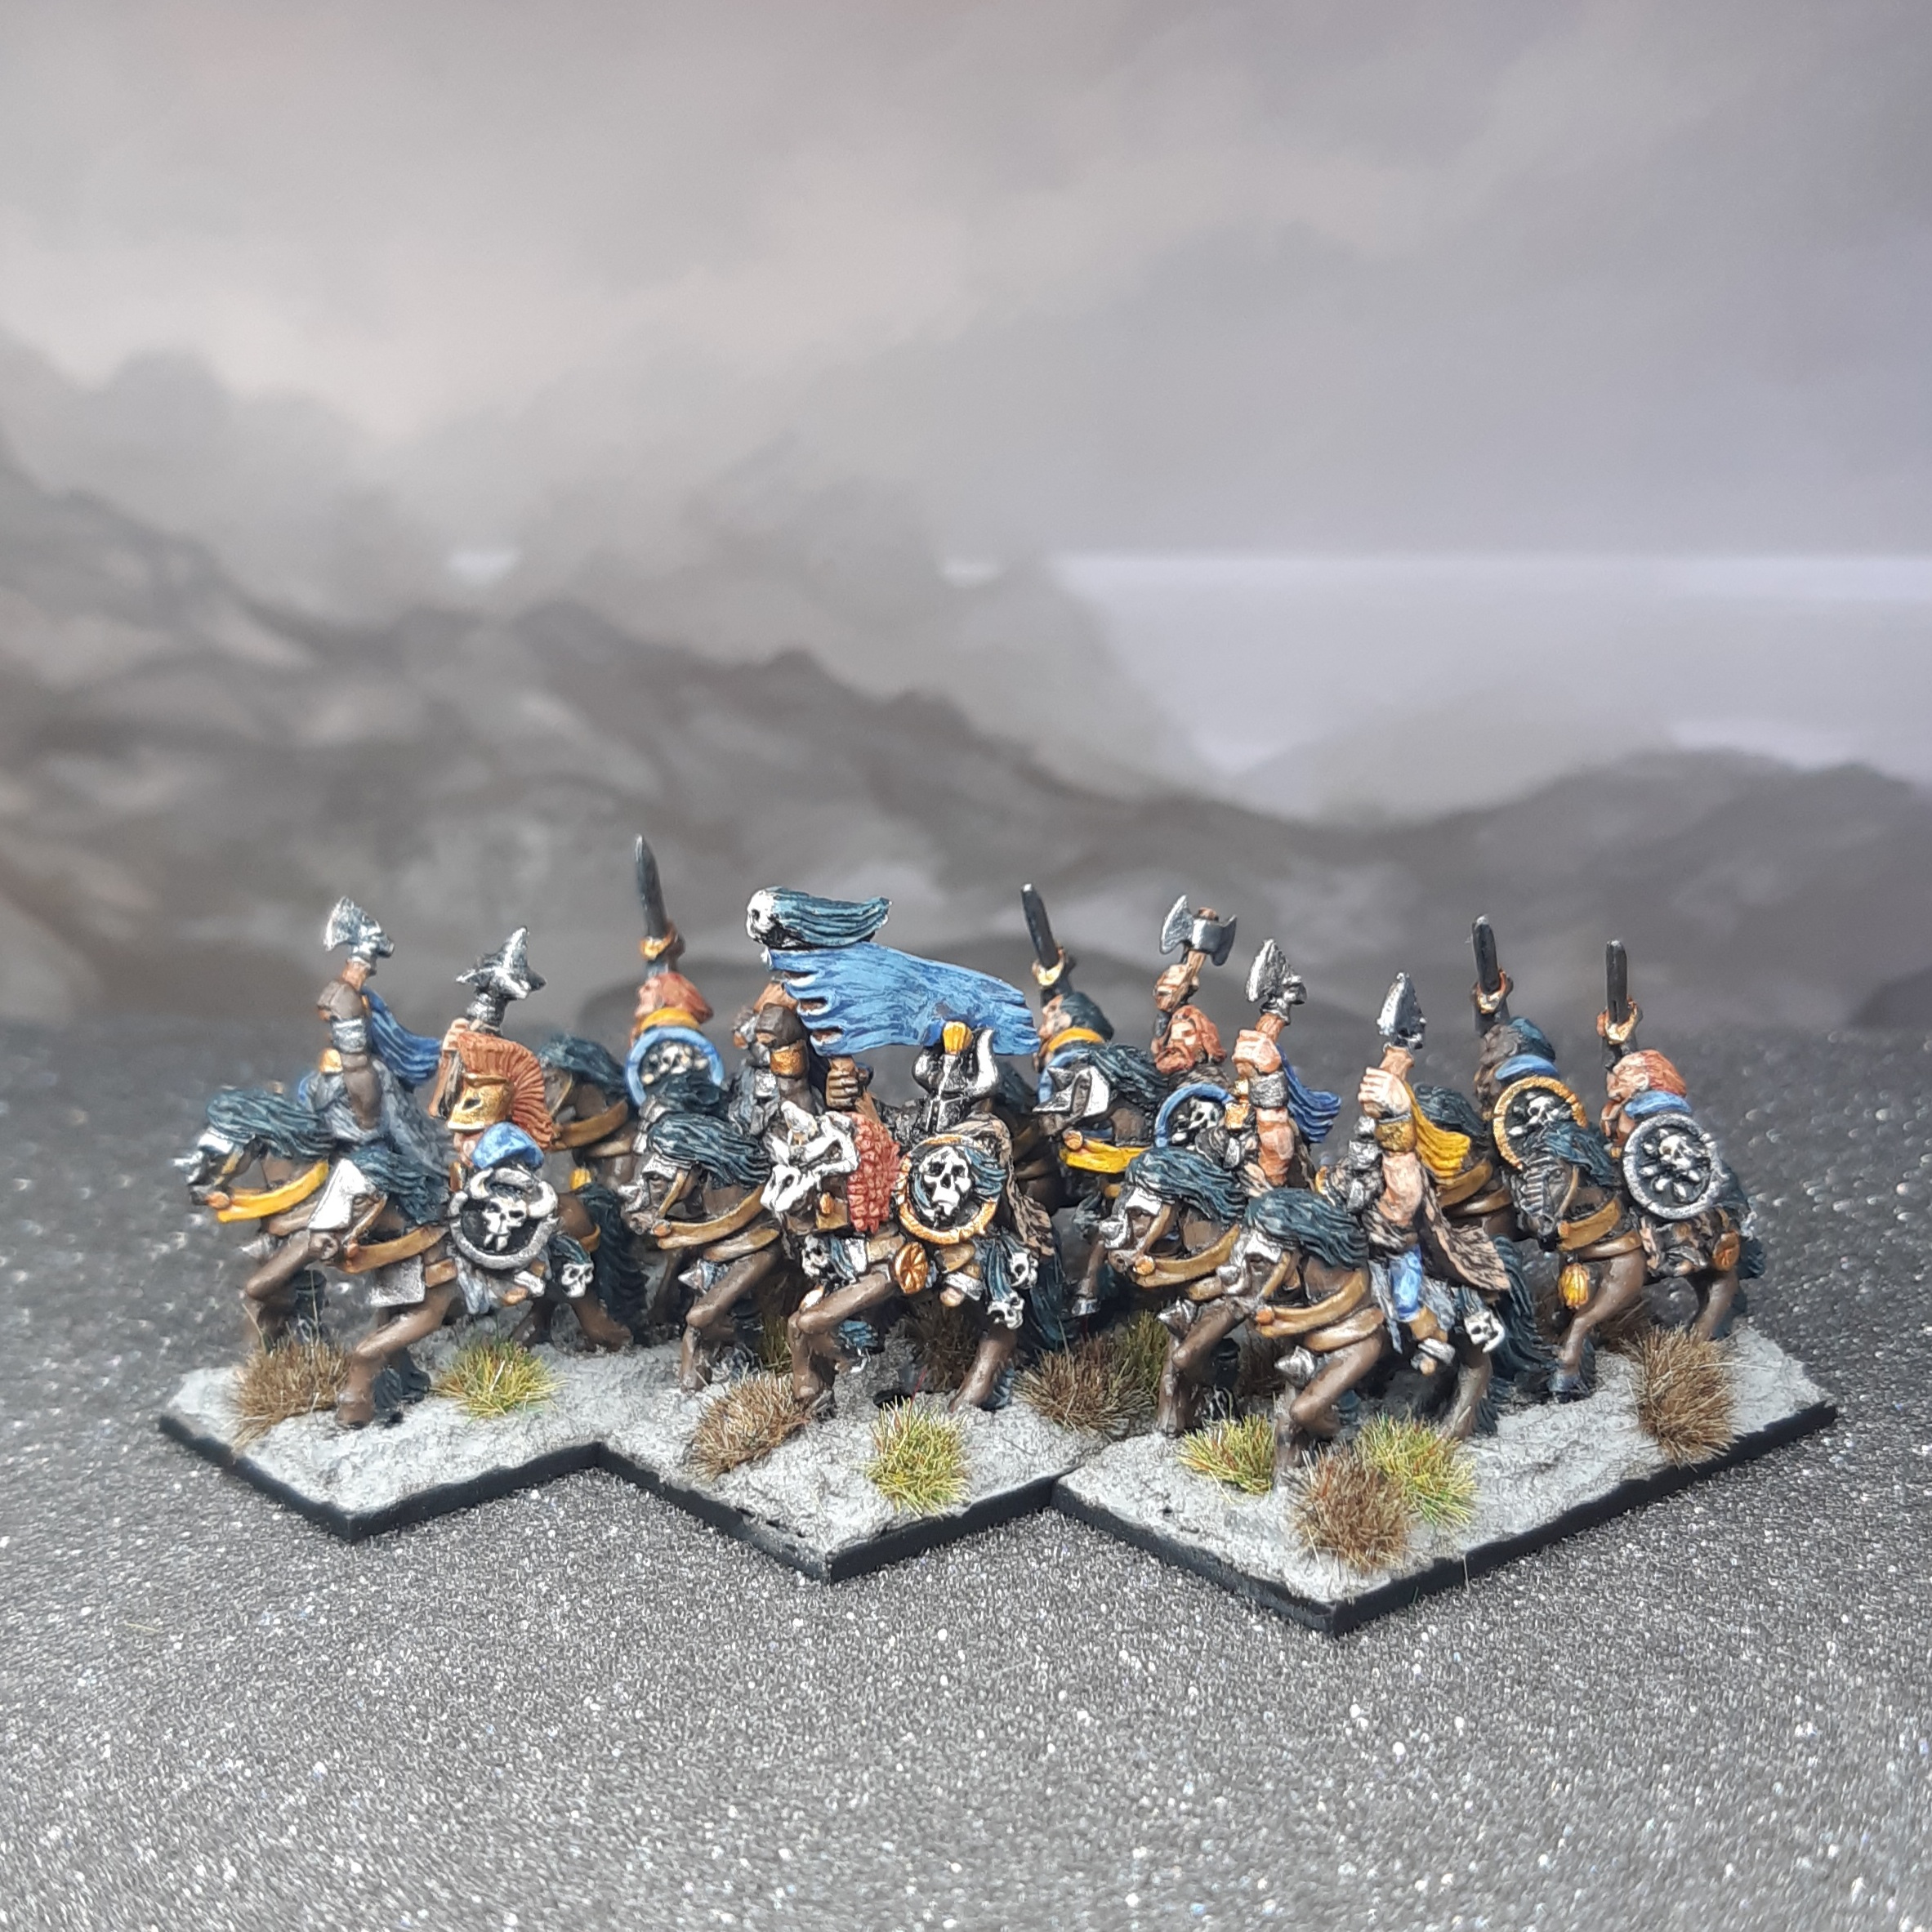
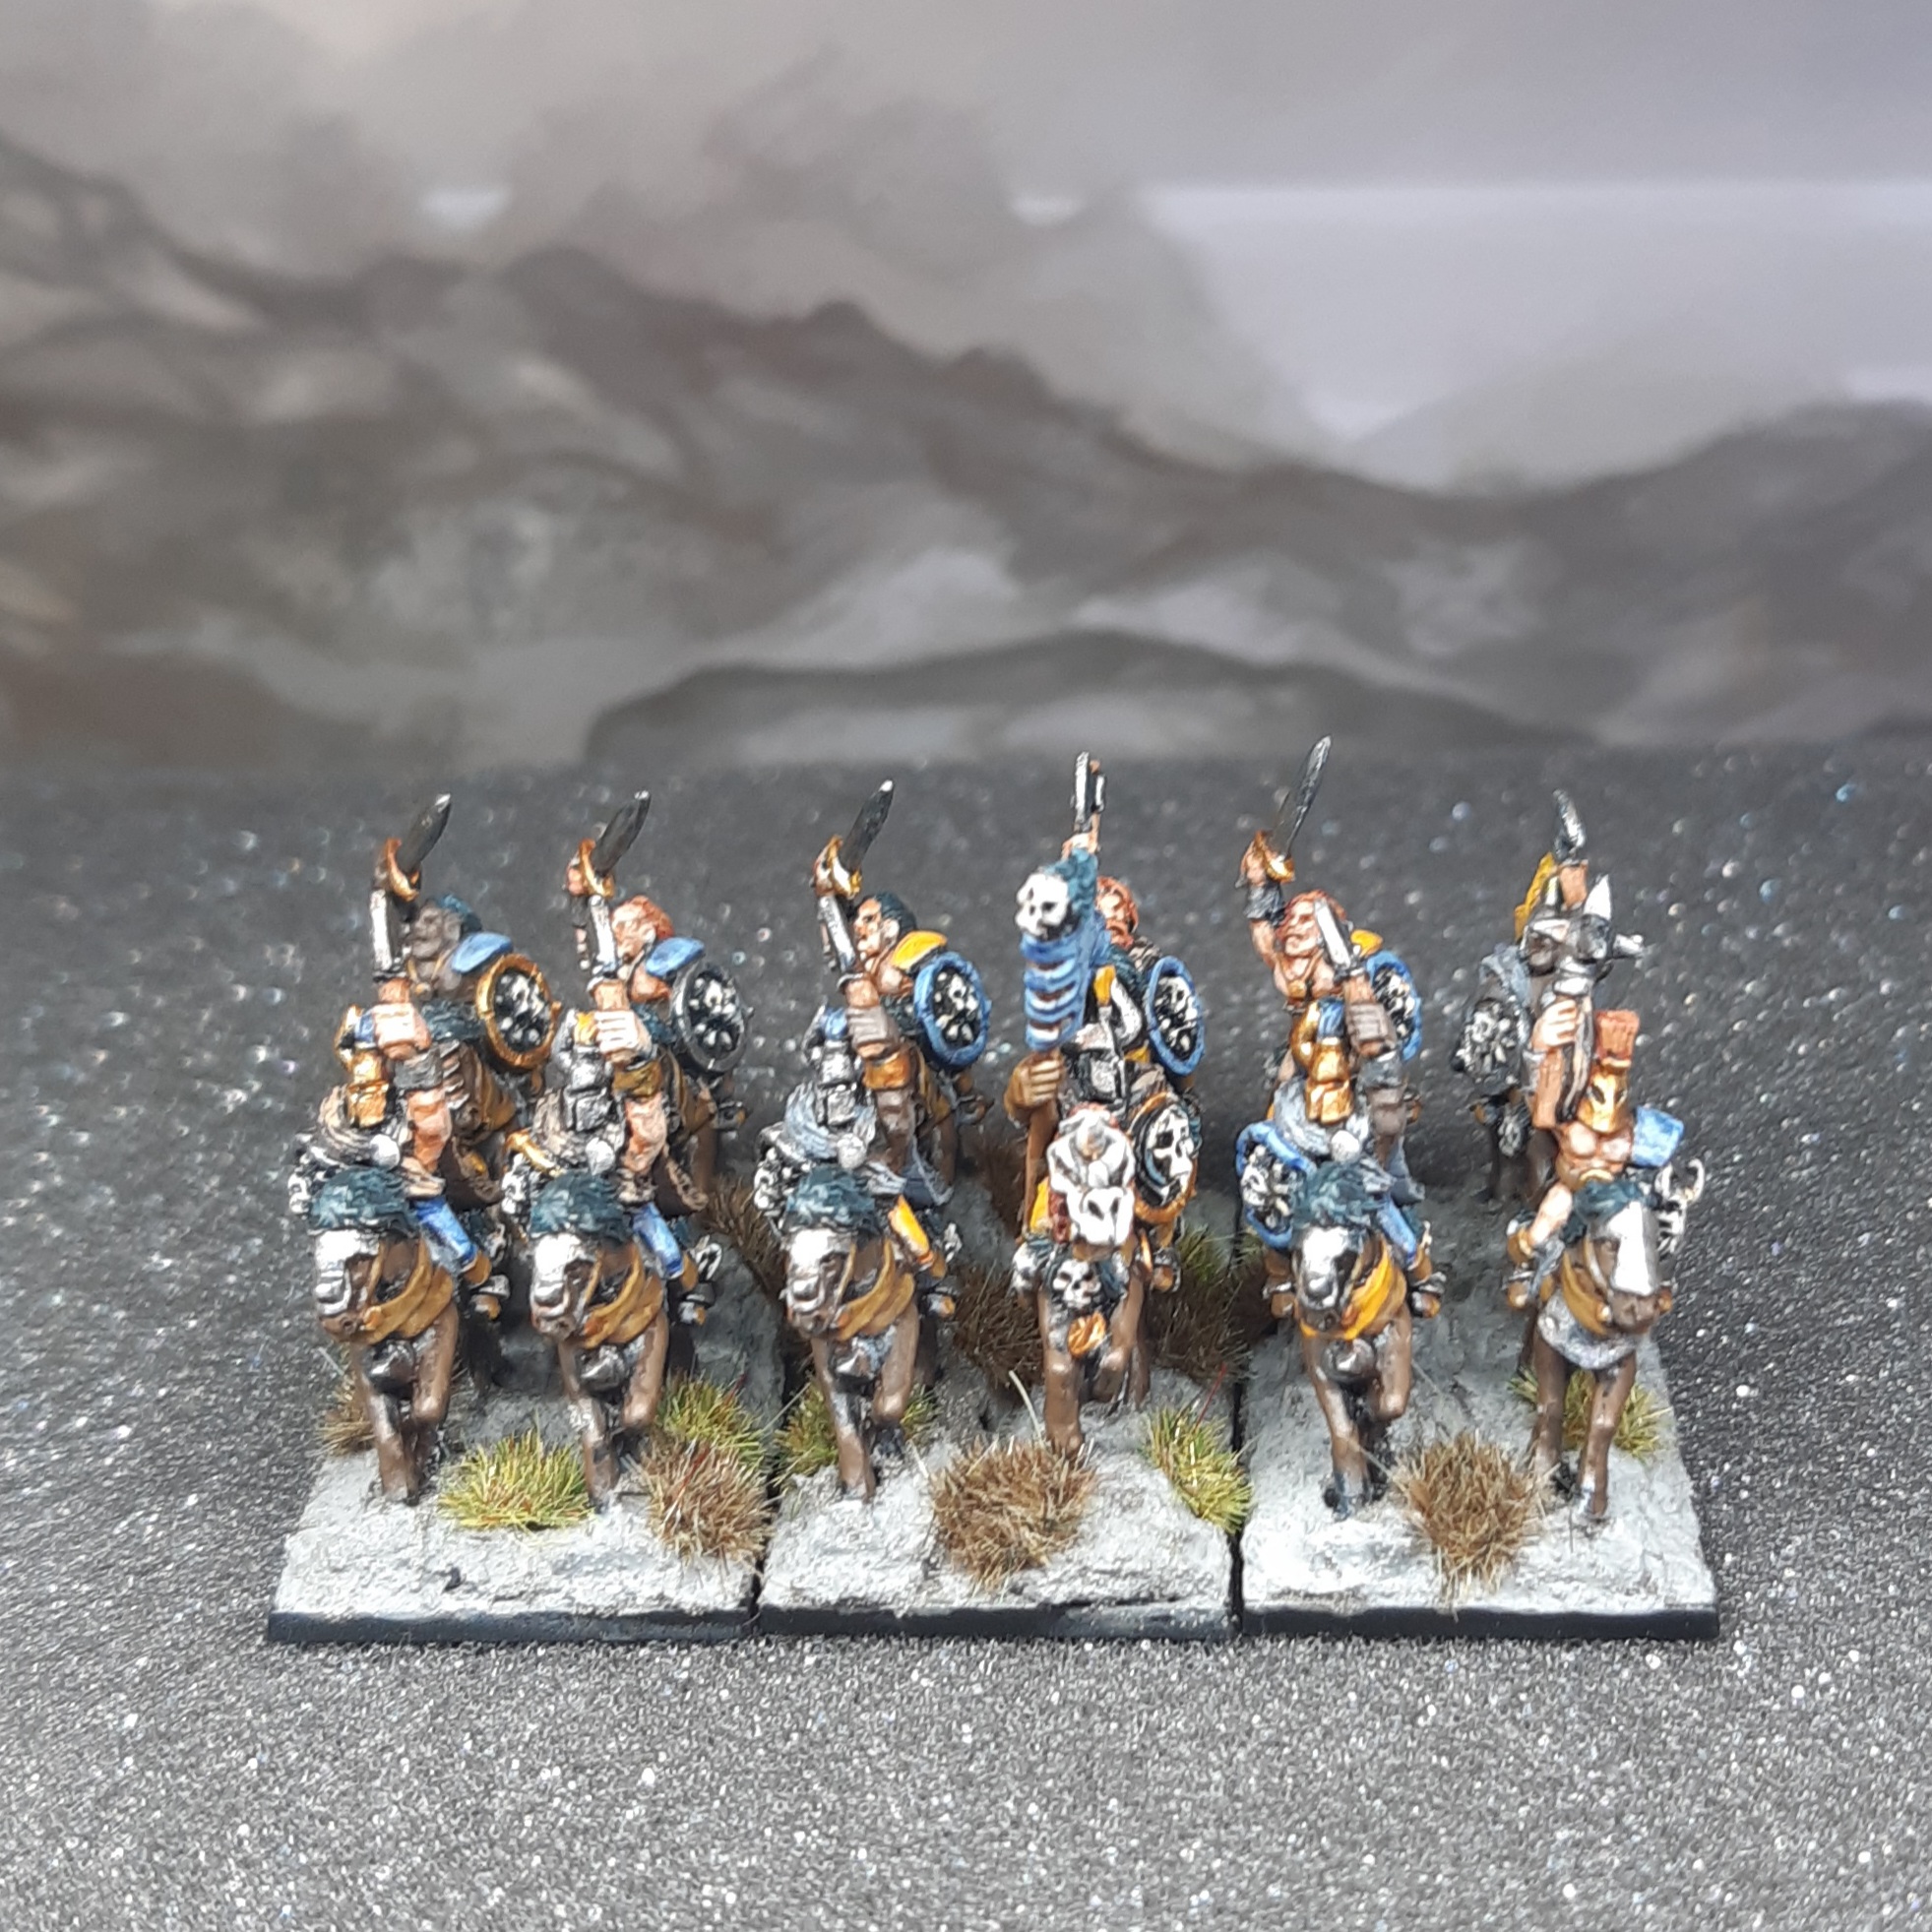
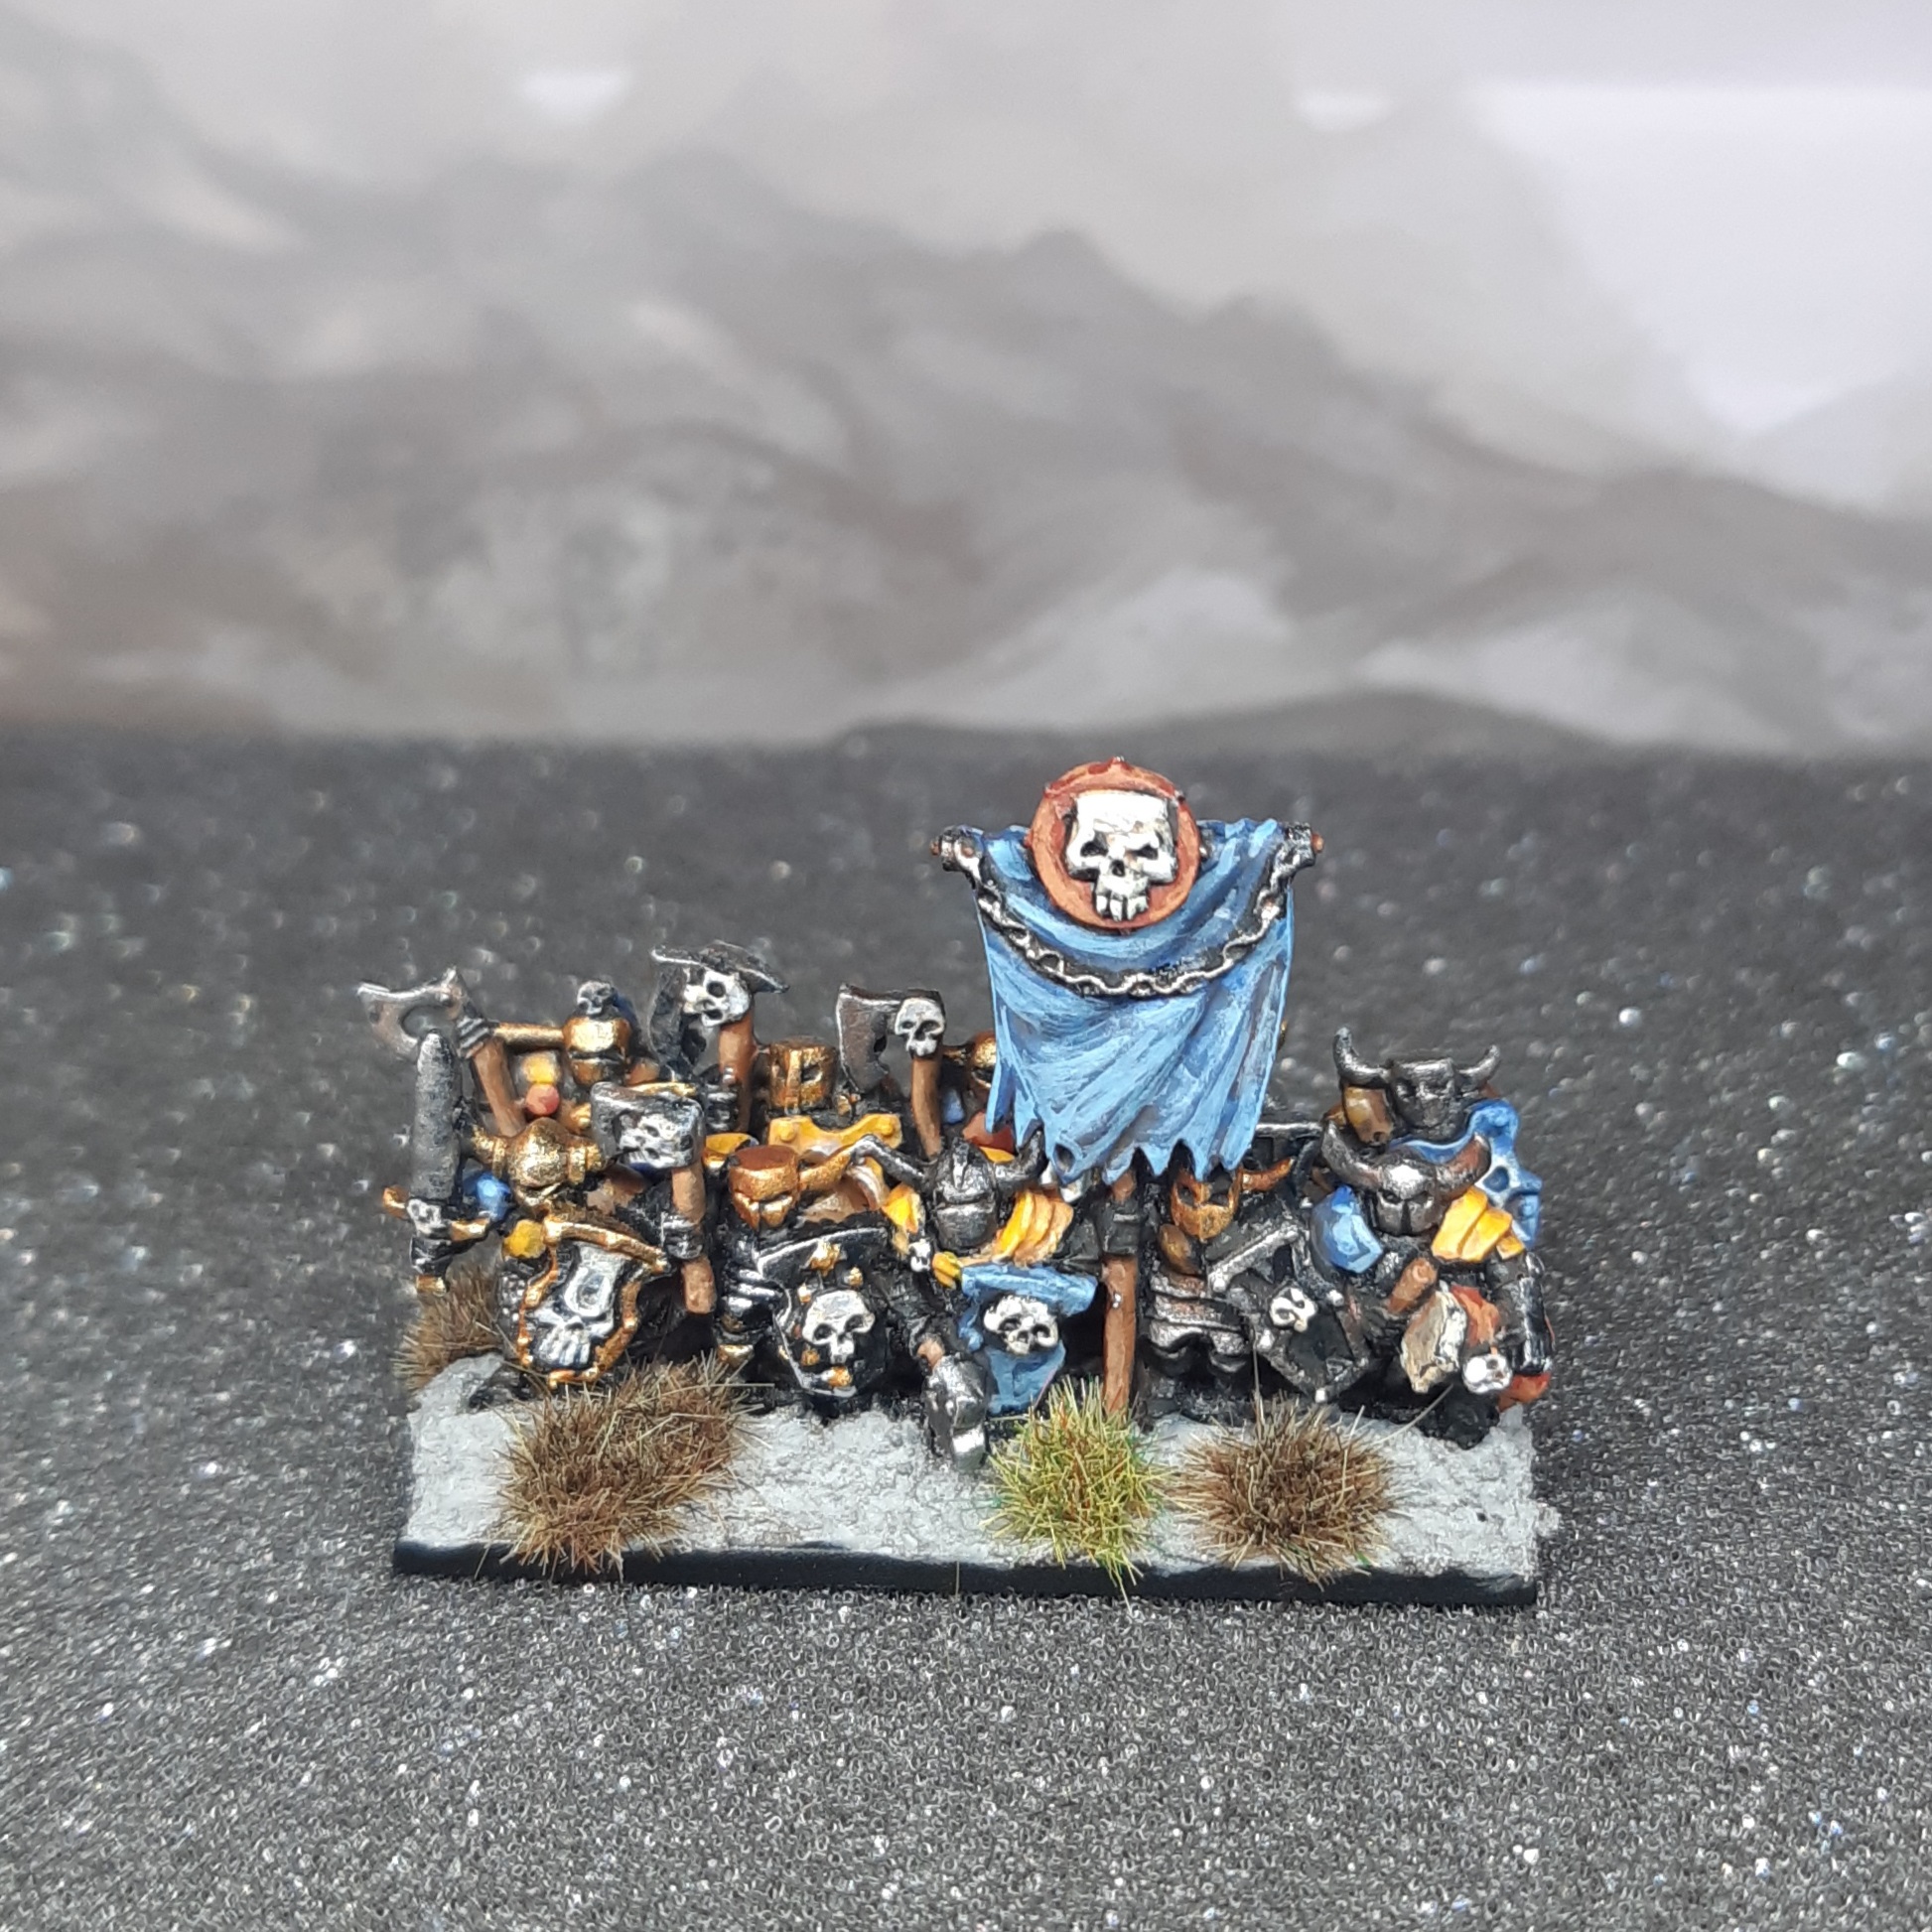
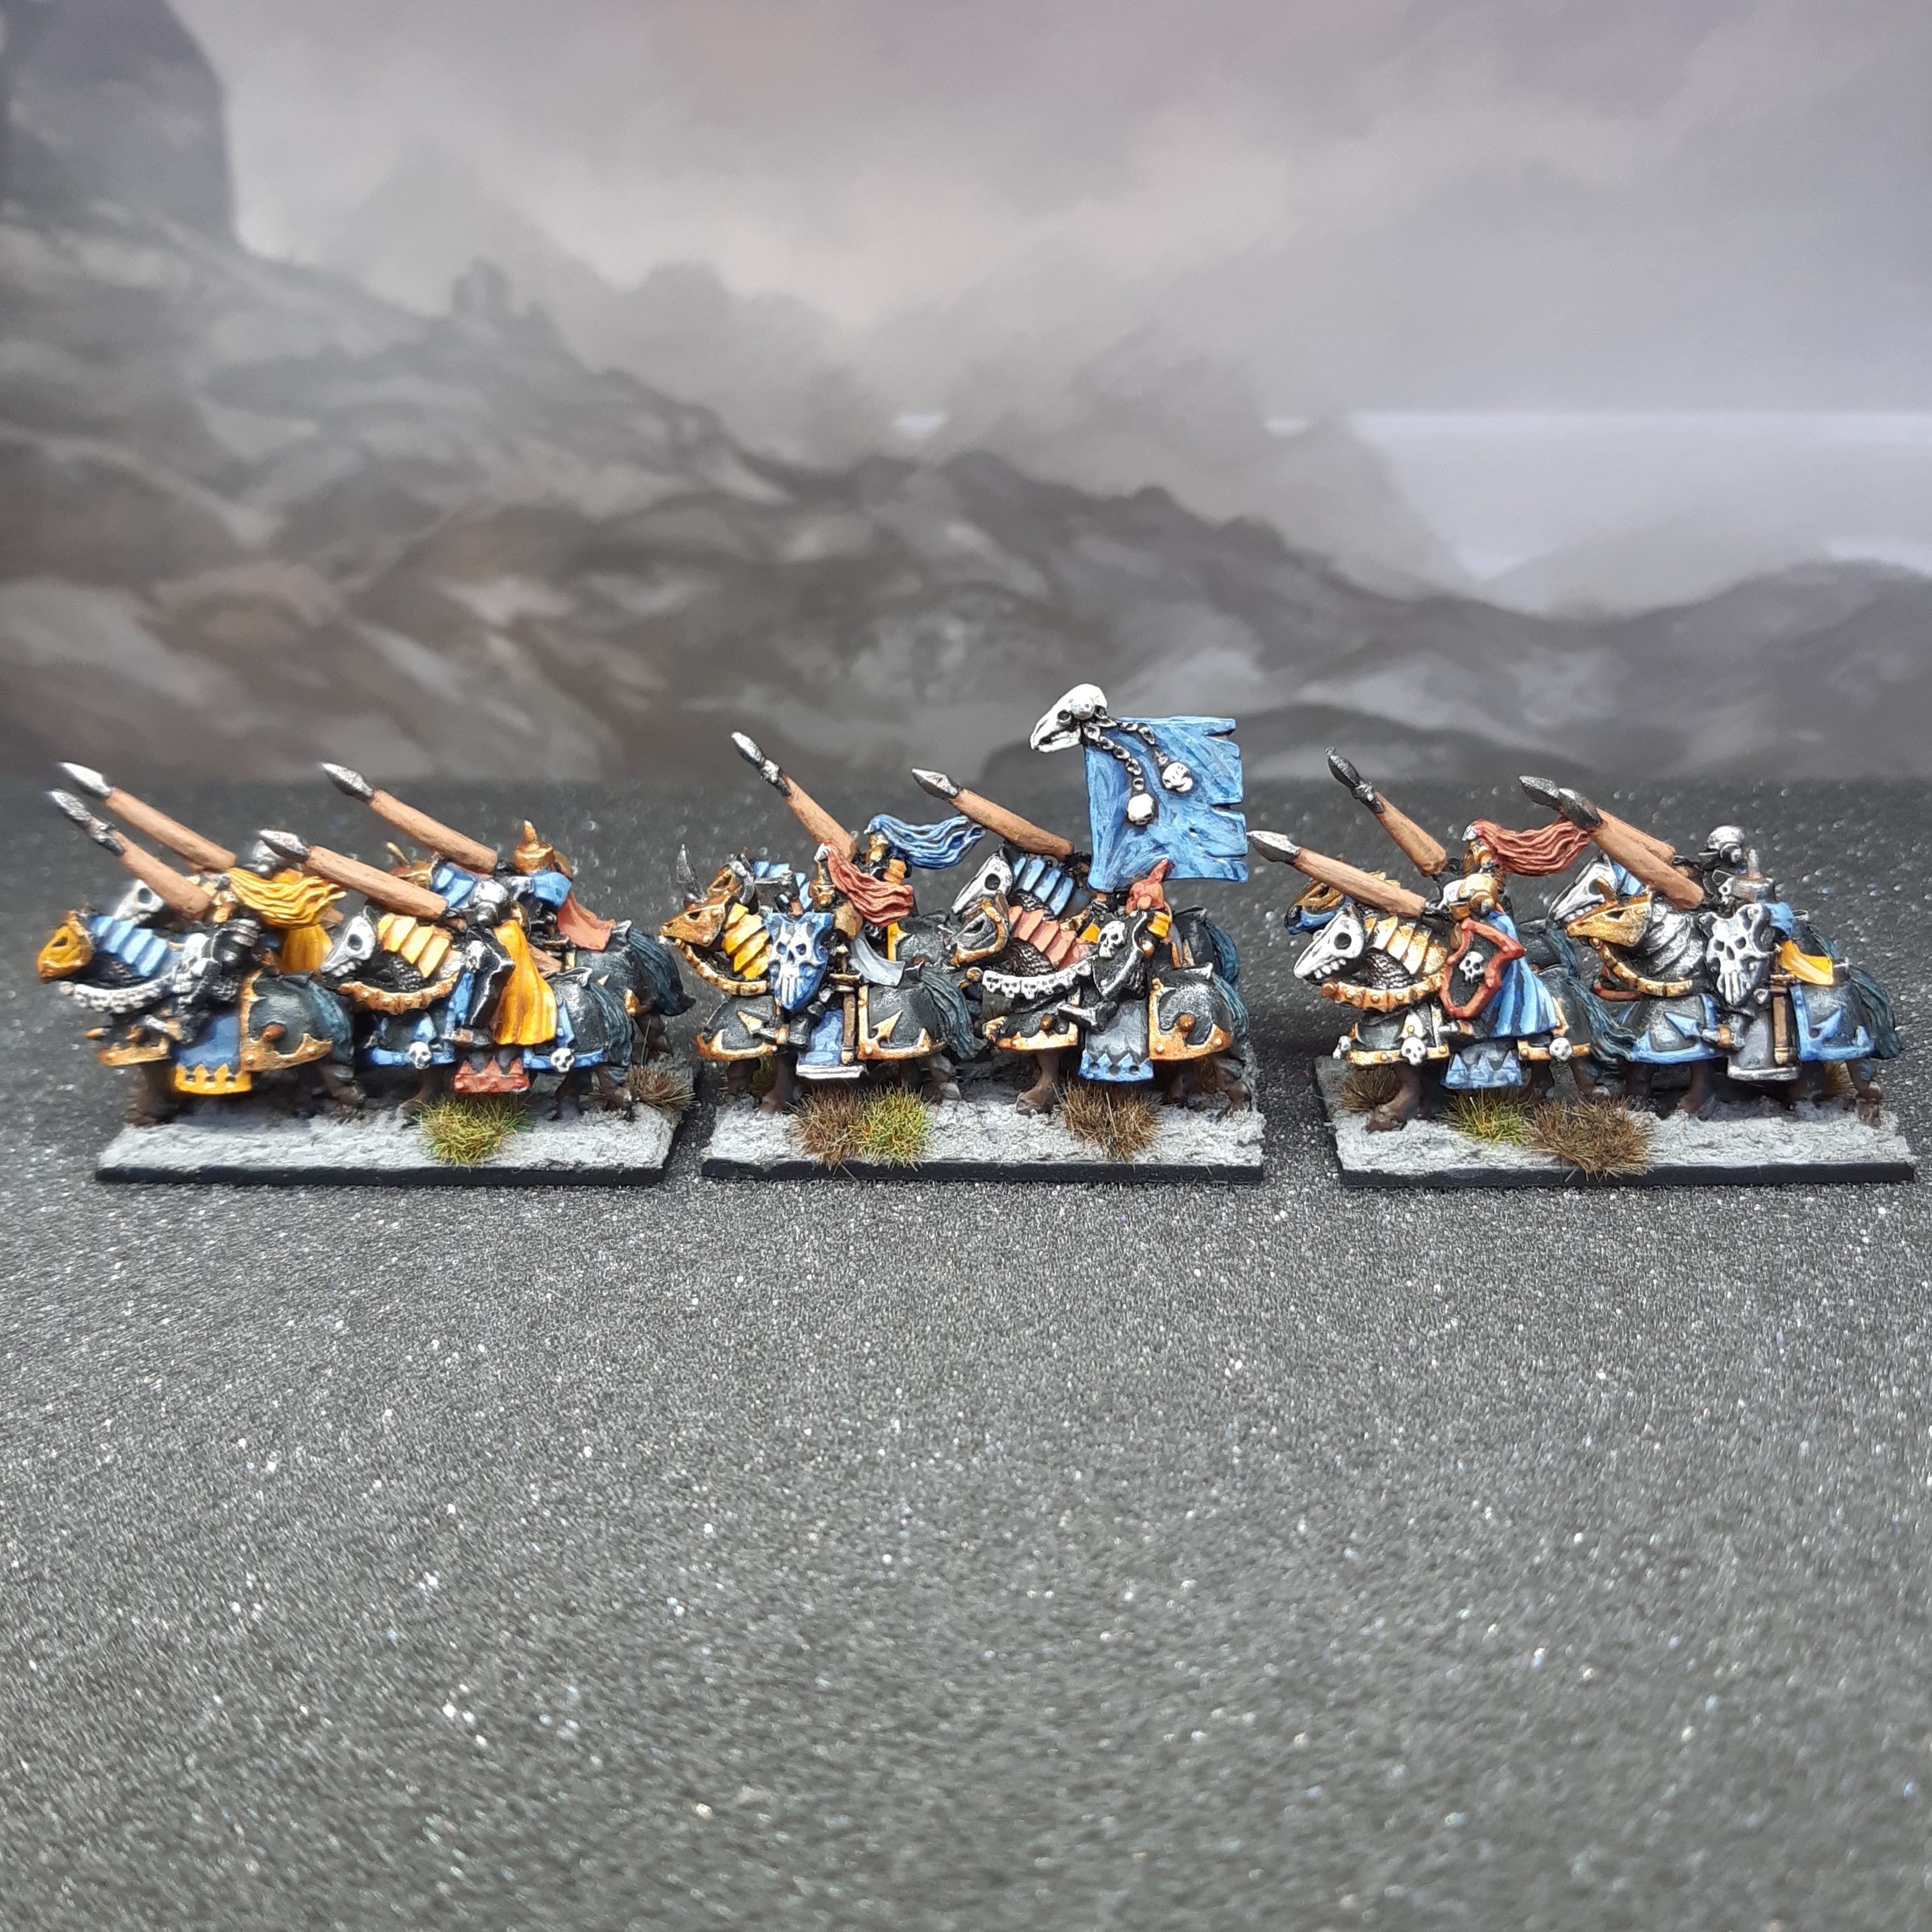
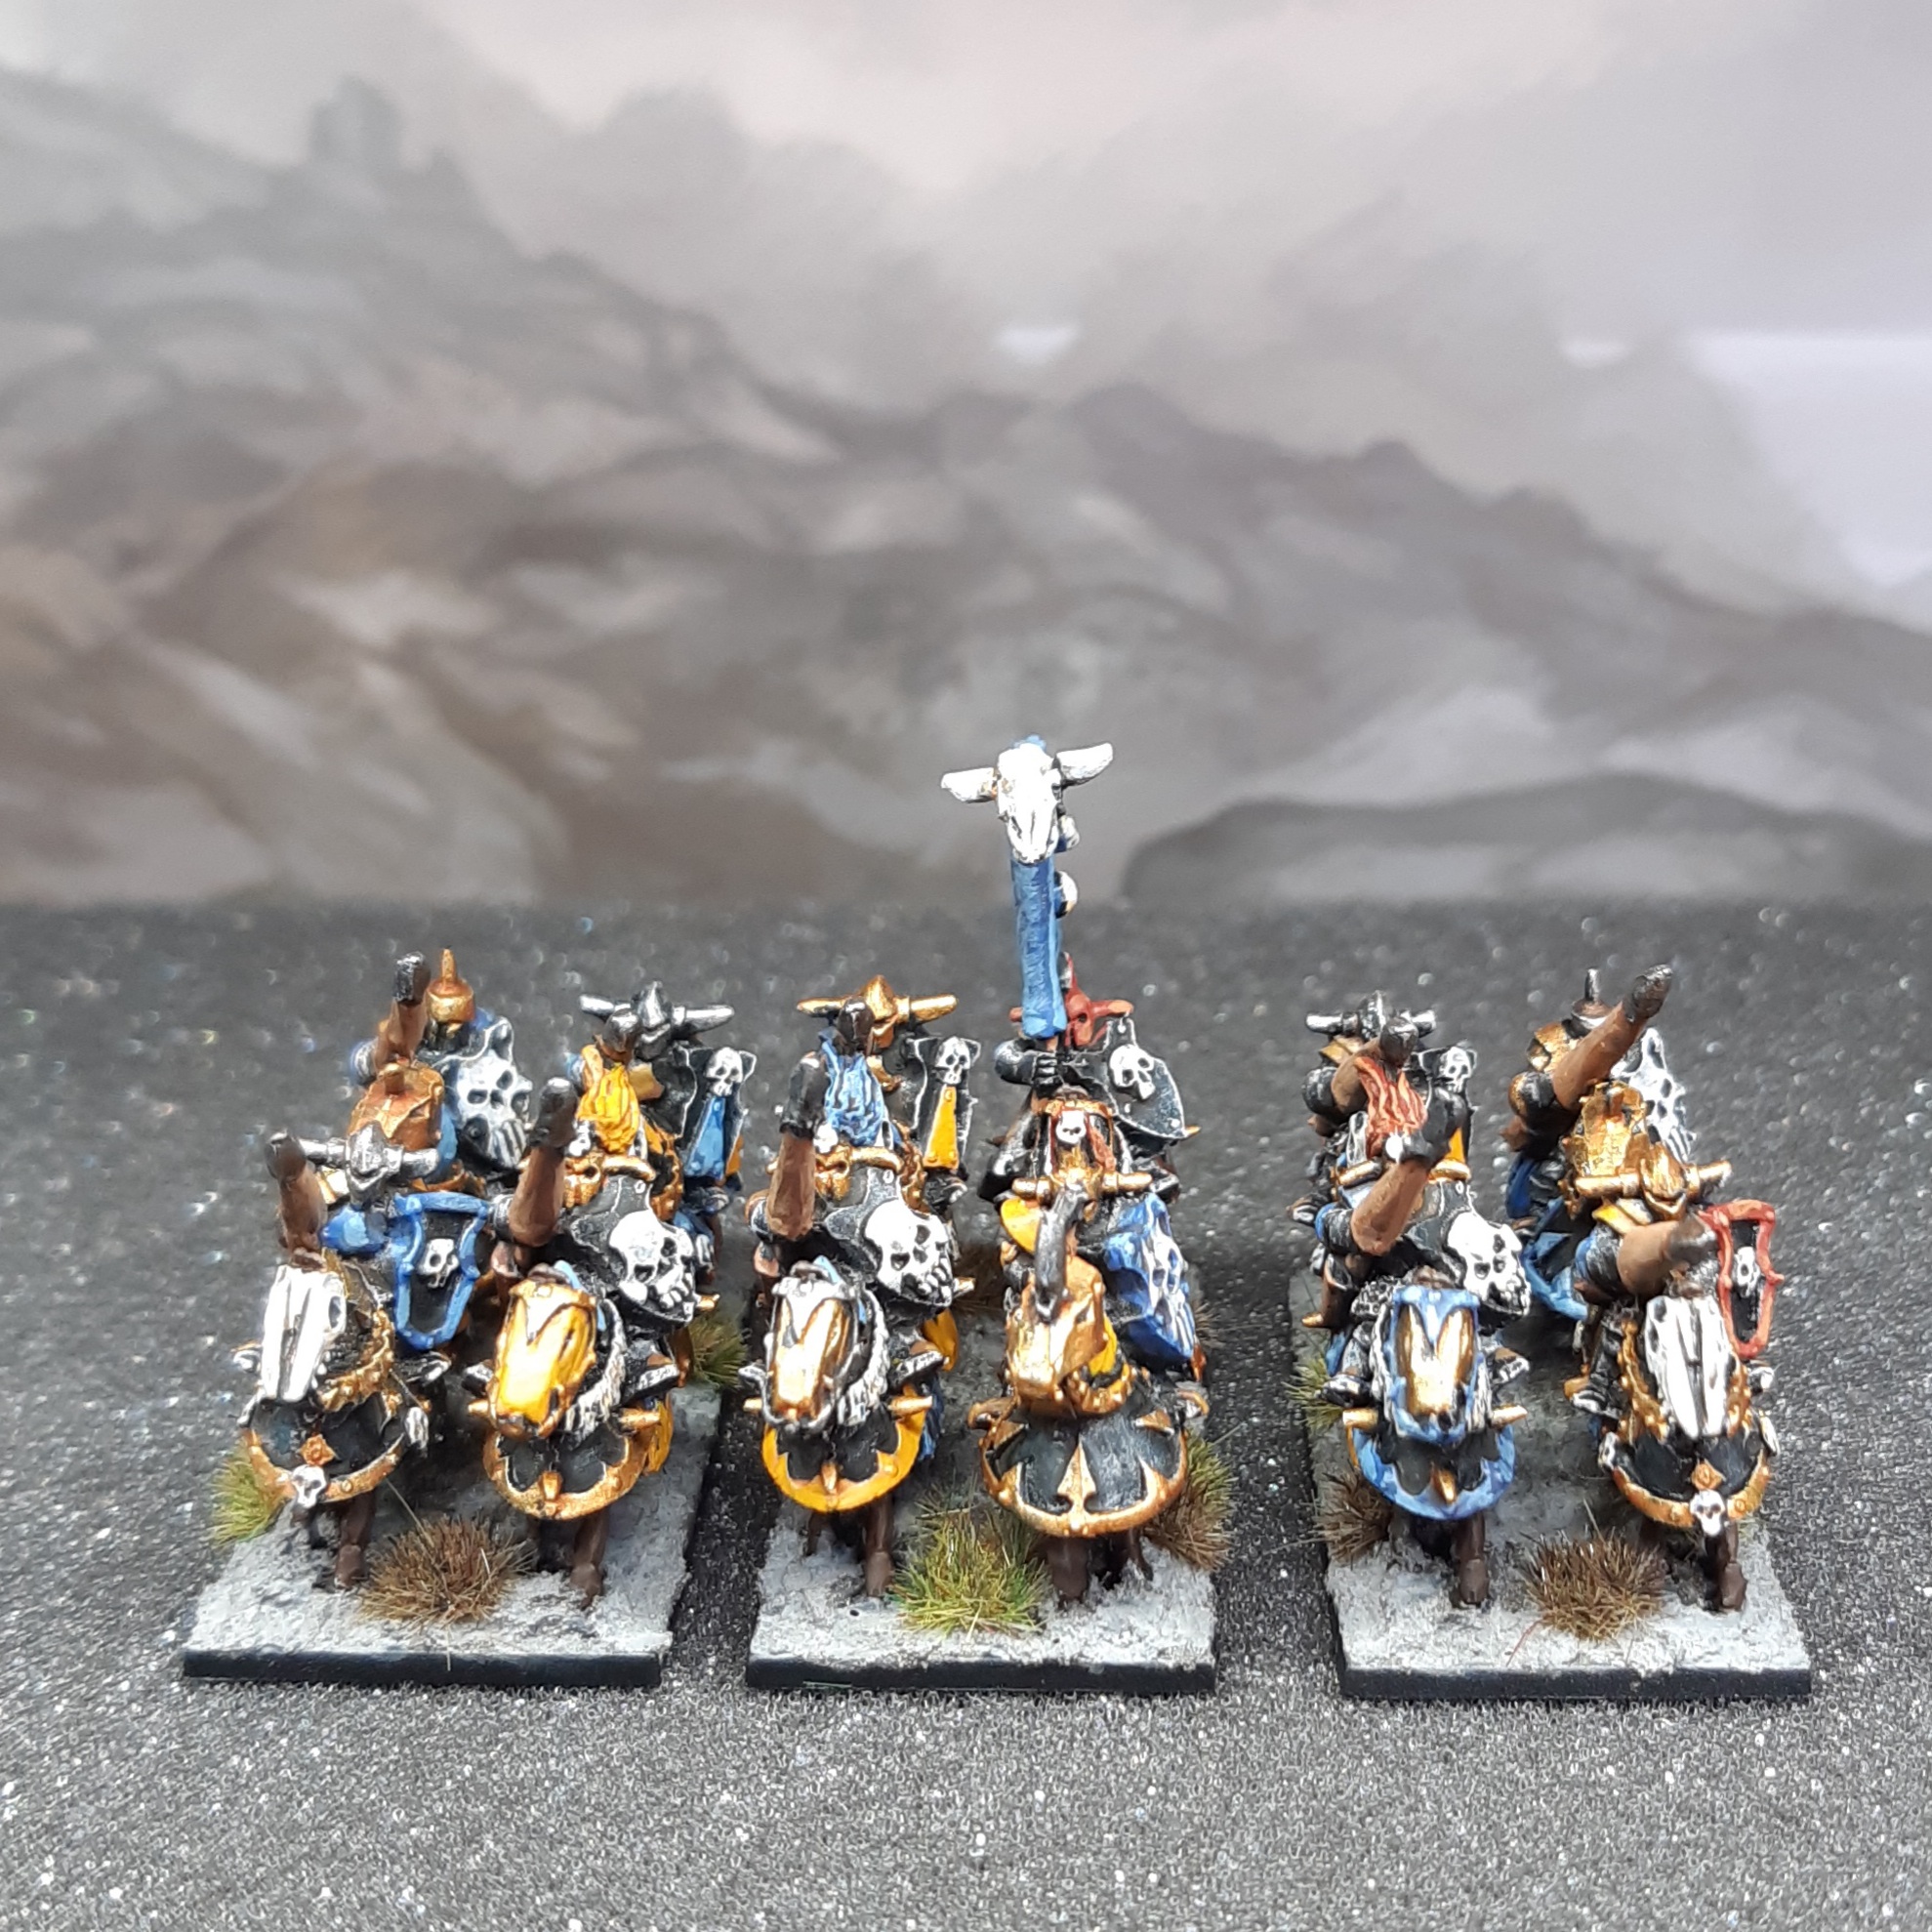
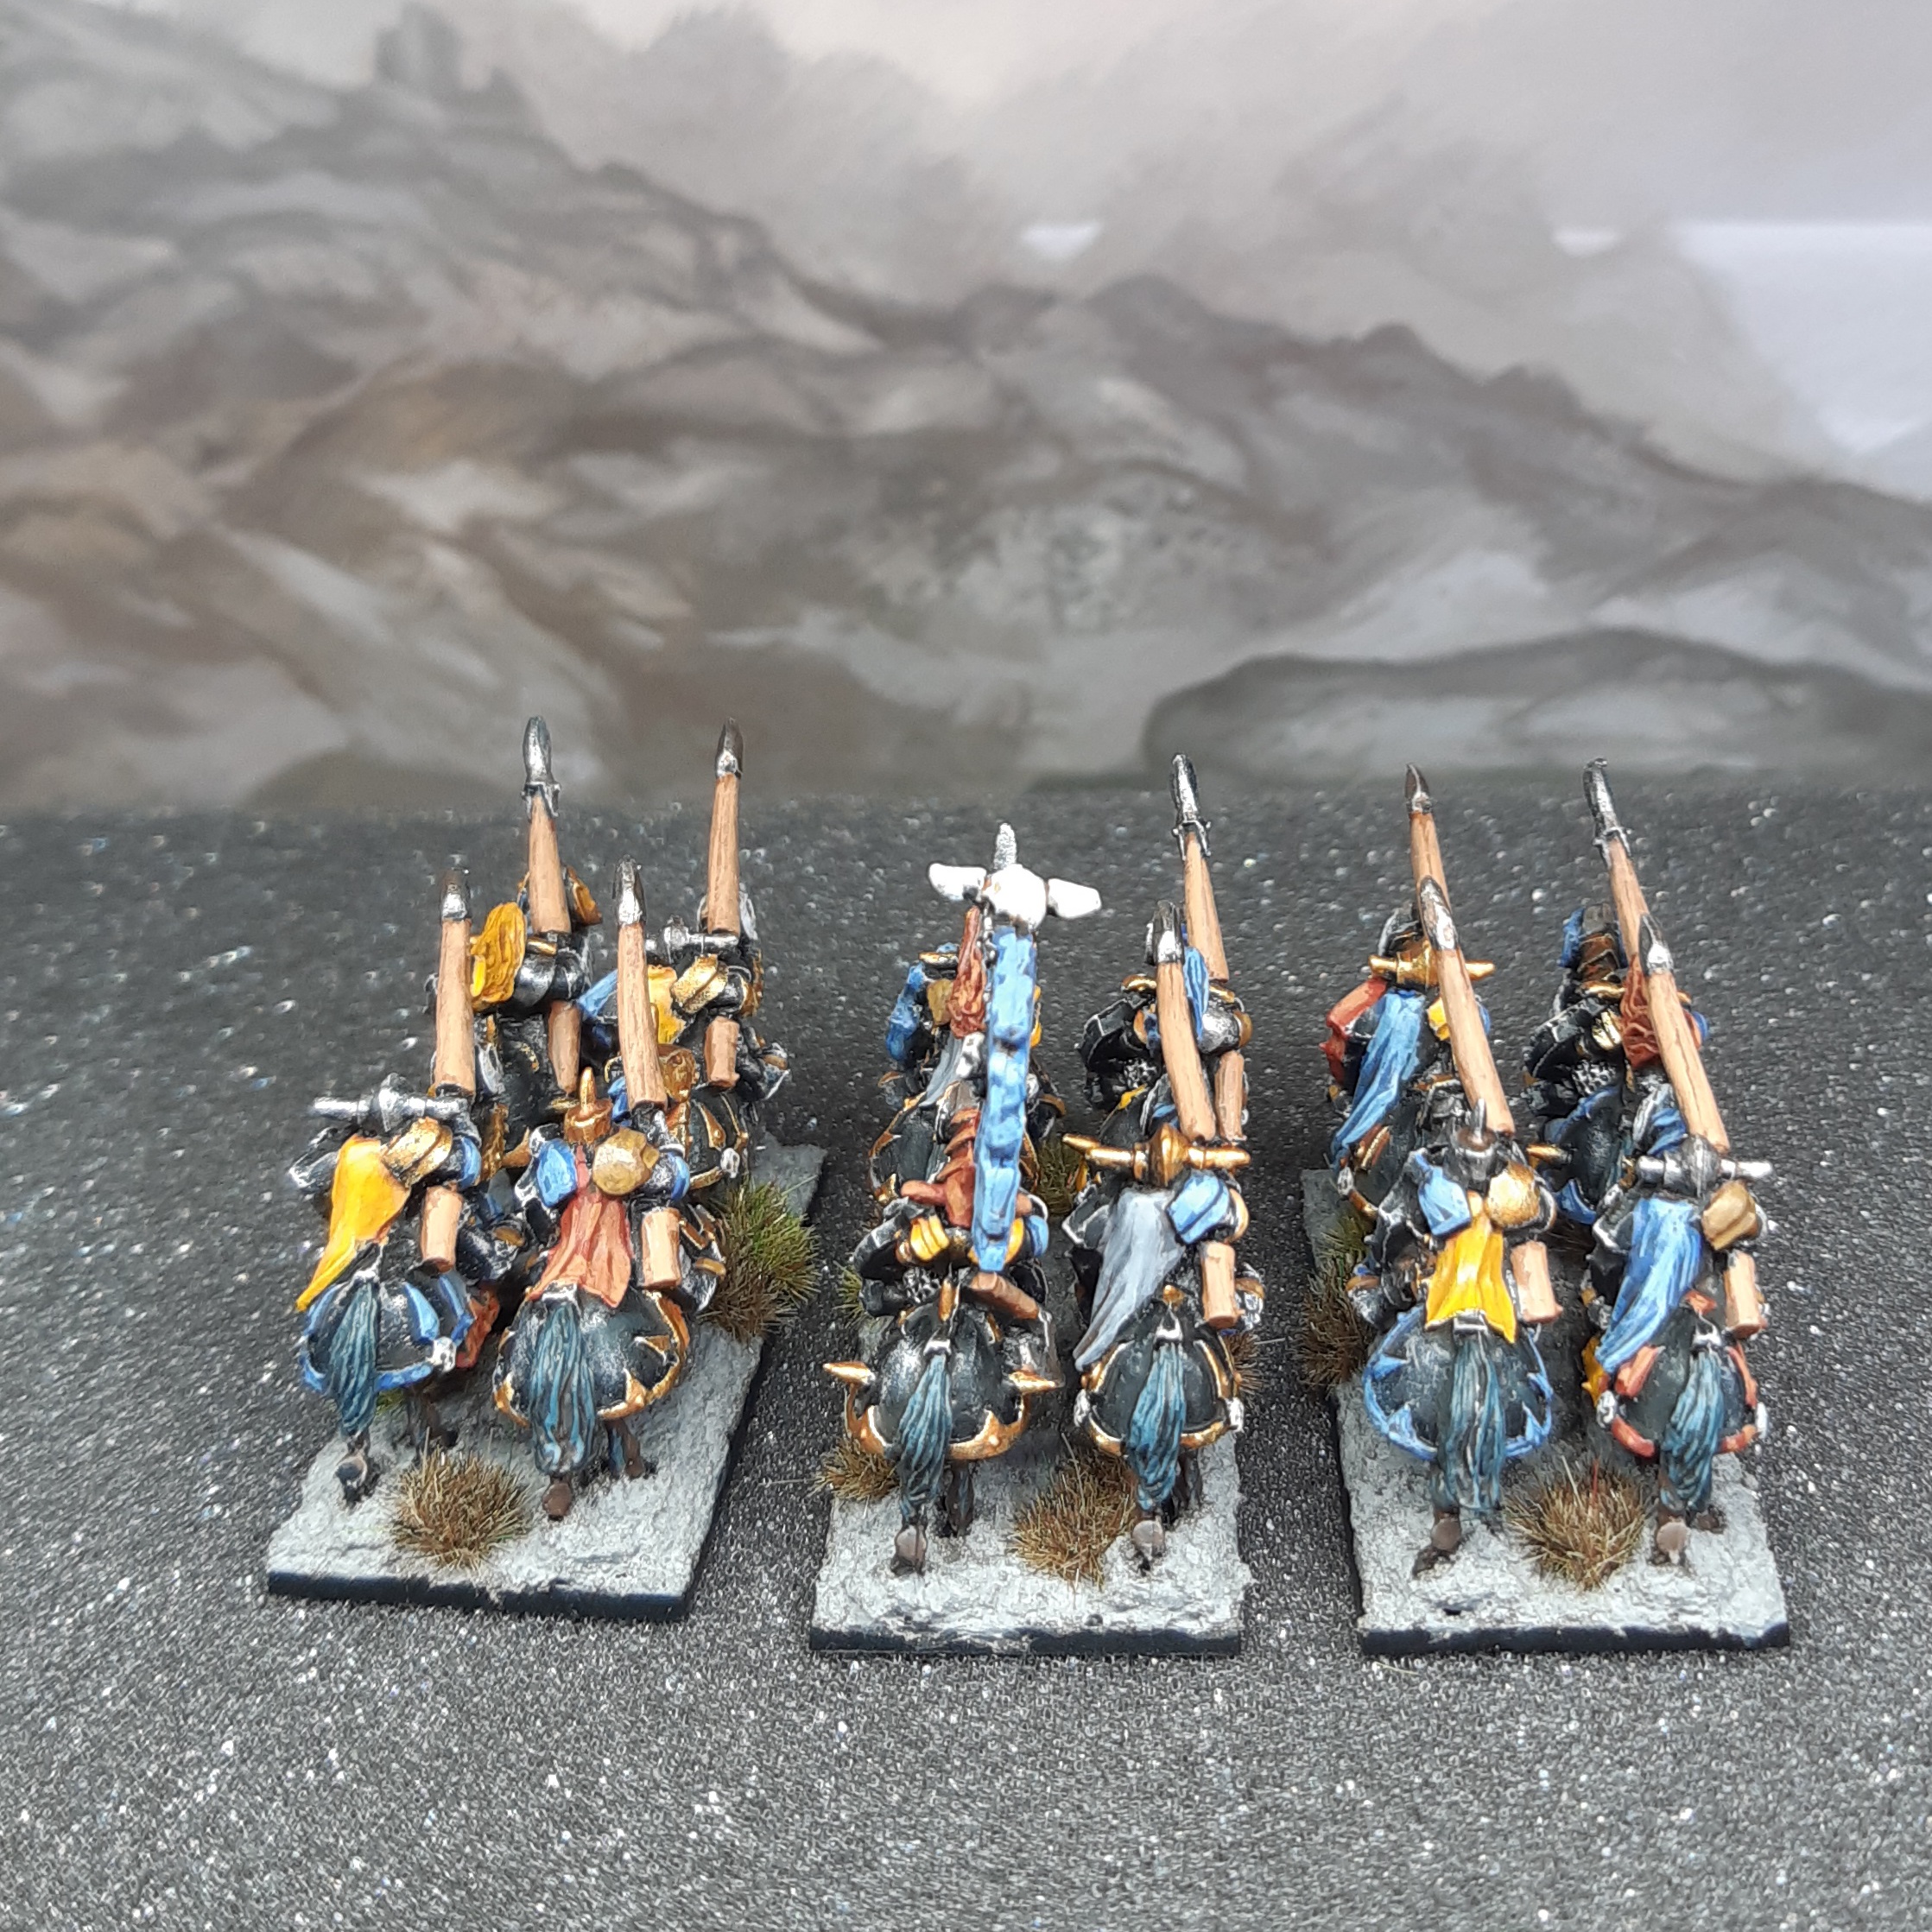
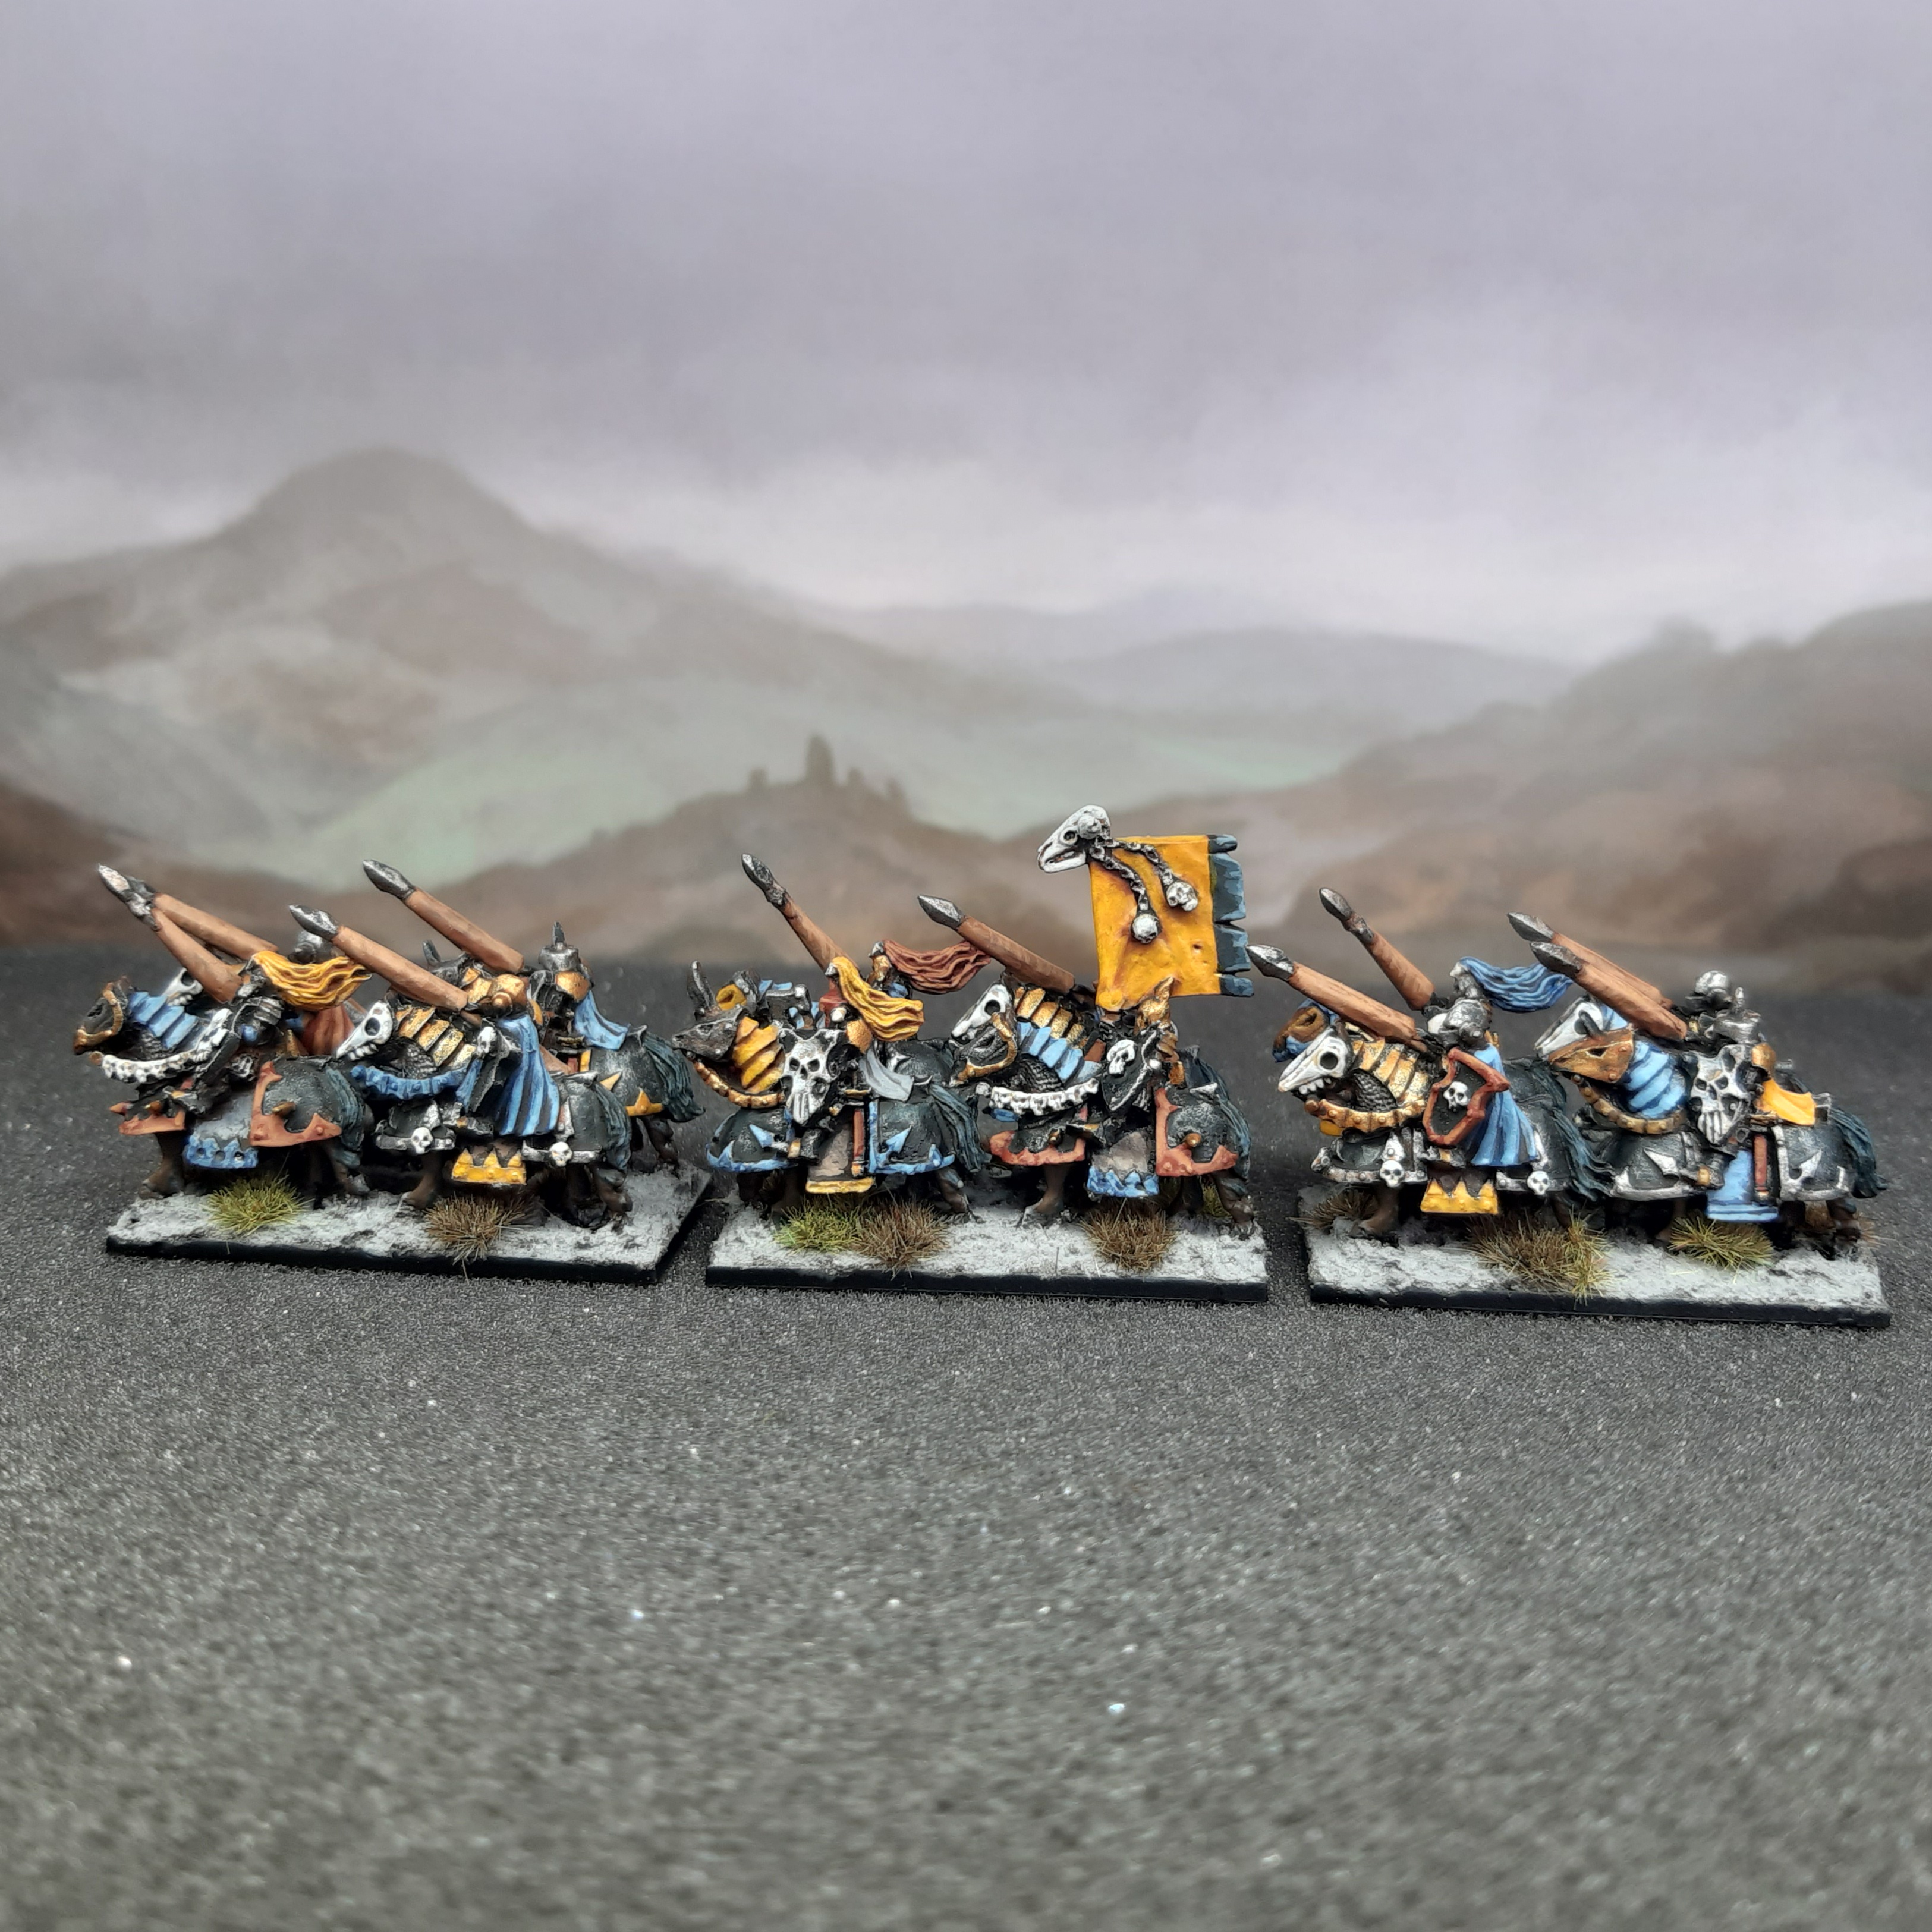
Chaos Knights
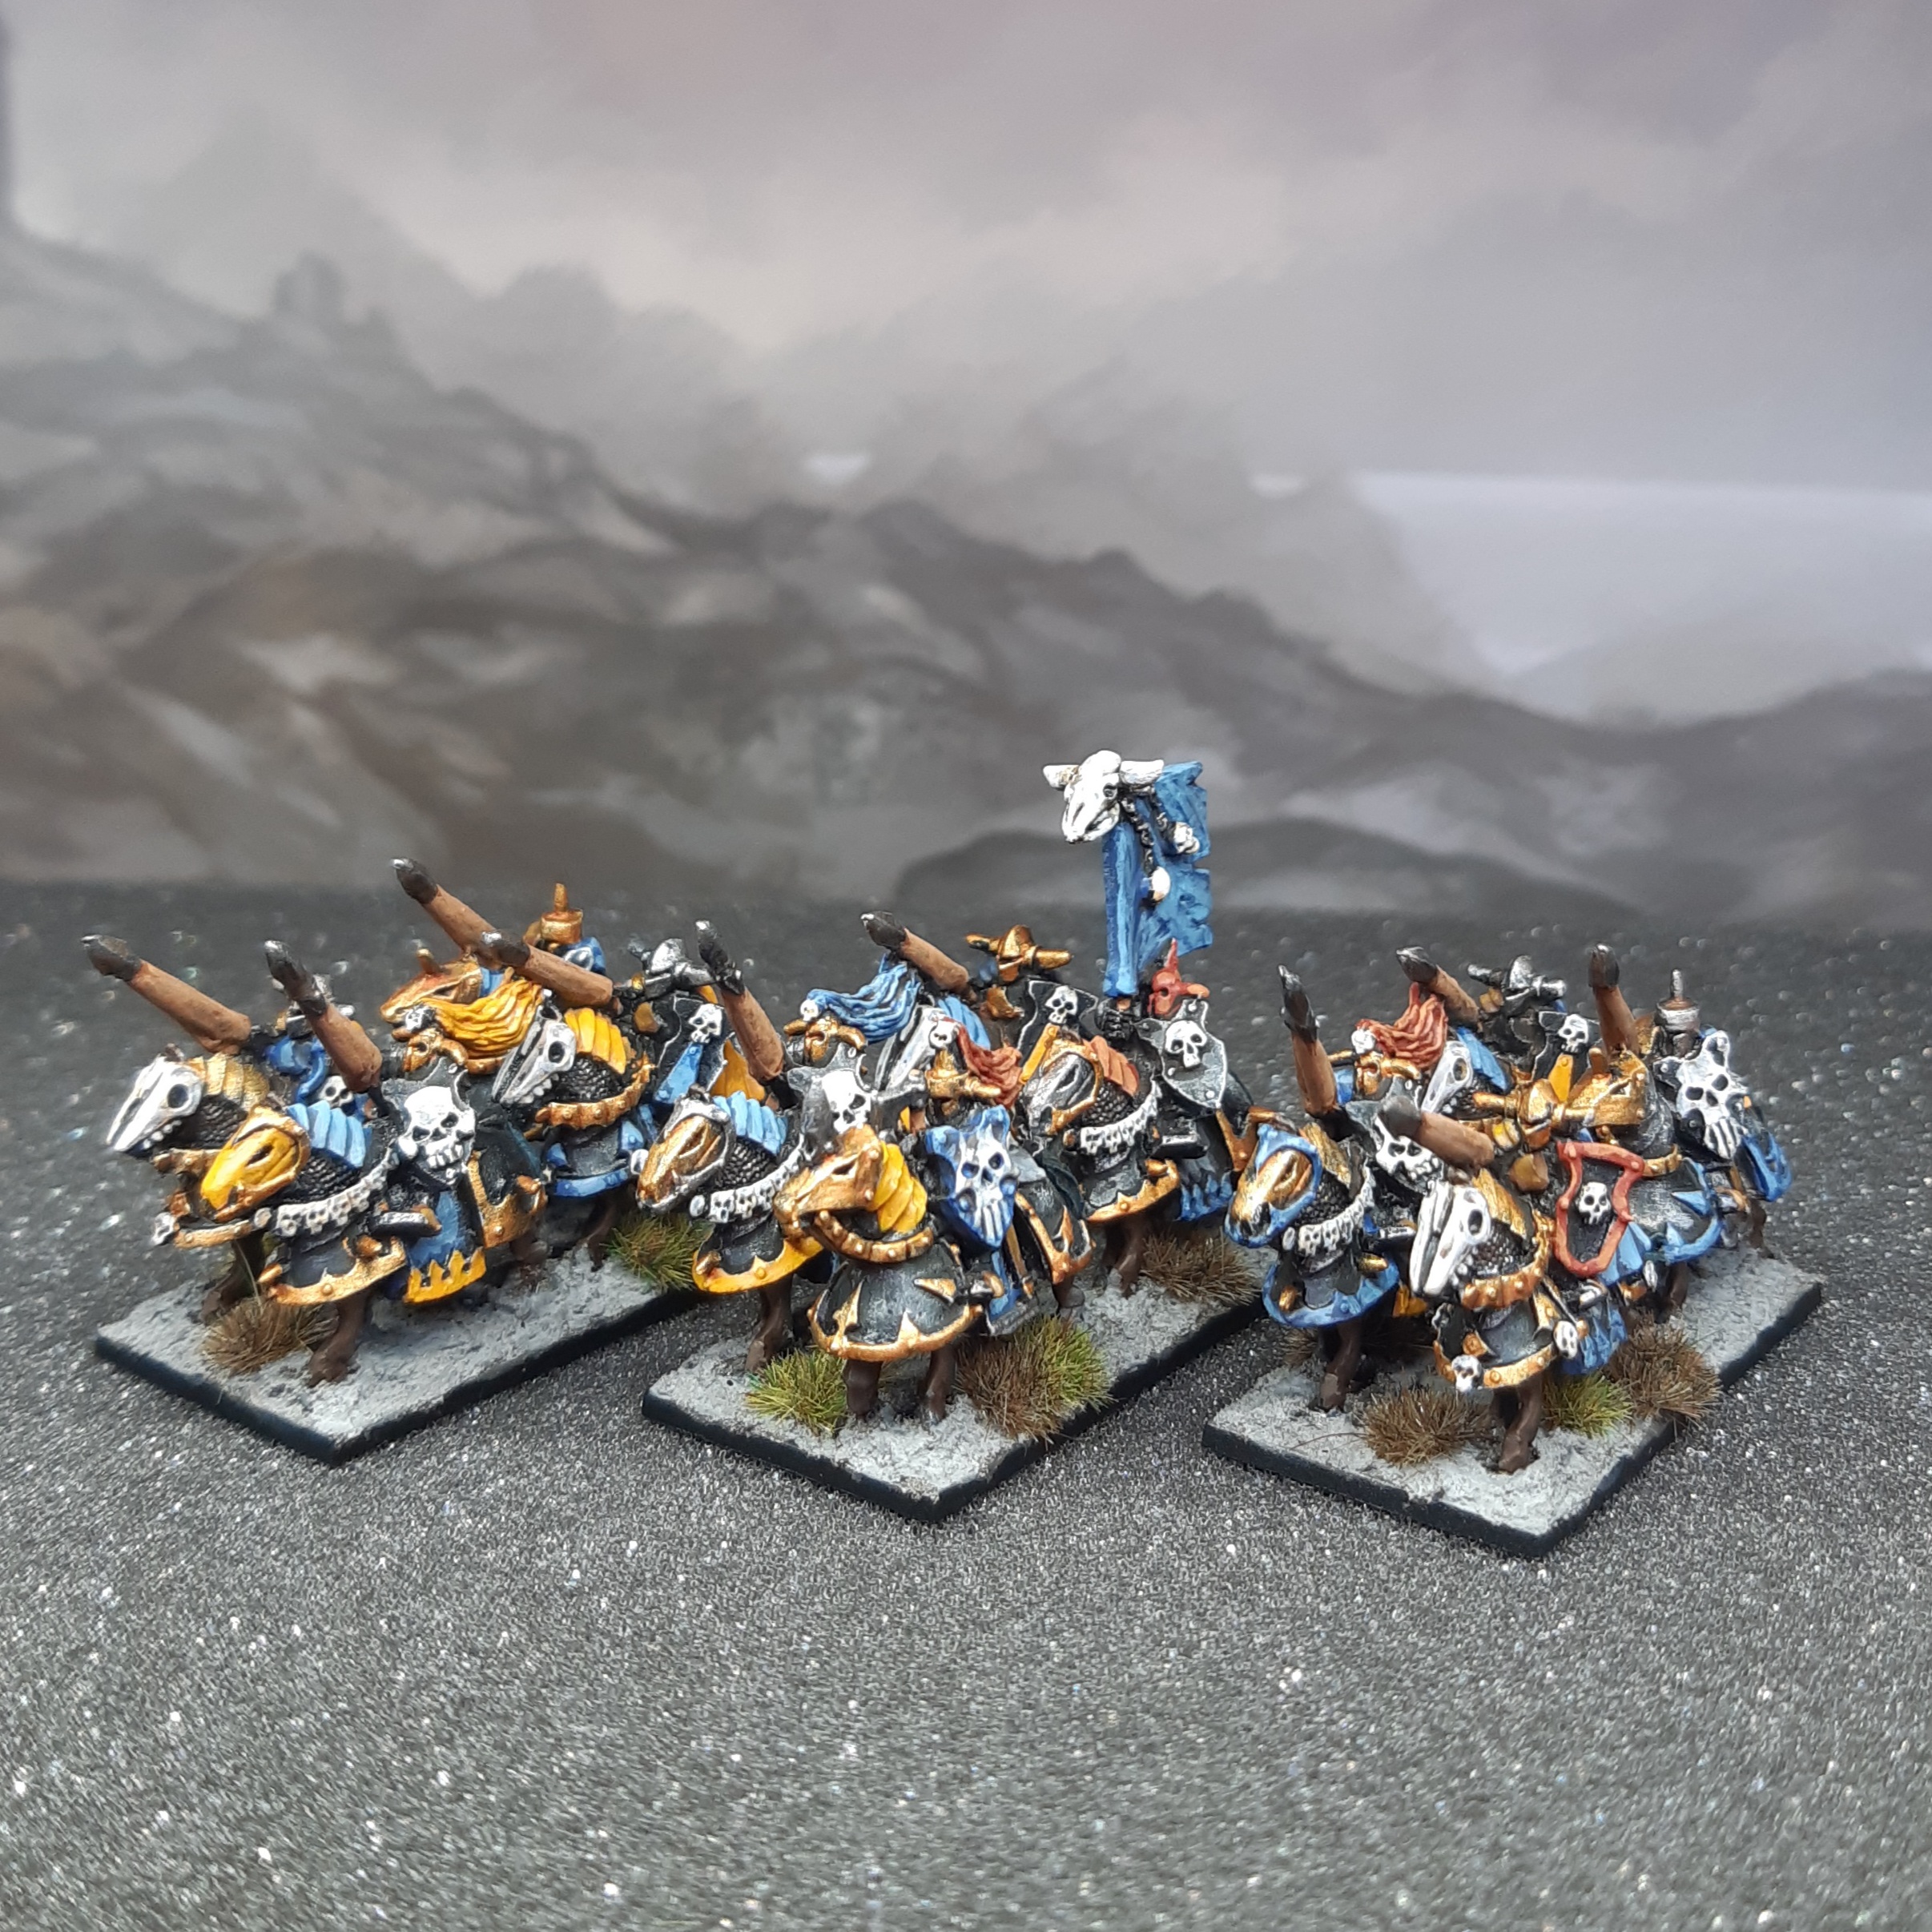
First of the two Chaos Knight units all finished. Again not much to be said, just continuing the paint scheme already outlined previously.
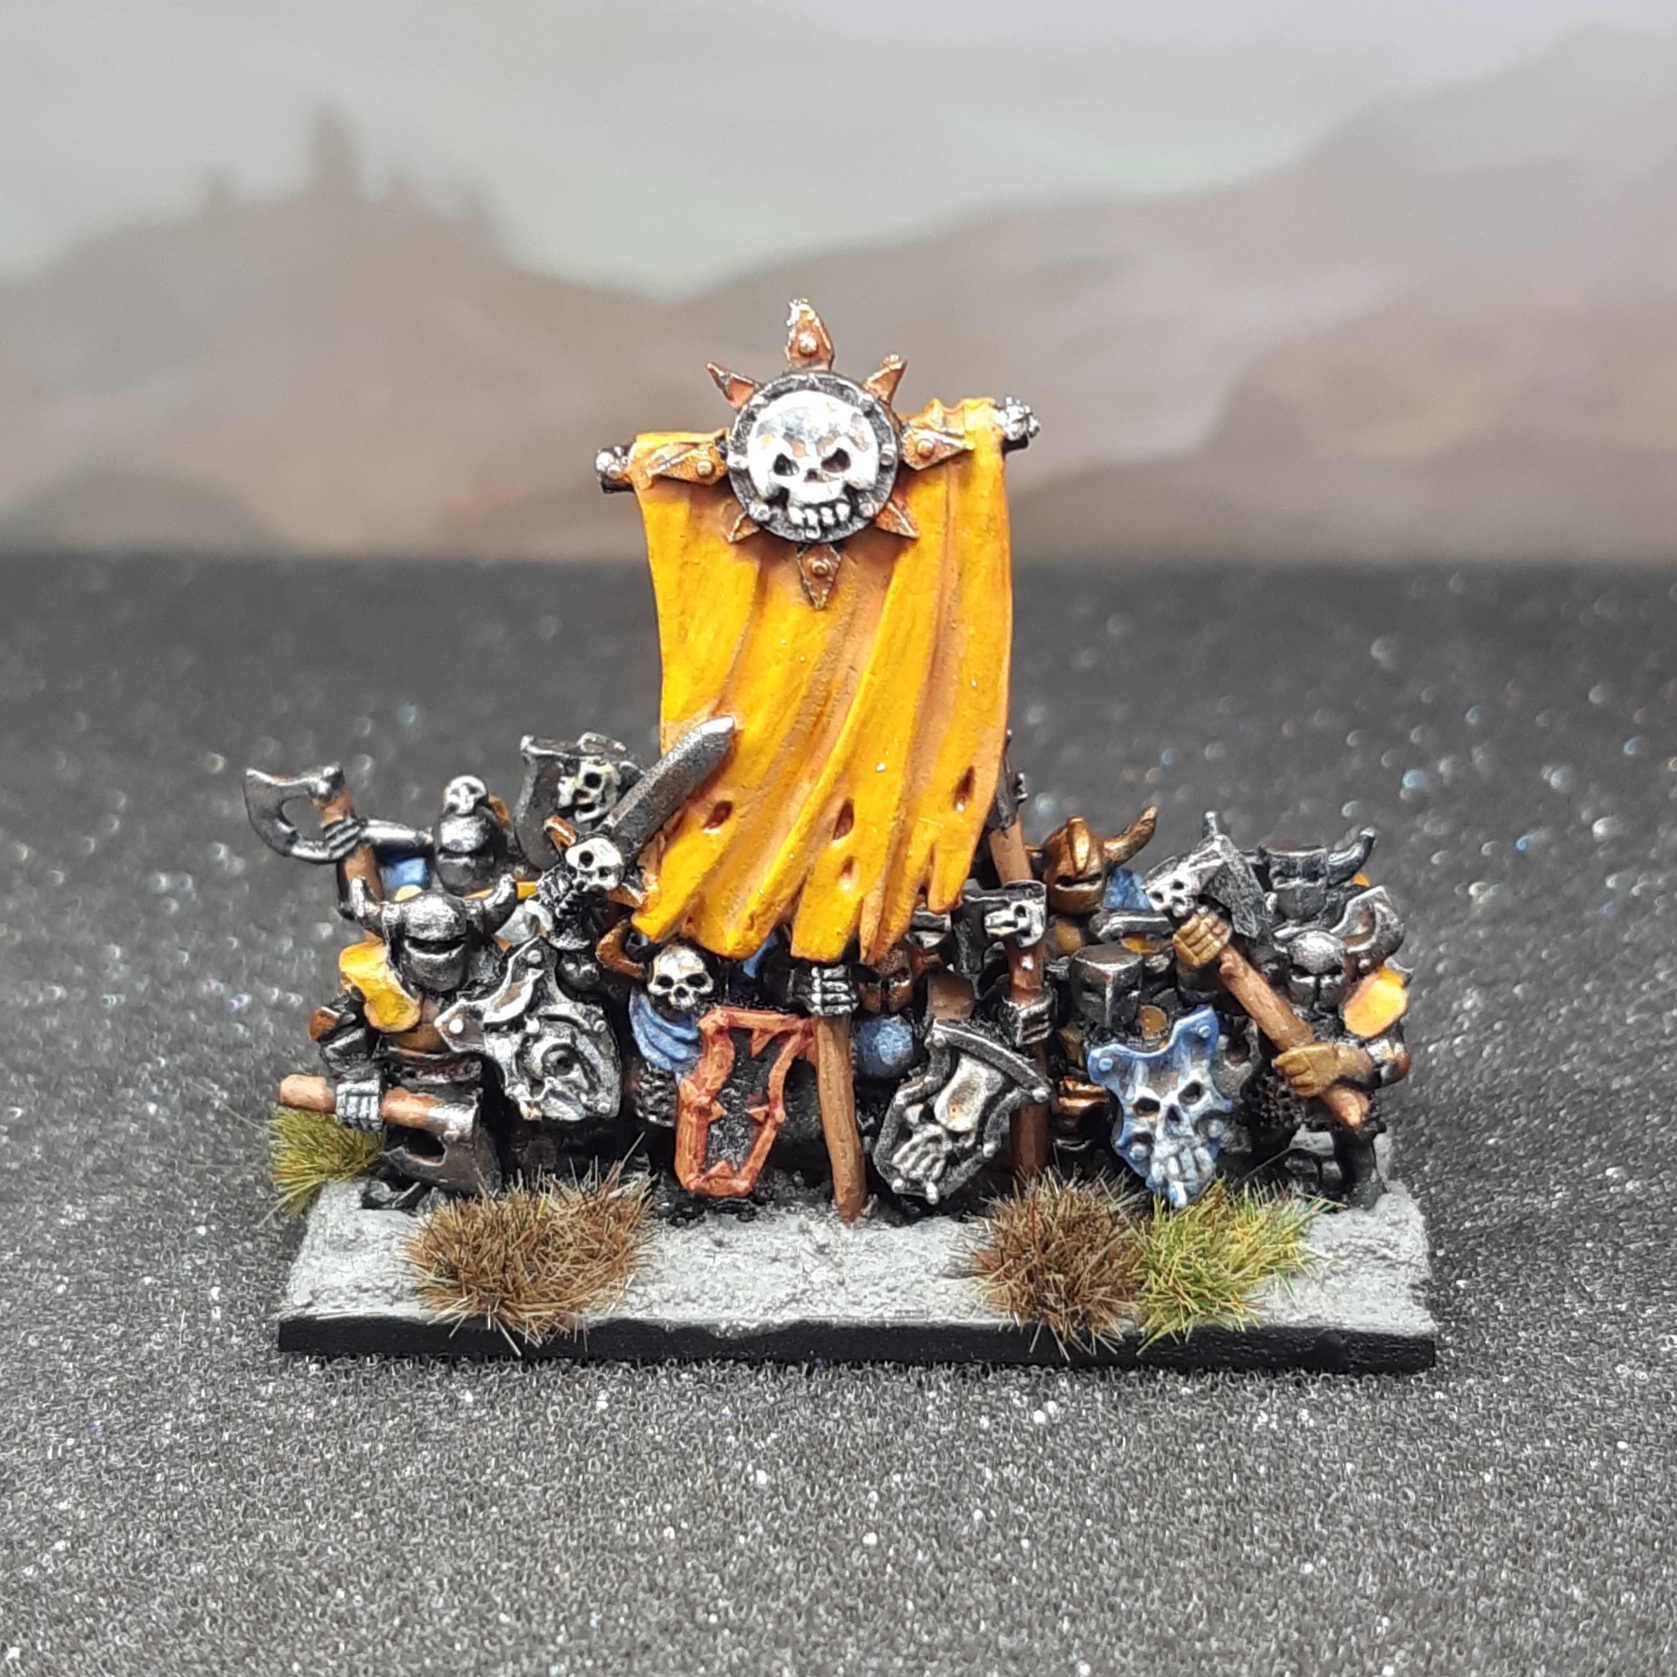
Characters
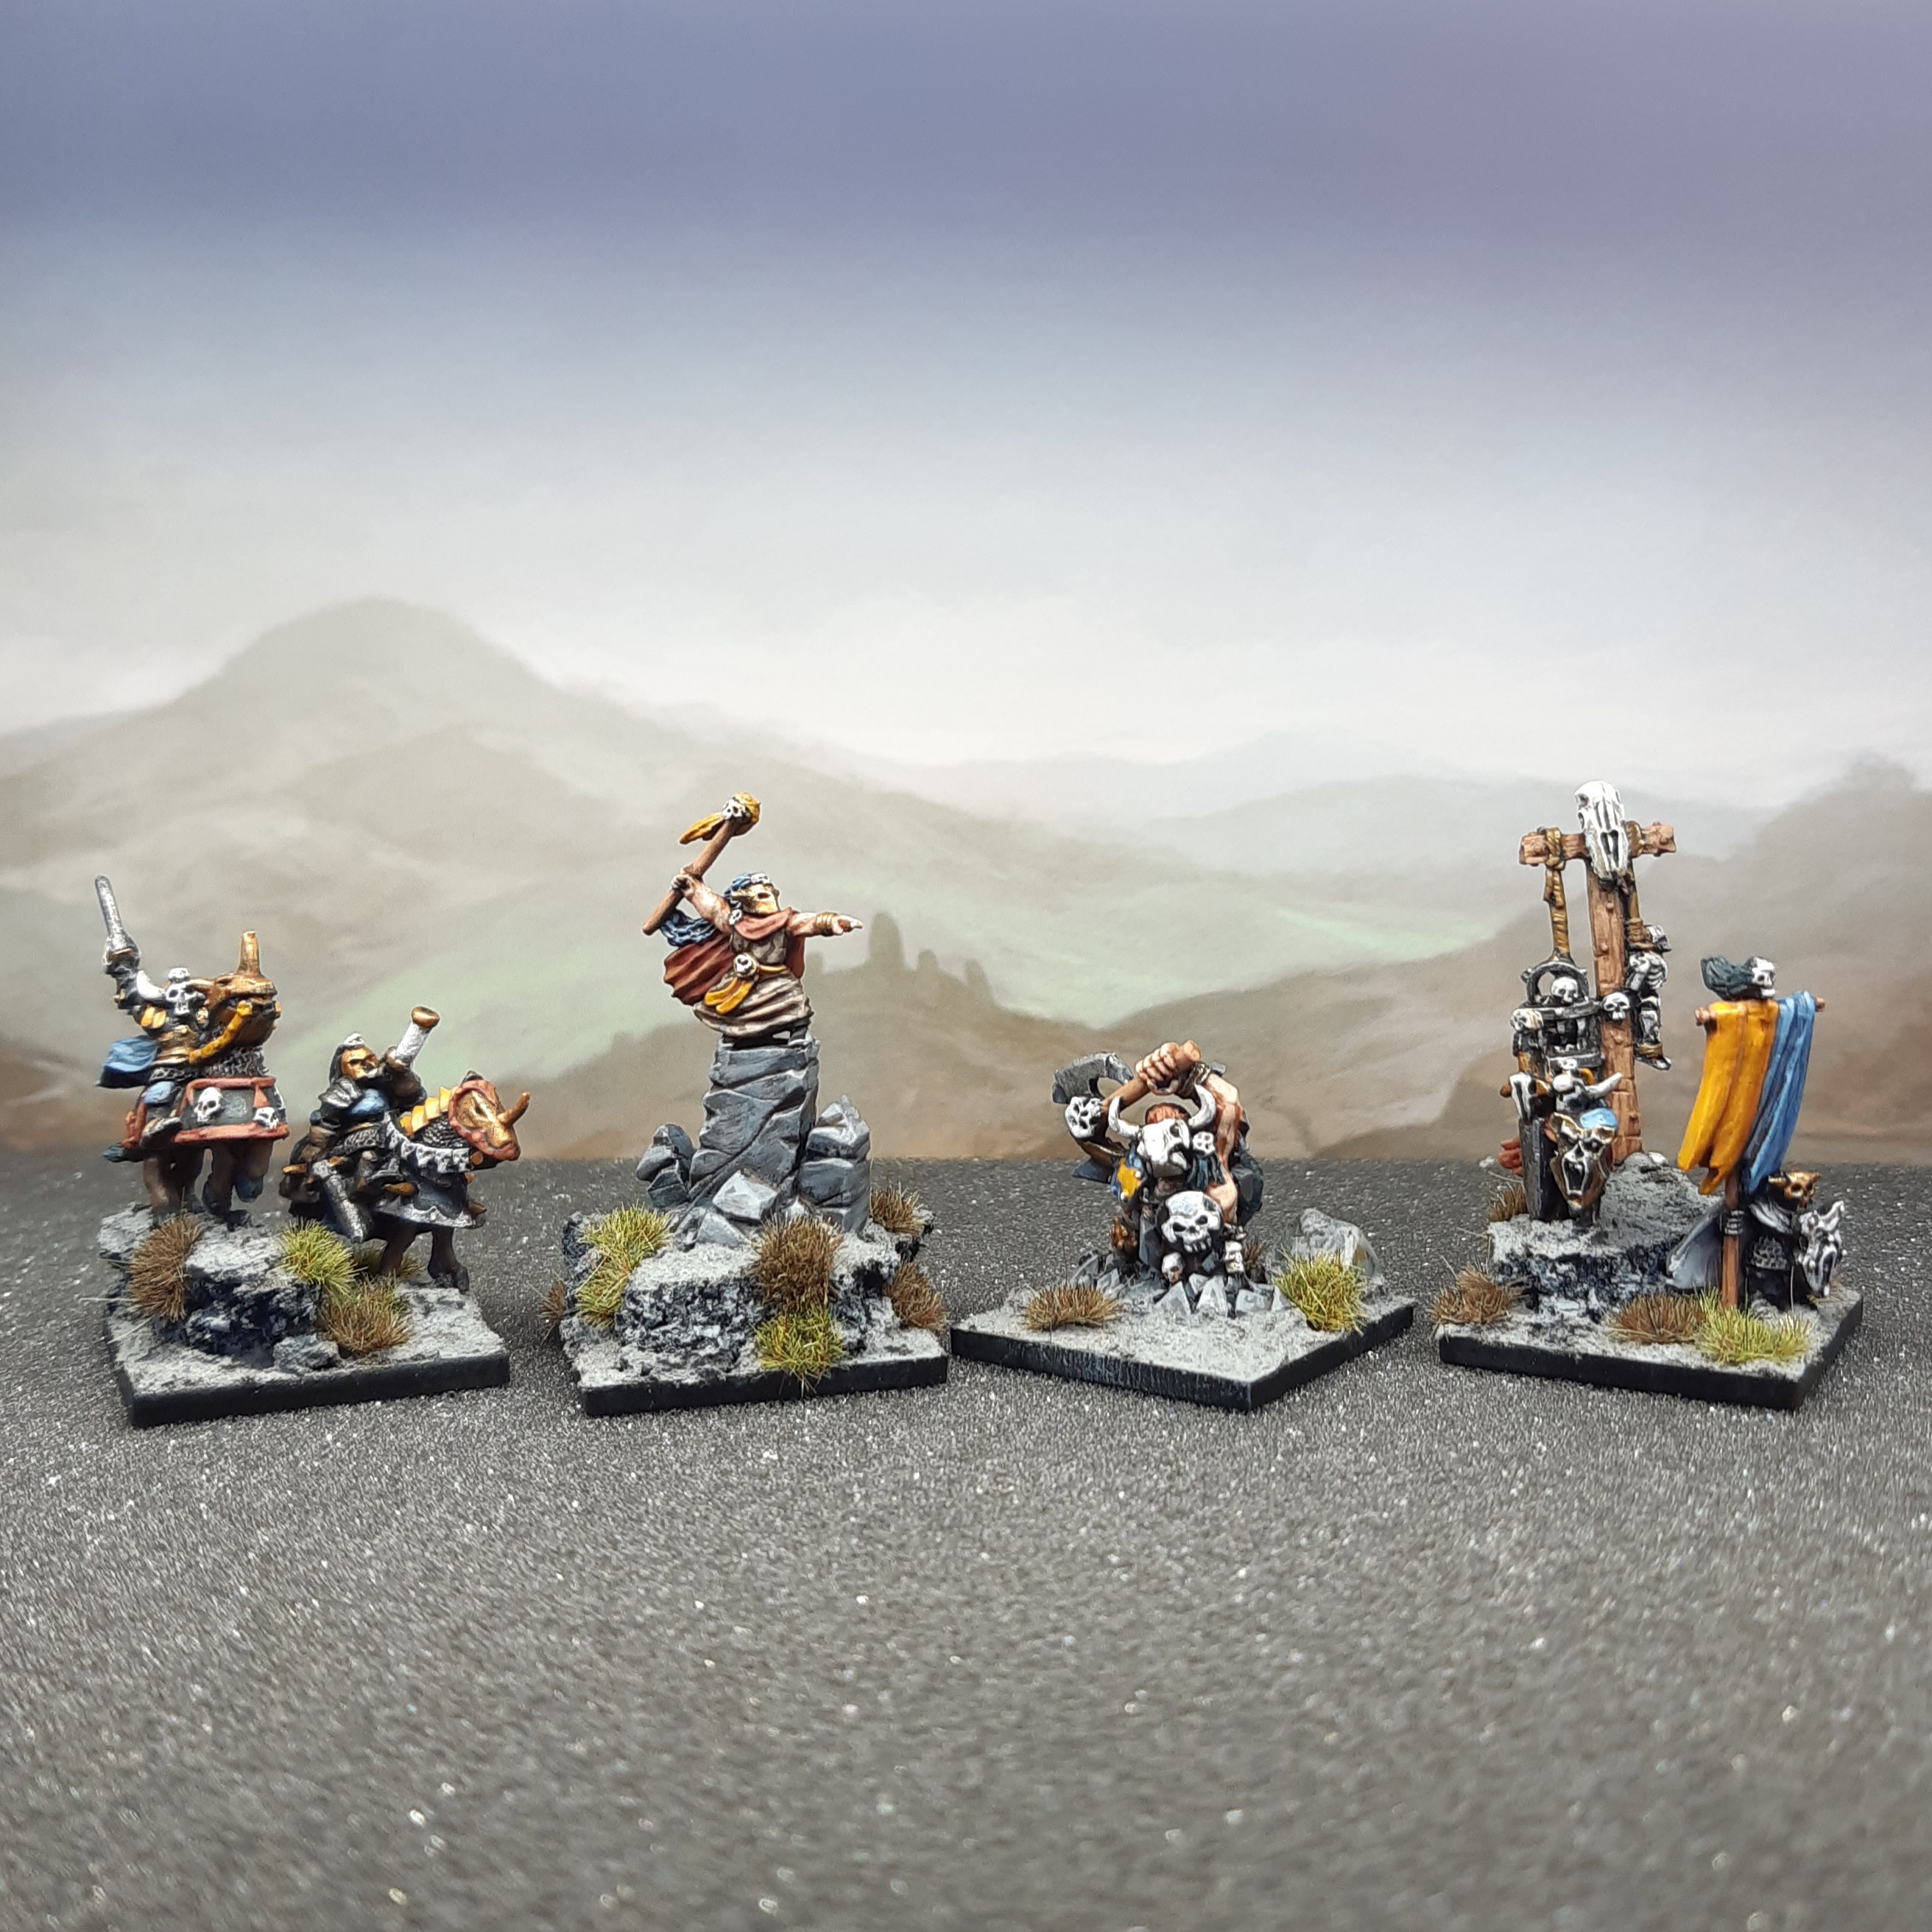
So far I’ve been busy working on units, but it is time to get some leaders and other characters painted.
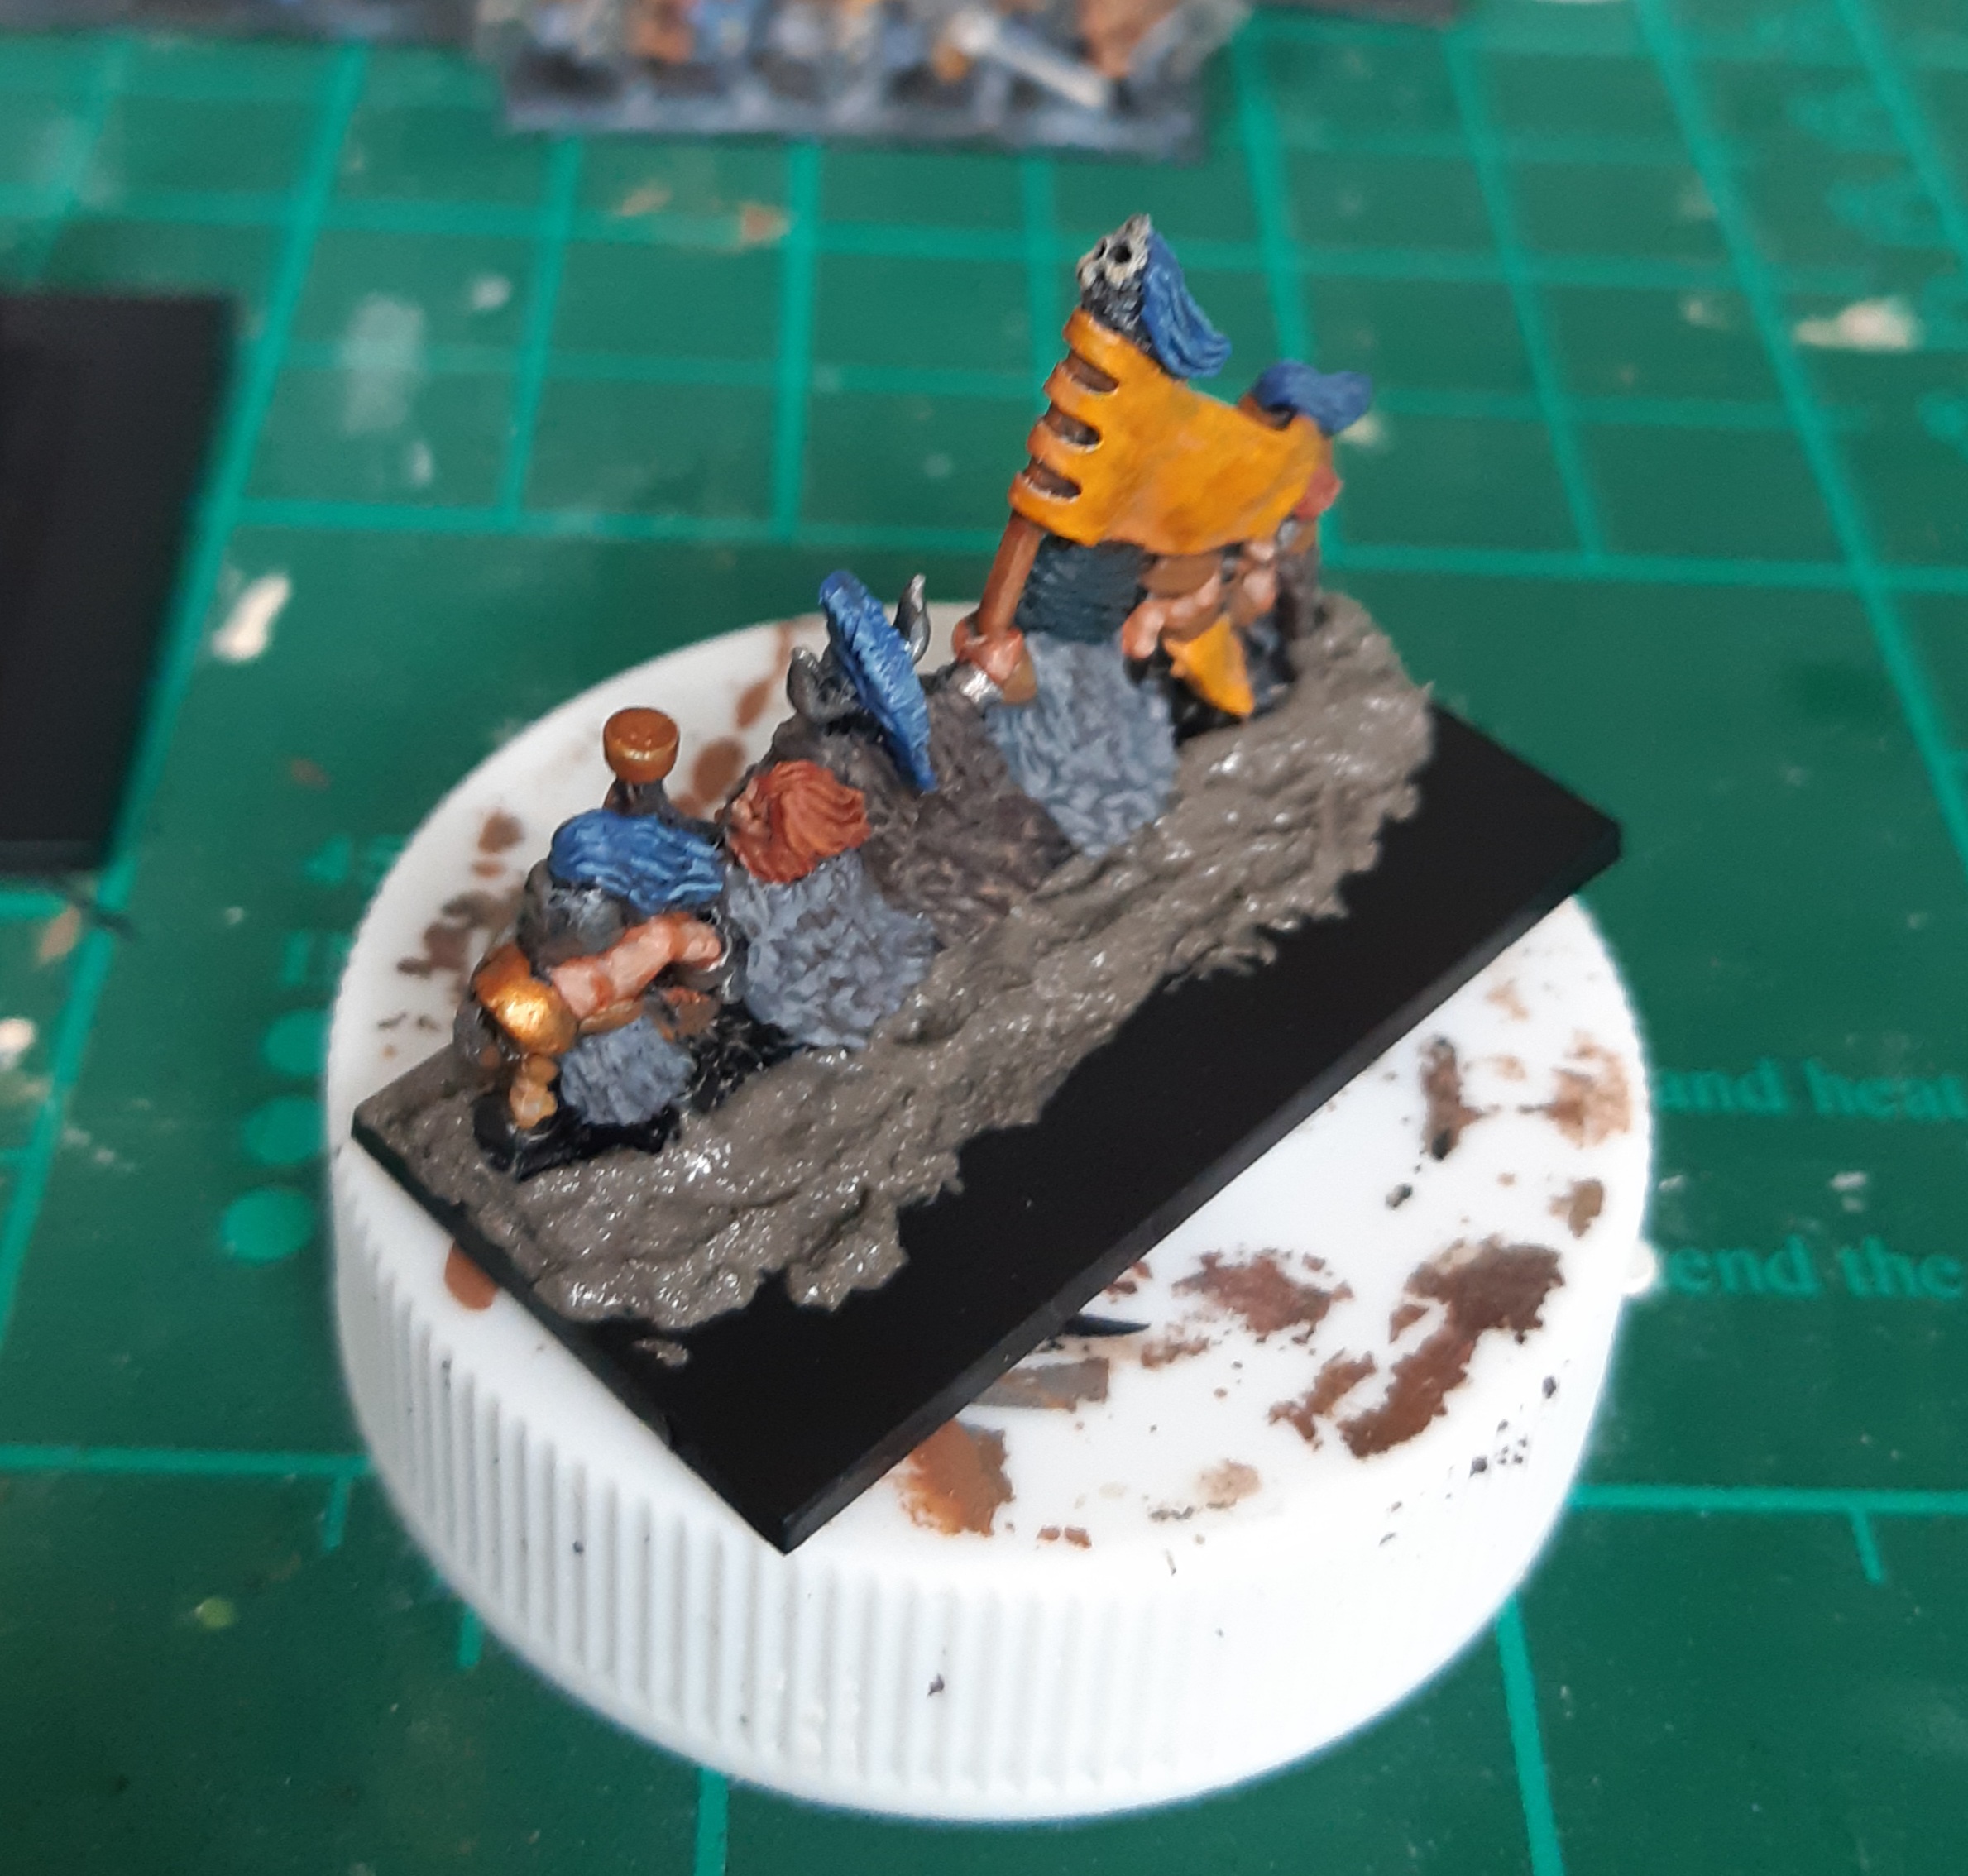
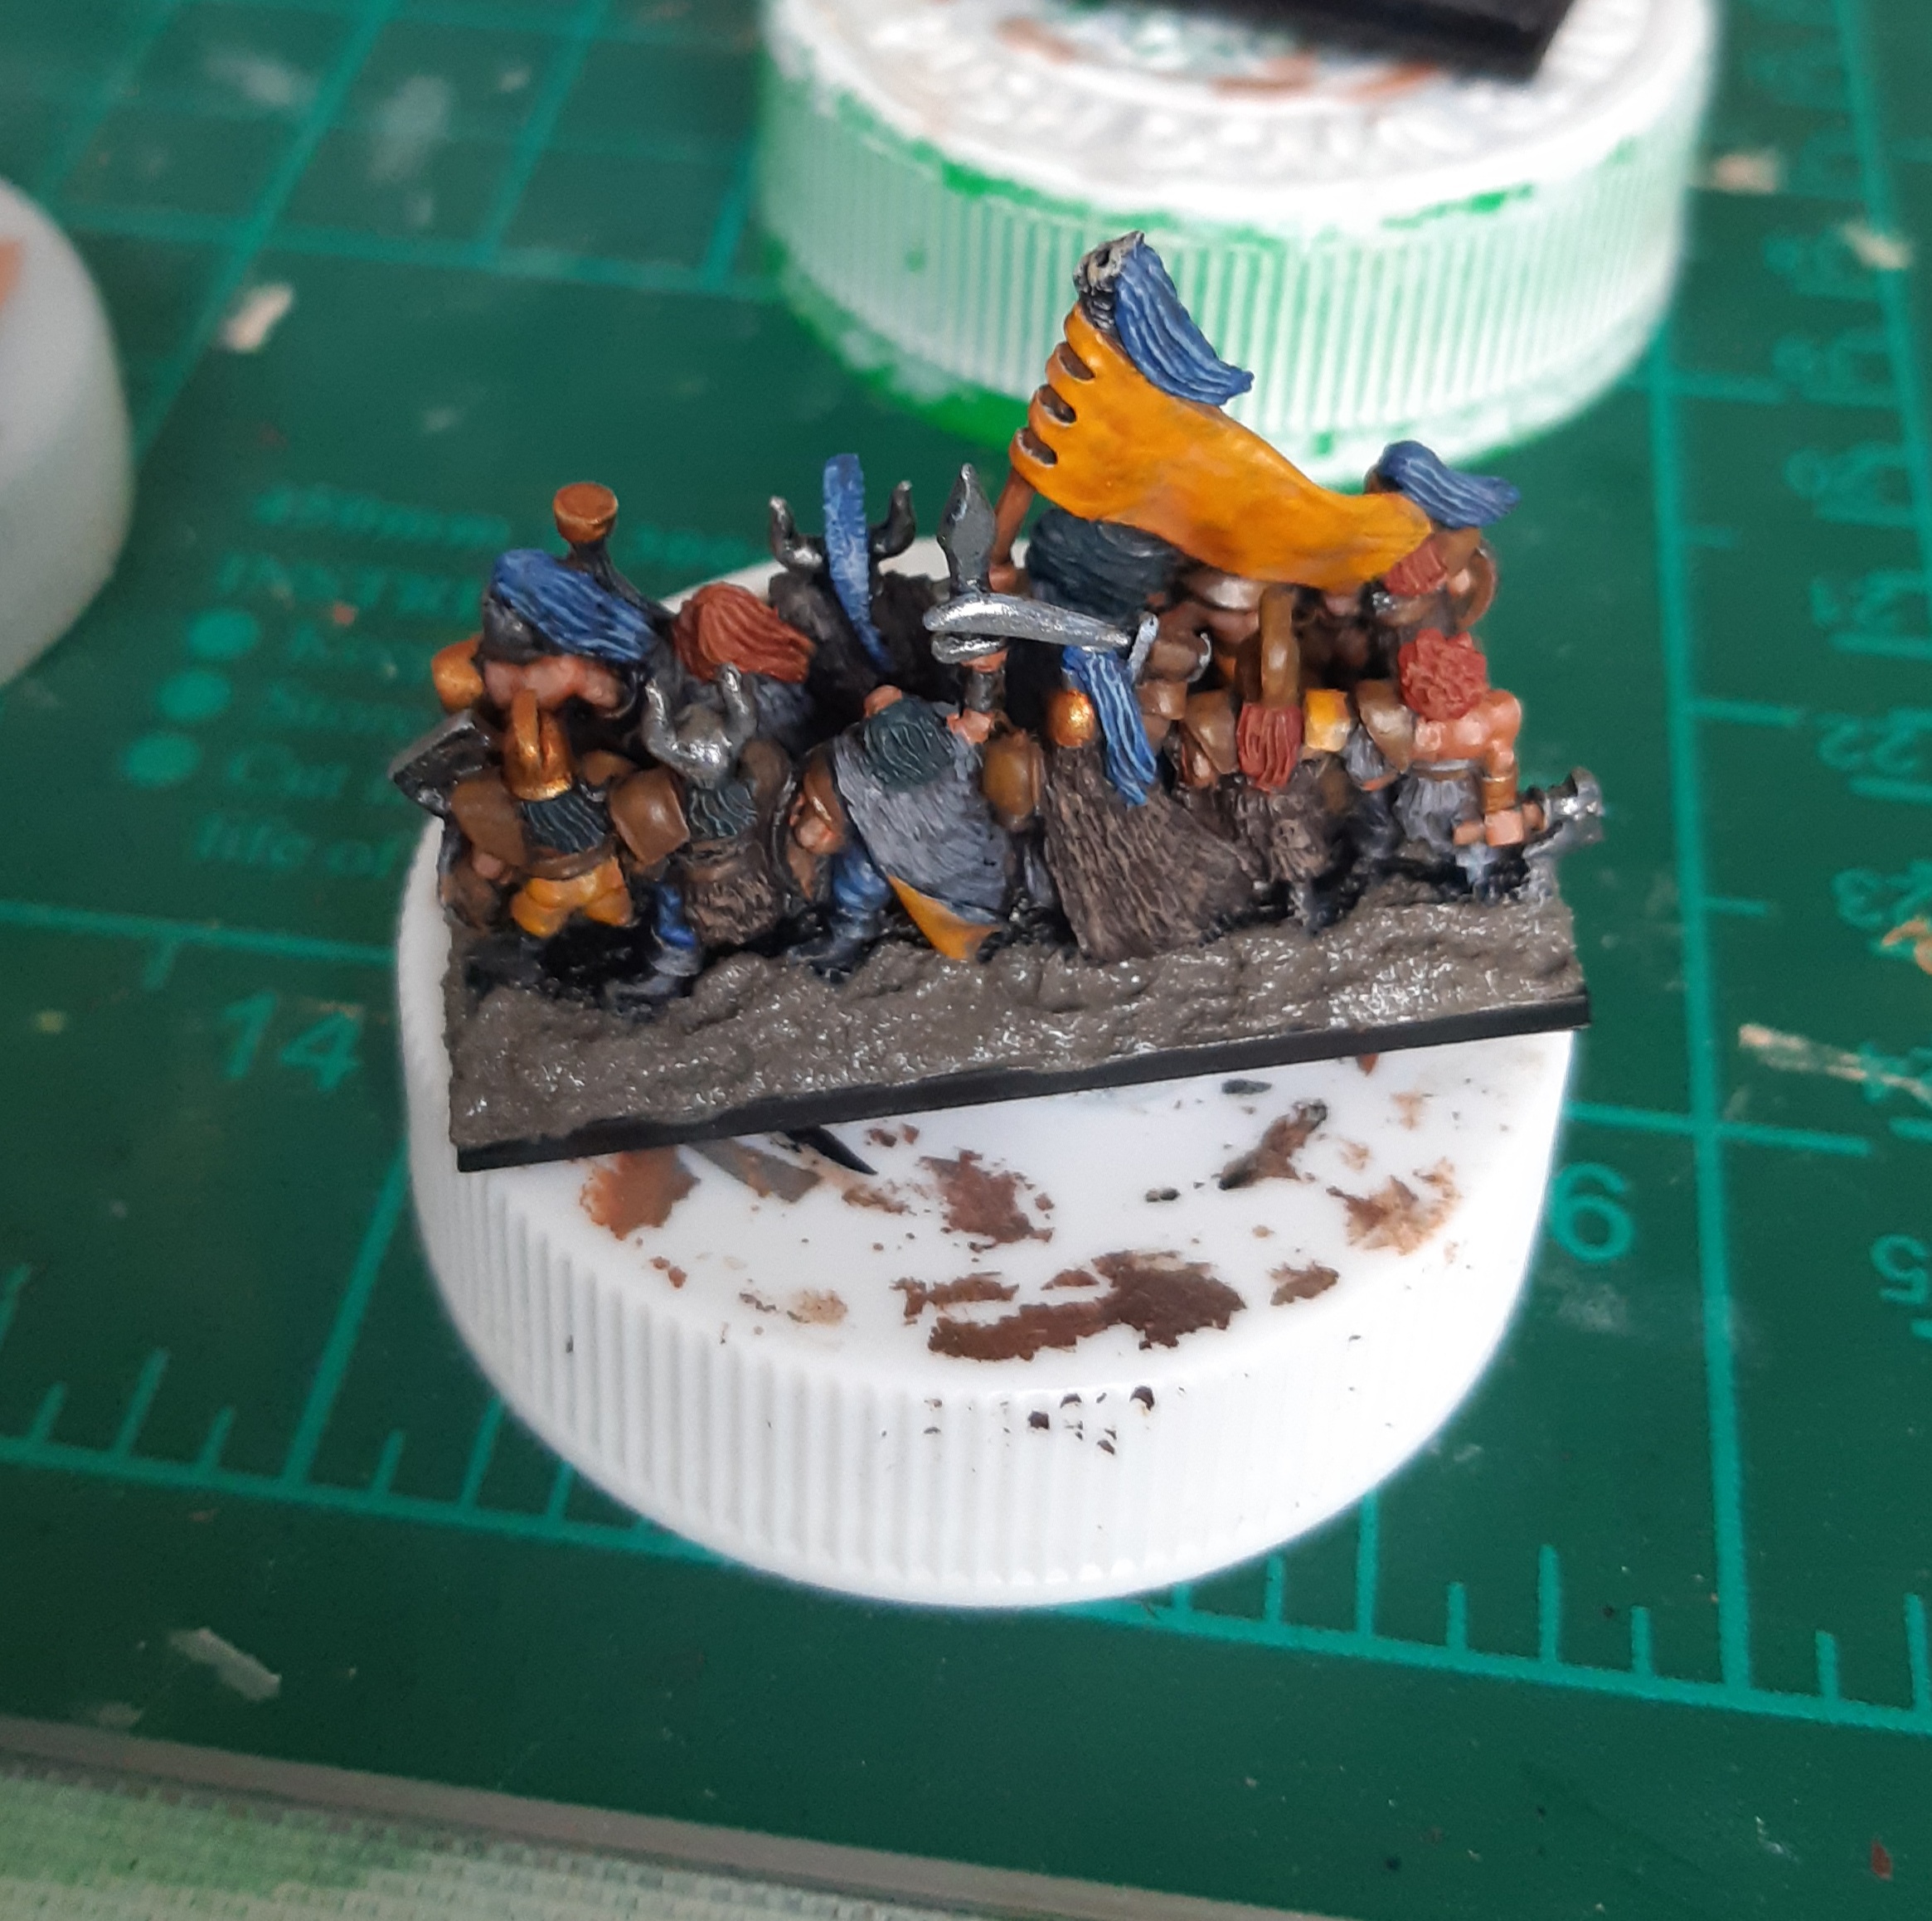
There are seven figures within the Warmaster Chaos character pack – a mounted hero and hornblower, a hero on foot and a standard bearer, a wizard standing on a stone pillar, a gibbet cage scenary piece and a weird mutant creature that looks like it is bursting out of the ground.
I grabbed a few 30mm square bases and played around with a few different compositions of the figures, before settling on the combinations show in the pictures. Pieces of cork were used to give some additional height to the bases. They were sprayed black, and given an initial overbrush with Vallejo Model Colour London Grey, then a lighter drybrush of Vallejo Model Colour Medium Grey.
Where multiple figures were on a base, they were painted separately and then glued on before adding the basing texture.
One unit left to go now, which are currently in a Dettol bath awaiting a scrub clean.


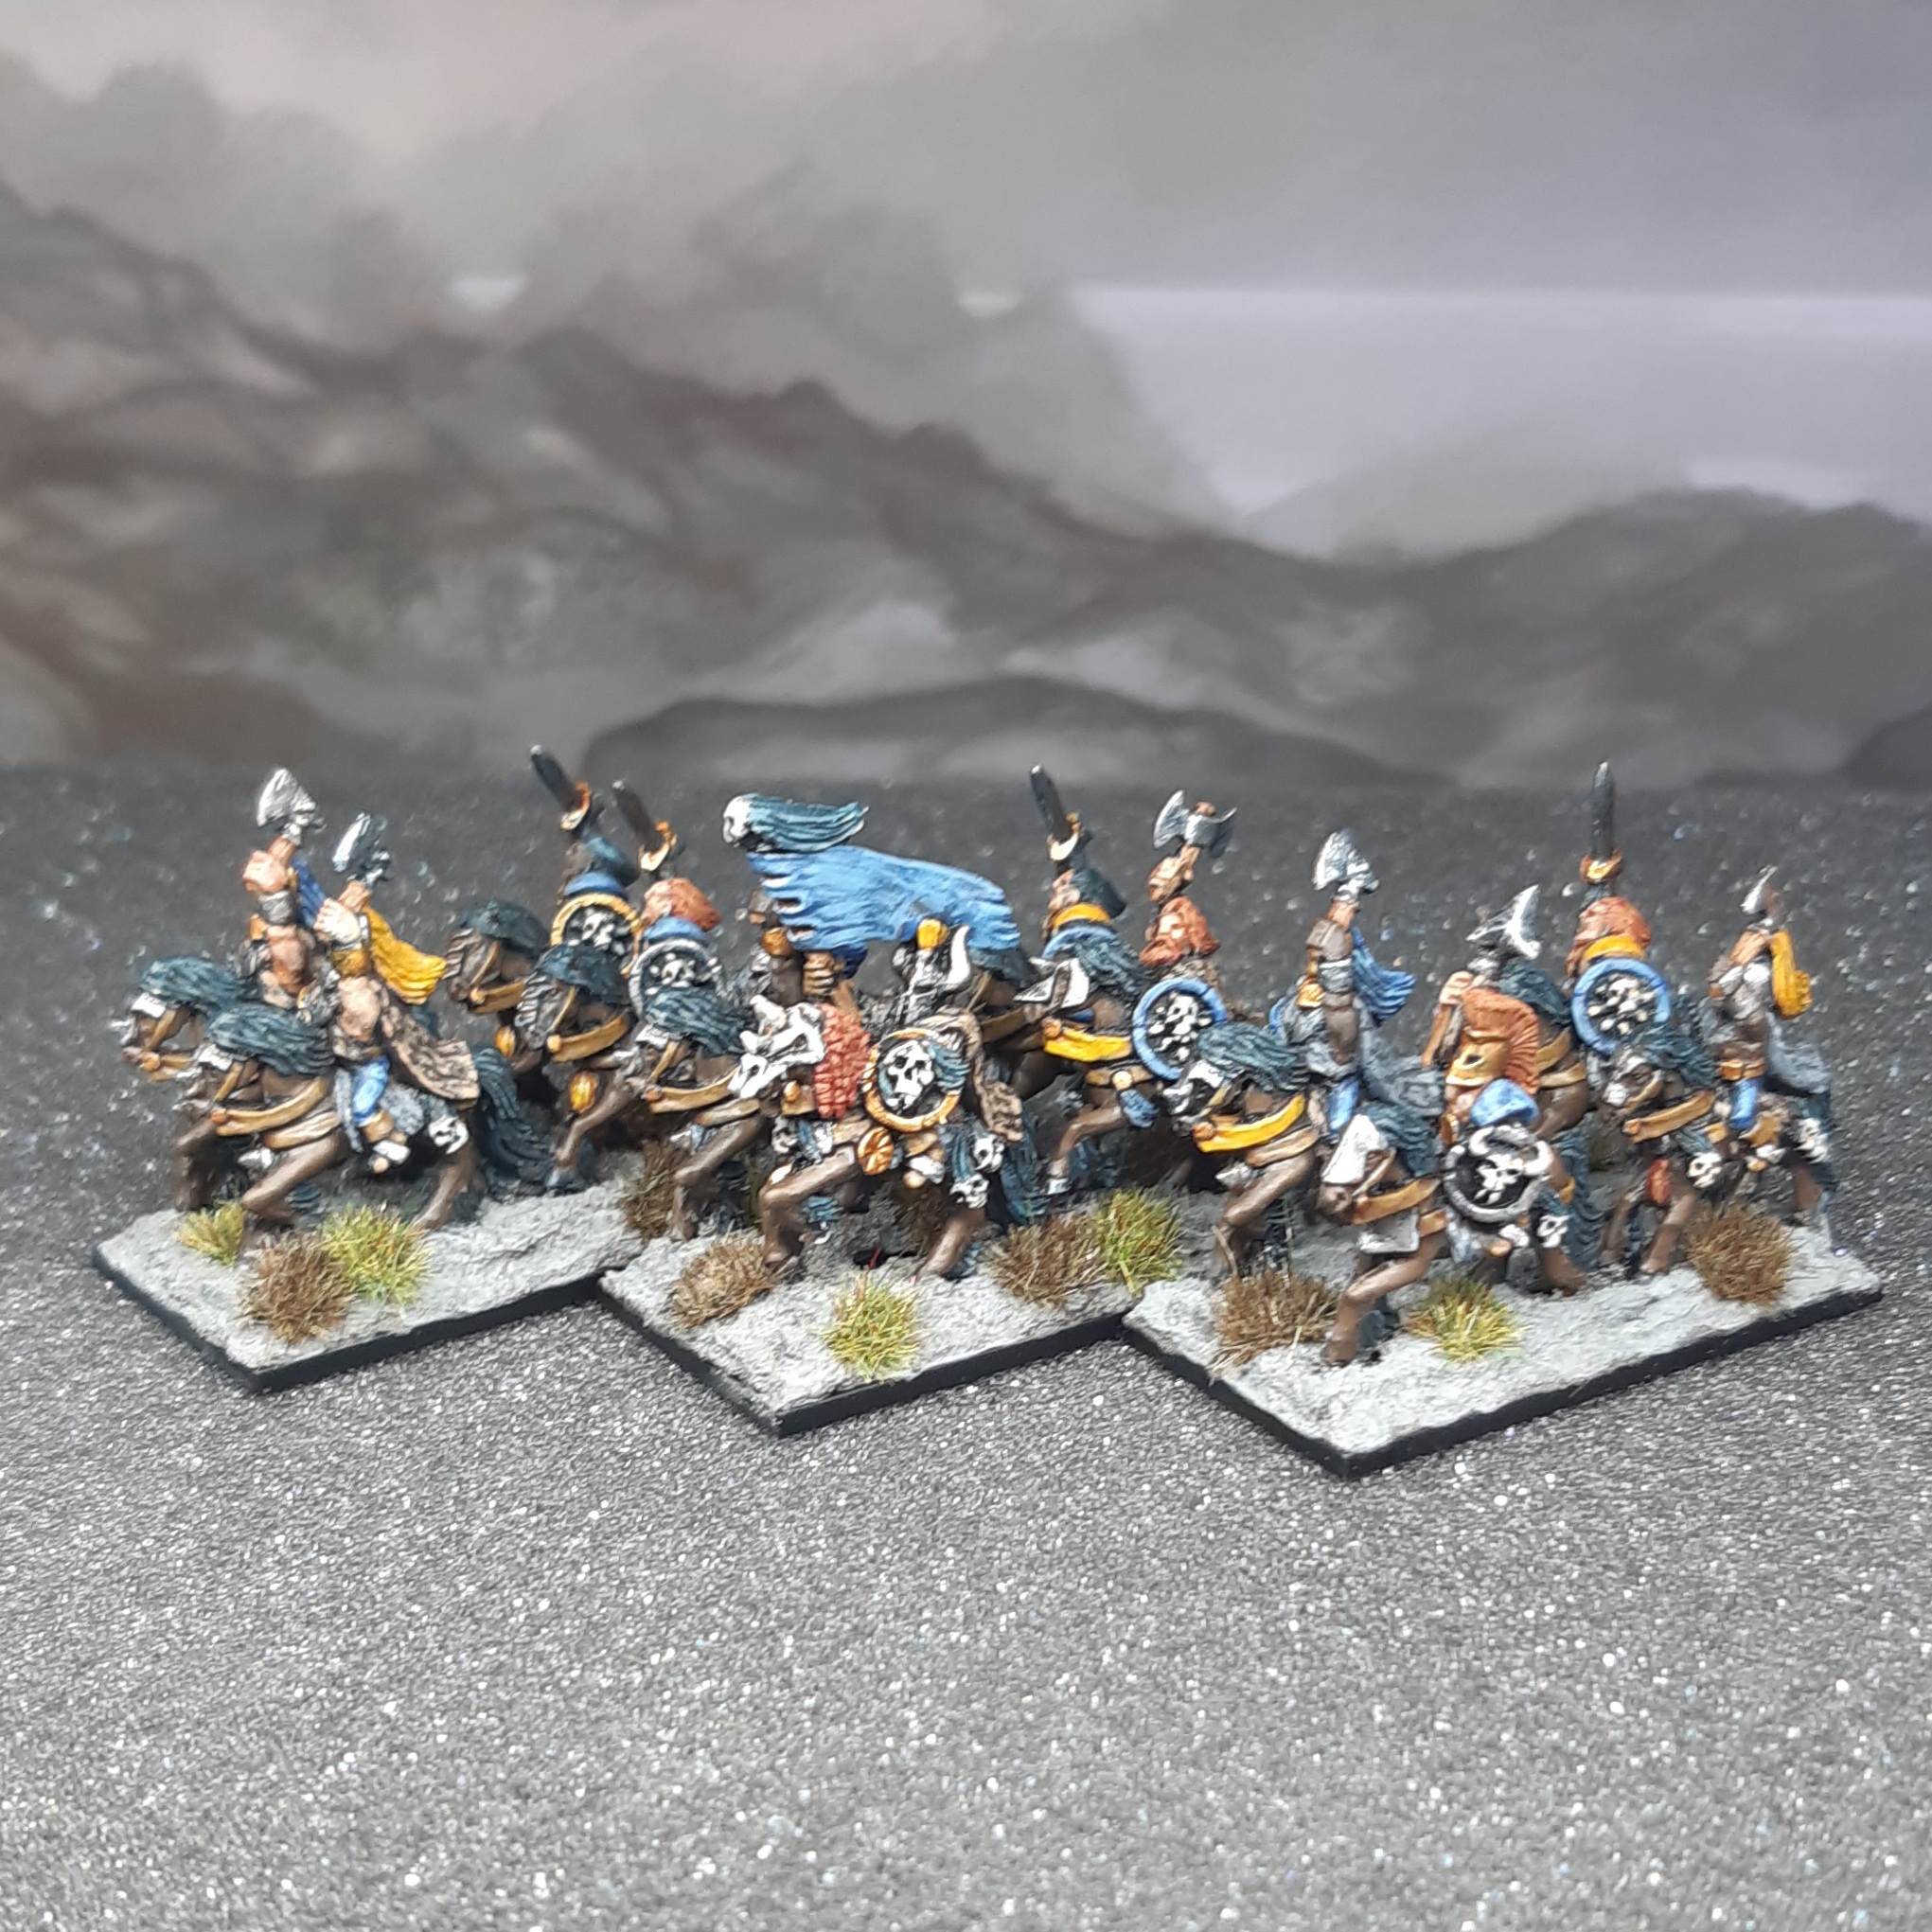
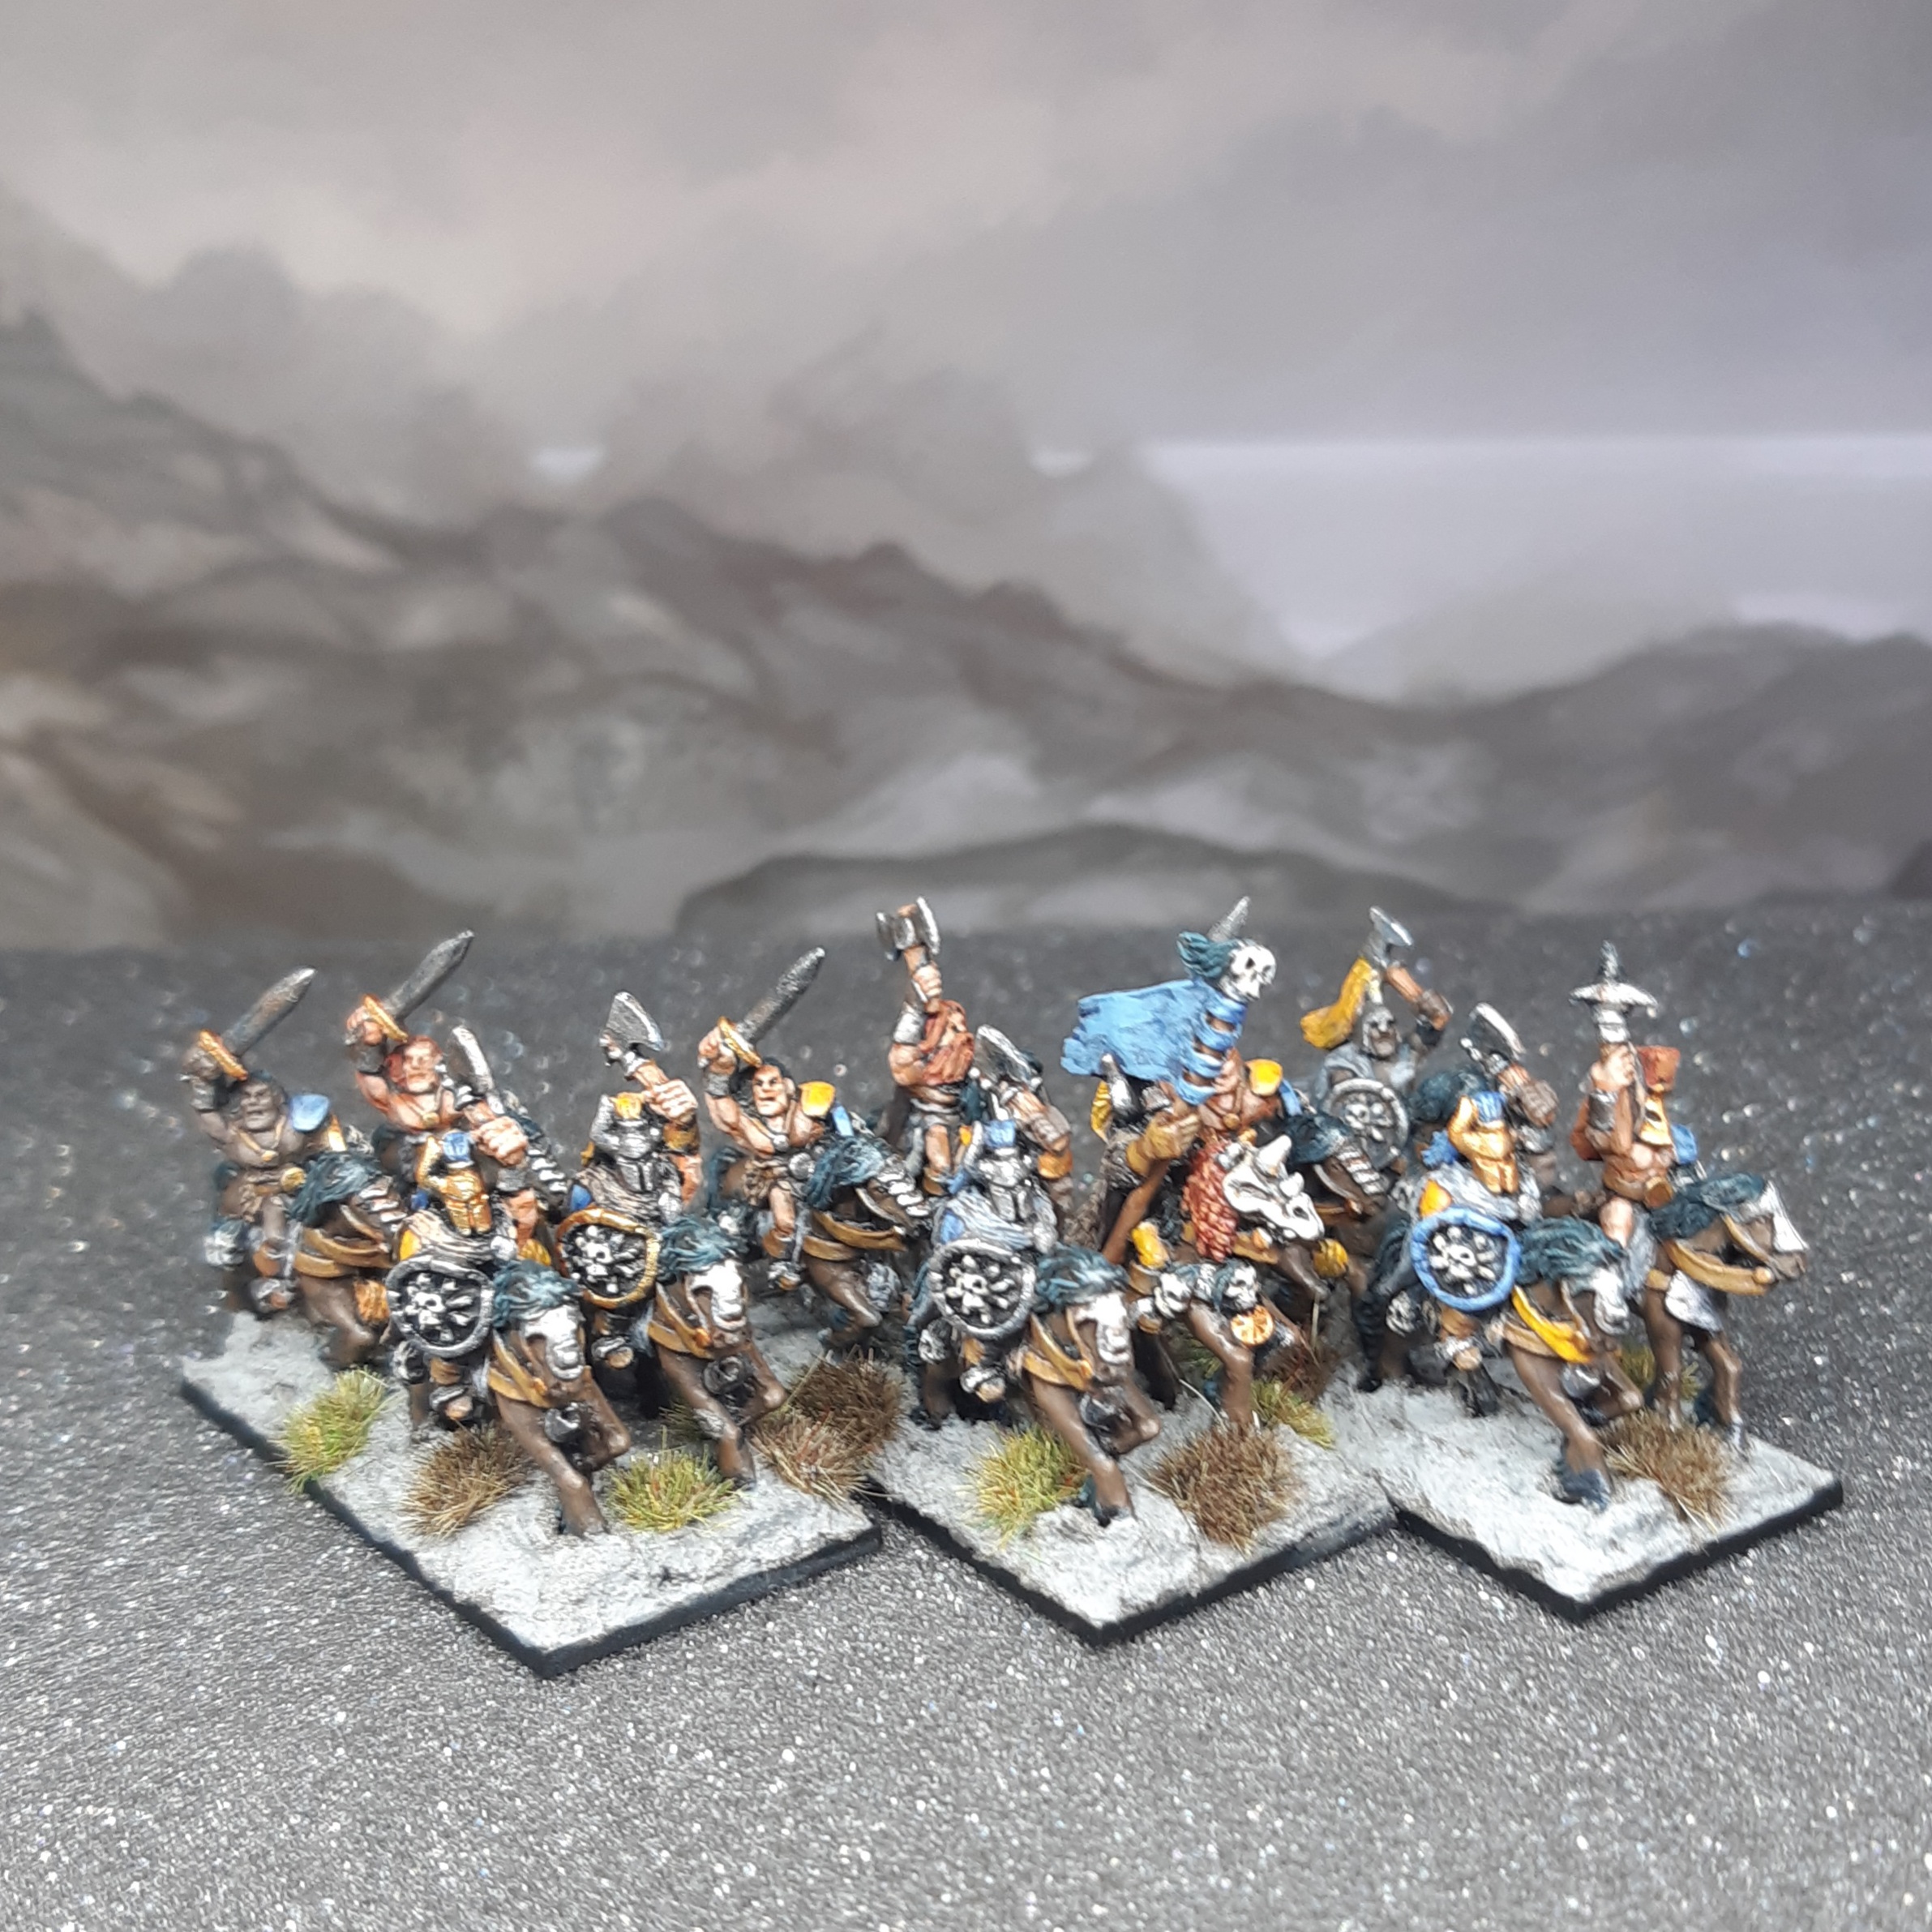
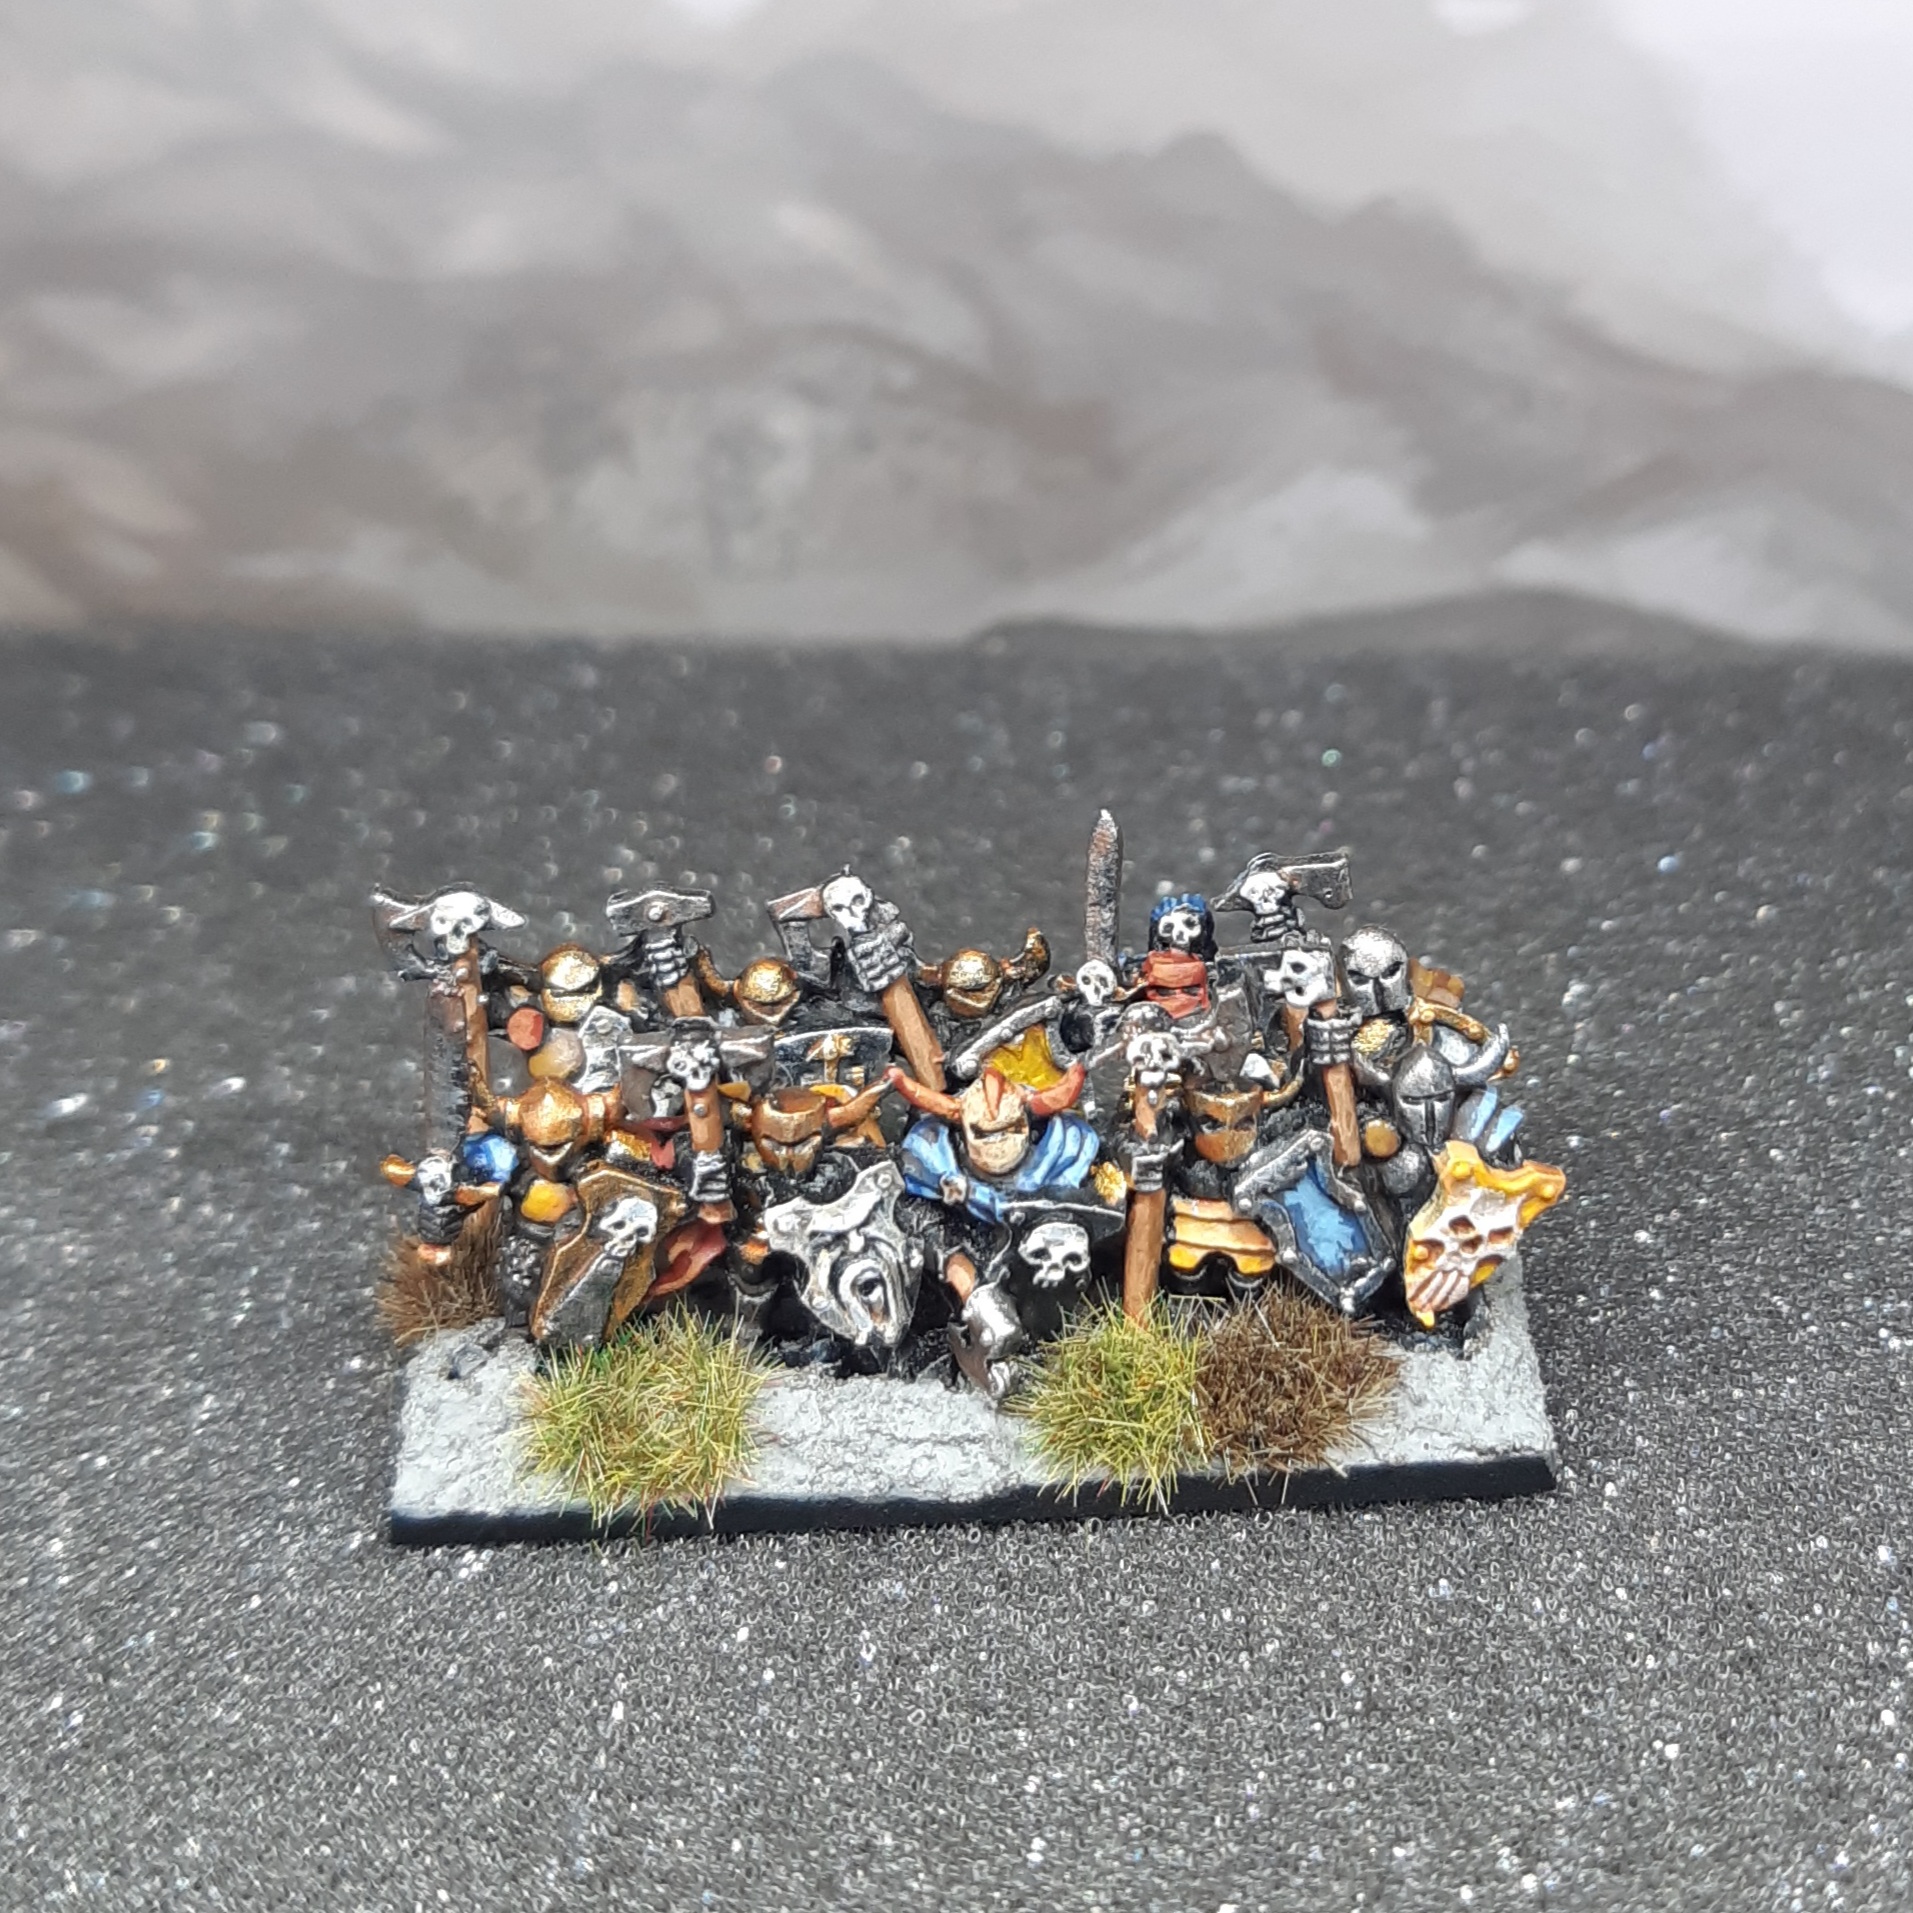
Chaos Knights (Again)
Final unit for this project is a second unit of Chaos Knights. I saved these to last, as they were possibly the last painted models I did 20 odd years ago before I fell away from the hobby.
Stripped of their original paint via a dettol bath, they were re-colourised to match the rest of the army. I’m pretty happy with the difference in the end result.
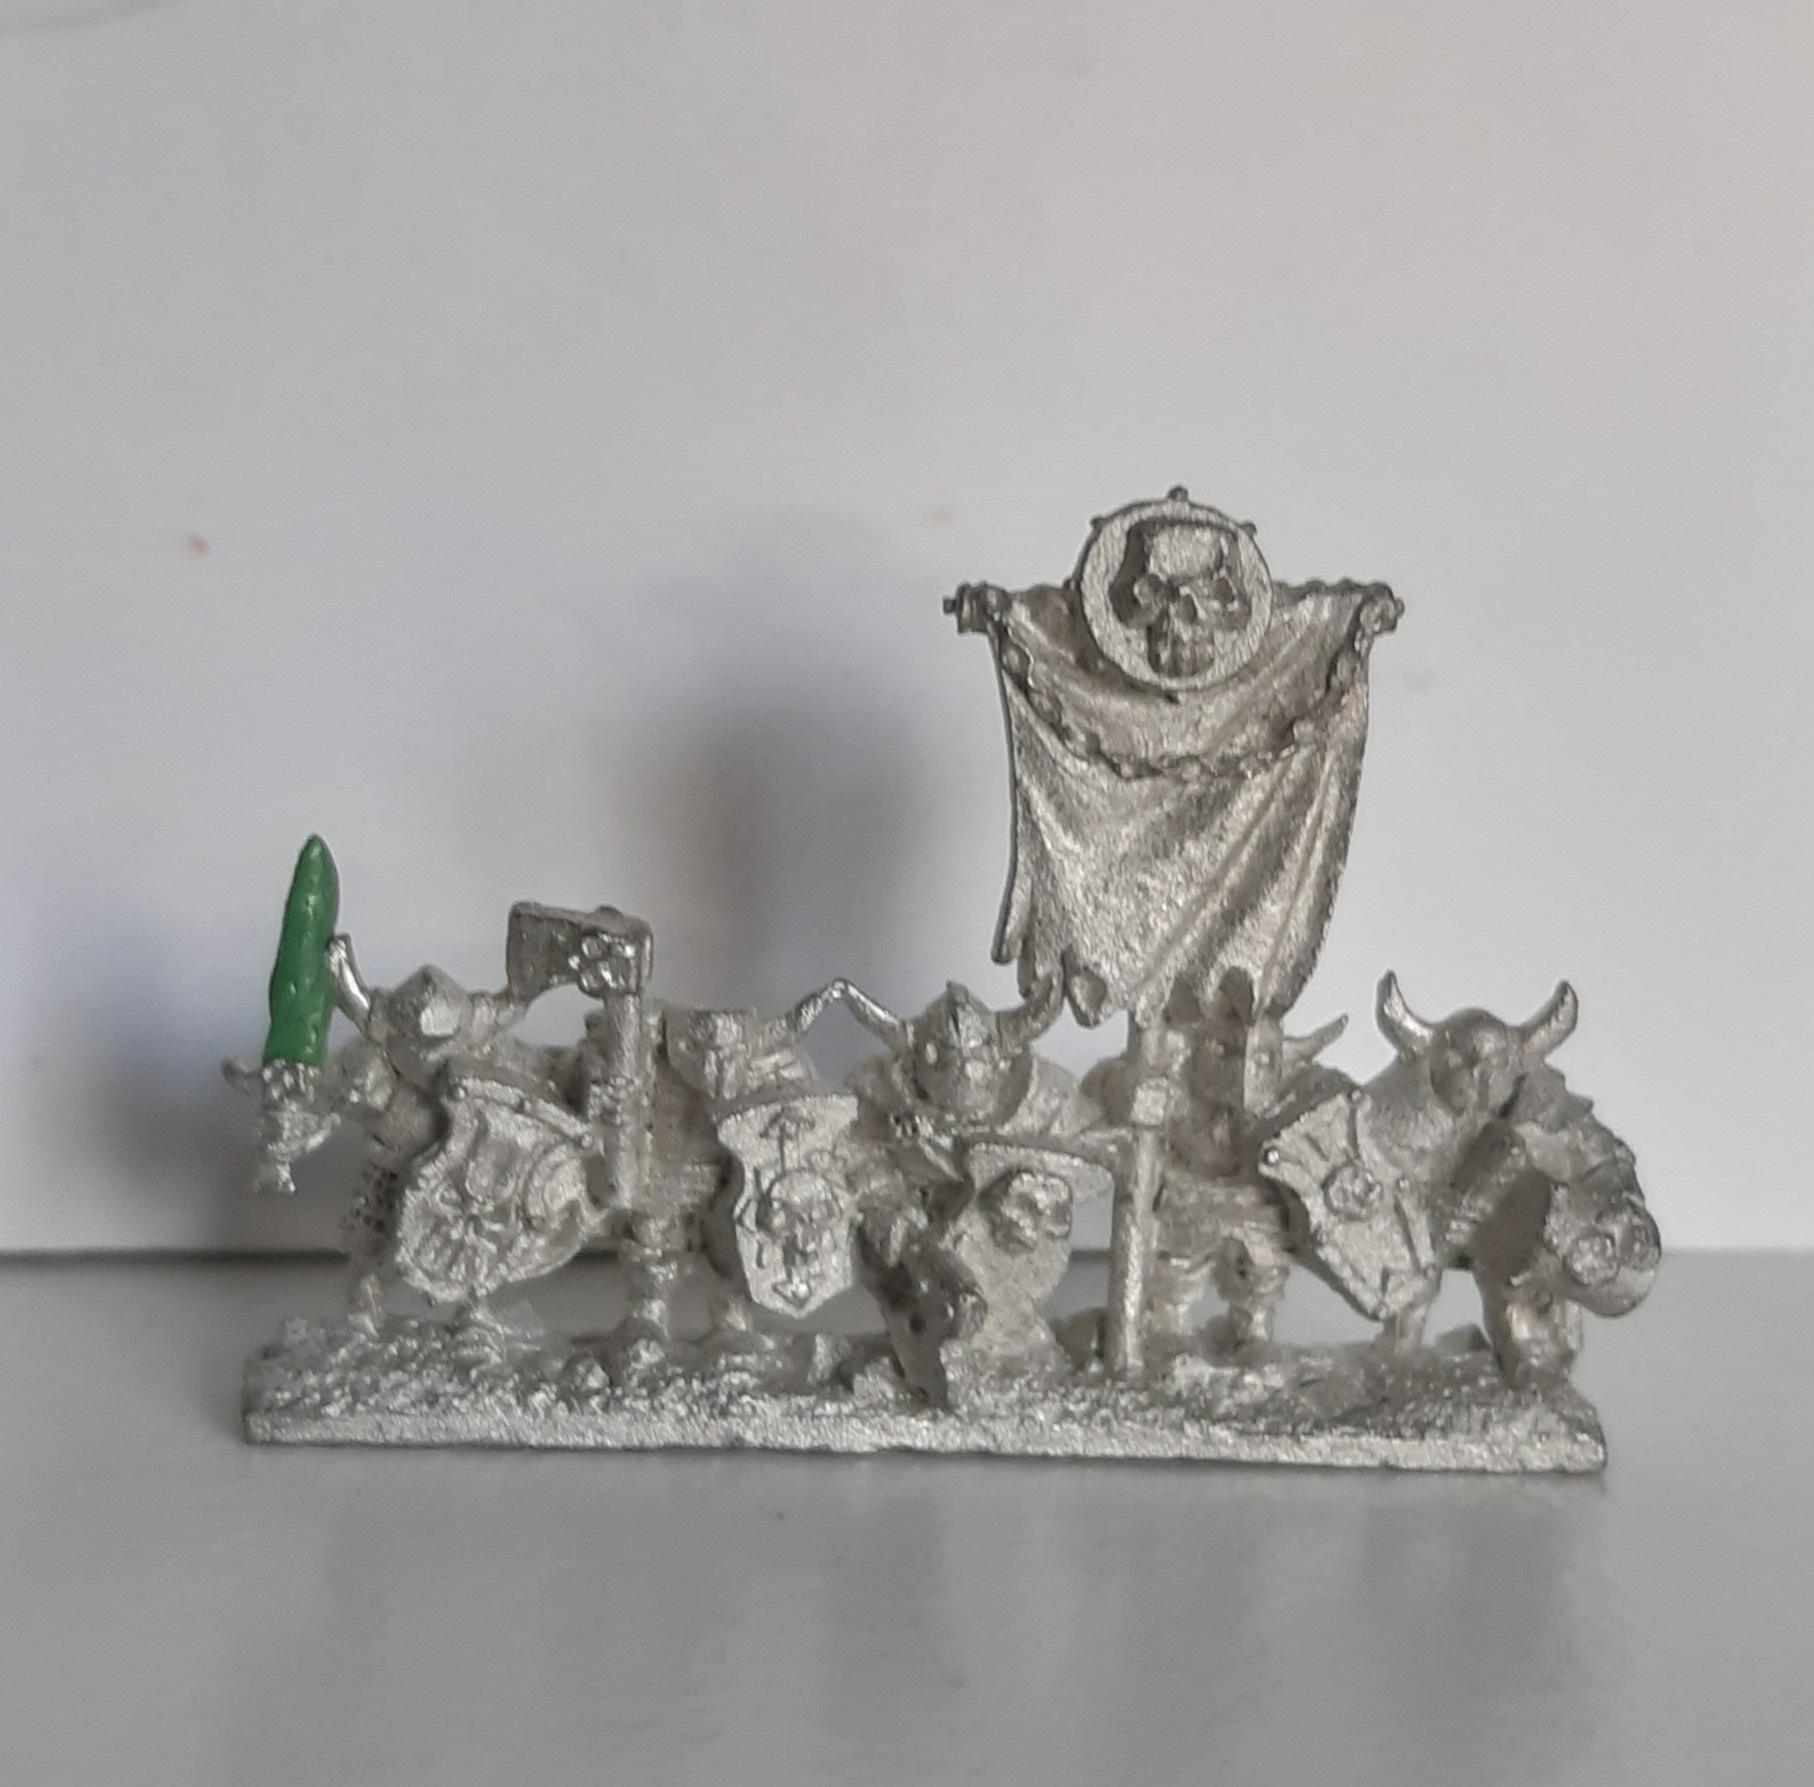
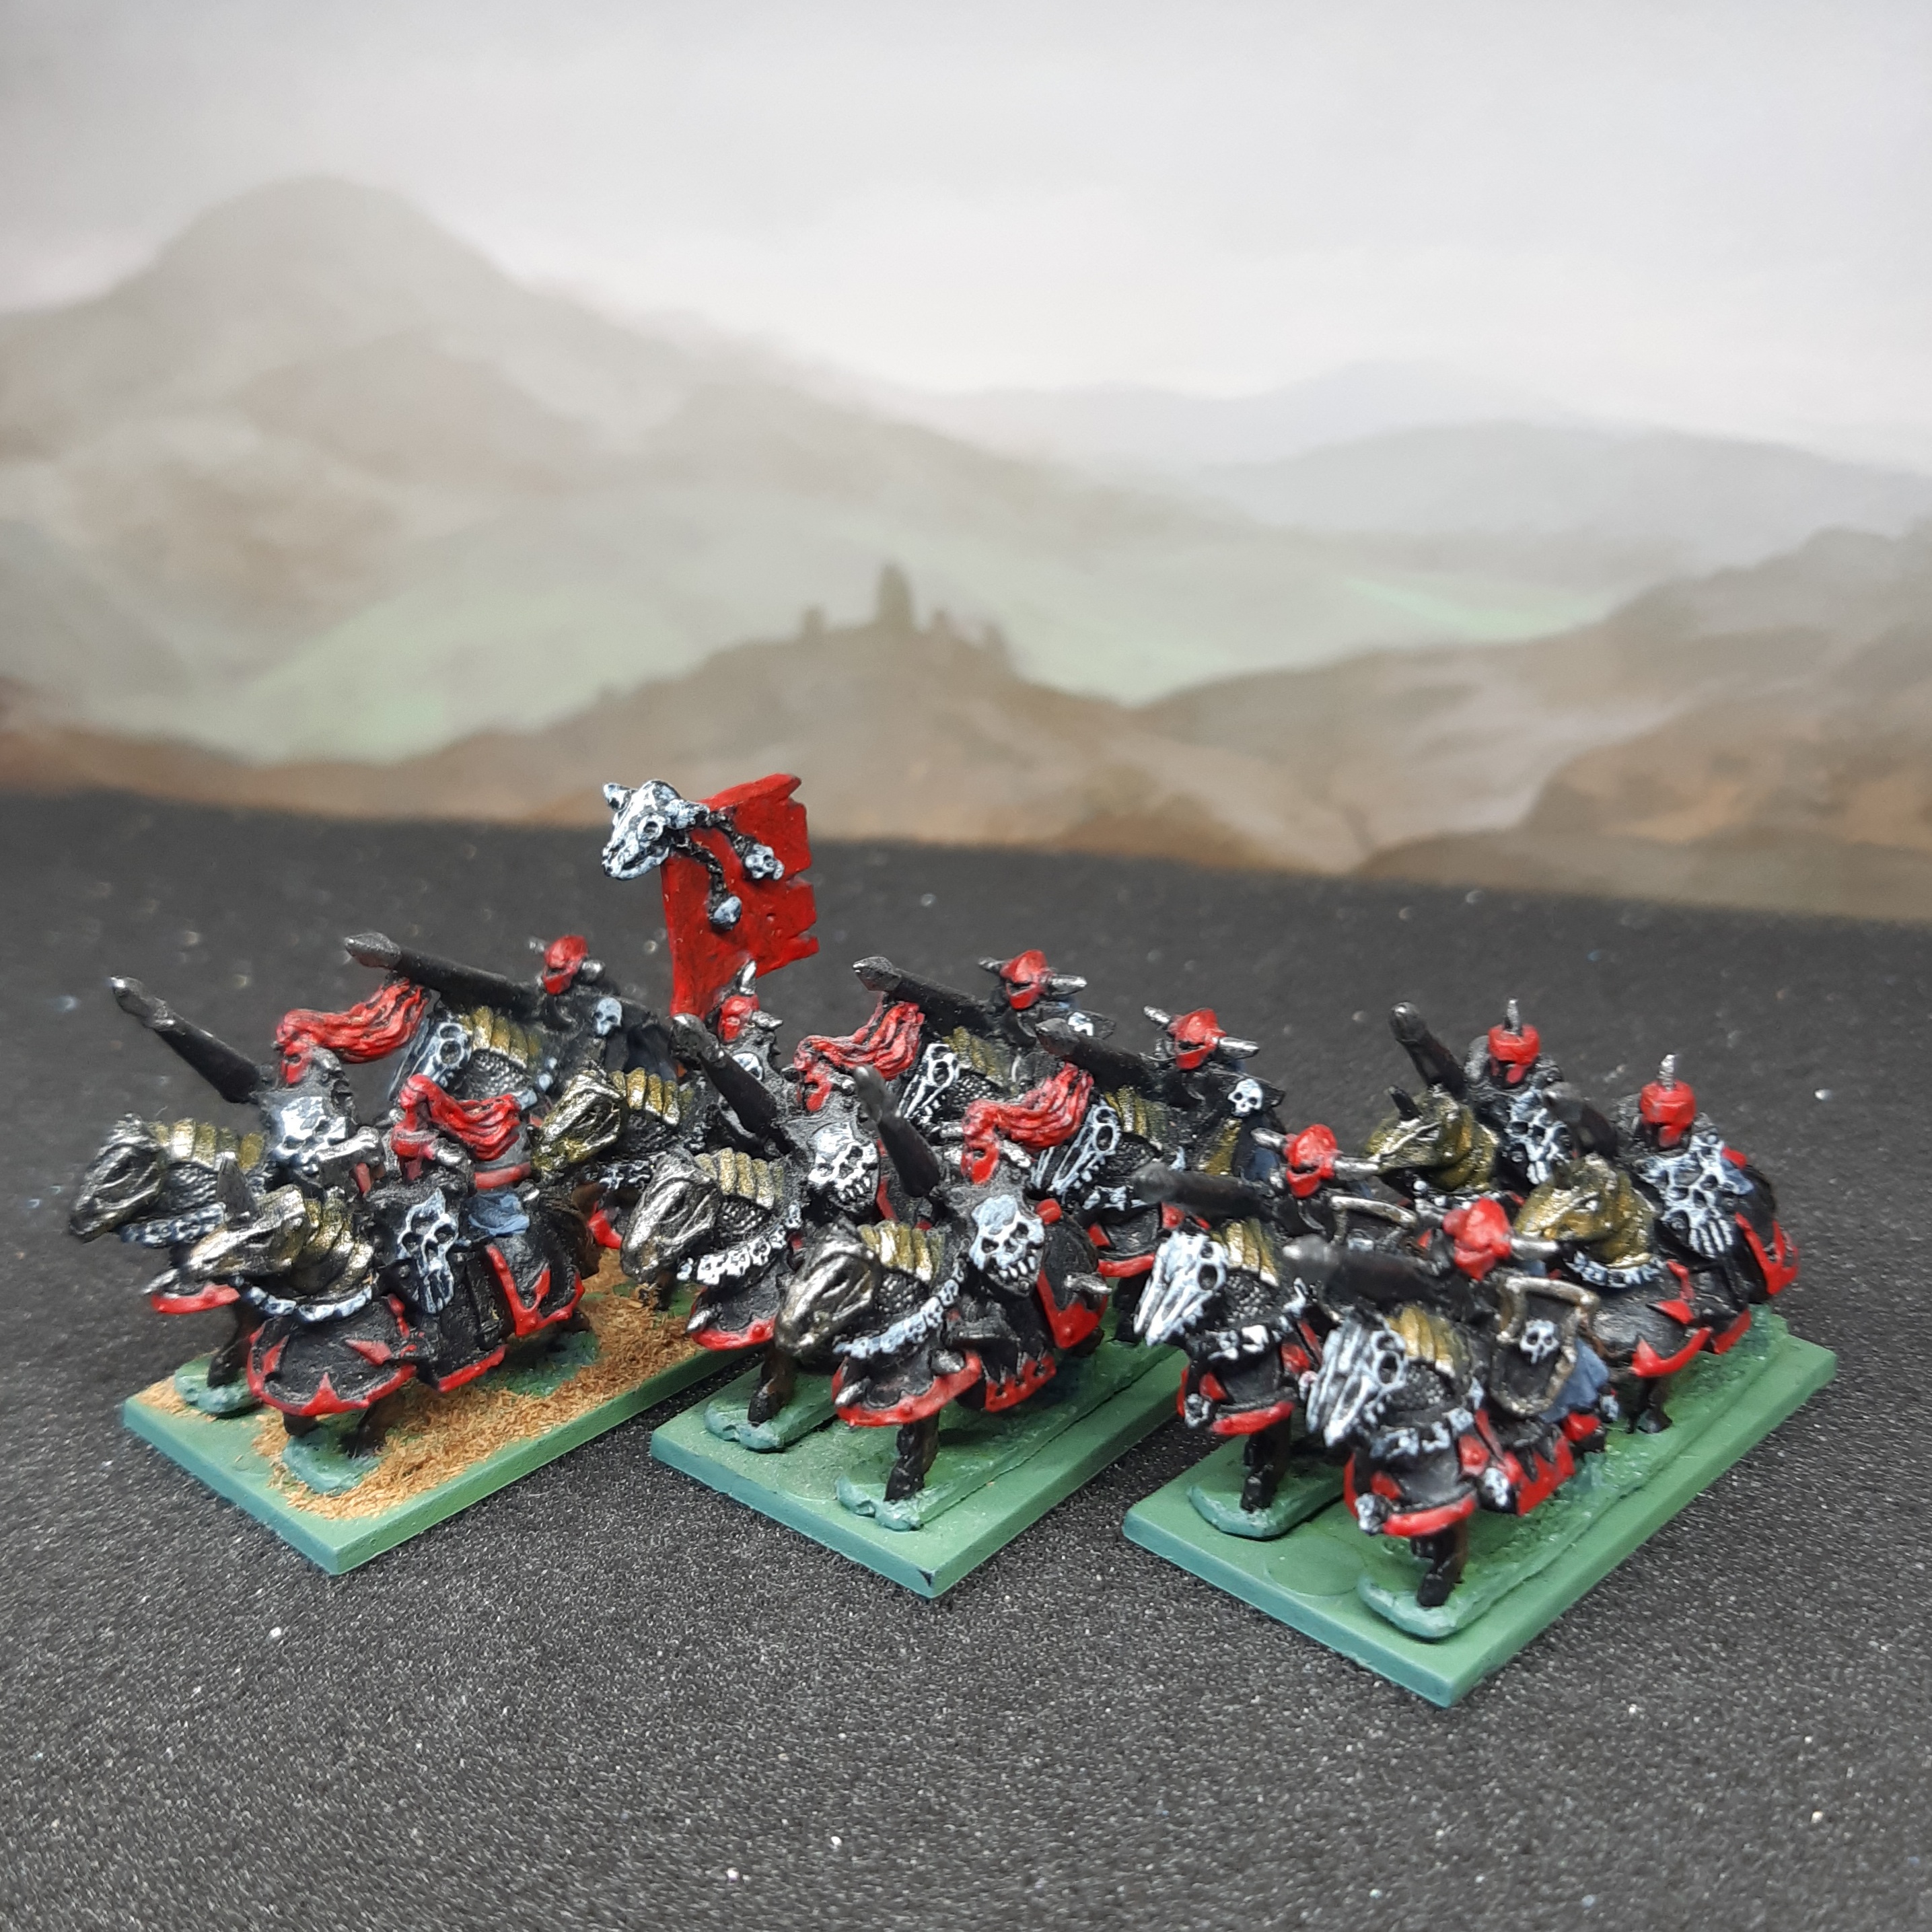 Original painted unit.
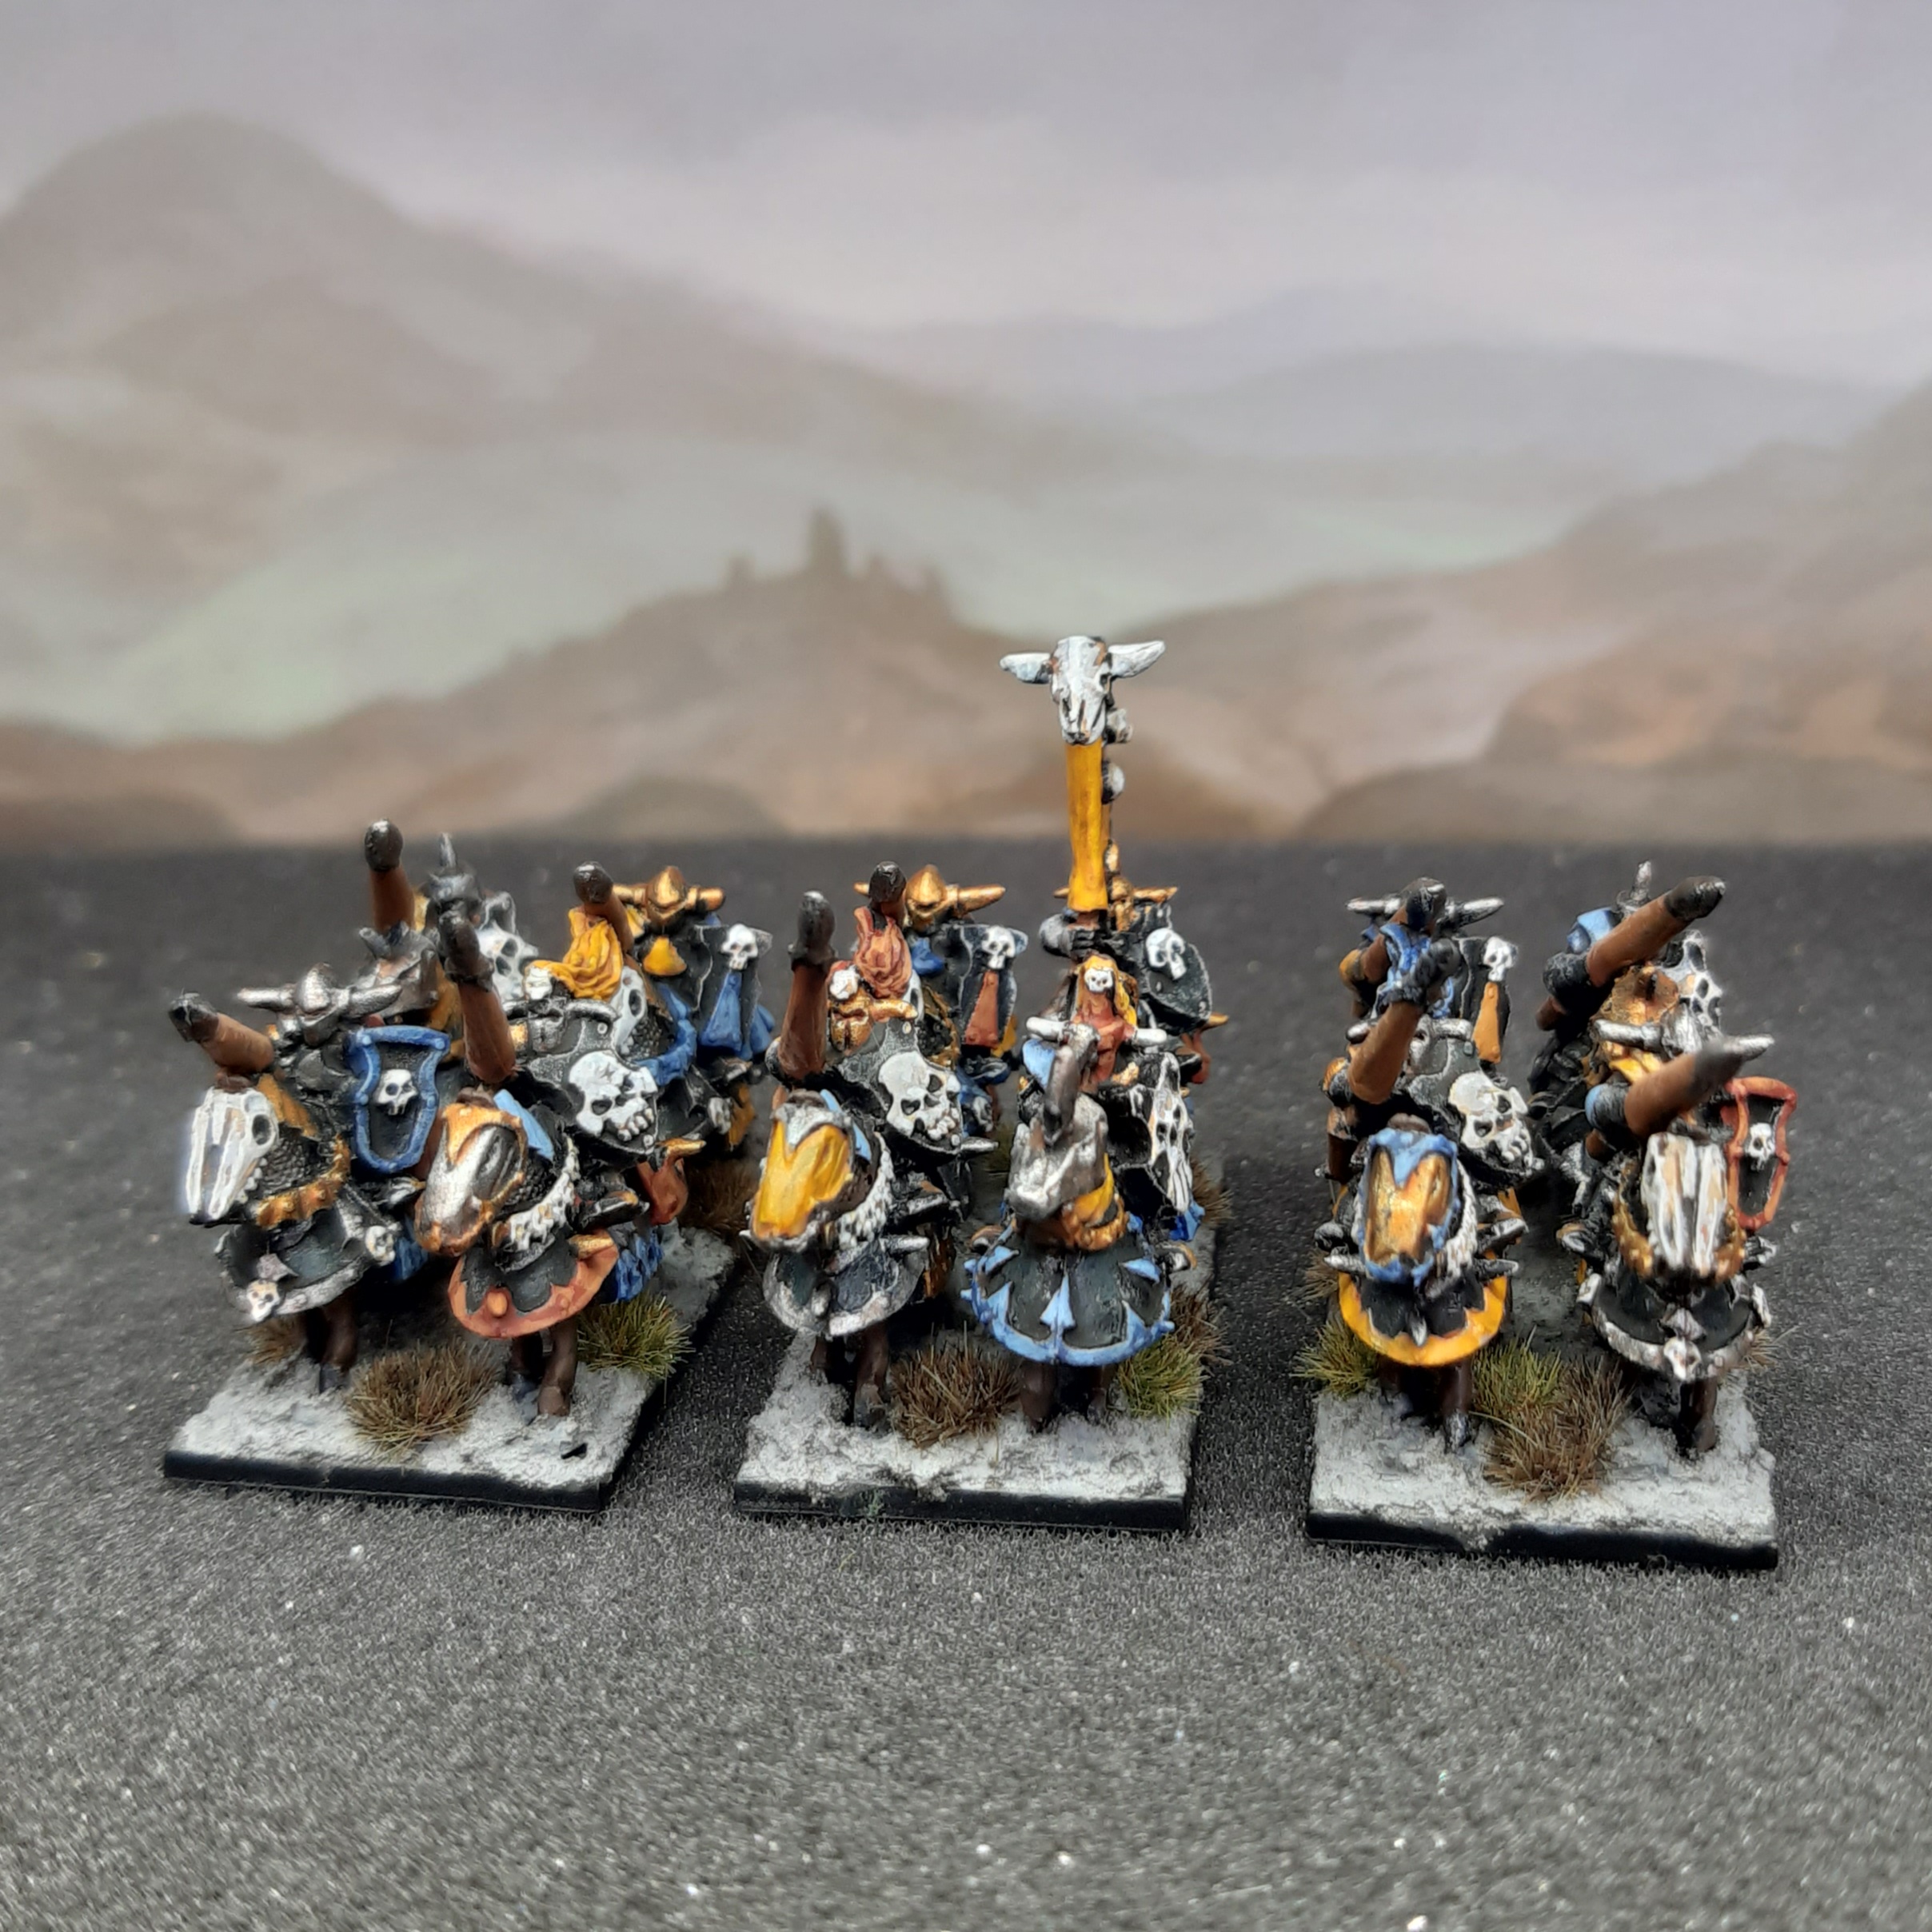
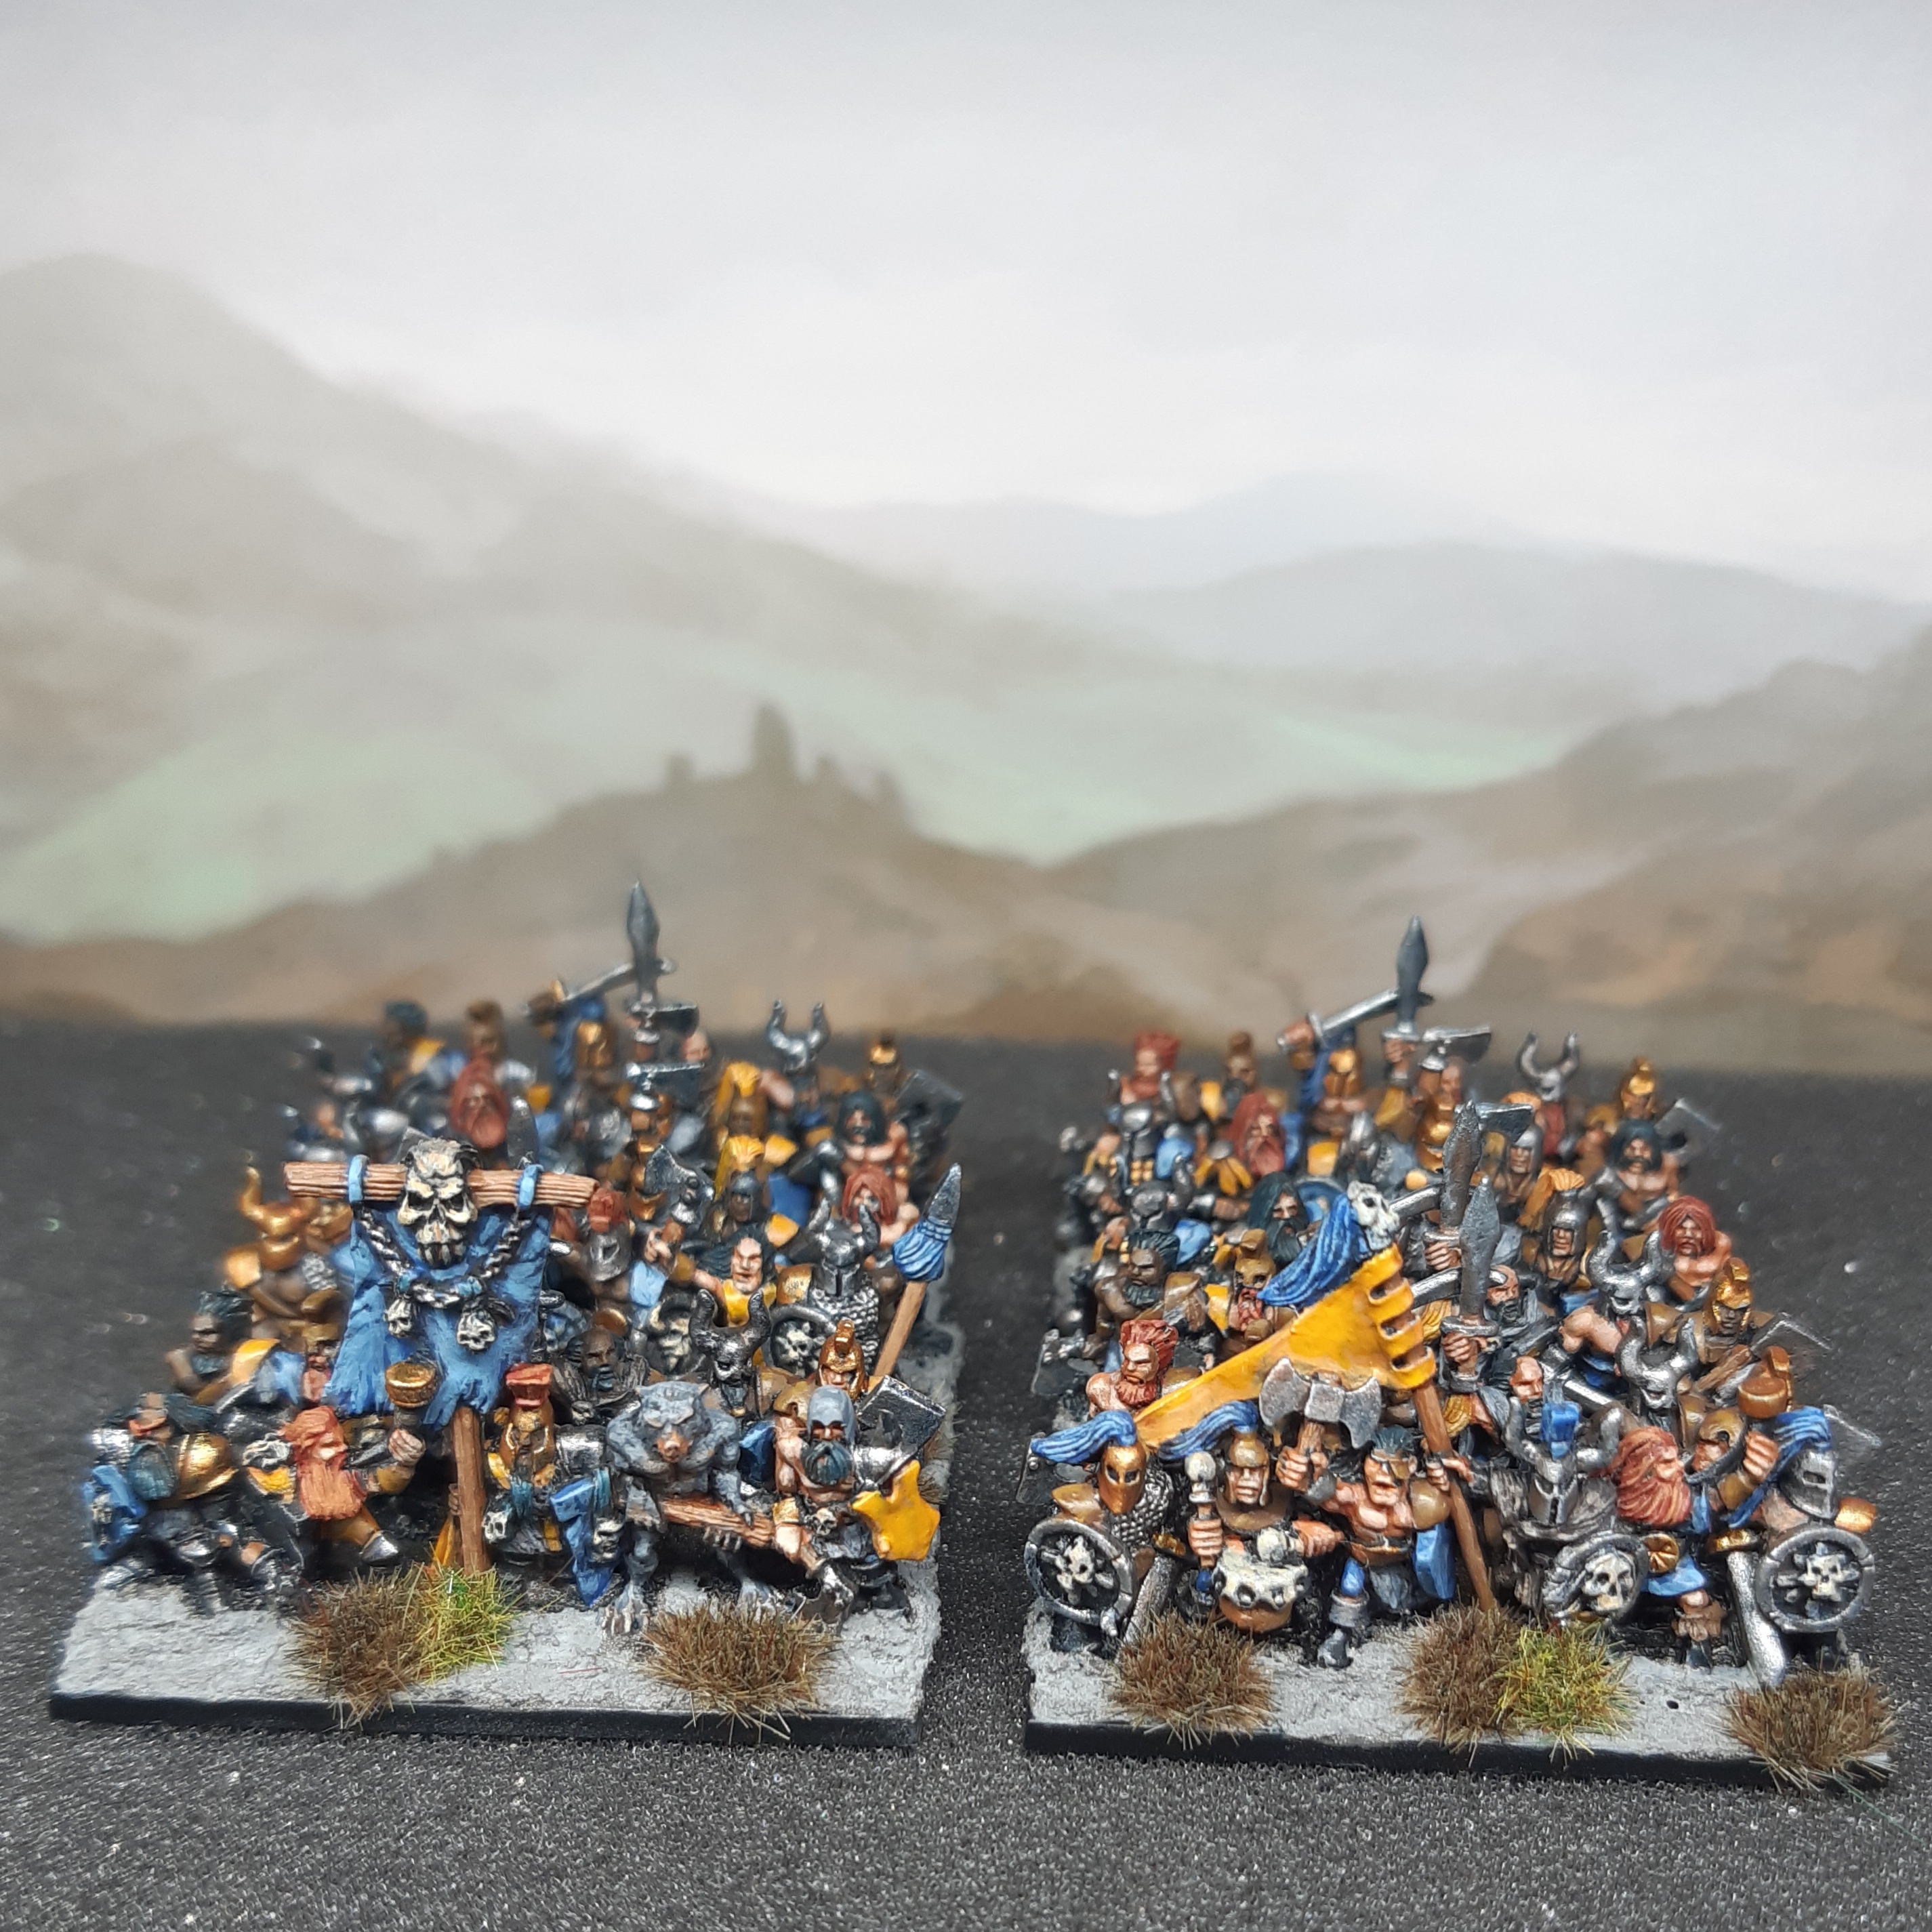
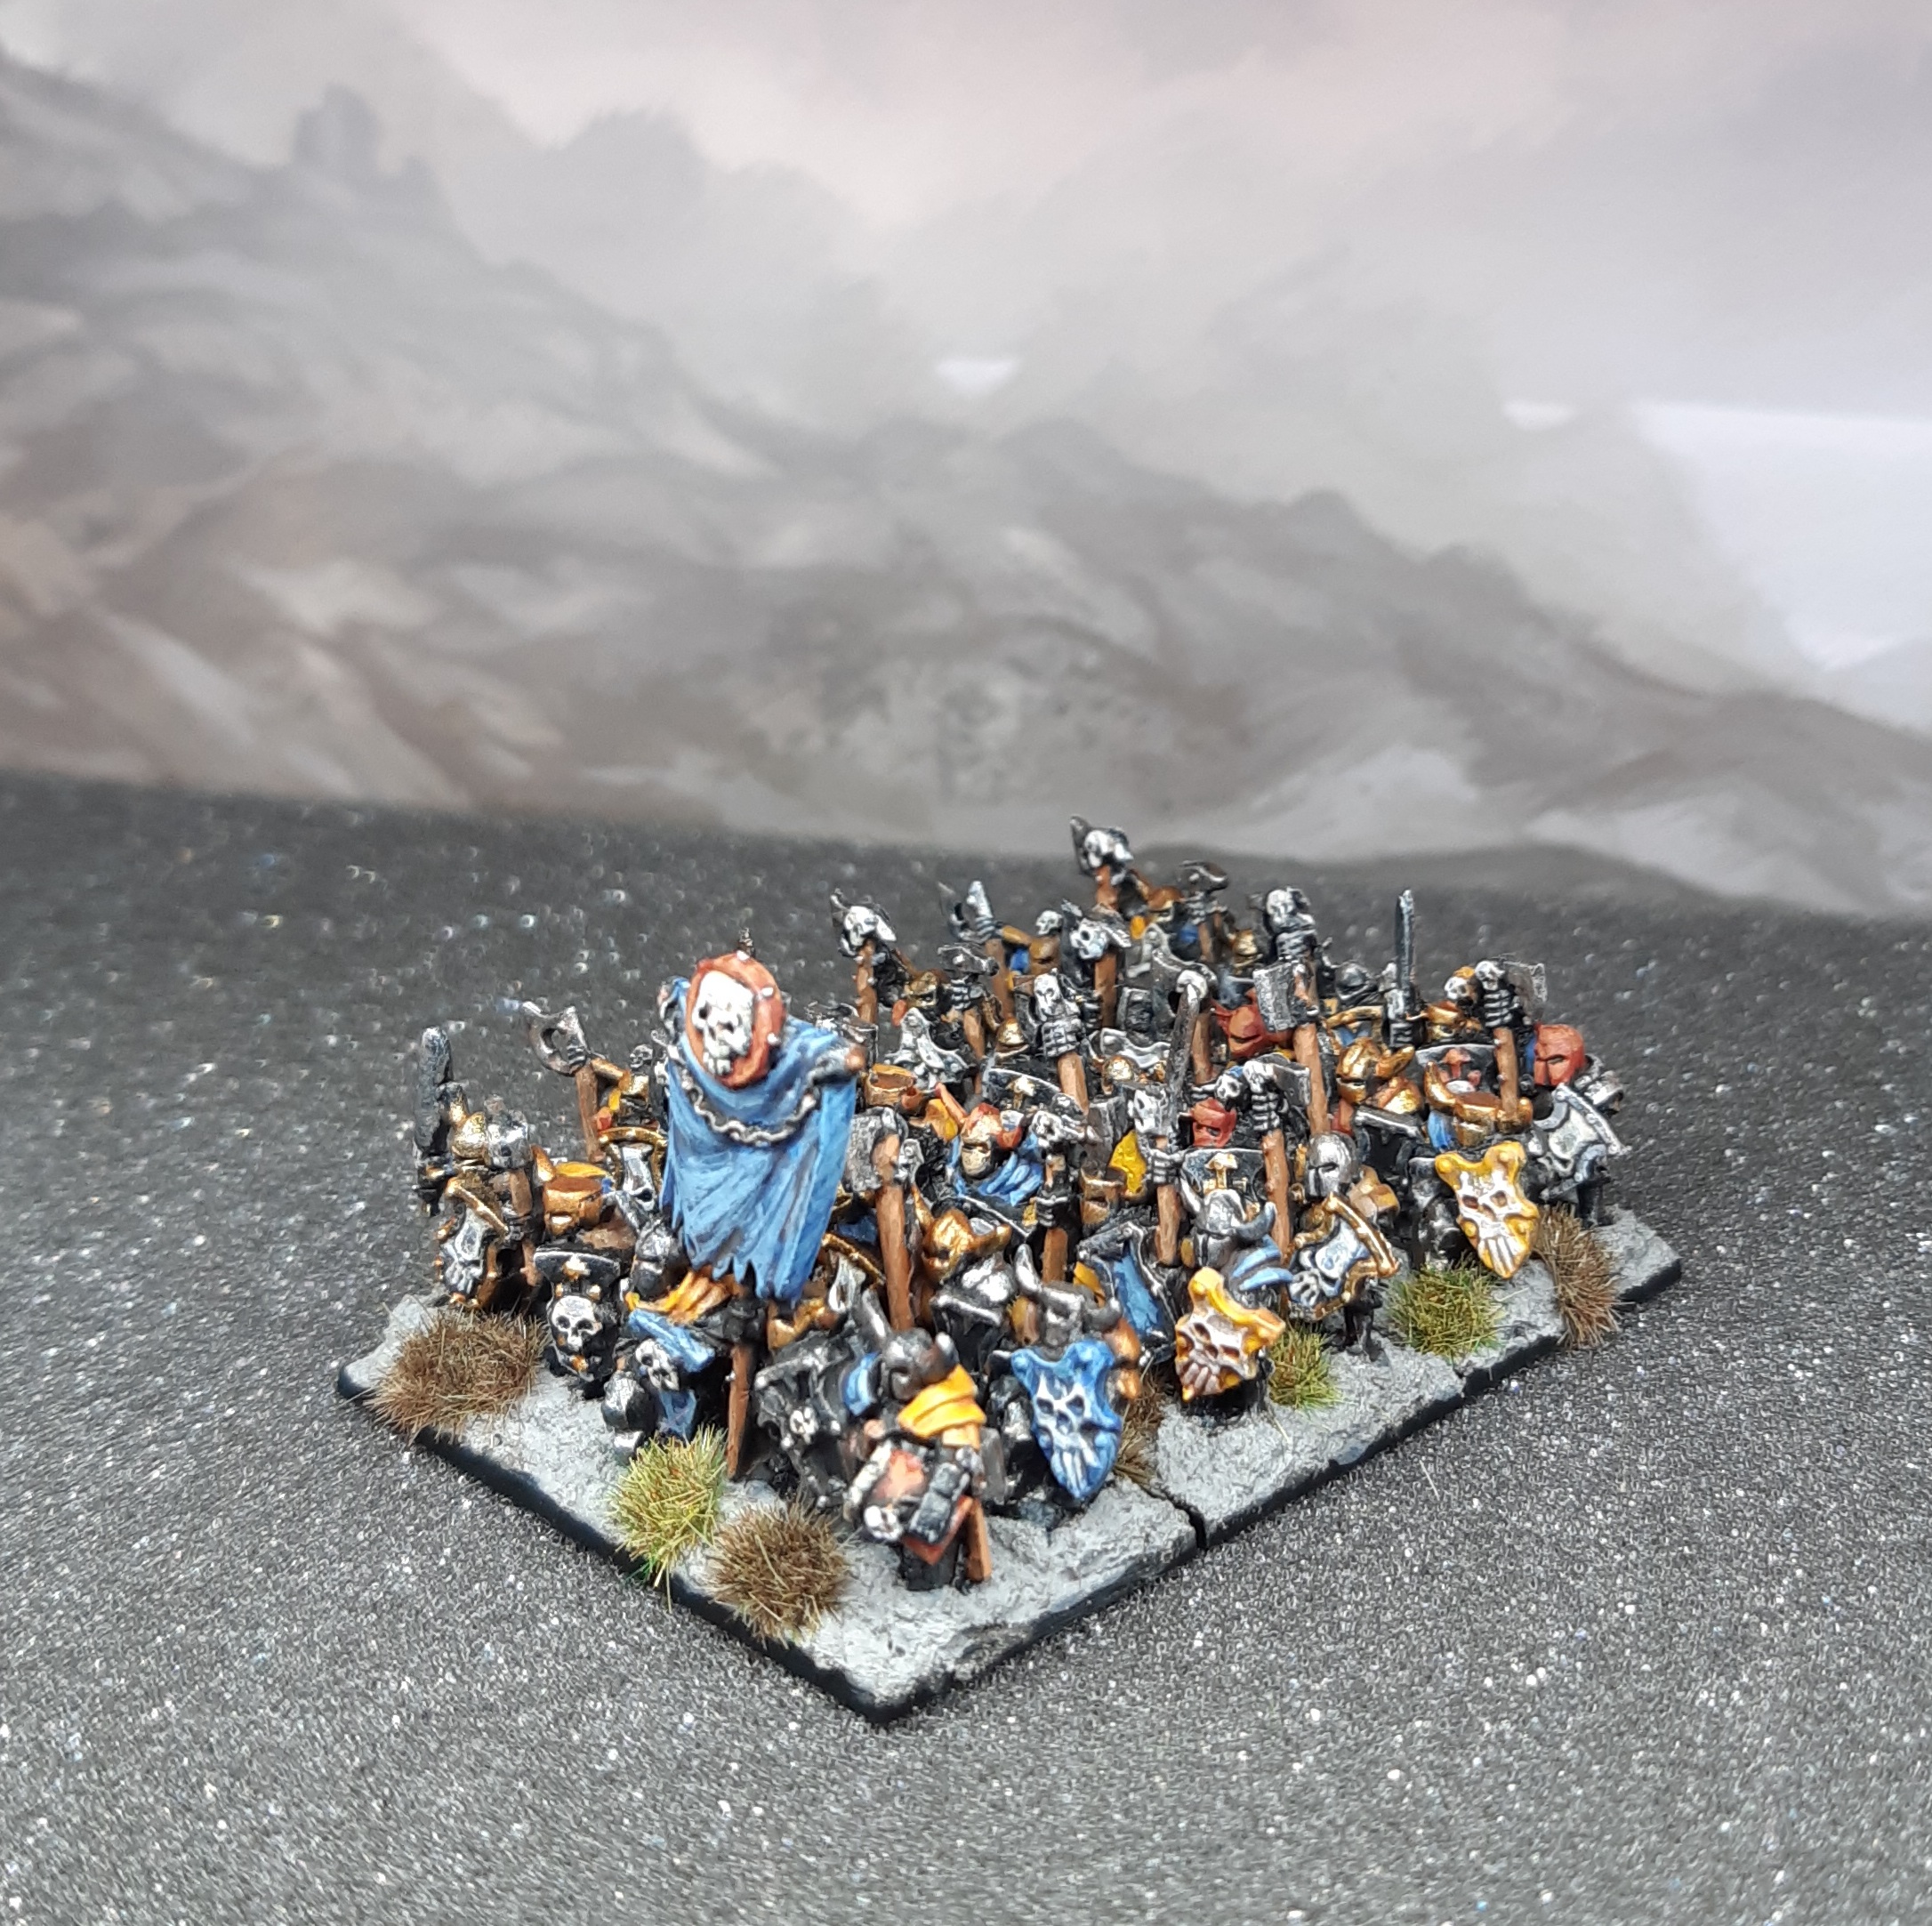
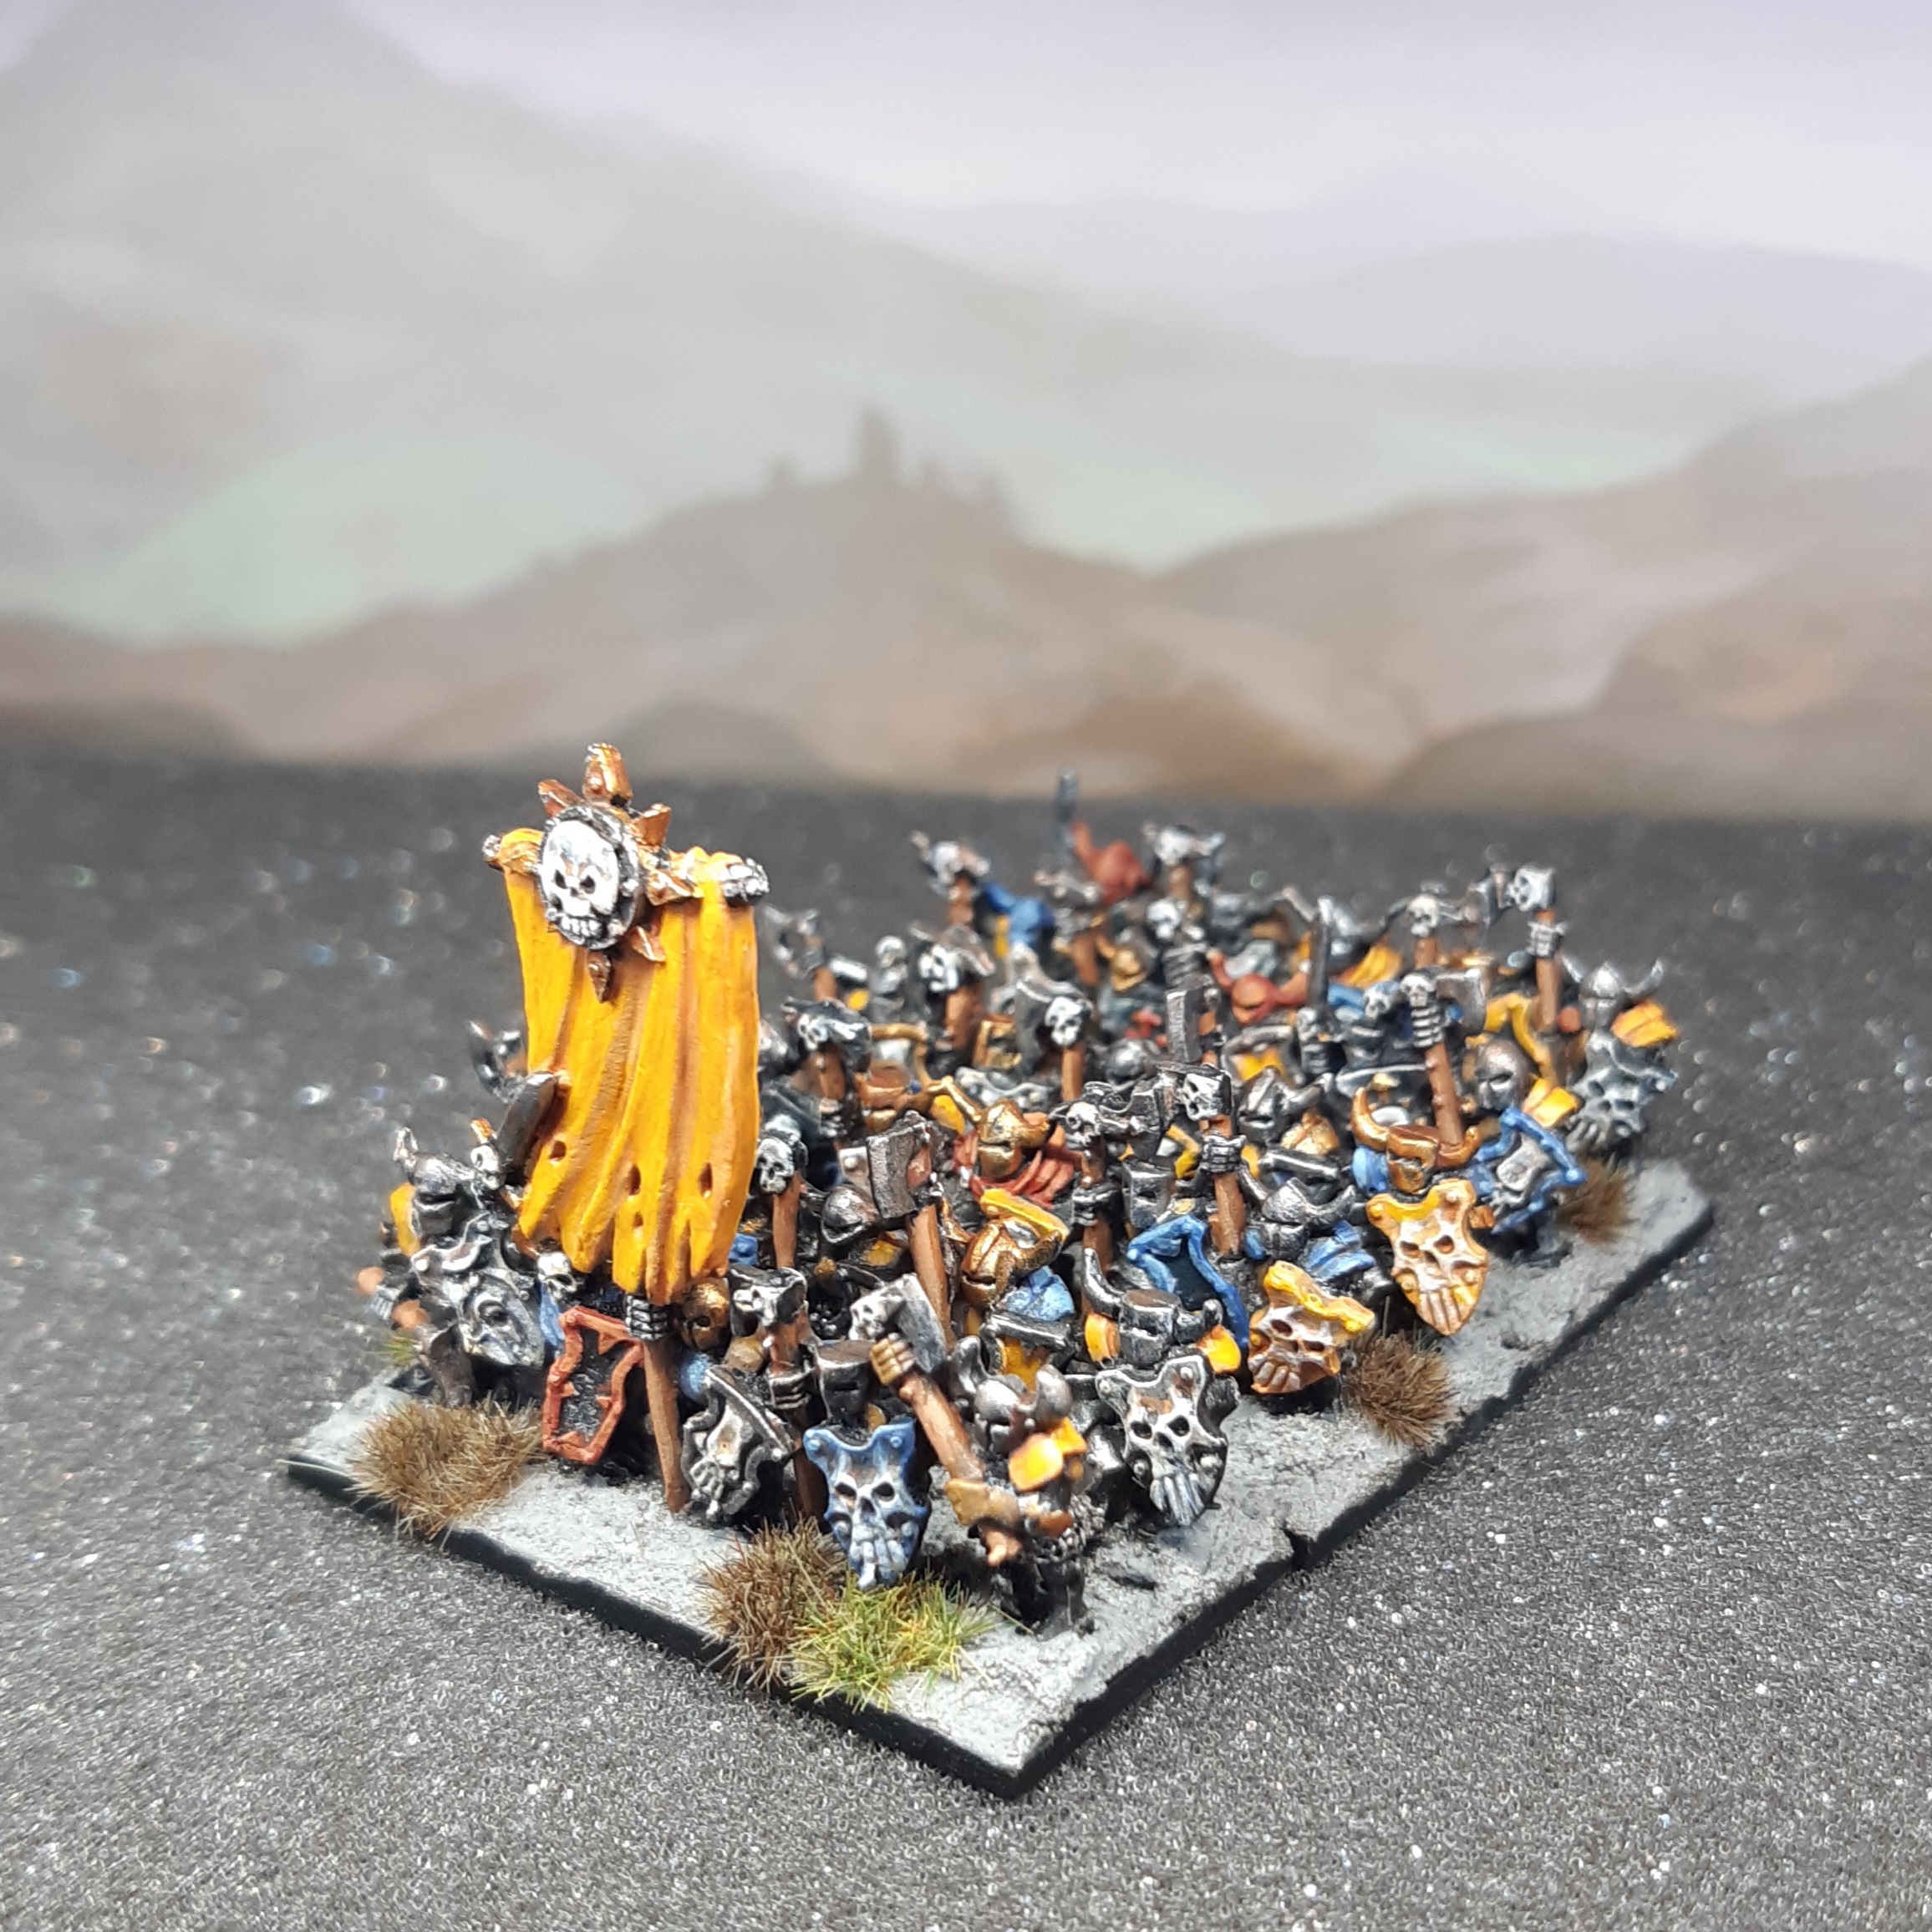
The Completed Warhost

With the last unit done, time to assemble the warhost. I’m pretty happy how the colour scheme looks across the final army.
In Warmaster terms, there’s just shy of 1400 of troops here, although there’s been no real thought in putting together a coherent army list for a game. This project was very much about the painting. Most likely these guys will first be used to play an entirely different rule system than Warmaster, with Hobgoblin a potential option.
I was initially worried that I would bounce quite hard off this project. Recent experience of painting up some 3D printed 10mm Skaven ended up being a bit of a chore. However I was very pleased to find that the Chaos figures were an absolute joy to paint.
I suspect this difference in enjoyment might be related to the two materials used, and how this impacts the end sculpts. I think the 3D prints look fantastic, but the metal figures were just a step up in terms of ease to paint. The restrictions that metal as a material puts on sculptors means all the stands are a bit flatter, without so many intricate cuts and folds as the 3D designs, which get fiddly for 10mm figures. Yet the metal stands have been so cleverly sculpted that they are still full of detail. Clearly there’s a lot of personal preference here, but I’d definitely lean towards hunting down more old metals over 3D prints if I want to expand this army further.
A few shots of different parts of the army to end the project (I really have to get a better setup for photography of groups bigger than half a dozen figures…). Thanks to anyone who has followed along, and a hat tip to @Nogbadthebad for prompting the idea for this Spring Clean Challenge.
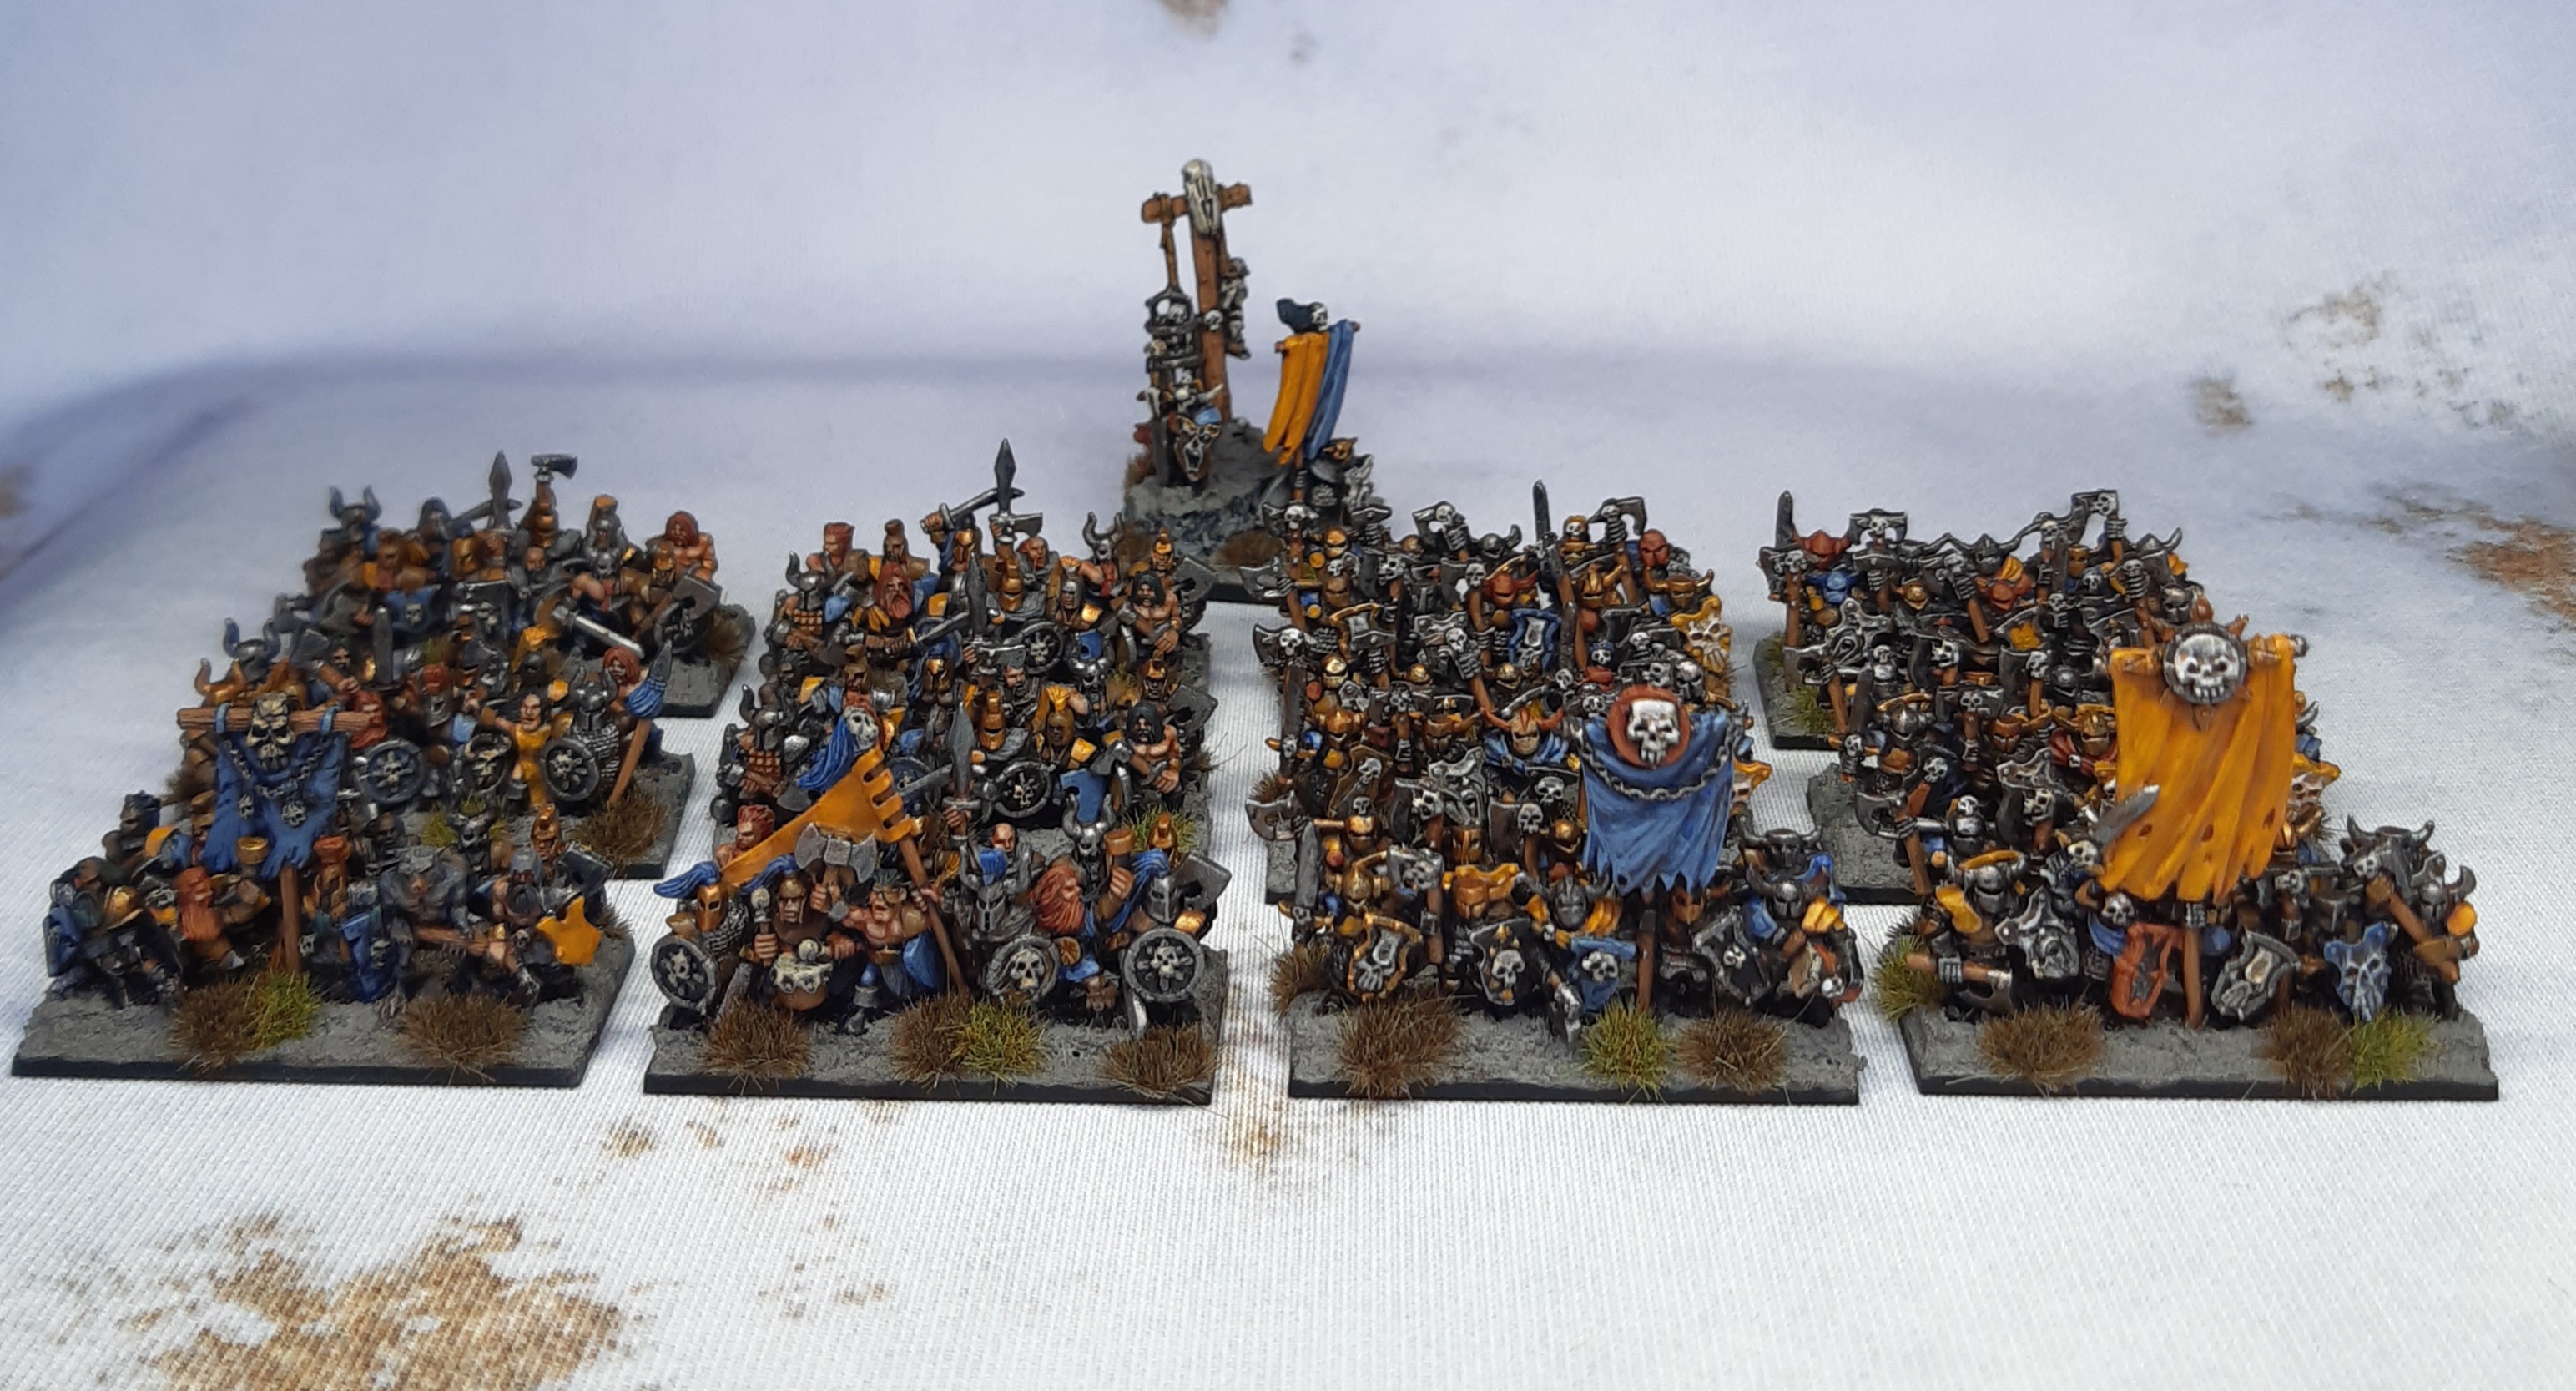 Infantry - two units of Marauders & two units of Chaos Warriors
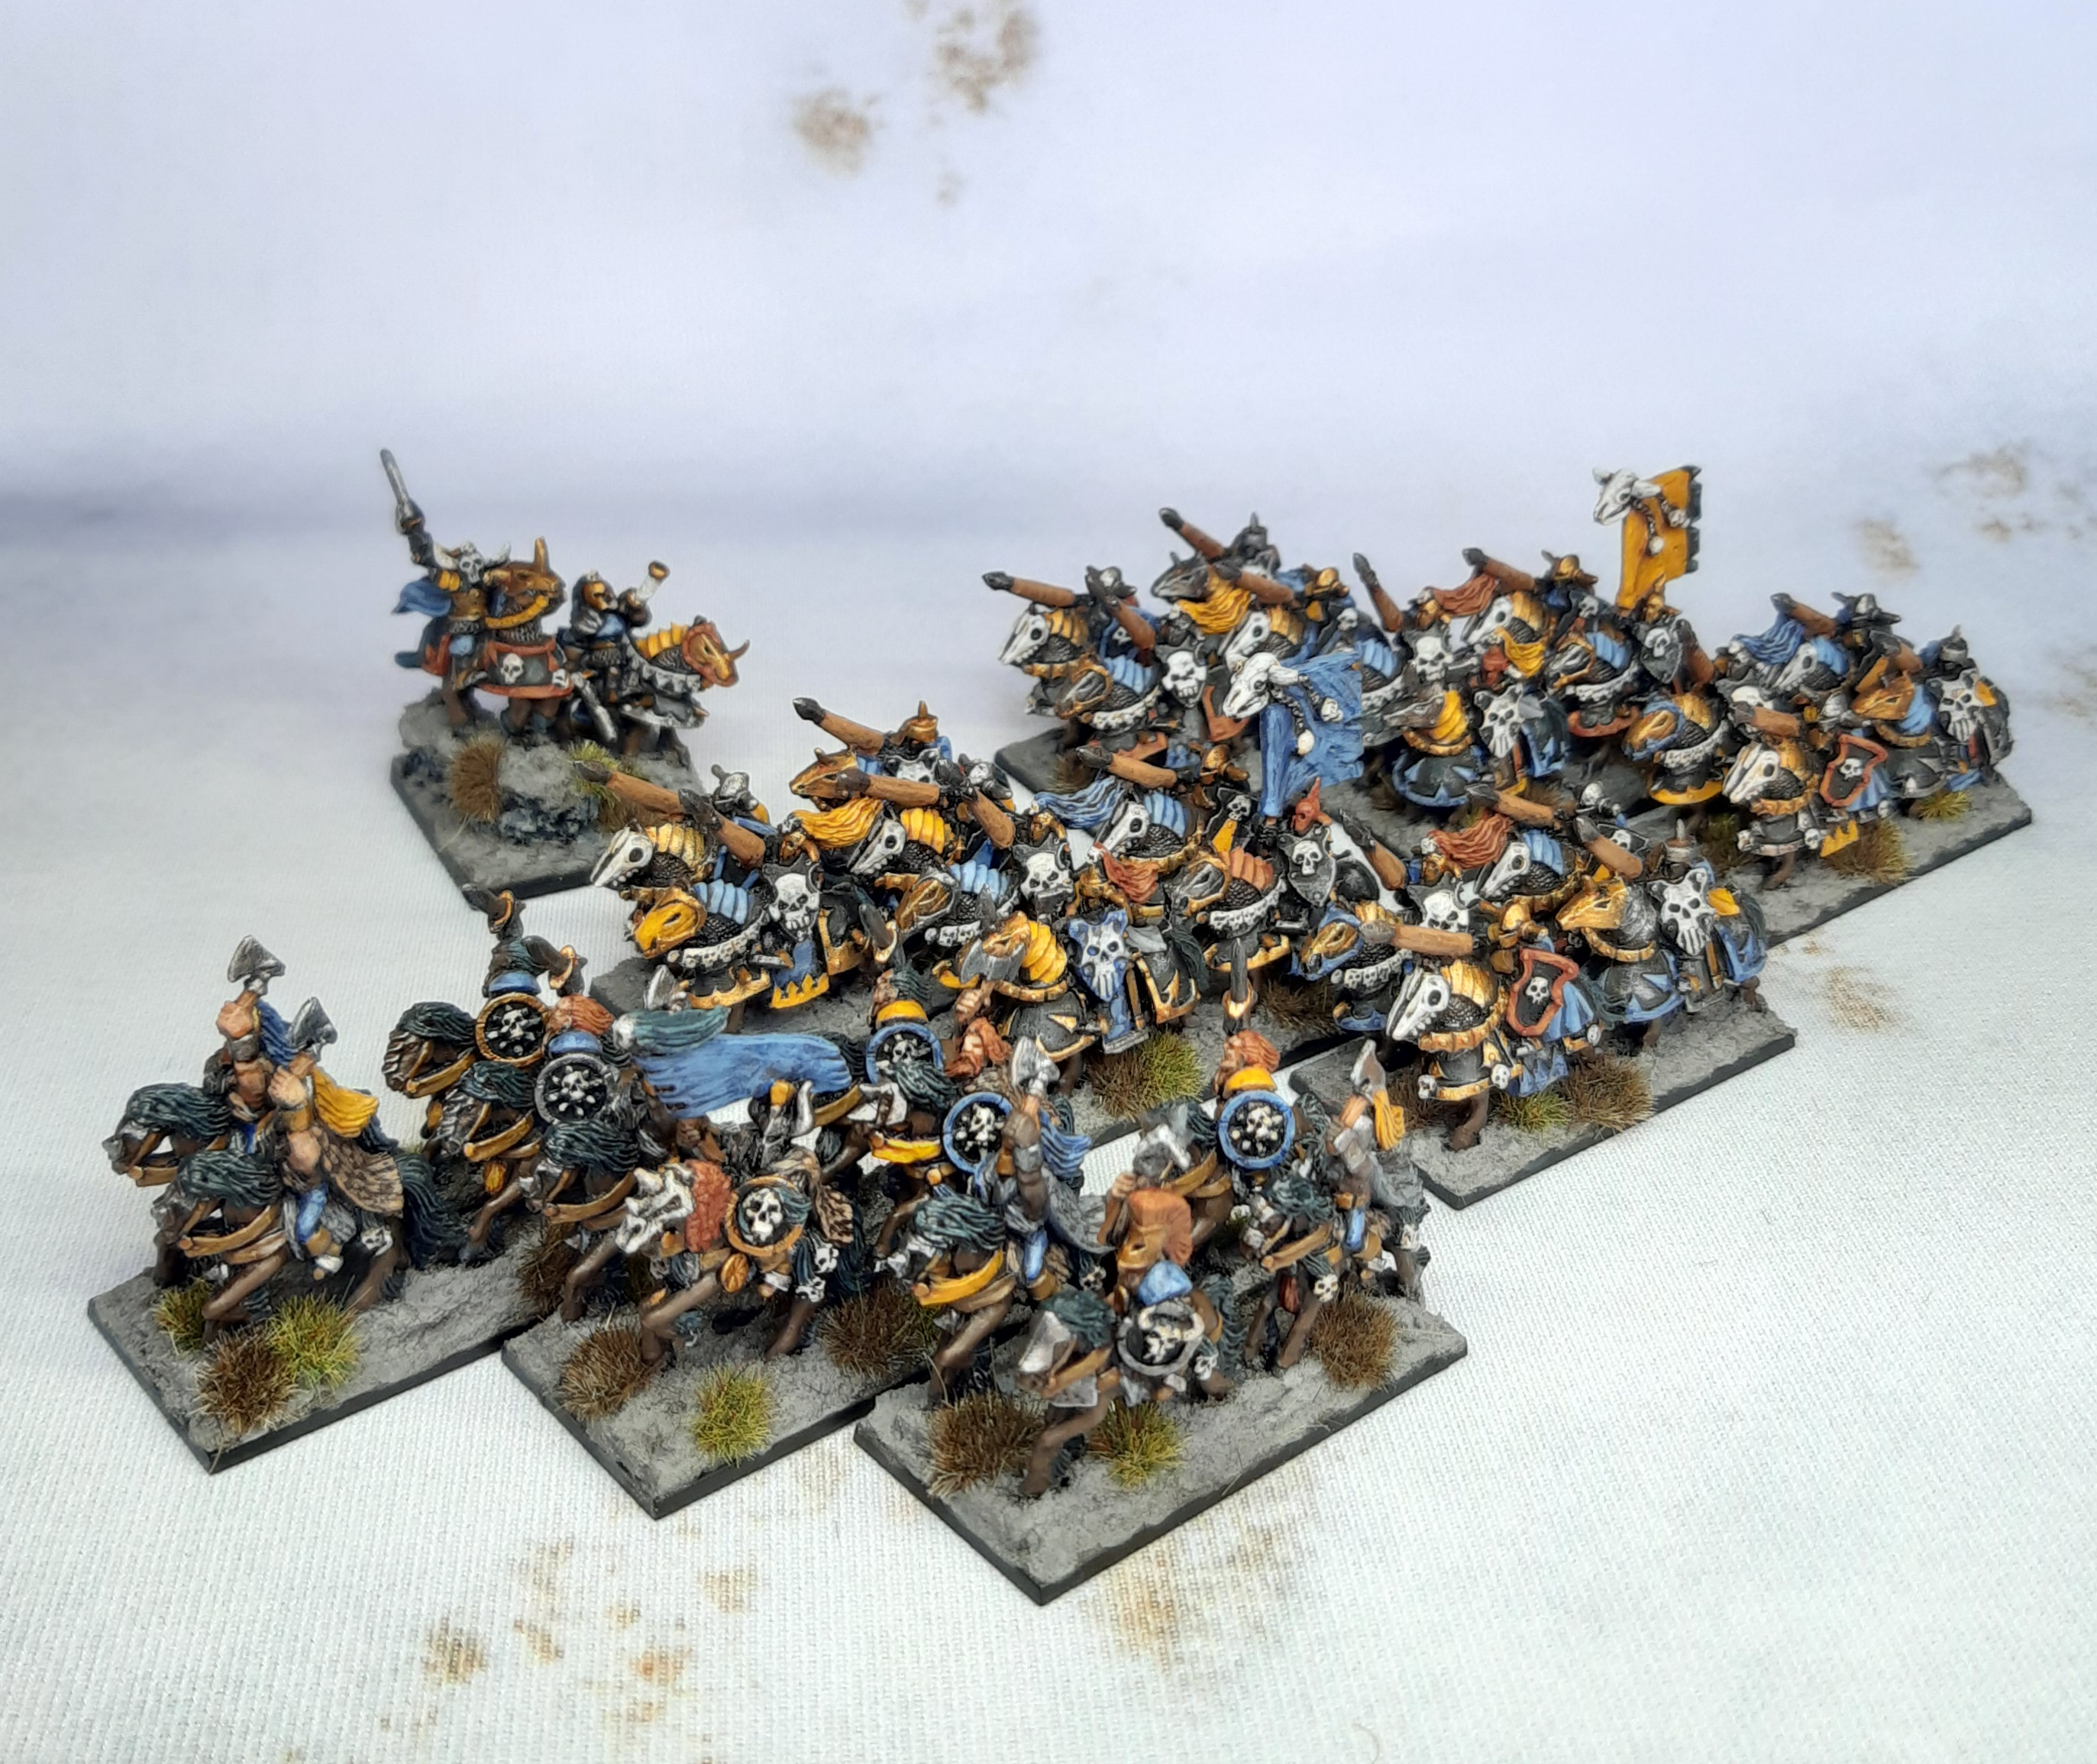 Cavalry - one unit of Marauder Horsemen & two units of Chaos Knights
 Fast attack - Harpies, Chaos Hounds and Chariots


