![How To Paint Moonstone’s Nanny | Goblin King Games [7 Days Early Access]](https://images.beastsofwar.com/2024/12/3CU-Gobin-King-Games-Moonstone-Shades-Nanny-coverimage-225-127.jpg)


Slaying Dusty Boxes


Recommendations: 311
About the Project
Like so many others, I have a huge pile of opportunity. I preordered the Slaine: Kiss My Axe starter set a few years ago based on my experience with Judge Dredd and Strontium Dog games released by Warlord Games. I did this without ever having read a single Slaine story or comic. I jumped into making terrain beyond the included terrain in the box. I built Trees, hedges, some rough terrain templates and purchased a large Celtic roundhouse. I even purchased a Humble Bundle that included all the Slaine graphic novels, and began reading them...and that's where my story ended until a I decided to get the minis painted. Now I'm set on finishing this project and finally playing the game!
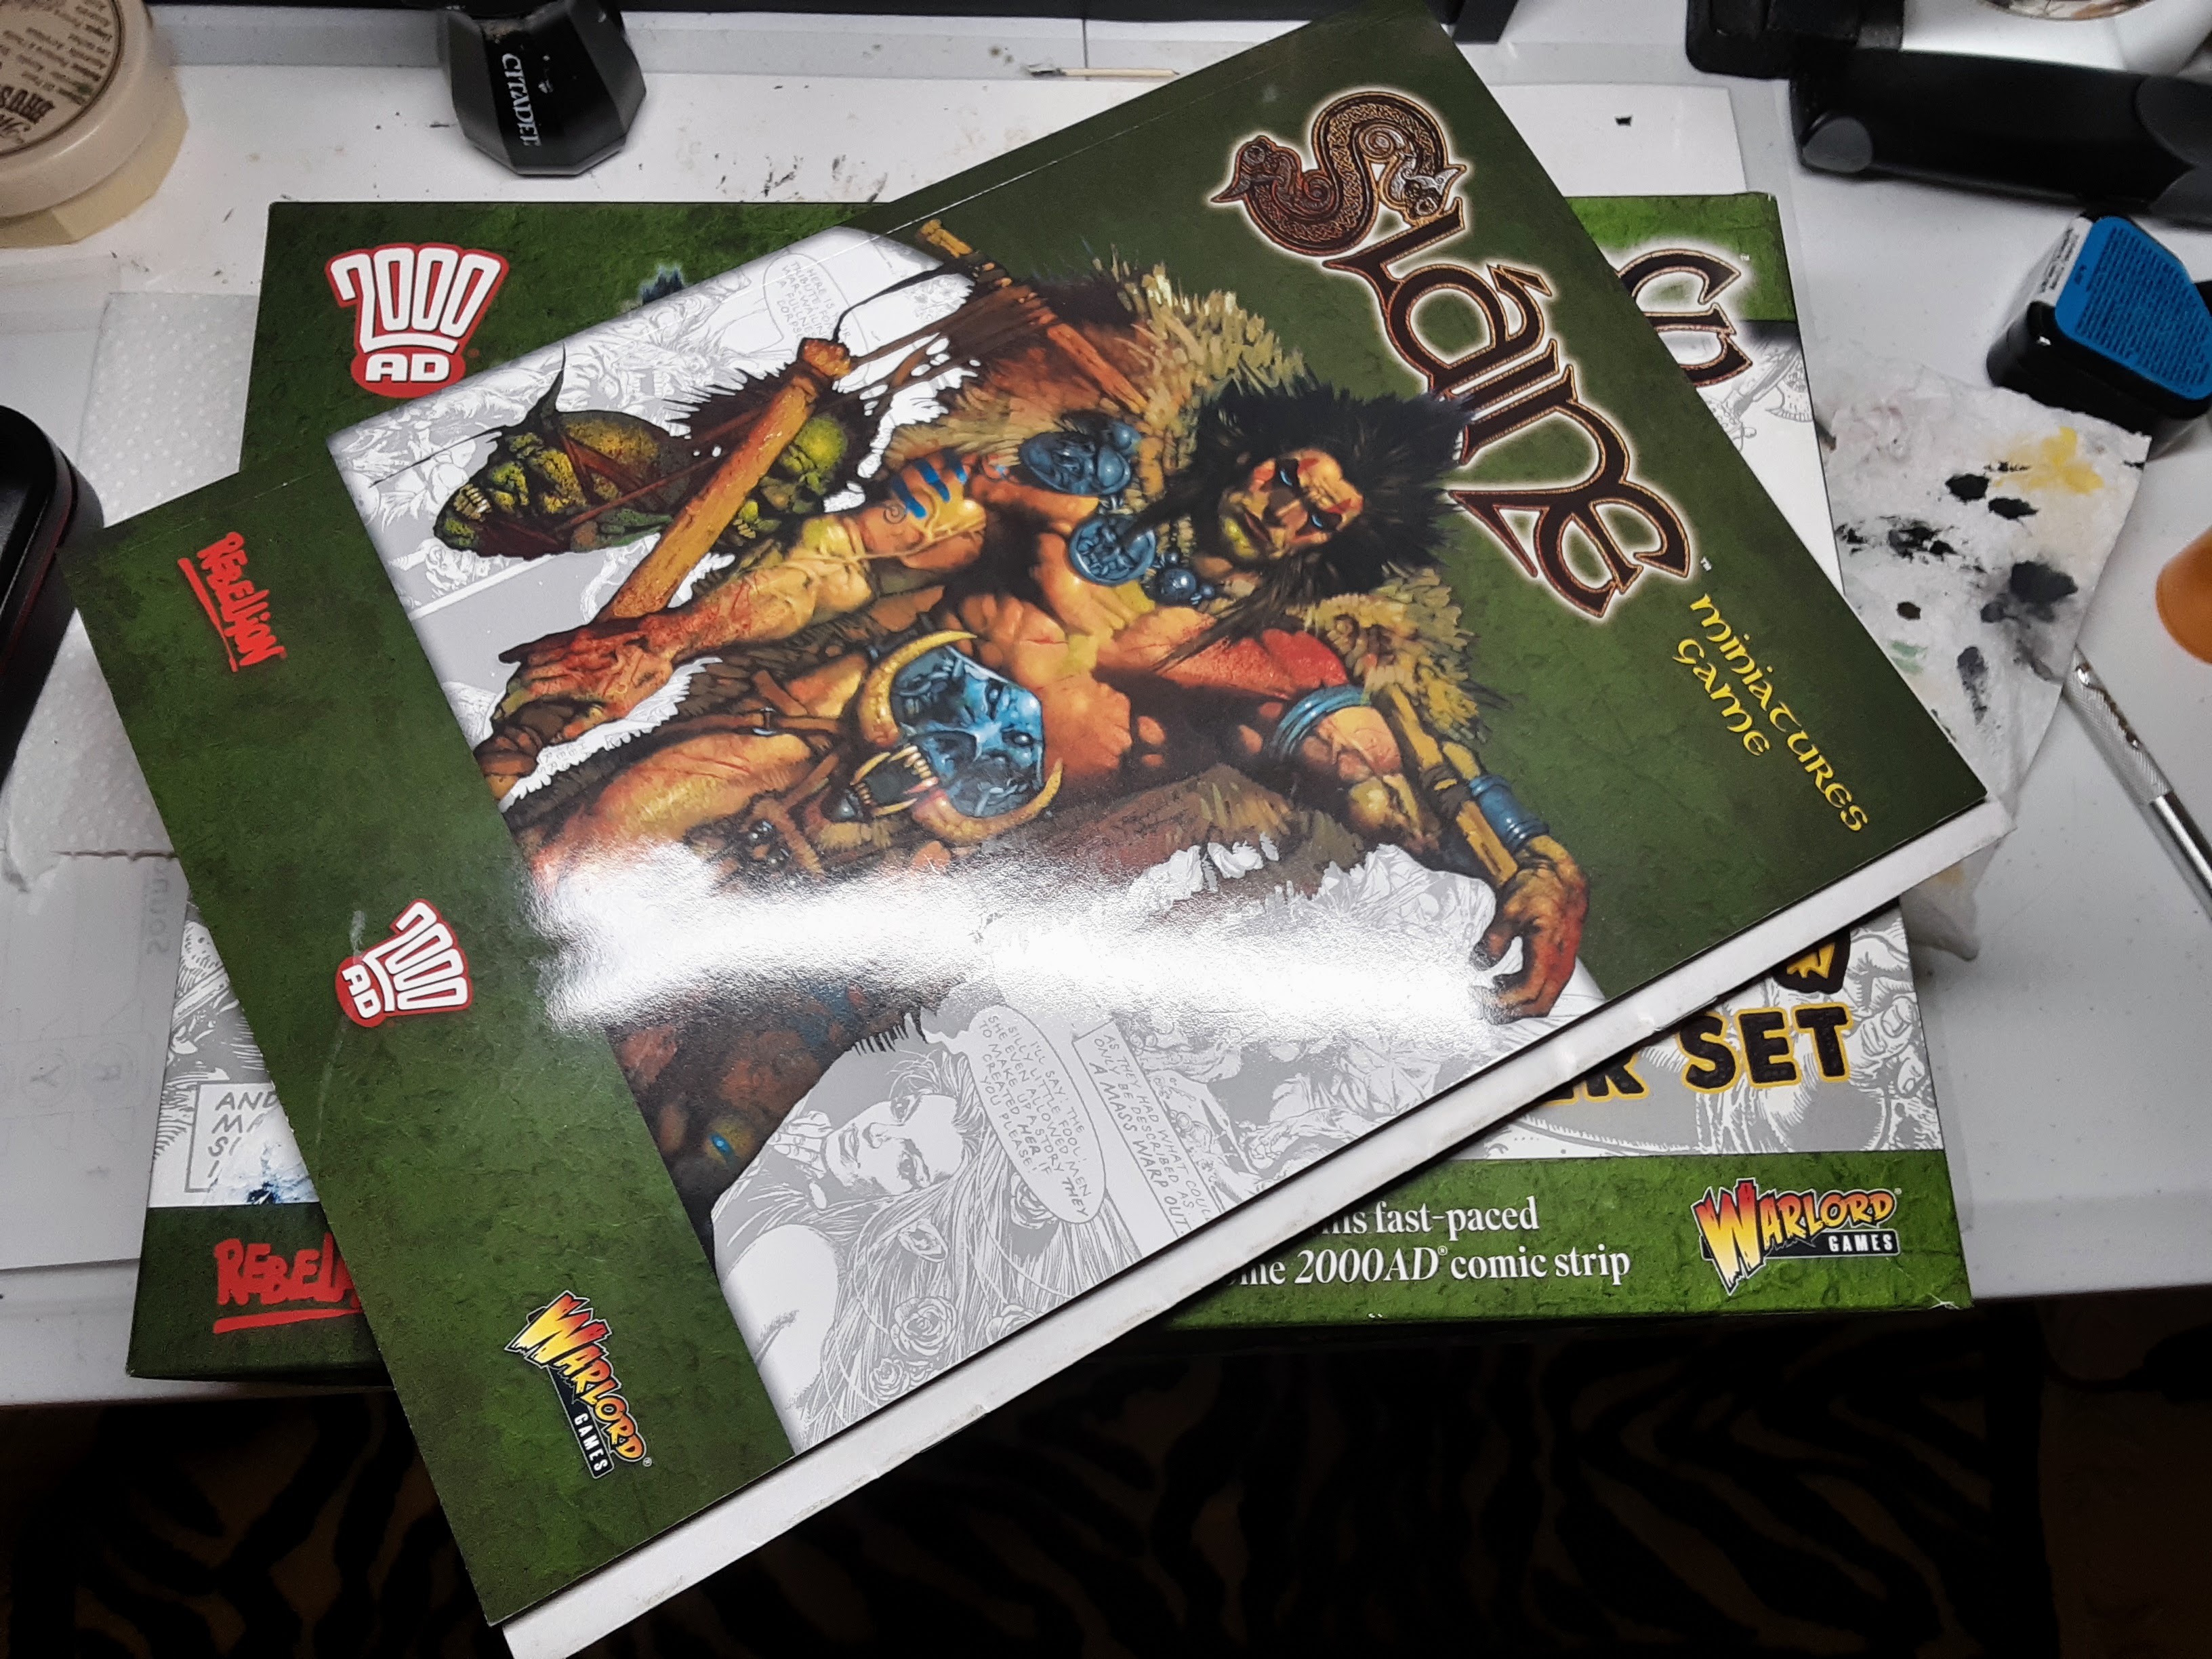
Related Game: Sláine Miniatures Game
Related Company: Warlord Games
Related Genre: Fantasy
Related Contest: Spring Clean Hobby Challenge 2024
This Project is Completed
Trees, hedges, and huts...Oh, my!
I mentioned in the description of the project that I previously made terrain for Slain: Kiss My Axe! while my minis sat unpainted for an excessive amount of time. I figure it’d be worth while sharing what I finished before jumping into the rest of the project.
Slaine inspired me to jump into terrain building due to me mostly owning SciFi terrain and a limited amount of terrain for Bolt Action. The plus side to Slaine terrain is that it would be useful for lots of different systems.
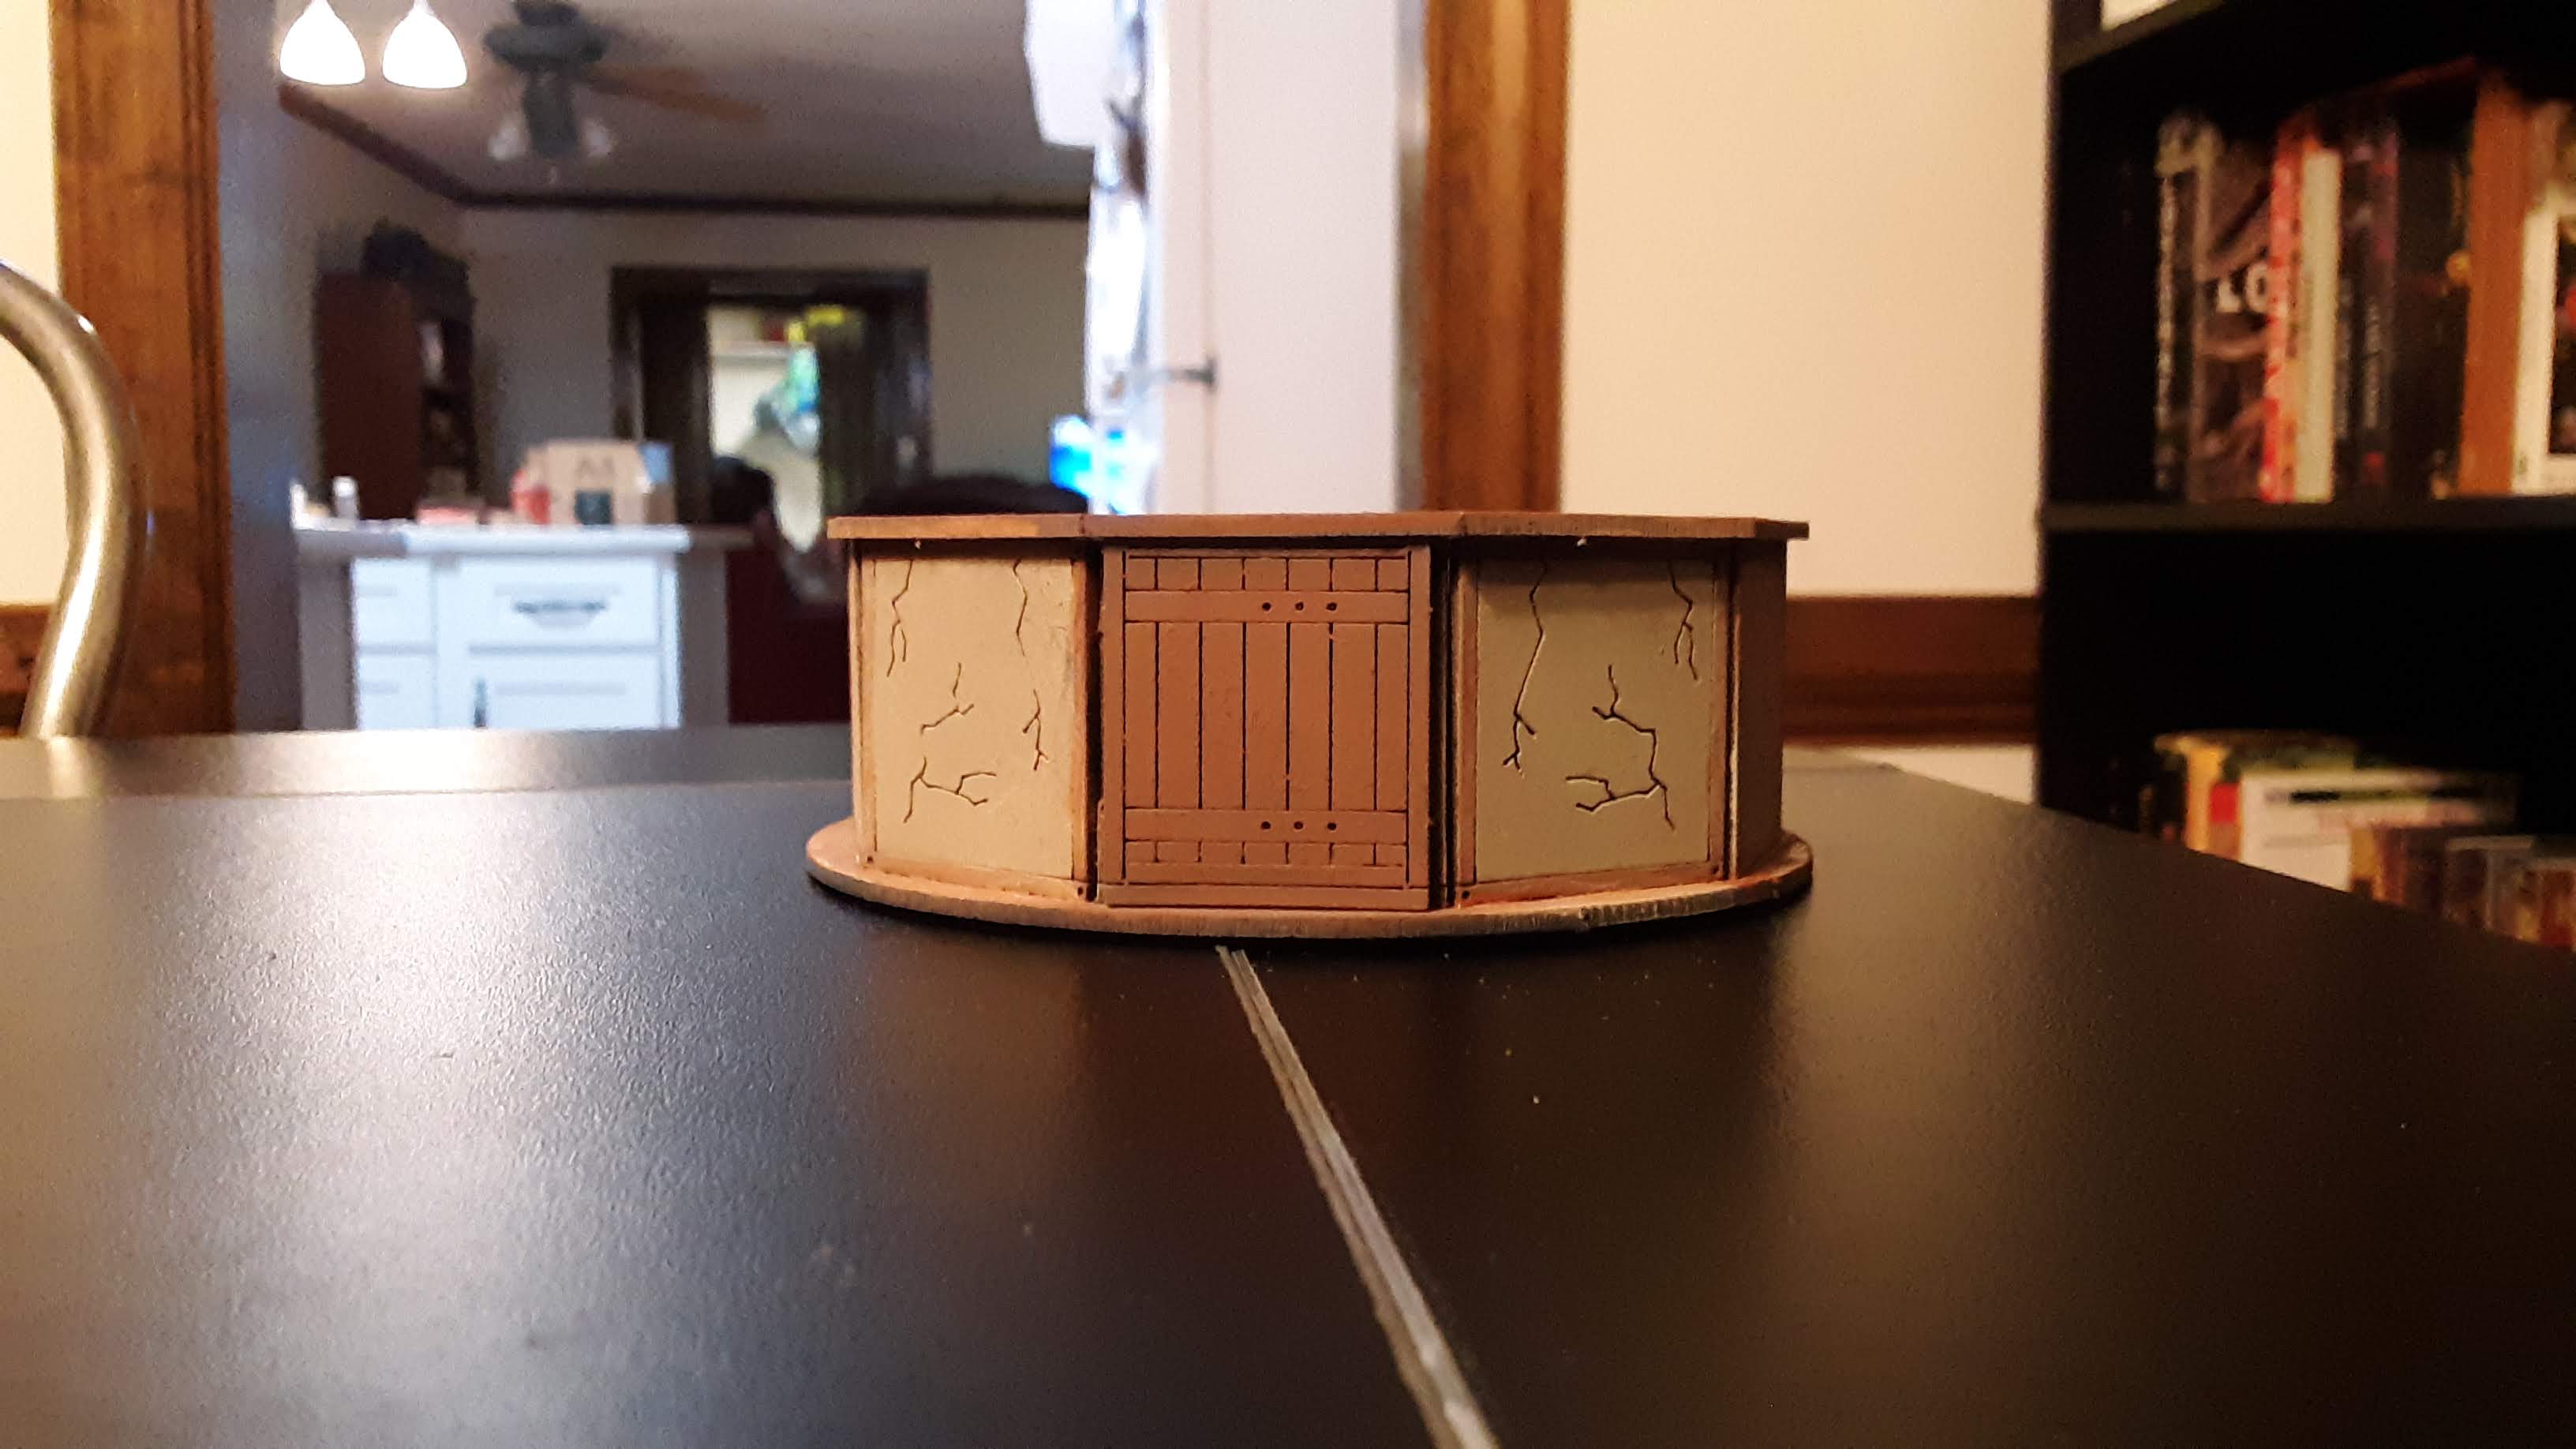
I decided that I wanted to pick up an additional Celtic Round House from Warlord Games, made by Sarissa Precision, before I started my terrain project. Once it arrived I jumped into the project.
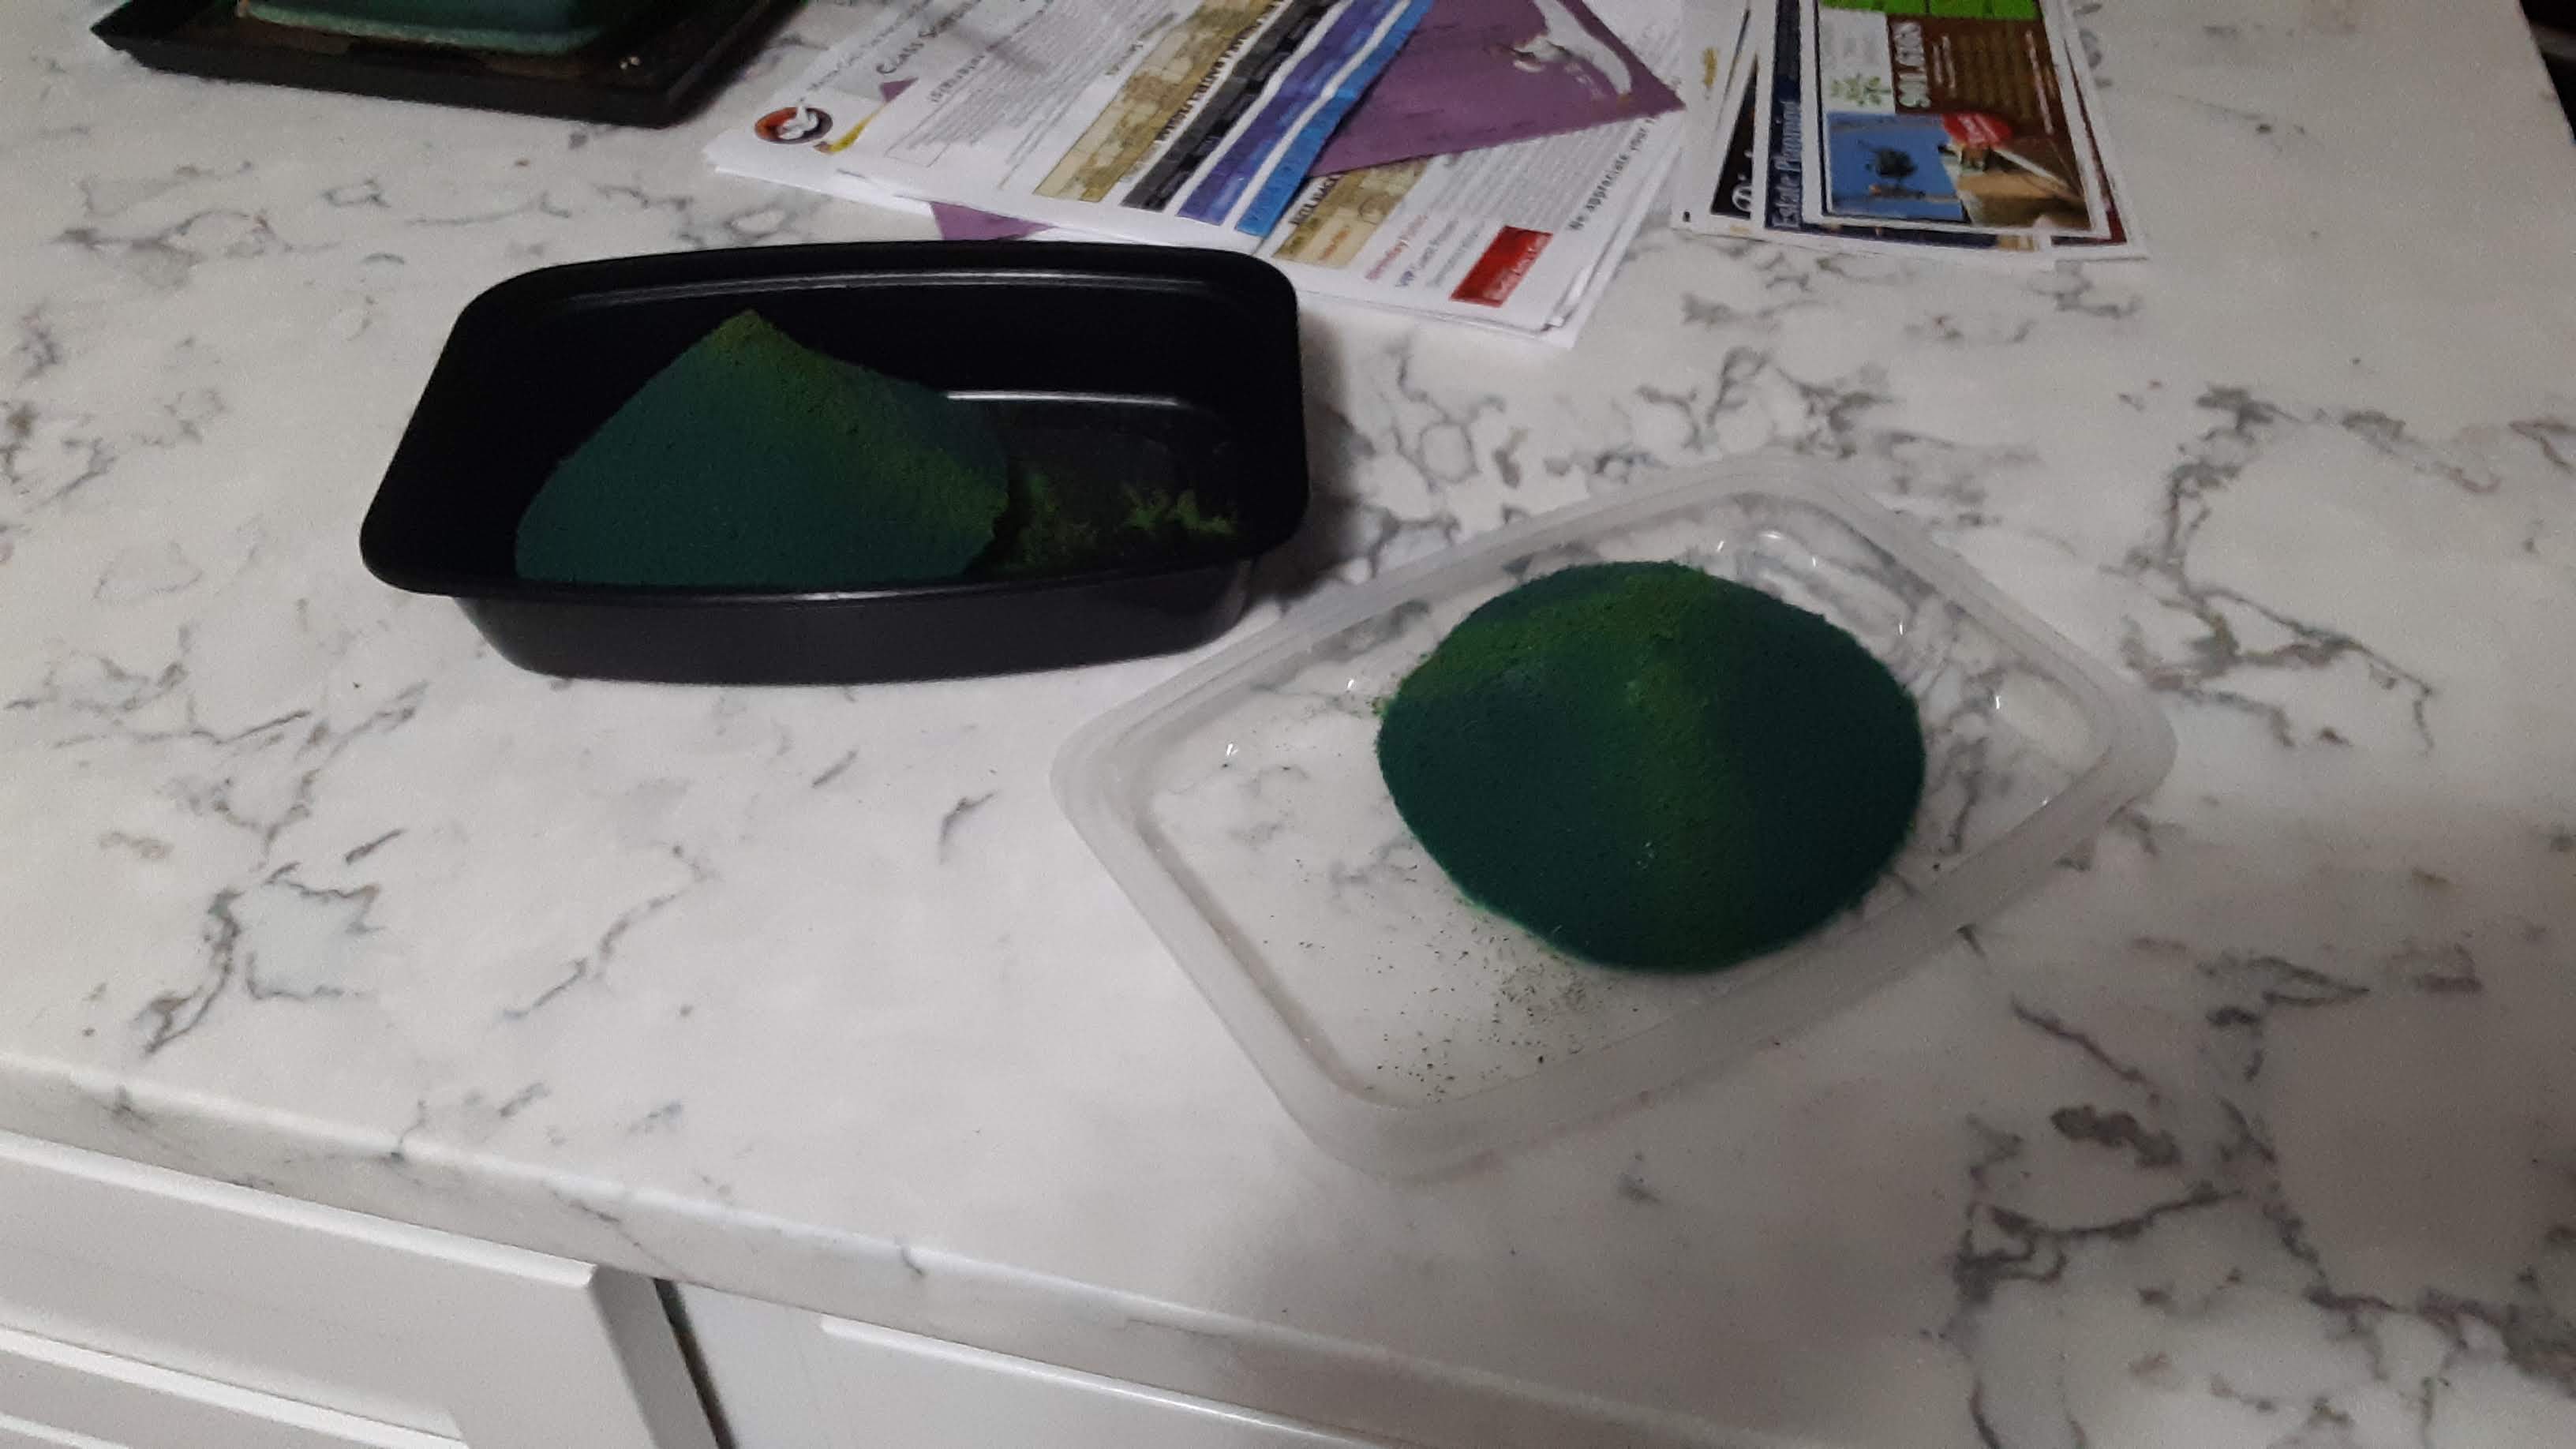
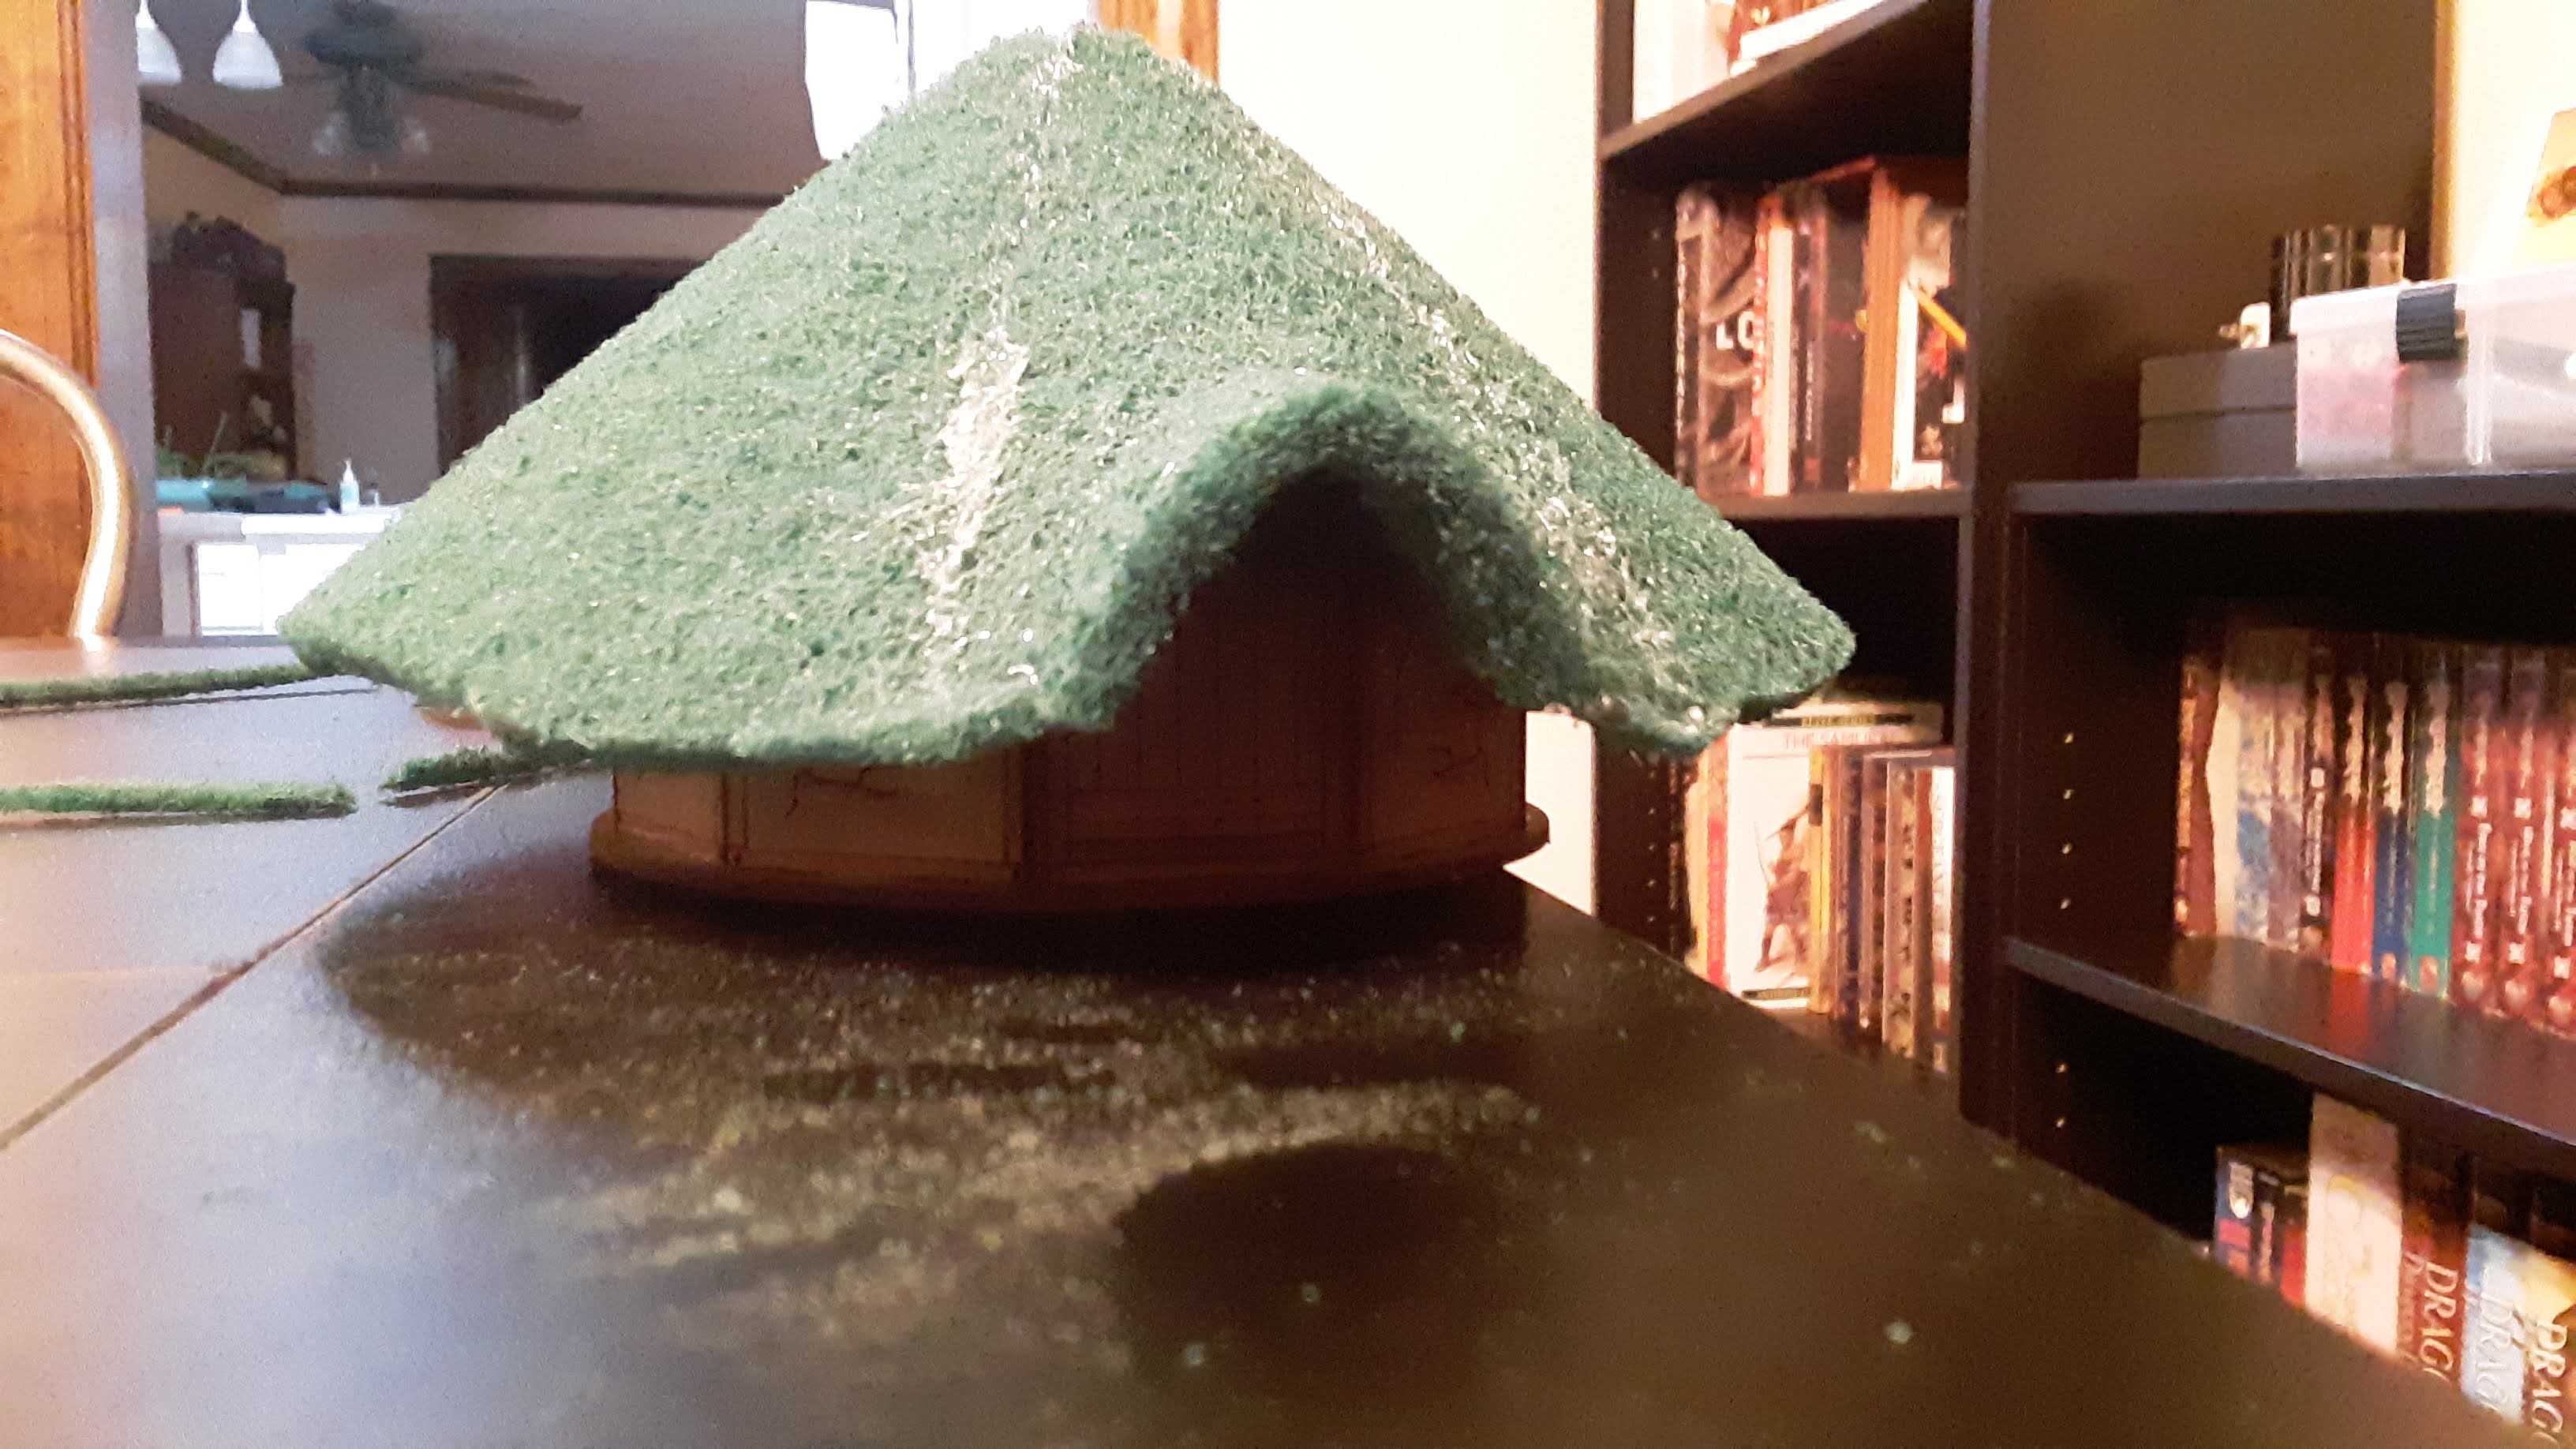
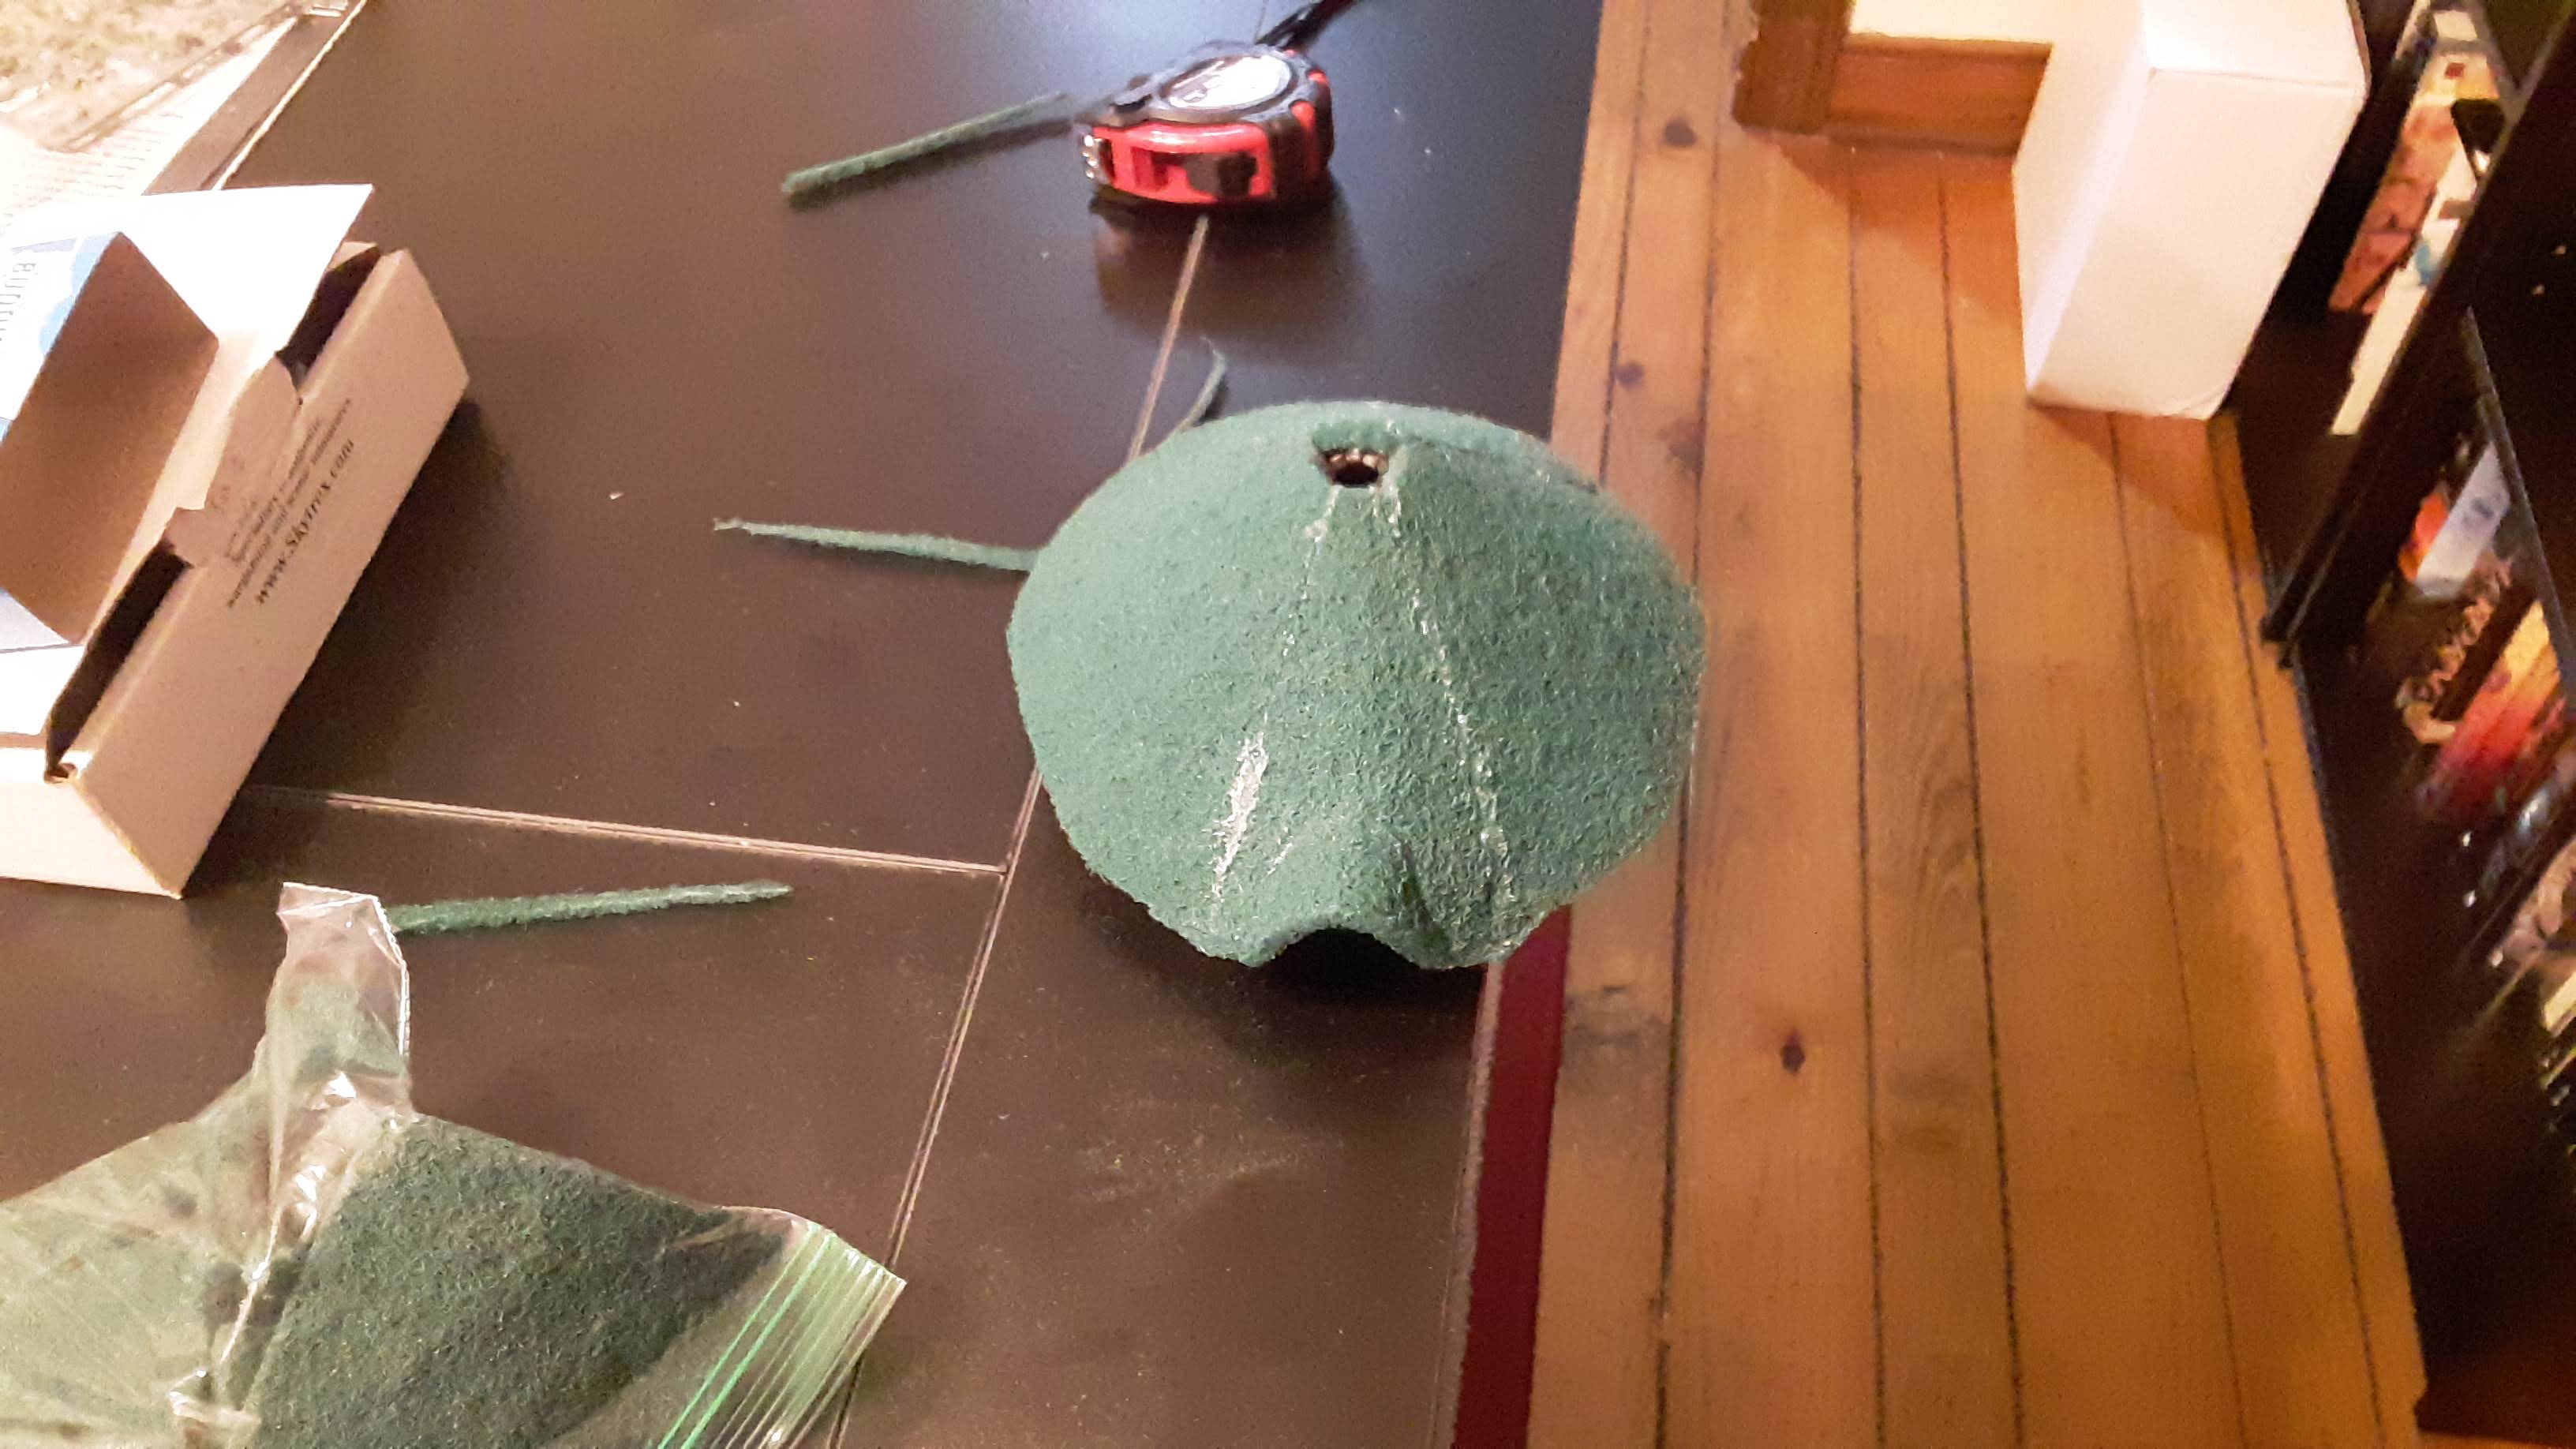
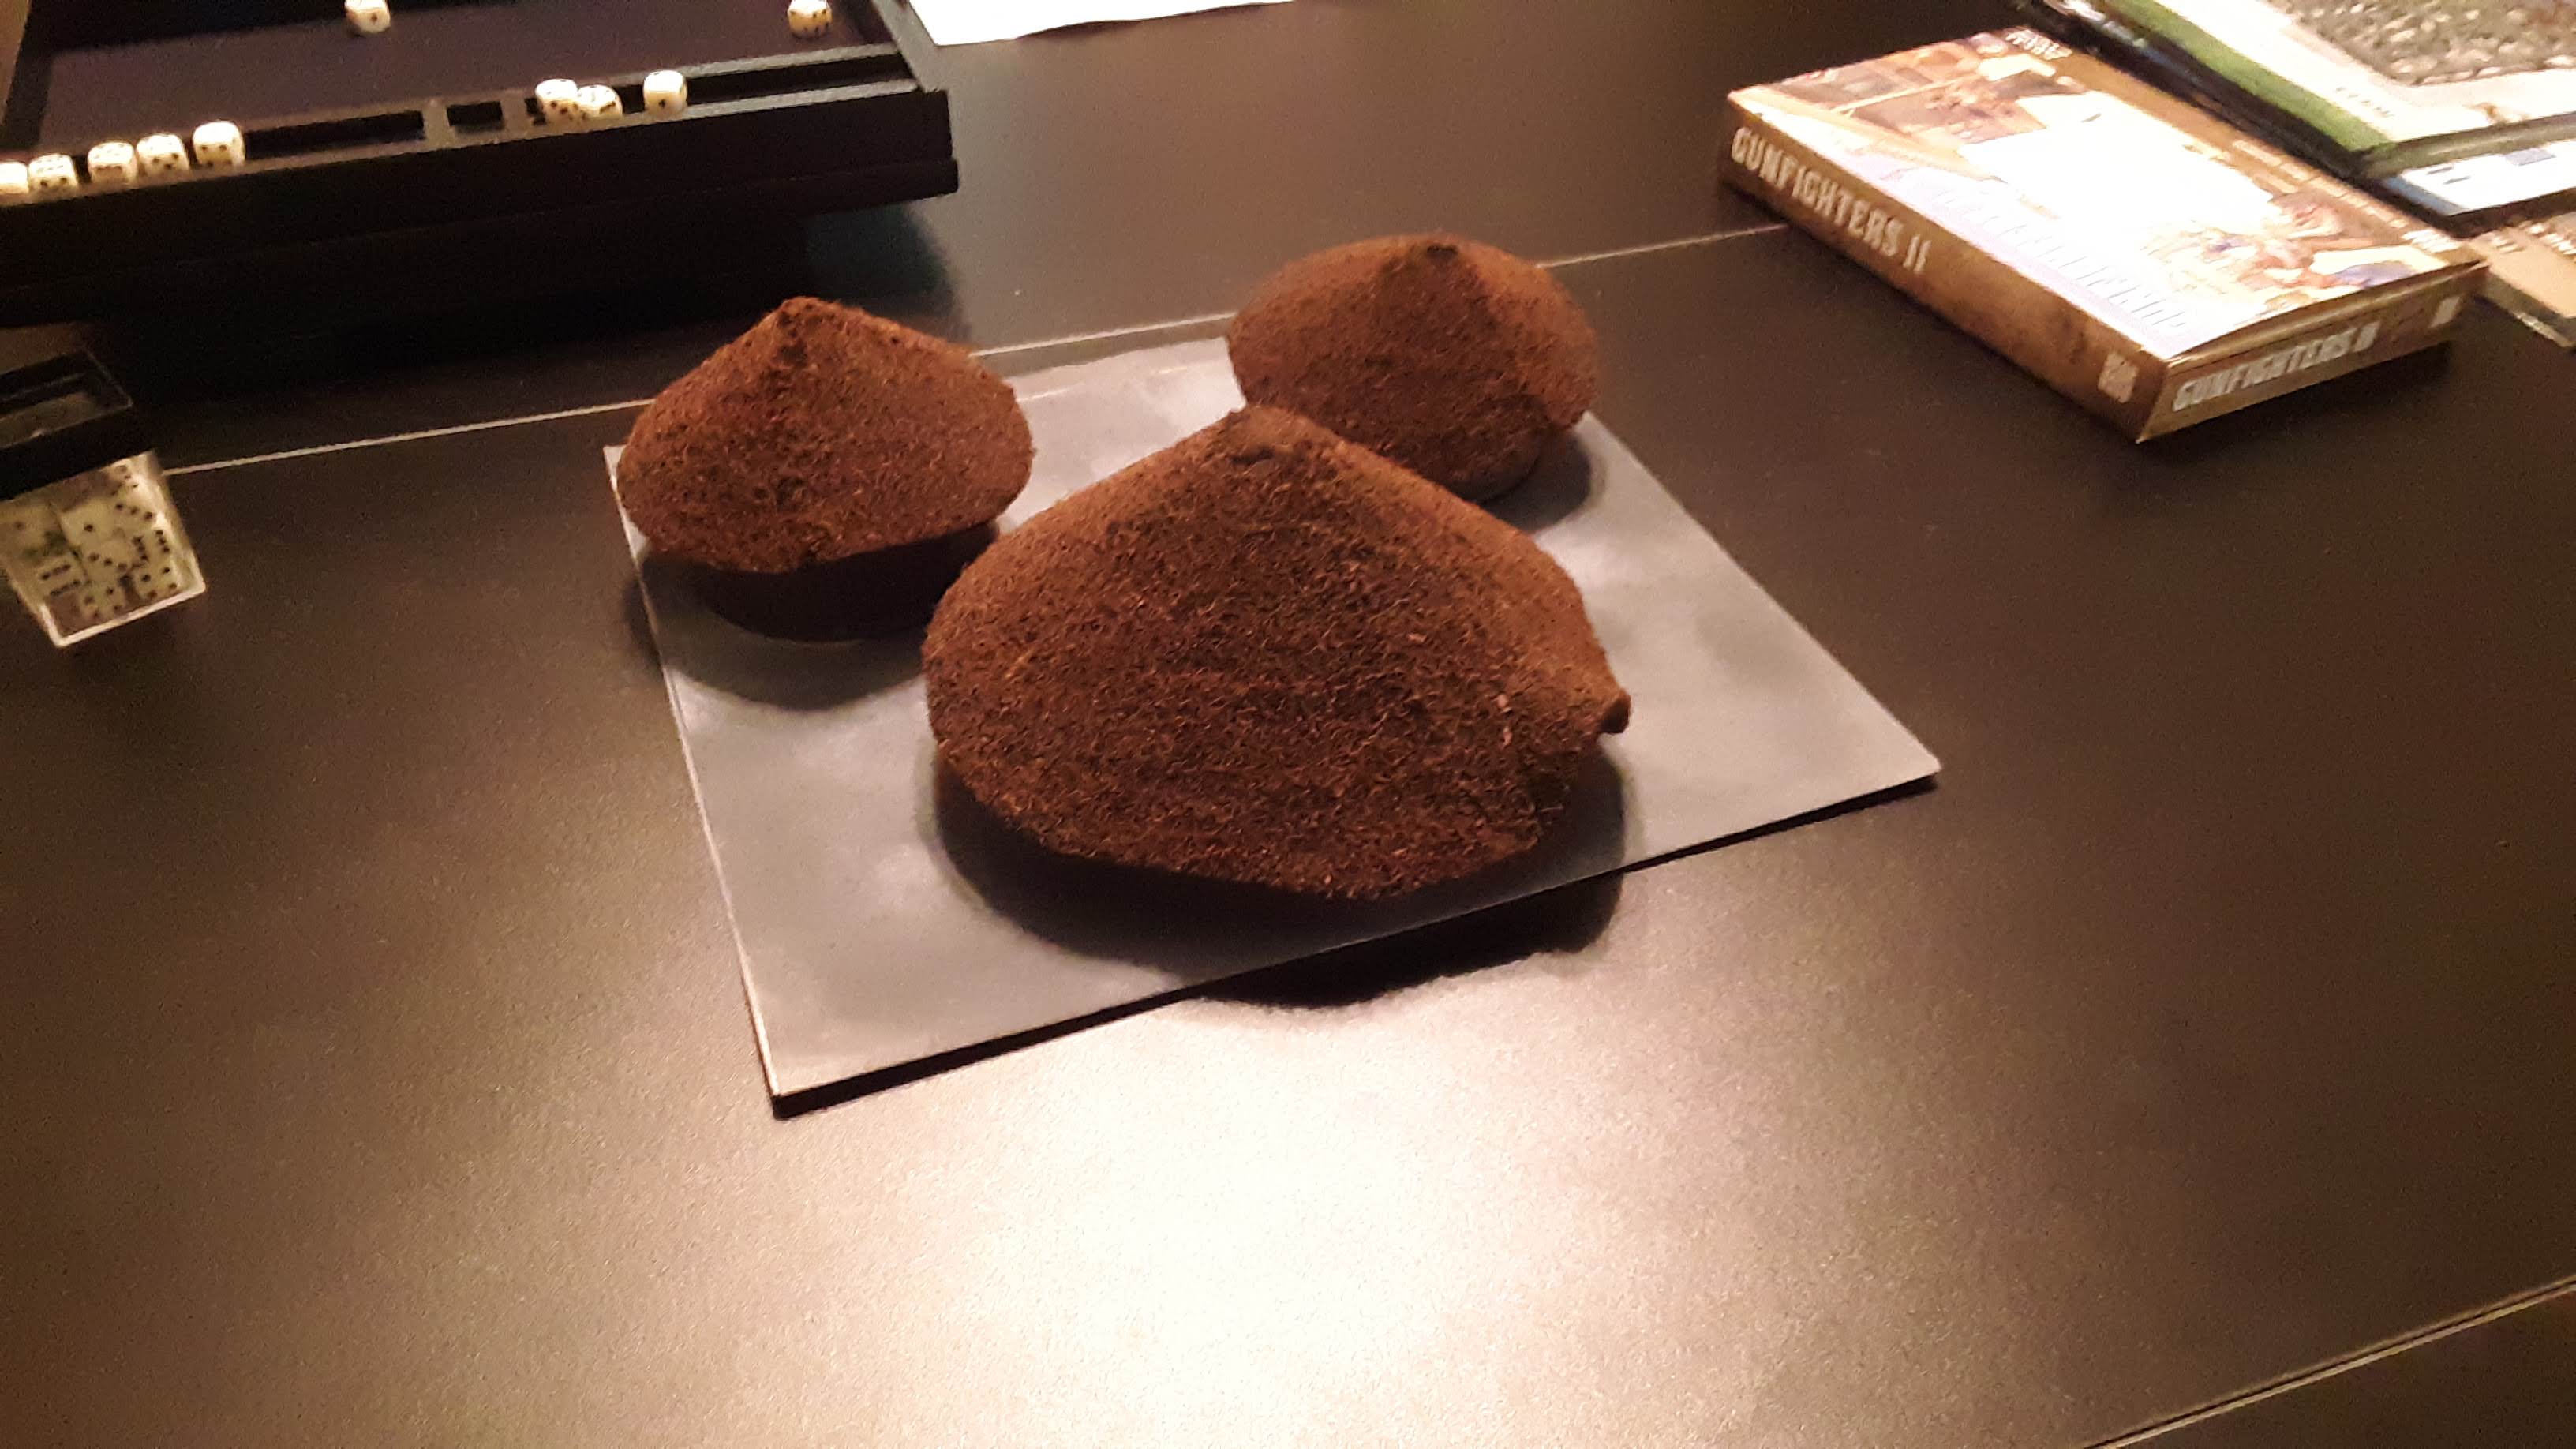
I decided to make the roofs of the round house using directions that came with the kit. I did a little research and thought using Green Kitchen Scrub Pads from the Dollar Tree (where everything is sold for $1.25) would be a fun project.
After purchasing the materials, I traced out the roof, cut, and re-cut…and re-cut. My ability to measure and cut things seems to have disappeared after elementary school. After multiple attempts I finally had a proper design for the roofs and used a hot glue gun to secure them.
Using the hot glue gun resulted in an unnatural line on the roof. I decided to use some white glue over these spots and grab a container of flock to shake onto the roof. I think it turned out well enough.
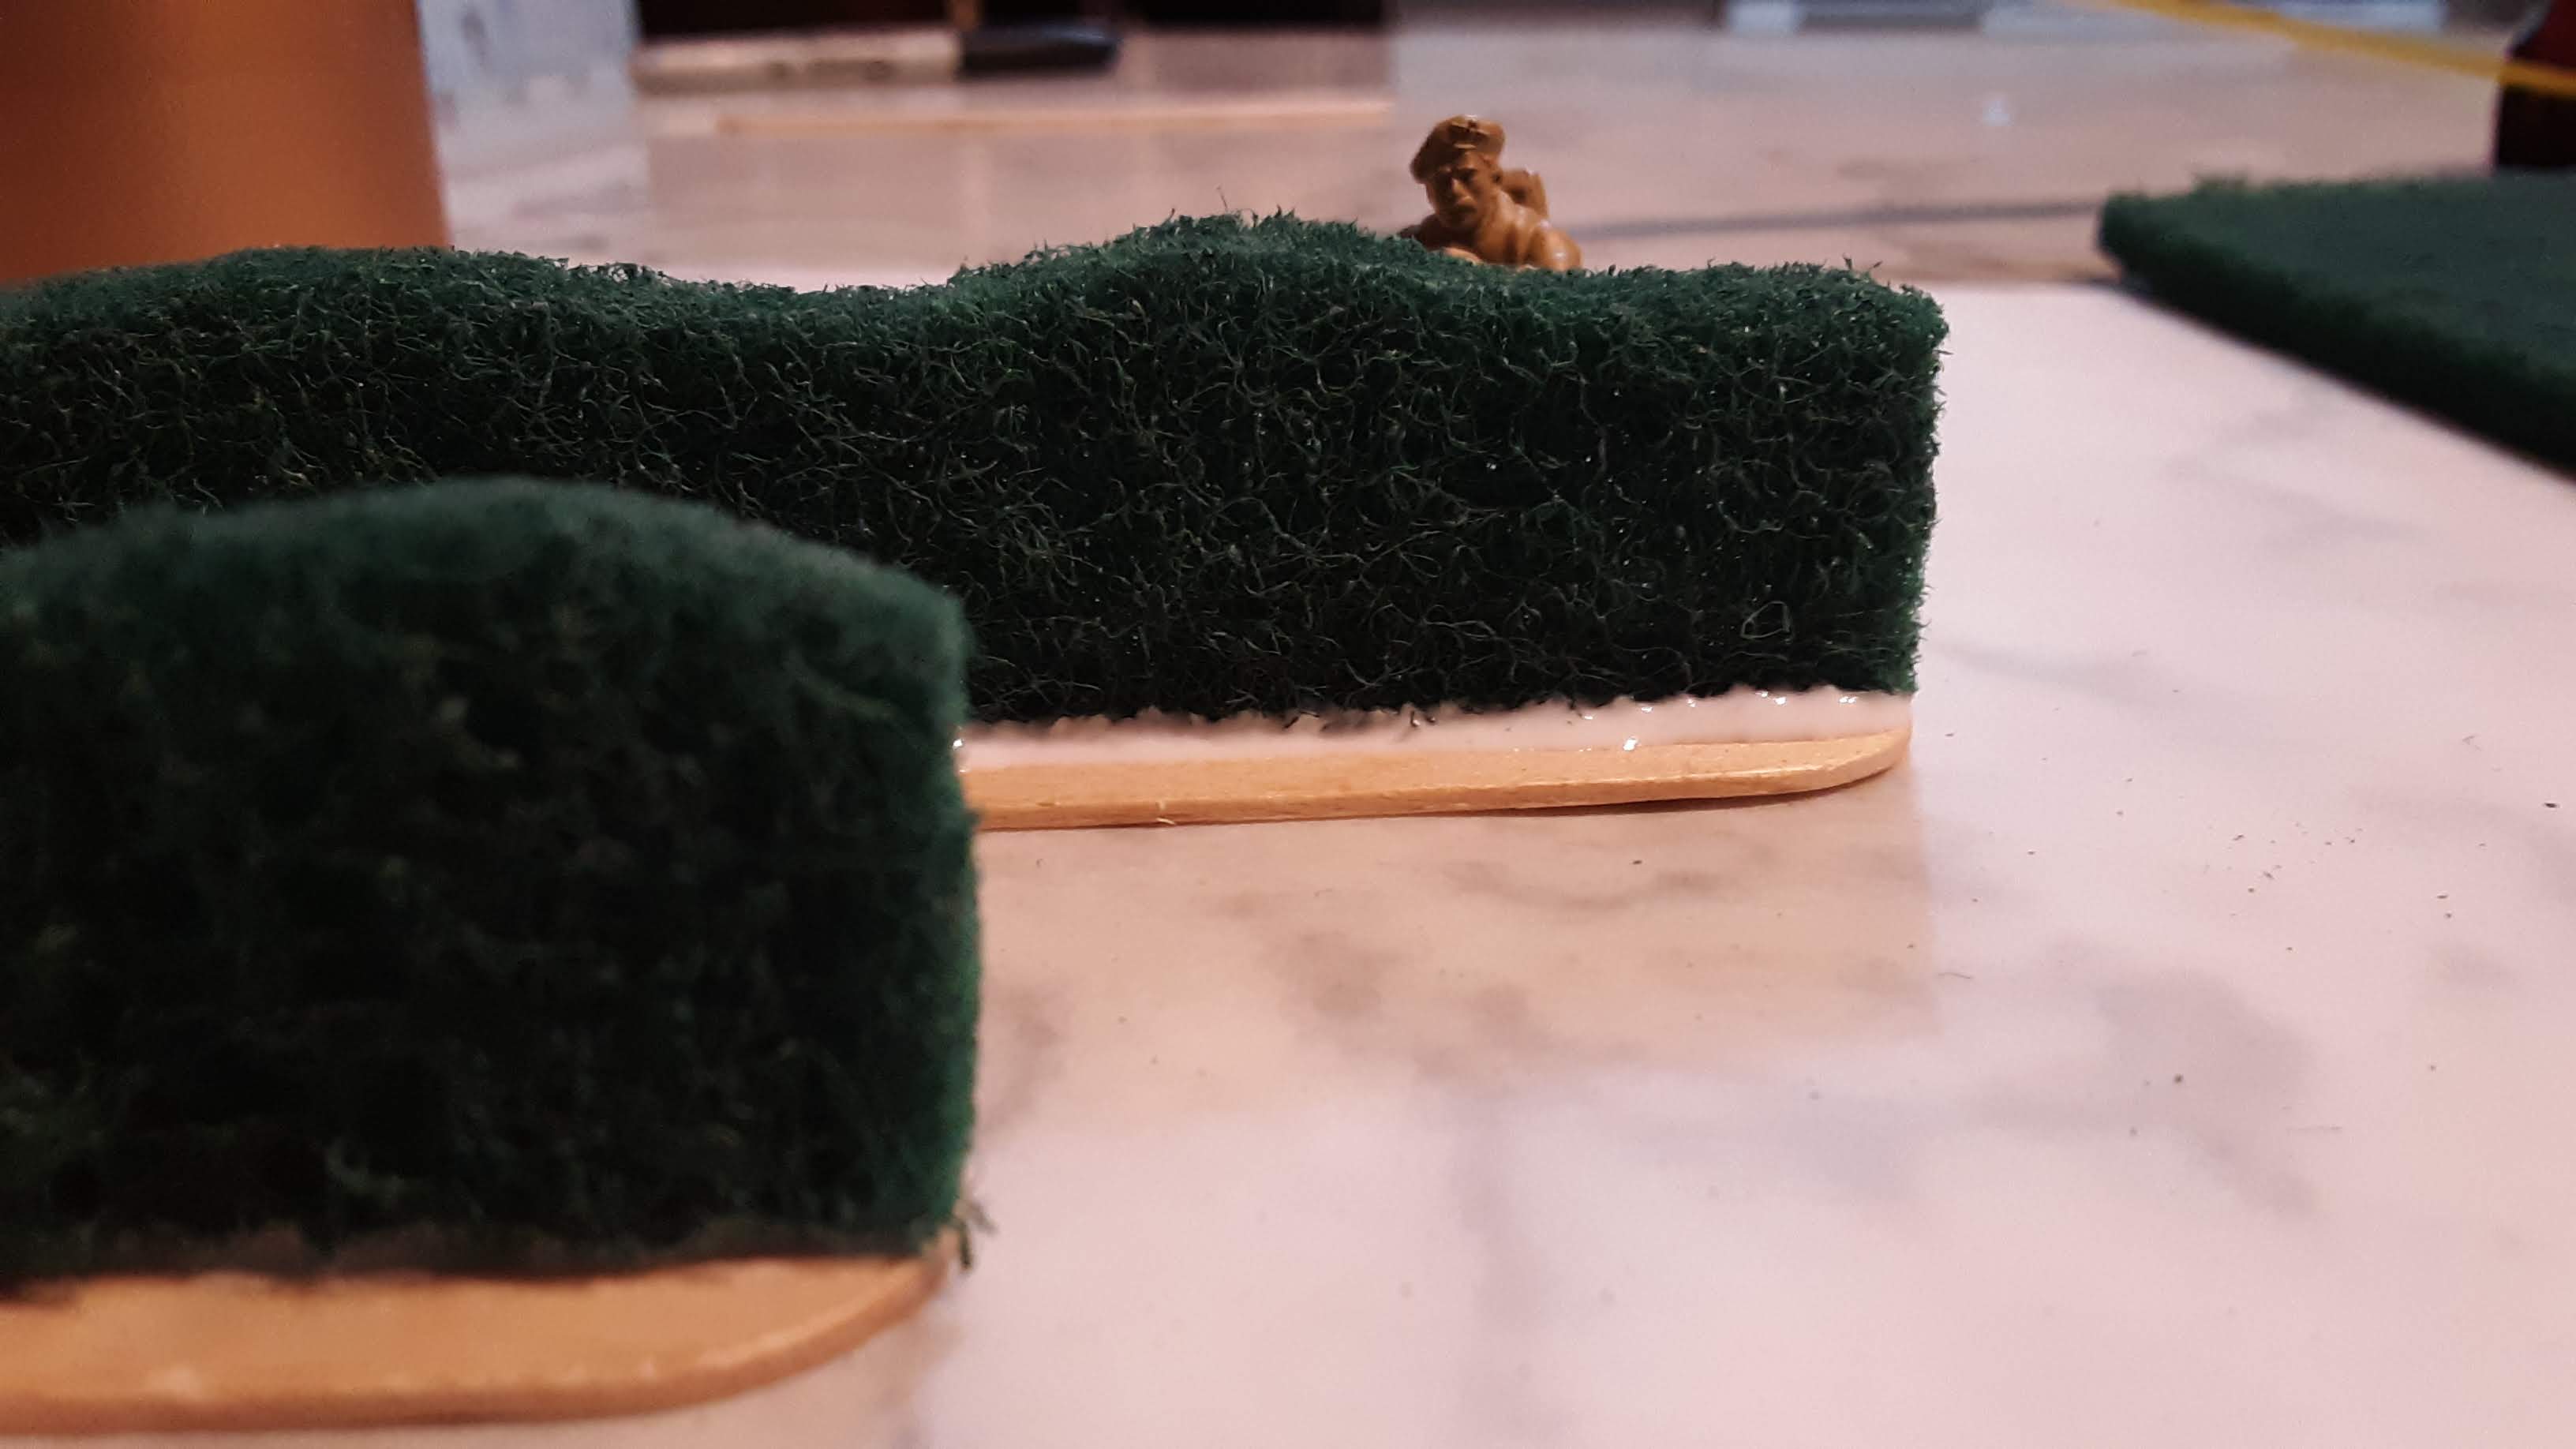
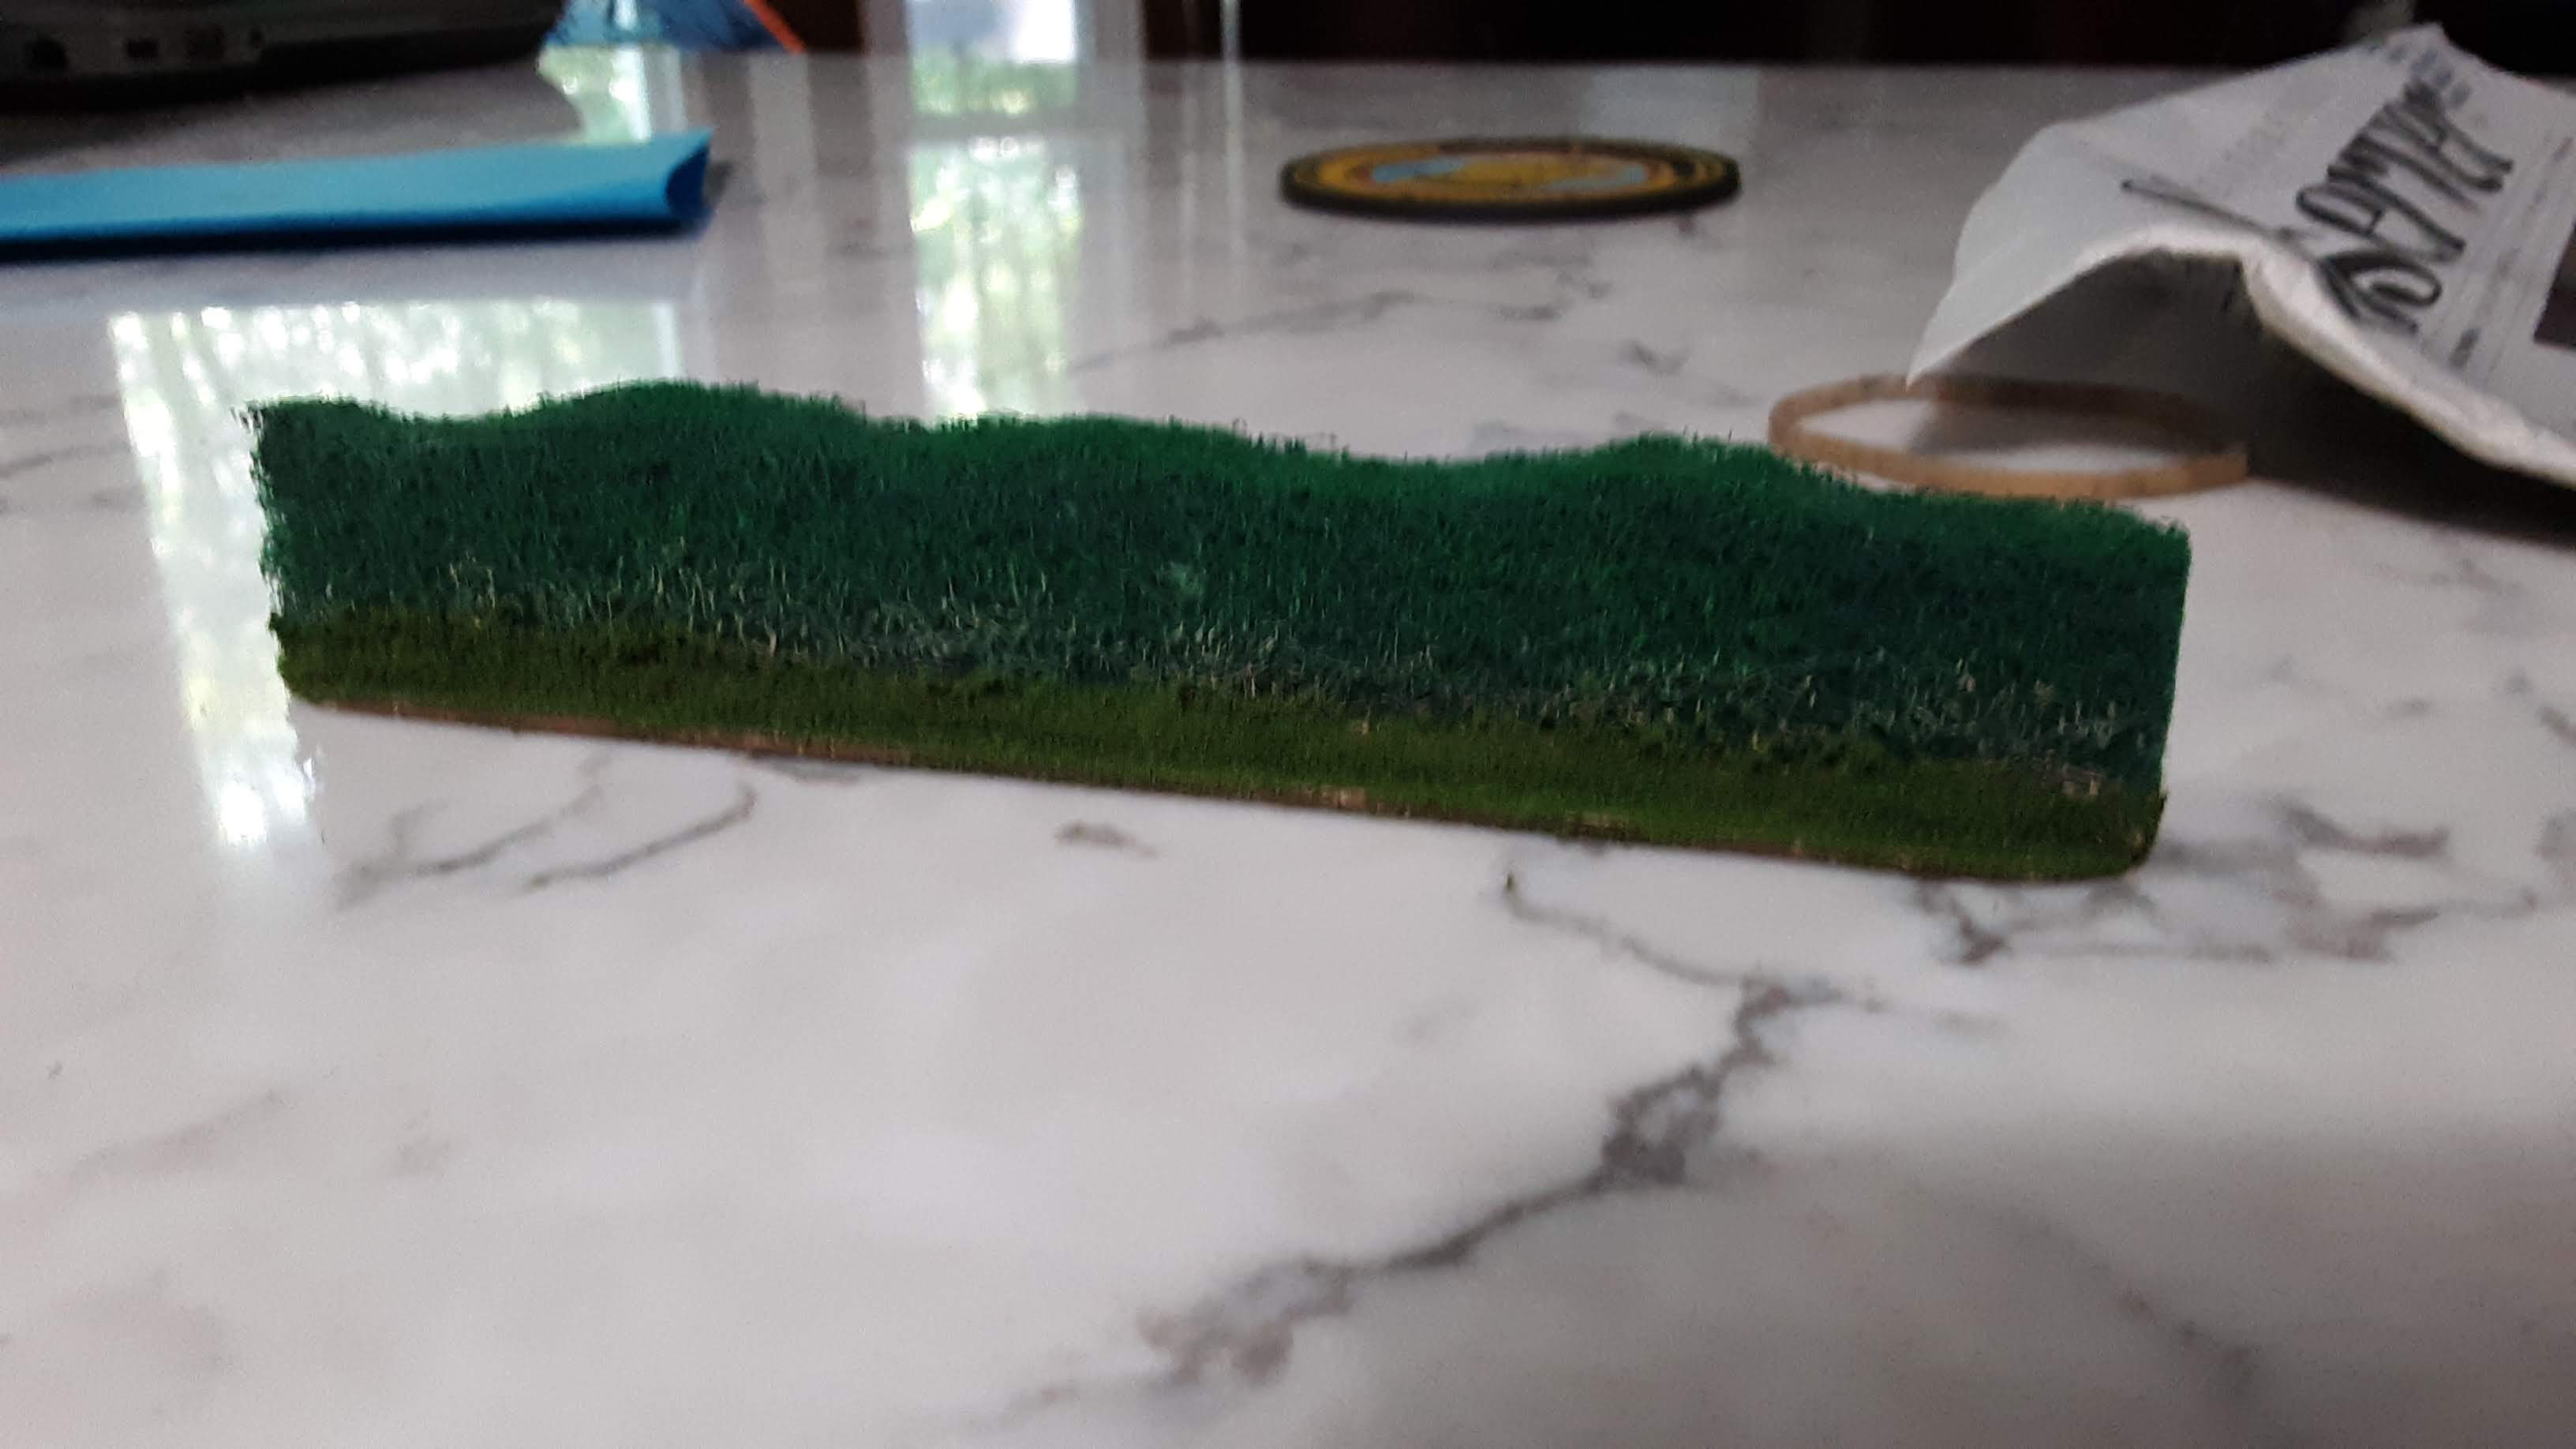
I knew that I needed some additional scatter terrain and decided to make some hedges. I consider myself a thrifty person, some might call me cheap, but I decided to use some leftover scrub pad material to make the hedges. I thought they’d be great for Slaine and Bolt Action.
I cut some wavy strips from the scrub pads using a Bolt Action mini to get the right height for the hedge. I used white glue to secure the hedge to a popsicle stick…and then the stick warped.
I decided to prime the popsicle sticks and tried gluing the hedge down again…and it warped again. Reflecting back on this experience, perhaps this had something to do with the Warped Slaine figure sitting unpainted in the box.
 Good enough for me.
I finally used my hot glue gun and the hedges were secure. I added a little bit of paint and flock to the hedges. I wasn’t going to put much more effort into them and decided they were good enough for my table.
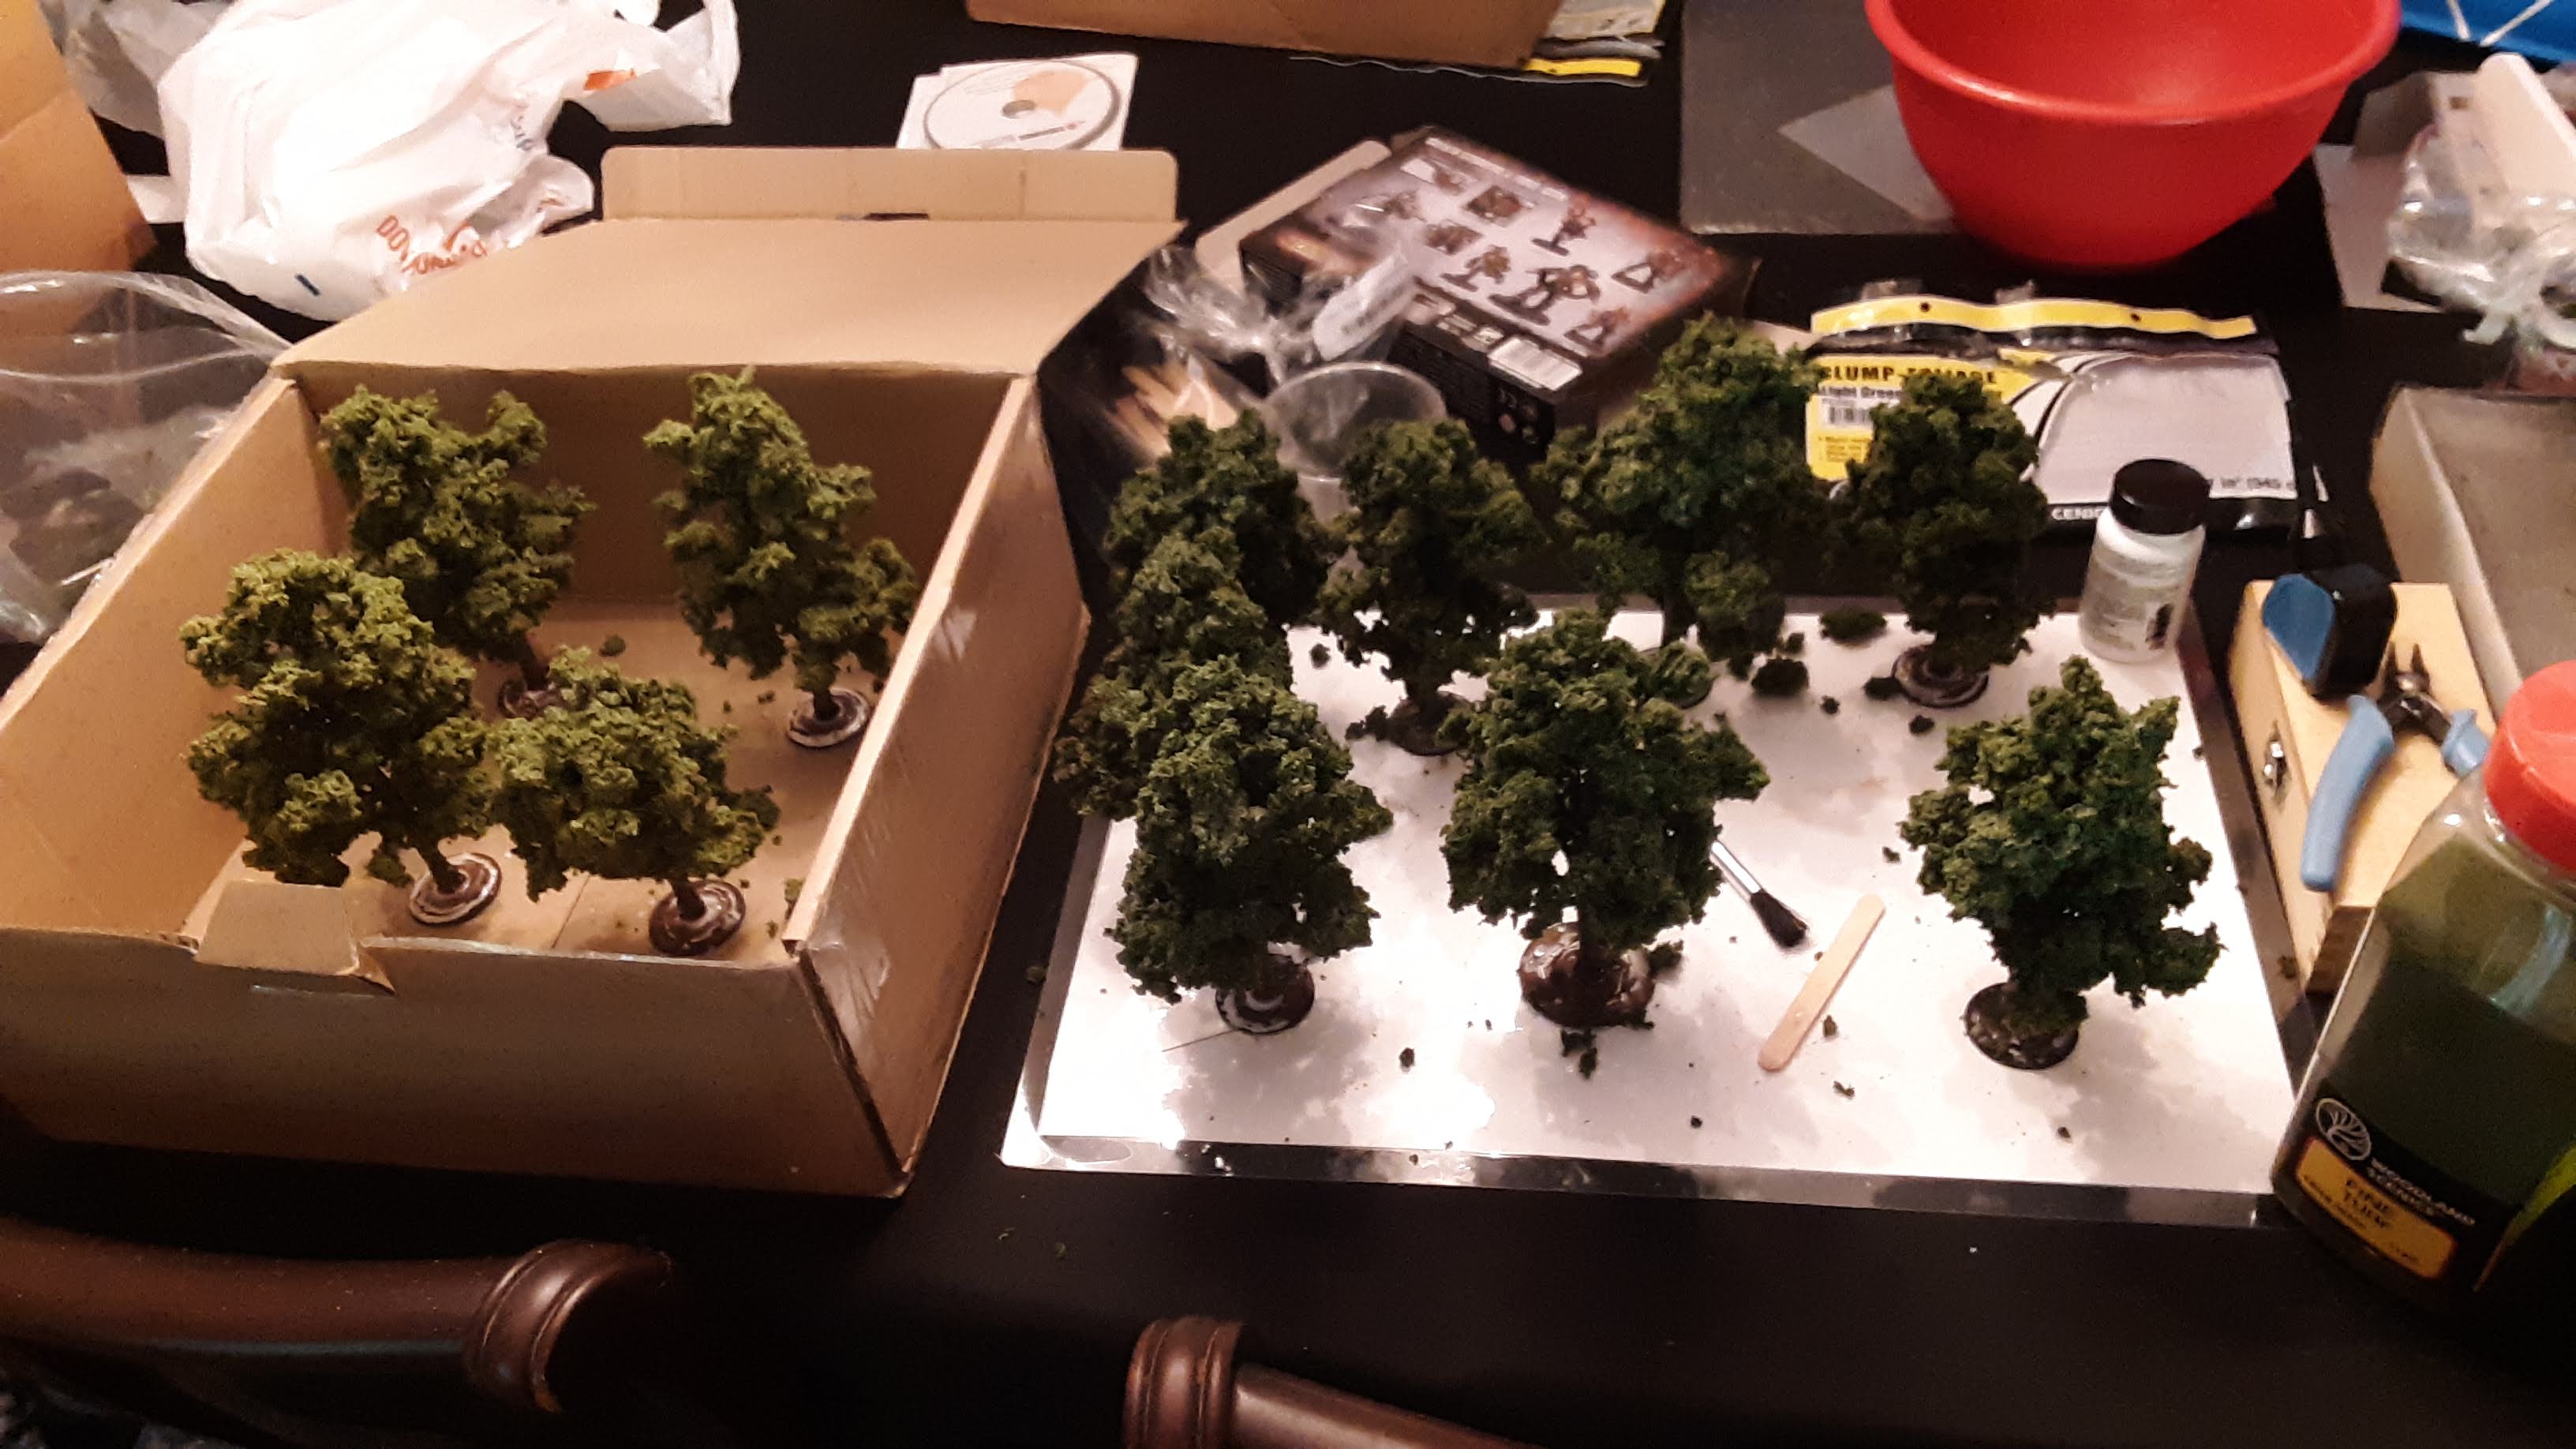
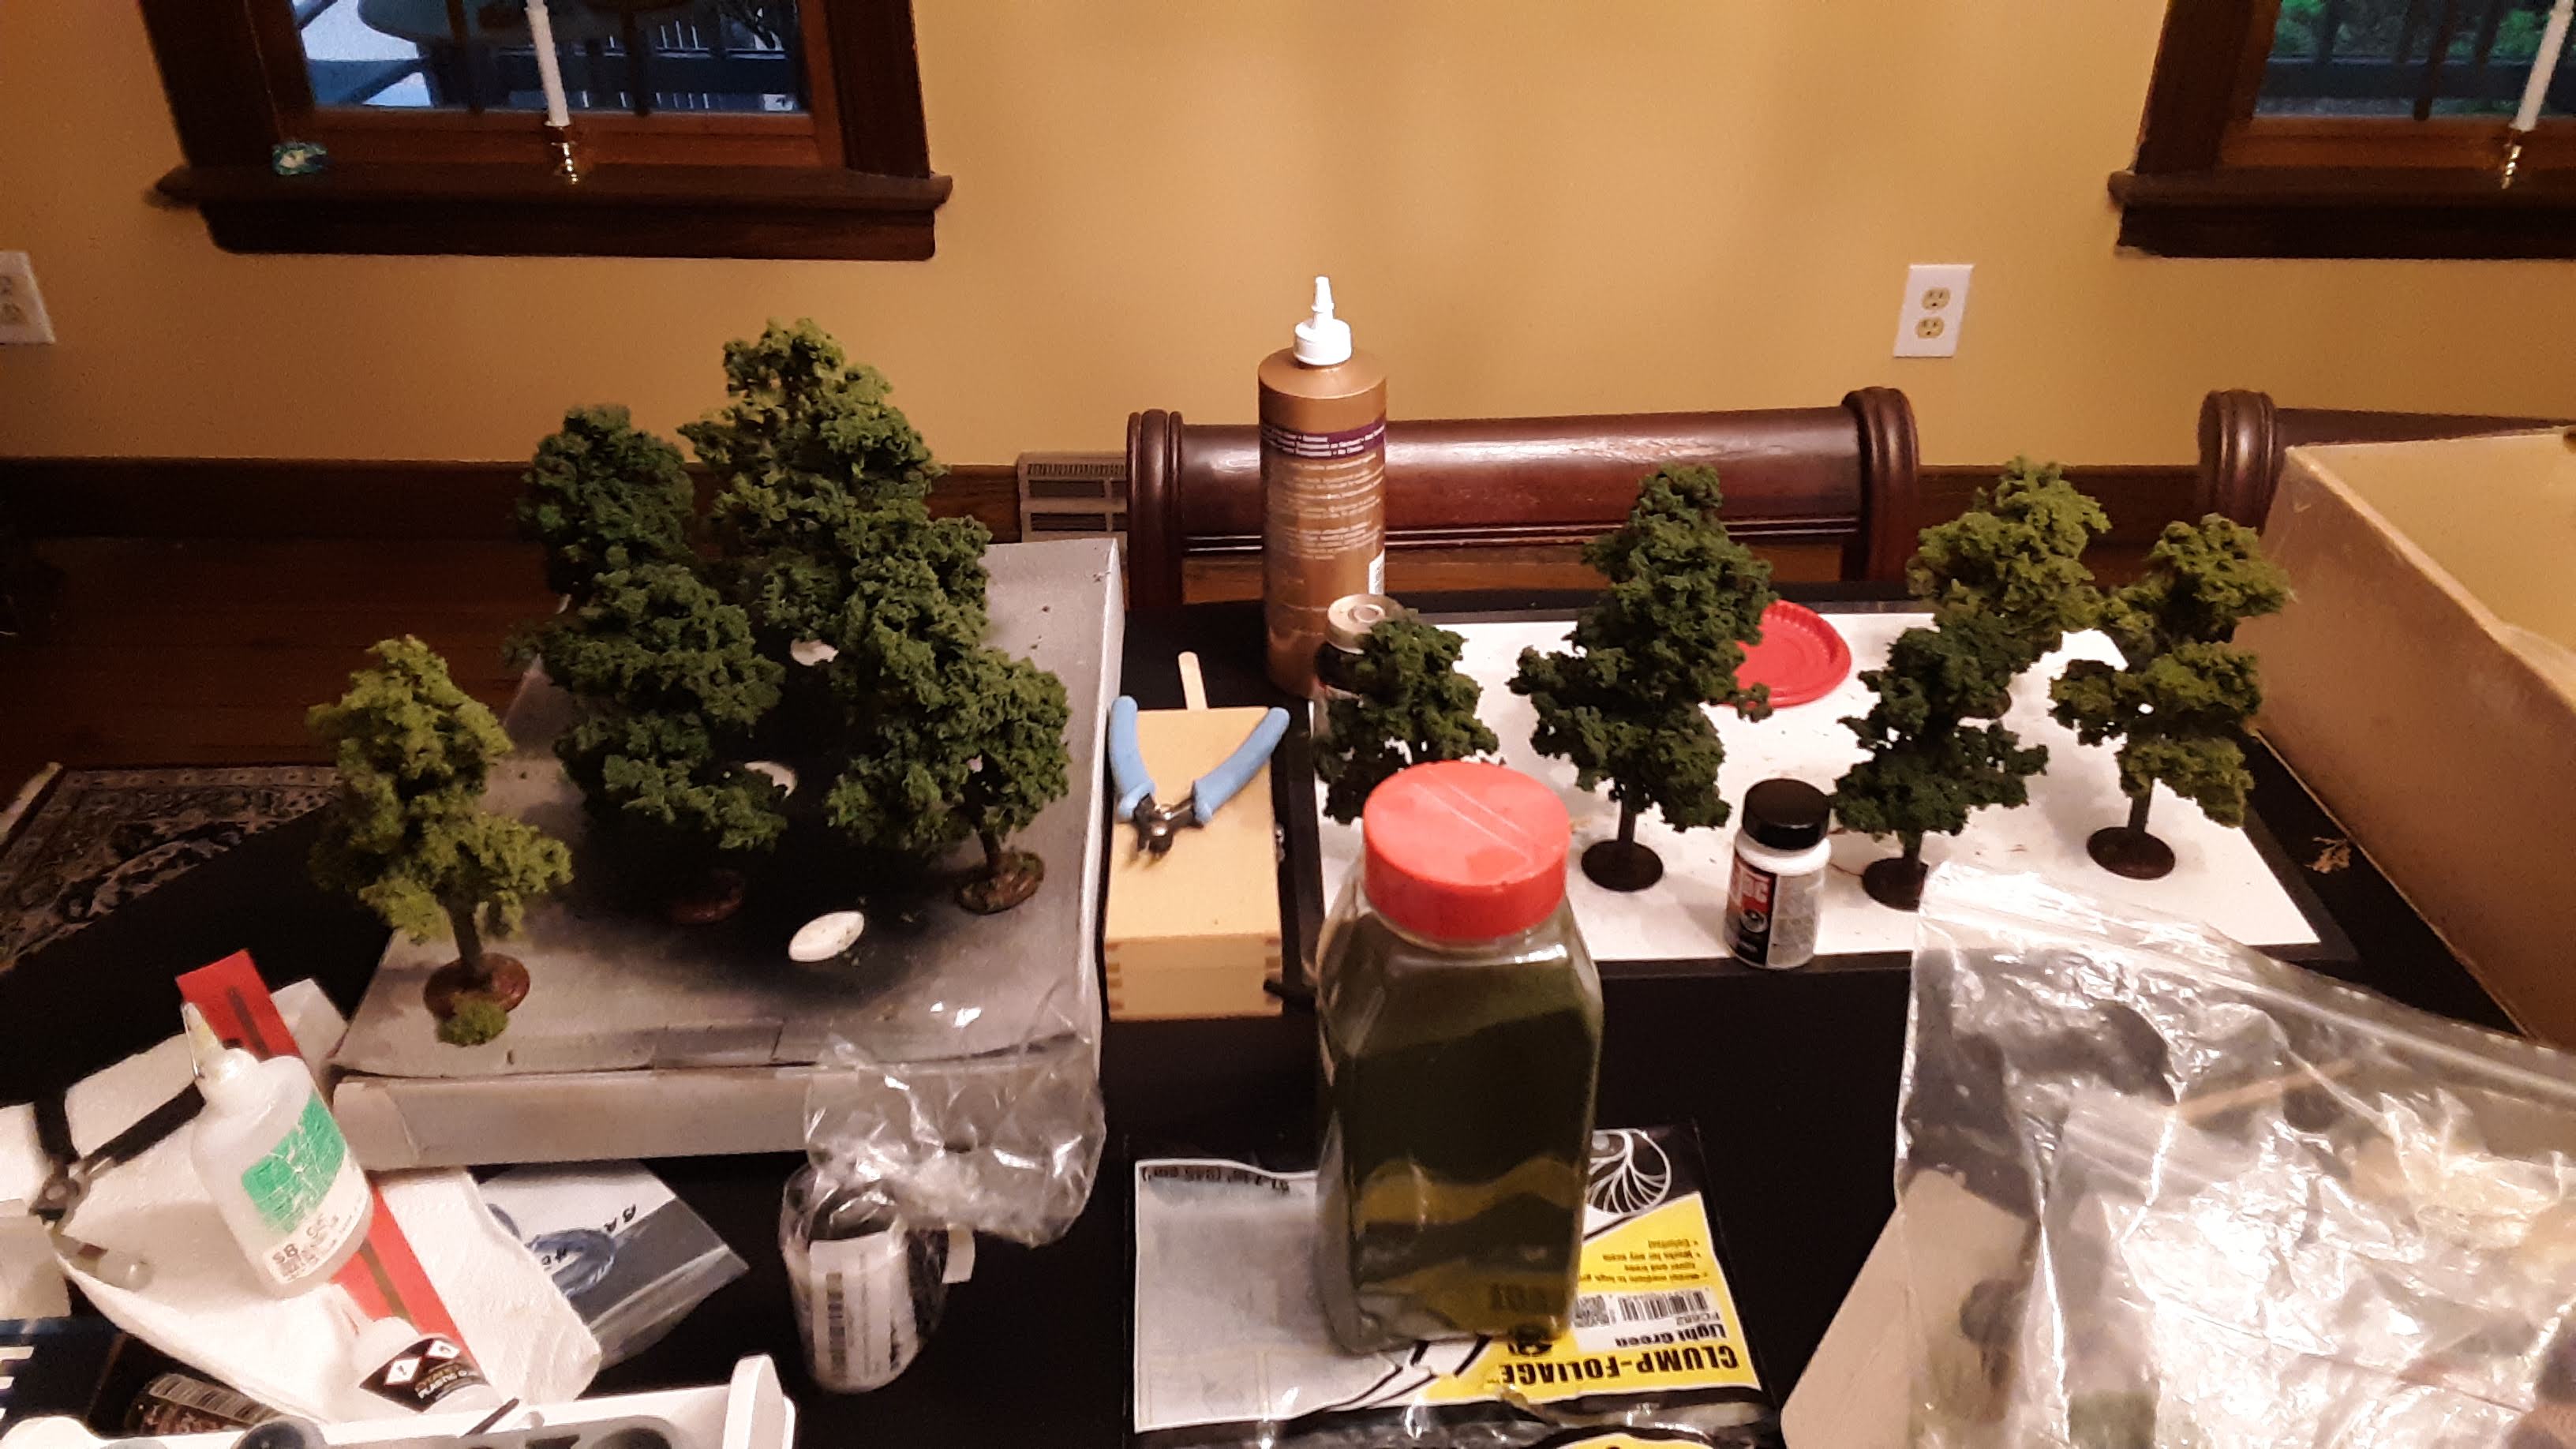
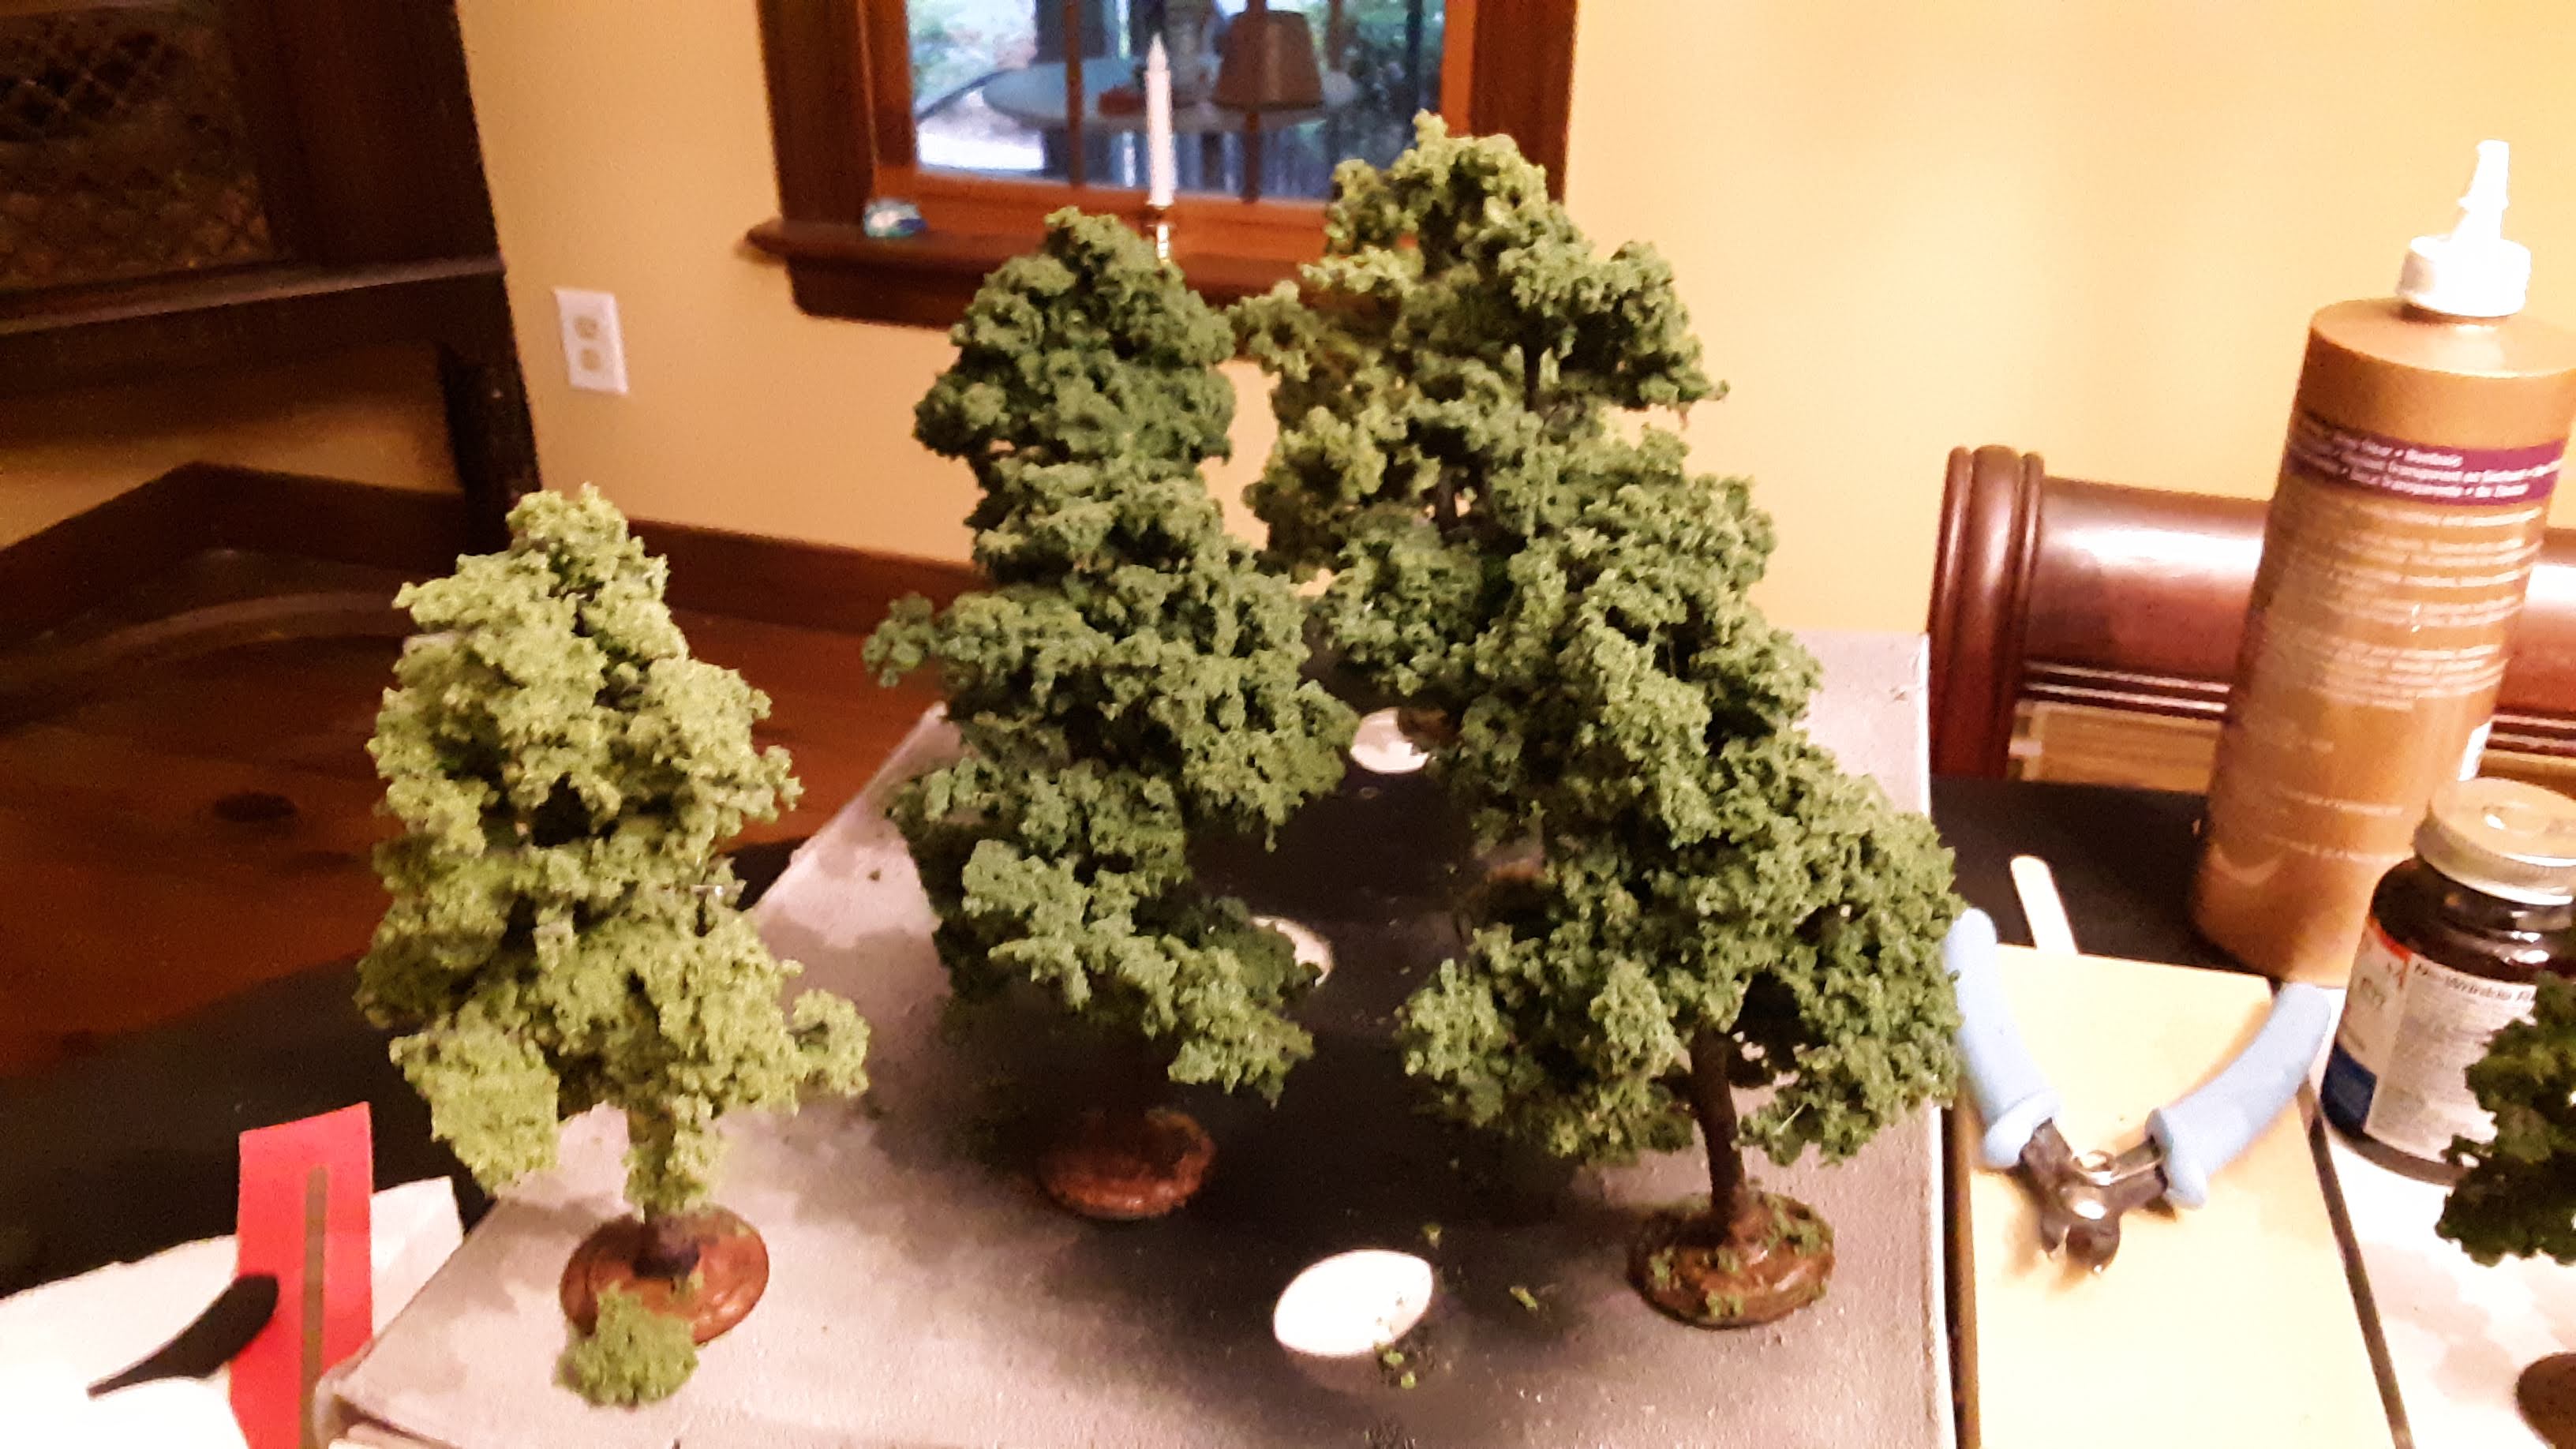 Not the Trees!
I think every gamer needs trees and I didn’t have any in my collection. I decided to order some tree kits produced by Woodland Scenics. They have some great tutorial videos on YouTube. After painting up the trees, a mix of brown and grey trunks, it was time to get the foliage on.
For some reason I decided to be thrifty (cheap) again and tried using white glue I had at home to secure the foliage to the trees. Not surprisingly this didn’t work, even after the tutorial on YouTube shared the type of glue to use.
I’m sure you’re thinking by now that I learned my lesson. Ha, no way in hell did that happen. I decided that I’d buy a different type of white glue…that didn’t work. Then I went back to the store and bought a brush on glue…that didn’t work. At this point I realized that I should just go ahead and buy the more expensive Woodland Scenics glue for this project.
The glue arrived, I used it, and it worked…
Lesson learned for this project, but I’m sure my thrifty mindset will come back to bite me in the future.
To finish up the project, I painted up the tree bases (large washers) and added some flock. I sprayed the trees multiple times with watered down white glue and I was finally finished with these frikin trees.
Like many miniature wargamers, I decided it would be a great idea to leave the rest of the Slaine minis in the box for about 2 years. Then I decided to finally start the project back up last week.


Throwing Shade or: How I Learned to Love Contrast and Speedpaints
 Is this organized, or just hidden chaos?
Between the time I stopped working on my Slaine project I decided to start many more projects, and even finished a few of them. Bear with me as I give a long story to explain painting my Slaine miniatures
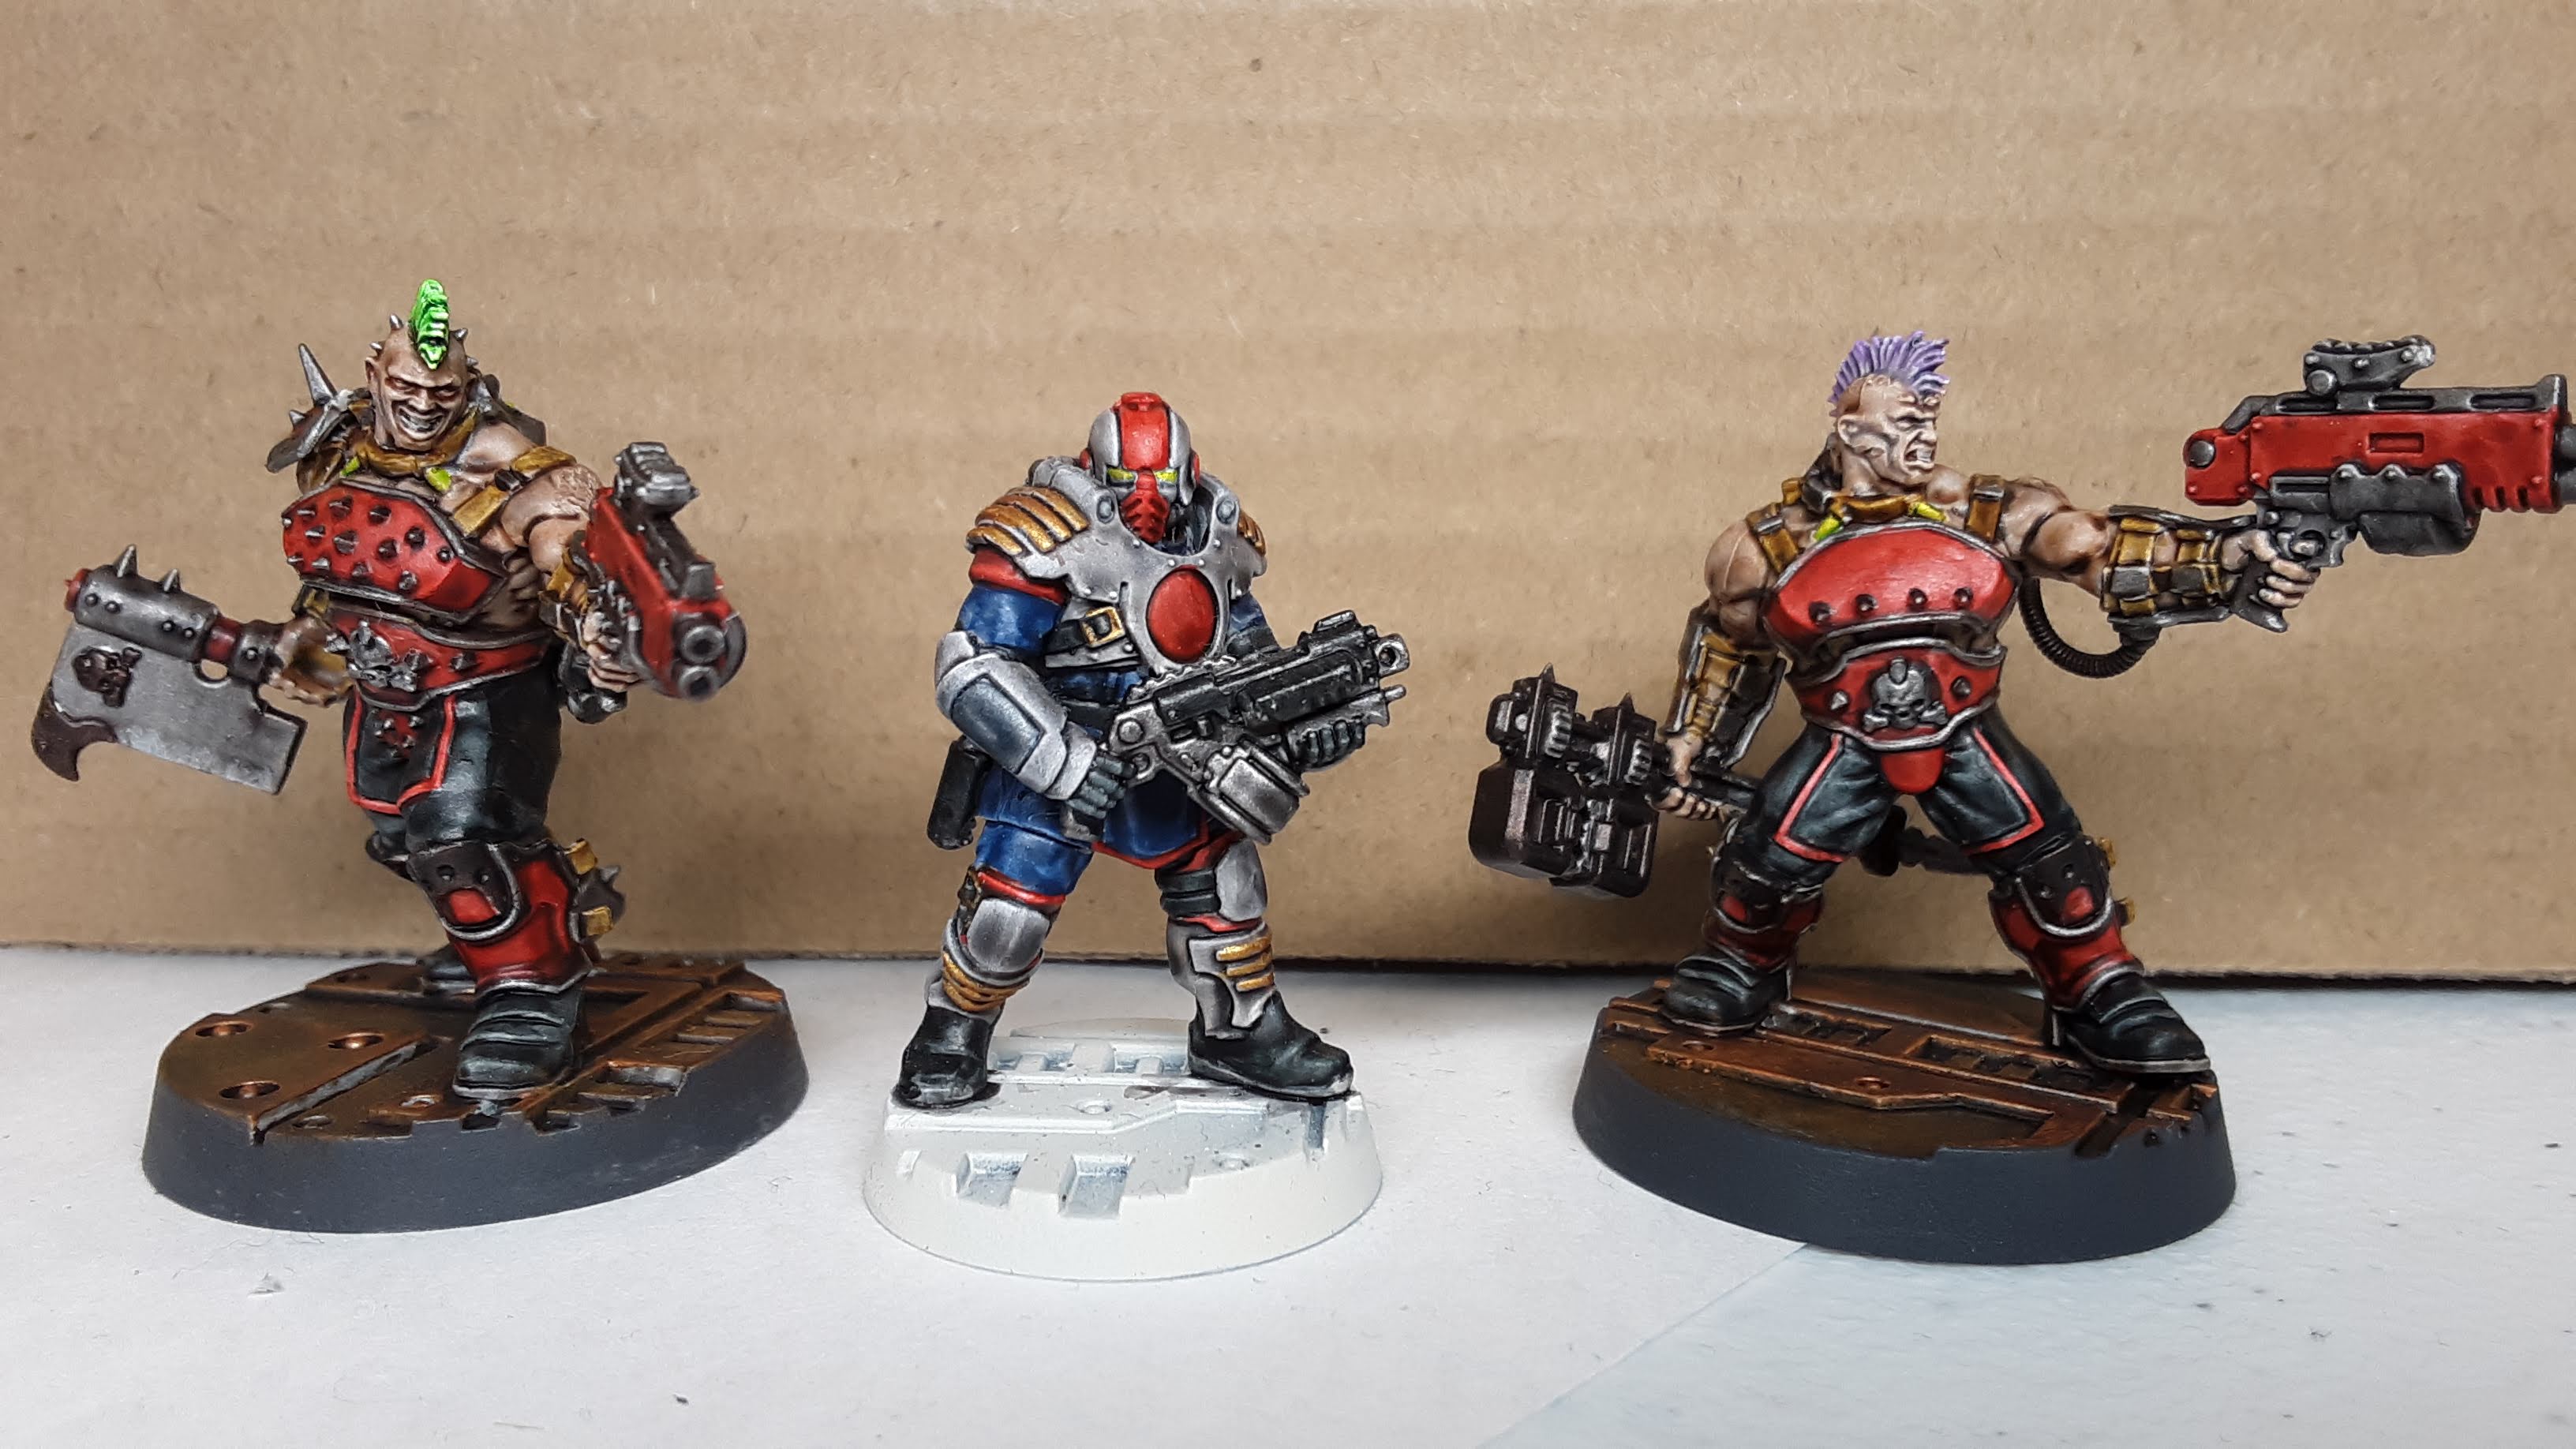
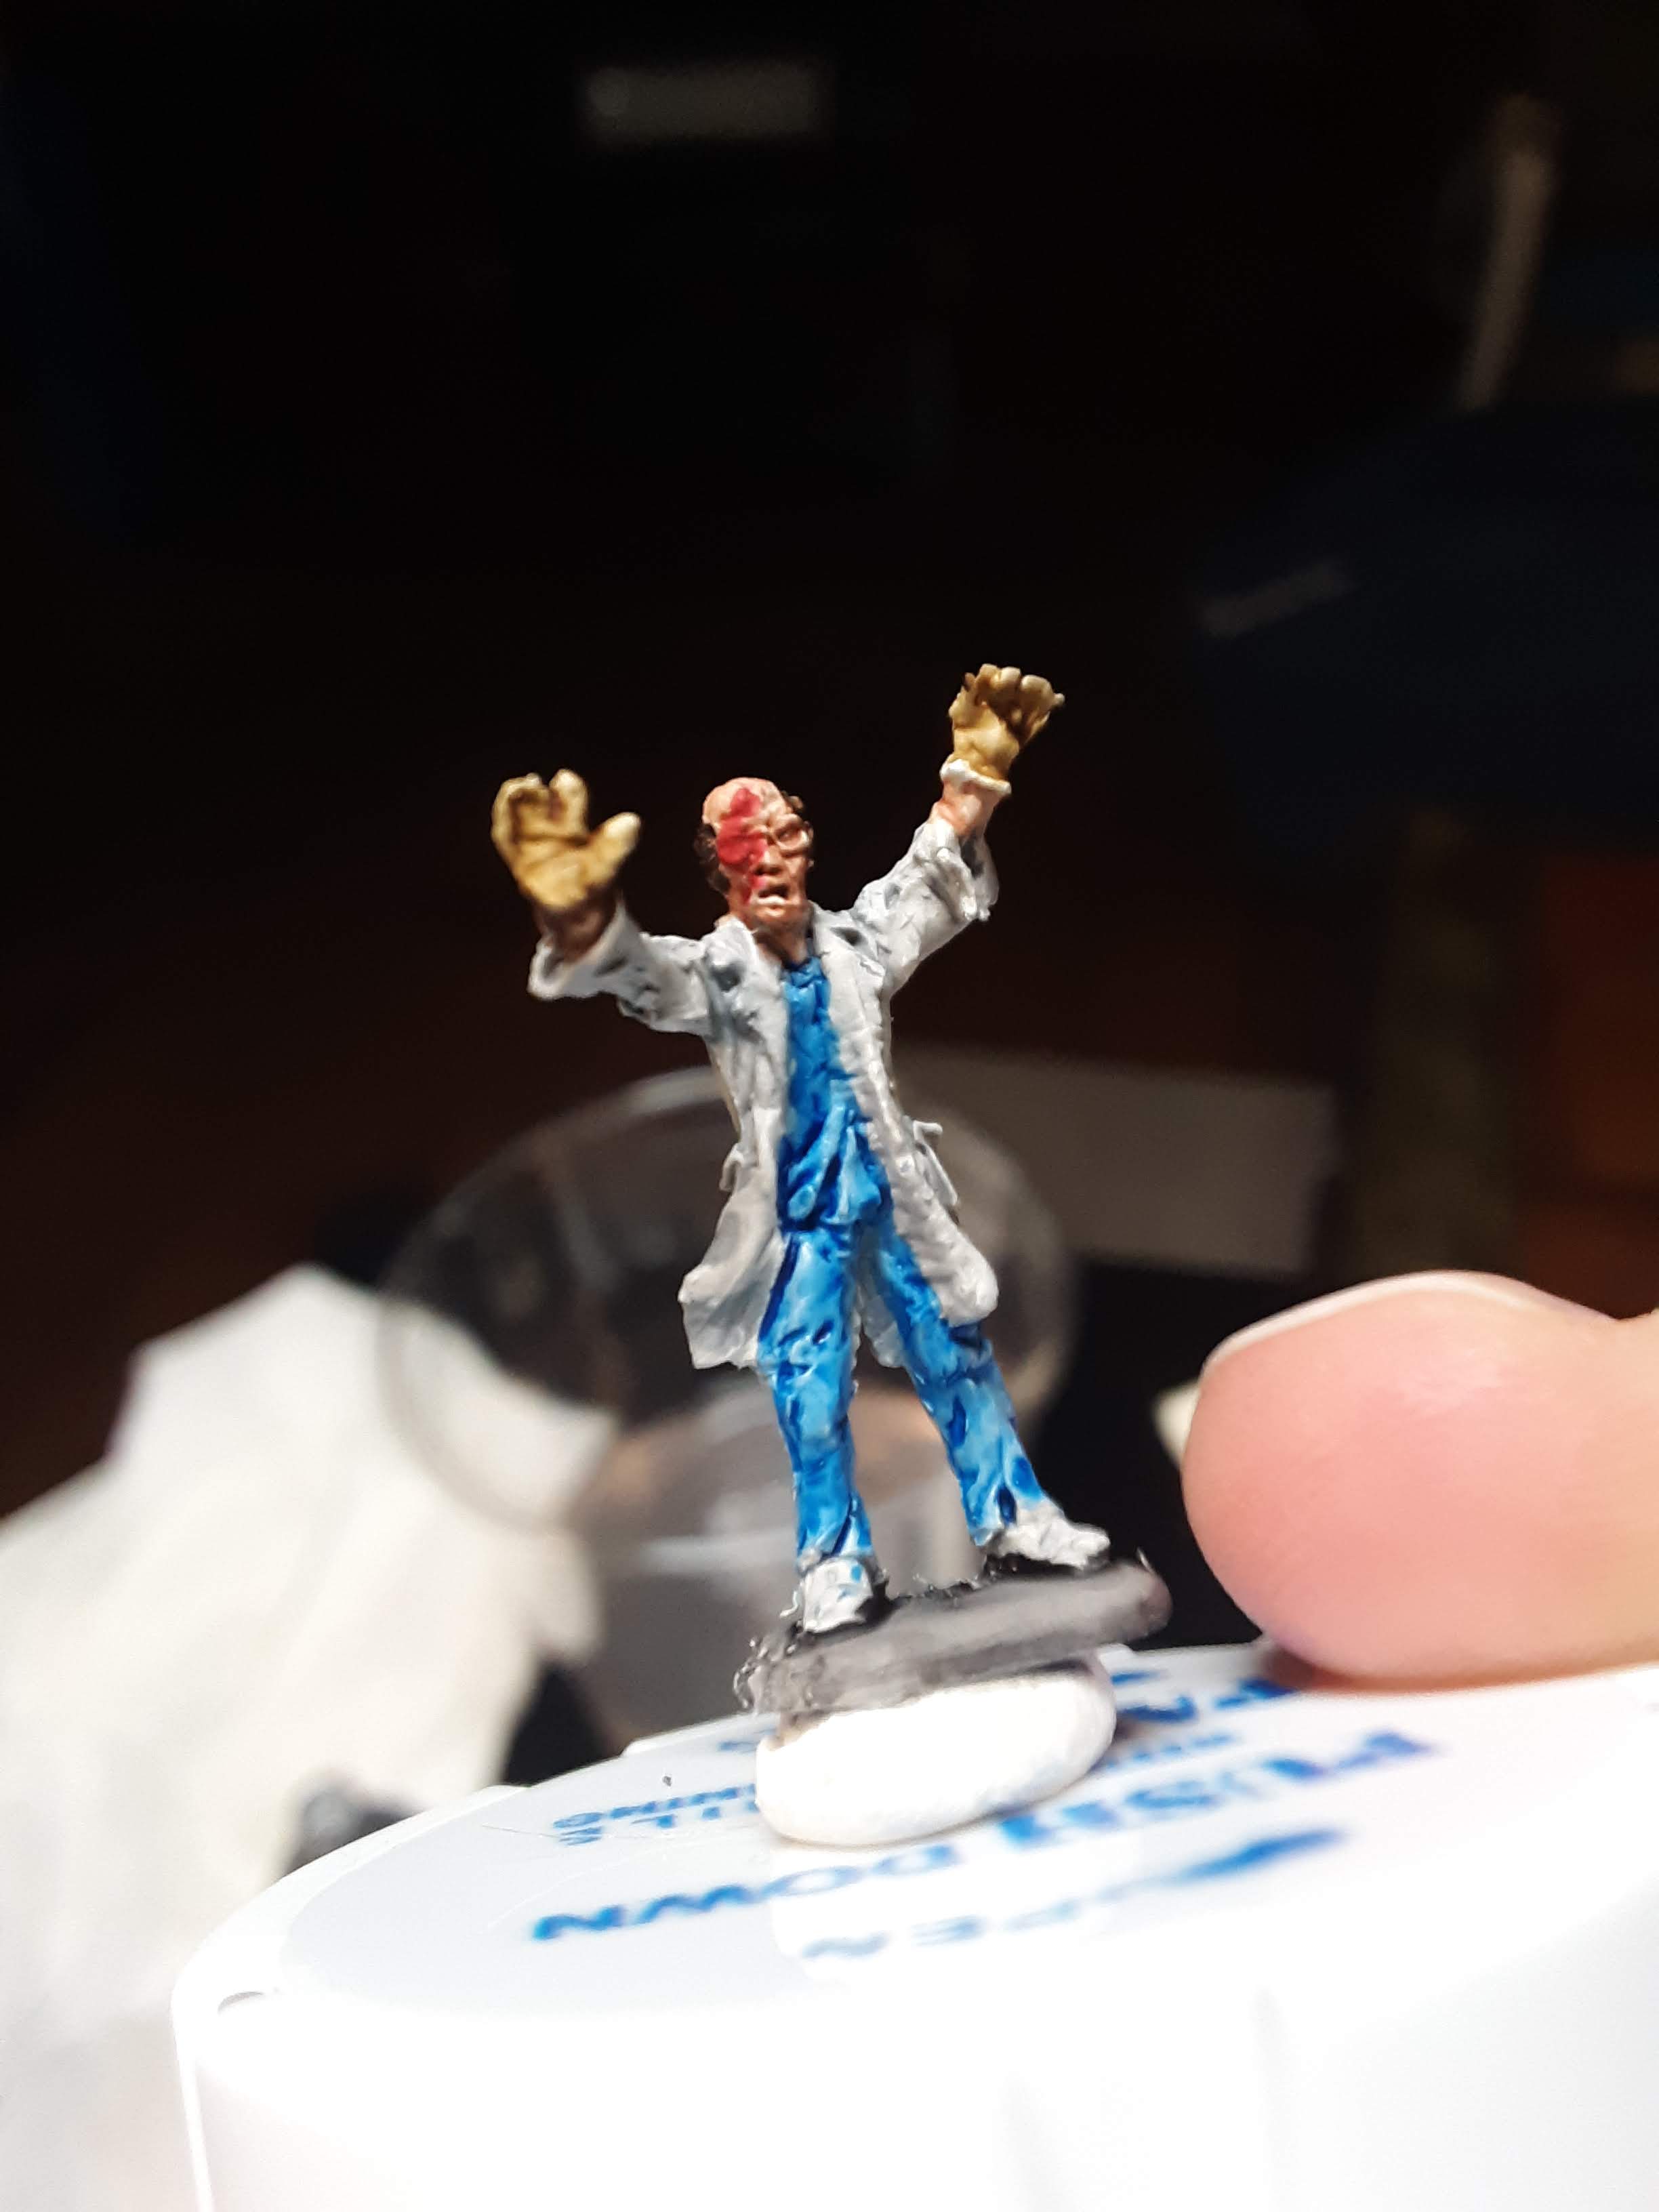
Every Christmas, I exchange gifts with a group of friends. Most of the time the gift giving is an attempt to get other members of the group into new addictions…err, I meant to say table top games. I received Goliath Necromunda minis from a friend and thought they’d be a great project to learn how to use Contrast paints.
 My first gang, Chemcanal Studs
I joined a Contrast Paint Facebook Group and began learning about the paints and checking out all the projects people posted. One day a post caught my eye where someone shared a tip how they would get better shading results from their minis. This was before “Slap Chop” became popular, or at least before I ever heard of it. Also, the tip had nothing to do with “Slap Chop”.
I decided to try this process out on my new Goliath Gang, the Chemcanal Studs, that I wanted to get finished for an upcoming store campaign. The process is pretty simple. You start by priming your minis with Wraithbone Spray. Then you make a mix of 50/50 Basilicanum Grey/Contrast Medium and shade the entire mini. It creates a nicely shaded, but somewhat darker base. The last step to prep the minis is to do a drybrush of a lighter color. I used the wraithbone paint from the pot. I was very happy with the results for my first Contrast painted army.
Many months later a little company called Army Painter came out with Speedpaints 2.0. I was lucky enough to get the Most Wanted set during last year’s Christmas Season.
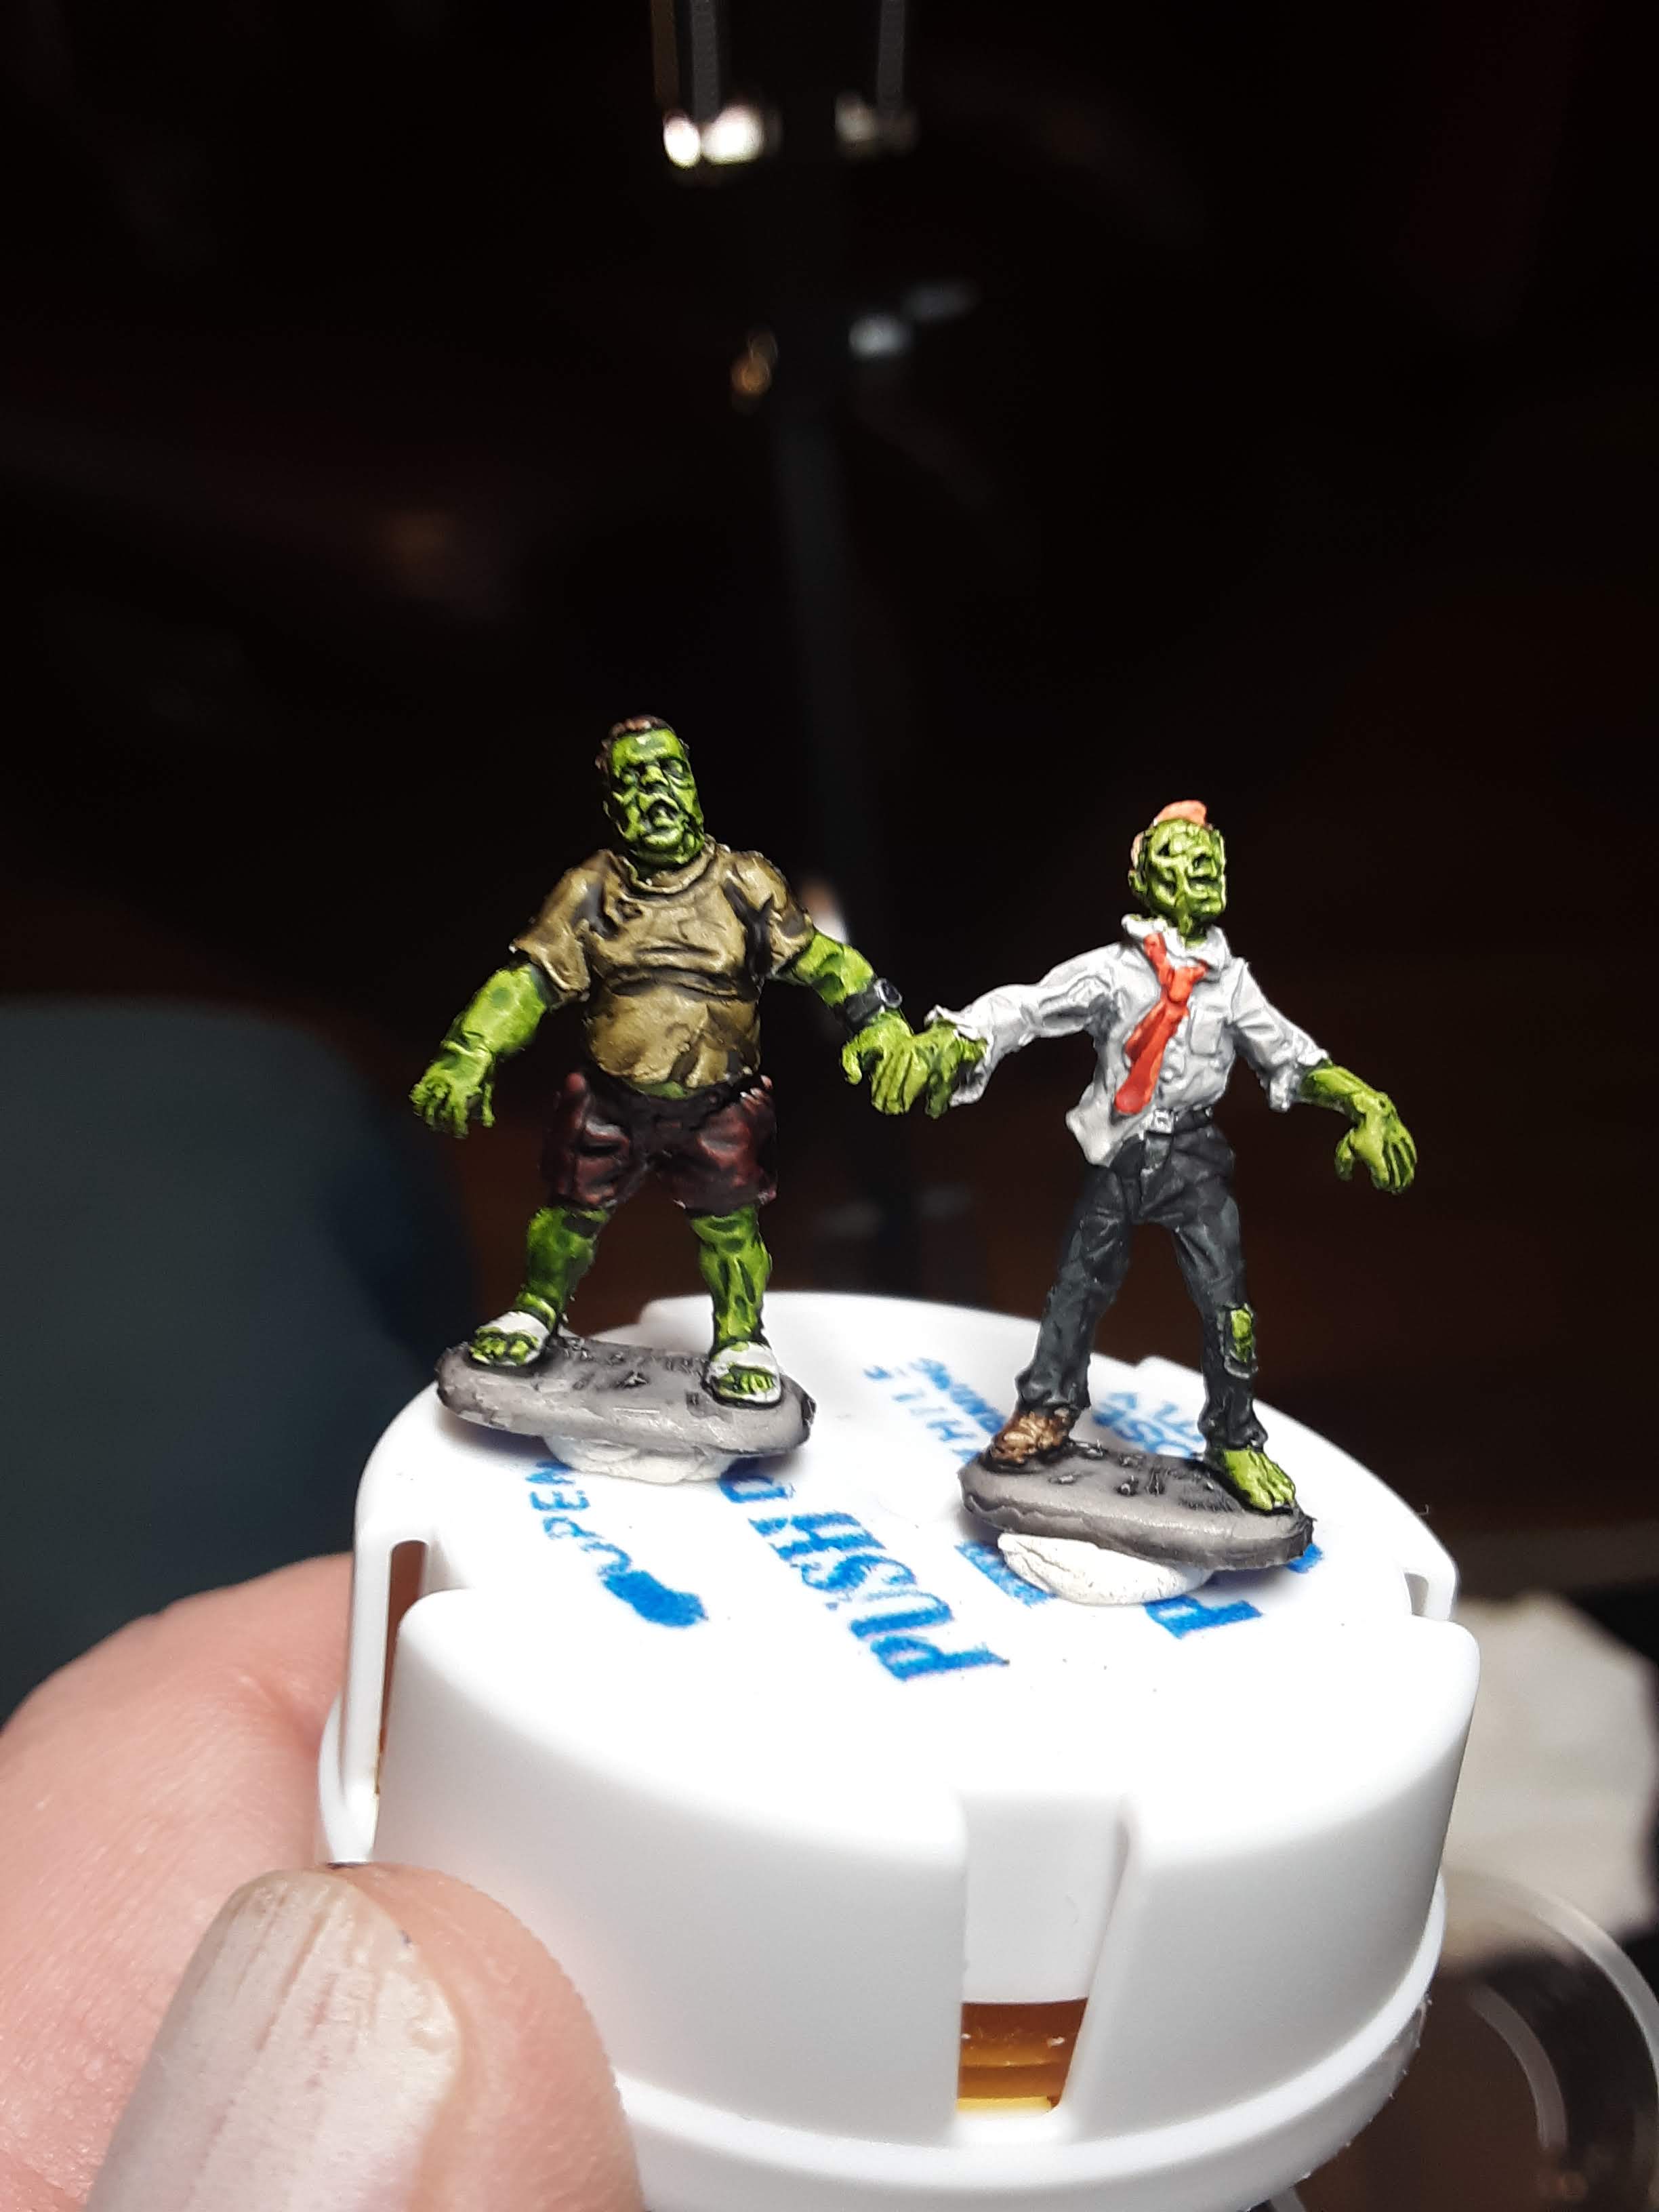
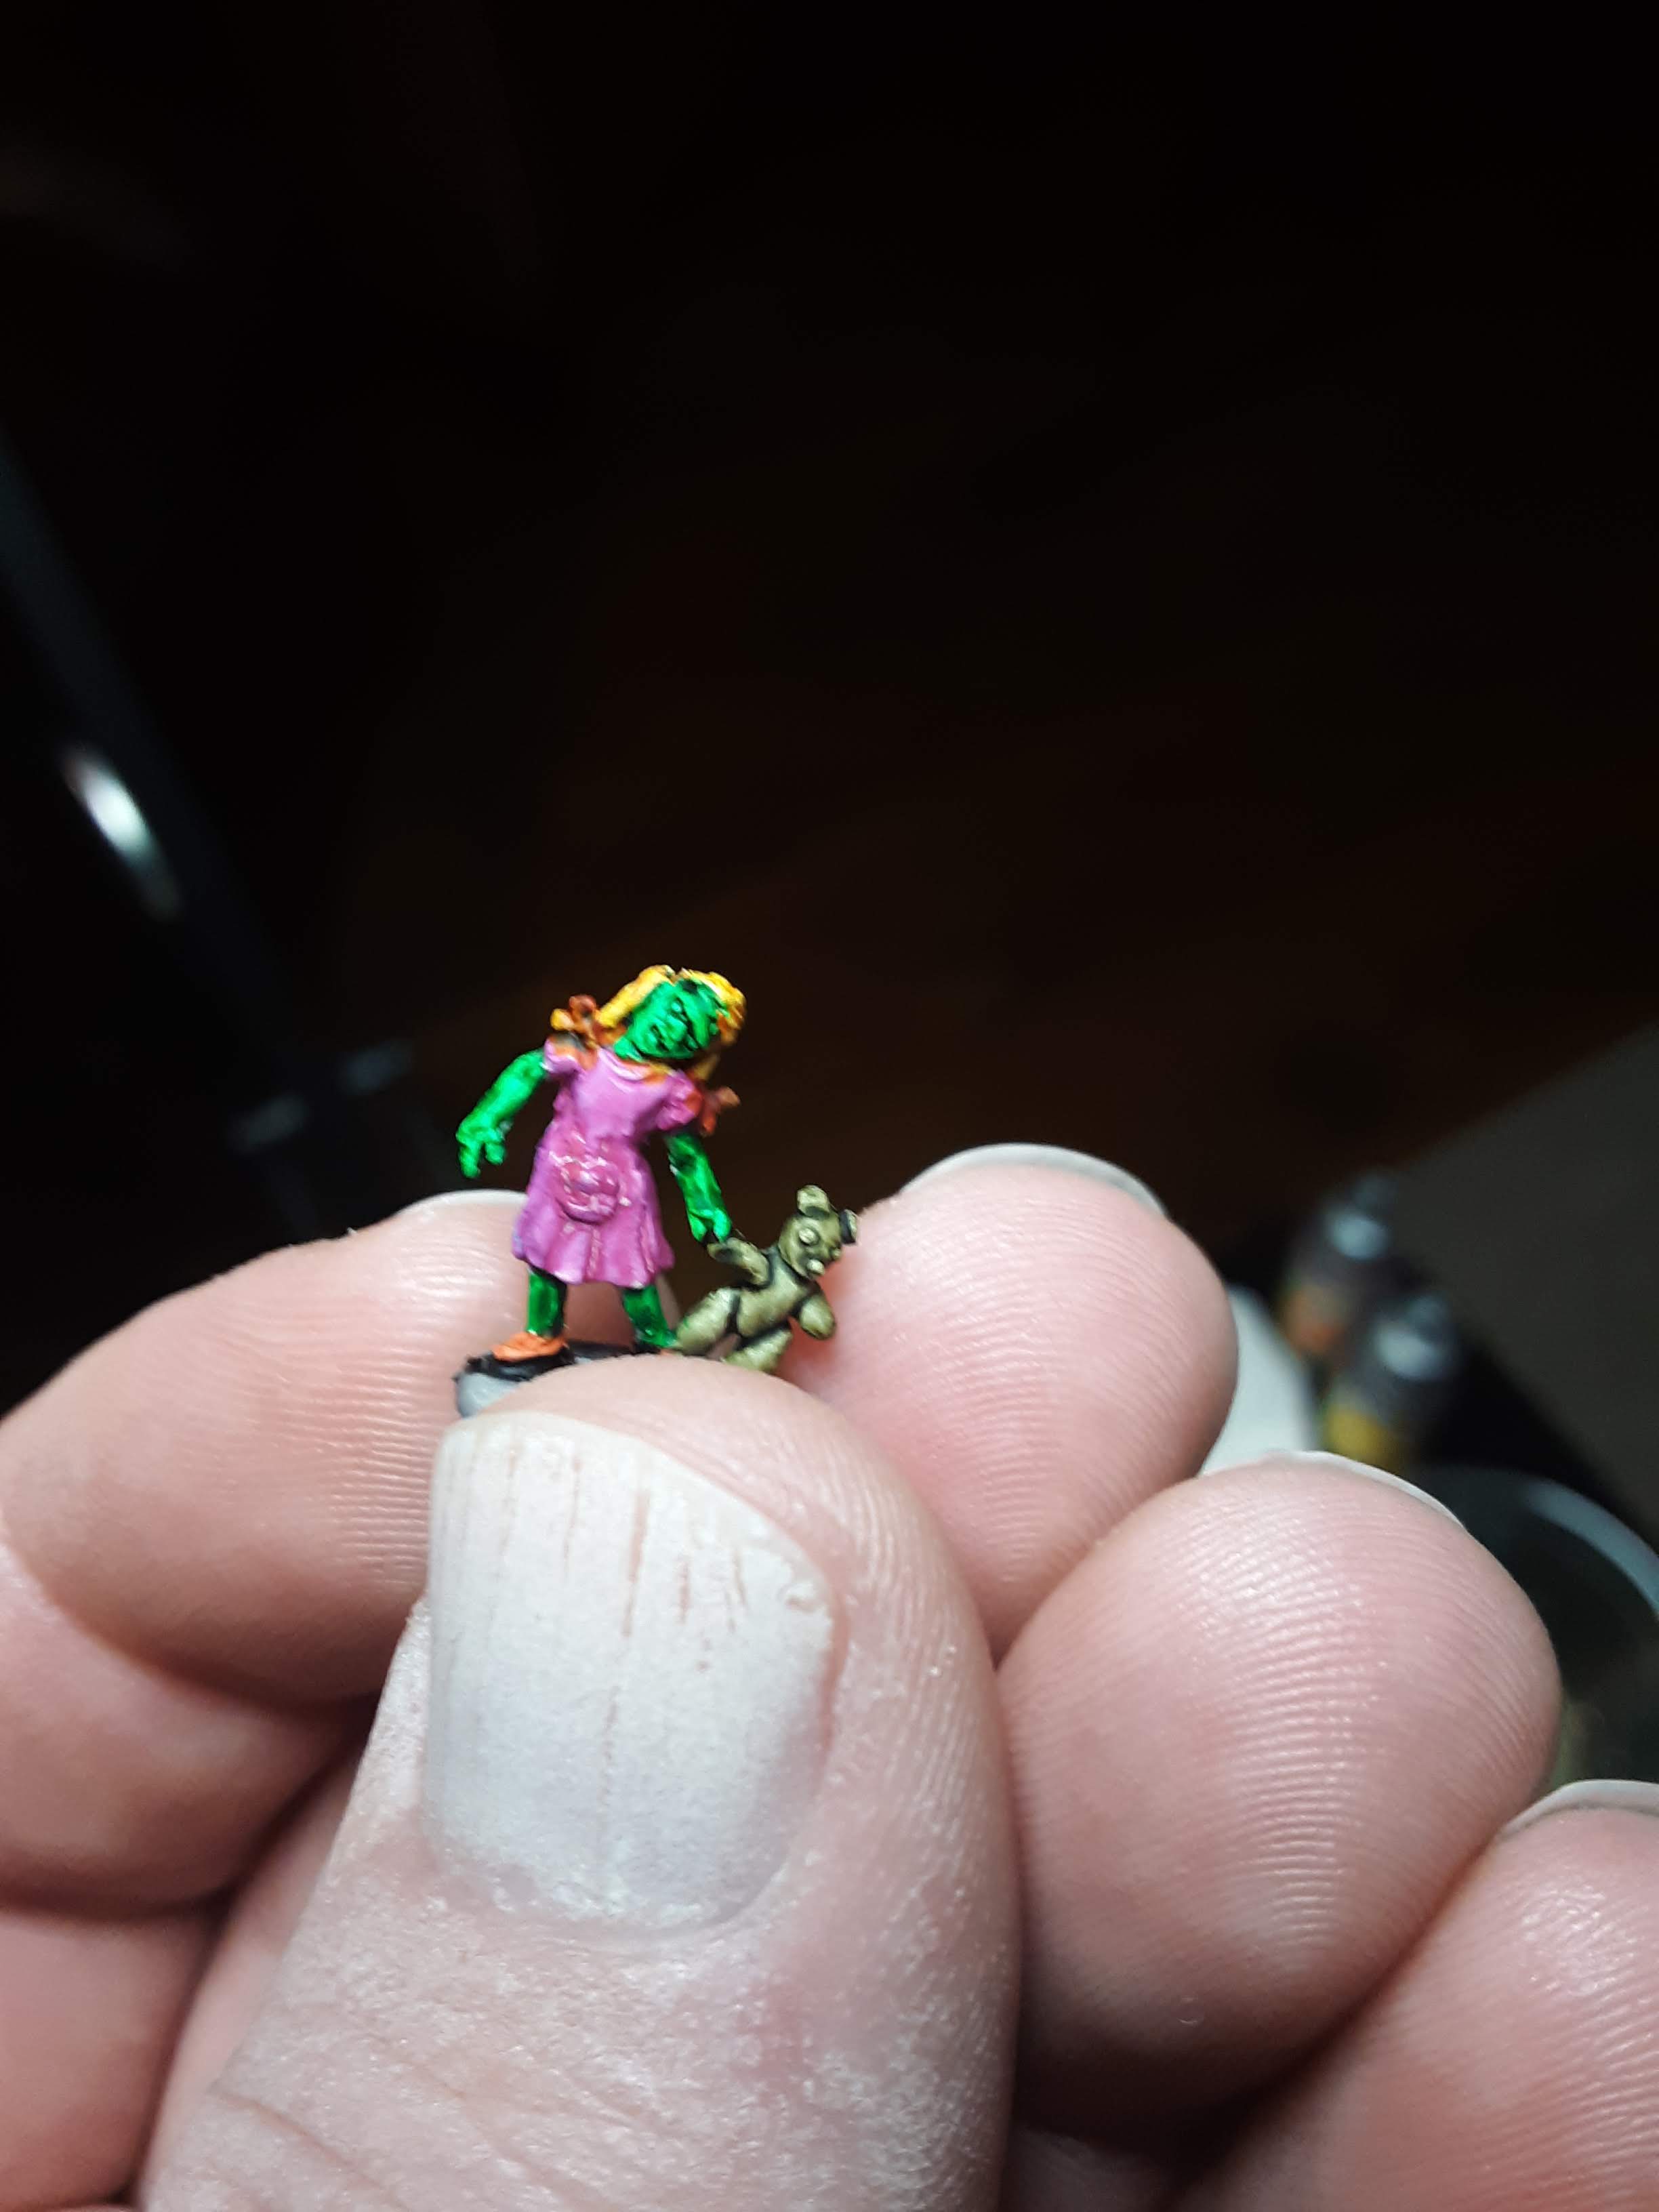
I wanted to try these paints out and was able to get a few miniatures primed that I’ve had sitting untouched. The minis I decided to use come from a Ukrainian company and are sold by the Plastic Models Store. They are super tiny zombies from the Dark Alliance Zombie Set 1. I use these unpainted minis for my old Zombies!!! board game from Twighlight Creations to add some variety to the zombies that came in the box.
It was a lot of fun painting up these little figures after Christmas and I like some of the paints better than the Contrast paints I used for my Goliath Gang and Enforcers.
 The Spring Clean Hobby Challenge
Now we’ve finally arrived to my project. Getting those Slaine minis out of the box and slapping some paint on them.
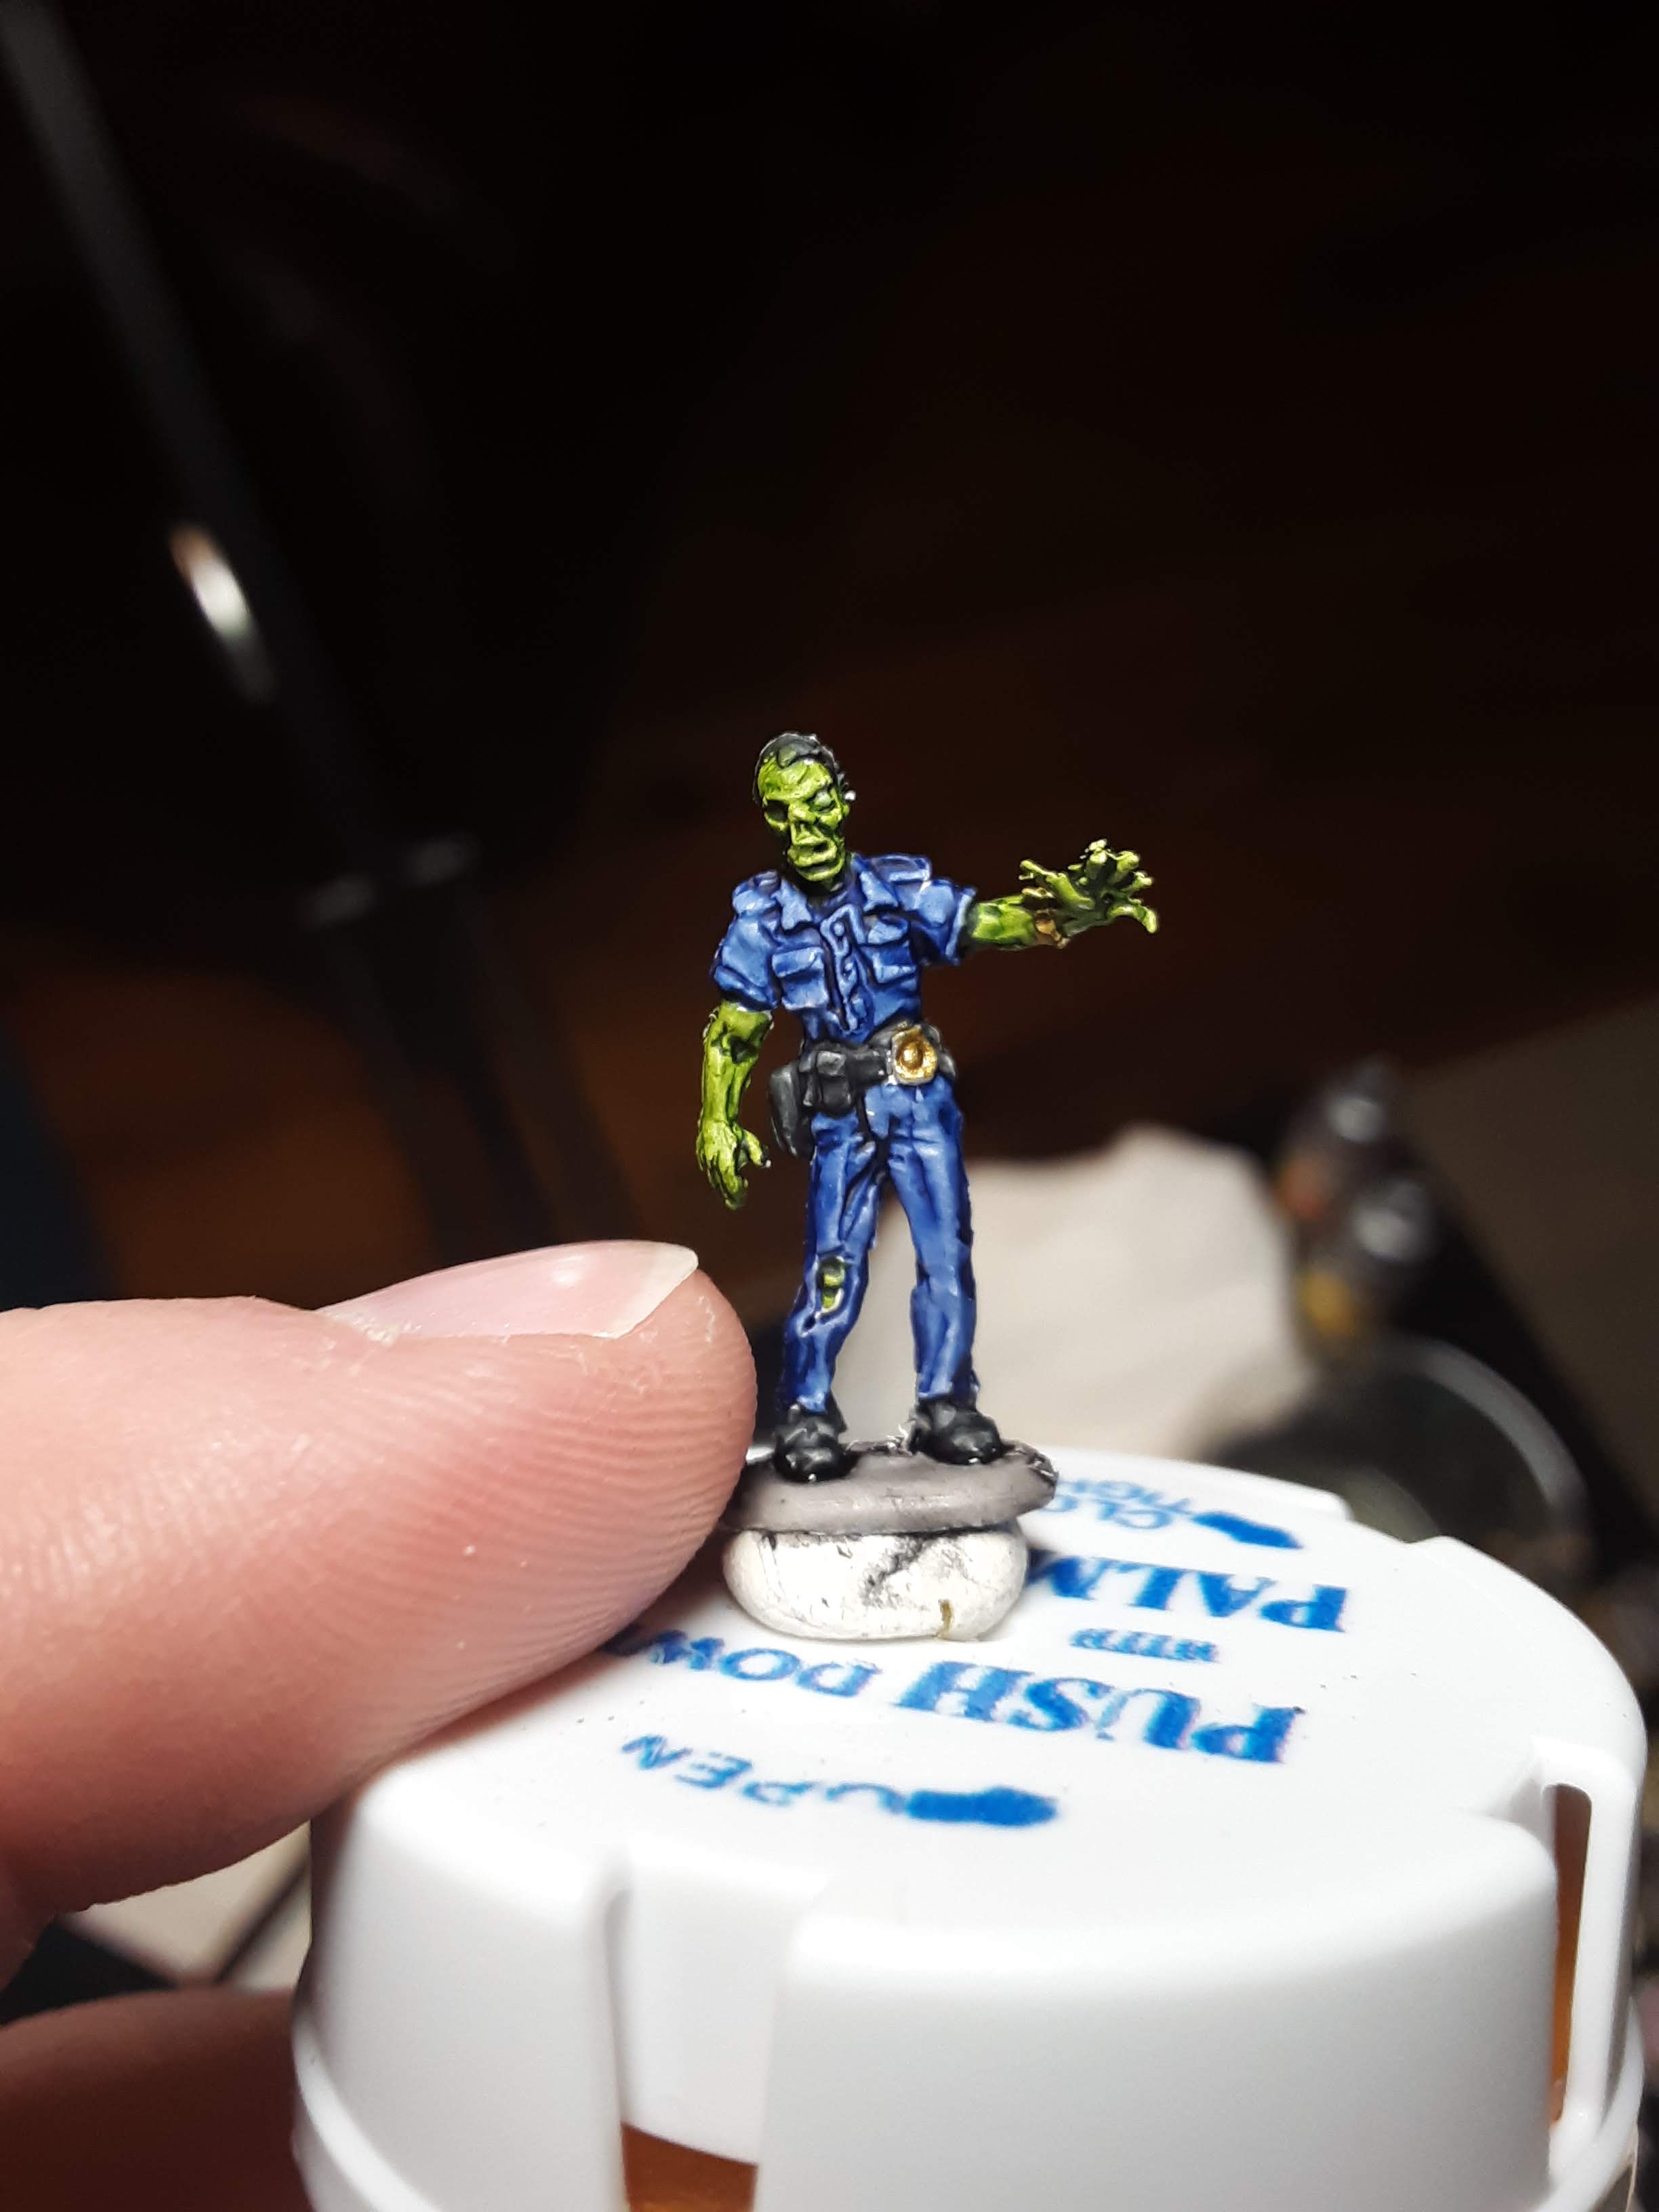
I used the same process to prep my Slaine minis that I used on my Goliath gang. All of the miniatures were primed using Wraithbone spray. The two miniatures in the photo are examples of the prep process before using Contrast or Speedpaints. Slough Throt only has the 50/50 mix of Basilicanum Grey/Contrast Medium. The Skull Sword has a dry brushing of Wraithbone paint from the pot. I think it helps create a smooth shading on the miniatures where the “Slap Chop” technique makes a miniature look rough or chalky with the colors.
You’ve successfully survived reading through my long winded story about how I learned to use contrast and speed paints, details about a few of my random projects, and how I prepped my Slaine minis.
Next up, I’ll share my painting progress.
It Has Begun!

Finally, I’m to the point in my project where I can share my actual goal. Getting some minis painted!
Like I mentioned in my last post, I decided to stick with a process I learned that uses a diluted Basilicannum Grey to give the minis pre-shading before I dry brush.
I had built and primed all of the minis for the Slaine: Kiss My Axe! starter set, including the special Slaine mini that came with the pre-order. I decided to finish the miniatures that came with the starter set before starting on the special Slaine figure. Mostly because I’m not sure what colors would be best for all the leather he’s wearing…instead of choosing violence he chose fetish for this outfit.

I strictly used The Army Painter (AP) Speedpaint 2.0 Most Wanted set and Citadel Contrast Paints for this step with the entire set.
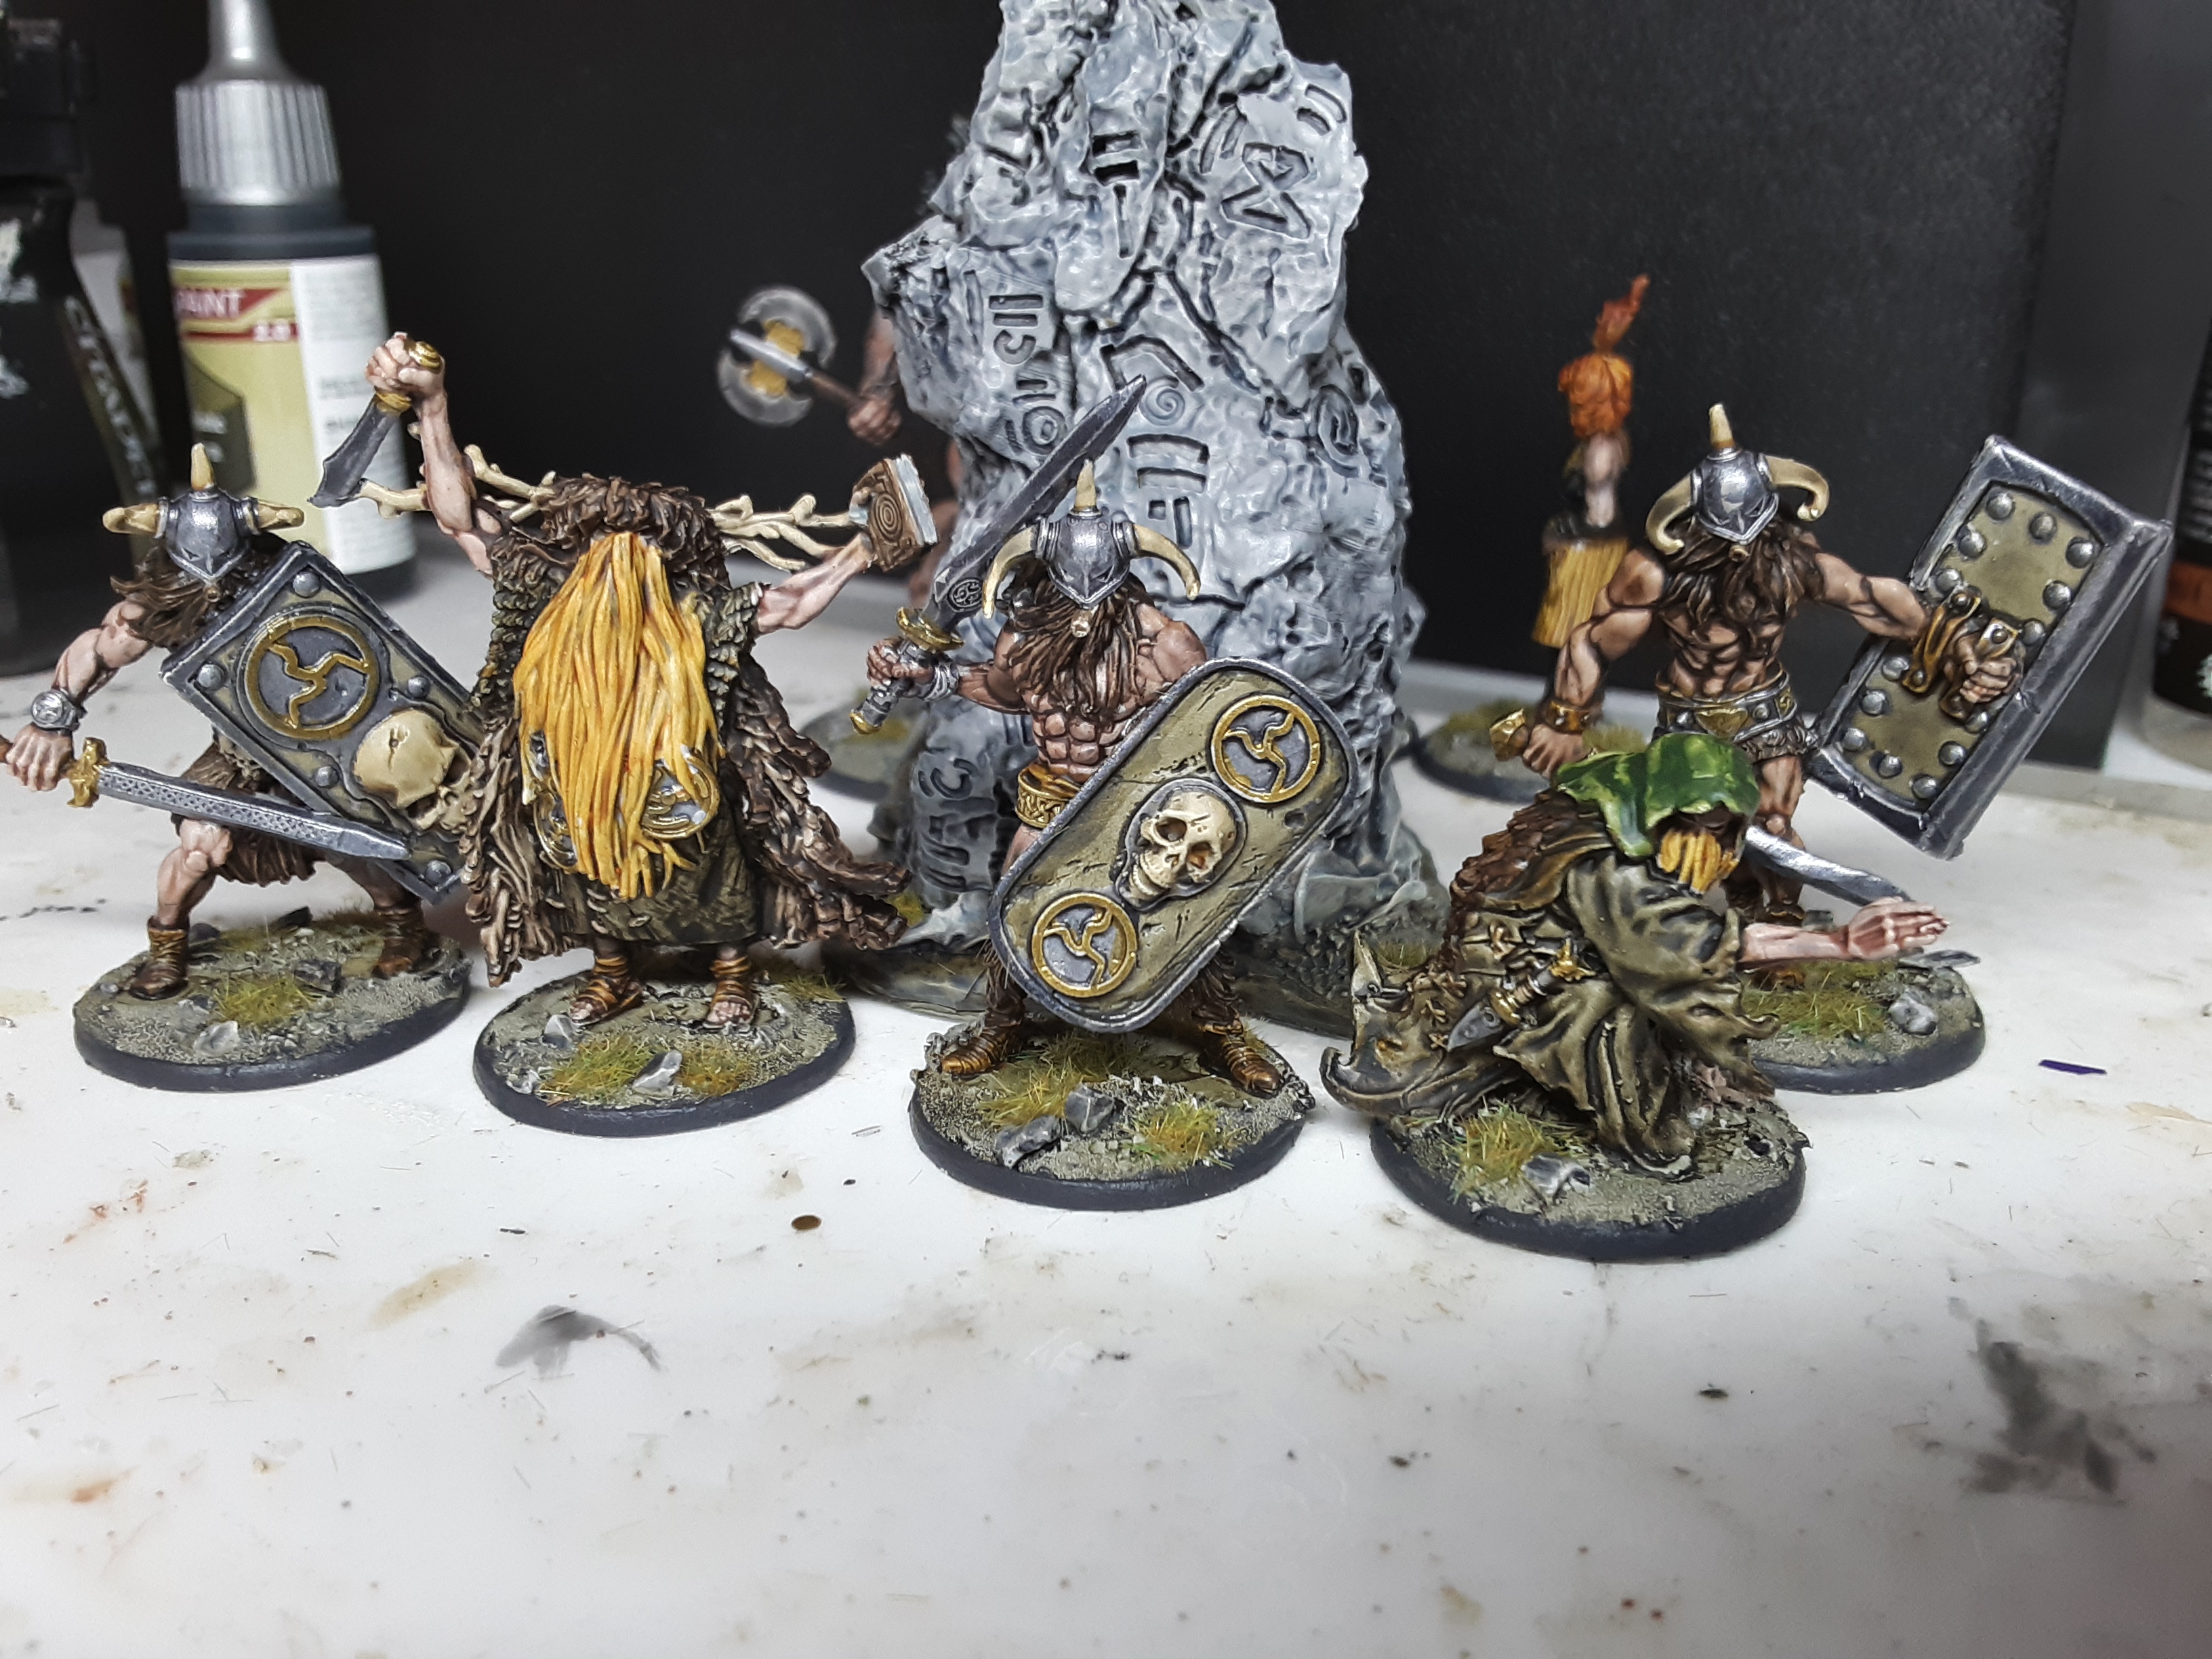
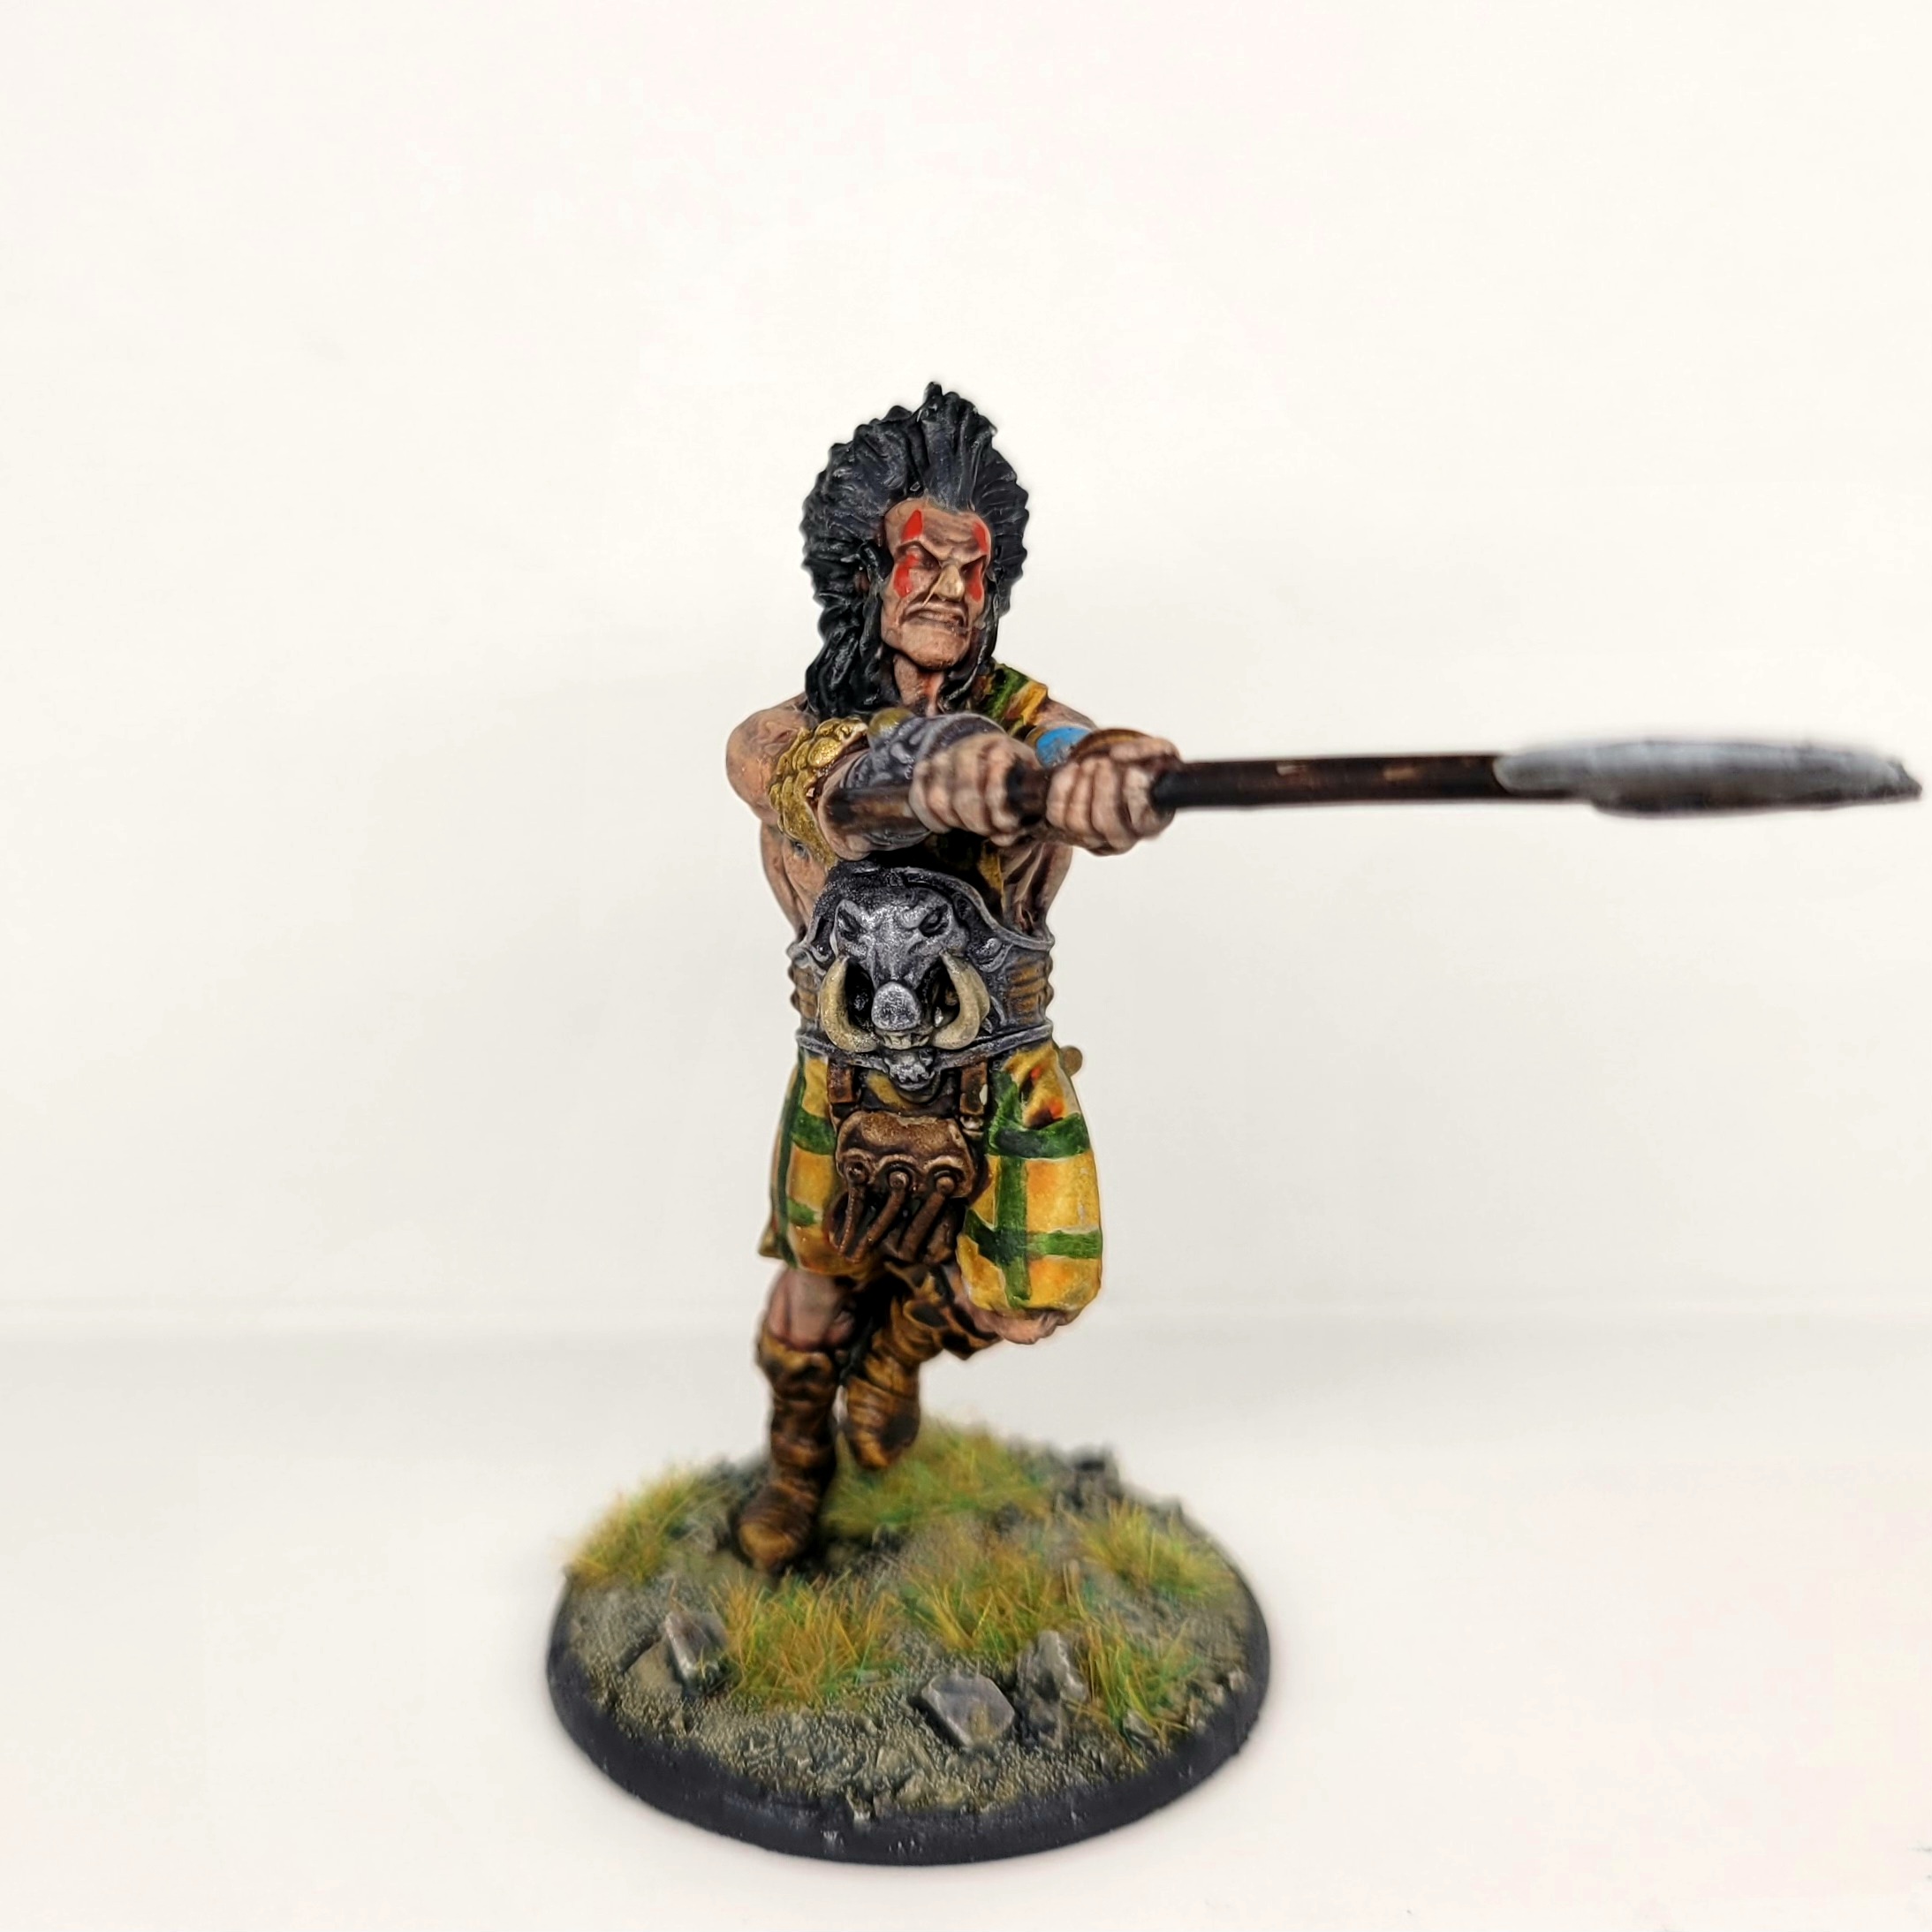
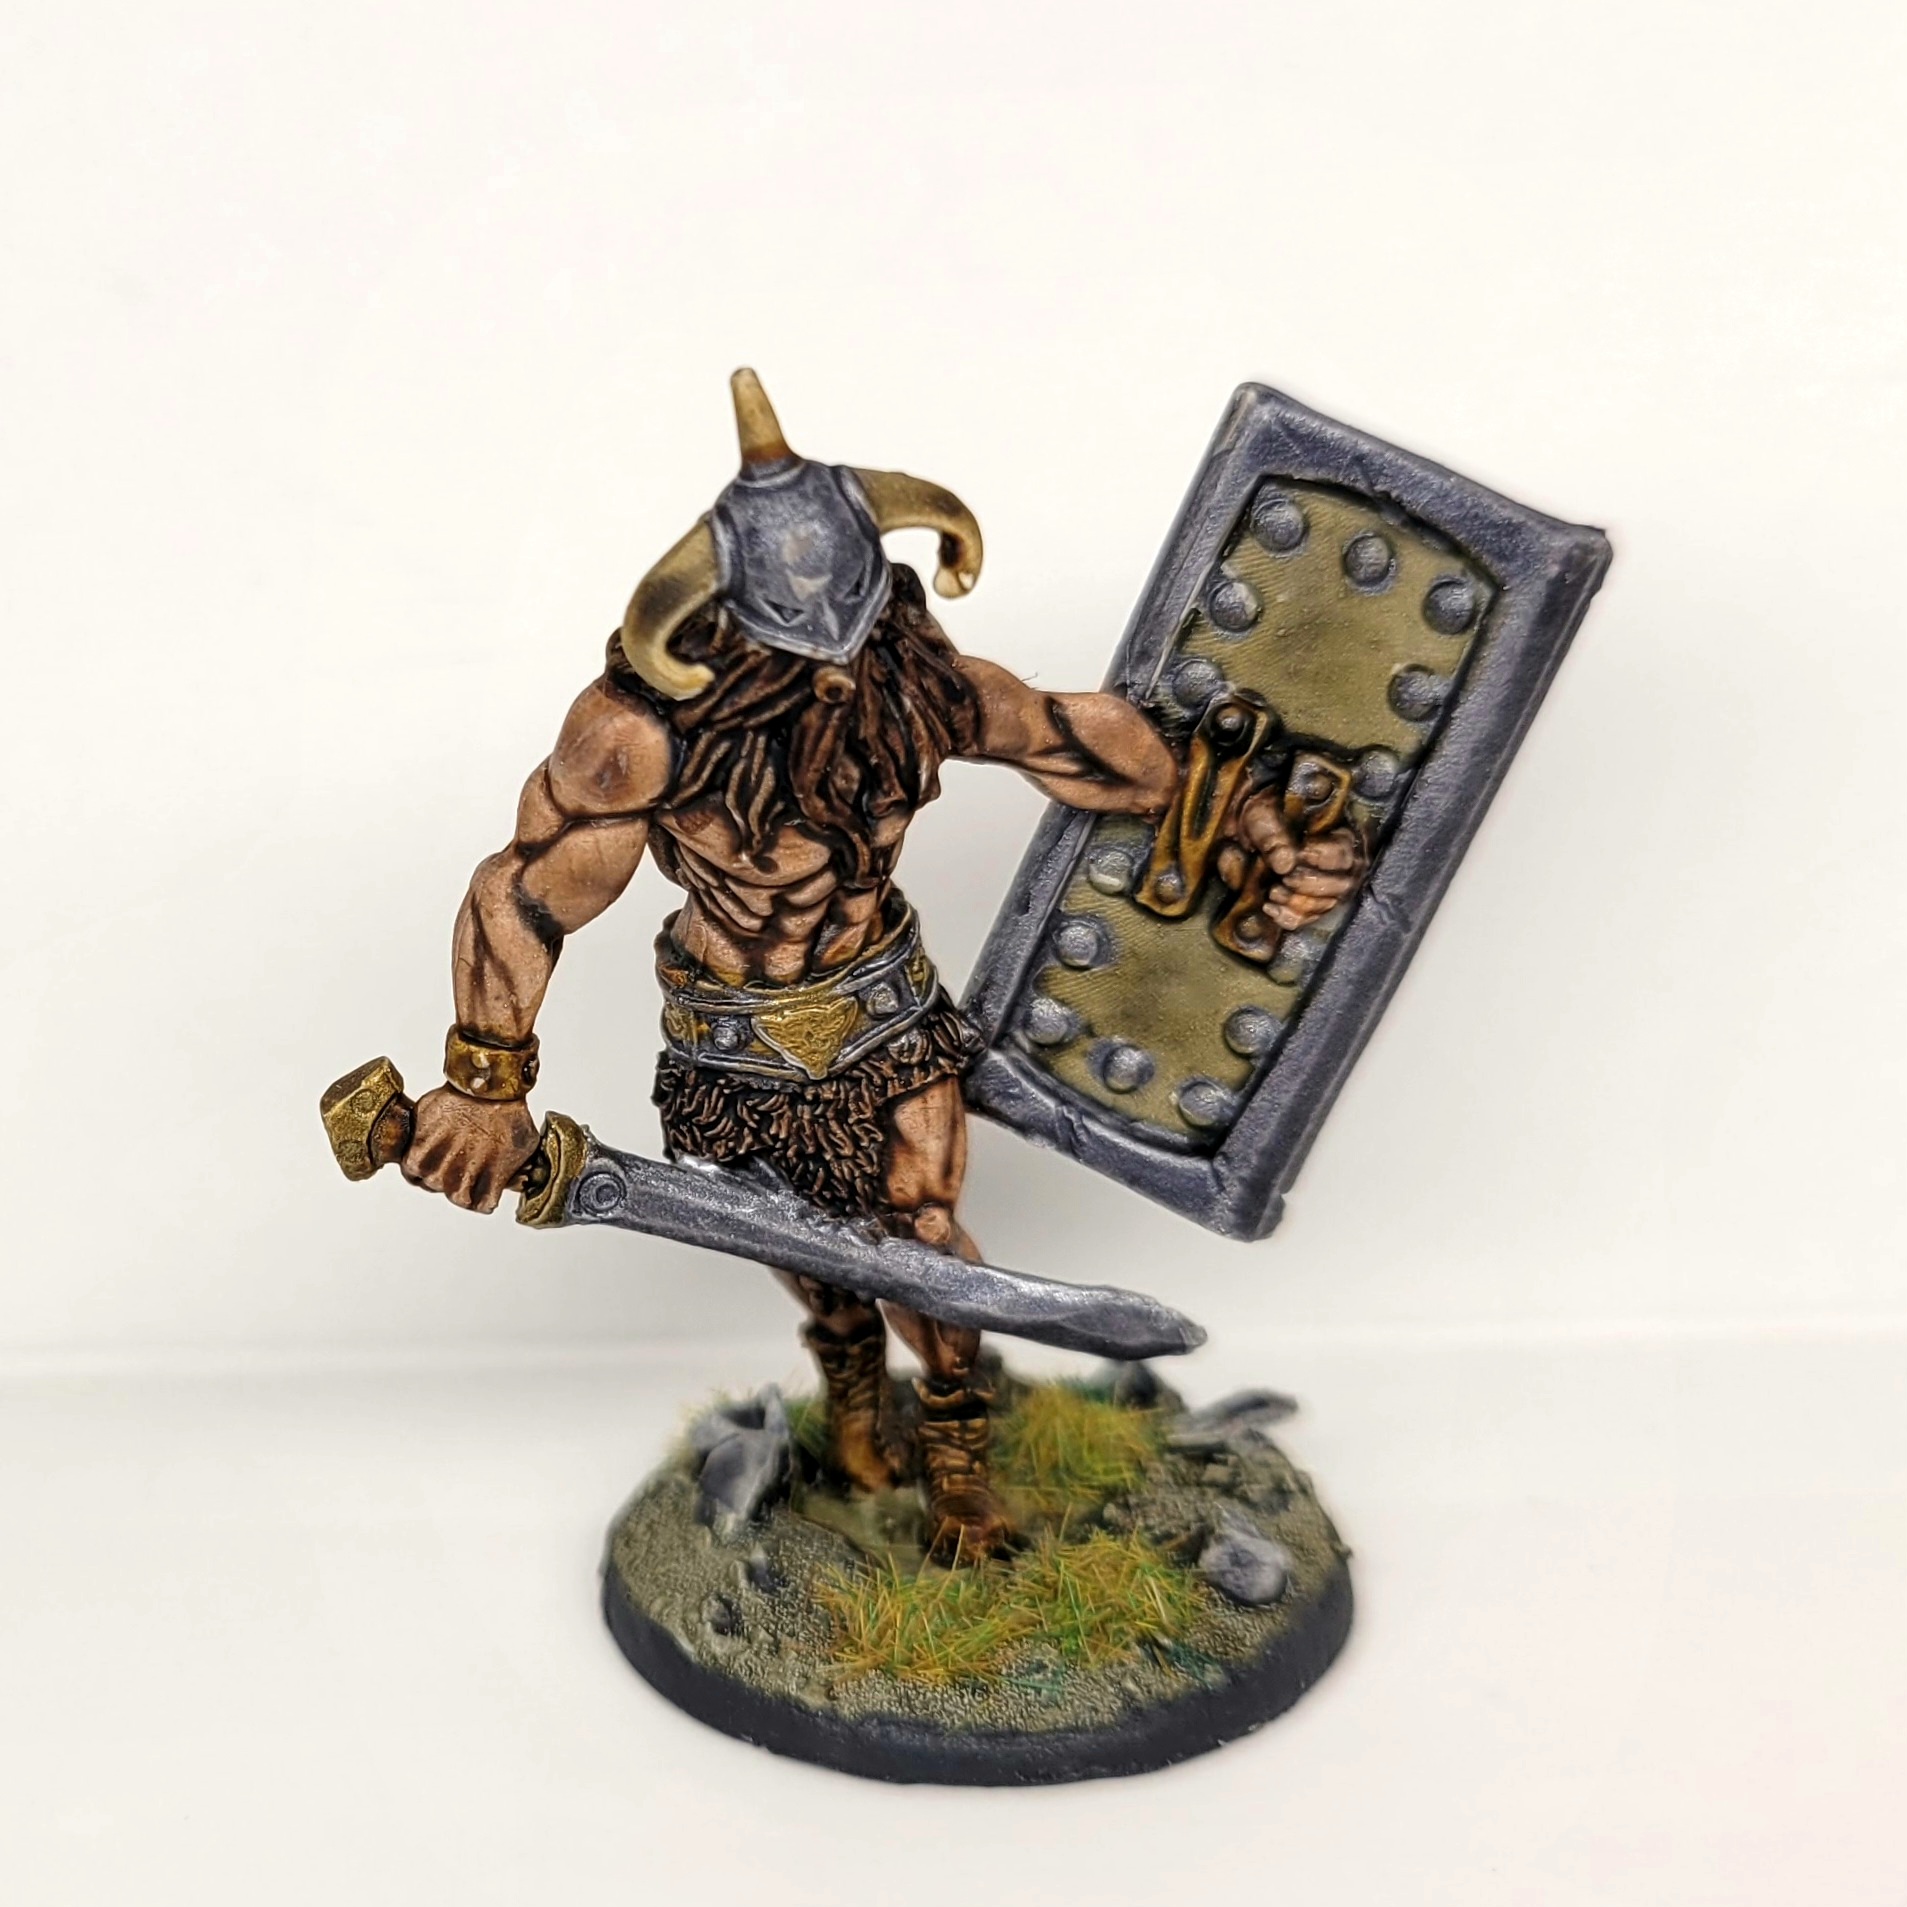
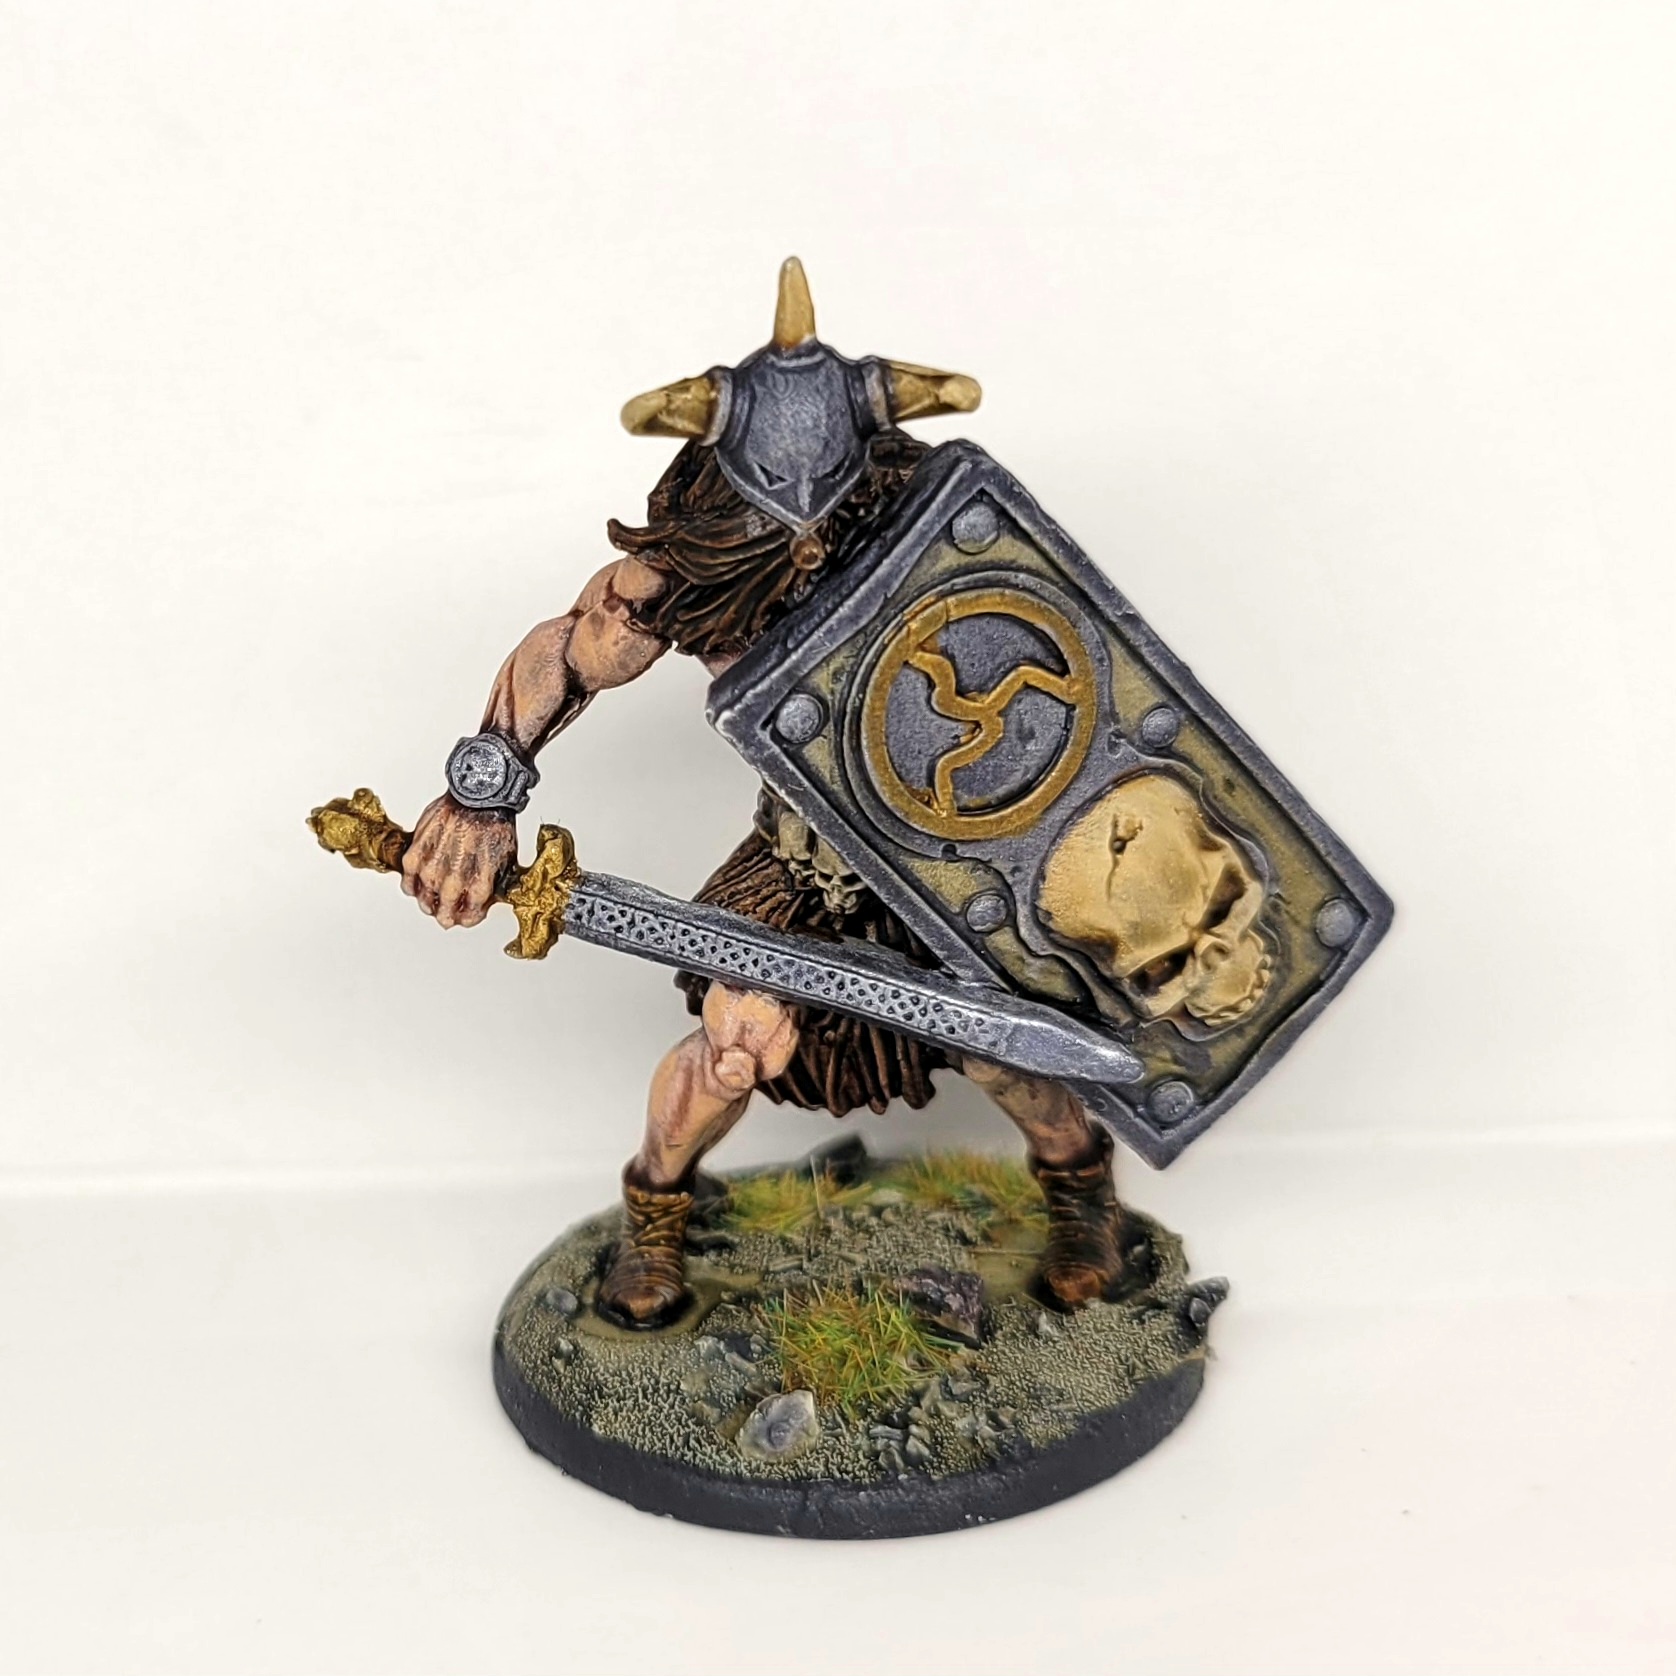
AP came with two skin shades appropriate for these minis. These are Crusader Skin and Warrior Skin. I also have a single Contrast that I wanted to test out, Guilliman Flesh. I decided to use the Skull Sword Miniatures as a test for the three skin tones. All three looked great to me, but I felt the Army Painter Crusader Skin would do best for the rest of the minis. I used AP Dark Wood on the back of one shield where wood was exposed and the hair and furs. Contrast Snake Bite Leather was used for leather straps, sword grips, and boots. AP Pallid Bone was used for the helmet horns, breathing tubes, and skulls on the shields. I used AP Desolate Brown for the riveted shield backing and shield fronts. The helmet was AP Broadsword Silver. The swords, metal on the belts, and shields are a mix of Broadsword Silver and Hoplite Gold. I was very happy with how these turned out.
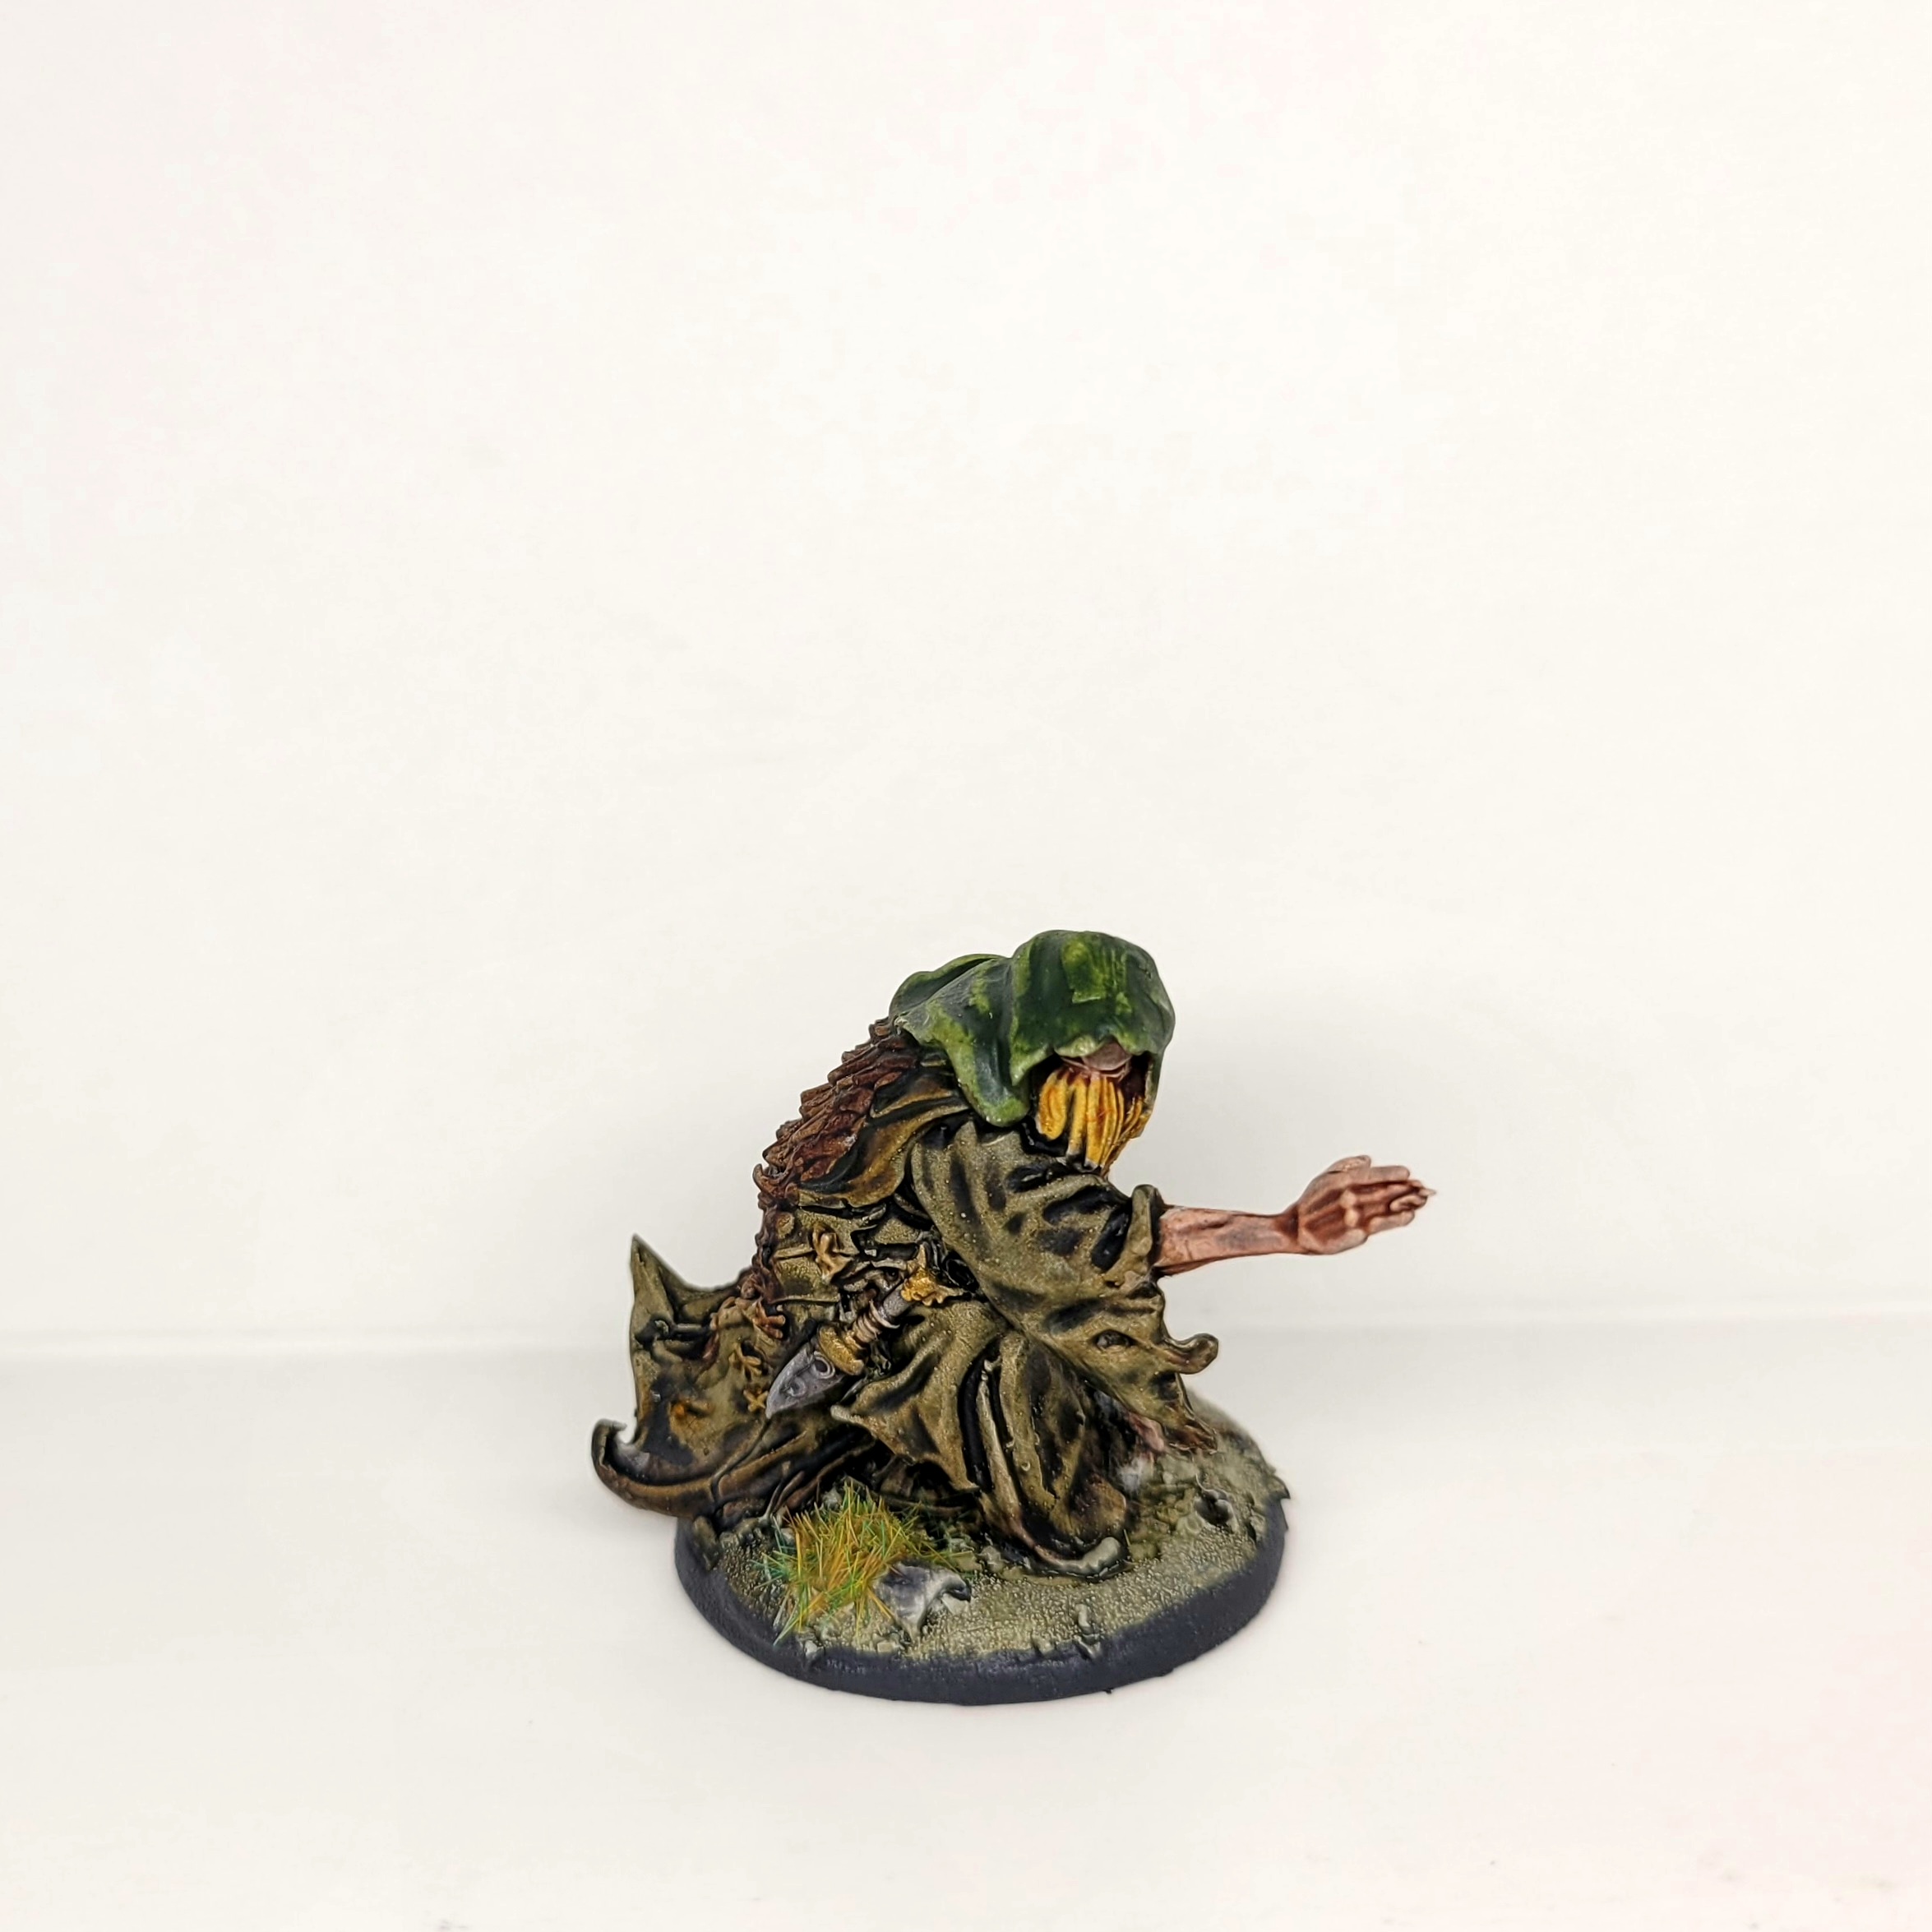
Slough Throt and the Drune Priest were painted very similarly to the Skullswords for their fur and metal items. I really started to like the AP Desolate Brown color and used it for their robes. AP Zealot Yellow was used for their beards and AP Crusader Skin for the small bit of face you can see and their limbs. For the Drune Priest, I decided to make the Drune Priests dagger stone by using Contrast Basilicannum Grey. Another new color I used was AP Forest Sprite for his hood. Slough Throt had a few unique items. I used AP Pallid Bone for his horns and Contrast Apothecary White for the book pages and a small bandage on his hands.
 Drune: Part 1 presented by Denis Villeneuve
My brain is a little drained from typing up all these colors for the Drune. Time for a mental break before I jump into the breakdown of the Earth Tribe heroes.
It Has Begun!

Finally, I’m to the point in my project where I can share my actual goal. Getting some minis painted!
Like I mentioned in my last post, I decided to stick with a process I learned that uses a diluted Basilicannum Grey to give the minis pre-shading before I dry brush.
I had built and primed all of the minis for the Slaine: Kiss My Axe! starter set, including the special Slaine mini that came with the pre-order. I decided to finish the miniatures that came with the starter set before starting on the special Slaine figure. Mostly because I’m not sure what colors would be best for all the leather he’s wearing…instead of choosing violence he chose fetish for this outfit.

I strictly used The Army Painter (AP) Speedpaint 2.0 Most Wanted set and Citadel Contrast Paints for this step with the entire set.
AP came with two skin shades appropriate for these minis. These are Crusader Skin and Warrior Skin. I also have a single Contrast that I wanted to test out, Guilliman Flesh. I decided to use the Skull Sword Miniatures as a test for the three skin tones. All three looked great to me, but I felt the Army Painter Crusader Skin would do best for the rest of the minis. I used AP Dark Wood on the back of one shield where wood was exposed and the hair and furs. Contrast Snake Bite Leather was used for leather straps, sword grips, and boots. AP Pallid Bone was used for the helmet horns, breathing tubes, and skulls on the shields. I used AP Desolate Brown for the riveted shield backing and shield fronts. The helmet was AP Broadsword Silver. The swords, metal on the belts, and shields are a mix of Broadsword Silver and Hoplite Gold. I was very happy with how these turned out.
Slough Throt and the Drune Priest were painted very similarly to the Skullswords for their fur and metal items. I really started to like the AP Desolate Brown color and used it for their robes. AP Zealot Yellow was used for their beards and AP Crusader Skin for the small bit of face you can see and their limbs. For the Drune Priest, I decided to make the Drune Priests dagger stone by using Contrast Basilicannum Grey. Another new color I used was AP Forest Sprite for his hood. Slough Throt had a few unique items. I used AP Pallid Bone for his horns and Contrast Apothecary White for the book pages and a small bandage on his hands.
 Drune: Part 1 presented by Denis Villeneuve
My brain is a little drained from typing up all these colors for the Drune. Time for a mental break before I jump into the breakdown of the Earth Tribe heroes.
Slappin' the Base Colors
 Earth Tribe, Wind & Fire
I used a lot of the same colors and choices from my experience painting the Drune forces. Once again, I limited myself to using AP Speedpaints and Citadel Contrast paints.
I forgot to mention that I referenced a lot of the Slaine graphic novels for color choices. I was able to pick up a large digital set through Humble Bundle before I started the project. I’m currently reading Lord of Beasts.
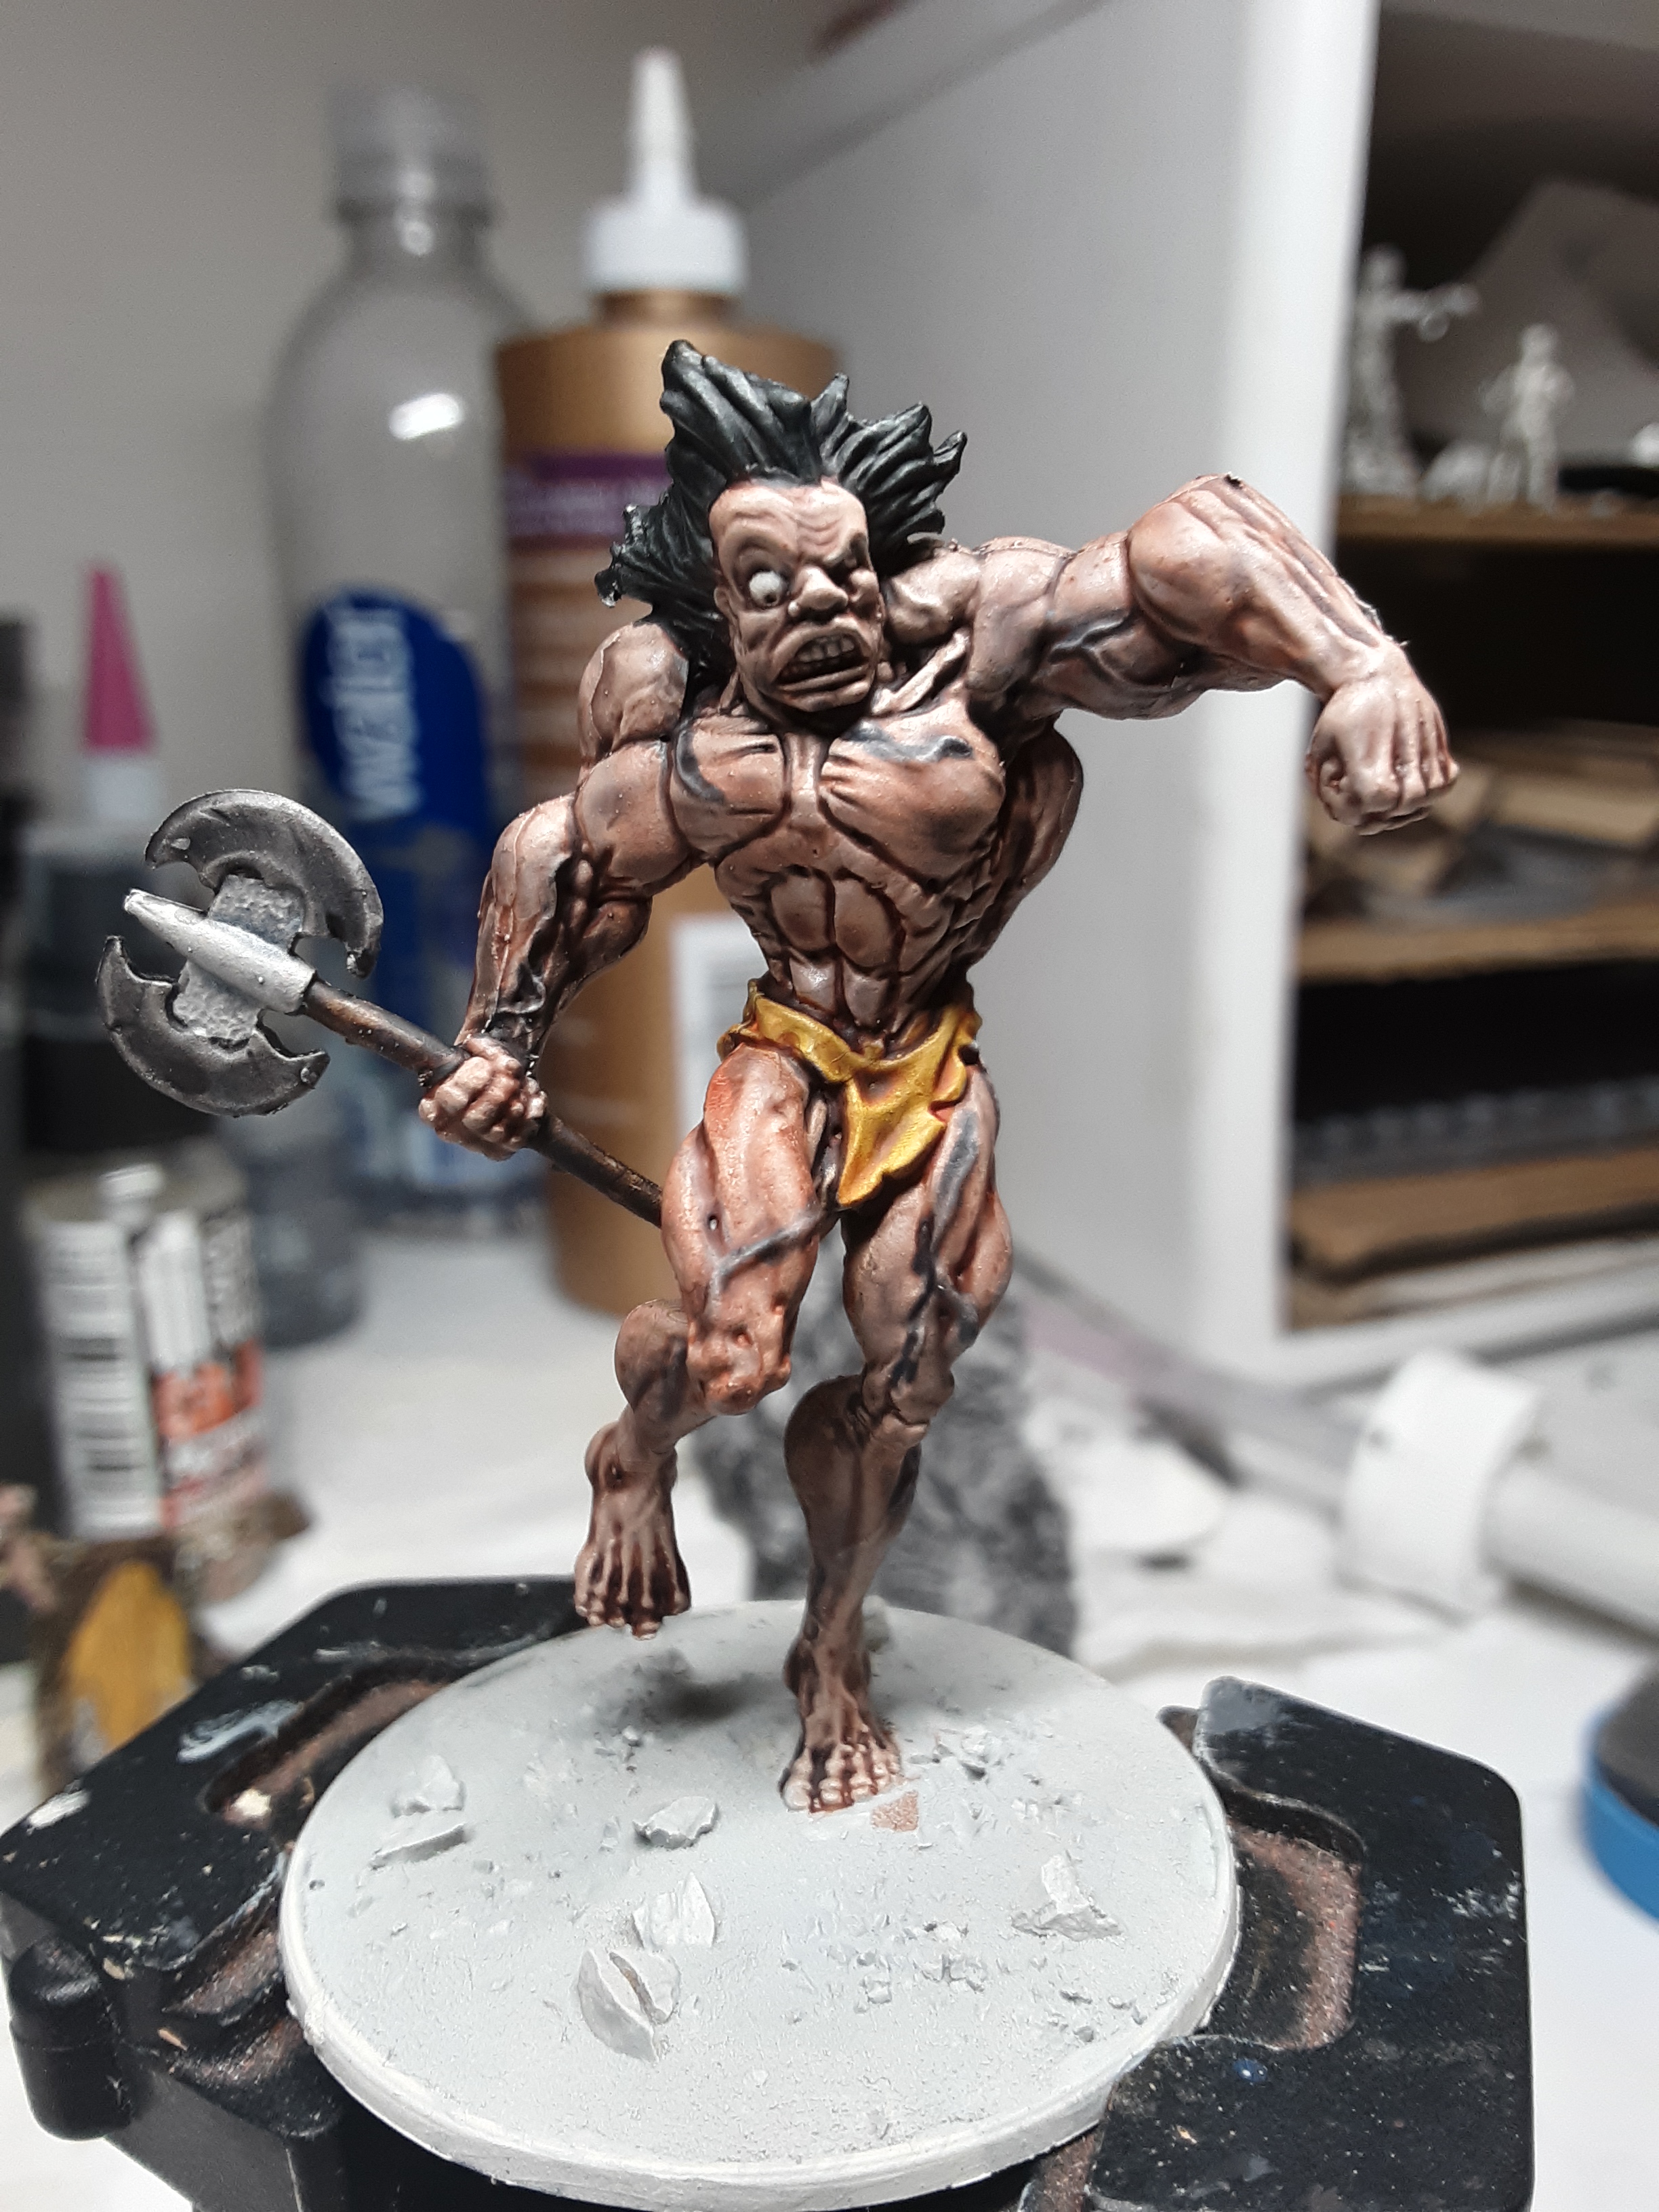
Warped Slaine was probably my favorite miniature to paint for this project. Ukko, Nest, and Slaine were also a lot of fun. Slaine and Warped Slain were almost identical to paint. I think the only difference was adding leather colors. Ukko was a bit tough to lock down the best colors to use and his details are very small. I had some difficulty picking the best colors for Nest and also keeping her looking feminine.
One of the big tasks I took on was the Weirdstone. I primed it Citadel Greyseer, but went through the same process with a wash of diluted Basilicannum Grey. I tried using AP Pallid Bone on the skeleton fragments around the base, but that ended up not coming out the way I wanted. I messed around with a lot of different colors and chose to dry brush the rock with some standard paints to bring out the details. One thing I discovered was that the AP Desolate Brown really stood out to me as a great base color.
I ended up using AP Desolate Brown for all of my bases and added some green grass from a Warlord Games Northern European basing set.

I thought I was finished with my minis and shared pictures of them with a YouTuber I follow, MattsMiniatureProblem, and he gave me some feedback about the colors. I decided to give them some extra details and try to smooth out some colors.
Next up, I’ll share pictures of my finished base set of miniatures for Slaine: Kiss My Axe!
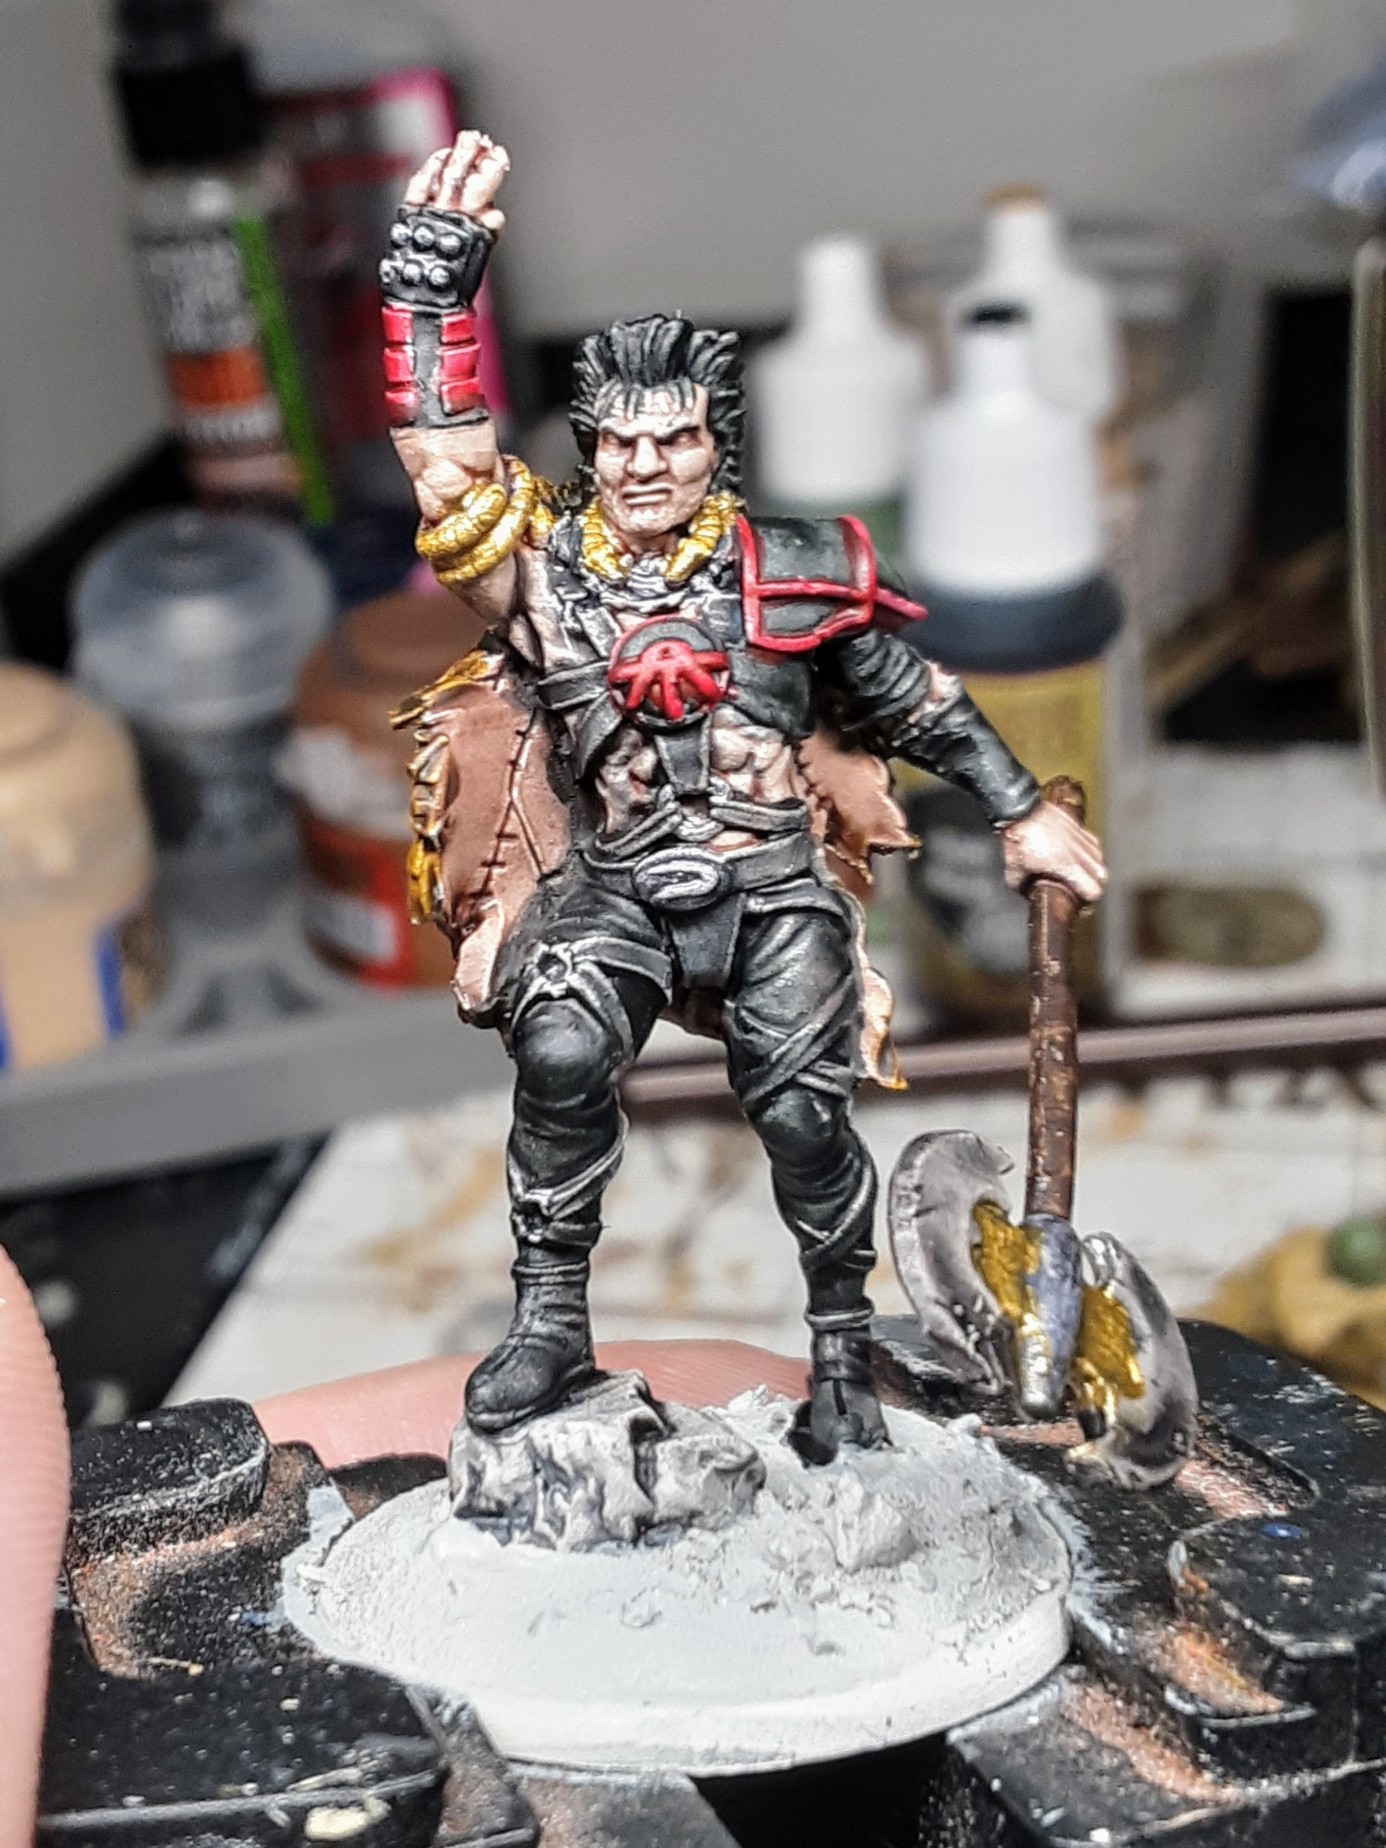
Highlighting My Progress

After sharing my pictures with a YouTube miniature painter, I decided to add some details before I called the basic set finished.
Usually I do a base layer of paint, wash or Army Painter Quickshade dip, and call my minis done. This time around I tried out glazing and highlighting. I tried out glazing/highlighting on about all of the minis for their skin using Citadel Kislev Flesh.
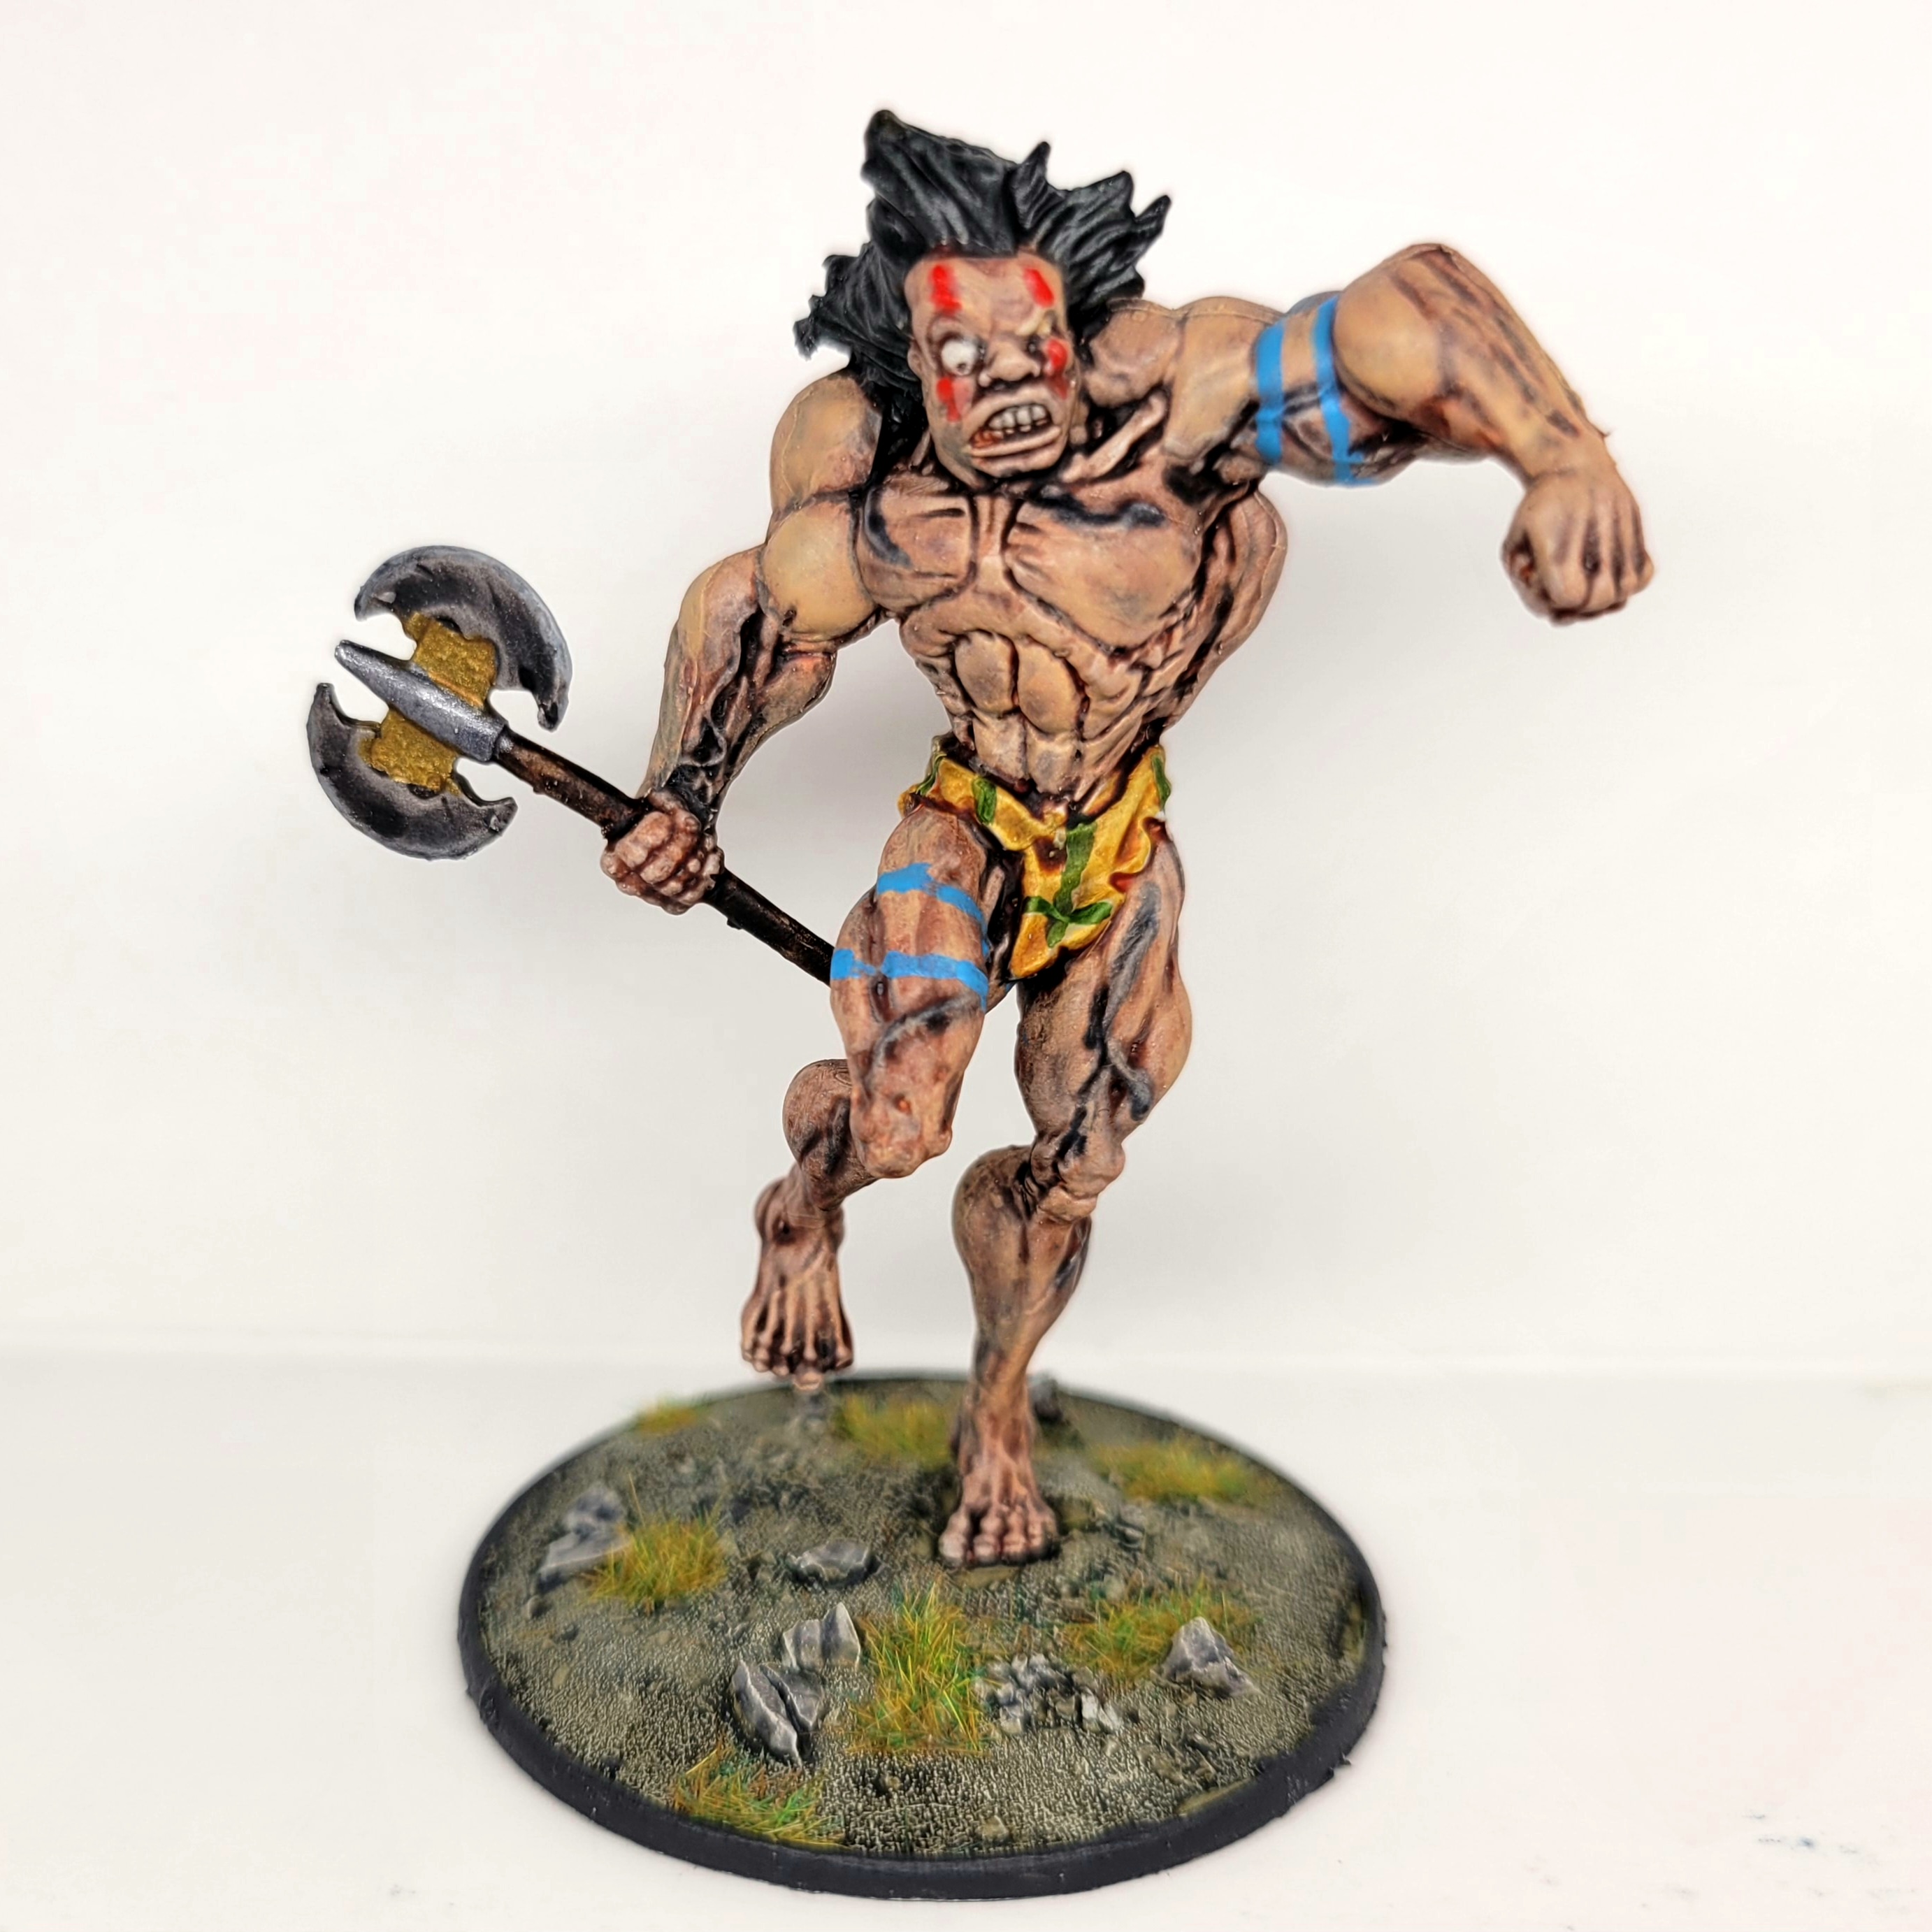
I started with the biggest mini, the Warped out Slaine figure to test out this new process. I began seeing a slight change in the mini and think it helped cut down on the splotchy appearance some of the speedpaints caused on the skin. Next I used thinned Citadel Wraithbone to make some lines on the tattered kilt. This was followed with AP Speedpaint Forest Sprite. I used Citadel Lothlorien Blue and AP Pure Red for Slaine’s body paint. I also added some AP Ash Grey to Brainbiter (the Axe) to highlight the stone edges. I also picked out some of the metal with AP Shining Silver.
 Ukko looking like he needs a beating
Ukko was a quick process. I highlighted the skin and the metal.
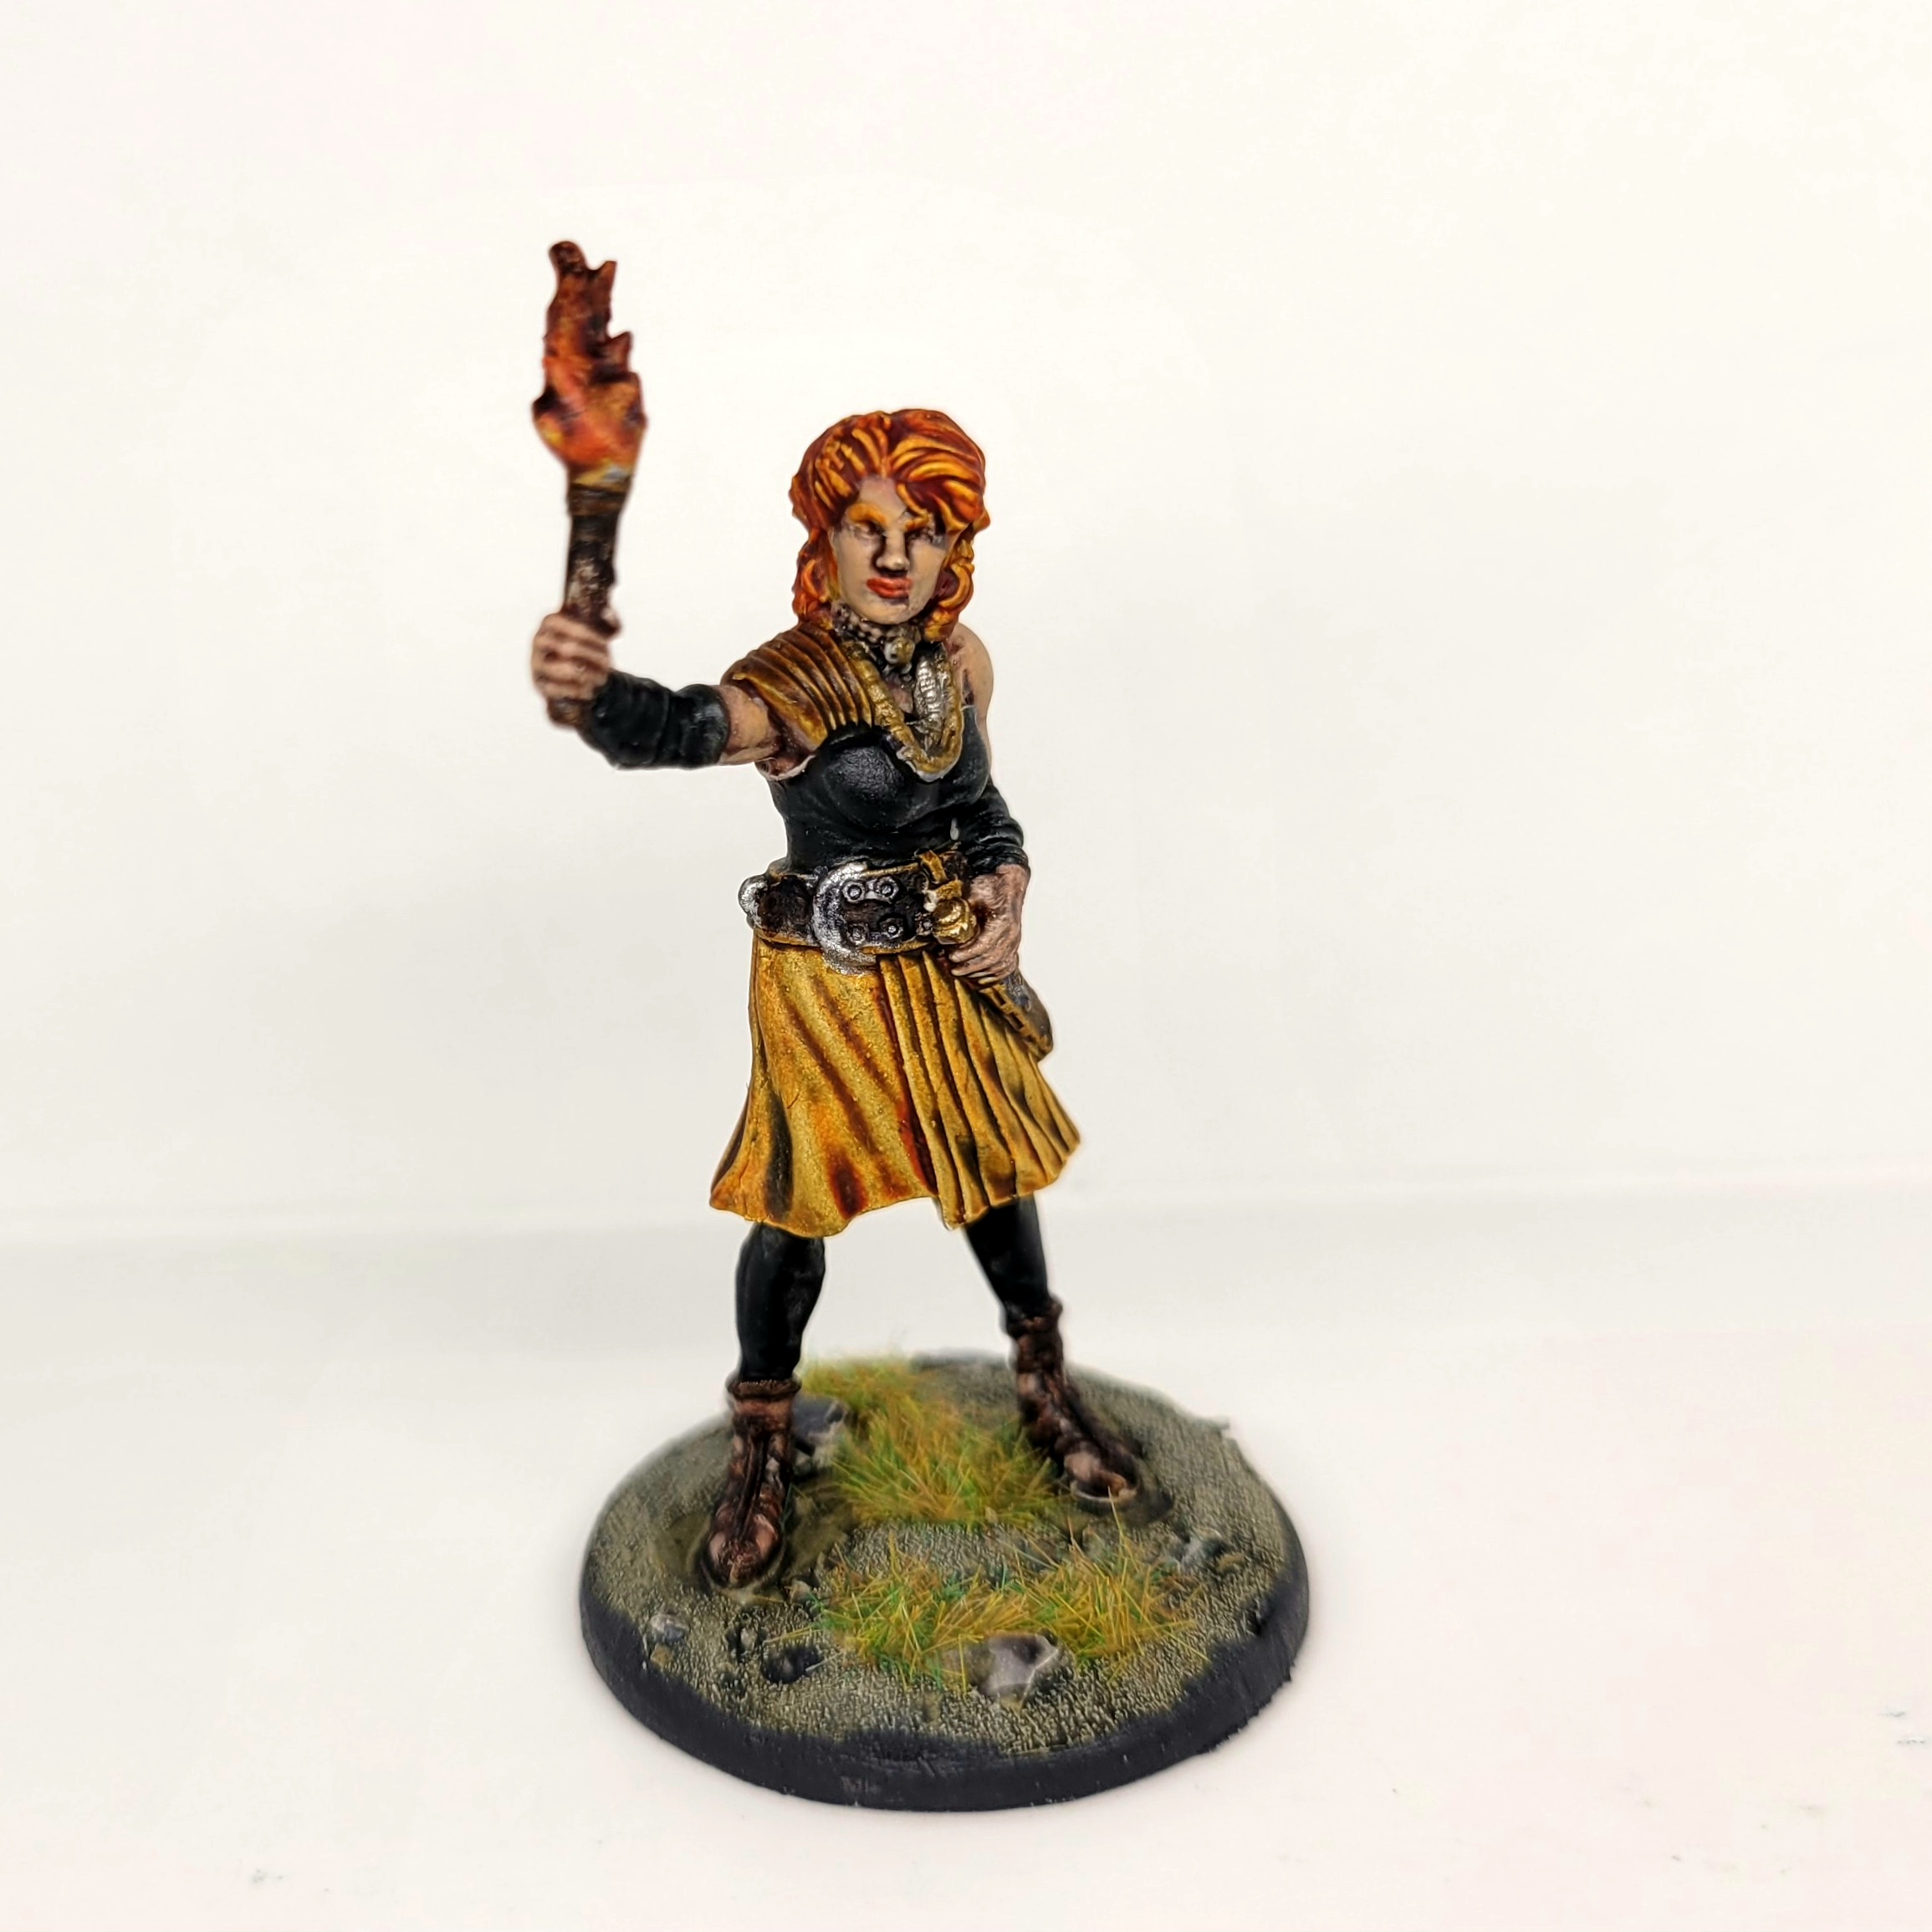 Nest out on the town
Nest was a bit more involved. I started by highlighting the skin. I needed to do a lot of cleanup for all the colors on the model, especially the clothing on the shoulder due to a “splotch”. From a distance her face looked very plain. I used AP speedpaint Slaughter Red for her lipstick to help bring out the feminine features of the character. I added some dry brushing of red and black onto the torch to finish her up.

Slough Throt and the Priest were pretty easy to highlight. I hit their skin and did a slight drybrush of AP Skeleton bone on the furs. Slough Throts bandage and book needed a slight highlight of AP White.
The Skull Swords had skin, metallic, and fur highlights similar to many of the other minis.
Lastly, I forgot to mention that I touched up all the base rims with AP Necromancer Cloak. This is one of my favorite colors for base rims.
I only have a few more items to finish before I call this project complete.
- I need to paint the special Slaine miniature that came with my preorder.
- I still need to play the game!
Skulls, Dwarves, and Rock that Roll
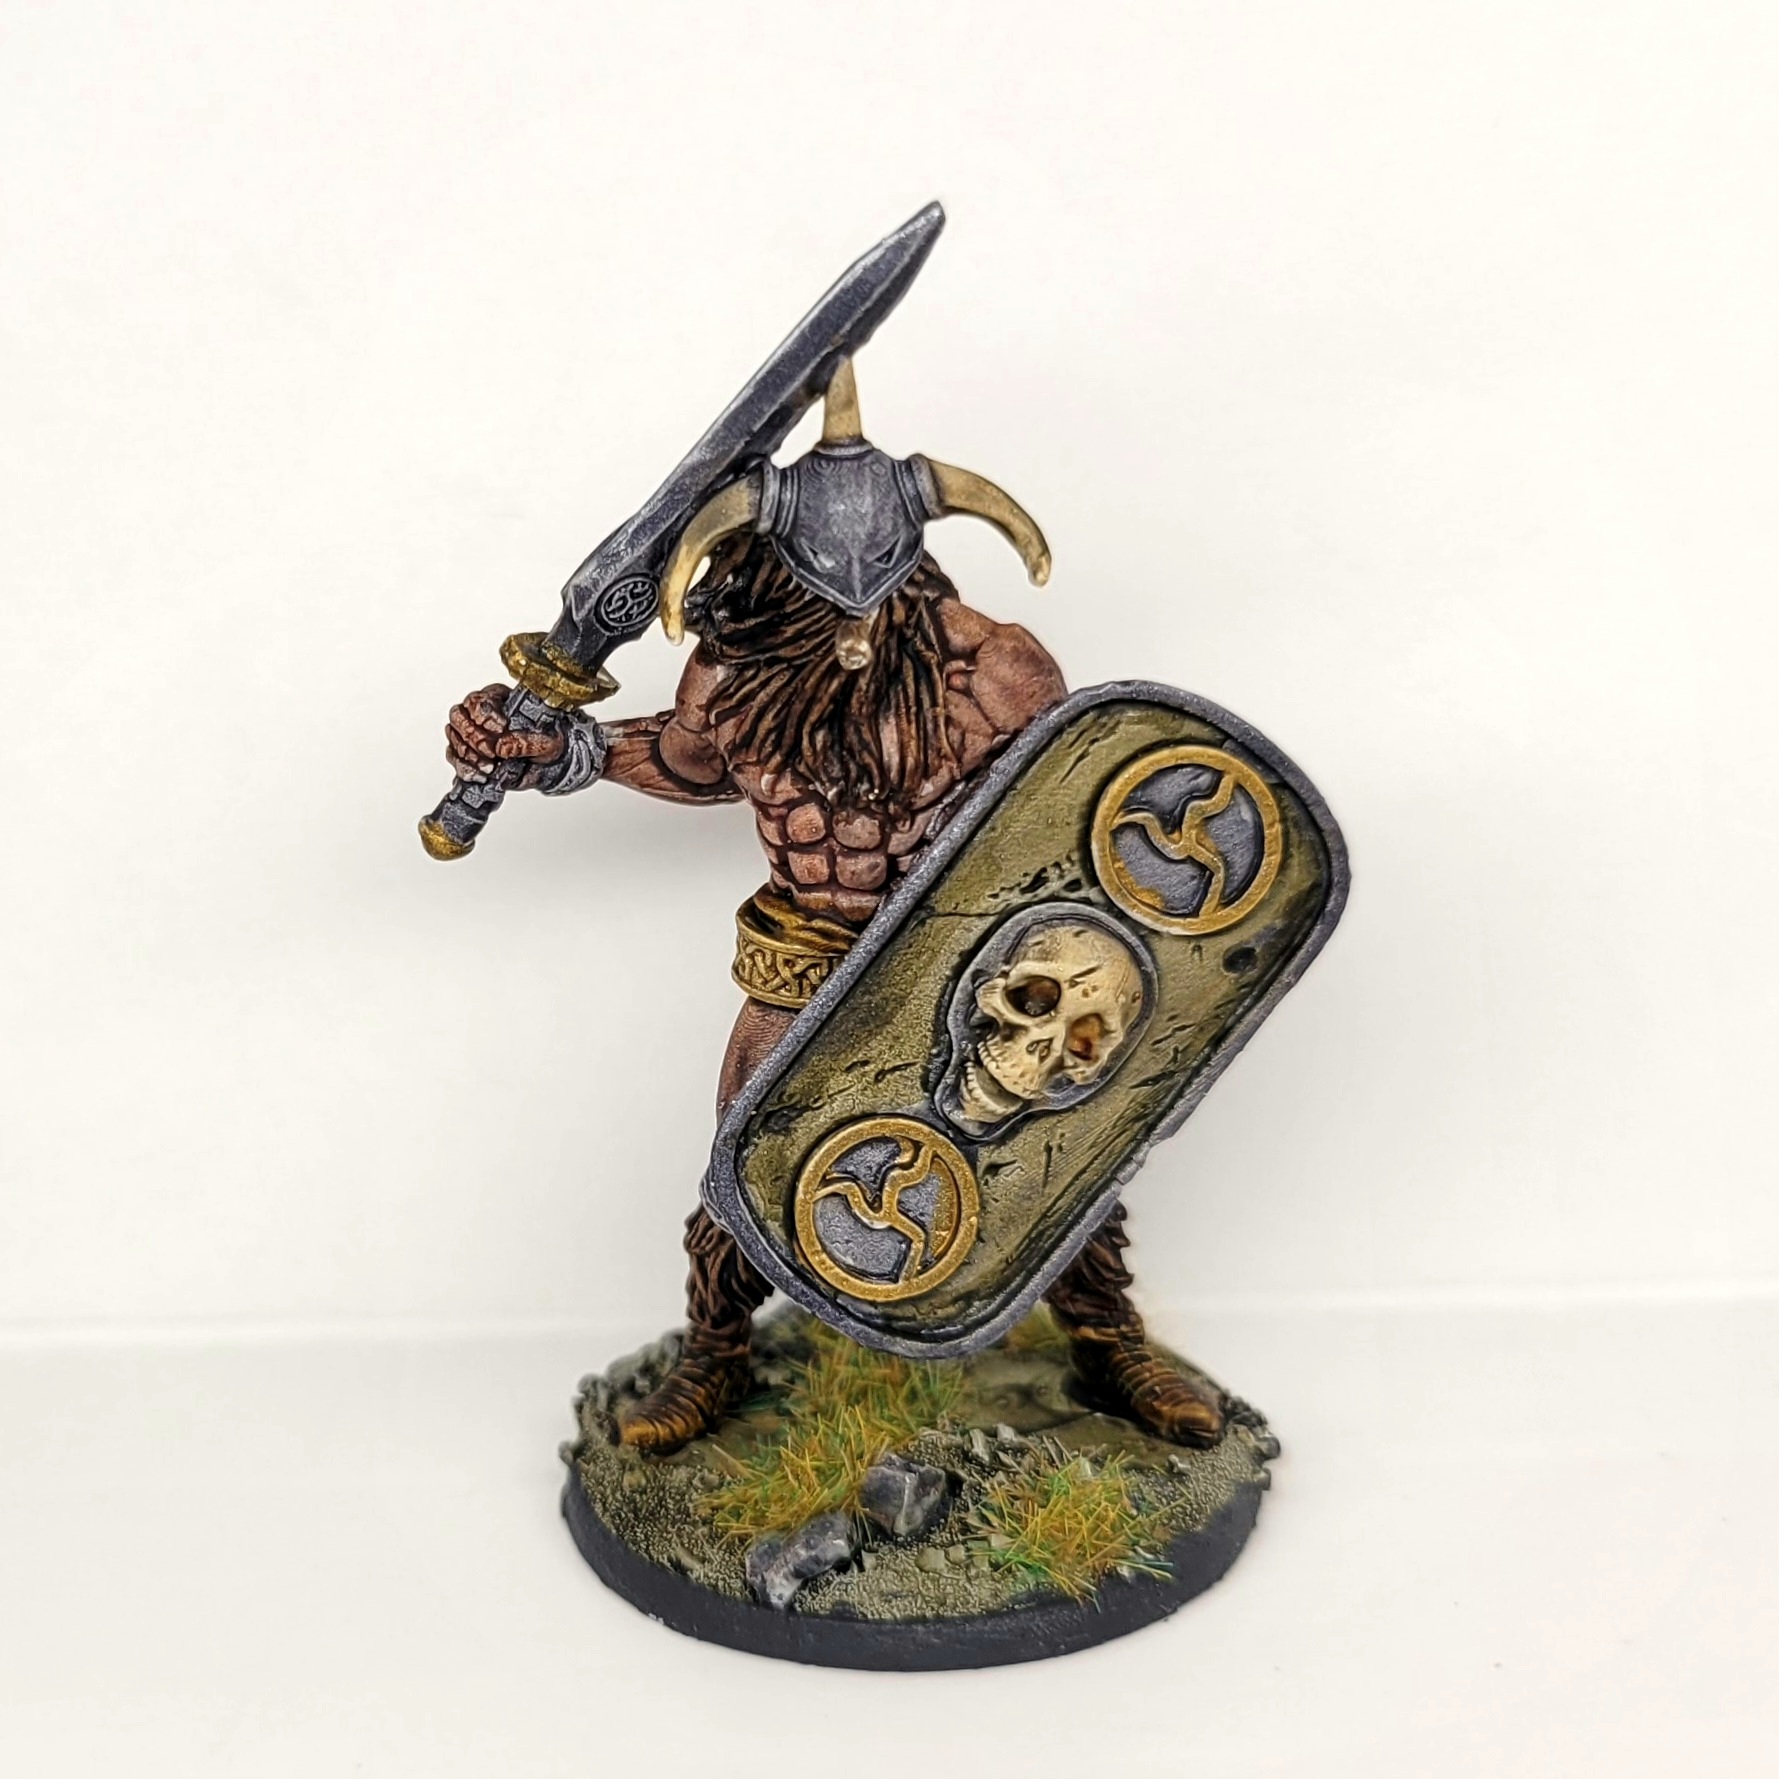
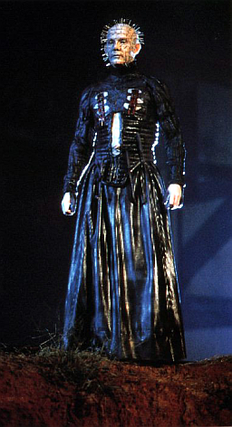
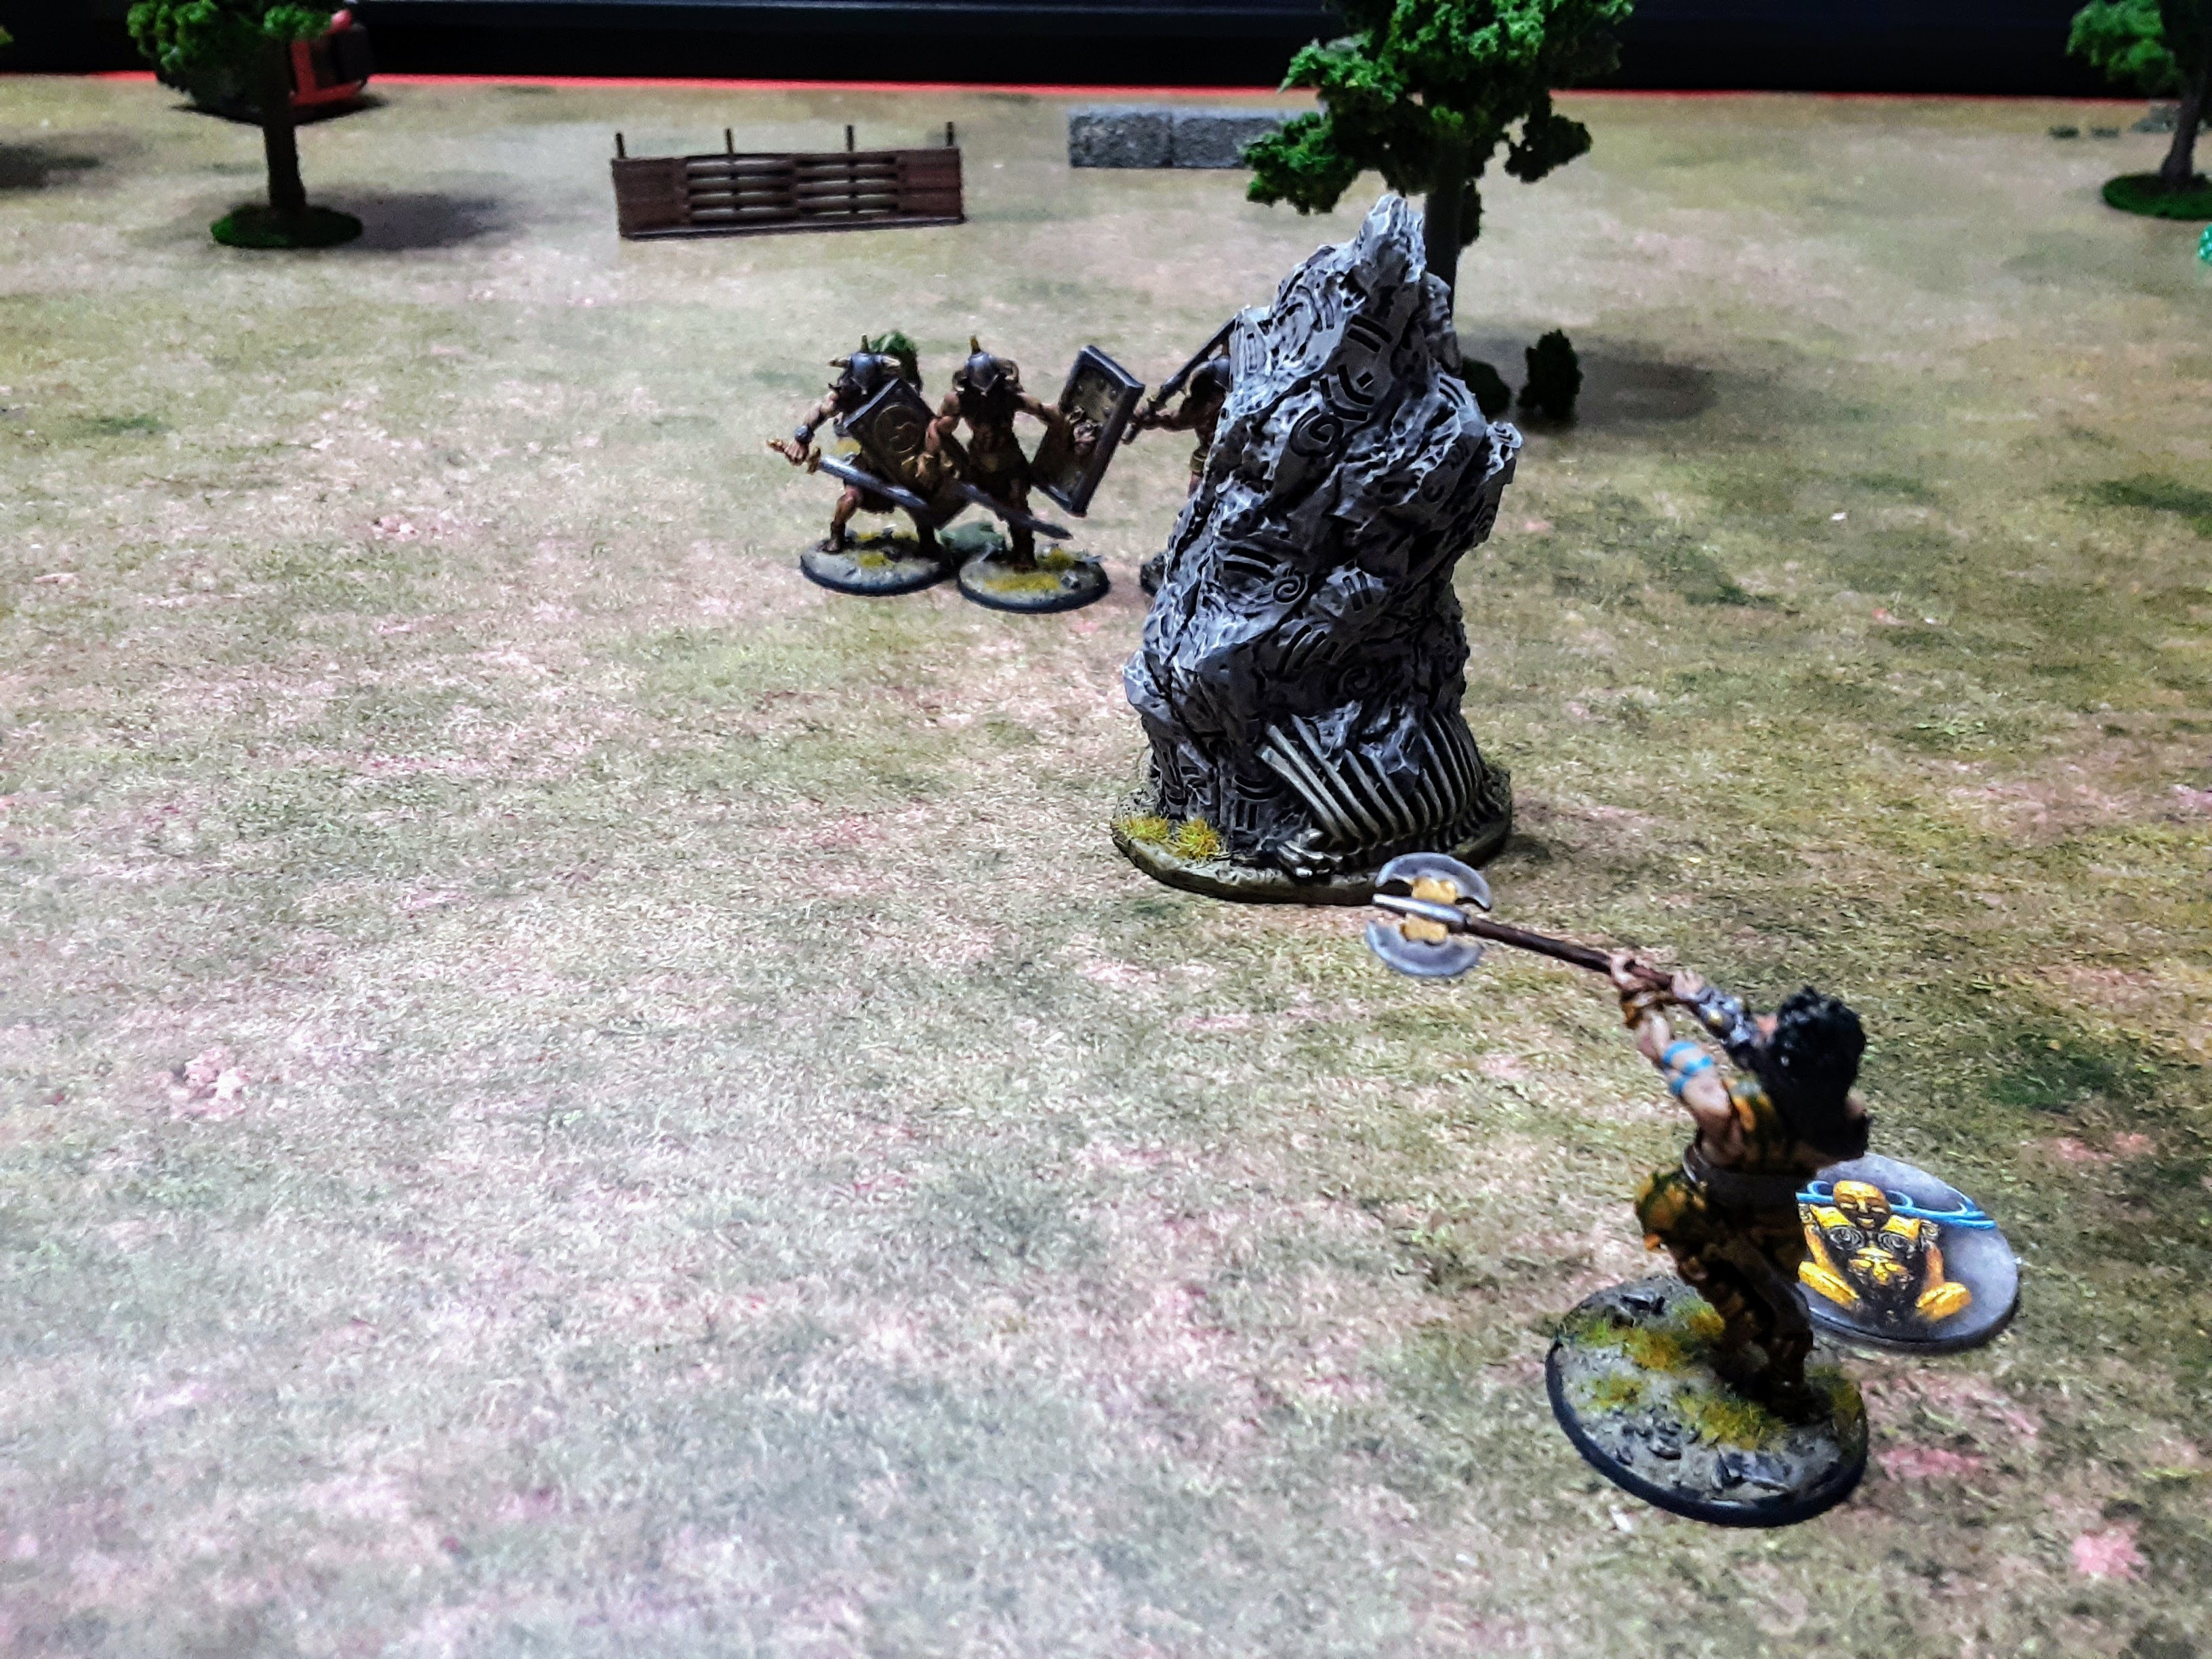
 A rare image of Slaine the King beginning a Warp Spasm
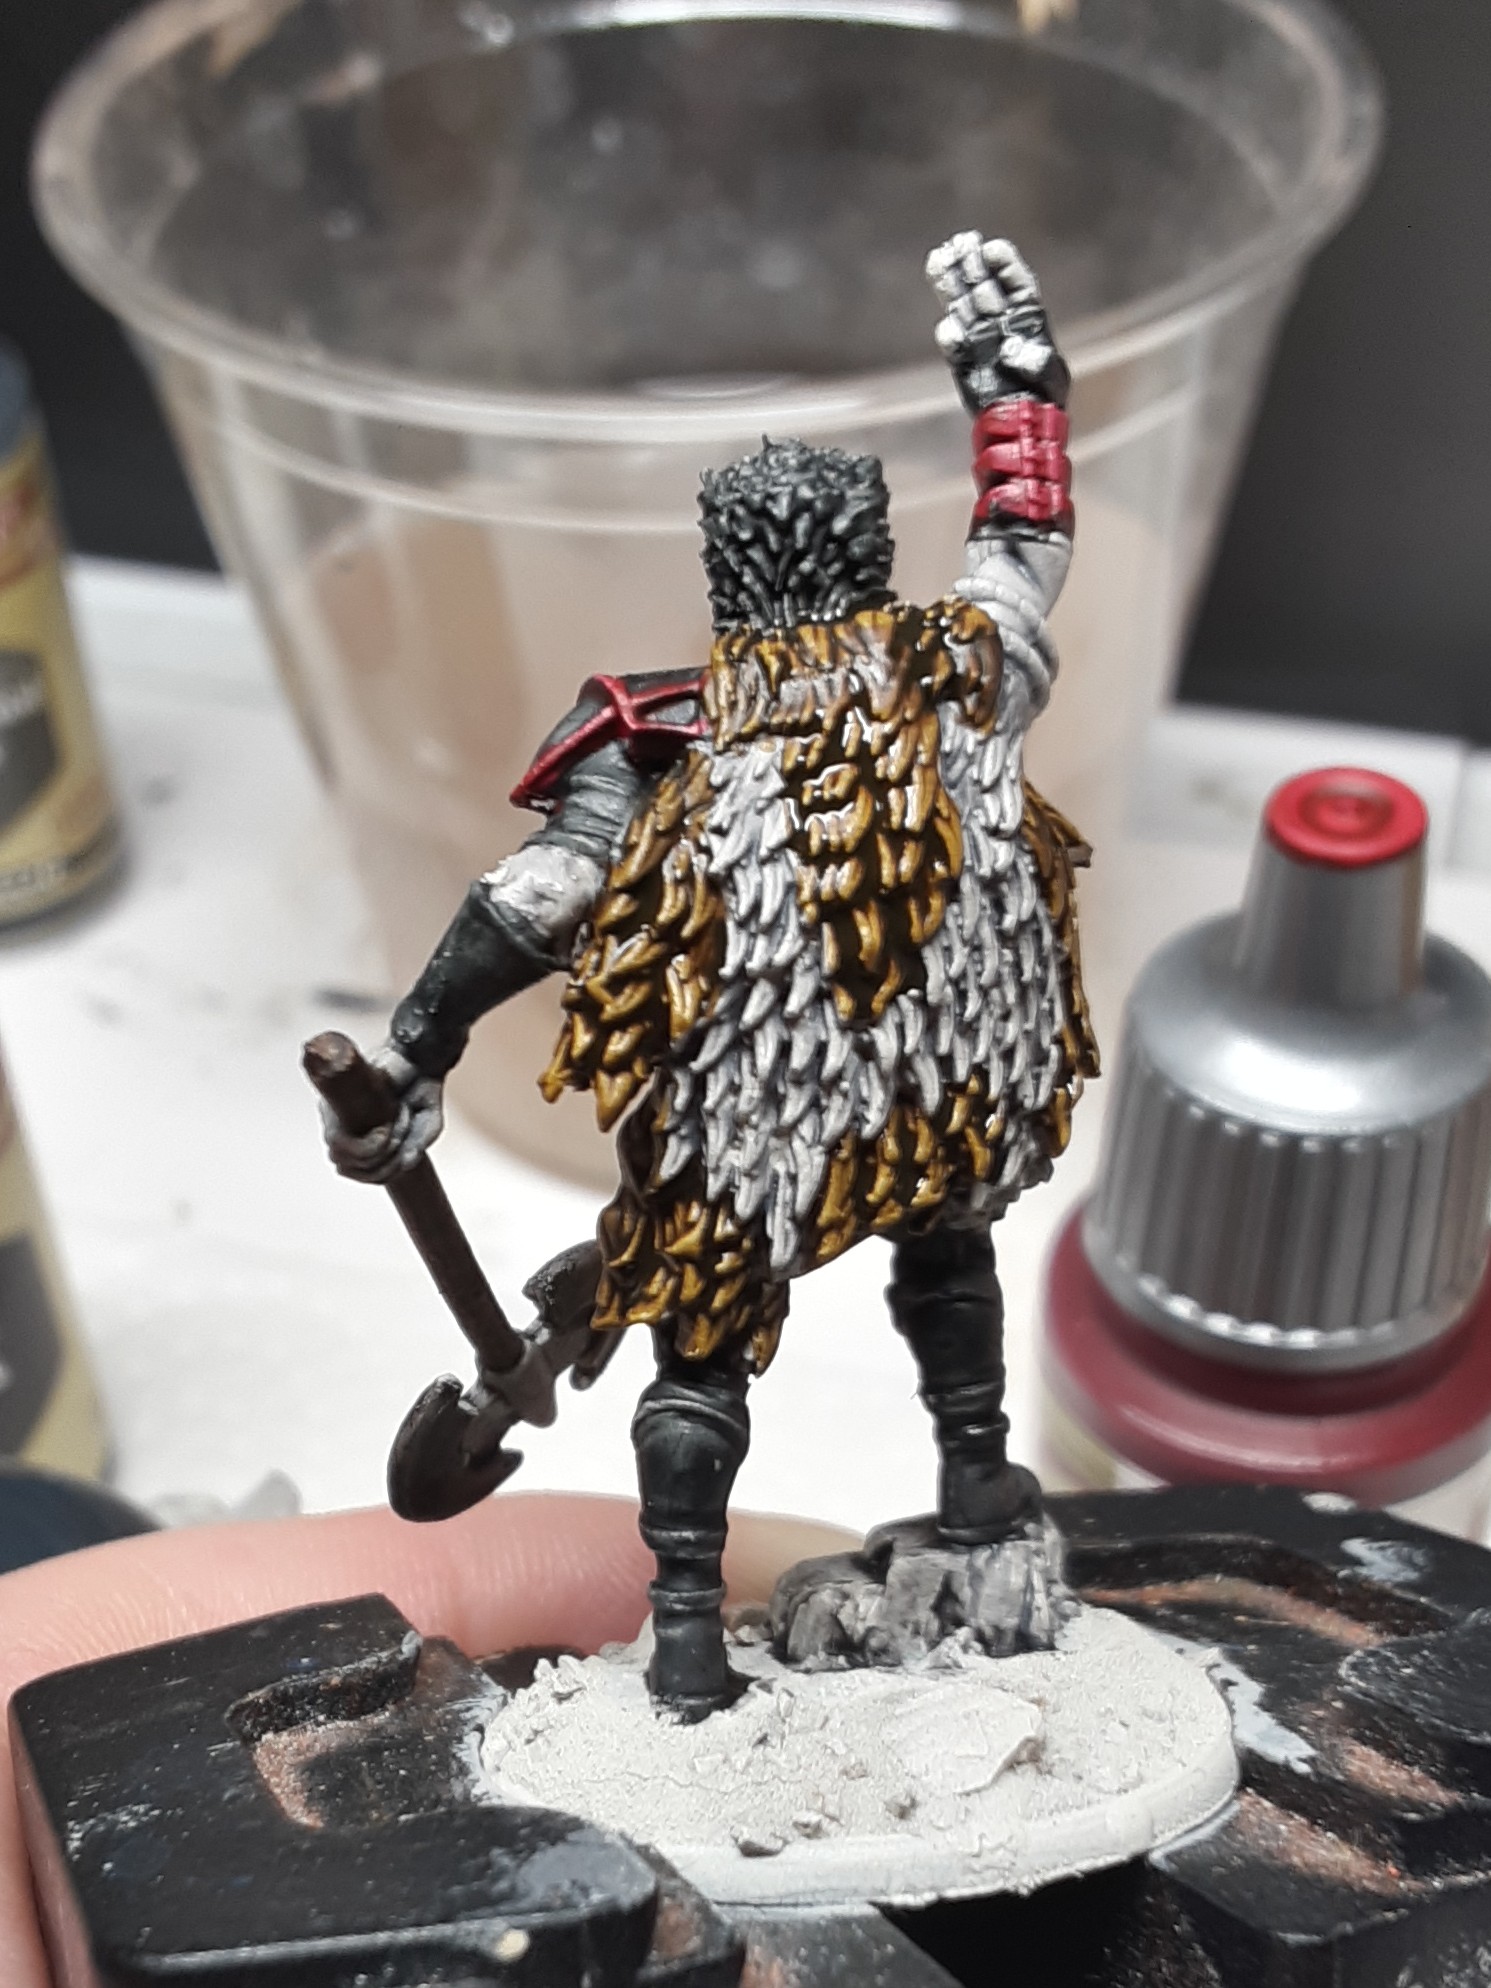
Time to finish up the last mini that came with my pre-order, Slaine the King.
Like all of my minis for this project, the Slaine the King figure was primed Citadel WraithBone, washed with diluted Citadel Basilicannum Grey, and then drybrushed WraithBone.
I started out by using Basilicannum Grey and AP Dark Wood for Brainbiter.
Next up was the Hellraiser phase of the project. There is quite a bit of black leather on this figure and I wanted to give it some some different shades to hopefully make the harness stand out from the larger pieces of clothing. I decided to use Citadel Black Templar for the larger areas and hair. AP Grimblack for was used for the harness. I think this worked well giving them slightly different shades of black. What sights these shades have shown me.
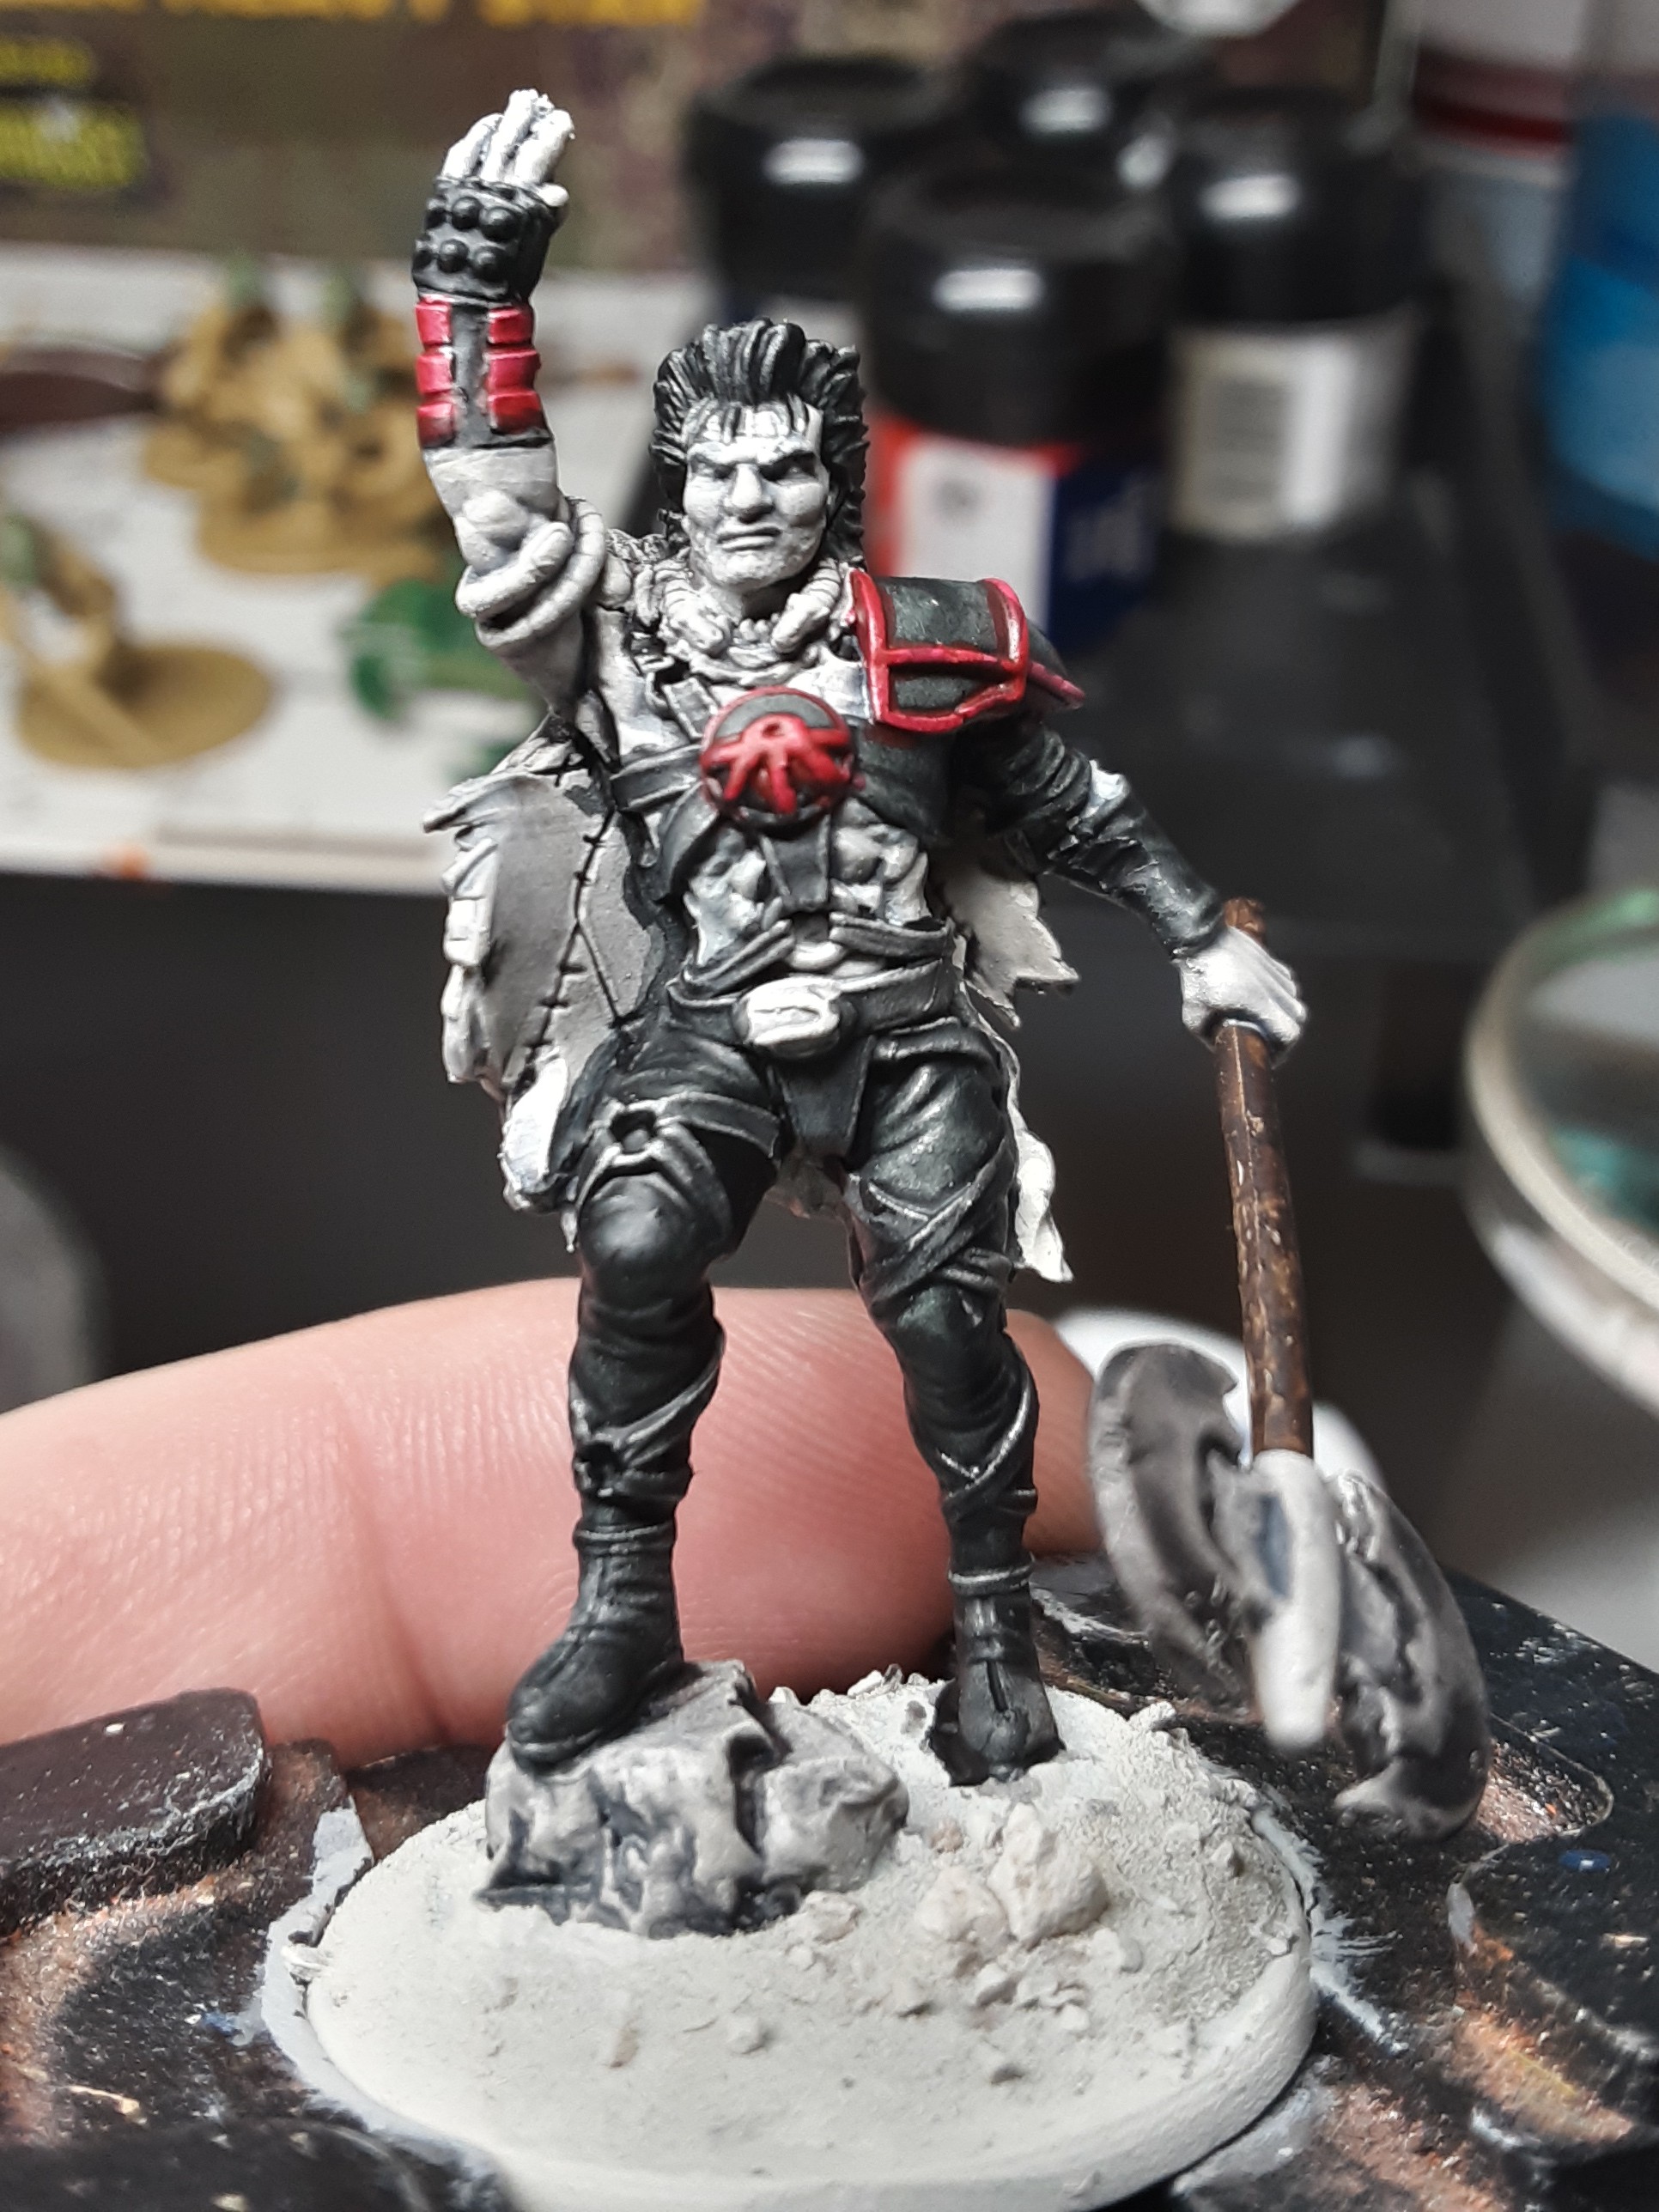
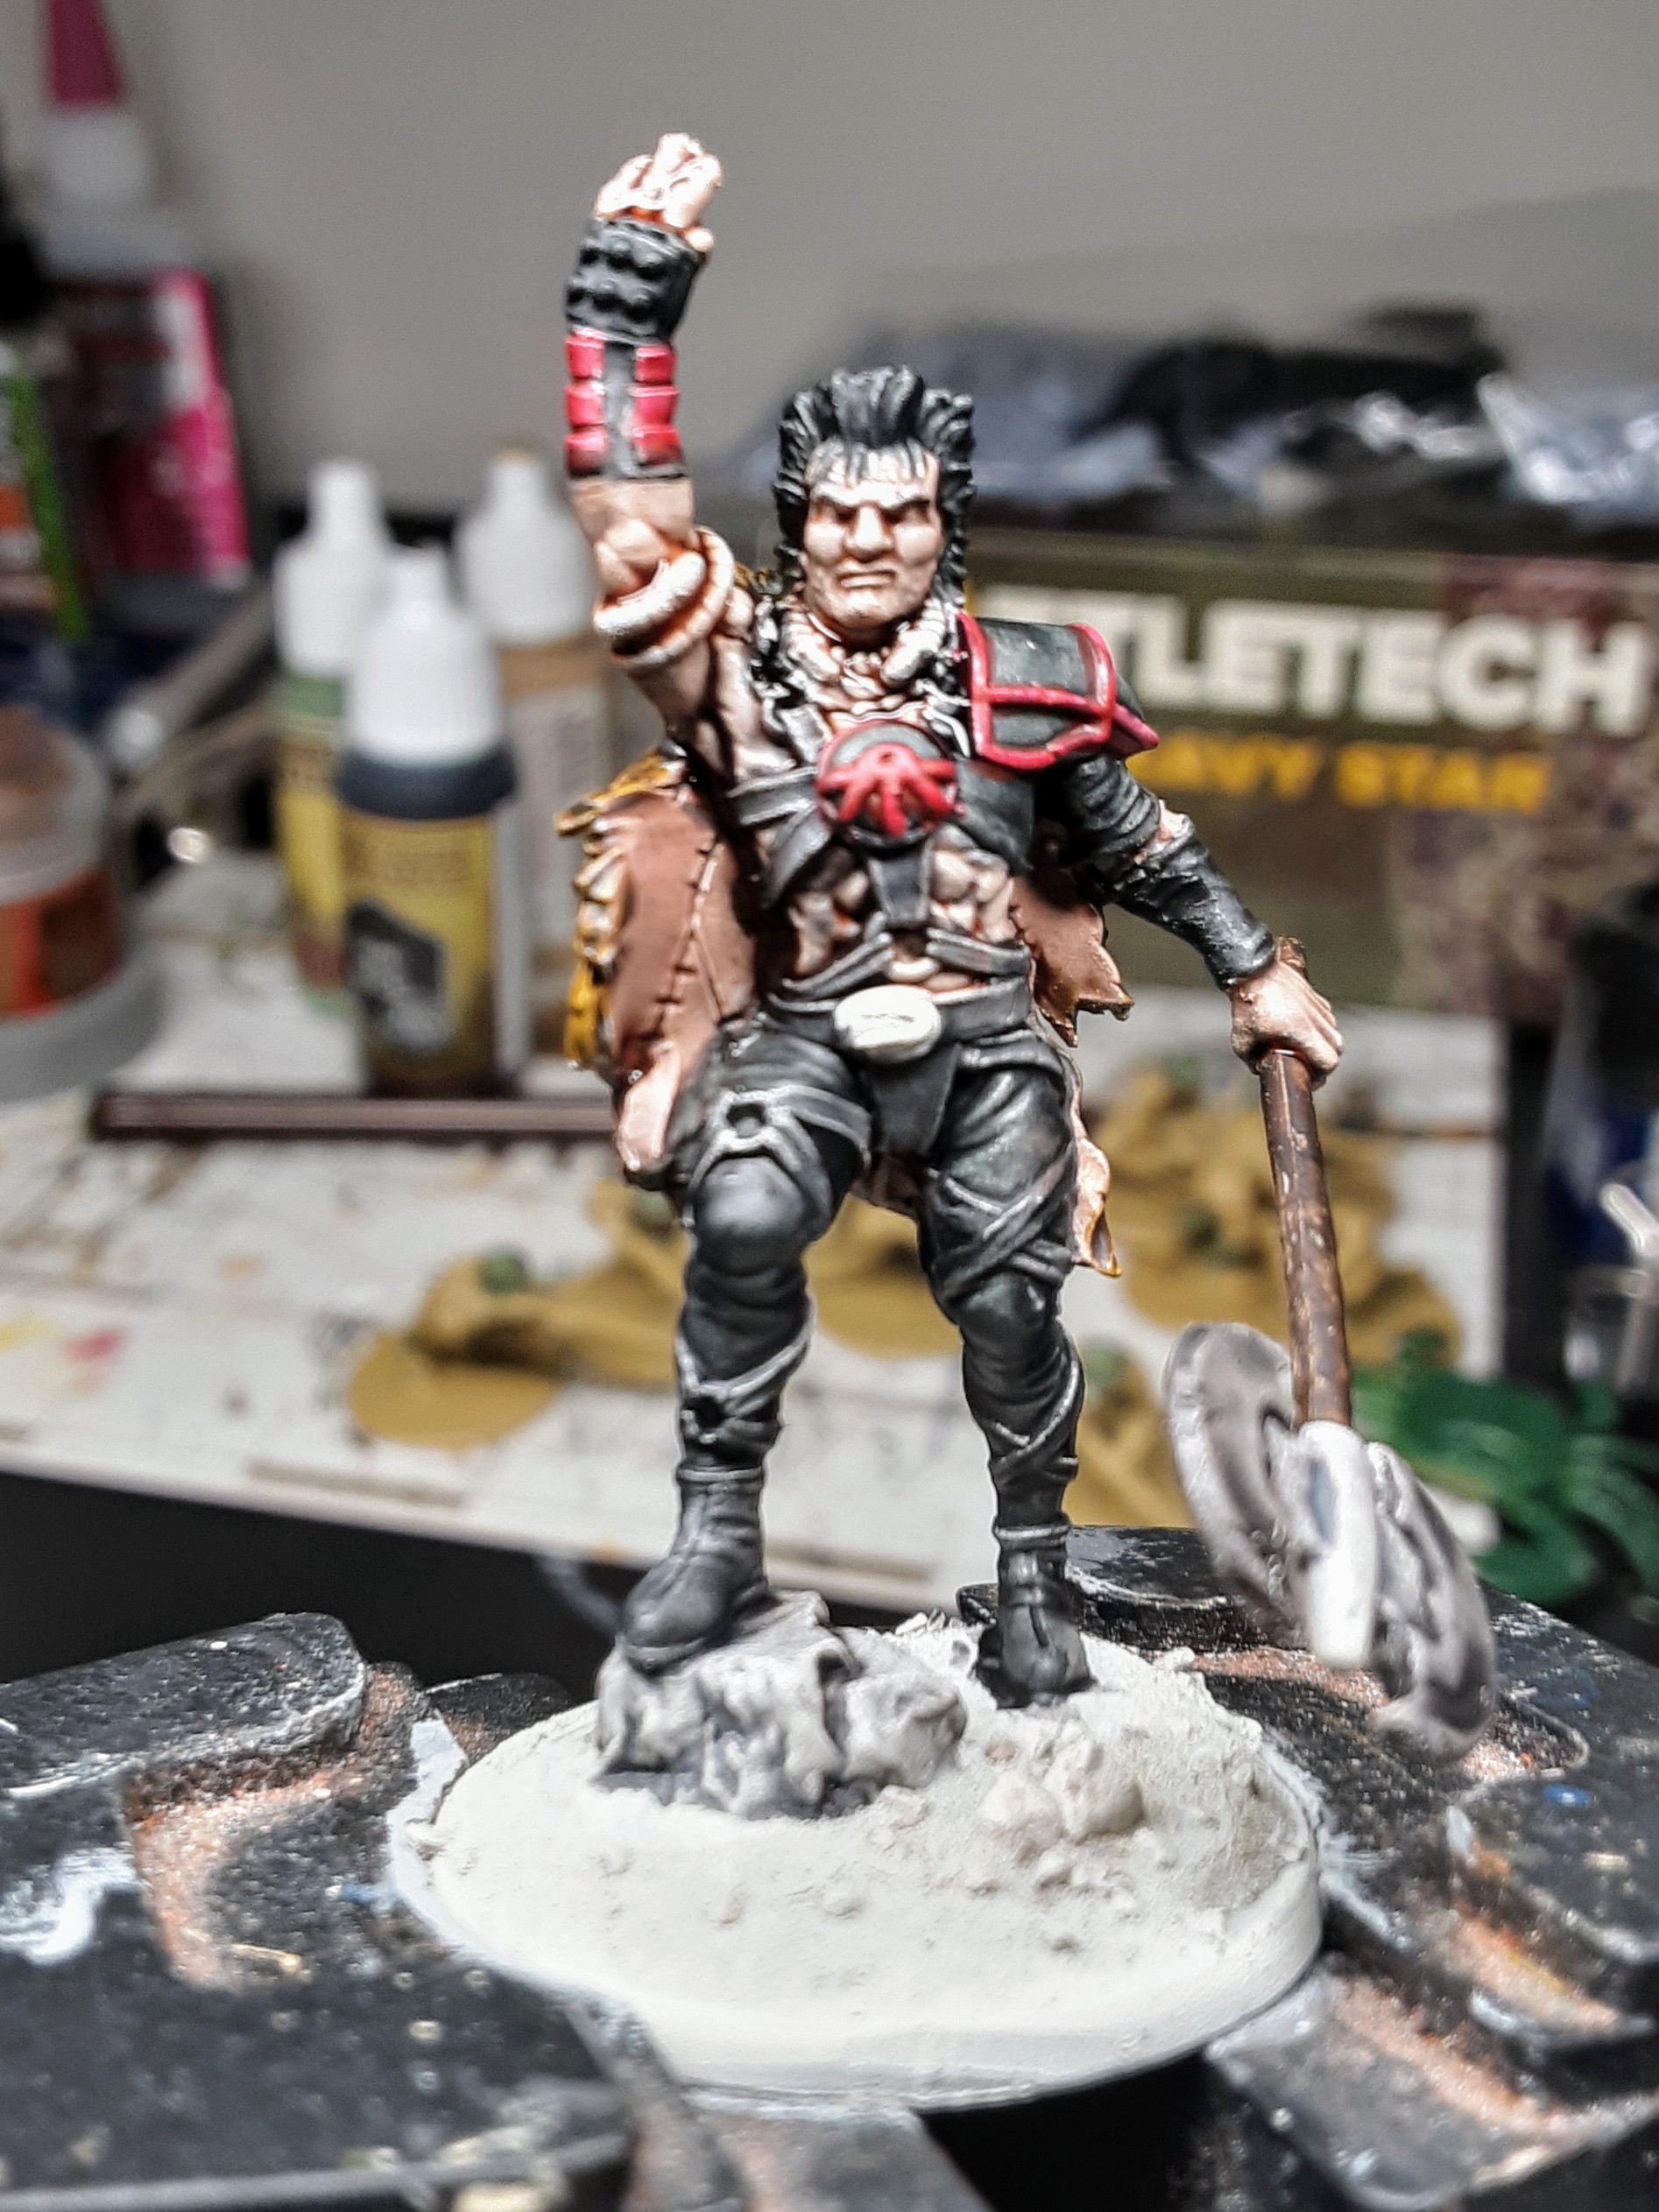
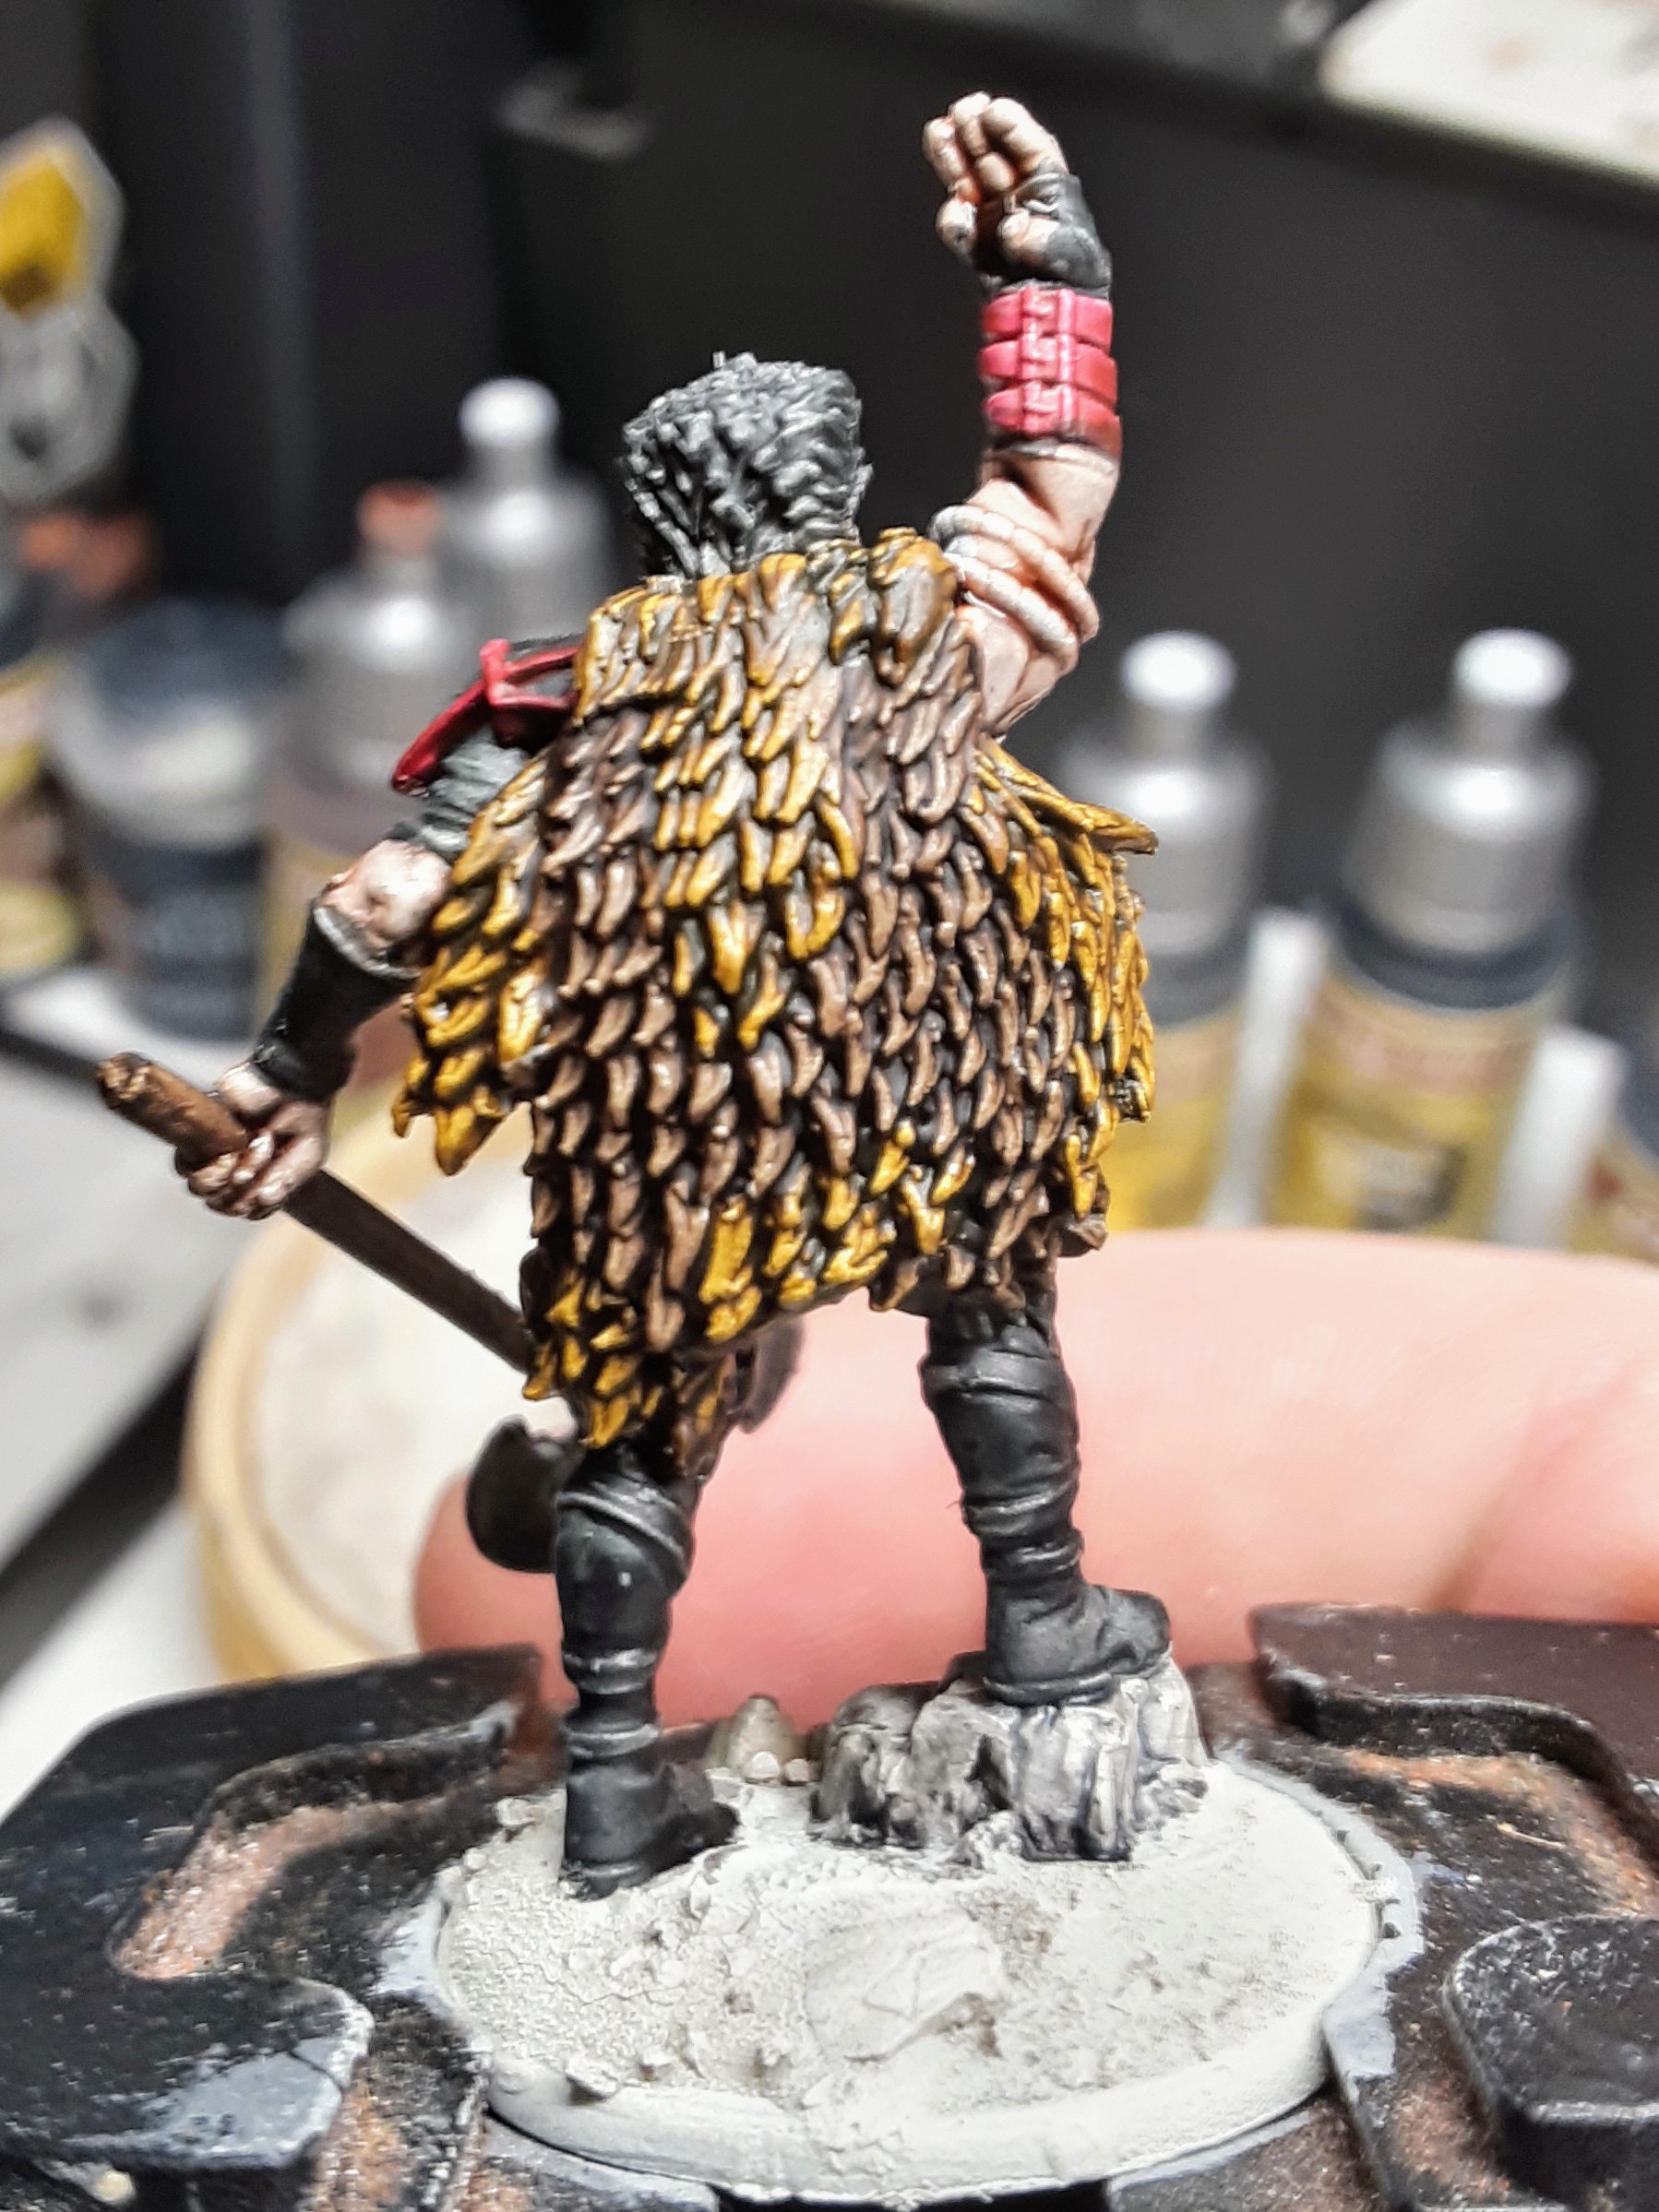
Red details were next. I used Citadel WraithBone paint to touch up areas where the black spilled onto details. This wasn’t too difficult using AP Slaughter Red. I think the color really helped make the mini pop.
I noticed that Slaine’s cloak was made from multiple pieces of patched together furs. I decided to use two different shades of brown on the cloak. These were Citadel Snakebite Leather followed by AP Dark Wood. I used Snakebite Leather first but noticed it wasn’t drying very quick and decided to hold off on adding Dark Wood.
I painted the flesh and skin of the hides while I waited for Snakebite Leather to dry. I used AP Warrior Skin for the hide and AP Crusader Skin for, well the skin. I jumped back to the fur and added the Dark Wood.
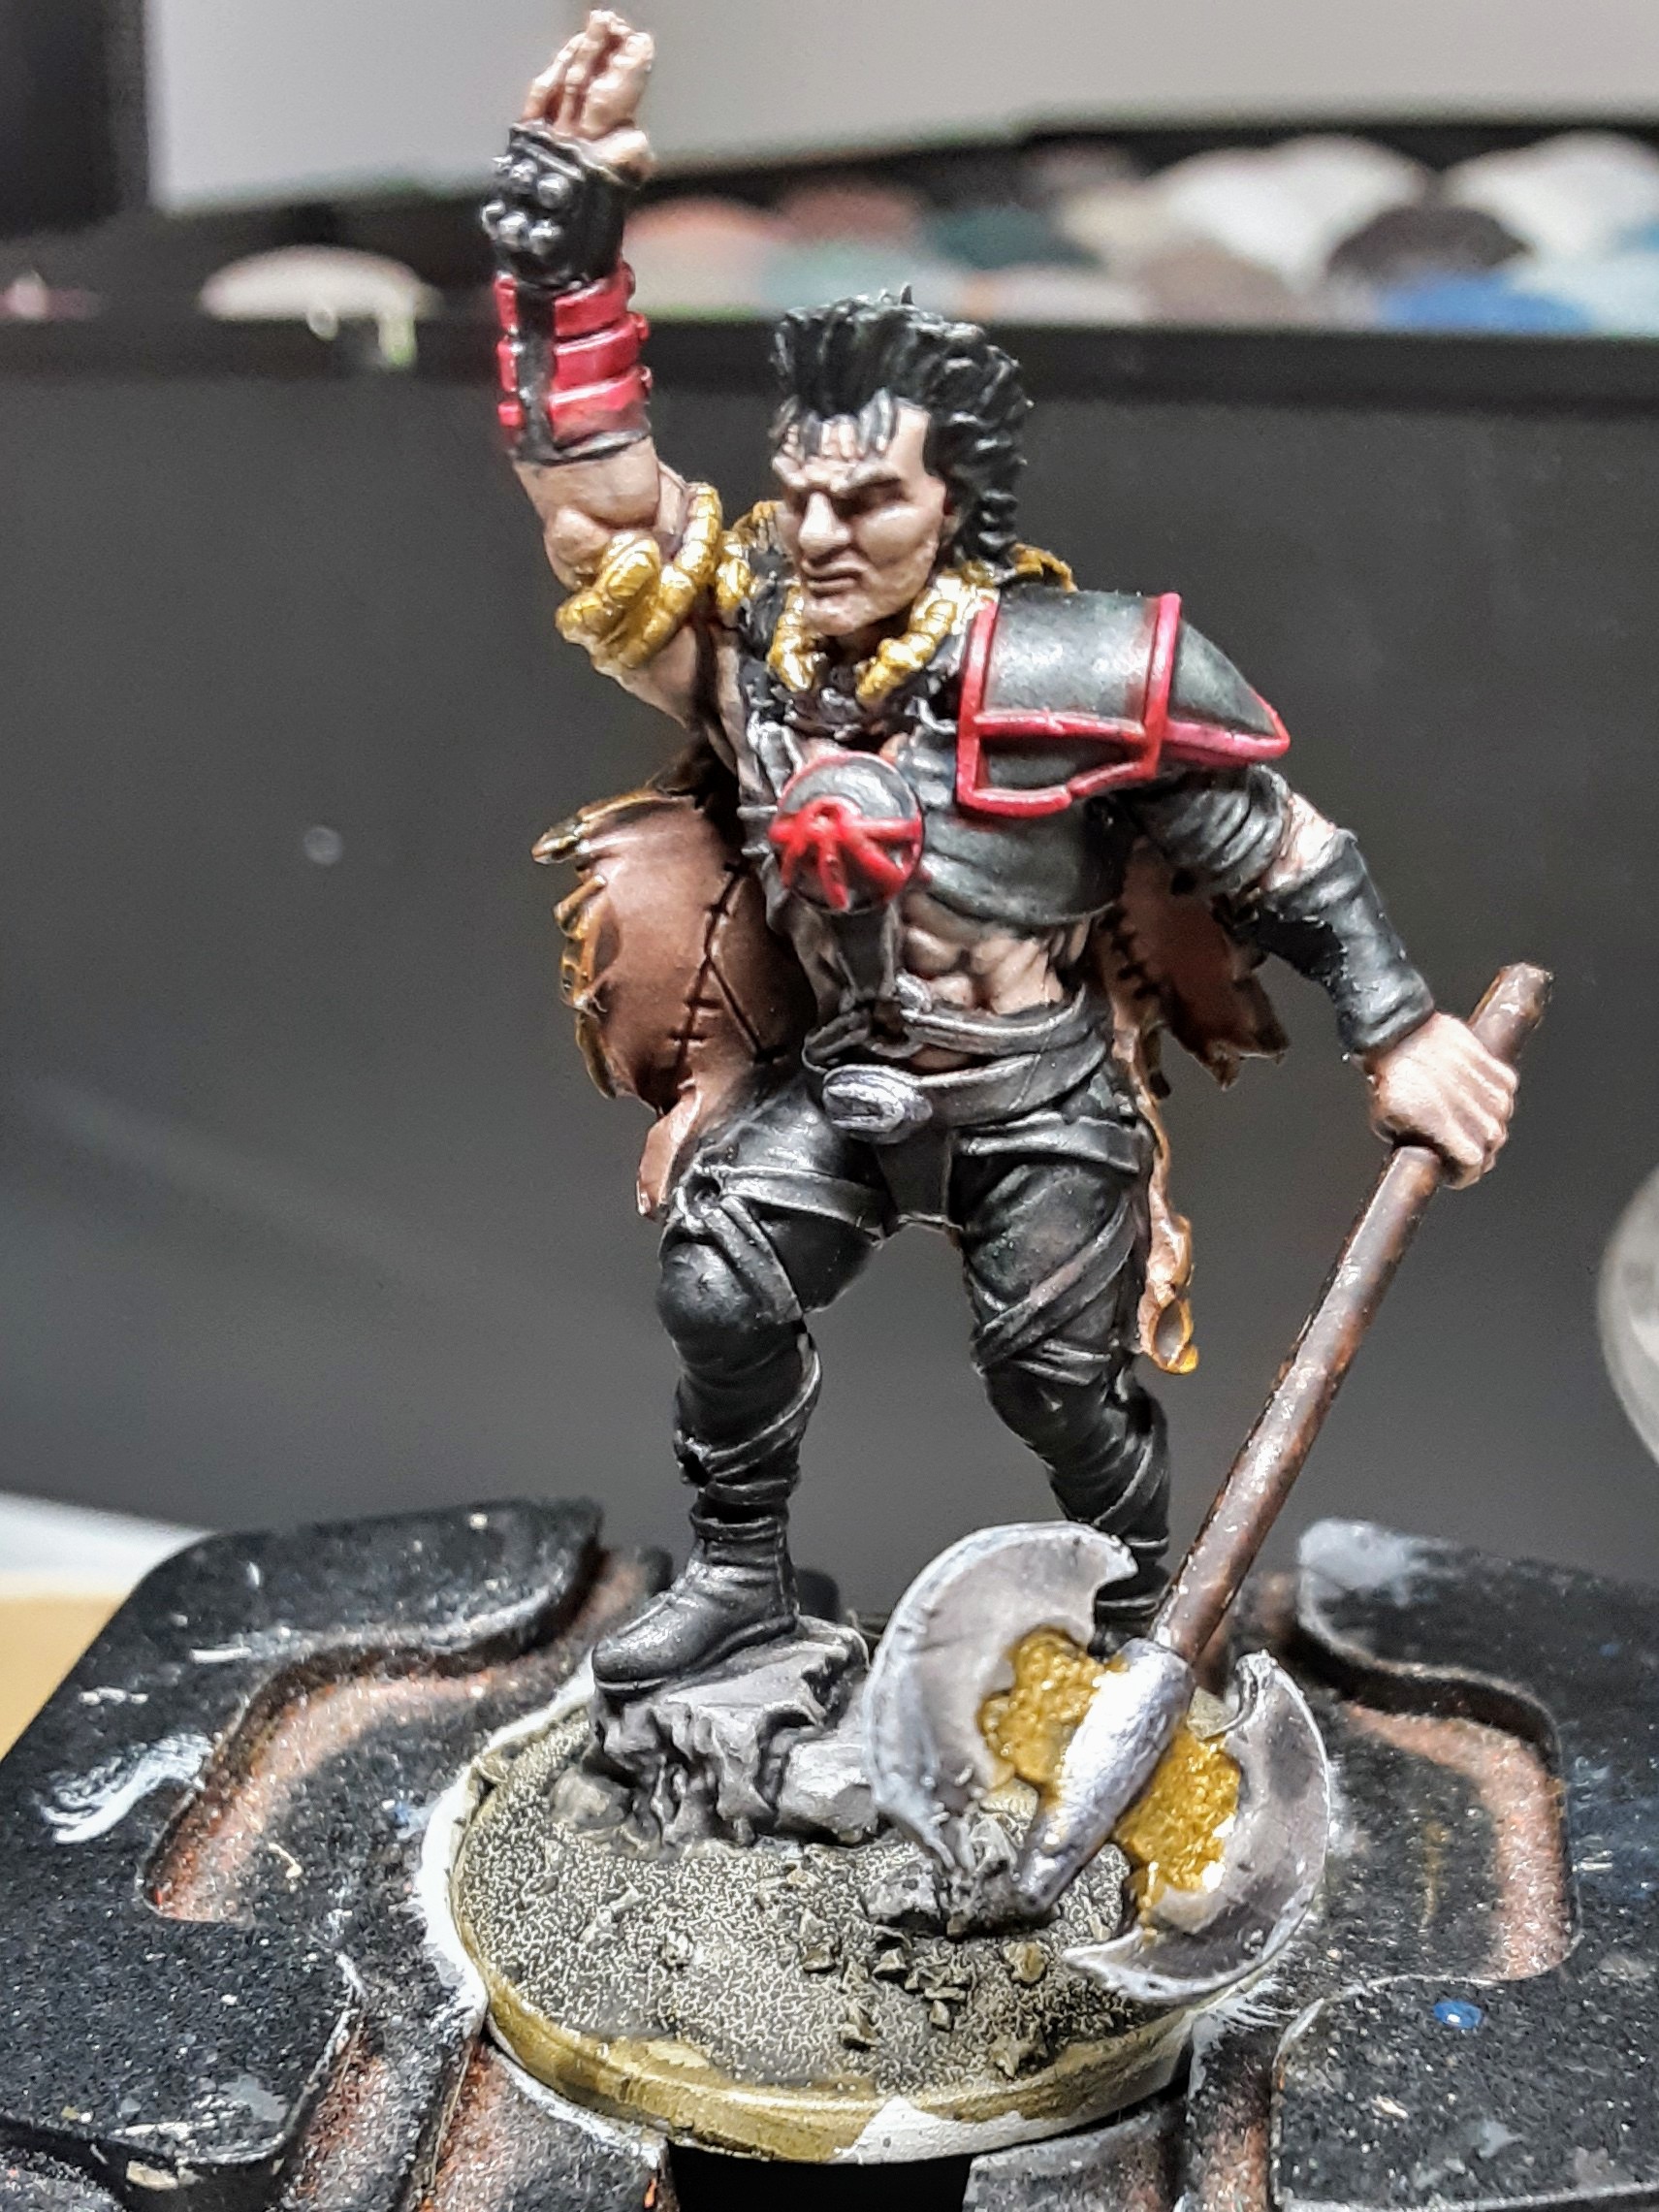
Once again, I did some touch up with Citadel WraithBone to clean up the model before adding metallics. I used AP Hoplite Gold and Broadsword Silver.
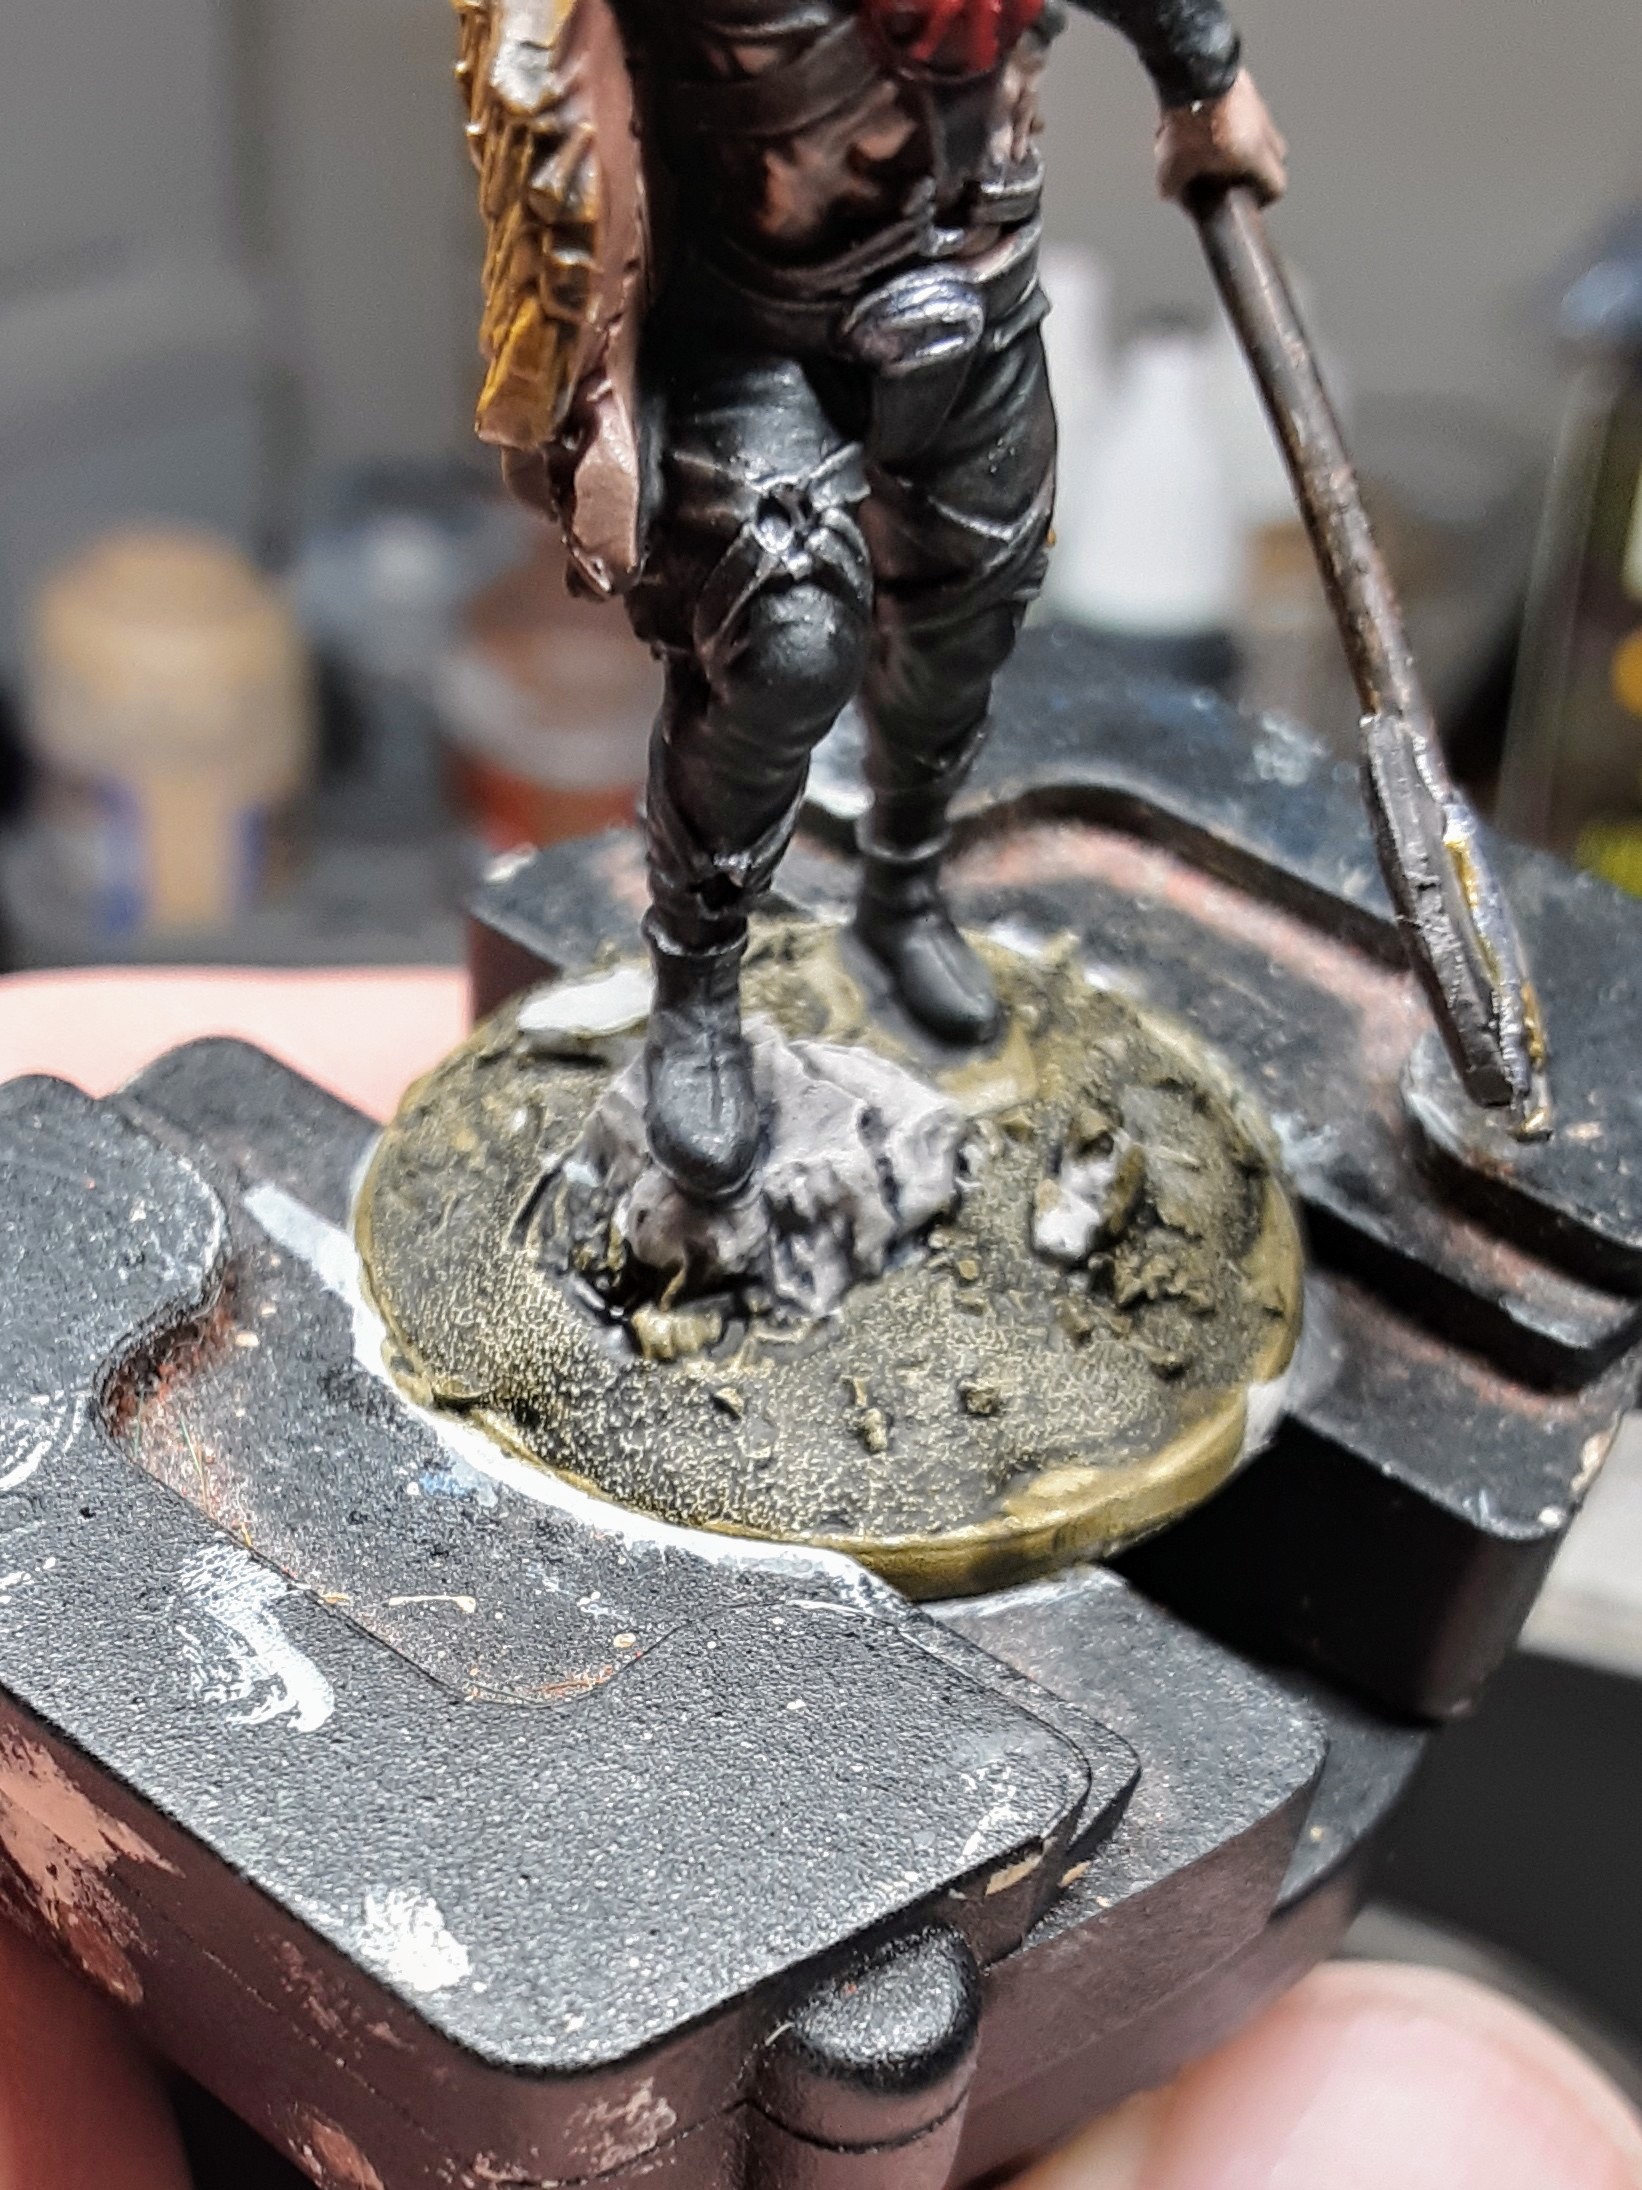
I used my new favorite color for the base, AP Desolate Brown.
After these base colors were down I did very little highlighting. I used AP Ash Grey on Brainbiter and then dry brushed the base with AP Skeleton Bone.
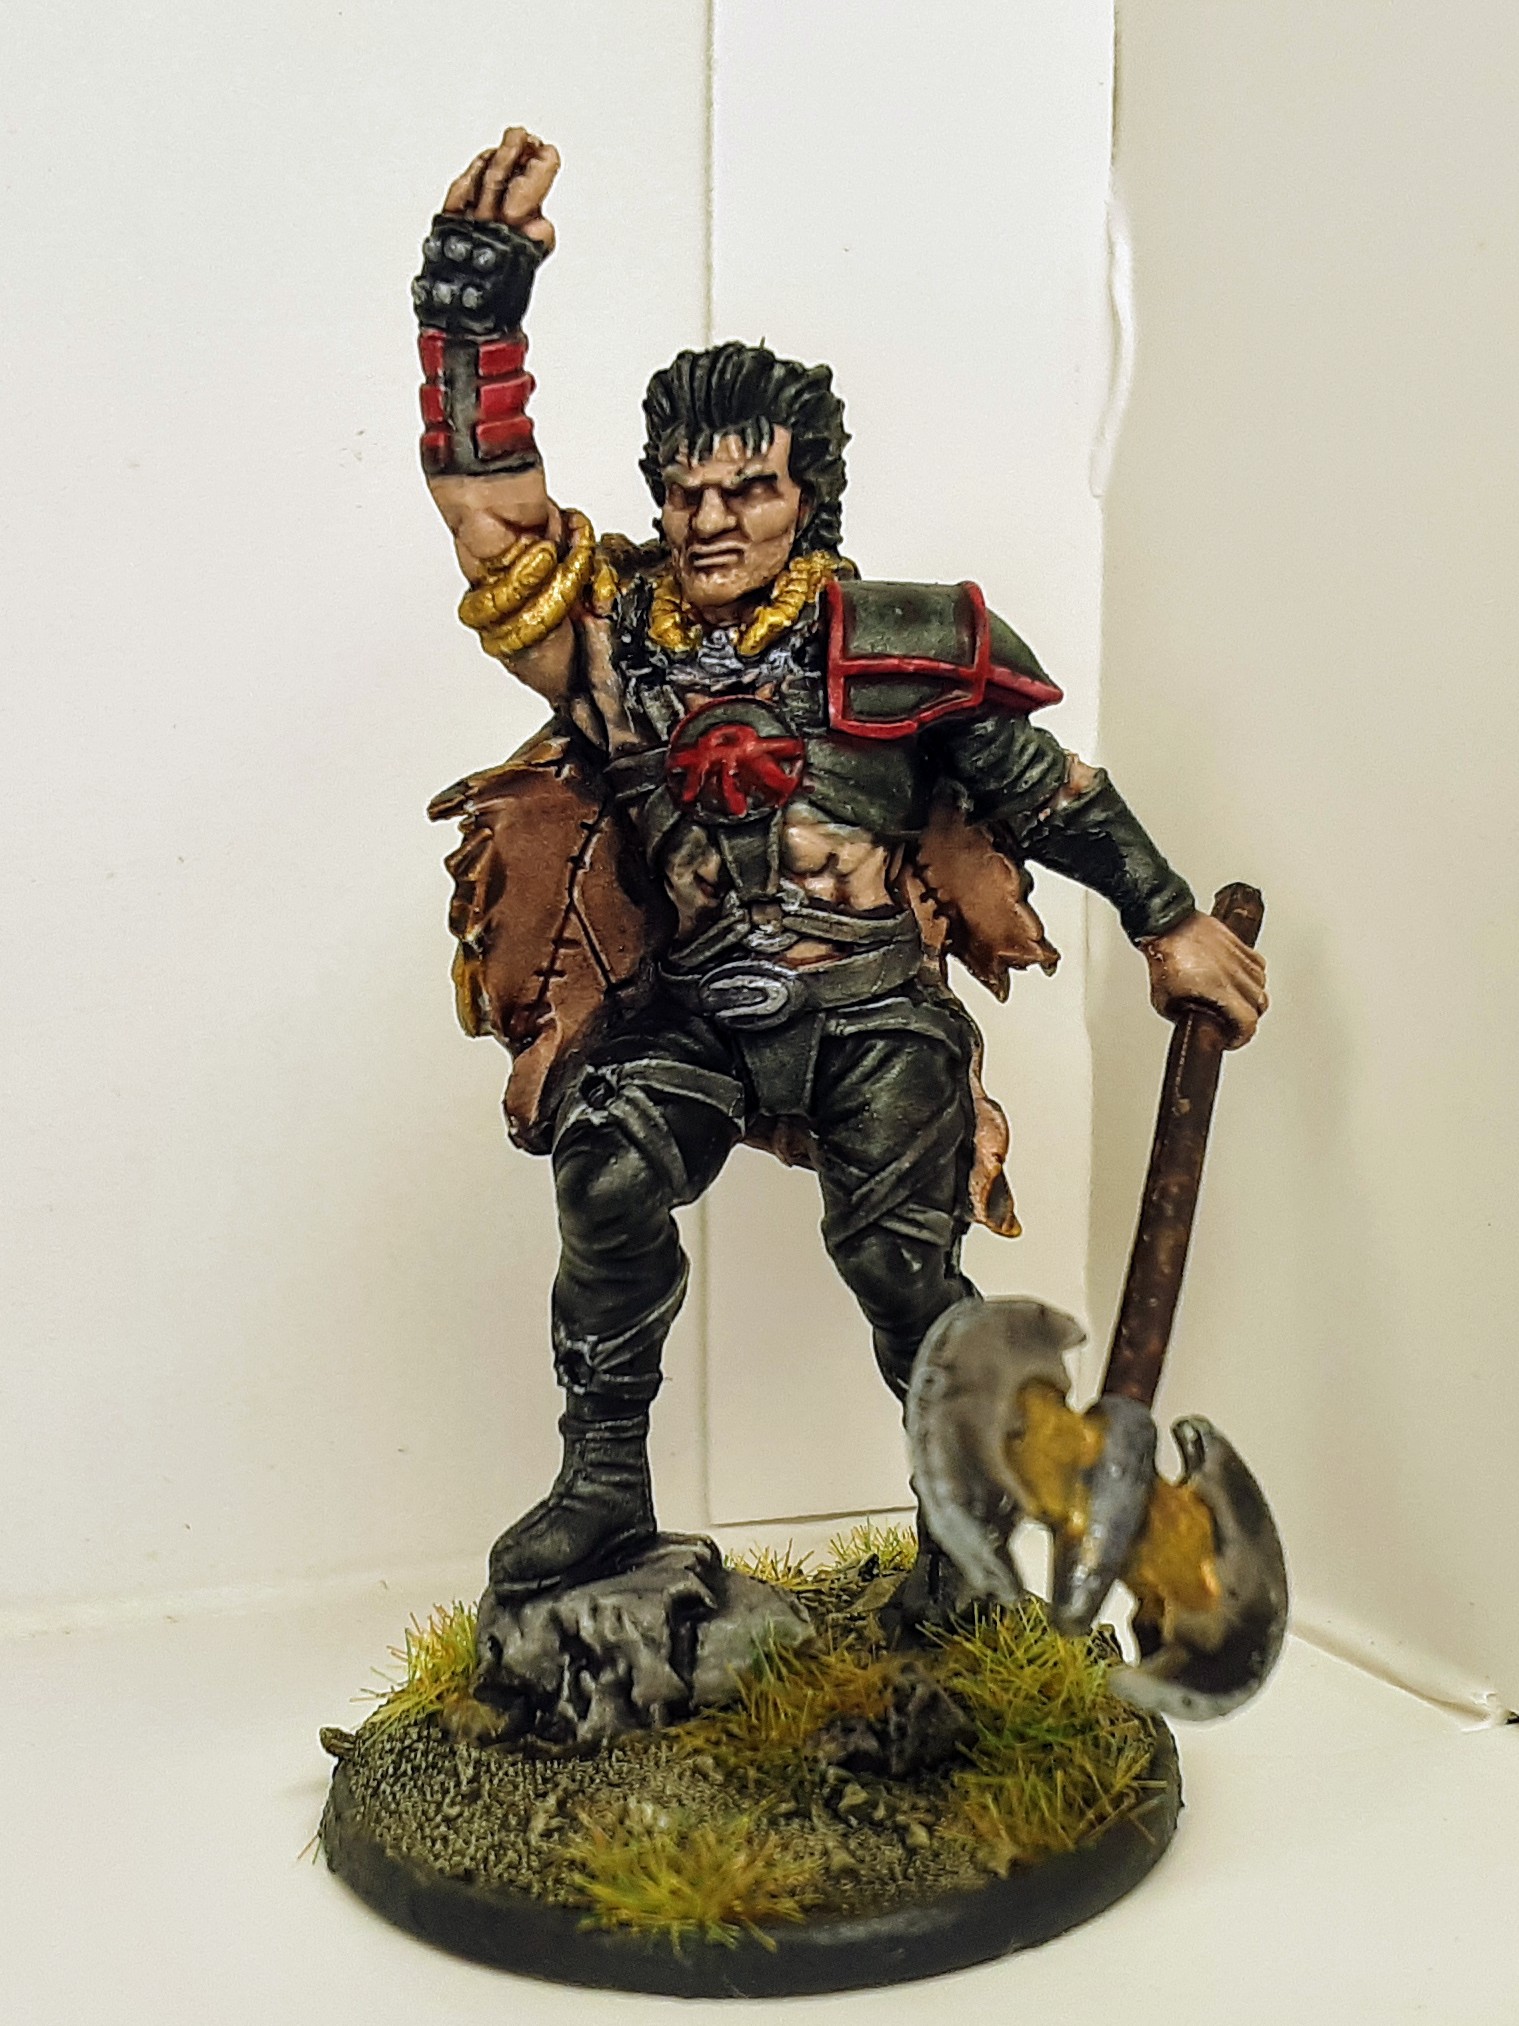
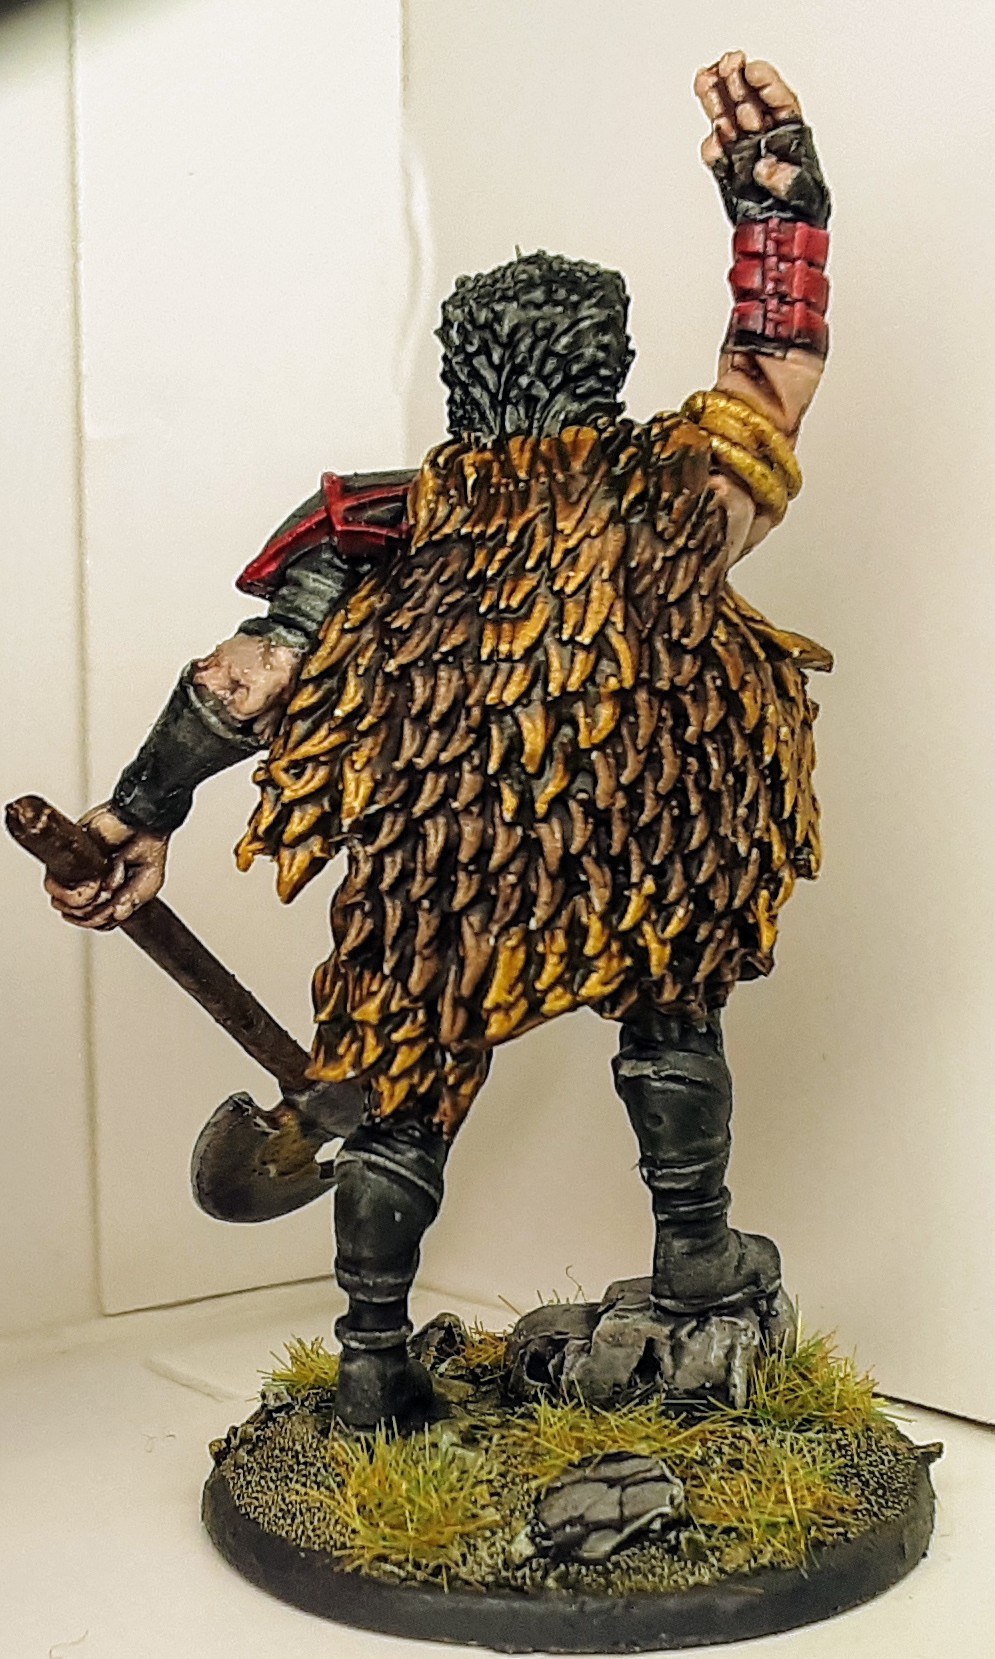
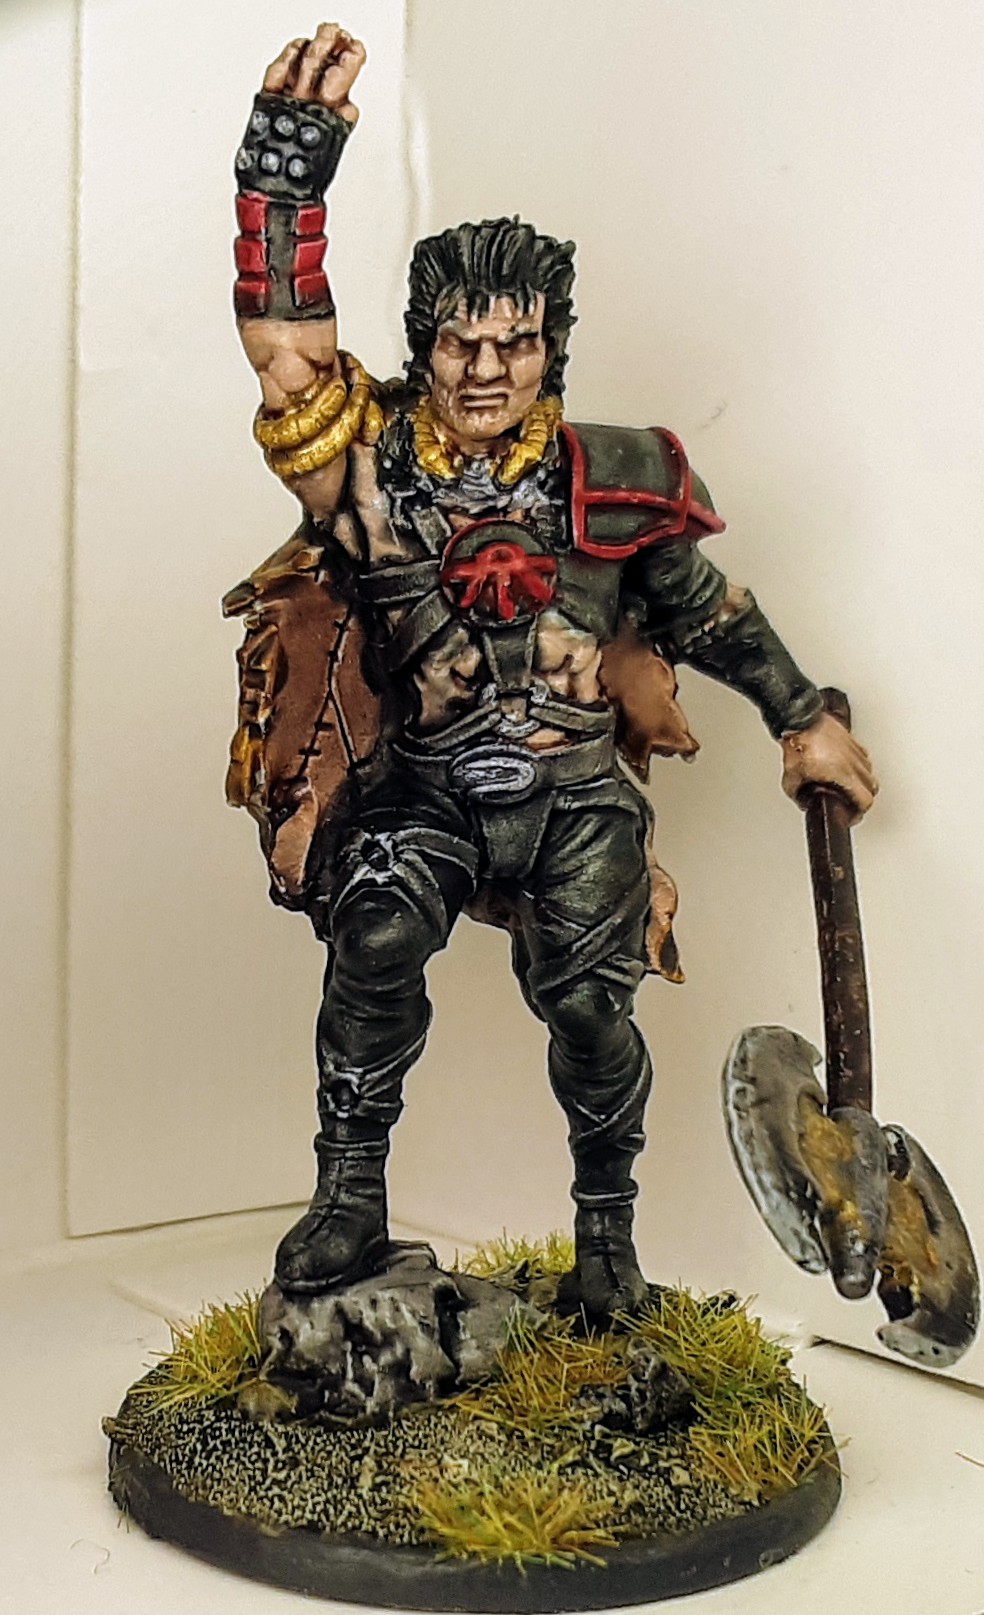
My son made the comment that Slaine was looking very punk when I showed him the finished mini. It’s a very 80s look for the King.
I was able to finish all of my minis, but I still need to play a few games to really call this project complete.
What’s the point of having minis for a game that you never play, right?
Have minis, will travel

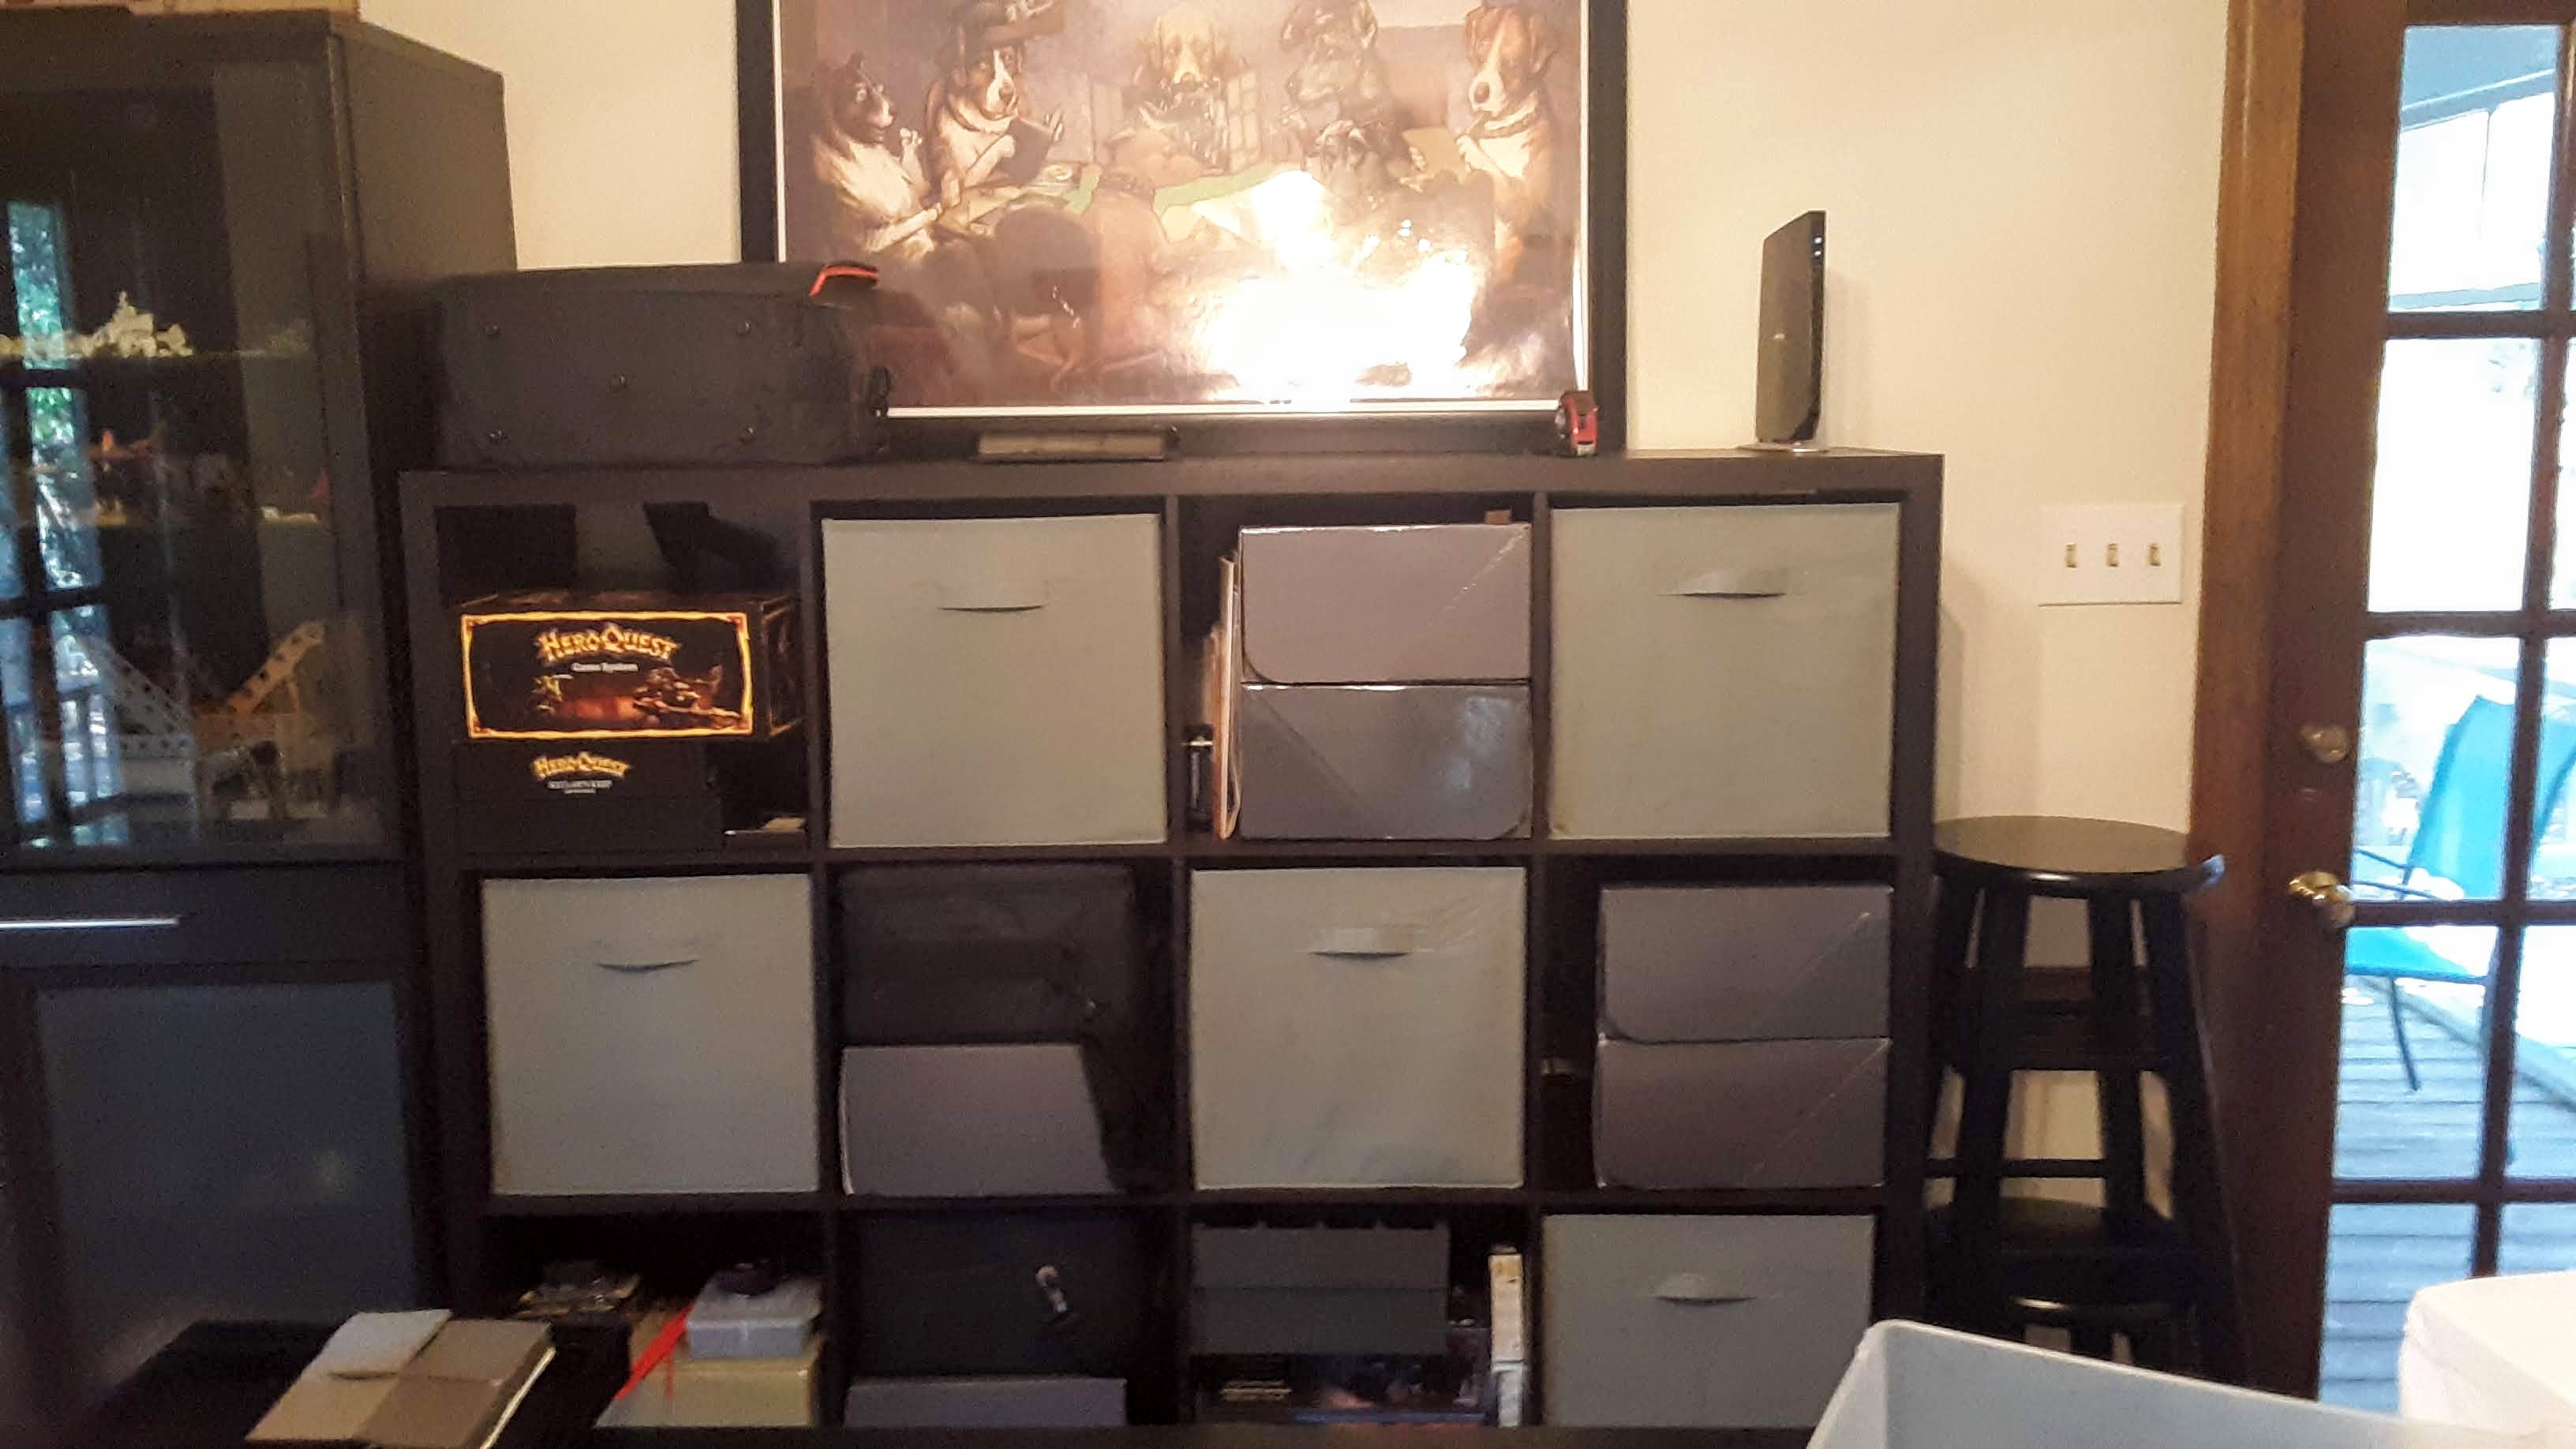
I mentioned a while back, in a previous entry, that I’m a bit cheap at times.
A few years ago I came across a large box of pluck foam designed for high end equipment and tool cases. I grabbed up as much as I could, knowing that my hoard of miniatures and games would continue to grow and storage solutions were not getting any cheaper. I’ve started a habit of using the box that minis come in for storage using this foam, and sometimes using cardboard (something I learned from the YouTube channel Wyloch’s Armory).
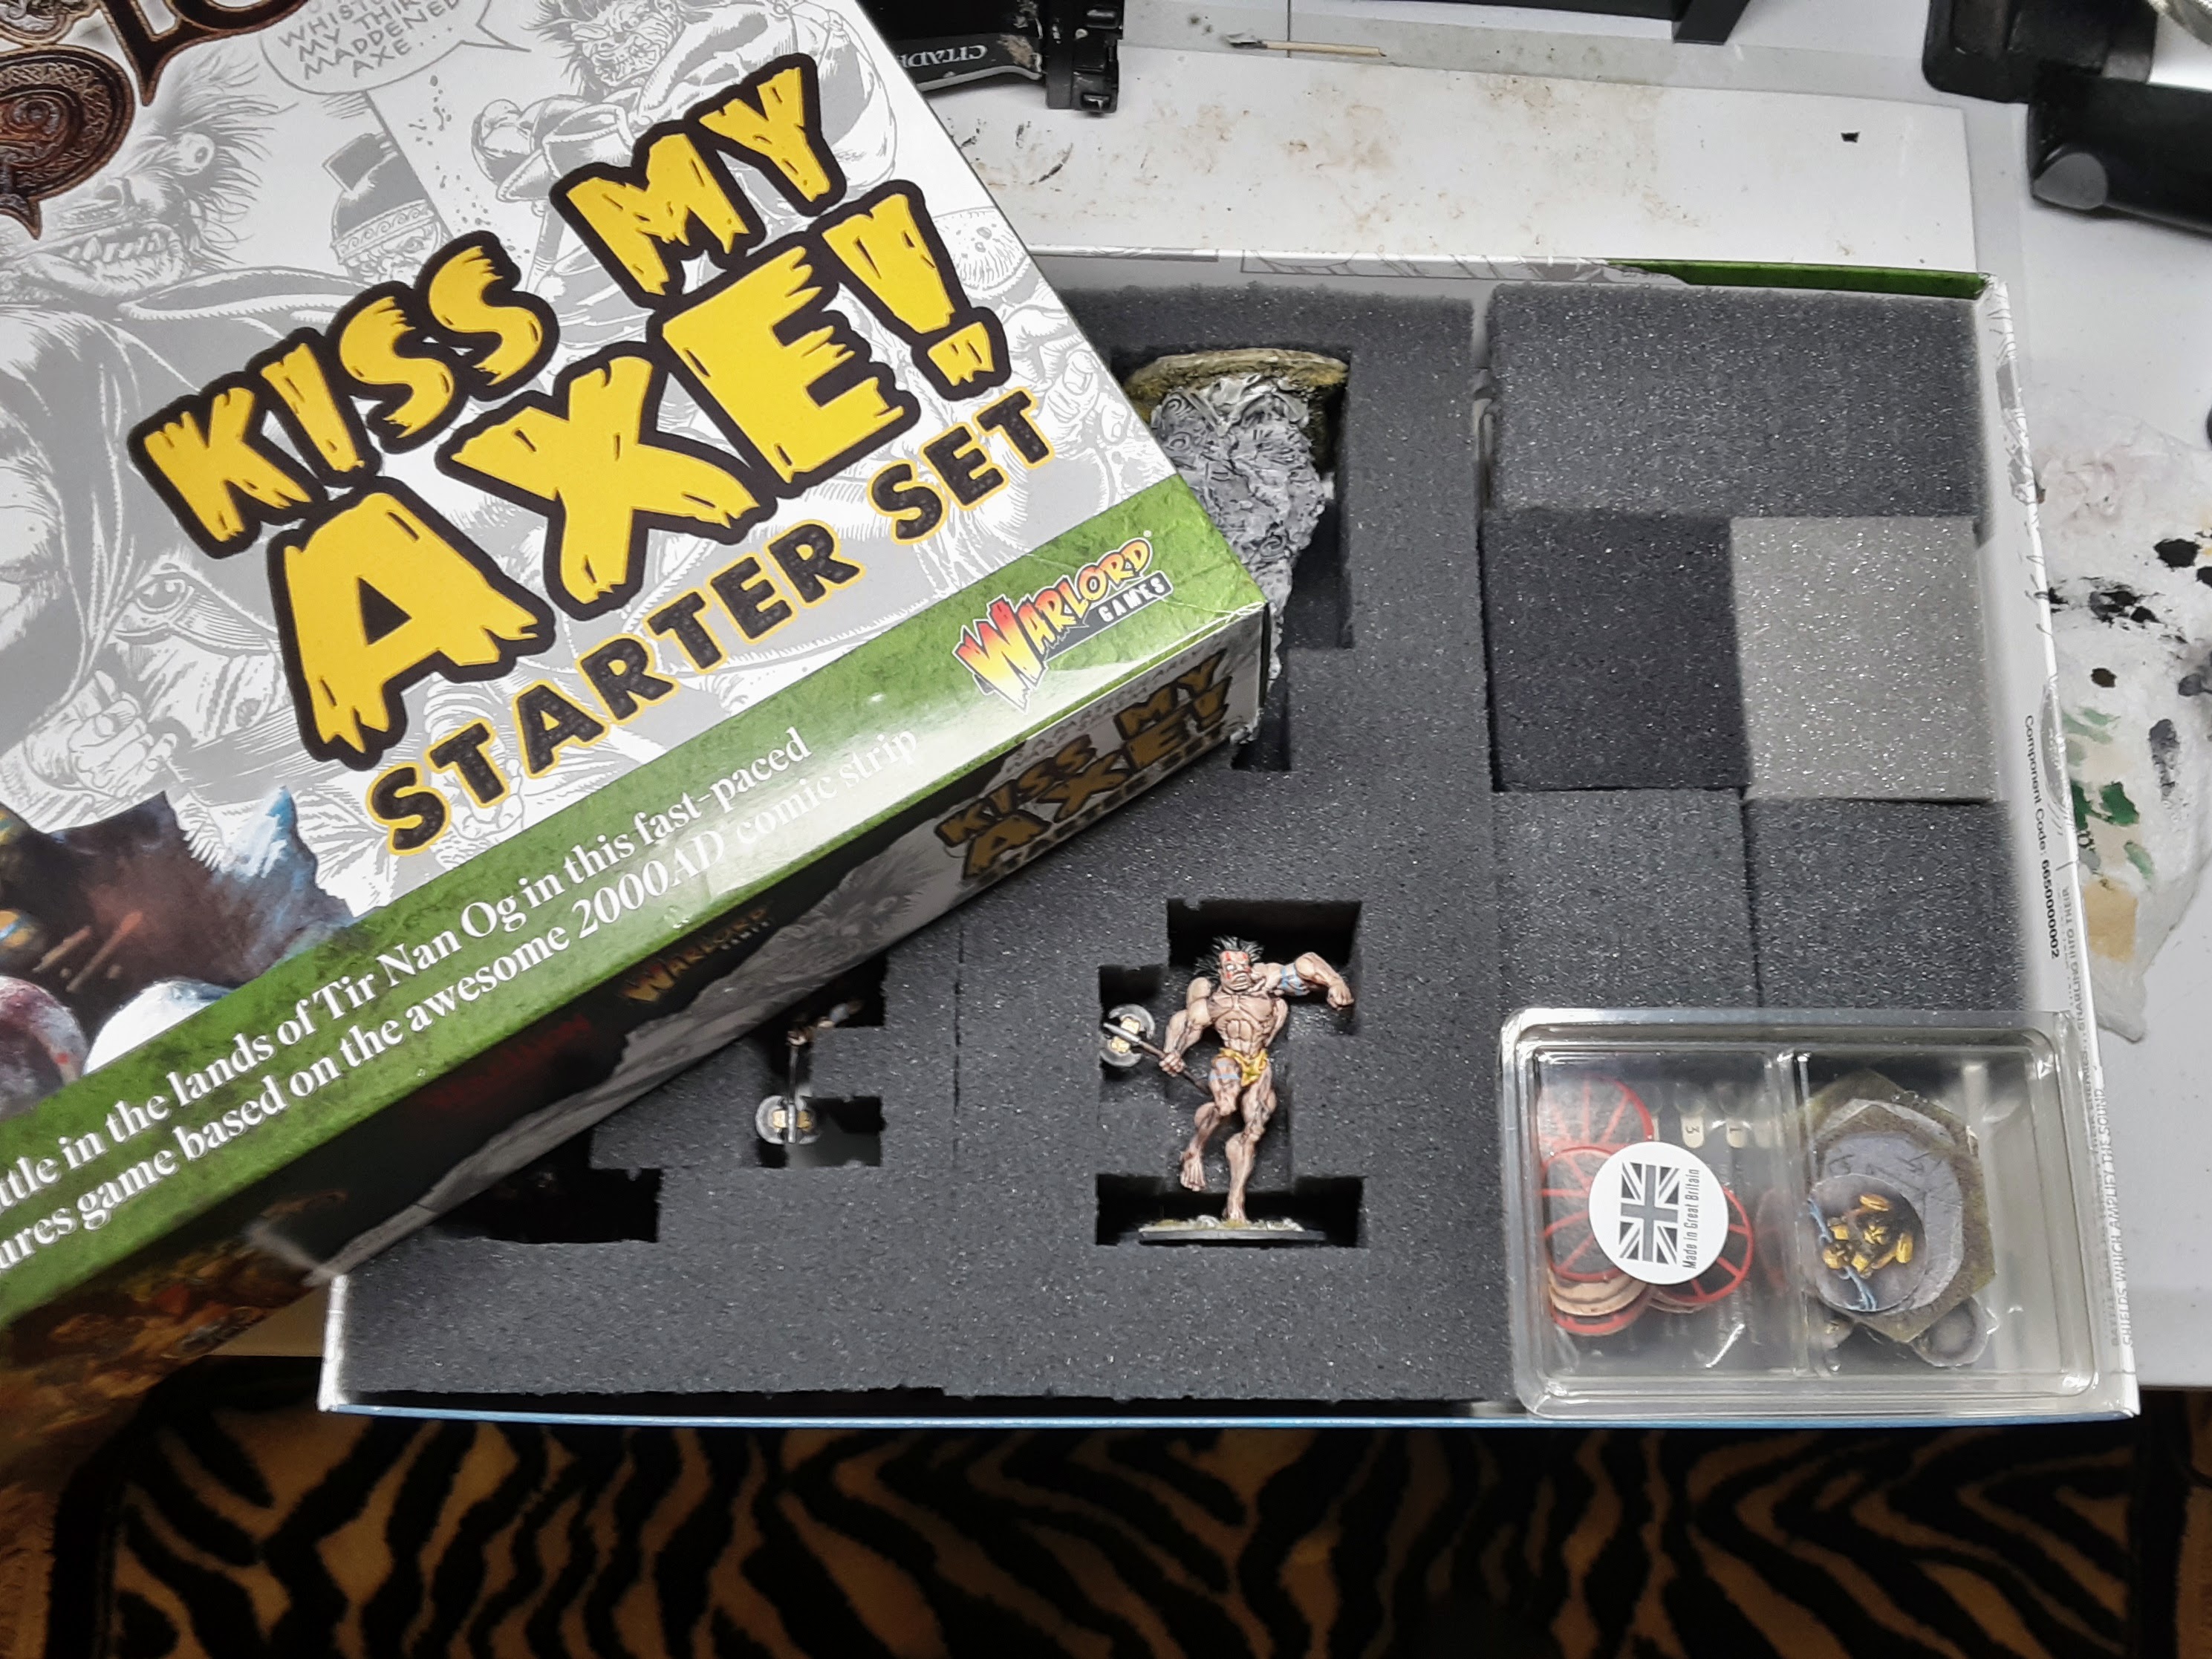 Just a peek at my fancy Slaine storage.
The old pluck foam came in handy for my Slaine box. I also decided to crab a bunch of my hoarded…wait…saved plastic clam packs from Warlord Games purchases. I obviously saved these clam packs because I’m environmentally concerned, not because I have a problem getting rid of things.
Have I mention that my significant other is a saint for putting up with me?
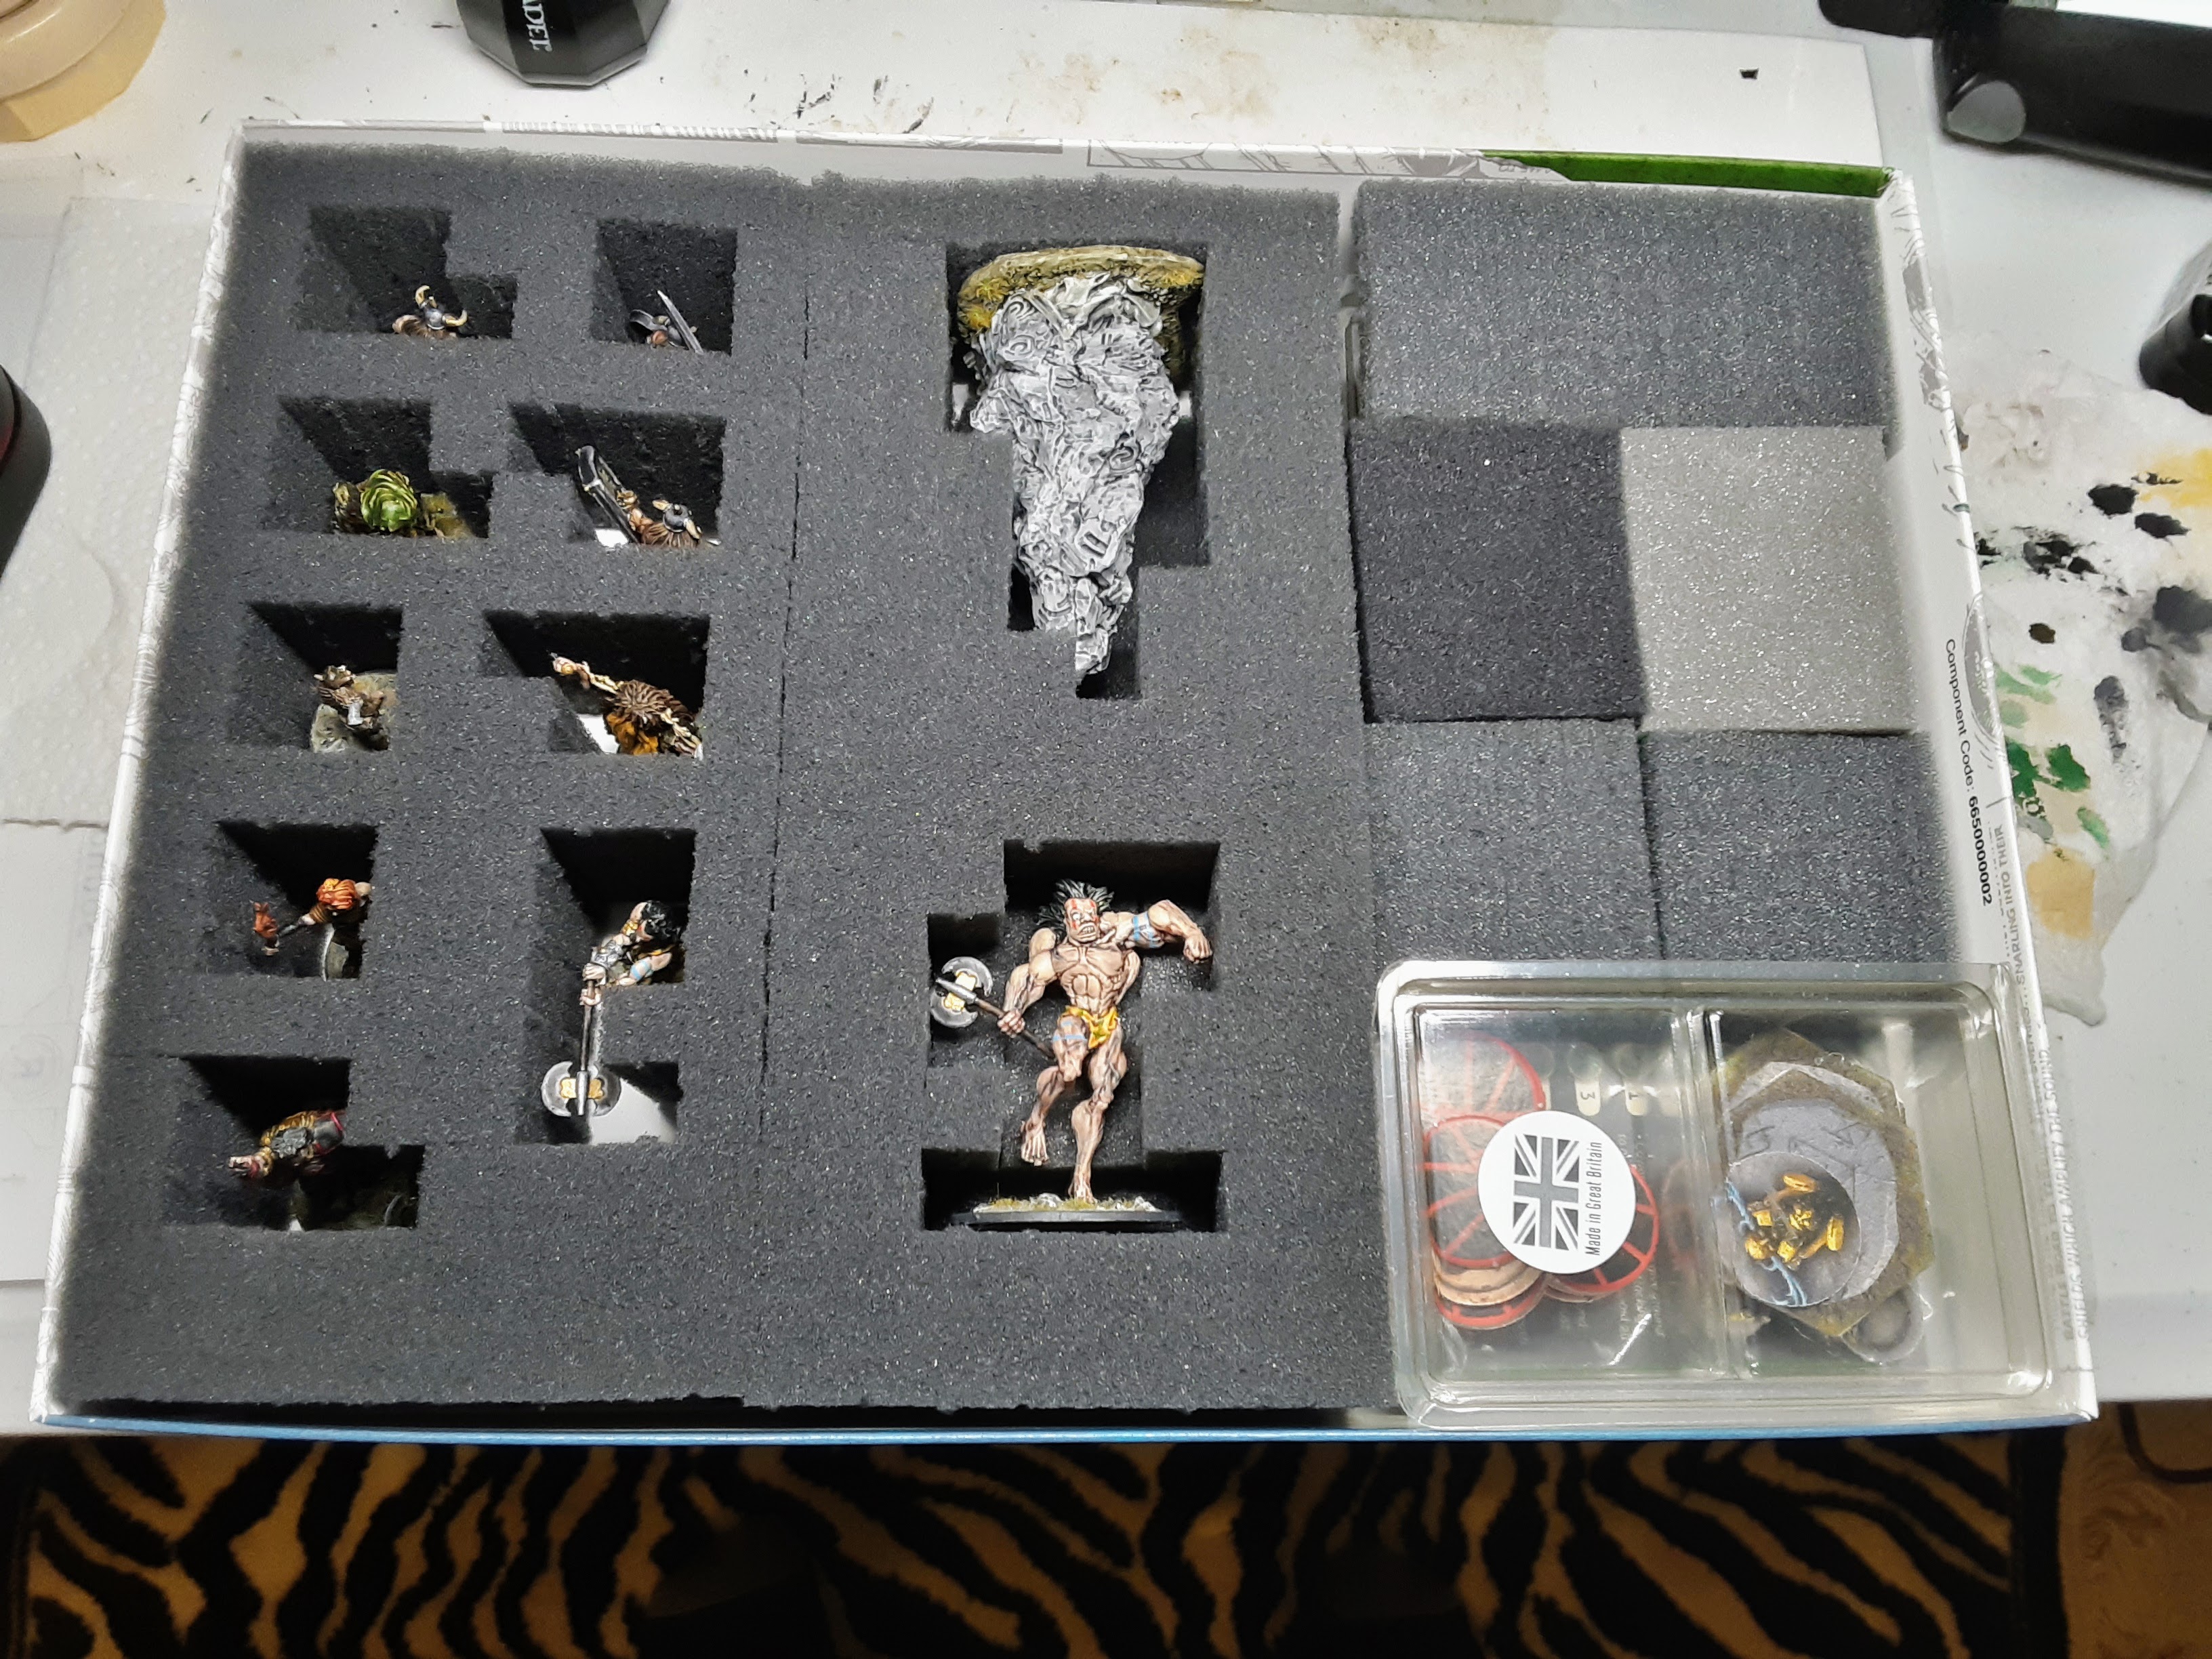
With my supplies in hand, I began laying out the minis and plucking foam. I don’t store my 2000AD game boxes on their sides, so I needed to layout everything with that in mind.
The Warped Slaine and Weird Stone required me to make some foam “beds” for parts of the models to rest on because they were too big to stand up in the box. The rest of minis were stored standing up. I did add some foam beneath the Rune Priest and Ukko because of how short/small the minis stand. This makes it easier to pull them out.
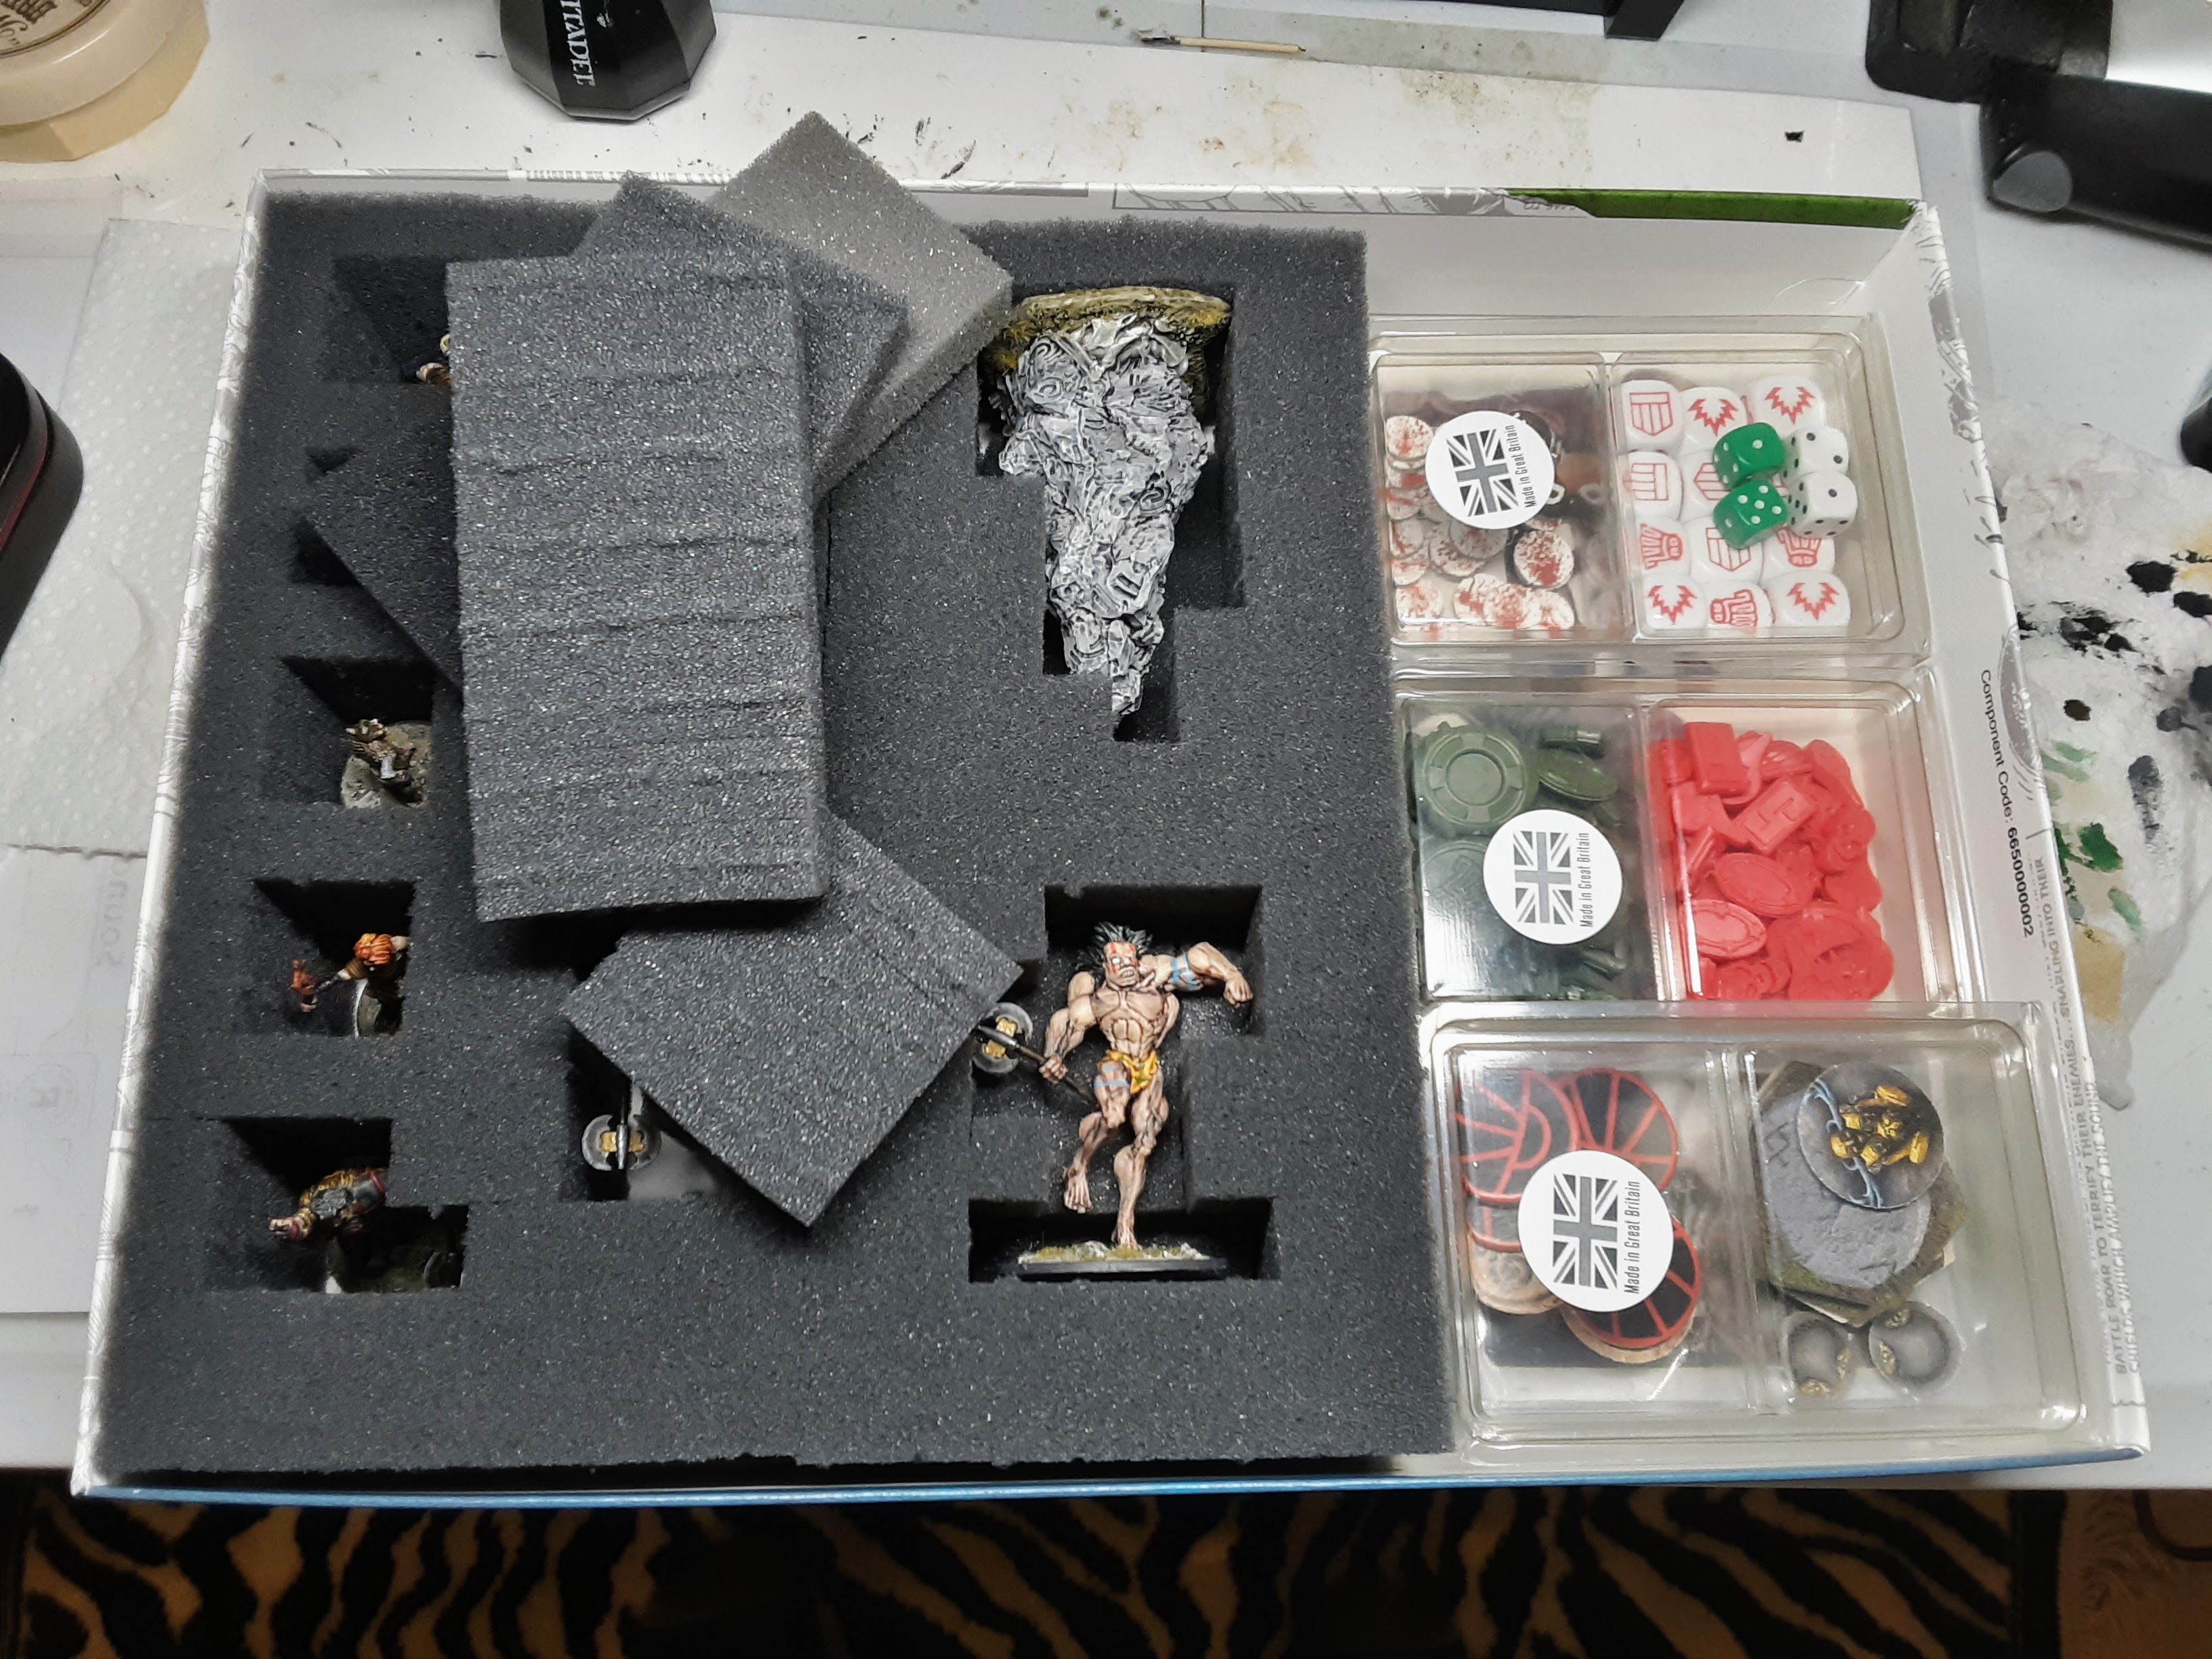
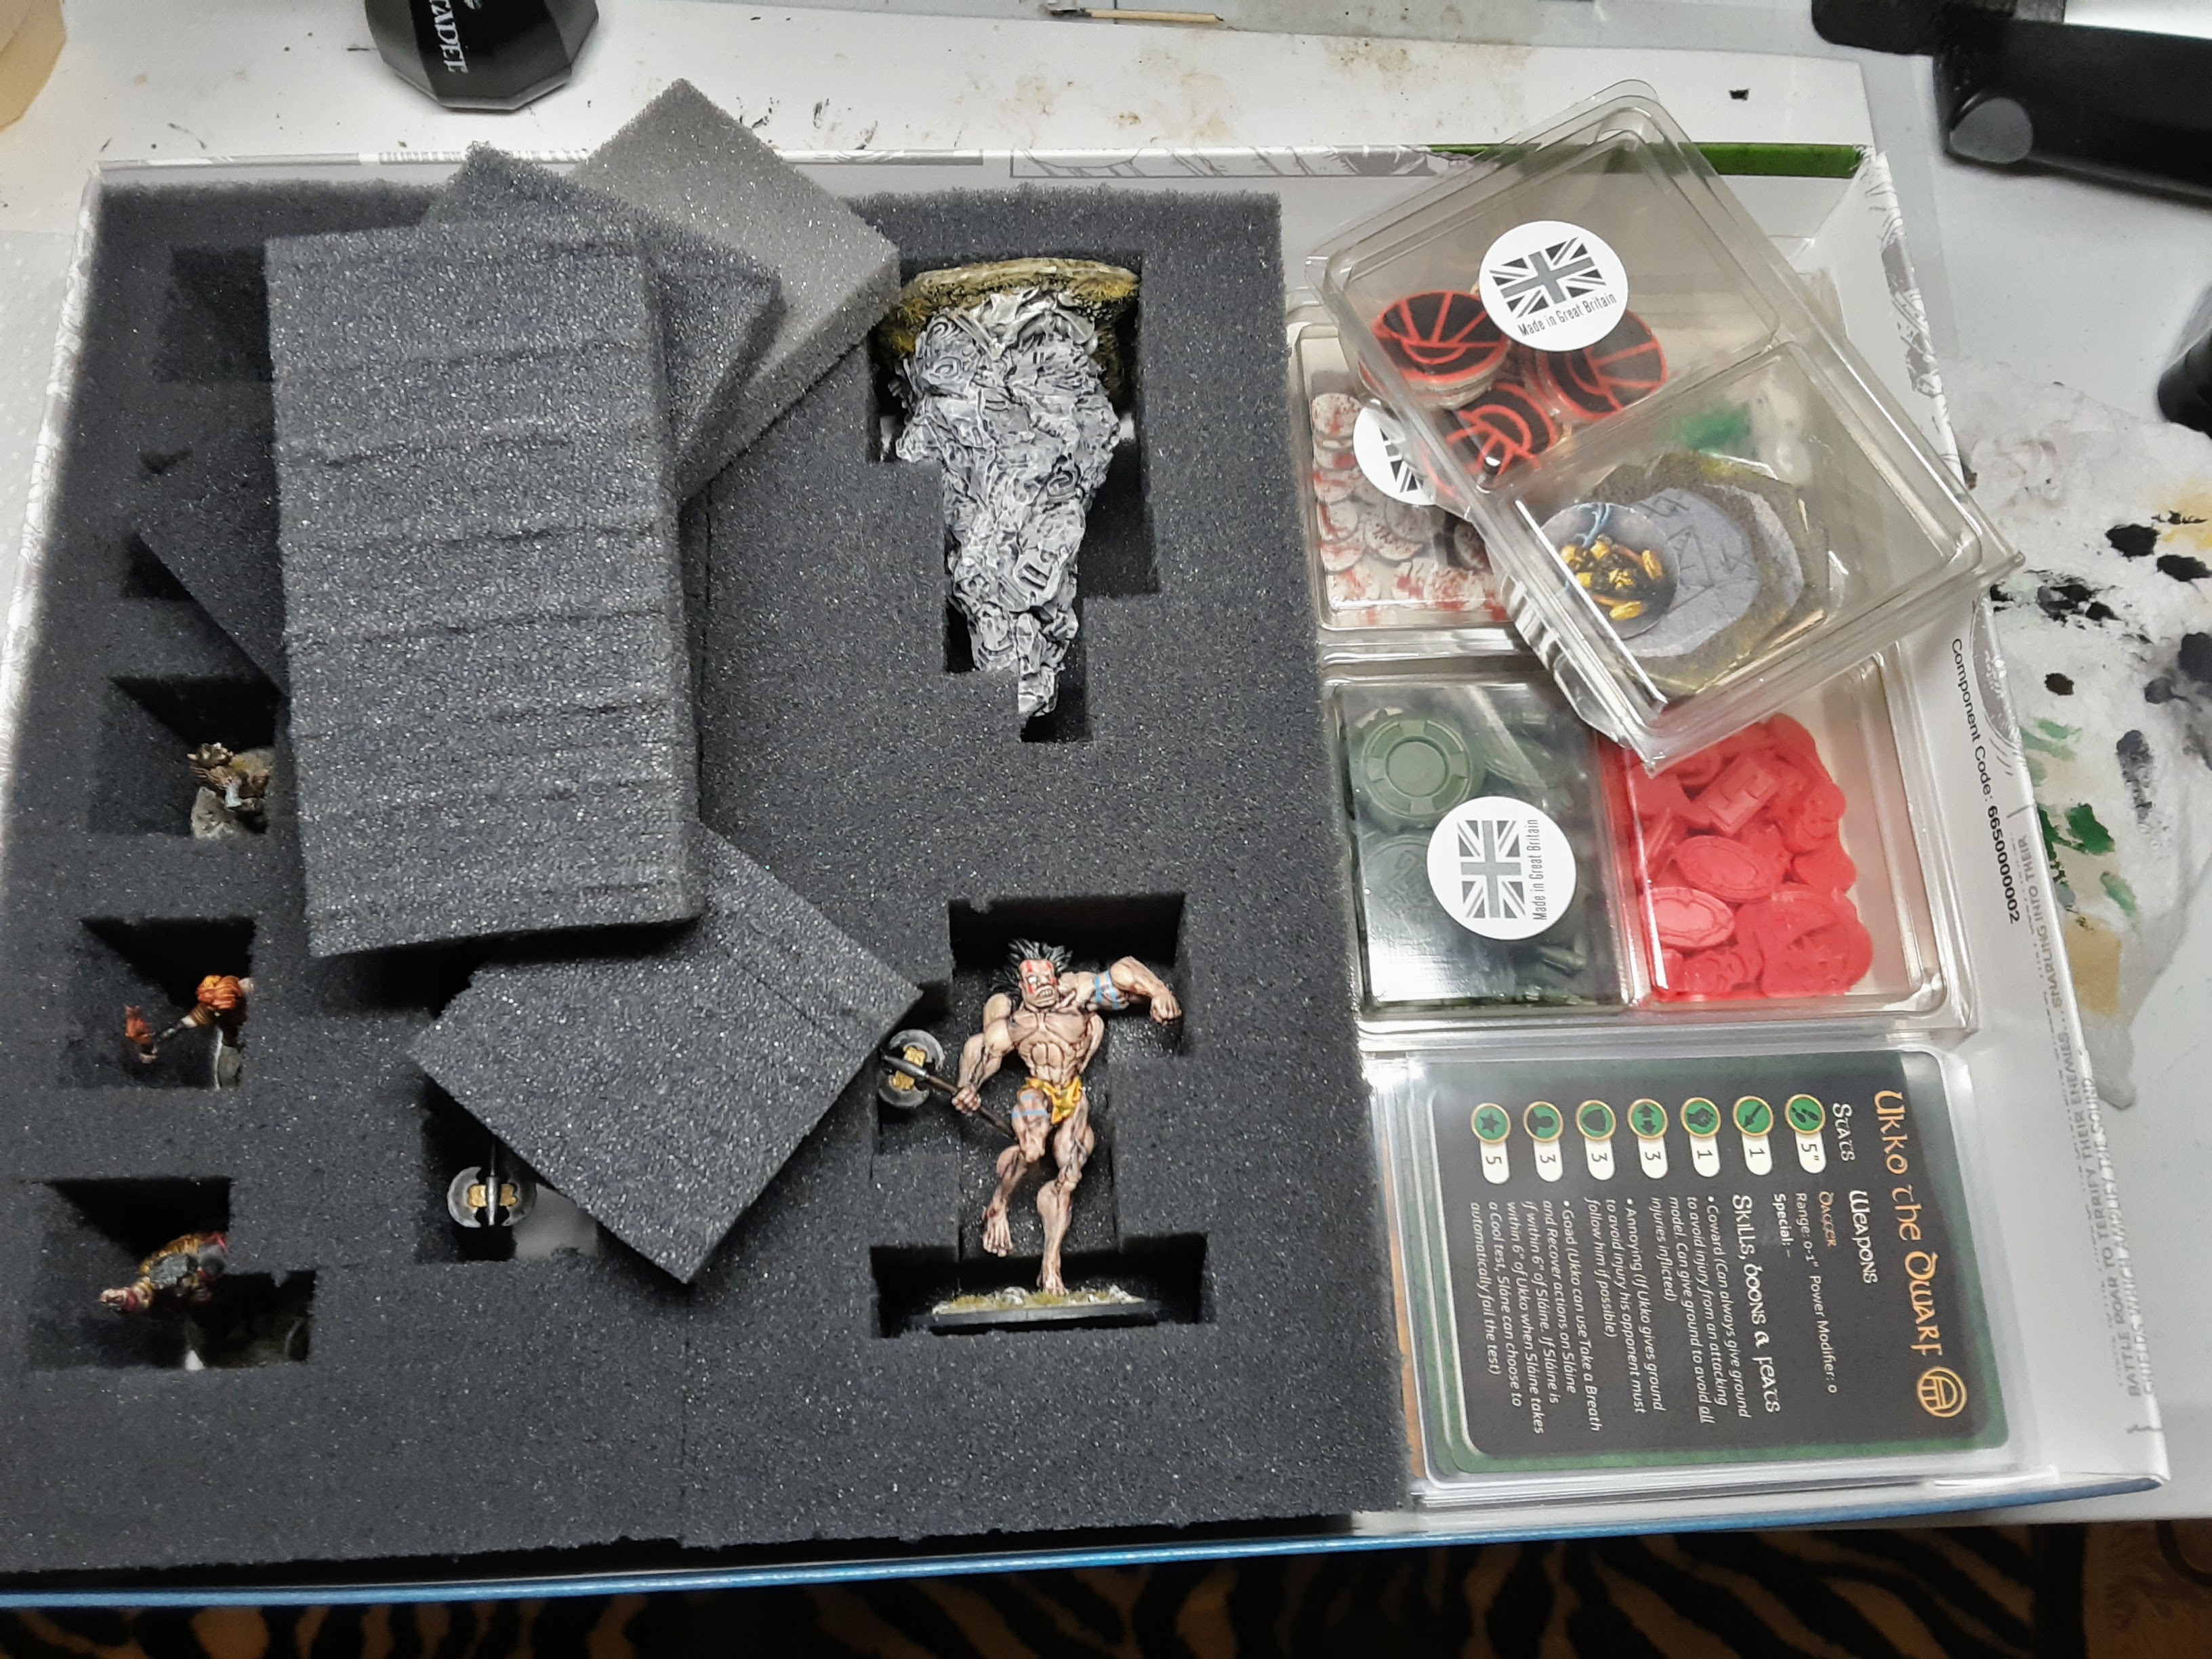
I used the clam shells to create a box for the plastic tokens, dice, counters, and other markers that came with the set. I decided to add a few extra dice to the set after I noticed that the Slaine player can roll a lot of dice when they have cards and other effects active in the game. I sleeved the cards and put them under one of the clam shells to keep the cards from sliding around in the box. I also used some leftover foam from clam shells and plucked foam to better secure these extra bits for the game.
I think I might try getting an outdoor picture with the miniatures now that I have a nice way to travel with my set…and I still need to play the game.
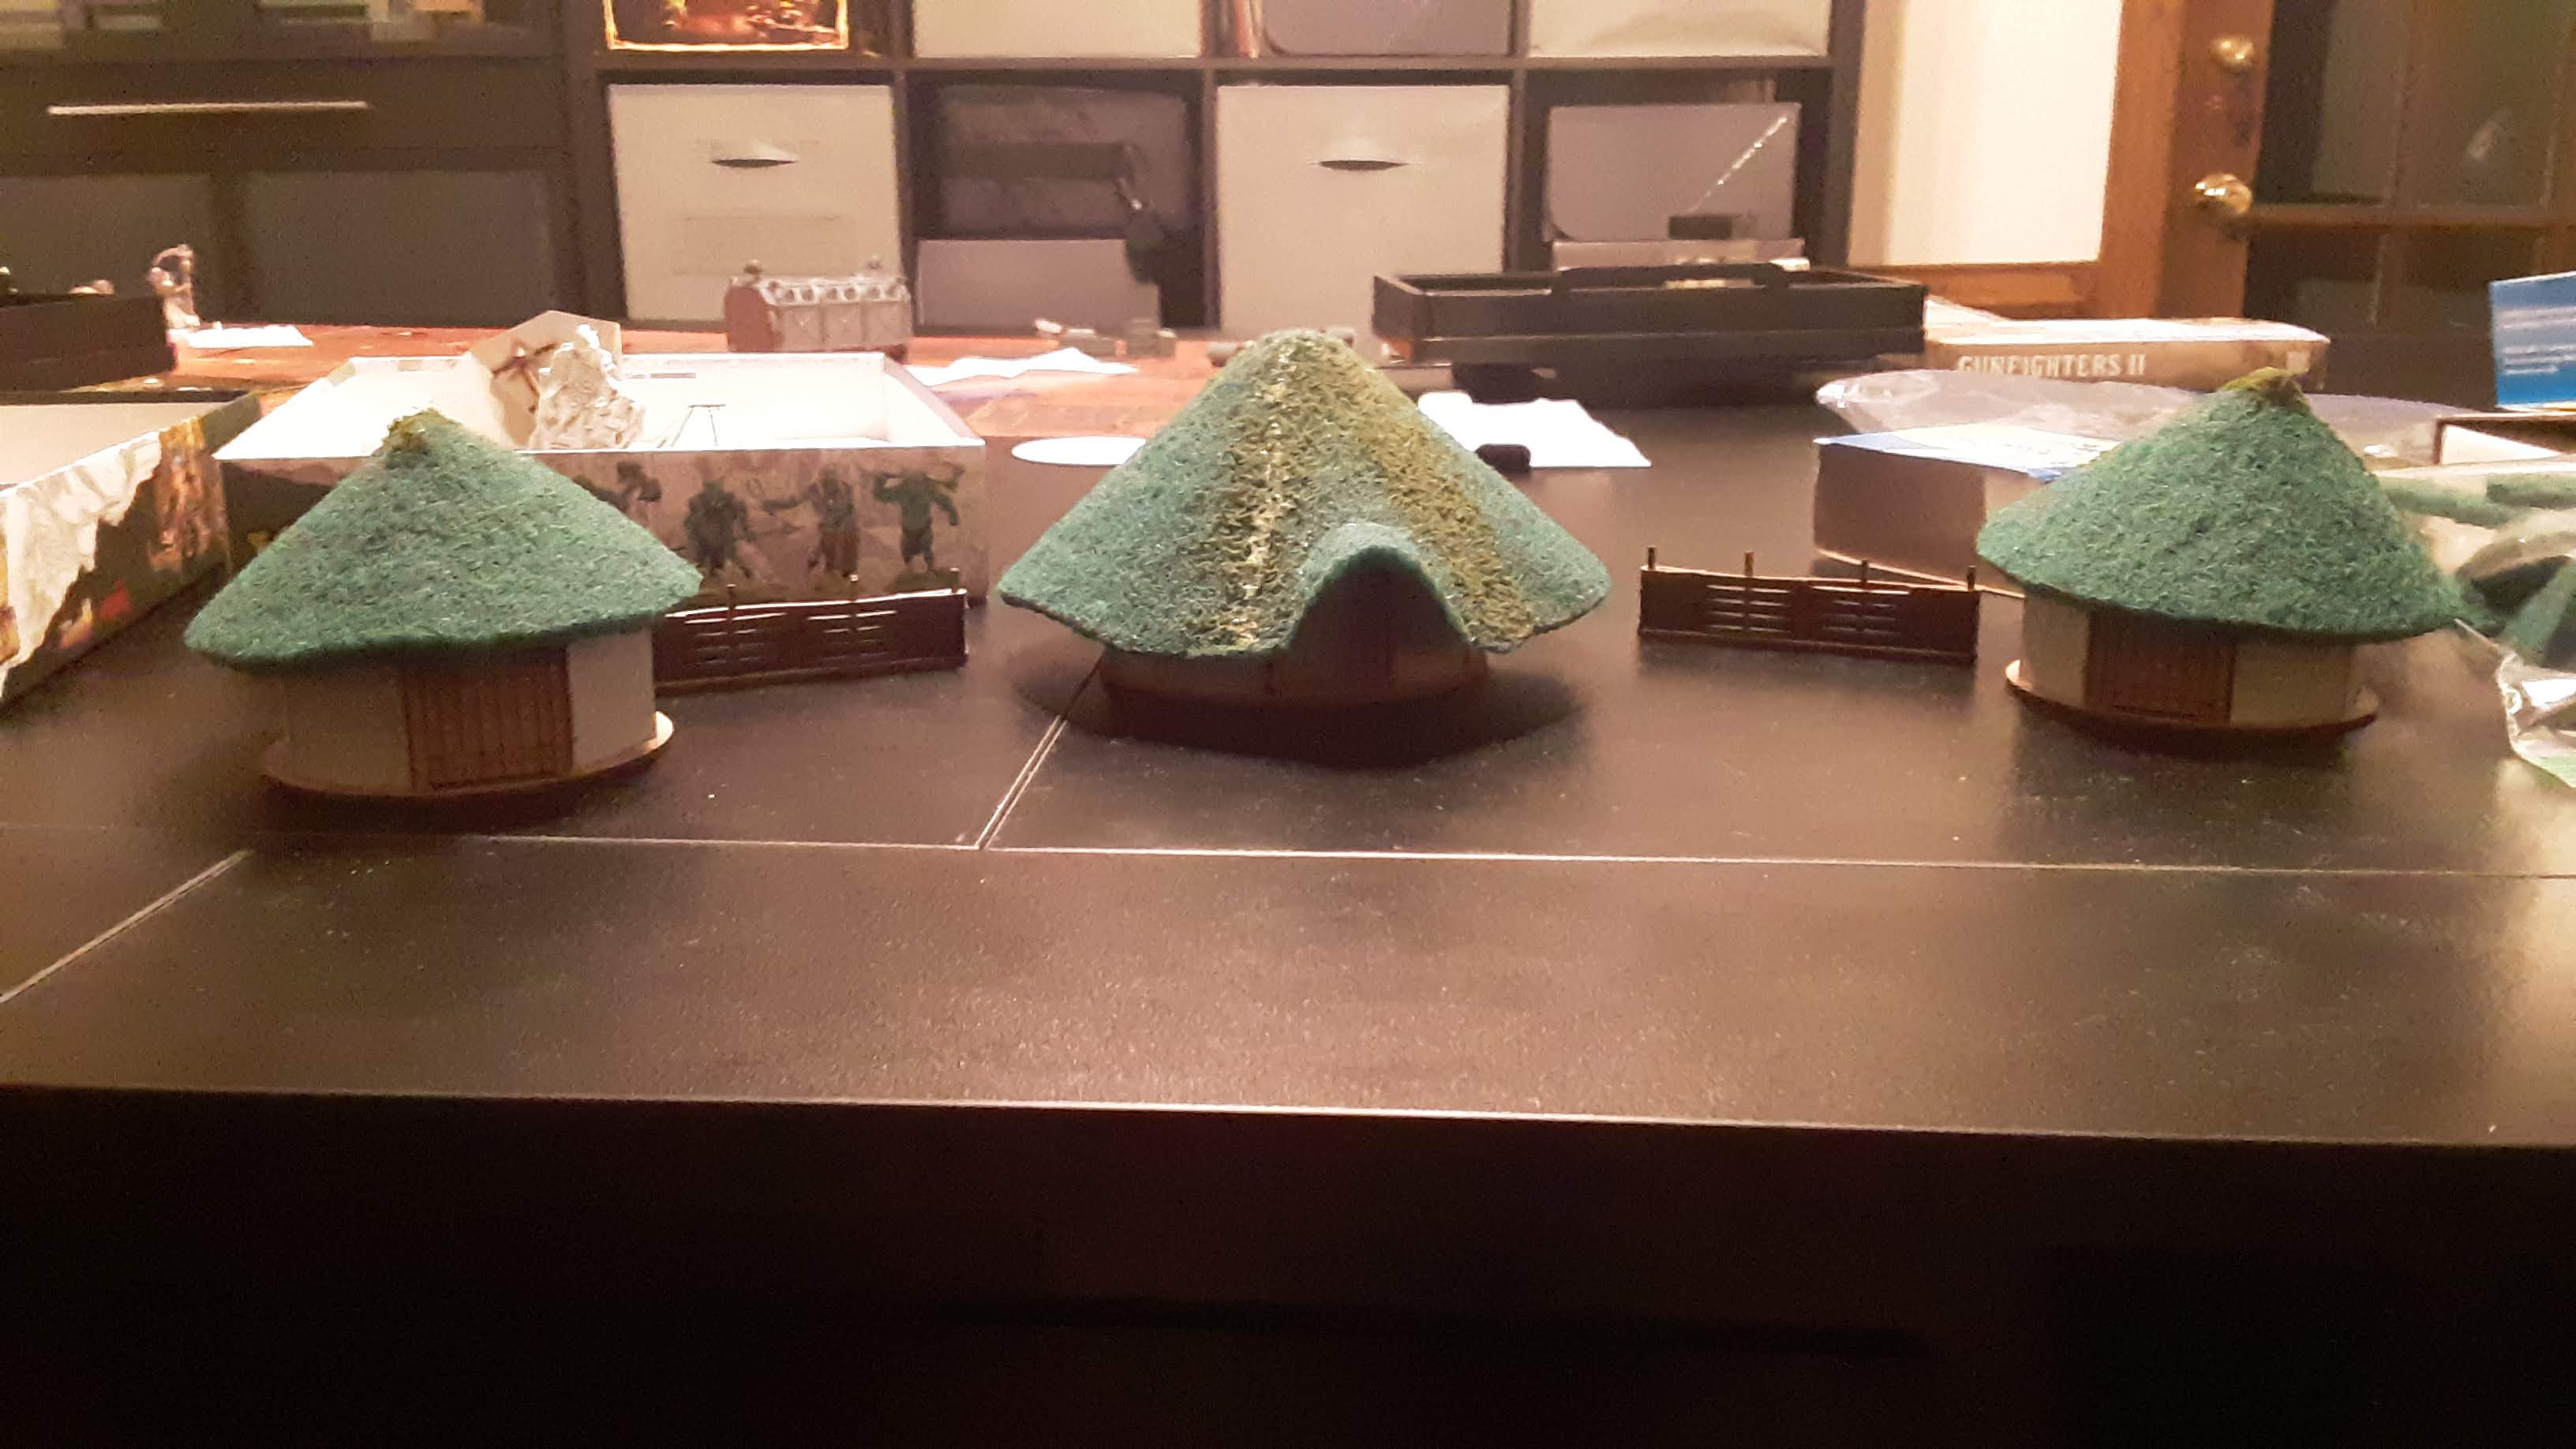
....and my finished Roundhouses
 The last picture I shared
So, I just realized that I forgot to share my finished Roundhouse project earlier in posts.
I mentioned in my first post that I ordered a larger Roundhouse from Warlord Games and the process I went through to make the roofs. I forgot to share how I painted the buildings and finished up the roofs.

I used some basic craft paints for the buildings. An almond color for the walls and brown for the wood and doors. I also took some construction sand and glued it around the base of the buildings.
I really liked how the details in the MDF wasn’t obscured by the paint I used.
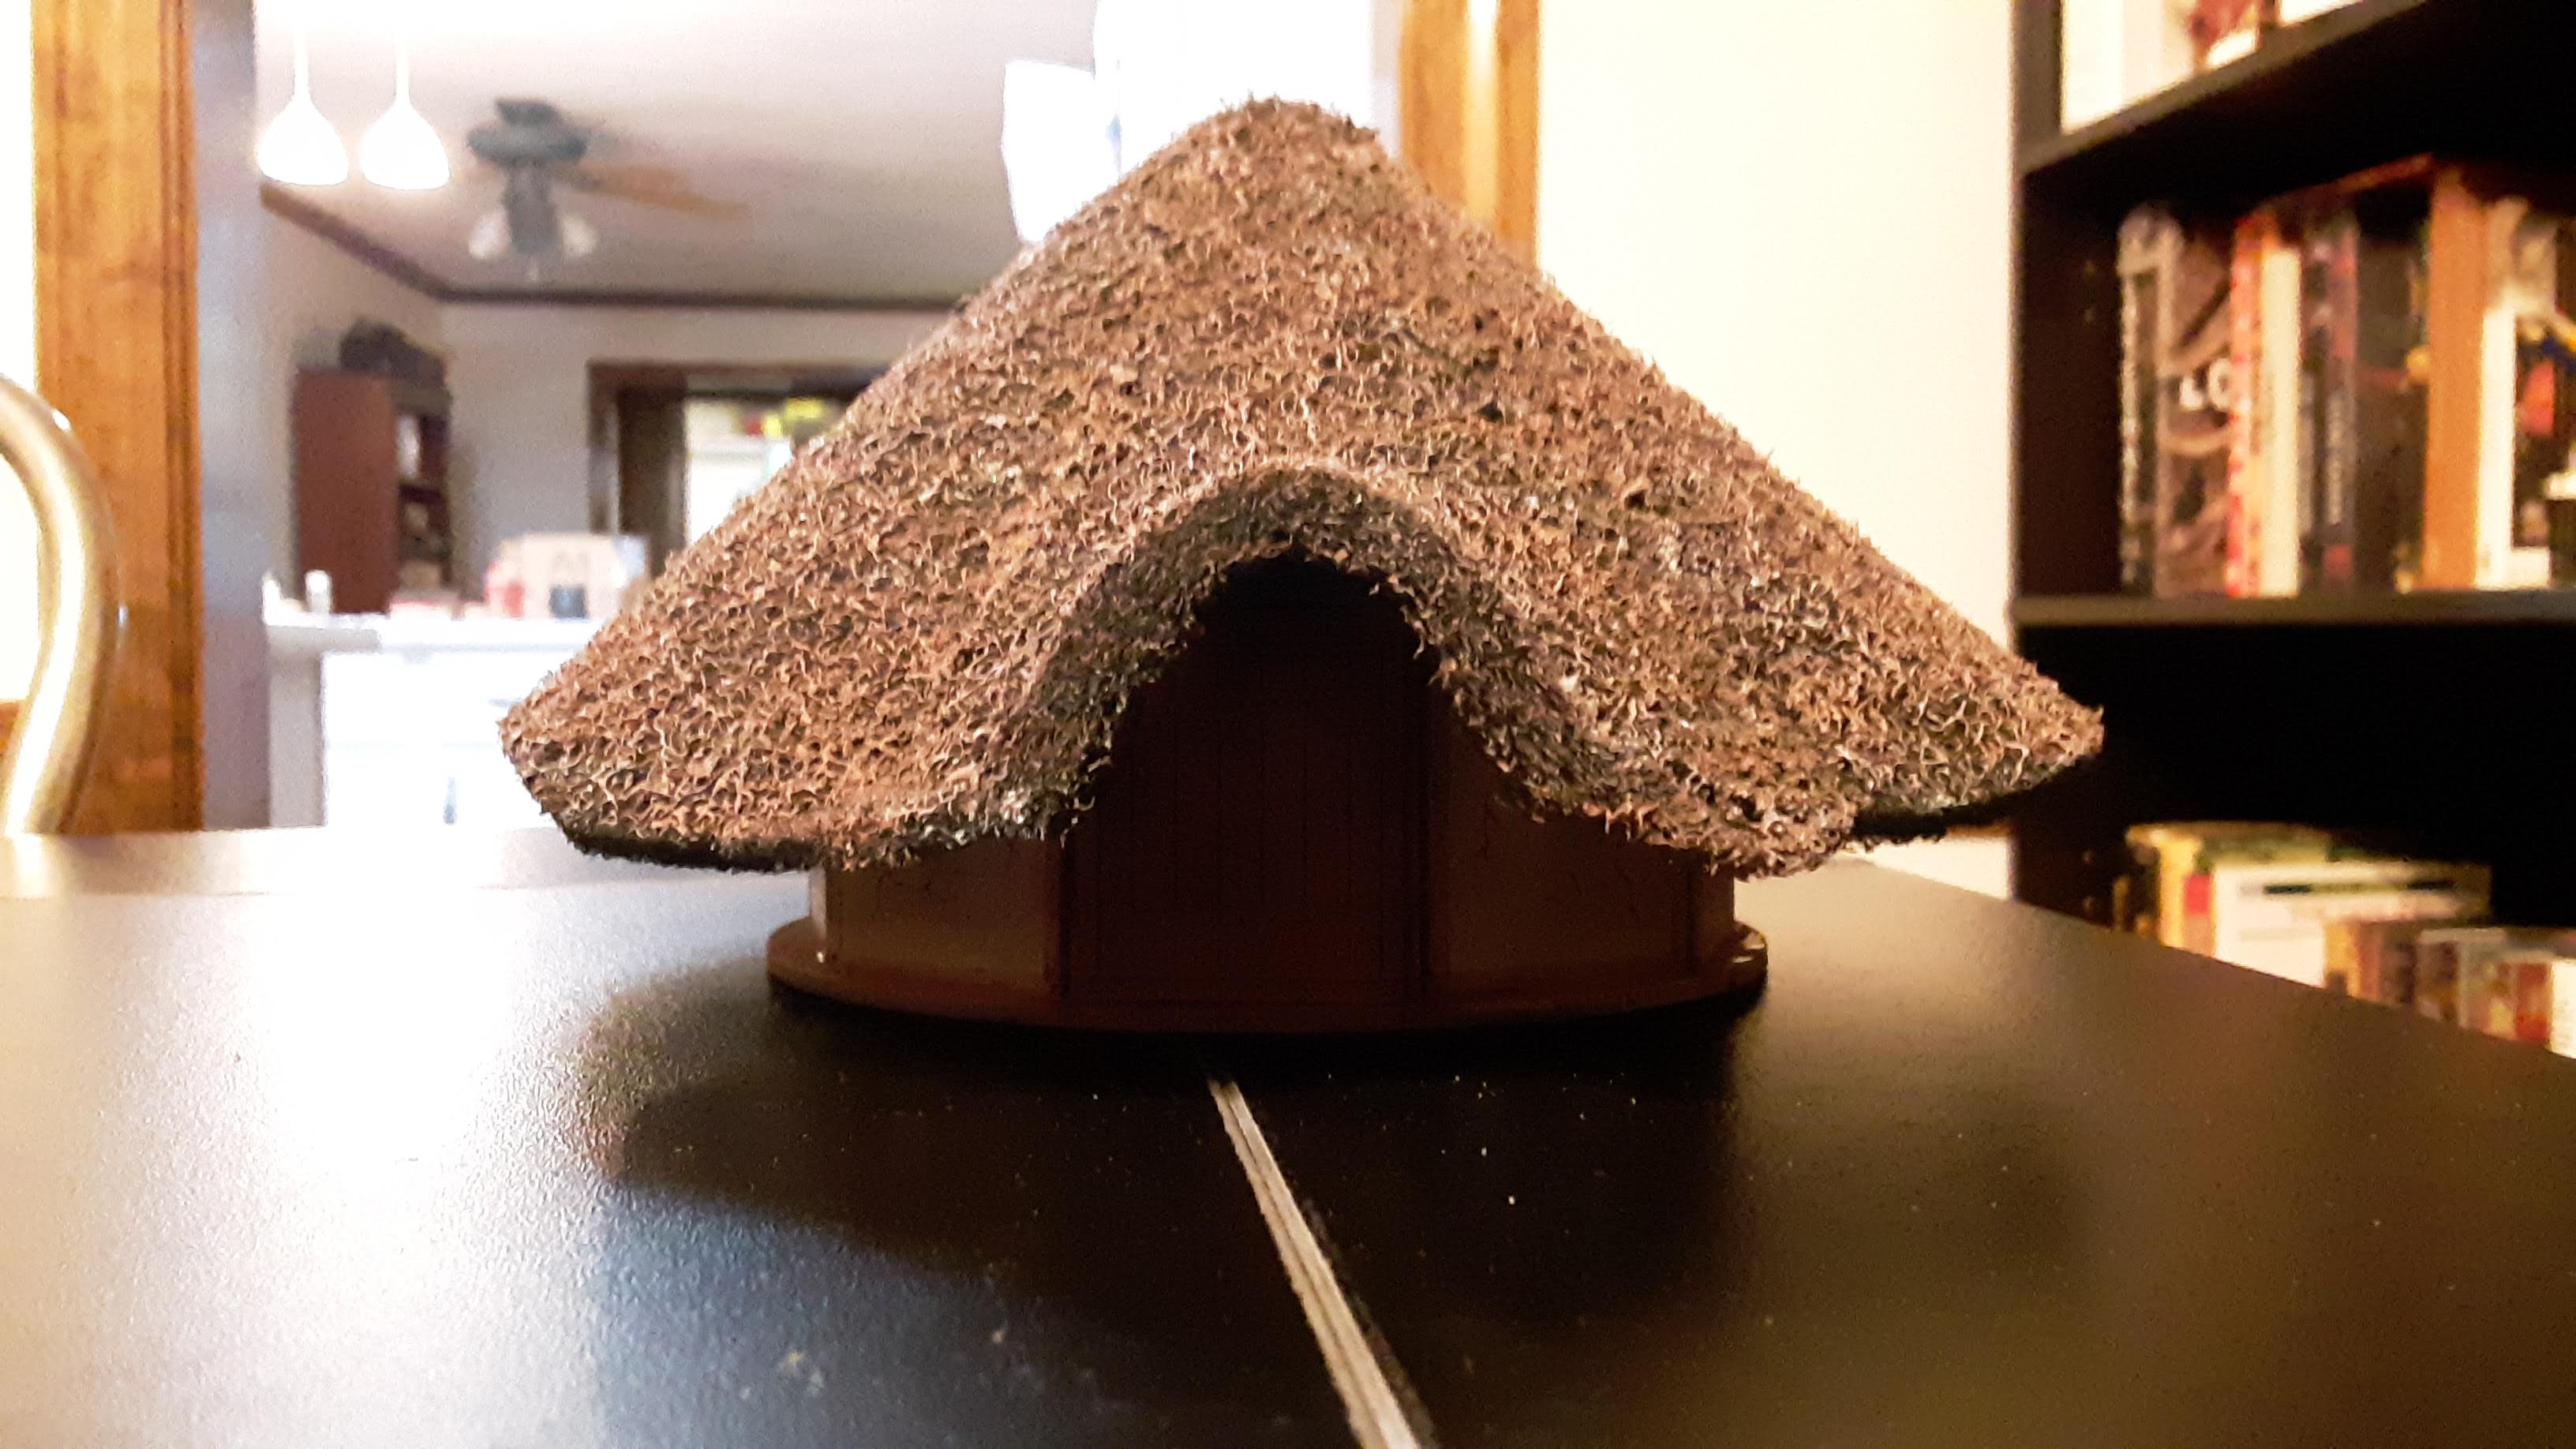
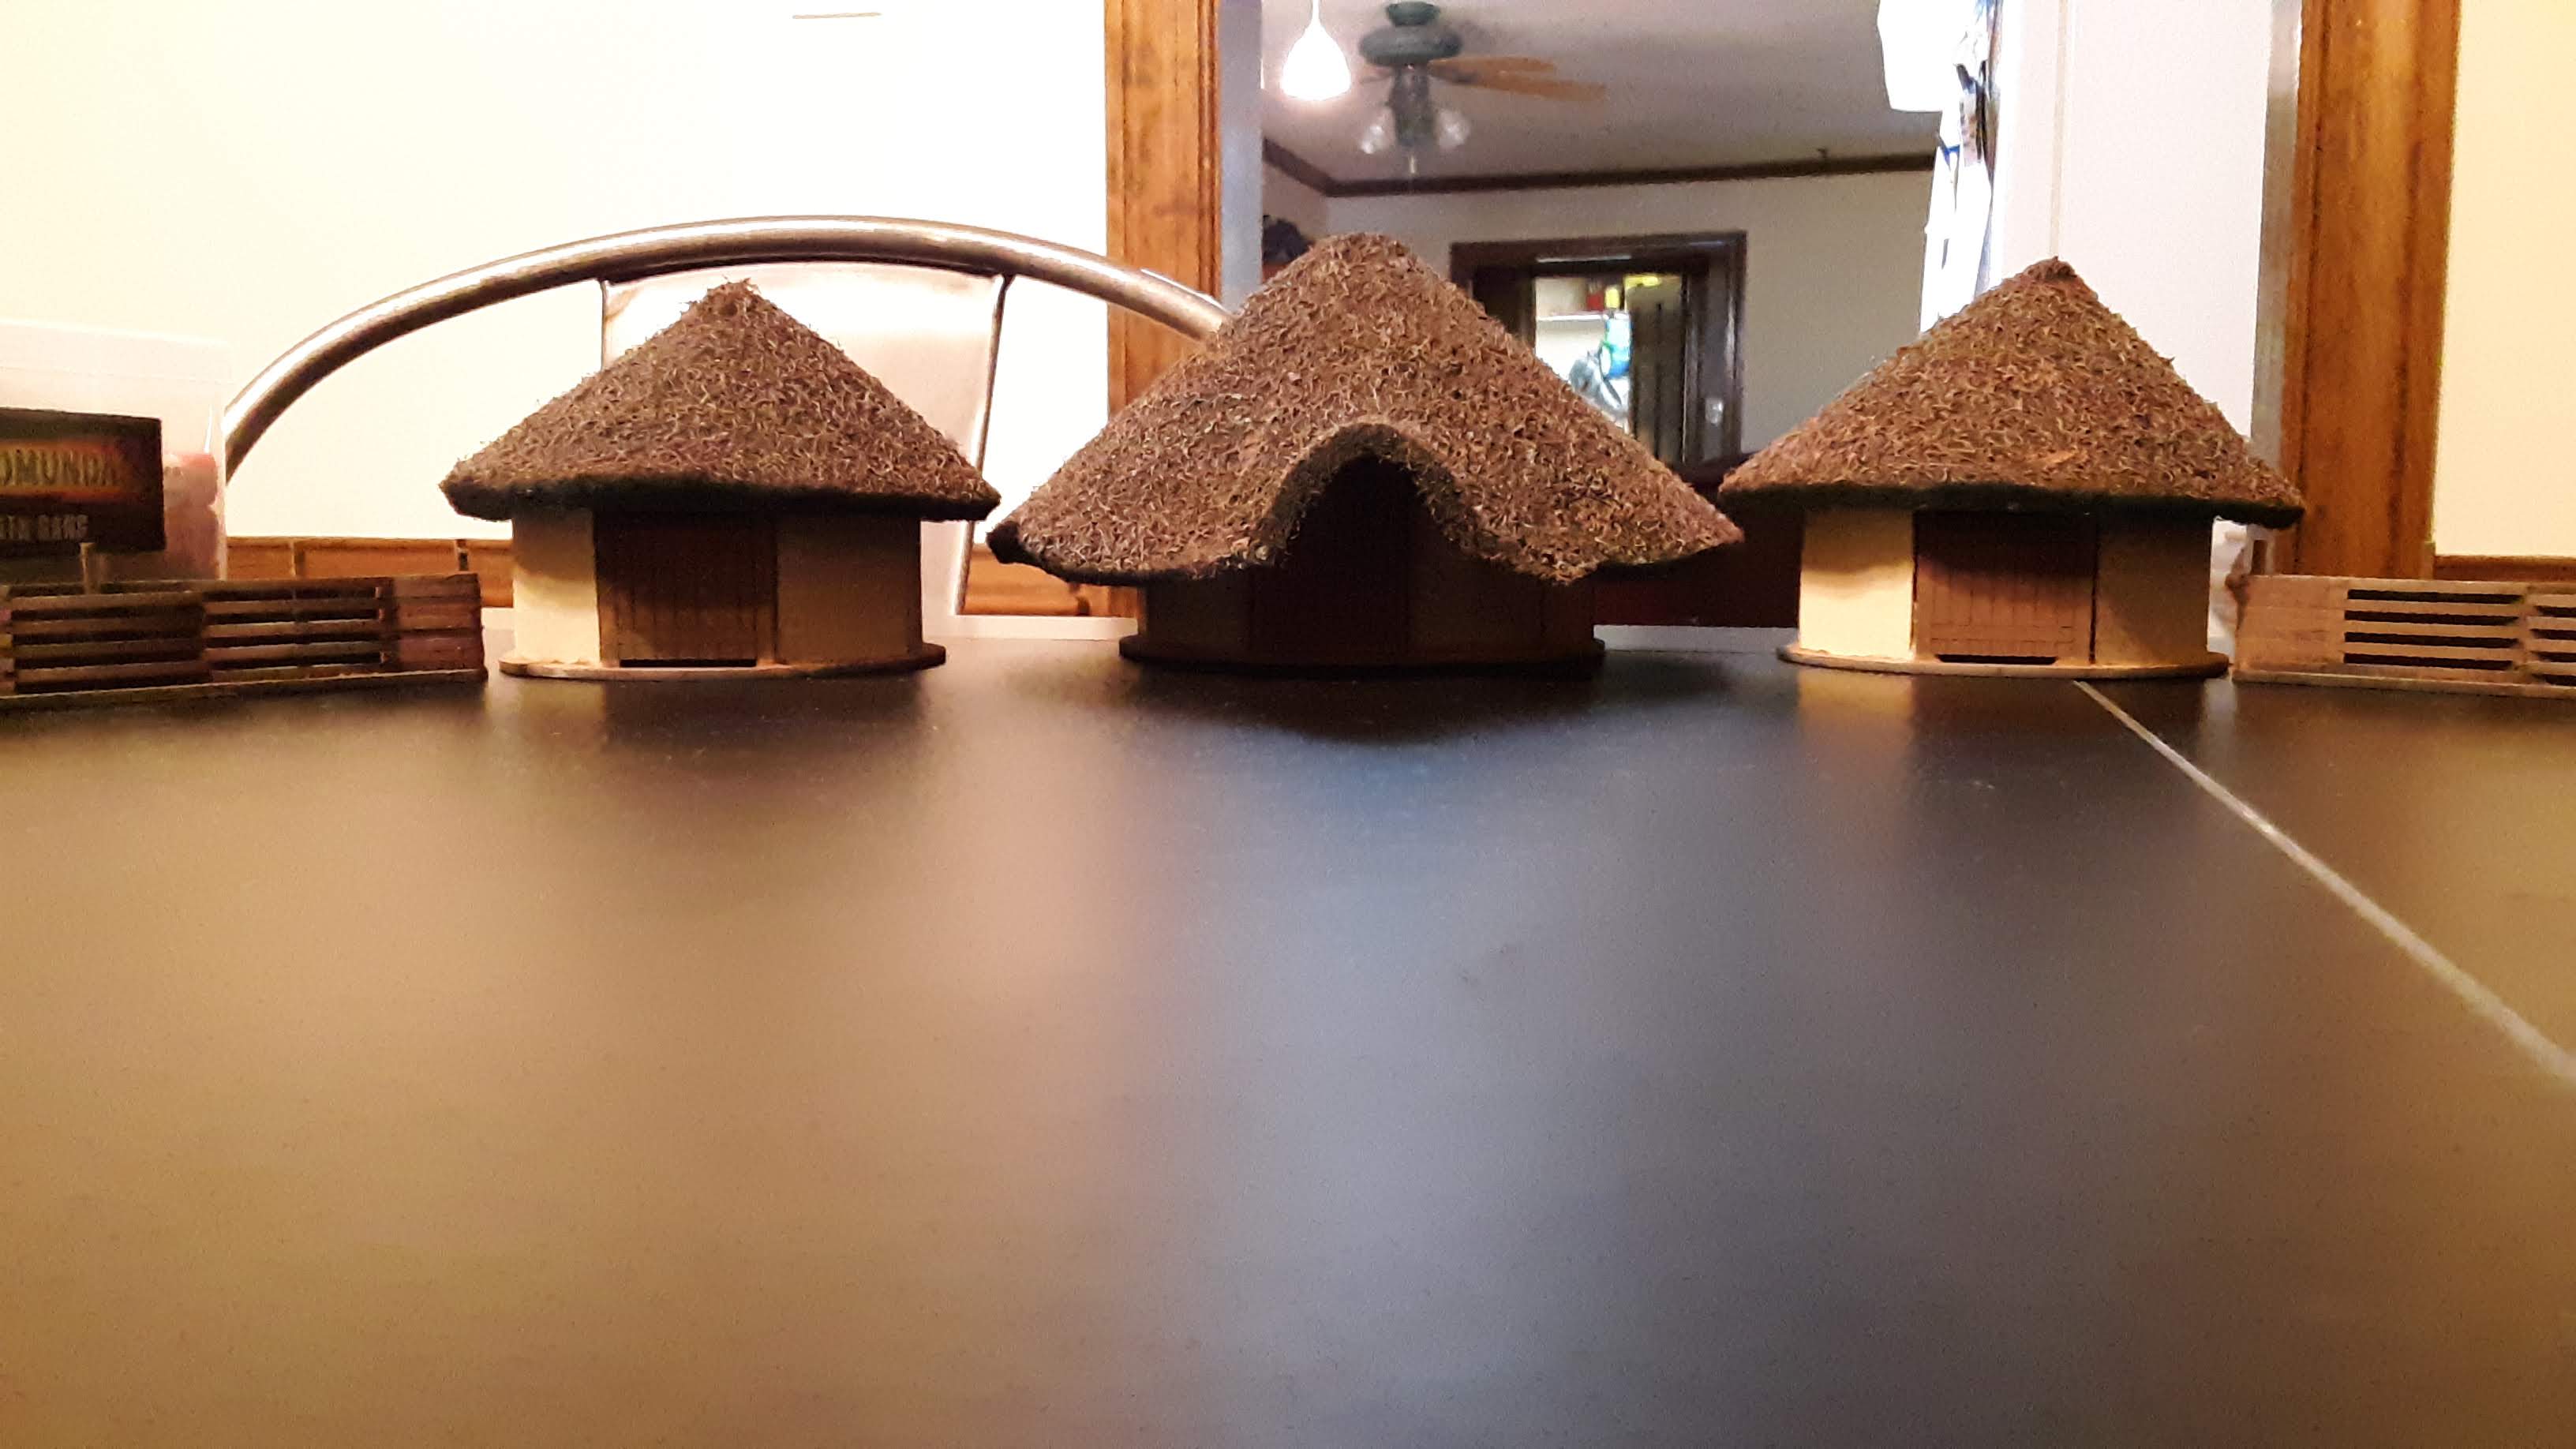
I primed all of the roofs black after hot gluing the roofs together and adding some flocking over the points of attachment.
I’m not sure the best name for the first painting process, but it was a very wet and quick application of the brown craft paint all over the roofs.
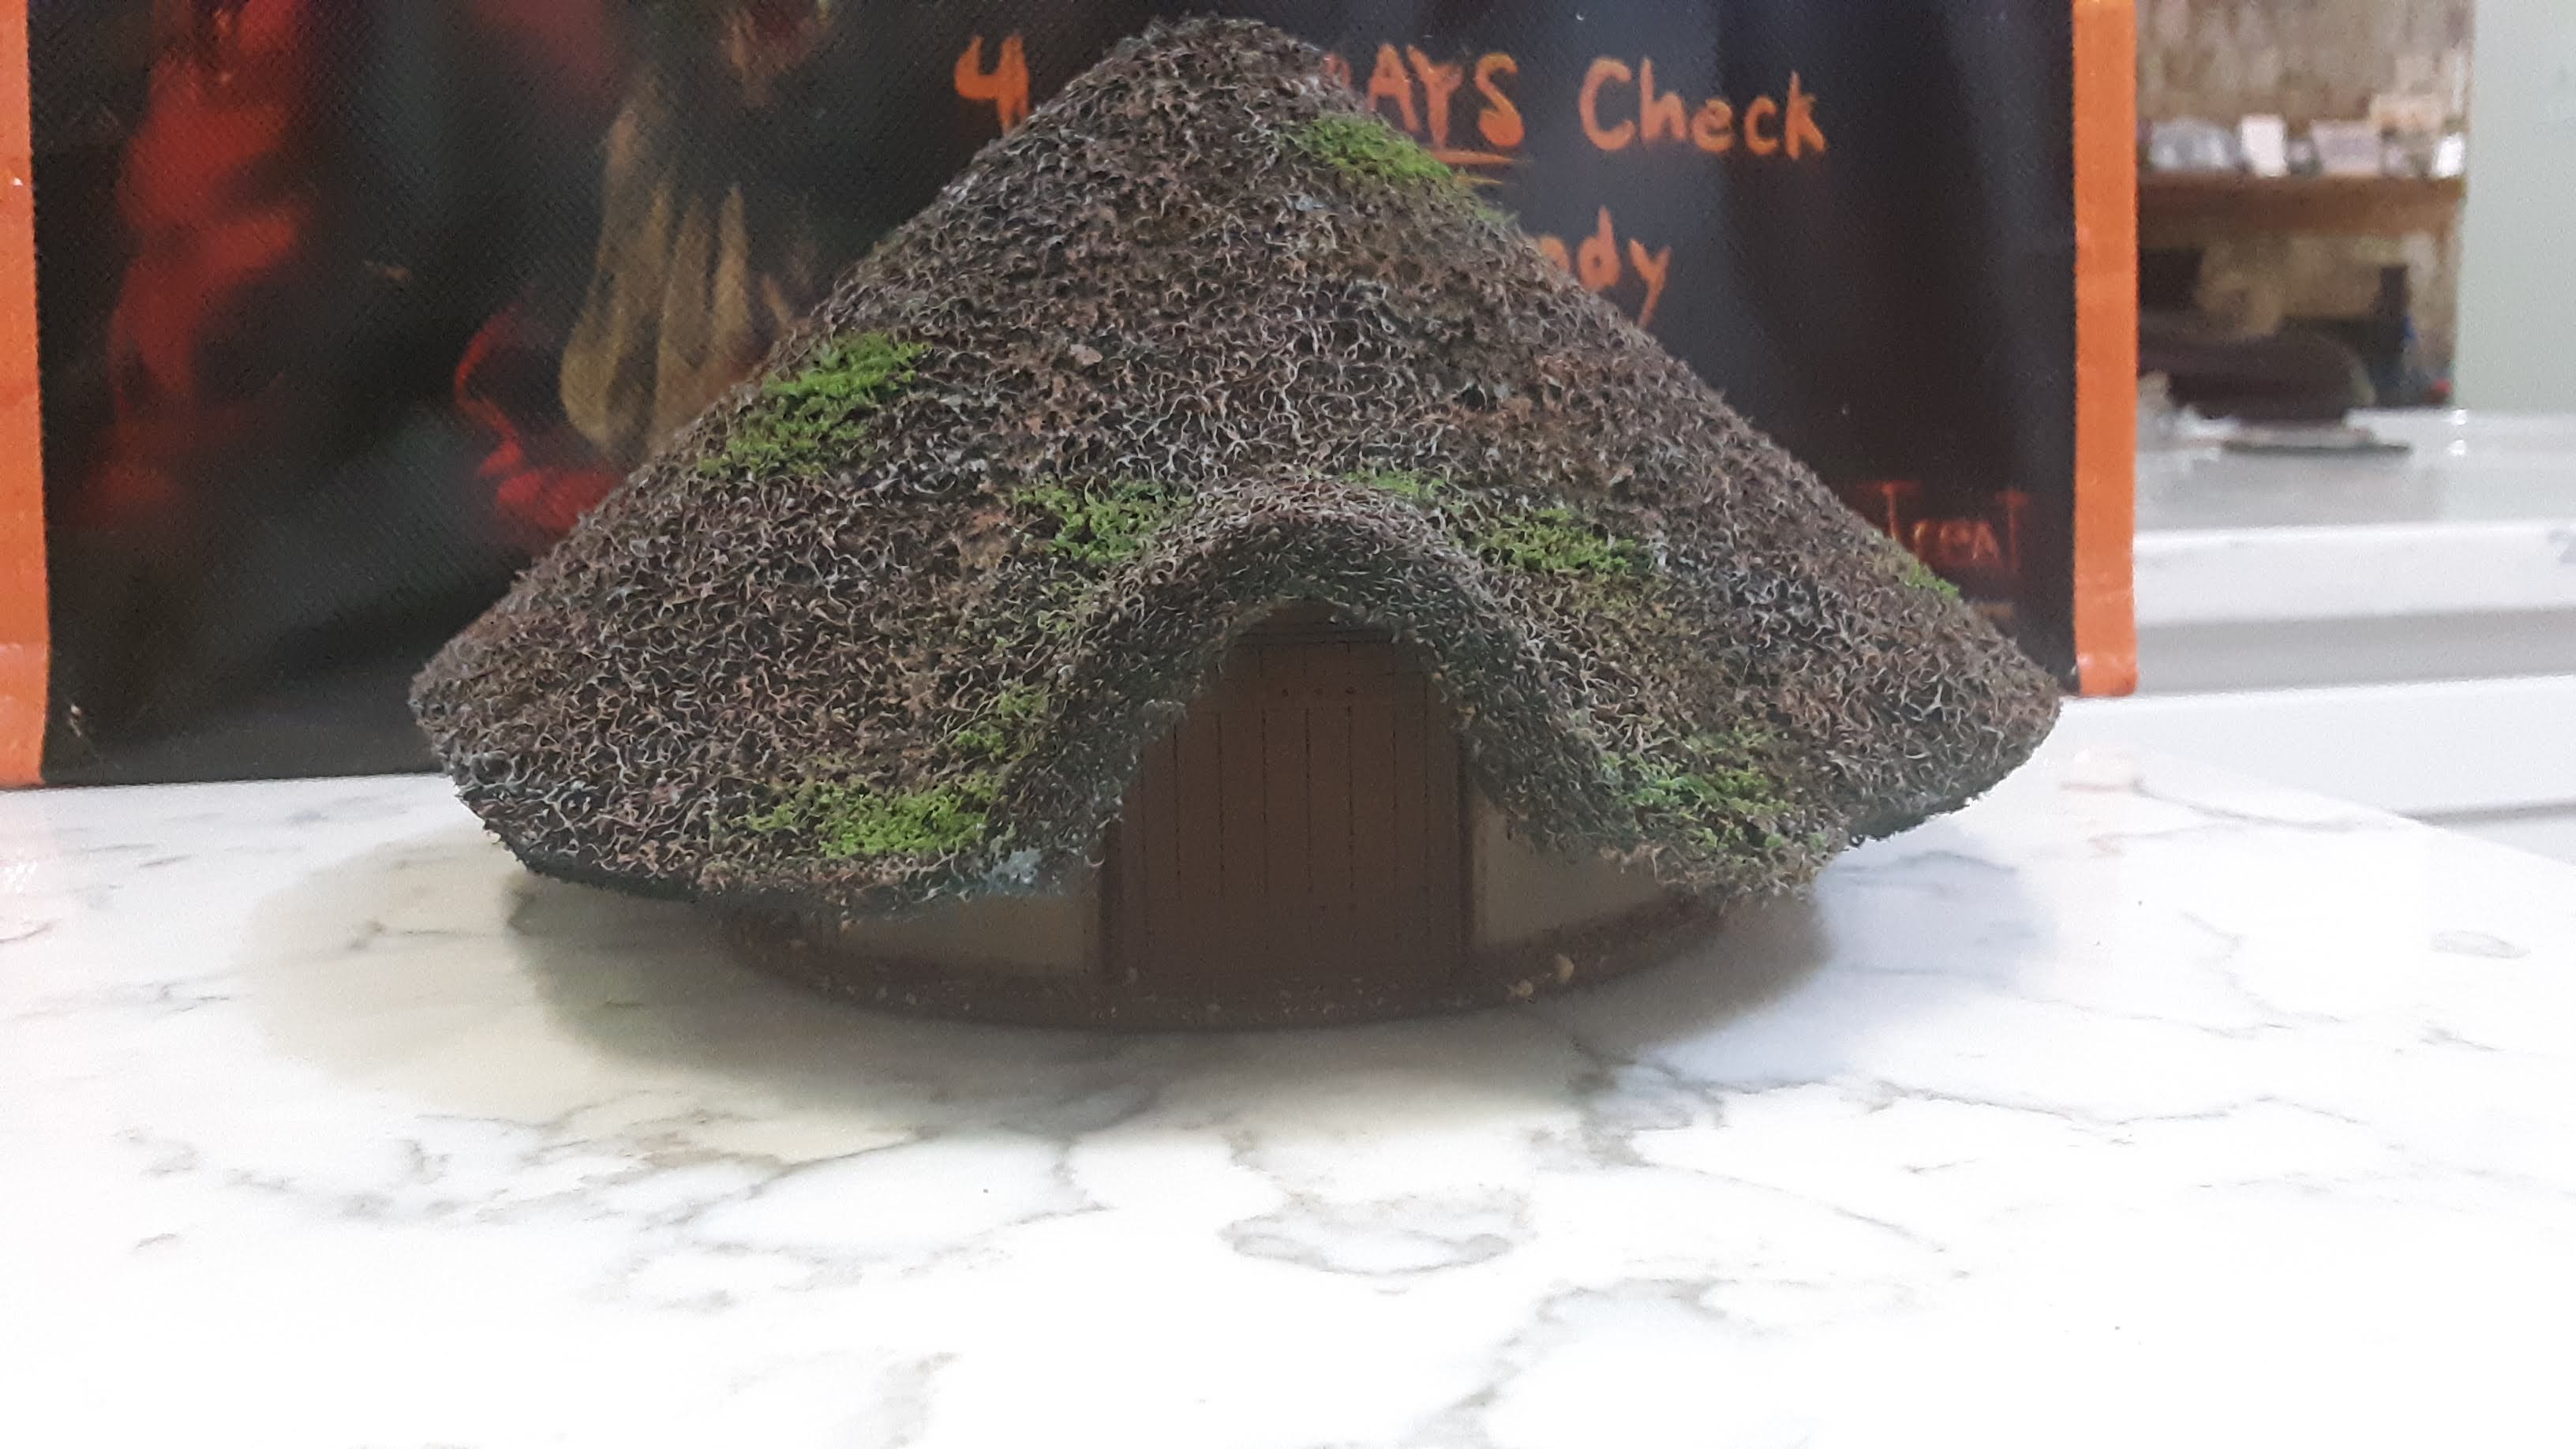
I shared the pictures of my roundhouses with a friend and he suggested adding another color. I went with a dry brush of a gray craft paint.
While that was drying, I looked up some images of roundhouses and saw that sometimes moss could grow on the roofs. I decided to add some PVA glue to spots on the roof that I felt could use some additional color and where moss or other plants might grow.
I think the buildings turned out well and didn’t take me very long.
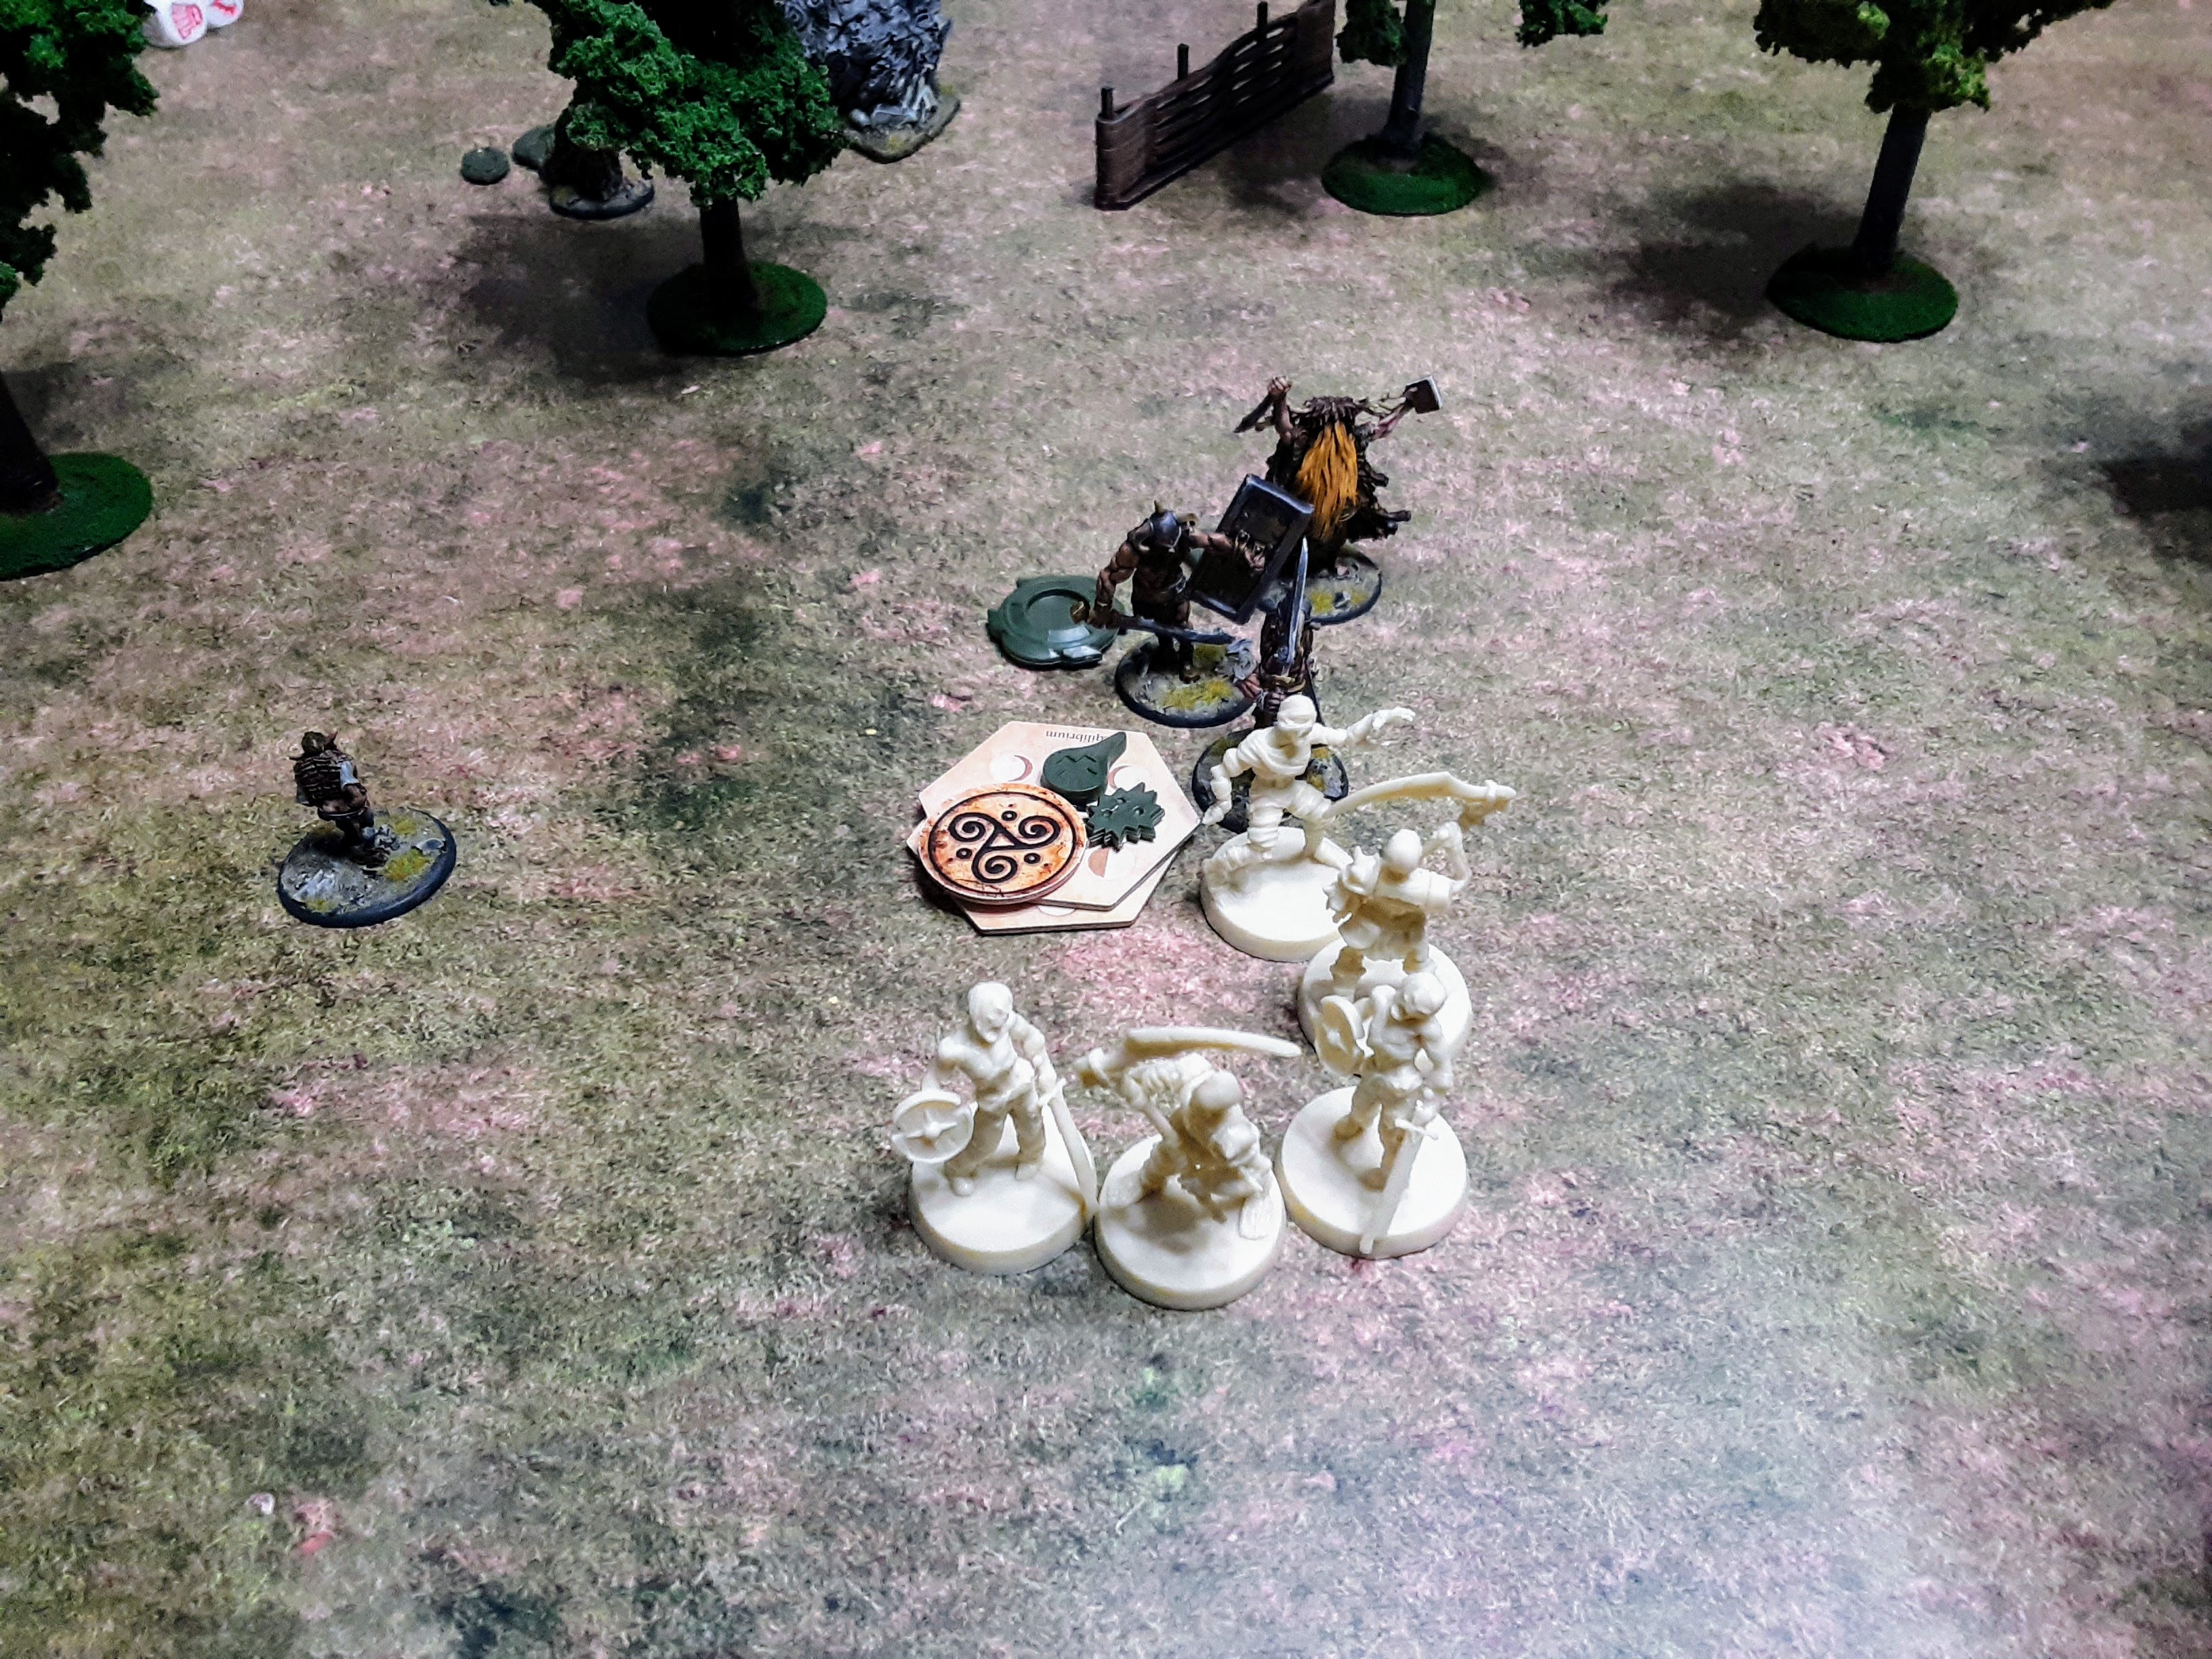
Game Day!
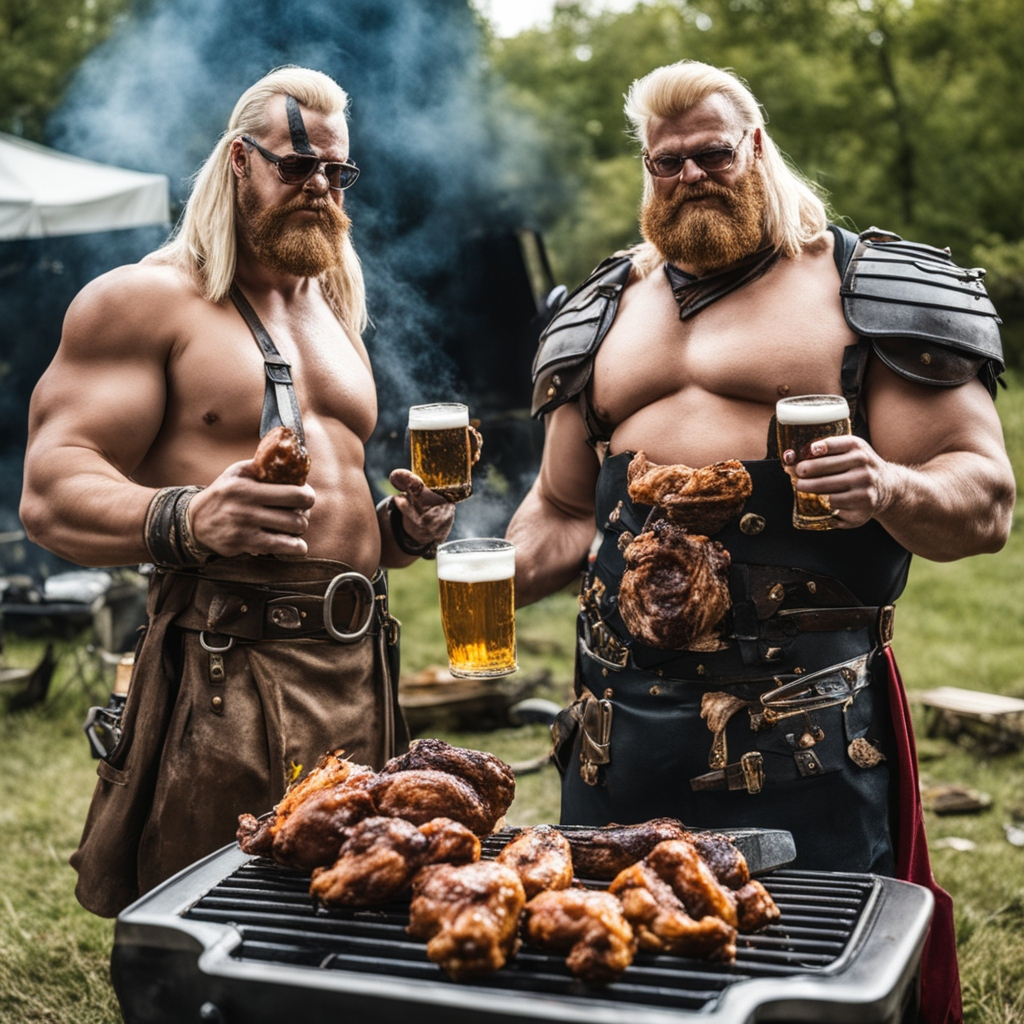 This is a very accurate AI image of last Saturday
I was finally able to play a game of Slaine: Kiss My Axe!
I had a friend come over for a Saturday of hanging out, adult beverages, grilling some chicken, and playing Slaine.
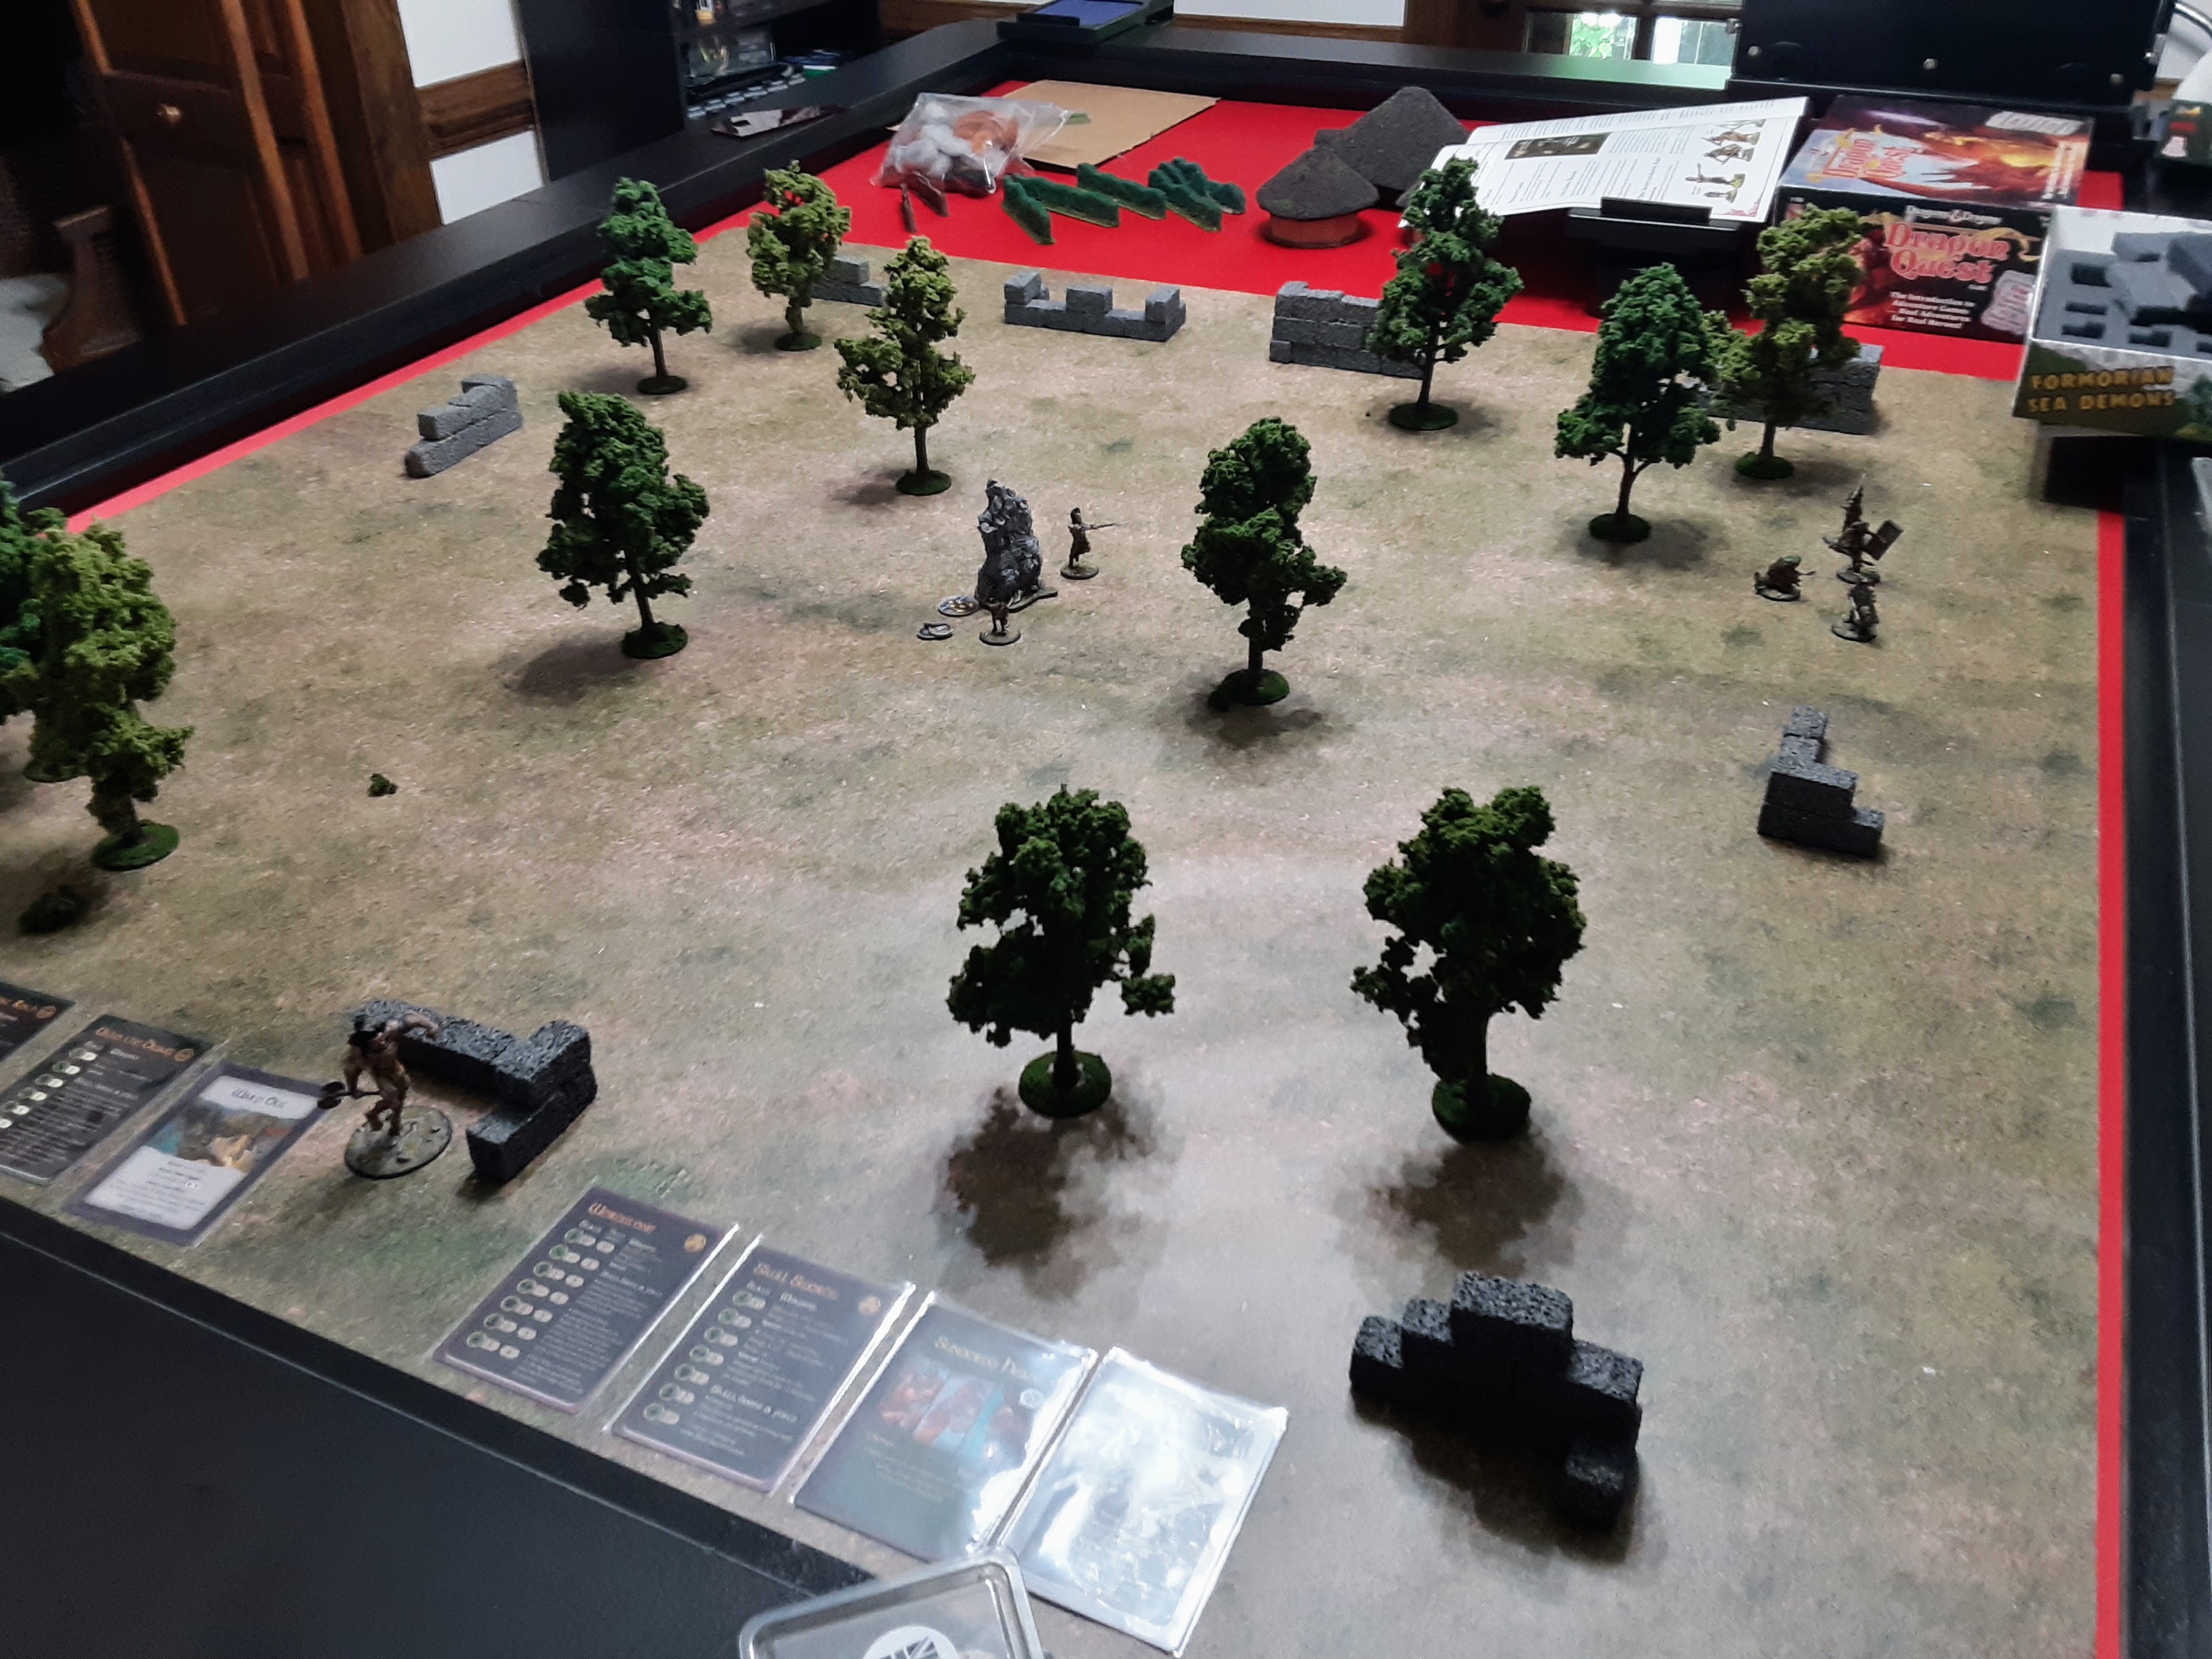
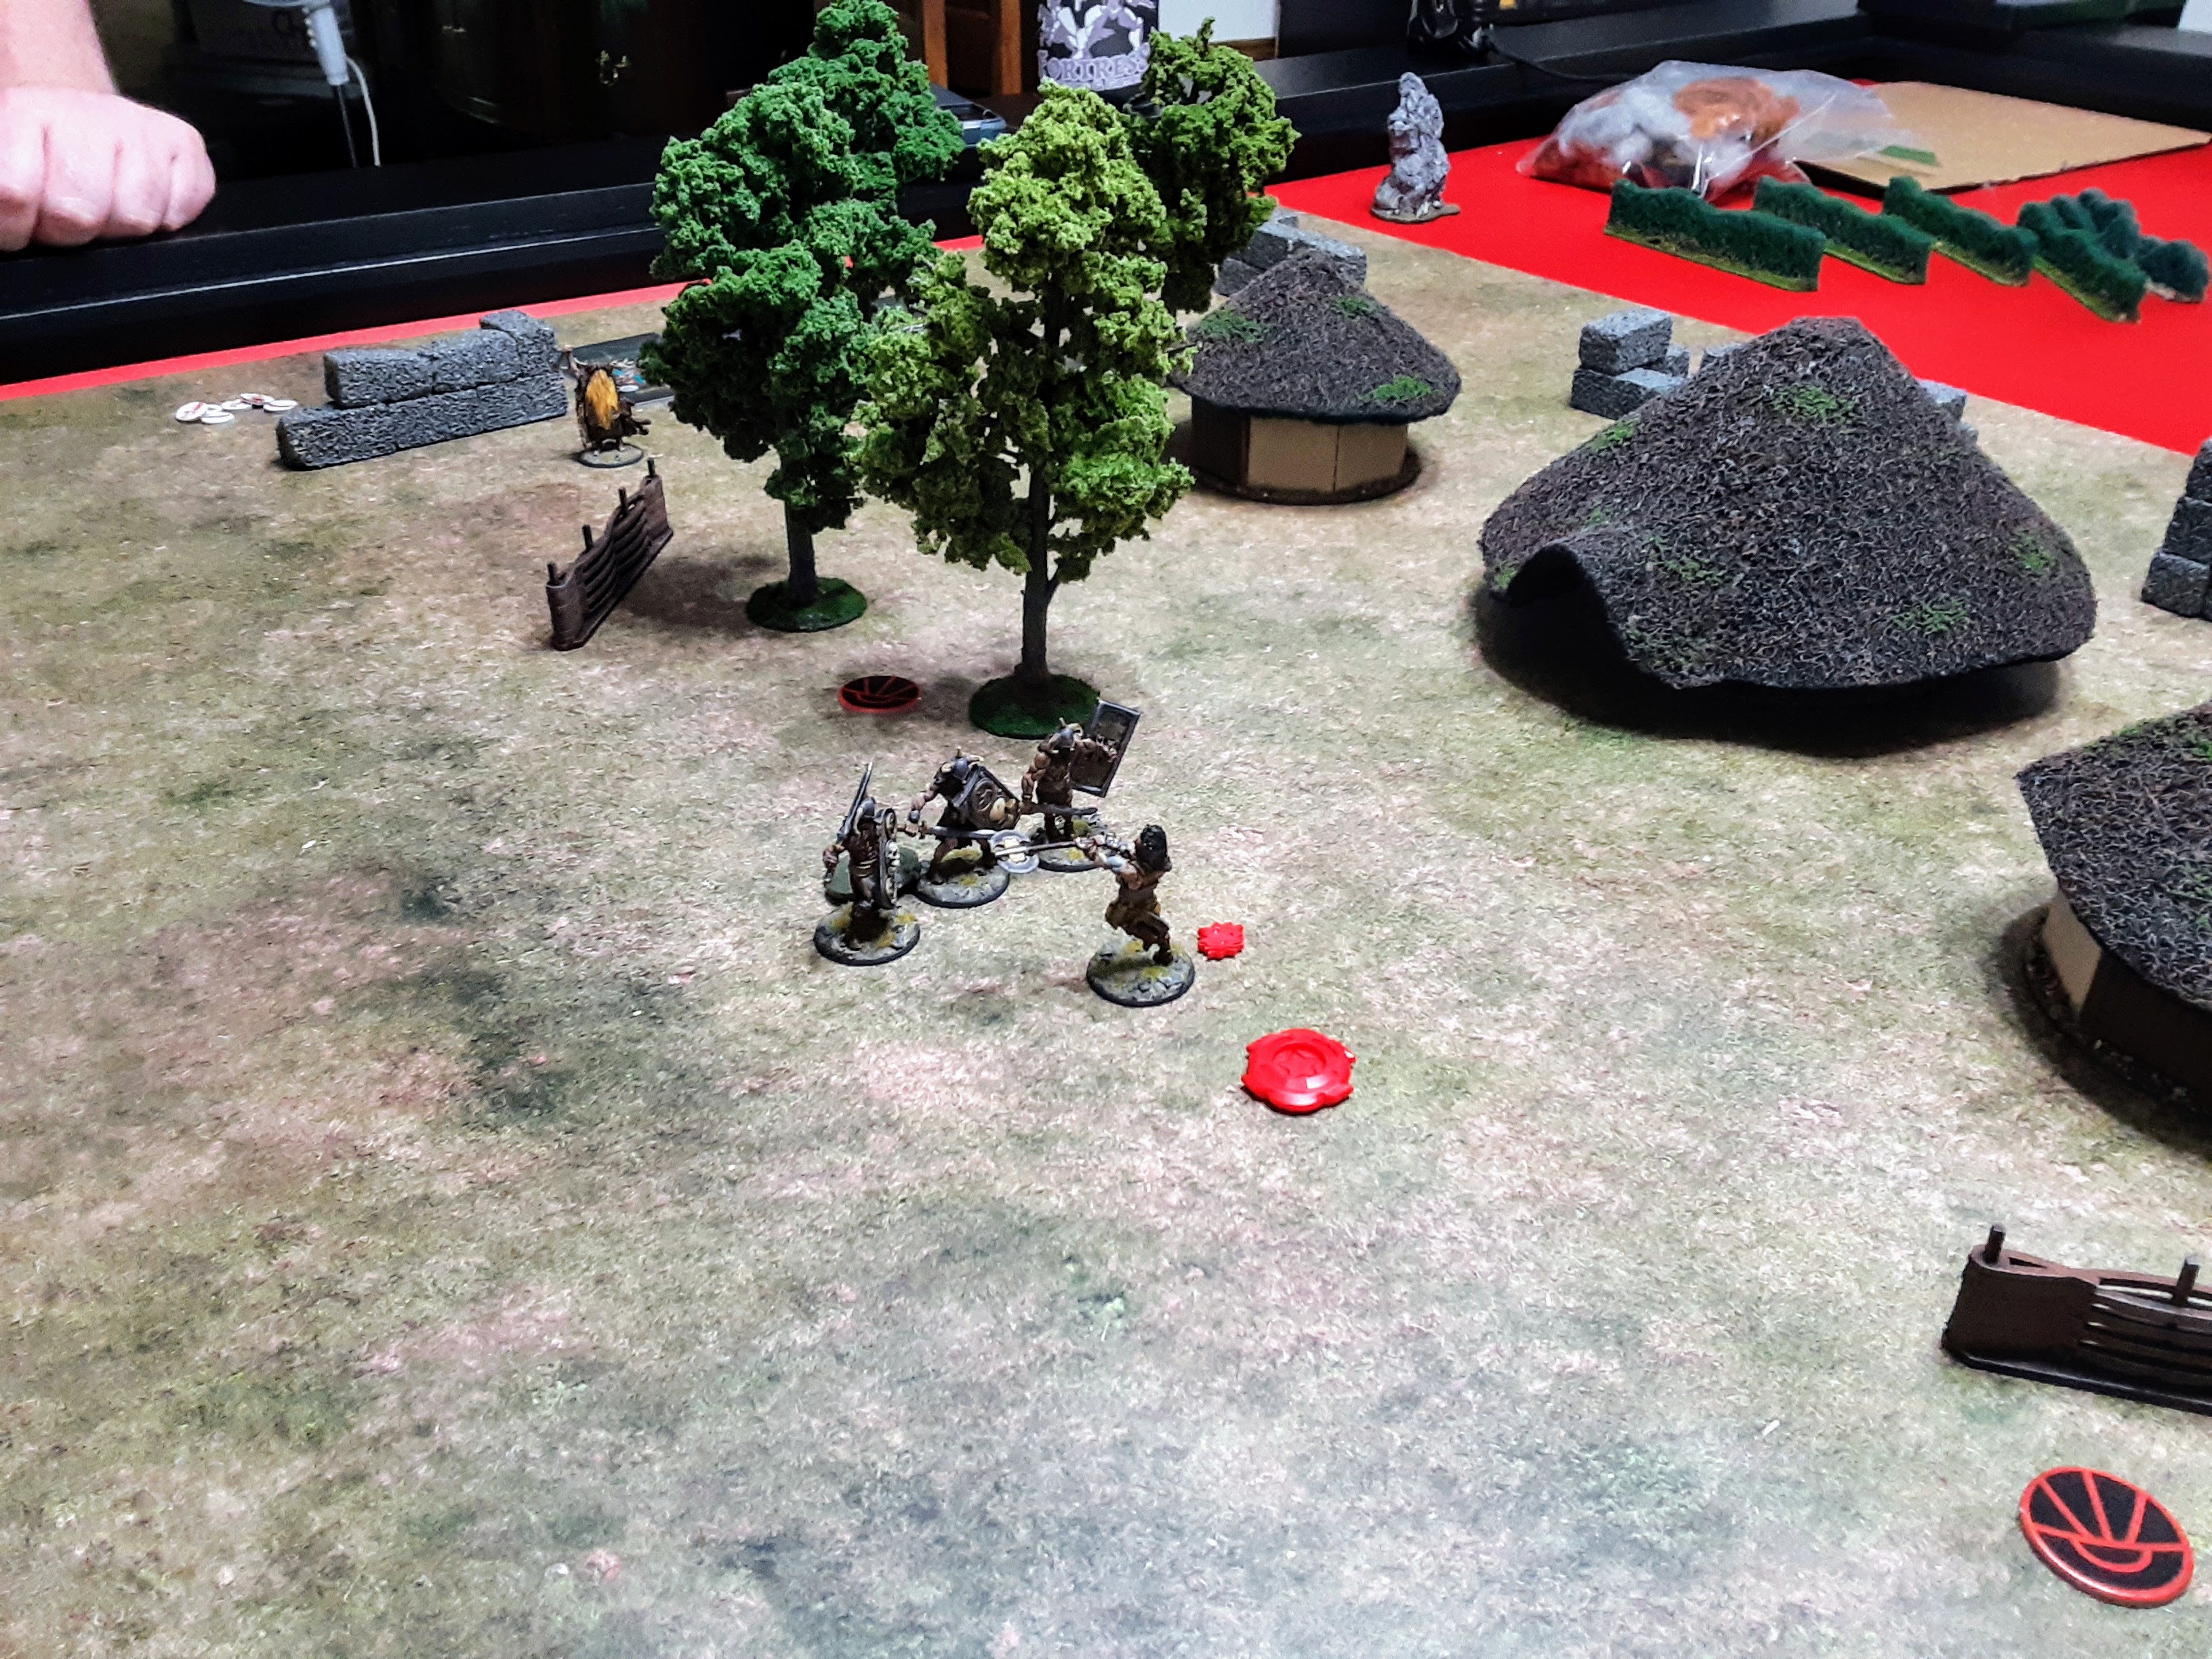
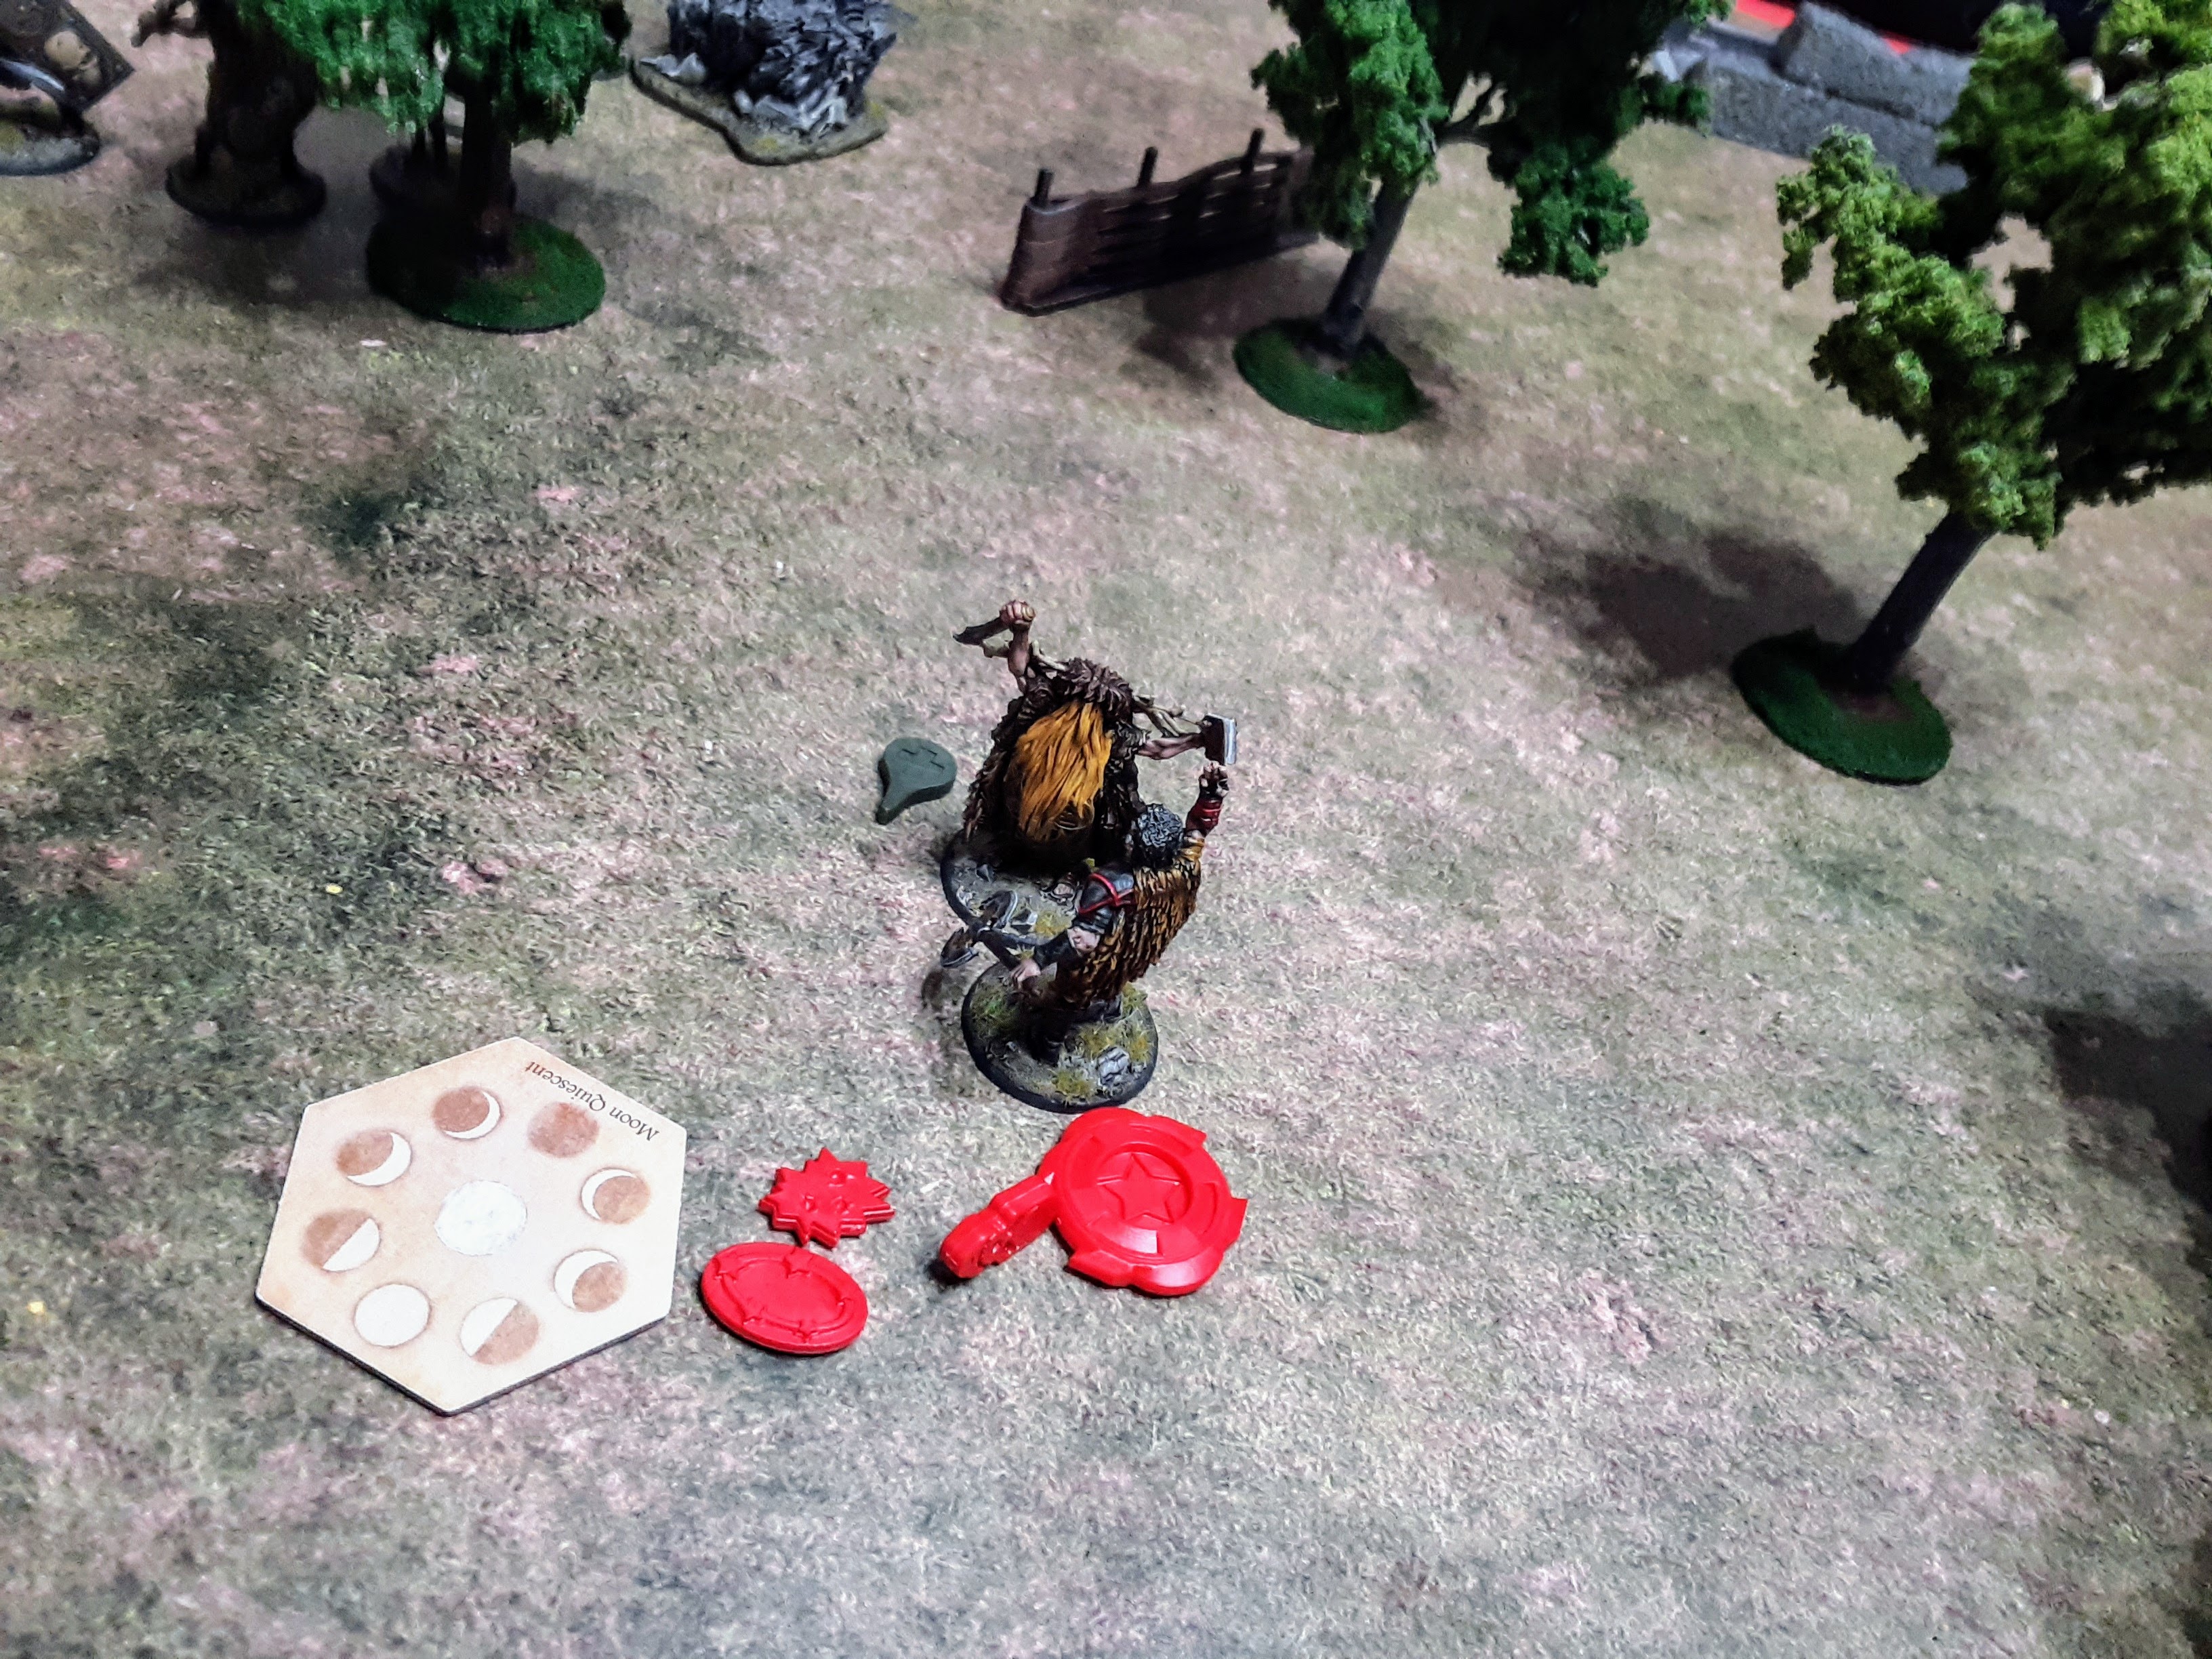
Obviously we started out by hydrating and playing the first beginner scenario, Treasures of Crom. I set up the table ahead of time with the the trees I made, and used some foam blocks/walls I made for D&D to mark out the 3×3 play area on my map. My friend chose to play the Drune force. Slaine’s goal was to gather as much treasure as possible while Drune for attempted to stop Ukko and Slaine from escaping.
Slaine and Ukko were quickly placed in a tough spot after the Drune force deployed. I decided that Ukko would heroically double move away from the Drune forces. Slaine moved back and dropped the heavy idol he was carrying to prepare for a tough fight.
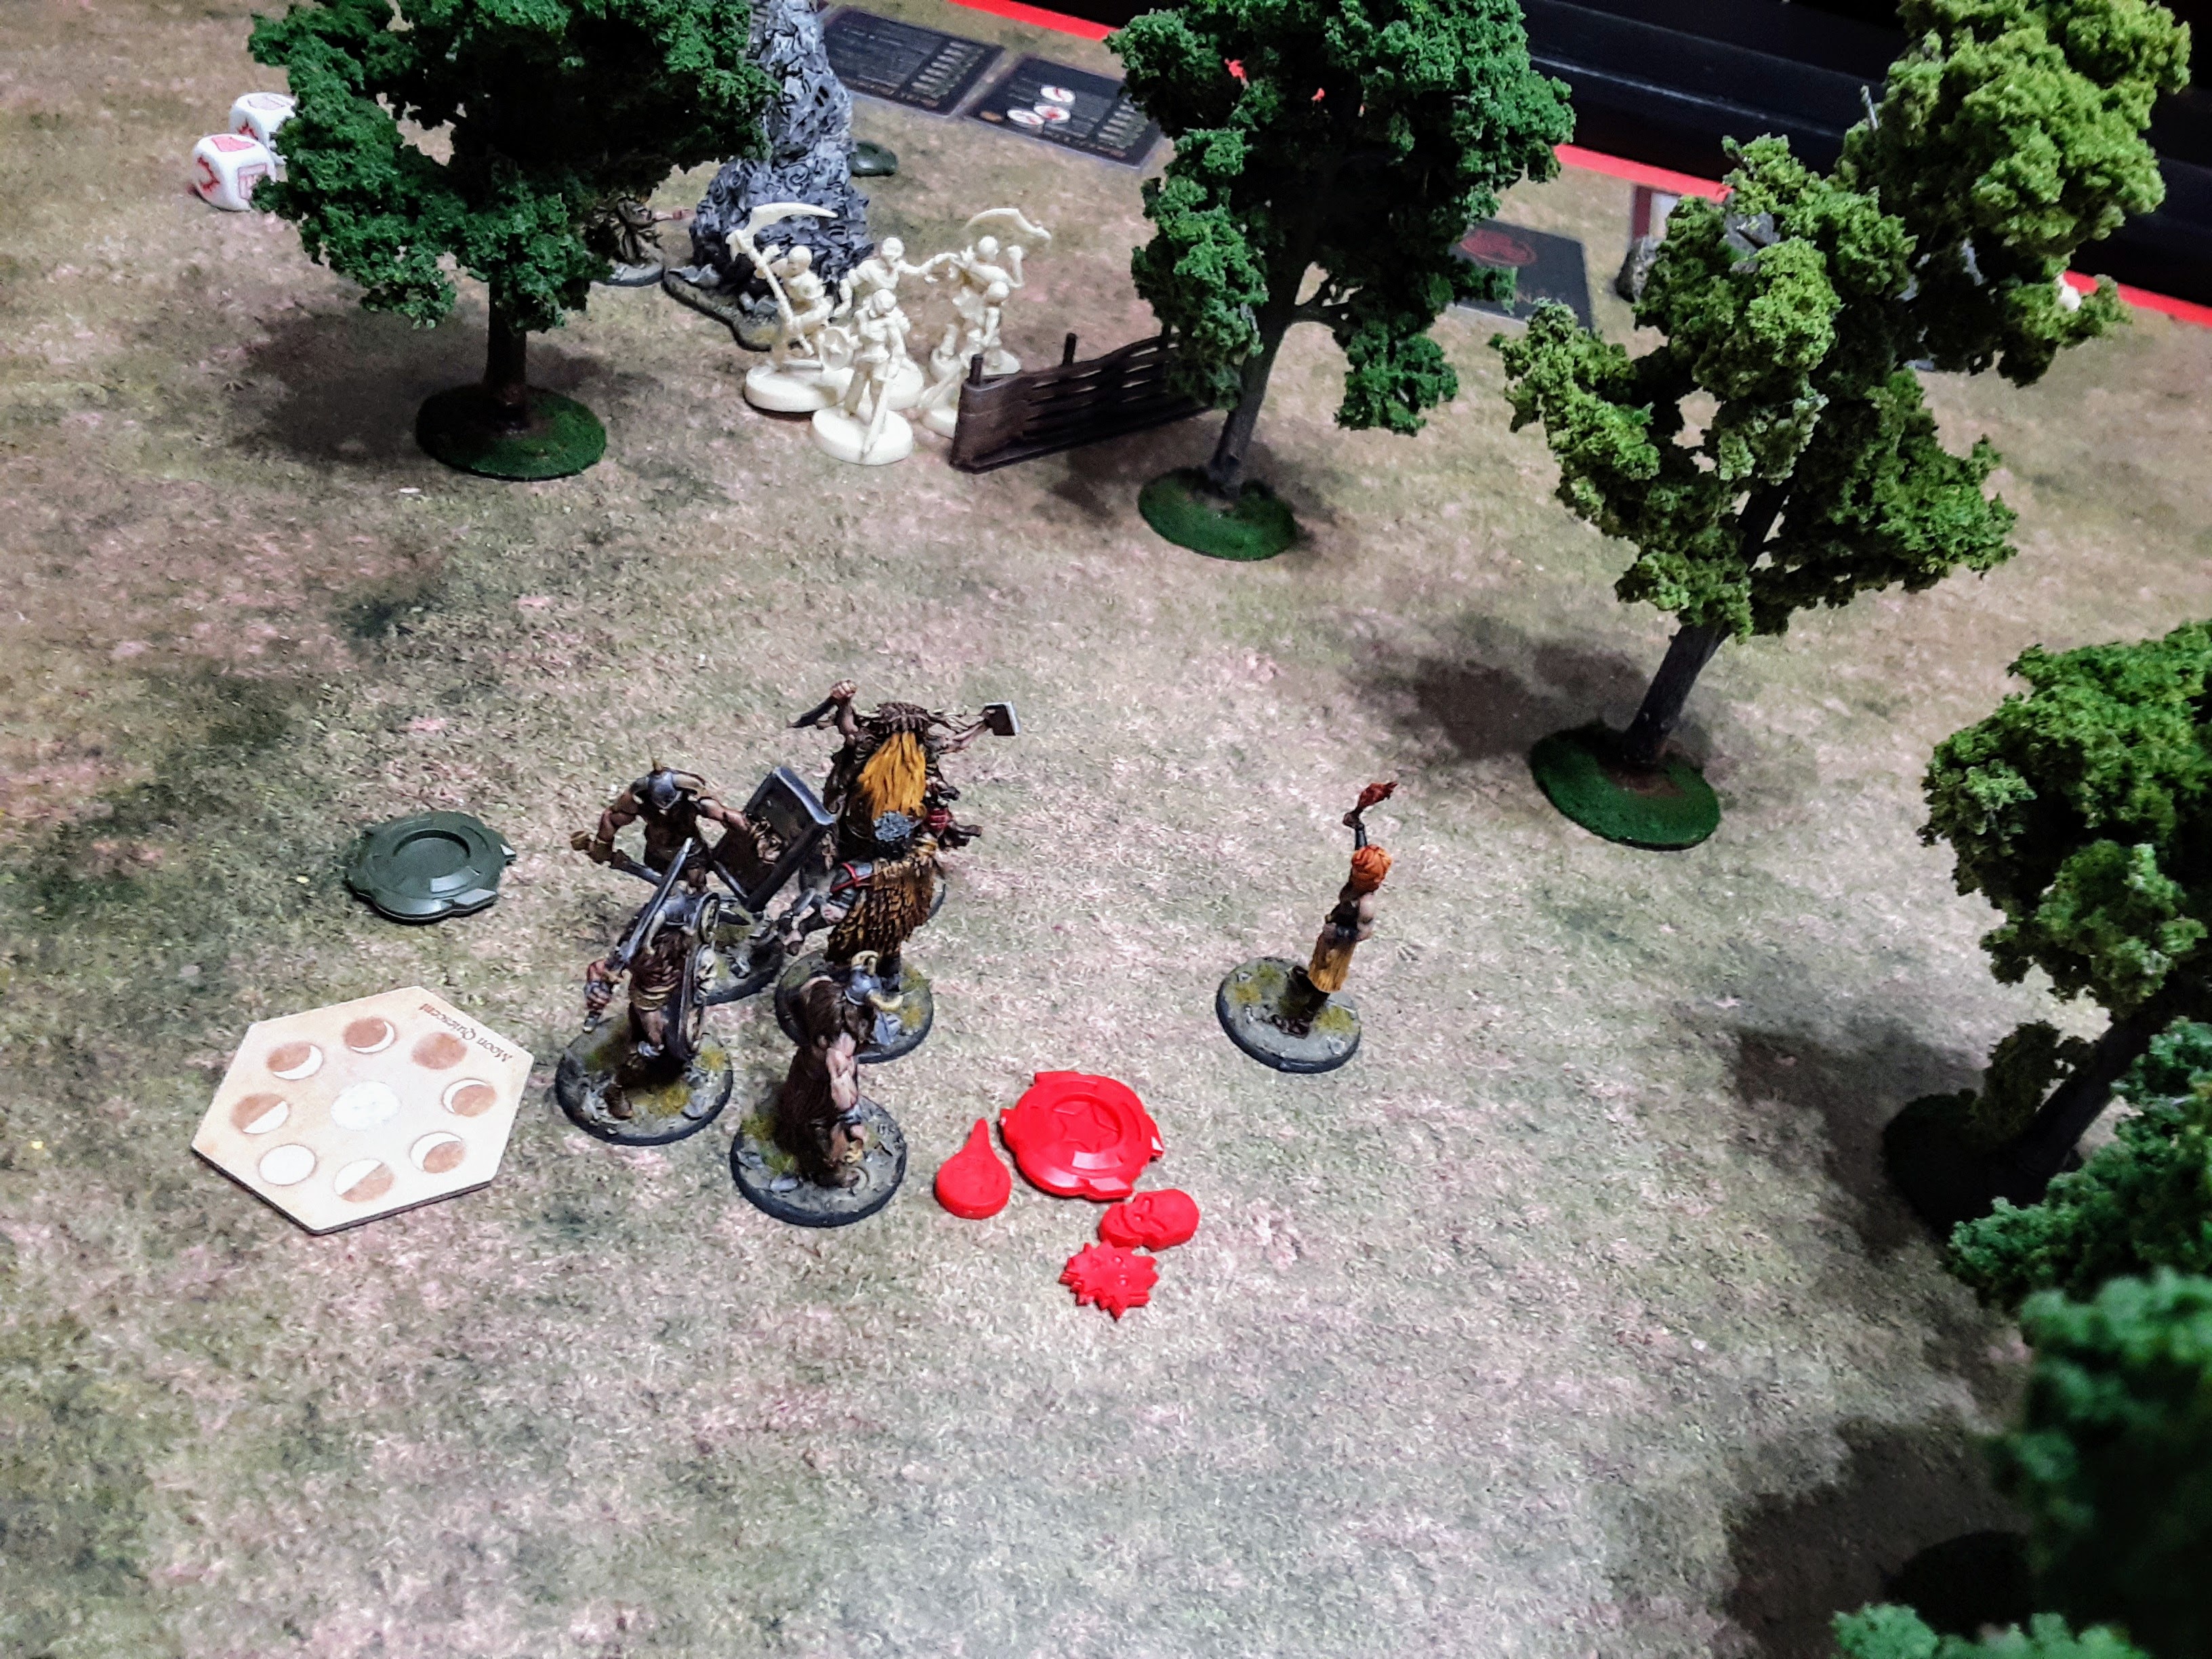
My friend was able to get his Skull Swords into combat with Slaine and we worked our way through close combat. I tried out some feats, and sadley Slaine didn’t get to Warp out on anyone. My friend didn’t care much for the Star Chips giving Slaine extra actions.
At this point Ukko had secured his treasure and ran off the board.
Slaine easily defeated the Drunes after a few rounds of combat. He then moved in to kill the priest and my friend decided to call the end of the first scenario.
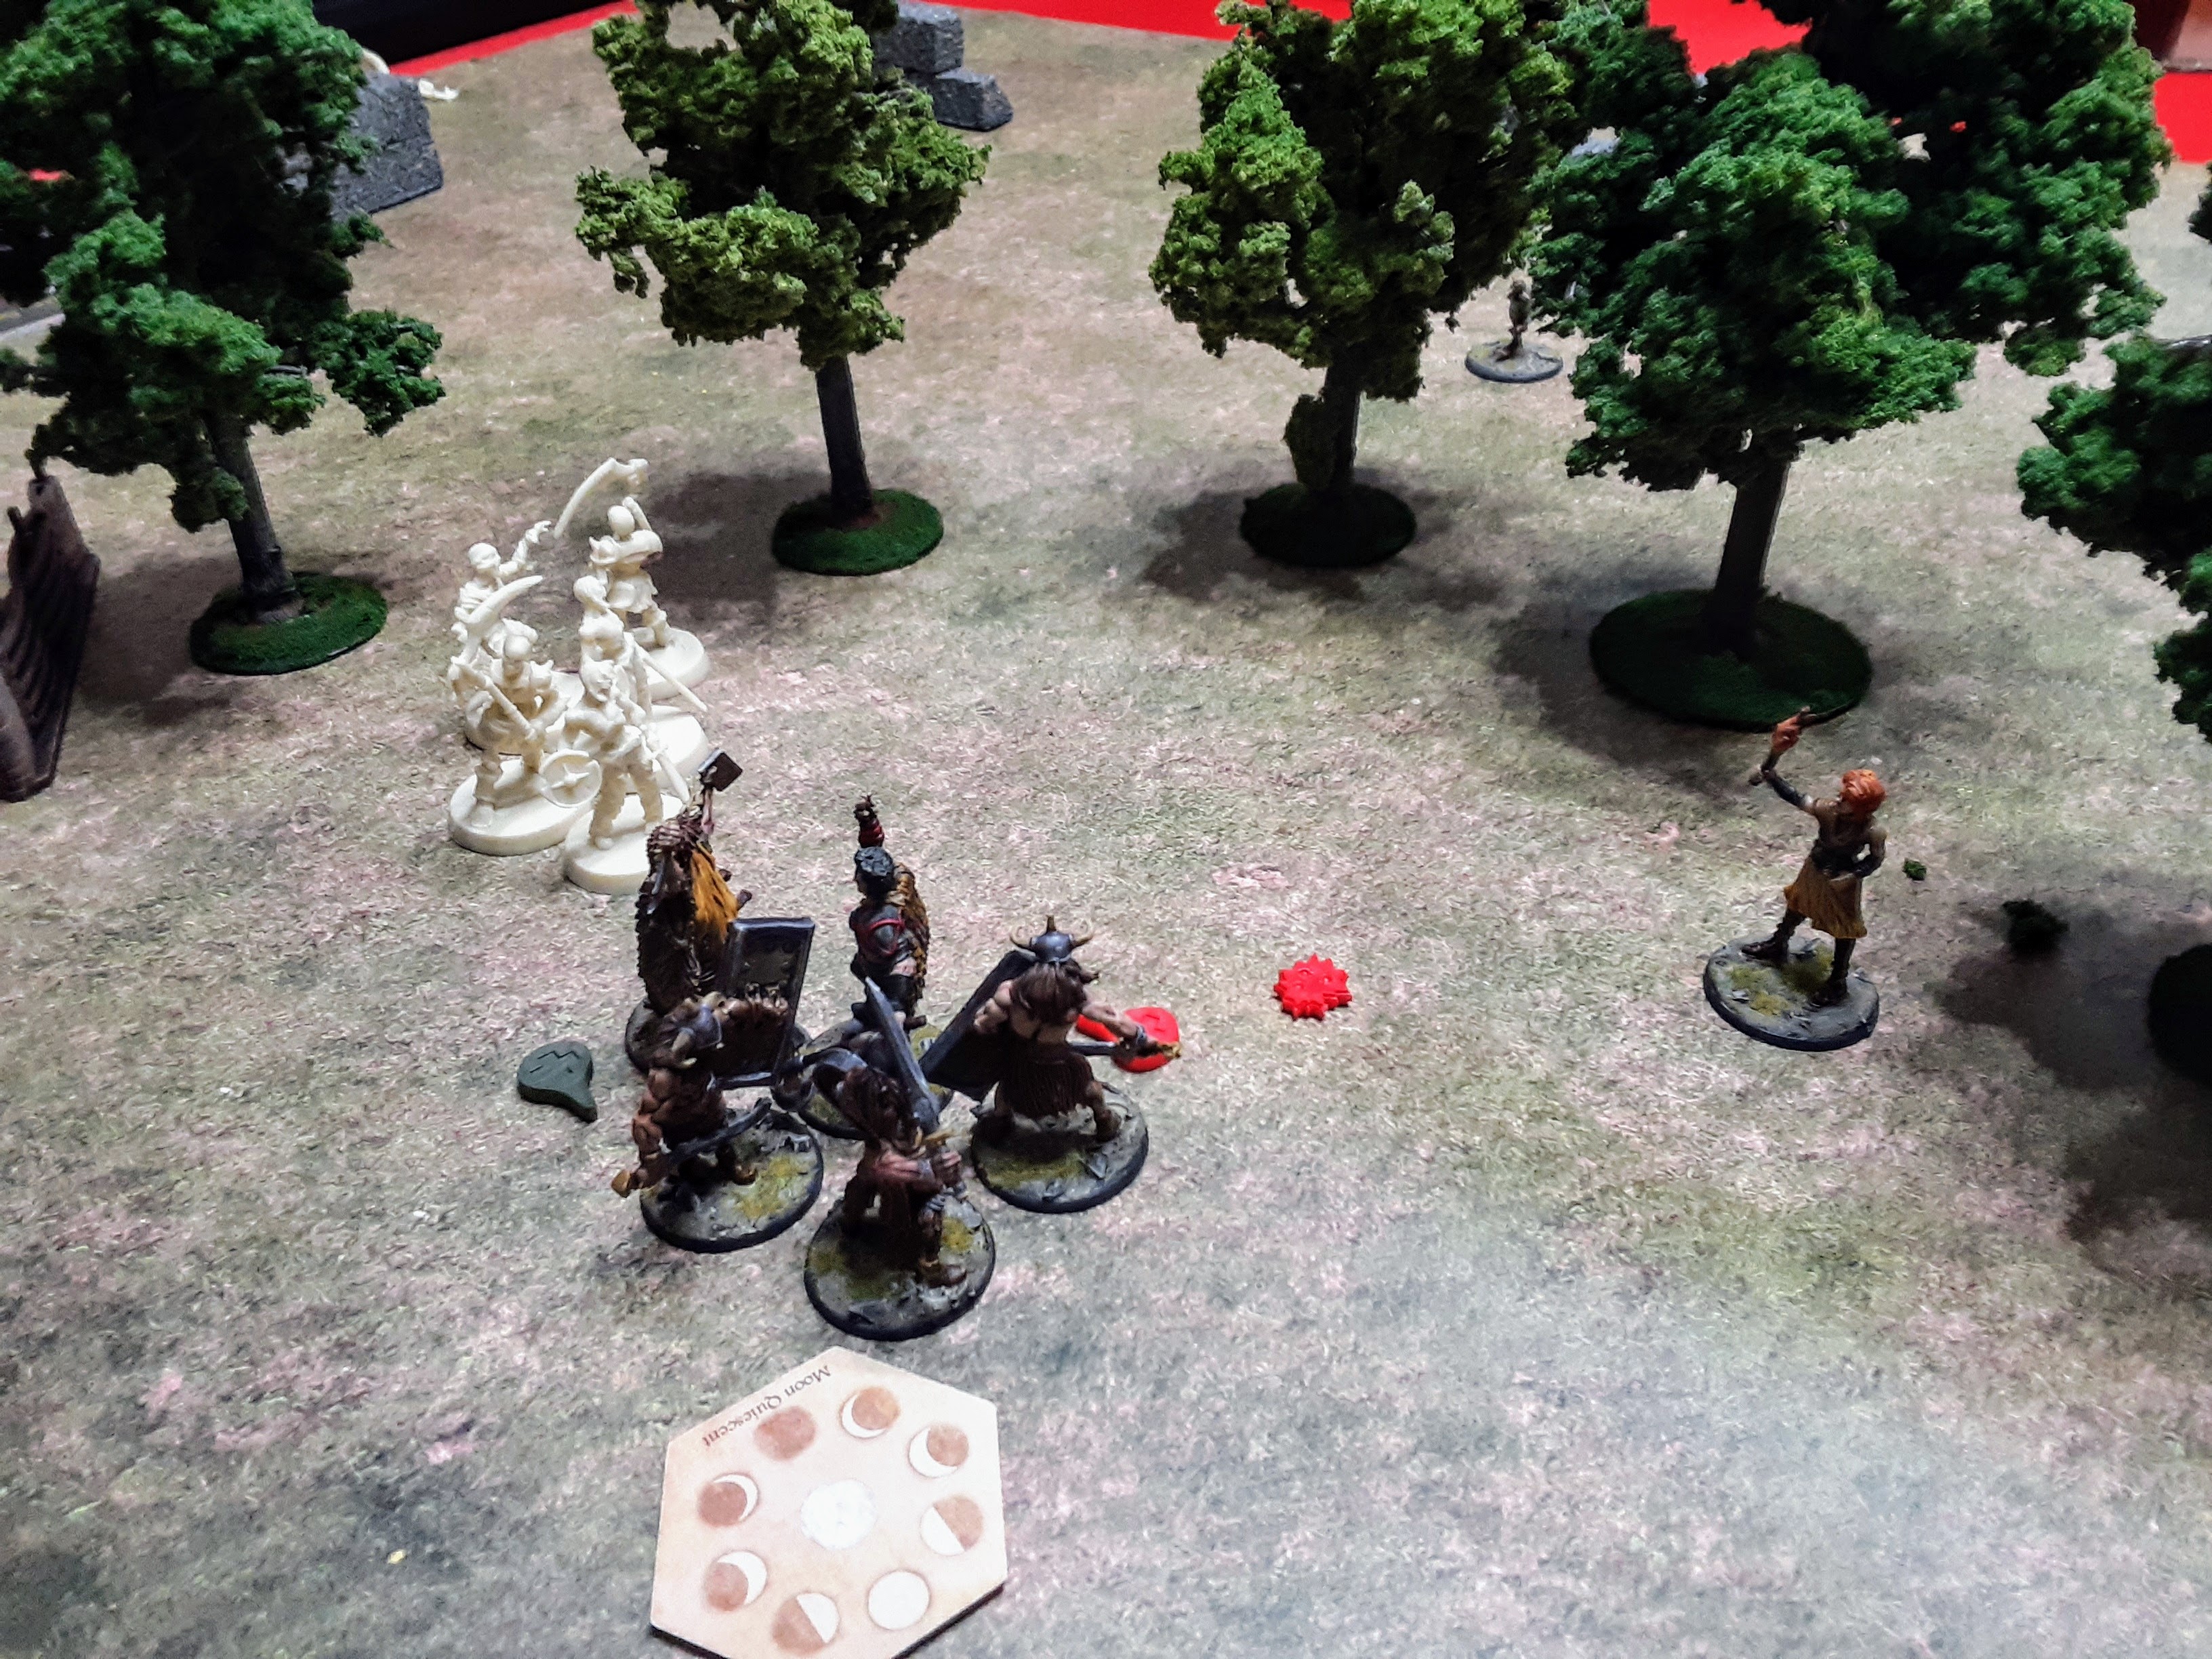
We set up for the second beginner scenario, A God’s Favour, after I finished prepping the grill. I was able to use the three roundhouses I made and we scattered the trees and moved the fencing around to match the layout for the scenario. The scenario called for the Drune force to attempt to change the sacred markers while Slaine and Ukko attempt to prevent them from succeeding. This scenario also introduced the use of Cosmic Alignment and Blood Points.
I catapulted Slaine across the table with Ukko to stop the Slough Throt from being able to change any of the sacred markers over to his side.
The next turn, Slaine was attacked by the Skull Swords. He was able to defeat them after I successfully returned the Star Chip to the bag. Slough Throt tried to gain use of his feats and boons (the Drune force was Unfavored in the scenario). Slough Throt wasn’t able to take advantage of his Star Chip during this game.
After defeating the Skull Swords, Slaine moved in and quickly killed Slough Throt…and he still didn’t Warp out this game.
This scenario when pretty quick. Once again, my friend wasn’t very thrilled with the Star Chip mechanic, but we were having a fun time learning the game.
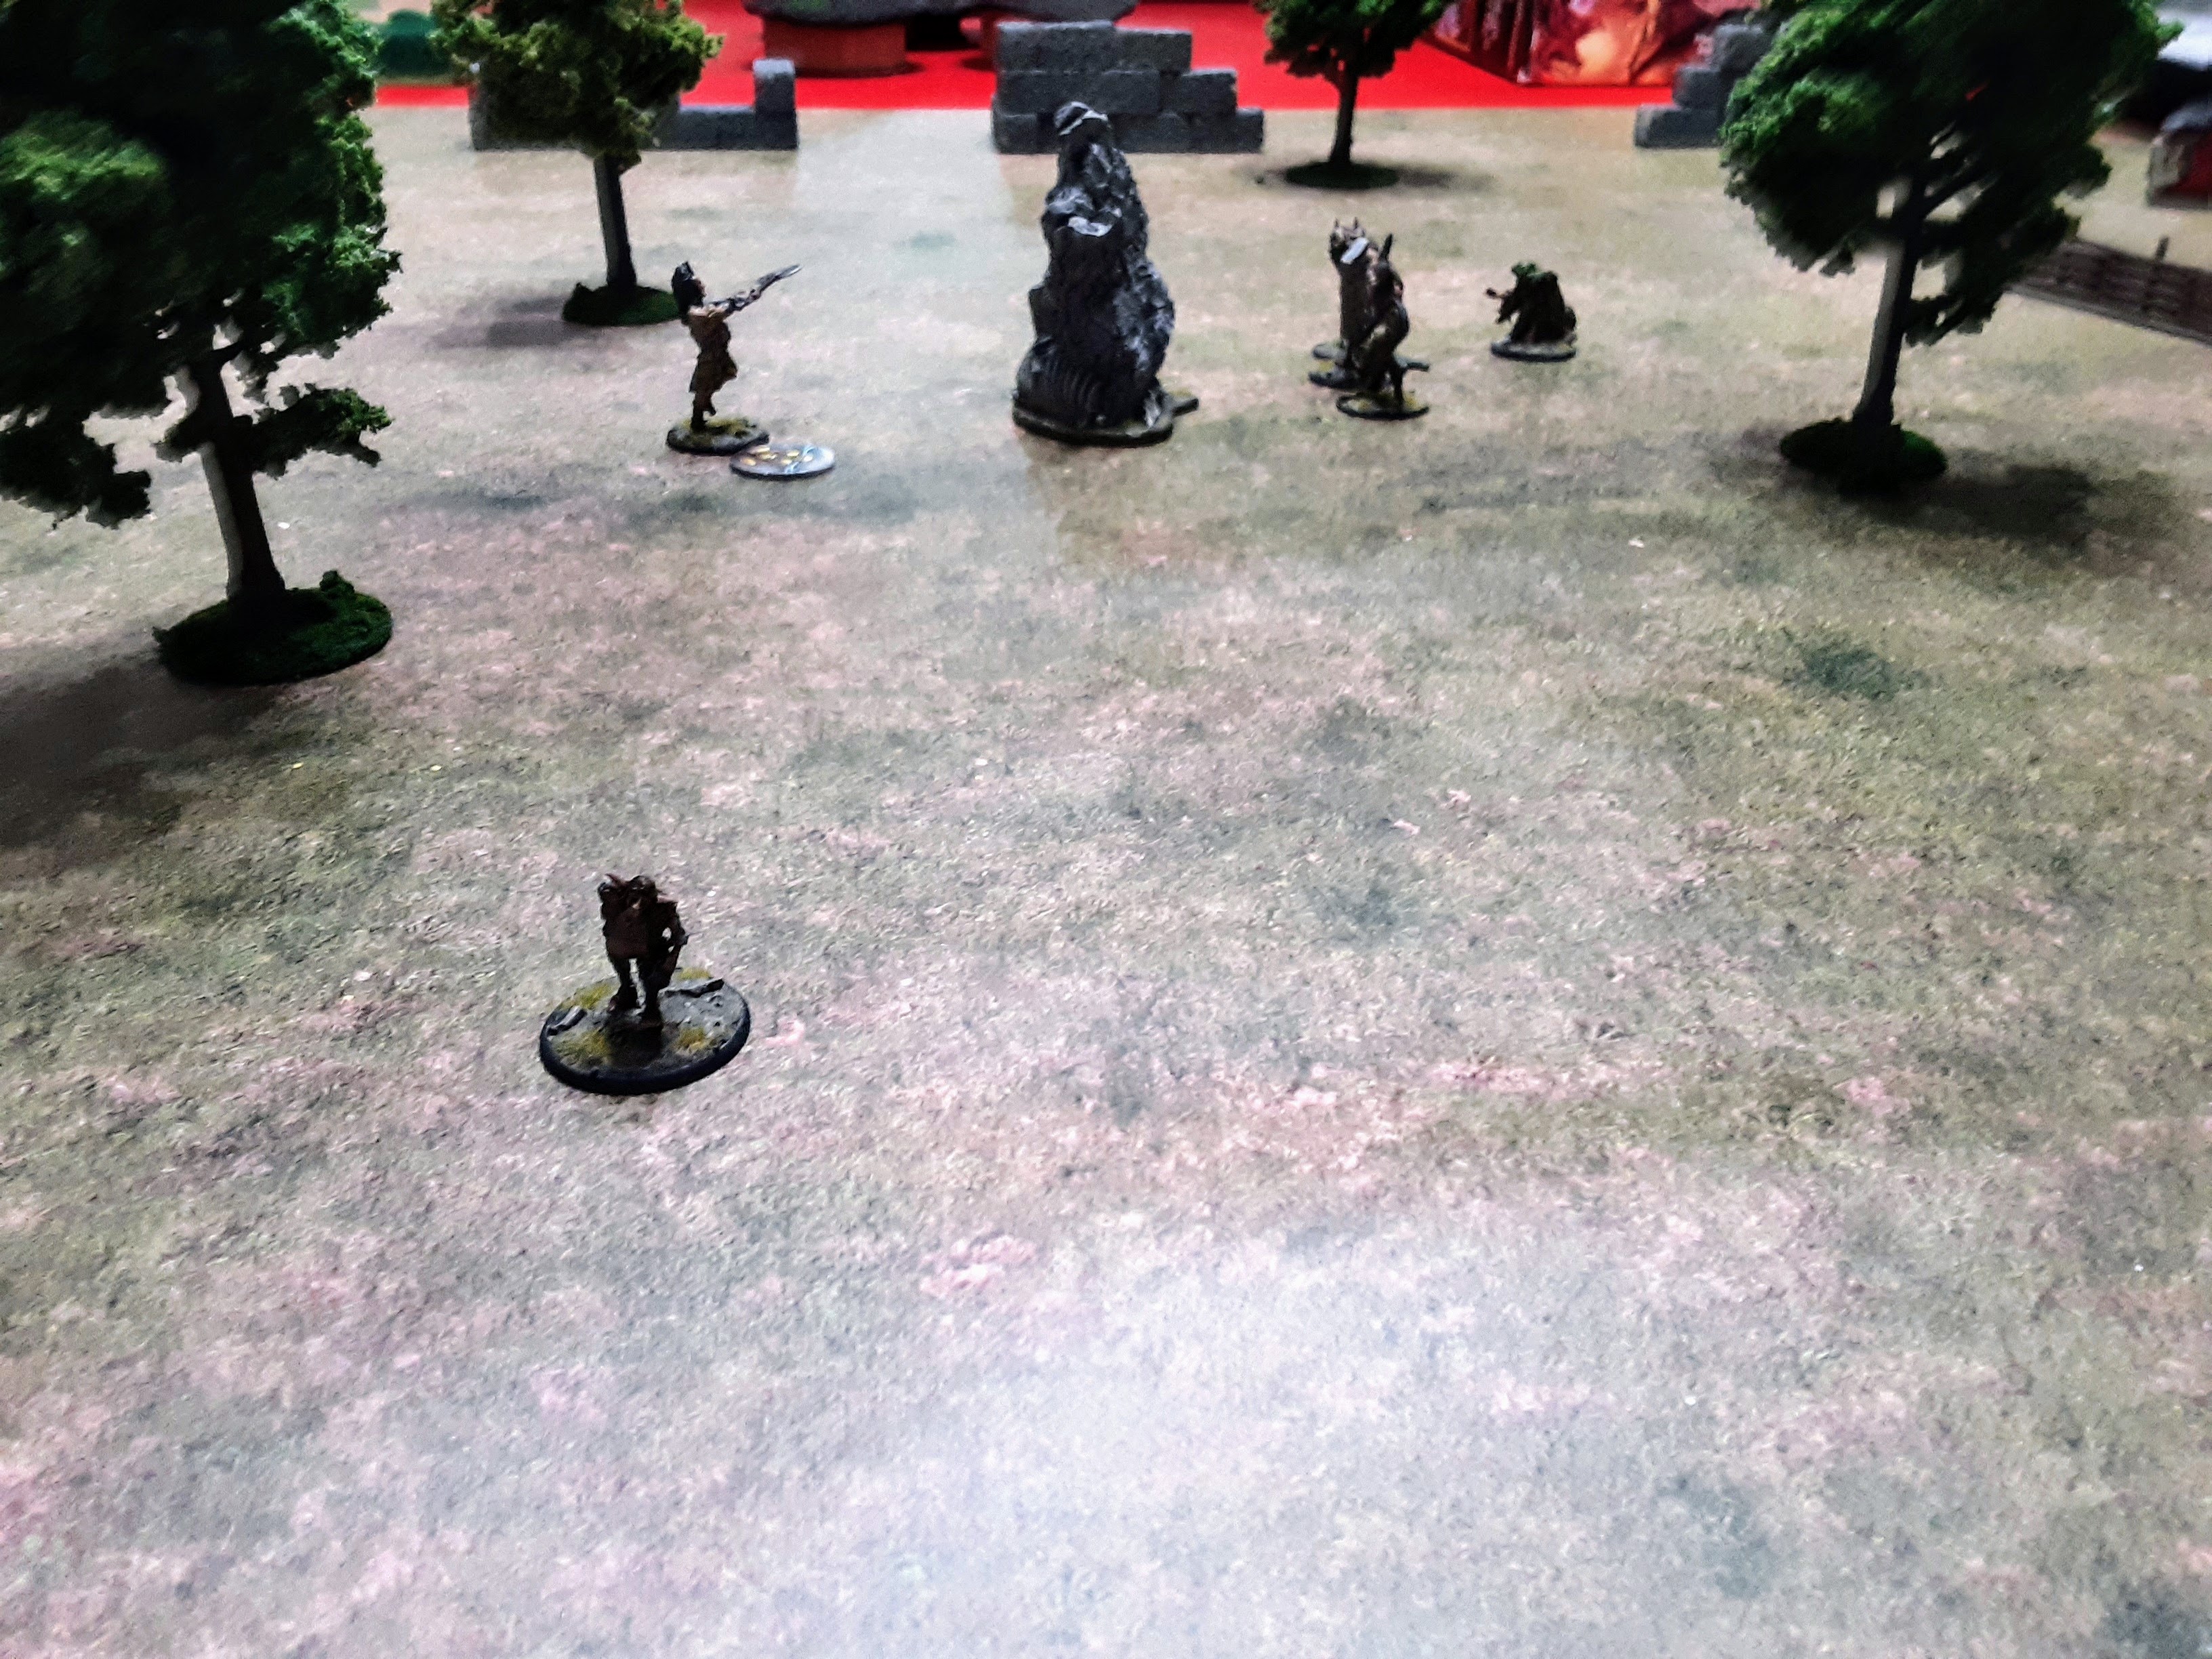
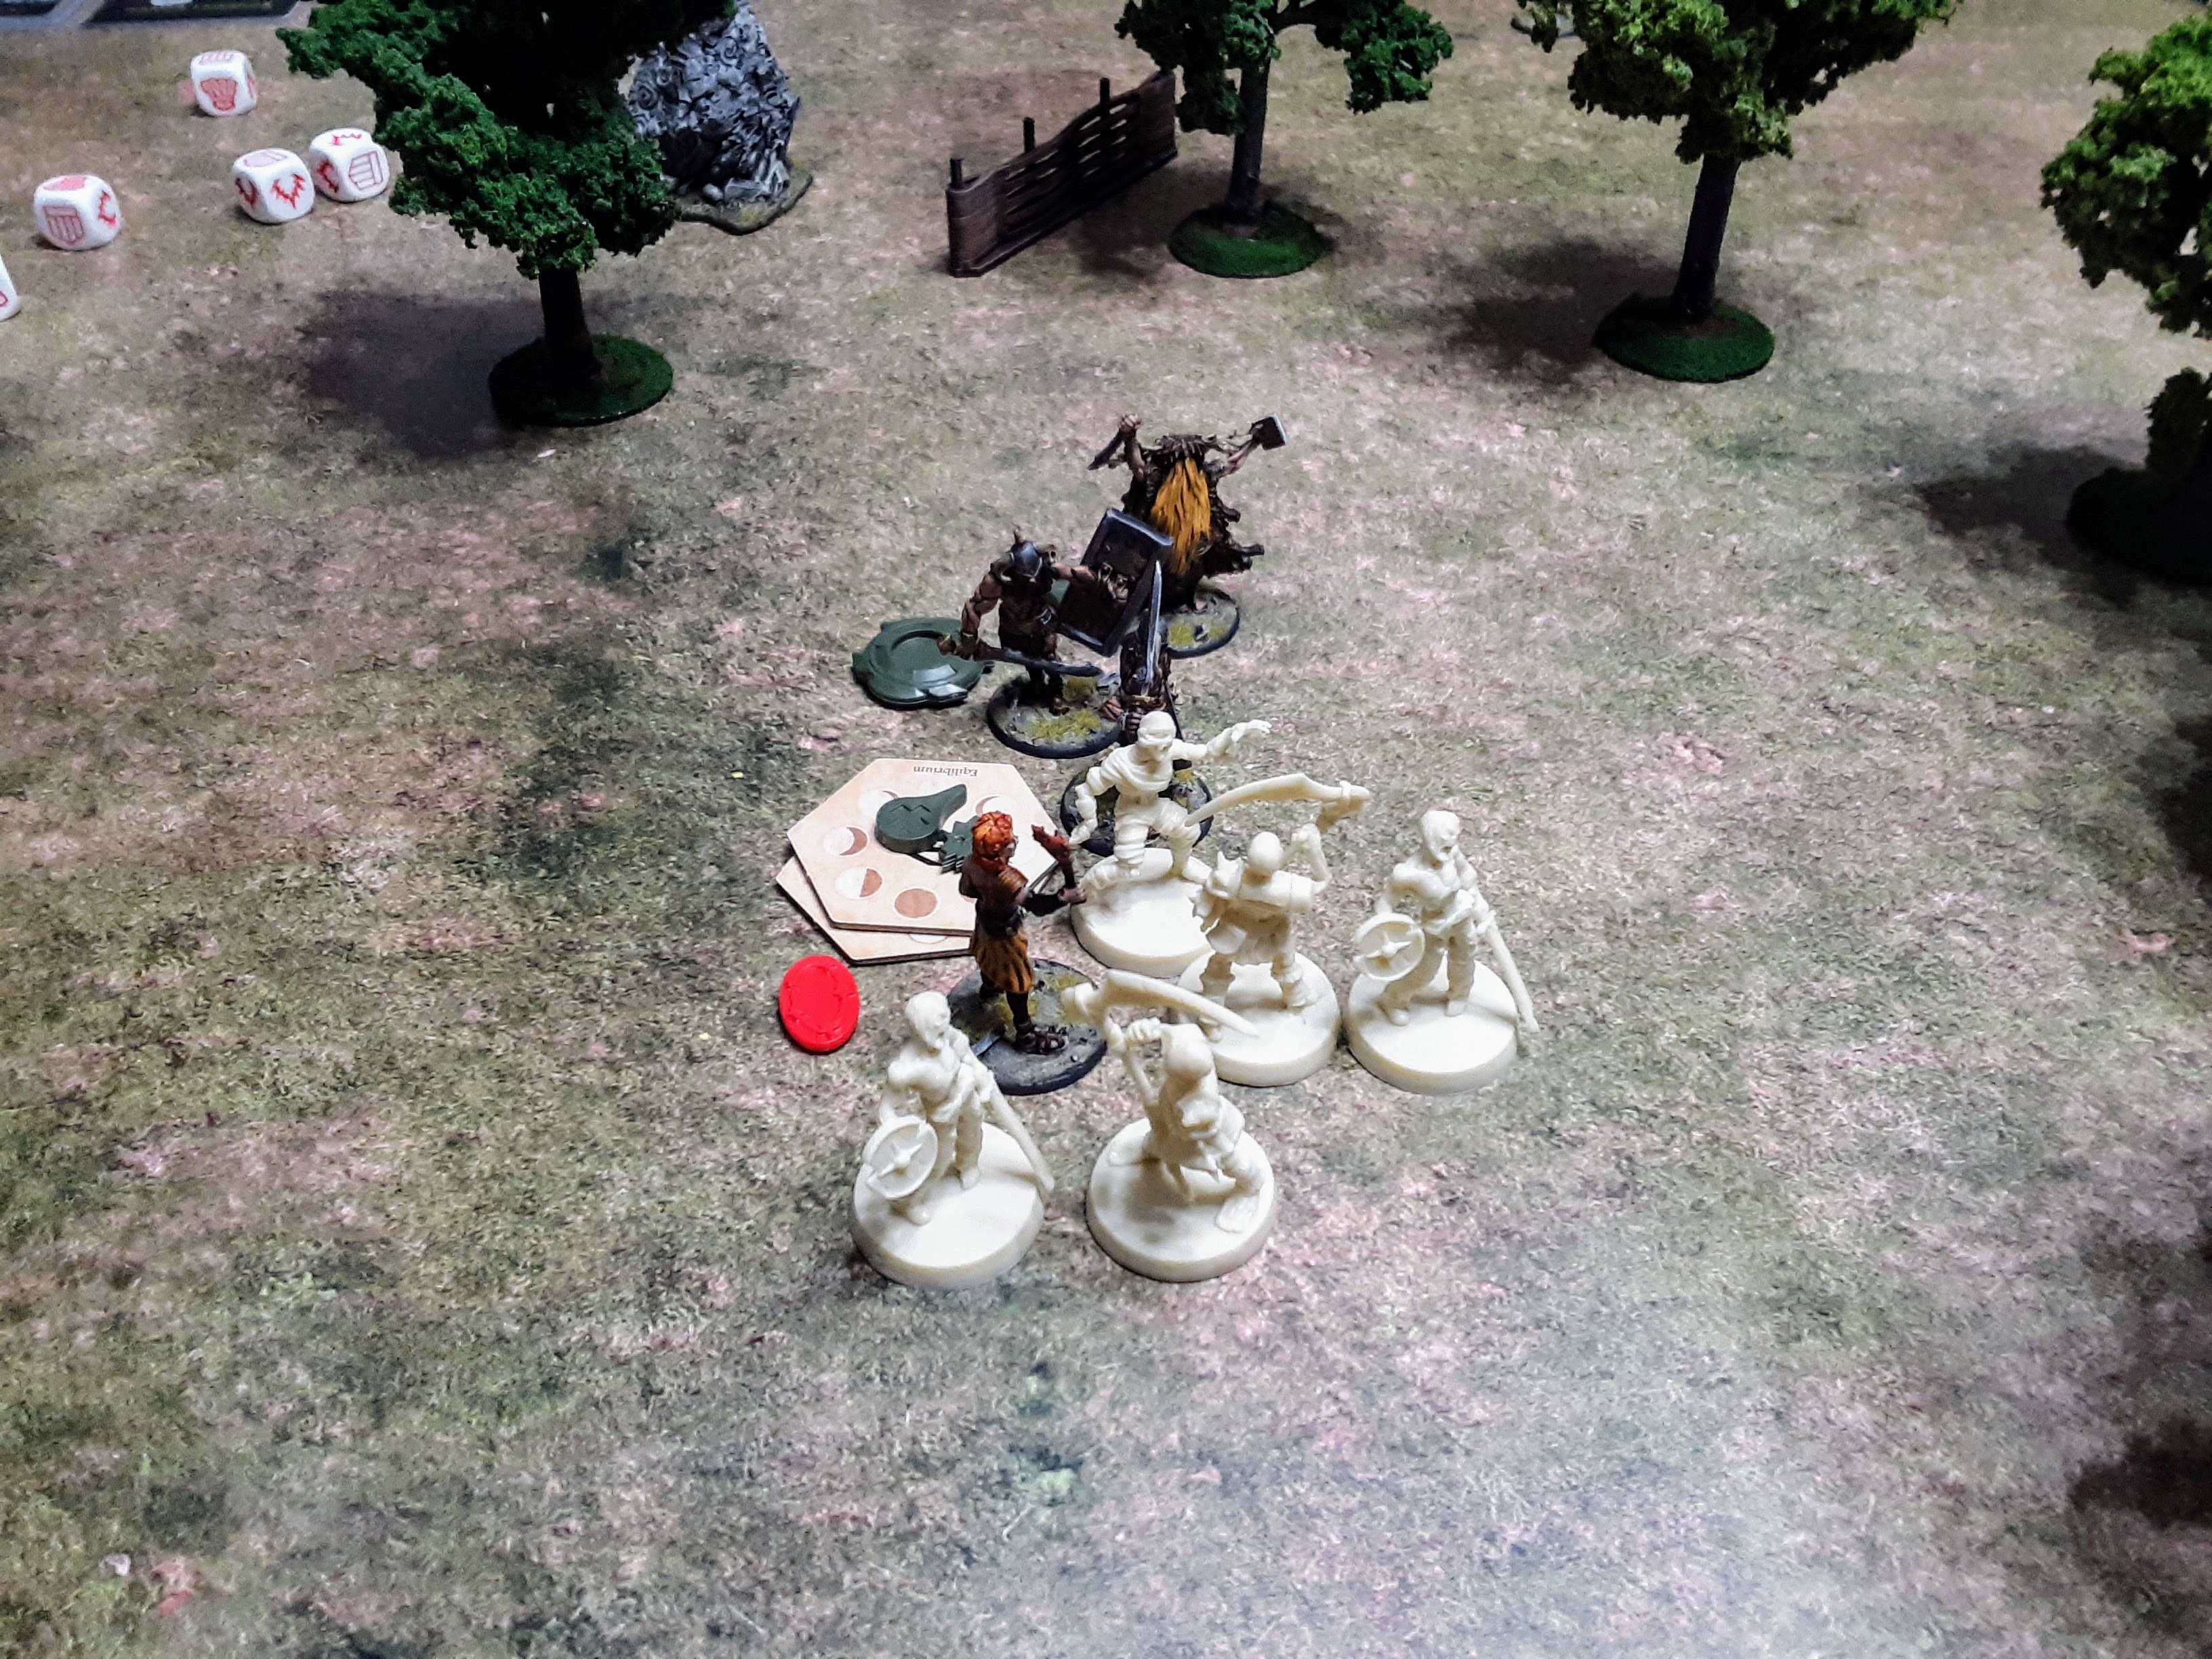
After a break and more hydrating, it was back to playing the third and final Slaine scenario, Rededicating the Stone. The goal was for each side to build a pool of Blood Points and attempt to control a sacred site in the center of board.
This game introduced Nest as a character for me to use. All the minis were on the table for this game. The only difference was I switched out the regular Slaine mini for the Slaine dressed in bondag…Slaine the King mini. I also pulled out some HeroQuest undead for my friend to use with the Weird Stone and Drune Priest as Half-Dead.
We decided to make a ring of trees around the sacred site, knowing it would be a Battle Royale. This game seemed more well balanced. I made some very bad moves in this game thinking I should separate all my heroes. I started by sending Ukko out on his own to try an sneak around to kill the Drune Priest. Slough Throt ended up getting his Star Chip about 4 times, consistently returning it to the bag, before any other minis took action. Finally, Slaine charged into the circle to fight and Slough Throt moved in to attack.
The initial clash between Slough Throt and Slaine was pretty epic. Slaine took multiple stun tokens, winded, and was poisoned. Luckily I was able to remove most of these effects with Nest and return the Star Chips to the bag for my force. At this point my friend had built up a sizeable pool of Blood Points and used them to summon Half-Dead.
Slough Throt spent some blood points to change the Cosmic Alignment to better favor his feats in combat.
Slaine was attacked by the Skull Swords and Nest moved up to support. My dice were not cooperating in this game and Slaine continued to take stun and damage. Also, I forgot to let Slaine give ground to prevent some additional damage. Slaine also kept ended up winded as I failed to return the Star Chip to the bag.
I realized too late that Ukko should always be near Slaine to help remove adverse effects with his special ability. This caused Slaine to loose dice in his combats from being winded.
Nest began to move away as the Half-Dead approached. After some additional combat, Slaine was slain. I never had the chance to have him Warp too.
Nest chose to attack the Half-Dead and was also killed. Ukko decided he needed to leave the battlefield and the Drune forces won the day!
 A gentlemanly post game discussion
We both had a great time and discussed the game while eating grilled chicken, watching the movie Gettysburg, and continuing to hydrate.
We both really like the idea of creating our own Heroes, Characters and forces for more balanced games against each other. My plan is to use a sizable Gaul/Celt force I have unfinished for this game. The Slaine minis are beautiful, but a bit expensive. My tendency to be cheap is telling me that I have a large amount of minis I purchased for SPQR that most likely won’t hit the table for that game and I can give them new life with this game. It also sounds like I have another future project thanks to Slaine being a fun game to play with my friend.
I’d still like to get a picture of my minis outside before I call this project done.
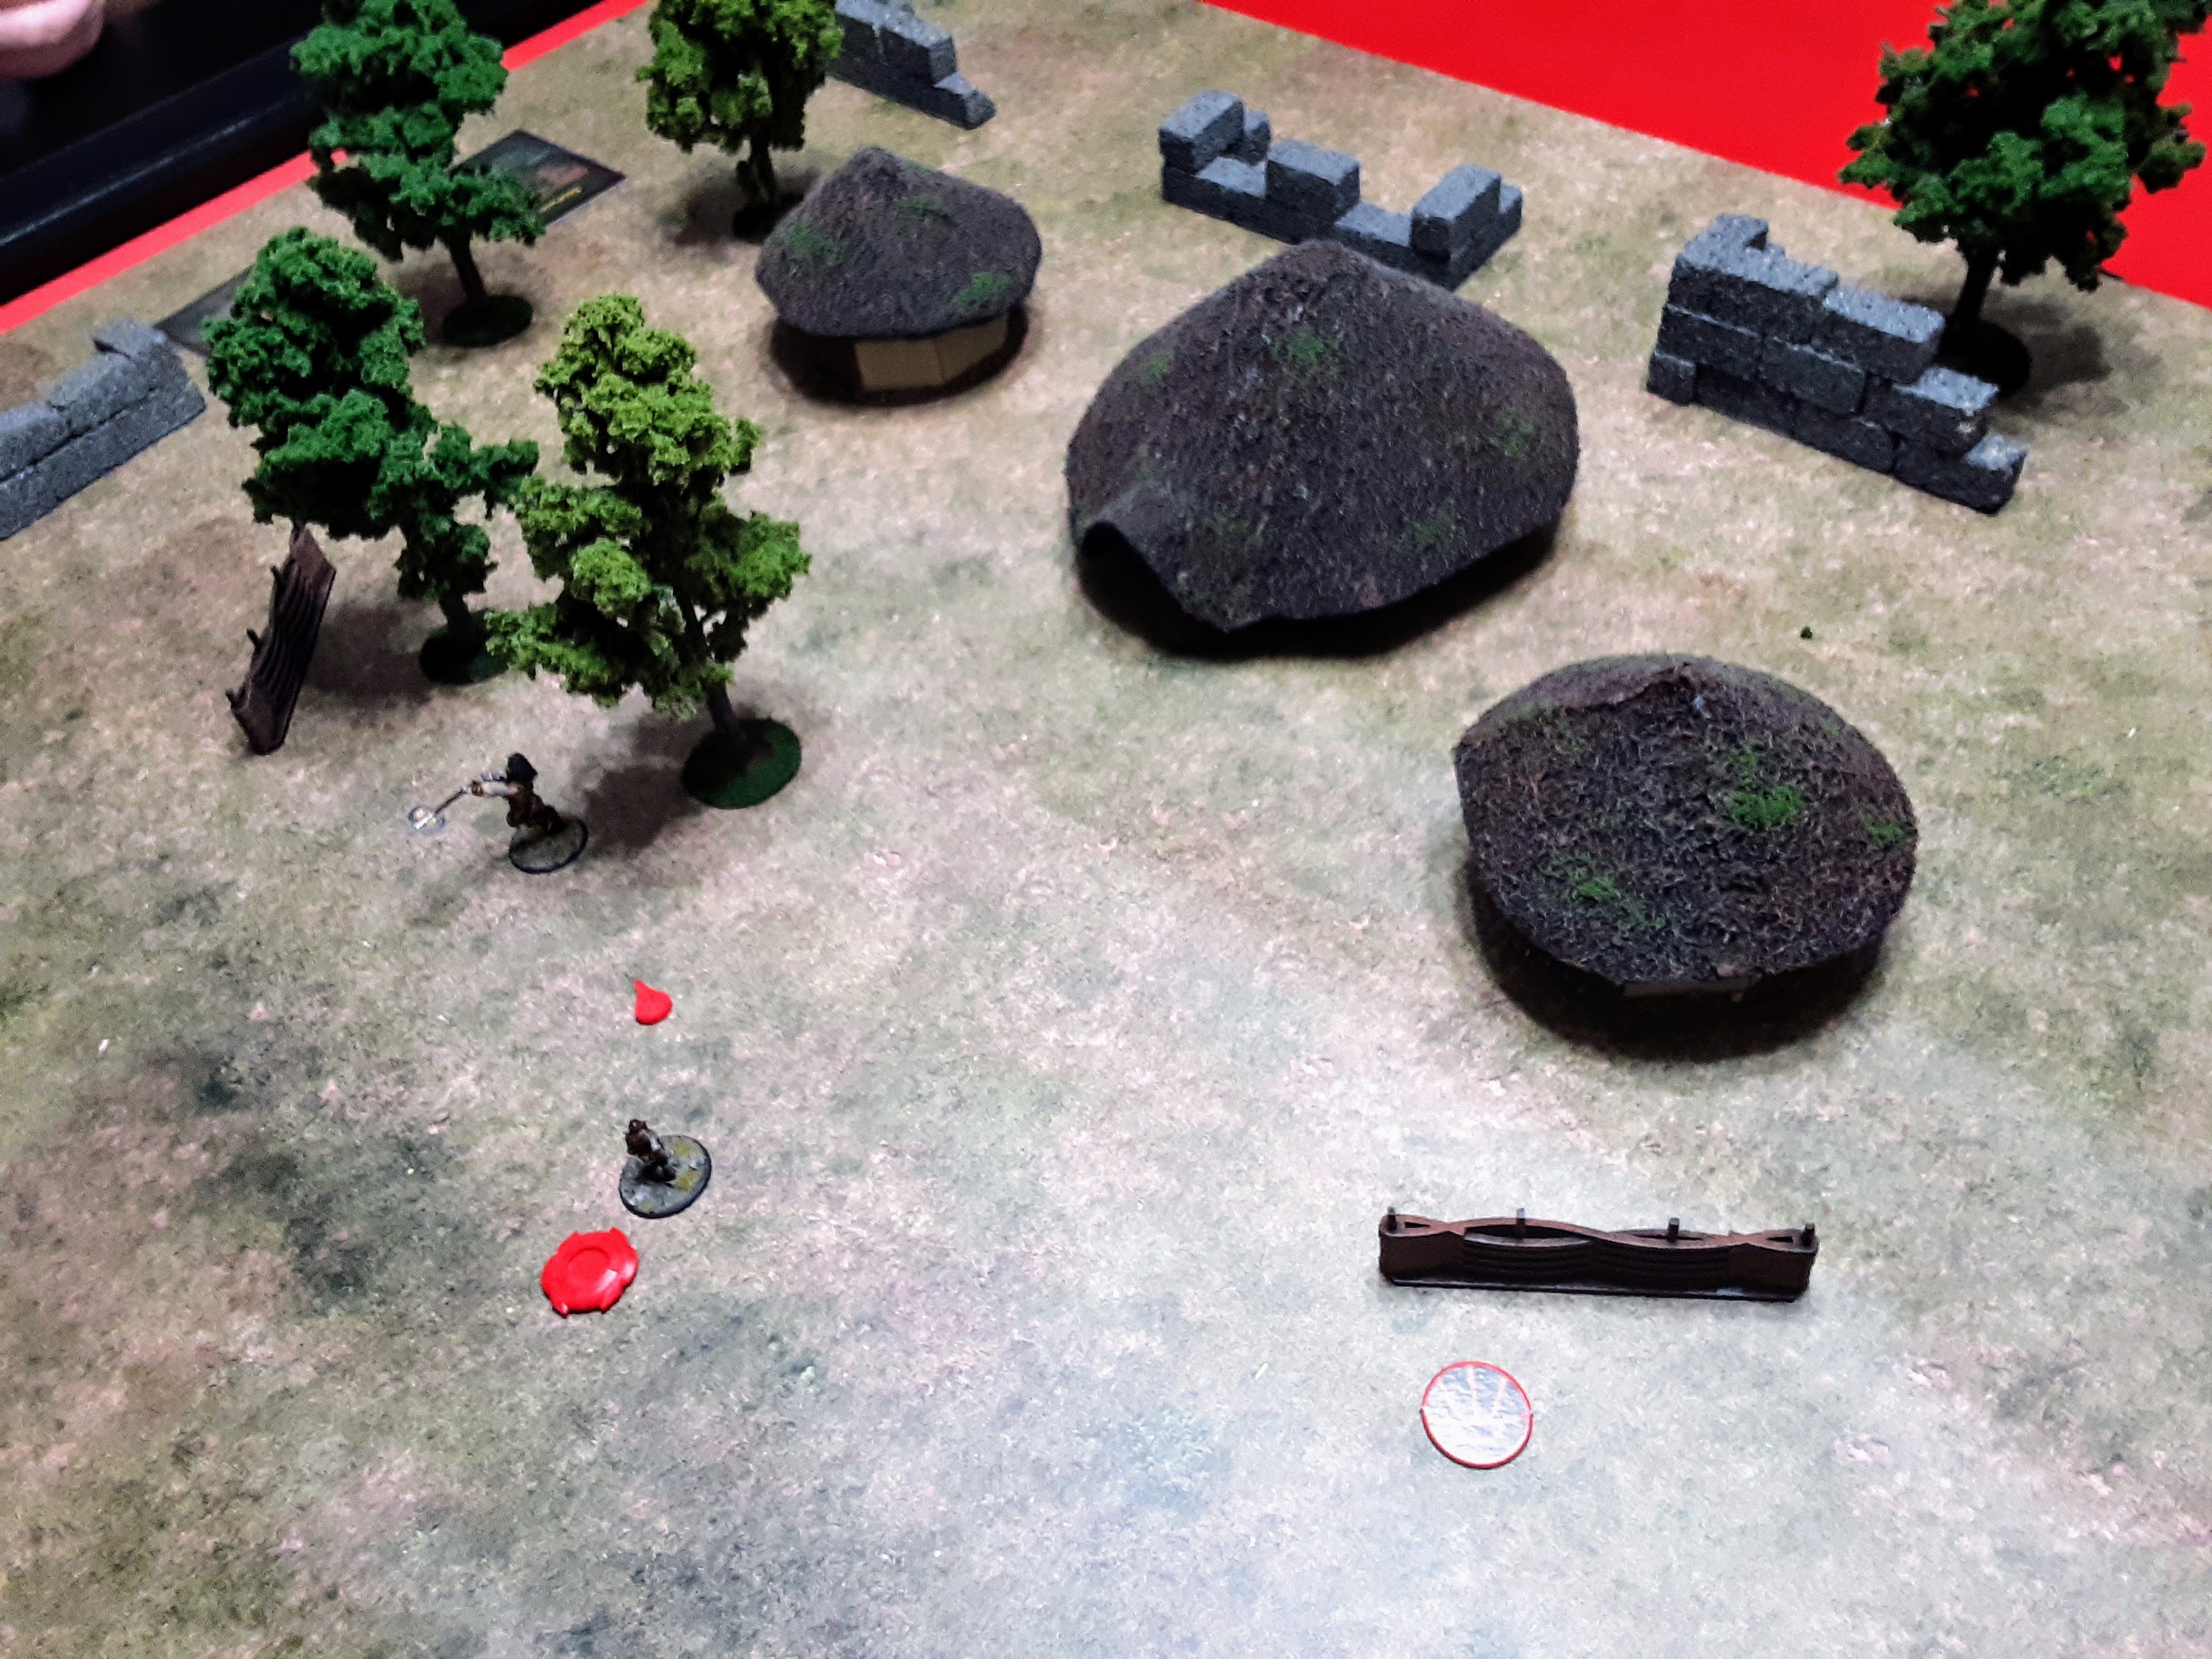
A Breath of Fresh Air on the shores of Tír na nÓg
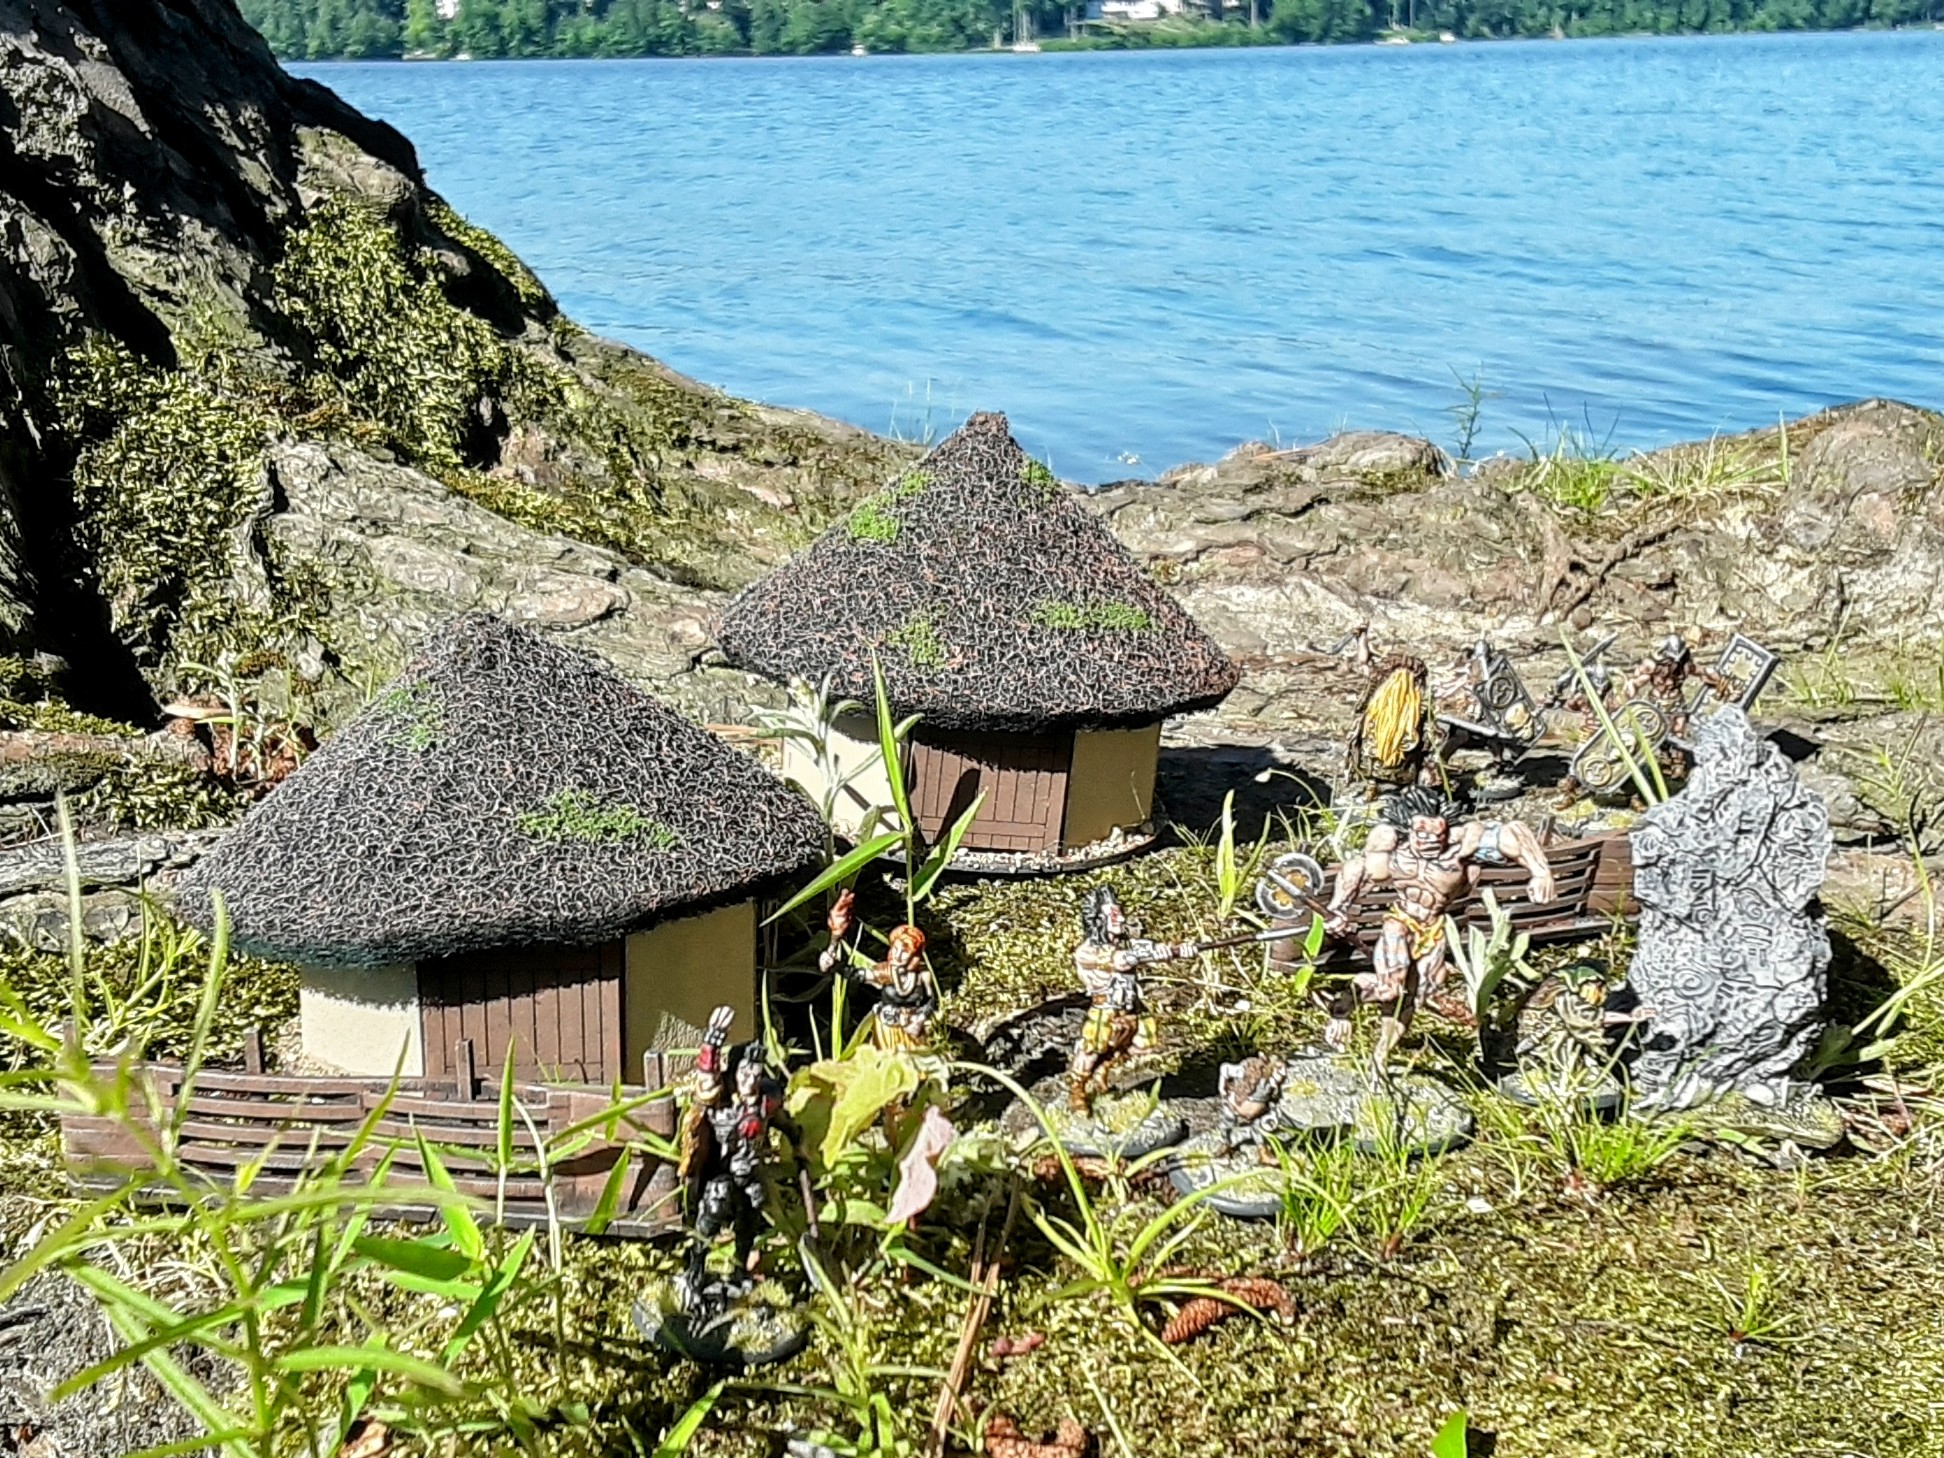
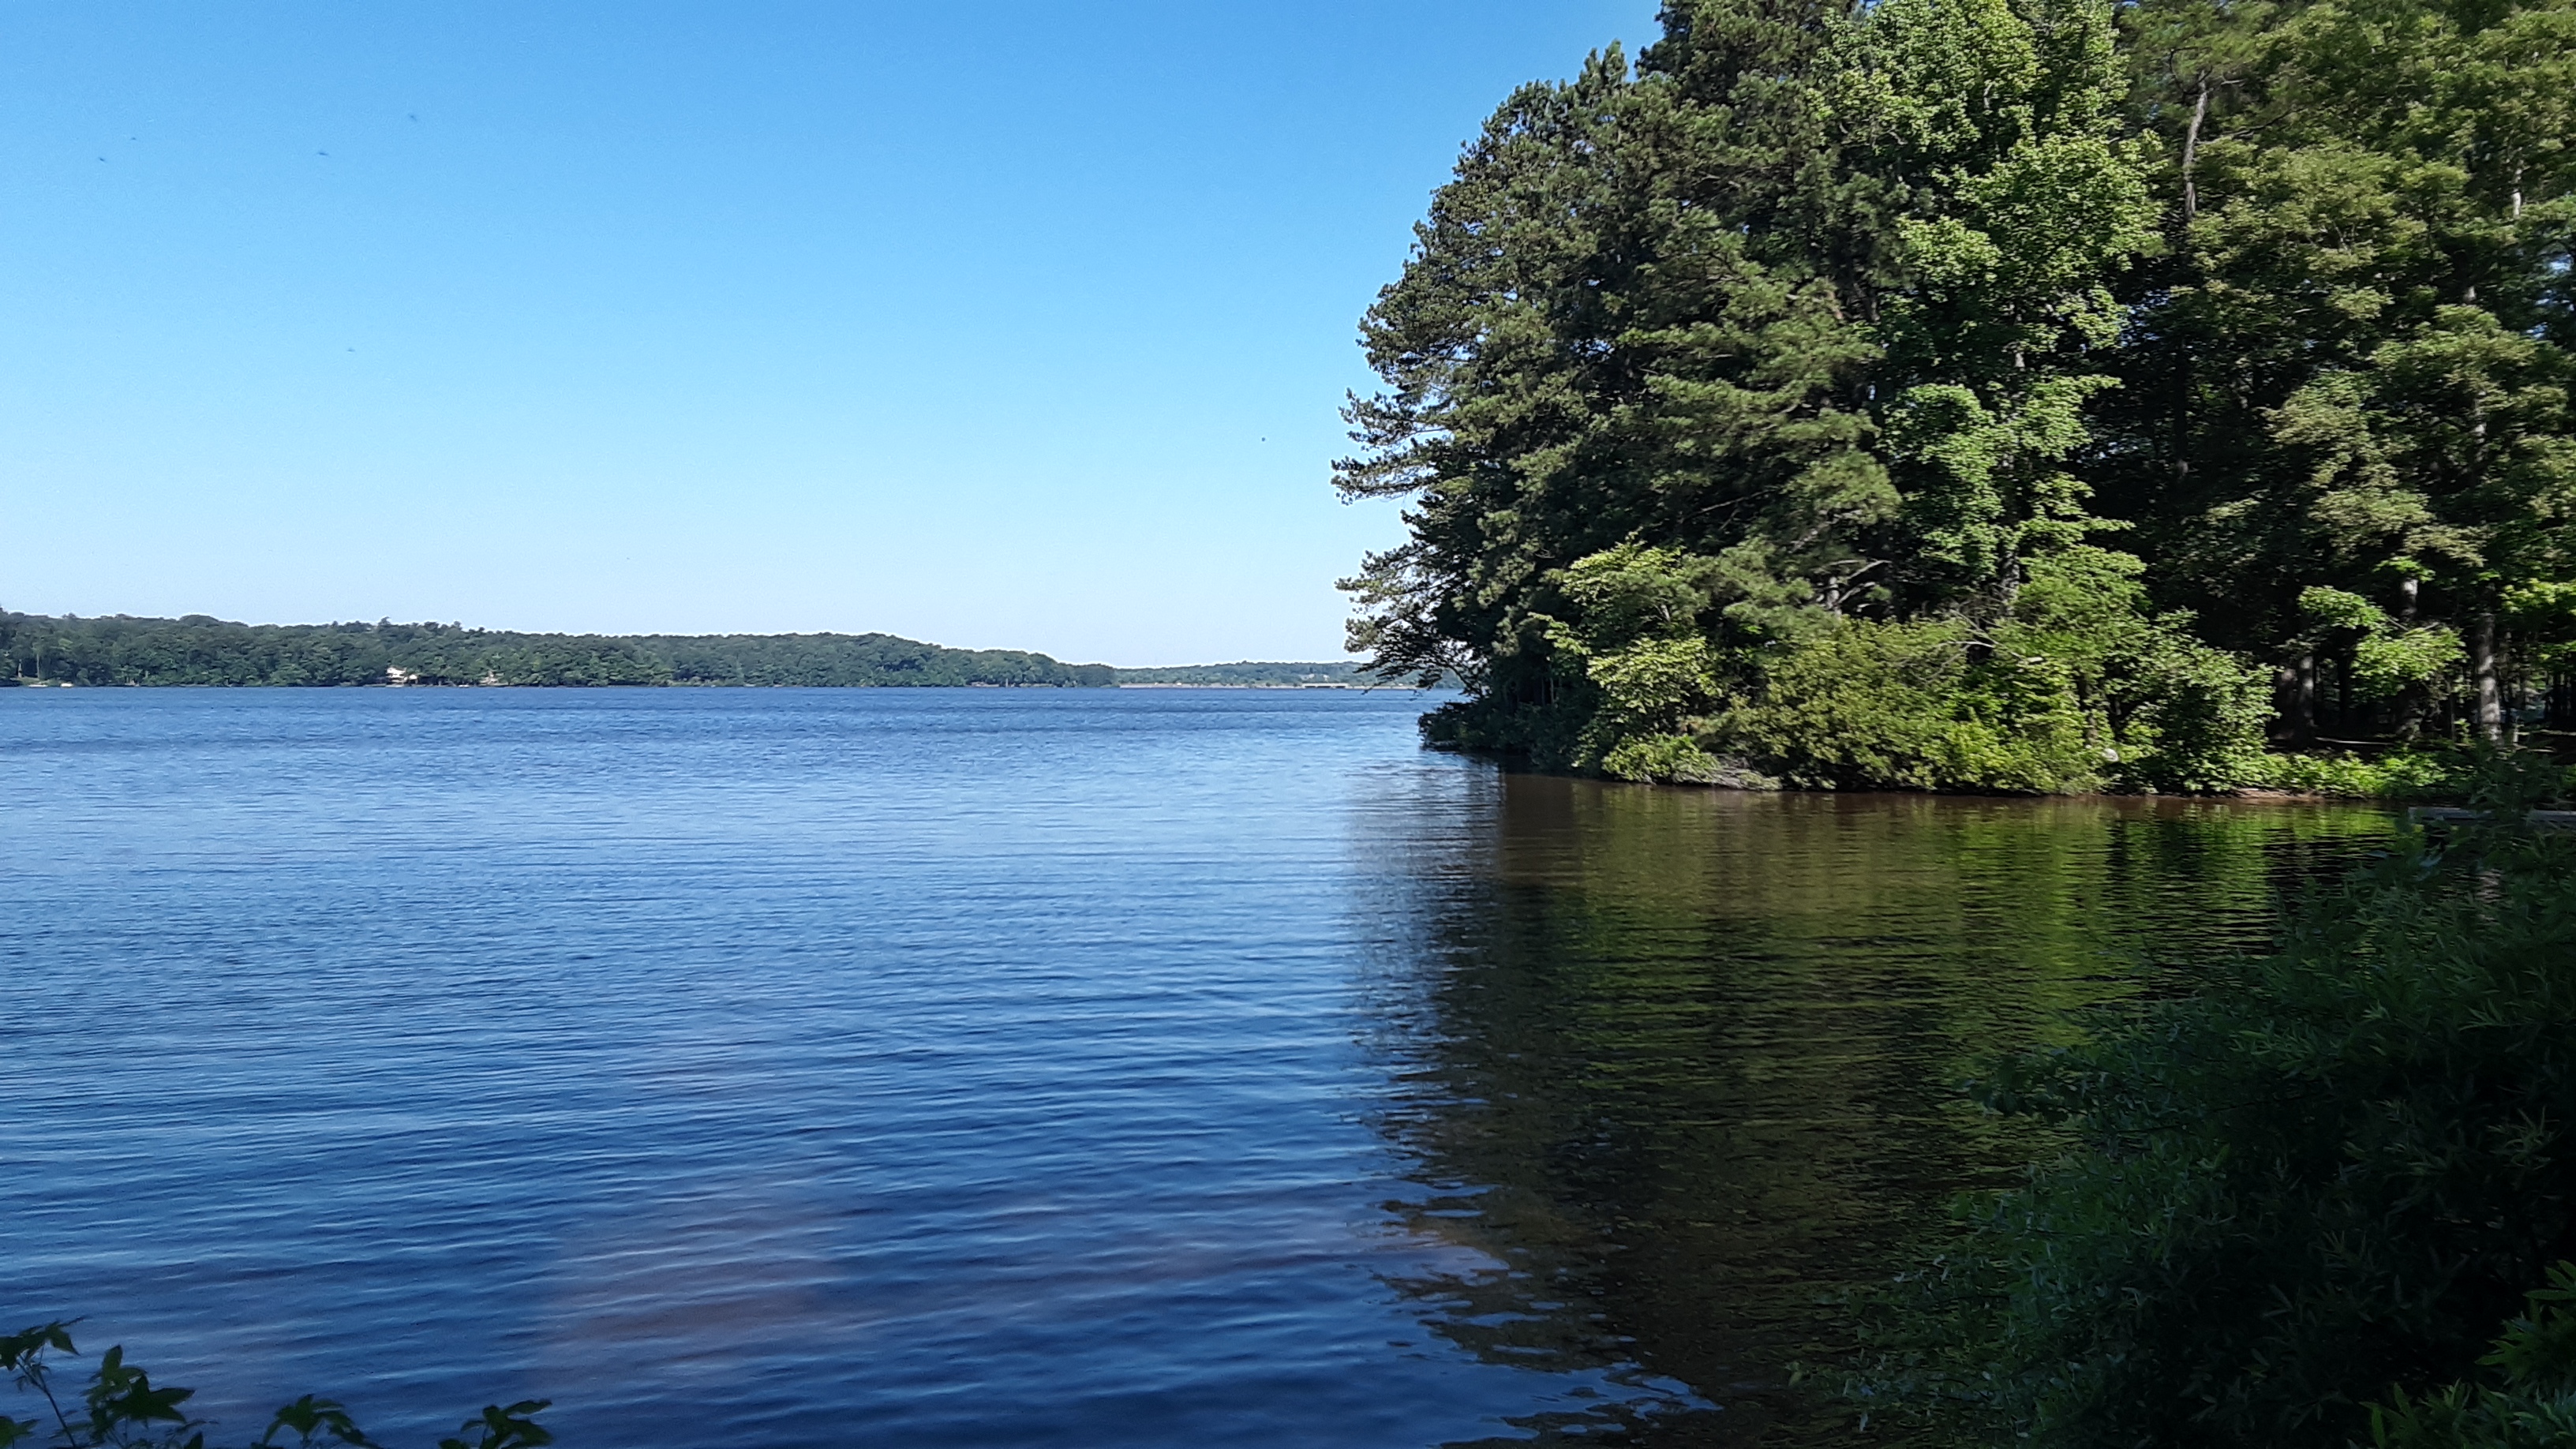
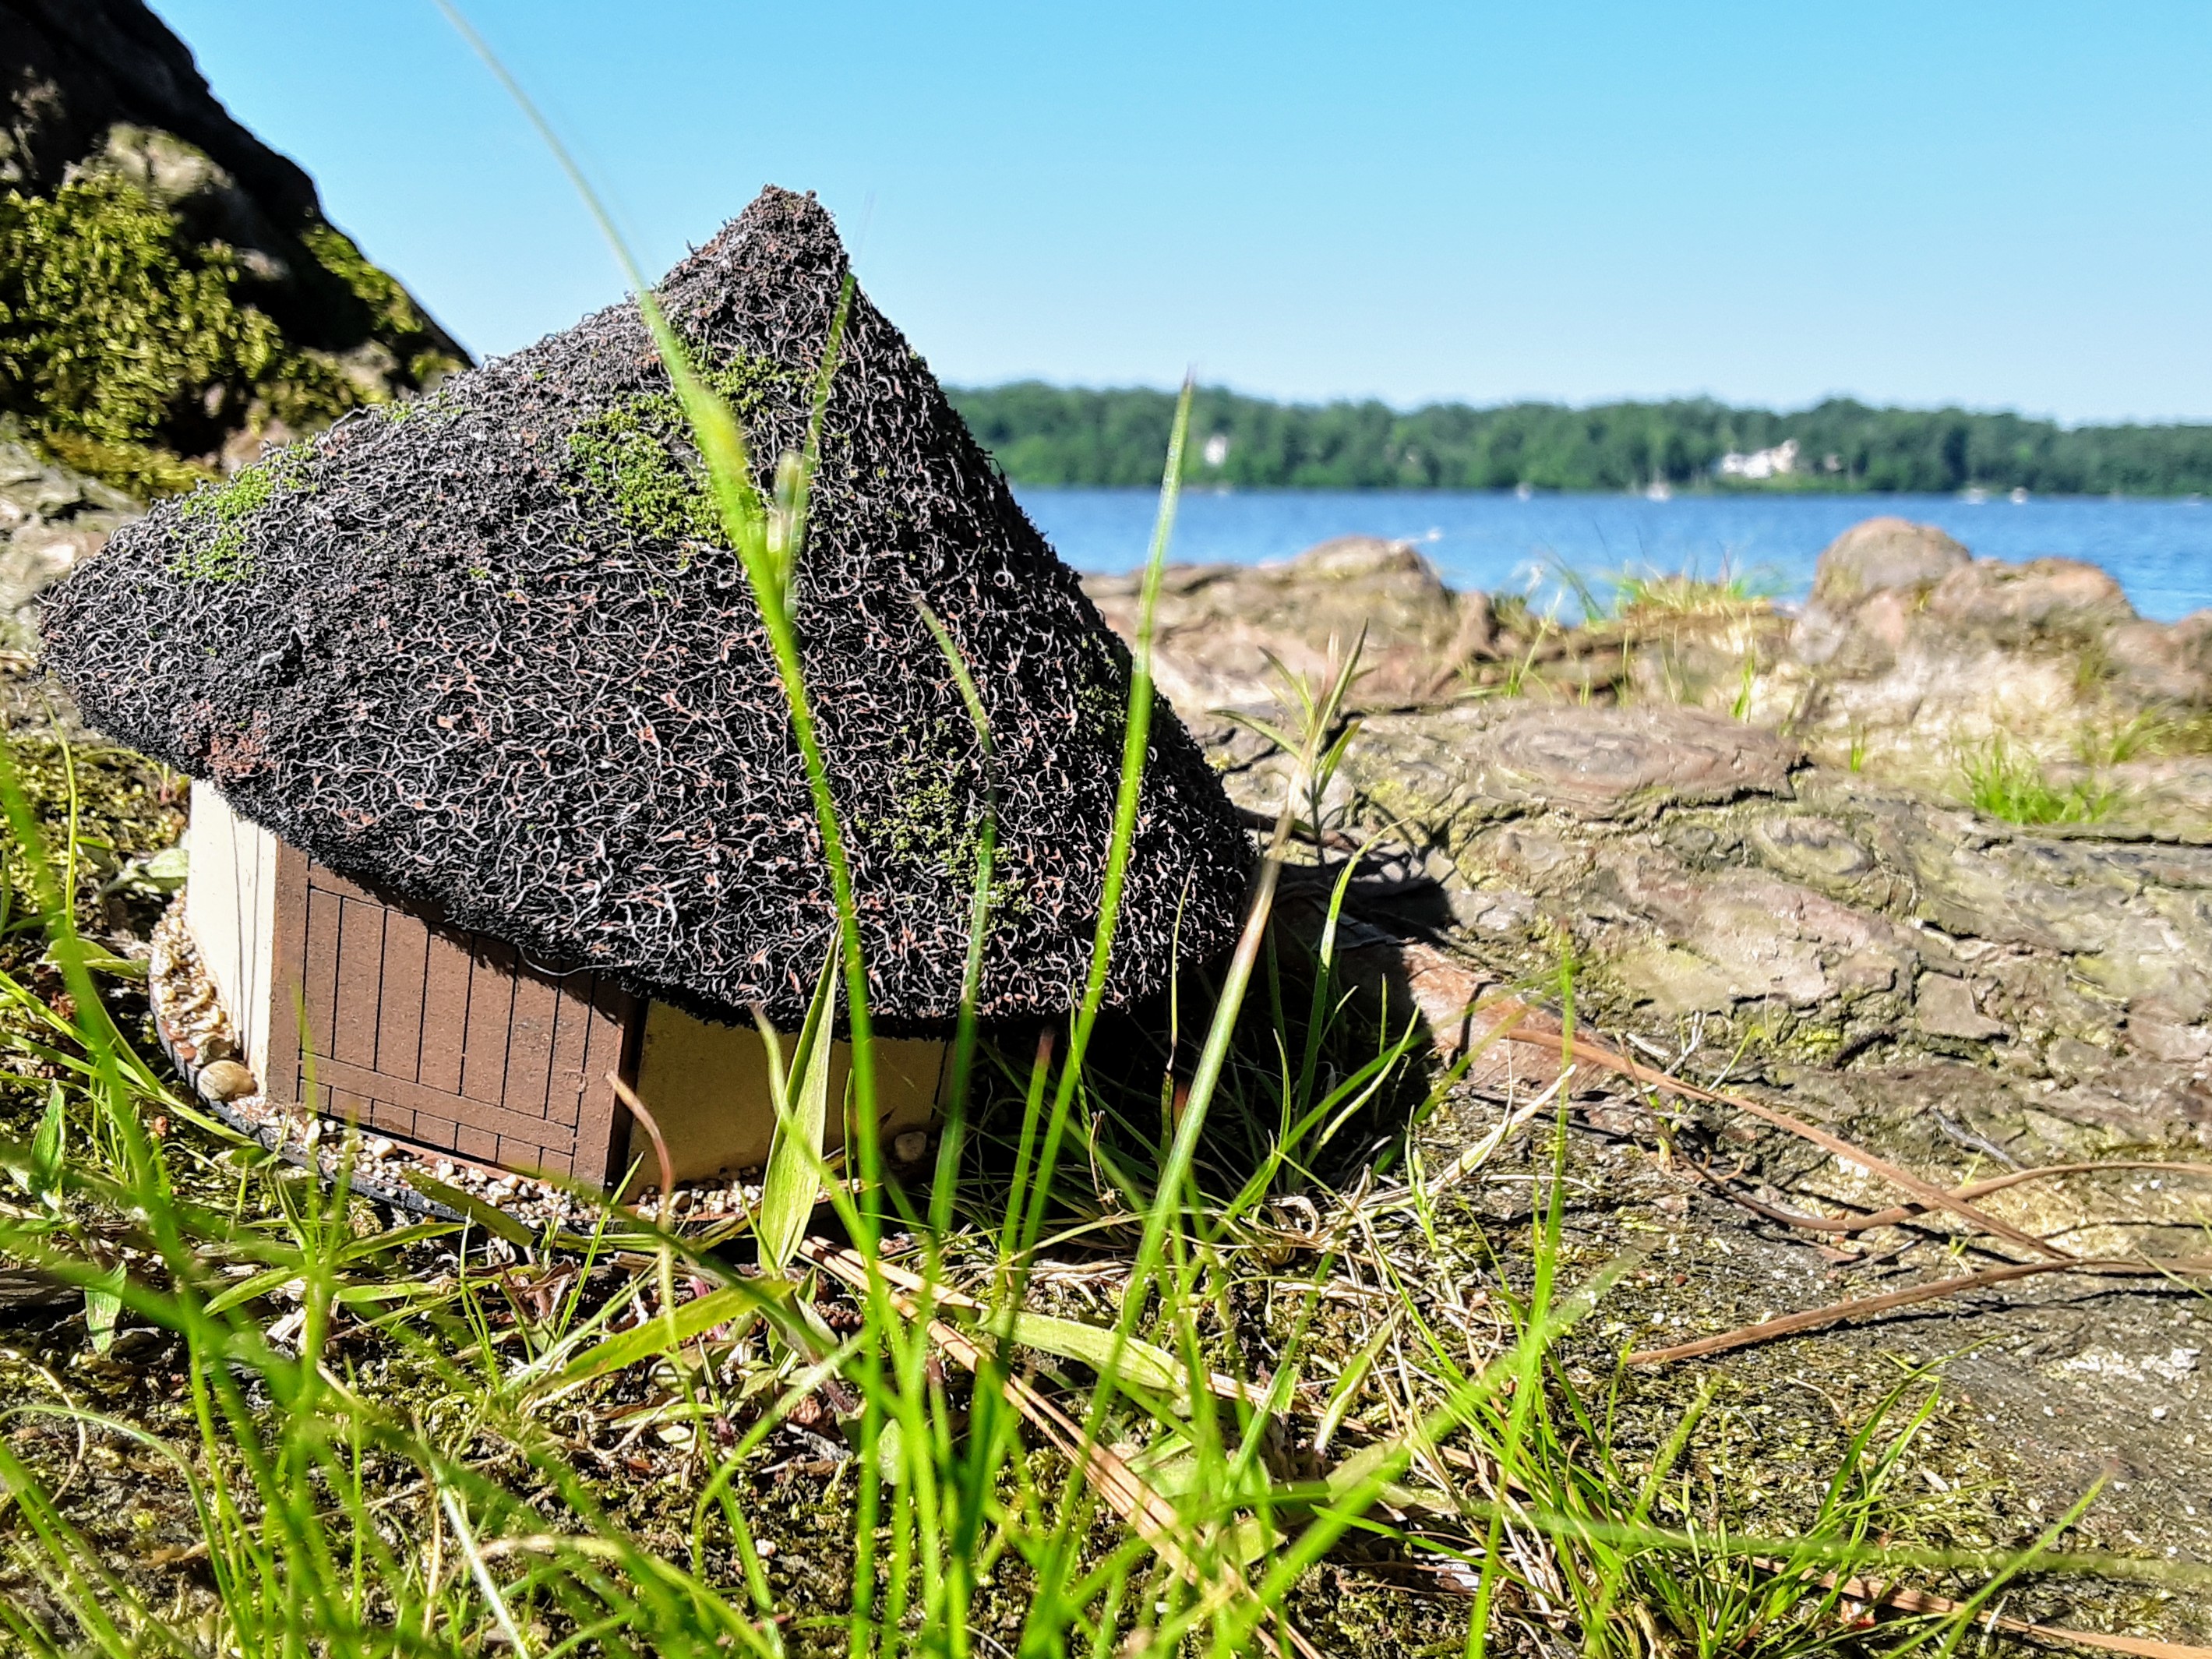 A lone roundhouse stands on the shore after the flood
I decided to walk down the trails along the water this morning. It was nice to get out of the house with my minis and visit the the shores of Tír na nÓg after the flood.
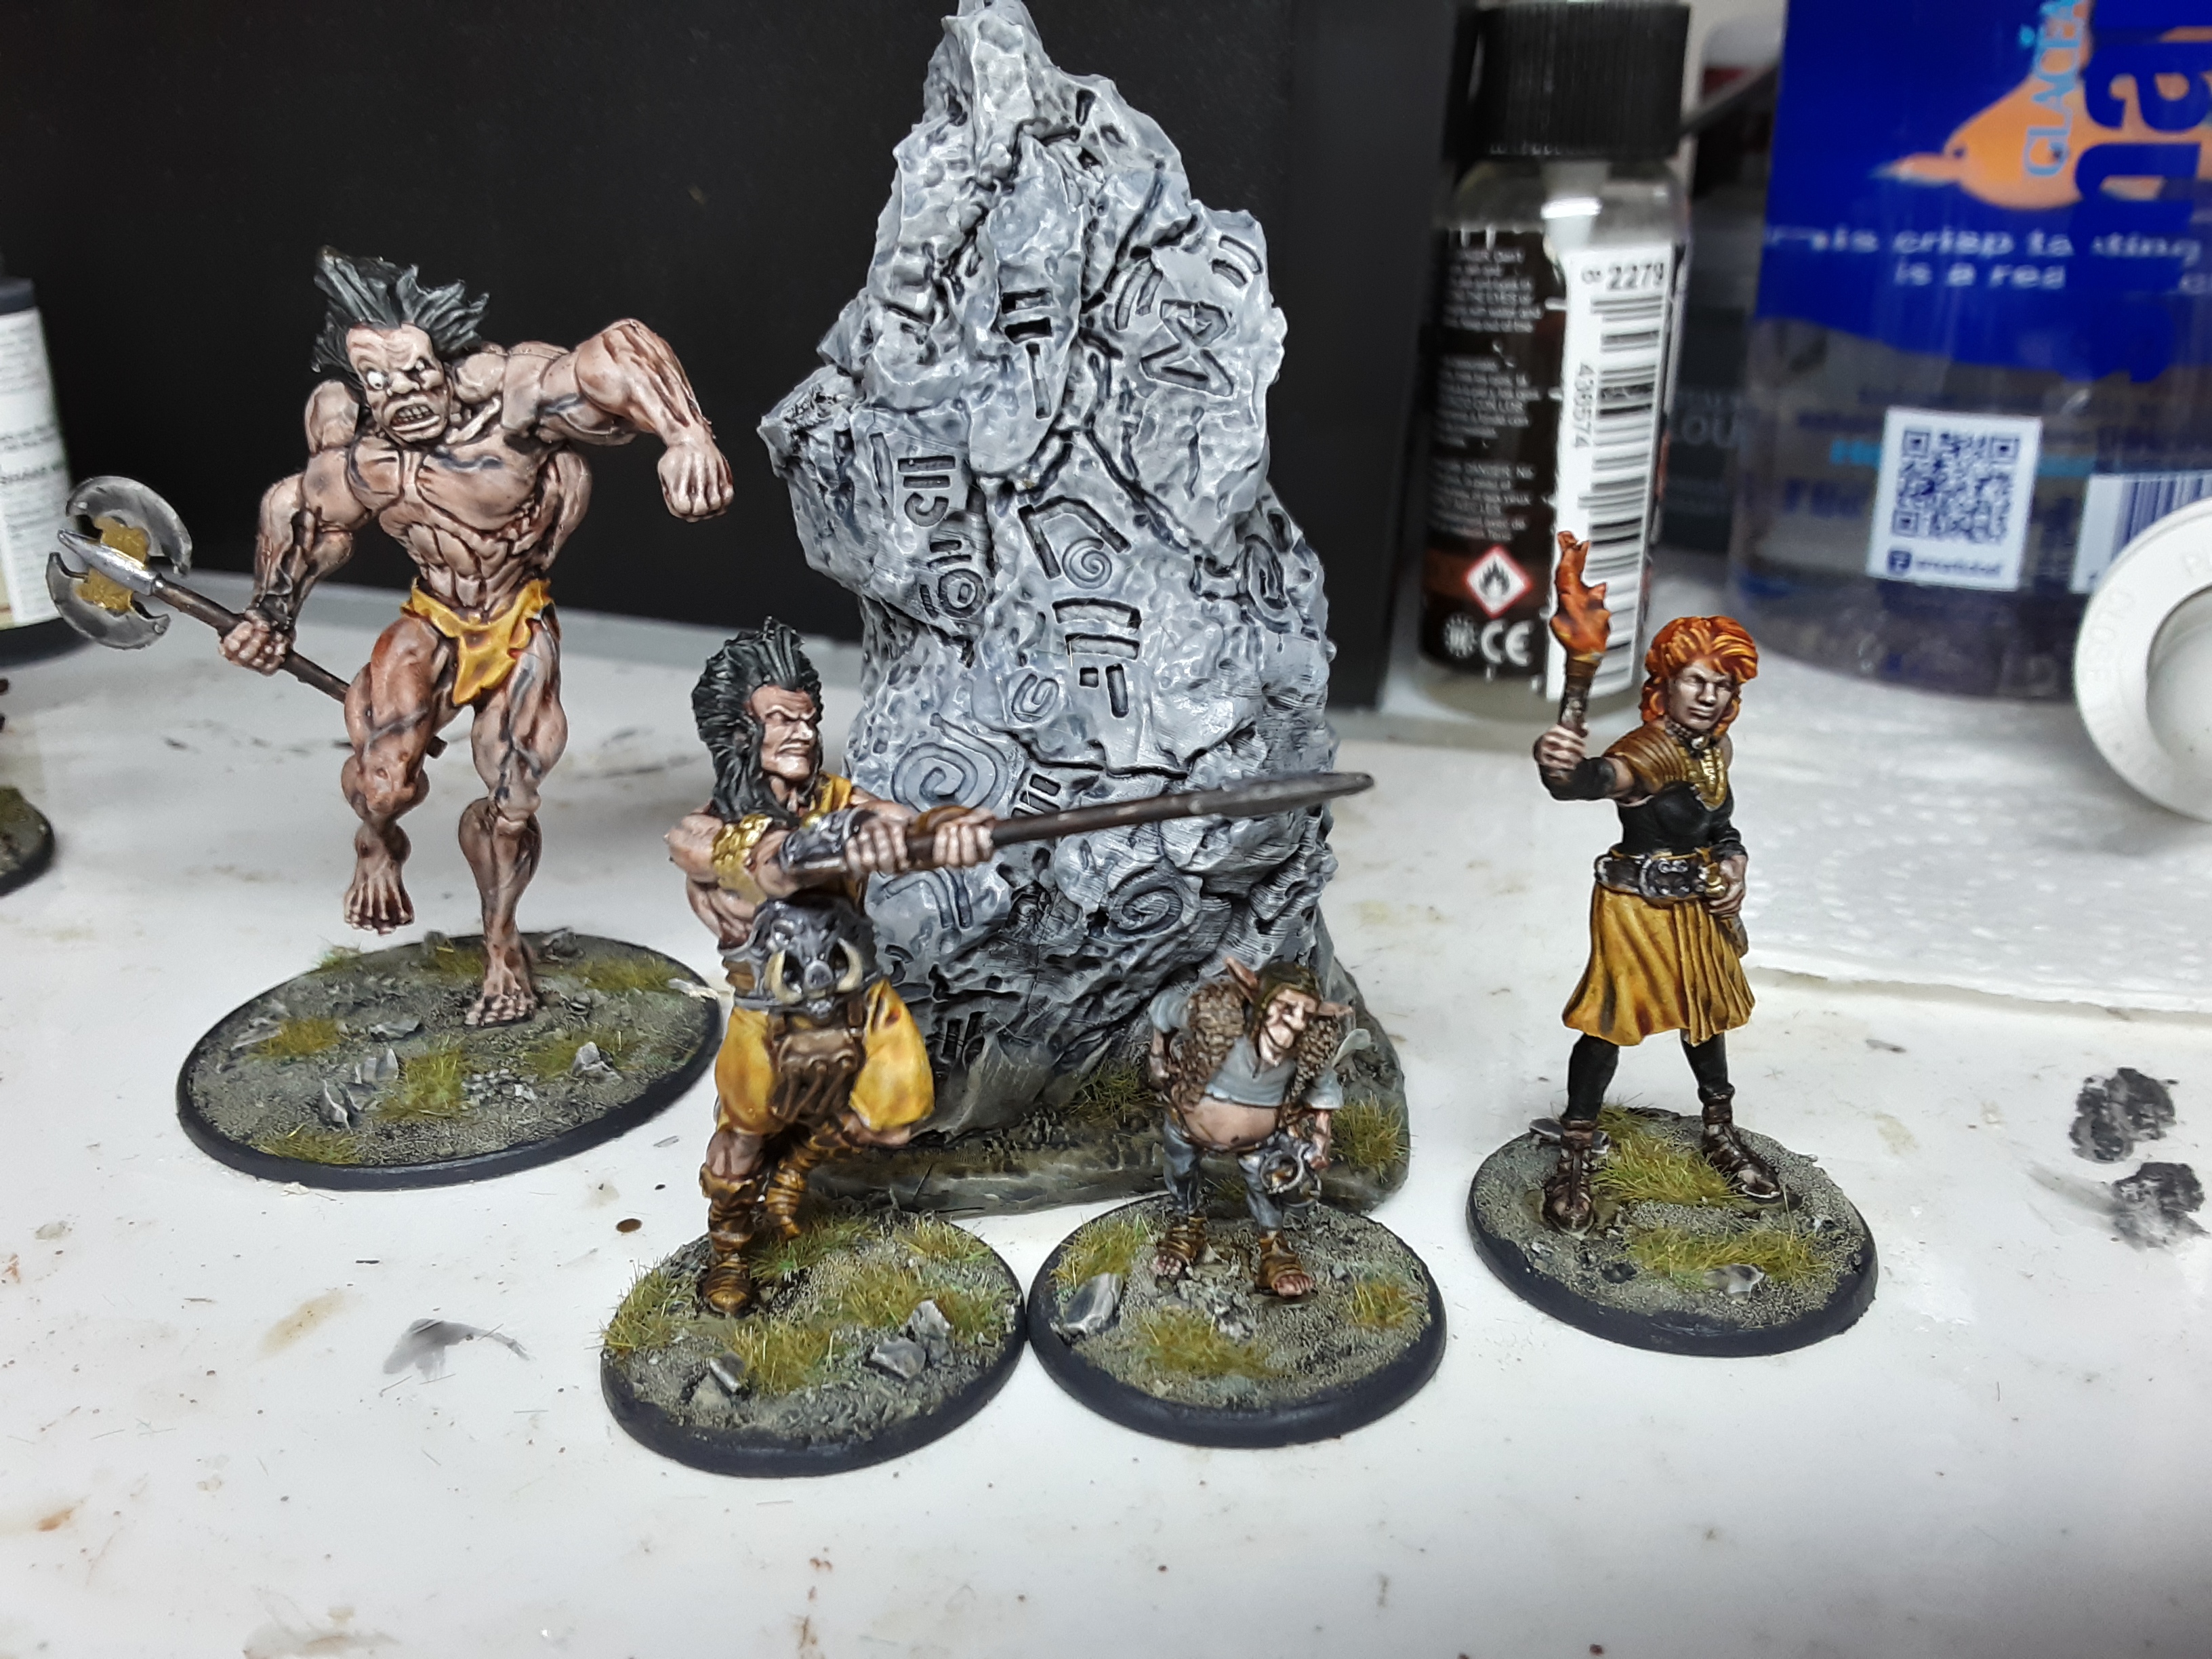
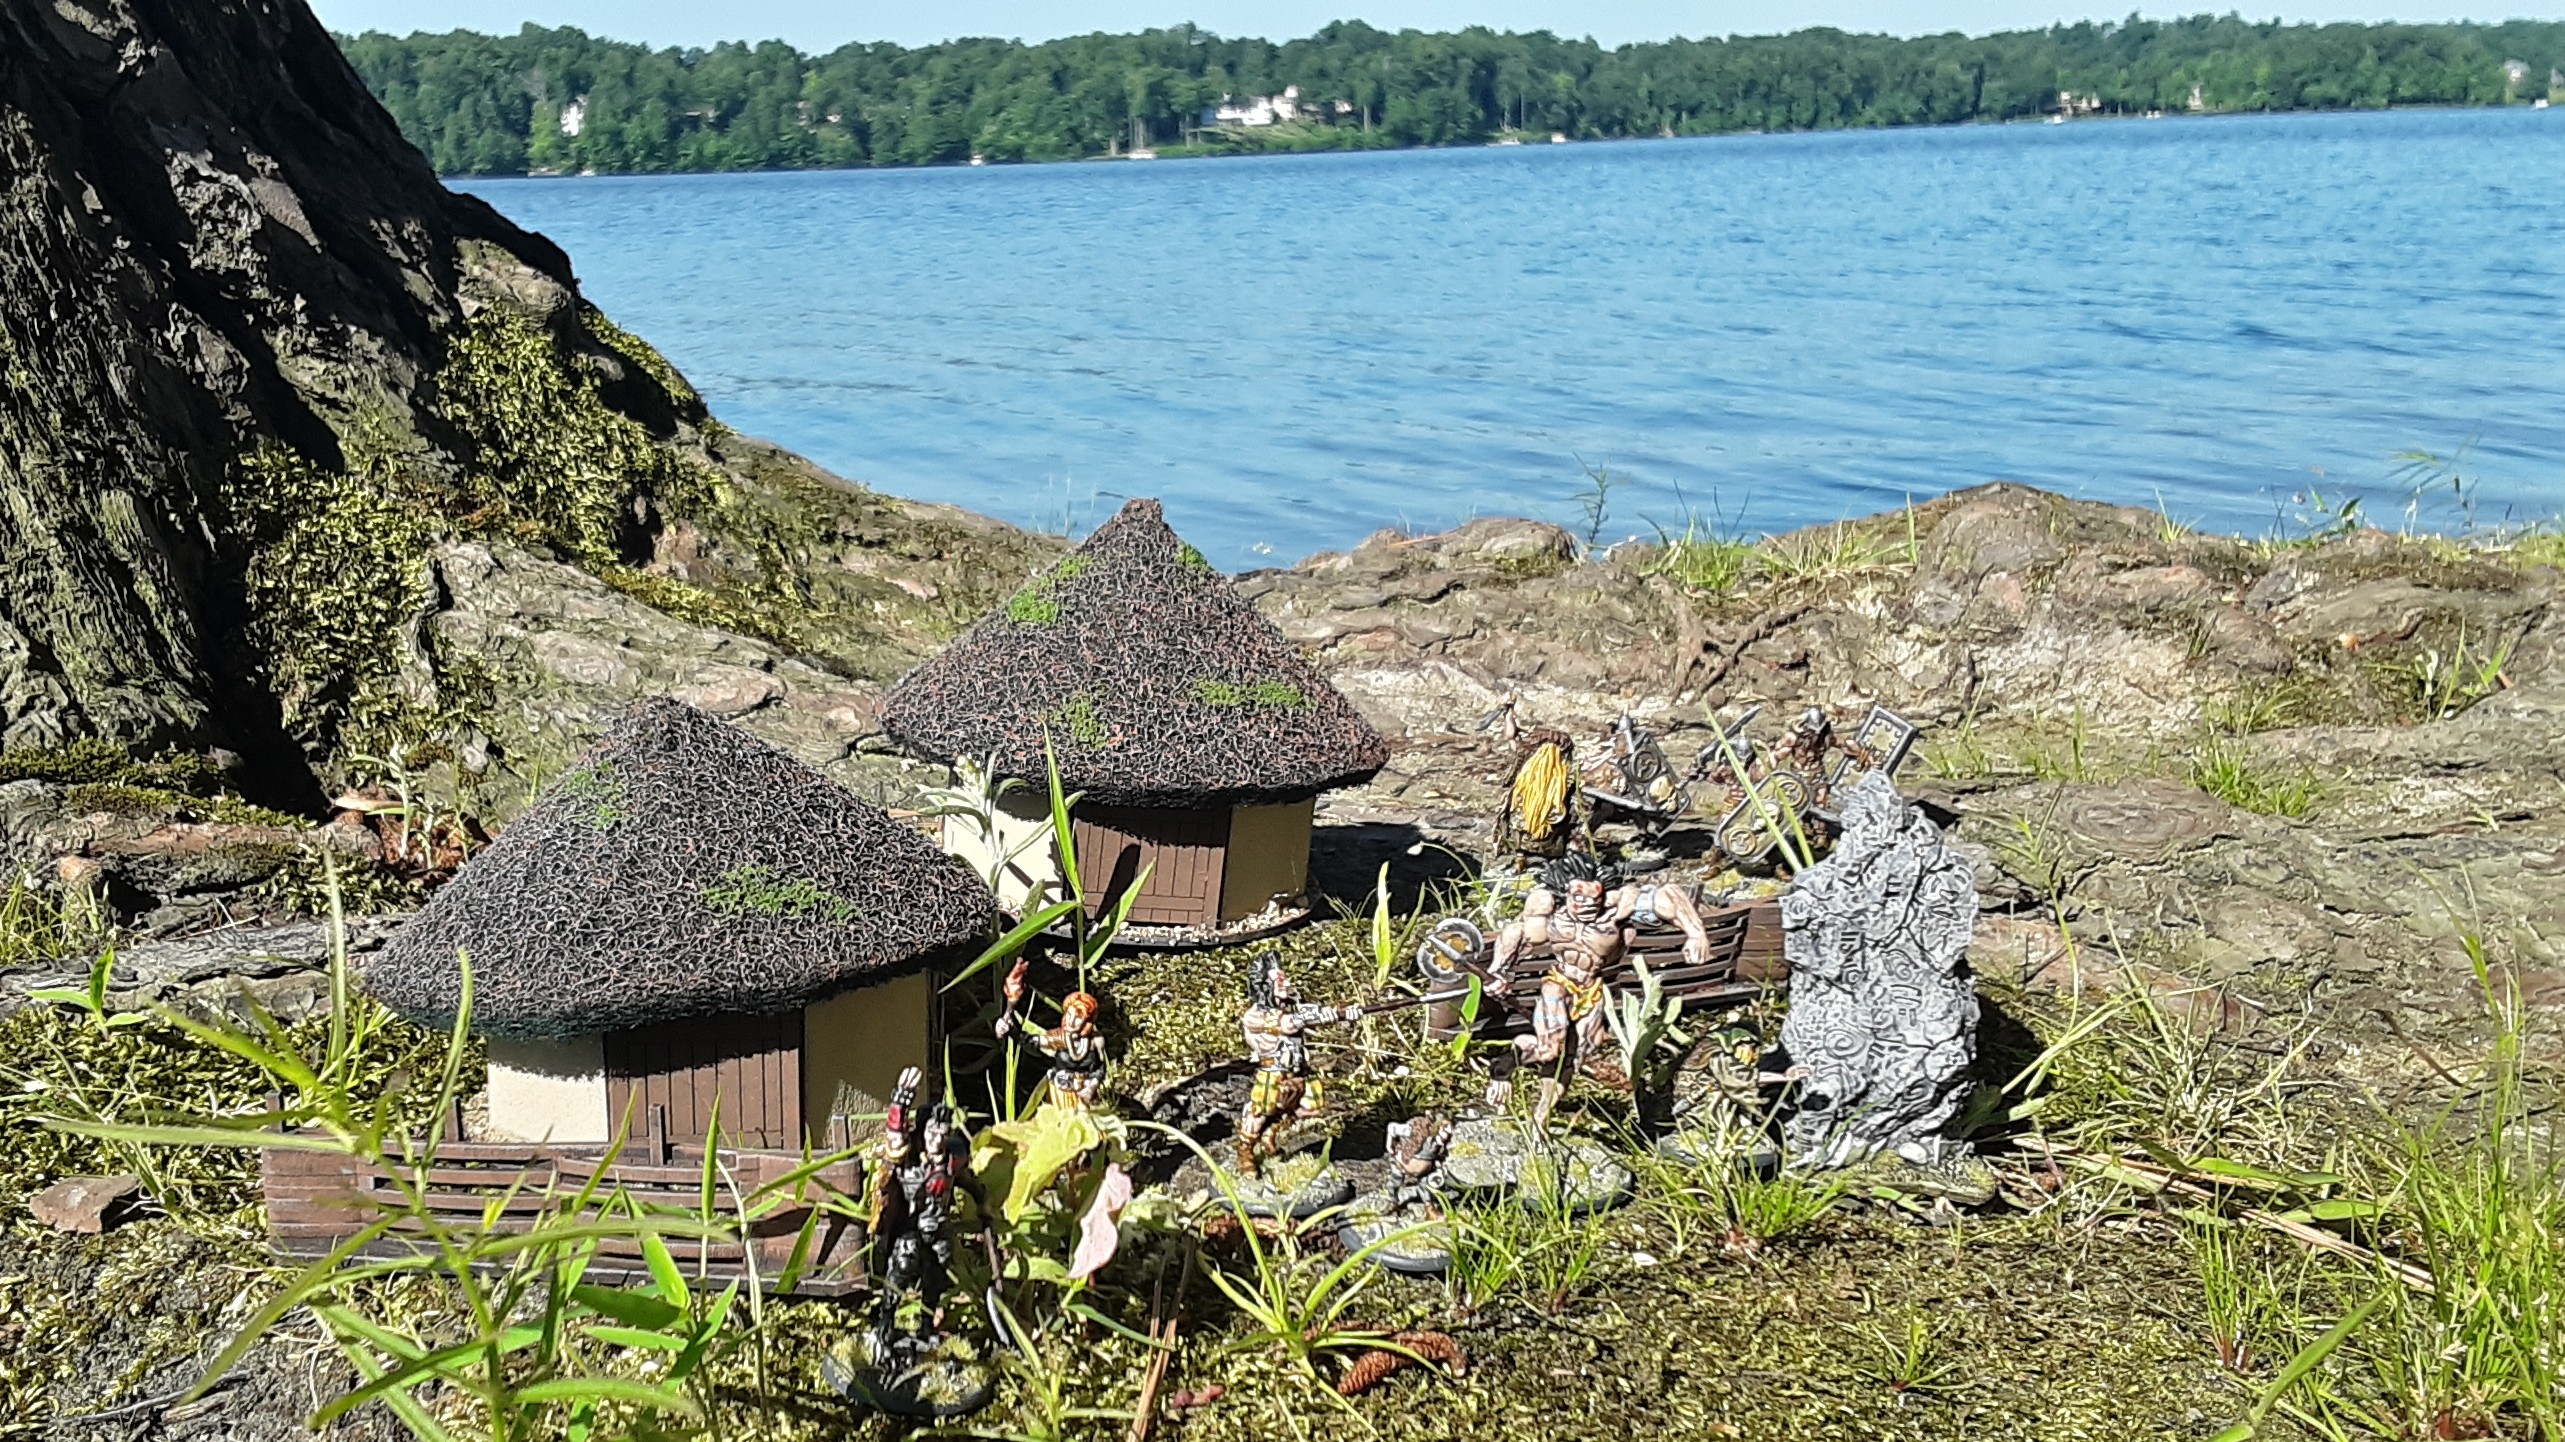
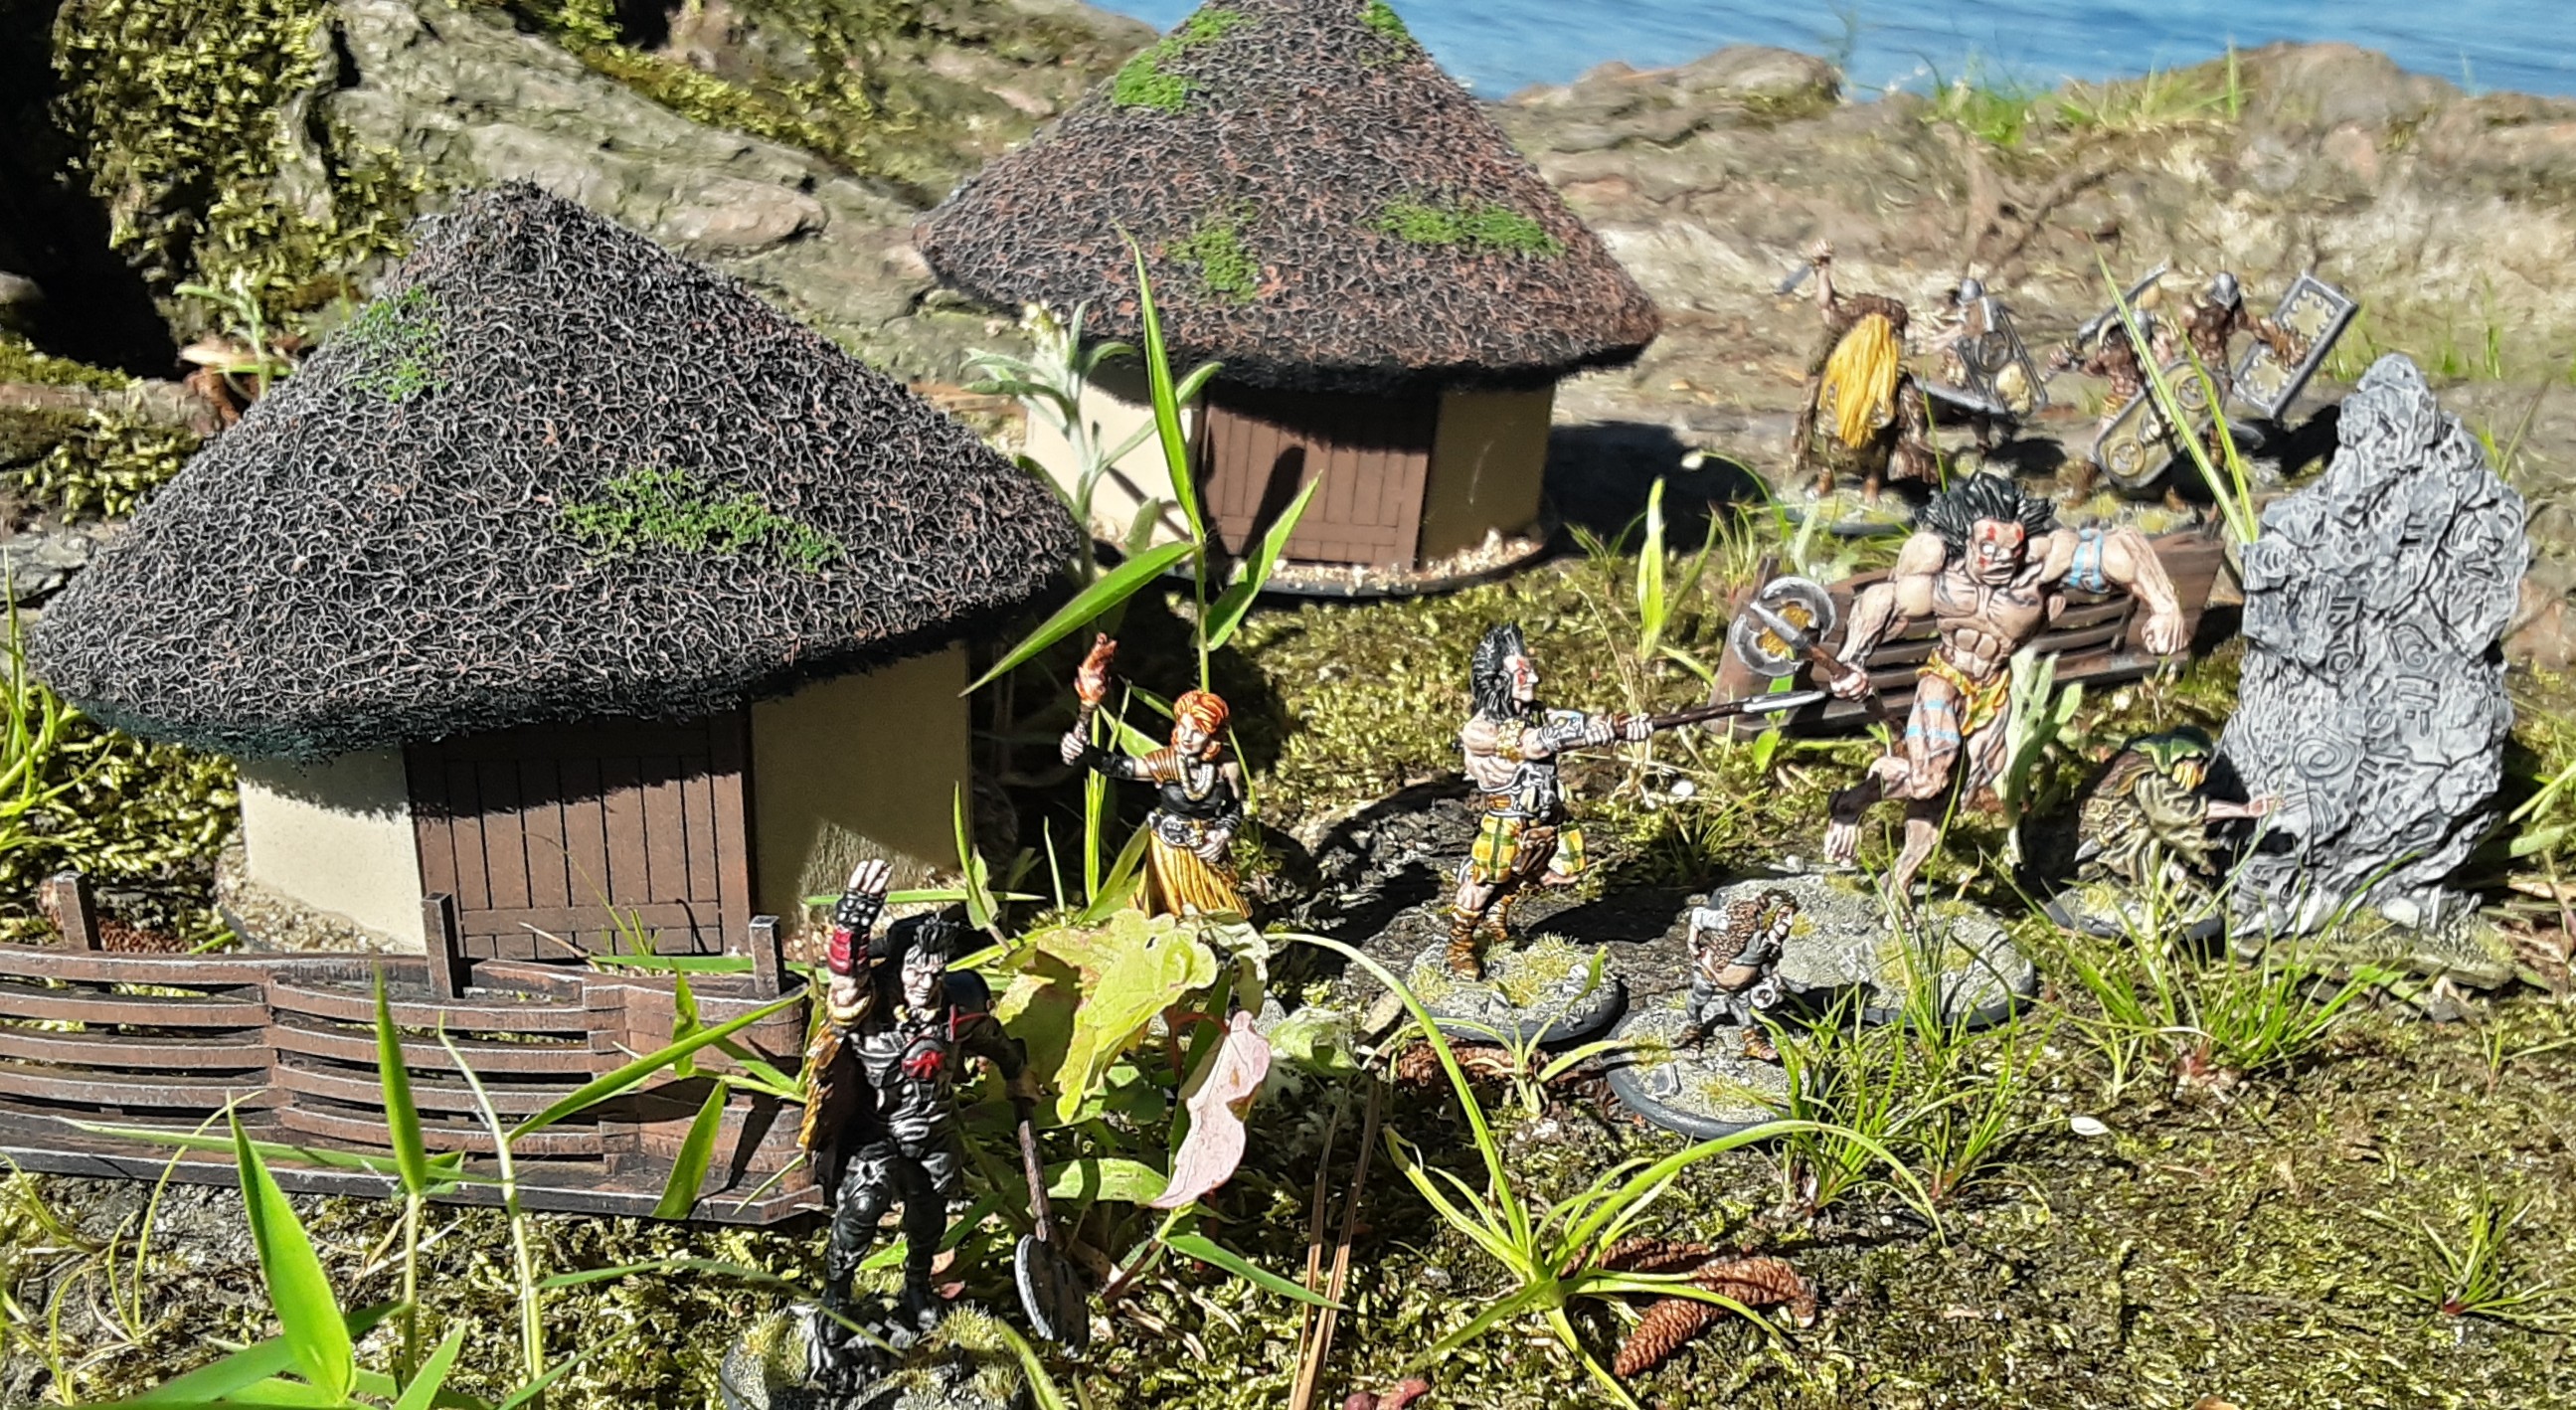 The minis and terrain from the Slaine: Kiss My Axe! Starter Set
The sun was very bright this morning and too shady to snap a picture in other areas. This was great experience if I ever want to take pictures of minis outside in the future.
Now that I was able to paint my Slaine: Kiss My Axe! set, play a game, and get a some fresh air…I can finally call this project done!
Thanks for reading my Spring Clean hobby journey.
 A final picture as I walked home, happy that a project is complete.