


What terrain can I make with my kids old toys?


Recommendations: 87
About the Project
As my kids get older, they outgrow their toys. Often these are sent to the charity shop or passed onto friends, but sometimes the toys are have too many pieces missing, are too chewed up or generally abused to be passed on with a clear conscious. Let's see if I can recycle some of them to make some terrain.
Related Genre: General
Related Contest: TerrainFest 2024
This Project is Active
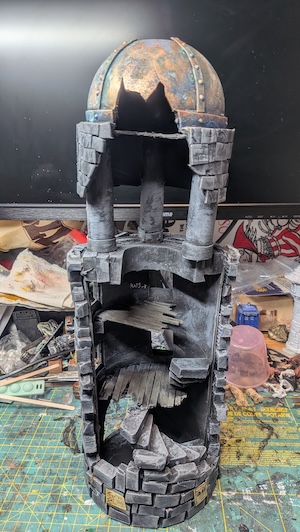
What to do with the play mat off cuts?
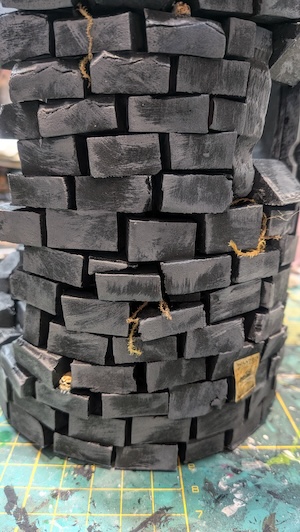
After making the rectangles for my last build, I has a carrier bag full of off cuts. I decided to turn these into ‘bricks’ and attempt the building method of laboriously sticking them onto a shell one by one.
A few sessions with a scalpel and a metal ruler had the off cuts turned into hundreds of little blocks, about 1cm by 2cm although I didn’t stress about getting them a uniform size.
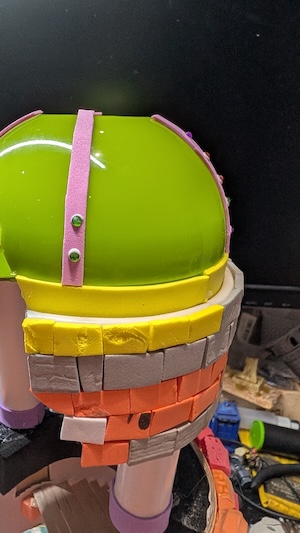
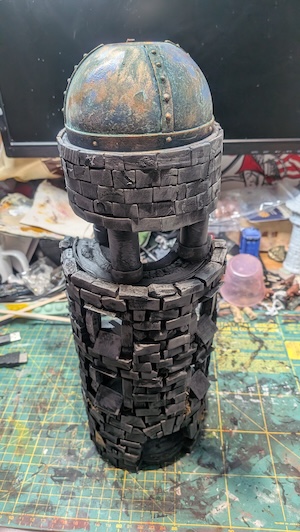
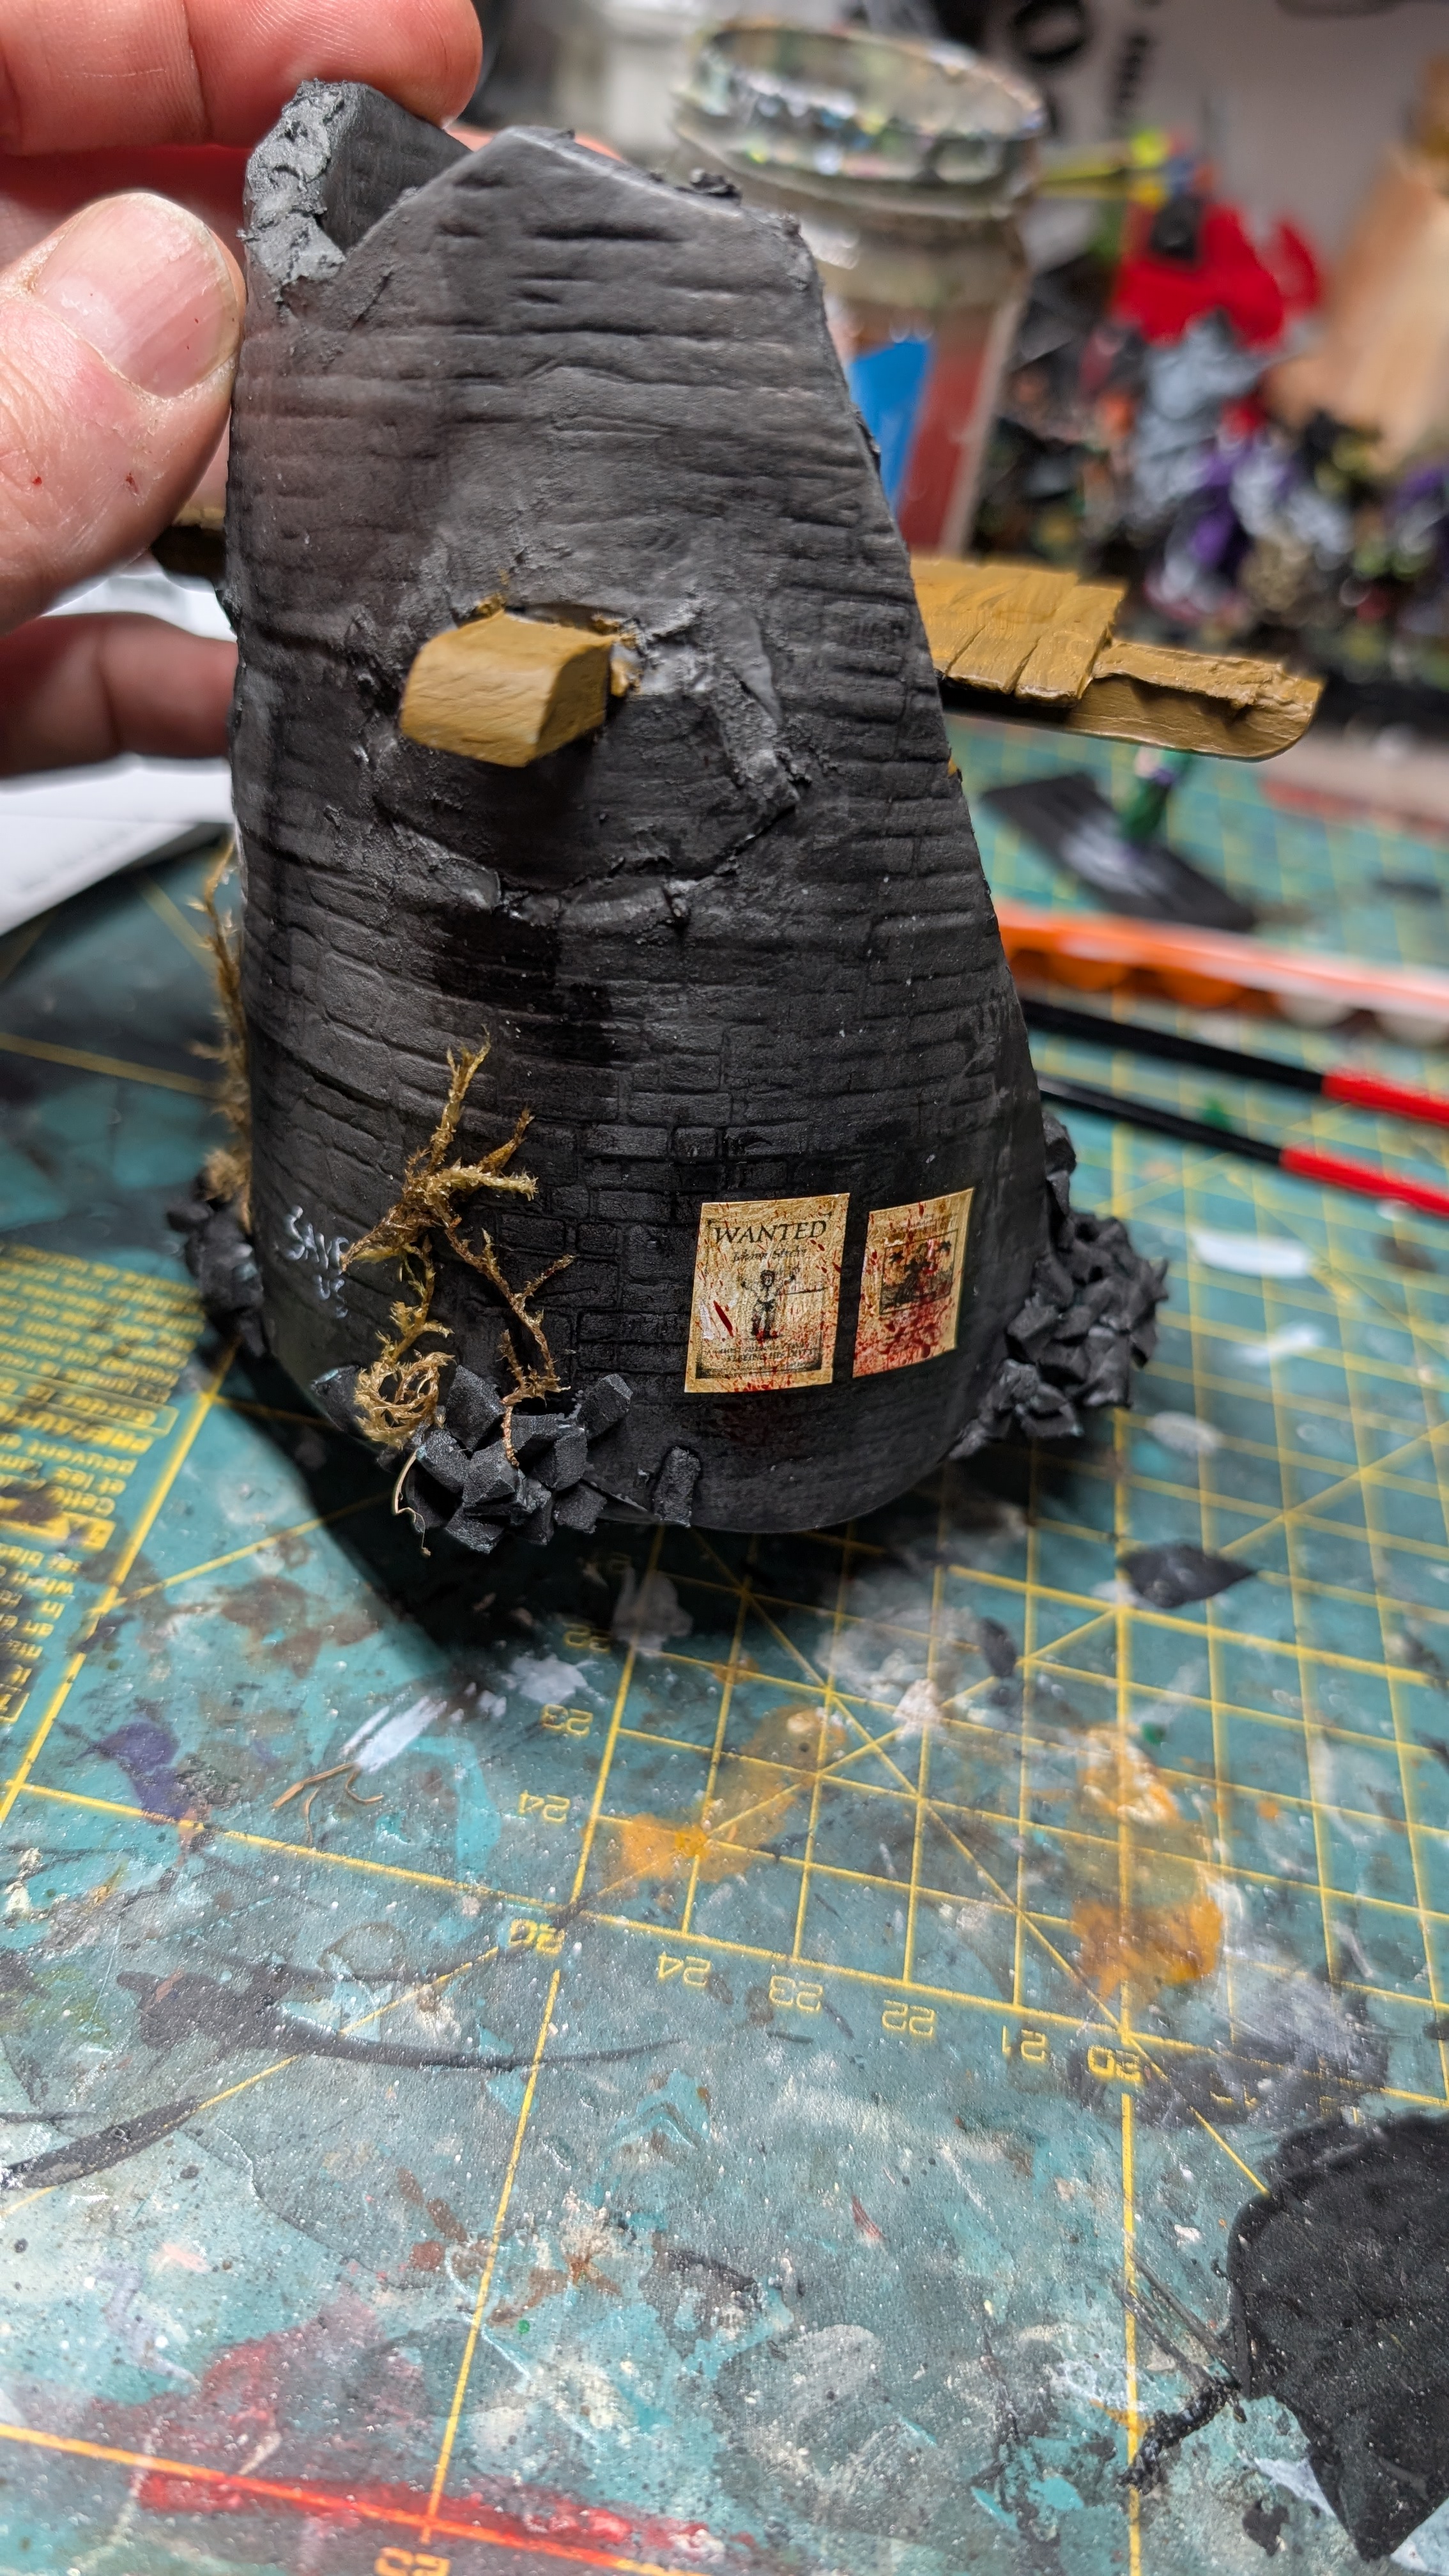
For the shell of the building I took a tube that I think was the packaging for a water bottle to make a tower. As I’ll be using this for my Mordheim games, I cut away at one side to make it look suitably ruined. I added a couple of stir stick floors, then pondered what to do with the top.
Happily the lid of the tube was an almost perfect fit to half a plastic ball that was the packaging for a bunch of toys (if you’ve got kids. you know the sort of thing : there’s usually half a dozen of them from different youtube influencers on the shelves on the toy shop). I attacked this with pliers to crack it.
A band of thin EVA hid the join, and I used old plastic pipe knocking around in the garage to make pillars to join this roof to the main body of the tower.

I decided that adding the same bricks I’d used for the body of the tower to the area below the dome would make the transition to the dome too harsh. So I used some of the thin sheet of EVA to make bricks that were just a facade rather than have any width. I think this sheet had arrived in the house as part of a Hobbycraft kit that my daugher had used once and discarded.
In a similar vein I raided a ‘diy diamond painting’ kit which was for making sparkly wind chimes. This provided rivets to attach make the dome look a little more interesting.
I primed this with spray primer, then dry brushed it grey.
The some was base coated with a dark blue, then I applied a sponged on layer of bronze paint, with a final wash of thinned dirty down verdigris.
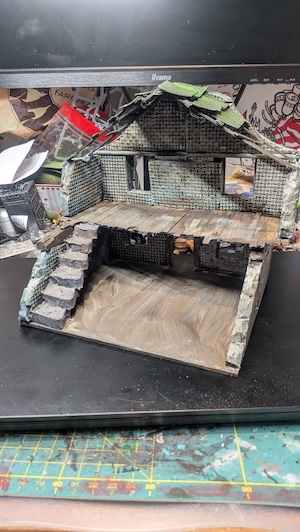
For finishing touches I added some posters, bits of moss and a couple of skulls tiny head bones.
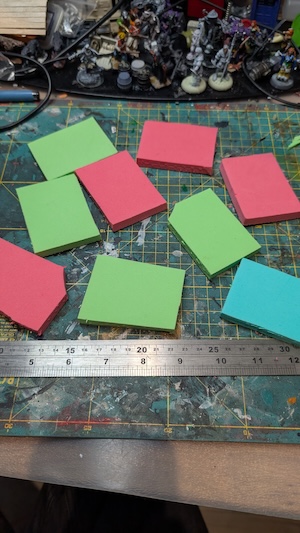
Looking for rectangles
In an attempt to make my life easier, I thought I’d inspect the play tiles and look for larger areas where I could harvest to create a number of same sized rectangles. This proved successful and I managed to get quite a few. Of course there was a lot of cut offs, so I put those aside for use later.
 https://www.beastsofwar.com/project-entry/1946210/?v=edit#
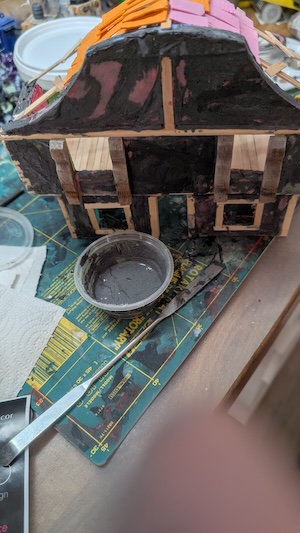
I used PVA to glue those together, using some of the balsa from the crate a couple of posts back to add beams the house.

Windows were either cut out, or assembled from smaller rectangles, with the edges hidden with more coffee sticks or wooden pegs. A gable was added using the curved shape of one of the off-cuts, rafters were even more coffee sticks and roof tiles were added with cut up very thing EVA shapes (I’ve no idea where they came from, but there were collected from the kids craft supplies).
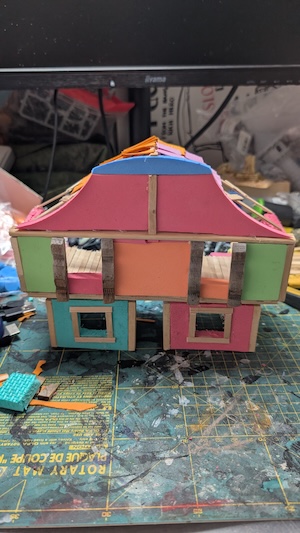
I didn’t go for the heat and roller to add texture this time, but rather the age old method of slathering the building with a slurry of thin polyfila mixed with PVA and craft paints. Once that was dry I used more craft paints to add a bit of colour.
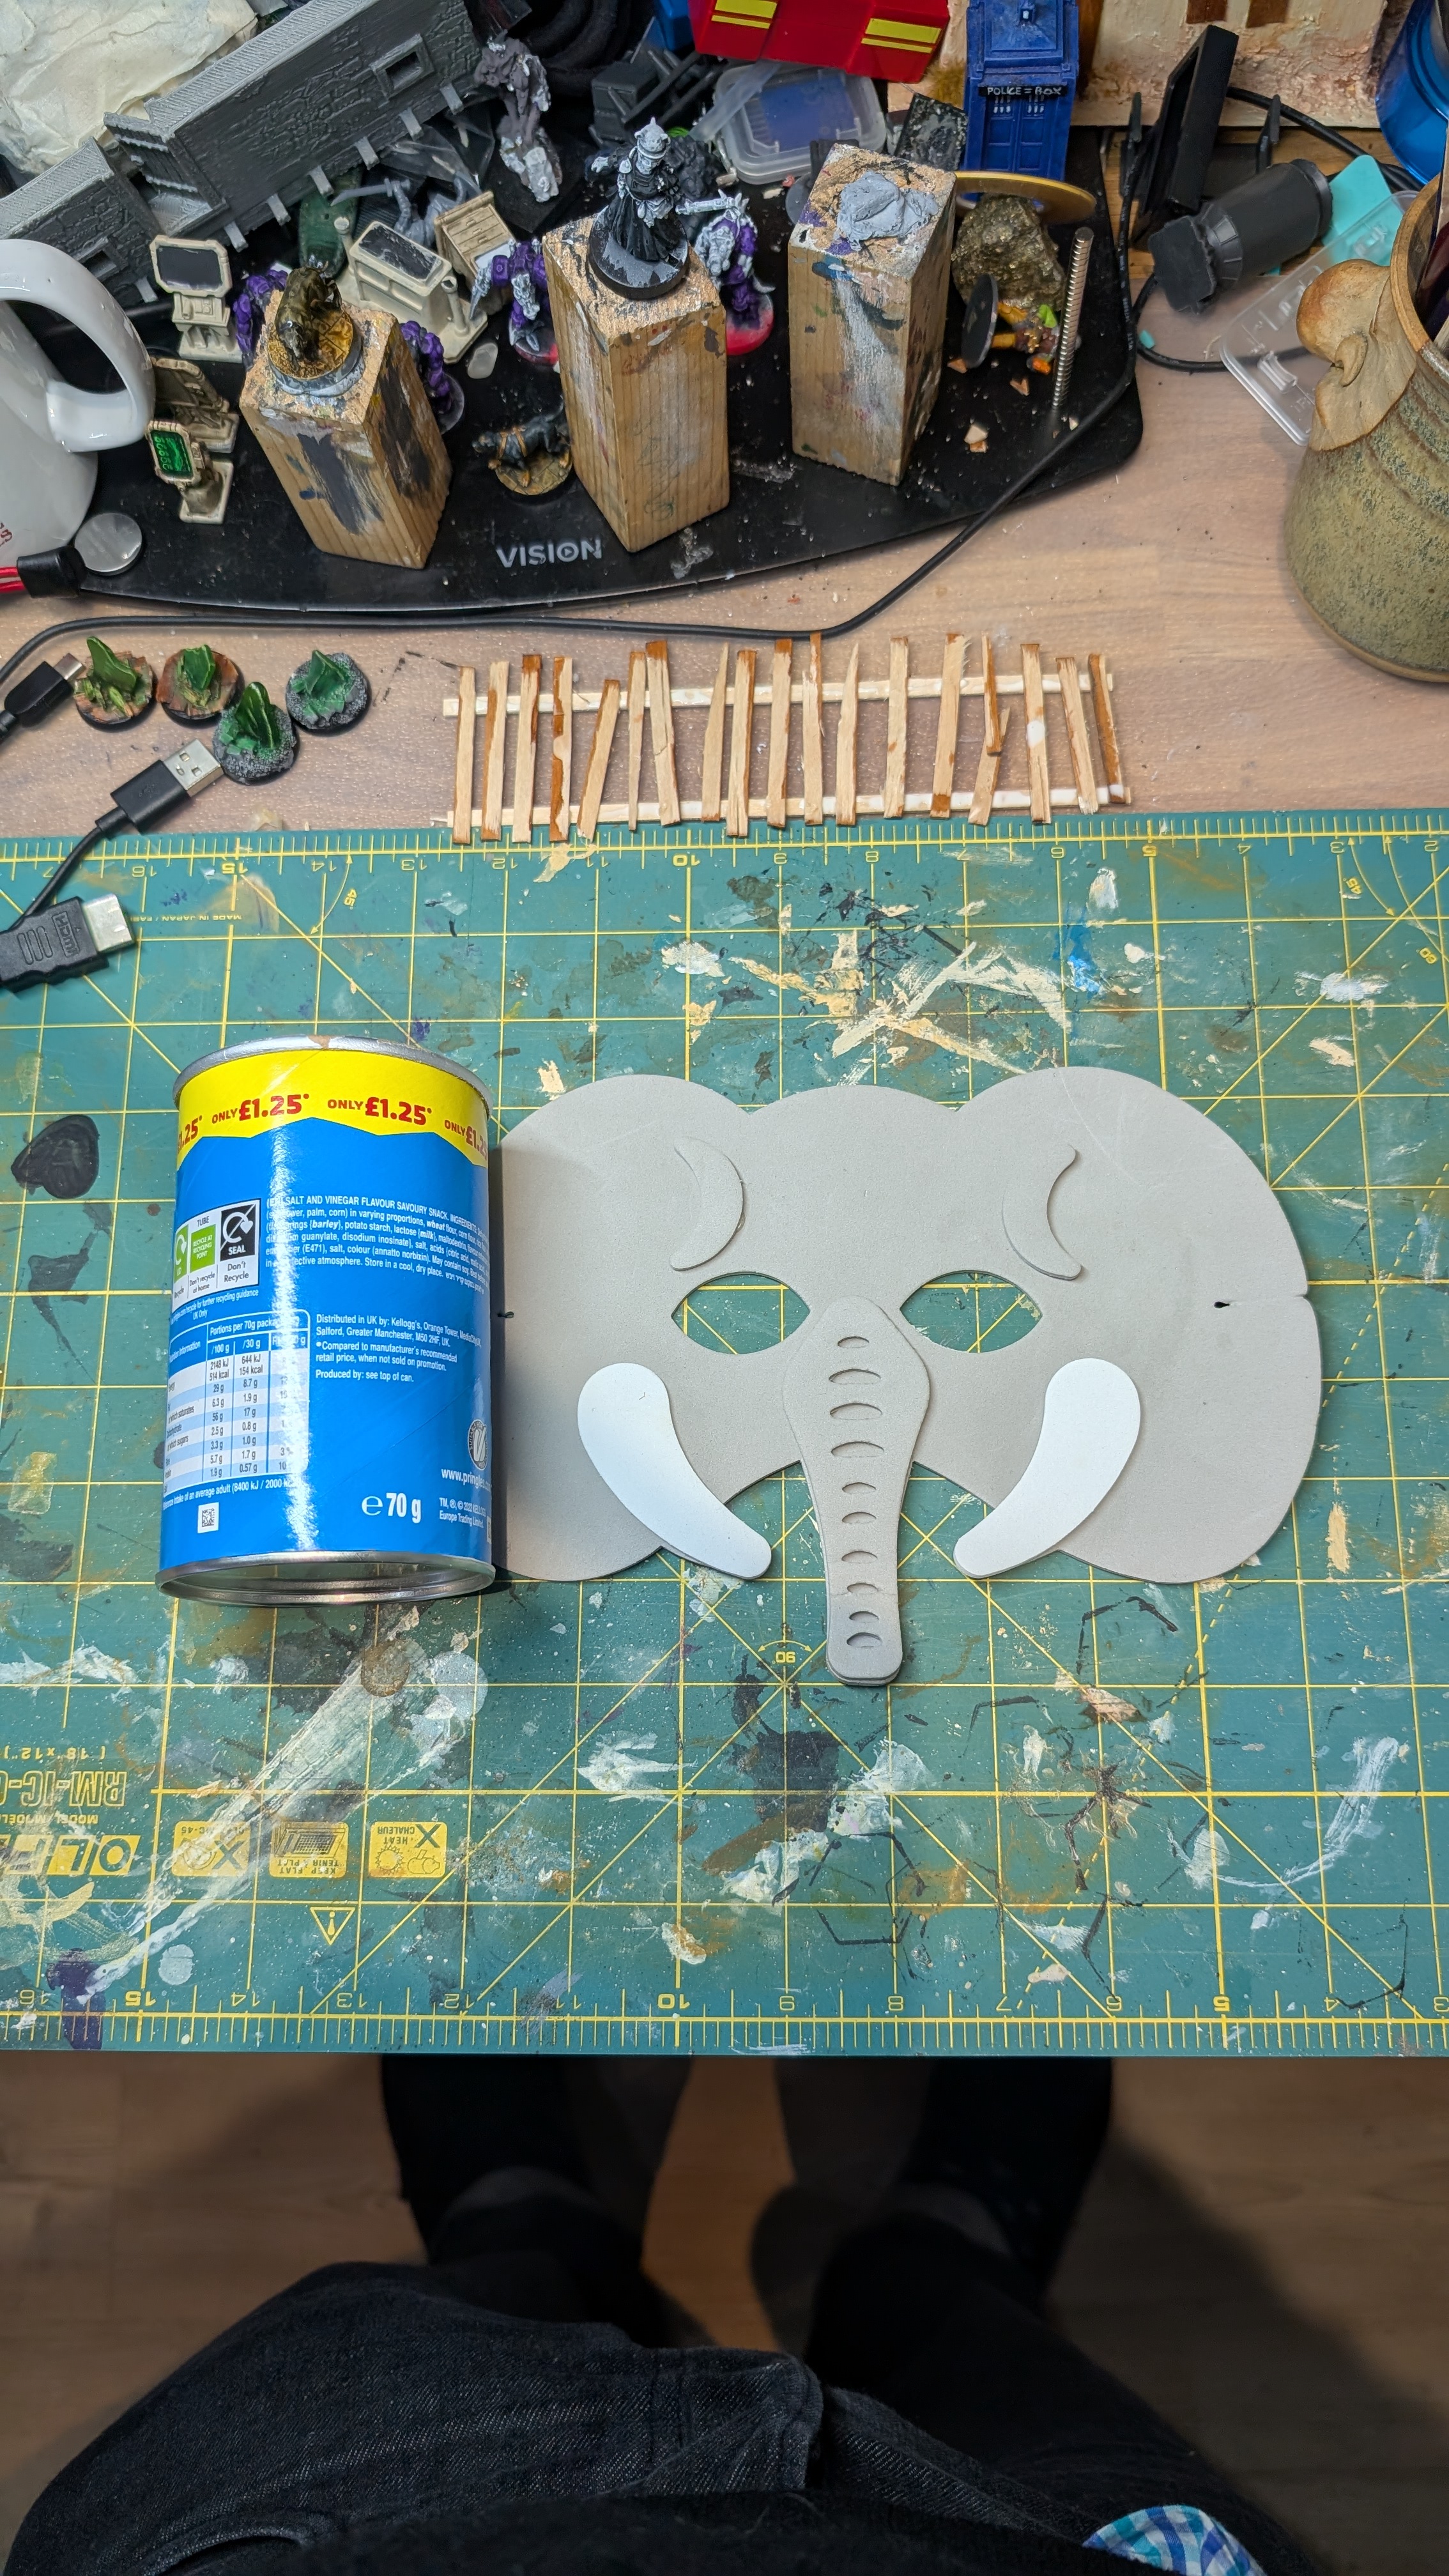
EVA elephant masks
I’ve always fancied building some towers, and I have a collection of cardboard tubes hidden from my wife in the garage for the time when I build a whole city of them.
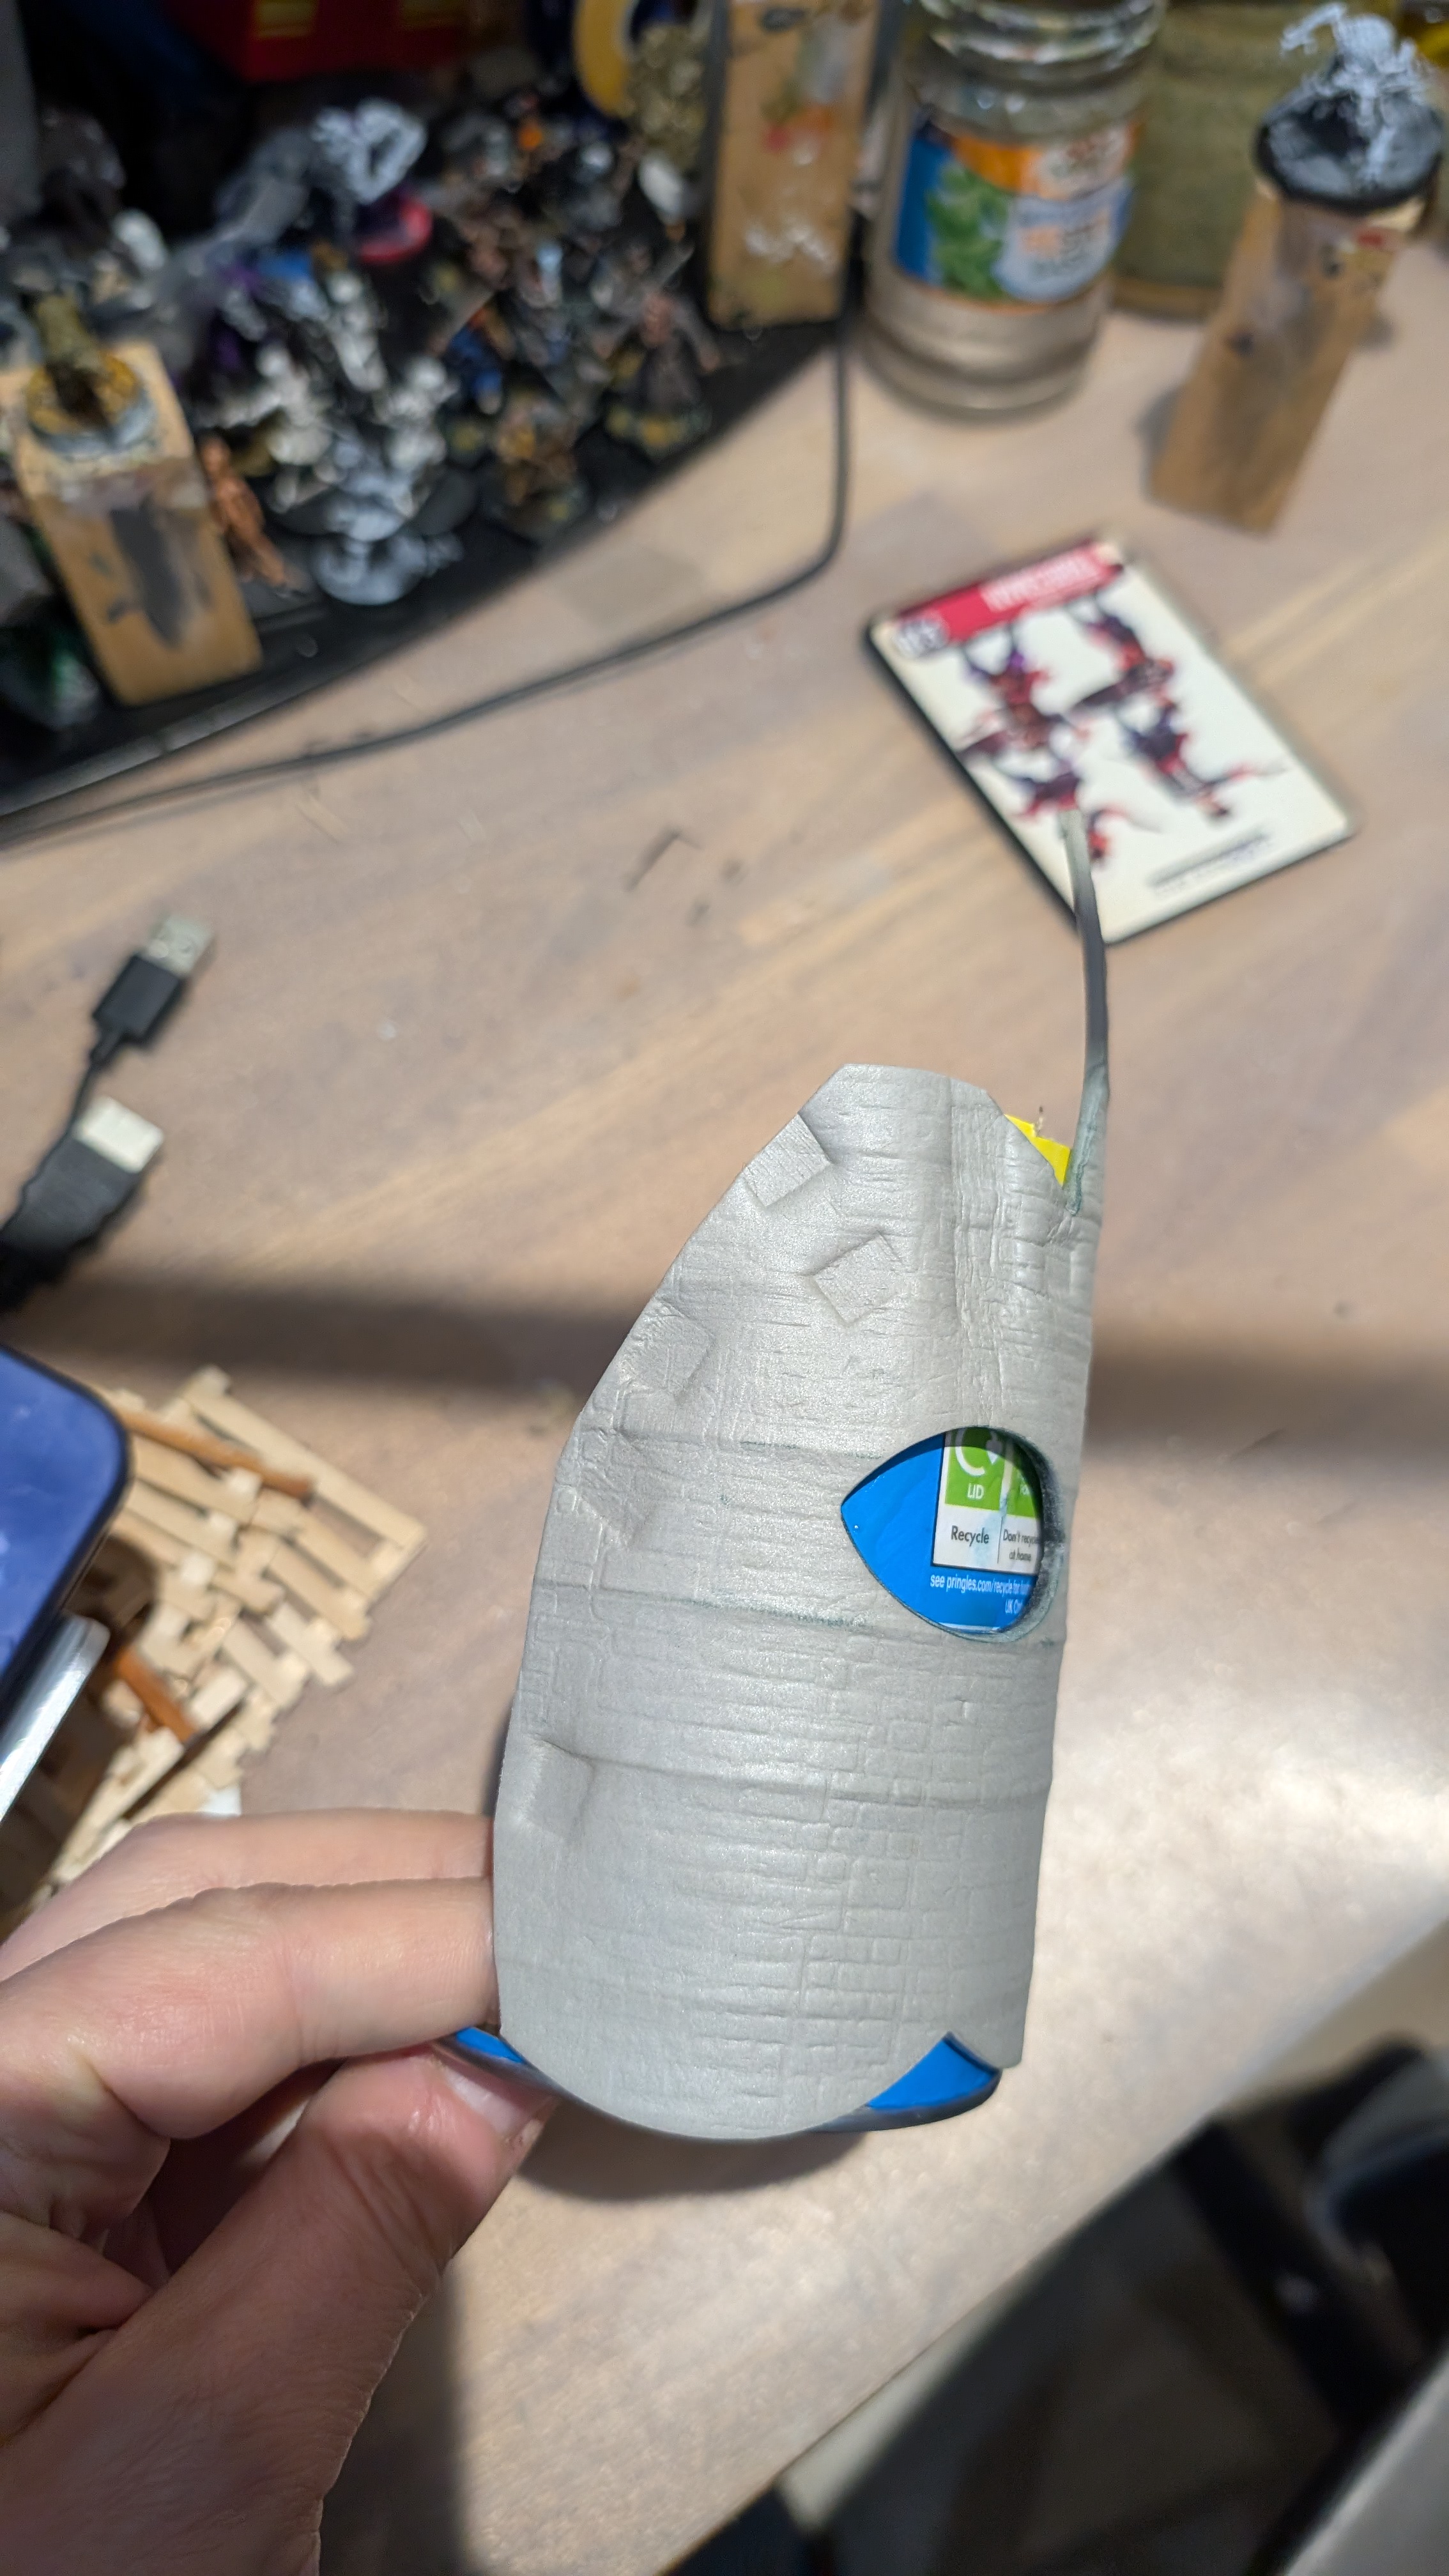
I thought I’d adapt the ‘texture on the playmat’ technique to an EVA mask that came in a party bag at one time. I stripped off the tusks and trunk, to make a single layer of EVA, then I hacked at a small pringles tube to make a shape that could be covered by most of the elephant mask.
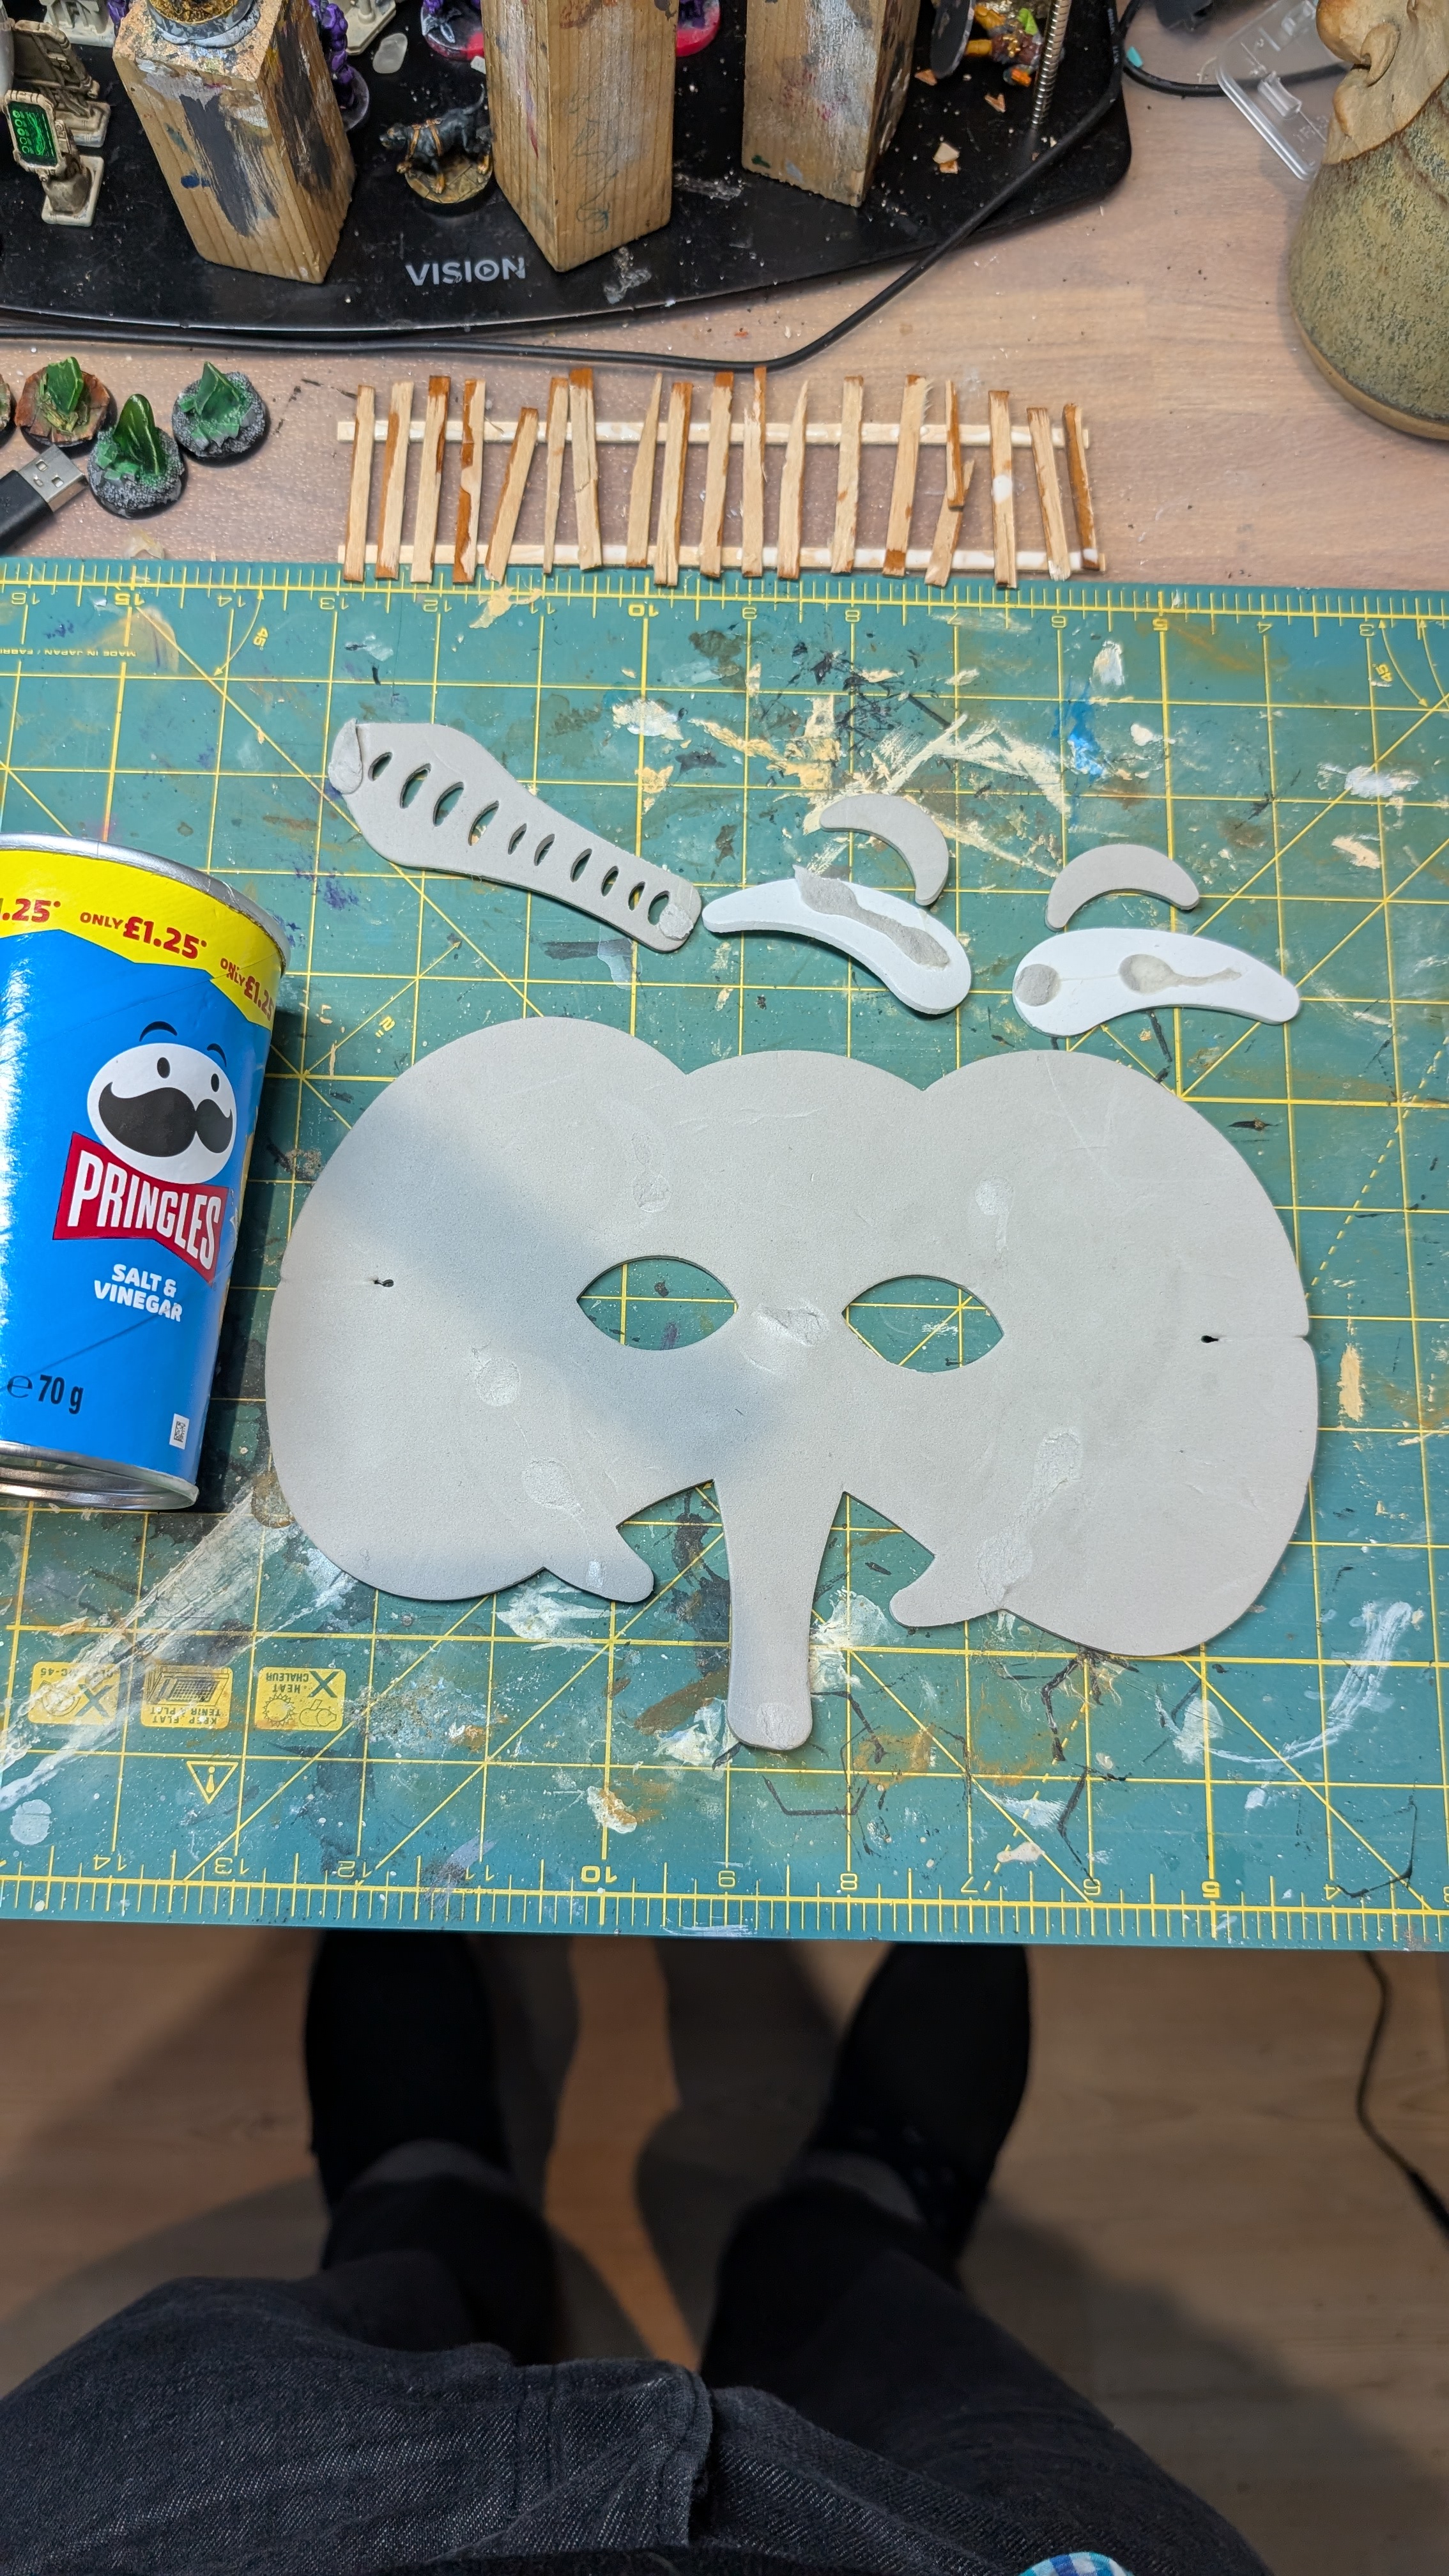
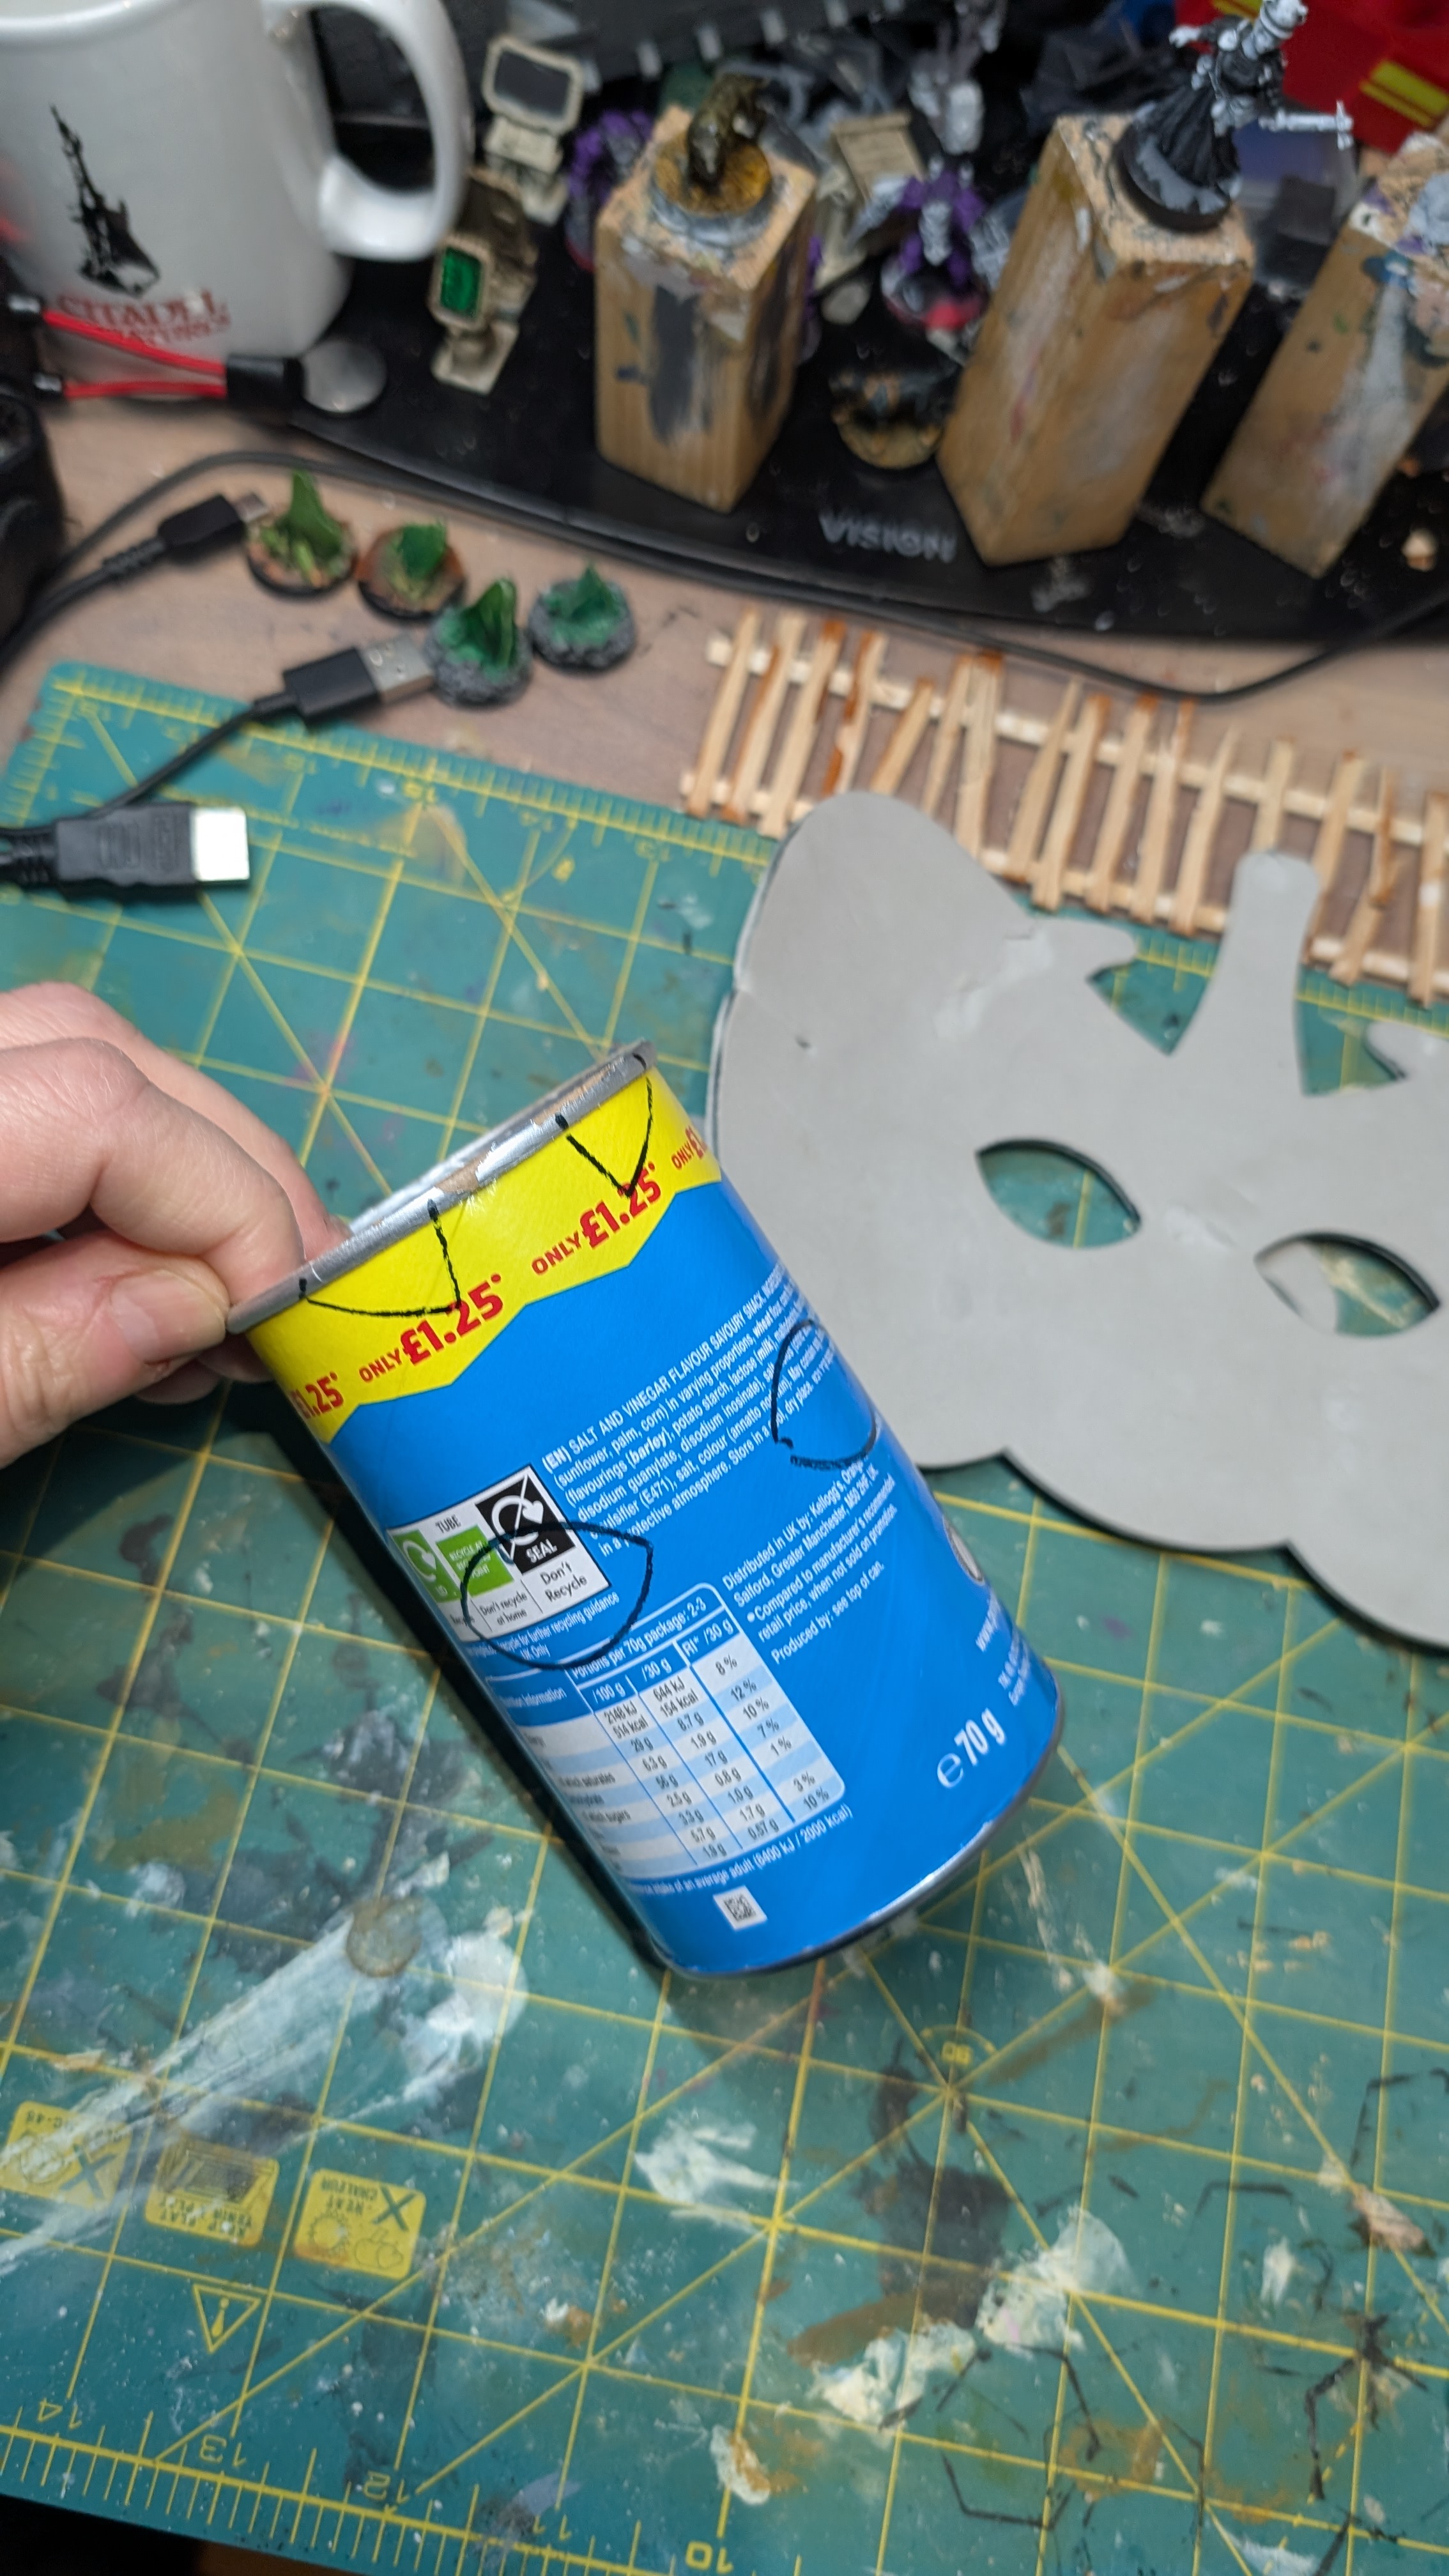
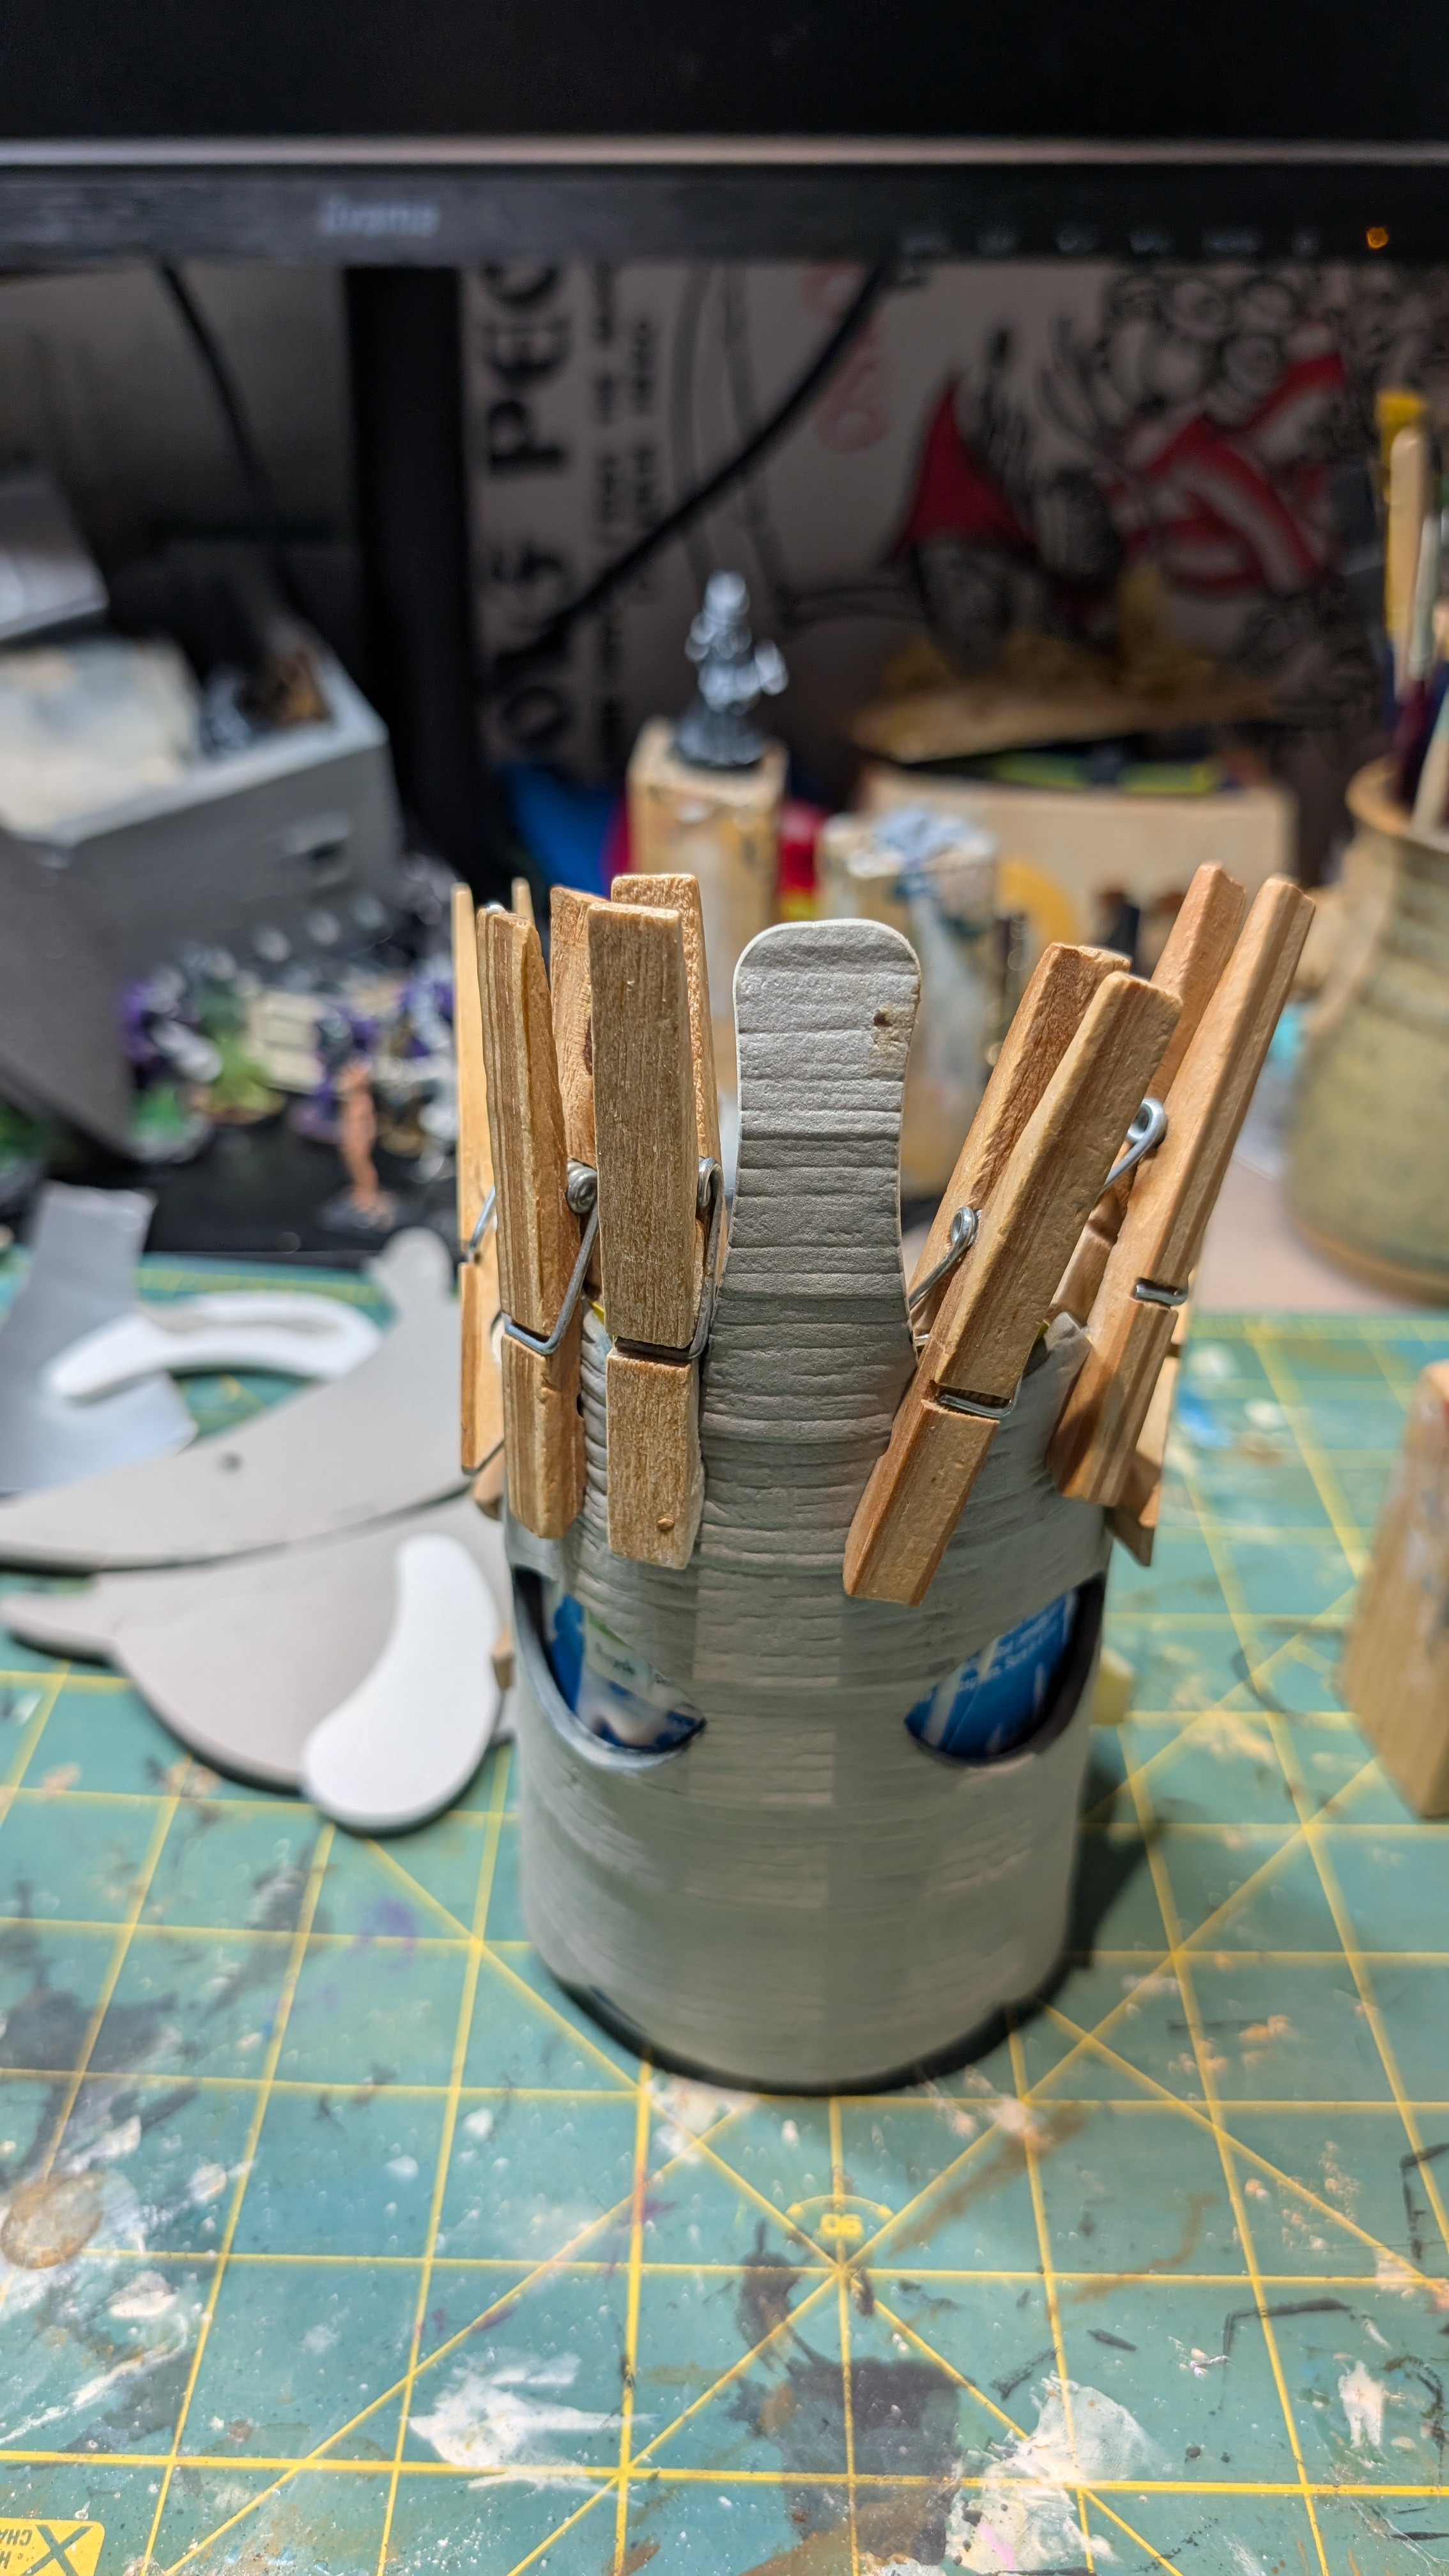
The heat gun and GSW roller didn’t seem to work as well with this sheet, but the brickwork texture was still visible. I glued that to the outside and held it in place with some wooden clothes pegs. Unfortunately, they left some indentation in the EVA but I decided to continue. Next I realised that the walls were too thin, and probably needed texture on the inside too, so I got out a second elephant mask (they were popular at the parties my kids were invited to a few years ago) and used that on the inside.
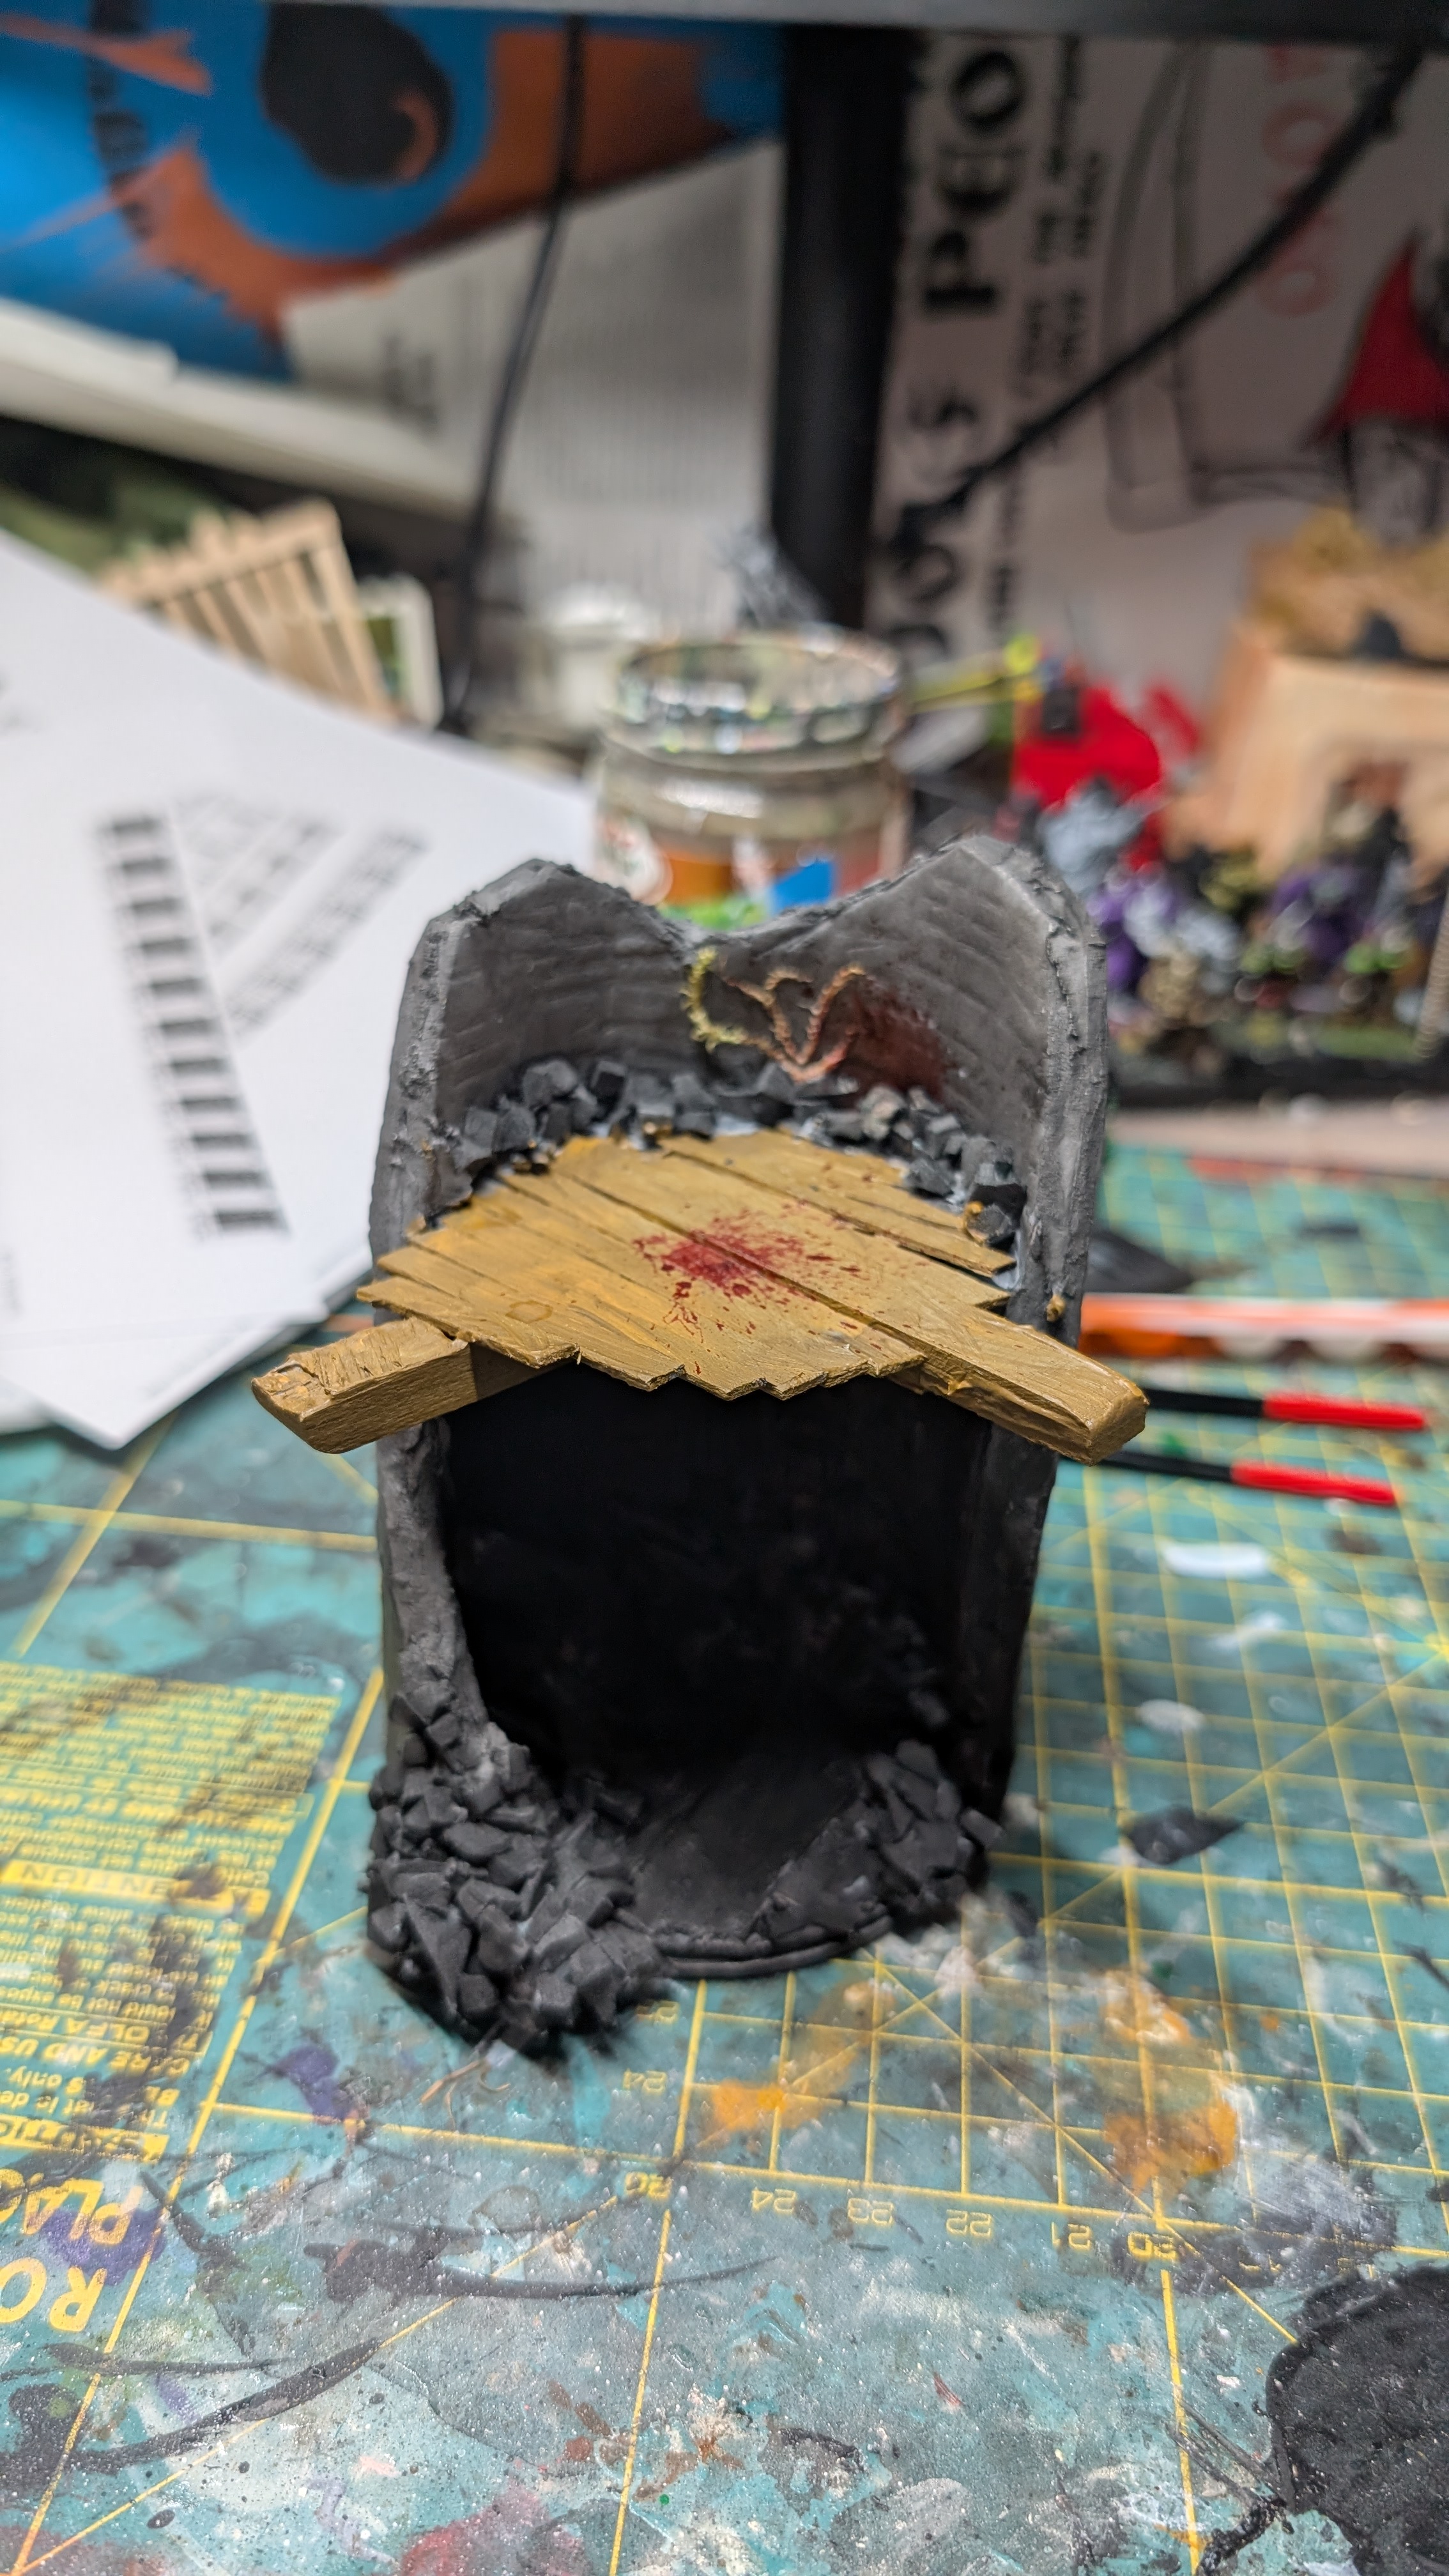
After that I covered the metal bottom of the pringle tin stir sticks, tiny EVA off cuts (made while on Teams calls at work instead of doodling) and some balsa salvaged from when I attacked the roofs in the previous post.
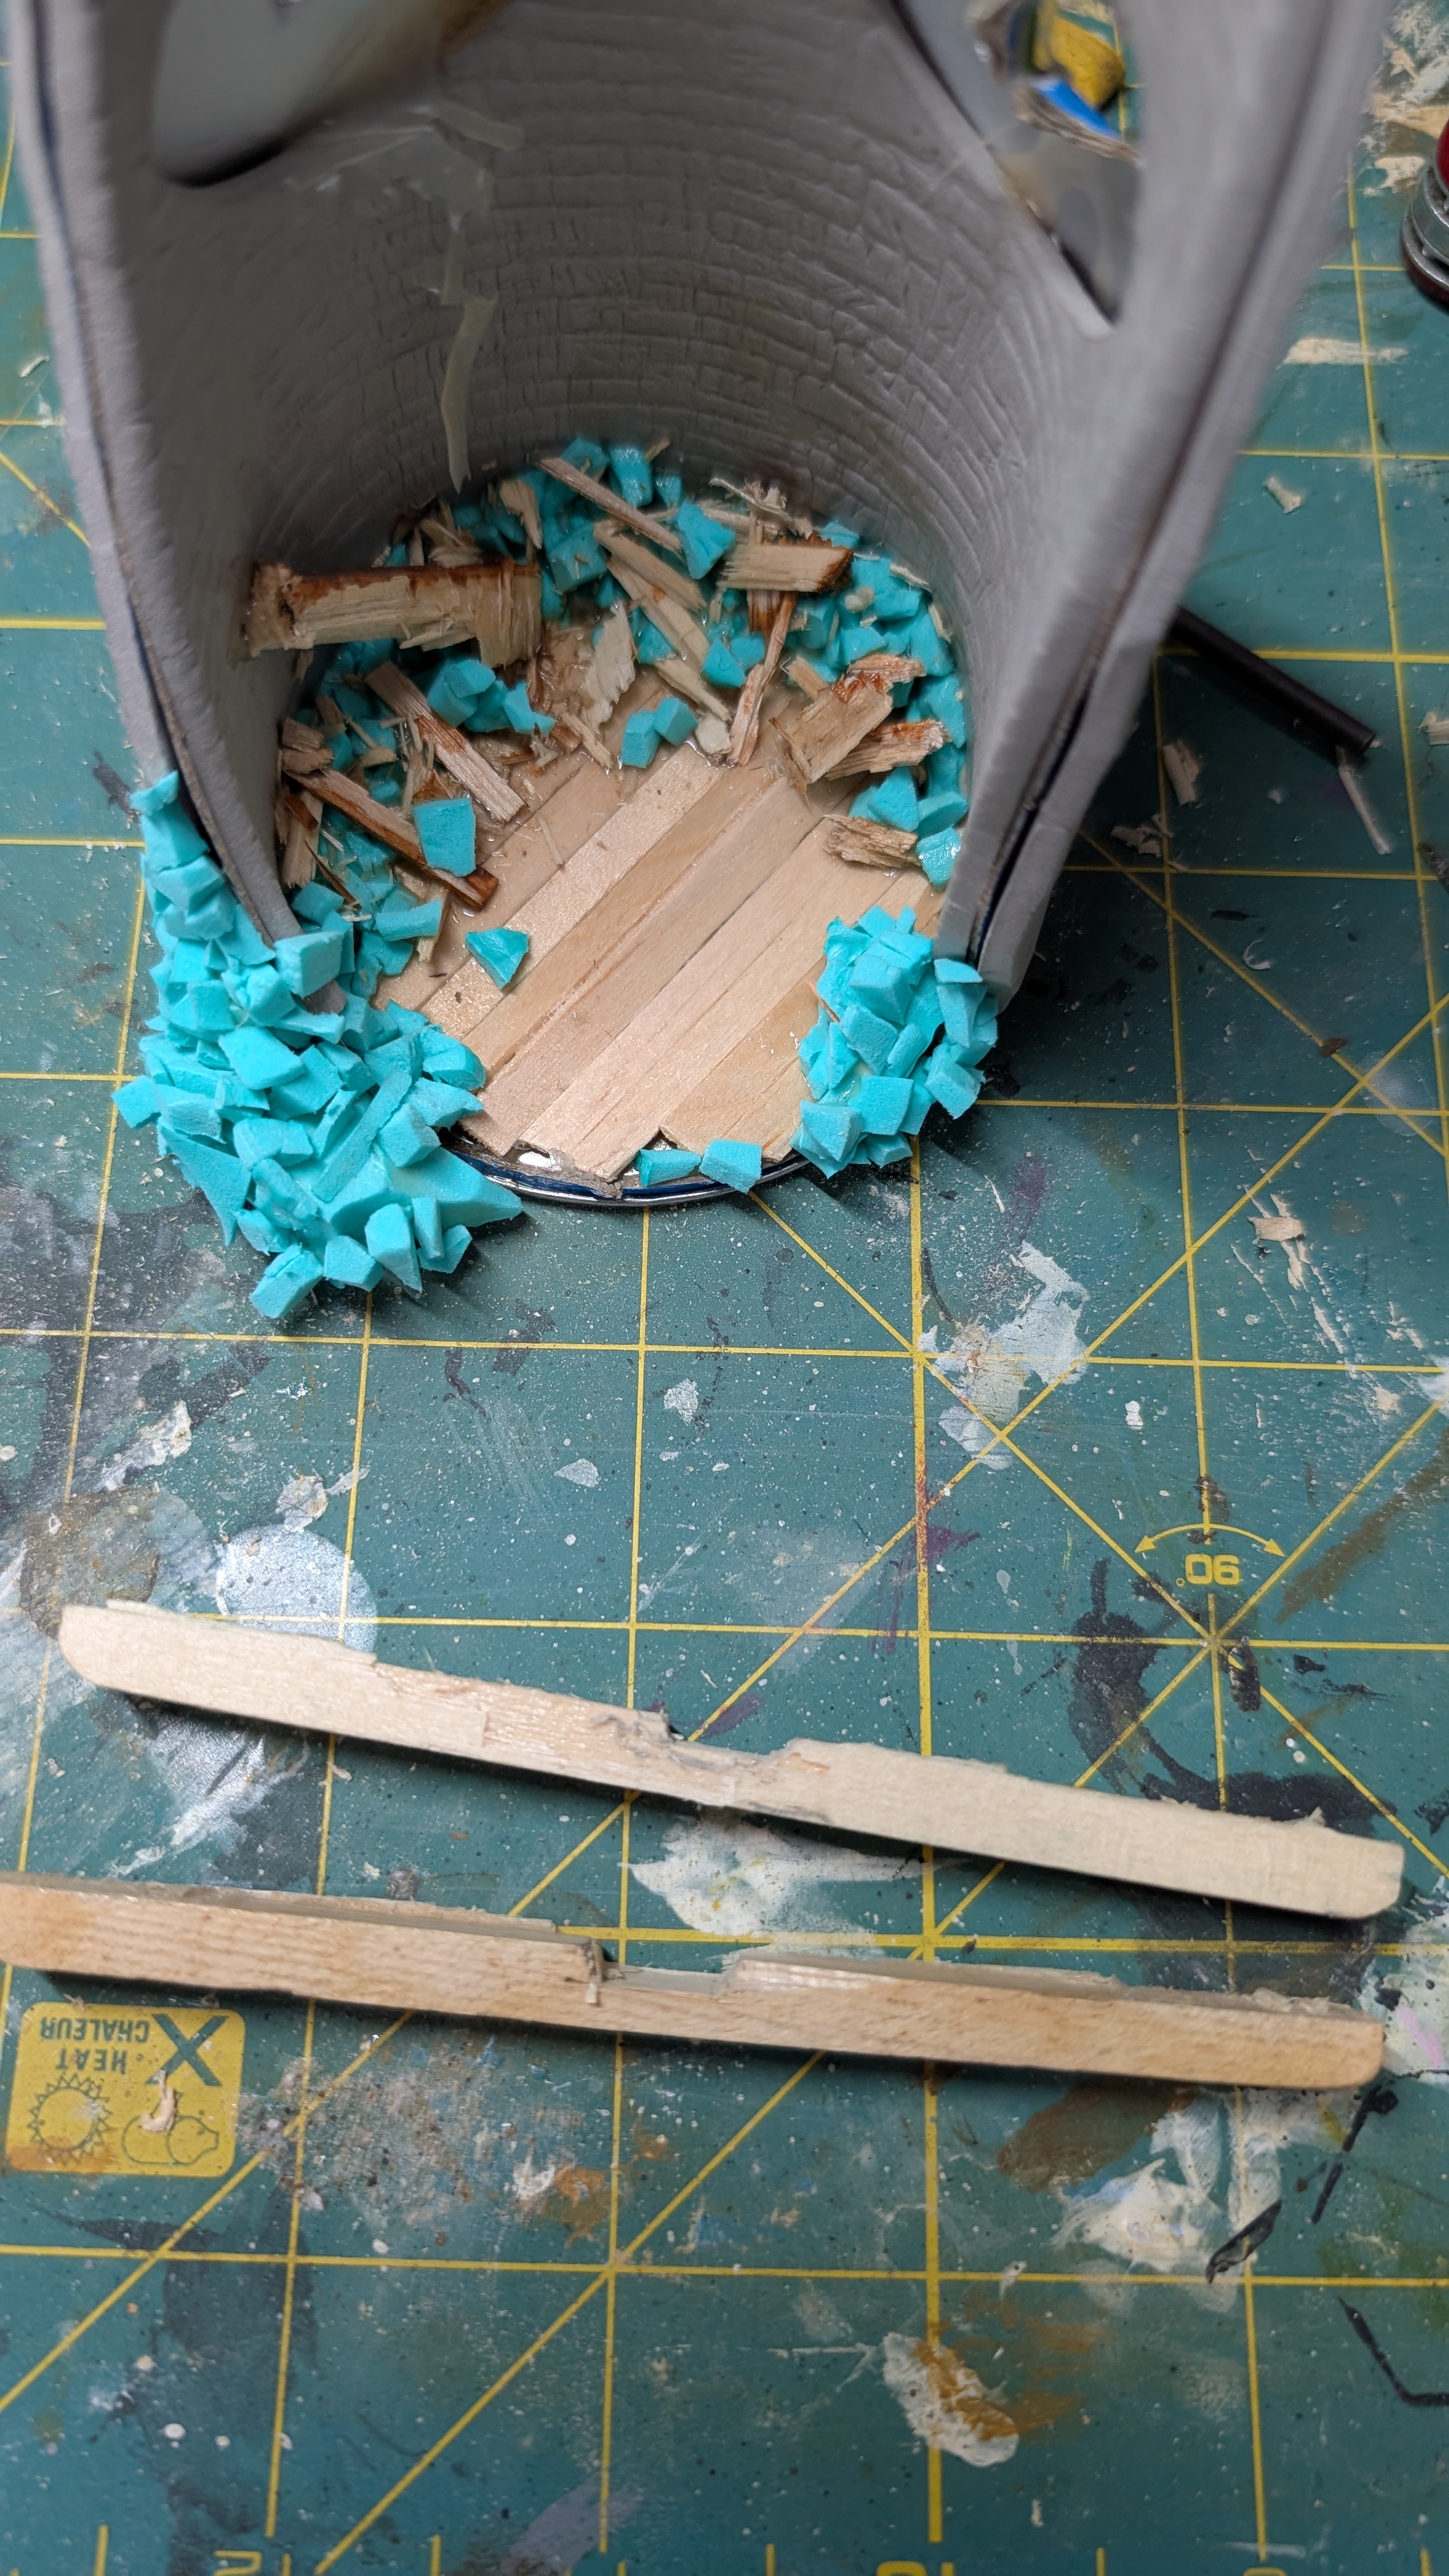
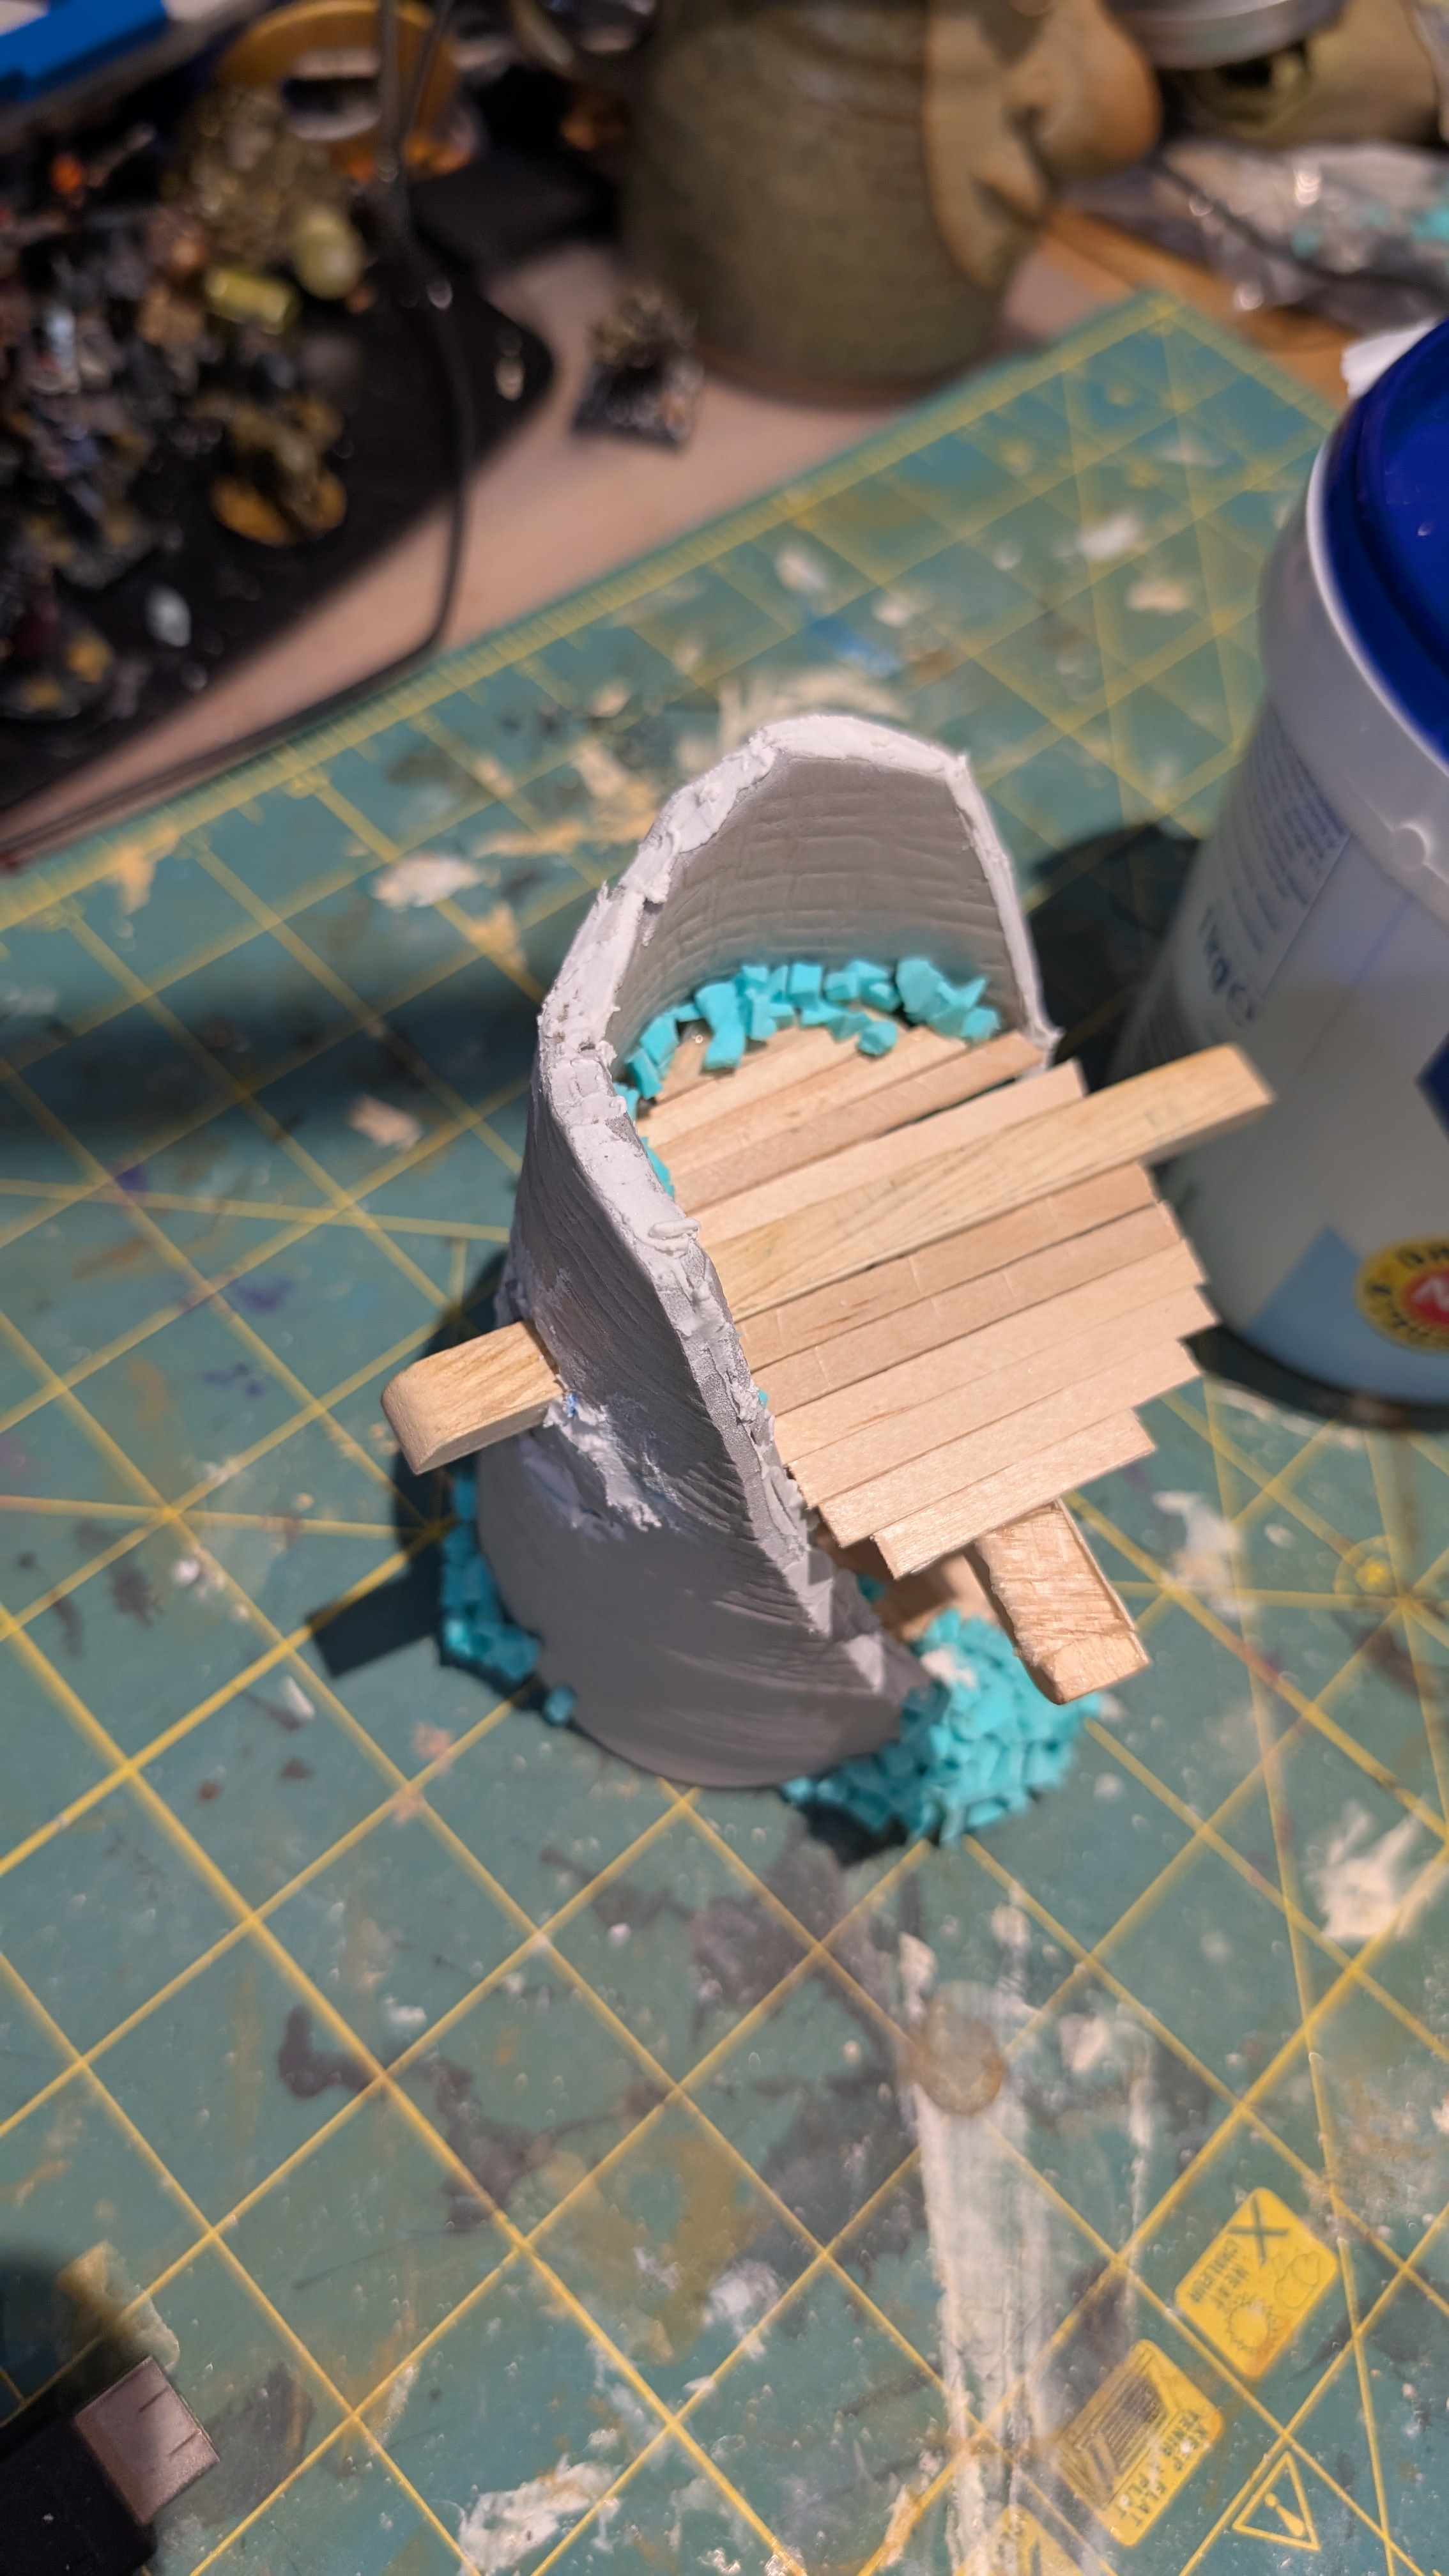
I created a second floor in the tower by using more of the balsa crates, stuck through the eye holes of the elephant masks, and more stir sticks. I then filled up the eye holes and seams of the tower sandwich with polyfilla.
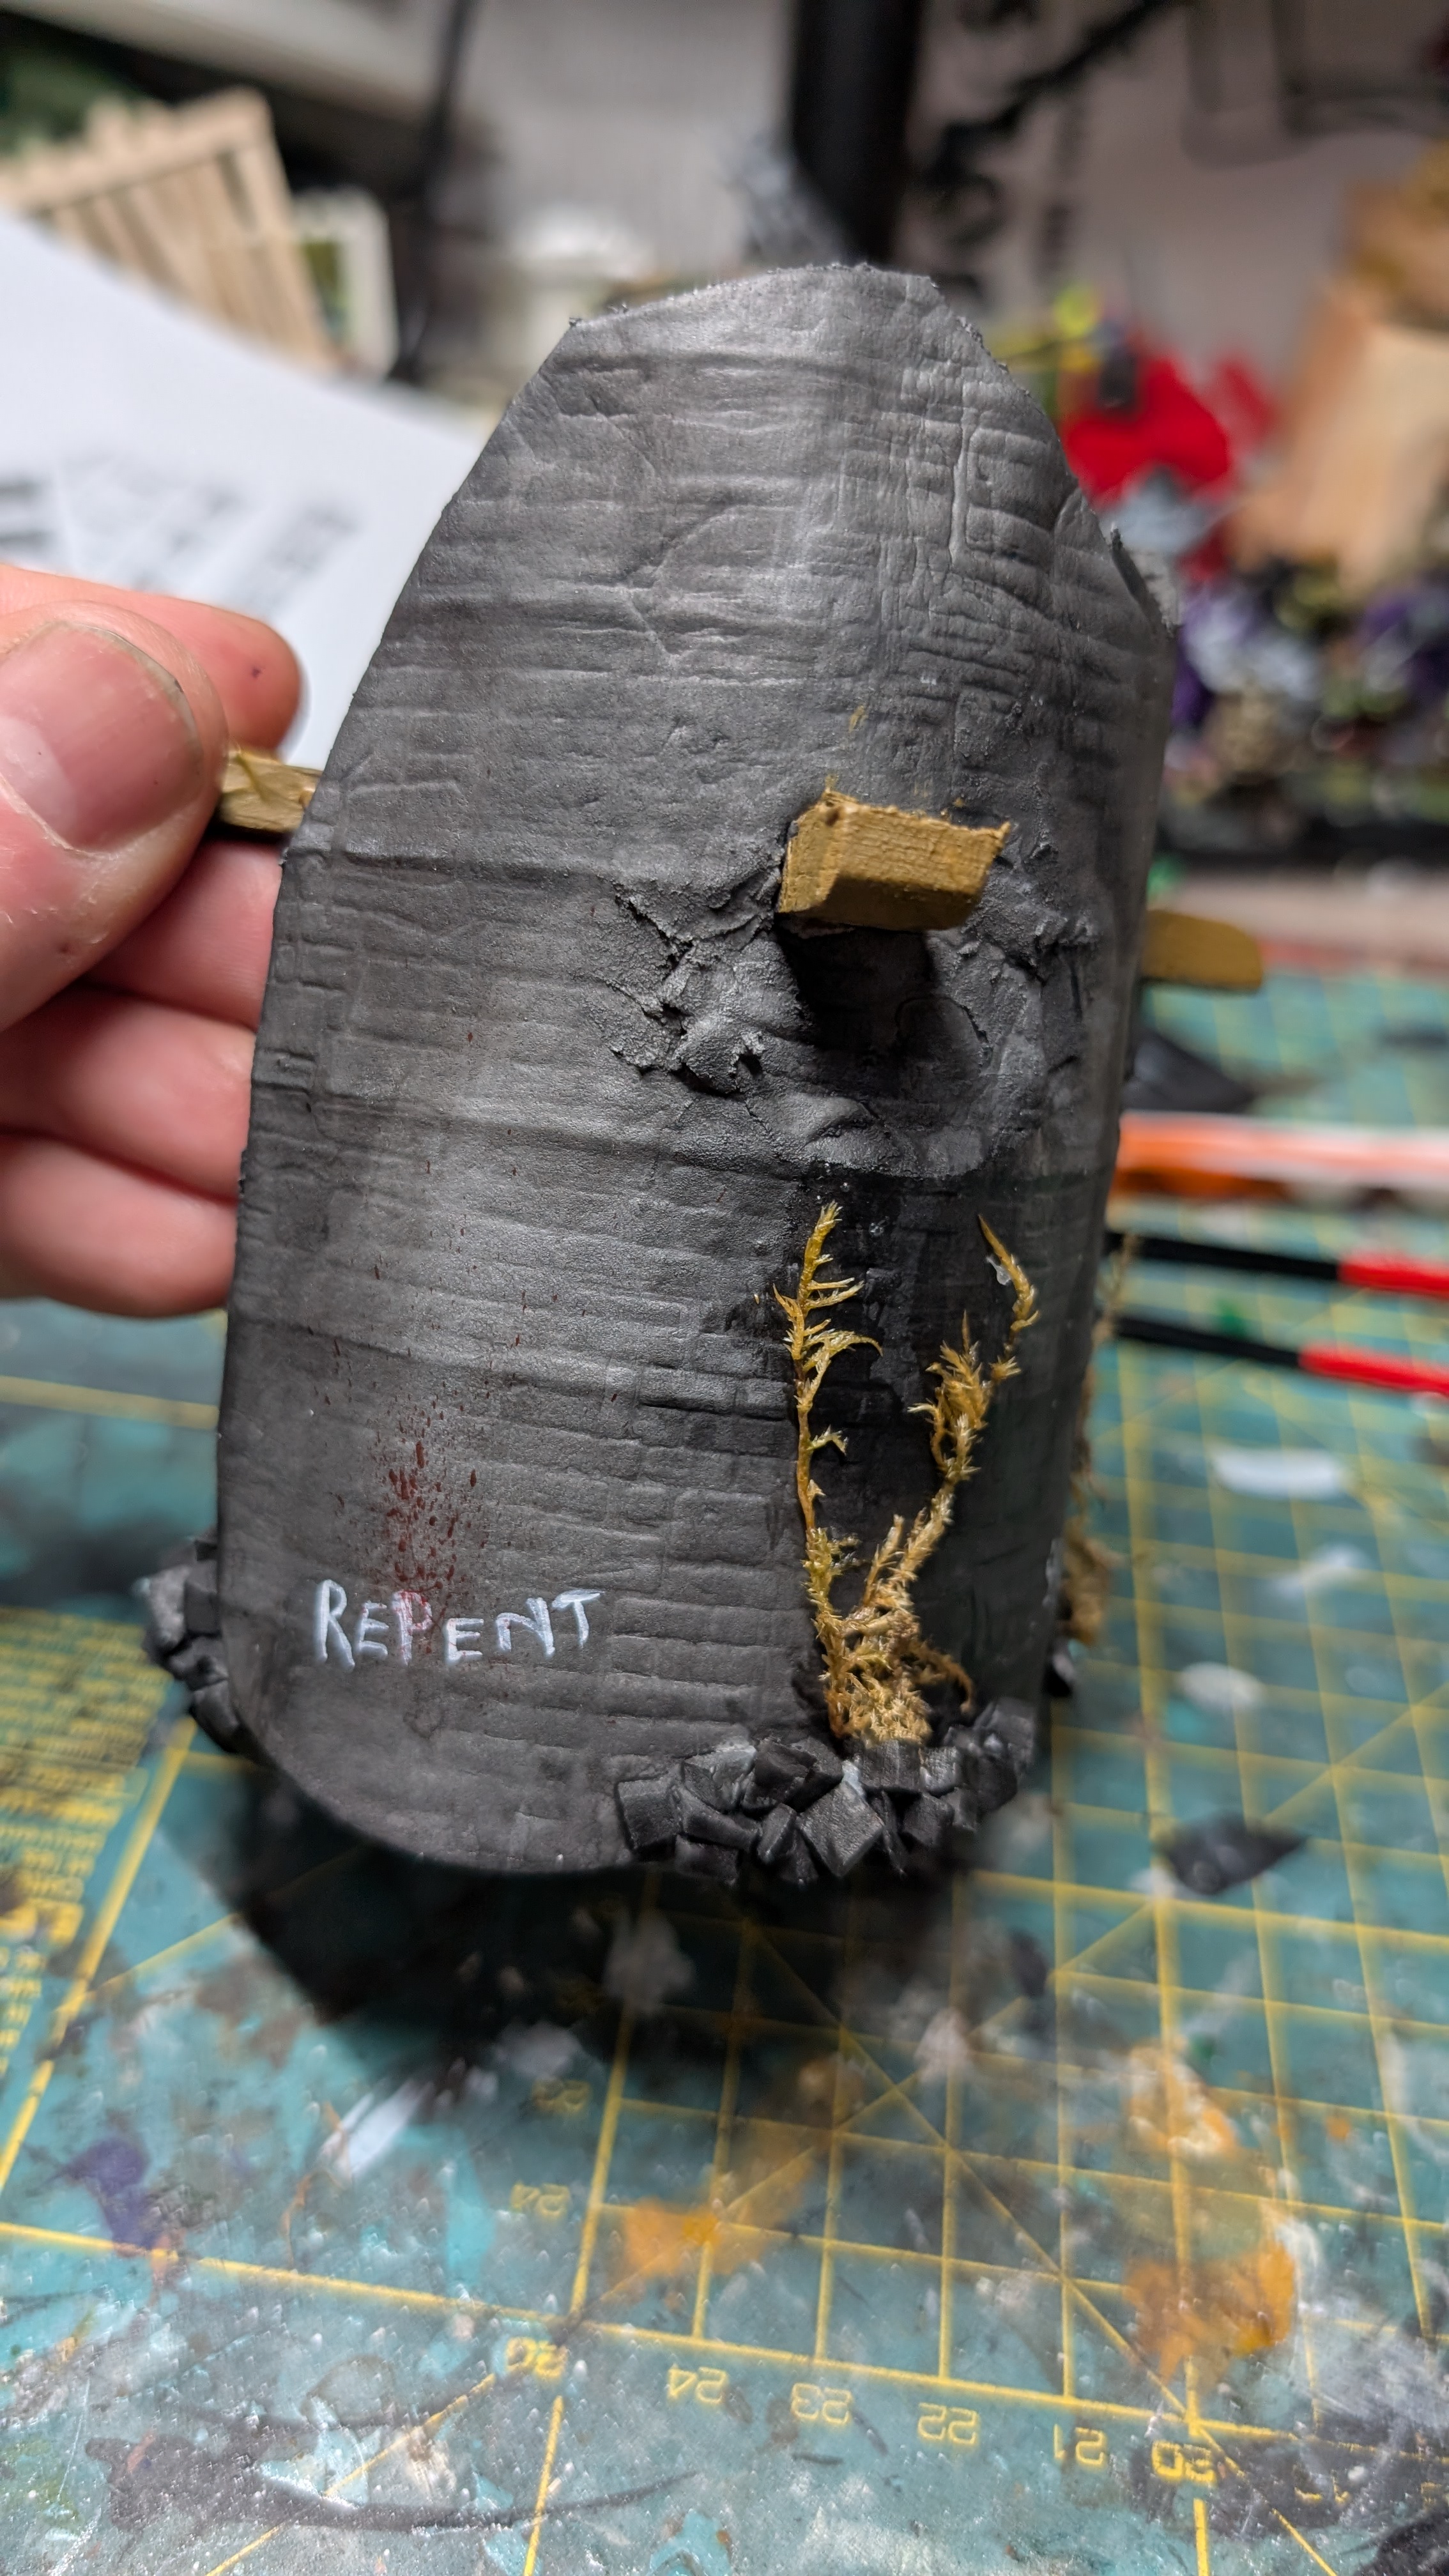
Craft paints were used to paint the tower, then I added come Mordheim graffiti, posters, moss vines and blood splats. I think it looks pretty good.
Balsa crates
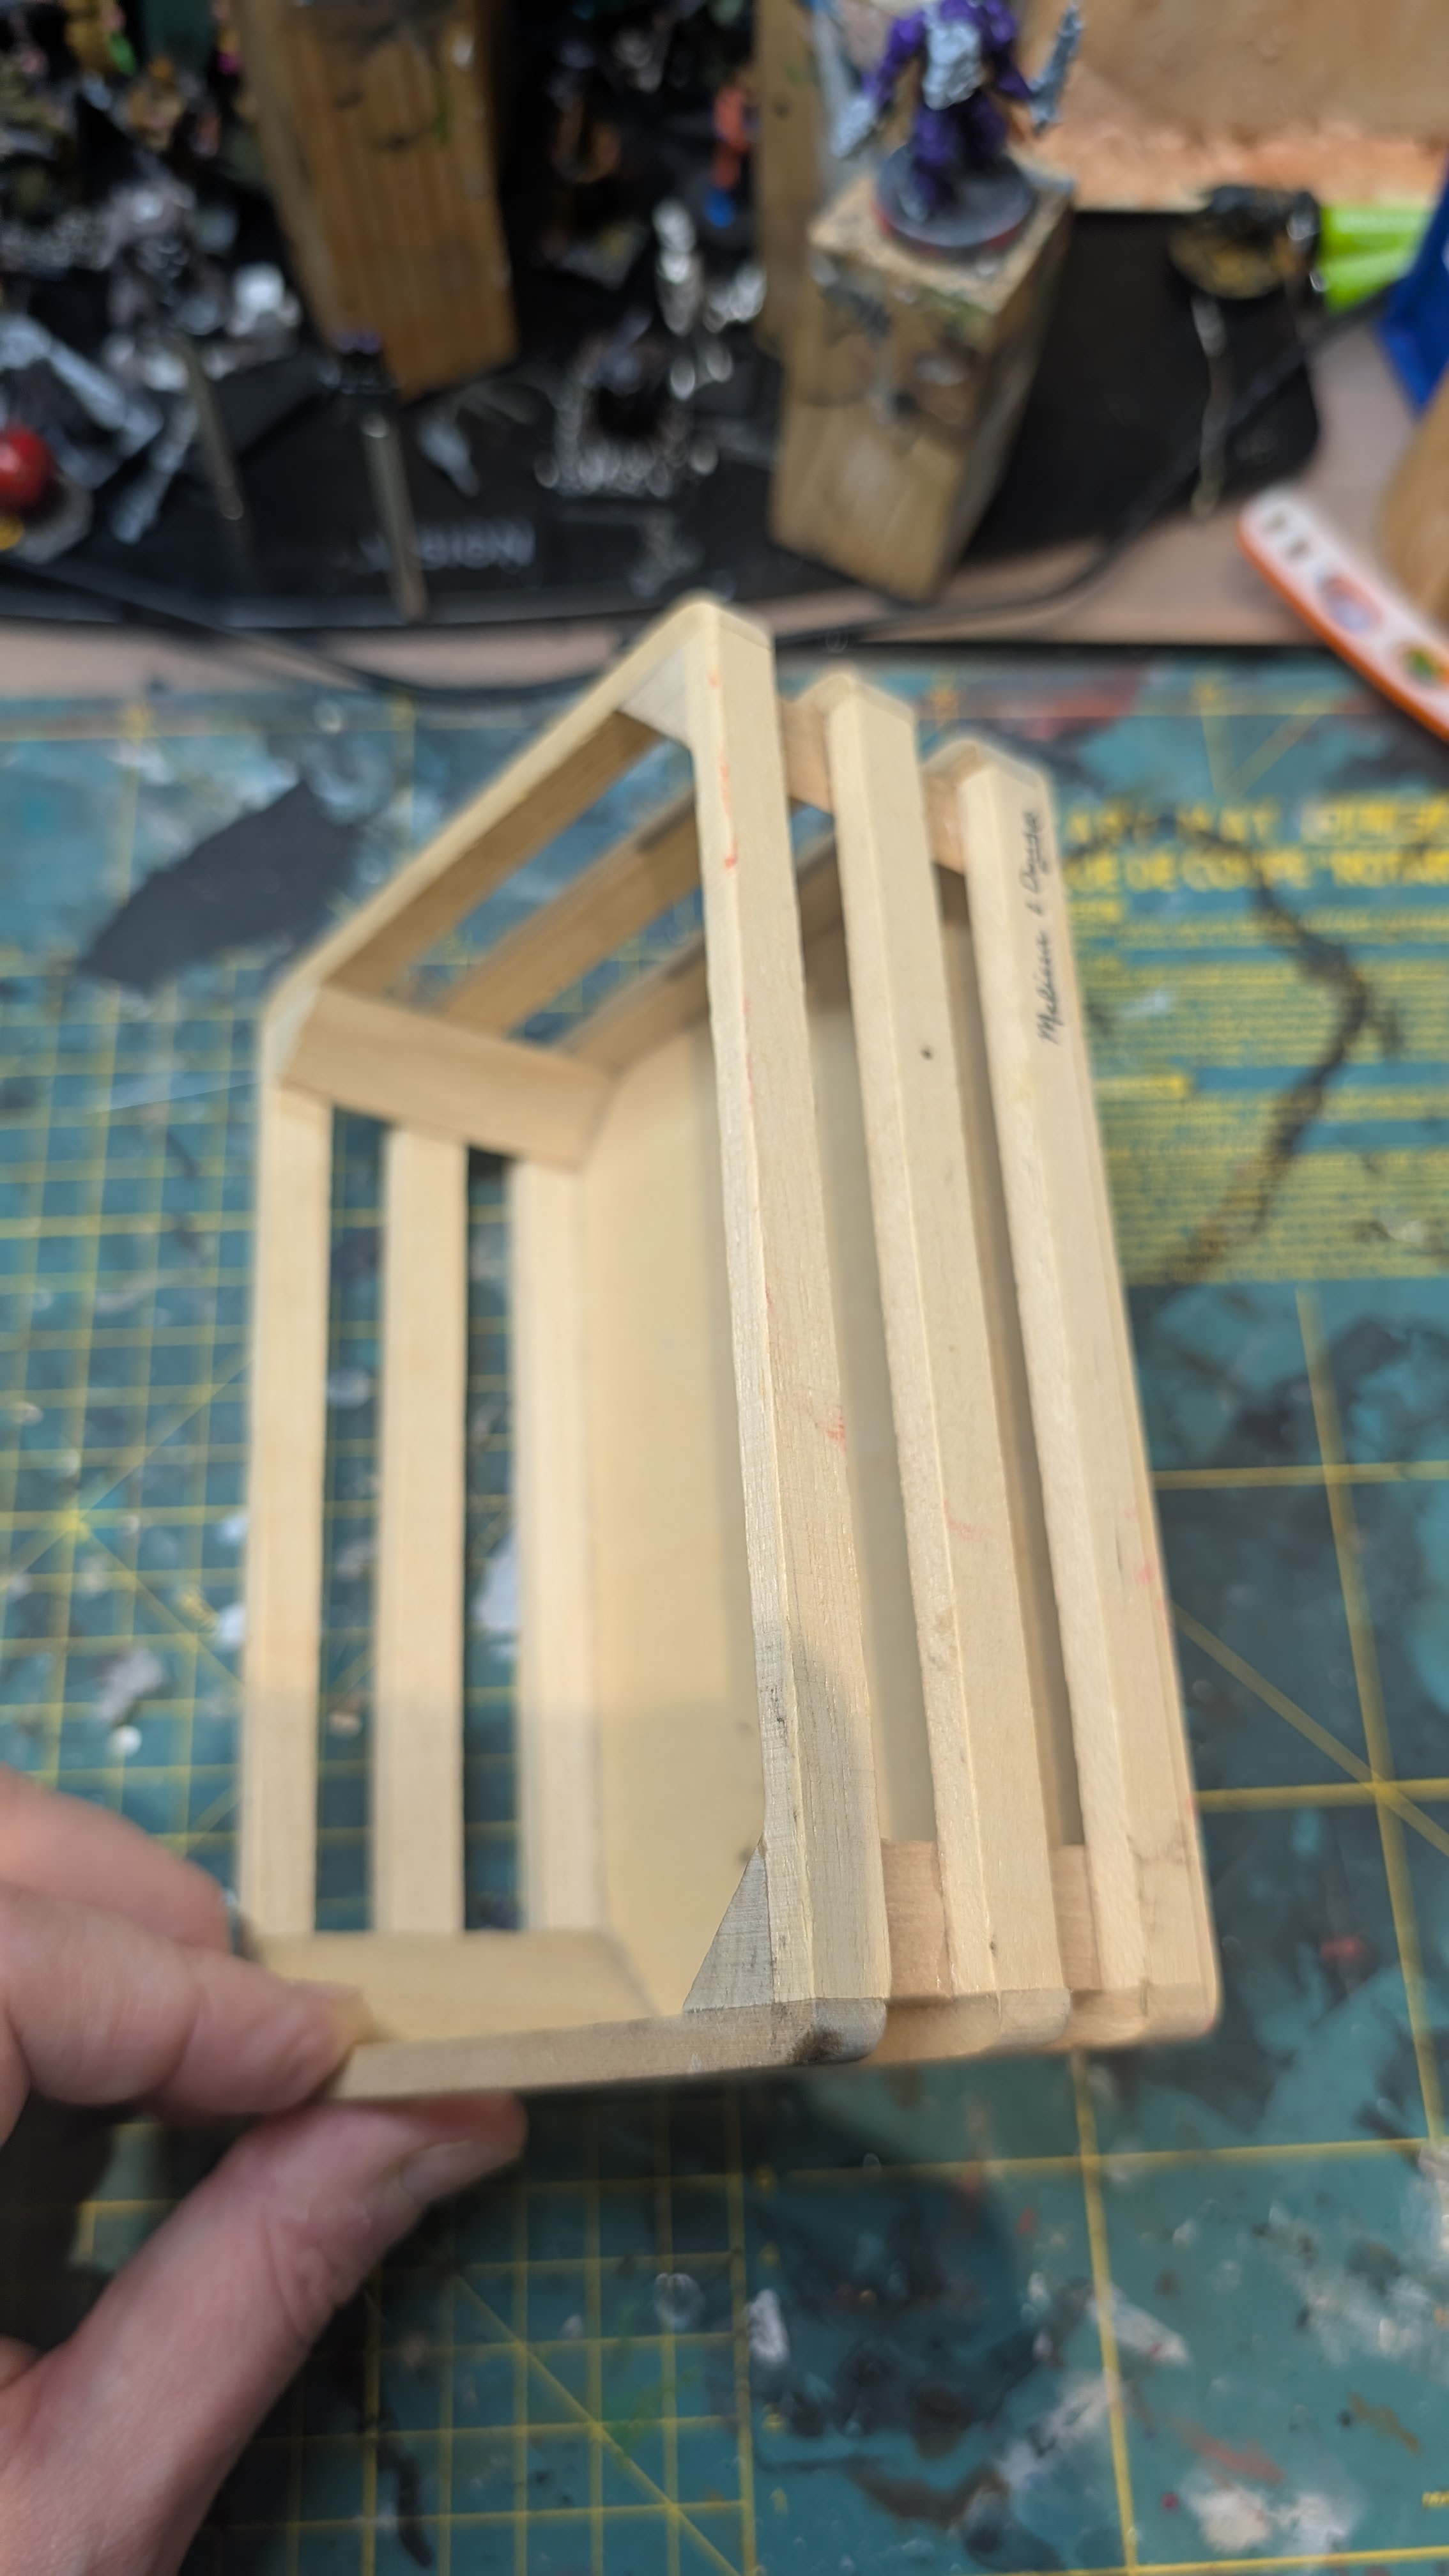
I held onto these balsa crates because “balsa”. I’m pretty sure that they held wooden fruits and vegetables for a play kitchen or shop. Looking at them with this project in mind they look like the beginning of a roof to me.
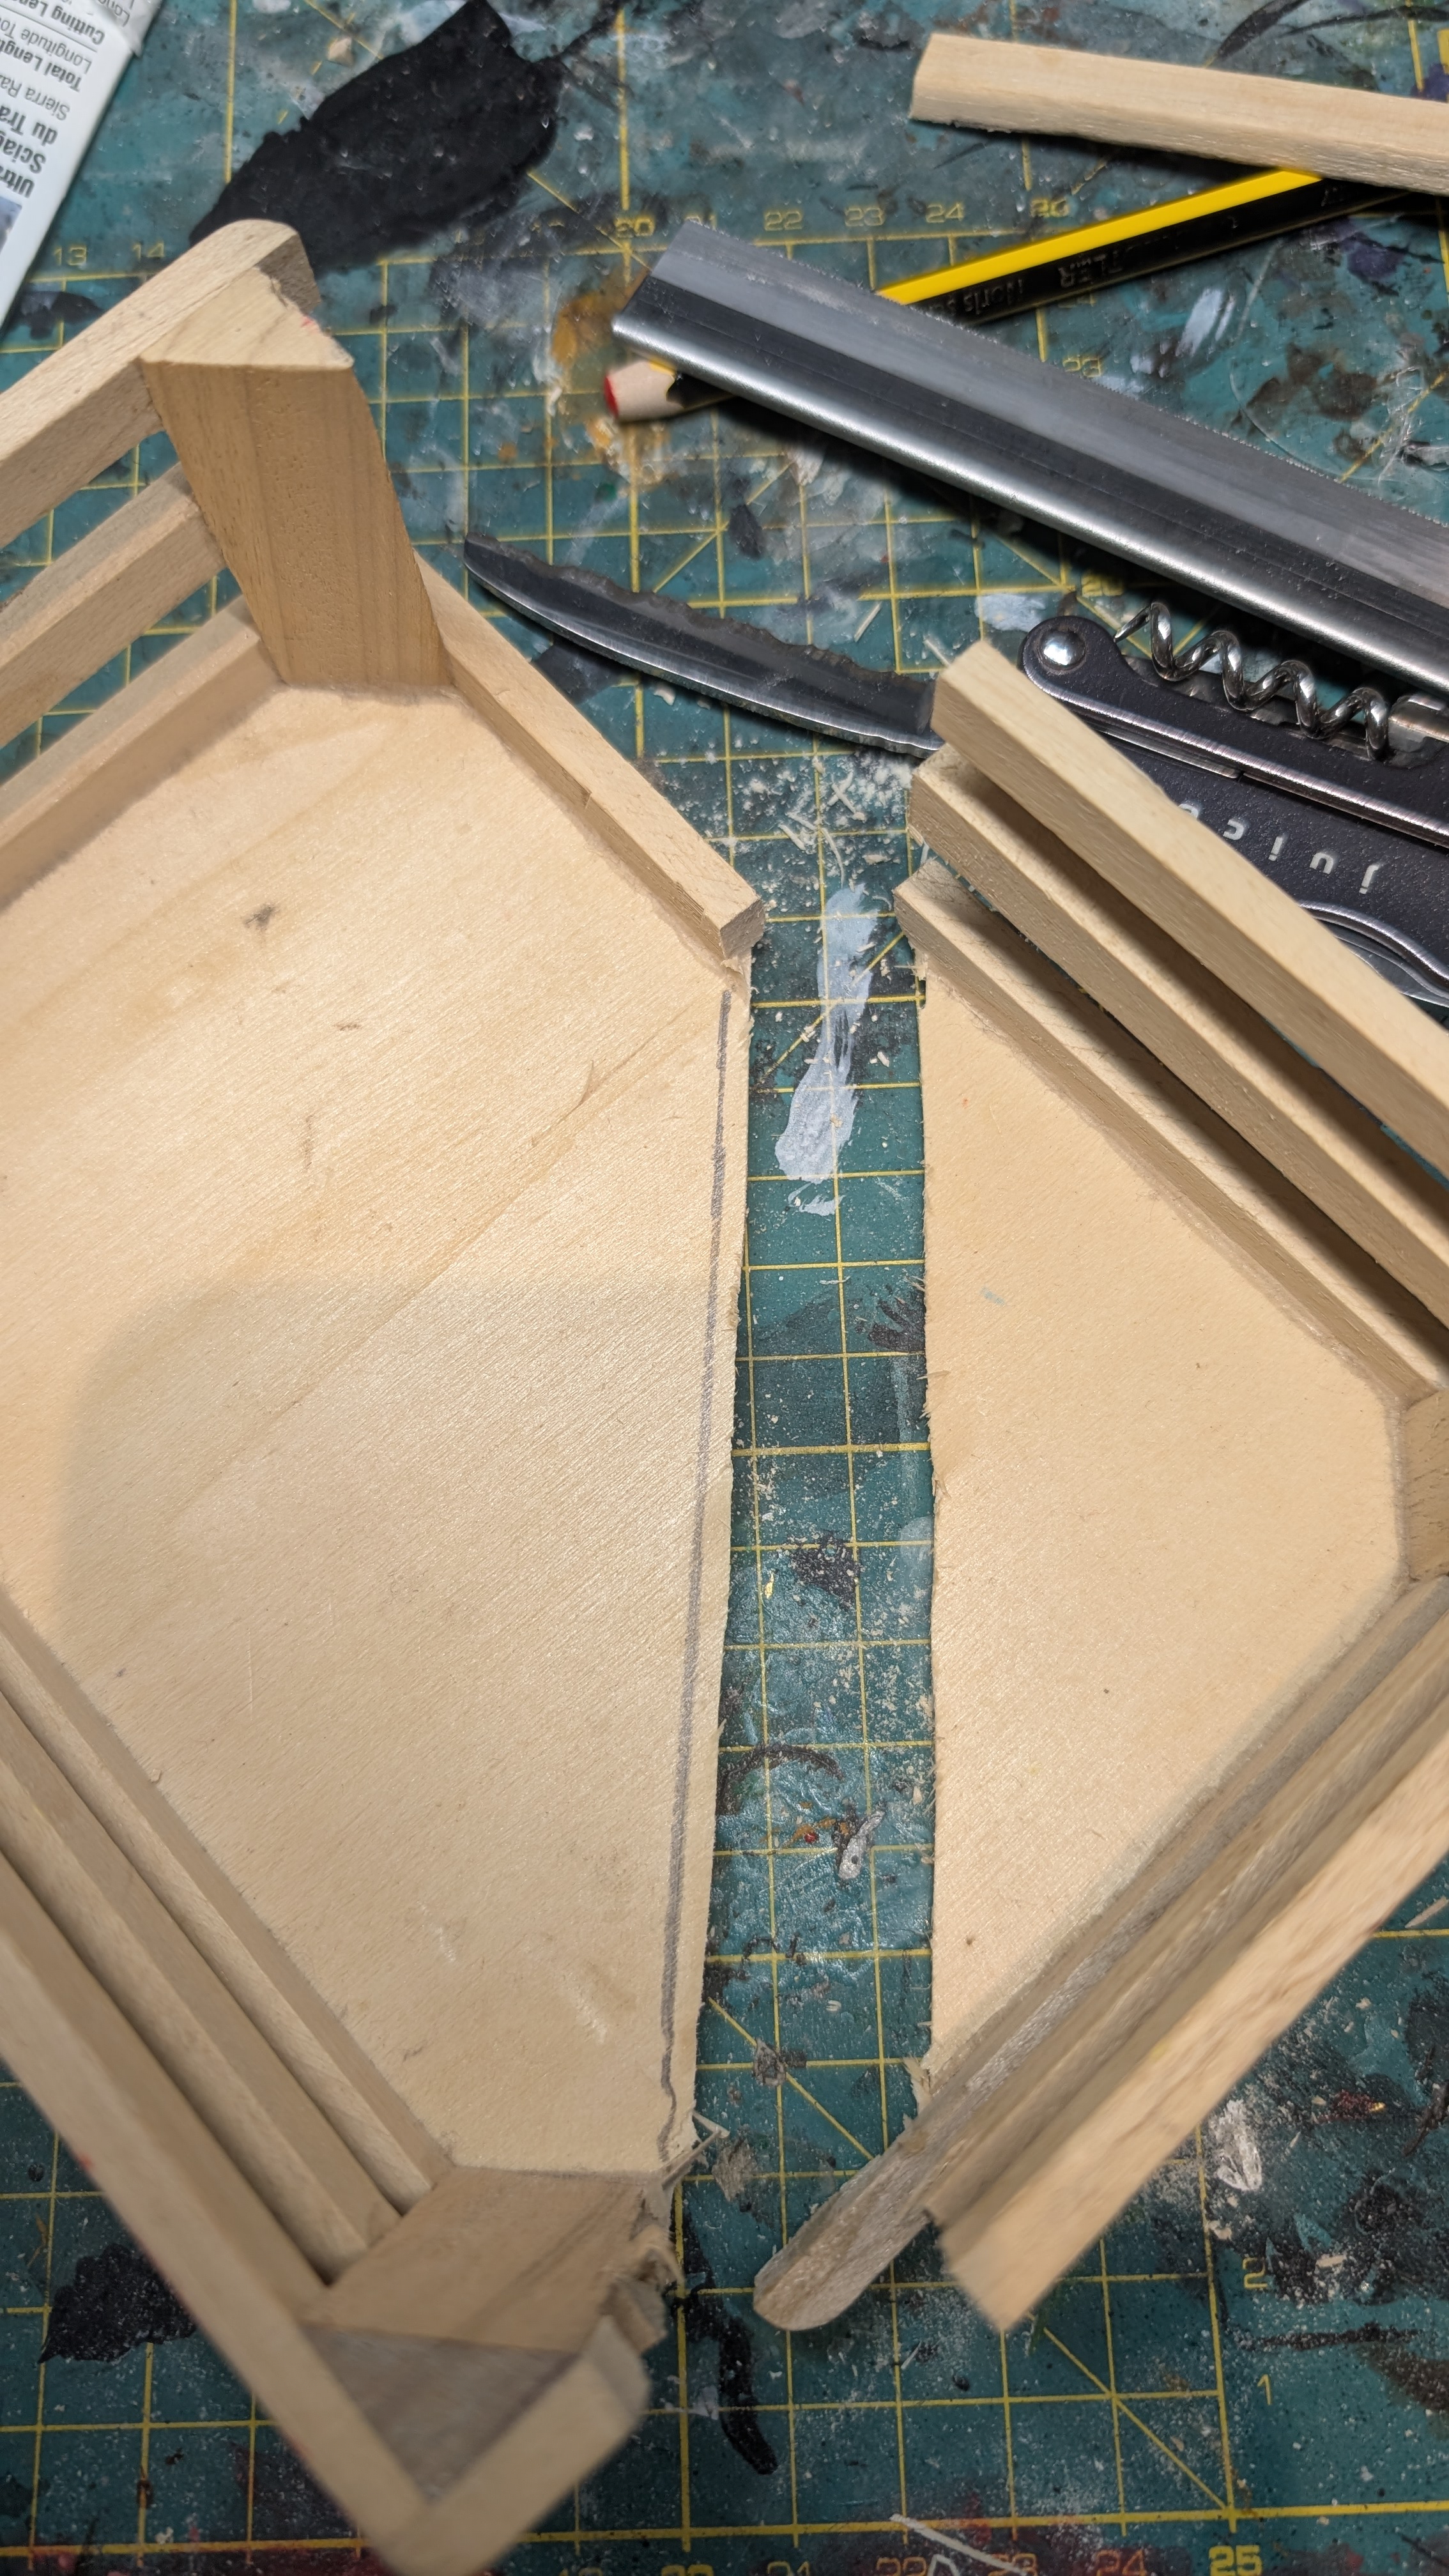
So now I’ve got the start of a roof. I frankly couldn’t be arsed to add hundreds of shingles/tiles so I thought I’d see what coffee stirrers would look like.
Not bad, but a little neat when they’re on top of ruined walls. So I took a pair of pliers to them to give them a bit of damage, and added a brown wash to darken them a little. I think they might work in a game now?
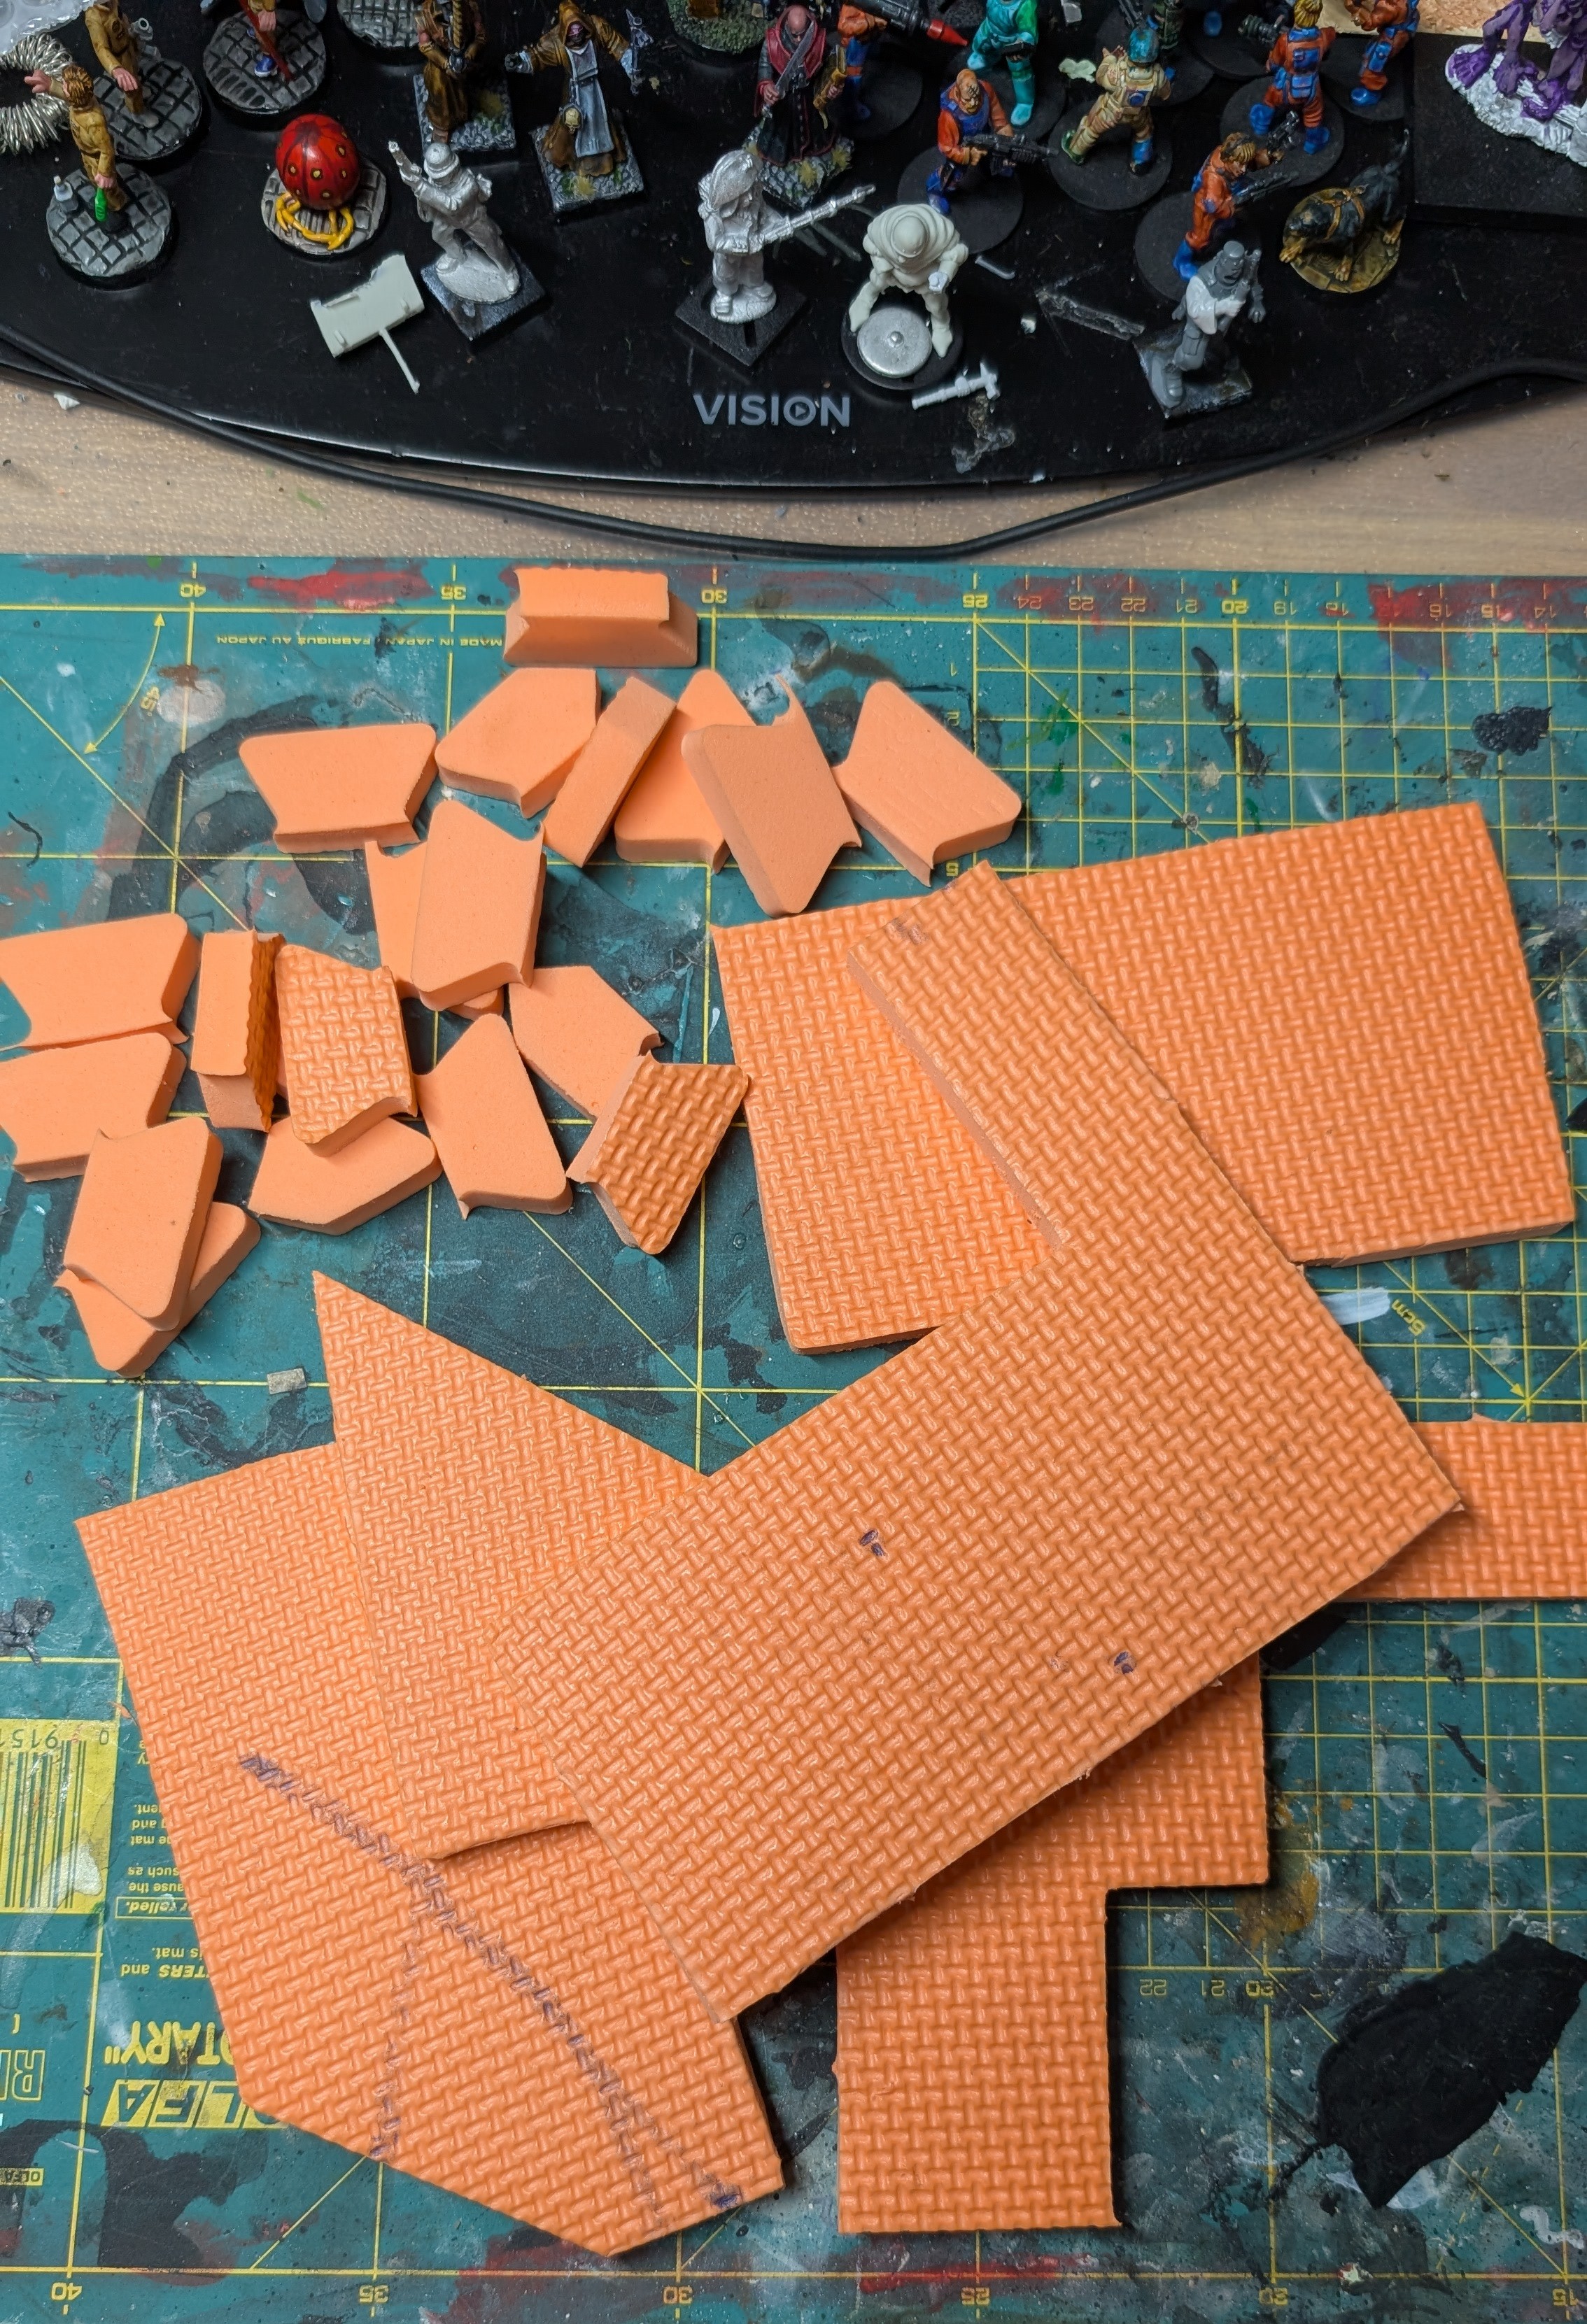
Play mats
For some reason we had two or even three packs of these floor tiled play mats knocking about. They lock together with their jigsaw like edges and were used to build dens as well as the more traditional use of providing a surface for tiny people to (more) safely fall over on. Perhaps they helped in learning to count too?
They were packed up in a cardboard box years ago and have been getting in the way whenever I venture into the over full shed ever since. I think they haven’t made it to the charity shop because we haven’t got around to sorting out one complete, not too battered set.
They’re made of EVA foam, which is an accepted hobby material, so that’s probably another reason why they haven’t gone to the the tip or the charity shop as I had it in the back of my mind that they could be useful one day.
Today is that day!
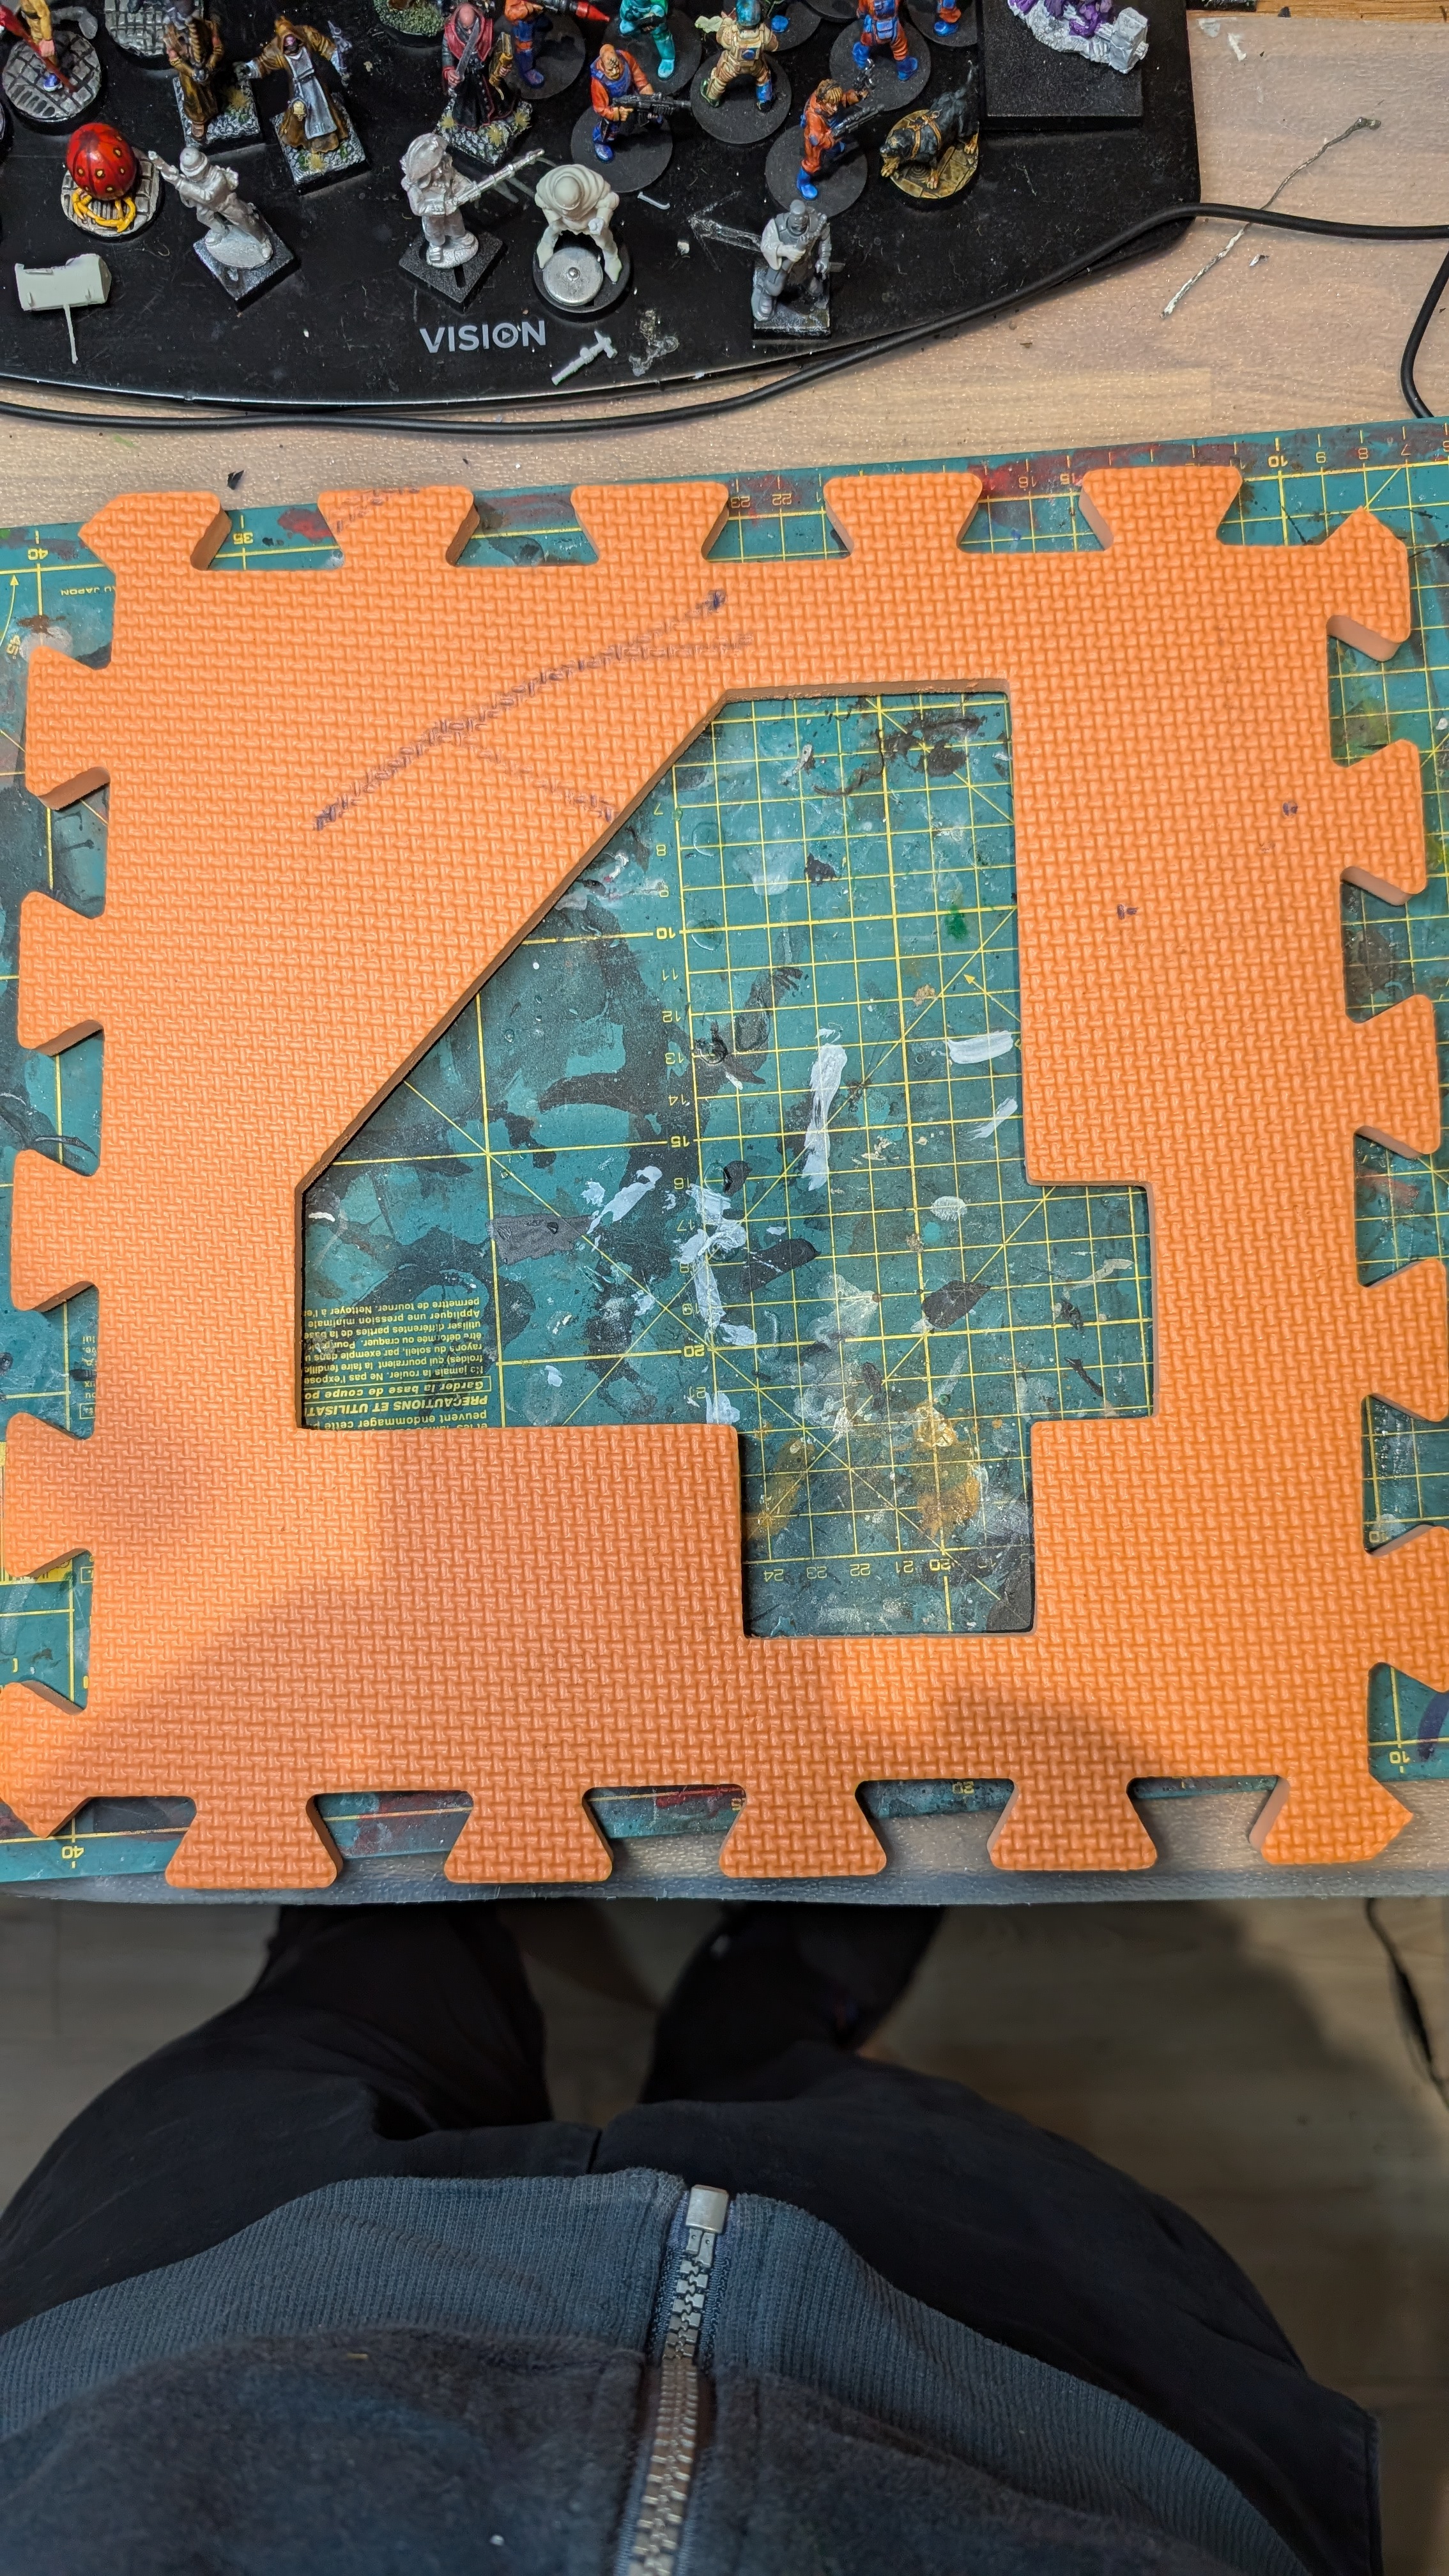
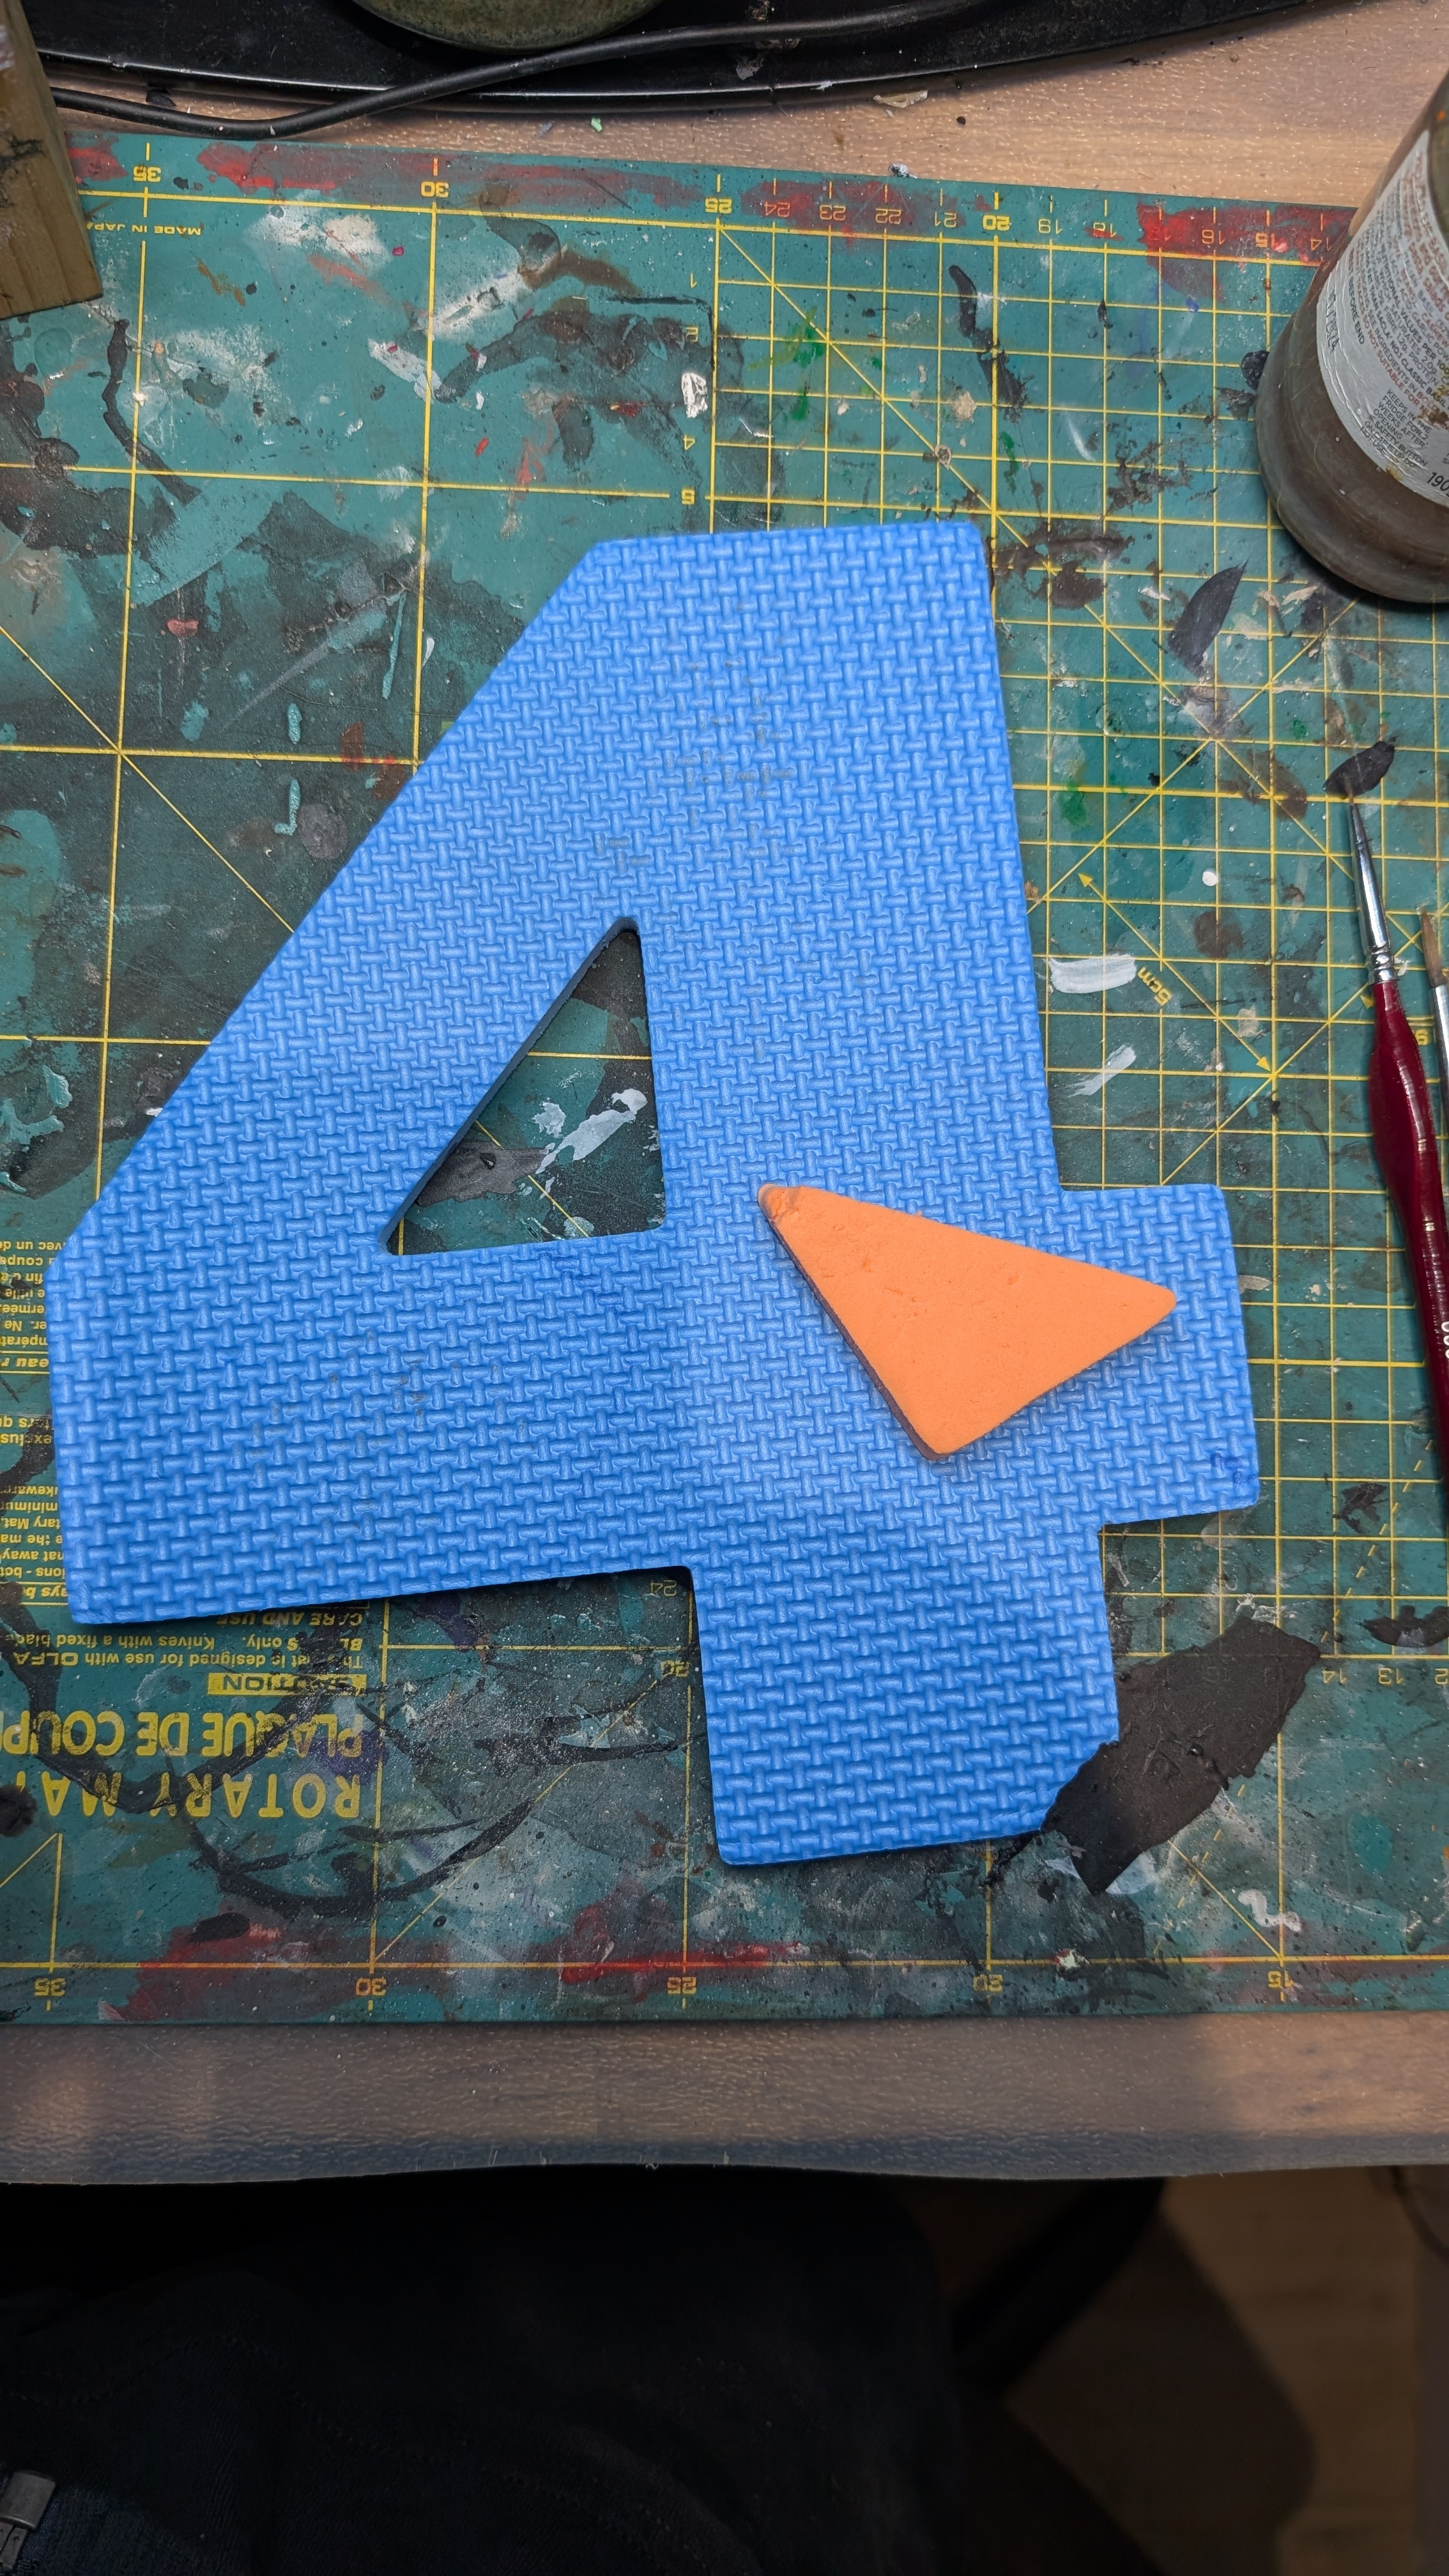
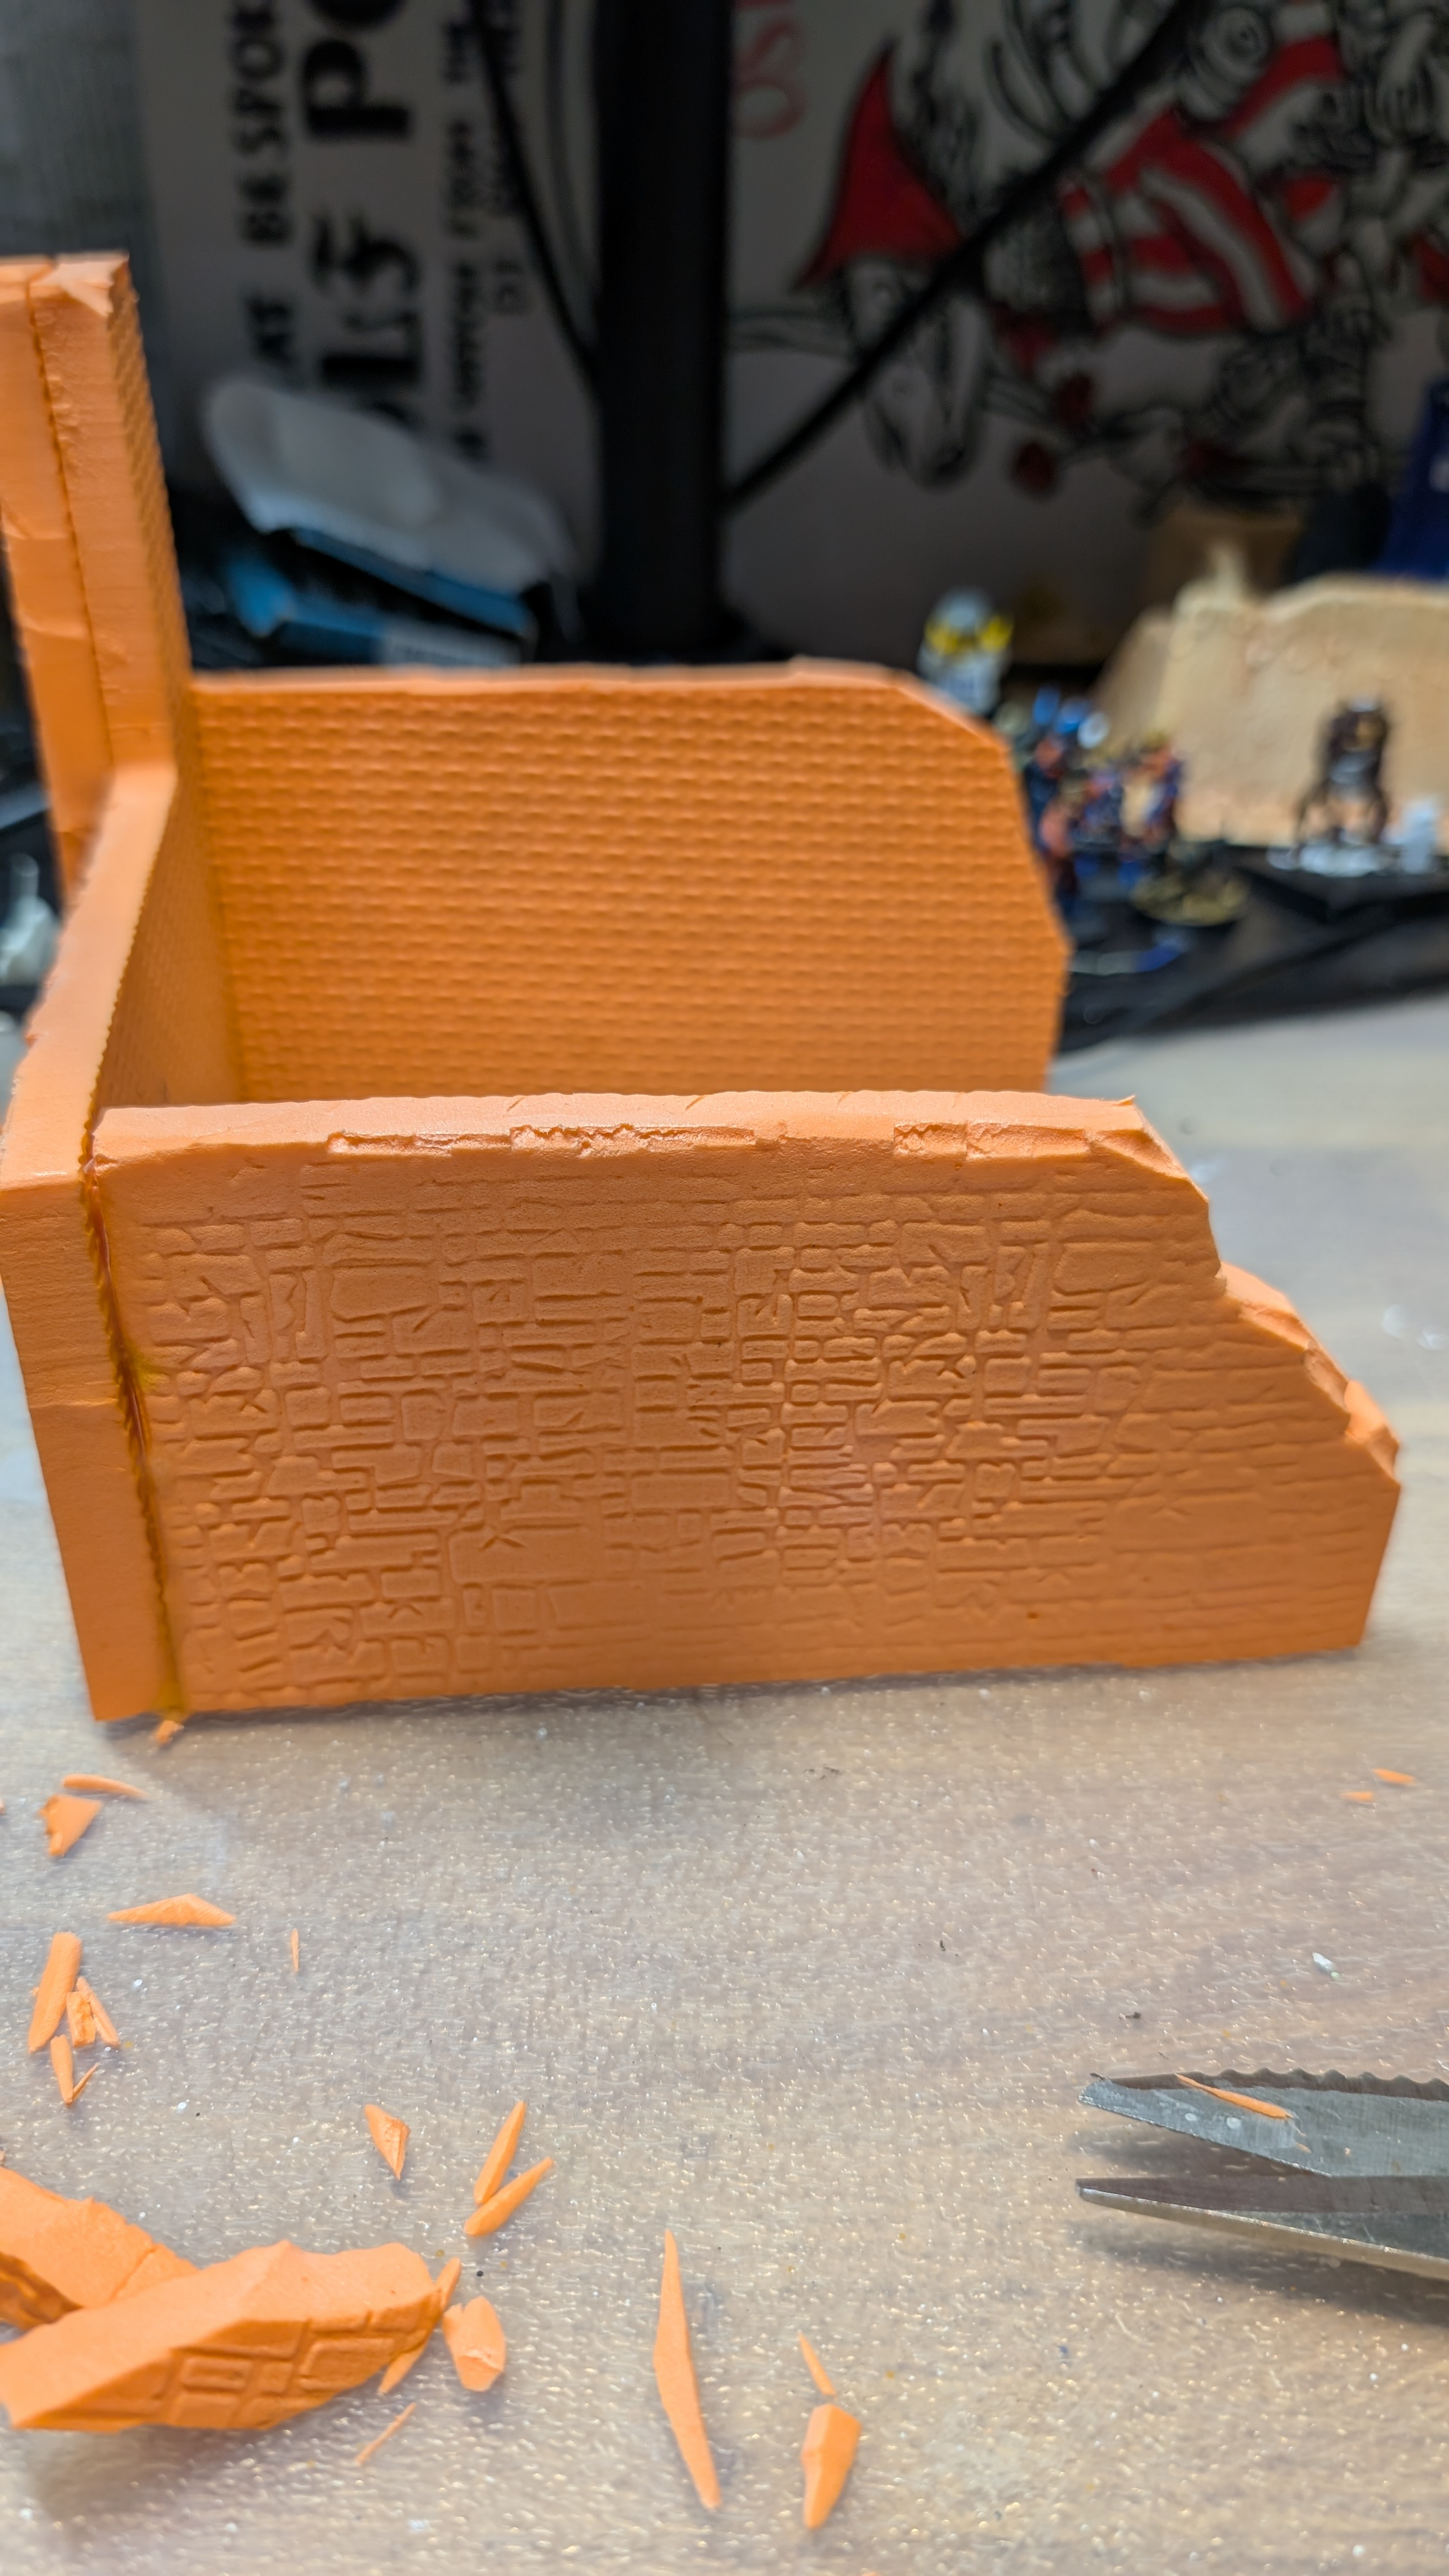
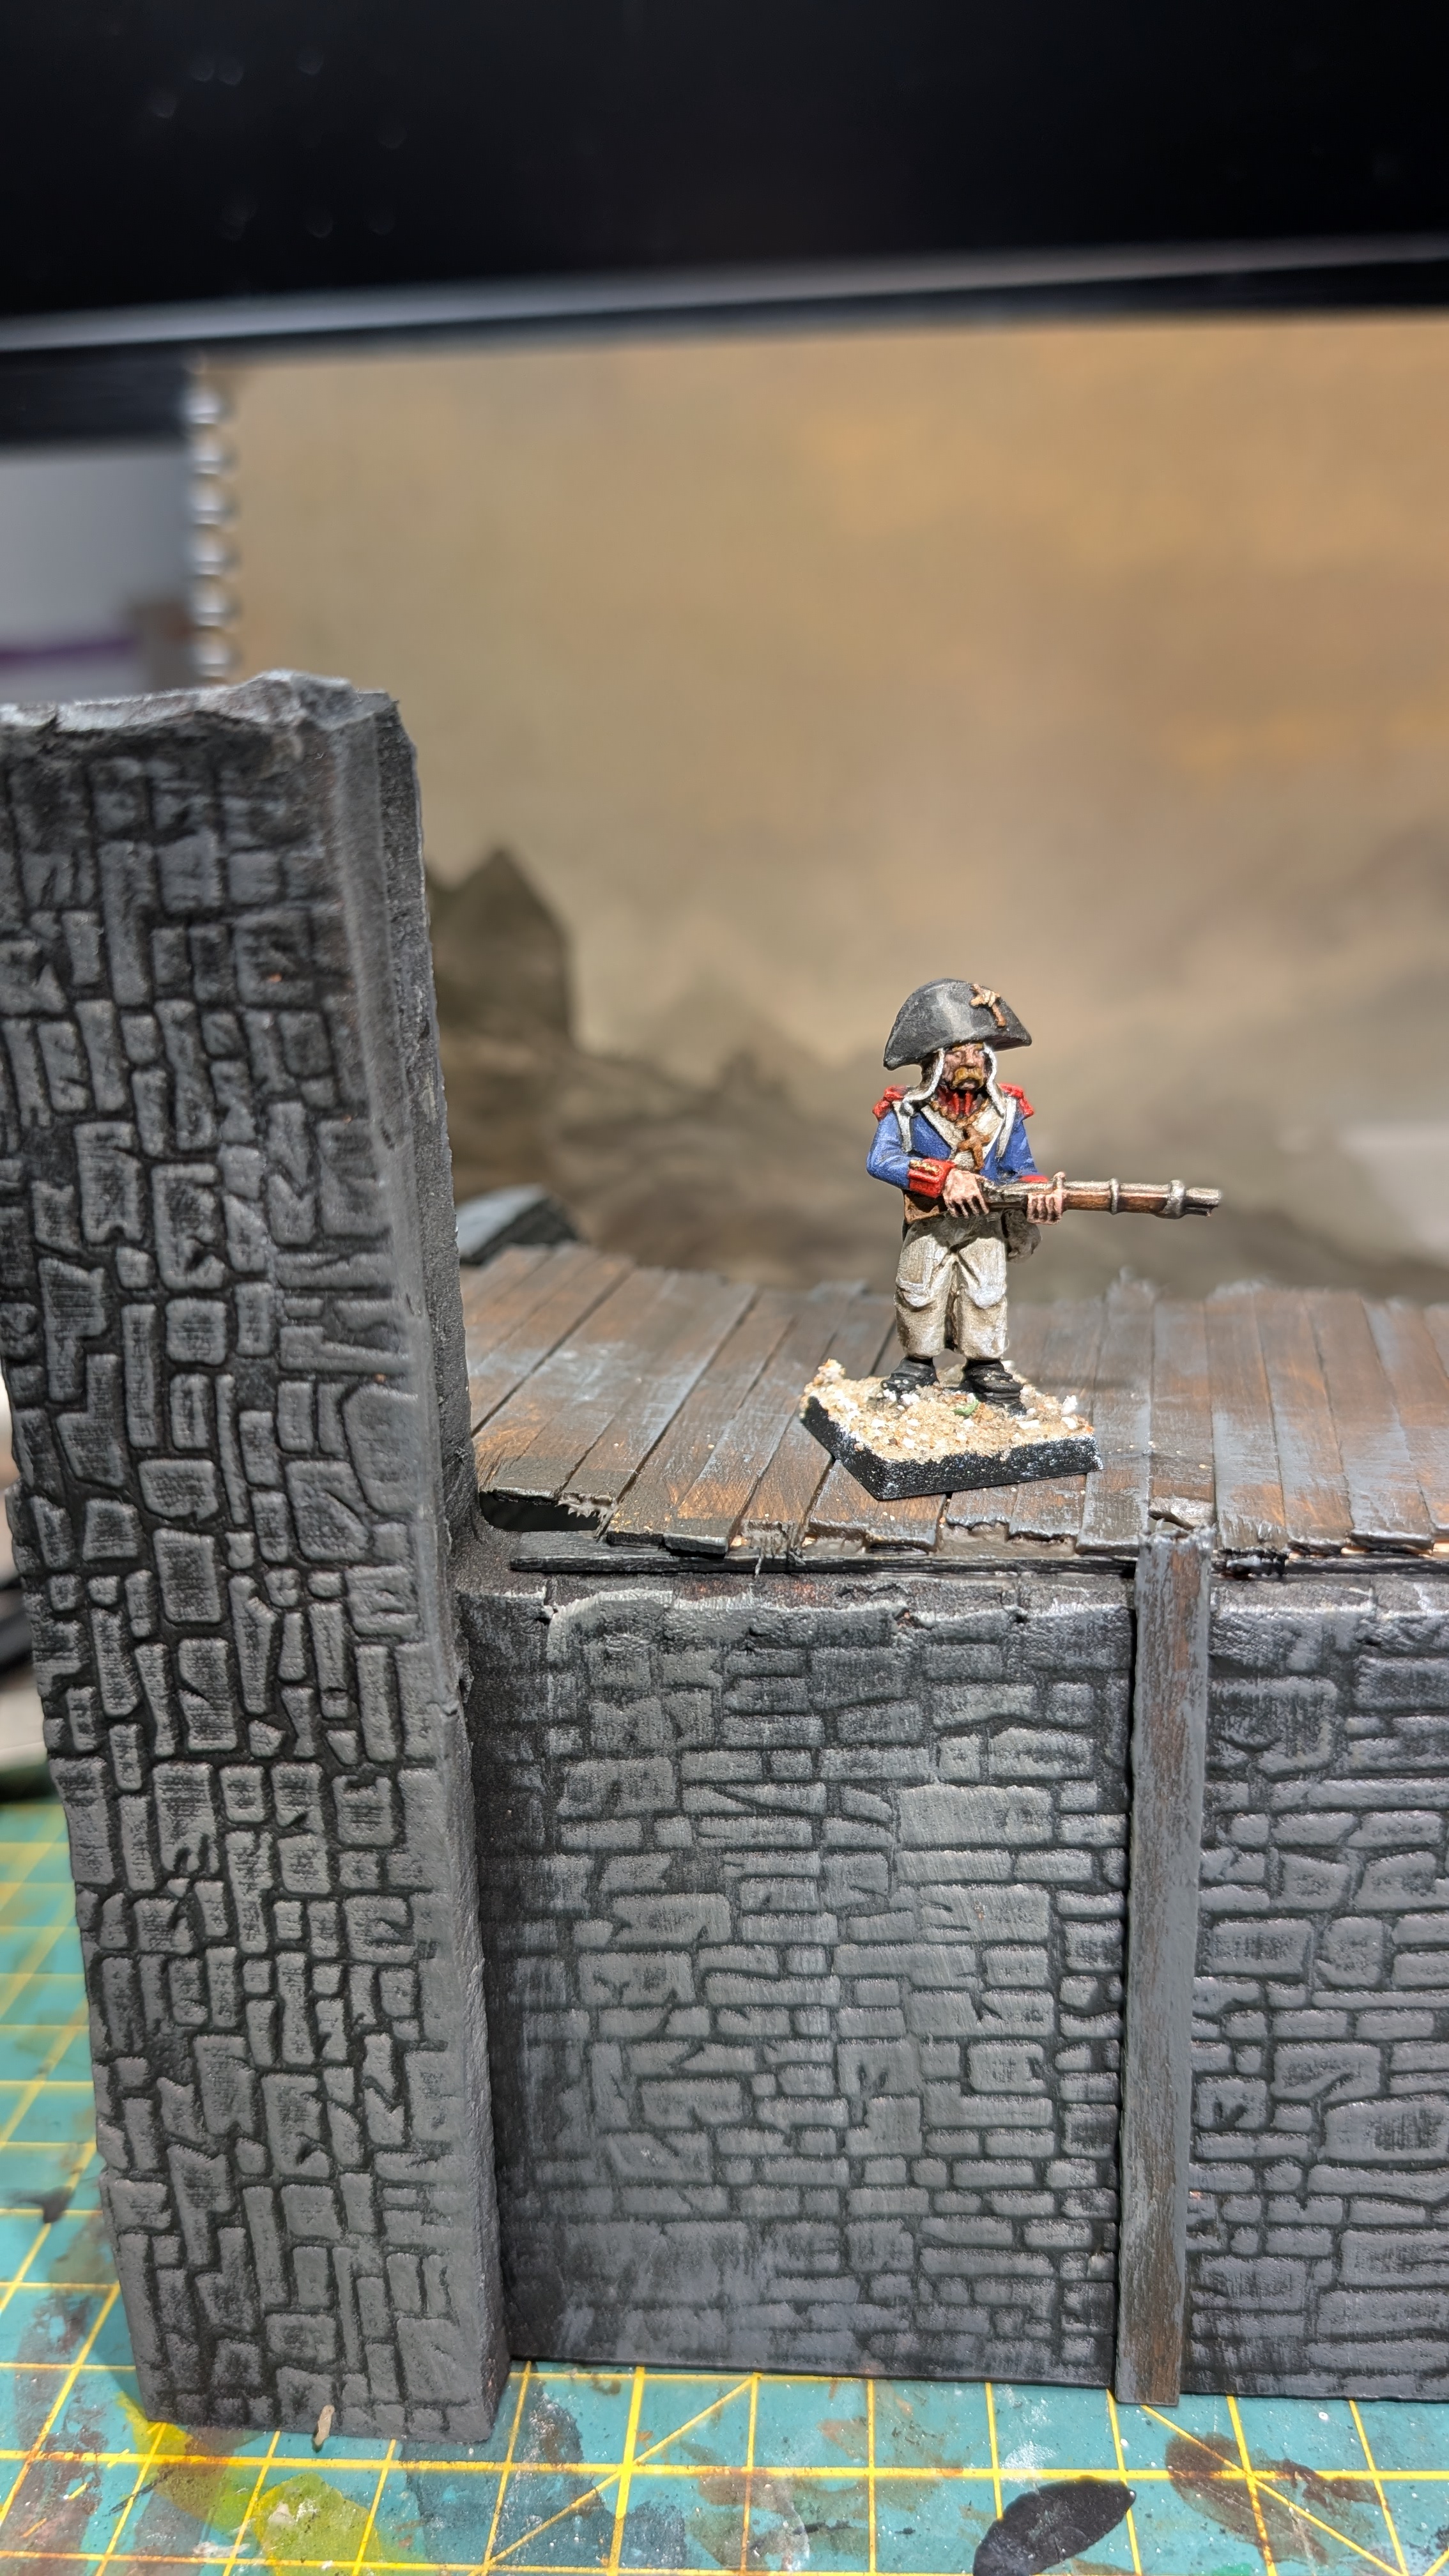
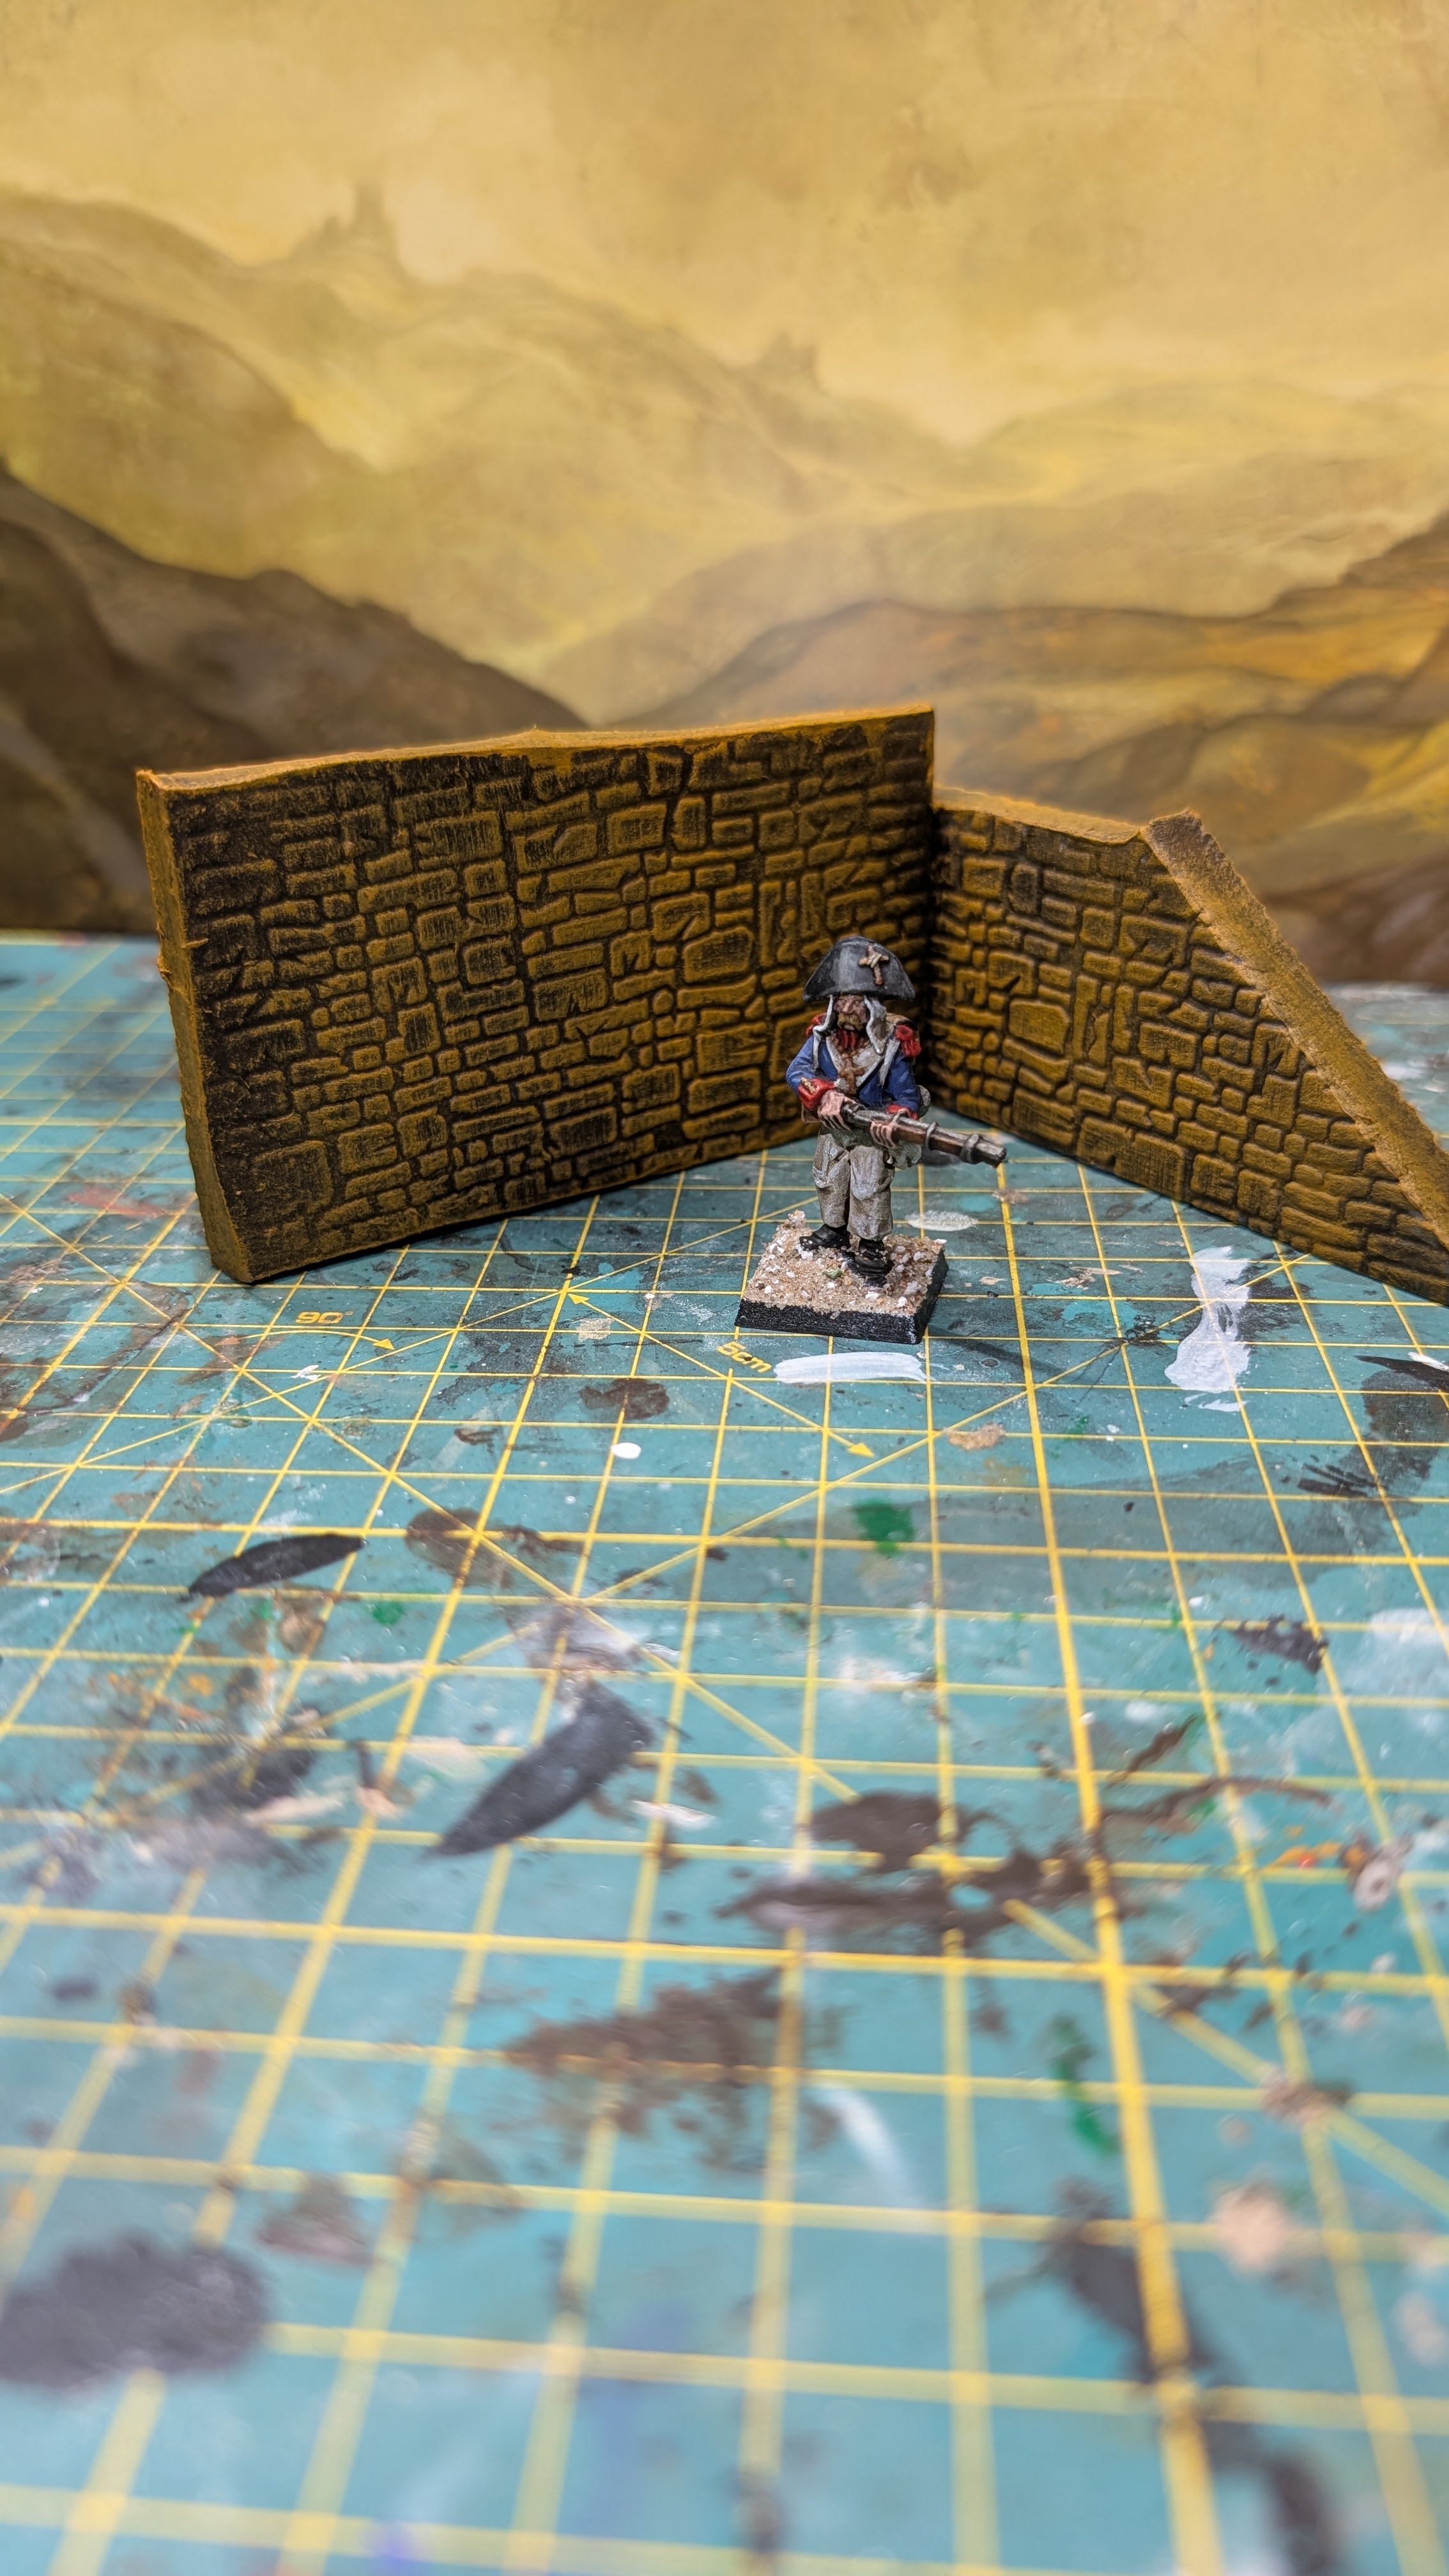
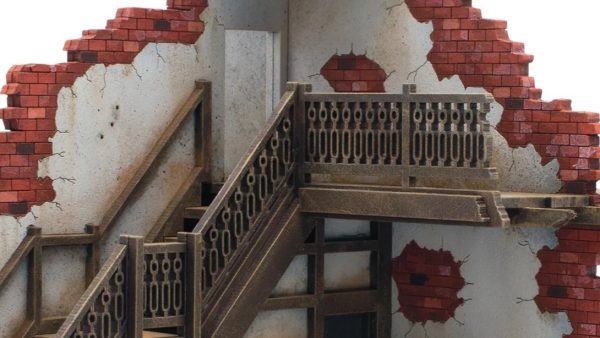
You can see this ‘4’ has been chewed and drawn on, plus it’s got a lot of useful straight edges; so I’m thinking “ruins for scatter terrain”. I’m not going to blunt a dozen hobby blades on cutting it up, so the heavy duty scissors will do the job.
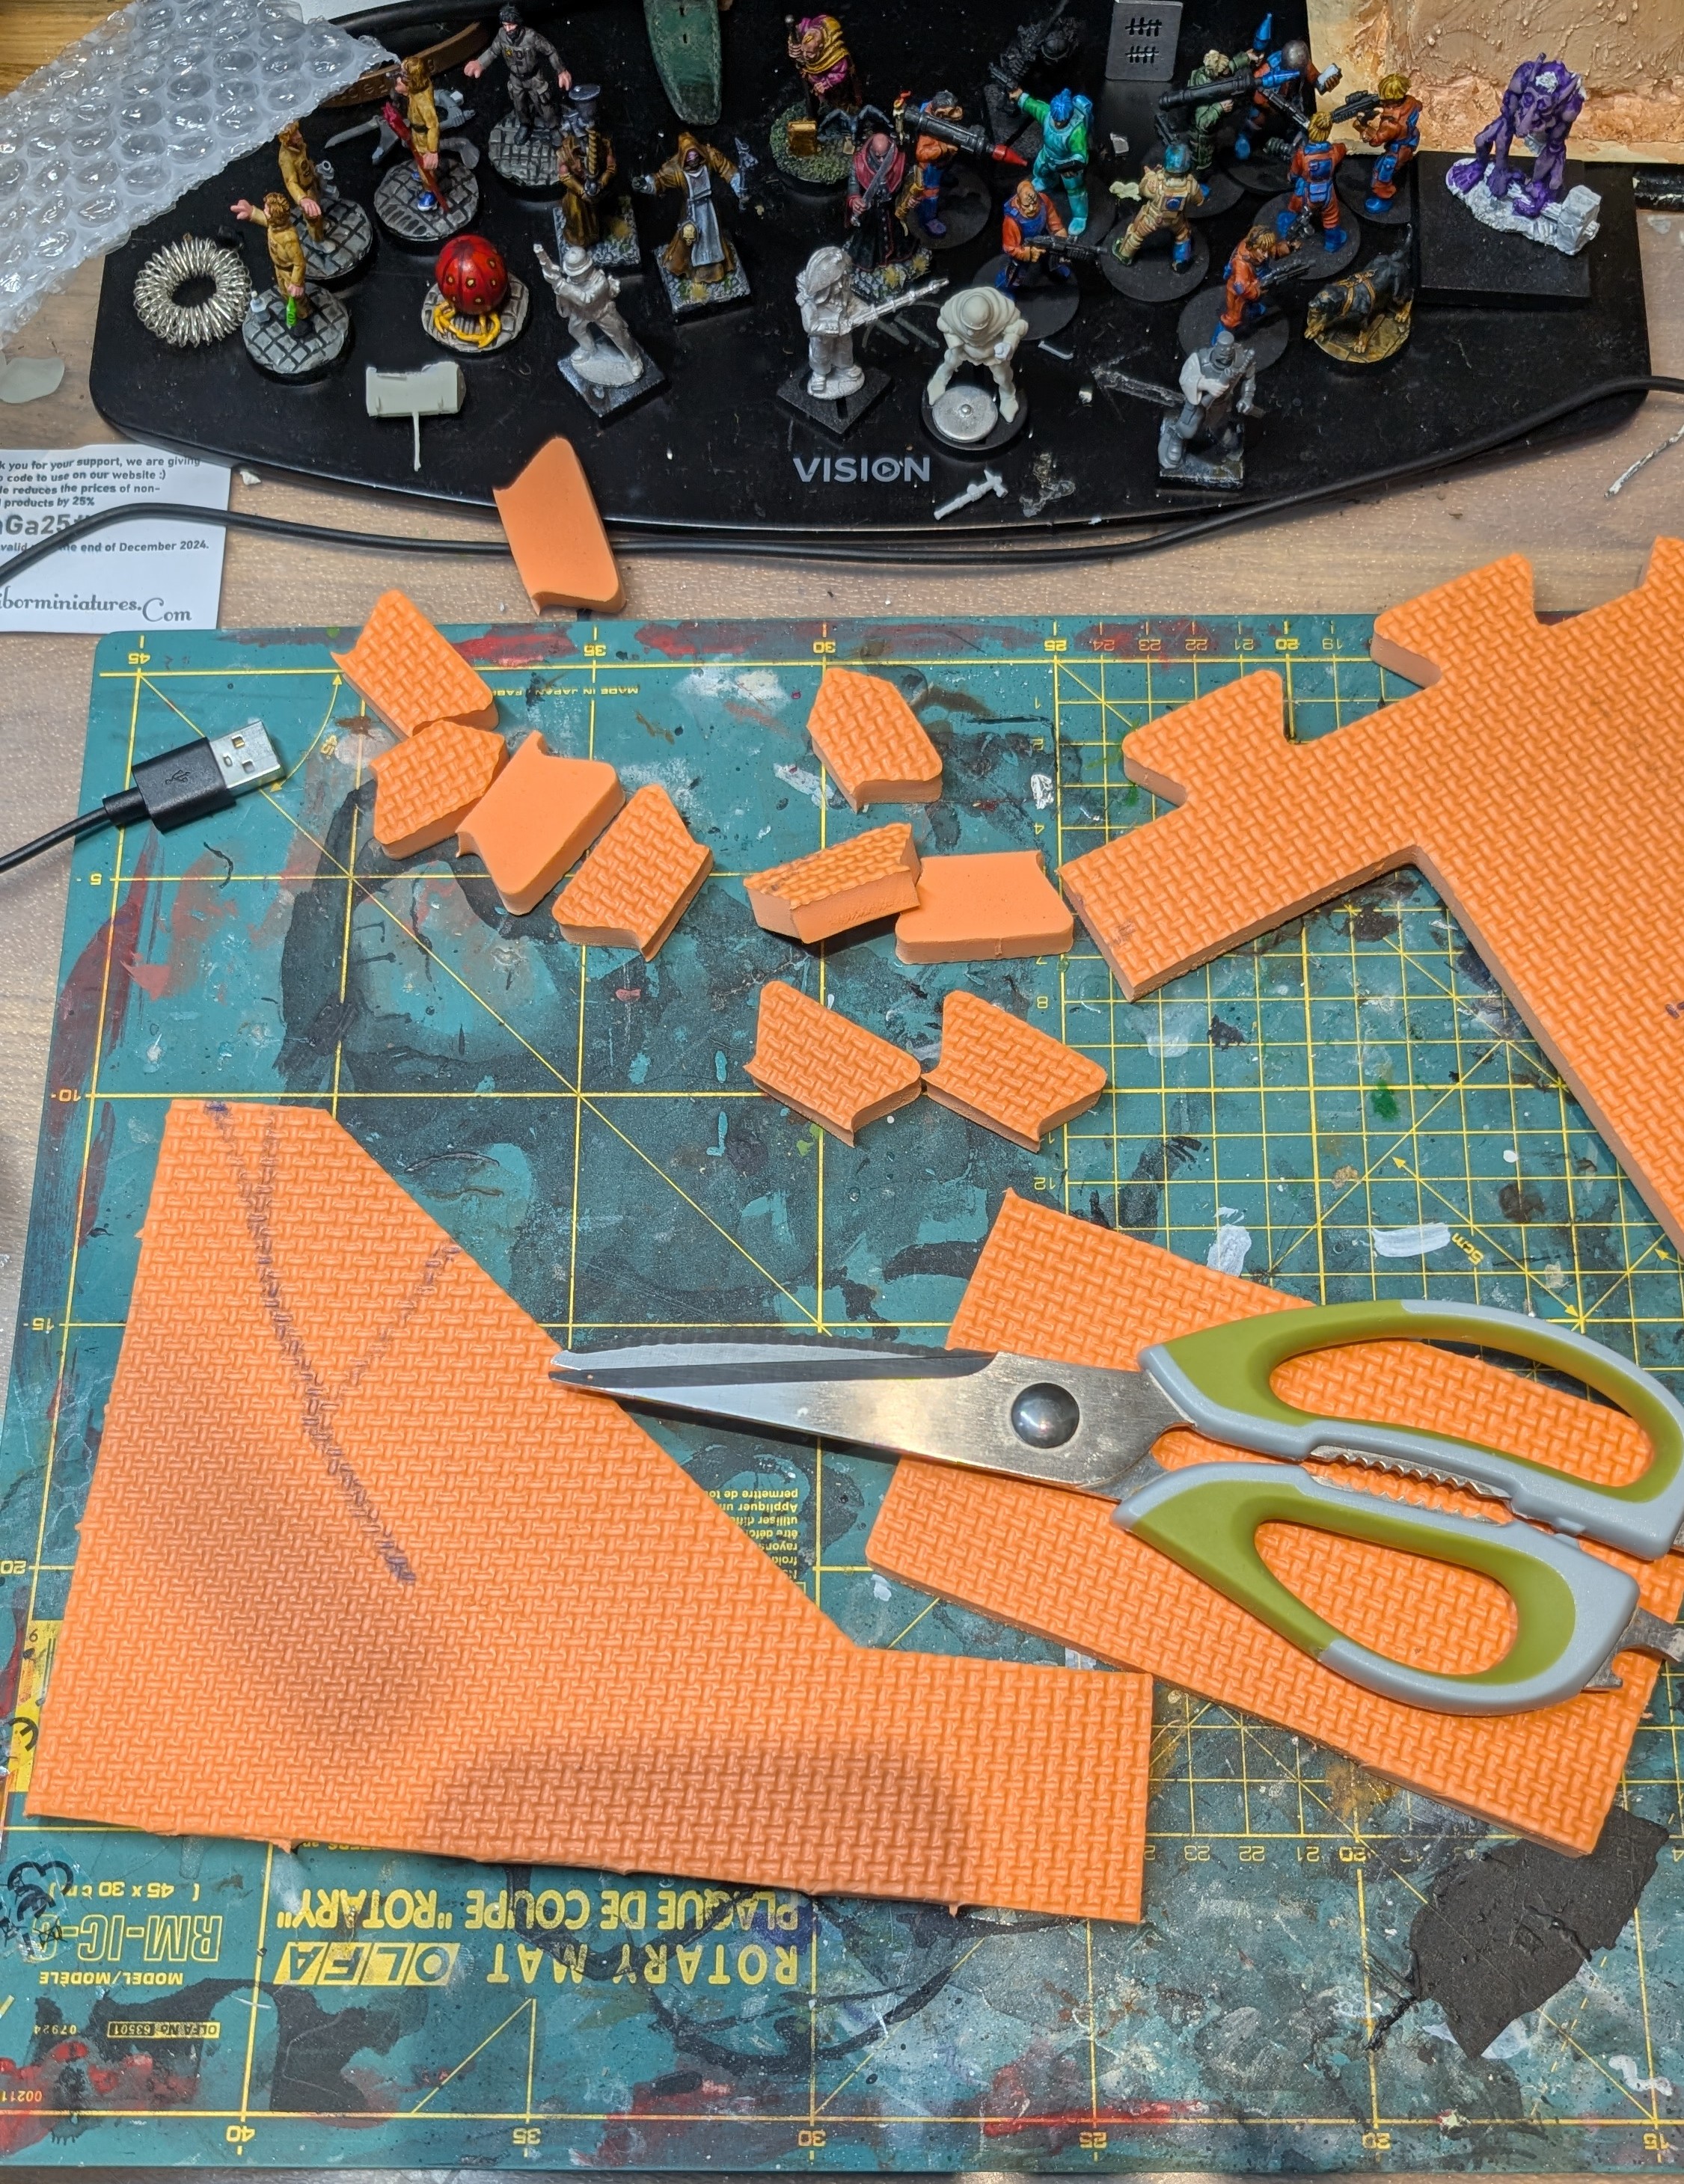
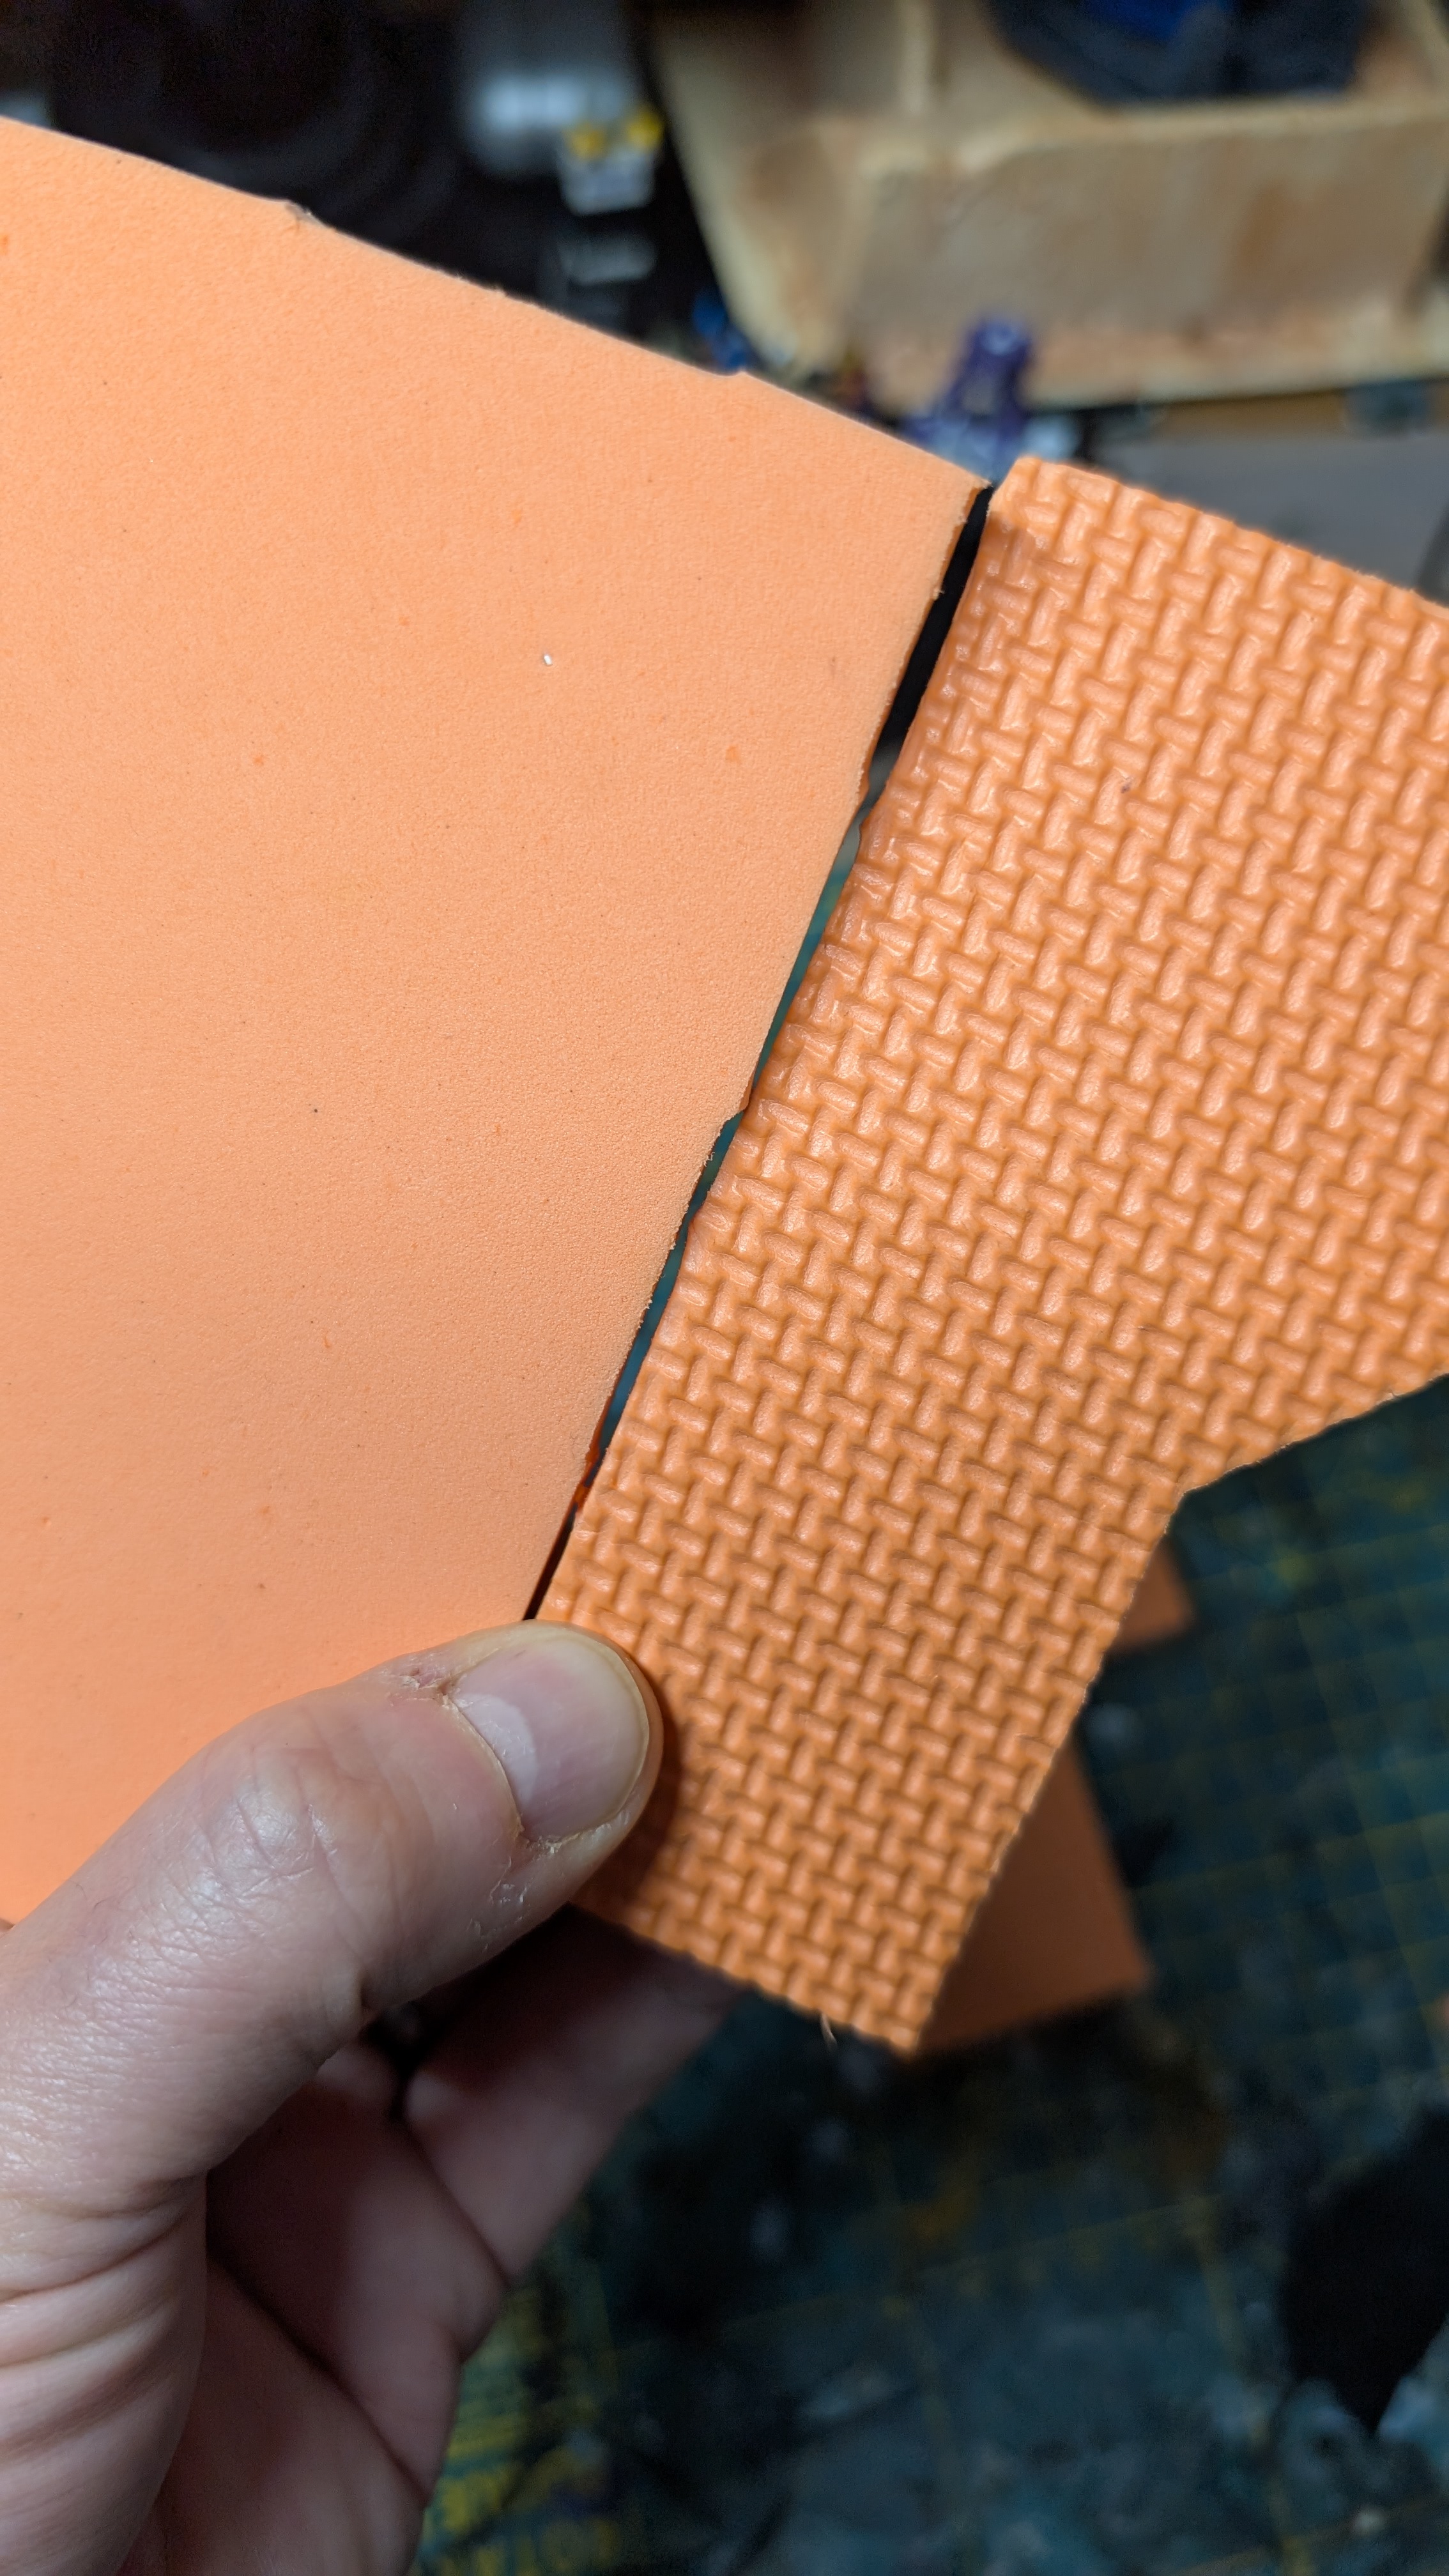
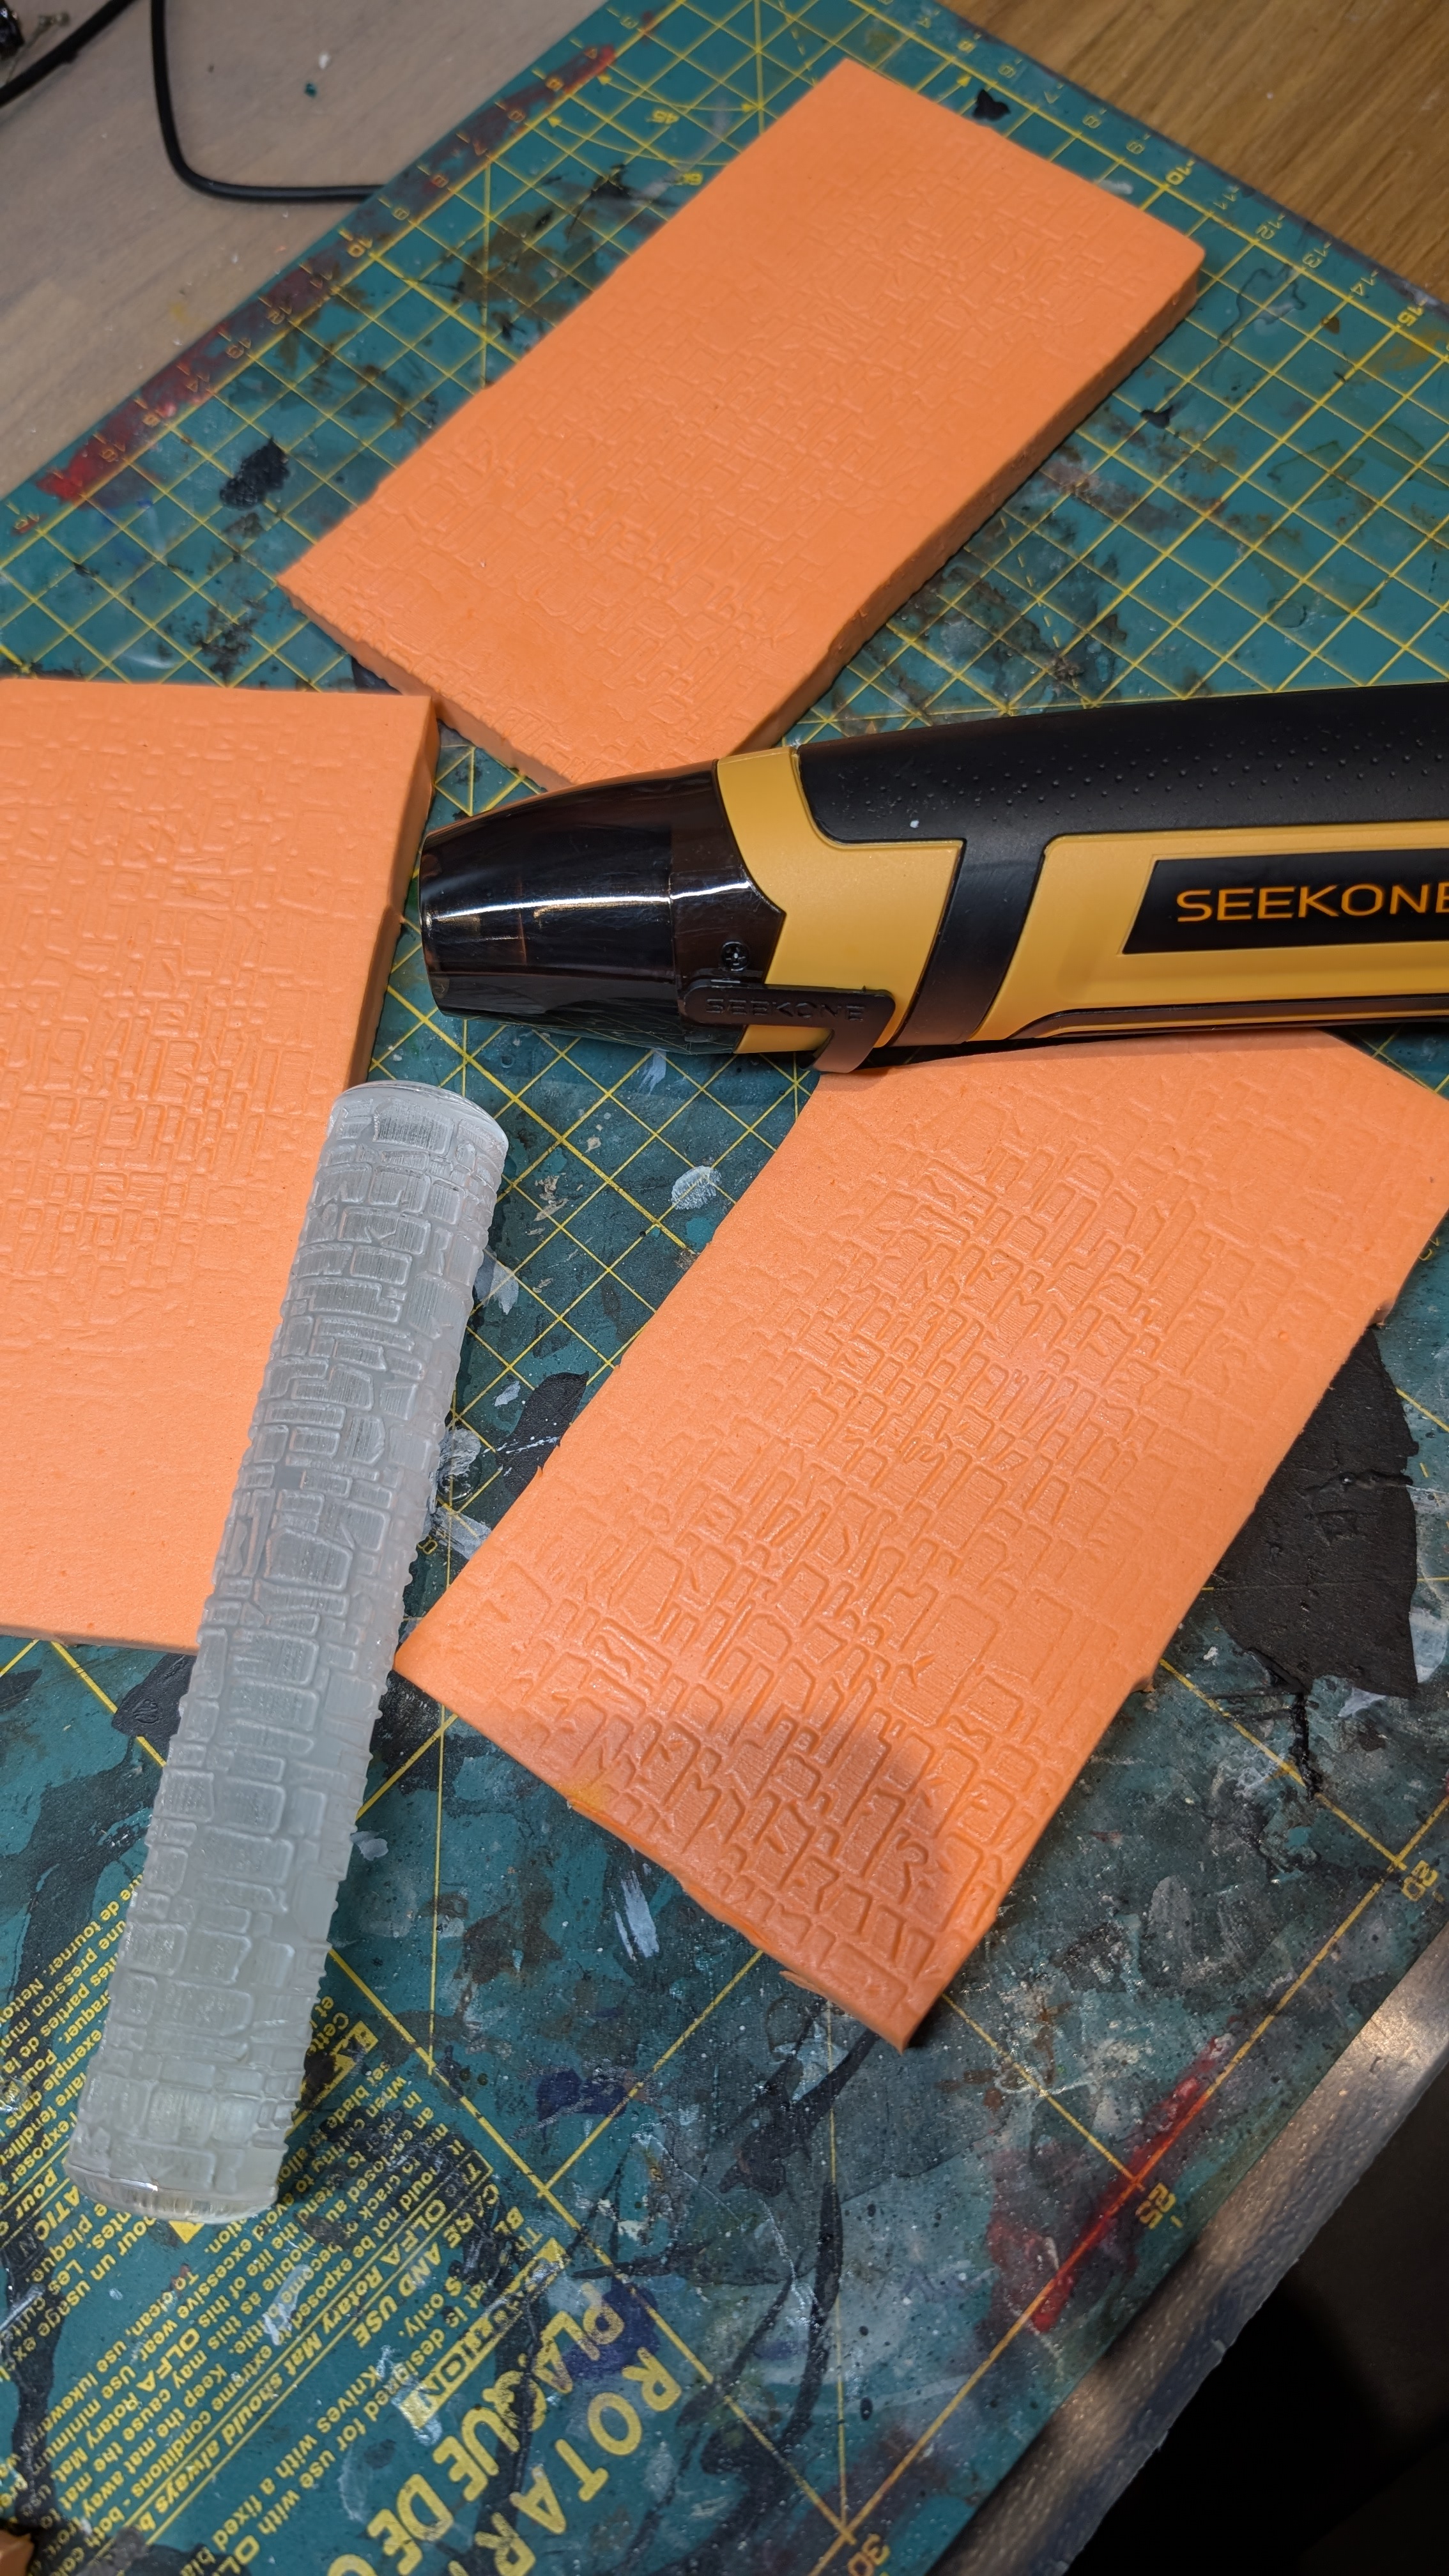
You can see it’s got a very smooth side and a more textured side. I guess the textured side might pass as brickwork from a distance if it’s painted up appropriately. Maybe I’ll try at one point, however I want to try to give the smooth side some texture using a green stuff world roller. A quick test reveals that even pushing as hard as I can doesn’t really leave a lasting texture, but I remembered something about heating EVA up from a YouTube video. Now, it’s been a long time since I needed a hairdryer and I’m not sure my wife would appreciate me borrowing hers, so this is the perfect excuse to pick up a hot air gun.
Happily this worked a treat.
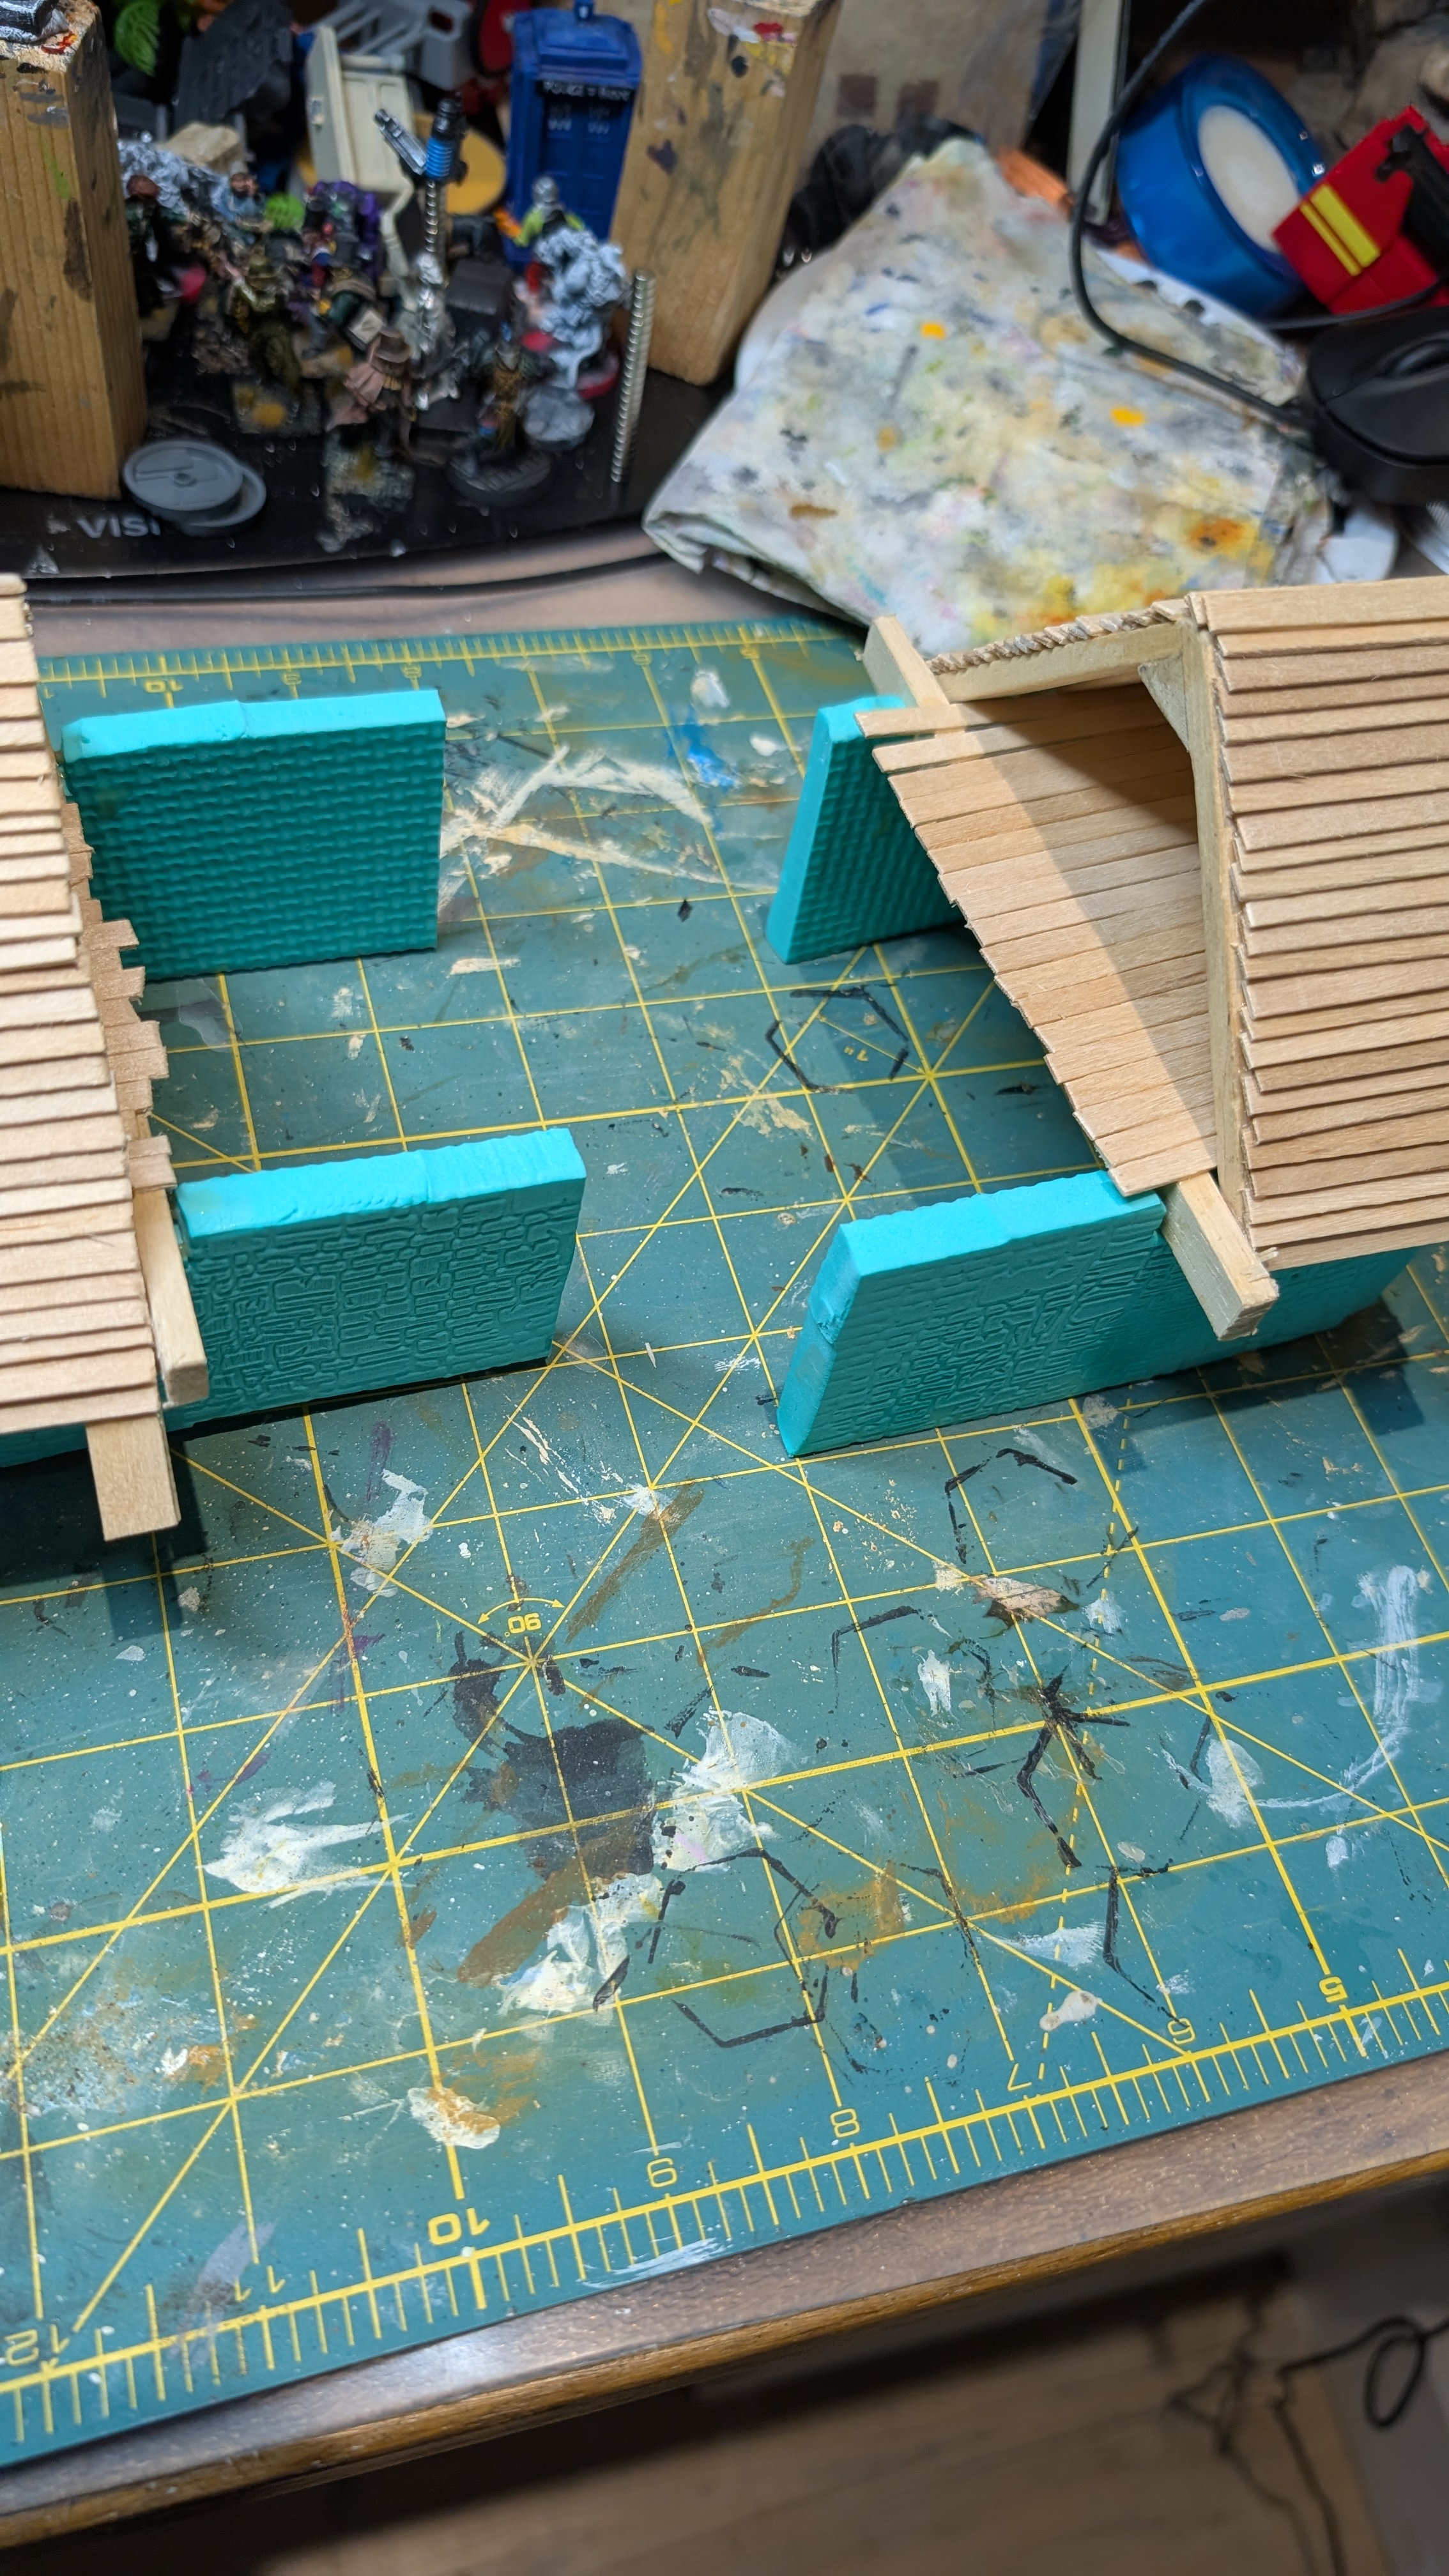
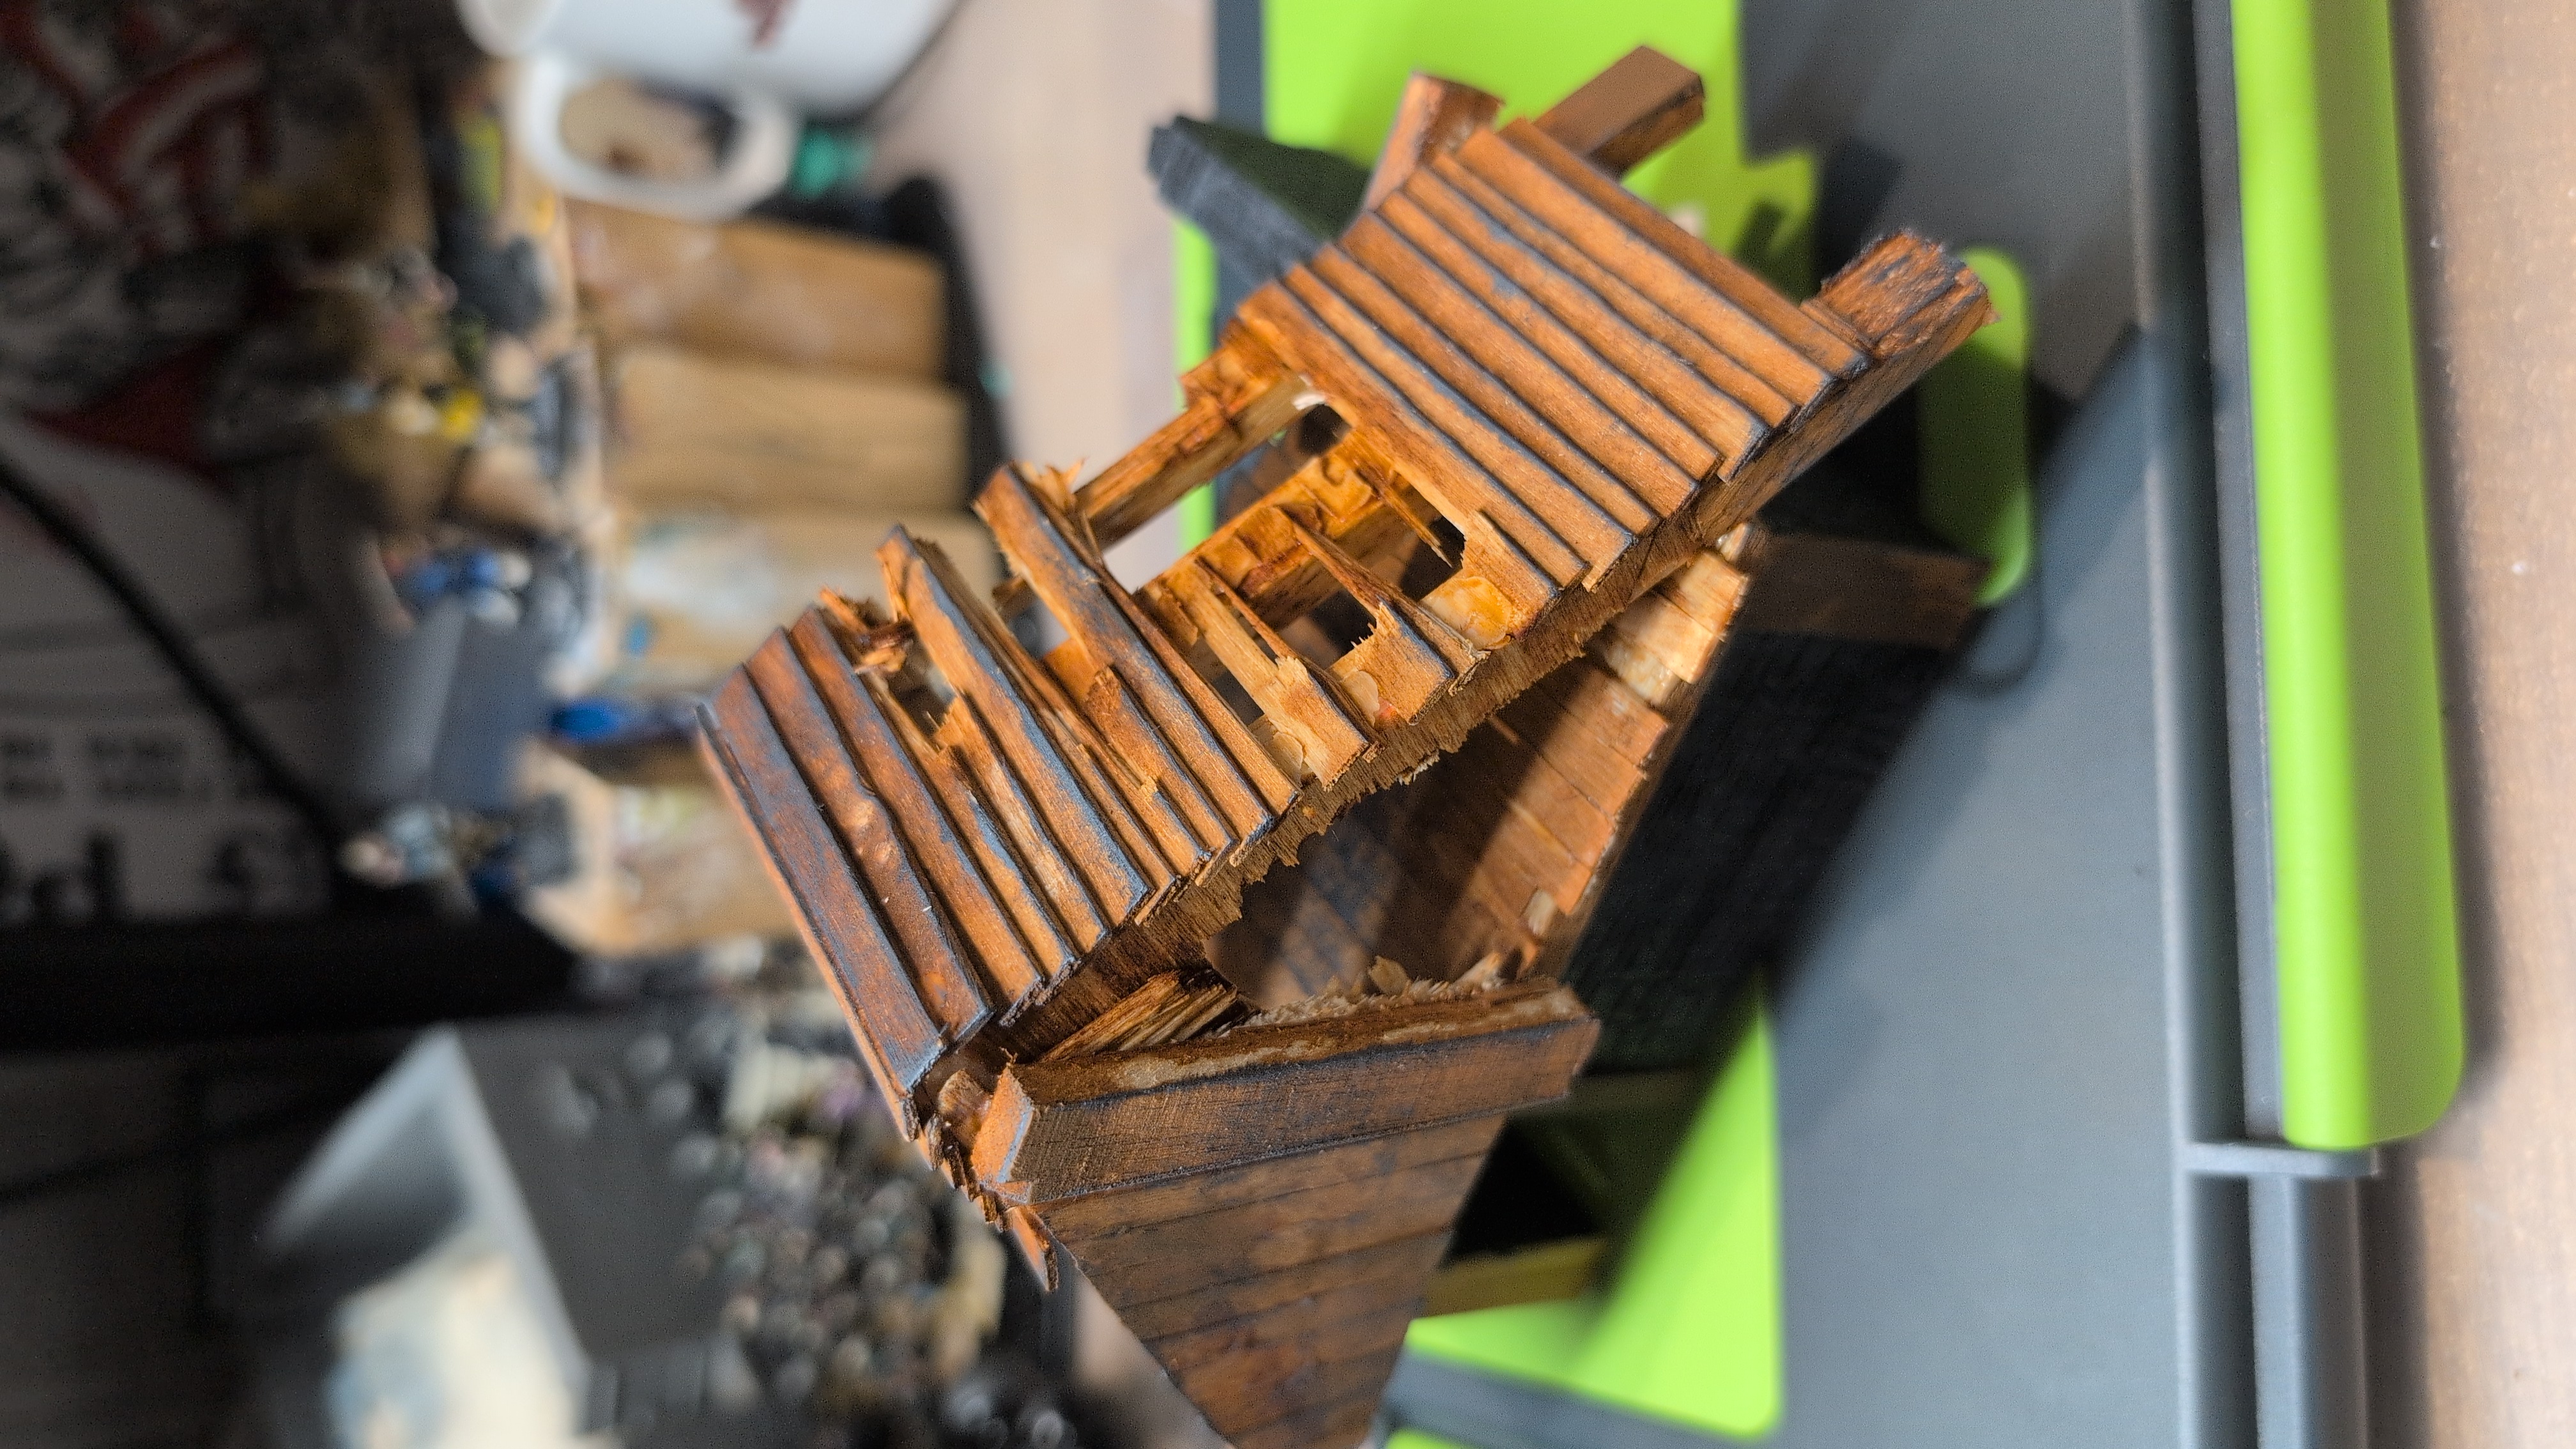
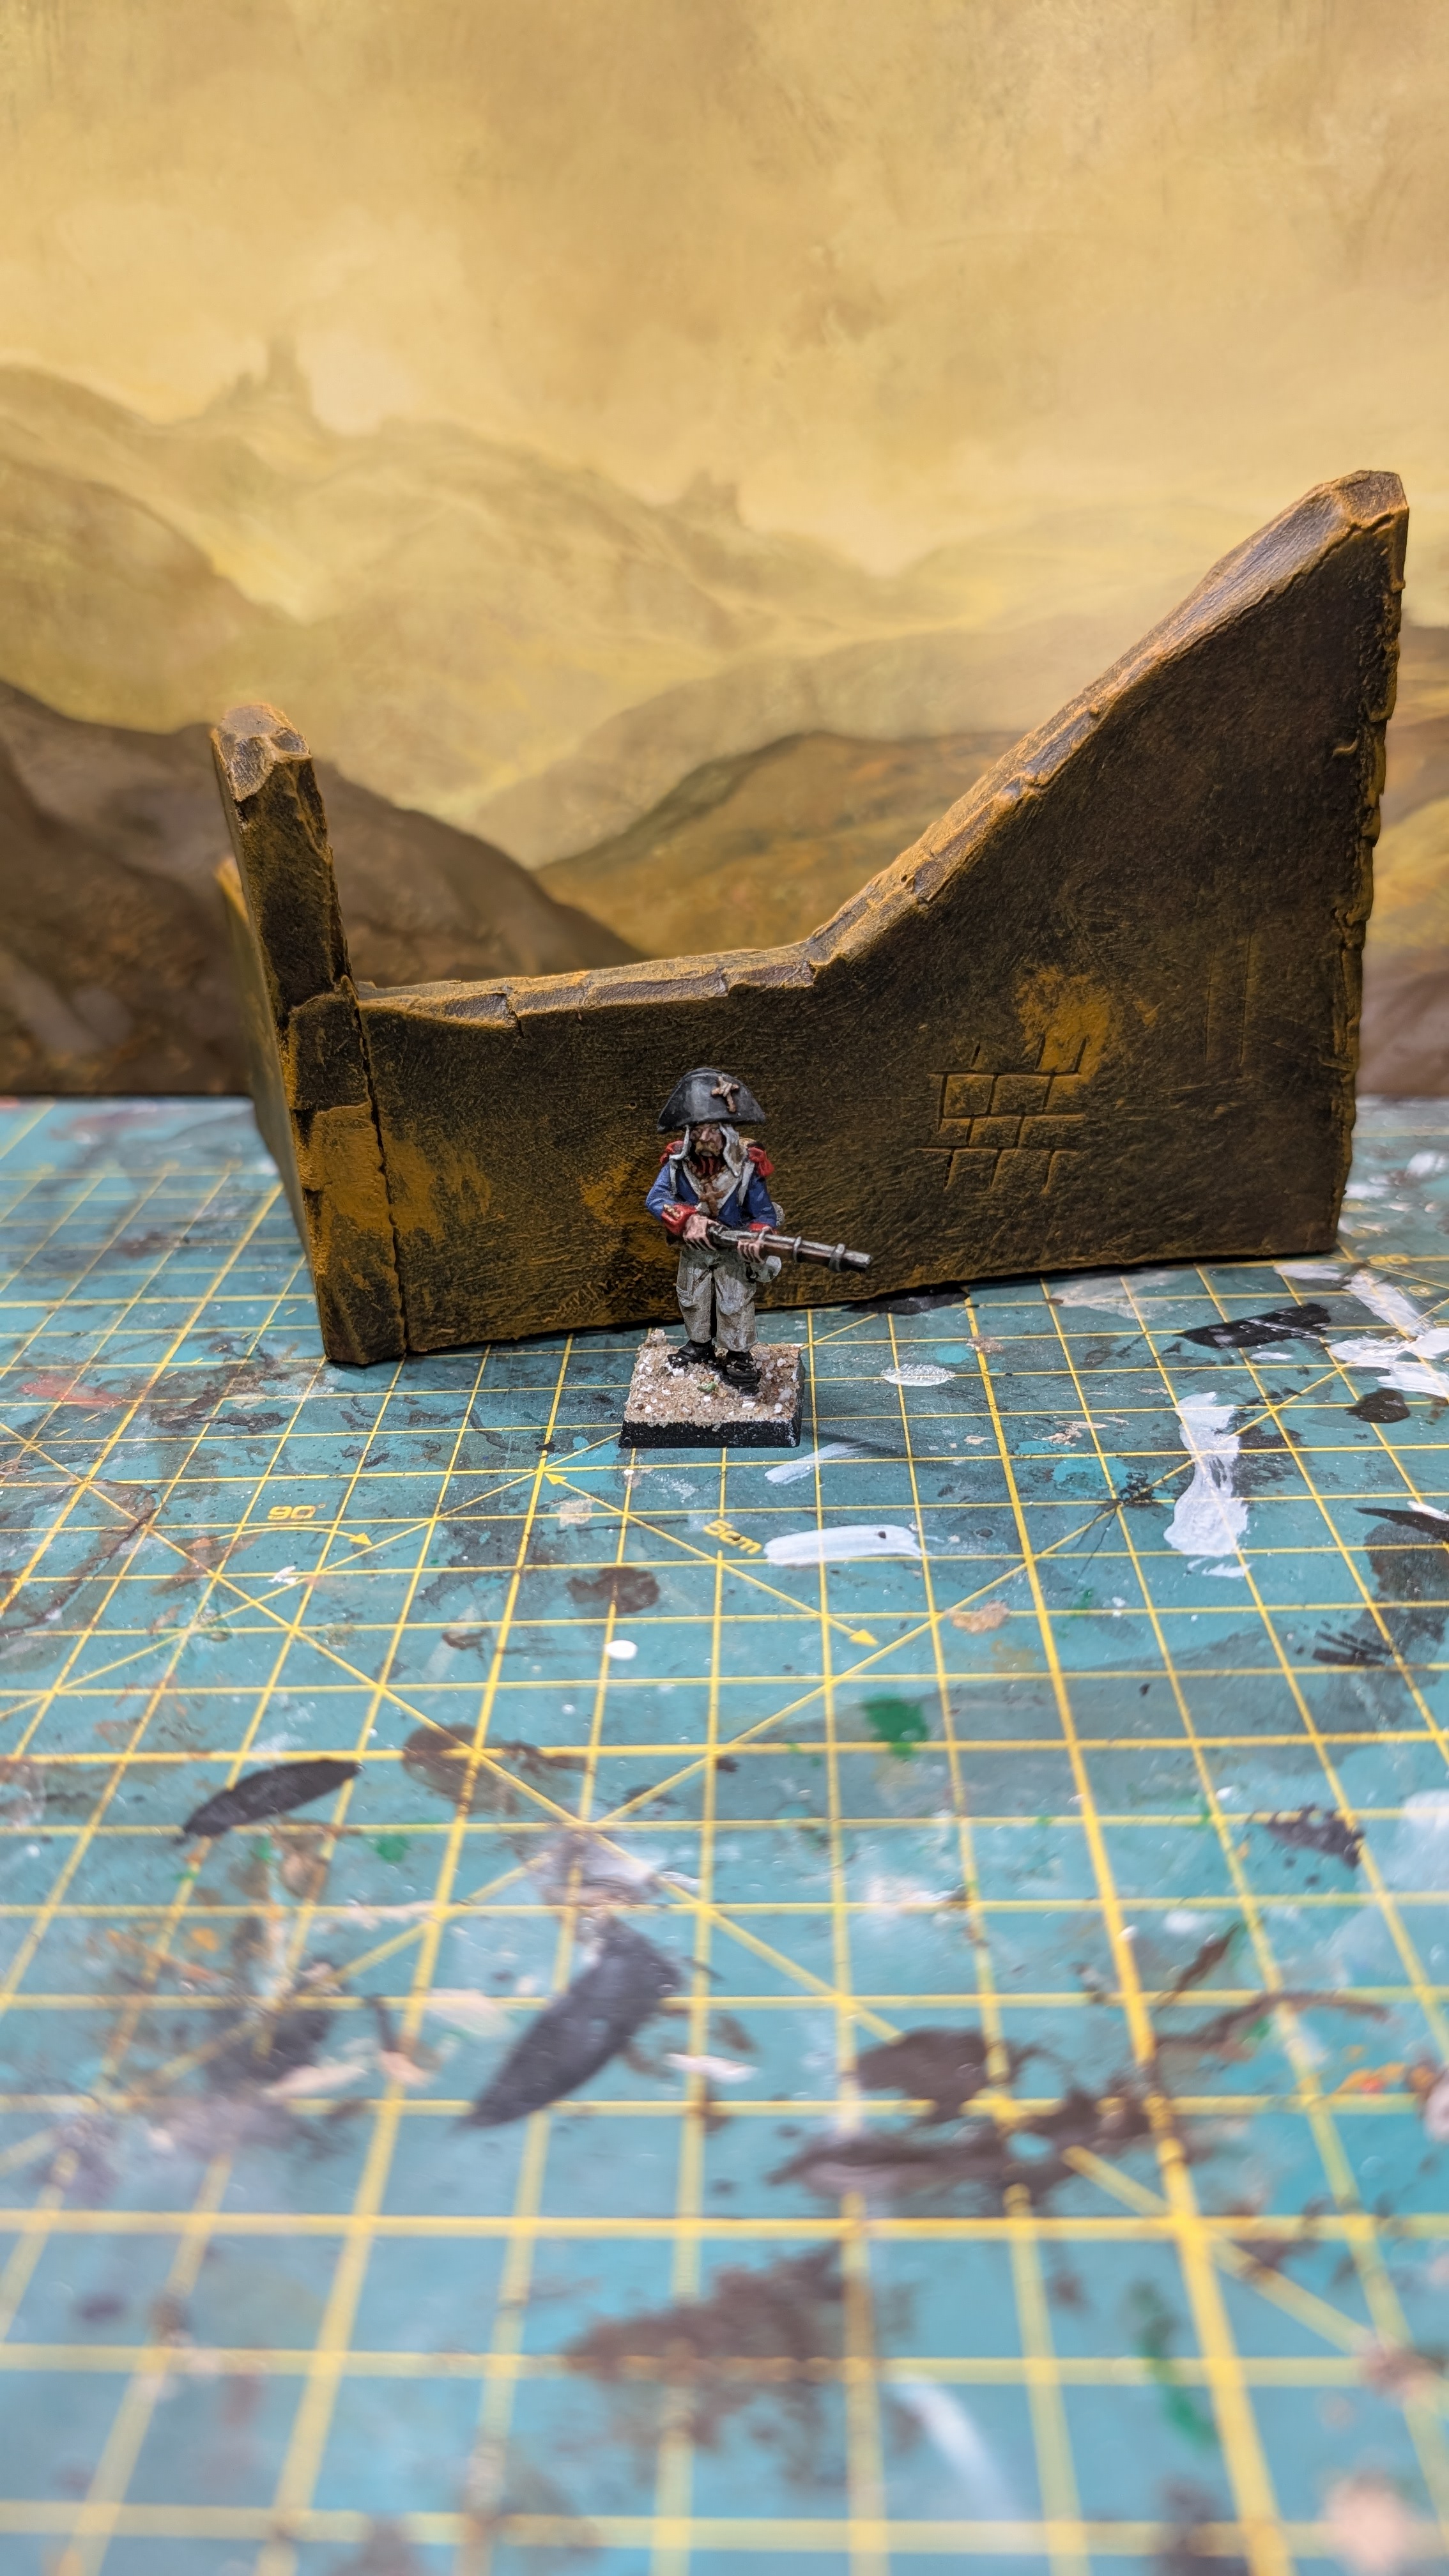
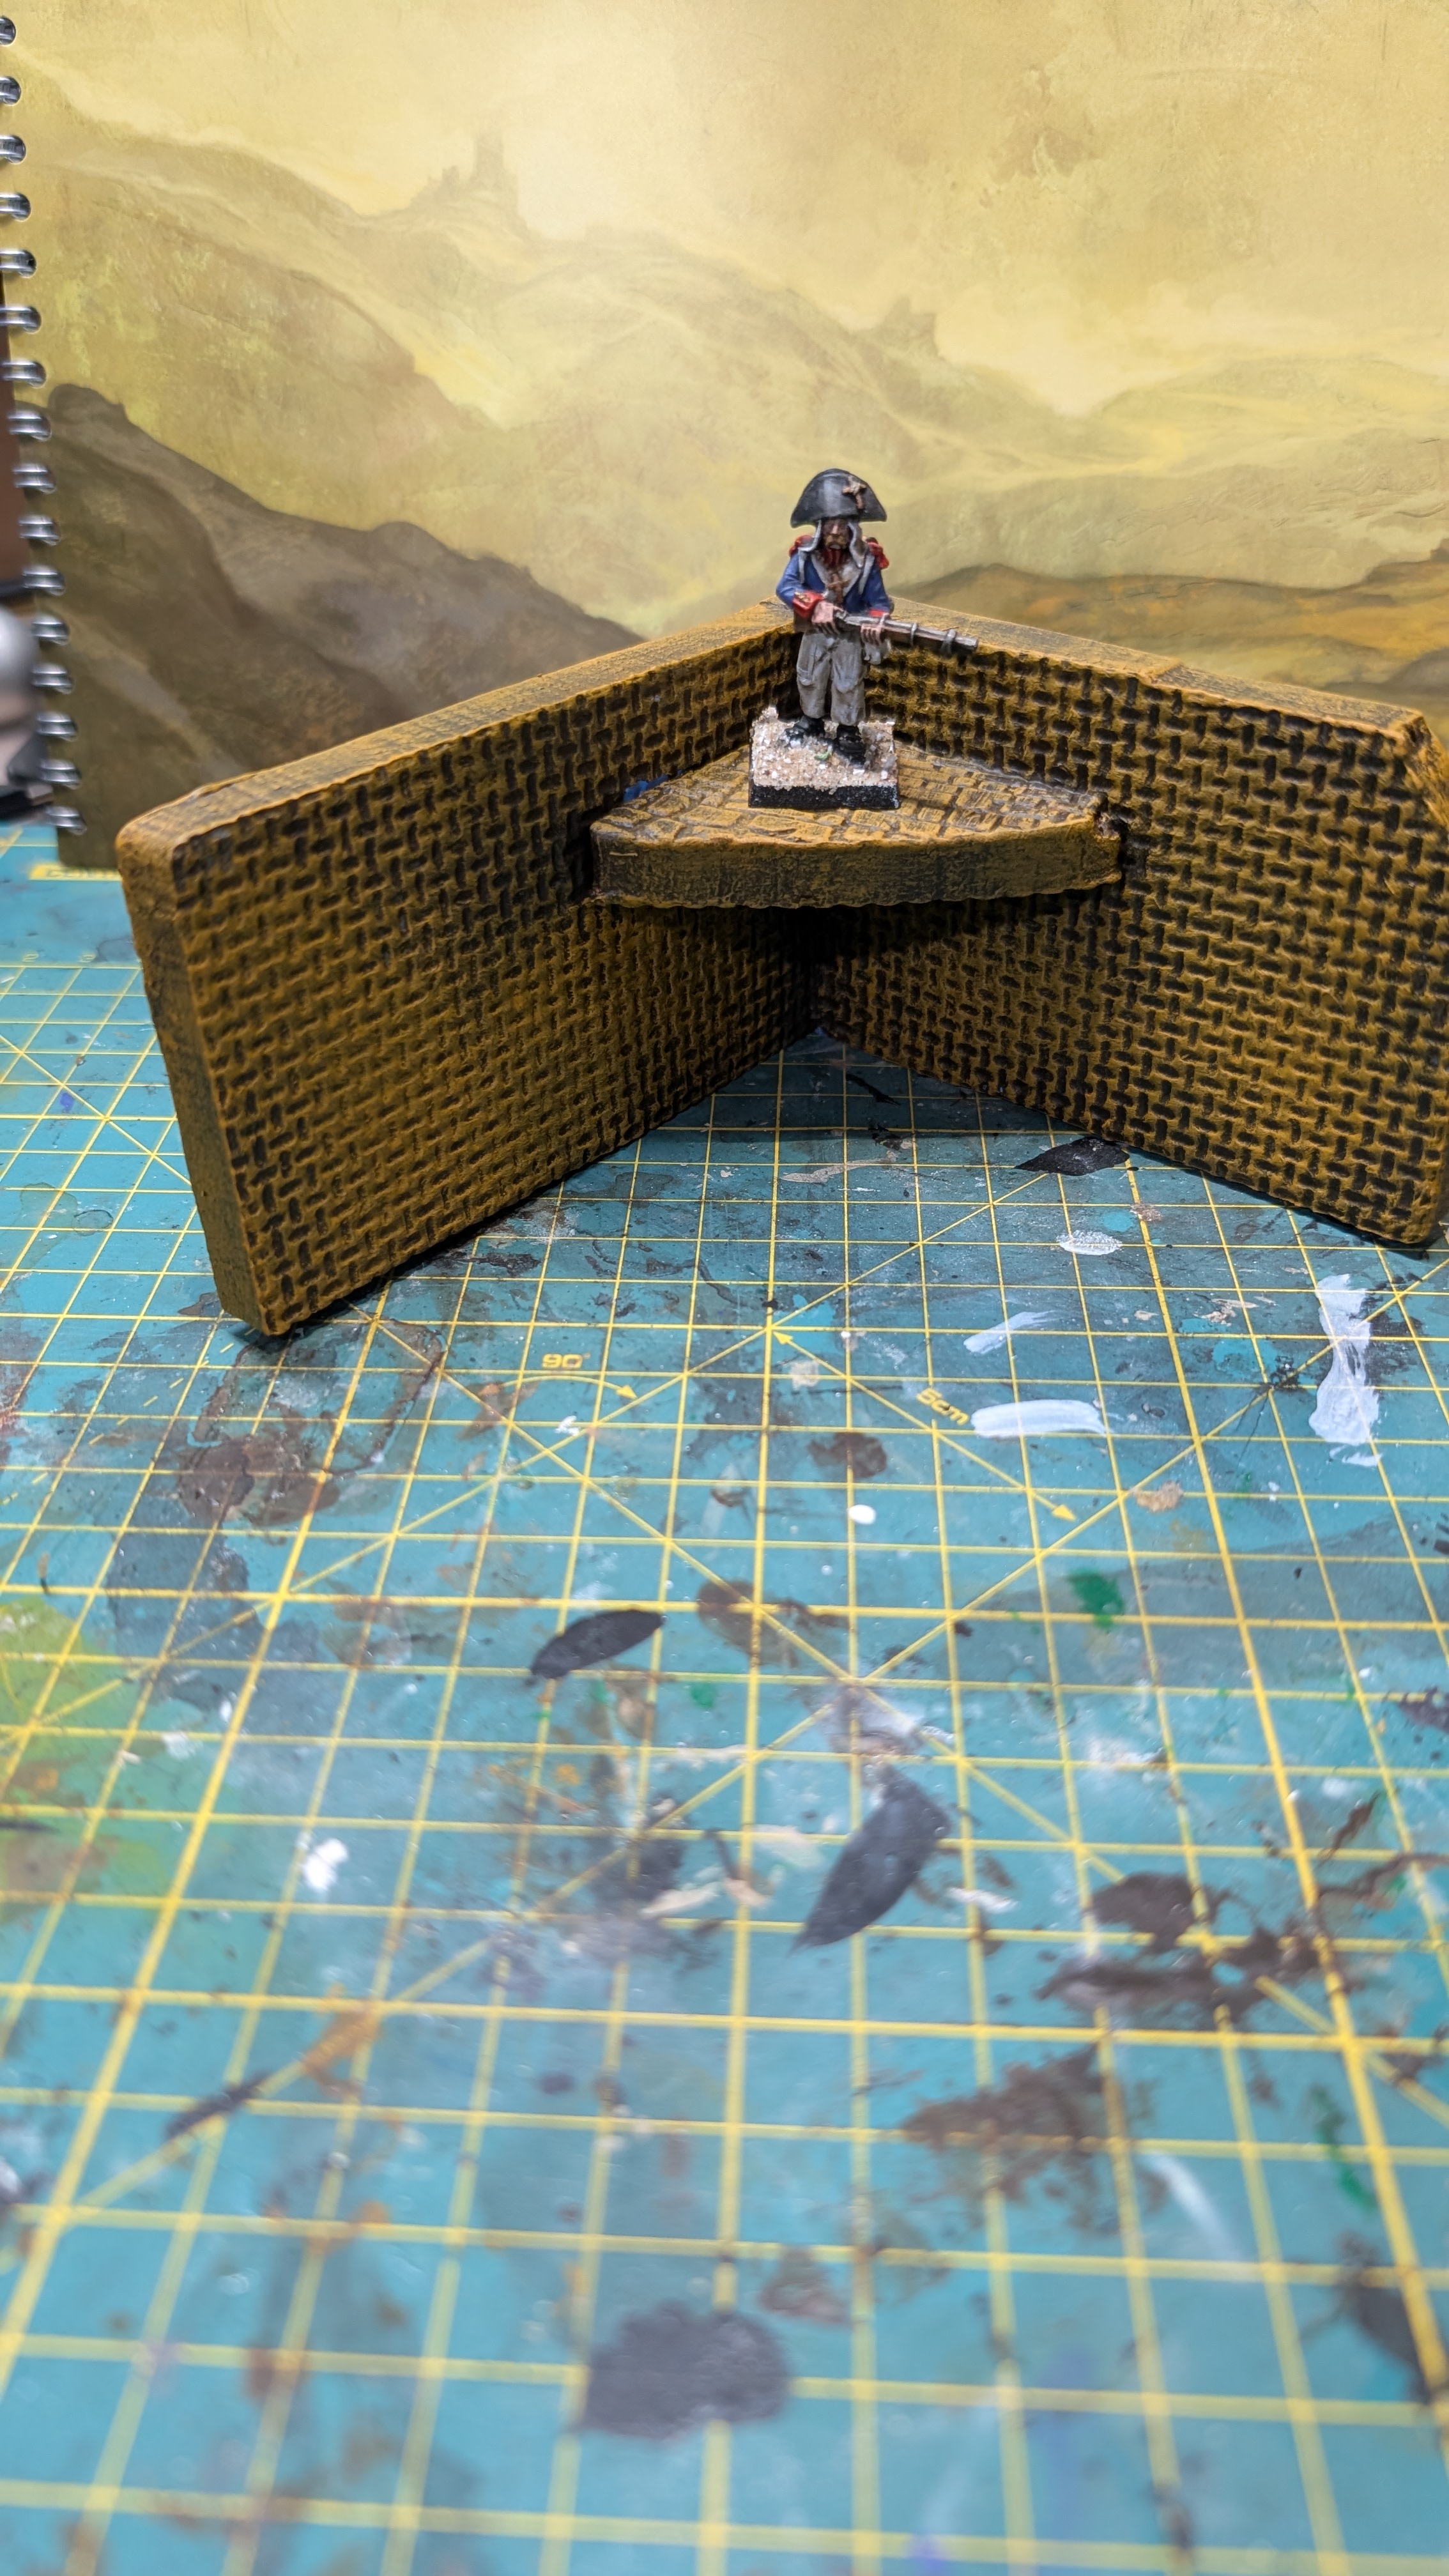
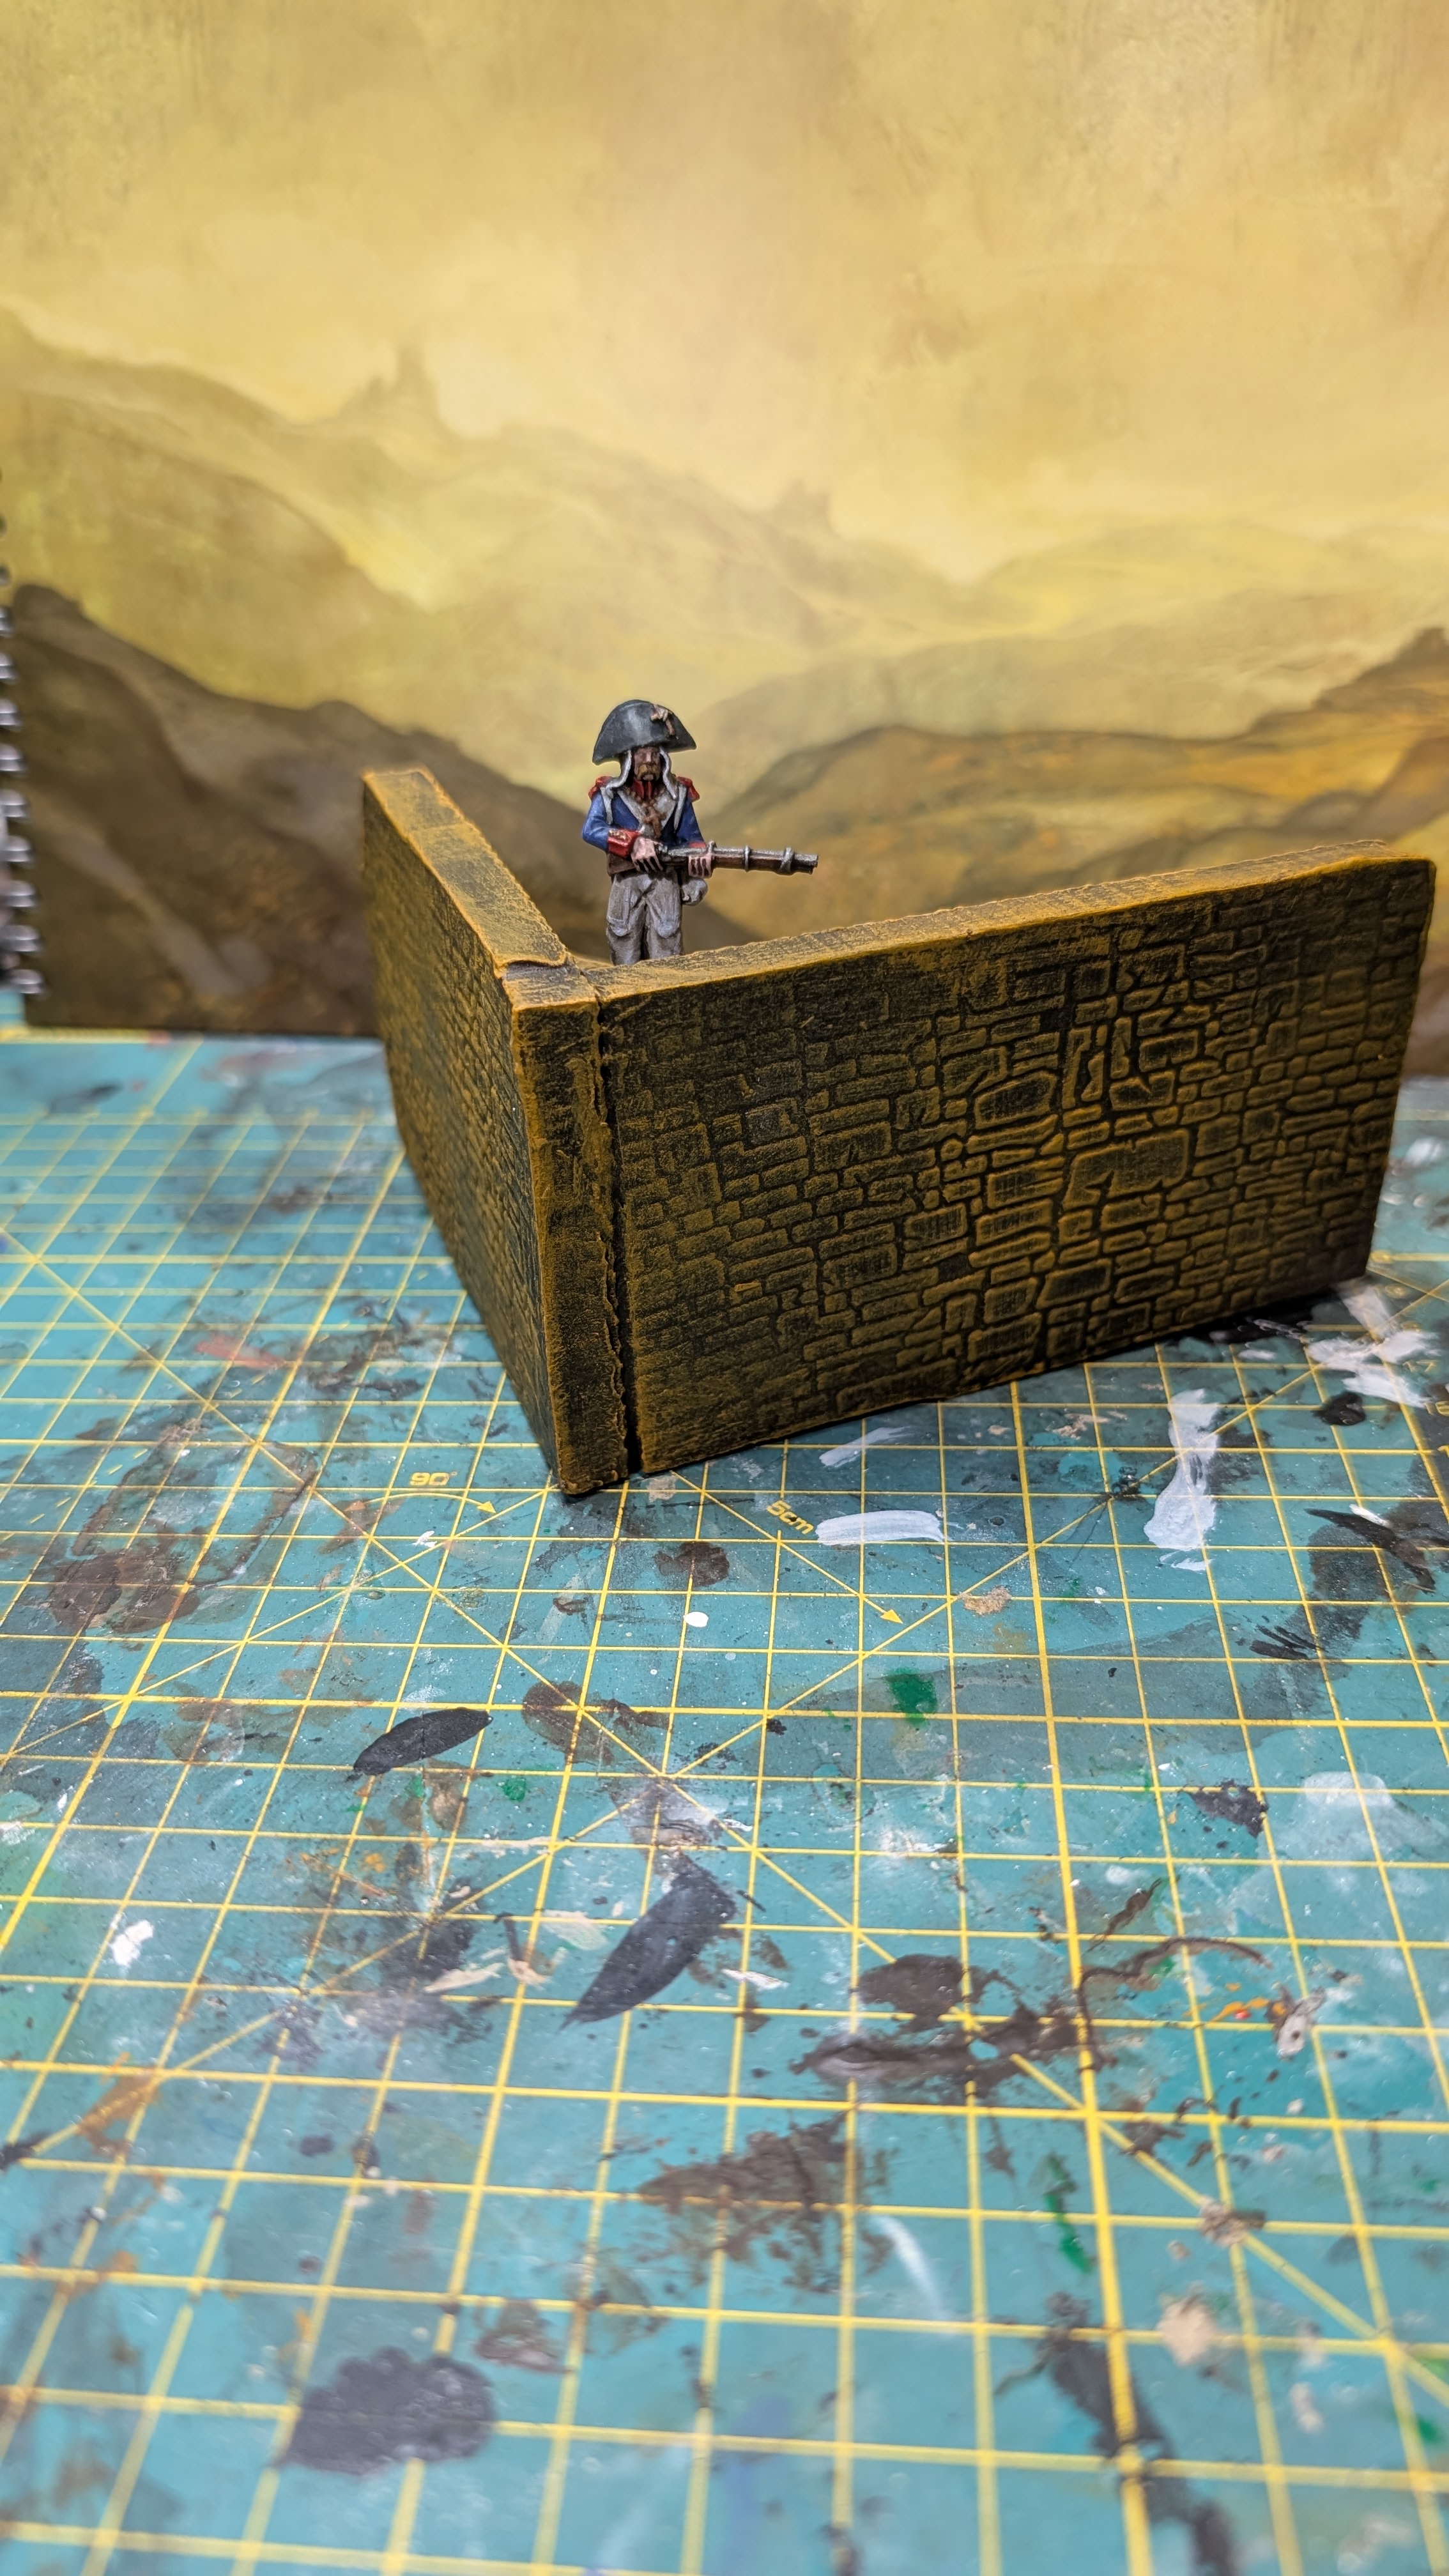
Most of the smaller pieces will end up as your traditional ‘ruined corner’ : stick a couple together and paint them to get them on the tabletop as quickly as possible. But I want to stretch myself a little with one building, so I got out the coffee stir sticks to build a broken wooden floor.
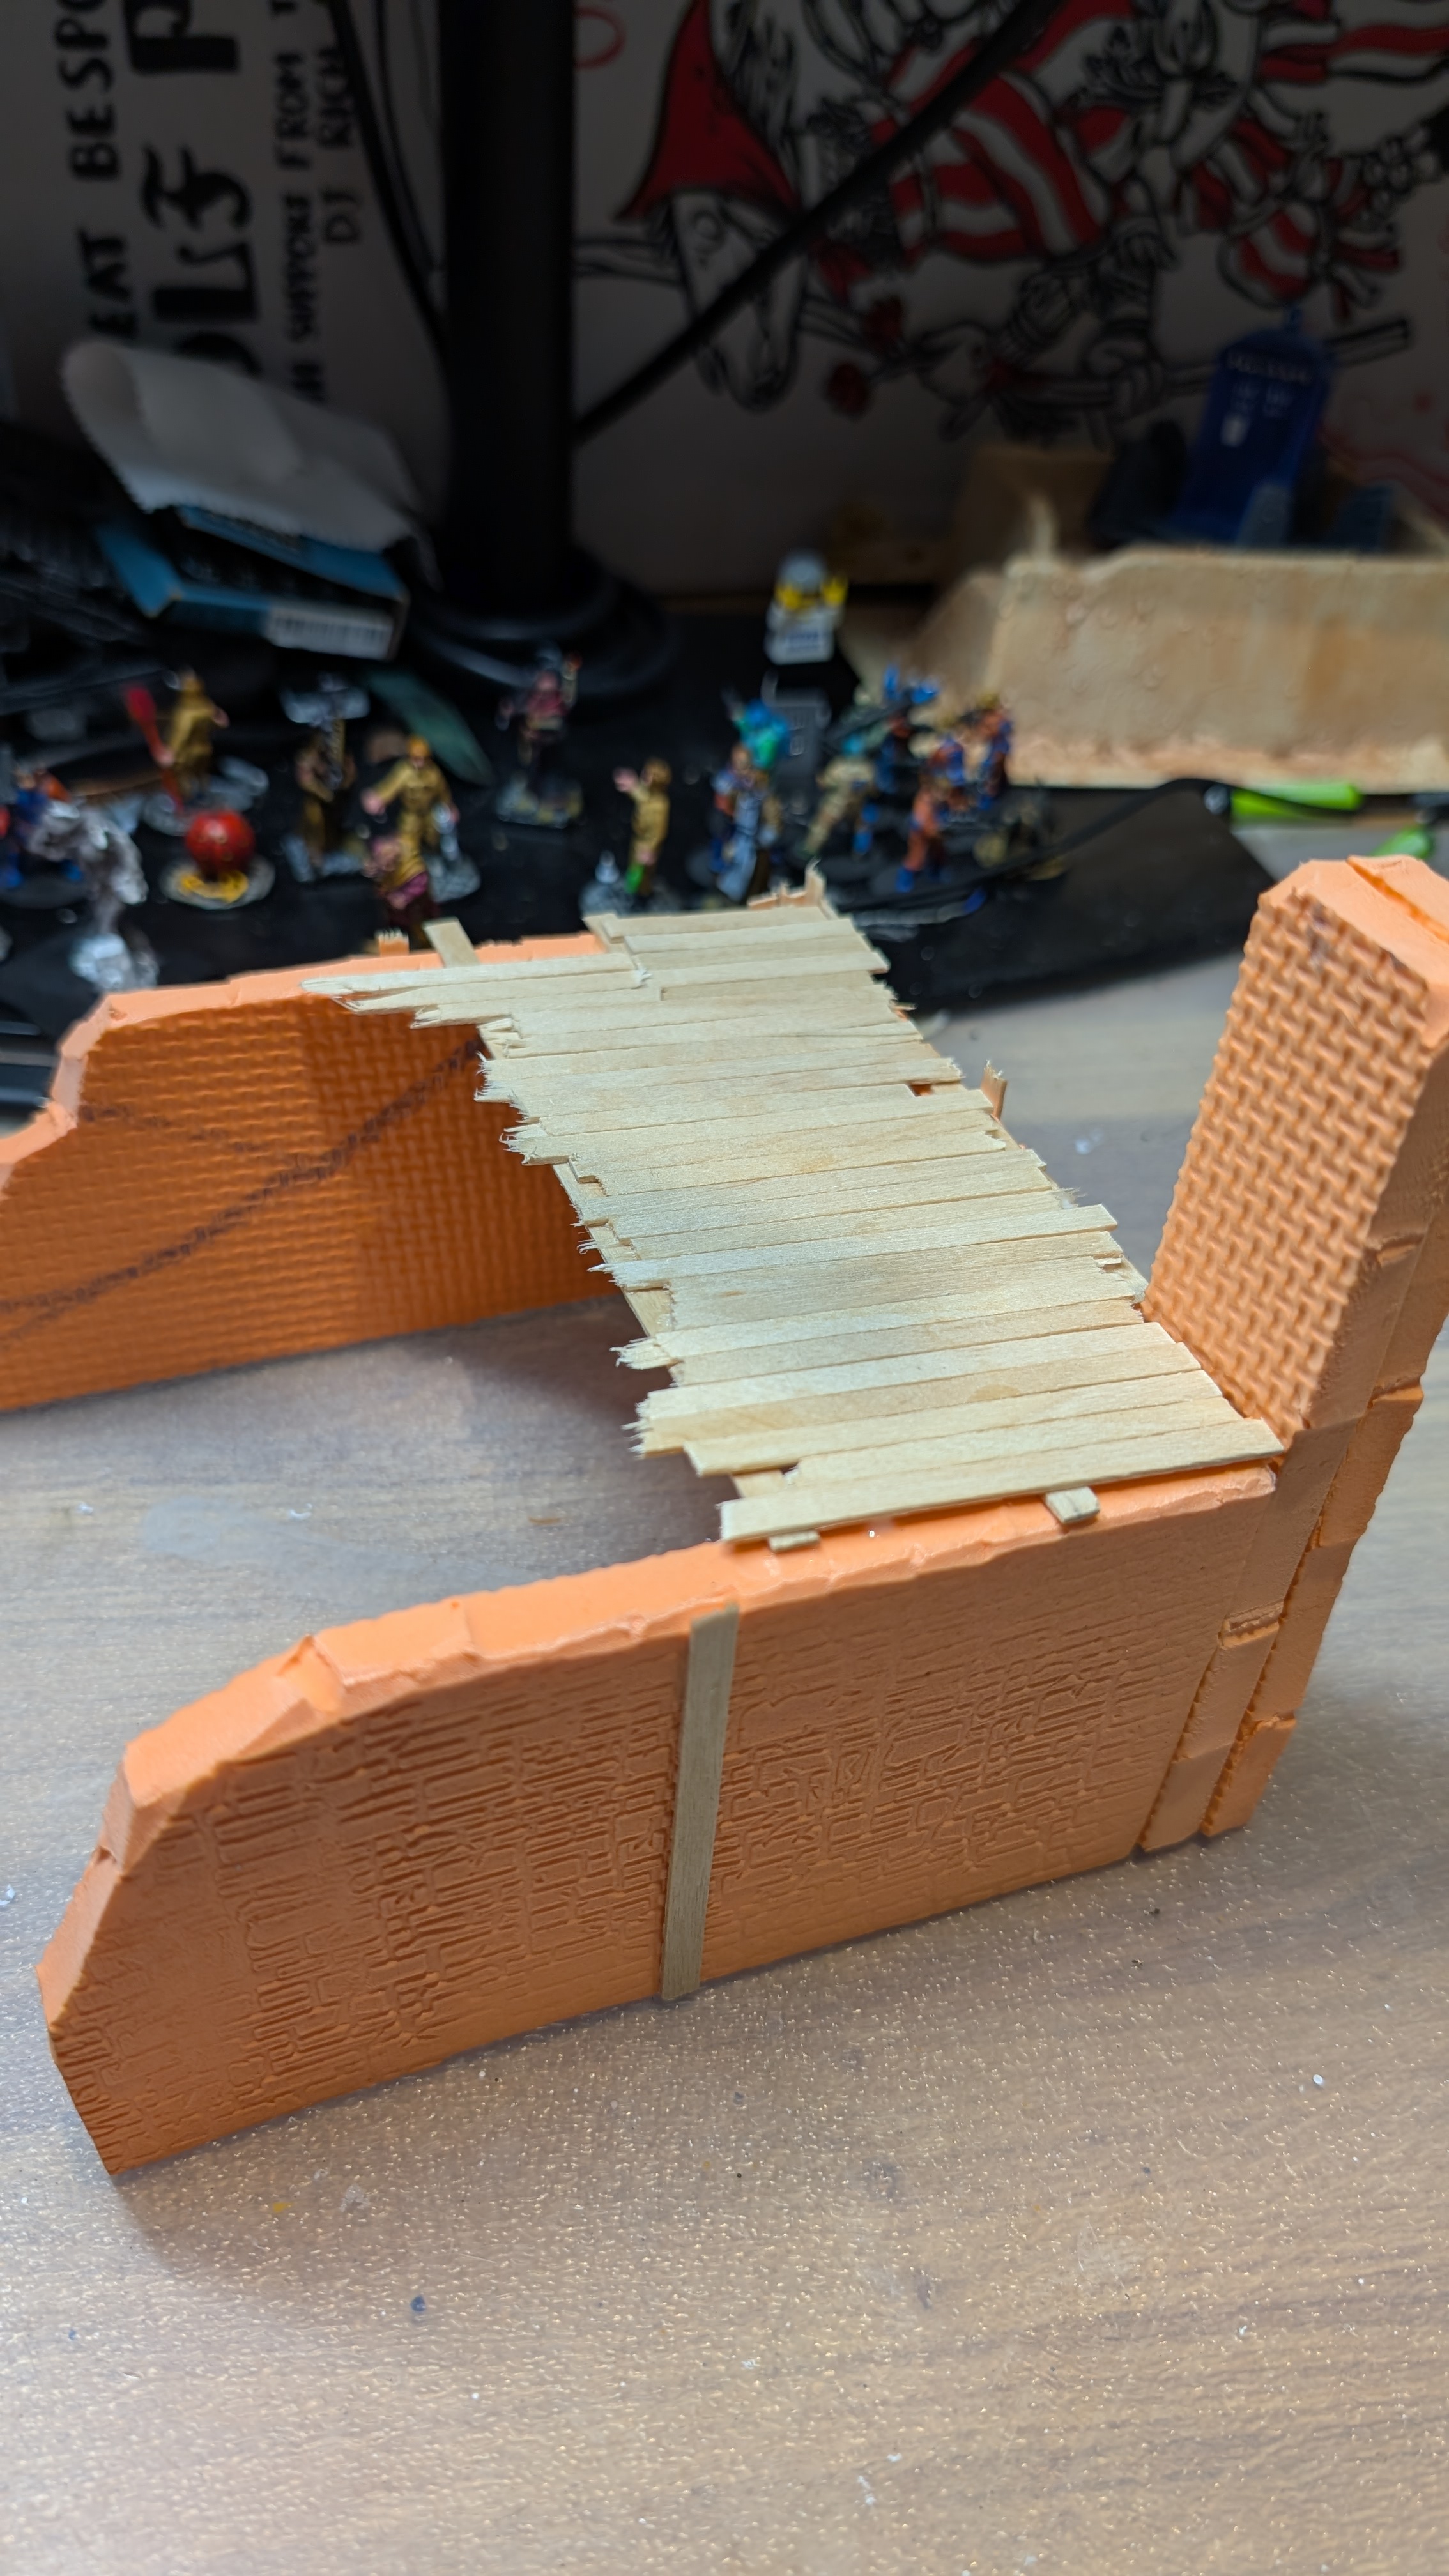
I also got the scissors out again to rough up the edges, trying to make them more ruined.
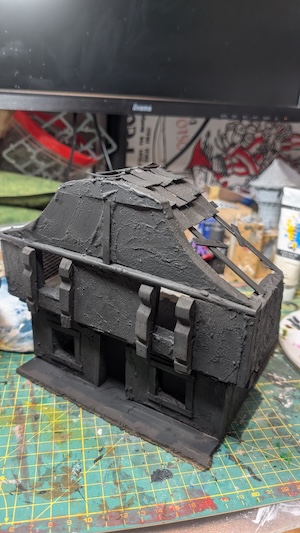
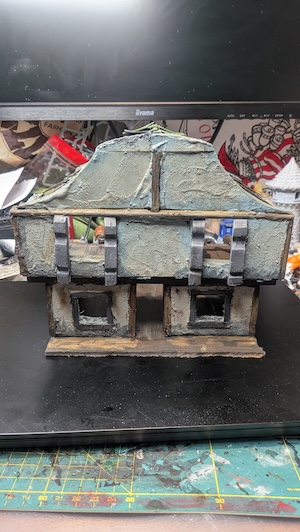
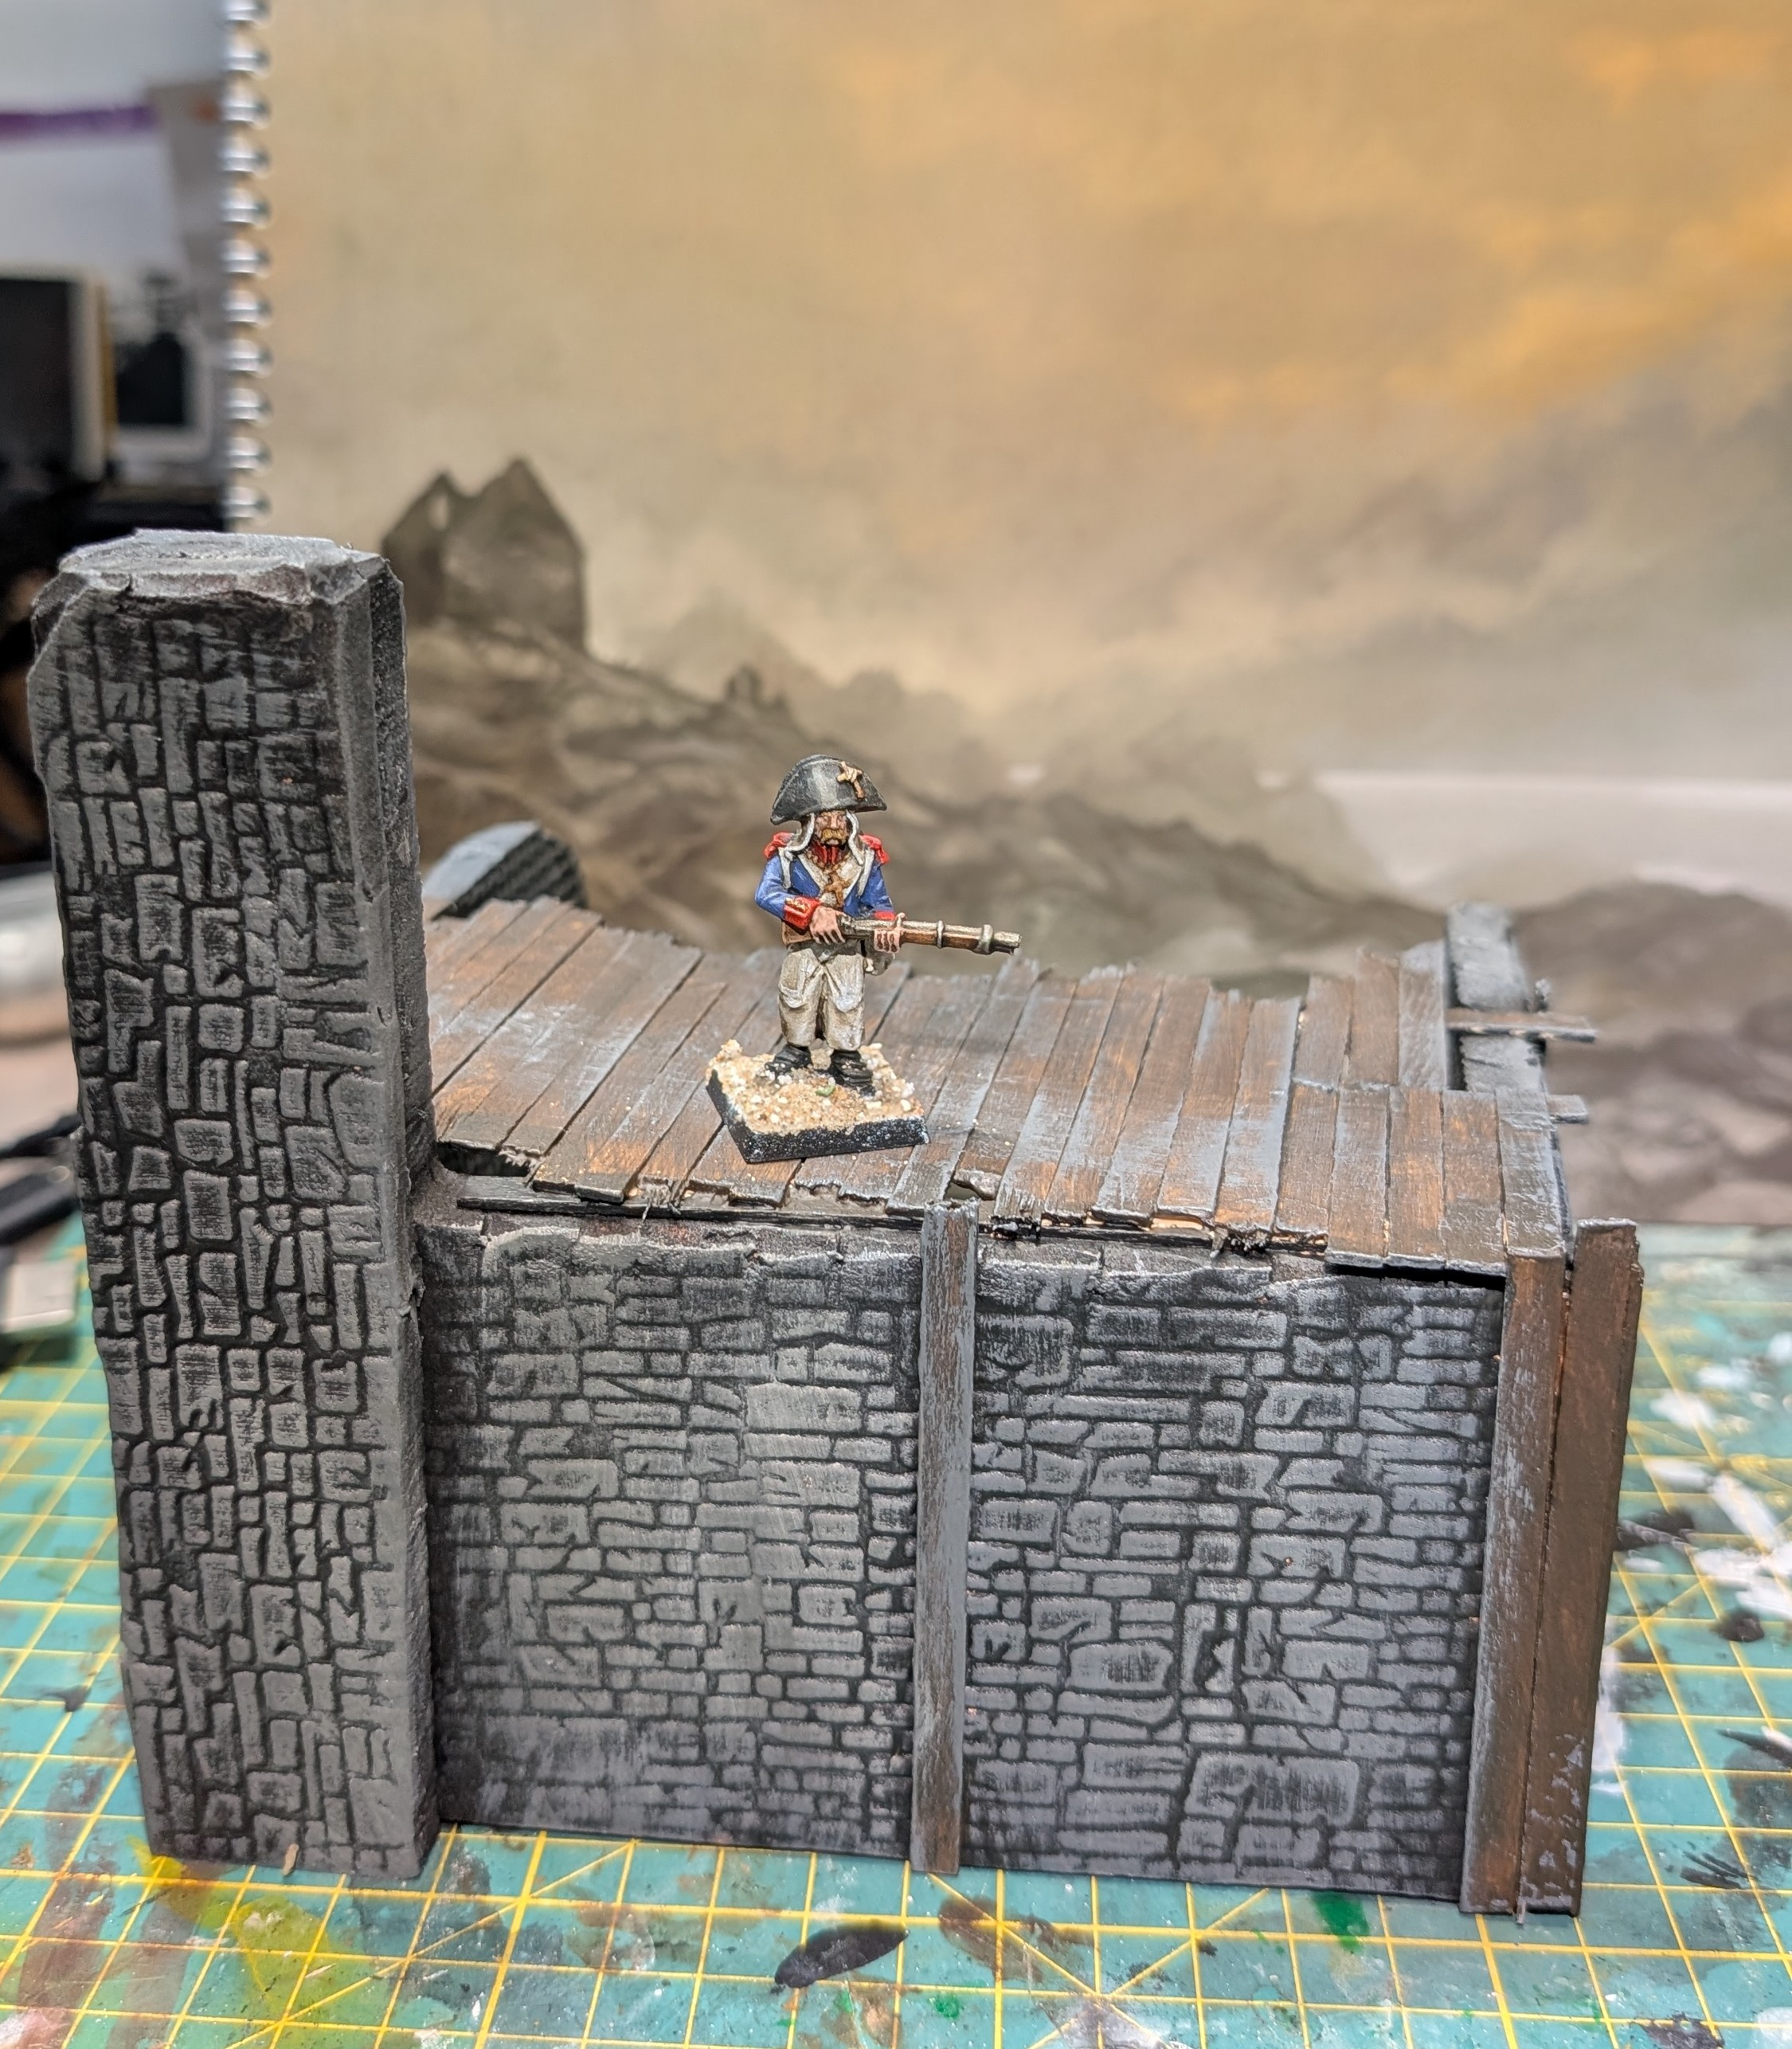
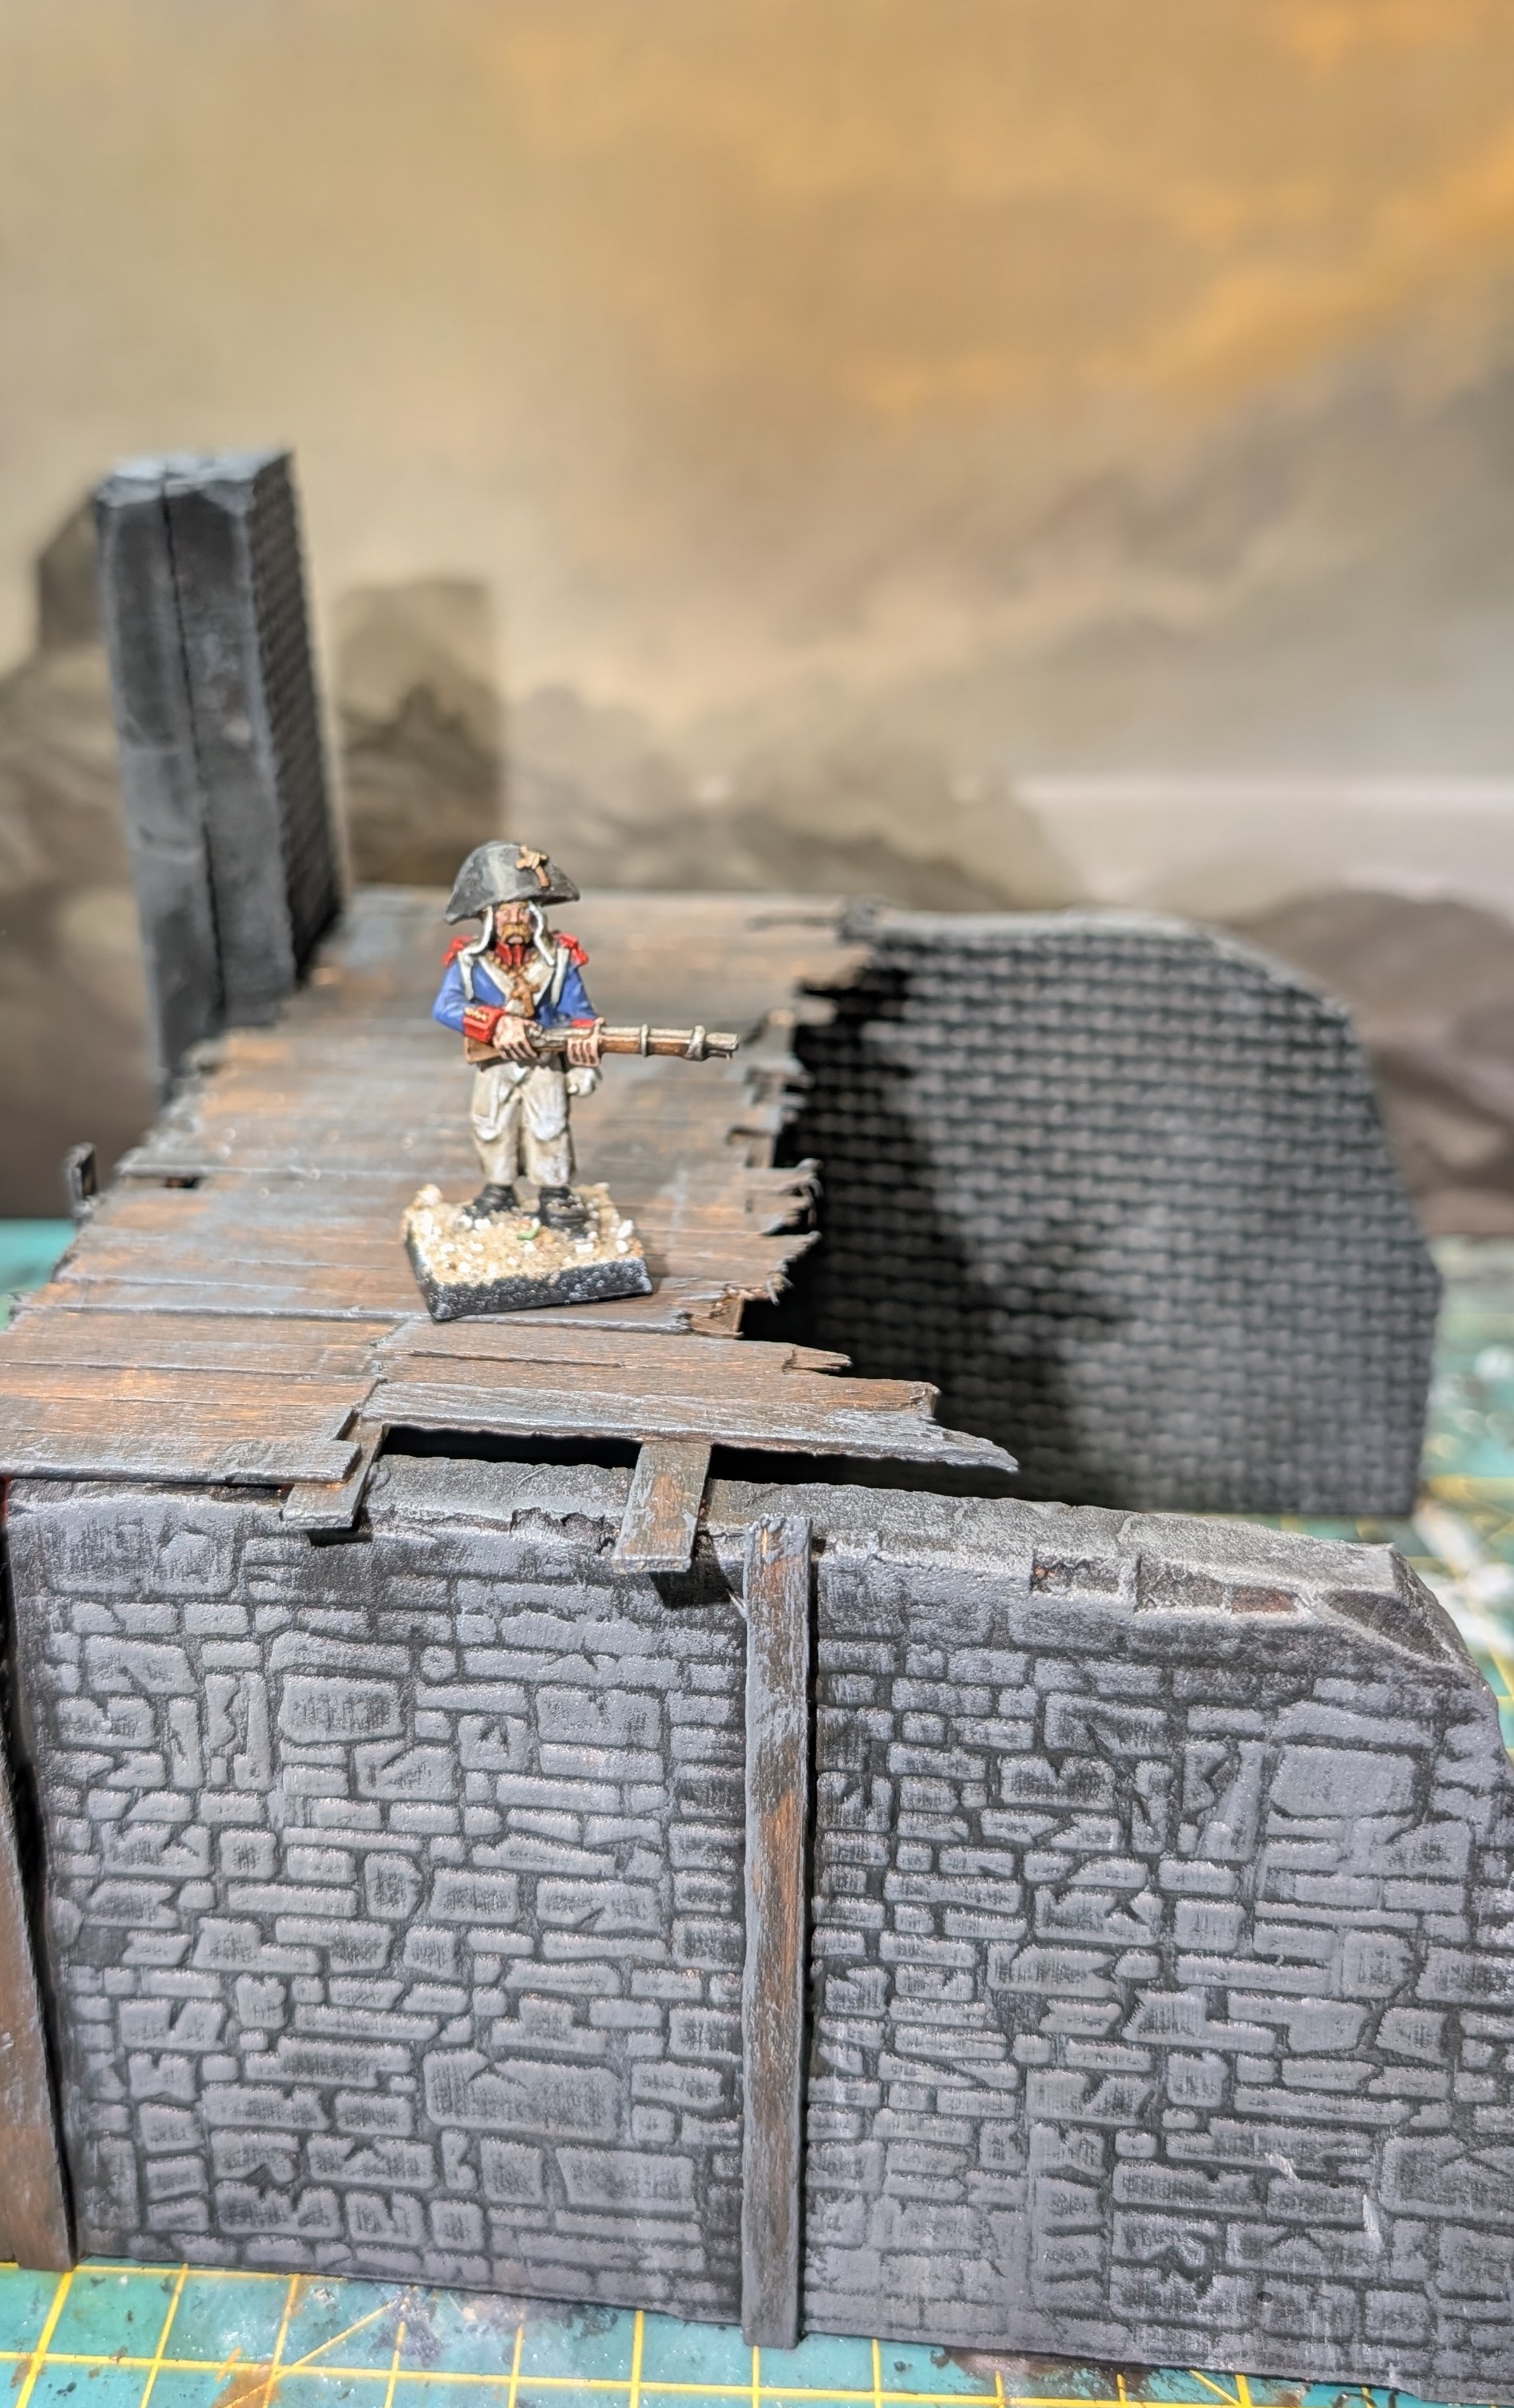
Painting is a couple base coat and then dry brush of craft store paint. Black and grey for a traditional fantasy look, brown and sandy for use in the desert.


![Warcradle Studios Reveal TINY New 10mm Festive Marker! [Updated]](https://images.beastsofwar.com/2025/11/christmas-kyle-main-600-338.jpg)