![Very Cool! Make Your Own Star Wars: Legion Imperial Agent & Officer | Review [7 Days Early Access]](https://images.beastsofwar.com/2025/12/Star-Wars-Imperial-Agent-_-Officer-coverimage-V3-225-127.jpg)


Tale of Three Tigers


Recommendations: 172
About the Project
I am going to build three different Tiger II models using the Bolt Action Tiger II Zug box . I want build an early " Porsche " turret Tiger attached to the Panzer Lehr . I also want to build a production turret ( Henschel ) Tiger with Fallschirmjager tank riders as seen in Battle of the Bulge photos and lastly a knocked out Tiger , your 70 ton road block as it were .
Related Game: Bolt Action
Related Genre: Historical
This Project is Active
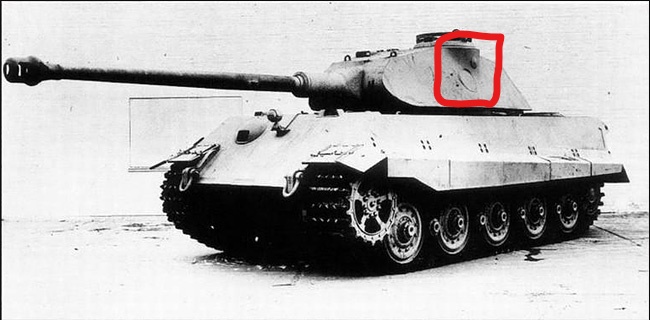
As I said earlier ,I can build 3 hulls and 3 complete turrets from this box set . By using bits from the parts box I find I am able to finish off a 4th turret ( Commander’s hatch , AA MG rail and roof fan needed ) I’m going to build one ” Porsche ” and 3 Henschel turrets and I’ll explain why . Because of its design flaws the Porsche turret had an armored collar added to the hull to help keep rounds from deflecting off the curve on the bottom of the turret and into the hull roof . The front of the turret had the same problem , but there was no easy fix . If you look at the Maus they added an armored collar in front of the turret , but the driver hatch was much further forward than on the Tiger II
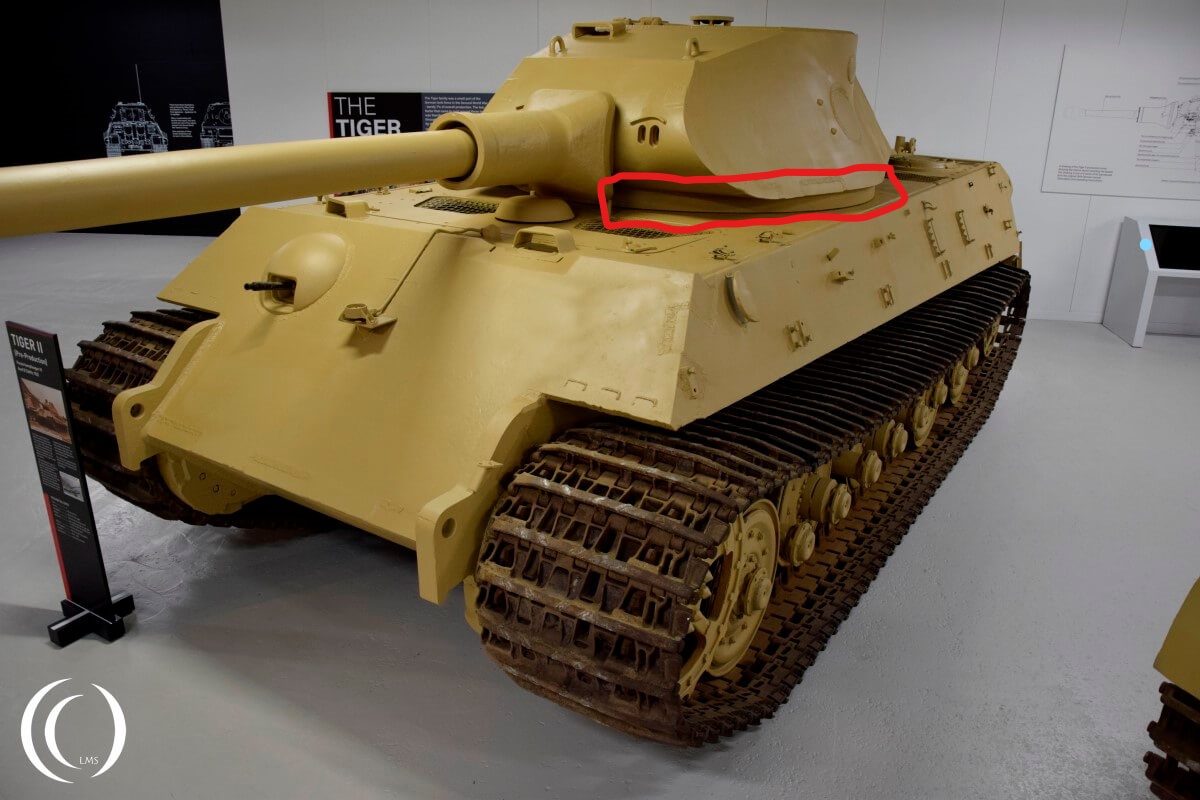
You can see the collar below the turret on the Bovington Porsche turret Tiger . The redesigned production turret had no such shot traps . So one hull with collar for the Porsche turret and 2 hulls for 3 Henschel turrets ( probably one with a damaged gun and some large caliber shell holes )
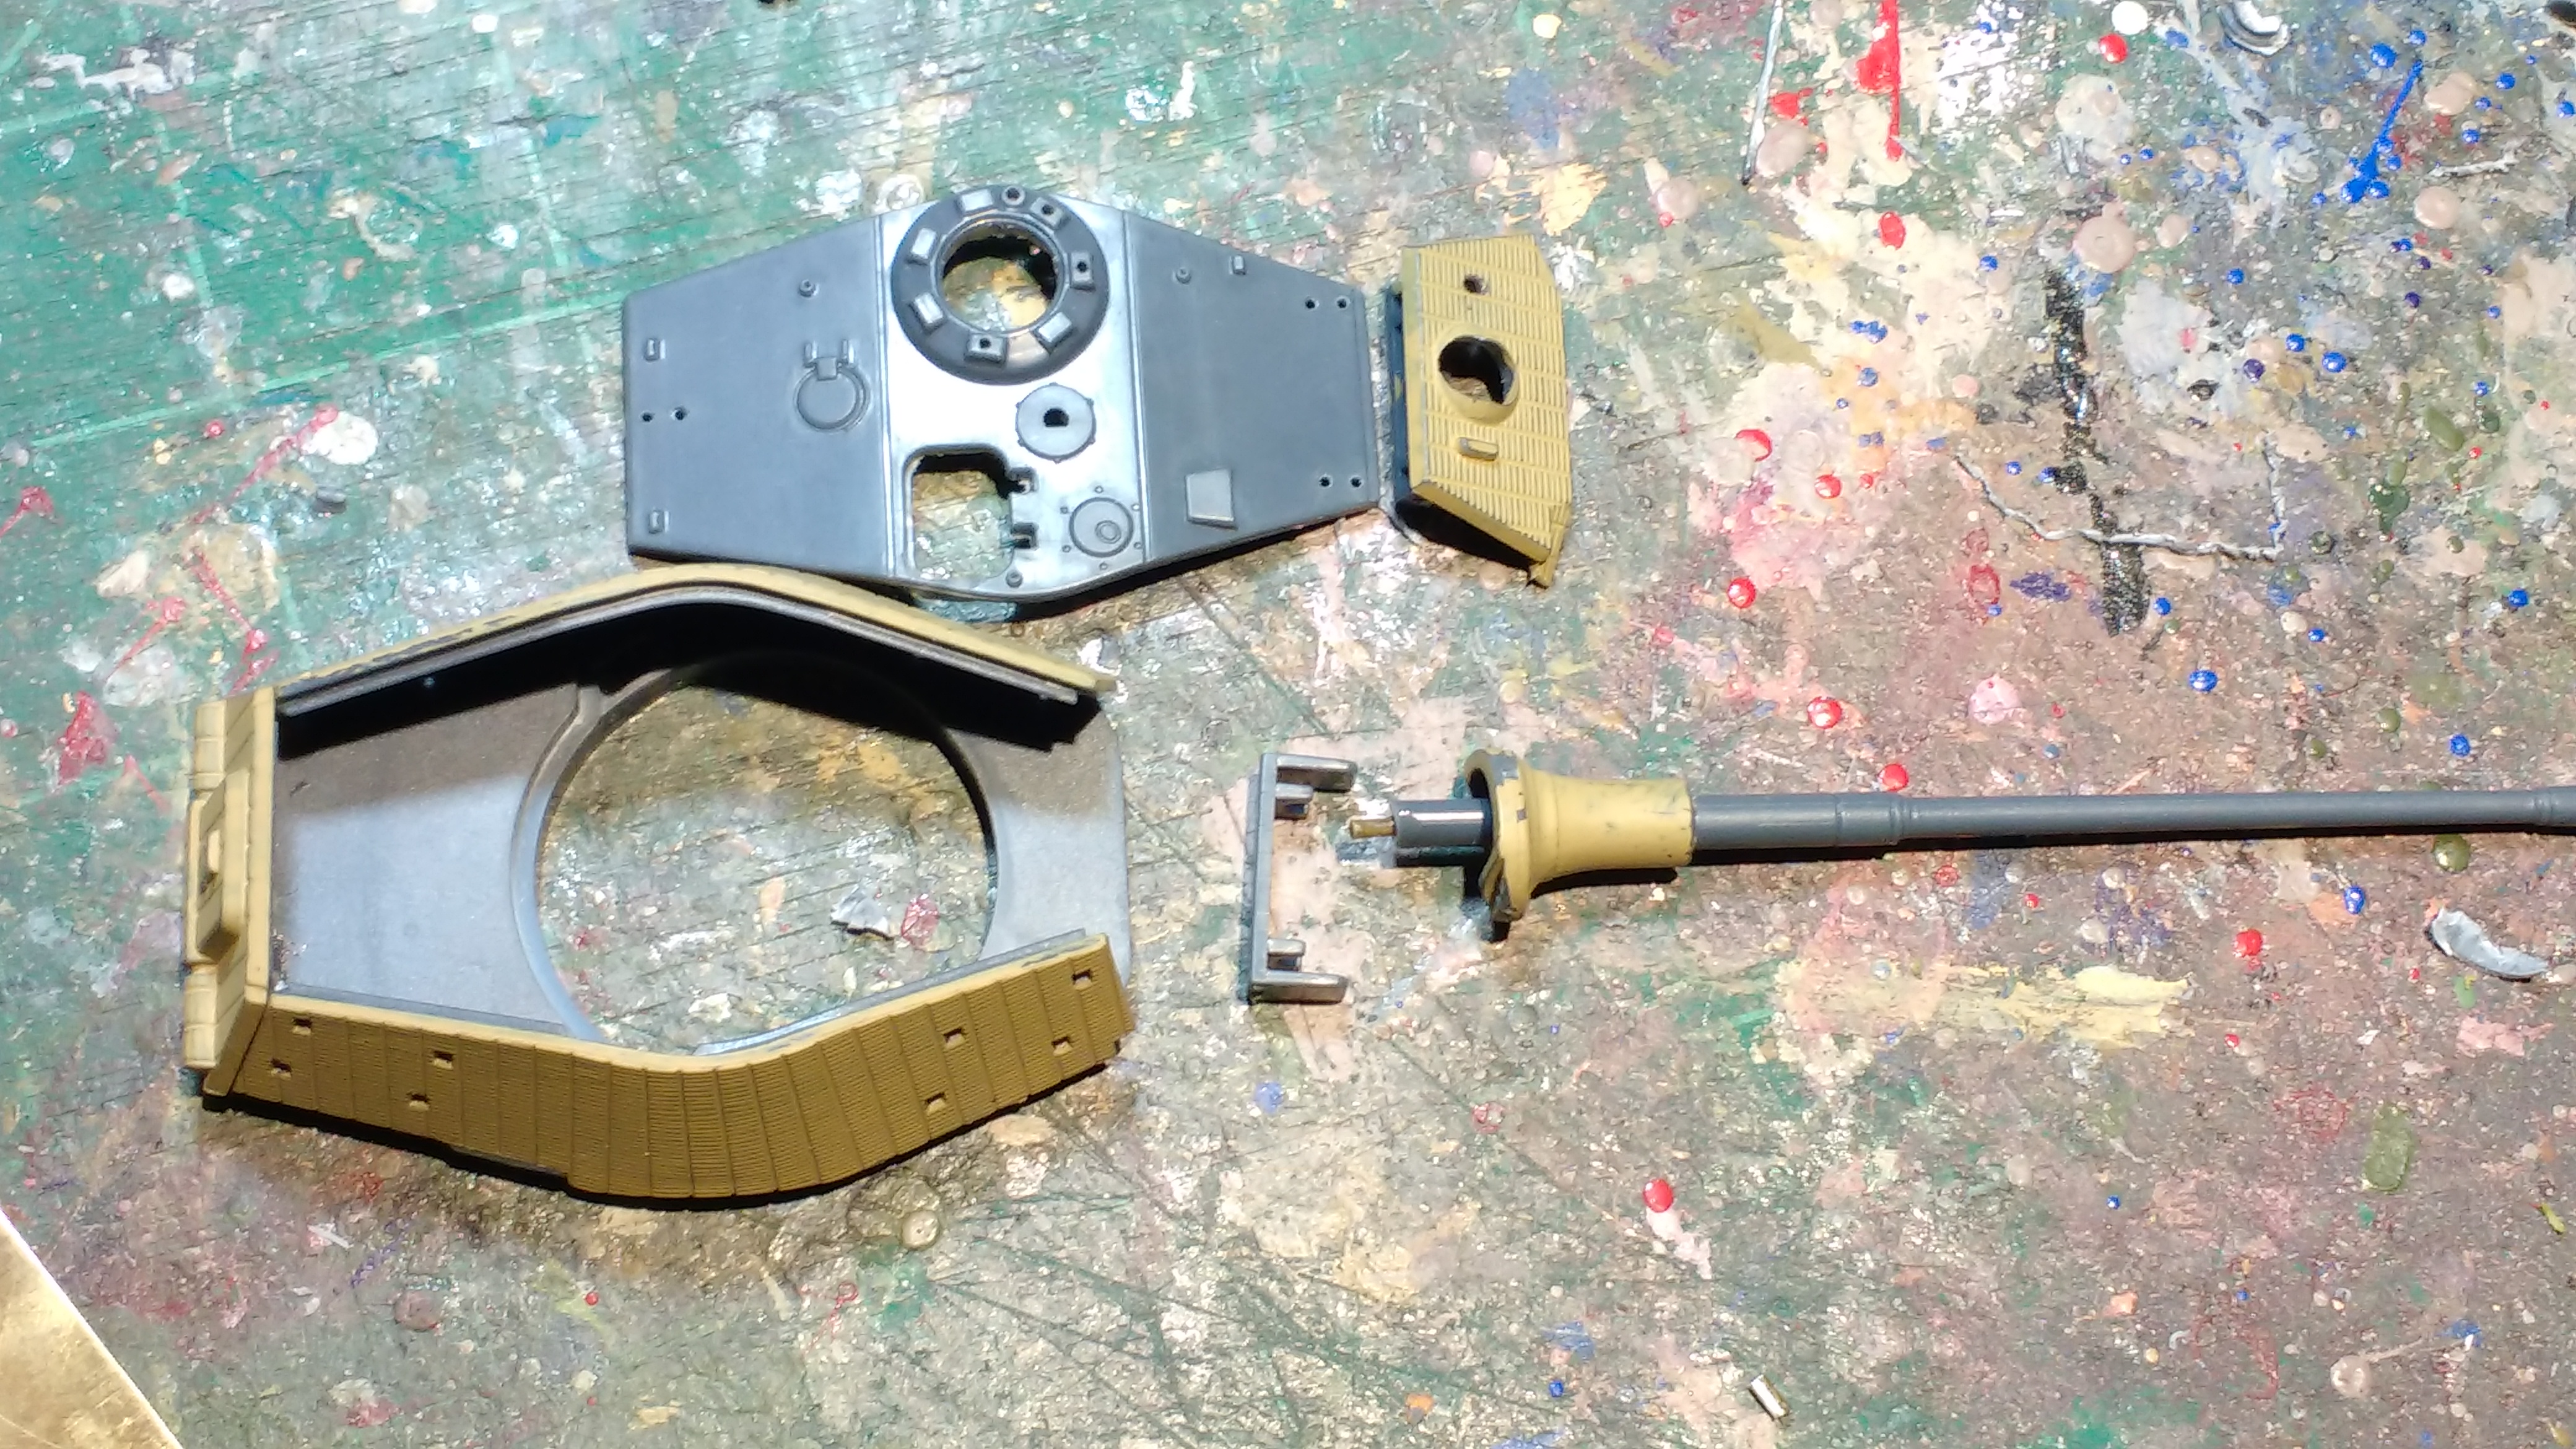
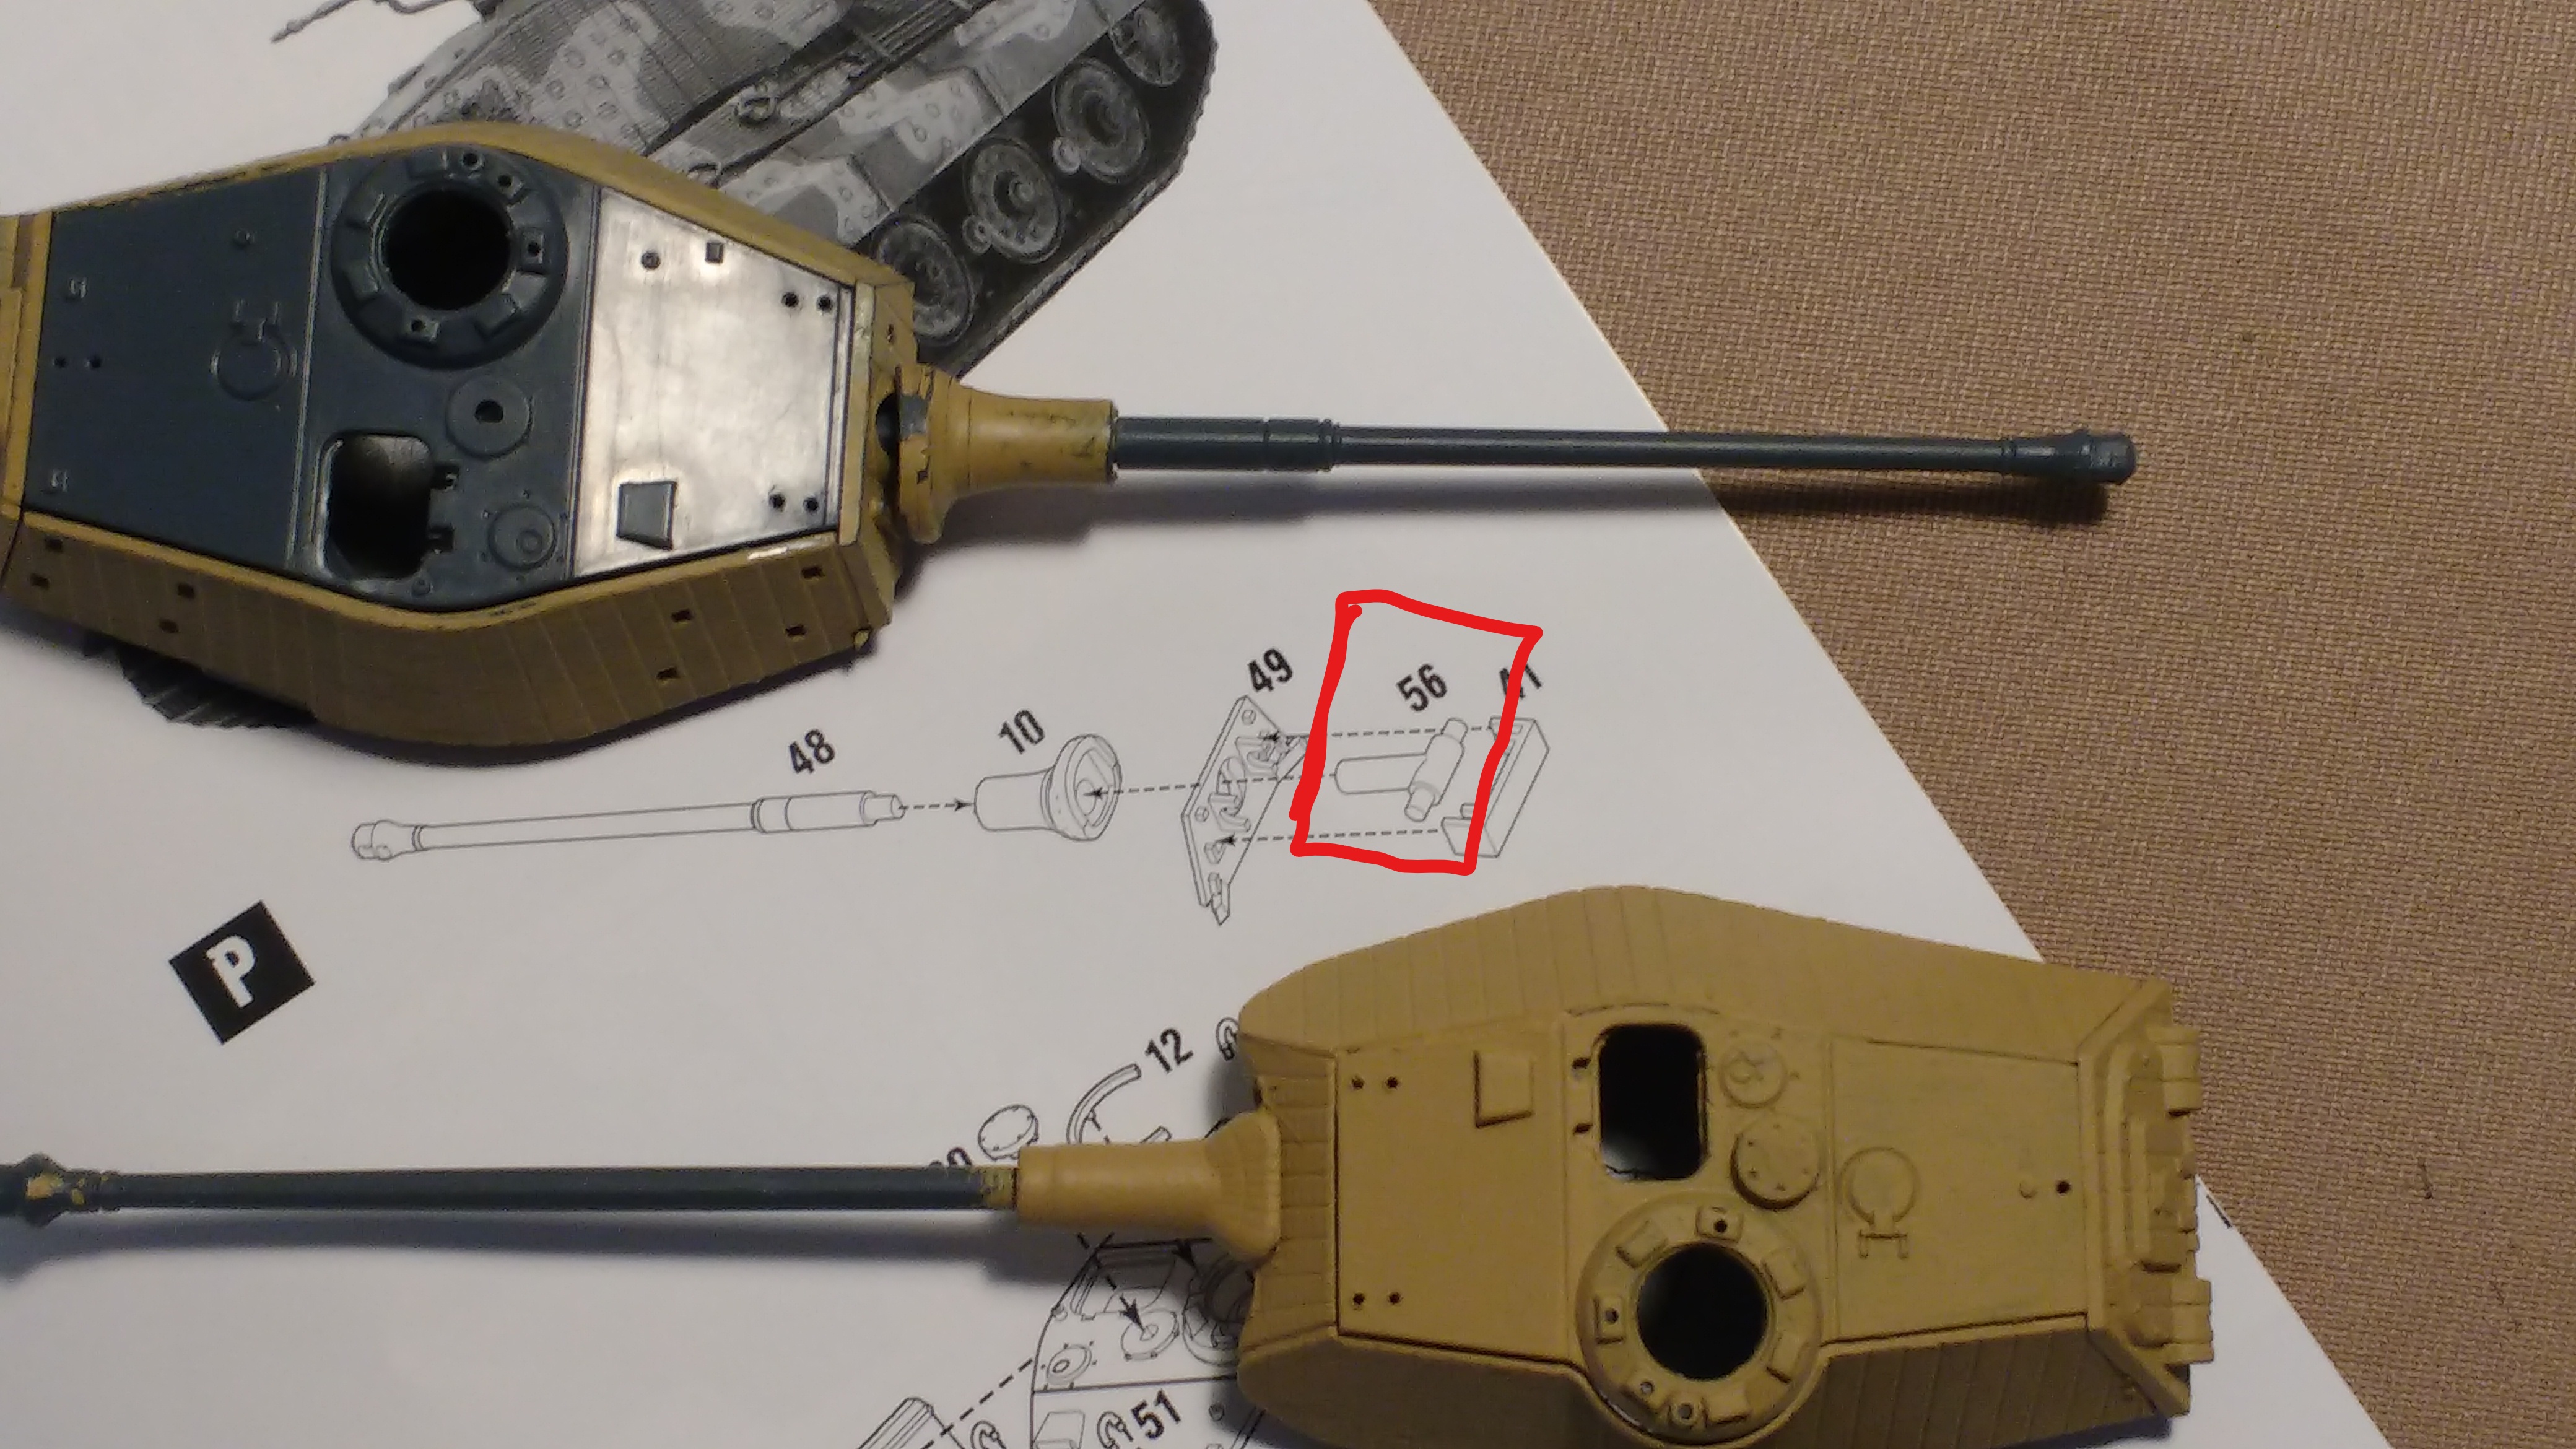
Today I thought I would tackle the production turret ( Henschel ) , what a difference in the build compared to the ” Porsche ” . It has cut outs on each side that almost snap together and rear plate has a nice lip to keep it in place and square . I wonder if different guys designed each turret on the sprue ? I placed the roof on just to keep the sides square while the glue set . While getting the gun barrel ready I noticed you only get one internal gun mount piece , but 2 internal mounts ( cheap sobs lol ) So I made my own .
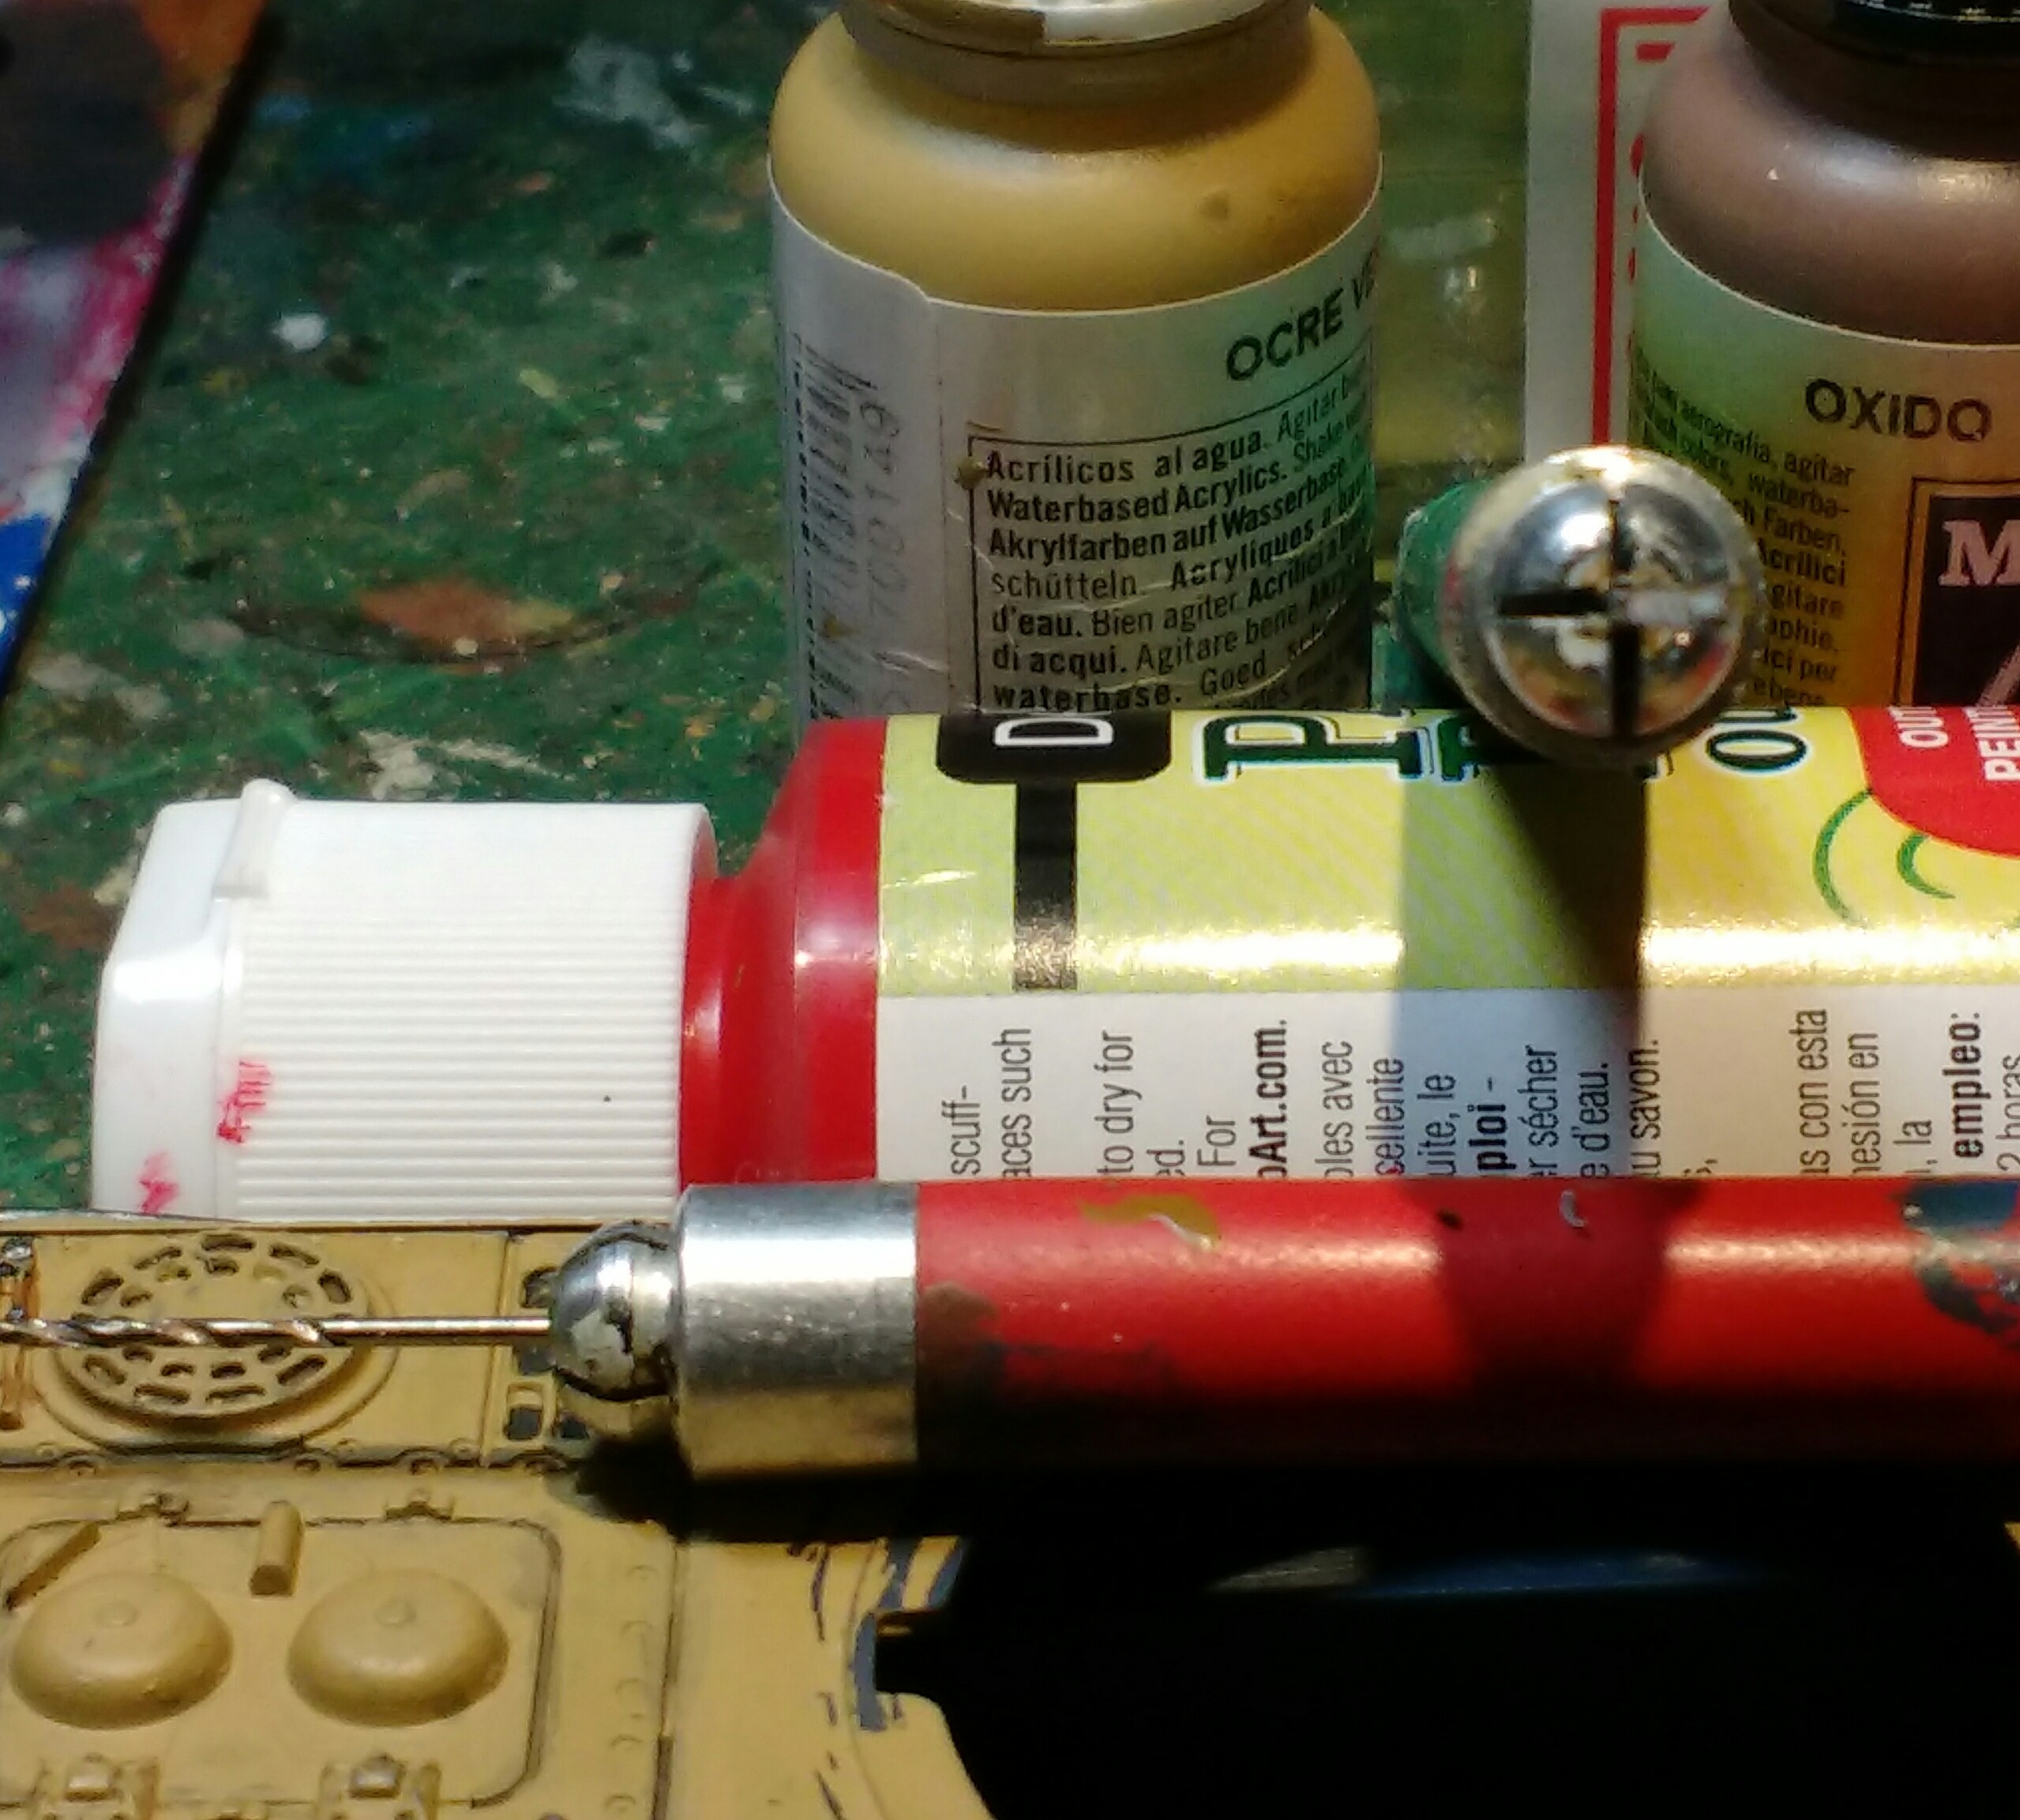
Just a hobby tip for now . Many of us have those mini drill bits to use when drilling out the sights and vision slits on our tanks

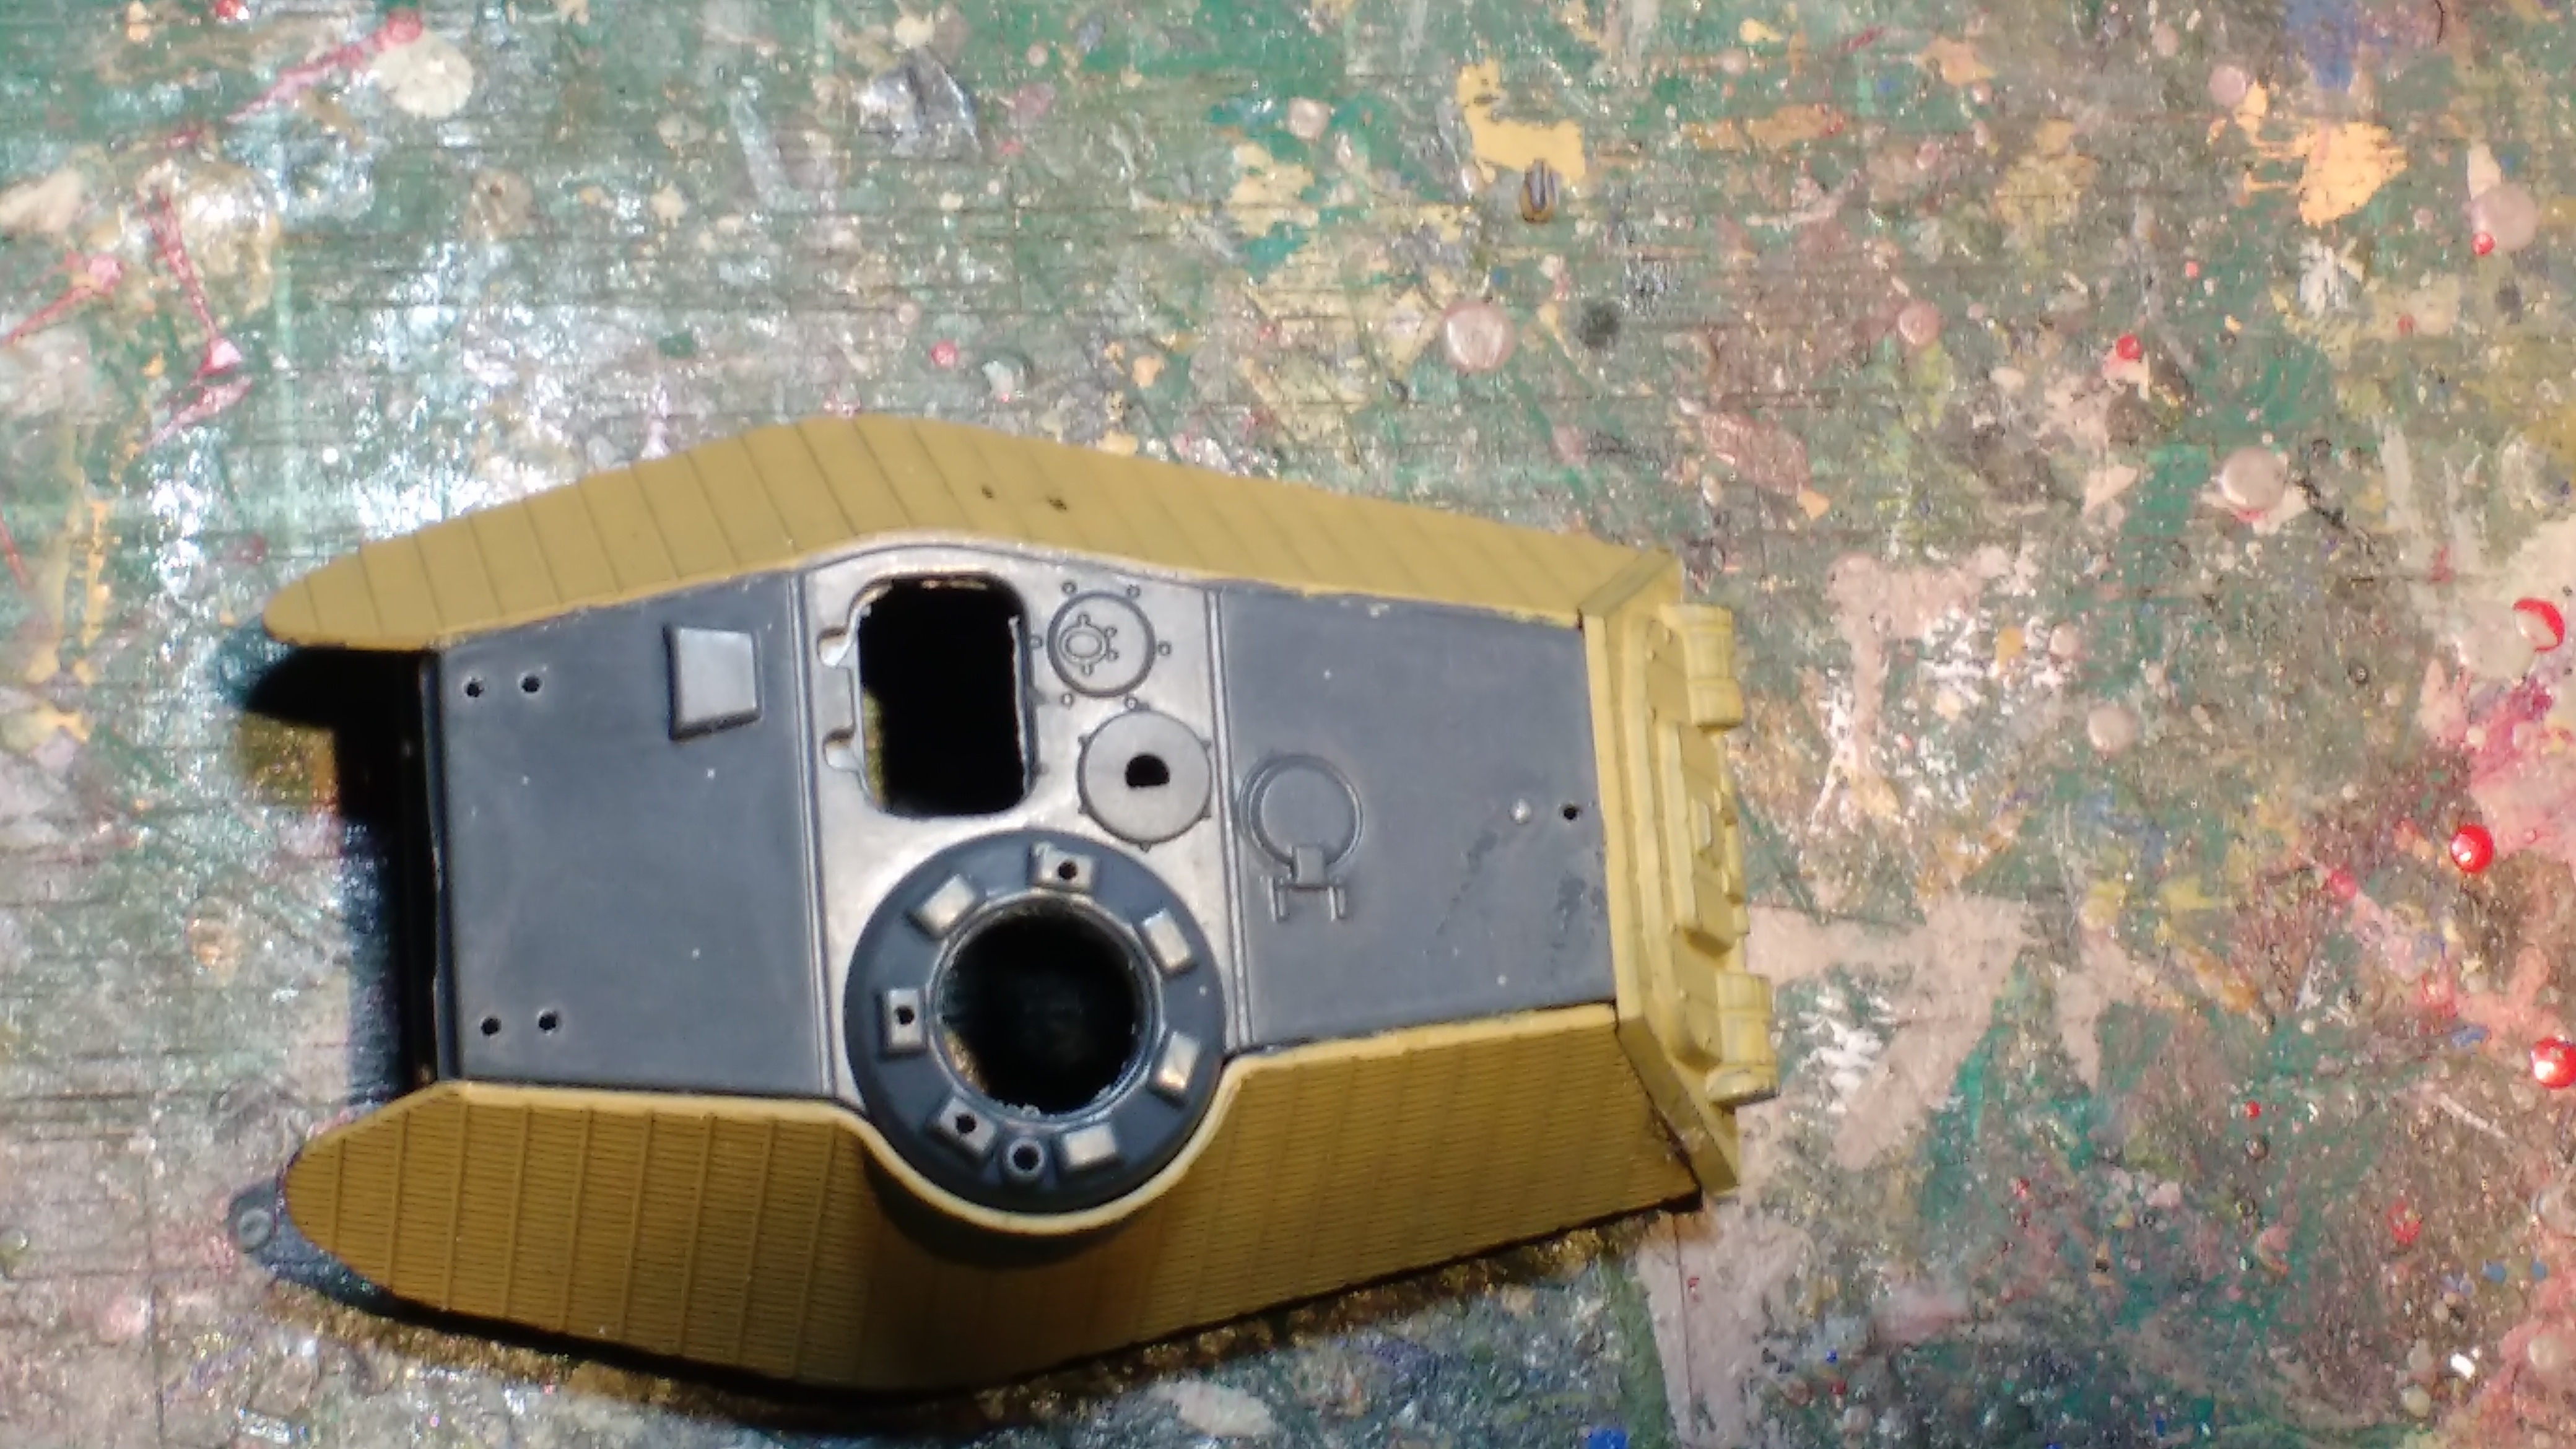
This is my Tiger II with the machine gun slot and sight holes drilled out . I’ve always found it to be a pain switching out those tiny bits if you have to make a variety of small holes . I found an easy solution , instead of a pin vise I use a craft knife handle that has a + shaped jaw . It holds those tiny drills perfectly . The brand name escapes me , but most hobby shops should have something similar and cheap ( about $3 ) , Mine have colored handles , so I keep the bits I use the most ( 1mm , 1.5mm , 2mm ) mounted and ready to go .
Putting aside the hull for now , I started on a “Porsche ” turret . And while some of the BA turrets are two or three piece affairs , the Tiger II turrets ( like the JS III & KV II ) are 6 pieces , And a real PIA to put together unless you have three hands

The problem is there are little or no pins or slot / lip to align the turret sides , rear and roof . Very much add glue to all pieces and hold together gingerly till it sets . Once set ,it looks great , just make sure you have a free hour or so to get this done right . The kit gives you the option of 2 turrets , but you only get one commader’s hatch , AA machine gun rail and turret fan cover . I found the extra pieces I need in the parts box left over from a Rubicon Tiger , so I can end up with 3 hulls and 4 complete turrets from this Tiger Zug box .

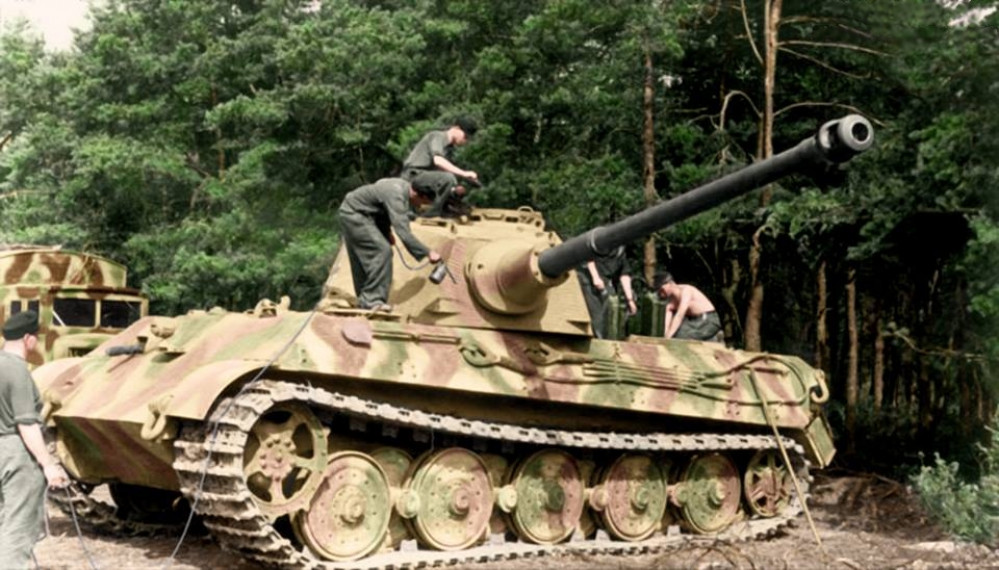
The initial “Porche ” turrets had a pistol port on both sides of the turret as well as a ” communication ” hatch much like the early Panther D on the left side . These were welded closed fairly early in production and then deleted altogether . Also , spare track links were not mounted on production ” Porsche ” turrets , a refit in late “44 added them to the 3 or 4 remaining tanks of this type , so if you want an accurate model , do your research . P turreted tanks were seen with track on the turret roof of wedged between the exhaust pipes
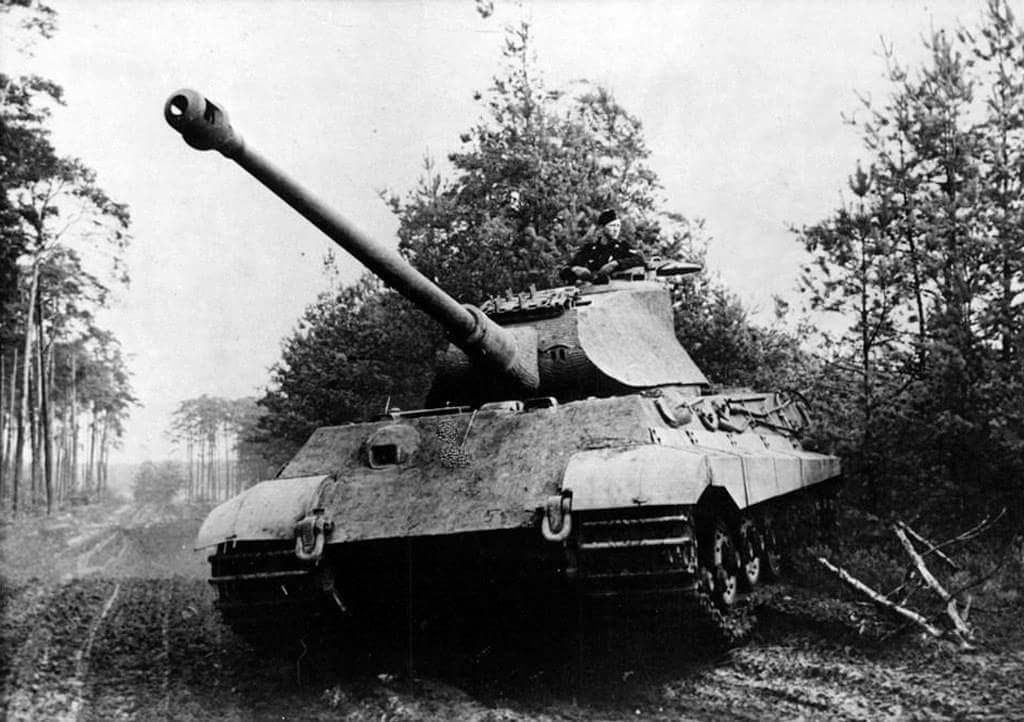
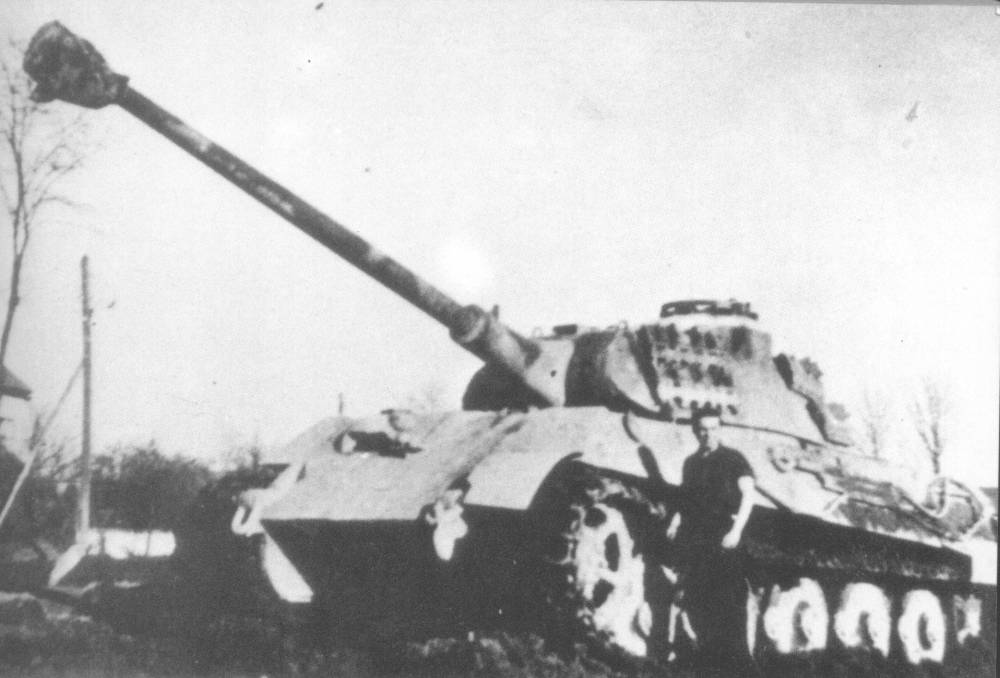
So lots of little things to consider before I finish this turret . Weather or not to add the pistol ports , as well do I add the track links on the turret sides ( all Eastern front units ) or build a Normandy Tiger ( with ports ? ), And still need to find a decent crew …
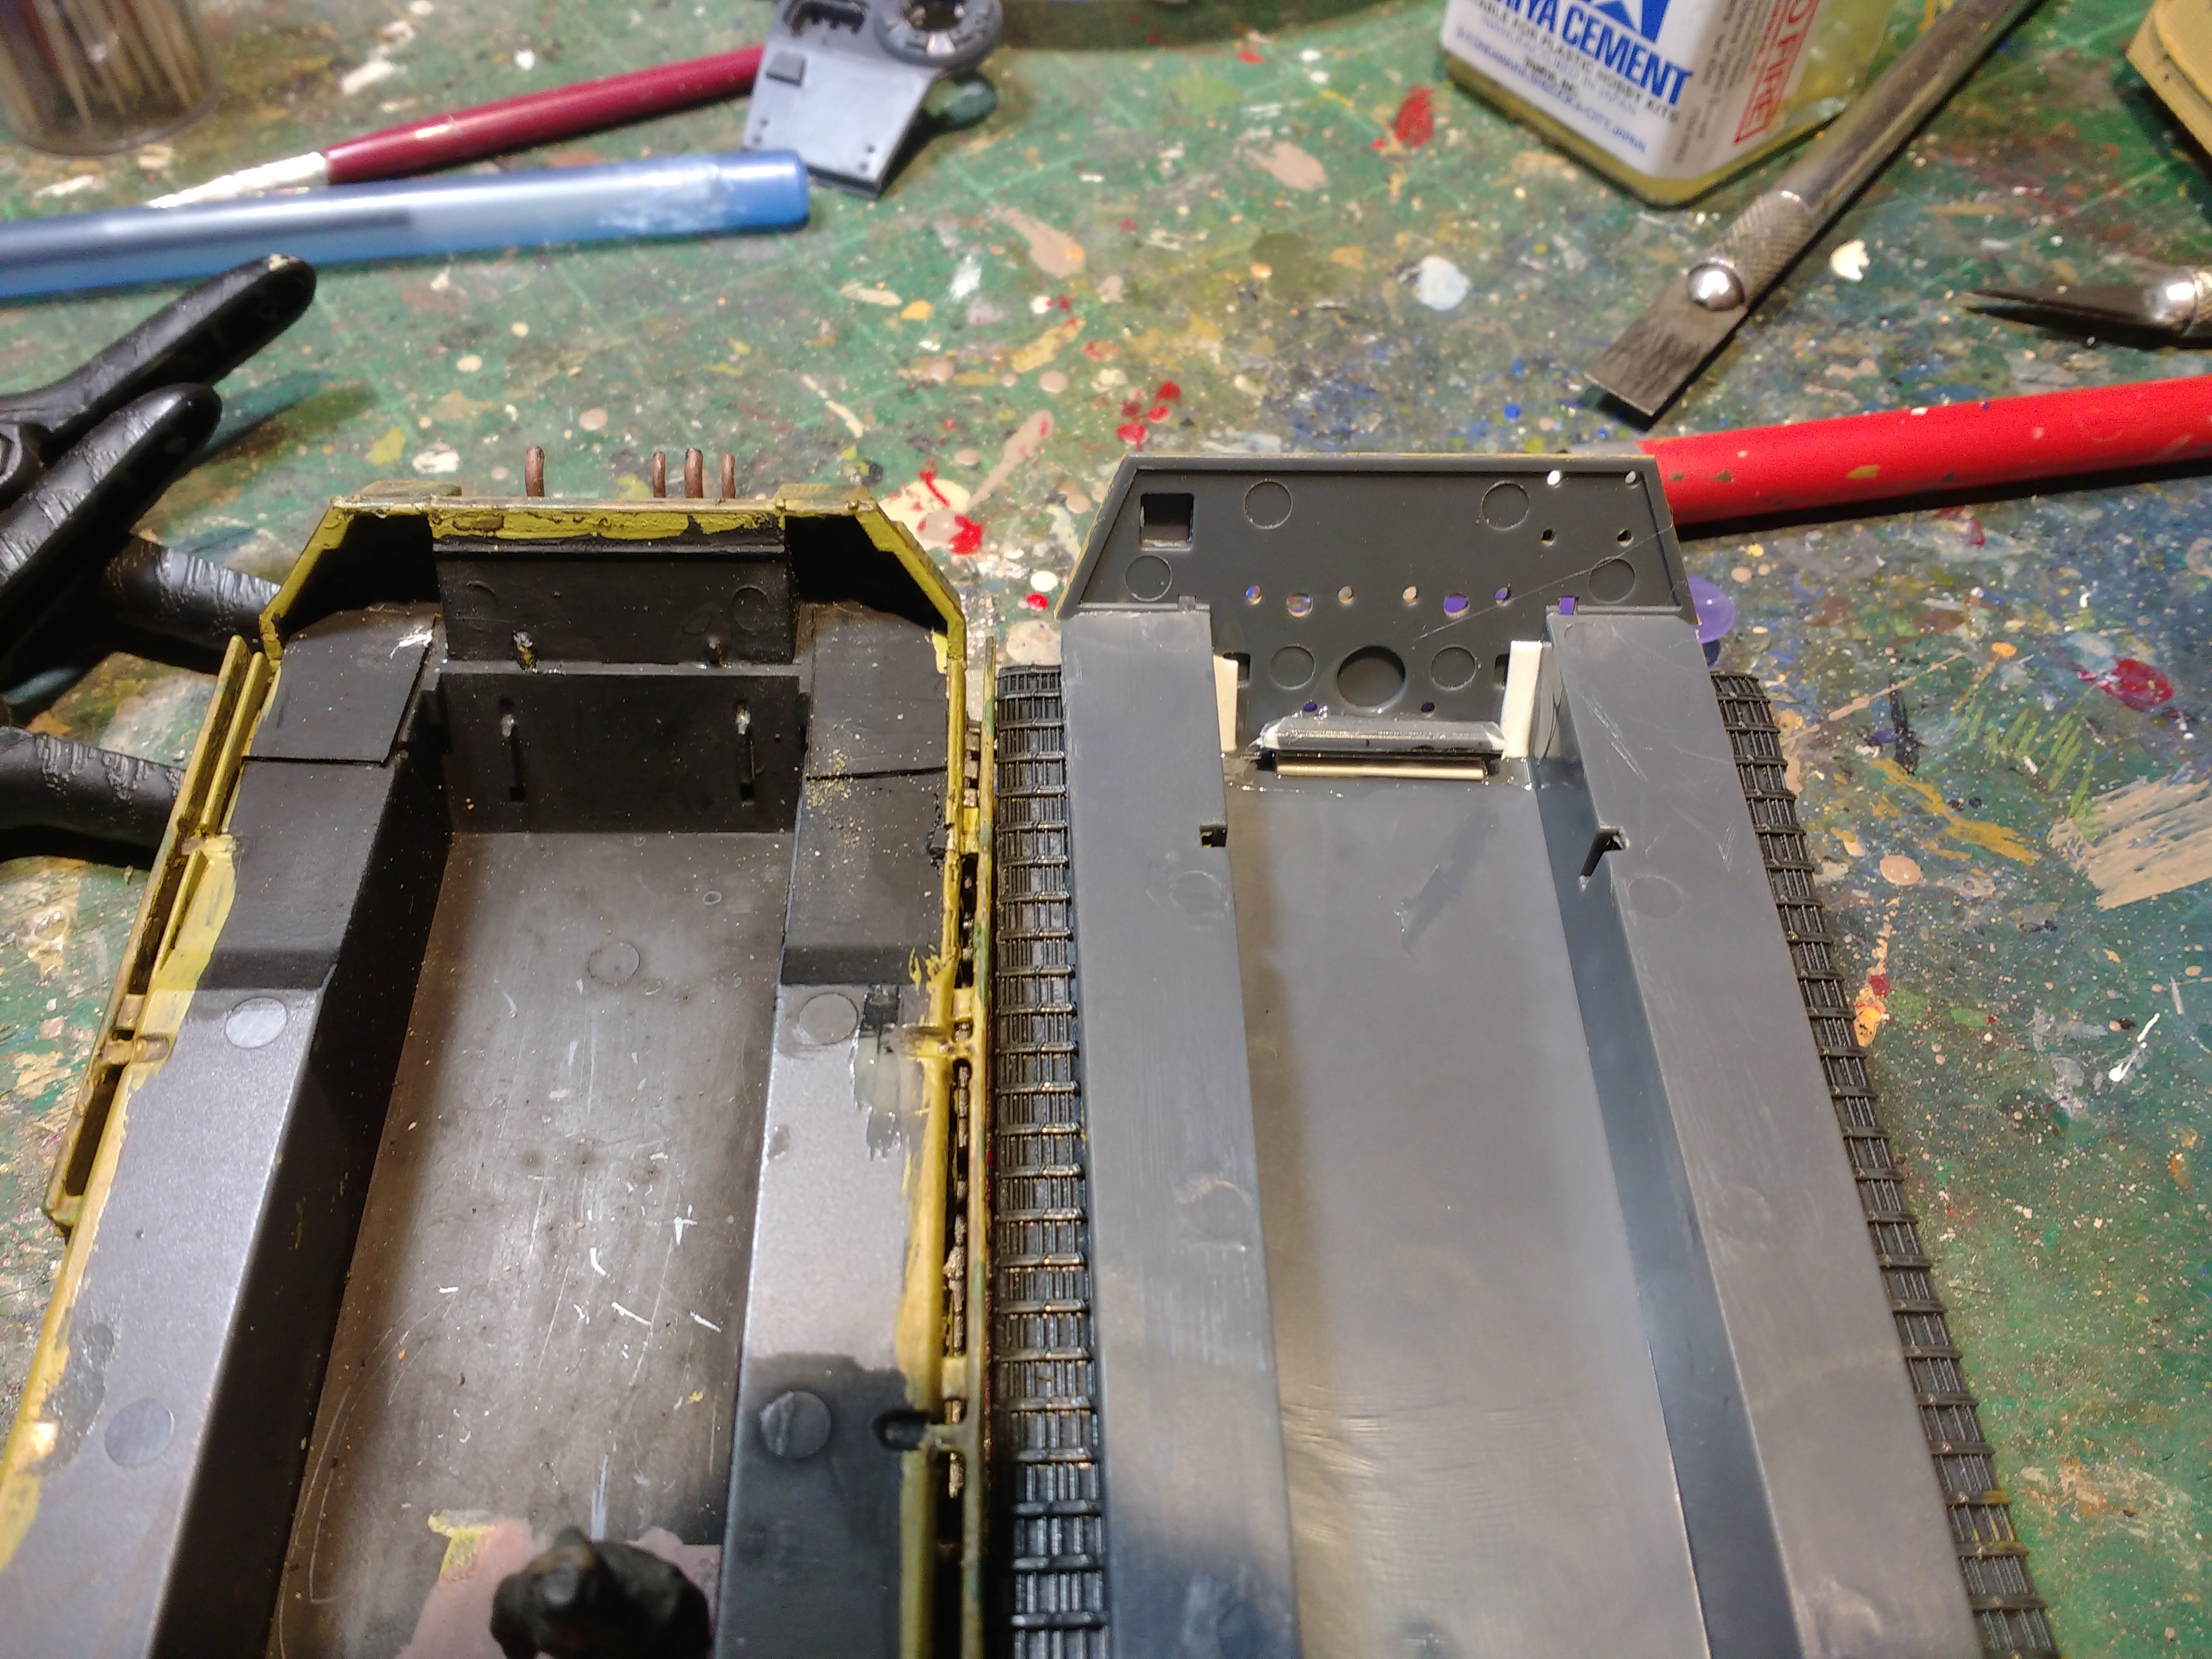
I’m so used to buiding tank kits that I just do stuff , without even realizing it . I had to add some pieces of plastic to the inside of the rear hull plate to get a larger surface to glue to . Unlike the panther ( on left ) there isn’t much thickness to the side walls and no pins or slots to lock the parts together . Panther interior painted black because it has see through engine deck grills , the Tiger II does not
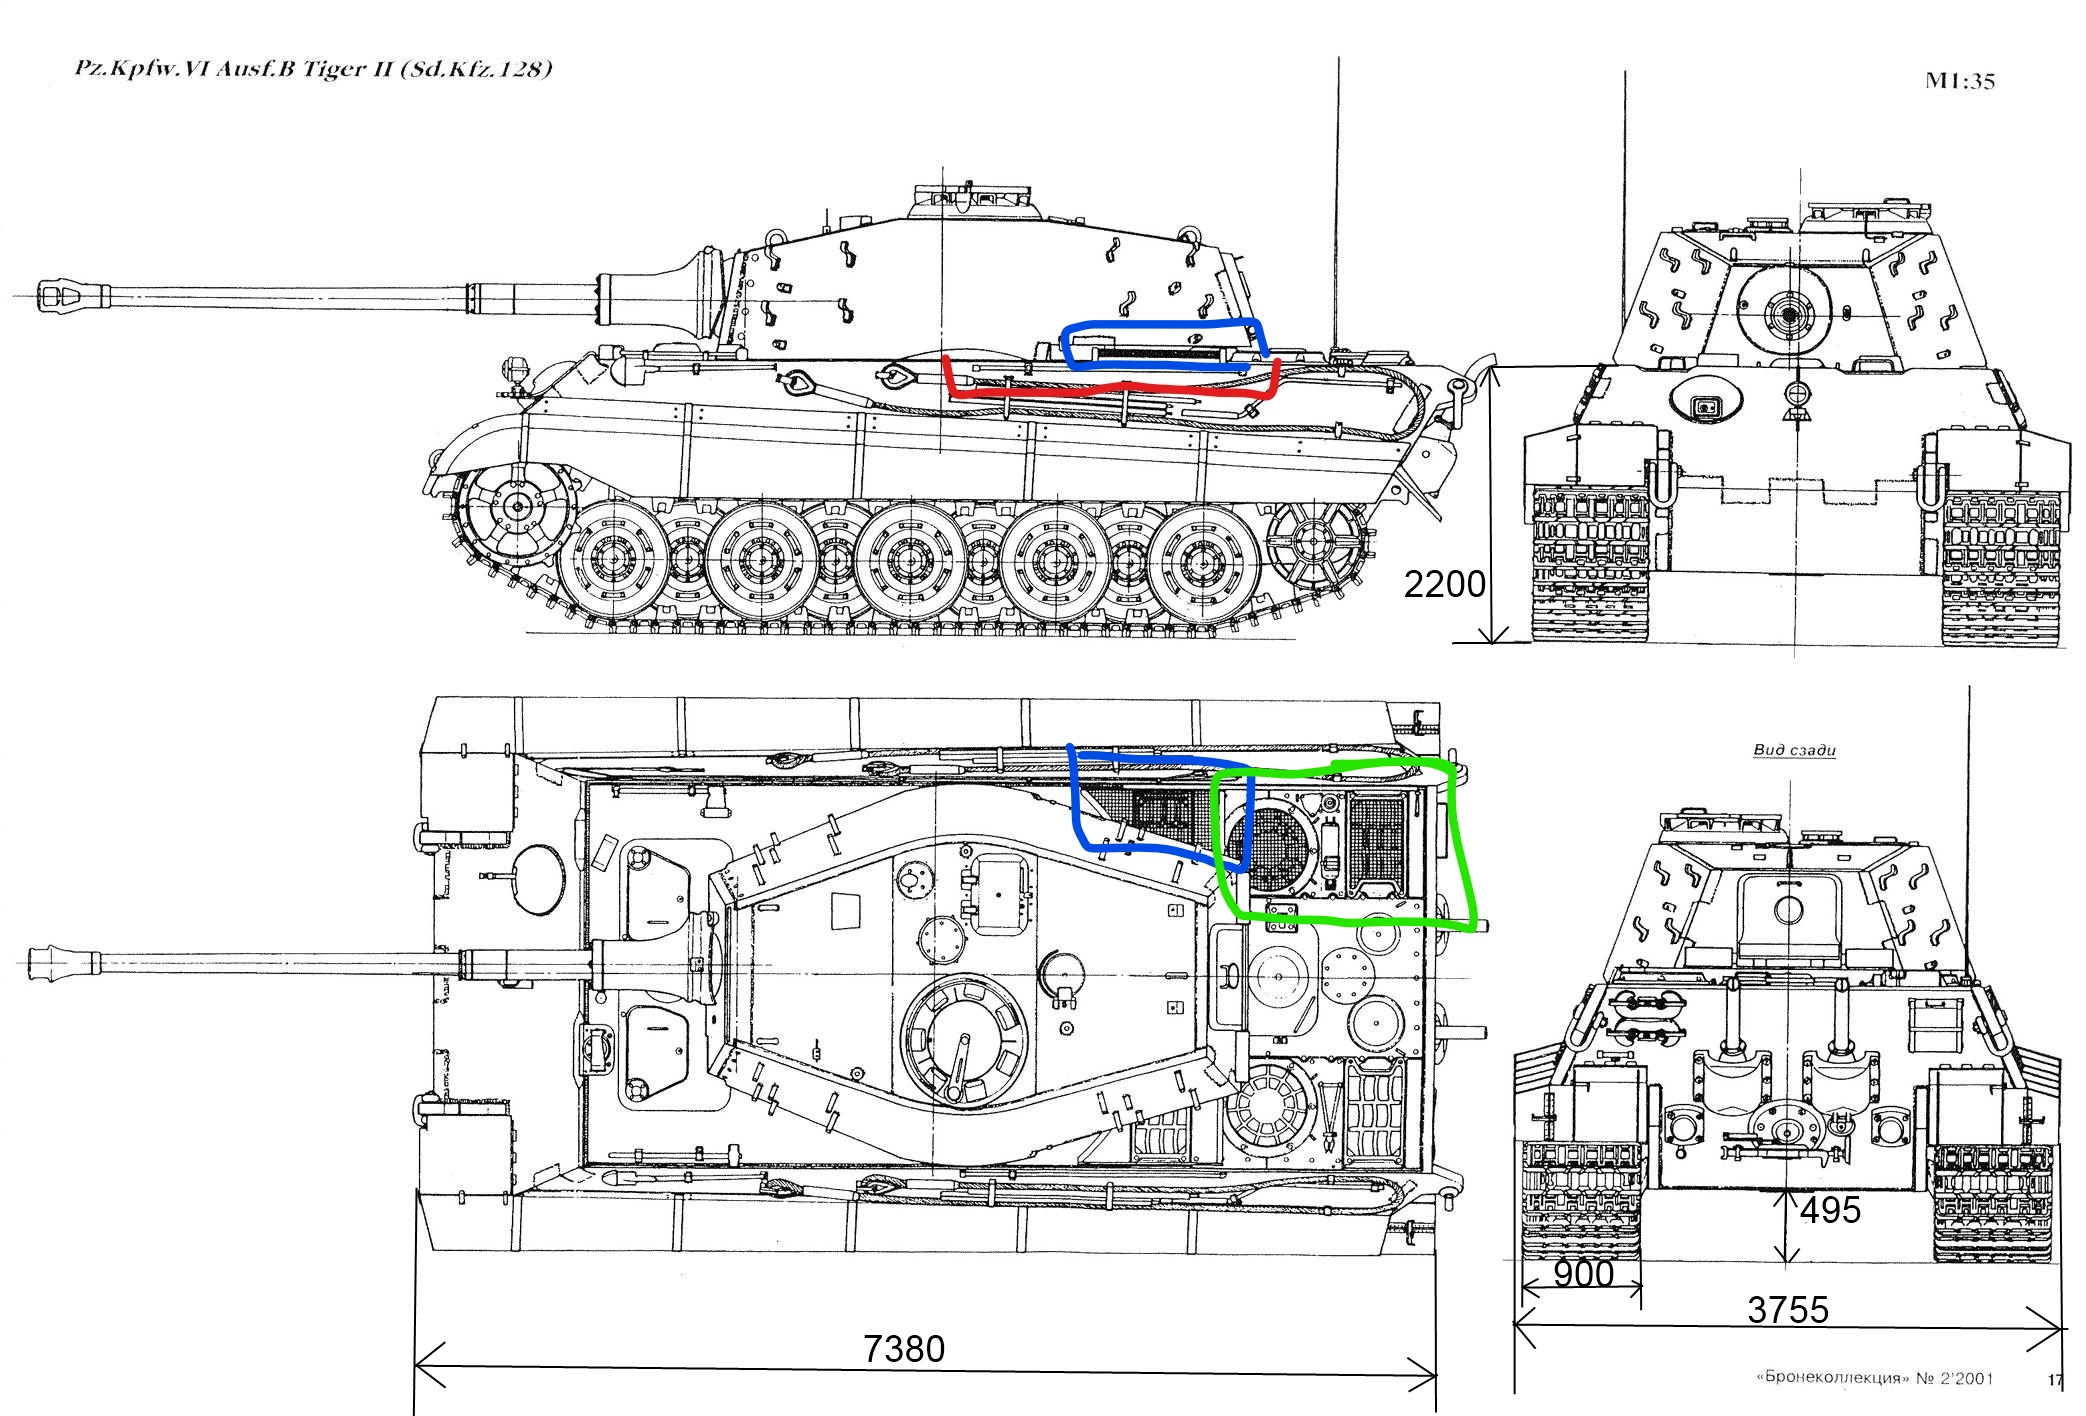
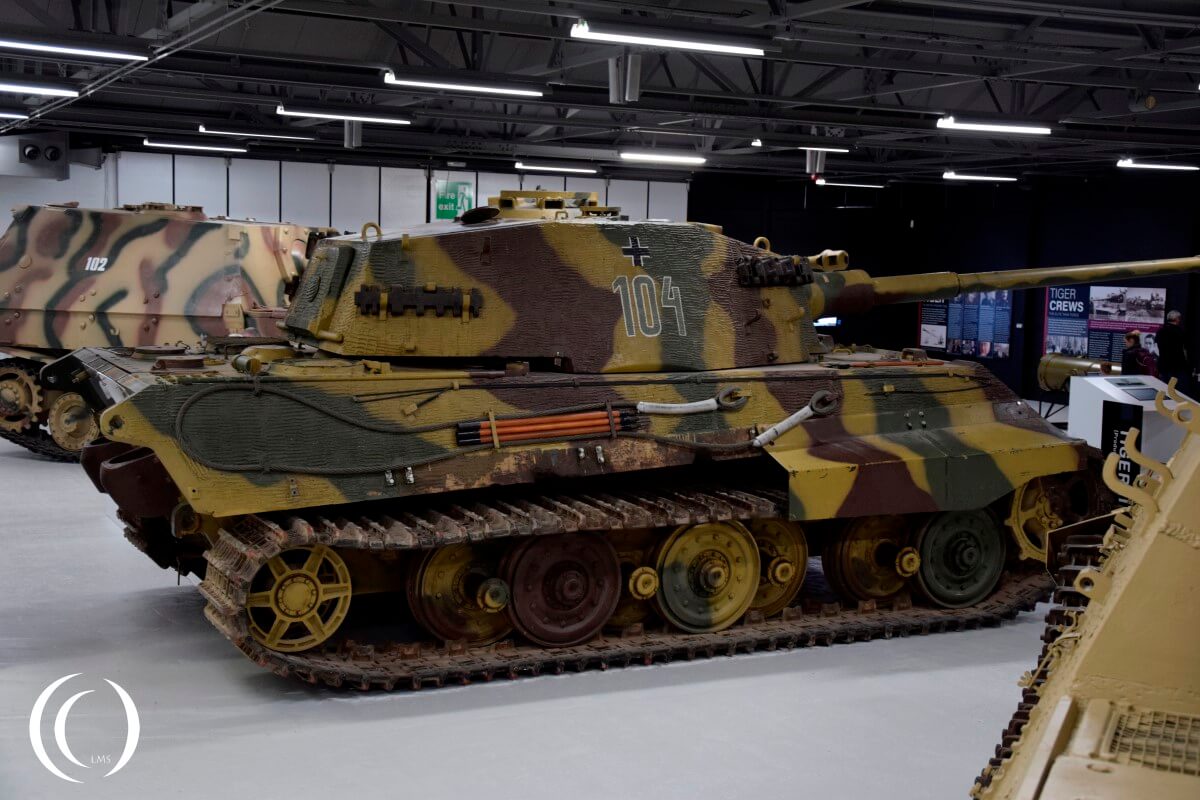
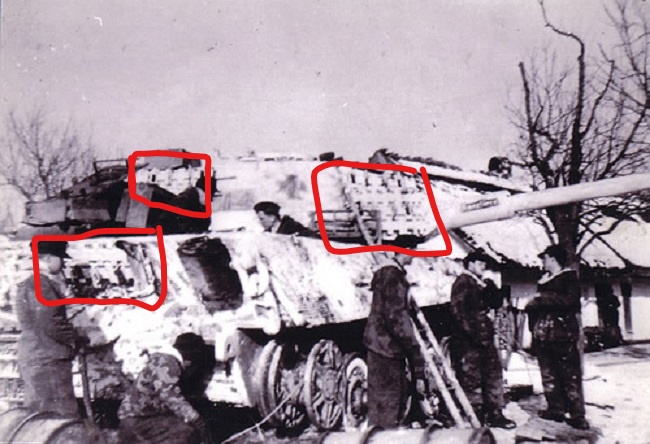
The red line is the pry bar , Also to be added ( maybe ) green lines – engine screens , added to keep leaves and crap out of the engine / cooling fans . Blue line ( under the turret overhang ) – is an anti grenade screen , to keep grenades and mines which could unseat the turret out from under the turret rear ( which was also full of 88mm ammo – boom ! ) Also needing to be added is a tube for caring a spare radio antenna , on the right rear deck edge
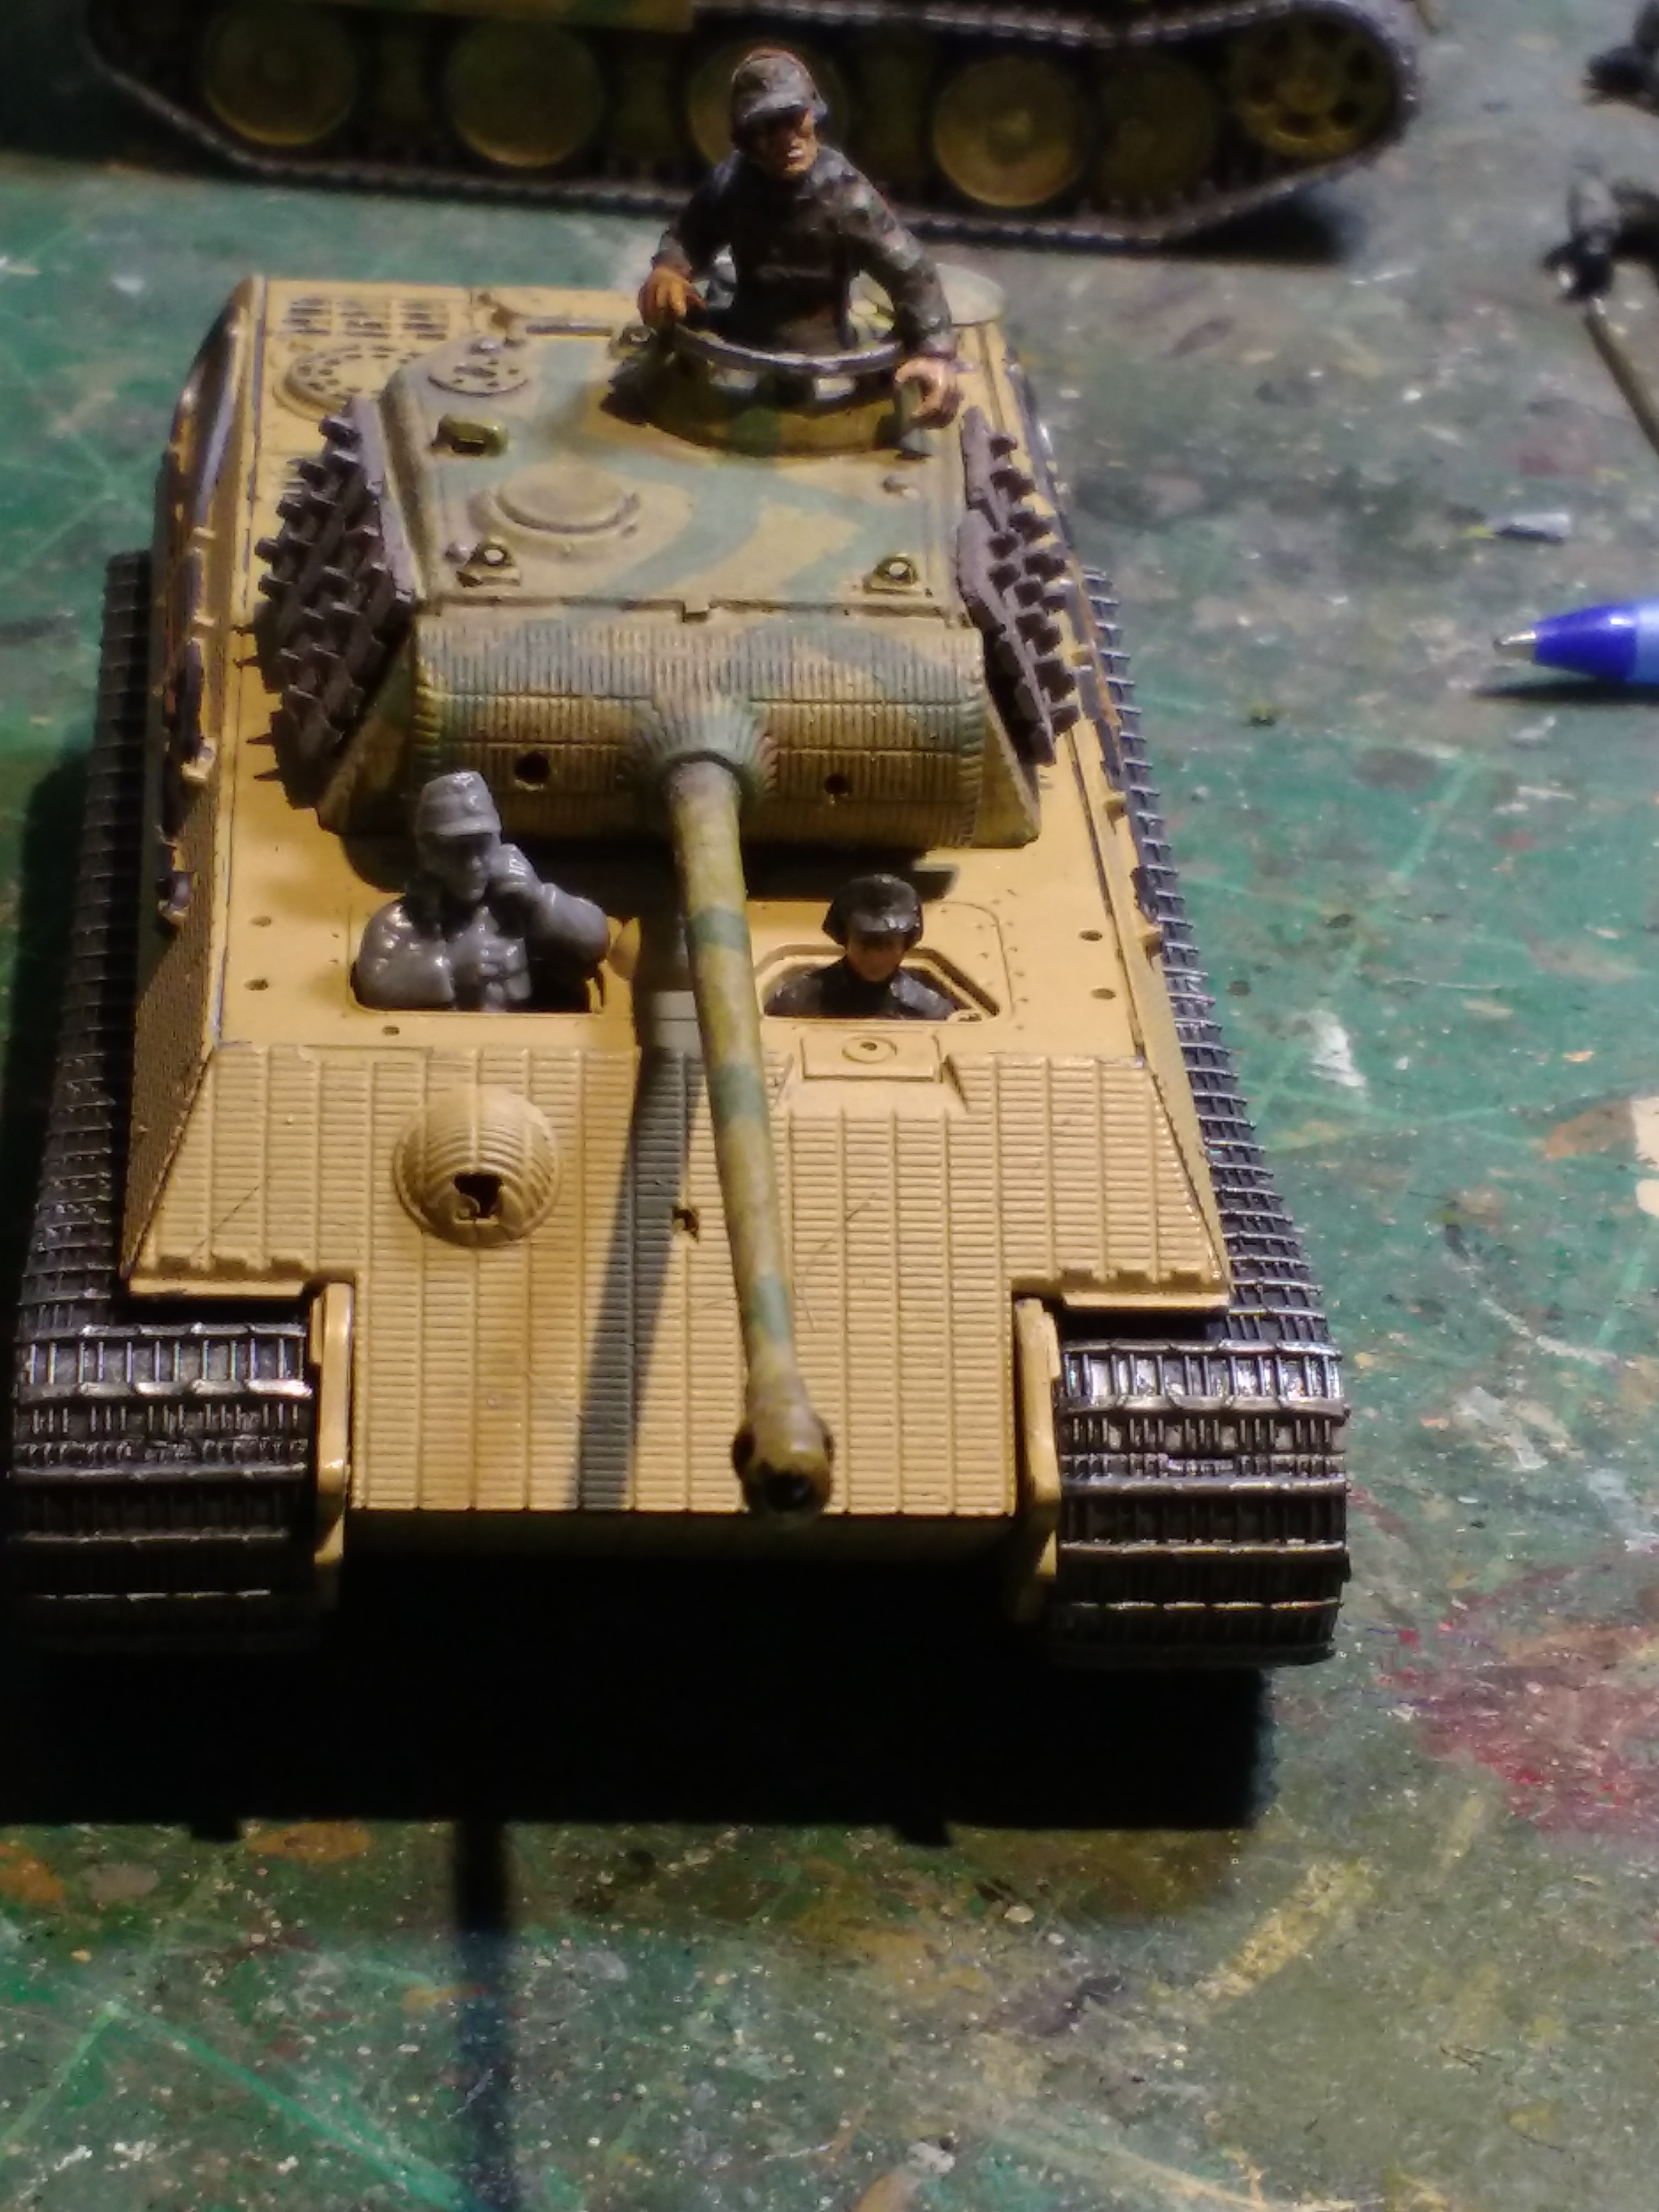
Idea for hull crew with Panther turret added for effect . I’m hoping Rubicon release their plastic tank crew later this summer as I’m really not liking the BA / Italeri figures in my parts box
Let look at what needs to be added to the hull . The kit has nicely molded on tow cables , gun cleaning rods and a engine crank on the left hand side . Separate tools are a shovel ( 2 provided in kit ) , Sledge hammer and axe , a pair of wire cutters are molded on engine deck ( note , handles are coated in a bakelite type substance so should be an orange / red brown color not steel ! ) Missing tools are a large pry bar on the driver;s side and the long thin track cable on the bow gunner’s side , The pry bar is an easy fix , bits box or plastruct rod , the track cable , I think mine might end up lost in combat .


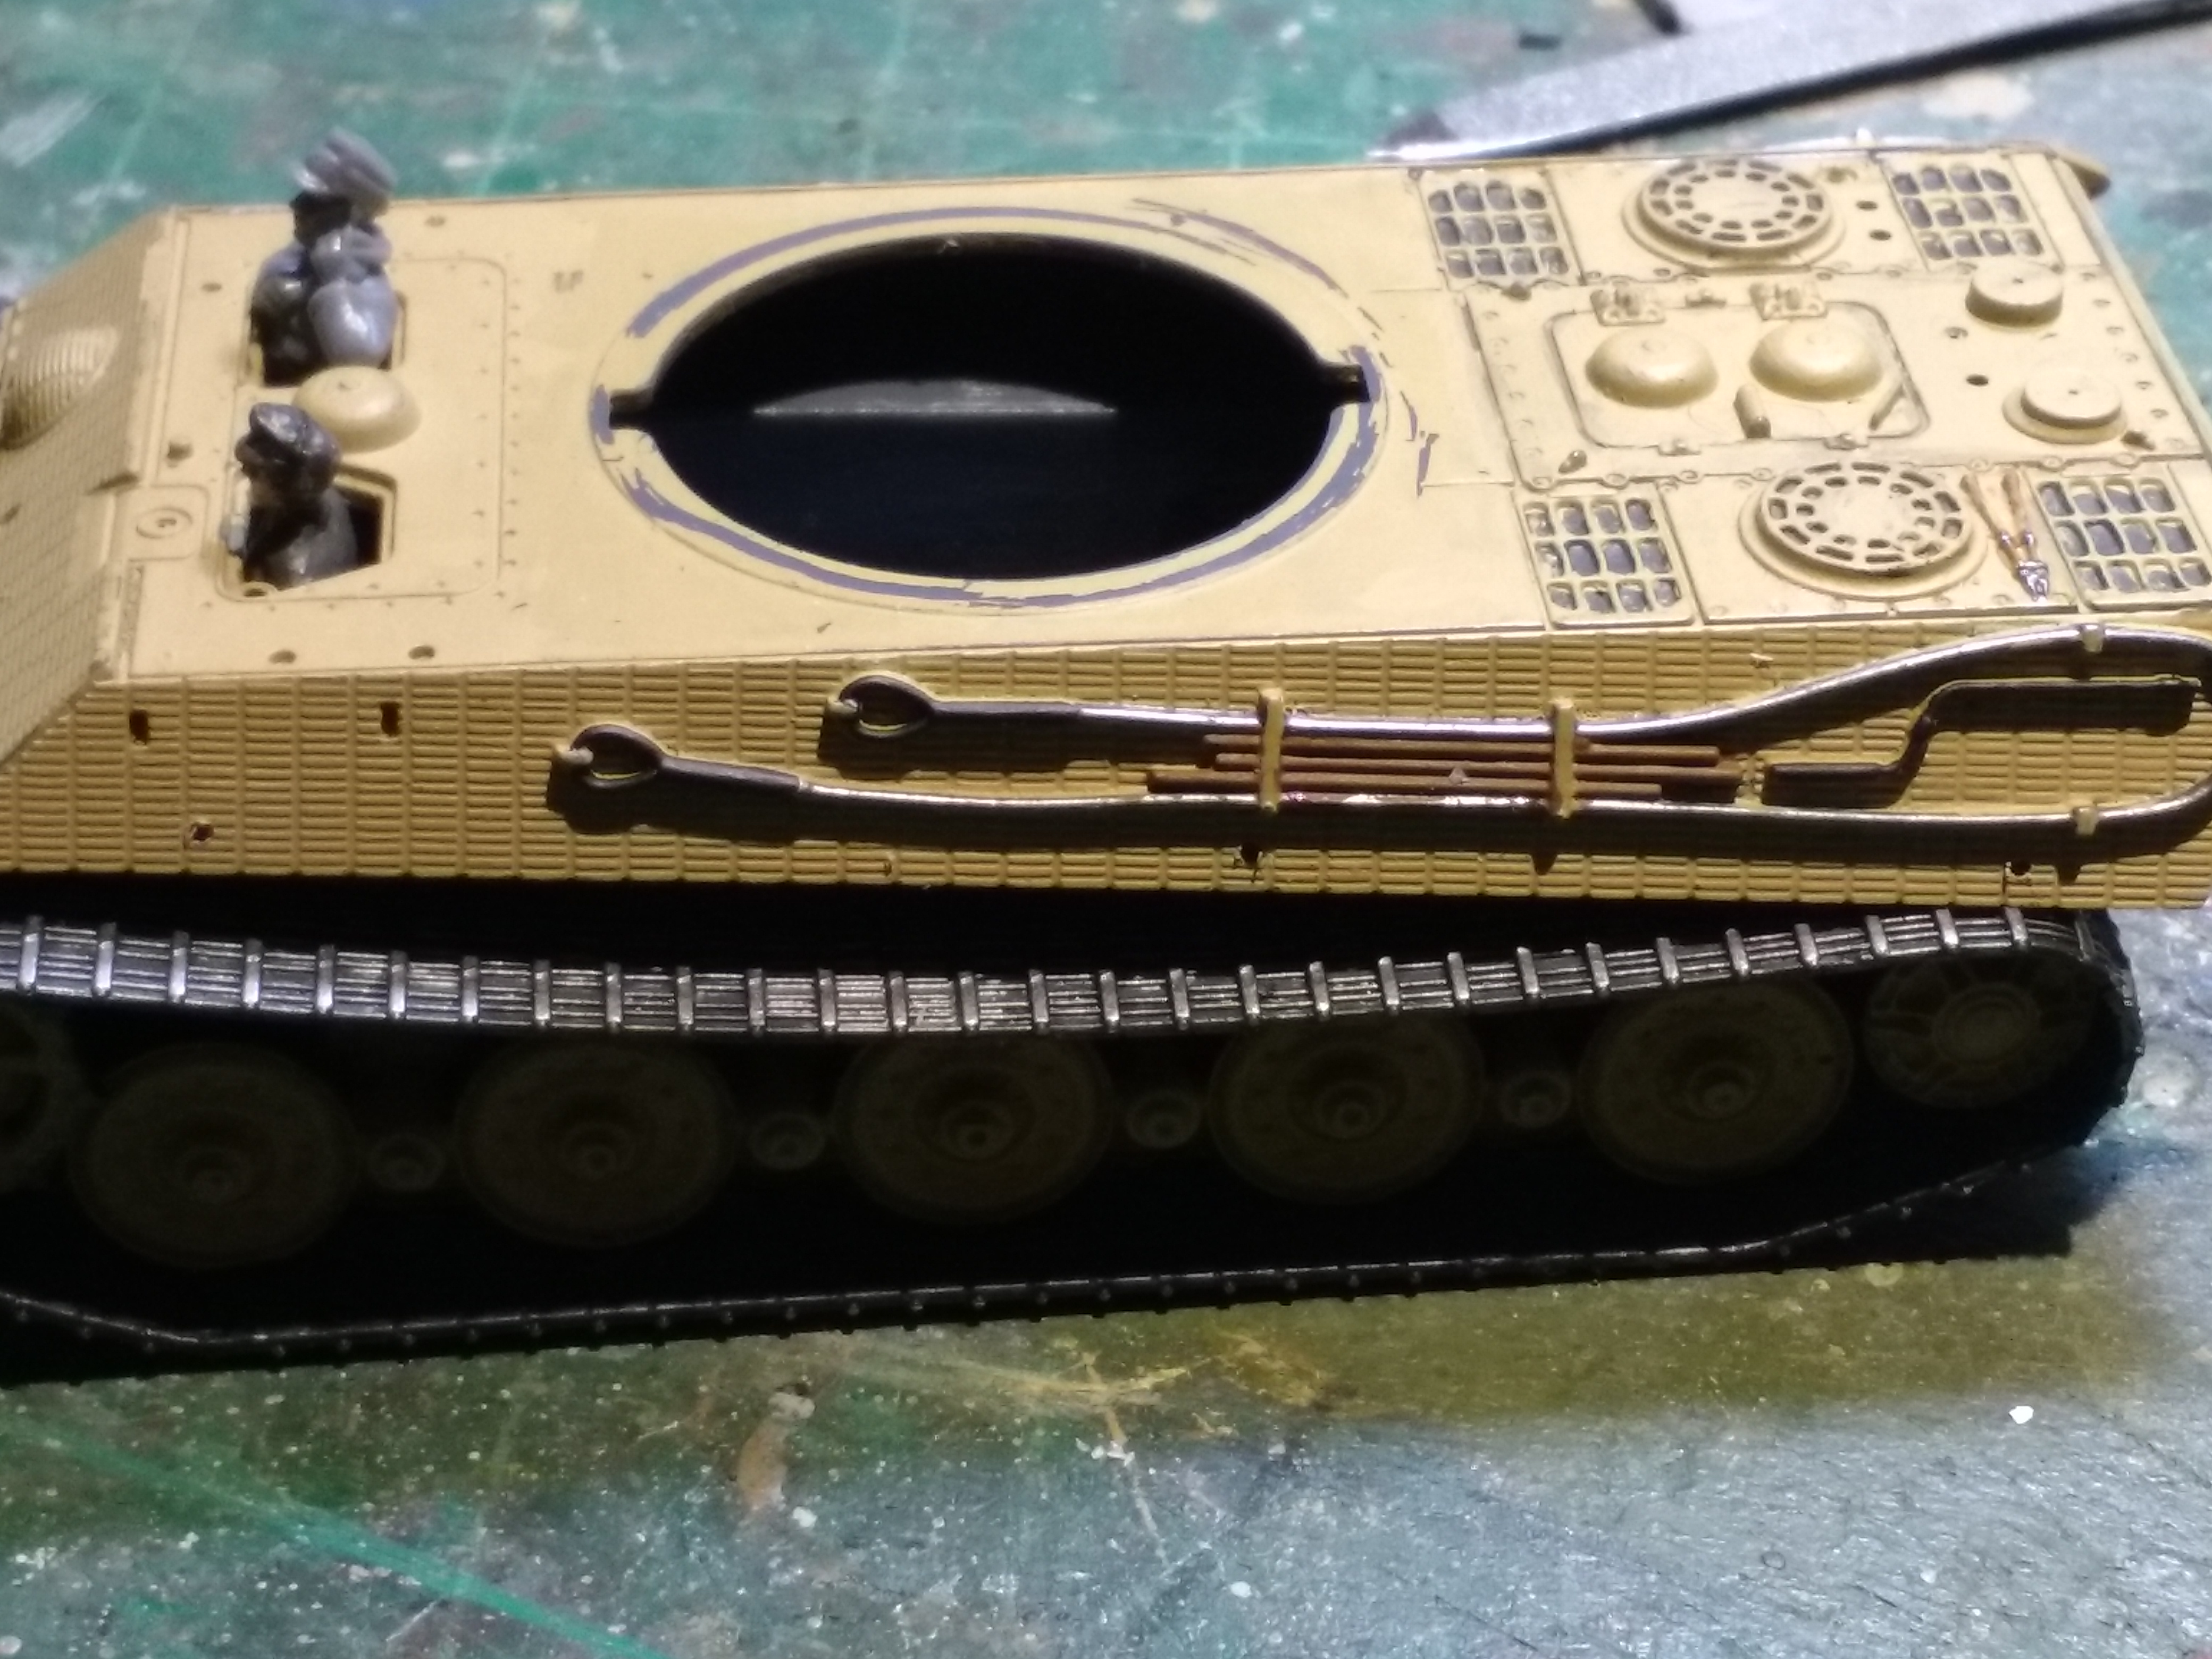
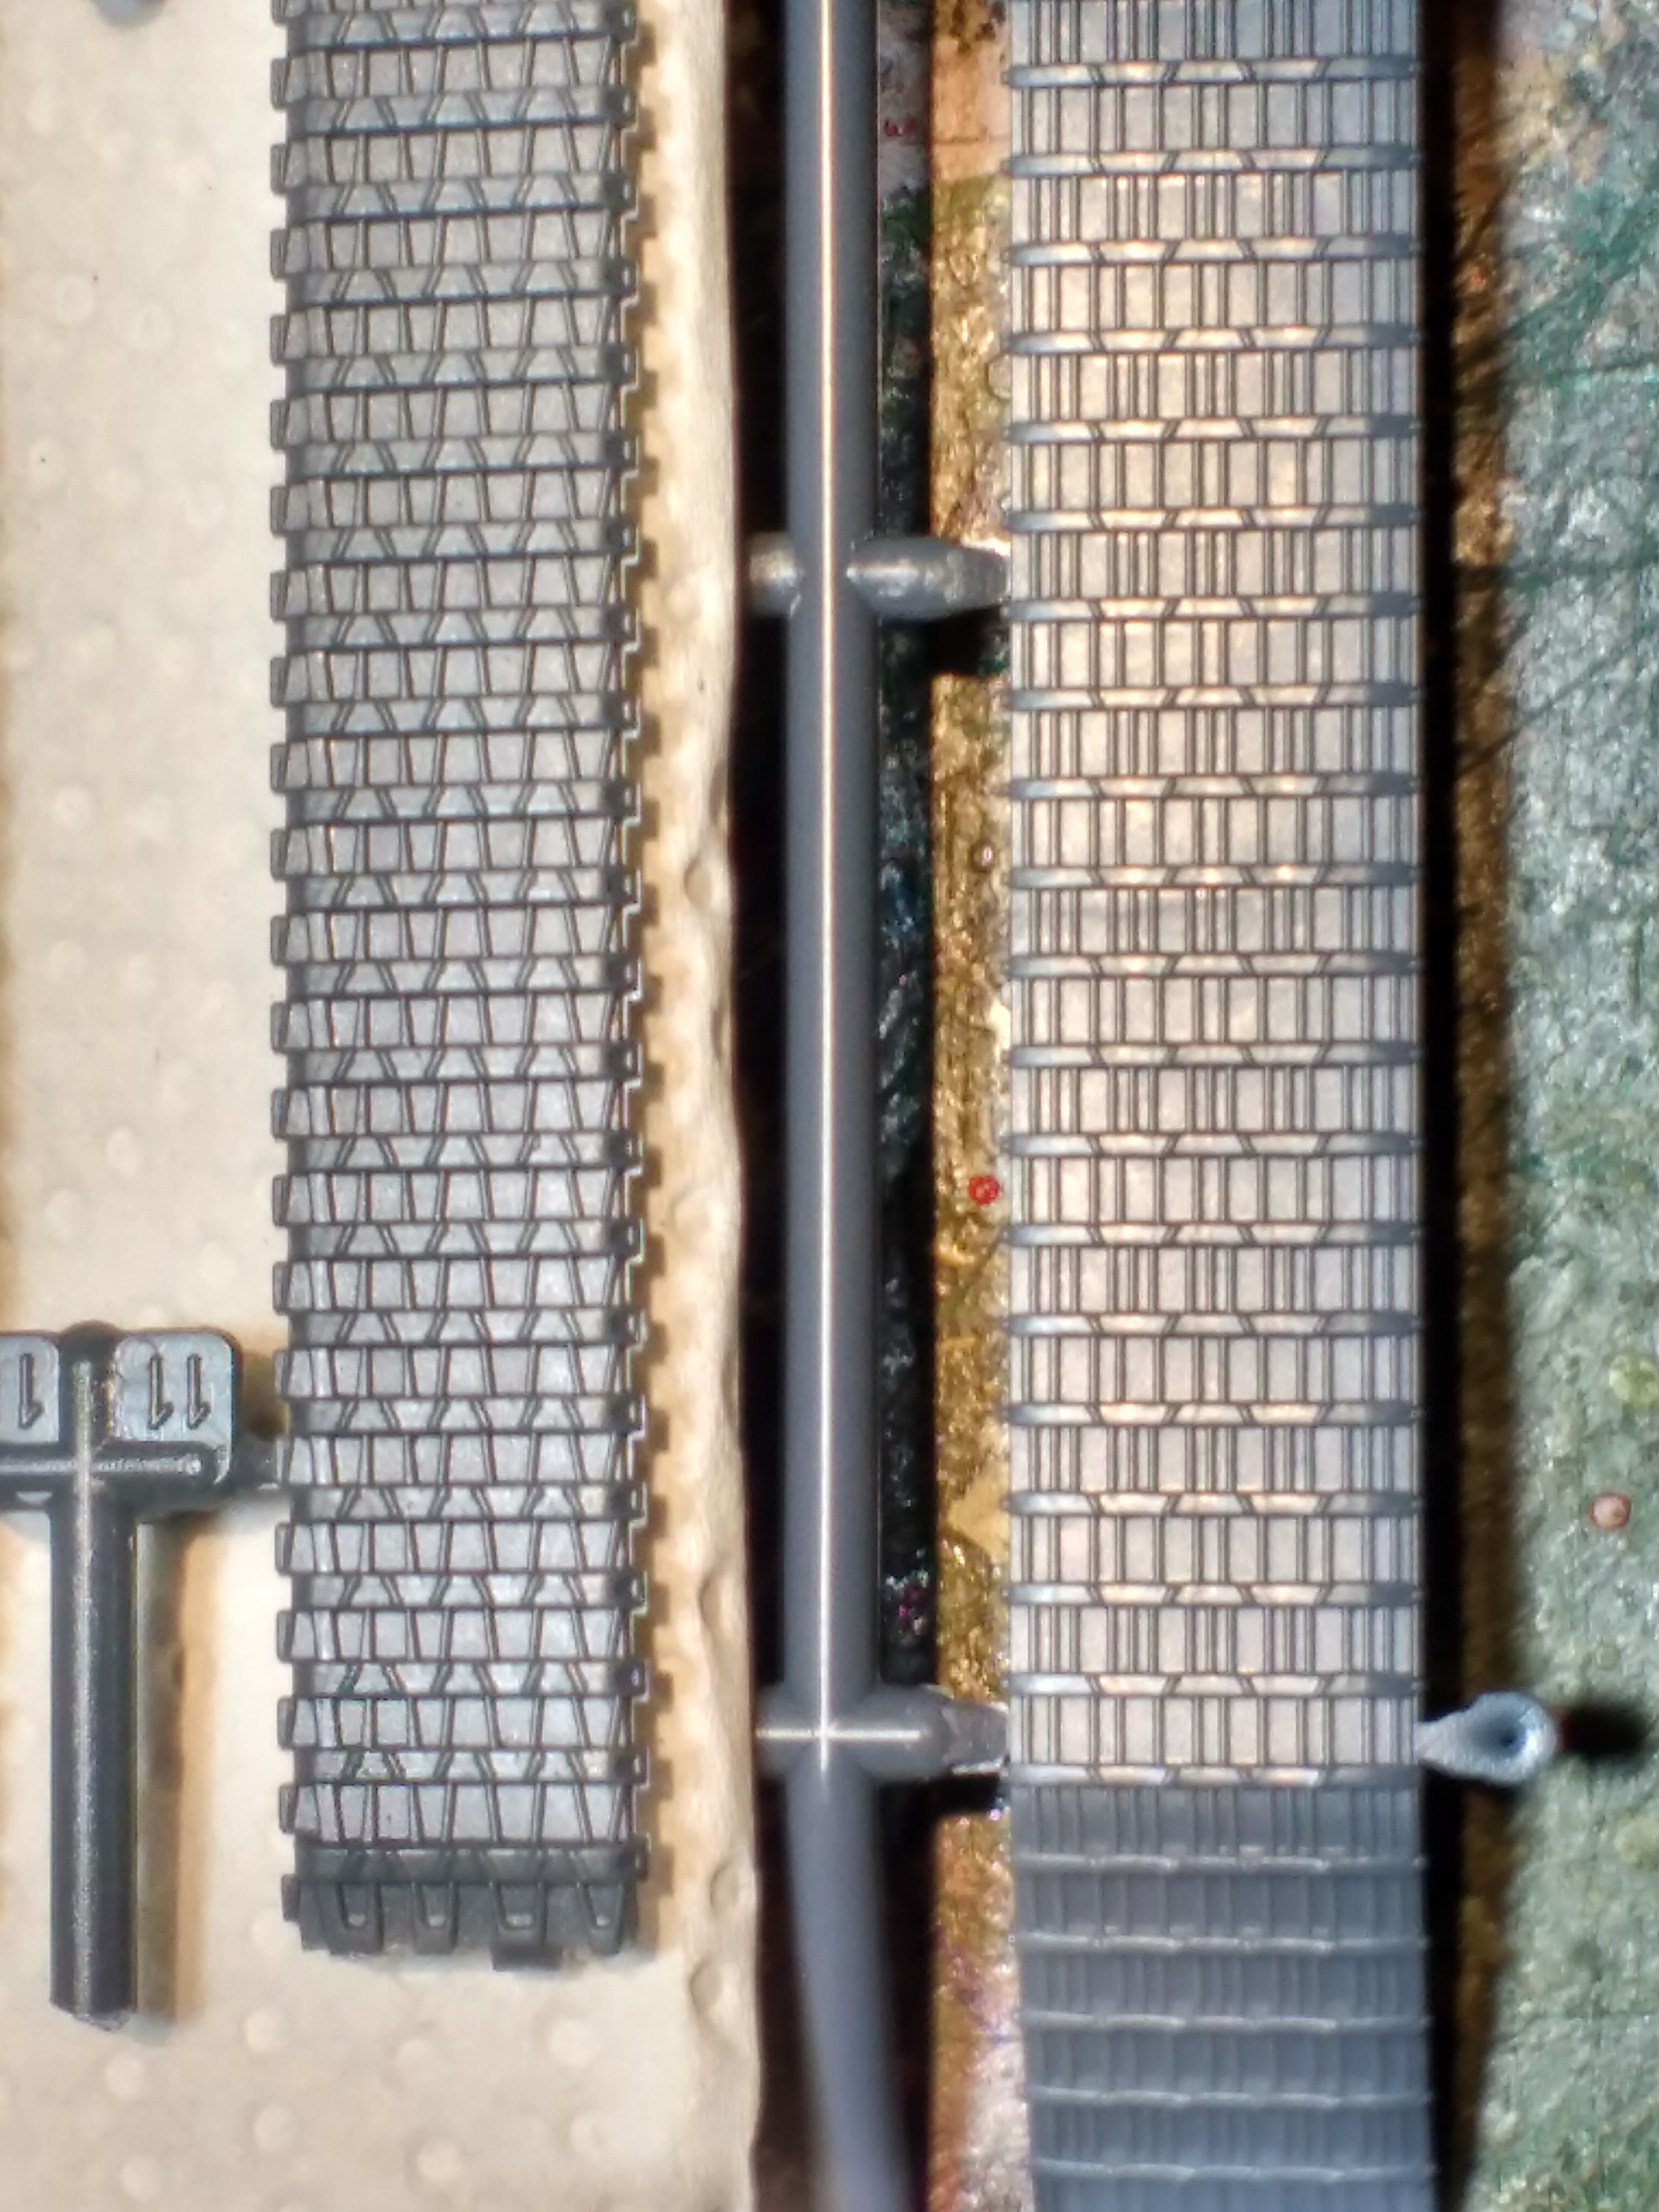
Short Kit Review : it looks like a Tiger II lol . Not a bad kit really , your typical compromise of game piece / scale model . The molded on details such as tools and tow cables are nicely done with a little more depth to them than the Panther giving them a better 3D look . On this kit the C hooks are separate pieces which is nice , again the ones on the Panther were terrible flat looking things . IMO it would have been better to have add on tow cables , more diorama potential , but as a game piece I understand the need to simplify . And having removed the molded on cables on the Panther I don’t relish the amount of work to fix the zimmerit with green stuff if I tackle the ones here . Nice that spare track for the turret sides are add ons , you can actually build to suit whichever photo you use as inspiration . The Tiger I had its spare track molded on , a real PIA to remove and you had to fix the zim , fun times . It looks like they have finally perfected the 4 piece track system , nice tight fit with no join lines visible . Other kits , the Tiger / Panther / JS II , etc were a struggle at times to with some trimming and sanding involved to make it look good . BUT , they seem to have made the track a little flat with low relief detail , not what Tiger II track looks like IMO , hopefully a wash will bring out the detail , if not there is always mud . Here’s a photo of the track , Tiger I on the left , Tiger II on the right . What do you think ?