


Head over Heels – Dungeonalia entry


Recommendations: 261
About the Project
A while ago I suggested that since my remake of Laser Squad had stalled, and having seen the excelled Crooked Staff modular room-based gaming terrain, I might attempt a remake of a room-based dungeon crawler, like the 80s video game Head over Heels. Then someone else said making ZX Spectrum games into tabletop games was an awesome idea and suggested Ghosts n' Goblins, and things got a bit sidetracked for a while. Then Dungeonalia popped up and I wasn't going to bother. But the given the first level of Head over Heels is literally set in a dungeon, I figured it was too goo an opportunity to miss. So as part of the Dungeonalia campaign, I'm having a go at making a tabletop game - a modular, room-based dungeon-crawler, loosely based on the classic Head over Heels. This will include game rules, modular terrain, characters and gaming cards. Fingers crossed.....
Related Genre: Humour
Related Contest: Dungeonalia 2023
This Project is Active
Building a smoke stack
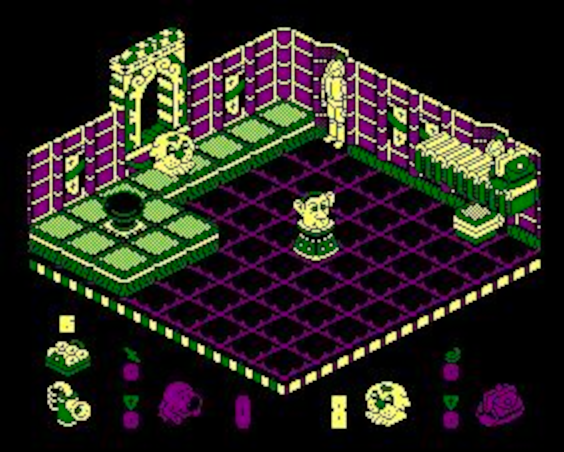
One of the things I’m really quite enjoying about making this game is putting some thought into the different “puzzle rooms” – especially those with items the player really needs to collect, in order to win the game.
In the original game, players had to collect items like a hooter (to shoot doughnuts) and some doughnuts (to shoot at the baddies) and a handbag (to be able to pick up things) as well as little fluffy bunnies that might give you extra lives or limited shields or extra-high jump abilities.
Many of these things could be optionally left out, and the game still completed. But one thing you couldn’t leave behind was the crowns needed to liberate each planet.

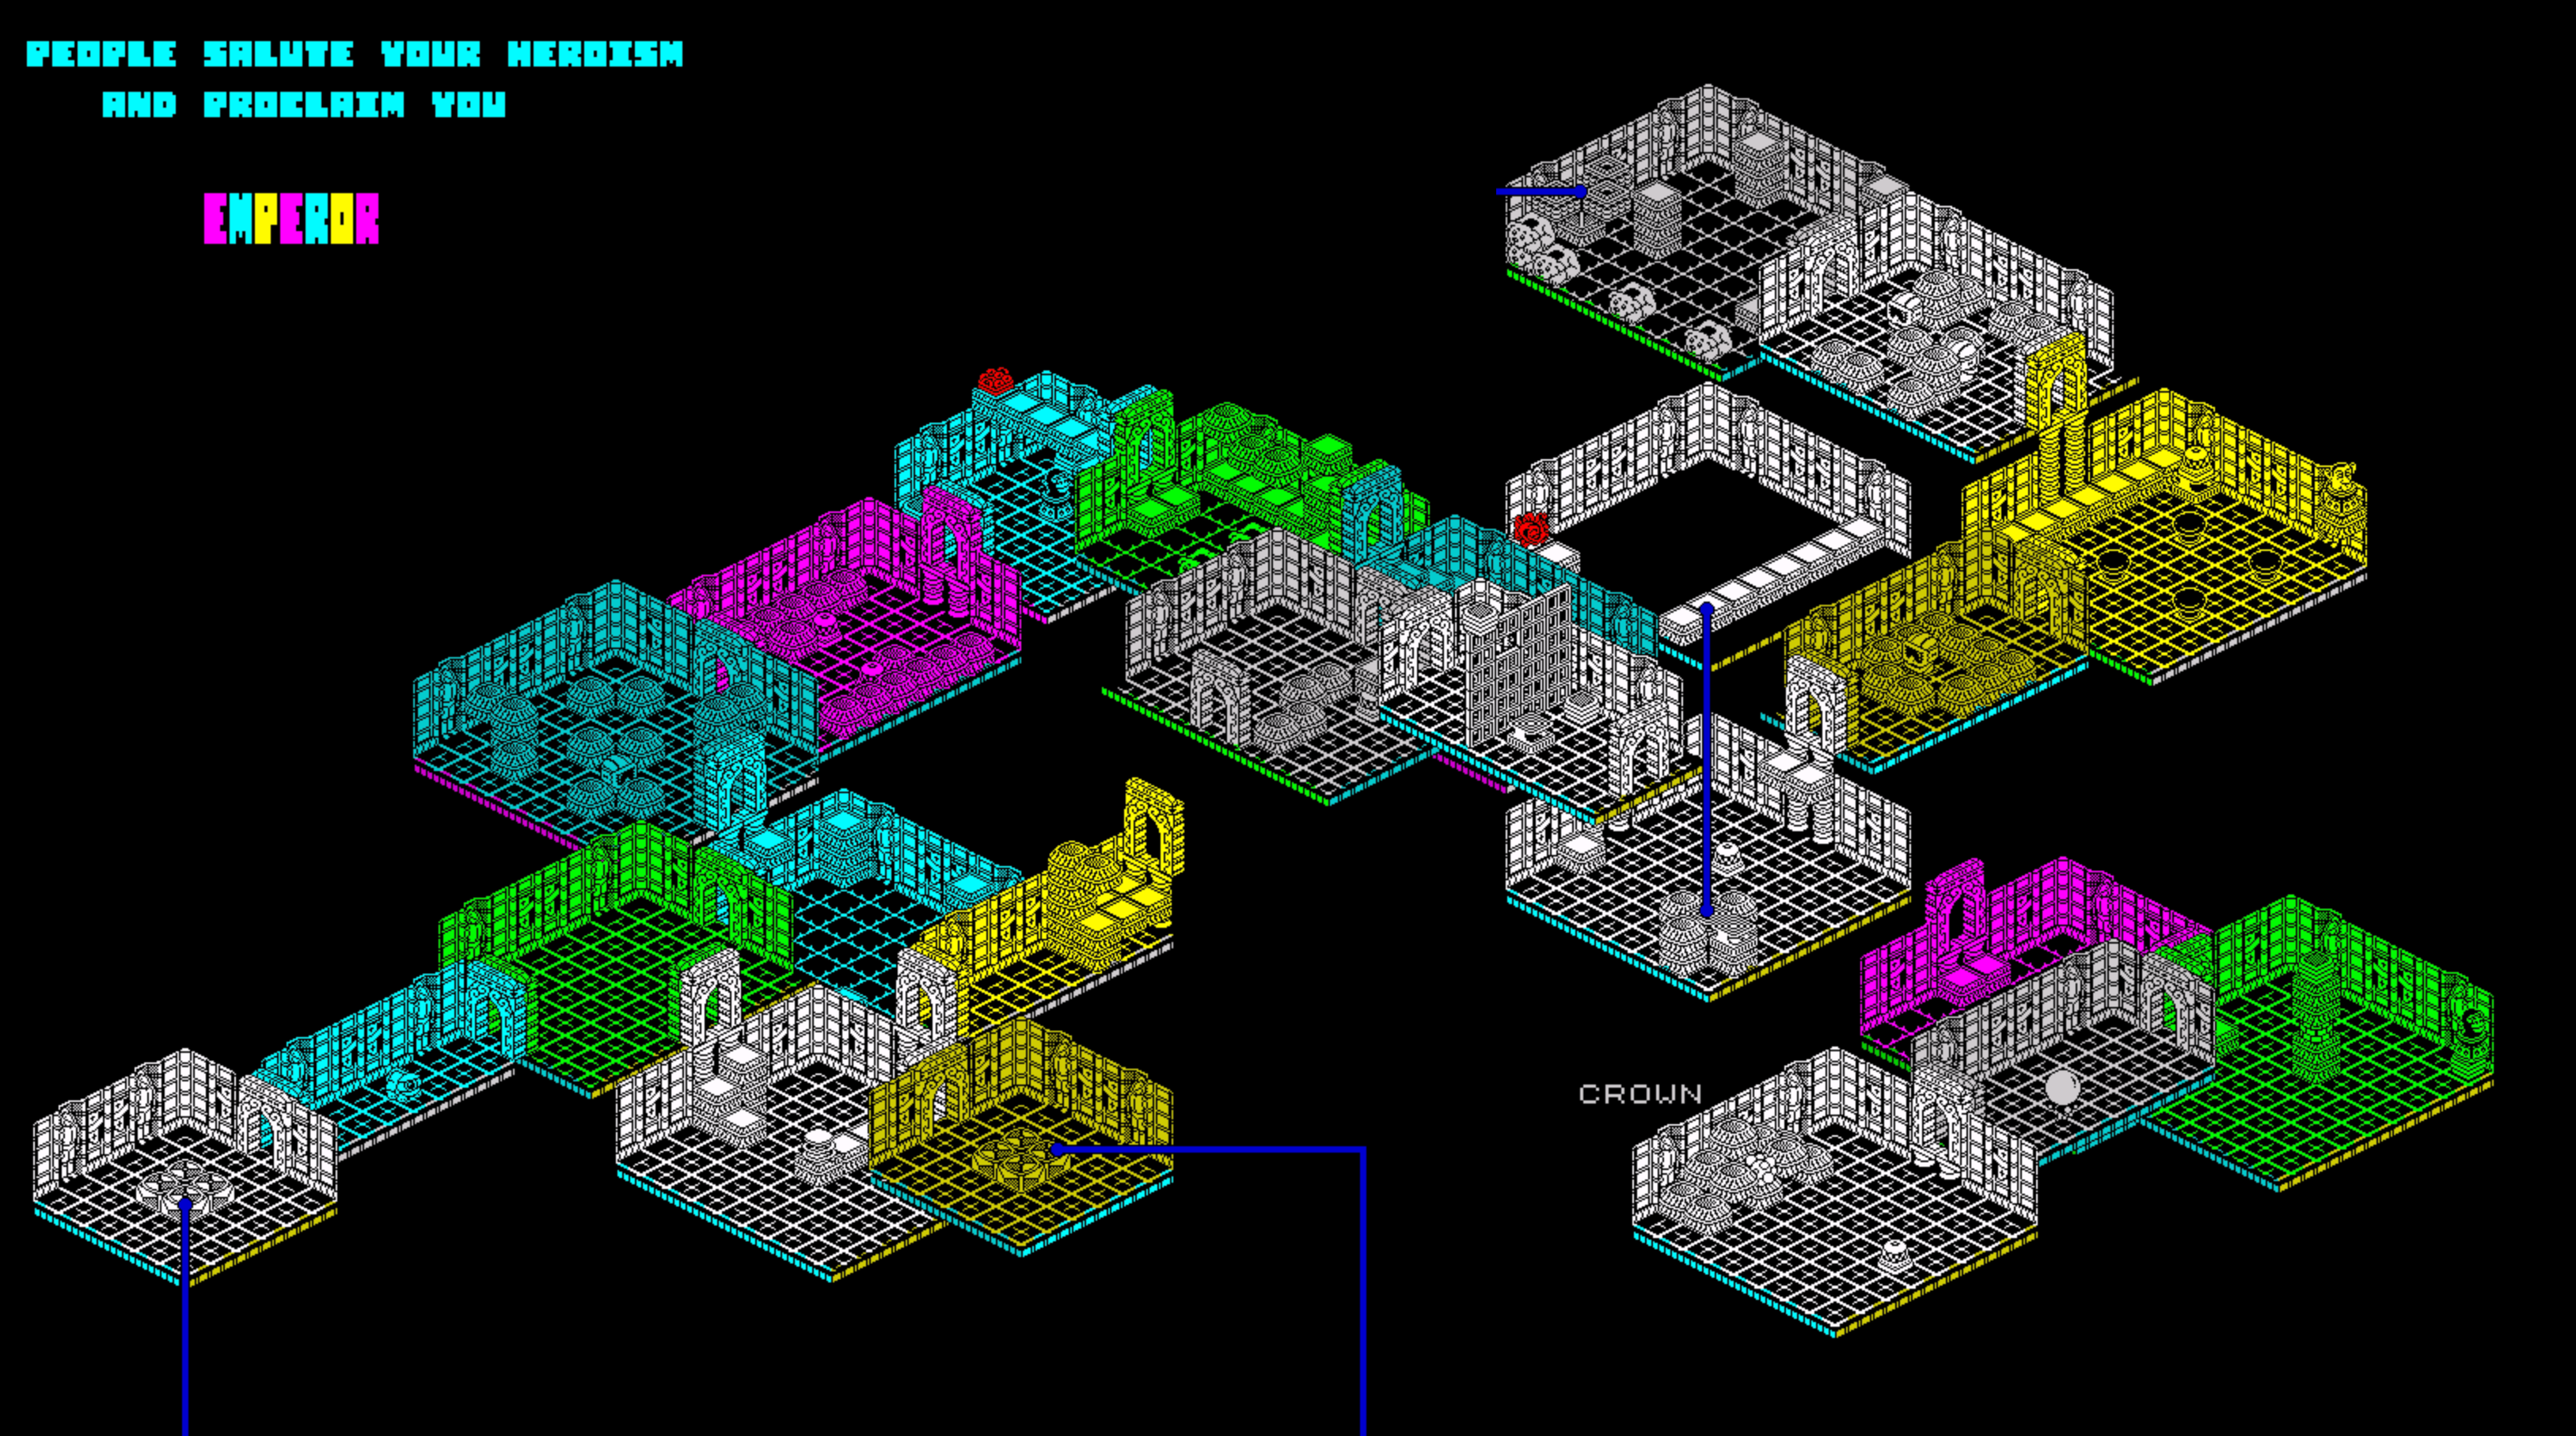
Crowns were invariably up on high places, and usually the player had to work out how to get to them. So I quite enjoyed creating this room.
Unfortunately, since I’ve invented the puzzle, I don’t quite get the same enjoyment as someone else, who would have to work out how to collect the crown without having the solution to hand
spoiler alert, it’ll require Head to stand under the blocks to the right, for Heels to jump on top of Head, then from there jump up onto the floating blocks and collect the spring (since there isn’t room for both to jump up onto the floating blocks combined, and Head can’t collect items). Then Heels will need to jump up the “stepping stones” to drop the spring on top of the other floating blocks. Then place Heels on the floor, in front of the floating blocks, have Head climb/jump up and push the spring on top of Mr Heels’ head. This should place the spring high enough that Head can now jump off the spring and on top of the crown.
Phew! Talk about team work makes the dream work!
Anyway, a big feature of this (and probably many other) room(s) is the big chimney stack that the crown sits on.

I couldn’t find any rounded chimney bricks across the interwebs (ok, on Cults3D and myminifactory) and the few “well with bucket” models I found didn’t really stack well on top of each other.
So I hit Blender, learned how to bend a cube-shaped brick around a curve, and set about building my own rounded wall section(s).
I was quite pleased with the results (though on seeing the chimney pieces printed, I think I should have made the mortar between the bricks a little deeper).
I’ve already magnetised the wall sections, and I love the way everything snaps together and holds firm, even if you’re a clumsy oaf like me and regularly jog the table.
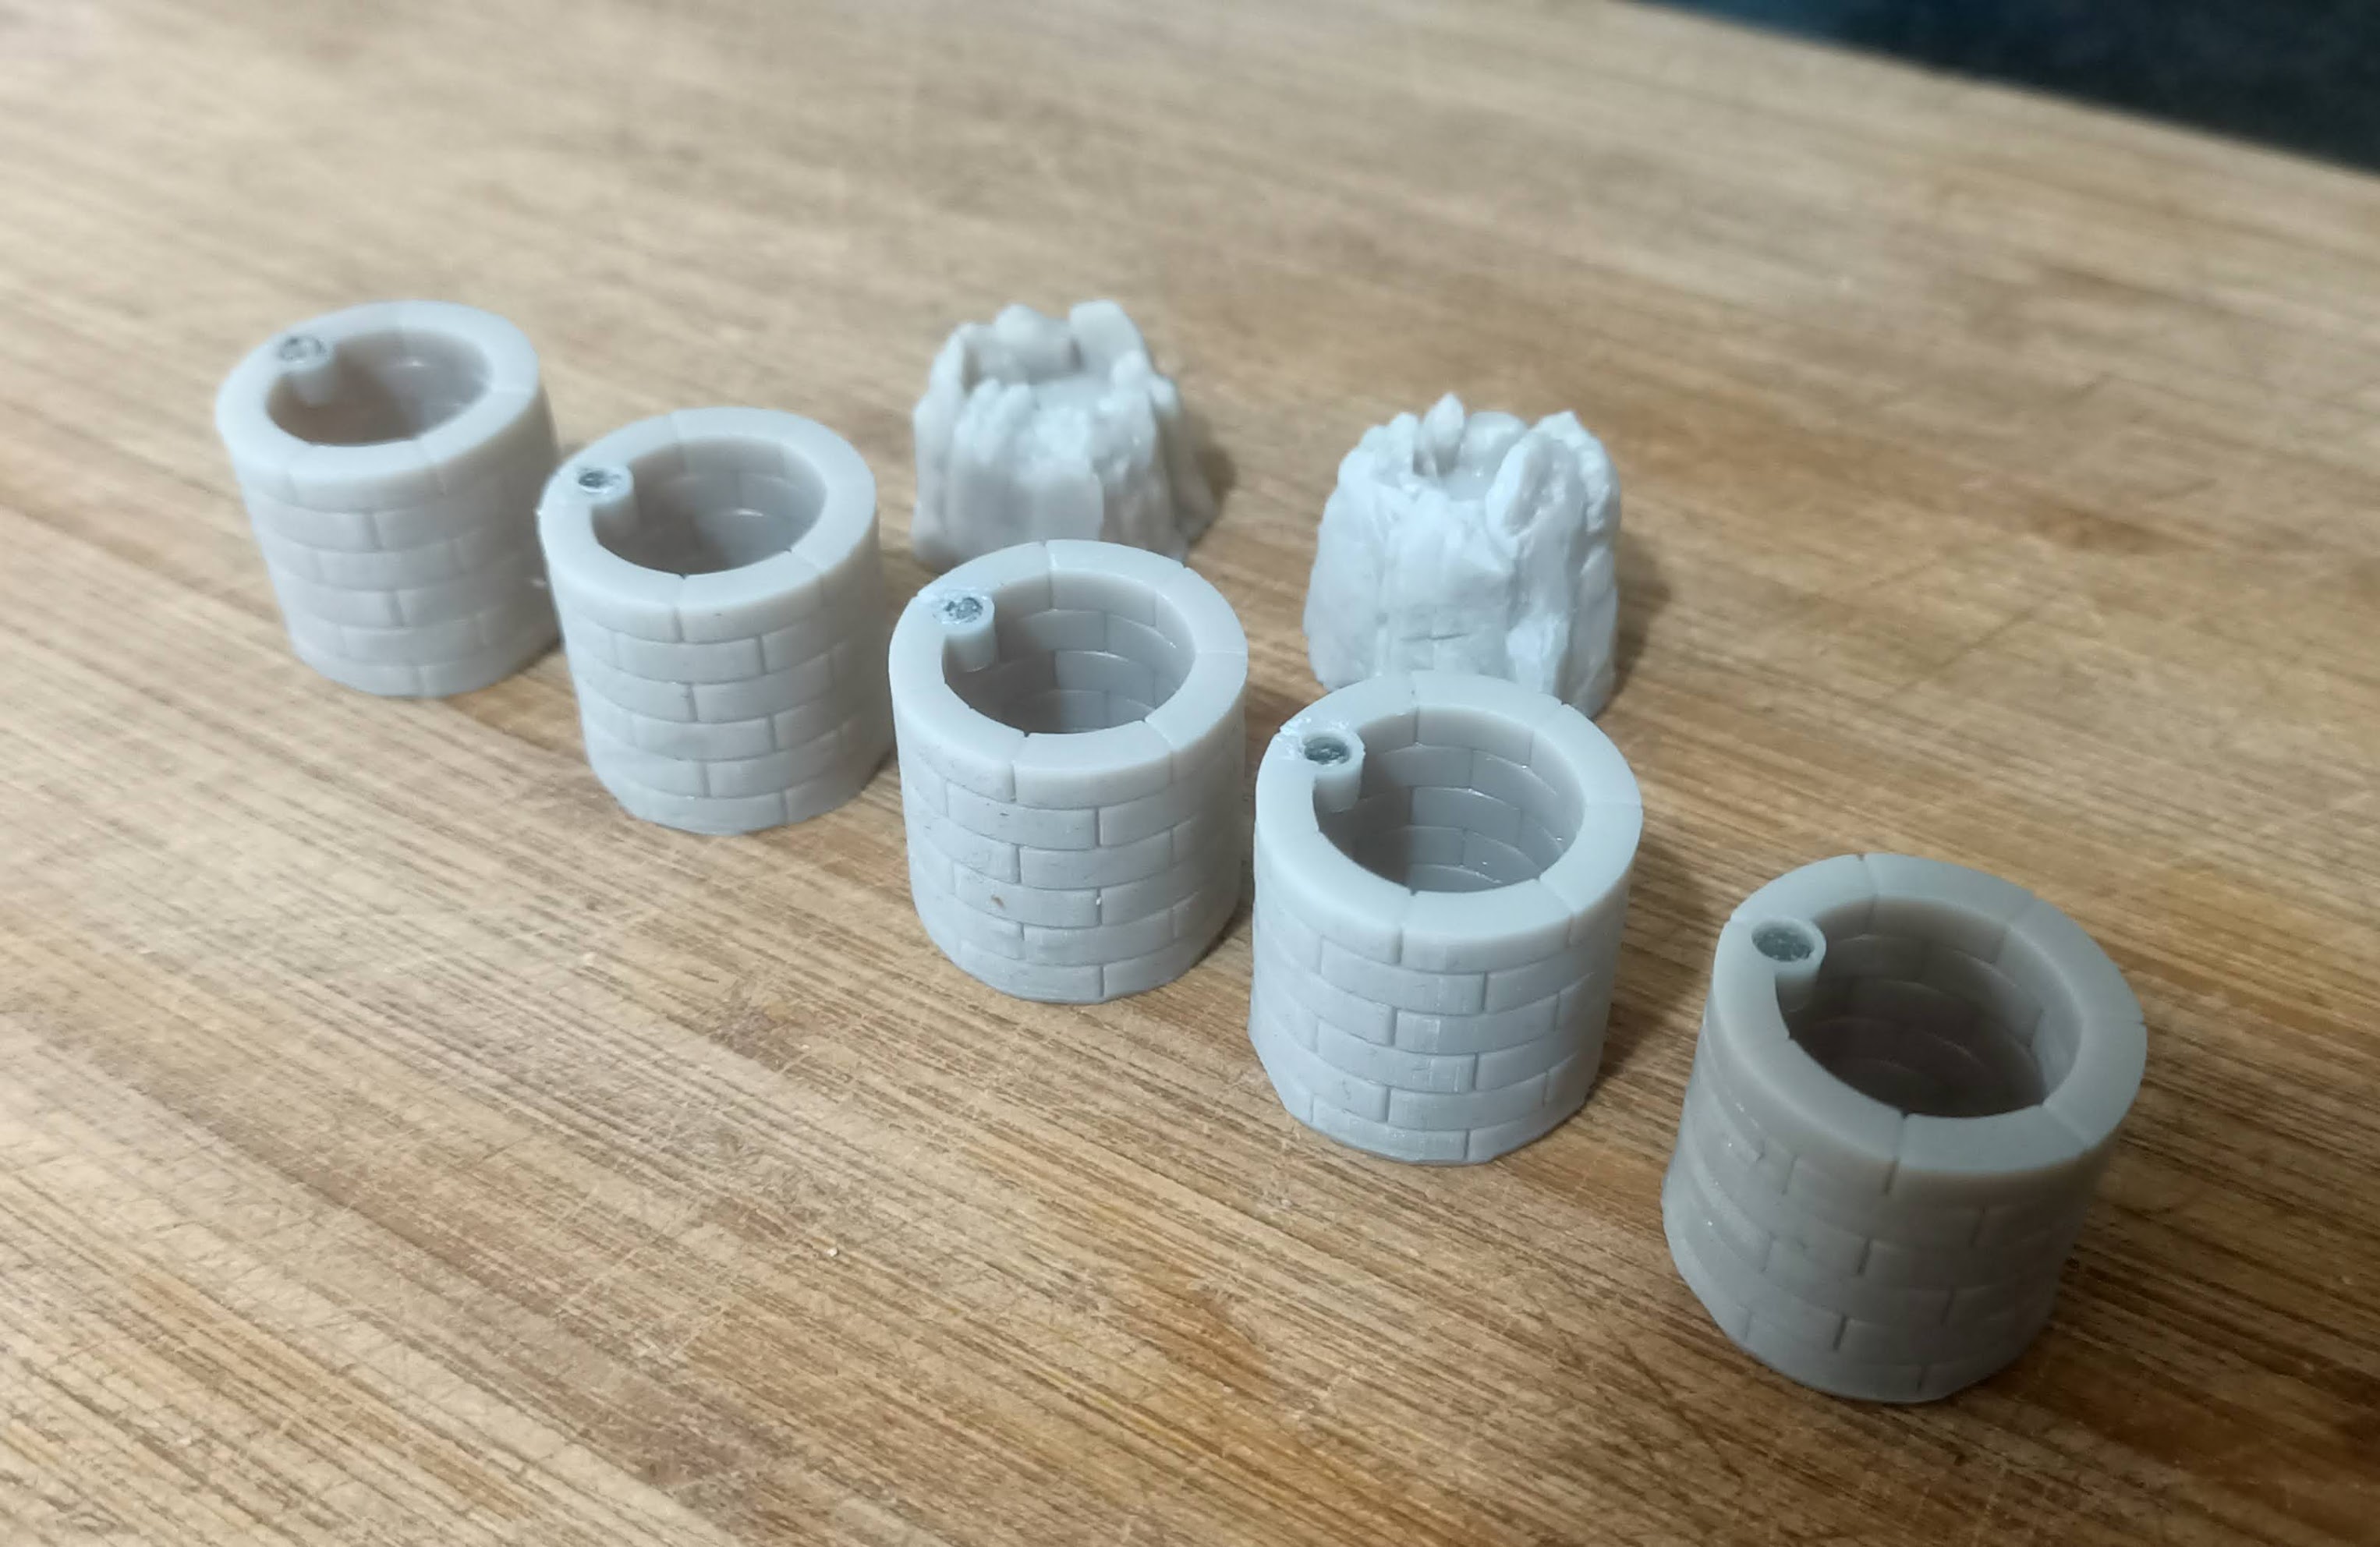
So in the top and bottom edges of each chimney piece, I placed a small round holder, just large enough to glue a 3mm x 2mm neodymium magnet.
Ensuring that the magnets have the right polarity at the top and bottom now means I can build a nice, tall chimney structure and not worry about it falling down.
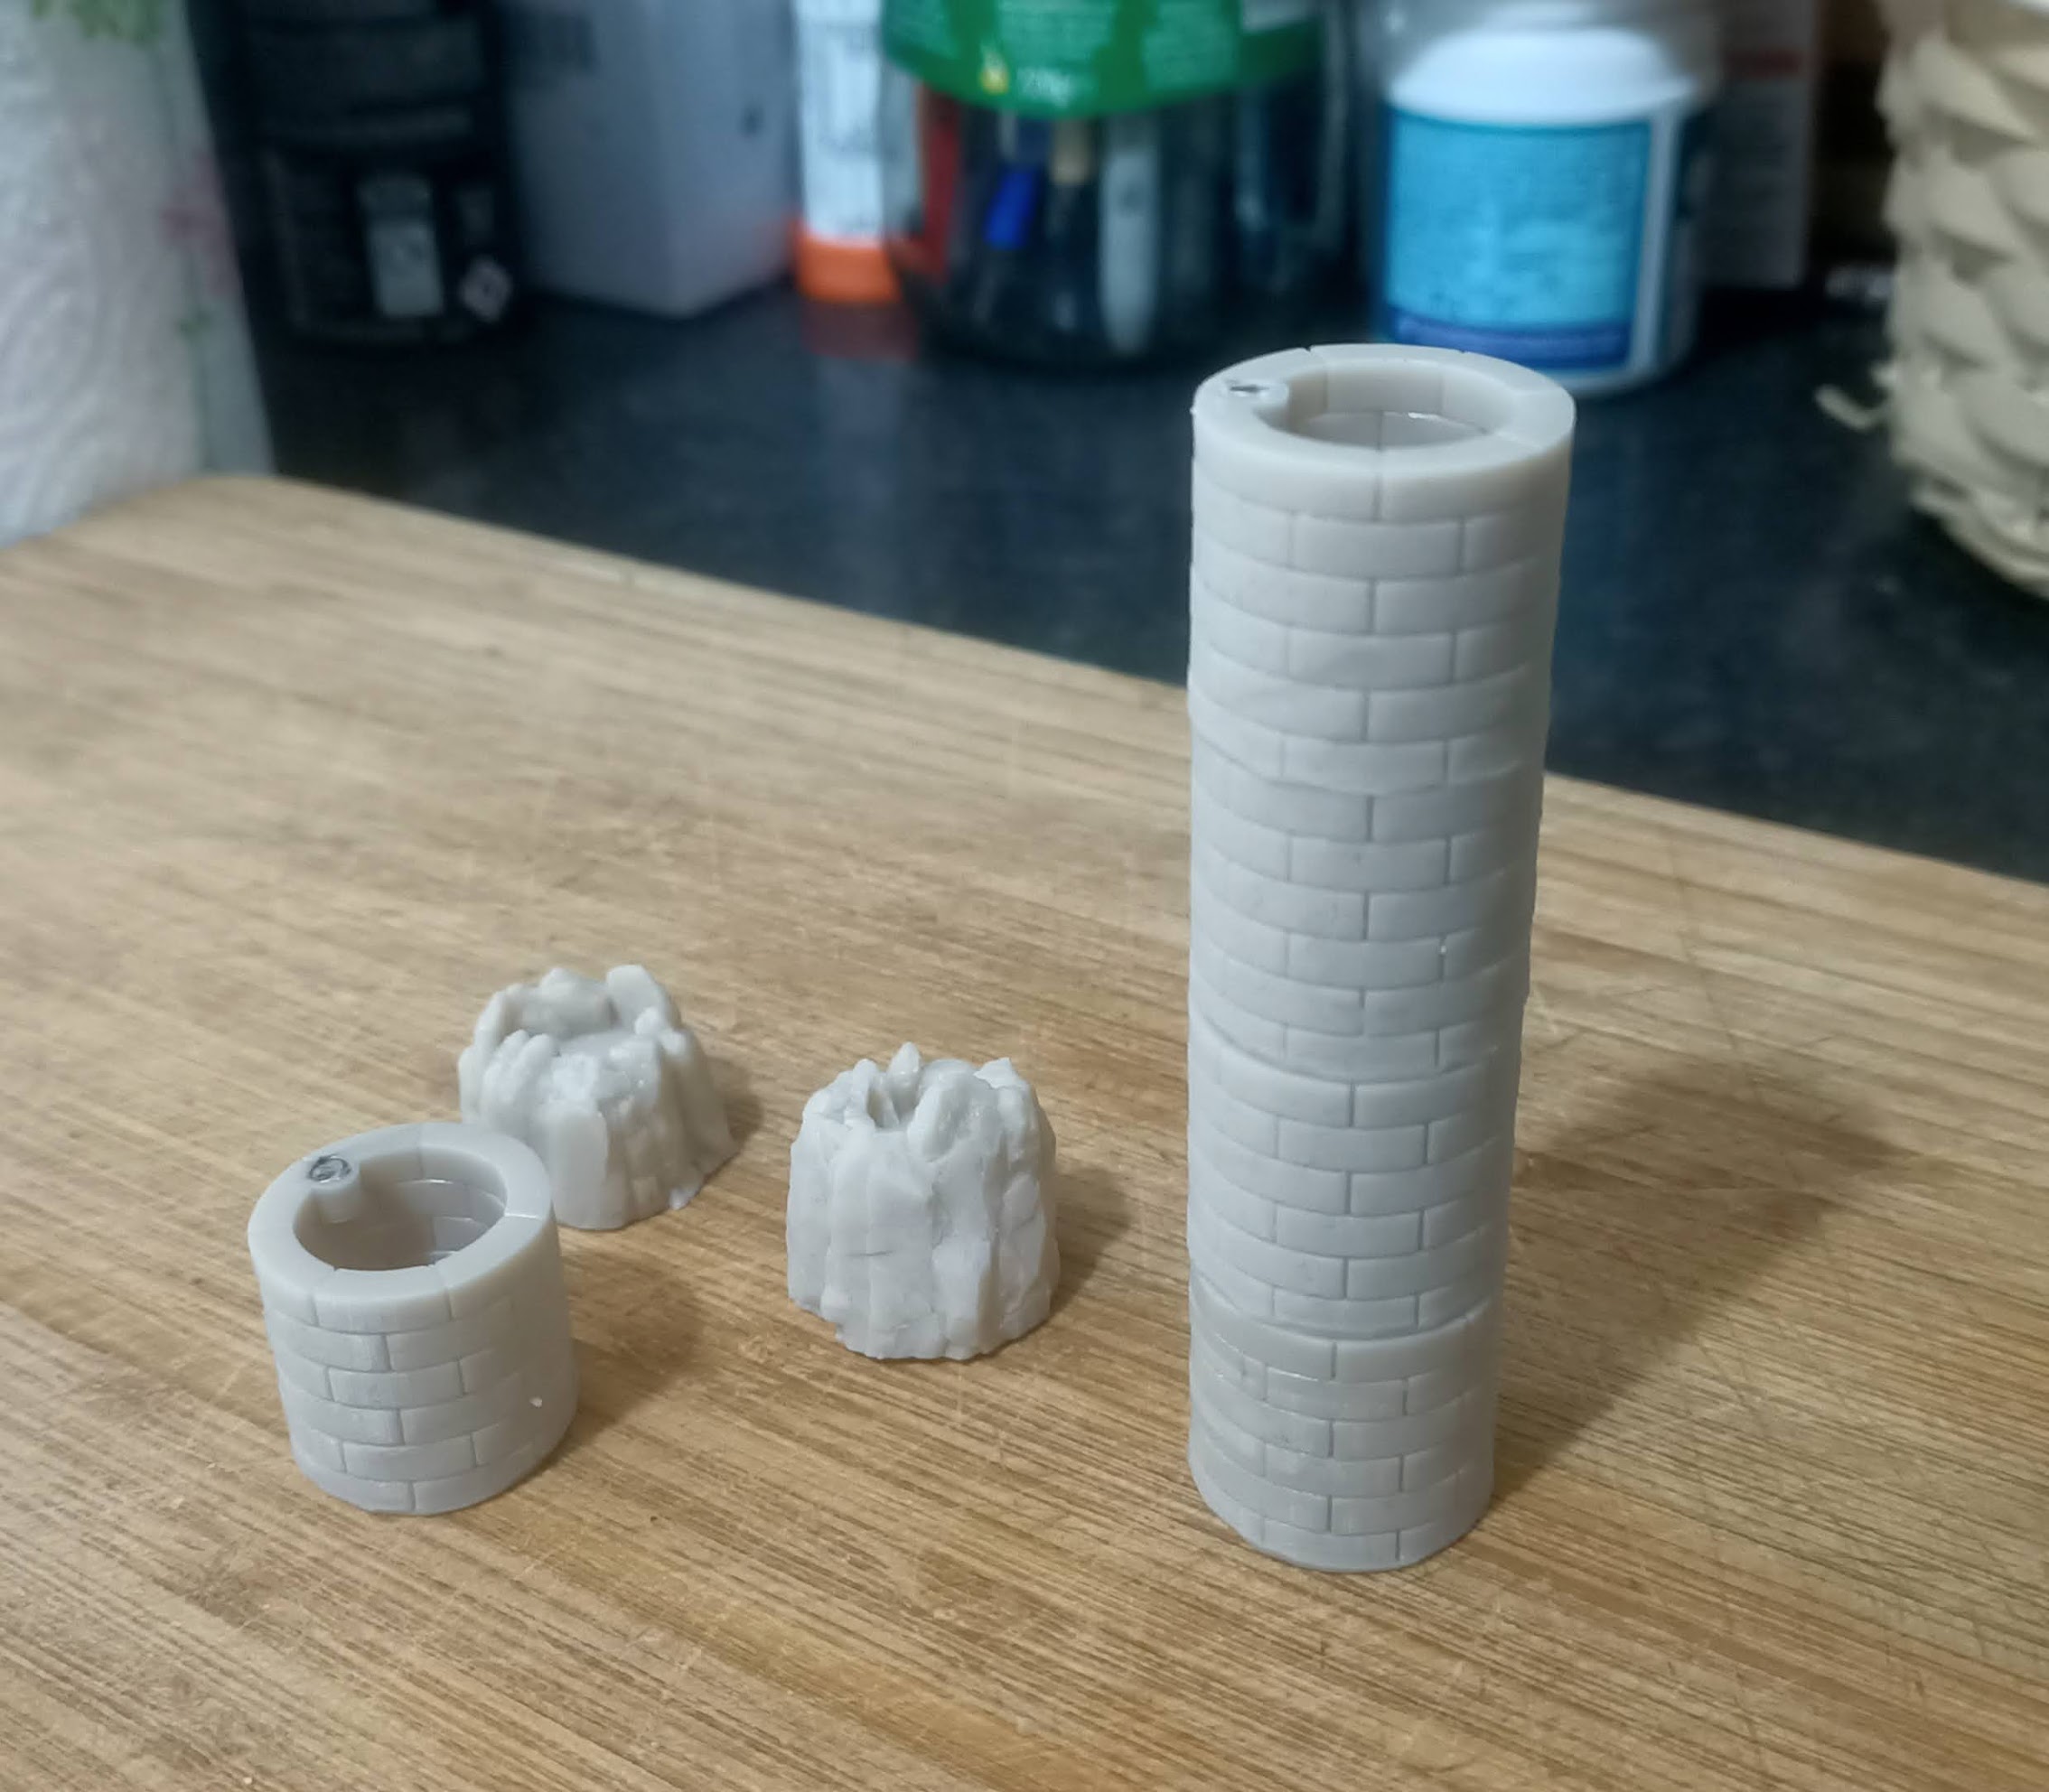
(since I had space on my build print when printing the chimney pieces, I also printed out a couple of “lava craters” but we’ll cover those in another post. Today was about making my chimney. And so far, it’s been a blinding success!
Fewer different room sizes
One of the things that keeps the original (computer game) Head over Heels interesting is the sense of progression throughout the game – it really does feel like a “proper” dungeon crawler, as you explore the different worlds.
And one clever way is does this – on a machine of such vastly limited memory and resource – is through the use of different sized rooms.
It’s much easier to keep a mental map of the game as you progress from “the thin corridor-y bit” into “the large room with three baddies in it” which in turn might lead to “the small corner cupboard room” which then takes you to “another corridor but running east-to-west this time”.
So one thing I wanted to retain in my tabletop remain was being able to have different sized rooms. But one thing I really, really didn’t want to have to do, was make a whole load of bases (complete with Fimo-clay tiles) of all the different room dimensions.
So I figured I could probably break most 7 x 7 rooms down into smaller sections.

The idea here is that if I wanted to create a large 7 x 7 room, I could just put all the pieces together. If I needed a 5×3 I could just use that one section.
If I needed a 3 x 7 corridor bit, I could just combine a couple of smaller sections. Likewise, for a 4 x 5 or a 4 x 7.
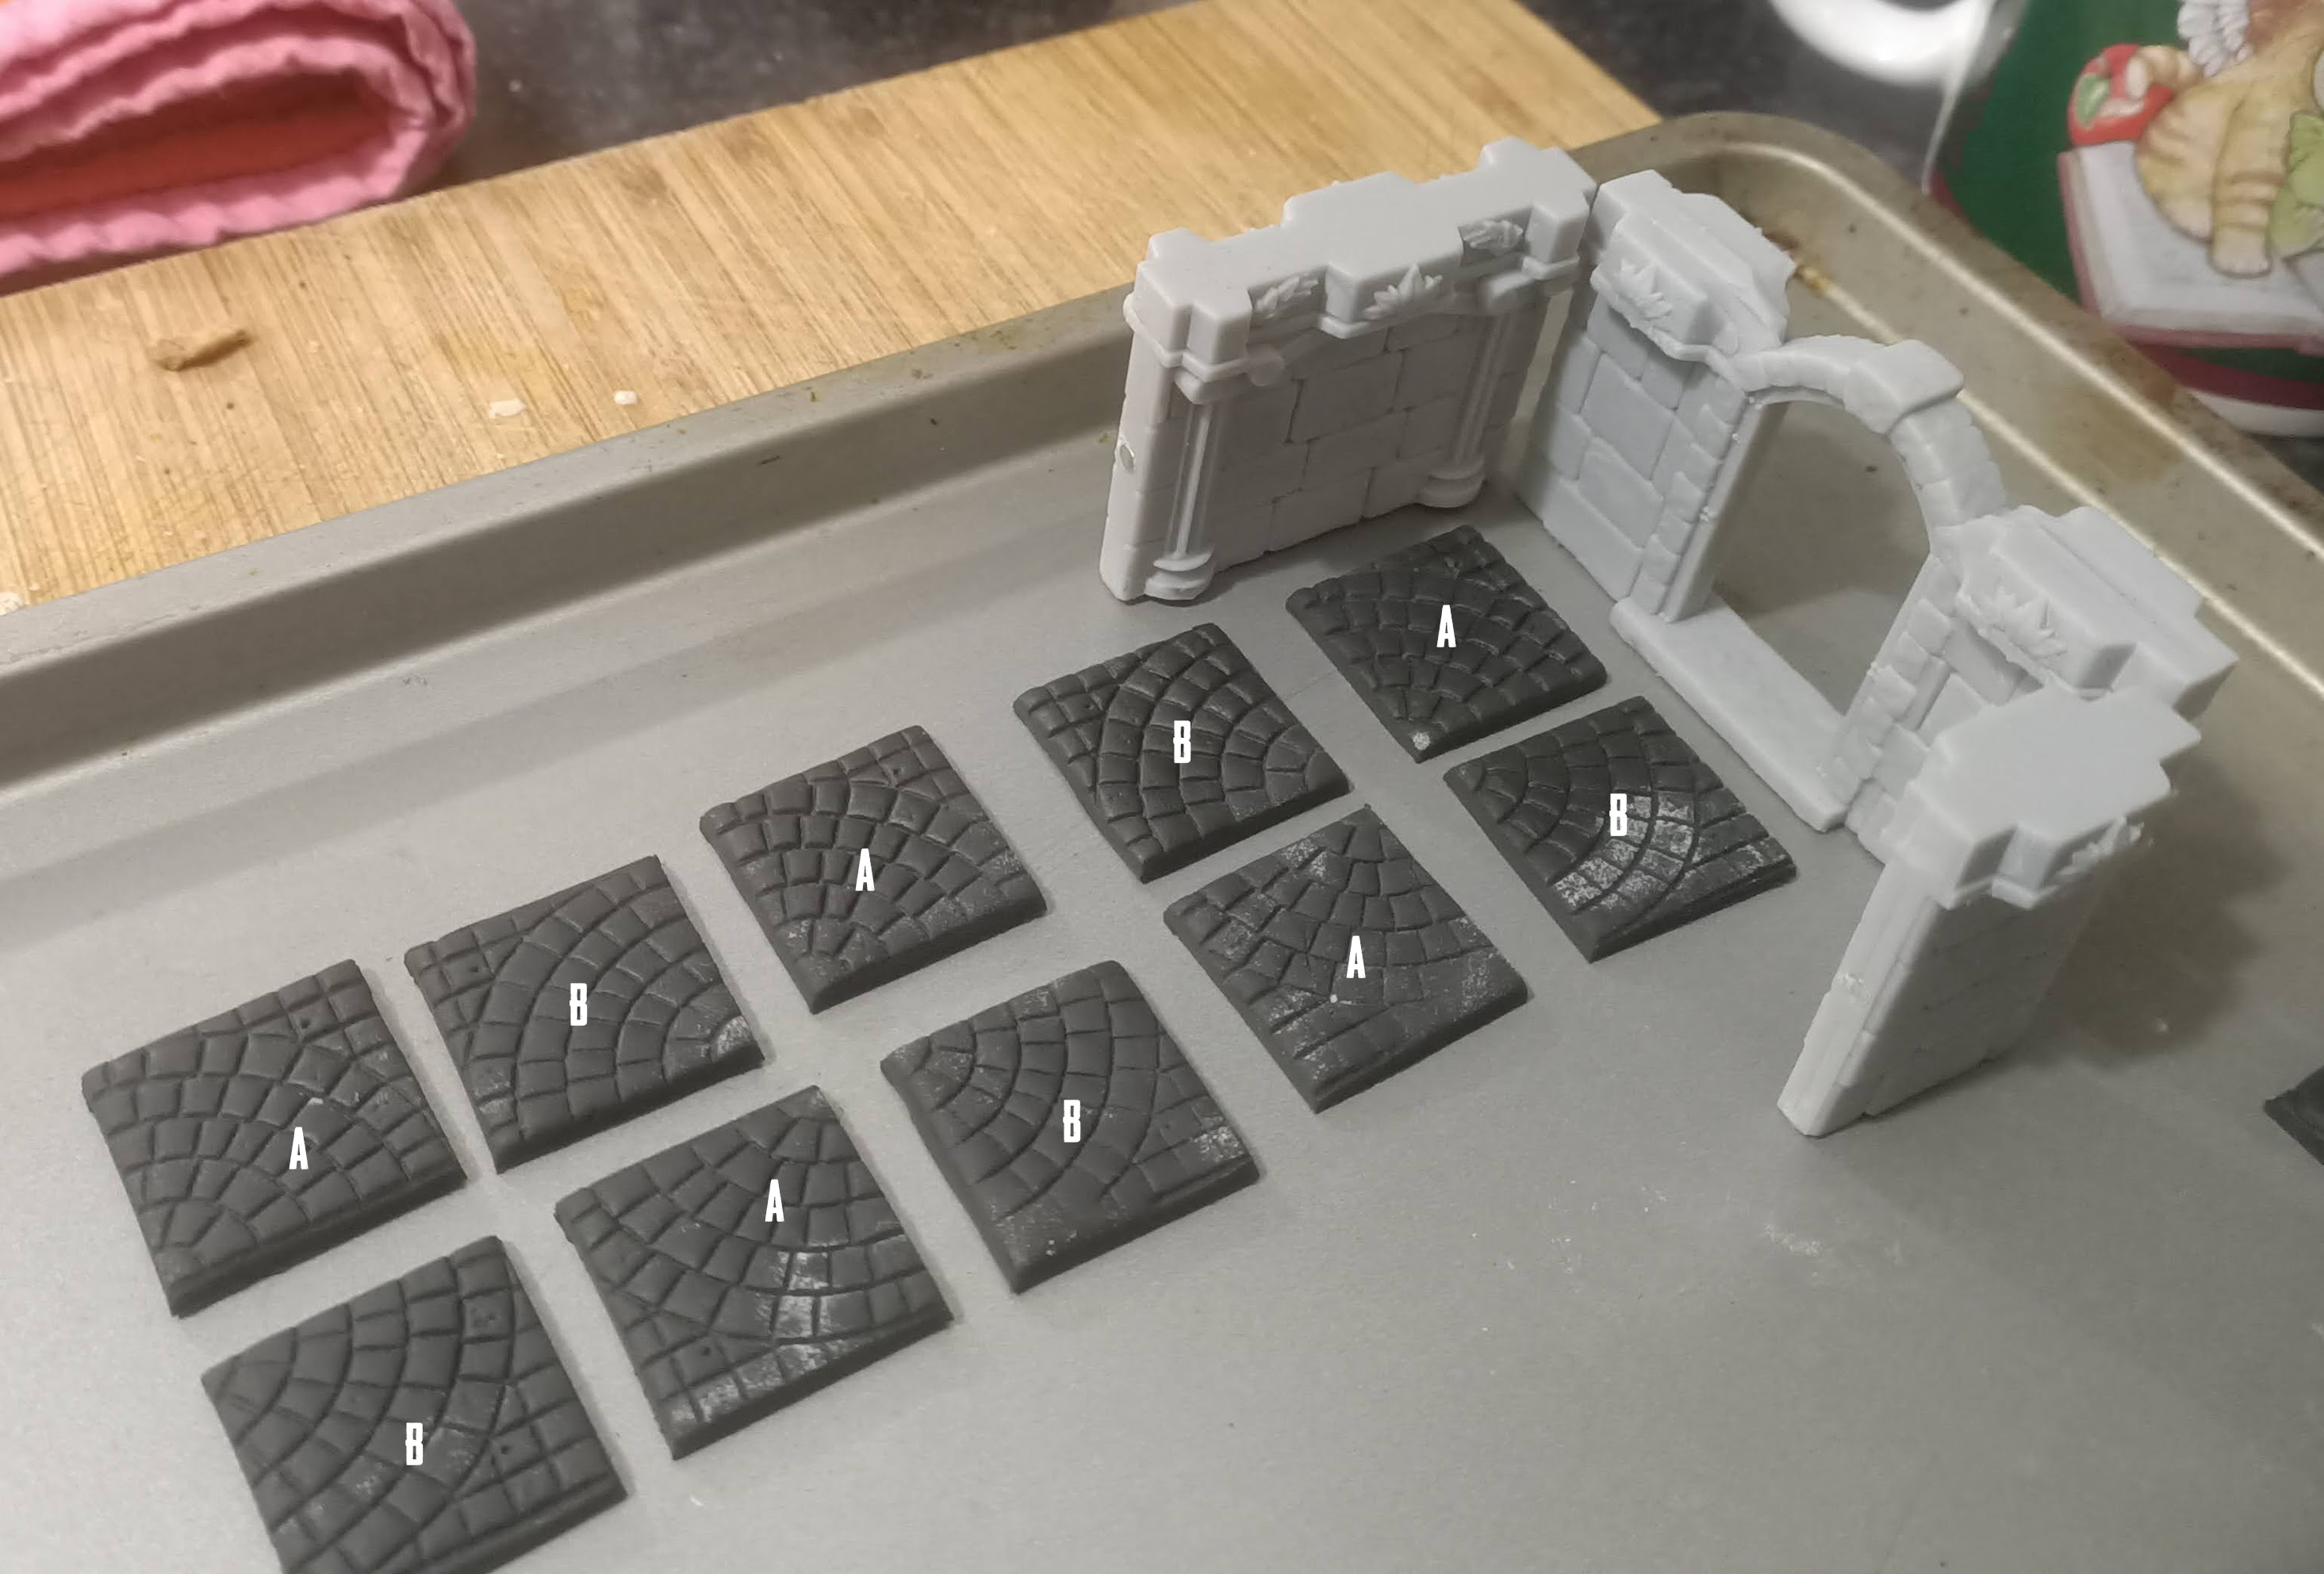
The pattern of As and Bs allows me to see which orientation pieces would need to be in, to make them fit, but also to allow me to use different patterened tiles, but keep a “seamless” visual going.
For example, if I wanted to use the “rounded cobbles” patterned tiles, so long as I placed them with the appropriate piece in either the A or B position, then when the pieces were placed together to make larger room sizes, the patterns would continue with their “seamless” layout.
But as I was creating my first few “room cards” for the game, something dawned on me…
Unlikes the video game, where you could just have different sized, empty rooms that the player has to just “pass through” to help them with their mental map of the game, a tabletop game requires effort to set up every room.
Each time the player enters a new room, they need to select the appropriate tiles, lay out the board, place the wall sections, apply any characters, then “play through” the room, to reach their new destination.
Which could get pretty tedious if, after laying out your room, you roll a dice a few times and simply walk through it – clearing the table when you reach the other side.
I felt like each room needed to be playable – it had to have something to keep the players interest; to make them want to lay out the room and actually play it (rather than simply say “I just walked through that room” and turn the next card because they couldn’t be bothered with all that layout, for little-to-no pay-off).

This looks like probably one of the smallest rooms I could get away with, that would still be playable. On entering the room (through either door) the player has to position their character, then try to avoid the baddie as they make their way to the other exit.
There’s a reason to go to the effort of laying this room out – something might happen as you play it out.
It also happens to look a bit like a corridor (it’s long and thin) and it doesn’t feel like it would work quite so well if it was any smaller than the current 7 x 3 grid squares. It might work on a 5 x 3 grid, but everything would already start to feel a bit cramped.
So I decided that instead of a whole load of different possible room sizes and shapes, I’m going to keep it simple – I’ll have just three floor tiles for each world, each will be 7 squares long, and then two and three squares wide (one 7 x 3 and two 7 x 2). This will allow me to create rooms that are 7 x 3 (corridor sized) or 7 x 5 (small room sized) or 7 x 7 (large room sized).
That should give enough variation to help with the mental mapping of the tabletop game (you’ll still go from “small room” to “corridor” to “large puzzle room” and so on) but without having to come up with lots of different ways of making each possible sized room enjoyable to play.

So with this in mind, it’s time to cut some mdf and make some terrain tiles!
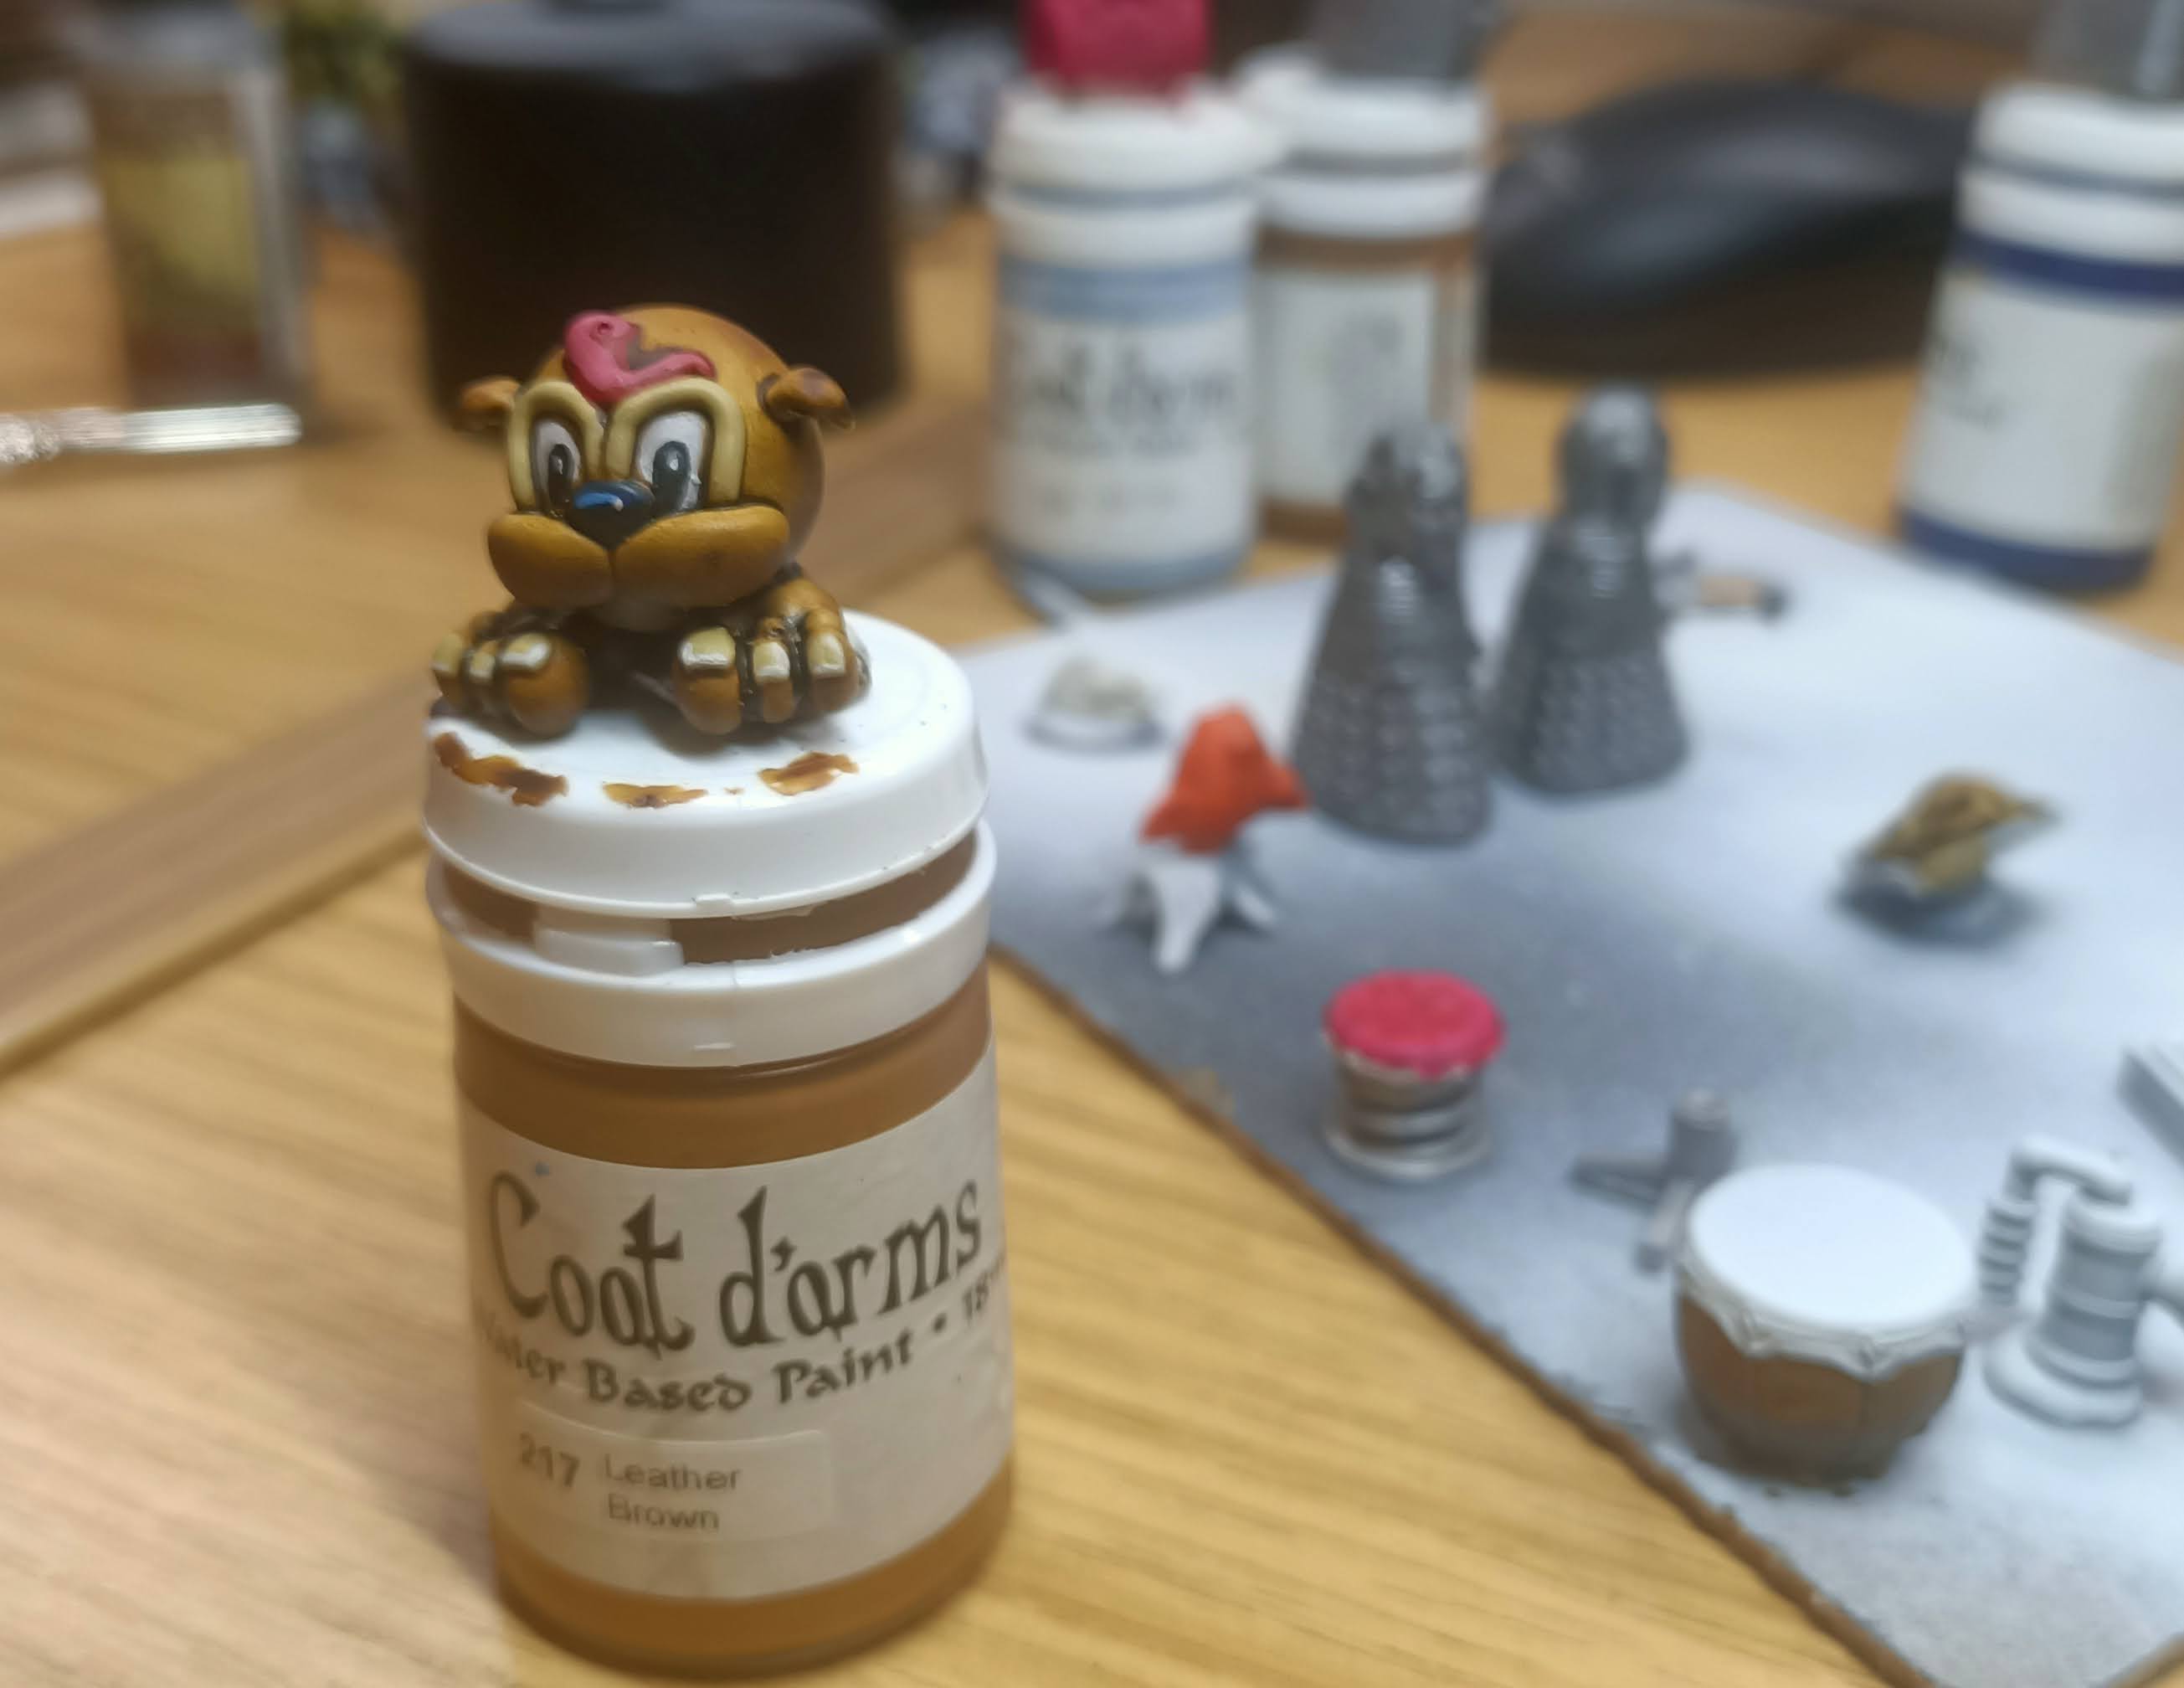
Painting up some miniatures
So the printer went burrrr and some miniatures appeared.
Determined not to get hung up with unpainted minis, I decided to go with just a quick and dirty paintjob to get them tabletop-ready.
Which meant “slapchop”.
But I forgot the golden rule of contrast/speed paints: they don’t look great over large, smooth surfaces. So painting what is essentially a round ball with a nose on the front with Iyanden Yellow Contrast Paint probably wasn’t the best idea.

But I reckon, apart from a little coffee staining, I might have got away with it.
When the finer details – like the “shine line” across his nose – are added, they should be enough to be distract from the blotchy base coat!
I persevered with the Mr Heels character and it gave me heart – not exactly my best work (I’ve mislaid my times-three magnifying glasses so had to paint by holding my minis almost at arms length and squinting!) but not terrible in real life (close up photos are pretty unforgiving – it looks much better IRL)
As part of my rush to get the minis done, I didn’t bother with a wet palette and applied paint straight from the pot. In hindsight, I think this might have been a mistake – it didn’t take any less time to actually paint the minis, but there are very definite texture lines on some of the paint colours, which probably wouldn’t be there if I’d thinned the paints, even just a little.
Still – as a “quick” job to get the minis onto the tabletop (so I can actually focus on the game element of this project) I’m not exactly disappointed either.
I had all kinds of ideas for layering up Dalek Charlie, for example.
I tried drybrushing one of them (I printed two) multiple different shades of silver, to get a nice, gradient effect. But it didn’t look too different from the other, which I just slapped a layer of silver on.
I reckon by the time I’ve smothered them both in nuln oil then added some “shining silver” edge highlights, it’d be almost impossible to tell the two apart.
So, from now on, it’s quick-and-dirty paintjobs to get them done.
Any that need more work – well I can always come back to it as next year’s “spring clean challenge” I guess.
Starting to make a game from a game
Ok, let’s be clear – a one-to-one recreation of Head over Heels on the tabletop just isn’t going to work, for all kinds of reasons. The main one being…. well, it’d be a bit…. boring.
My main plan is that as you enter each room, you take a card from a deck and it tells you how to lay out the room before playing. If there are any baddies in the room, it tells you where to place them, and how to move them, on the baddie’s turn.
But Head over Heels (the video game) also lots of “empty” rooms that you just move your character through. Which is fine as a passtime on a video screen – but as a modular tabletop dungeon crawler, expecting players to clear away a previous room, set up a new room, then move their character through it – with no NPC interaction or anything else to do – then break it all down again and set up another empty room, and repeat….. well, that just sounds tedious!
And Head over Heels also contains some wonderful puzzle rooms.
But making every room a puzzler also feels a bit like hard-graft.
We’re recreating Head over Heels here, not the (already brilliant) game, Tipover!

So I figured we’d need a bit of a mix of the two – some rooms a bit “puzzle-y” and some rooms a bit more “action-y” (with baddies).
But on a turn-based game, interaction with baddies will end up either being completely random or completely predictable. Thinking about how the game plays (on the computer) most baddies have predictable behaviour. And tackling any room with a baddie almost always relies on you being able to predict their behaviour and move accordingly.
But if it’s a turn-based game, and you have all the time you want to think about things (rather than a video game which is more often about quick reflexes and manoeuvrability) having predictable baddies could be quite boring after a while.
But if the alternative is that baddies are always completely random, that too could feel like you’re beaten by random chance, rather than you’ve failed to master the game. Which is ok, every now and again, but could get tiresome if it happened in every single room you visit.
So I think I’ve come up with an idea.
But it’s really controvertial.
Really, really, controvertial.
I think a lot of people will hate it. So hear me out…..

Yep.
It’s roll-to-move.
Now before you slam the lip of your laptop down in disgust, let’s go through it. You roll to move. So some turns you get to move four or five spaces – some turns (if you’re unlucky) only one. So you can’t just predict where the enemy will be at the end of their turn and always move into a safe space.
There’s an element of risk and jeopardy on your turn.
But it could still get pretty repetitive if all you had to do was just roll more frequently, and take more turns to get through a room.
So here’s the second element to roll-to-move:
You only get so many turns to complete a move.
Whenever you play Head over Heels, there’s a general feeling that the longer you remain in a room (with a baddie, especially) there greater the chance of slipping up and being killed.
Even in a really simple room, with – say – a toaster you have to jump over: nine times out of ten, you’ll clear it with no issues at all. But every now and again, for no reason or explanation, on a really simple obstacle, you might mis-time a jump or walk into something you know you have to avoid!
So my tabletop game isn’t simulating moving the characters of Head and Heels around Castle Blacktooth – it’s more like a simulation of someone playing the videogame where they move digital avatars, in a simulation of moving the characters around the castle.
That’s pretty meta, right?
So the idea is that you roll-to-move. Sometimes you’ll get a few sixes and crossing a 7 x 7 room will be pretty straight-forward and the baddies can easily be accommodated. But sometimes, just when you need to move most, you’ll hit a one. That’s like the time you played and mis-timed a jump and had to go back a few squares and queue things up to try again.
And sometimes you’ll run out of turns to complete a room because you rolled a lot of ones and had to move to spaces you didn’t want to, in order to avoid the baddie in the room.
And that’s like the time you played the game and got trapped in the corner of a room, between the baddie and a killer-block and you just knew you were going to lose a life and have to start the room again.
So with all this in mind (it’s still very early days in terms of rule development, and these things might yet change) I started making some cards to help with playing the tabletop version of Head over Heels.
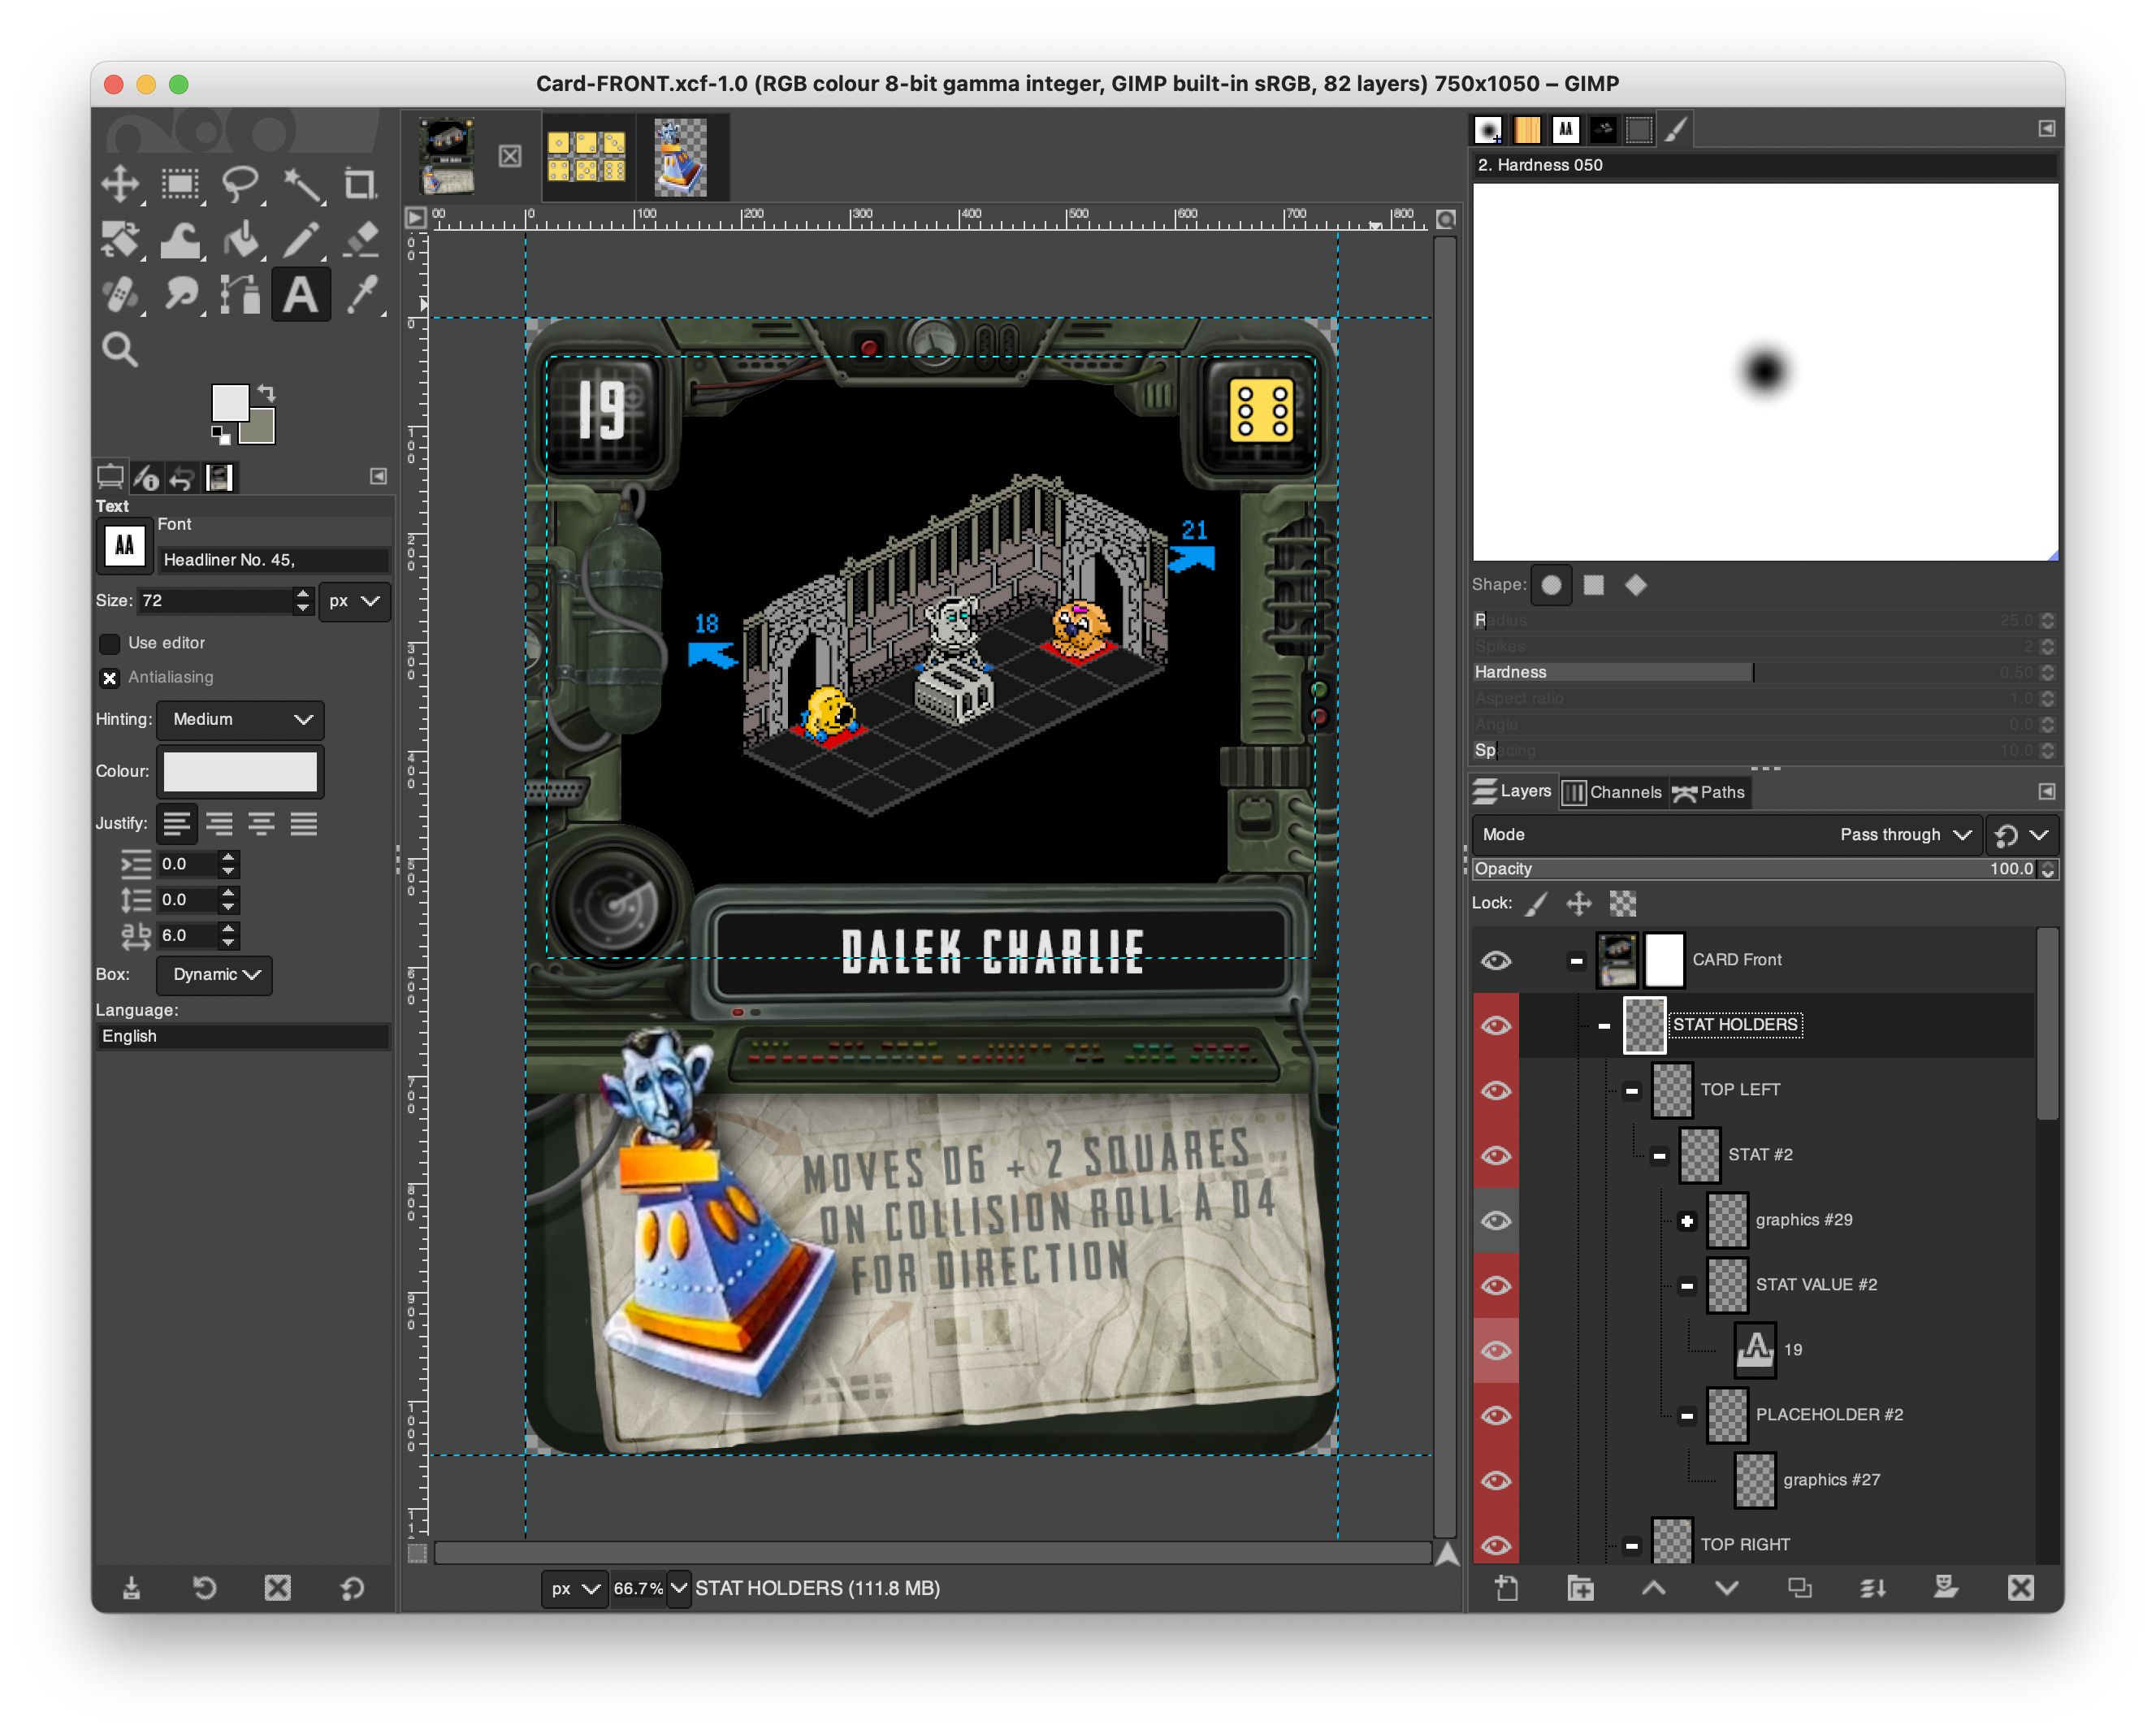
So every room has a number. This is shown in the top-left corner.
I’m not sure yet if wandering the map will be a case of simply turning over the next card in a deck whenever you exit a room (through whichever door you choose) or whether different doors lead to specific rooms (for a more consistent map).
We’ll have to see how it plays about – because there will be some rooms that only Mr Head can complete, and some that only Mr Heels can complete. And it wouldn’t feel fair if Head could no longer progress in the game because he’d drawn a “wrong” card. (maybe this could be mitigated against, but I’m also currently allowing for mapping specific exits to specific linking rooms).
Each room also has a “countdown timer”. Which is simple as turning a dice to the number shown in the top right, whenever you enter a room.
Place your character in square in front of the doorway they’ve just entered from, roll your dice to move, and at the end of your turn, reduce the value of the countdown timer.
When the countdown timer cannot roll down from one, you lose a life and have to reset the room.
If there are any special instructions (like a baddie in the room, for example) instructions are shown on how to move the baddie on their turn (in this case, roll a D6+2 for Charlie’s movement, and each time he hits an obstacle (or wall) and cannot proceed forwards, roll a D4 to determine his new facing (north, south, east, west). Some characters might use a D8 and a Blood Bowl style scatter template for direction, some only move up, down, left and right.
I’m sure that, as even these simple rules are play-tested, I’ll find all kinds of things wrong with it (or need to invent caveats or exceptions to rules) but so far, this is starting to feel like it could actually be something…..
Can't wait for the next print....
I’ve been fumbling about with Blender for a few hours already and am really enjoying recreating some of the characters and items from the original game.
I’ll be honest, it’s often little more than searching myminifactory or Cults3d and using some crude cube-boolean-subtractions (or brute-forcing things together using the union tool).
I’m particularly pleased with the spring I made from a stool top, some clever use of Blenders “screw” modifier and a few basic primitive shapes.
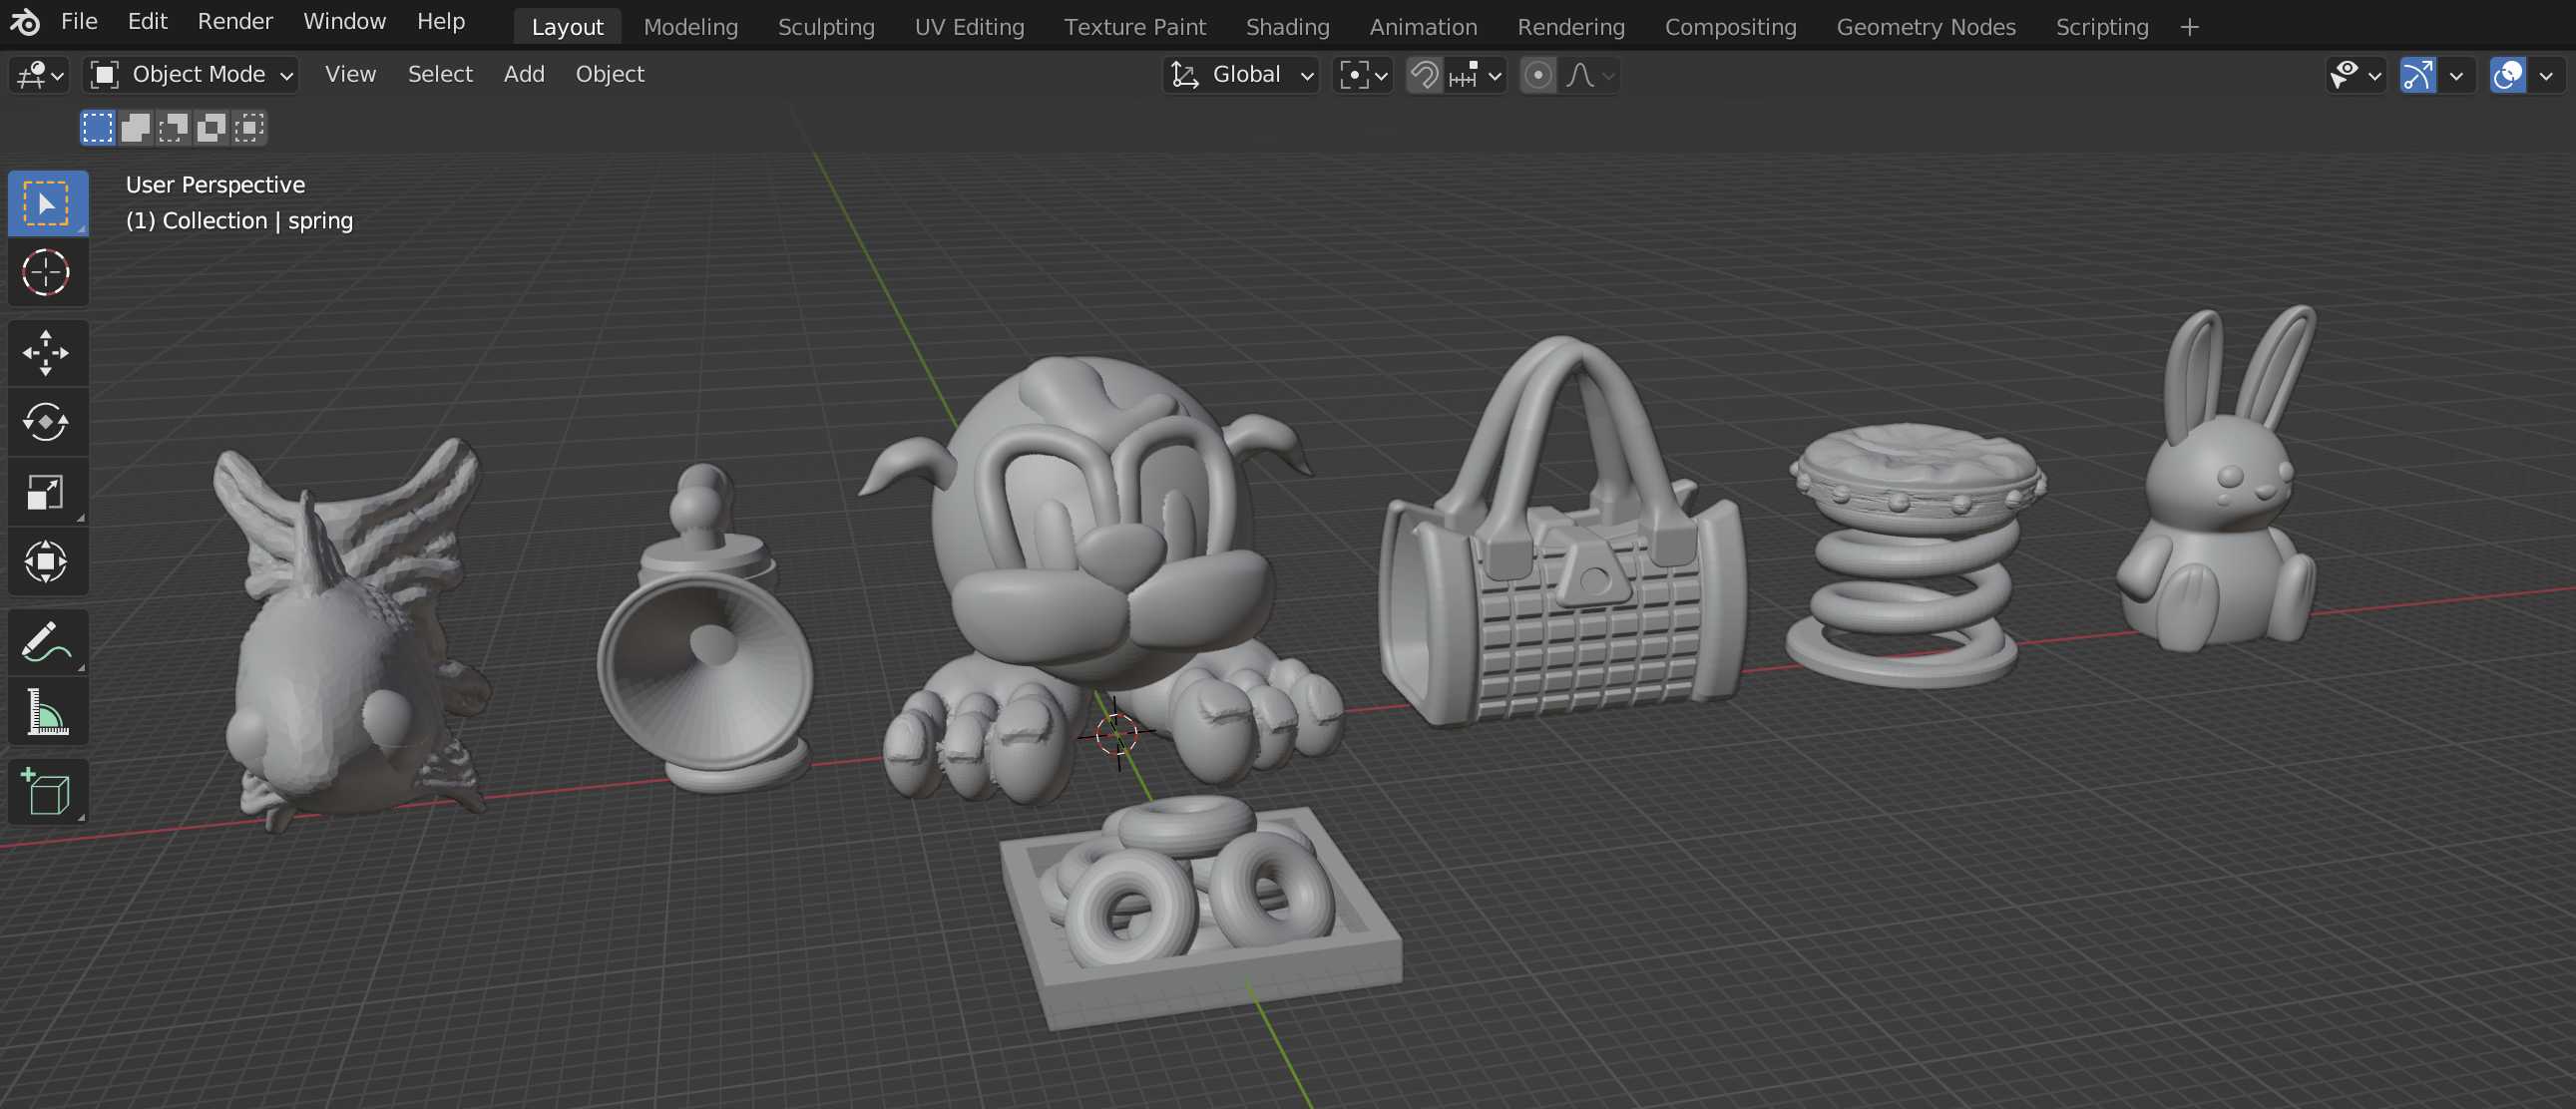
I’ve had to take a few liberties with some of the items – for example, the “extra life” rabbit is now sitting upright rather than lying down. But, hey, if I claim it was always going to be “heavily influenced by” rather than “one-to-one remake of” the original game, I should be ok, right?
Adding some baddies for the dungeon
I’ve never really bothered much with D&D.
Like sprouts and pickled tripe, I tried it once and didn’t like it.
But even I’m familiar with the “baddie tropes” from D&D. Like the Owlbear. Or the multi-eyed Beholder. Some things you just expect to be present, no matter how many times something is played or “rebooted”.
And it’s very much the same with Head over Heels.
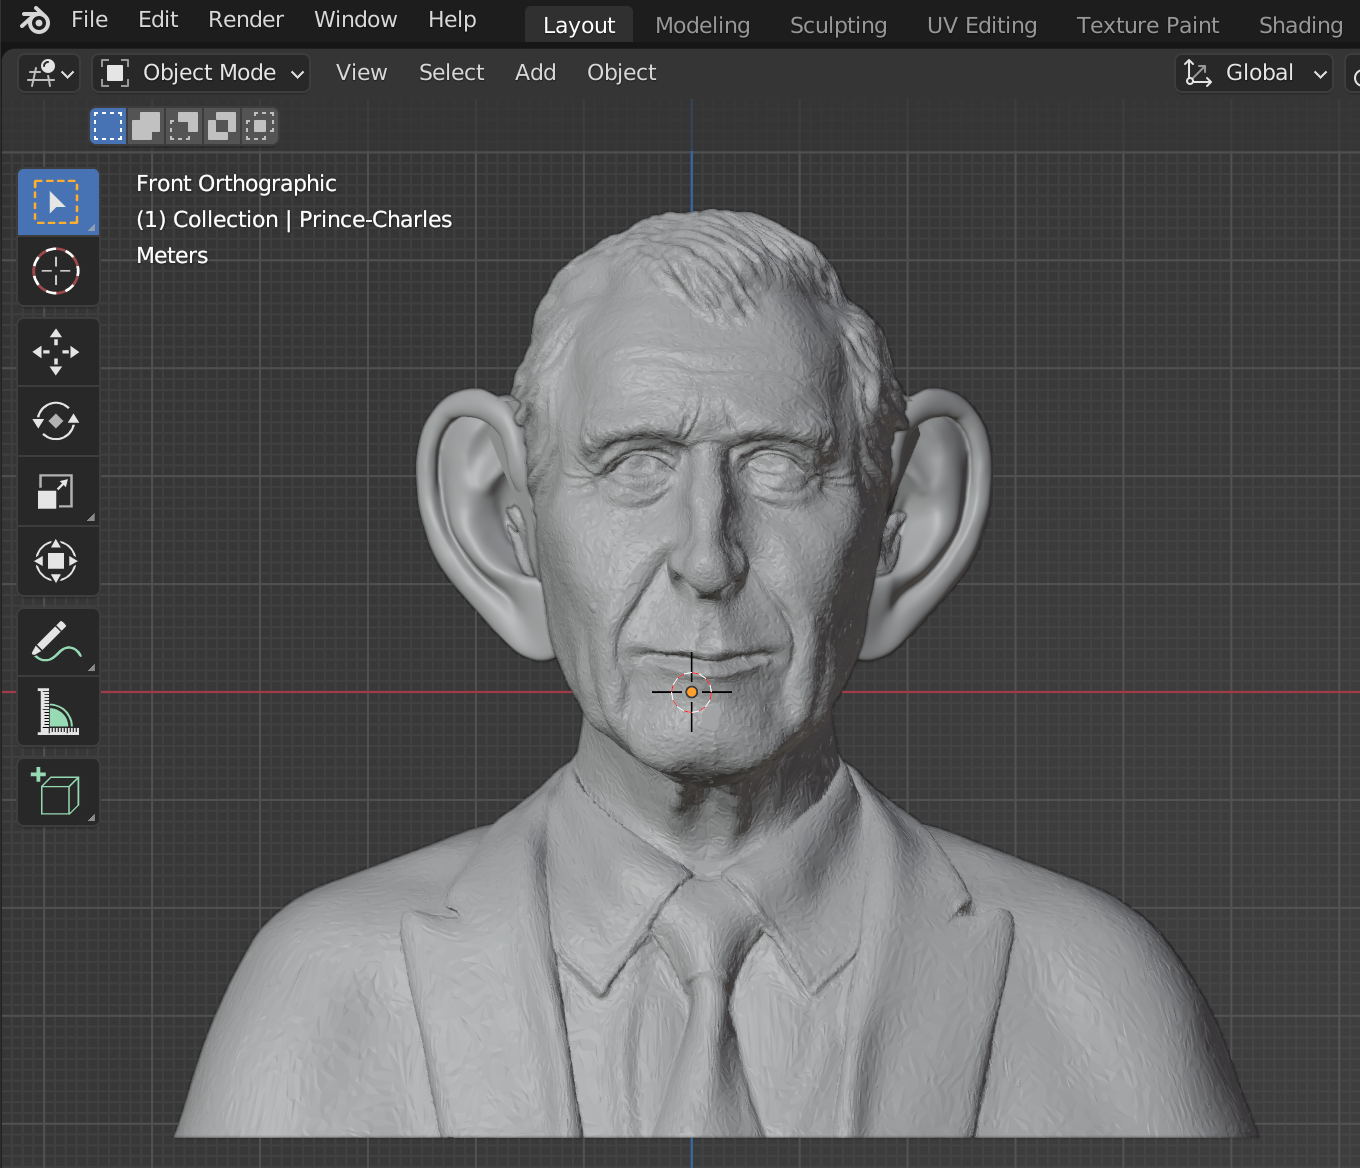
Nobody would even dare make a remake of this game, without including the Dalek Charlie.

He even appears in the game poster art.
And in-game looks *exactly* like the real life at-the-time-Prince-not-King Charles
So while I’m waiting on the printer to finish, I took to Blender, hit Cults3d and downloaded a couple of STL files to do some (rather crude) mash-ups.
It’ll be interesting to see how this prints out at just over an inch high – I’m hoping some of the more textured surfaces get “rounded out” by printing so small, and we can get a more cartoon-ish looking character.
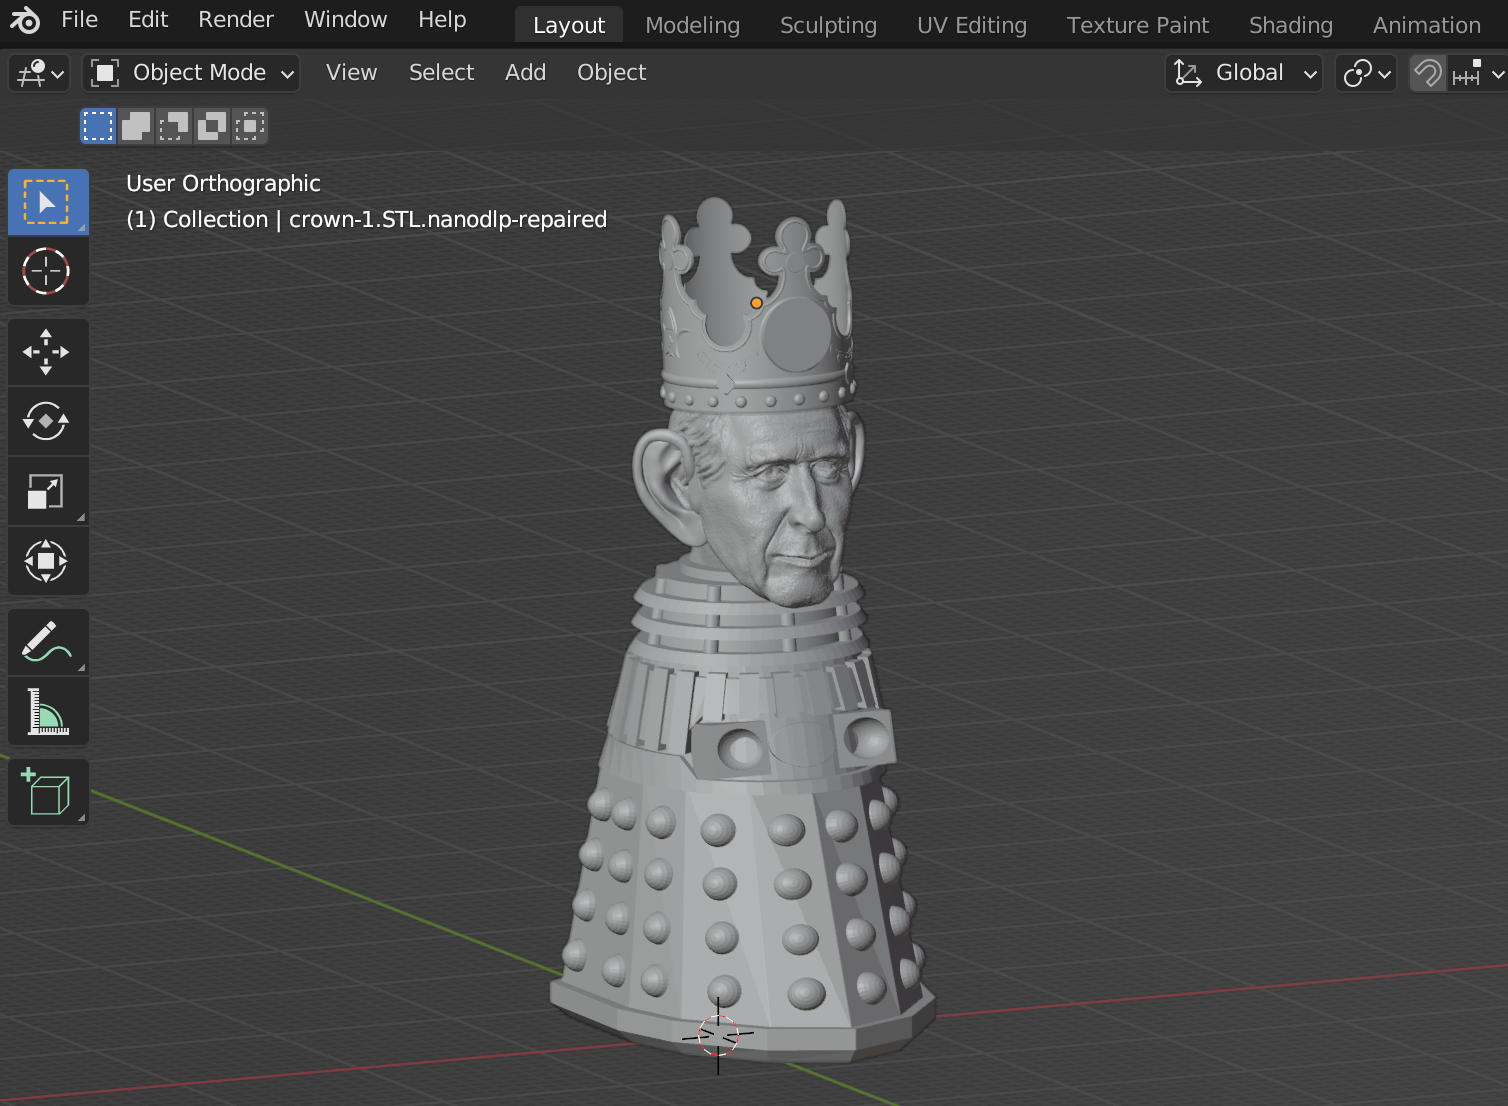
The first thing to do was to add some comedy over-sized, Spitting Image-alike ears to a model with a close likeness to the great jug-eared one.
Then it was a simple case of boolean-chopping his head off (is that still treason if it’s only done digitally?) and sticking it onto a (free) Dalek body STL
https://cults3d.com/en/3d-model/game/mk-3-dalek

I really wanted to add a crown to this character. I don’t even mind paying for a few STL files (I’ve spent a few quid on this already). But the famous St Edwards crown isn’t easy to get hold of as a 3d-printable file (that will scale down easily to 32mm scale) without spending silly money.
So I came up with an alternative. Sadly, my Blender/3d skills aren’t quite up to making this 3d-print-friendly. I’m not sure how to thicken the walls of the crown, so they’ll survive the resin printing process. But if I could, this is the crown I’d go with
The stars of the show
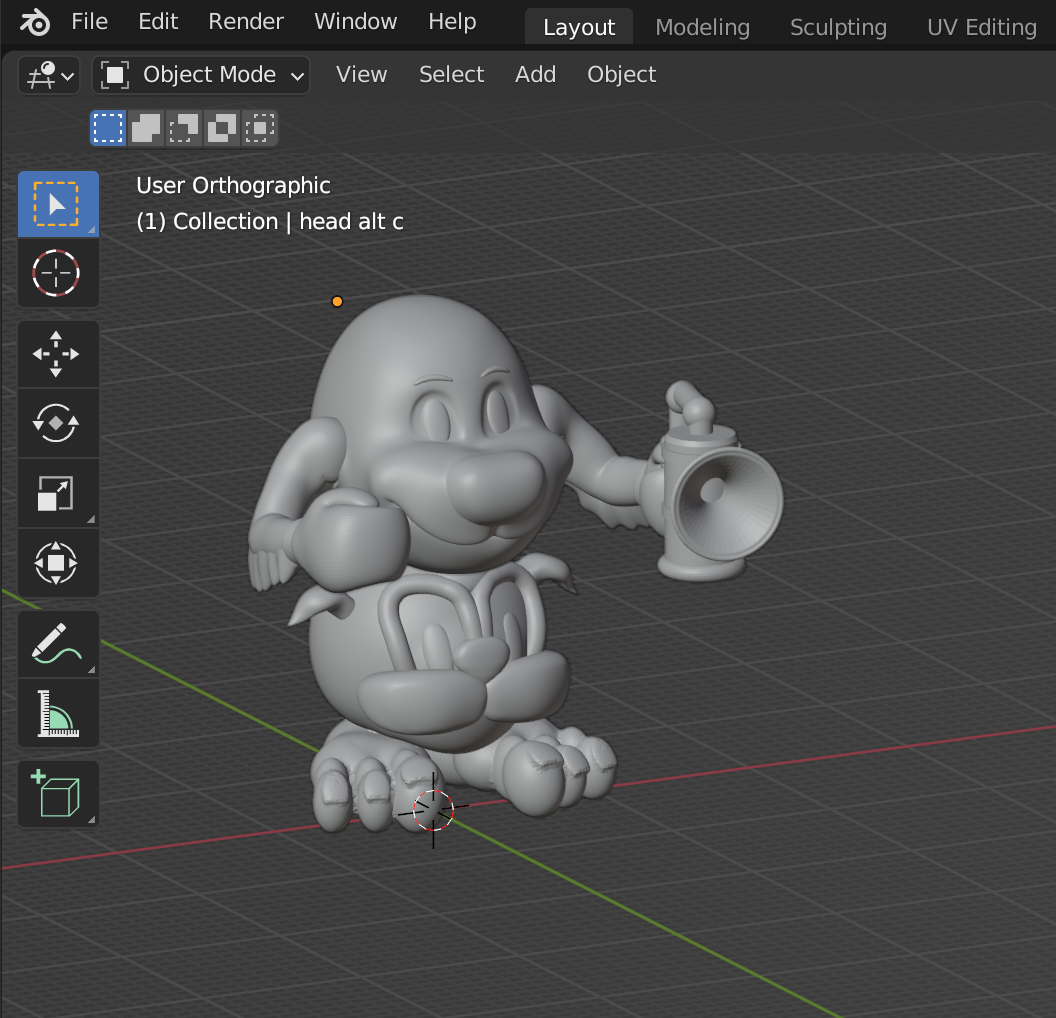
As a placeholder, I ordered and downloaded the Head over Heels characters from Cults3D. (https://cults3d.com/en/3d-model/game/head-over-heels)
One can see that even at first glance, they are not the best modelled characters – but they were something to print as use as proxies. In the meantime, I hit up a couple of people on Fiverr, sent some of the original game artwork and asked if they could create some similar, high-res models.
Of the two responses I got, I found the Mr Heels character to be a pretty good likeness, but the Mr Head character – in both cases – wasn’t quite there. So I flexed my own crude Blender skills and made a mash-up of the two, to create my own version of Mr Head.
The results are below:

I’ve included each model twice in case of failures – this is my first time using Chitubox exclusively for supporting and slicing. Usually I drop the models into Prusa slicer, support and export, slice in Chitubox, then run the whole file through UVTools (to check for islands).
But I’ve noticed – particularly with my castle wall tiles – that Prusa slicers seems to be very aggressive when auto-placing supports, and requires a lot of cleanup afterwards.
Plus, later versions of Chitubox include a detect islands in layers feature and even a crude “delete islands from all layers” option (not something I’m a big fan of because doing so can often made a bad problem worse!)
But I checked each (ok, most) layers it produced and decided which islands I could safely delete. But this is a new way of working for me, so I’ve provided slightly differently supported versions of each model, just in case any of them fail during printing.

Tonight the printer goes burrrrrrrrr.
Let’s hope that tomorrow we can splosh some paint around!
The last post title didn't make sense
…. because the project system stopped me adding content after a couple of paragraphs. So let’s pretend this one is called “who mentioned Wallace and Grommitt?”
Picking up where we left off….
I really got into texture rolling (ok, I got really excited by printing a load of texture rollers and thinking of all the great tiles I could make with them) so printed a few different rollers.

I tried rolling a large(r) sheet of Fimo, and applying grid-lines using a steel ruler.
I wasn’t convinced with the effect. To begin with, I’m rubbish at getting everything perfectly square, so they look a little bit wonky anyway.
But it also feels quite inflexible – the smaller, individual tile approach gives me more options.
And, frankly, looks a lot better…

Which leads me onto the rather tenuous link to the Aardman classic Wallace and Grommitt.
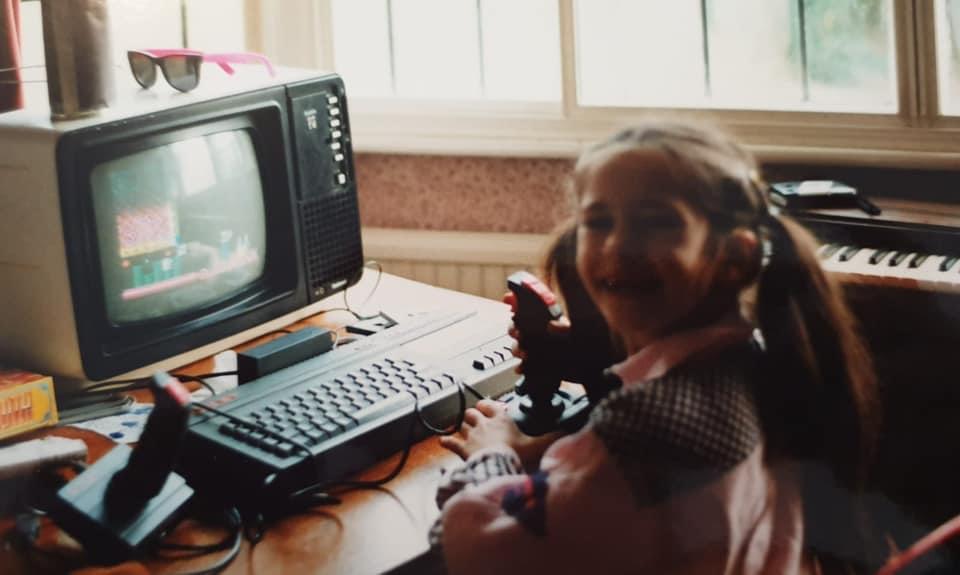
See, there’s something quite appealing about a “hand-made, had-crafted” finish to this game. It’s a retro-cartoon-like 8-bit computer game converted to the desktop.
I would be really tempting to just whack everything into Blender, create a whole virtual world on the screen and press “print”.
But there’s something really nice about actually making something “old-school”. And the finished result looking like it too.
Just like the original Wallace and Grommitt films.
They don’t suffer from being hand-animated stop-motion movies. In fact, the odd frame with a thumbprint in the cobblestones is exactly what makes them so endearing. They look like what they are – hand-made, cartoony, retro nostalgia.
More modern animation films may look more sophisticated, and probably take a fraction of the time to create, when everything is computer generated. But this is old-fashioned, warm-your-heart pure nostalgia.
Which means actually making stuff with my hands instead of a mouse!


