


![How To Paint Moonstone’s Nanny | Goblin King Games [7 Days Early Access]](https://images.beastsofwar.com/2024/12/3CU-Gobin-King-Games-Moonstone-Shades-Nanny-coverimage-225-127.jpg)


SteveOmega13's Kingdom Death Settlement


3D Terrain turorial: Acanthus Plant
My mind has been blown this evening, the last thing I expected when sitting down to paint some more minis was for this project to appear on the XLBS. Just goes to show that you never know what others will think of your work until you put it out there.
Sam pointed out the Acanthus Plant tiles in the background of my pictures and I have been meaning to put together a tutorial on this. It just so happened that I had all of the pieces ready to do so. So, lets get on with it.
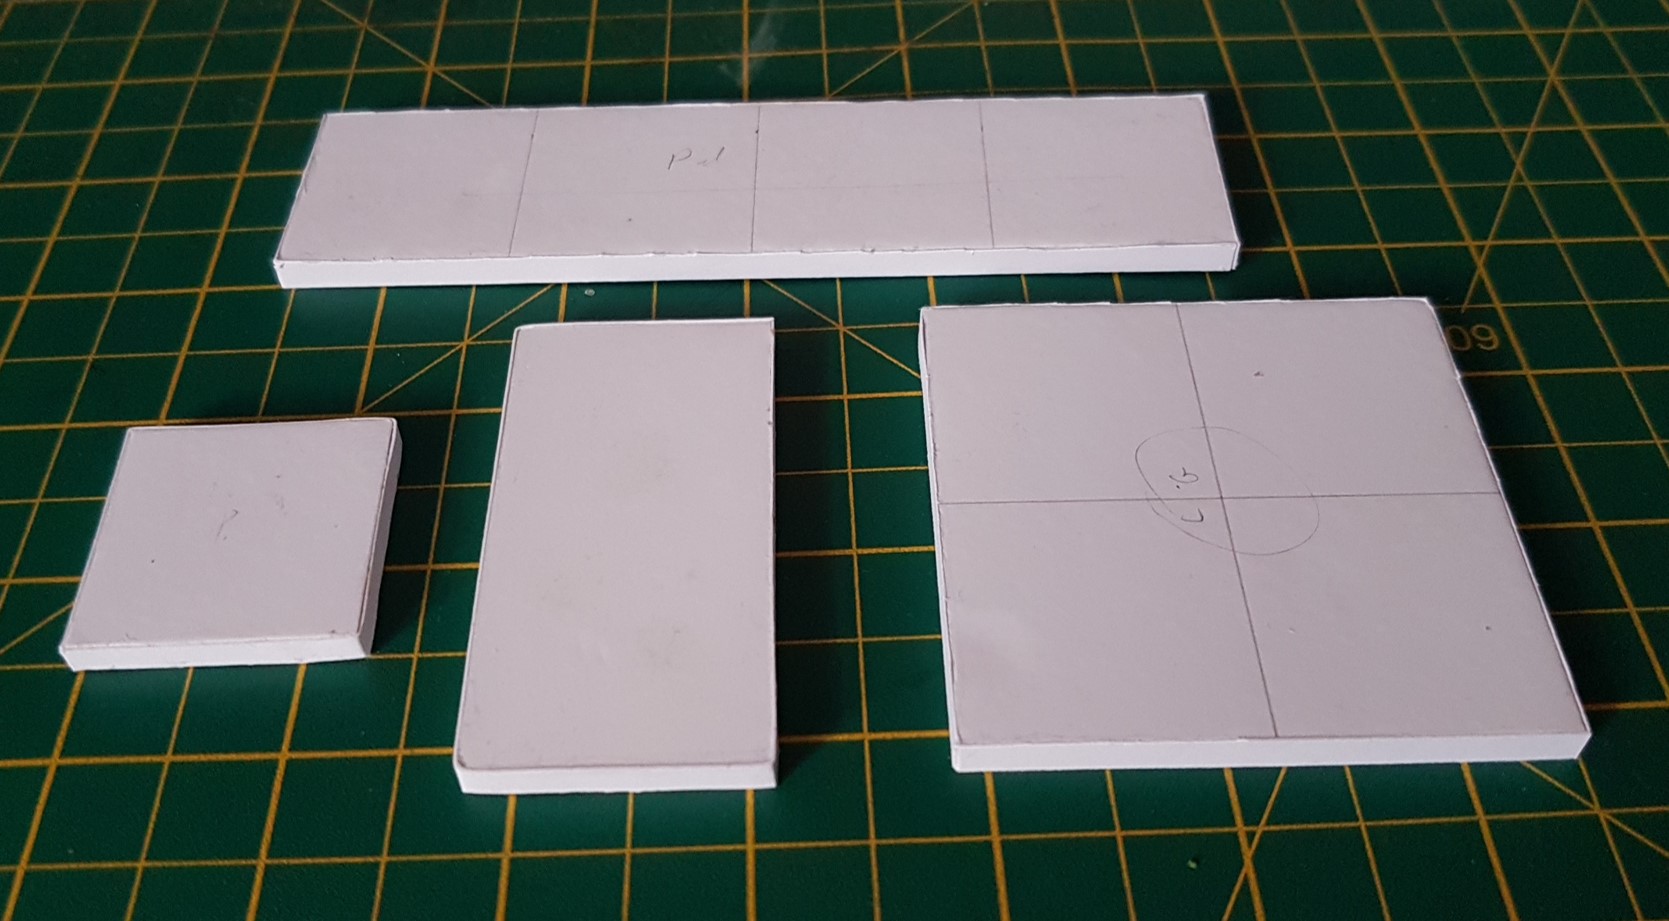 Step 1: The raw tiles
The base to the tiles is a 5mm thick sheet of foam board. I drew on a 33mm square grid and used it as a guide to cut out shapes to match the tiles from the core game. I then glued a strip of card around the edge of each of the tiles using PVA glue to seal off the foam innards. Once dry any excess card was trimmed away with a craft knife.
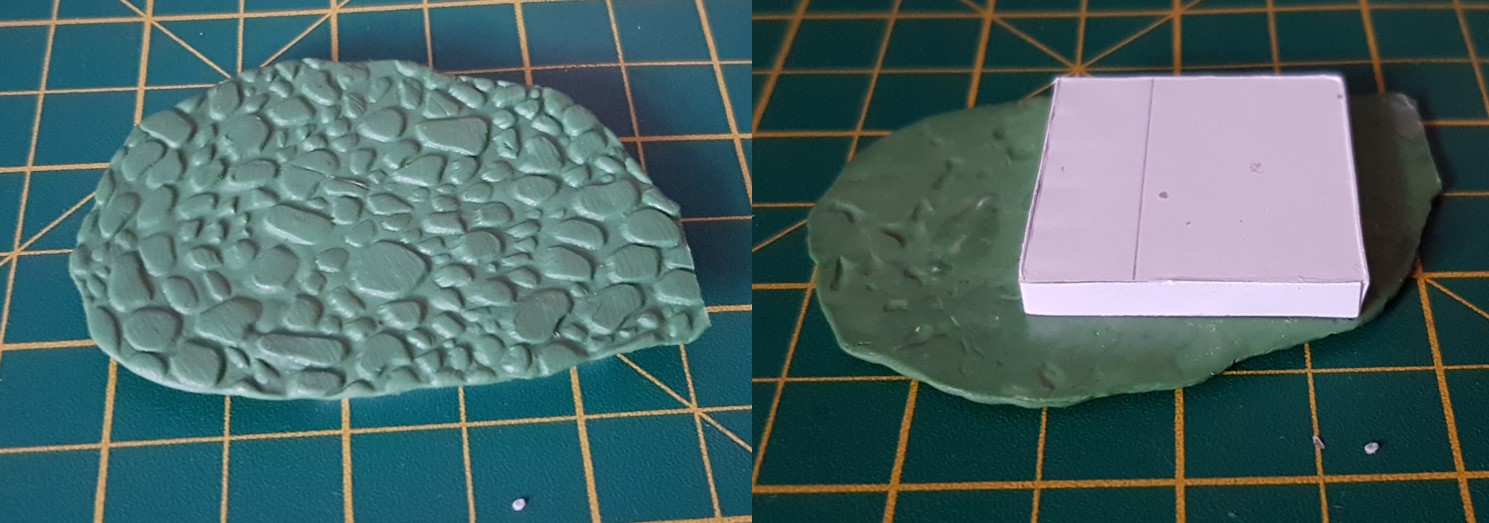 Step 2: The GreenStuff
To get the cobble effect on the tiles I use a Cobblestone Texture rolling pin from Green Stuff World. I make myself a surface by wrapping a board with plastic wrap and roll out a portion of green stuff large enough to cover one or more tiles. This time I estimated wrong and unfortunately have more wastage that hoped.
Once dry I then glue the tile and green stuff together with superglue and wait until it is dry. If you move on to the next step too soon then you are likely to find yourself attached to the tile.
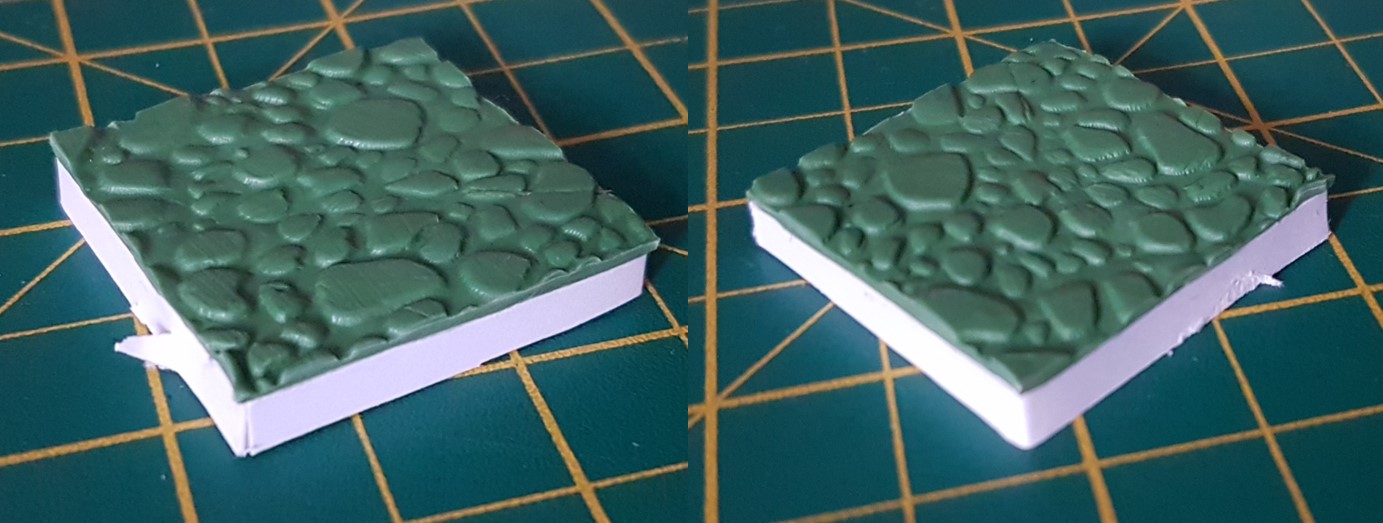 Step 3: The basic tile
Once the glue is dried I trim off the excess green stuff with a knife. It is worth doing a rough cut first, 1-2mm away from the card, to make the close cut easier.
The aim is to trim the green stuff to the same area as the card tile. This will allow the tiles to fit within the grid on the main board easily. Take care cutting the last of the excess green stuff to make sure you do not cut into the card as I did. While this can be cleaned up and covered in painting it saves time to get it right in the first place.
With that the basic construction of the tiles is complete. Next comes painting and dressing.
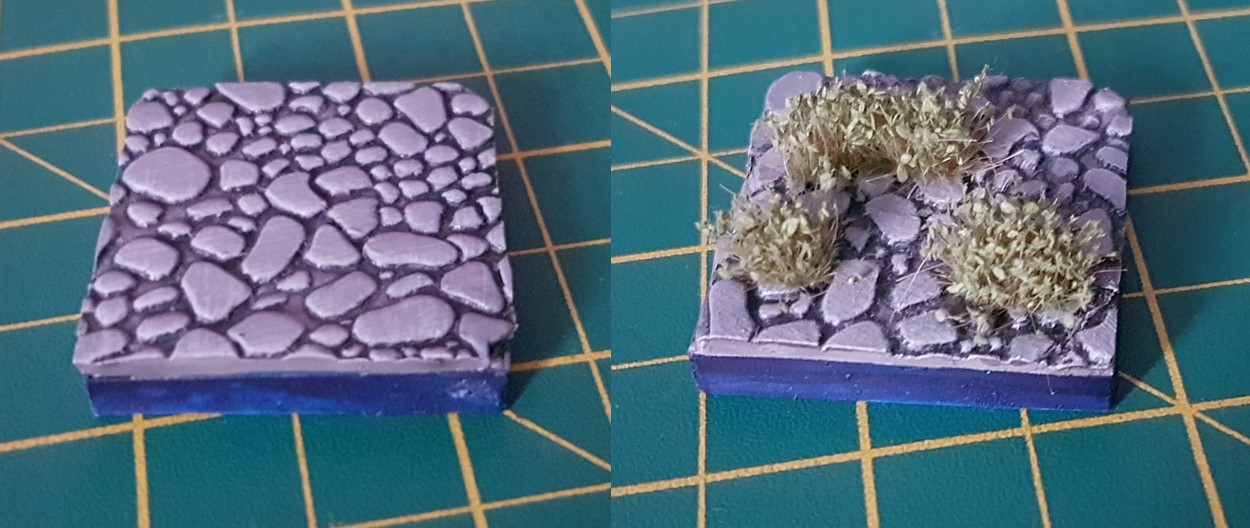 Step 4: Painting and adding details
I kept the painting on these tiles intentionally simple as they are meant as enhancements to the game and not distractions. This scheme consists of 4 paints:
- Vallejo Cold Grey
- Vallejo Stonewall Gery
- Vallejo Night Blue
- GW Nuln Oil
After base coating in white, the cobbles are based in Cold Grey before the recesses are washed in Nuln Oil, twice, to darken them. Once dry the cobbles are picked out in Cold Grey again before having a light drybrush of Stonewall grey to pick out the edges. Finally the sides of the tile are painted in multiple coats of Night Blue to get a deep colour.
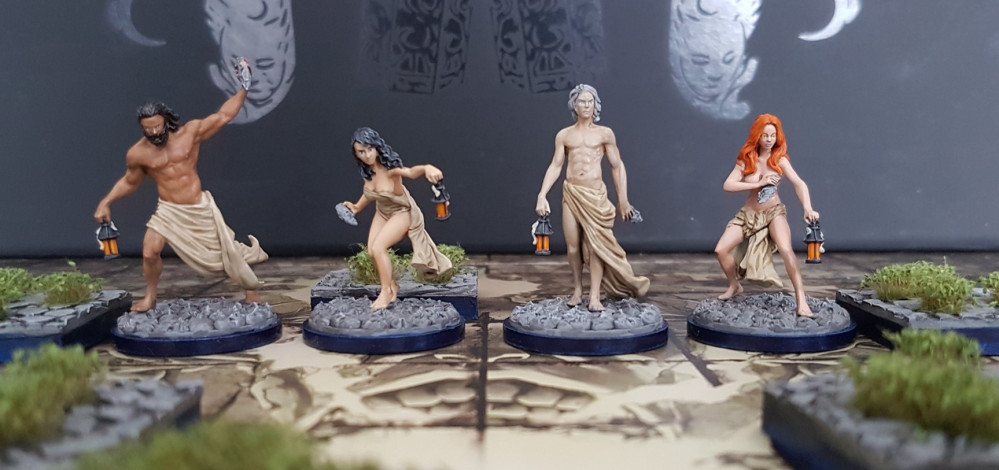
After varnishing, the final step is to dress the tile. I used self adhesive Dark Green Shrub Tufts from Green Stuff World to act as Acanthus Plants. I arranged the shrubs of the tiles in a way to allow a mini to stand on the tile when playing the game (as shown below).
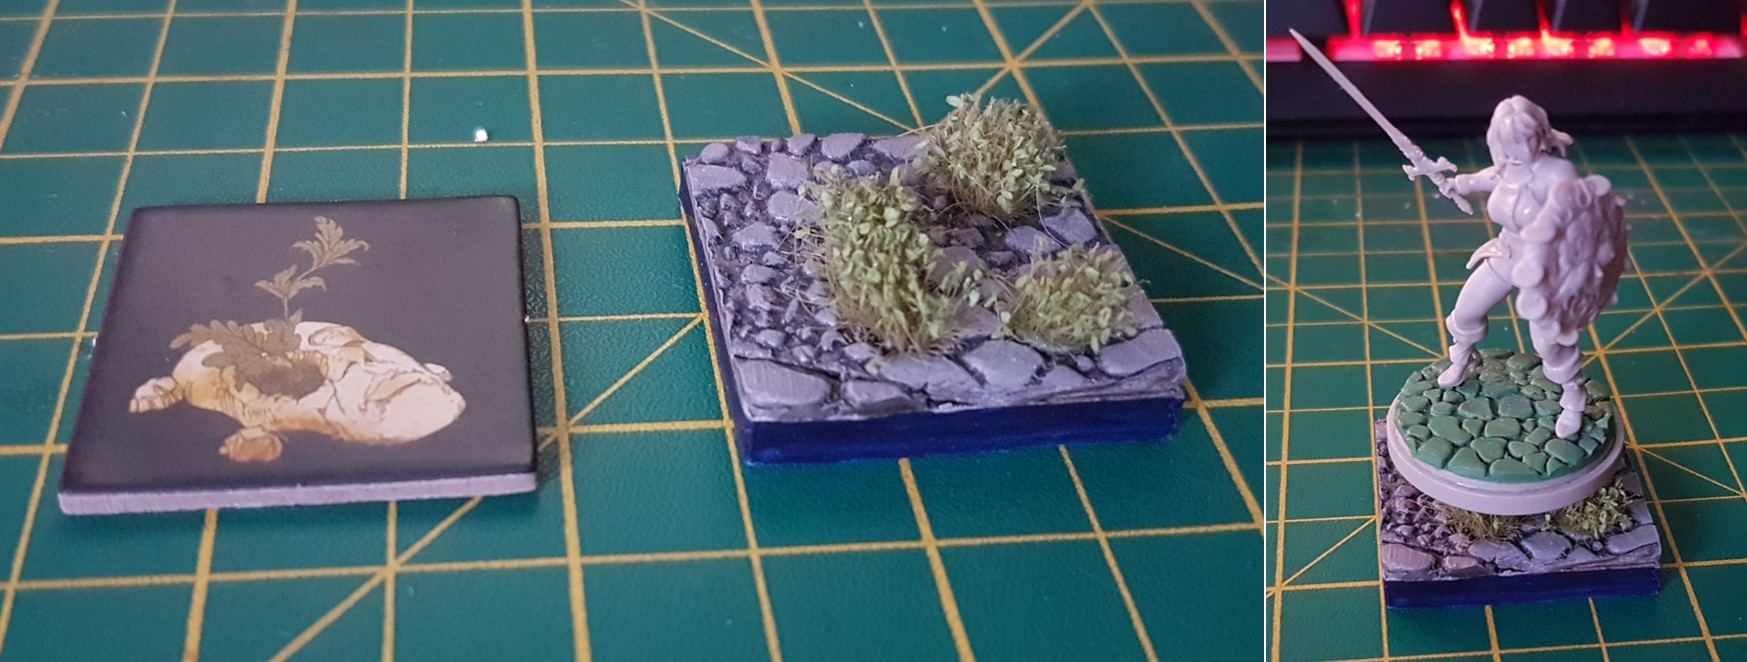 The finished tile
So there you have it, a quick guide to making 3D tiles for a boardgame. I can’t claim that the original idea was mine as many people have done similar, but this is my implementation.
I plan to do the same for the other tiles required in the game. Resin crystals and wedding cake pillars are the current plan for Ore and Pillar tiles but I have not decided on the others.


Leave a Reply