![How To Paint Moonstone’s Nanny | Goblin King Games [7 Days Early Access]](https://images.beastsofwar.com/2024/12/3CU-Gobin-King-Games-Moonstone-Shades-Nanny-coverimage-225-127.jpg)


SteveOmega13’s Kingdom Death Settlement


Recommendations: 87
About the Project
A landing page for my journey through this big black box of horrors.
Related Game: Kingdom Death: Monster
Related Company: Kingdom Death
Related Genre: Horror
This Project is Active
New Year, new motivation... maybe.
After months of feeling snowed under by “Real Life” I have finally found the energy to get back to what matters, spending many hours painting and playing with minis.
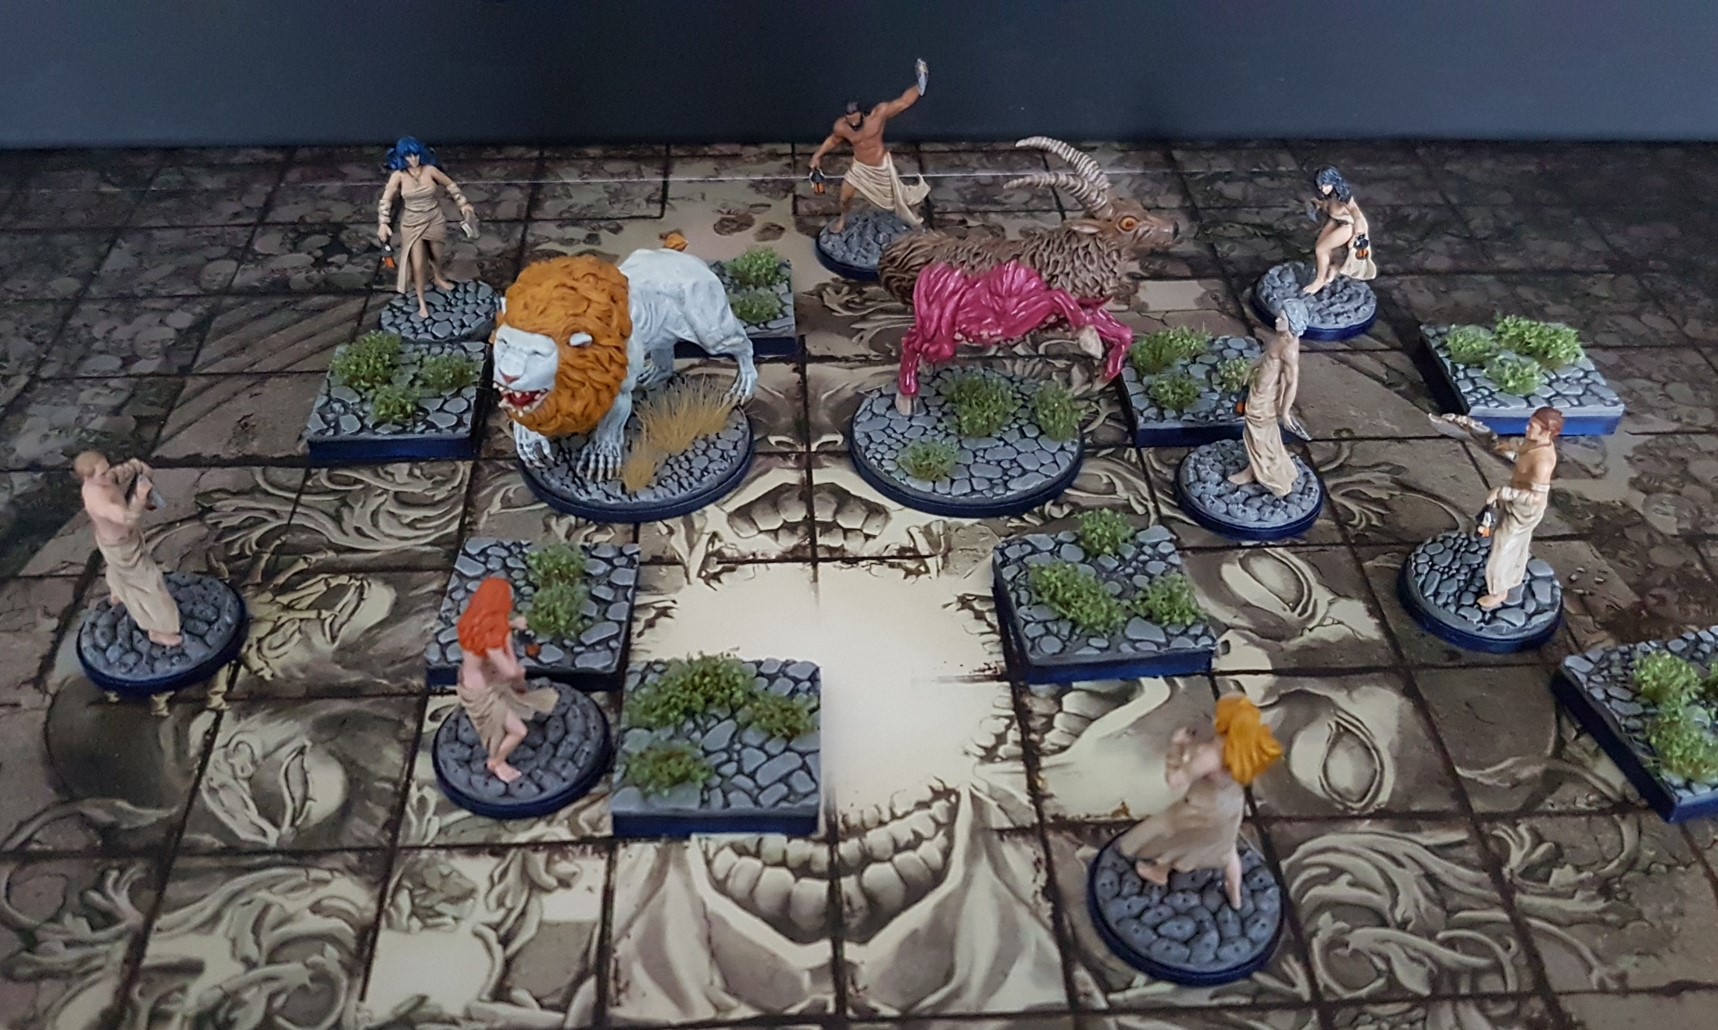
I managed to get a few sessions of KDM in with my gaming group and stuff got weird pretty quickly, and that was just the settlement decisions. Many a Lion was harvested until a fog stopped us from returning to the settlement. Next session we should reach the Butcher. Someone is gonna get bisected.
On the painting front I managed to get the Kings Man and the Rawhide Survivors painted. I had a bit of an issue with the varnishing on the survivors, it went on a bit thick on one or two of them. Nothing disastrous but it is noticeable on them if you look closer.
Thankfully the Kingsman went much better (I was more careful with the varnish on him). I tried to follow the Vajello Non-Metalic Metal steps from one of their paint sets. It is a good starting point and gave me a good idea of which colours to use to get a gold effect, but I can see ways I would do it differently next time I try the colour. Perhaps on the Hand.

Not sure when I will next paint a KDM mini as I have a few Infinity models I am working on at the moment (both minis and terrain). I do however know which models I will be working on, the Phoenix and the Watcher.
3D Terrain turorial: Acanthus Plant
My mind has been blown this evening, the last thing I expected when sitting down to paint some more minis was for this project to appear on the XLBS. Just goes to show that you never know what others will think of your work until you put it out there.
Sam pointed out the Acanthus Plant tiles in the background of my pictures and I have been meaning to put together a tutorial on this. It just so happened that I had all of the pieces ready to do so. So, lets get on with it.
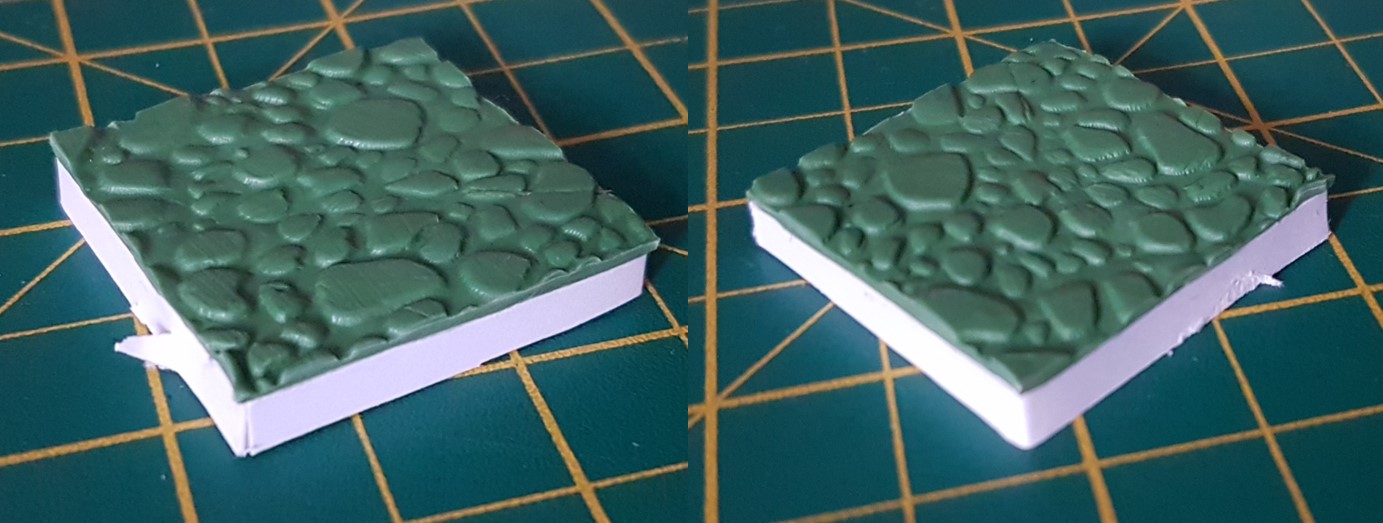
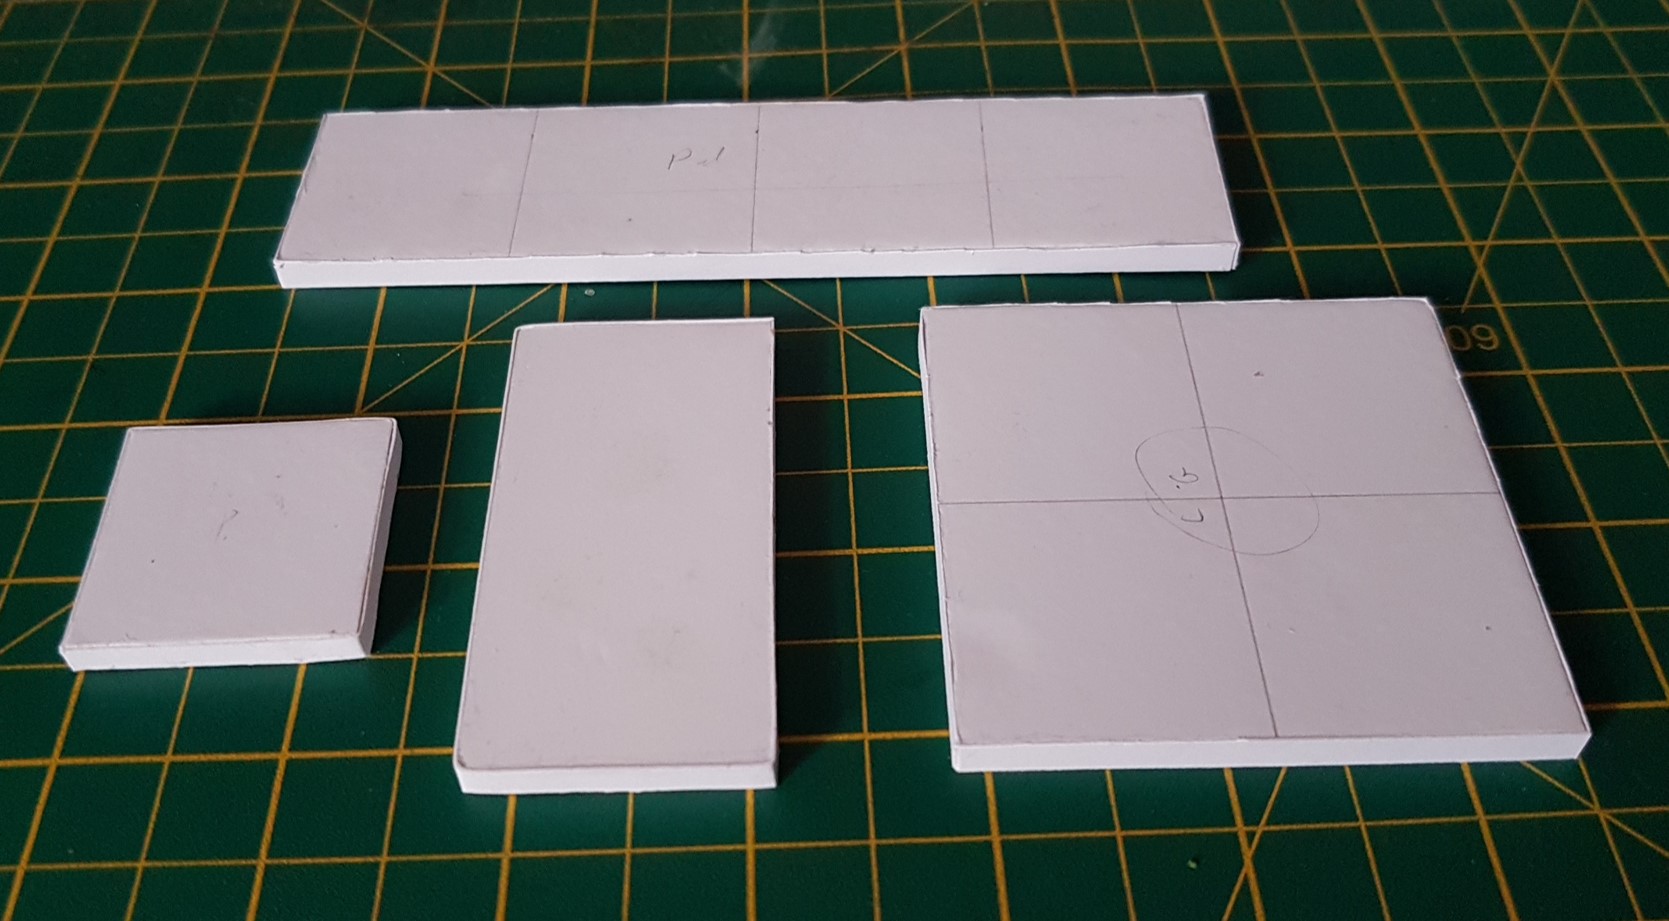 Step 1: The raw tiles
The base to the tiles is a 5mm thick sheet of foam board. I drew on a 33mm square grid and used it as a guide to cut out shapes to match the tiles from the core game. I then glued a strip of card around the edge of each of the tiles using PVA glue to seal off the foam innards. Once dry any excess card was trimmed away with a craft knife.
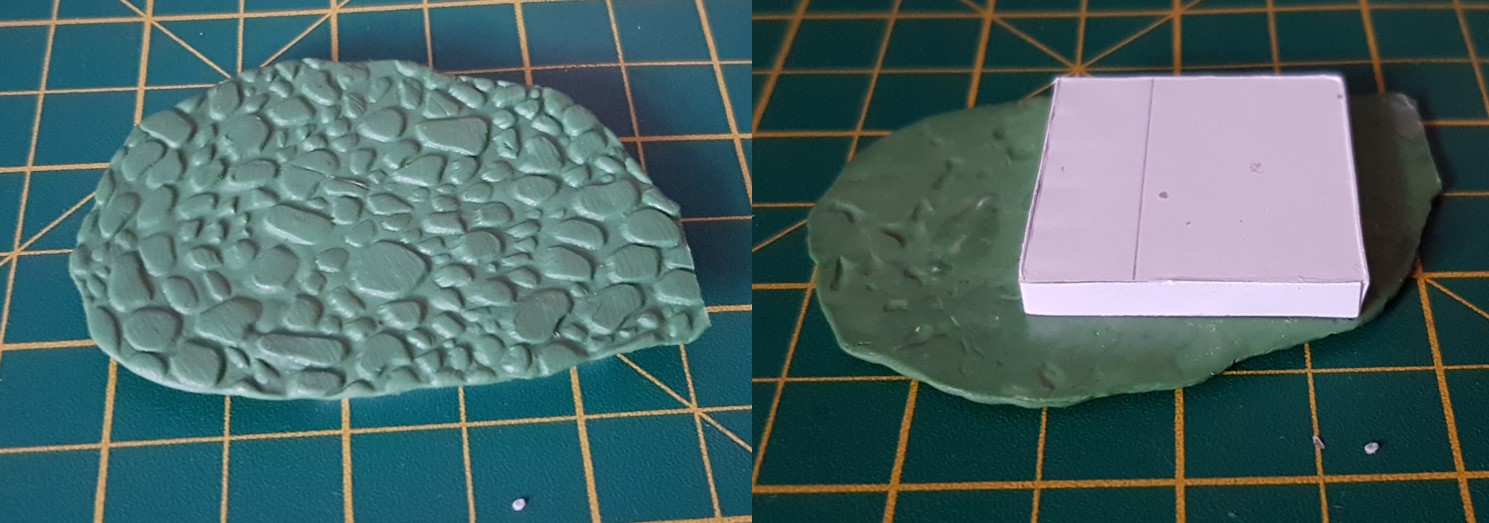 Step 2: The GreenStuff
To get the cobble effect on the tiles I use a Cobblestone Texture rolling pin from Green Stuff World. I make myself a surface by wrapping a board with plastic wrap and roll out a portion of green stuff large enough to cover one or more tiles. This time I estimated wrong and unfortunately have more wastage that hoped.
Once dry I then glue the tile and green stuff together with superglue and wait until it is dry. If you move on to the next step too soon then you are likely to find yourself attached to the tile.
 Step 3: The basic tile
Once the glue is dried I trim off the excess green stuff with a knife. It is worth doing a rough cut first, 1-2mm away from the card, to make the close cut easier.
The aim is to trim the green stuff to the same area as the card tile. This will allow the tiles to fit within the grid on the main board easily. Take care cutting the last of the excess green stuff to make sure you do not cut into the card as I did. While this can be cleaned up and covered in painting it saves time to get it right in the first place.
With that the basic construction of the tiles is complete. Next comes painting and dressing.
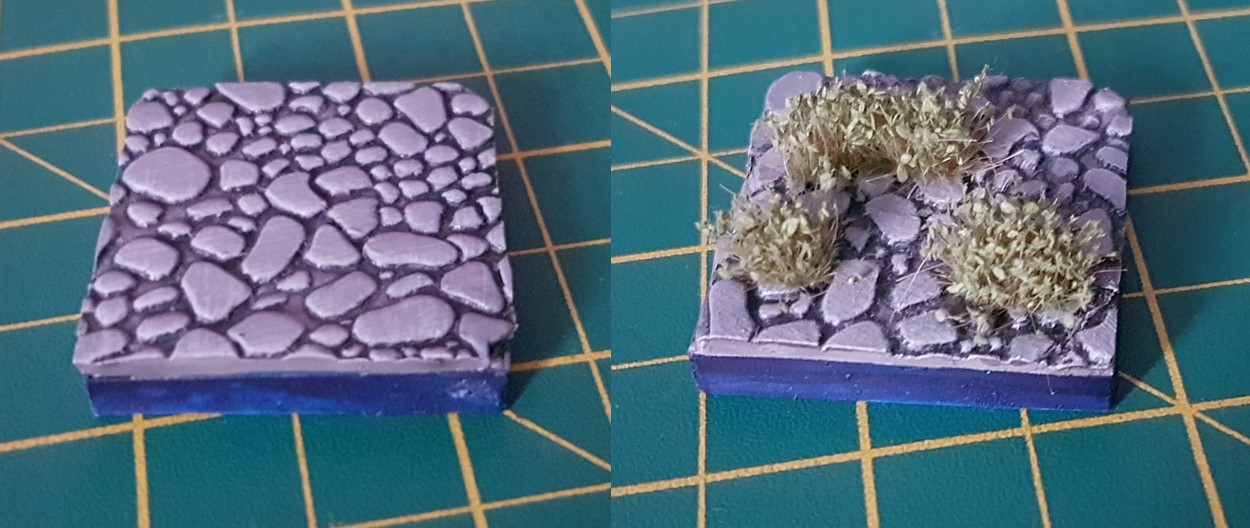 Step 4: Painting and adding details
I kept the painting on these tiles intentionally simple as they are meant as enhancements to the game and not distractions. This scheme consists of 4 paints:
- Vallejo Cold Grey
- Vallejo Stonewall Gery
- Vallejo Night Blue
- GW Nuln Oil
After base coating in white, the cobbles are based in Cold Grey before the recesses are washed in Nuln Oil, twice, to darken them. Once dry the cobbles are picked out in Cold Grey again before having a light drybrush of Stonewall grey to pick out the edges. Finally the sides of the tile are painted in multiple coats of Night Blue to get a deep colour.
After varnishing, the final step is to dress the tile. I used self adhesive Dark Green Shrub Tufts from Green Stuff World to act as Acanthus Plants. I arranged the shrubs of the tiles in a way to allow a mini to stand on the tile when playing the game (as shown below).
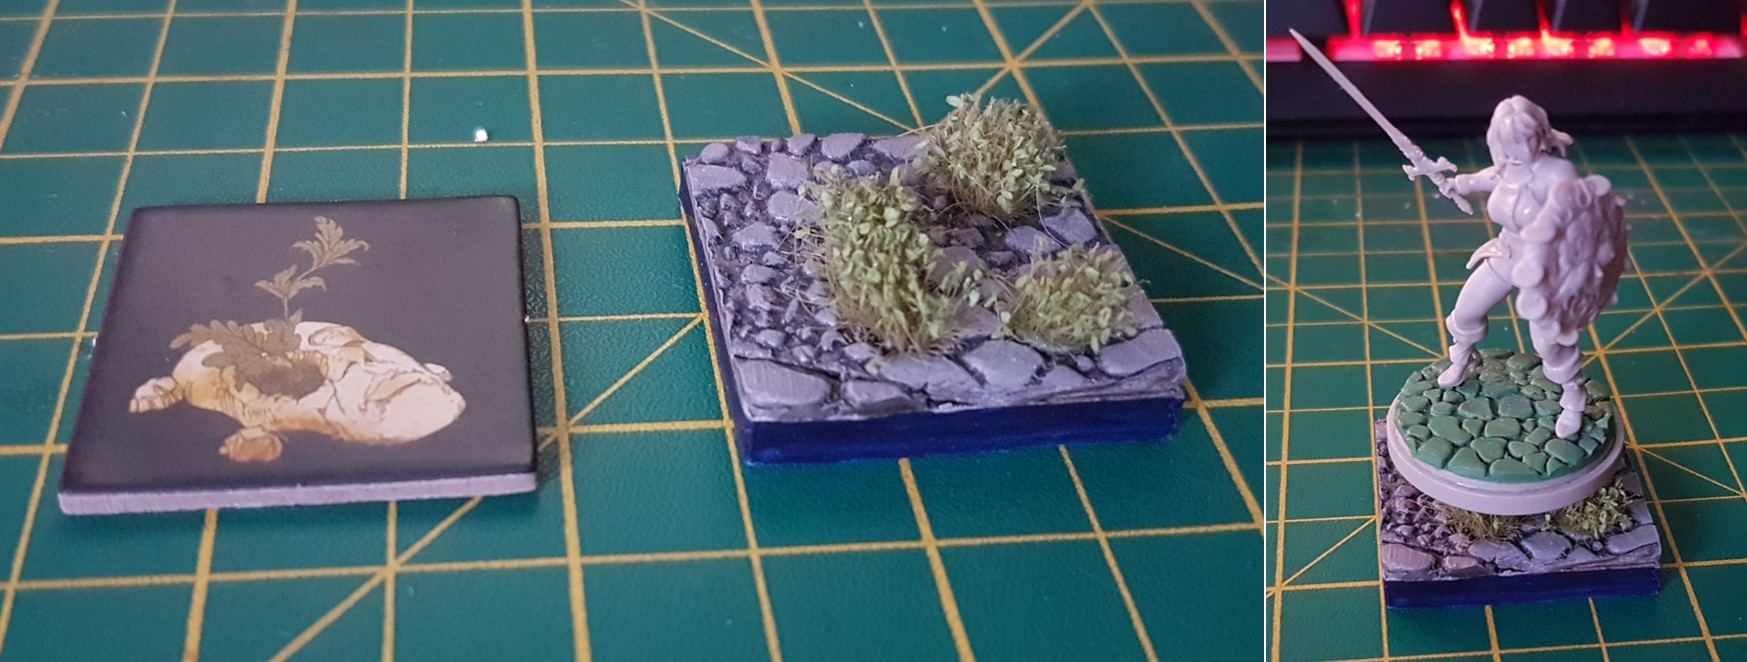 The finished tile
So there you have it, a quick guide to making 3D tiles for a boardgame. I can’t claim that the original idea was mine as many people have done similar, but this is my implementation.
I plan to do the same for the other tiles required in the game. Resin crystals and wedding cake pillars are the current plan for Ore and Pillar tiles but I have not decided on the others.
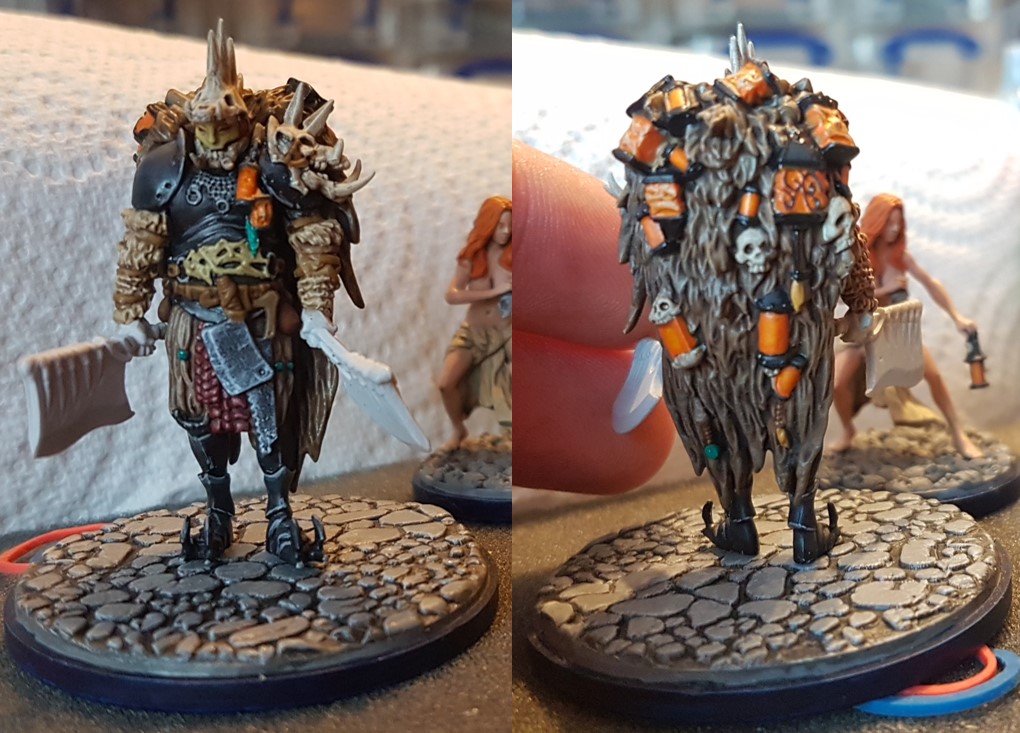
The finished Butcher
I finished the main painting on the Butcher a few weeks ago (before the Hobby night live) but have not found the time to update the project. Better late than never, here is the finished Butcher… looking rather clean.
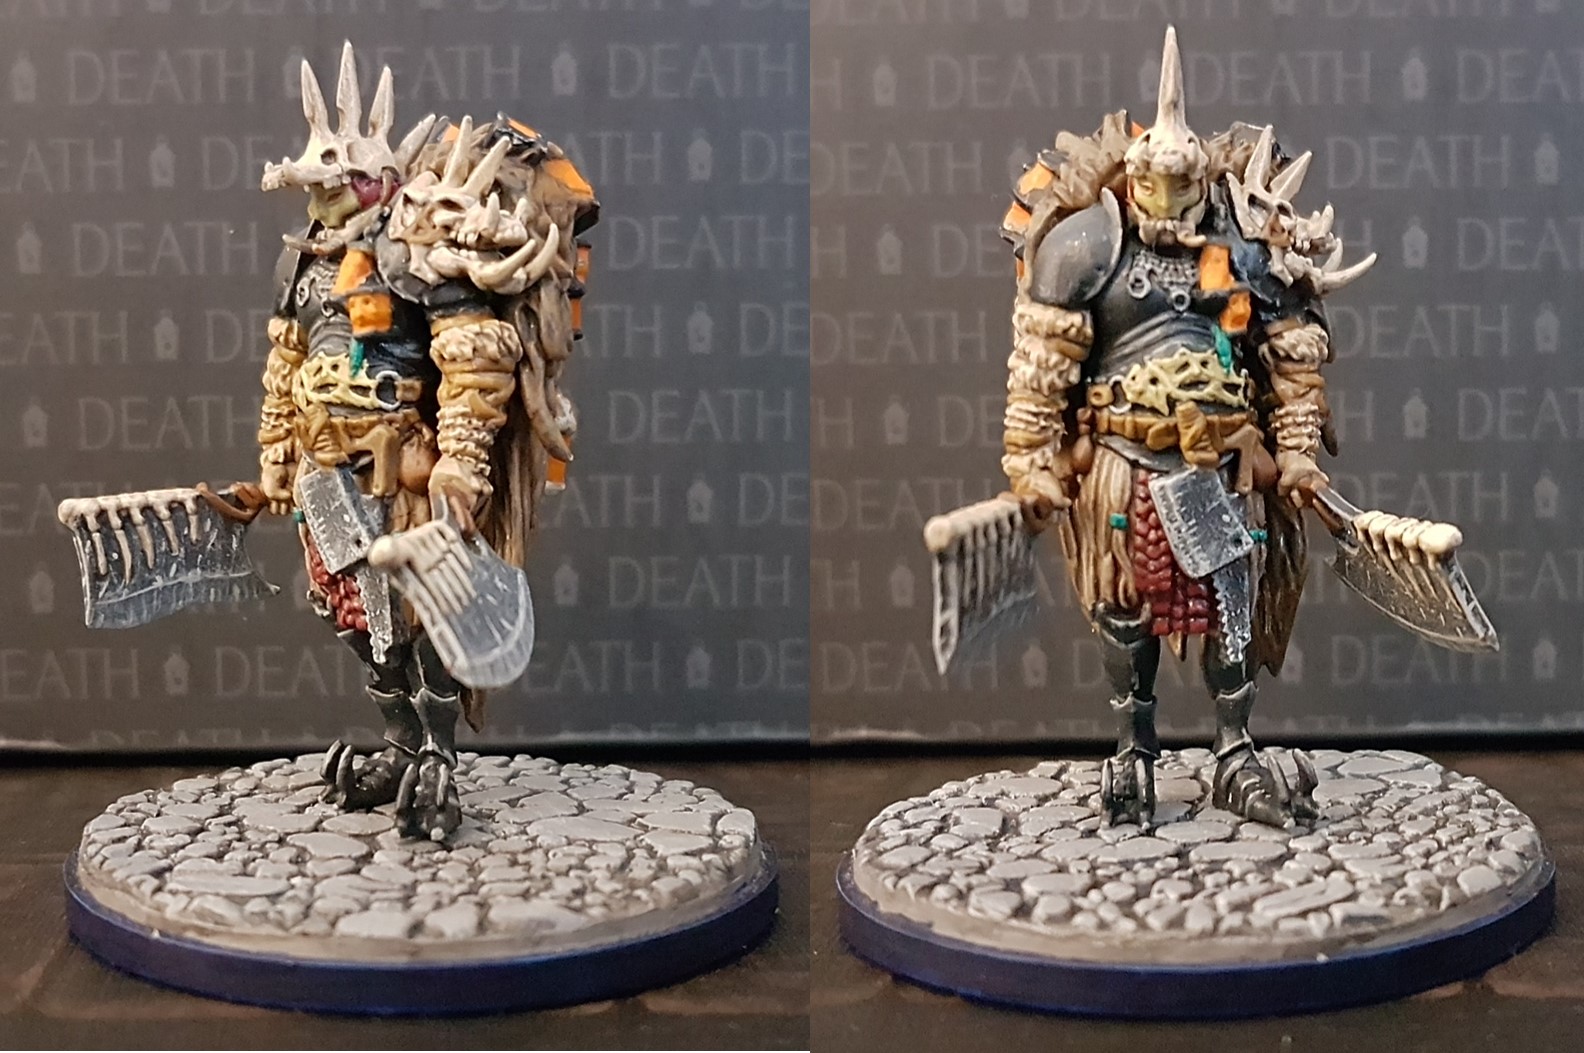 From the front
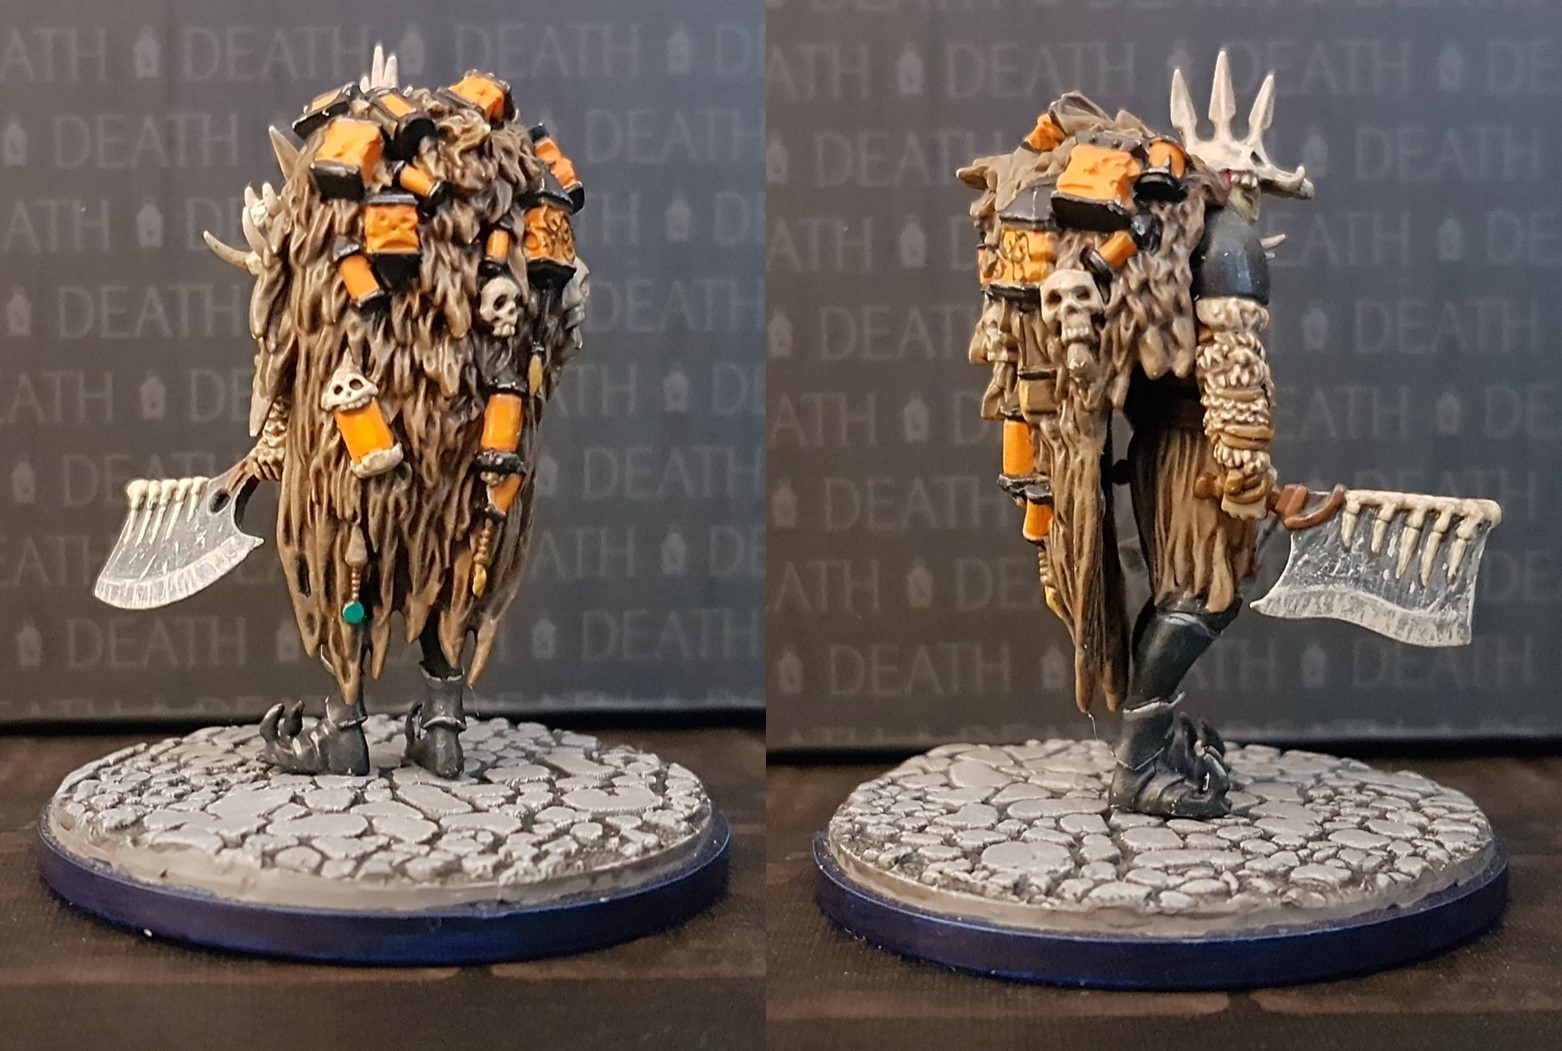 Obligatory rear shot
I may return to add some gore to this mini at a future date but for the moment I want to move on to the next minis.
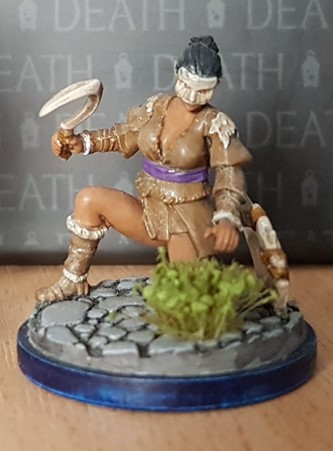
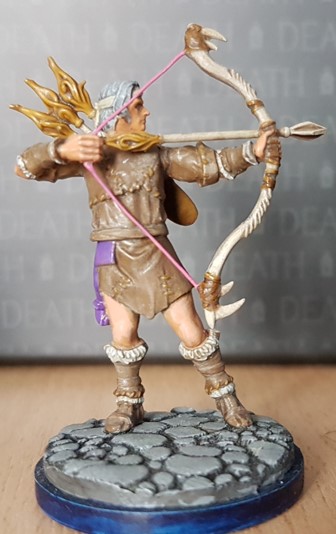
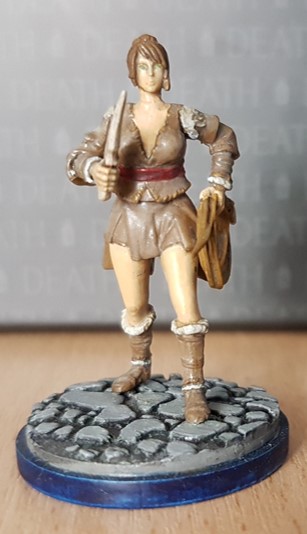
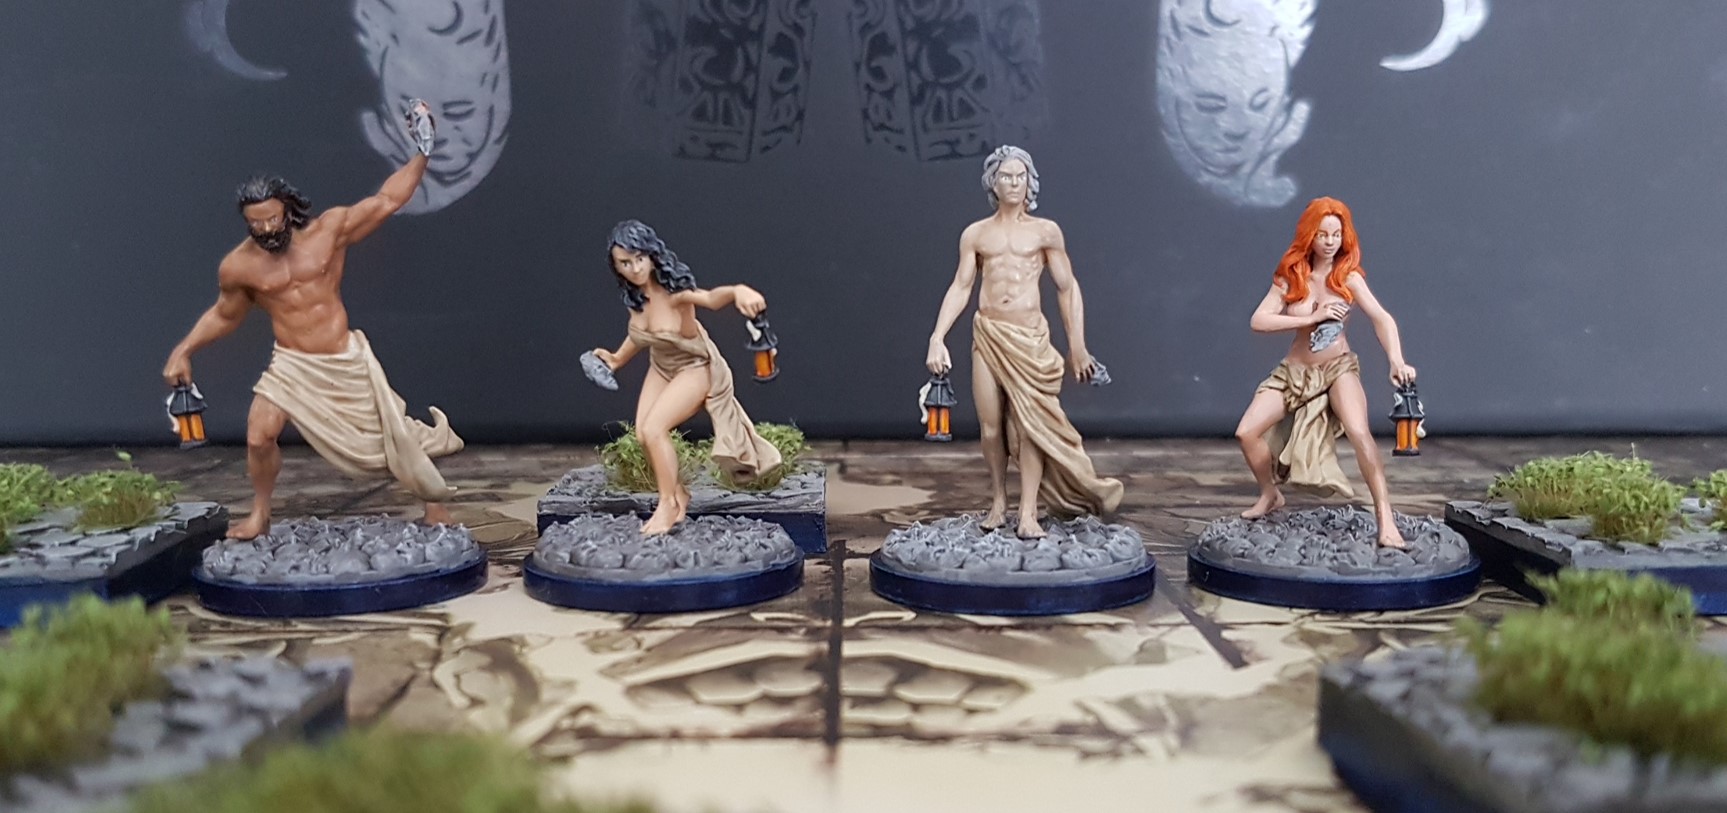
The Kings Man and the Rawhide armour survivors are the next minis I have put together. I tried to go for more dynamic poses for these survivors to add more narrative to the mini.
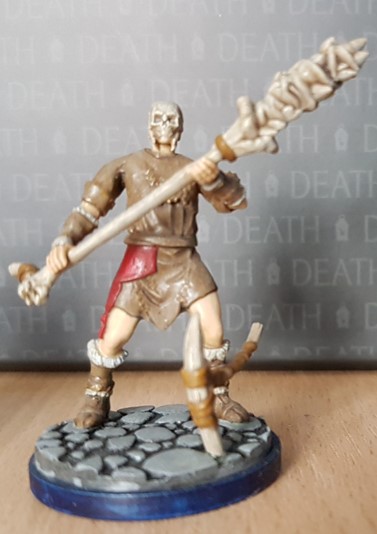
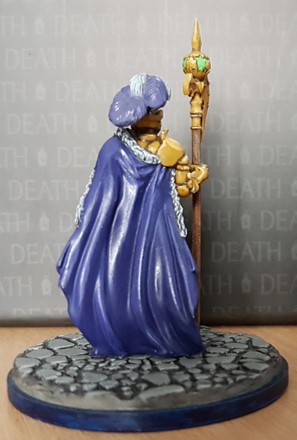
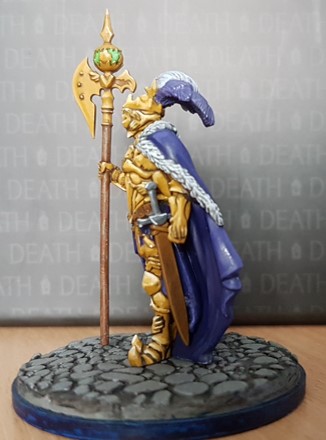
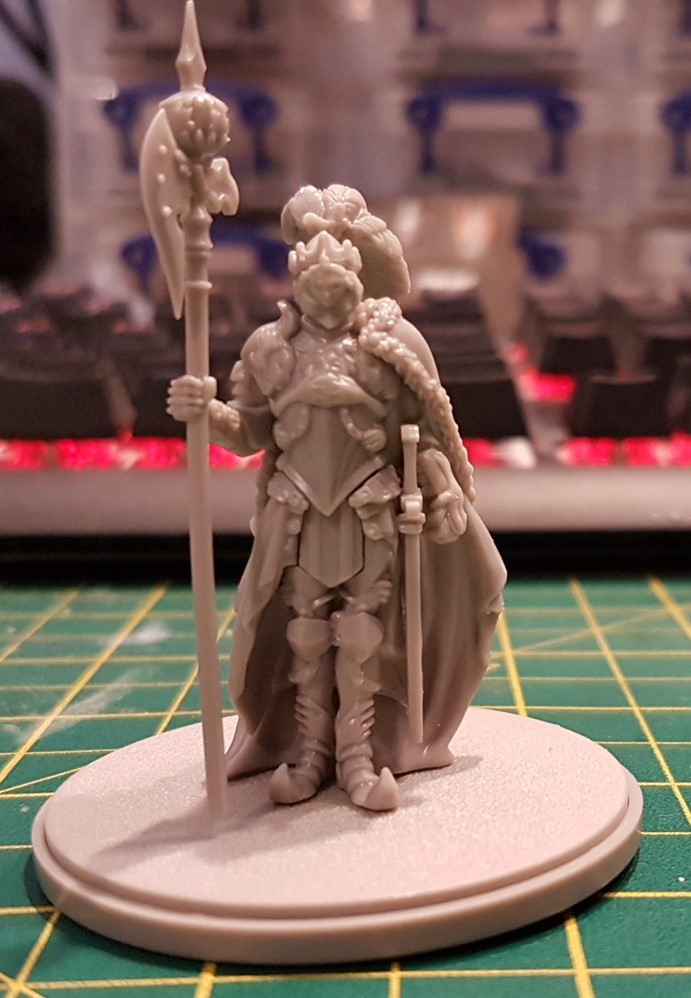 The Kings Man
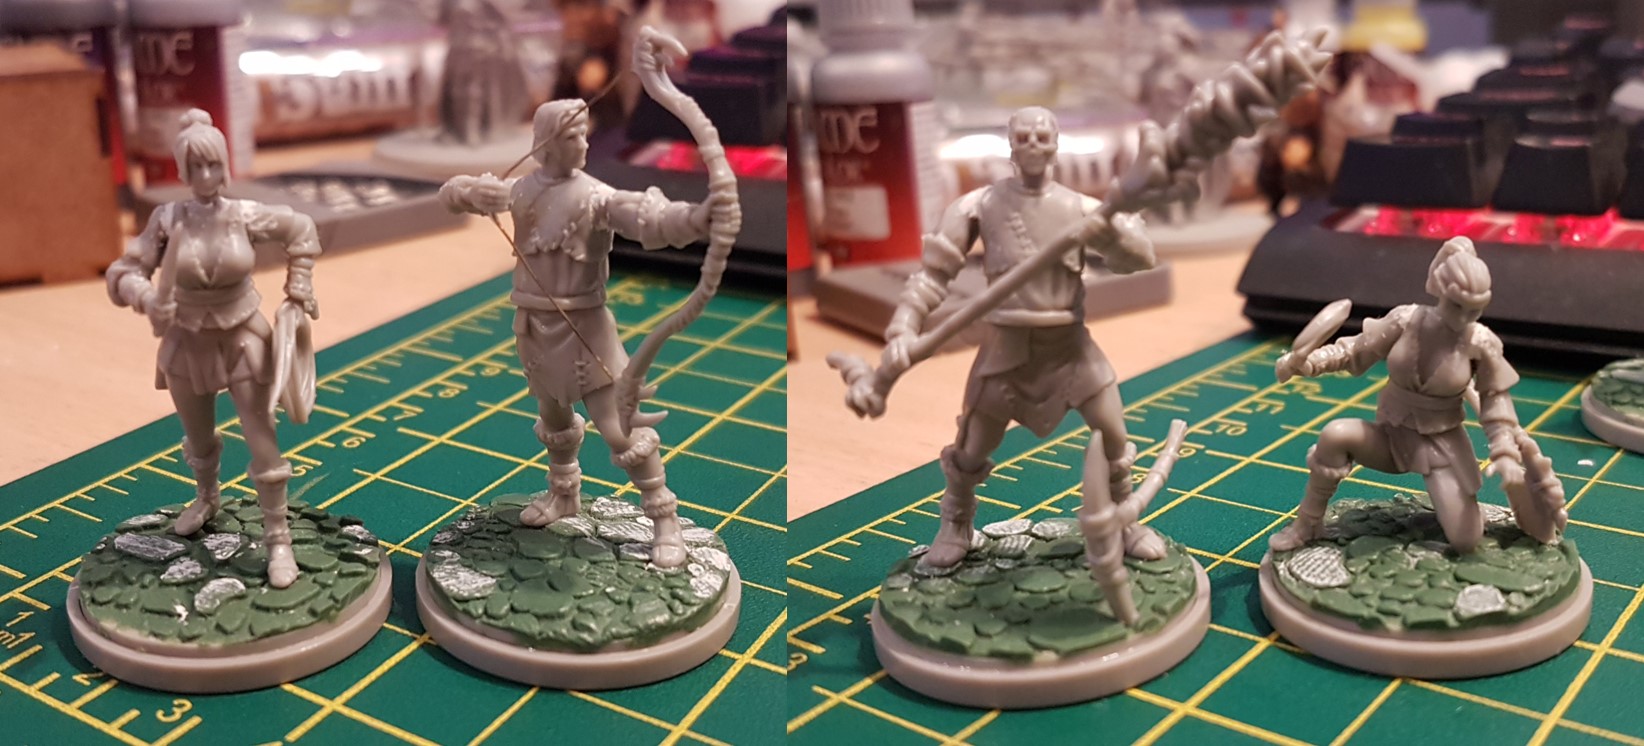 The next victims... I mean survivors.
The Cleavers
Well, I have finished the Butcher for now. I have yet to decide on whether to add gore to the mini yet so he is in a pre-encounter form for the moment. While I wait for a good time to get in some proper shots I thought I would put together a quick guide on how I painted the Cleavers.
The final effect was achieved using the following Vallejo colours and a GW wash:
- Black
- Cold Grey
- Stonewall Grey
- Bonewhite
- GW Agrax Earthshade
 The base coat
The base colours were all mixed from Black and Cold Grey. I mix the colours as I use them so I don’t have exact mixtures. The first layer is a very dark grey (probably 3:2 black to grey, maybe darker) and covers the whole weapon.
The next layer is a lighter grey (around 2:3 black to grey) and just covers the bevel of the blade.
The last part of the base coat is a lighter grey (1:3 black to grey) on the edge of the blade.
The last step of this phase is to define the step between the first two colours with cold grey, as well as edge highlight.
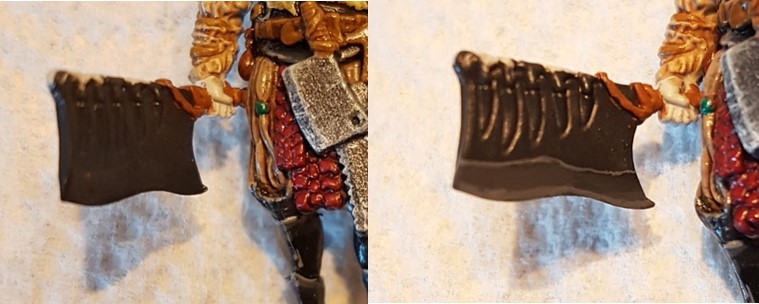
 Detailing the right Cleaver
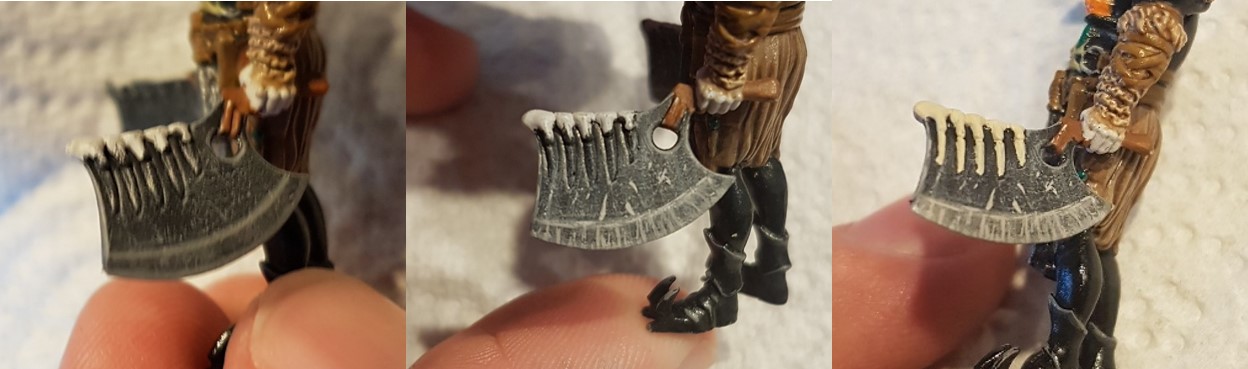 Detailing the left Cleaver
With the base complete the next step is to add the texture to the weapons. This is started with a Cold Grey drybursh over the whole of the weapon. The trick is to move the brush from the blade towards the spine at slight angles to get a scratched effect.
For the final steps you need to get out your fine detail brush. I started by adding thin lines to the blade, perpendicular to the cutting surface, in both Cold Grey and Stonewall Grey.
Next I used the Stonewall grey to add scratch marks on both the blade and the body of the cleaver. I also added to the edge highlighting to finish off the metal parts of the weapon.
The final steps of paining the weapon were to work on the bone features. This was simply picking out the bones with bone white, washing them with Agrax EarthShade. This was finished up with a drybrush and highlighting with bonewhite.
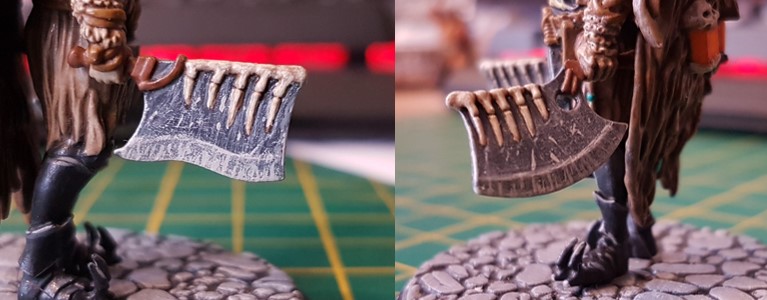 The final result
Progress on the Butcher
Best laid plans and all that…
While starting this project has indeed refocused my hobby efforts, work and SWR did their best to derail it. On those evenings where I had spare time (and brain power) I have made progress on the butcher.
Over the week he has progress from…
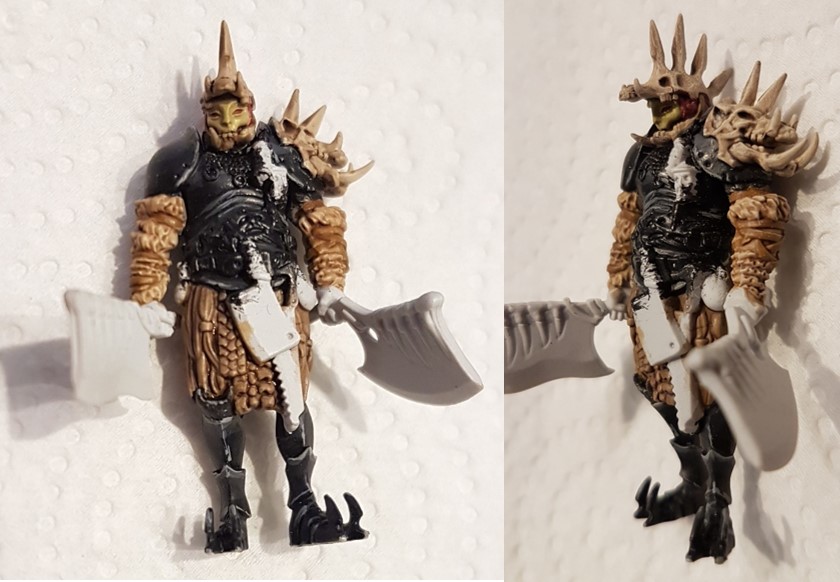 Washing and Drybrushing on the Arms, Skirt and Bone complete
Through the next set of base layers…
 Work Started on the chest adornments
And through a number of steps that I didn’t remember to record (including the mistake of trying metalics on the weapons) to how he currently stands.
 The butcher and his ghostly axes ... wait a minute, thats not right!
I am not sure about the lanterns yet but with a few touch ups they will be at a point where I can leave them and revisit then at a later date.
For the Black armor I am trying a non metallic metal (with a paint brush) to give it more depth than a flat black. To a lesser extent I am using the same technique to add texture to the lanterns.
The rest of the model has been painted with a basecoat, wash, (optional) drybrush and final highlight. My go to method. I did try using a gunmetal metallic on the cleaver and saw. However it looked so out of place after the first coat that I immediately changed to another style of weapon painting.
Now I just need to finish the general touch ups, varnish the painted areas and then I can start on the hands and main weapons.
The Journey Begins...
I have been in a bit of a motivational dry spot with a lot of my hobby recently and thought I would try something new to give me a boost. I have recently joined in with the DnD group at my local gaming club and it has left me wanting to get back into the beast that is Kingdom Death: Monster.
Over time I have painted number of the survivors and the first two monsters, but the Butcher is currently sat on my painting tray half finished. I hope that through this project I can drive my progression through the amazing miniatures in this game.
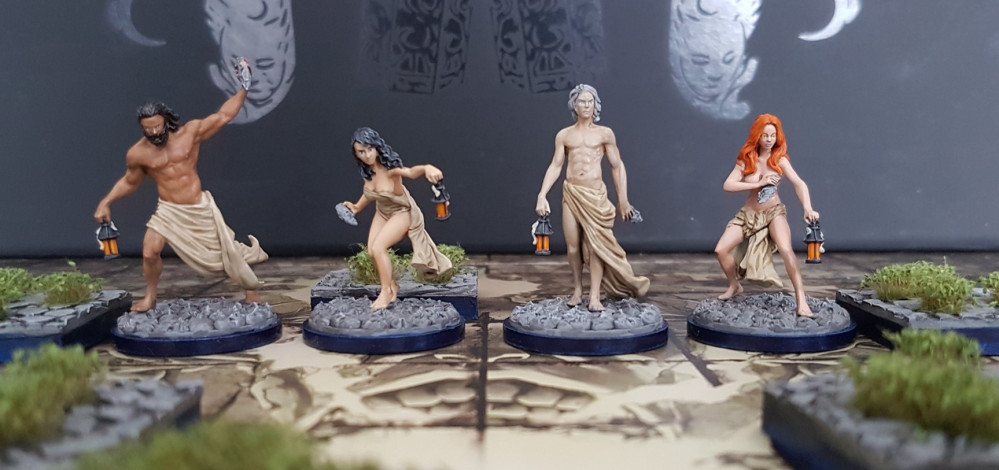
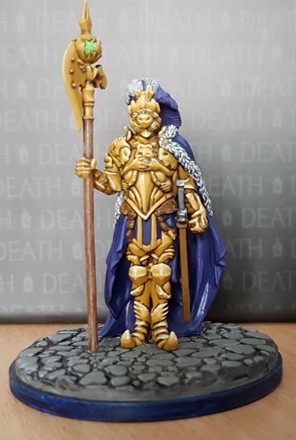
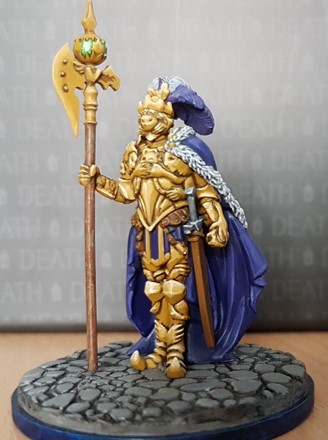
To set me off on this journey, here are some pics of the models I have already painted.
 The Starting Survivors