![Make Your Own Star Wars: Legion Heroes! Rebel Agent & Officer Set Review [7 Days Early Access]](https://images.beastsofwar.com/2025/12/unboxing-atomic-mass-games-star-wars-legion-rebel-alliance-agent-_-officer-coverimage-225-127.jpg)


Age of Sigmar Fyreslayer Lodge


Recommendations: 236
About the Project
With the new edition of Age of Sigmar on the horizon I am getting on with painting up my Fyreslayer Dwarfs. Thought I'd share my progress with you all. For the Magmadroth I took inspiration from an online video by Big Mek Workshop and the GW TV pages, but have been varying it to suit my ability and style. I have learnt a lot painting the Magmadroth, and forced myself to use new techniques I normally shy away from like edge highlighting and flesh tones. Really pleased how it has turned out so far. There are some superfluous steps in there, especially on the riders hair where I went back and forth trying to get the right balance and contrast, but the lessons learnt will certainly help me formulate a speedy approach to painting up the rest of the foot troops.
Related Game: Warhammer Age of Sigmar
Related Company: Games Workshop
Related Genre: Fantasy
This Project is Active
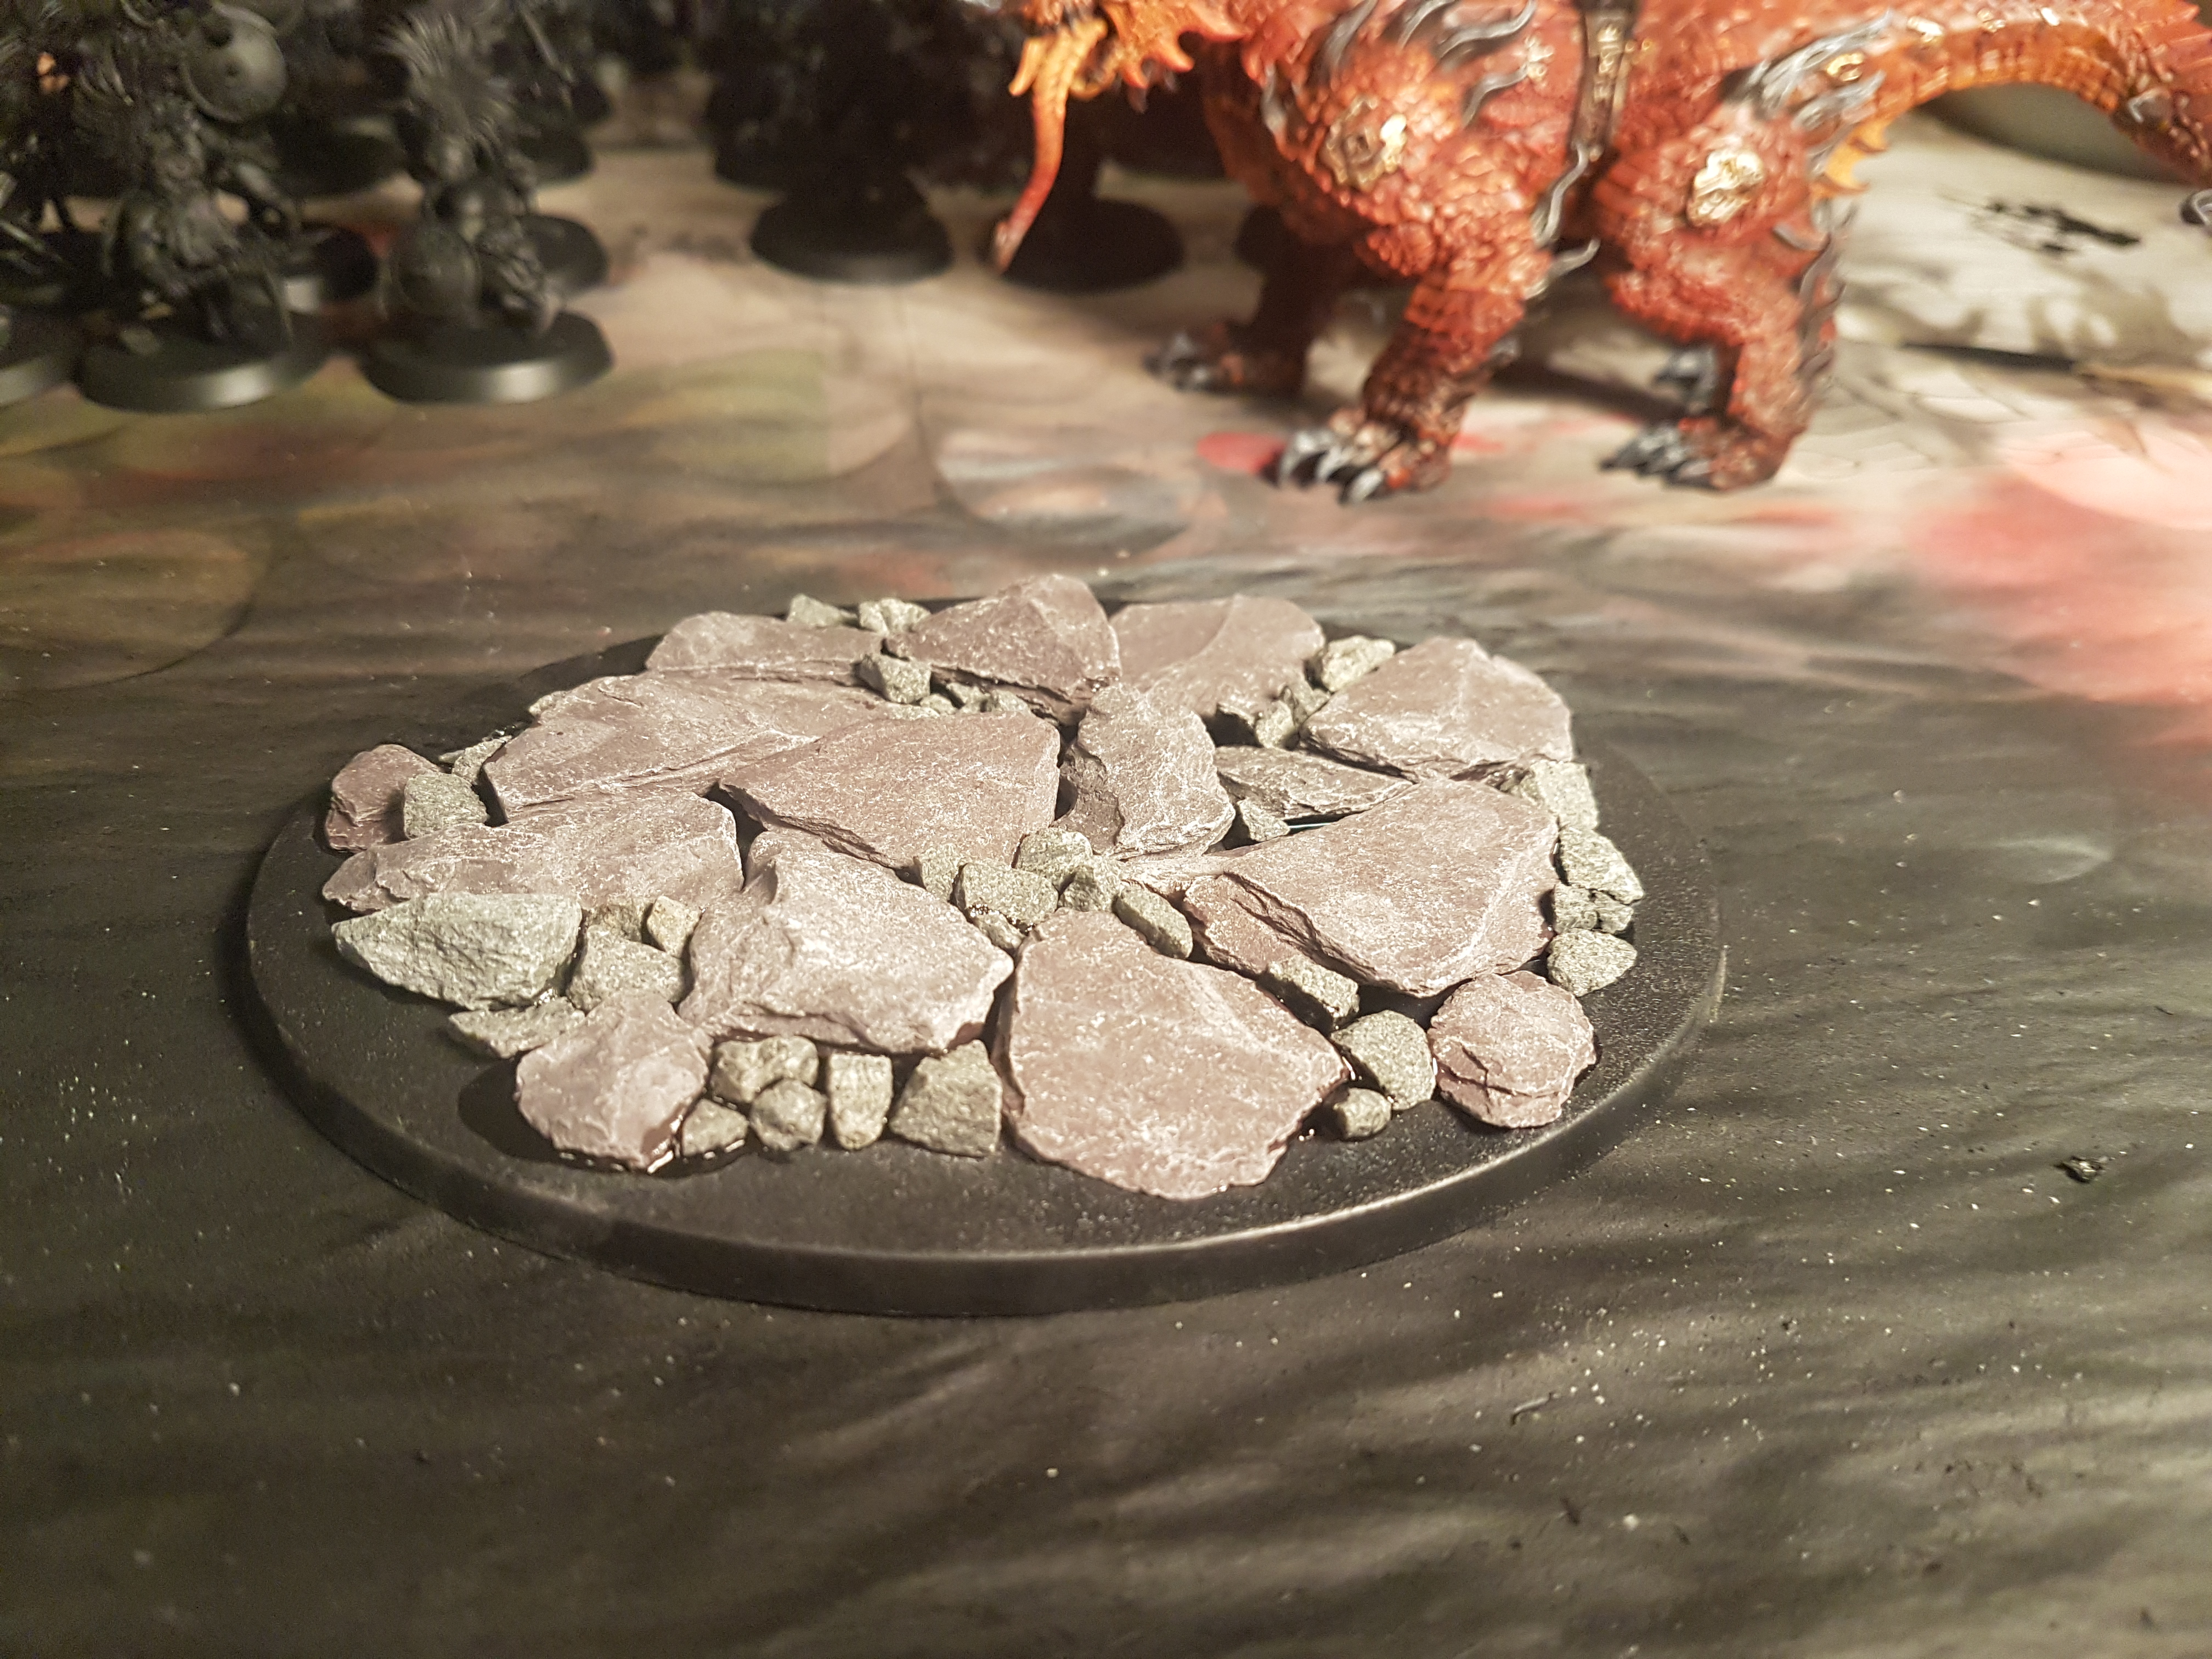
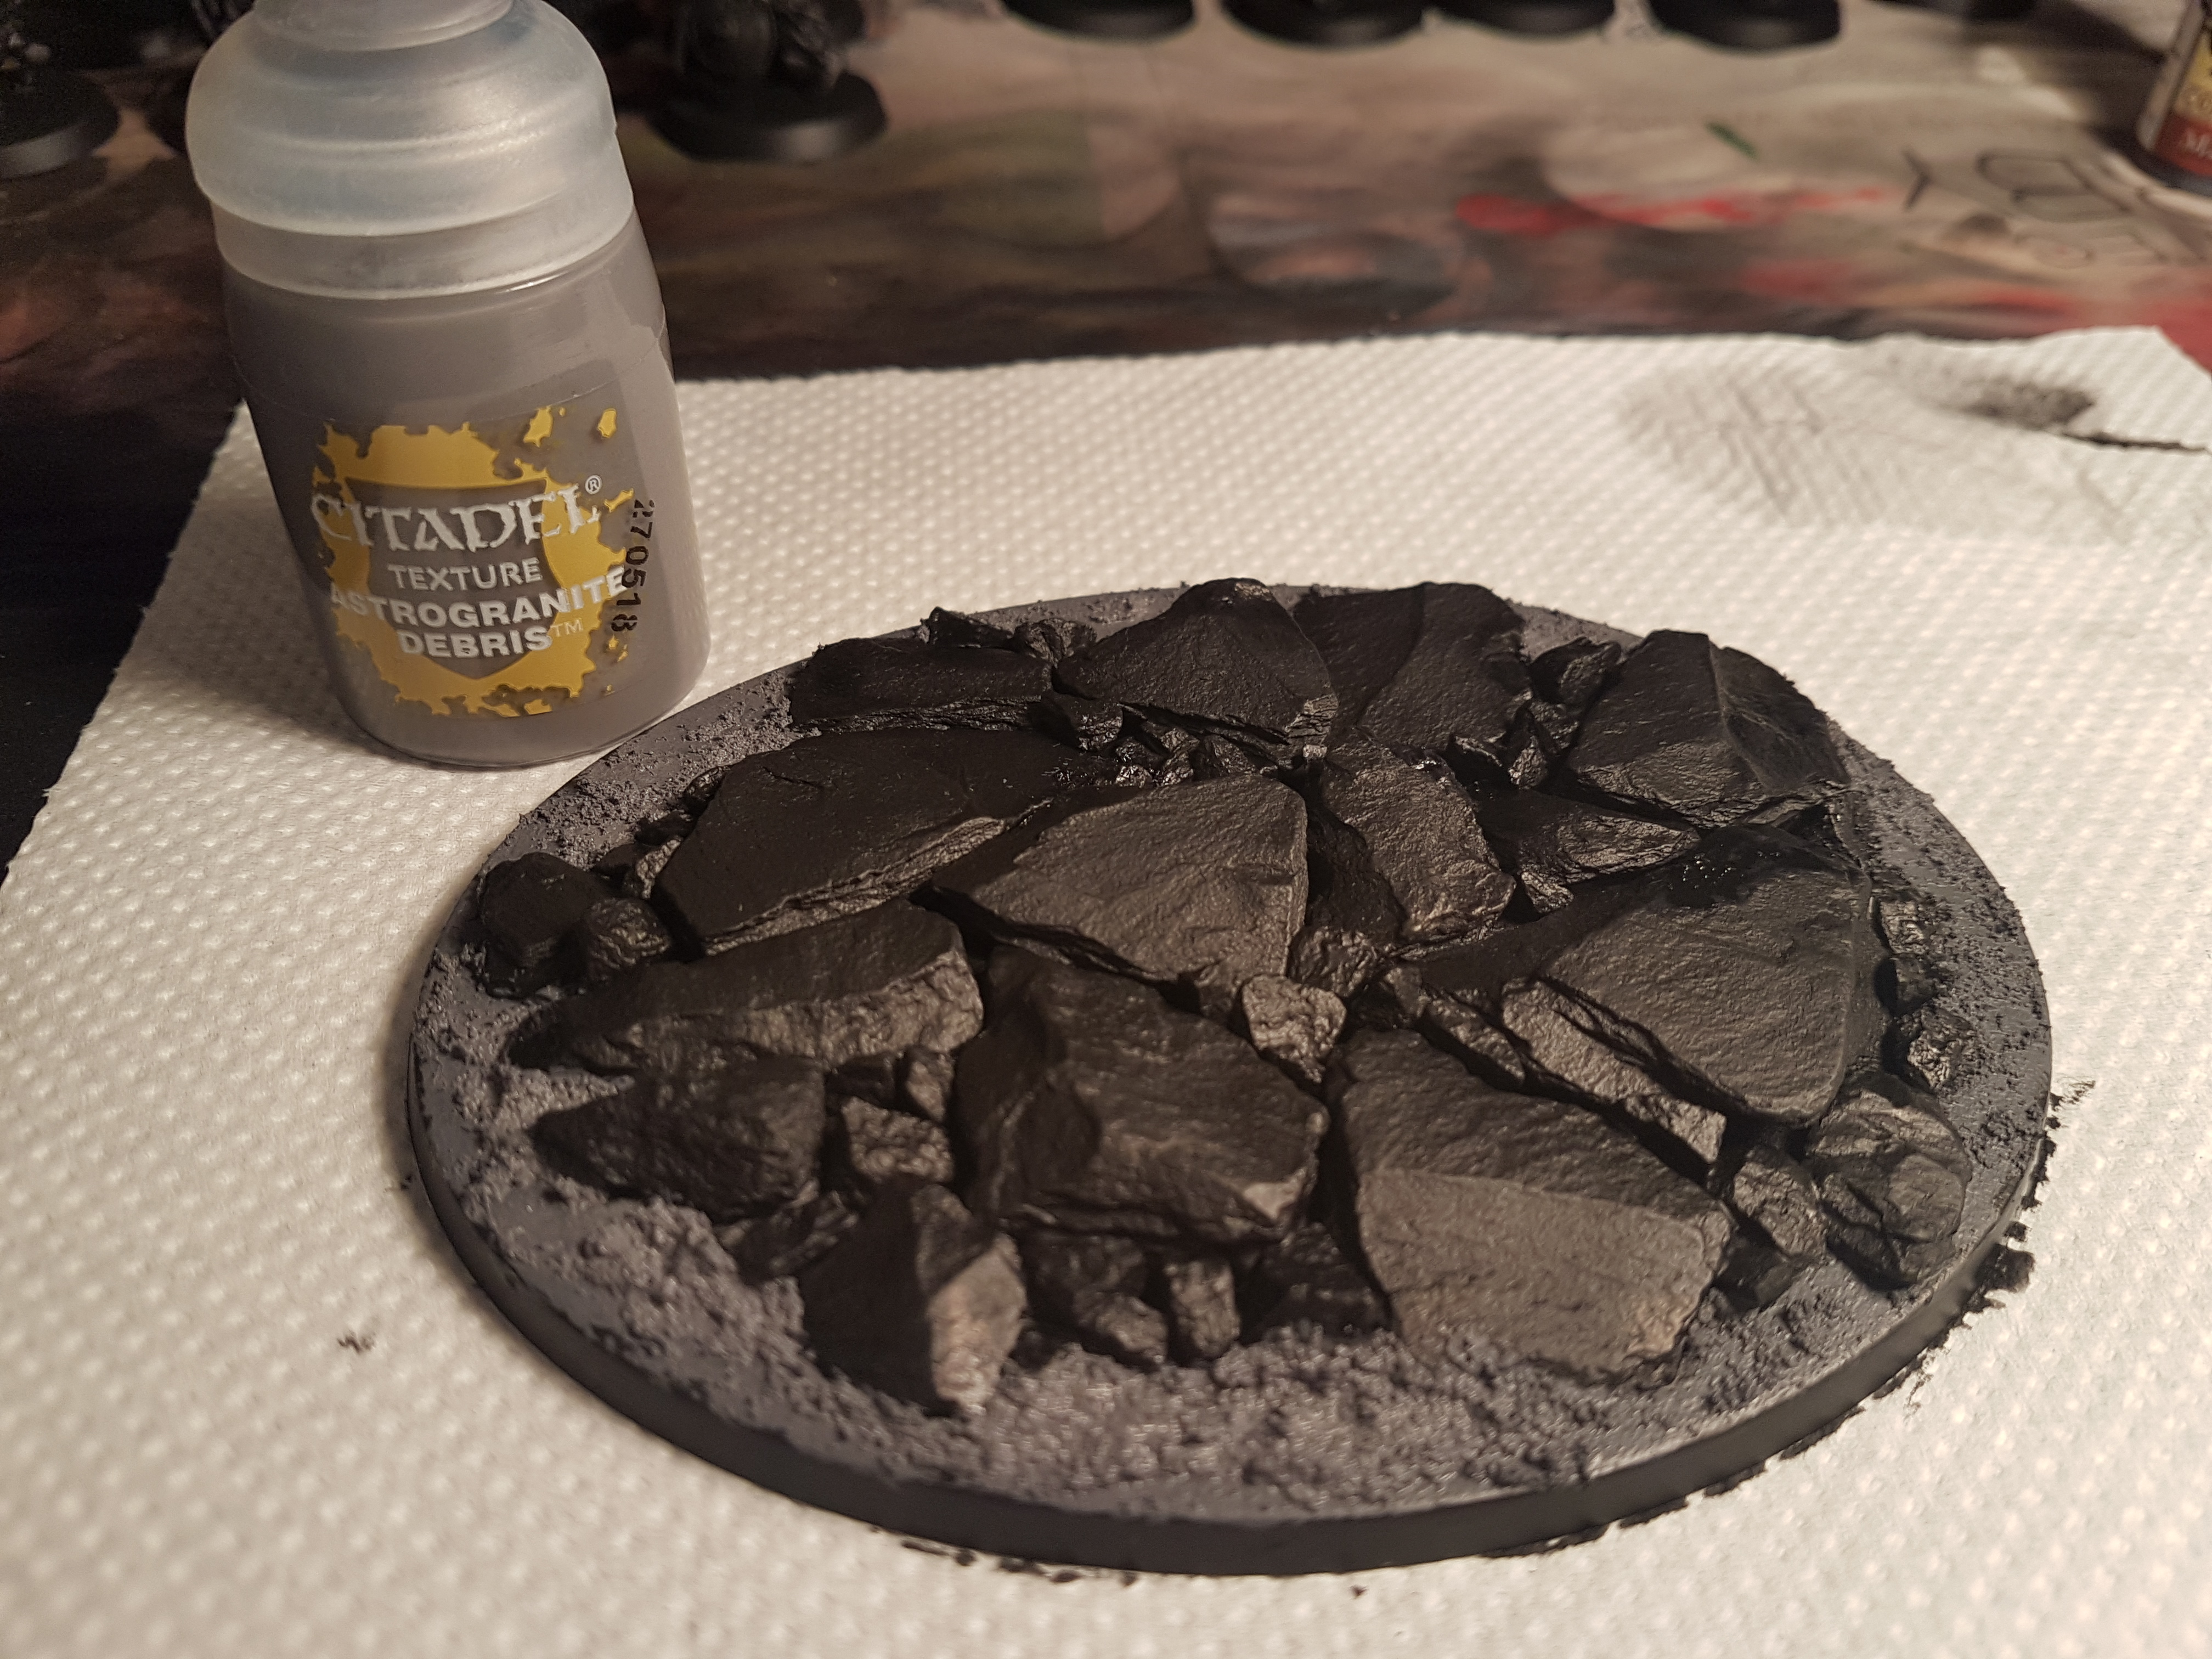
Basing Part 1
Trying something new for me, so this might be a bit hit and miss….
I decided to go for a rocky base. I started by arranging some pieces of slate on the base. I was trying to find an arrangement that would allow the Magmadroth to stand flat in its final position. I then unfilled the spaces around with further pieces of slate, super gluing them into place.
I then pooled superglue into the gaps inbetween the slate and filled these with small chips of rock.
The natural stone had some nice colours, but the slate and chipped rock were different stones so it looked a bit odd, I also wanted a darker base to really contrast and frame the bright red Magmadroth. So I primed the entire base black.
Following this I used a GW citadel texture paint Astrogranite Debris applying it quite thickly to the remaining flat areas of the base.
I’m hoping to get three different layers of texture, between the big flat slabs of rock, interspersed with smaller rocks and then the broken up texture of the debris.
Will have to let this dry and see how it turns out.
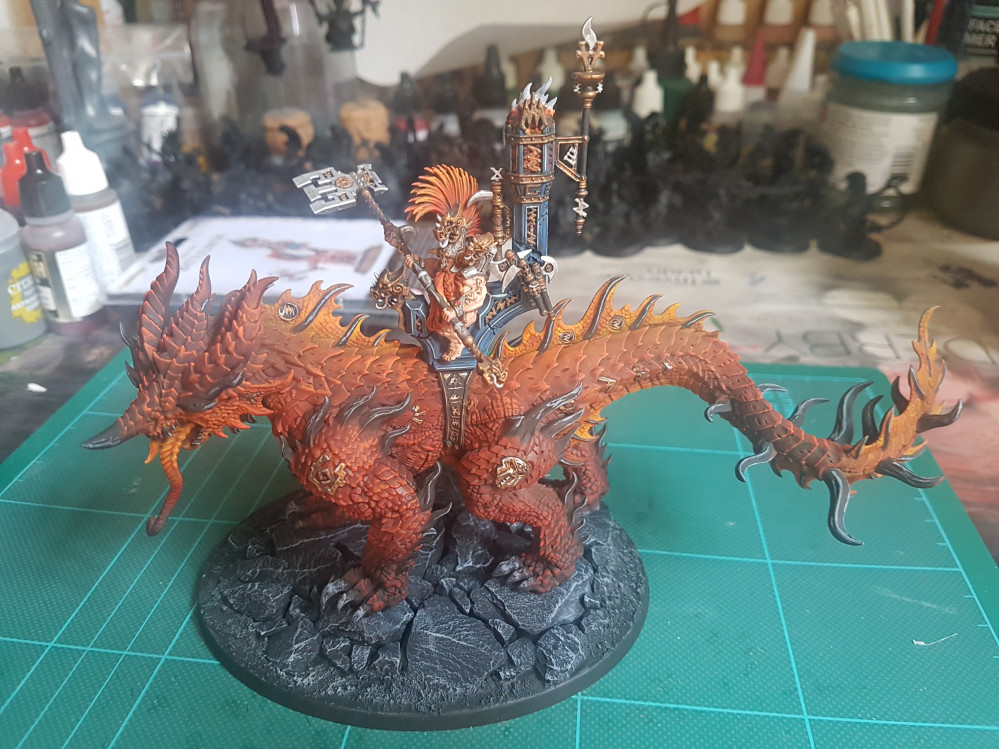
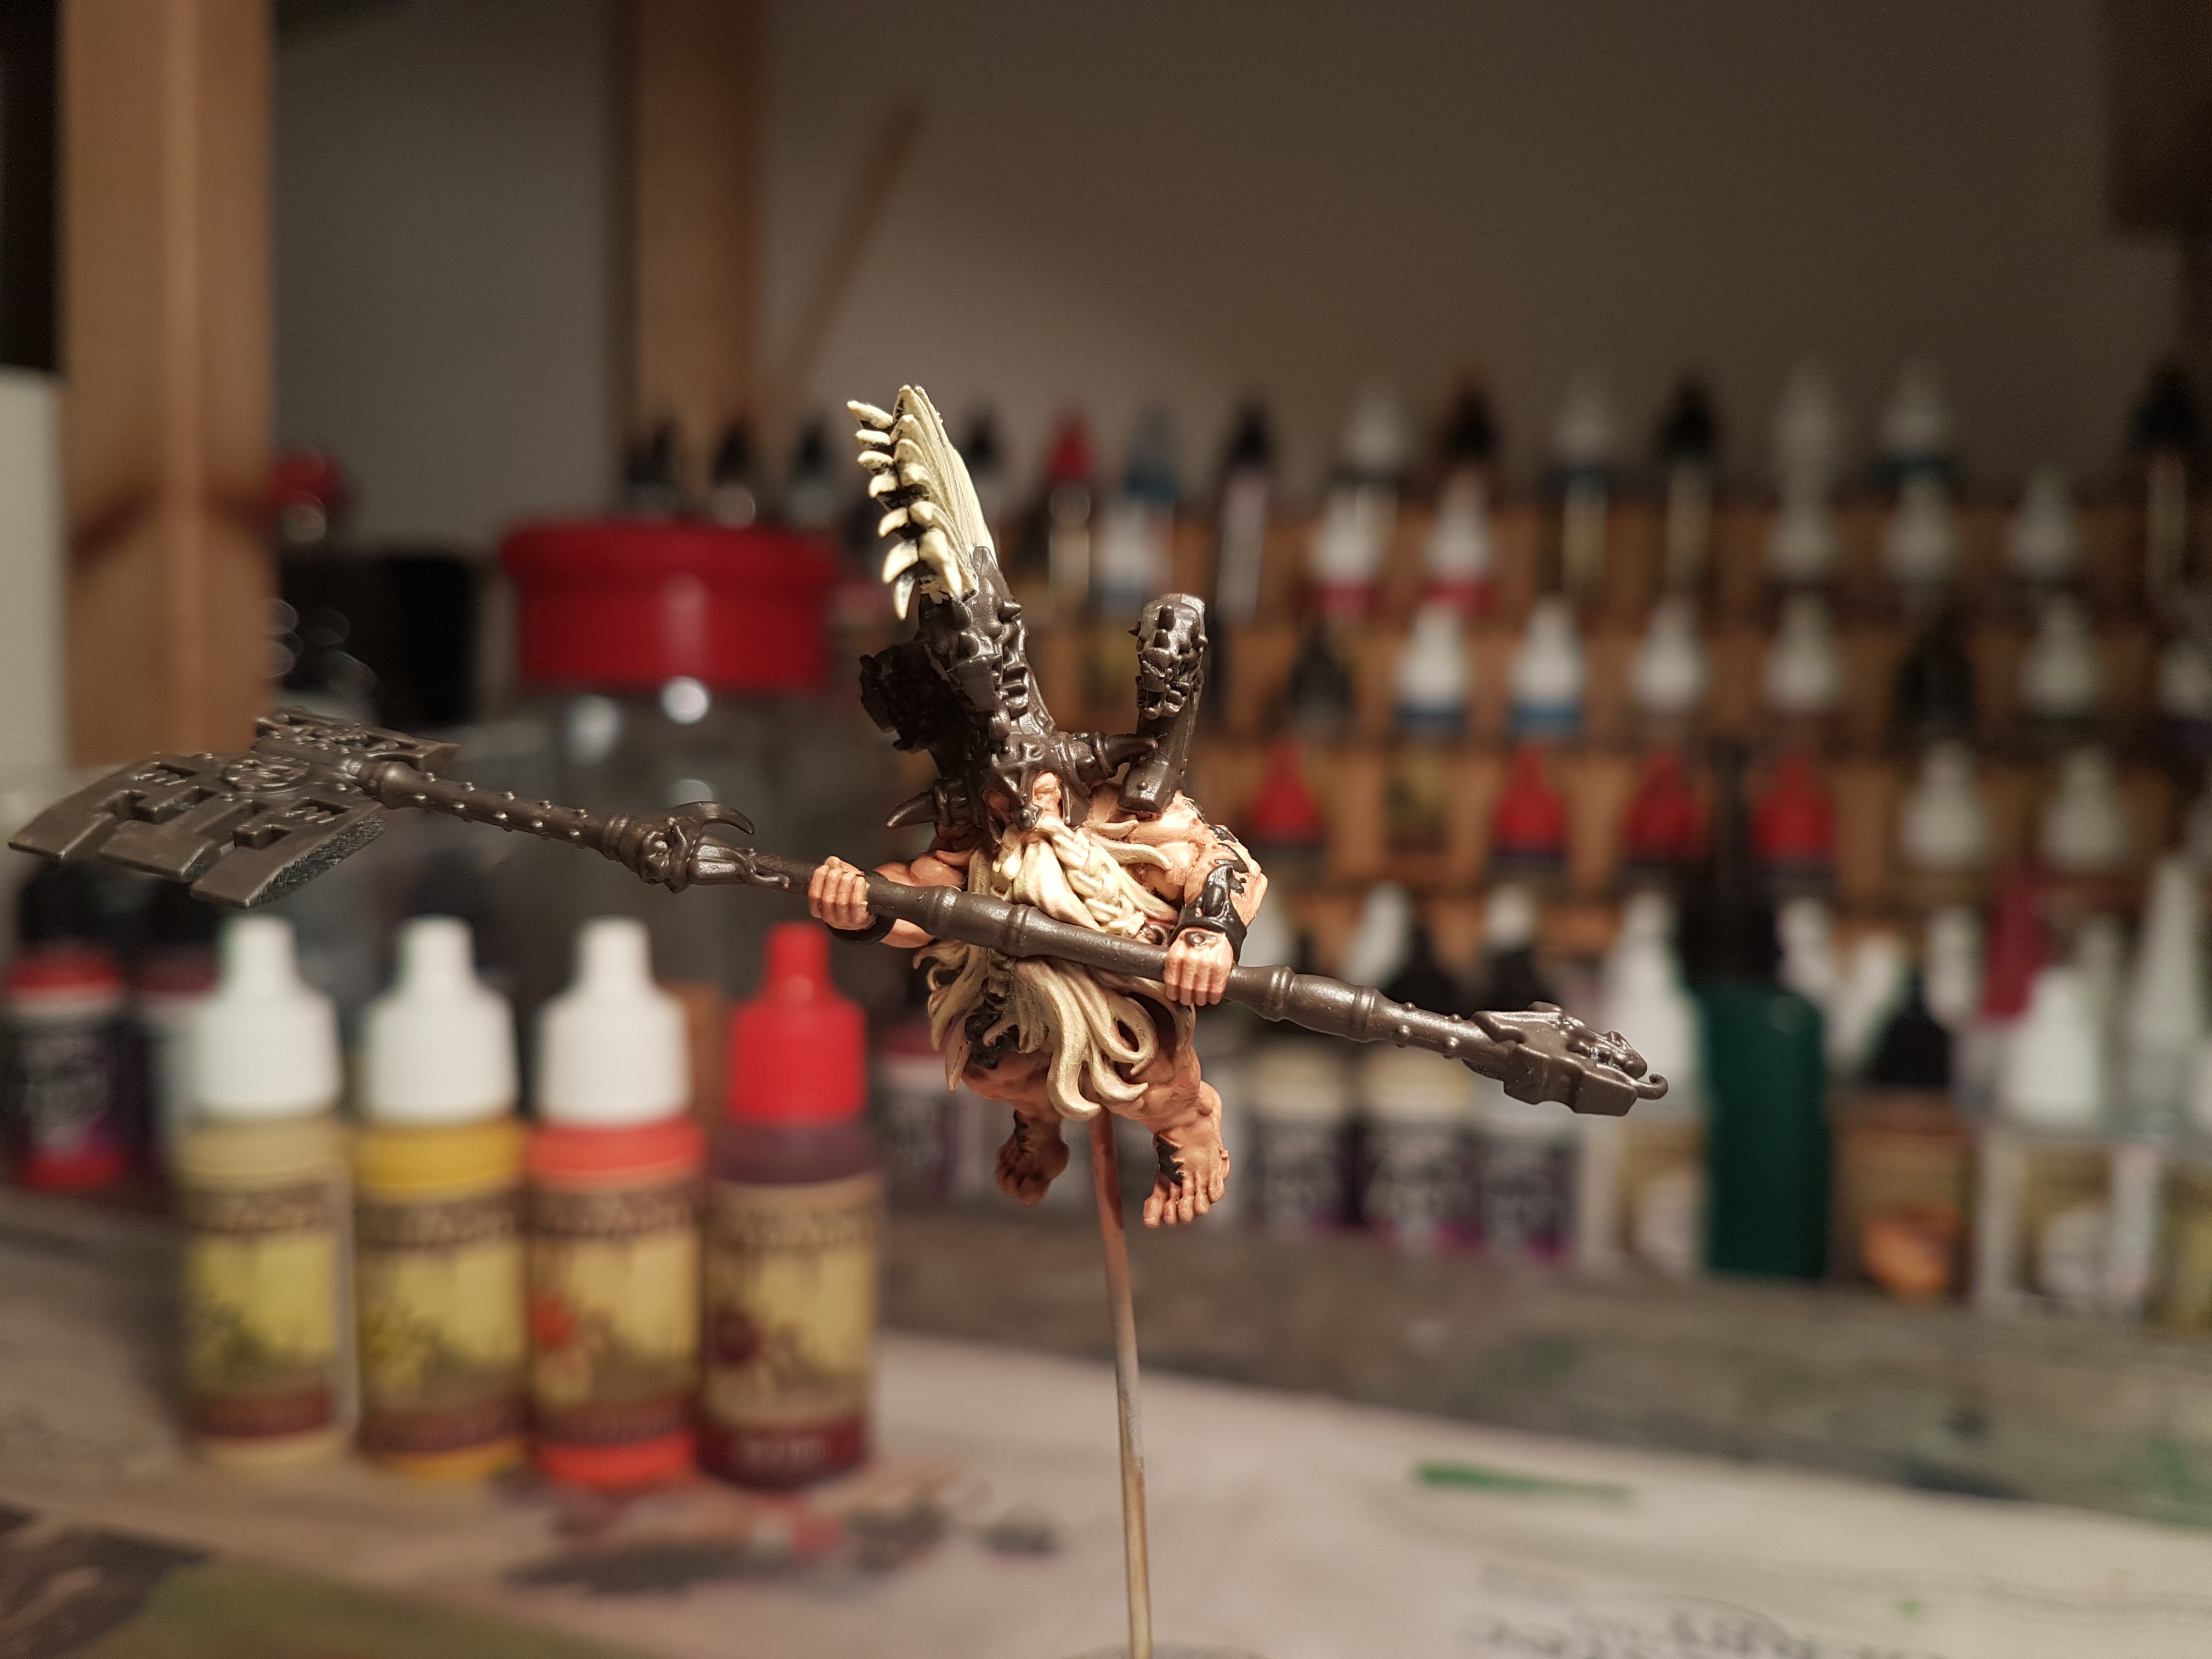
Magmadroth, throne and rider combined
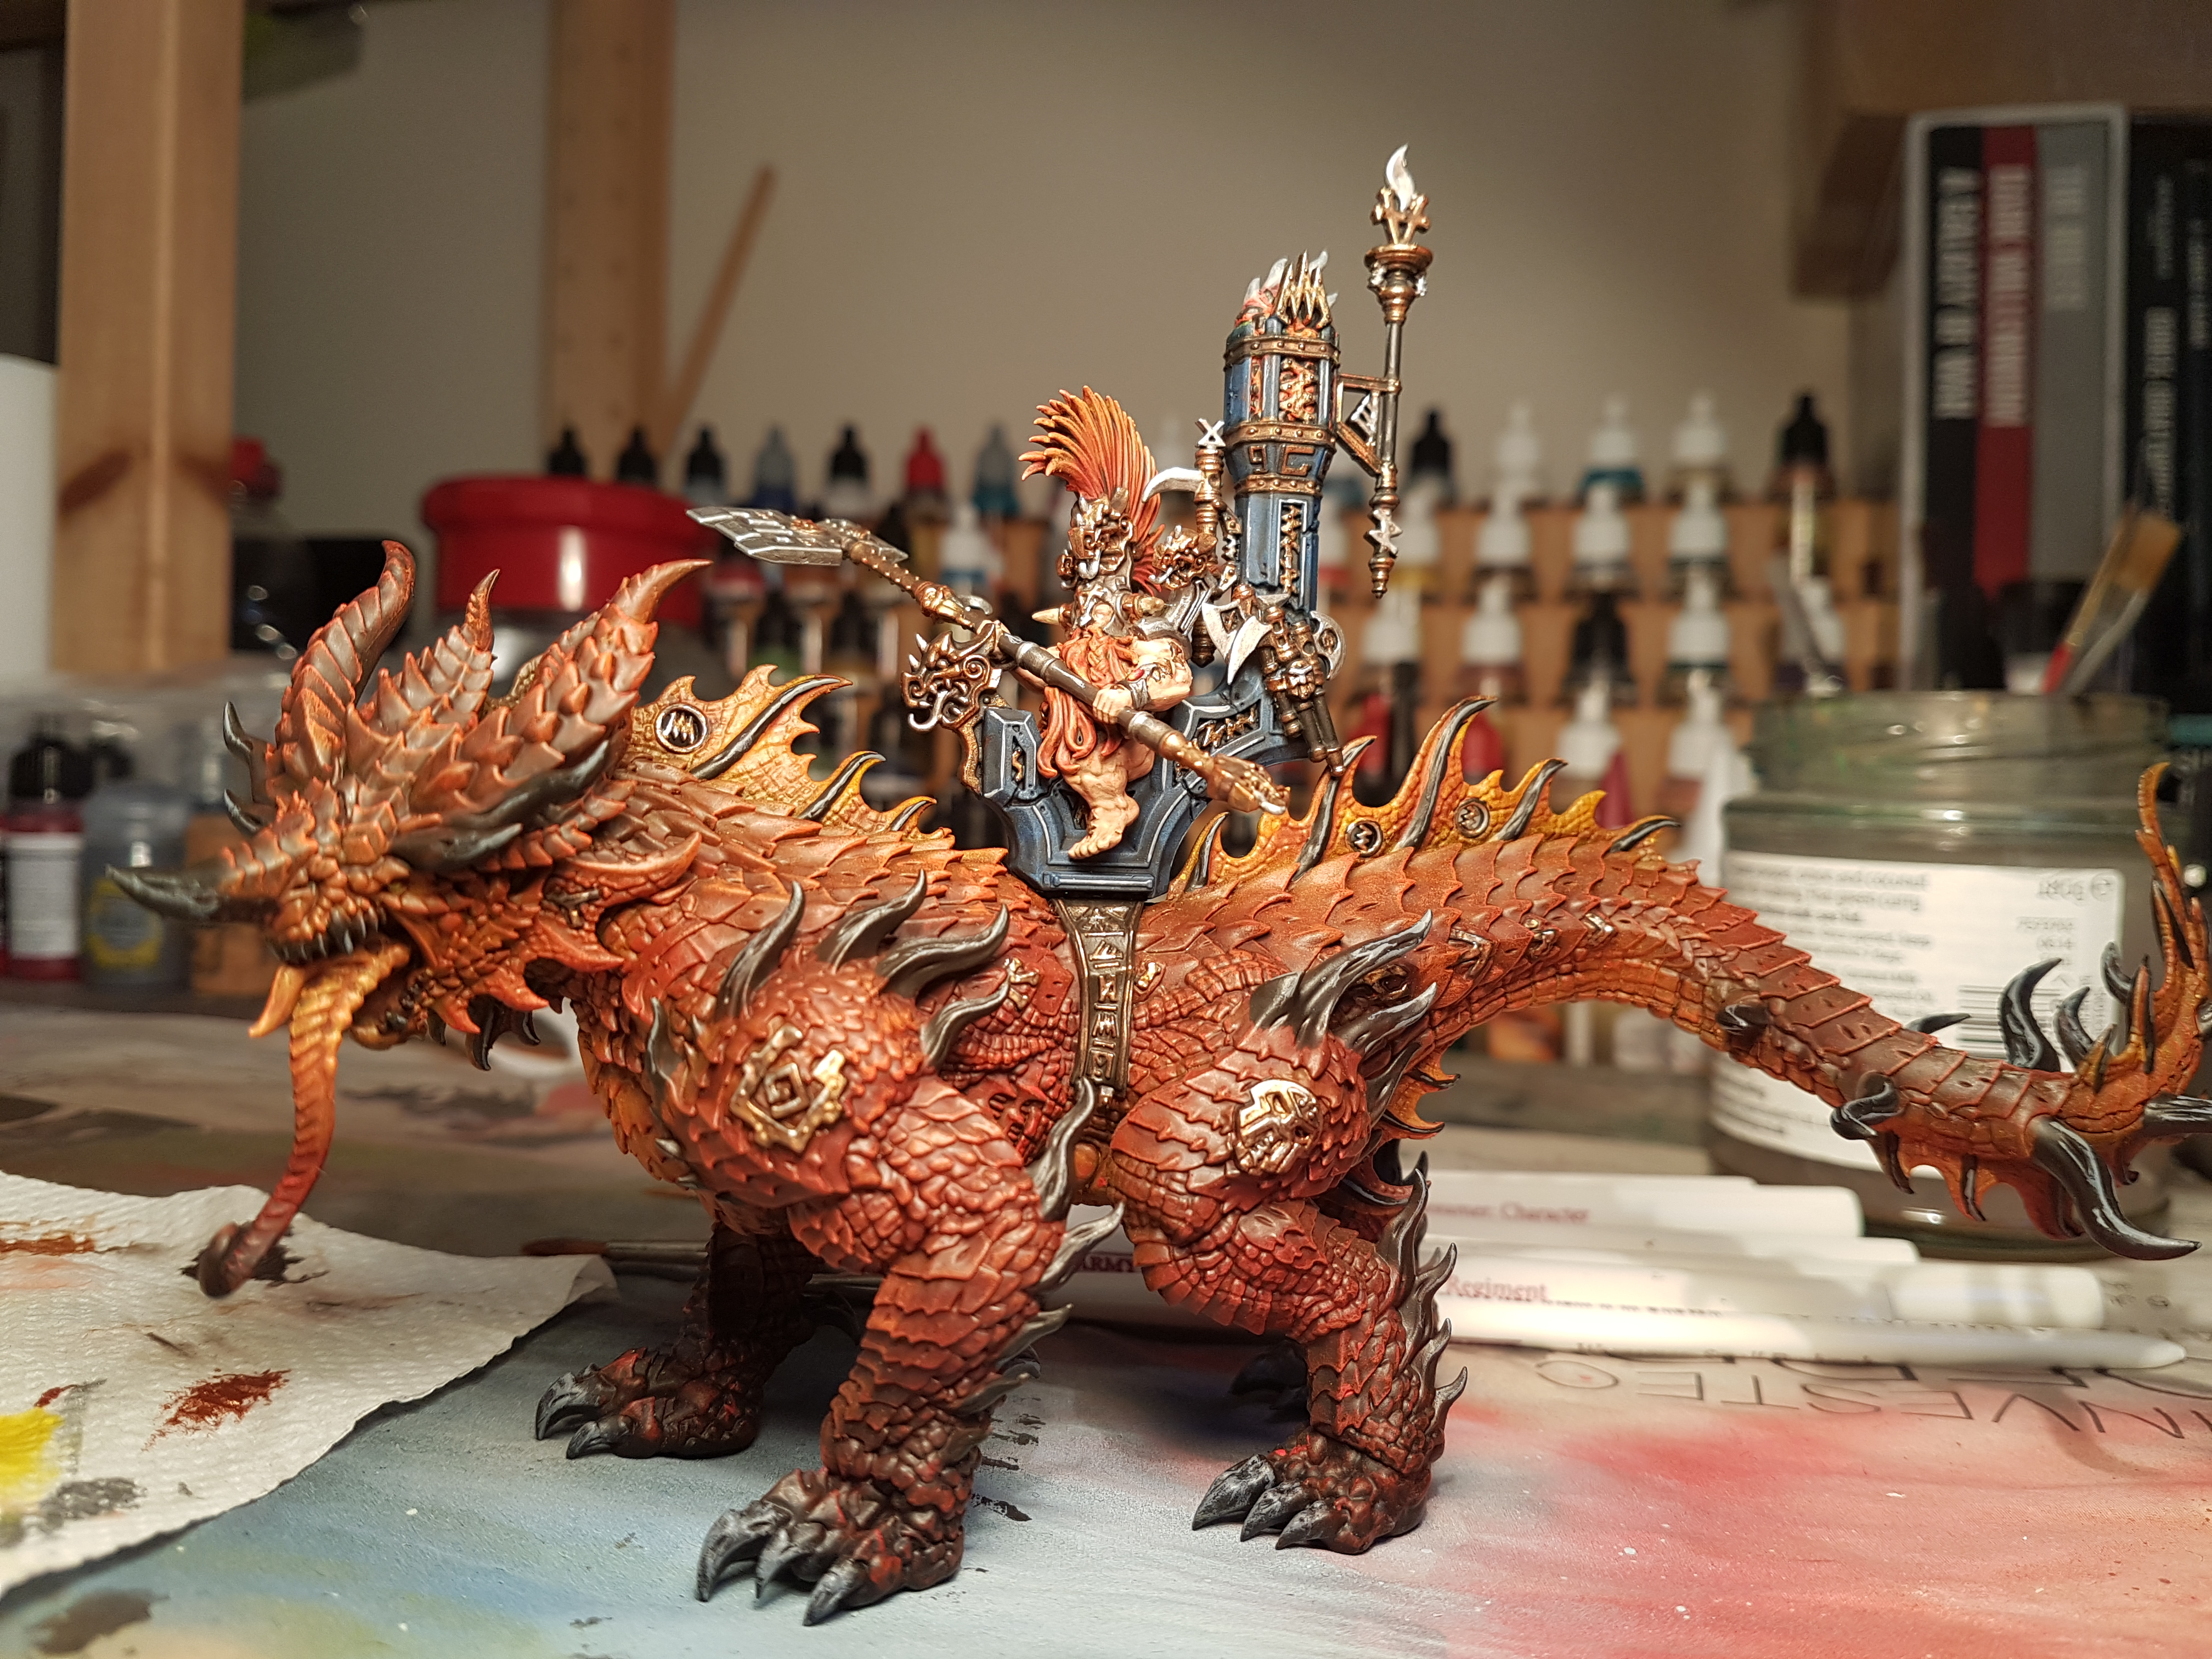
With all parts of the miniature painted and combined, next step is to do the base.
I am thinking a fairly simple rough, dark igneous, volcanic style stone, to give a strong contrast against the bright reds and oranges of the model.
I do not think I want to do any actual lava flows as this will blend in too much with the miniature, which I want to speak for itself.
I will ponder on this, but would welcome any thoughts any of you may have.
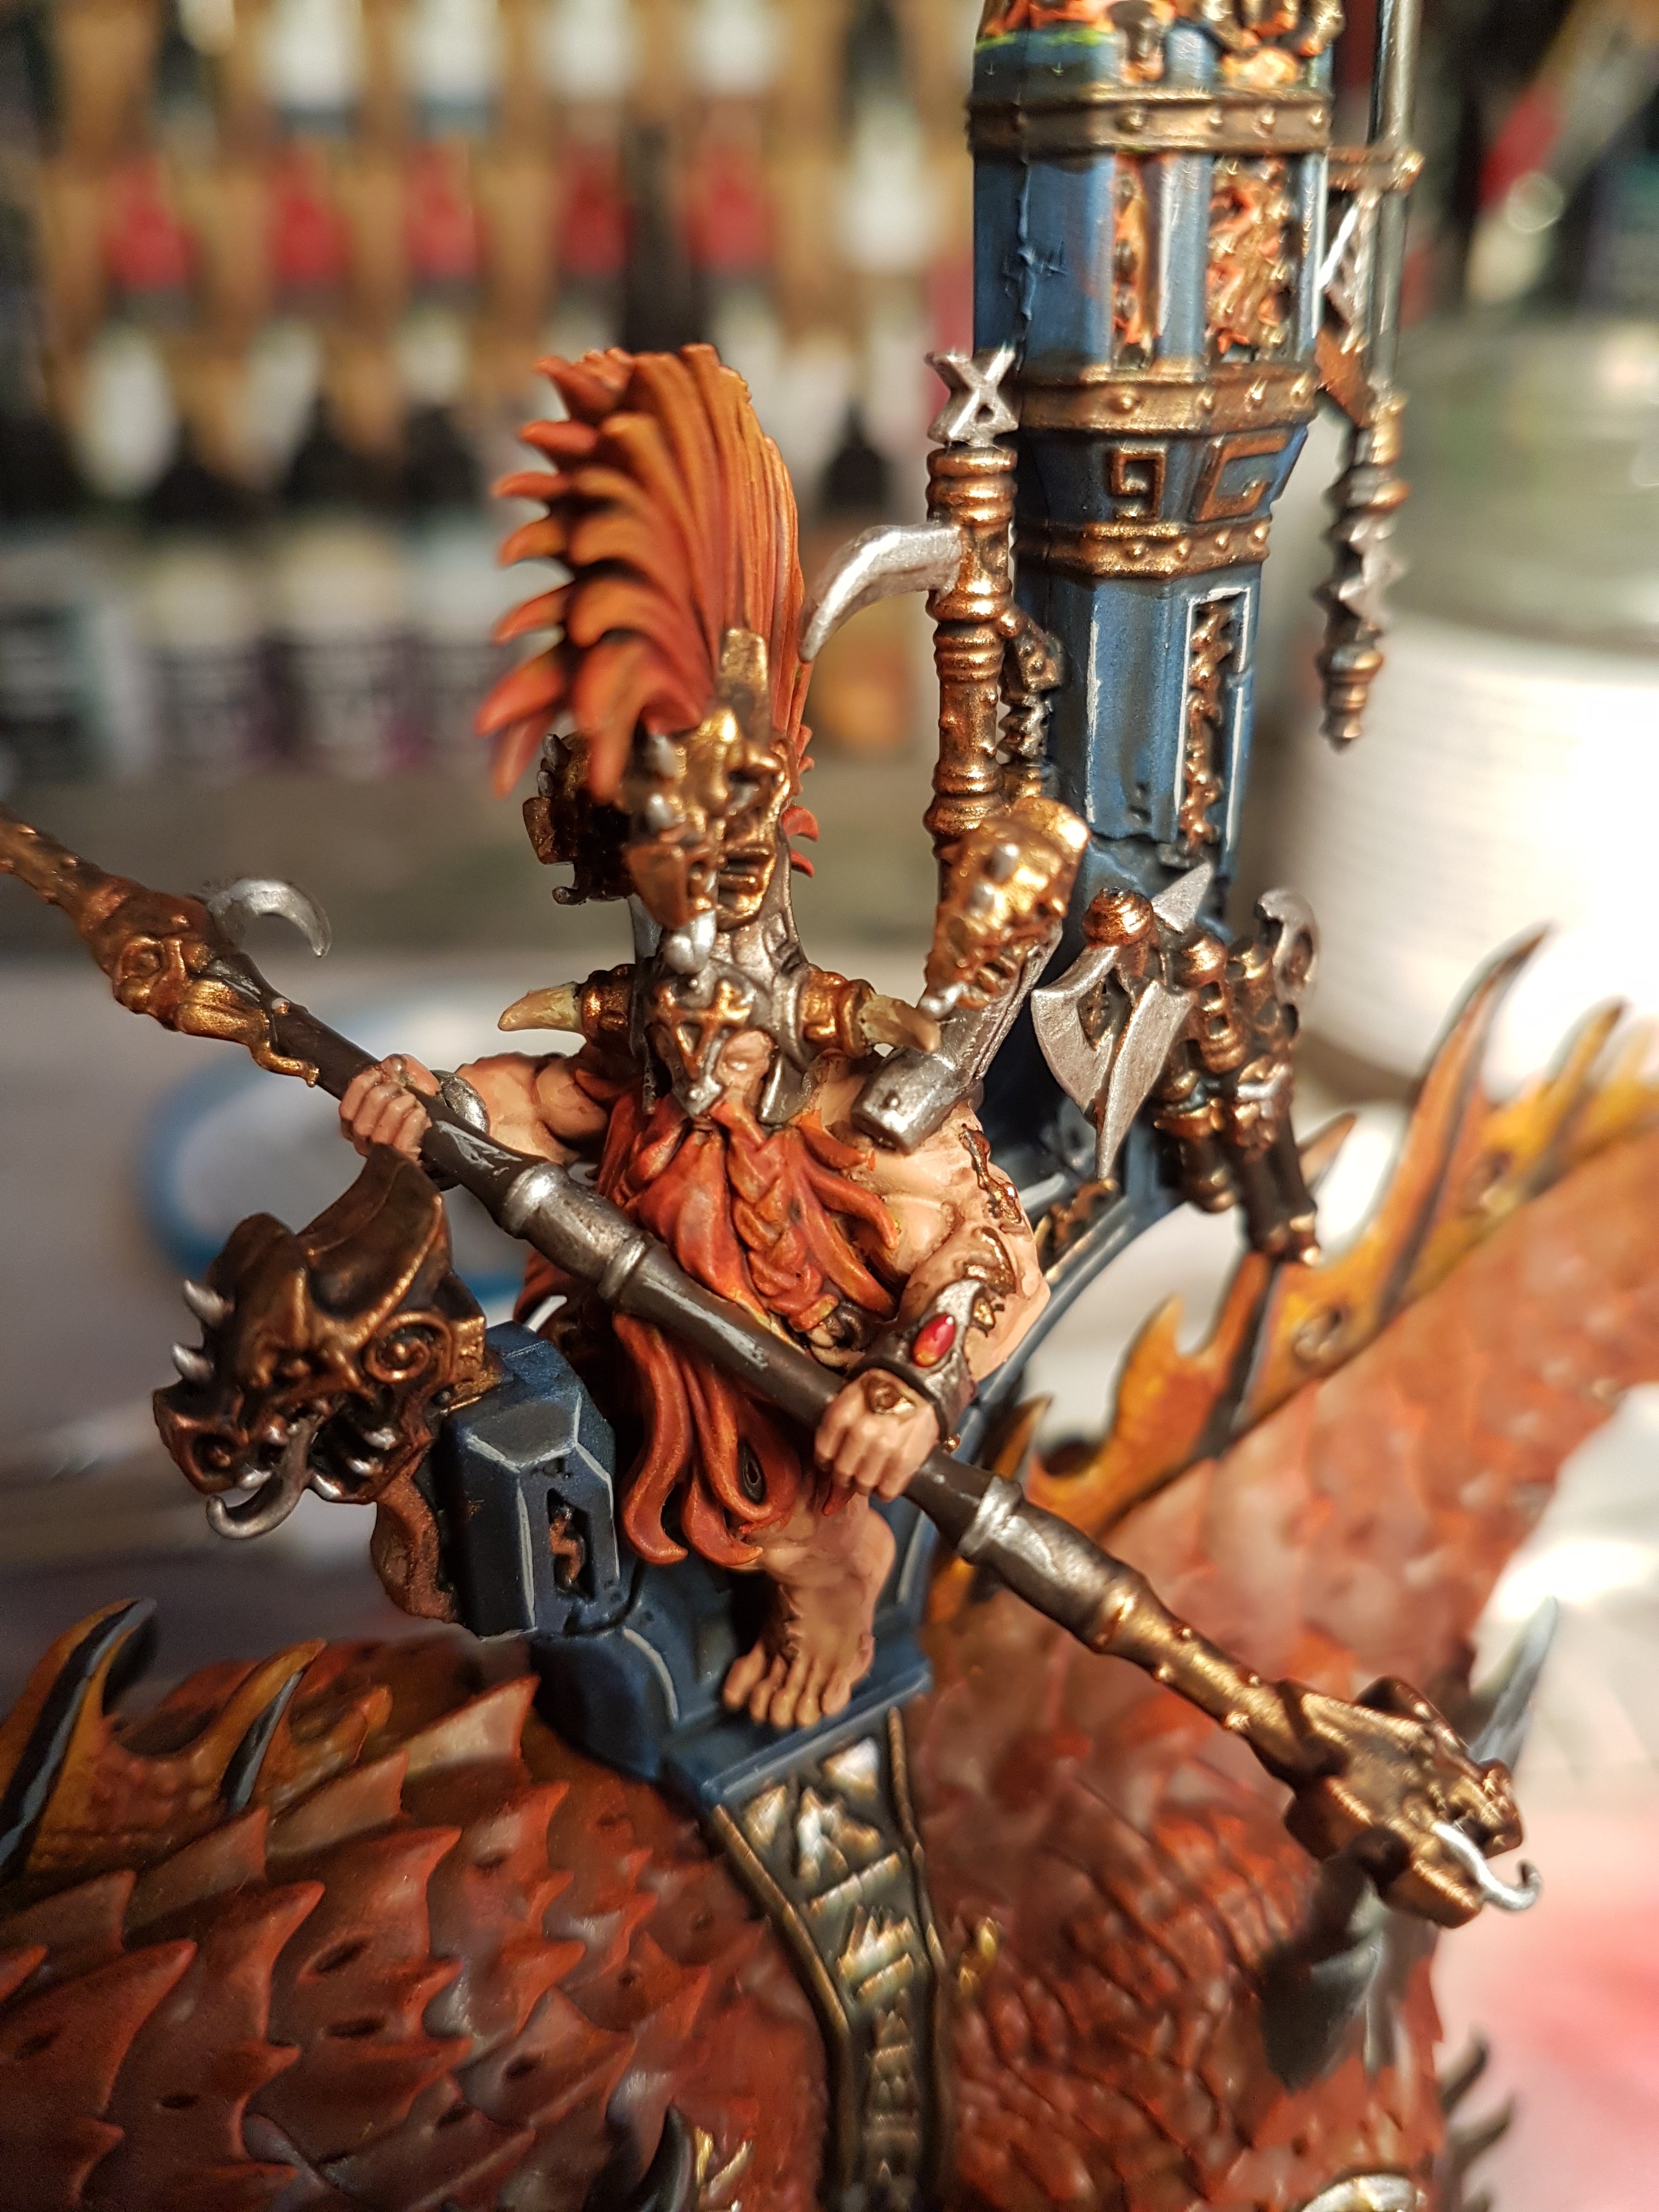
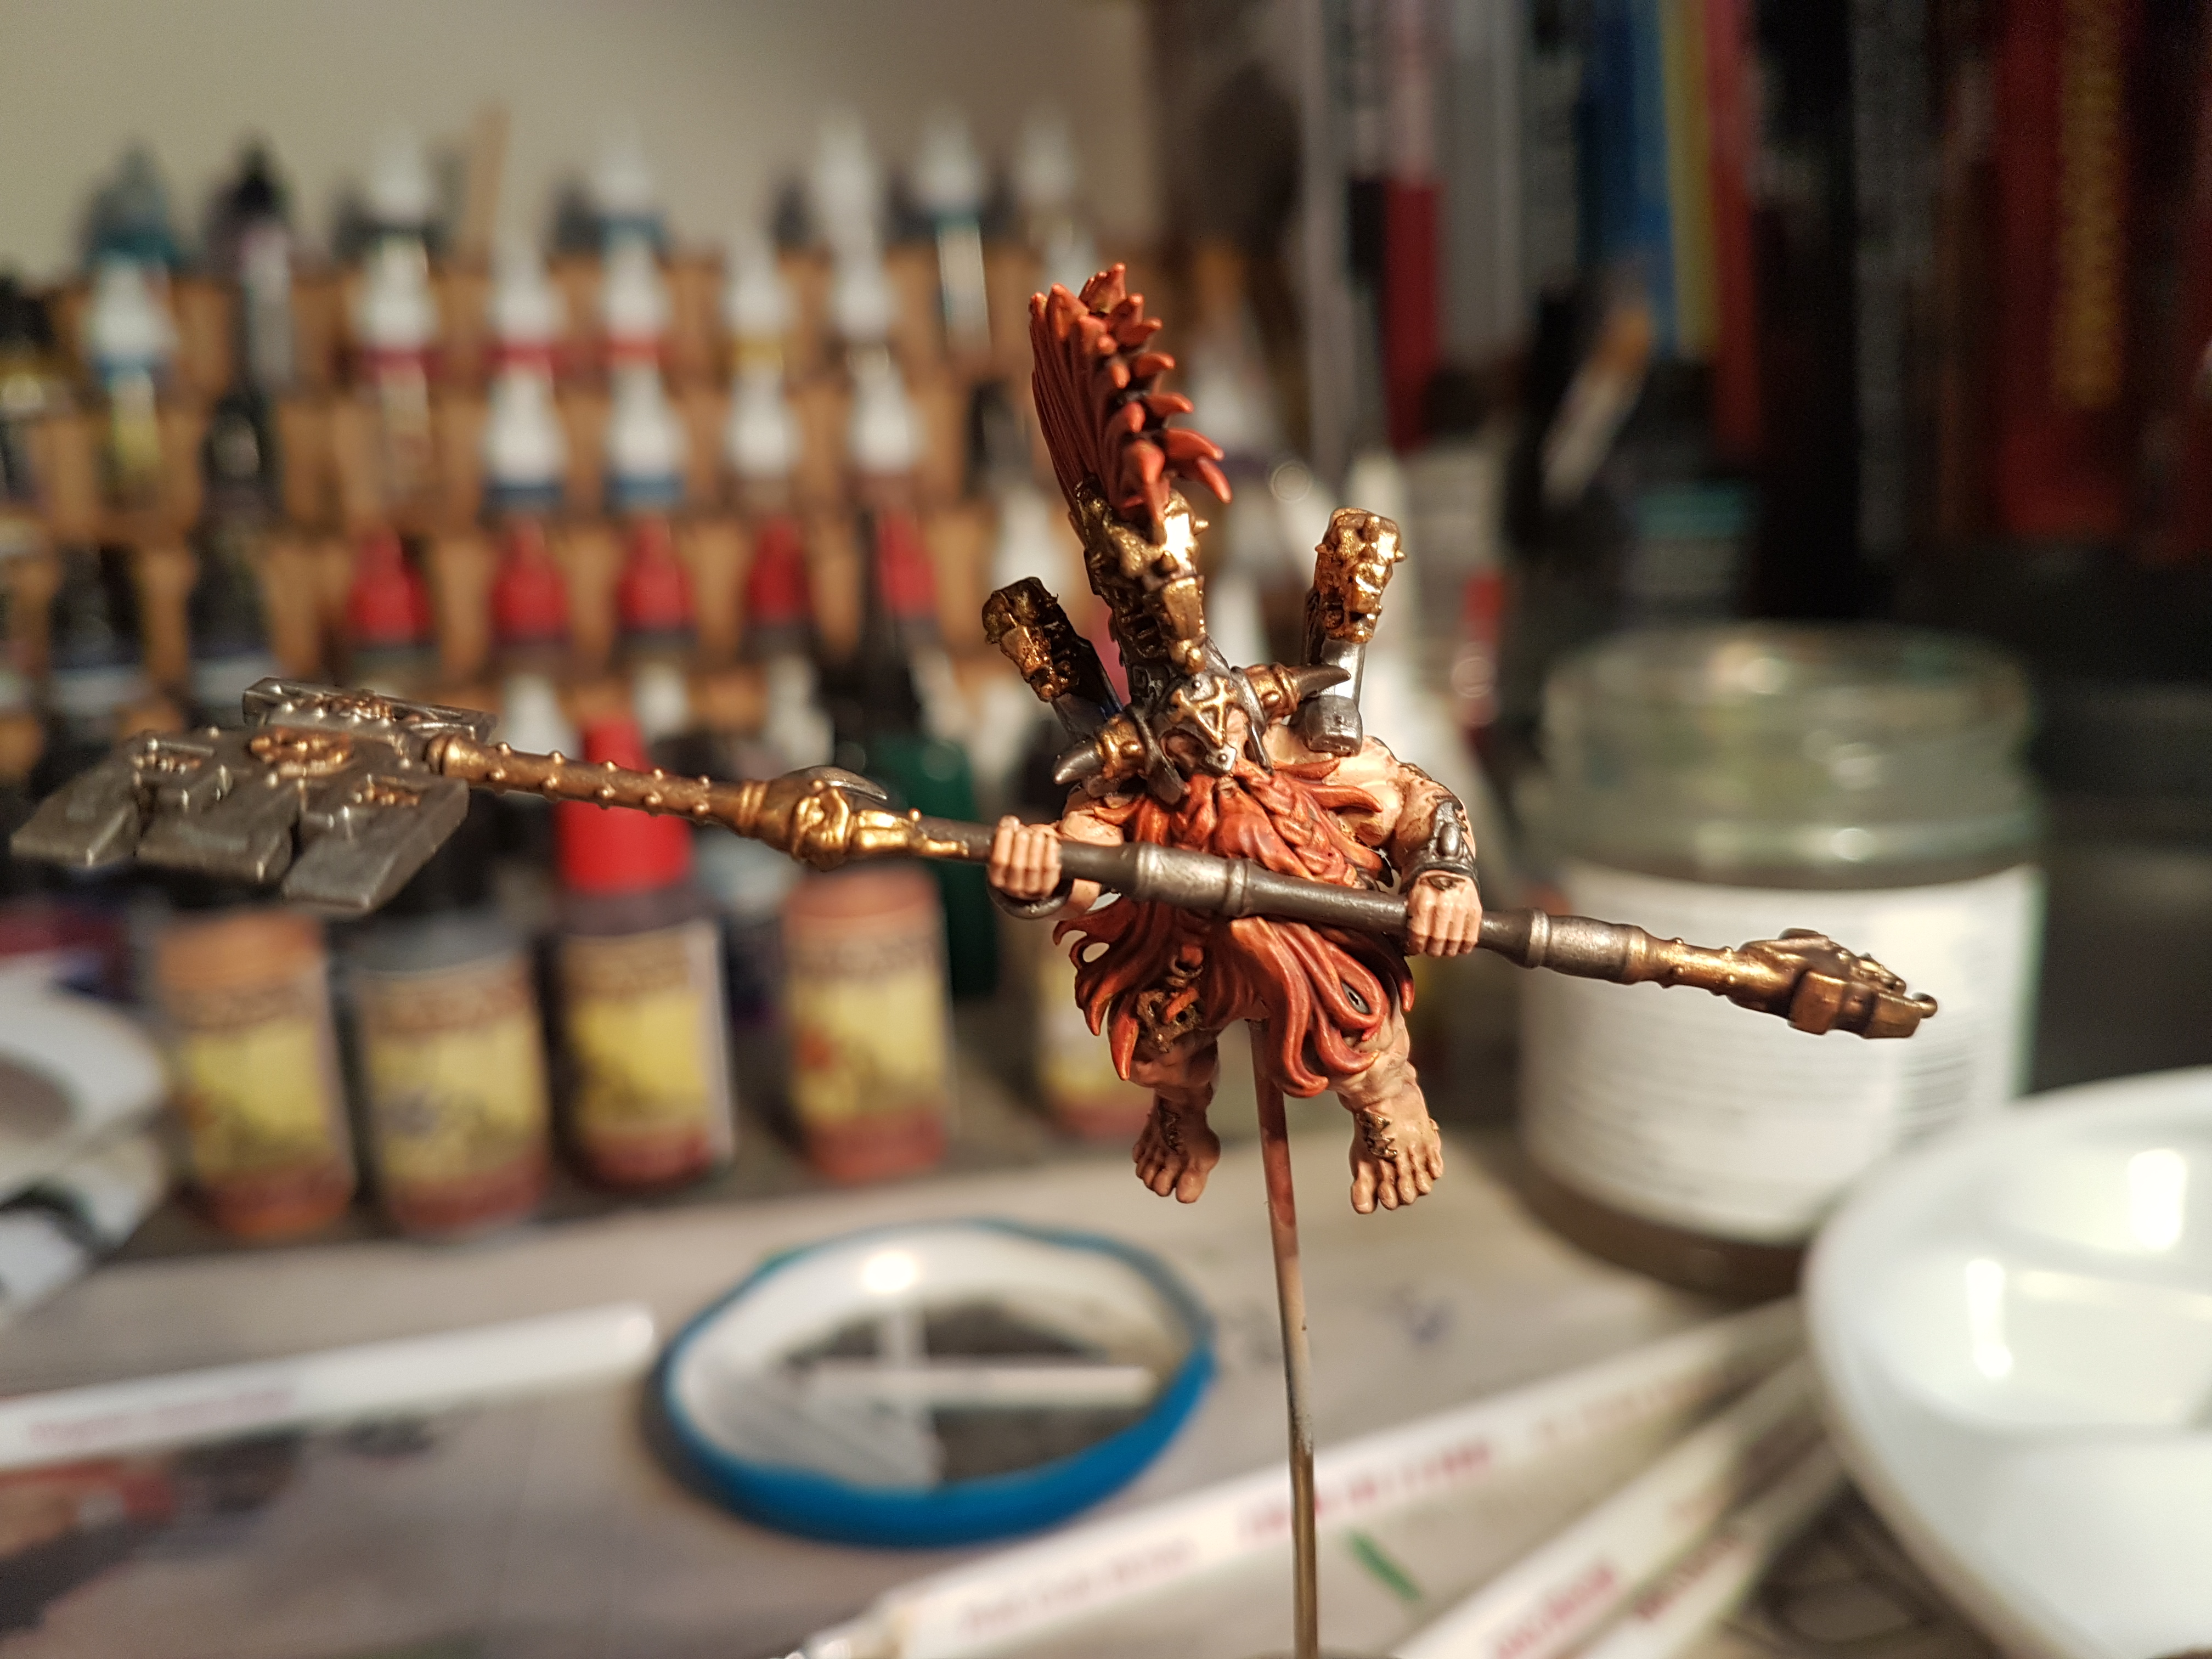
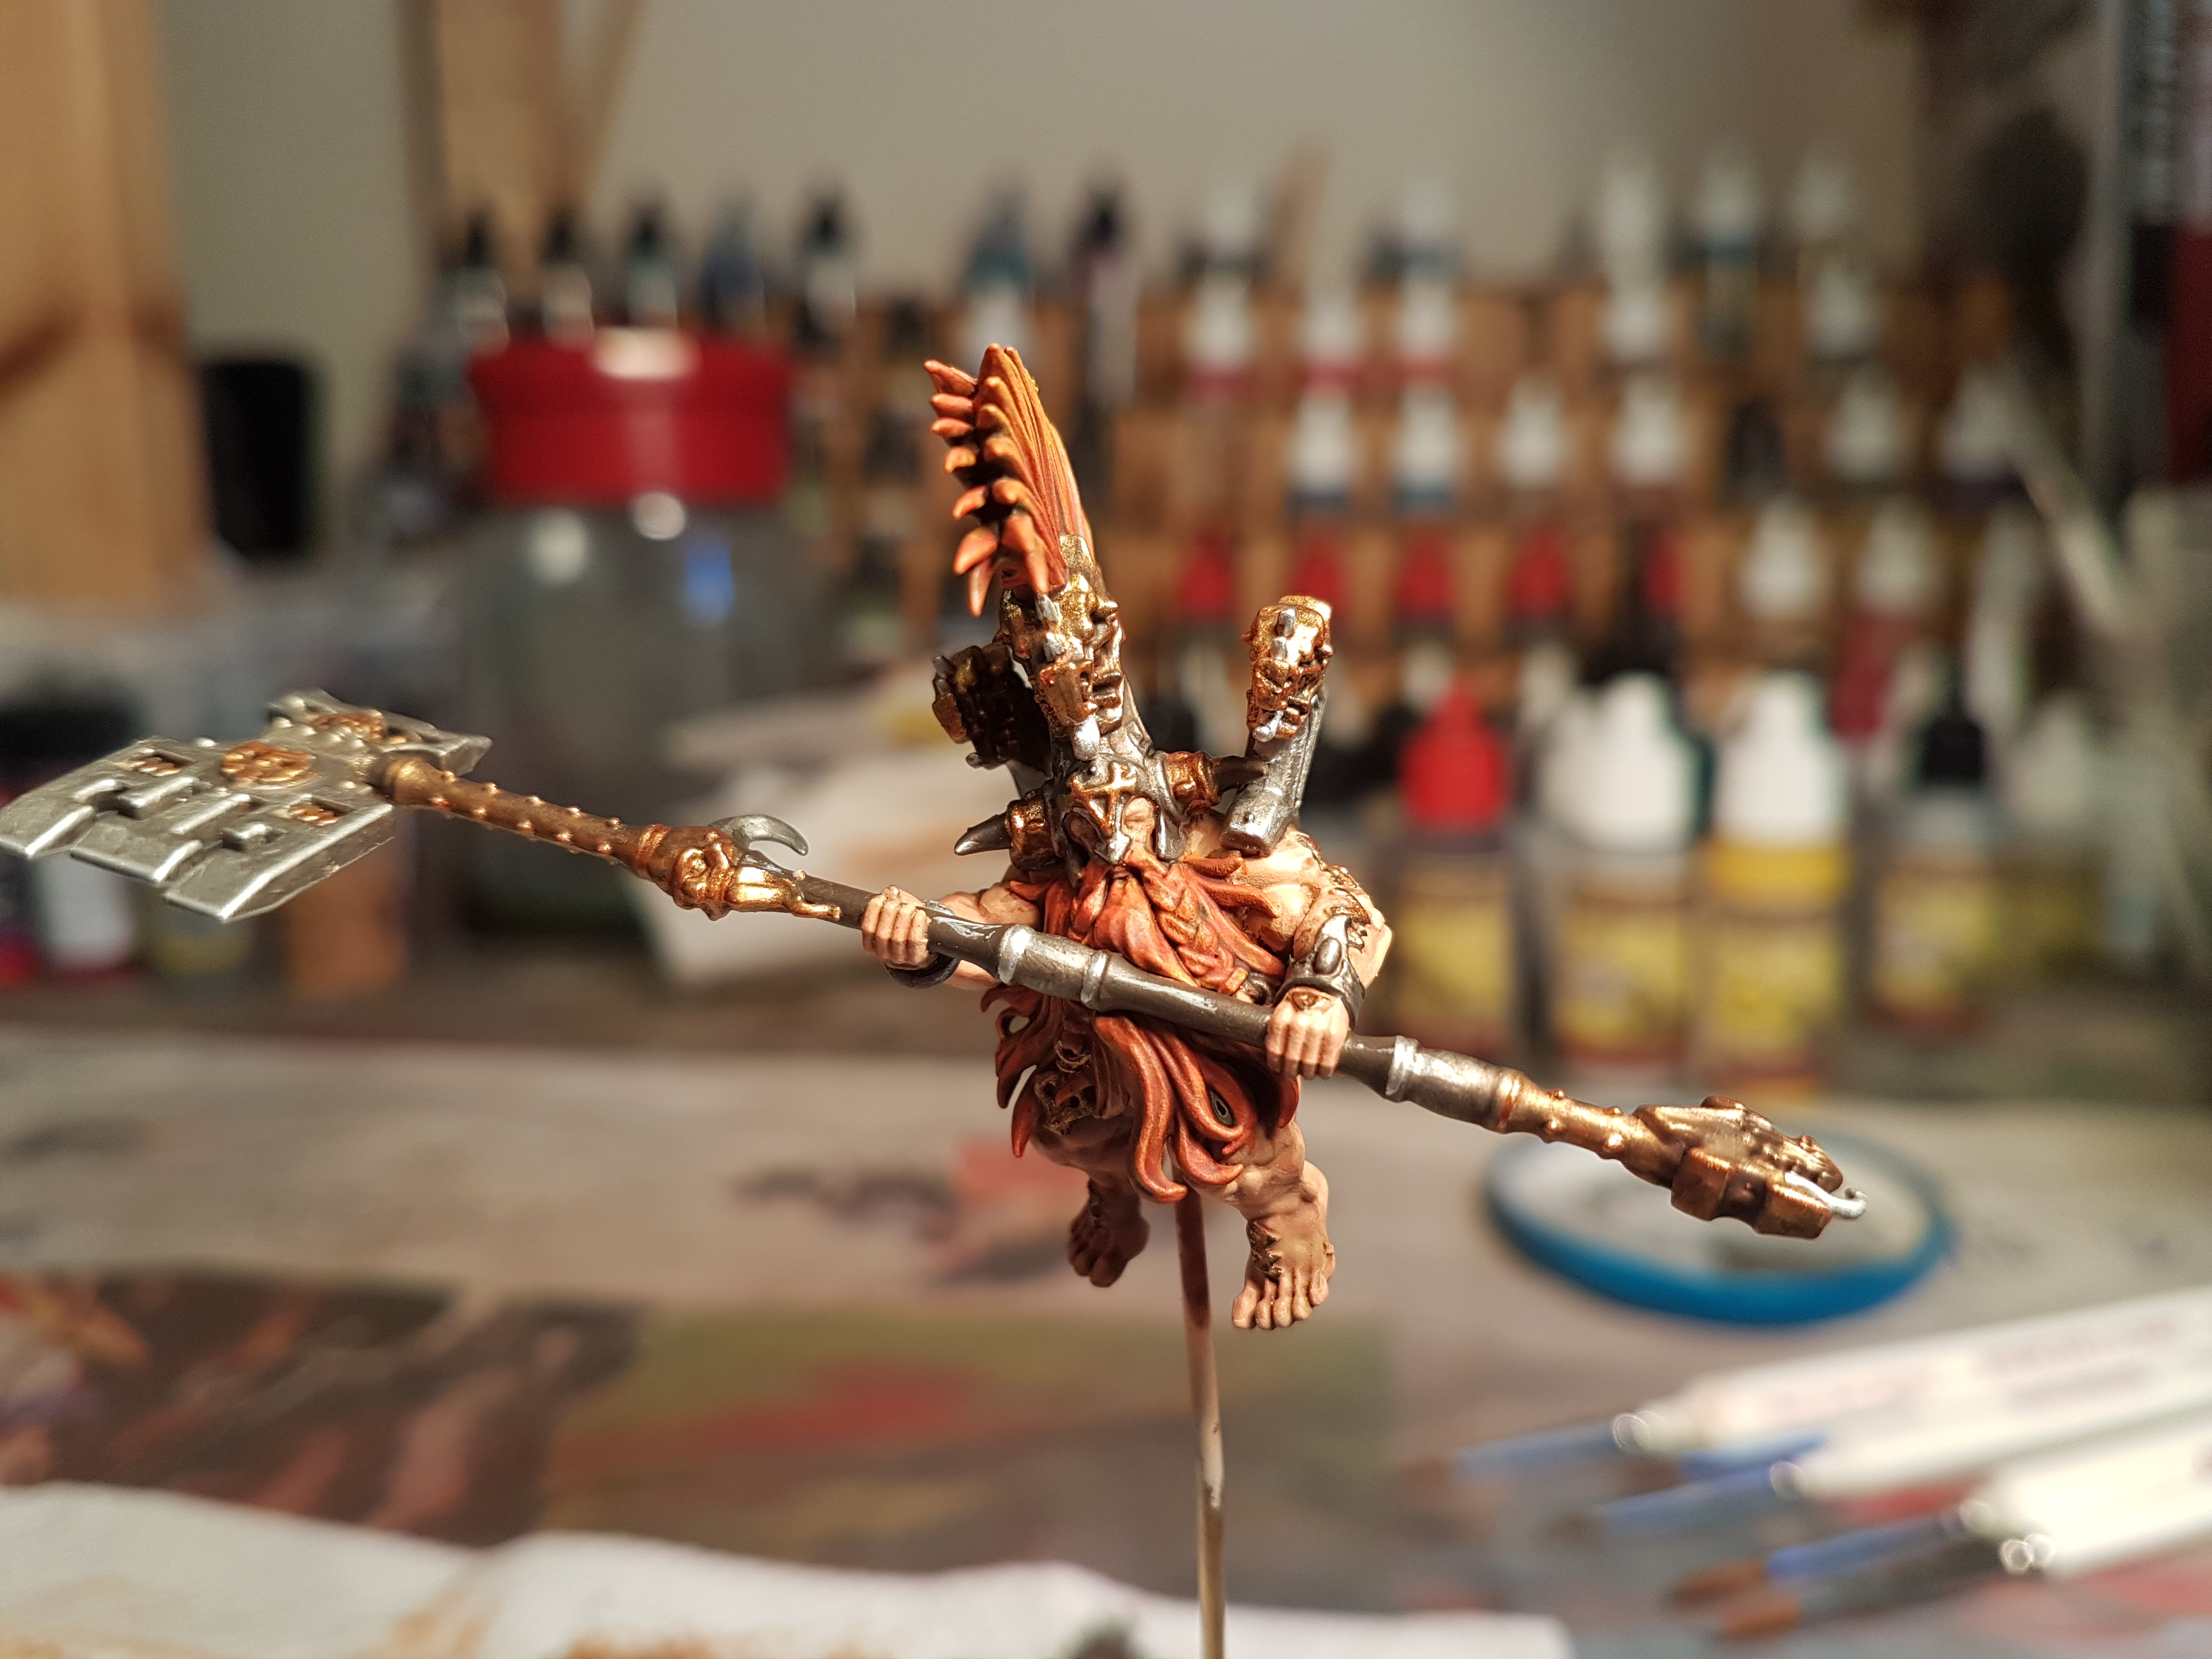
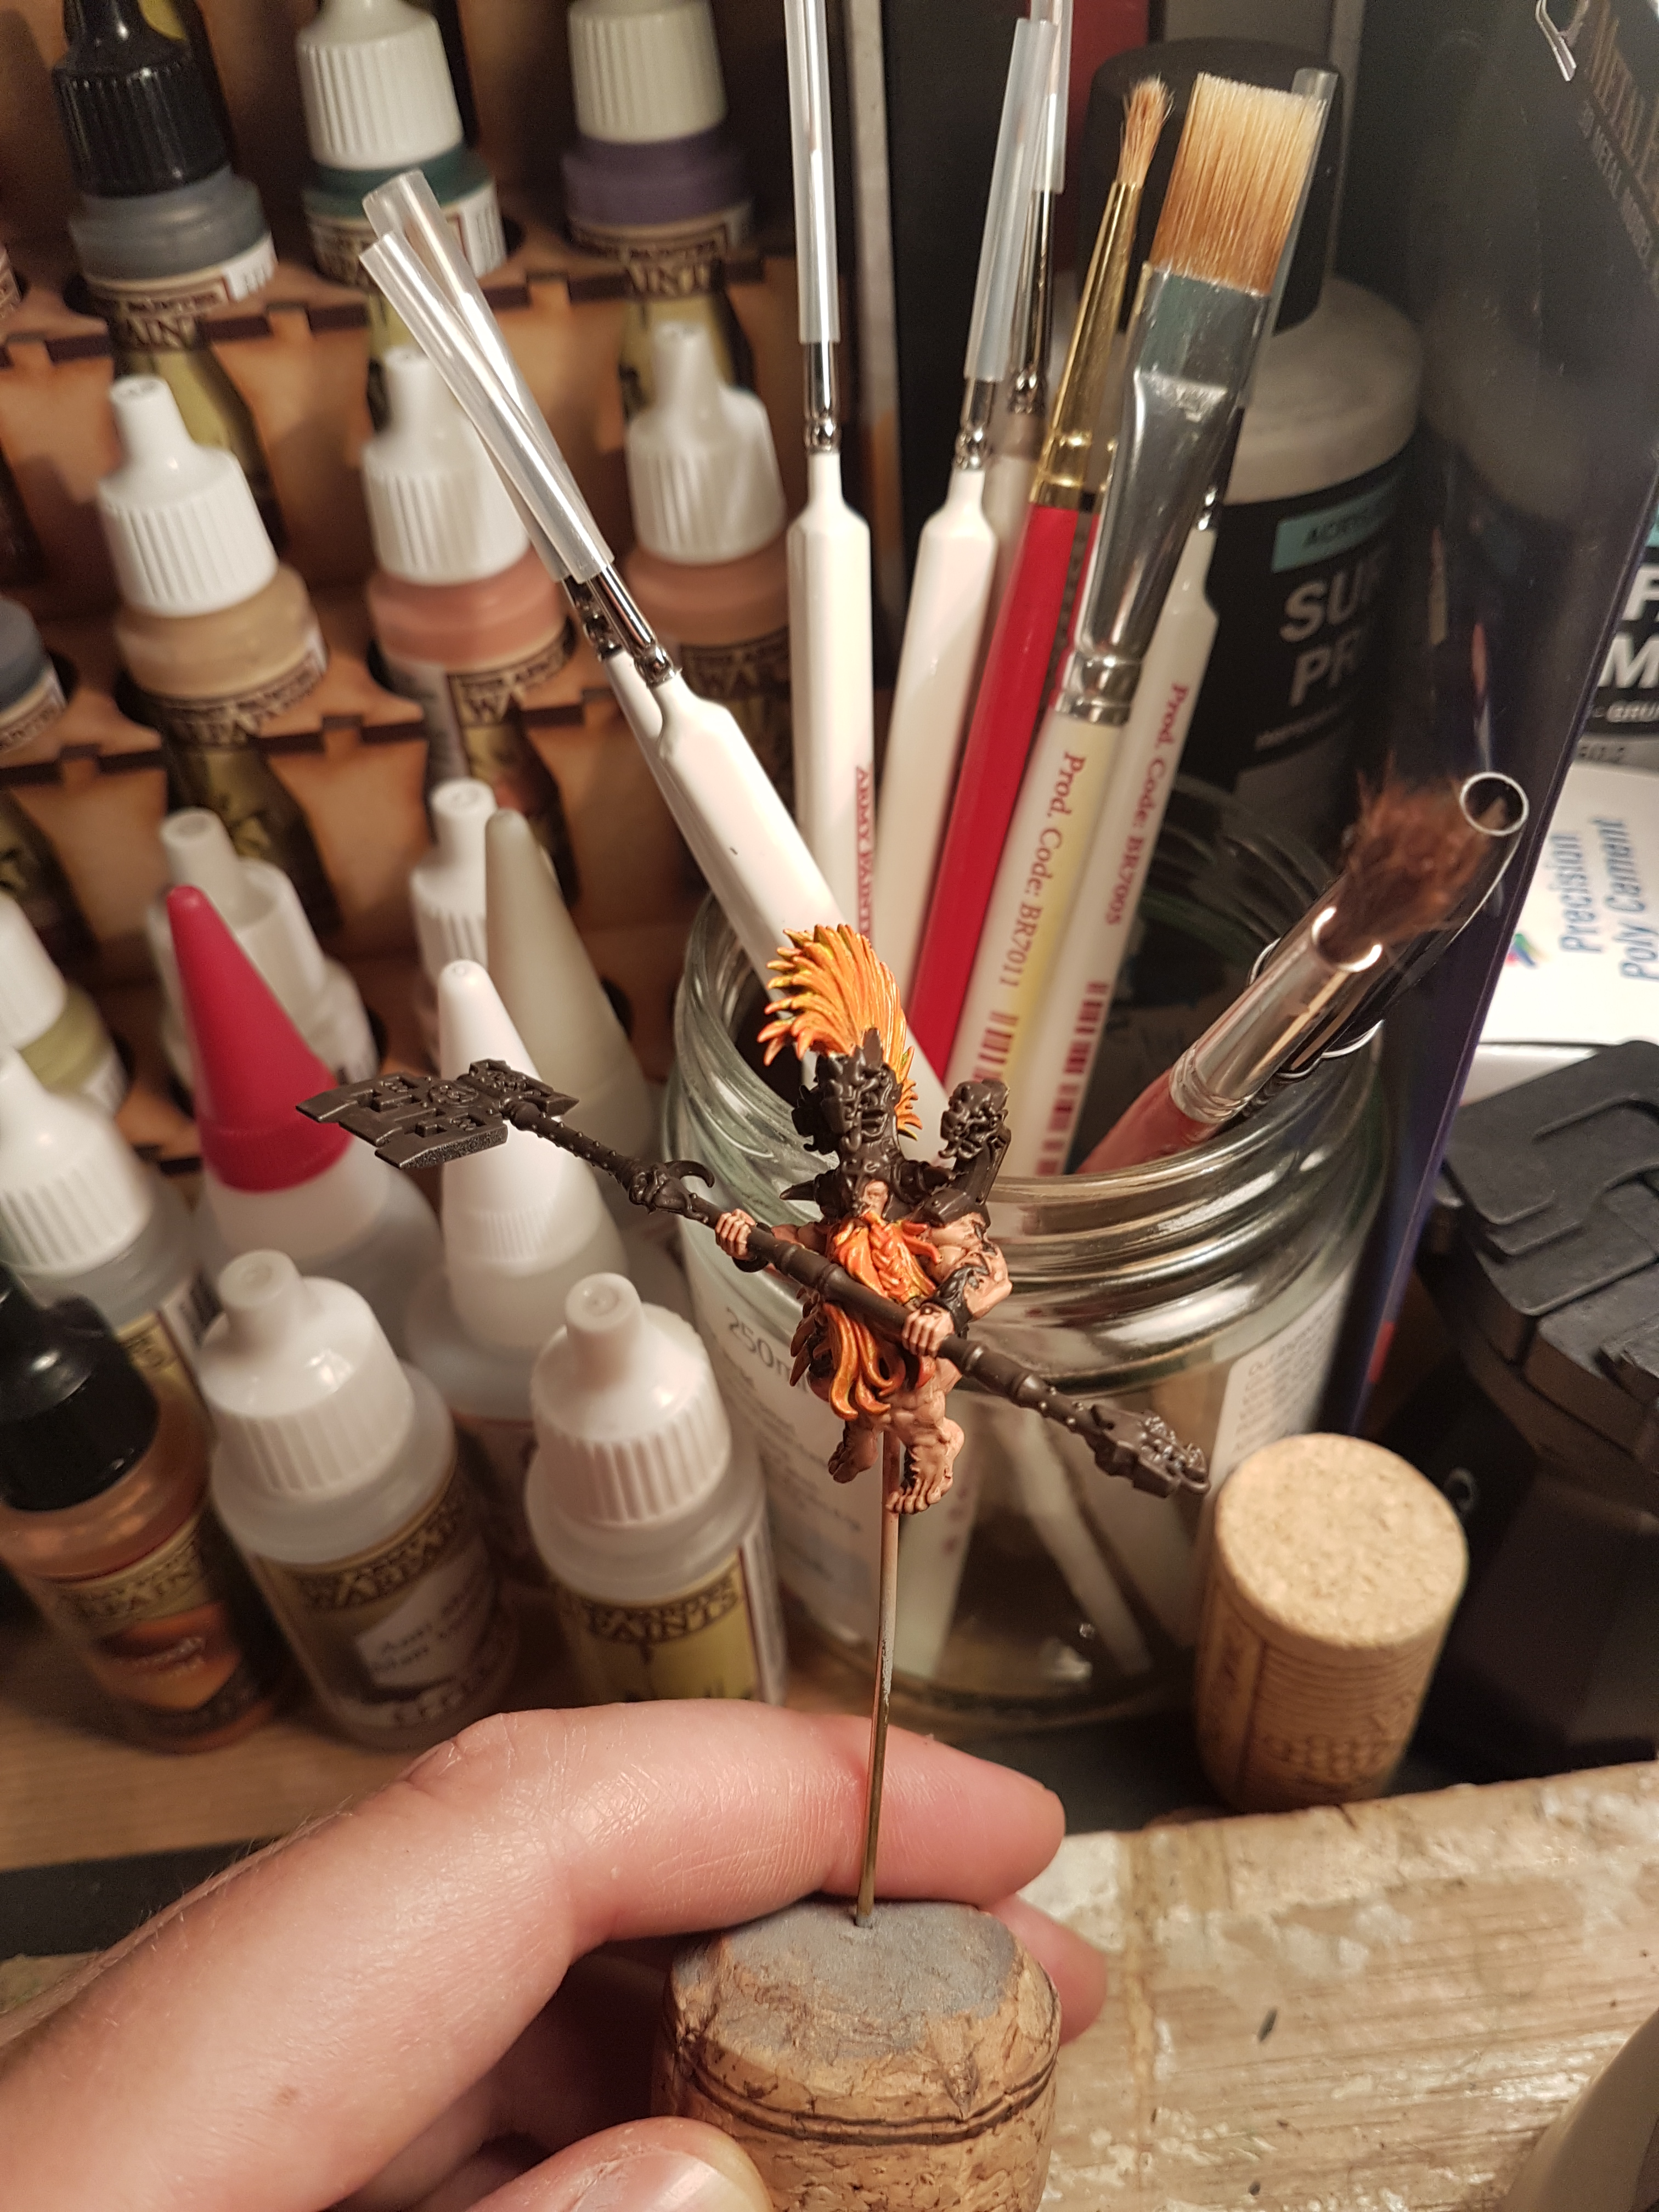
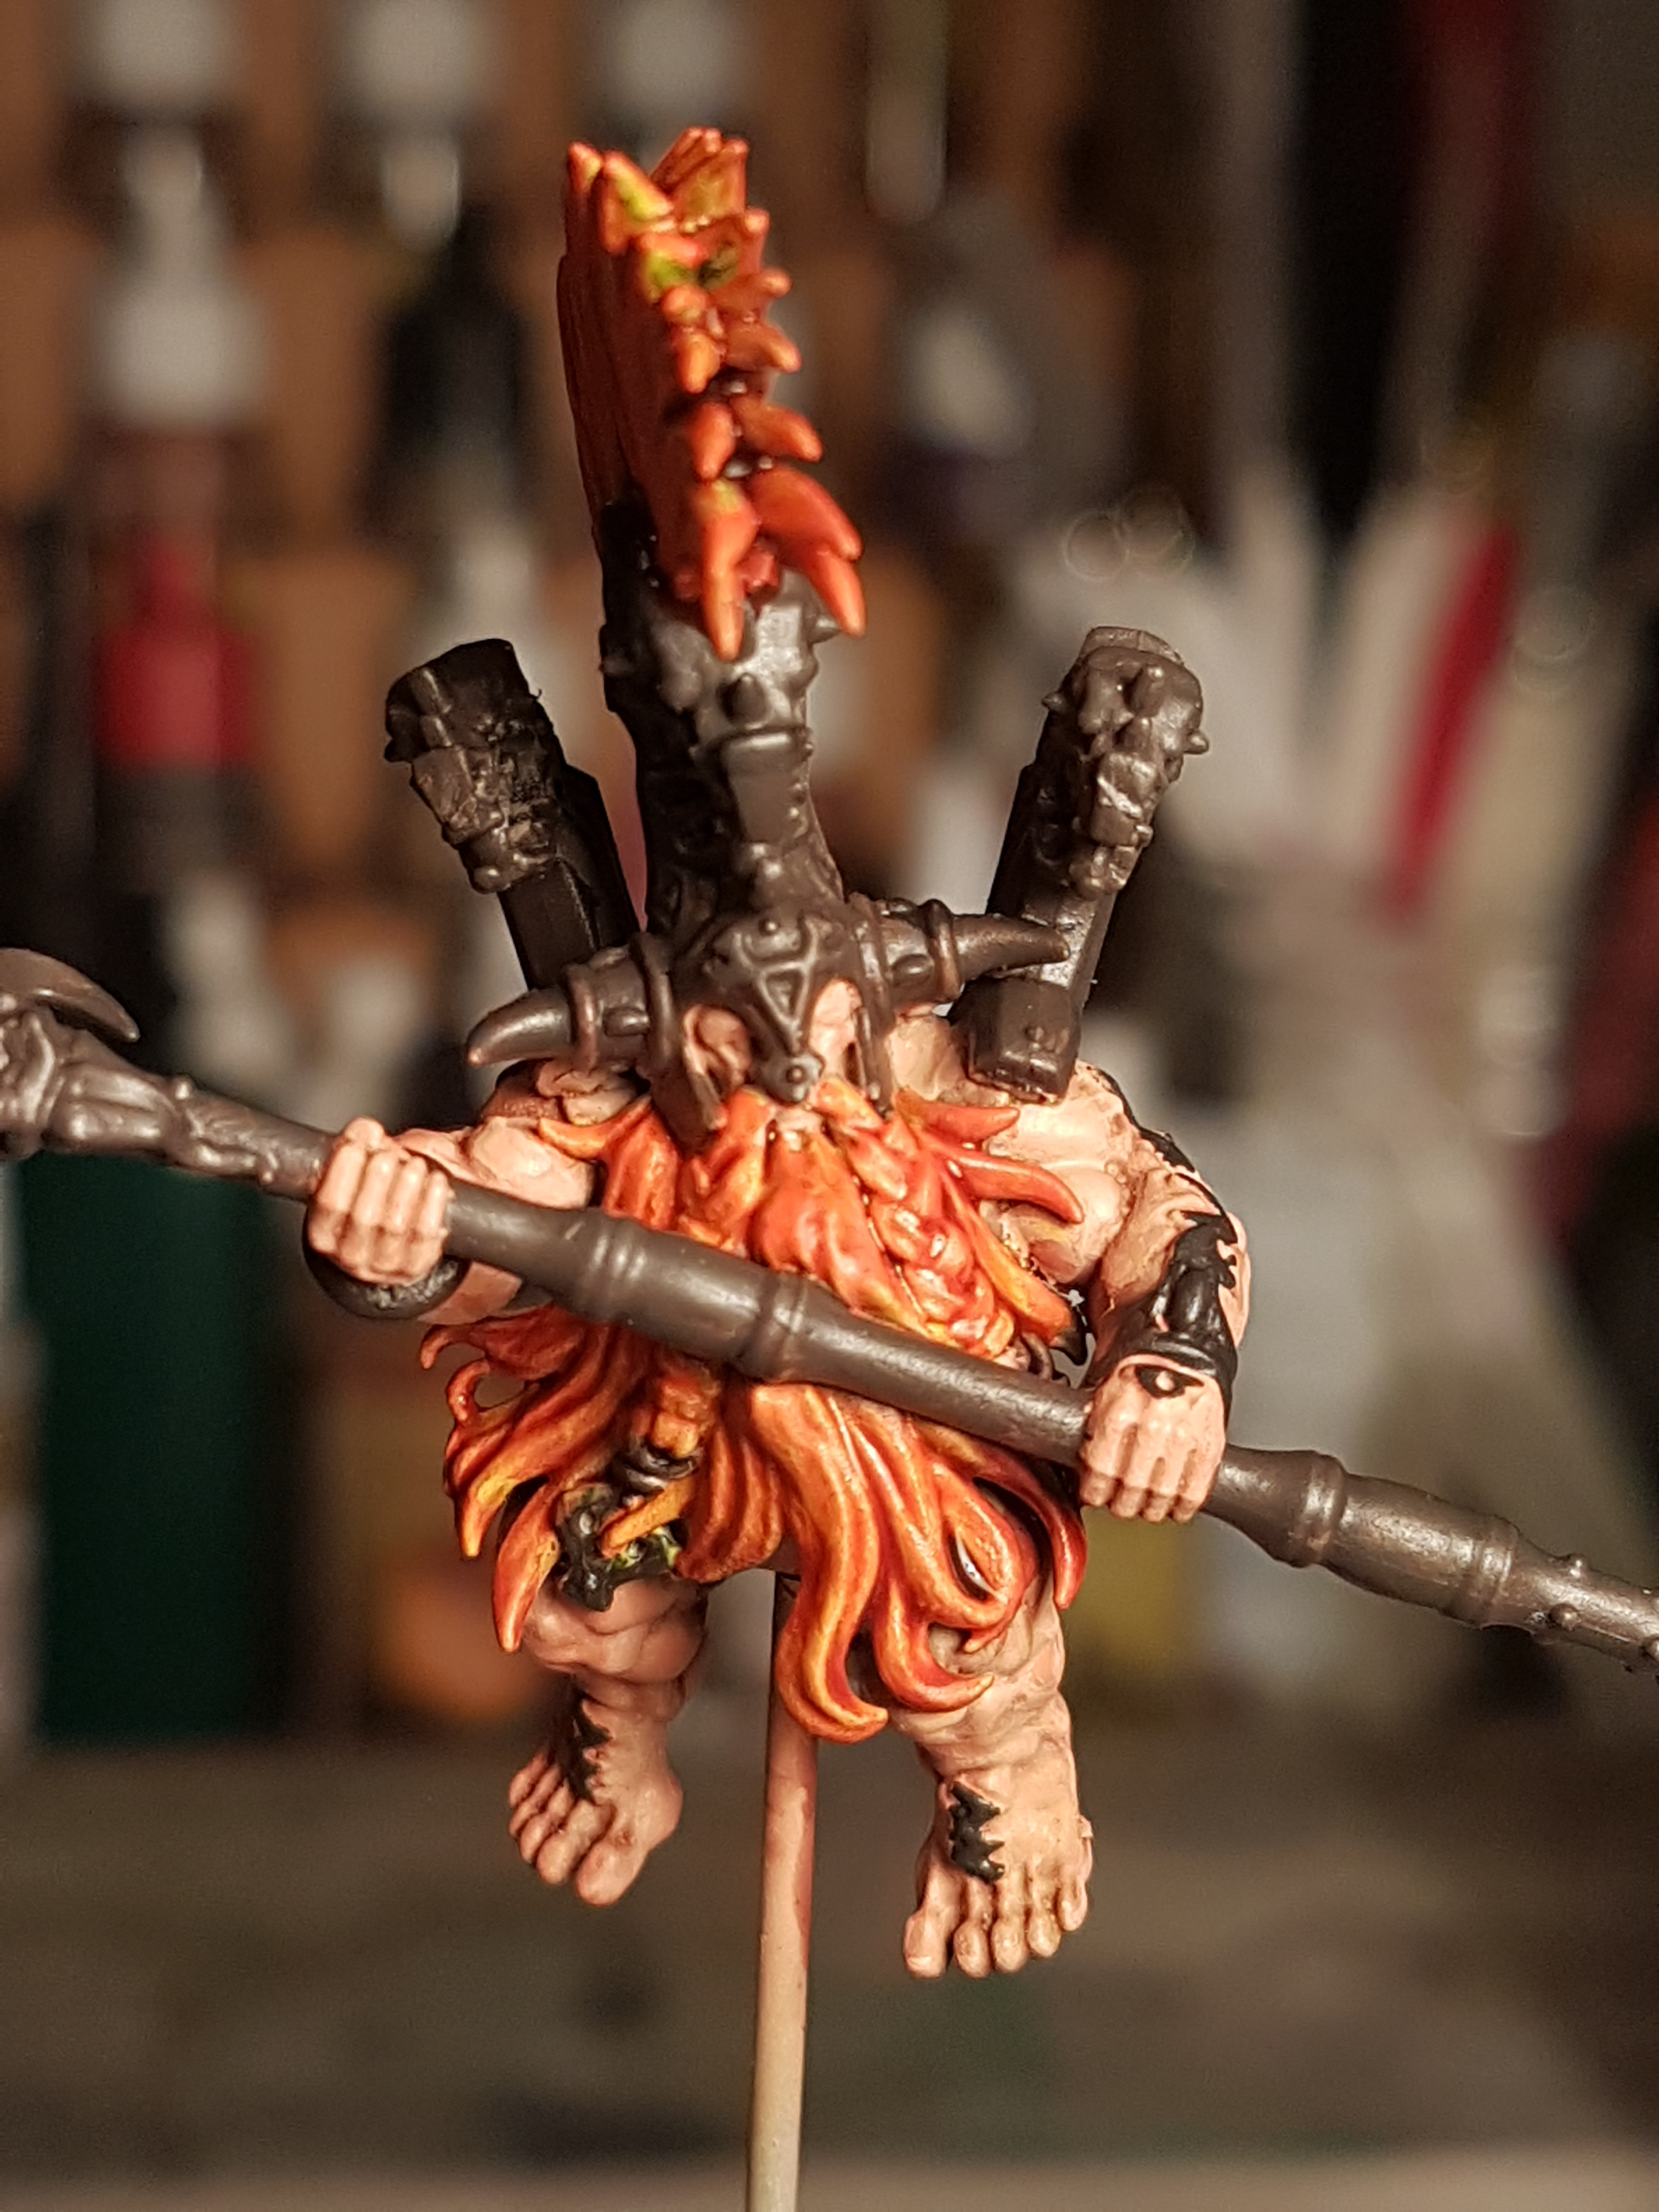
Final Touches - Gem and Horns
The rider was now nearly complete.
There was a gem on the riders wrist guard, I decided to go for a complimentary red gem for this.
My gem painting is not amazing, but a combination I find that works for me is by painting each successive colour over half of the previous colour, working towards one end of the gem, before putting a small white dot at the opposite end.
Photo shows the colours I used to do the gem.
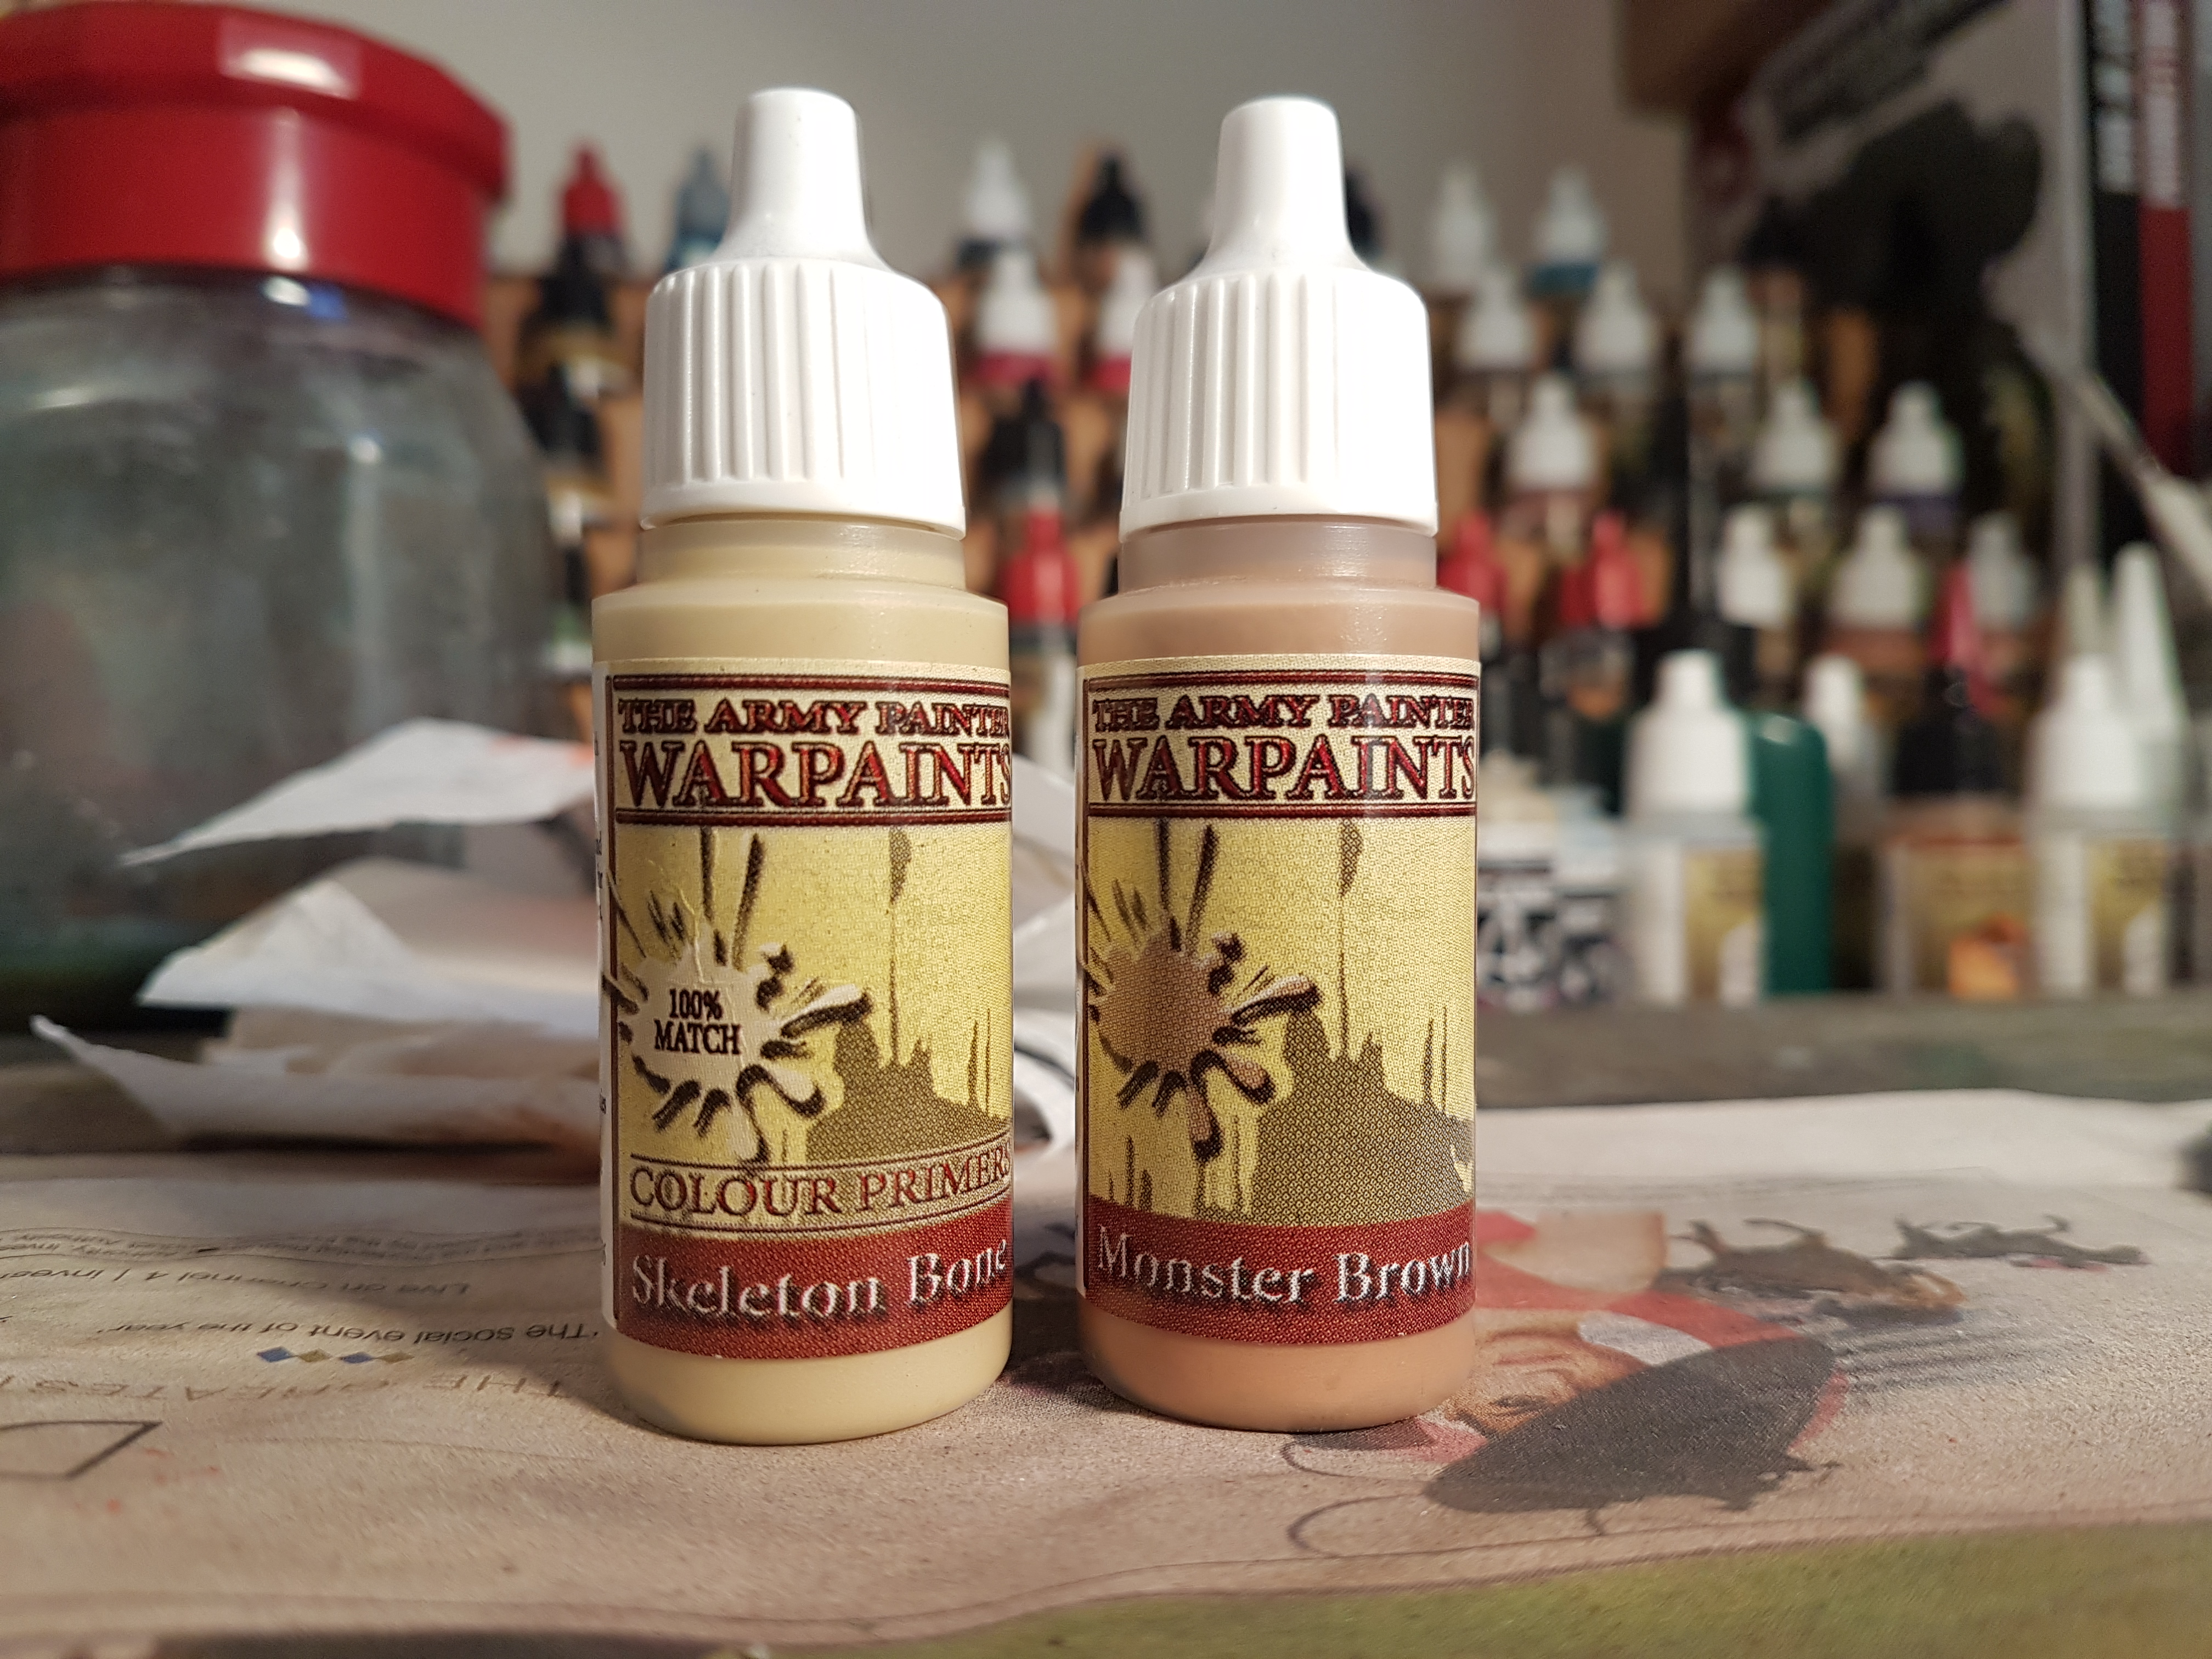
For the horns I used skeleton bone with a layer of monster brown towards the tip, and then using rough brush strokes quite deliberately as it got close to the helm, allowing the skeleton bone colour to show through.
With this the rider was pretty much complete. I hate painting eyes, so I put a very thin dab of white over the miniatures eyes to give a little contrast with the skin, but this is about as far as I go.
Time now to add the rider to his mount….
 Gem and Horns complete. Time now to add the rider to his mount....
Rider - Metallics
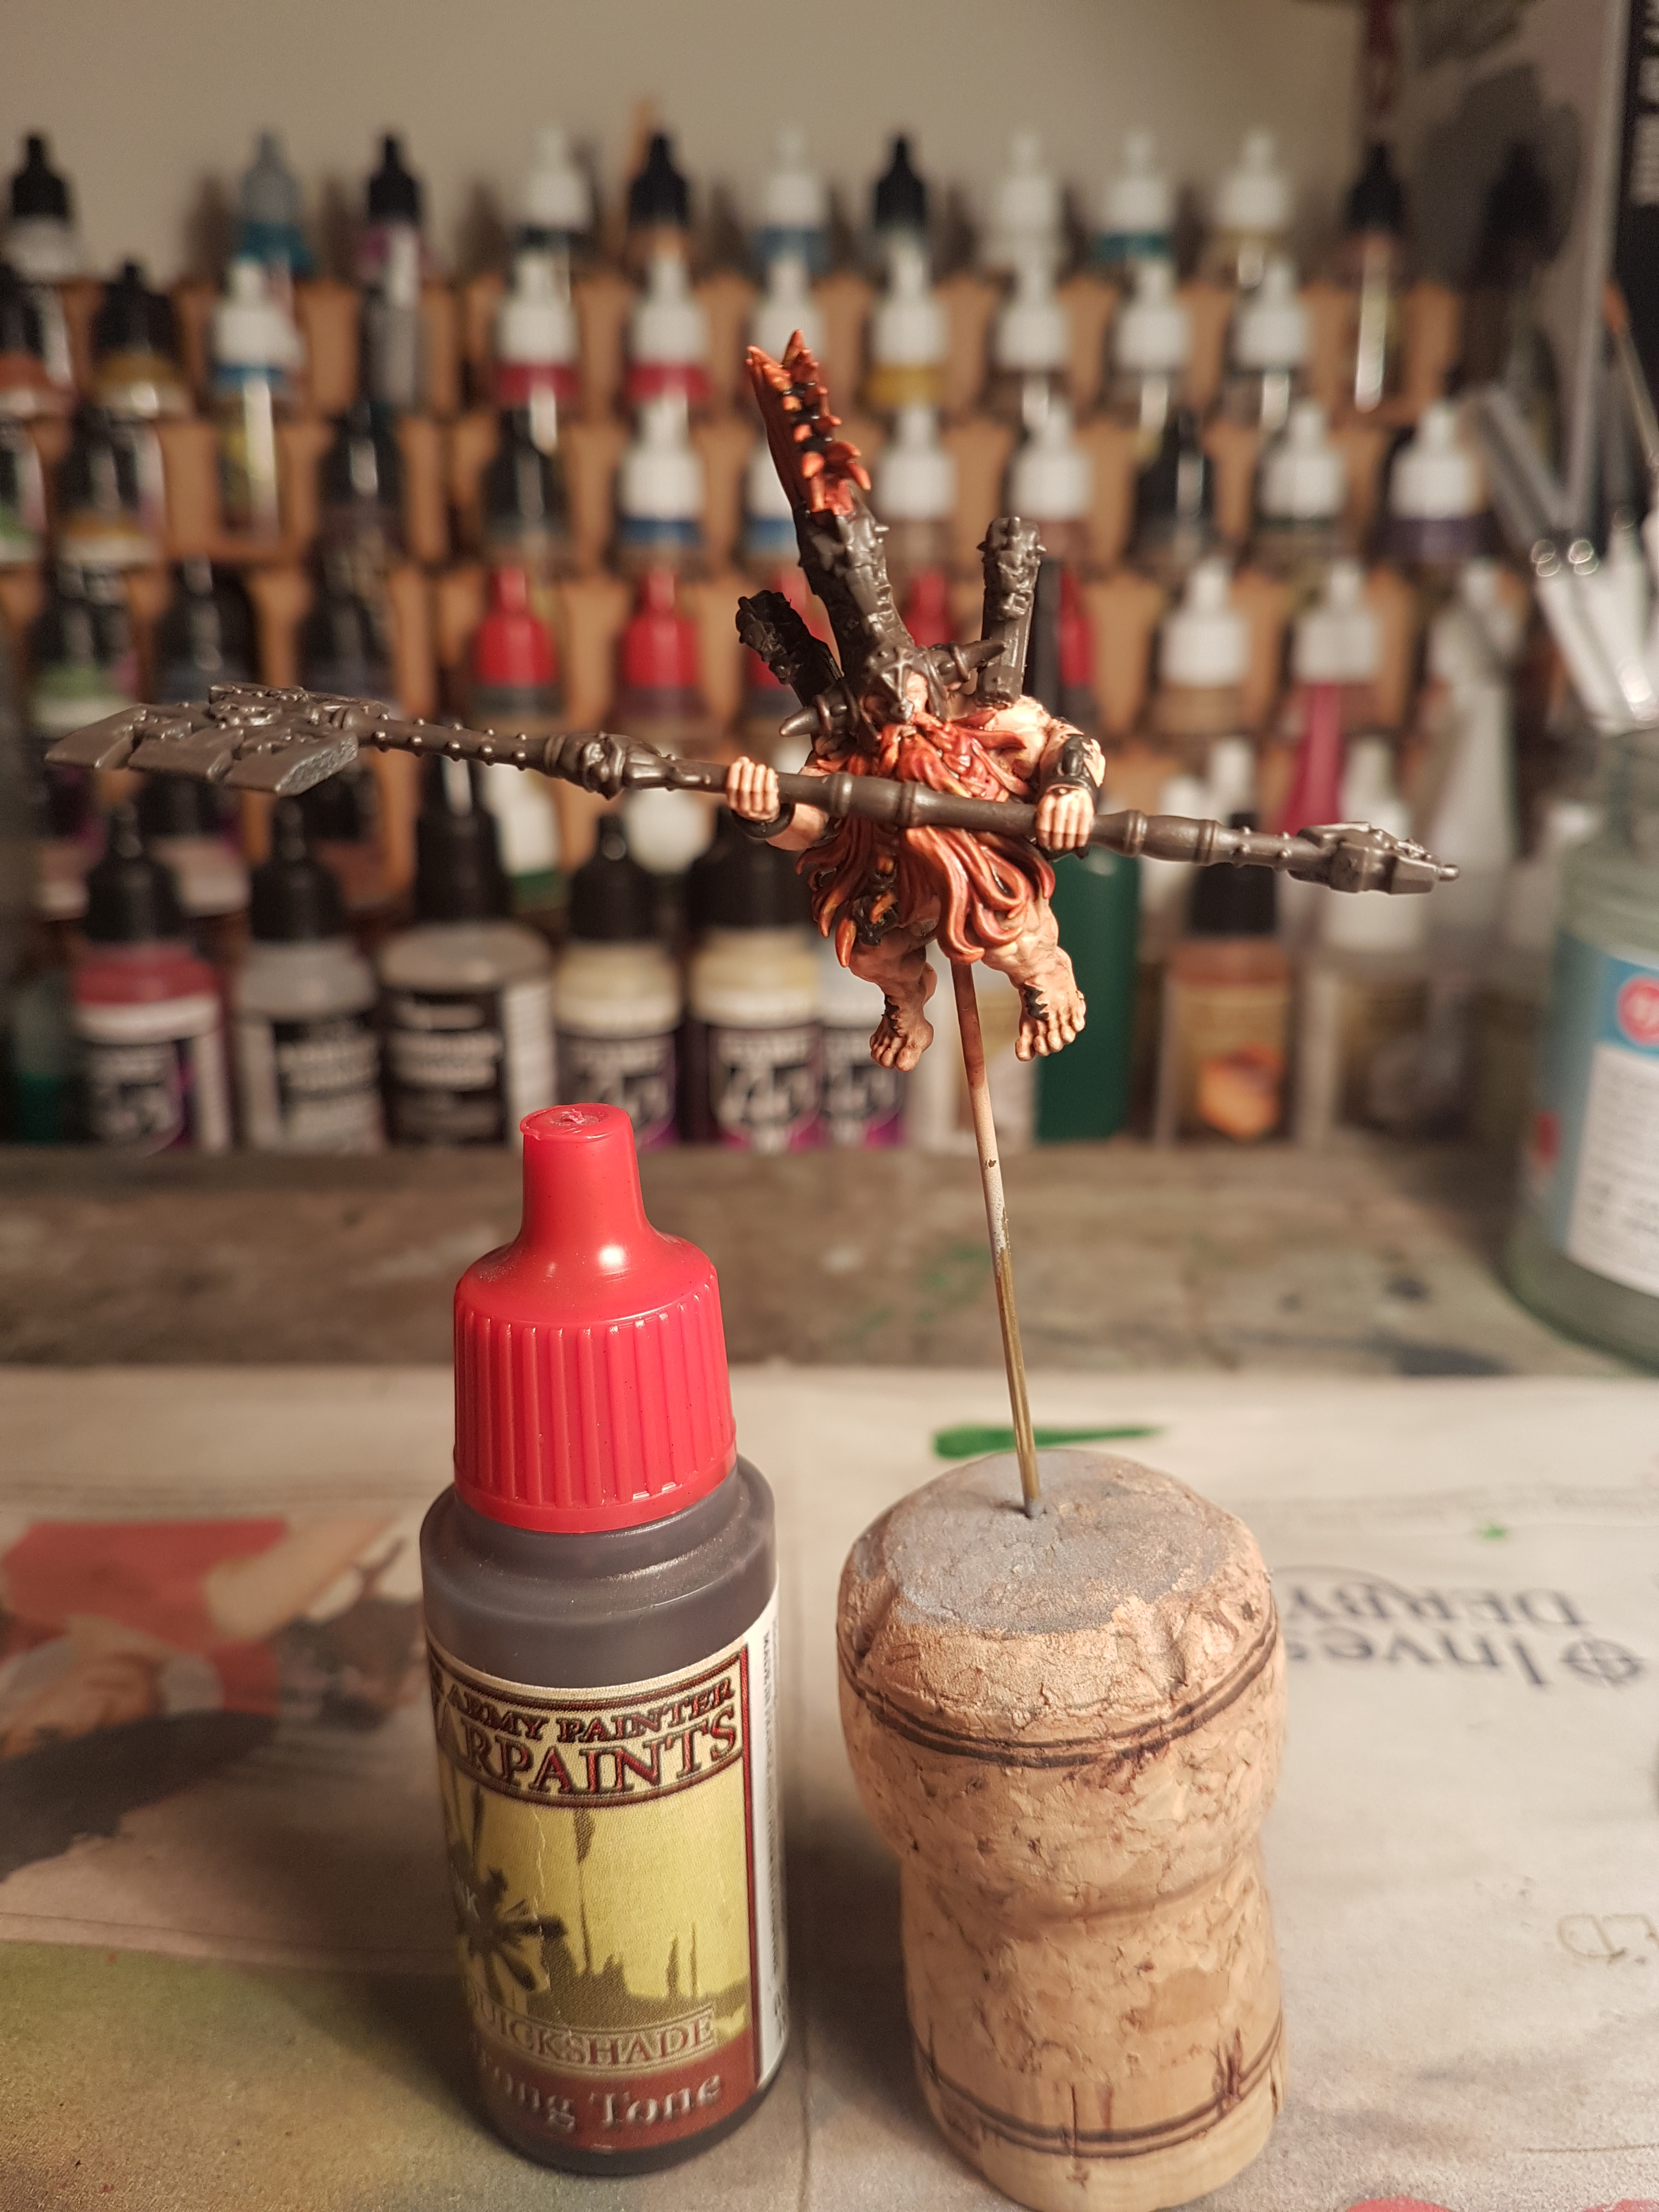
I then added a metallic layer to all the metal areas, using AP Plate Mail on the “silver areas” and AP Greedy Gold on the runes and other details.
Following on from this I washed the metallic areas with strong tone ink and the highlighted using AP Shining Silver and Weapon Bronze, on the Plate Mail and Gold Areas respectively. I also used shining silver to pick out some of the dragon head details on the helm, axe pommel and shoulders.
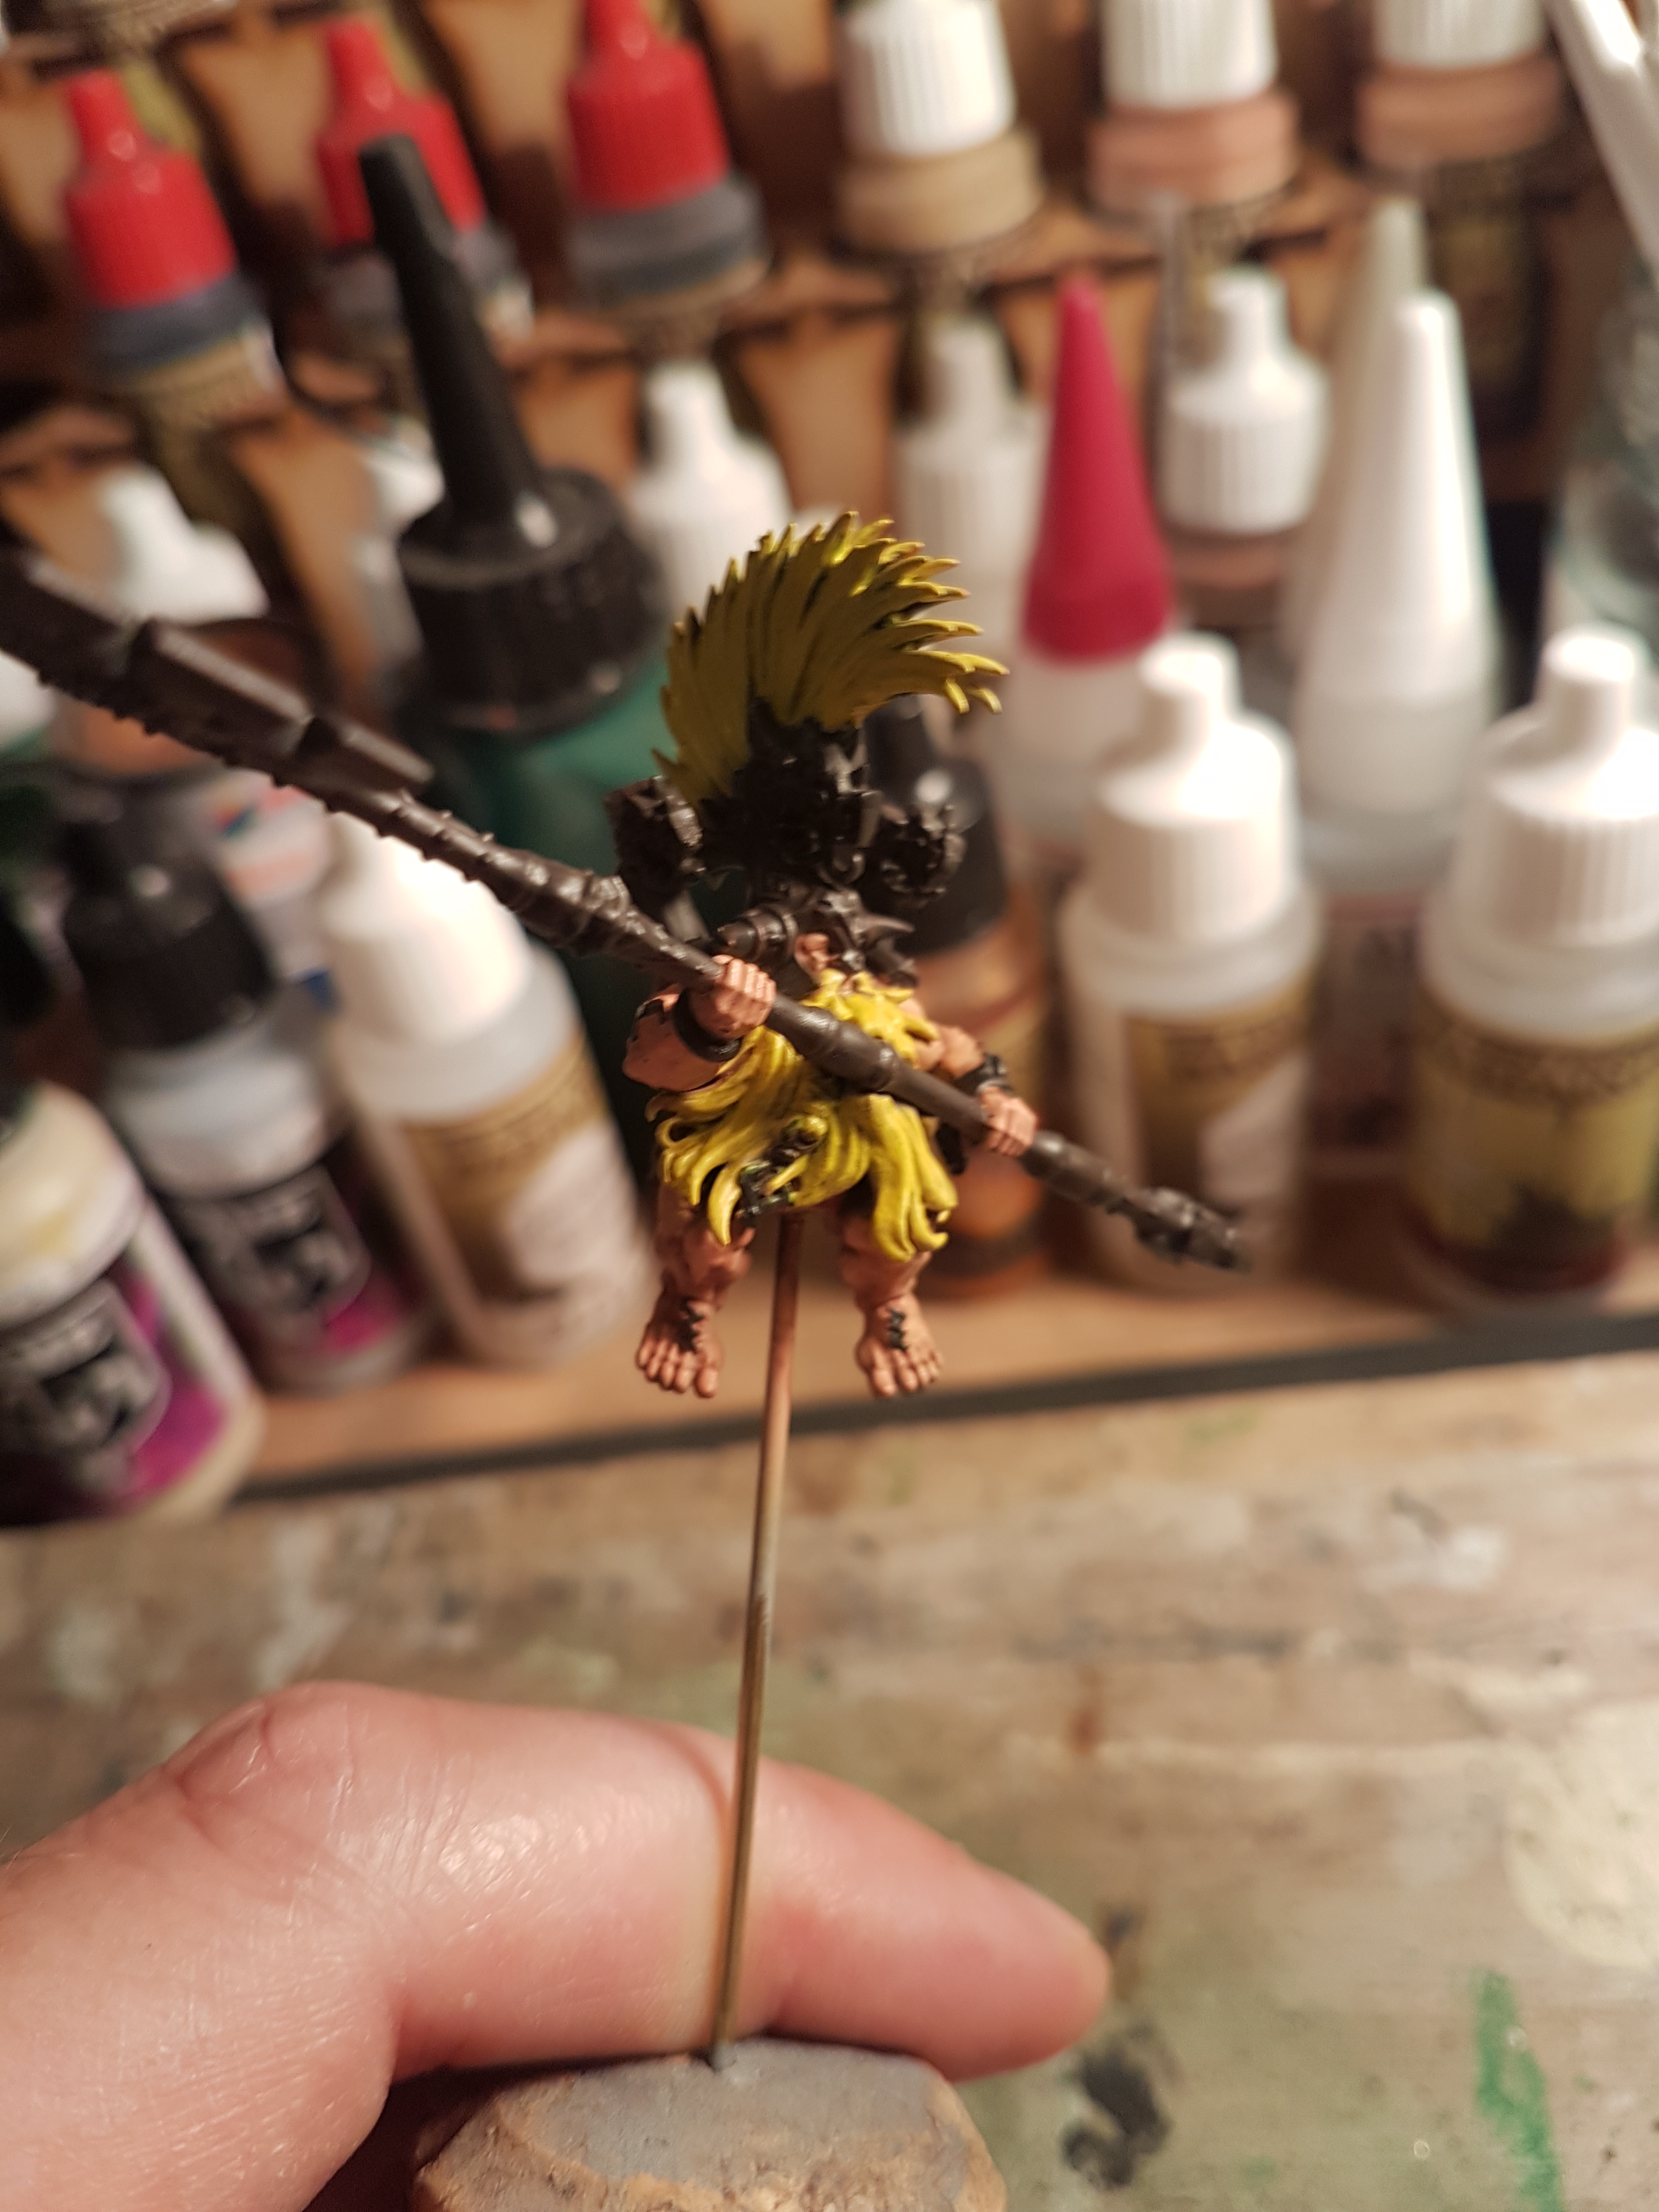
It was at this stage I felt the hair could use a little more life on the very tips so dry brushed on some yellow. I also used ash grey on some of the brown black areas to edge highlight in a few areas, just giving them a little more life and breaking up the colour.
Hair Areas - Part 3
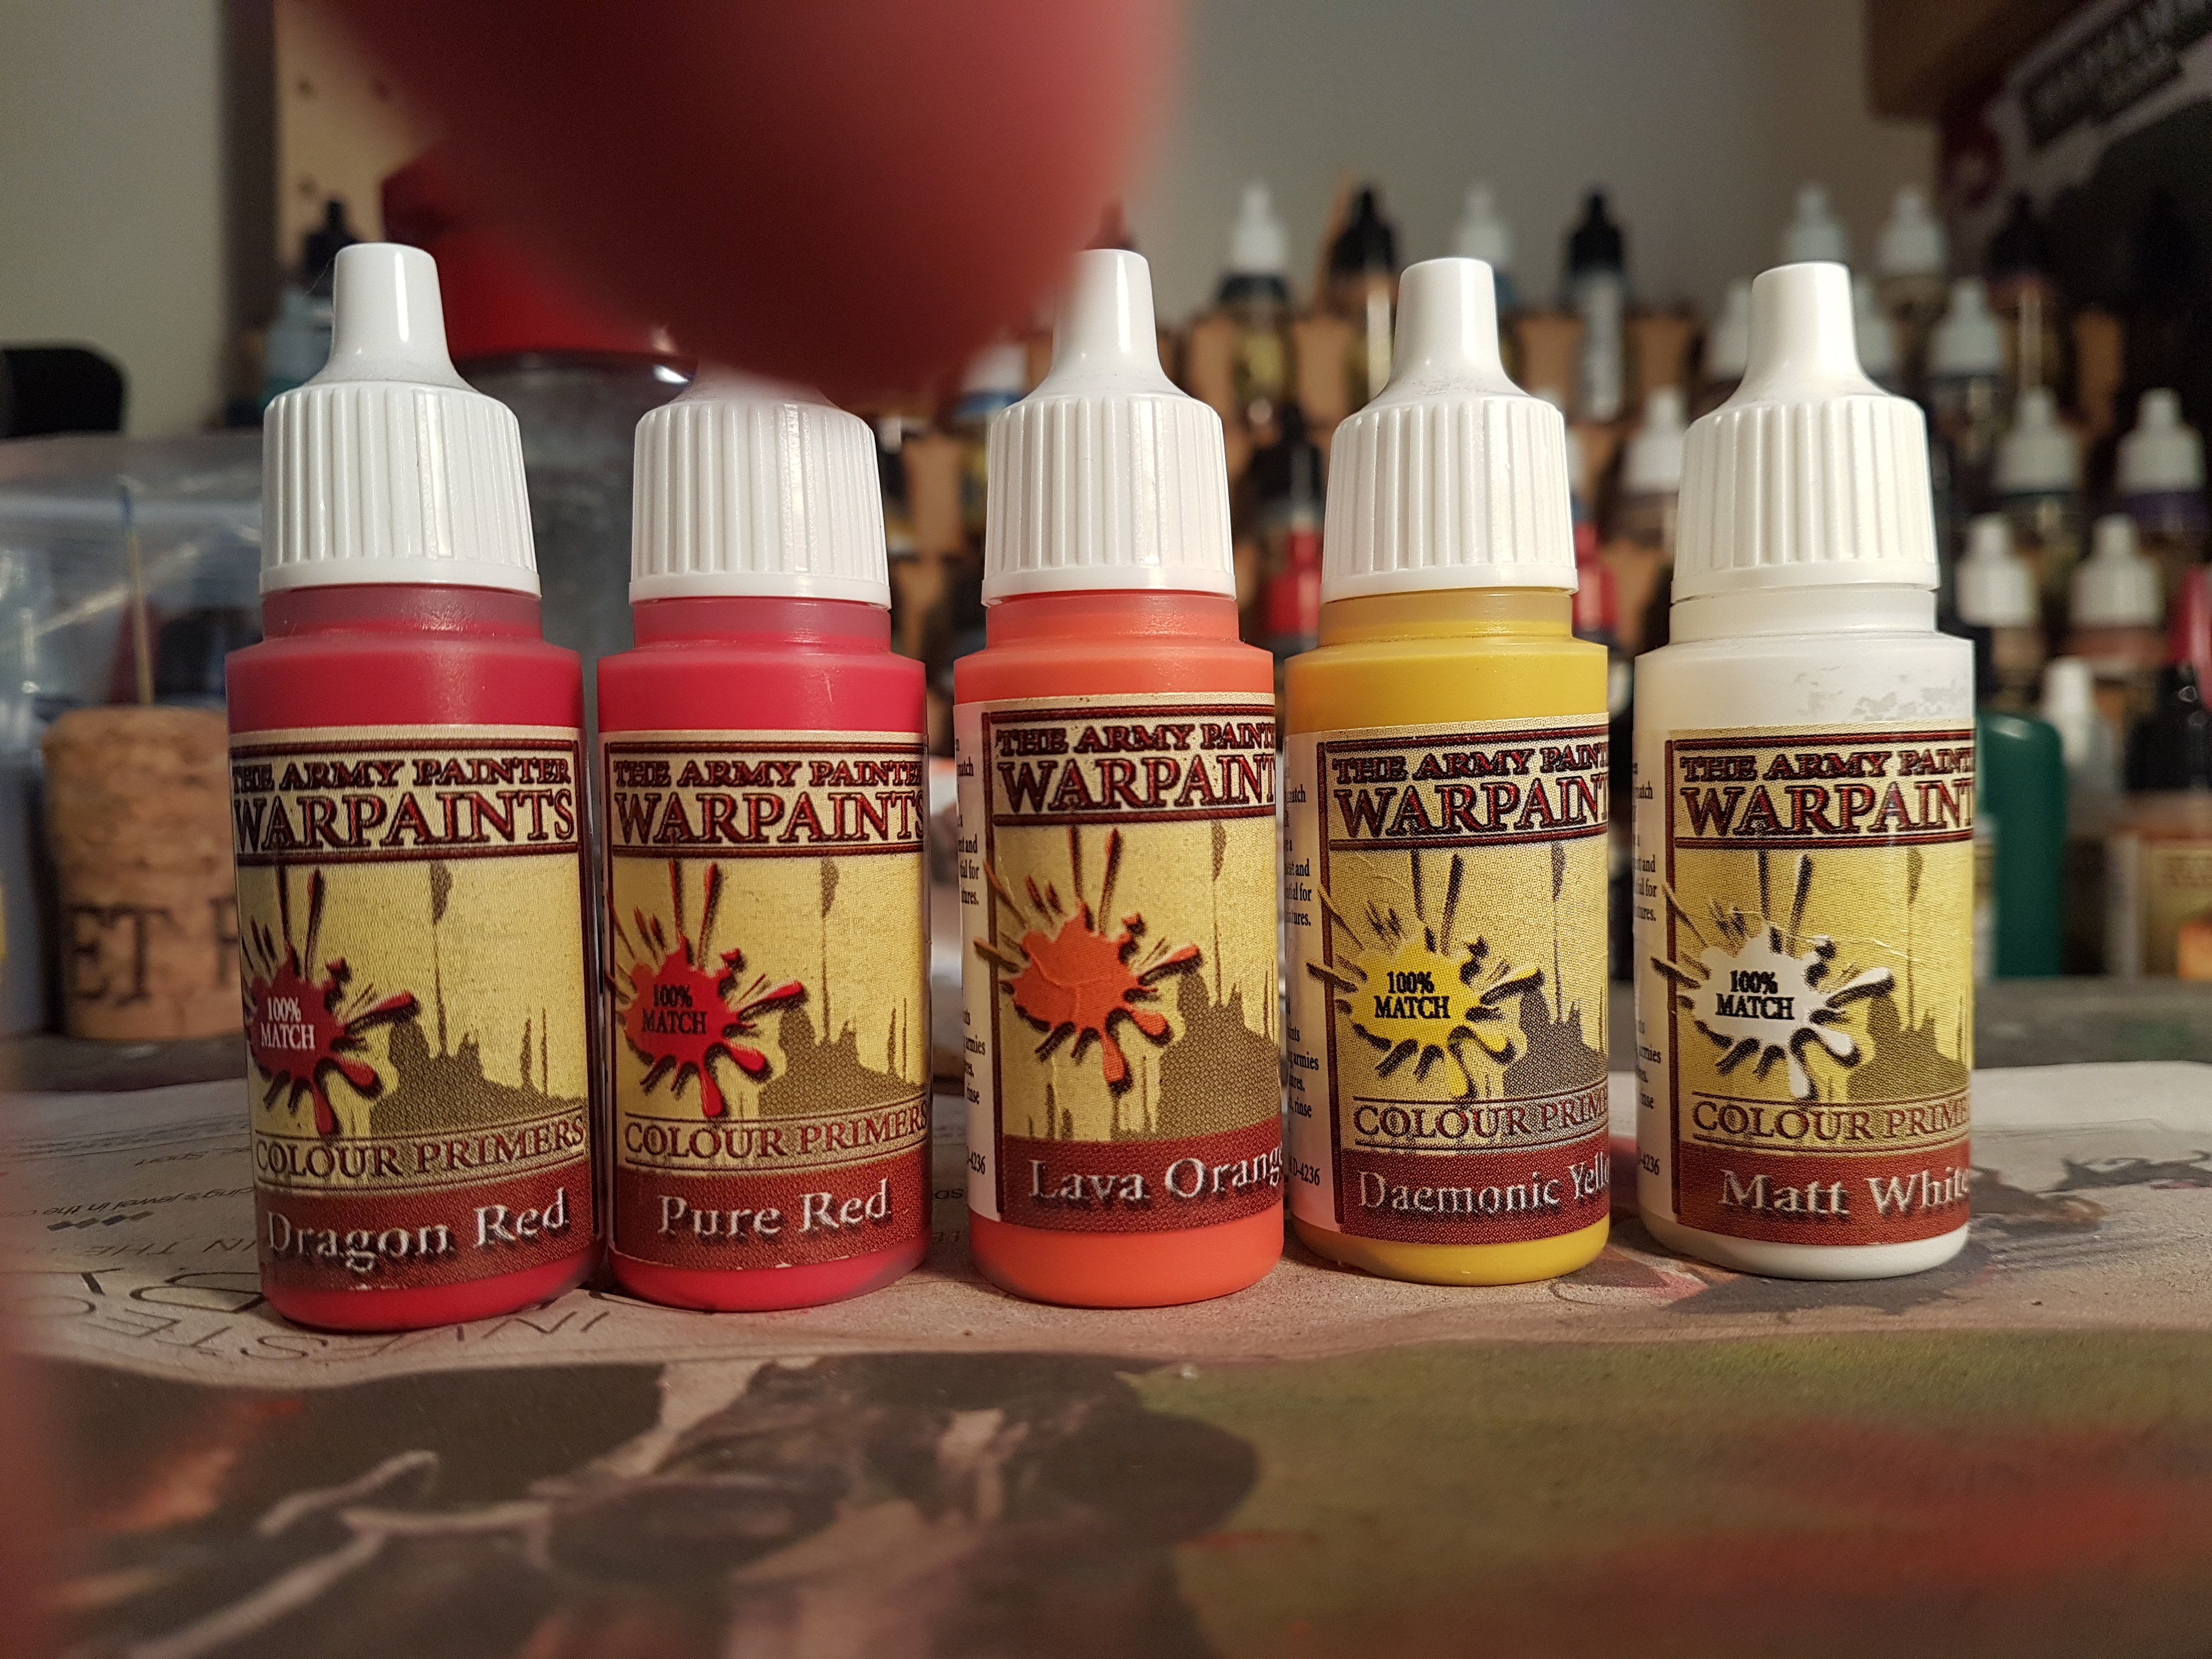
Going back to the rider this evening, whilst the hair brightness felt right, it still lacked something. So I drybrushed some red towards the base areas and then some orange towards the top. This gave it a subtle graduation.

Hair Areas - Part 2
I had been planning to add some highlights to the hair, but upon review of the previous evening’s painting session the beard looked too bright.
I like my miniatures to “pop” on the table, but the beard was clashing with the magmadroth itself.
So the next step was to use some AP Strong Tone Ink, to dial-back the overall brightness.
Having let this dry, I am much happier with the contrast/brightness.
Hair Areas - Part 1
I started on the hair by brushing on AP Skeleton bone, over this I painted yellow. I find the bone base is an easy way to paint yellow quickly without having to apply multiple thin coats.
I then went over this with AP Lava Orange, deliberately leaving a few tips yellow.
This was followed by a wash with Red Tone Ink.
It was then time for bed and sleep.
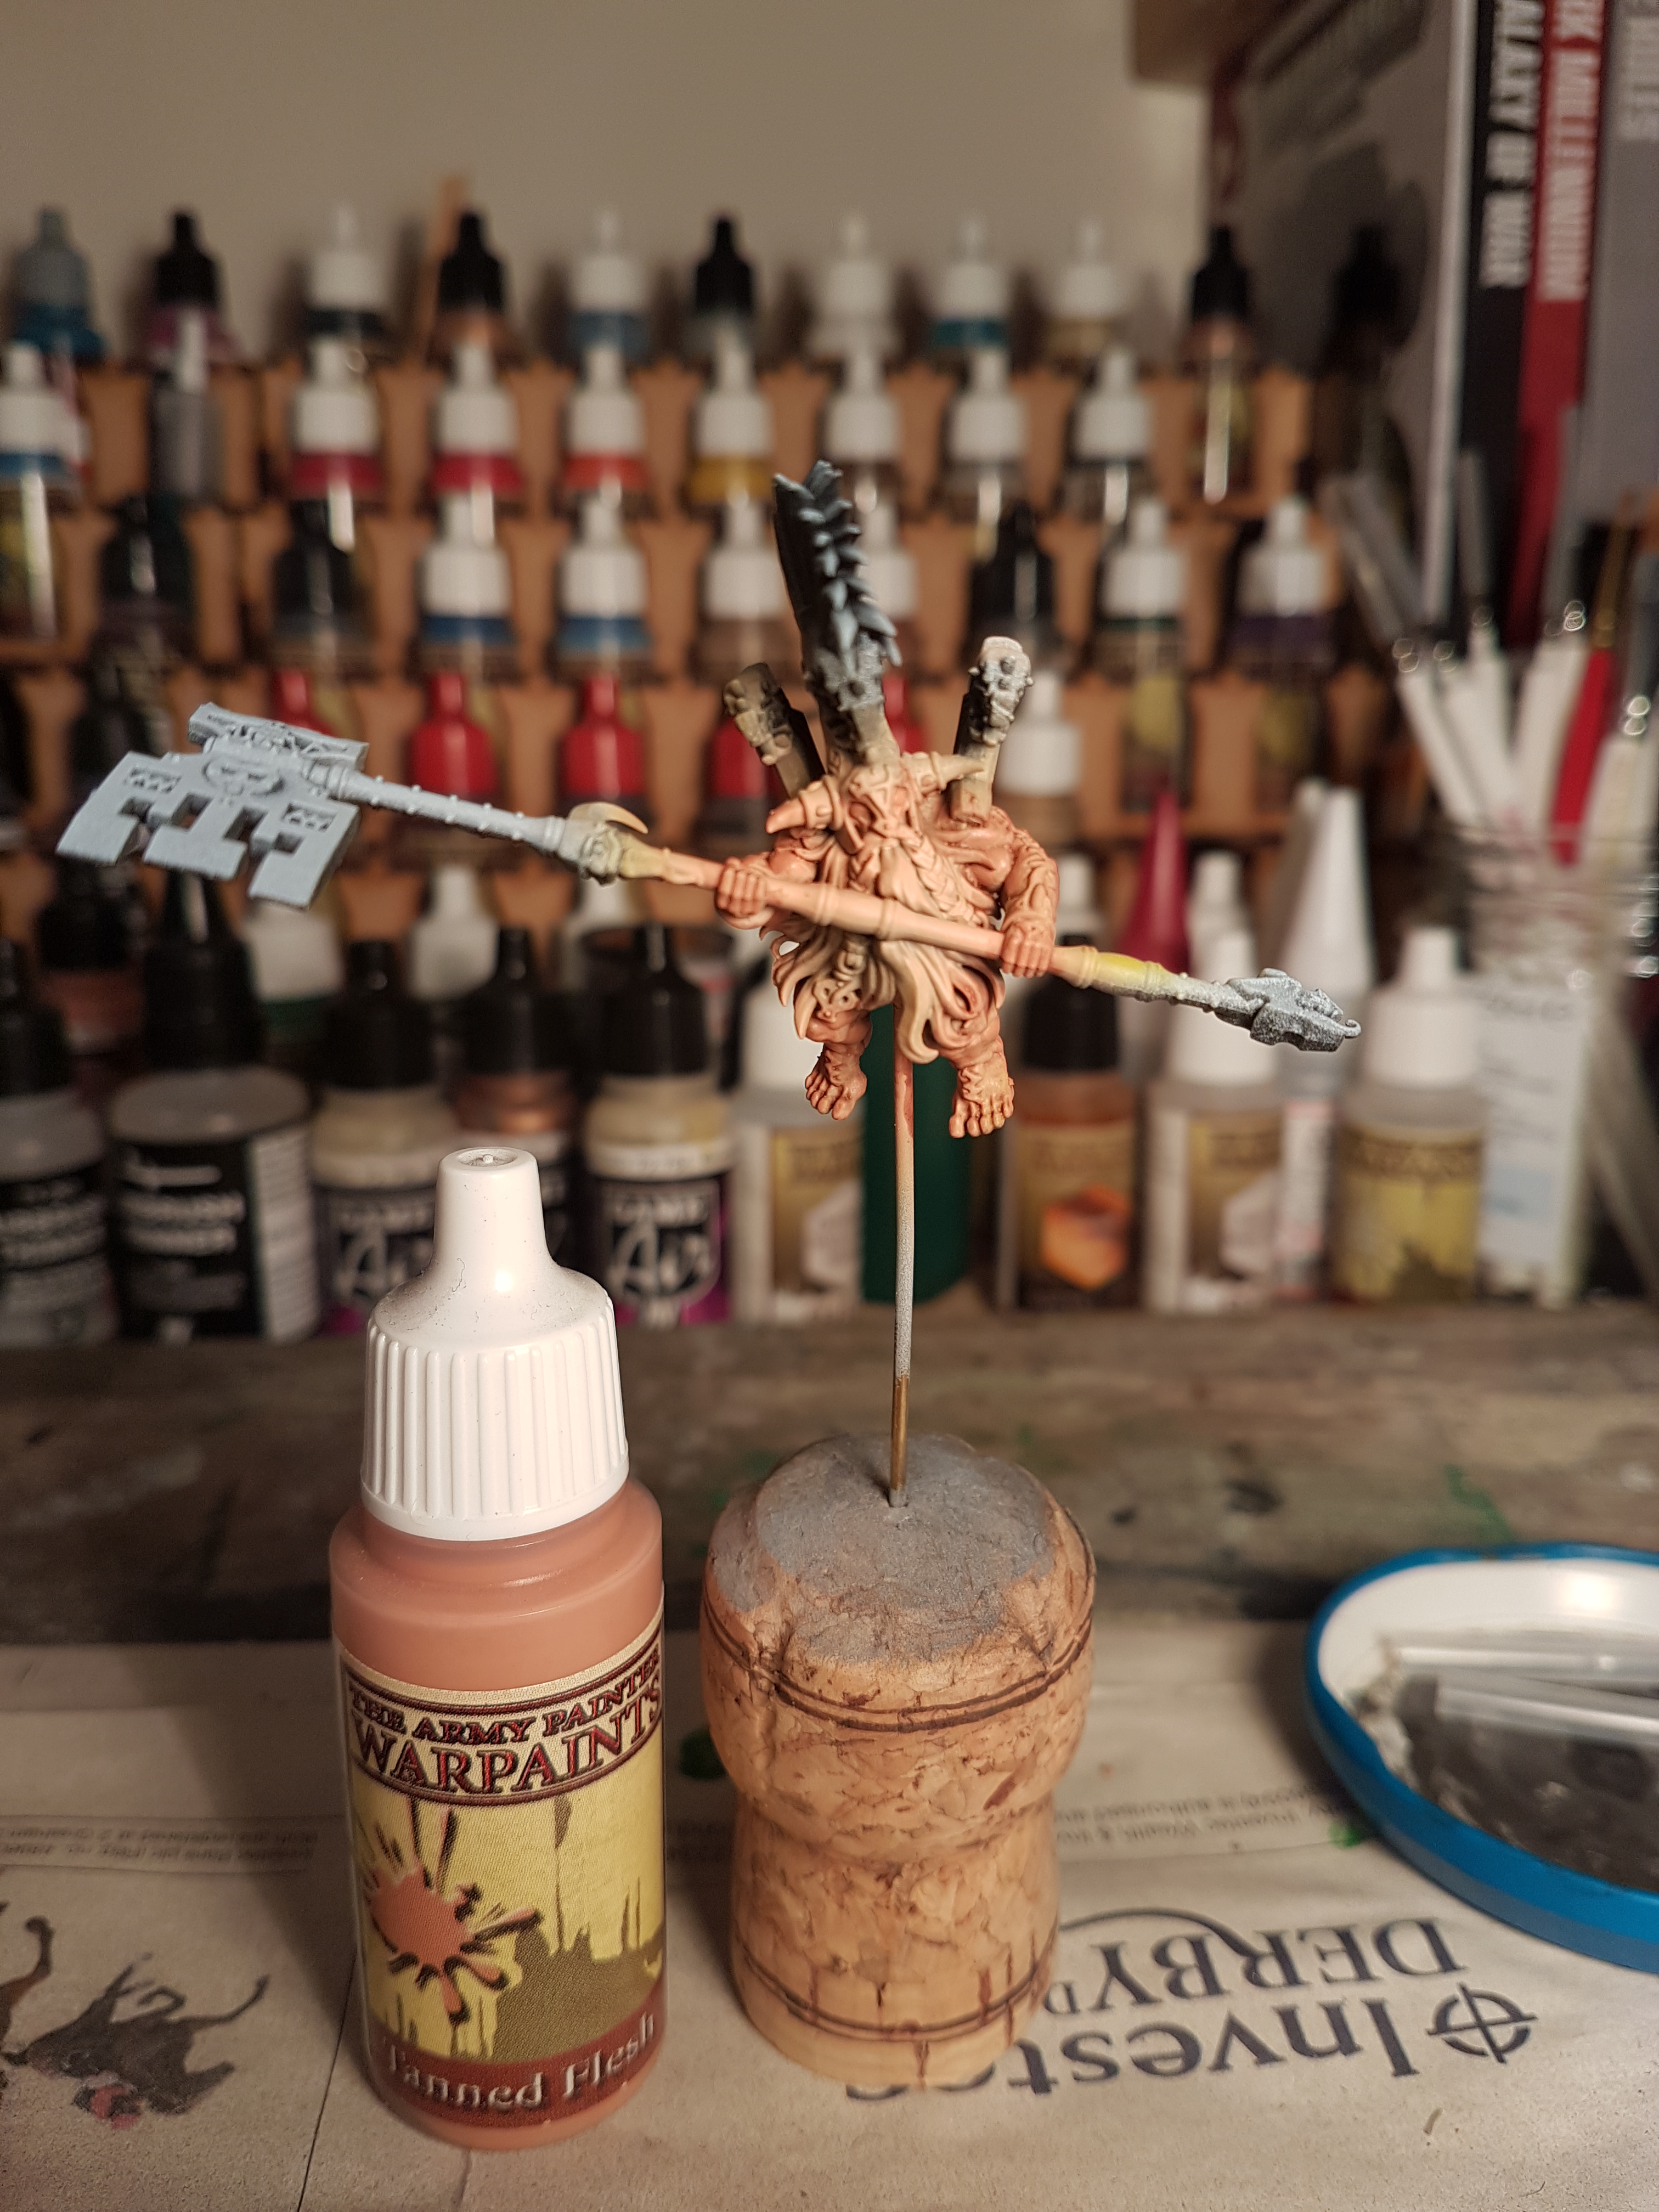
Rider - Flesh Part 2
With the flesh wash dry and my belly full, I picked up my brush to continue on the flesh areas.
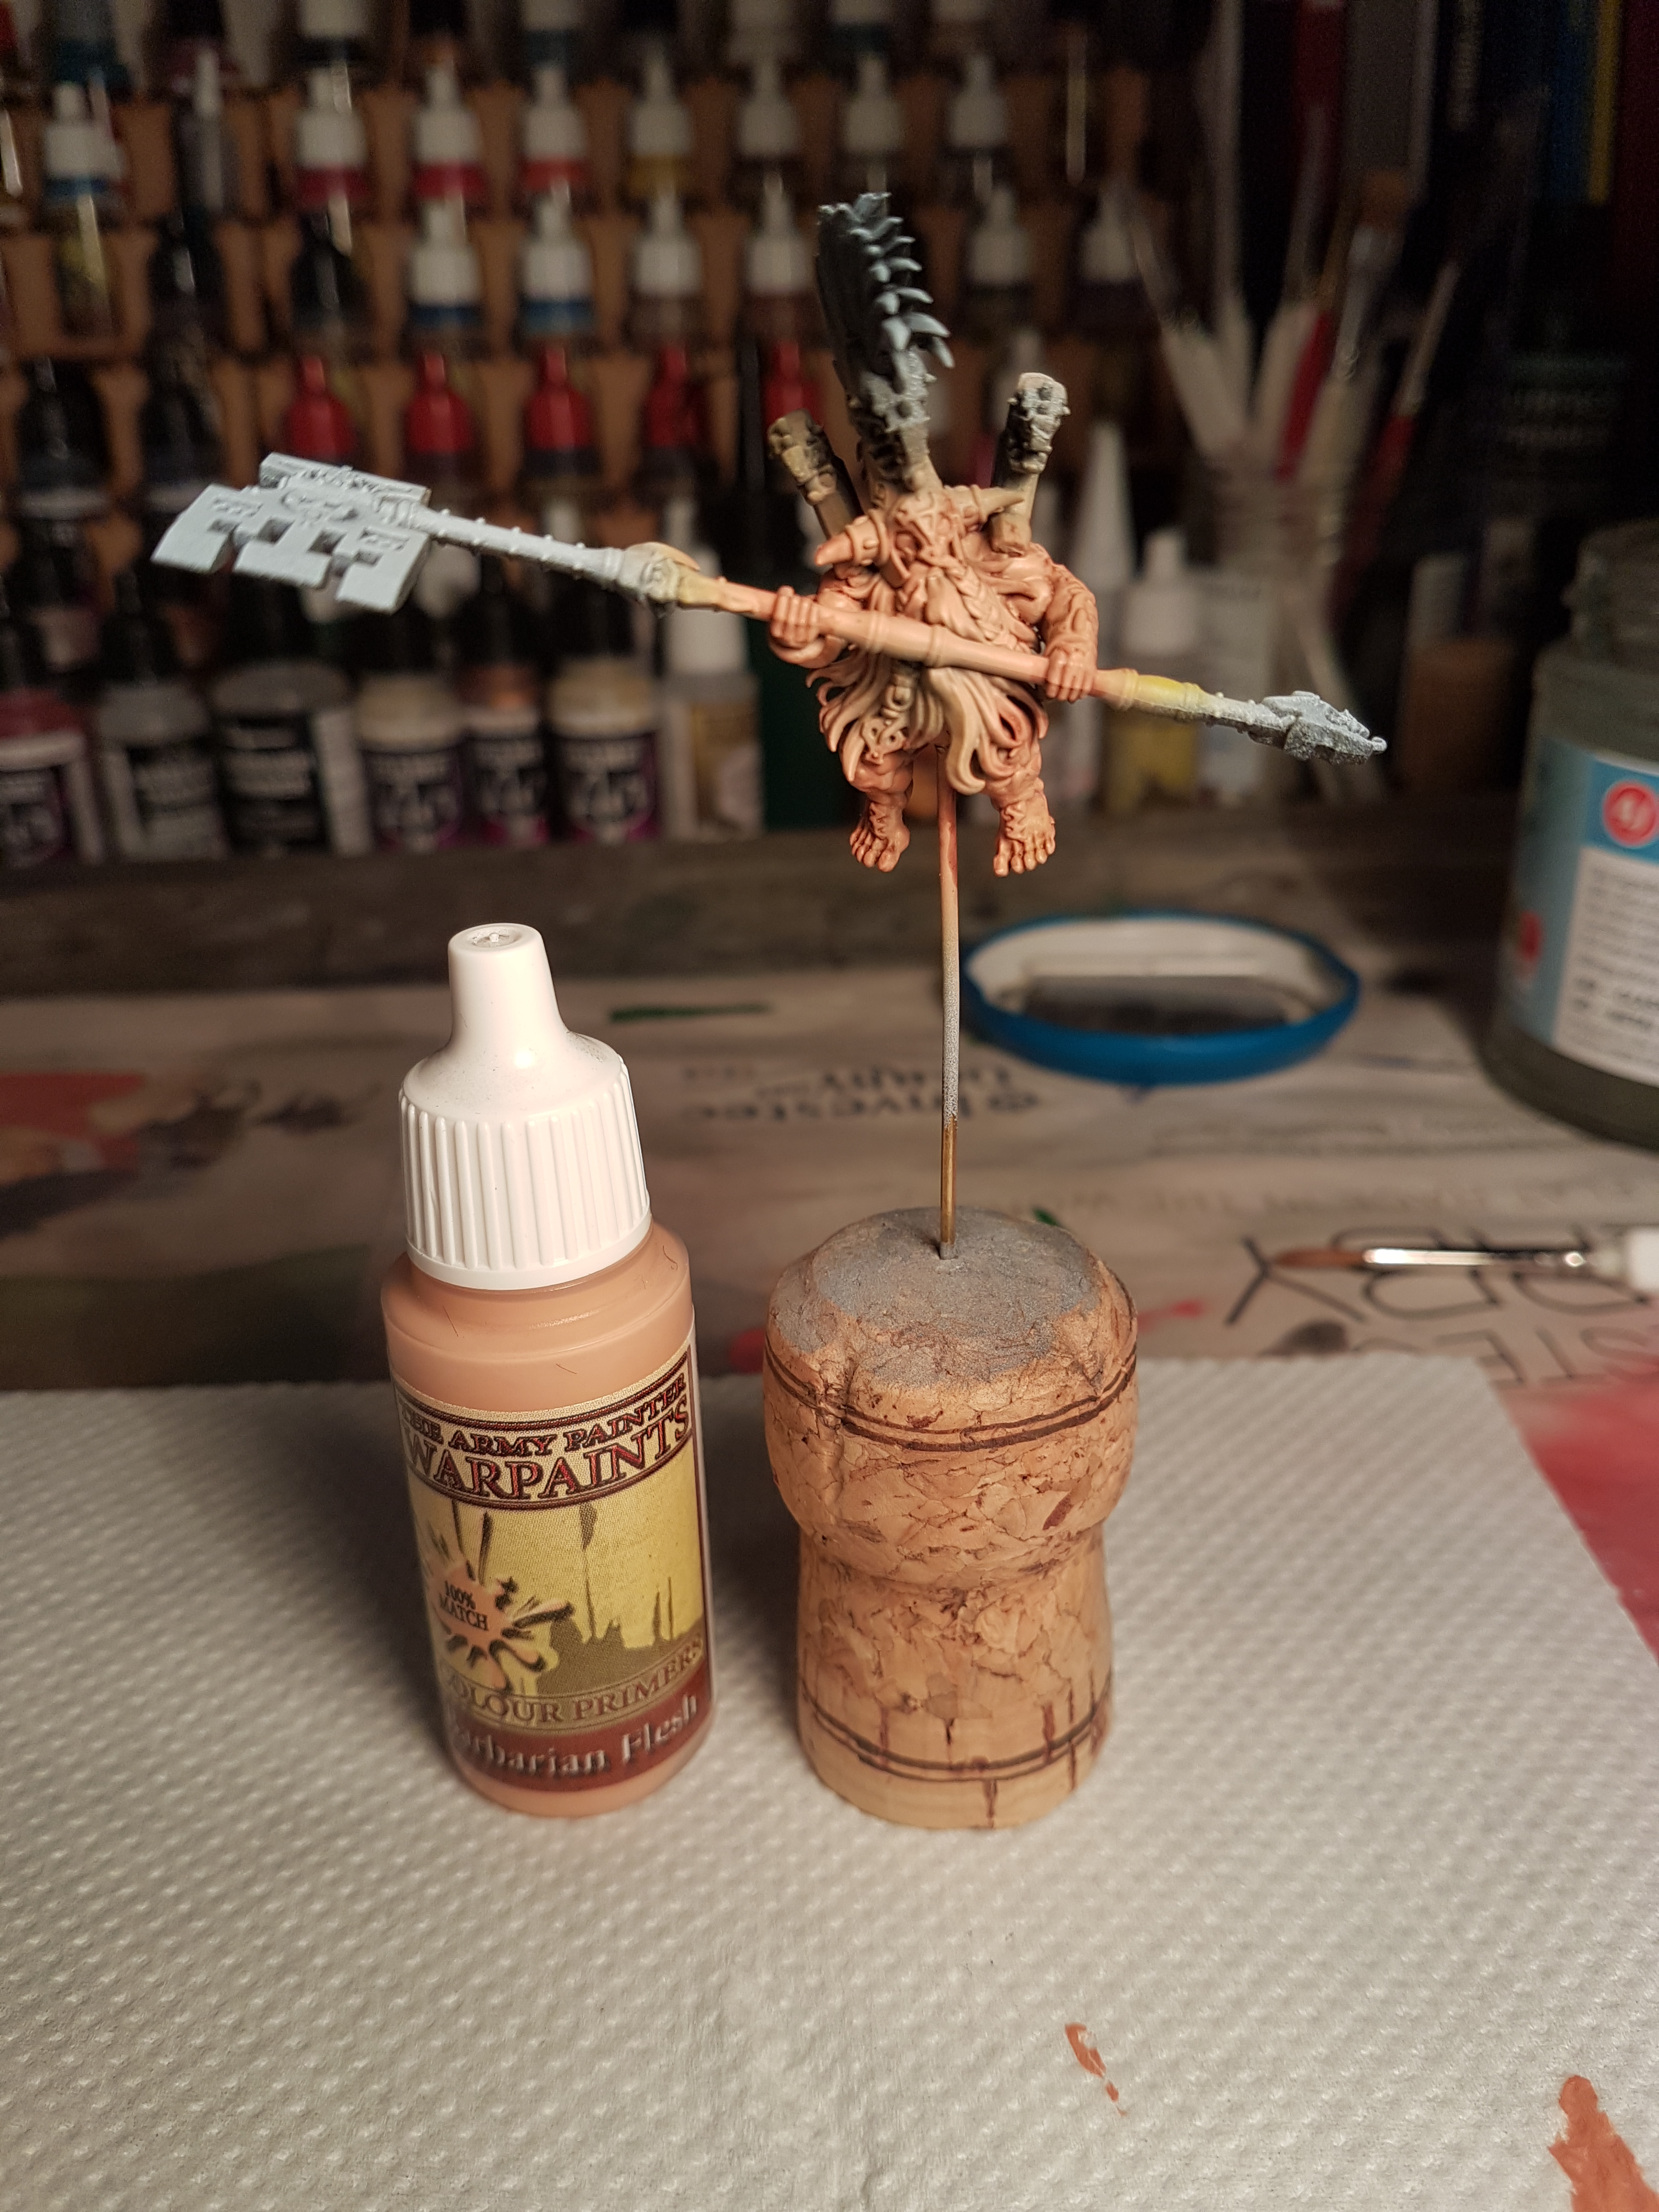
Using Army Painter tanned flesh I picked out all the raised muscles and joints, and the followed this with a high-light of AP Barbarian Flesh.
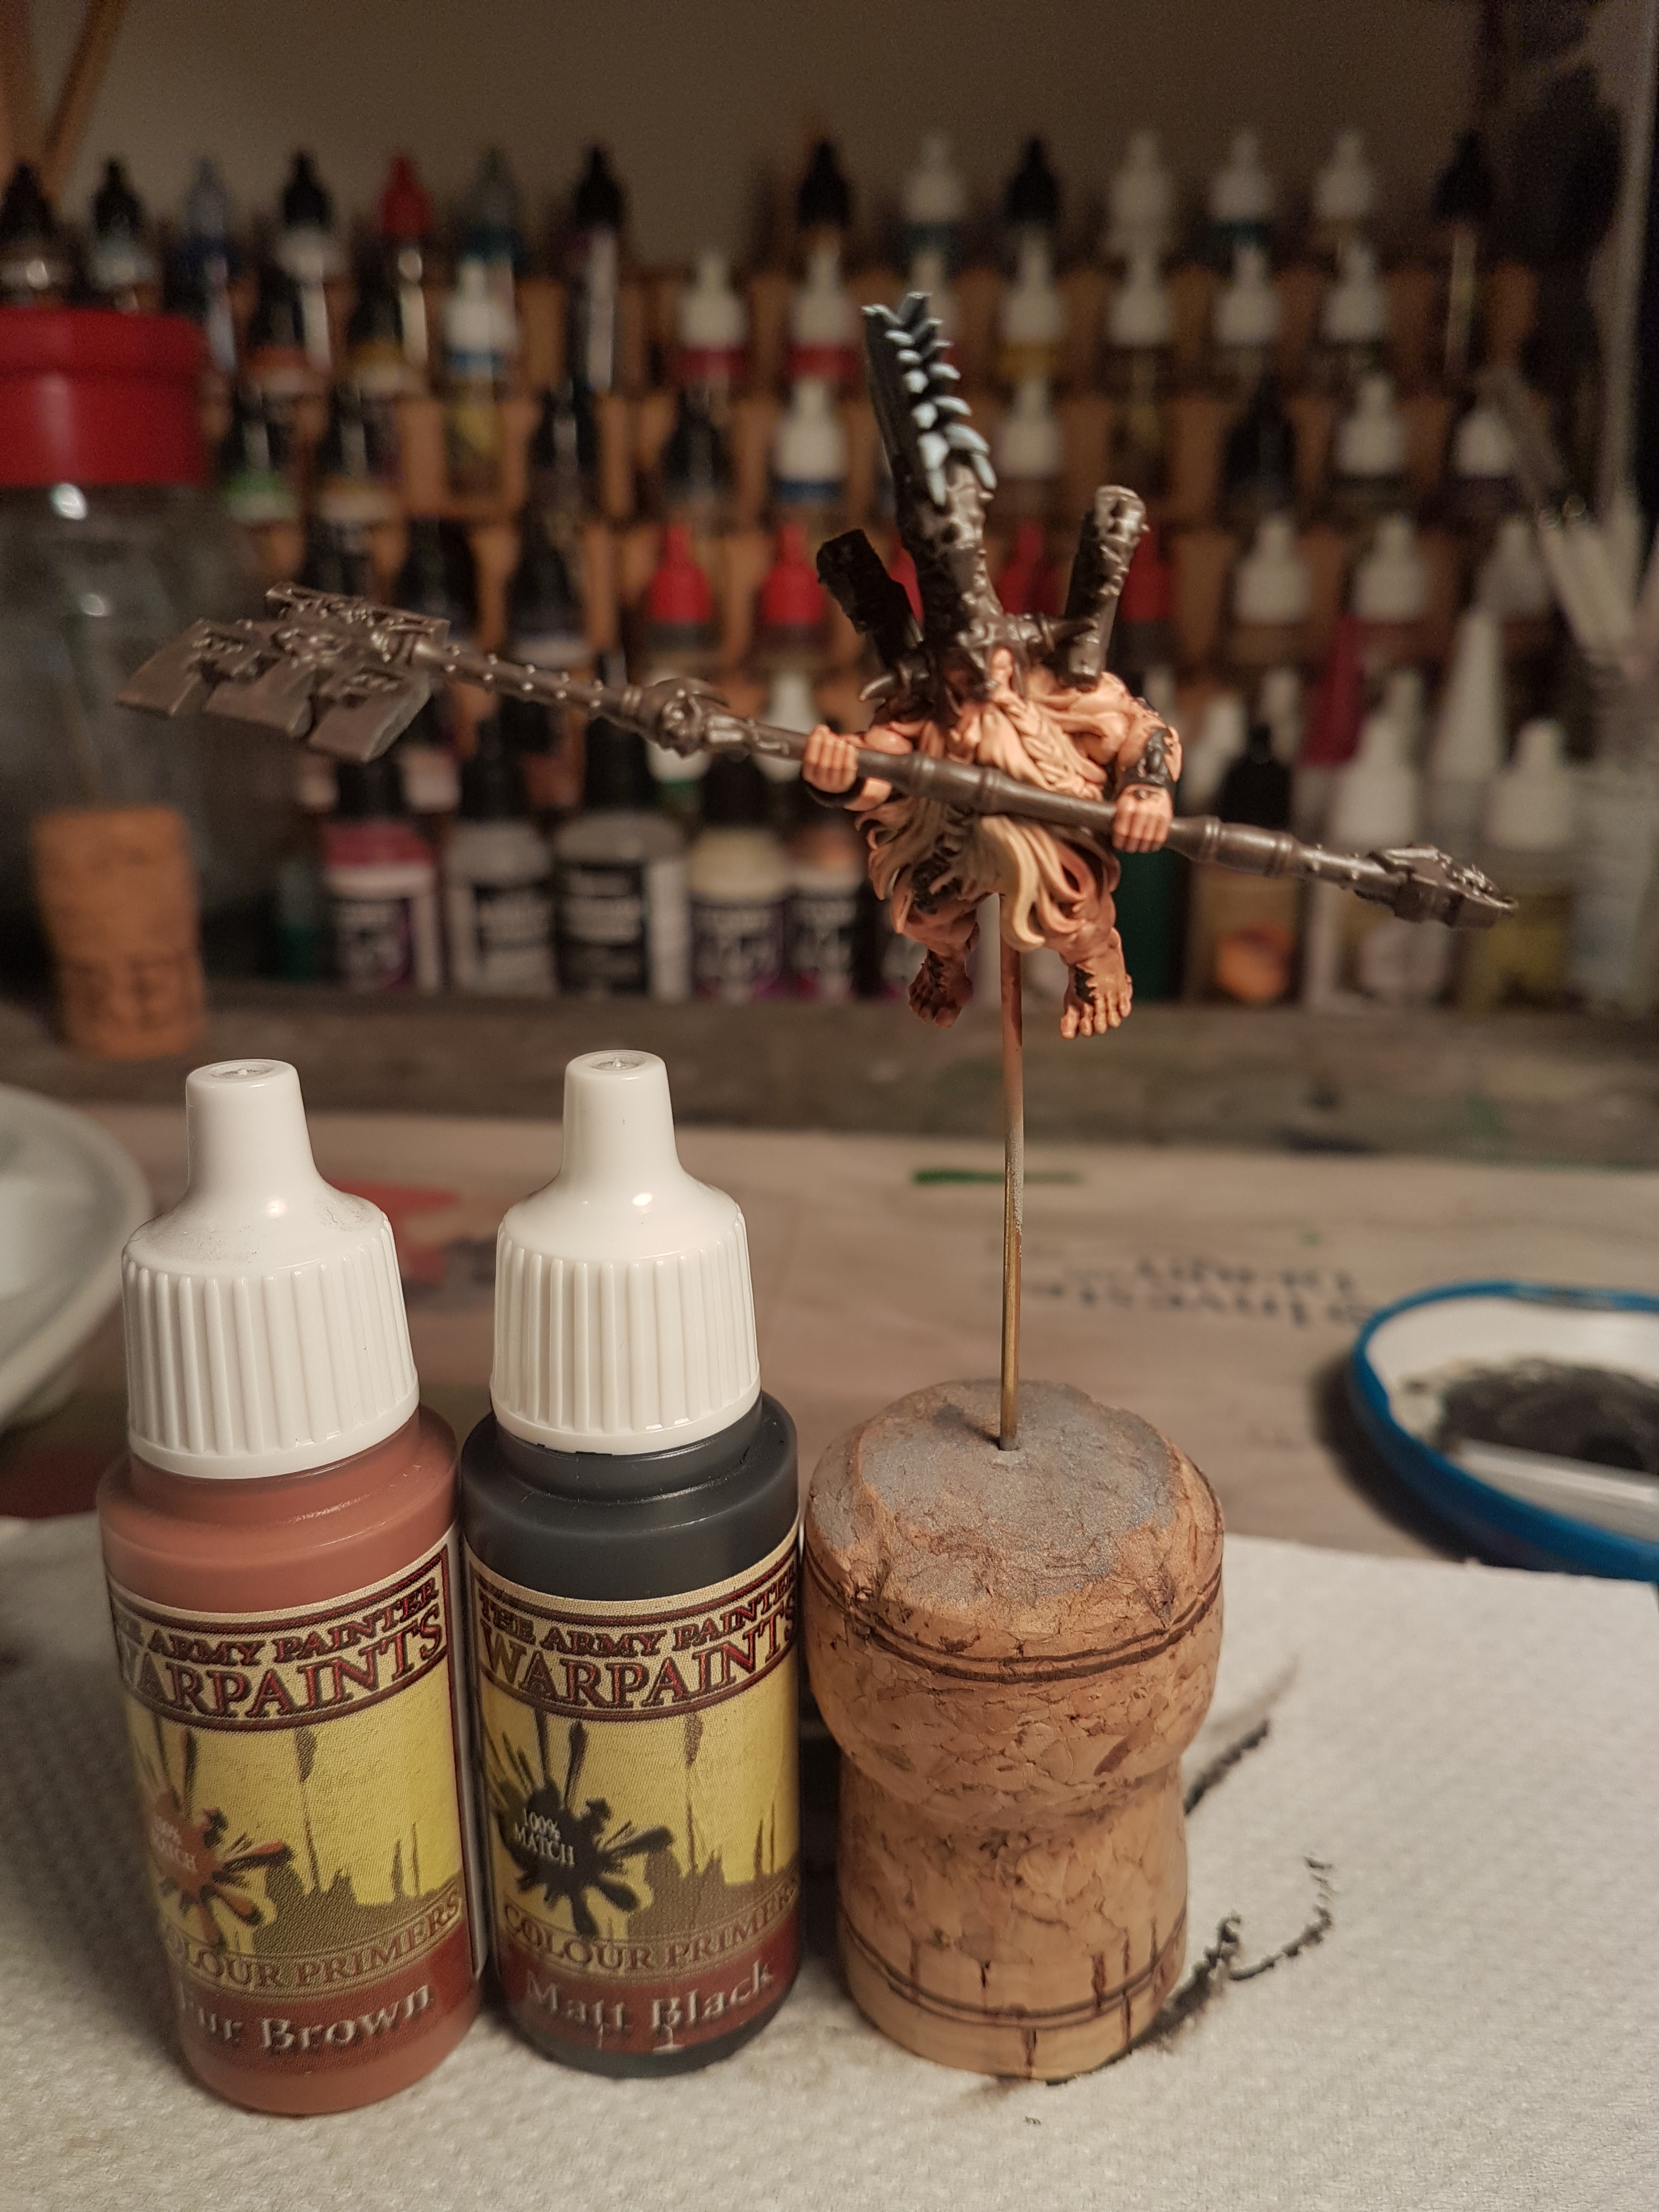
This completed the flesh, so I then picked out all the weapons, runes, armour and straps with the AP Oak Brown (2 part) / AP Matt Black (1 part) to provide a base for later work on these areas.