![How To Paint Moonstone’s Nanny | Goblin King Games [7 Days Early Access]](https://images.beastsofwar.com/2024/12/3CU-Gobin-King-Games-Moonstone-Shades-Nanny-coverimage-225-127.jpg)


Harry Potter Miniatures Game painting guides


Recommendations: 68
About the Project
These guides are aimed to give some handy hints and tips to getting your figures painted for the Harry Potter Miniatures game from Knight Models. I've aimed to keep things as clear as possible, however please don't hesitate to ask for more information or clarity. All of these guides are intended to be a simple jumping off point for someone new to the painting hobby, and don't have to be followed to the letter, please experiment and find your own paths too!
Related Game: Harry Potter Miniatures Adventure Game - Wizarding Duels
Related Company: Knight Models
Related Genre: Fantasy
This Project is Active
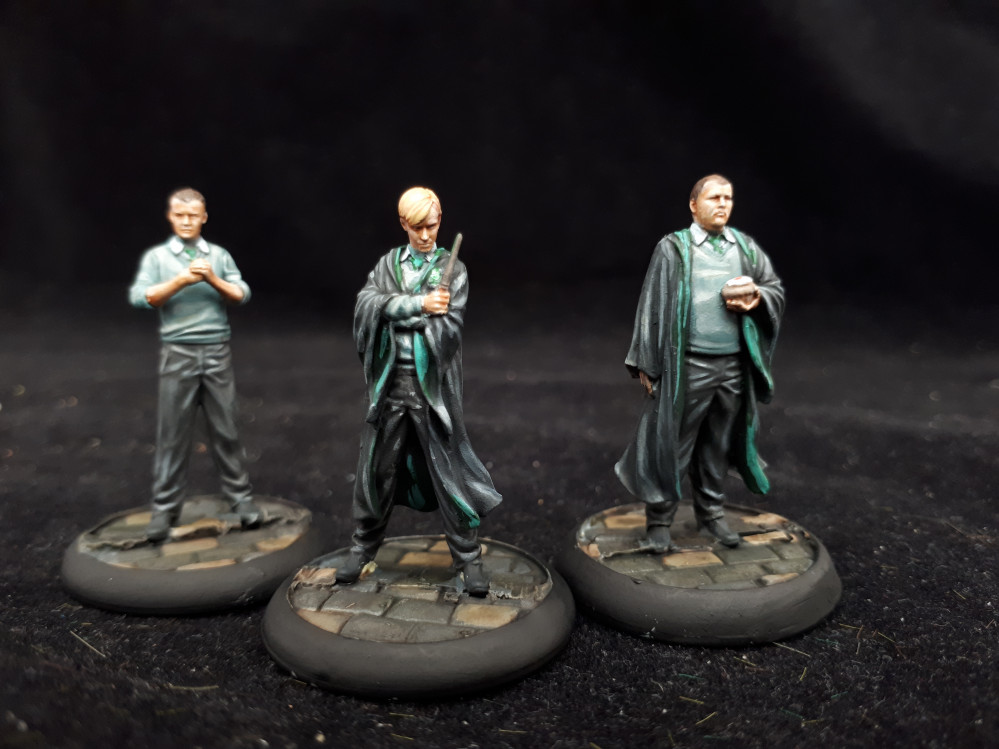
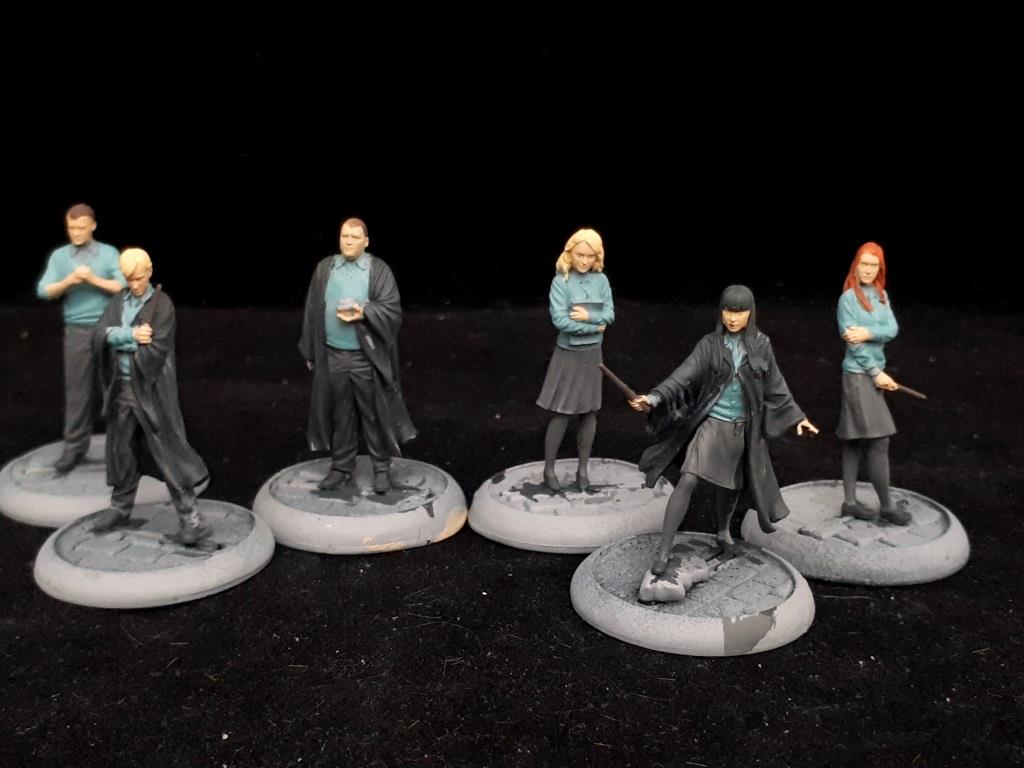
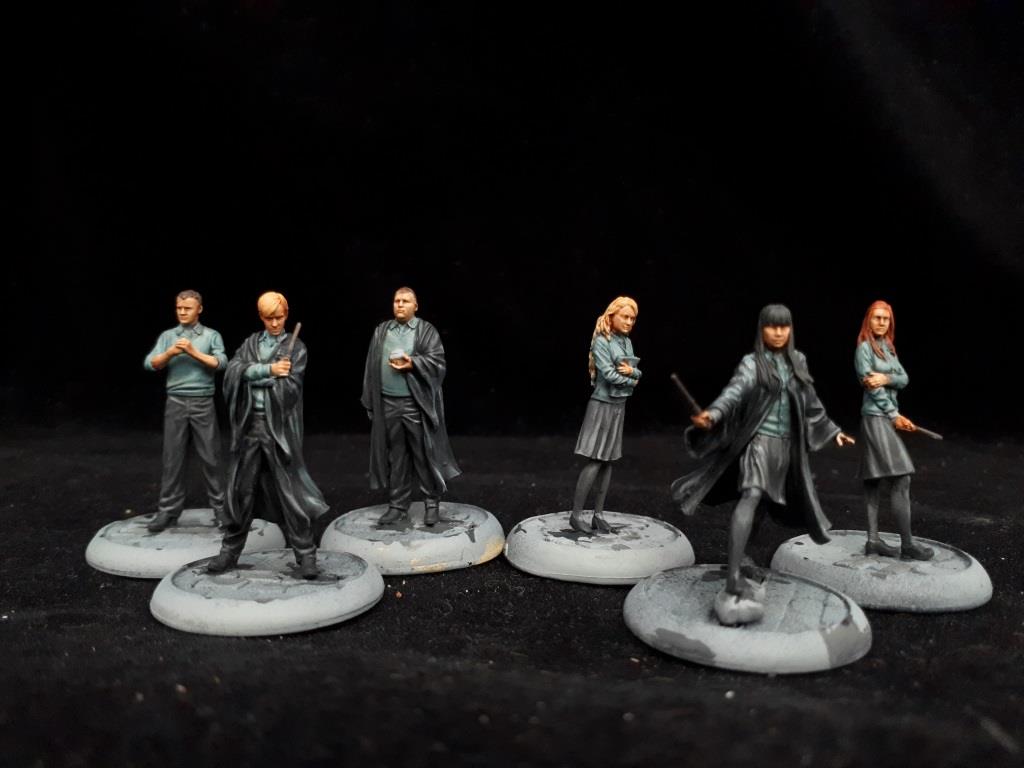
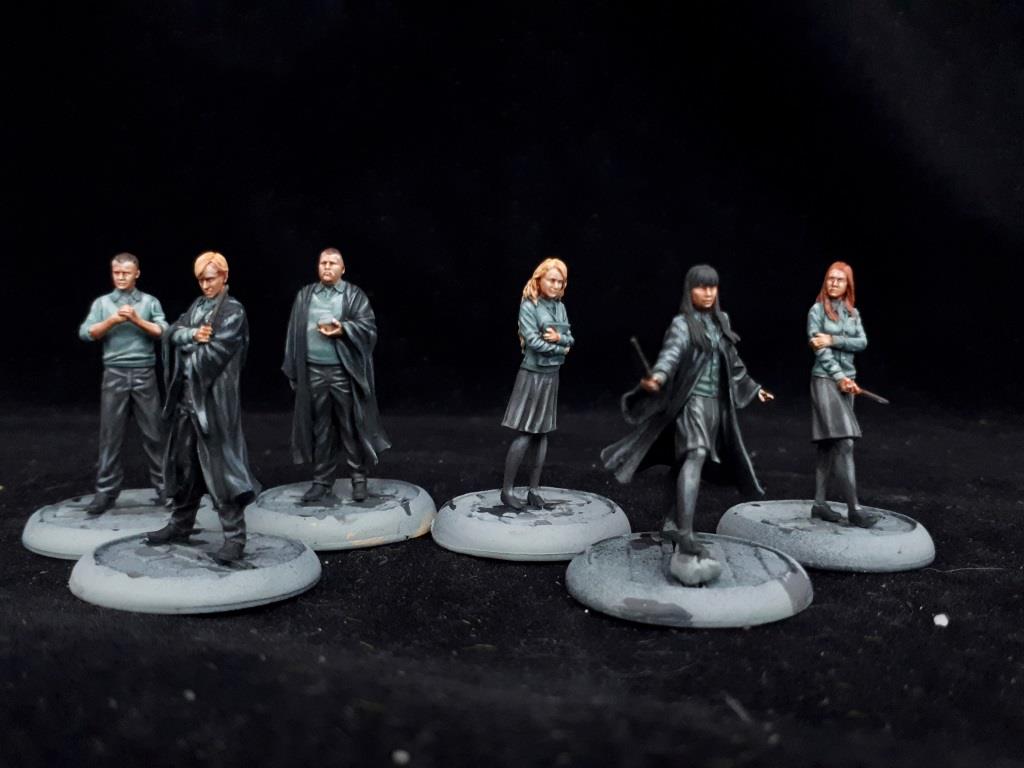
Painting the Hogwarts uniform
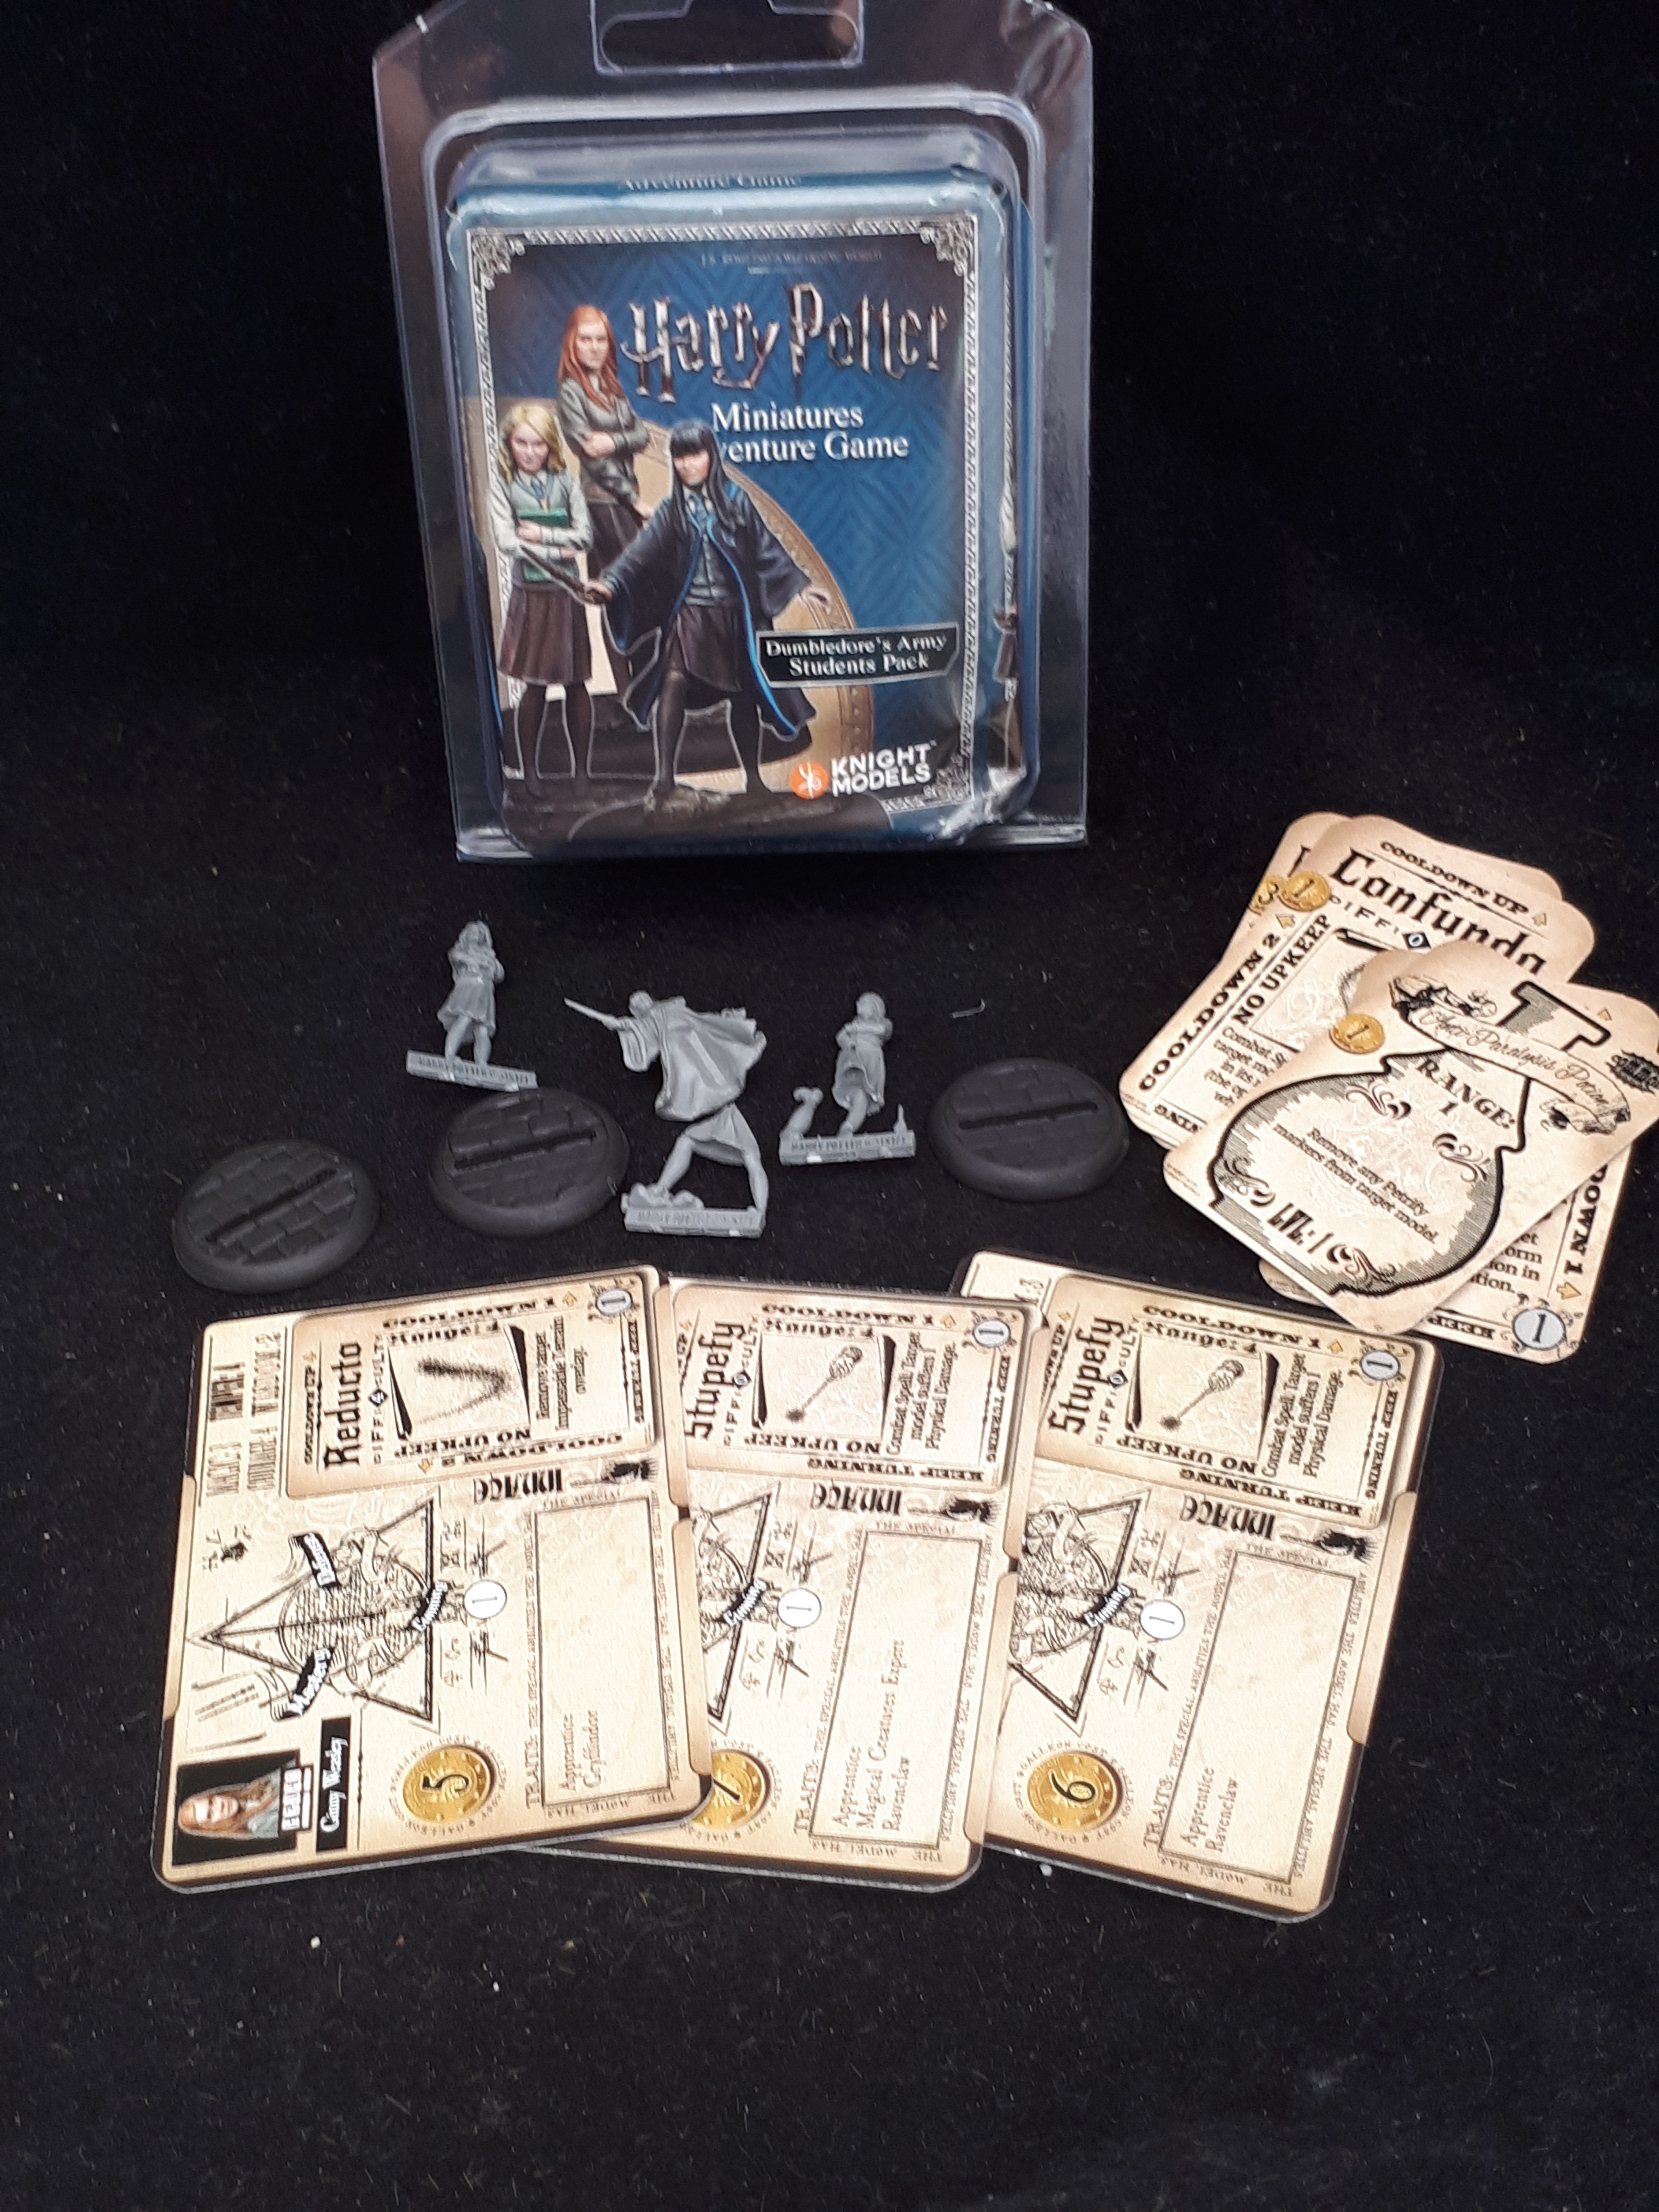
This time we’re looking at how to paint the basic Hogwarts uniform, following on from the preparing the models guide, using both the Dumbledore’s Army and Slytherin Students packs.
I’ve aimed to keep it as broad as possible, and you don’t need to work through all the steps if you don’t want too. In fact, you can even stop at any stage you like, do the basing (which I’ll cover next week), and come back to the models to add more detail at a later stage if you wish.
The final step in this particular guide will cover painting the house colours for Ravenclaw and Slytherin, and I’ll aim to cover the other houses at a later date.
In this and other guides I mainly use Vallejo with some Games Workshop paint, but if you can find colours from other ranges close to what I’m using, you’ll be just fine.
For brushes, I’ve just used a £5 paint brush set from The Range, though my preference is Windsor and Newton series 7. These brushes are far more expensive however, so for this guide I’m keeping the brushes to an affordable, realistic level for the average beginner.
Step 1
Paints used
Vallejo
904 Dark Blue Grey – Jumpers
867 Dark Bluegrey – Trousers/skirts
862 Black Grey -Capes and shoes, Cho Chang hair
956 Flat Flesh – Skin
871 Leather Brown – Gregory Goyle and Vincent Crabbe hair
818 Red Leather – Ginny Weasley hair
916 Sand Yellow – Draco Malfoy and Luna Lovegood hair
Brush used
Size 2 from a £5 brush set
So, with the figures primed, we’ll start by simply and neatly blocking in the basic colours on the figures. Vallejo paint comes in dropper bottles and is quite thick, I use an old Pringles lid as a palette, and mix however much paint I put on the palette with an equal amount of water to thin it down and to help it flow. You don’t need that much paint though, as it goes quite a long way.
Games Workshop have some great videos on Youtube regarding this if you want some extra tips, though I like the paint to be around the consistency of milk.
Step 2
Paints used
Vallejo
815 Basic skin tone – Skin highlights
986 Deck Tan -Highlights on clothes
Brush used
Size 1 brush from a £5 paint set
This step Is starting to bring some detail and life to the figures. To do this, we start to apply some highlights to them. The purpose of this is to bring depth and interest to the detail, though if you wish to skip this stage, you can go straight to Step 3, or even to Final Details.
As with Step 1, we need to thin our paints, however, we need to thin them a little more than before and make them very thin. Keep adding water to the mix until the paint flows from your brush, though without losing control of the paint. Try it a few times and you’ll see what I mean.
With these highlights, we’ll be applying them to the raised areas of the faces and clothes, and start by placing the point of the brush at the highest point, then carefully drawing the brush back along the detail. This can take some practice, and you do need to be neat, but the next stage will help to tidy things up, and will also reduce some of the contrast you’ll have too, as the figures will look quite chalky at the moment.
I’ve chosen not to highlight the shoes or hair at this stage, as we want to keep those for Stage 4.
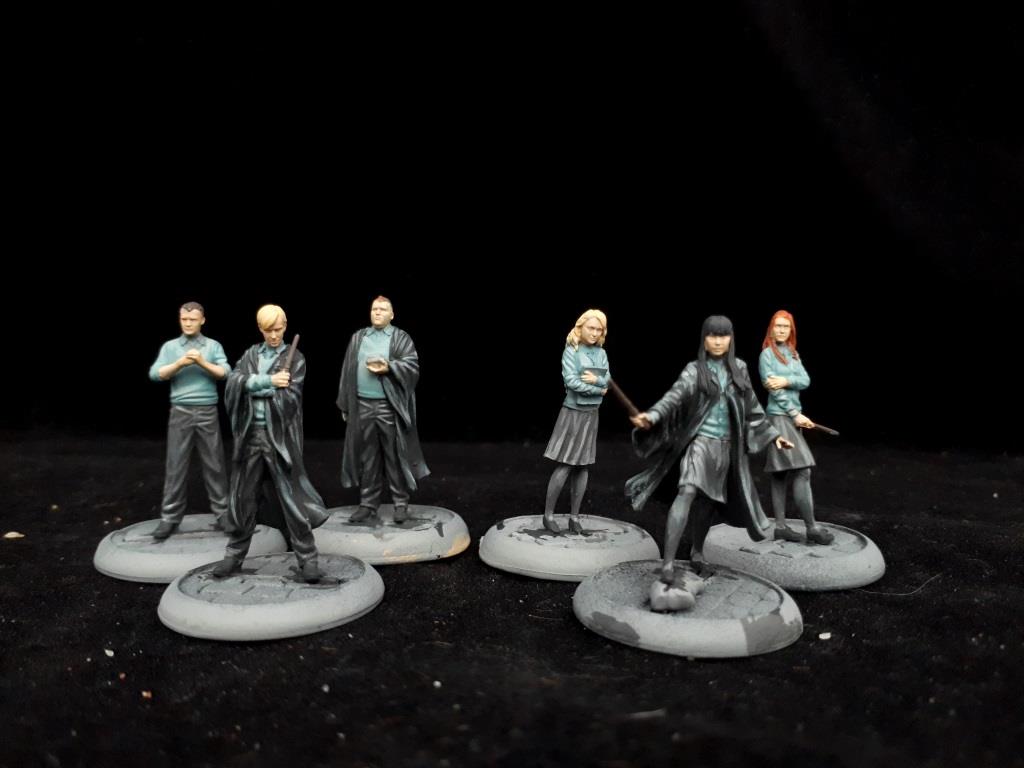
Step 3
Games Workshop
Reikland Flesh -Shade Skin, and also Blond hair
Nuln Oil – Clothes, brown and black hair.
Brush used
Size 2 from a £5 brush set
So far you might be thinking all the colours are looking a little pale, well, there’s a cunning plan for this! We’re going to paint washes onto the model. This will serve 3 functions. Firstly, it will darken the figure down. Secondly, the wash will fill the recesses and add depth and shadow to the model, and finally, it will help blend our highlights from Step 2 into looking more natural.
A lot to ask maybe? Hopefully not. You can use these products straight from the pot, simply dip your brush in and paint them onto the relevant surfaces. Try not to let the wash pool, or run, simply apply it as you would any other paint.
It’s probably also worth giving it a few minutes between using the flesh and oil washes to prevent them running into one another!
Leave the figure to dry for an hour before Step 4, go on to the Finishing Off step.
Step 4
Paints used
Vallejo
815 Basic skin tone – Skin highlights
986 Deck Tan – Highlights on clothes
862 Black Grey – Shoes, Cho Chang hair
871 Leather Brown – Gregory Goyle and Vincent Crabbe hair
916 Sand Yellow – Draco Malfoy and Luna Lovegood hair
Brush used
Size 1 brush from a £5 paint set
To really make the figures pop, we’ll add some final highlights. These are applied in the same was as in Step 2, however we’re going to be even more precise, and only apply them to the very highest points of the figure. We’ll also apply them to the highest edges of the details in the figures hair, and the tips of their shoes.
Finishing Off
Vallejo
871 Leather Brown – Wands
0951 Matt White – Shirts
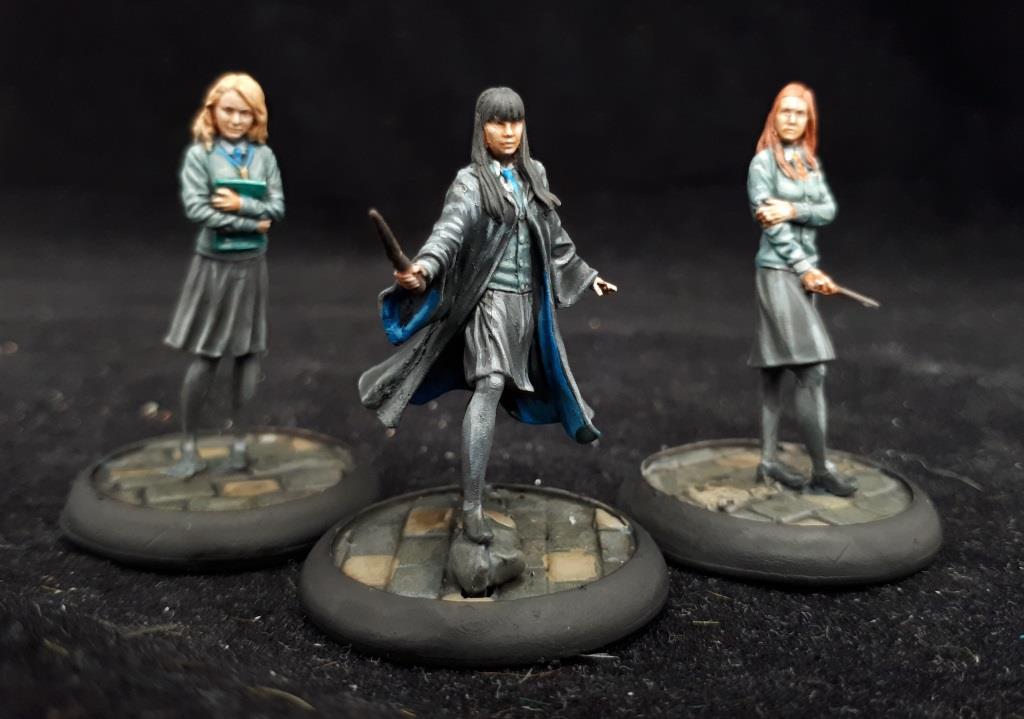
Ravenclaw
Vallejo Game Colour
021 Magic Blue – Cape base colour
023 Electric Blue – Cape highlight
028 Dark Green – Book base colour
025 Foul Green – Book highlight
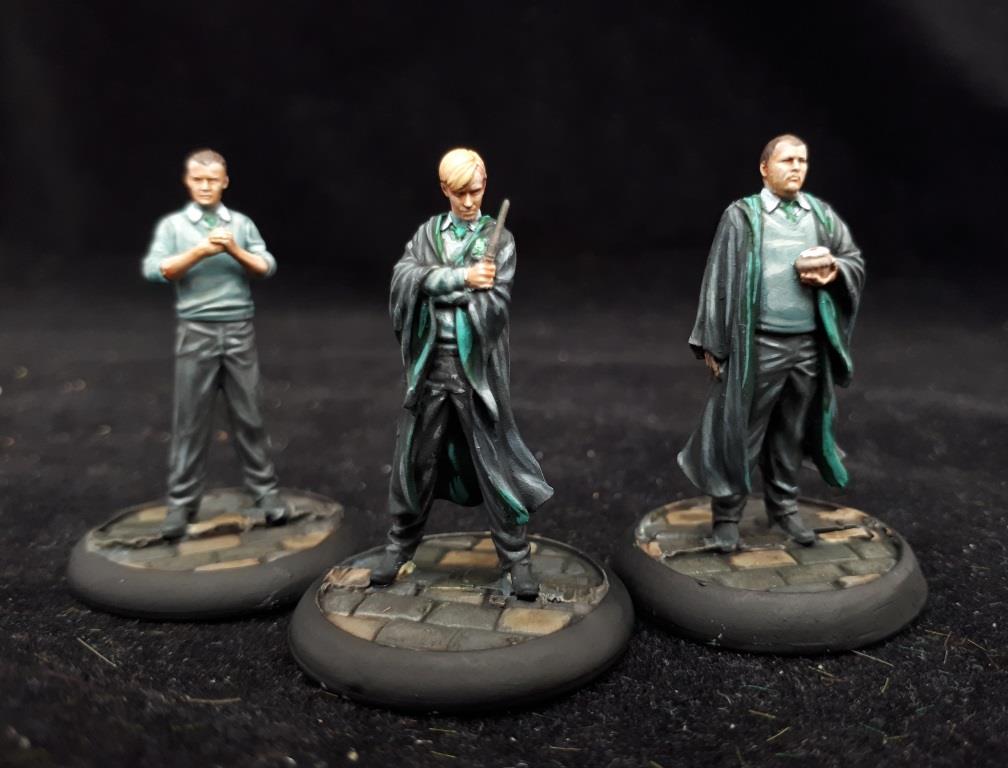
Slytherin
Vallejo Game Colour
028 Dark Green – Cape base colour
025 Foul Green – Cape highlight
The final thing the figures need now is finishing off with the colours of their respective houses. Firstly, paint their shirts white, then once that’s set, pick out their ties, the inside of the capes, the insides of the cuffs, and the insides of the hoods with the base colour listed above.
It’s worth doing a Google image search of the characters and their costumes from the movies to really get a feel of how the colours should look, and where they should be visible too.
Once you have those areas of the base colour down, just add a few highlights using the techniques we’ve covered before, and the figures are done, ready for basing!
That’s it for now, next time I’ll have a quick and simple guide on how to fill the gaps, and paint the stones on the models bases.
Quick note on the pics in this post. I’ve had to downgrade the quality of the images to actually get them uploaded. It’s been several hours and a lot of swearing, but it’s finally worked!

Preparing the models
Step 1.
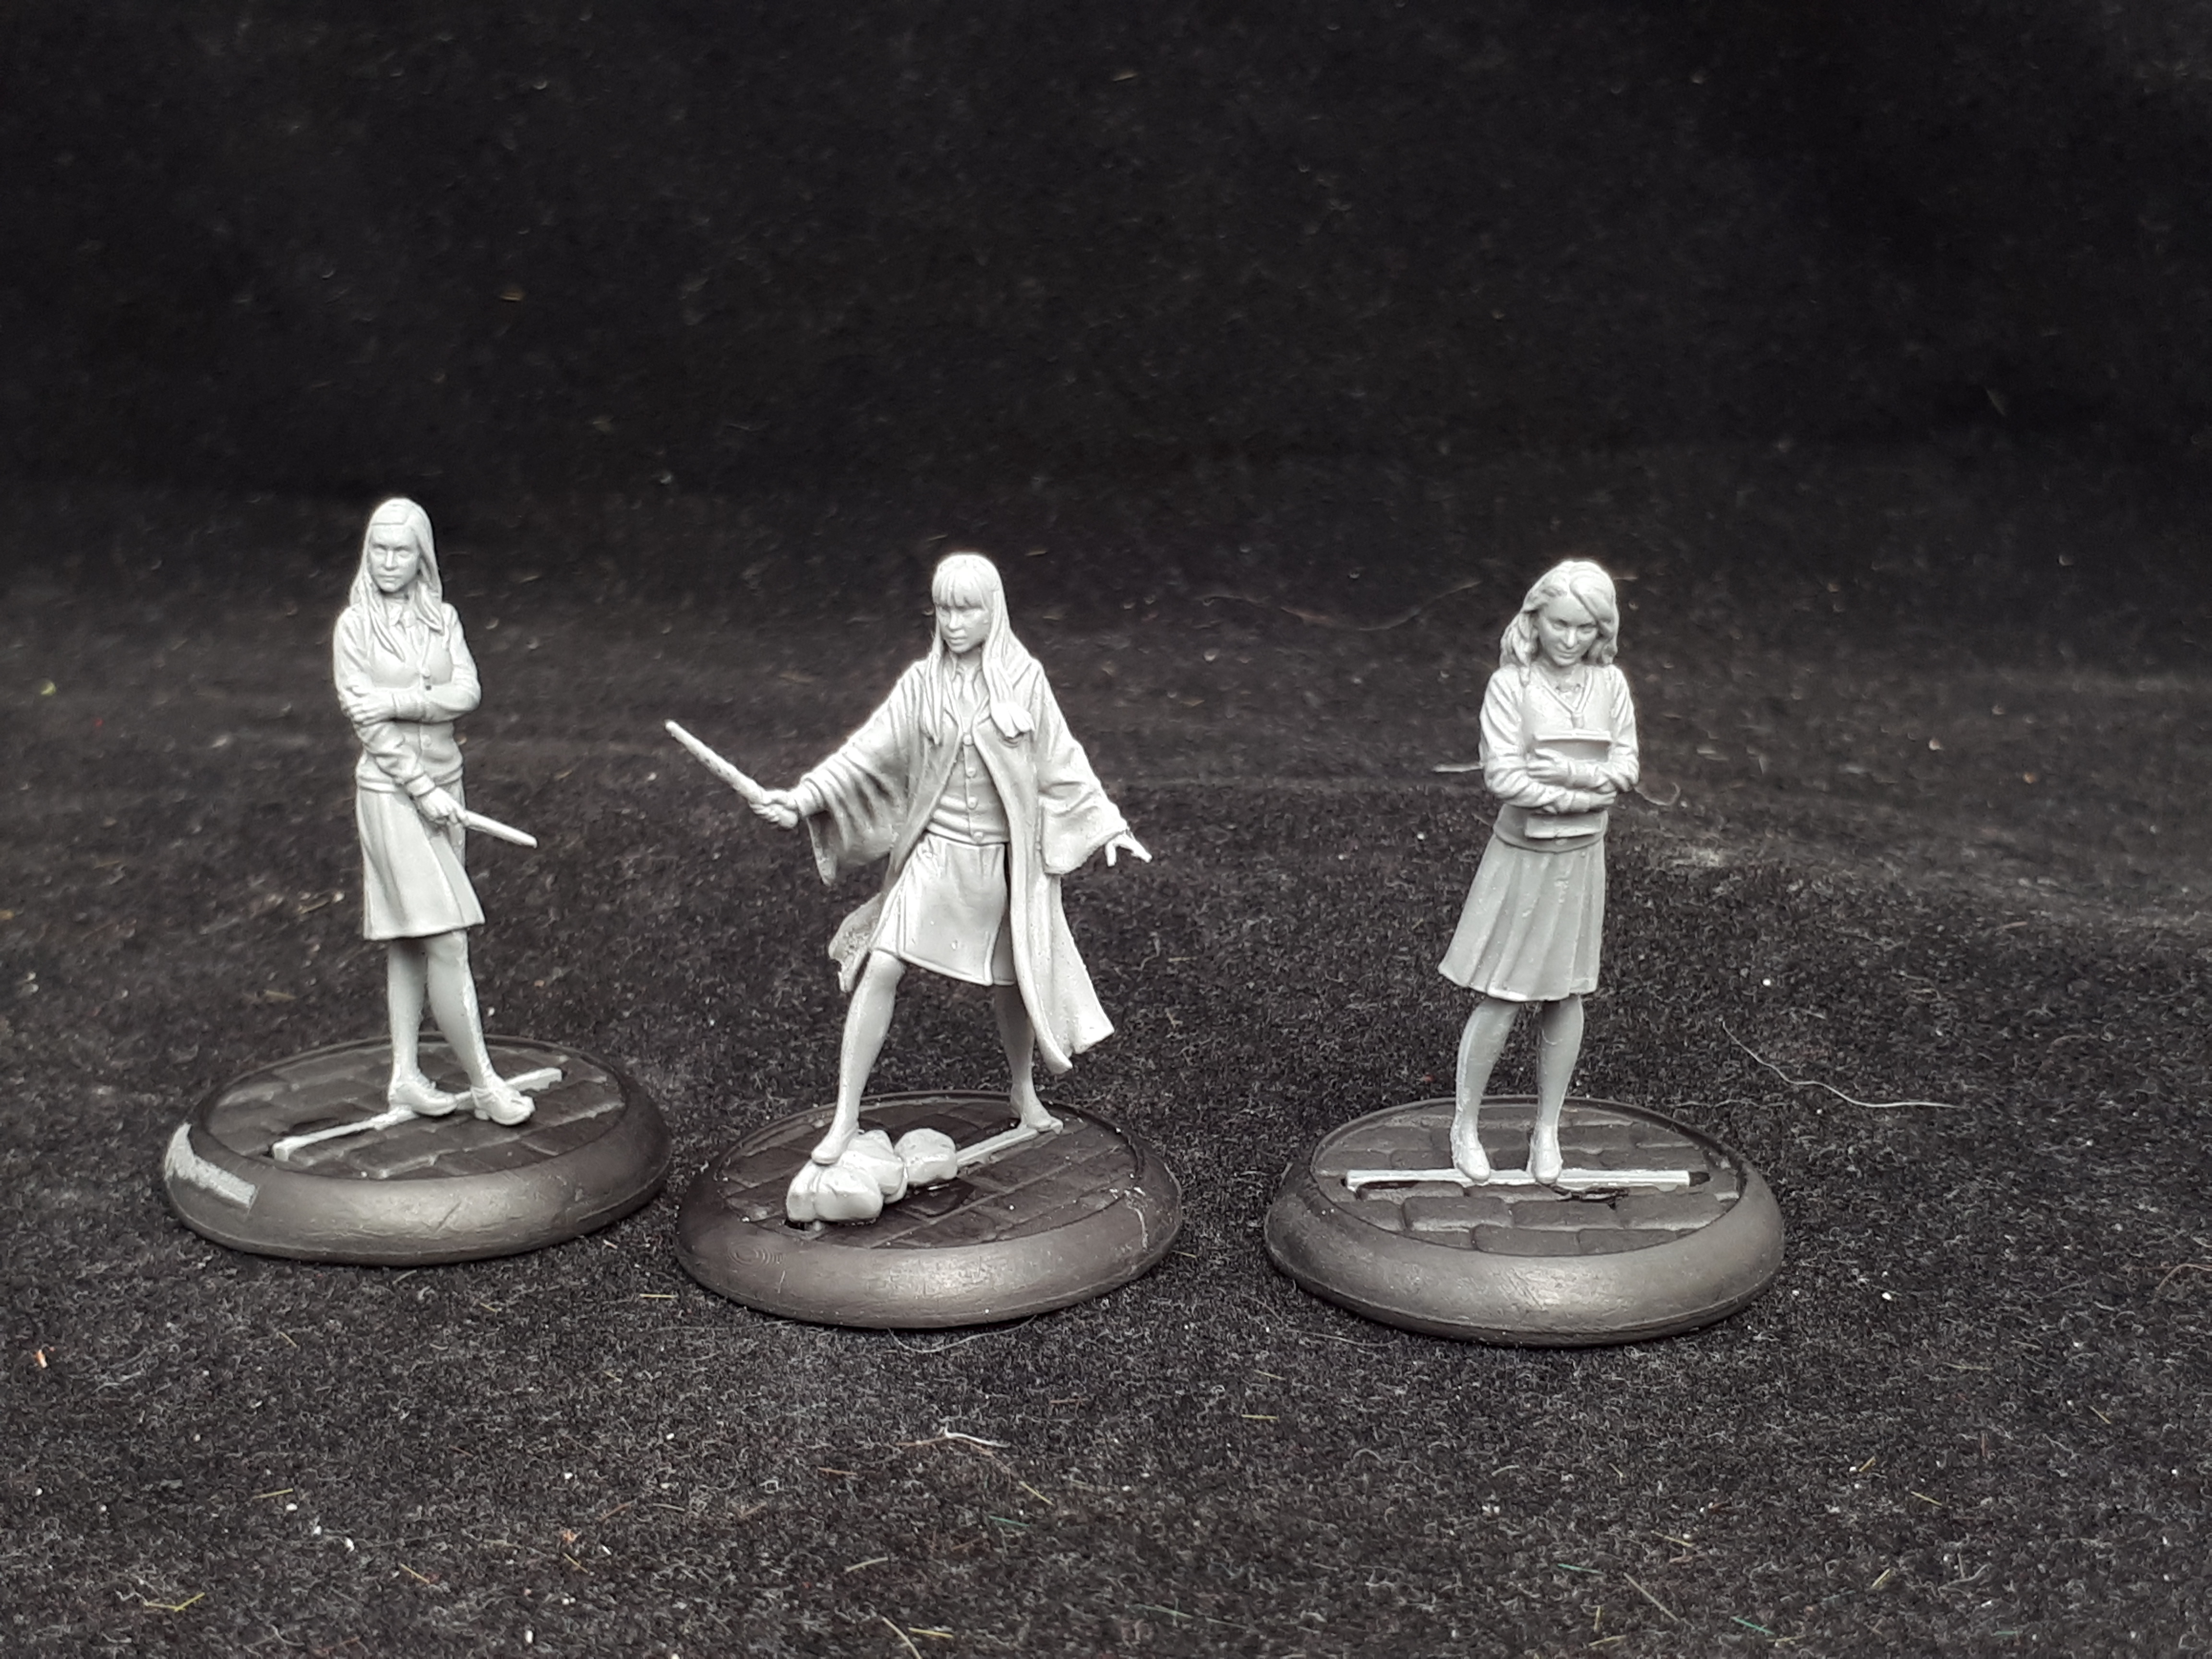
So, you’ve purchased your figures, the packs are fresh in your hand and you want to get them ready to used.
First thing to do then, is open the pack (This is a surprisingly detailed guide…), and check the contents. Whilst these models don’t come with instructions, it’s just a case of matching the figures to the cover art. If you have any bits missing or mispacks, then drop Knight Models an email.
I’d also like to take a moment to mention most of the models used in these guides are pre production ones, so may be a little different to the released models, though there shouldn’t be any noticeable difference.
Before you can start sticking anything together, it’s worth giving the models a gentle wash in some warm soapy water, to remove any residue from the production process. Personally, I use water around the temperature of a coffee that’s been left out for around 20 minutes, with some washing up liquid in it.*
*The water, not the coffee.
You can give these a gentle scrub, however I didn’t with these, and simply let them soak as the detail on the models is so fine.

Step 2
Gather your tools up. I’ve used a pair of hobby knives, and some super glue for these. One blade has a fresh, super sharp blade, whilst the other has an older, worn blade. You could add a set of files in too if you have them to hand, but I’m trying to keep things as minimalist as possible for now.
As the models are all resin, you’ll need superglue to bond them. Gorrilla glue is excellent, though a little expensive, I tend to use Poundland superglue as it has a nice flow and still gives a good bond.
Figures are created in a mold, and an inevitable part of this process is the occasional line along the side of the model, or bits of extra material not part of the model. To get rid of these extra parts, use your sharp knife to trim off any of these excess parts.
For the mold lines, I like to lightly scrape along these with the blunt back of the blade. You could use a file for this too, however that can destroy detail if you aren’t careful, and I find the back of the blade gives some more control.


Step 3
With the models prepared, stick them together, if necessary, and also glue them to their bases. I can’t recommend dry fitting them together first though to make sure everything is fitting nicely. If not, try pushing cleaning up the joins a little more as there’s probably a bit of flash or a mold line stopping things fitting properly.
Step 4
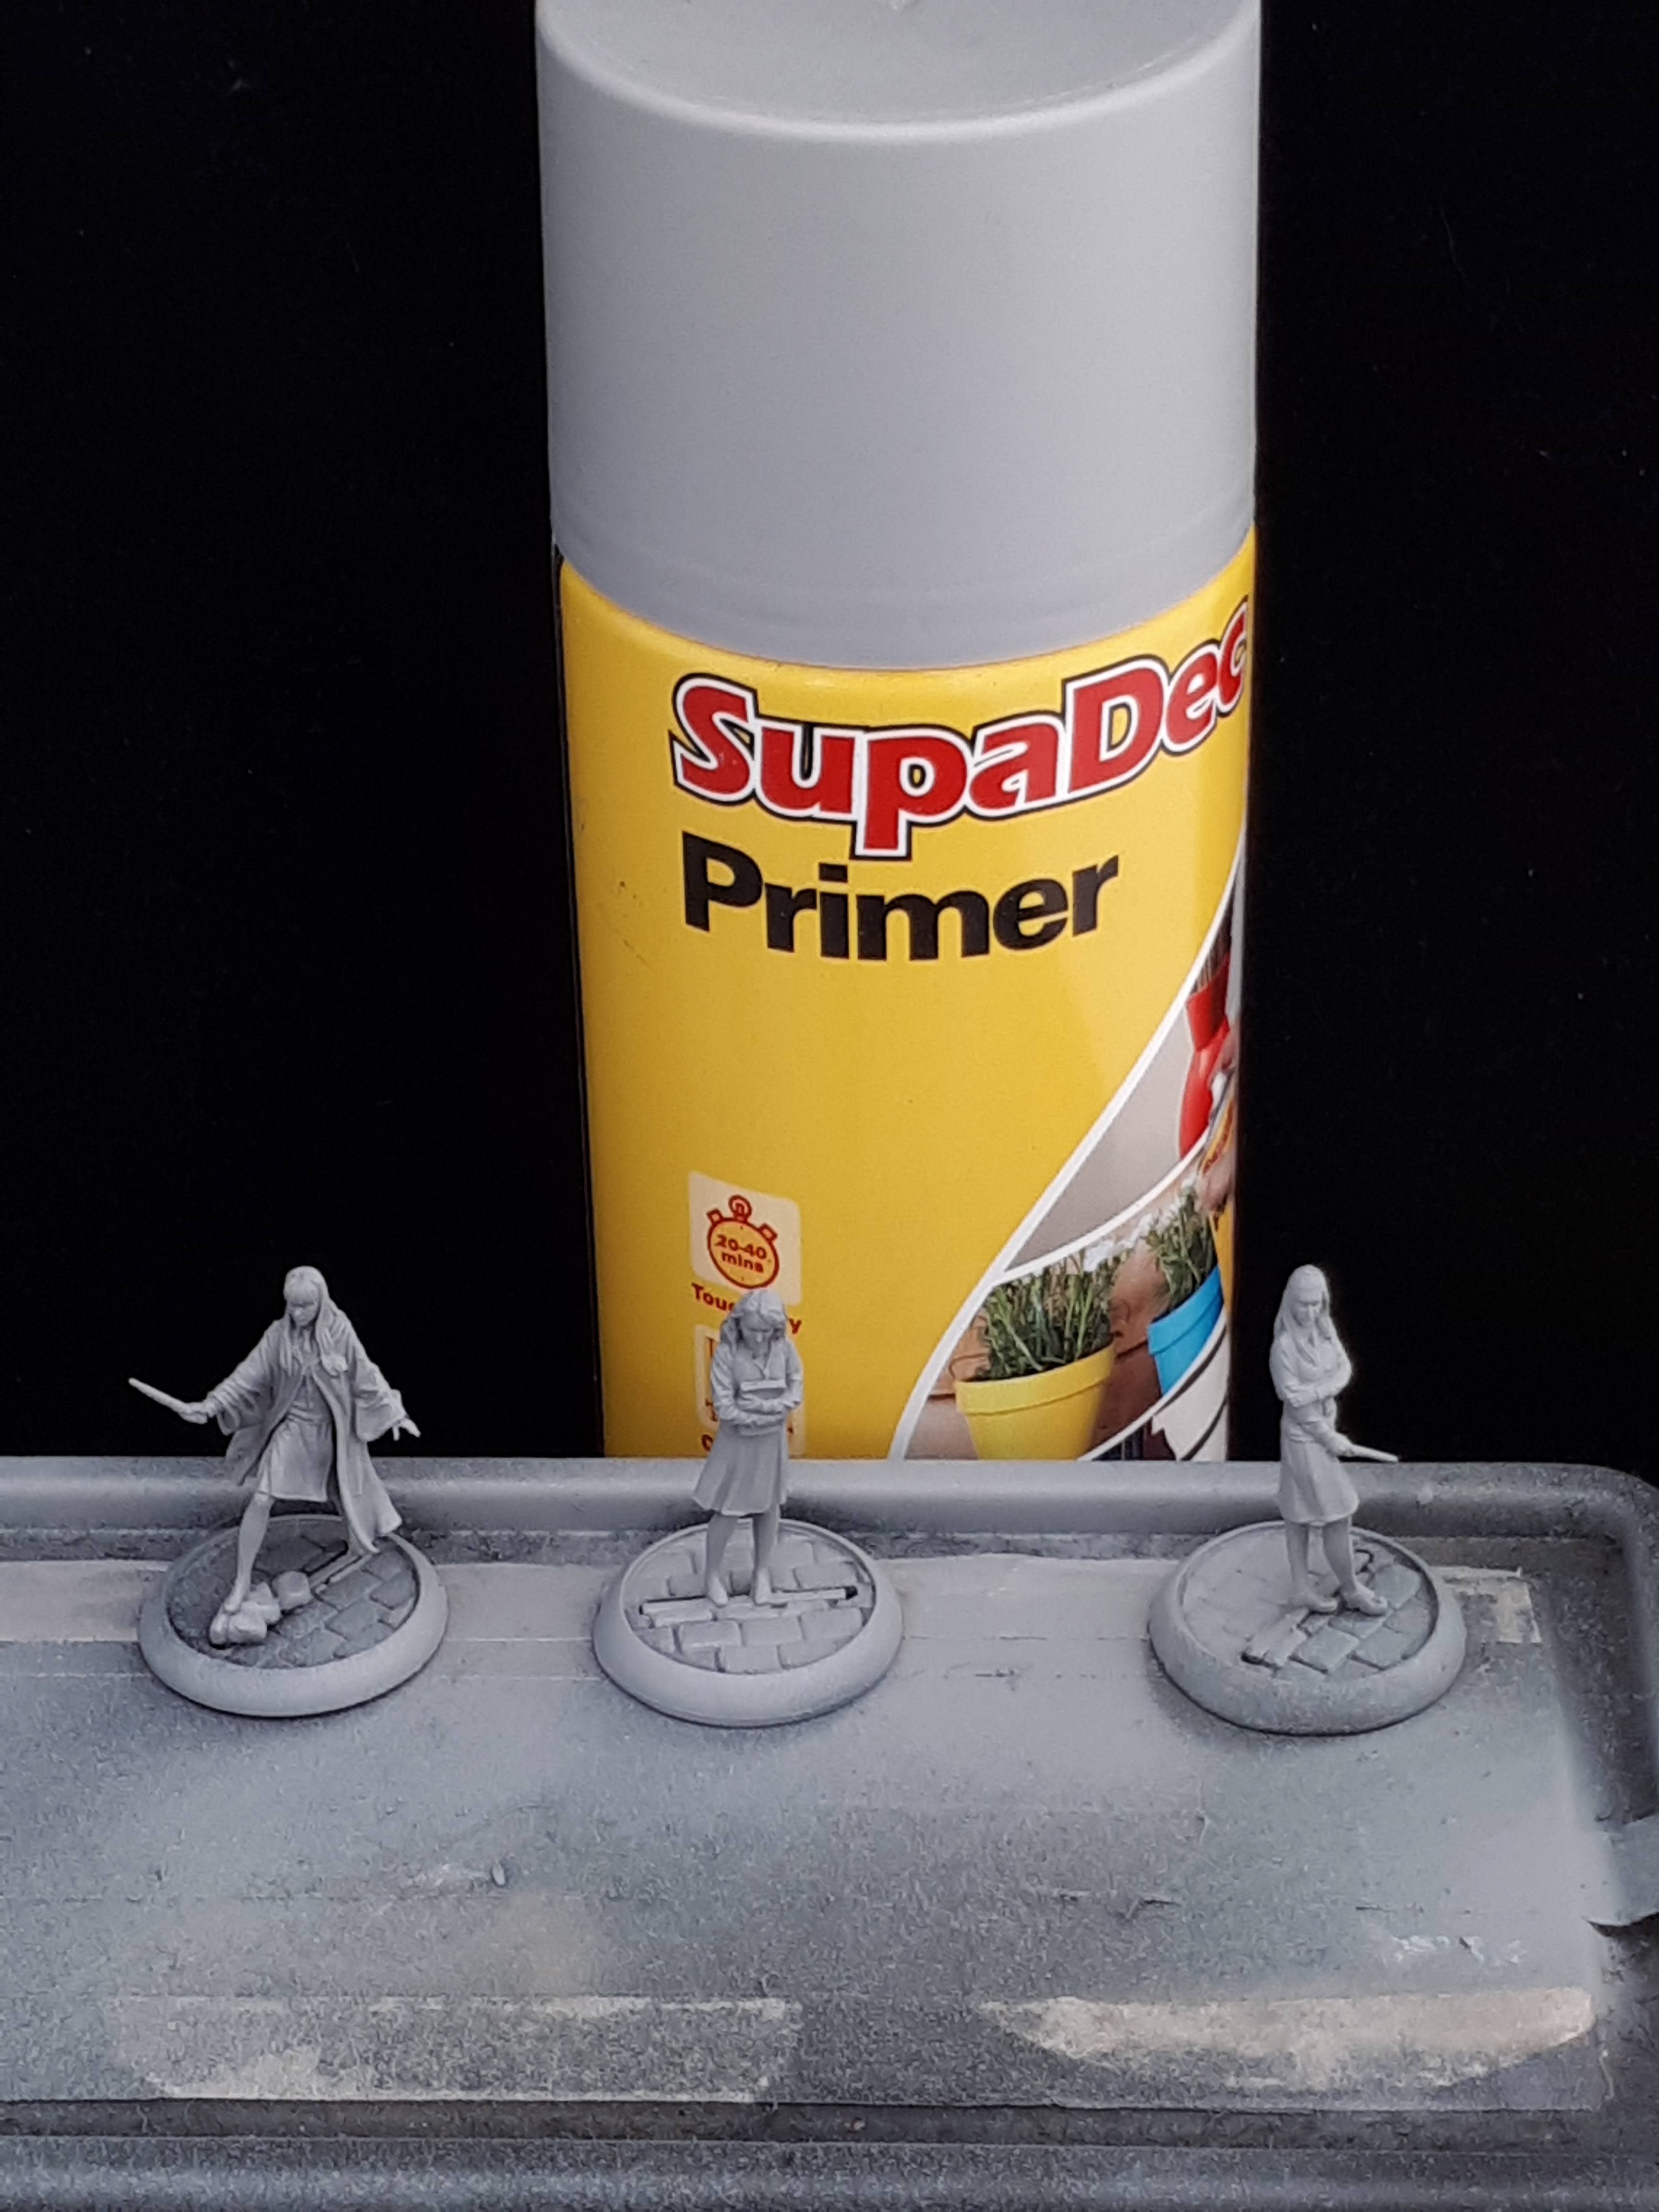
Resin figures need to be primed, and for this, you’ll need a primer! Primers are a special type of paint with a bonding agent, to help them adhere to the surface, and also to aid the paint you apply later, and stop it wearing off with handling.
Most car parts shops sell good ones, notably Halfords in the UK. I’m a fan of the Supadec grey primer, as it’s both cheap and hard wearing, and it can be found on eBay, and most hard ware shops too in the UK. I’ve no idea about the rest of the world however!
To prime the figures, I use some double sided tape to stick them to an old box, then spray them in the garden, holding the can around 6-8 inches from the model, after shaking it for around 30 seconds. Leave the models to dry for a few hours, and overnight preferably. Then you’re ready to begin painting.