


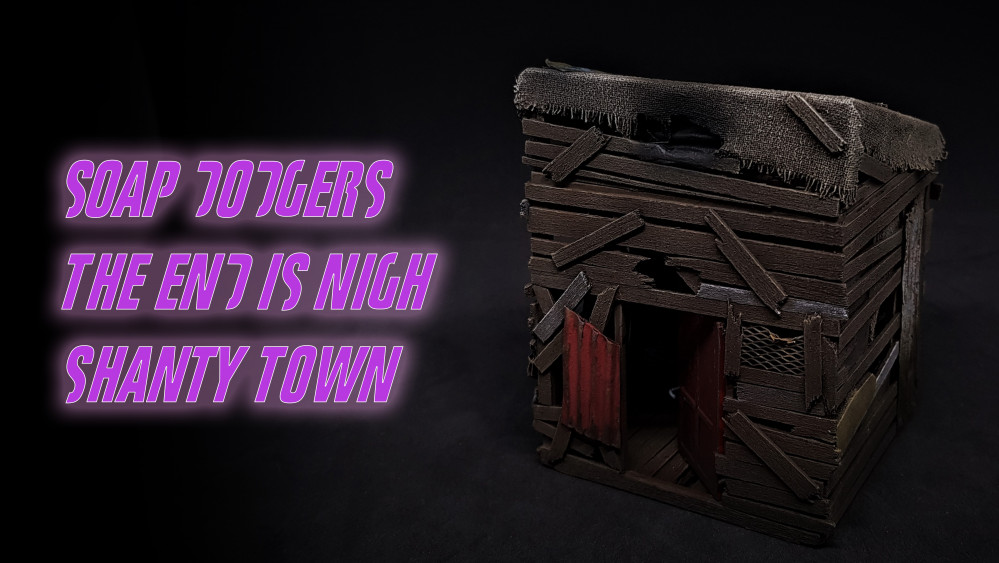
Terrain Challenge – Shanty Town


Recommendations: 244
About the Project
it's about time that I started my terrain challenge for The end is nigh. I Don't have much time at the moment. So I hope I get done in time! This will be based around a shanty town idea and a quick method of building.
Related Game: Fallout: Wasteland Warfare
Related Genre: Post-Apocalyptic
This Project is Completed
Inspiration and Plan.
Started this project and it needed to be fast and furious.
I thought of lots of cool things but I need a shanty town as a part of an upcoming part of an RPG I am doing.
There are lots of ways to make this fast. If you have seen any of my other recent projects I am also lucky enough to have a laser cutter. Problem is I don’t like the look of run down laser cut buildings it doesn’t have enough texture to make me believe in the object.
I then went about looking for inspiration. I have been playing fallout since Fallout 2 came out. I love the look and writing of the games and I just needed to use this an inspiration.
I not only looked at the aesthetics of the game but also looked at Fallout 4 and how they make there own buildings.
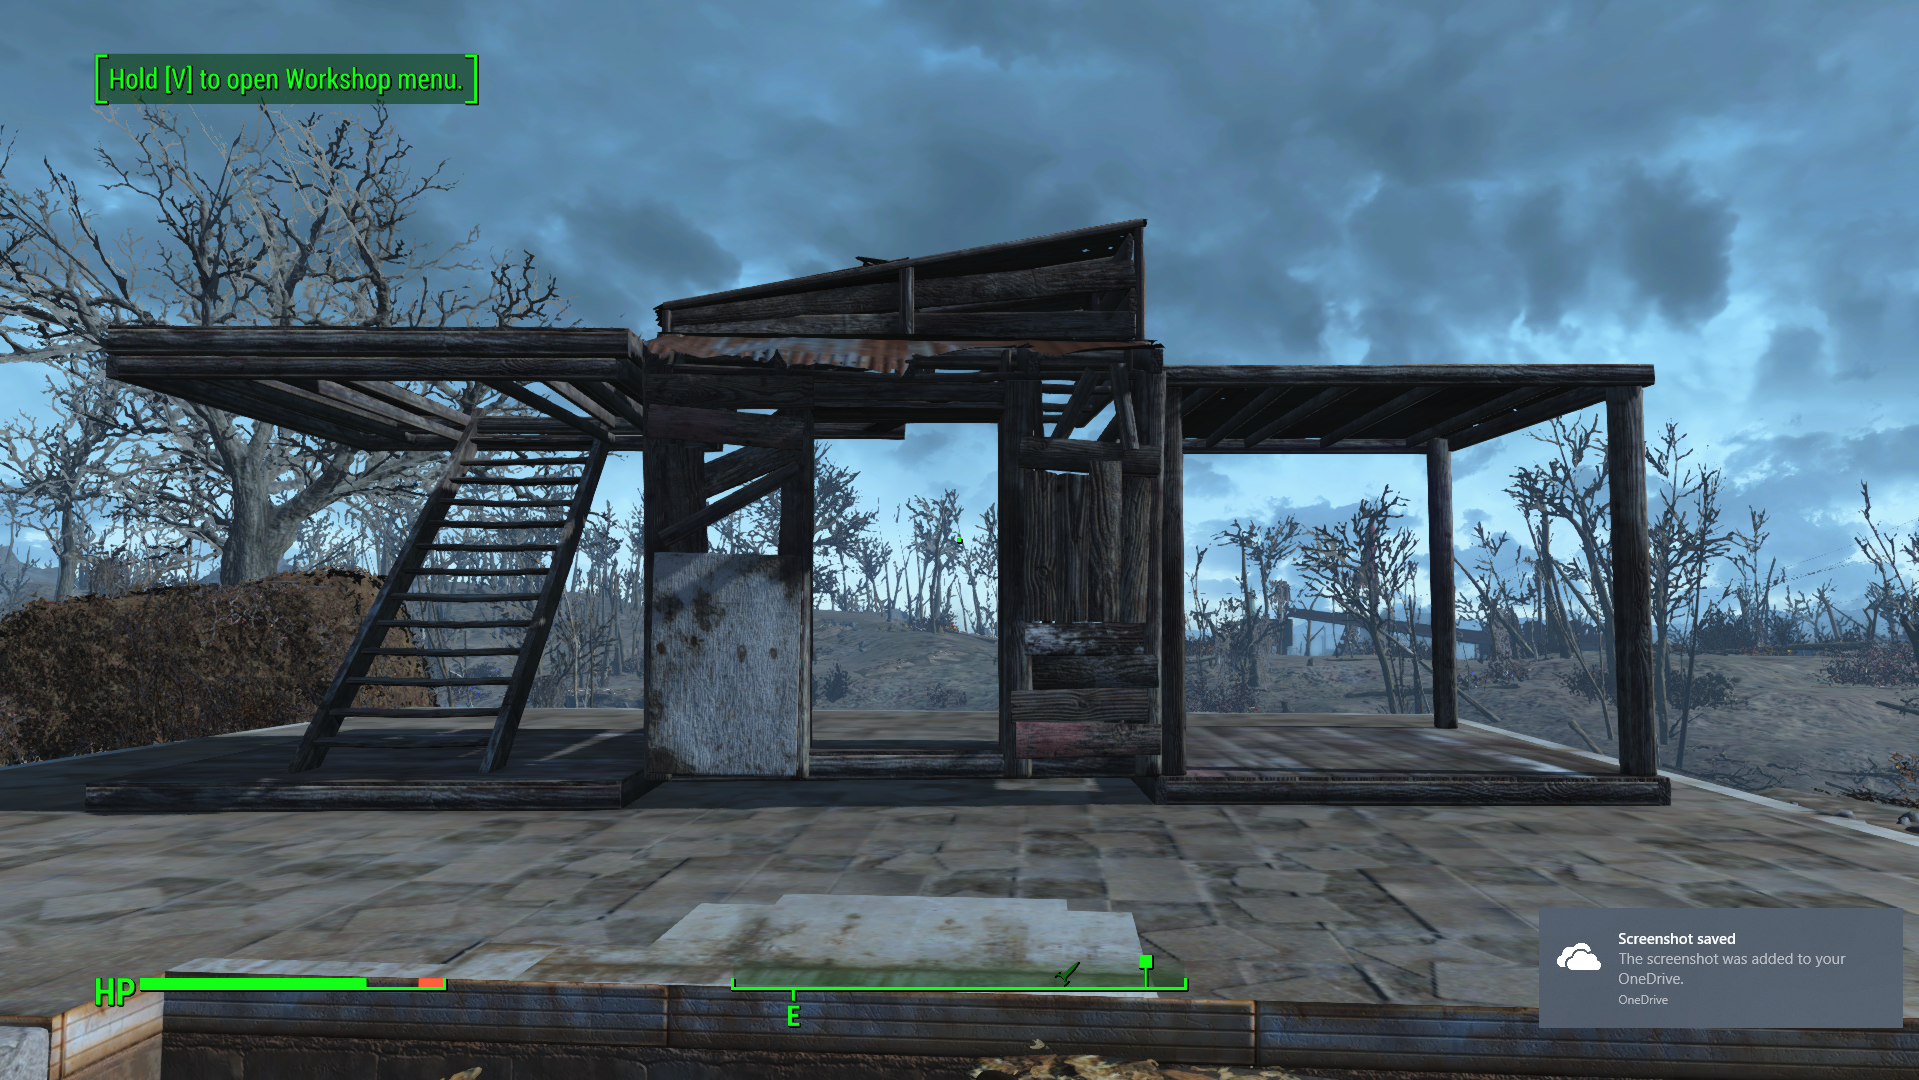 This is a screenshot of a few objects you can build in Fallout 4 as you can see these are just components that share dimensions and lock together.
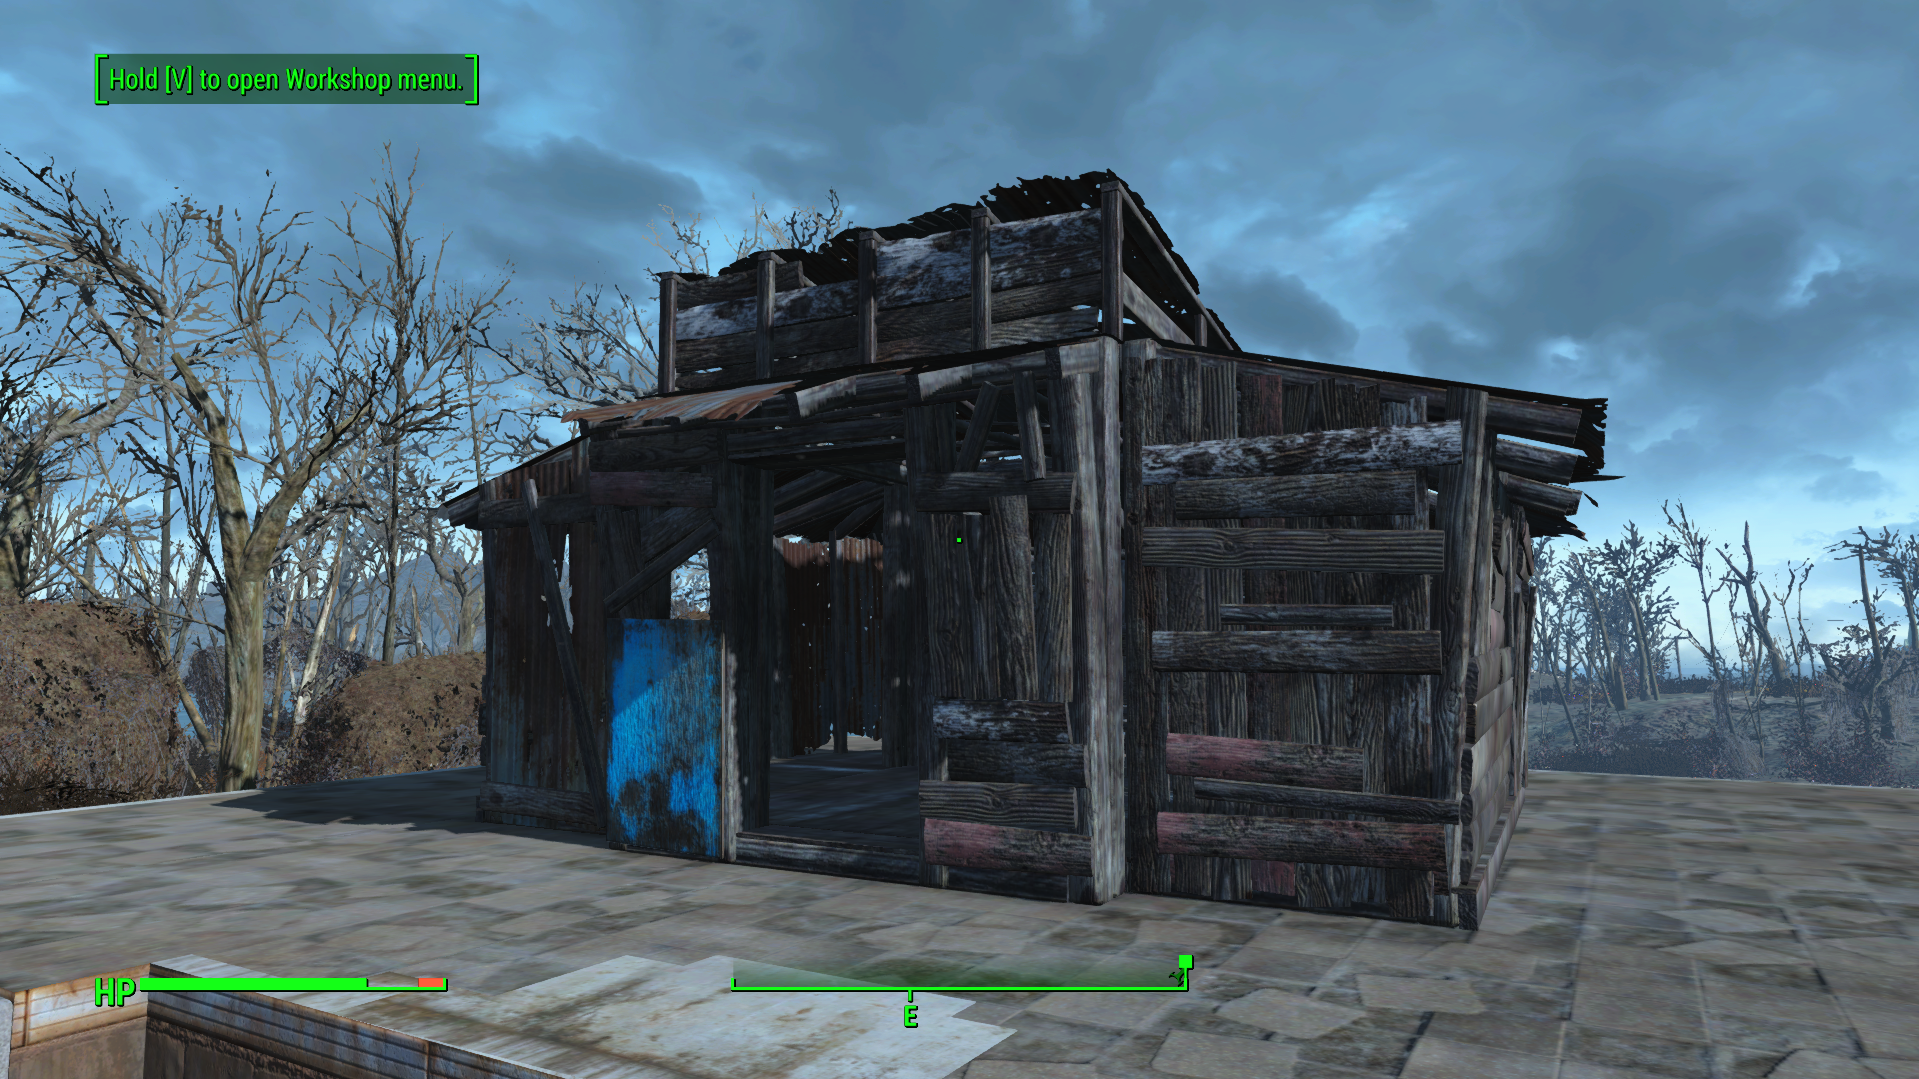 This is a pre-built object however it shares the same components you can make individually.
 So I have my plan!
I will make a modular construction system similar to fallout 4 so I can make copies of an individual building component and join them together to make larger more complex structures.
Designing
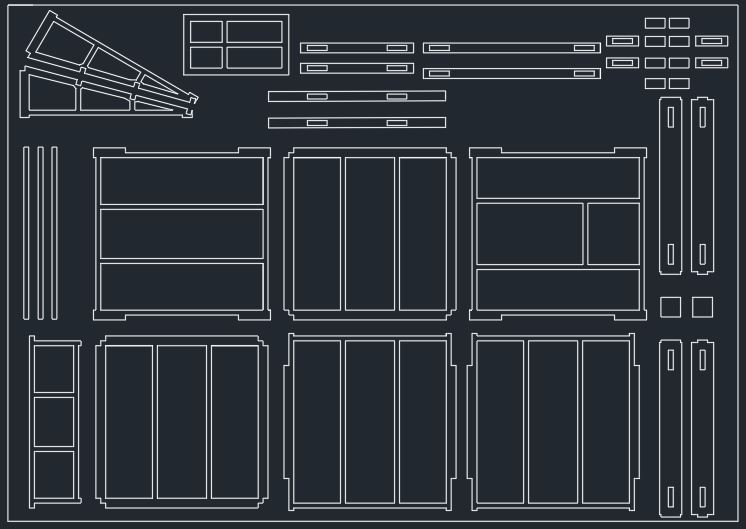
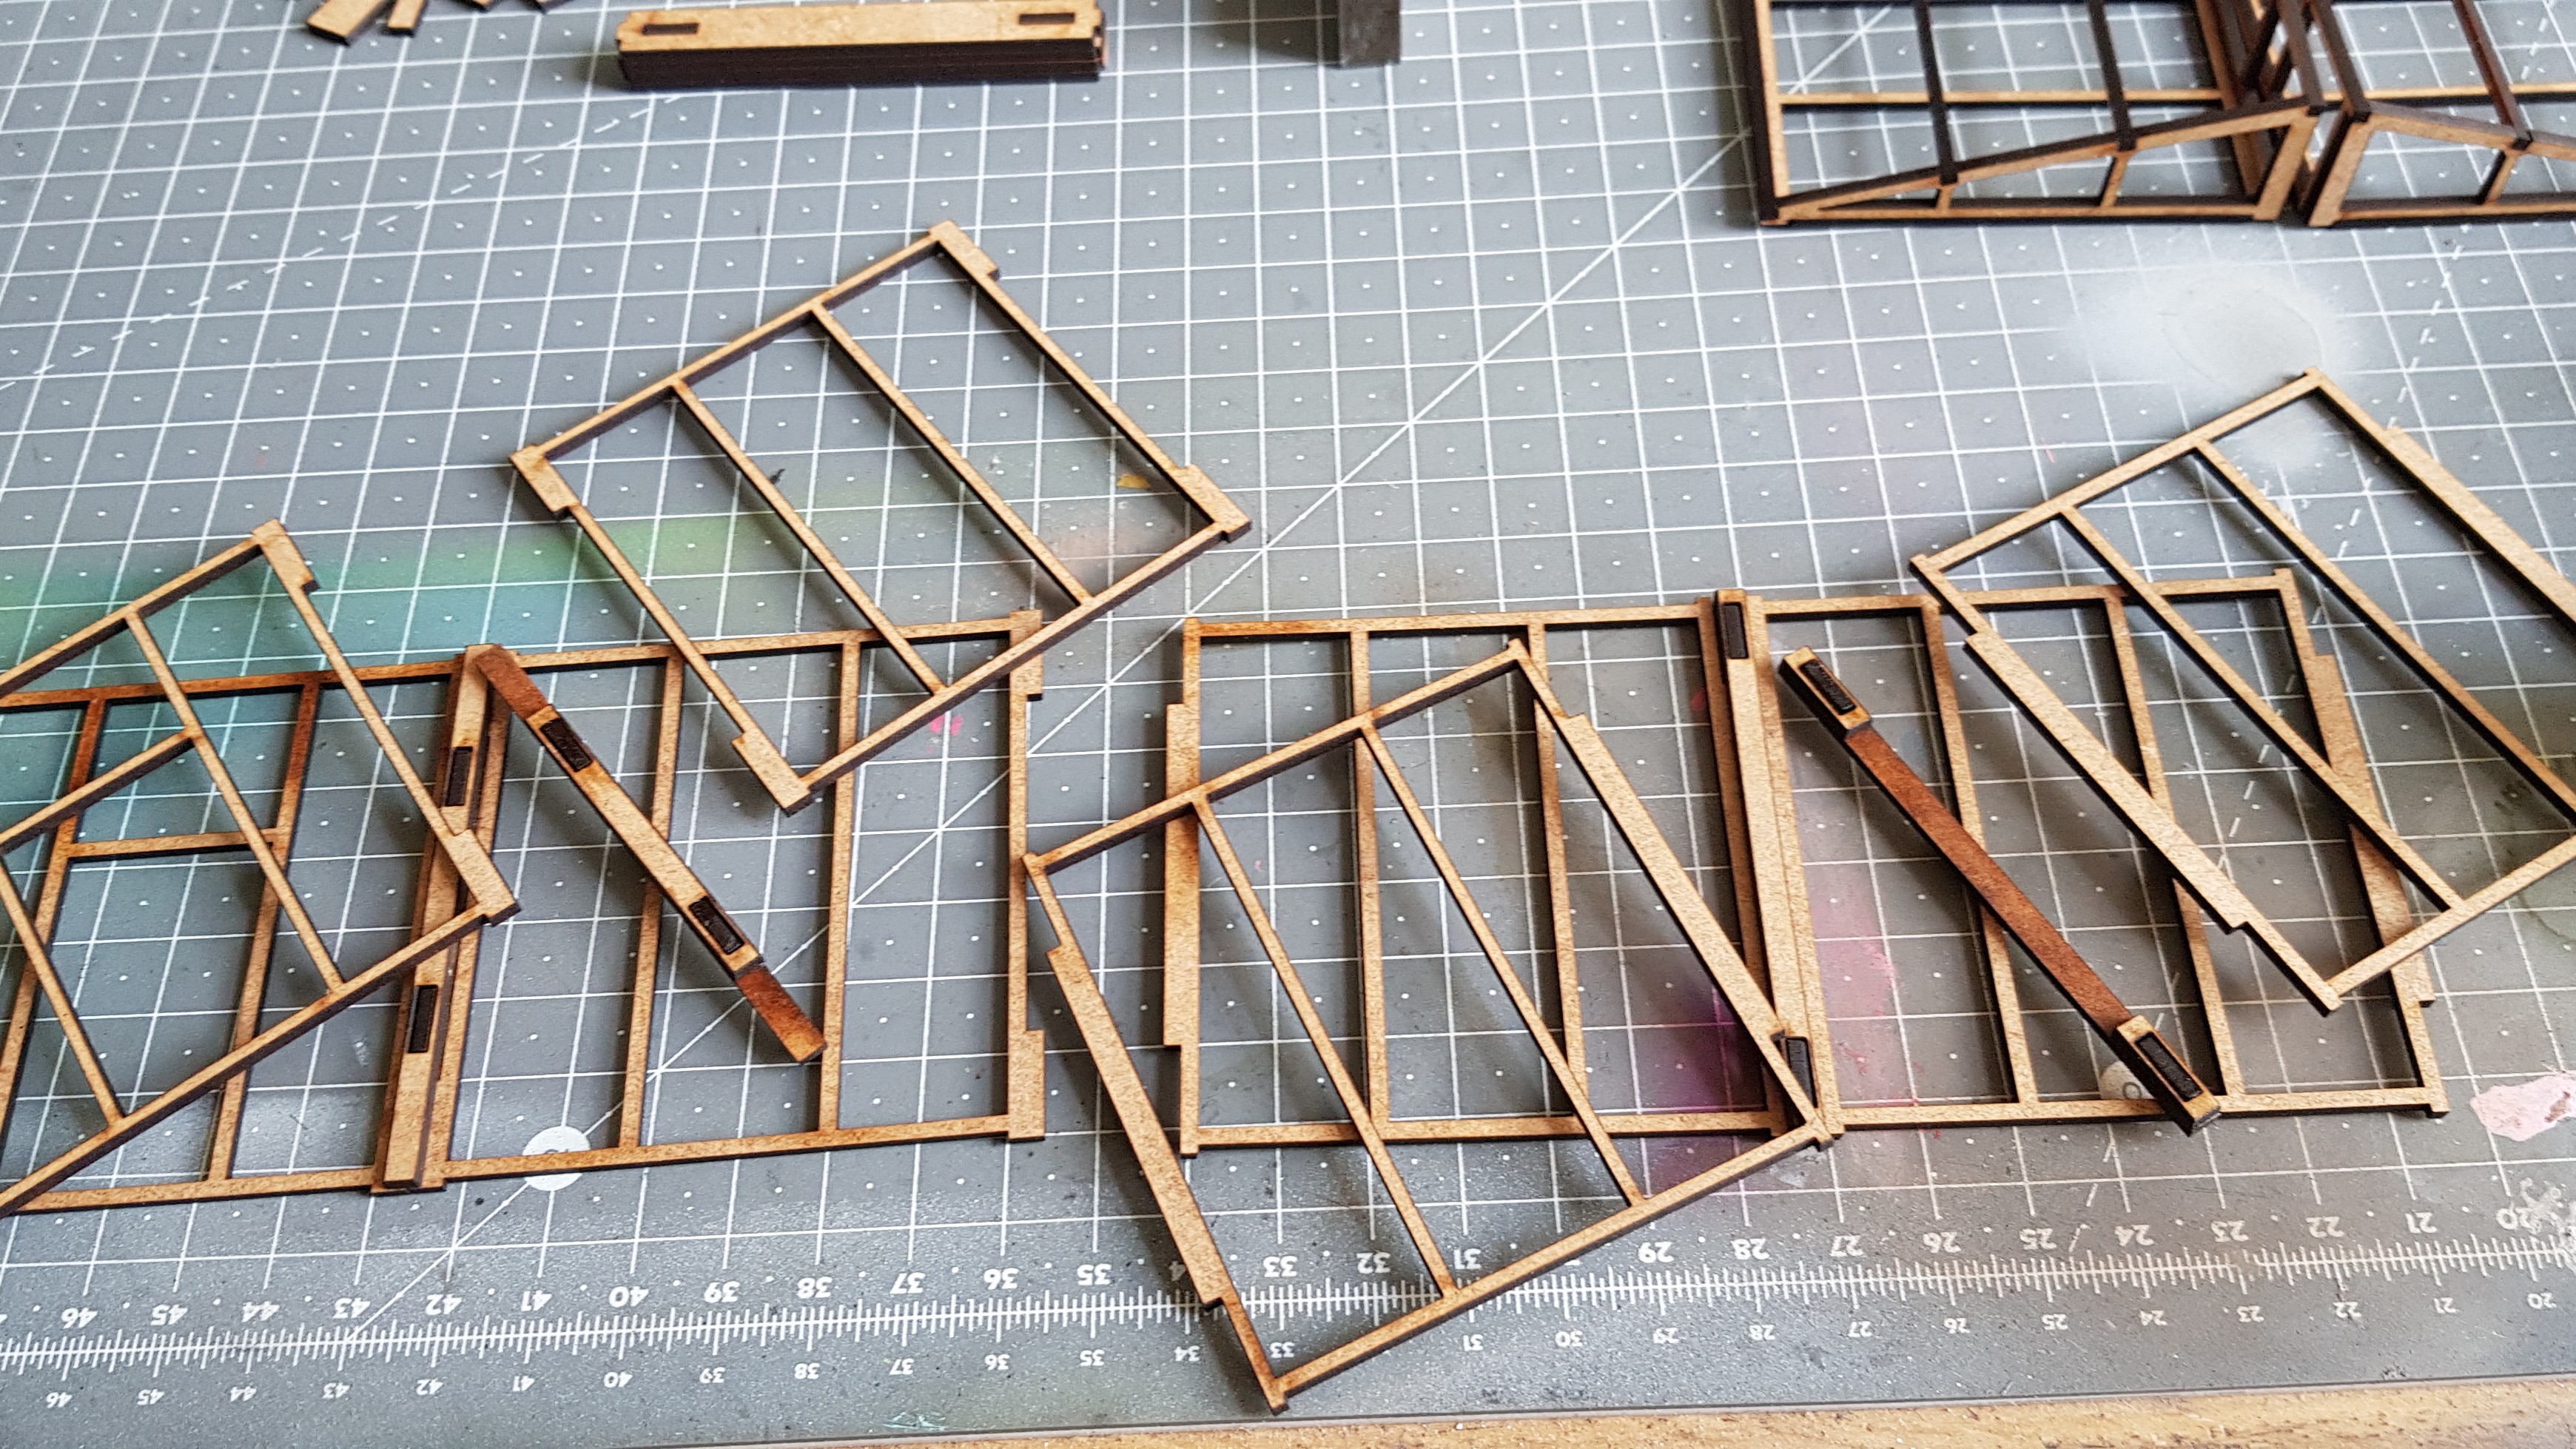
So I started putting some lines down on my computer using CAD software.
I will make these public so if you have 2mm MDF and access to a laser cutter you can try yourself.
Link to files if you wish to try – One Drive
I just wanted a frame though would be sturdy and reasonably square so I could just have fun putting things together. This could also be cool if you wanted to make a building site.
This has been though many iterations in a short time. When I was cutting one I was already making changes to the next. Not the best idea but it seemed it work. and some of the ones you will see are older versions. I have just improved the concept and fit of things.
I made one with stairs and one without and the hole I need for stairs is larger than the standard width in the floors.
NOTE: I have not tried the stairs so I hope they work…
 Standard Shaty hut
 Shaty hut stairs.
 I could go overboard at this point and make lots of different sections but stairs and without are ok for me at the moment.
I have also included joining sections to join wall sections together. This may not be elegant but again it worked. Also the side frame feet are only 1mm deep to allow for stacking and I also have a central column for if you are joining 4 squares together. Again could do more but this is more than enough and have I said I don’t have much time.
The drawings took about 2 – 3 hours so I don’t expect them to be perfect with all angles covered but I may revisit this when I have further time and add to this.
The building process.
So I had everything done and a sort of final design started so I got my laser cutter running.
I will say that I am now the proud owner of lots and lots of MDF rectangles.
I posted a video of my laser cutter, cutting before but it’s dull as dishwater so I will not post that but here is a quick video of me making a 3 cube structure.
quite a few mistakes here due to camera in my face but I hope you get the idea. This is sped up 4 times so it took around 30 minutes to build in total. Which is not bad for me. I done this for lots of buildings.
 New and improved linking system rather than in the videos.
 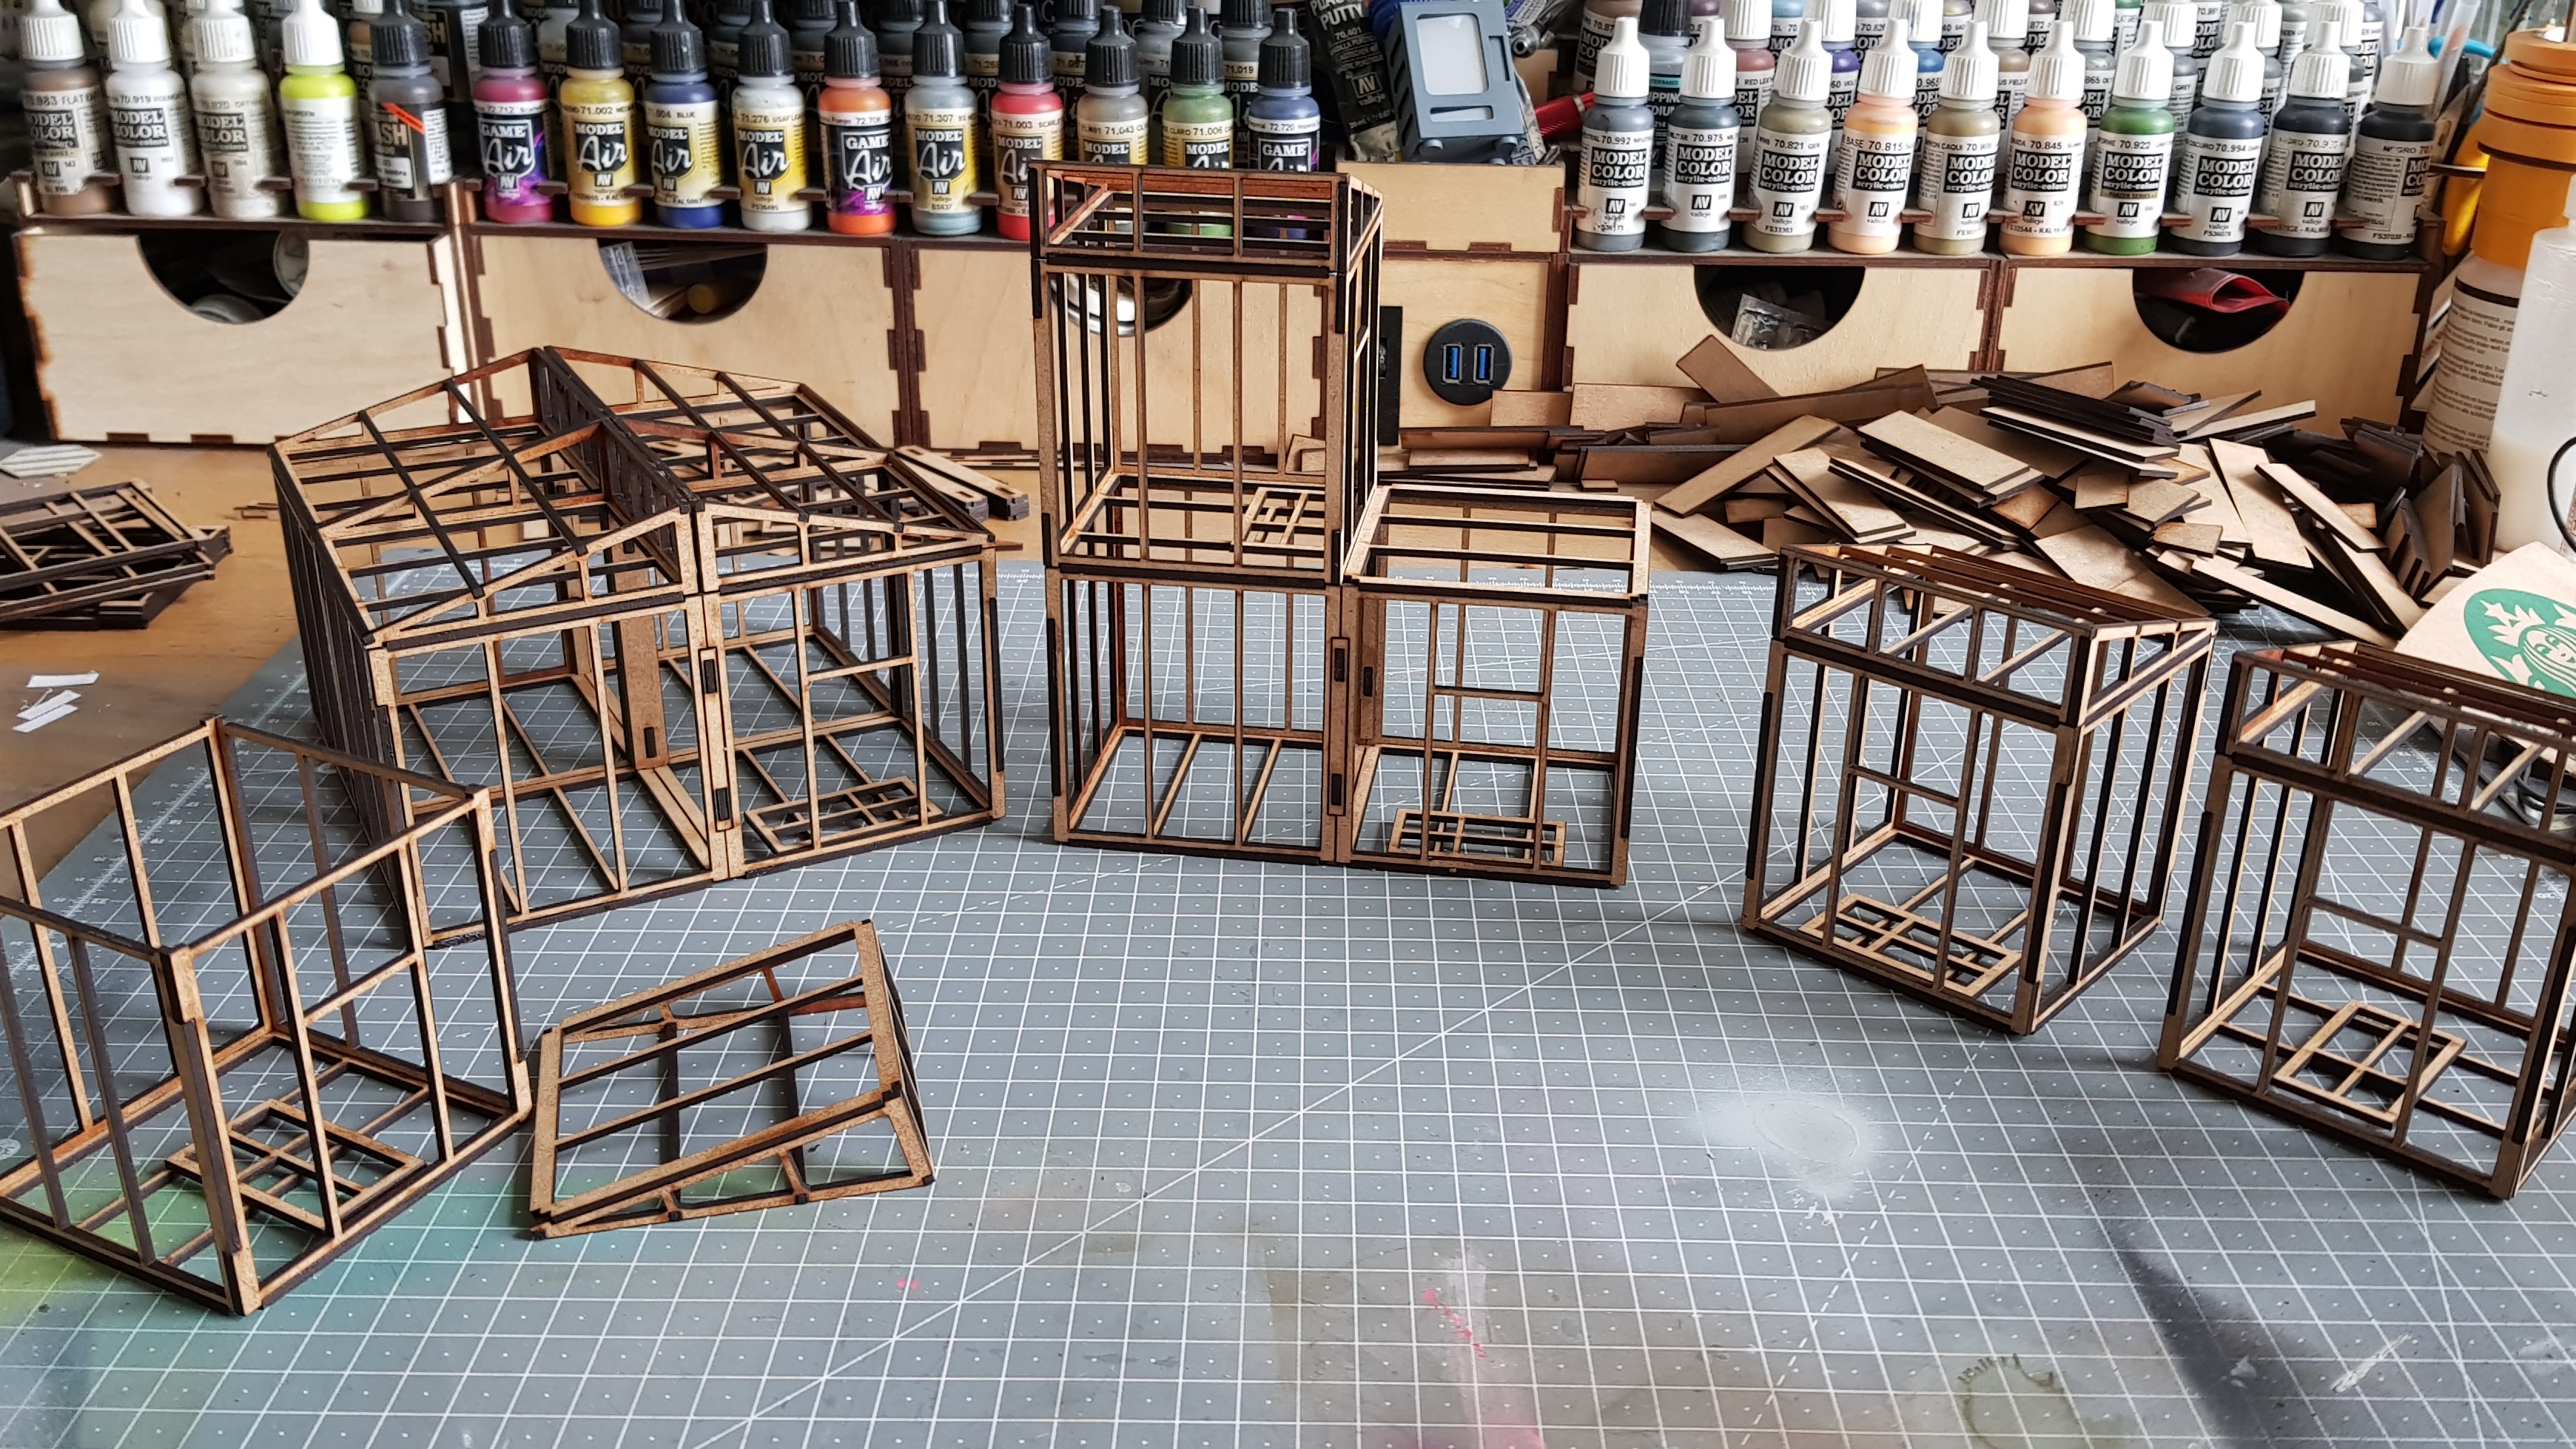 The building selection I have made so far. You can see my huge pile of scrap MDF in the background.
So I have My building site. Now it’s time to truly build!
Prototype
I needed to try this off the cuff and see what the results would be.
So I rushed ahead. Now I have all of this straightened out in my head I will try and make a video and break down the process in my next post on another building and the materials used next.
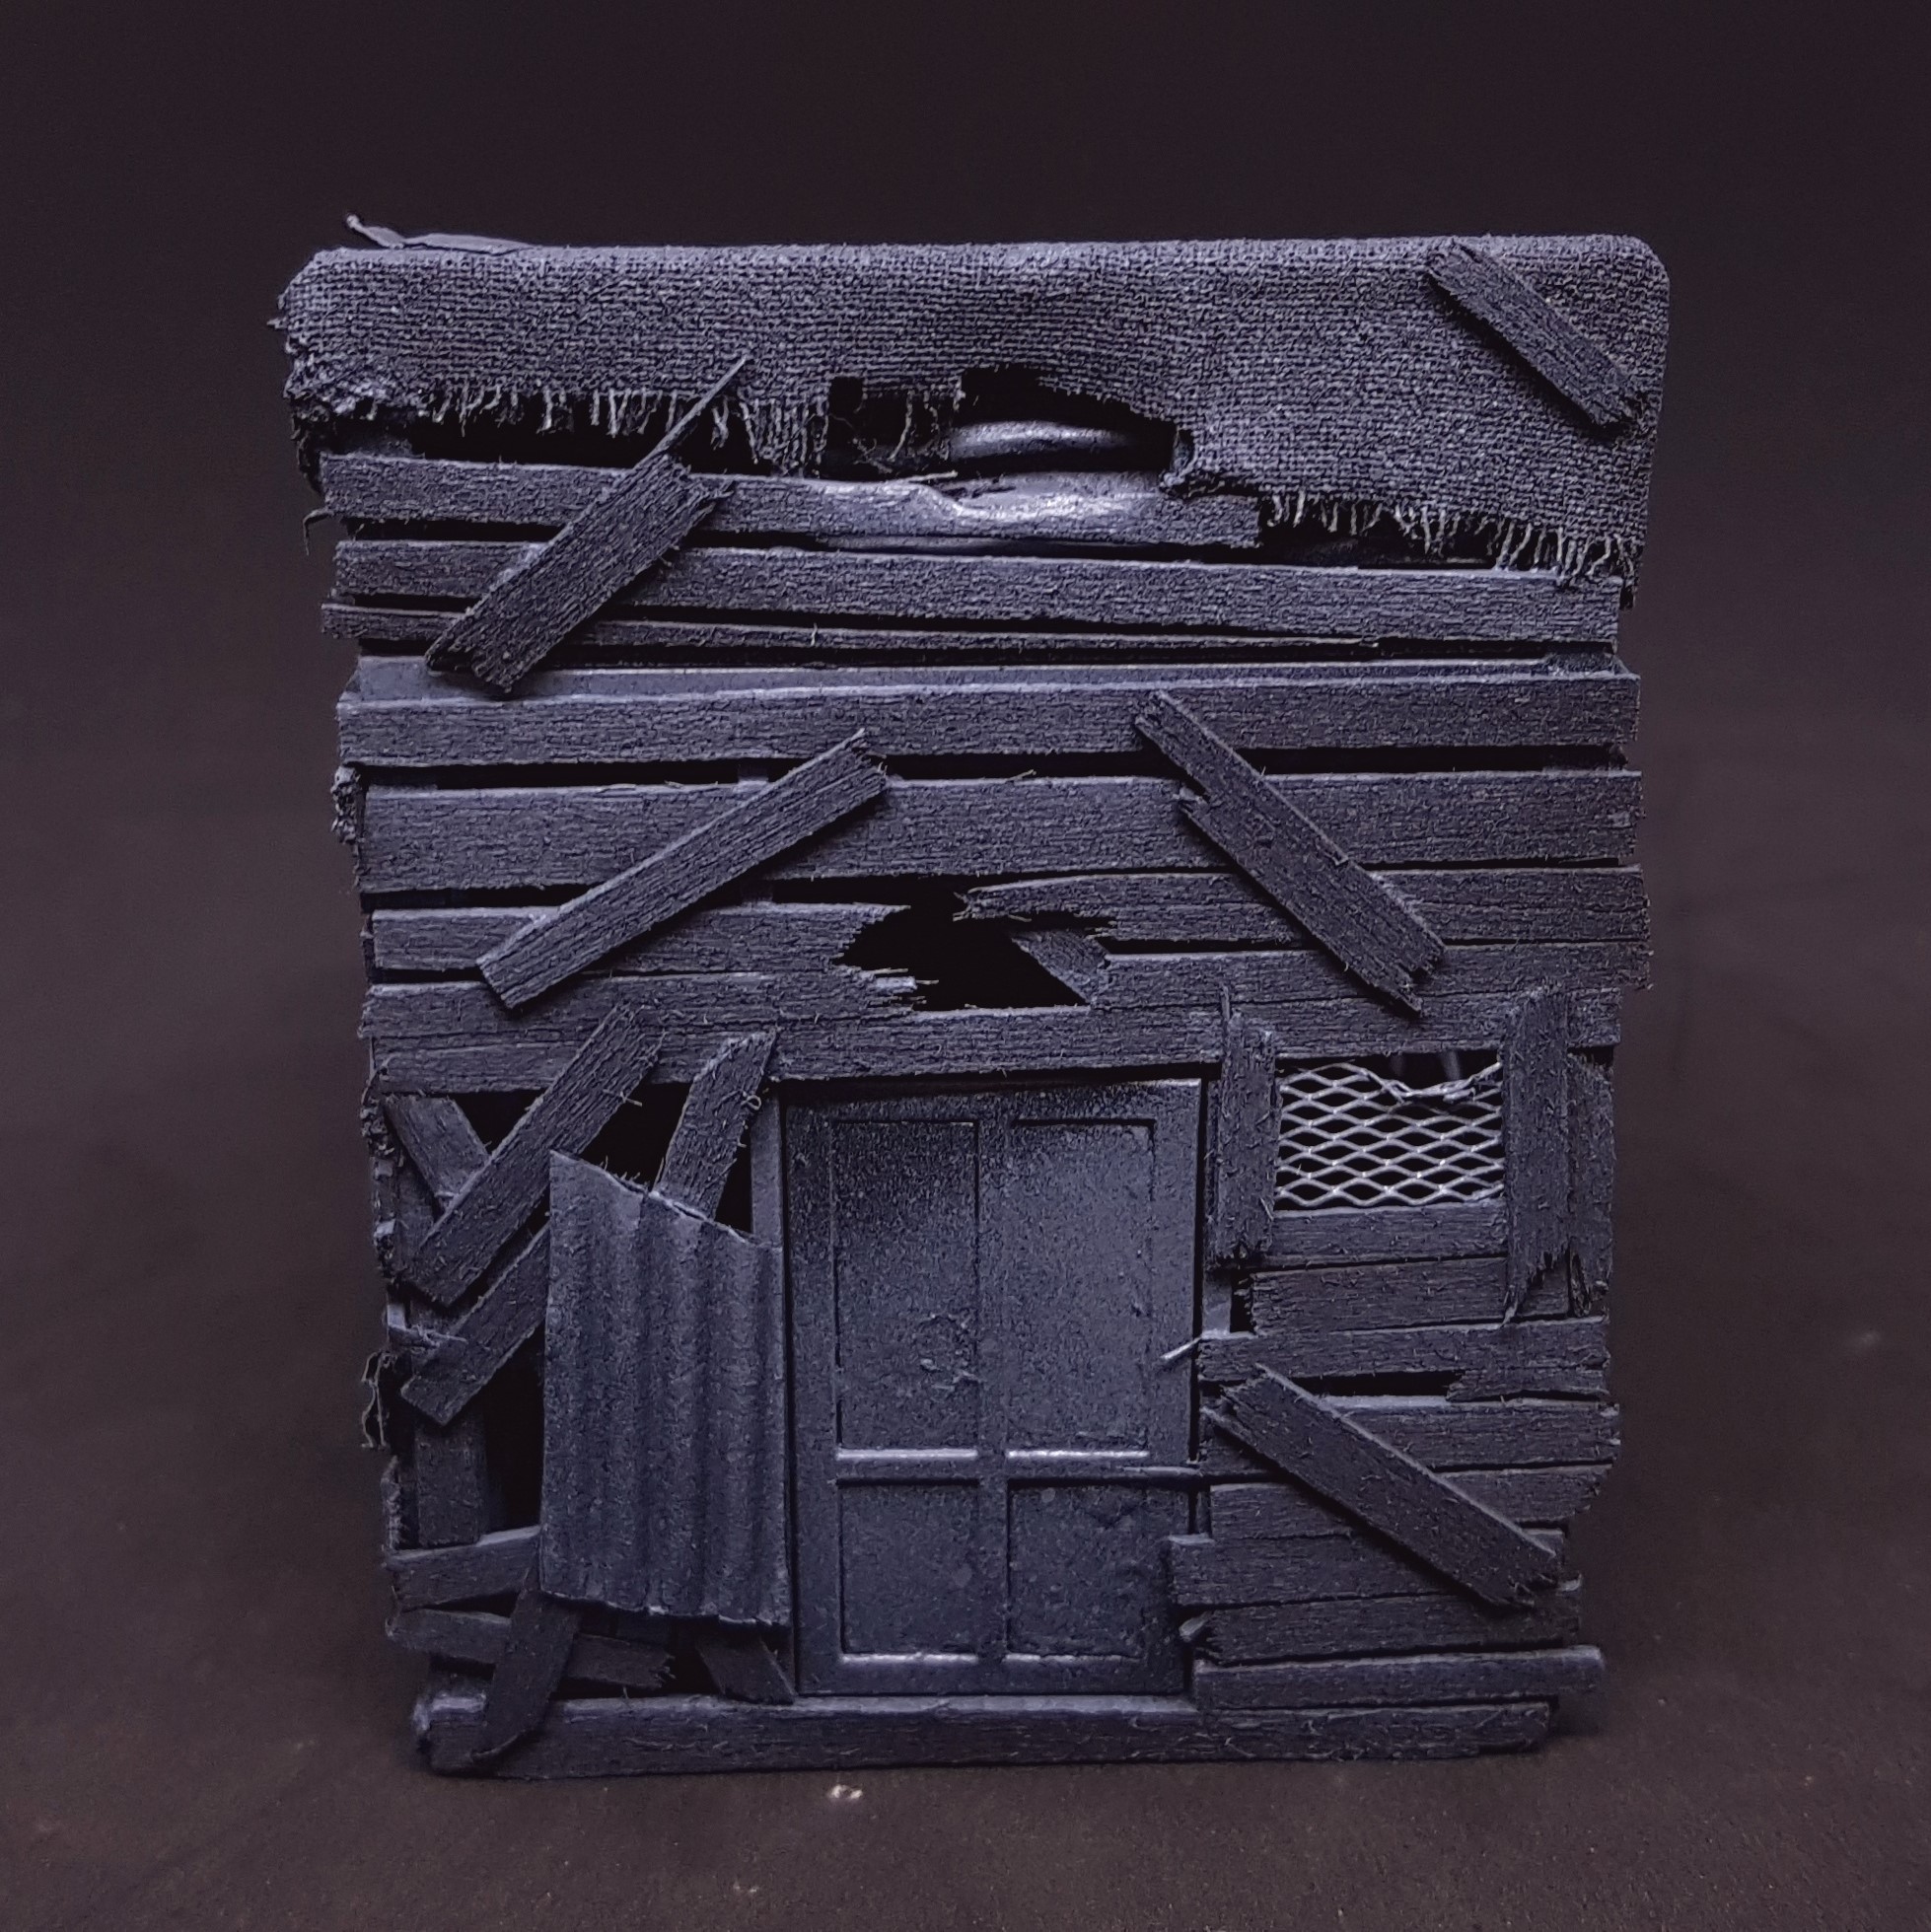
This is the smallest possible structure I have 3 of these to do so seemed like a good idea to do this.
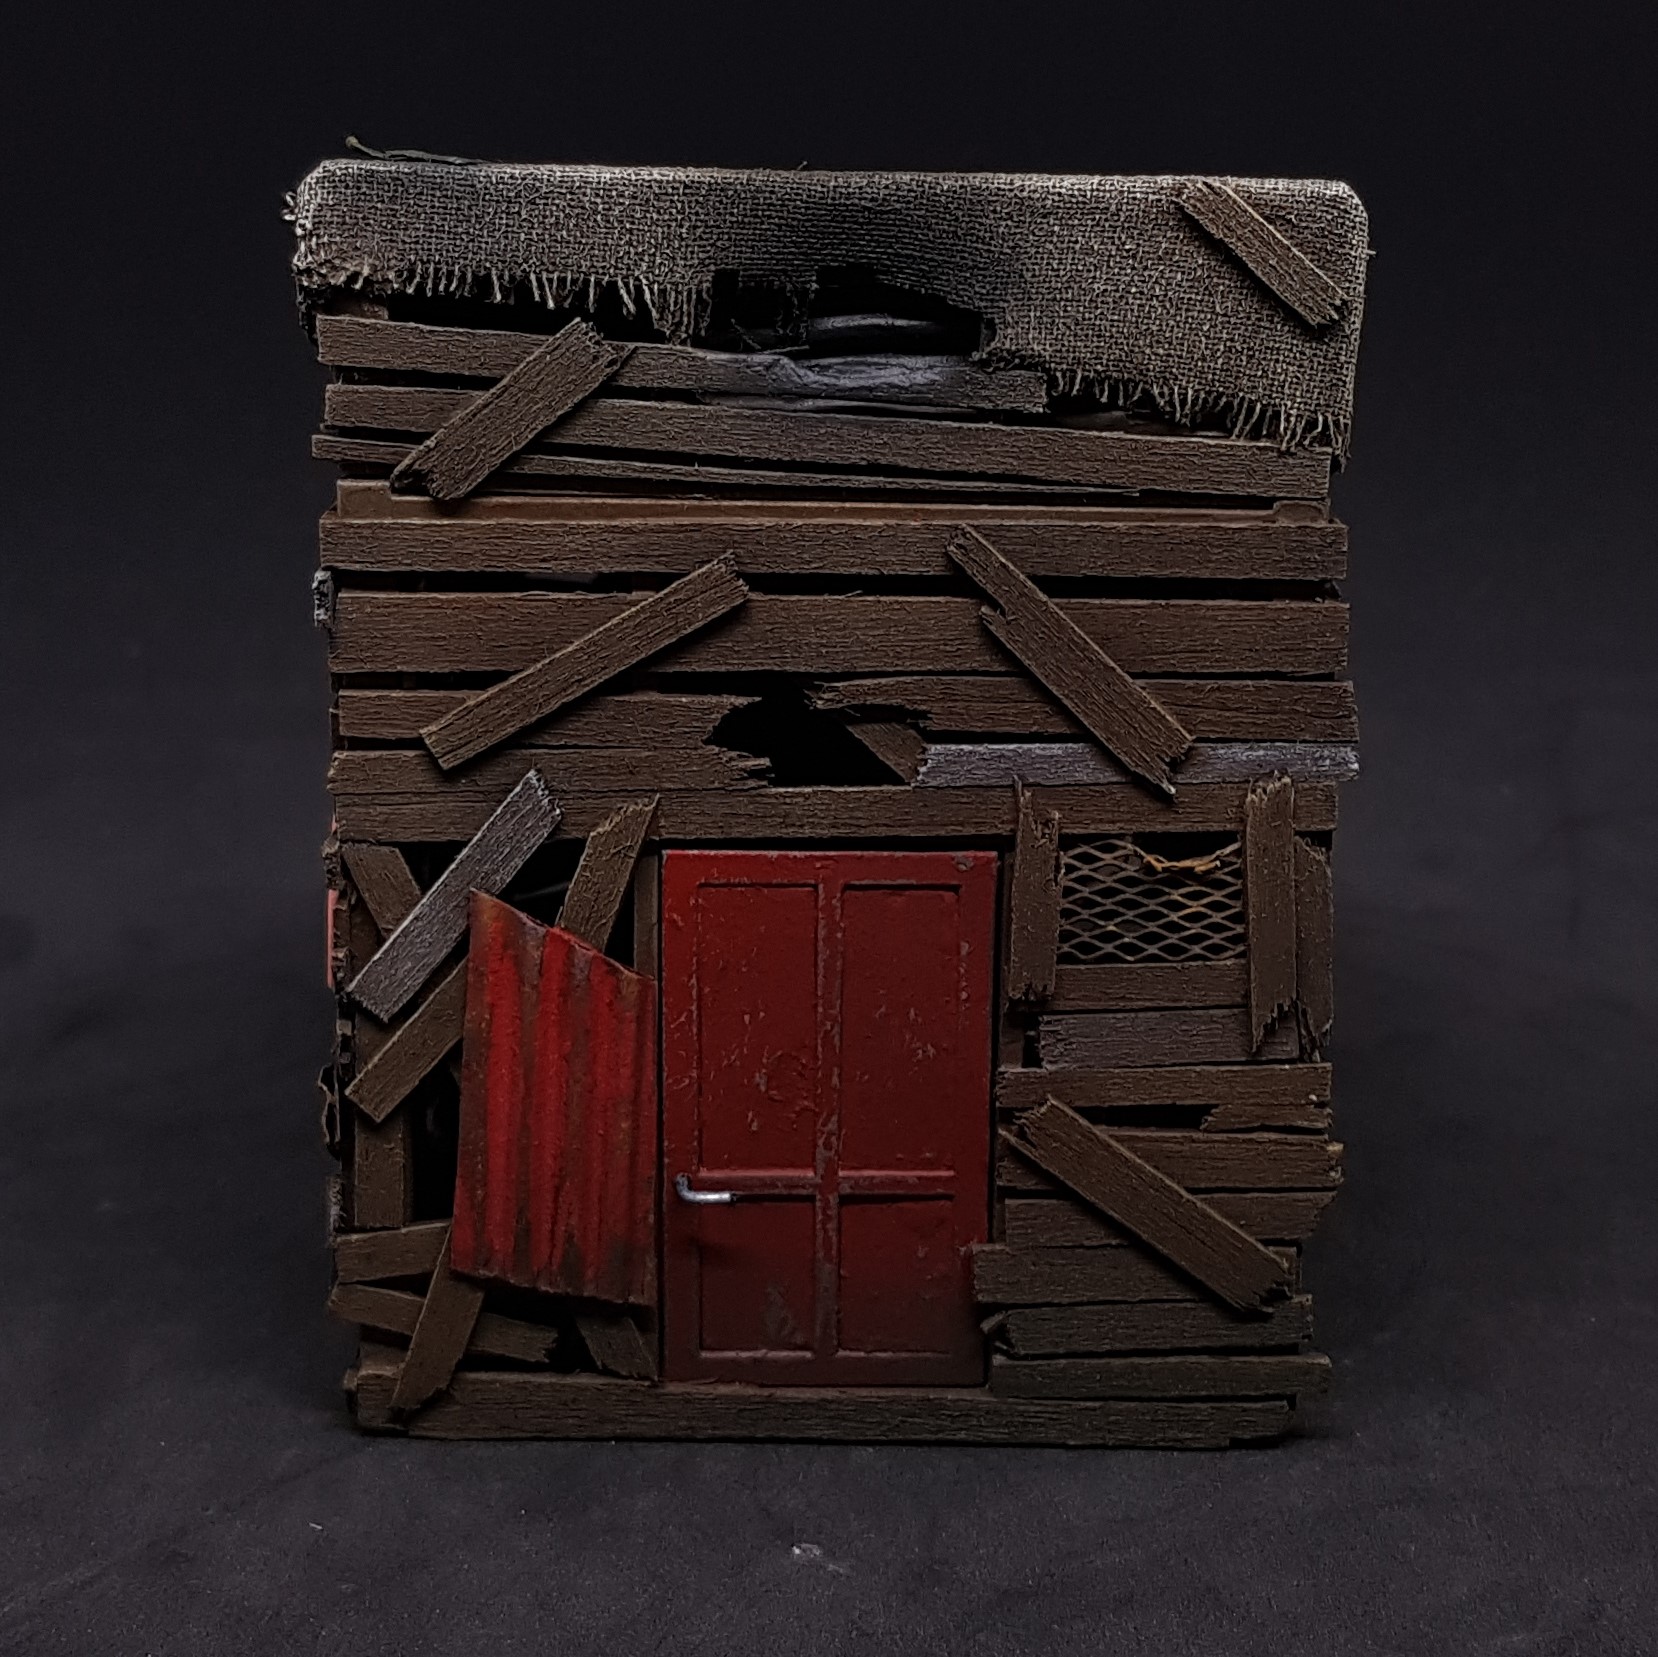
I used offcuts I had laying around, balsa wood, coffee cup holders, card and some fabric to cover the shack. I need to find more suitable materials for variety. I used a number of techniques that I will go into later e.g. so the fabrics do not get fuzzy. I think this needs another layer of detail so I will continue to work on this.
 Font
Font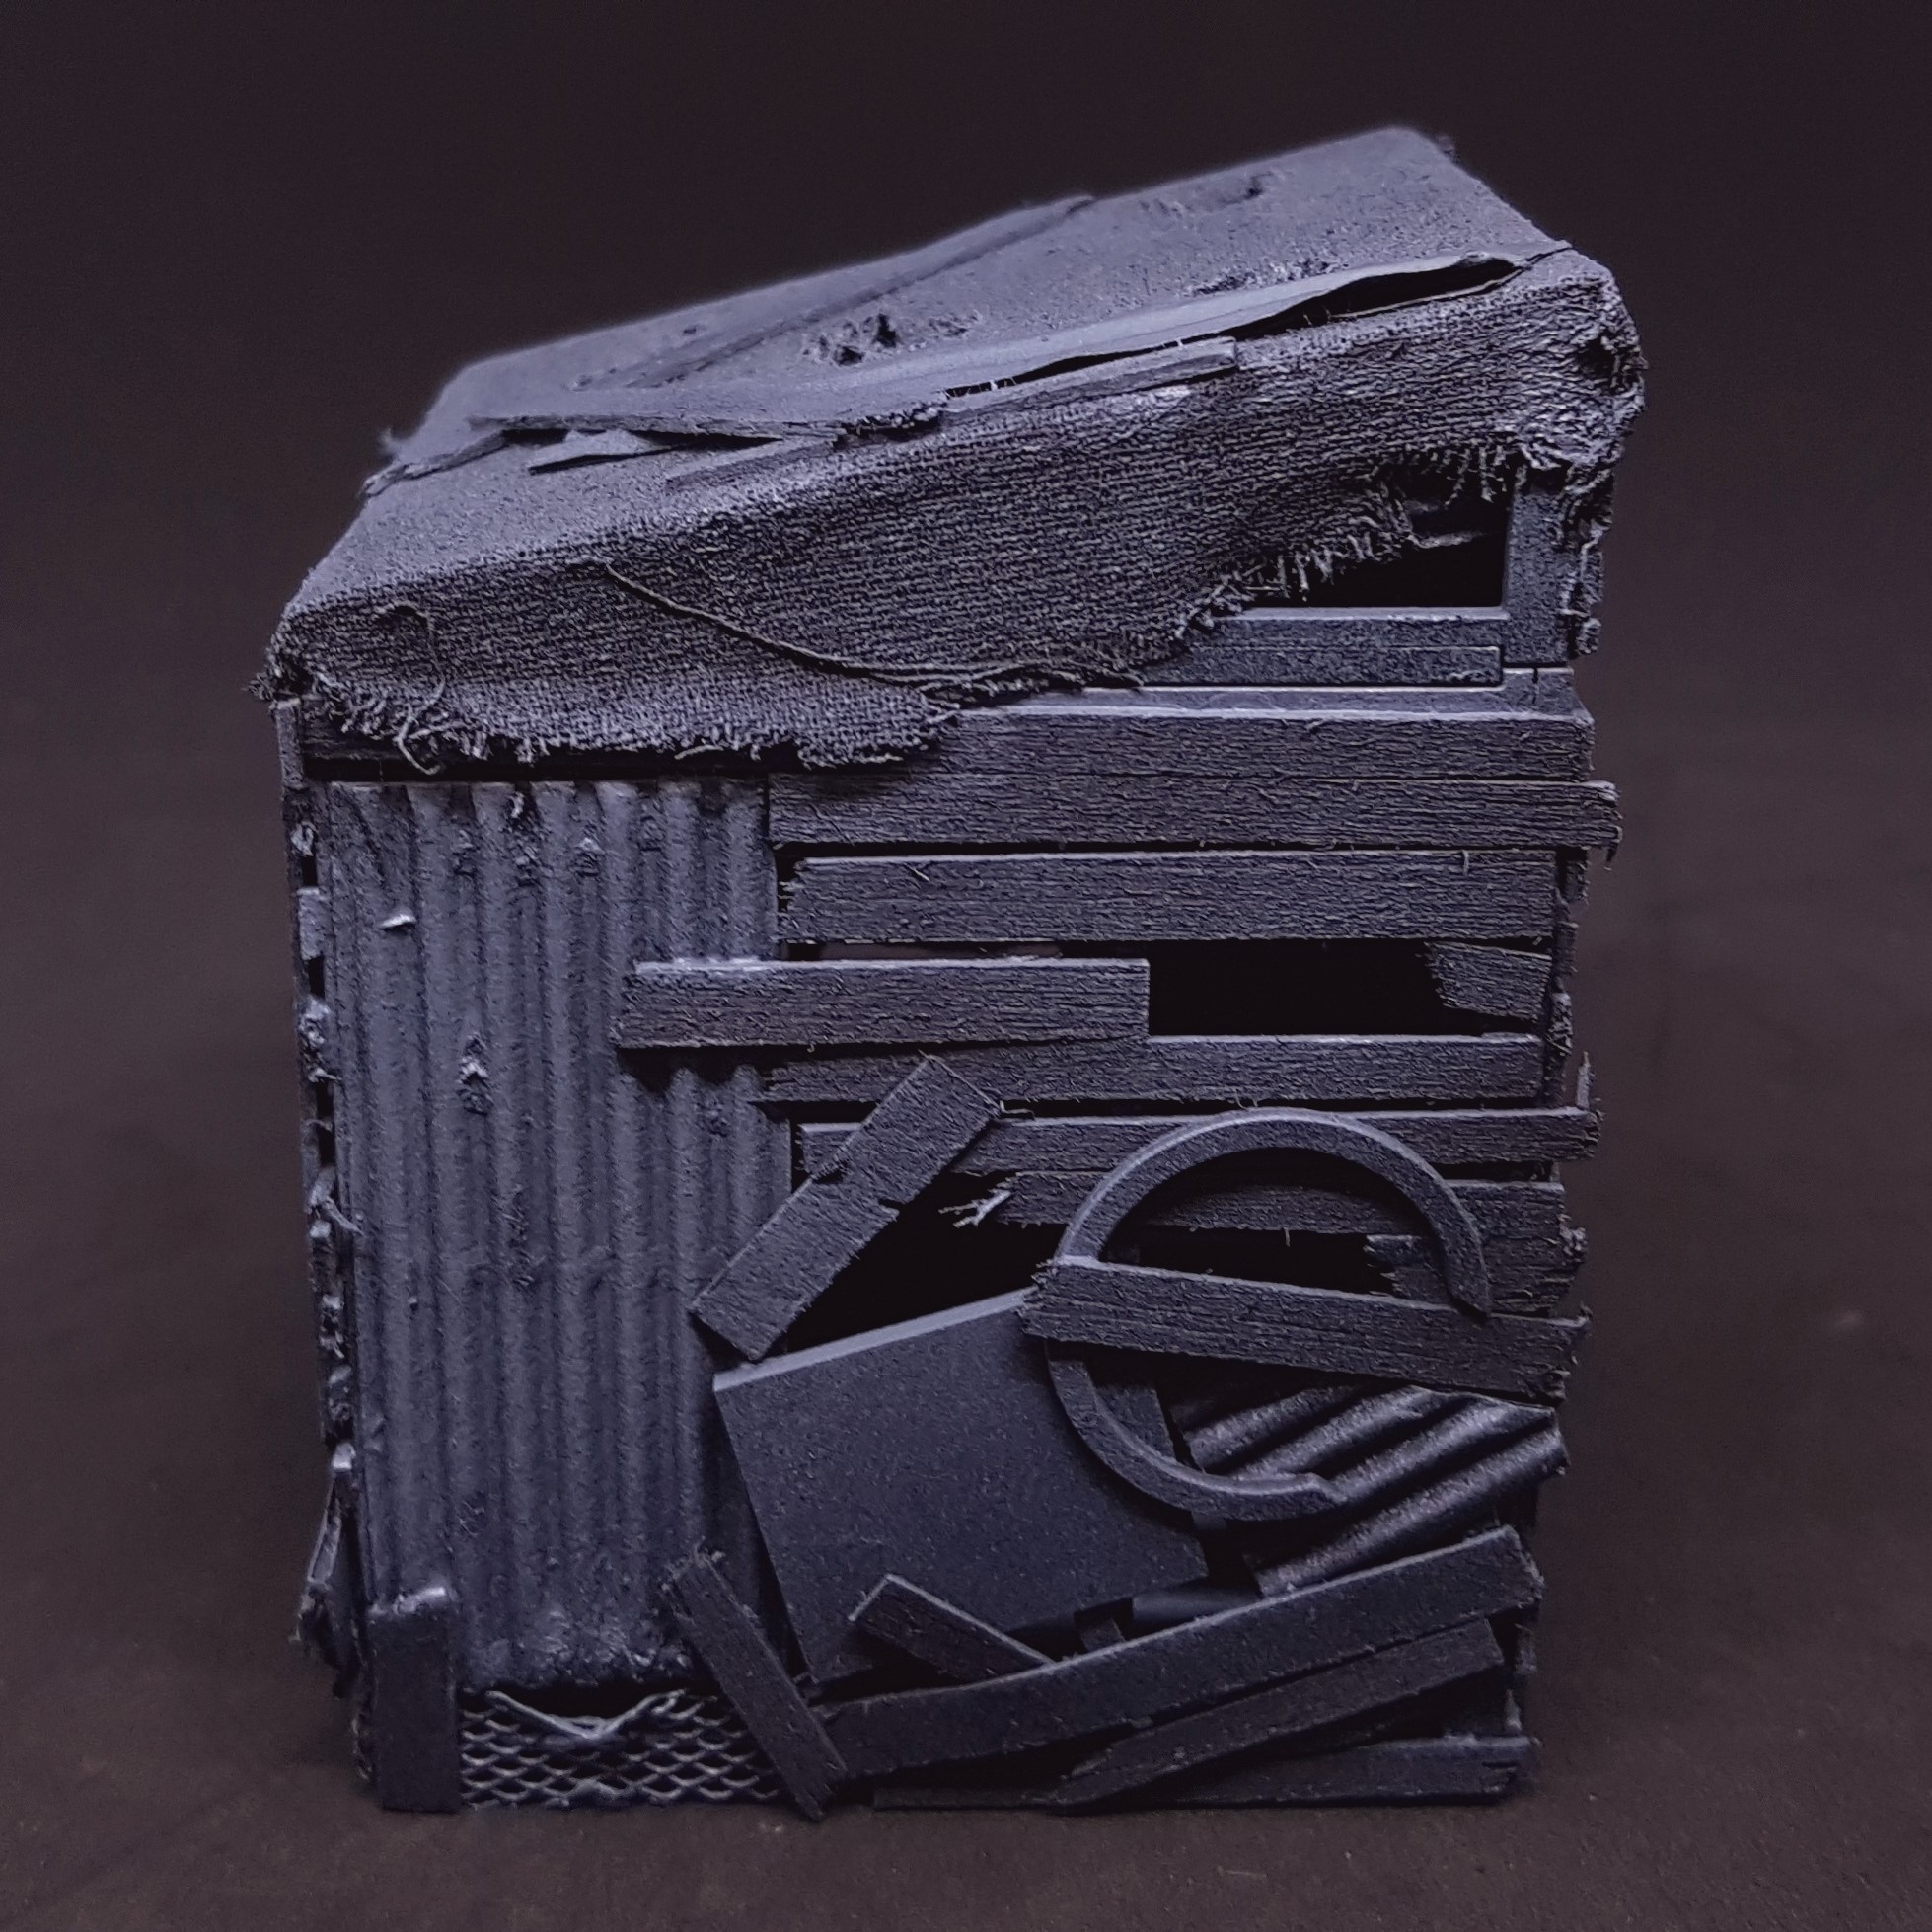 Left
Left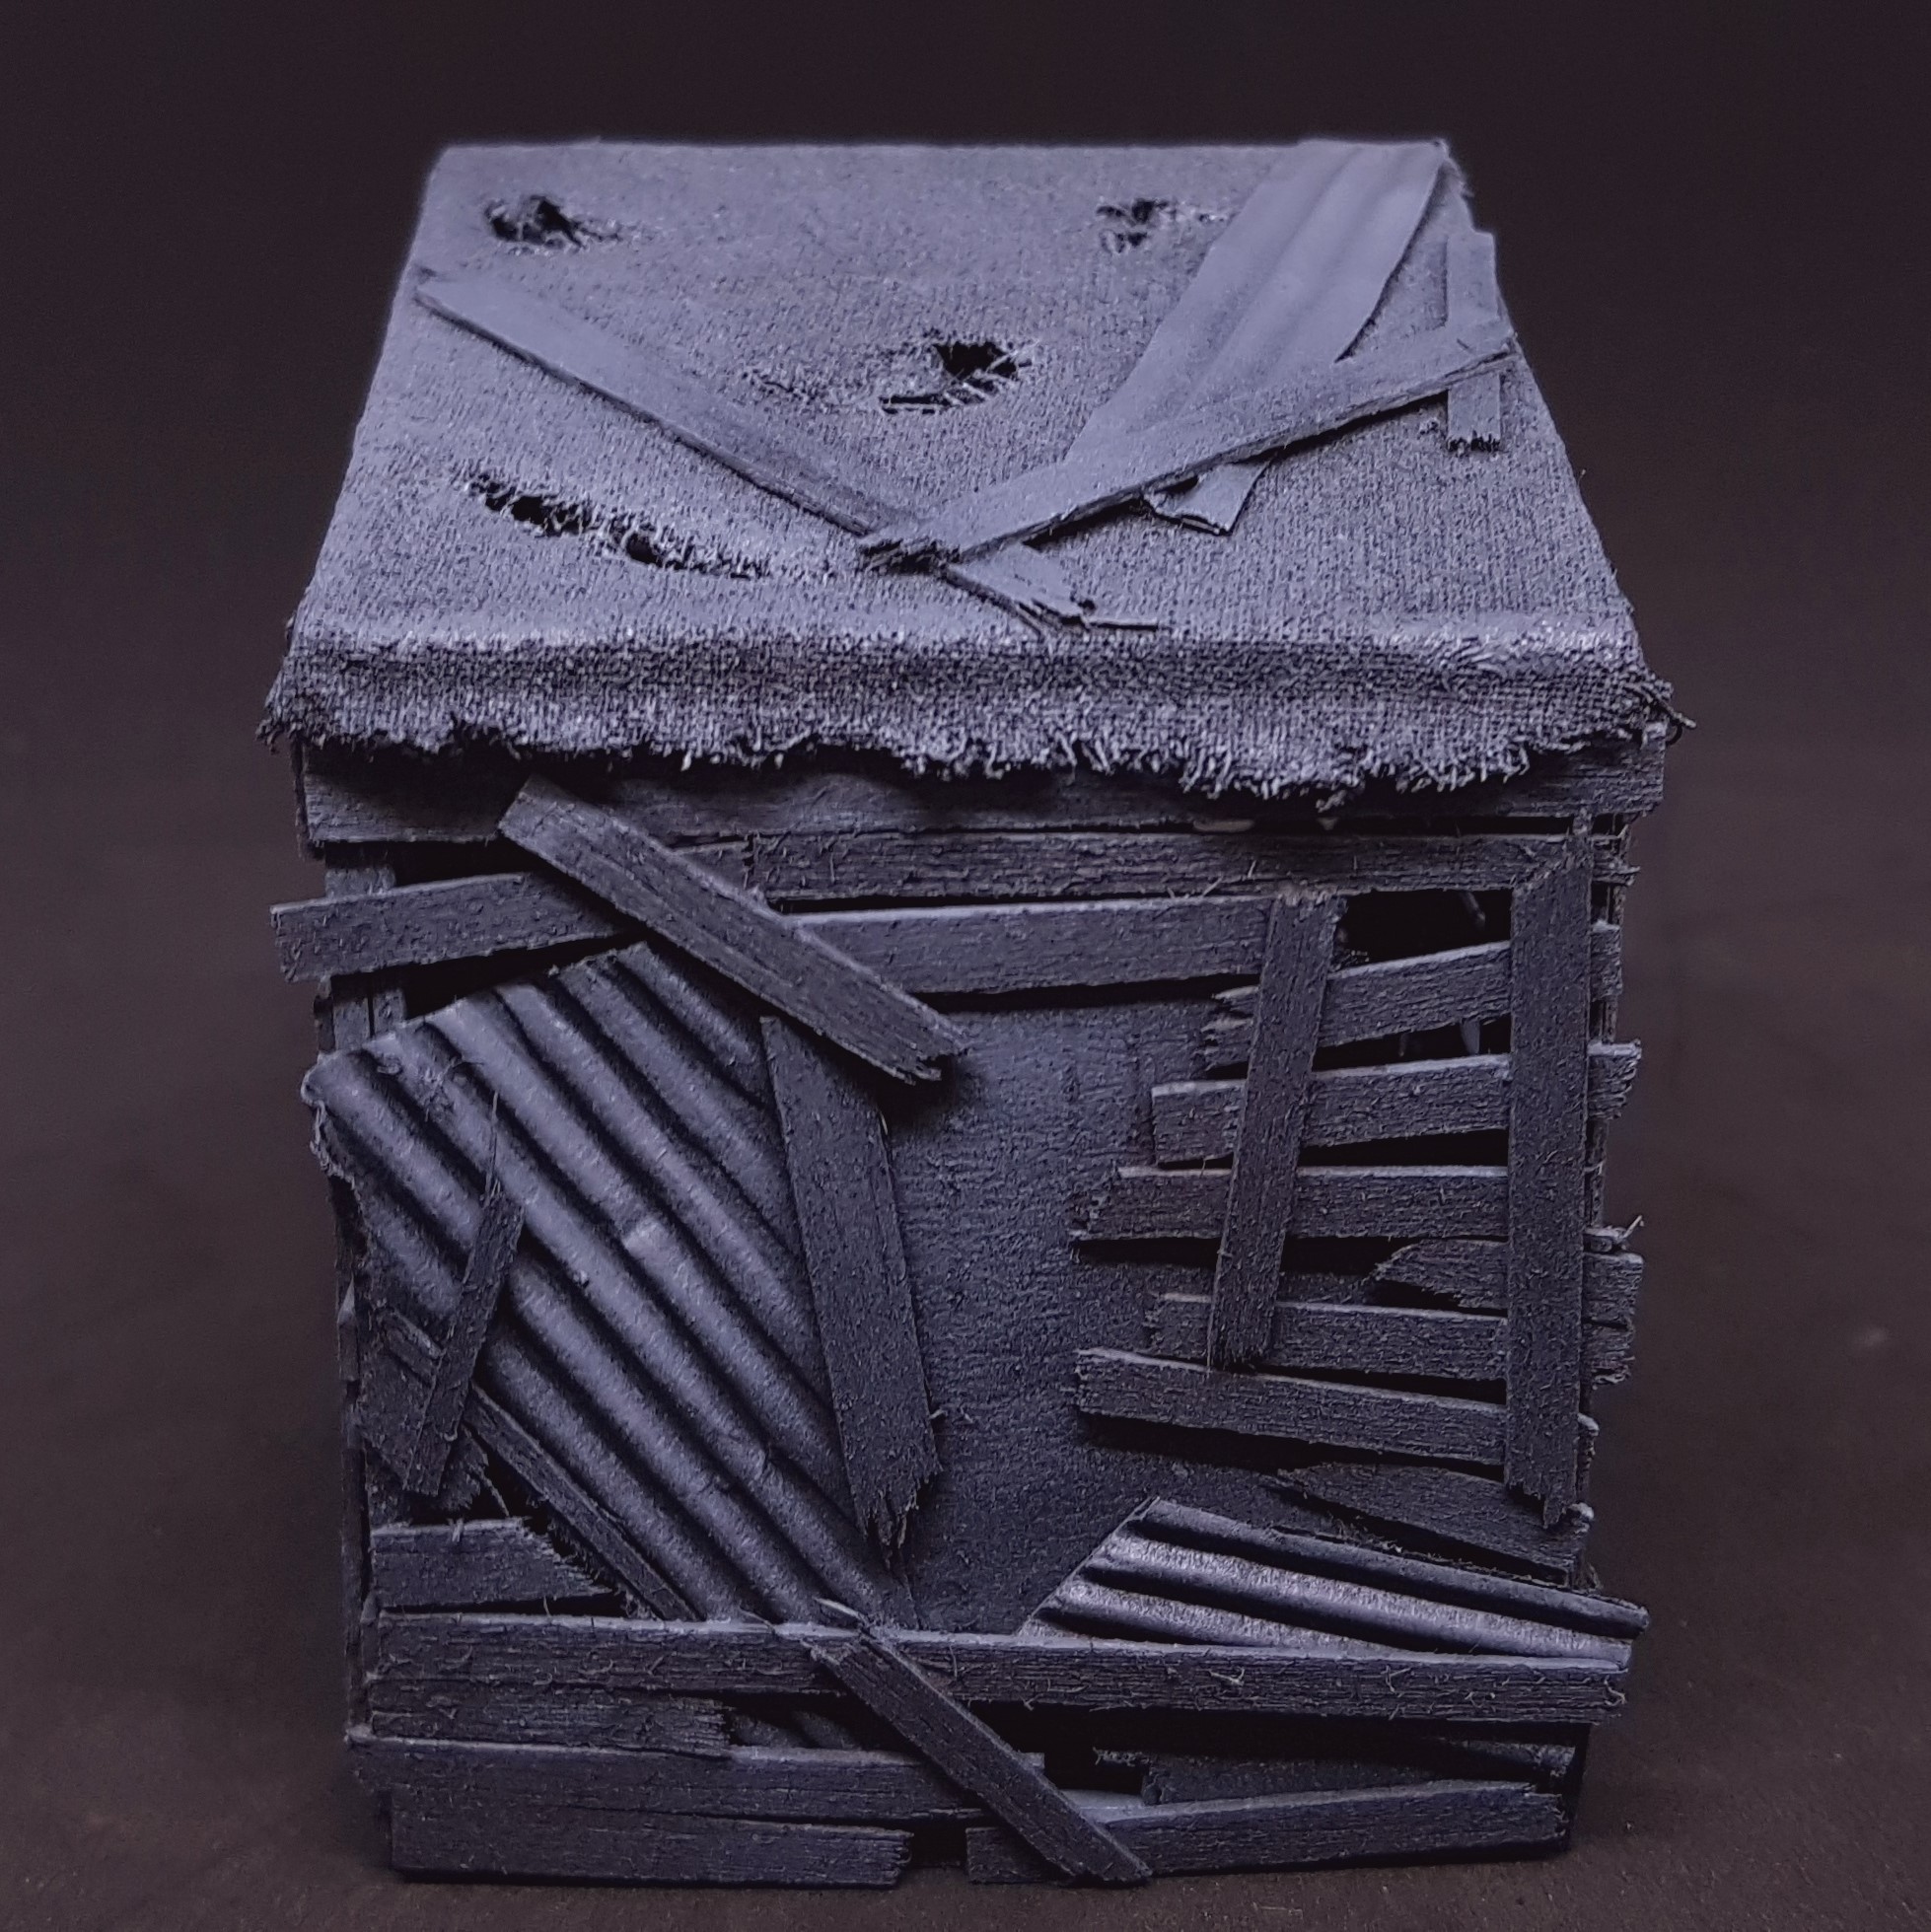 Back
Back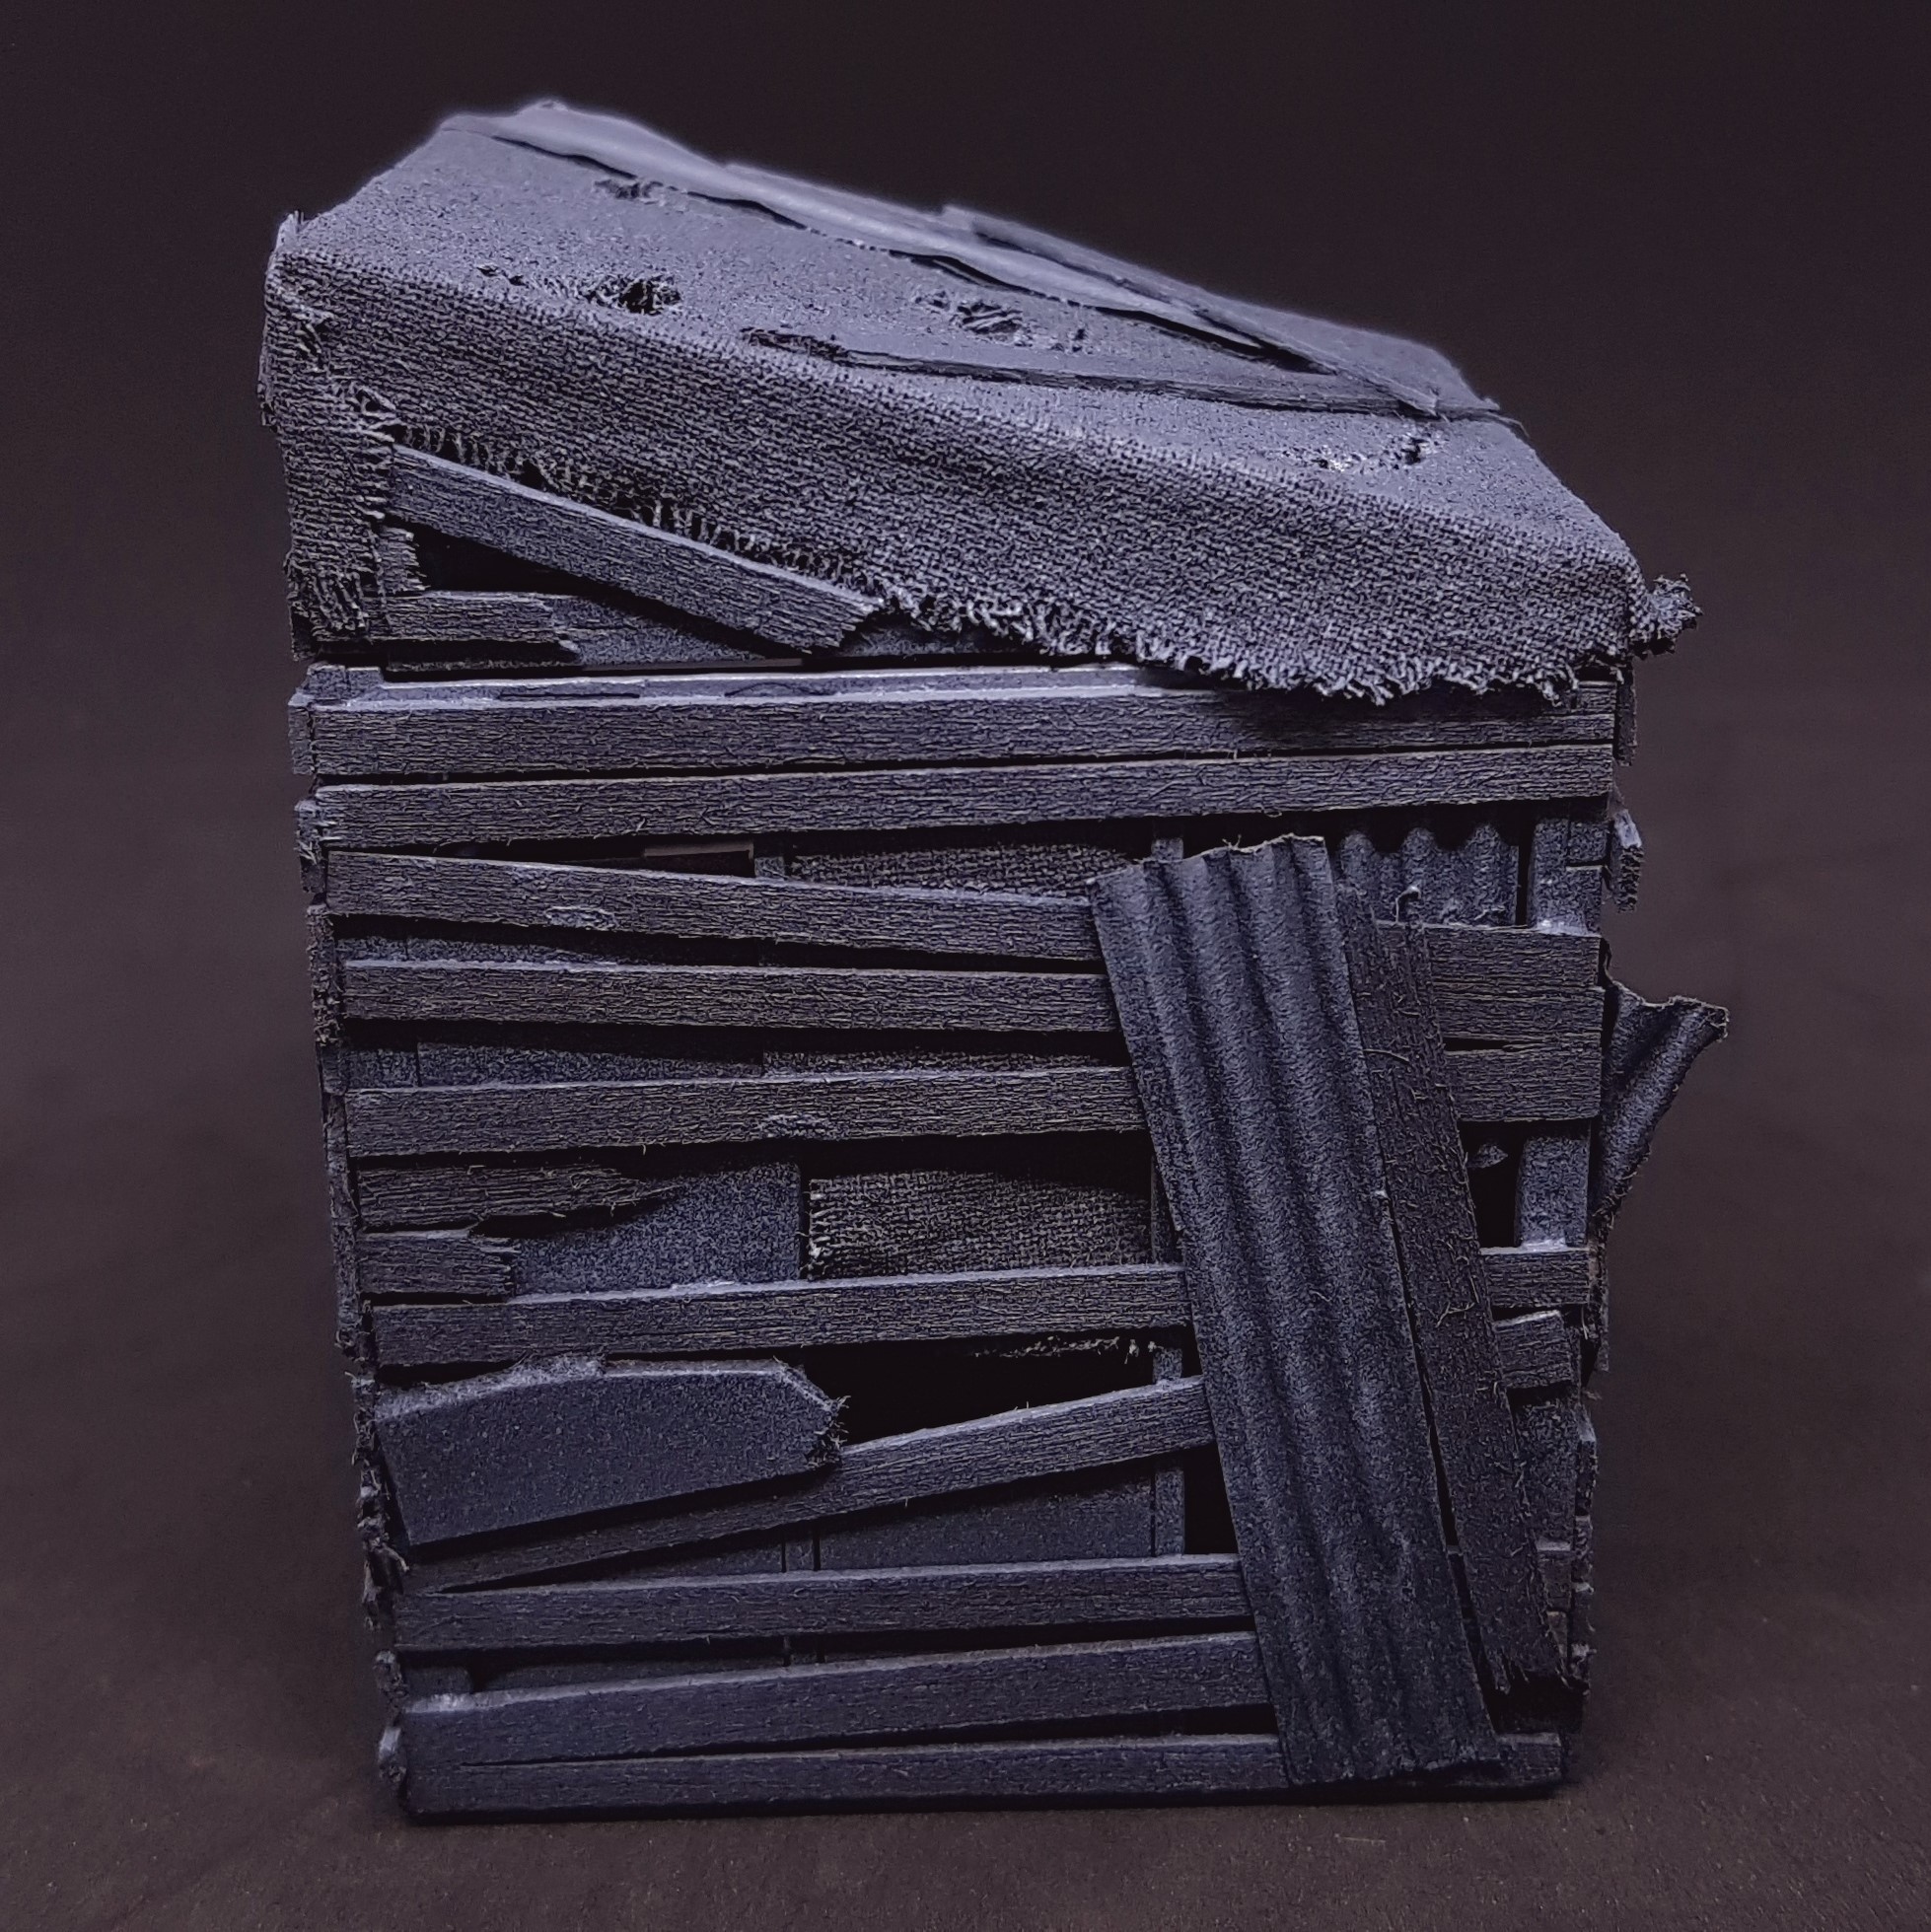 Right
Right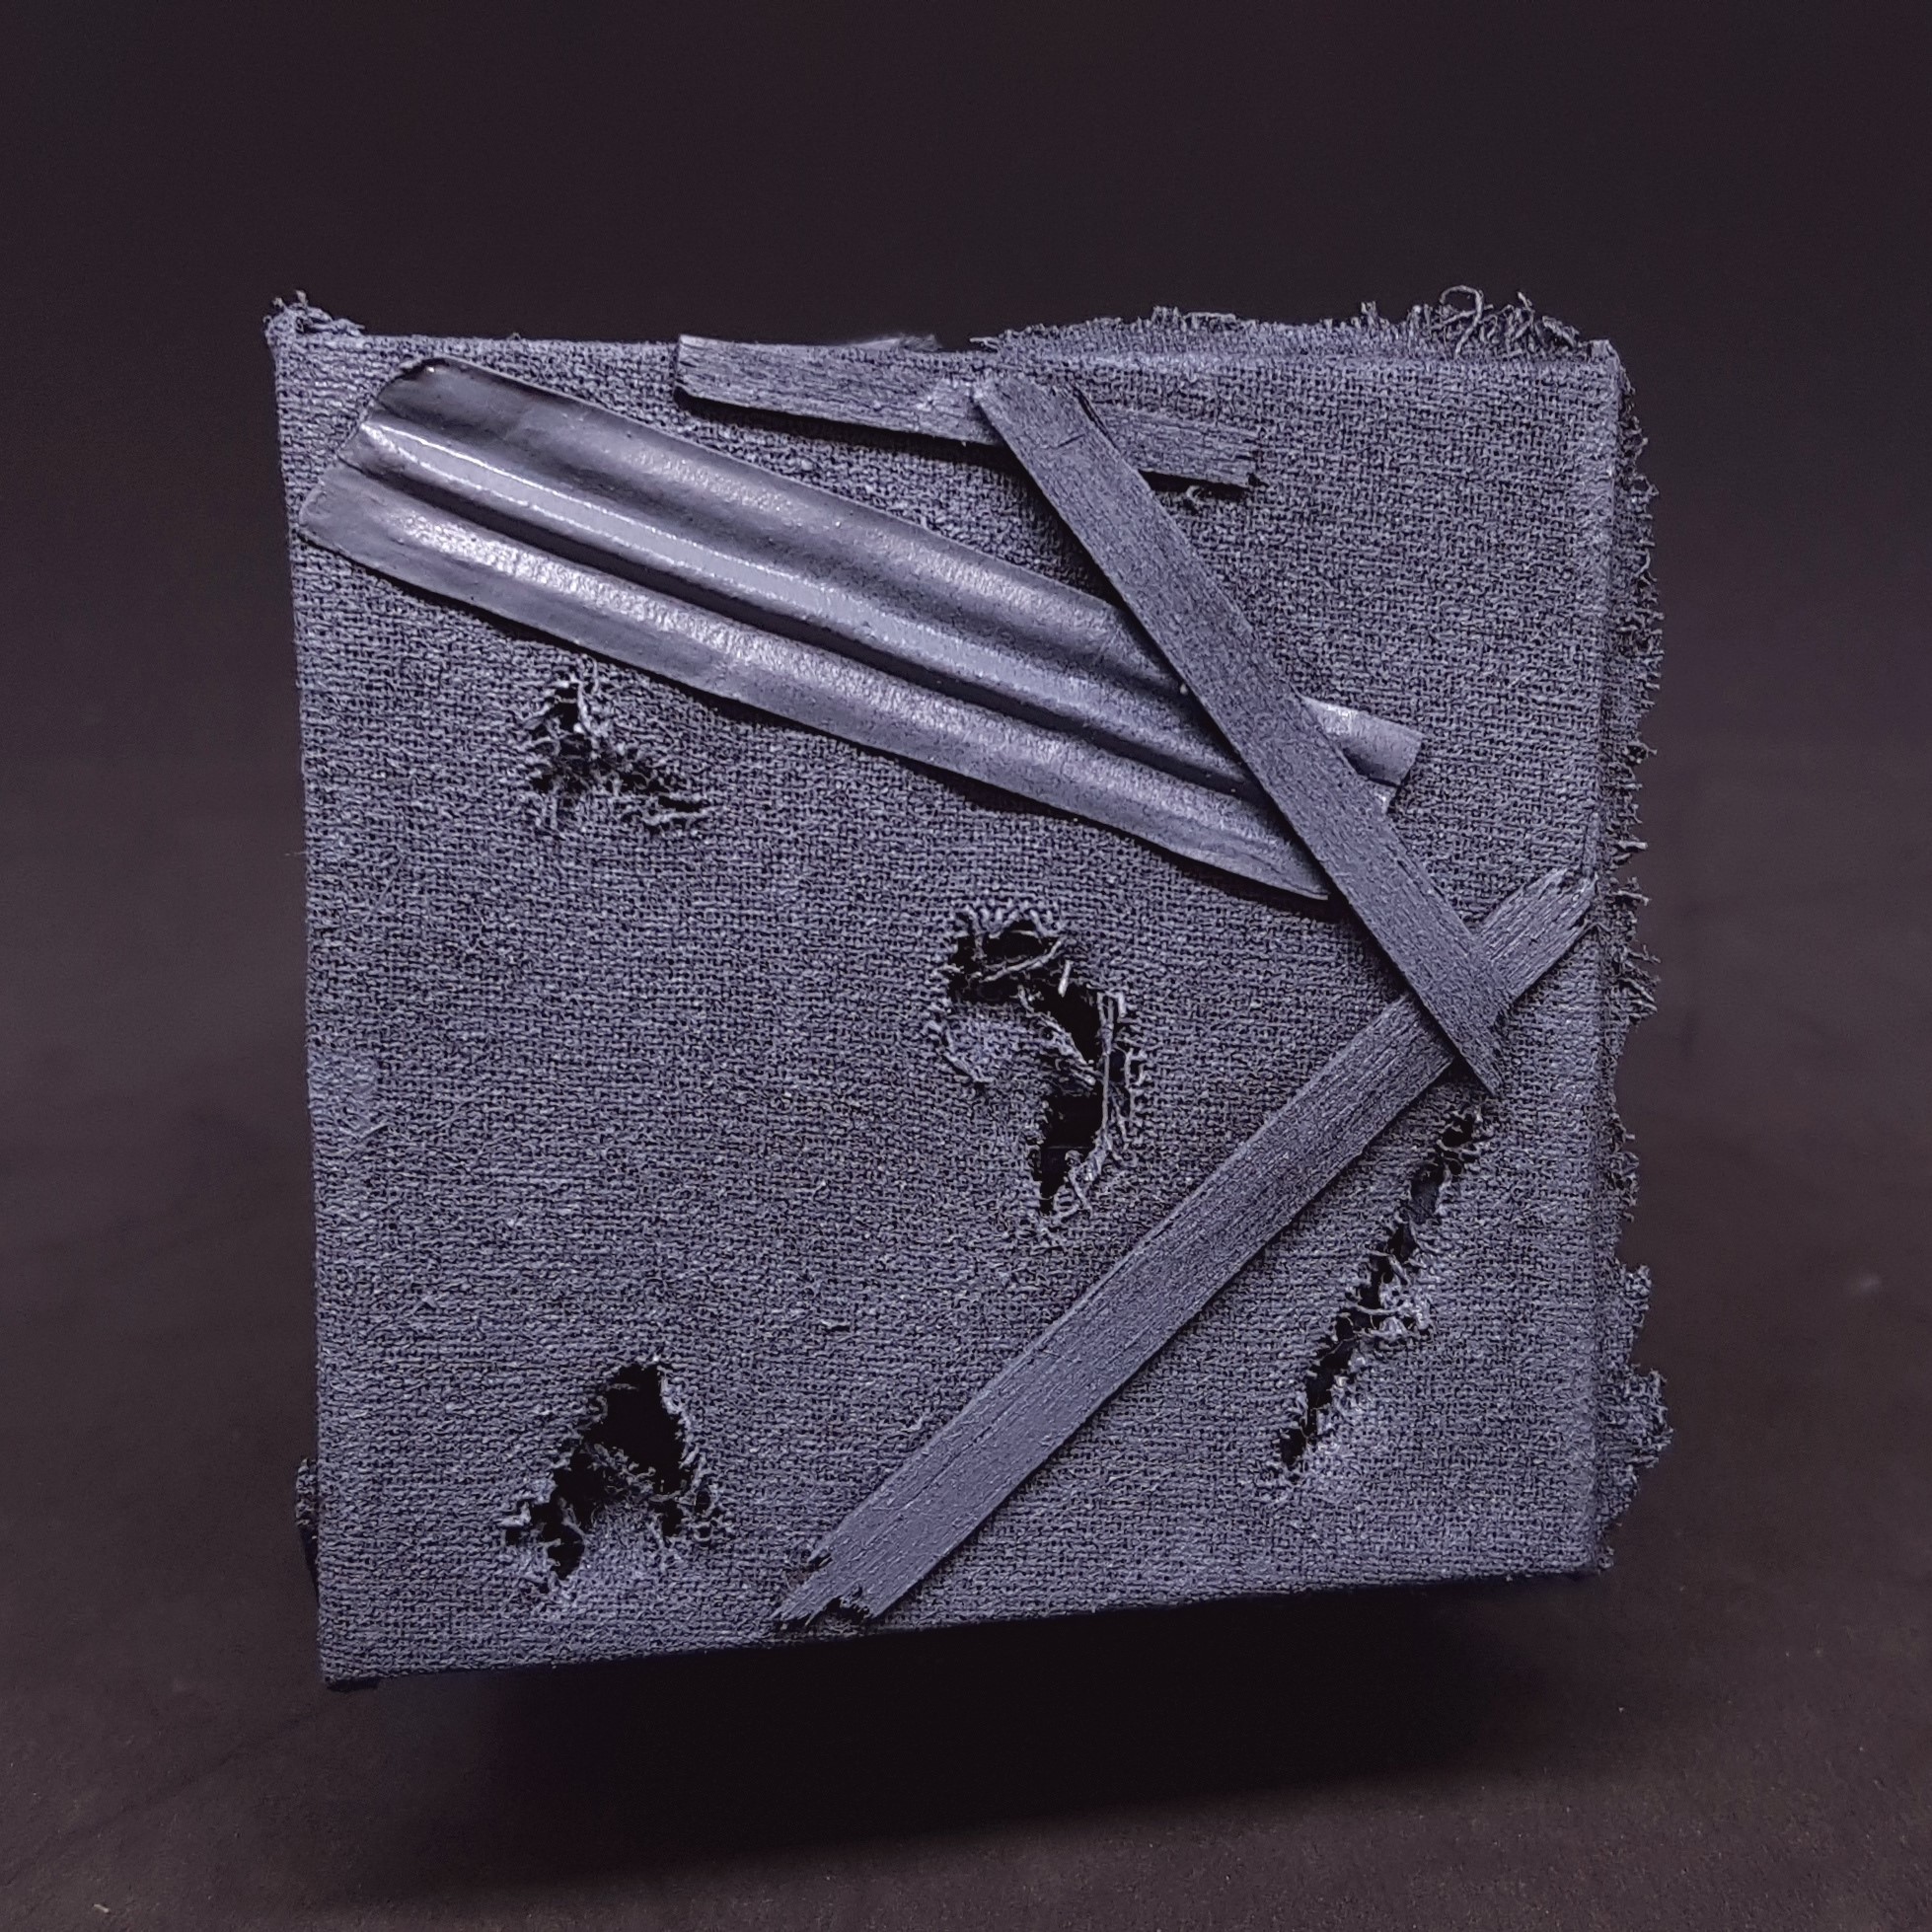 Top
Top Bottom
 Interior
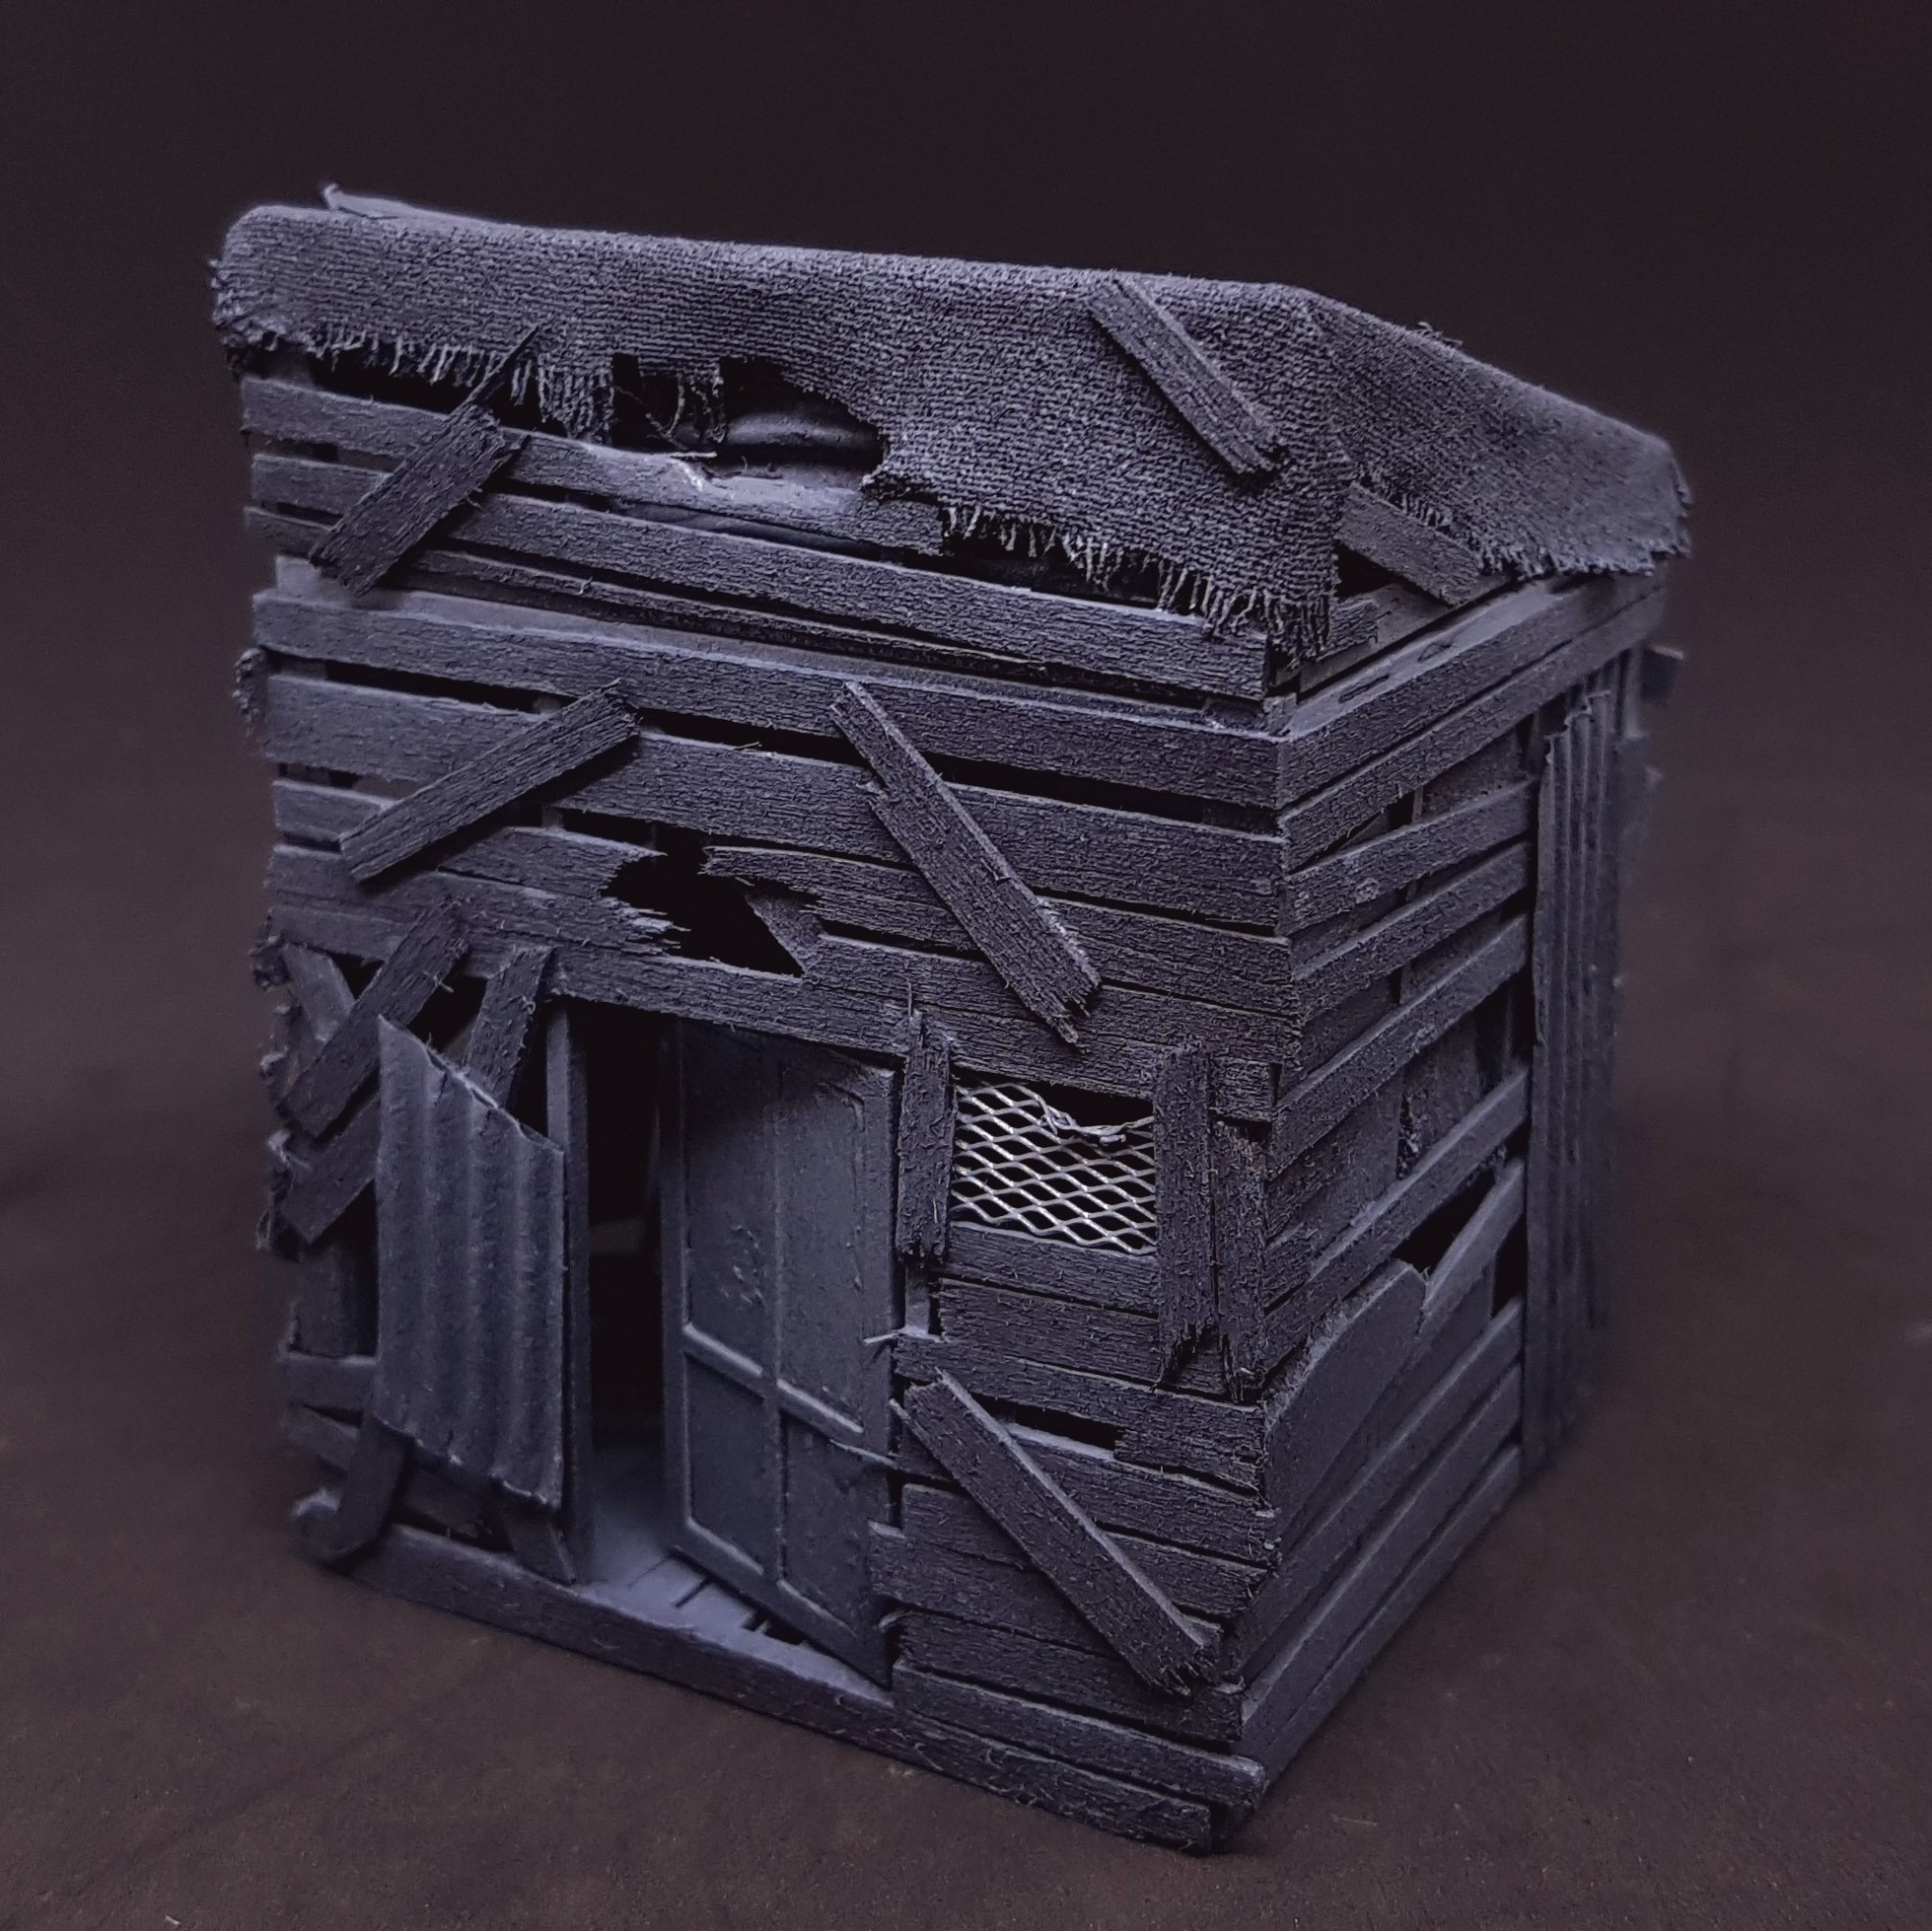 The assembled model
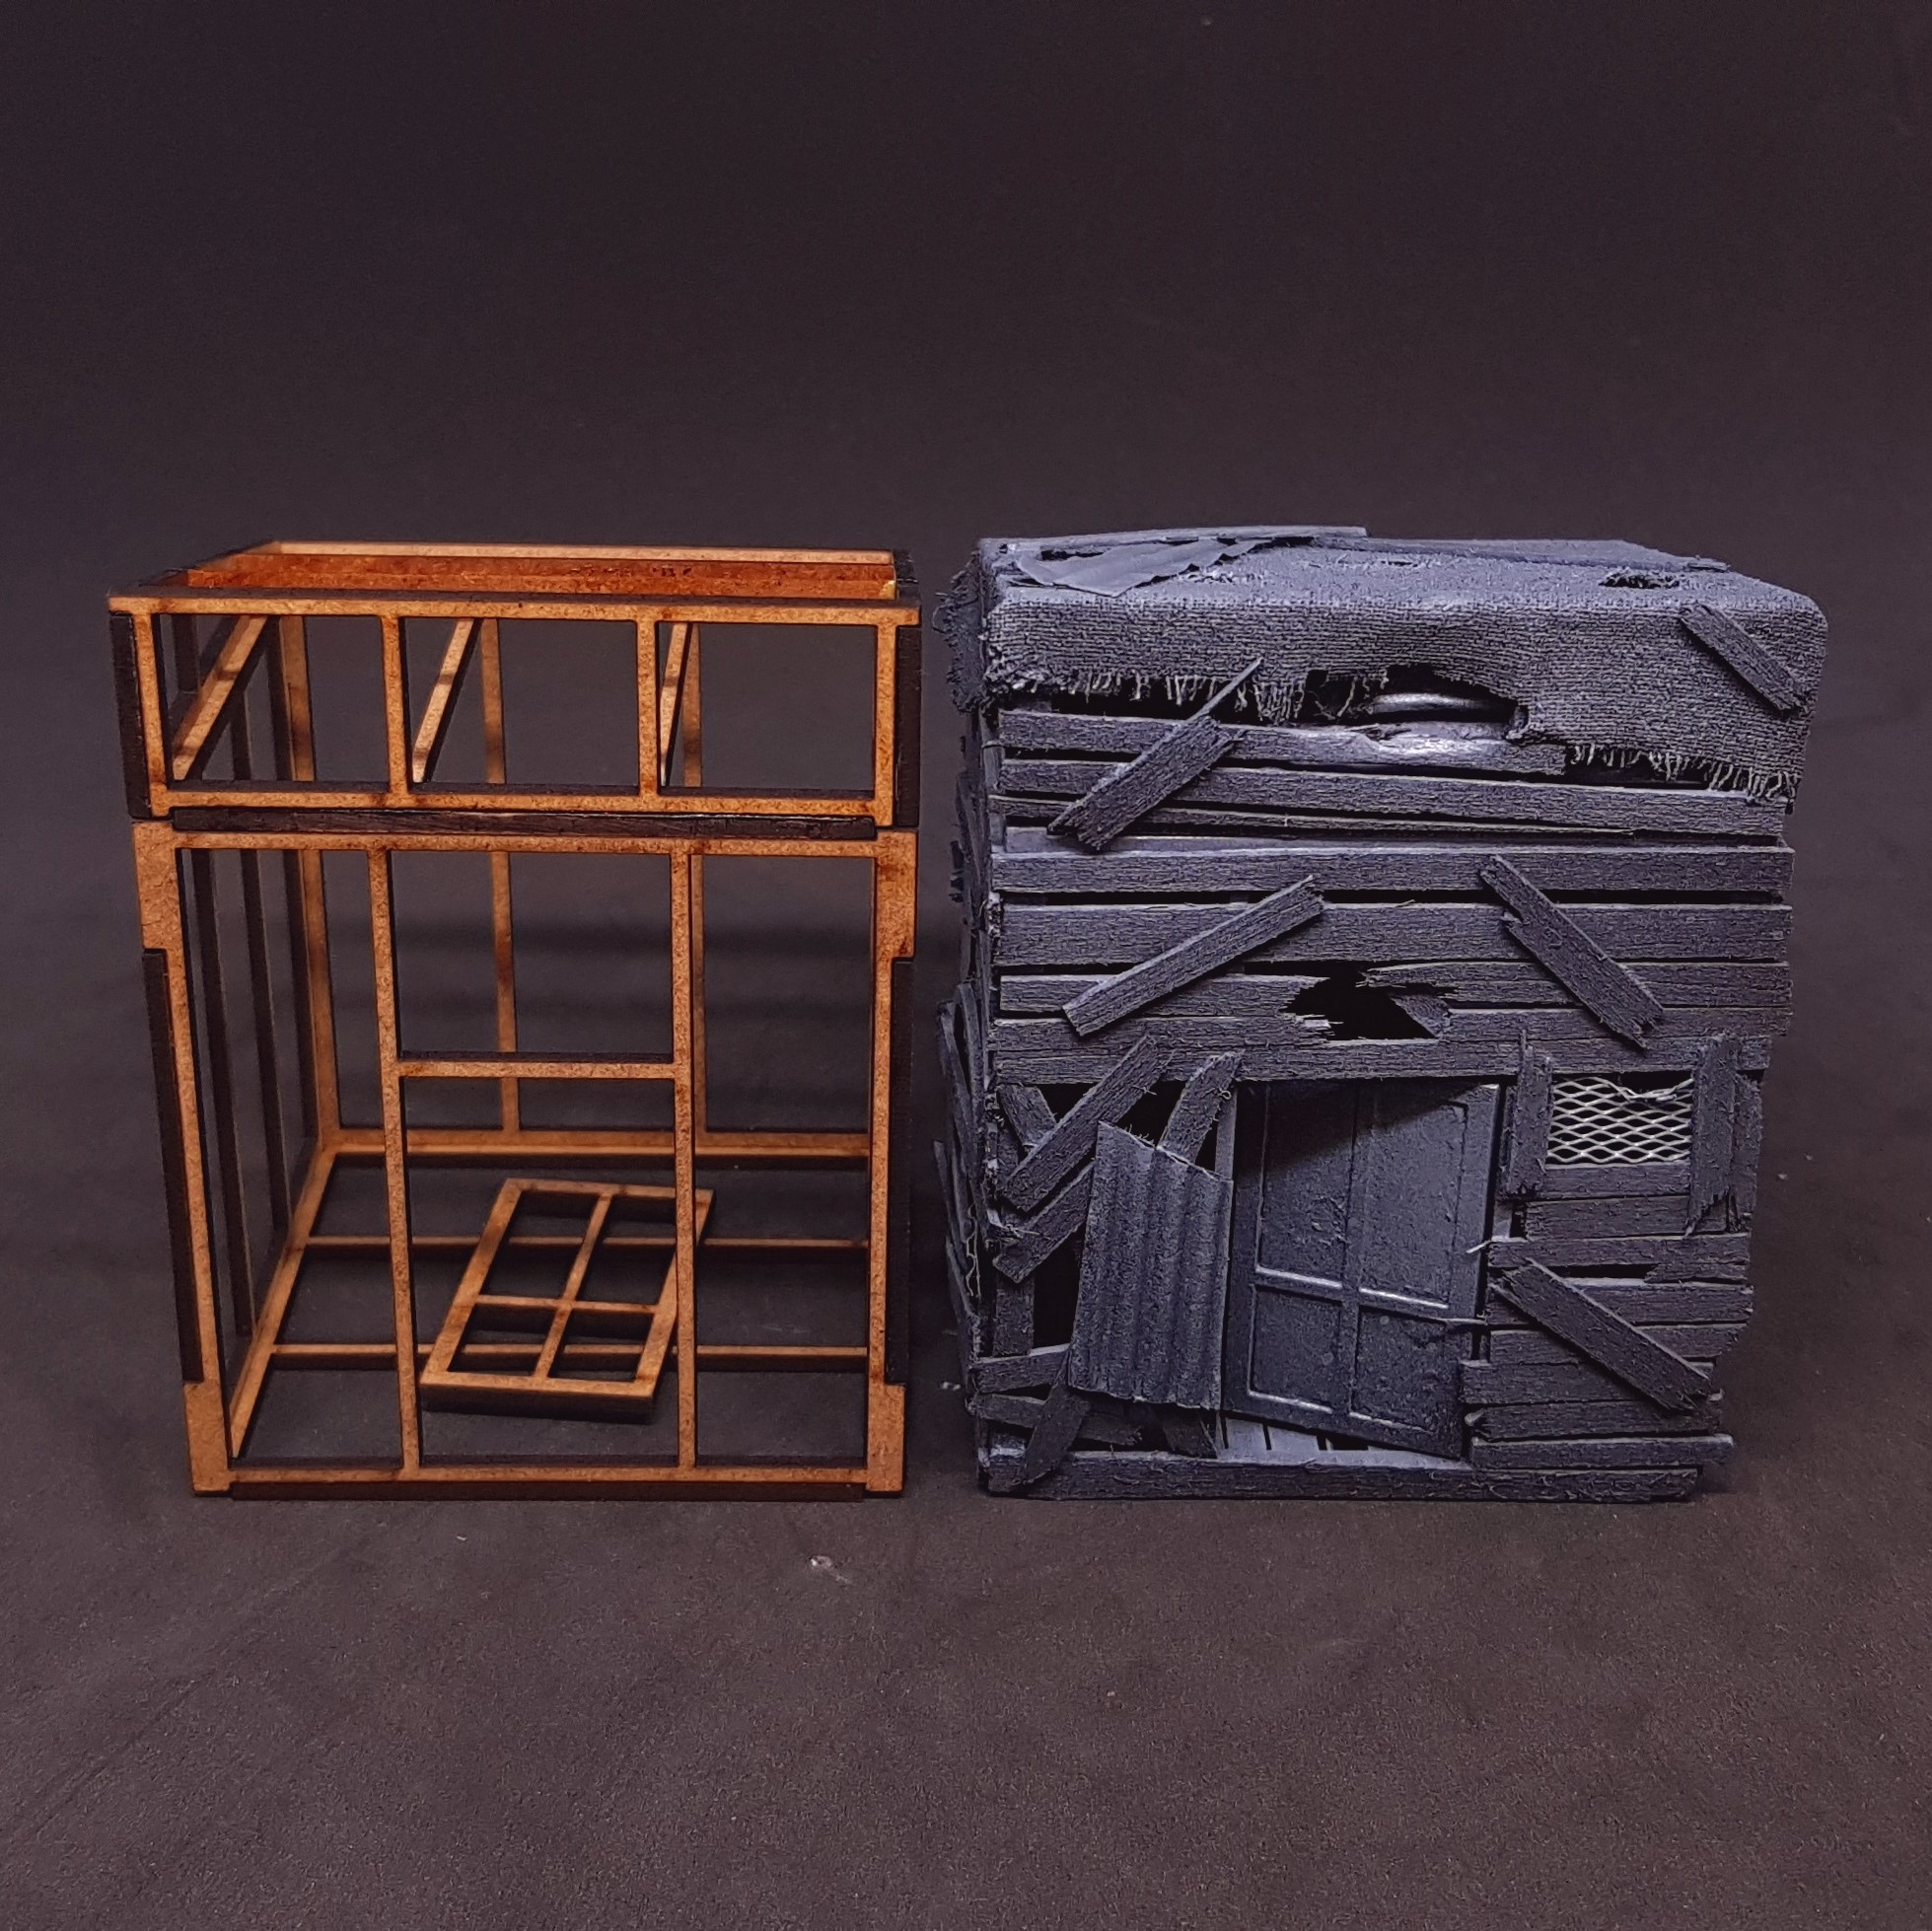 Side by Side with frame
Something to note, the roofs are all removable for interior gameplay and they are still stackable so I should have a limited amount of changes I can still make. The door works as well!
I am just glad all that texture is still in there, this is the key to what I am doing. The post apocalypse in Soap Dodger’s head is not pretty but it is full of texture.
Feel free to tell me any materials you would think is good to shove onto this. I think I will cut up some plastic bottles for some clear sections and may also use some plastic wrap of differing kinds to add after for a transparent effect.
Some of you may think this is not a strong structure but even before you add the sides it is quite strong like an oak in the wind because of the flex it has.
So that’s where I got up to with this. Not a bad start, but need more work on the project and further tutorials on sections and also painting!
As ever, more to come when I can find time!
Prototype Painting
I had my prototype. So as I said I wanted this to be almost a study in textures. To this end I decided what types of textures will be involved. I think I need more but this is a good base point.
I used mainly hairspray, airbrushing and dry brushing to get this far. I think it needs some pigments but I have ran out also I think I can get a lot more variety out of the hairspray than I did.
Now I know what I am doing I will be able to do better tutorials on how to get this done on the other buildings.
 Front
Front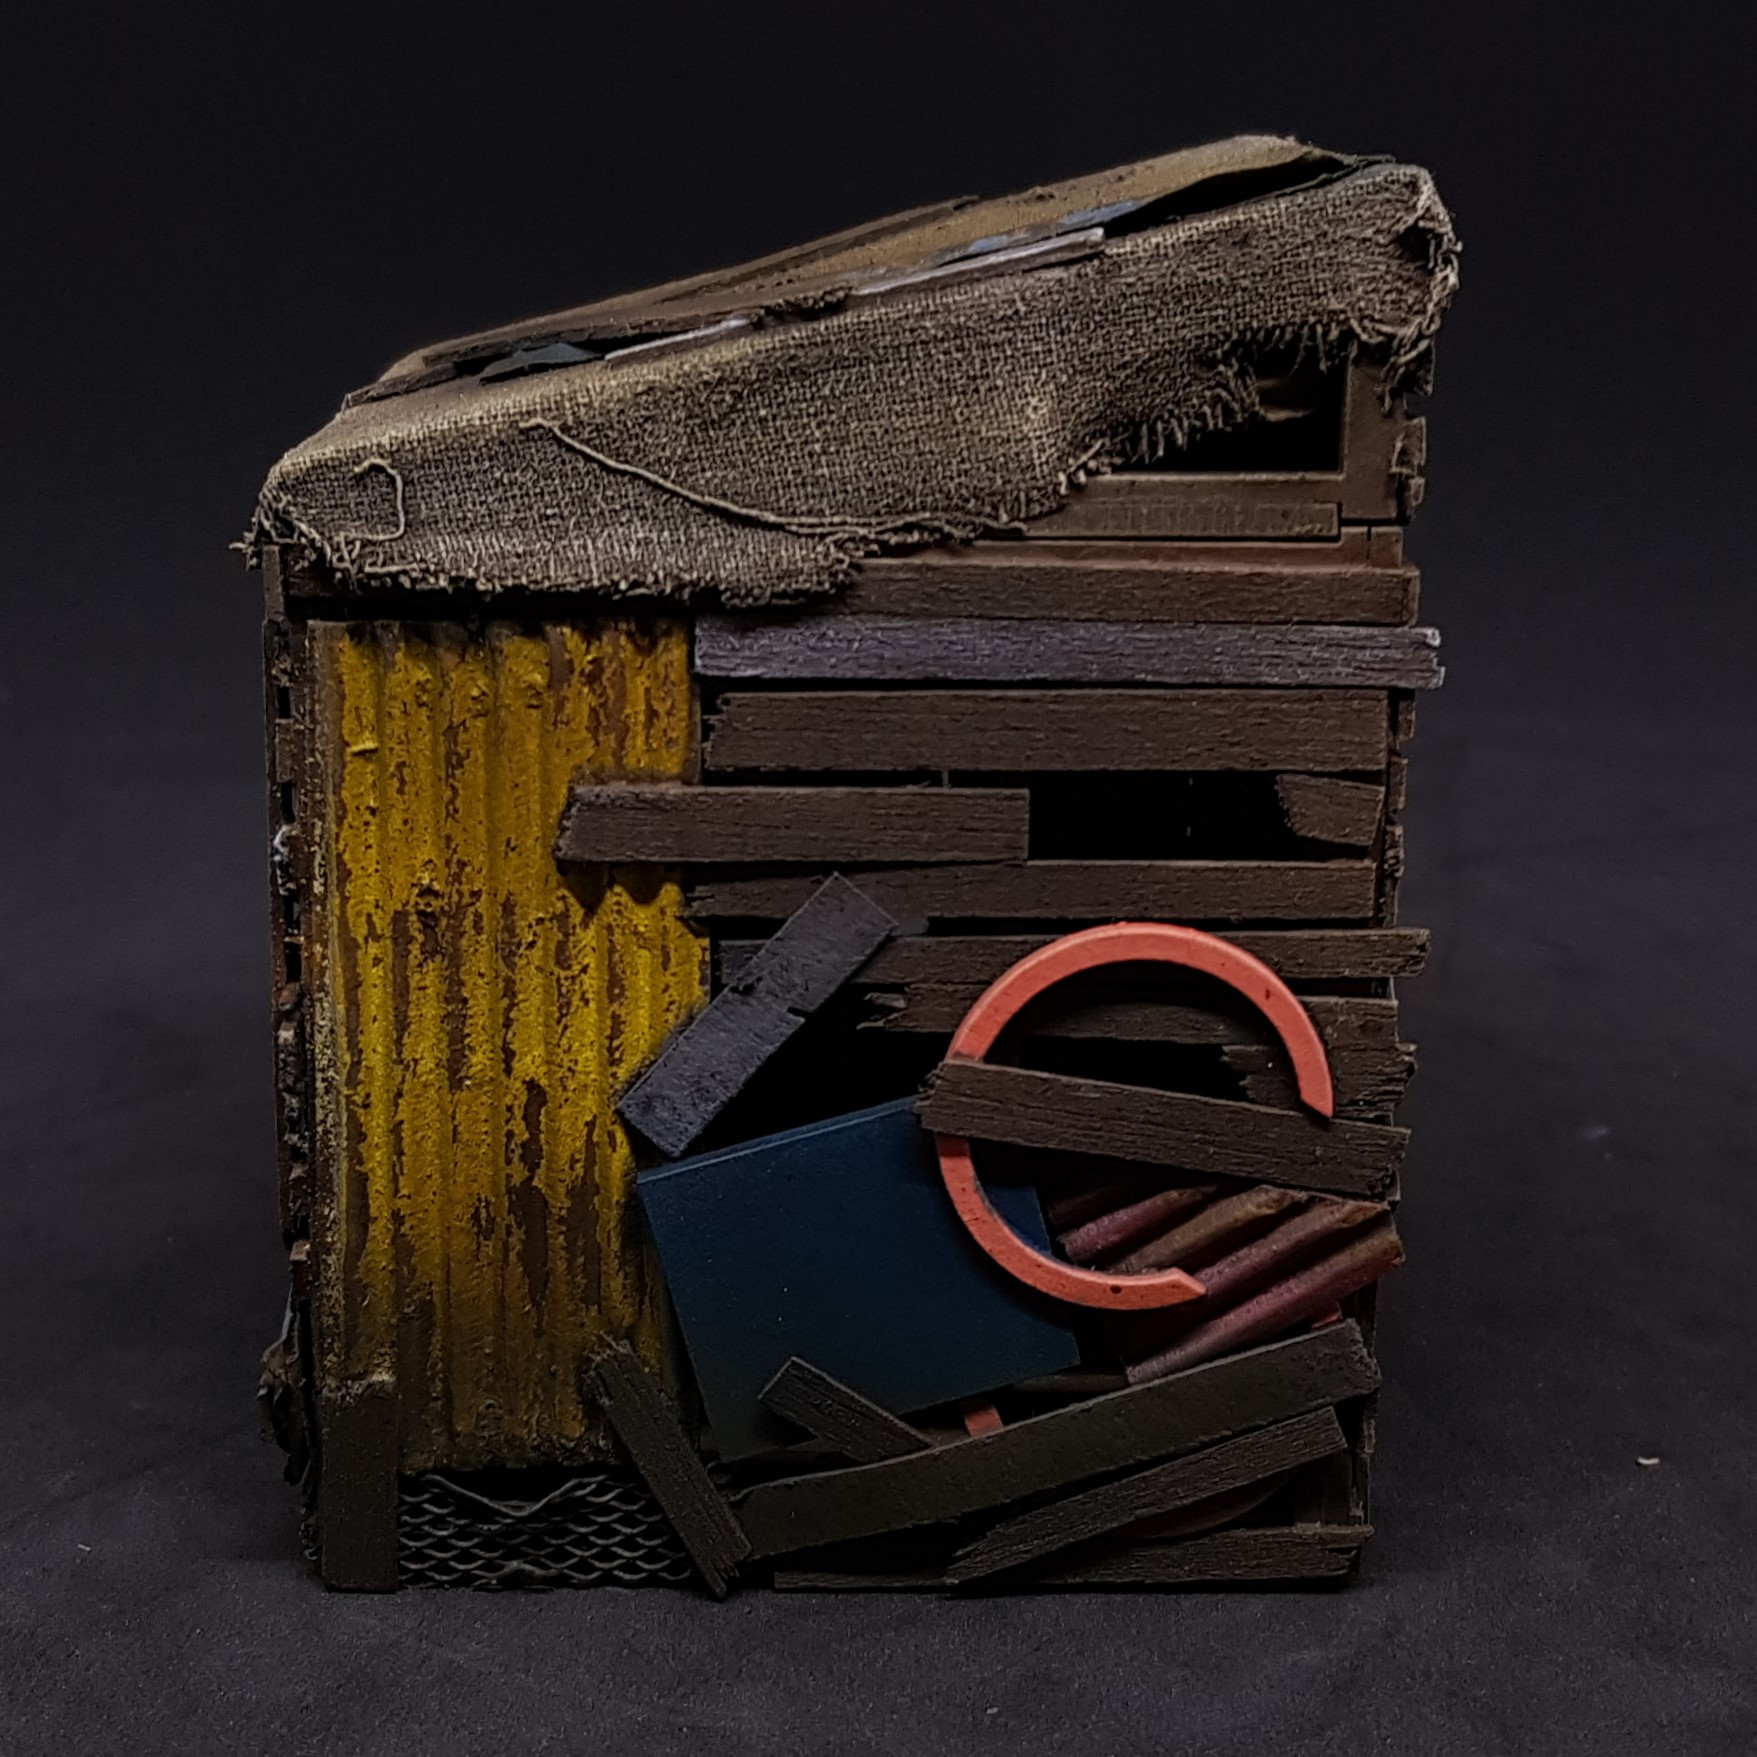 Left
Left Back
Back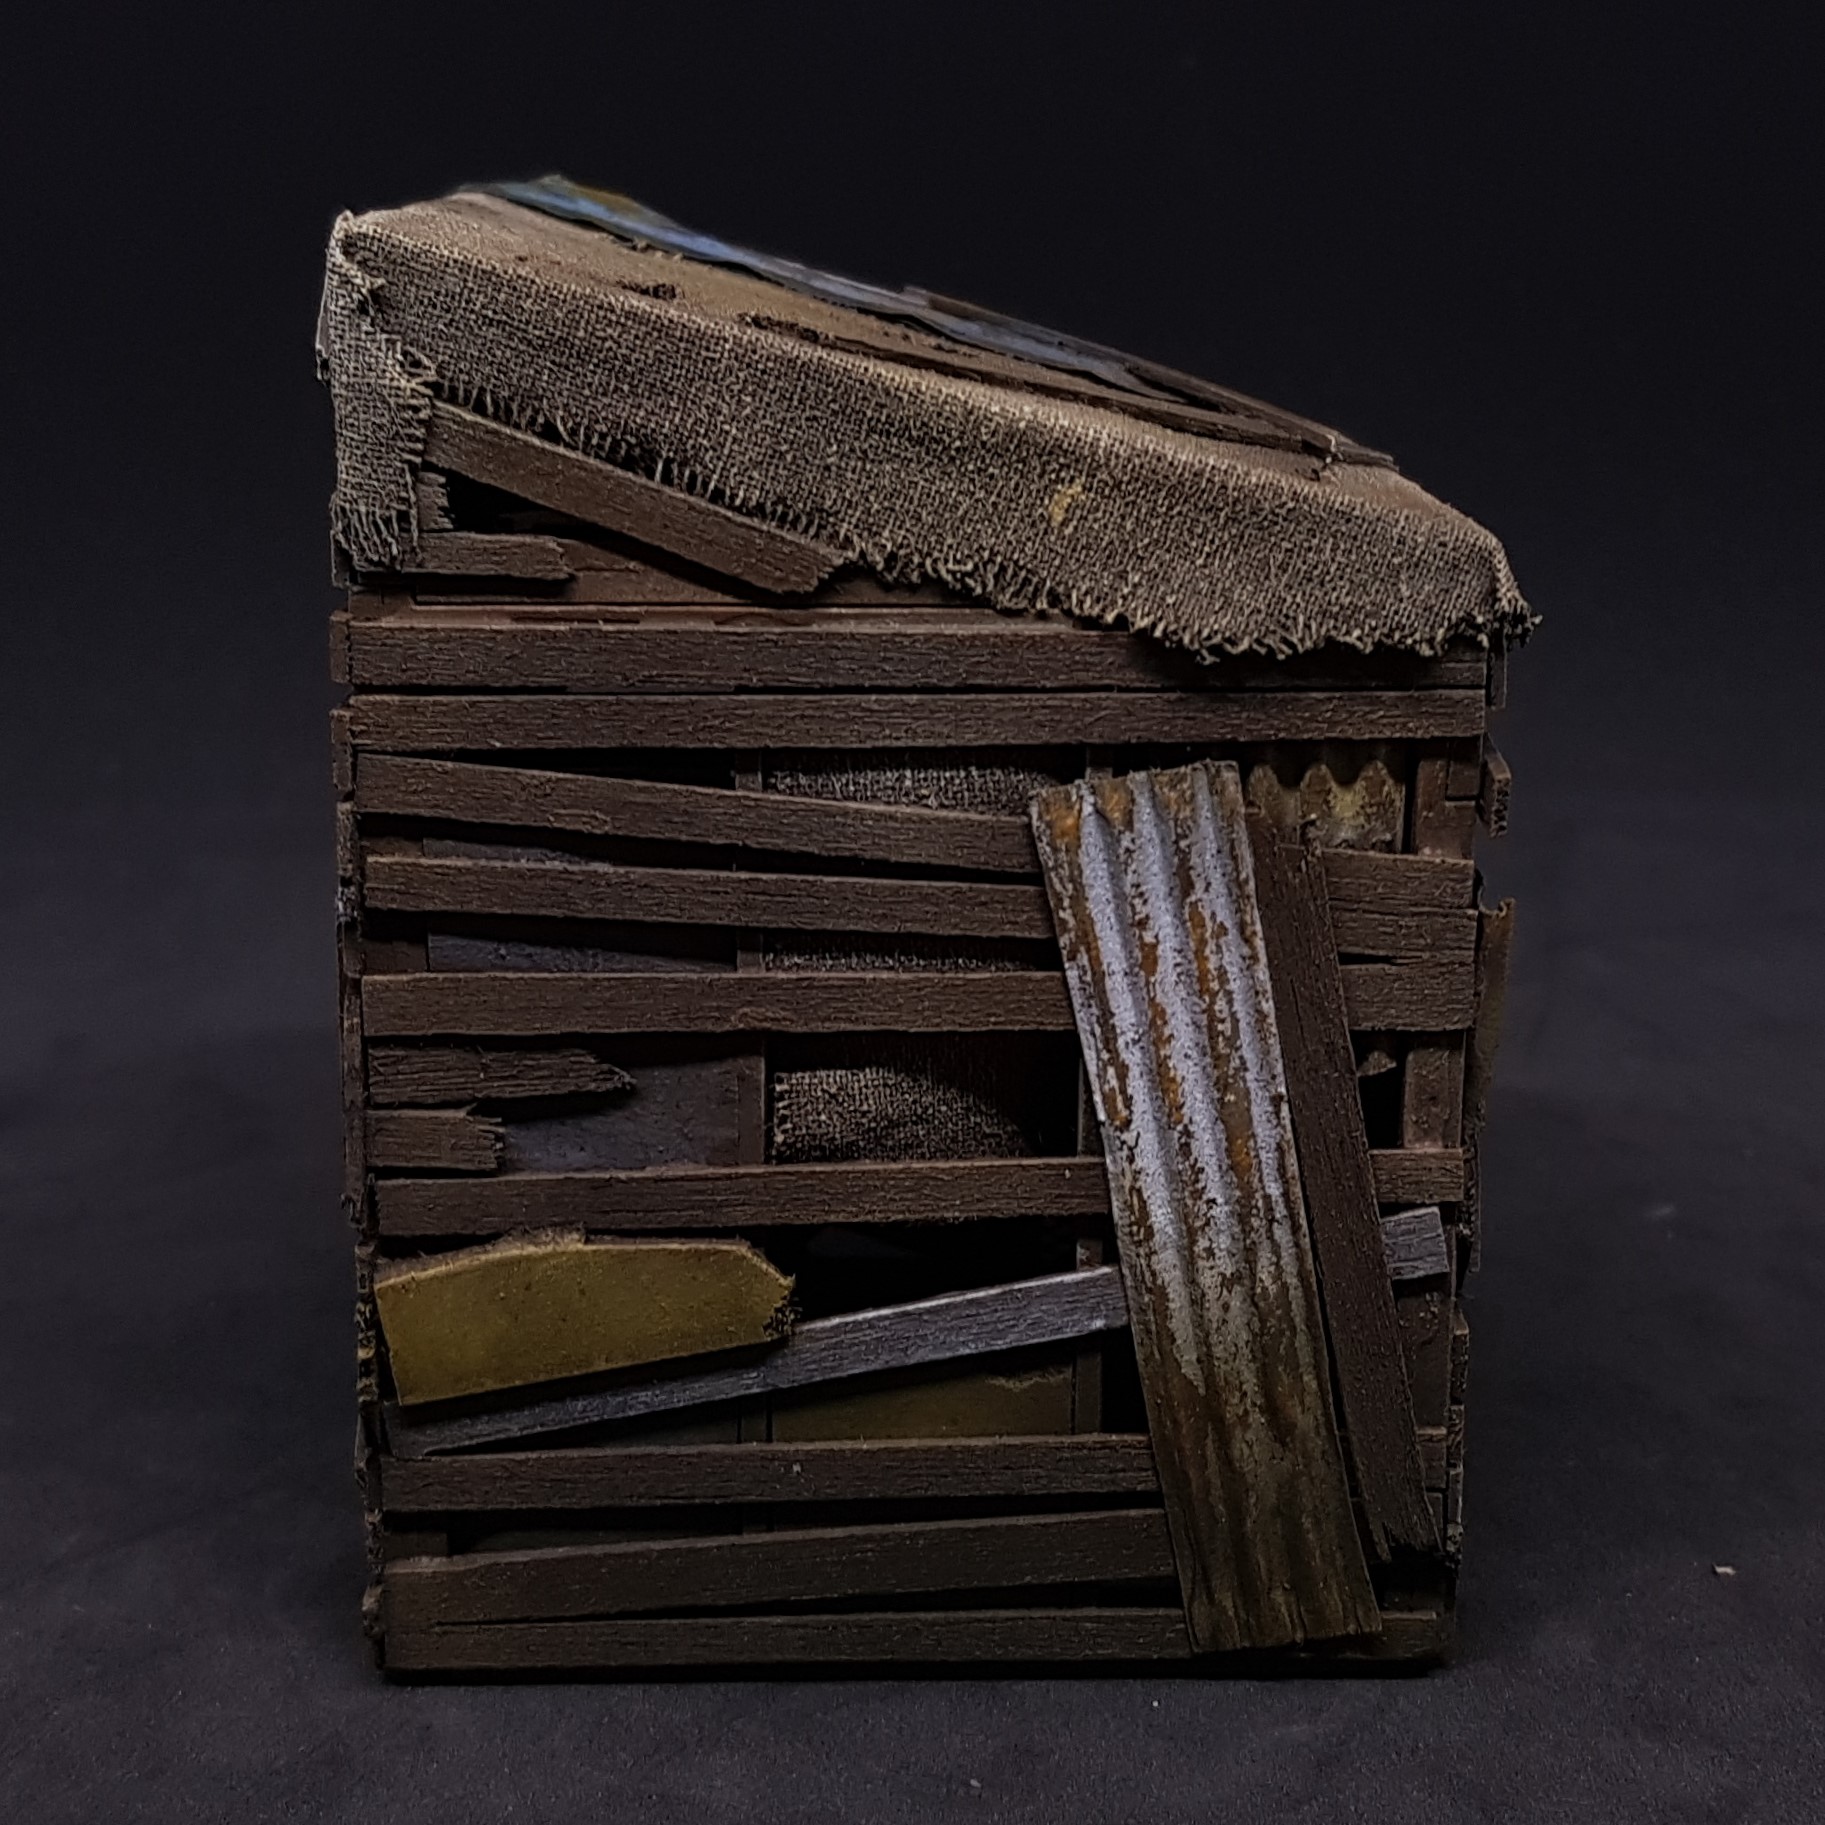 Right
Right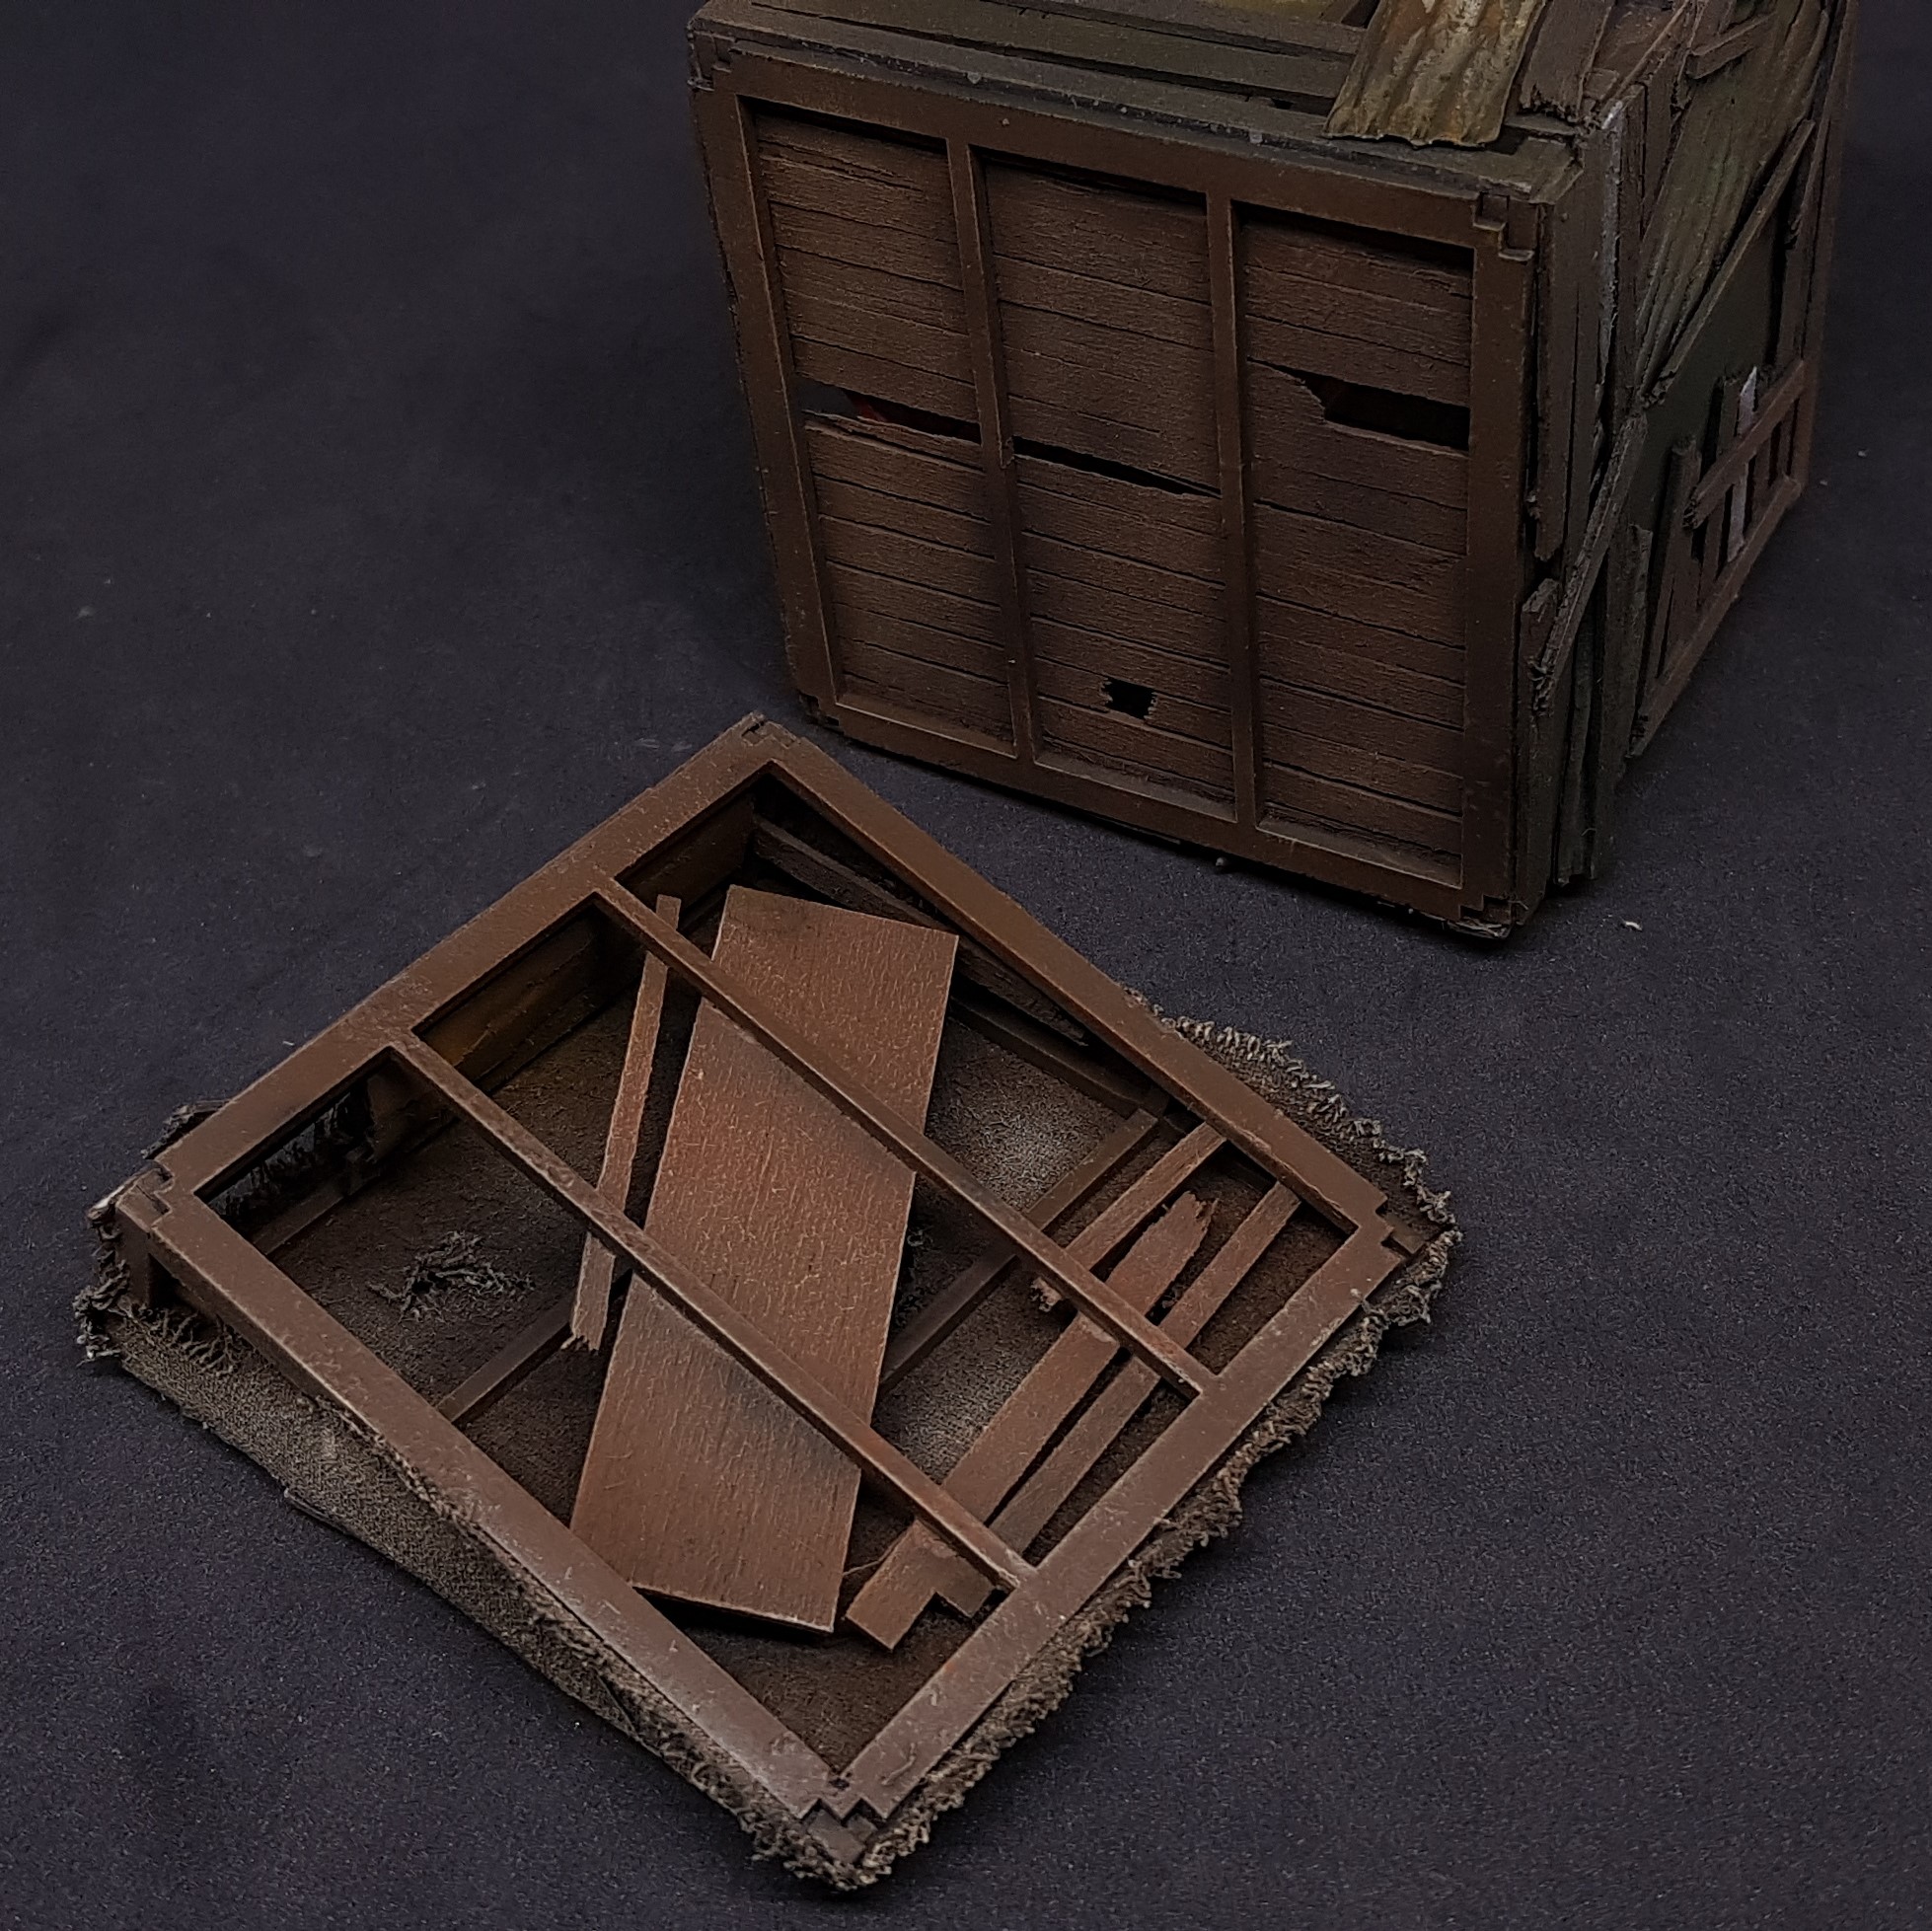 Bottom
 Interior 1
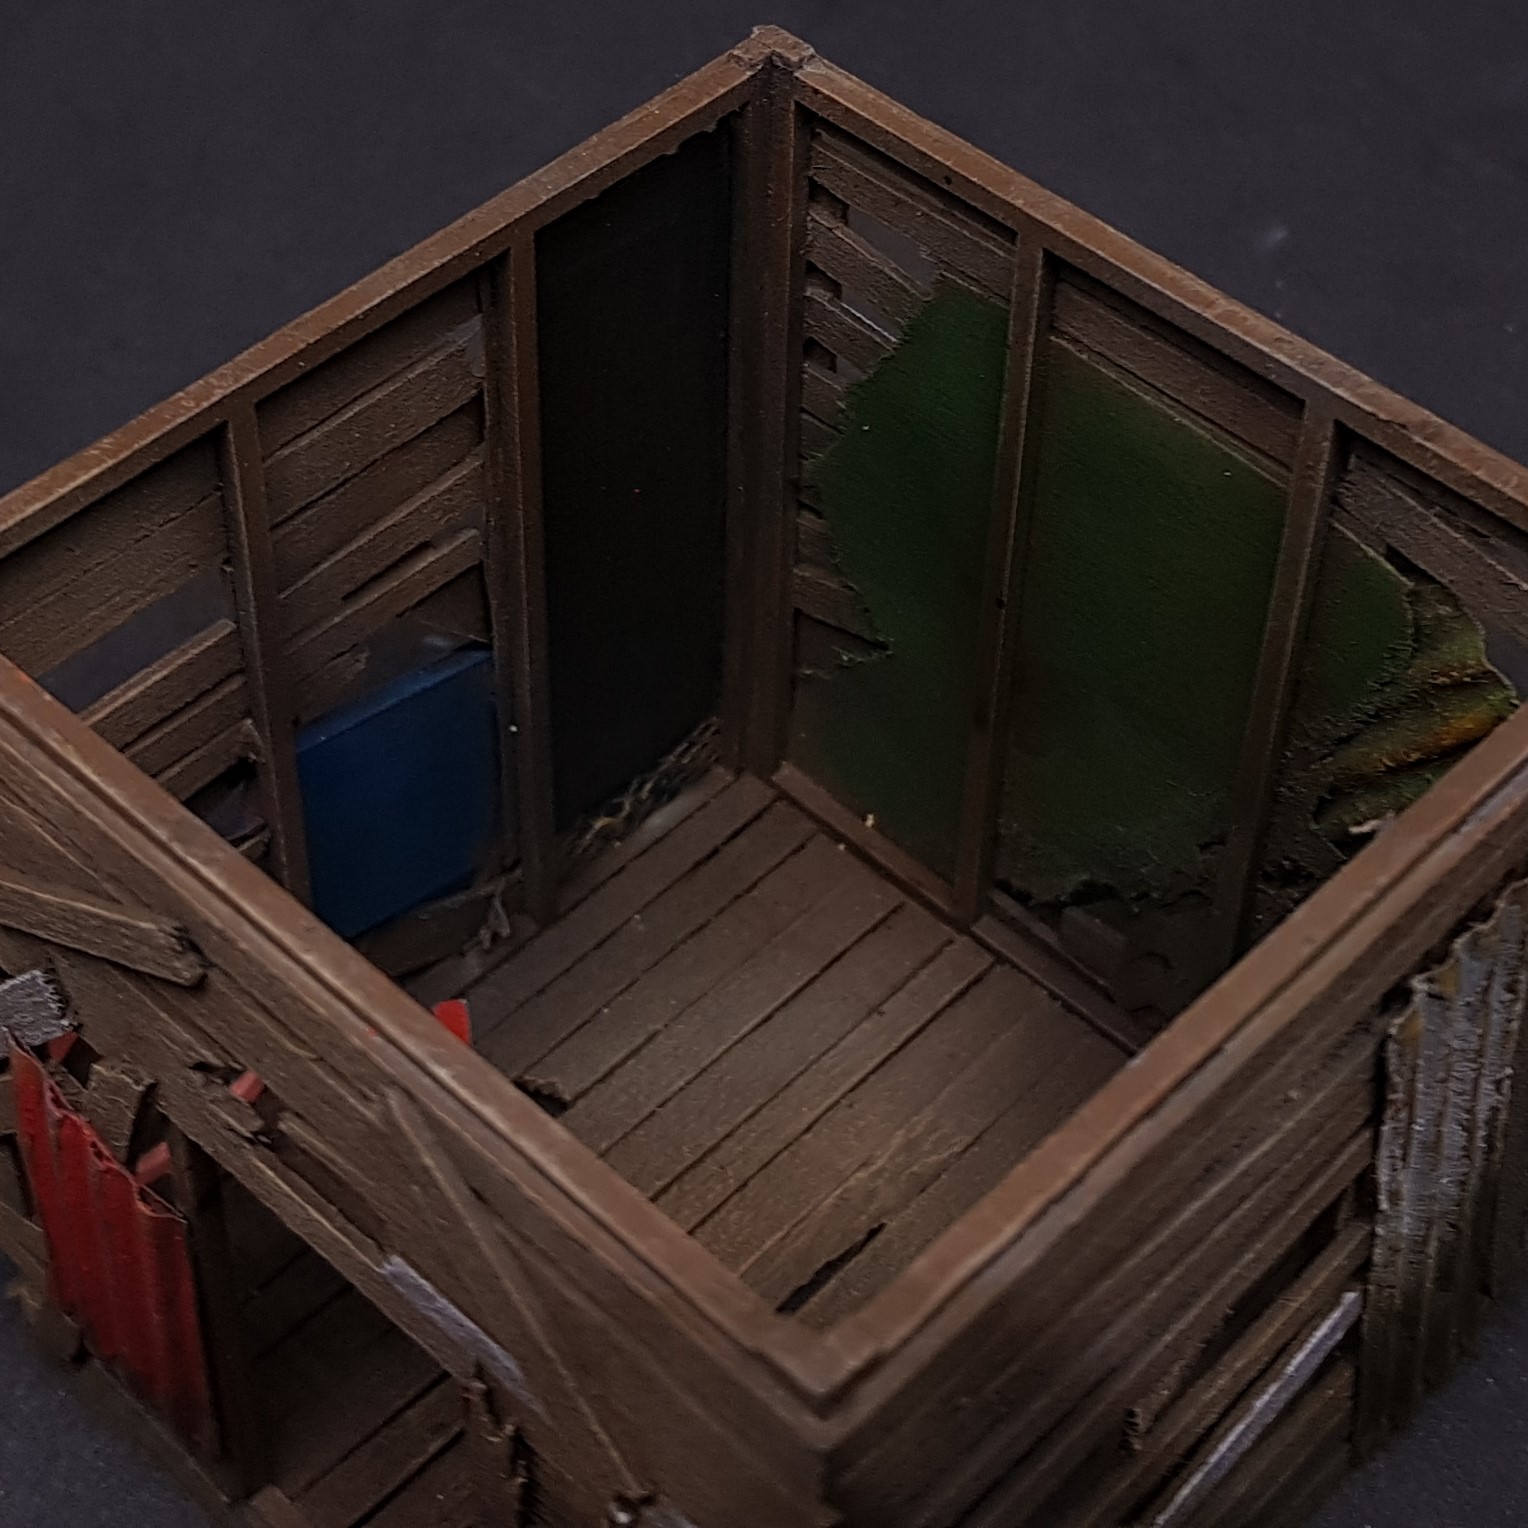 Interior 2
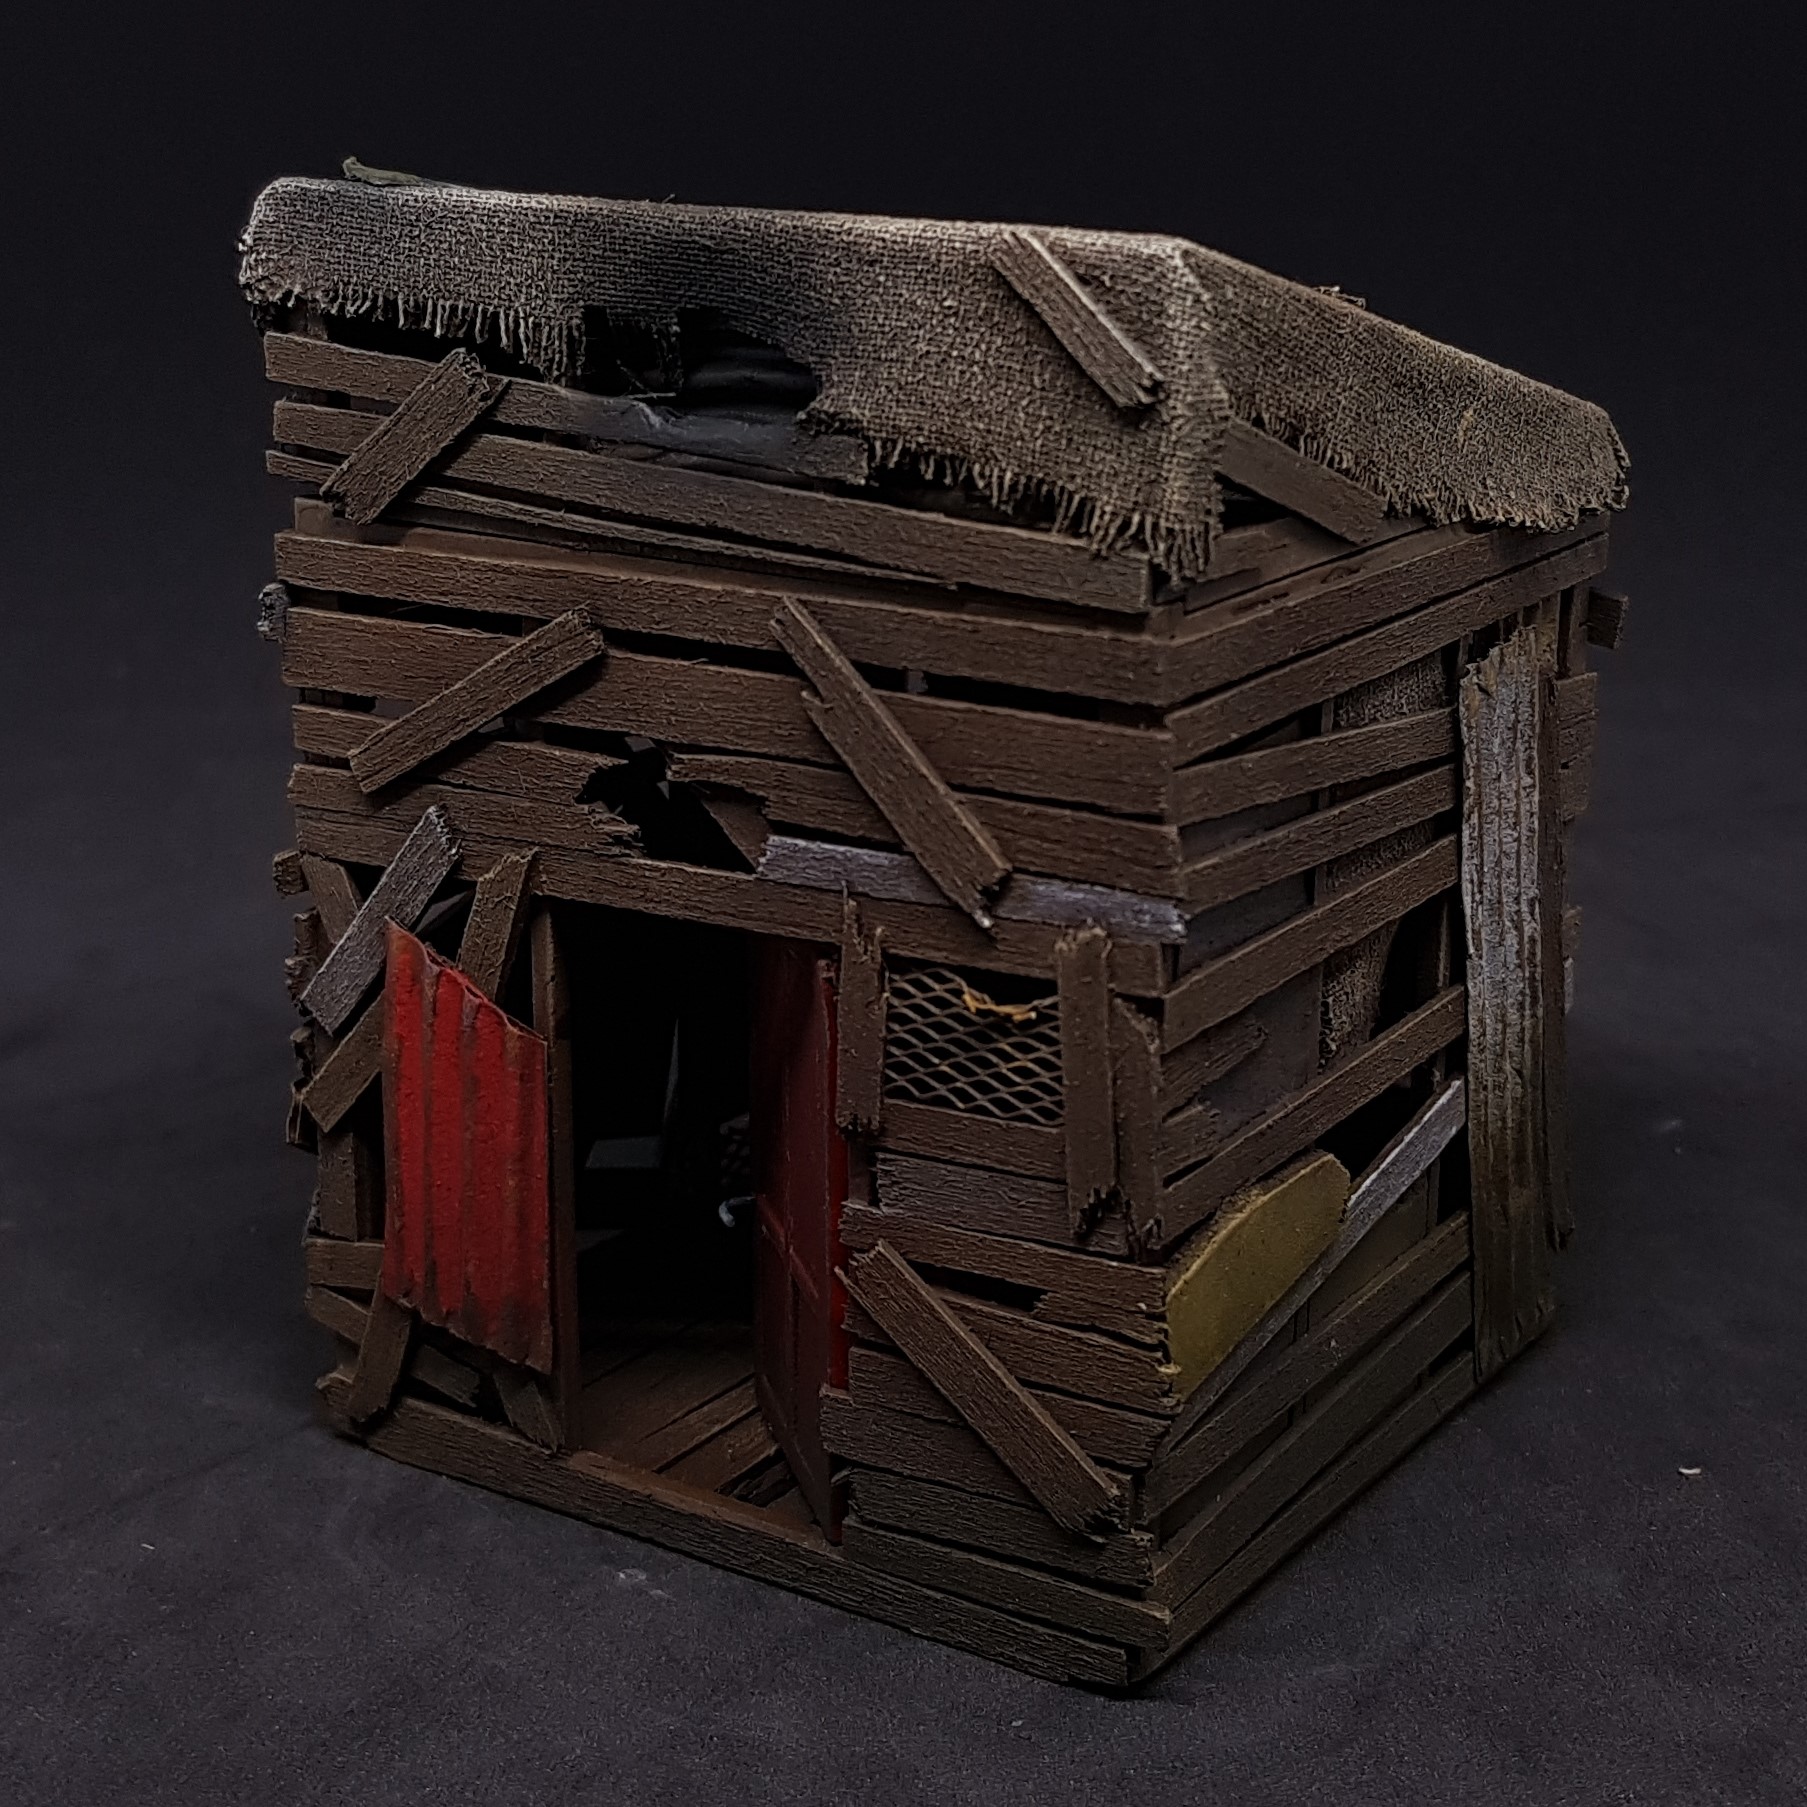 Painted model
 It still stacks!
There you have it! Finished prototype. Didn’t take to long and I think it’s an ok building.
Thought about pre painting all of the components and just assembling this. I would do this if I were making a kit but the whole idea of this was free flow construction and I think the amount of touch ups to the paint would not make this worth it.
The rest should only improve from here. Looking forward to getting more texture in it.
Feel free to suggest other texture techniques and materials. Ones I am thinking about are polythene from carrier bags. glass elements, stippling on paint, newer metals etc.
I will start the next one and the how to’s next. I was also thinking of adding a shop of some kind and a destroyed or collapsed building. This will be time dependant though.
Assembling a Shanty hut
I don’t this yesterday and painted it today. This is a massive amount of footage but as I do not have the patience so edit properly you can have it all in one.
I used:
- Superglue
- Scissors
- Scalpel
- Lighter
- PVA glue
- Straight cutters
- Coffee cup holders
- 1mm balsa
- 2mm balsa
- Scraps of plastic
- Aluminium mesh
- Fabric
- 1mm card
Possibly some other stuff I would watch the video for further details.
This took a bit of time but I think it may be useful to some people. Video is sped up 4x times to try and make it worth a watch, if you want to get to a particular point just scroll to it.
Sorry it’s so long but I think if I speed it up any more it will just be a blur. I could edit this but life is too short :).
I have finished this at this point but editing videos, even though I am not editing and uploading them seems to take some time.
I will see if I can edit this tomorrow and put up the painting side of things. This is a lot longer. It may have been a better idea just to take each element and do a short 5 min video of the painting but it’s done now.
As ever more to come.
Painting A Shanty hut
As promised here is the full painting video of how I paint these.
Weirdly enough making this times what I do and I have to say I must be slow at building and painting. You can see in the vids I don’t know how as I am always doing something.
Assembling a hut takes up to 30 minutes building it takes 2 hours and painting it takes 4 hour. That’s 6 hours 30 minutes per hut. I know if I was not filming I would go a bit faster but I would say about 5 hours per building. That seems crazy…
Anyways, enough of my time rant. I am not in this hobby to make money I do it for enjoyment! This has been certainly fun to paint. Here is the video, again sped up 4 times.
I used:
- Cheap Poundland spray-paint grey and black.
- Airbrush
- Brushes
- Toothpick
- Hair dryer (borrowed/stolen from wife)
- Vallejo paints, matt varnish and streaking grime effect paint.
- Homemade airbrush medium
- Cheap masking tape
- Model masking tape
Possibly some other things. (see the video for further information)
 Only thing not filmed were plastic screws on the front top right and the silicone on the side left. ( As I forgot)
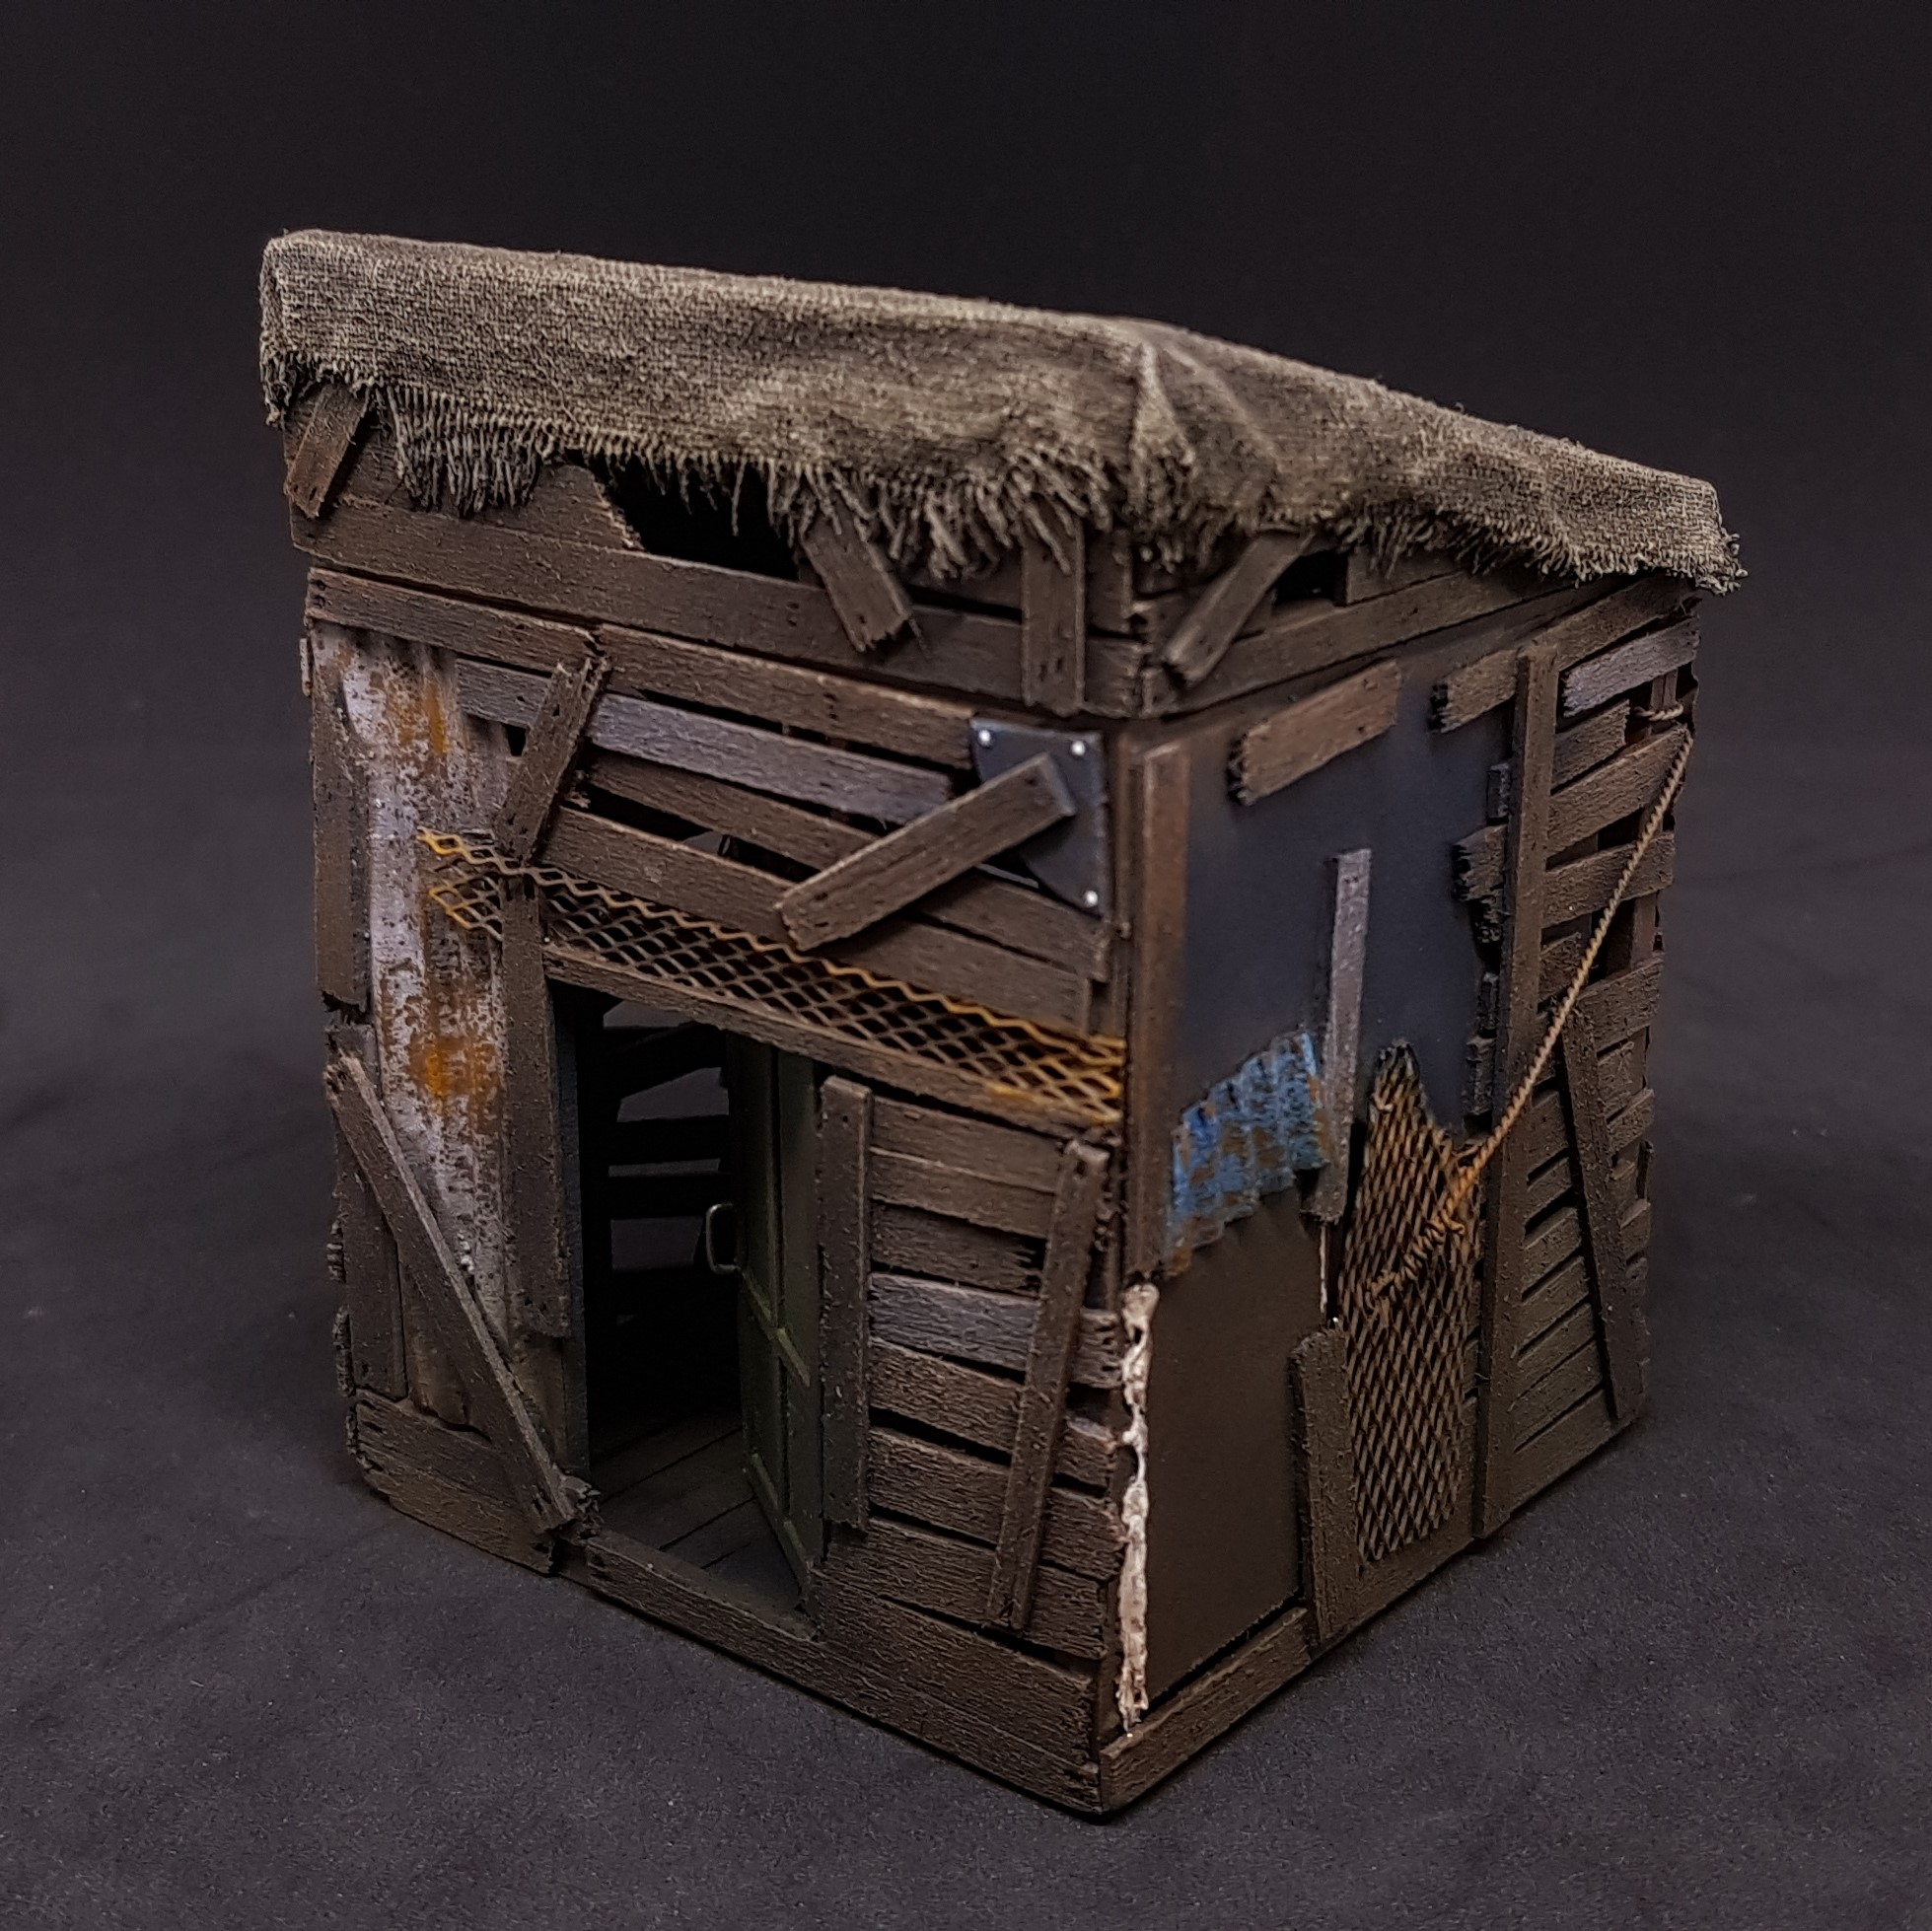
 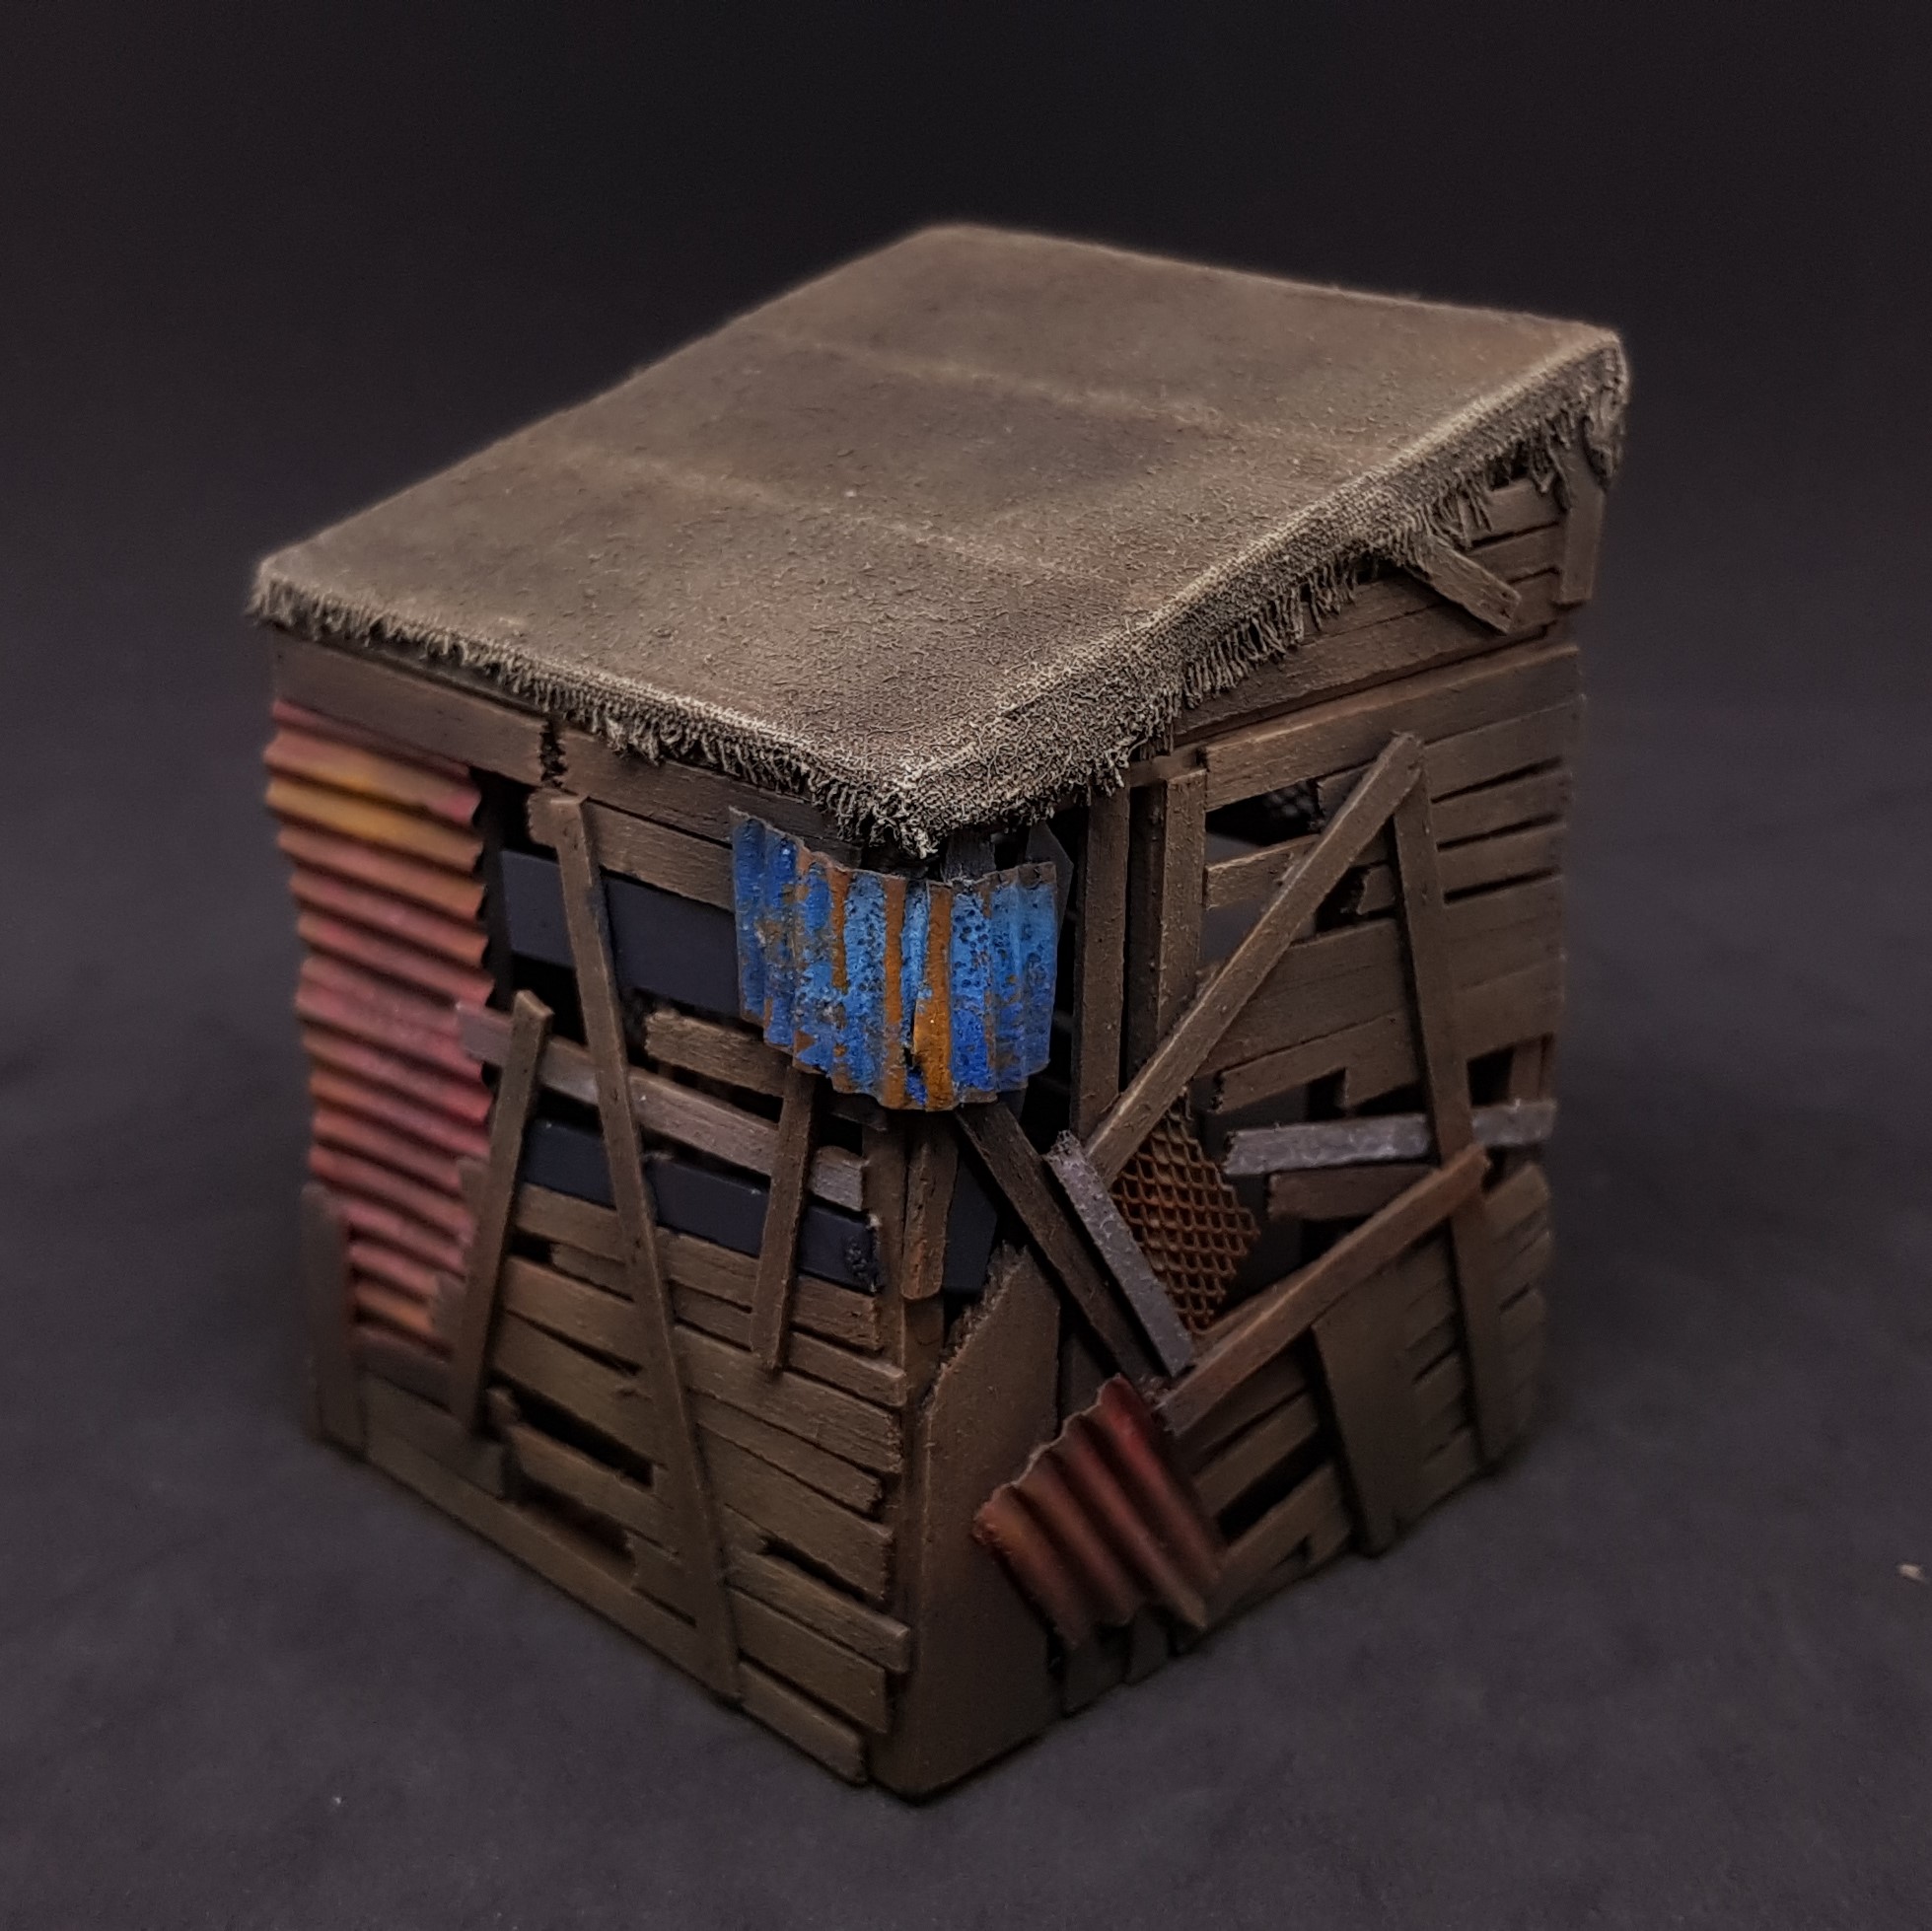 View from the other side
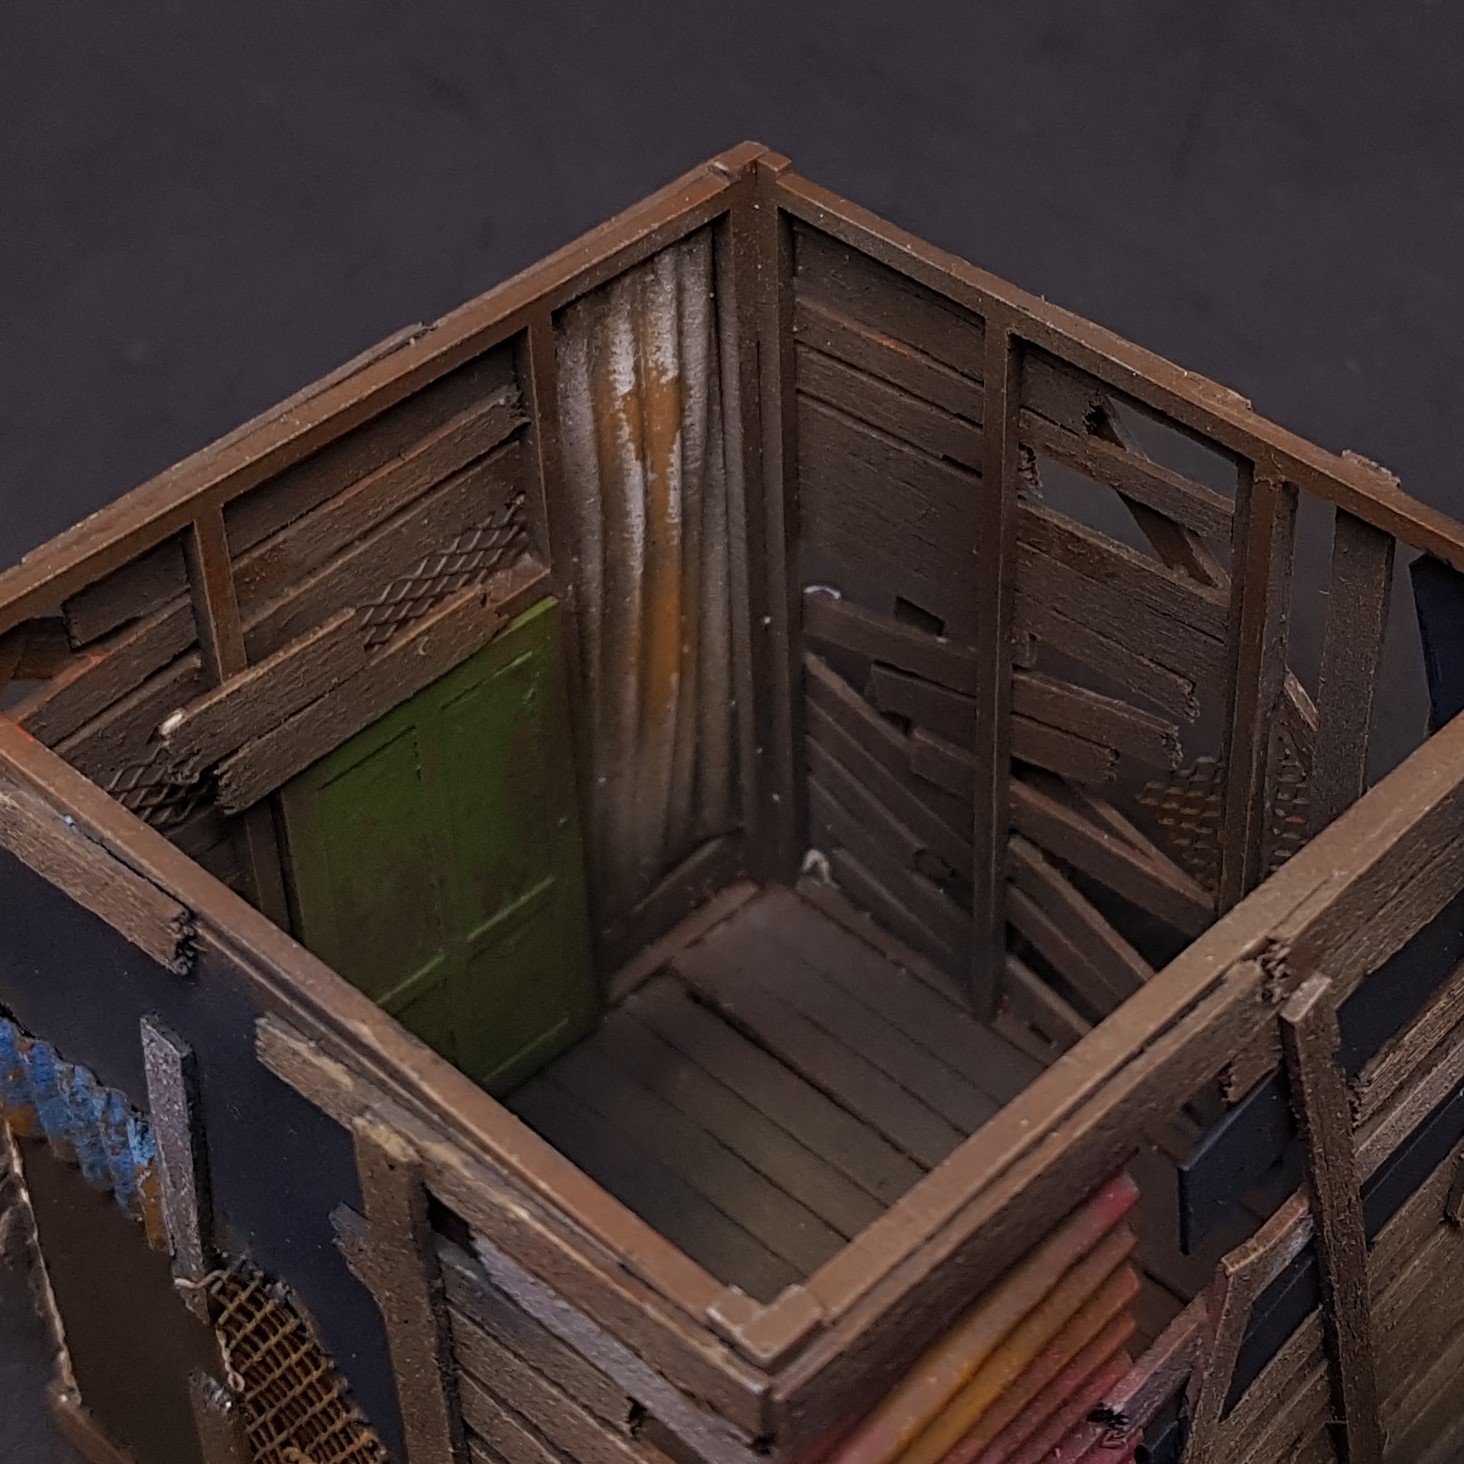 Interior
 Interior opposite view
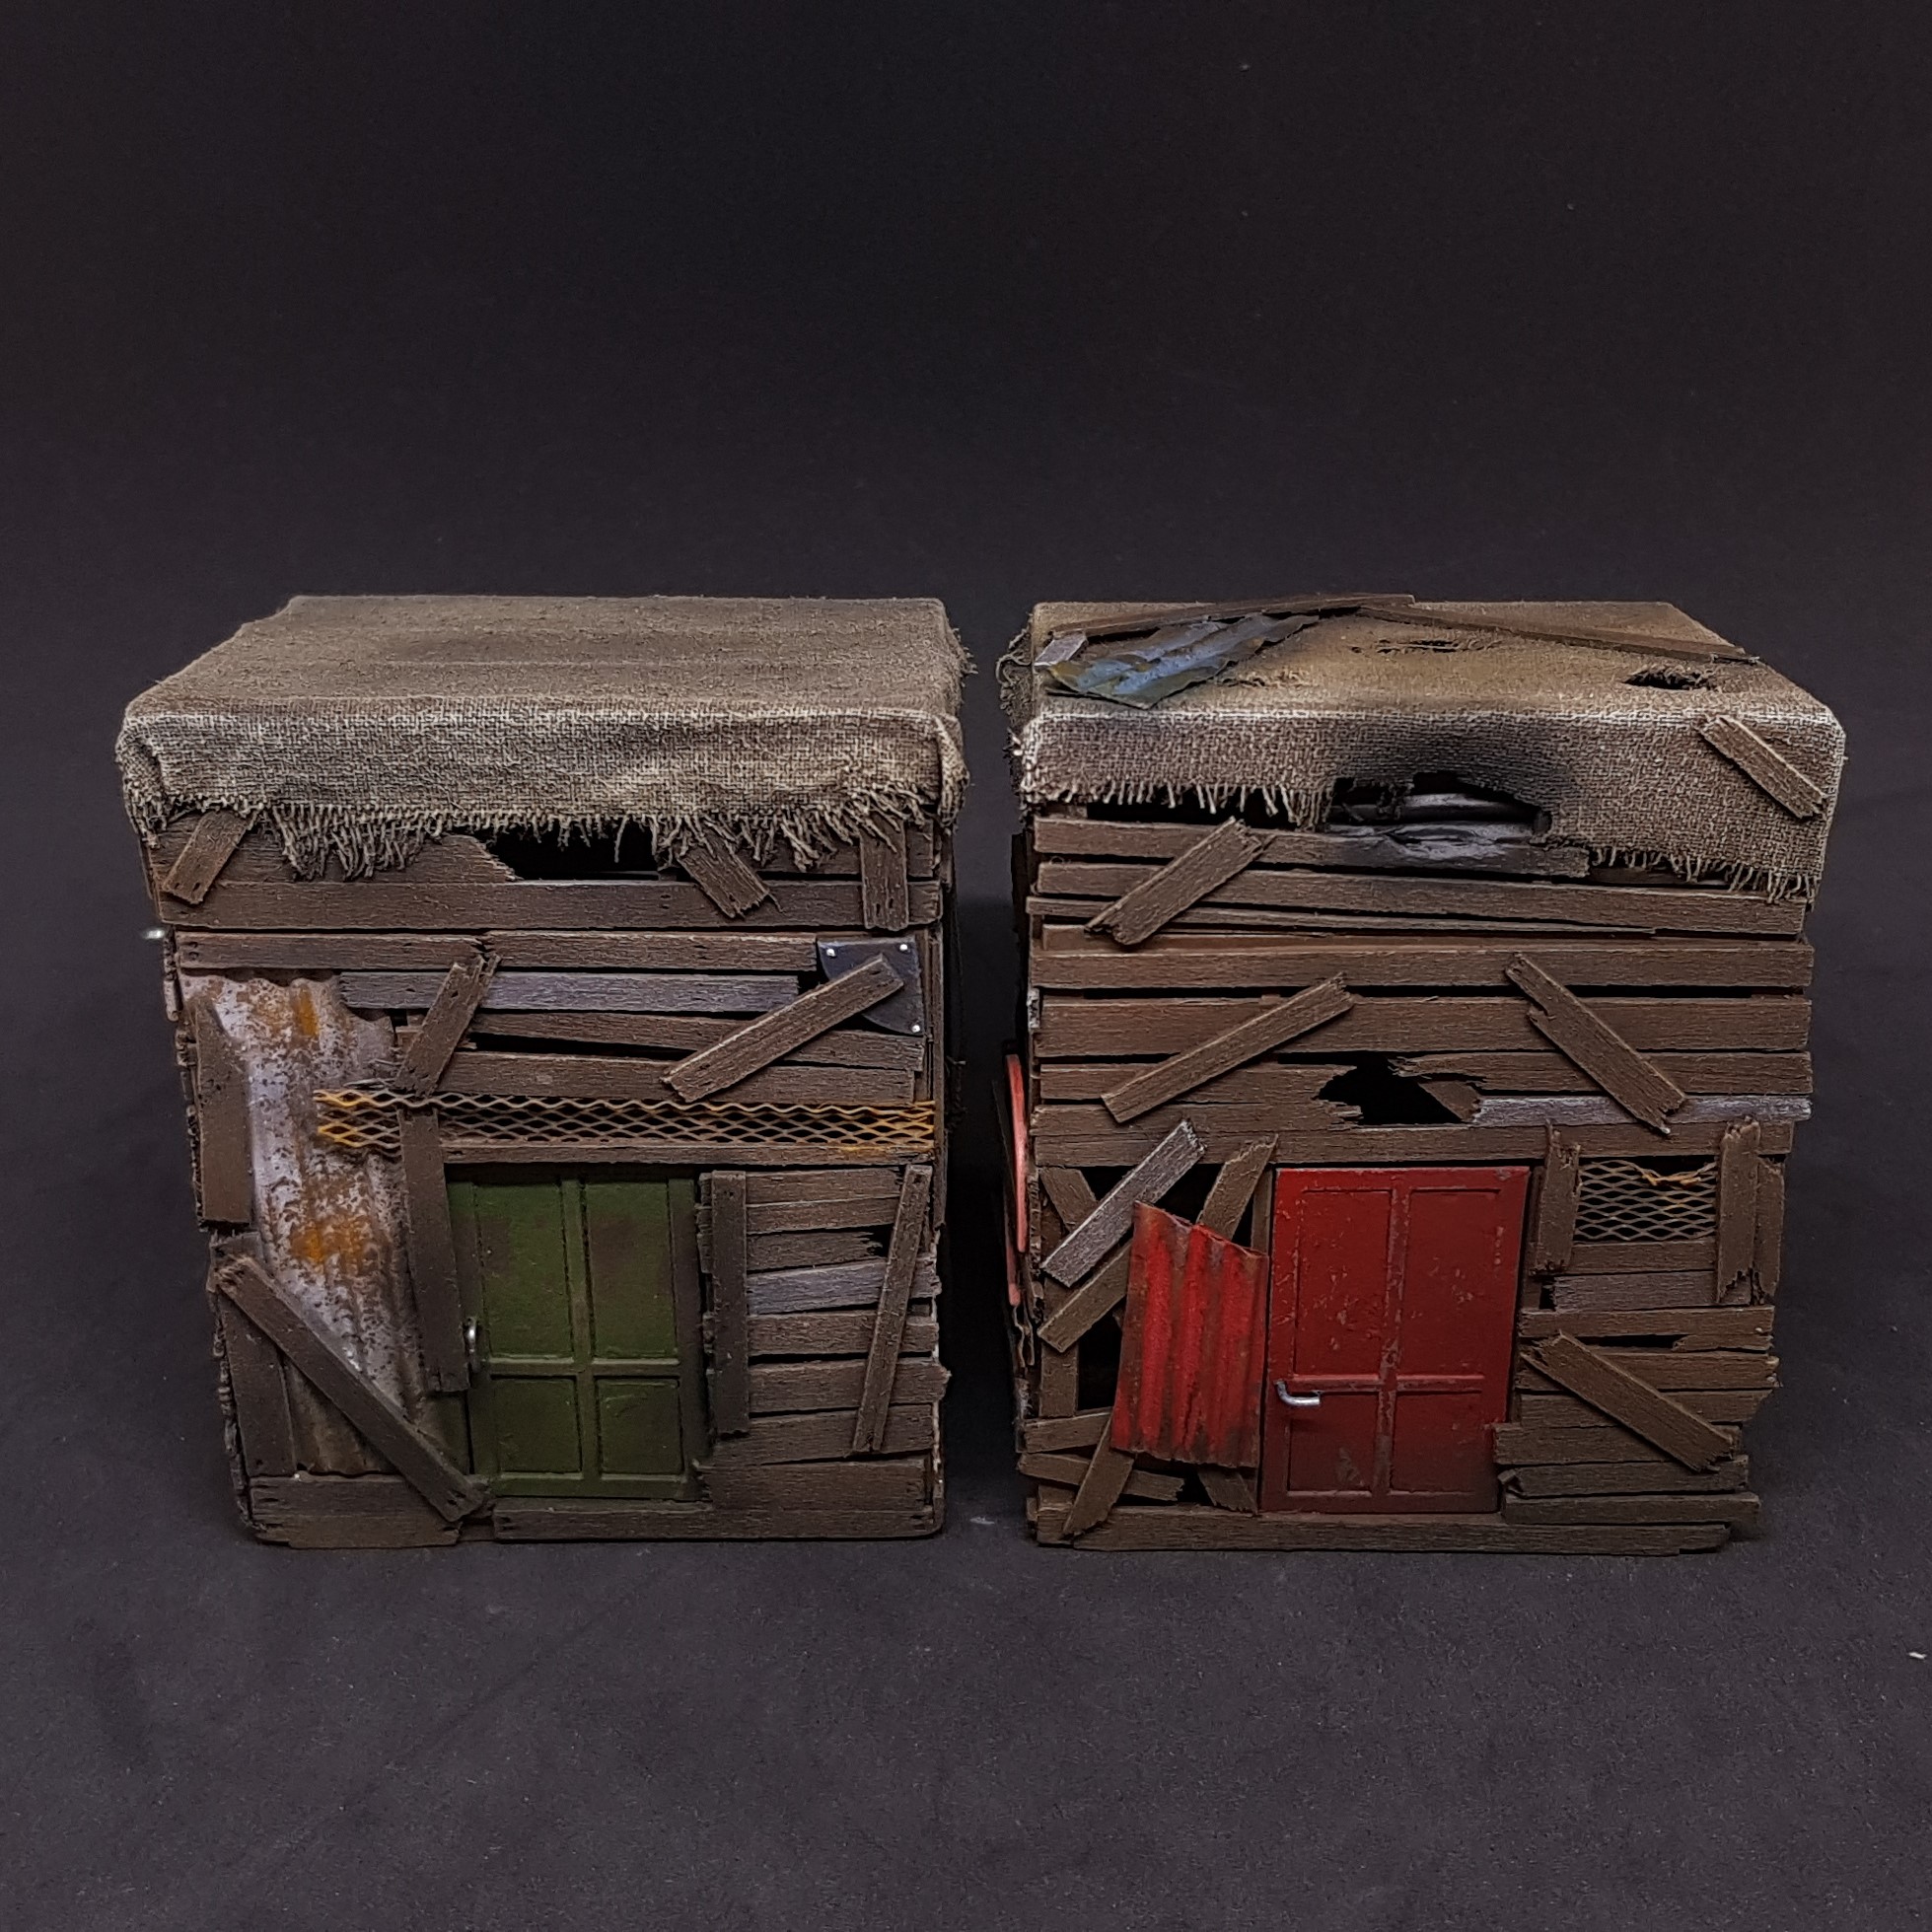 First two side by side
As you can see if you watched the video I don’t always mask when spraying. I get away with it sometimes and not other times and this just comes down to how much effort and what look you wish to get.
I also don’t wait for things to try even when this effects finish. It’s the post apocalypse no one has time to watch paint dry, even if this marks the model. (in this case)
I like some of the colour going around and some paint chips worked into things as every time I see this in real life the chips are never removed anyway and paint flecks are all over.
I will do a photo tutorial showing how I do the metal and how to do this better. This was stolen from scale model people but who knew some cardboard could look so cool! (I didn’t) I also want to try and do a proper video but unsure of how this would come together or if I have the patience for it. Guess it can wait until a rainy day.
More to come! Perhaps something larger?
Two floor hut.
It’s been great to see everyone’s work. I have not commented as much as I wanted to as I feel under the gun, though I have lots of time left.
Started this yesterday. Thinking of breaking this down for people who do not wish to watch an hour video of me painting, I will come to that later.
I found some more materials, only a couple. A fridge was delivered with corrugated plastic. This works great and I also used a screen cover this is more of a fabric but has a strange texture on it.
I also made the stairs and they do work. I also laser cut Balsawood for the first time. I used 2mm balsa and apart from the smoke that comes out of it, making stains the wood this worked surprisingly well. I did have my fire extinguisher handy as I thought it would just catch fire and knowing how fast this would go I just had to make sure I had a plan B. Though I did laser cut the grain of the wood in the wrong direction (Doh!).
Not a lot of innovation in this one but I have made a plan and stuck to it. I wish I would find 28mm scale model kit cars and vehicles as I wish I would use this as panels for a building. I looked and can’t find anything I like or that would work.
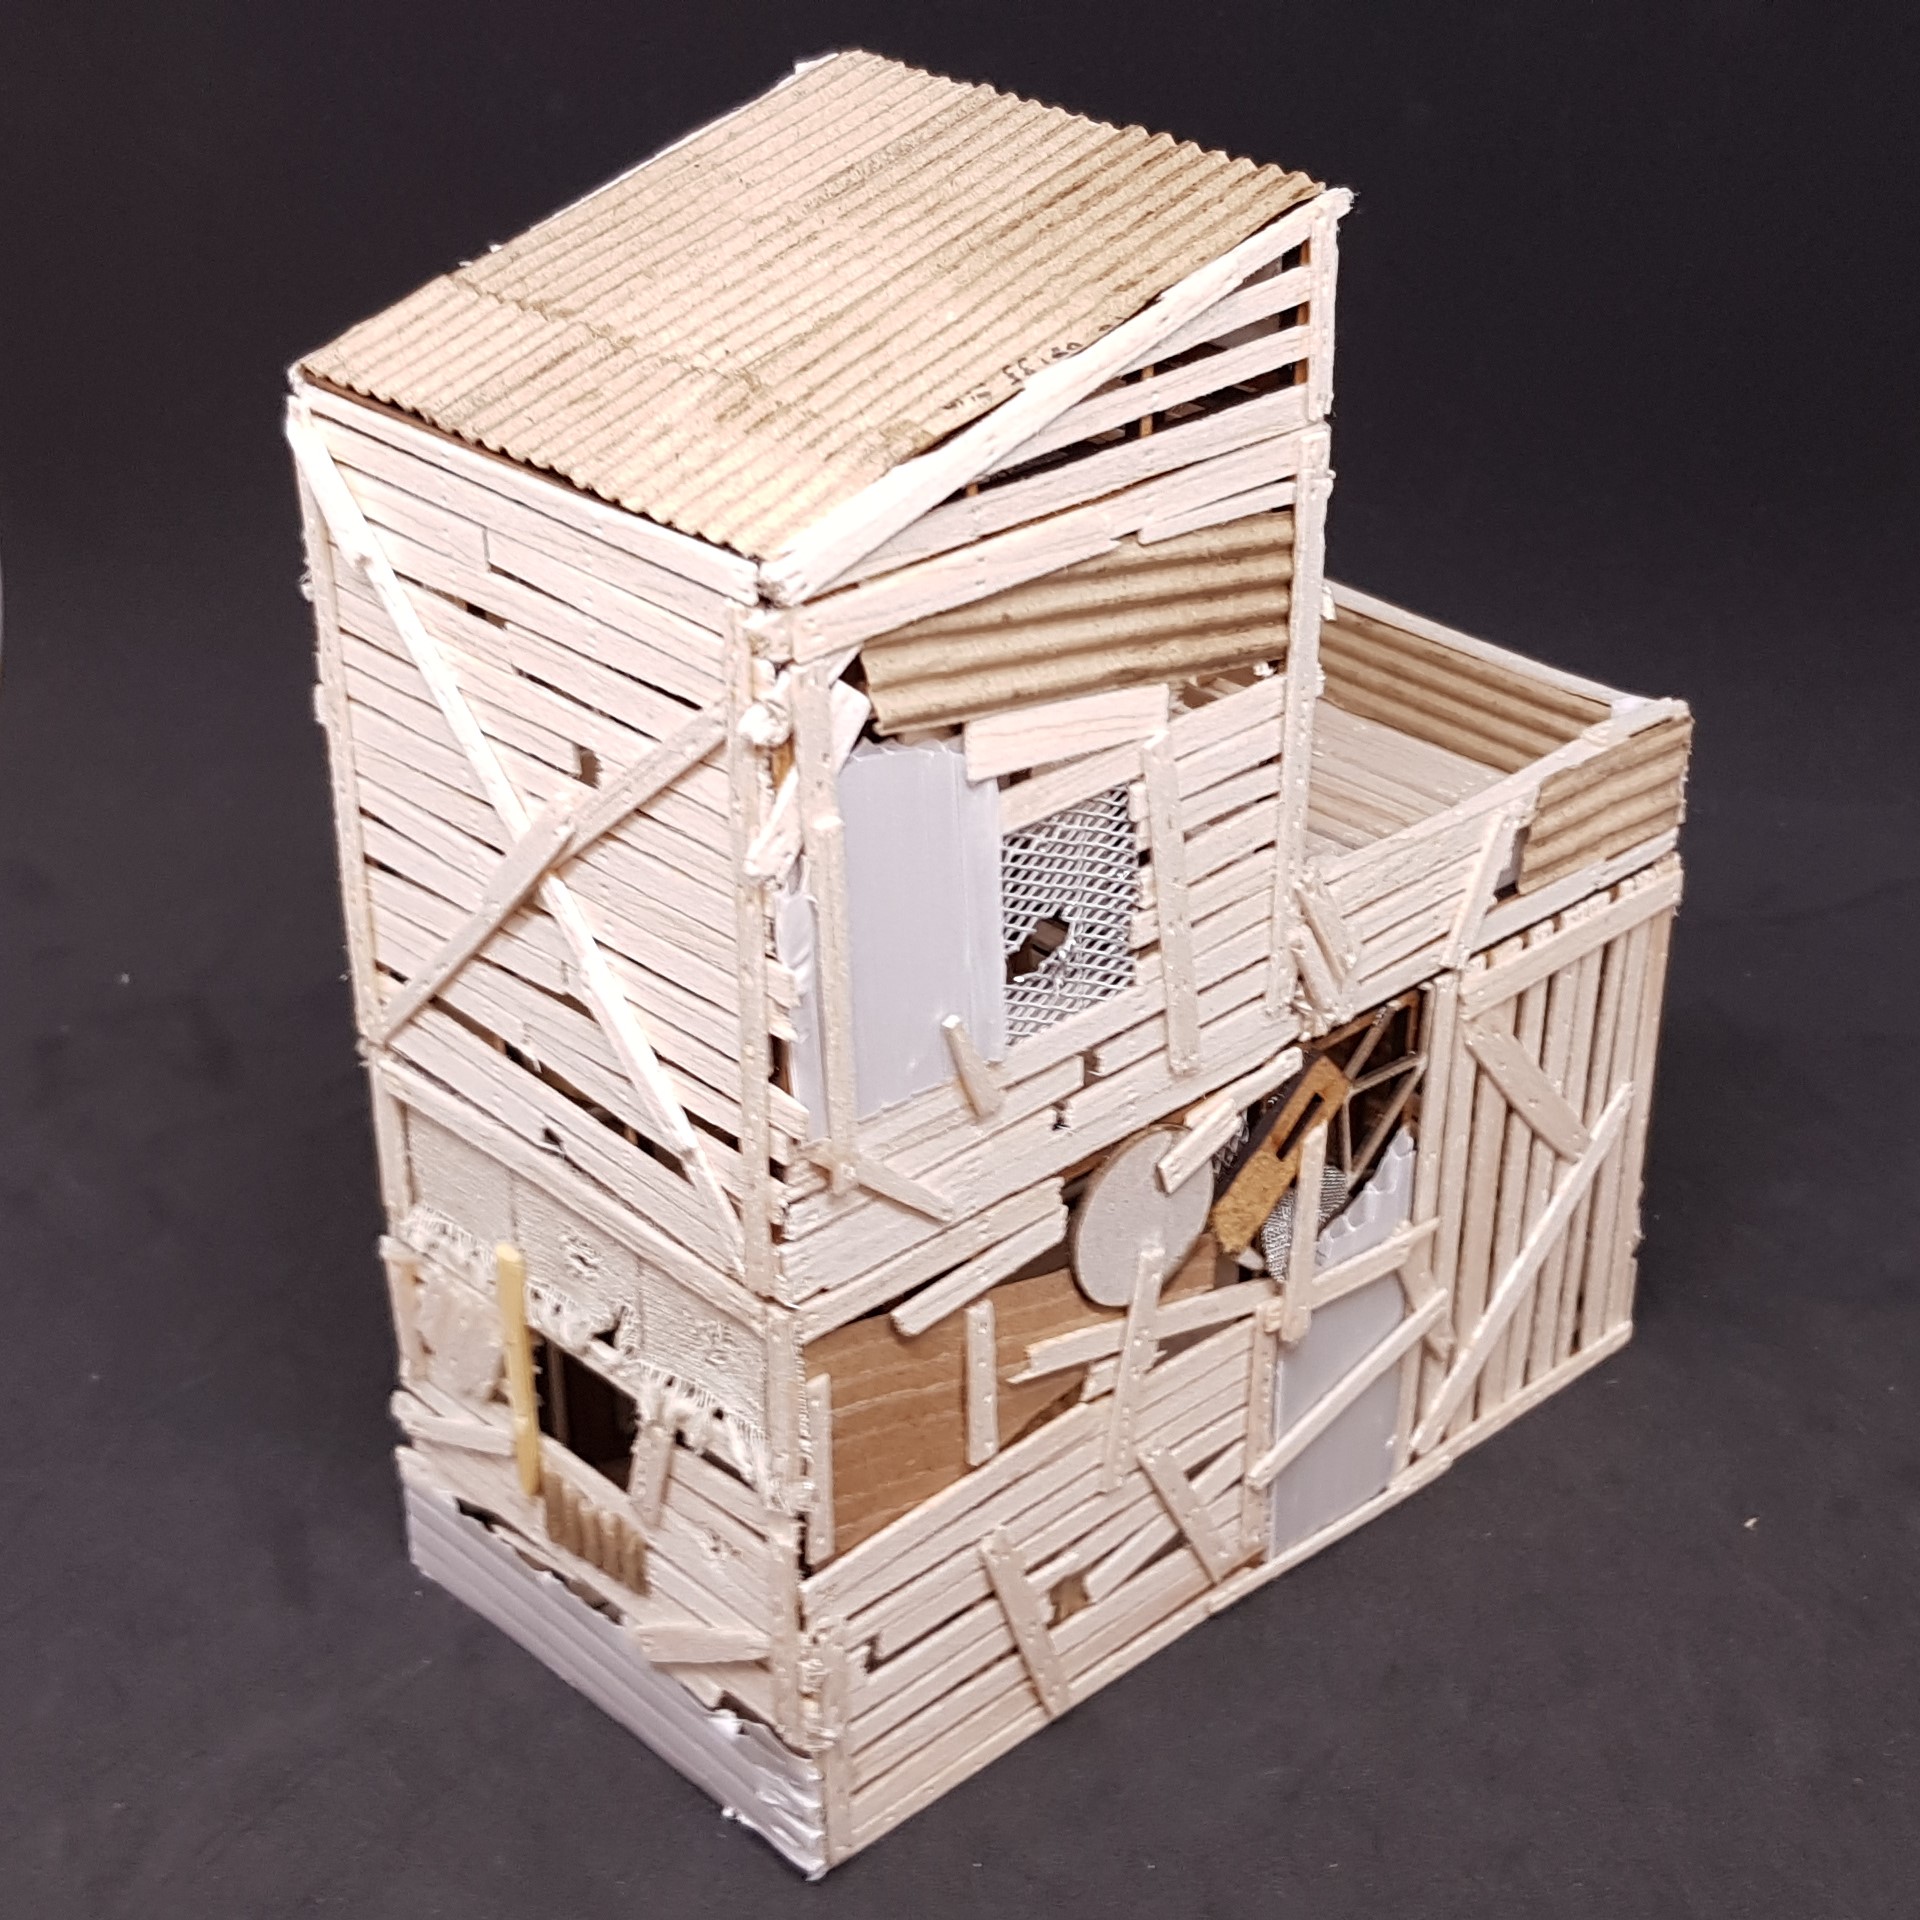 I decided to stick the upper floors together this was more to stop any damage that may happen with constantly putting two tightly fitting pieces together.
 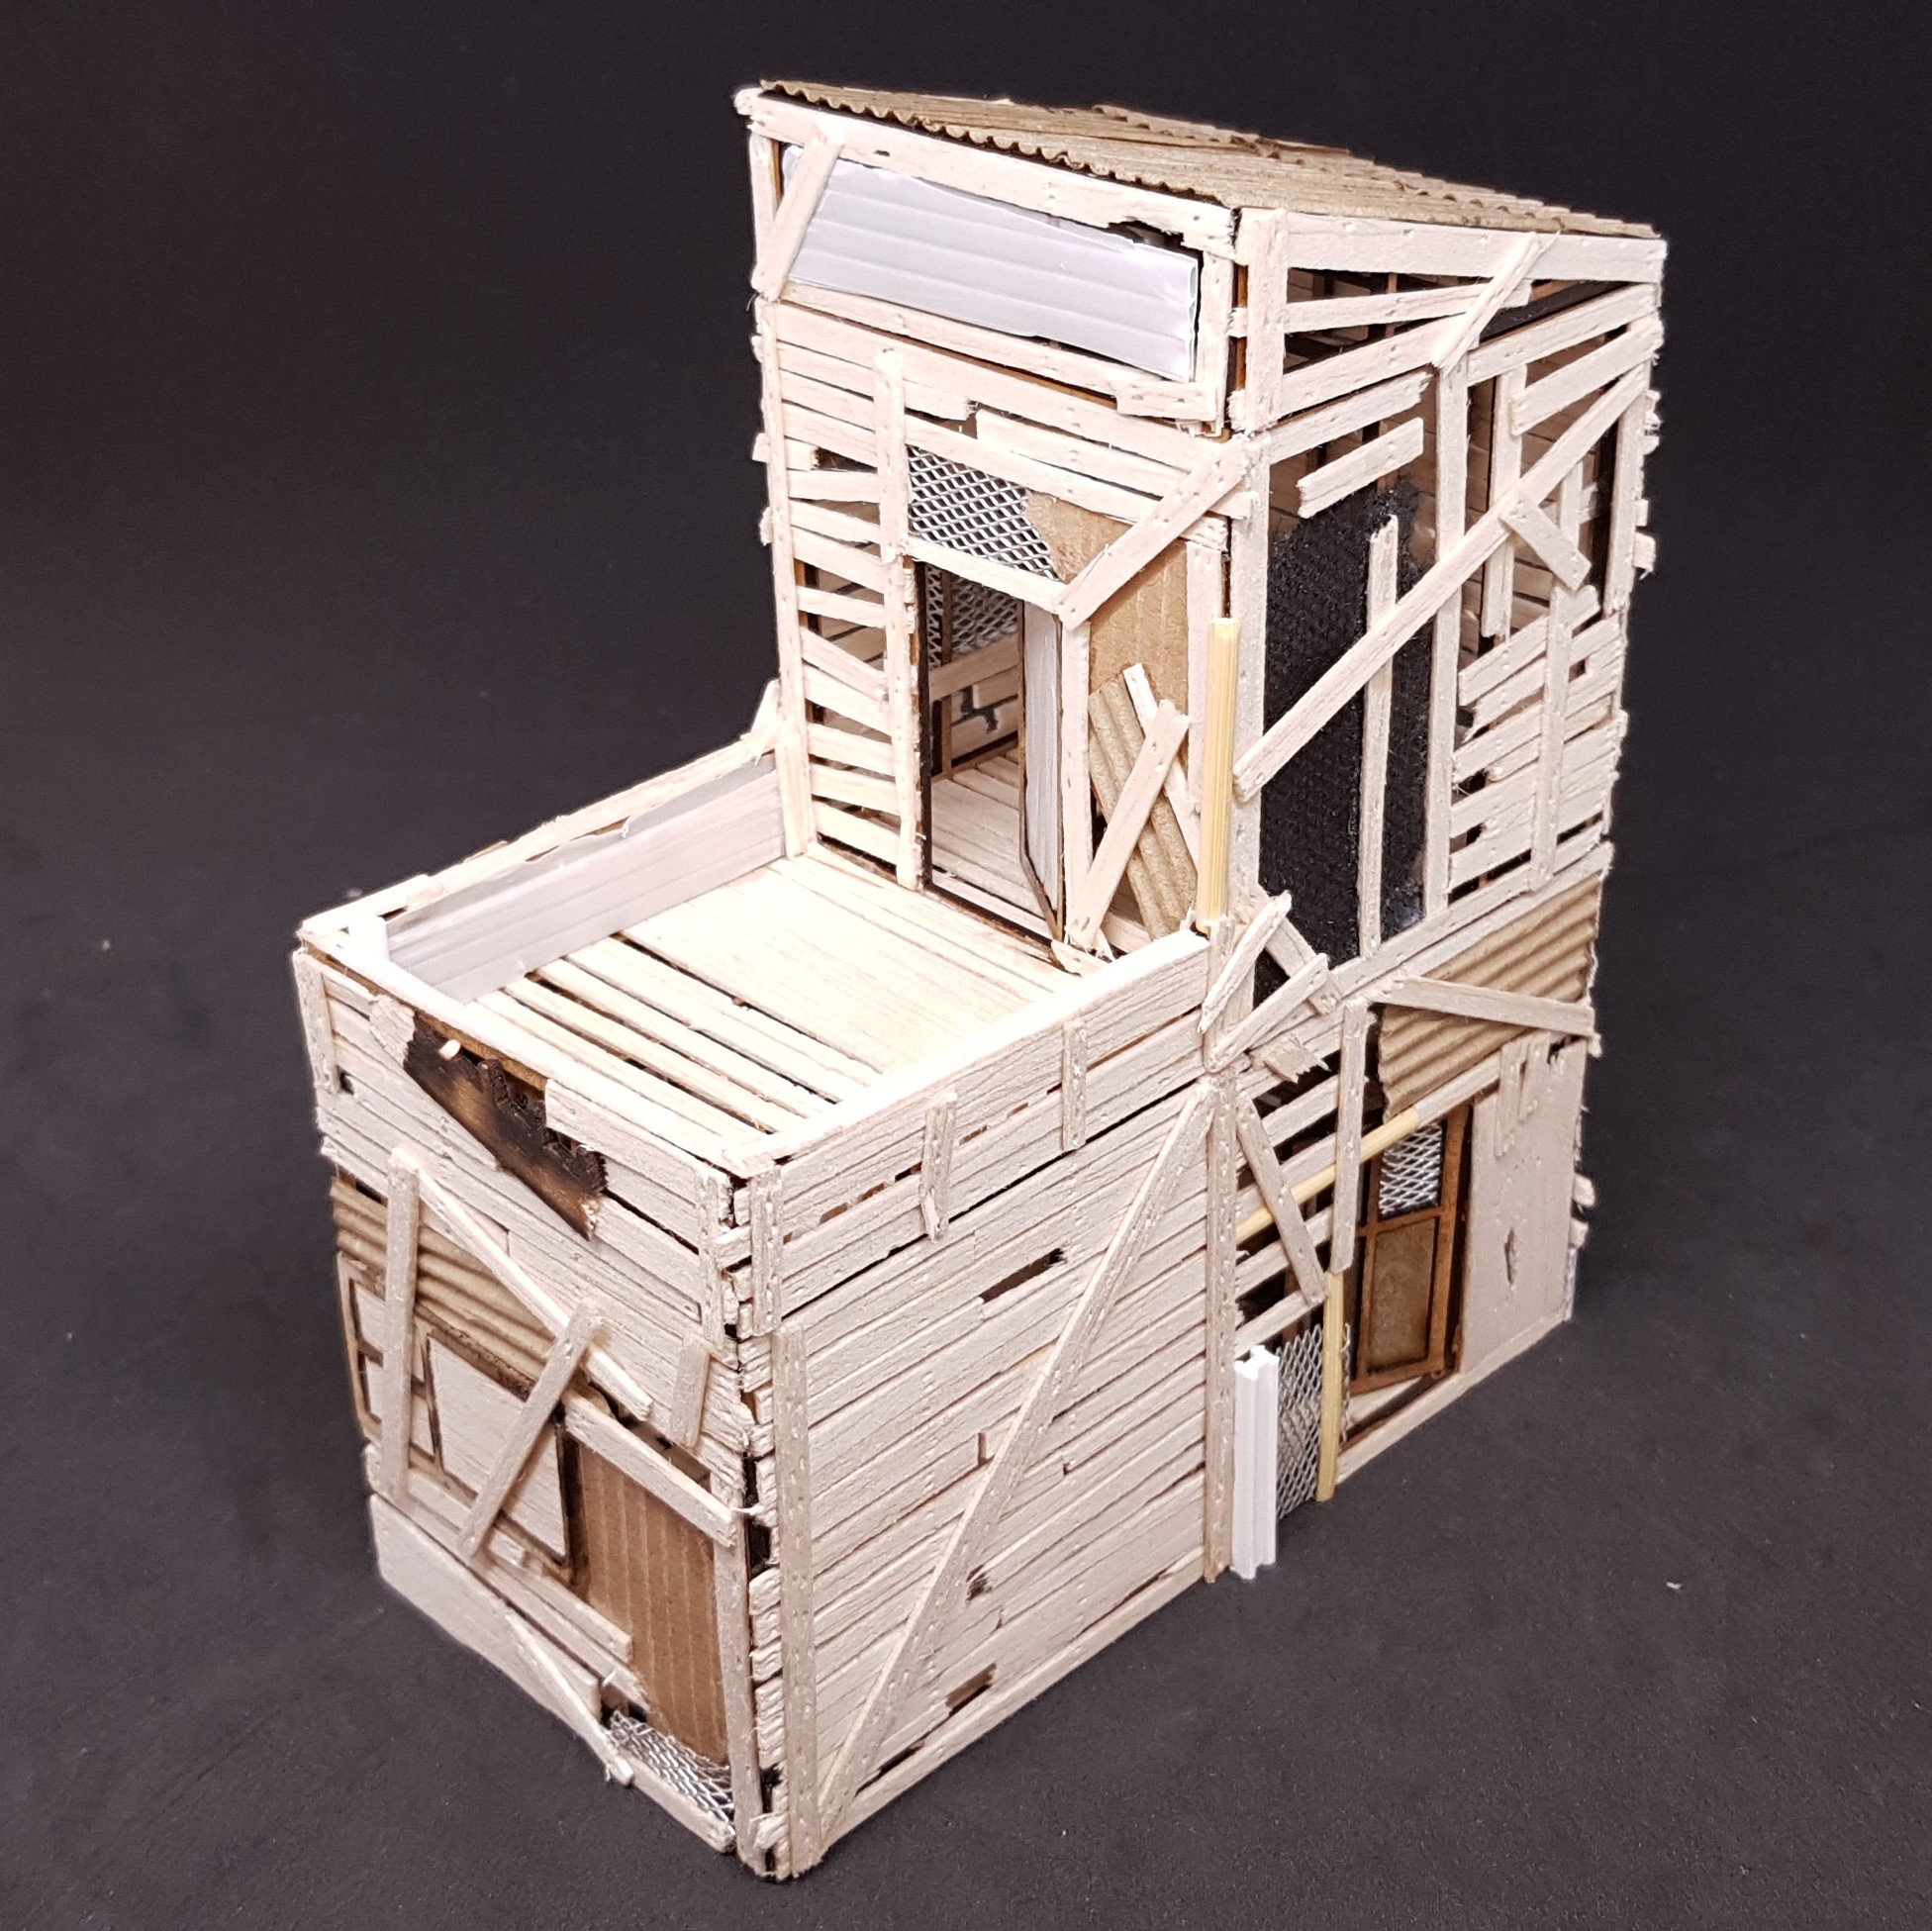 I reinforced the inside of the balcony; my thought was this would be a fighting position and a thin strap of wood is not what you would want to be cowering behind.
 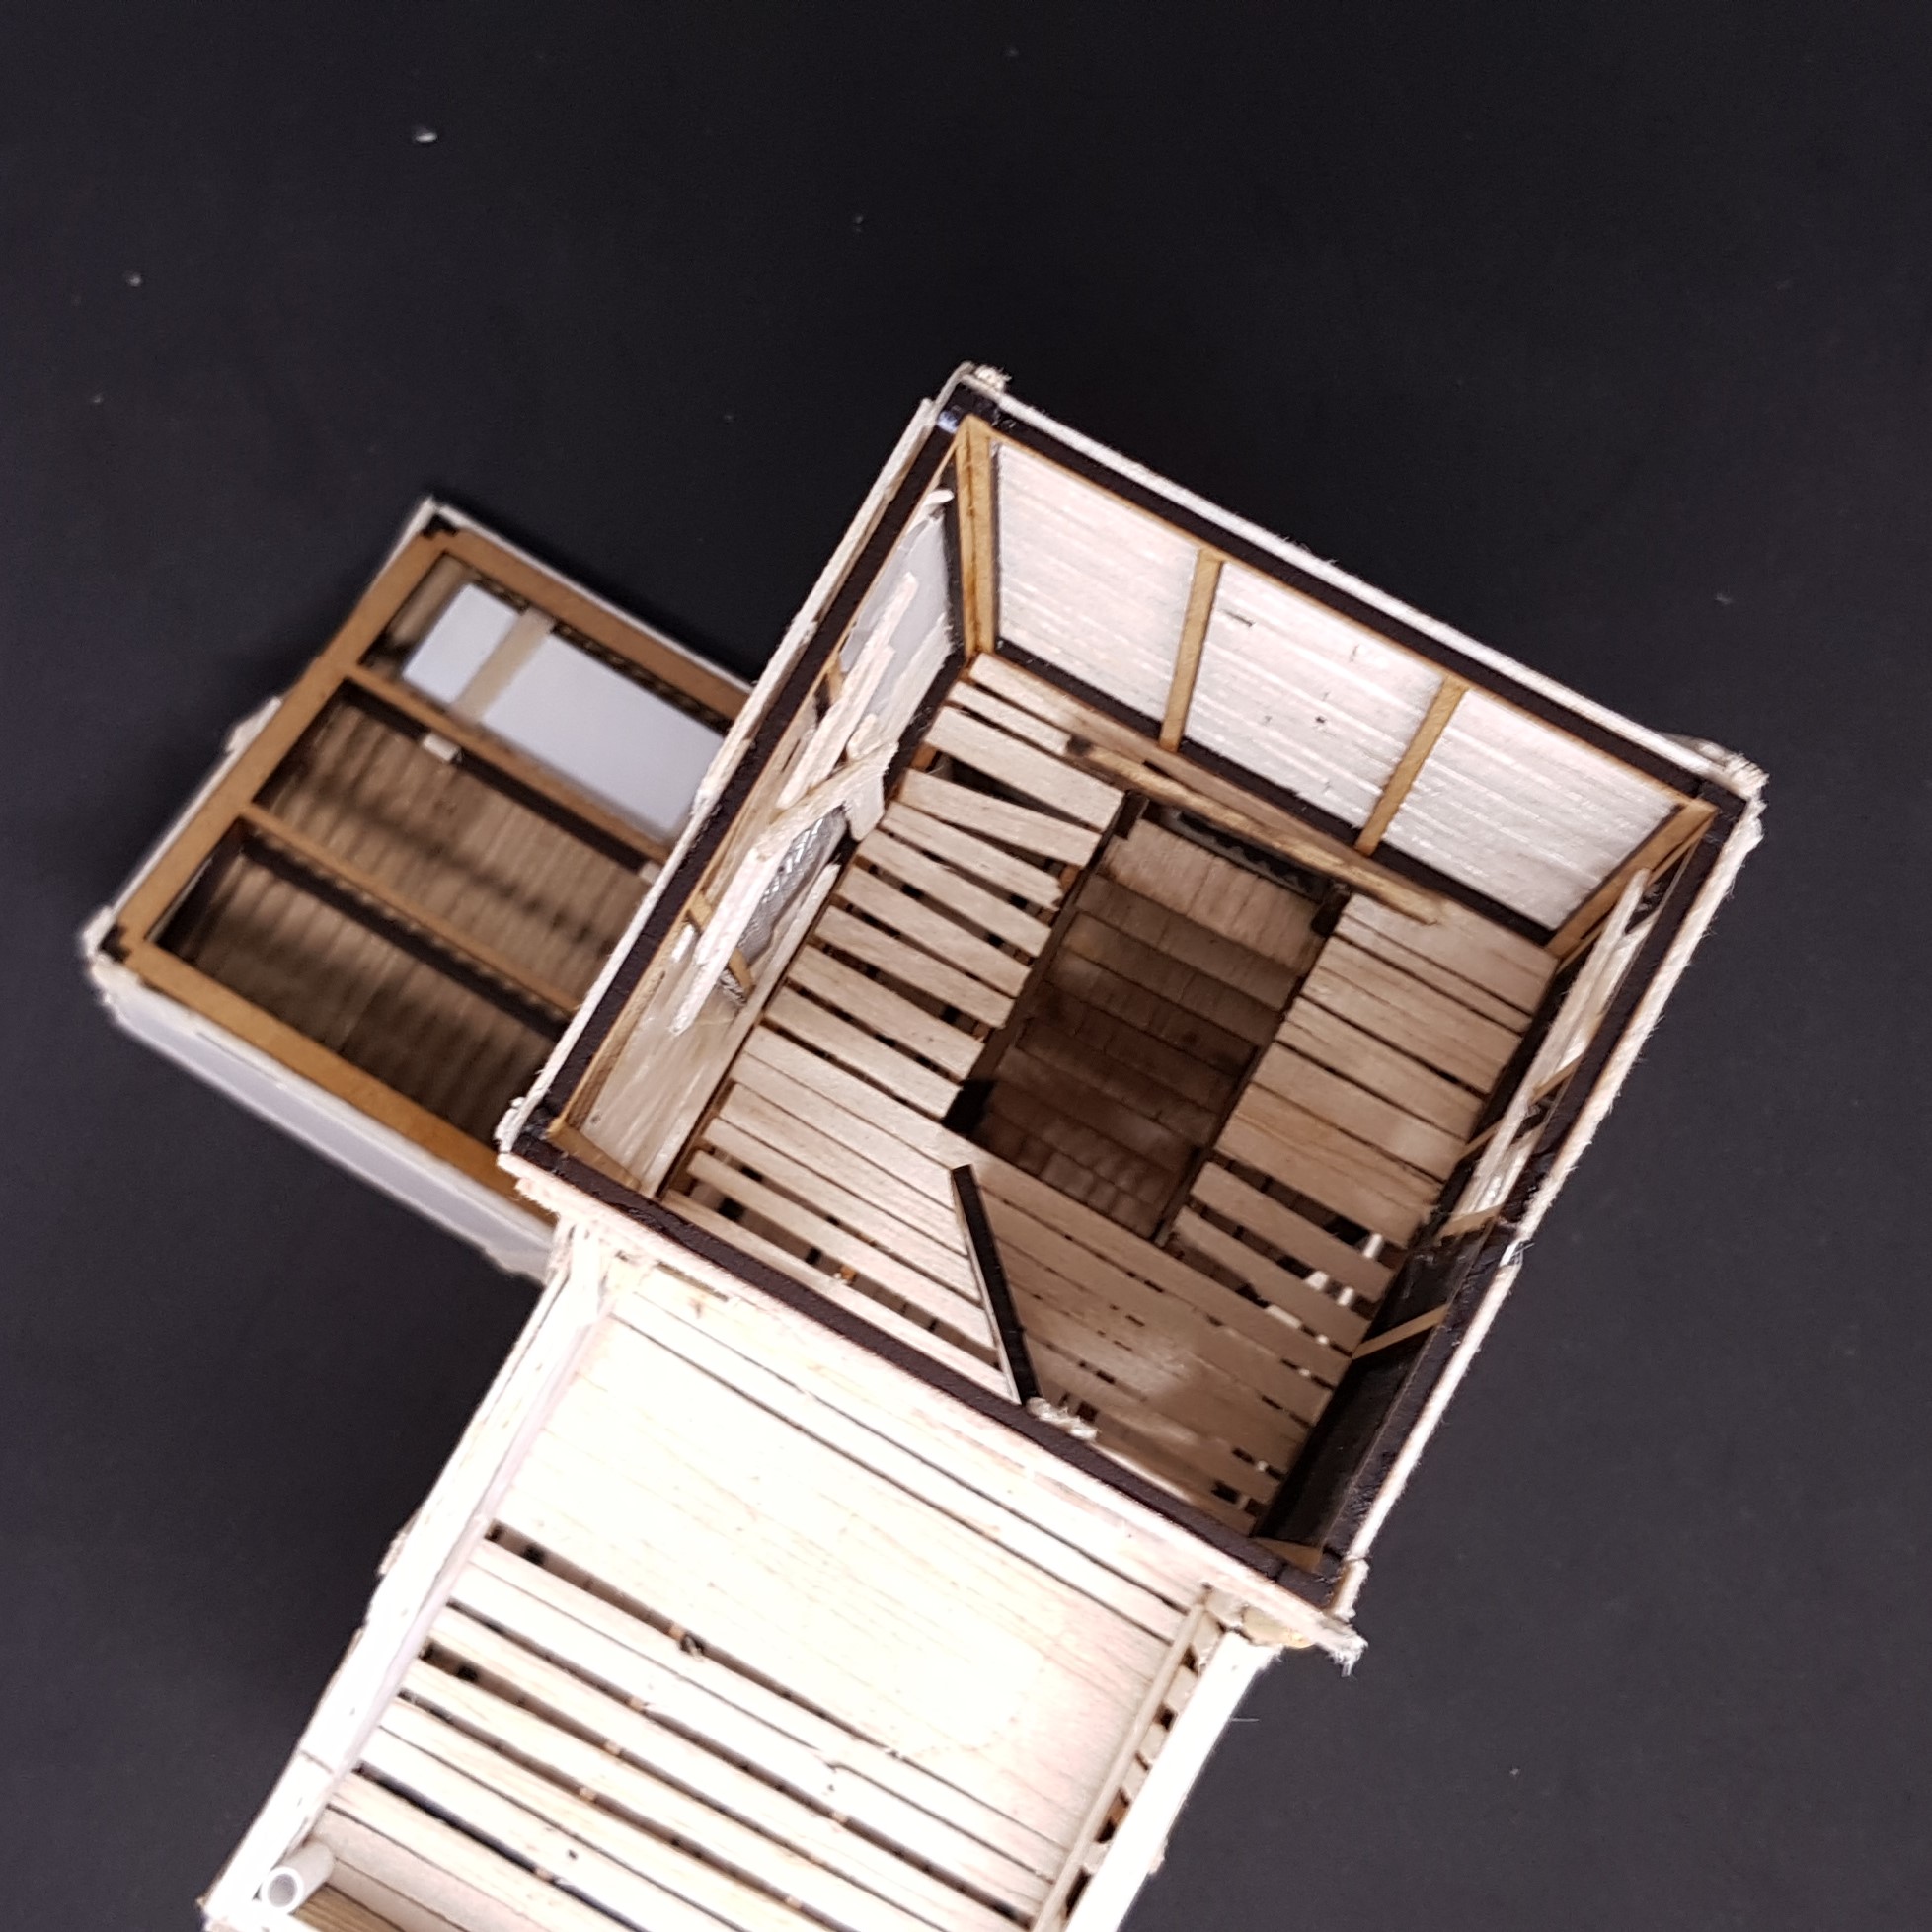 A shot with the stairs, a nightmare to photograph but I decided to not glue these down for packing and playability. a cross piece was added to make them easy to put in.
 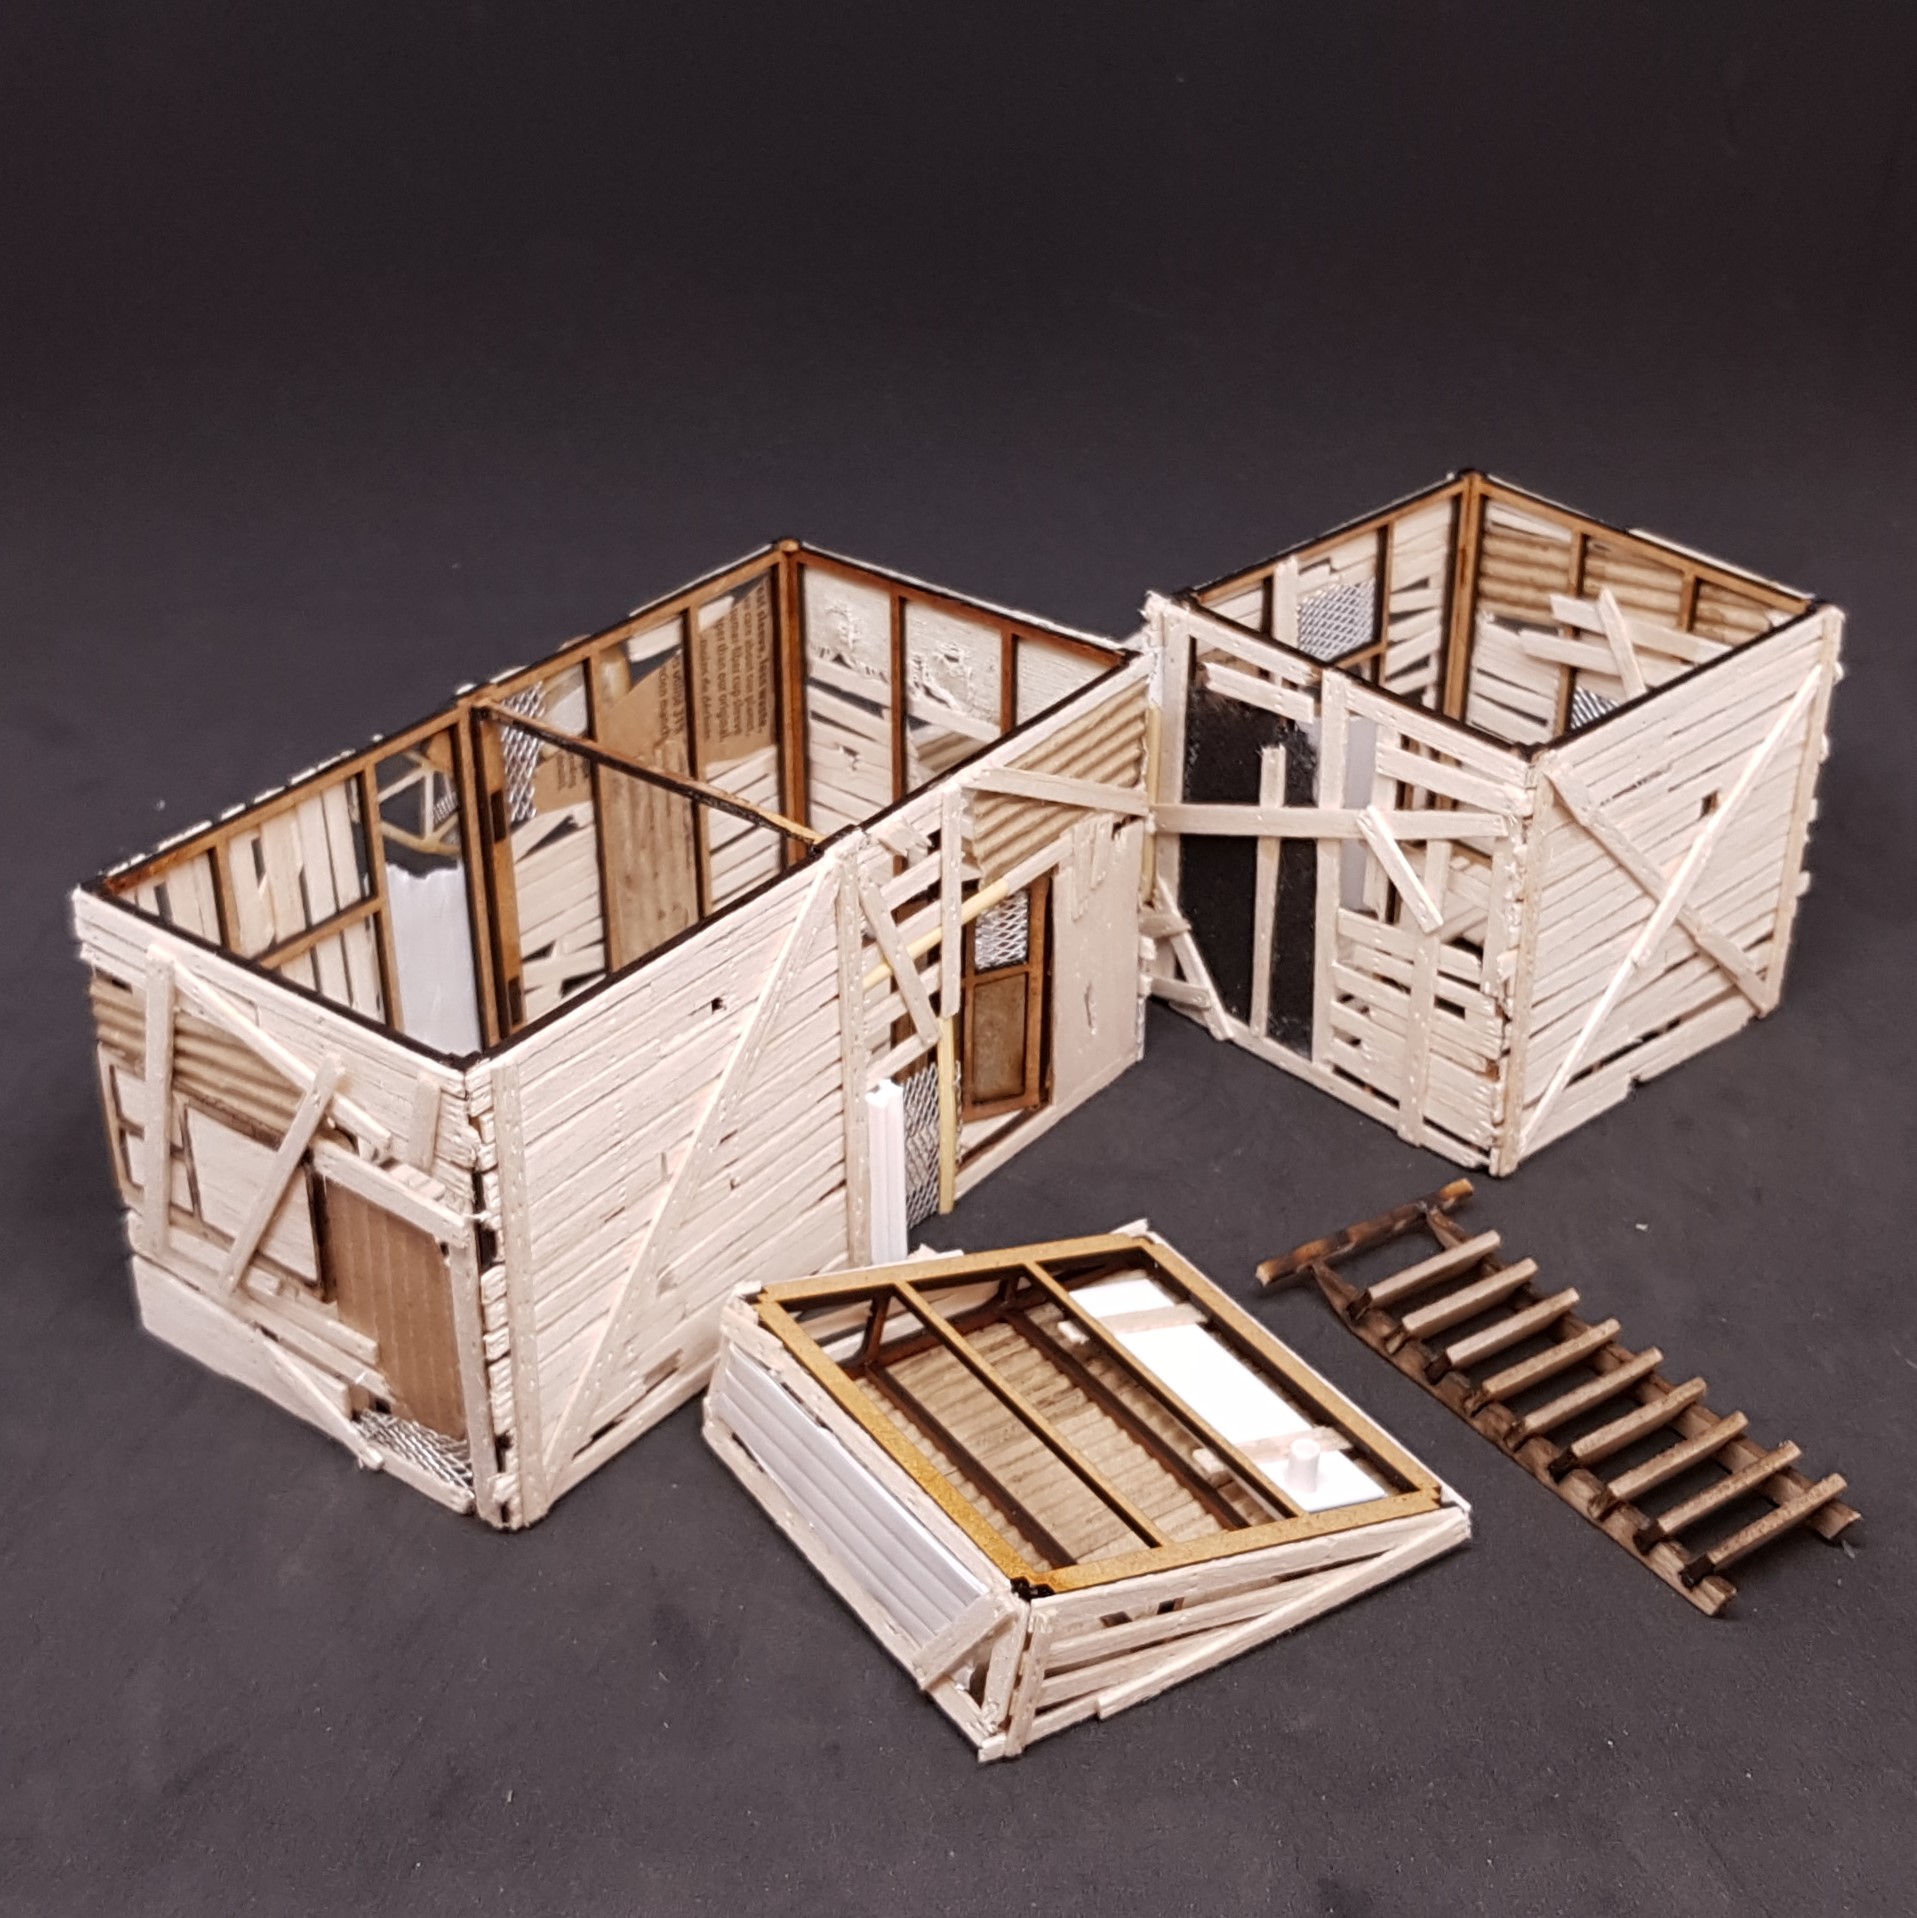 Everything disassembled for pliability and painting.
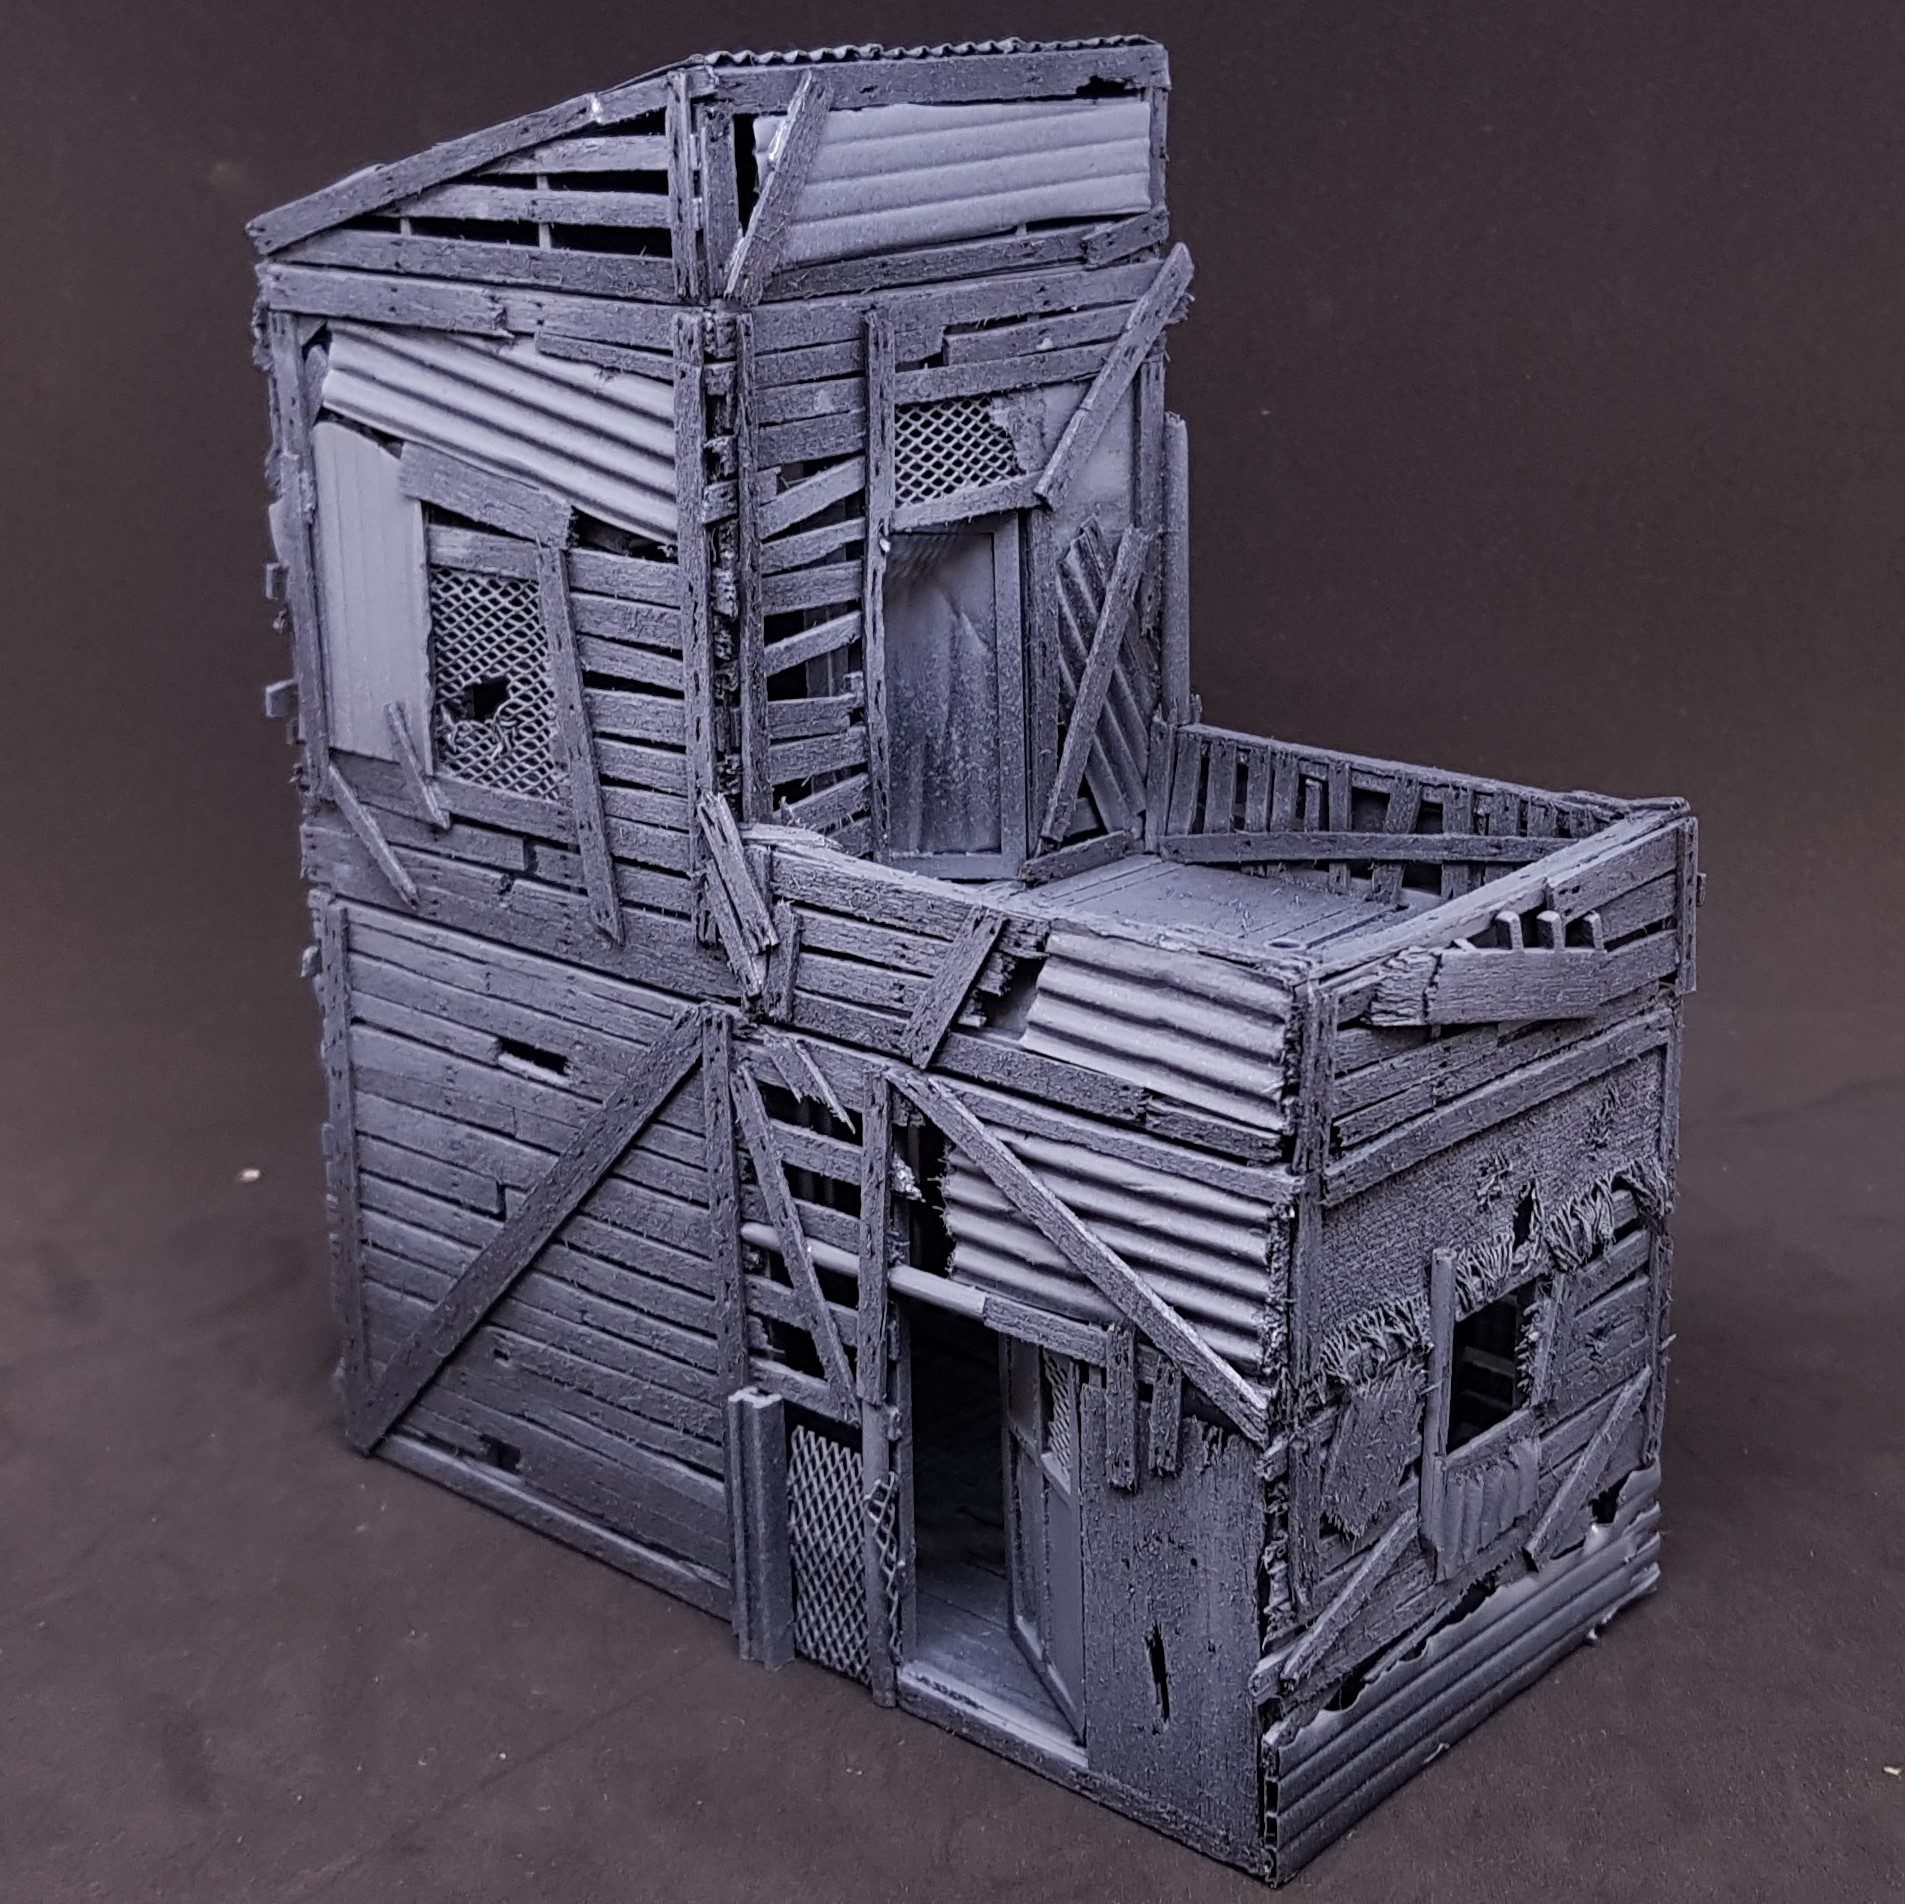 A zenith’d shot I like to do this as there is so much going on it’s hard to see detail.
  Other side.
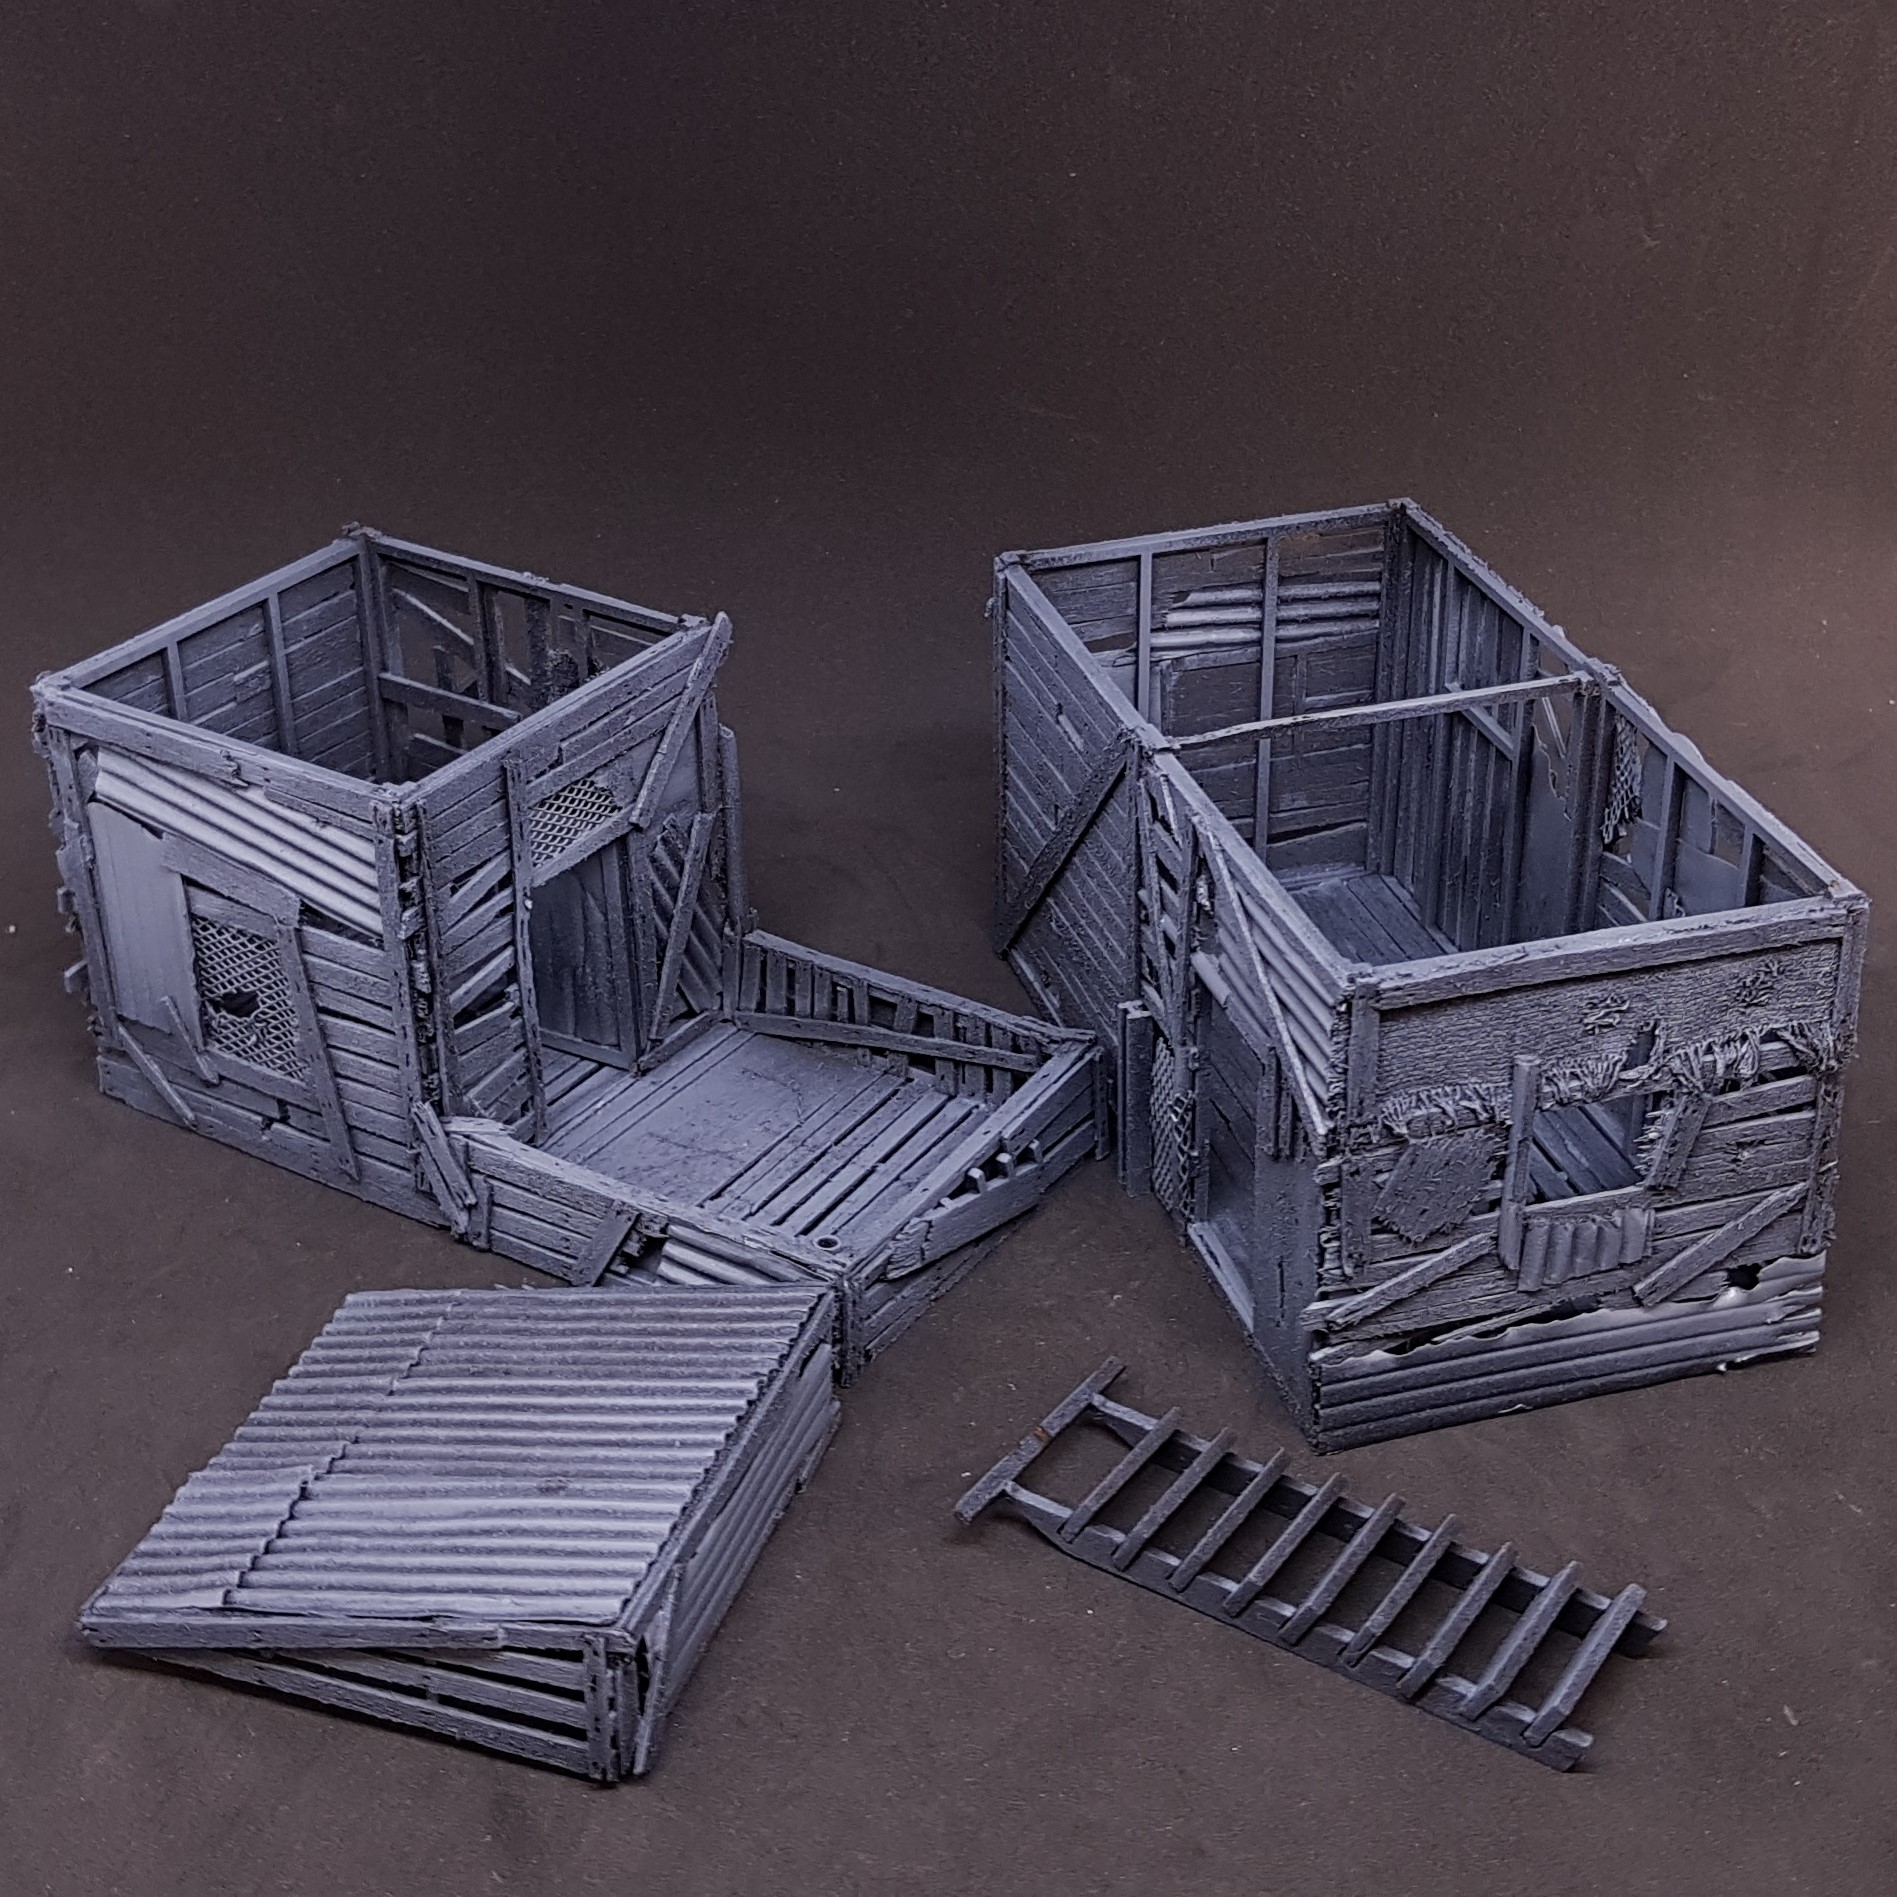 Deconstructed.
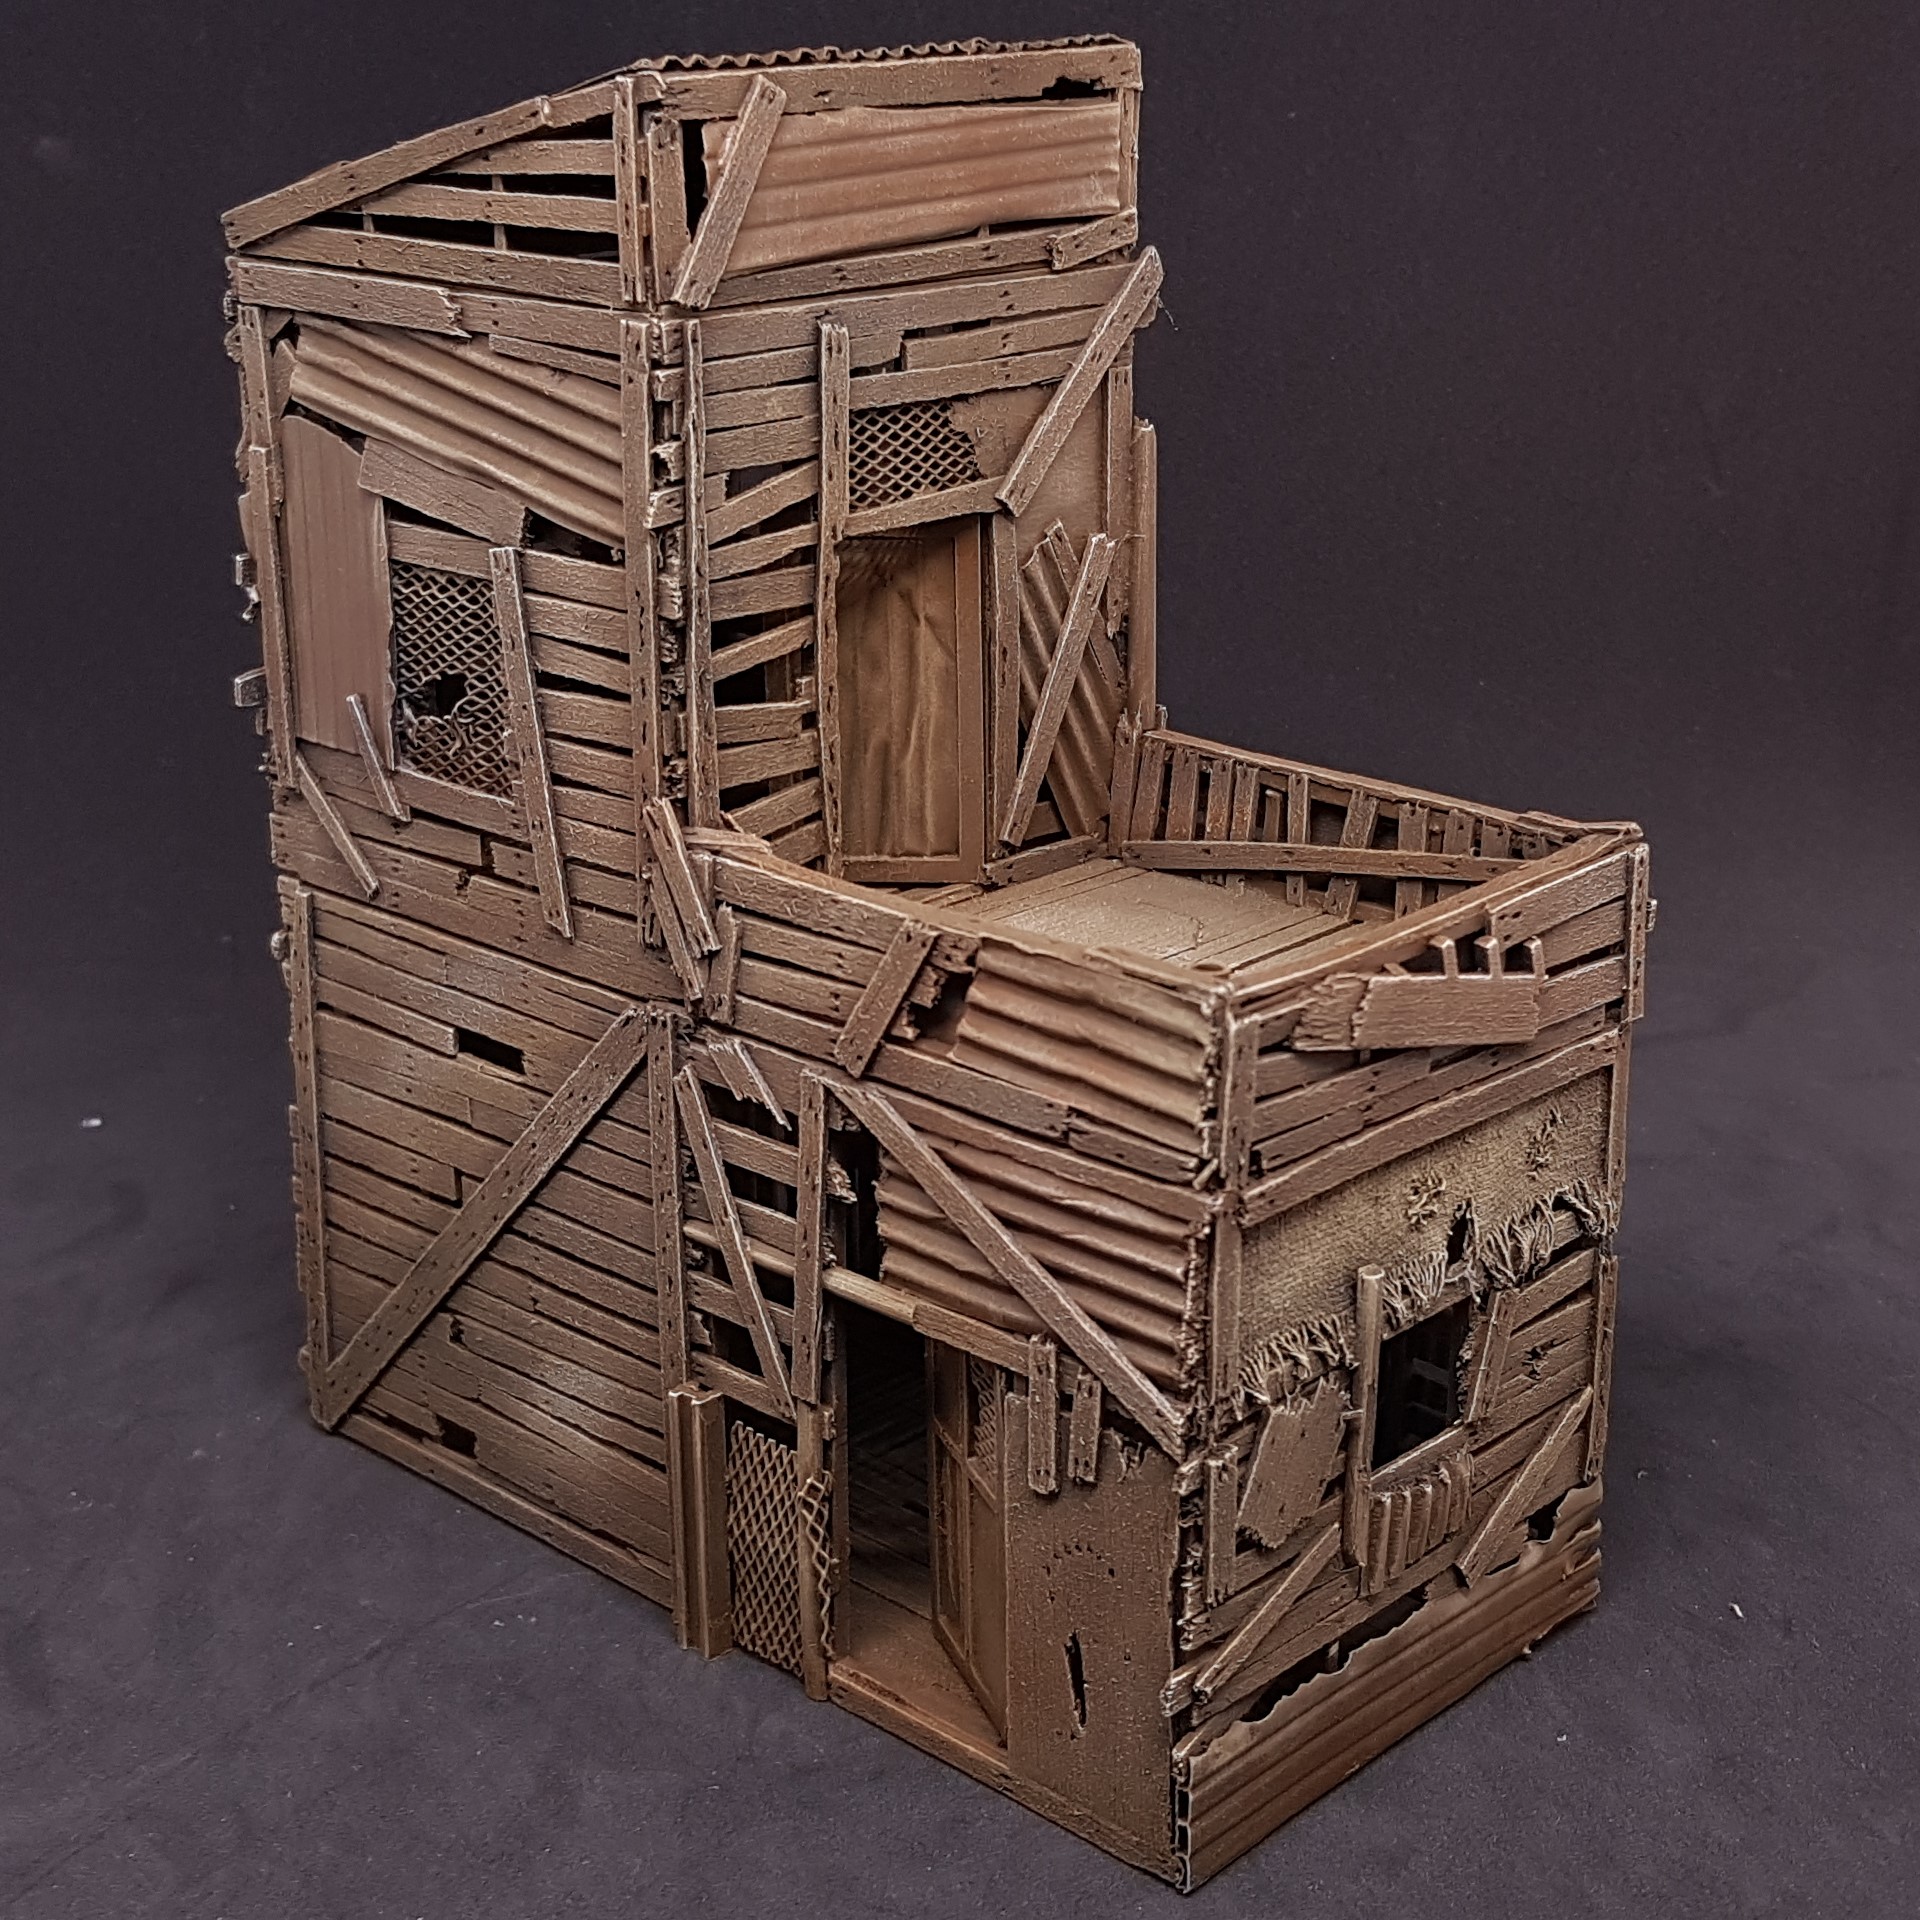 This is where I am up to now. Wood done about to move onto details.
 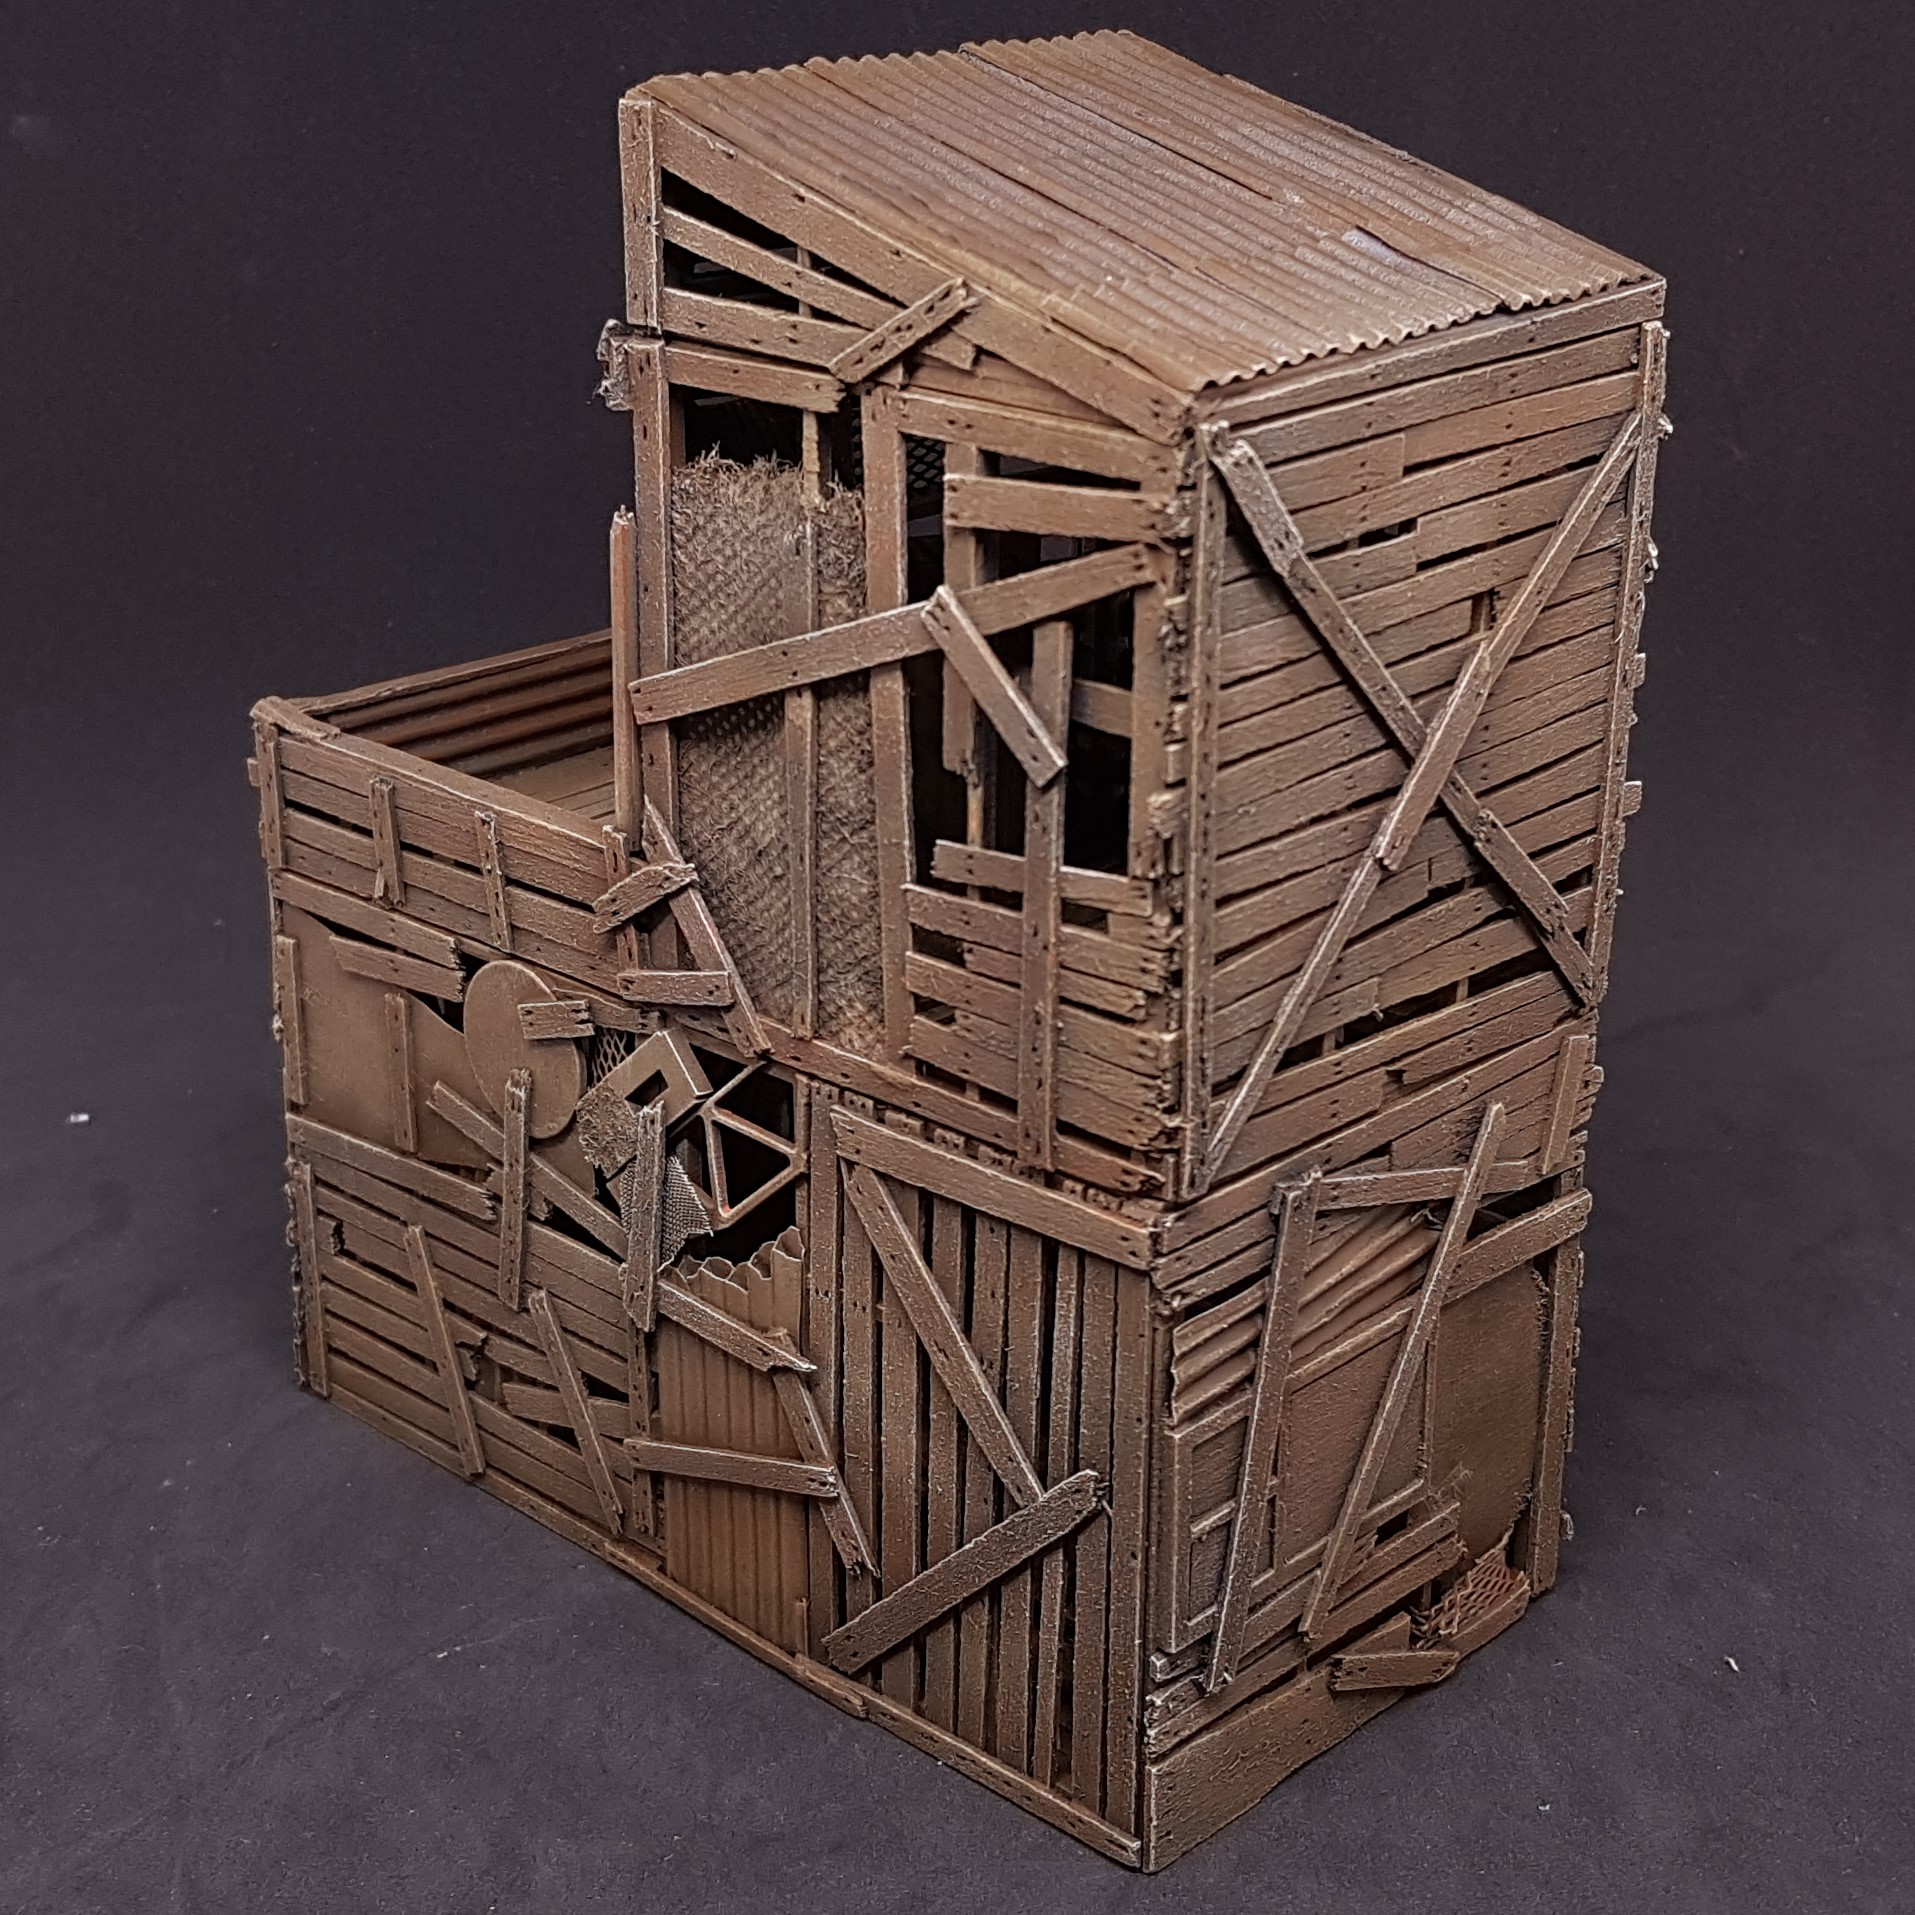 Otherside, looking forward to moving on.
 From doing this one it was quicker than doing 3 1/2 “cubes” but it’s surprisingly time consuming to build and paint. It’s fun doing get me wrong, but half way though each step I get the urge to do something else. I think it’s component fatigue due to the amount. Something I would think about if you undertake a similar project. Possibly don’t do it for a time based challenge so feel you can leave it for a bit.
Today I am going to start on the detail painting. Next up though I have a tutorial section on wood (giggles).


