


![How To Paint Moonstone’s Nanny | Goblin King Games [7 Days Early Access]](https://images.beastsofwar.com/2024/12/3CU-Gobin-King-Games-Moonstone-Shades-Nanny-coverimage-225-127.jpg)


Collins Does Yavin IV Table Build


Recommendations: 460
About the Project
As I am deep into Star Wars Legion and am now making little incidental items of terrain for it I might as well have a punt at making some input into this competition! I plan to make the Massassi Ruins, or at least part of it from Star Wars. Many of you will recognise this as the original Rebel Base from A New Hope. I feel that this fits in with the theme of the challenge in many ways. Firstly the Death Star approaching Yavin IV does indeed symbolise that the end is nigh for the Rebellion (or is it!) but the whole site has seen a number of apocalypses in its time, firstly the Massassi people and then the Sith (and then the crew of the Death Star, oops, sorry, SPOILERS!) more can be found out about the temple HERE
Related Game: Star Wars: Legion
Related Company: Fantasy Flight Games
Related Genre: Science Fiction
This Project is Completed
Research Stage
As with any random idea that comes into your mind the best thing to do is
- Write it down – done
- Research it – doing it
- Plan it
- Realise the dream
- “Save the dream” – Saw Gerrera
A lot of information about Yavin IV base can be found on Wookieepedia from both Canon and Legends timelines.
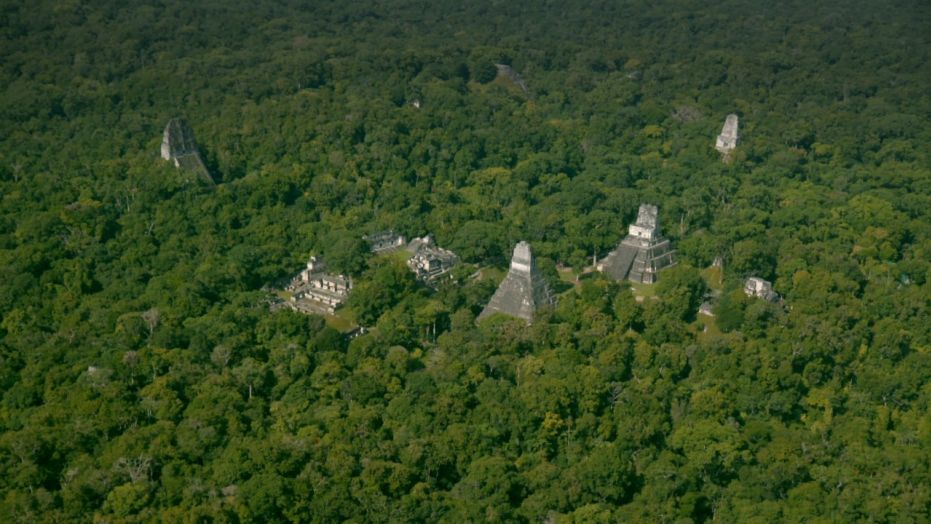
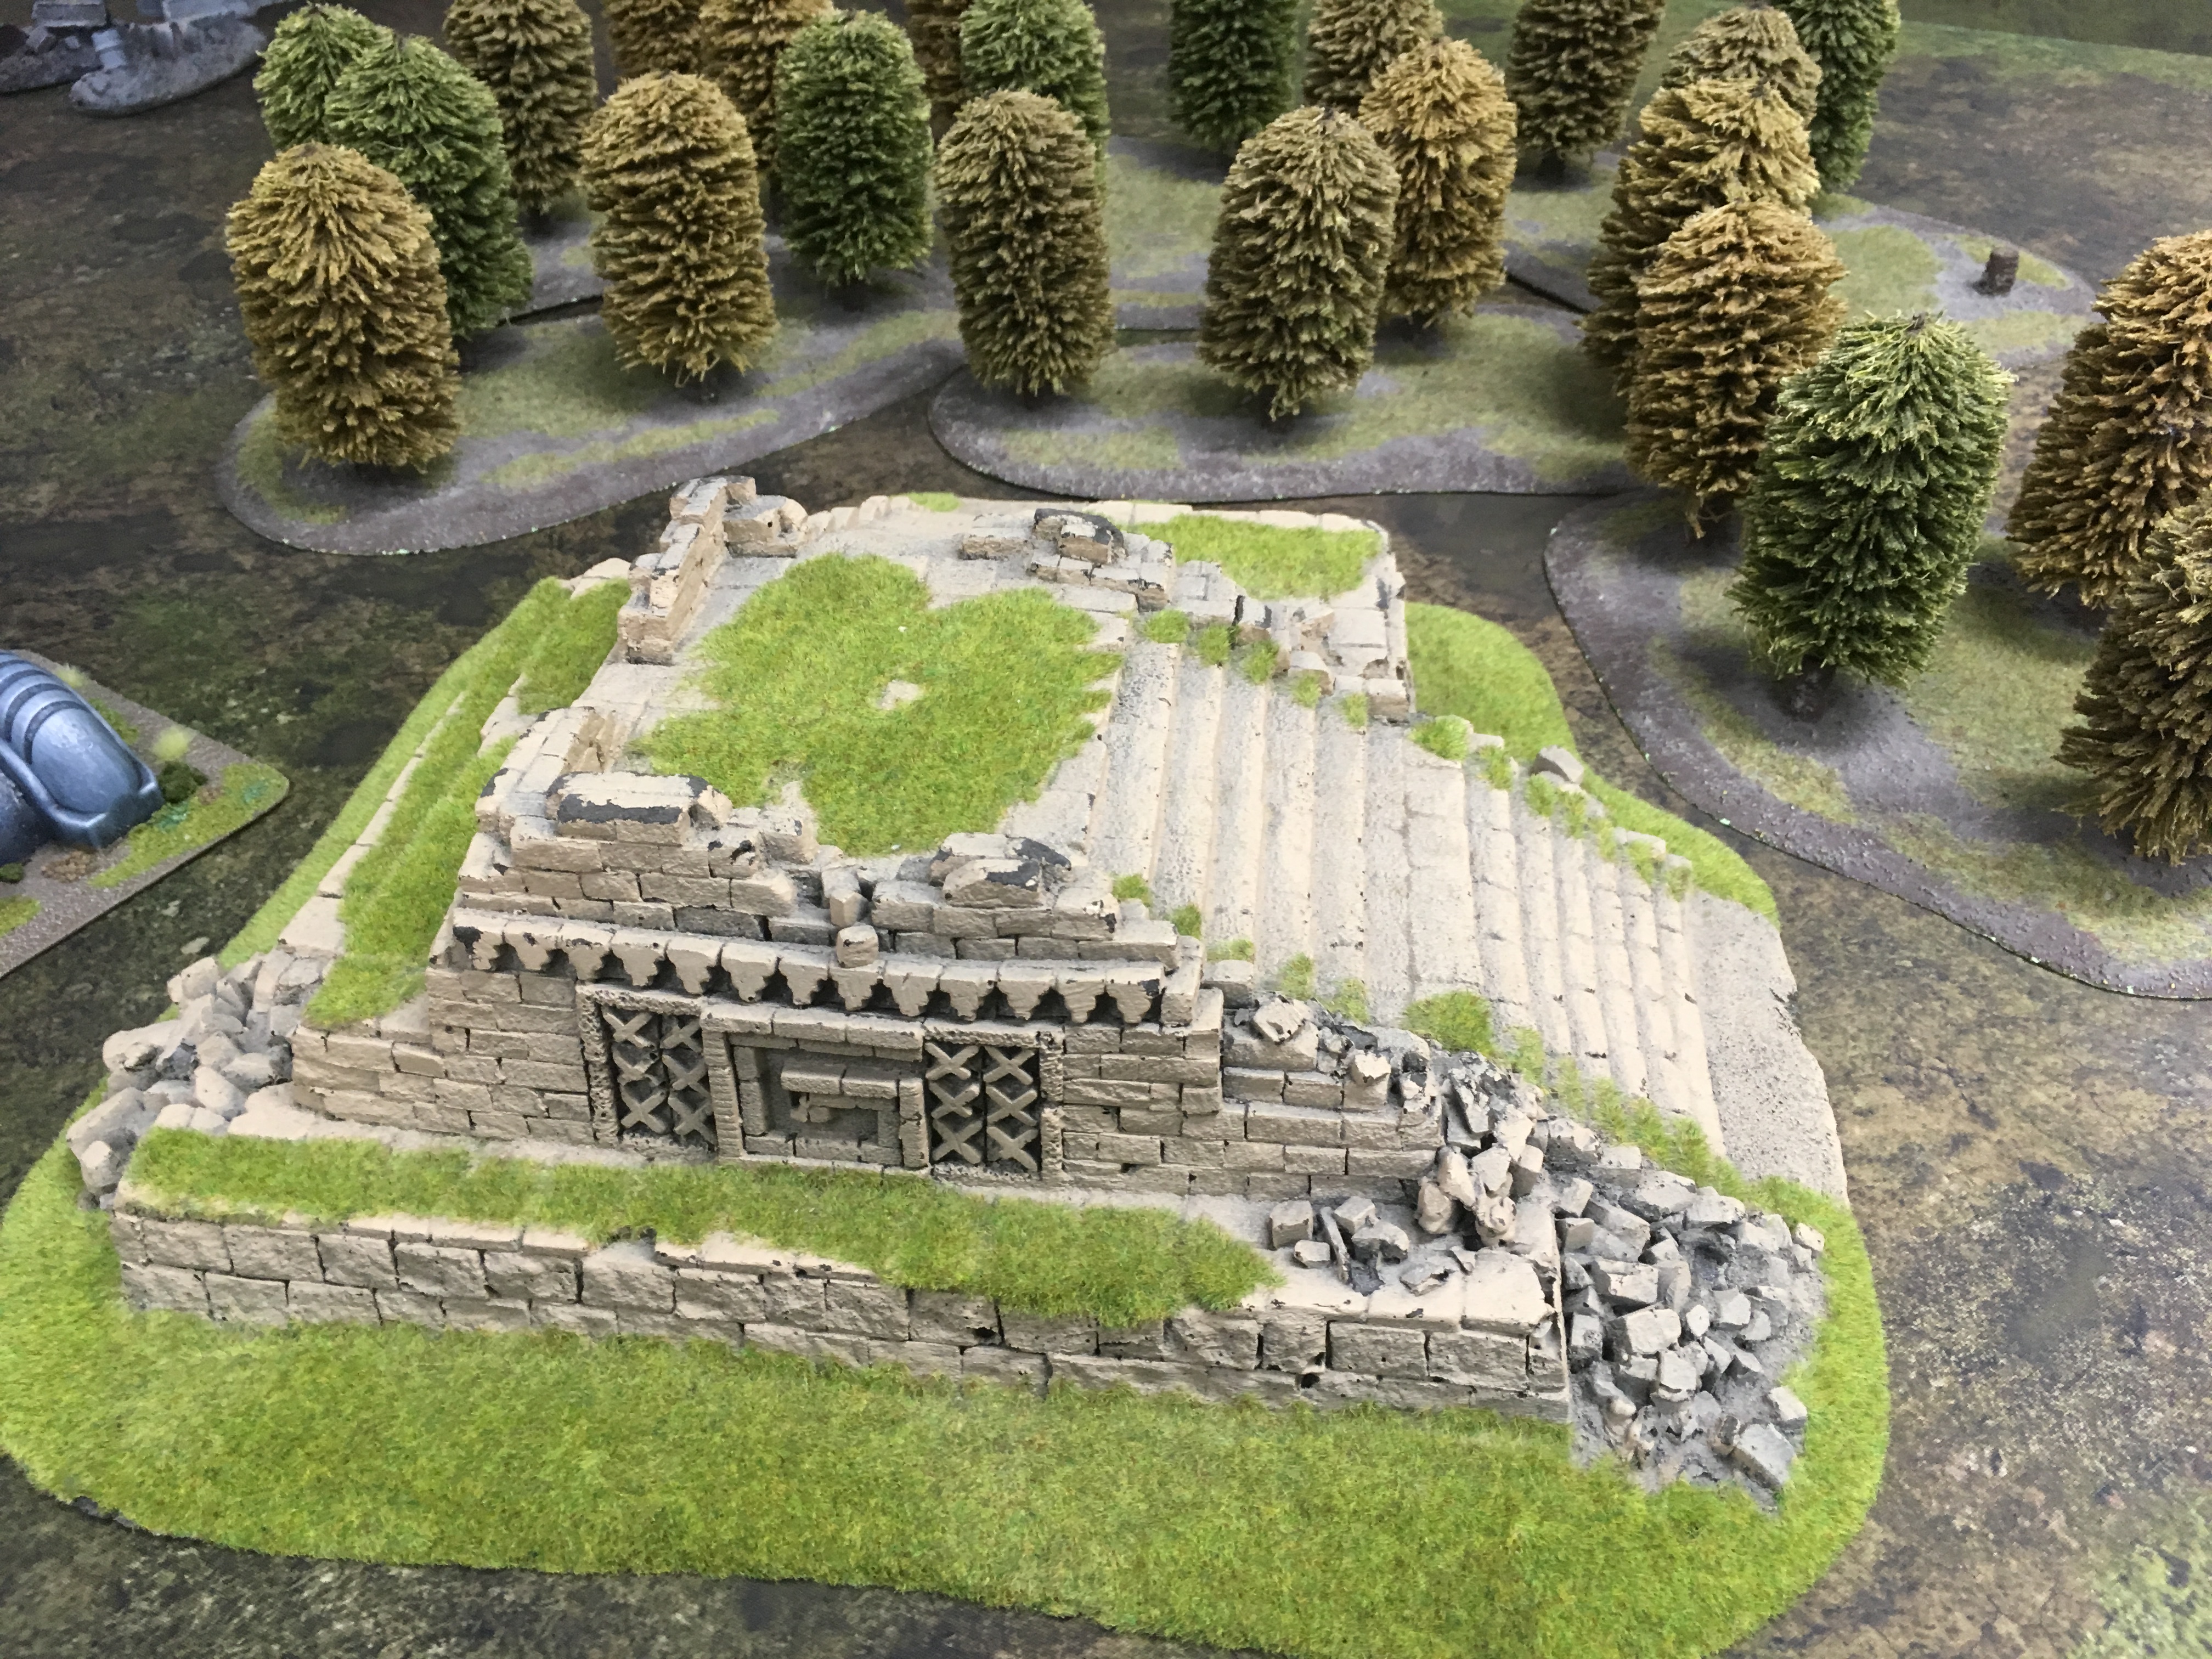
I don’t think im going to make a full temple as its huge (see below image) however I think it would be awesome to make a section of it, or a ‘runway outpost’ type part of it.
 The great temple really is a great big temple! I'll never be able to make it properly and have gaming space left over
So given that its huge shall we look at sections of it that could make excellent gaming areas.
Below is a cross section/cut away of it and it perfectly demonstrates just how large this thing is. In the bottom left of the underground hanger you can see two GR-75 Medium Transports, that are 90 metres in length. You may remember these ships as one of them bounced off the front of Darth Vader’s Star Destroyer at the battle of Skarif and were extensively used in the escape from Hoth.
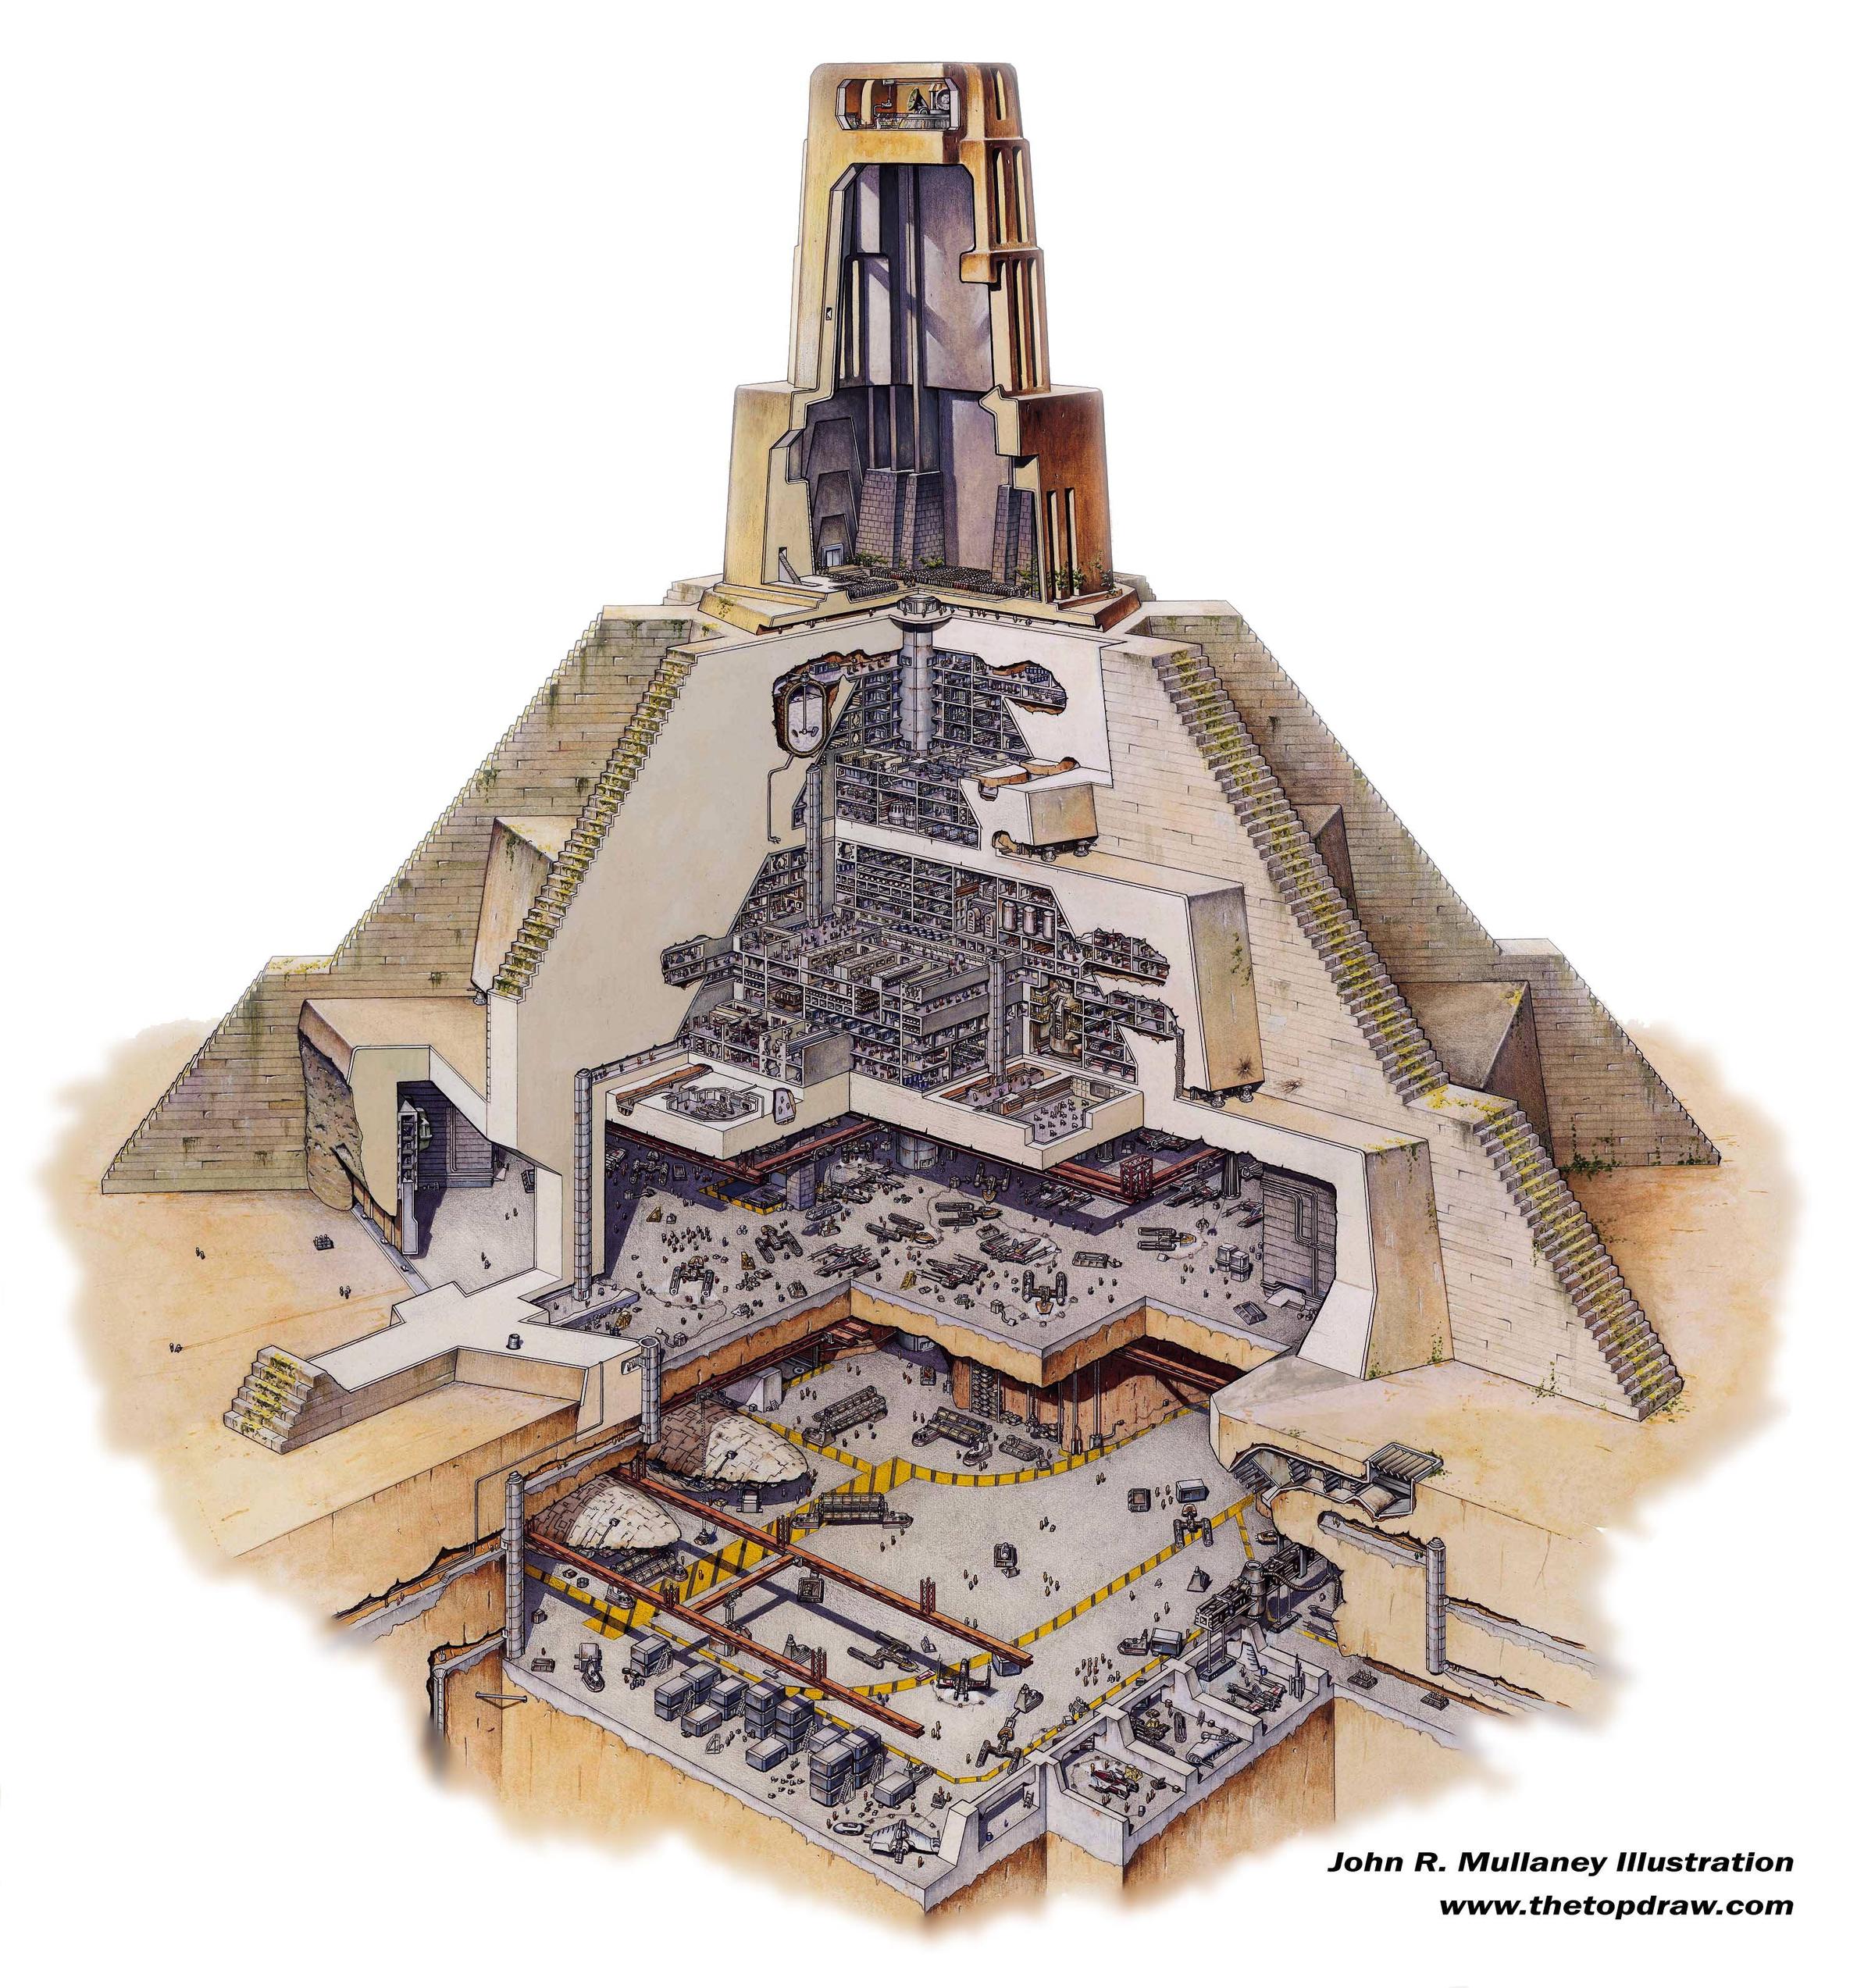 Just look at the size of that thing!
So now that we’ve decided that it would be foolish to make the entire site its time to think smaller.
The size of a gaming table for Star Wars Legion is set at 6’x3′. Thats a large area but also its quite small by normal war-game standards. I do not anticipate being able to make enough stuff to cover the whole table. Certainly not in time for this challenge, I’m not a madman. My FLGS (which is where I play this game, a lot) has recently bought a lot of the wonderful gaming mats from deepcut studios. The best one for this I feel is the swampy one. So I’ll work with that as the base.
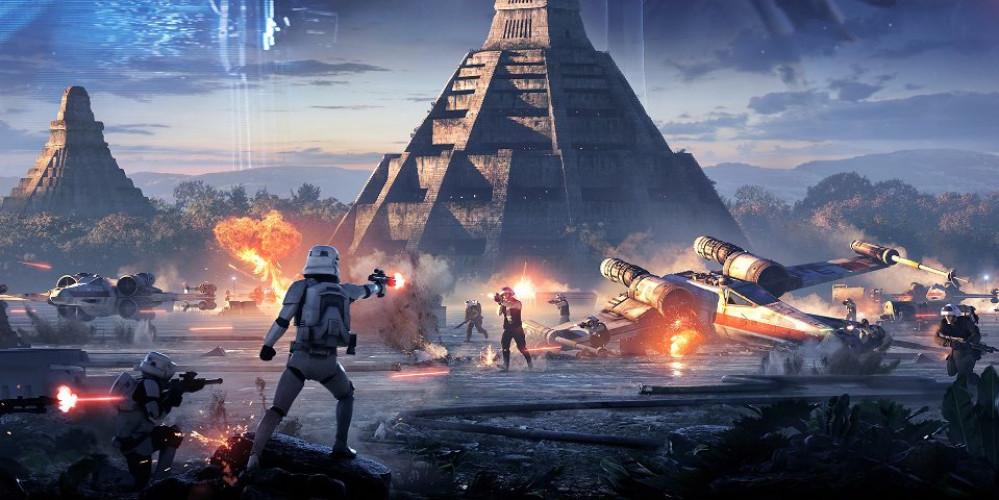
Given that its going to be an outdoorsy type table (I still can’t believe I’ve decided to do this… lunatic) lets look at some cool artwork online for inspiration
 A view from the treeline towards the temple. Clearly a large open area for ships to land
 Cool image of X-Wings scrambling from the temple hangers. Note the overly green tinge
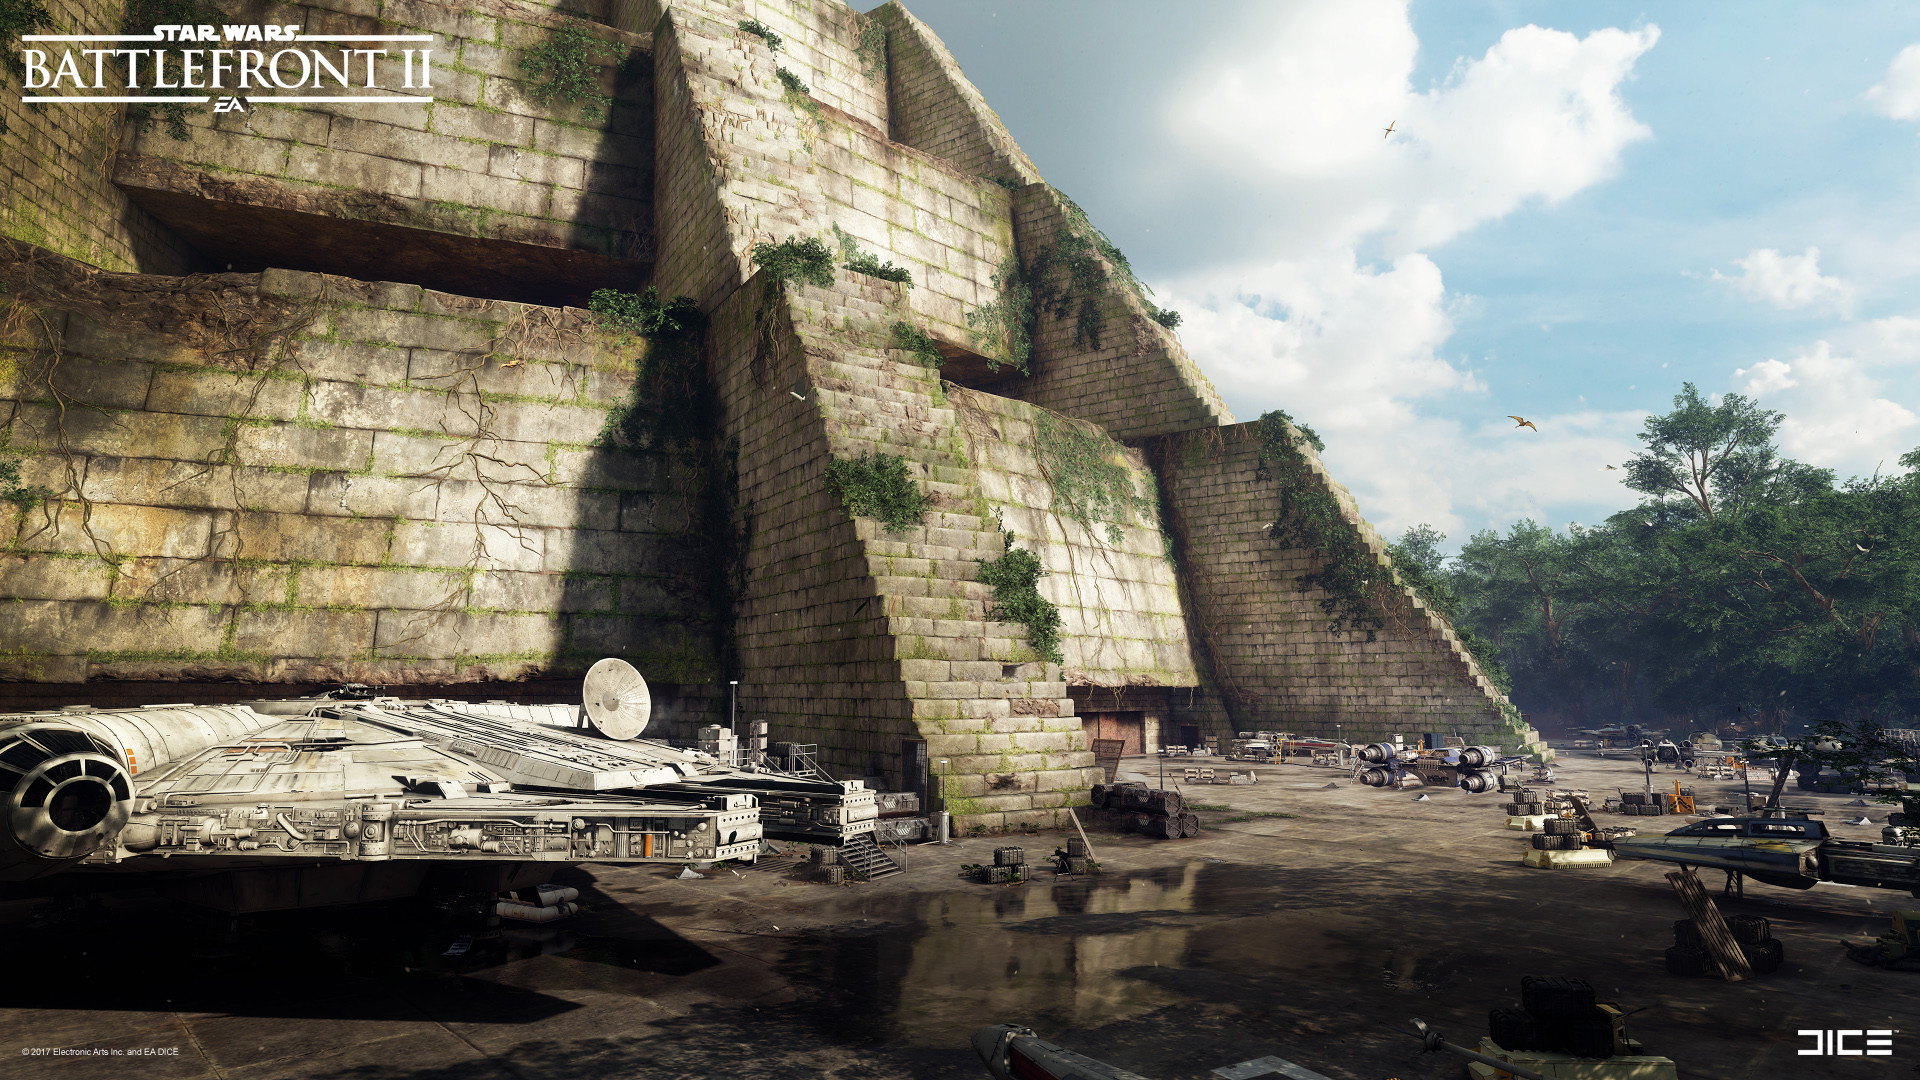 Image from the Battlefront 2 game showing the Falcon parked up
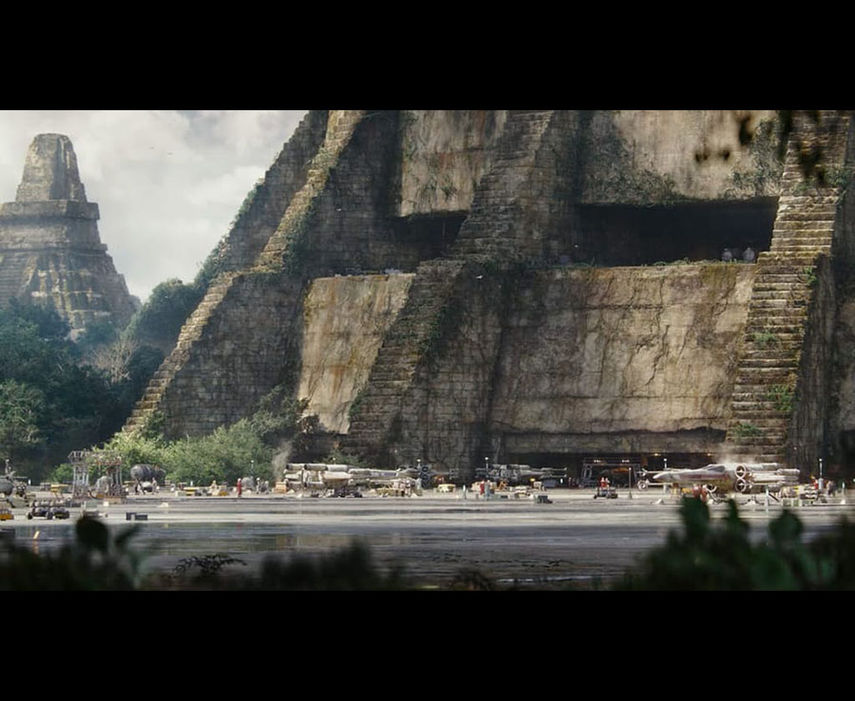
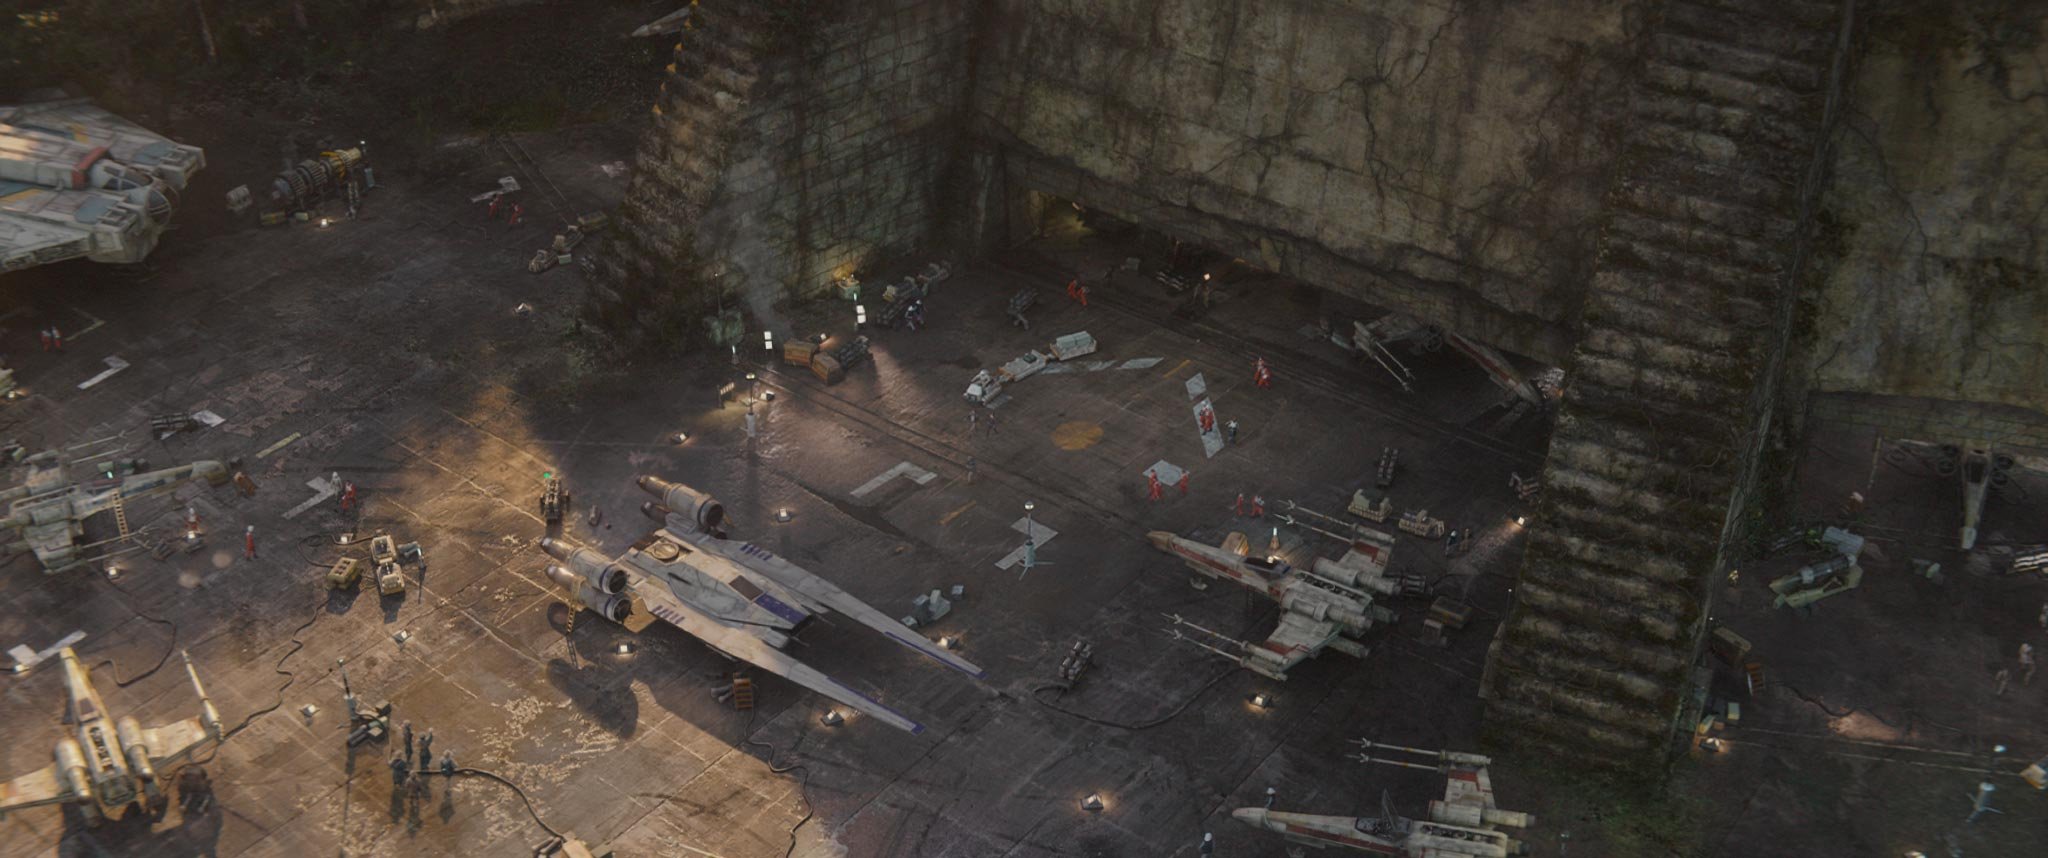 A shot from Rogue One showing the landing area nearer the Temple doors
I really enjoy the last image, I think it would make a wonderful play area. Open, flat, easy to see models etc but also plenty of line of sight blocking material, specifically ships, cargo, fuel etc to make interesting games. Not sure how I am going to make it without having to make the temple however, I don’t want to make a big one. Perhaps it would be wise to look at the original inspiration for the temple for the films. The set for the Yavin IV base was the Mayan City of Tikal in Guatemala.
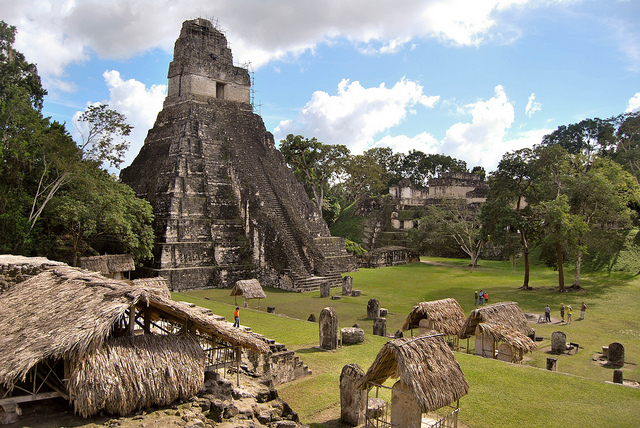
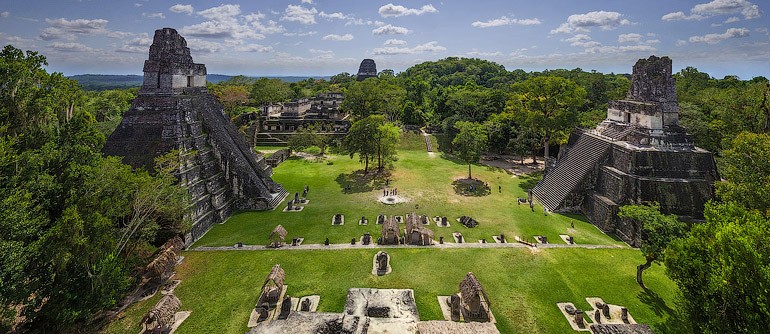
We can definitely see where some of the inspiration came from. The tops of the temples are alike and the stepped sides are similar, just much much bigger in Star Wars. Because as Warren always says, “More, is More”. The steps on the Tikal temples have been replaced by large stepped buttresses.
I feel it’s time to make a drawing!
Planning Stage
So lets put pen to paper (or stylus to tablet) and come up with a plan.
below is a top down view for what I hope to achieve
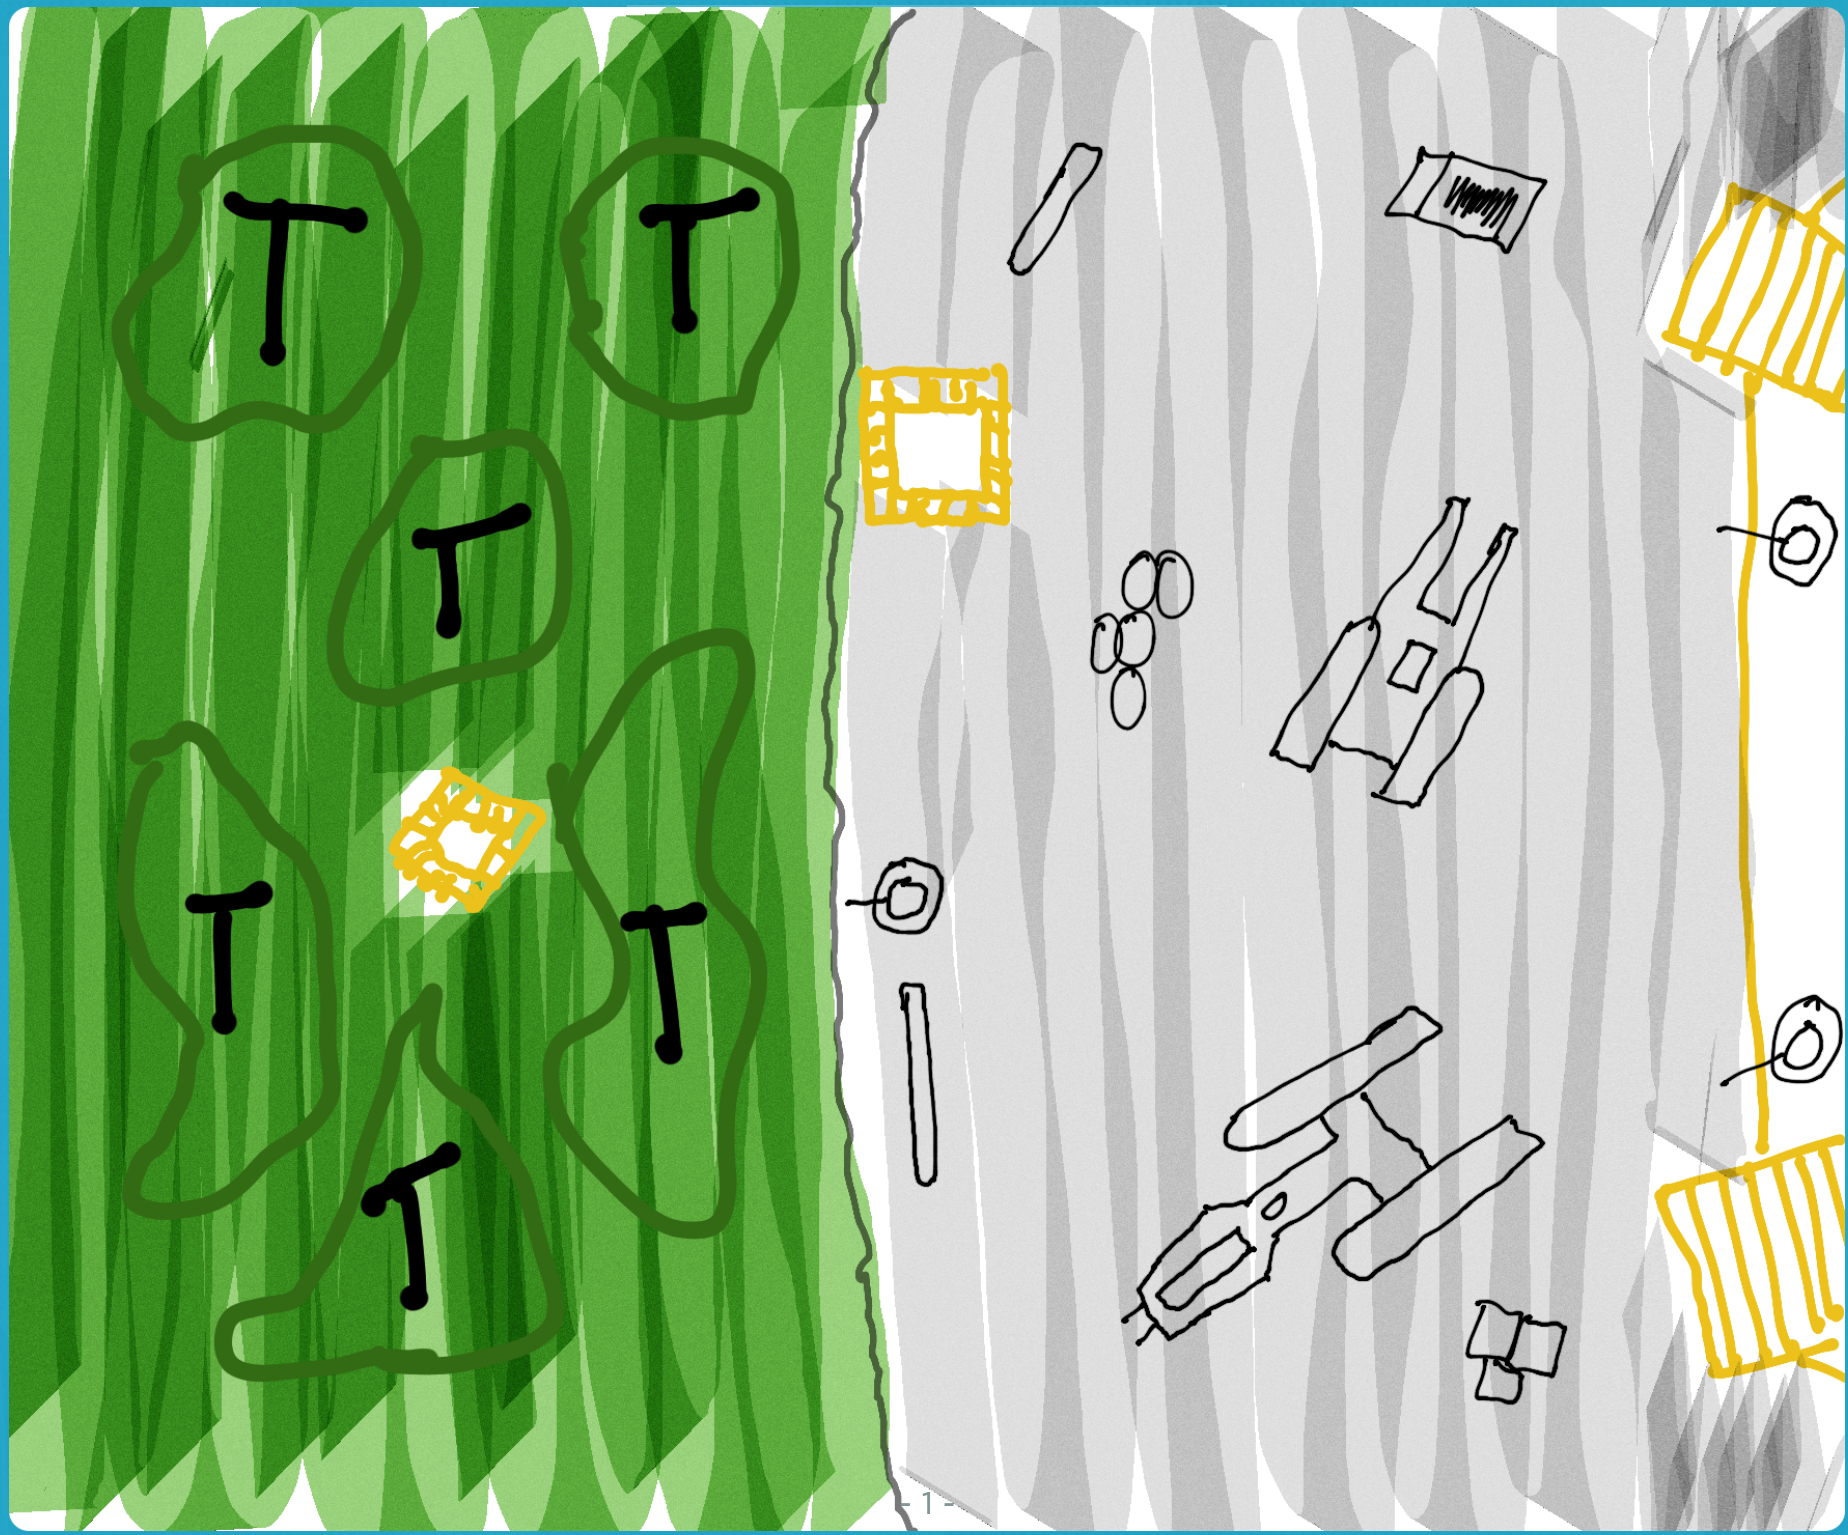 hmmm, that looks familiar
on the left hand side of the image you can see a green area, I plan to make use of the previously mentioned swamp mat for this area and then have some trees. The FLGS has some trees but they are very deciduous and not at all jungly so I might have to make some specially. not sure how to achieve this though so some thought might be required.
On the right in yellow you can see a section of the temple. I do not plan to make this full scale (thats mad) as this will be a themed board I think a representation will be more than enough. in other places you can see yellow structures. These are representations of other smaller towers from the massessai culture which have been reclaimed by the jungle etc. the point of them is to keep the theme of old clashing with new running across the table.
In the middle you can see a big grey area. this is the main landing pad area outside the temple. In the pictures and film this appears to be made of Ferrocrete (Star Wars Concrete) slabs or blocks. Im not entirely sure how I will achieve this big blanket area in a way that looks good and is easy to store and change to different tabletops, desert, city, planes etc. Entry on that soon.
Scattered across the landing pad I have drawn ammo boxes, fuel containers, emplacements and other landing pad detritus. Star Wars has very specific requirements for their fuel and ammo boxes so may need to buy or have them made. We shall see. In addition to this scatter I have drawn a couple of Starfighters. A U-Wing and a Y-Wing. I have found some cheapish 1:72 scale child’s toys for this on the internet. I know the scale of legion is 1:48 or 1:52 but after a discussion on facebook which came back with mixed reactions to different scales I have decided that I’ll give them a punt. At the end of the day, they need to LOS blockers rather than 100% sized perfections! Representation is key I feel.
I have also drawn some circular towers, most notably on the temple and boundary of the jungle. These are planned to be defence towers, specifically the a DF.9 Anti Infantry Tower. These appear to be extensively used by the rebellion as base defences, see the cross sectional picture and the historical documentary “The Empire Strikes Back” for the Battle of Hoth scenes. I don’t plan to make these game playable pieces as they will all face one way (away from the temple, obviously) but they can be great cover.
when all this is put together I am convinced that it fits with the terrain challenge. The Battle of Yavin was almost the end of the Rebellion (with one swift stroke). I can imagine the whole base being extremely tense and apprehensive. Arming up starfighters for the upcoming battle or maybe after the battle during the abandonment of the facility. The Empire clearly would not just sit and let the Rebels run away. The loss of the Death Star was a massive embarrassment for the Empire, they would swiftly deploy a fleet to pulverise the base. Perhaps the Rebels are halfway through packing up and refuelling the final starships and freighters when the Imperial ground assault has happened. There is so much appeal to this last ditch rearguard action to get the last ships out the system, the troops are desperate, as their hope, dreams and personal existence’s end is nigh…
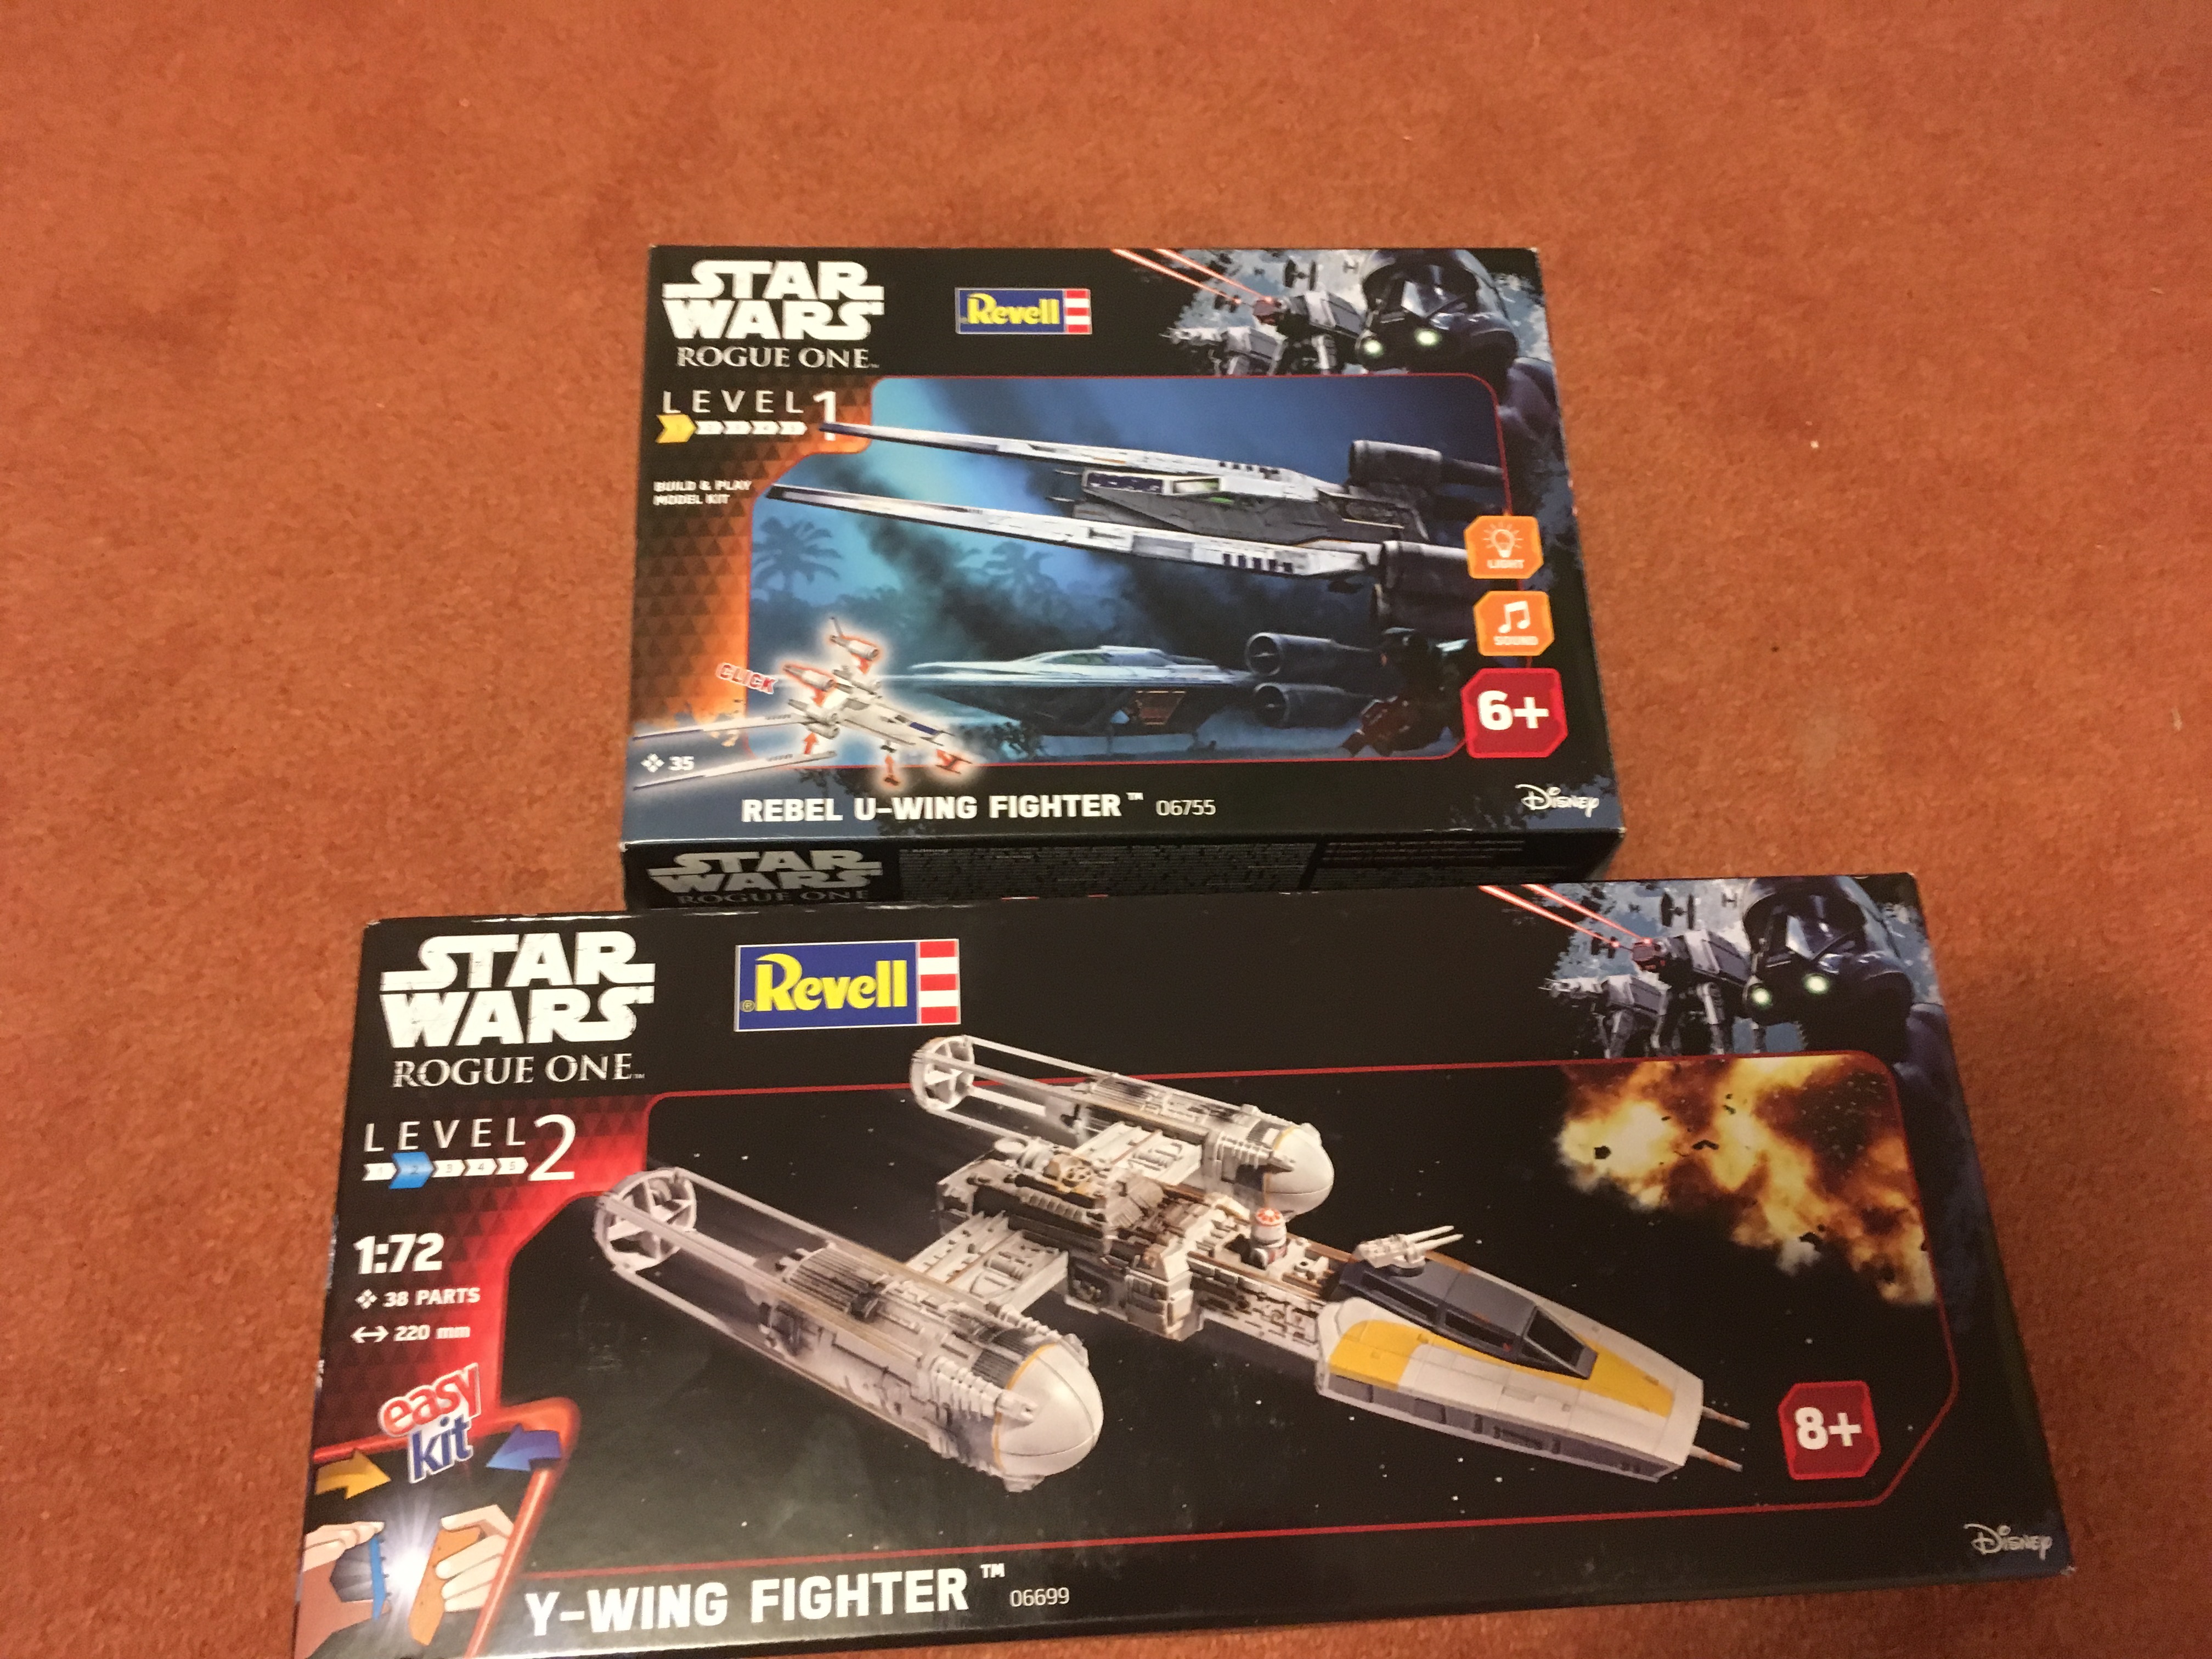
So will 1:72 look naff or not?
with the delivery of the starfighters the only way to know whether they will be of any use to my project or not is to just build them and hope for the best.
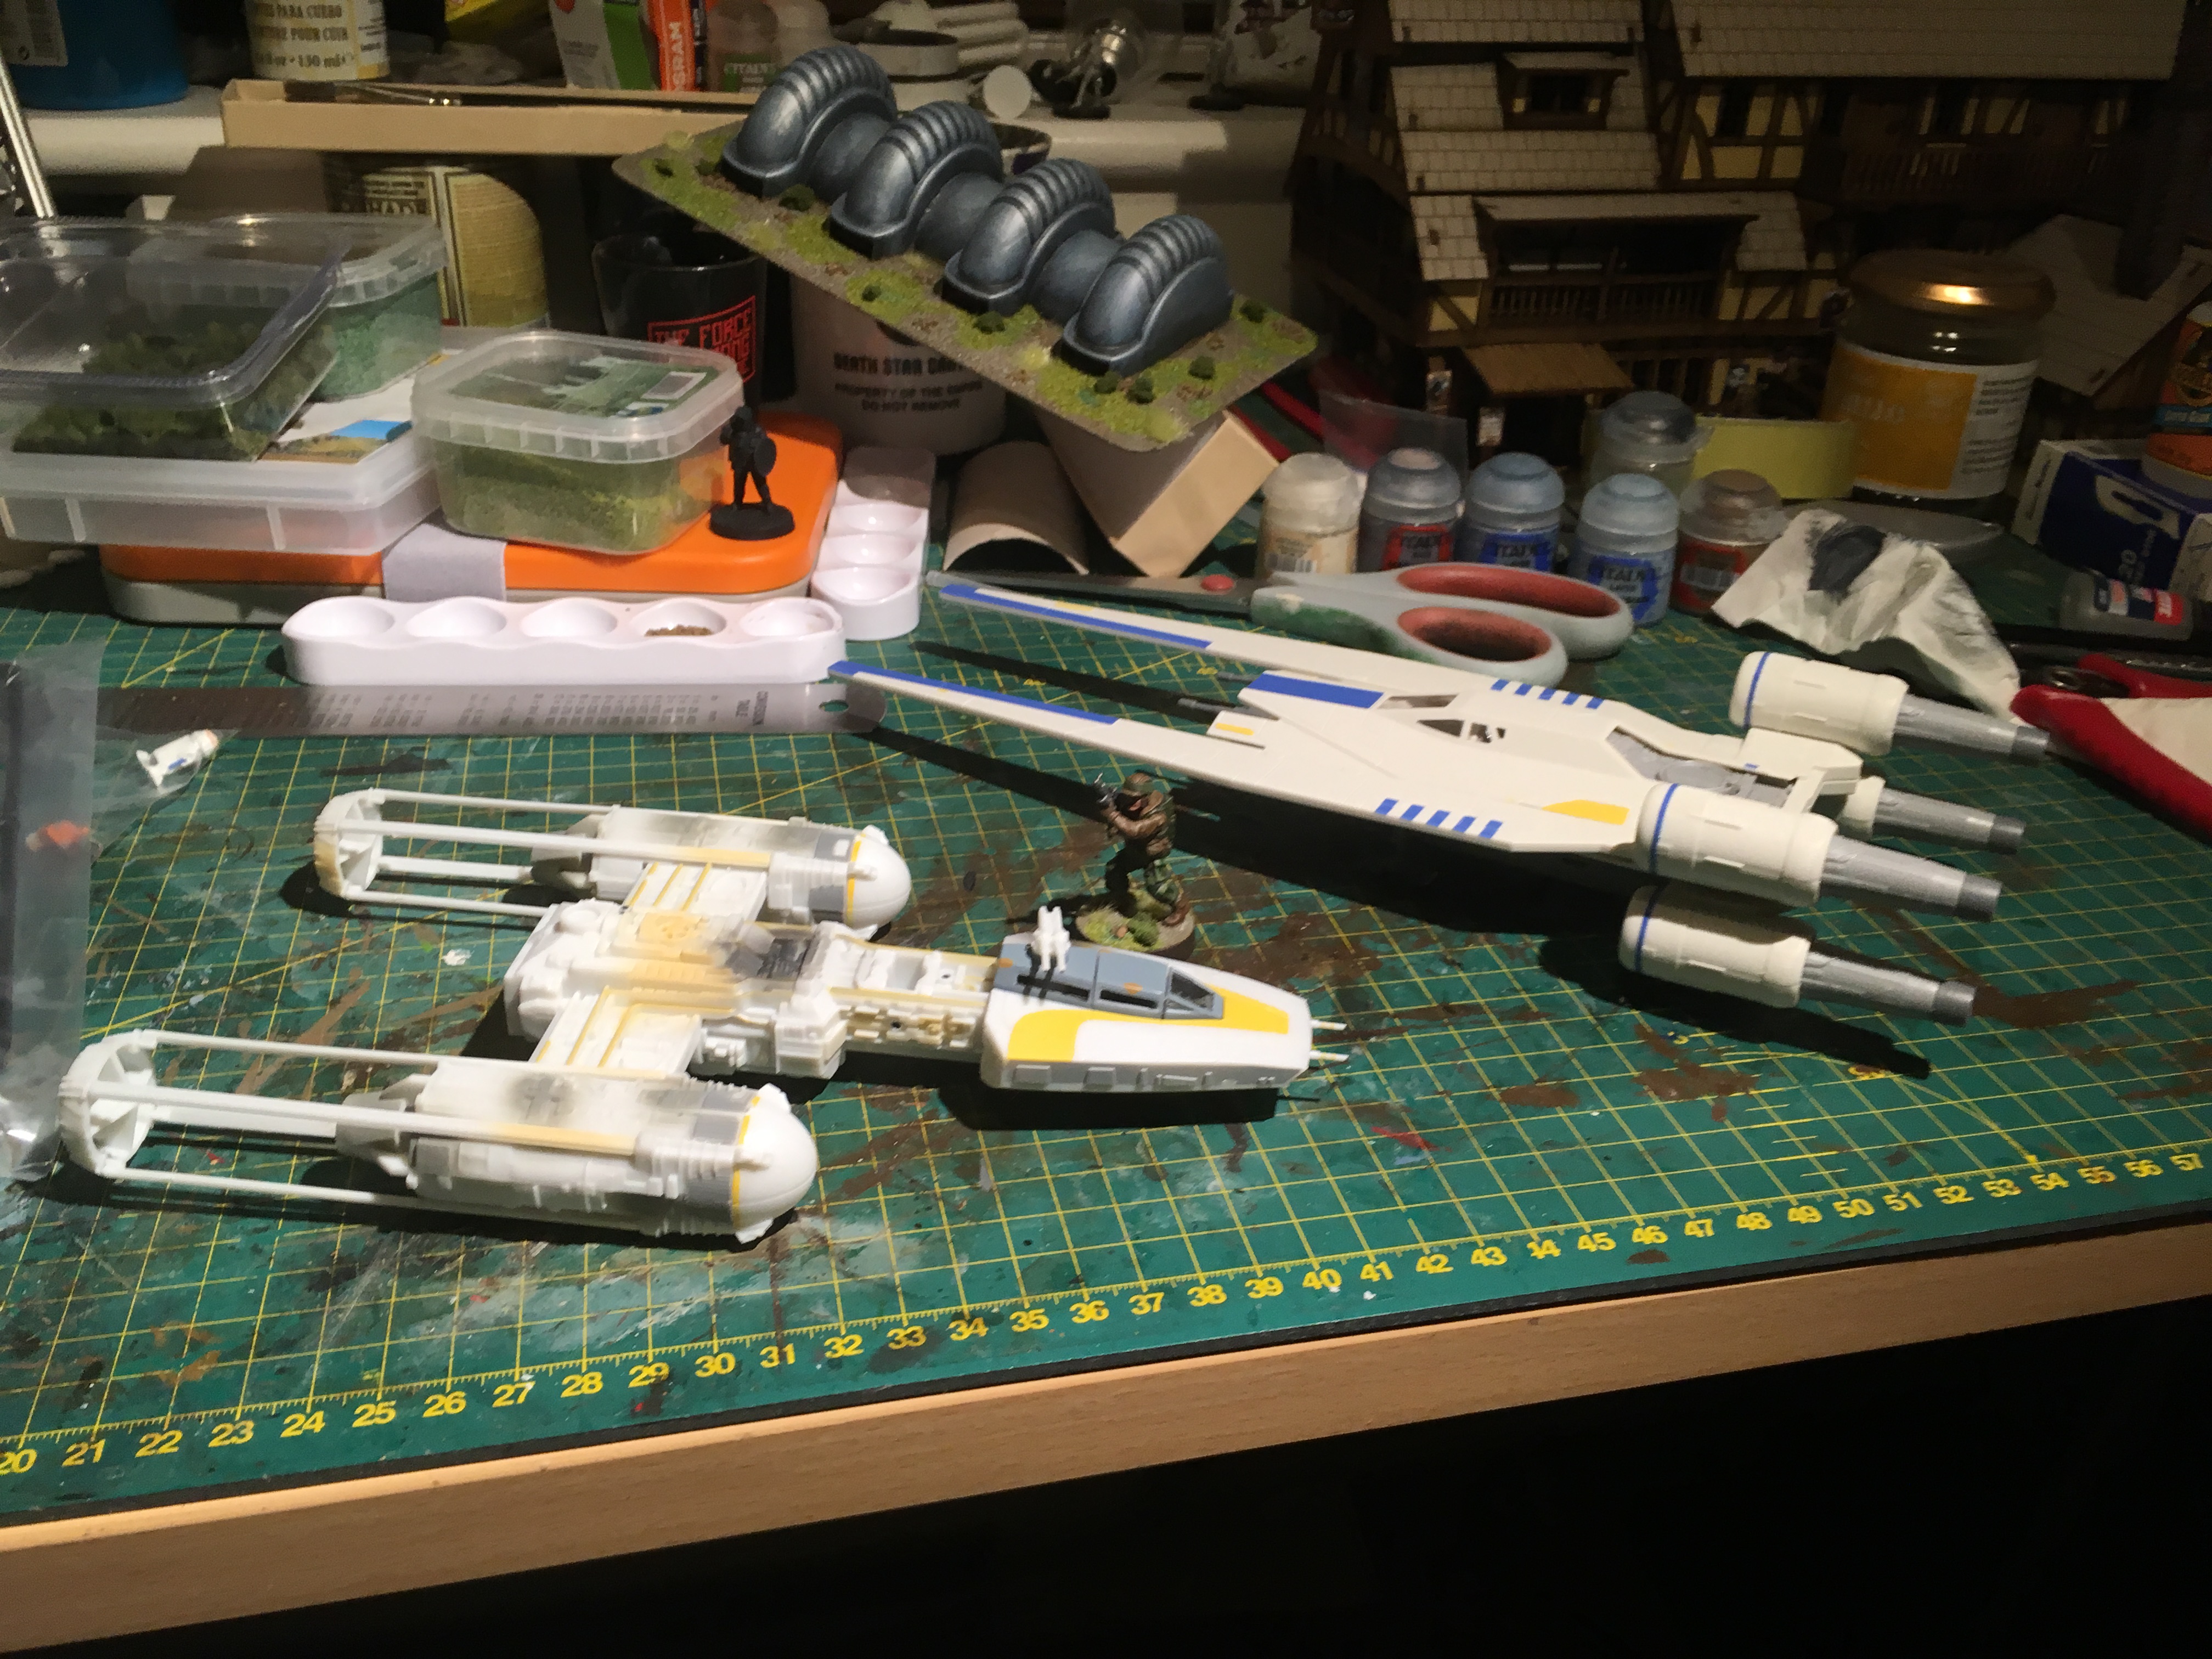
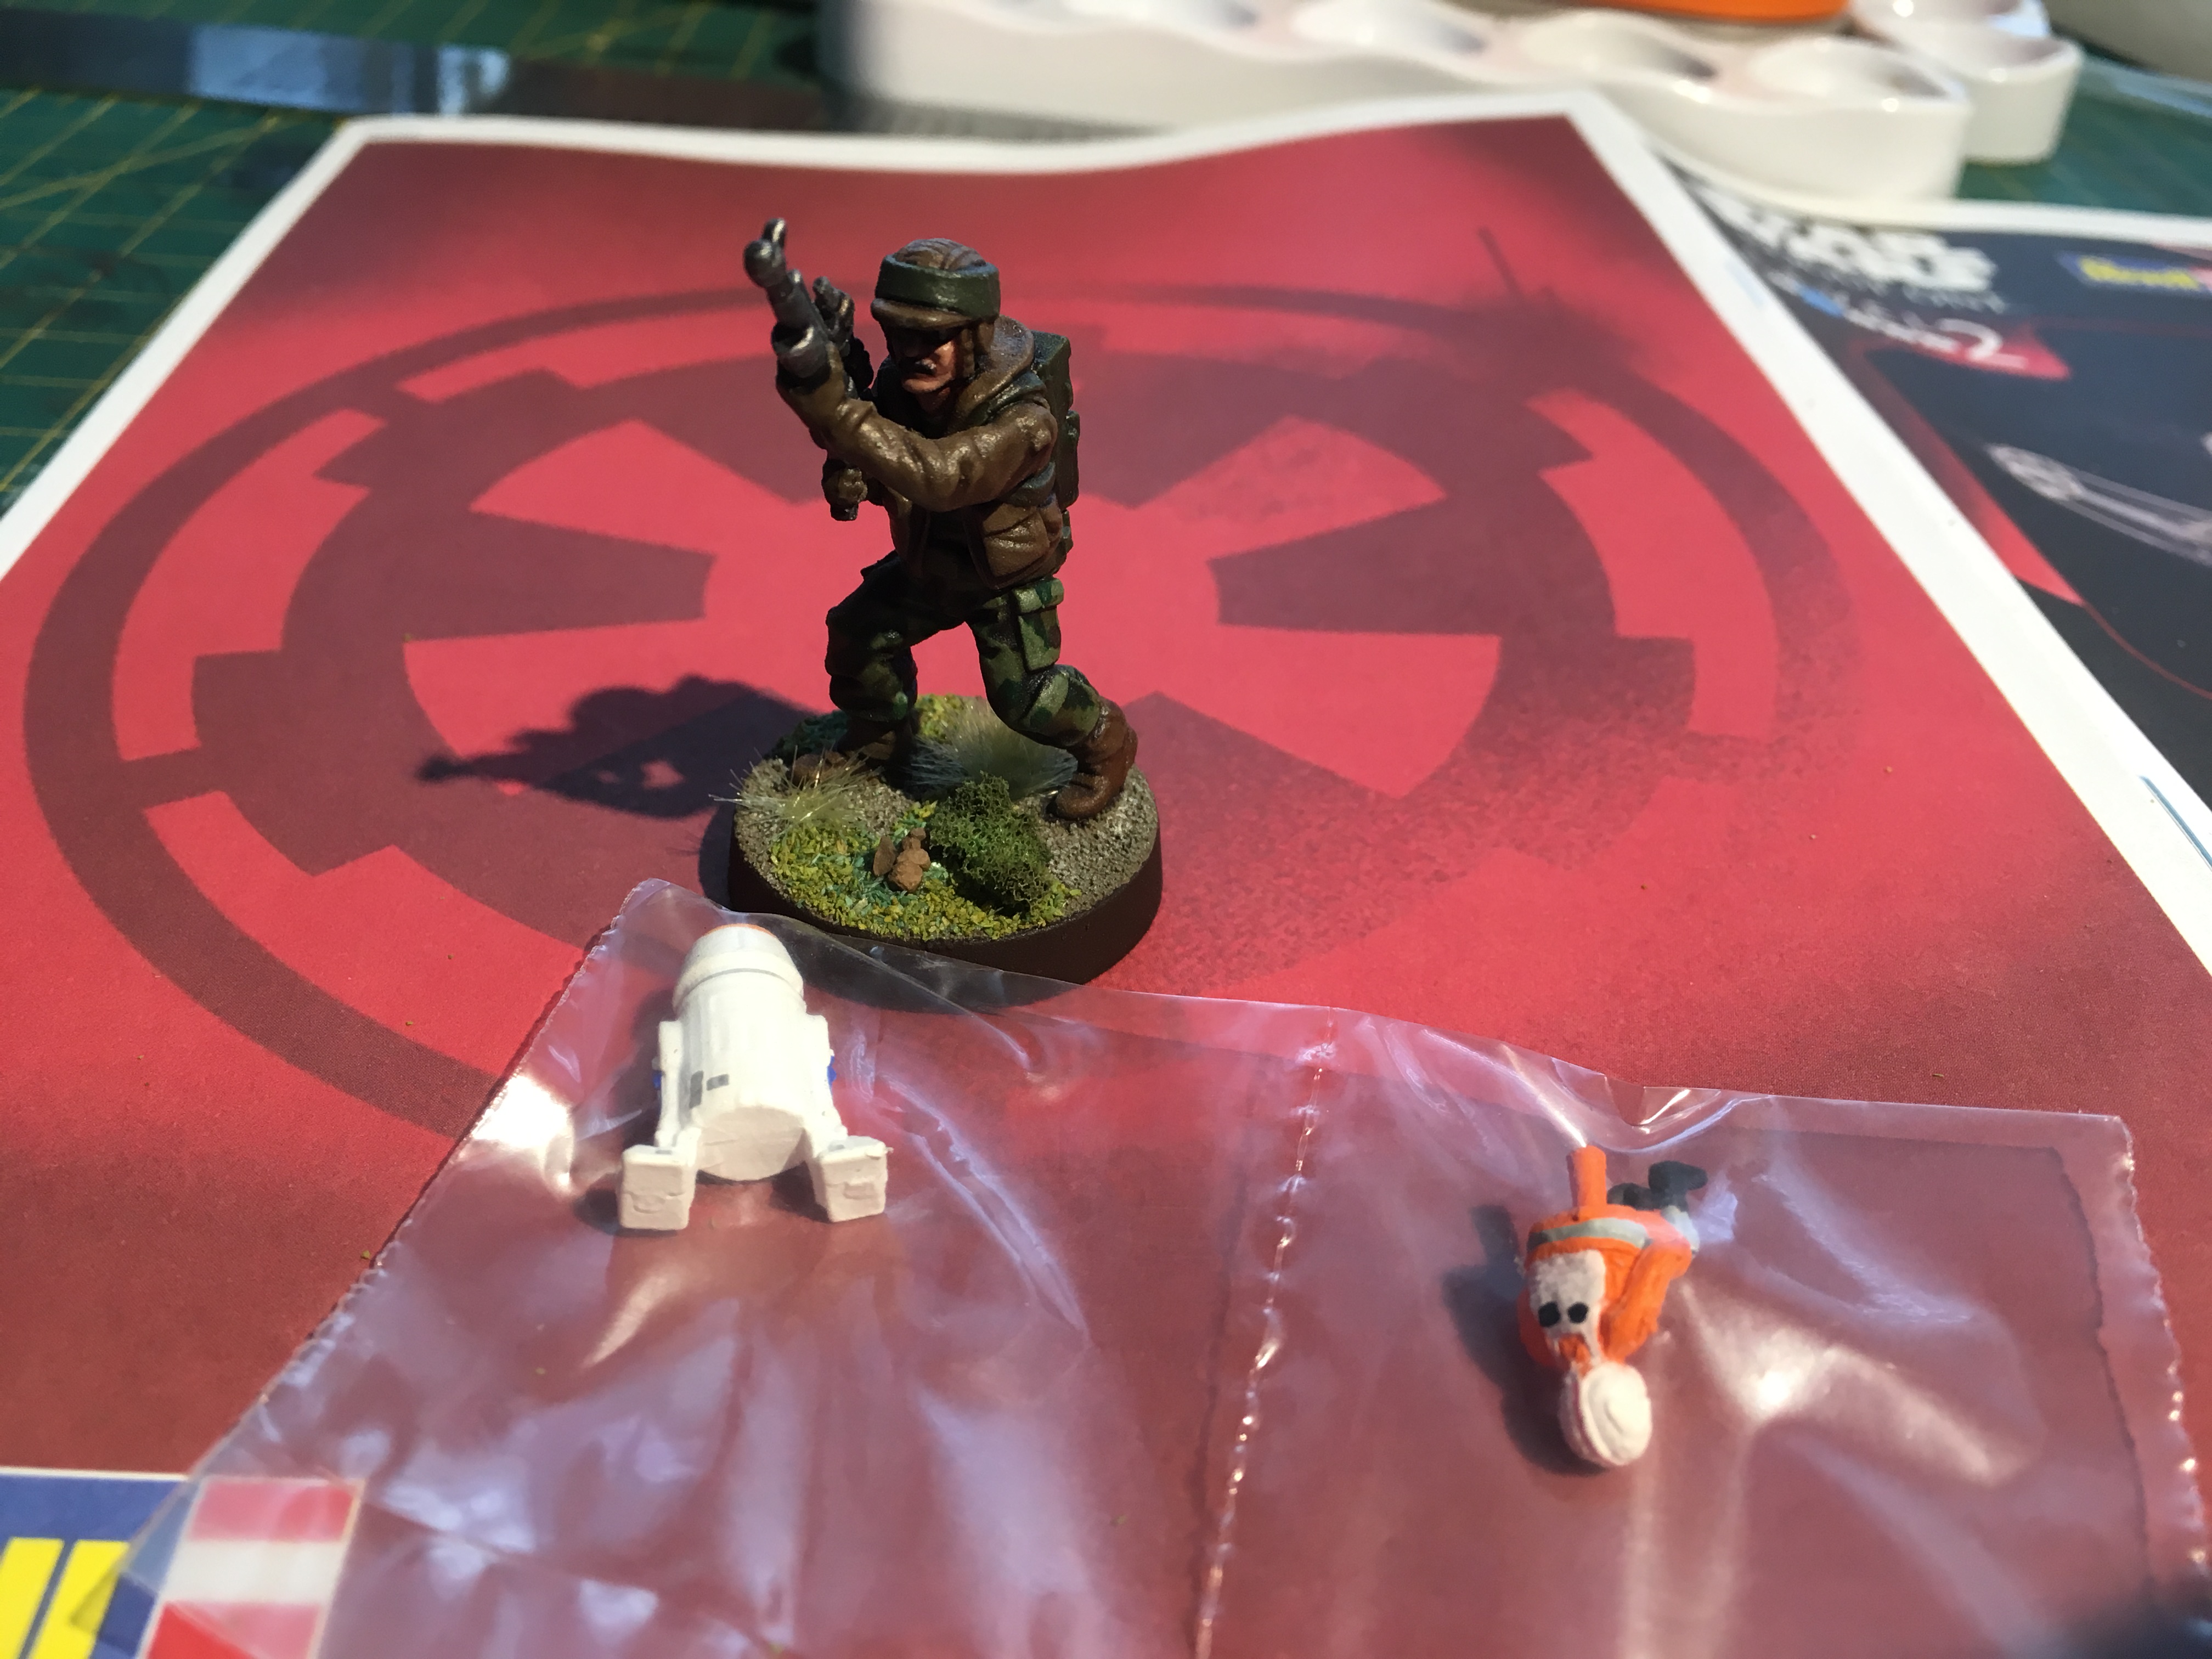 not a good sign!!
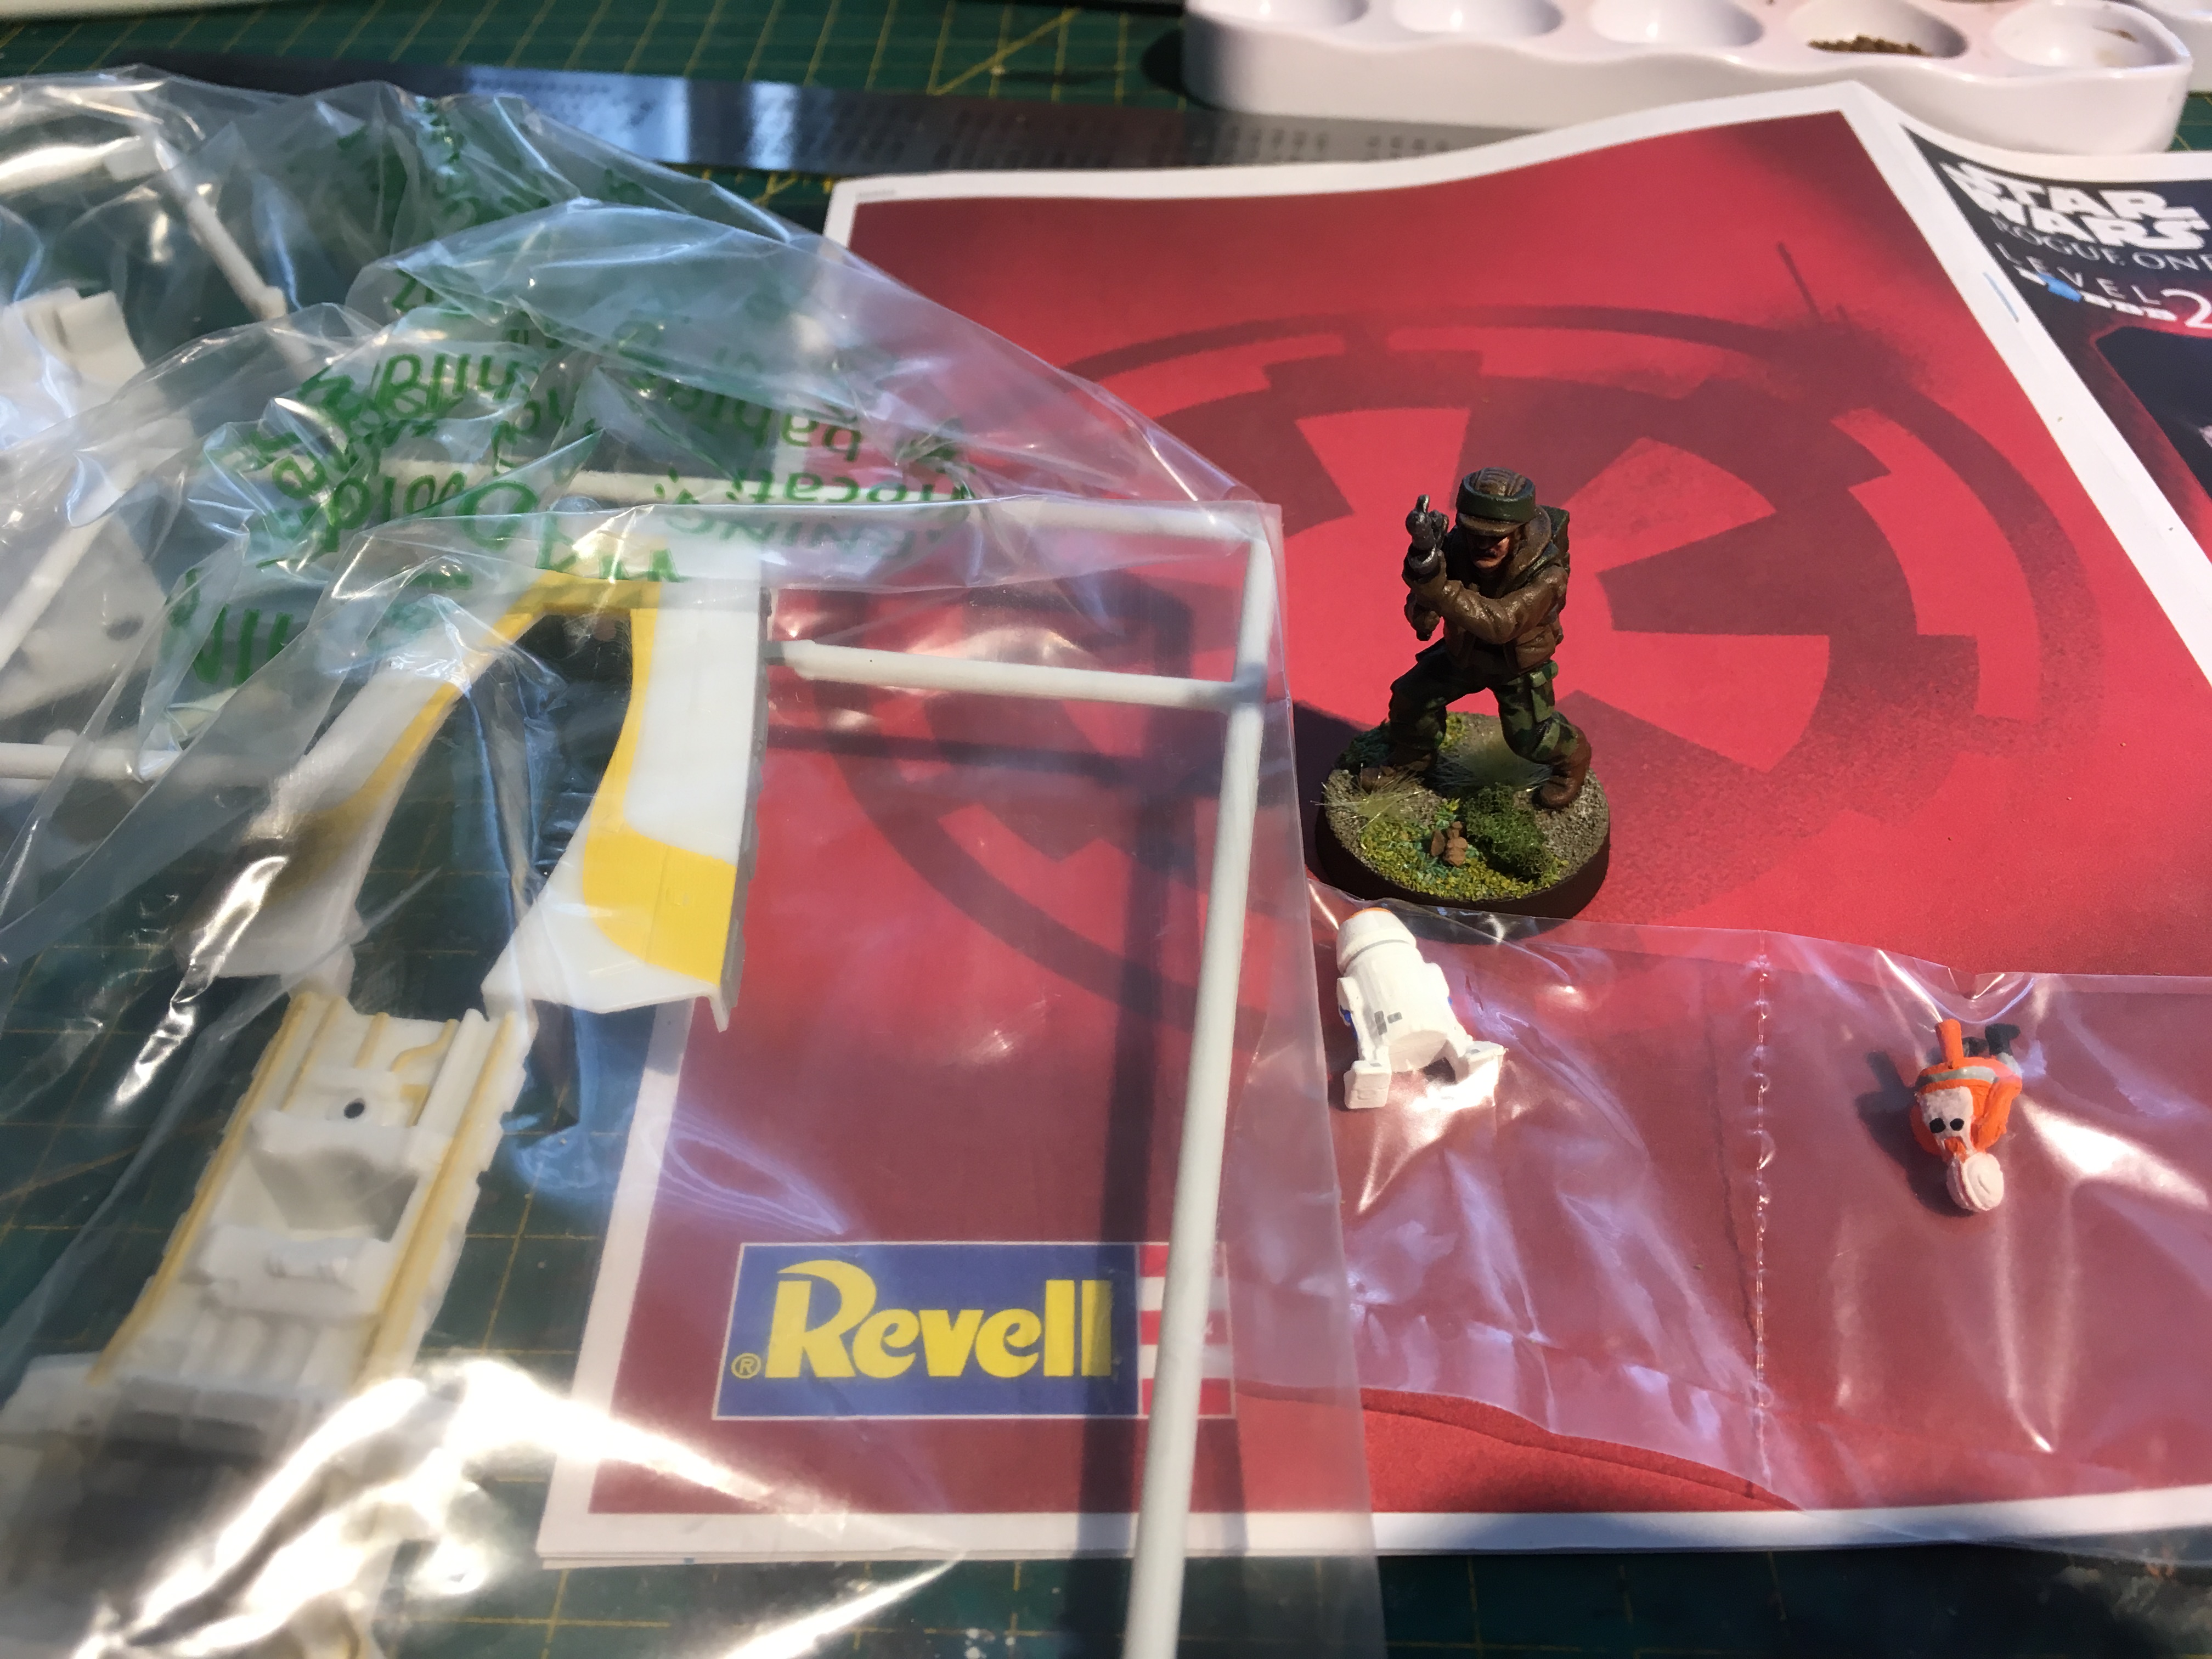 hmmm perhaps the person in the model y-wing is overly small.
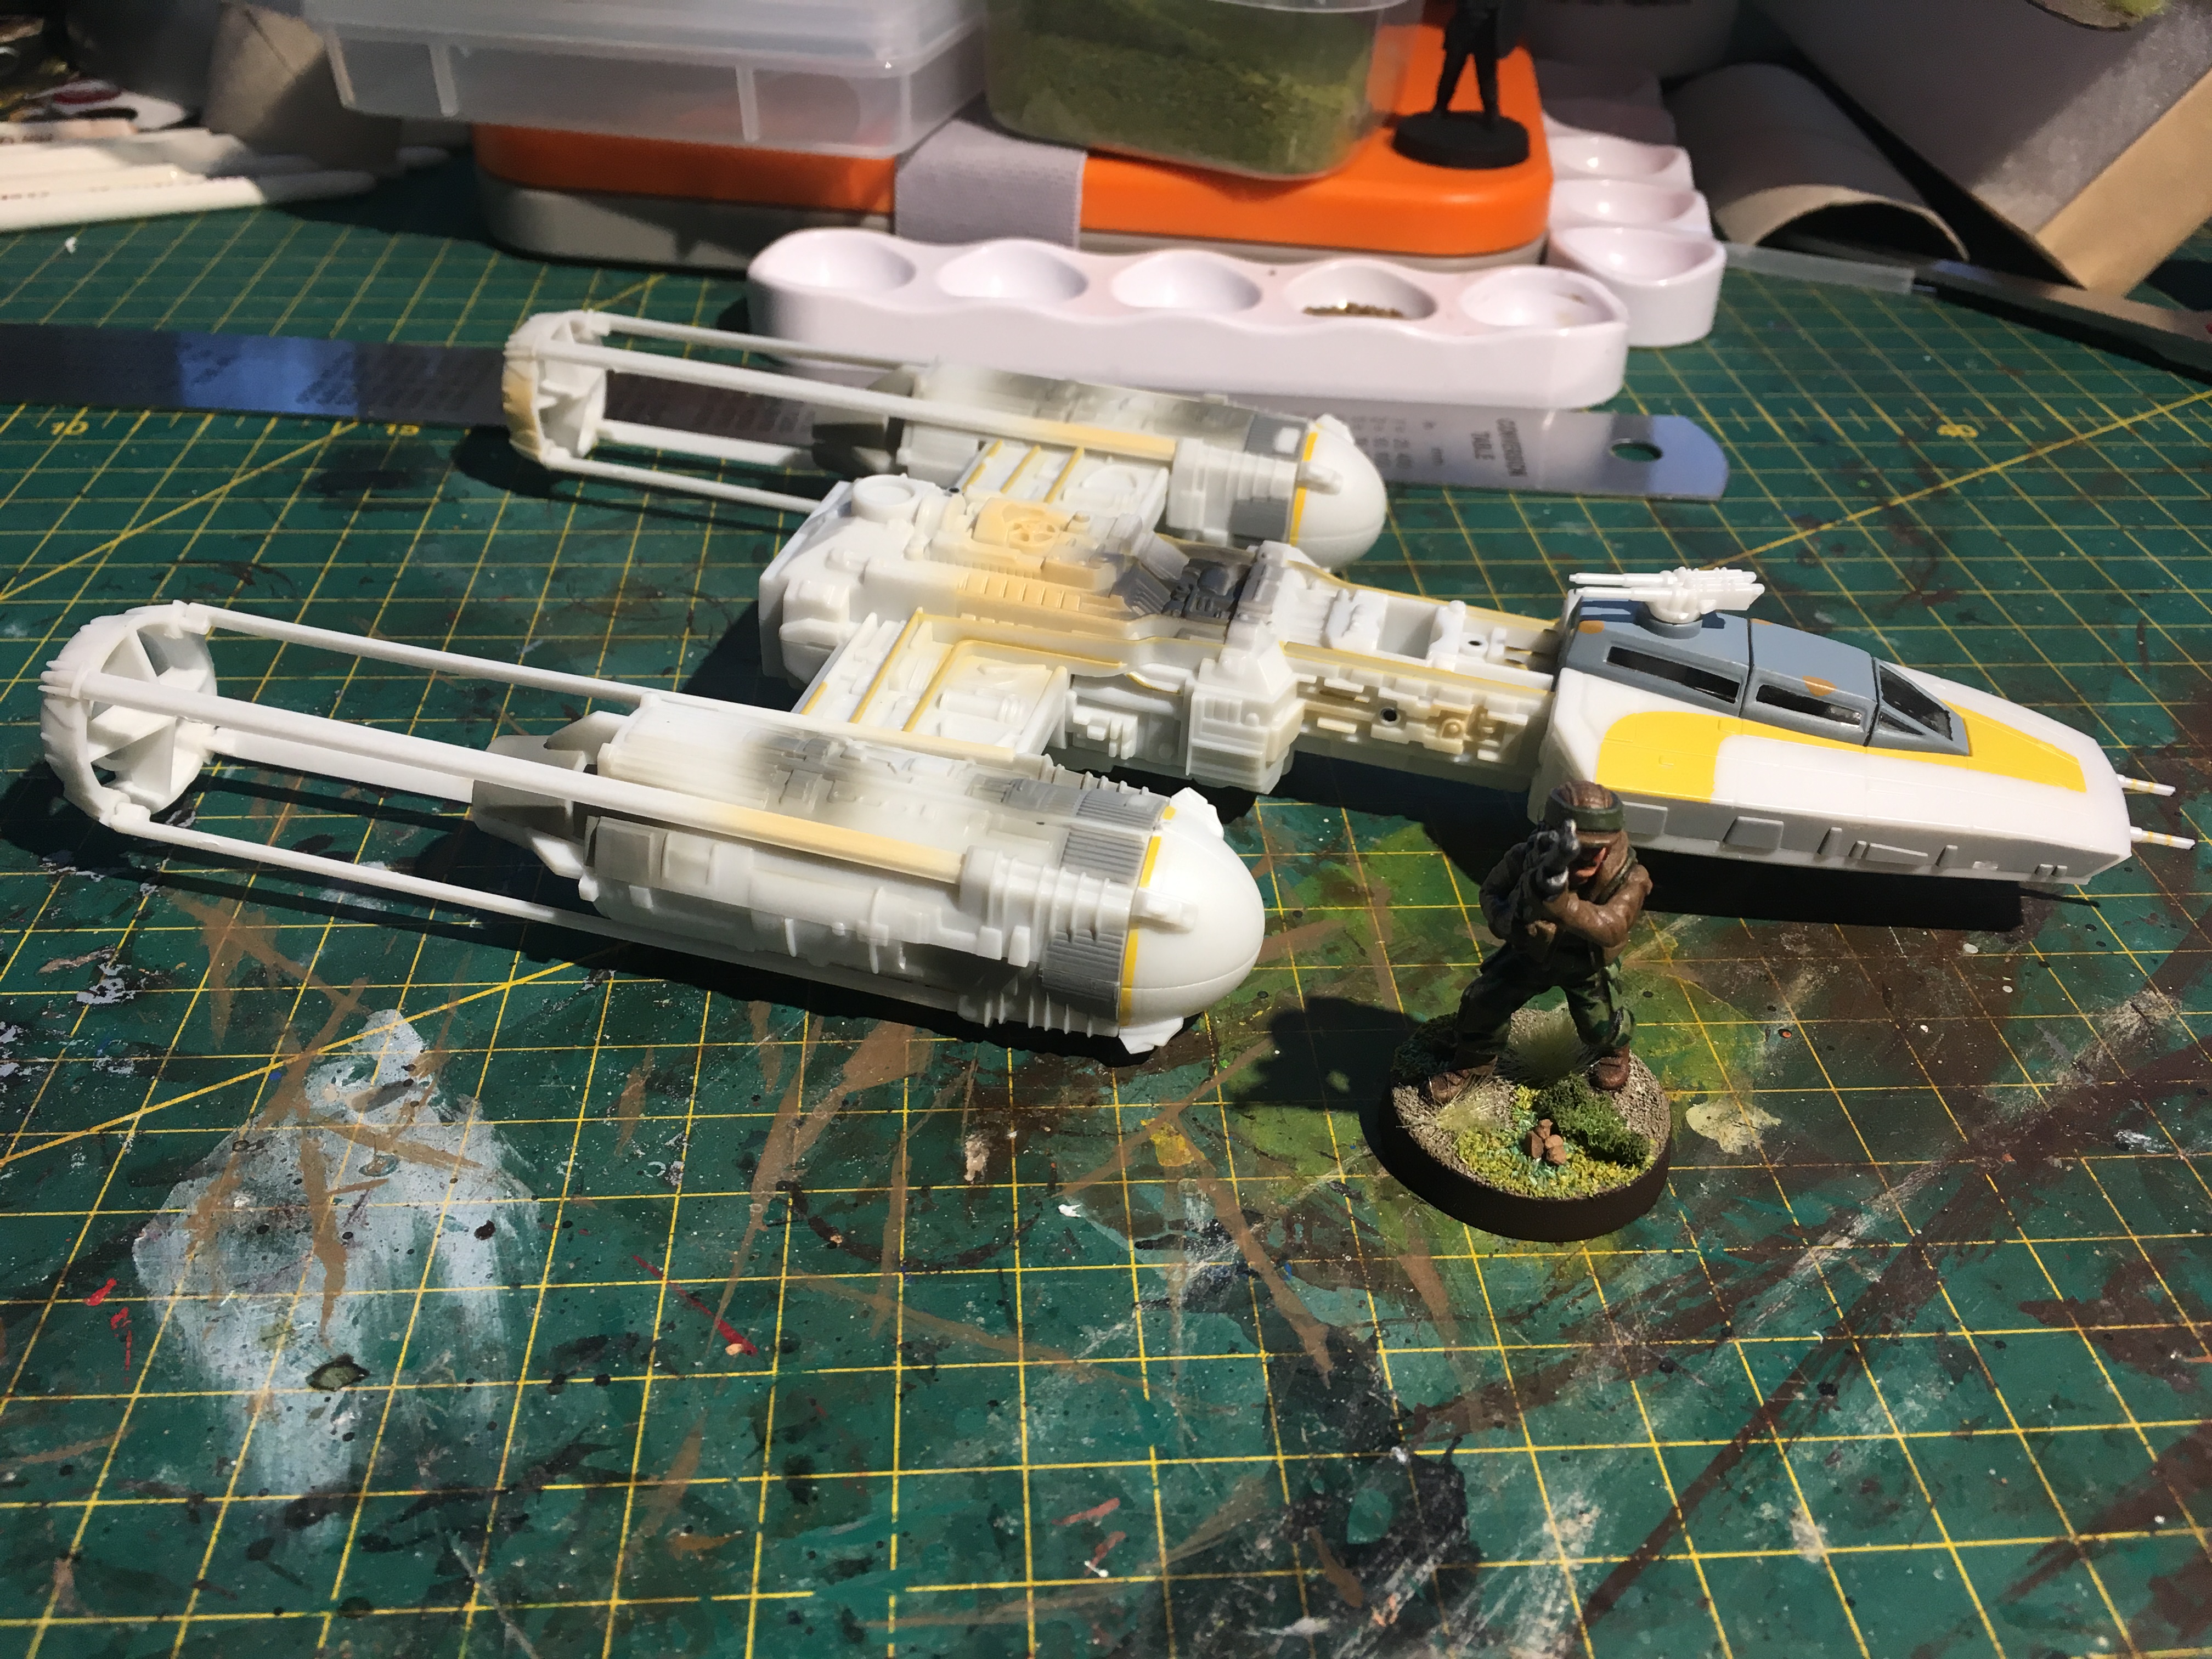 Yeah so it is noticeably smaller
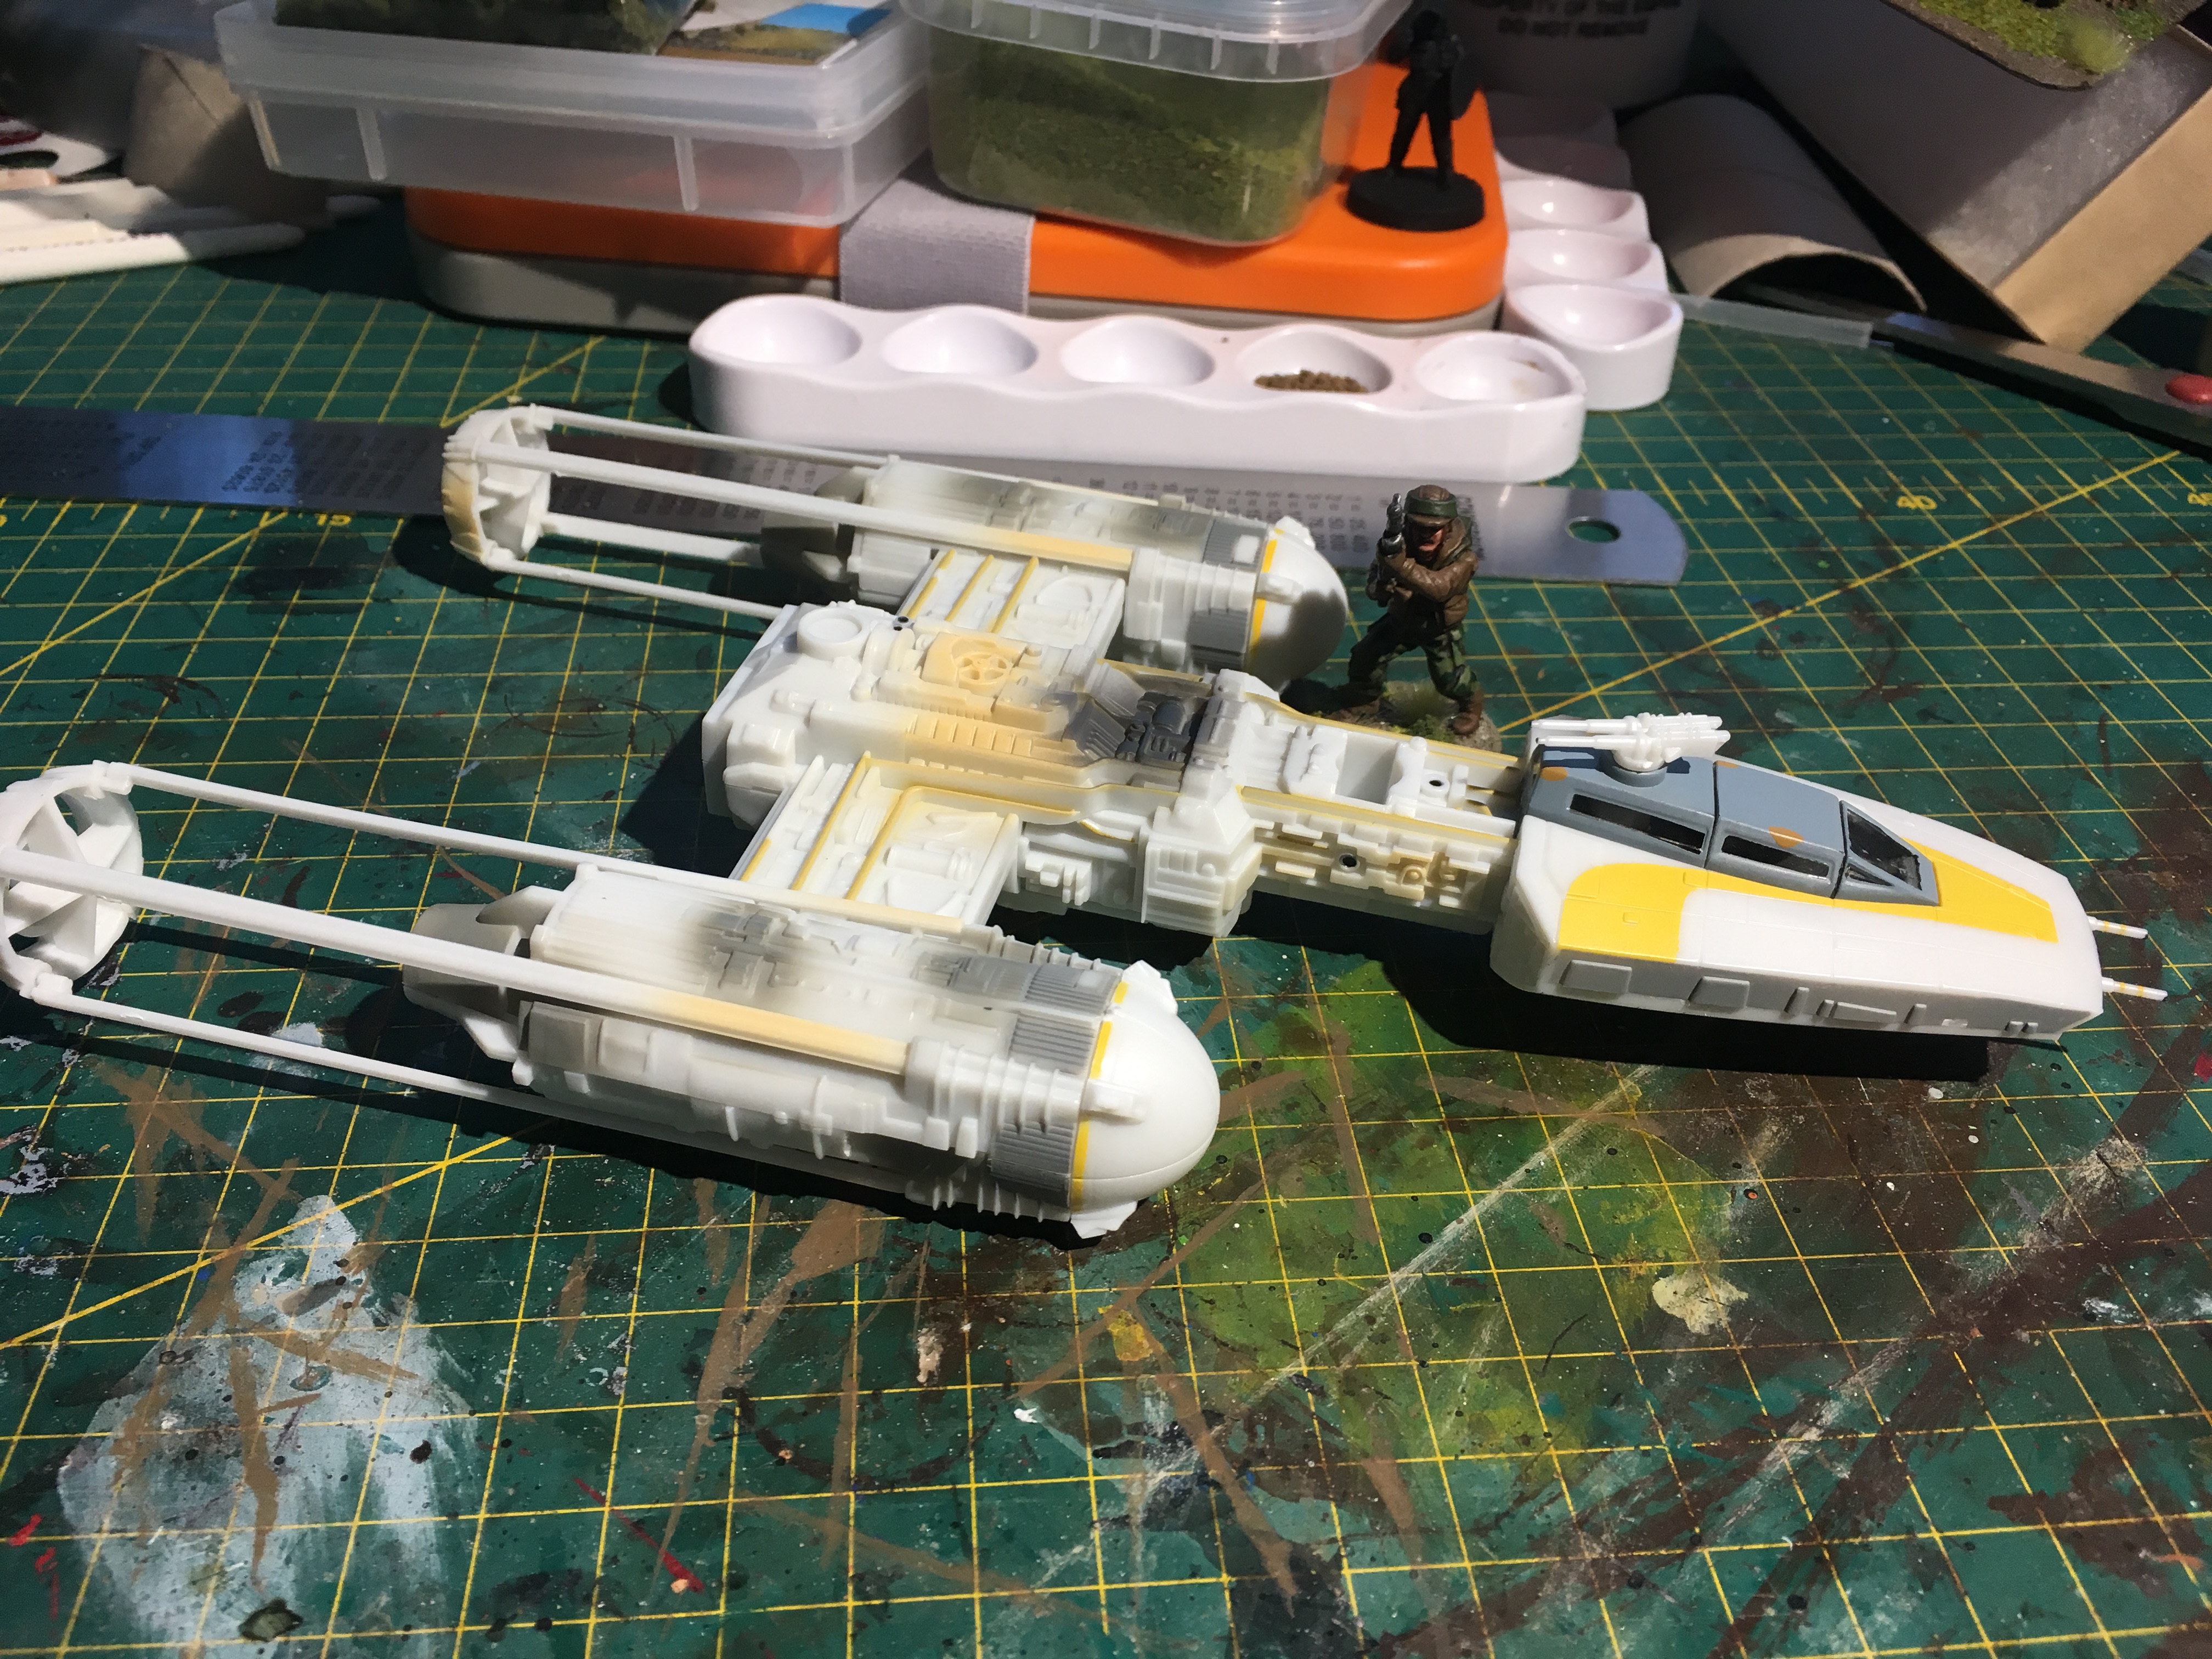 but I think I might be able to get away with it. remember, I want representations!
So the Y-Wing is noticeably smaller which is a shame. I will continue with the build and problem solve but I don’t think I’ll be buying more of this kind of model for now. I am not looking forward to building the U-Wing. That might get ‘crashed’ and turned into a scatter piece that way. shame really, the models were cheap but not cheap enough to be such a failure without a sting.
Fuel the Beast!
As this board is going to contain effectively a runway it stands to reason that some of the scatter terrain for it can be fuel related. If the Solo movie taught us anything it is that fuel is just as important a resource in the Star Wars Universe as it is in this one!
Sadly the fuel seen in Solo just doesn’t make good scatter terrain, it’s way too small. But never fear! Star Wars Rebels (tv show) to the rescue!
 C1-10P ‘Chopper’ by a canister of Rhydonium
 Rhydonium canisters seem to be perfect for scatter terrain! Just need to come up with method of making these. My mind went to greenstuff and plastic tubing but after researching things online I found I didn’t need to make them
Thankfully somebody has already done all the hard work for us and uploaded it to thingiverse. Thank you to the original modeller, you’ll save me a lot of time.
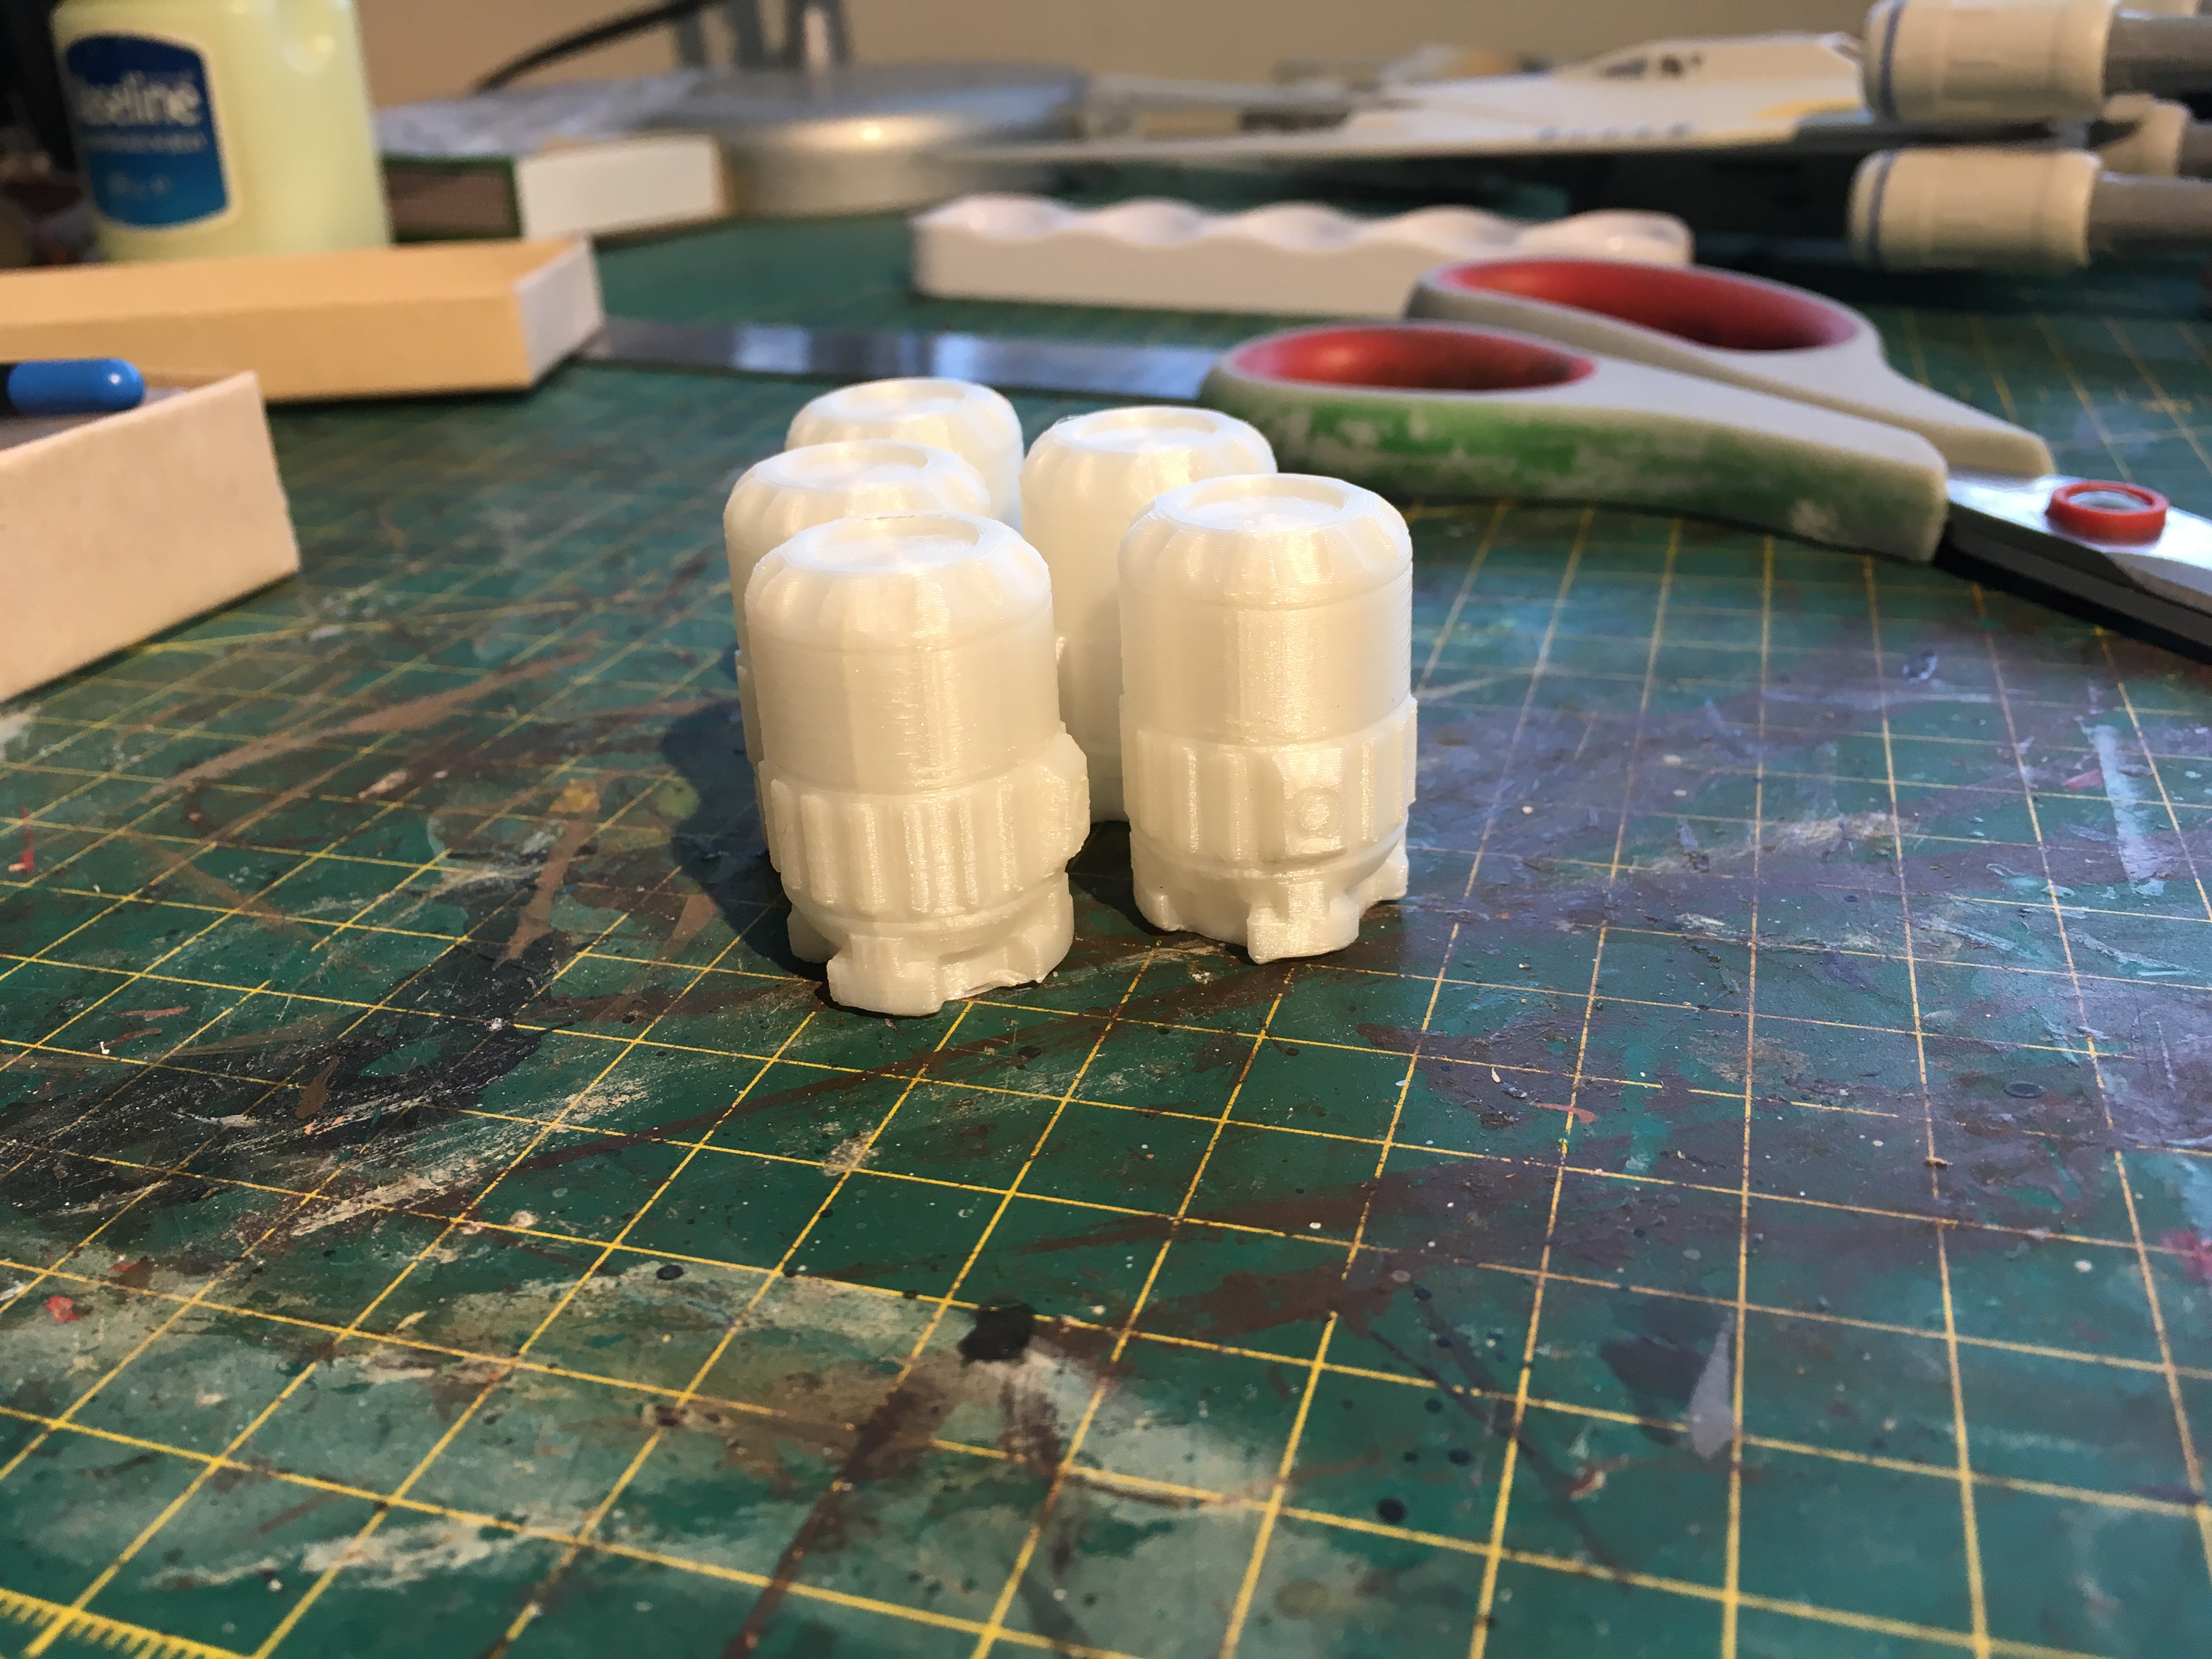 My friend was kind enough to print 5 of them for me. Print time was apparently 30mins per canister
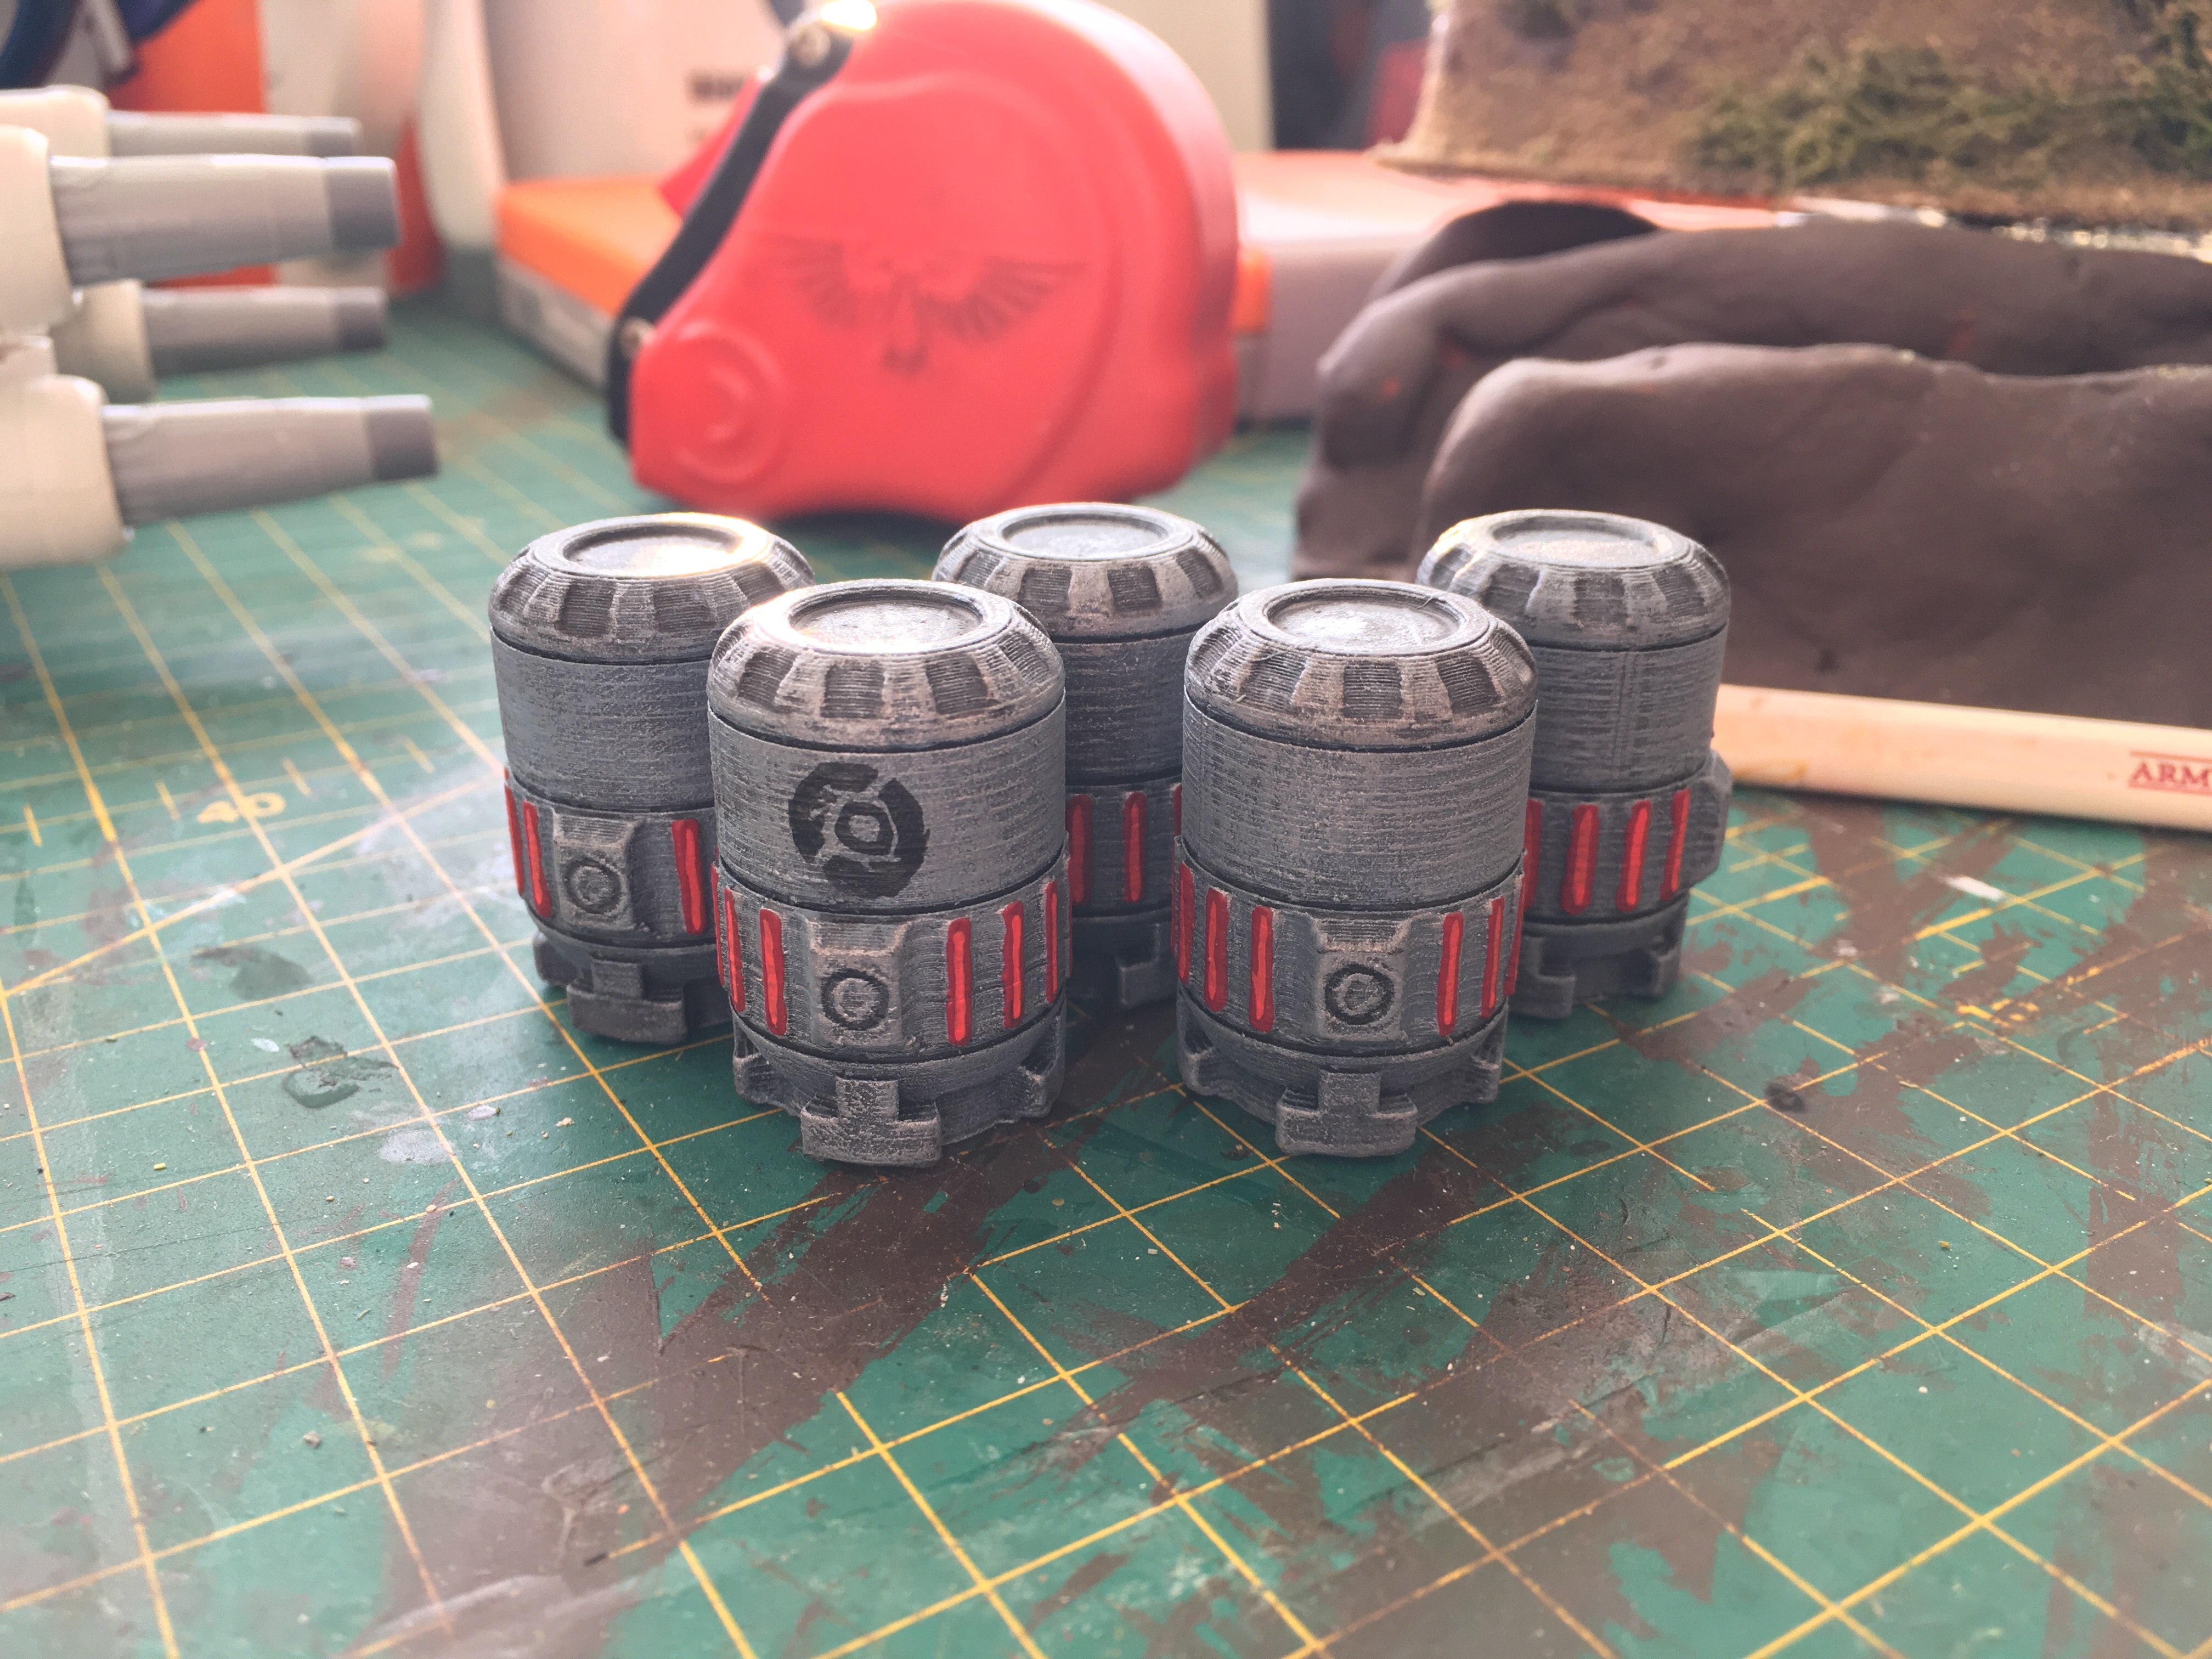 The final painted items
The paints used for this are dead simple and it was mostly drybrushed
Mechanicus Standard Grey
Russ Grey
Fenrisian Grey
Necron Compound
Then a Nuln Oil wash and highlights with two types of red (can’t remember which now but a dark and a really light)
Storage Tanks
At large ports and airports you will always find large fuel storage containers. The base on Yavin will be no different and in this endeavour I’m reusing some plastic that would only end up in the bin or recycling. It will serve a much greater purpose as a fuel storage container I feel!
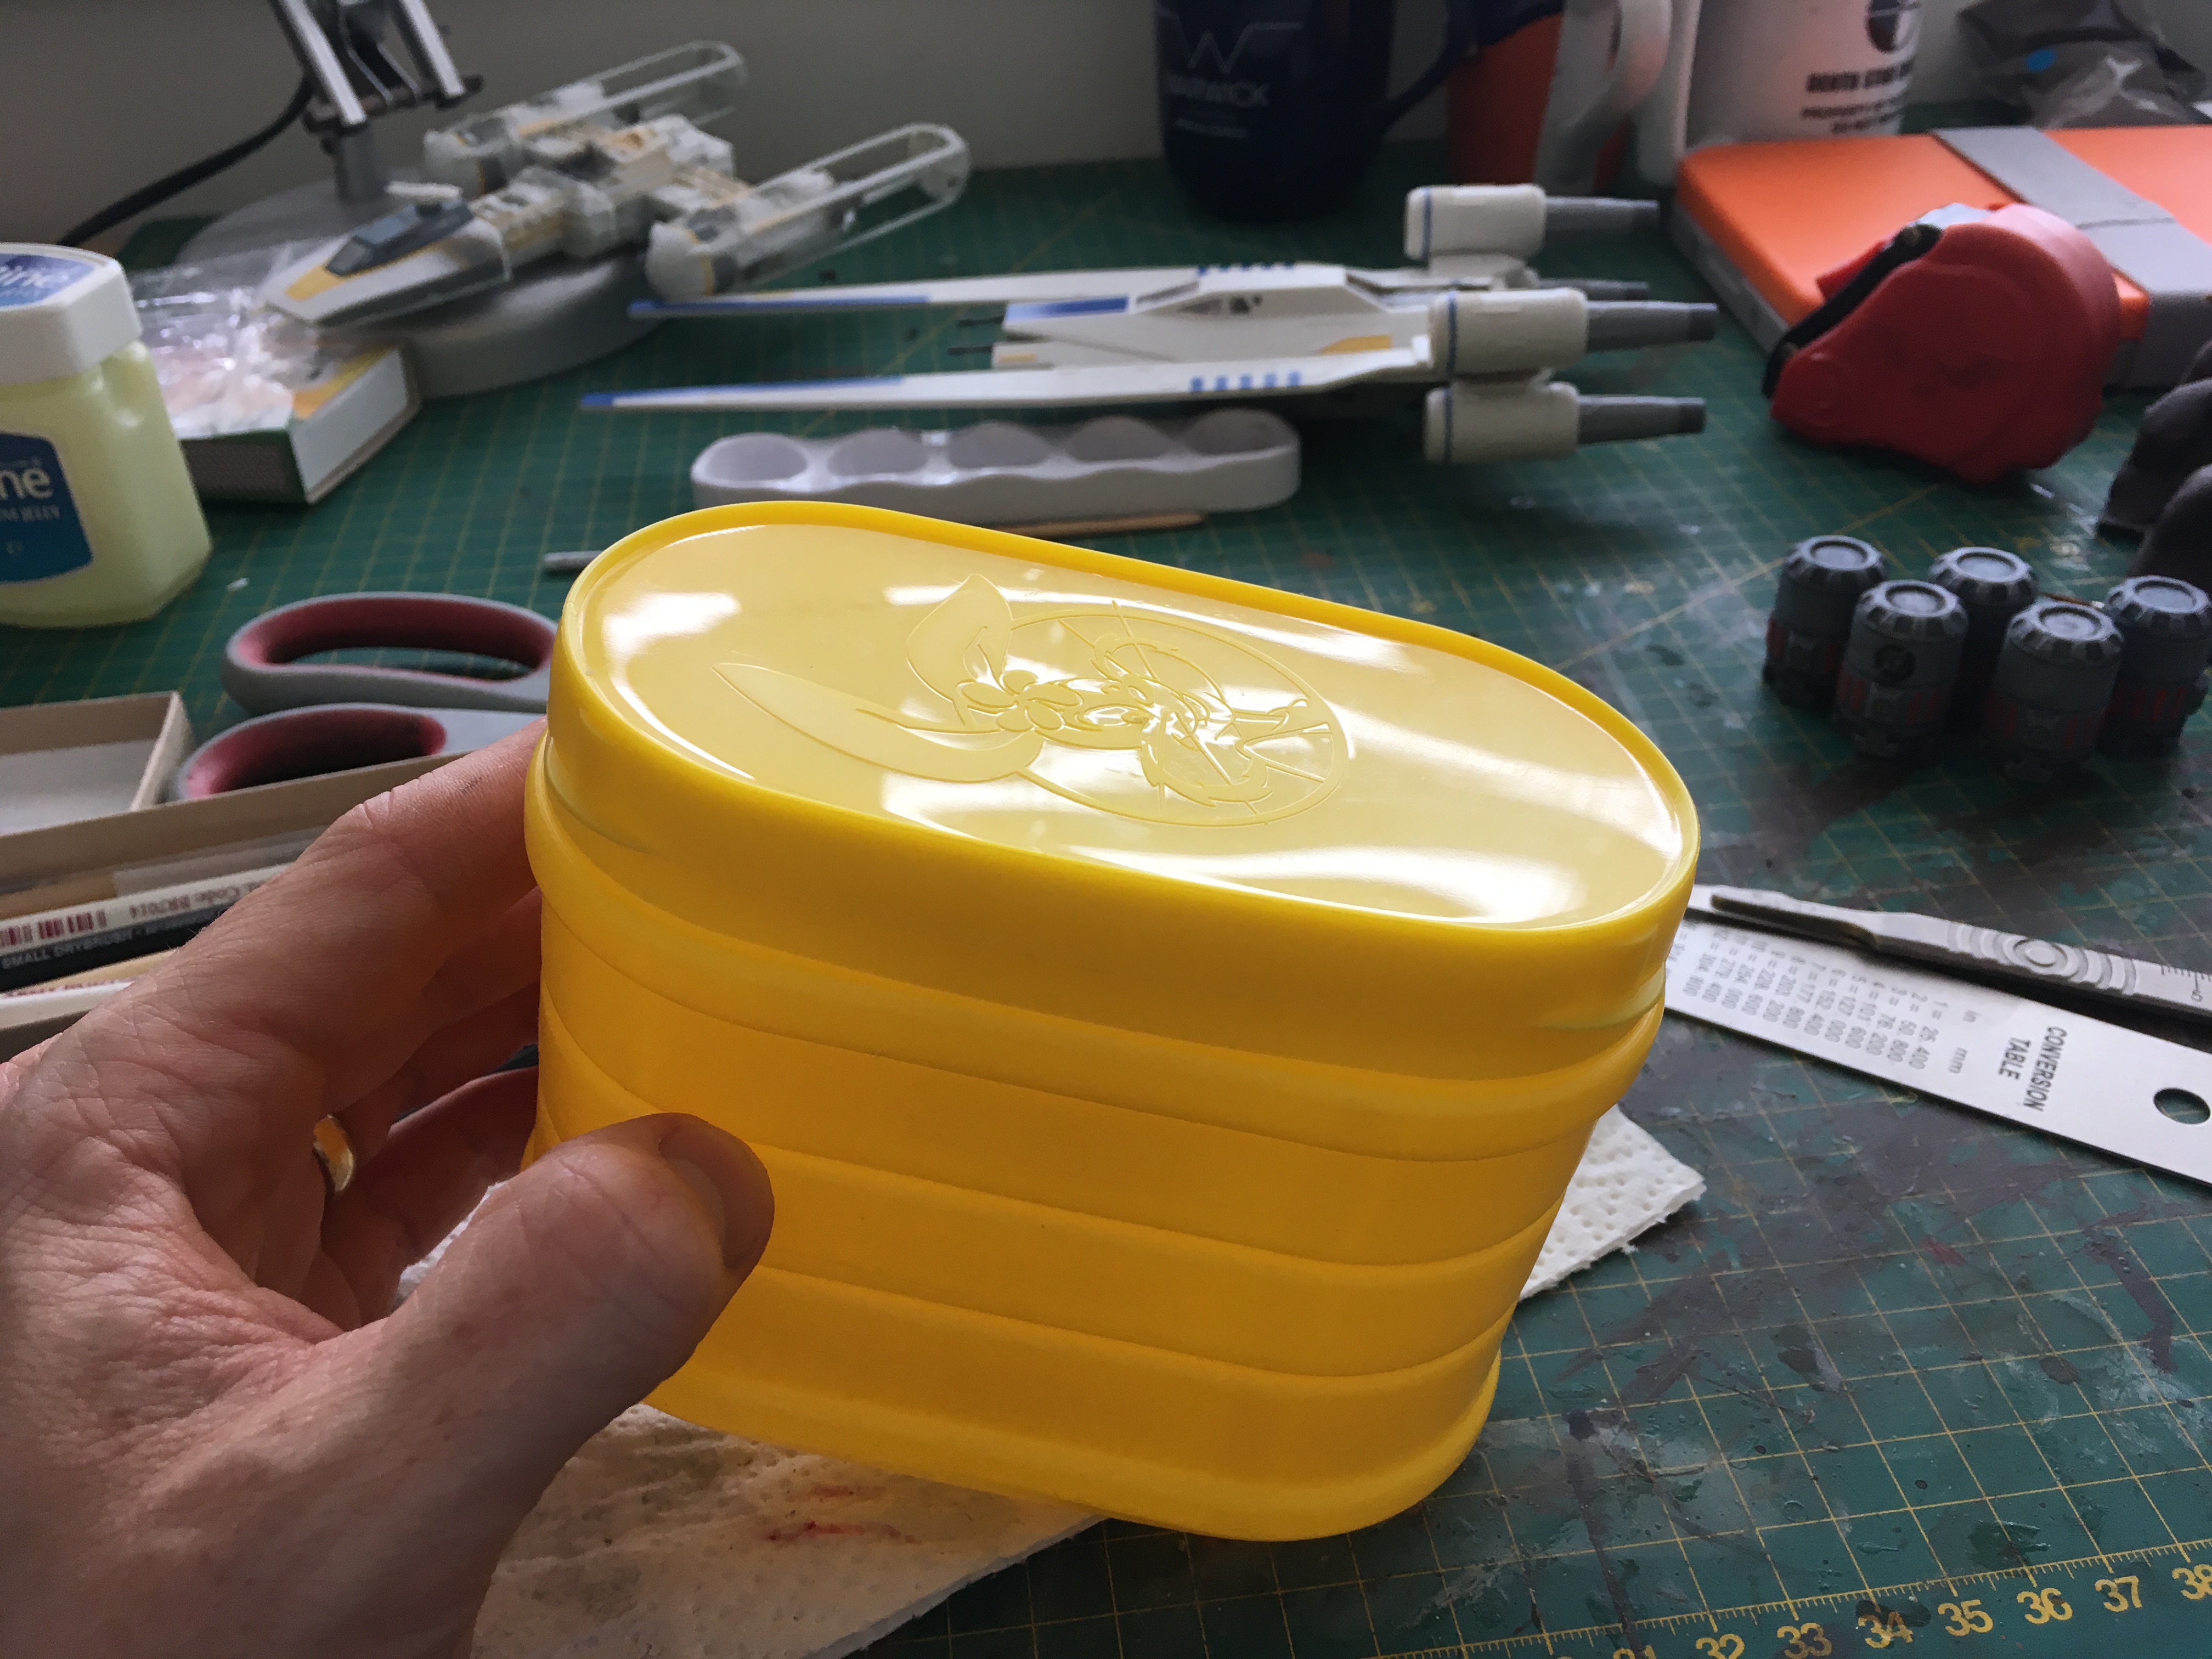 One old banana nesquick milkshake powder tub
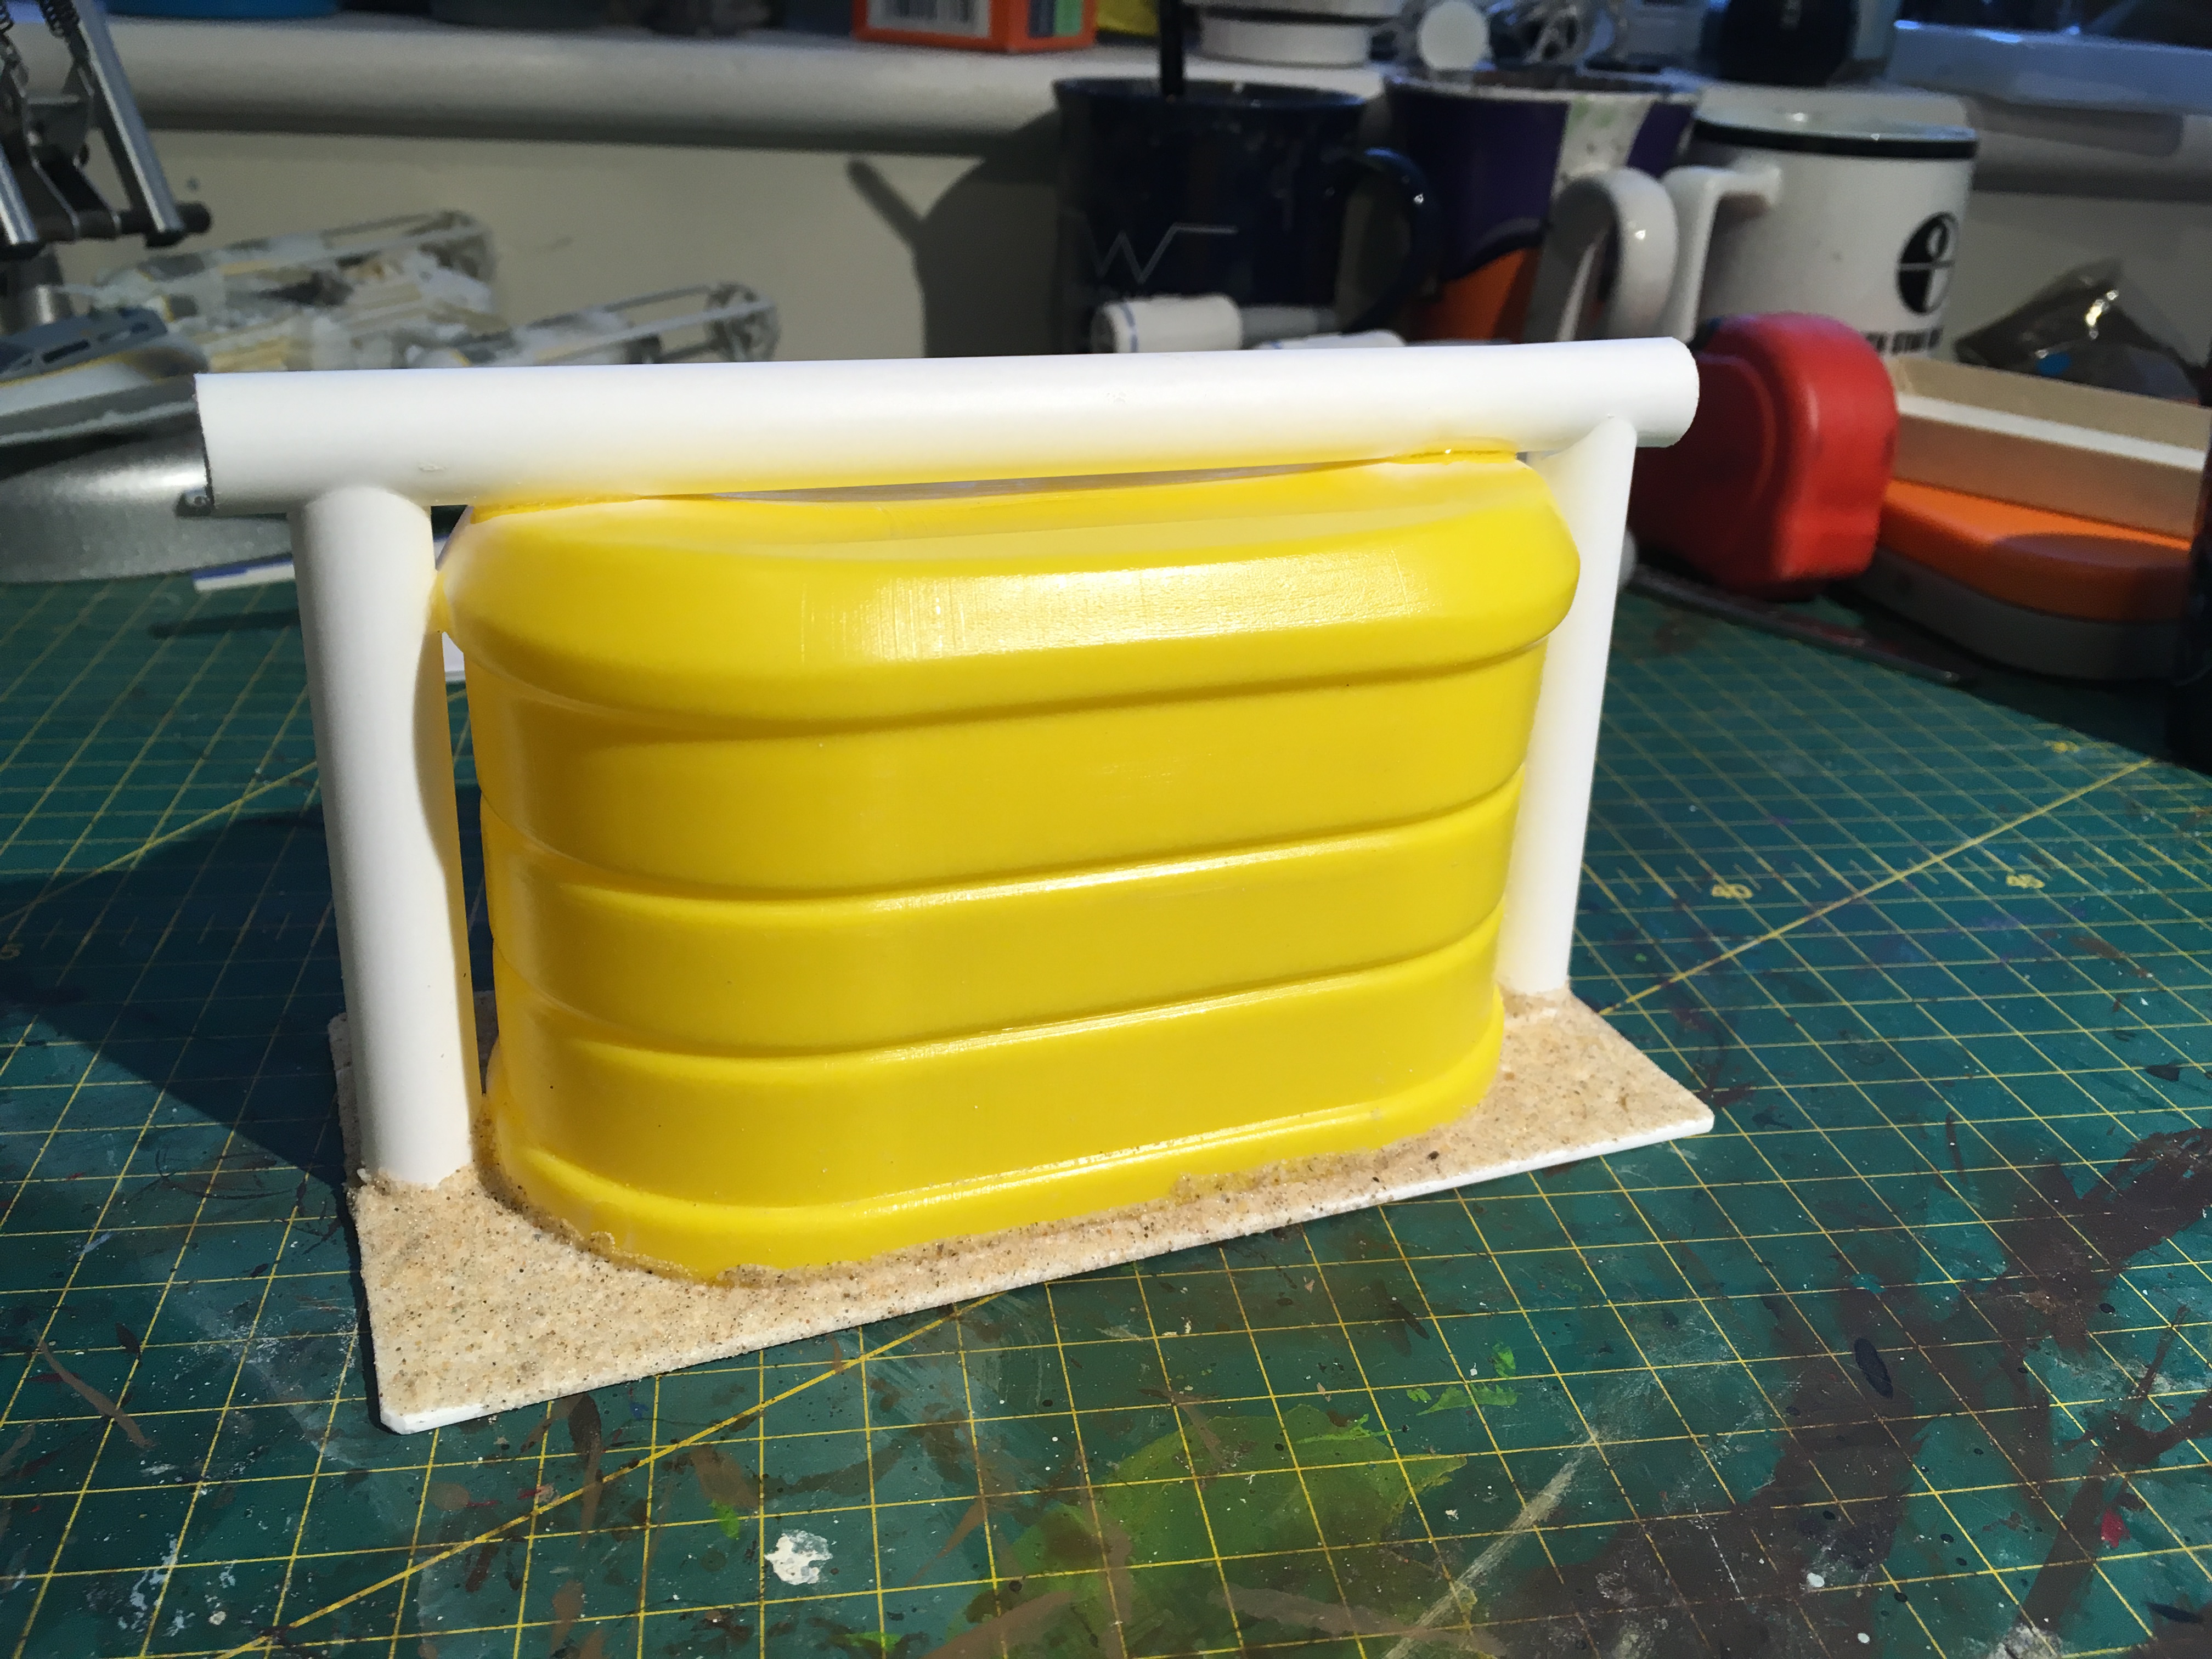 Random plasticard tubing I had lying around to represent delivery pipes or something
  Plugged the ends with DAS modelling clay. Details/disguising will be painted over this to hide it
Initial stages of painting the storage tank
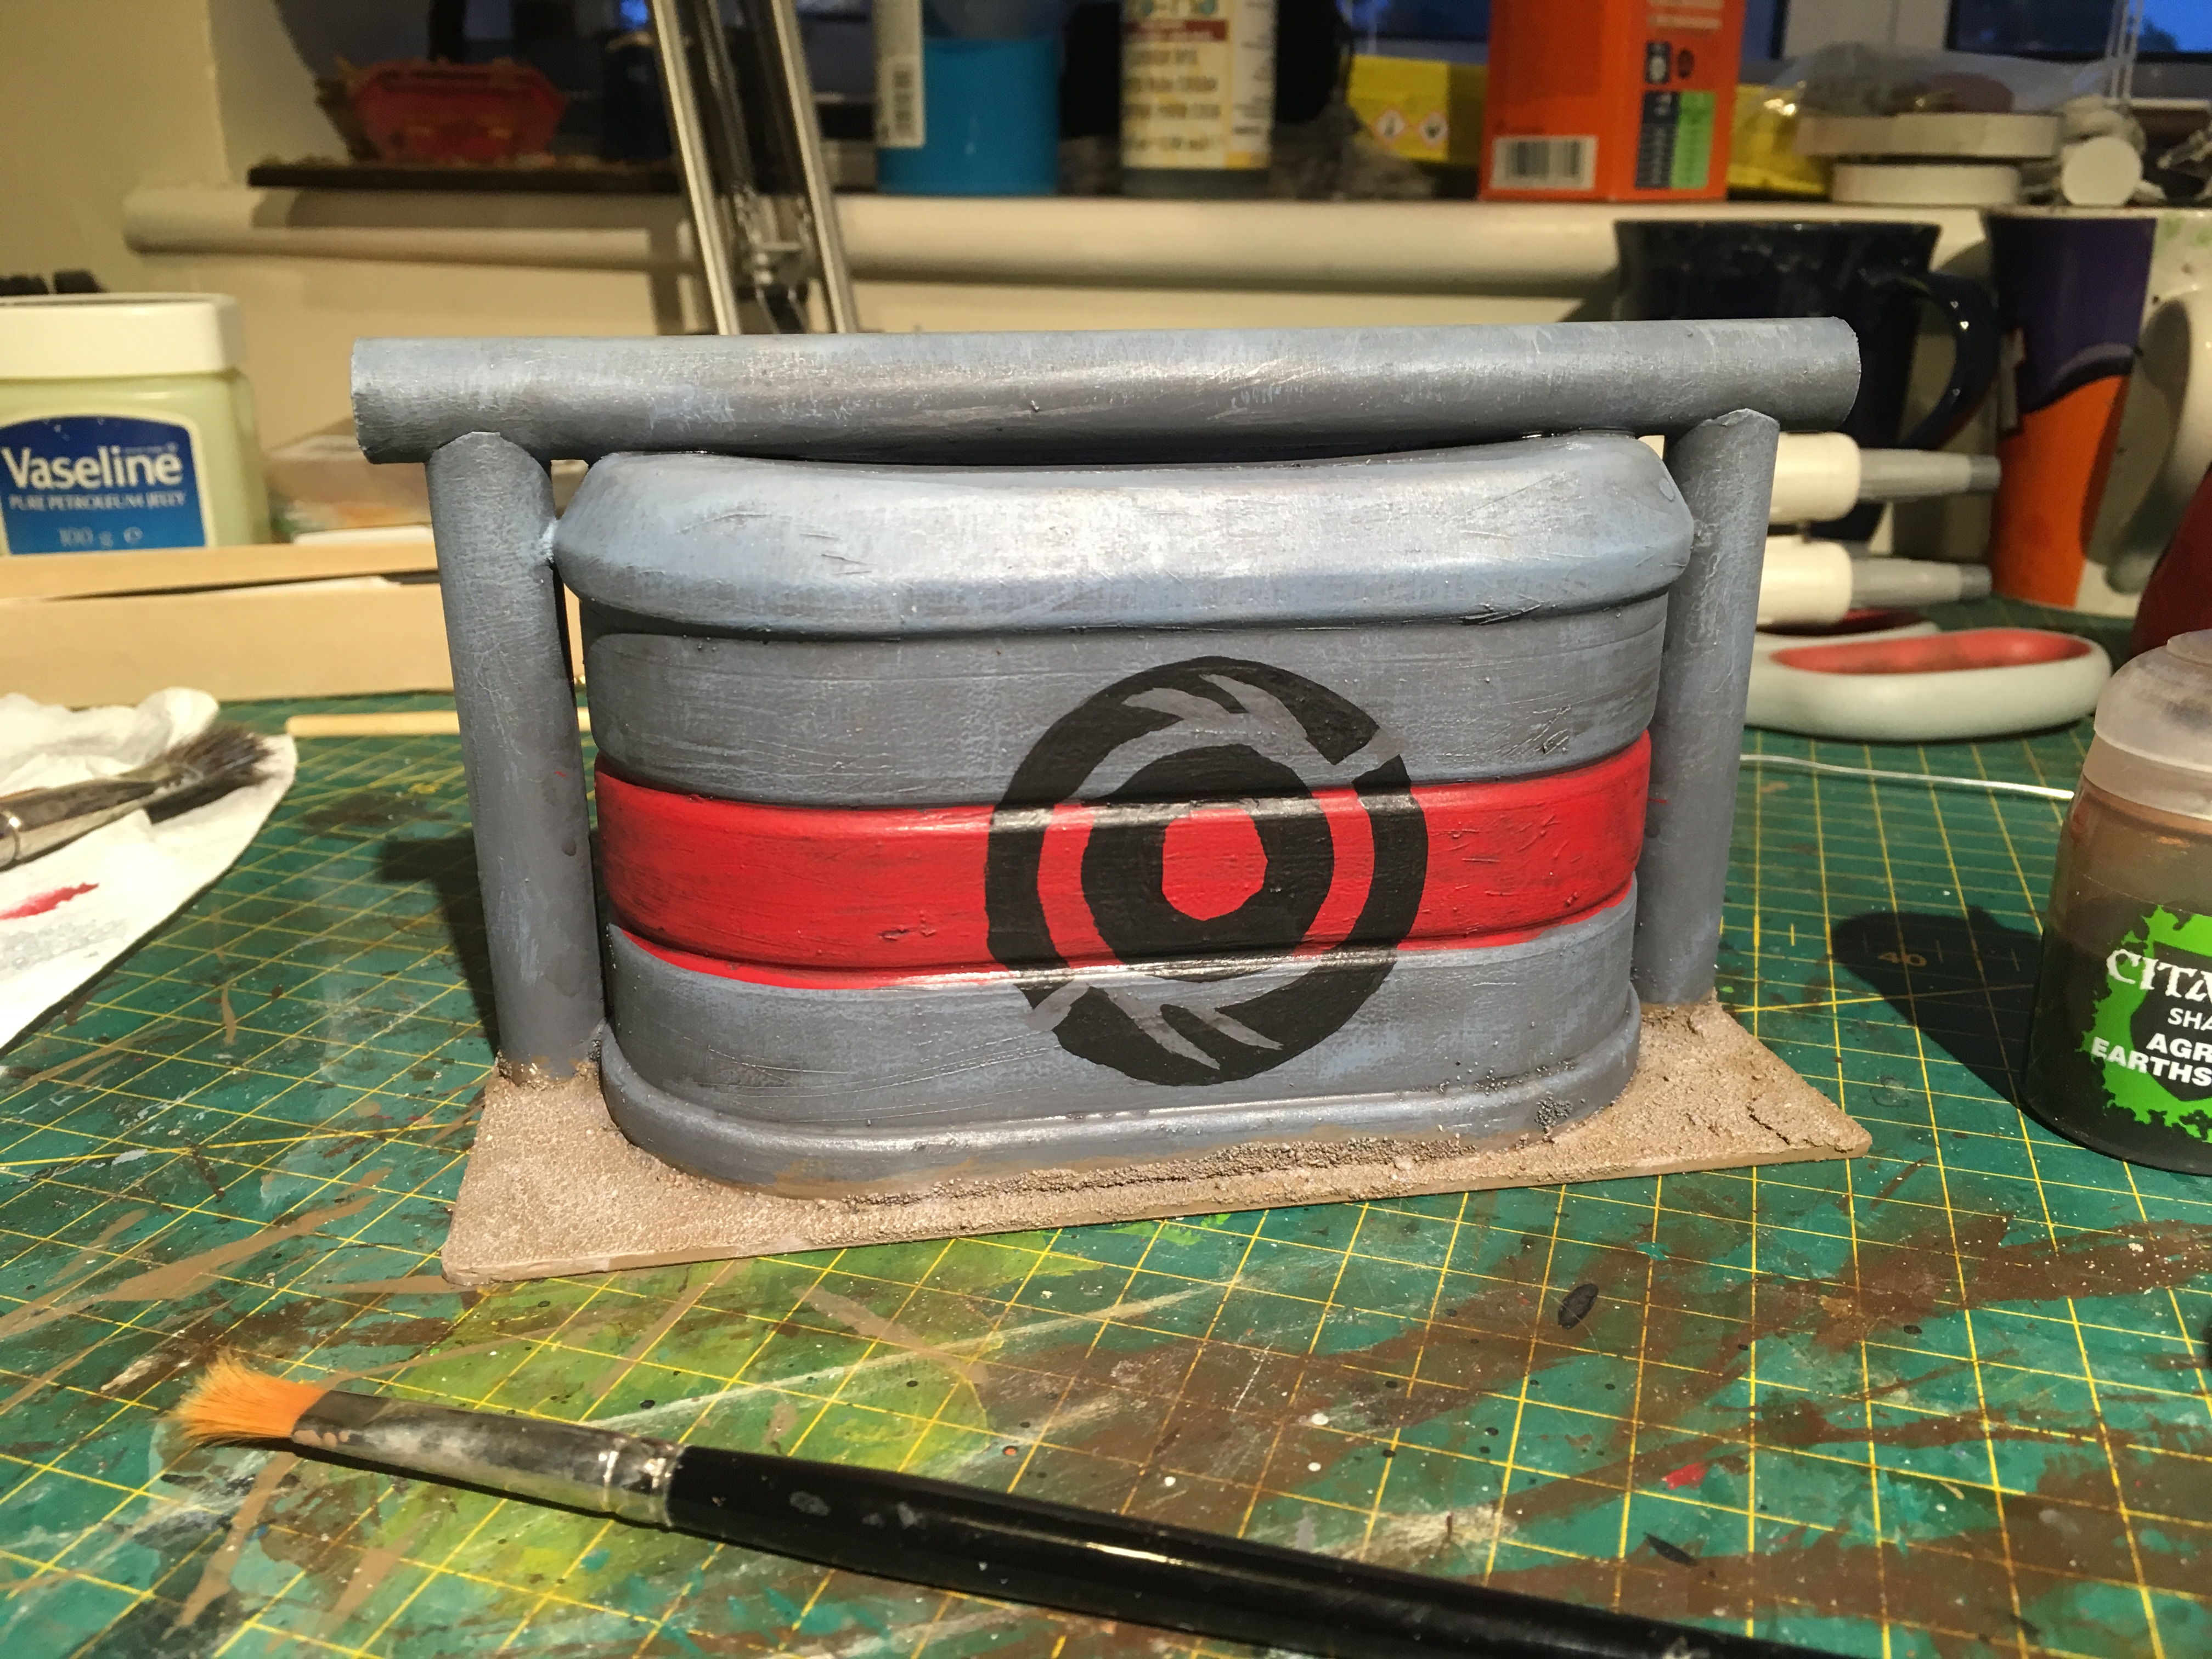
This has been painted in the same way as the fuel canisters at this point but I’ve had to beef up the details. A big grey board will look awfully dull. I decided to add a big red stipe around the midriff of it. Nothing says don’t shoot at this like a big red stripe. Well, according to Star Wars anyway.
Did you know that the reason the Tantive IV (Leia’s ship at beginning of episode IV) is painted red is that red is a warning colour. In Star Wars diplomats are protected and anyone who shoots upon them shall suffer the wrath of the ruling government. Sensor scans etc will also give you this warning but ships were also painted red as a visual reminder. (Or at least that’s the fluff reason) more info can be read here on the consular class cruiser wookieepidia page
Making things grubby
If anything stays in the jungle longer than 5 minutes then something else starts living on it.
as such I’ve started adding dirt and grime to this storage tank to make it look a bit more interesting.
the first thing I did was to add a brown wash to areas I thought would collect dirt, eg the top pooling area, certain side bits and the a few good streak marks. I then did the same in a more gentle fashion with a grime type paint (typhus corrosion). To make really dirty bits.
after that i used a green wash to add the effect of moss or general green plants starting to grow on the tank. Once it was all dry I protected it with Matt varnish and added two types of flock concentrating on using the darker shade and some small rocks.
finally I decided to make the tank have a small leak, could lead to some explosive fun in game if I so wished! The paint I used for this was nikolide oxide, a bright green technical paint, I was heavy handed about it too.
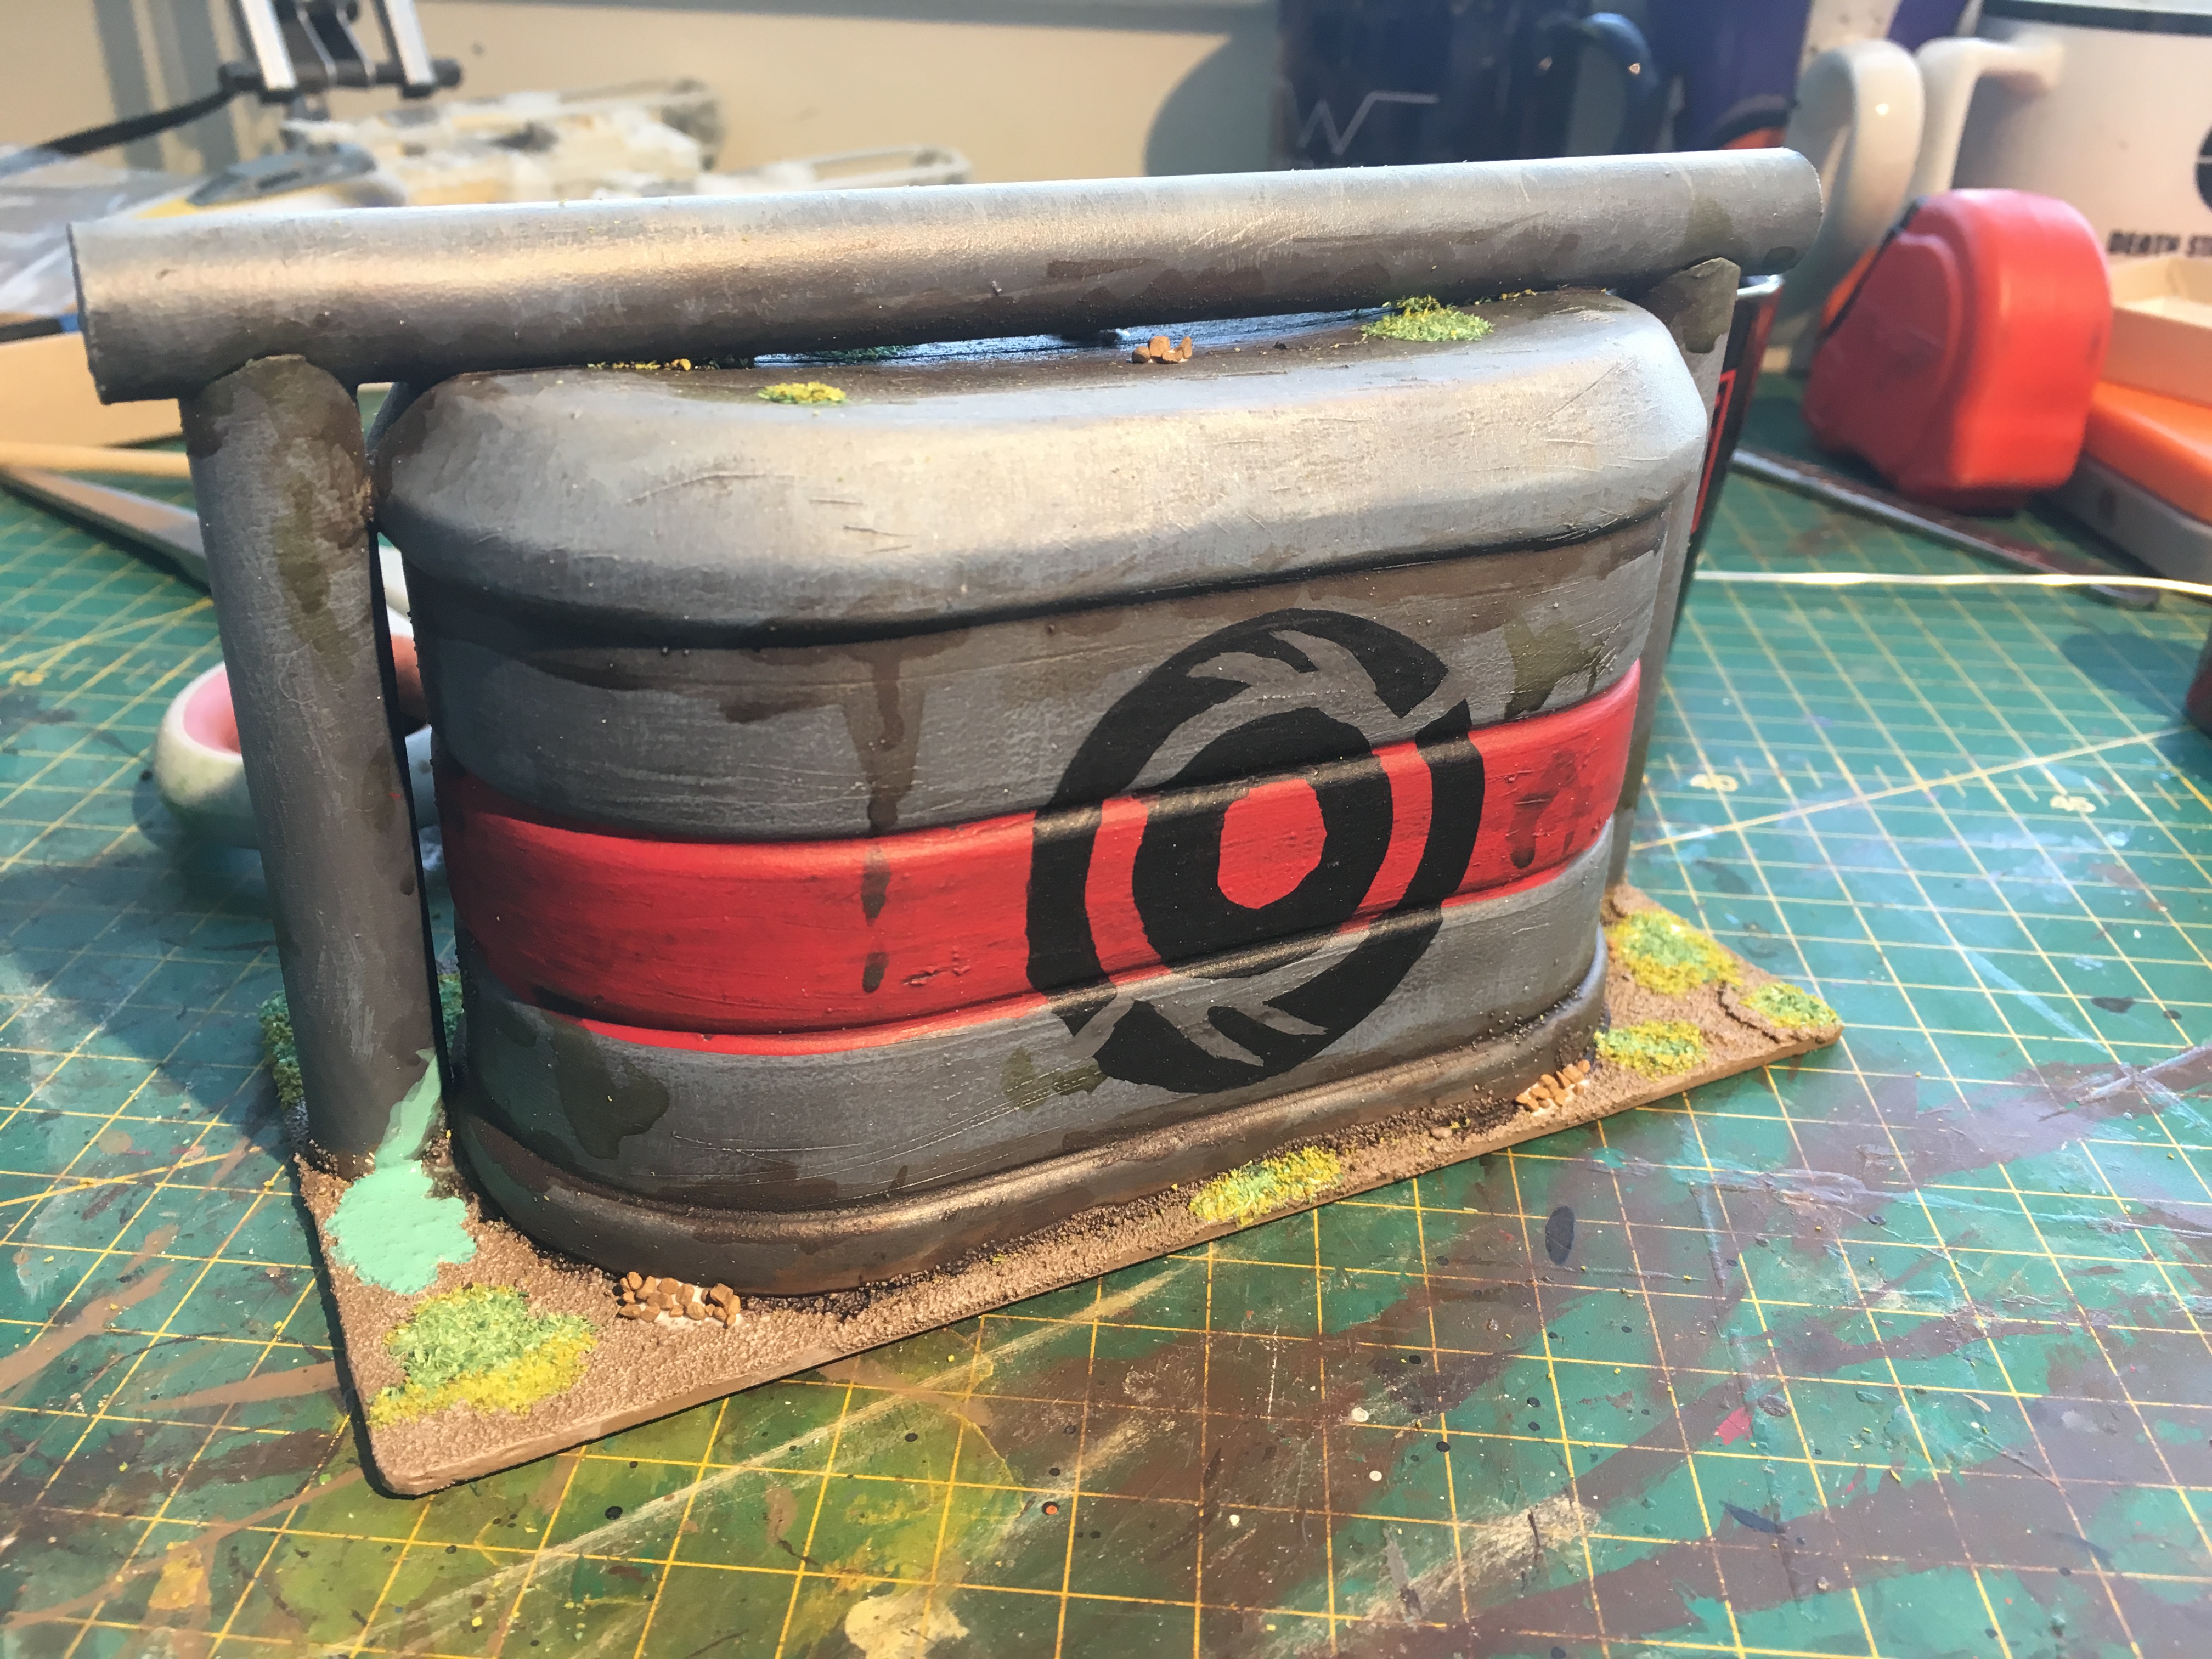
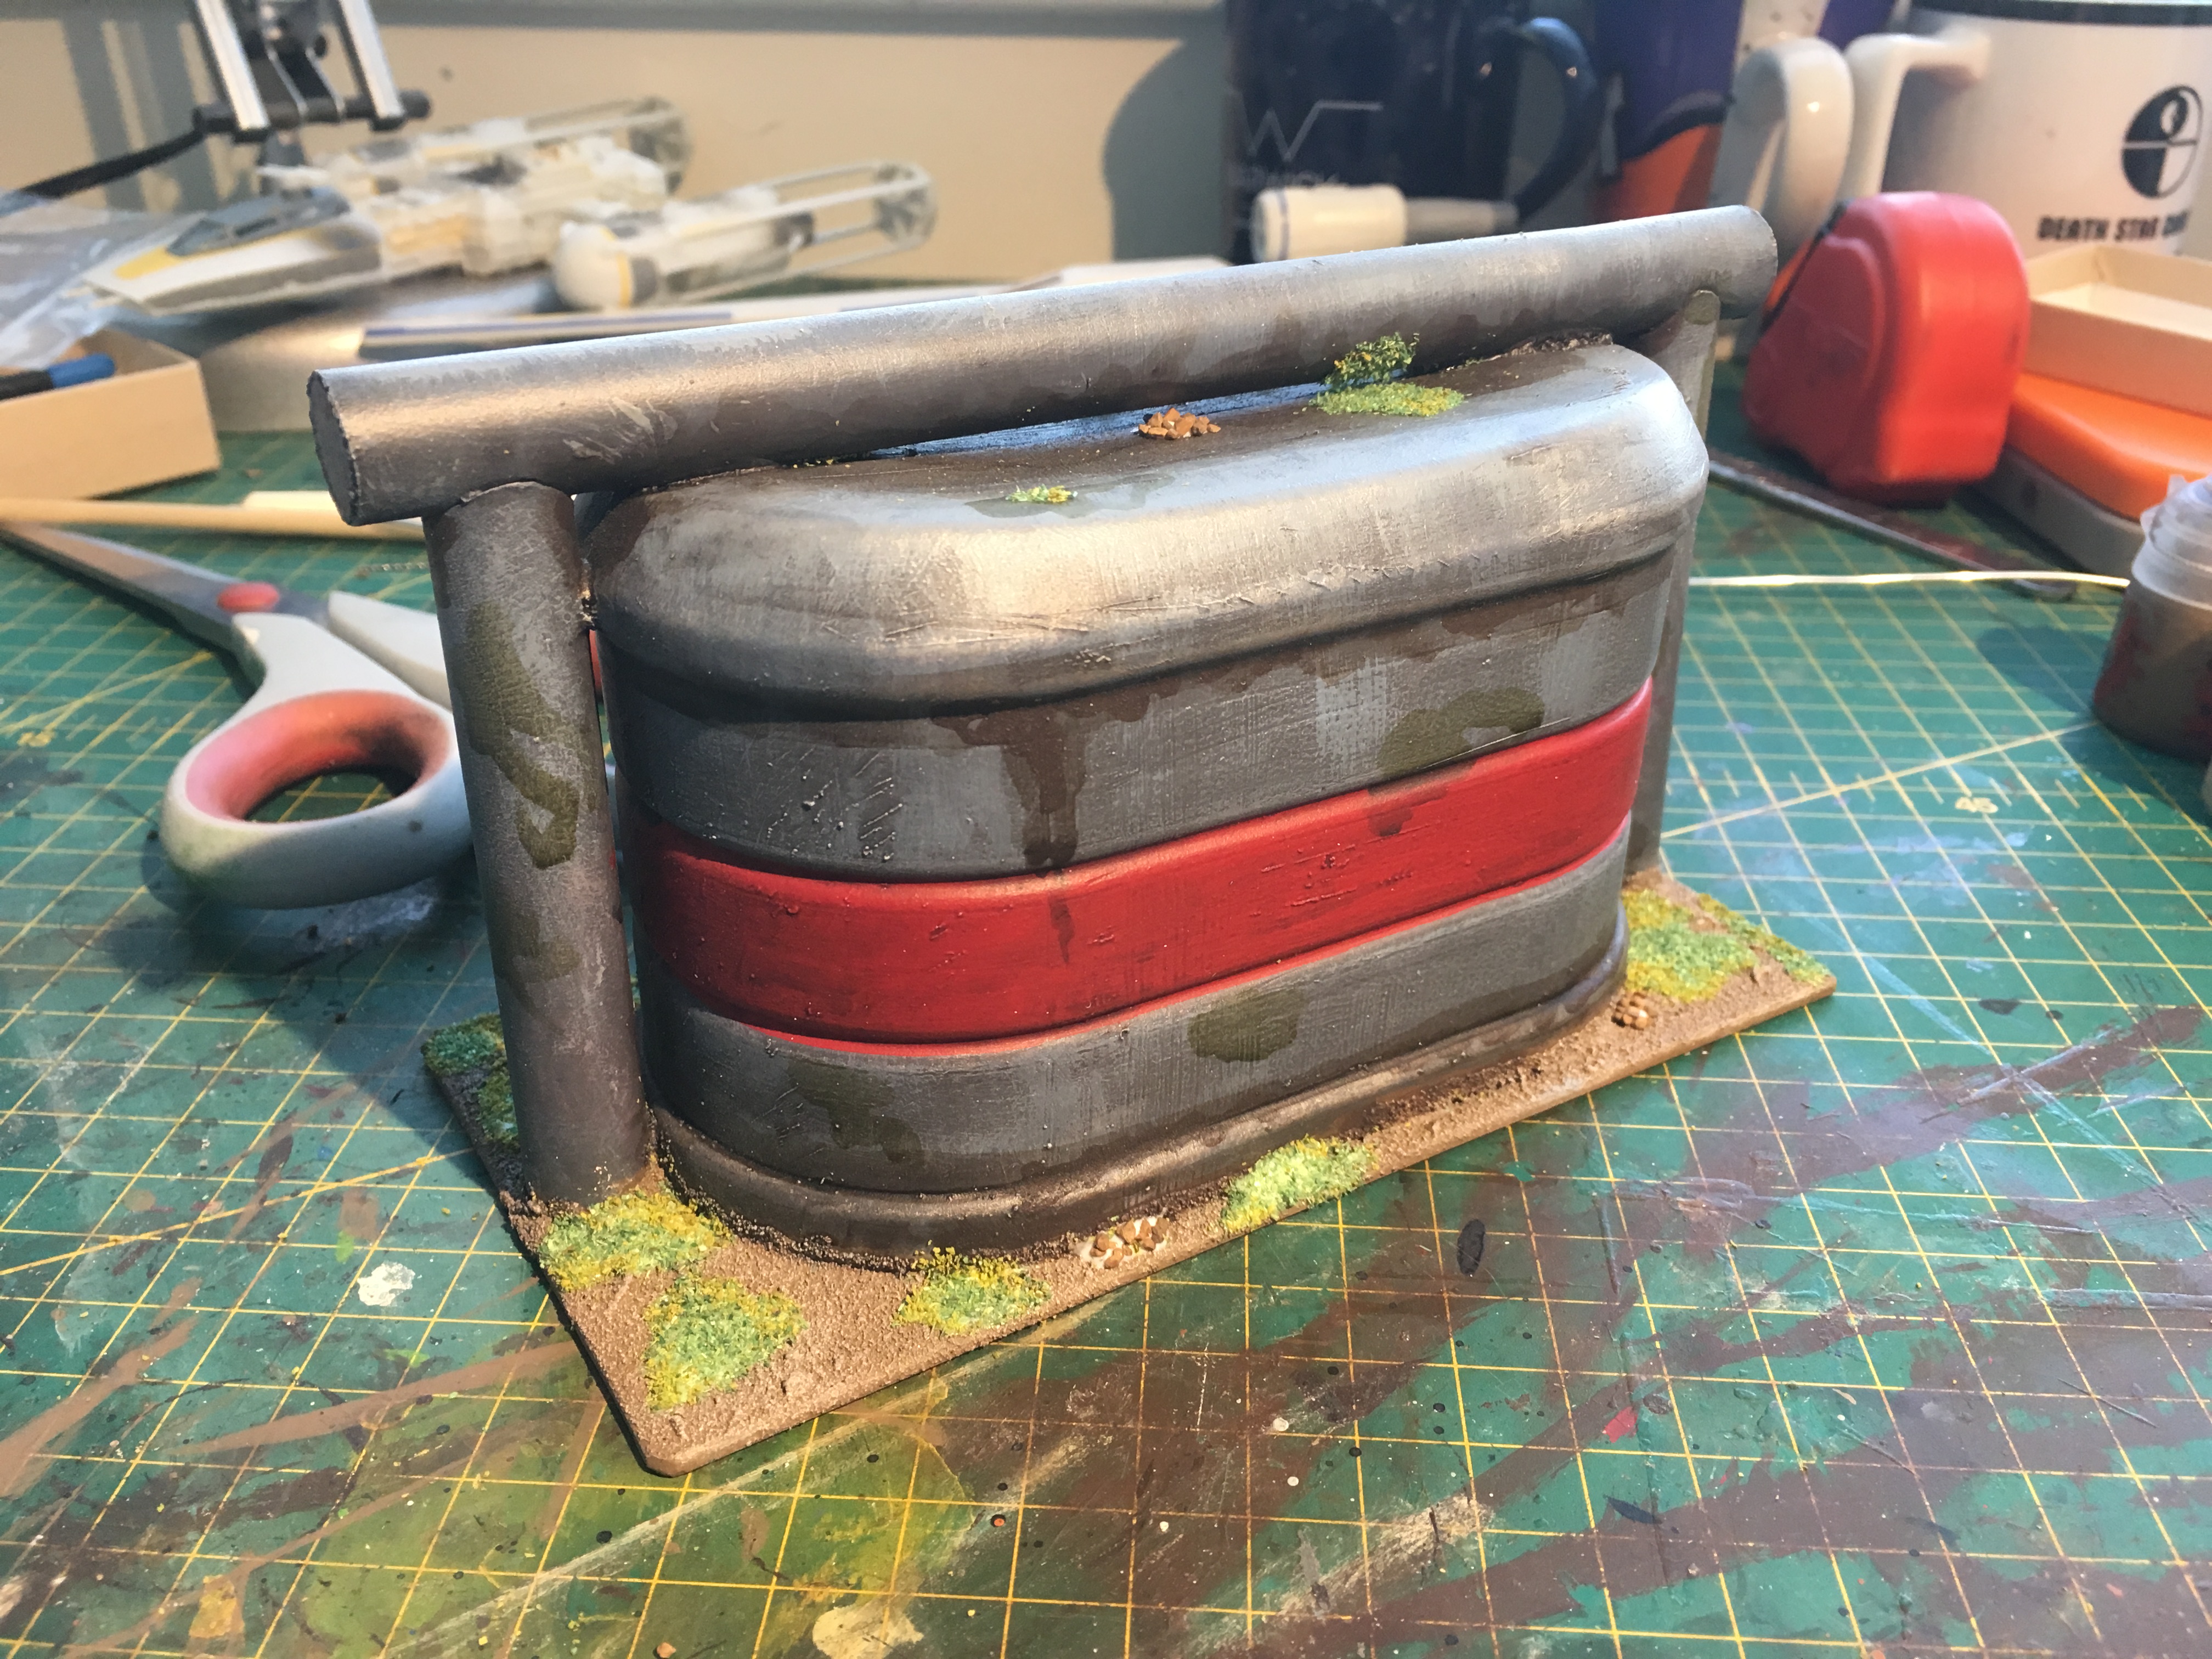
 Star Wars fuel is bright green apparently
 How does the table look so far?
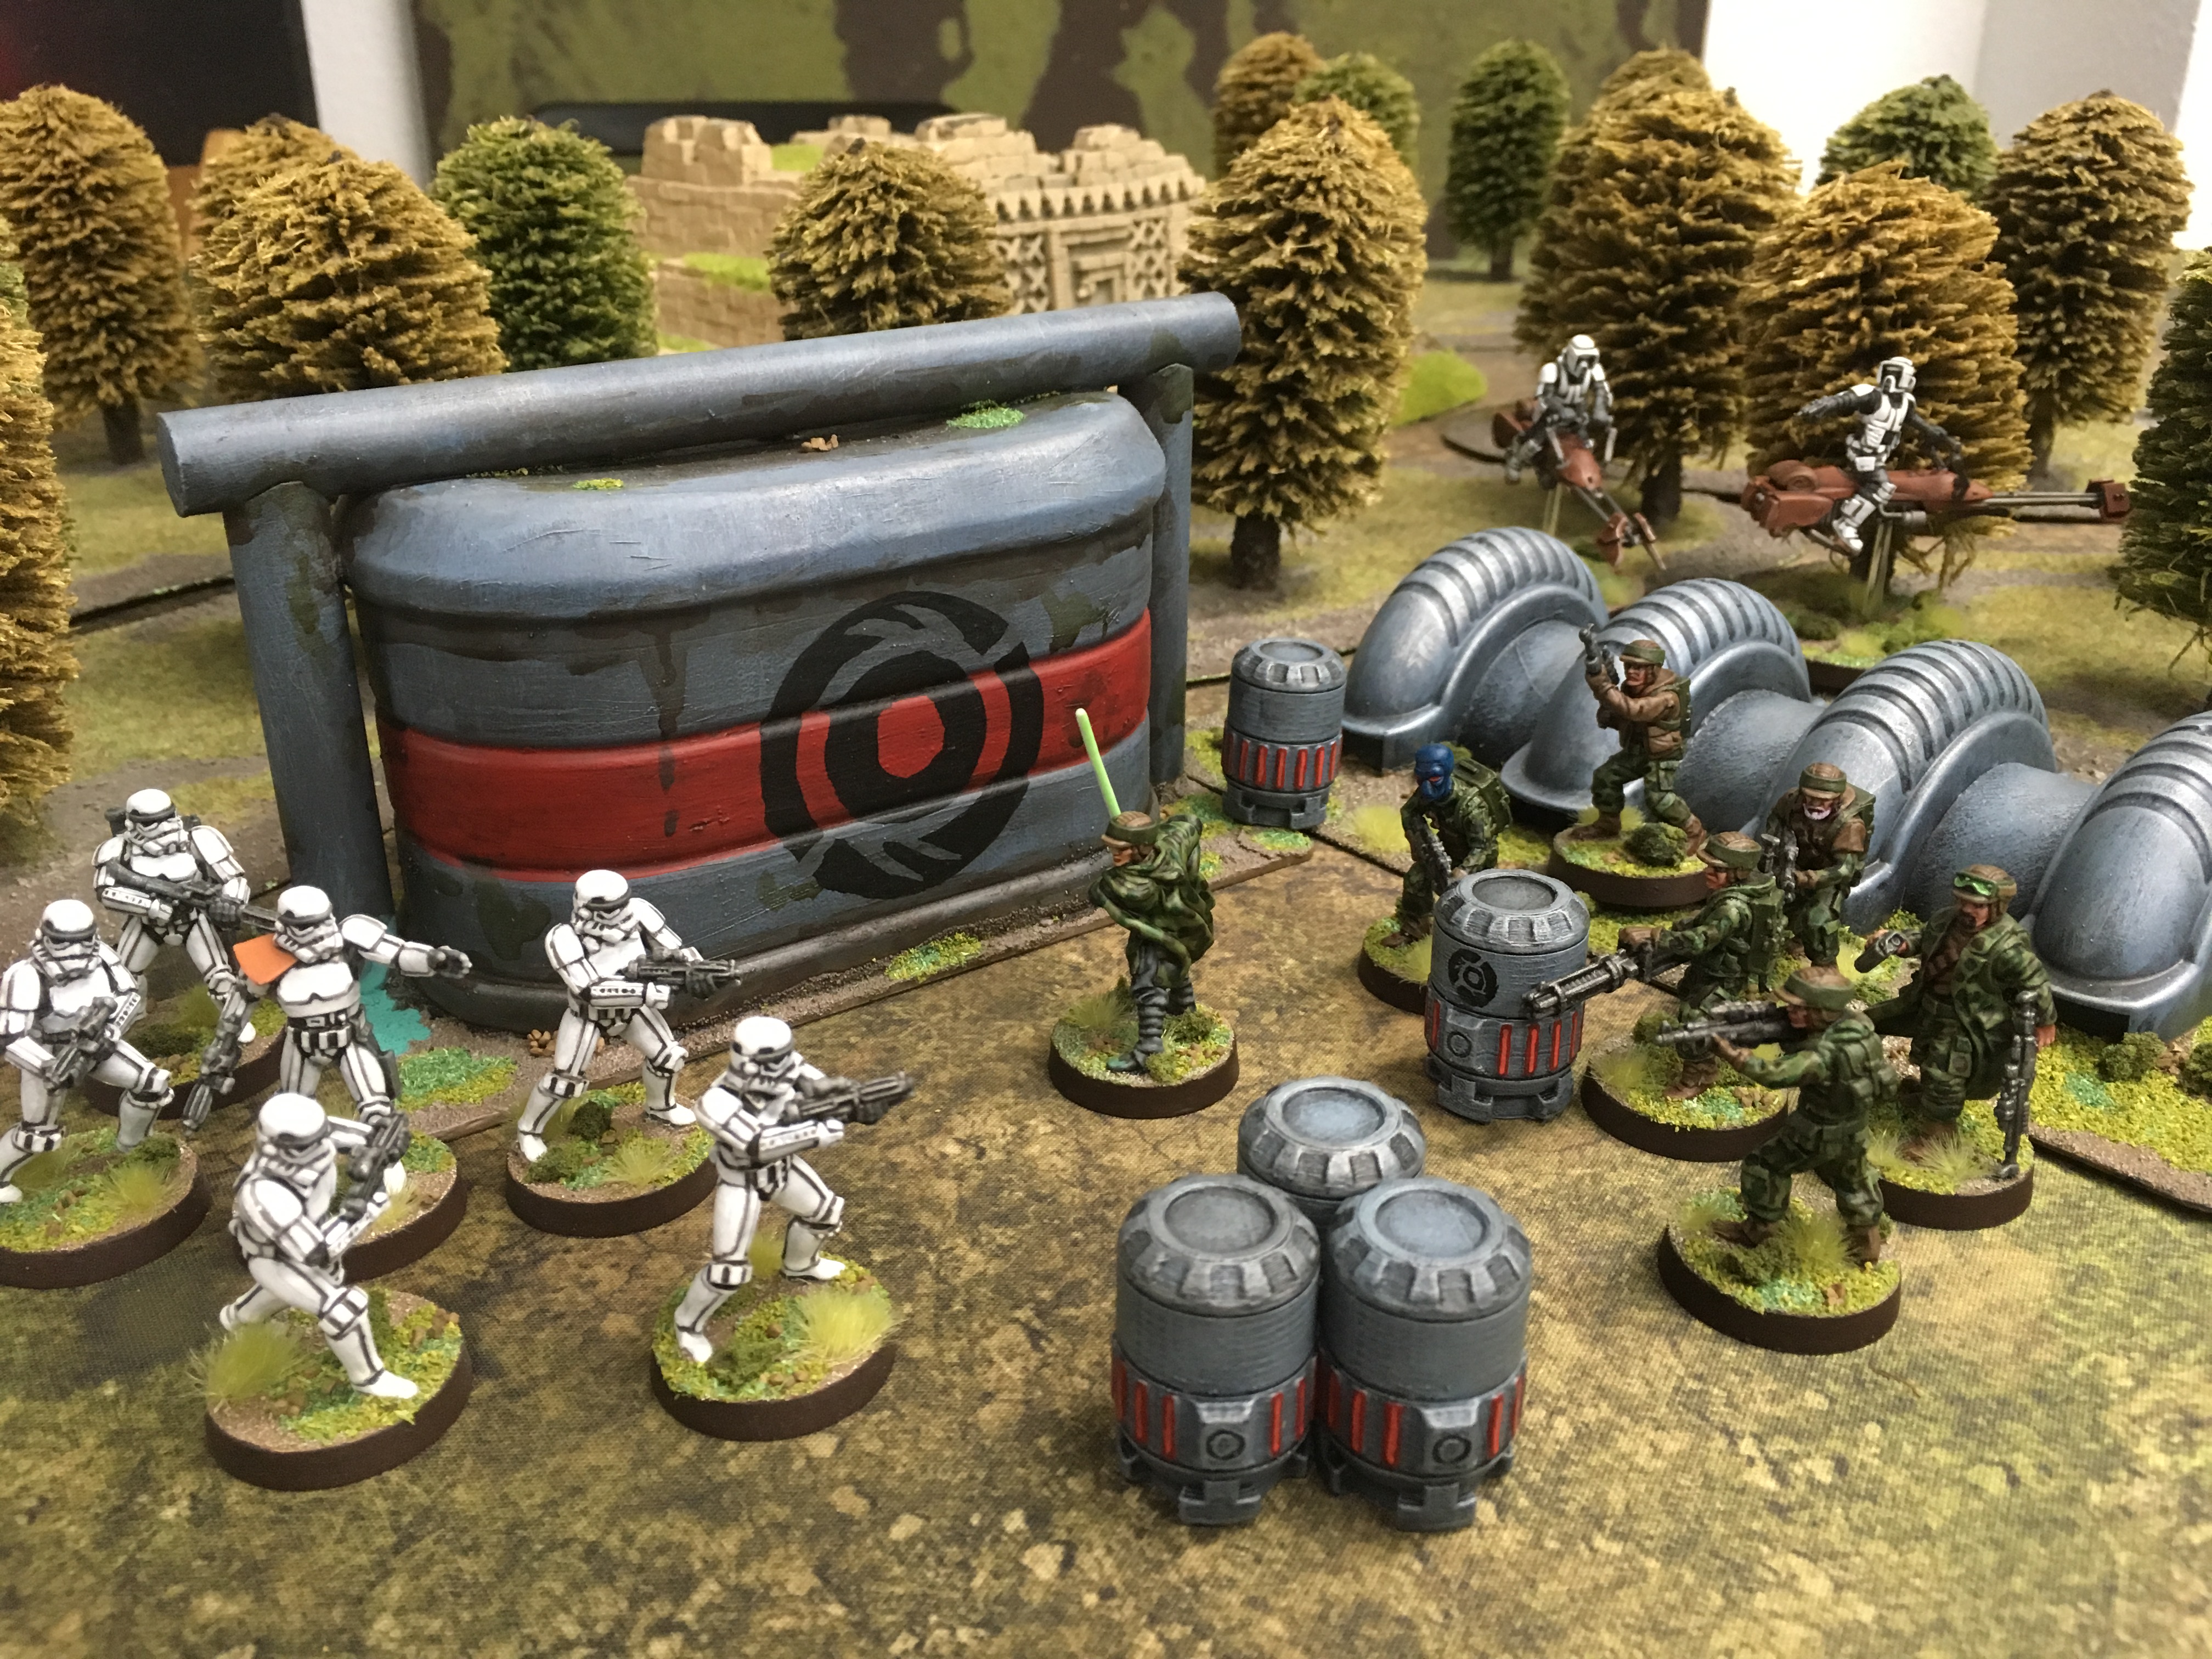


I think the scatter terrain looks good atm. The base on the mini shield generators is too big I feel so that might get redone.
the trees are just what the FLGS has on the tables at the moment, they are the worst scale in the world for legion but are good representations of woods for games. They will need changing for this as they aren’t jungly enough. Too much like a deciduous woodland.
 Hmm this is a good find in the cupboard! Good for inspiration of the temple!
Let’s make a runway and staging area
So my life took over my time recently and I haven’t had time to make much progress on this project. I am not going to be getting it done in time for the end of the month. Still I shall carry on anyway as I plan to keep improving the tables at the FLGS.
For this section I planned to make this a removable piece so it could be used on several boards or removed all together. I started this with a piece of 3×3 foam that is only 1/2 inch thick. Its the same stuff Lloyd has used for a lot of his VLOGS just a lot thinner. I started by getting some cheap black paint and putting it in a bucket / washing up bowl (an old one so the wife doesn’t murder me) with some water. I then plunged the foam into the watery dark abyss. Its now sat out in the garden drying out.
 3x3 is a big area. I am worried about it not sitting flat when I’m done.
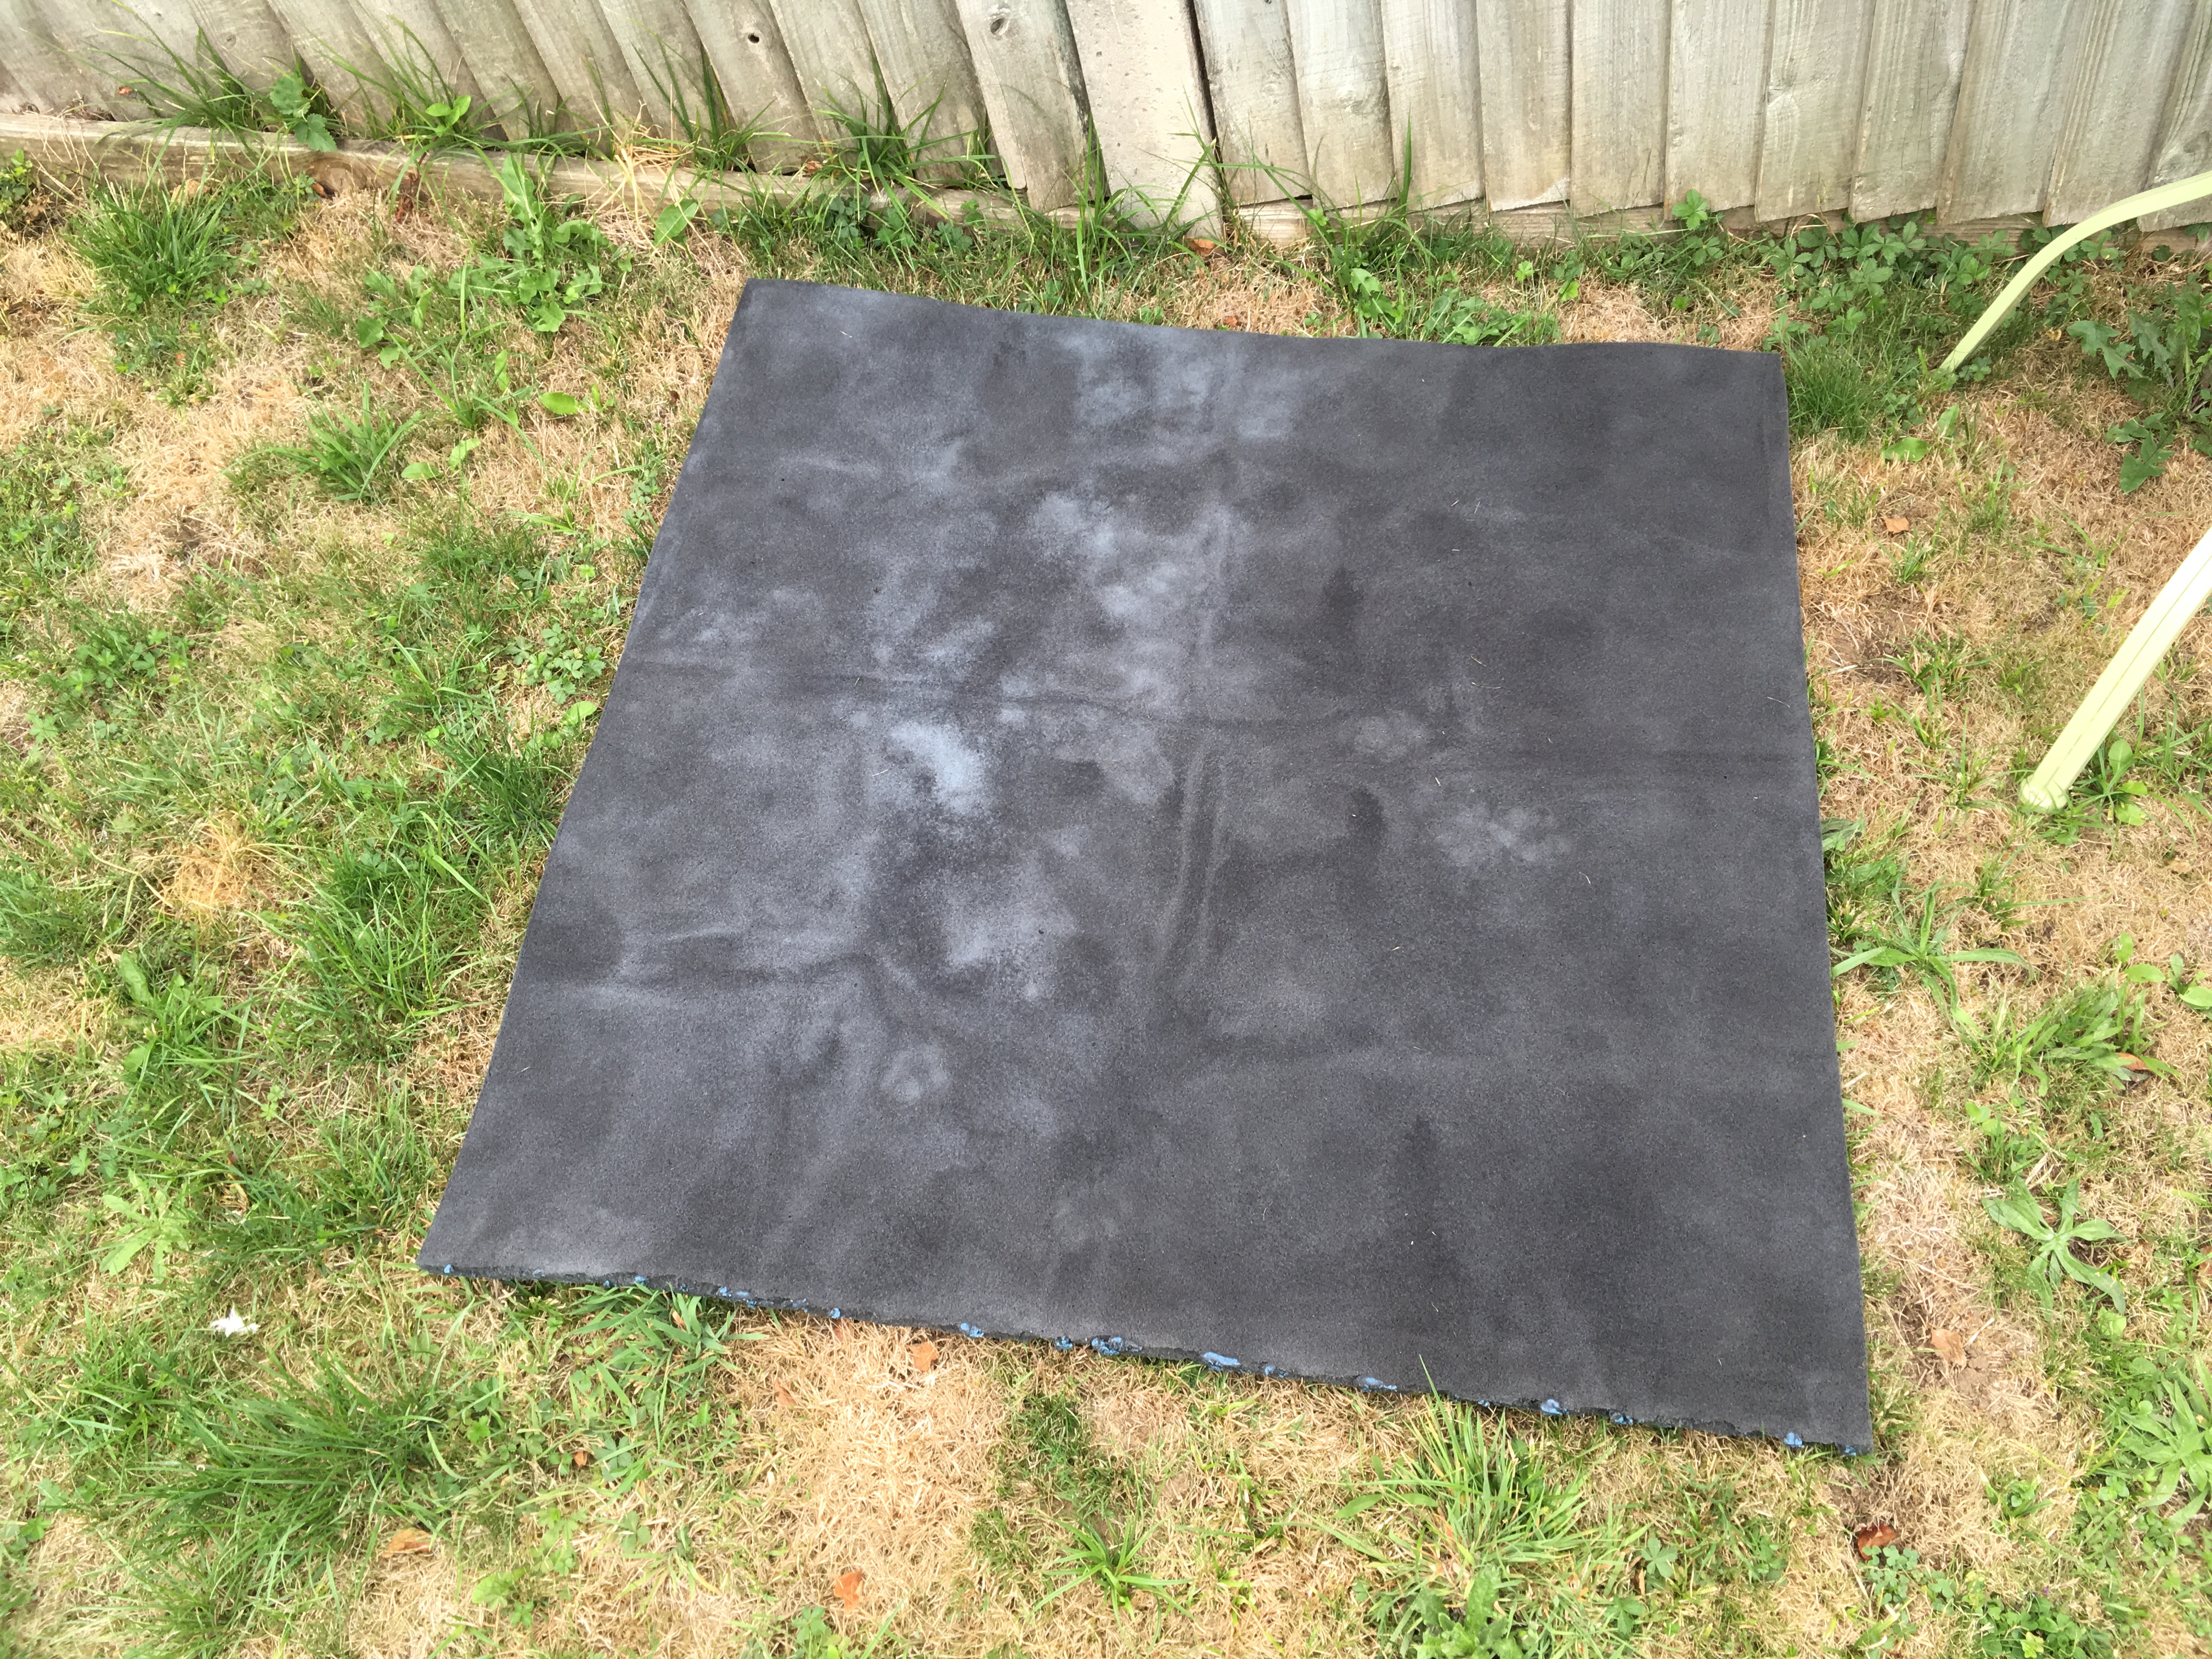 Patchy base colour. Also look at my poor lawn! The summer has killed it!
Tester for the temple
So whilst my foam runway continues to dry I’ve started on making a simple temple section. I would really like feedback on how this looks people as I’m not convinced with my outcome yet.
 I’m taking inspiration from the temples in Peru for these purely because I’ve been there, granted Inca is not Myan but still
 Used a biro to mark my pattern
  Should have used an old empty biro
So to add some detail
first I cut and glued using hot glue gun and then I washed the paper off the foam board. I recommend that if you do this you wash the paper off first and then glue it, will save you time and glue.
then I took a biro and drew on a pattern of smooth nitted rocks that are typical in Inca holy temples (very impressive, go look at some!)
then using cheap tester pots of paint from wilkos I painted a base colour and dry brushed highlights.
after that i made a wash using cheap brown paint and water which I splashed on all over. The idea being for it to pool in the recesses. It didn’t work as well as a proper shade but hey, this is terrain!
after the (heavy) wash I needed to bring back my original colour choices so that involved drybrushing the wilko paint back on.
finally I made a brown green wash with cheap paint and washed that onto the bottom of the piece and made splotches in other areas on the sides and top.
what do you think of it? I think it’s too brown, I’m thinking a yellow or sepia shade would have been better
New wash on the temple test
As I mentioned before I was not happy with the brownishness of the temple once it was washed. So I made a brown and yellow wash which looked suspiciously like watery baby poop from a baby that’s not feeling well (yuck!).
i slapped the baby poop on my next test piece and made comparison. I have to say, I think I like it! Makes the temple look a lot more like the research images from post 1.
 Left, brown wash. Right, baby poop wash.
Work on the runway
With two shades of grey from wilkos I started slapping it down. Firstly the darker shade in as even a fashion as I can. Then the lighter shade in a very haphazard fashion. The idea being to generate areas of light and shadow, or perhaps dry and dampness which you see a lot of in the jungle, or at least the jungles I’ve been in have always been very damp lol.
 Just slap the paint on
  Start plucking the once edge out to try and do some blending
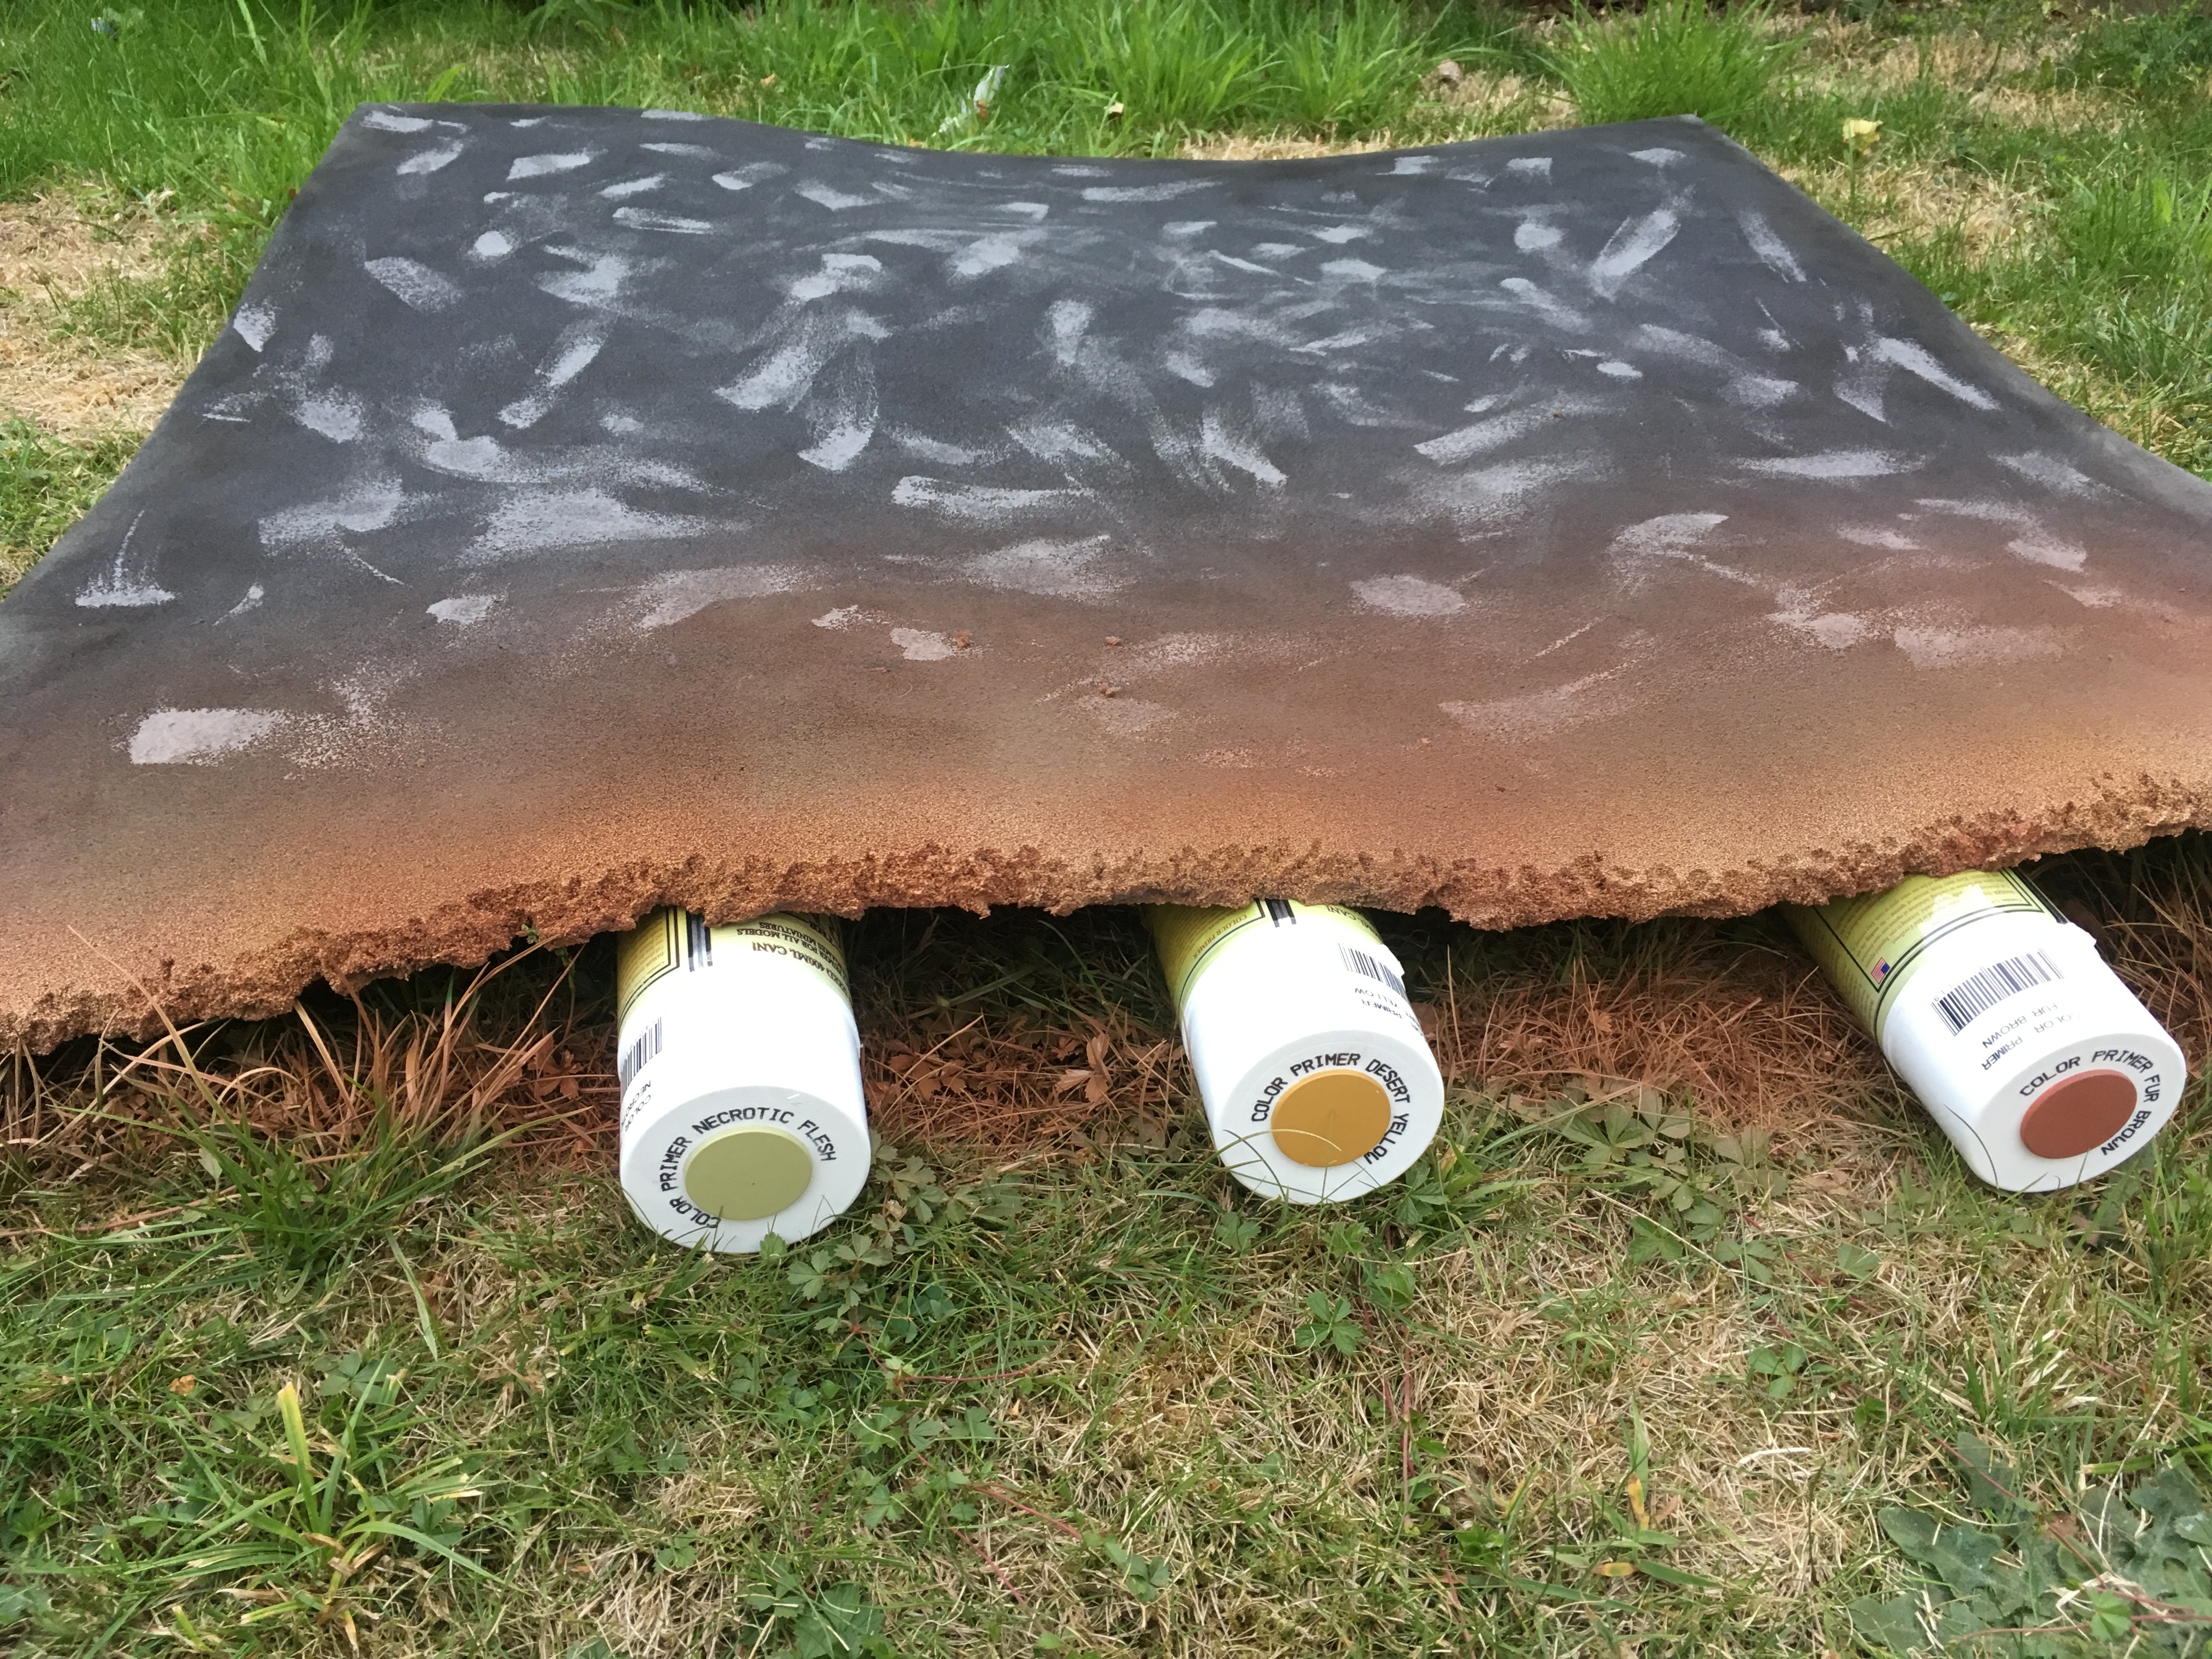 Used three sprays but the brown is the base colour
 Then go back to the wilko paint and try to spread it out and blend a bit more
The run way is almost there!
 Started by making a template in cereal box cardboard
 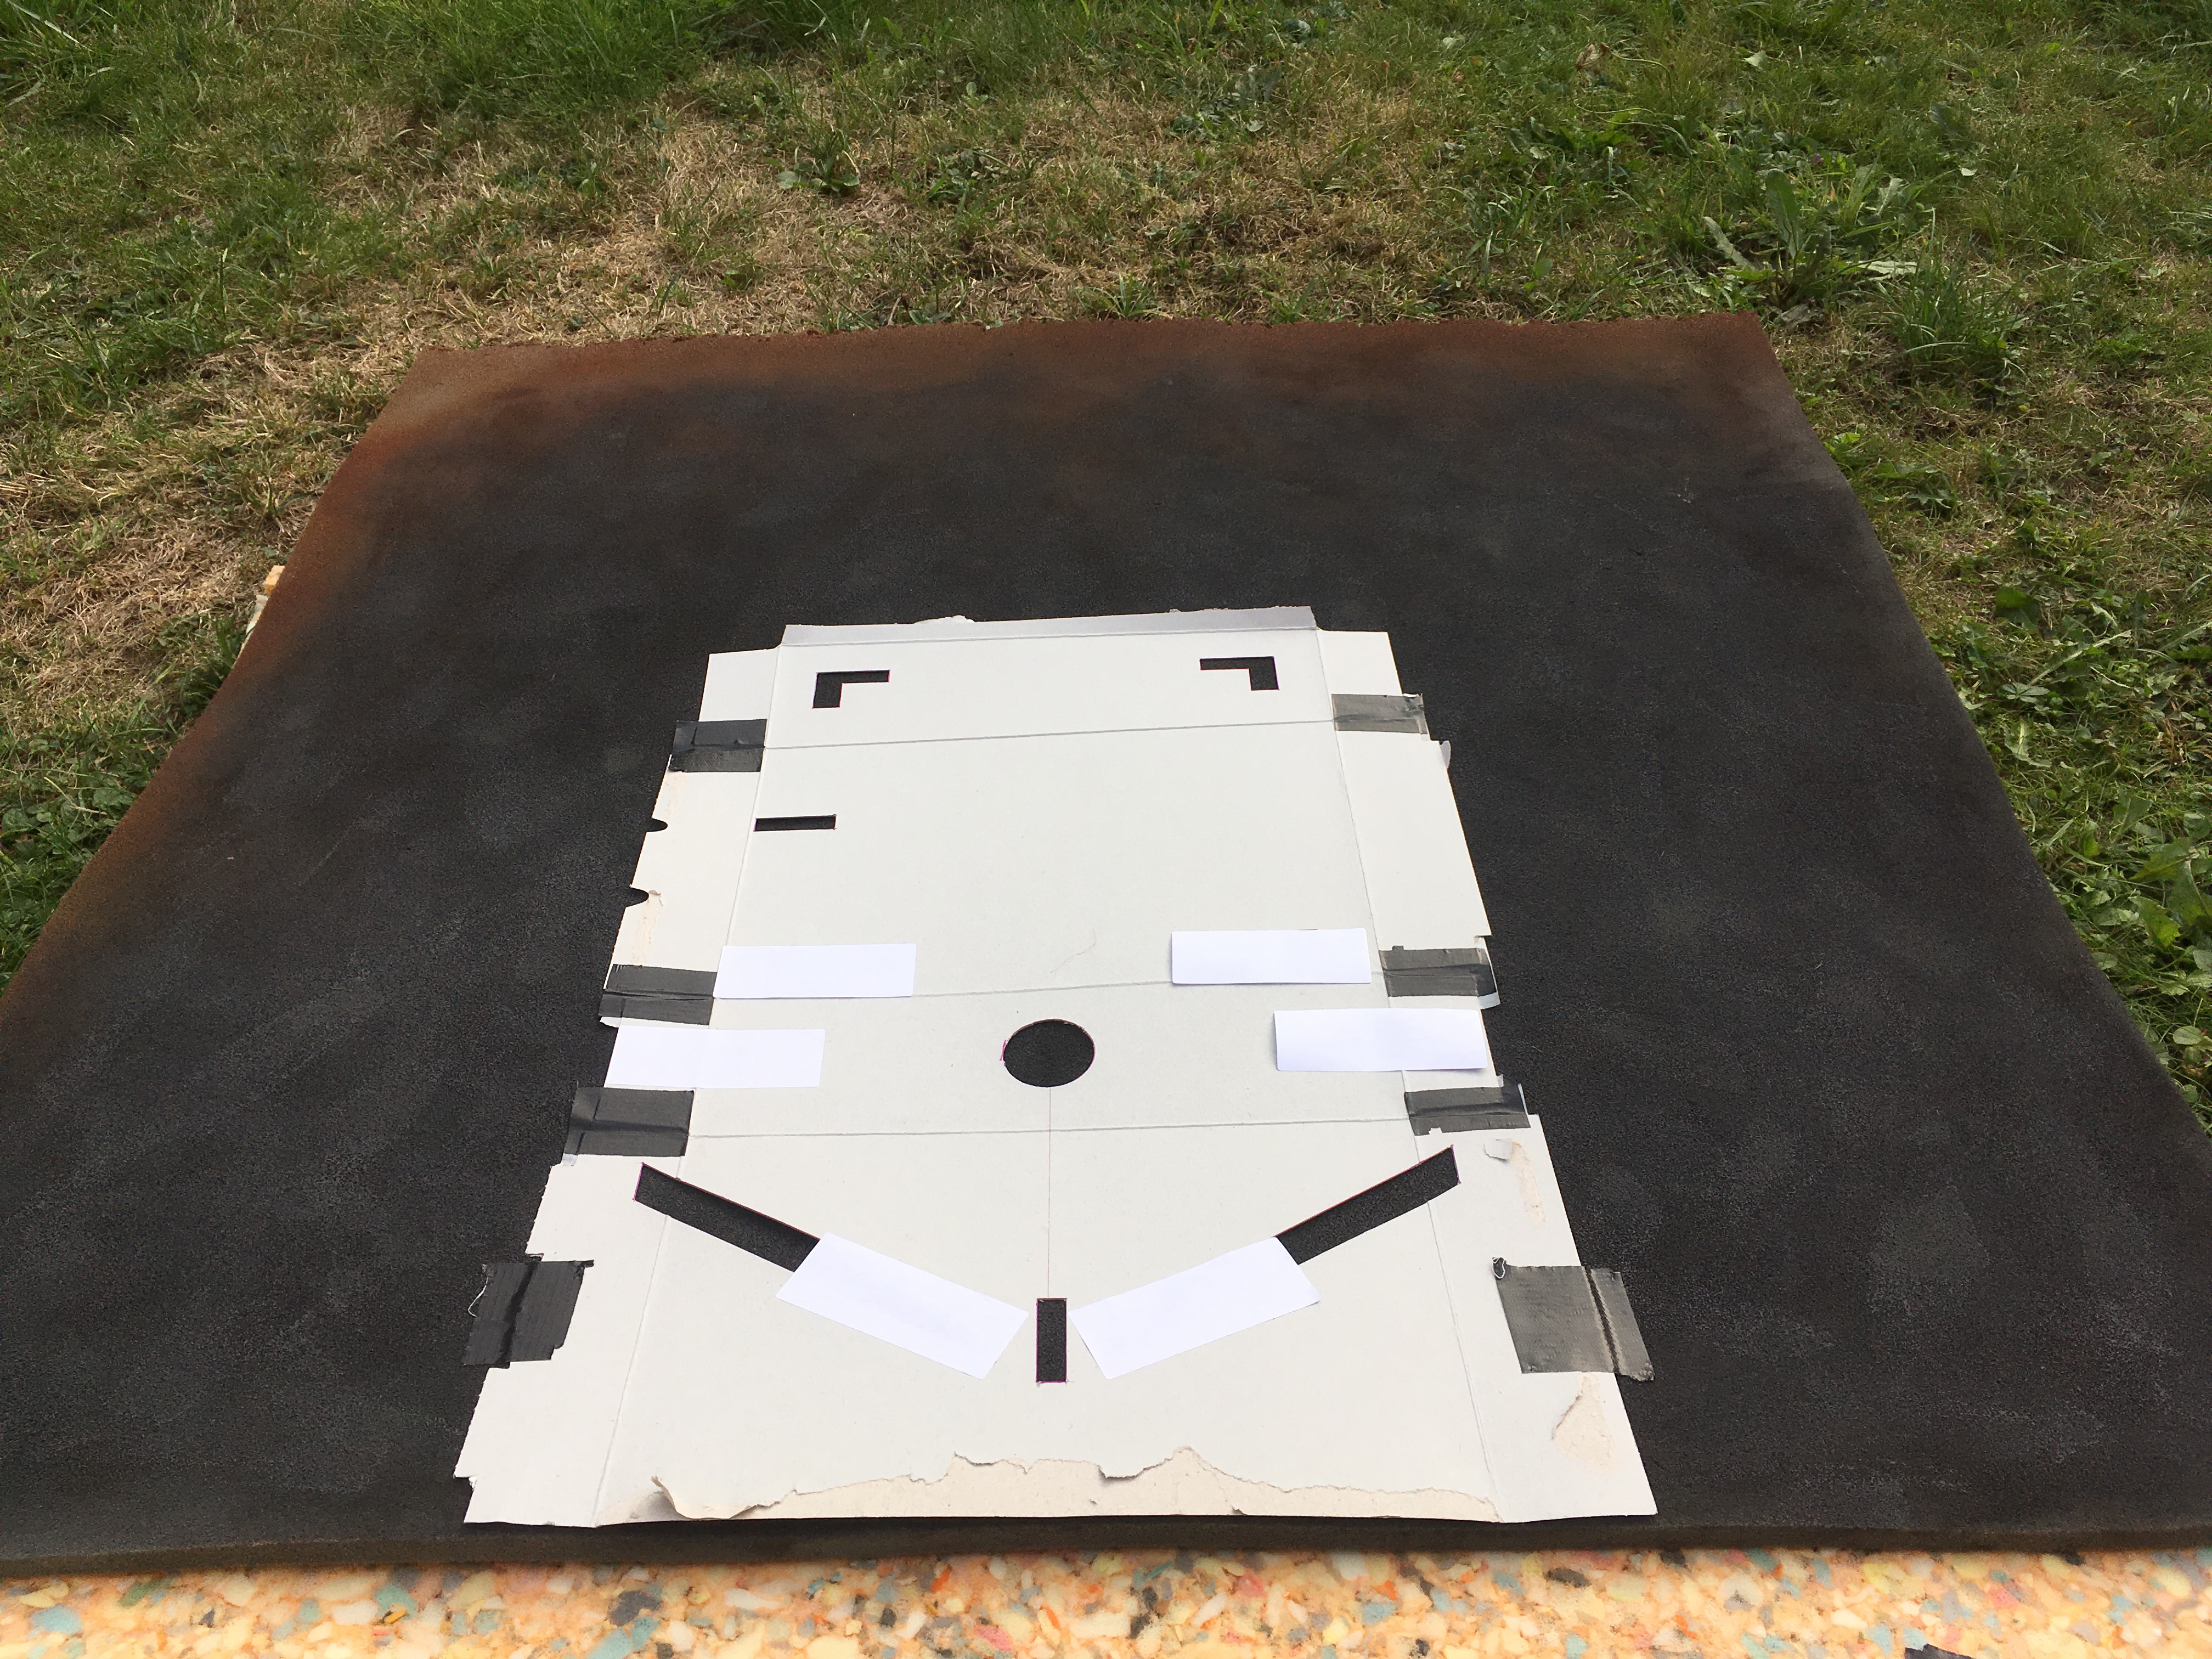 Tape it down and cover the areas I don’t want spraying
 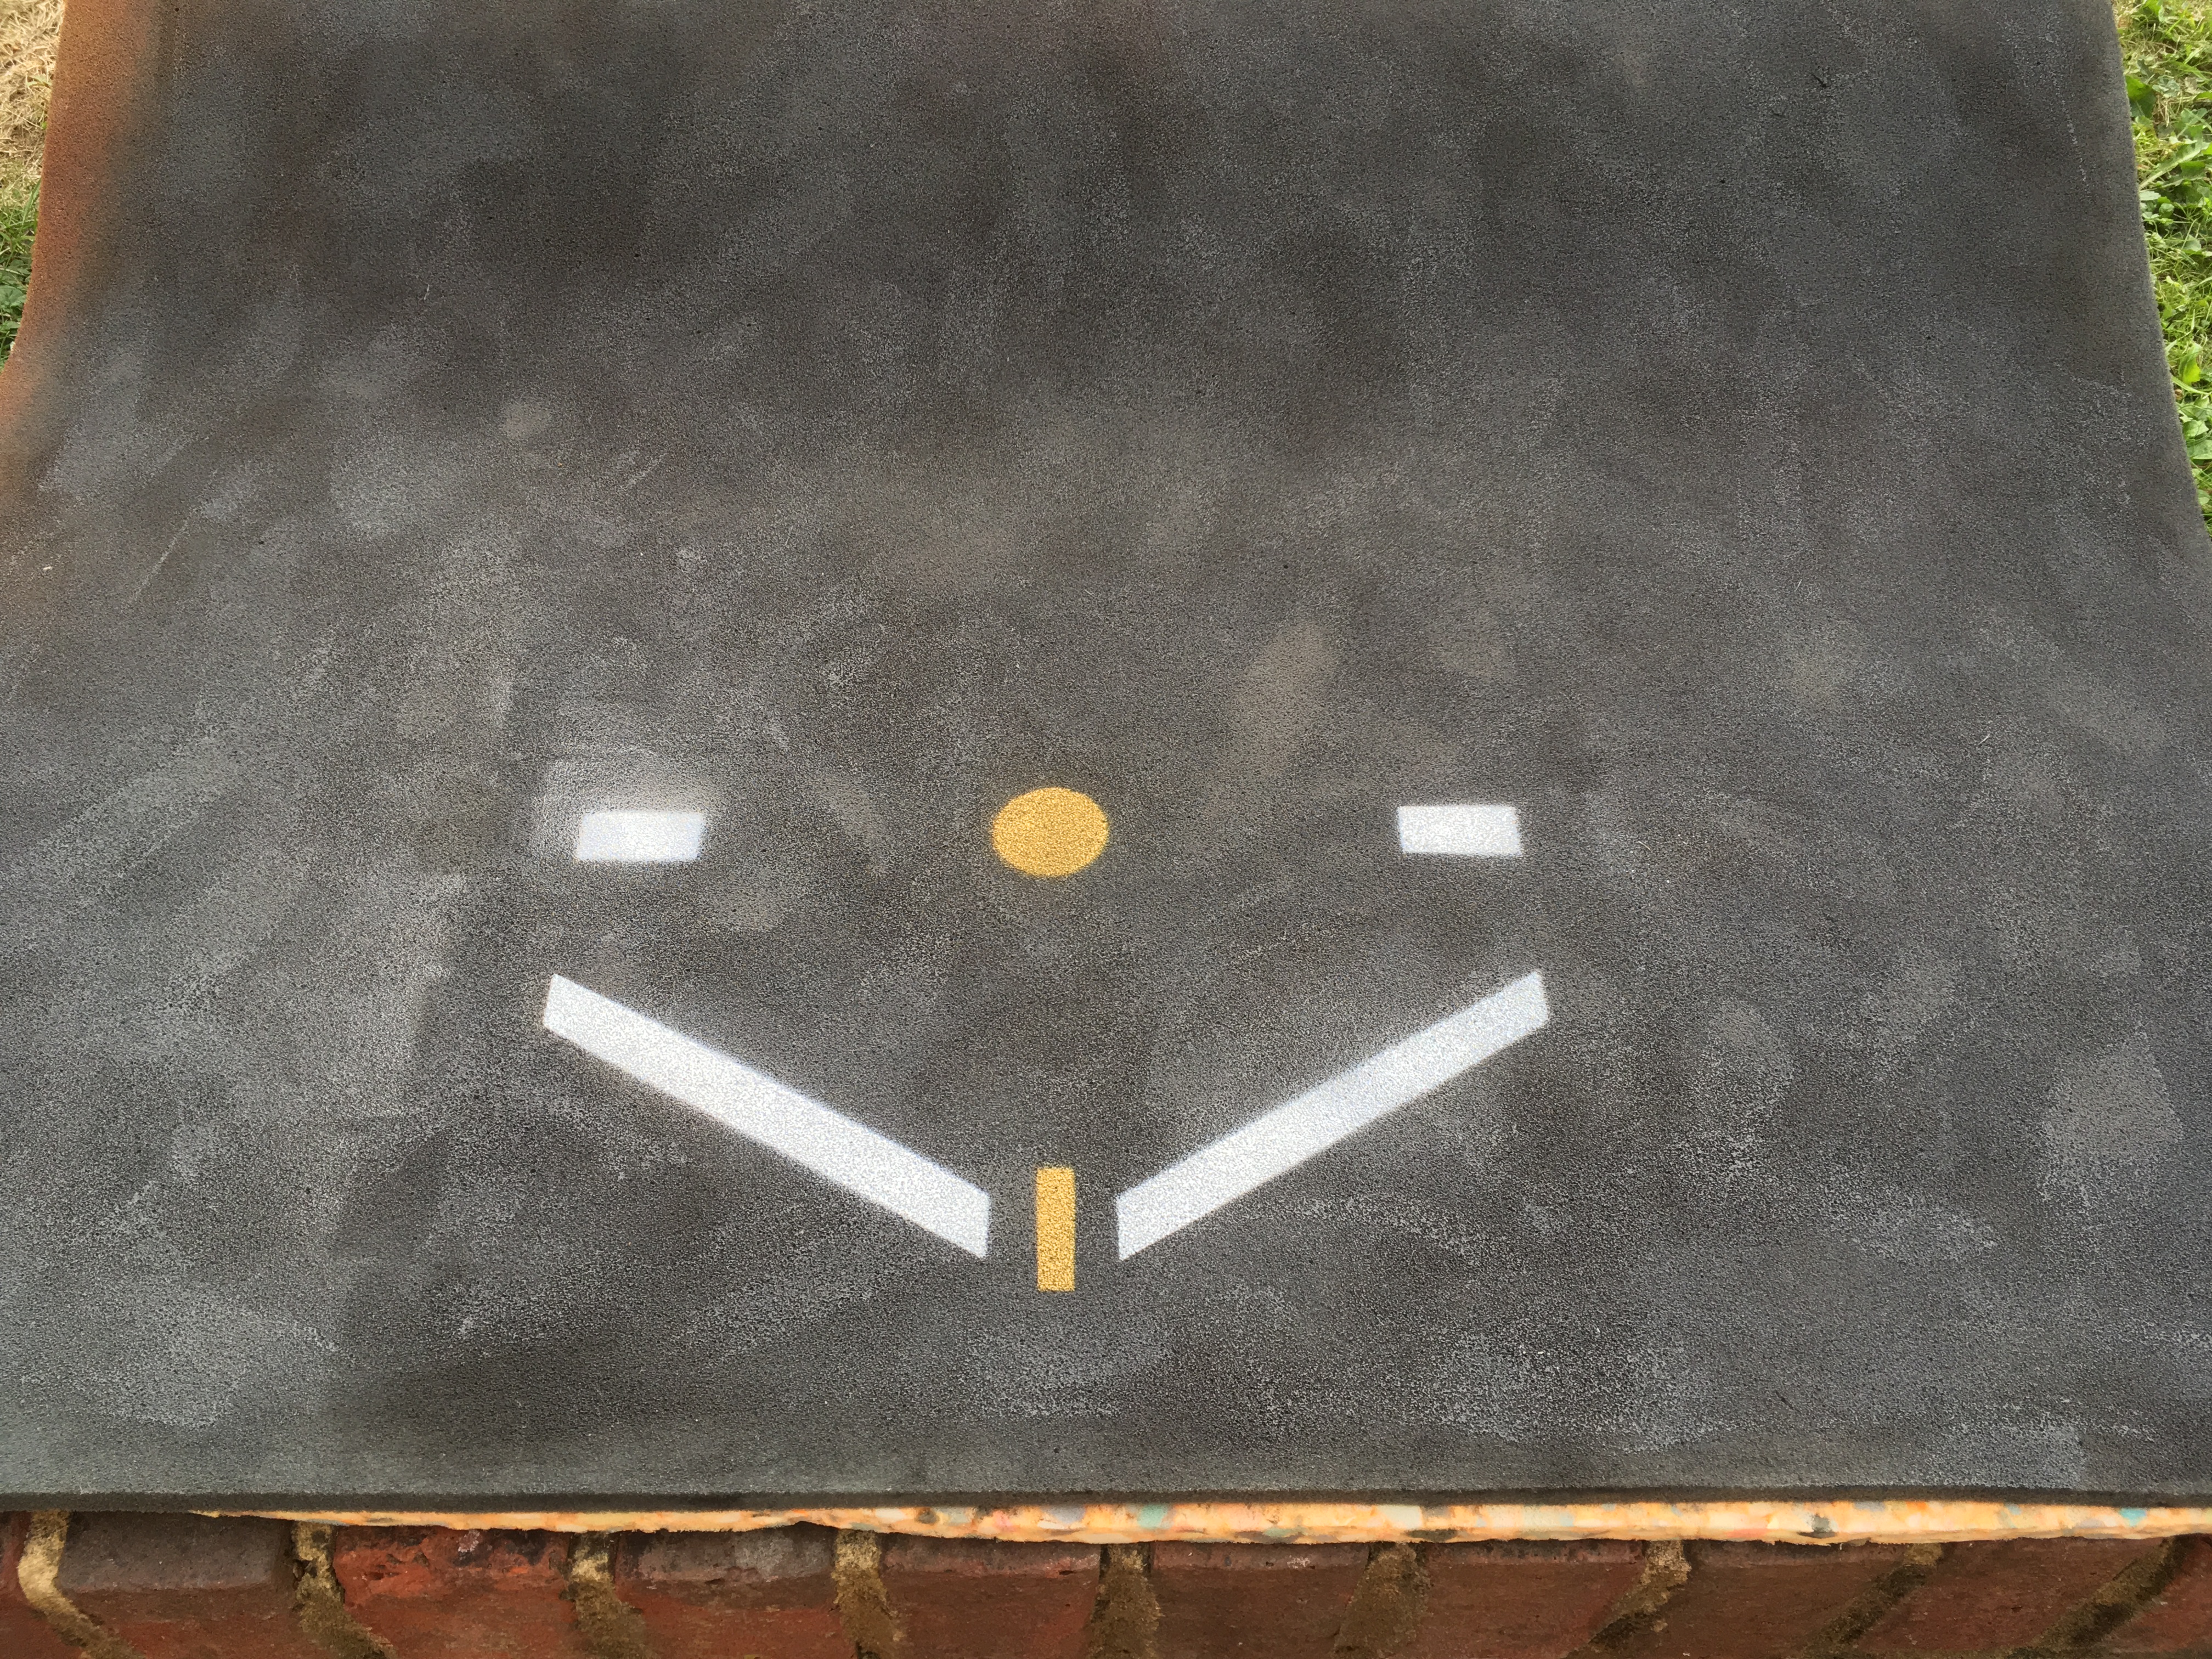 Spray two colours! White and desert yellow from armypainter rattle cans
 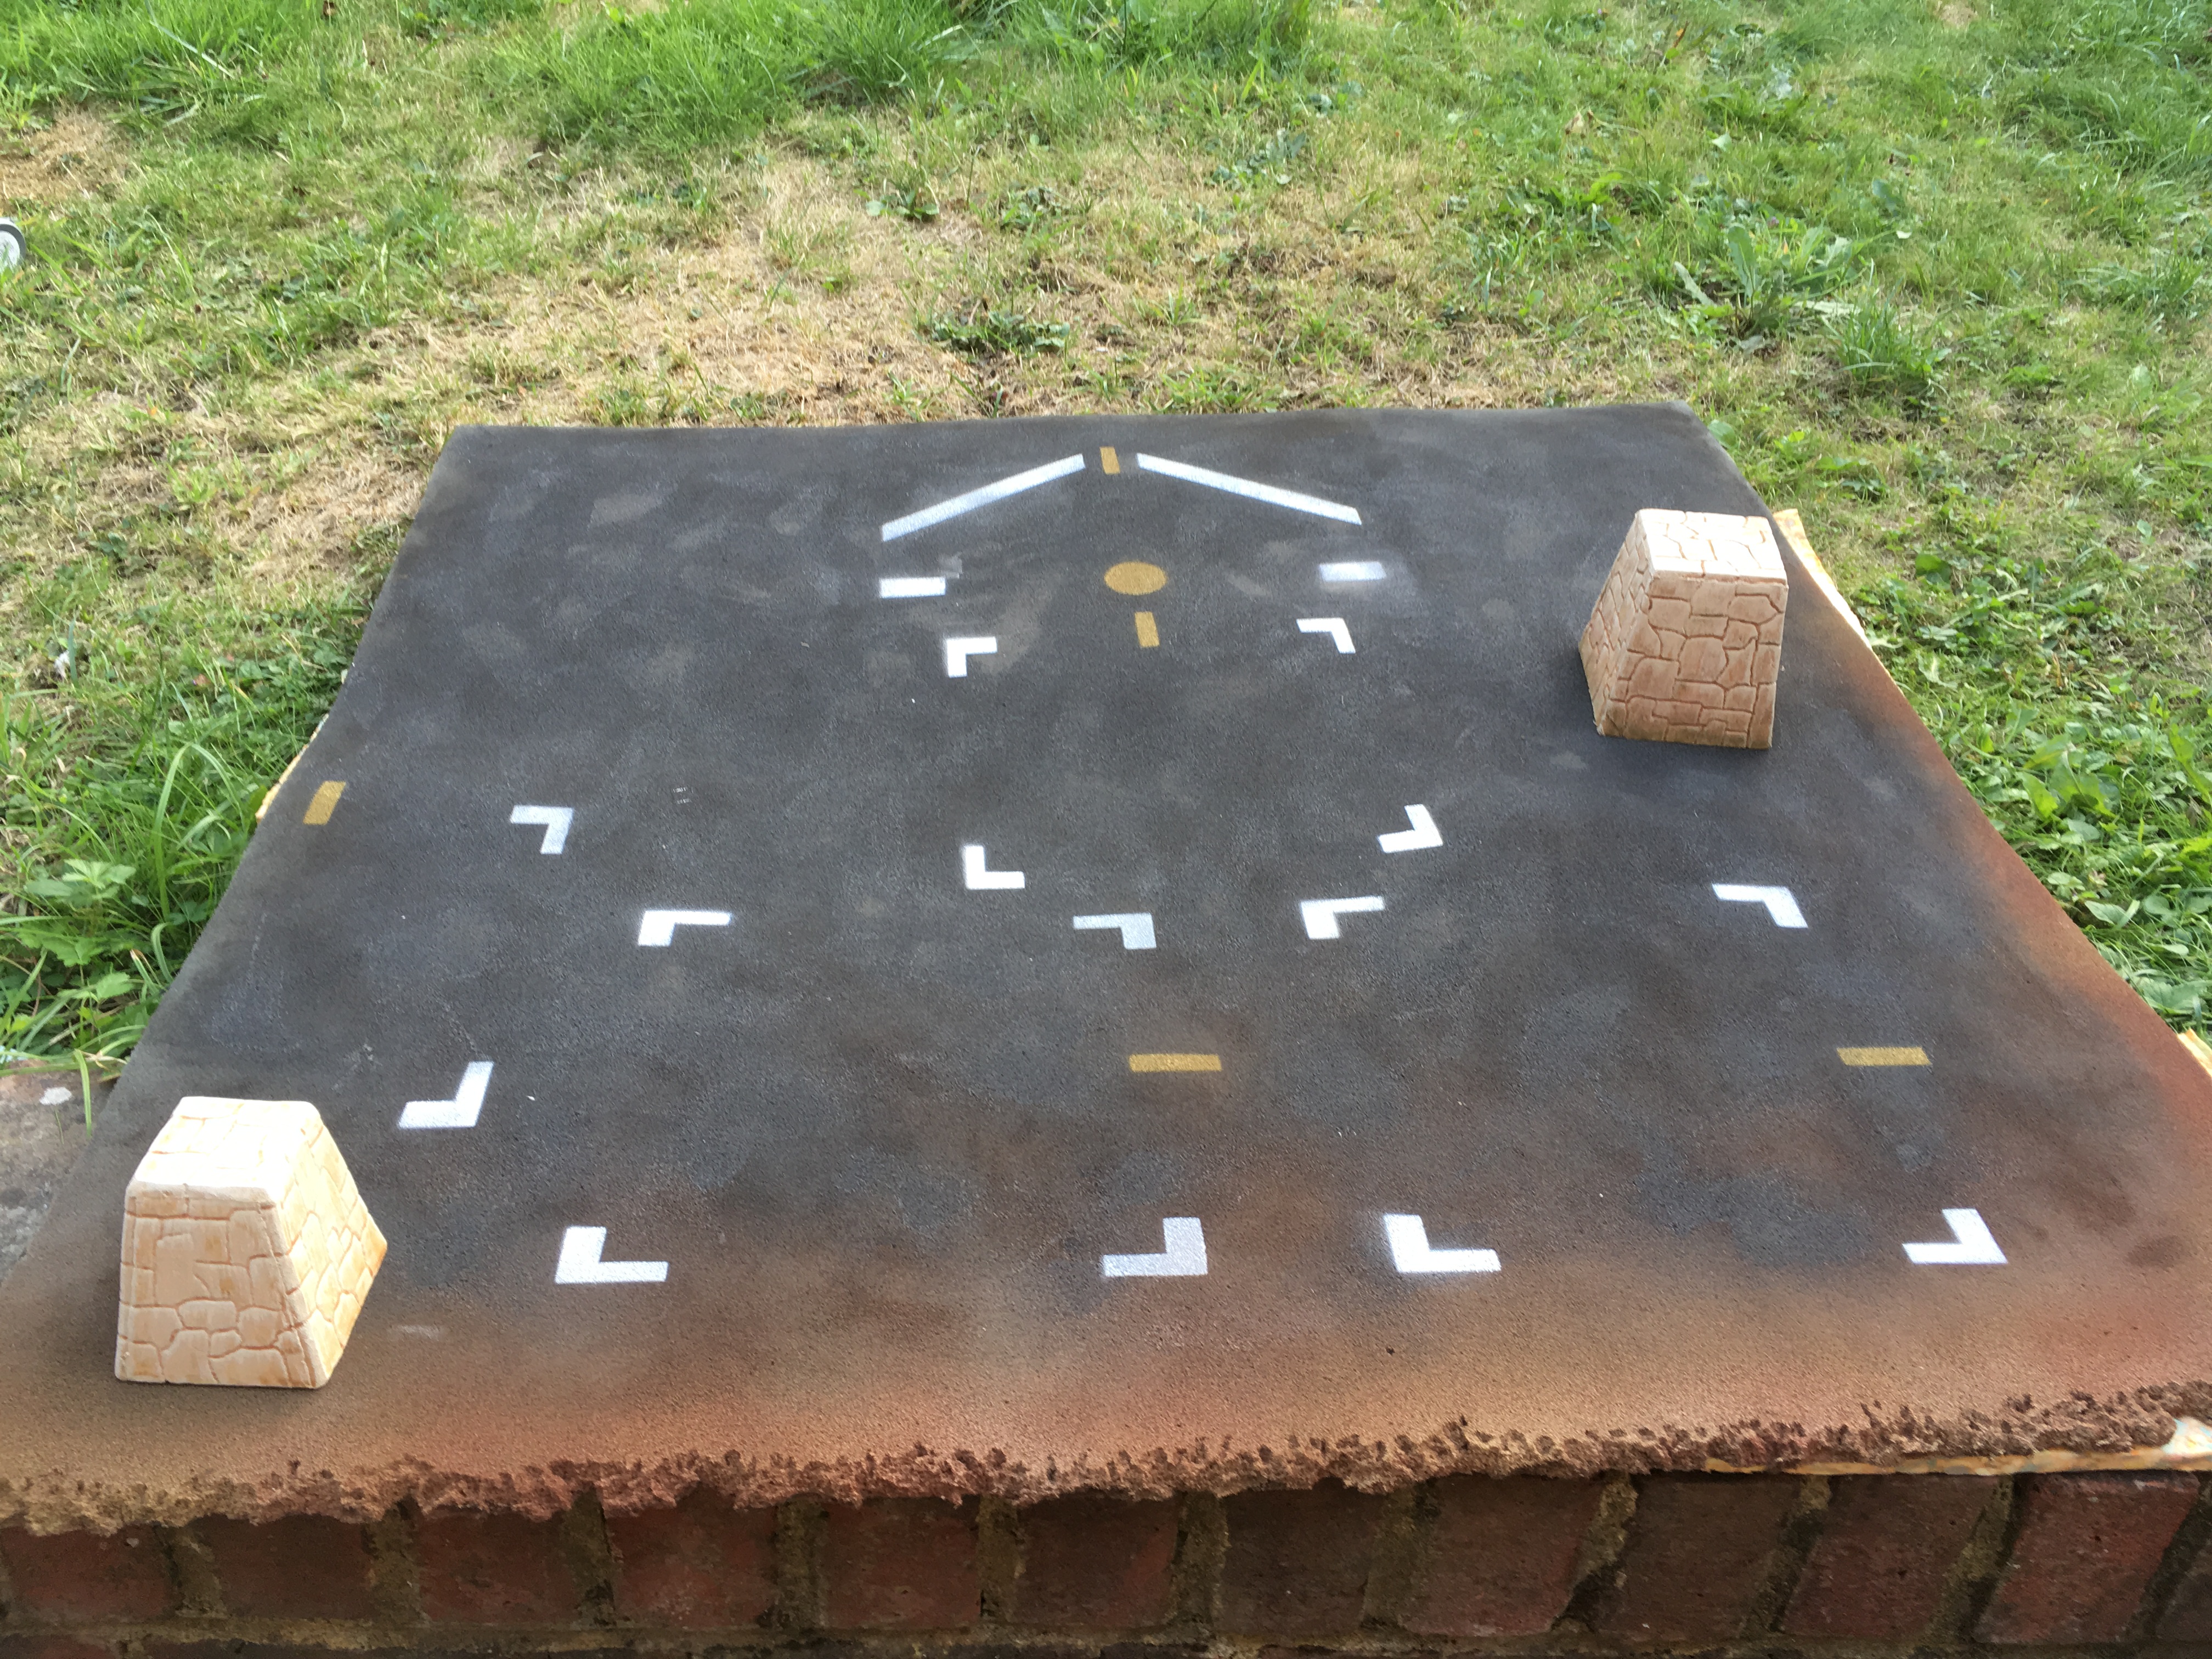 Do more of the same
 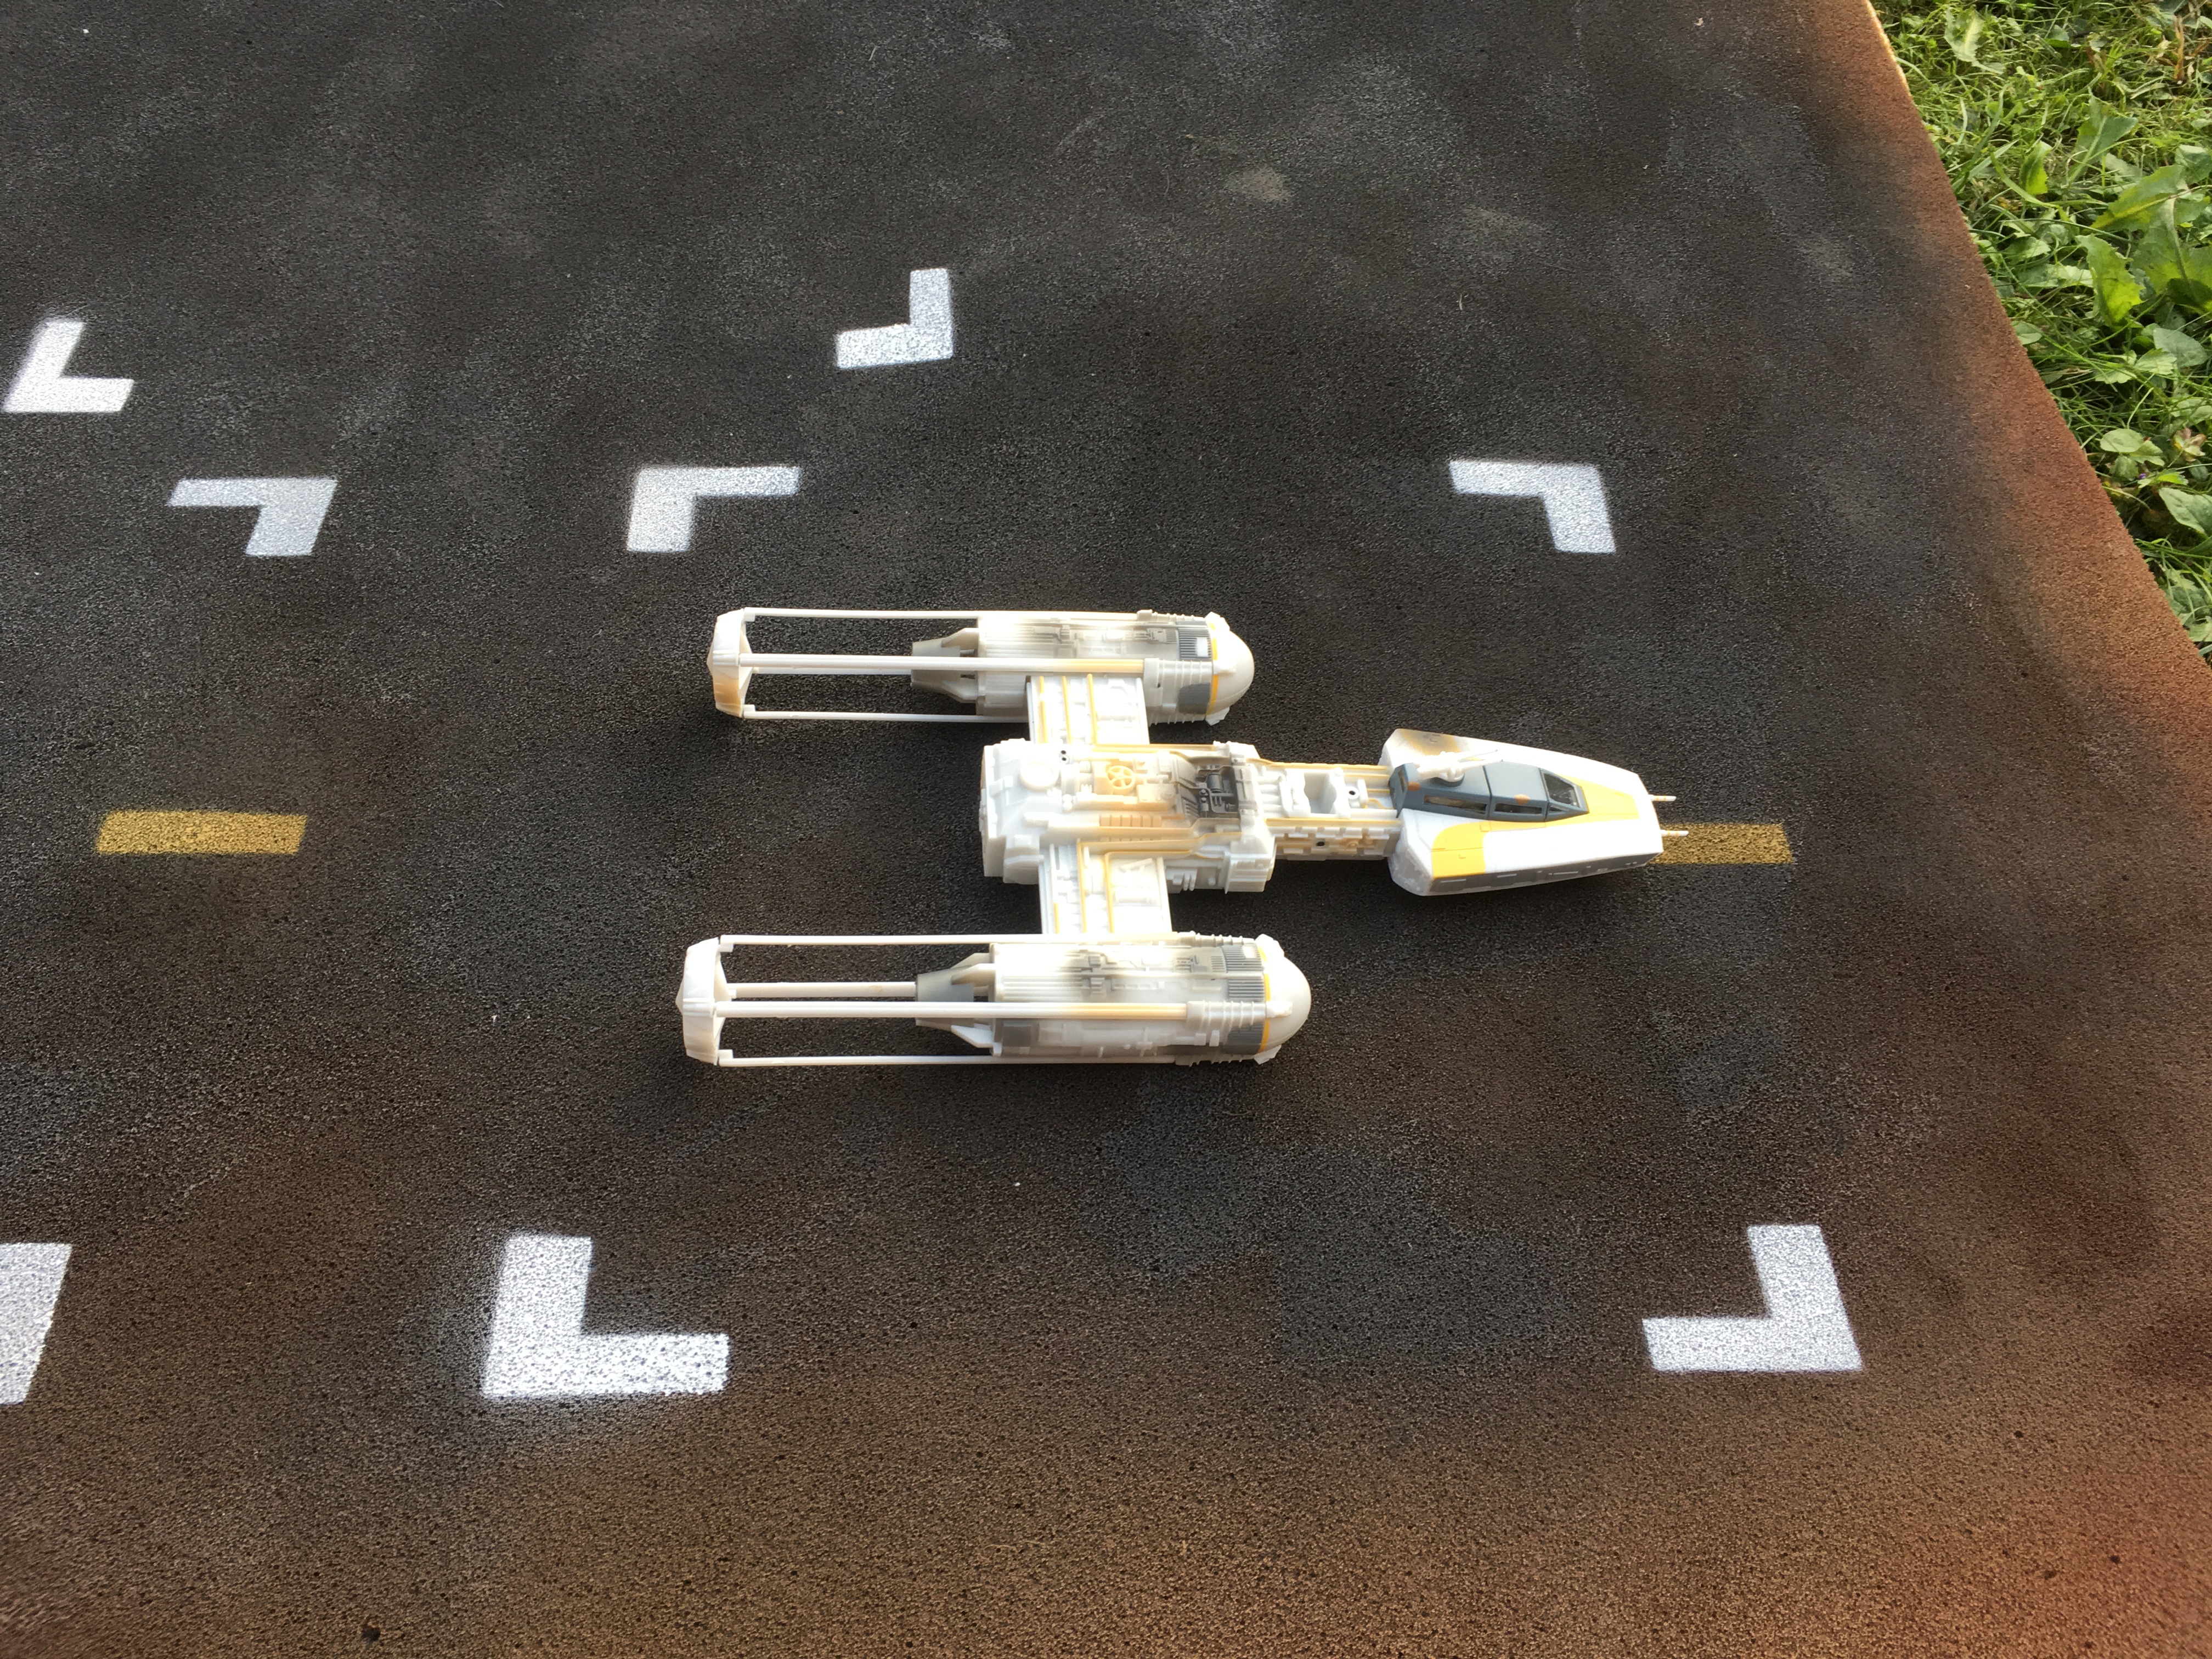 The small y wing fits I’m it! It should be noted that this has been roughly scaled for an Xwing
 To work out the rough scale of the boxes for xwings I went to wiki and wookiepedia to figure out that an xwing is about 12.5m long, at a rough scaling of 1:54 that means that 1250 cm comes down to 23cm. So naturally I went for a nice round 25cm haha.
looks good enough for me but if I was to redo it I would make them more rectangular rather than square as y wings and u wings are much longer and would also use these parking spaces haha
Welcome to the Jungle!
As you will know I’ve been wanting to make this jungle. However since I’ve run out of time for the competition I’ve decided to rename the project to Collins does Yavin IV table build. I still plan to continue with the project of course.
So let’s move onto building some jungle terrain specifically scatter. Full disclosure none of this is new or innovative basically borrowed from the terrain tutor and his videos can be found here.
Ive been collecting bits throughout the month for these scatter pieces, mostly from wilkos and the range.
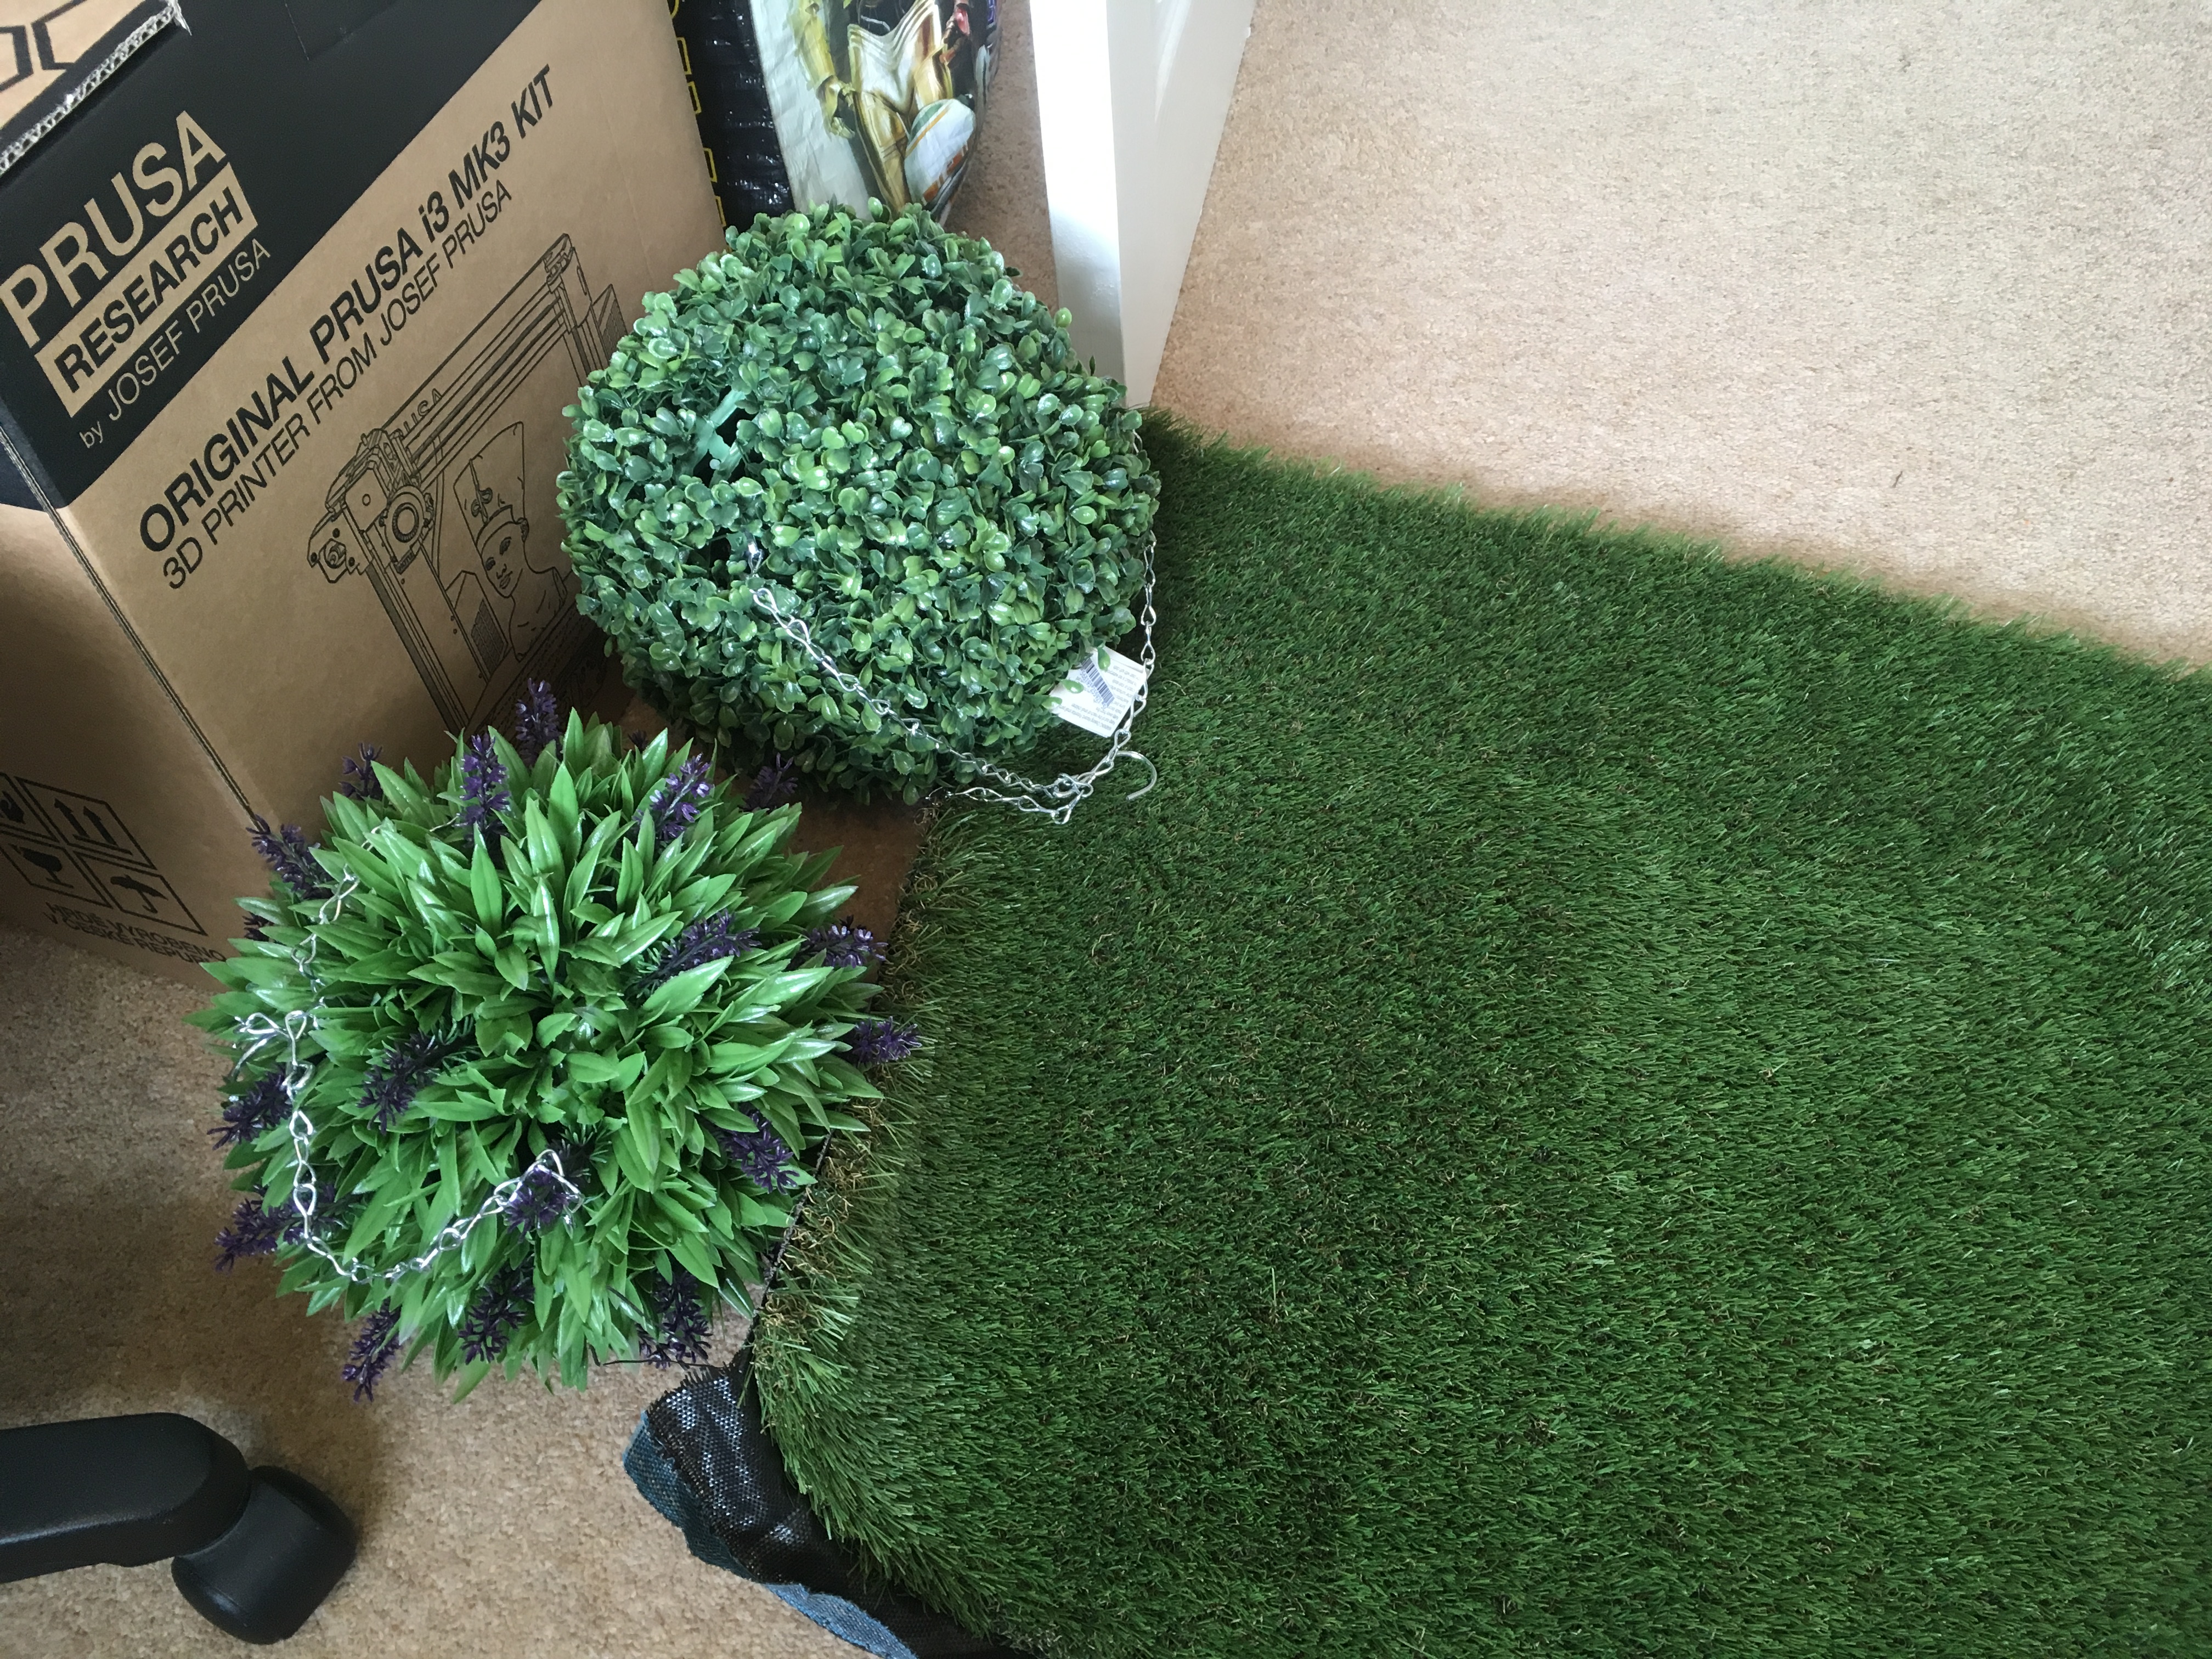 Two hanging balls for £9-11 each and some offcut of fake turf (spoiler image! I also have got a 3D printer now!)
 One £6 bag of aquarium plants
As you can see the aquarium plants are very bright greens whereas the garden plants are muted.
I’ll have to make some bases and most likely I’ll be building so wire trees with steel wool toppers. I hope that I’ll build them in a better scale for the wargame.
I started with a sheet of 6 mm MDF and cut it into many random shapes. Then after that i used DAS modelling clay to add some bumps just like TTT did.
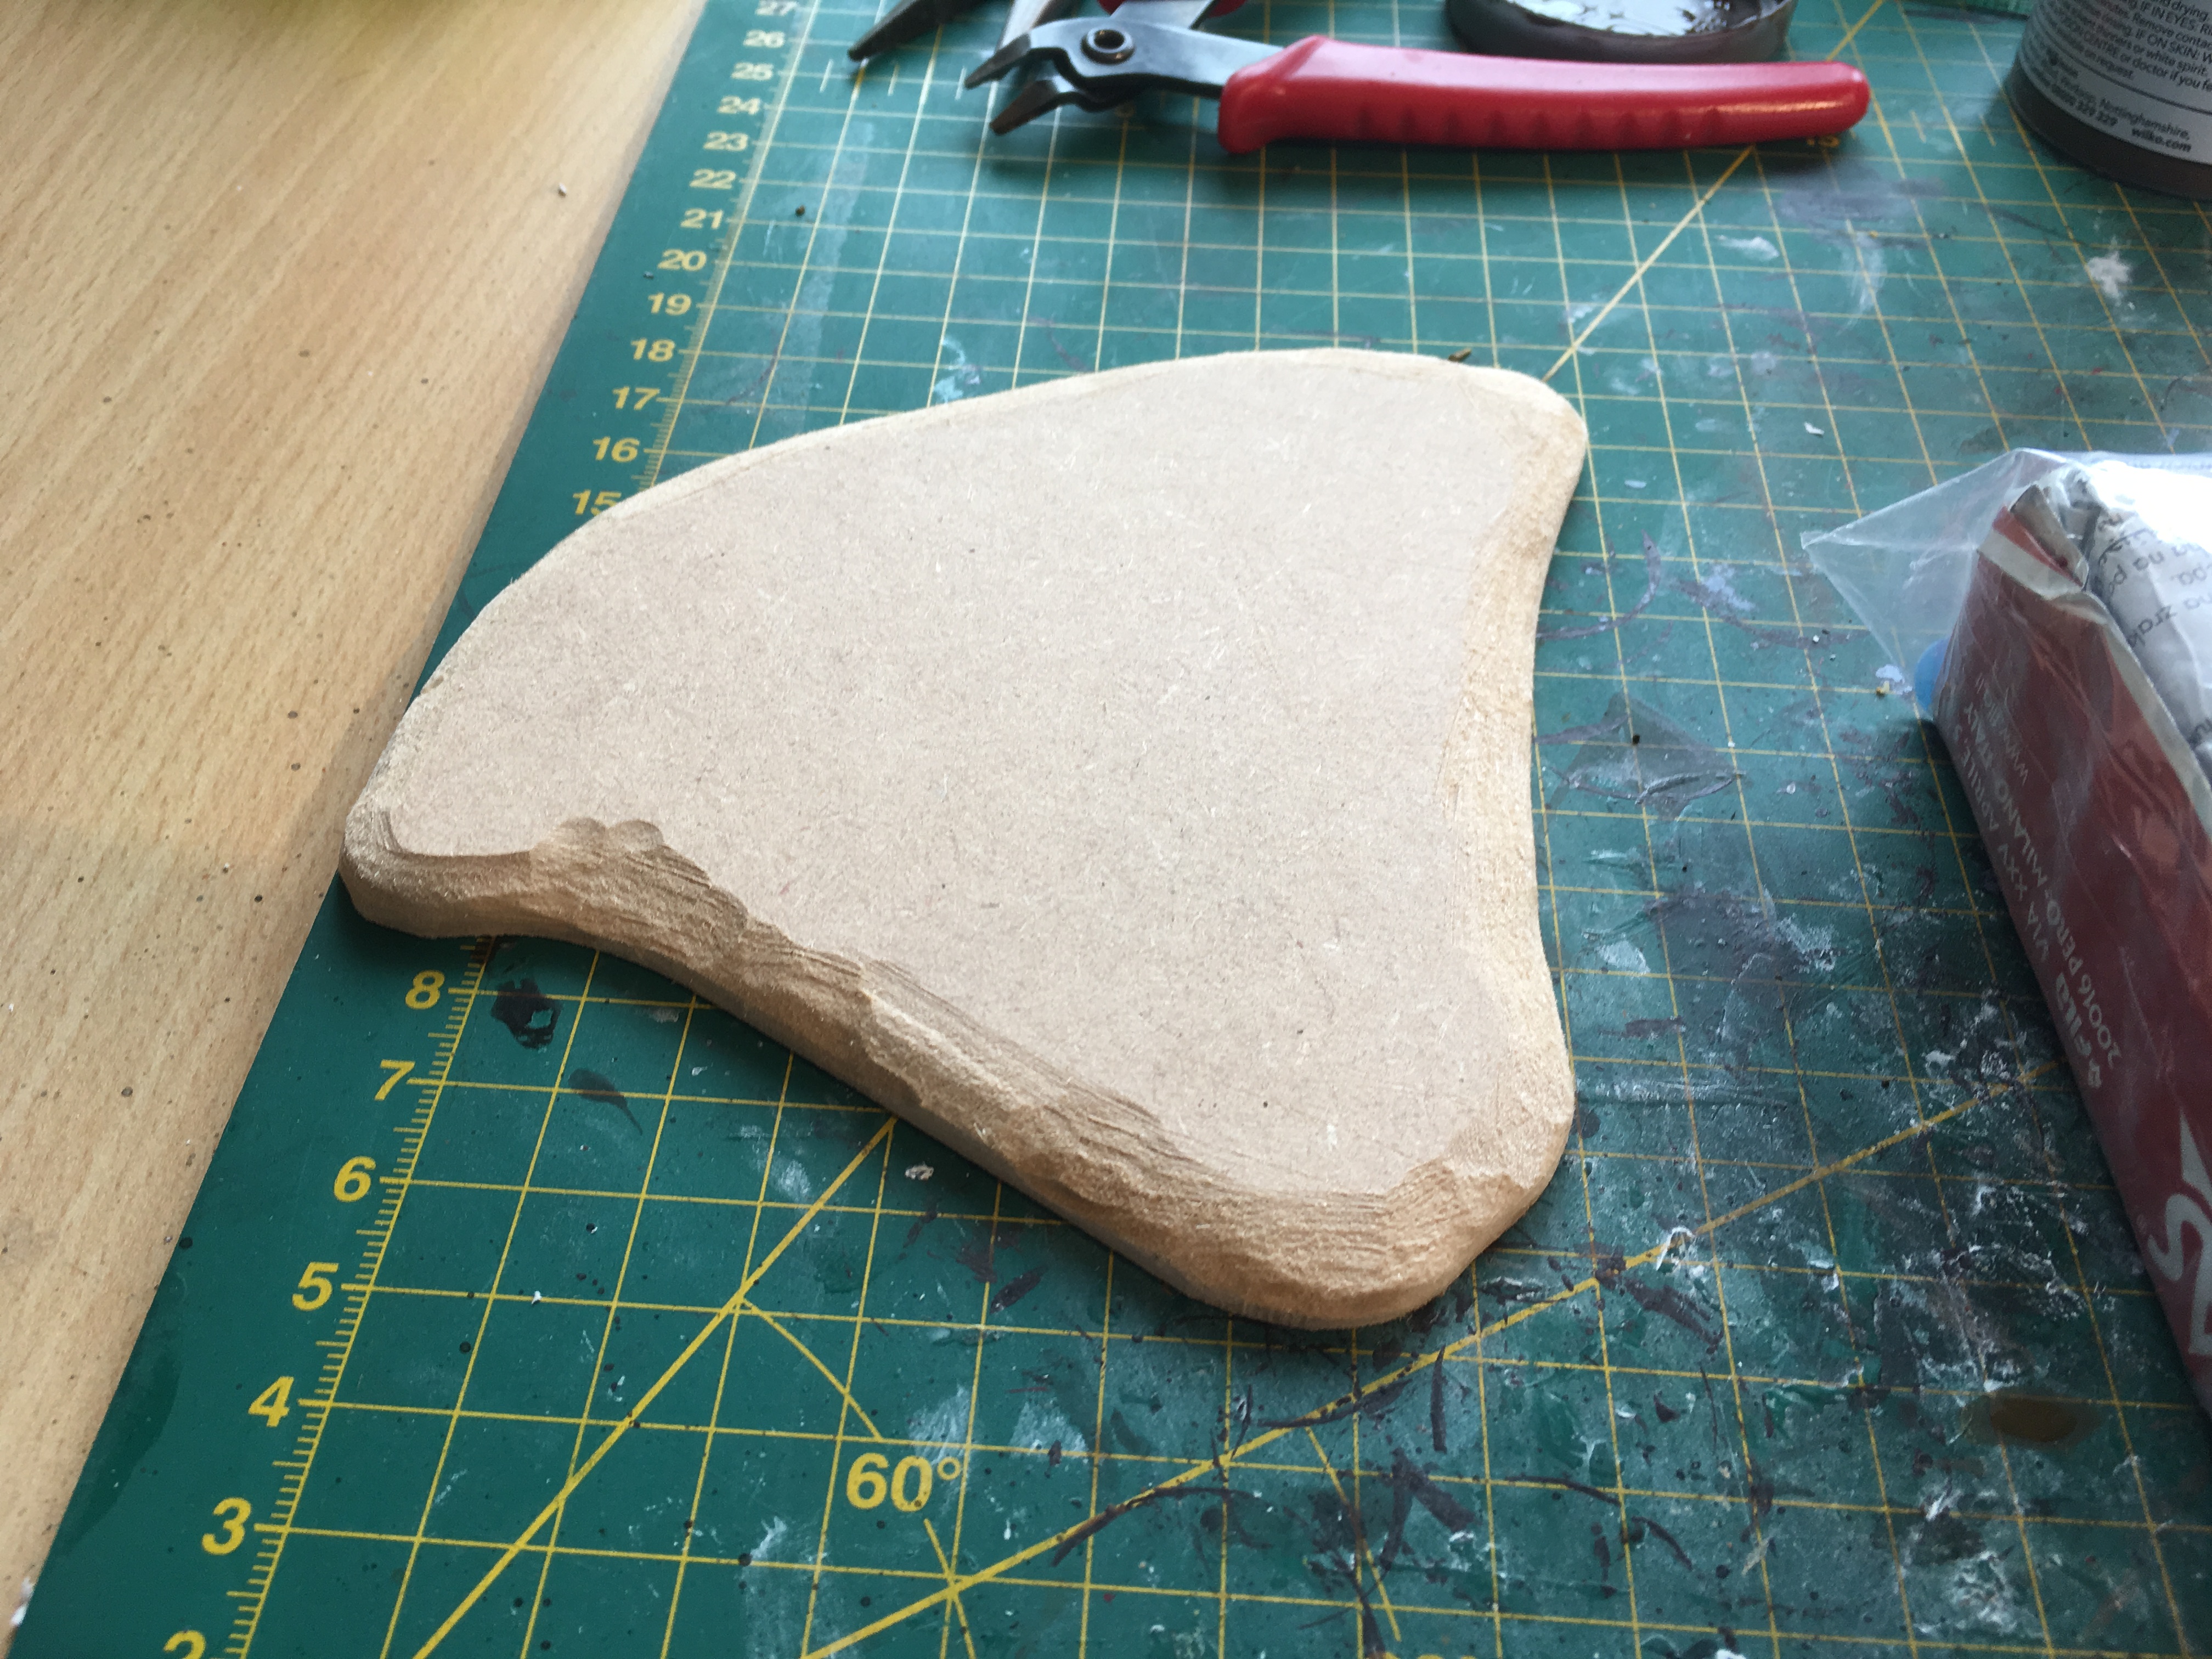 Random MDF boards that have had their edges bevelled off with a Dremel
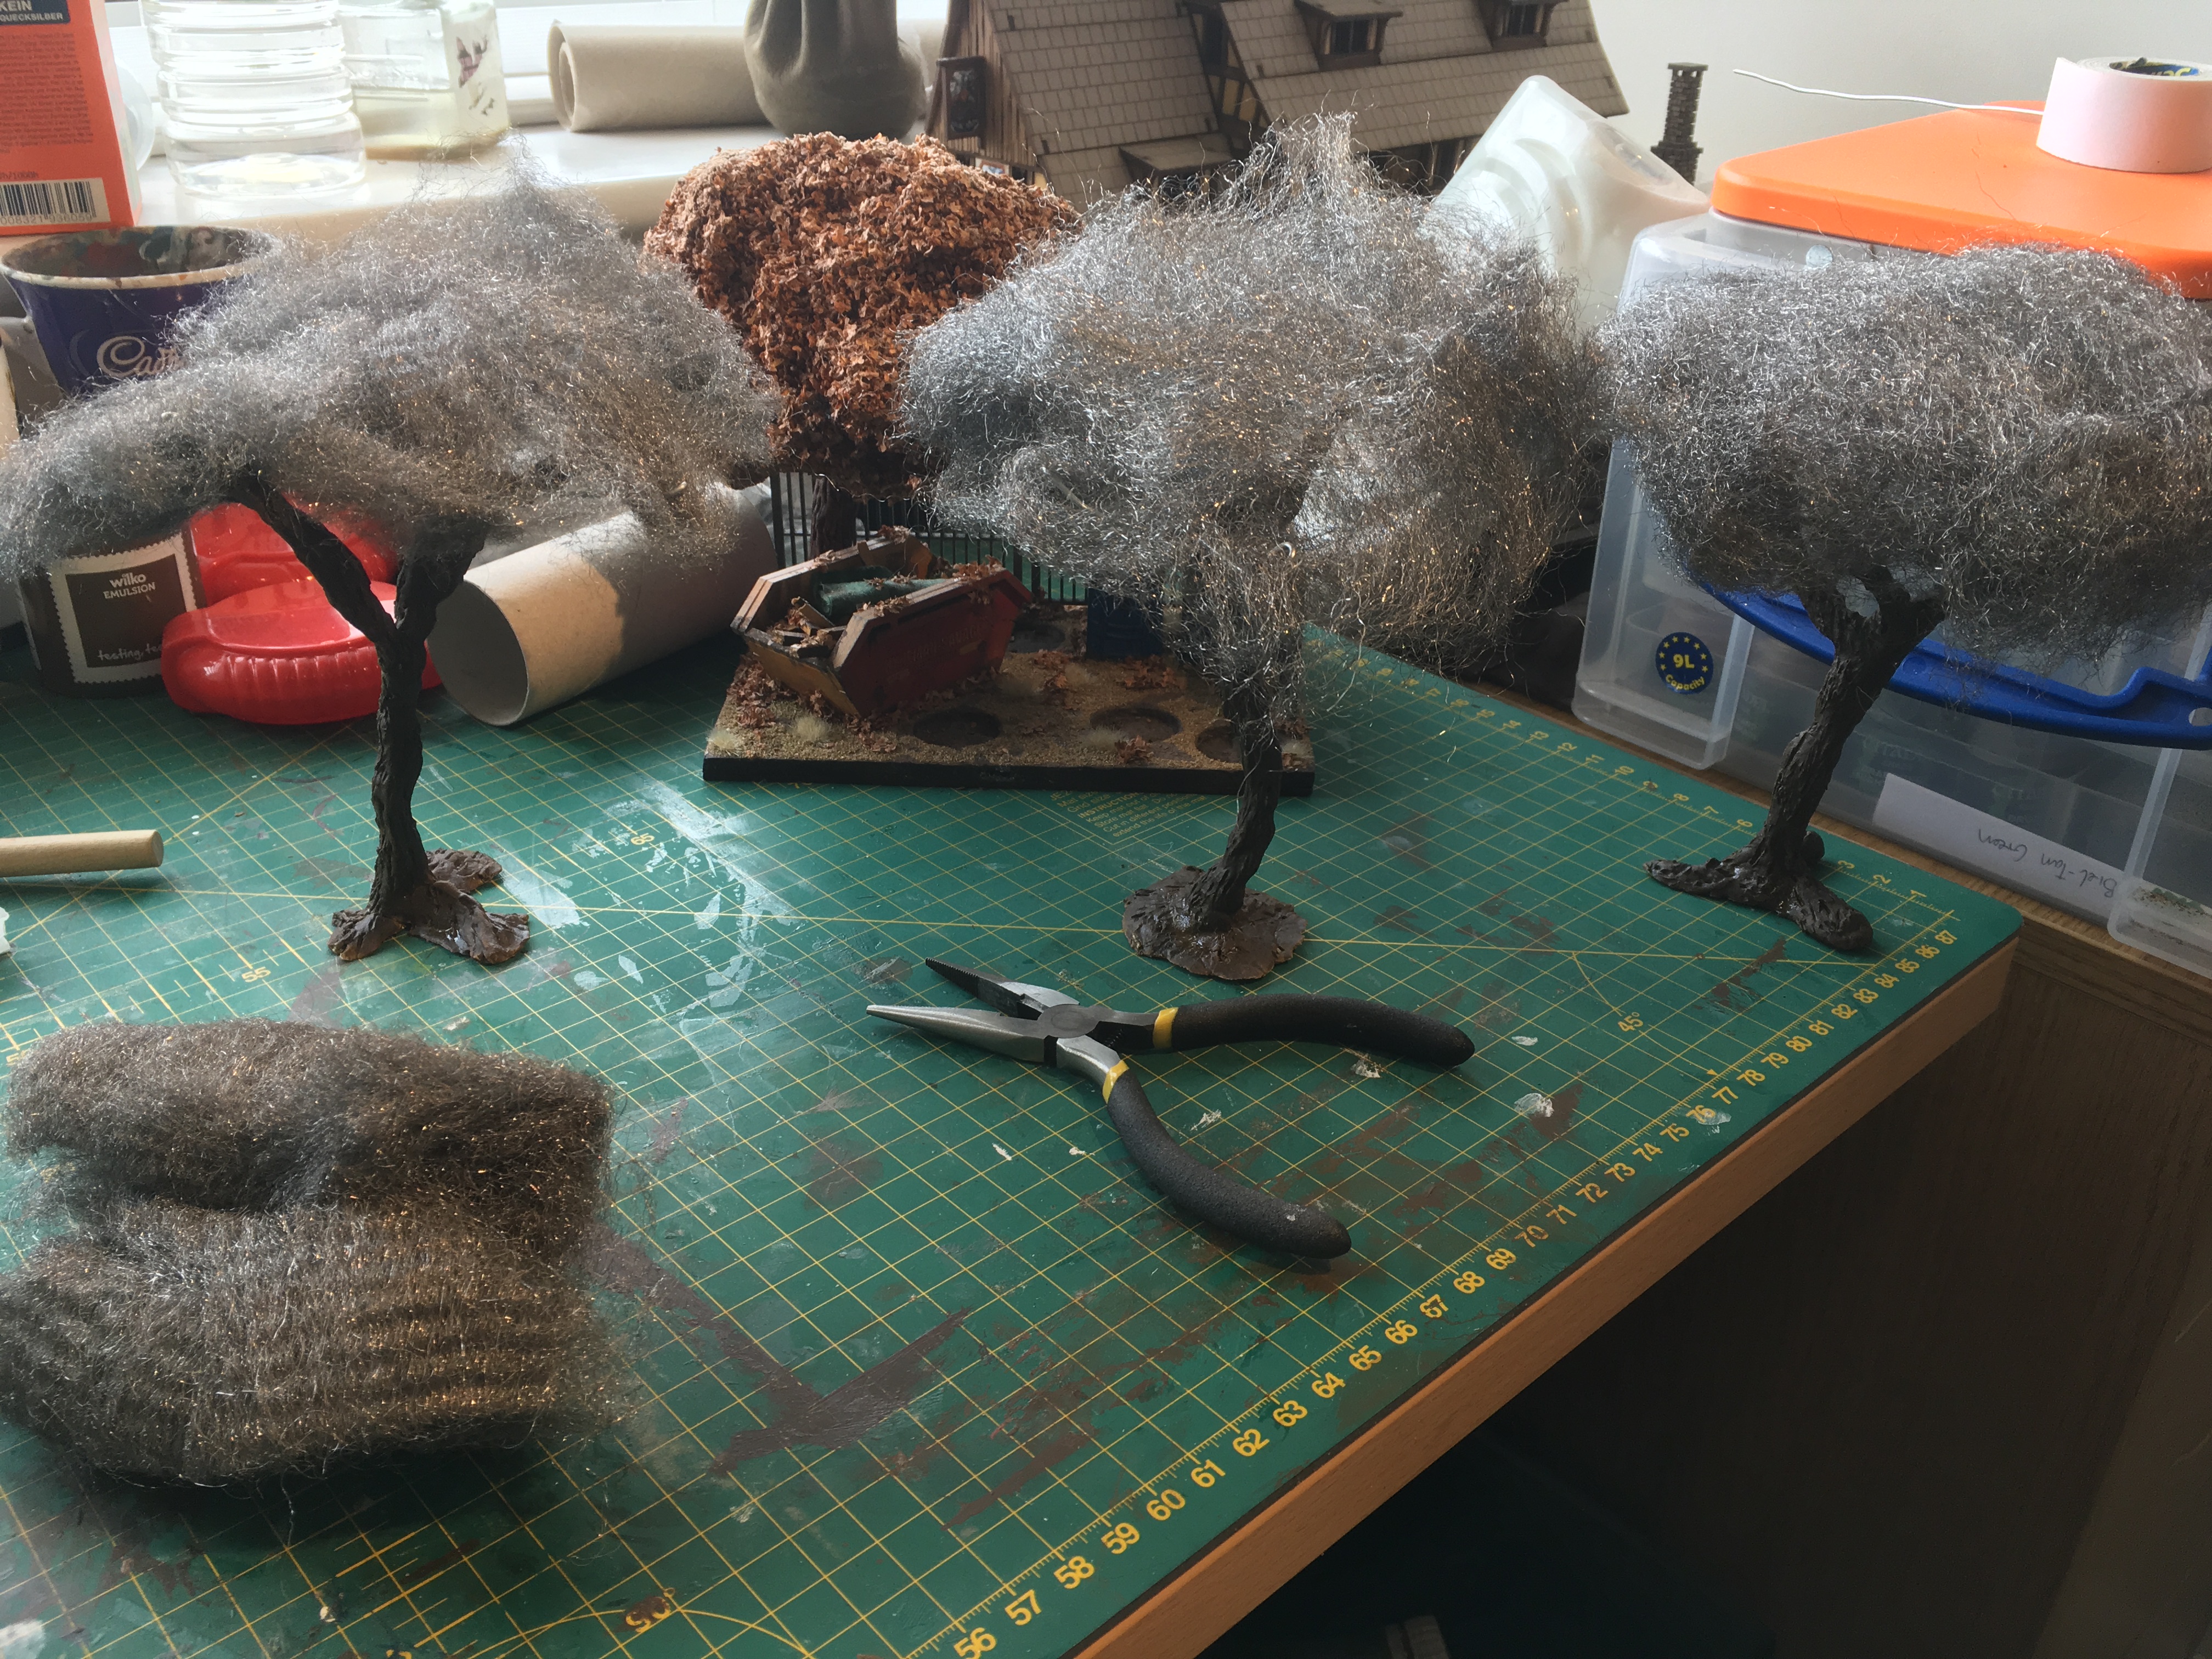
  Wire tree with bark added in DAS
 Slapped on the DAS on the board and now waiting for it to dry before painting
The trees were made by taking 1 mm garden wire and twisting it together. After that they were then cut and twisted again into different branch shapes, Eventually leading to single strands of wire, after that I hook was made using the last of the wire.
Once I was happy with the random I then covered the whole thing in DAS modelling clay. I used a sculpting tool to make bark like scratches in the DAS and left to dry overnight.
once dry the trunk and main branches were painted using a cheap brown house paint.
Flocking hell! It gets everywhere!
The work on the trees continues!
i took some steel wool and fluffed it up and roughly hung it on the branches
I covered the trunk with cling film and then took it outside to spray it brown
after that I sprayed on some hobby craft spray glue (3M spray mount) and then tried to cover it with some green flock. I say tried as it was mildly breezy outside and apparently that means that flock goes everywhere except where you want it… I mean seriously the leaves on the trees weren’t moving but the flock went everywhere!
 Roughly place the wire wool
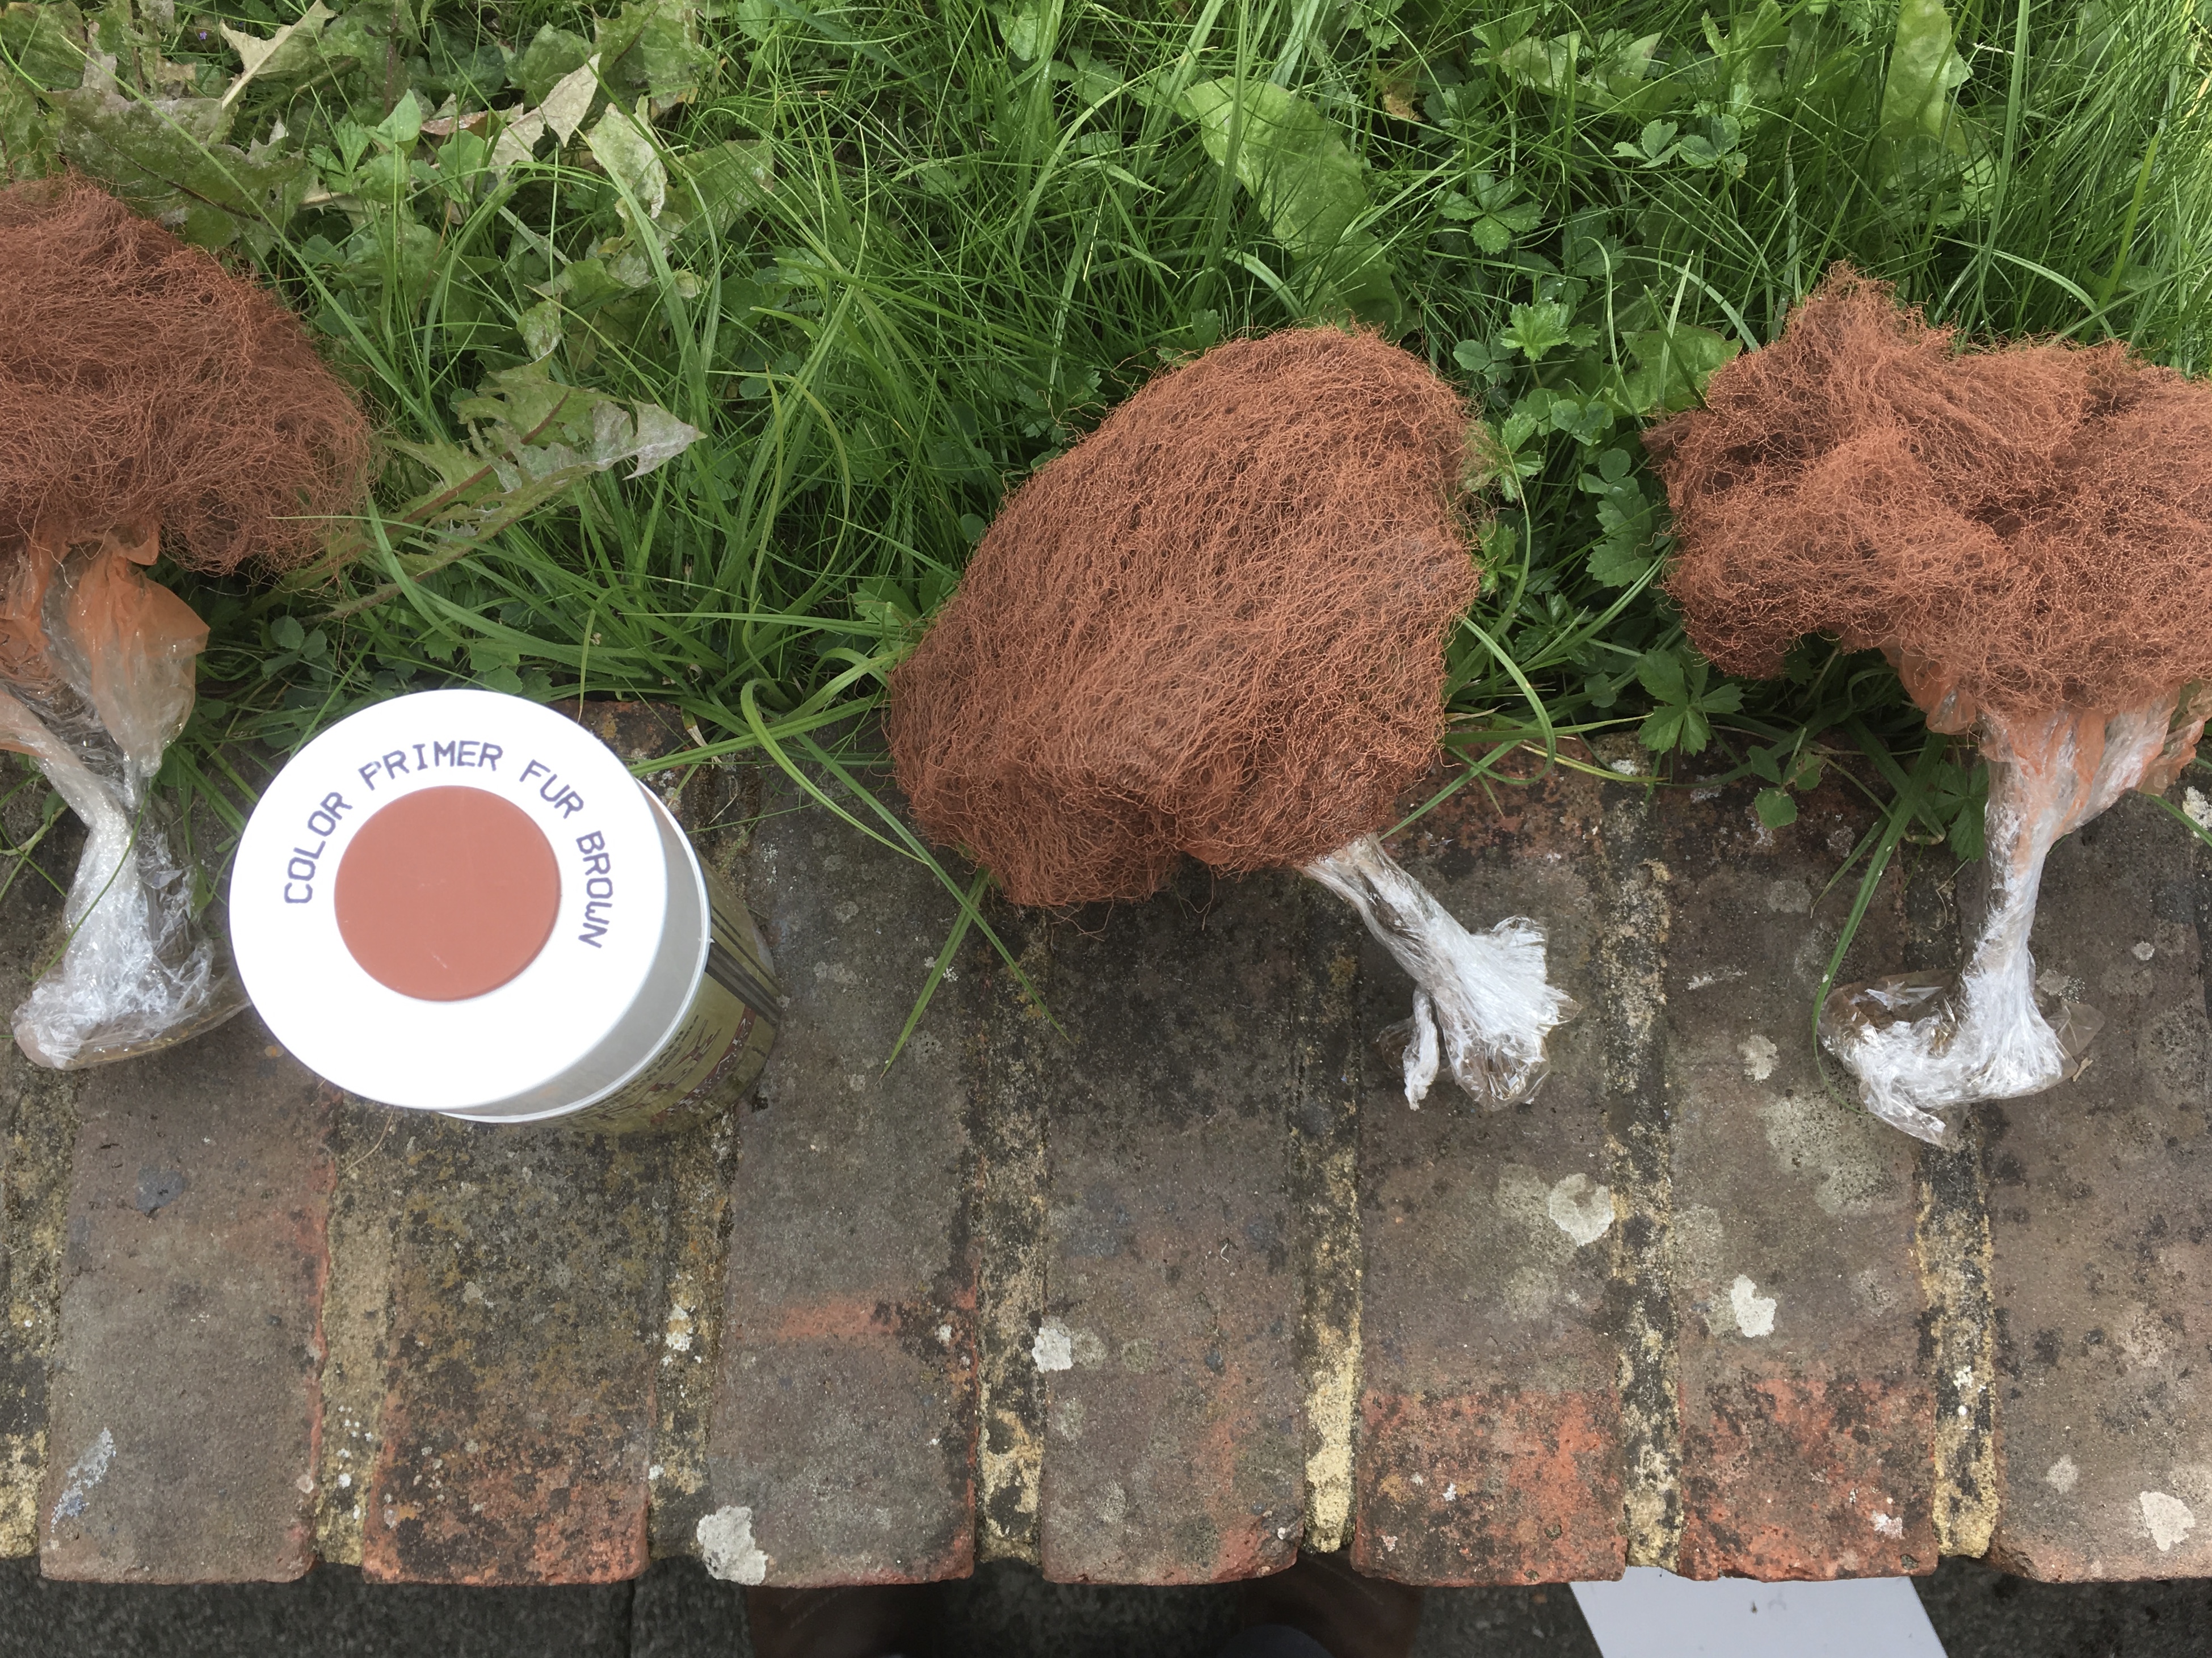 Sprayed with brown
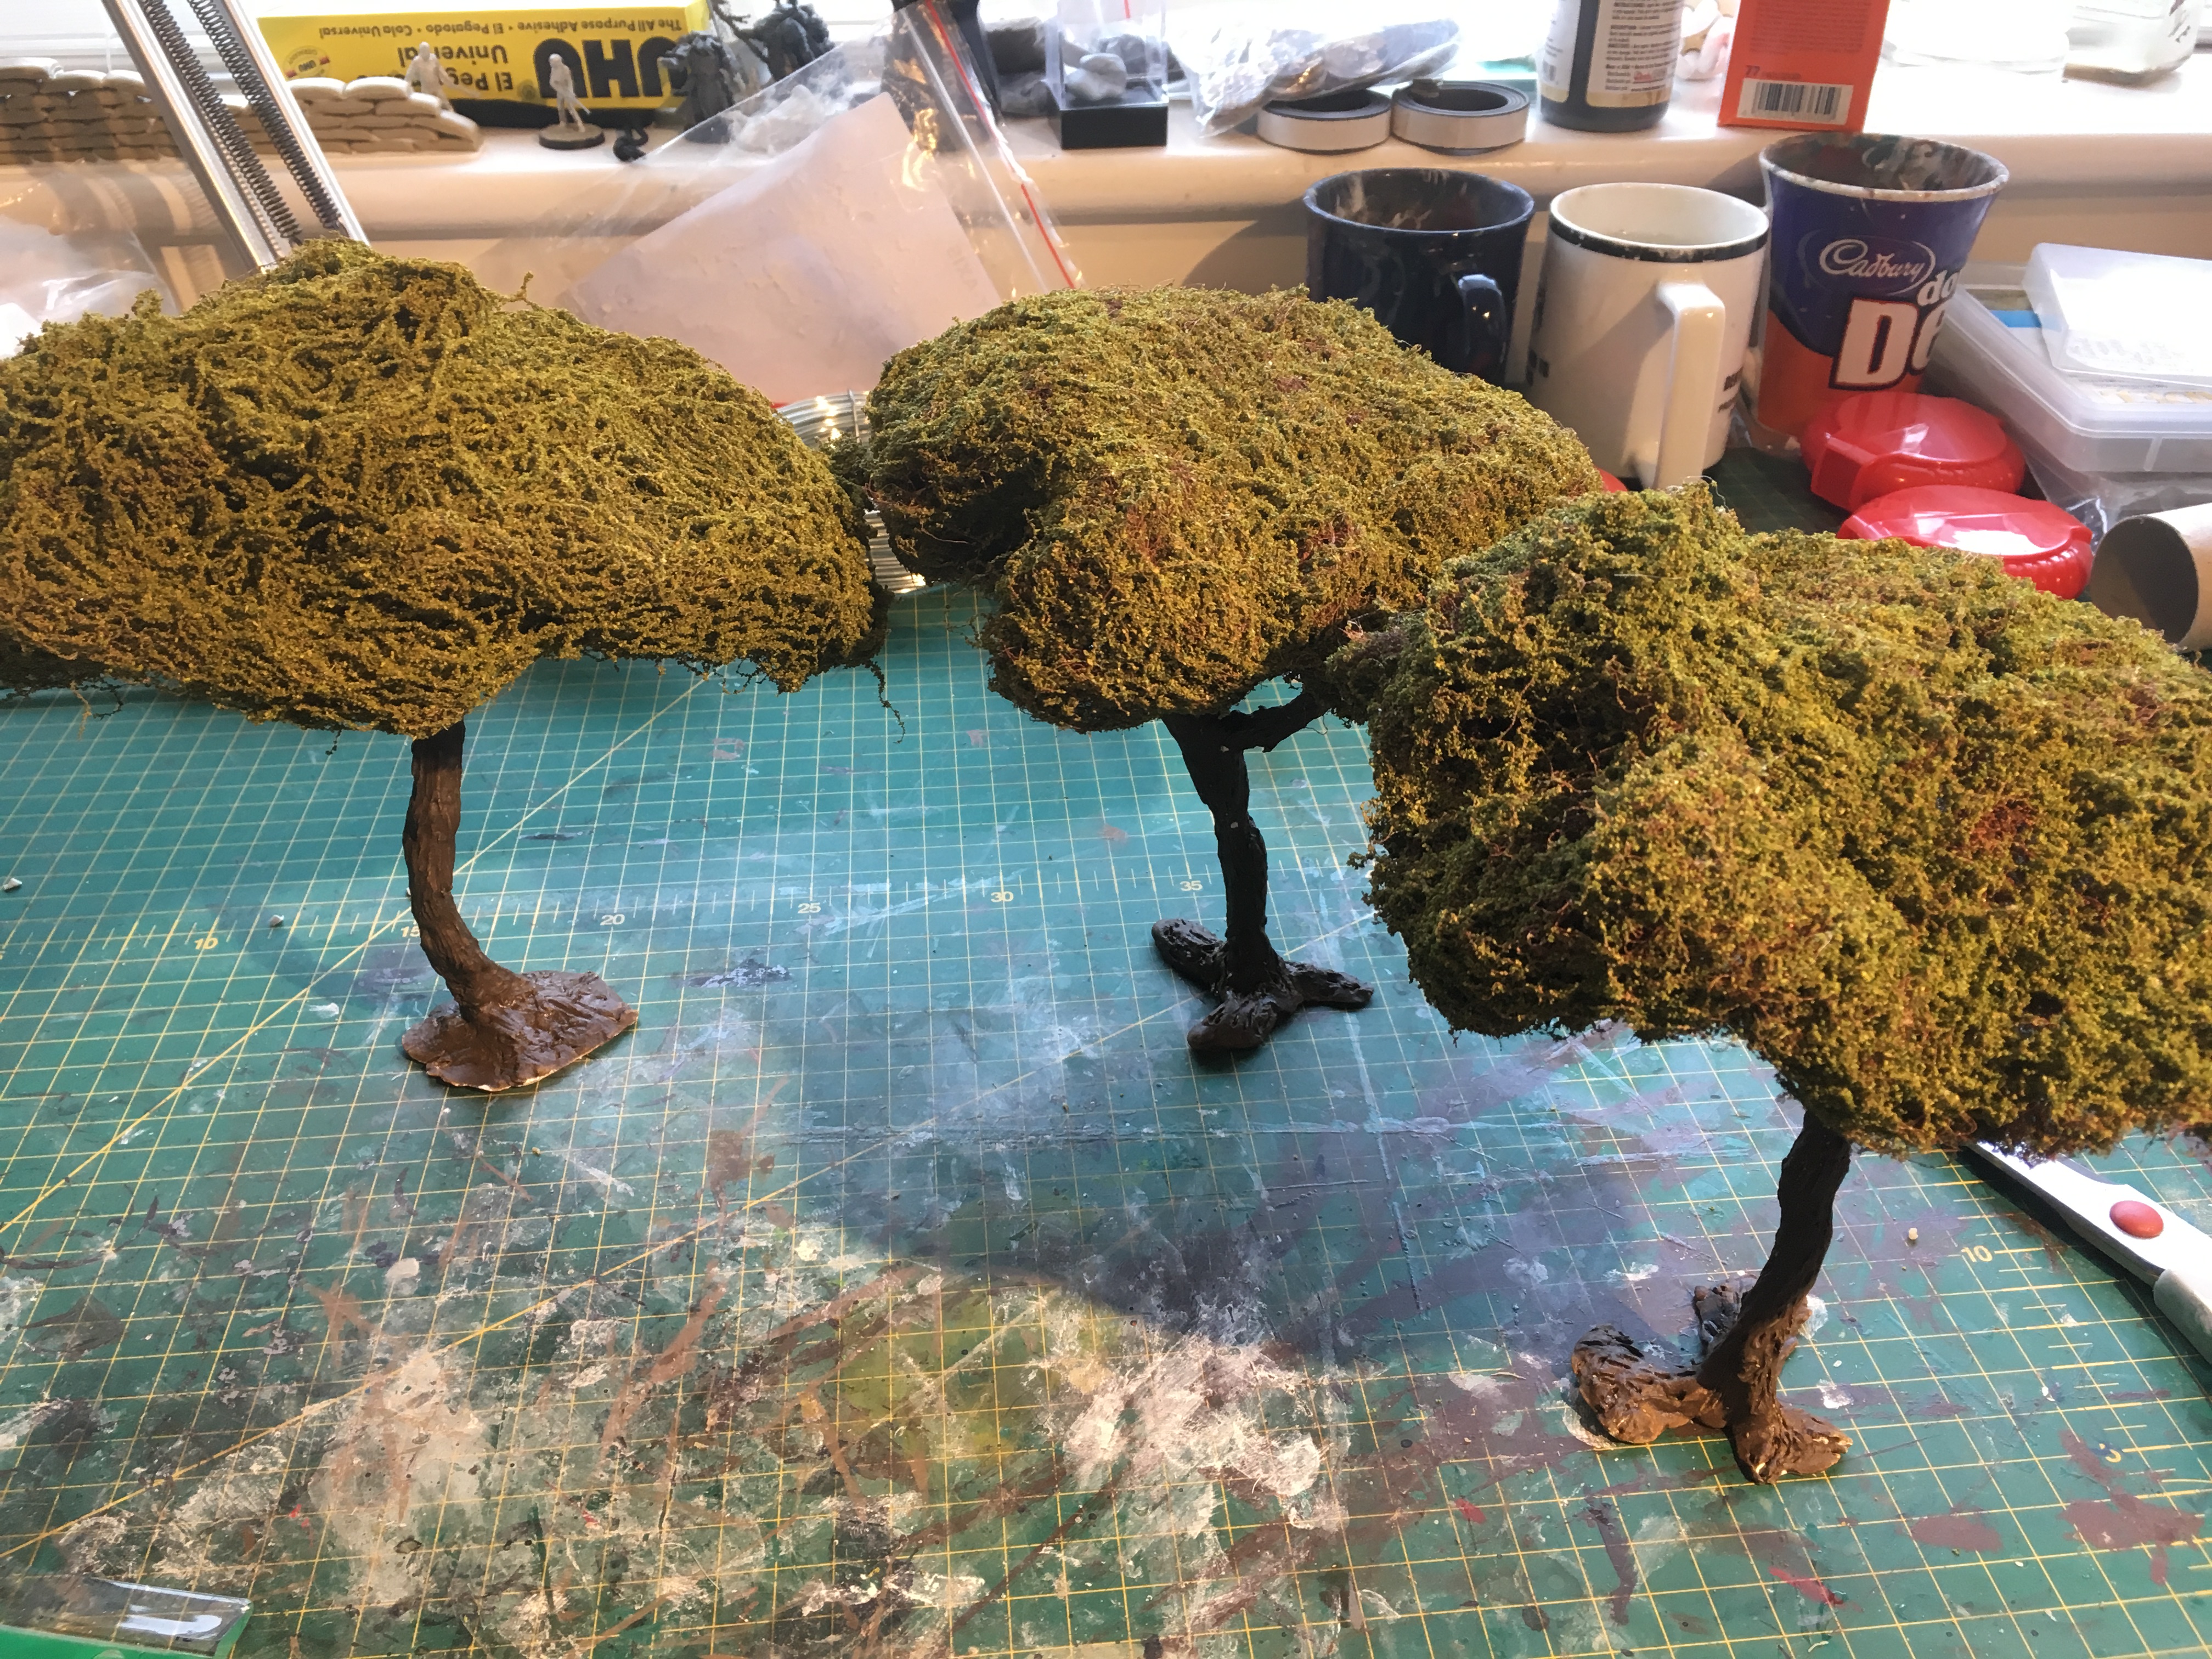 Flocking using a spray craft night
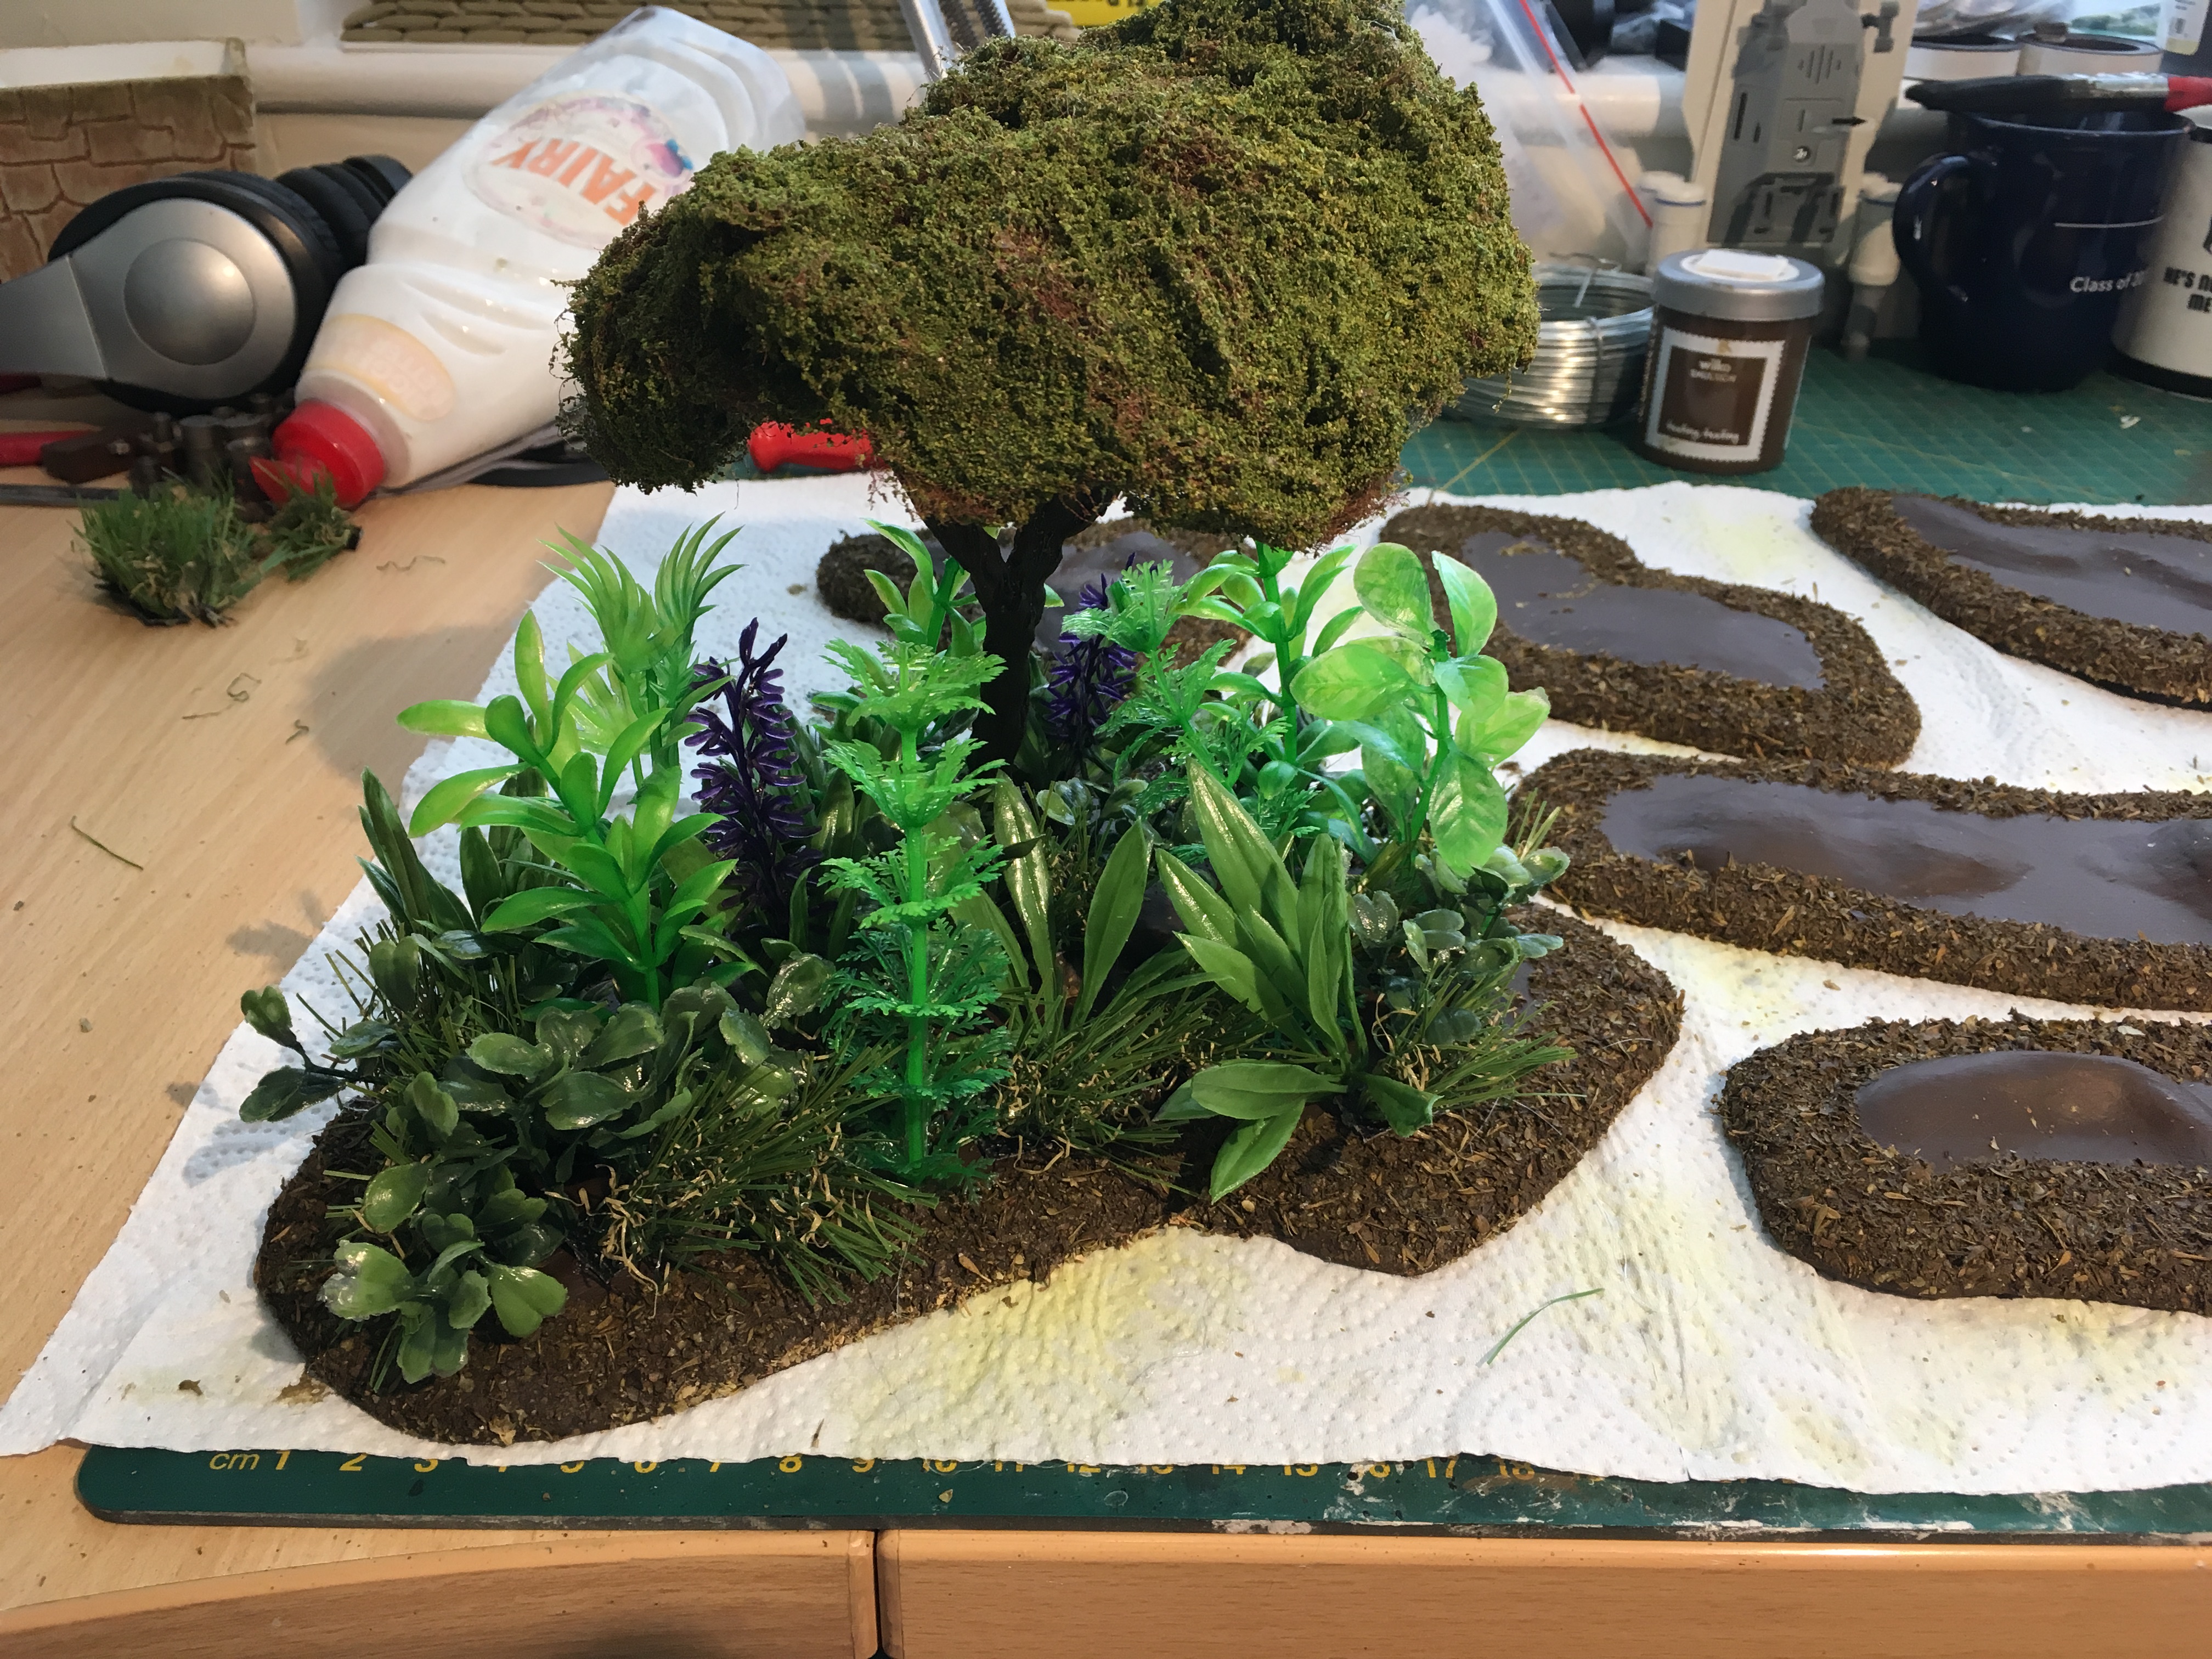
Jungle is mostly done
I’m nearly out hot glue so thank god it’s done! That and I’m done with sniffing herbs in strength!
im really happy with how they came out, the artificial turf is the best part of it, people should totally copy that idea
im not sure whether I should wash down the really bright plants. I think it would probably improve it but I’m not sure I can be bothered. The only wash I have in quantity is the army painter dip but that dries hard and shiny so would then require matt’ing down afterwards and may crack off completely with use. Hmmm, let me know your thoughts.
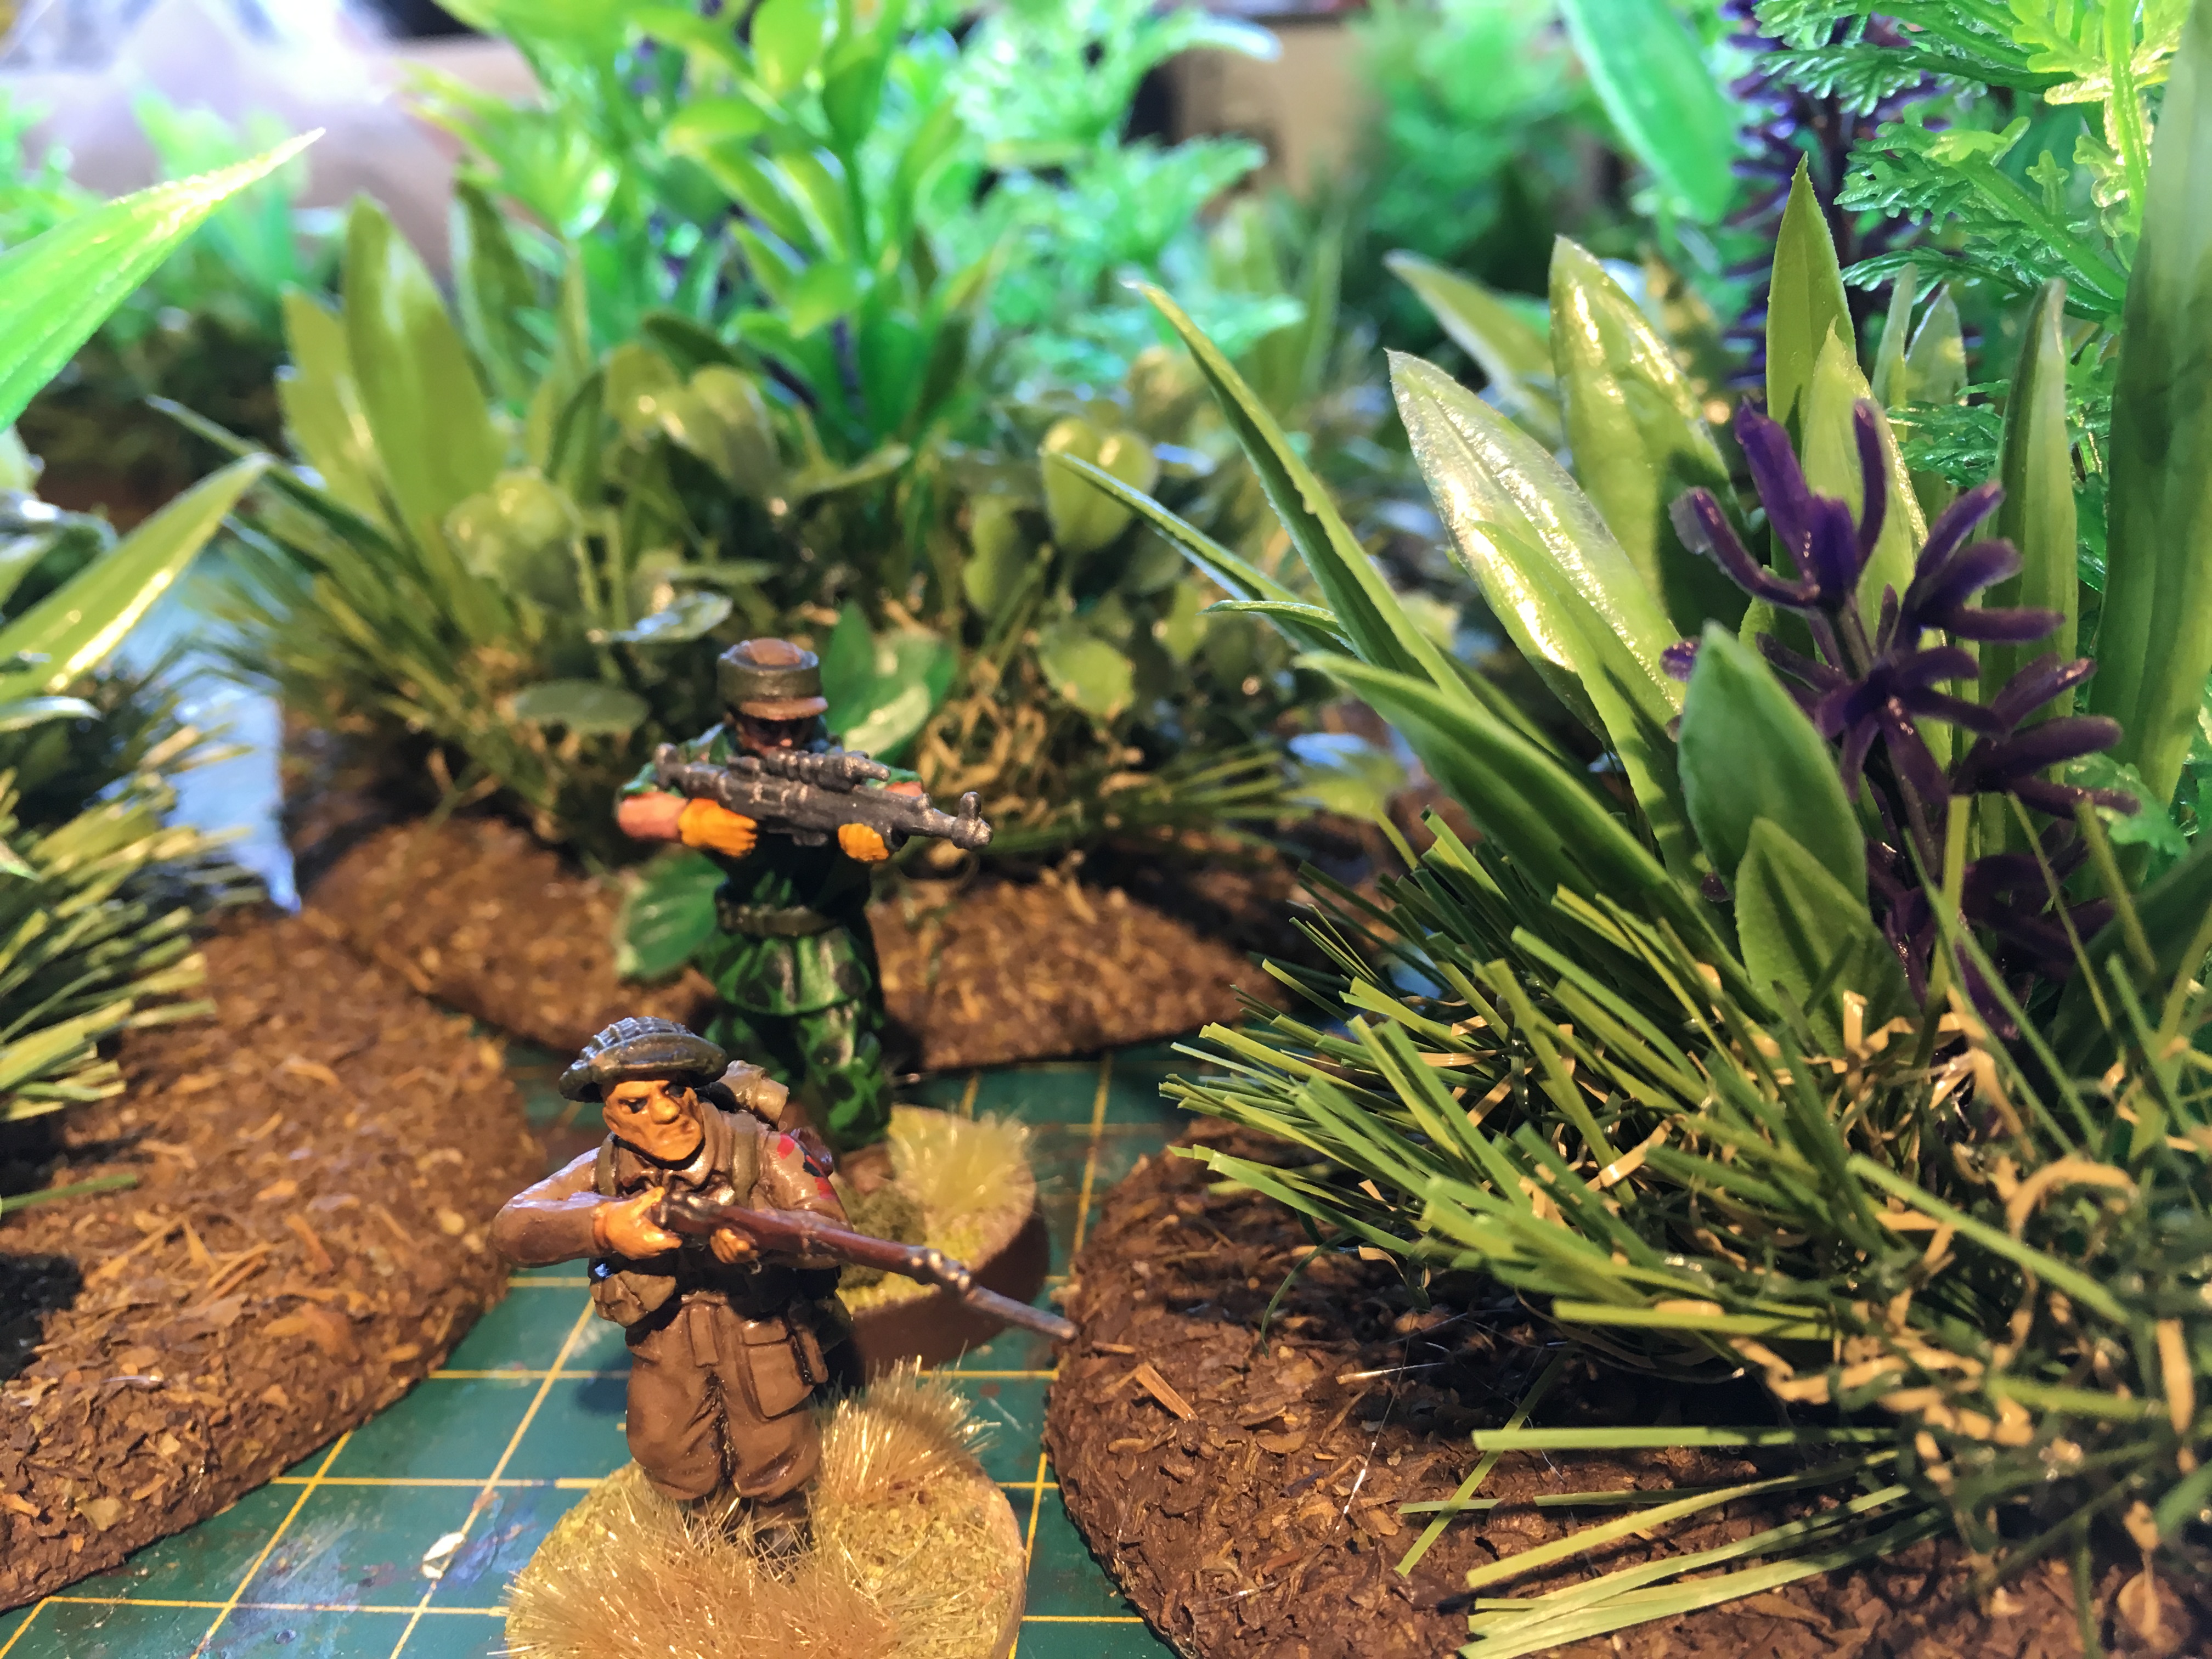
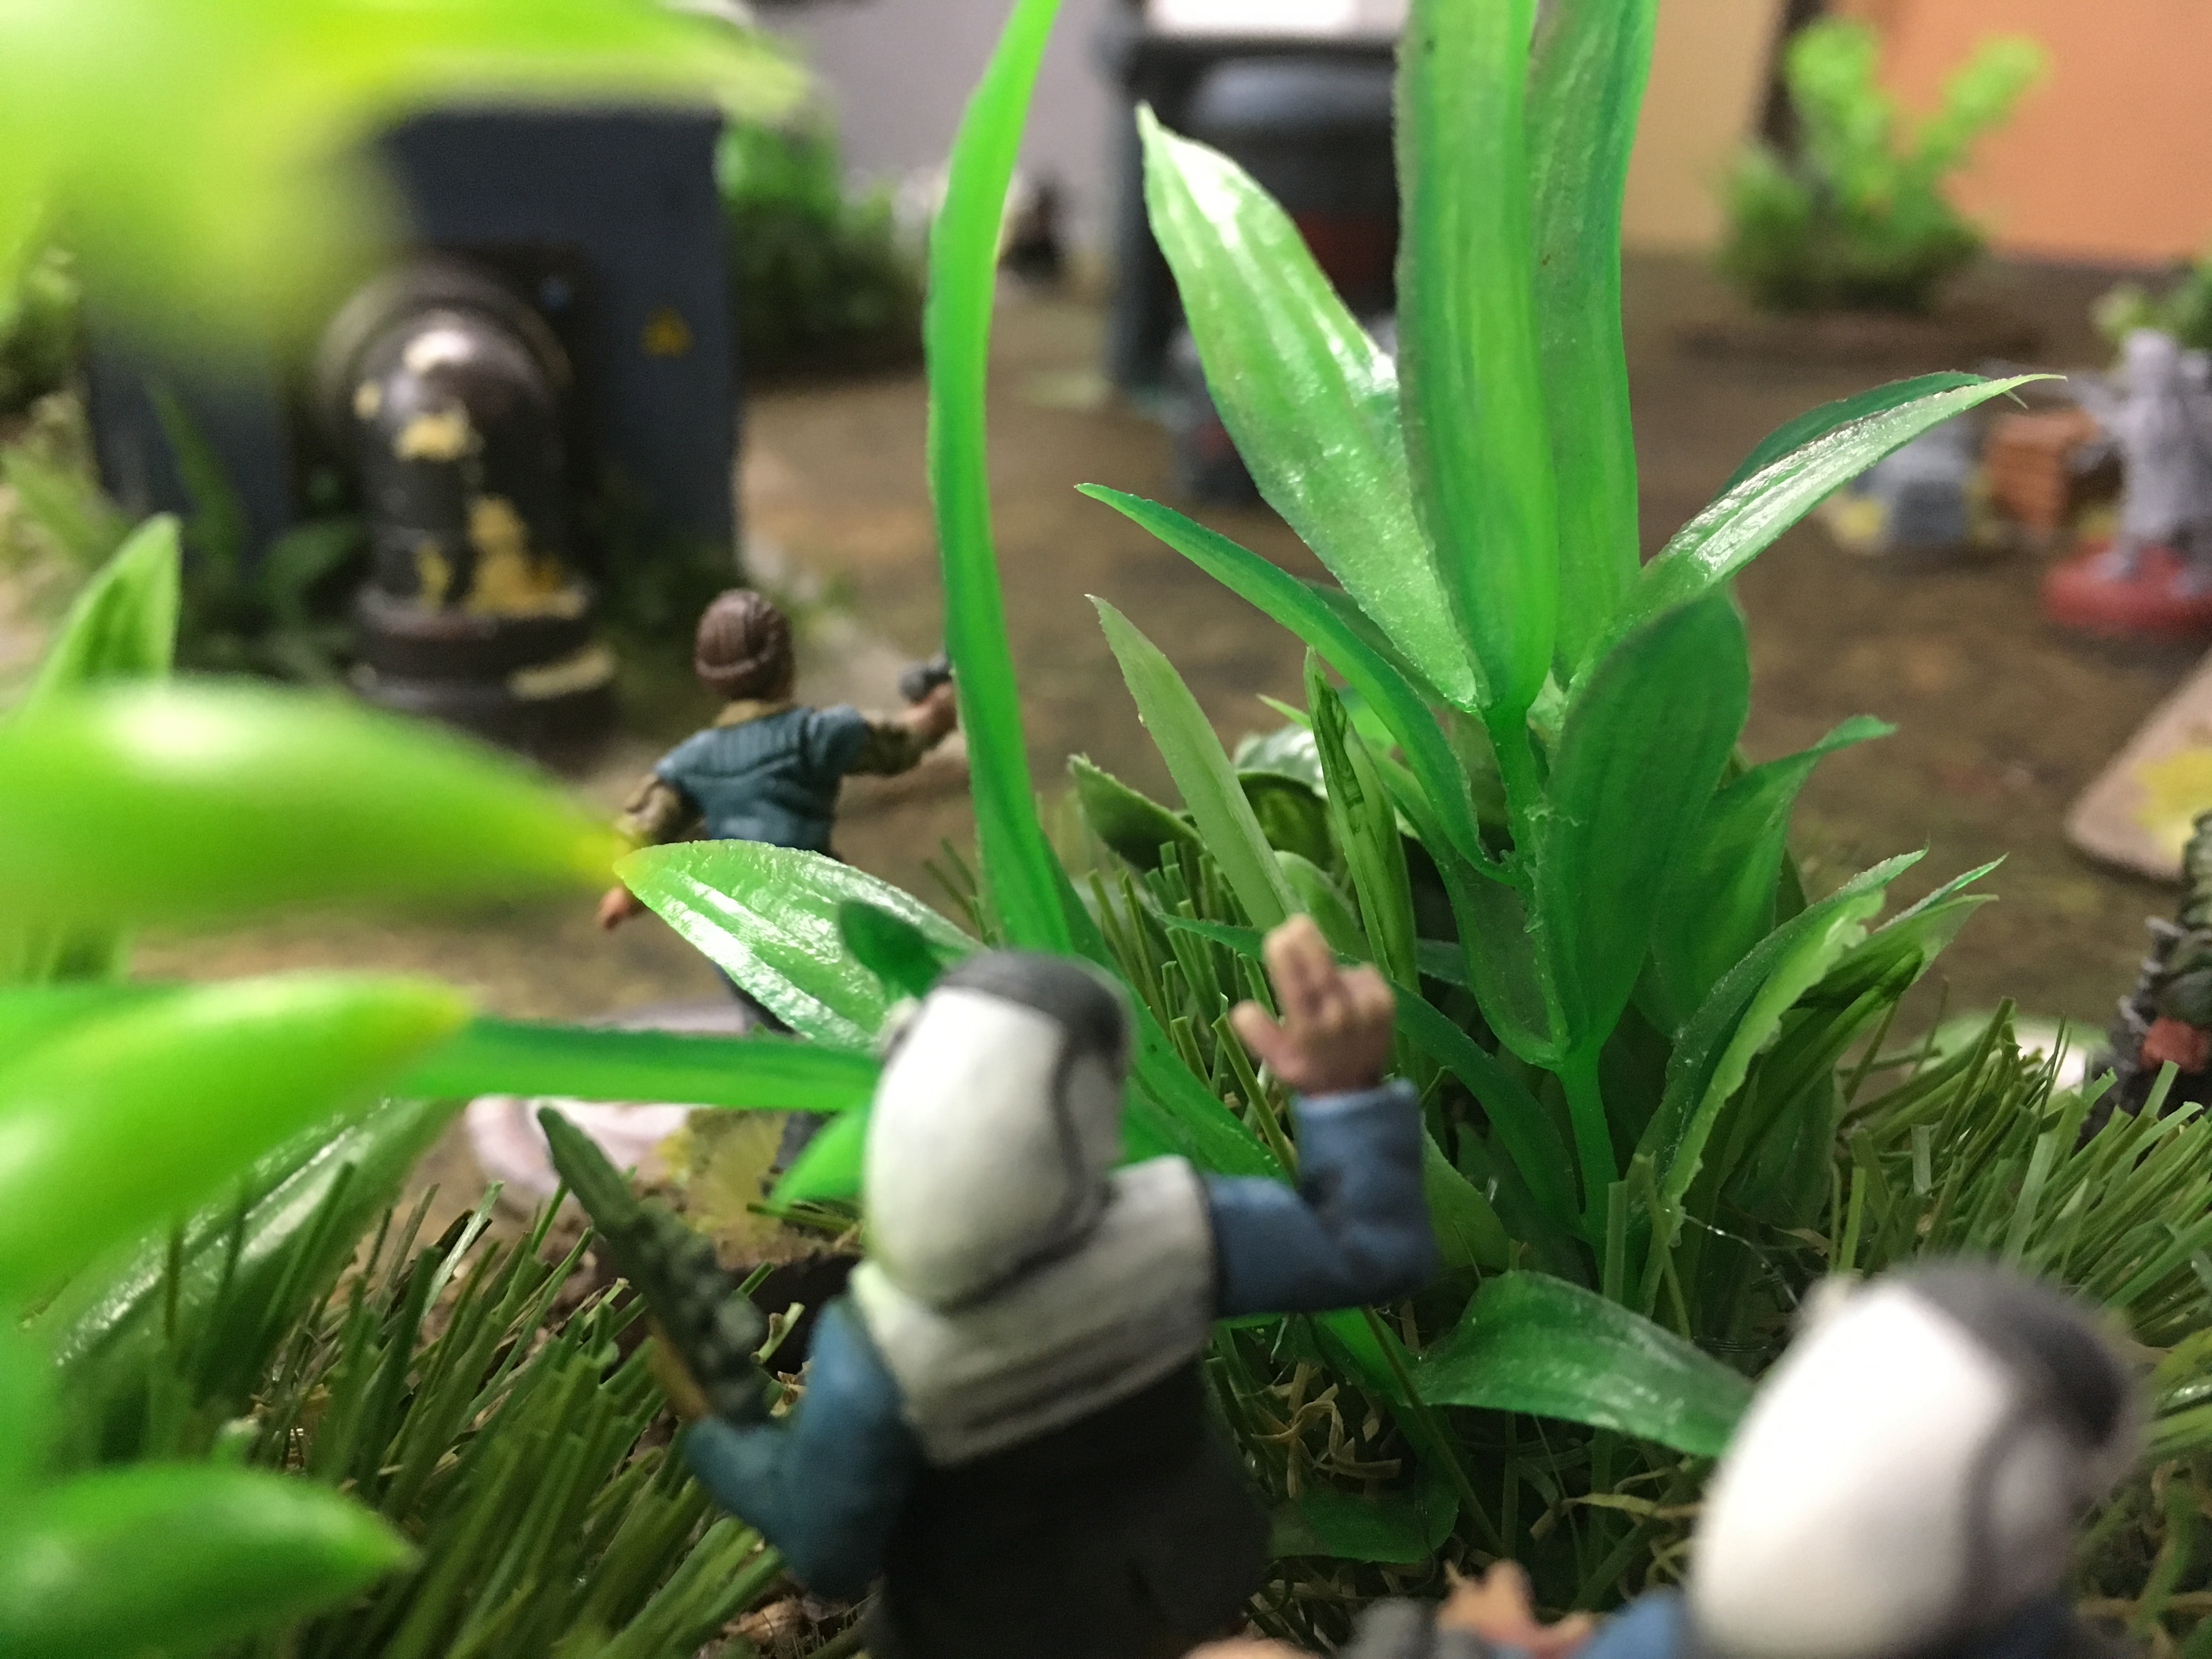
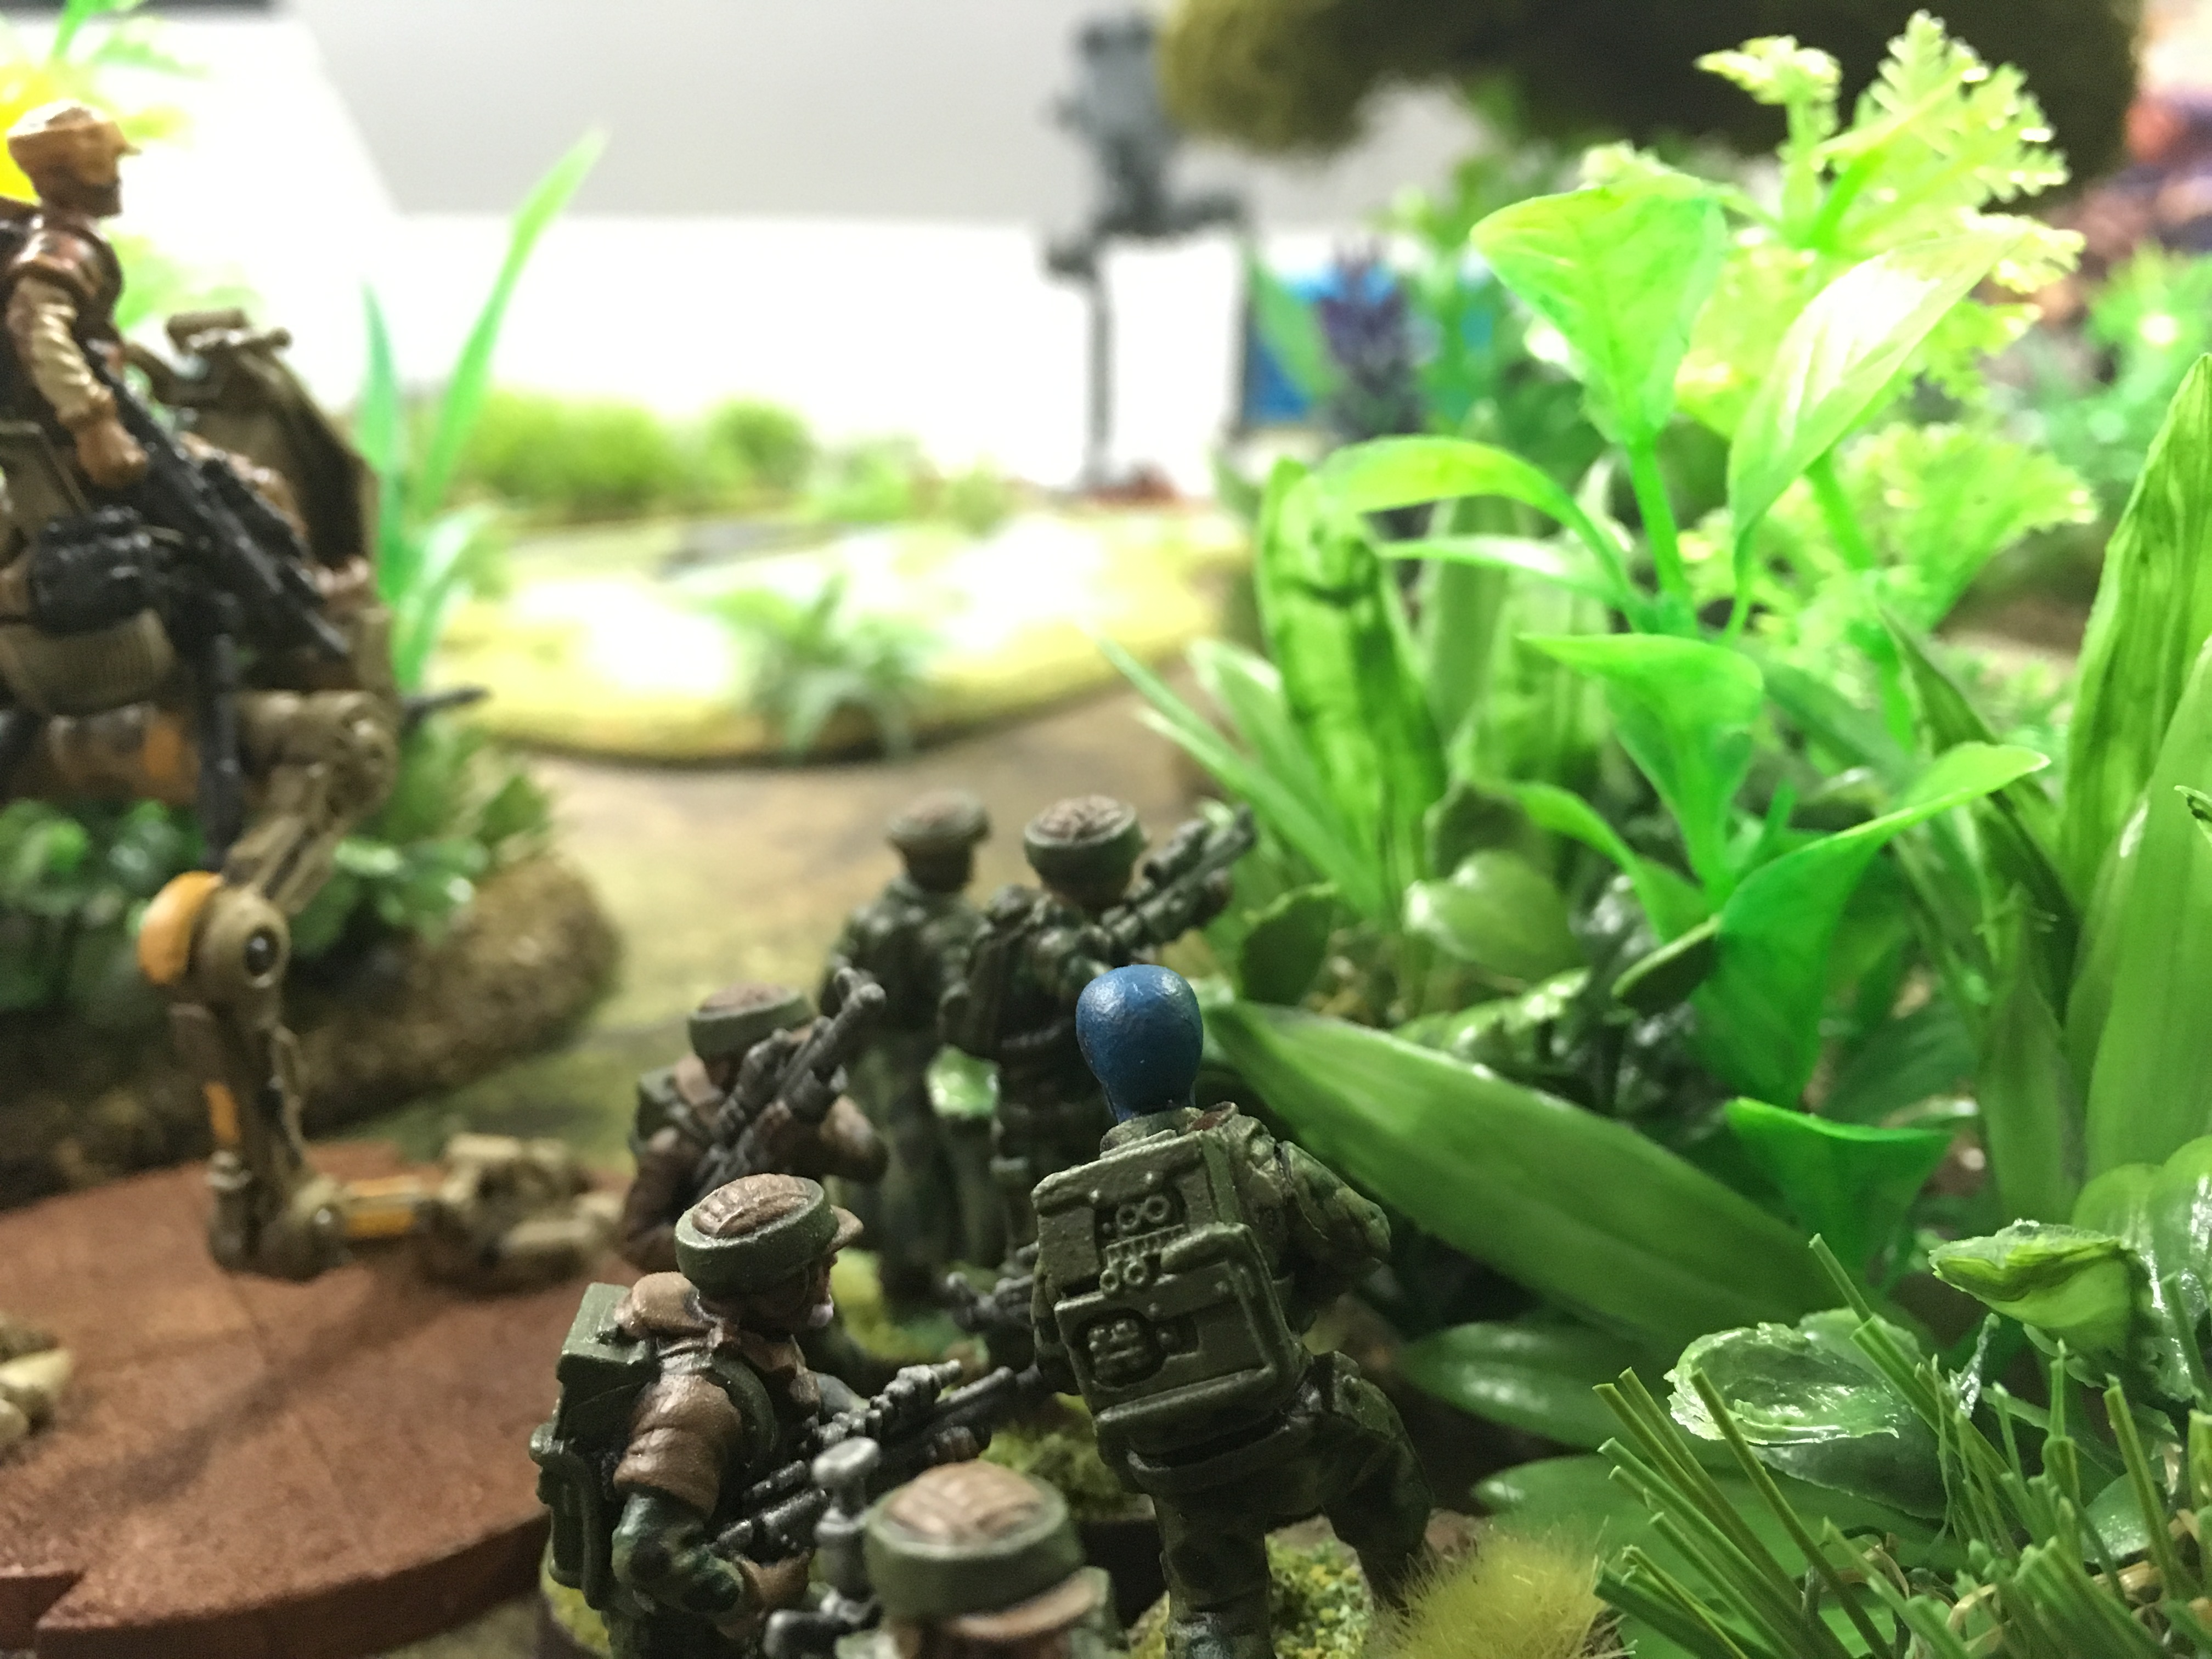
 Models for scale

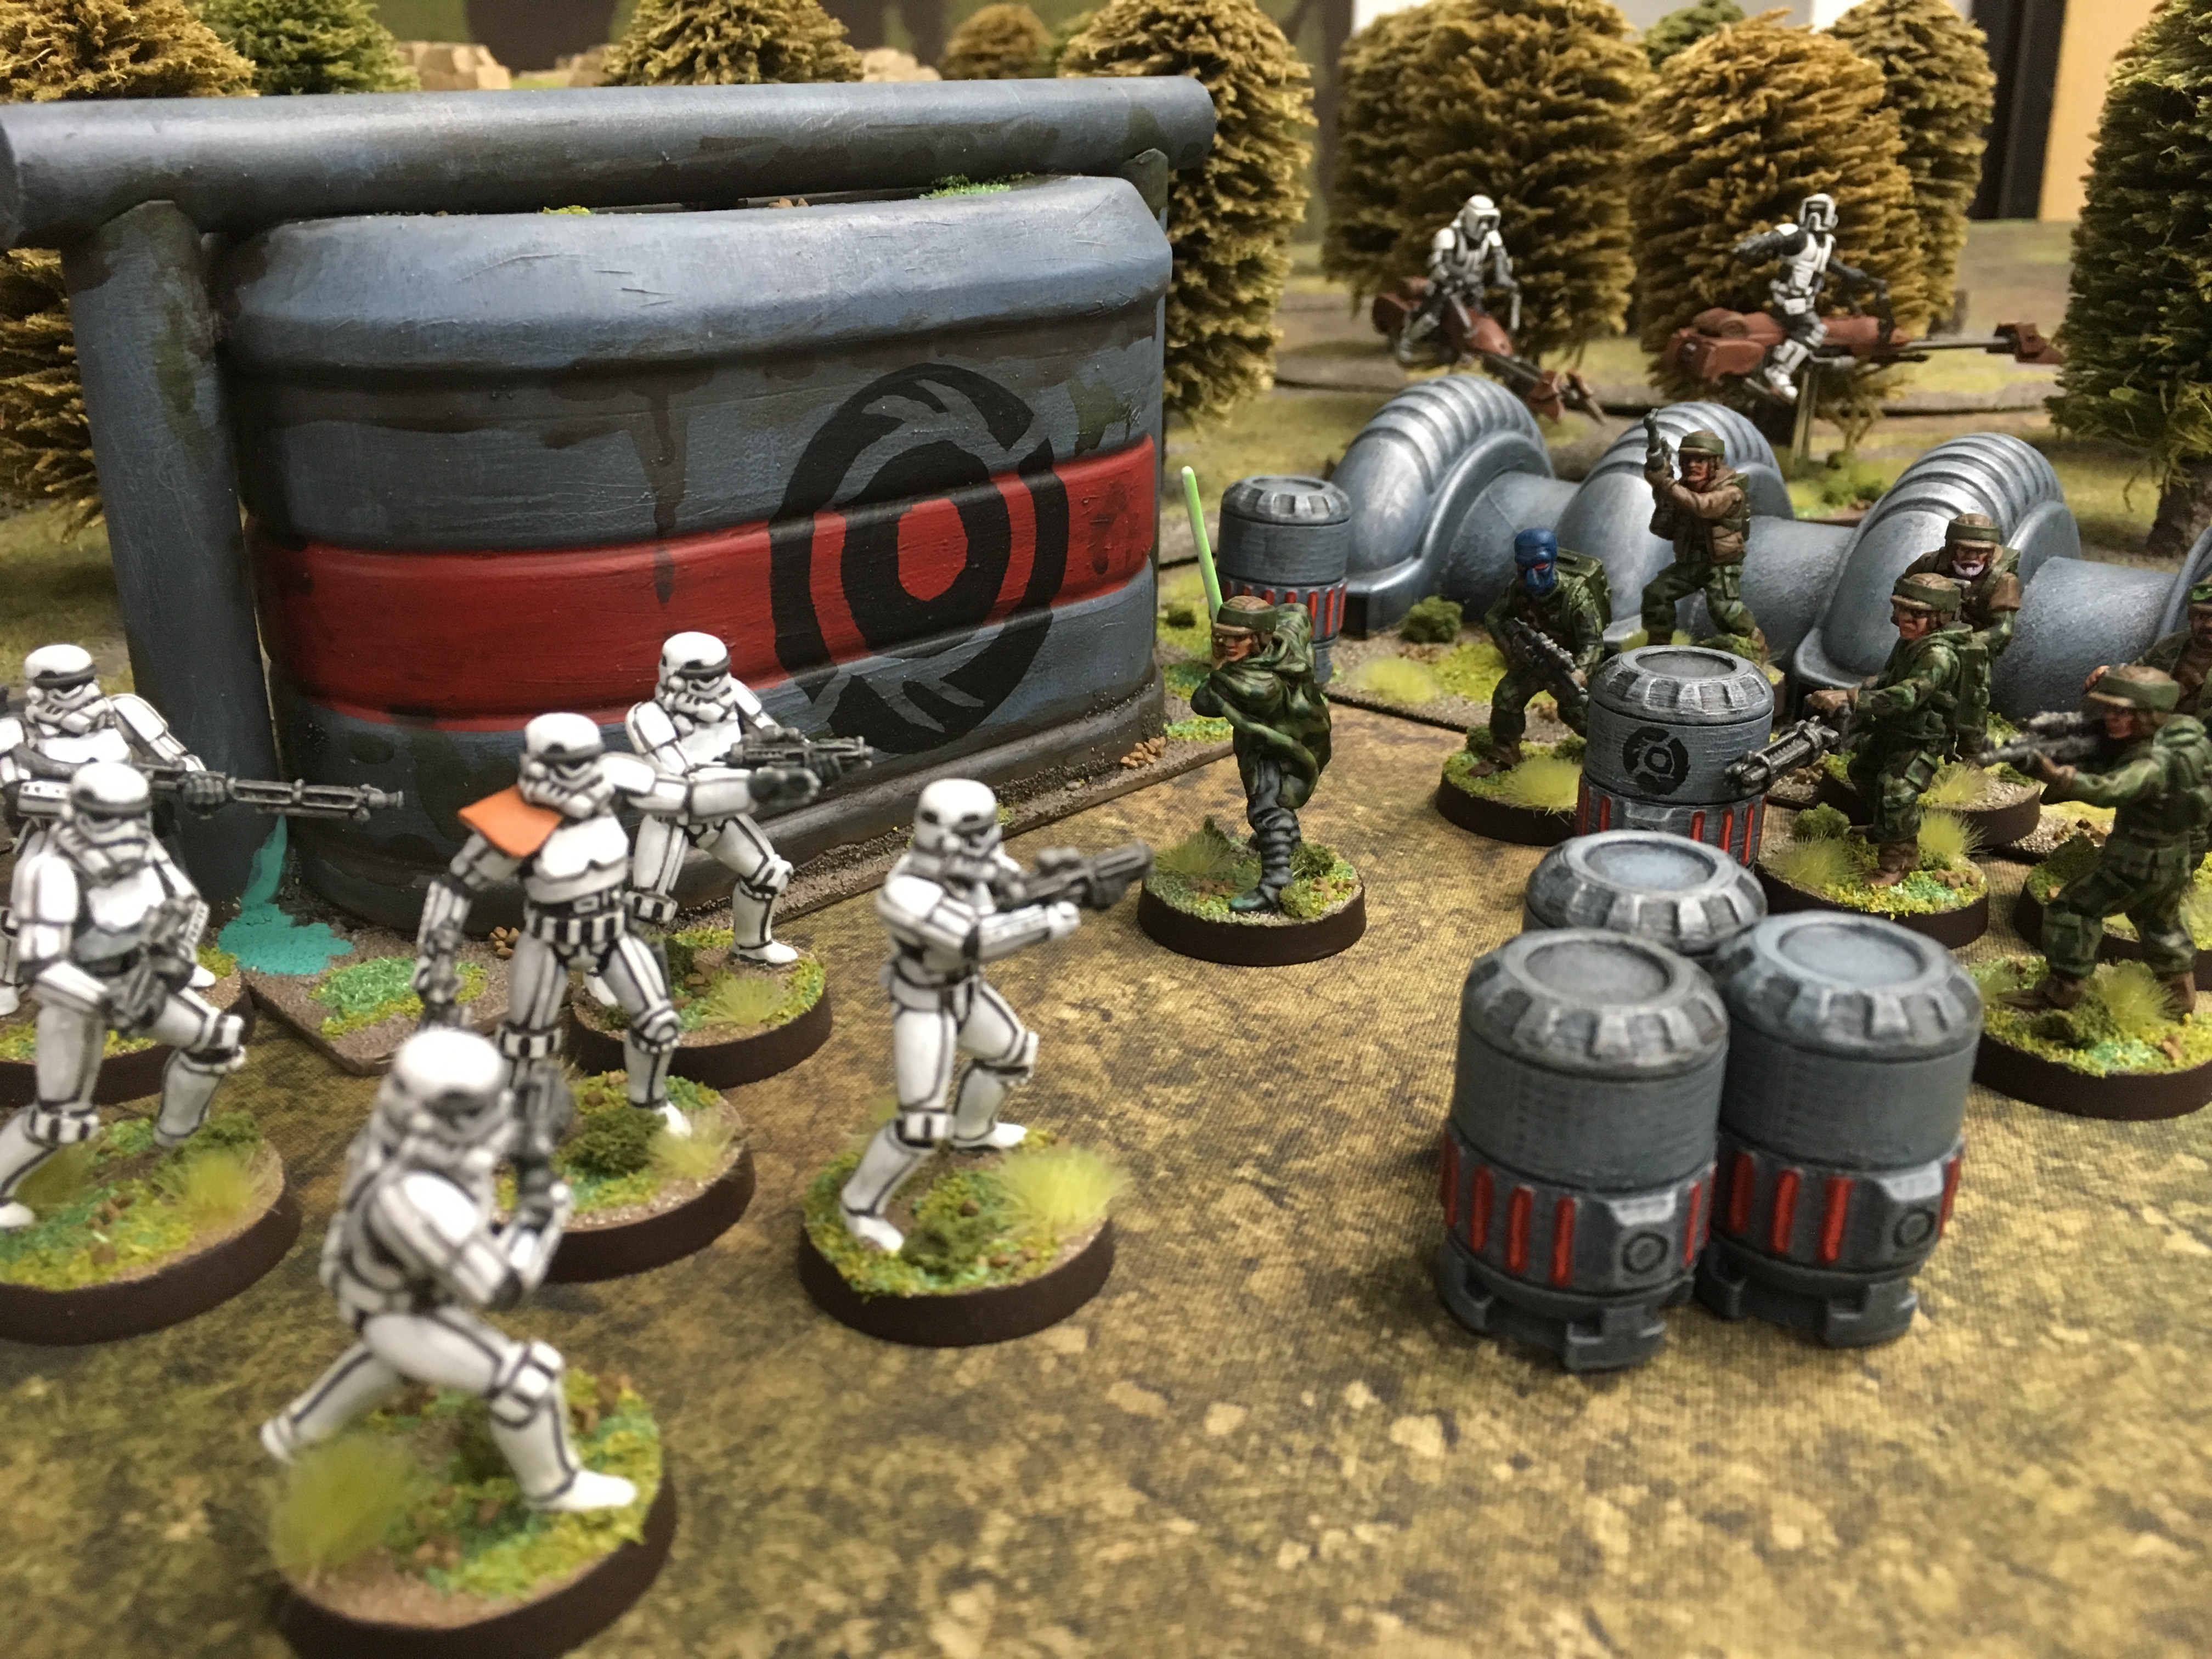
Testing it out
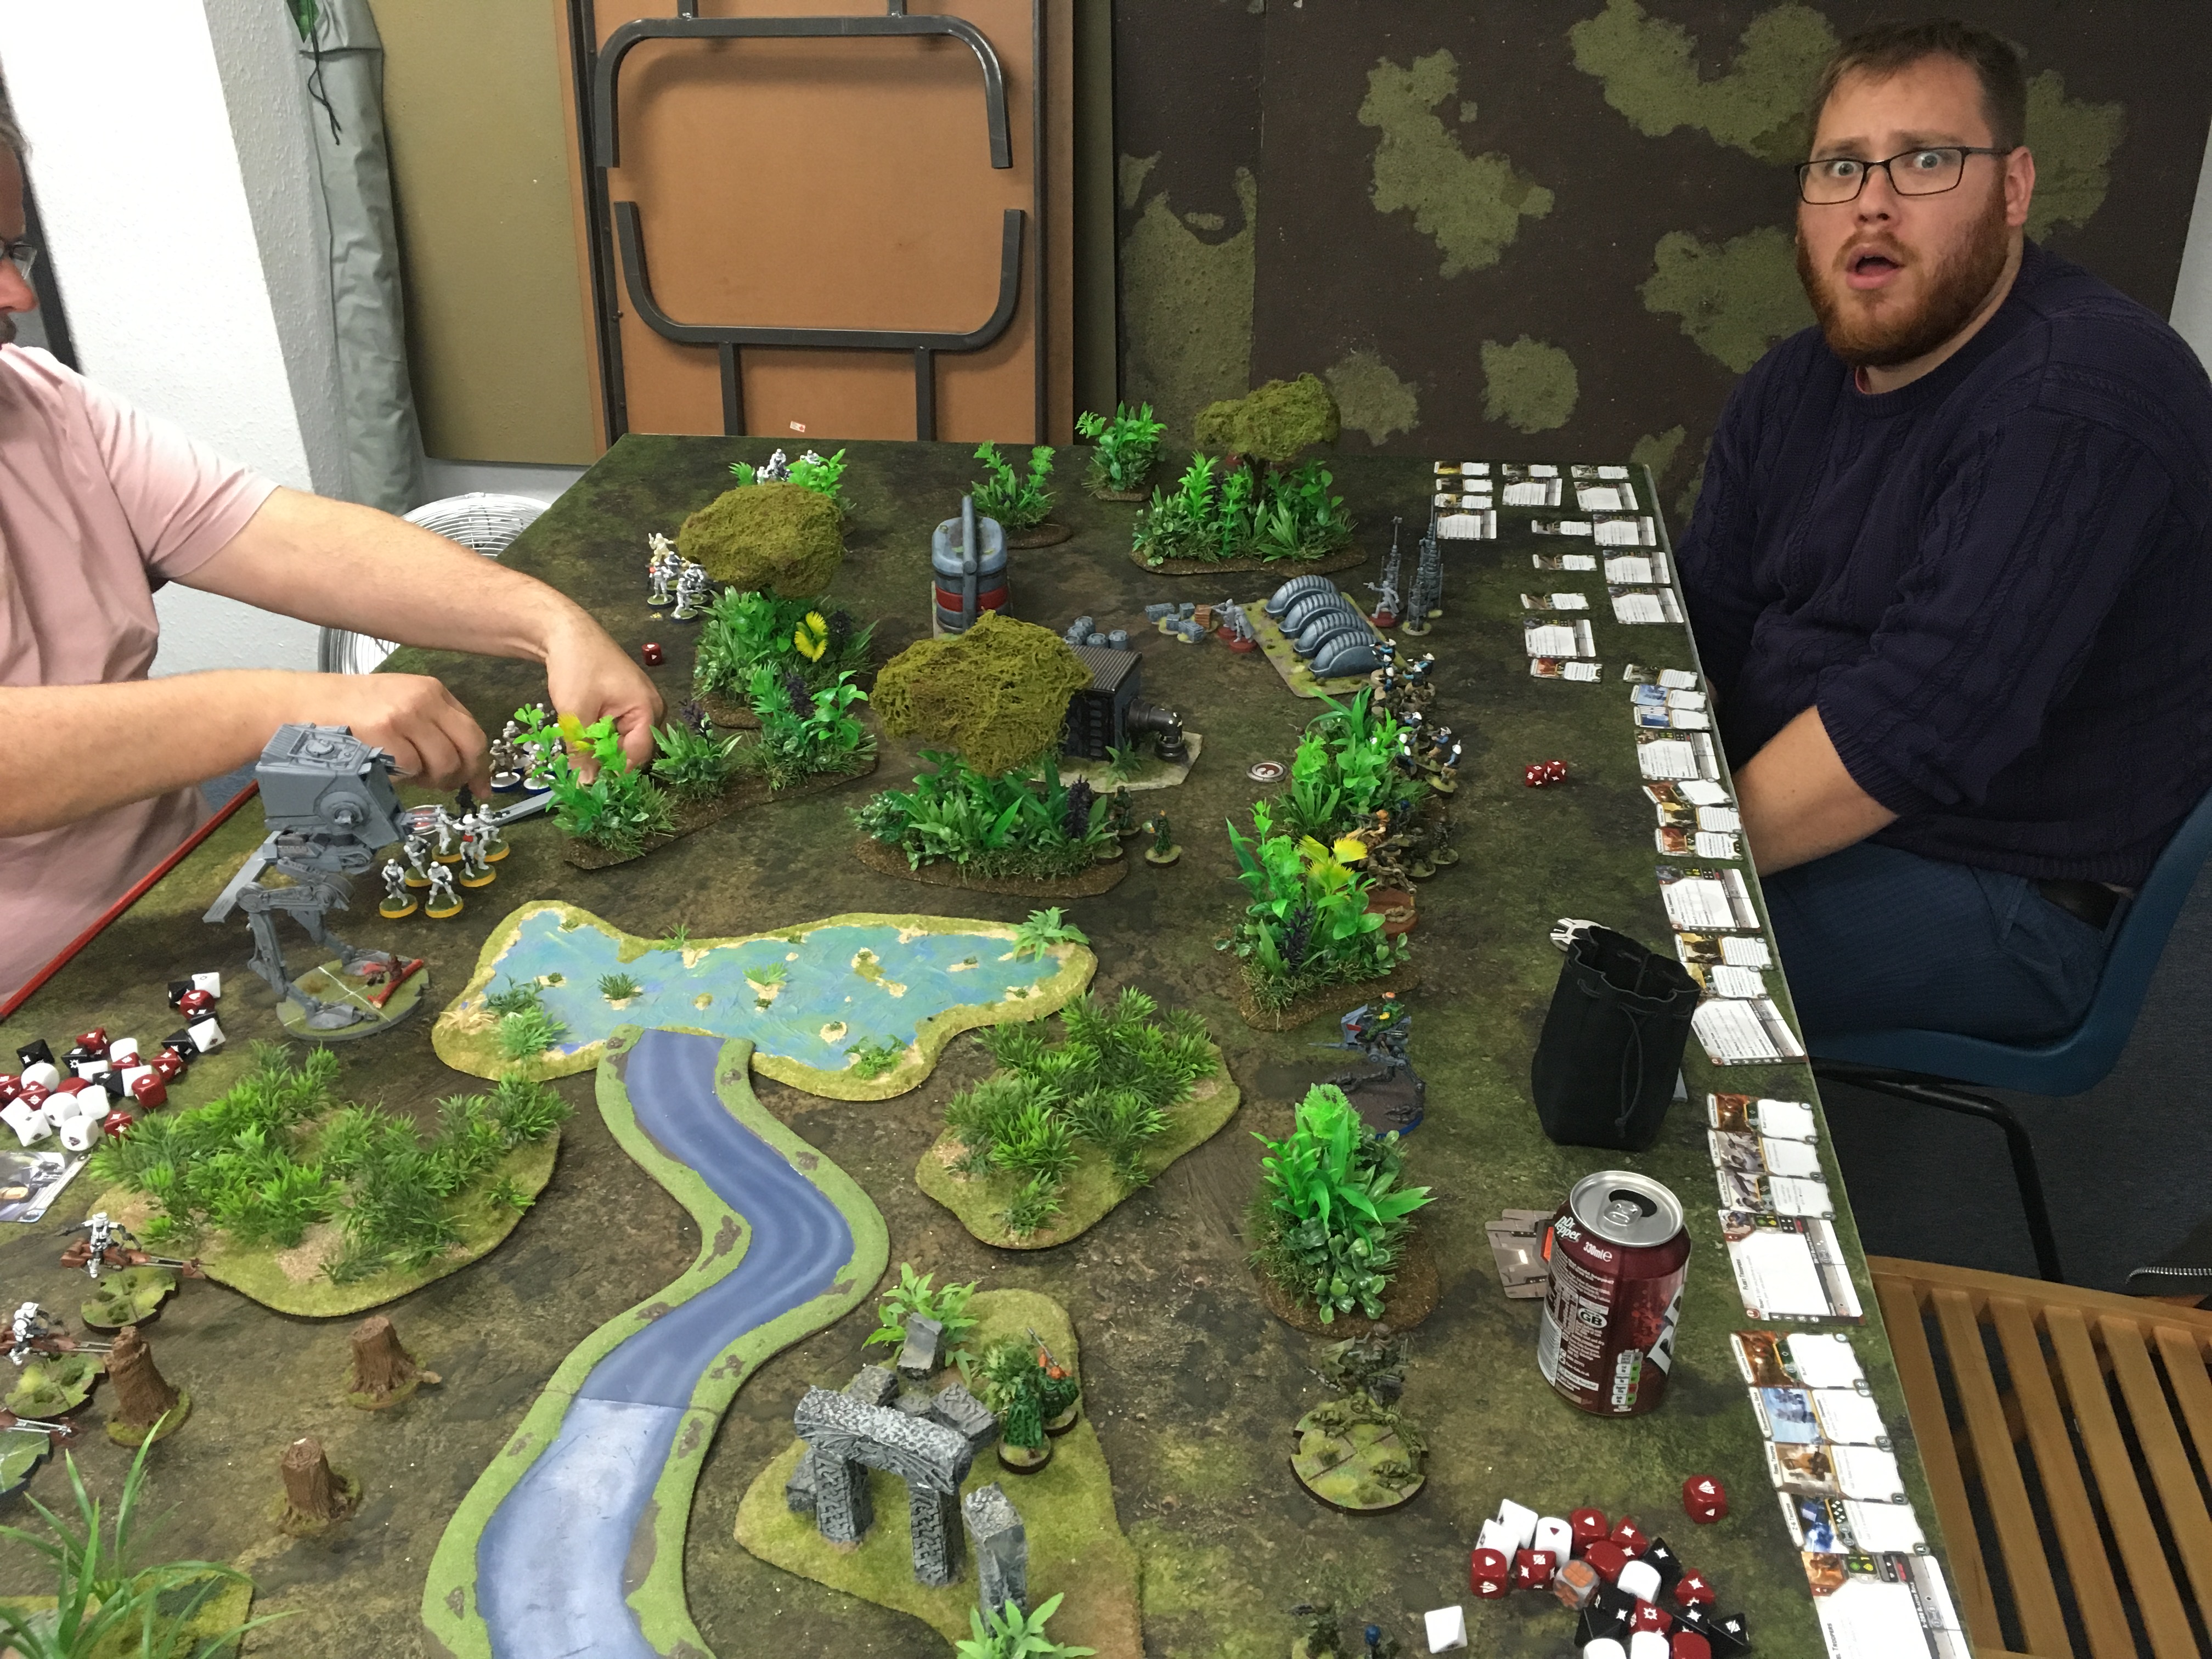
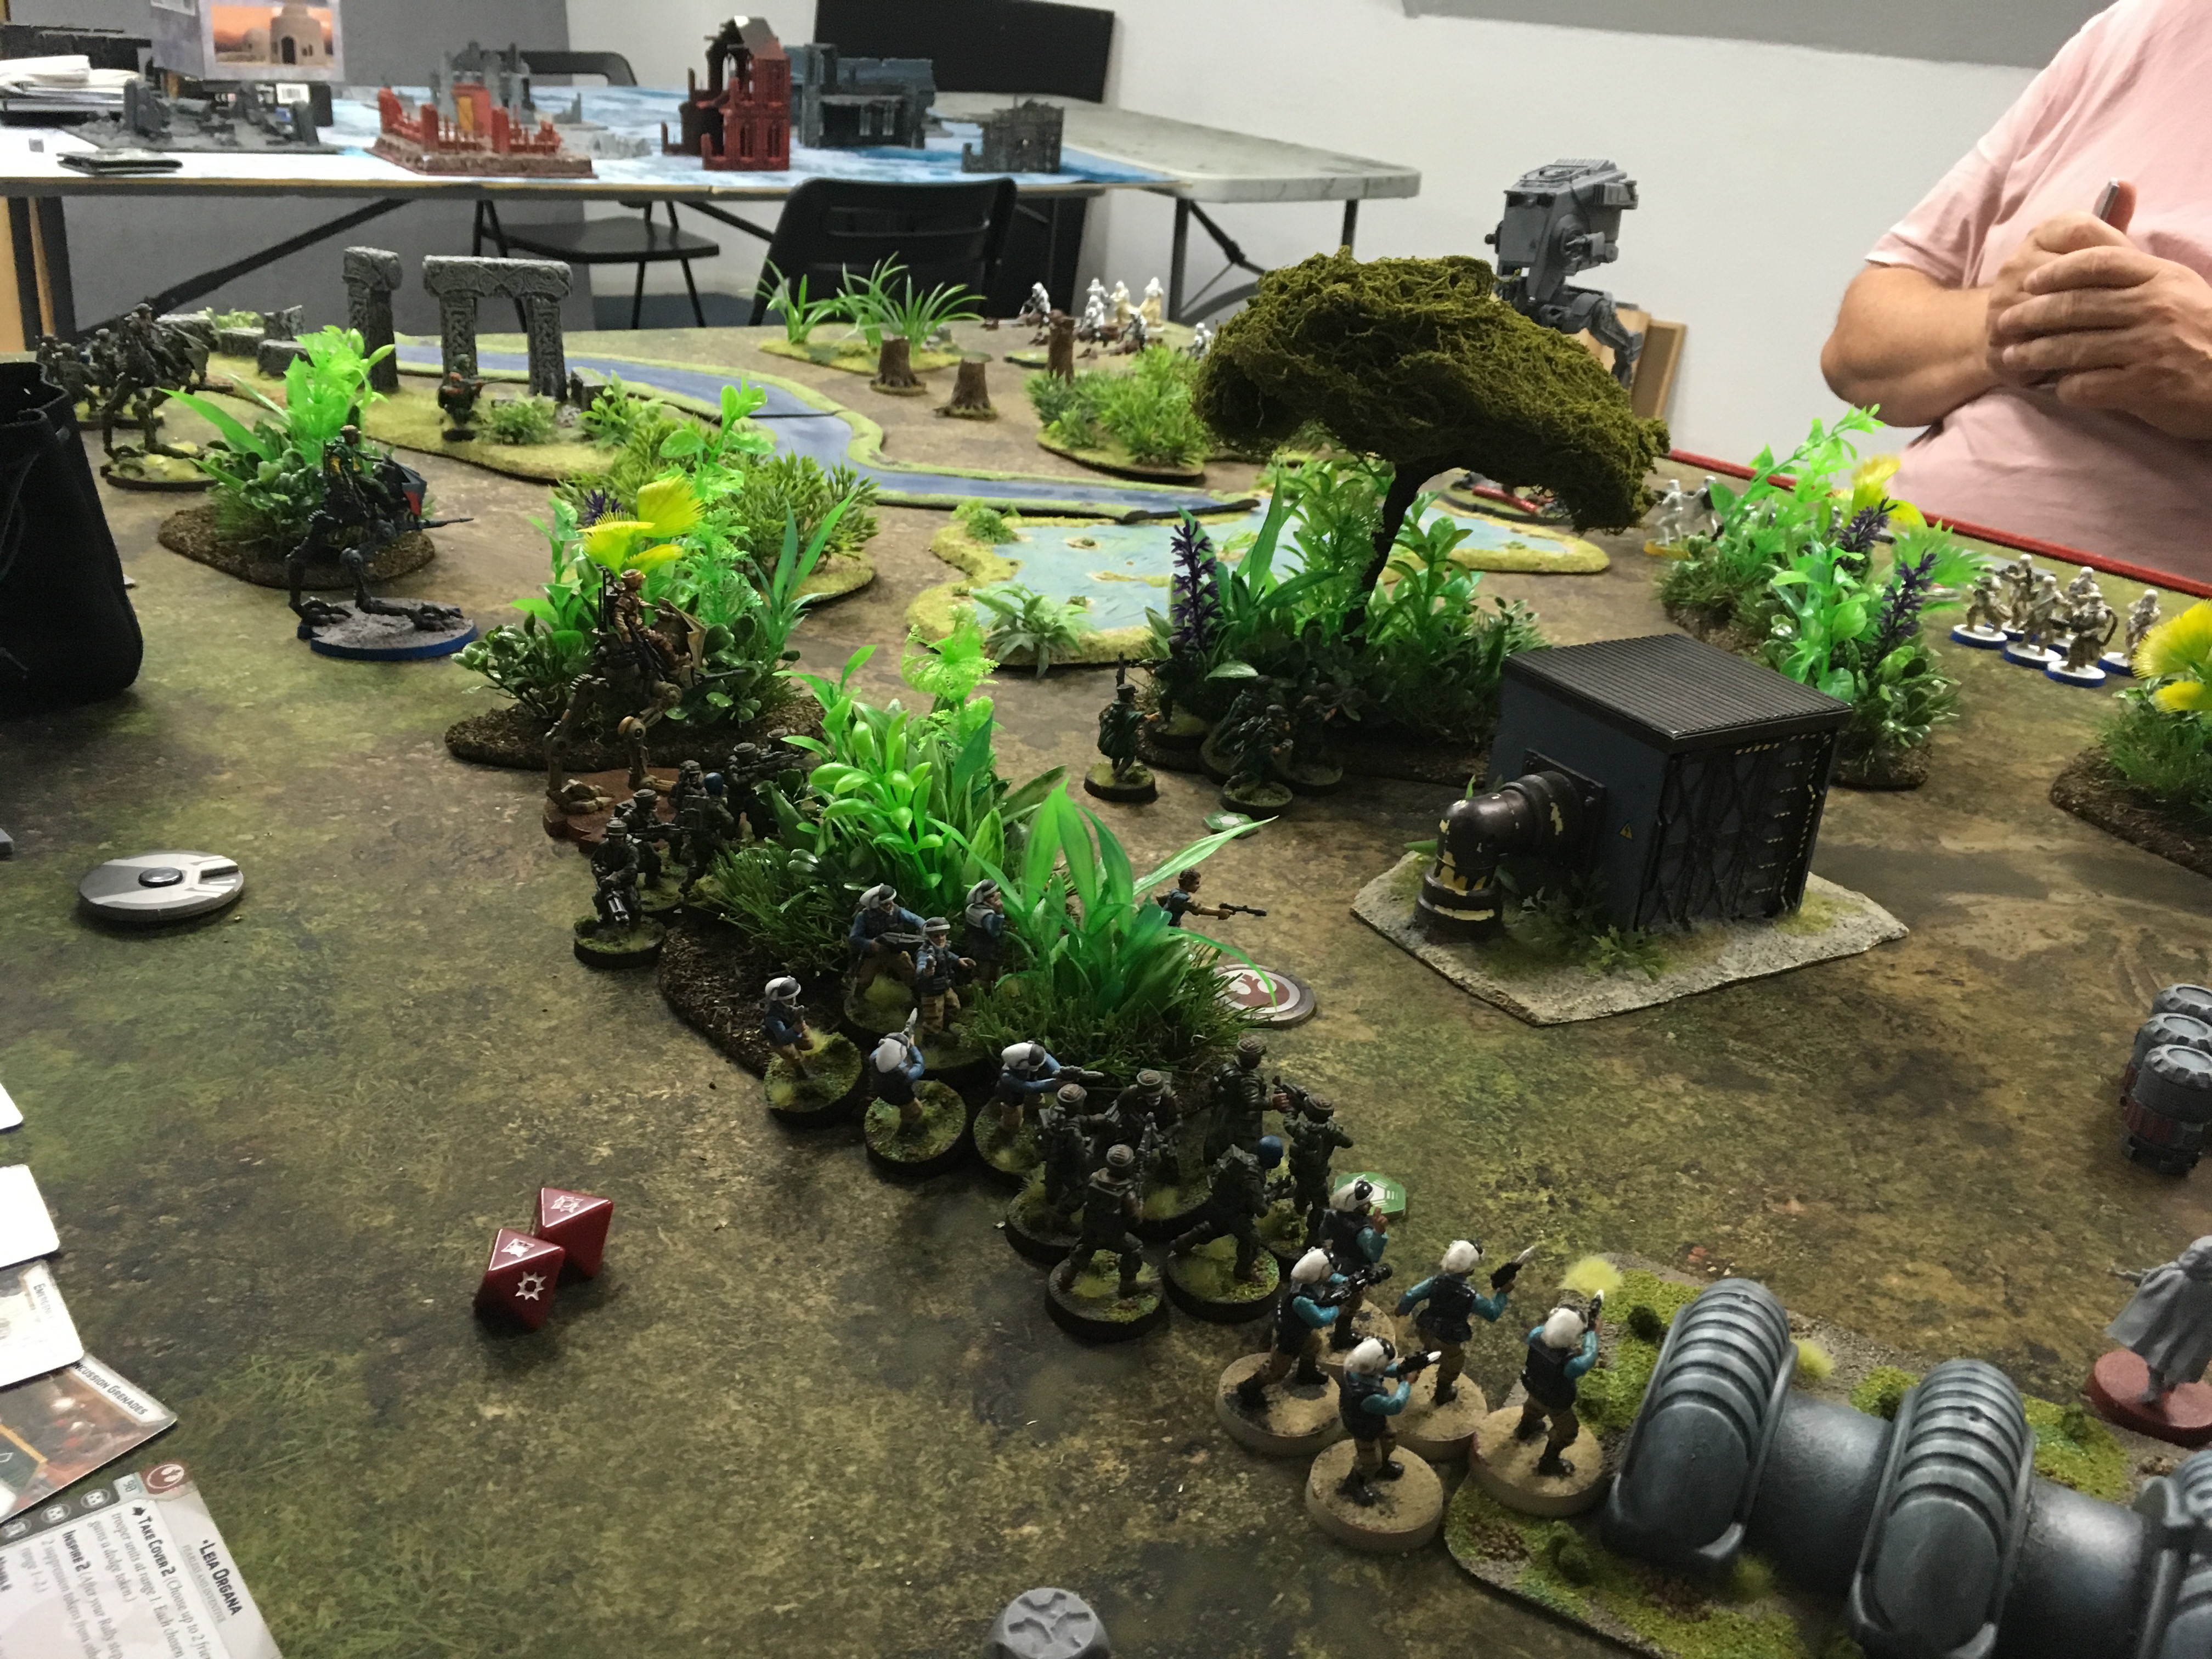
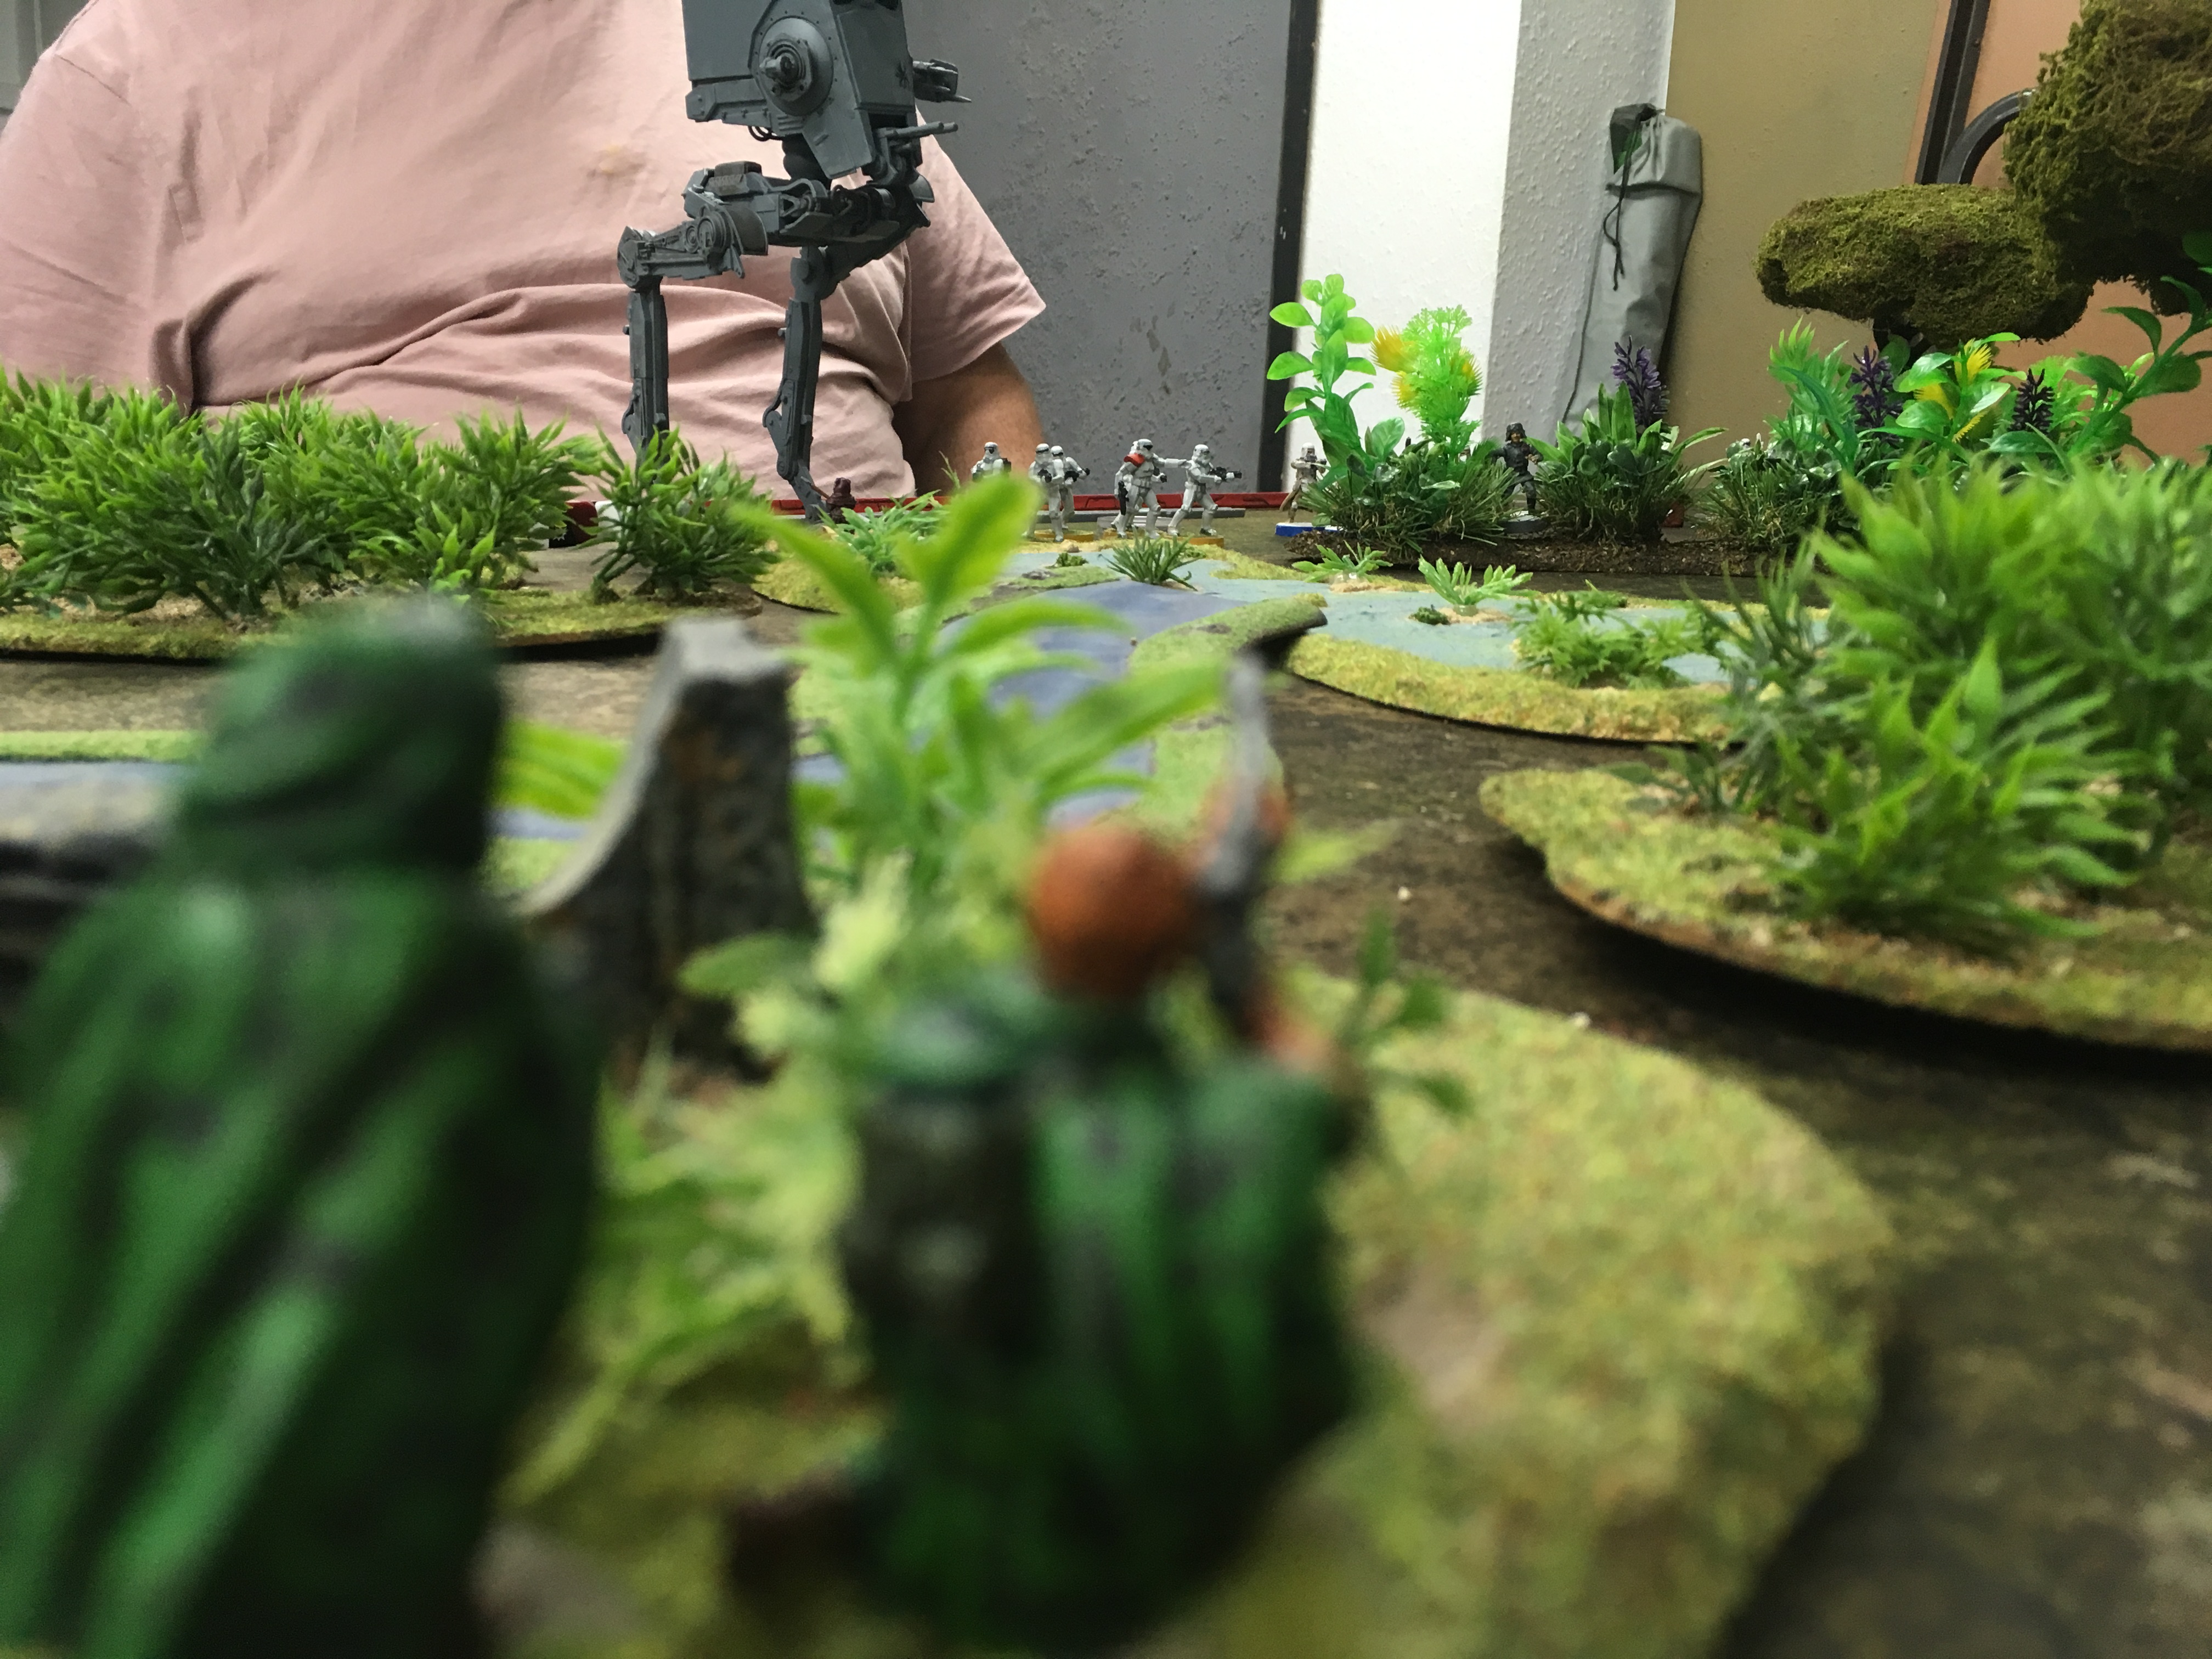
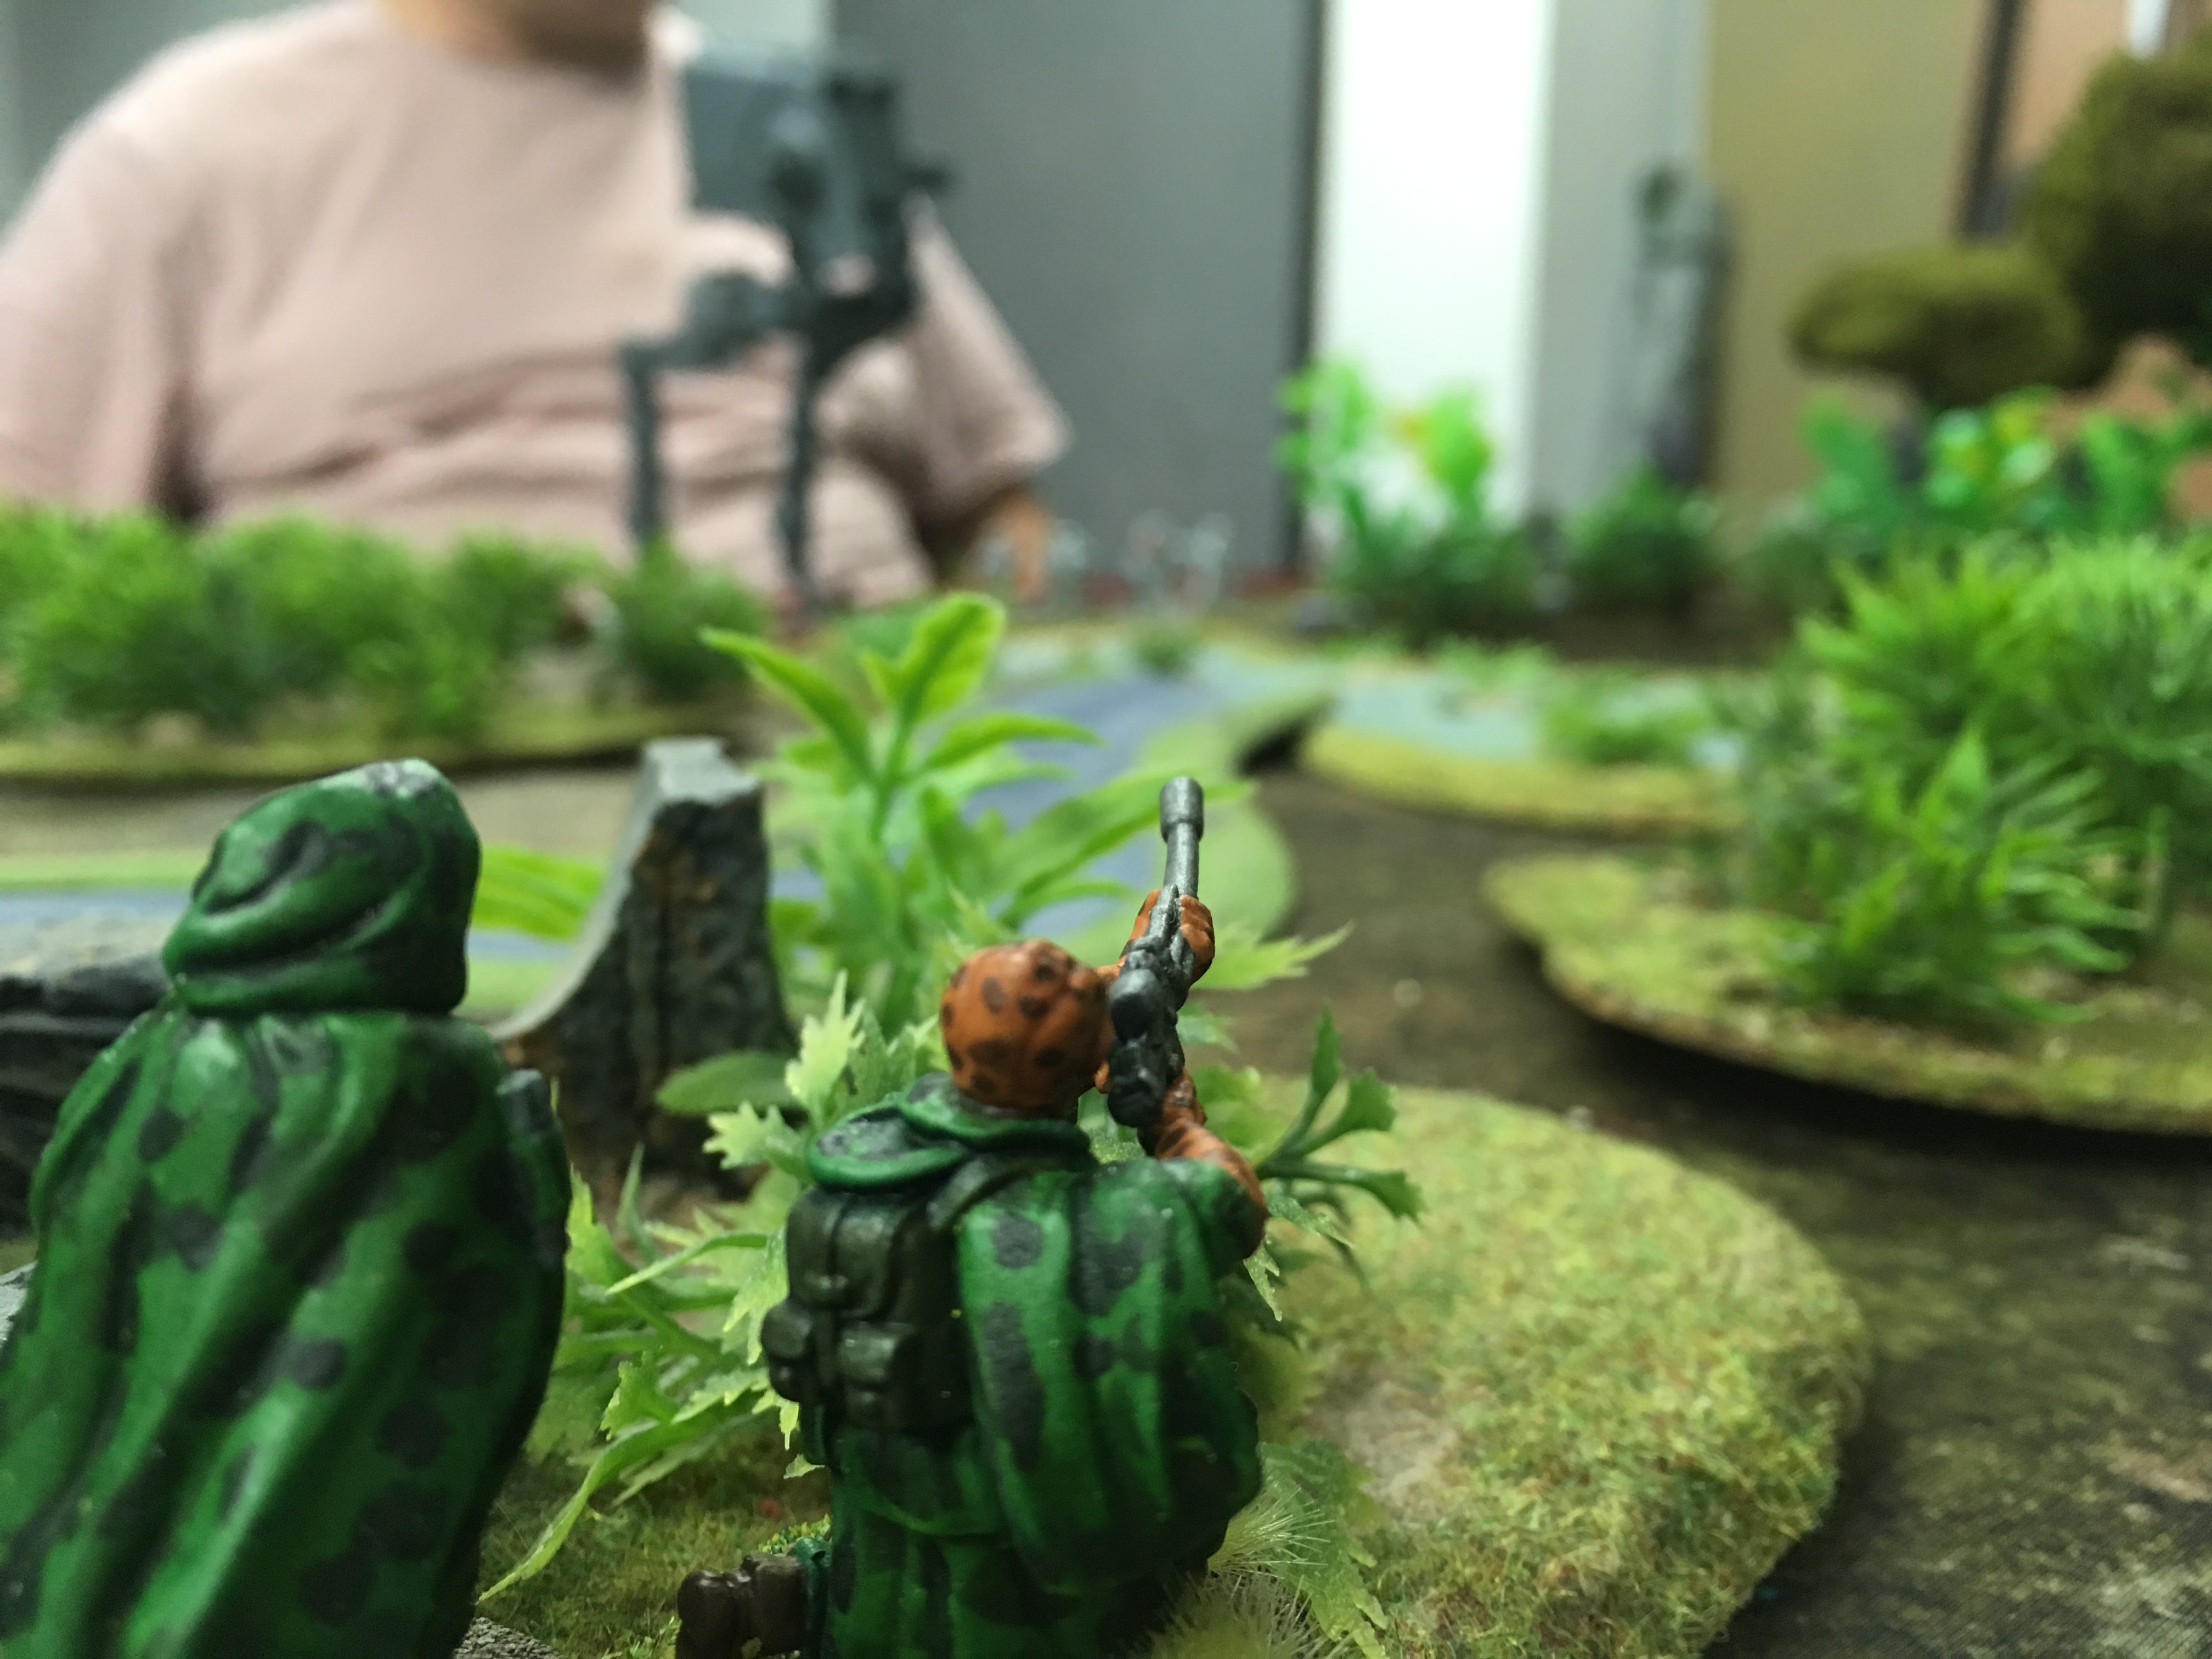
Took some of the jungle terrain down to my FLGS where it will live eventually.
a couple of us clubbed together to have a 1200 point scrap in the jungle.
we all agreed that the bits i had made looked great and that once all the Yavin bits are done we will have a cracking game.
we also decided that we would need to have asymmetric conditions to make it fit with the Star Wars Story.
Now, as you may have noticed I recently bought a 3D printer because I couldn’t find decent models of star ships at the right scale (or at least that’s how I justified it to myself) os hopefully soon I’ll have a printed X-wing to paint up


