

![O-12 Infinity Fast Response! Firebat Attack Wing Unboxing & Review [7 Days Early Access]](https://images.beastsofwar.com/2026/01/unboxing-corvus-belli-infinity-firebat-attack-wing-coverimage-225-127.jpg)


Spring Cleaning in the burrows


Recommendations: 401
About the Project
I started this project about a year back from memory. I finished a single burrow and started a dozen smaller projects for my board. Some are components salvaged from older unfinished boards for Bolt Action and Lord of the Rings. I haven' touched it in about 6 months and the spring cleaning challenge seemed like the perfect way o kick it off again and get some closure ;) Lots of scratch built and converted village houses and burrows to come.
Related Game: Burrows & Badgers
Related Company: Oathsworn Miniatures
Related Genre: Fantasy
Related Contest: Spring Clean Hobby Challenge (Old)
This Project is Active
A room with a view: 2
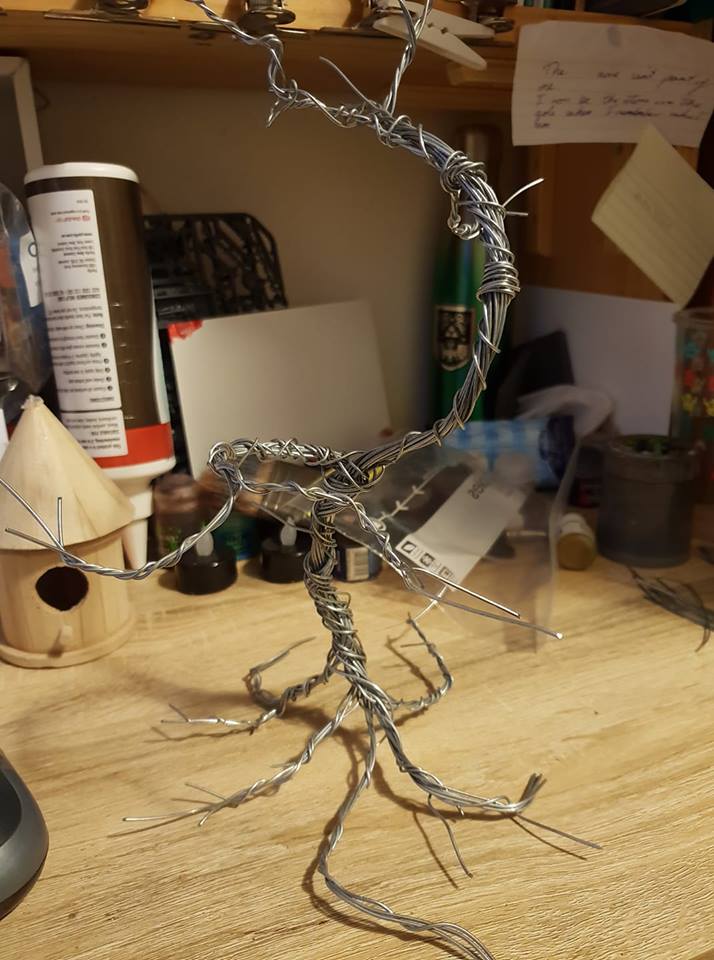
OK, so it’s been a while since I worked on the bird house and today I tackled the tree to set it in.
I used some aluminium wire about 2-3 mm thick and cut it into 20-30 cm lengths.
I took about half and twisted them together then added the other lengths a few at a time and twisted them around to make roots.
Top lengths were pared off and twisted out into branches.
 Step one
BASING:
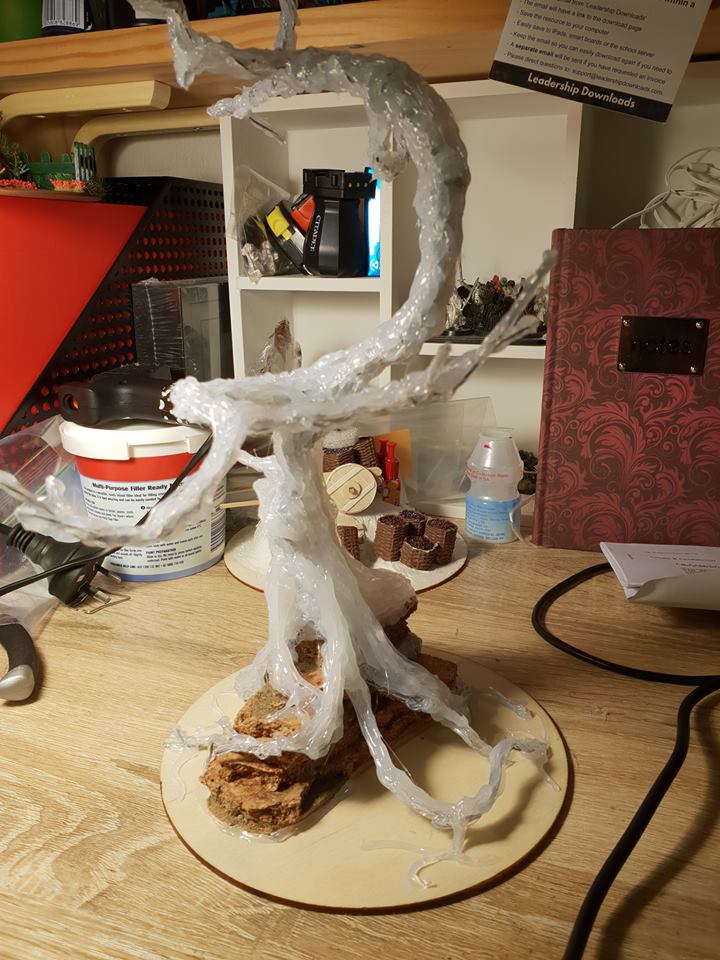
Next I grabbed an old rock pile I had sitting around. It’s just cork tile glued into layers.
I twisted the roots around to they’d grip the rocks.
Then I used some small U shaped wire hoops that I cut off branches that were too long.
I pushed these through into the cork and added some super glue. It doesn’t matter if it looks odd at this stage as the next step covers everything up.
BARK:
After a discussion on a terrain group I settled on hot glue to make the bark. This is because the tree is very tall, about 30cm and needs to be sturdy but have some flexibility.
I added it in several layers, the first was quick and messy just to get the shape, the subsequent layers more directed and styled.
I used downward strokes of glue to make the tree similar to a fig with large buttressed roots and lots of hollows.
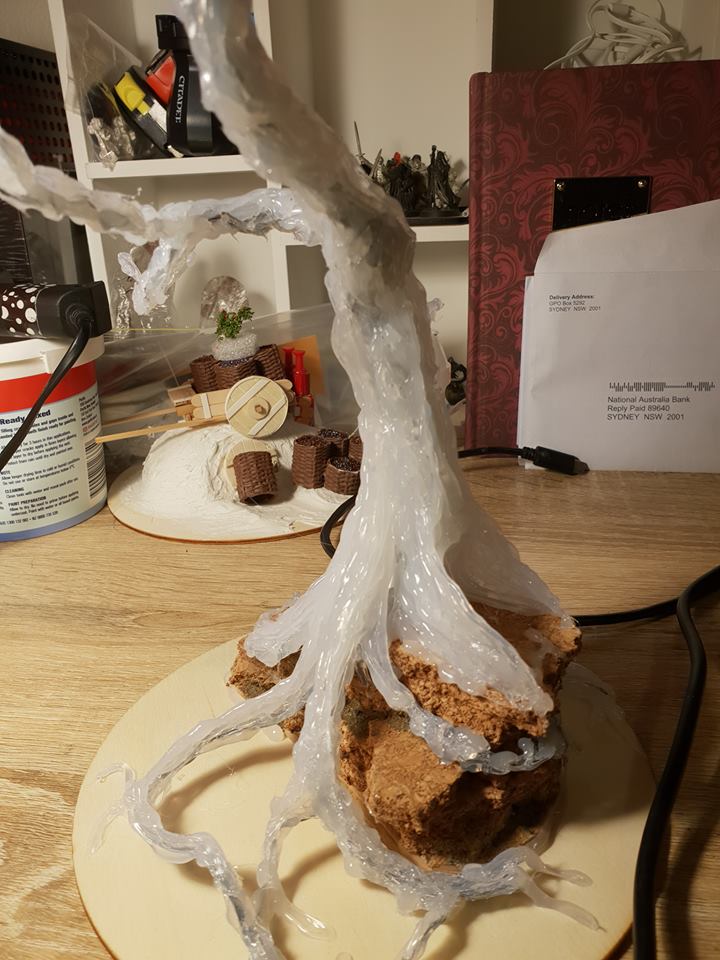
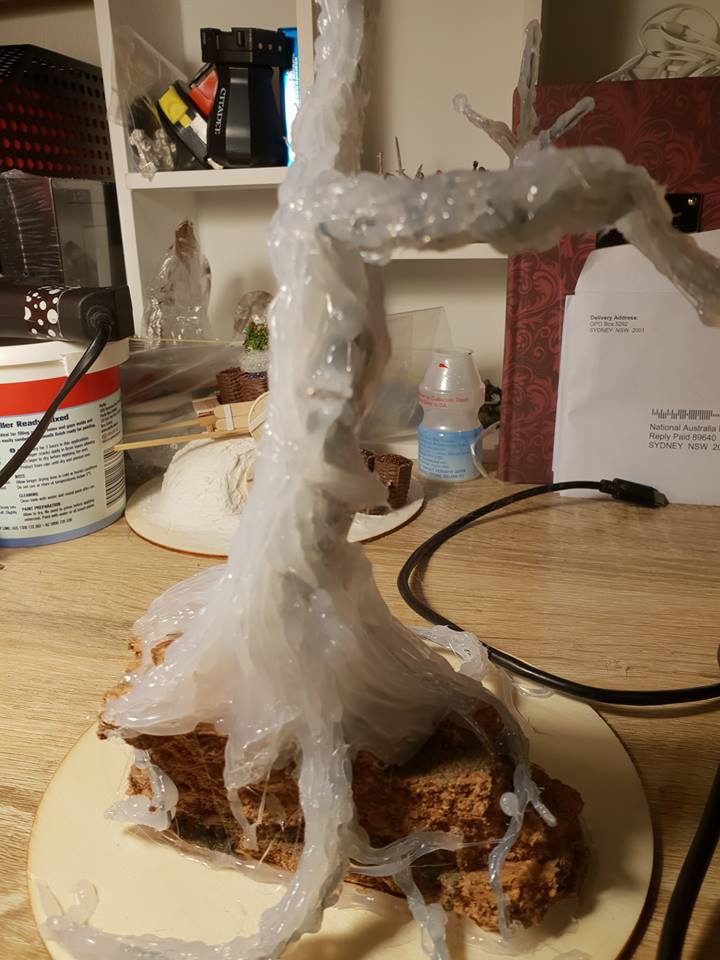
And that’s it for now. Next up is some texturing for the bark and detailing the base.
Cheers, T.
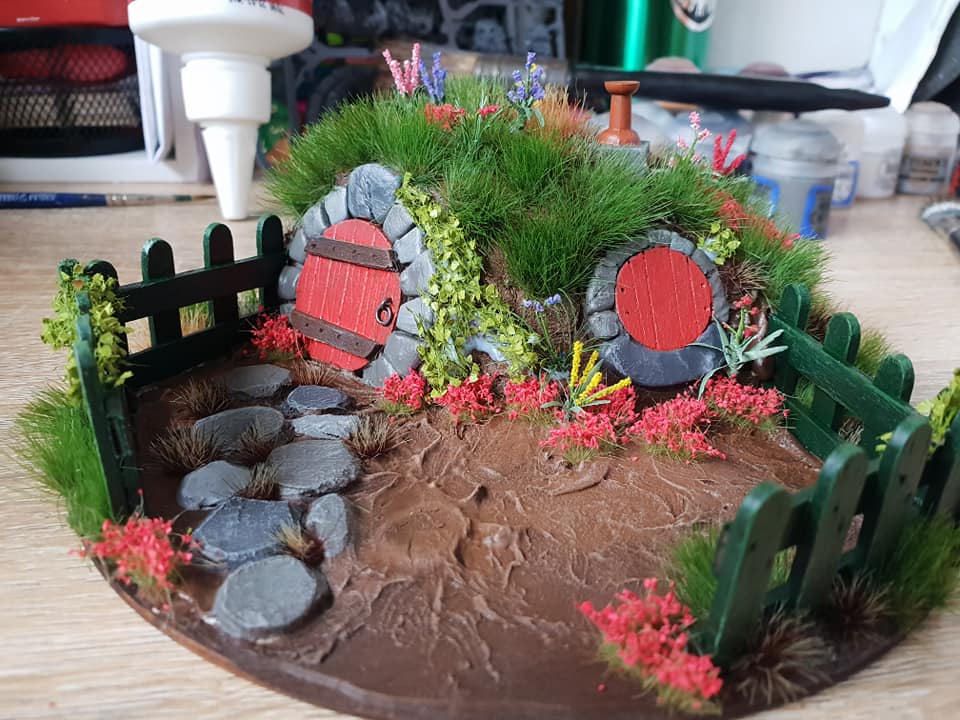
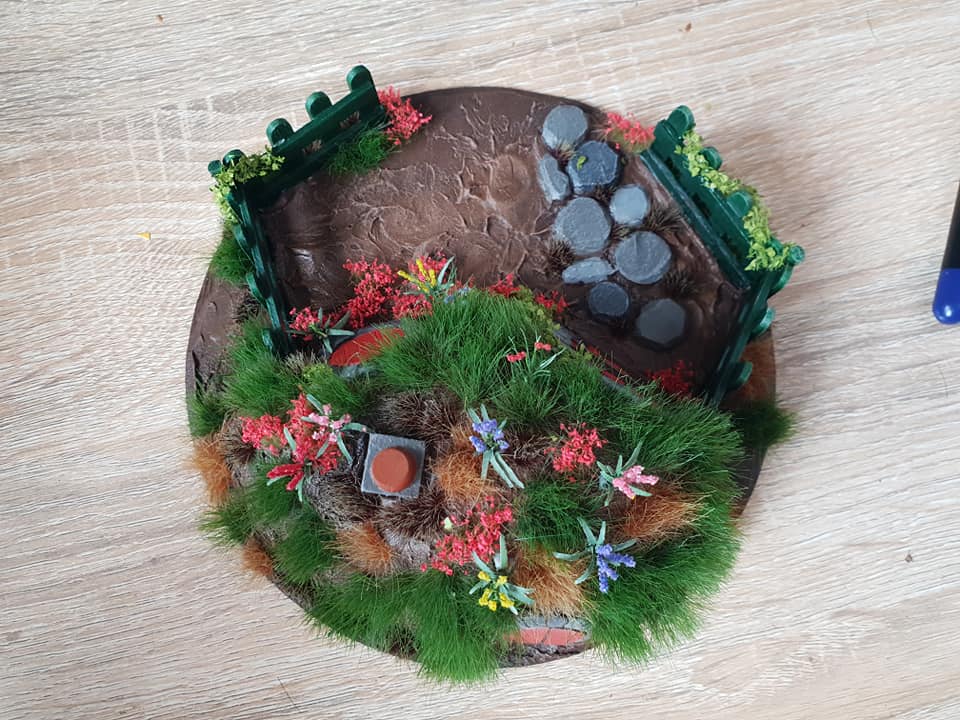
Burrows 4: Finally some paint!
OK, so it’s not completely finished but here’s where it’s up to now.
I wanted it to look like it’s residents, so here’s a spiky haired hedgehog house. I may peel a few tufts off and I’ll certainly be adding more static grass and mossy flock too.
The fenced off area will have a small vegetable patch with some sculpted pumpkins and the like.
Anyway, hope you’ve enjoyed the project so far.
Cheers, T.

Burrows 3: Windows on the world part 2
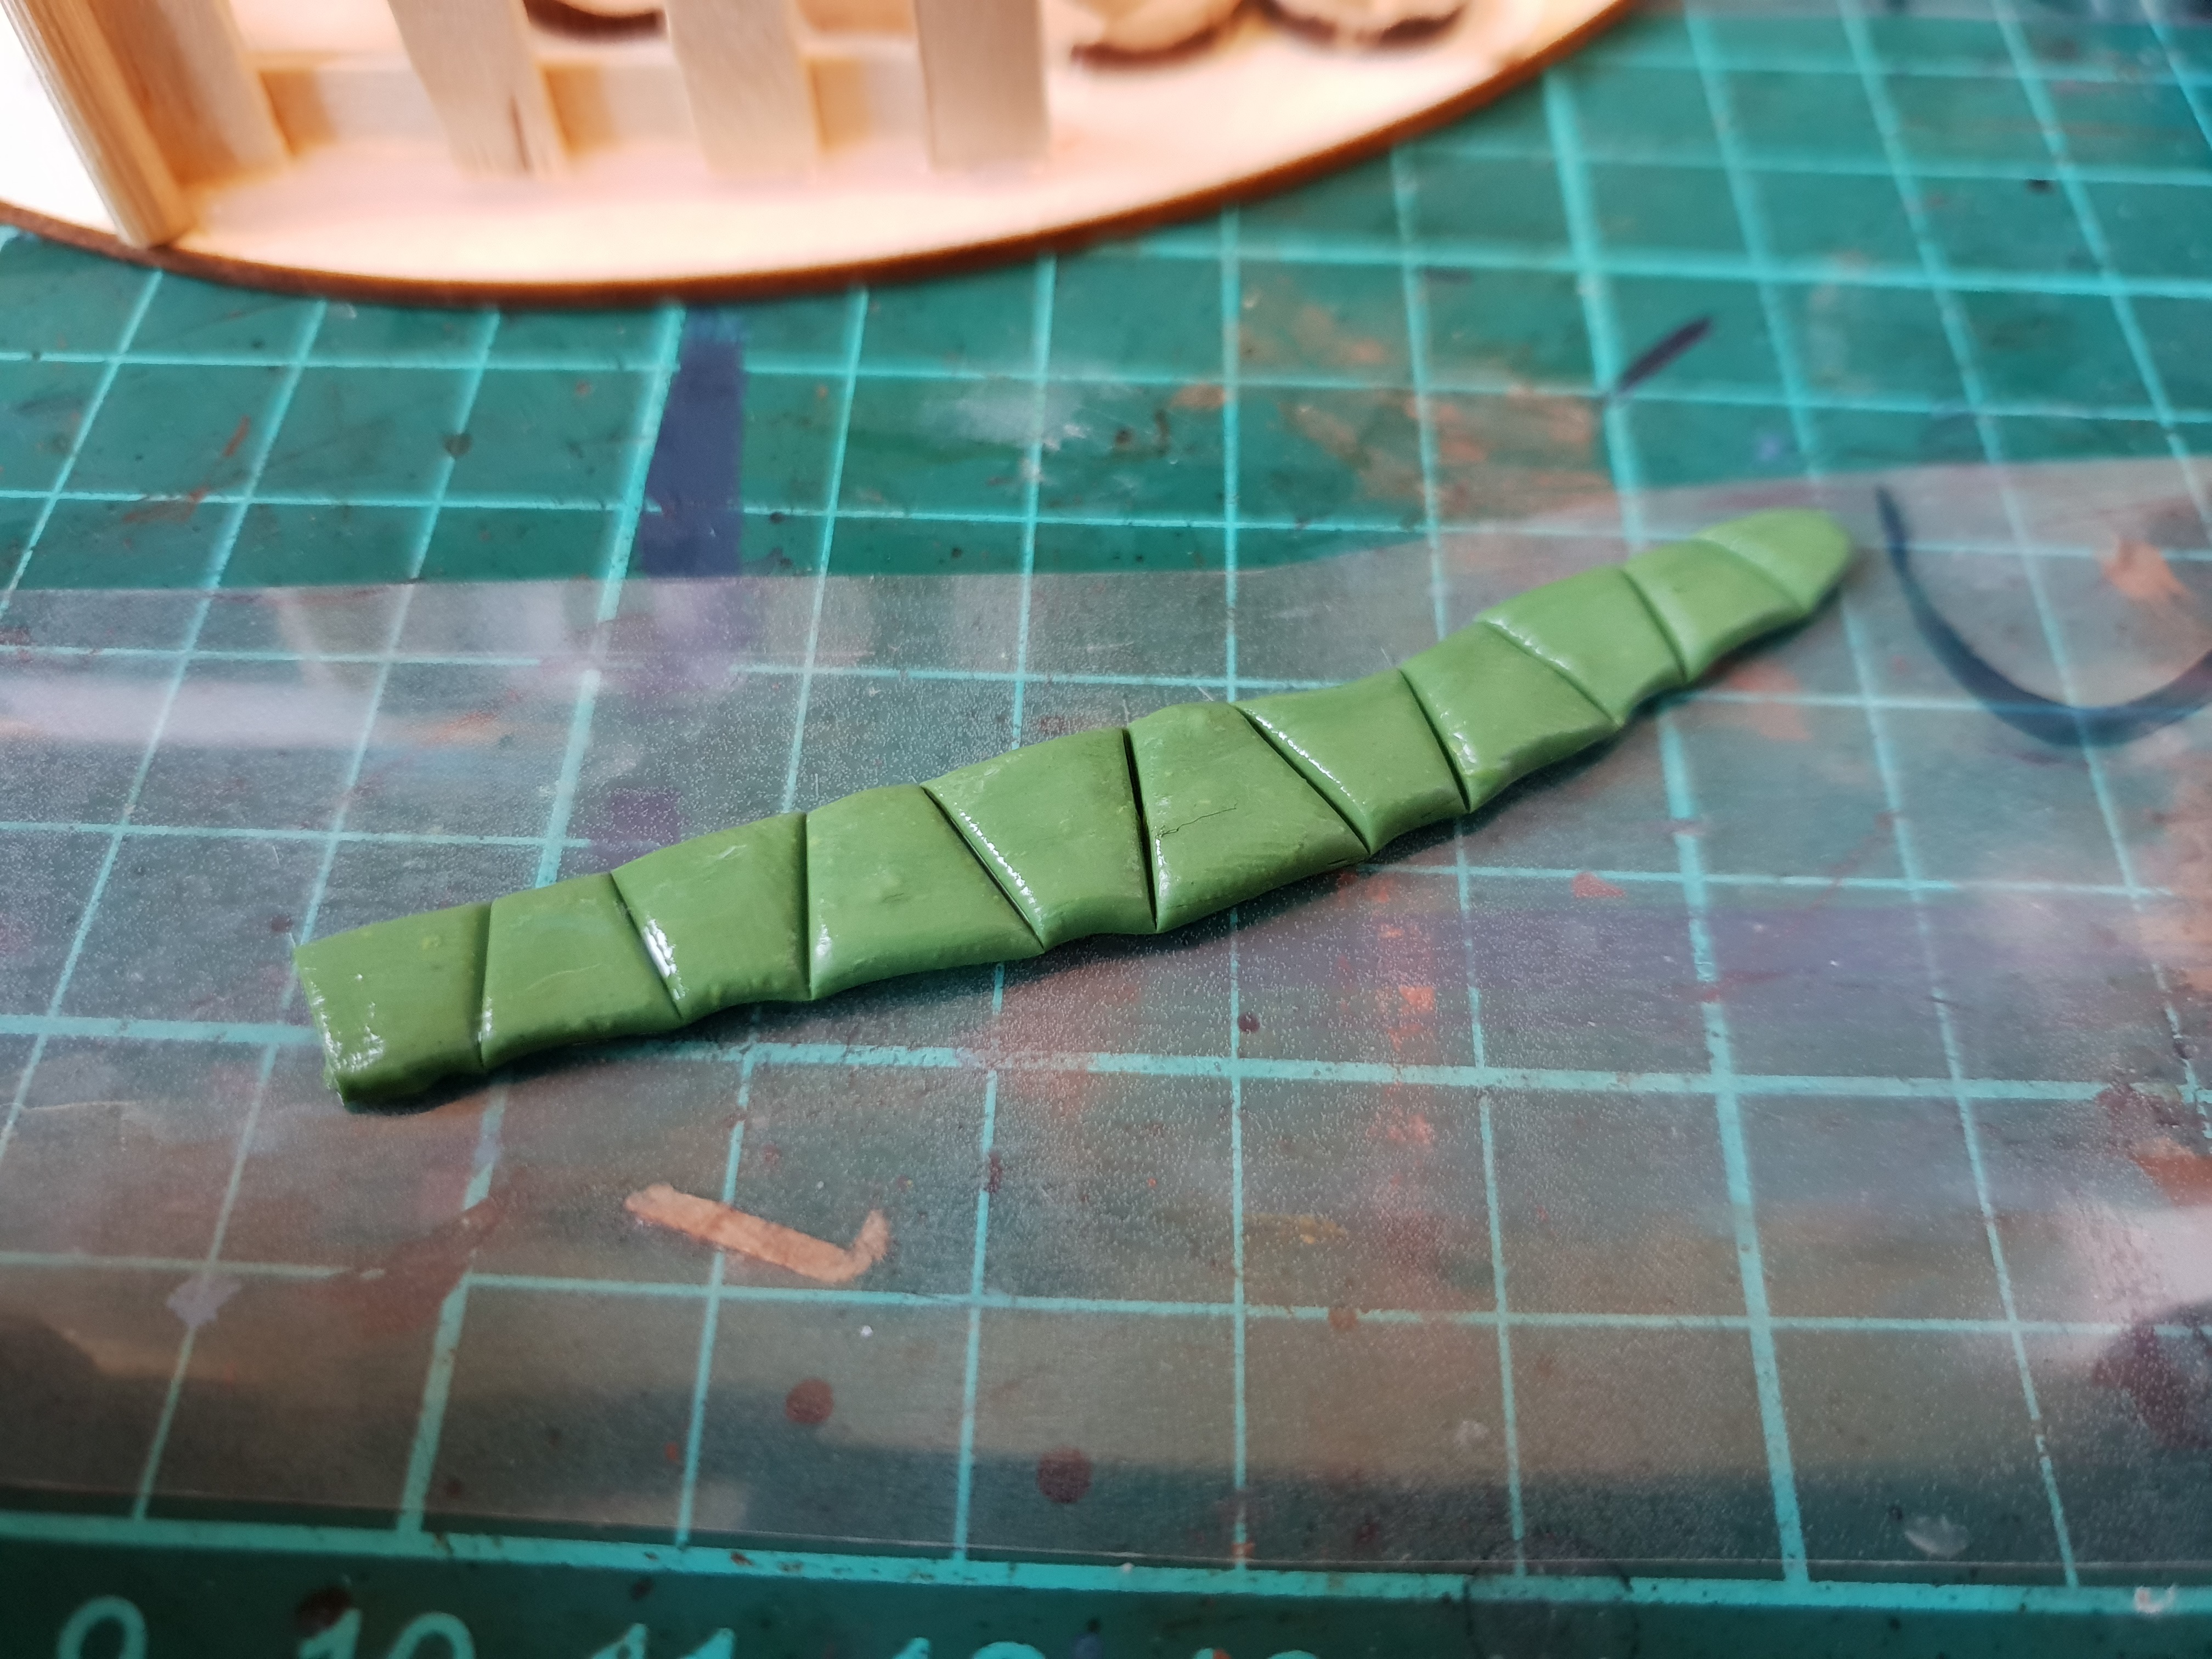
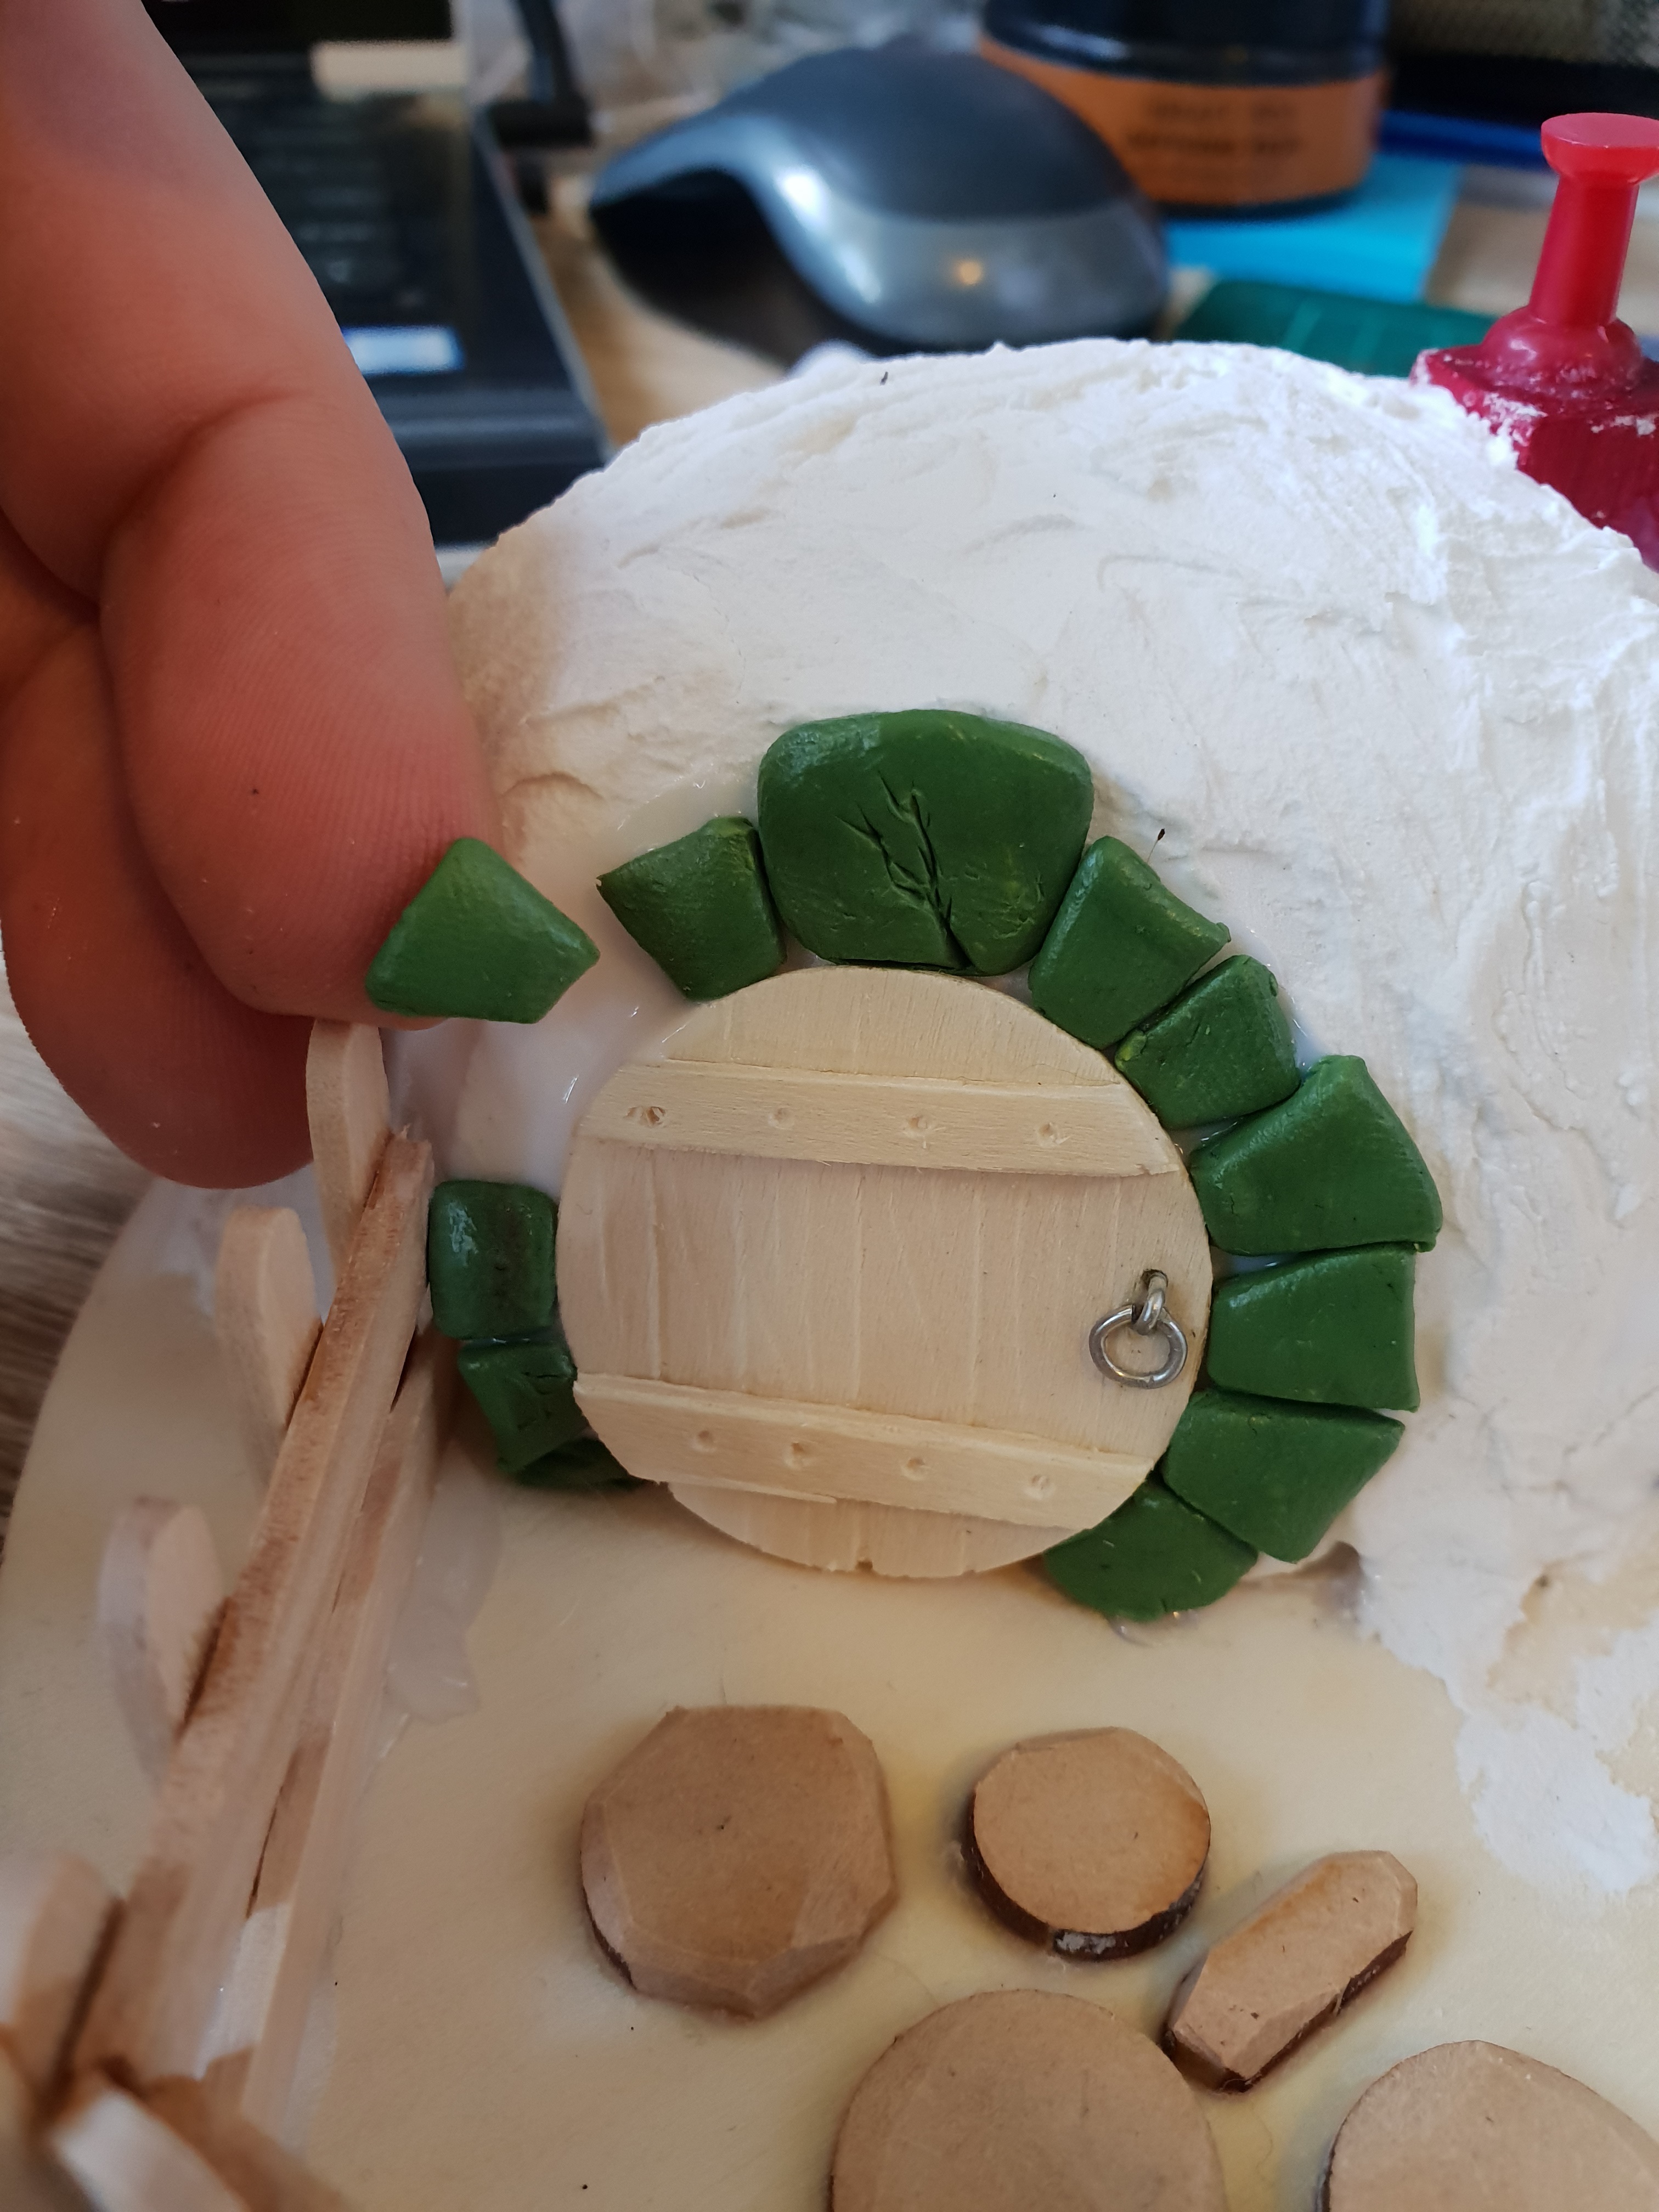
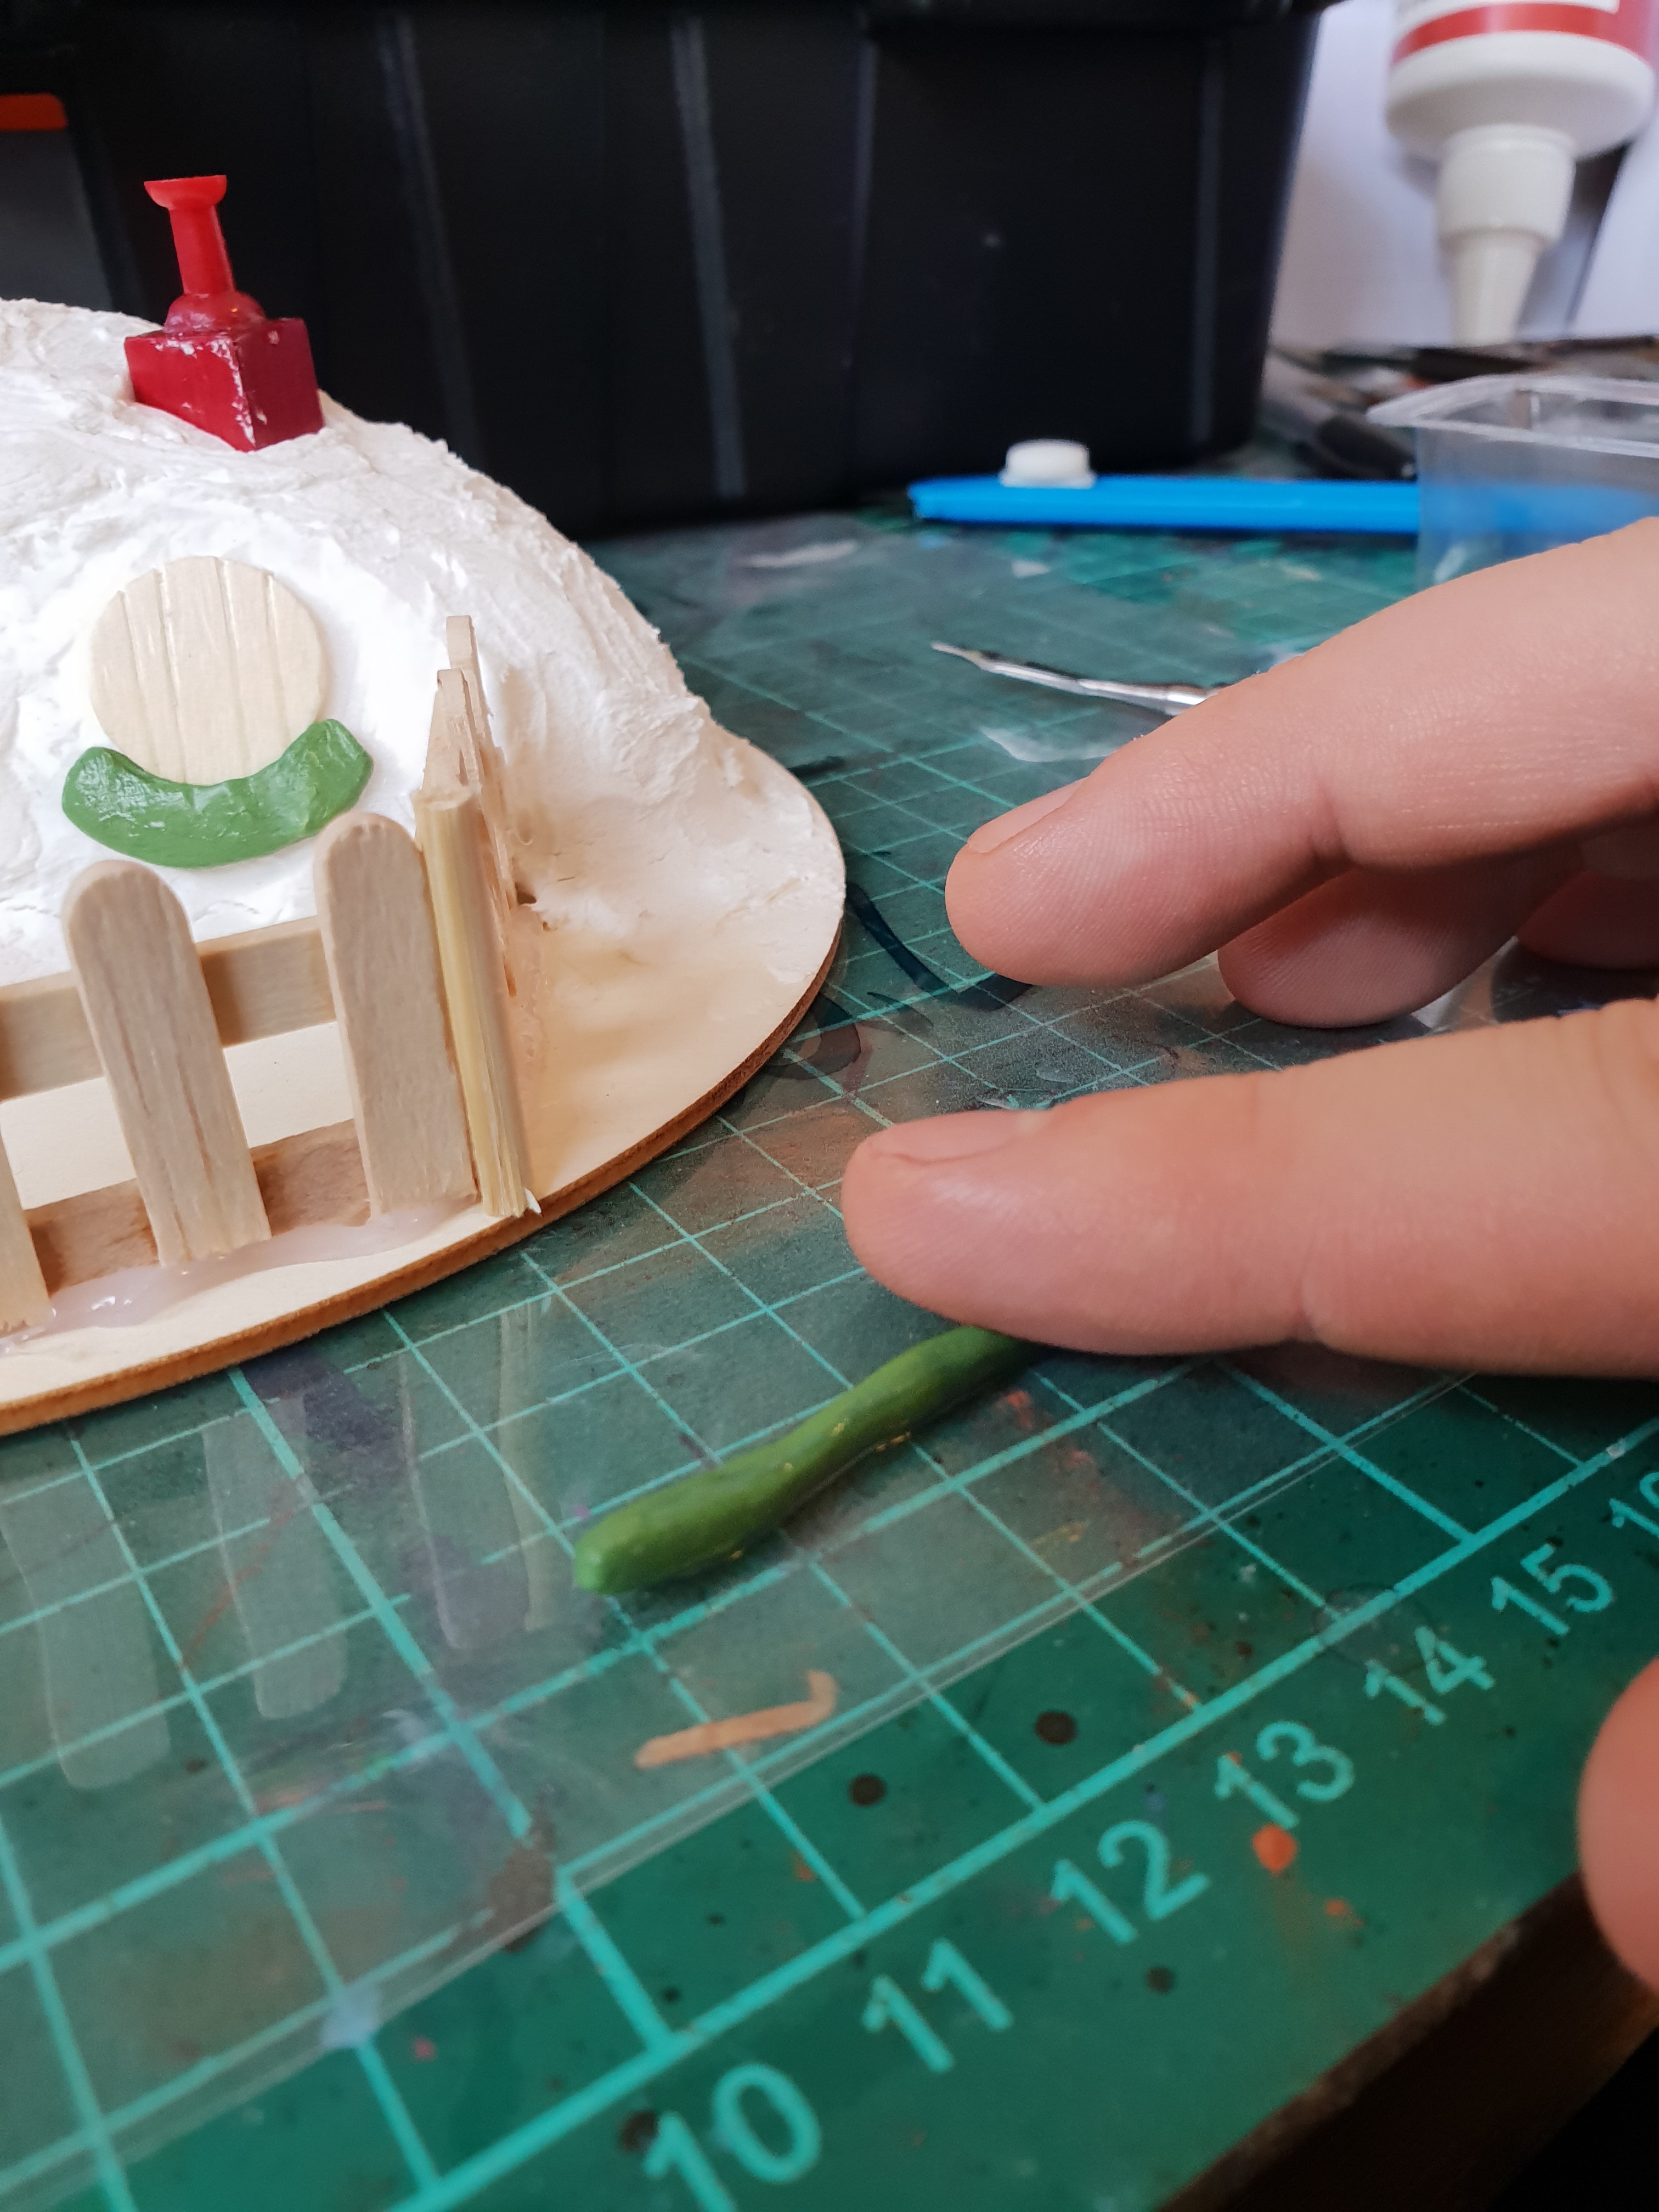
OK, so it’s a door not a window but here’s the second method for doing stone frames.
-This one I started by rolling out a thicker section of green stuff onto some plastic sheet.
-Next I cut it with a hobby knife to form some rough trapeziums and push in the joins with a sculpting tool to represent rounded stones.
-This line is left to semi-cure for about an hr.
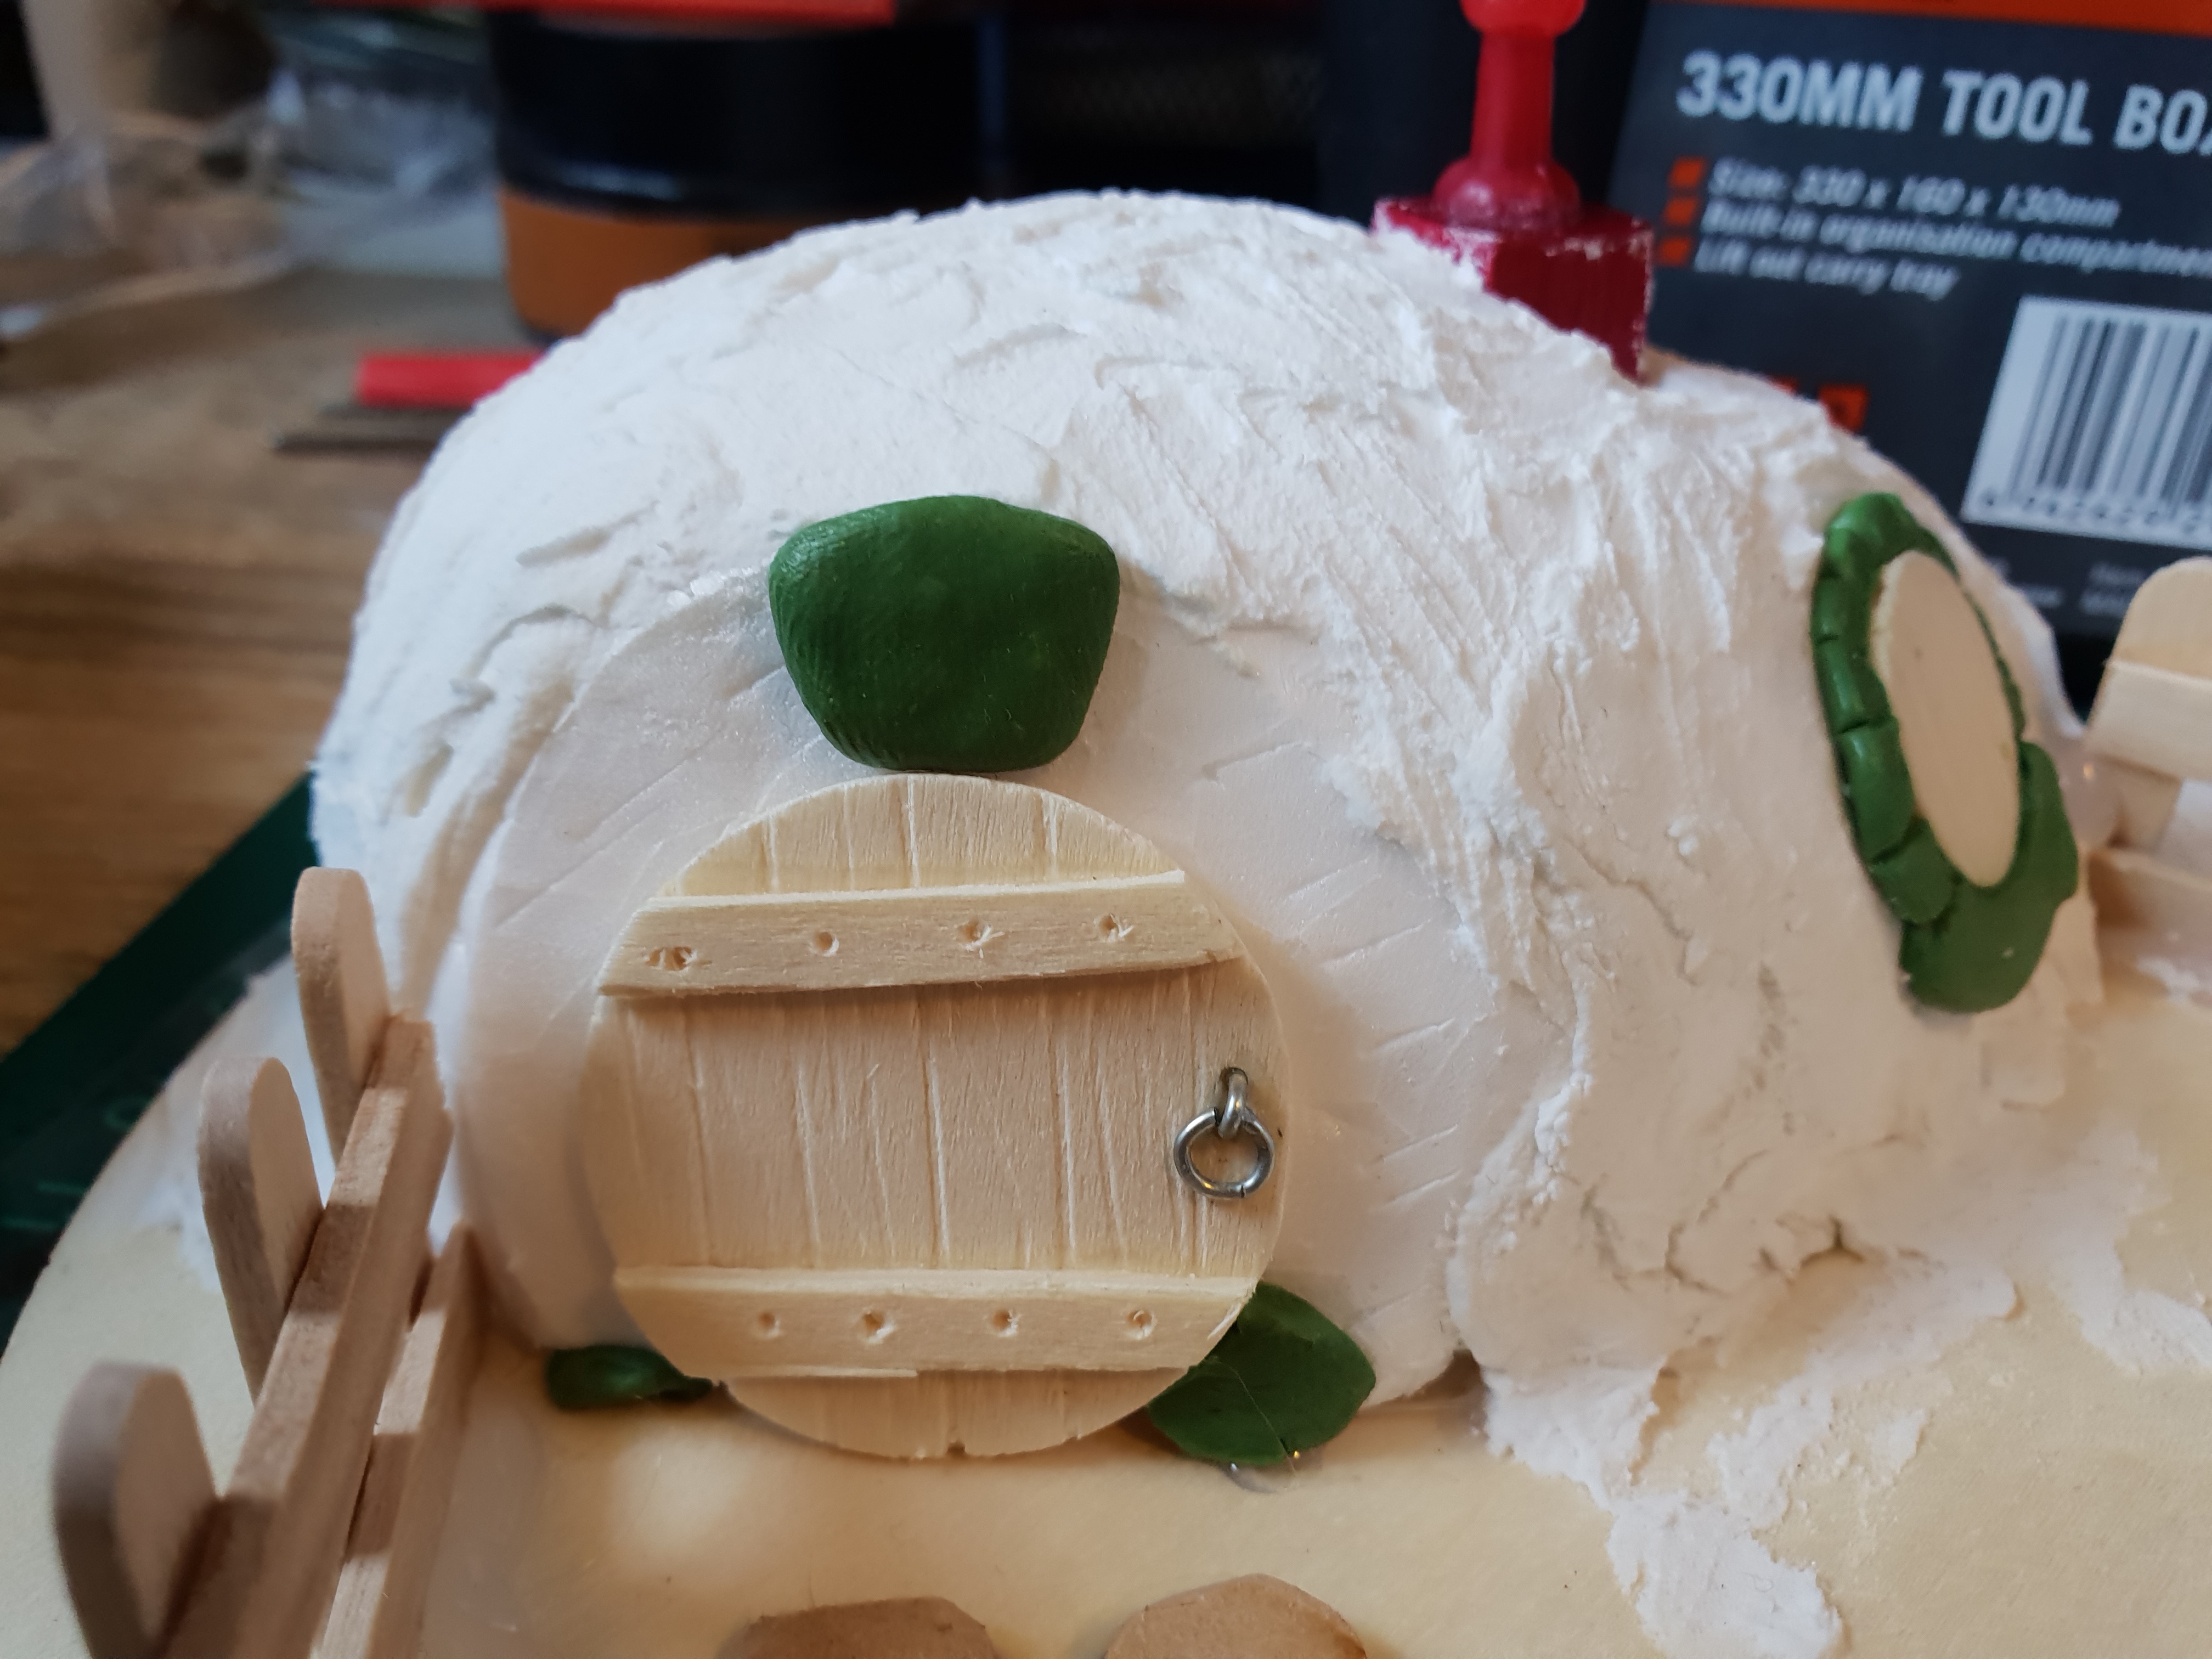
-Corner stones and a large key stone are pushed onto the door now.
-Once the other stones are semi-cured, they are peeled carefully off the plastic and put in place around the door with PVA glue. The semi-cured nature means that there is still some play in the putty to change their shape to fit the door better.
And that’s method 2.
Cheers, T.


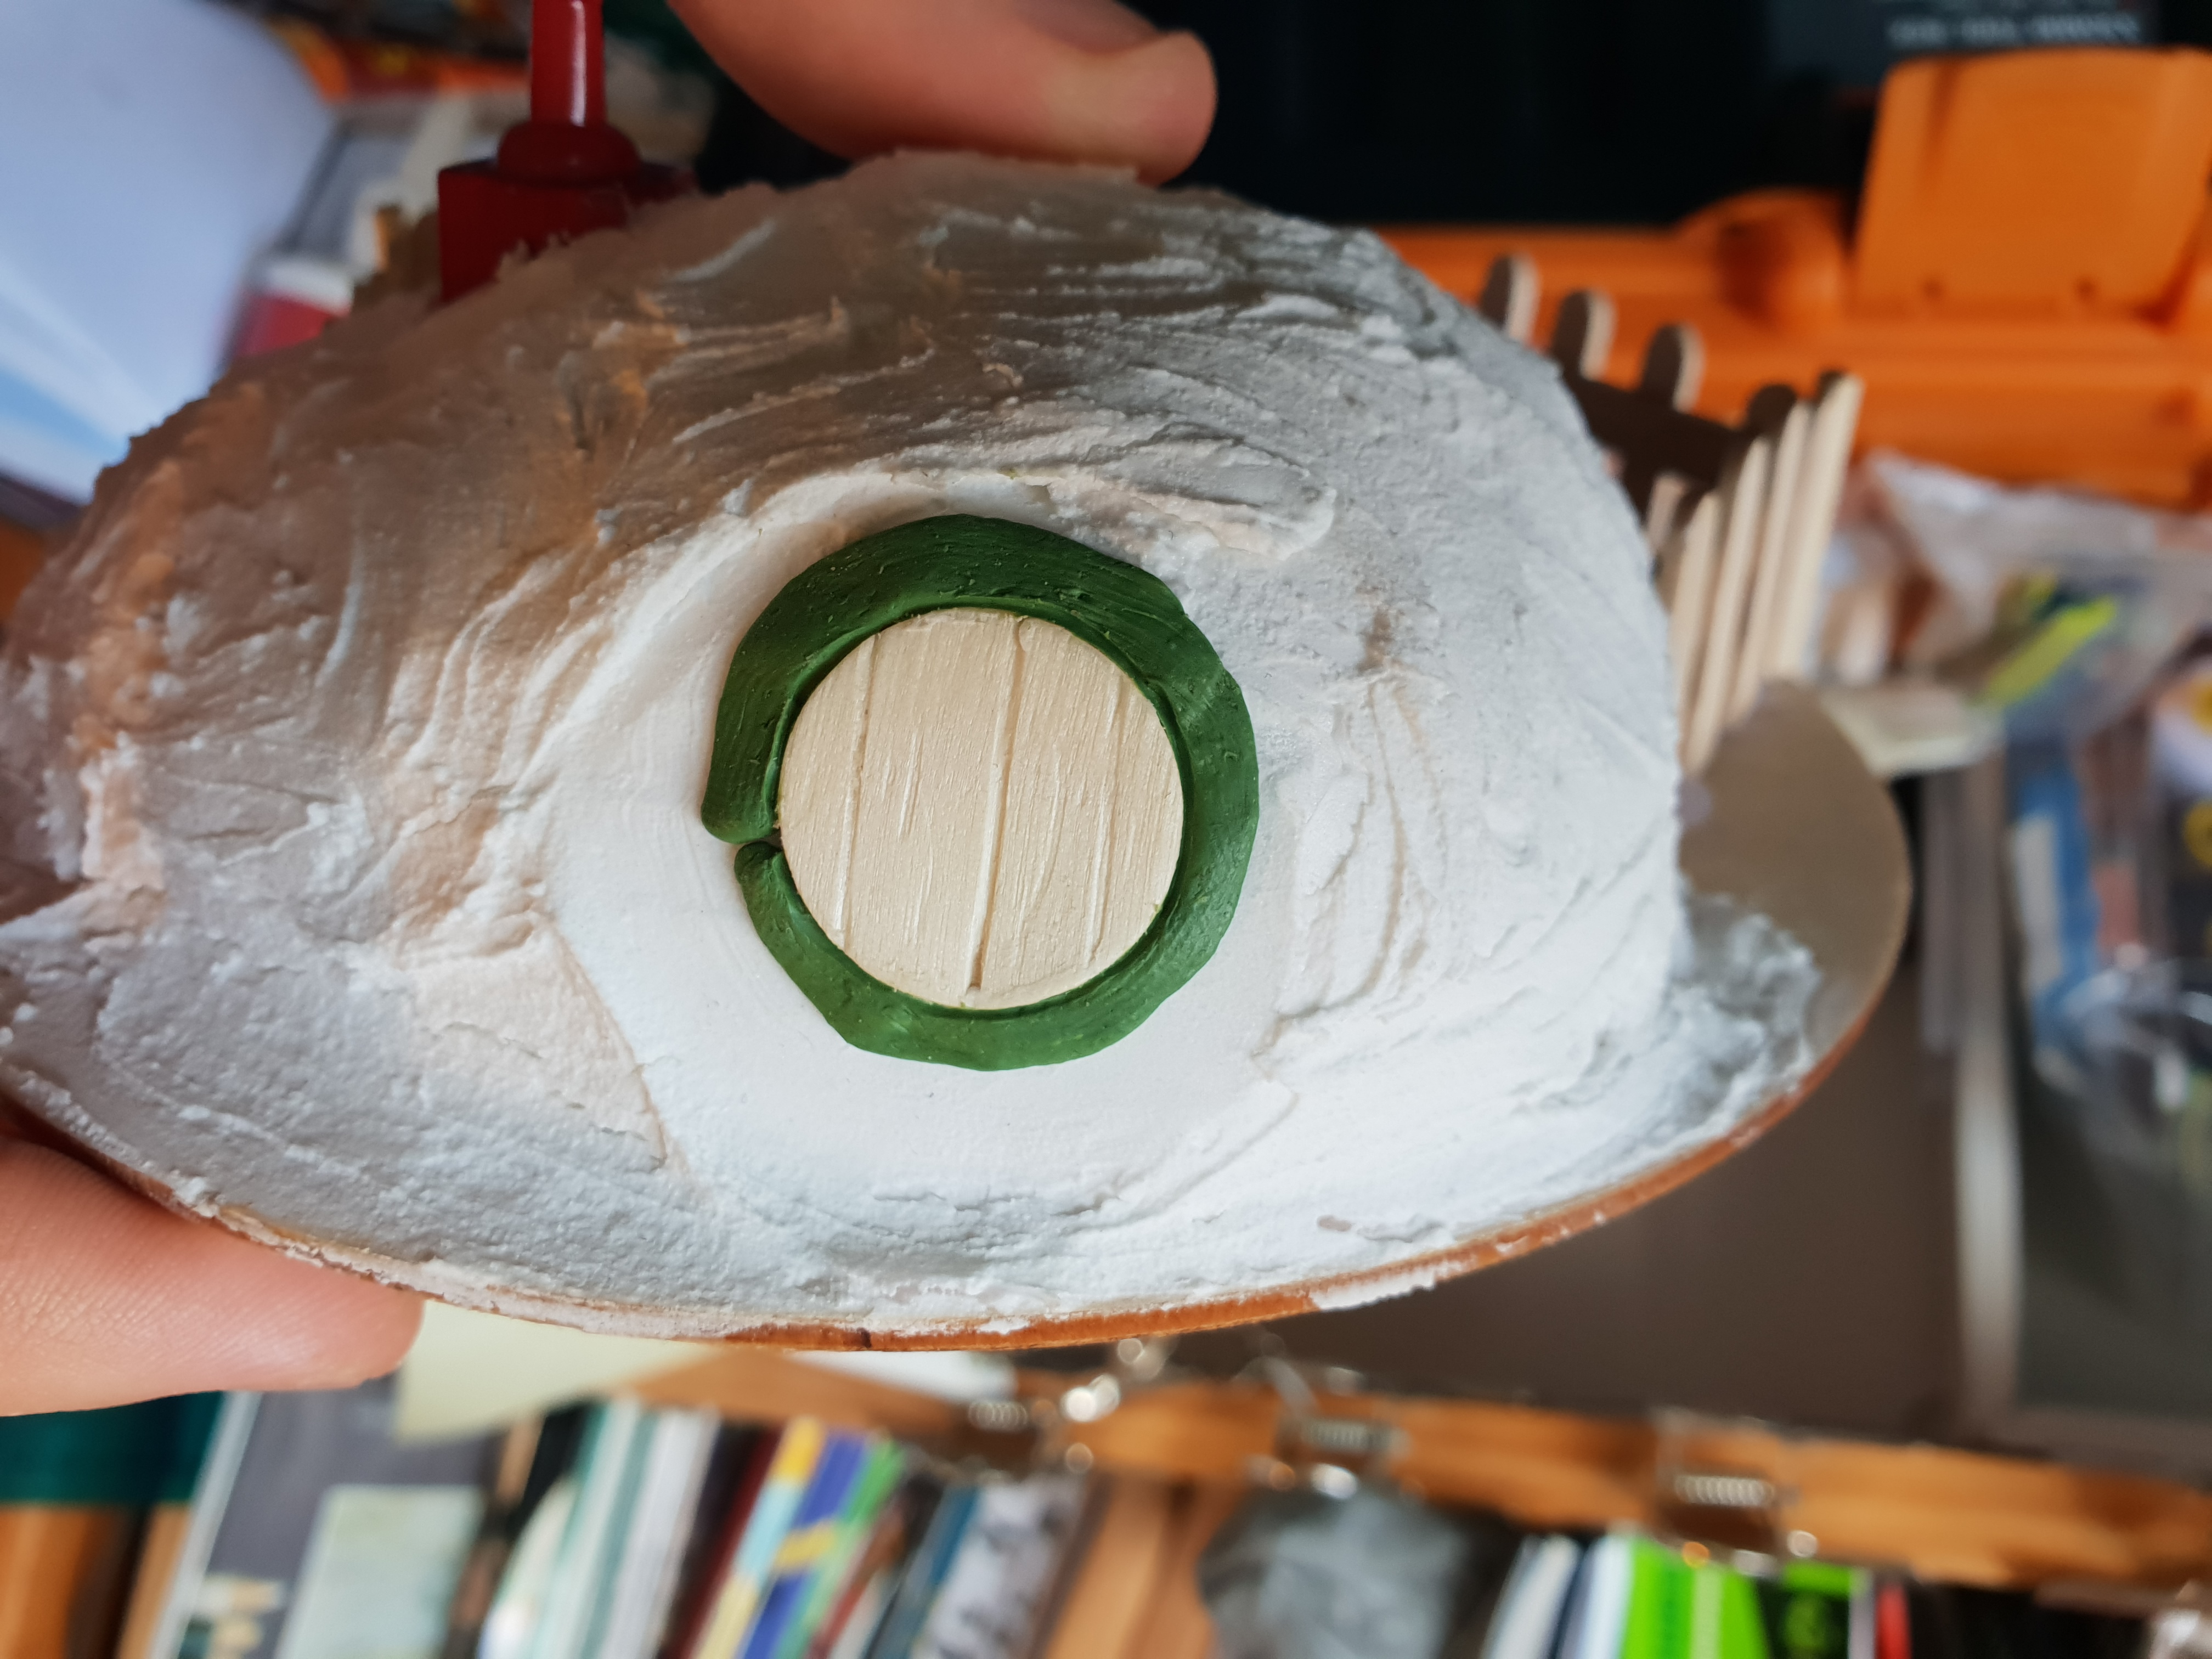
Burrows 3: Windows on the world part 1
So the detailing on the burrows continues. Today it’s working on some green stuff window ledges and frames to represent simple stone and bricks set into the dirt wall.
I used two different techniques which I’ll explain as I go.
Method 1
-Roll out a sausage (technical term) of green stuff onto some damp plastic sheet. I use and old overhead projector transparency but a zip lock baggy does just as well. This allows us to peel off (or slice off if you stuff up the dampness like me) the item later to apply it to the model.
-Peel away the green stuff and curl it around the window like a snake, using a damp finger to smooth out any lumps.
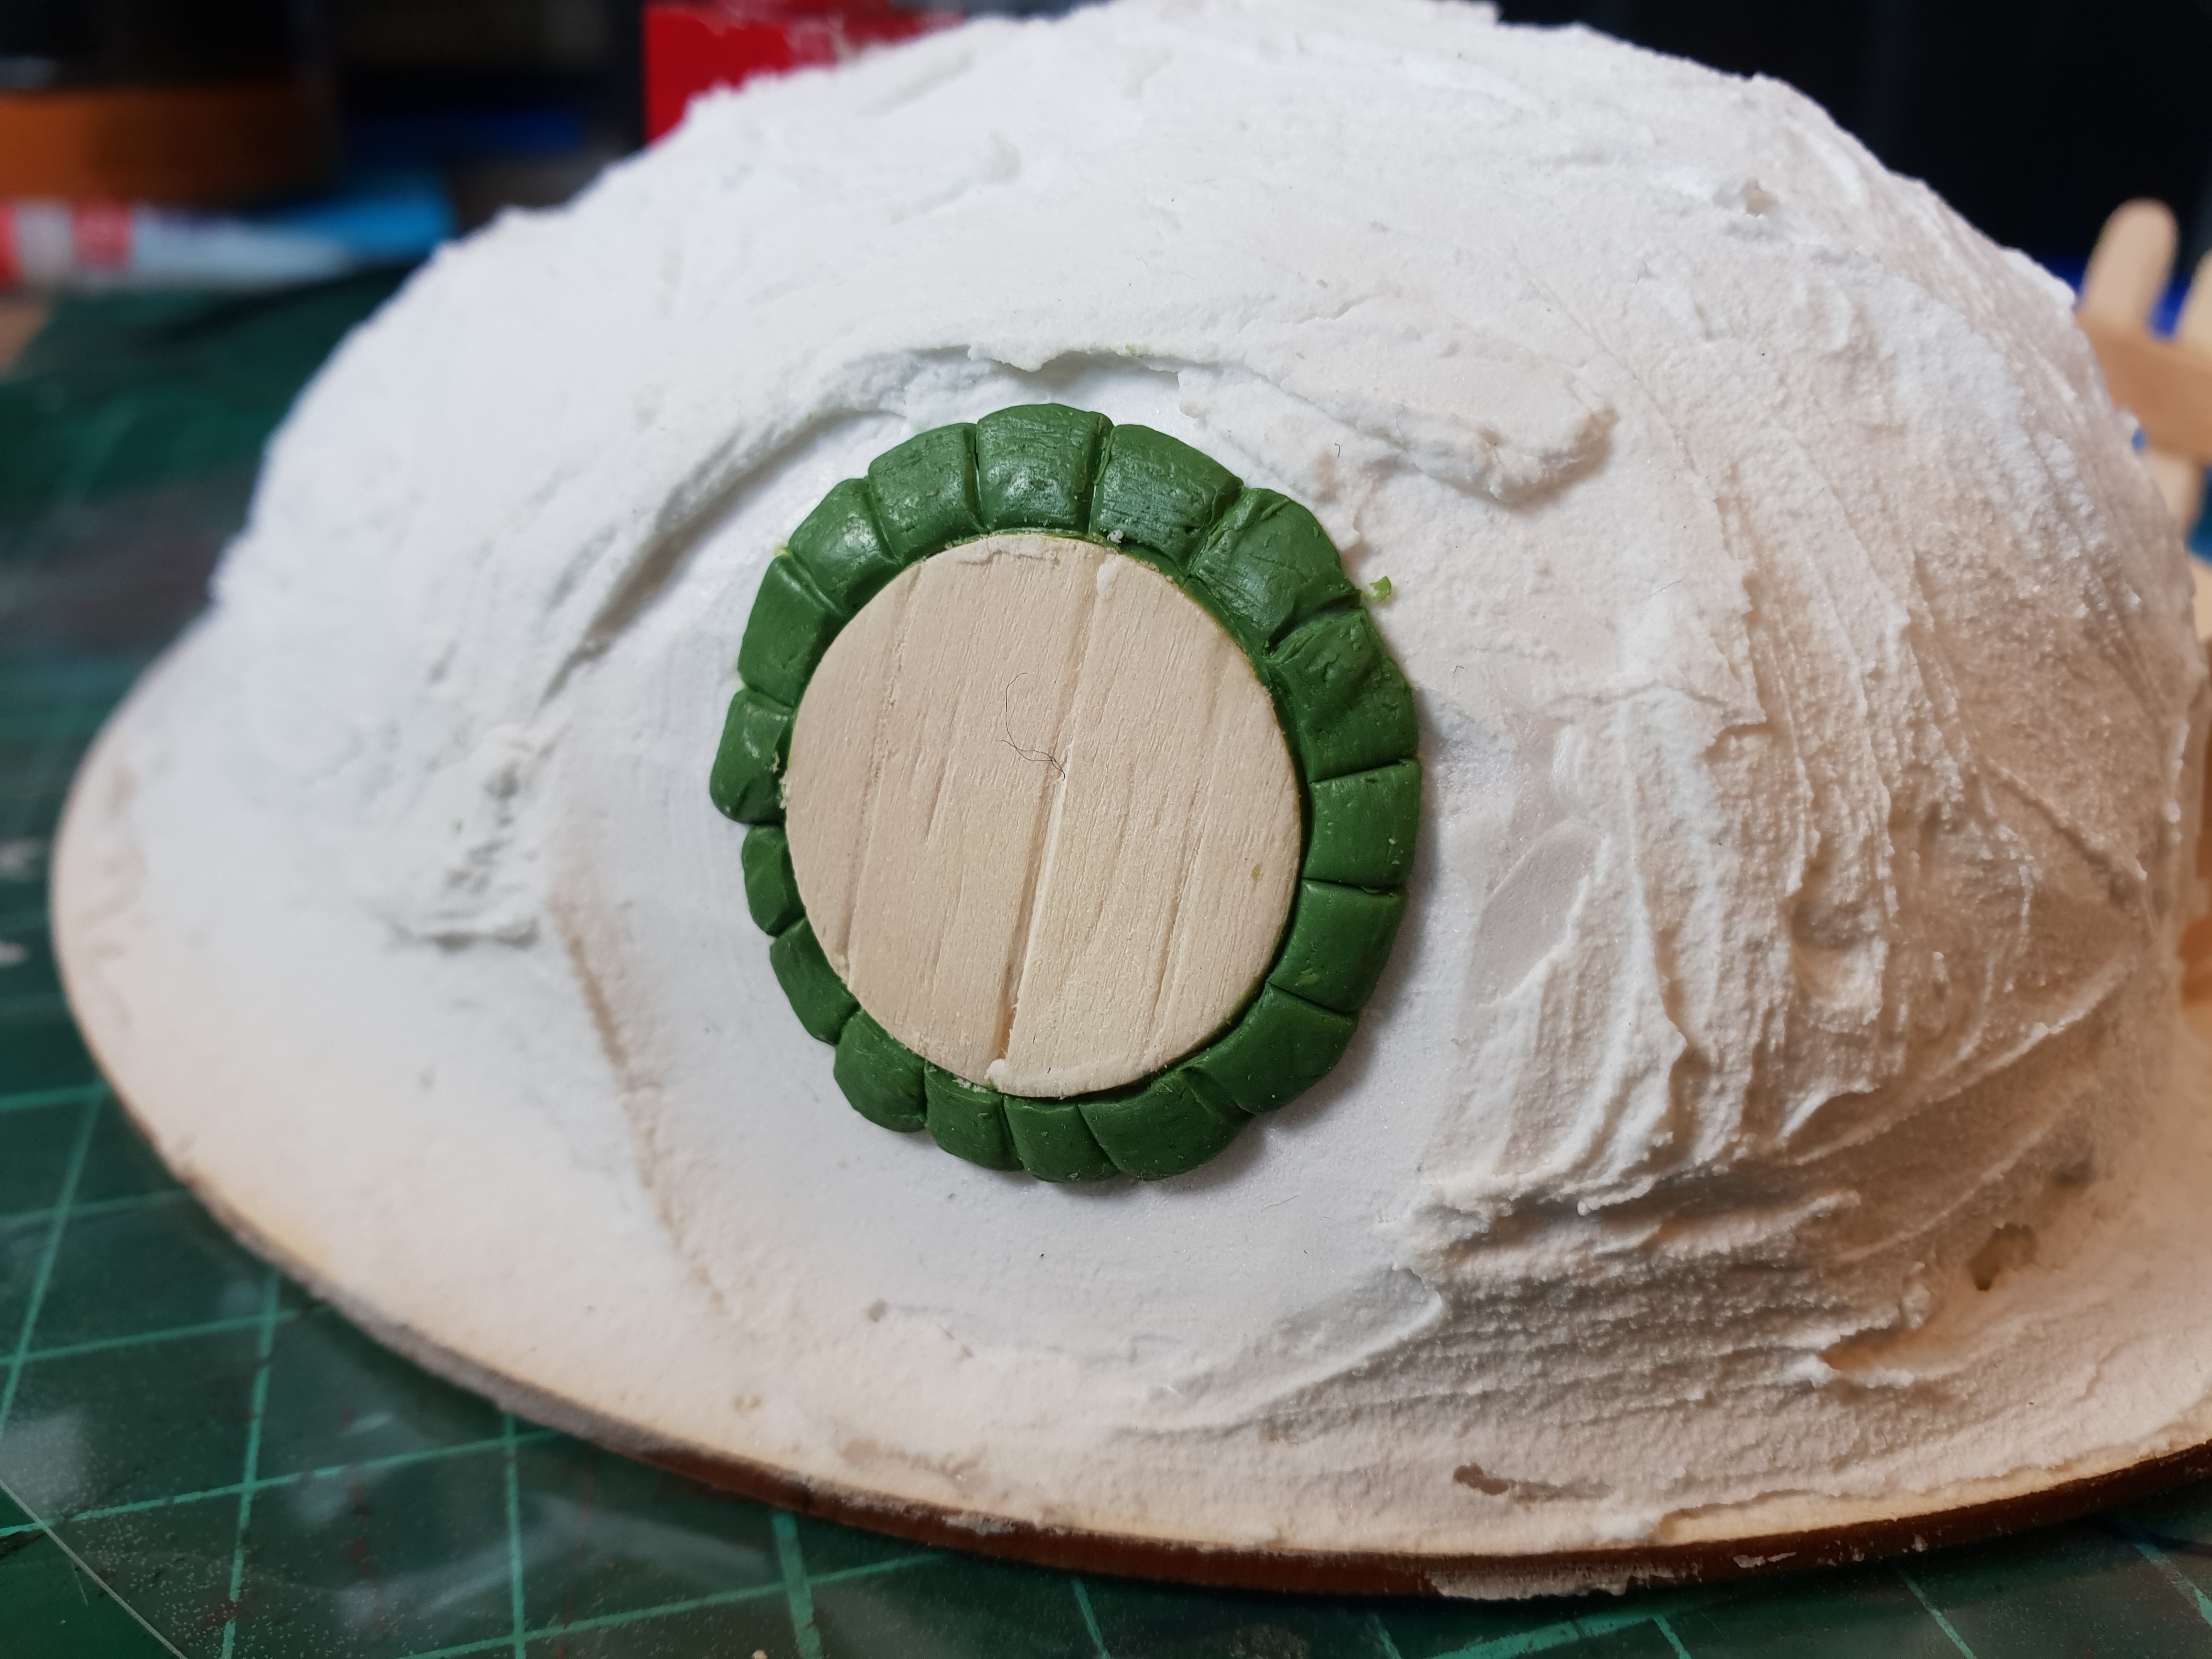
-Then wet the blade use a hobby knife to score line in to delineate the bricks. Don’t press to hard or you’ll drag the putty away from the window.
-Next use a sculpting tool to press back towards the window at each join in the bricks to create the impression that they have rounded corners. You can widen the gaps int he bricks and create cracks and chips at this point too.
-Smooth over the whole circle with a damp finger to round off the edges and leave it to set.
I tried out two windows, one with a large curve of stone for a ledge and one that was just all stones of a similar size.
That’s method one, back soon with more.


Village details: 2
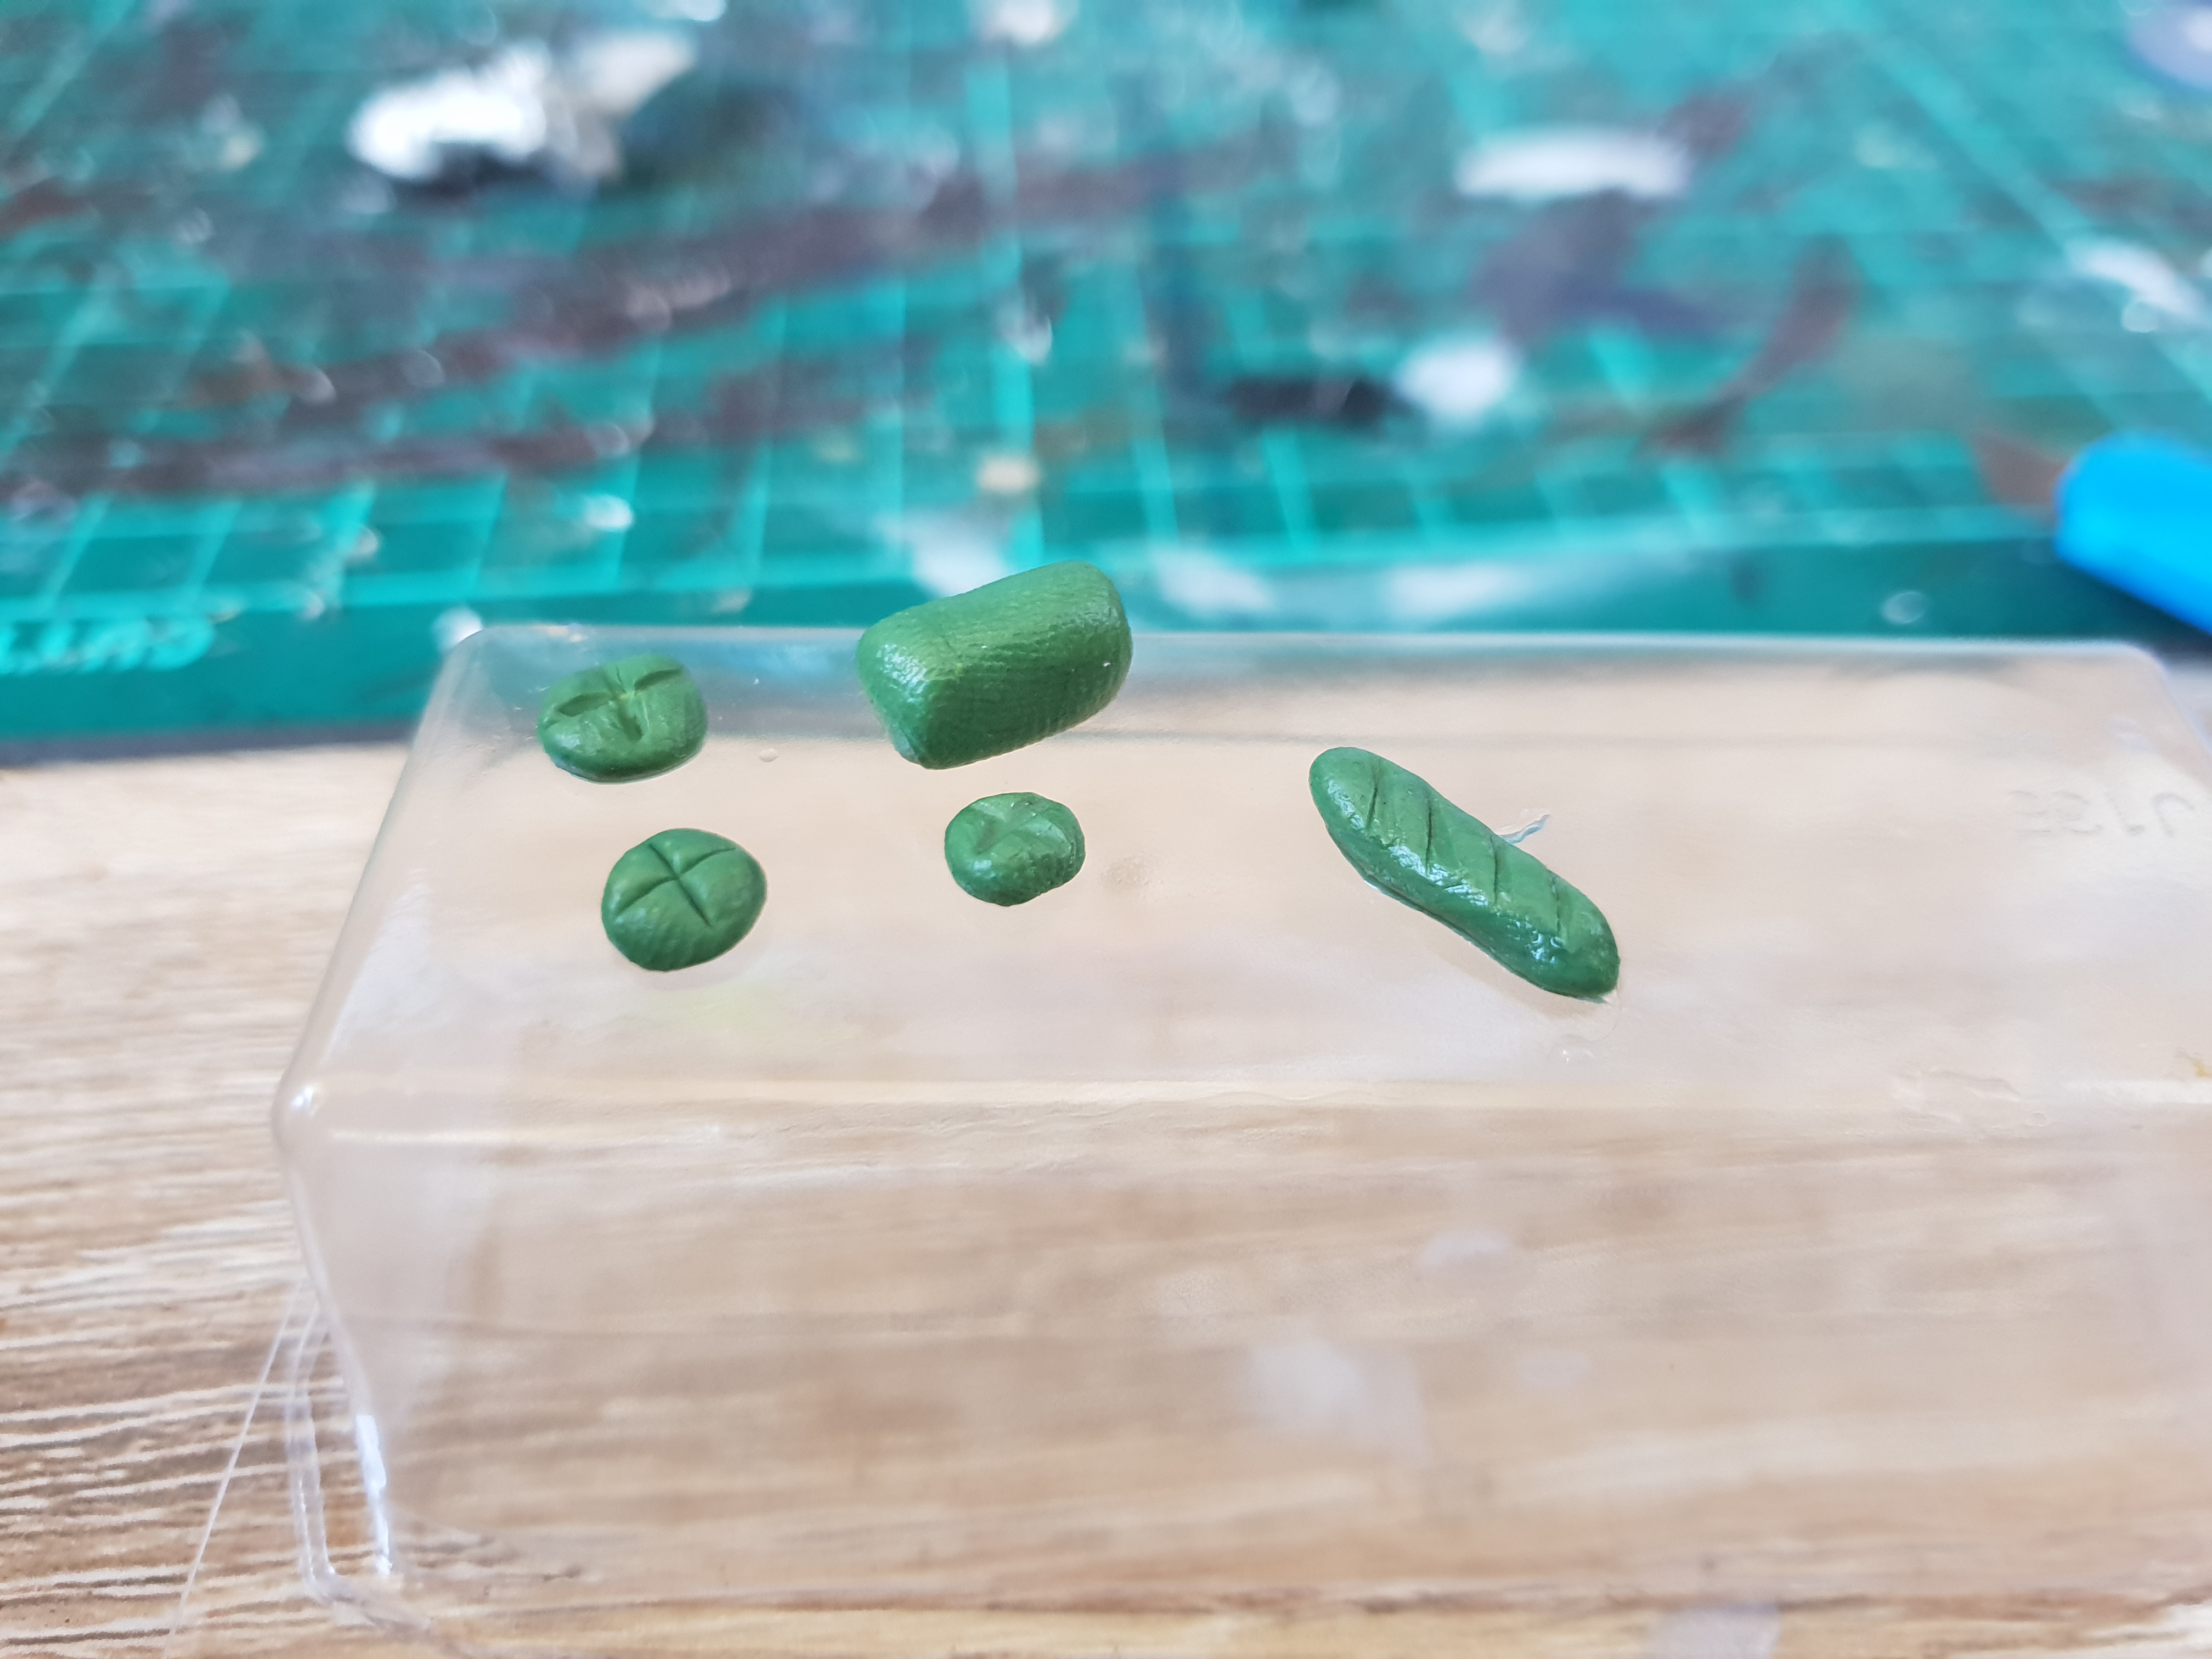
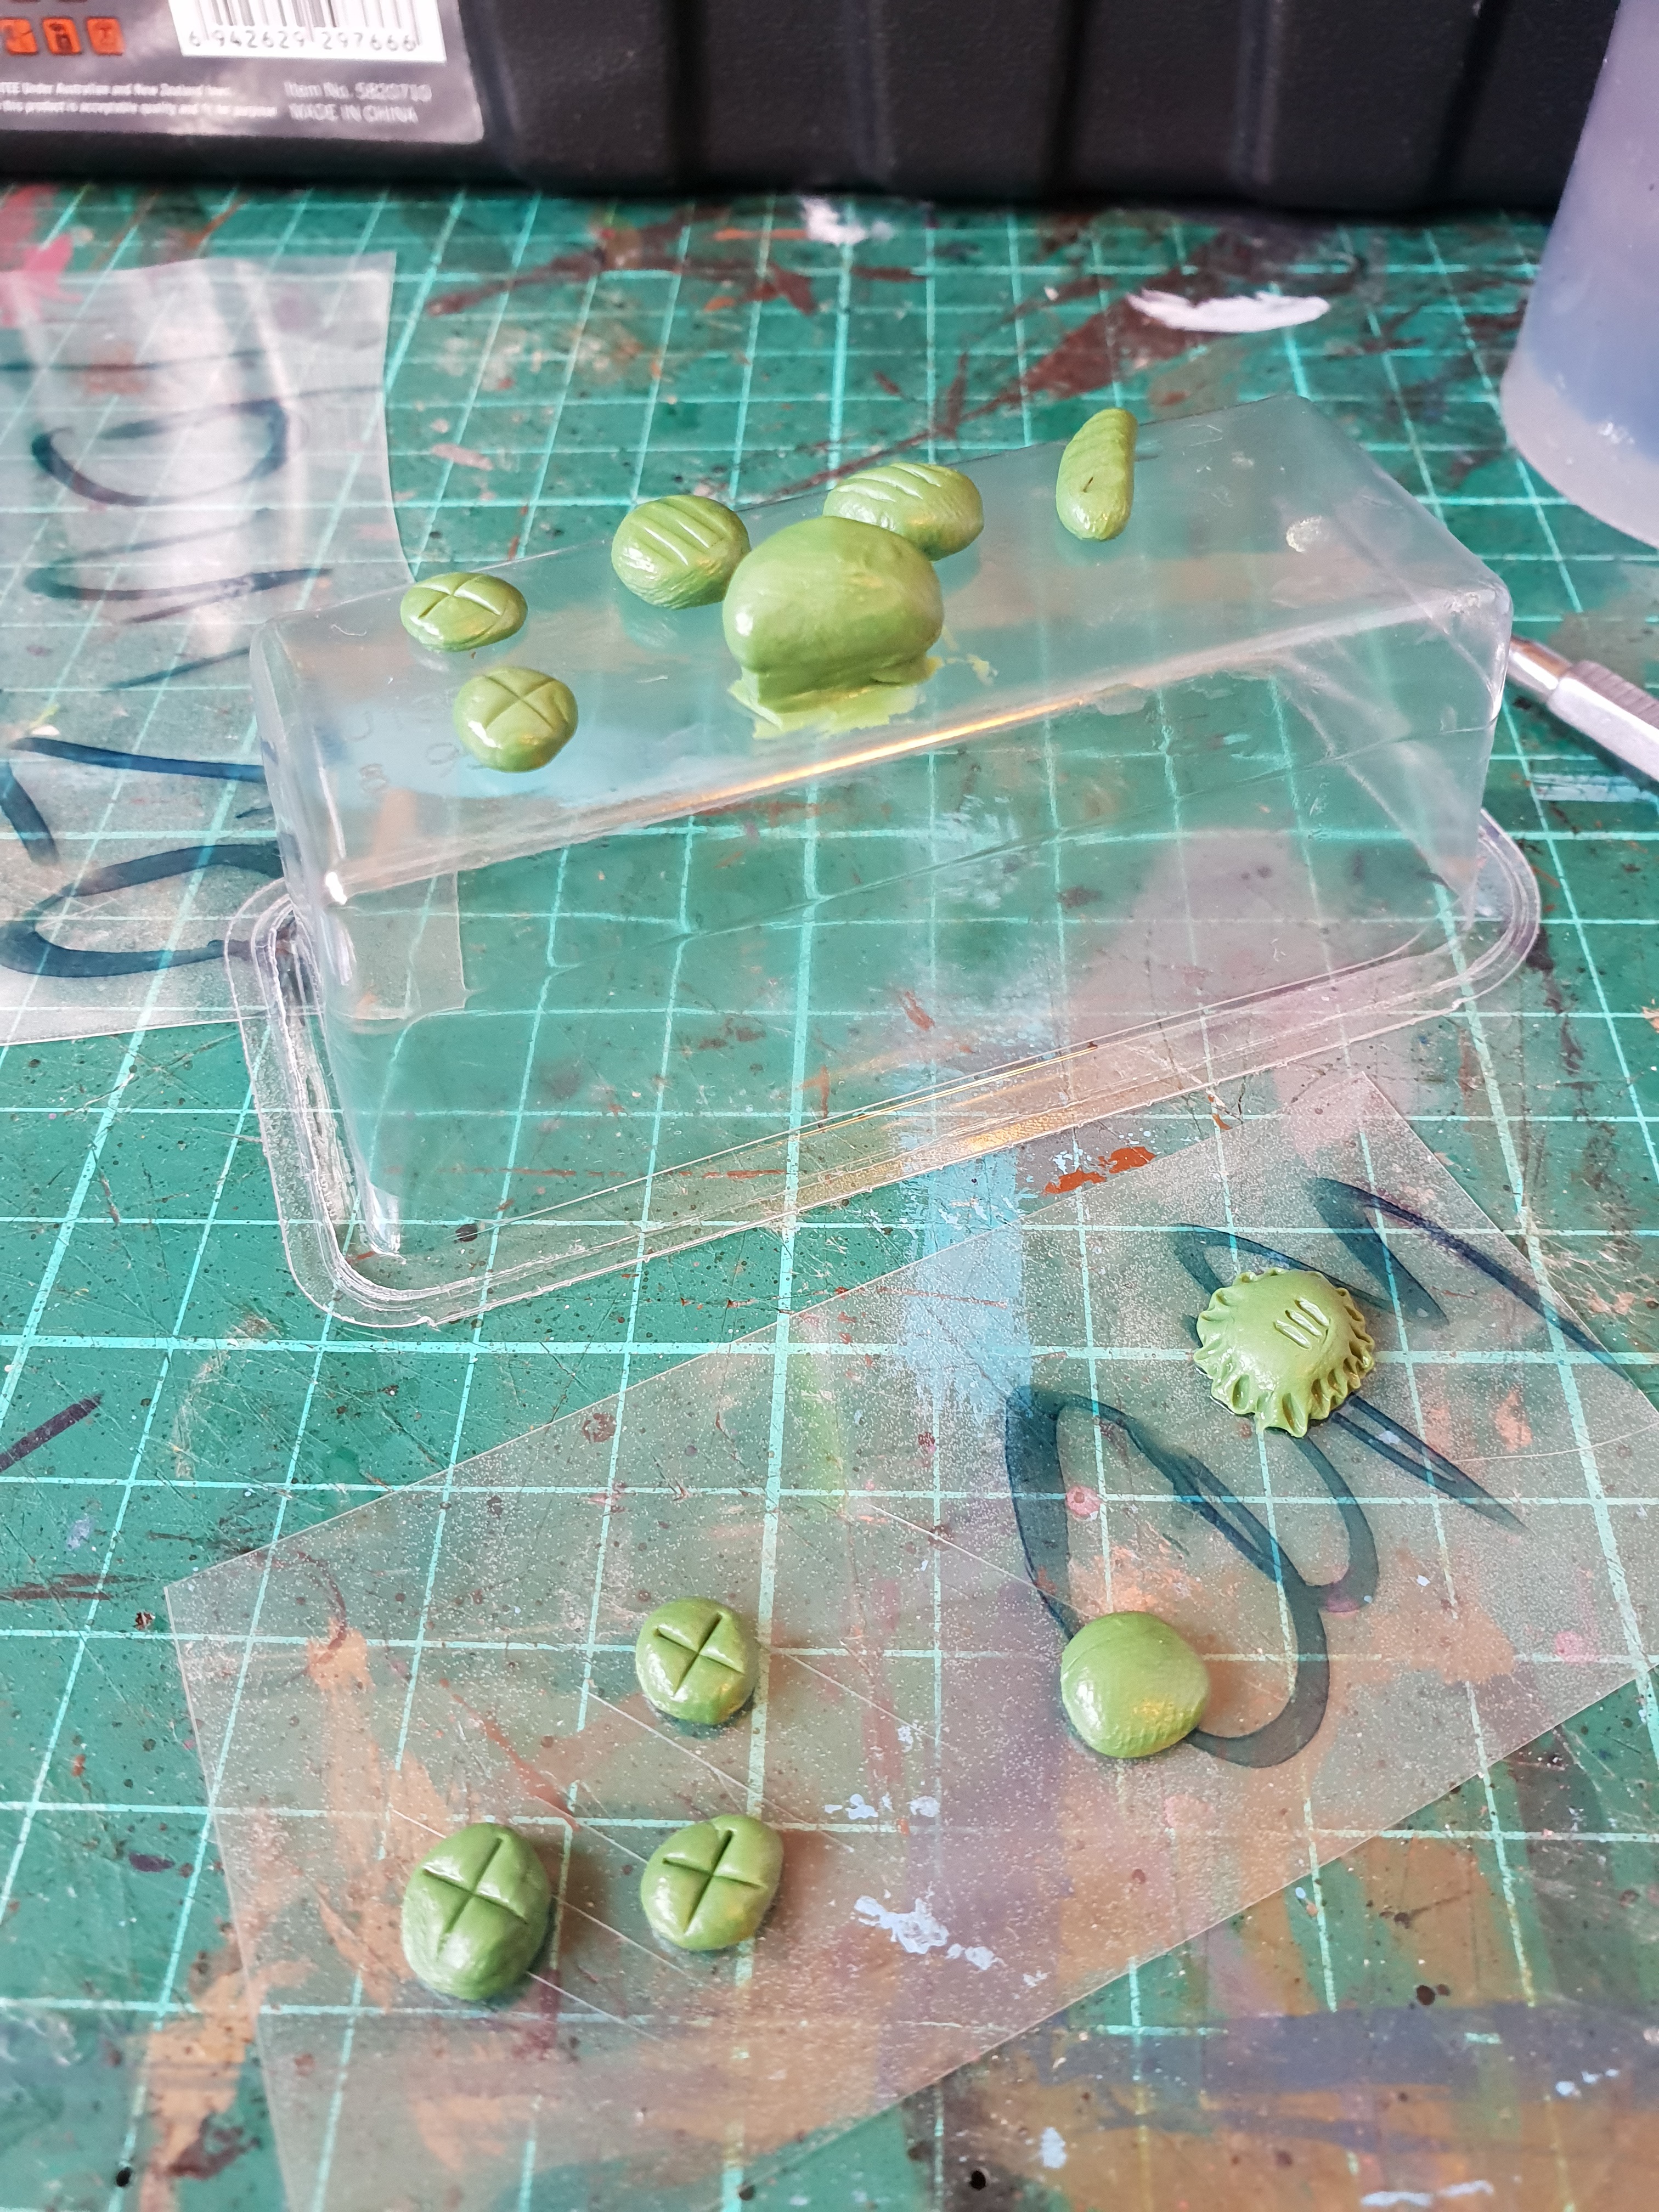
One of the things I love to do when I work with green stuff is use the leftovers to make odd bits for future projects. In this case its baking
I use plastic sheets, zip bags or similar to sculpt on so I can peel the item off later on.
Heres a range or bread rounds, loaves, pie tops and so on.
I’ll make a small village bakery later on.
Cheers, T.
Village details:1
Similar to Justin, I love all the little bits of scatter that make a board a real place.
To that end, while my other projects were drying I grabbed a handful of mini lolly sticks, wooden discs, cardboard and some BBQ skewers and got cracking.
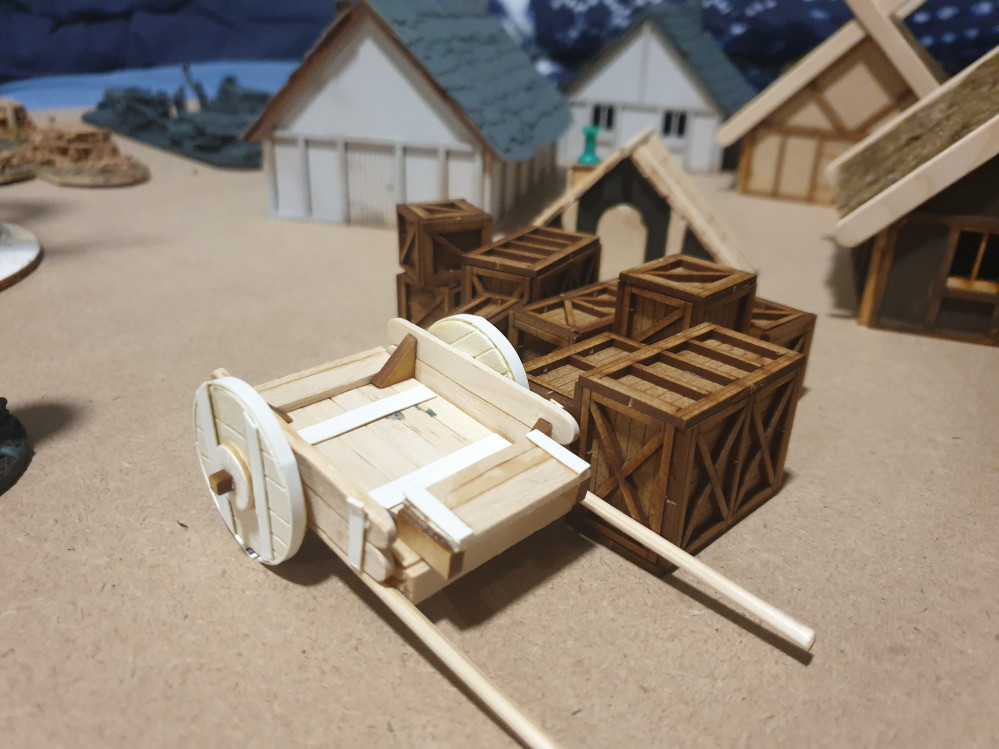
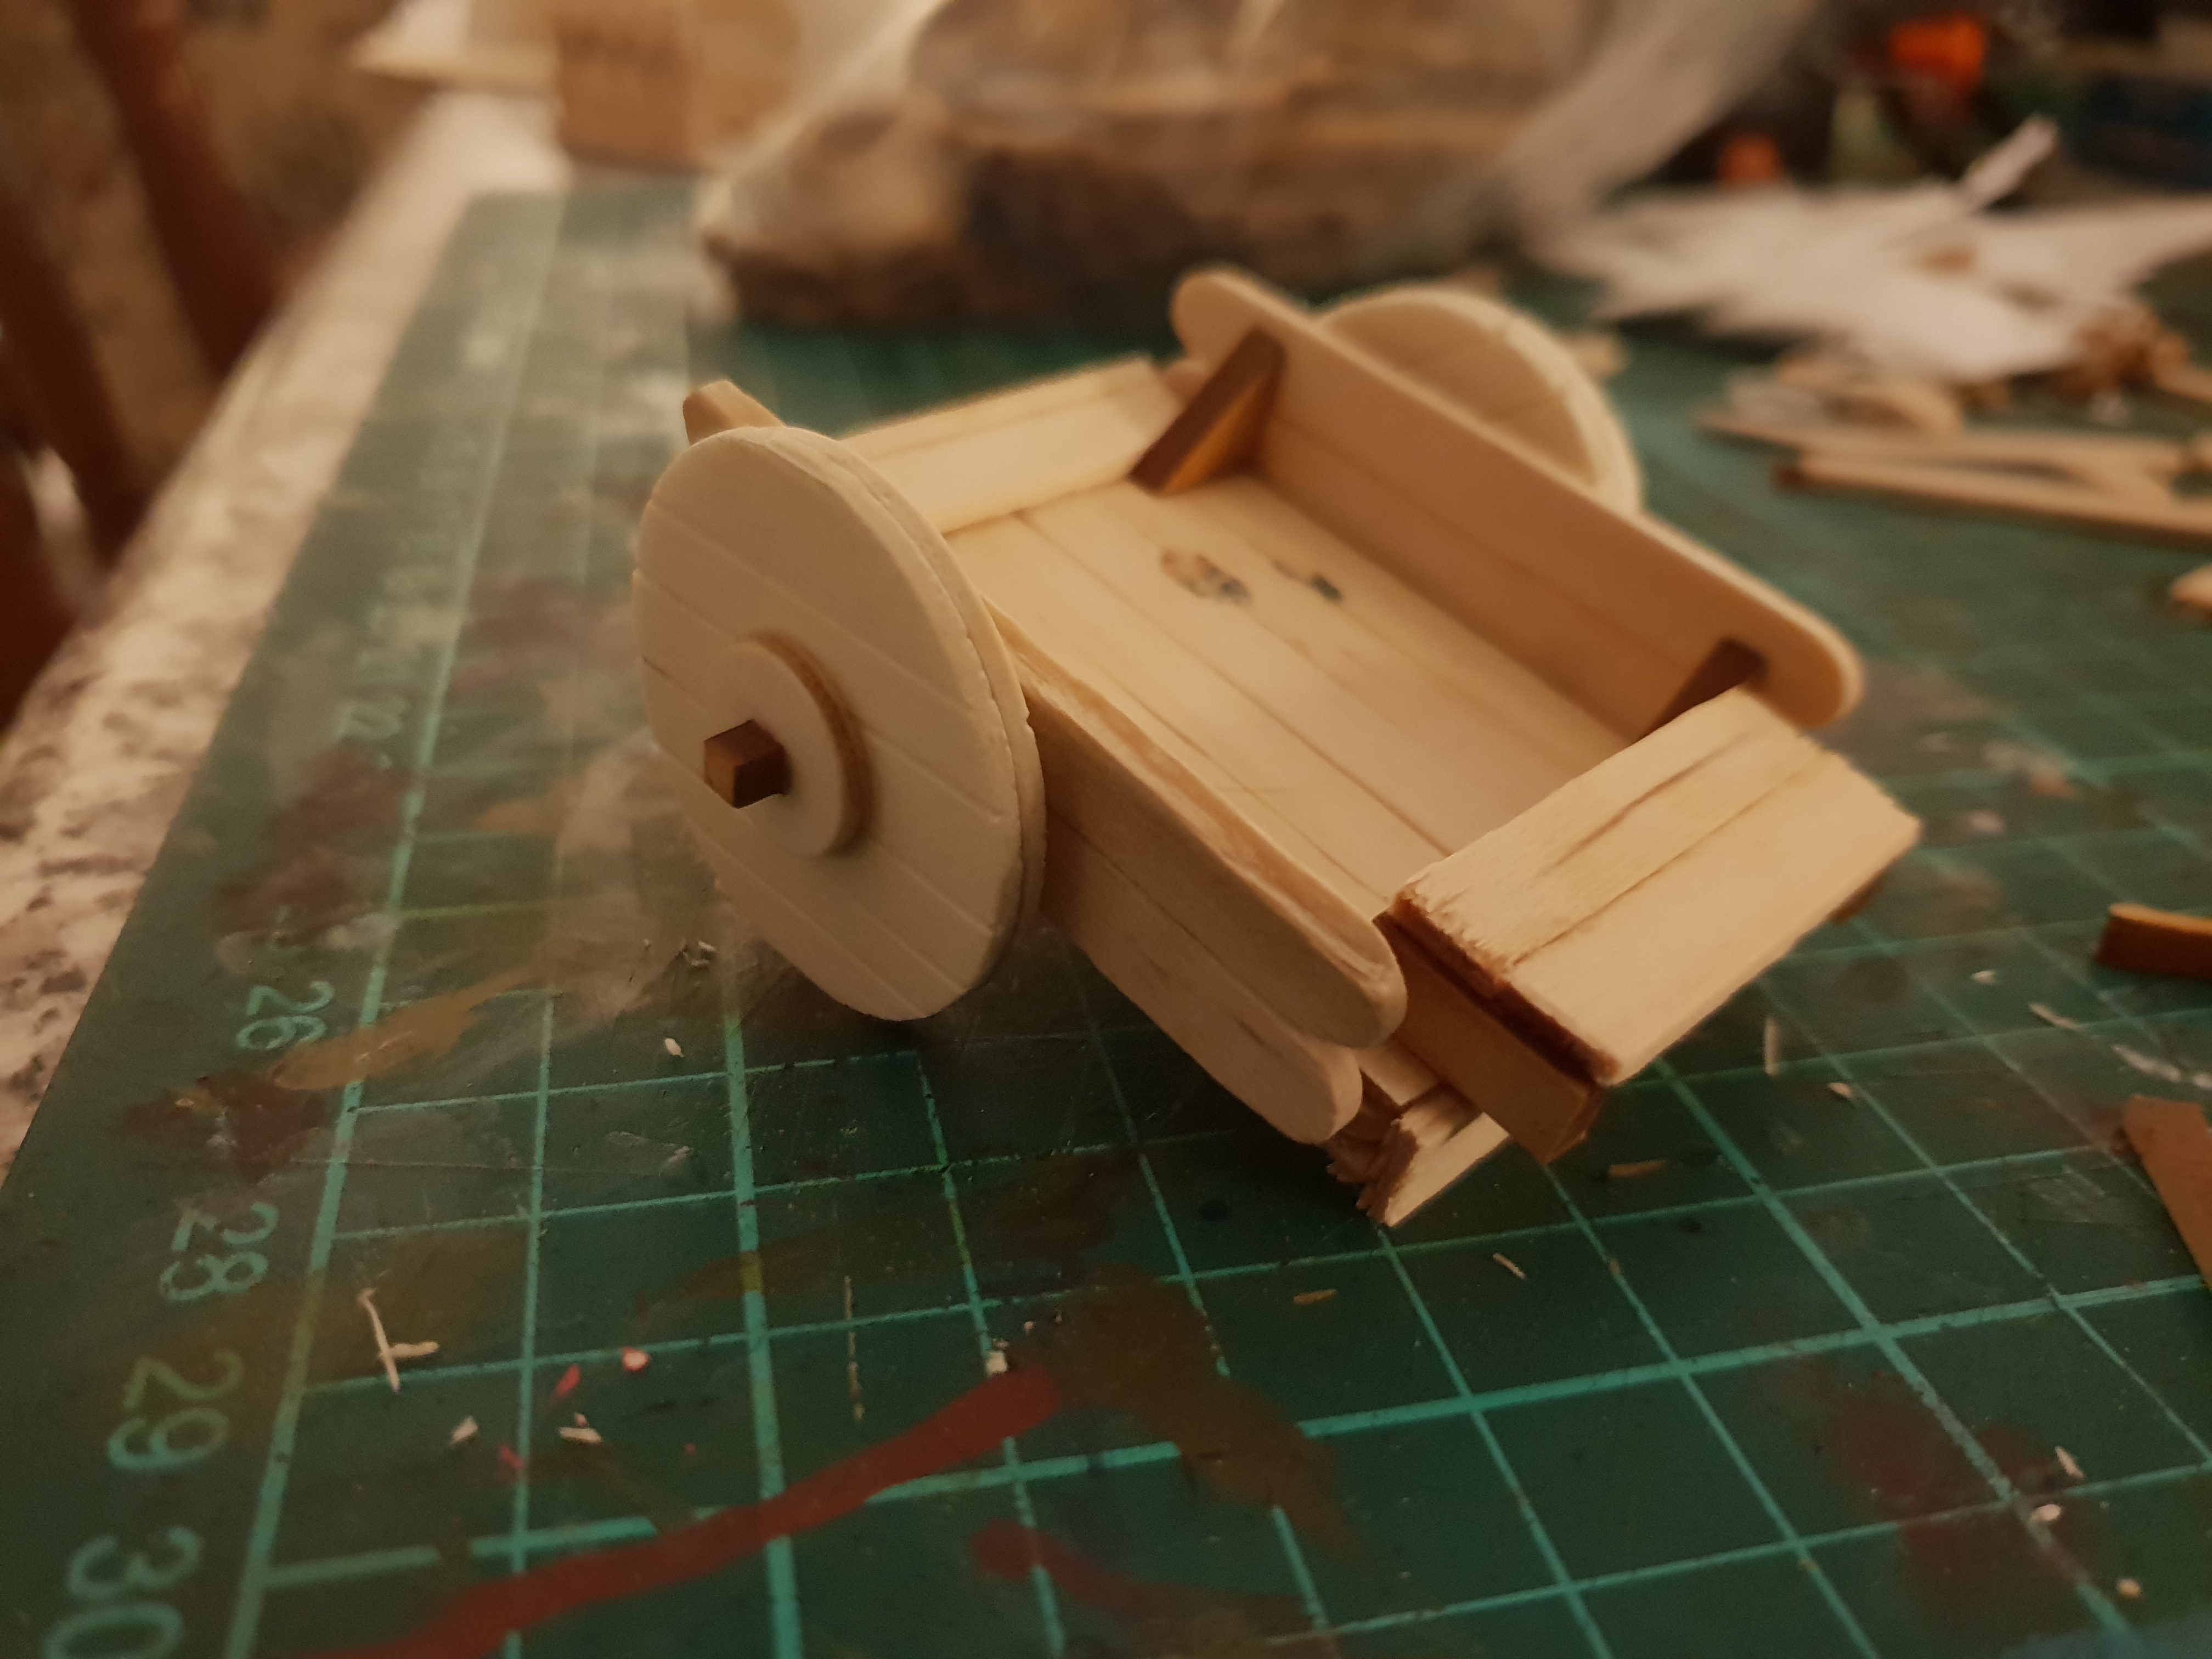
Step one. Build a platform using superglue. Lie the sticks flat to get them lined up and glue another across them around where the axle would be. Then trim some more sticks and cover the ends.
Some MDF off-cuts and press-outs form supports for the walls and the drivers seat.
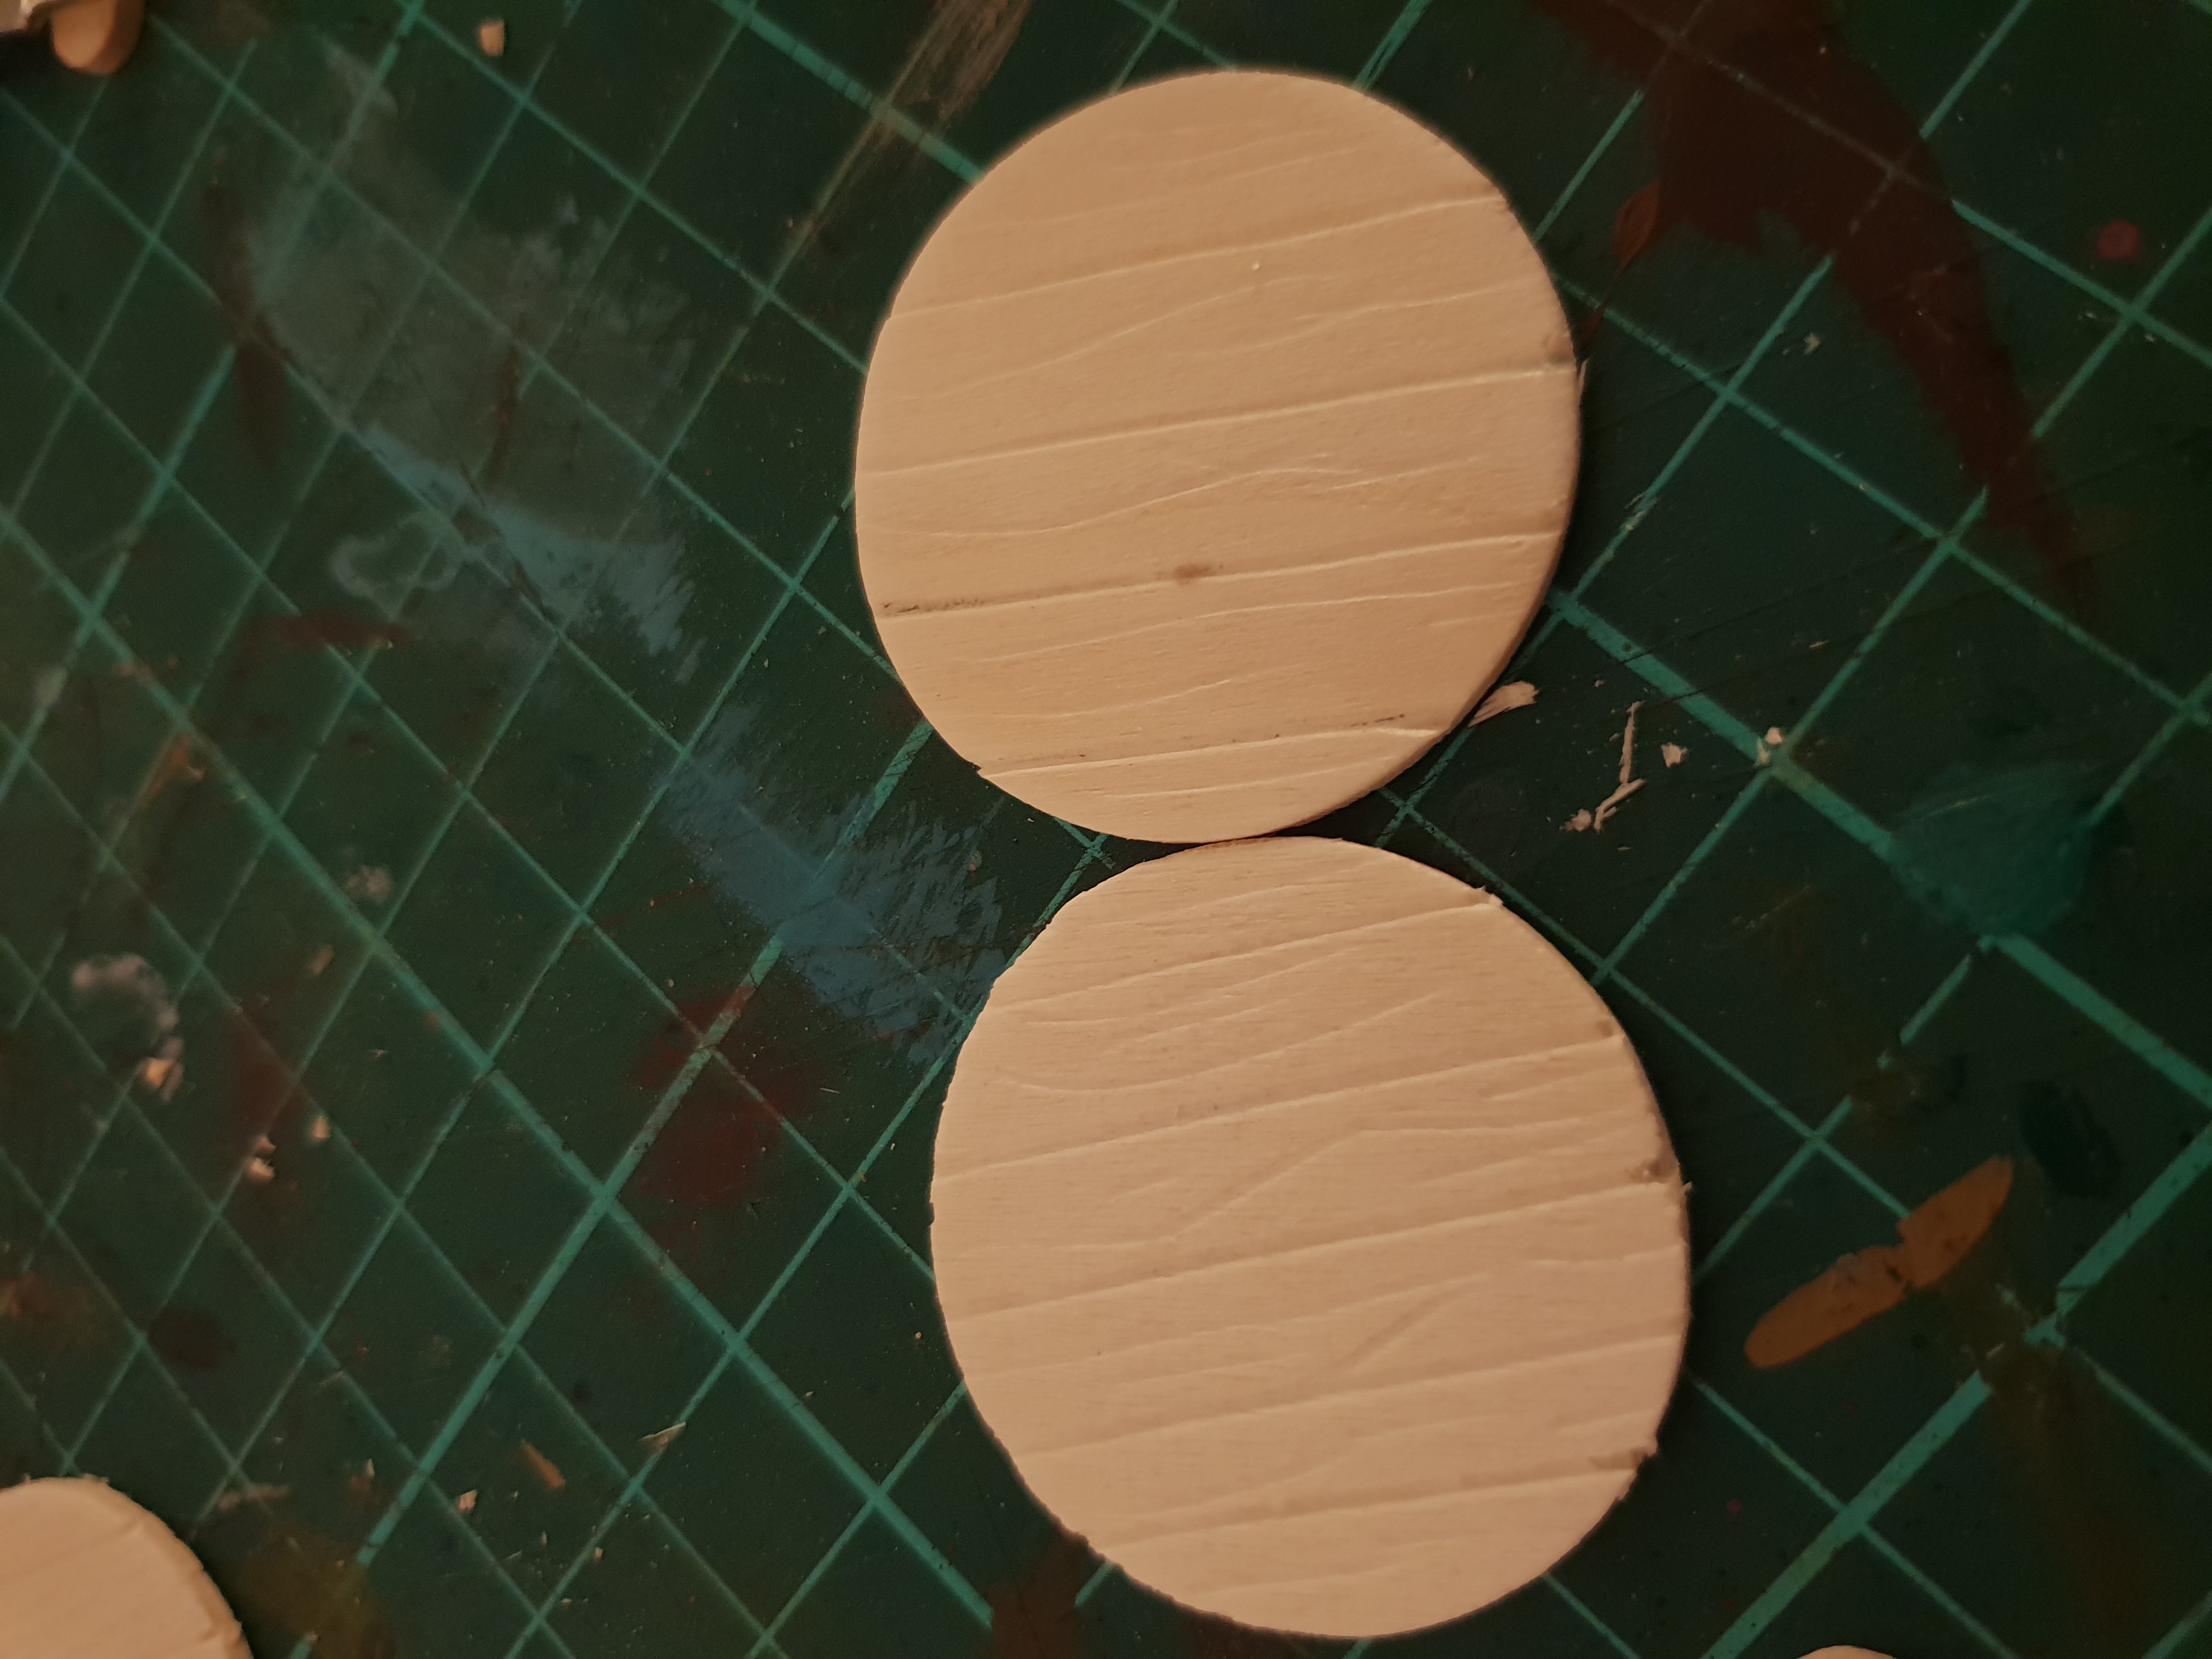
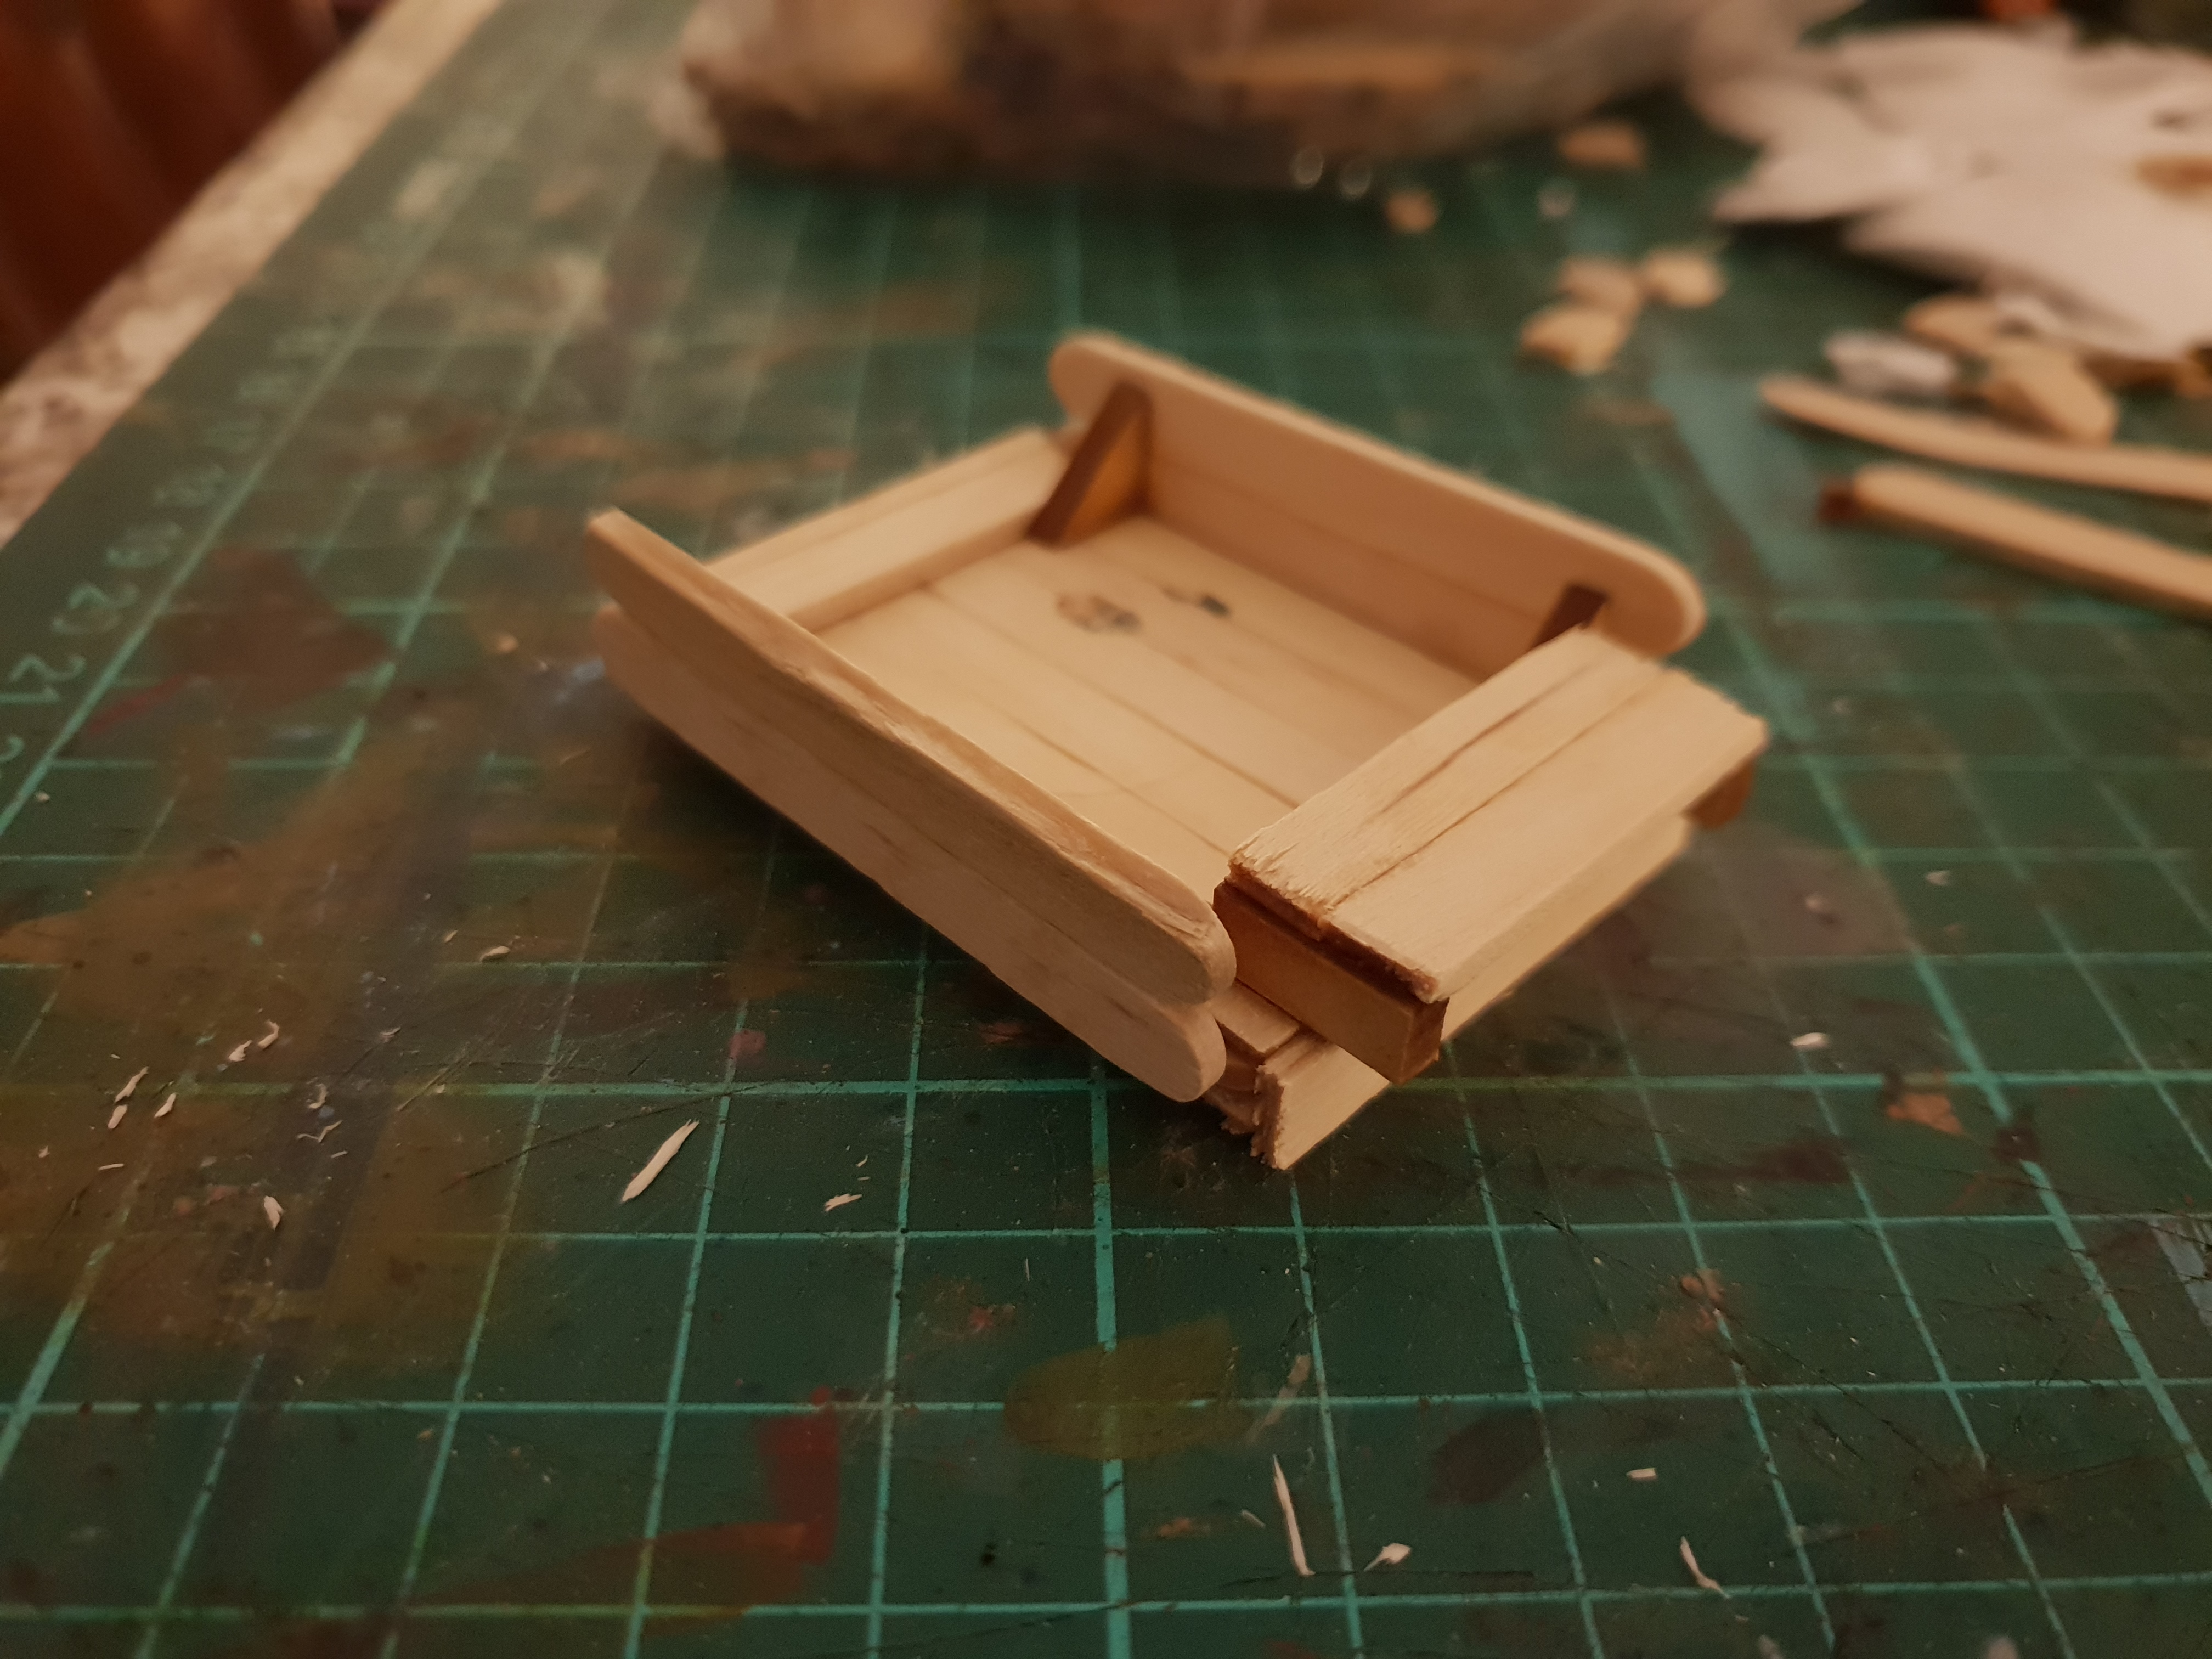 The assembled body of the cart.
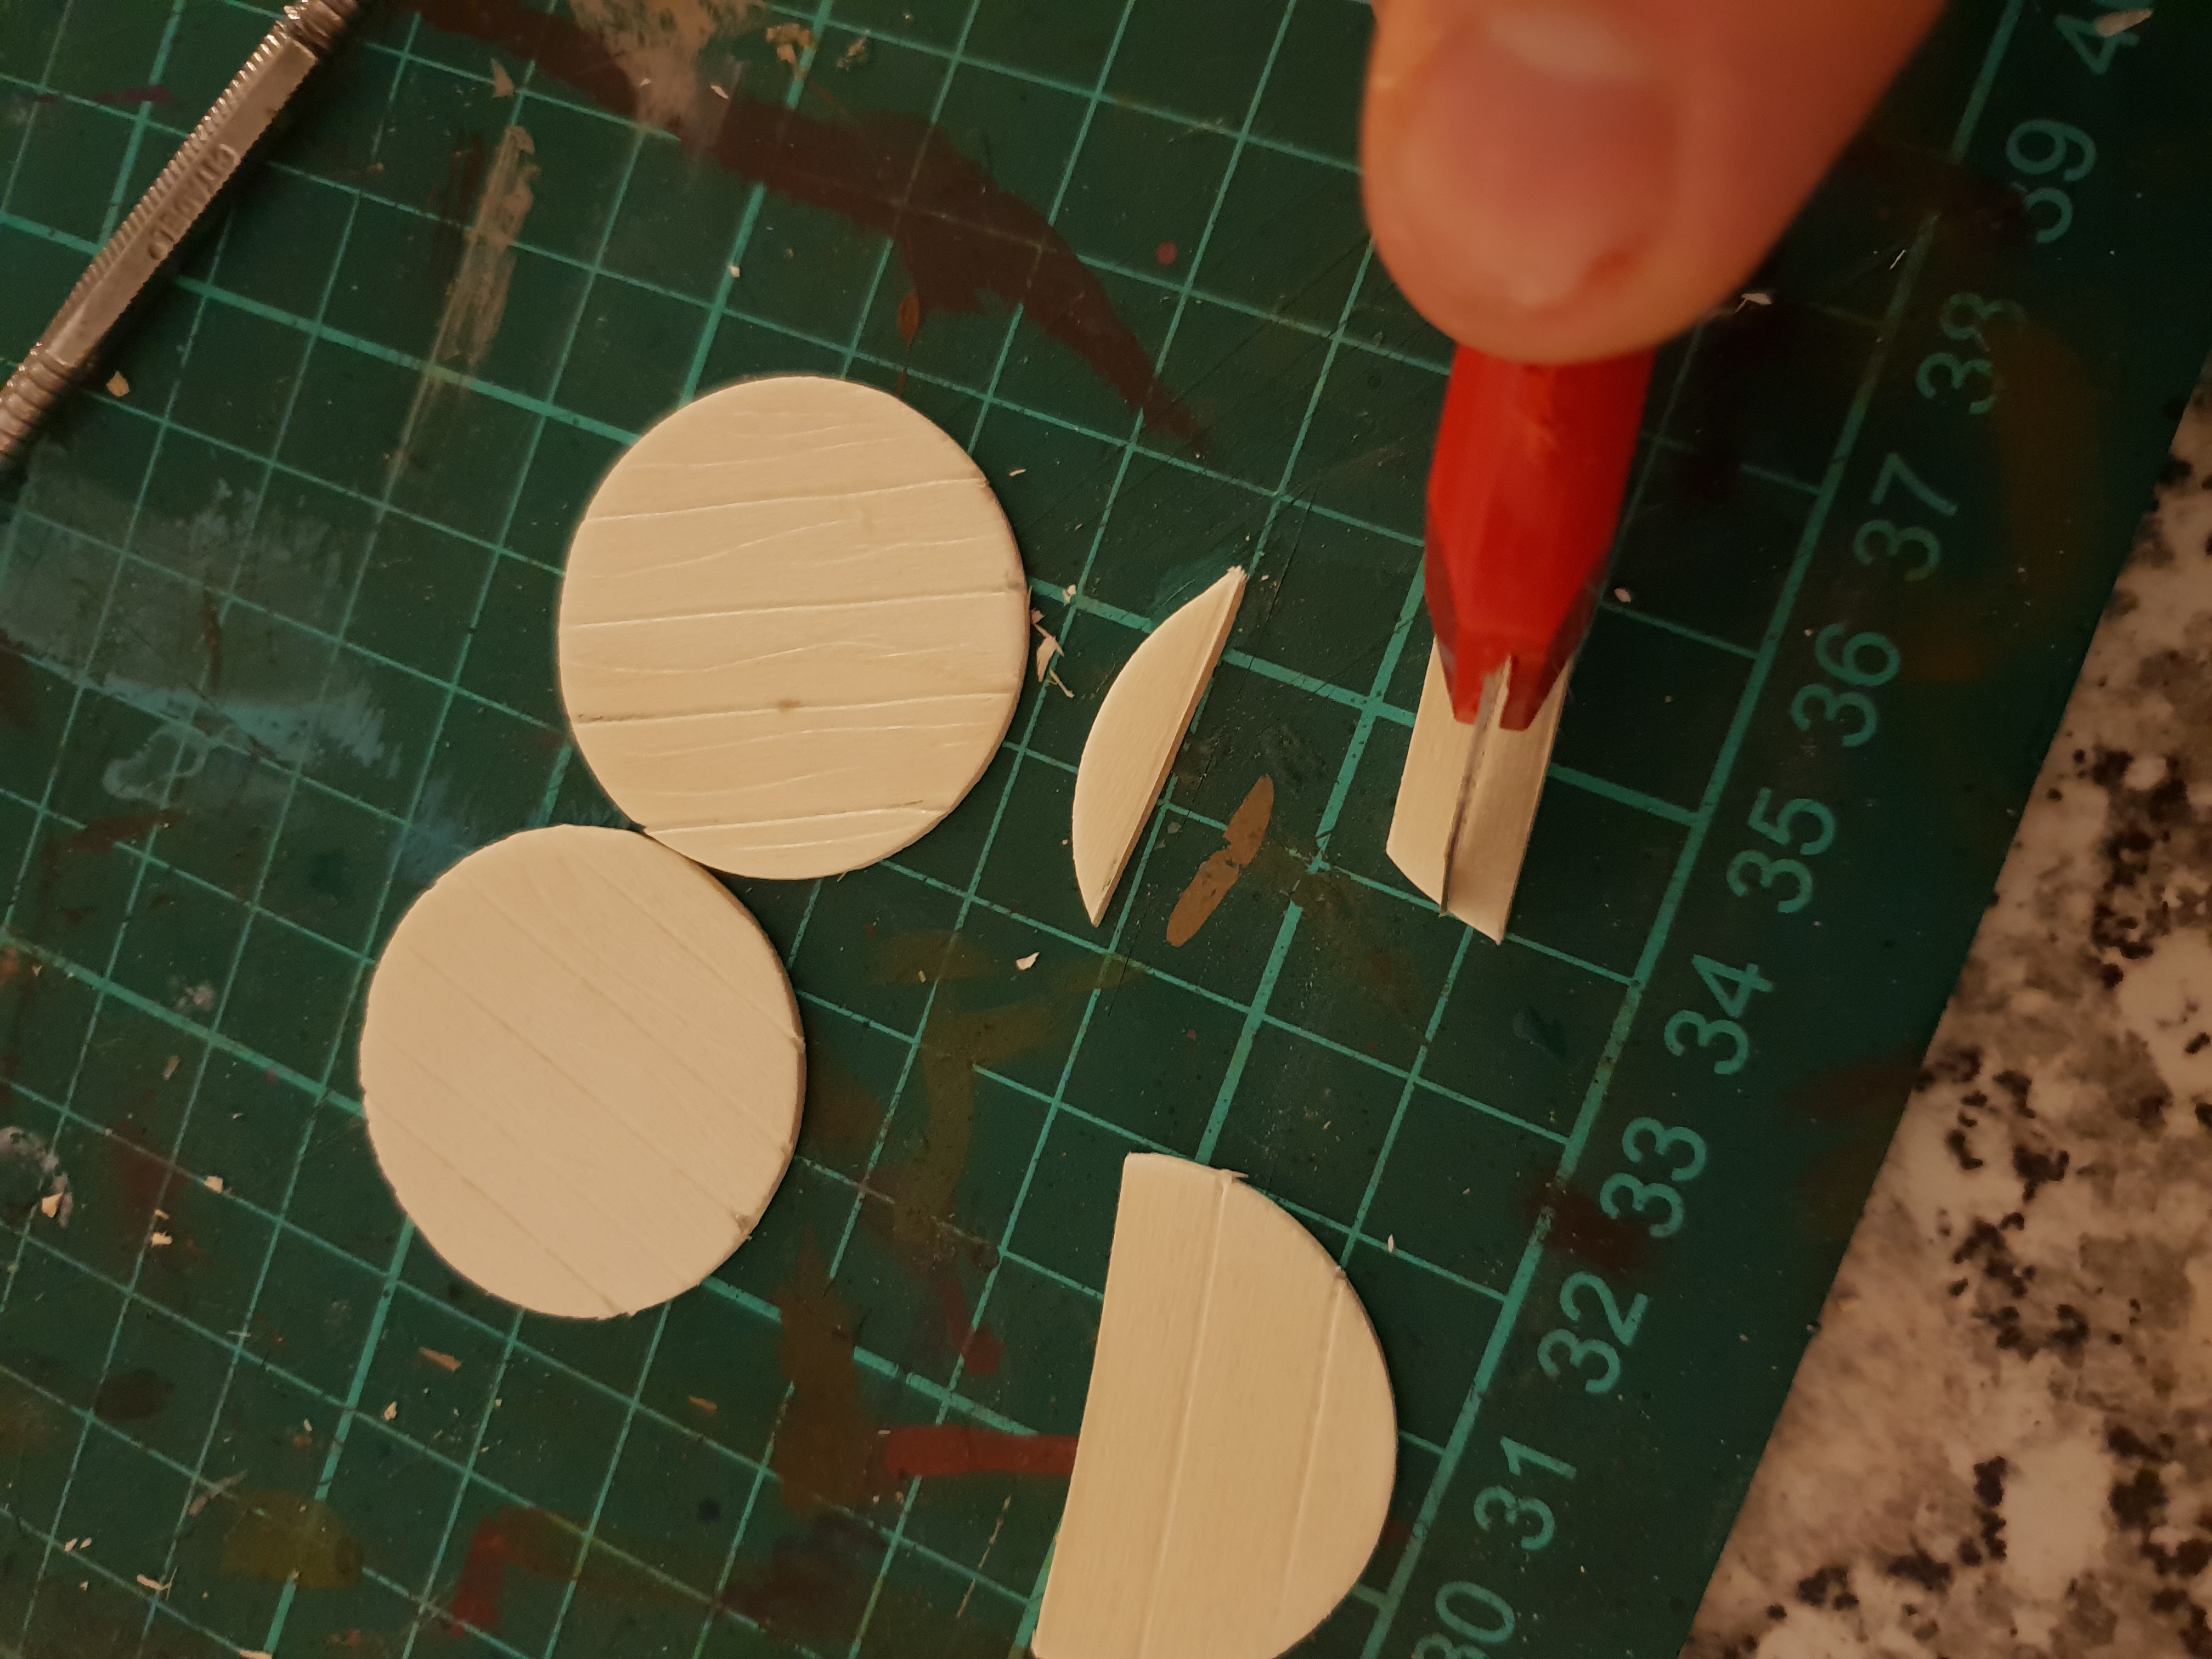
Next, I scored some planks into two wood discs and glued them back to back to get the right thickness. I added smaller discs and a square bolt to the centre for the attachment lugs and wheel guards.
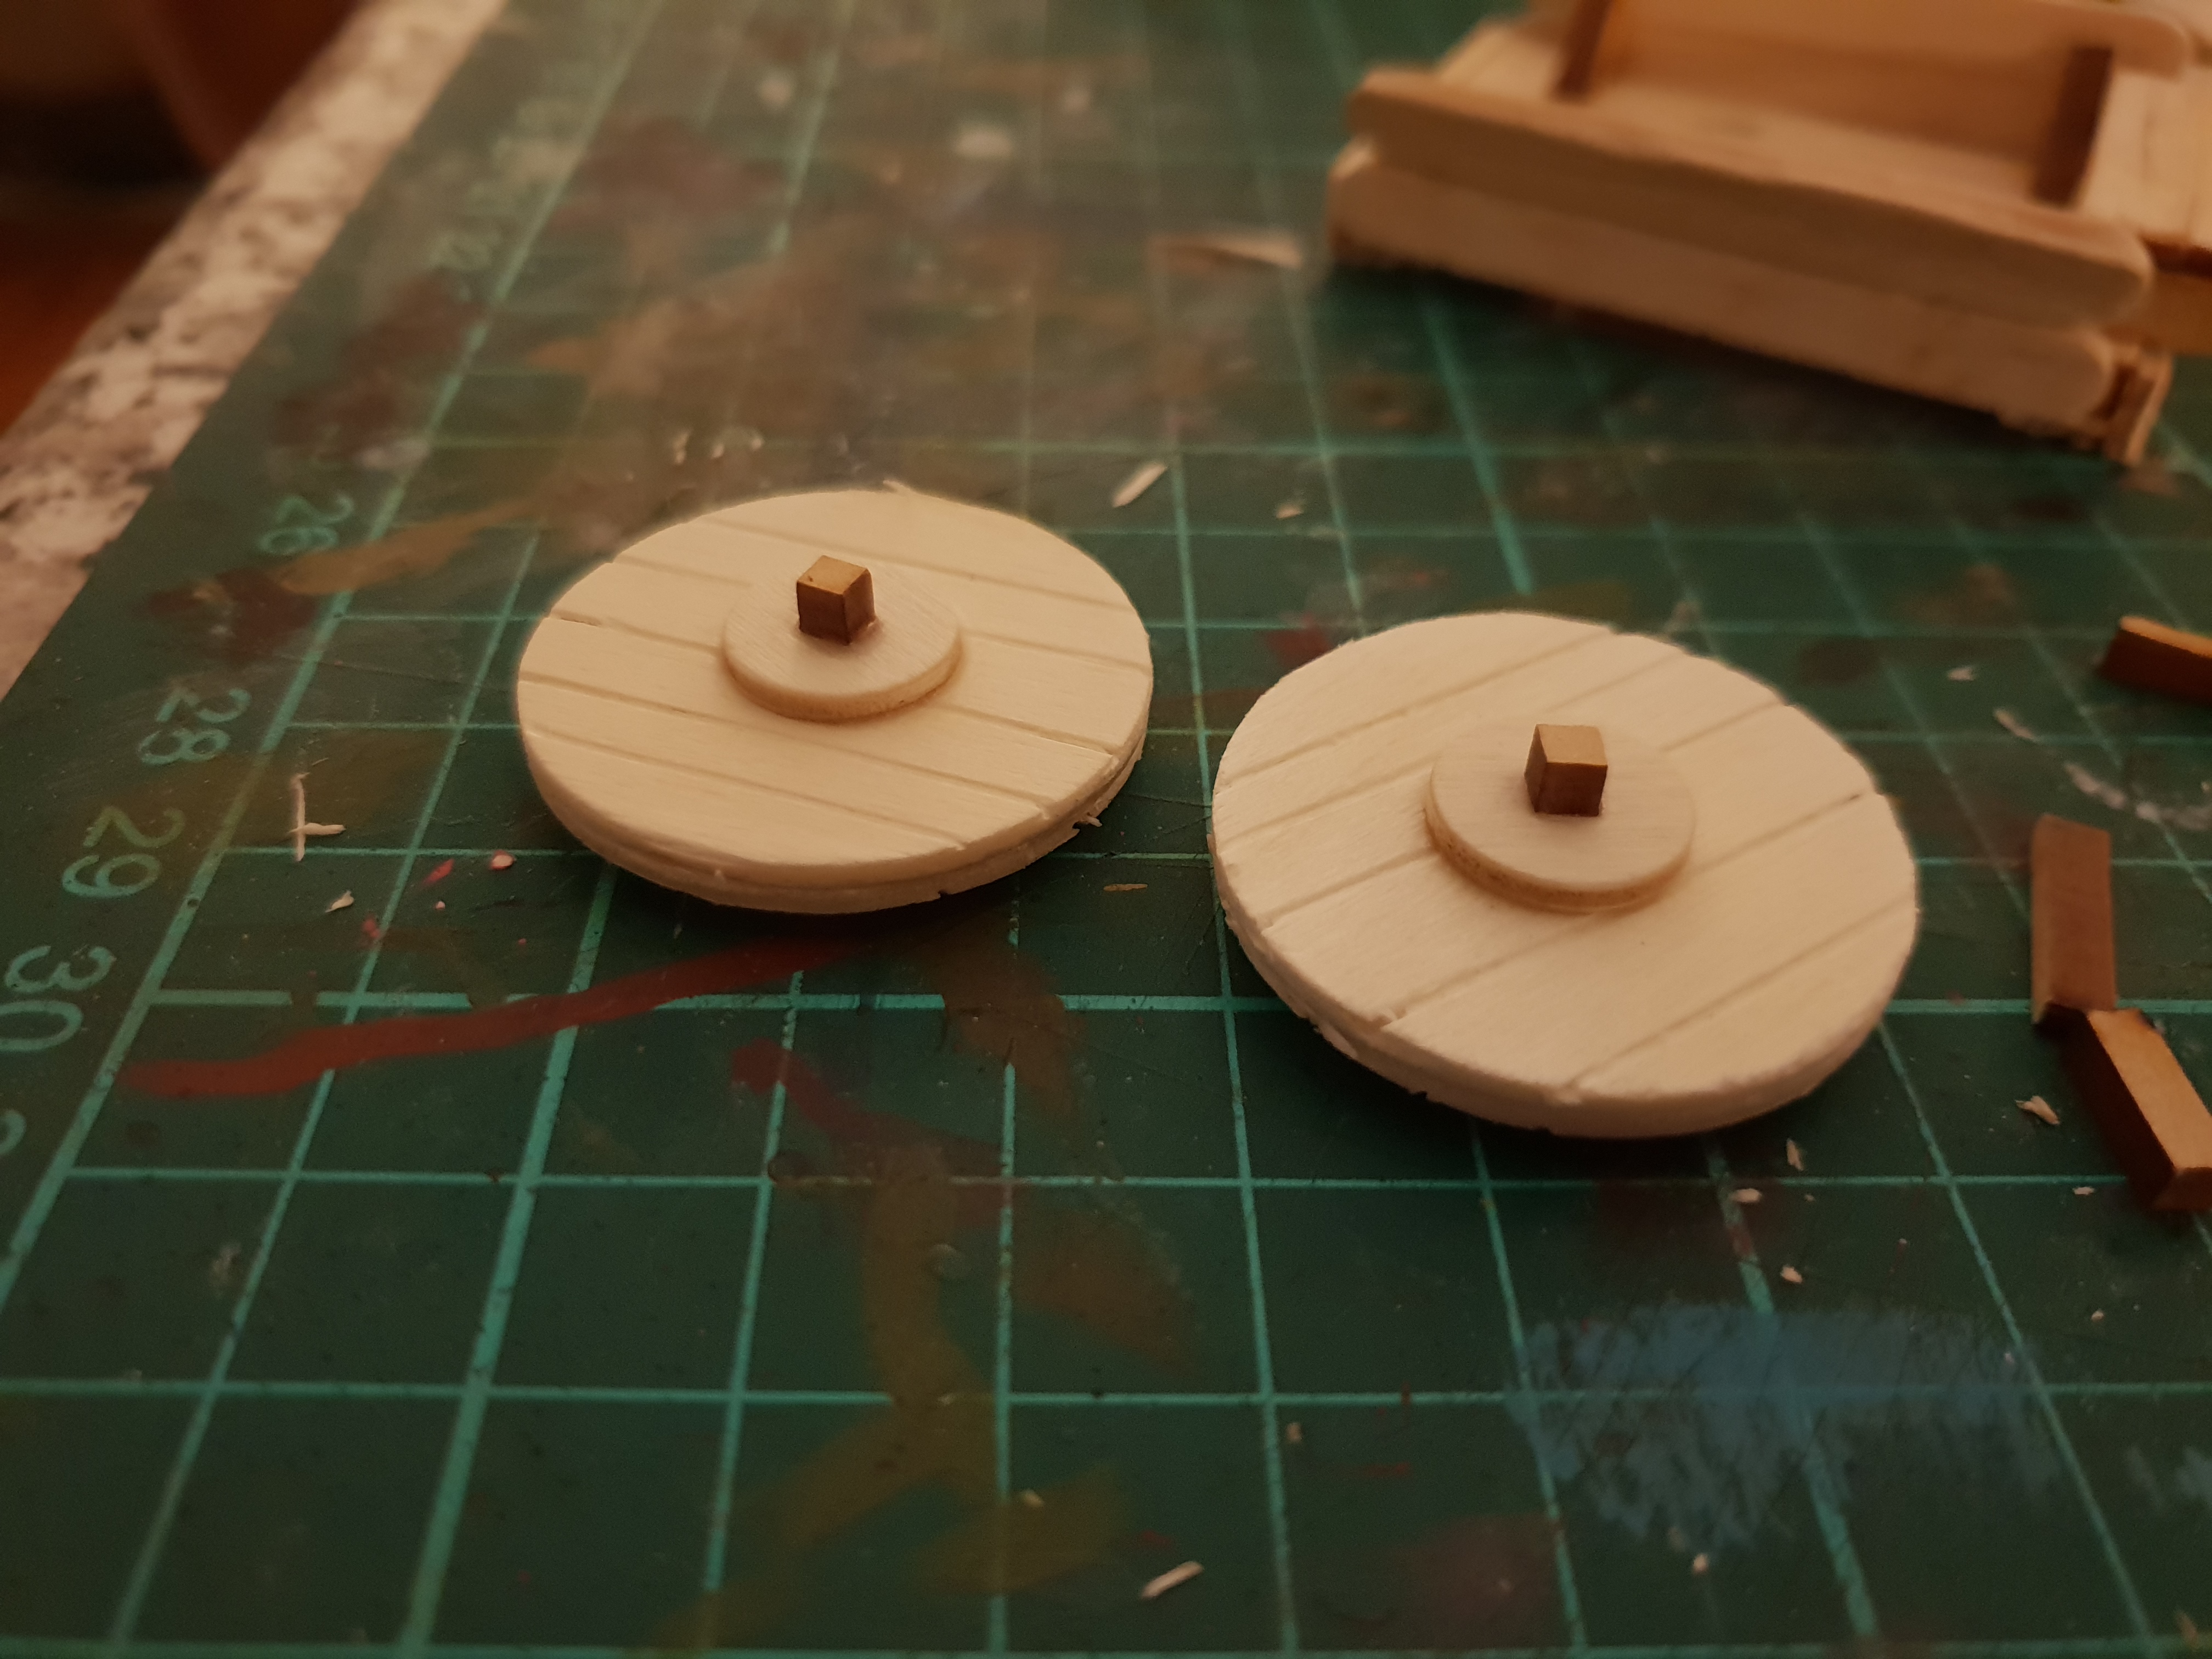
I glued another disk on the inside of each wheel so they wouldn’t sit flat against the wagon and glued them on.
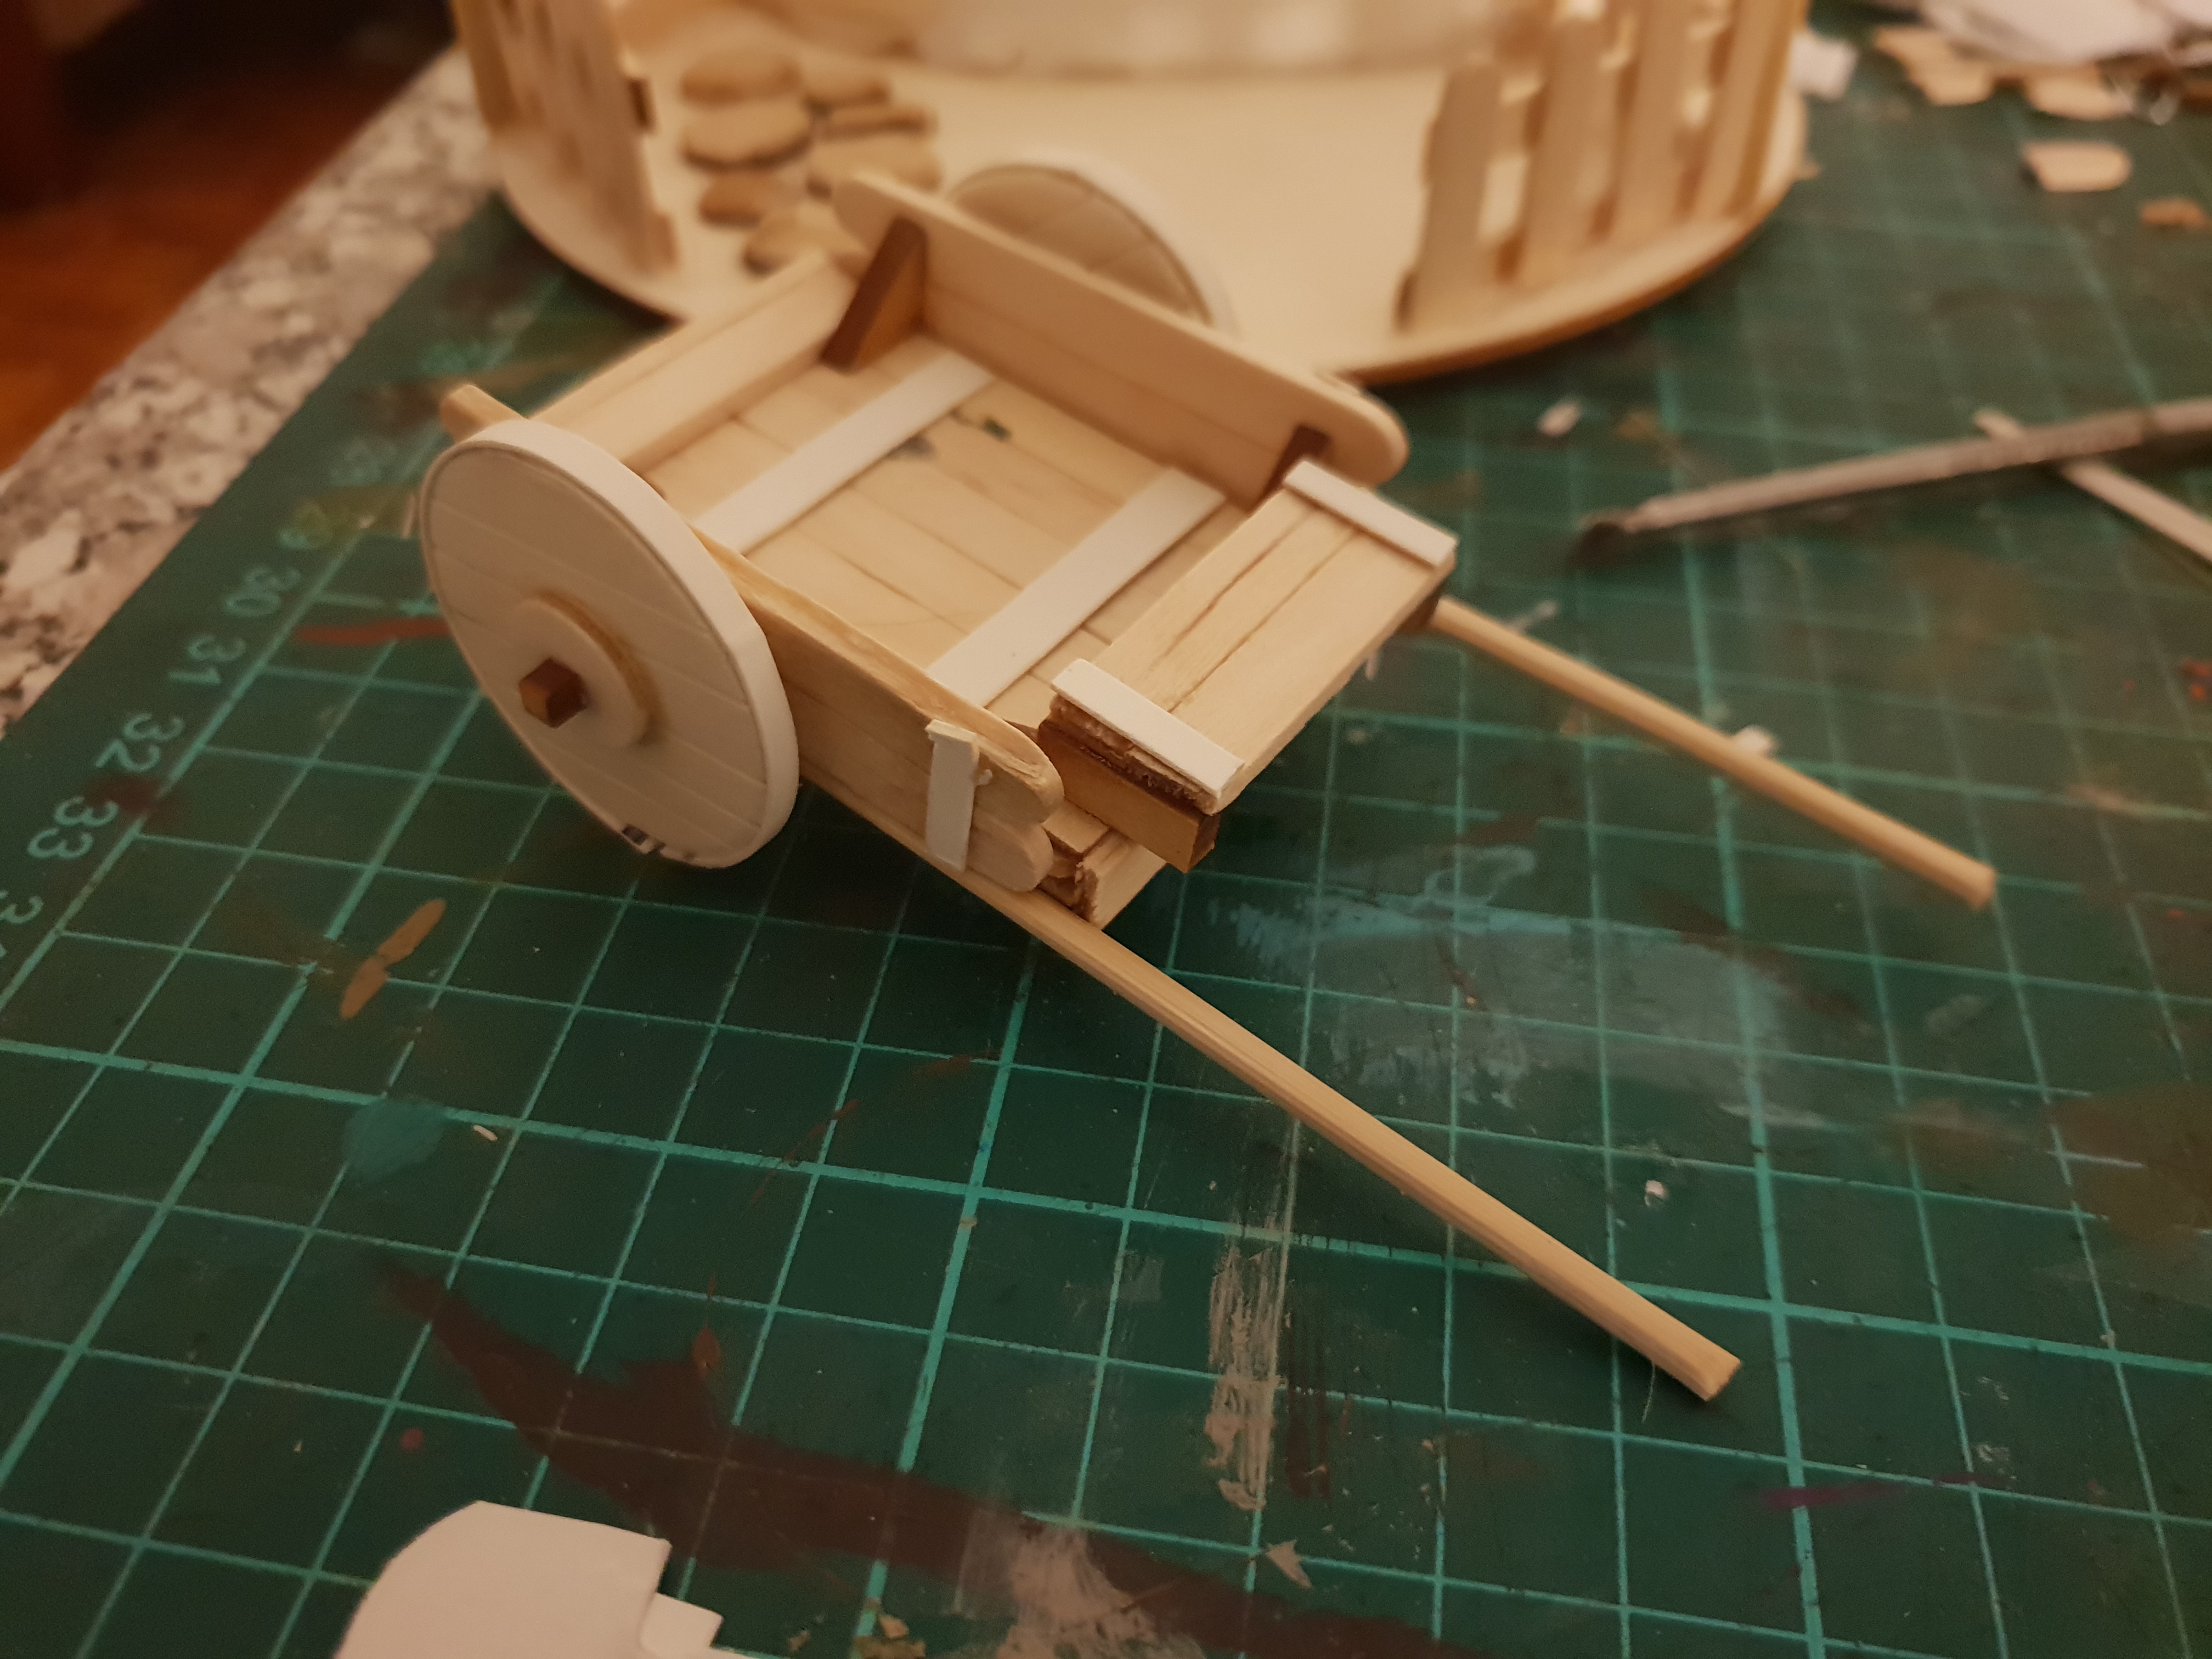
Last off I added some detailing using cardboard to represent metal banding and supports. If i really feel like it i’ll add some nail heads or bolts to these but it’s optional.
I’m not sure about beasts of burden in Burrows and Badgers to I’ll add some twine bindings to the spars at the front to represent where animals can pull it as a team like a team rickshaw.
And that’s where I’m up to on that so far 🙂
Cheers, T.
Burrows 2
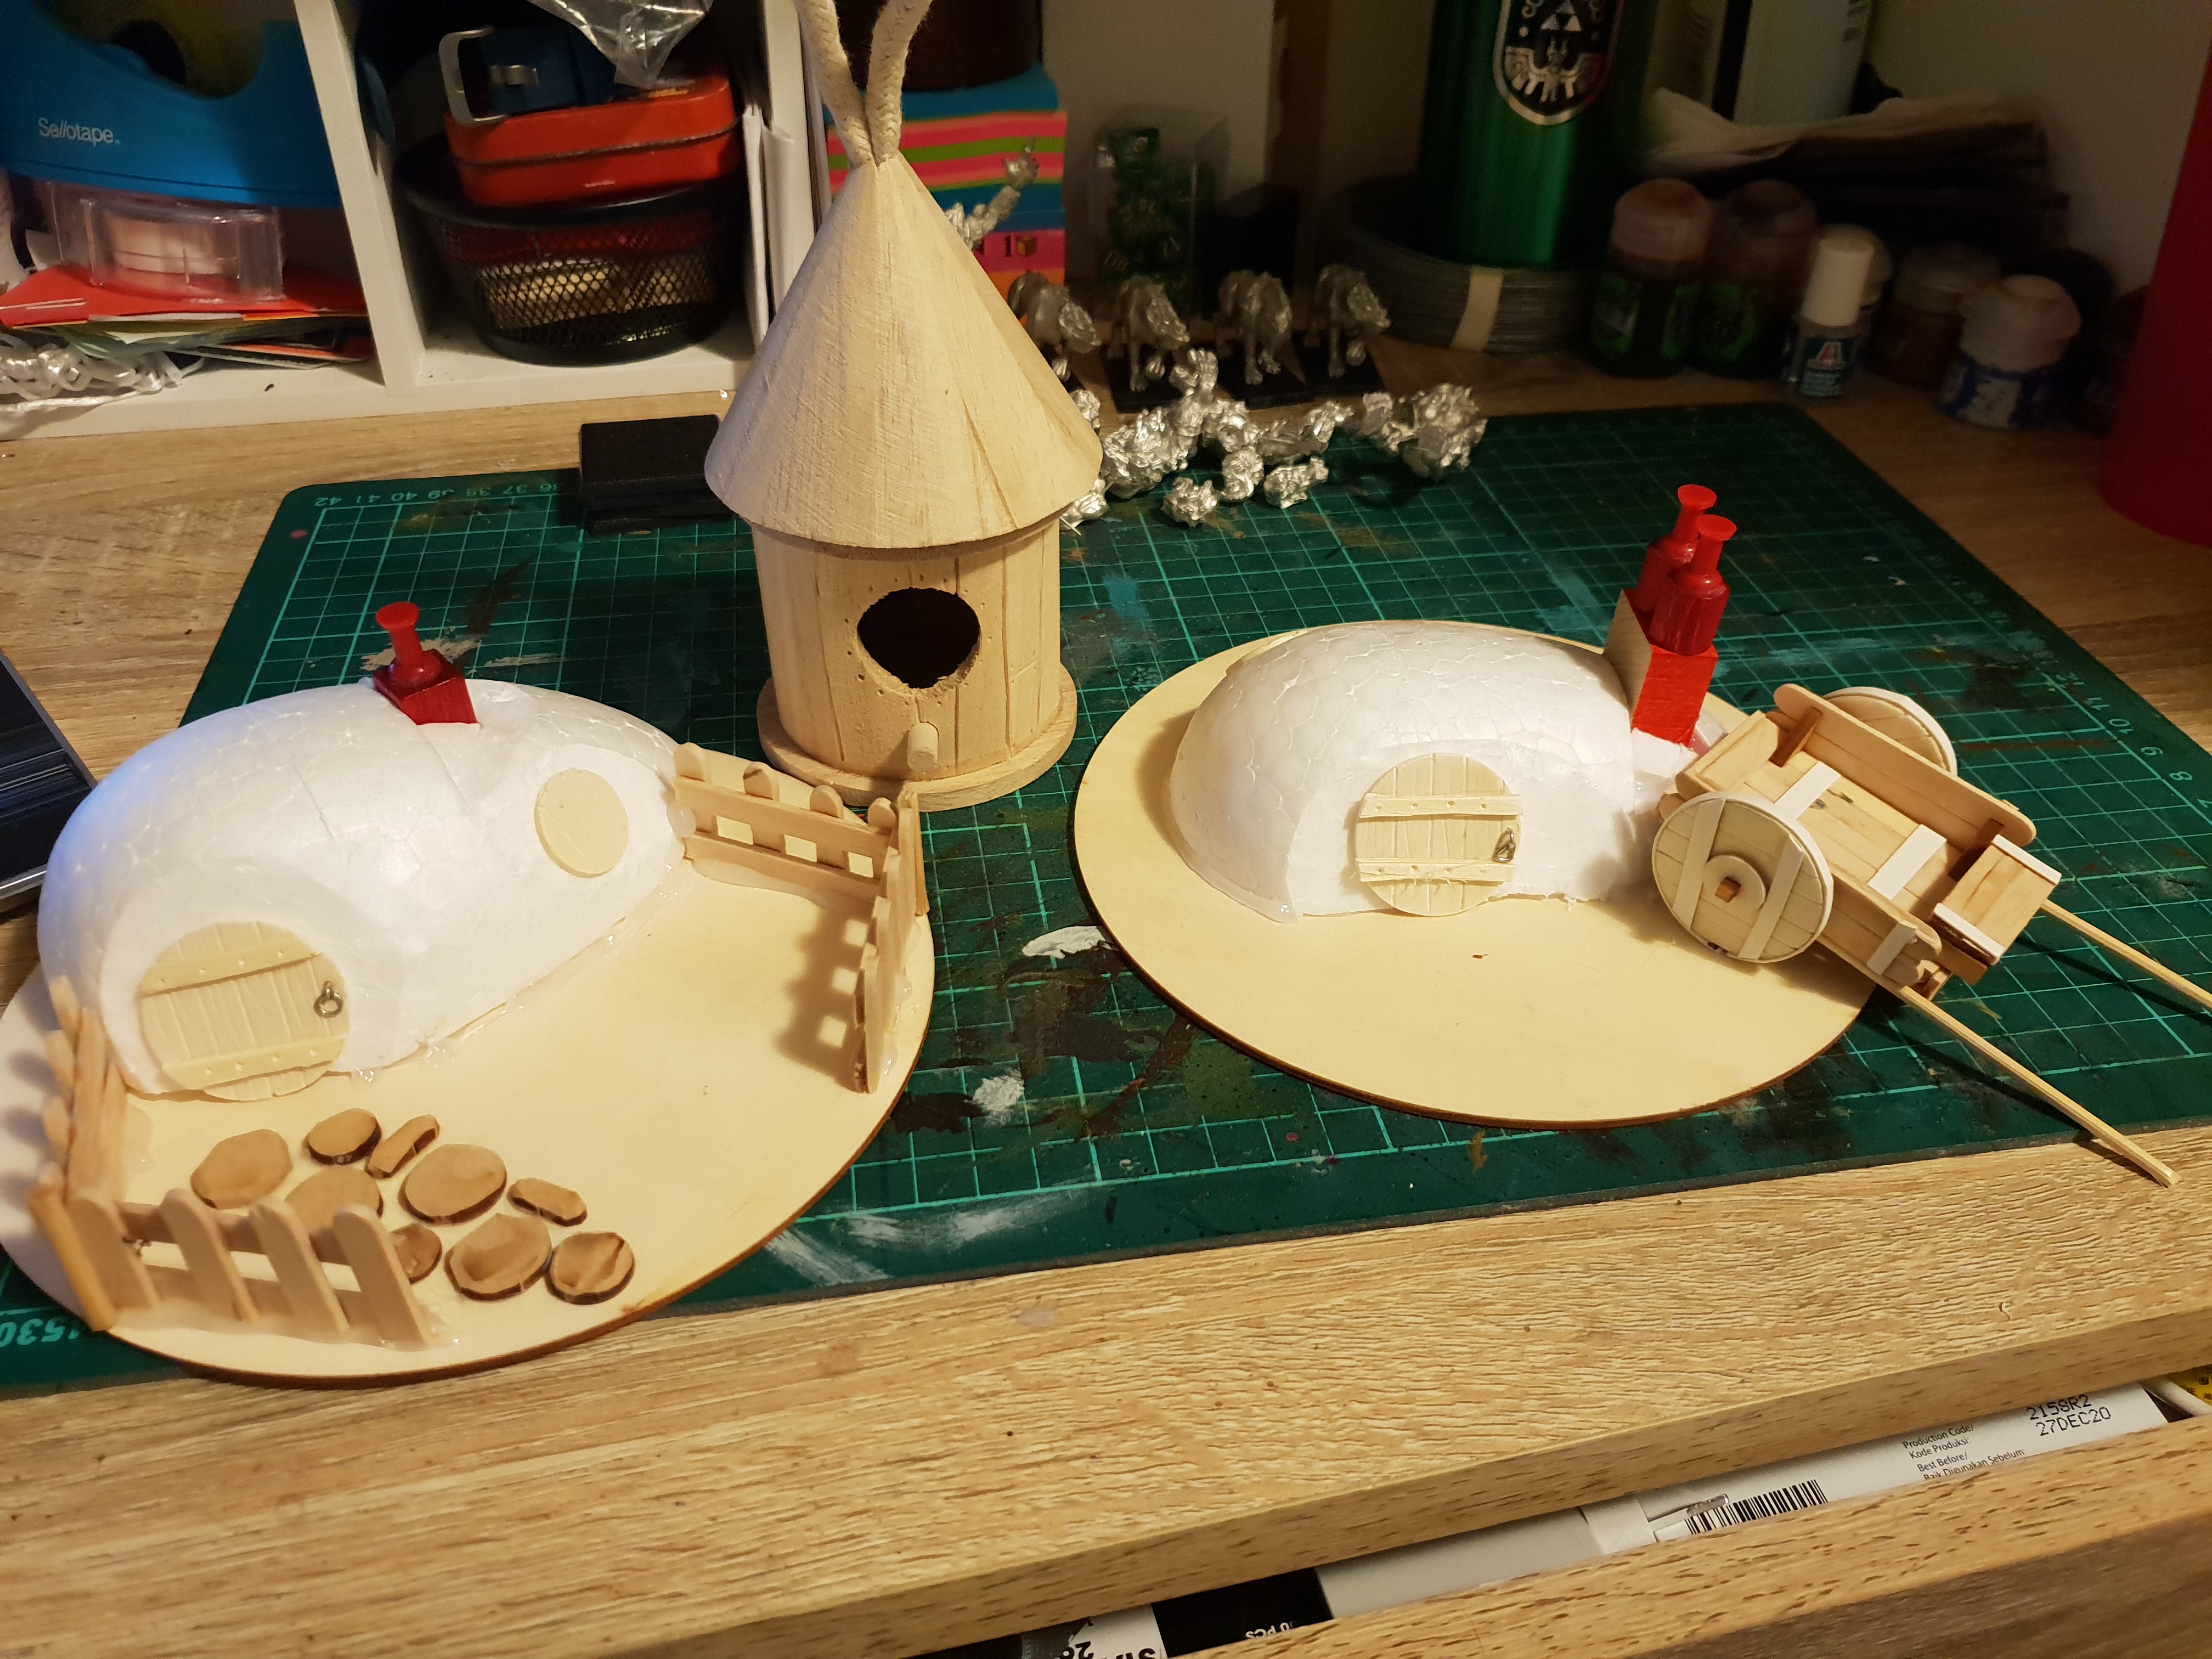
Now, with the basic shells intact, I’ve added some extra details.
The fences are are just mini lolly sticks cut in half with bbq skewers for the corner posts.
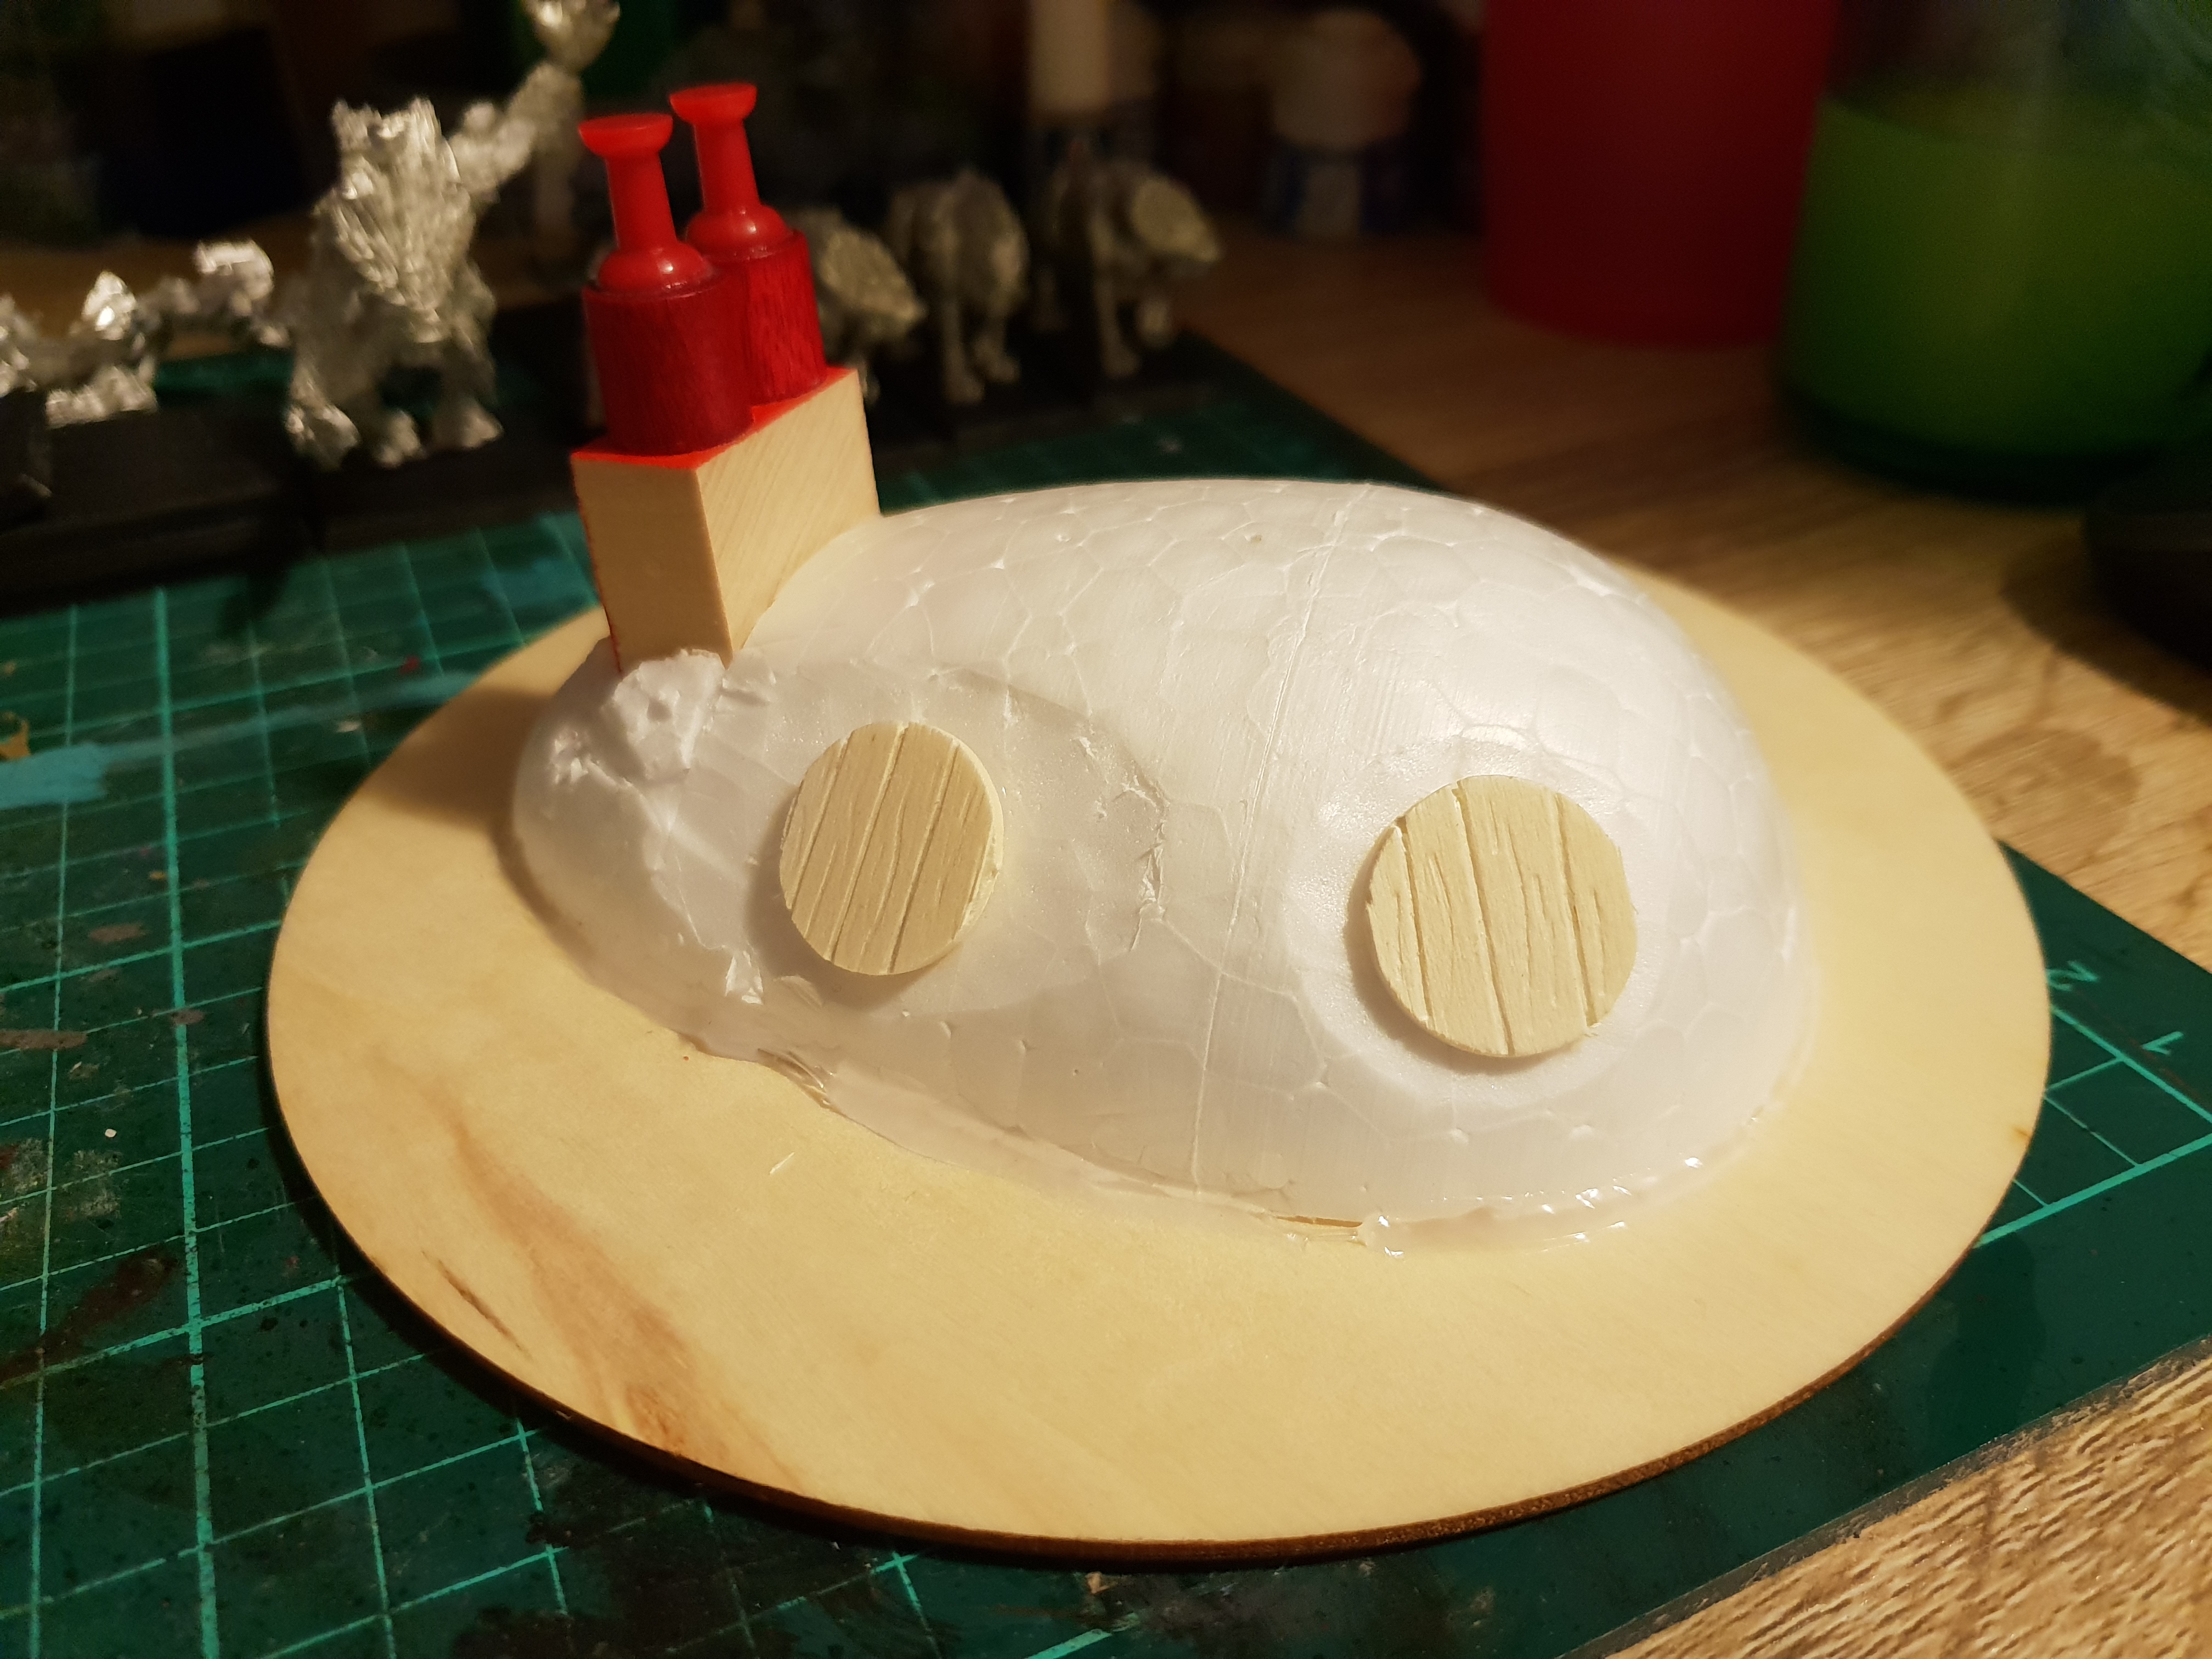
The chimneys are some old painted blocks and beads with drawing pins on top for the ceramic chimney pots. They’ll get some bricks glued on made from card or thin putty.
I think I’ve made them small enough to avoid any critters pulling a Santa to get inside, but those Shrews are pesky little blighters.
I finished off this stage with some stepping stones made from off cuts of MDF. I’ve sliced the edges and used non-uniform thickness to make them look like gathered stones.
Comments and criticisms welcome 🙂
Cheers, T


Burrows 1
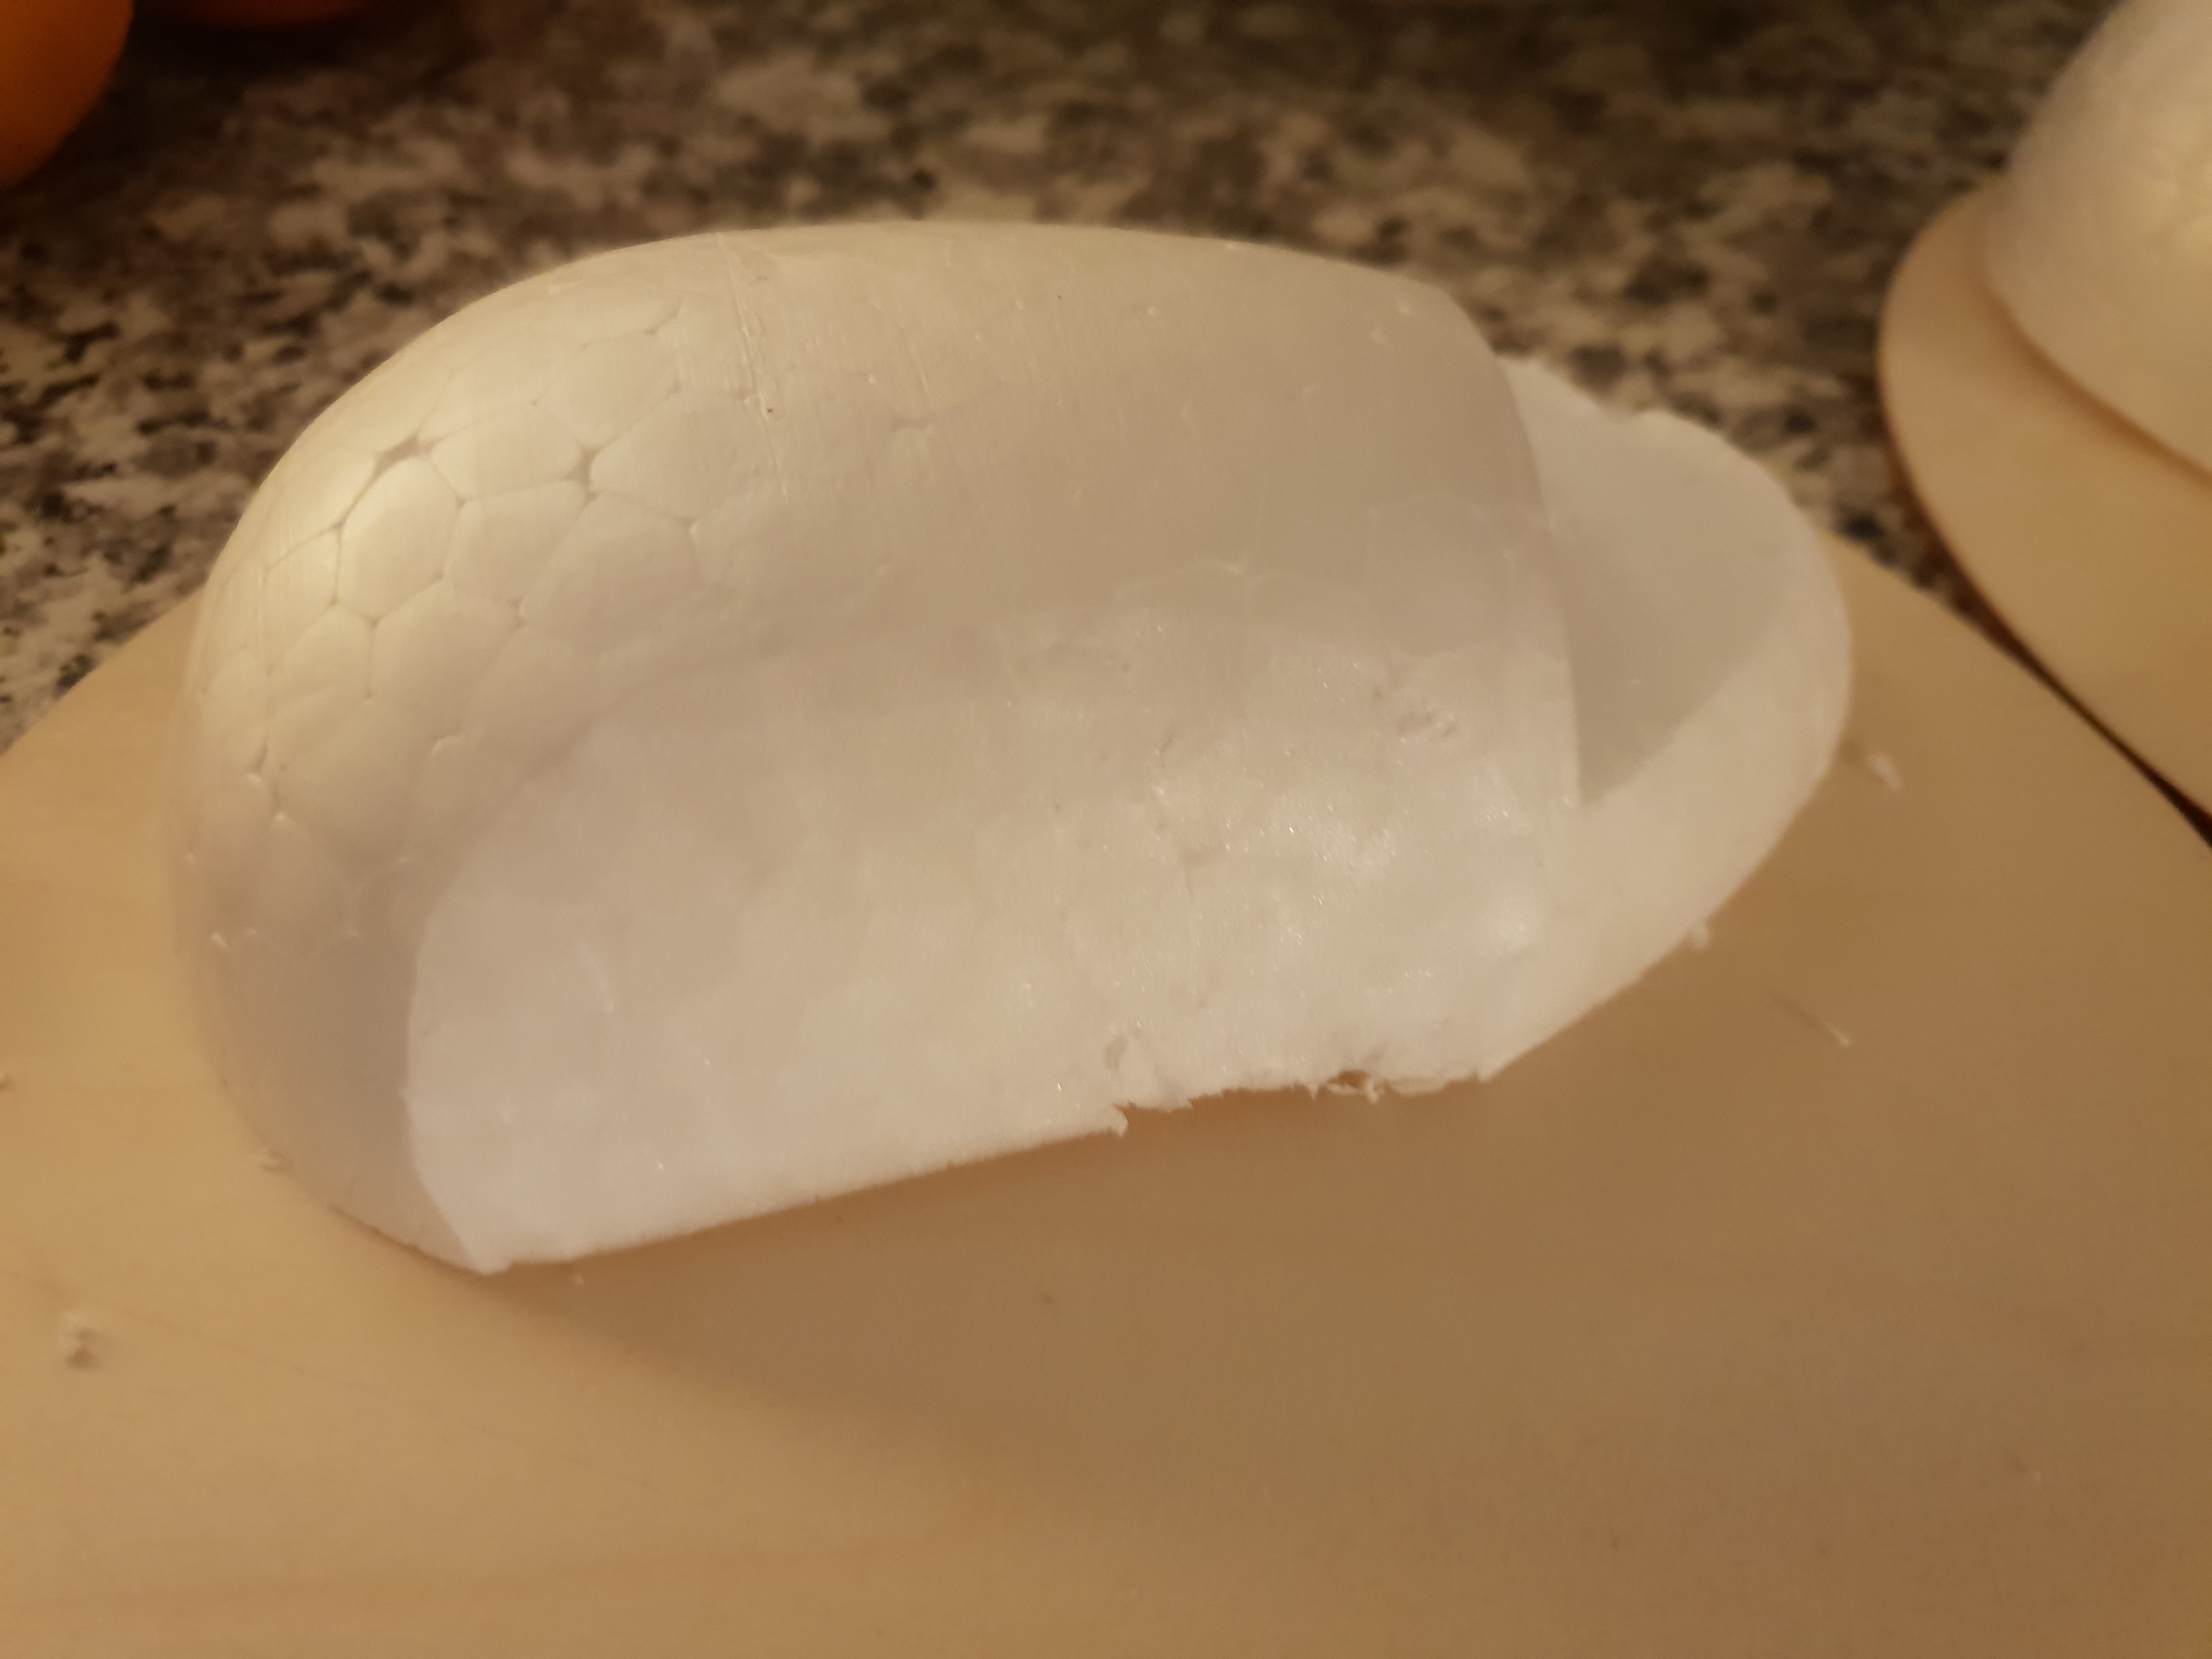
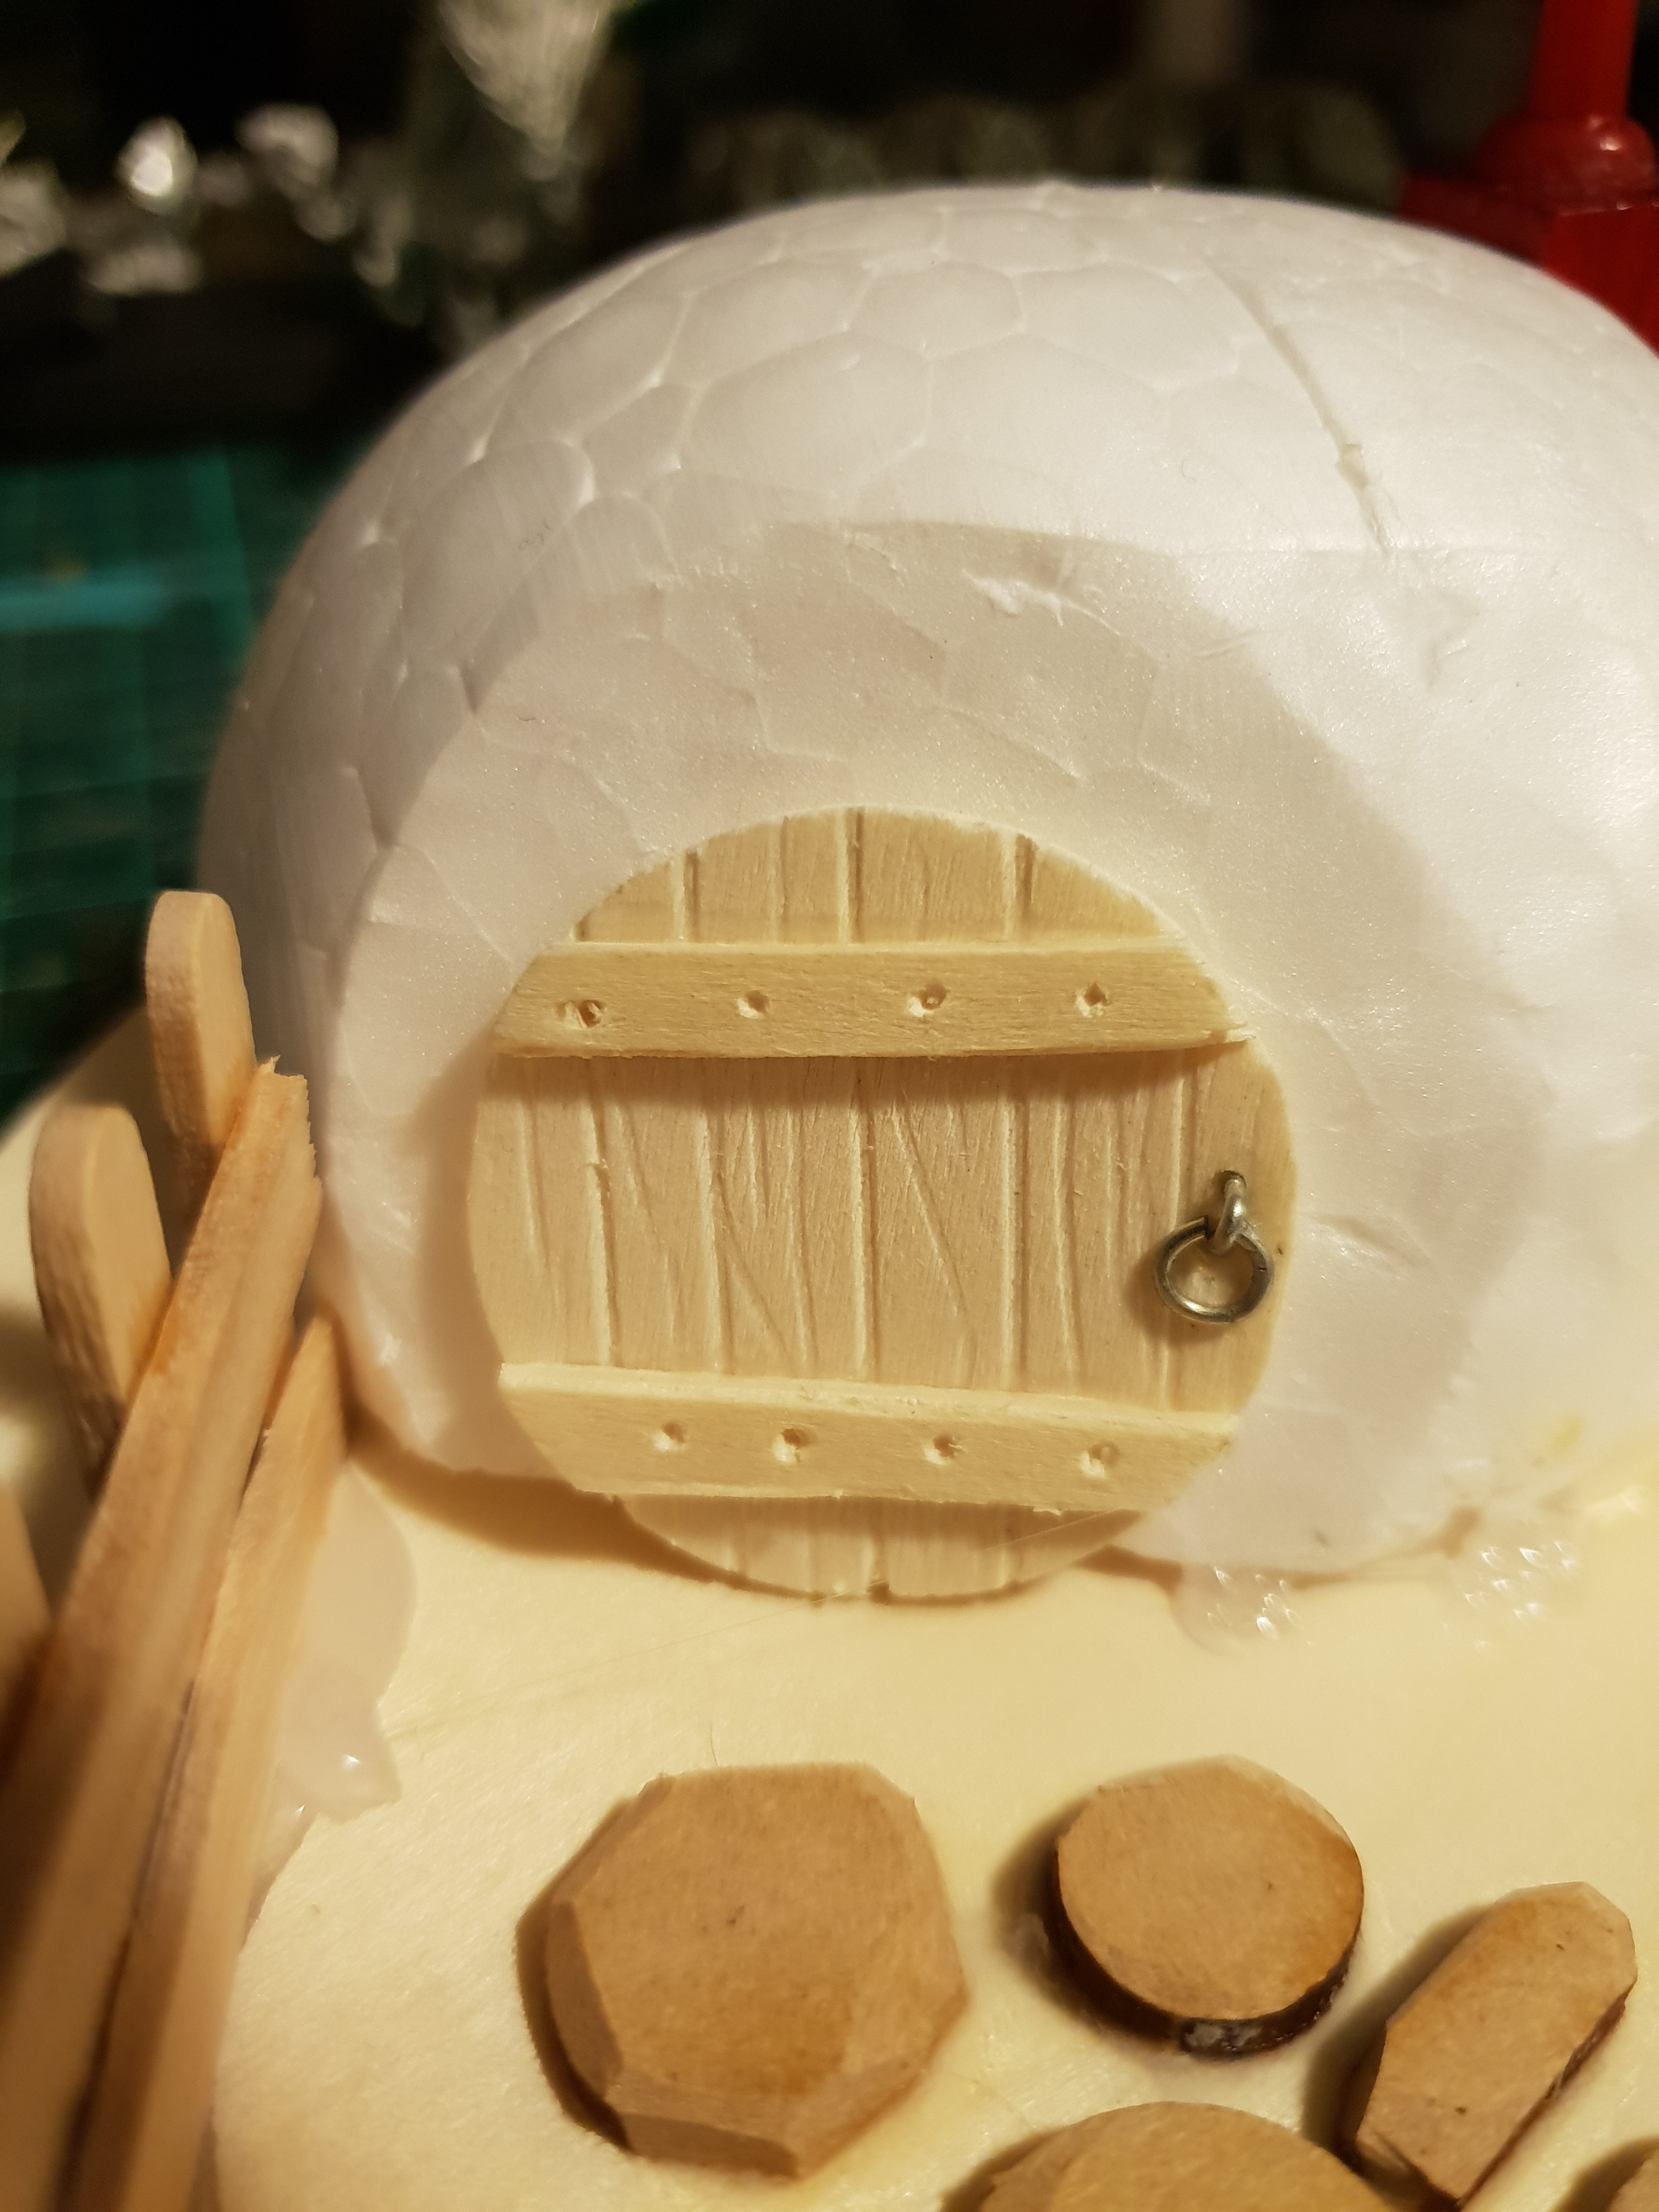
The Burrows are meant to look like there would be more to them underneath but also like they’d be a cozy cottage inside. Definitely inspired by Hobbits.
I started with a foam egg, used hot glue to attach it and seal the joins.
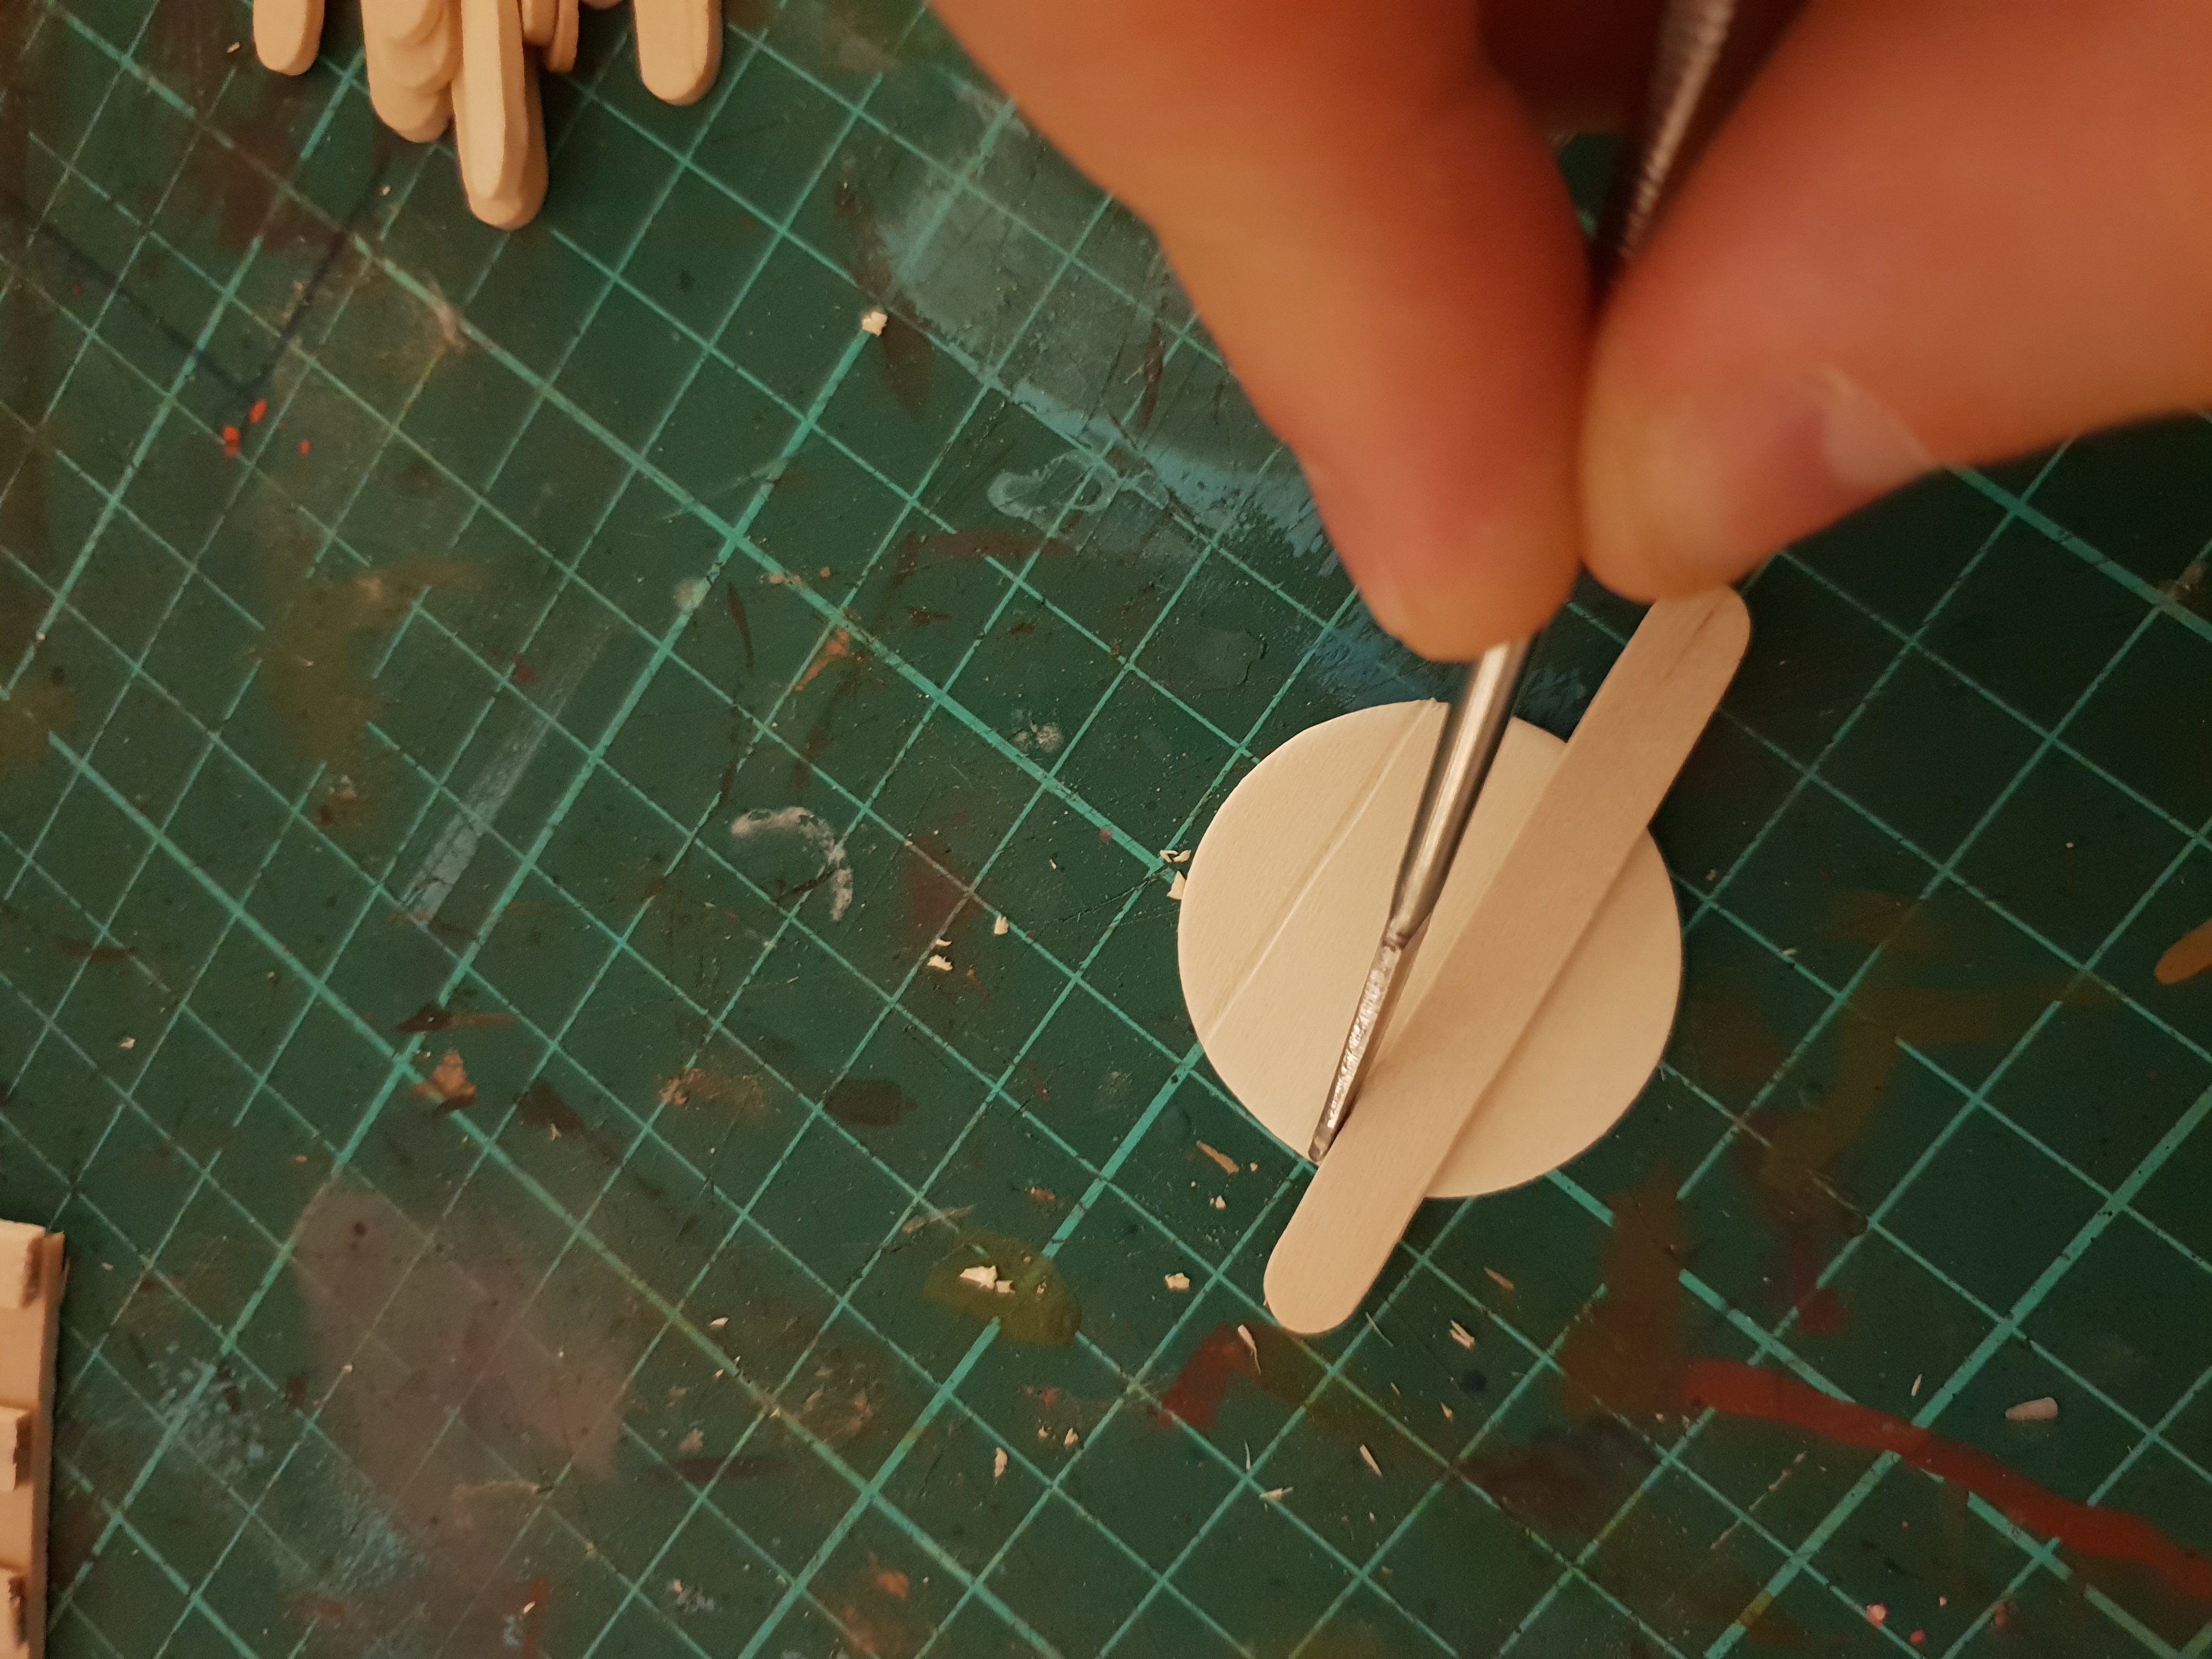
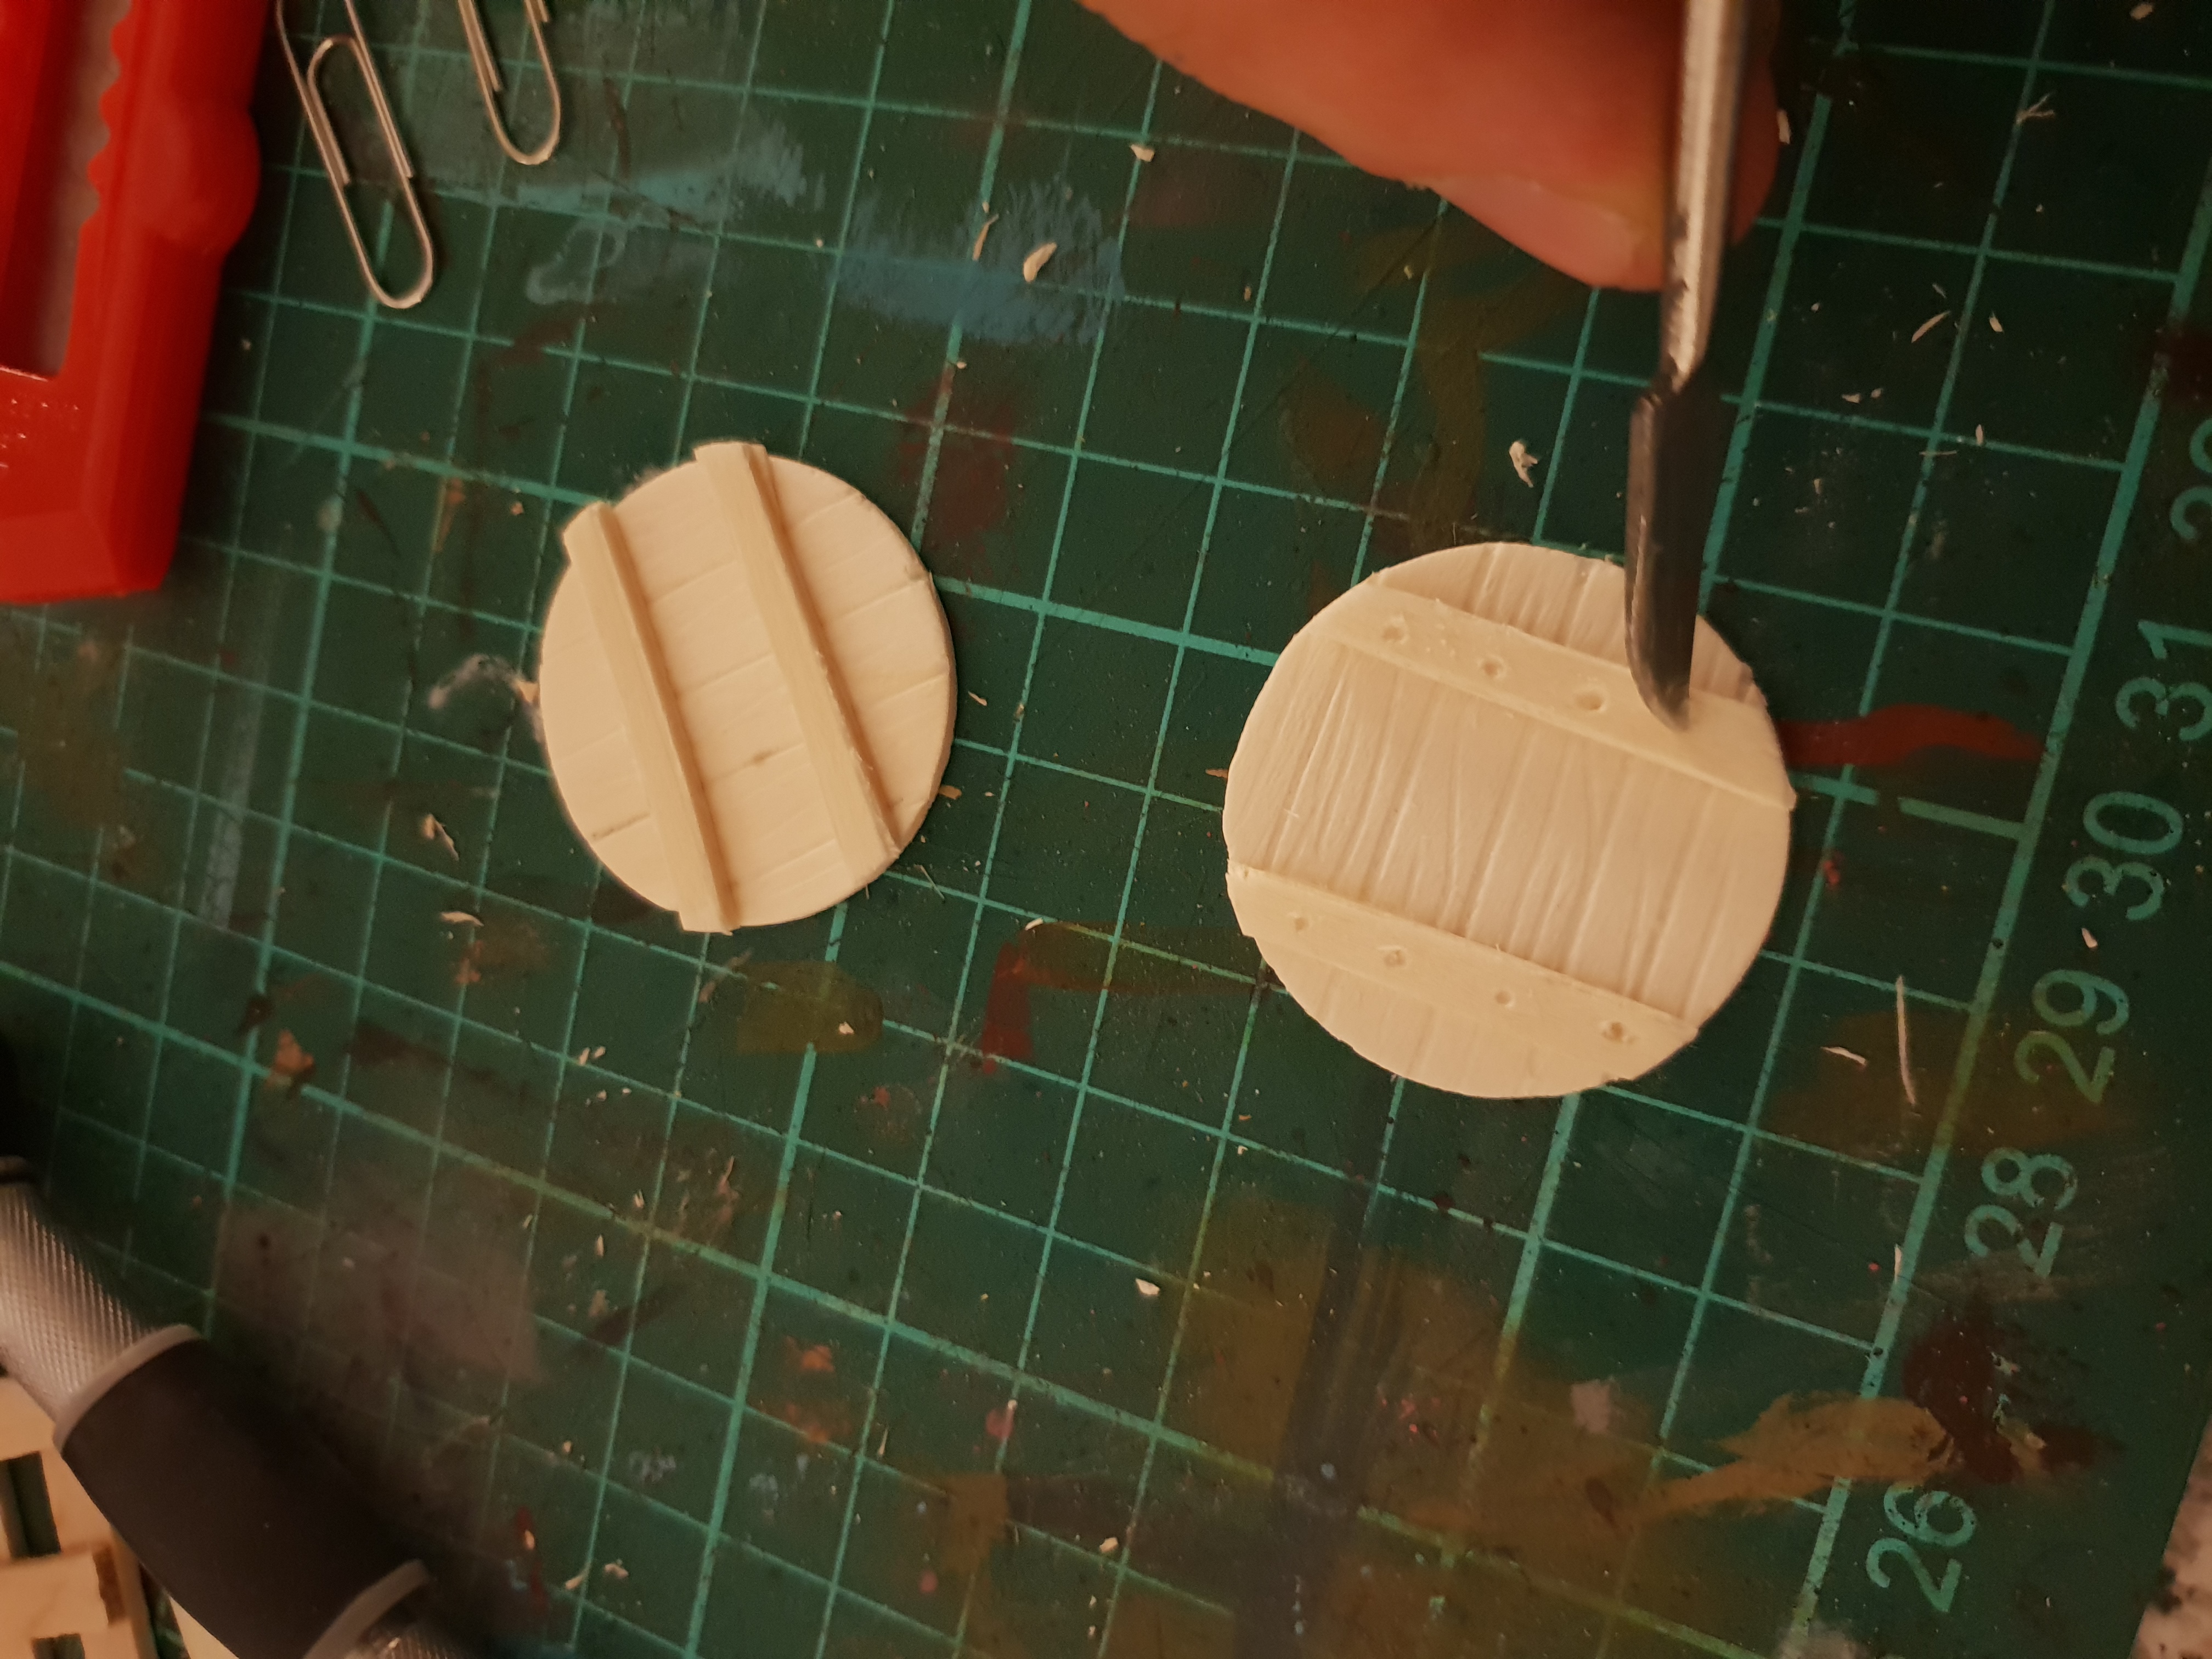
Then I started on some windows and doors by scoring some wooden discs. Then I added banding, nail holes, door handles are from paper clips bent and pinned in place.
Cheers, T