![Make Your Own Star Wars: Legion Heroes! Rebel Agent & Officer Set Review [7 Days Early Access]](https://images.beastsofwar.com/2025/12/unboxing-atomic-mass-games-star-wars-legion-rebel-alliance-agent-_-officer-coverimage-225-127.jpg)


Night Lords by Mage updated 29/10/19 Forgefiend Update


Recommendations: 433
About the Project
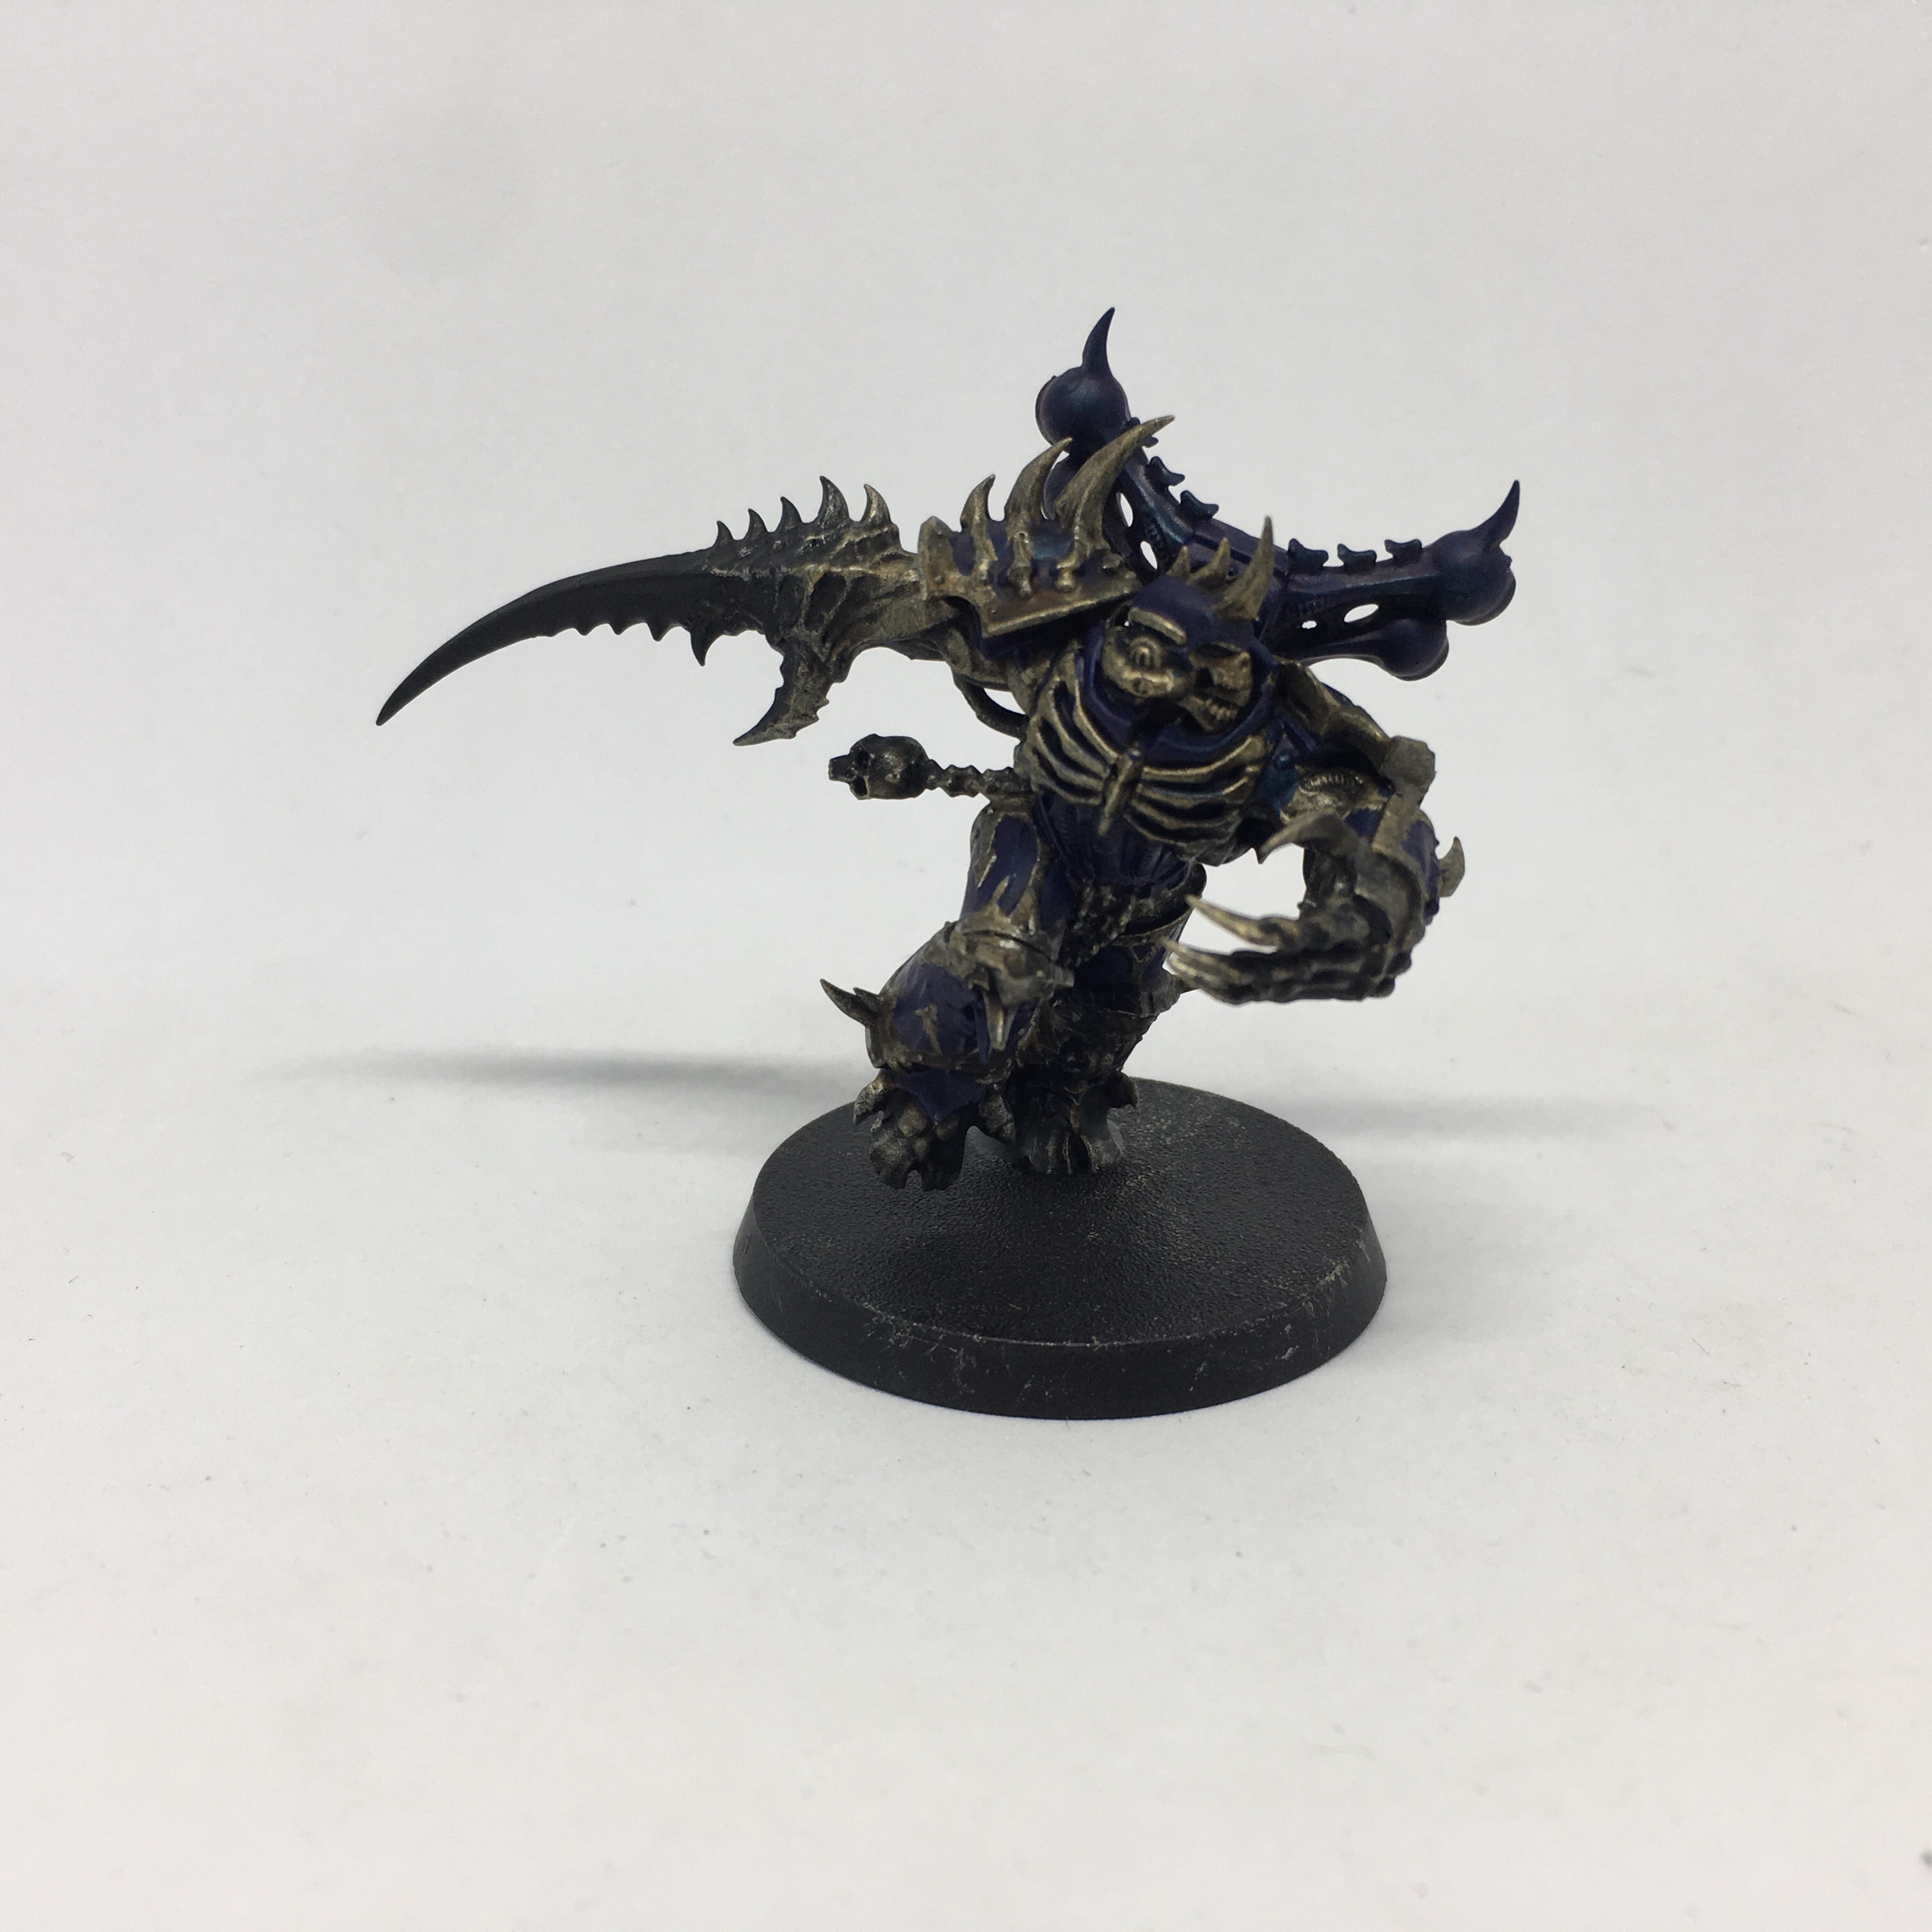
Hey everyone, thanks for calling by. This is my Night Lords Chaos Space Marines army for Warhammer 40,000 Eight Edition. So far it is one half of Shadowspear but will be expanded upon down the line. It's my third Chaos Space Marine army since I started the game twenty-two years ago. The aim is to do it expediently to a tabletop or better than tabletop standard. Unlike some of my previous project logs this will have more a tutoring element incorporated. Thanks for reading!
Related Game: Warhammer 40,000
Related Company: Games Workshop
Related Genre: Science Fiction
This Project is Active
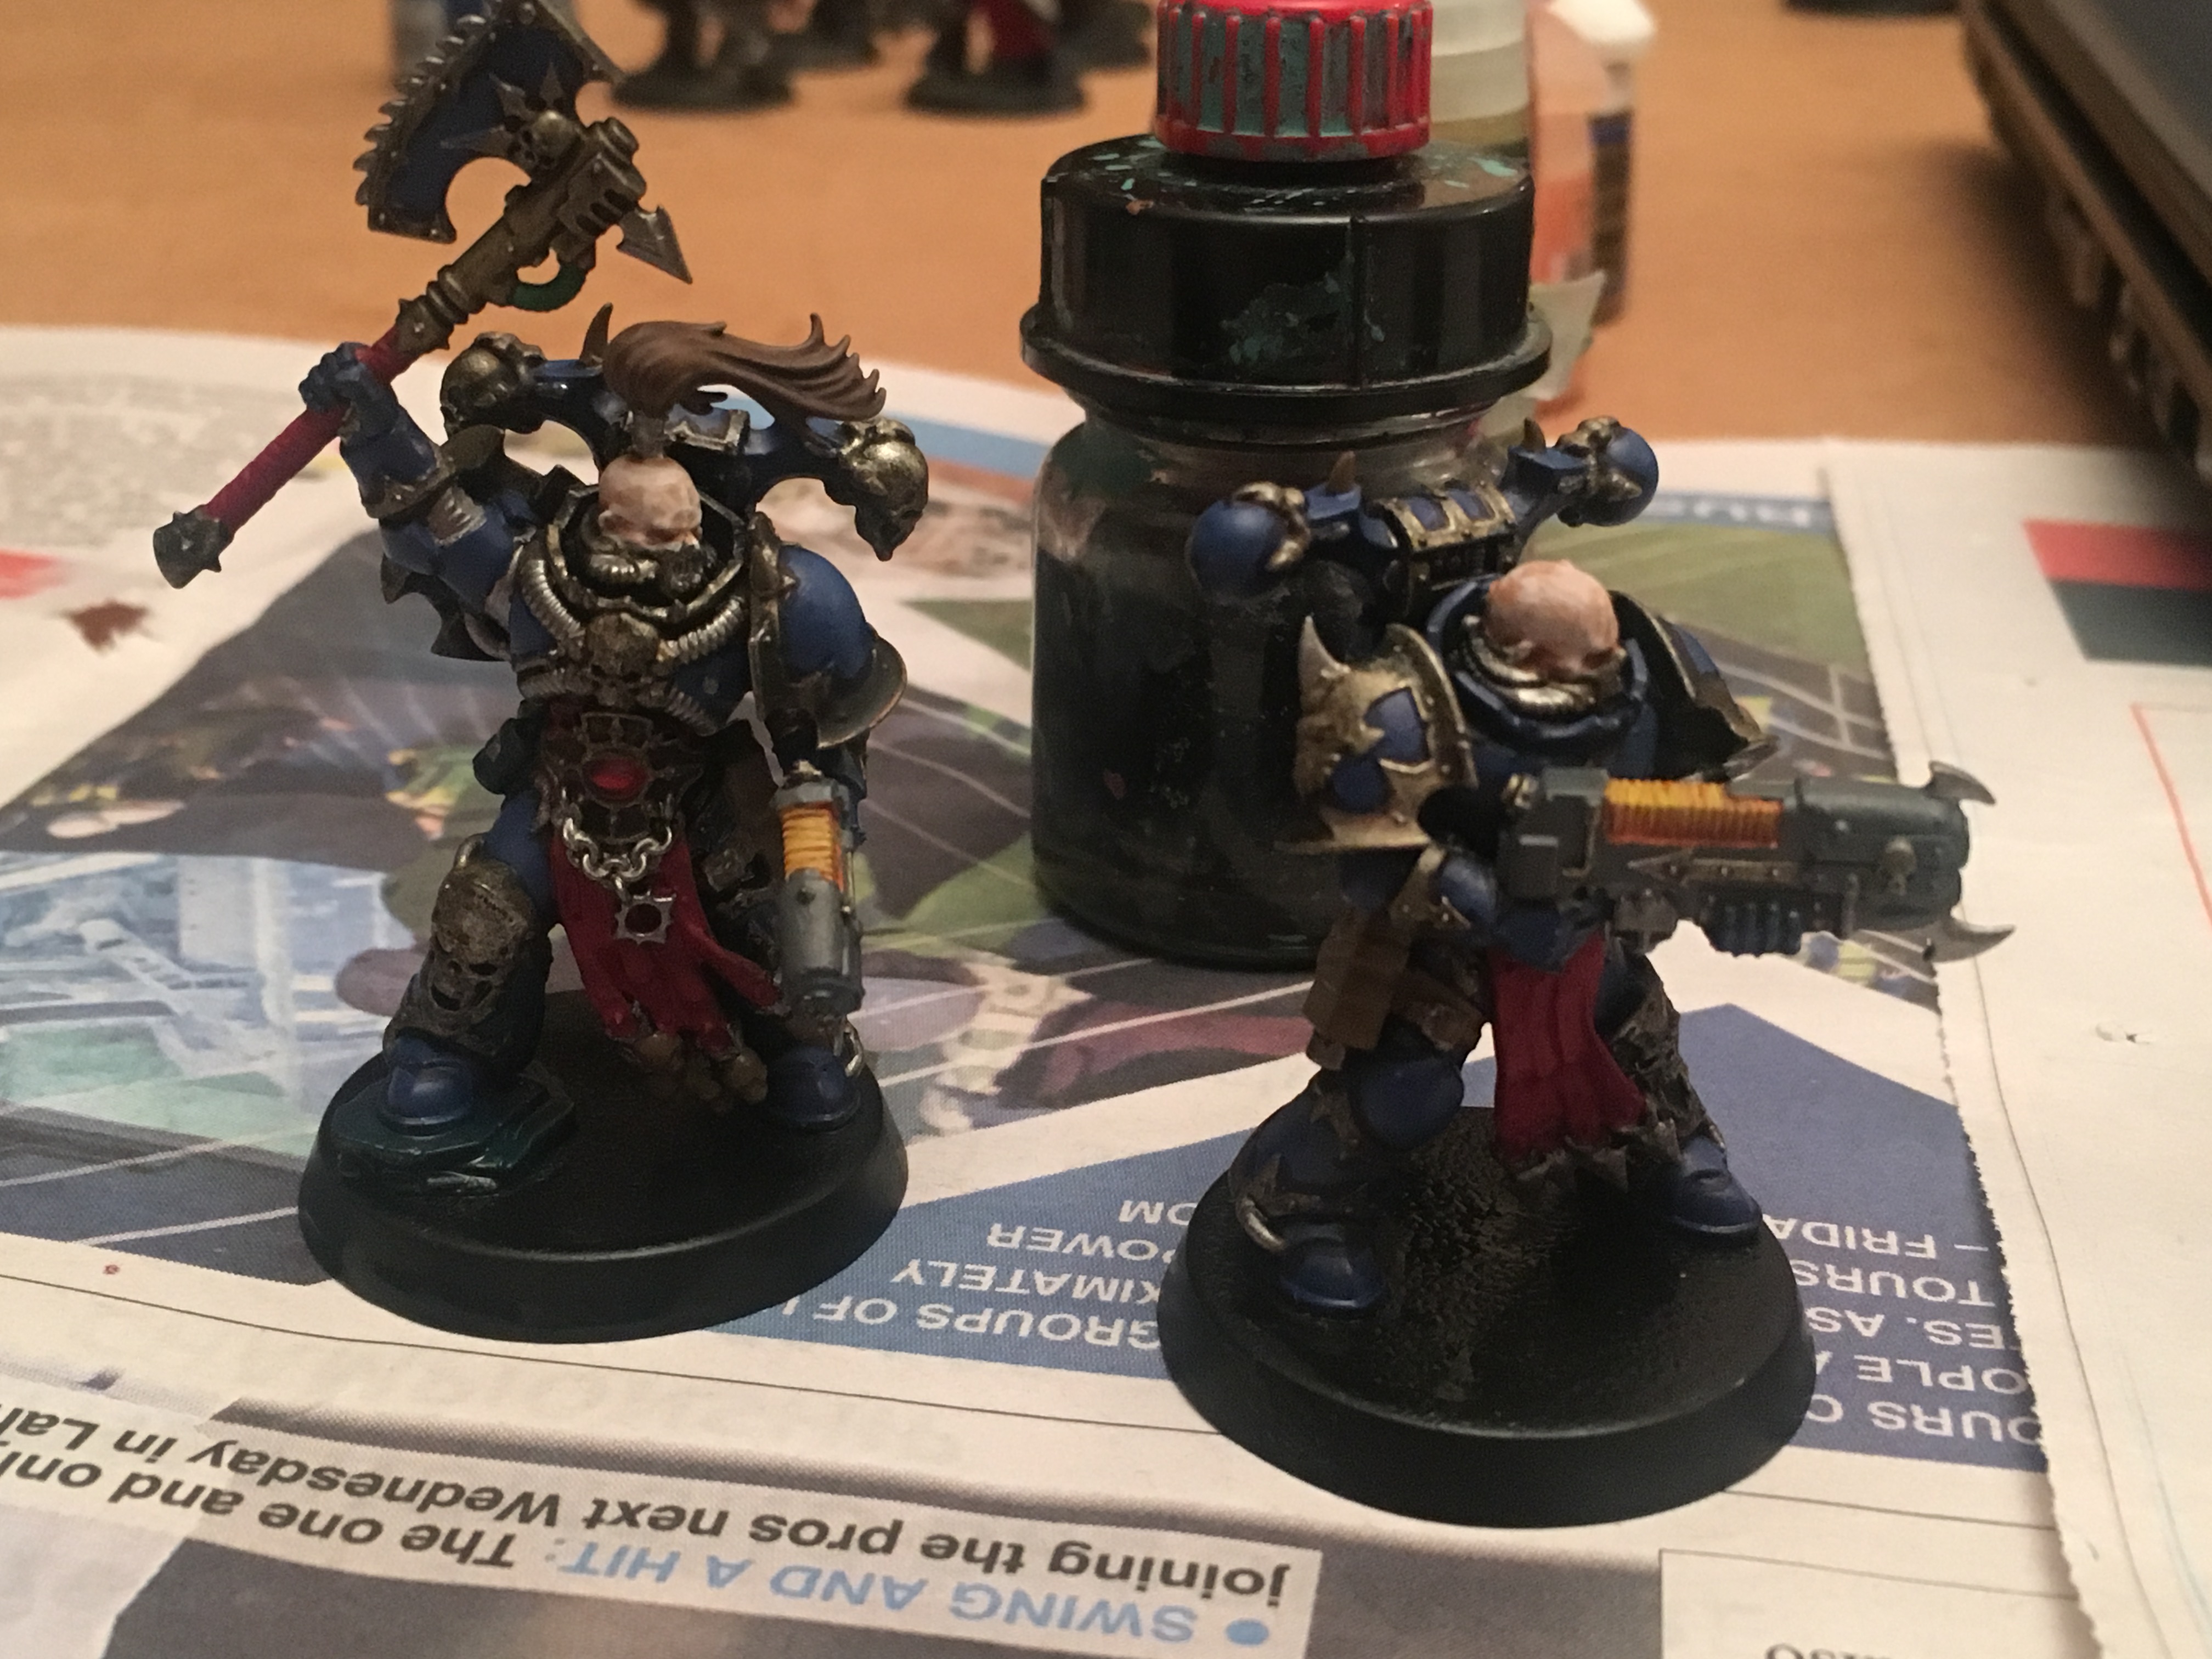
Entry 12: Sunday's Progress Part 1
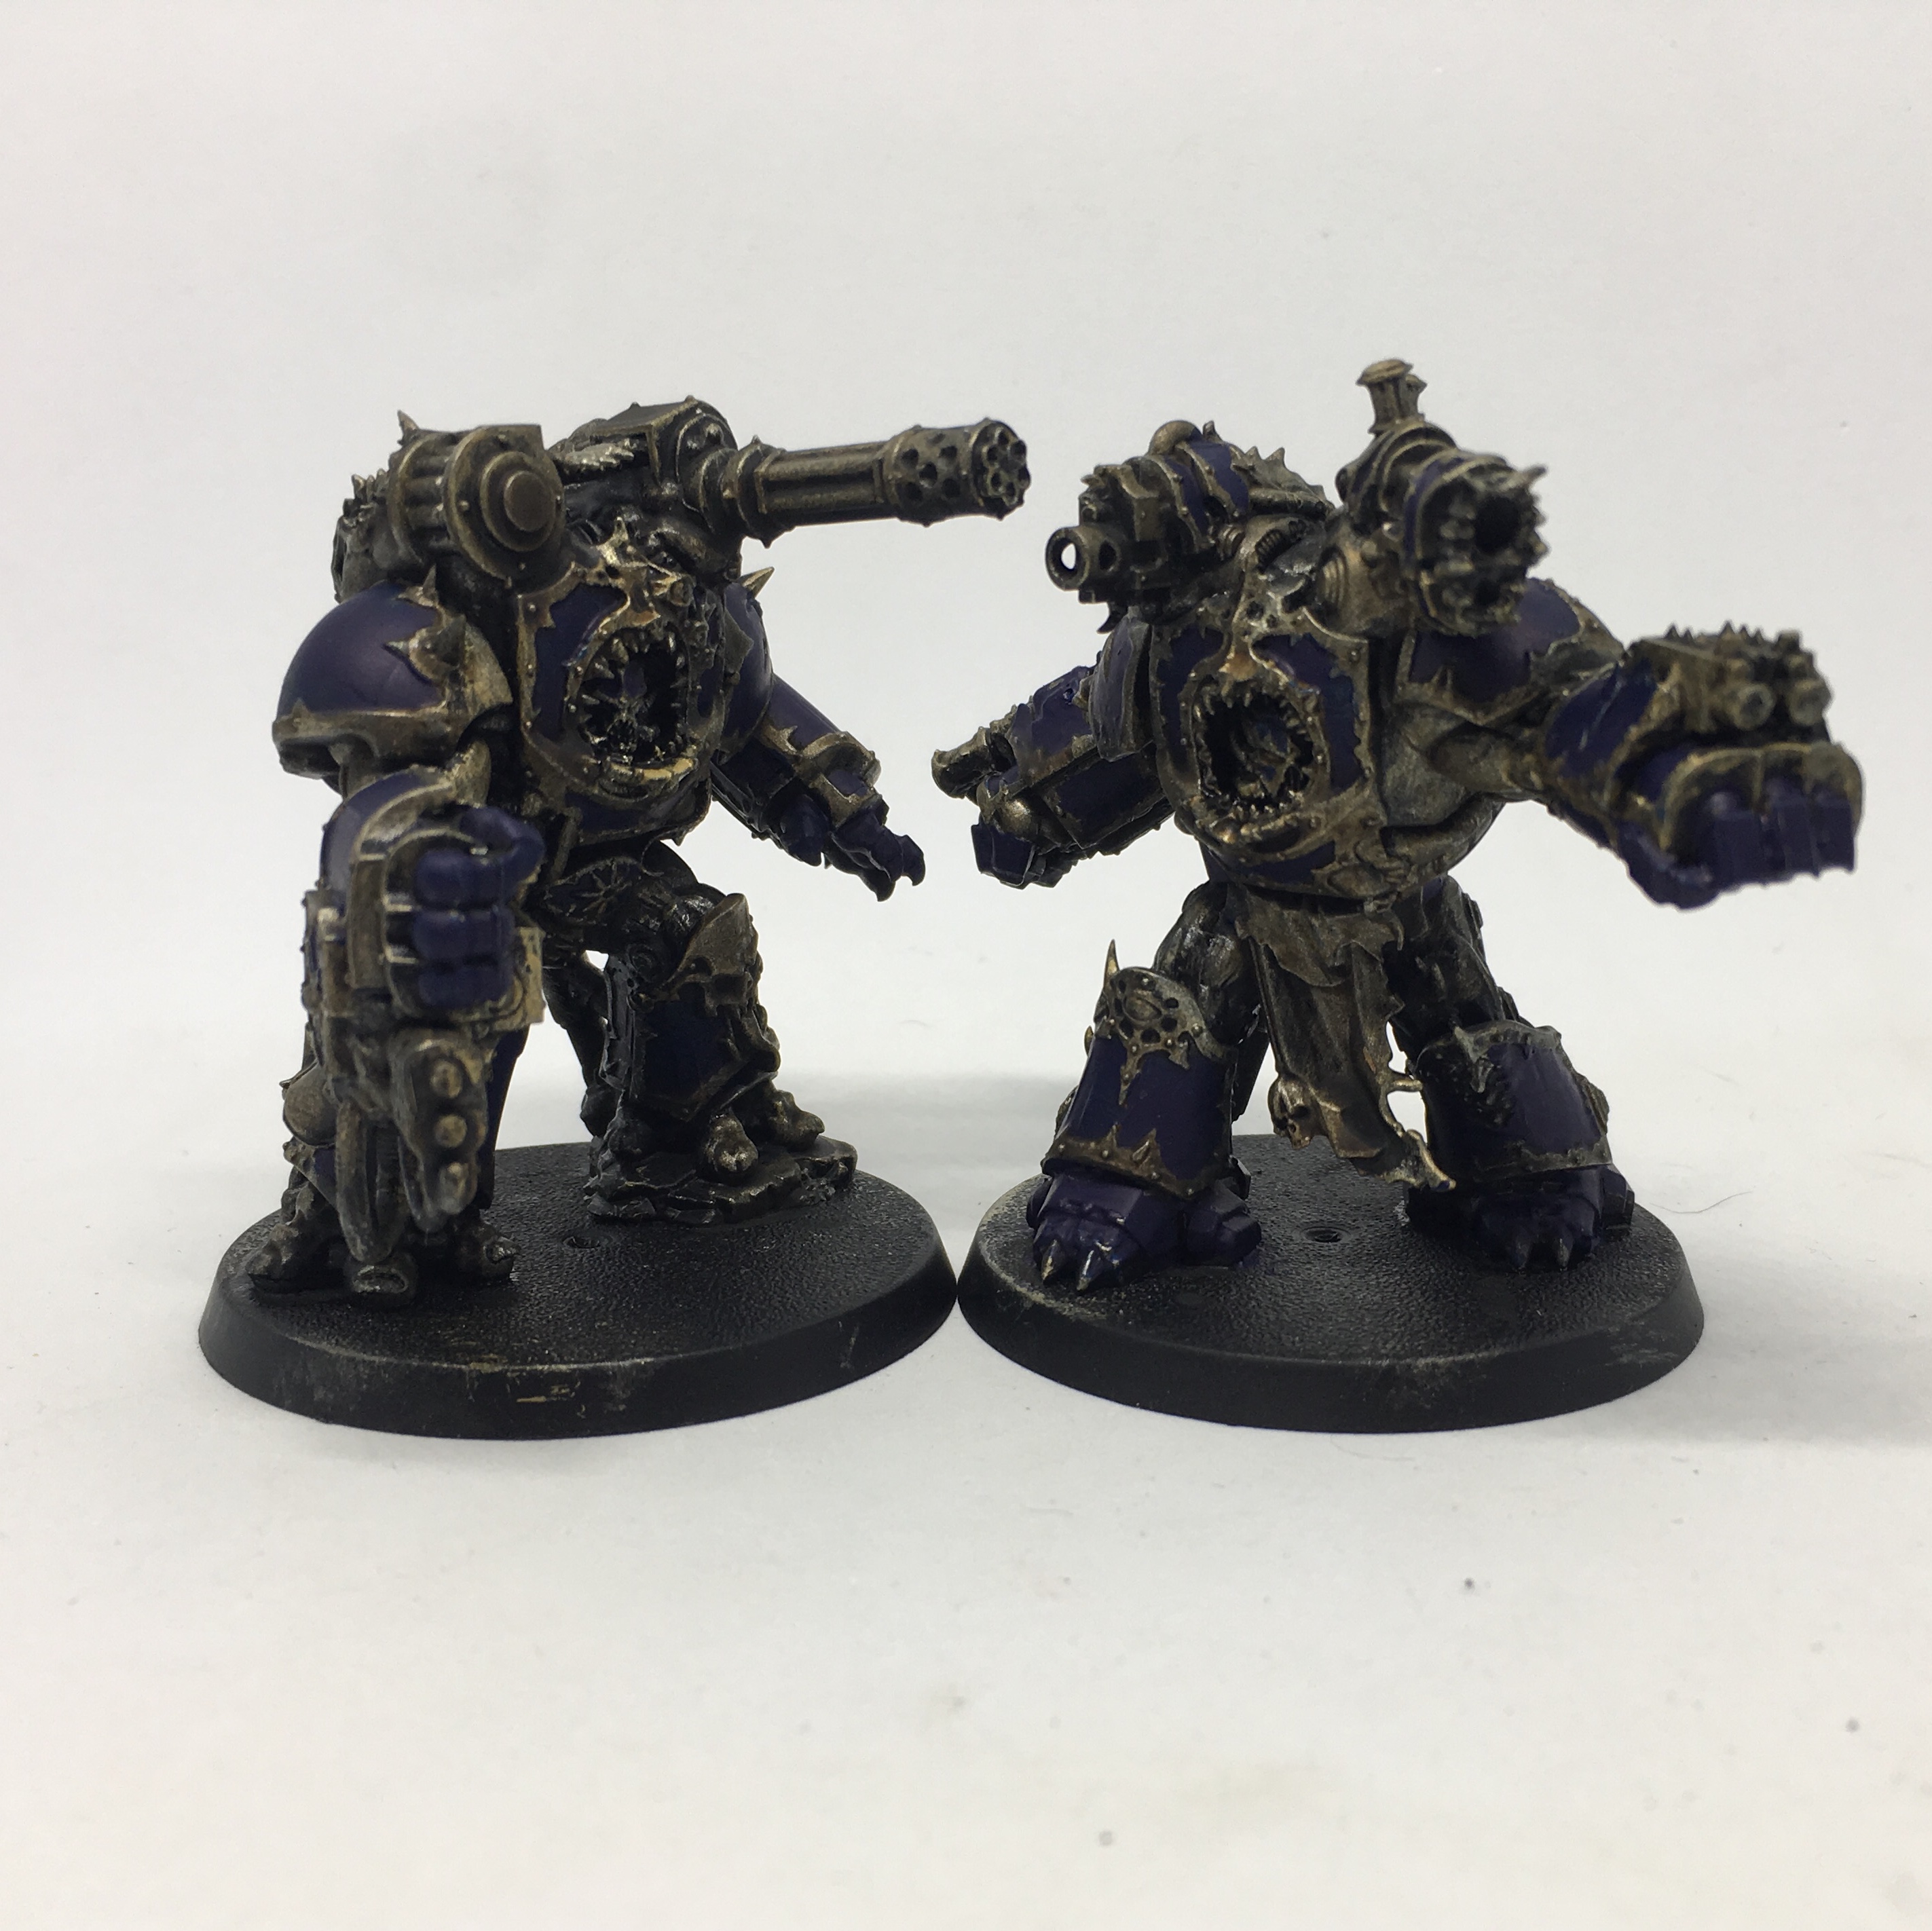
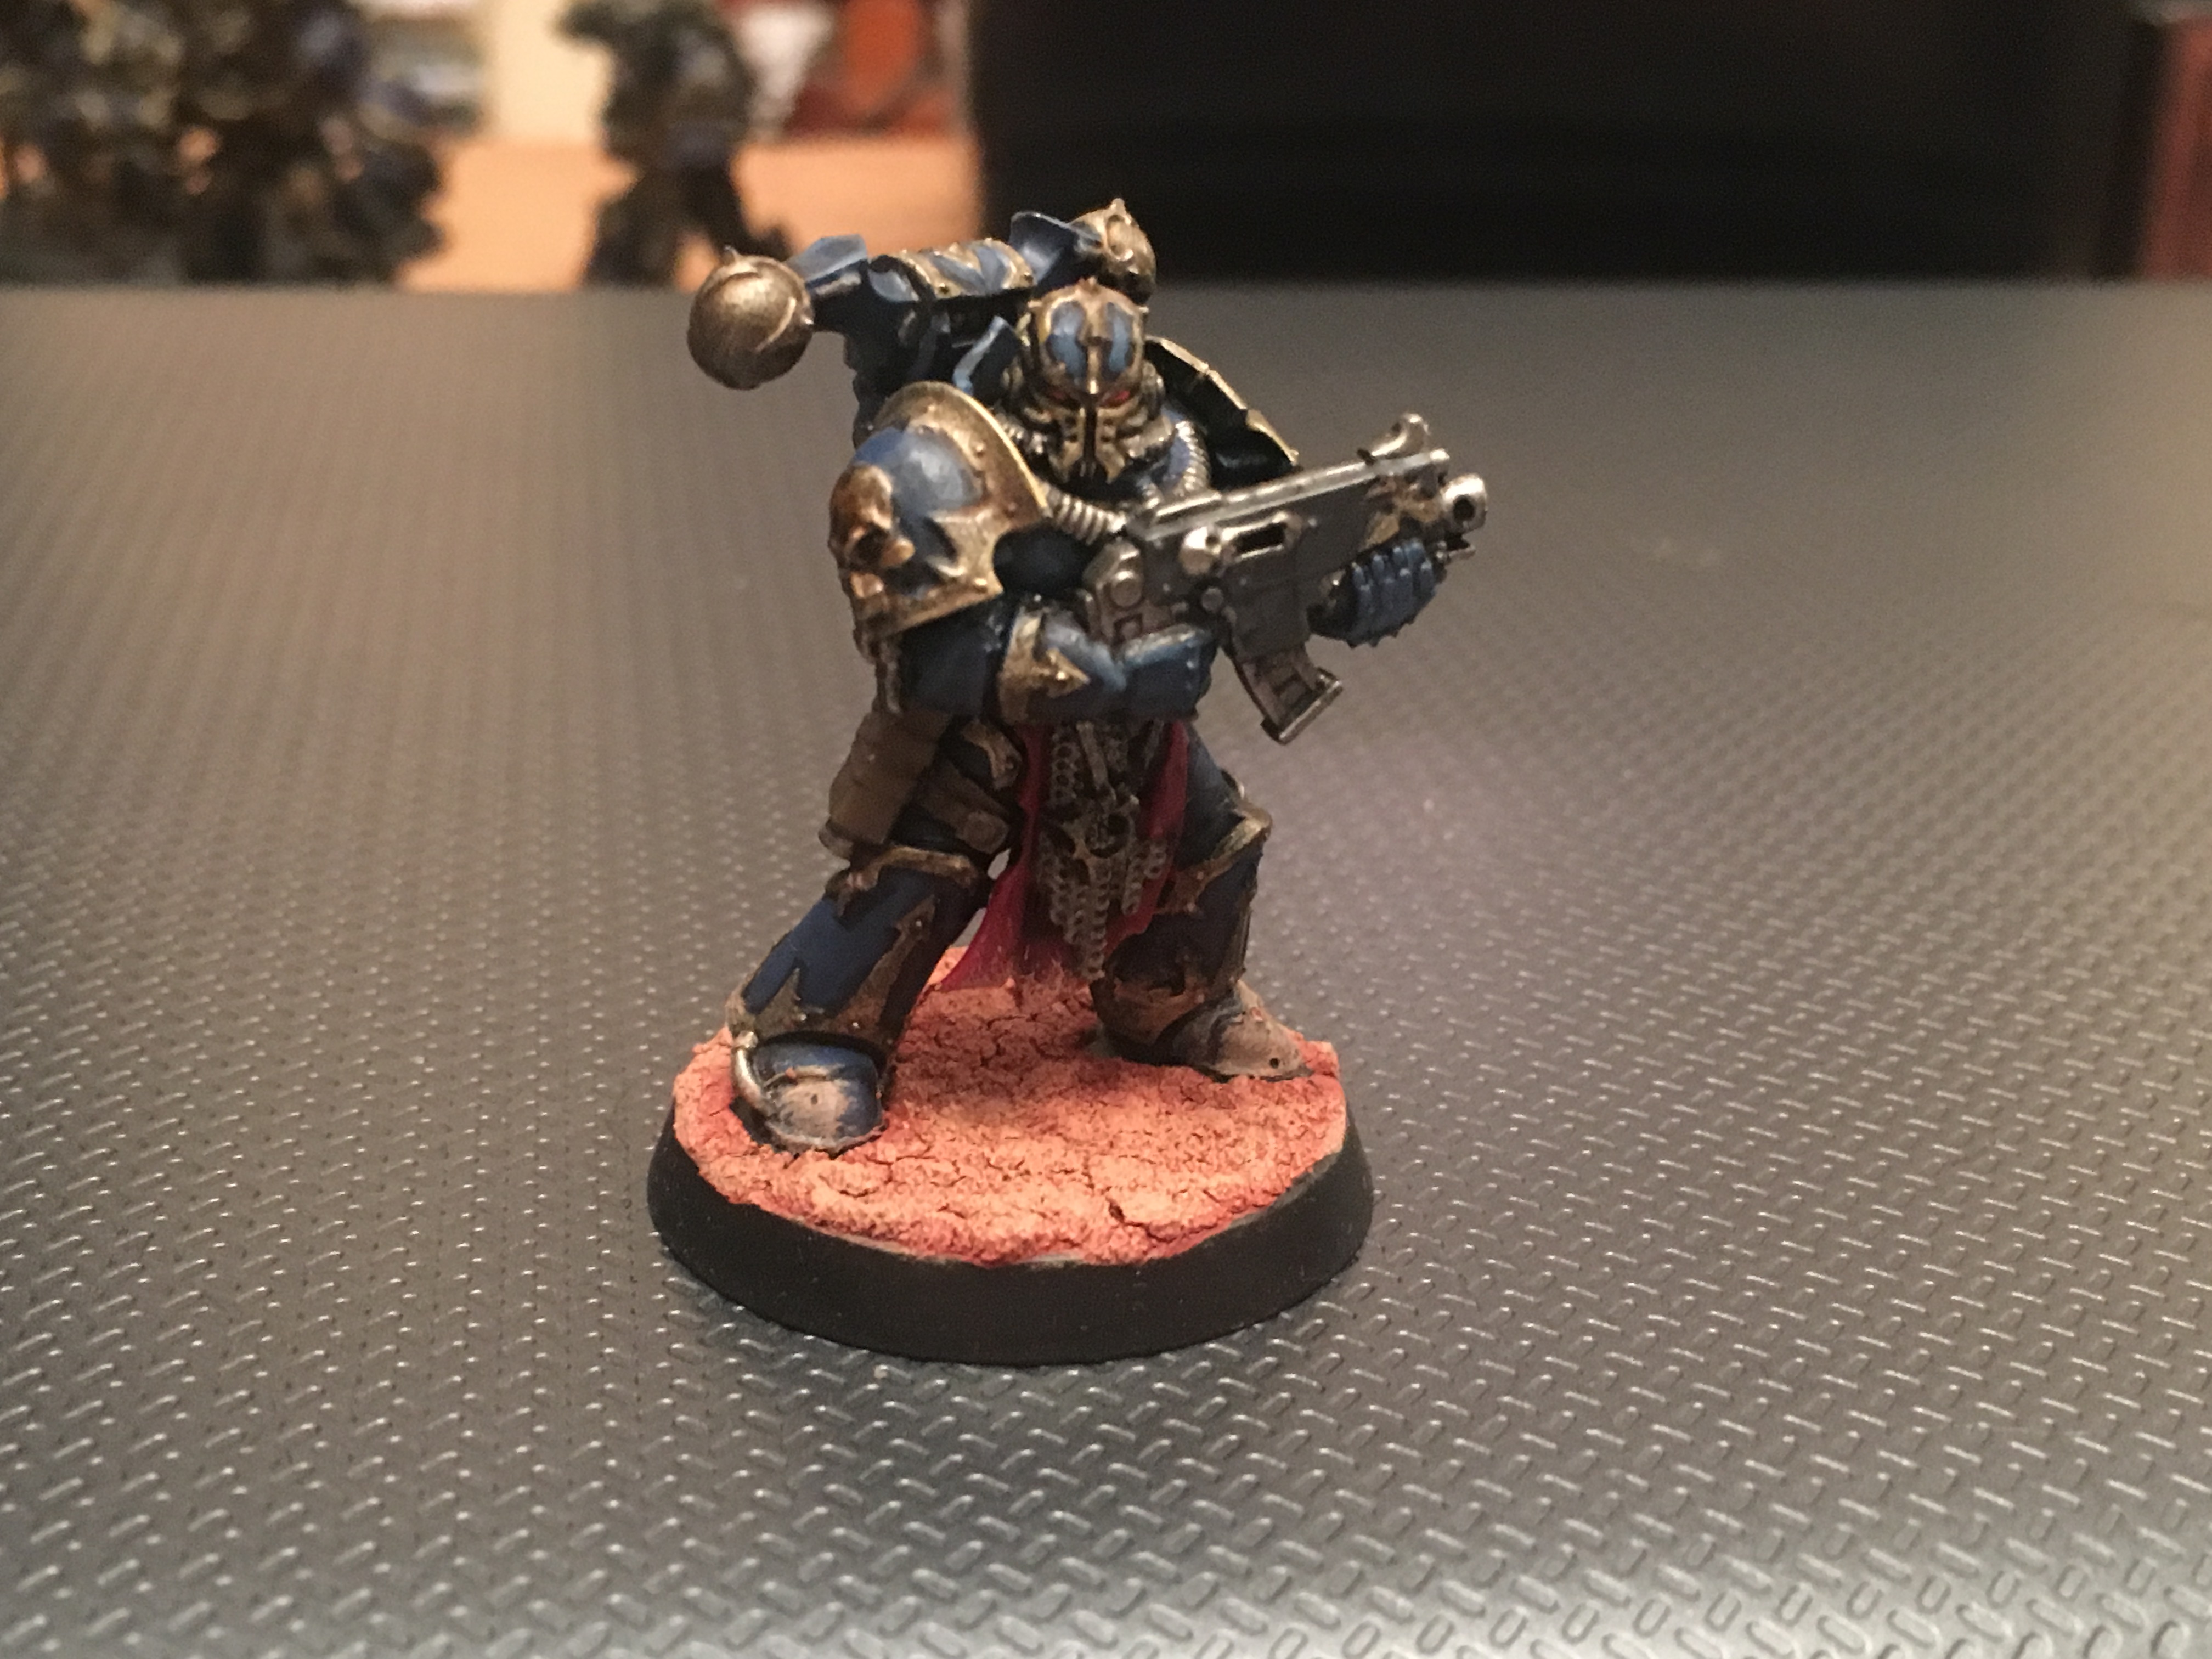
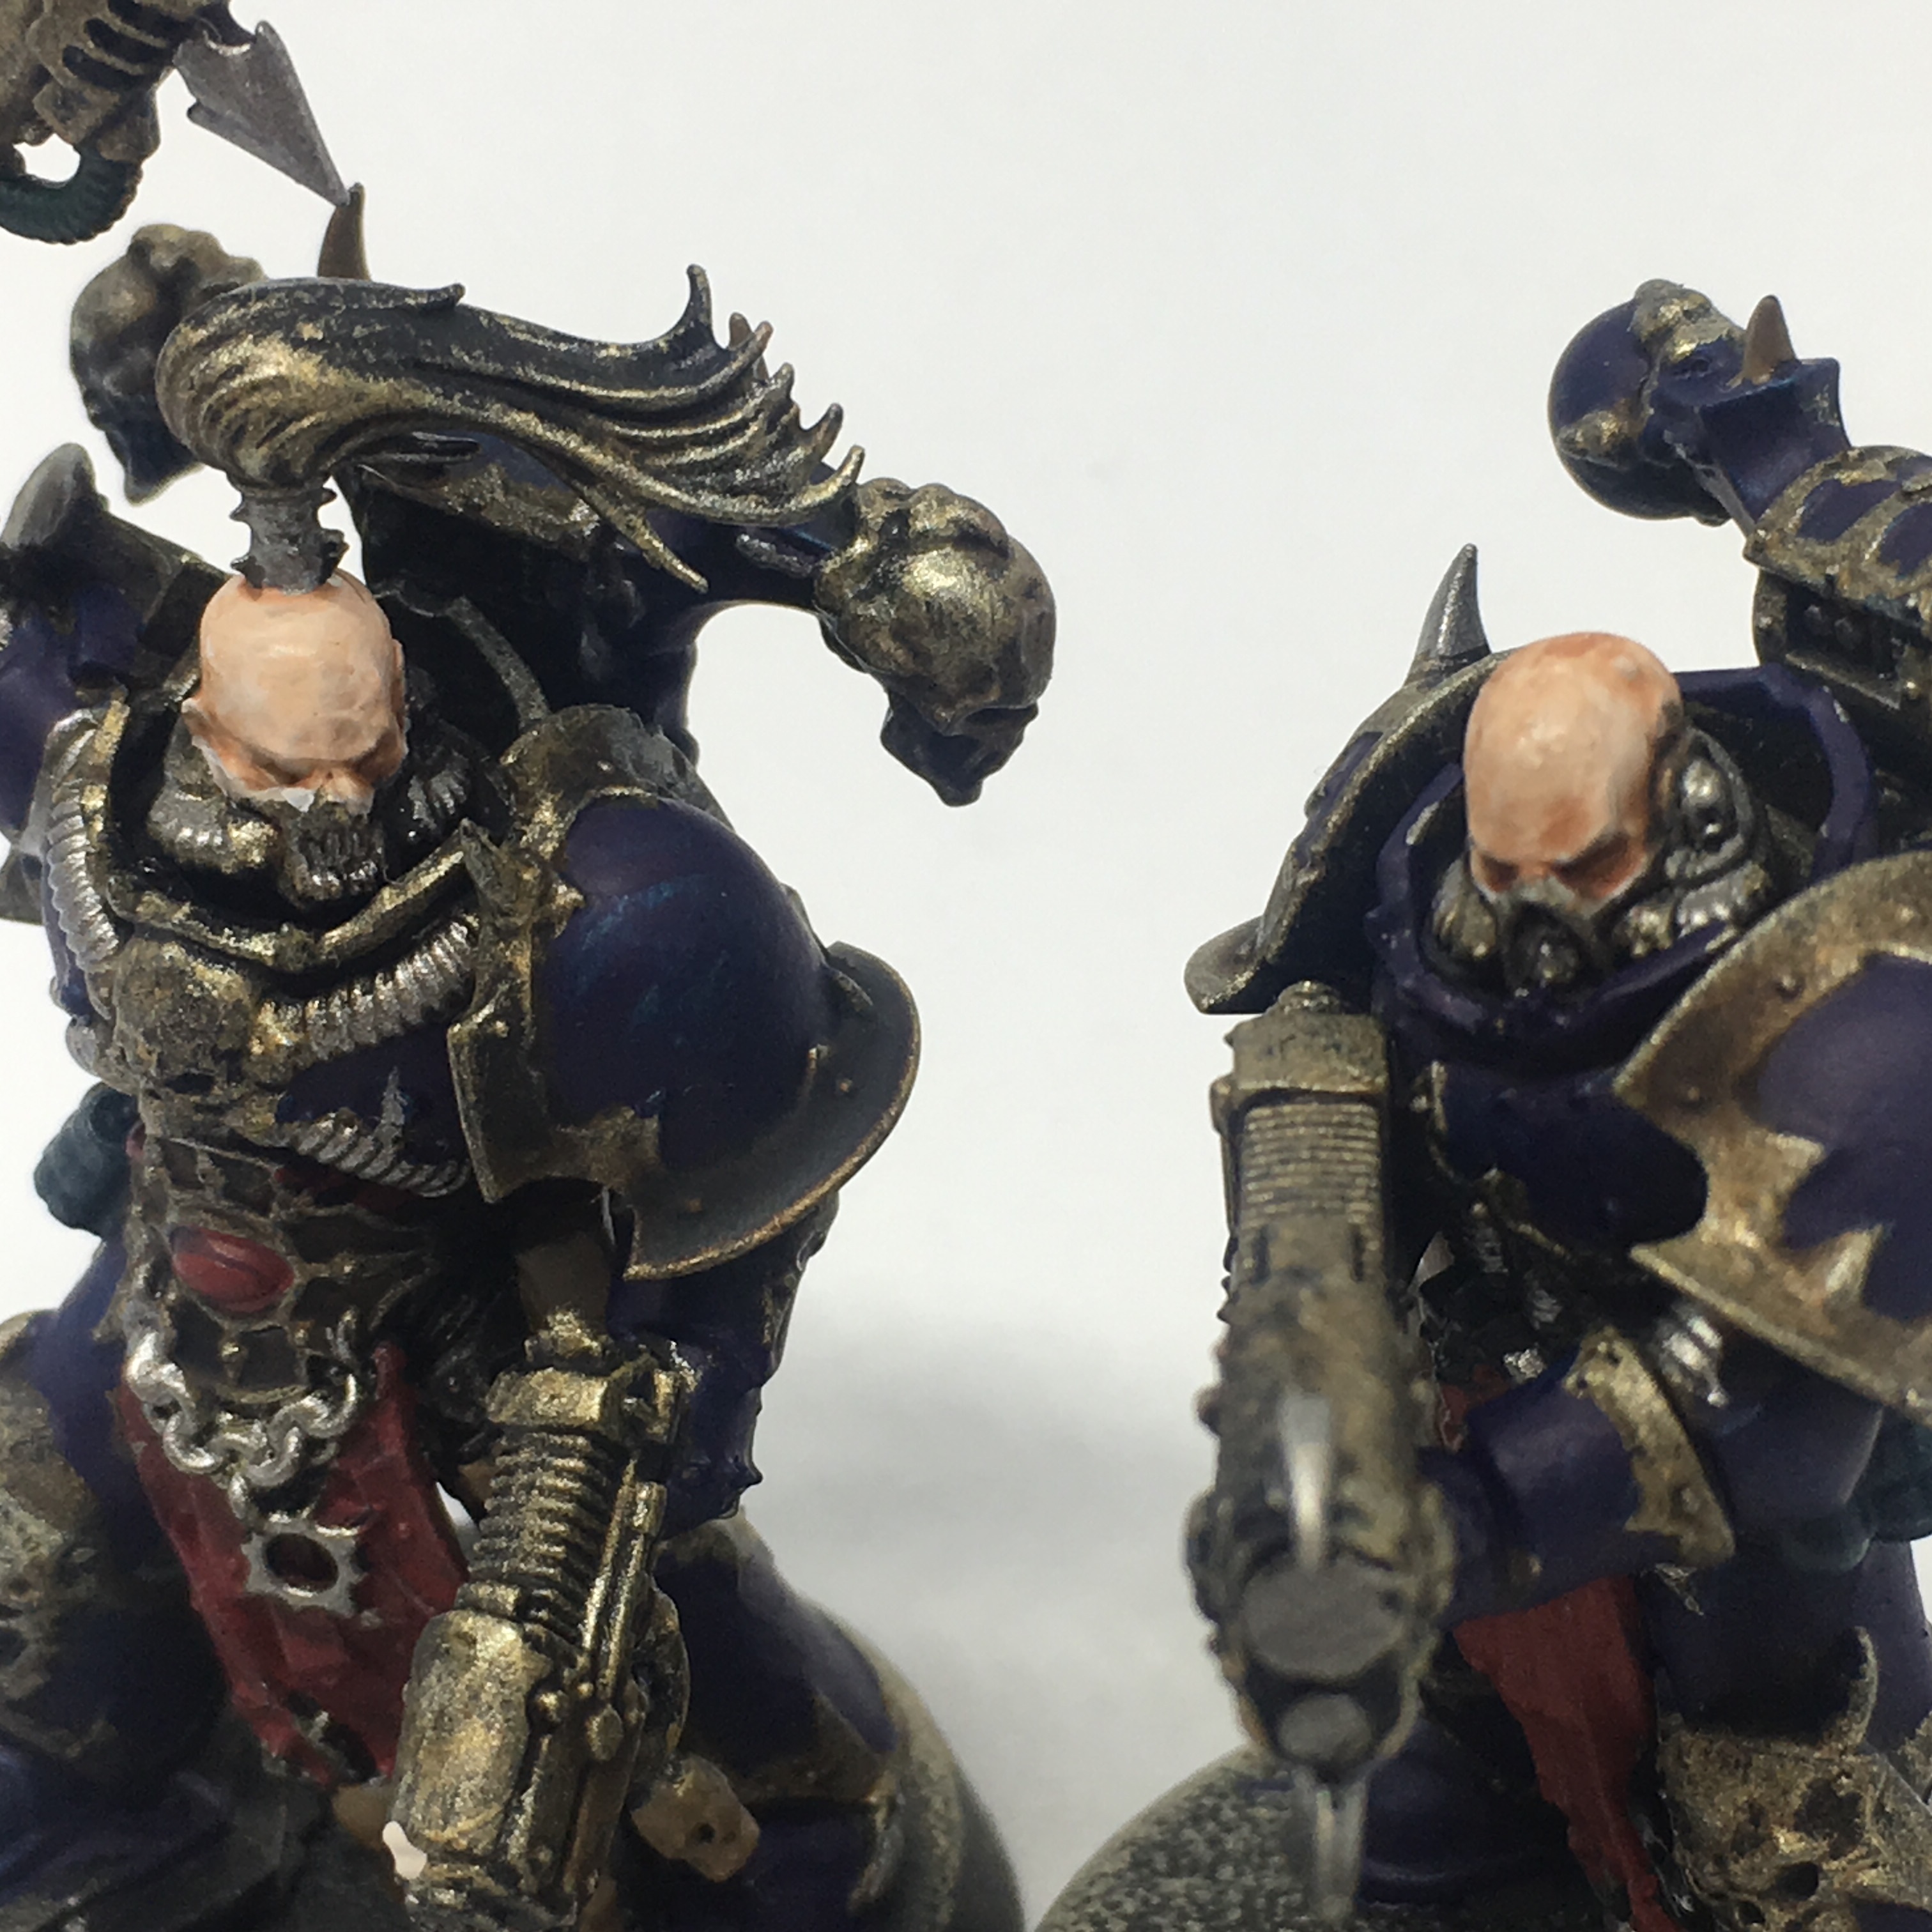
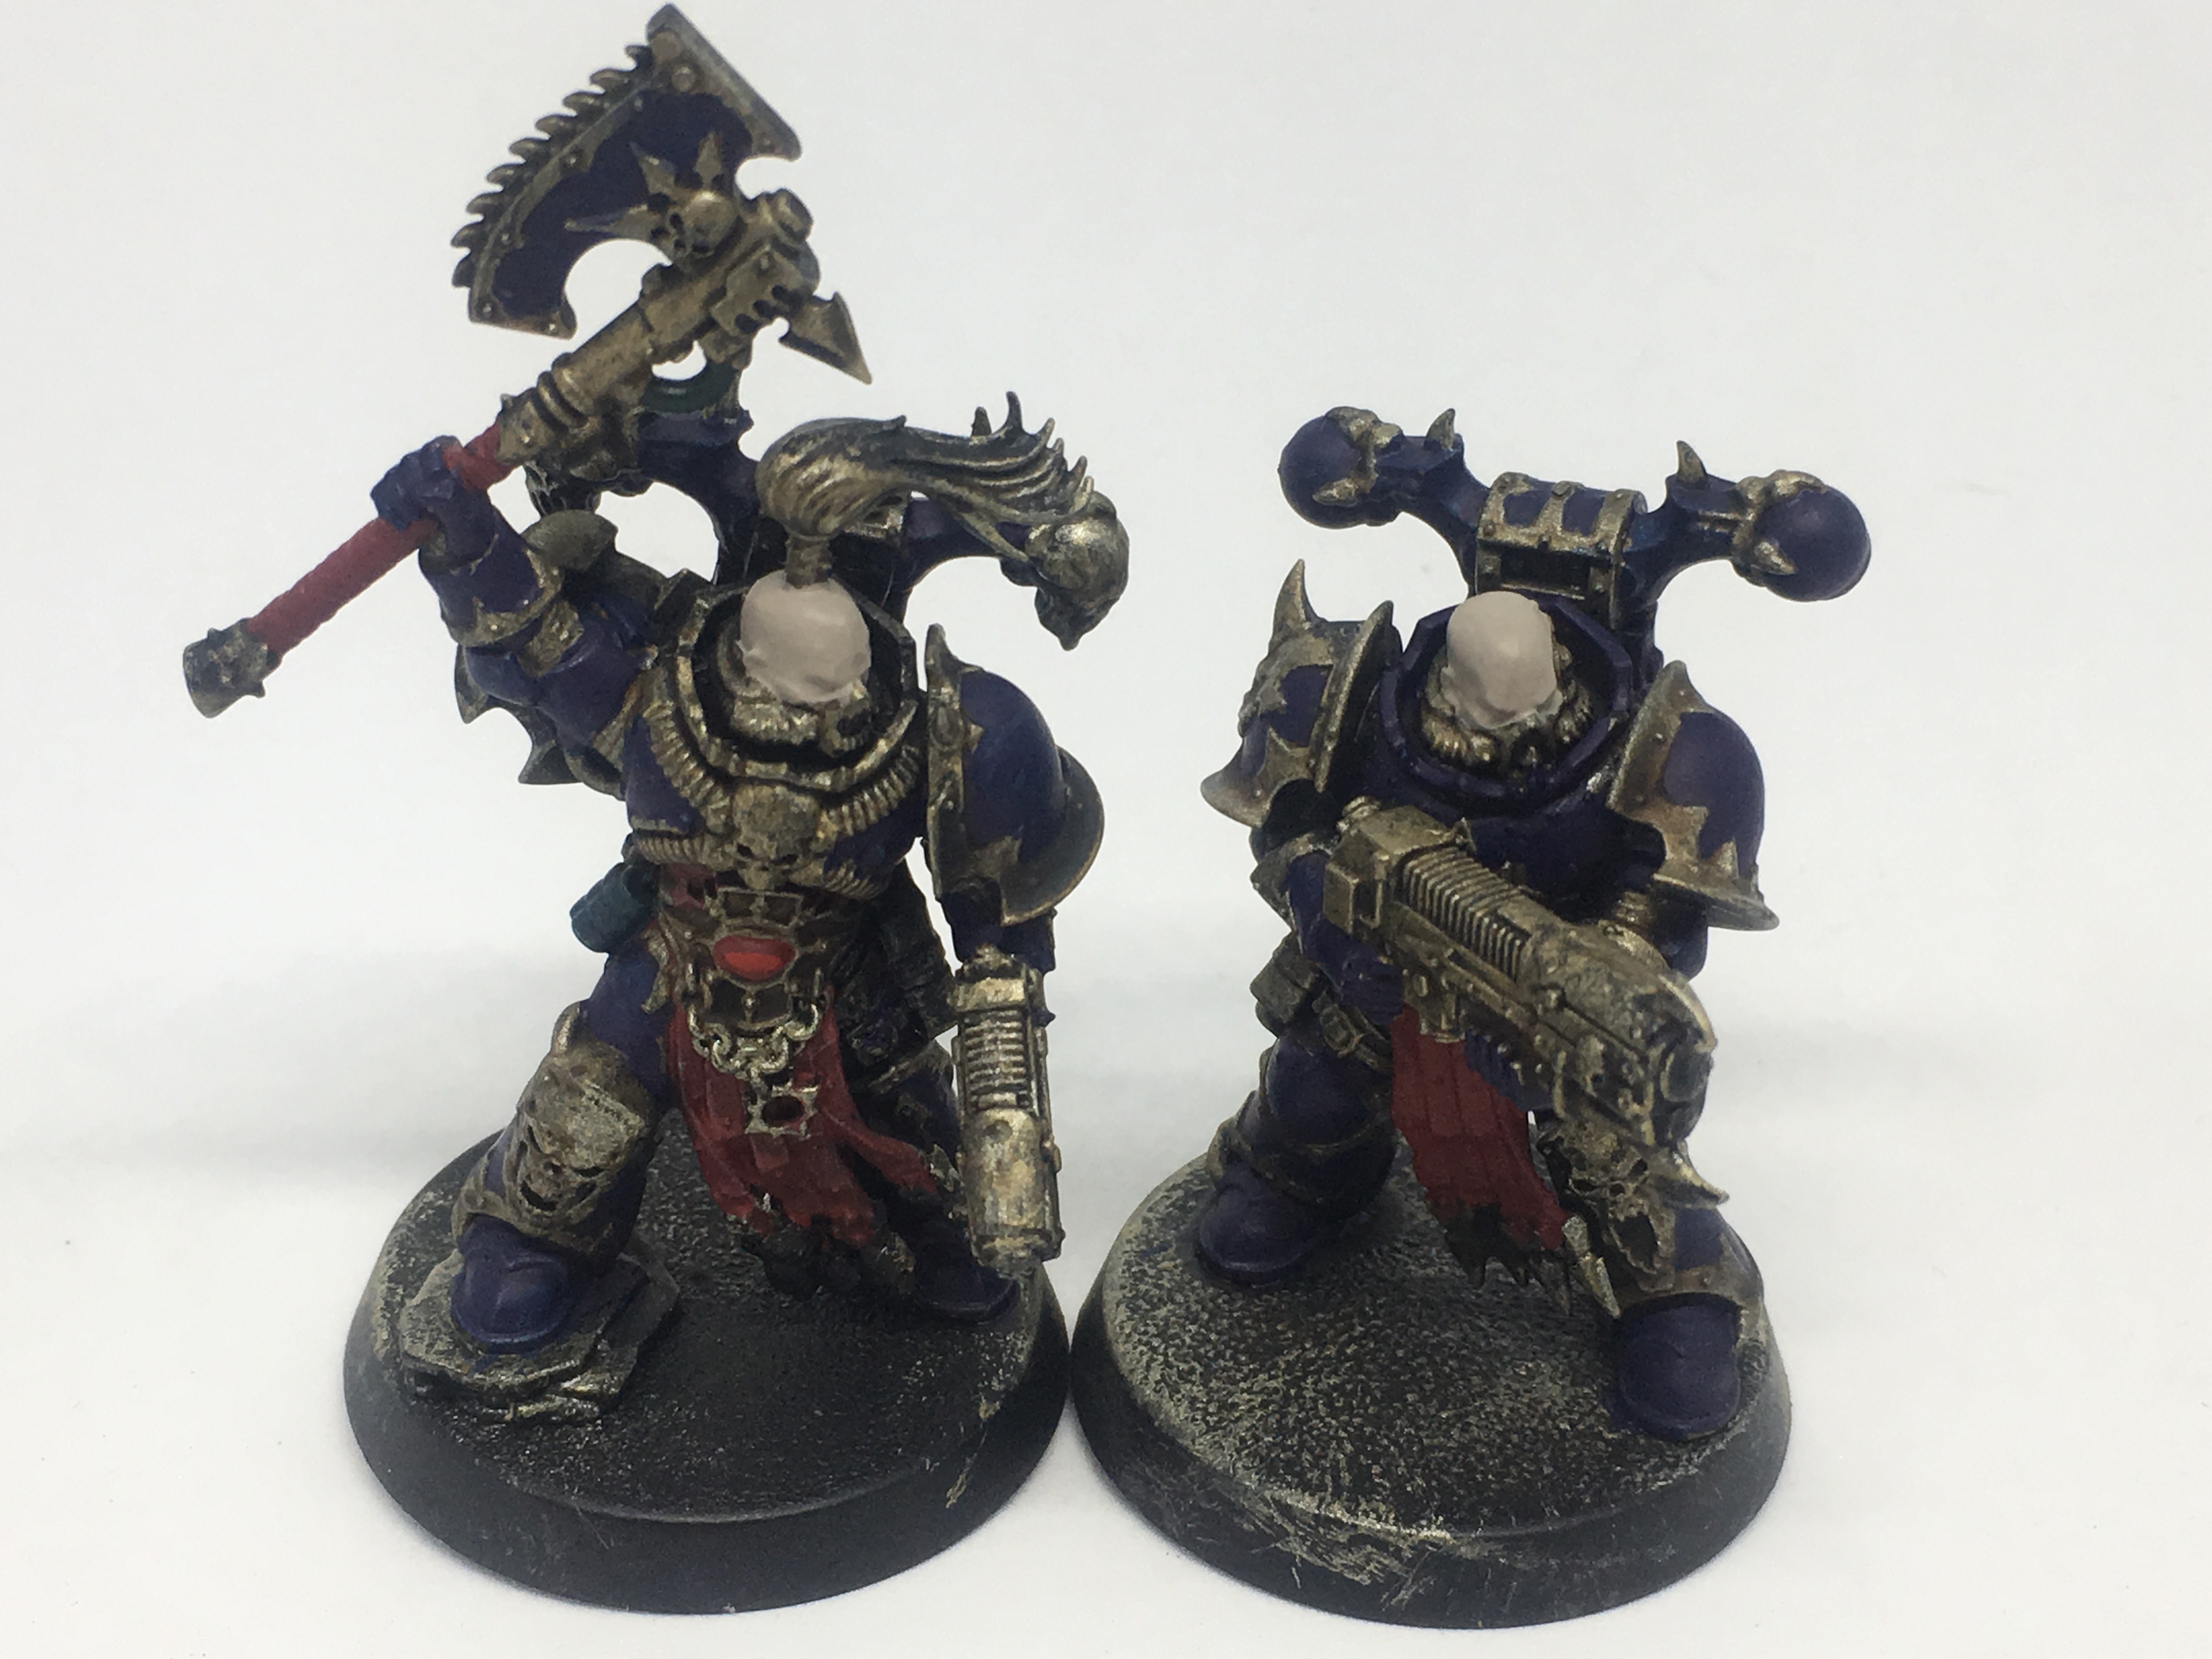
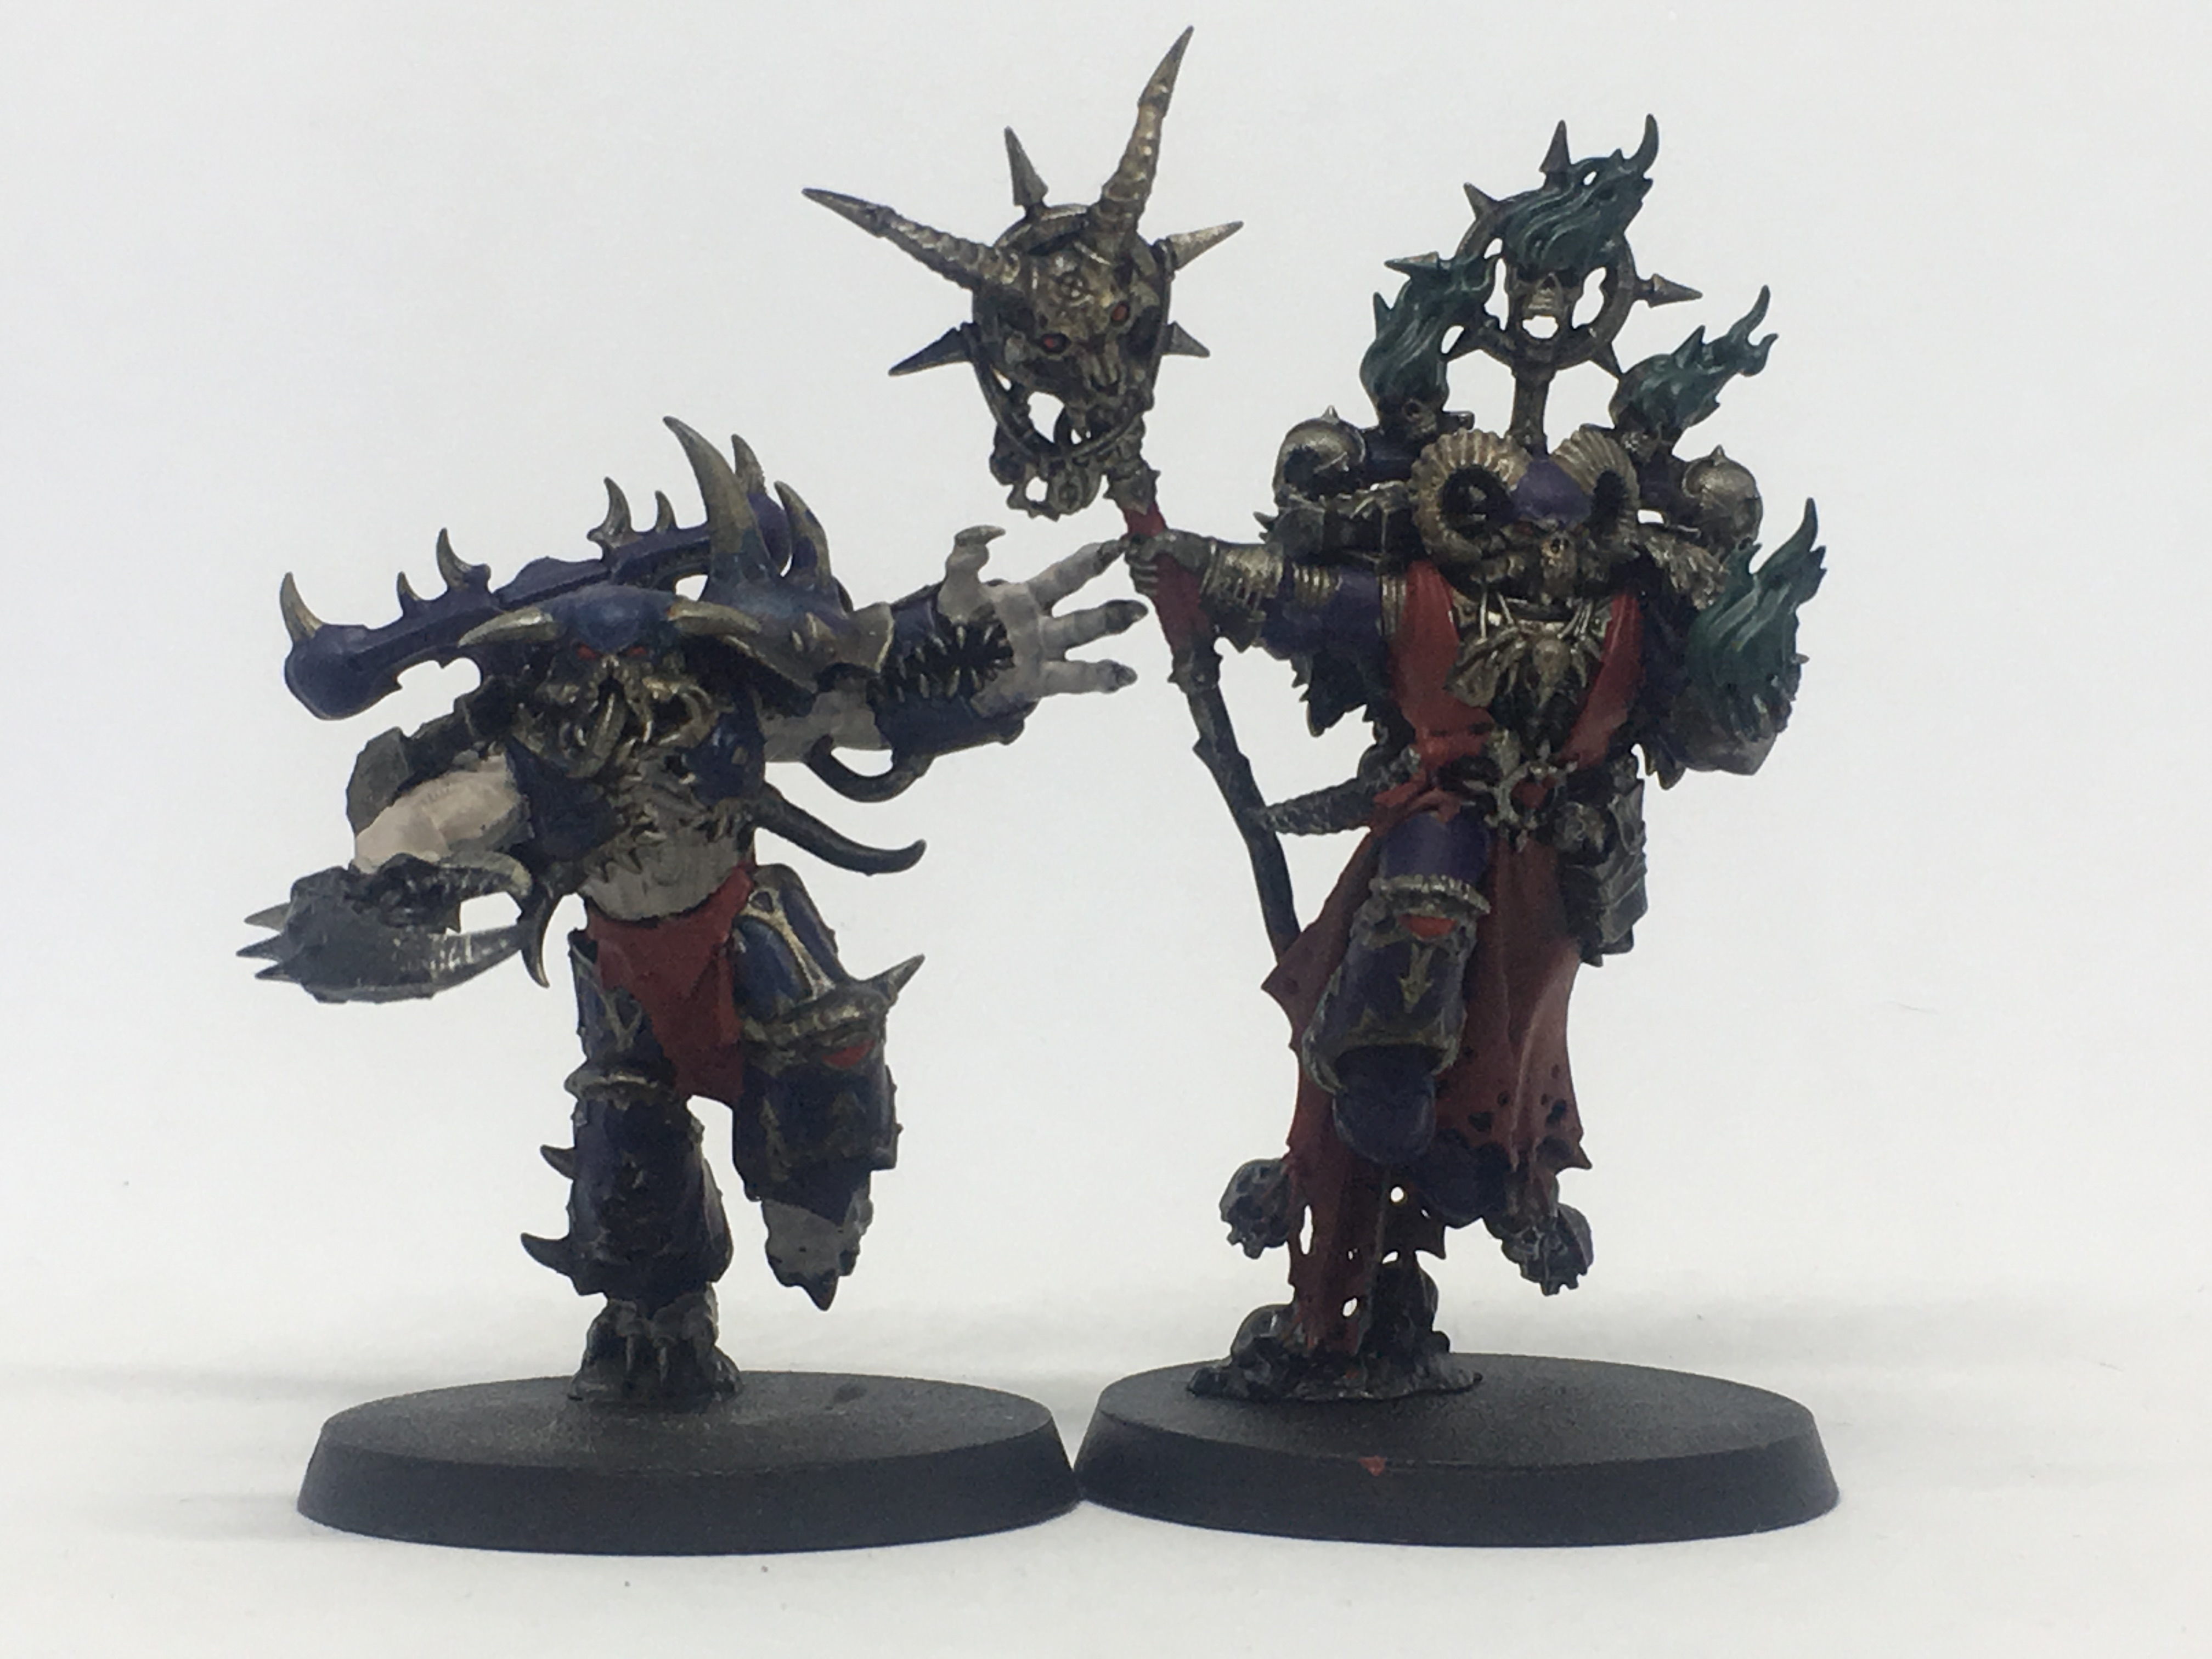
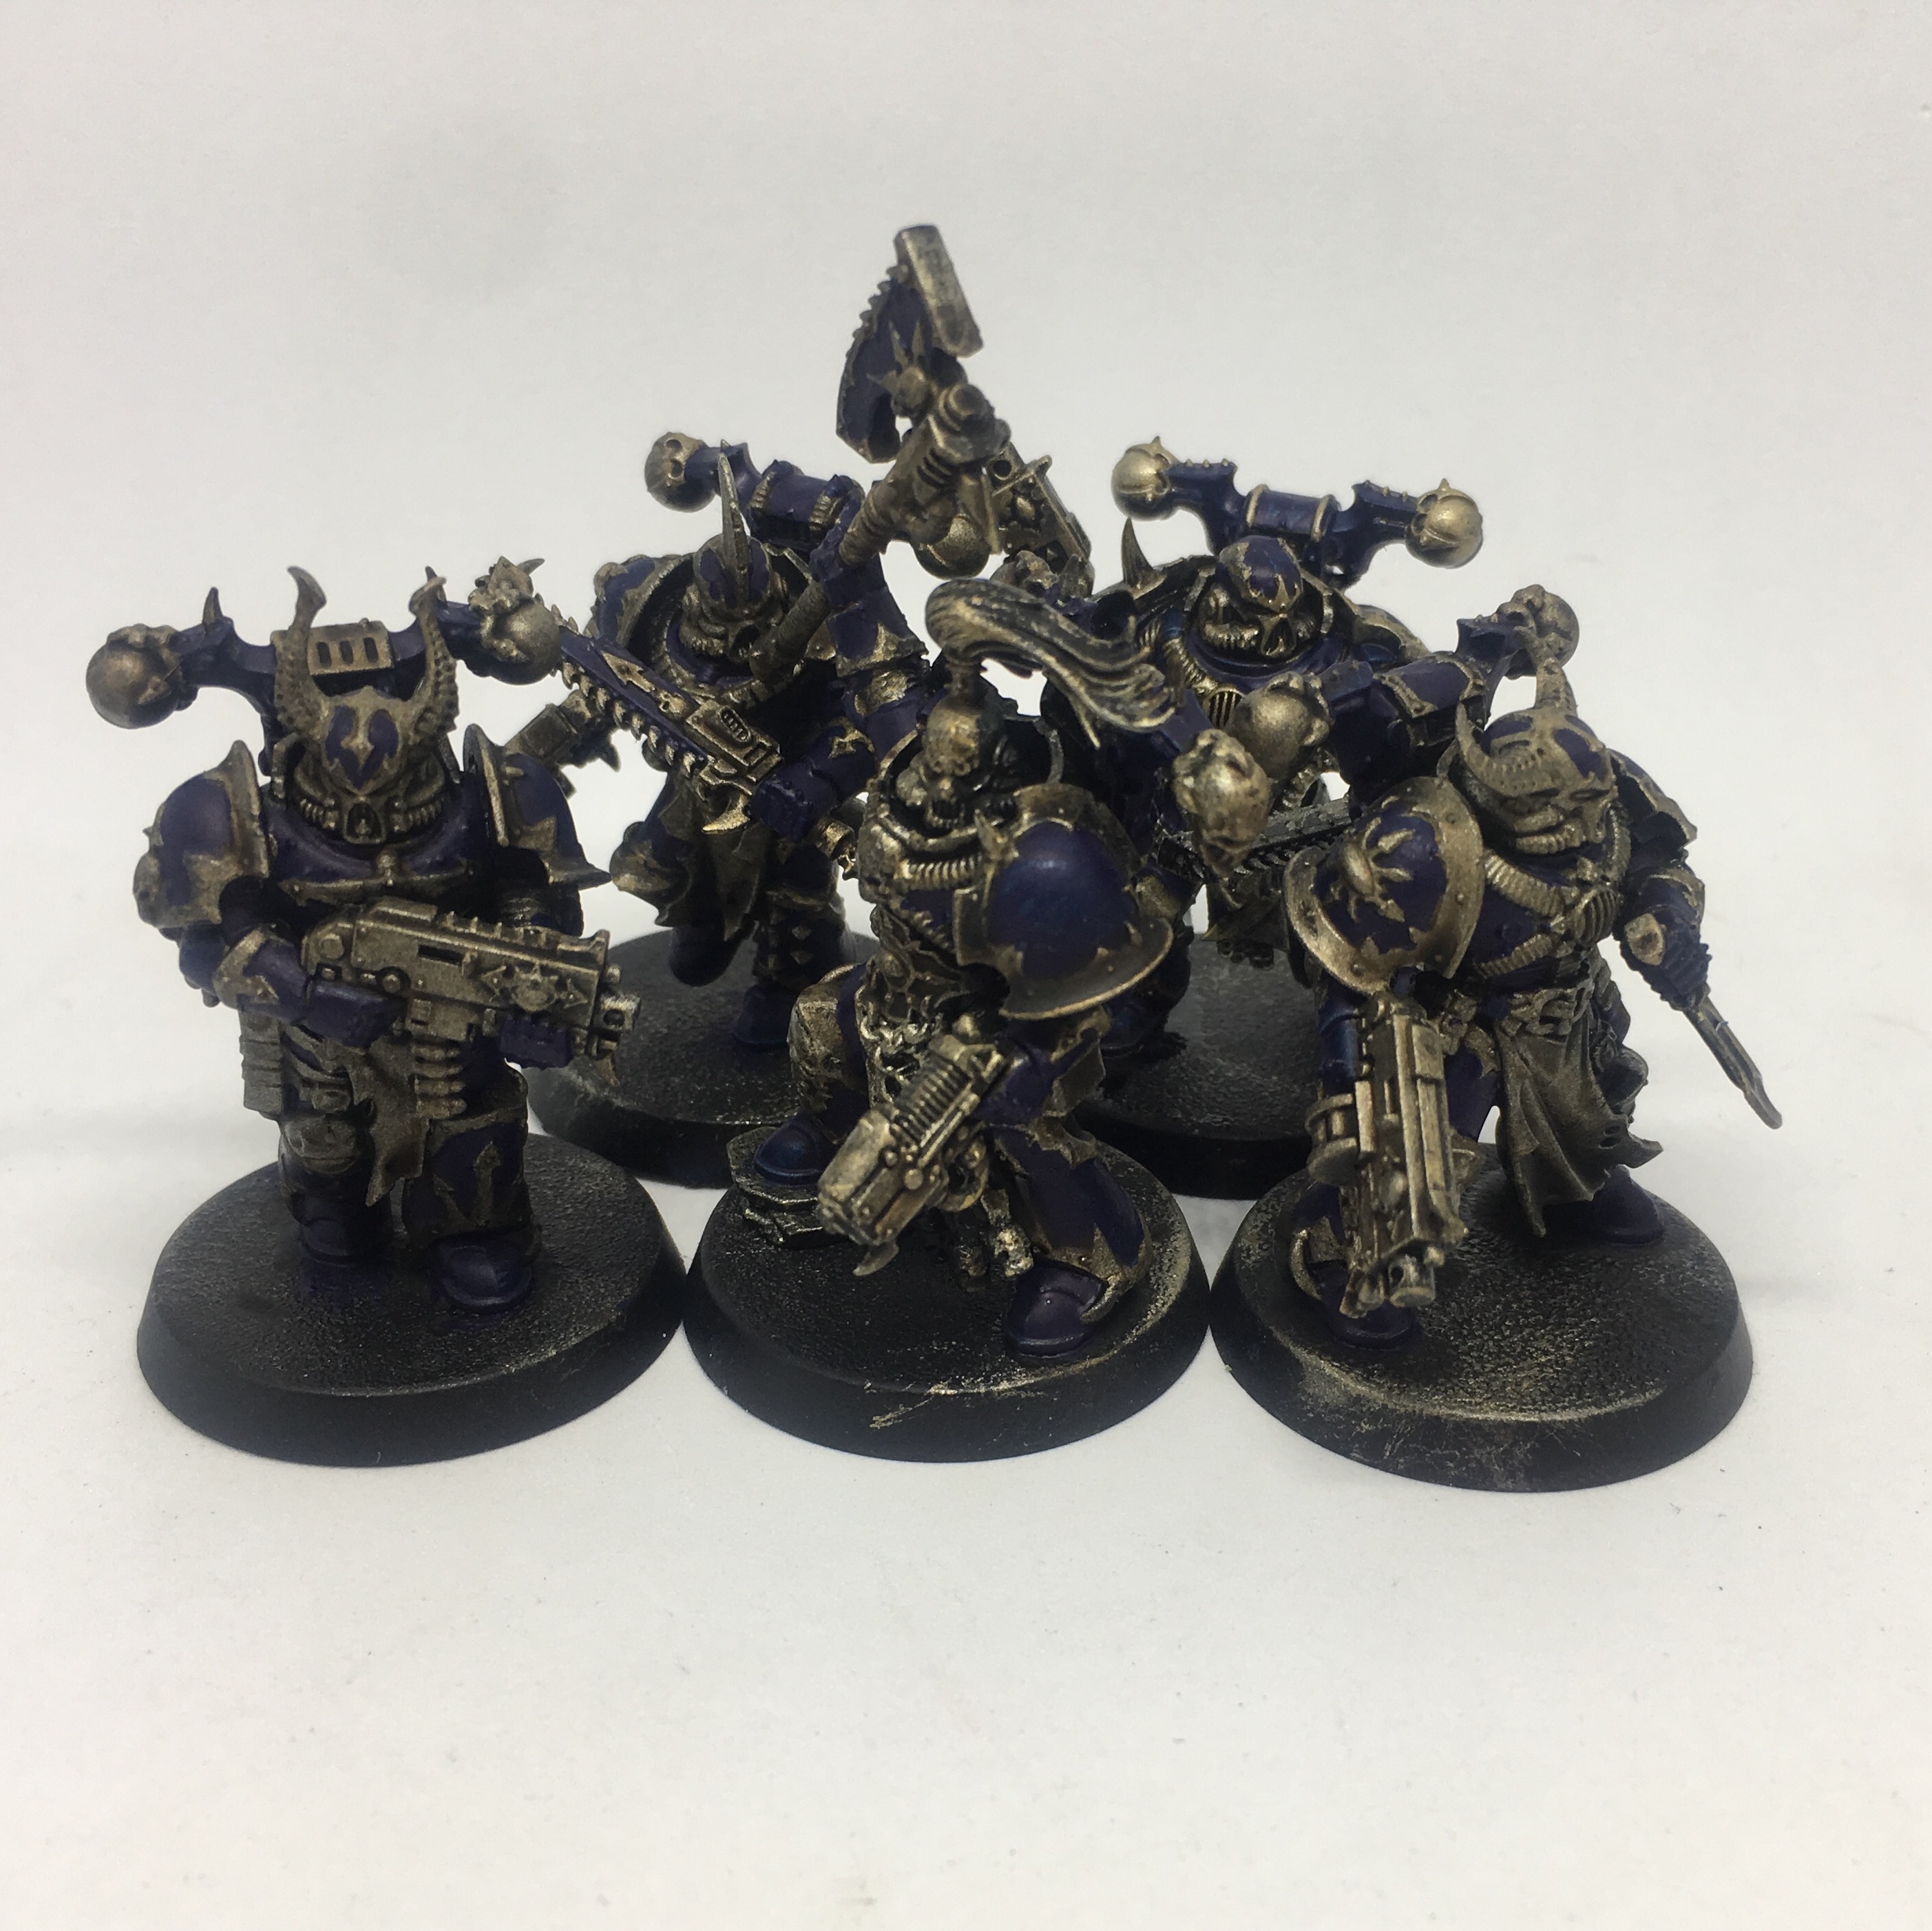
This is not much of a tutorial here either, but I have four models that are 90% done and four more which are 85% done. Been busy meeting up with friends and walking today. It is great to almost have this ten-strong squad finished. Then I will start on my Master of Possession, two Greater Possessed, two Obliterators and the Venom Crawler.
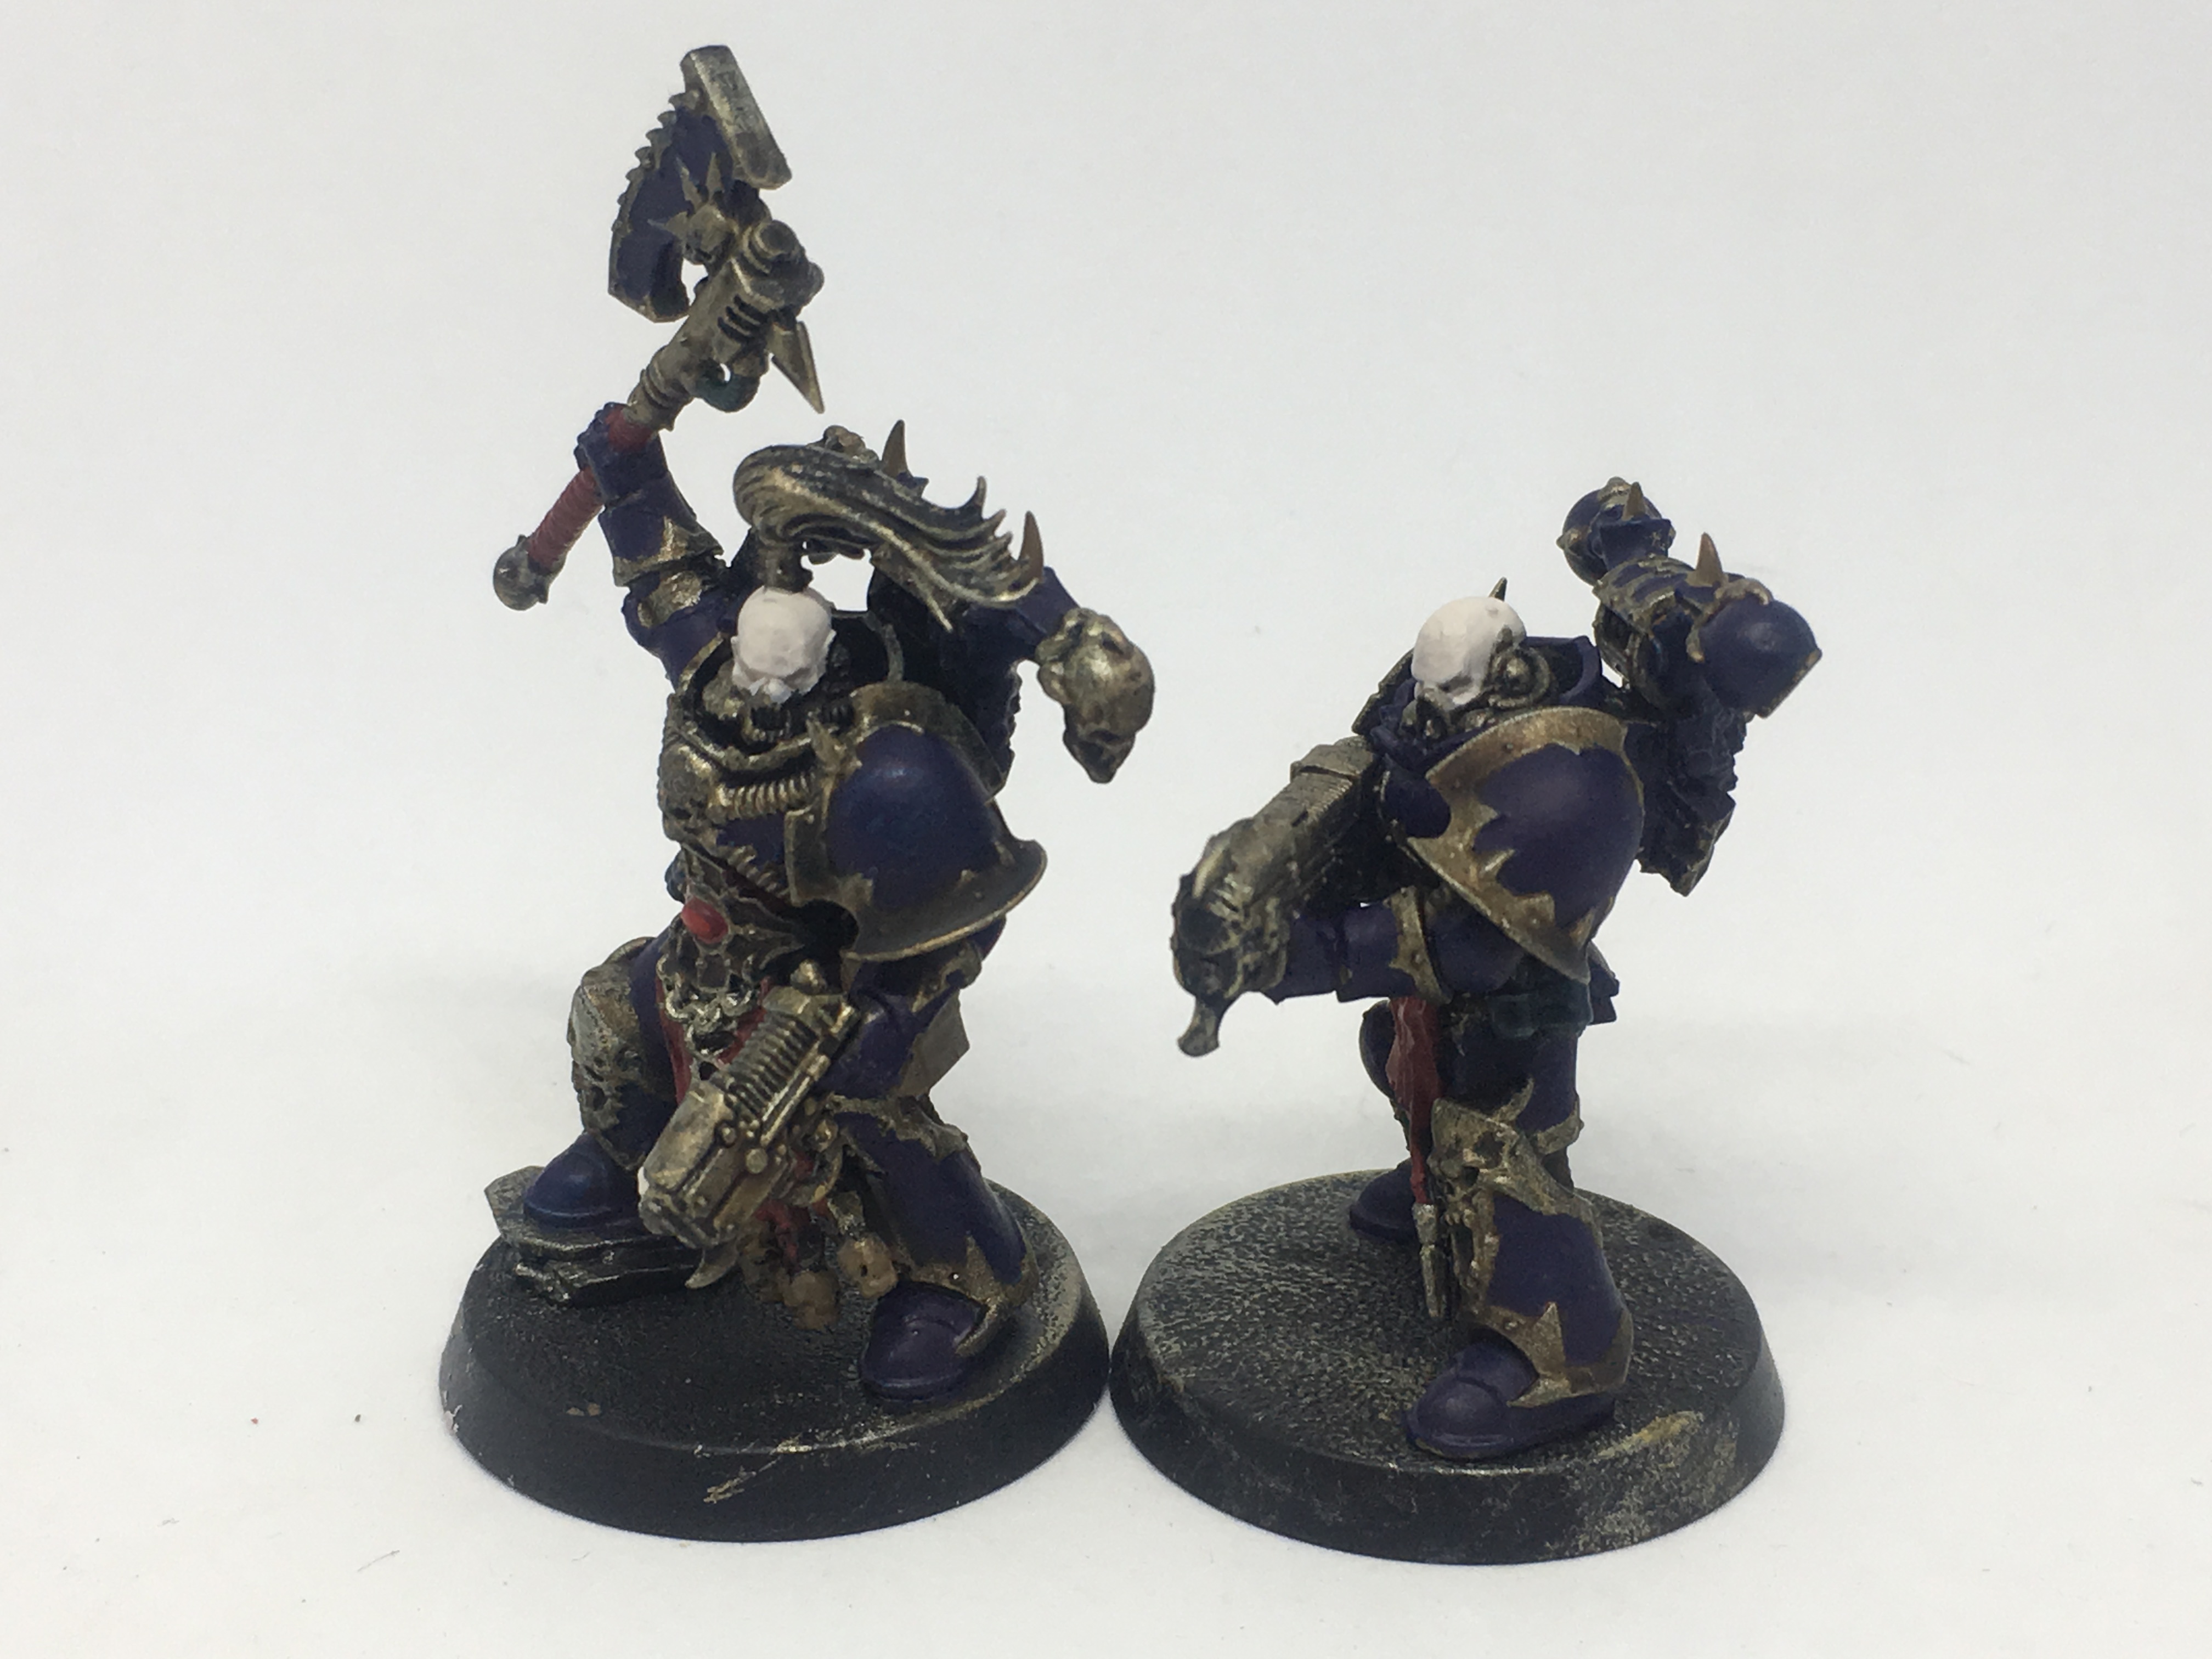
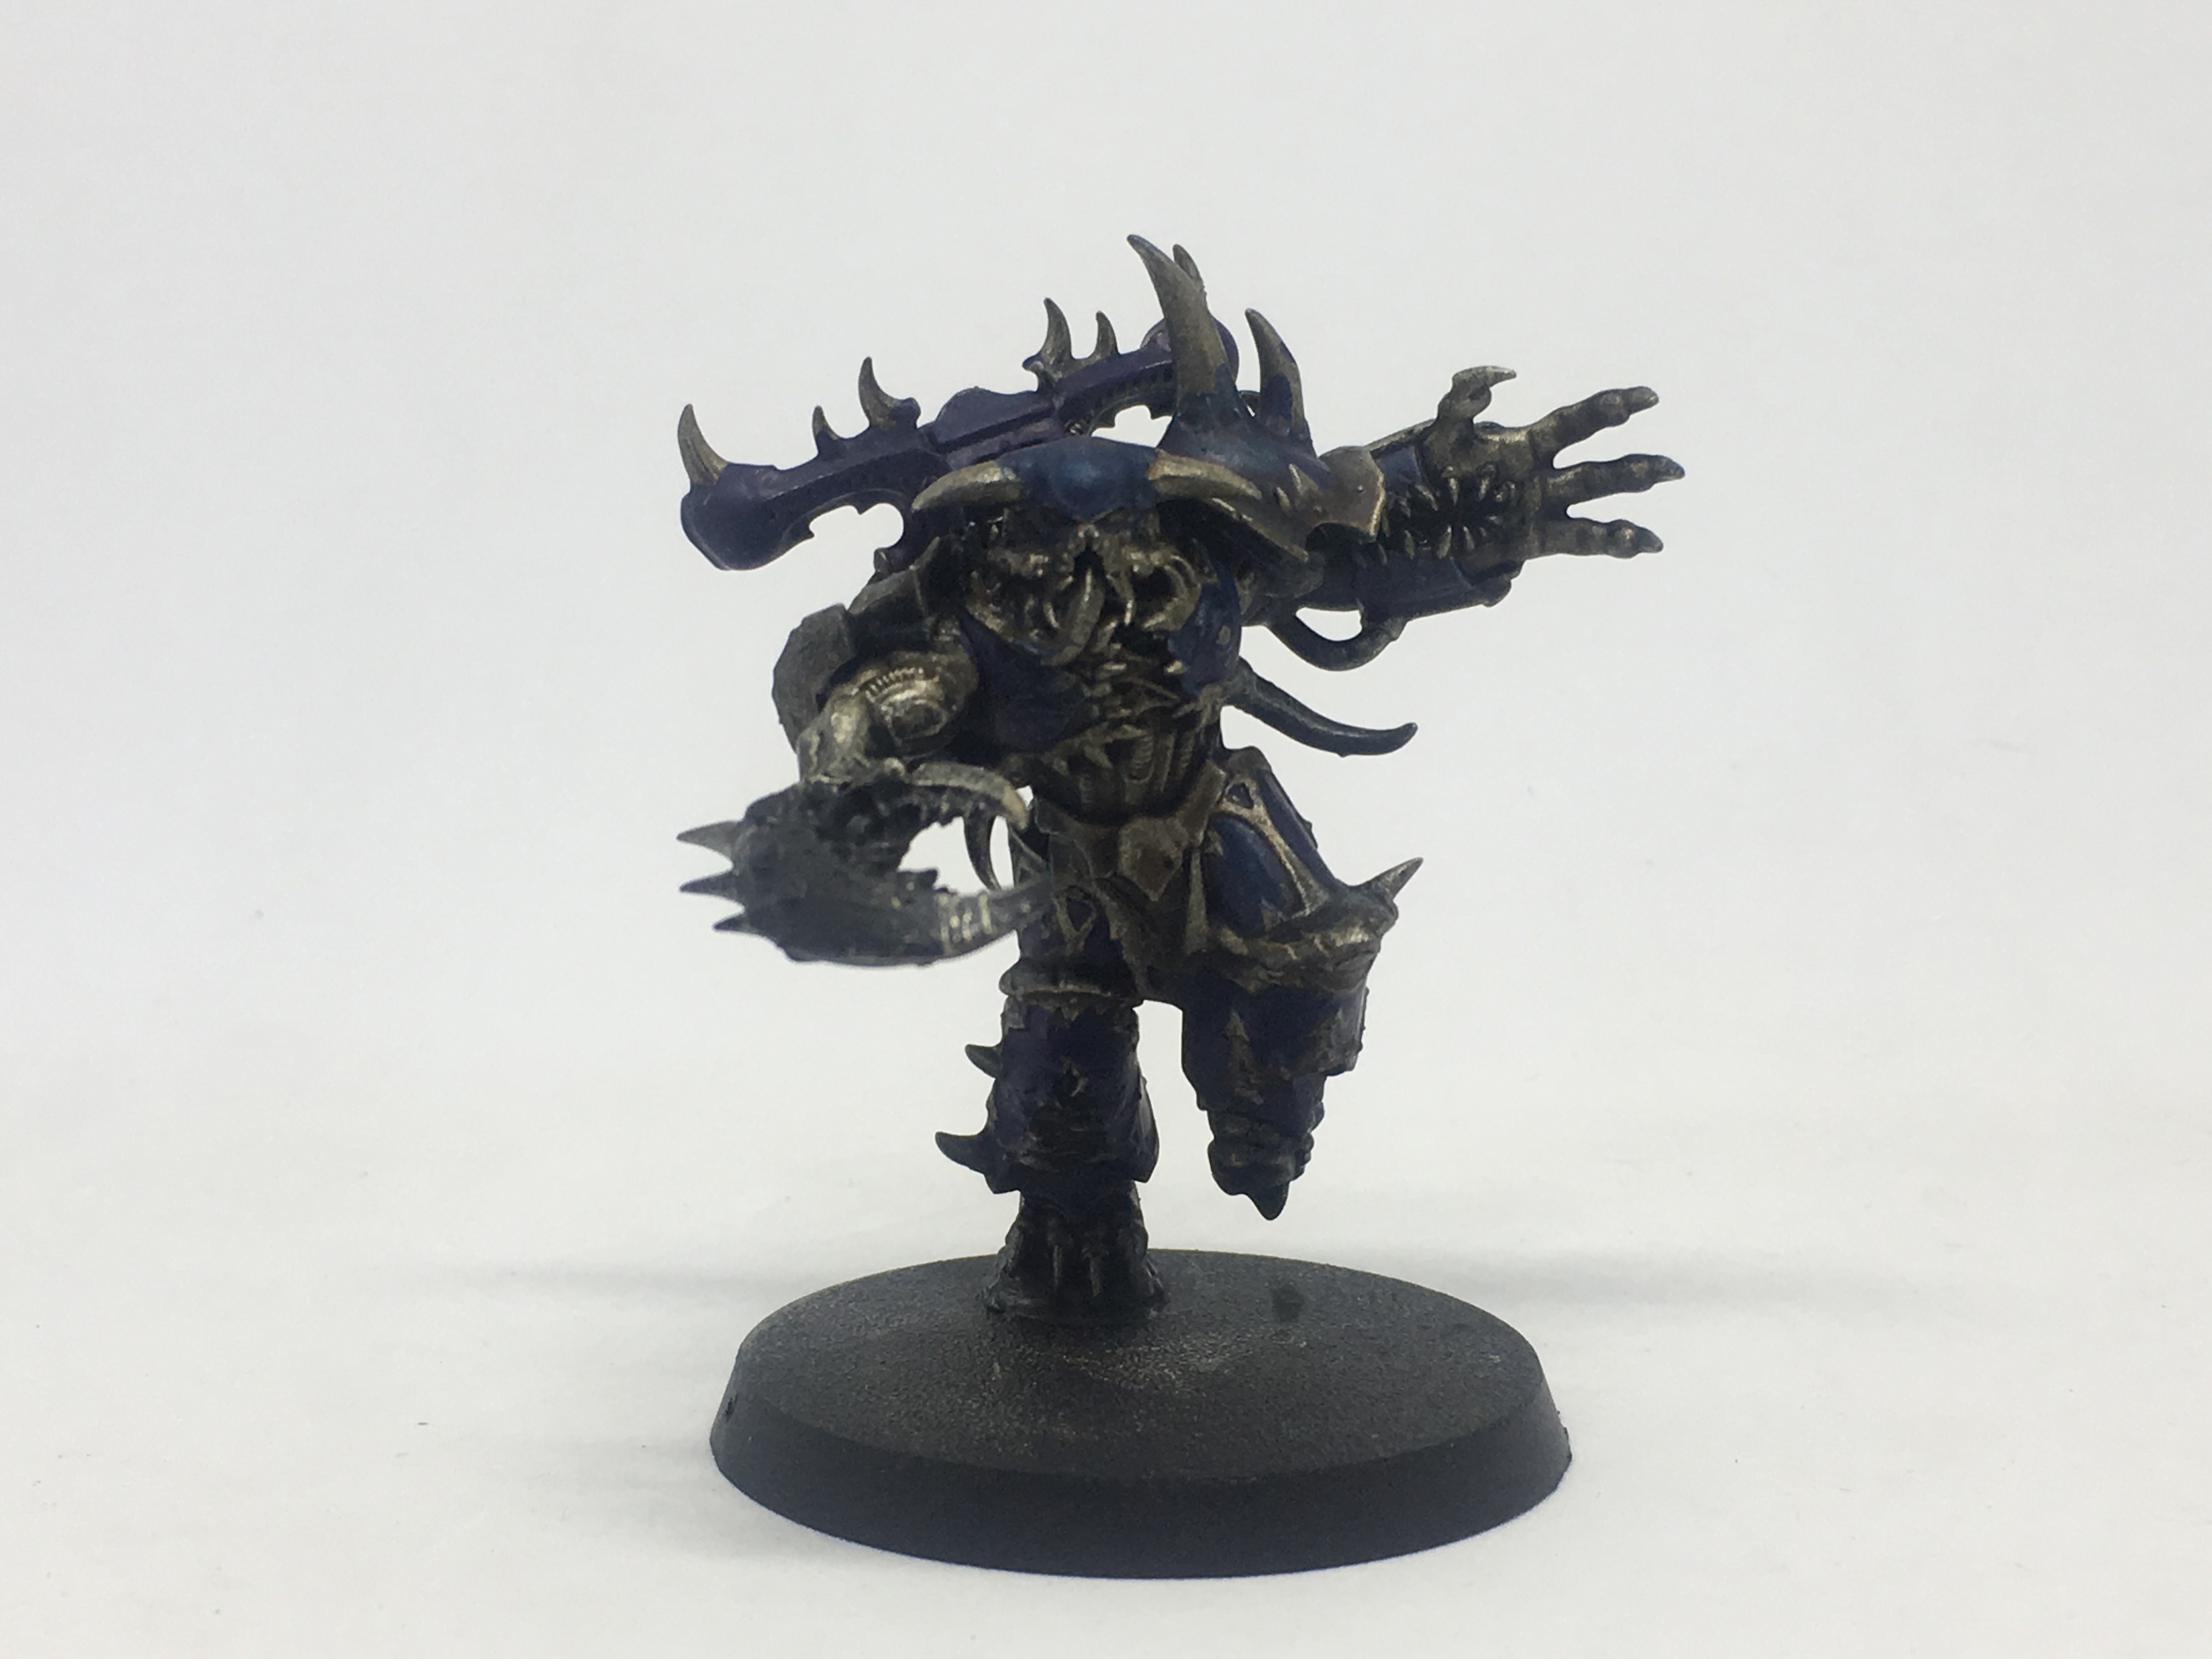
Edit: This stretched longer than I expected so I am spreading it into two posts. Also the last picture is a better shot of my second completed model


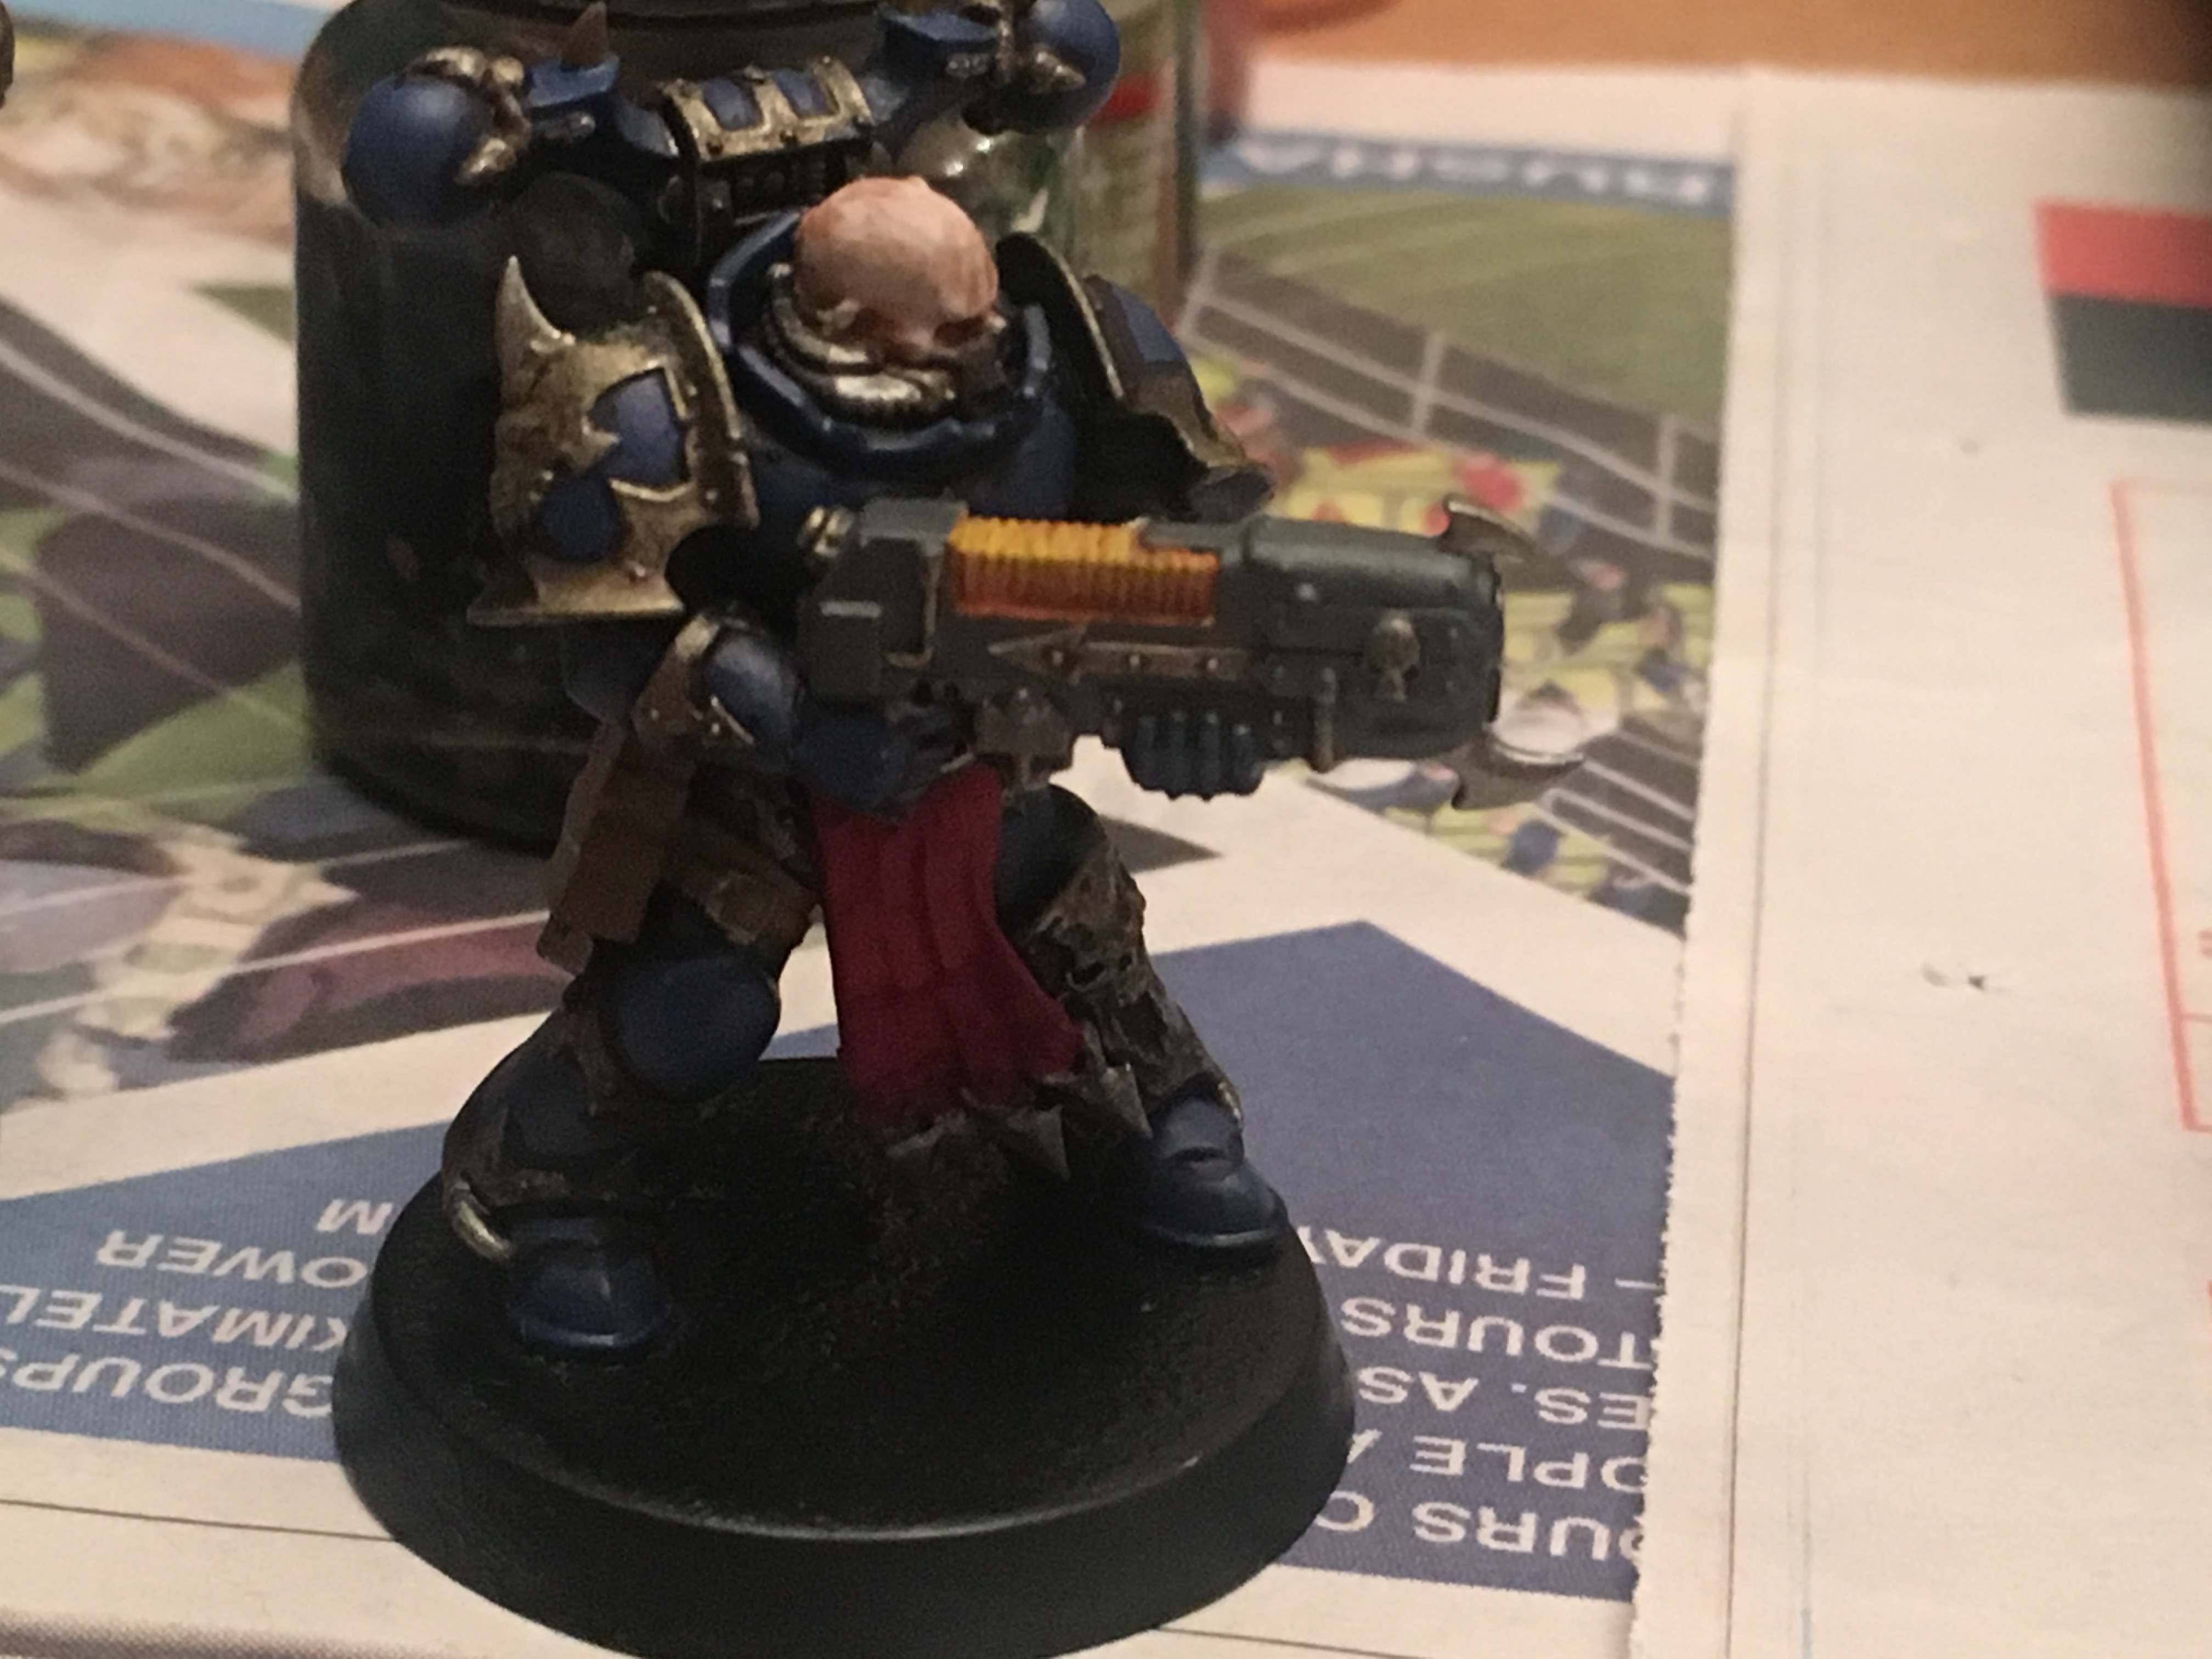
Entry 11: Saturday’s Progress
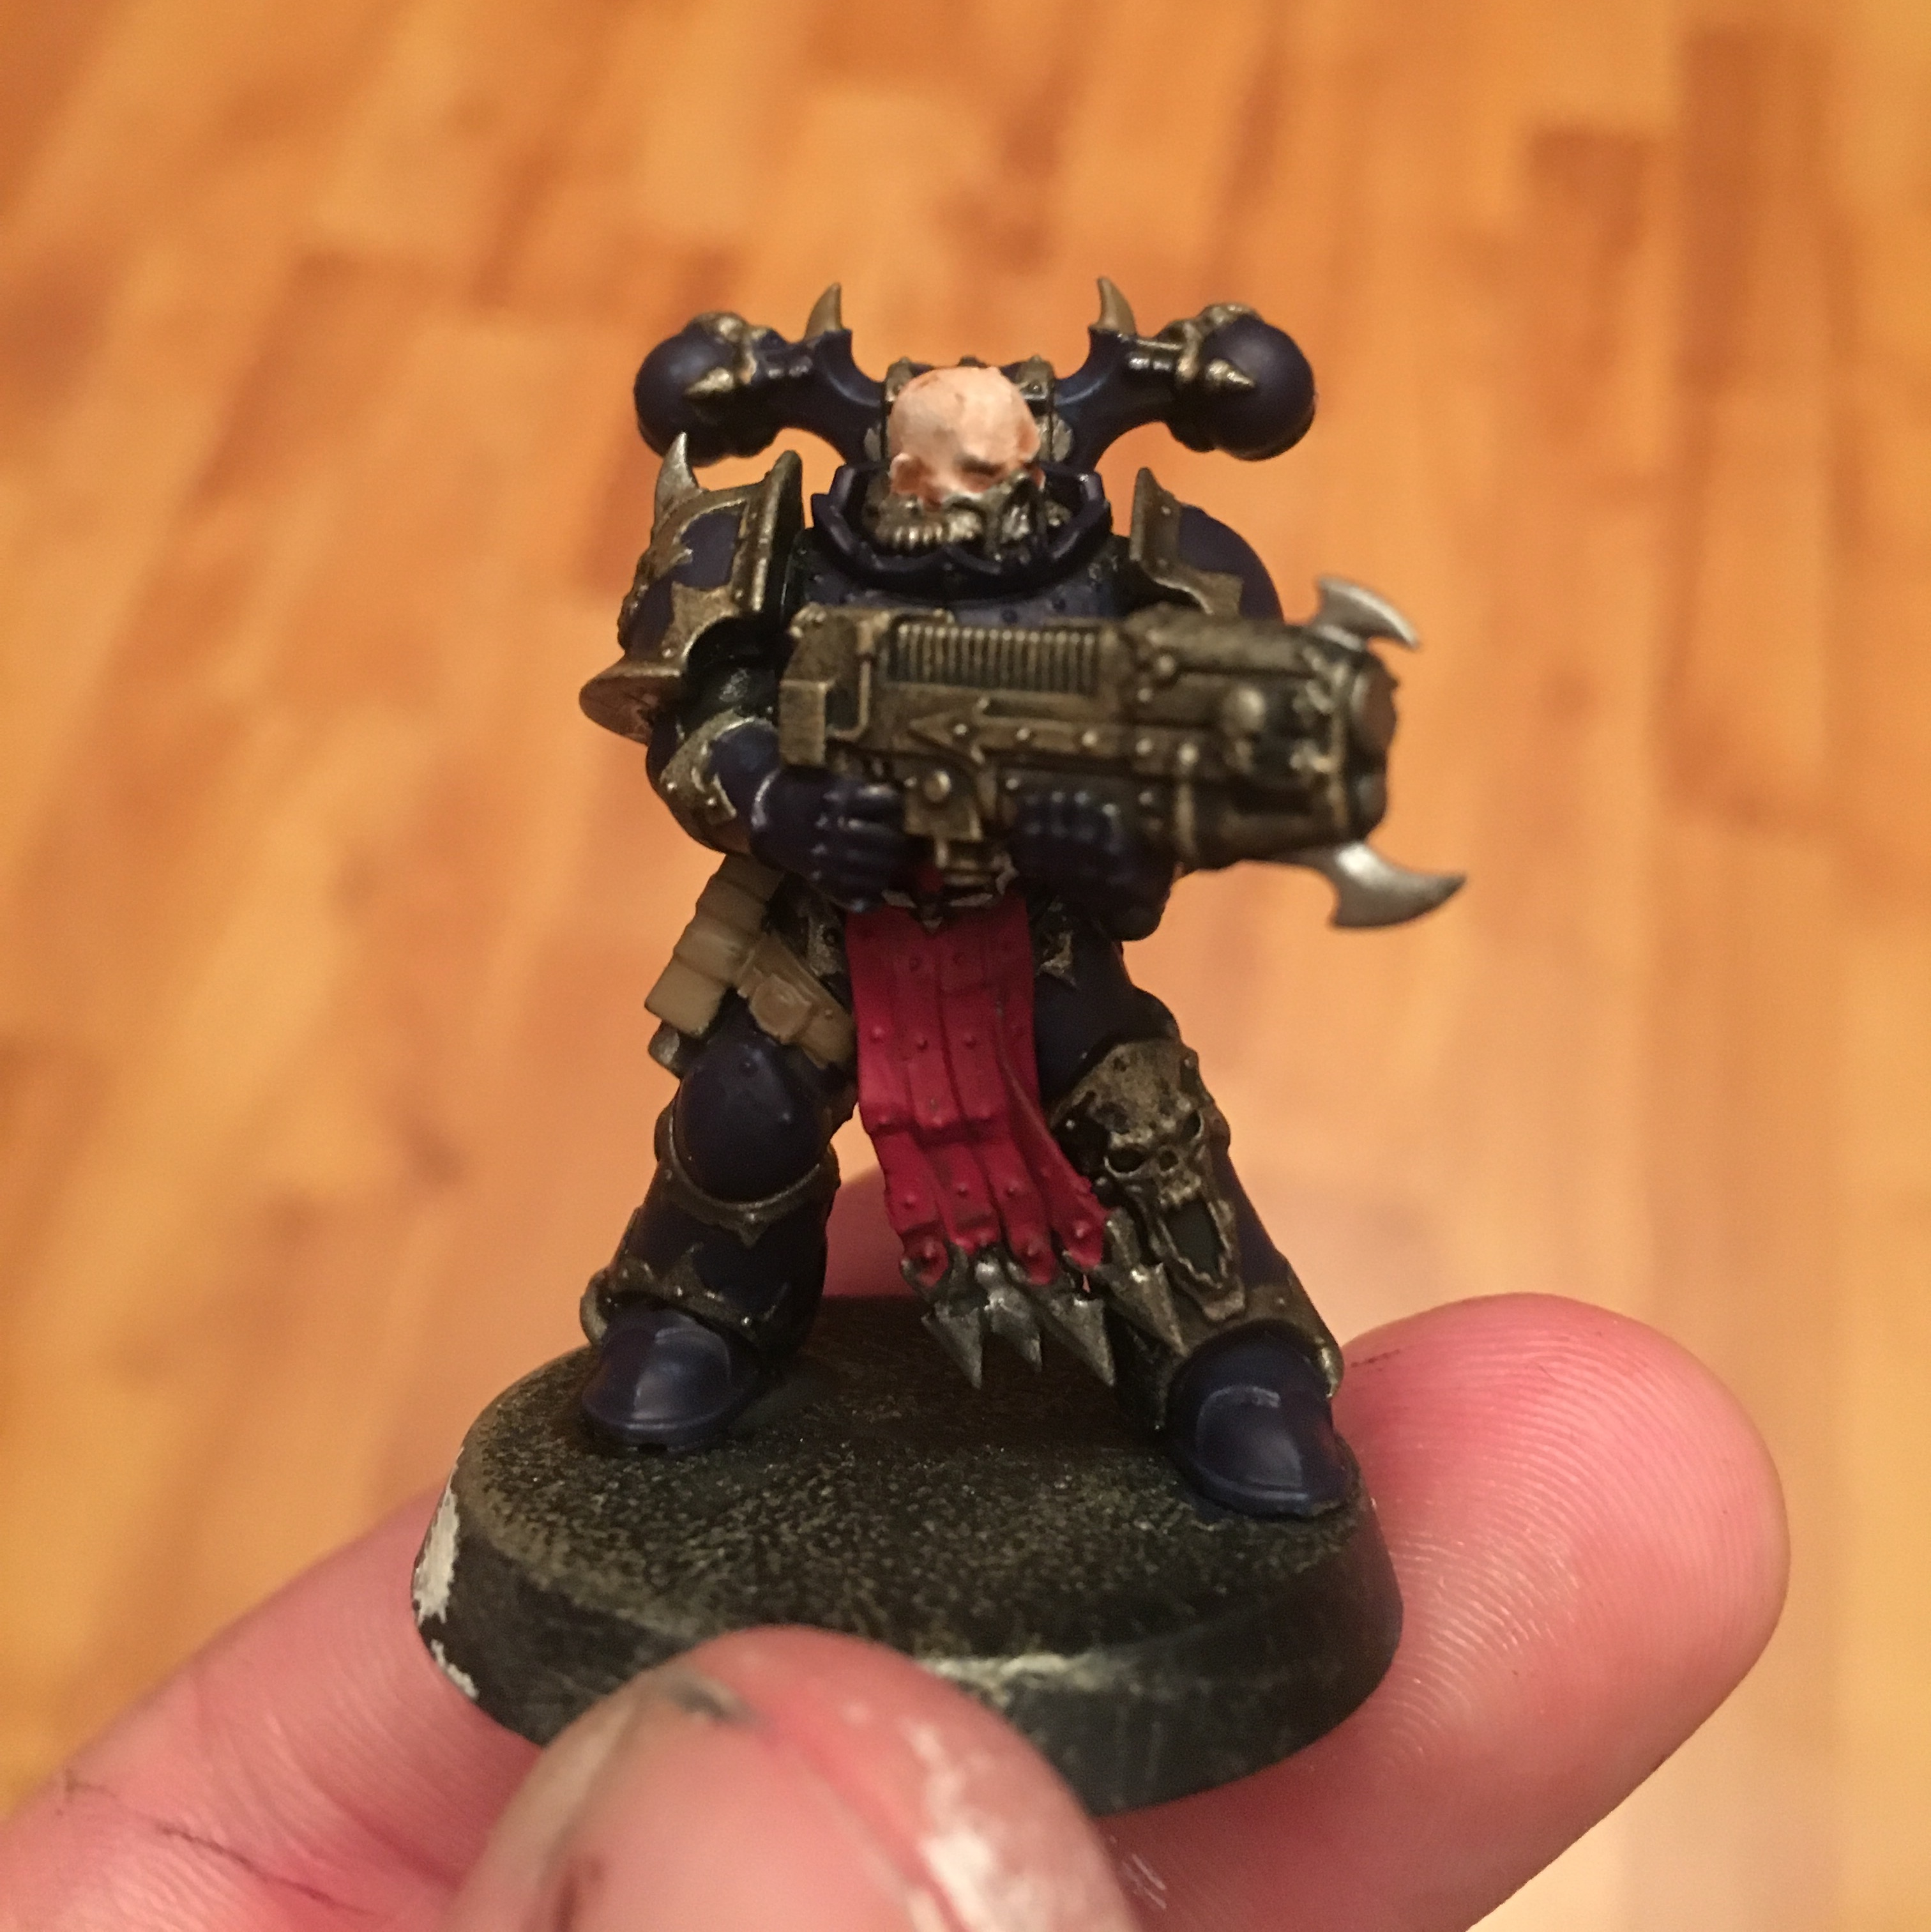
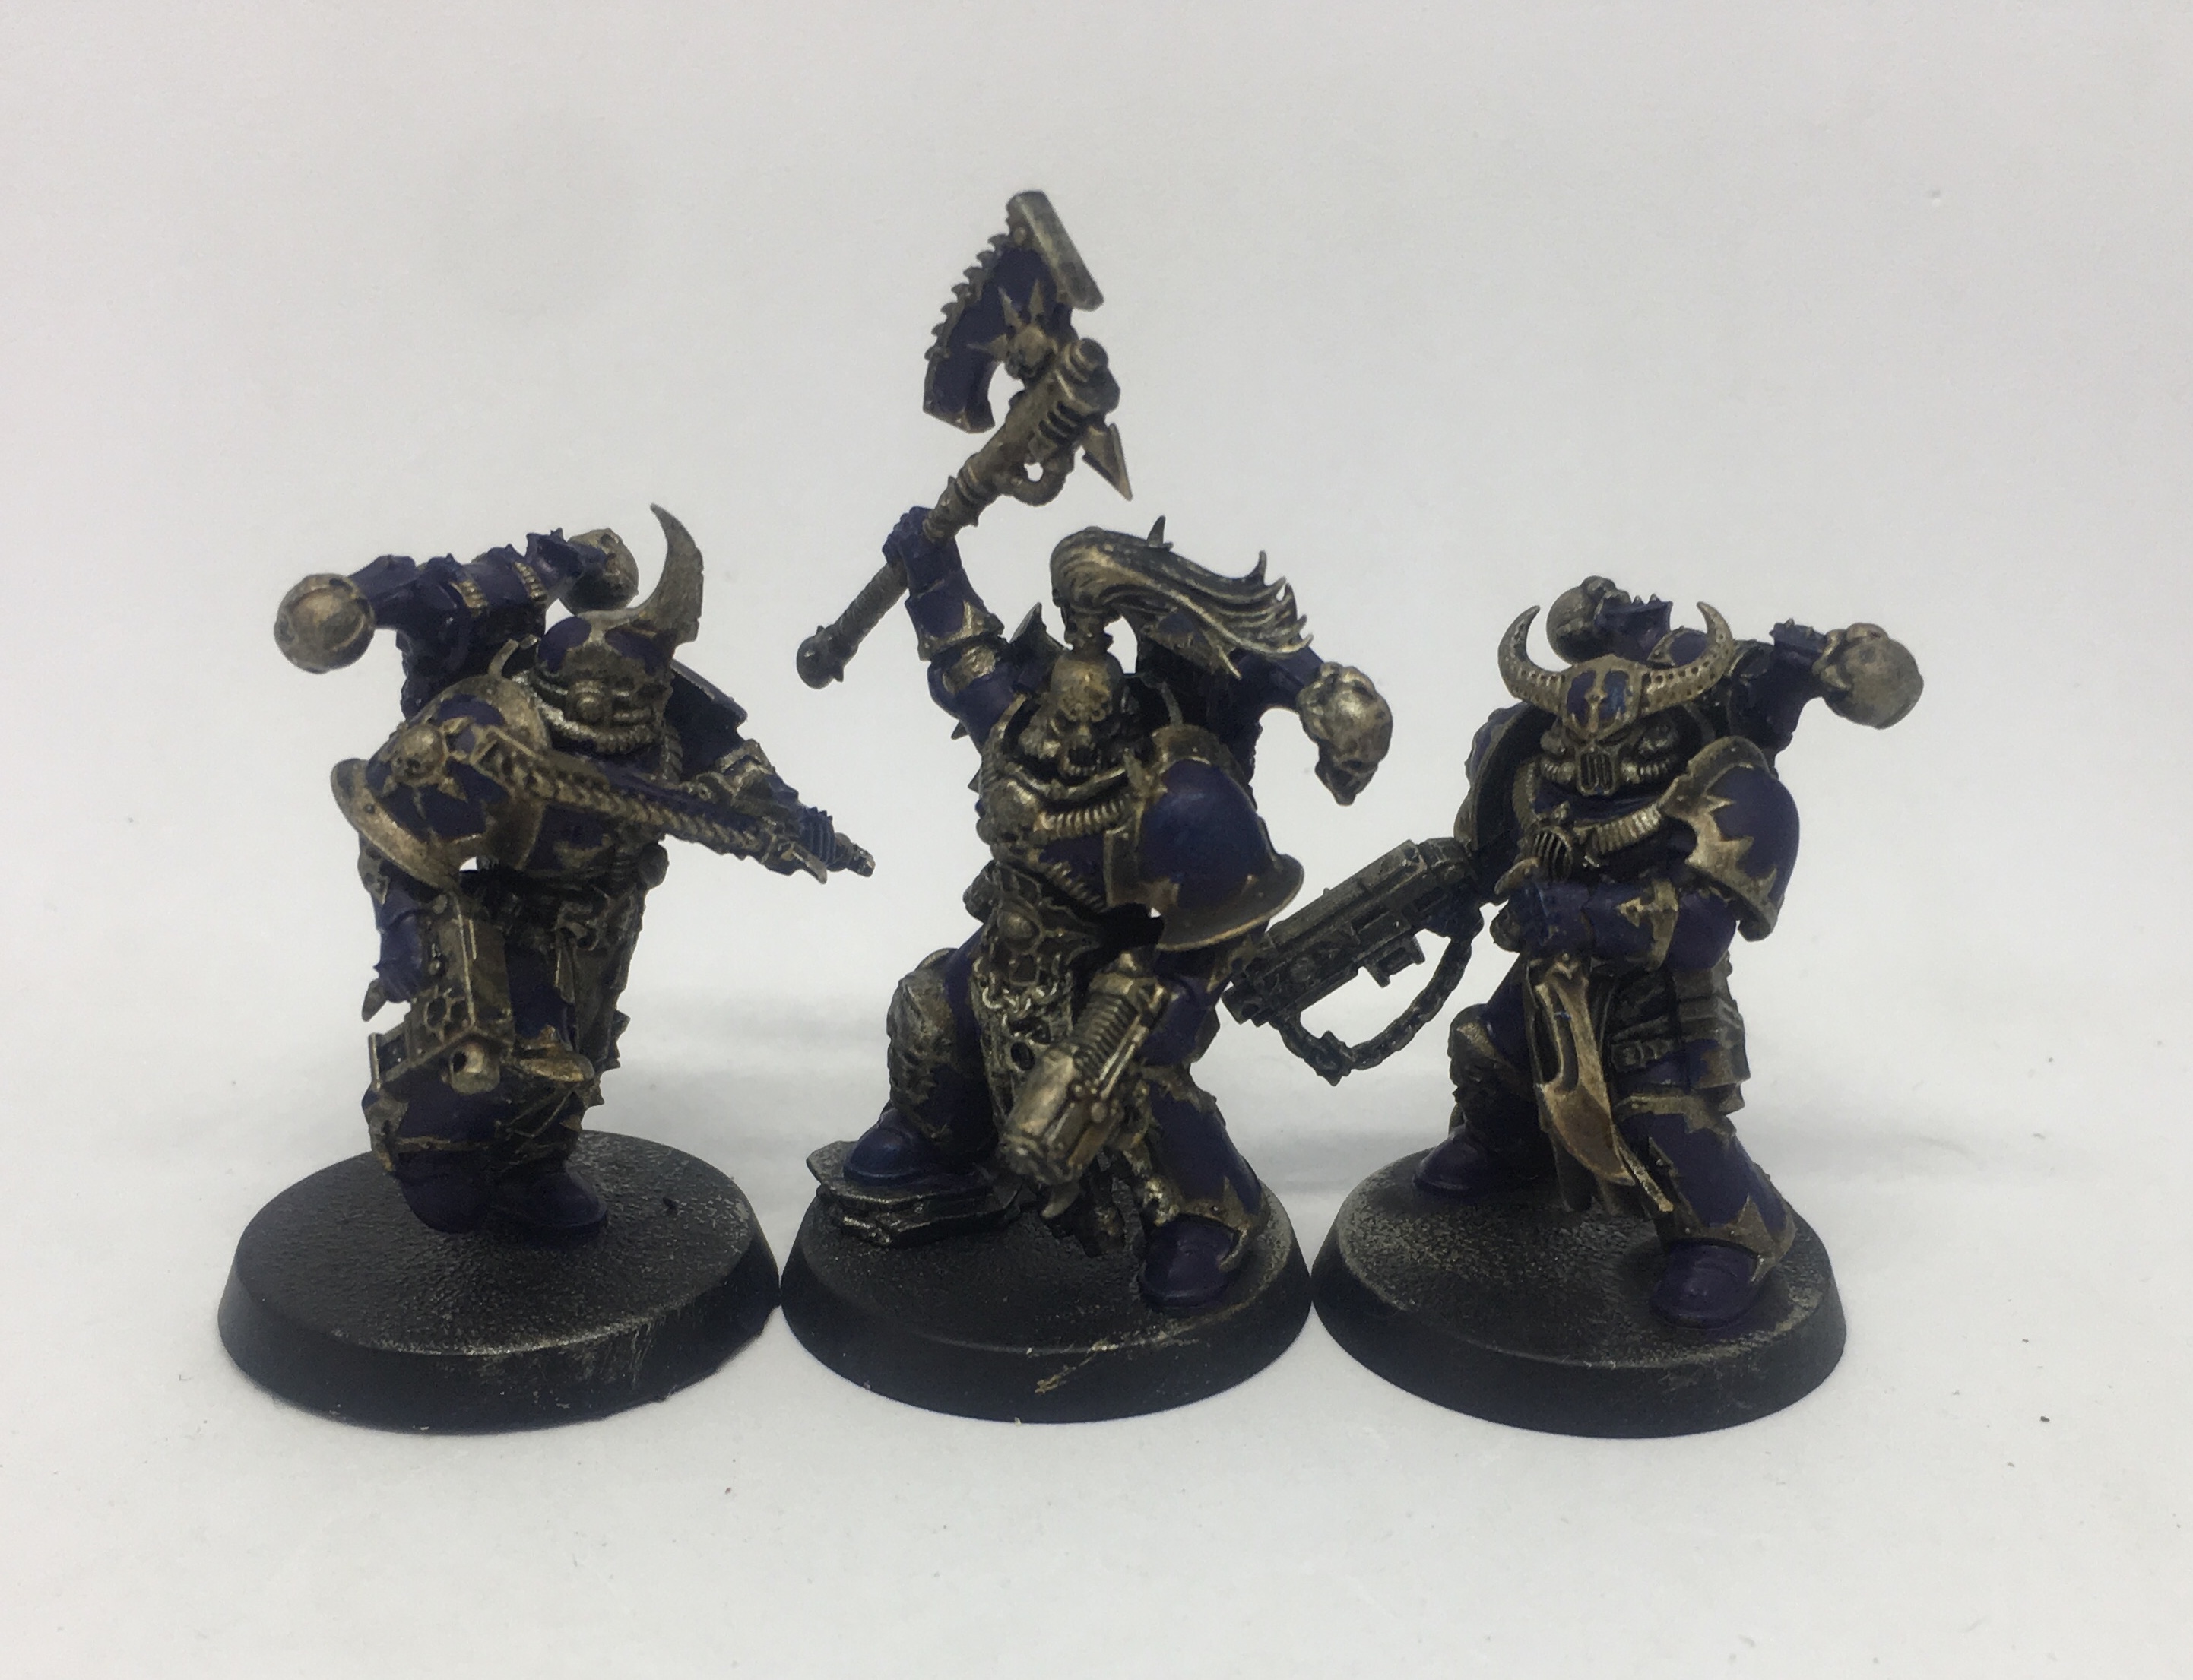
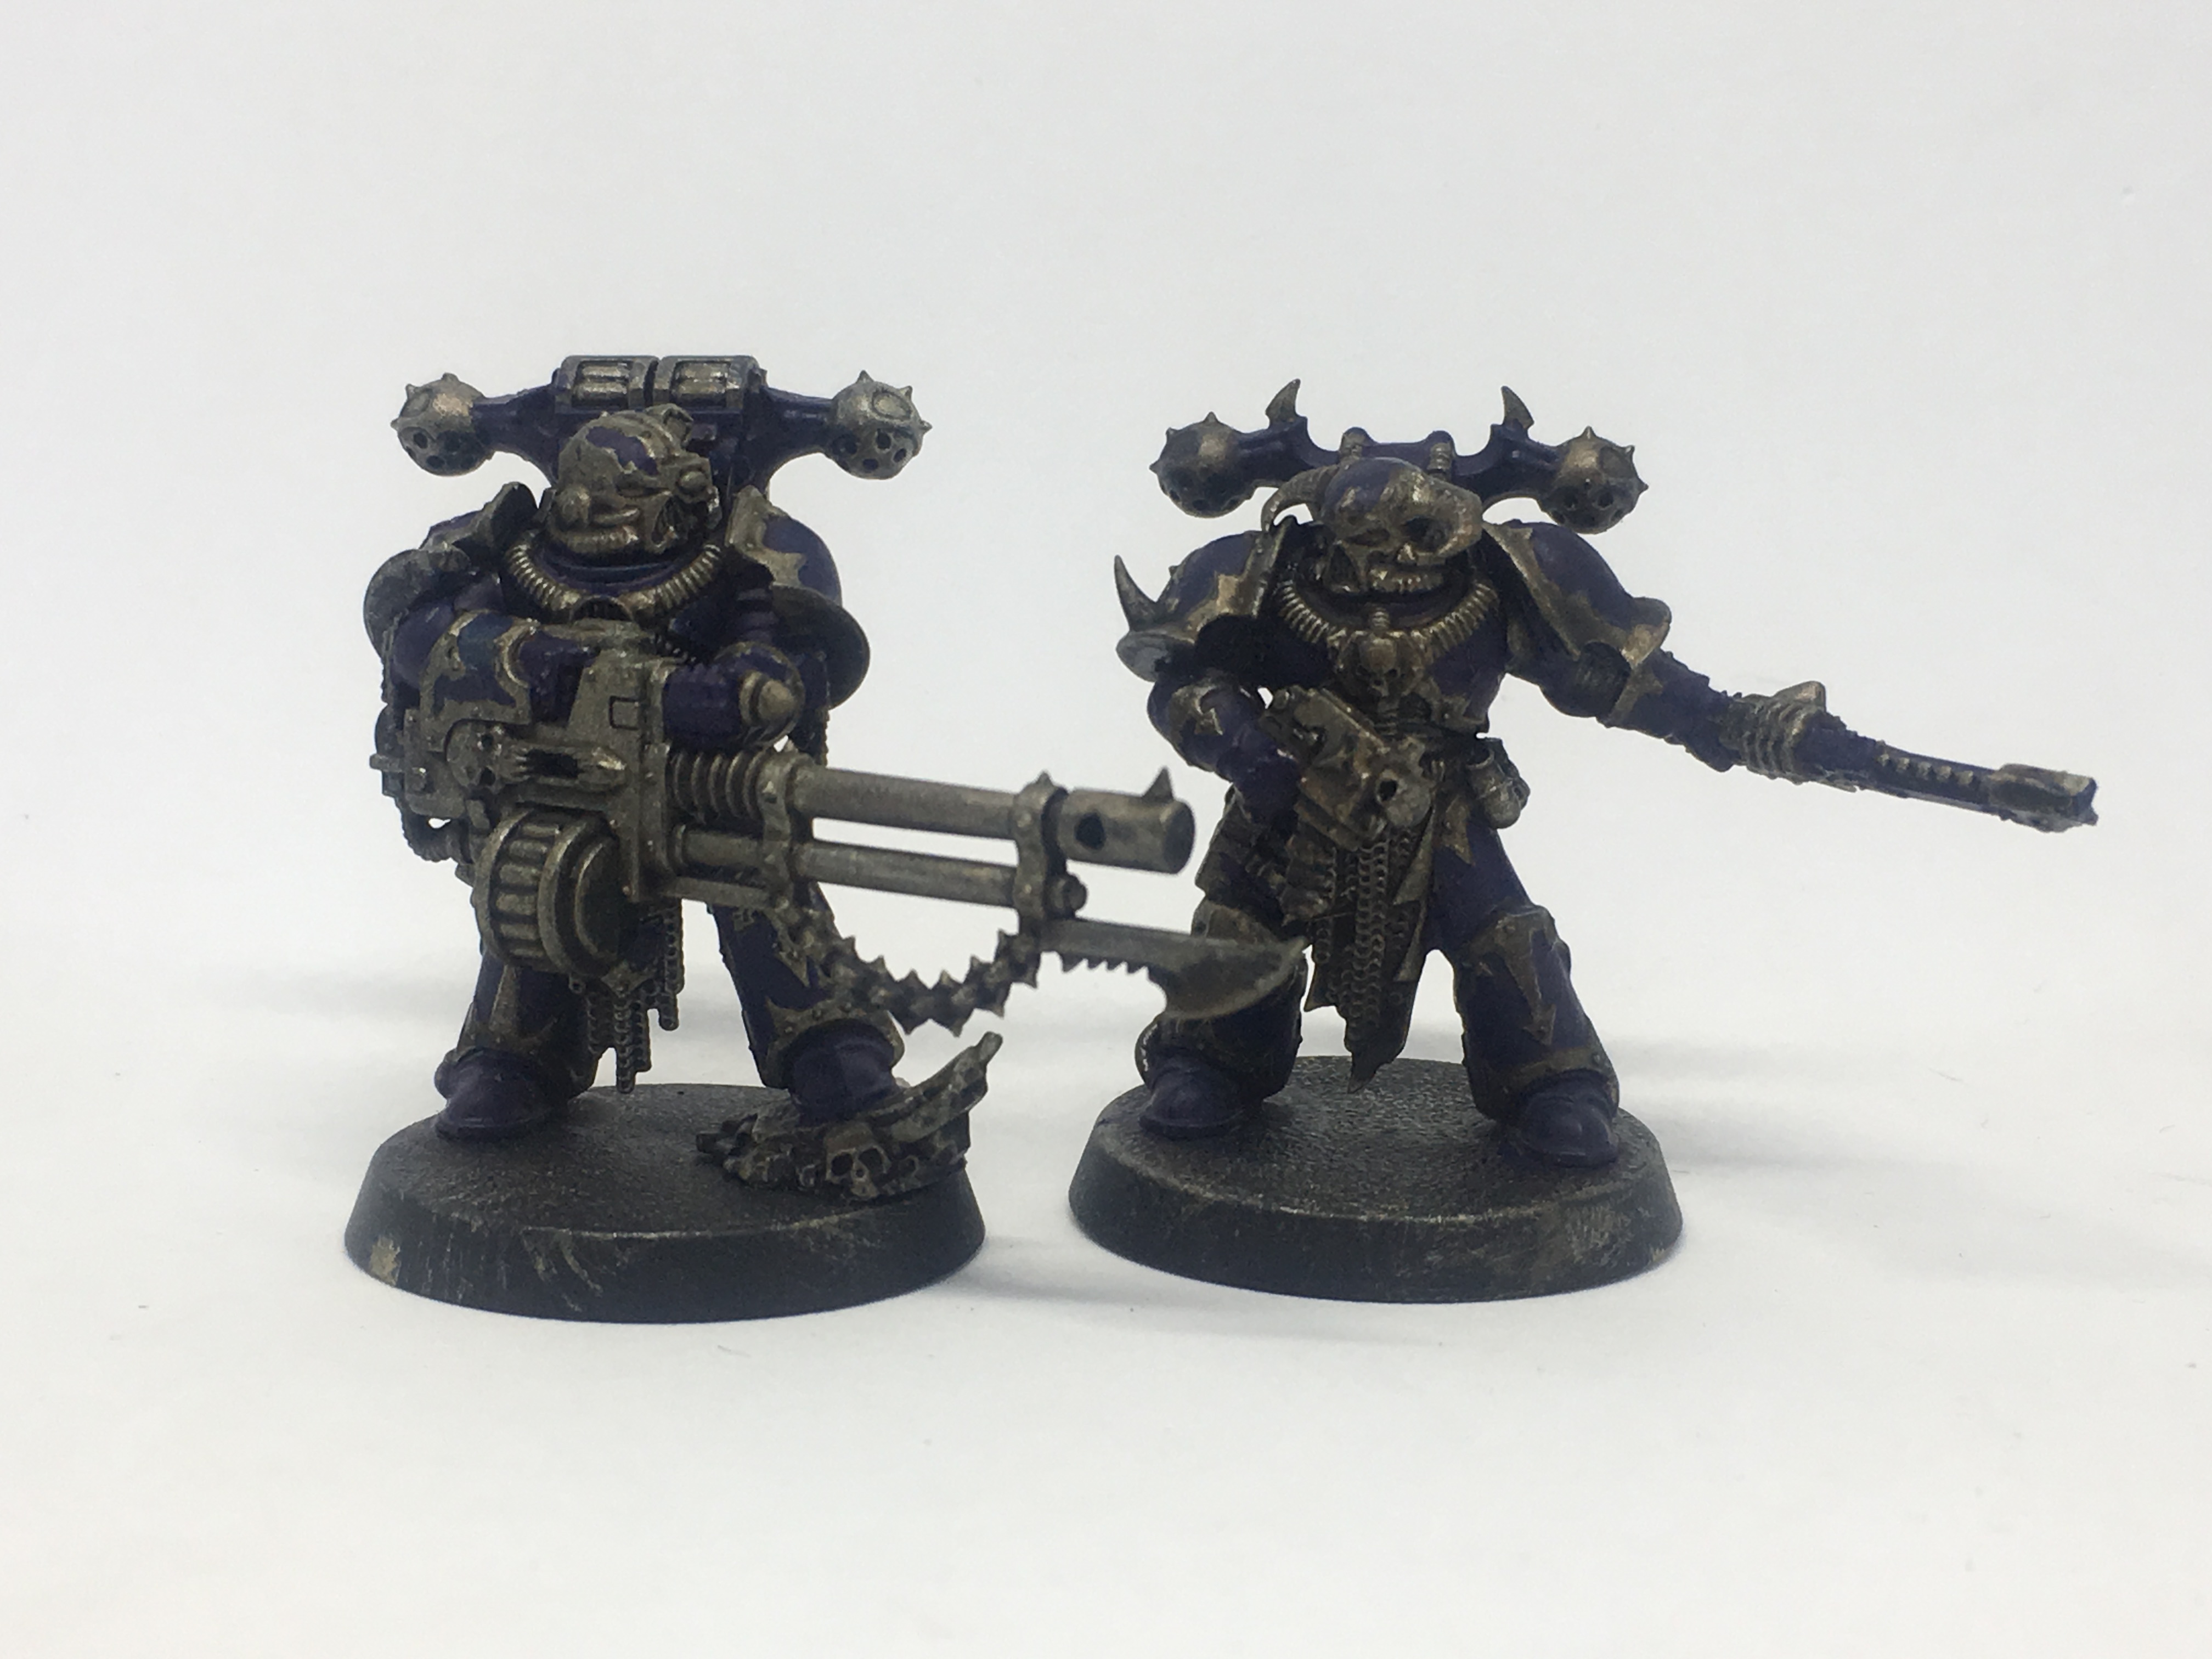
A small update. I’ve completed a Marine and am working now on the squad leader and plasma gunner.
I am hoping to finish the squad today and will return to the more tutorial and stage by stage stuff with the obliterators and Possessed: I got a bit ahead of myself with the batch painting.
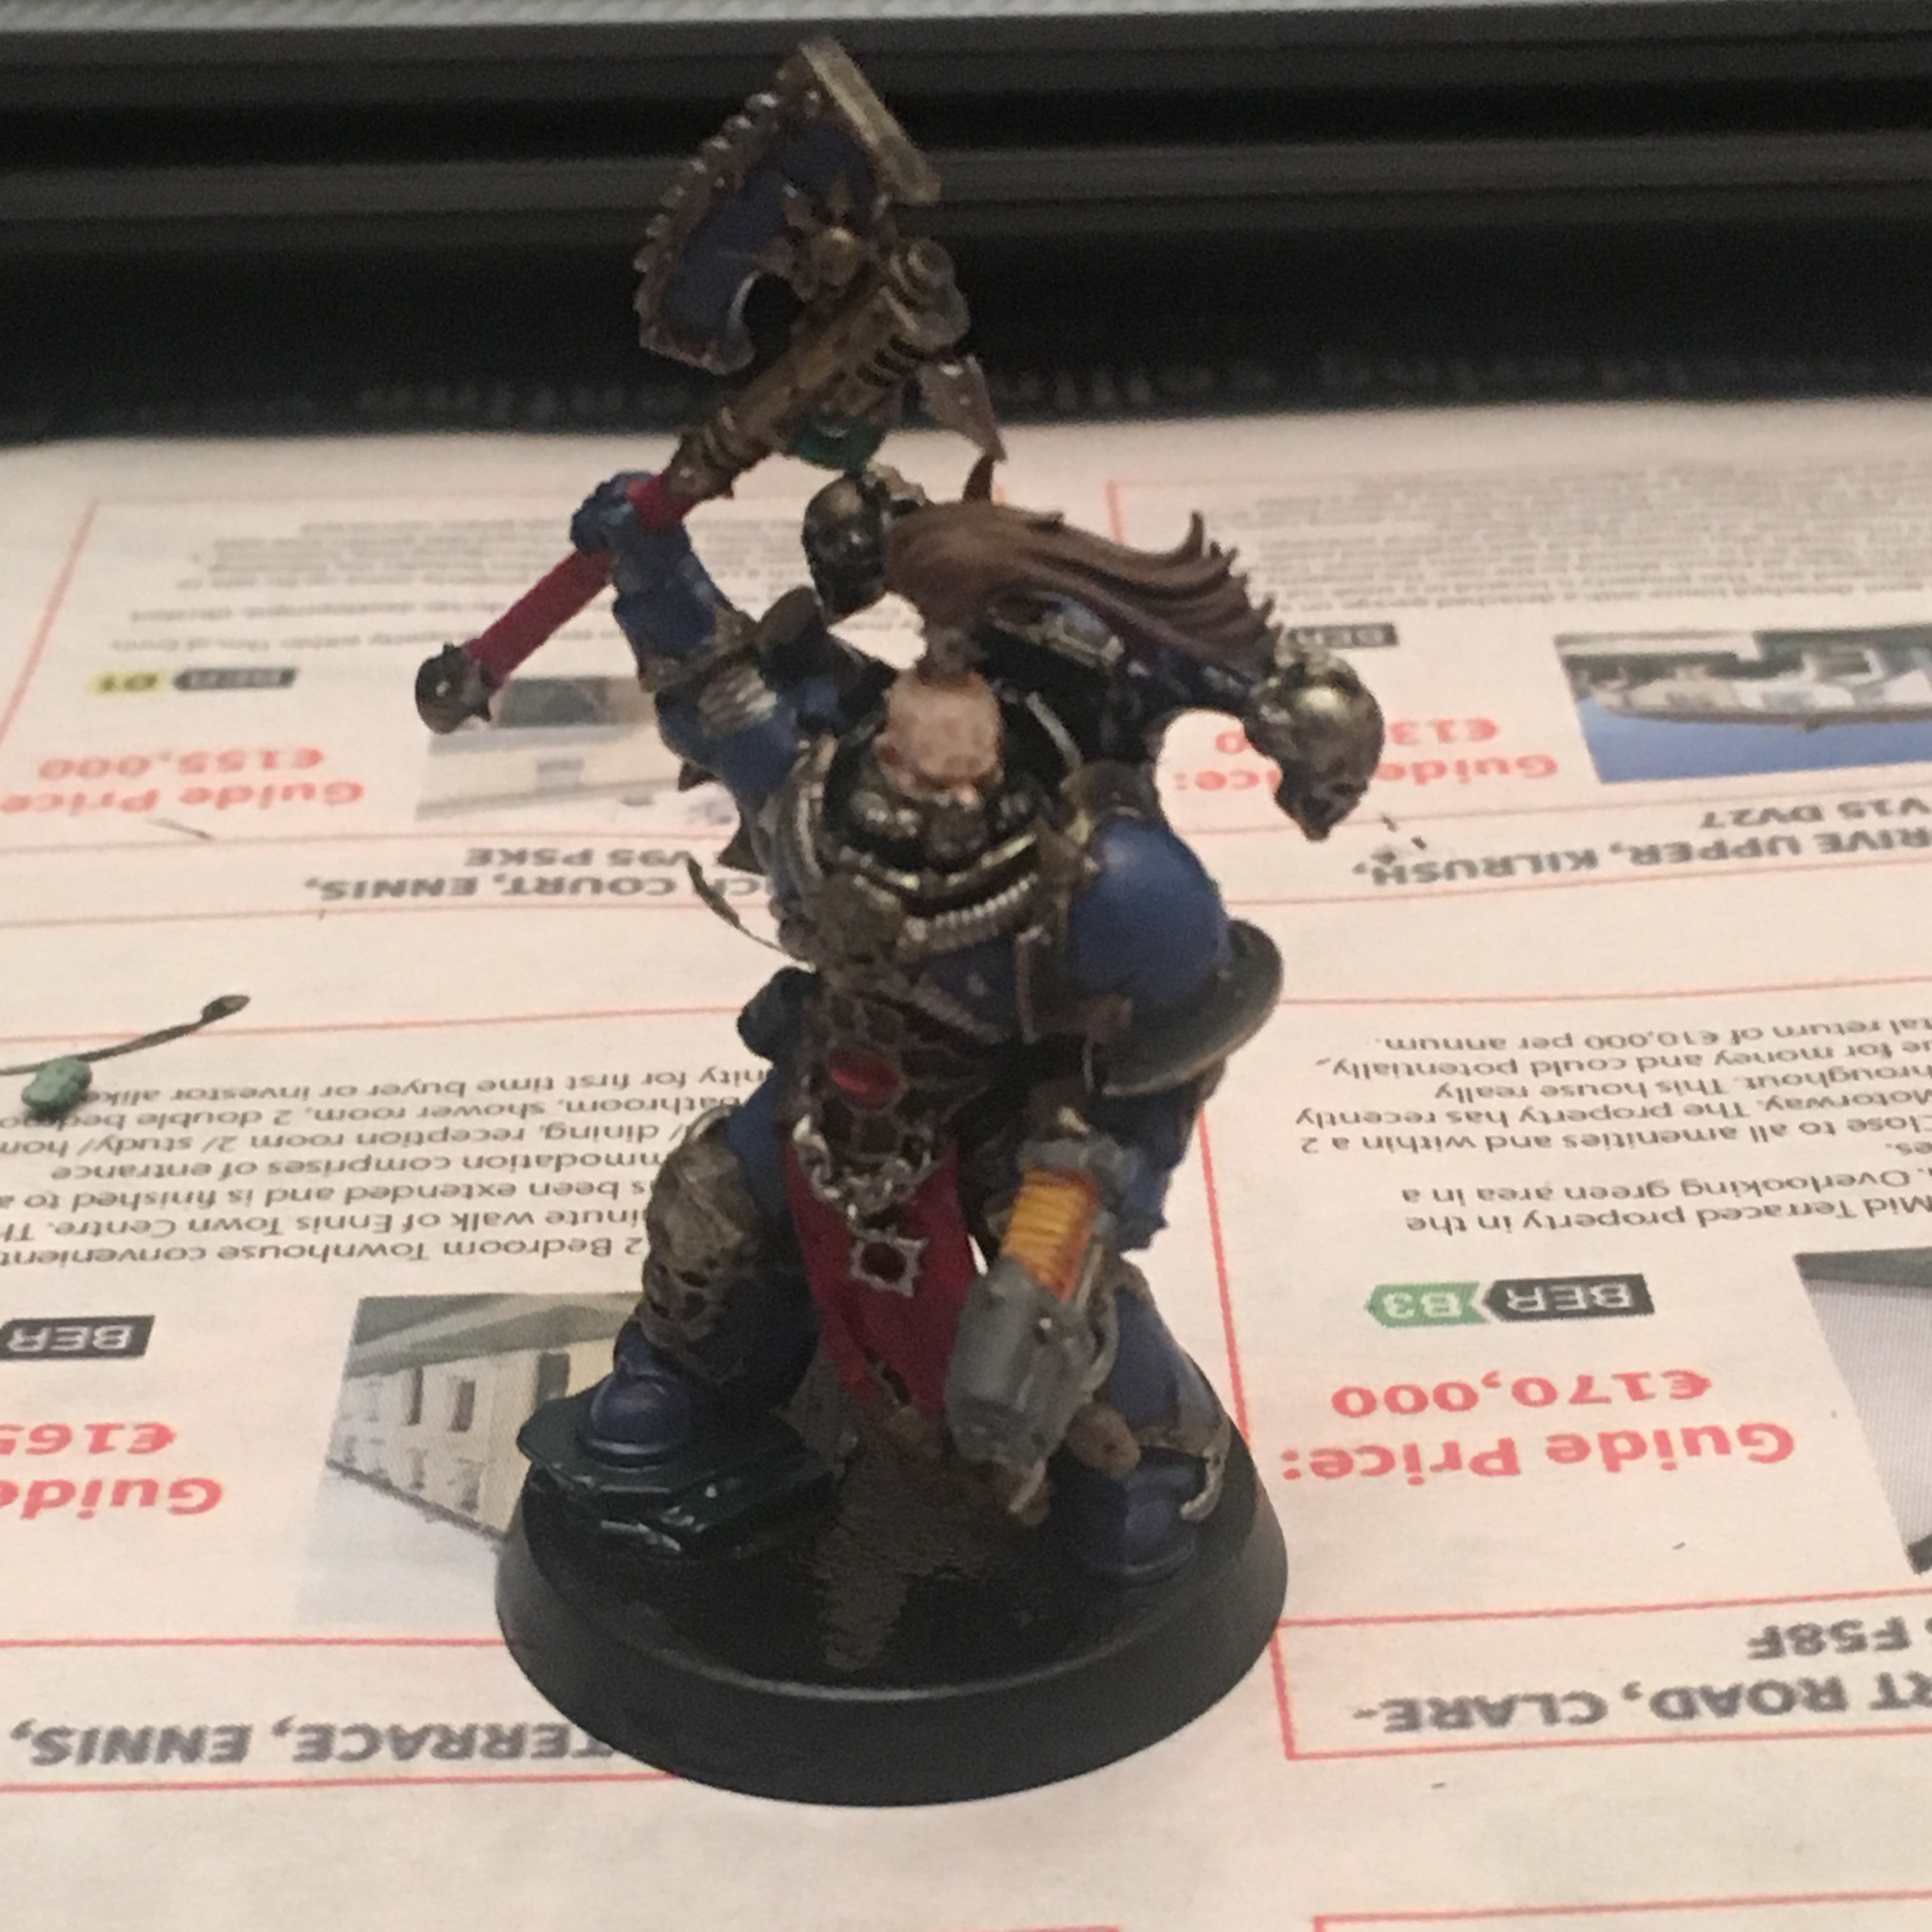
Entry 10: Pale Nightlord Skin Tutorial Part 2
I am still working out the kinks in the first post with the upside down photos. Also I felt that it was getting a little too long for a single post as a tutorial.
Punctuation is important on a plog and this year I decided to do one more focussed as a tutorial since I did not do one last year and got few recommendations for Tutoring if any in the two I did.
Additionally this post marks my first deviation from the GW tutorial.
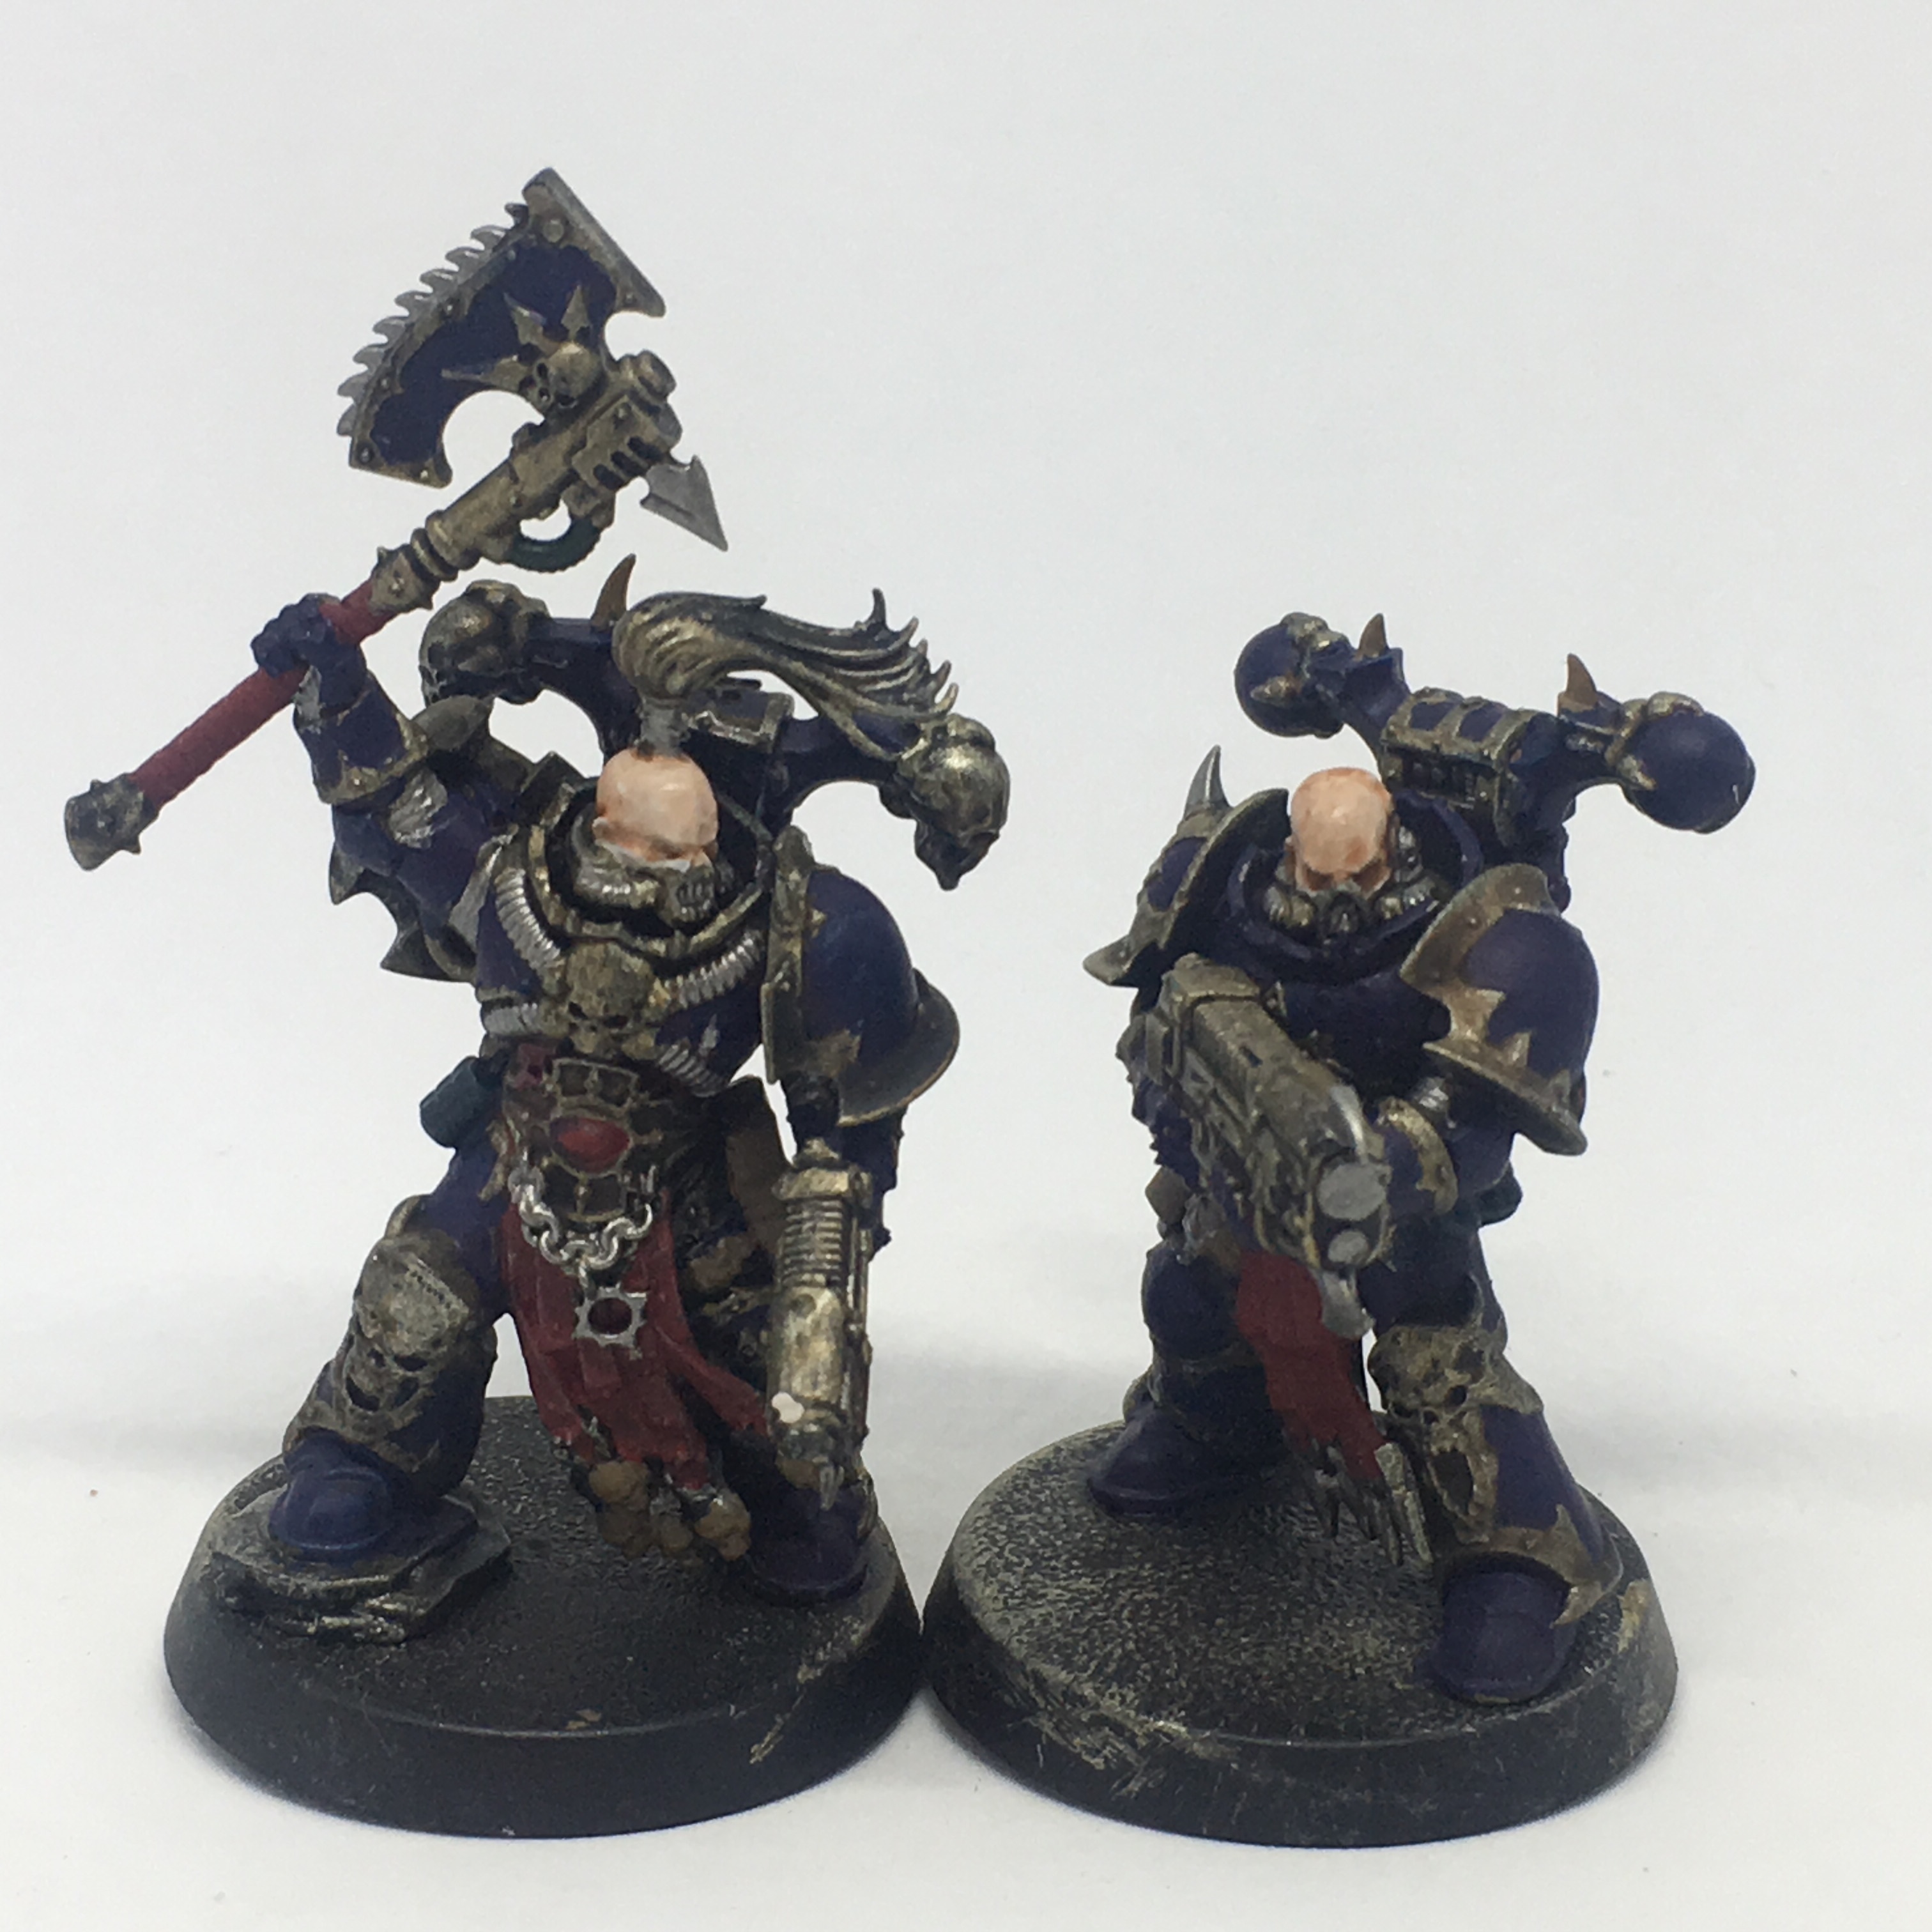
Below, I did a thin hilight of Pallid Wych Flesh. A second coat may be needed depending on how it looks, transparency, and how you yourself use water/medium.
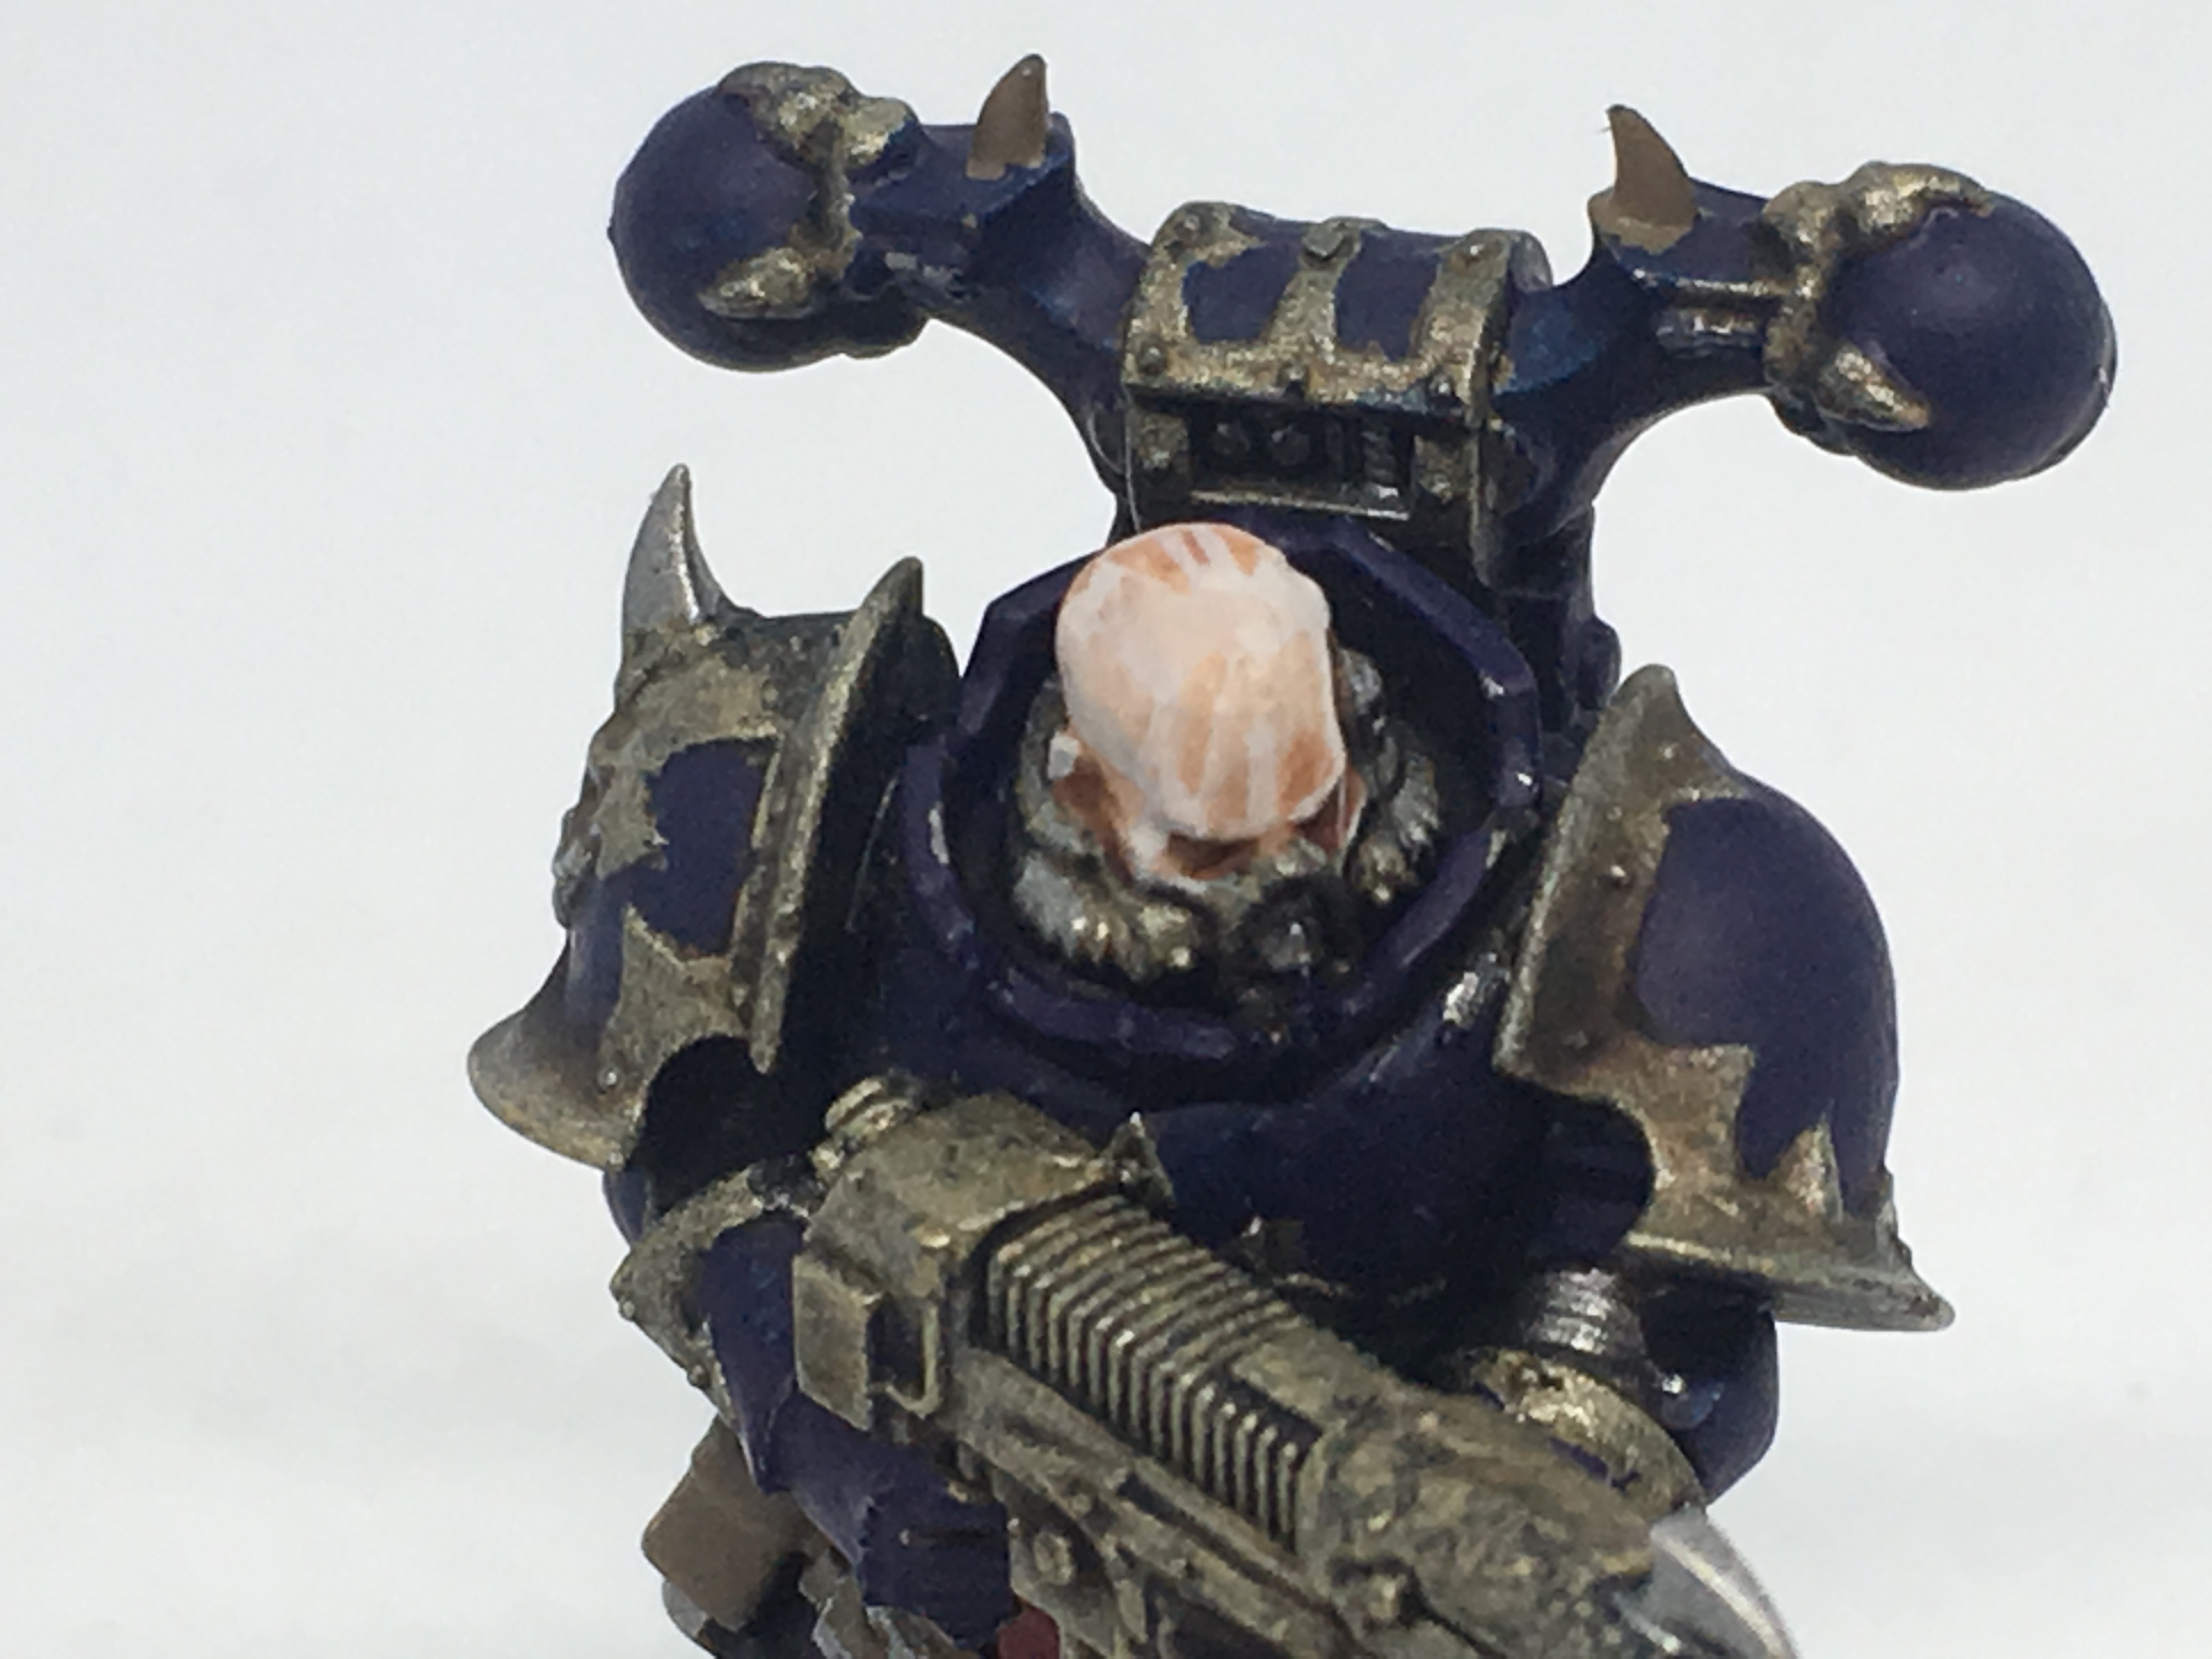
At this stage, bare in mind I had paid little attention to the original models in pictures and box art, I noticed there was a scarred Chaos star symbol on the sergeant’s head. I came back to this with a second thin coat. I have to say I am quite impressed with that detail and it came up nicely.
In Conclusion:
Disclaimer: I do not own White Scar paint and have not done this step. I will return and do it, but only conservatively on the most pronounced parts of the heads and faces
I’m liking this skin tone and am very happy with the results. This recipe could also be used for:
- Raven Guard
- Void born humans
- Delaque Gangers
- Afriel Strain Guardsmen
- Mutants
- Daemonettes
- Zombies
- Albino
- Azog / Goblin town goblins from the Hobbit
- Cyborgs
- Servitor
- Ghouls
- Vampires
- Possessed Creatures
- Carcharodons Space Marines
- Legion of Evervlight from Hordes
… to name but a few!
Time to break out the Leadbelcher paint. I’ll be back with an update tomorrow:
Also please comment and leave feedback! ???
Entry 10: Pale Nightlord Skin Tutorial Part 1
The Night Lords gene-seed gives them pale skin over time. With that in mind, and fond of the GW system and speed painting I checked out Warhammer TV for something along those lines. I found this and was not disappointed:
https://www.youtube.com/watch?v=efMsWE8Uz4s
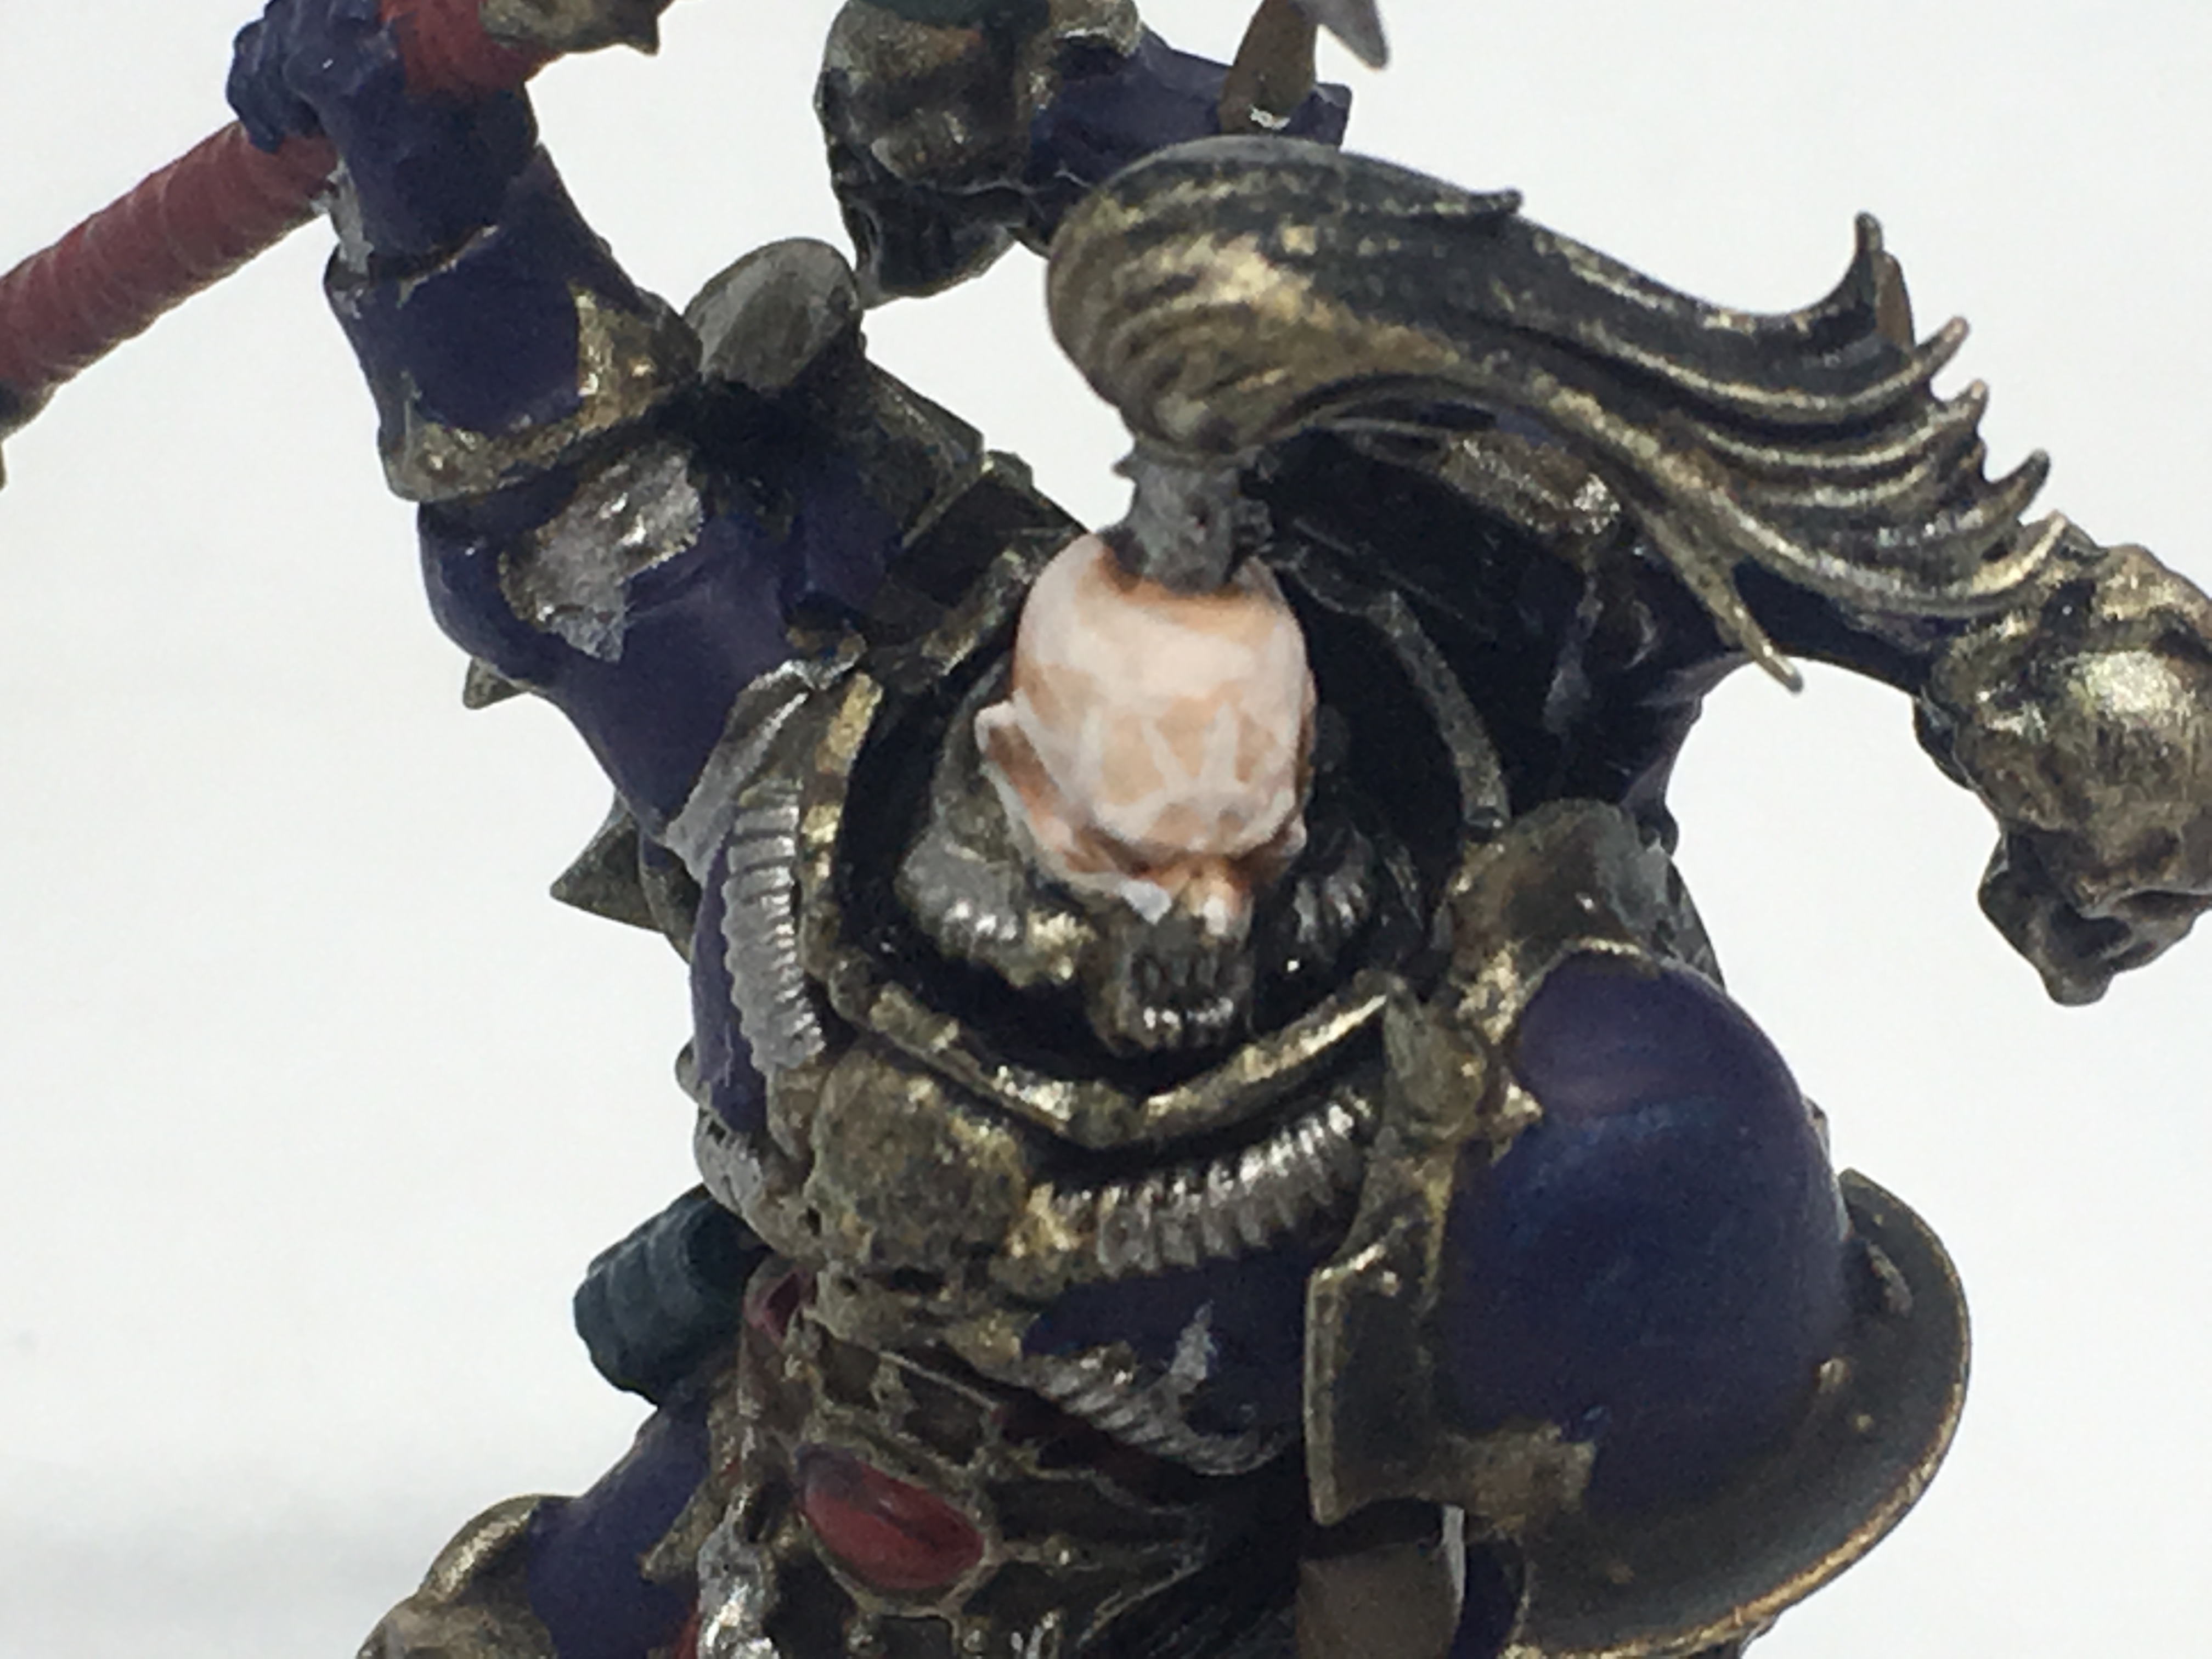
I began with Rakarth Flesh. Two or three thin coats are needed.
Next I did a layer of Pallid Wych flesh, this was 1:1 water, maybe a little more. It needs to be watery but not runny, imho. You may need to do a second coat, it depends on getting the right consistency that works for you. Hope that is helpful, I am not the most skilled nor technical painter. Most of the GW guides say to get to the paint to the consistency of milk – to me it needs to be close but a little thicker. Your mileage may vary.
Be sure to hit the prominent areas like eyebrows, forehead, scarring etc. Don’t worry if this isn’t perfect, the next stagess help with making it get cleaned up and enhancing it.
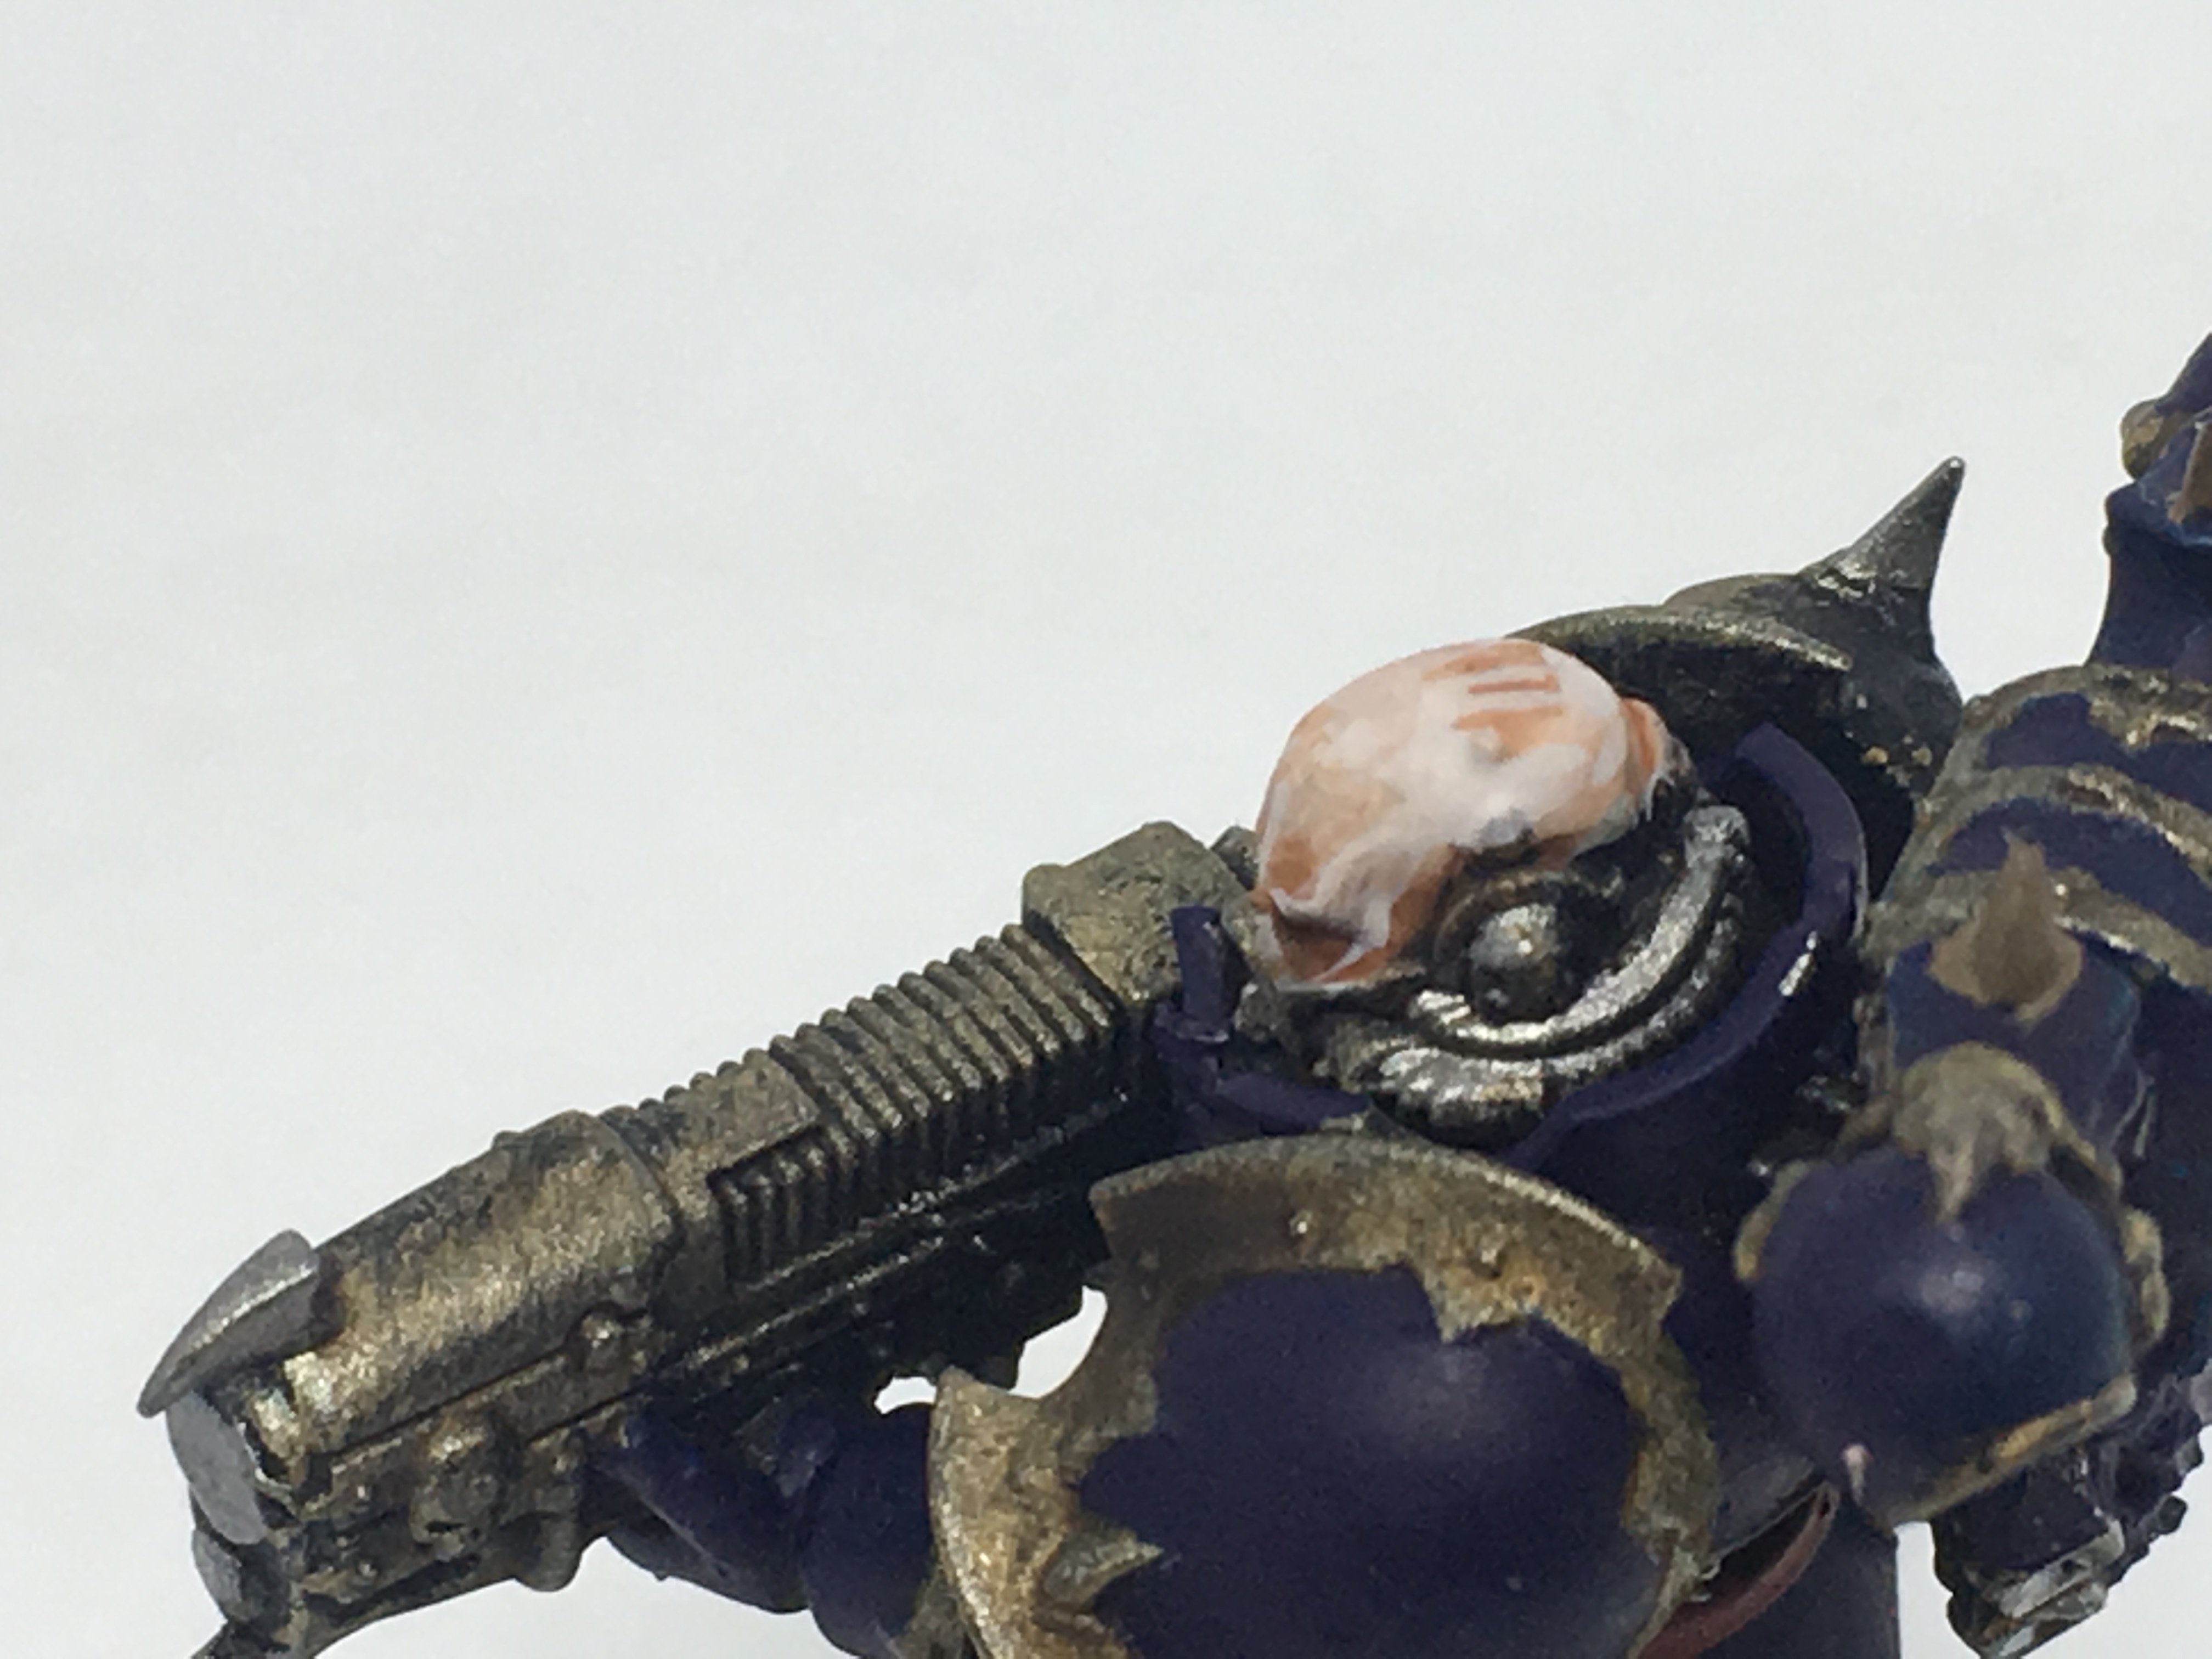
After achieving smooth basecoats and highlights, which is important as skin is not as forgiving as rough armour or speedpainting, do a wash of Seraphim Sepia.
Use Lahmia Medium or water if you want but I am advising against that. Before you gasp shocked gasps of ‘thin your paints’ let me explain. If you have have more than what you need to medium down on your brushy, but less to apply one full thick coat, you can just push and spread the wash around so it sort of thins itself naturally.
Think of it like getting the right amount of butter on your knife before spreading it to perfection on a slice of toast; smooth, even, and tasty. Don’t eat your minis. Below are my results and I was super happy with them. If you cringe at my painting skills, well, cringe away. It’s the best I can do.

Entry 9: Basecoating
A quick update before bed. I have started basecoating. Everything will get two thin coats by the look of it. I’m breaking the models into stages as some have more skin, horns, daemon bits and metal compared to others.
I have have started on the Chaos Marine squad, one Greater Possessed and the Master of Possession. Once these all get their basecoats done I will work on each indivodual unit at a time. I find once basecoats are complete then washed, details and edge highlighting can be hard for me to do in batches as they require a different category of brush control, technique, focus and attention span.
For instance with an ineividual character model there are usually more textures, surface areas and details to do compared to say, basic infantry. It’s a different pace, speed and beast altogether and hard to change gears in my brain with the discipline and momentum I build.
Likewise the Possessed have more horns and skin compared to Chaos Marines while the Obliterators are bigger again.
The most important thing you can take away from this insight is do what works for you and makes you happy so you can keep moving along, in a fun way, with the project. Turning it into a grind ‘because this is the way you are supposed to do it’ will affect your morale and enthusiasm for what your working on, as well as the quality of your work.
Find your own path: the journey is more important than the destination in some ways.

Entry 8: The Blue...en...ing... part 3
Ok, after posts failing to load, upload and re-upload I am back up track. I am not too please with how long it has taken this evening with this a loan and I am a little behind on painting now.
Many thanks to @robert for recommending I retry by uploading one pic at a time then nuking the entire post. I will be applying that moving forward.
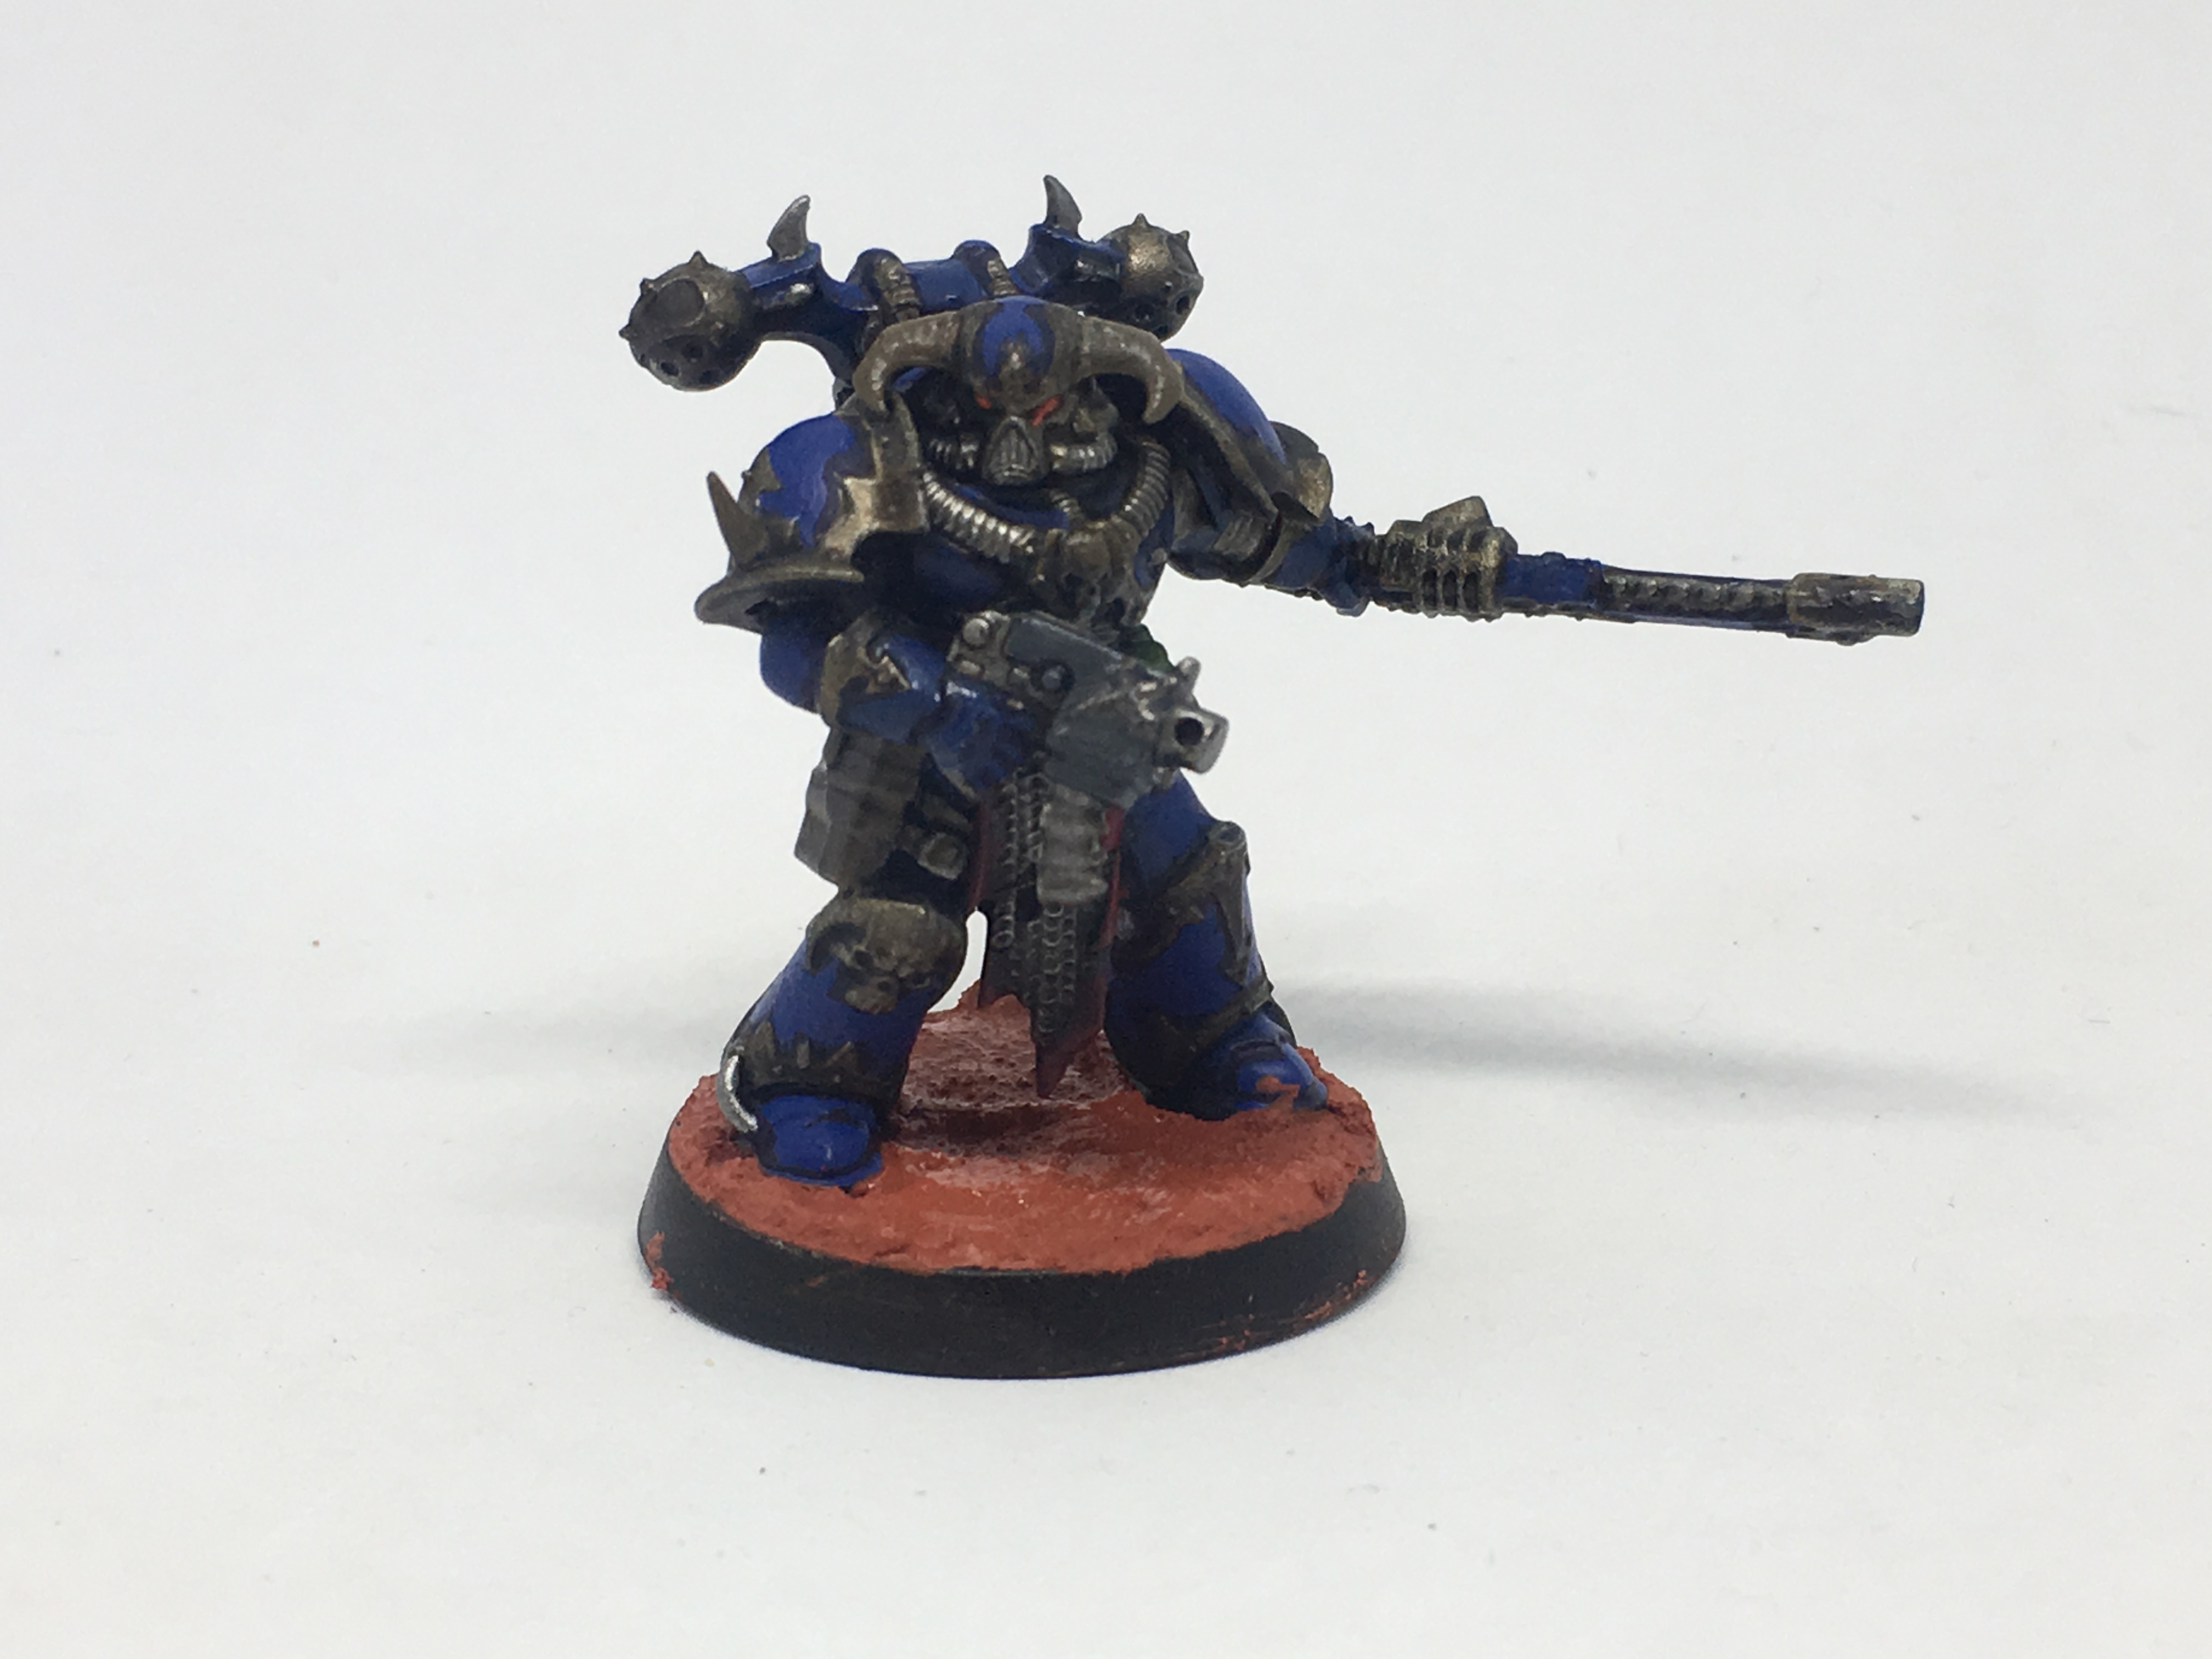
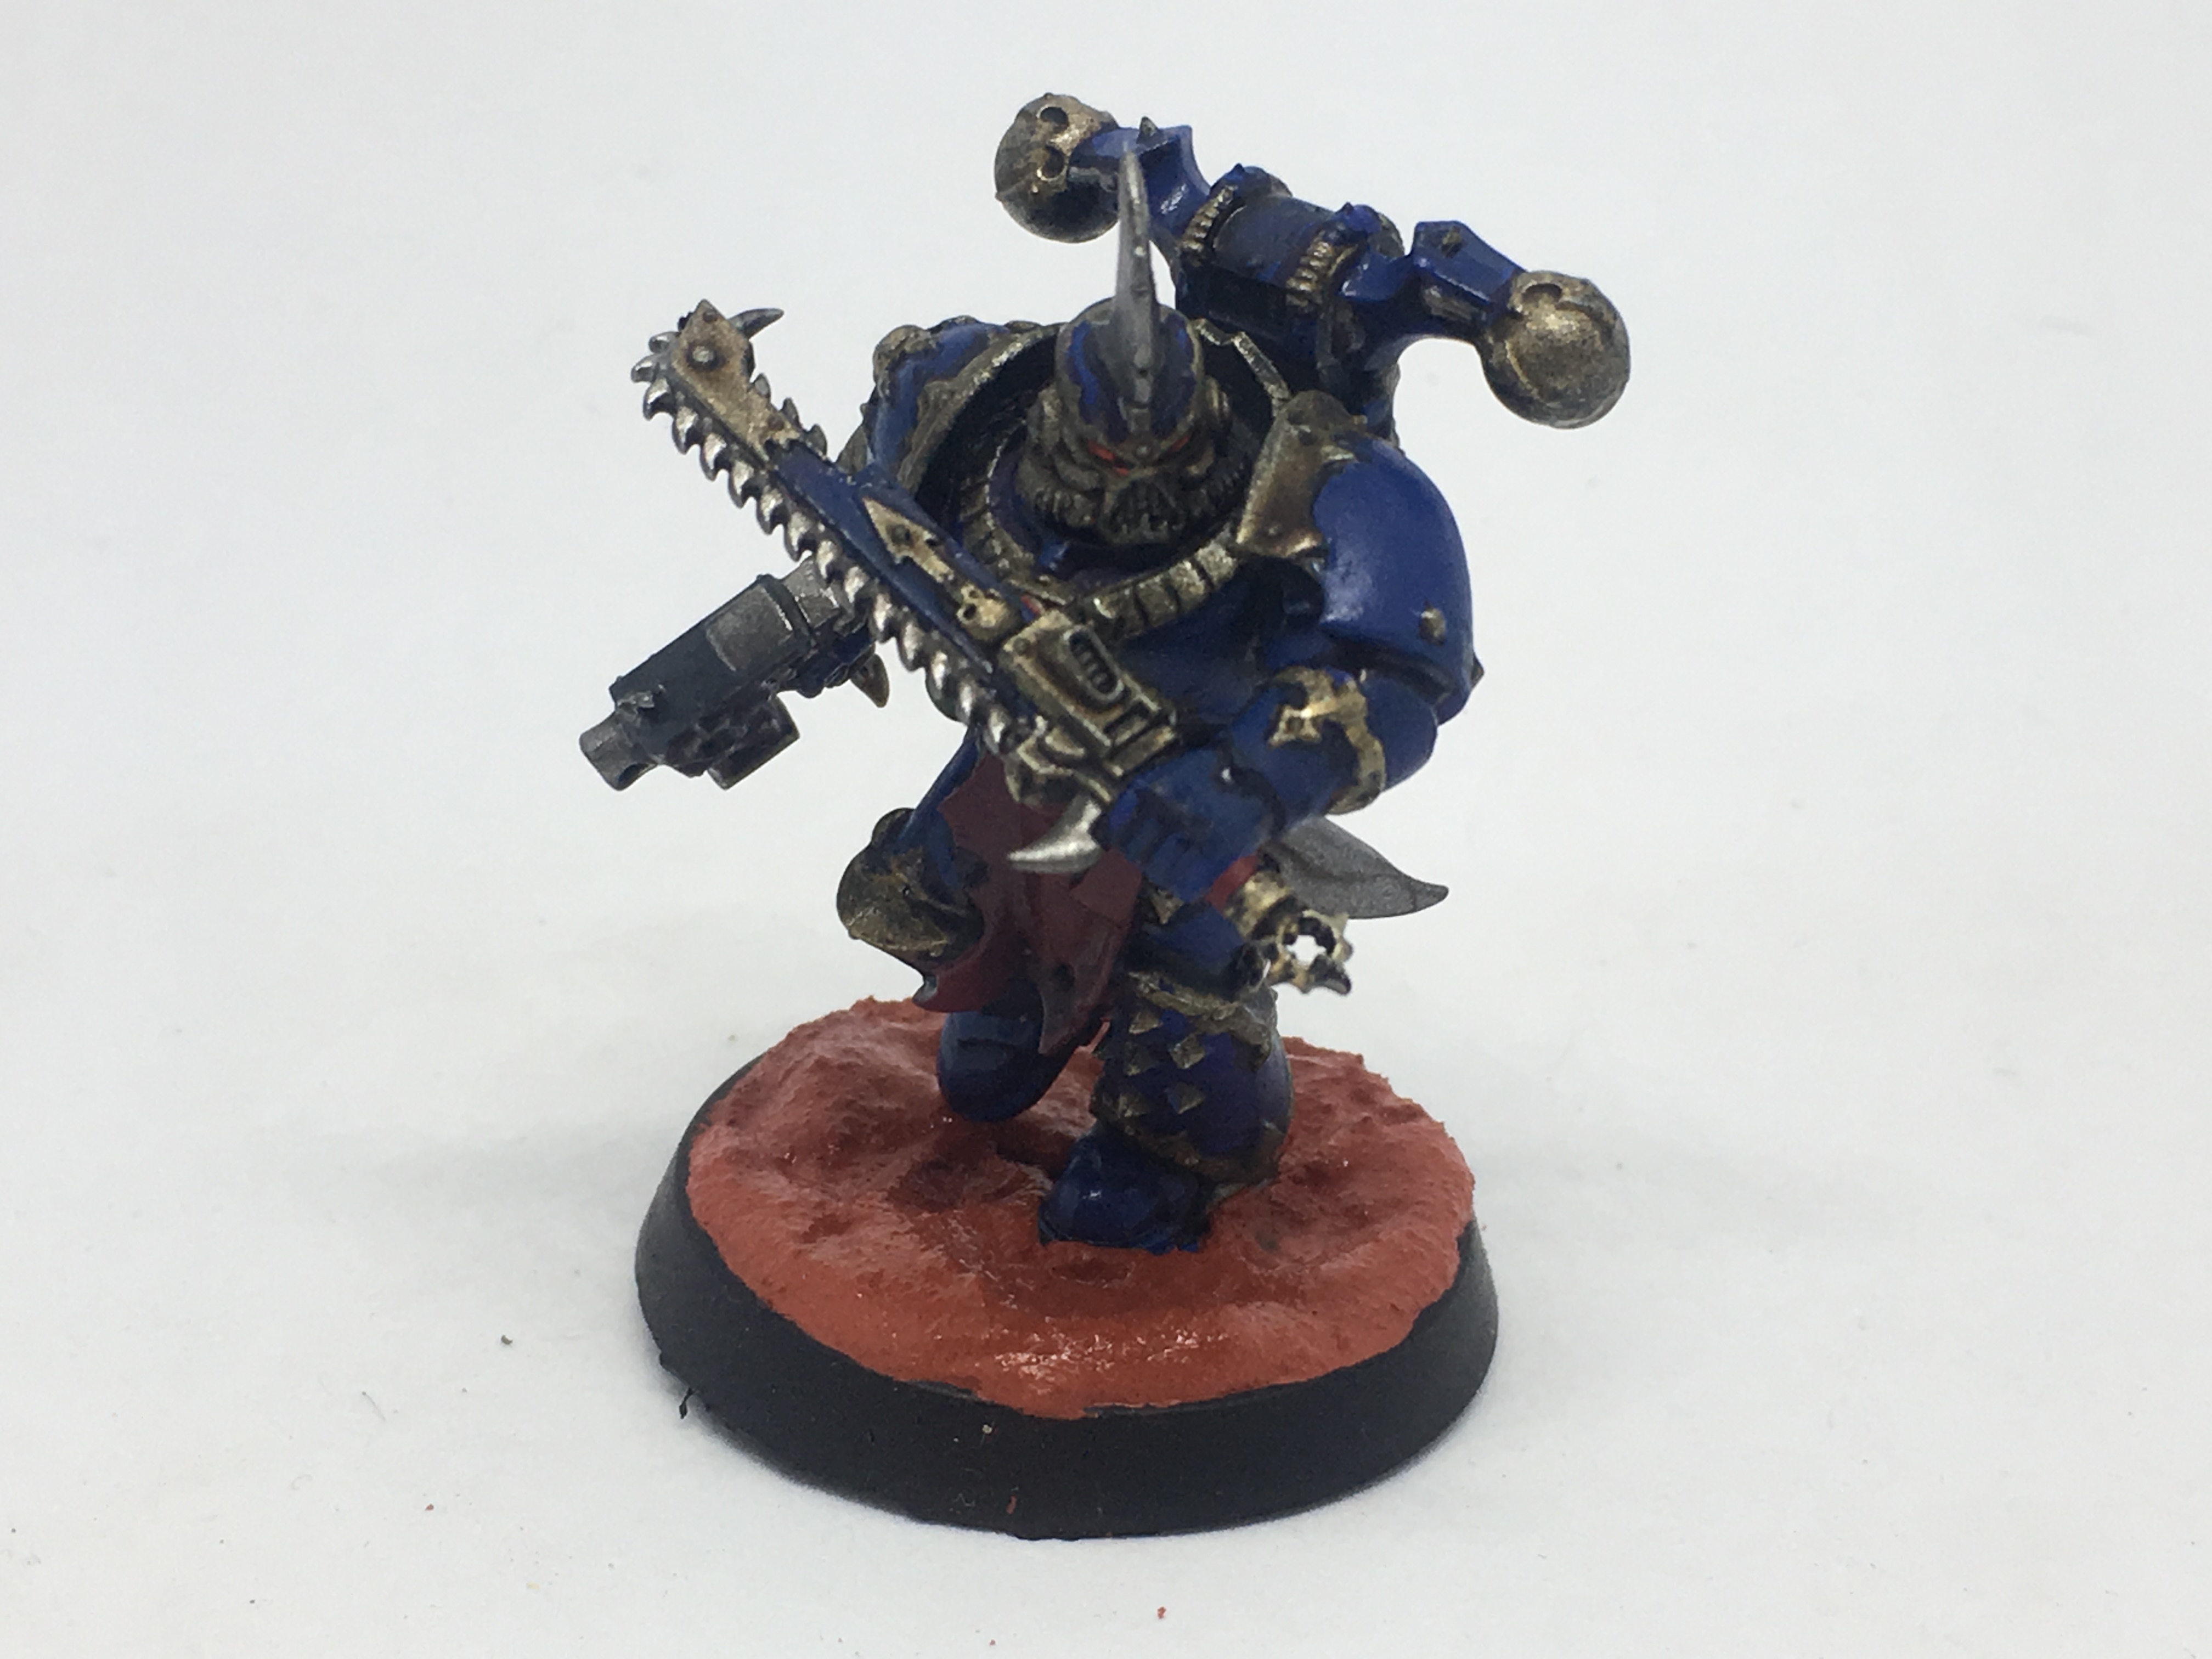
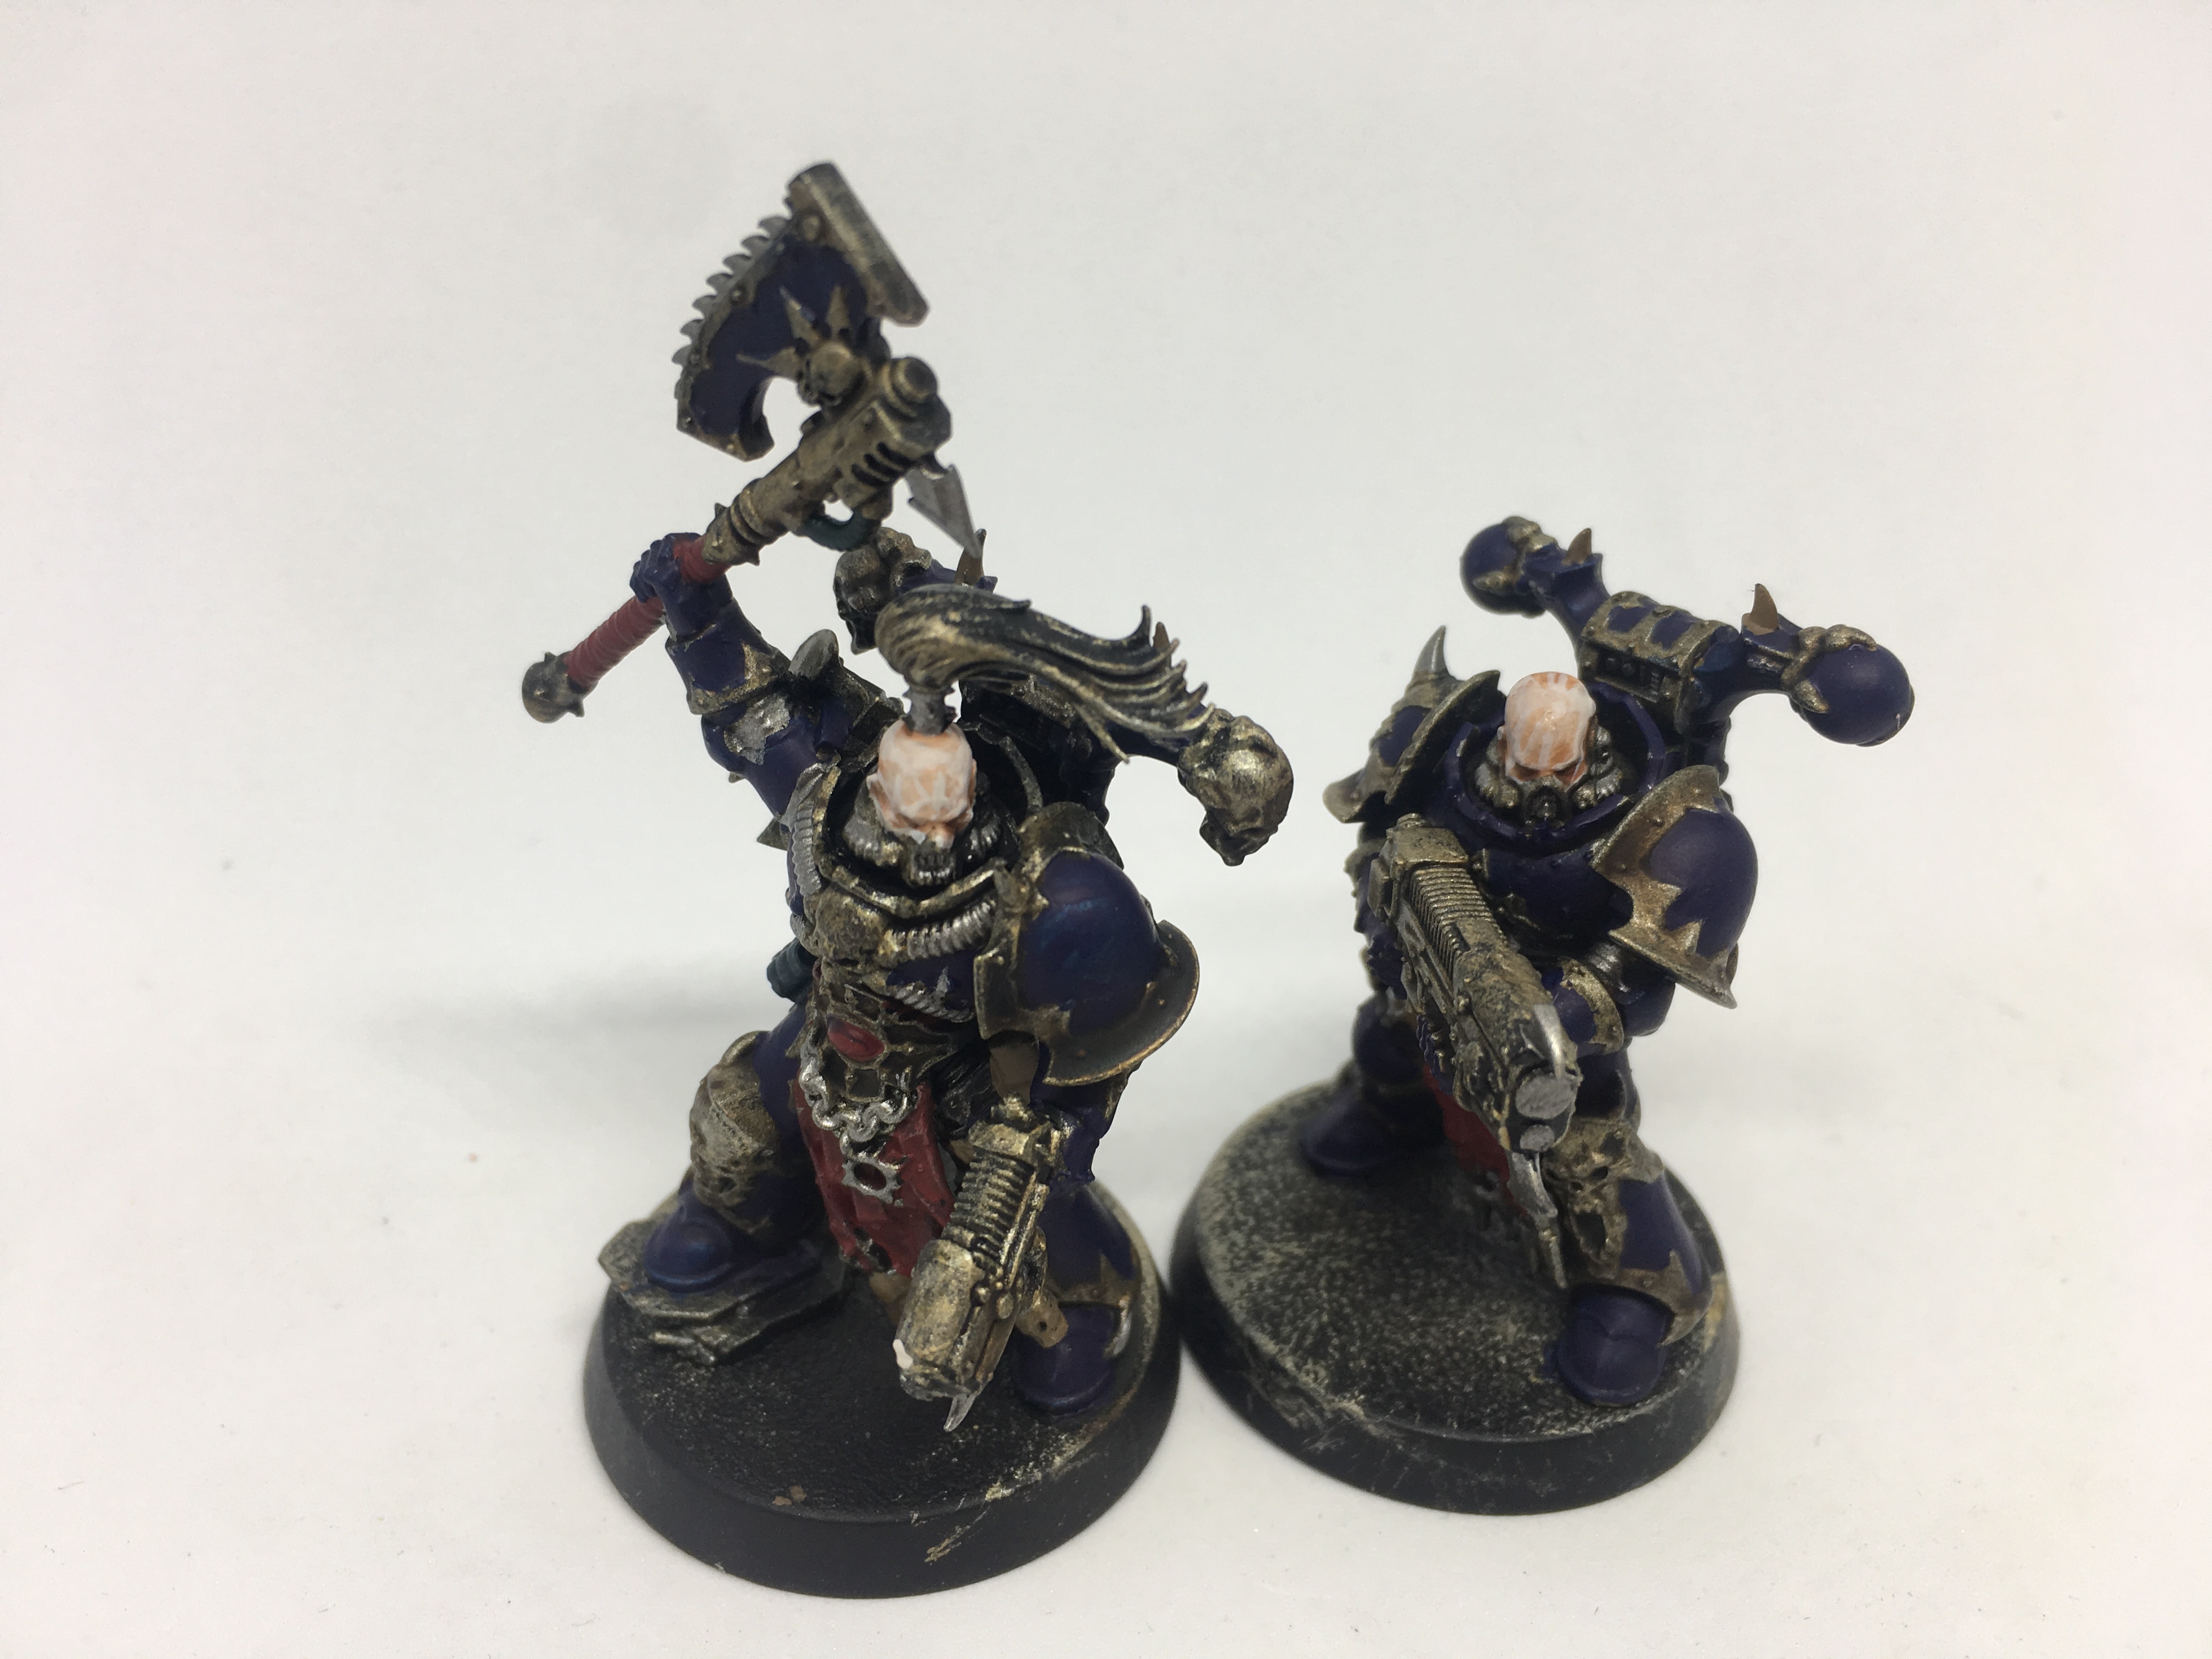
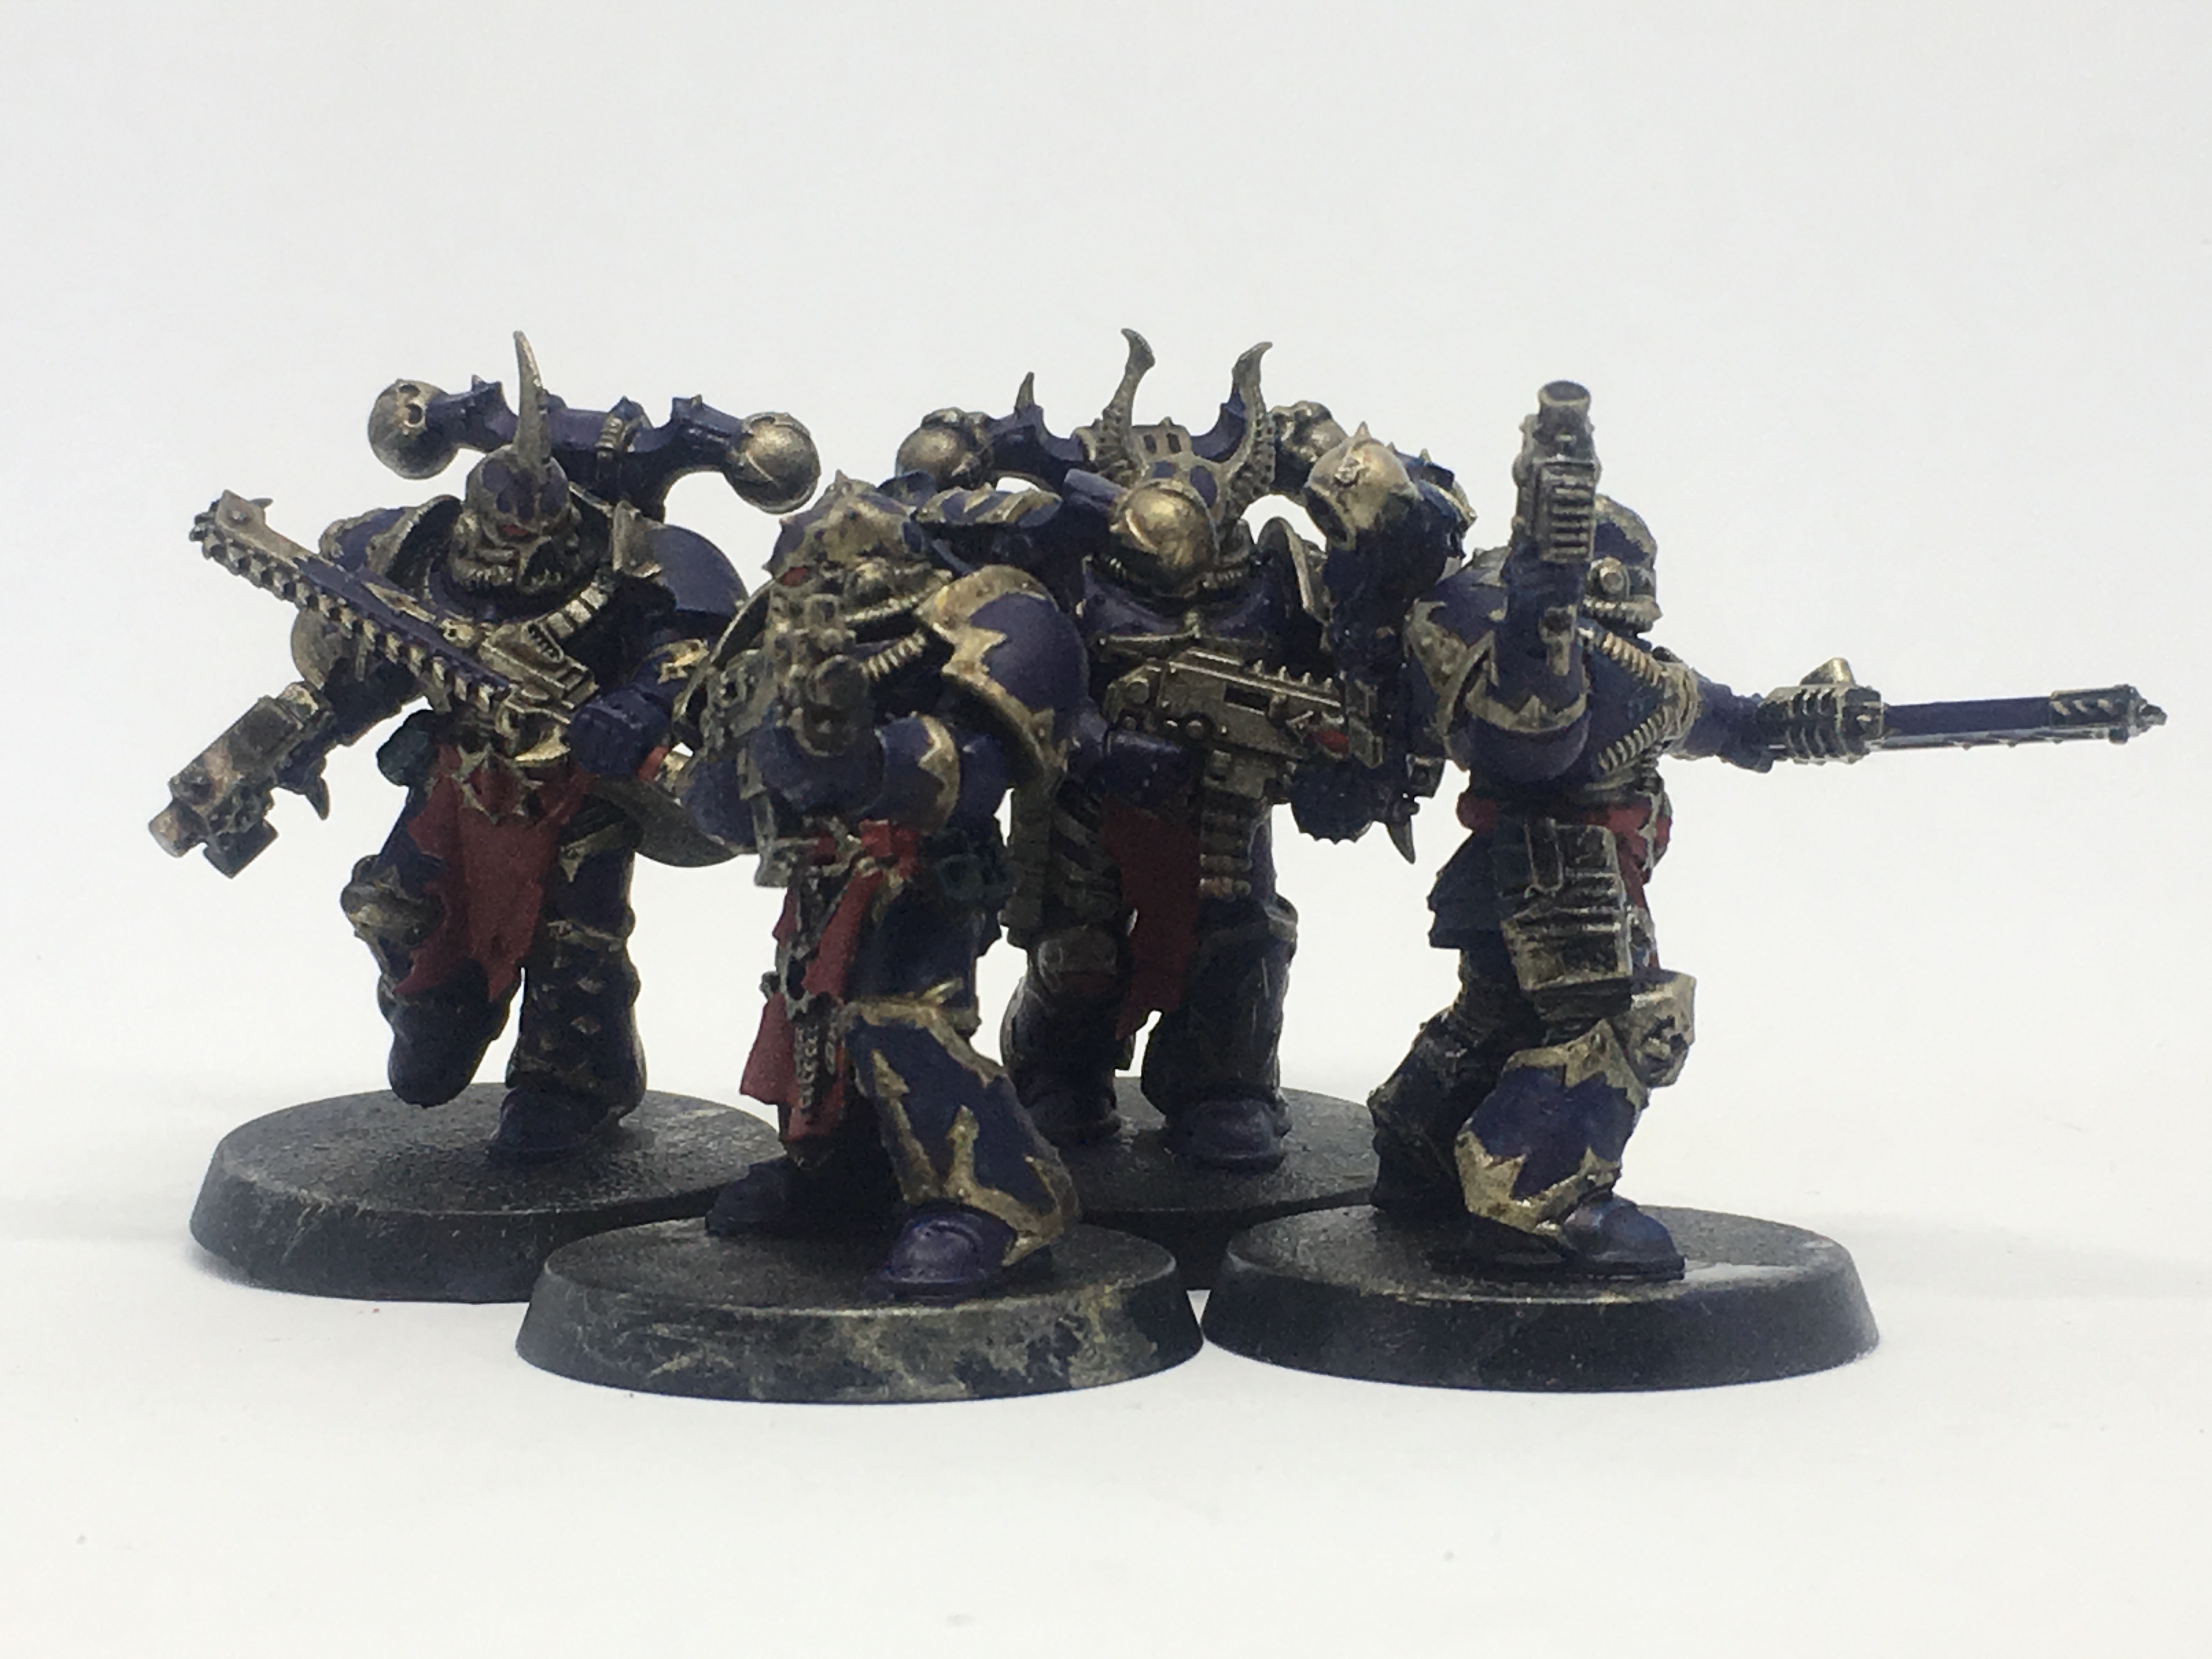
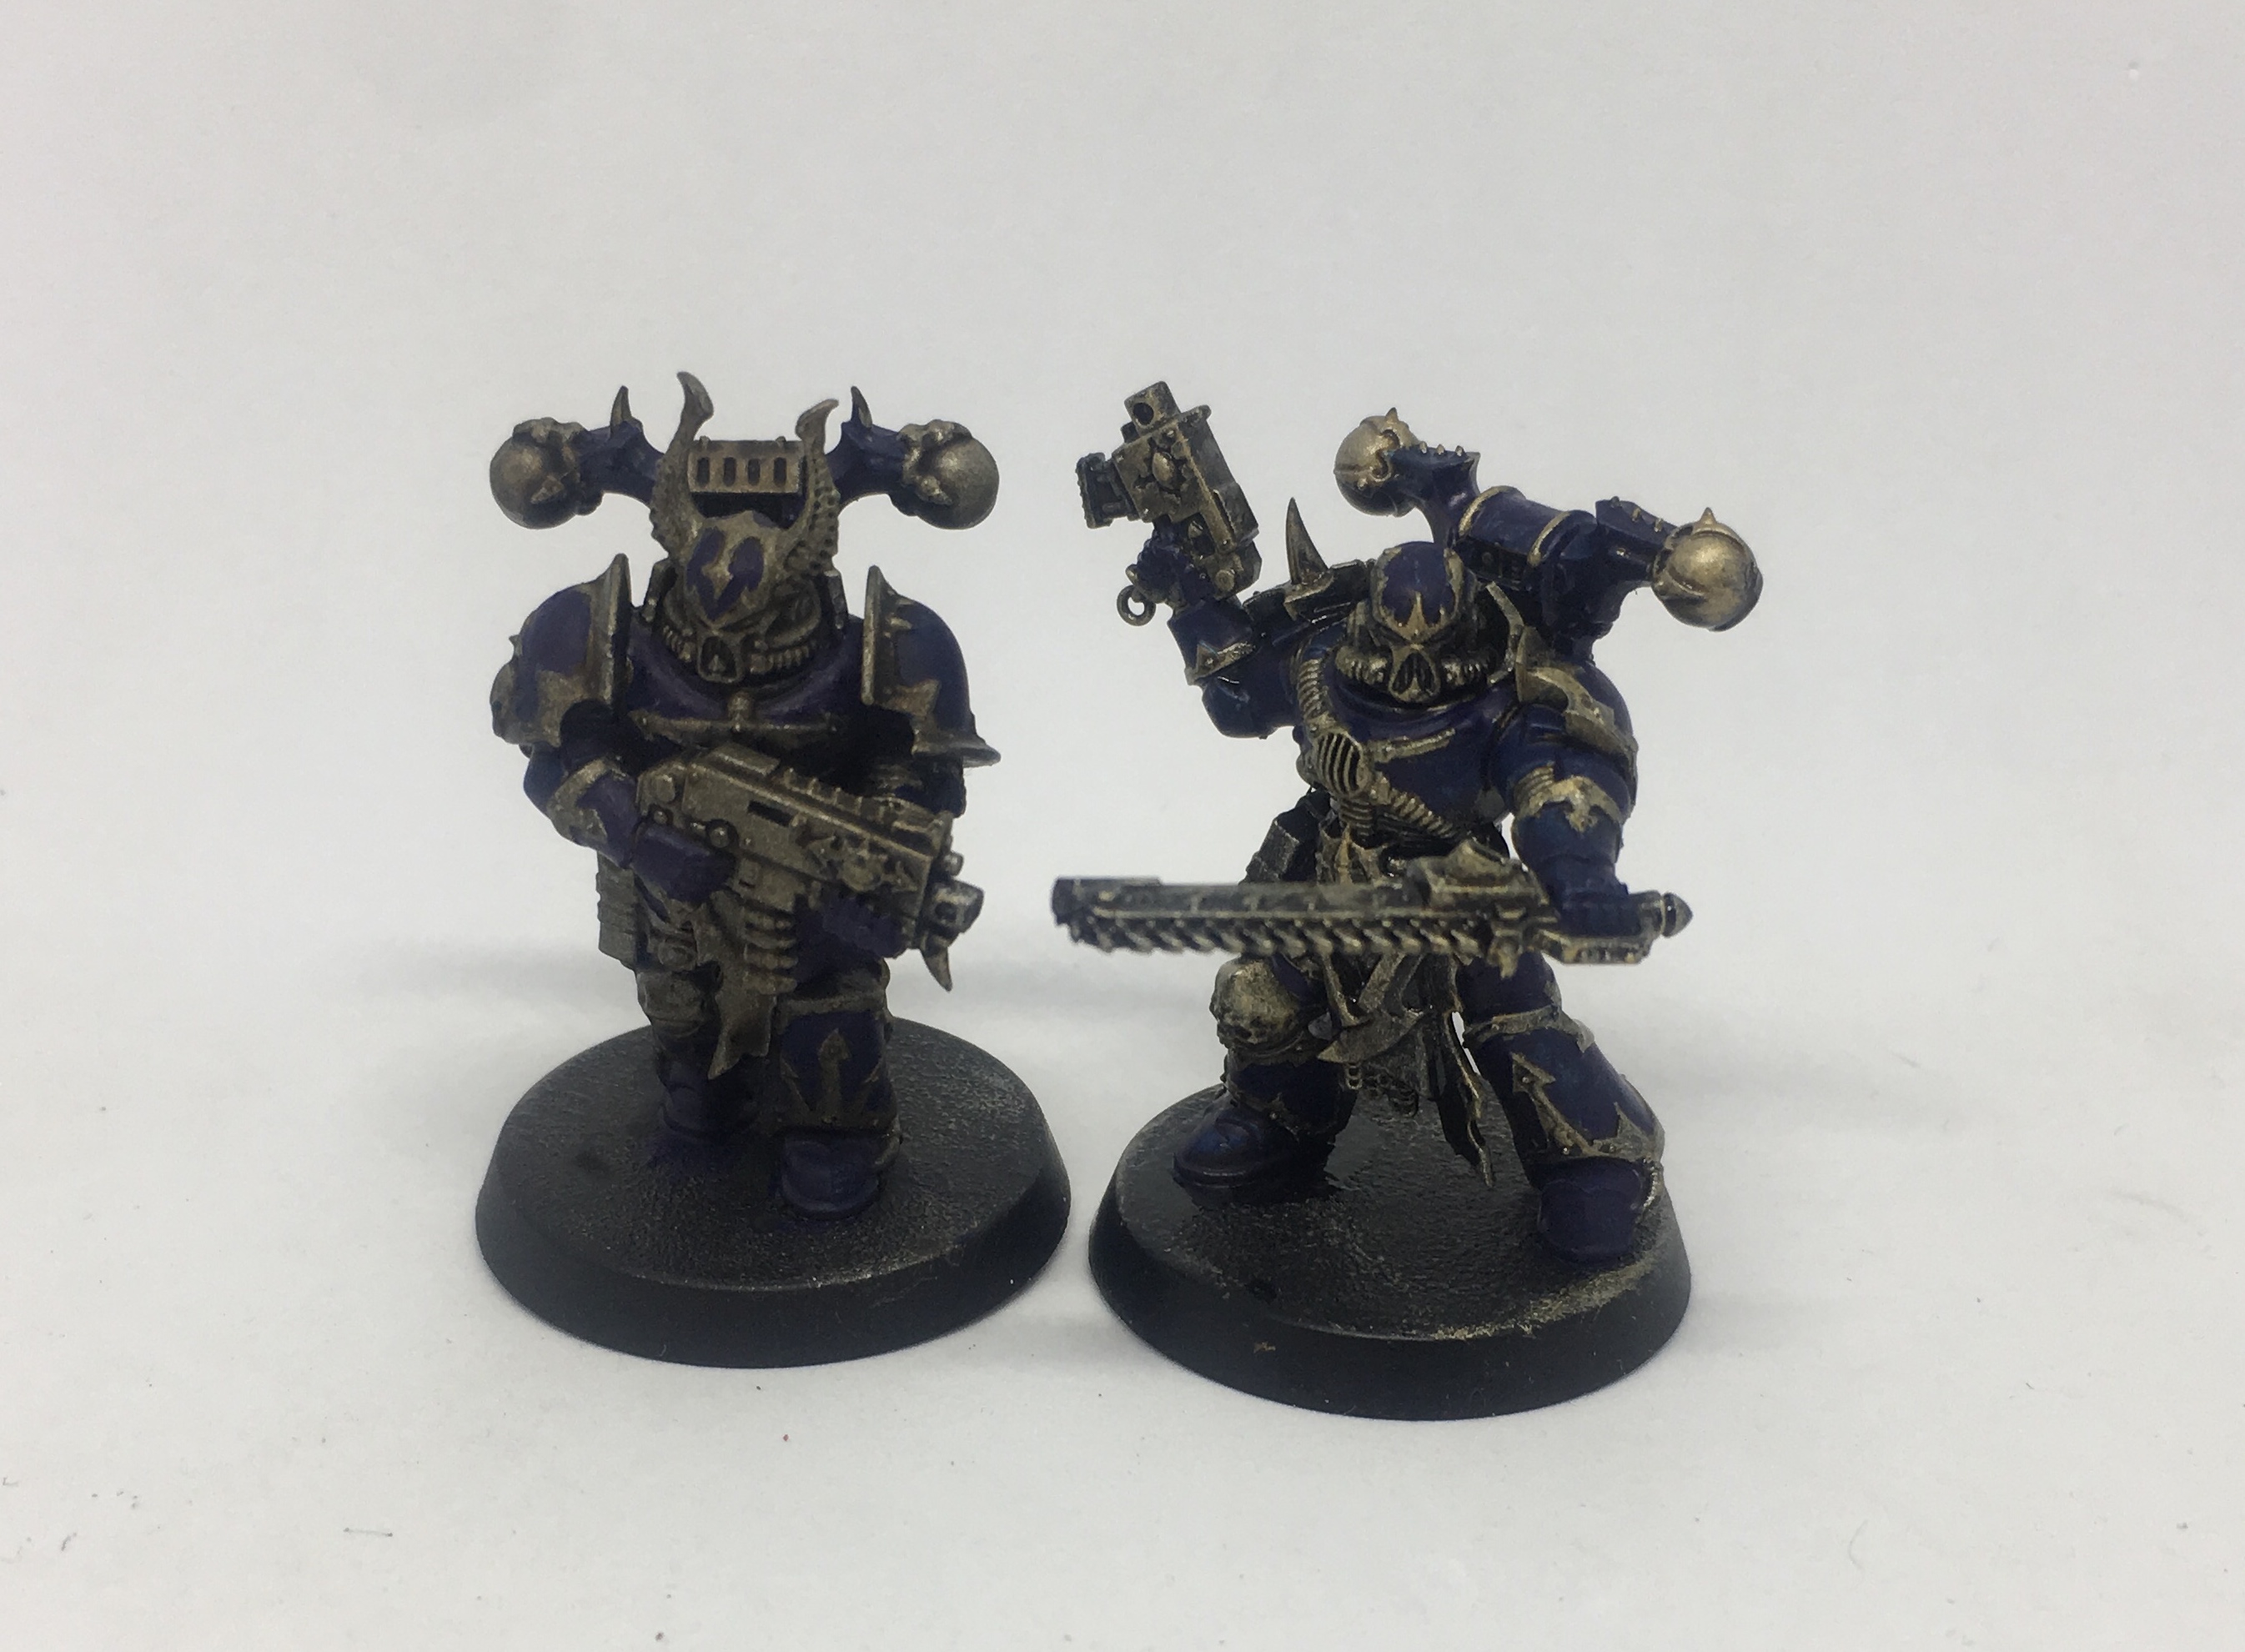
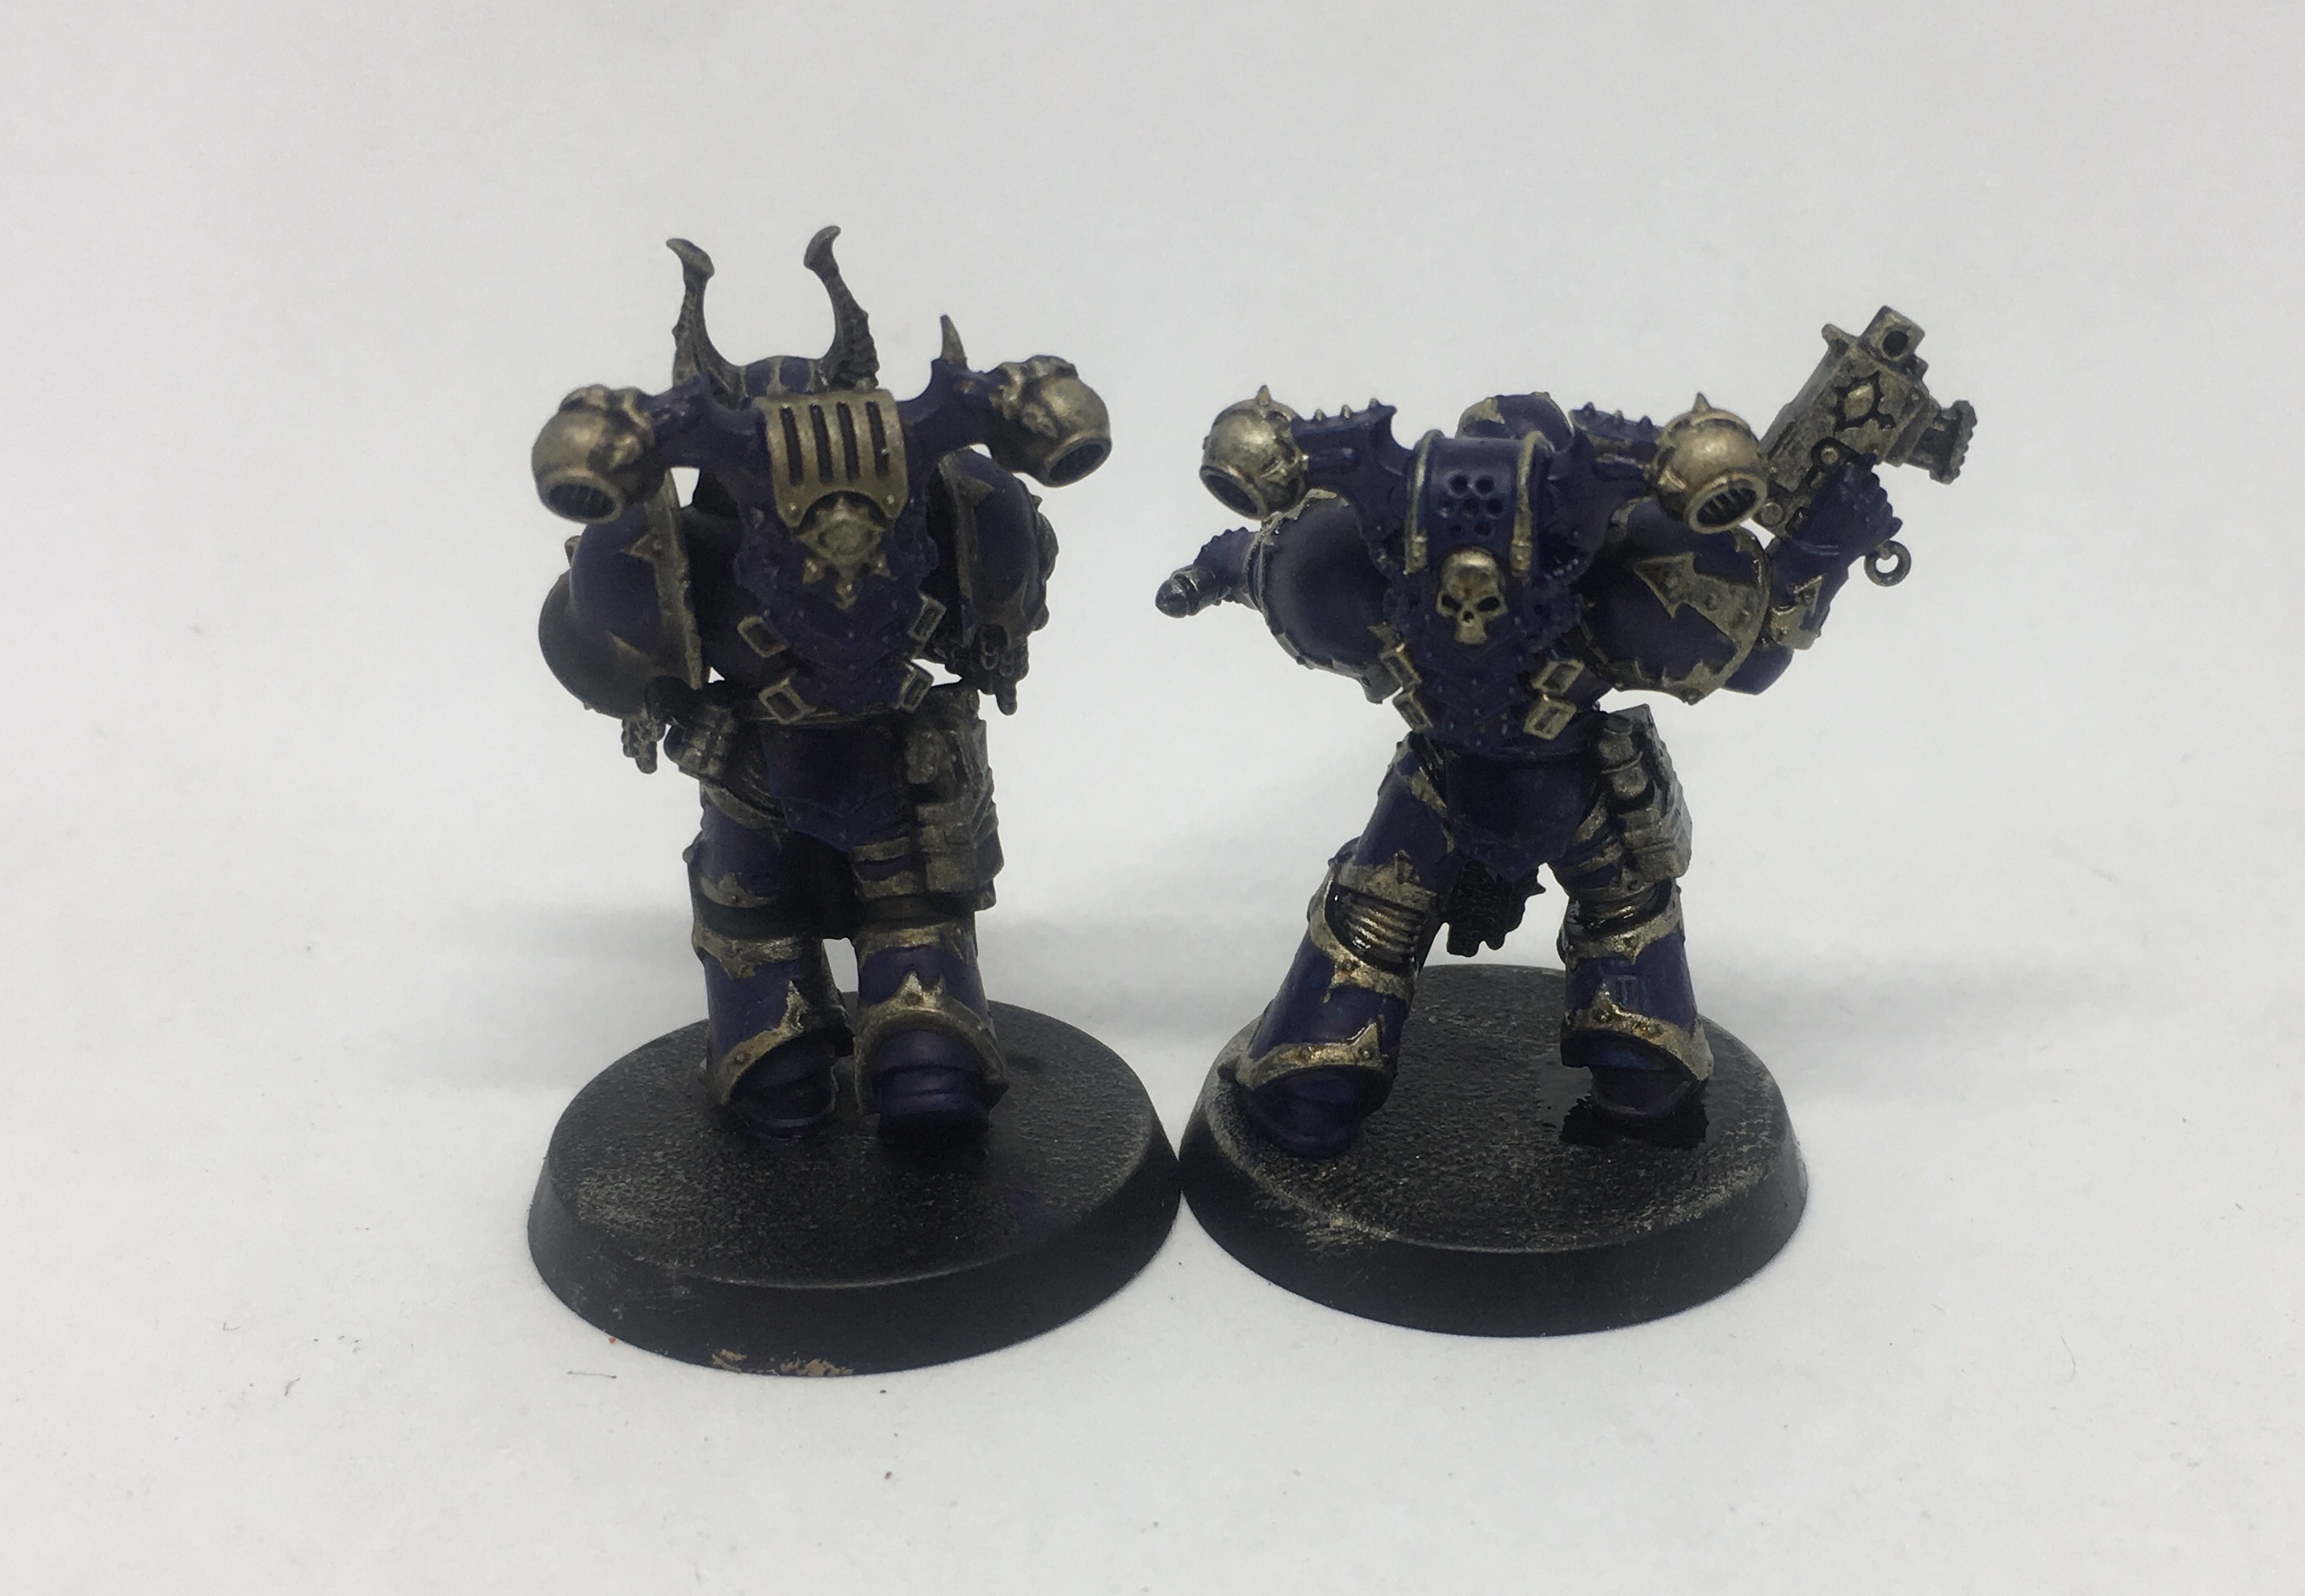
So here is the end of the unintended Trilogy. More Night Lords with some blue on them! Enjoy!

Entry 7: The Blue...en...ing... part 2
Today I finished the blue on the rest of my Chaos Space Marines from Shadowspear. I made a few mistakes here and there but I dont mind. The gold is showing through a little in parts but thats ok: the next coat of blue and the black wash will remedy needing to do a second coat.
It was slow, required accuracy and took a while, but it was enjoyable and satisfying. I guess its a tad smaller than my last project and different enough, despite being a 40k army using power armour.
I also got more detail work done, in addition to these, but I am still working on it and will post another update about them either later today or tomorrow.
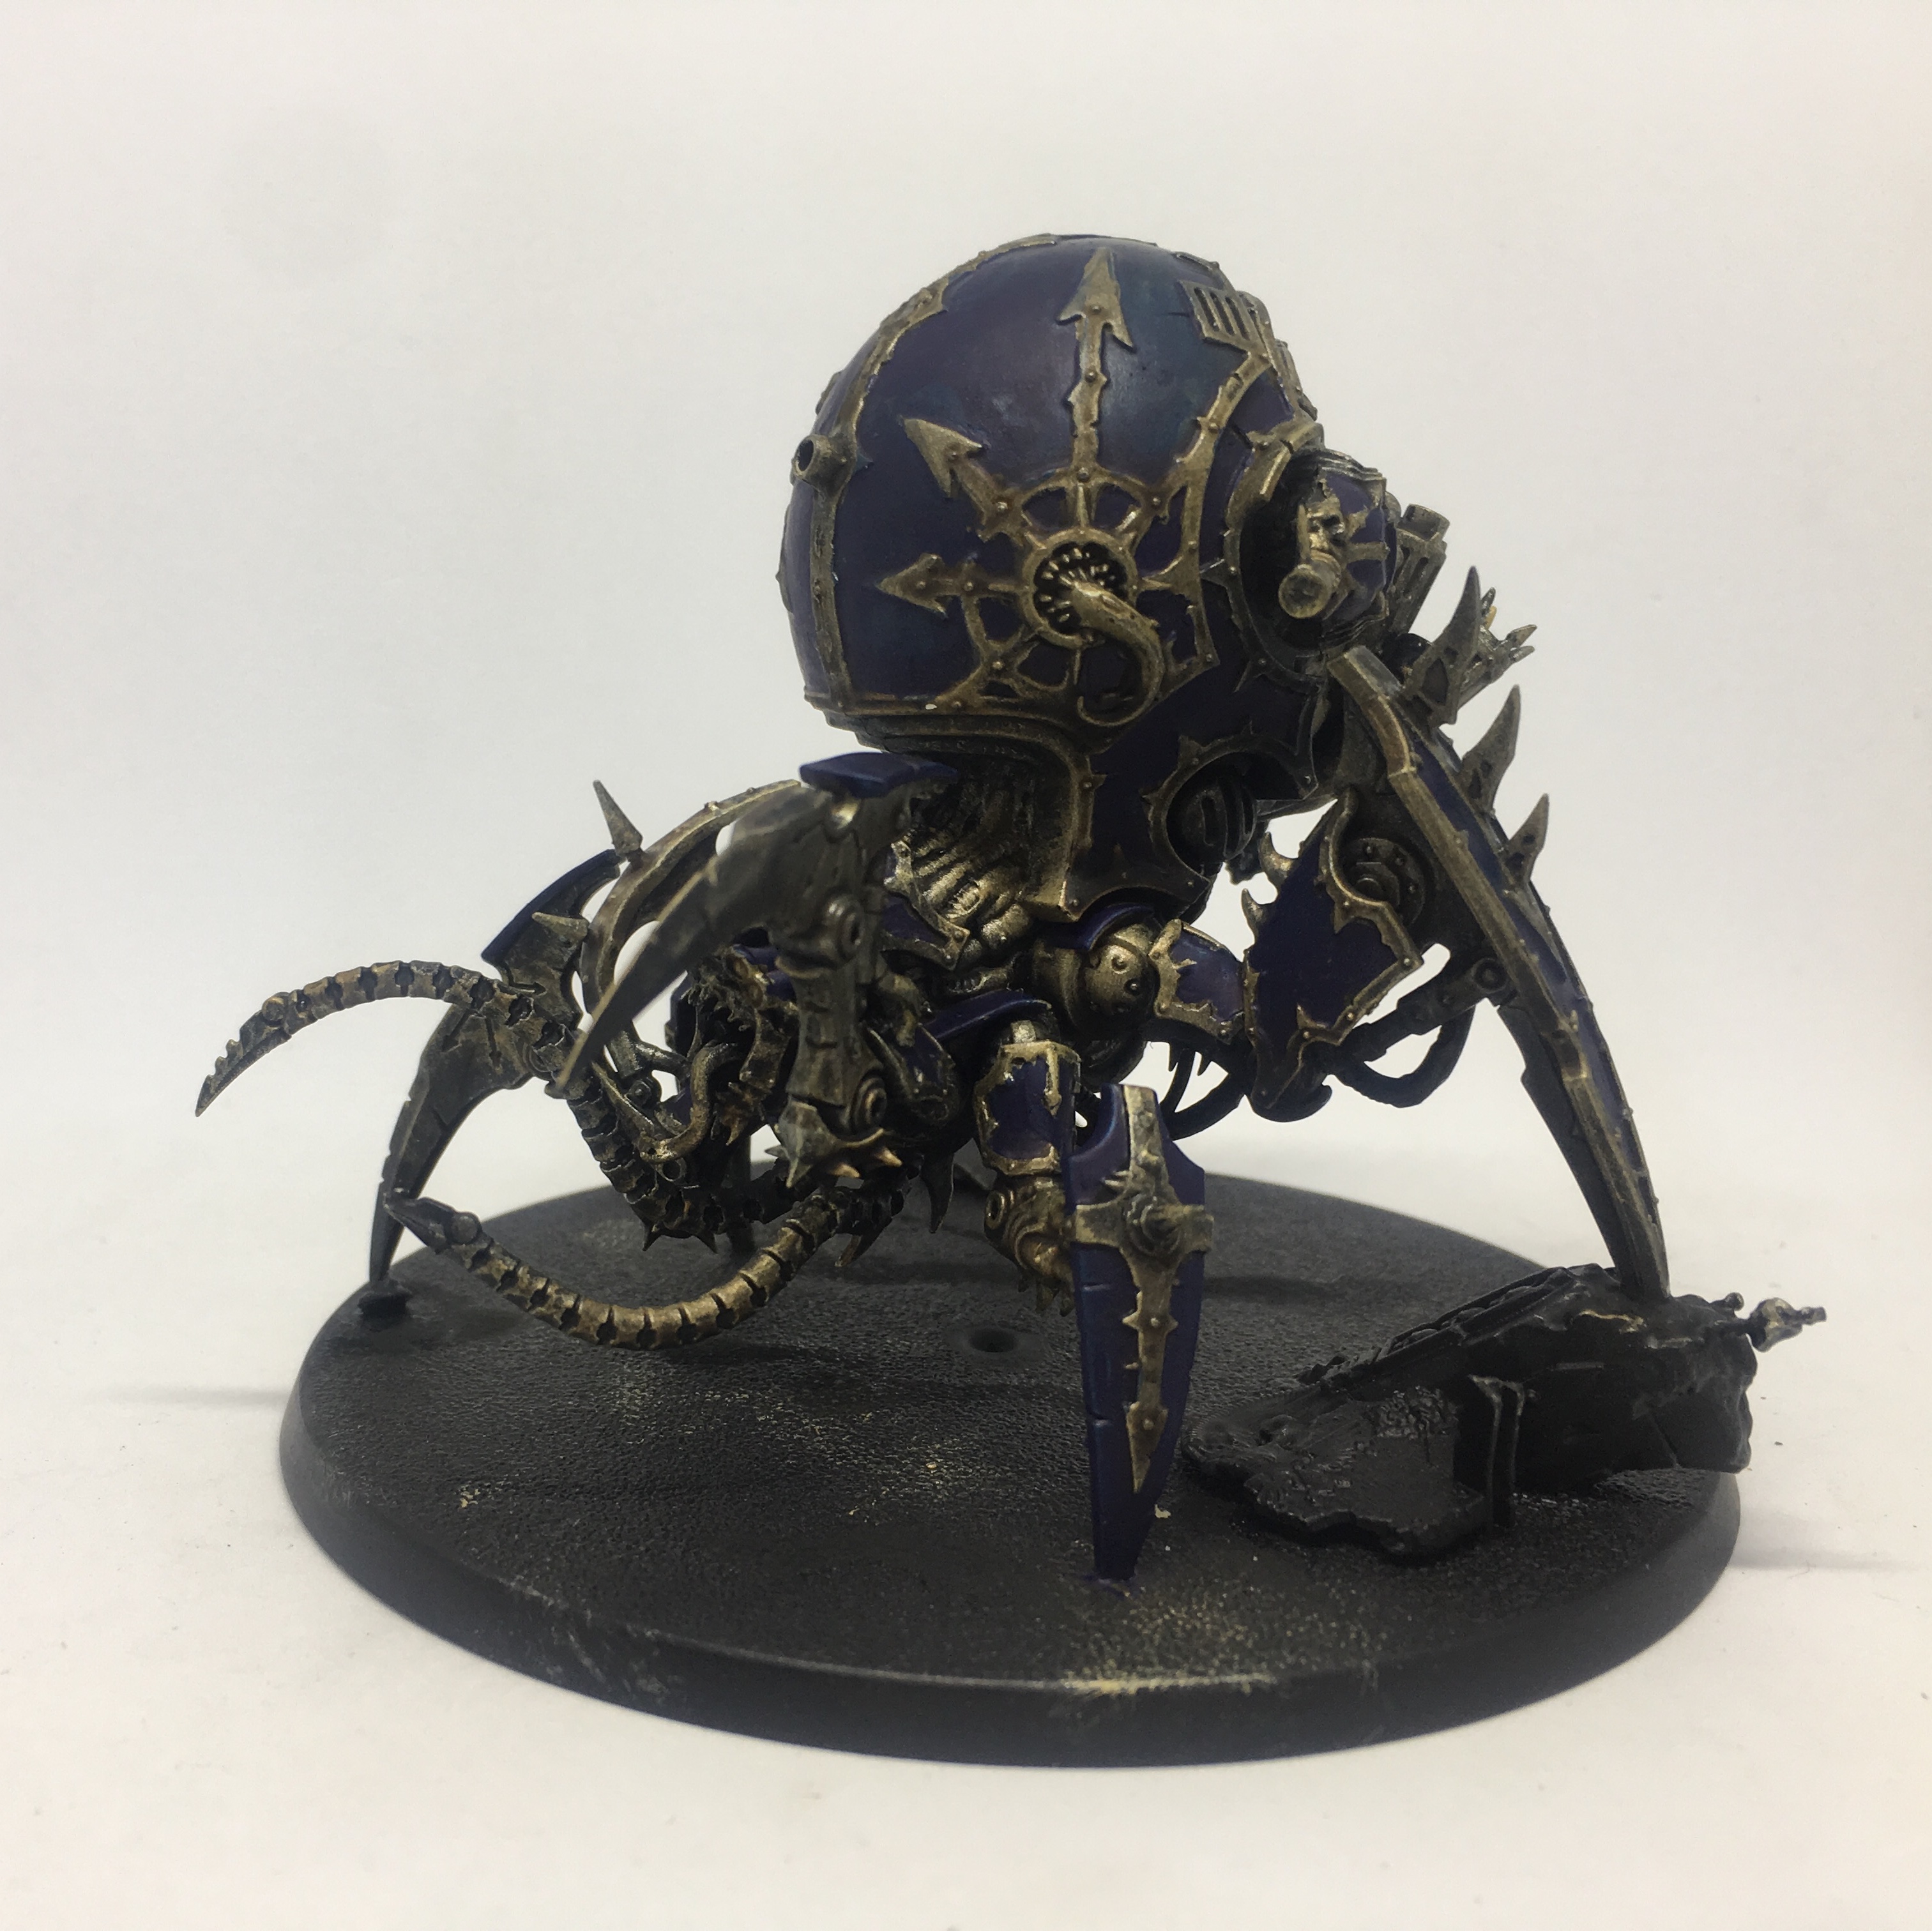
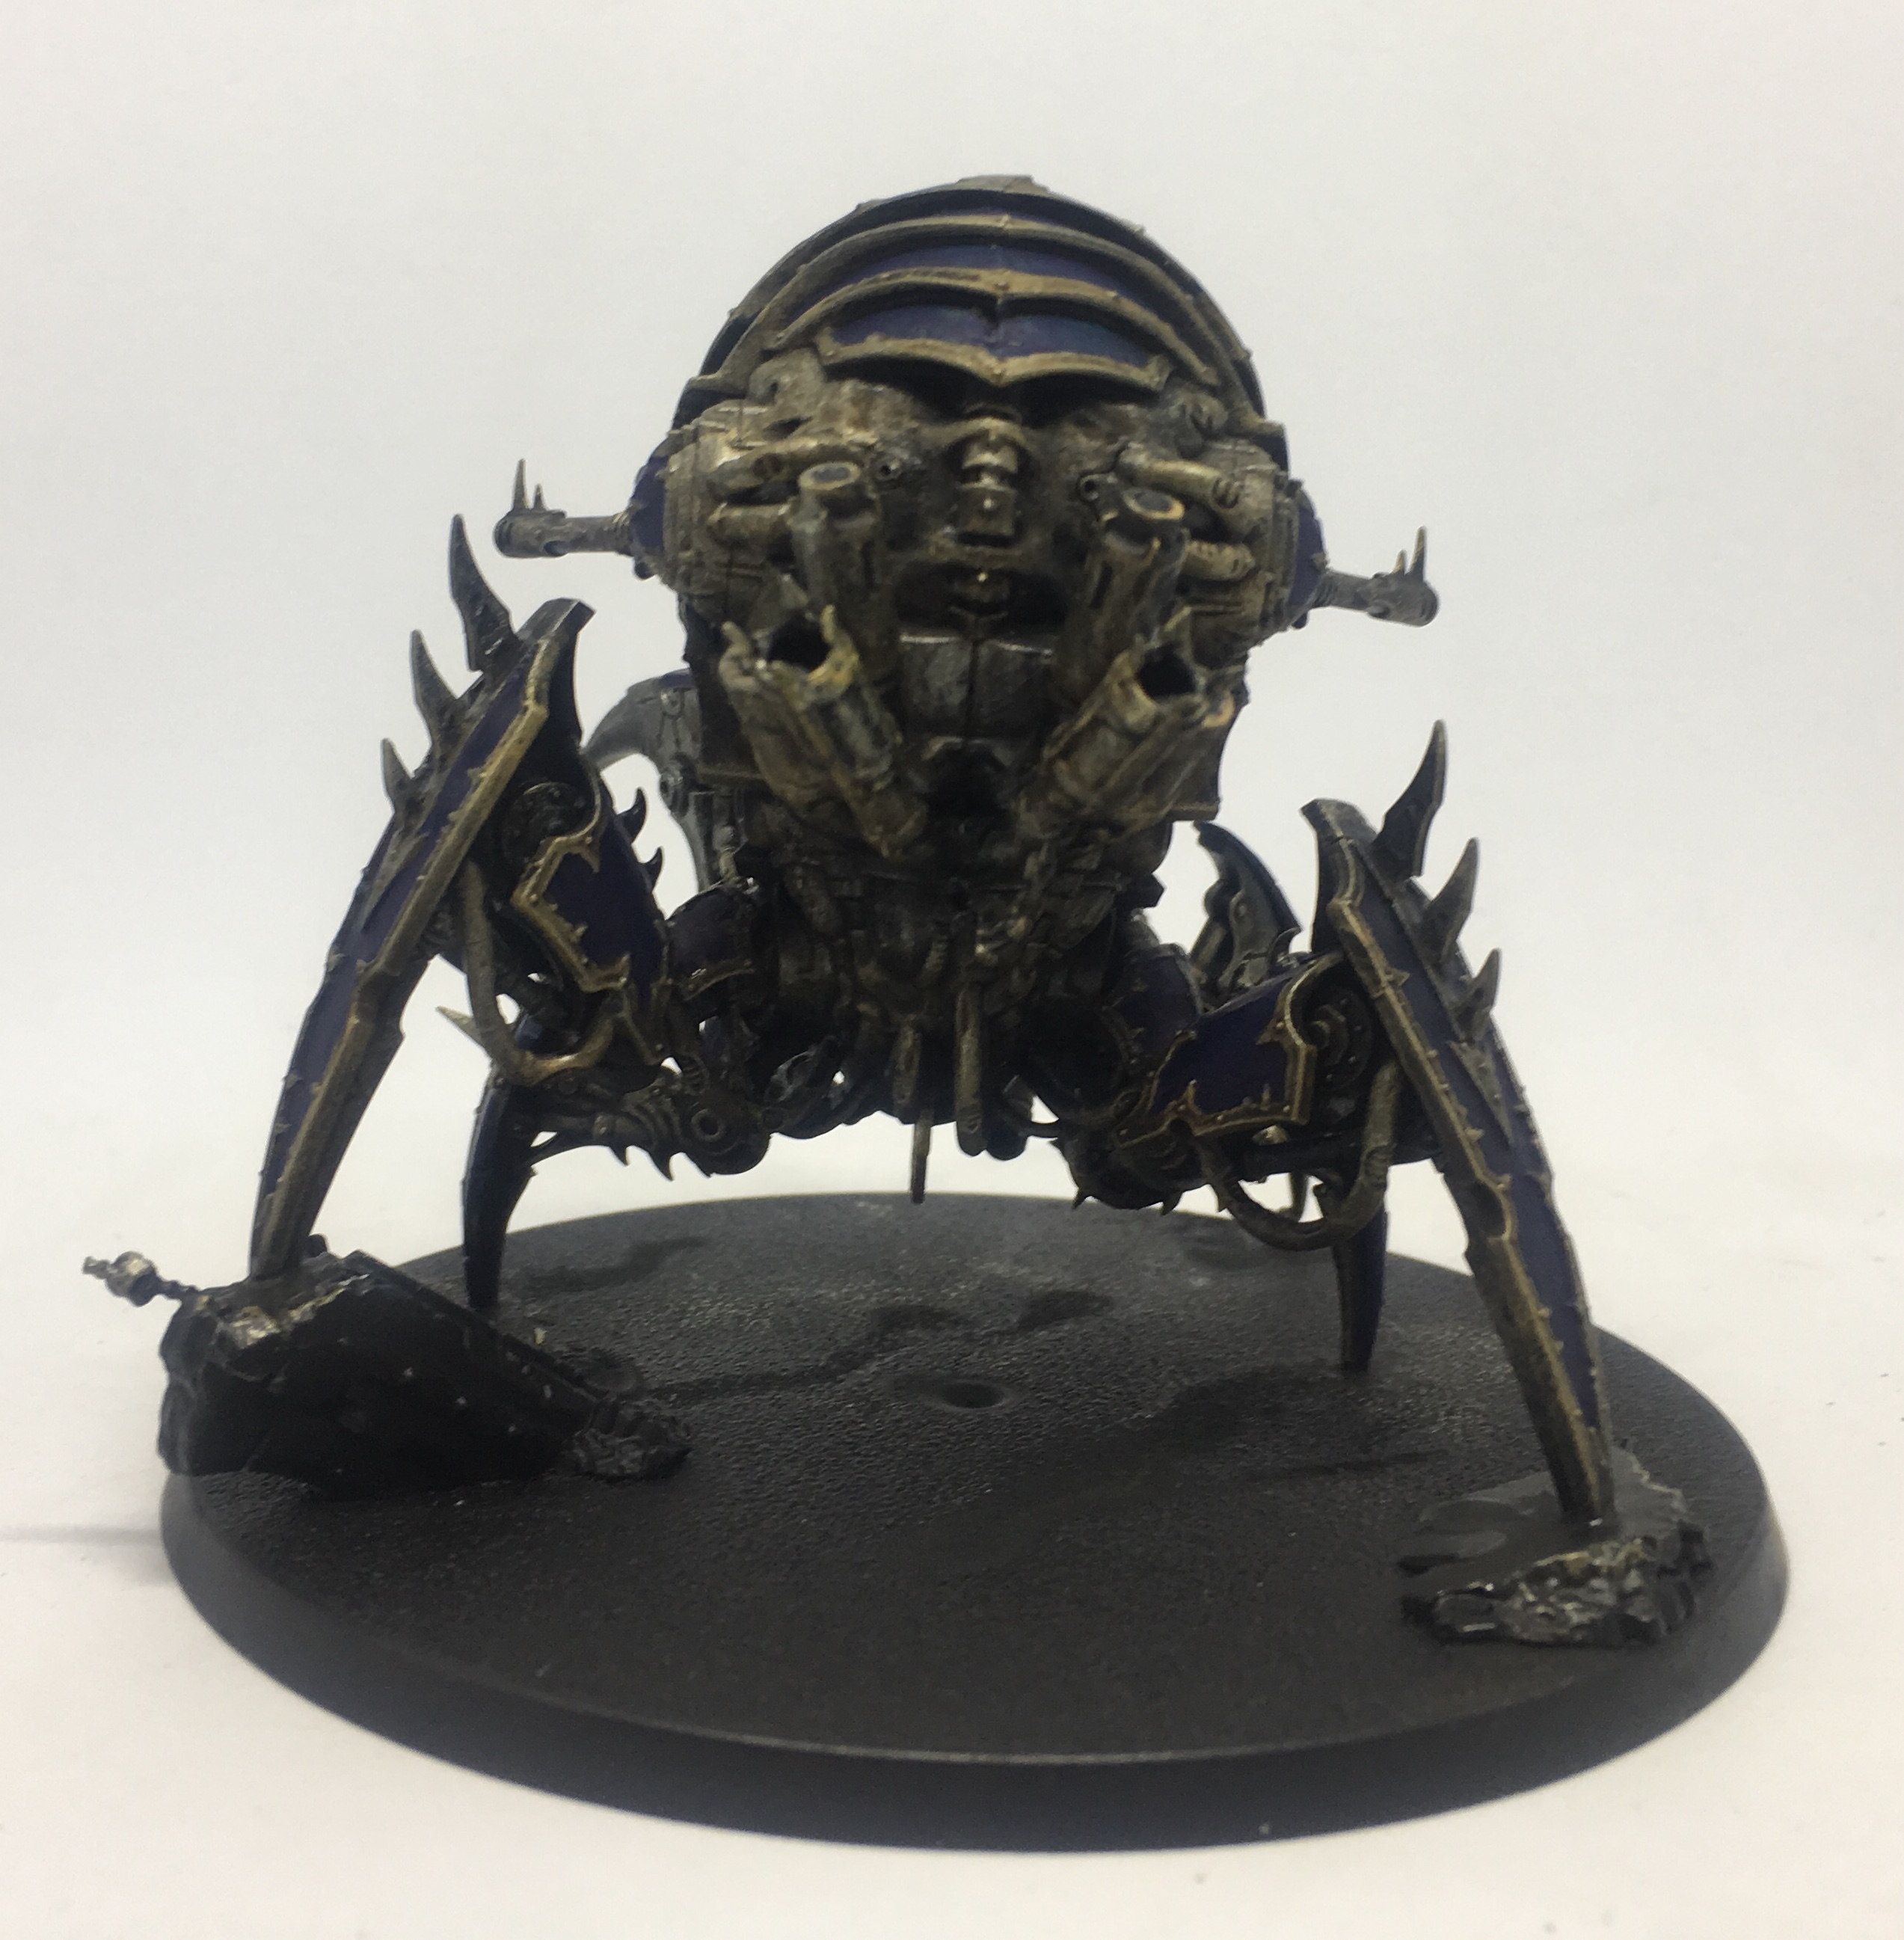
So the Venomcrawler is completed, the squad of ten Chaos Space Marines and the remaining Greater Possessed.

Entry 6: The Blue...en...ing.... part 1
Picture heavy is this entry as it is just applying the Night Blue as a basecoat in as a block colour. I’m doing one medium ish coat. Even though some of the gold is showing through, this will be remedied by the next coat of lighter blue and the black wash.
I still have one Greater Possessed, nine Chaos Marines and the Venomcrawler to finish with this step.