


Husaria – Building a Polish army for the 1620s


Recommendations: 2003
About the Project
This project describes my efforts to build a 1620s Polish and Lithuanian Commonwealth army, including the famous Polish ‘Winged’ Hussars. I will cover the historical research, choosing the miniatures, build and painting the miniatures, and finally hopefully playing with the army. (N.B. Since starting this project I have added a couple of further projects to the system. One contains opponents for the Poles, the Swedish army. I had been adding entries about these here but it was a perhaps bit confusing. See here for the Swedish project: https://www.beastsofwar.com/project/1798825/ . I also started a project for the set up a of demo game planned for Salute 50, using the Poles and Swedes, here: https://www.beastsofwar.com/project/1798842/ .)
Related Game: Pike & Shotte
Related Company: Warlord Games
Related Genre: Historical
This Project is Active
Command
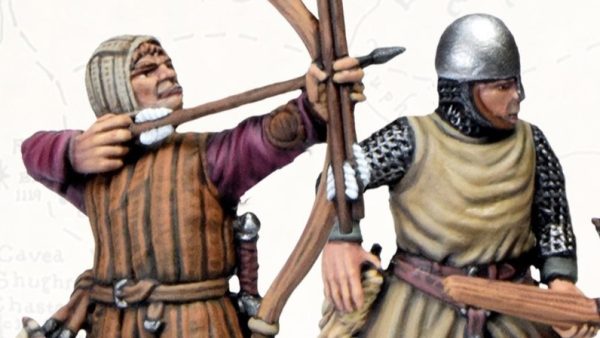
When building previous armies I have often fallen in to the trap of getting all of the troops ready and then finding I have no generals to command them when I come to play the first game with the army. To prevent this I decided to jump in early this time with some command bases. There are plenty of images available to provide ideas and inspiration for Polish-Lithuanian leaders, and I’ve included some in this post.

To provide figures for my command bases both Foundry and The Assault Group (TAG) have some nice Polish command packs. I have used some of these figures in my hussar units, but have also kept one or two for the generals and their followers. I typically build my command bases with a small vignette of figures on a round base; three figures on a larger base for the overall general, and two figures on a smaller base for subordinate commanders. I’m following this approach again for my Polish-Lithuanian army, that is recreating the army that fought in the battle of Dirschau in 1627. The following describes the first command bases I’ve constructed.
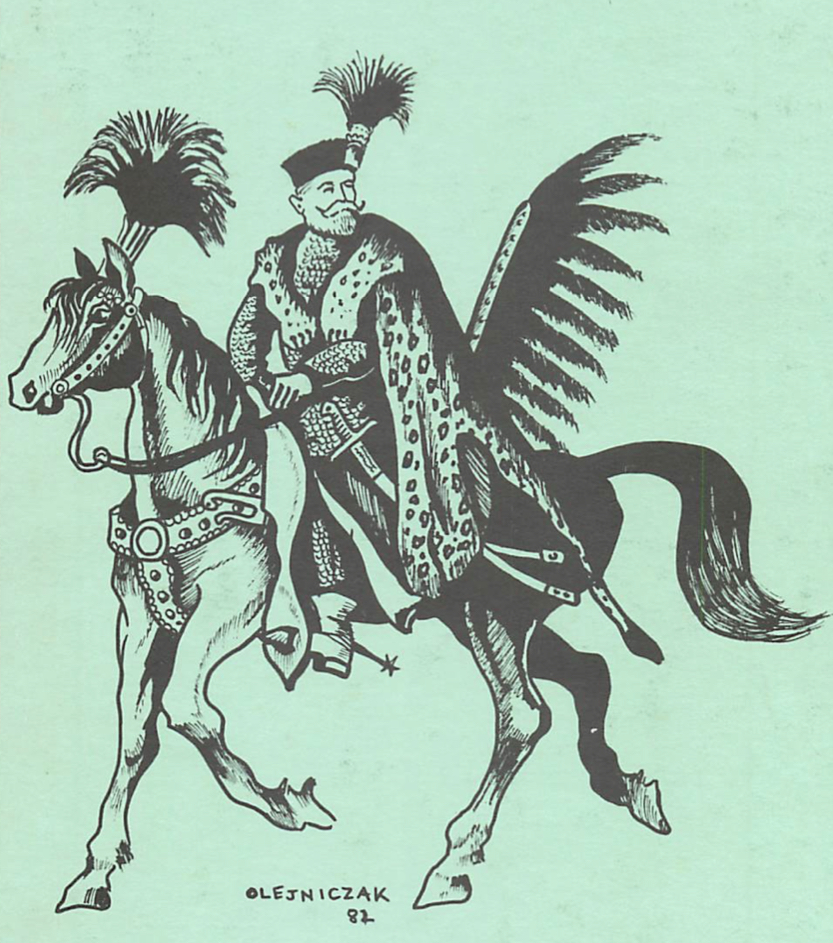
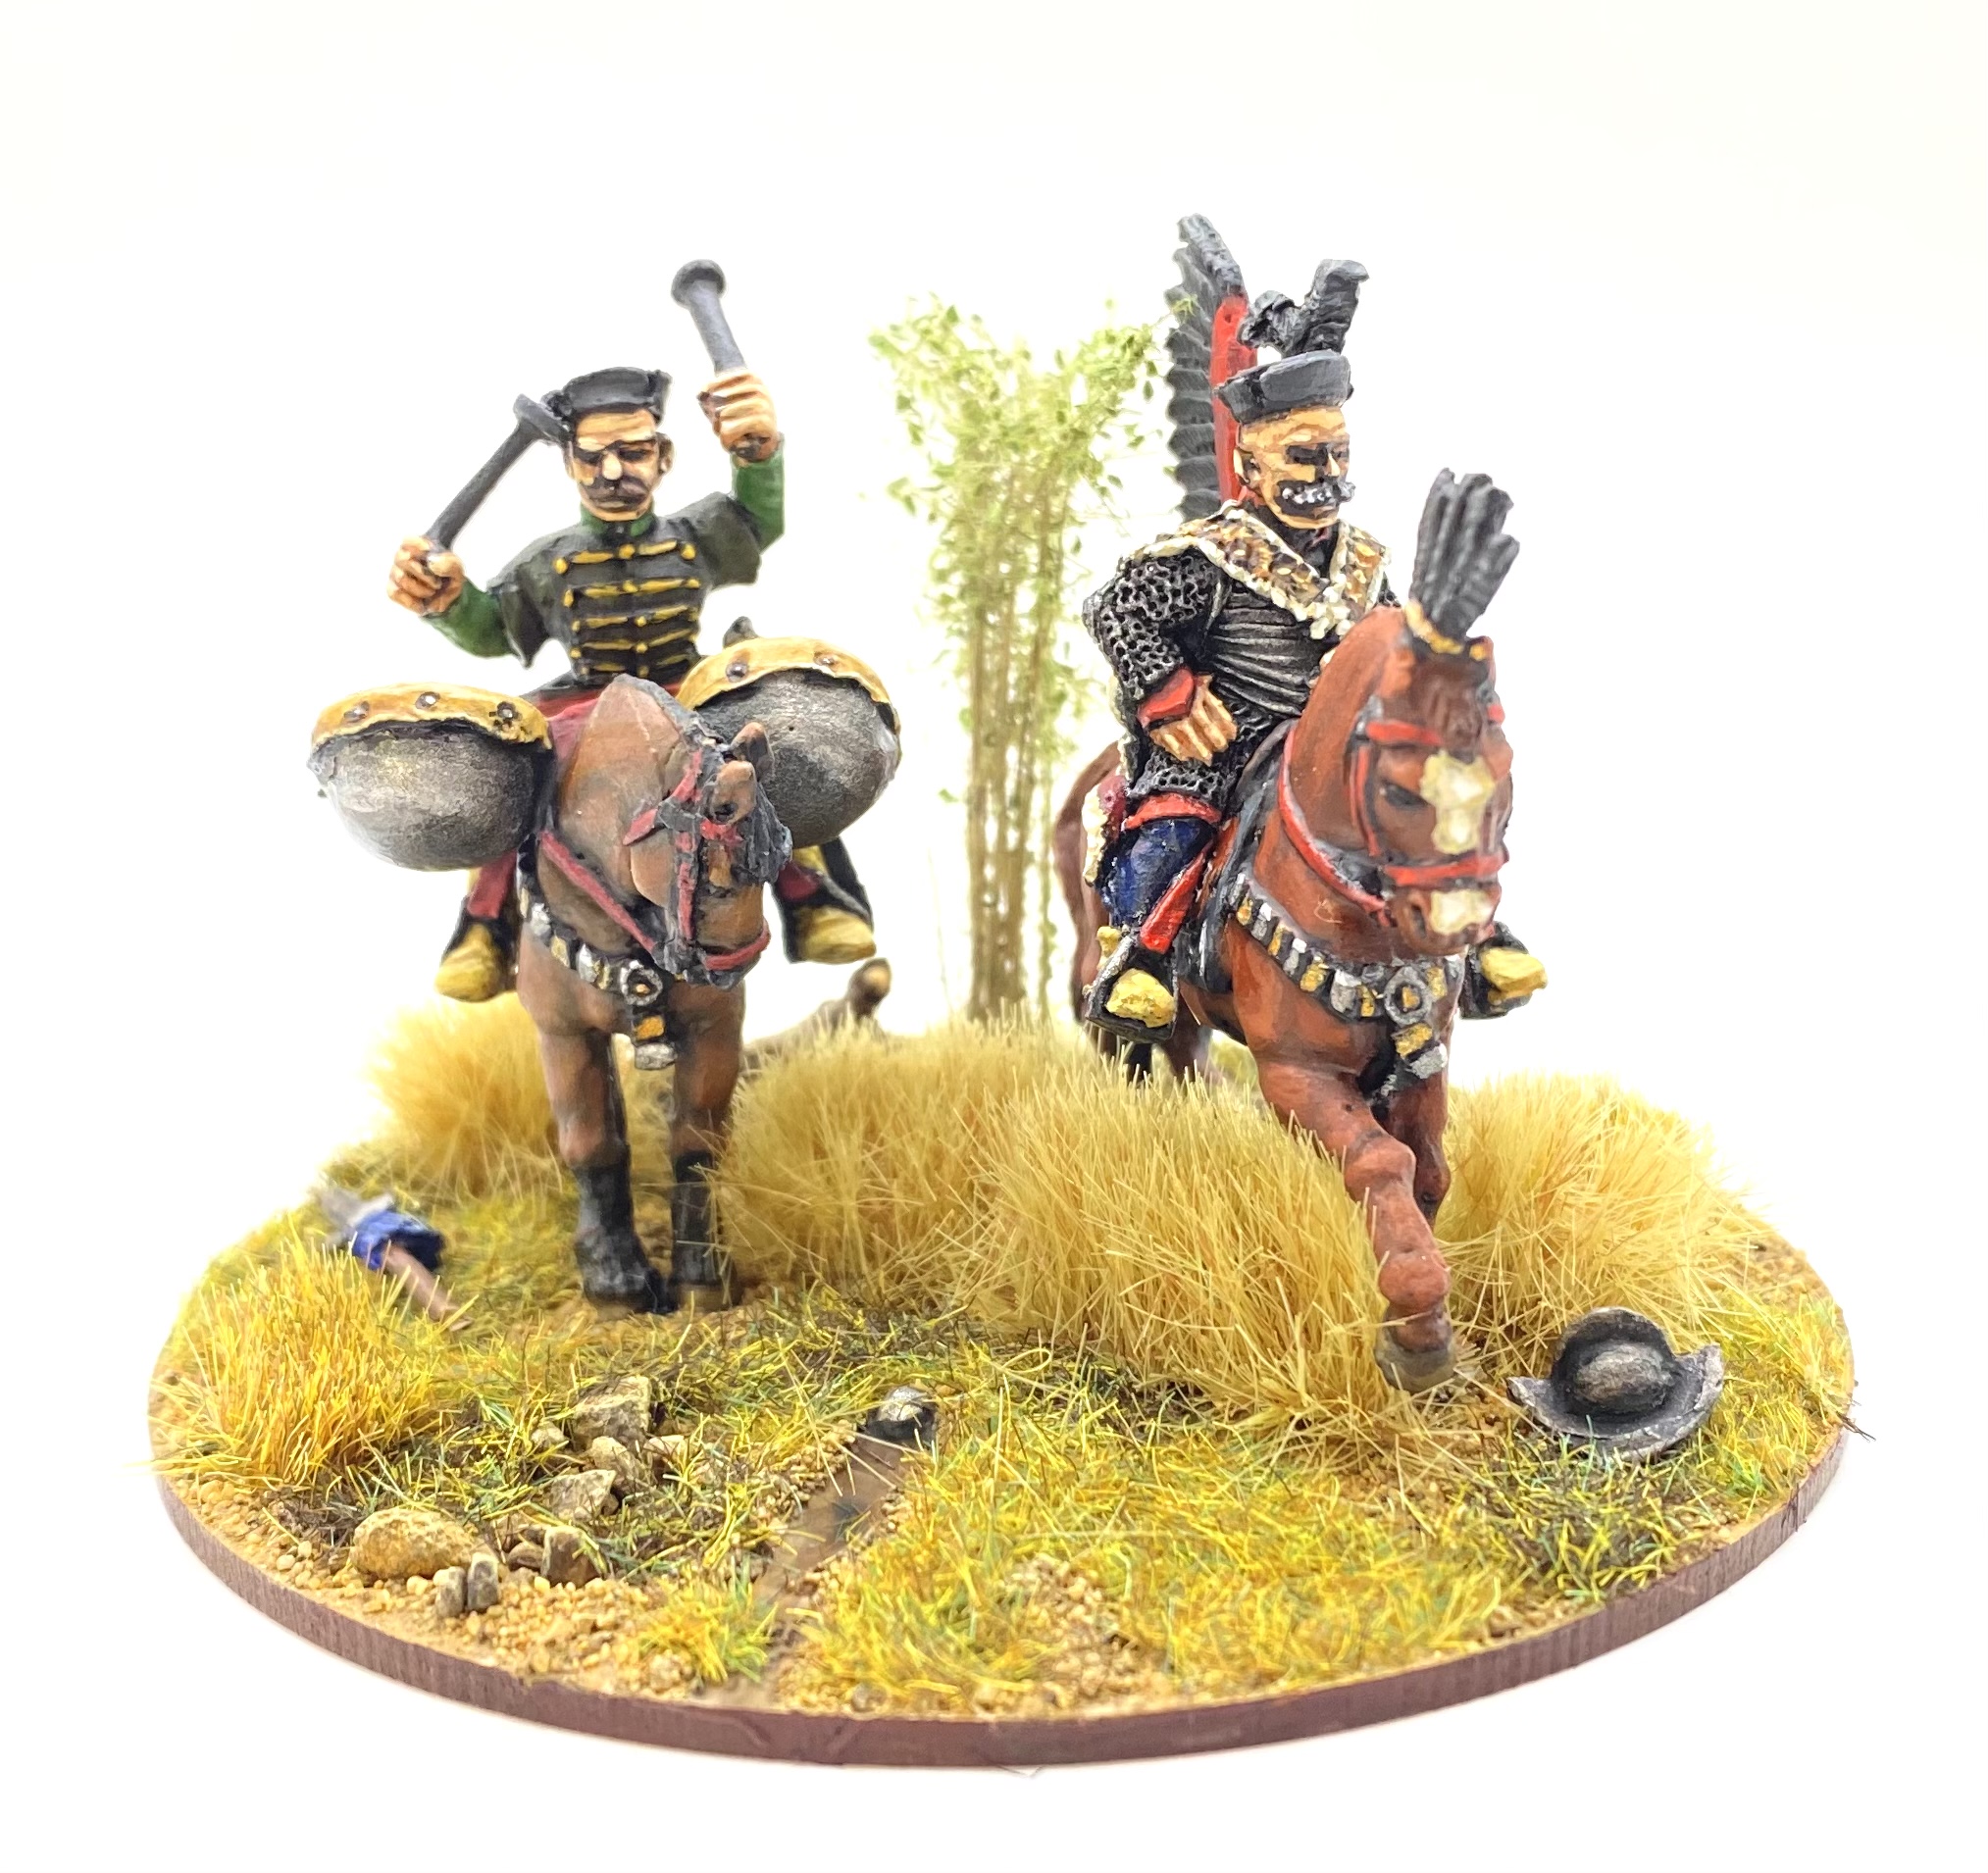
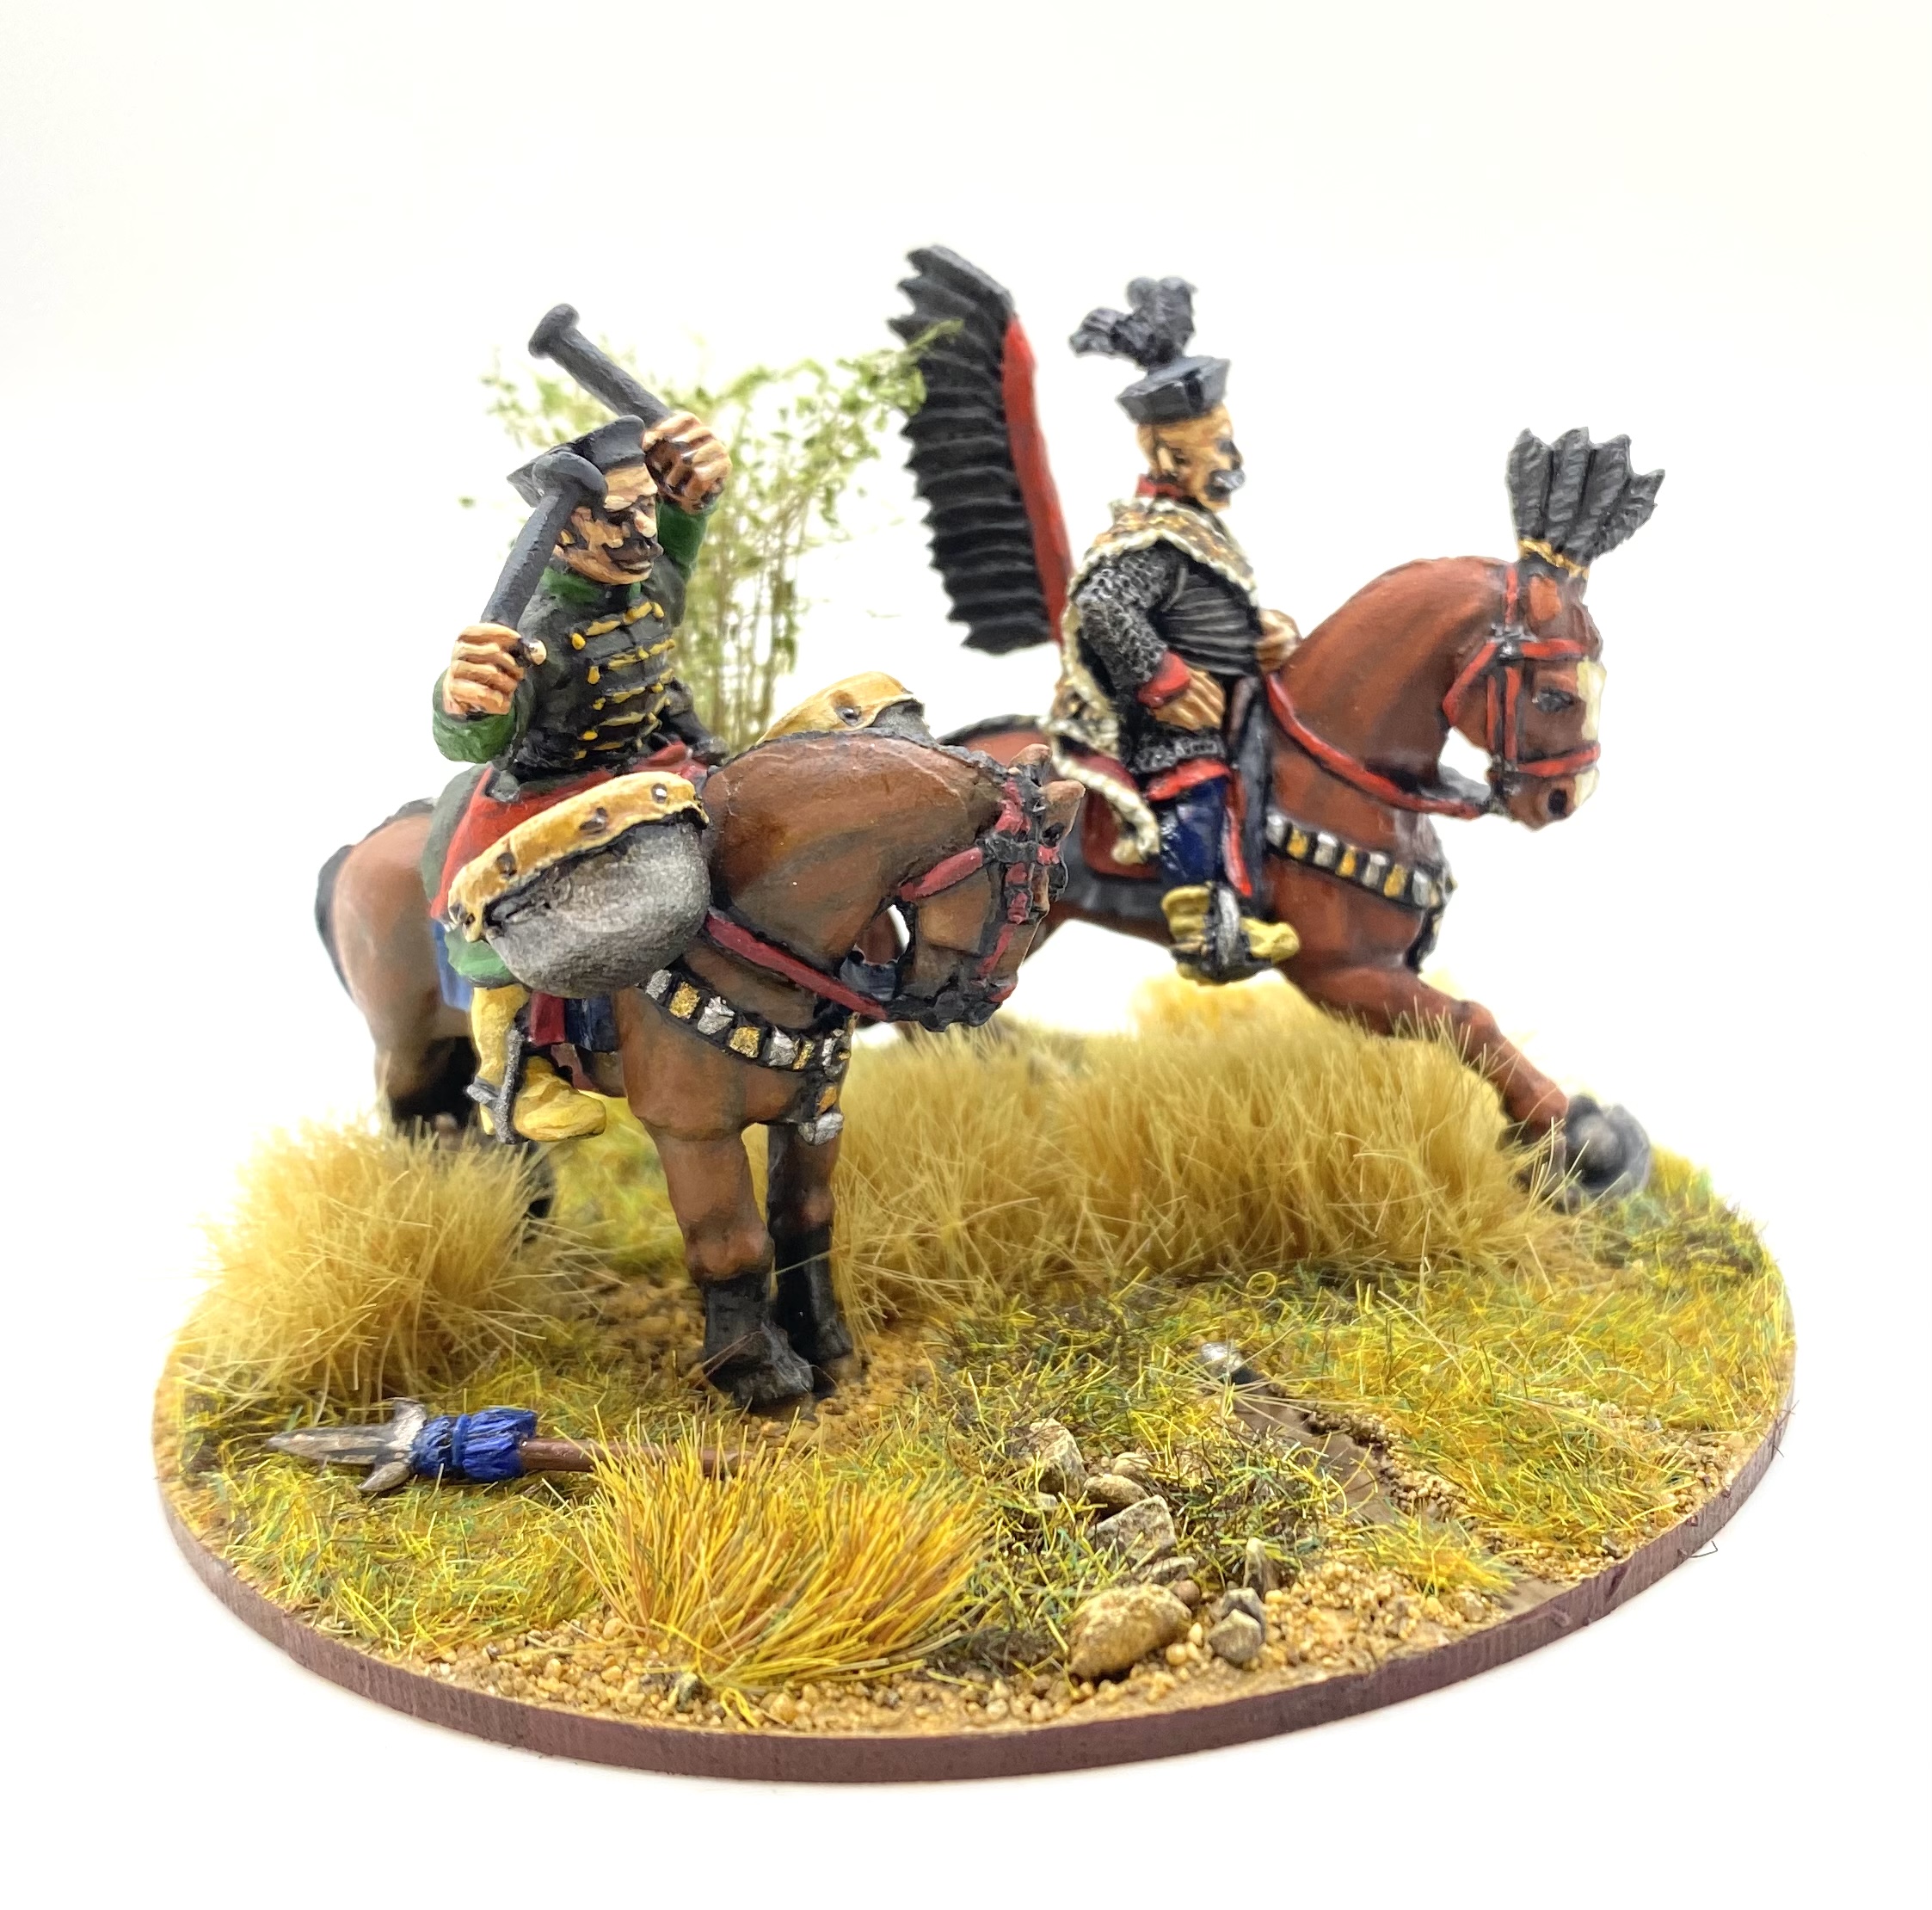
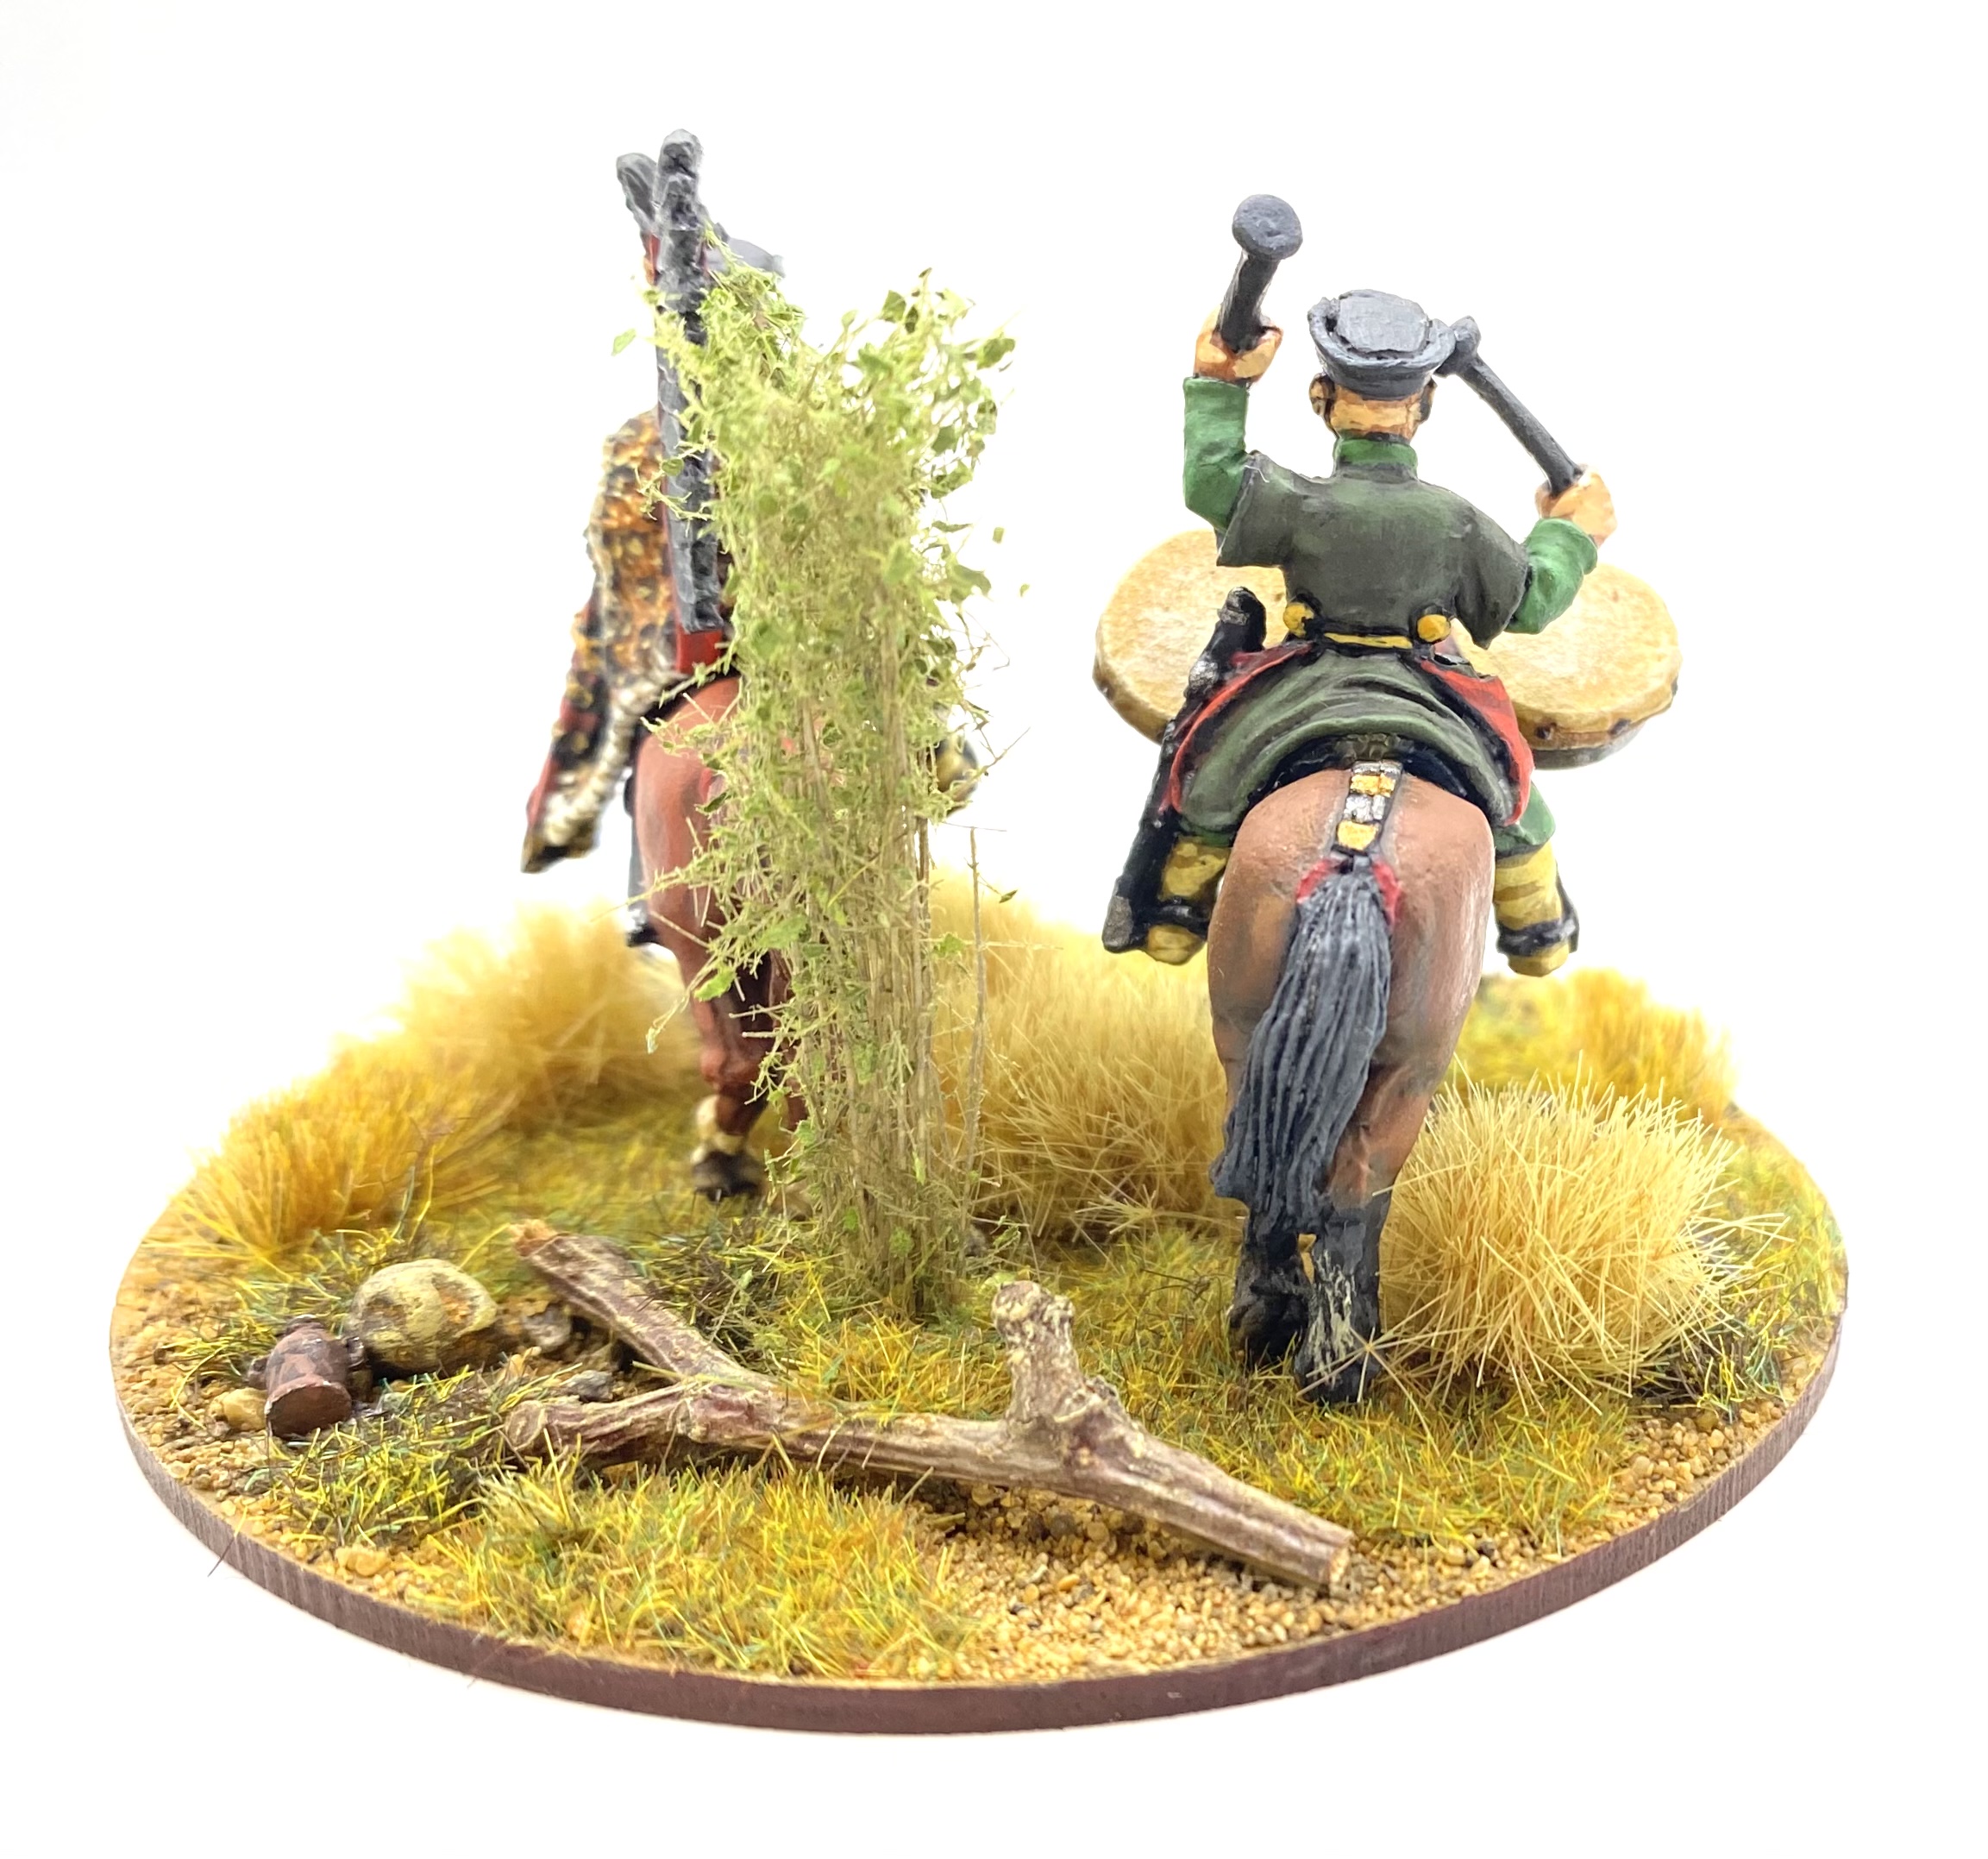
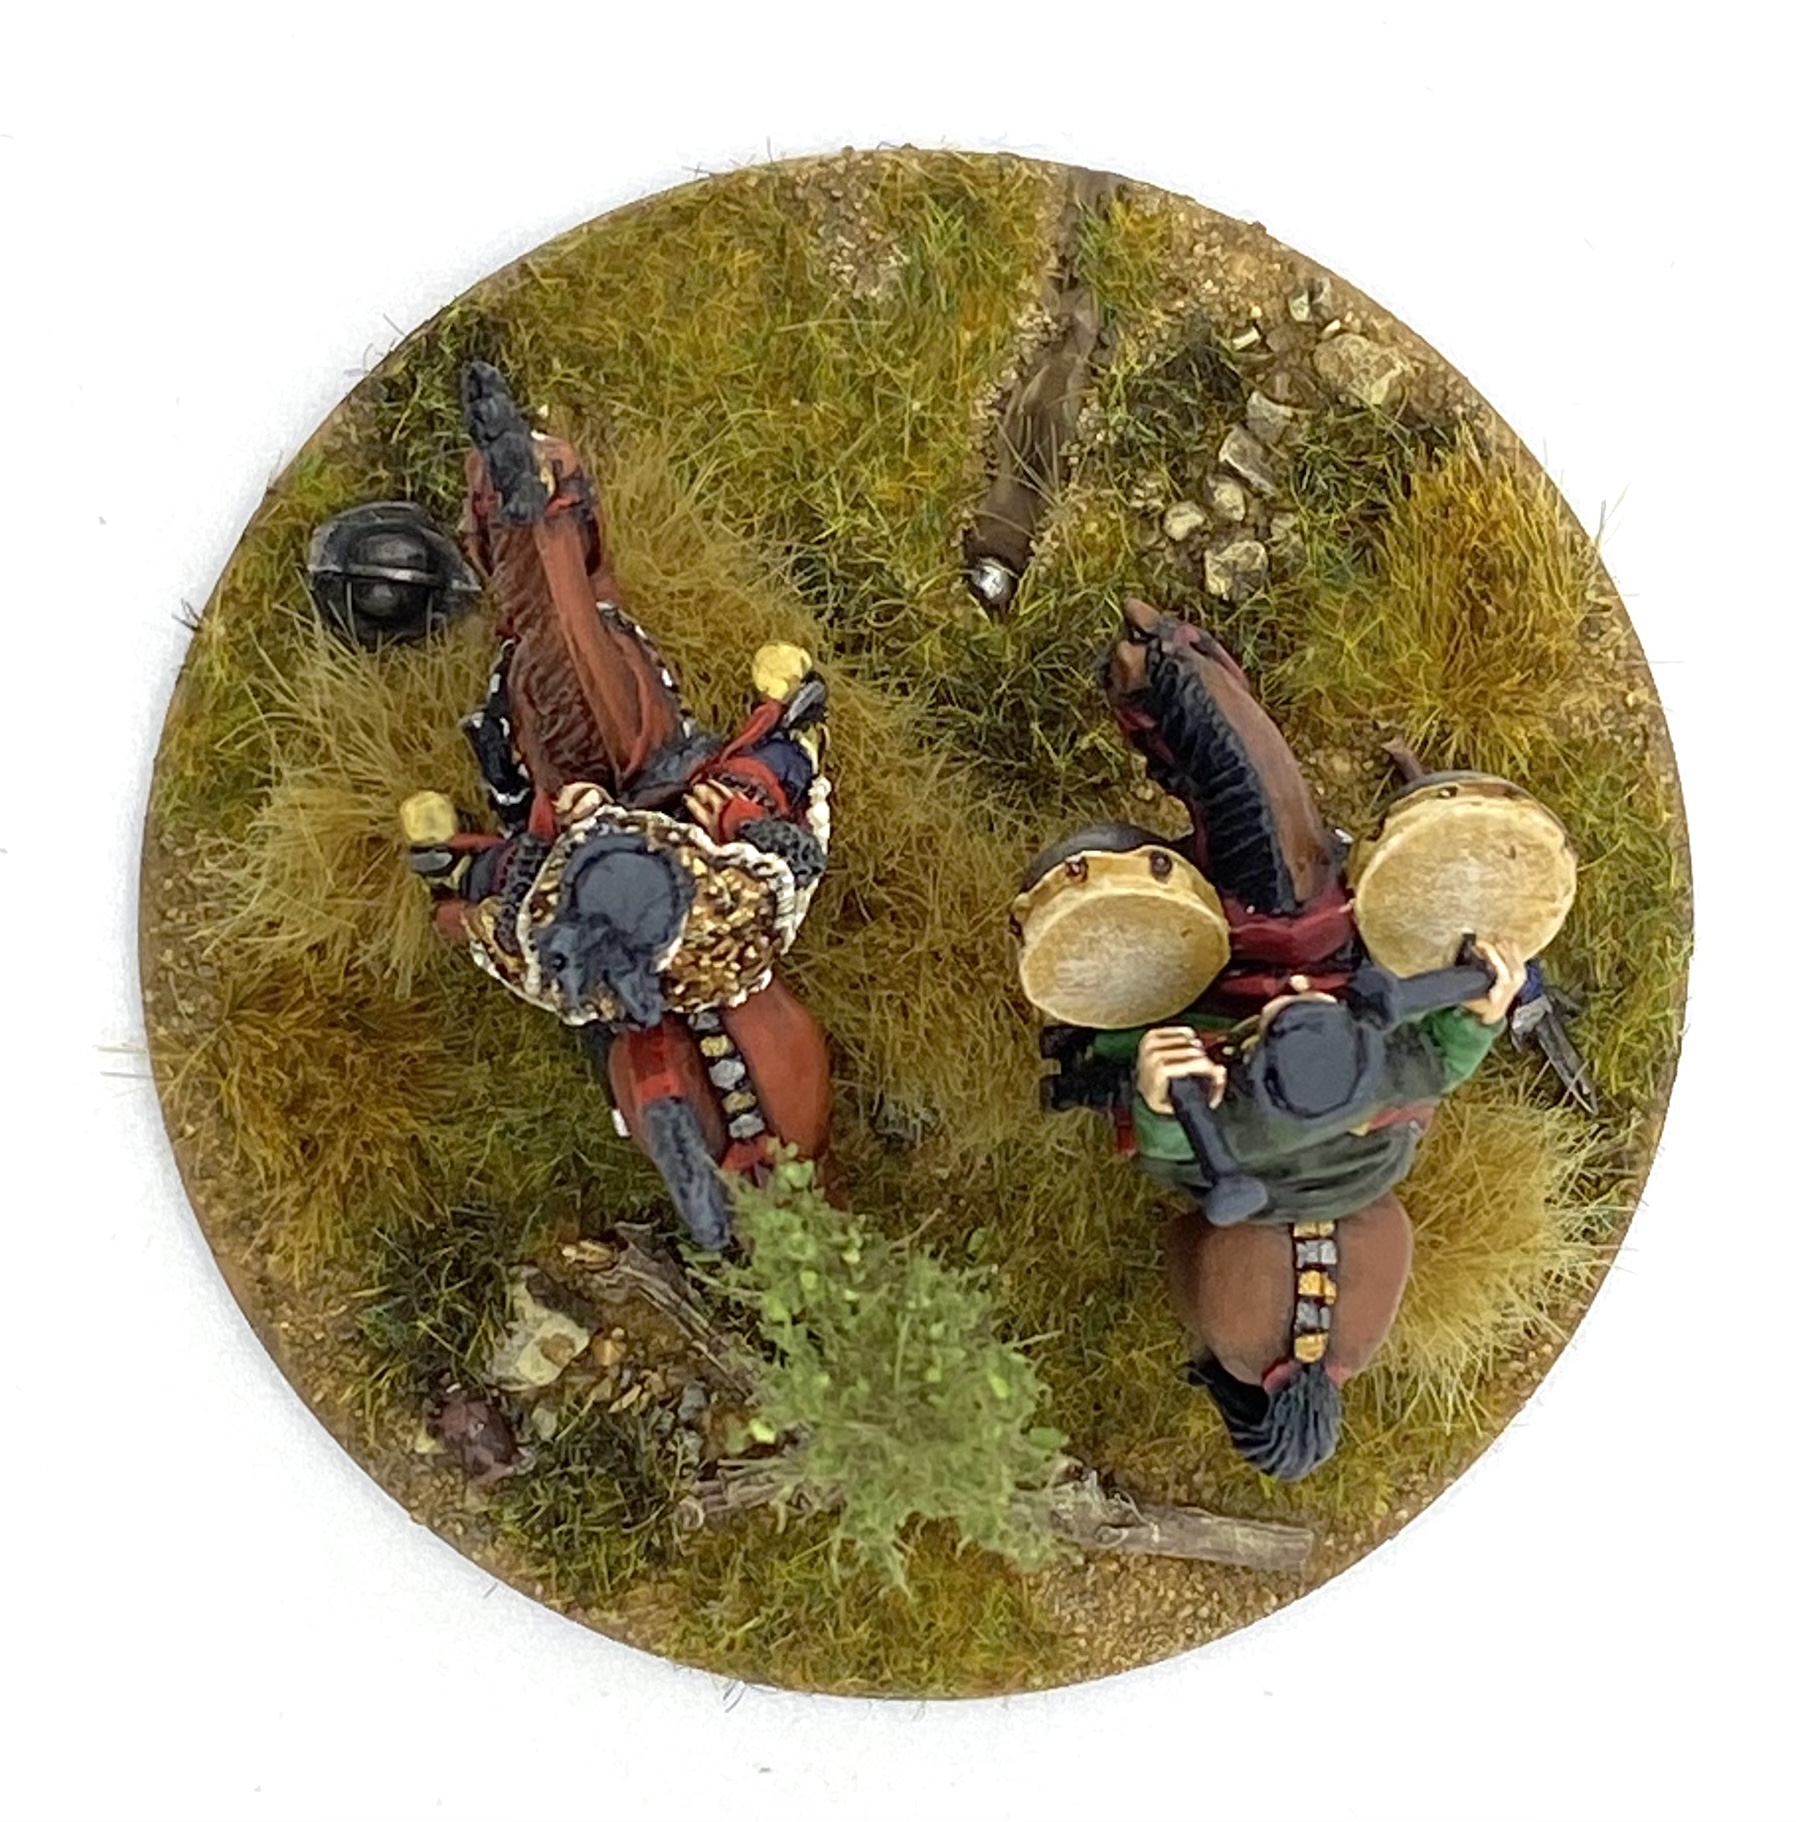
The first base is for one of the subordinate commanders at Dirschau, Marcin Kazanowski. He was a very experienced soldier and leader, and was in his mid sixties by the time of the battle of Dirschau in 1627. In a long military career he had fought against all of the Commonwealth’s enemies; Ottomans, Cossacks, Tartars, Muscovites and of course the Swedes. I thought that the old Hussar commander that I converted slightly to match the WRG cover (see my first Hussar post) would be ideal to represent him. I also found a picture of a hussar officer that looks like he may have been the inspiration for the WRG cover.

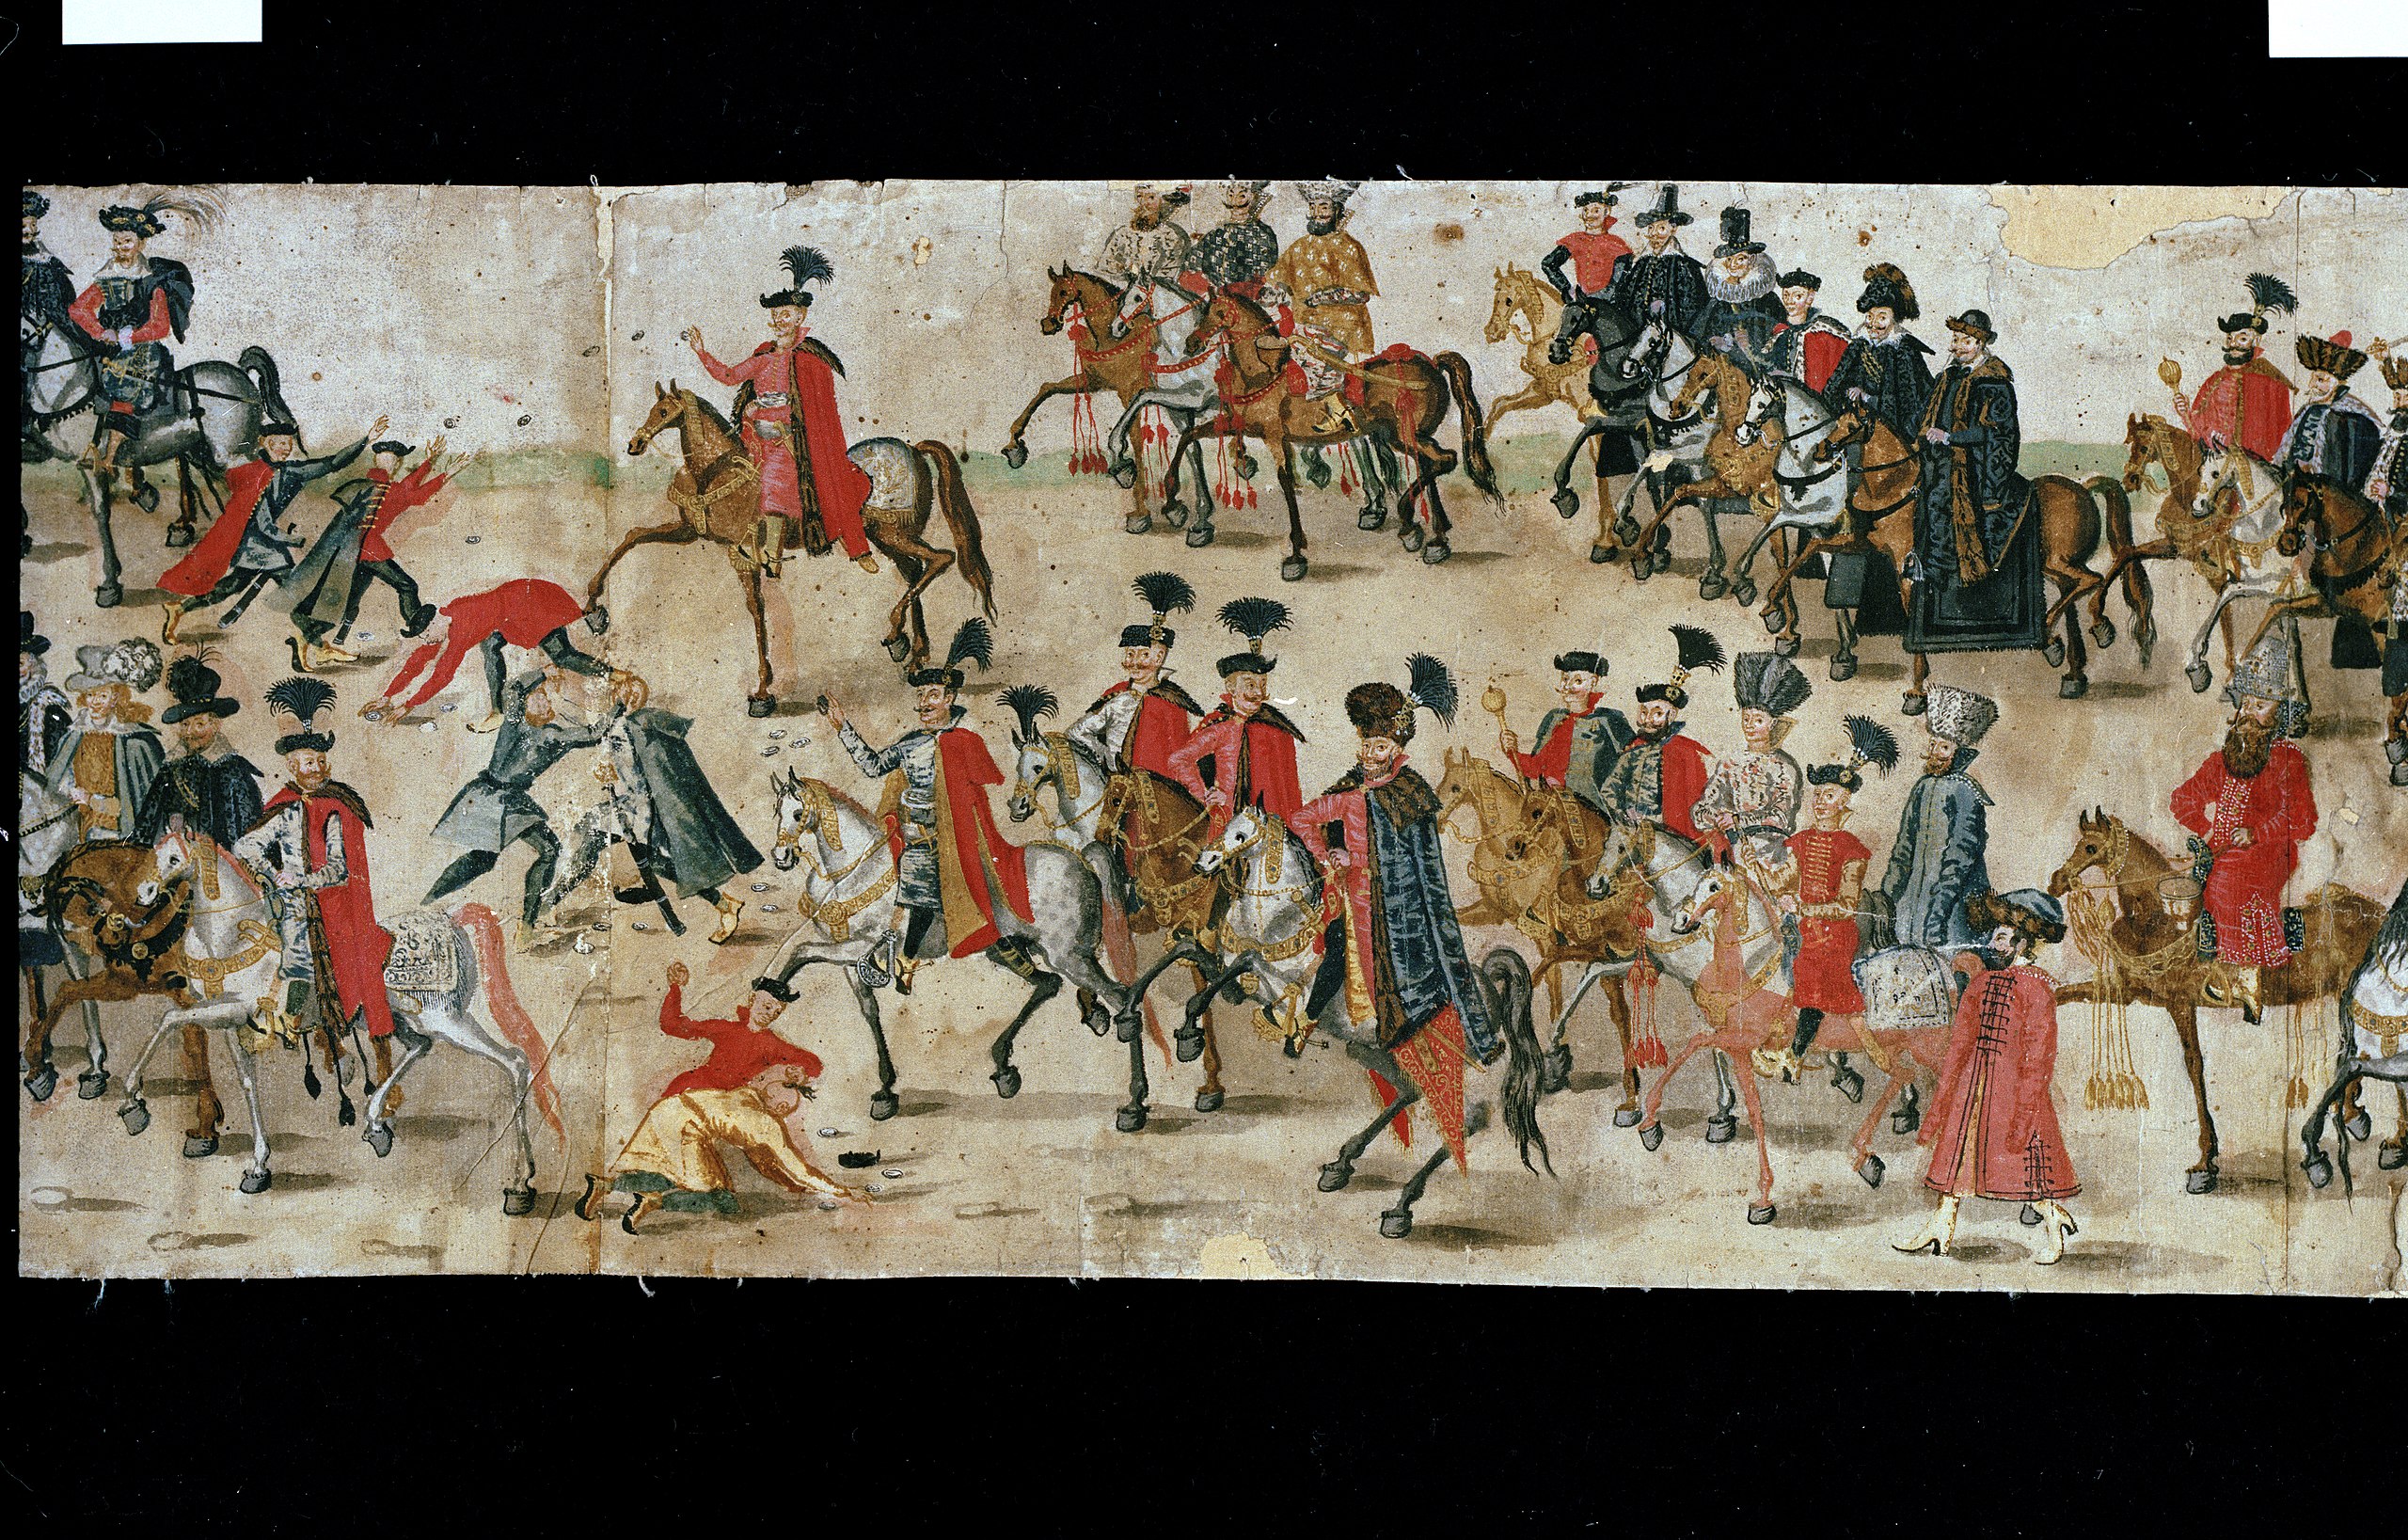
The illustration above is taken from a very useful source for dress and equipment in this period. It is from a 16 metre long picture which shows the parade that took place to celebrate the marriage of King Sigismund III Vasa in 1605. (Link.) This contemporary picture (painted sometime in the early 1600s) is very useful as it shows Polish hussar and foot units marching in the parade, as well as all sorts of nobles, therefore giving some ideas for military attire, and what my generals might look like. A degree of caution is needed as the picture shows a parade and might not 100% represent what was worn on a battlefield, but it is a starting point.
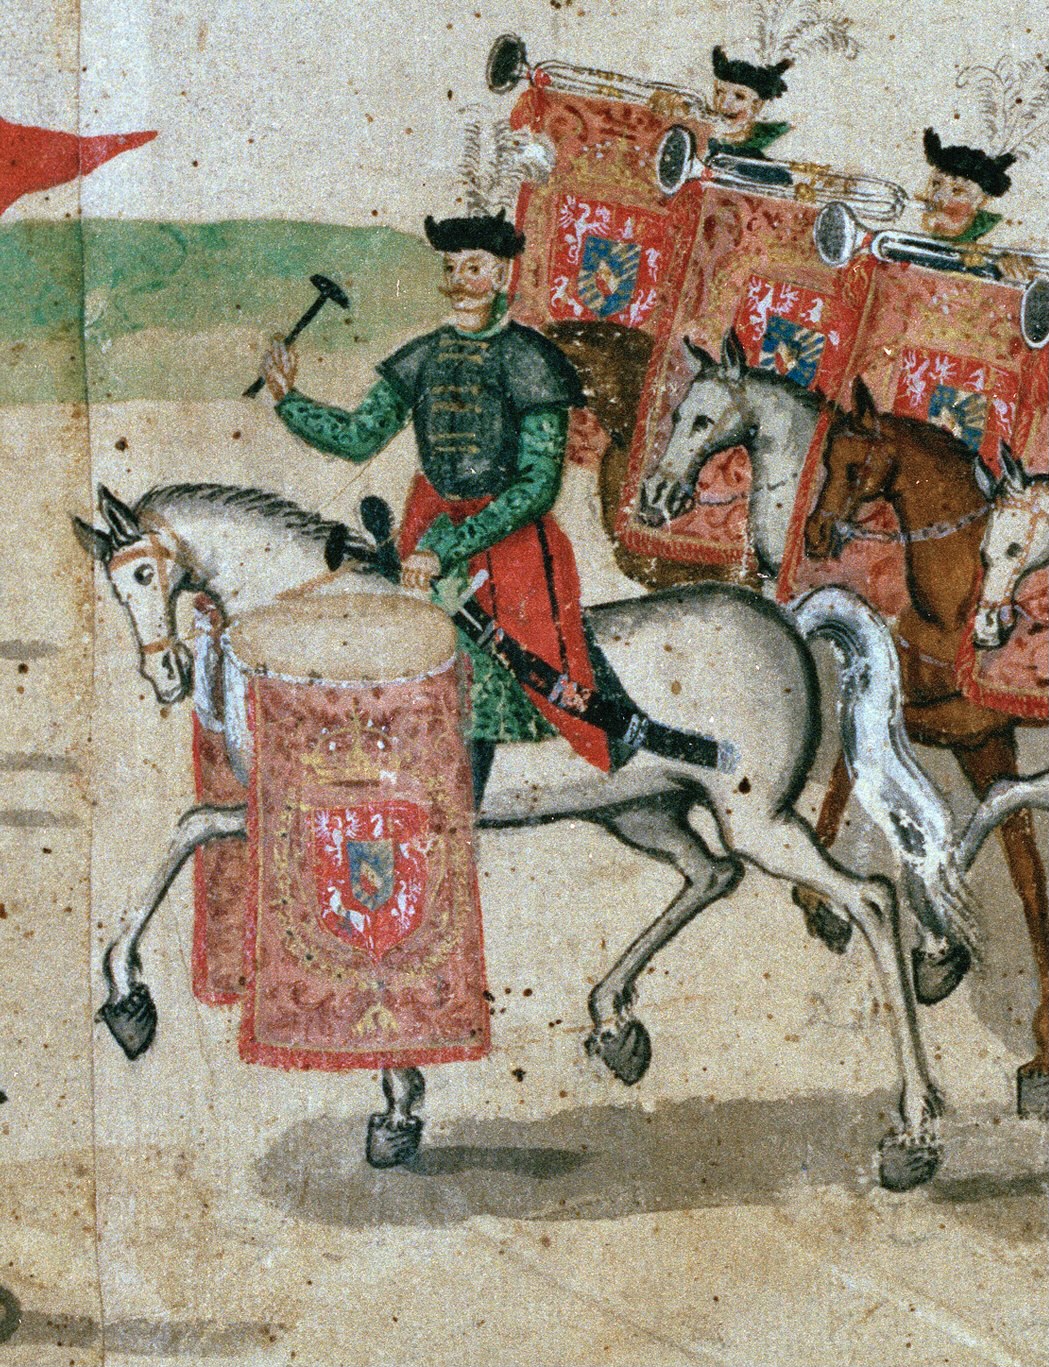
Next I needed a second figure for Kazanowski‘s base. Figure manufacturers seem to be very keen on producing mounted kettle-drummers for the Poles, and these do often feature on contemporary paintings, including the Stockholm Roll. I thought these would look a bit odd in the front rank of my charging hussar units, but would be a nice bit of ‘character’ to add to a command base.
My Foundry Kettledrummer, despite not having the drum banners (perhaps taken off prior to battle?), would fit perfectly for the this command base. To finish off the command base I had a rummage in my bits box for some ‘battlefield debris’. I think the challenge with this is to be subtle without any detail becoming totally lost. I’m never sure if I’ve got this right or not.
Here is the finished command base for Kazanowski.


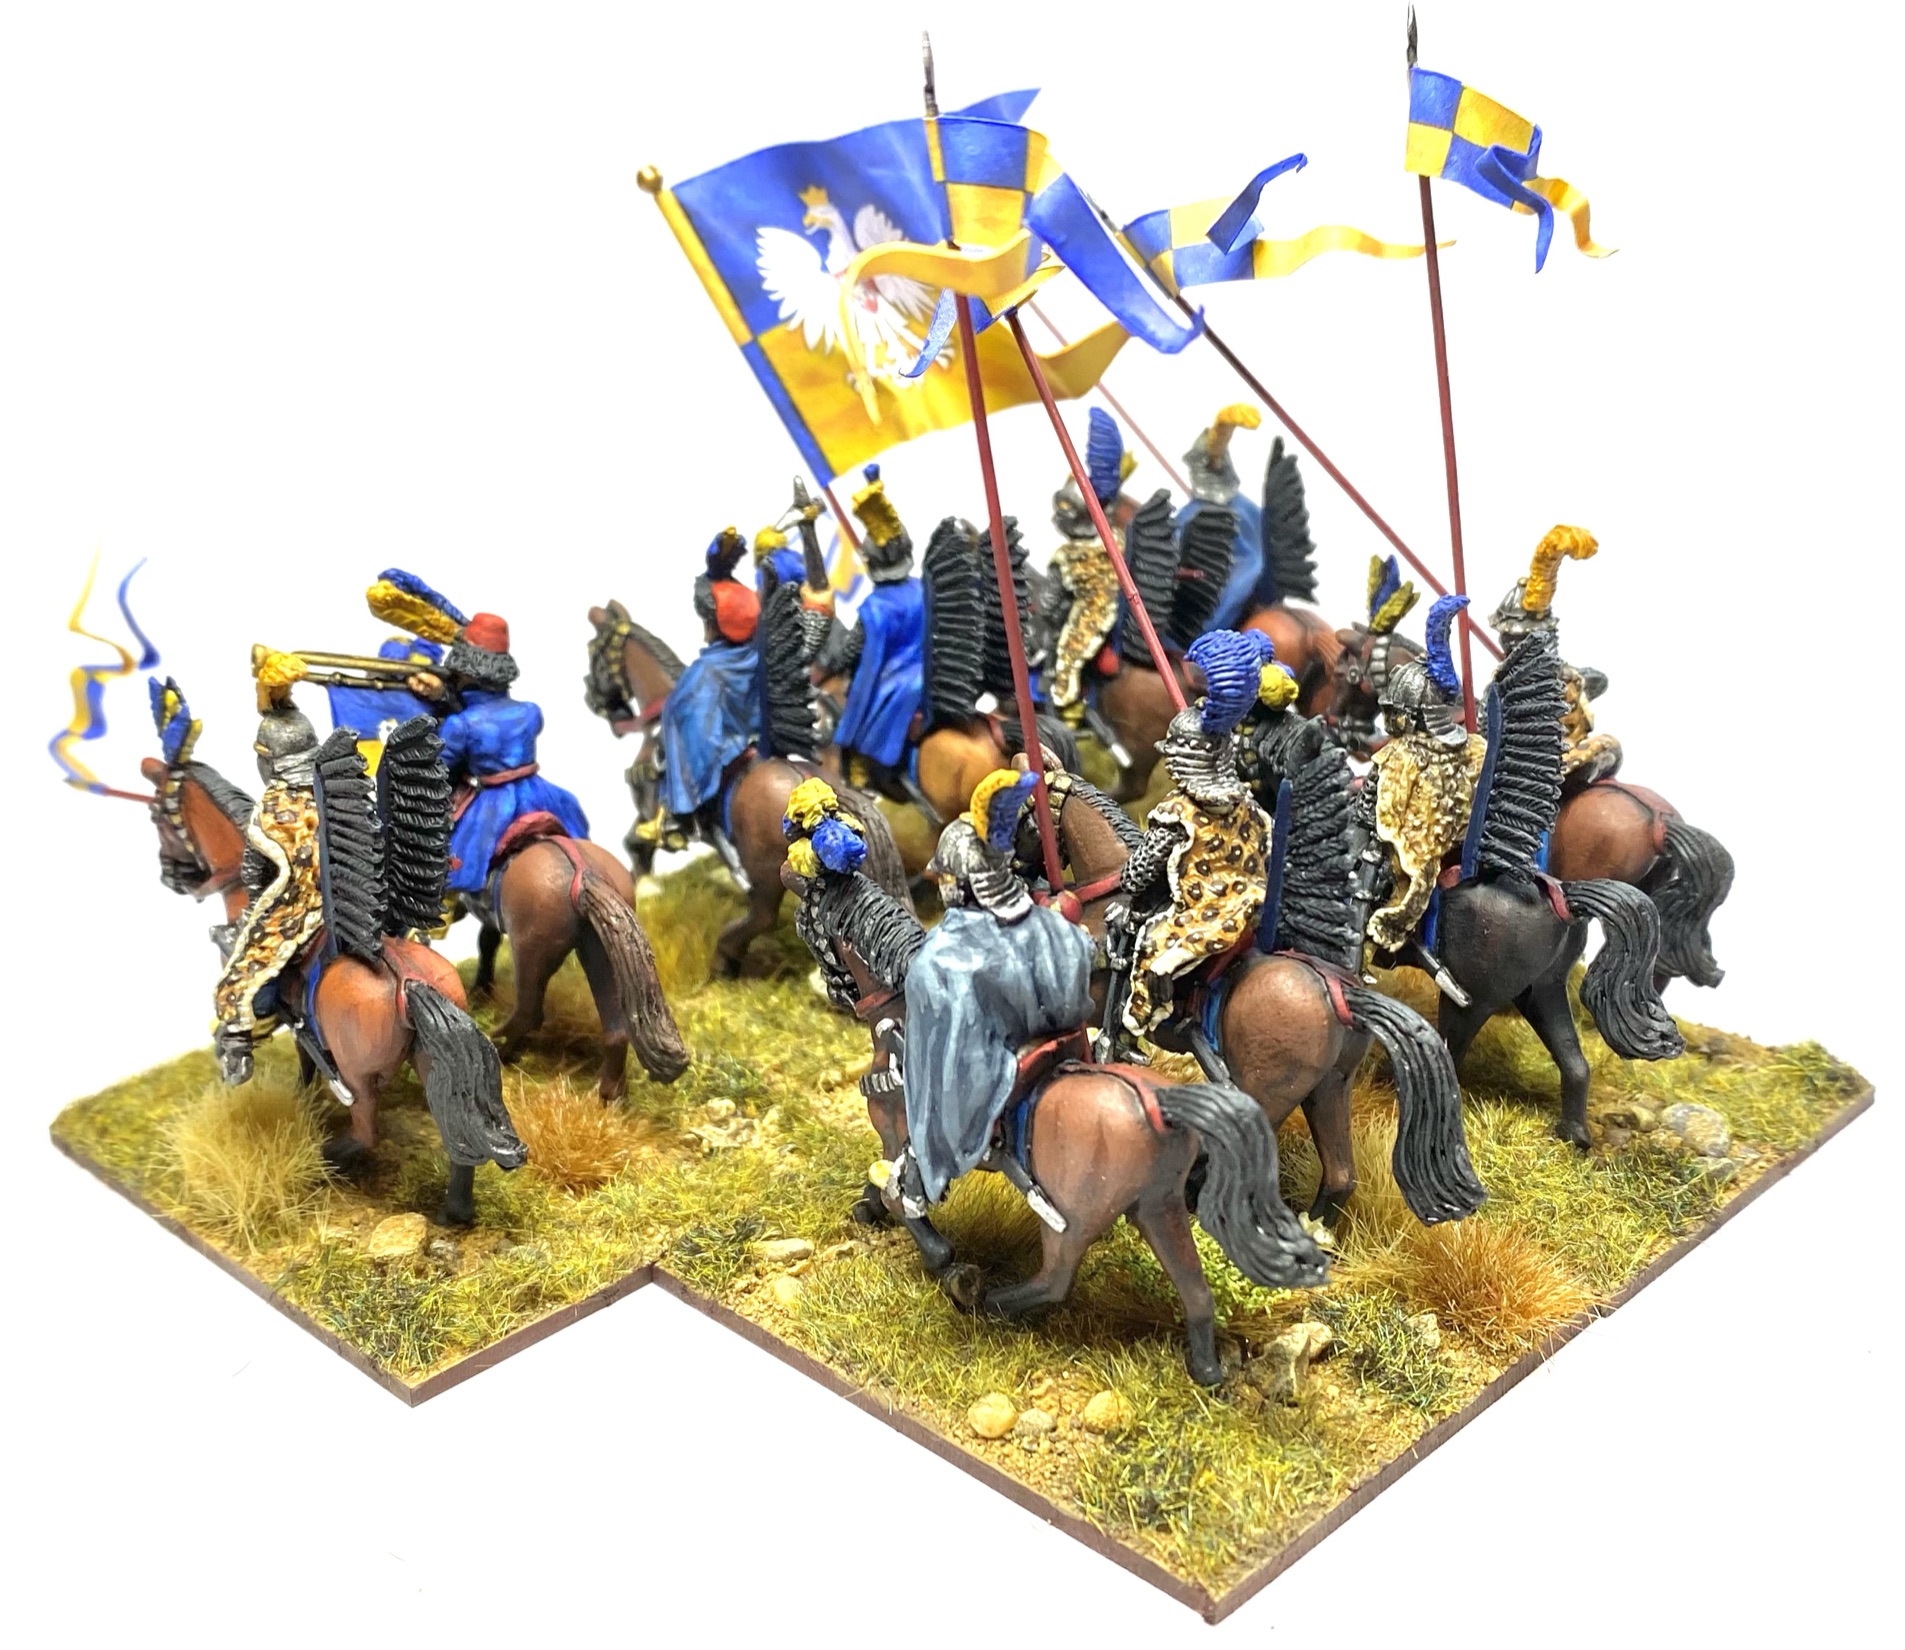
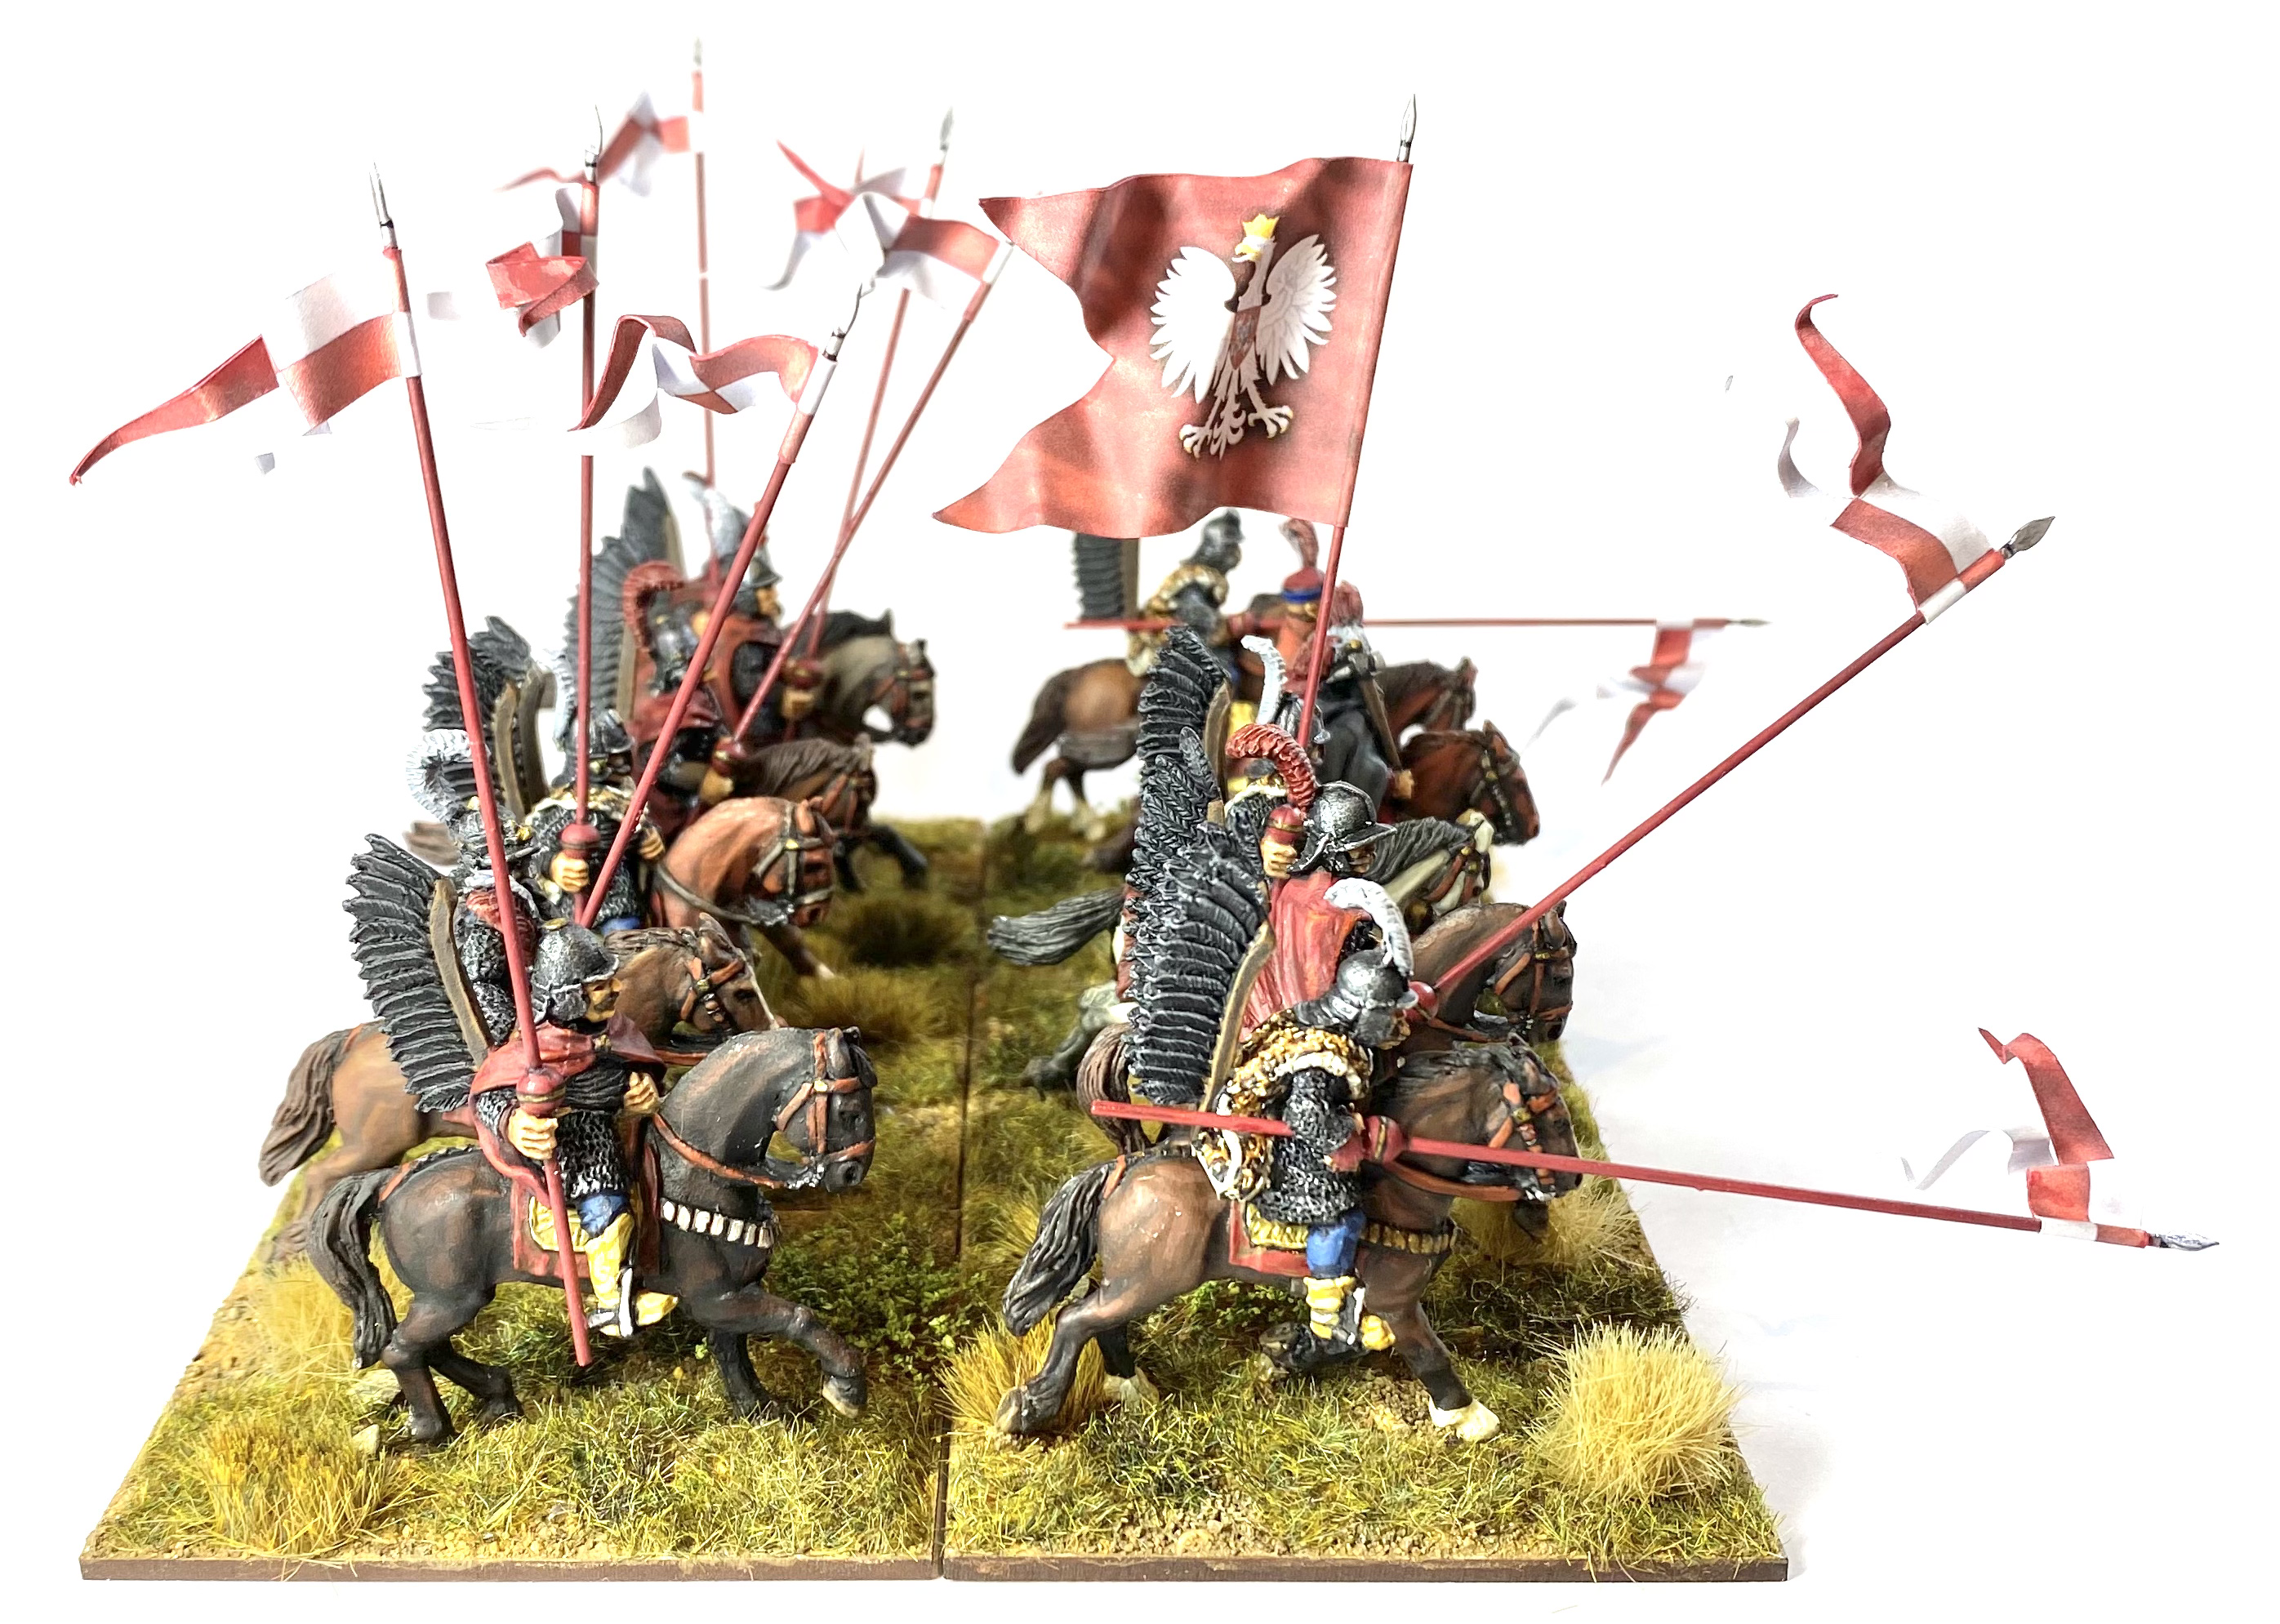
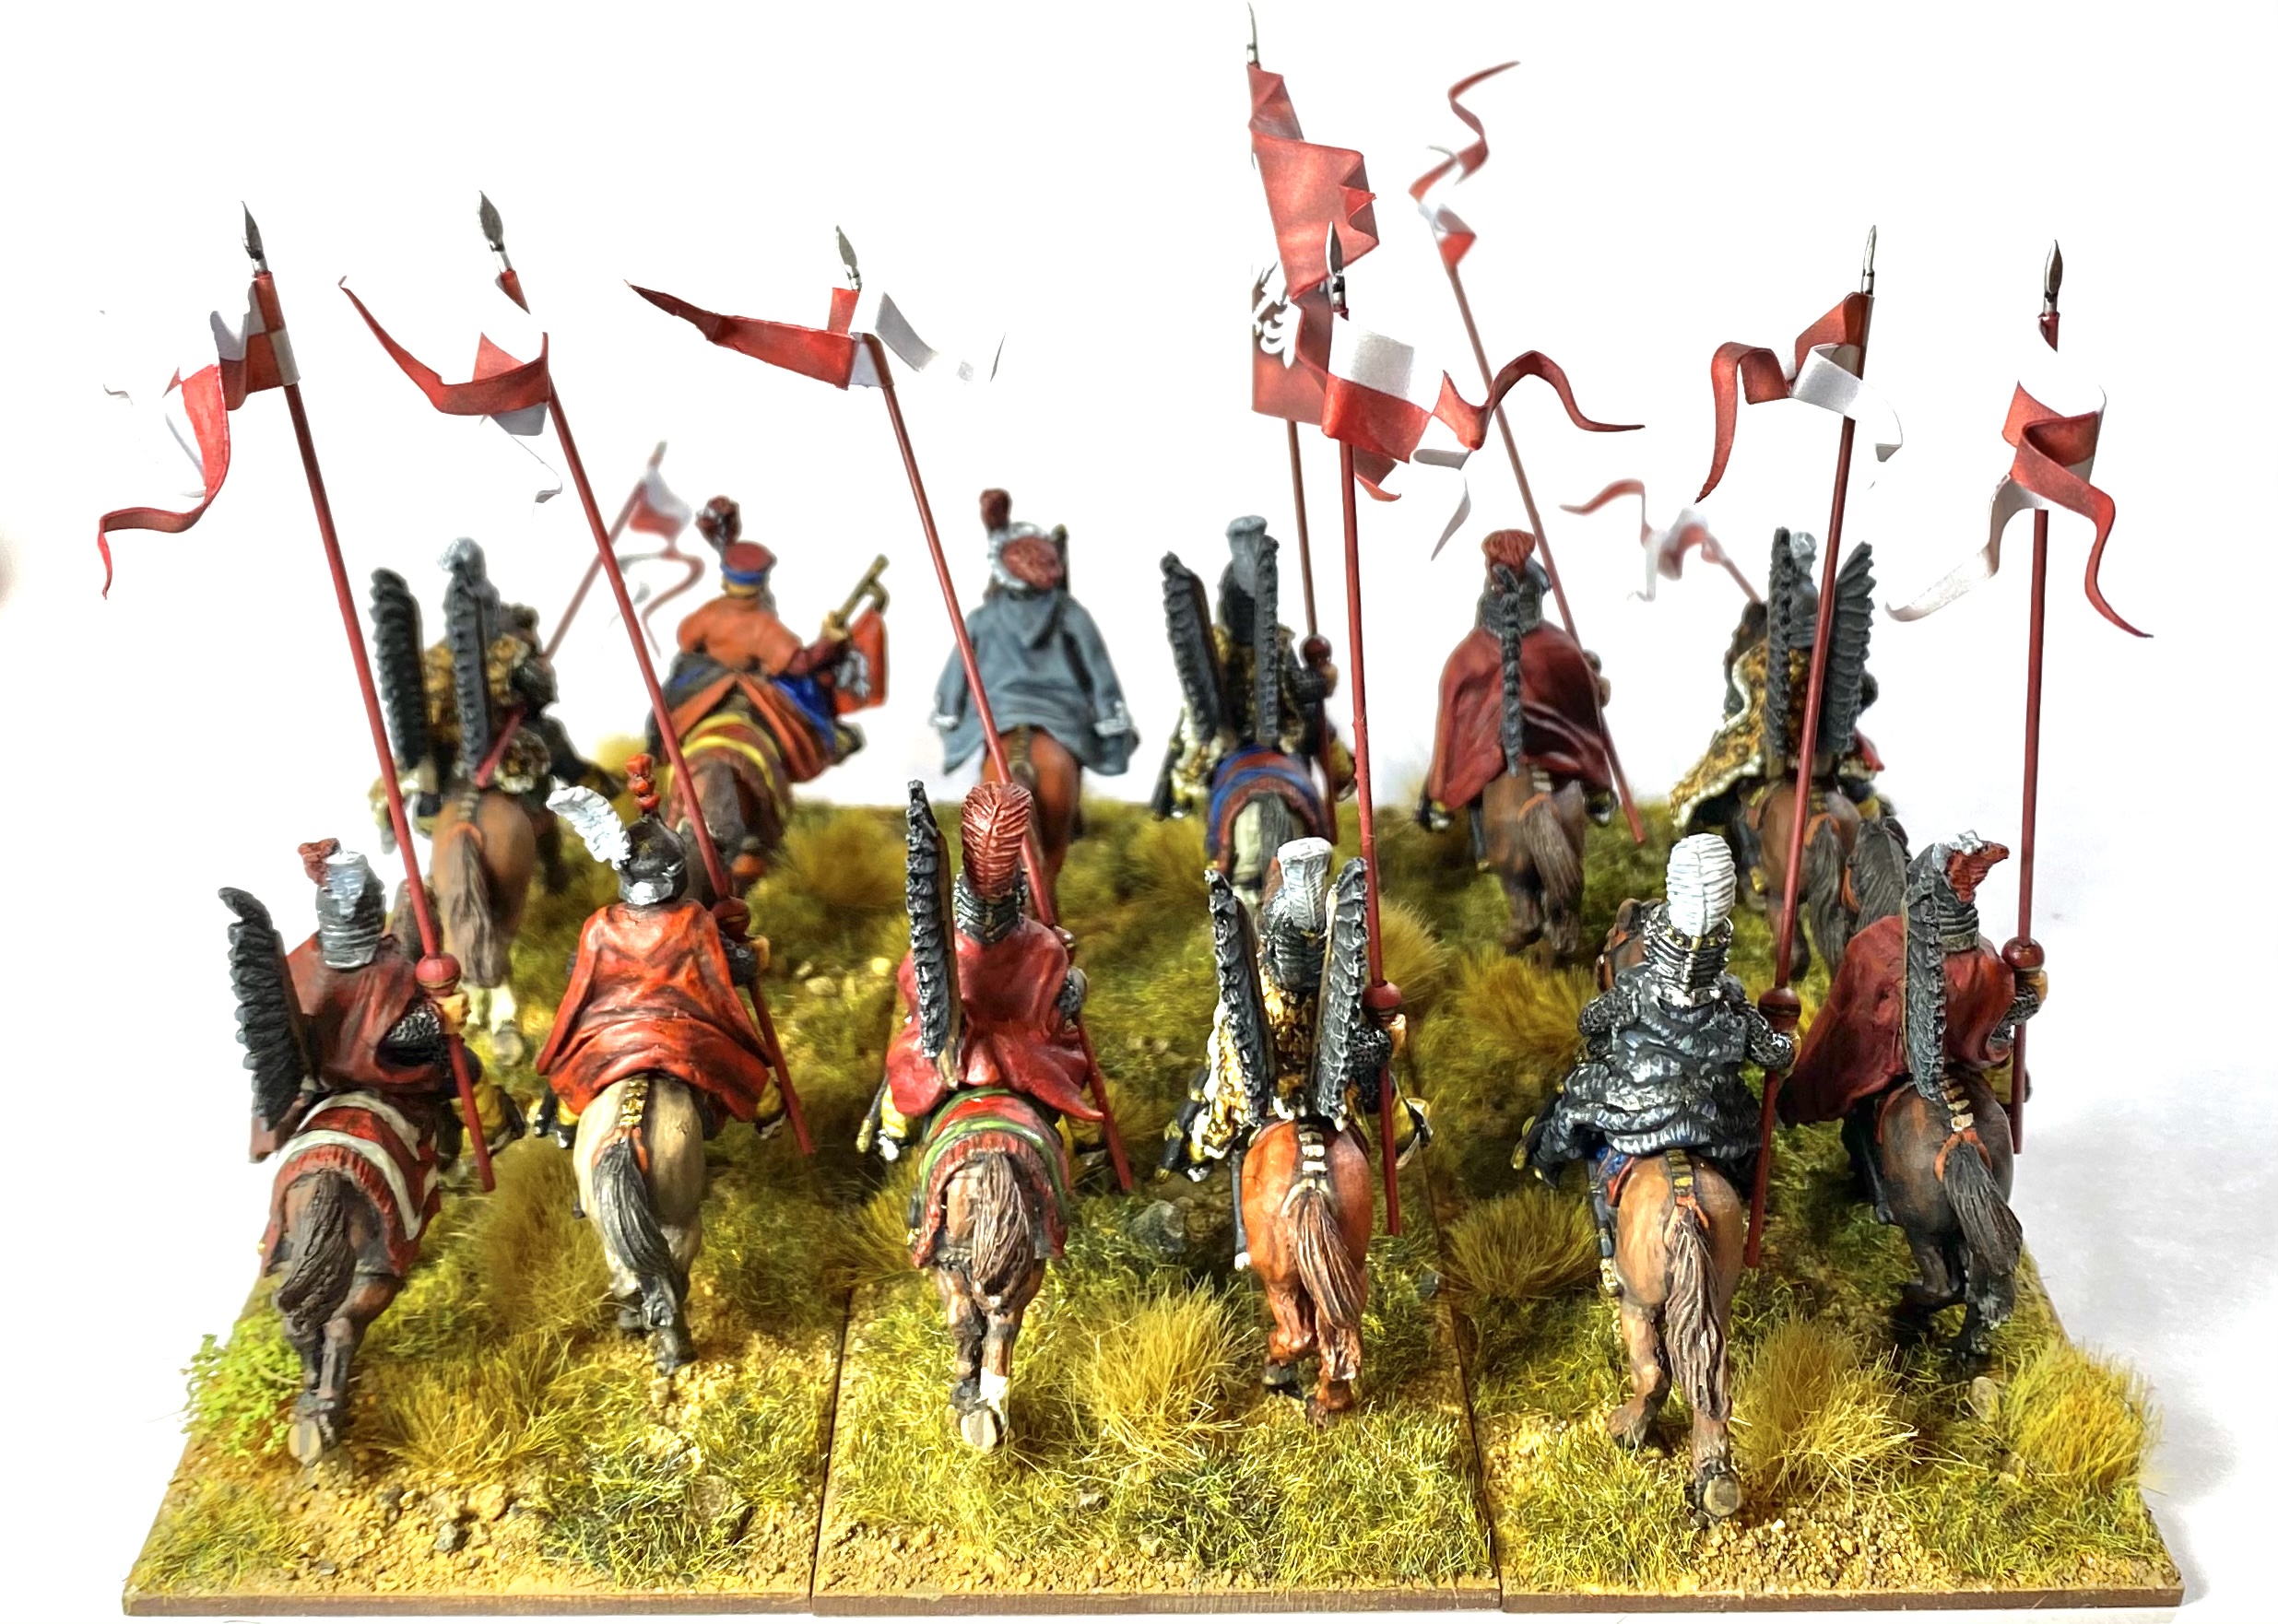
More Husaria!
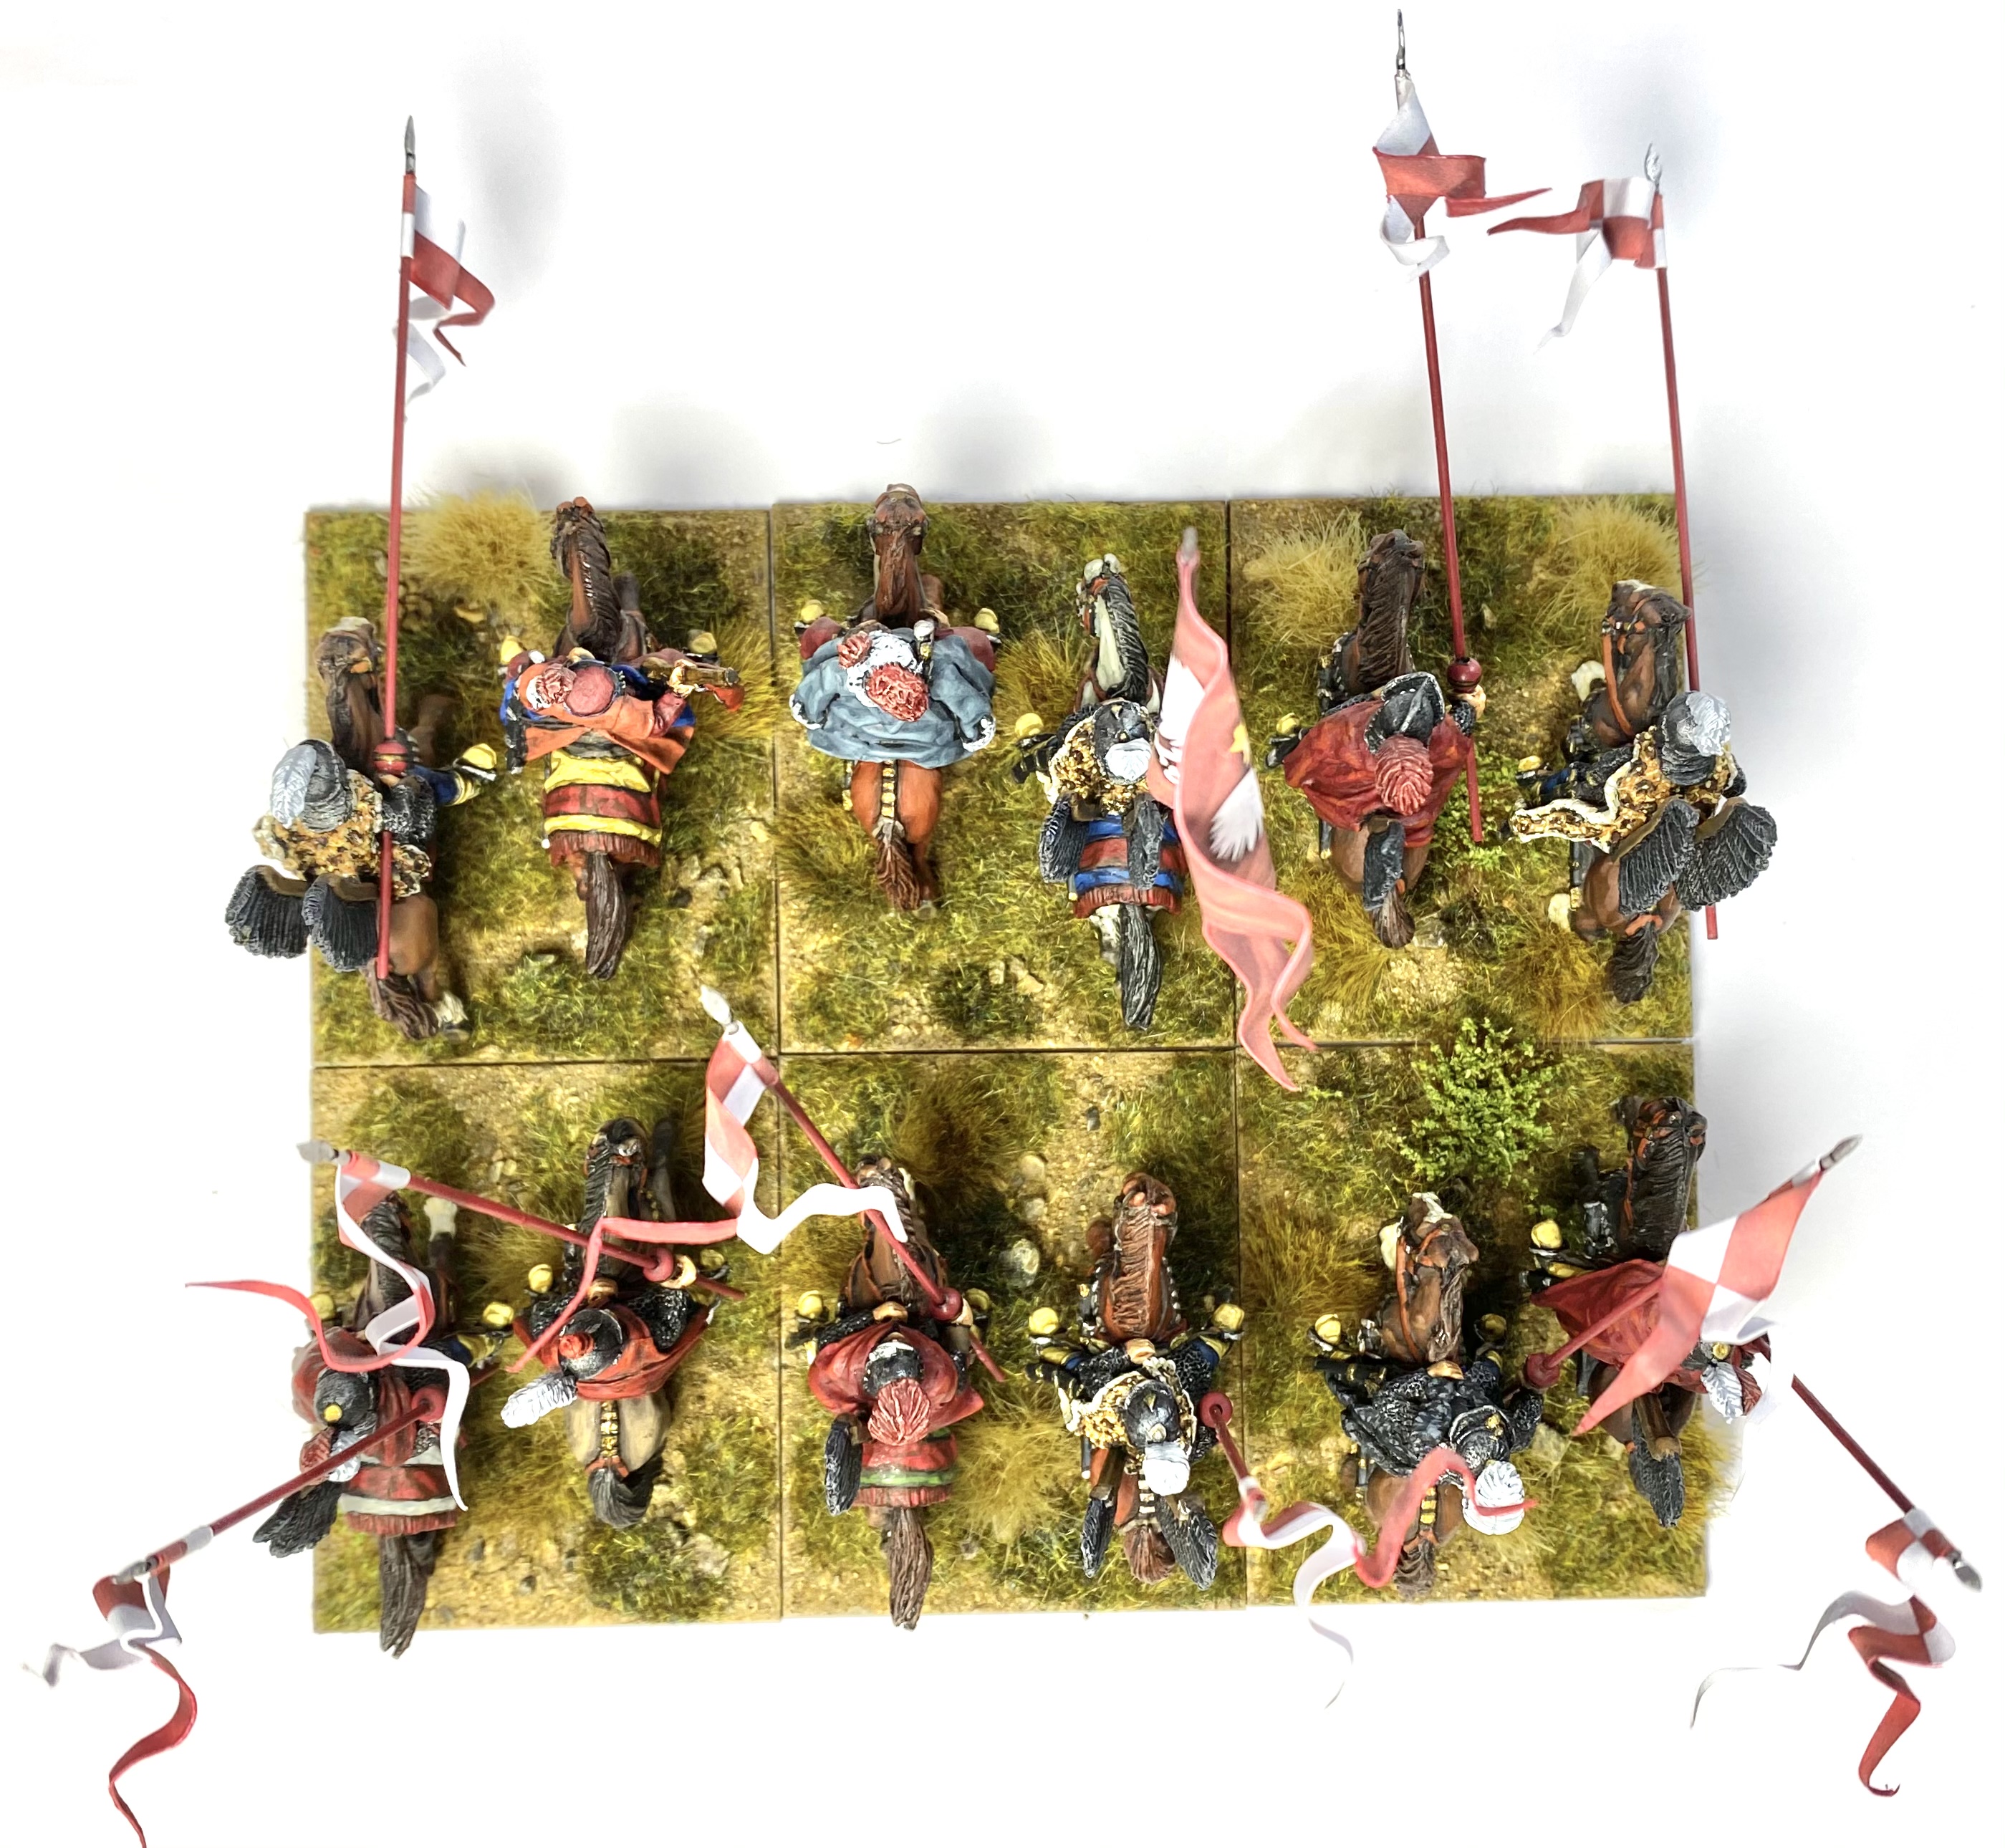
With the transfer, from the last project entry, done then it was then time to glue riders on to the horses and get on with the basing. Once again, I used 50mm wide by 60mm deep and 2mm thick MDF bases from Warbases. (Each base takes two horses.) The basing technique was the same as on the previous unit; filler/spackle to hide the figures’ bases, brown paint and pva over that, with sharp sand sprinkled on to the wet pva. Once the pva was dry, a dry-brush of beige on the sand, and static grass / tufts to taste.
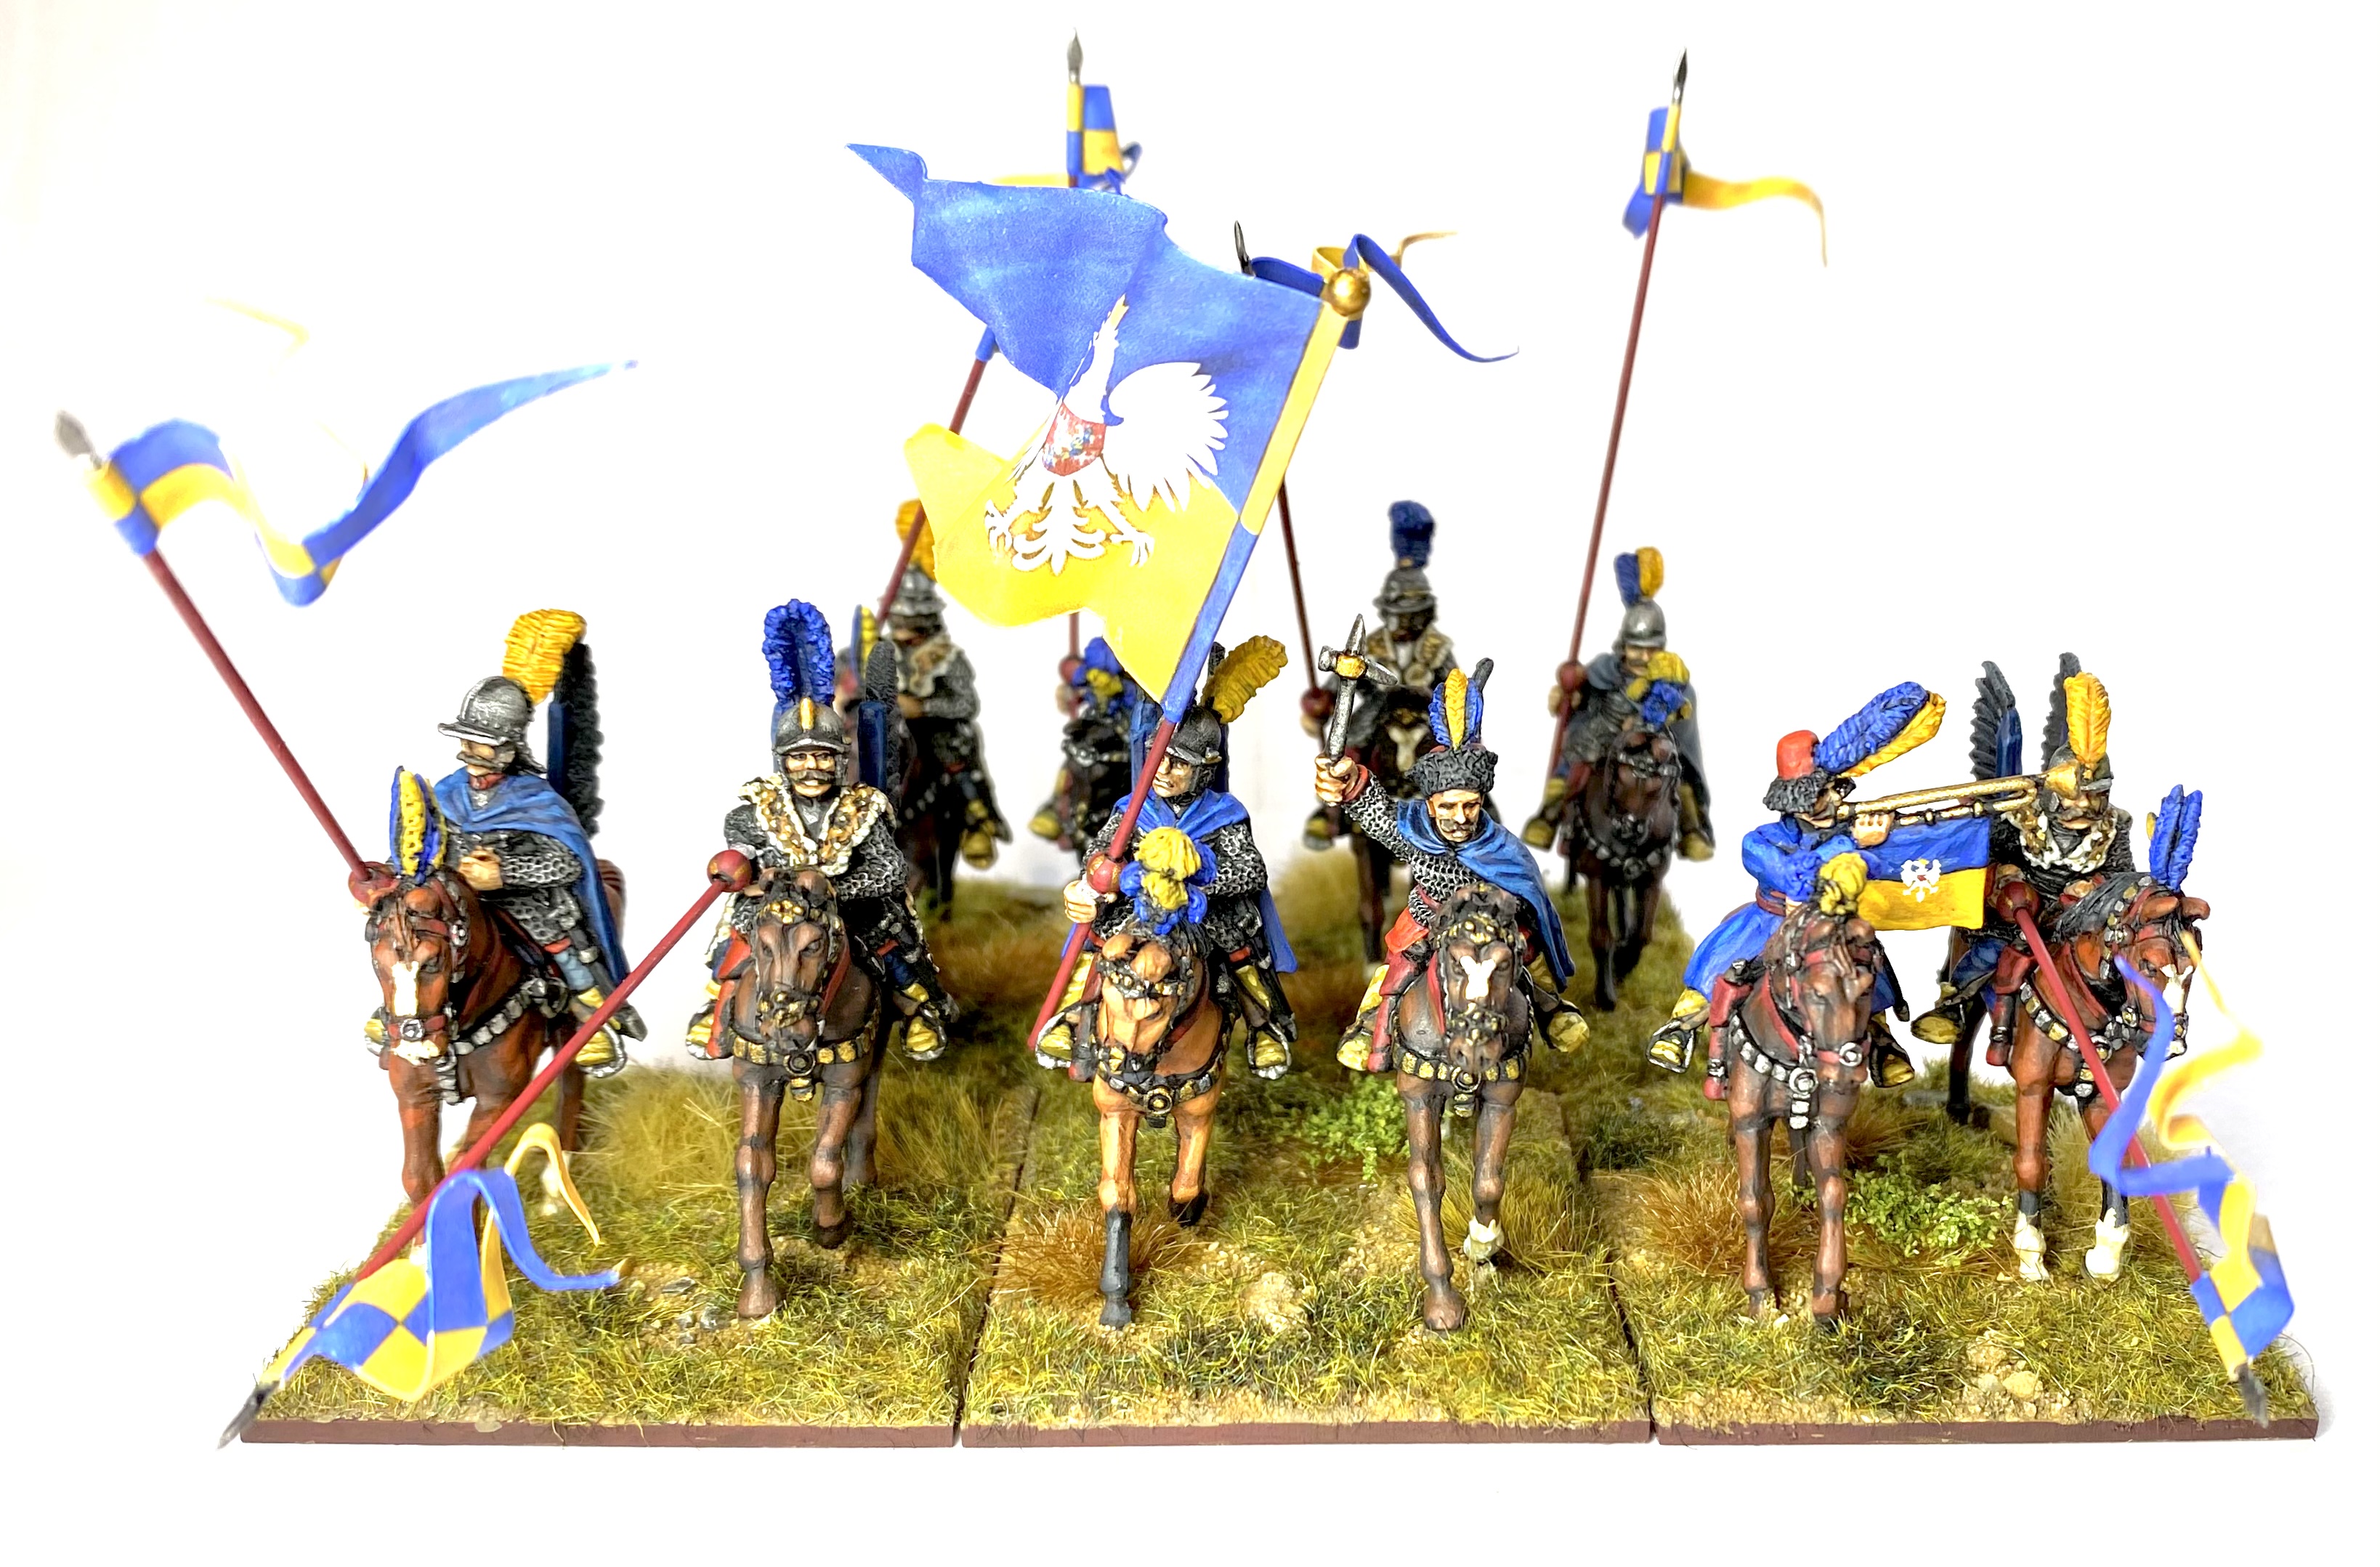
So, here is the second unit finished. (The eagle eyed will have spotted that there is a base of two figures missing due to a miscalculation in figure purchases. This has been rectified!)

With two units done I have had to restock my lead mountain with more hussars. Next on the painting bench will be some command bases (and the missing base of two for this unit).
Yellow and Transfers
I’ve not really found a yellow, to use over a black undercoat, that I’m super happy with in the Vallejo or Army Painter ranges. I’ve tried using Vallejo Ochre Brown, as a base for yellow, and built up from that. This is ok, but I wondered if I should look at some other ranges. I have been slowly getting more into the GW Citadel range of paints. I already really like the various shades such as Agrax Earthshade, and have been really pleased with some of the red base + layer combinations. They is a handy app called ‘Citadel Colour’ which helps translate from actual colours to sets of base, layers and shades from the (strangely named!) Citadel range. From the app I found Averland Sunset as a base, with Cassandra Yellow as a shade, and then Yriel Yellow as a layer. I bought this set of paints and I have found they work really well. I also tried some of the Citadel metallics. I must say that, despite the bottle’s pot design (rather than being in dropper bottles), the paints that I’ve tried so far have been really nice to use and I’ve become a bit of a convert!
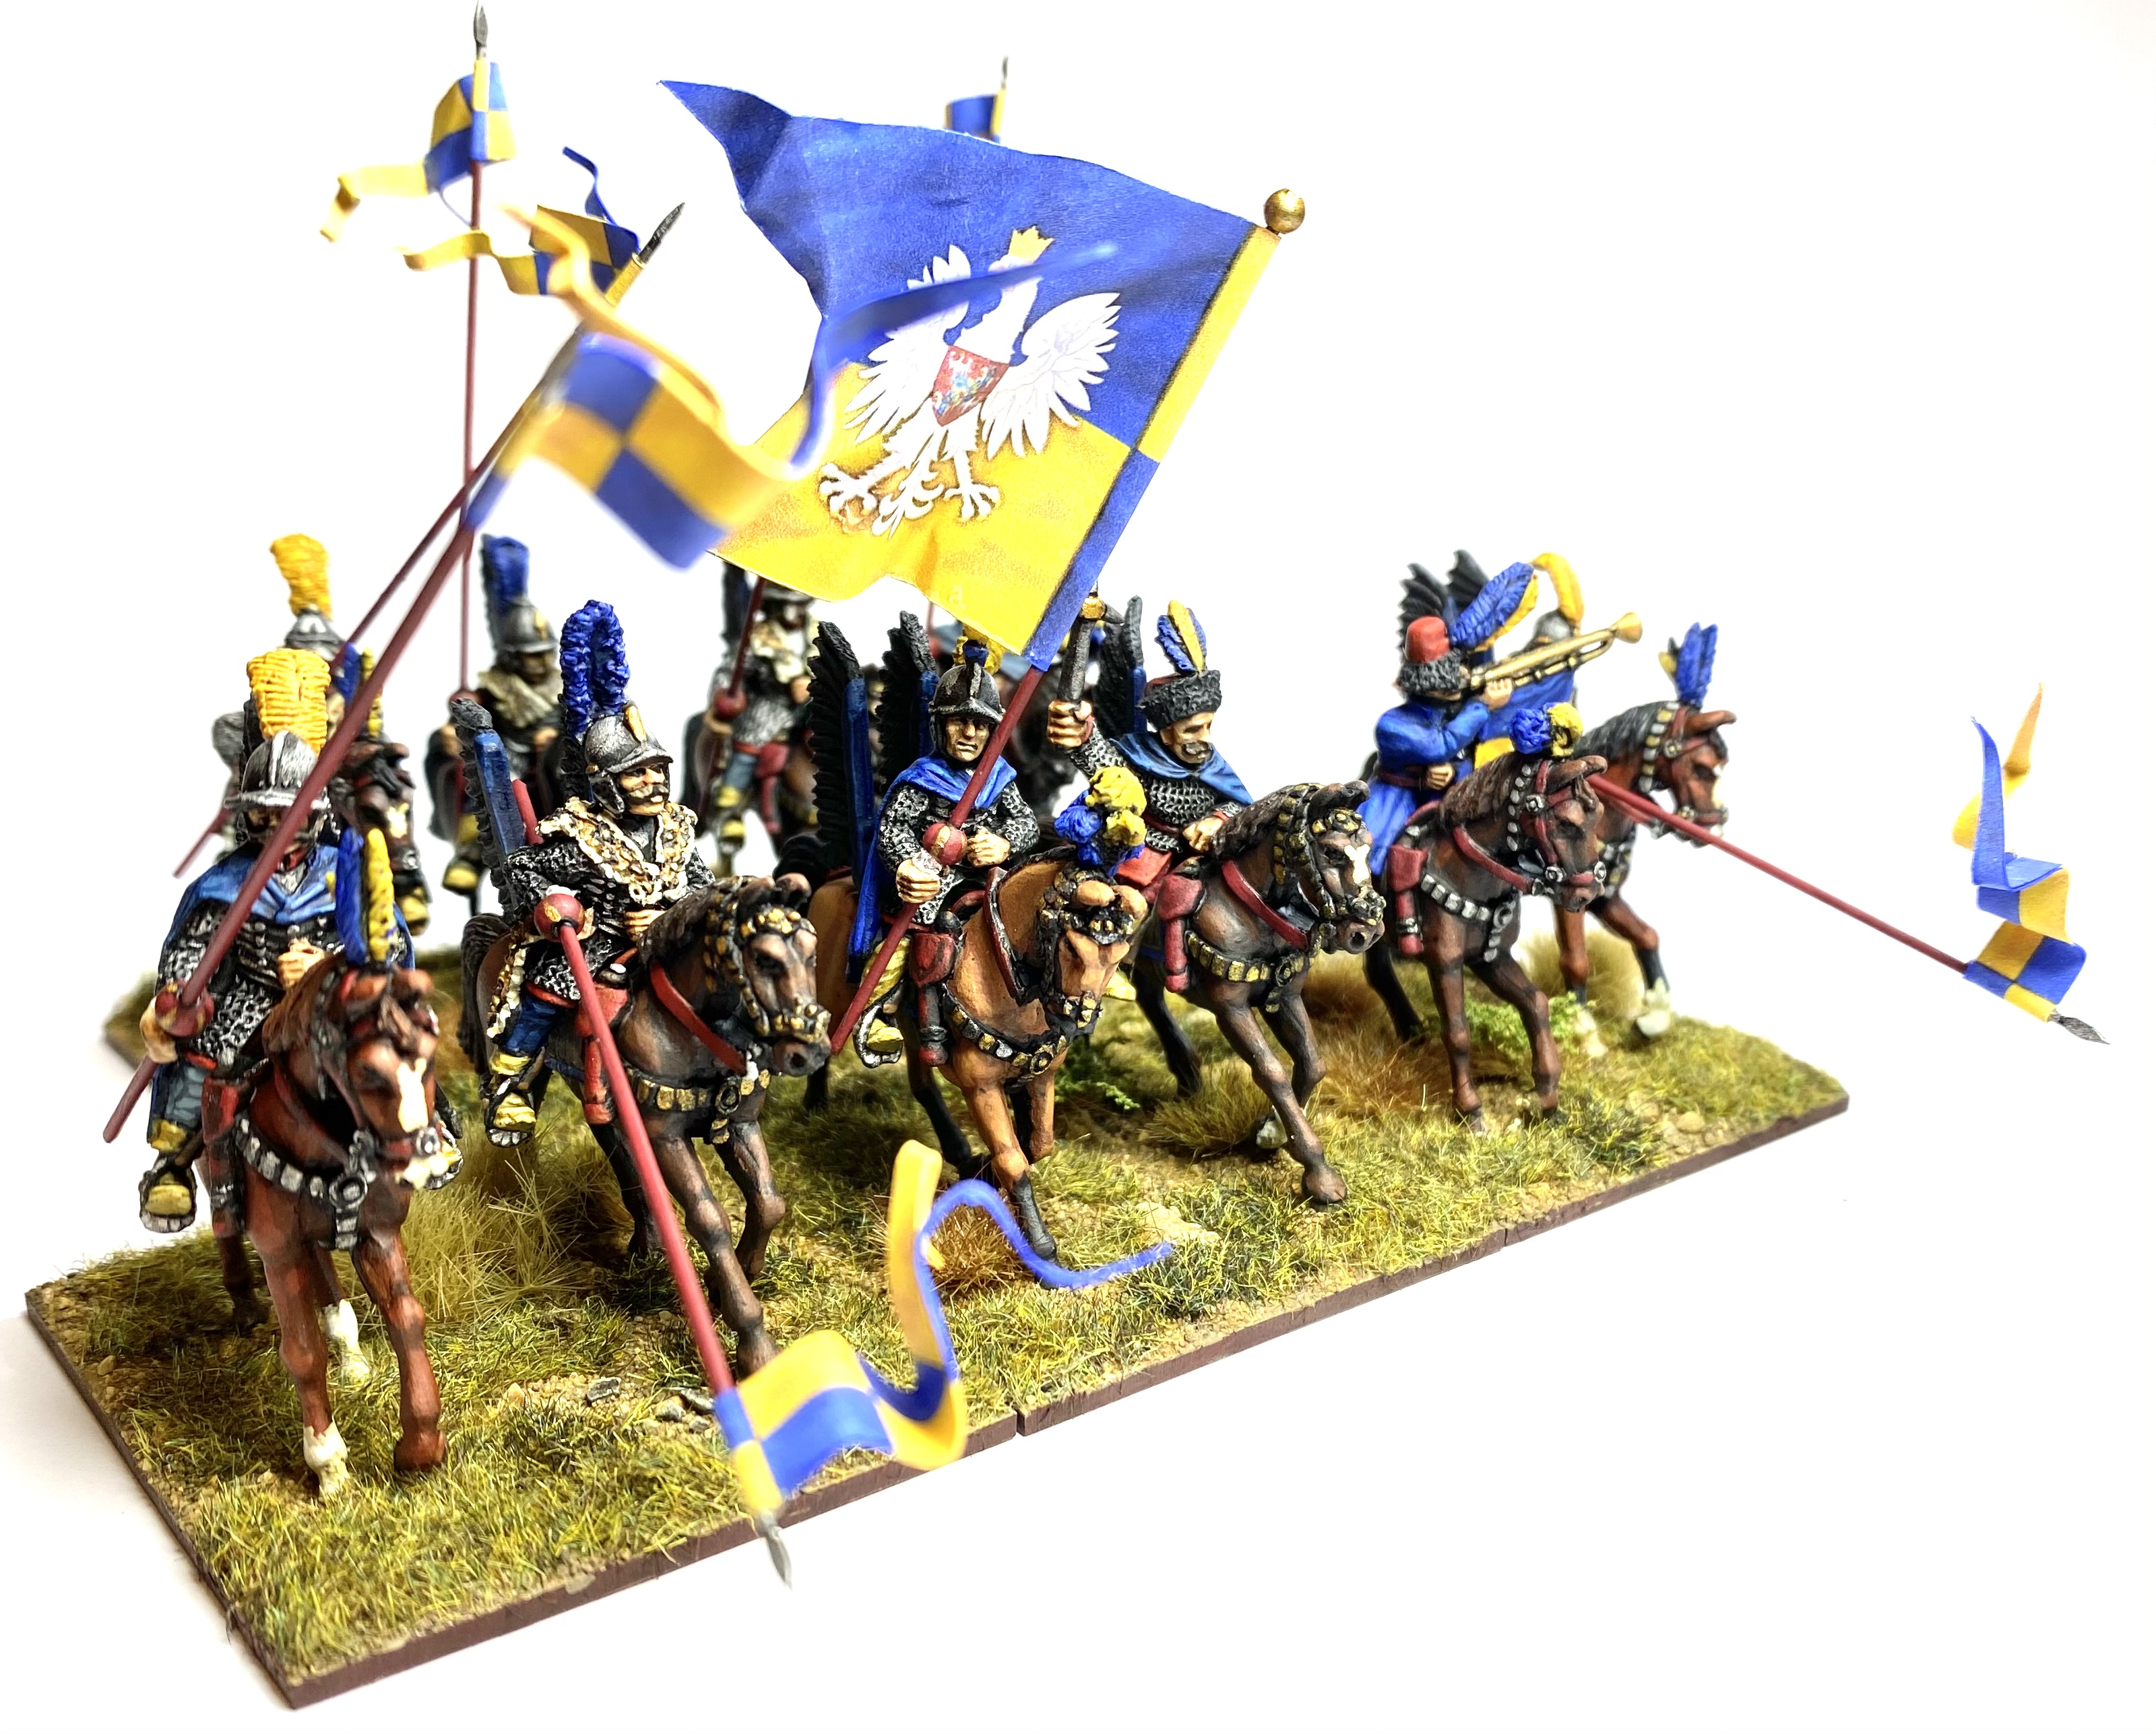
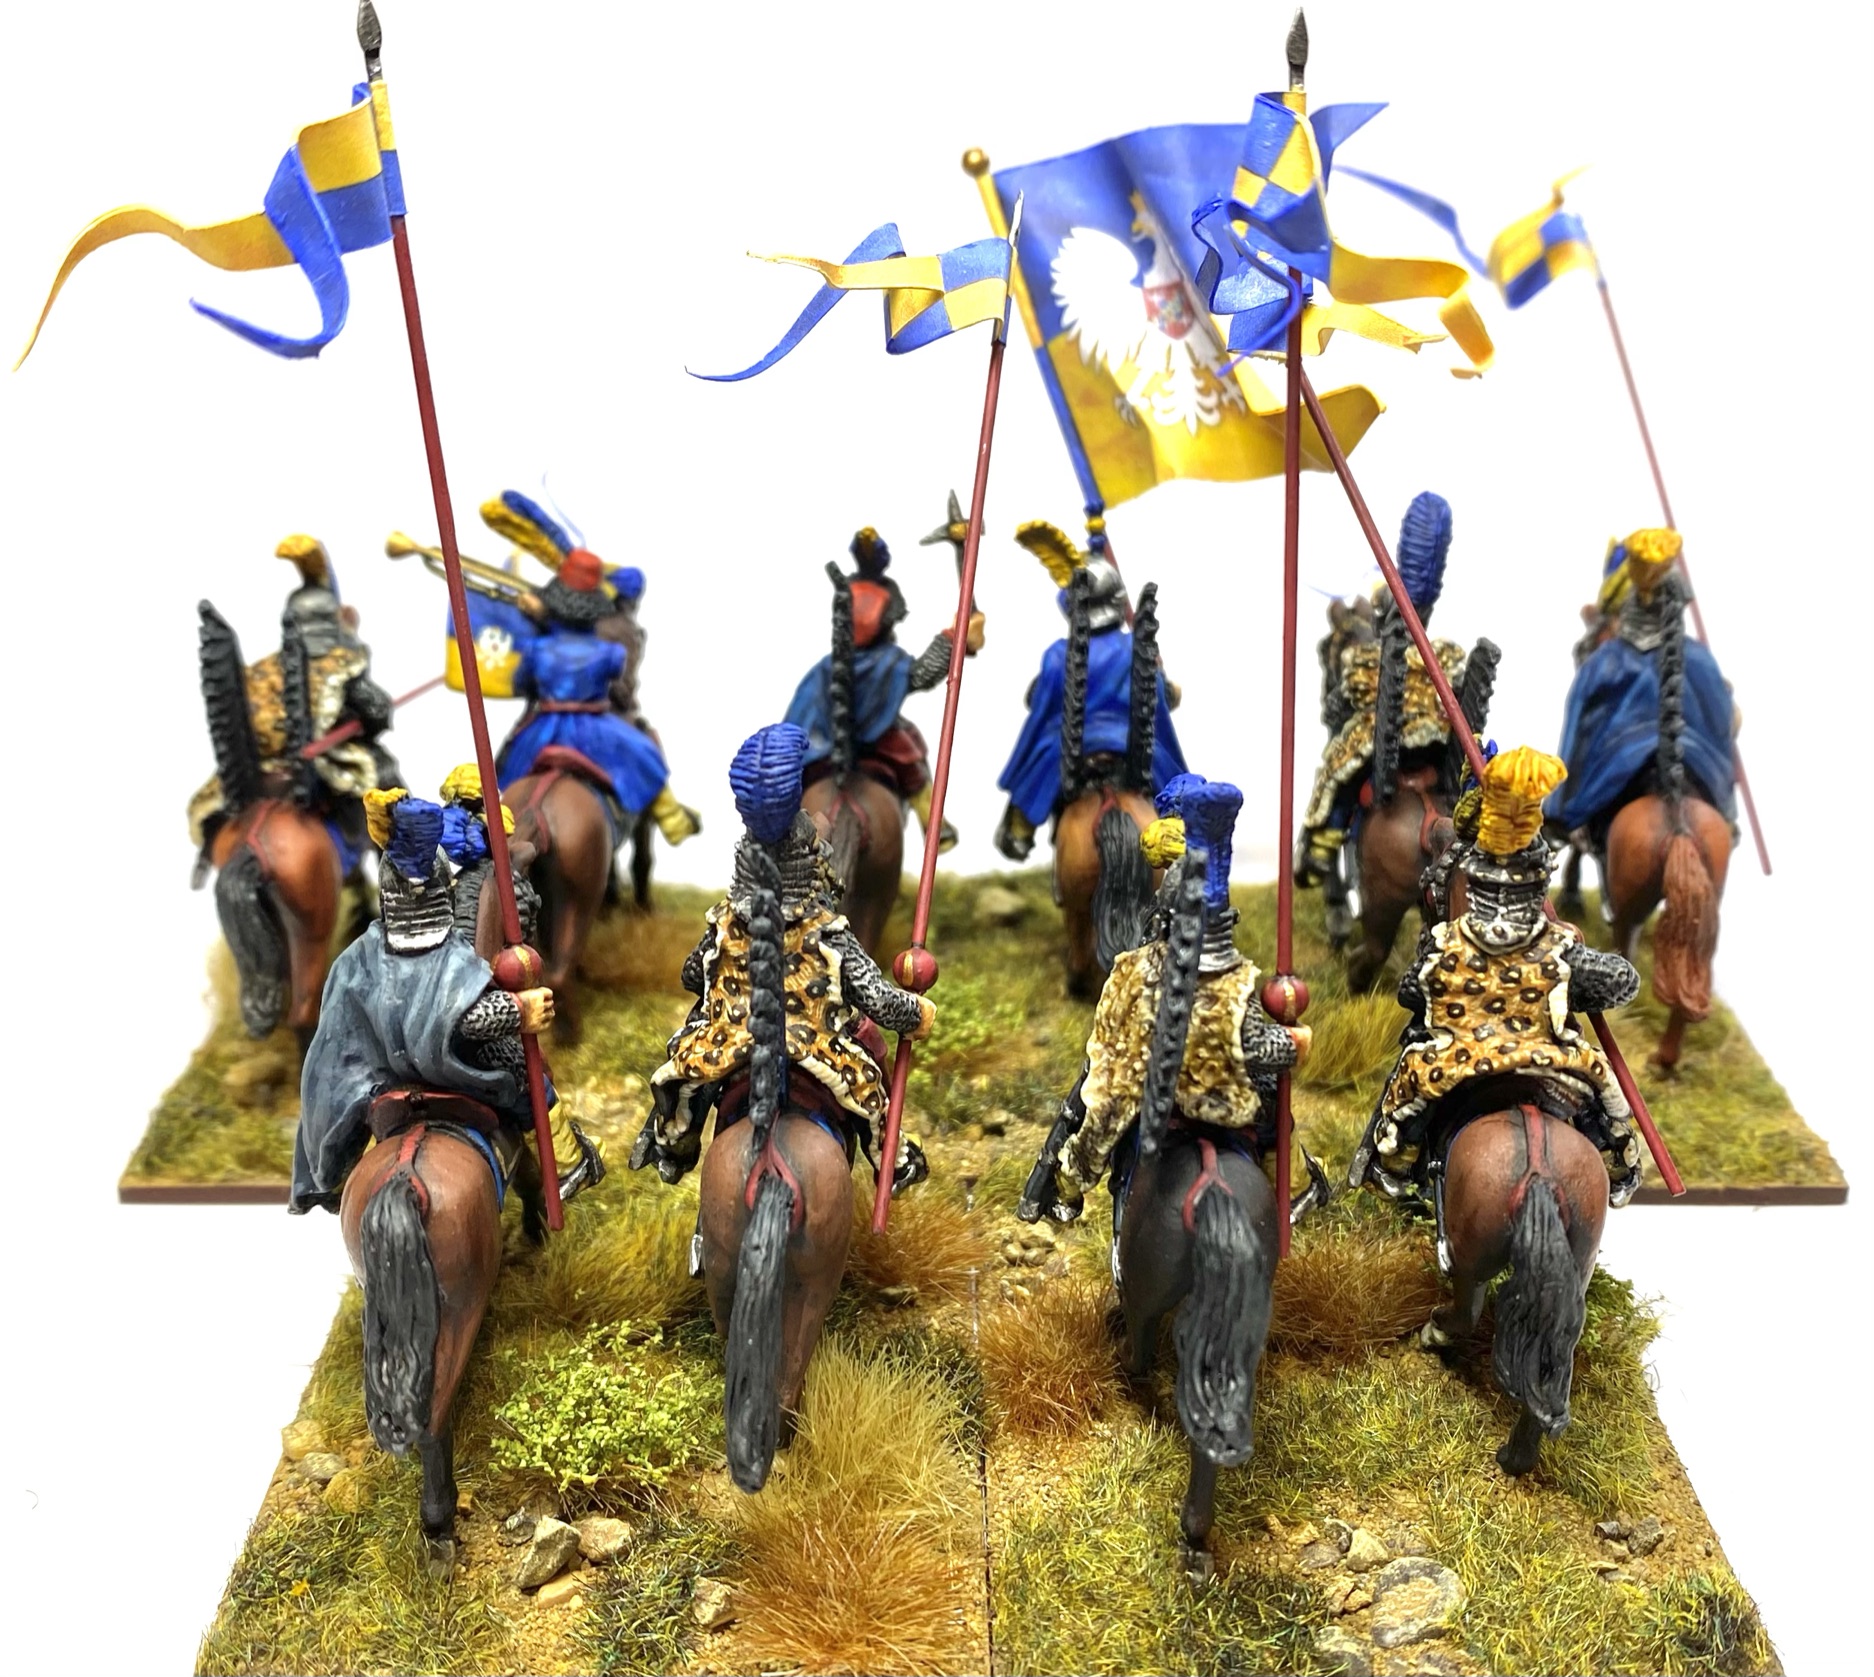
 Flags and lance pennons for the unit from Battle Flag
After painting the figures I brushed on a gloss varnish as a protective layer for the riders, horses, and the lances. As mentioned the lances were getting a set of Battle Flag pennons. The main unit standard is blue and yellow, split horizontally, with a white eagle in the centre. I decided to repeat this on the trumpeter’s trumpet banner, that is cast on the figure. The two colours was fairly straightforward, but the white eagle would be tricky. A Google search threw up some potential transfers that looked like they could work from Vene Vidi Veci. VVV do sets of 15mm and 28mm ‘medieval’ heraldry symbols that can be ordered in a variety of colours. I ordered sets of 15mm and 28mm from Magister Militum (link) in white, black and red. I ordered both sizes as I wasn’t sure how big they would be and wanted to make sure that they would fit on the trumpet banner.
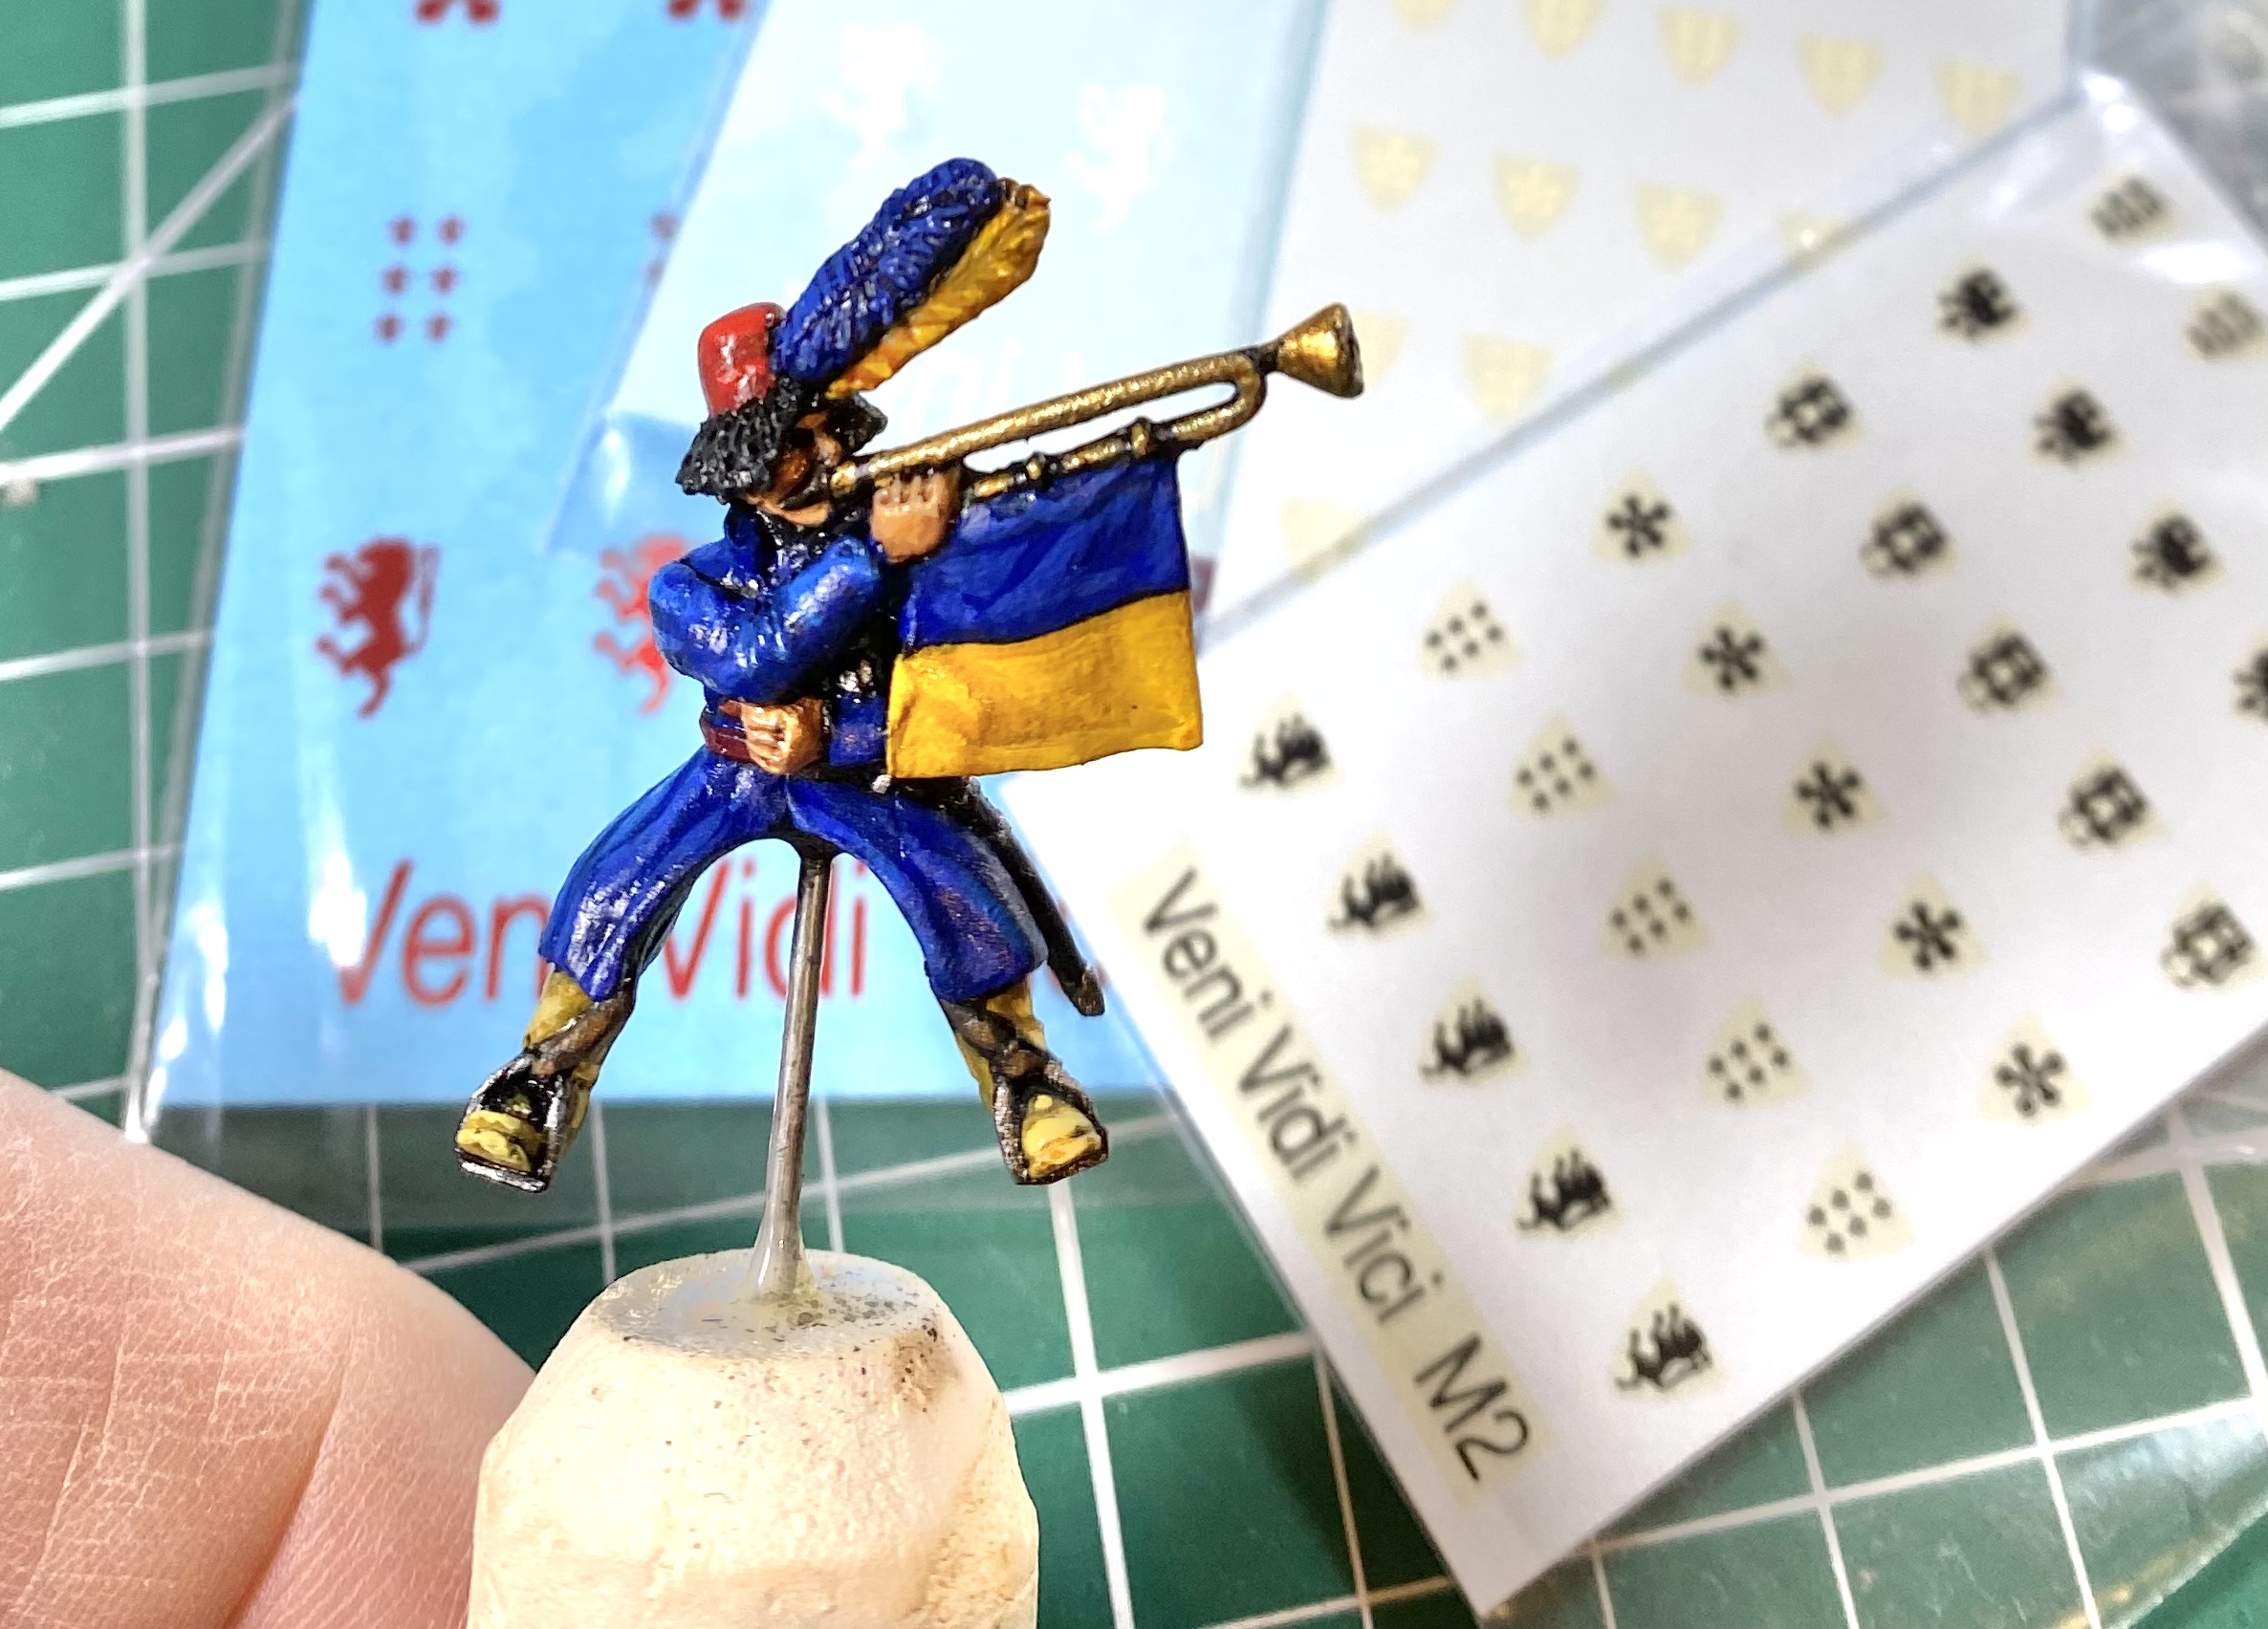 Trumpeter varnished and ready for transfers.
Once I had the transfers I decided that the 15mm size transfer would work best on the trumpet banner. I haven’t used transfers for a long time and decided to give this fancy Micro SEL and Micro SOL stuff, made by Microscale, a try. The figure was already gloss varnished, which is apparently the best base to start transfers from. I cut out a small, white, single-headed eagle transfer from the VVV set and, using a pair of tweezers, dipped it in water for a few seconds. While the water was soaking in to the transfer, I painted a small amount of Micro SEL (from the blue bottle) on to the trumpet flag where I wanted the transfer. The transfer was now loose after its short soaking and so I slid the transfer off its backing and positioned it on the banner with the same brush I used for the Micro SEL. The Micro SEL allowed me to move adjust the position of the transfer with the brush tip. When it was in the right spot I smoothed it down with a small amount more of Micro SEL. After repeating this for the back of the trumpet banner, I set the the figure aside to dry.
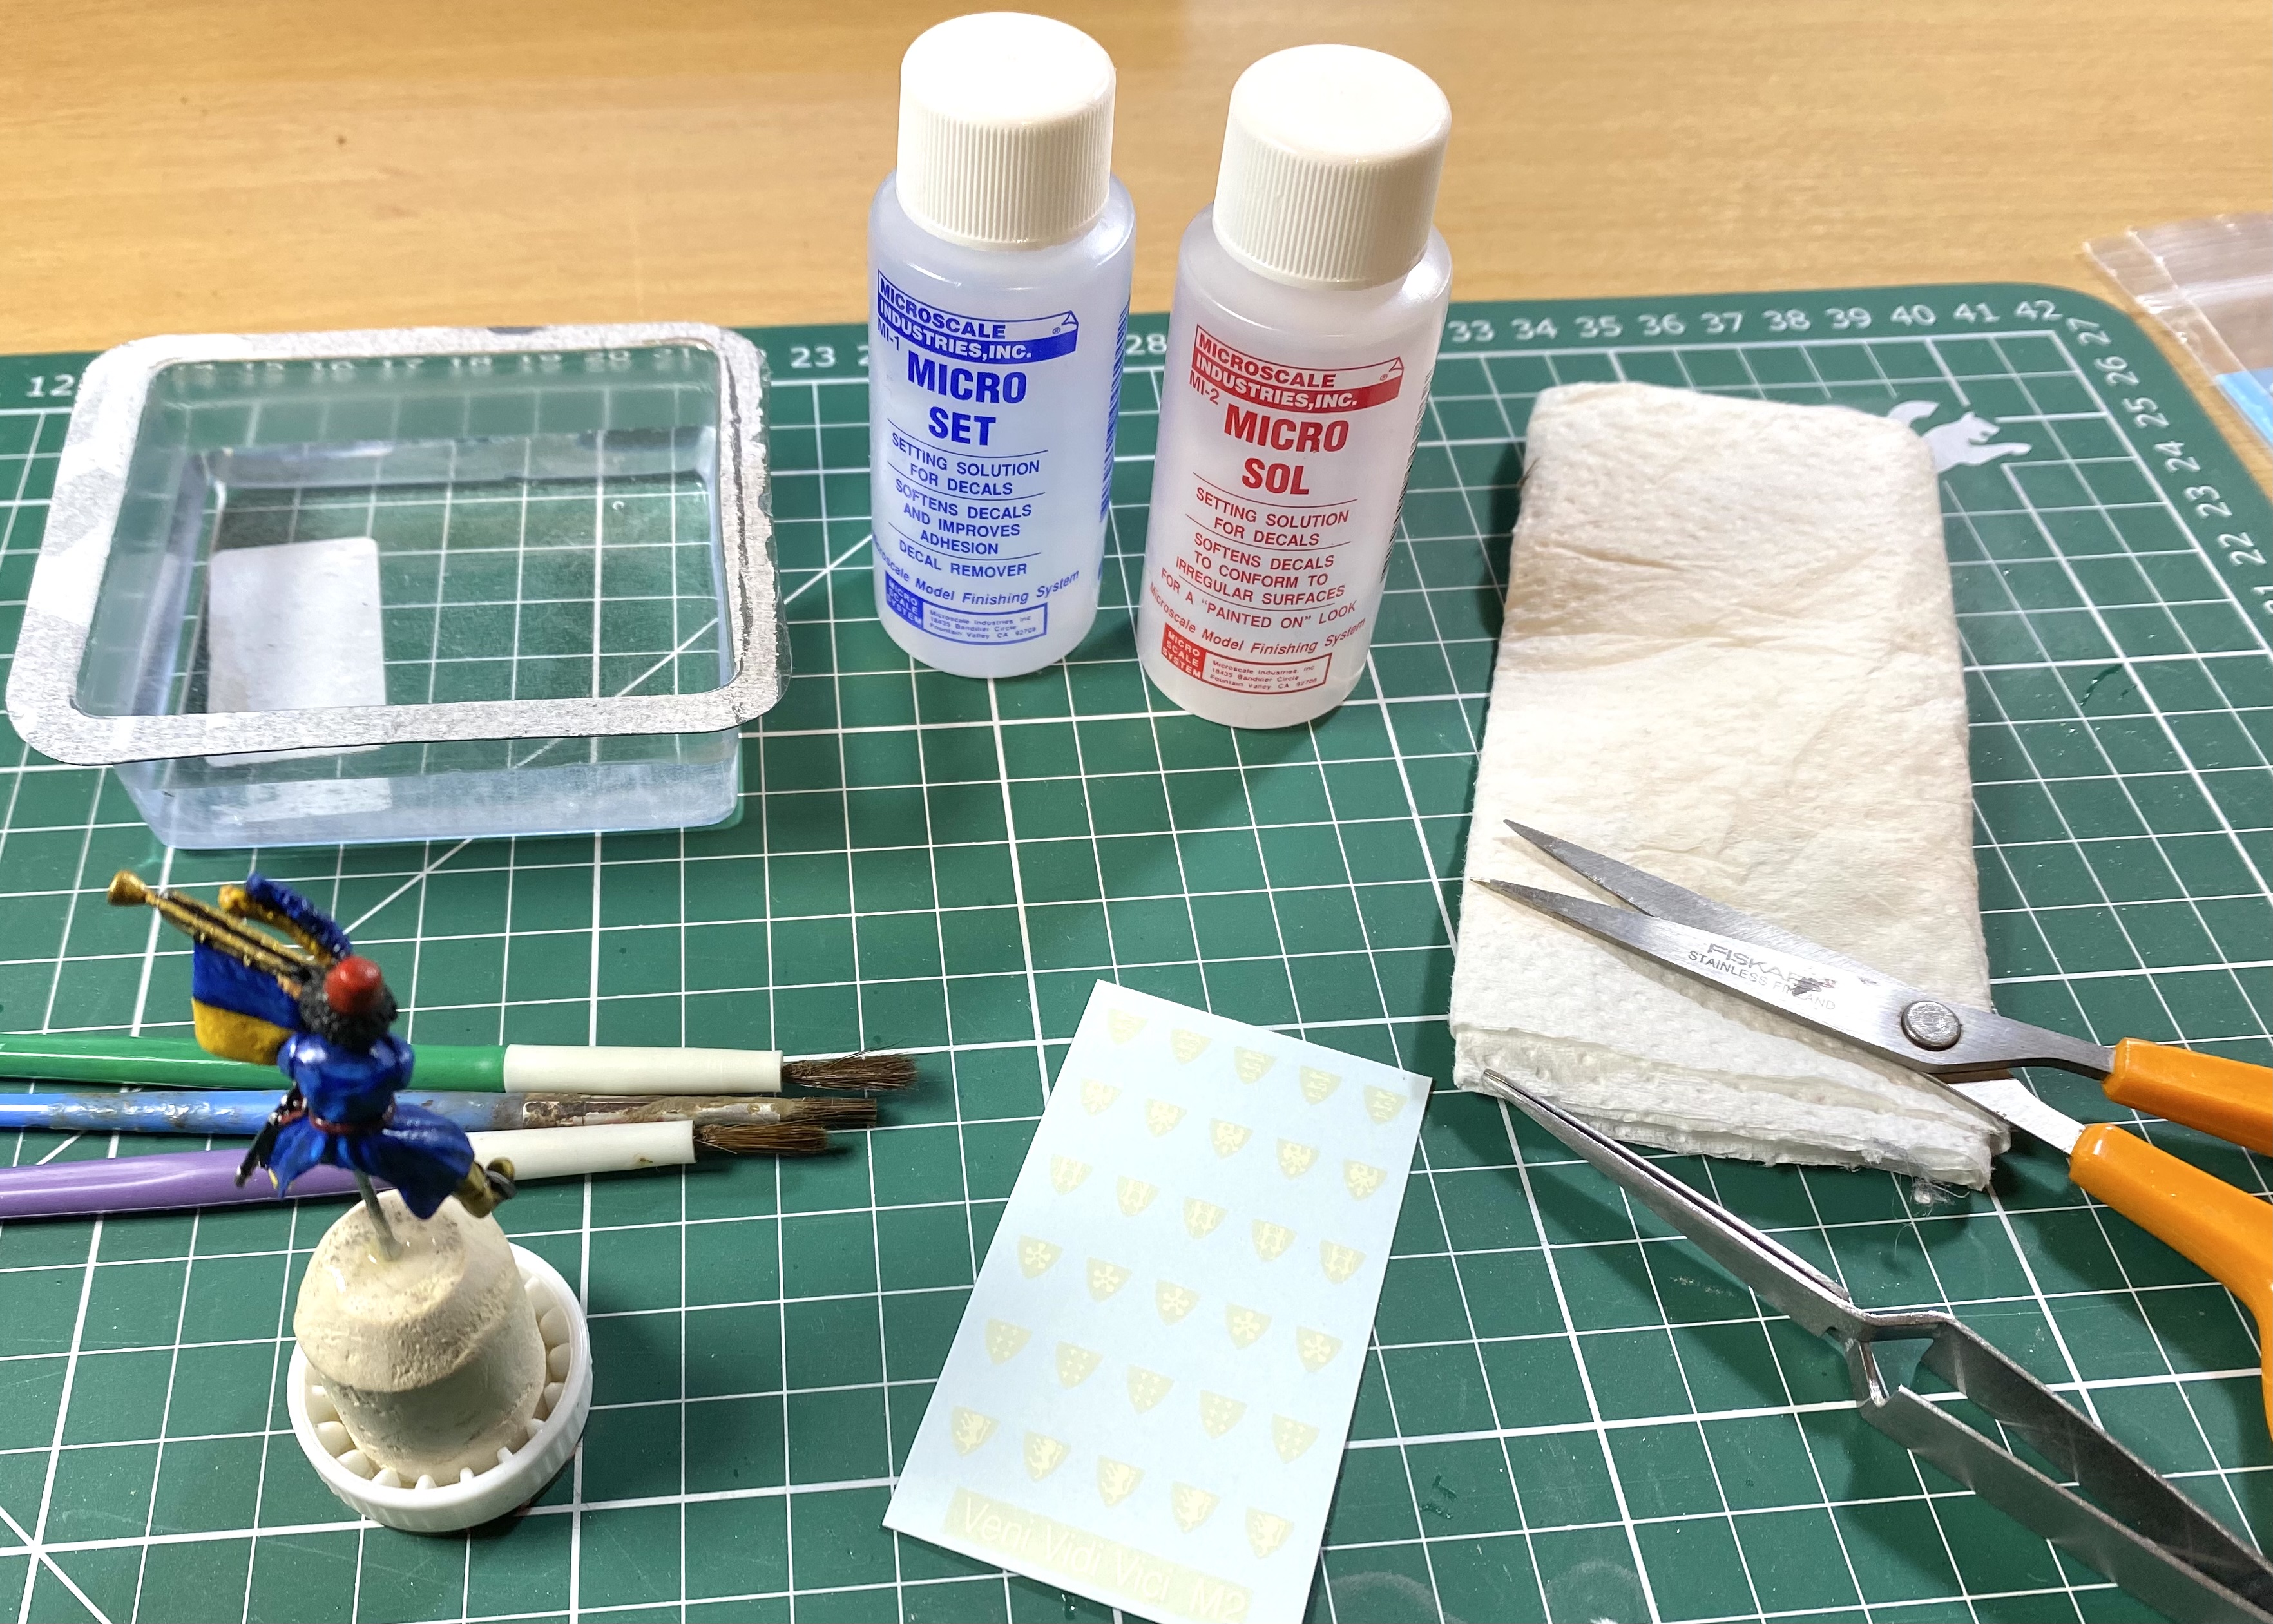 Equipment for applying the transfers to the trumpet banner.
Once the transfer was dry I painted a small amount of Micro SOL on top. As the banner was a fairly flat surface this last stage, meant to mould the transfer on to curved / uneven surfaces, was perhaps not necessary, but I wanted to try out the full process. I left the figure to dry once again. The flag design that I was copying for the trumpet banner has a small red shield over the eagle’s breast, and a yellow crown on the eagle. At this scale, two blobs of colour, were good enough approximation of this design for me! I‘m sure many people would have managed with some white paint to approximate the eagle, but the transfer was a neat way of getting a consistent result on both sides.
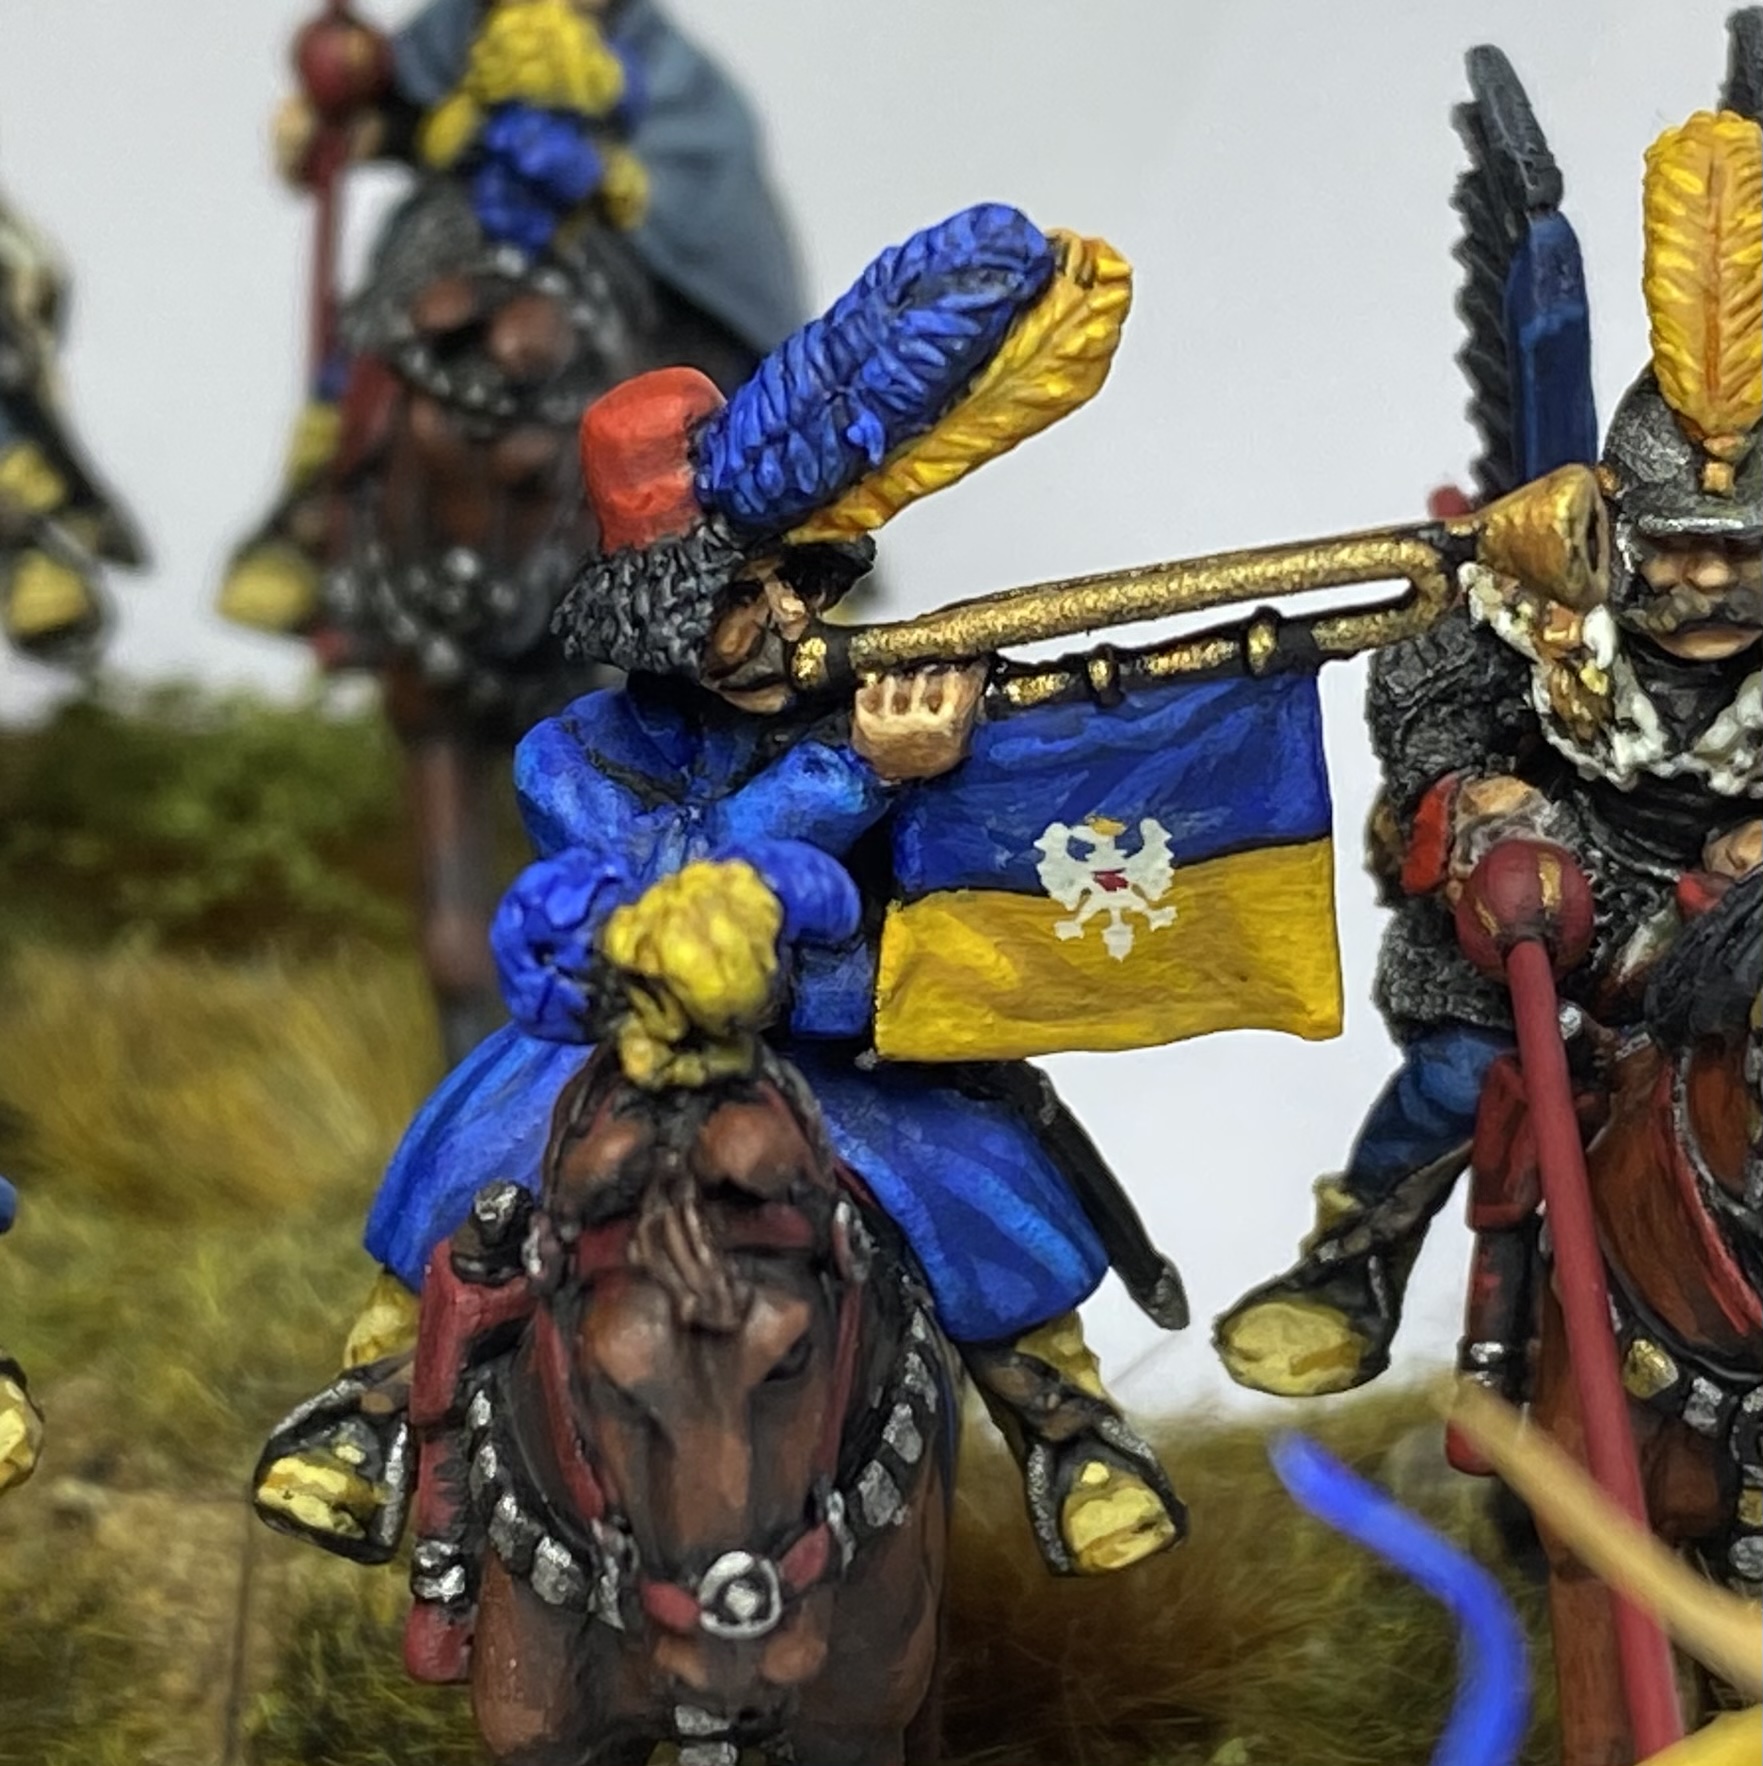 Trumpet transfer applied and dots of paint added.
Hussar blues
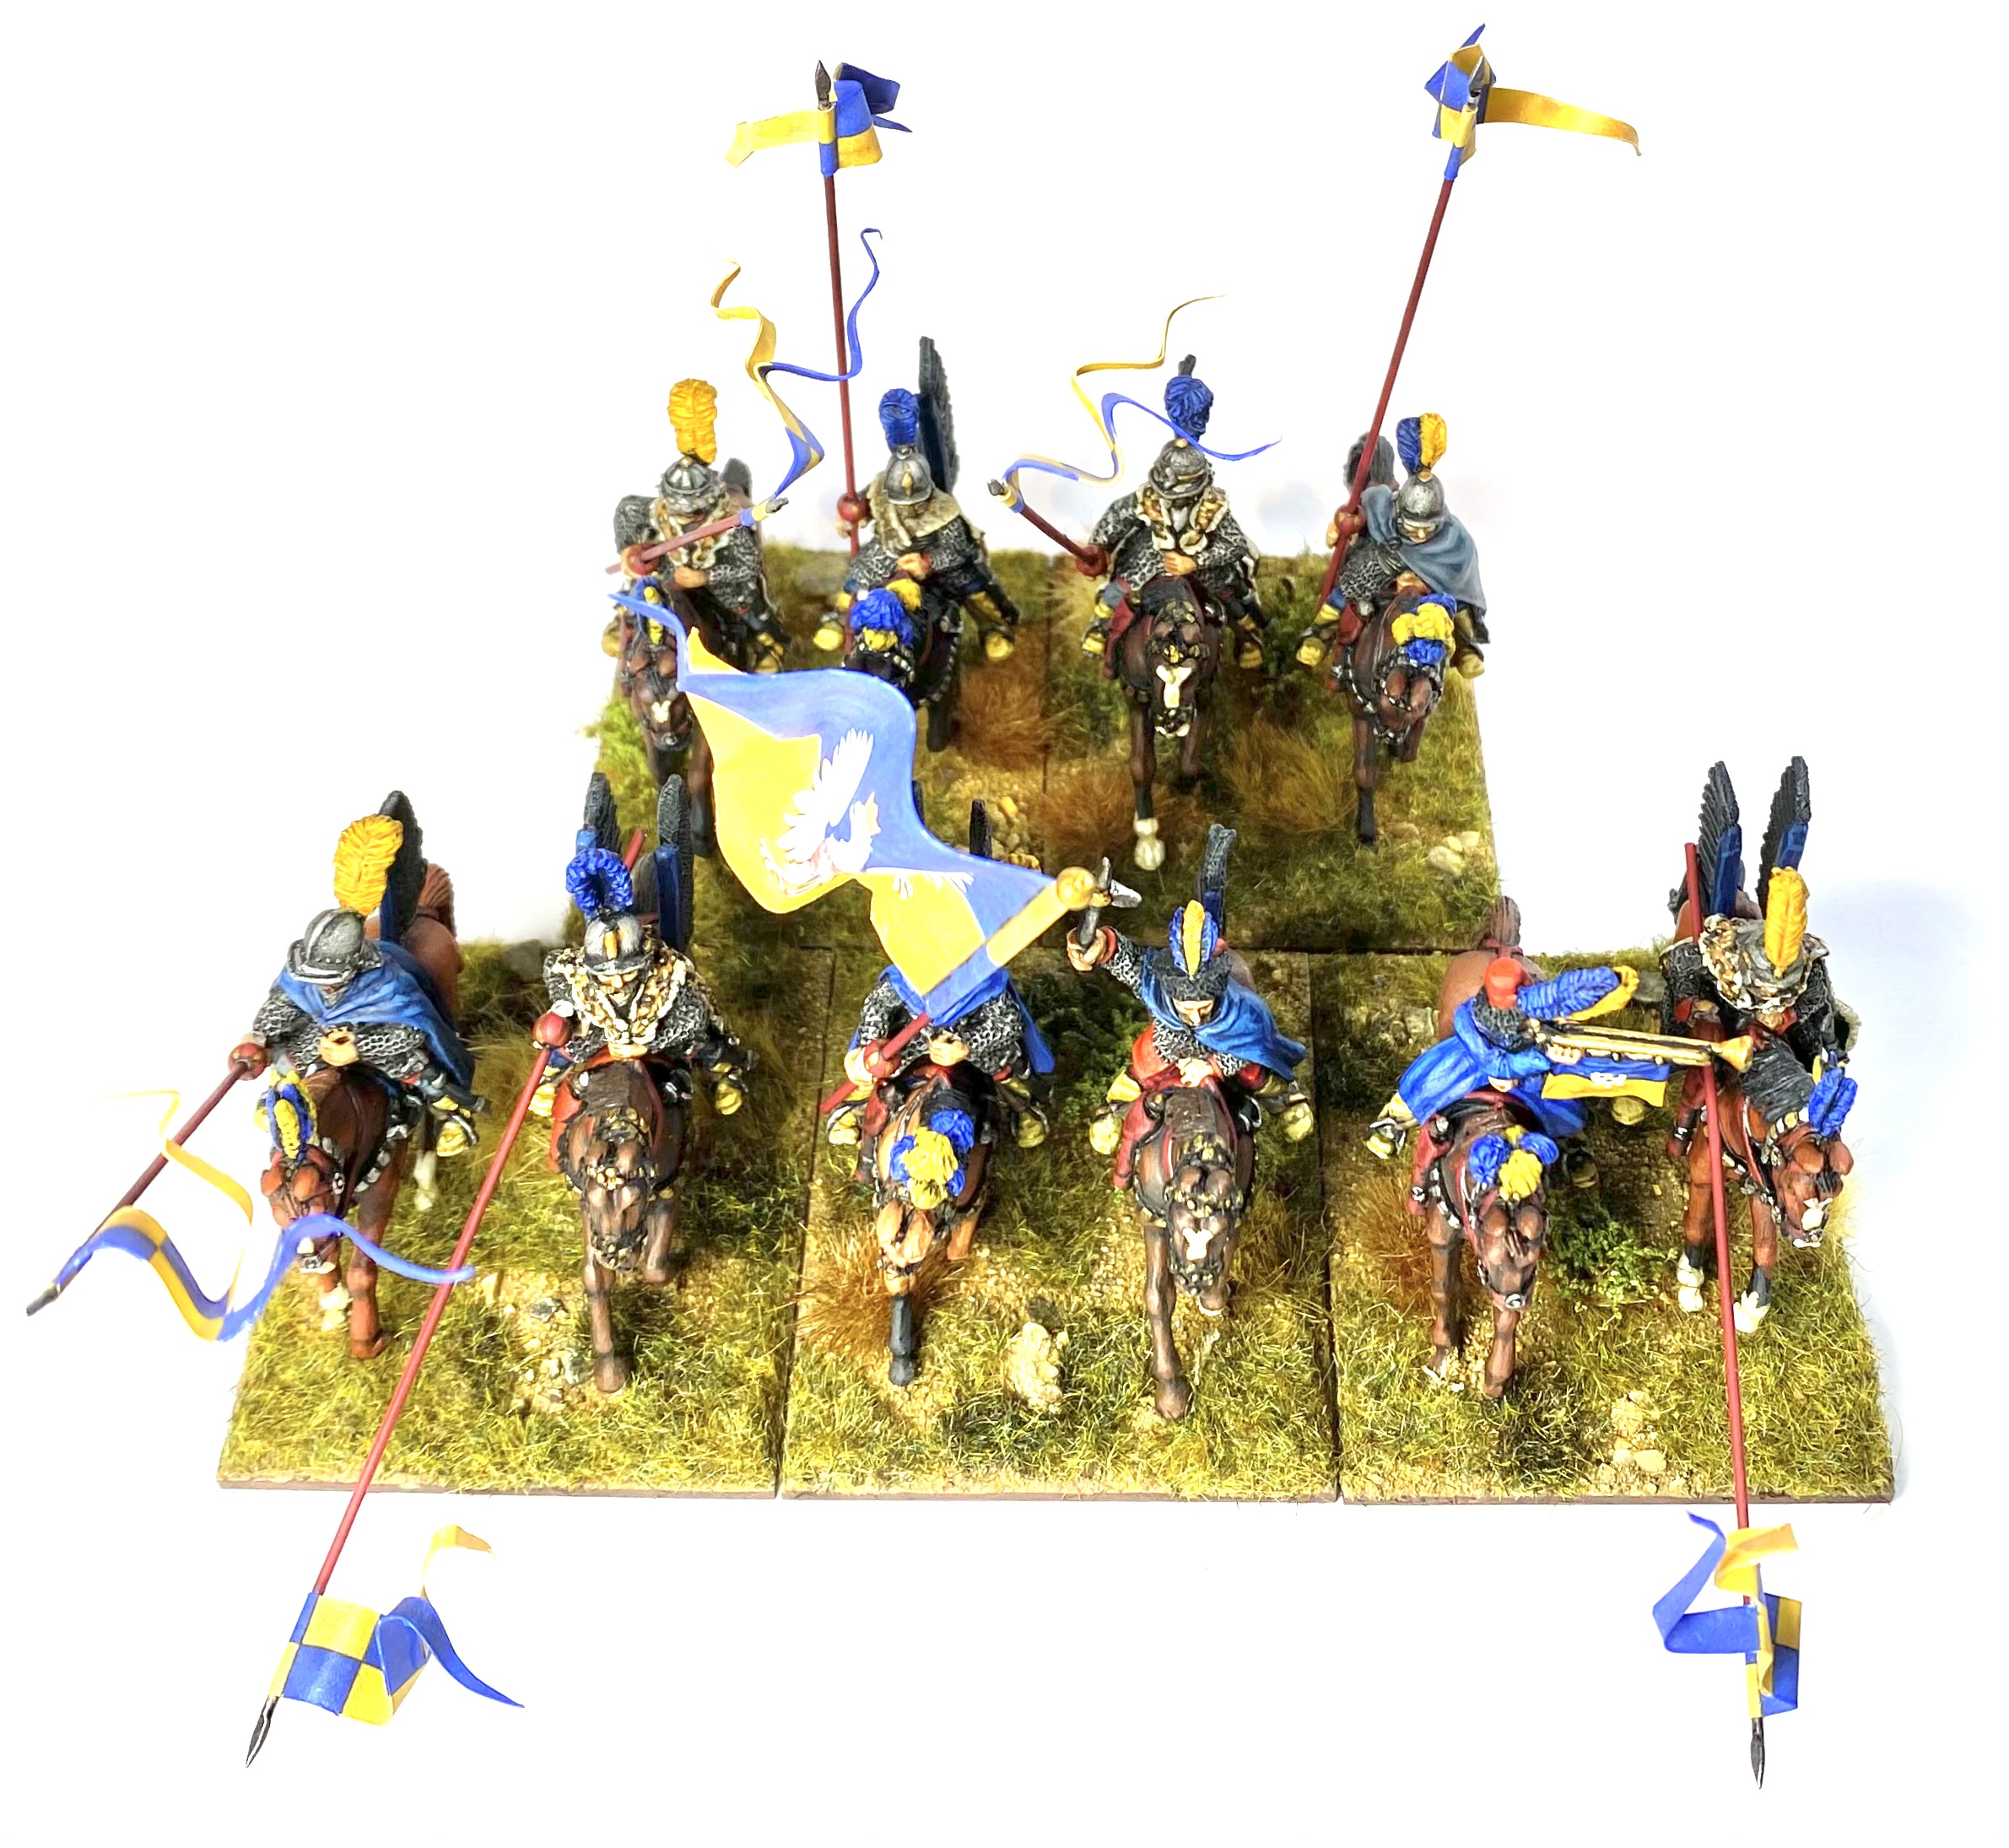
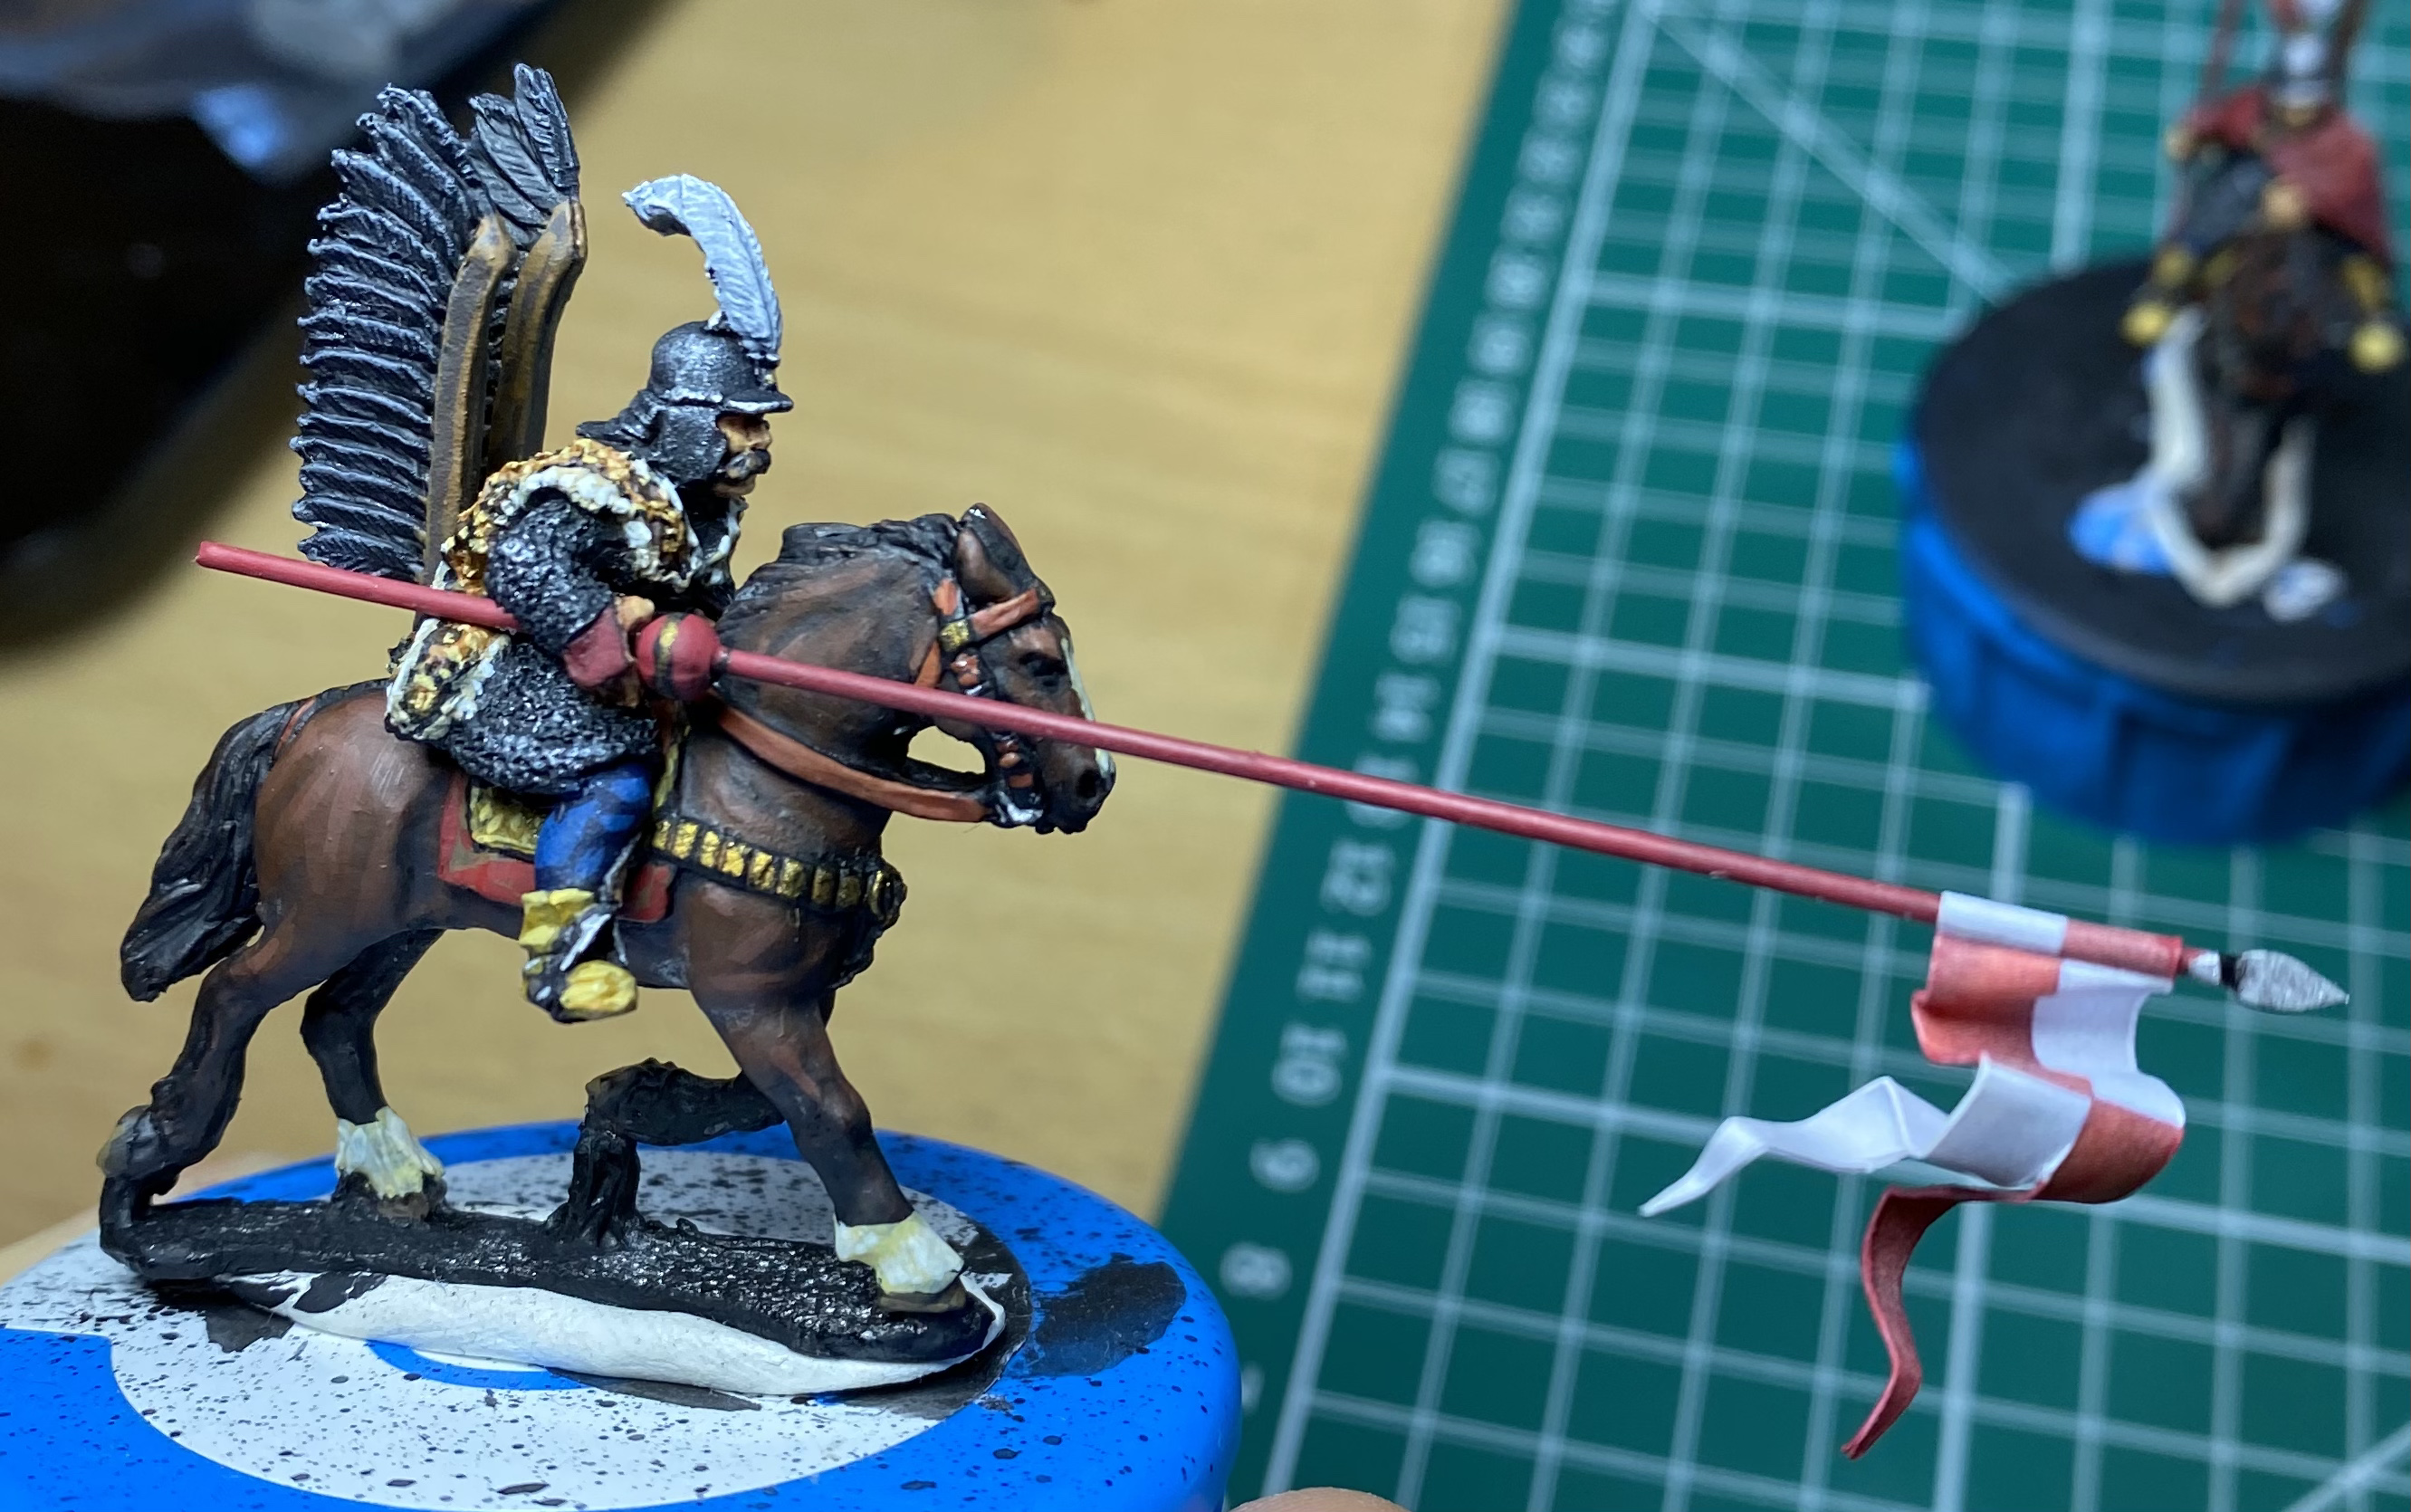
Trying to keep up momentum I’ve moved on to another unit of Hussars. This unit is made up of a mixture of The Assault Group (TAG) and Foundry riders, as before, but this time on TAG horses. The TAG horses are nice clean sculpts and most have some fancy feathers etc. which are very suitable for the noble Hussars, who liked an ostentatious display. They also have a single pistol holstered on the right side of the saddle. This is a nice touch as firearms were becoming popular with the Hussars in this period. I’m not so sure about carrying only one pistol, but I expect someone out there knows if this is right?
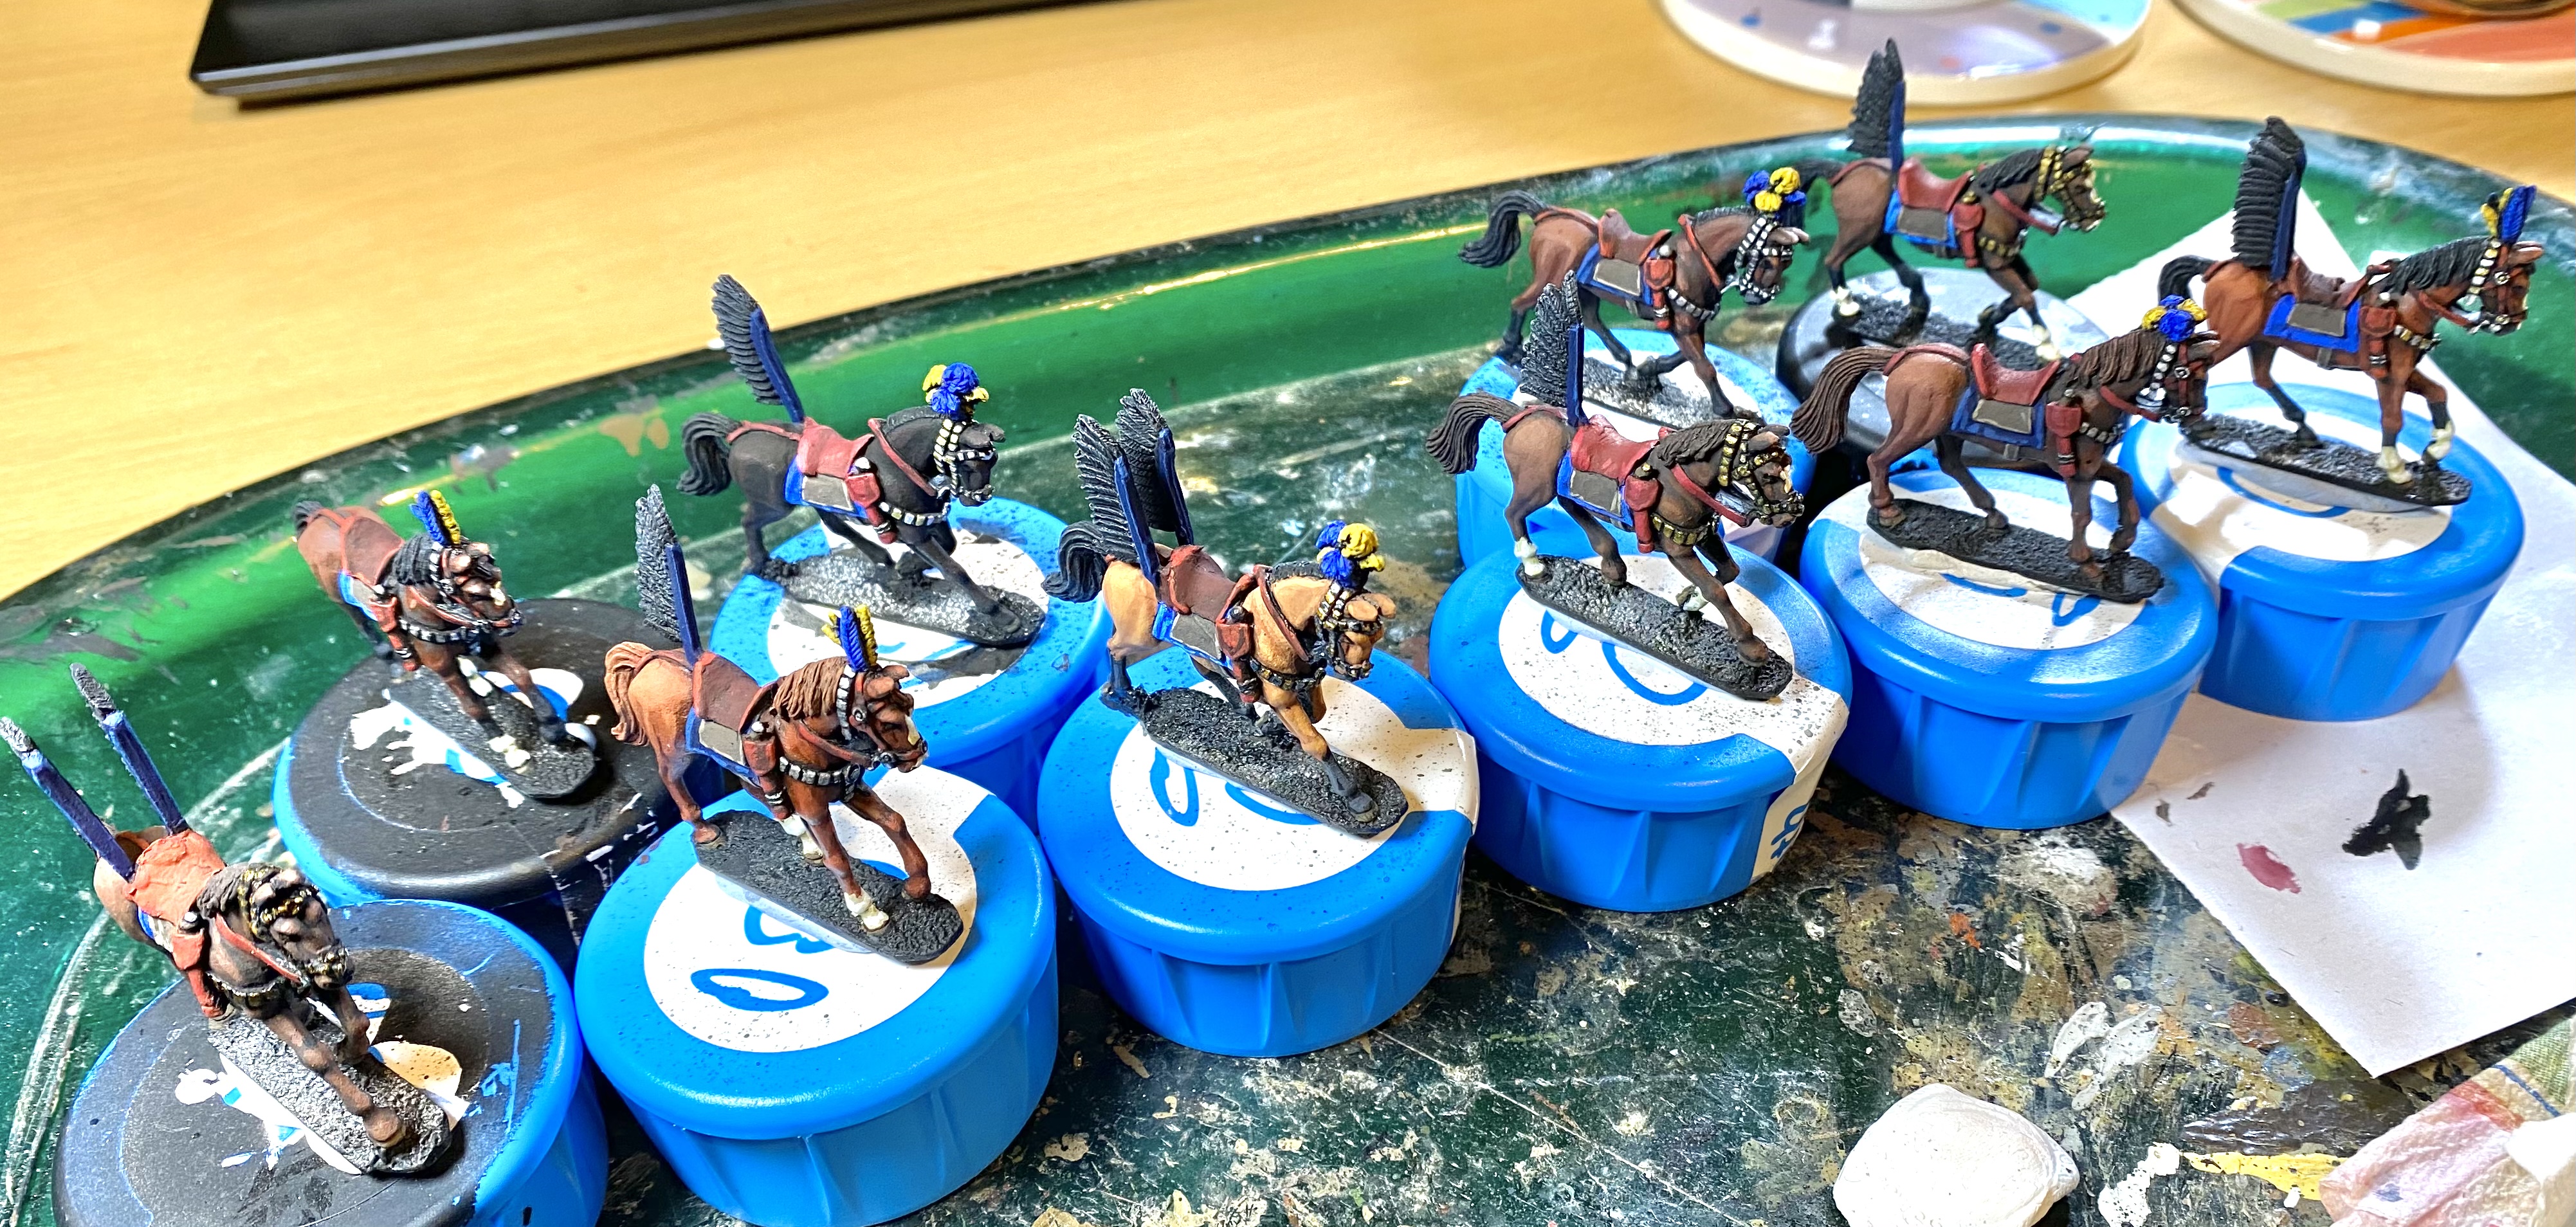 Riderless horses ready for varnishing
I’ve added wings in twos, or singles, to most of the figures, but left some without. In this unit the wings are attached directly to the horse, rather to the equivalent position on the rider figure. As covered in the previous posts, I have decided to have wings ‘saddle mounted’ (rather than fixed on the rider’ backs) in ones or twos as limited to the richer / more showy individuals in the unit. The wings are a mixture of the TAG wings and the Foundry wings modified to be the straighter, earlier type. The TAG horses have a slot modelled at the back of the saddle to take wings. The Foundry riders needed some chipping and filing to make them fit in the TAG saddles and I had to keep riders and horses matched during the painting process so I could be sure of them fitting together at the end.
Although not always strictly historical, I like to have a colour theme for my units. For this unit I had chosen a blue and yellow flag, with matched pennons, from Battle Flag. I therefore decided to carry on this blue and yellow theme to the horse trappings, and also the Hussars’ cloaks and helmet feathers. I chose to use a few different hues of blue to add some variety while keeping within the overall theme. I used Vallejo’s Prussian Blue, Ultramarine, and Pale Dark Blue, and then shaded / highlighted each of these. I also wanted to include red on the hussars as this was a popular colour with wealthy Polish nobles in this period.
 Riders ready for varnishing
Fanfare!
To complete the unit I followed my normal basing approach. The figures were glued, two figures to each 50mm wide and 60mm deep, 2mm thick, MDF base, from Warbases. The bases were then covered in an earth coloured paint and PVA glue mix, and sharp sand sprinkled on to the mixture while it was still wet. Once the paint-PVA mix was dry it was dry brushed with a beige colour, and then static grass and tufts were glued on with more PVA.
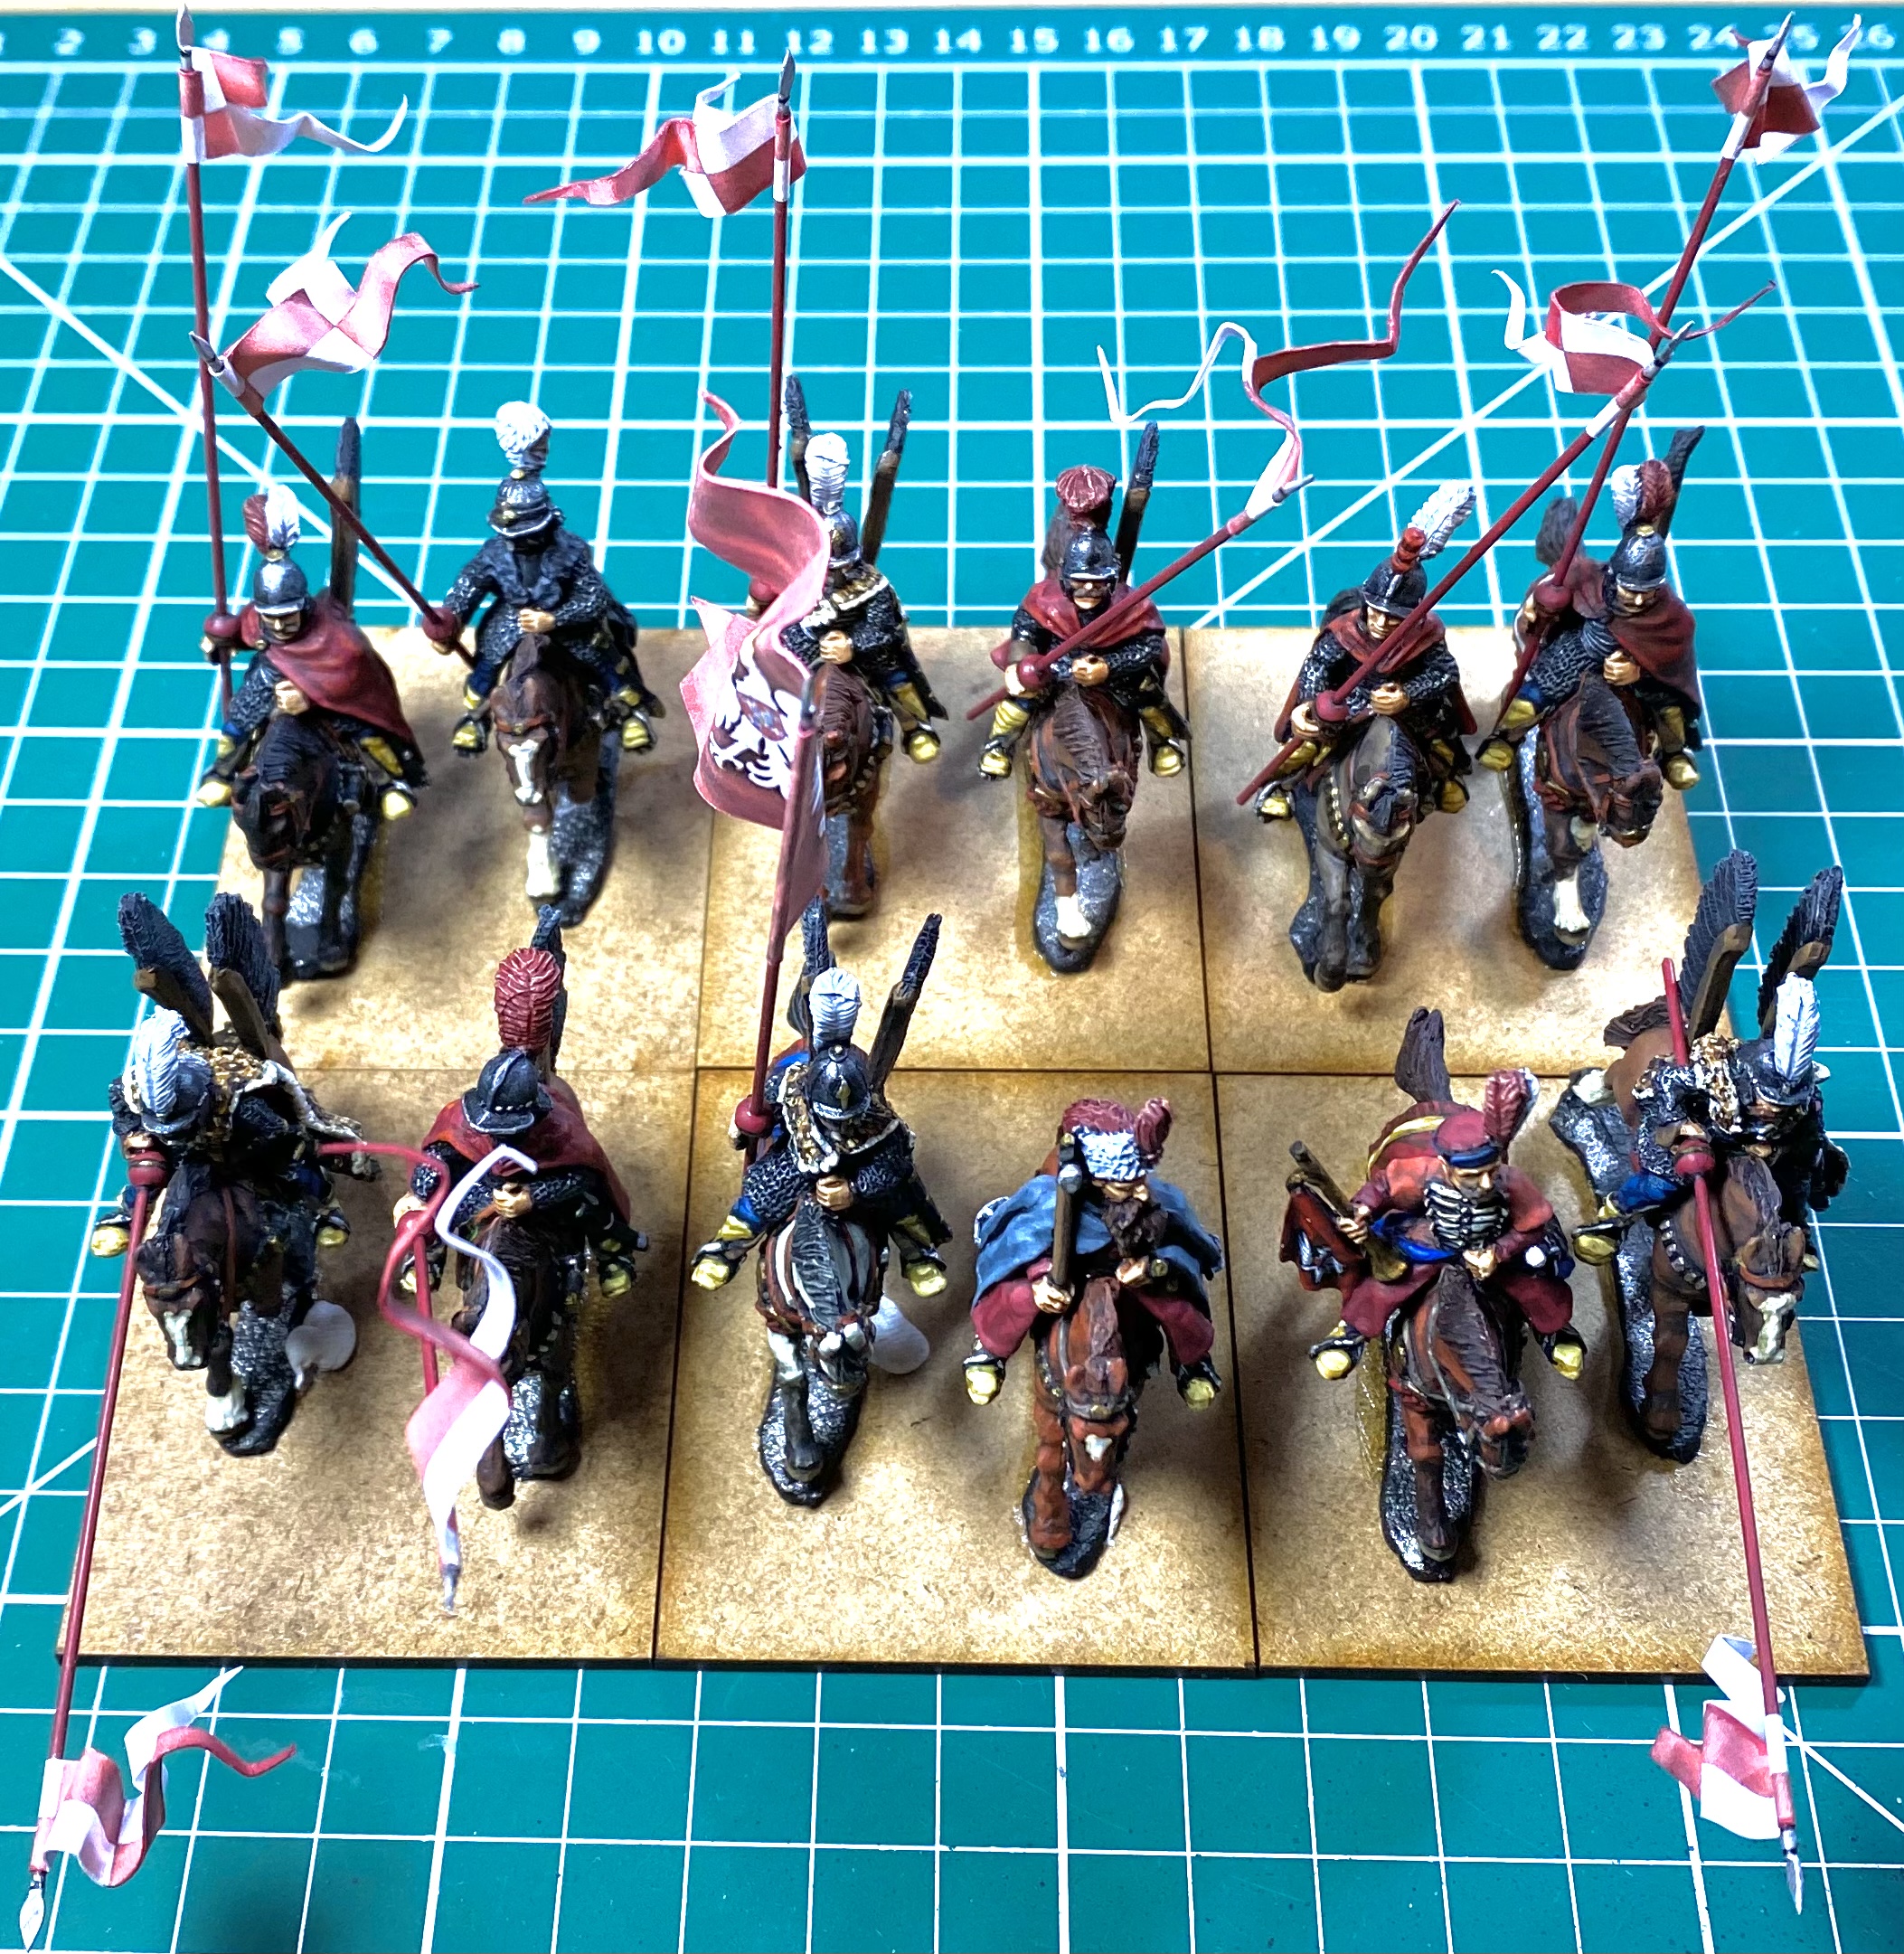 Hussars glued to MDF bases from Warbases.
With a final fanfare of trumpets my first unit of Hussars was completed!
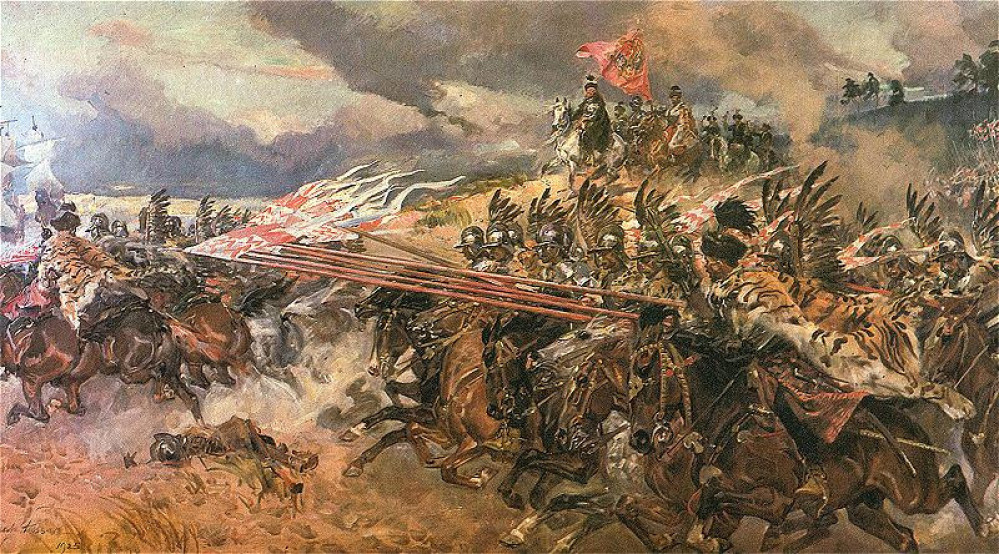
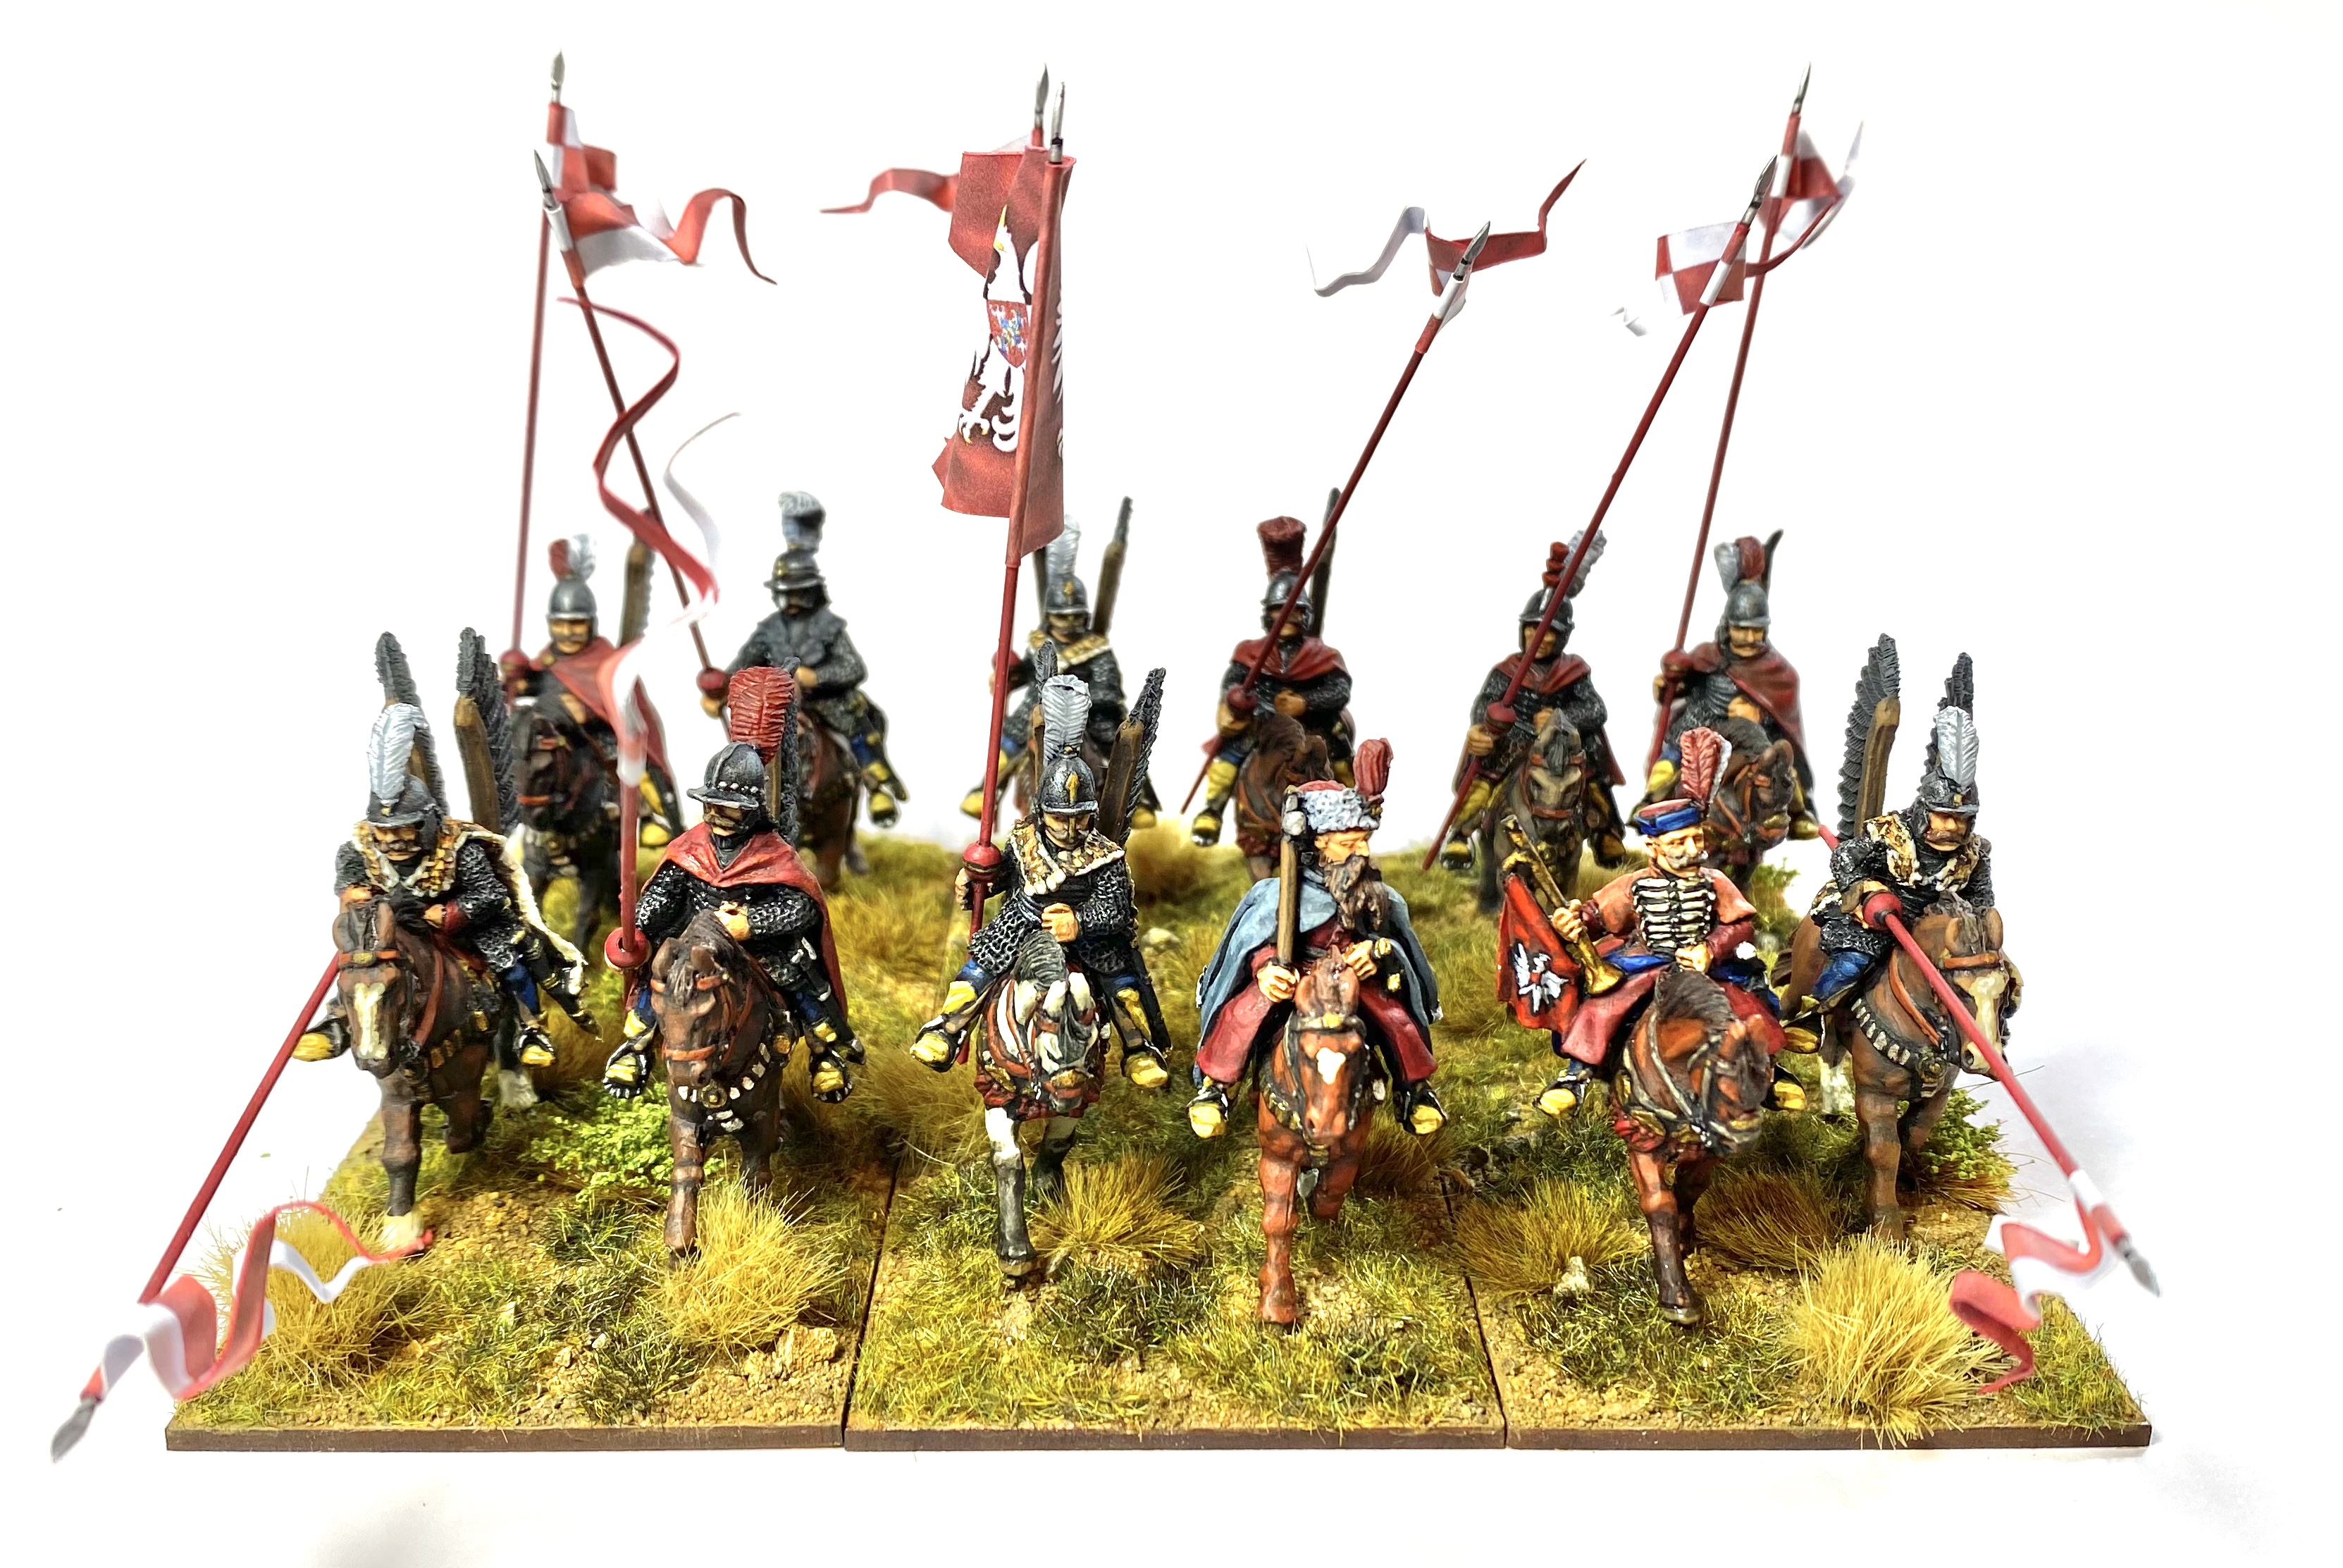 The finished unit charging in to action!
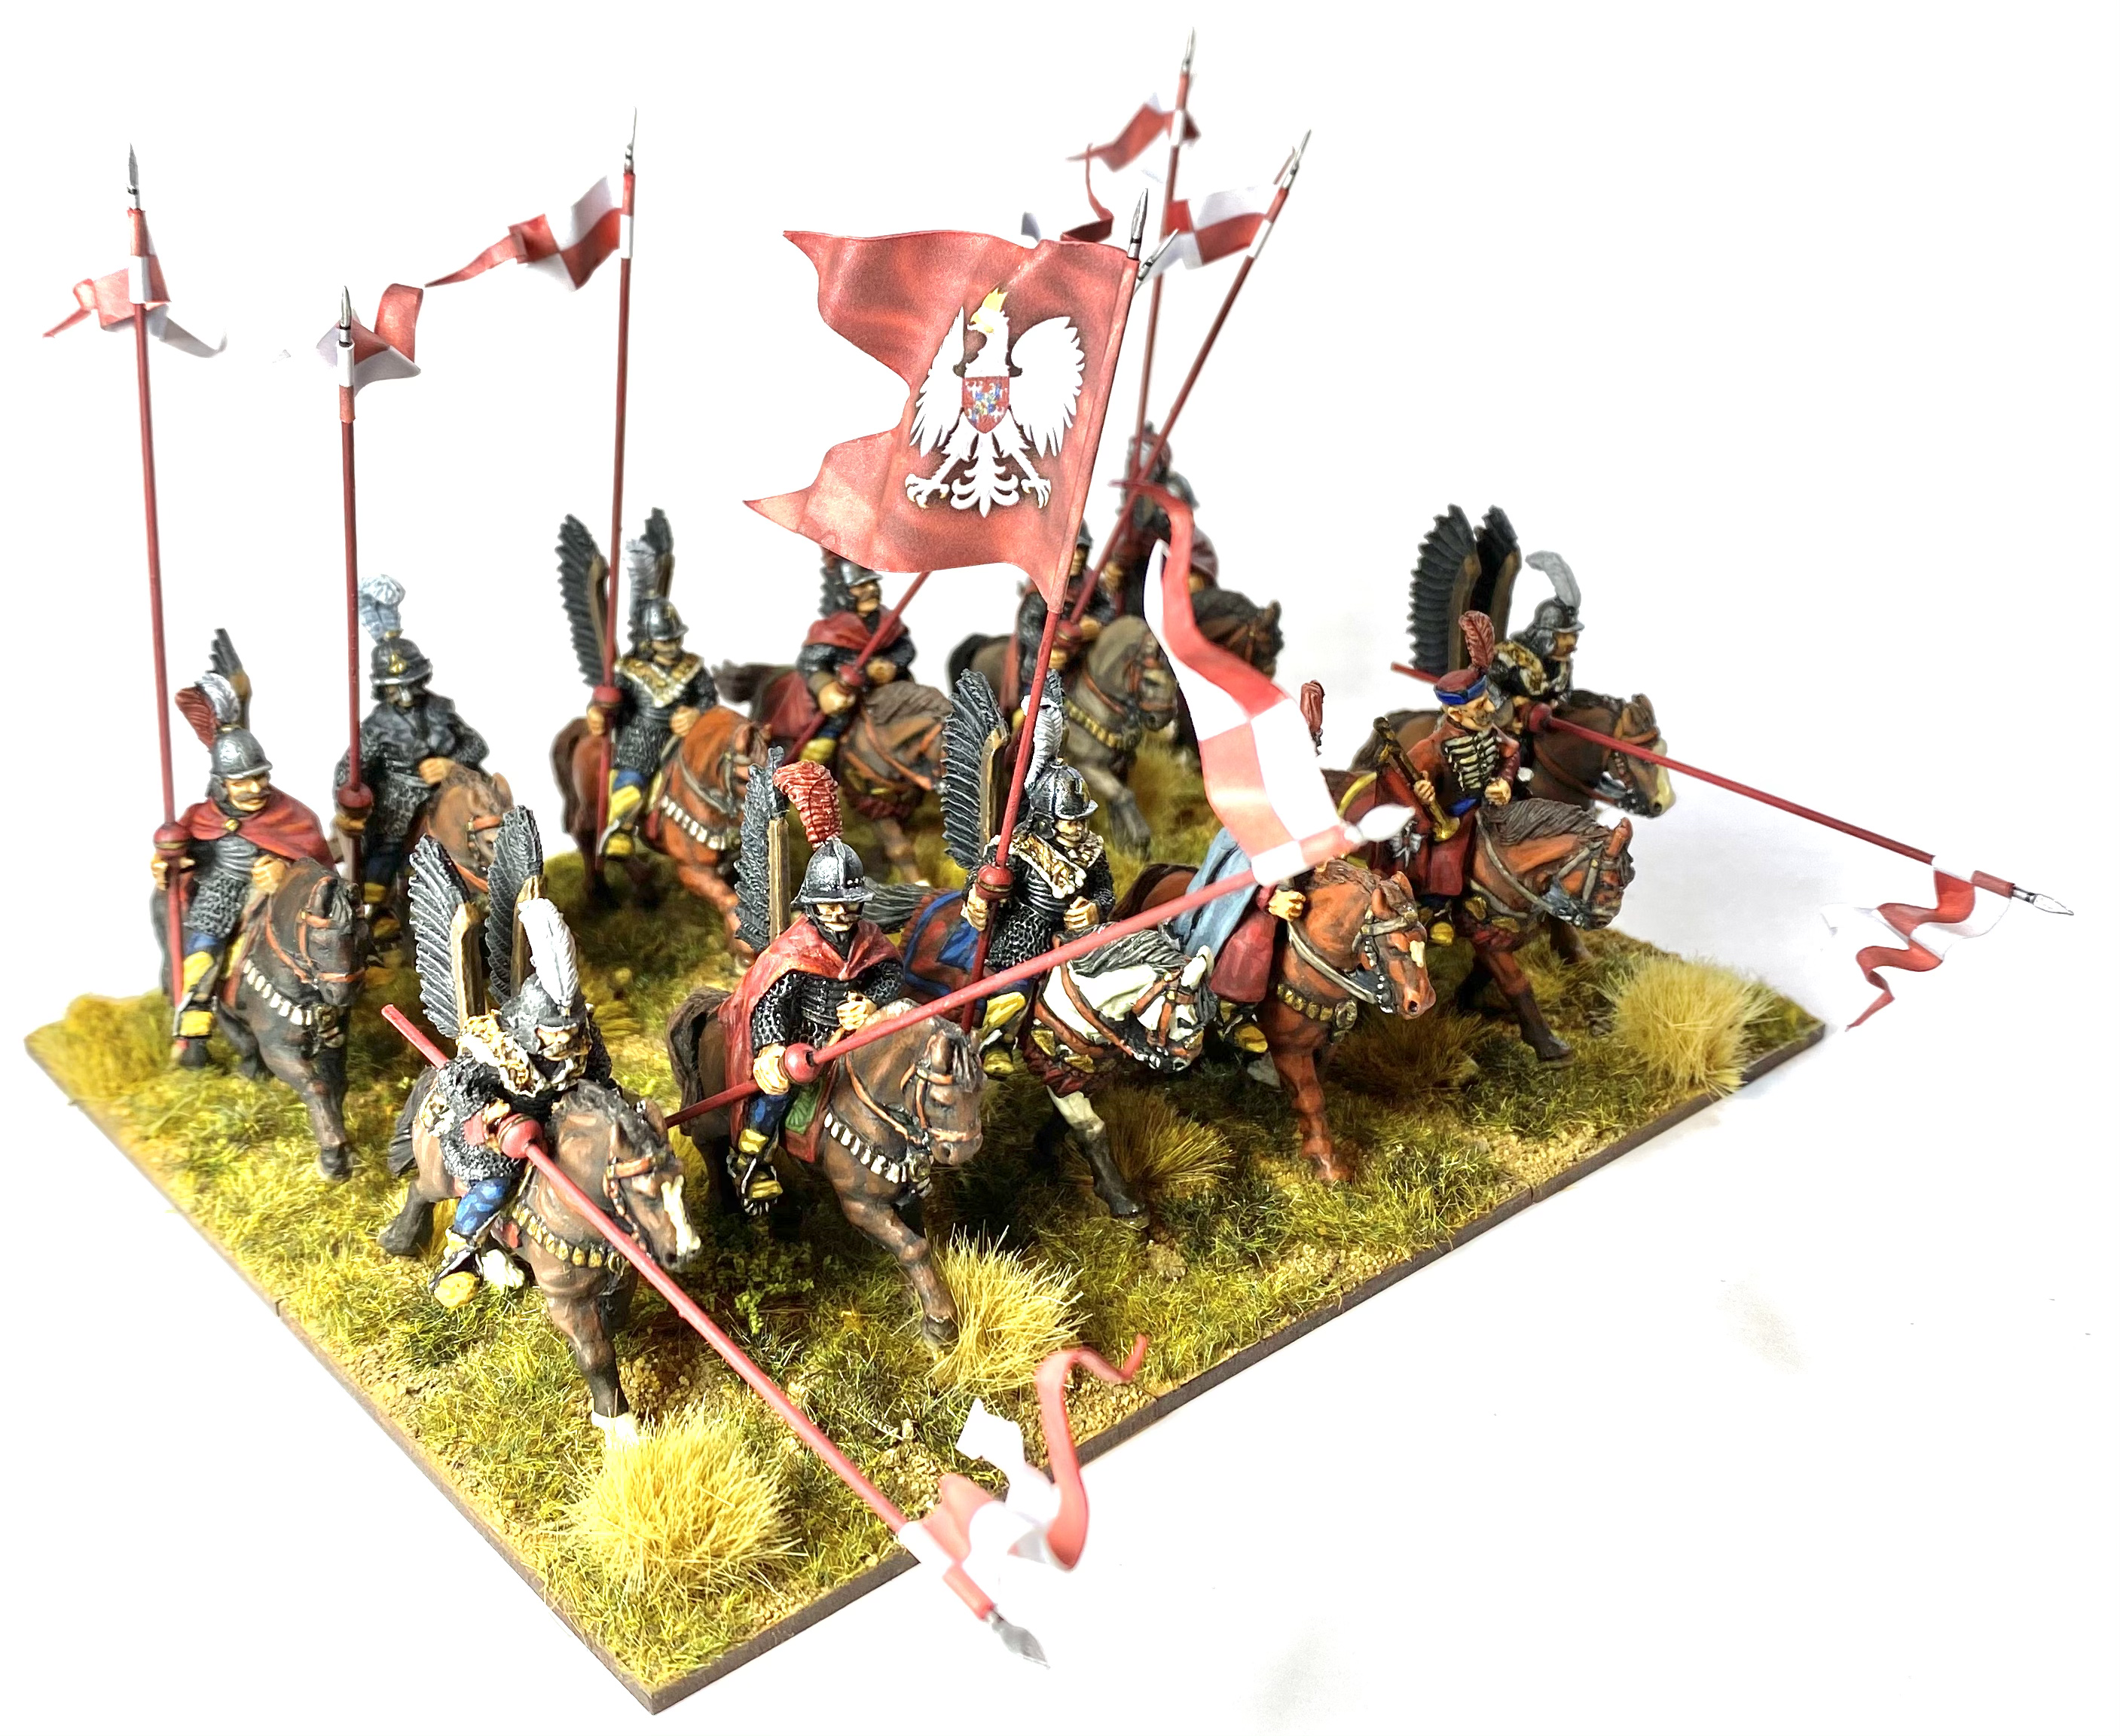

It feels pretty good to have the first unit done. I realise that I have made a bit of a ‘song and dance’ over one unit of cavalry, but I really enjoyed putting it together, and trying out some new techniques. I’m also pleased that the unit looks like I’d hoped it would, and should give a good impression of a 1620s Hussar formation.
Next in the painting queue is another unit of Hussars. I look forward to pushing through a bit faster on this one, using all of the lessons learnt on this first unit.
Sticks and Flags
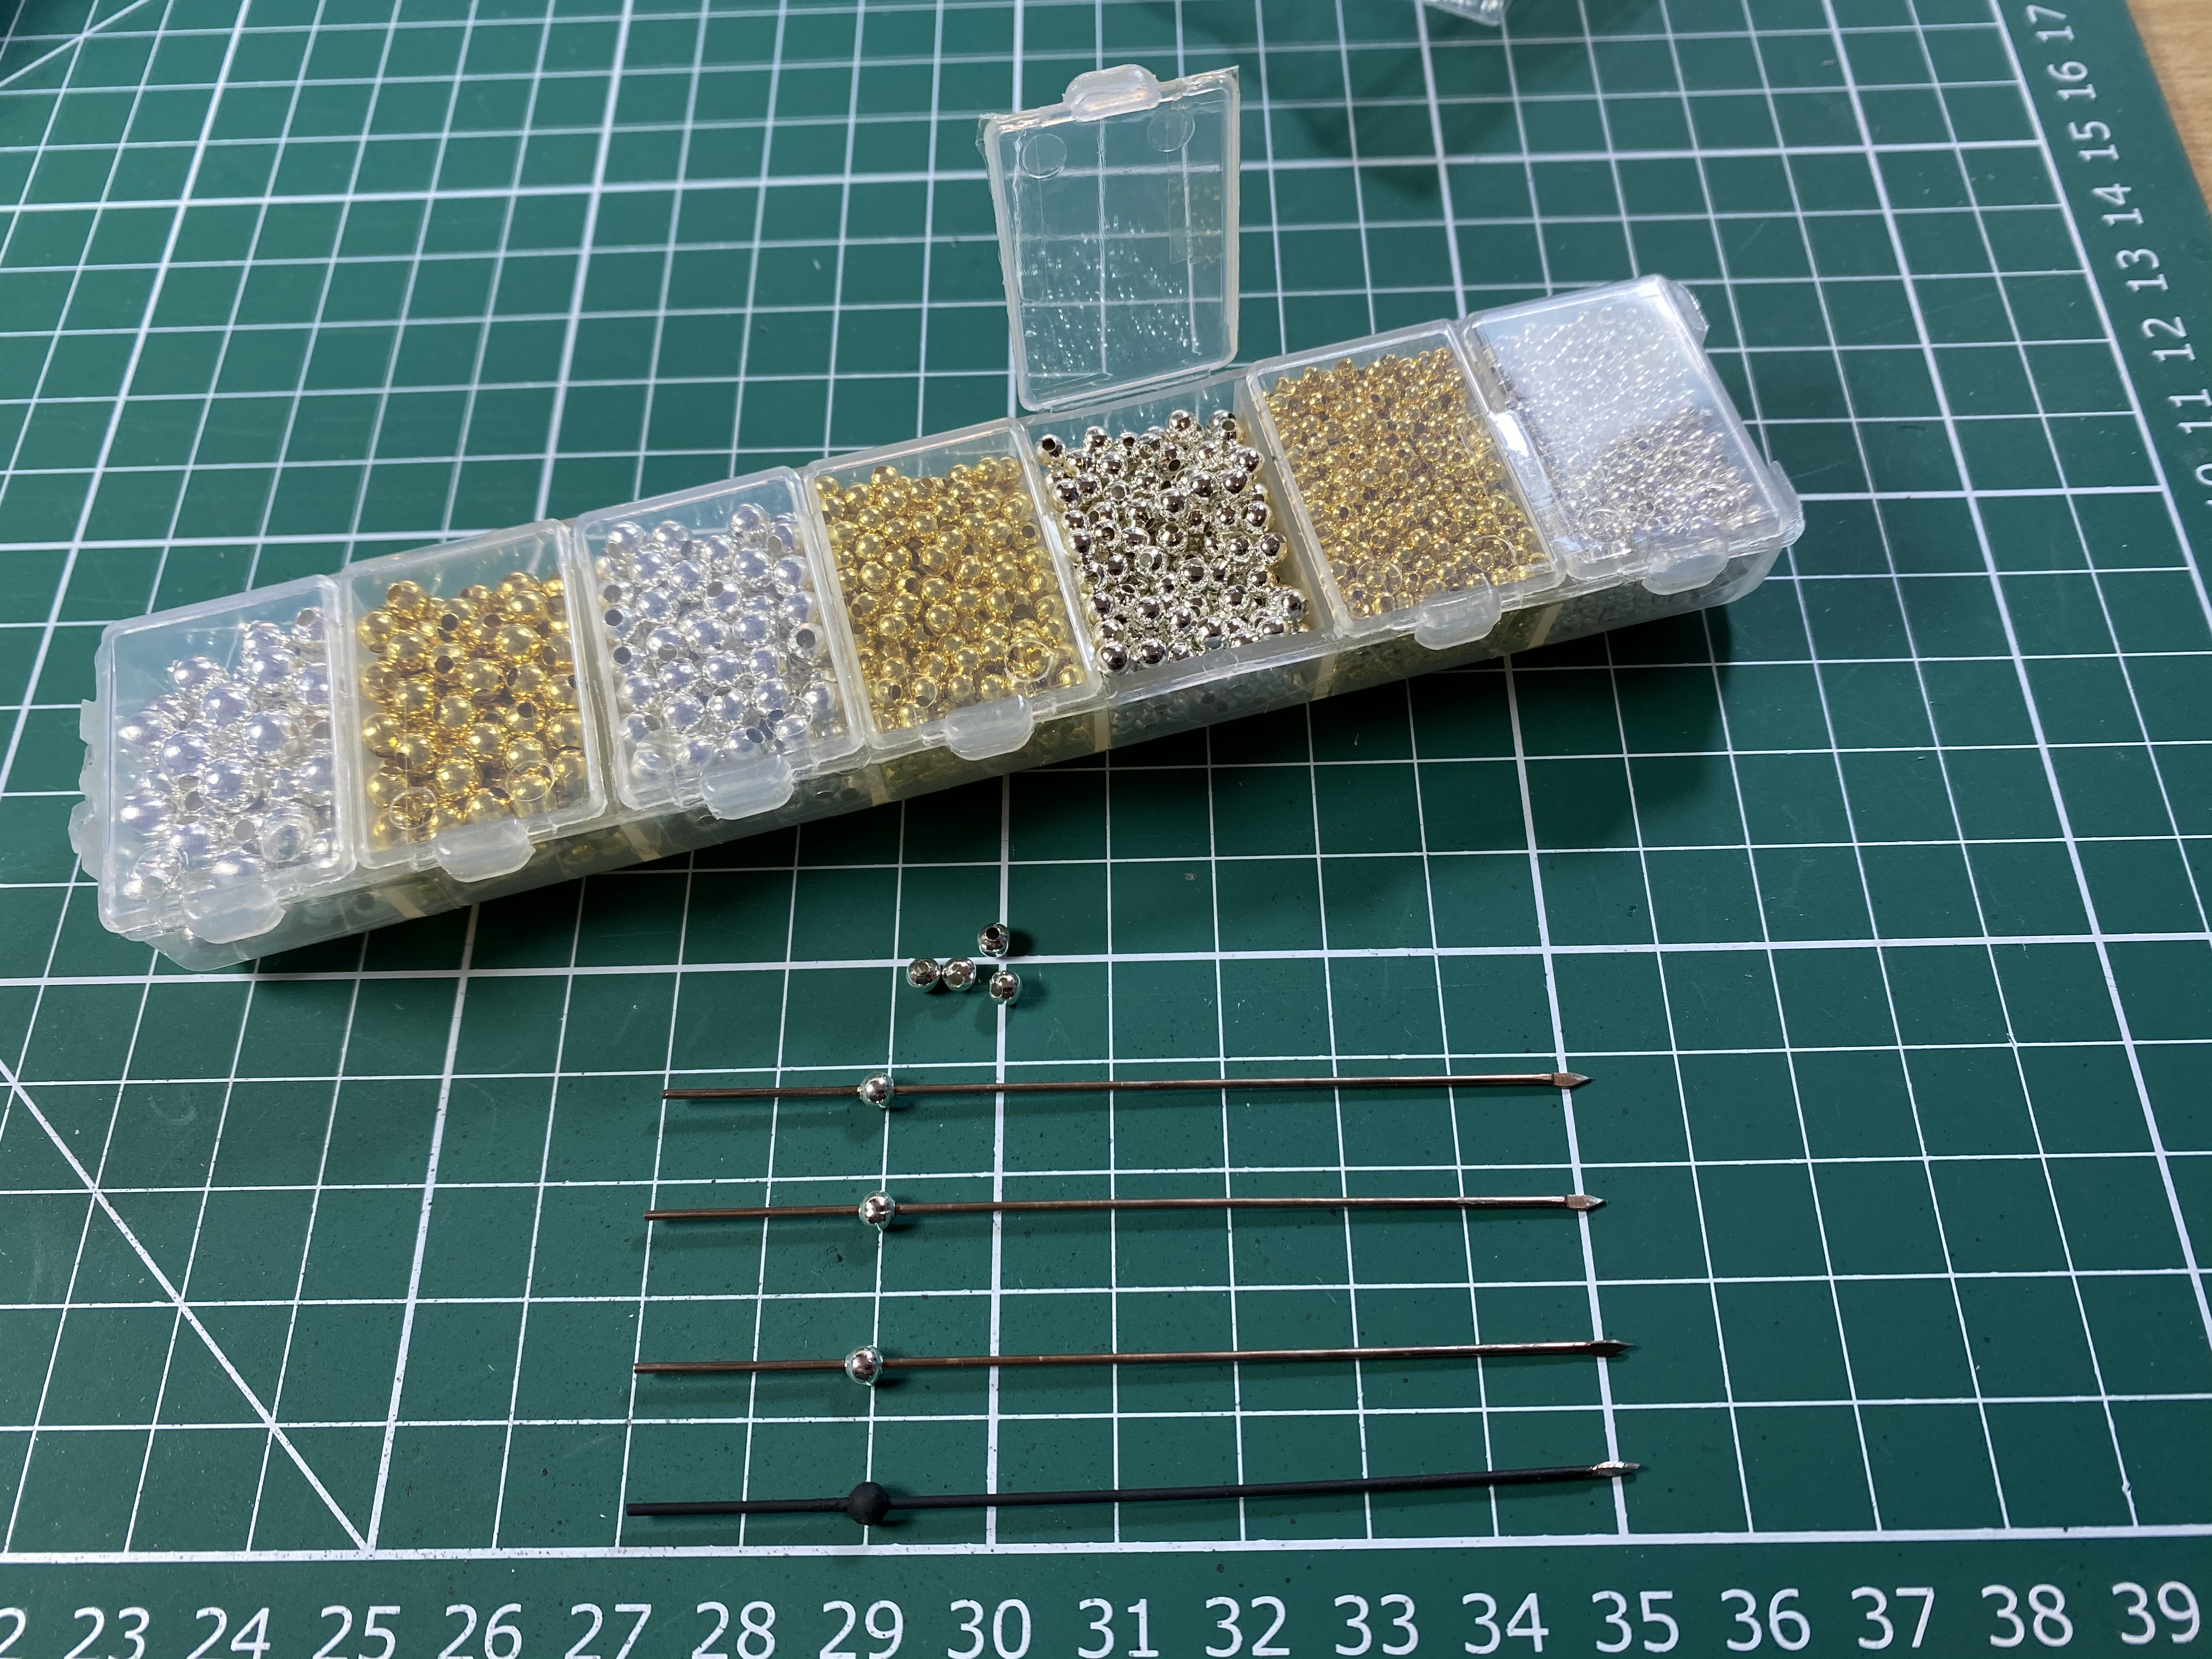 Lances made using 80mm brass spears (from Warlord) and with a small bead added to each. Undercoated with black spray primer.
 With the horse and riders just about ready it was time to move on to the Hussars’ primary weapon, the lance, or “kopi”. These are typically shown as painted red, often with patterns. I decided to keep the lances red, but fairly plain, with just a small detail on the hand guard. (I will try to work up to stripes etc. for future units.) I painted and varnished the lances separately before attaching them to the figures. One of the striking features of the hussars are the brightly coloured, swallow tailed lance pennons. I bought some sets of these from Battle Flag (link). I cut these out with a modelling blade and then glued them on to the lances. I use good ol’ Pritt for my flags.
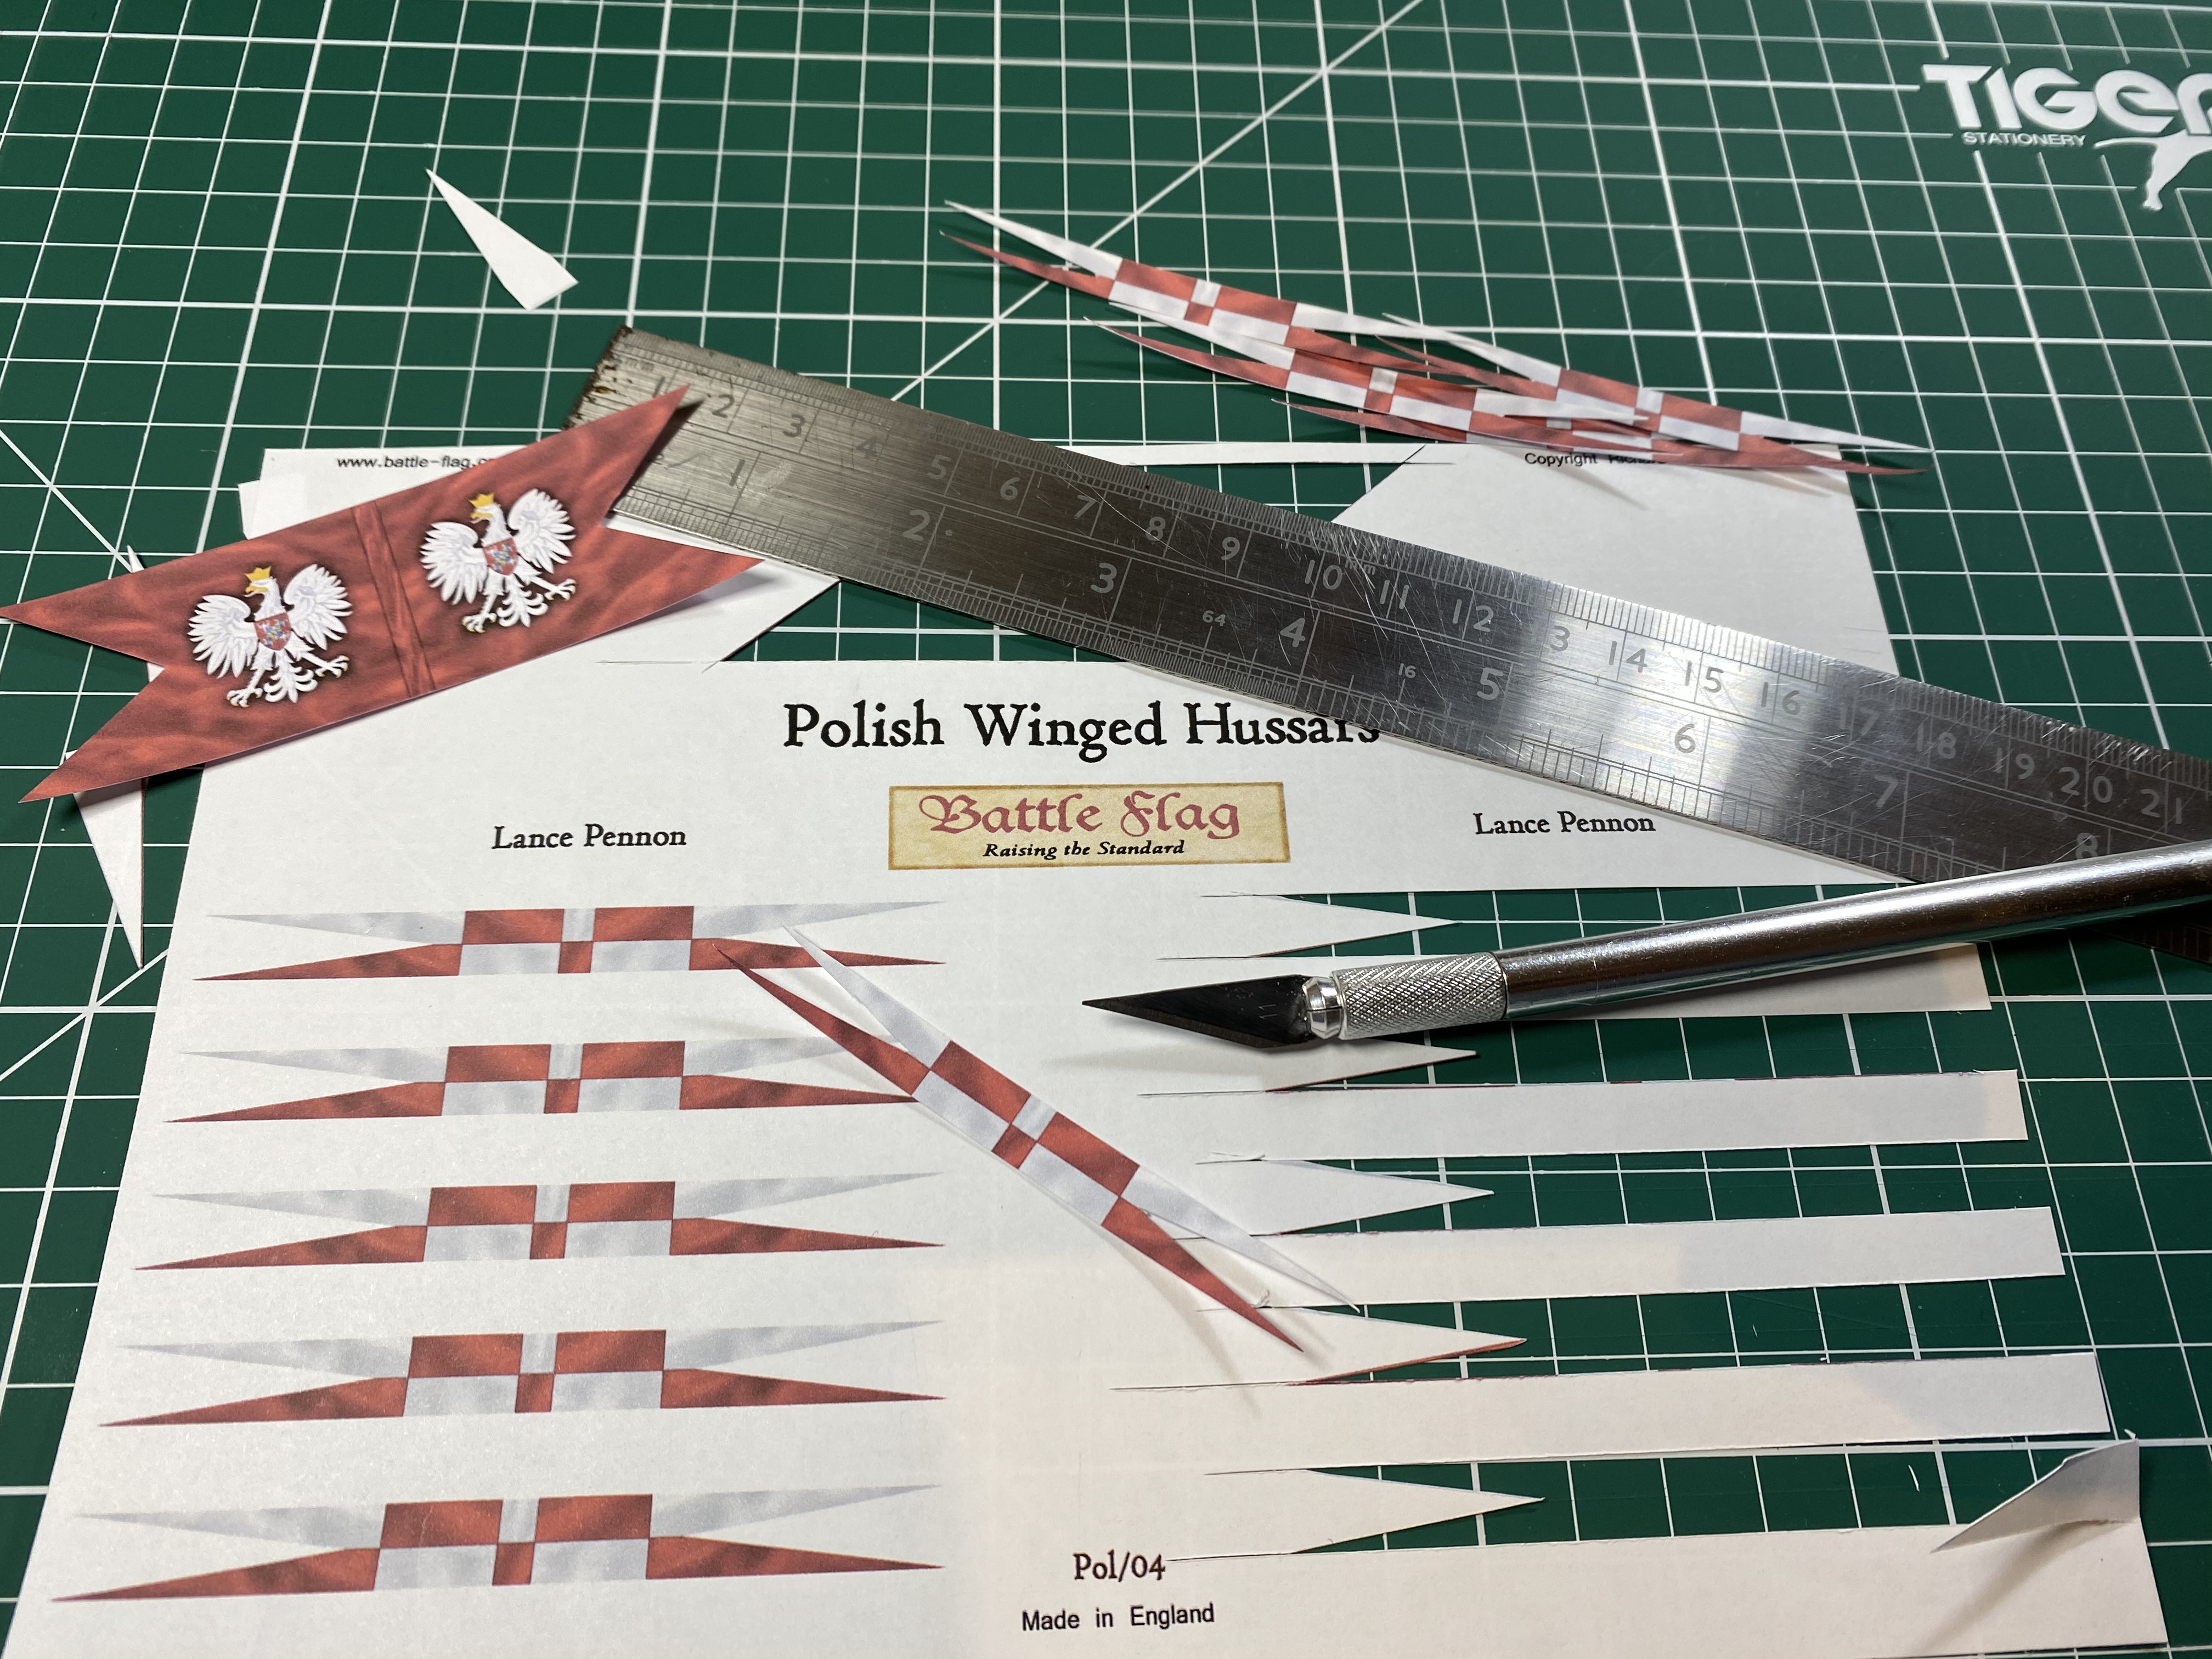 To cut out paper flags I find a sharp blade and a metal ruler are the easiest things to use.
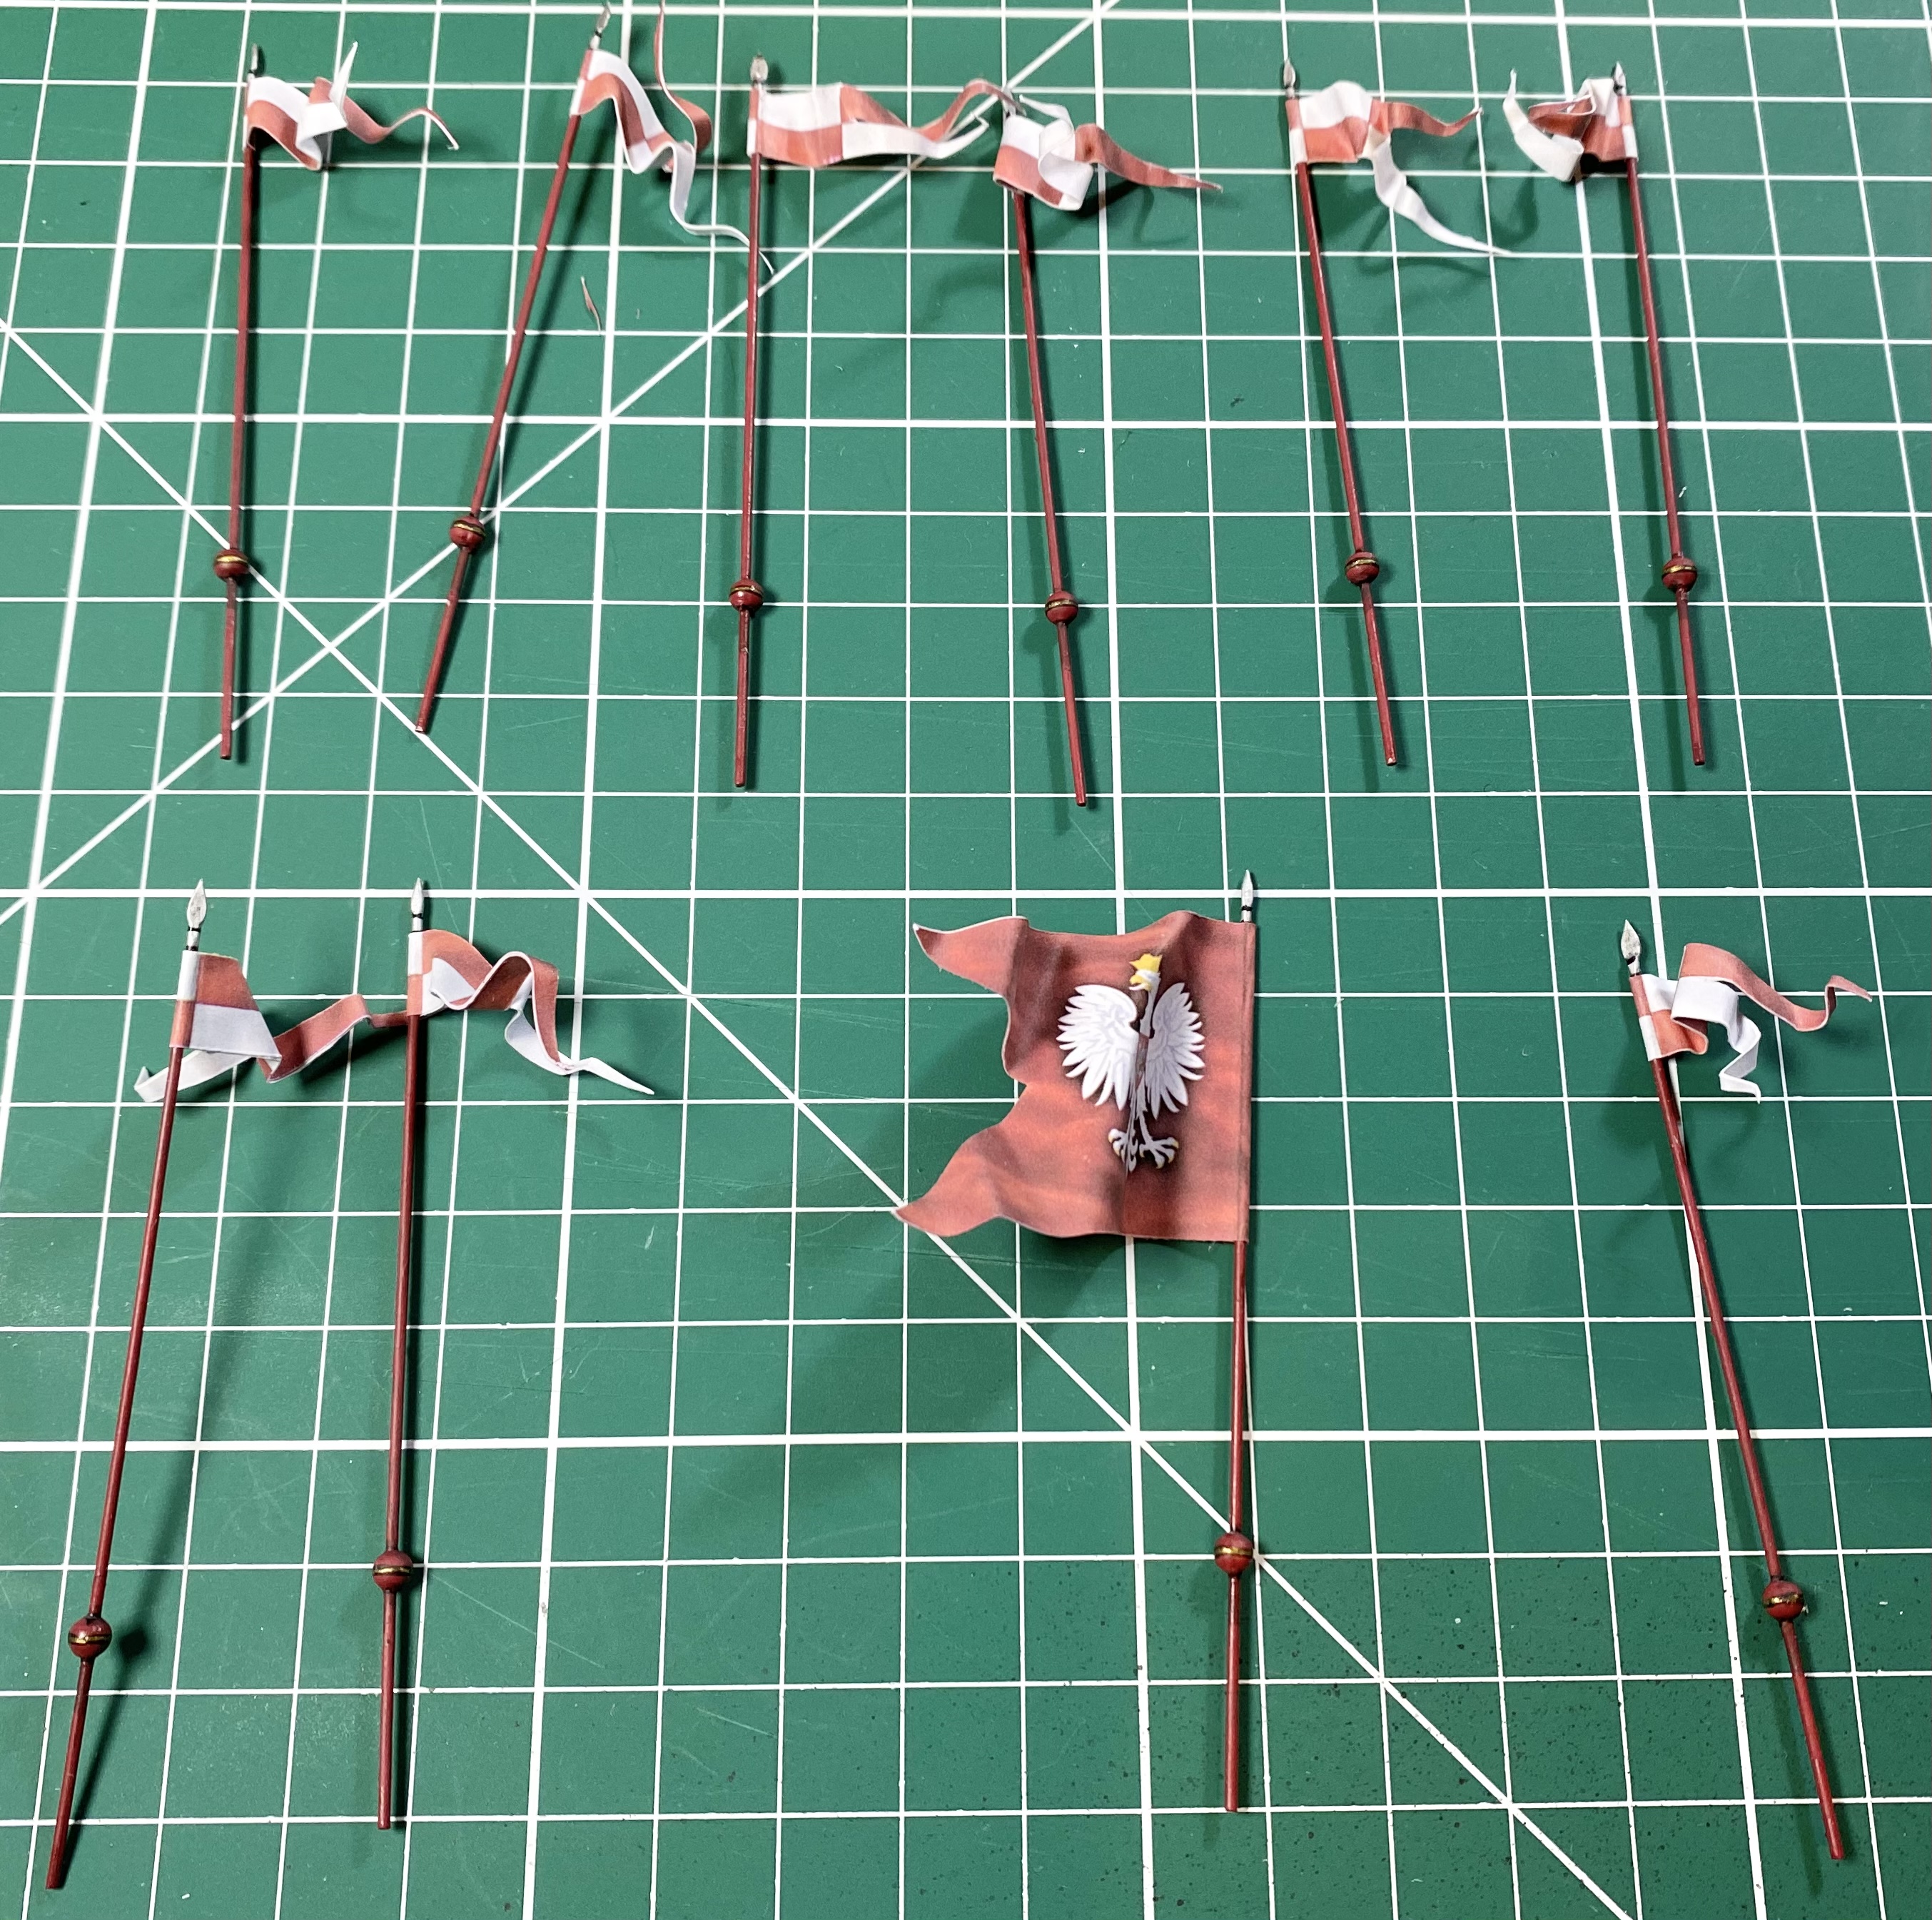 Once the glue has dried then painting the edges is very important!
With all of the components ready it was time for the final steps. Glue the riders on to the mounts, matt varnish over the complete model, and then gluing the lances on to the riders. It was great to finally add the lances; the figures seemed to come to life with the lances in their hand
 Ready for basing - a hussar mounted on his horse with lance
Animal Print
One item on the figures that was a ‘first’ for me was the animal pelts. These were very popular for the wealthier Hussars, and leopard skins seem to have been most popular. It was not unusual to make fake leopard skins by adding spots to pelts from other animals. I had never painted leopard skins before and so I resorted to searching YouTube for a suitable tutorial. I found one (https://youtu.be/NjcvsaKIhWU) which was nice and straight forward, and I was quite pleased with the result. Here are the steps I used. (All colours are from Vallejo Model Color range.)
 First 131 Orange Brown as a base, leaving a gap at the edge.
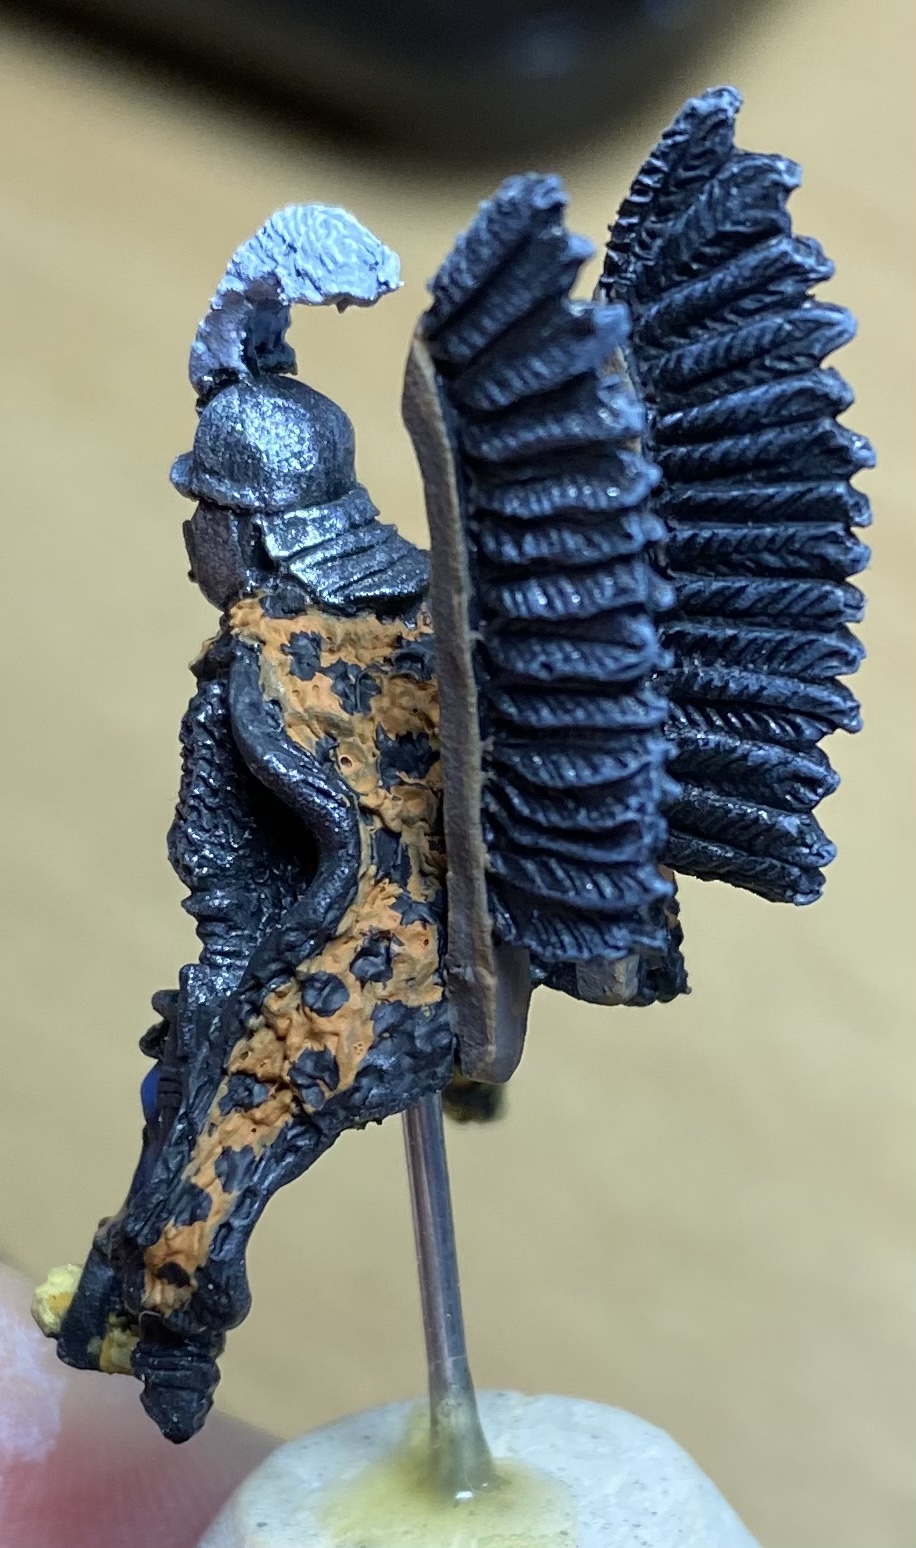 Random ‘splodges’ added in 169 Black.
 Base coat highlighted with 121 Yellow Ochre.
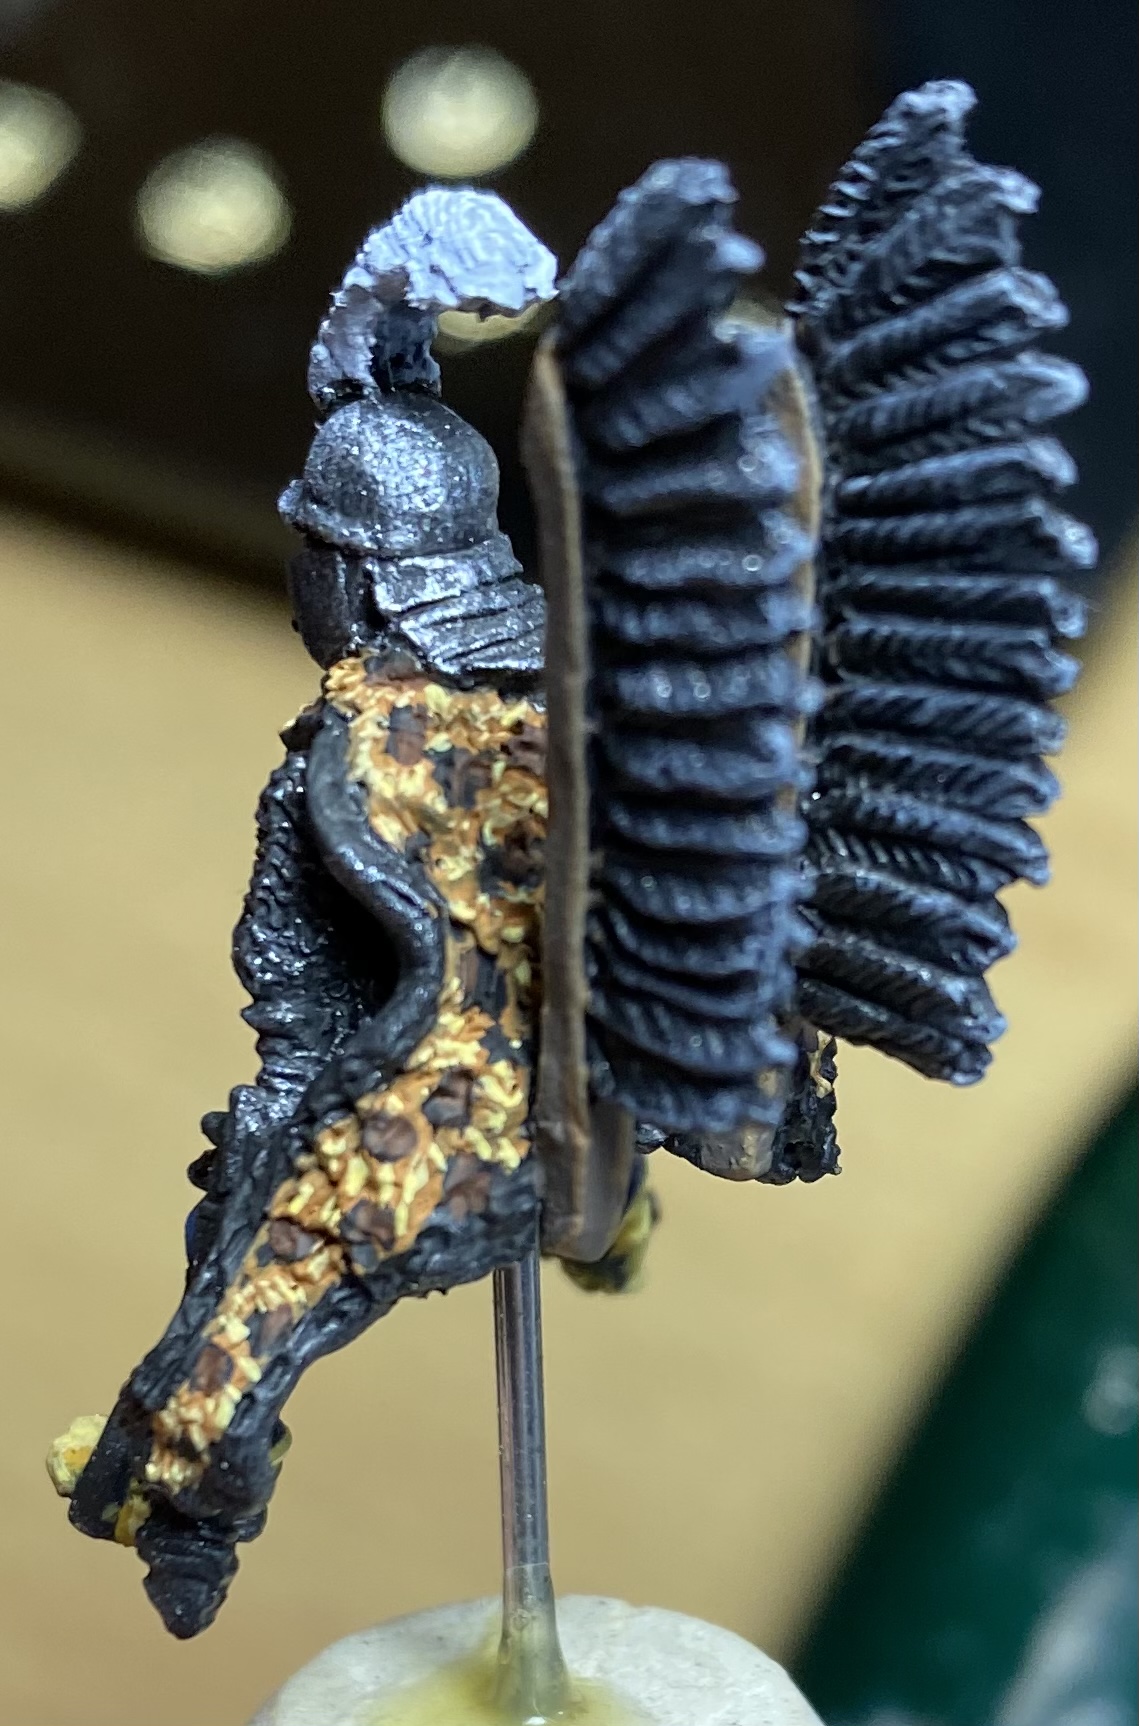 Splodges highlighted with 140 Flat Brown.
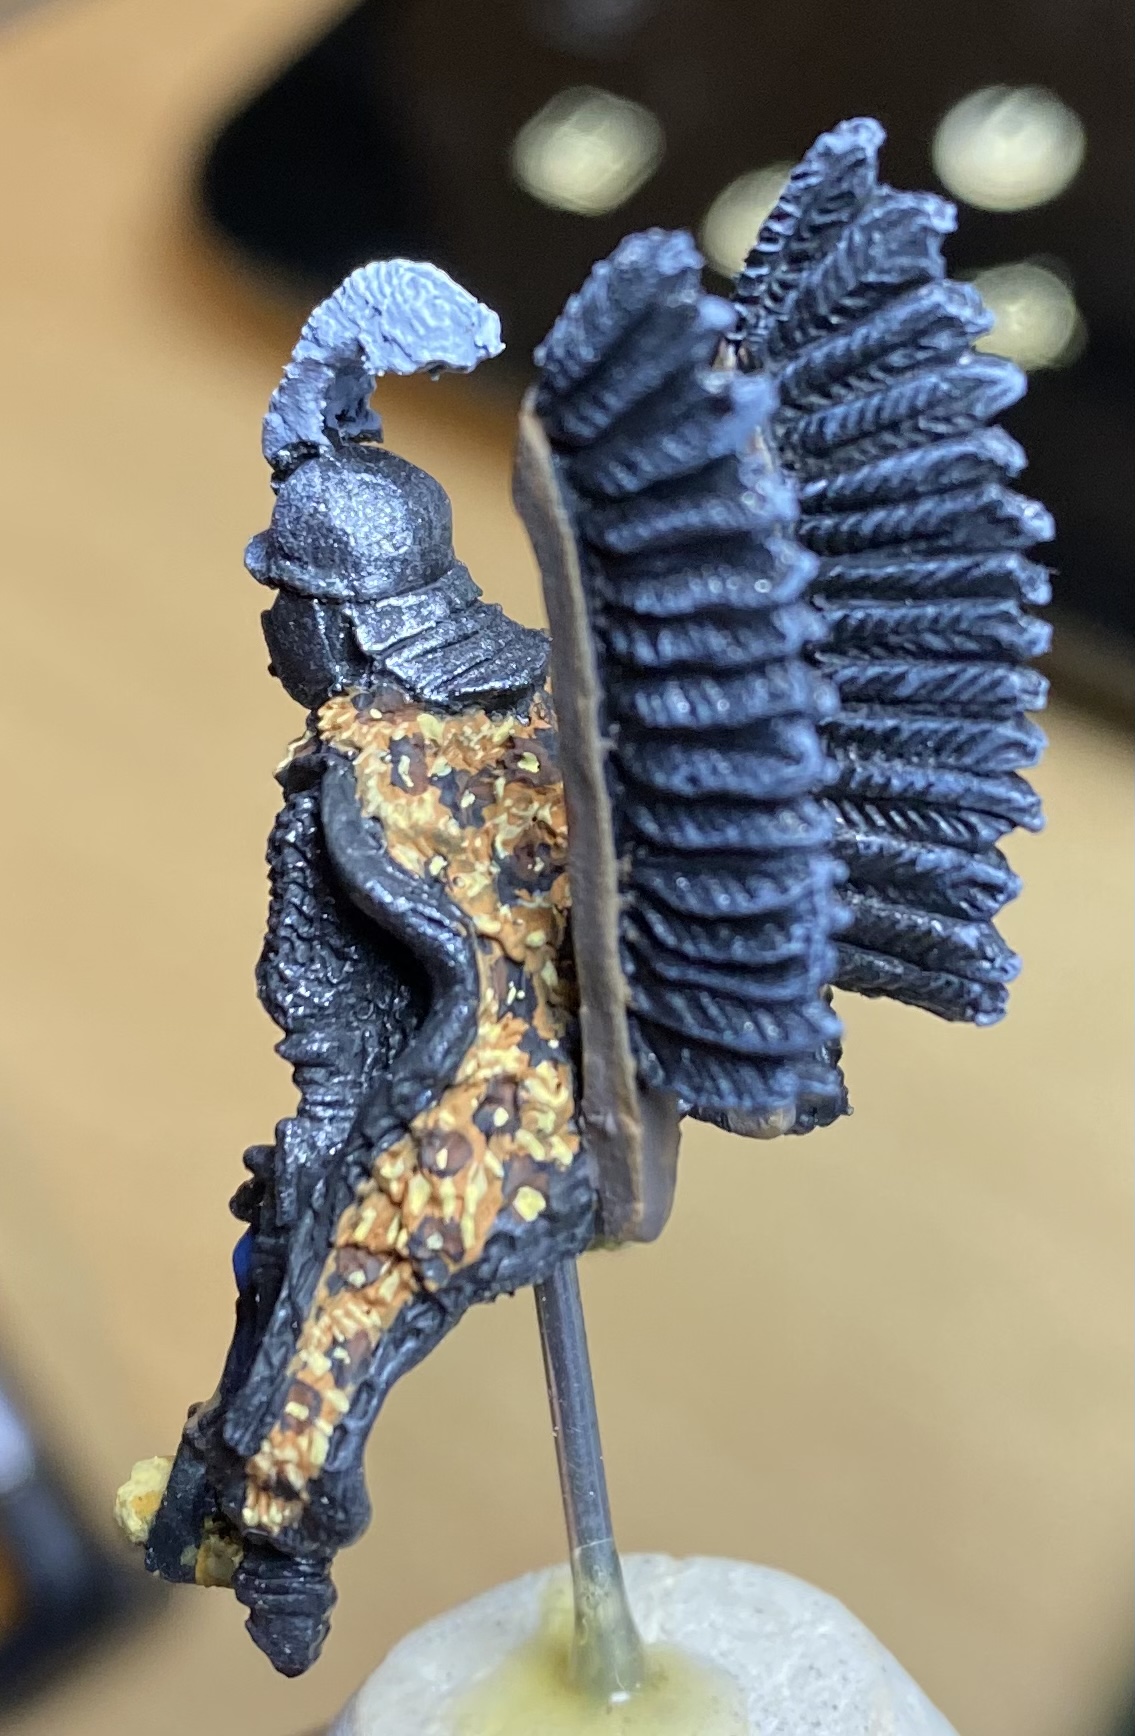 Splodges further highlighted with 121 Yellow Ochre
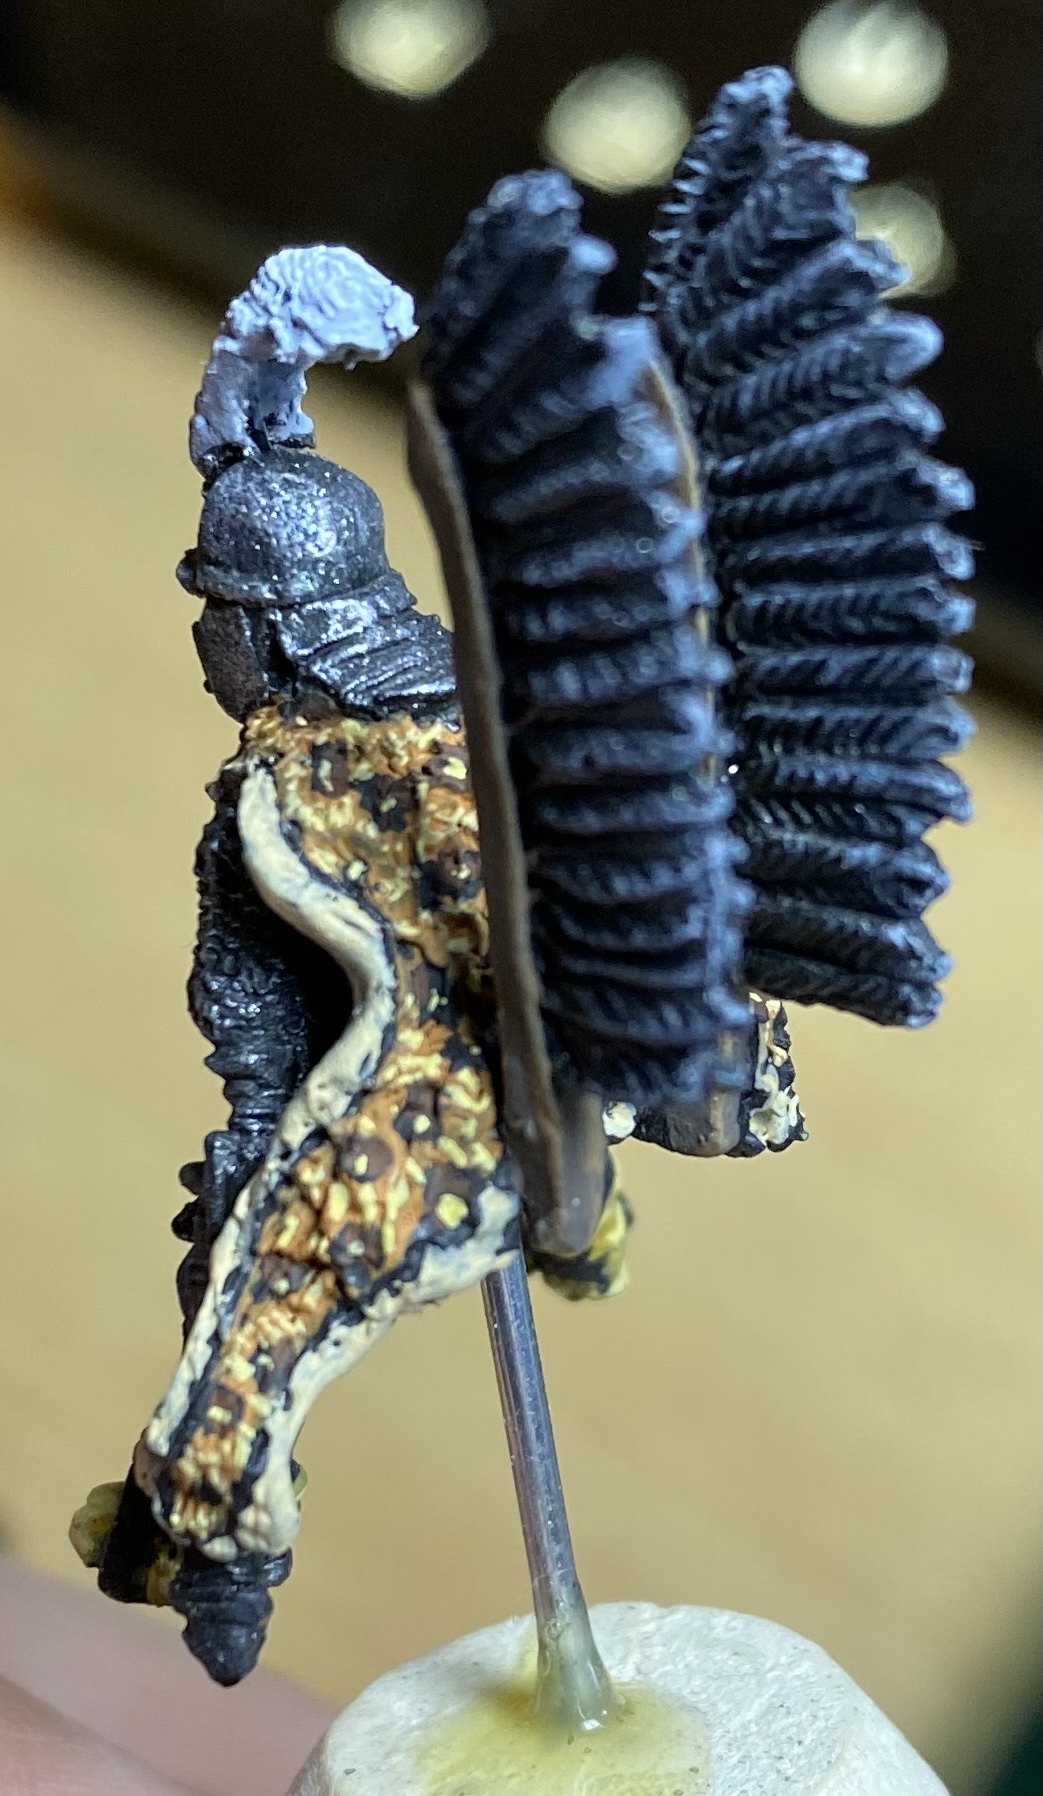 Edges painted with 124 Iraqi Sand.
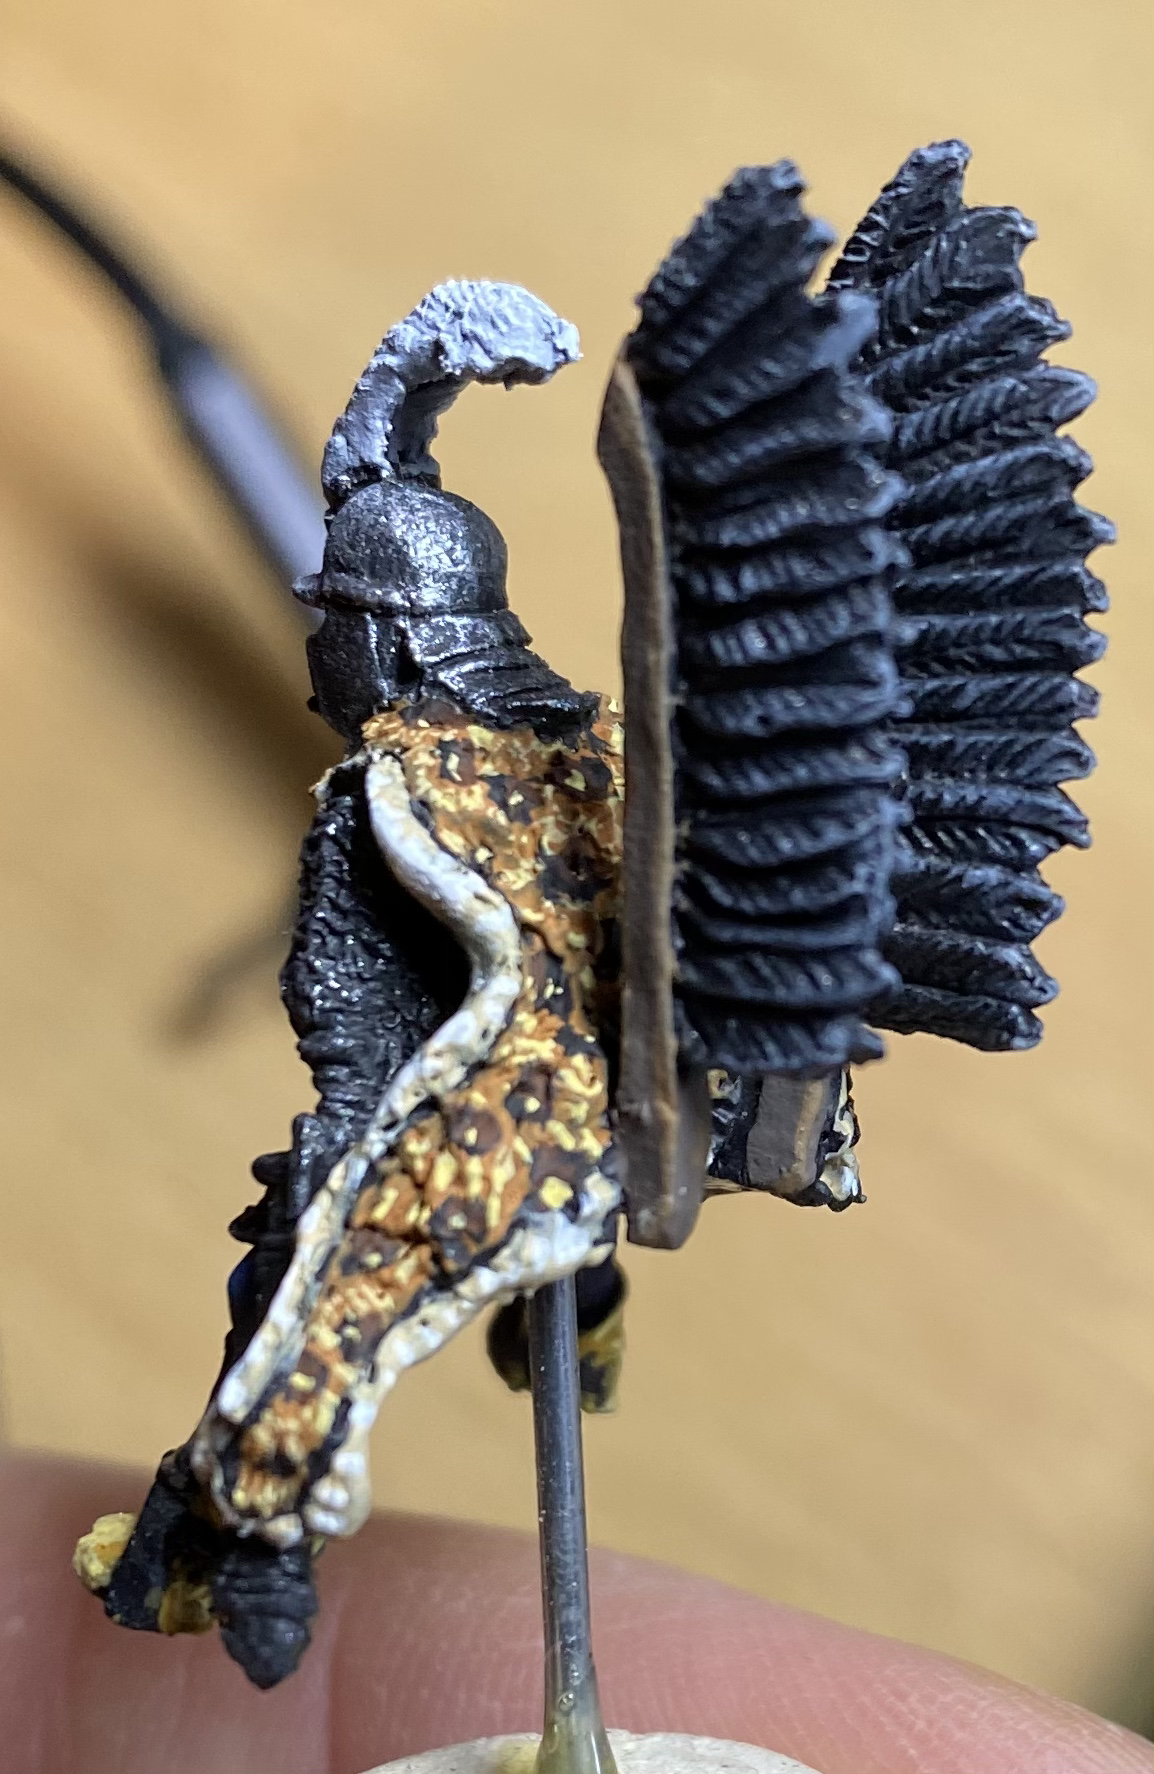 Edges highlighted with 5 Ivory and 4 Off White.
I was quite pleased with the result. At a wargaming, arm’s length, distance it looks like a good approximation of a leopard skin, although I don’t think it would fool a real leopard. On the basis that many of the cloaks worn by the Hussars were ‘fake’, this might actually be a point in my favour!
Any colour as long as it’s black
I also like to use a black undercoat on 17th century cavalrymen as I find it a good base for armour, and it also helps hide mistakes / missed bits! In my previous TYW armies I kept armour very dark as it was typical in the West to blacken armour to protect it from rust. I made the Hussars armour brighter as this seems to have been more typical for them to not blacken armour (I guess they had more people available to shine their armour!). For my first unit I chose several different shades of red for the Hussars’ clothing and cloaks, to make them look part of the same unit, without giving them a uniform. Red was considered a higher status colour, and so popular with the noble Hussar companions. Yellow boots or shoes were also a must-have fashion accessory and so I used a Yellow Ochre for these on the figures which was a good match for the pictures in the Osprey books.
 Foundry and TAG riders with armour and flesh colours done. Numbering is to match riders to mounts.