Old Skool Goodies, Baddies and Whatever


Recommendations: 305
About the Project
Finally getting round to painting the Lead/Plastic pile of shame! Mostly old school minis from days gone by, some much more recent than others
Related Genre: General
This Project is Active
Coming Soon!
Just a few hints of what is to come in future! I did say my collection goes back a good while!
Work has started on the next batch …… but what will it be?!!!!

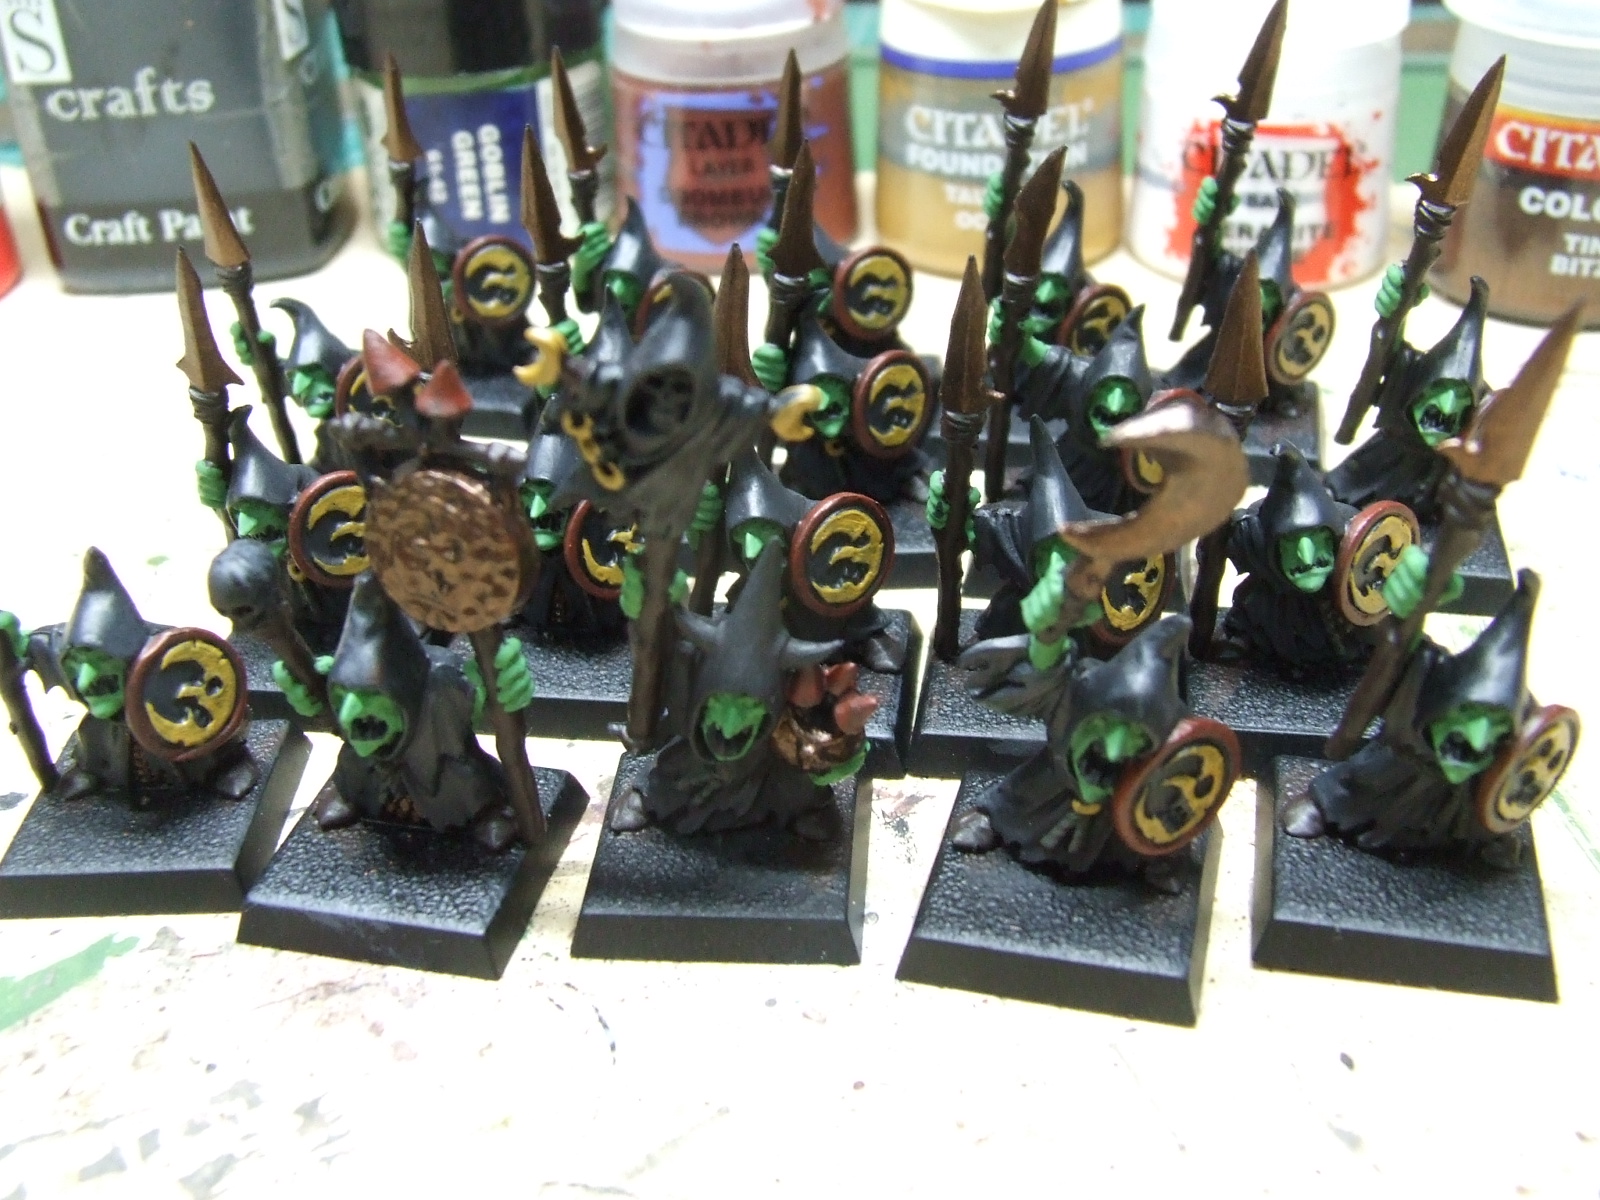
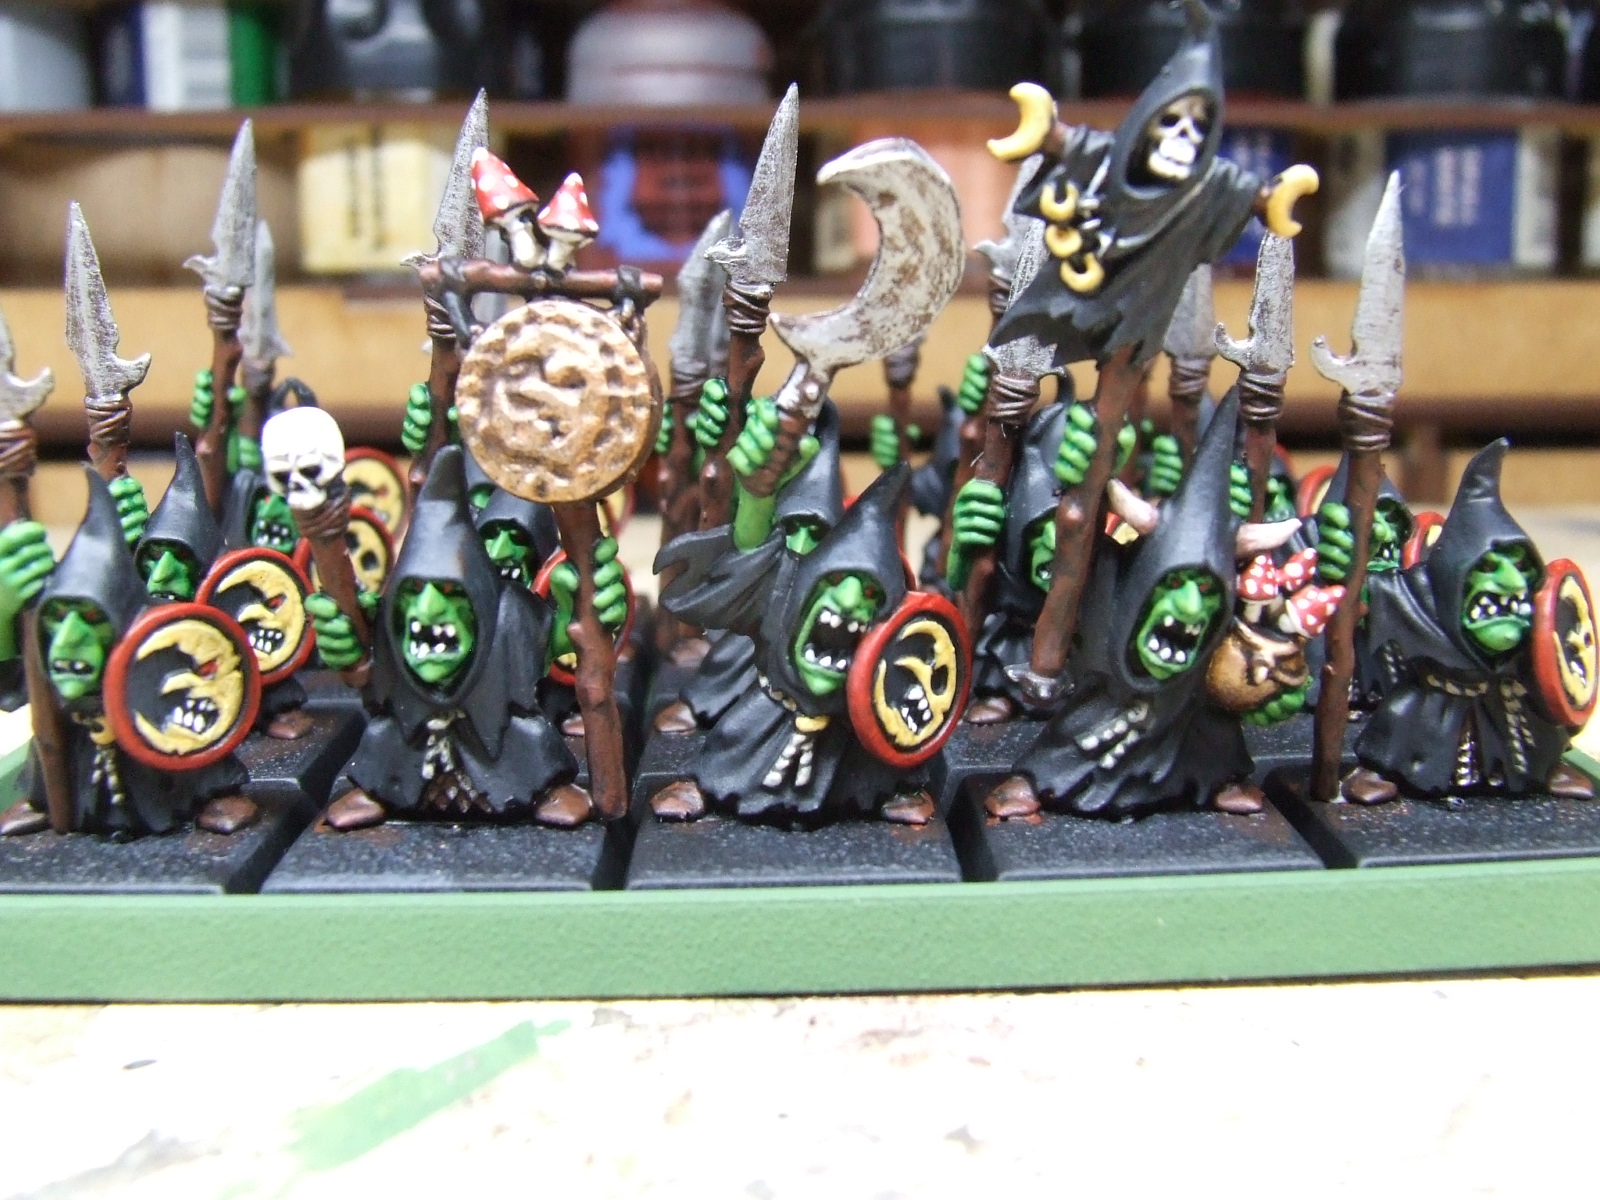
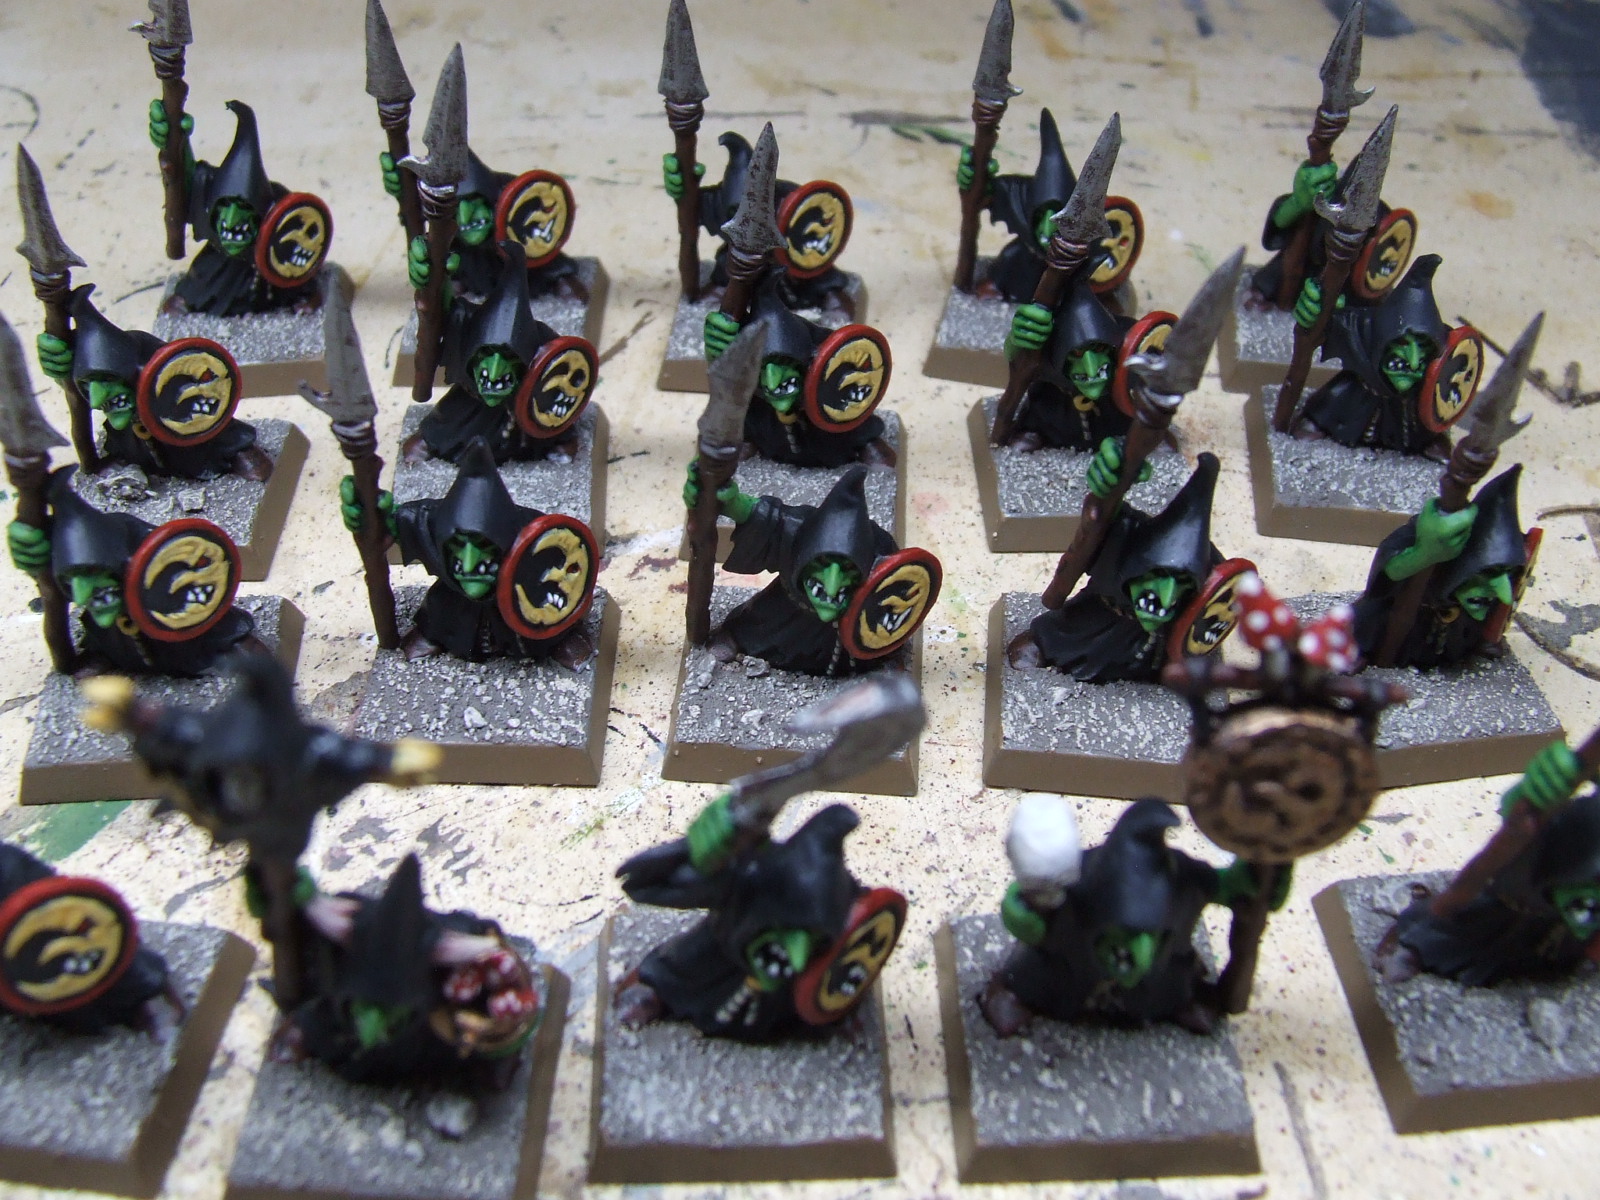
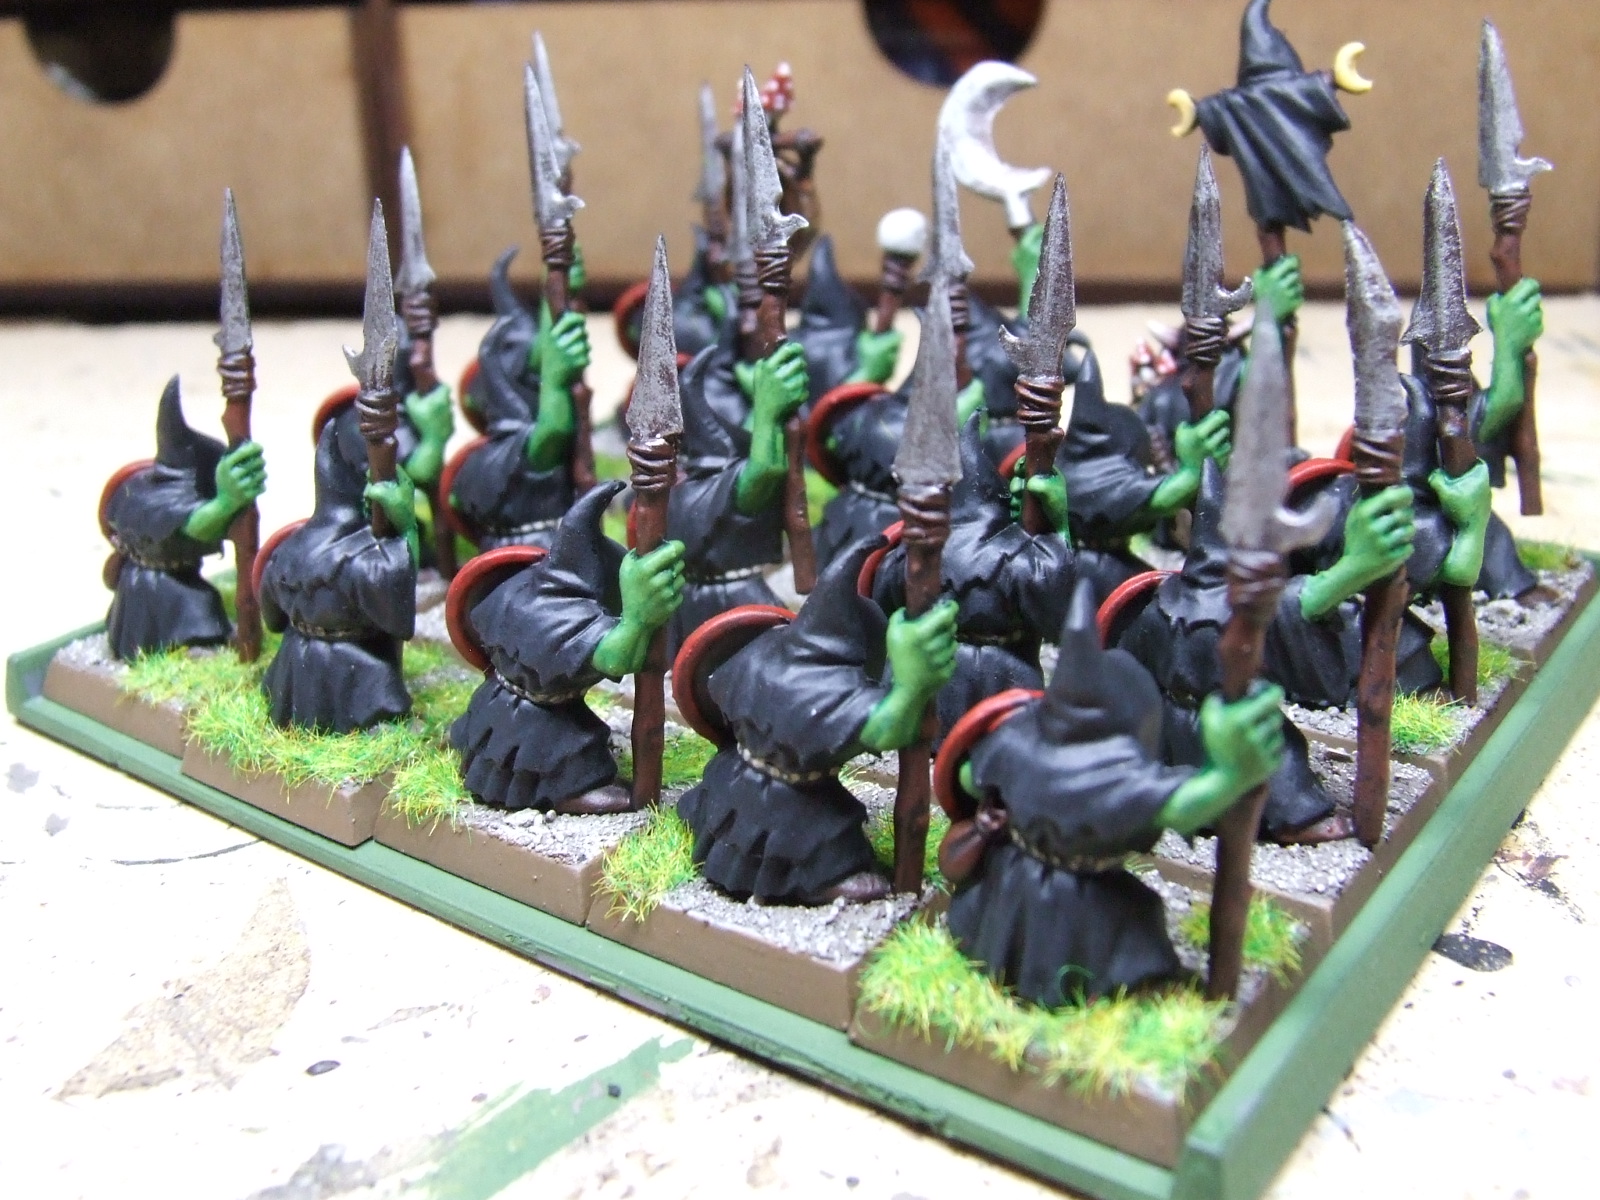
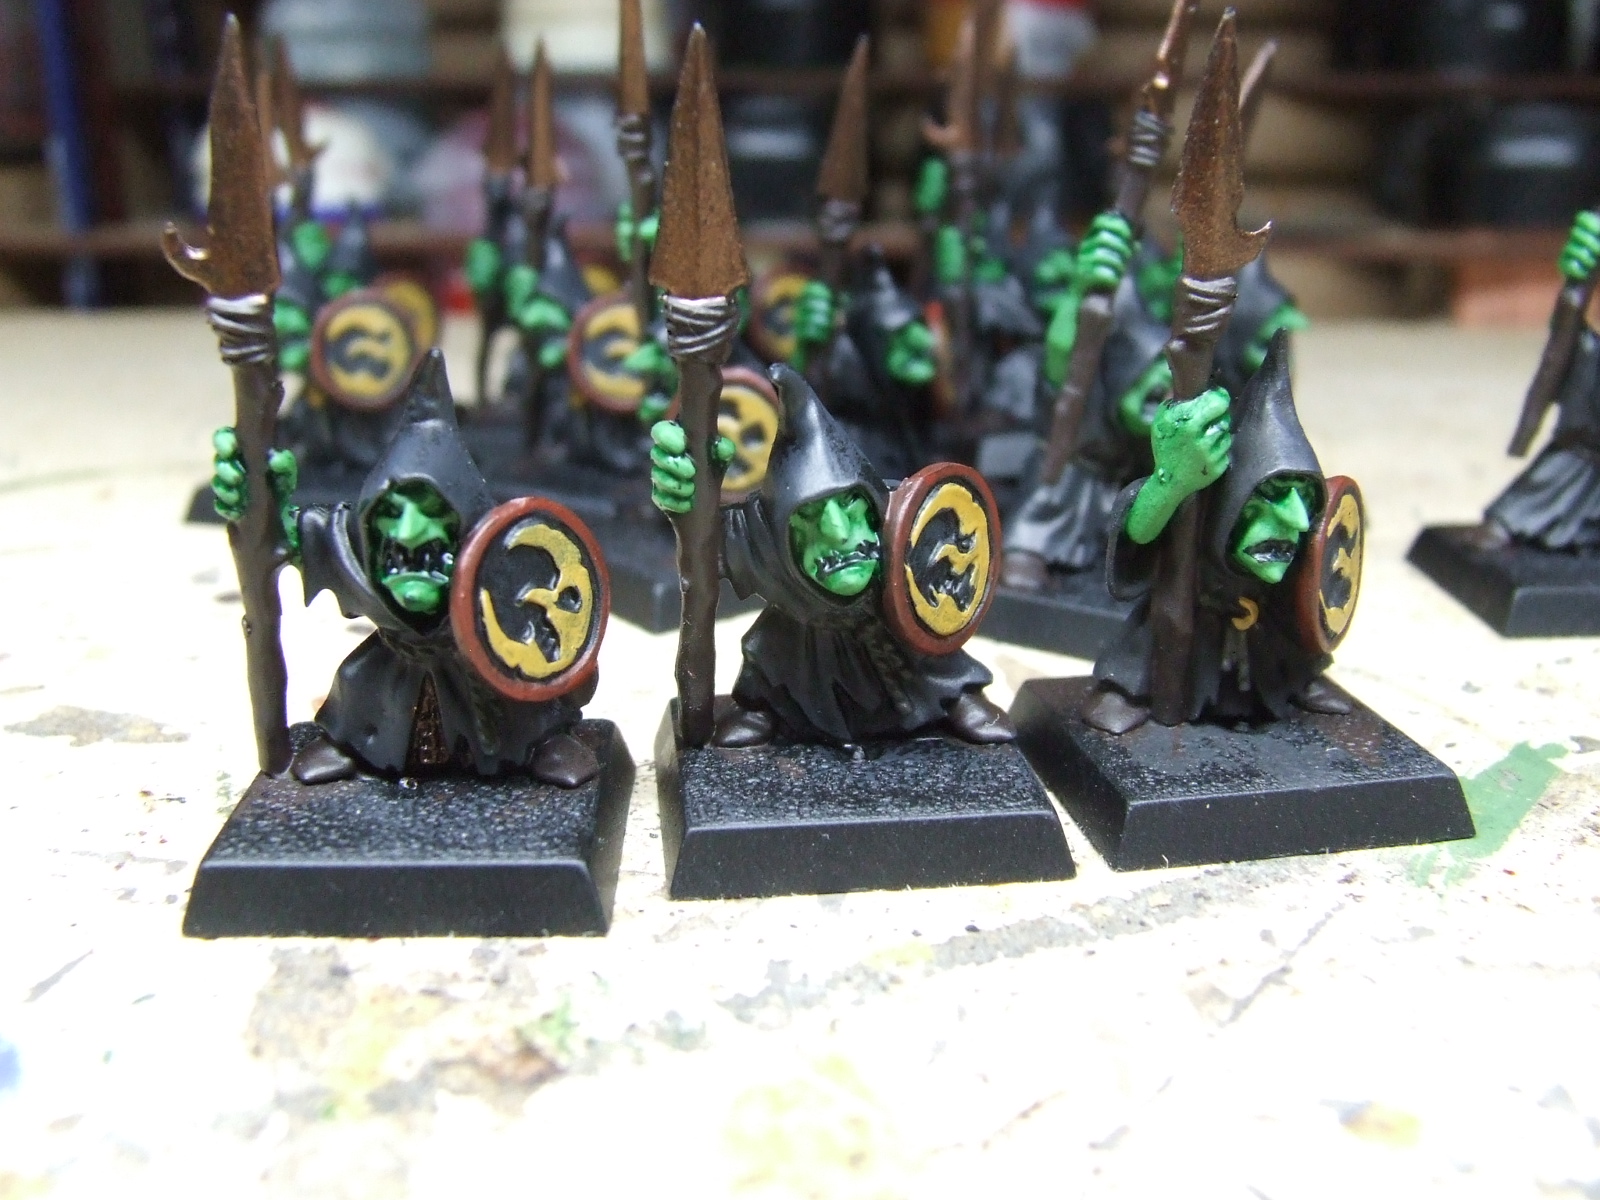
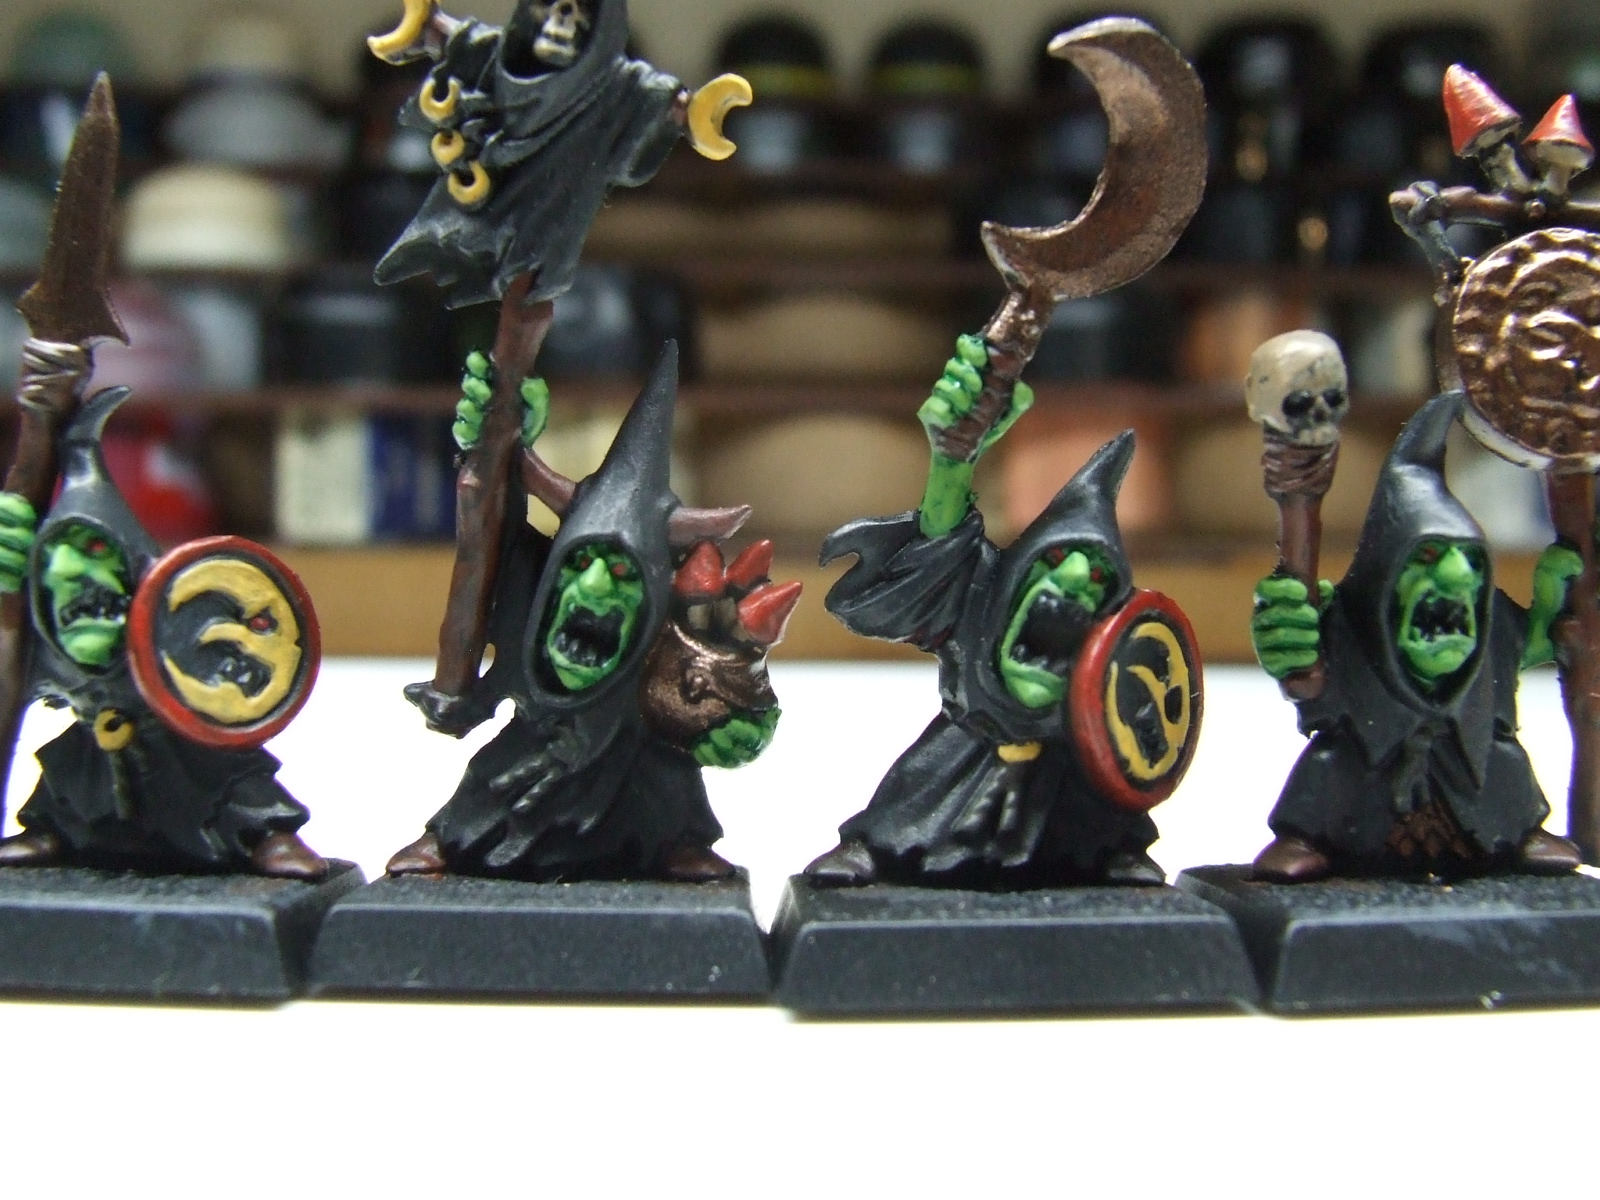
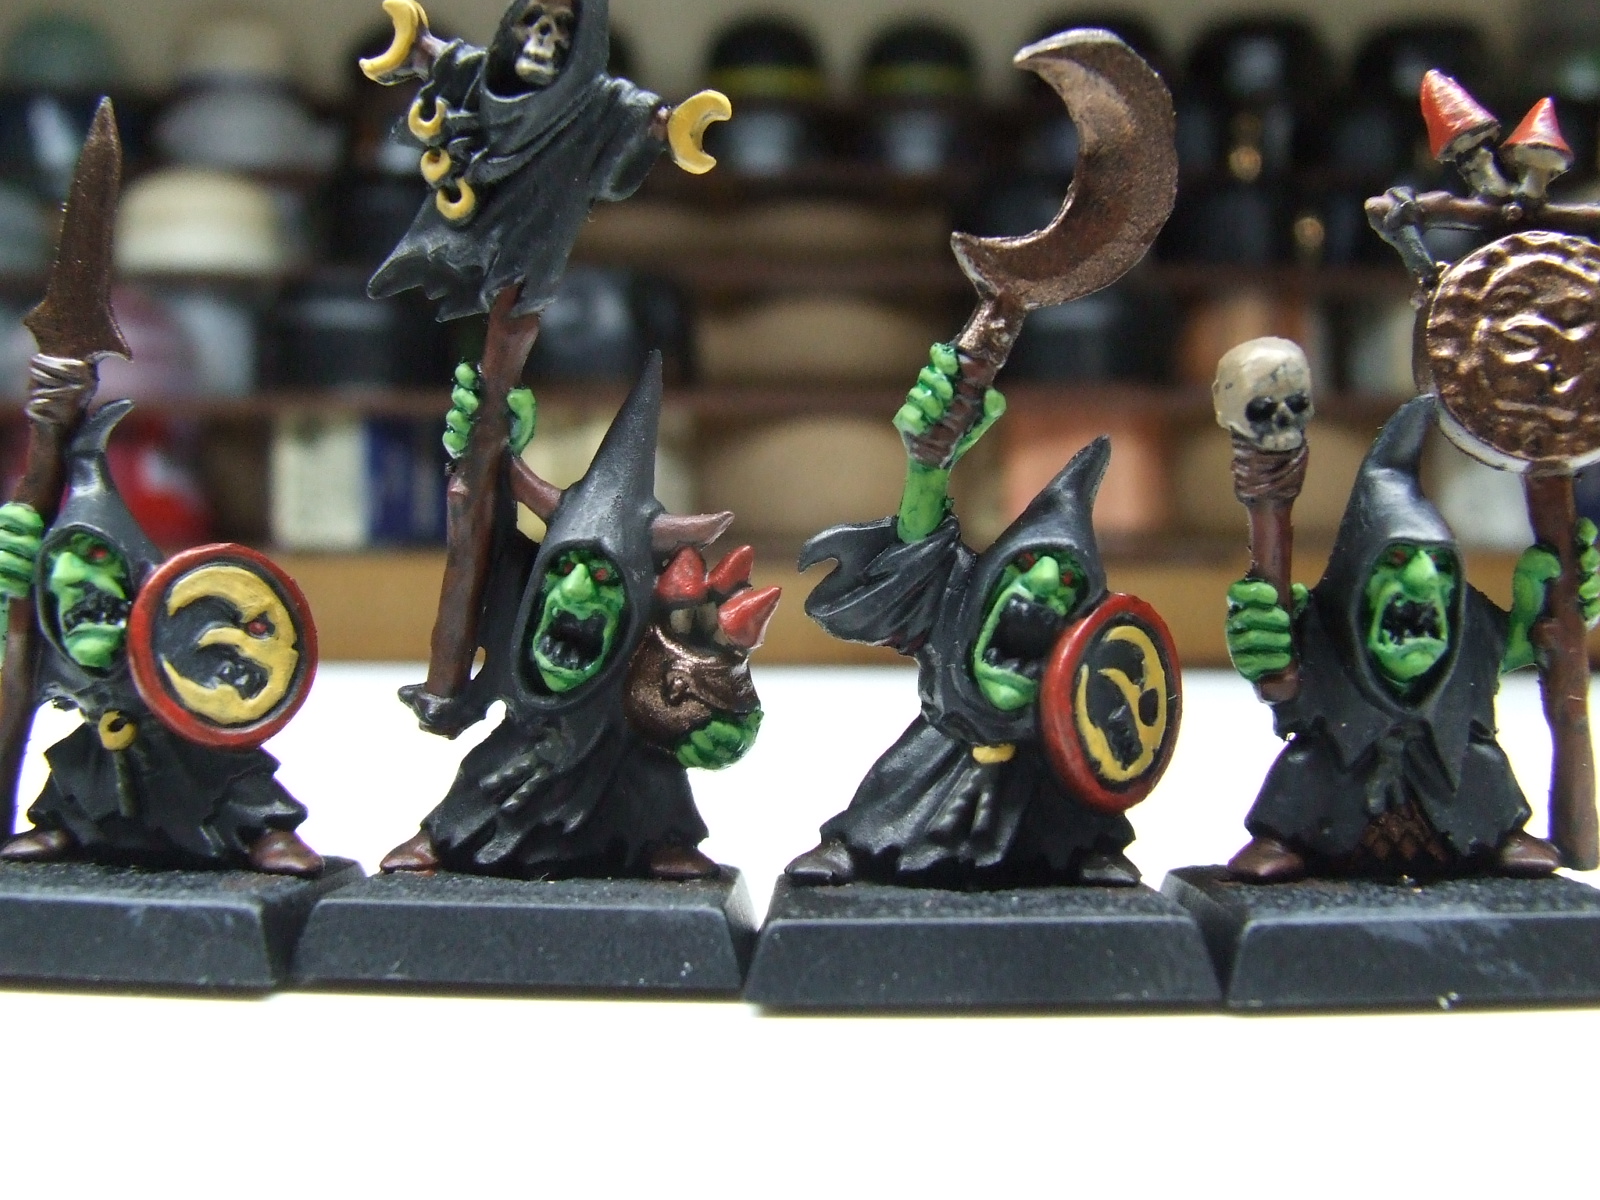
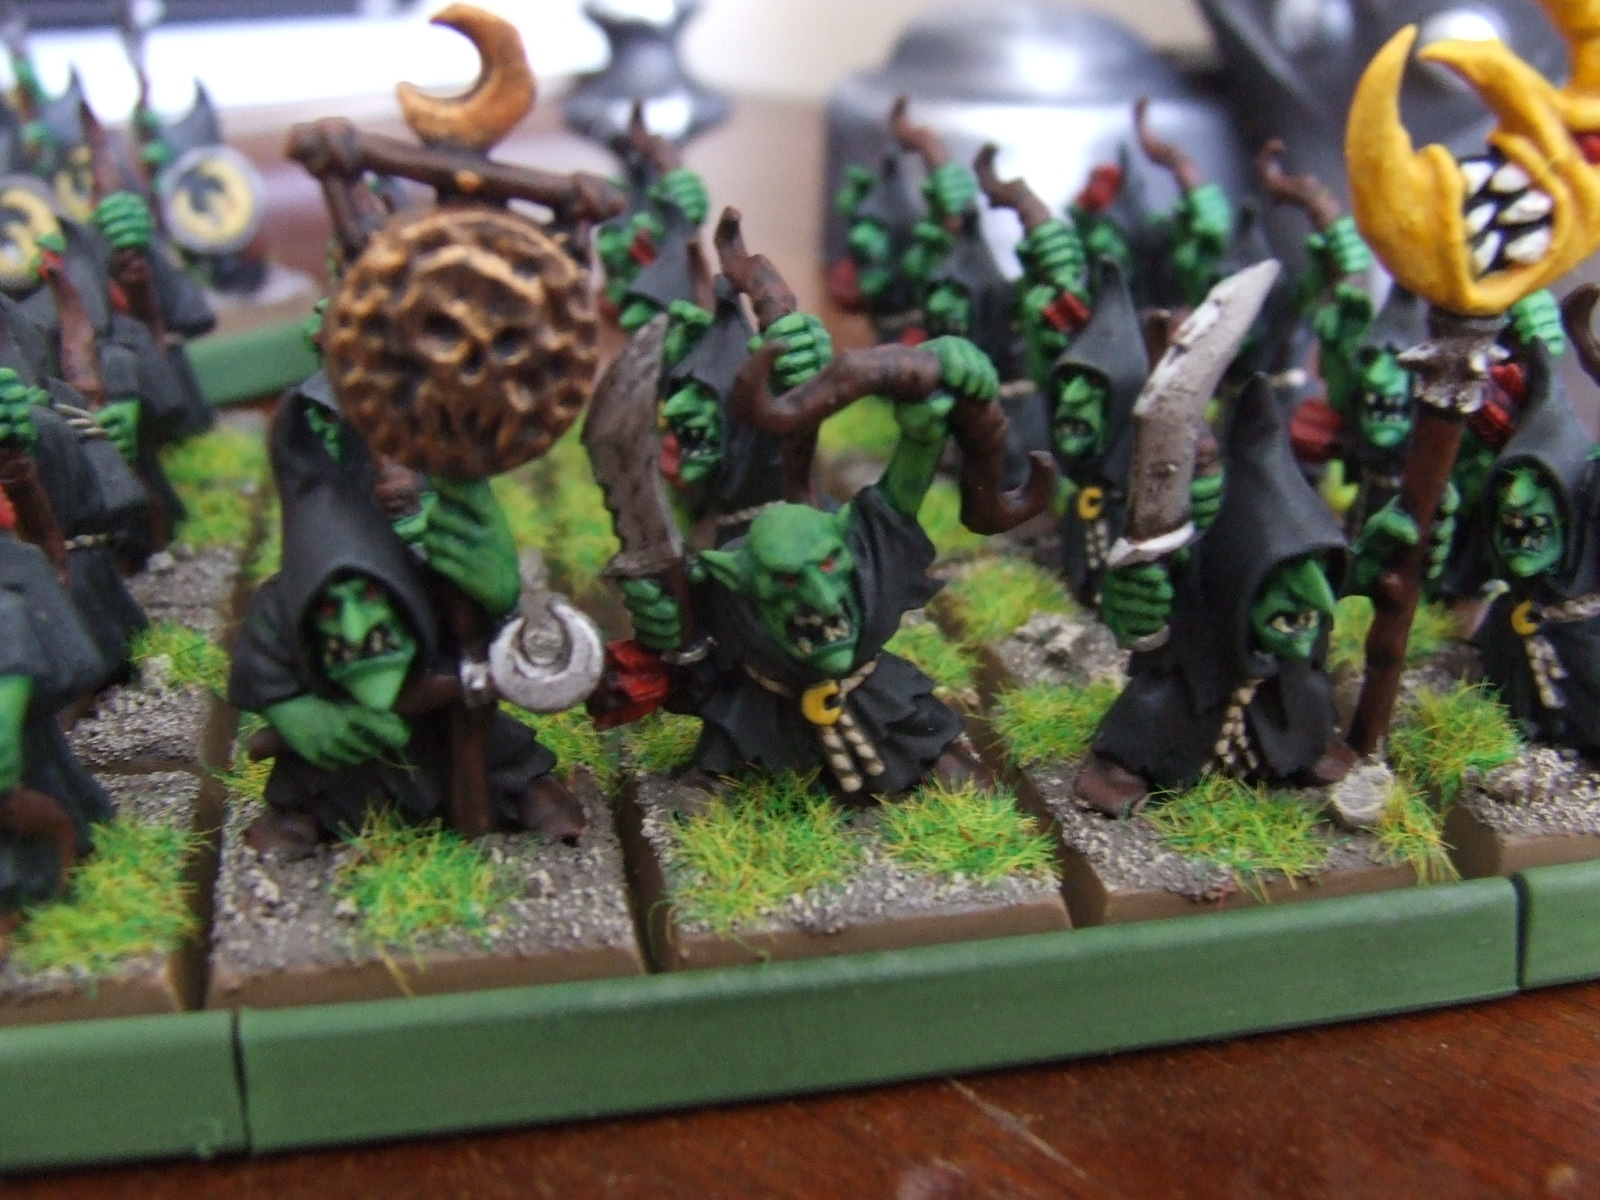
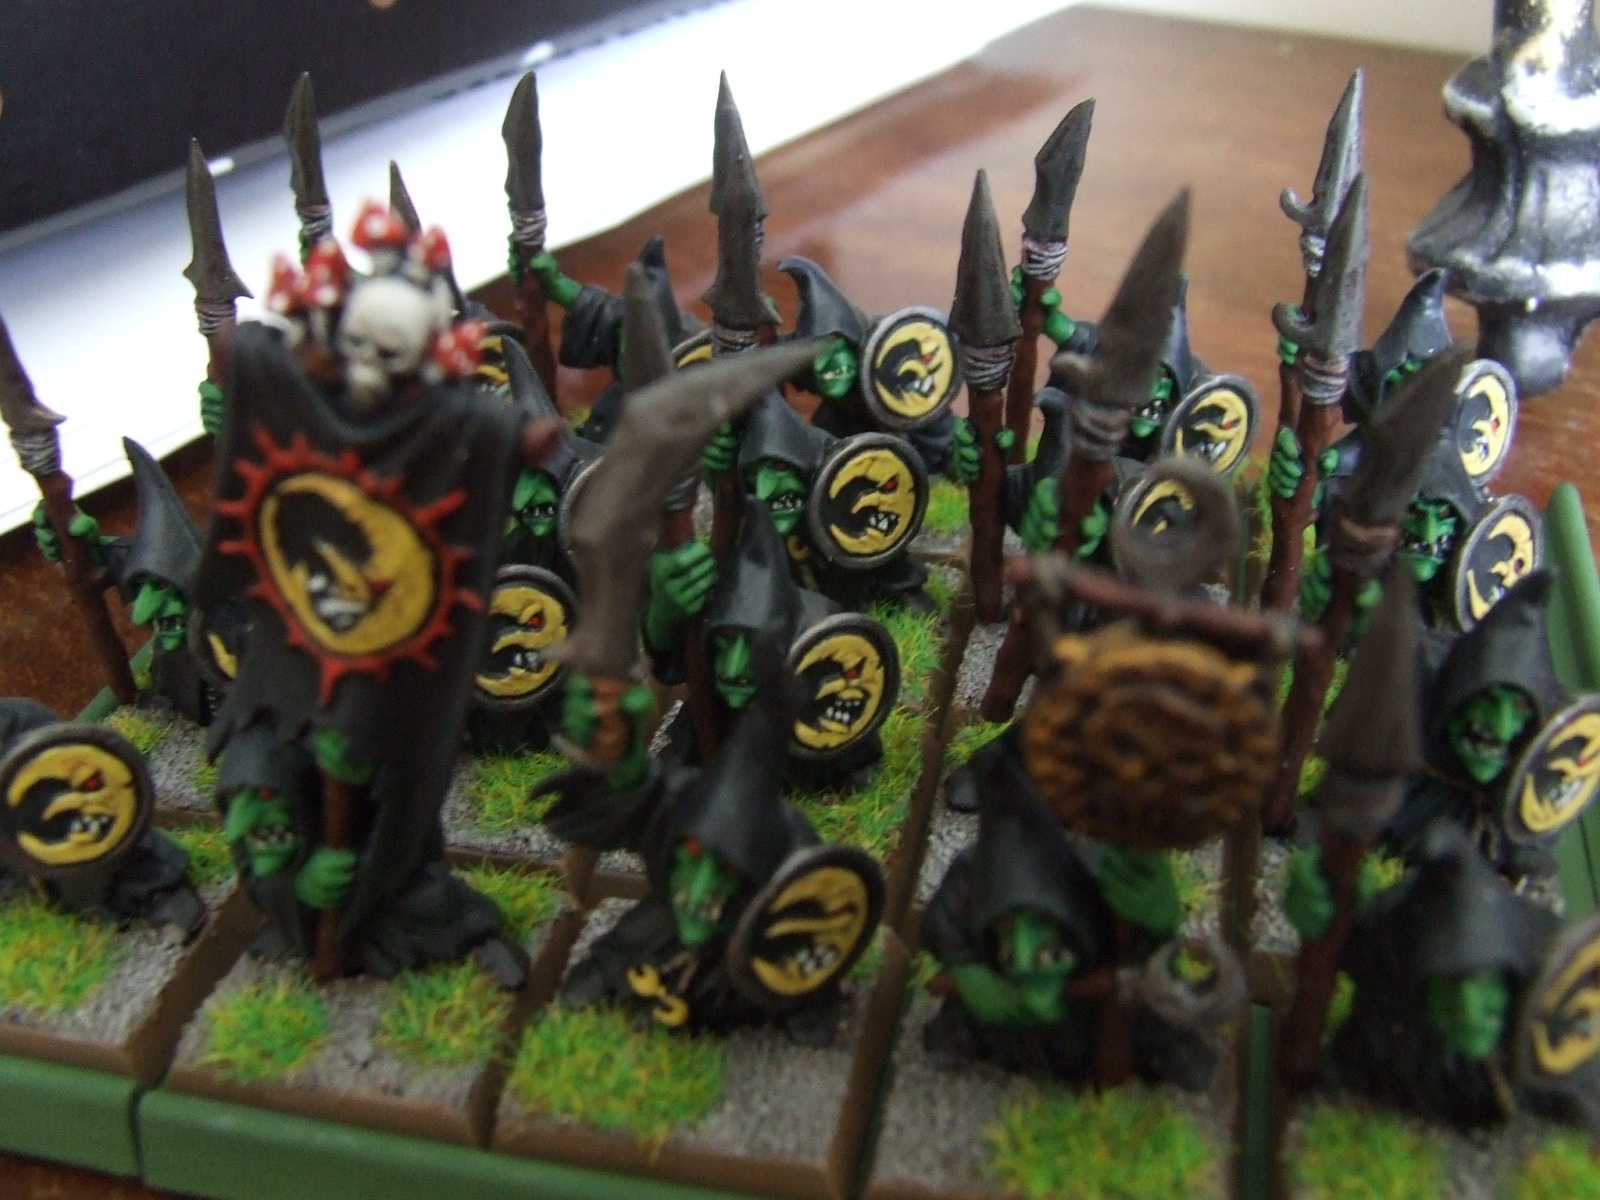
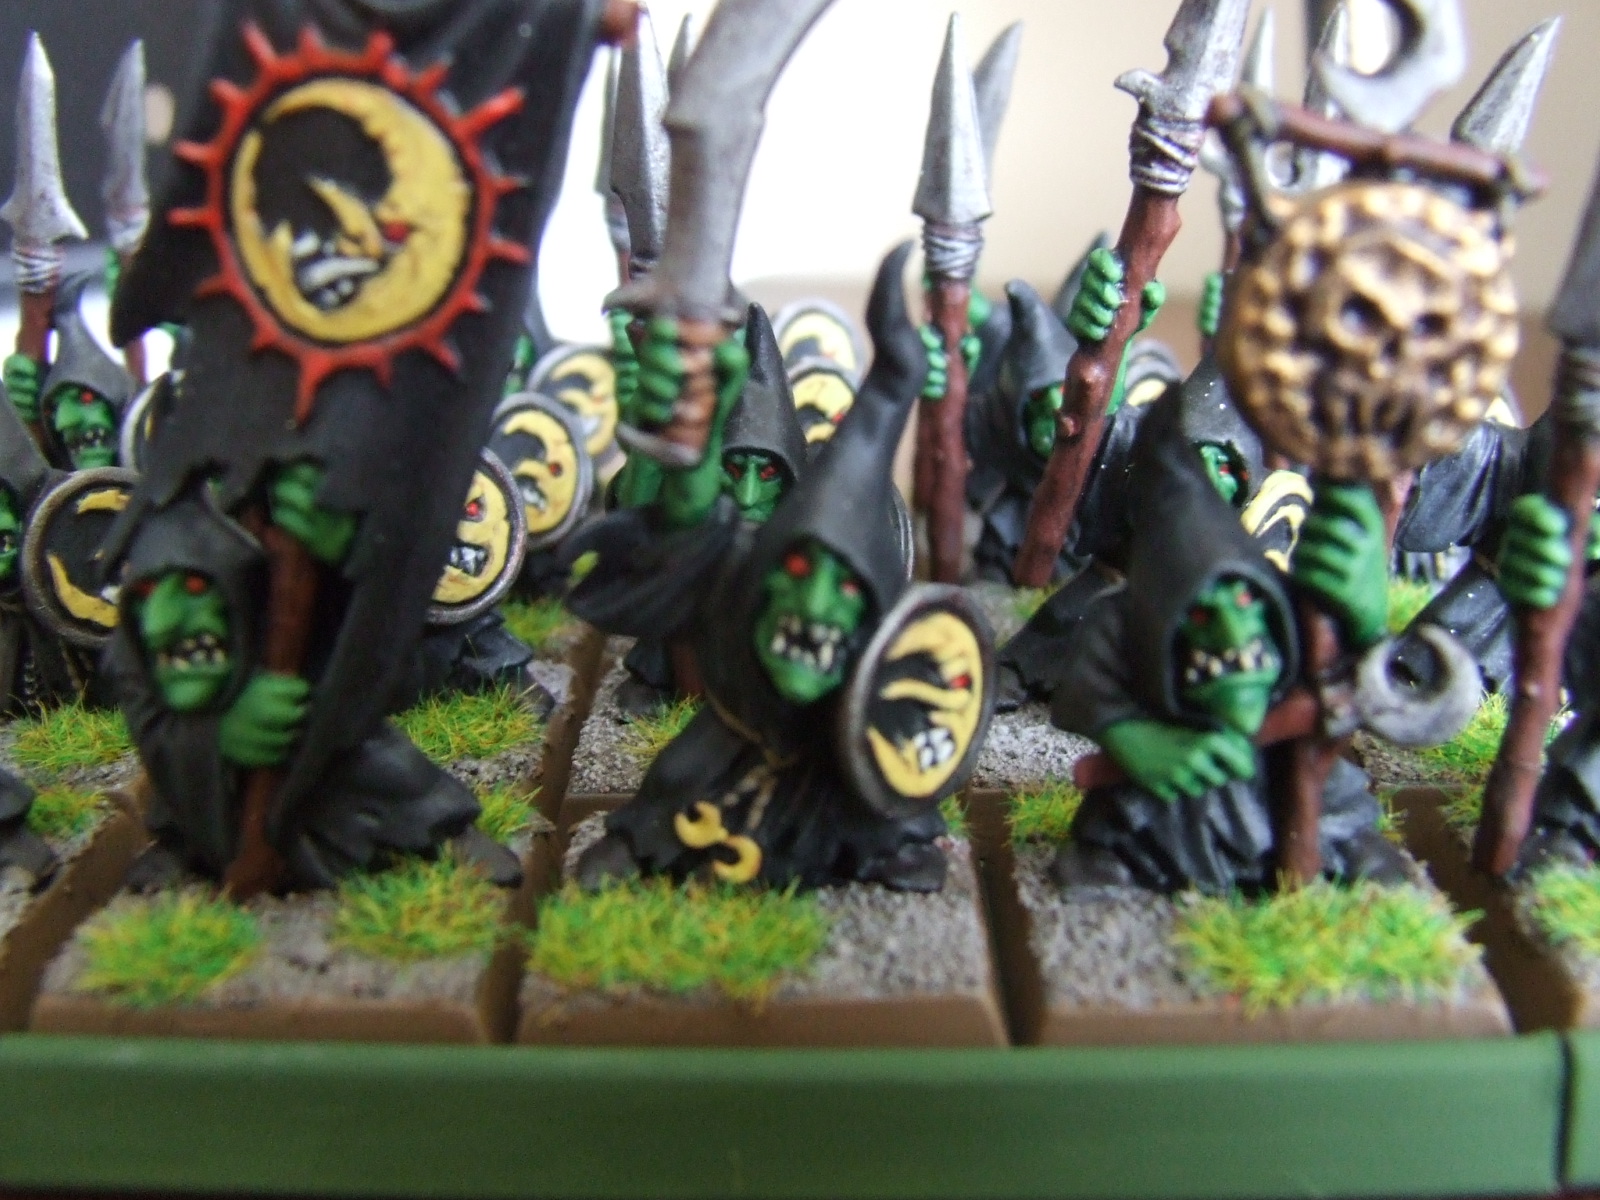
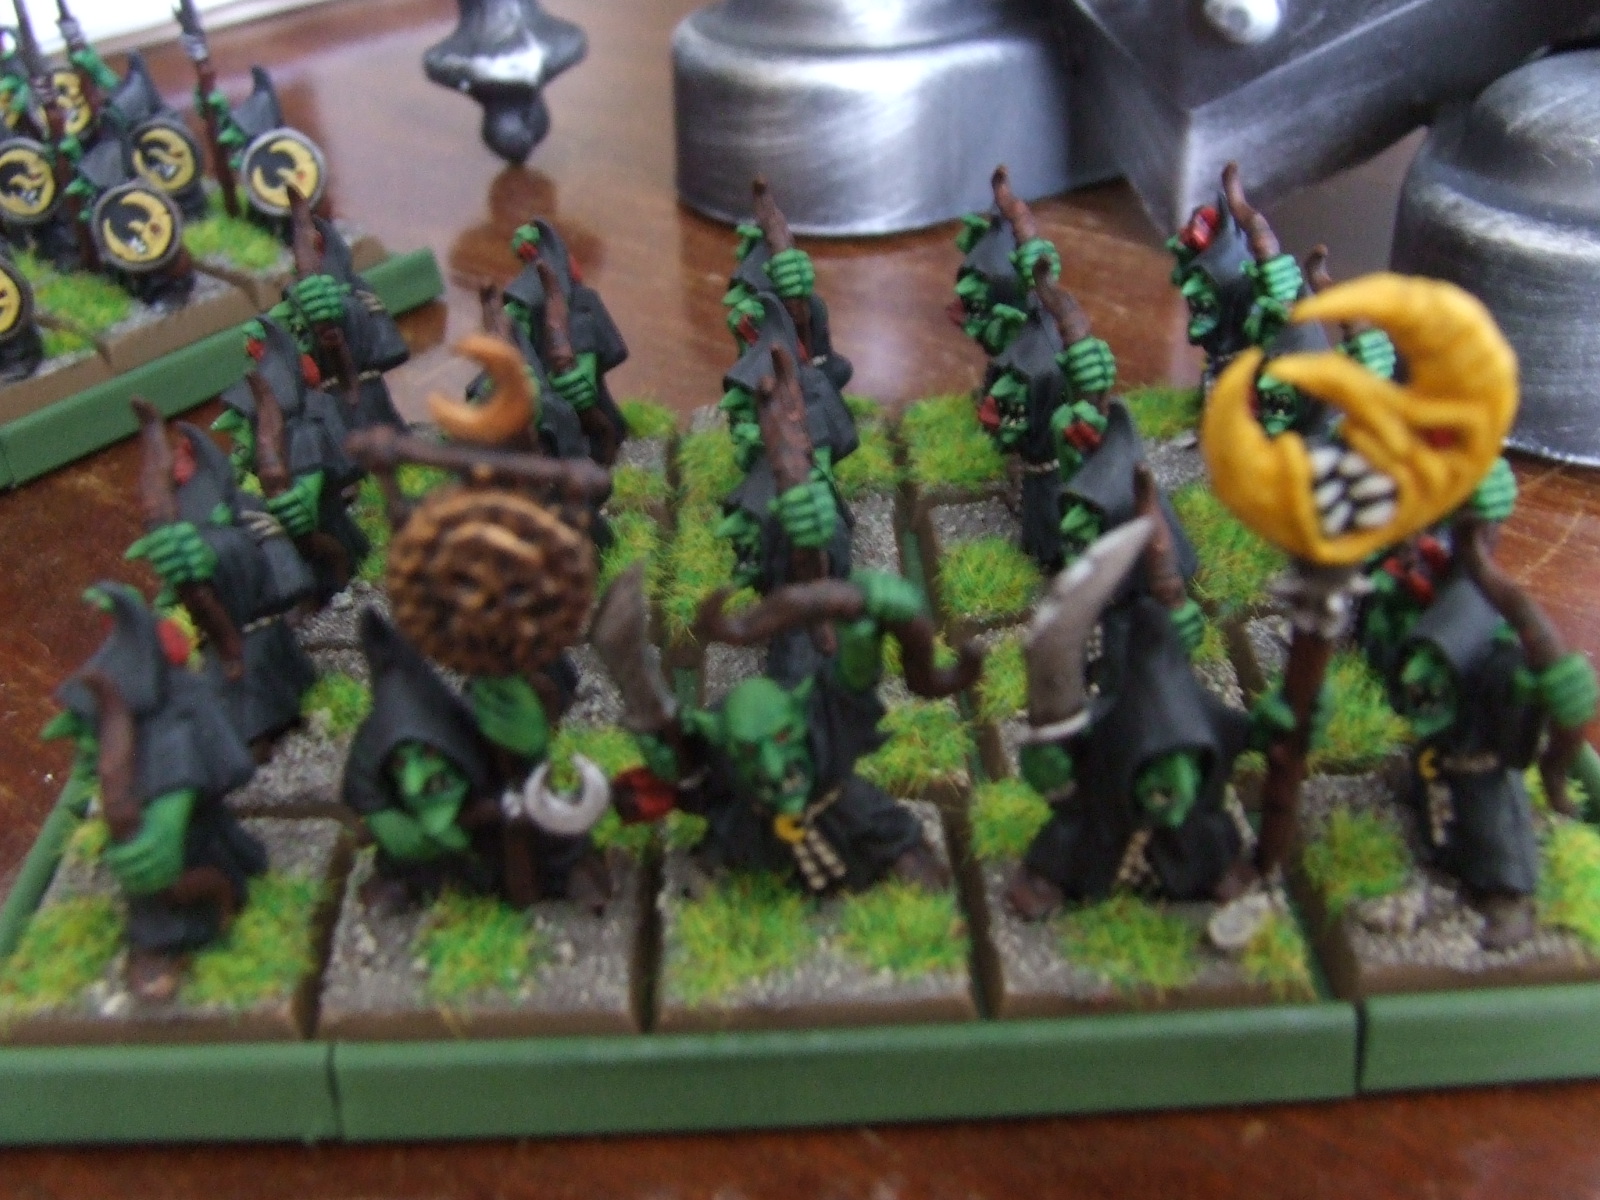
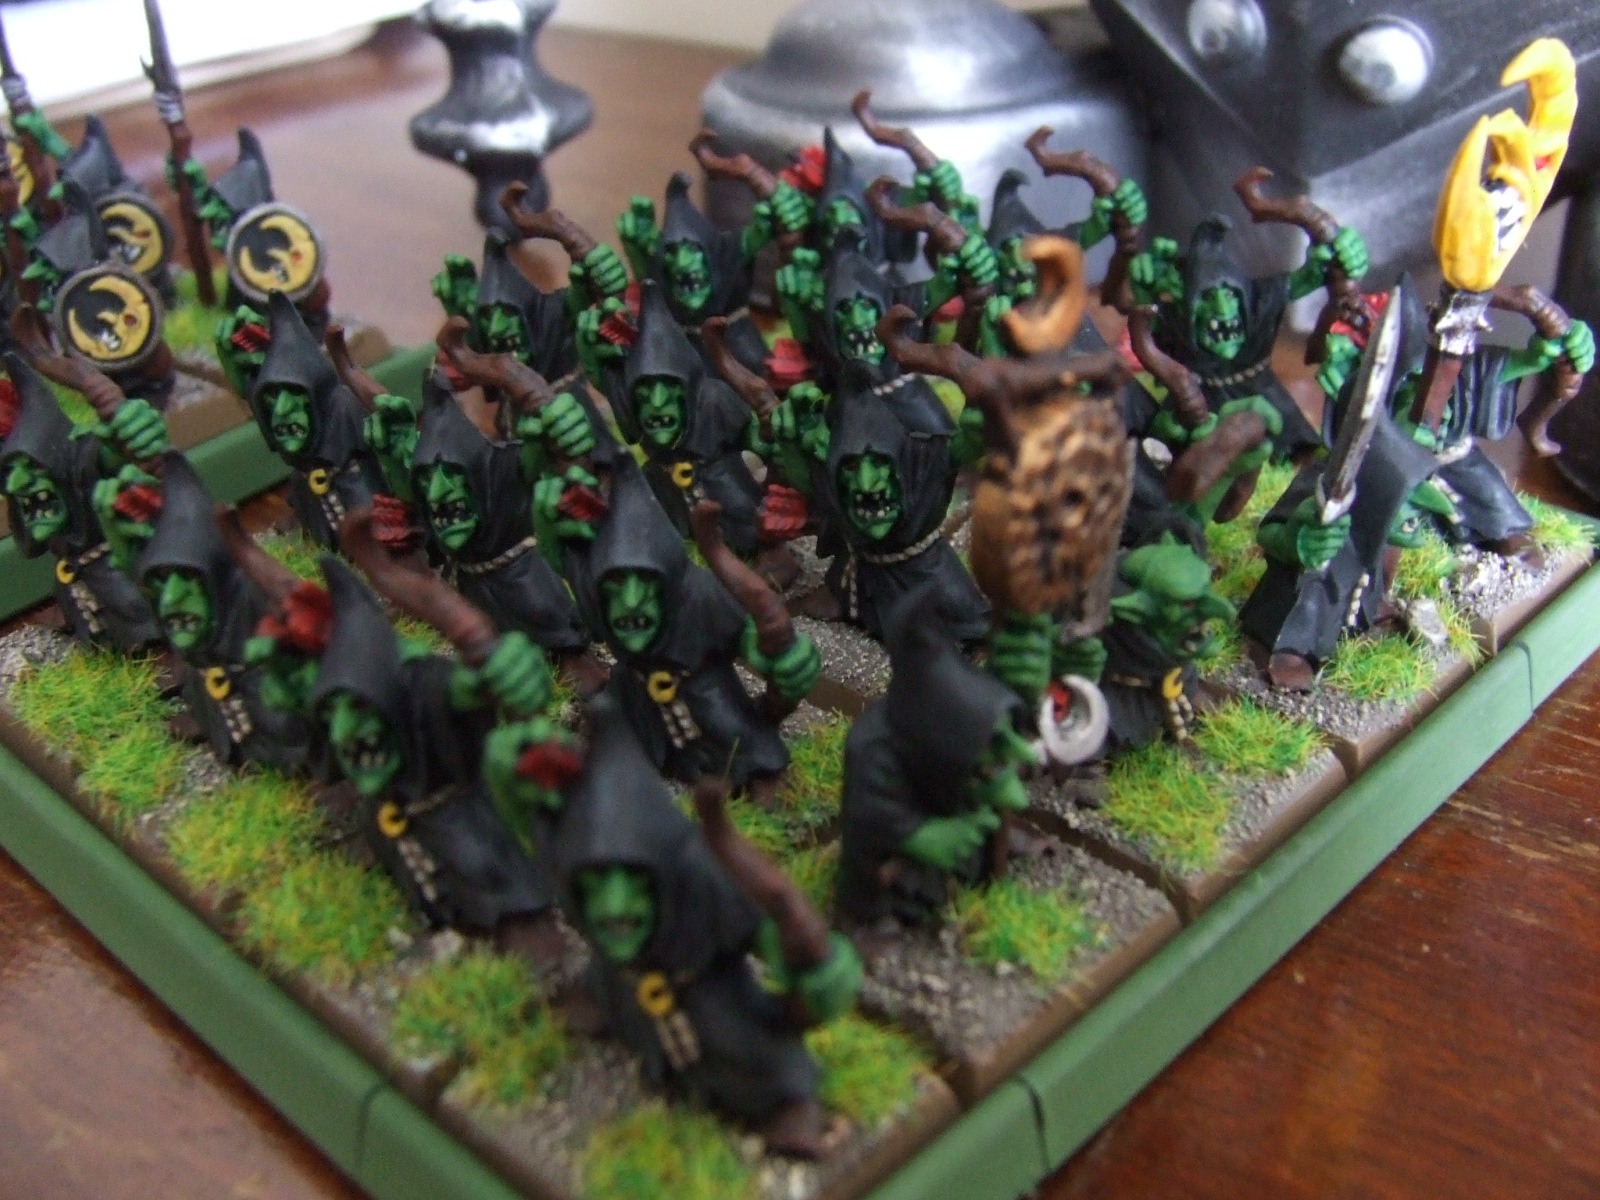
An hour a day puts these Gobbo's away!
Its been a hectic week at work, but despite this I was able to get around to more painting and to finish off this latest batch of Goblins.
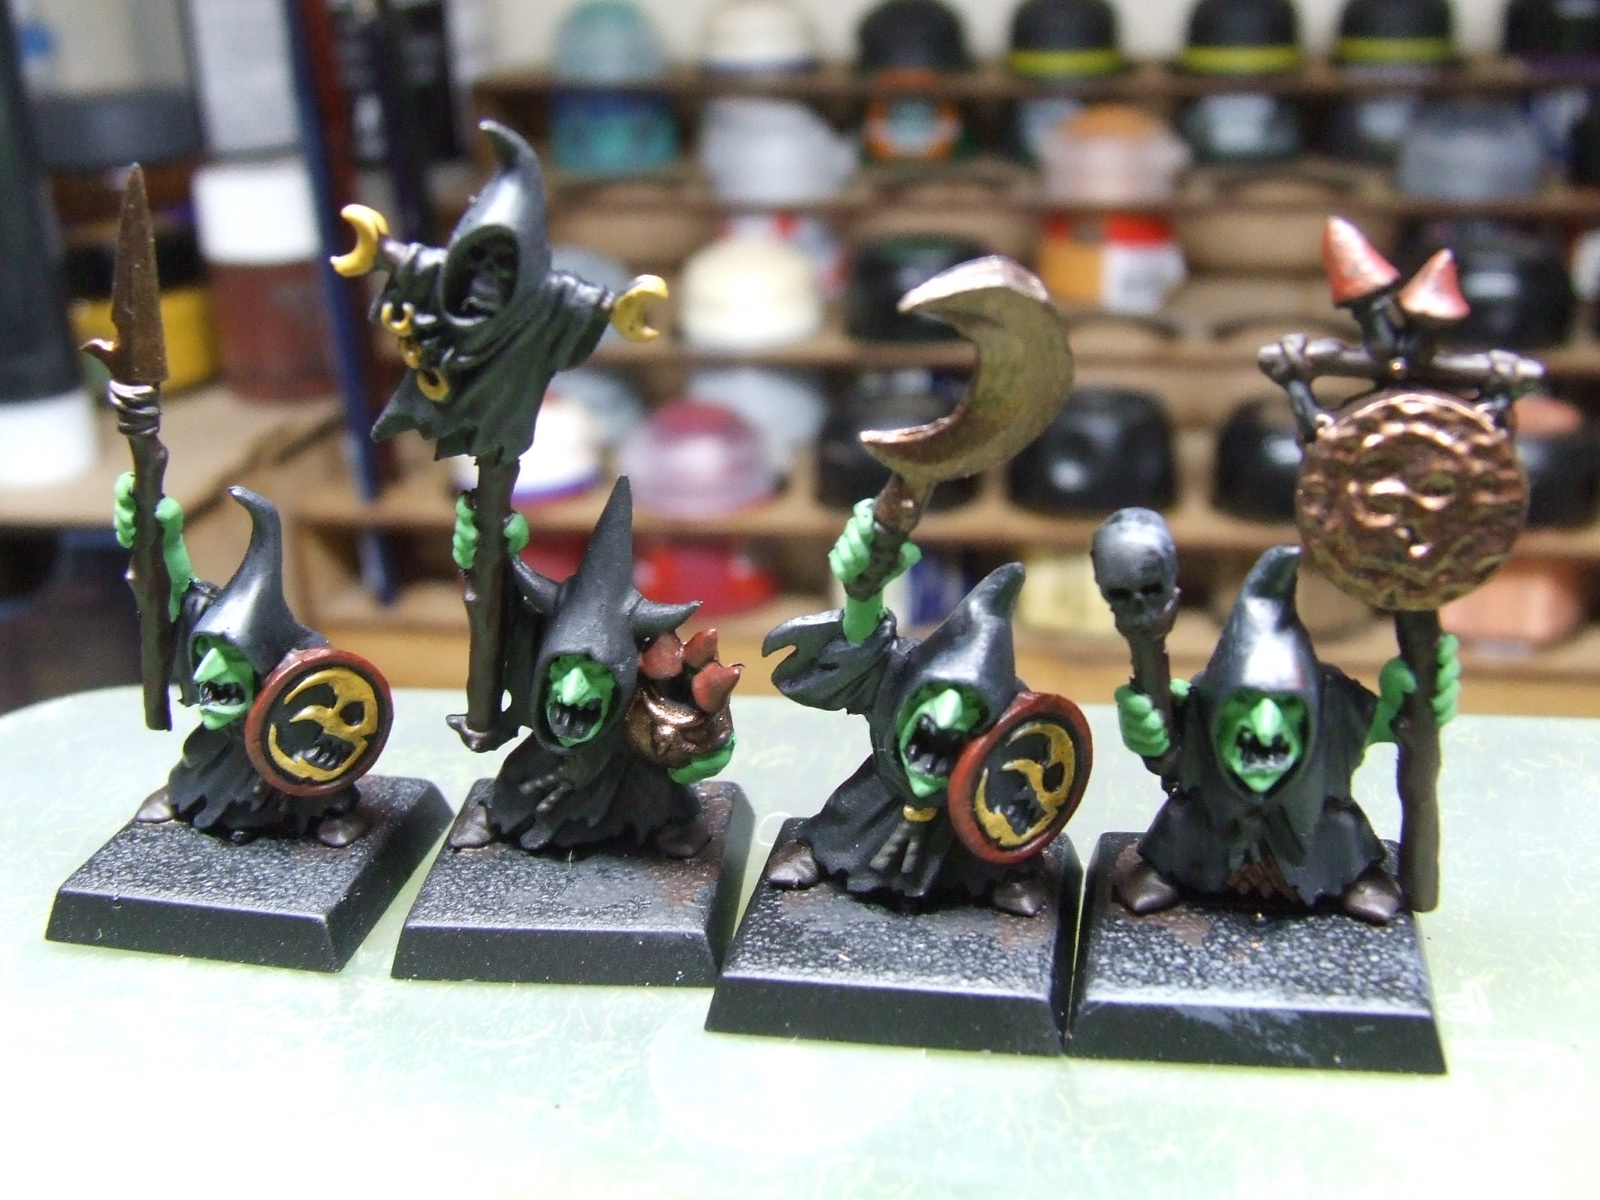
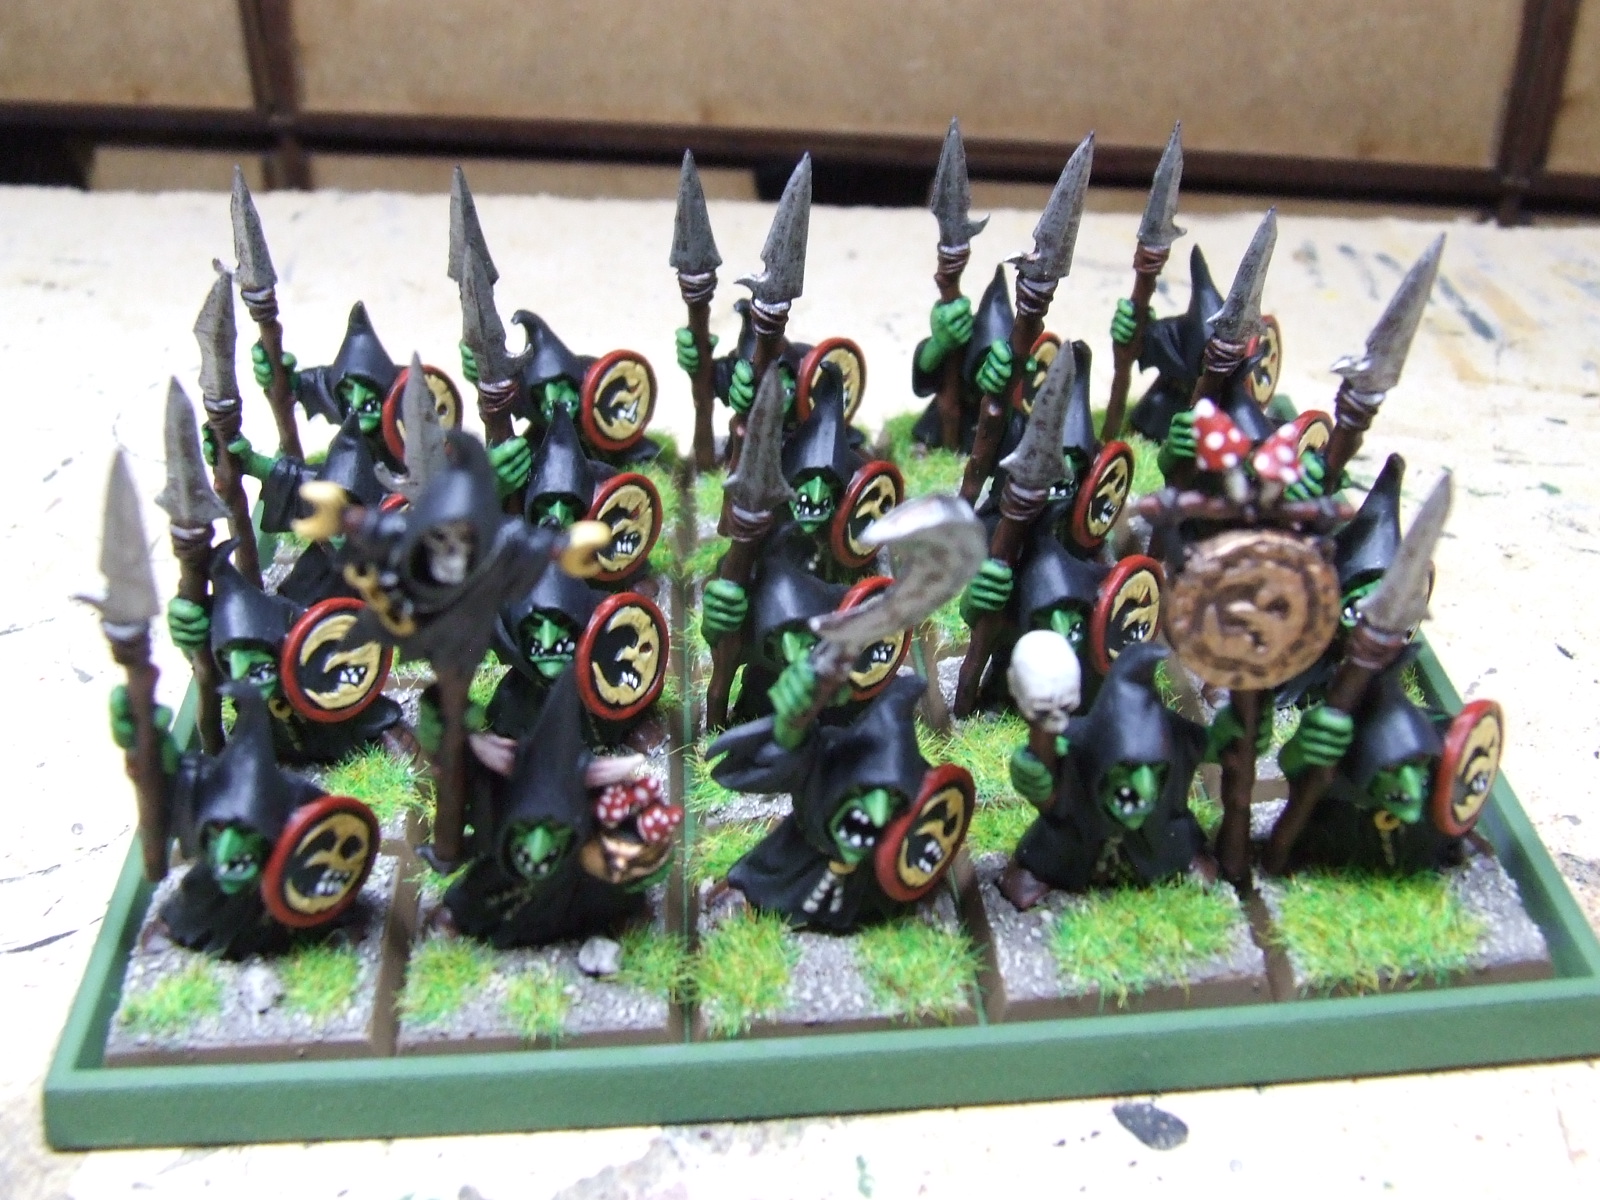
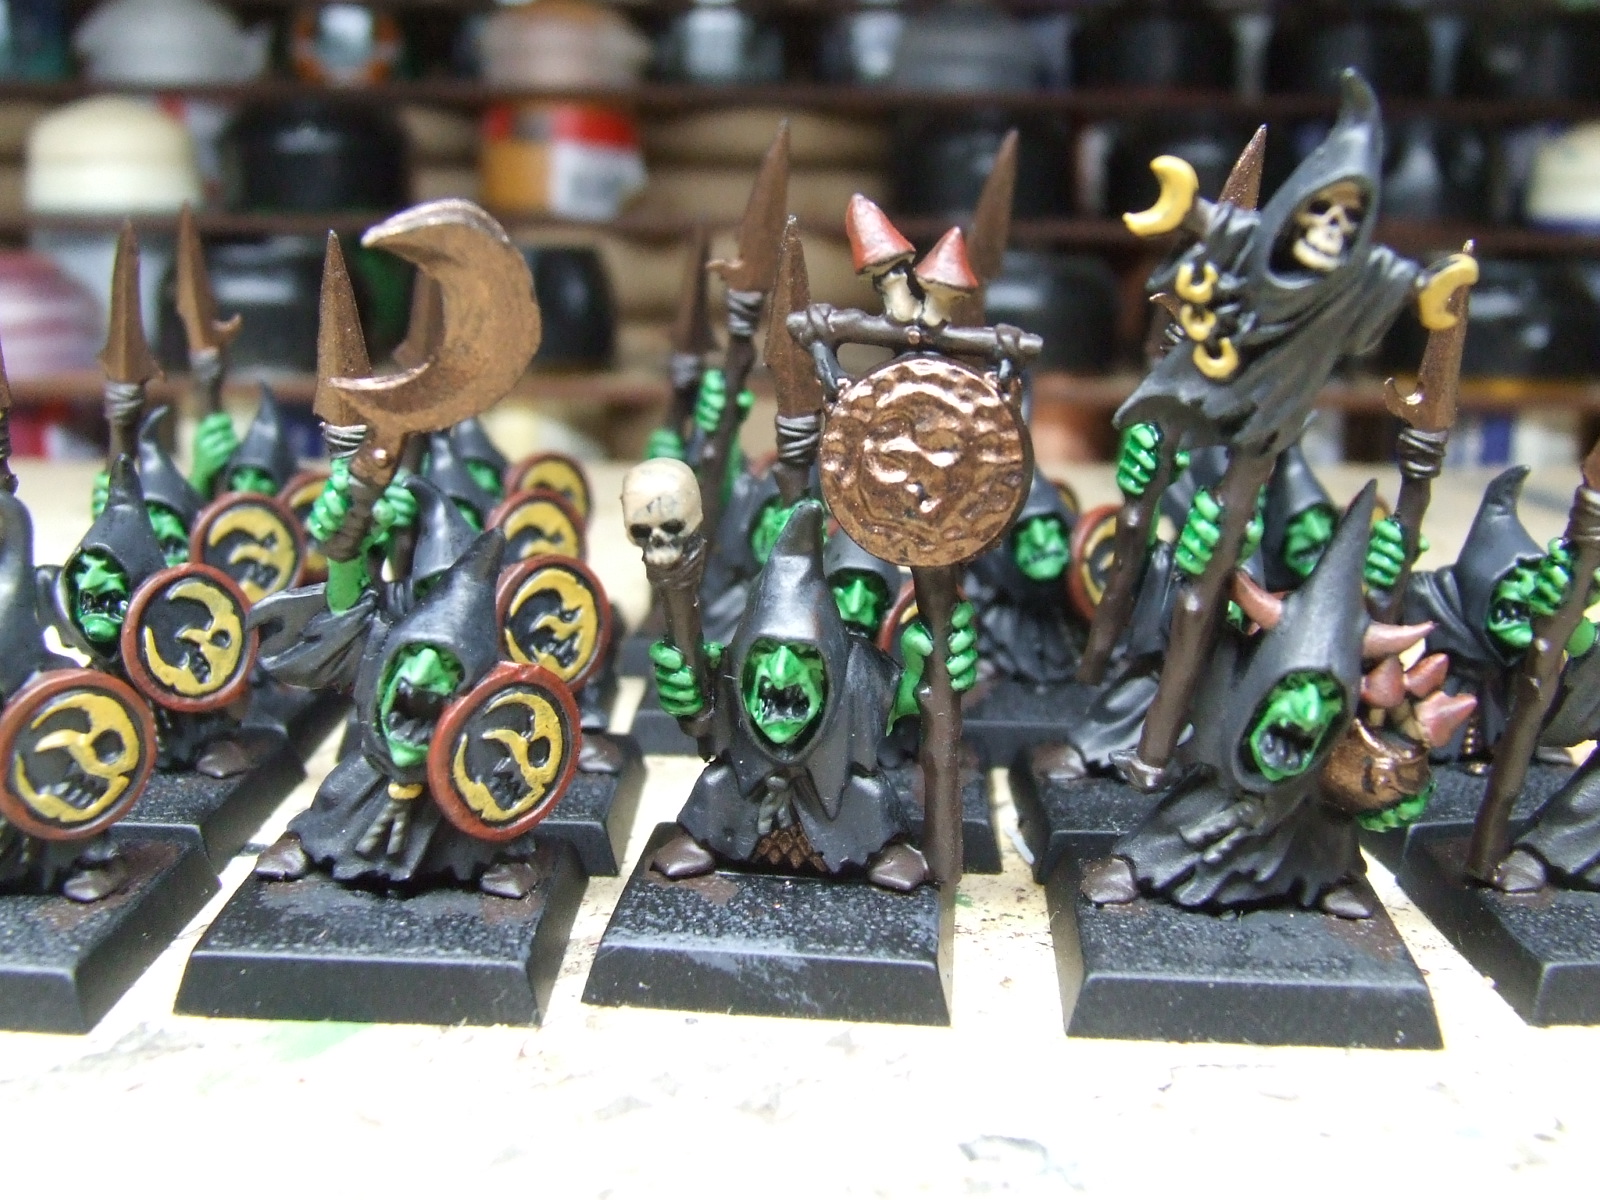
spearheads, scythes and other “iron” metals were given a heavy drybrush with chainmail.
The gongs drybrushed with dwarf bronze, then another drybrush with 50/50 dwarf bronze/ shining gold and a final drybrush over the moon with the bronze/gold mix with some added silver.
Belts were picked out with a 60/40 mix of Graveyard Earth /white. This mix was also used to highlight the stalks and undersides of the mushrooms, the skulls and individual teeth. More white was added to further highlight the skulls and teeth.
White was added to the remaining Yellow/Yellow Ochre mix in the wet pallet and this was applied as a careful highlight layer over the moon designs.
A fairly thick coat of neat scarlet was applied to the shield rims and tops of the mushrooms. and finally blobs of white were added to the mushrooms for that proper look!
I then gave everything a coat of matt varnish.


The final stage which is my personal favourite part (NOT!) is the basing! It always seems to me that basing takes up far longer than any other part of the painting process! I know this is not true …. it just sems that way!
Bases were firstly given a coat of pva glue and dipped in sand.
Once dry I paint the whole base with my own dark earth mix. When I first moved from using enamel paints to acrylics I missed the old Airfix Enamel Dark Earth brown so I did my best using various cheap acrylic paints to mix up a batch, which is in effect a darker less yellow Graveyard Earth. (This was so long ago that Citadel paints hadn’t been invented!).
The sand surface was highlighted with a cheap cream paint and the sides of the bases given a coat of graveyard earth.
Static grass was added to complete the look. I always try to apply an odd number of grass tufts/areas, i.e. 1, 3, 5, etc, as this looks more realistic than even numbers, but will add the occasional even number if there are a good few bases to do.

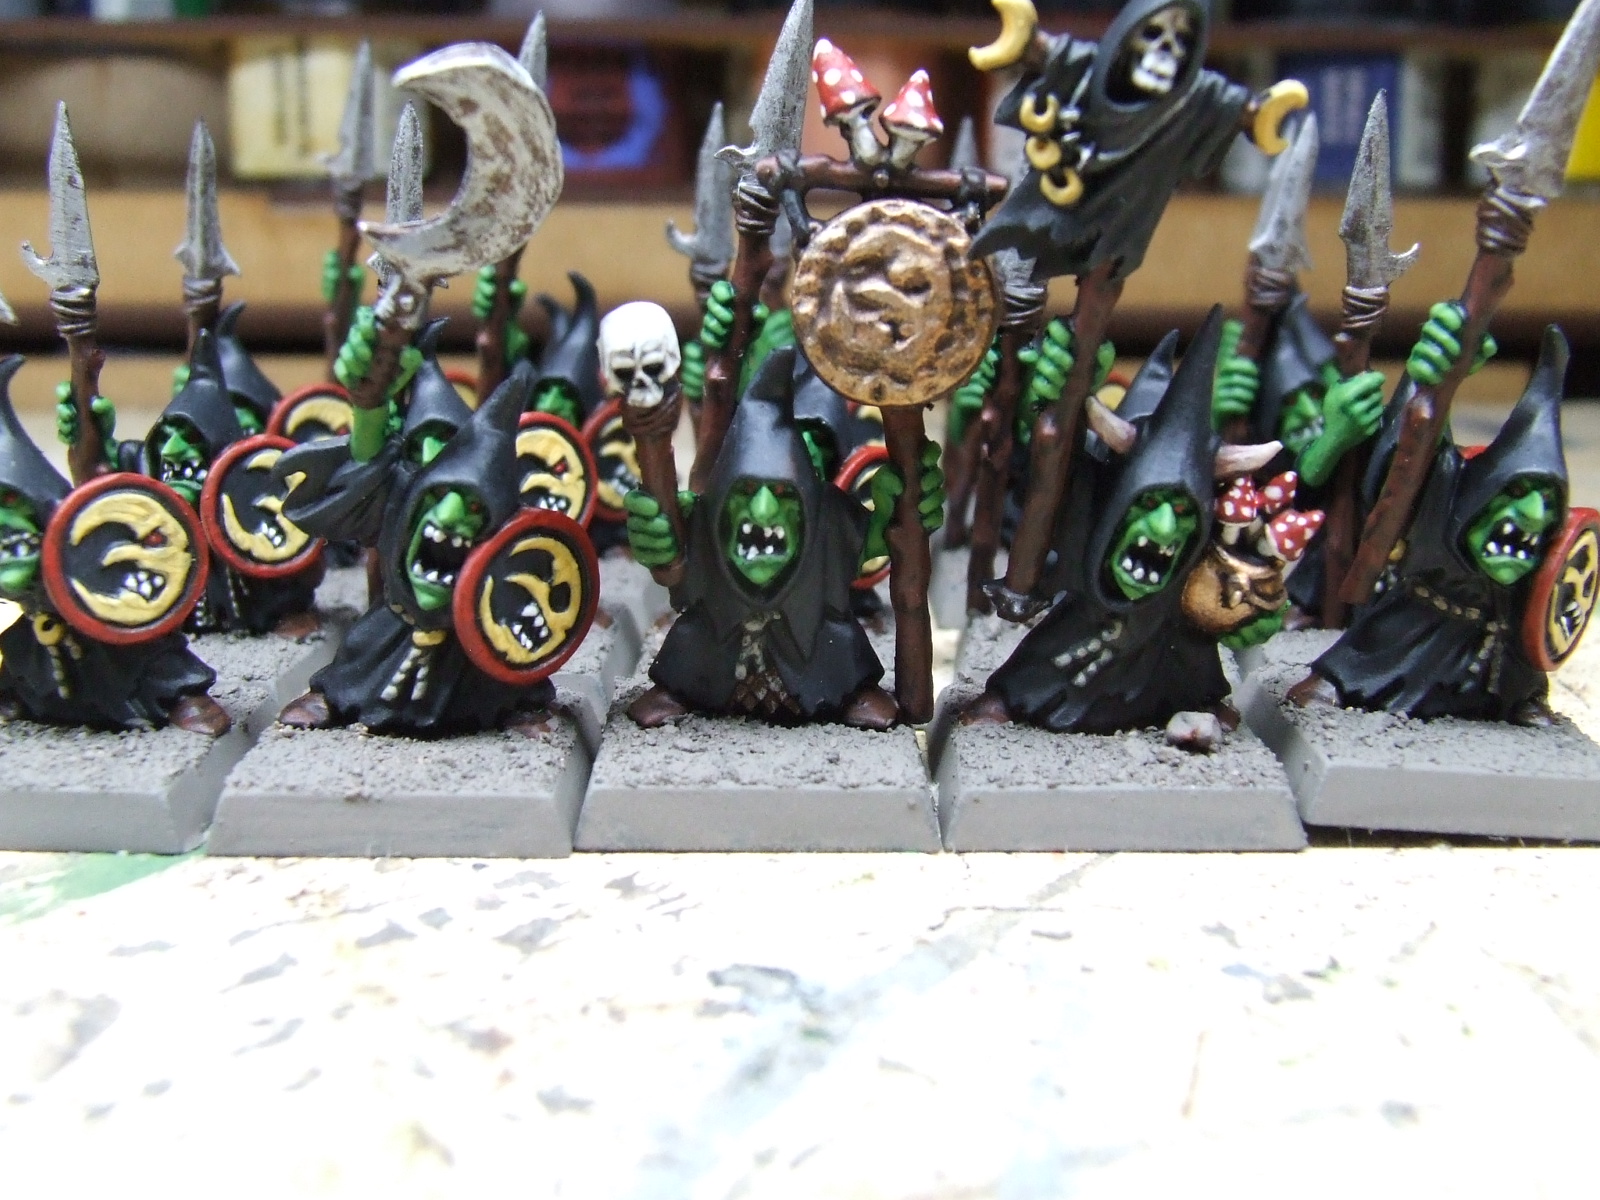
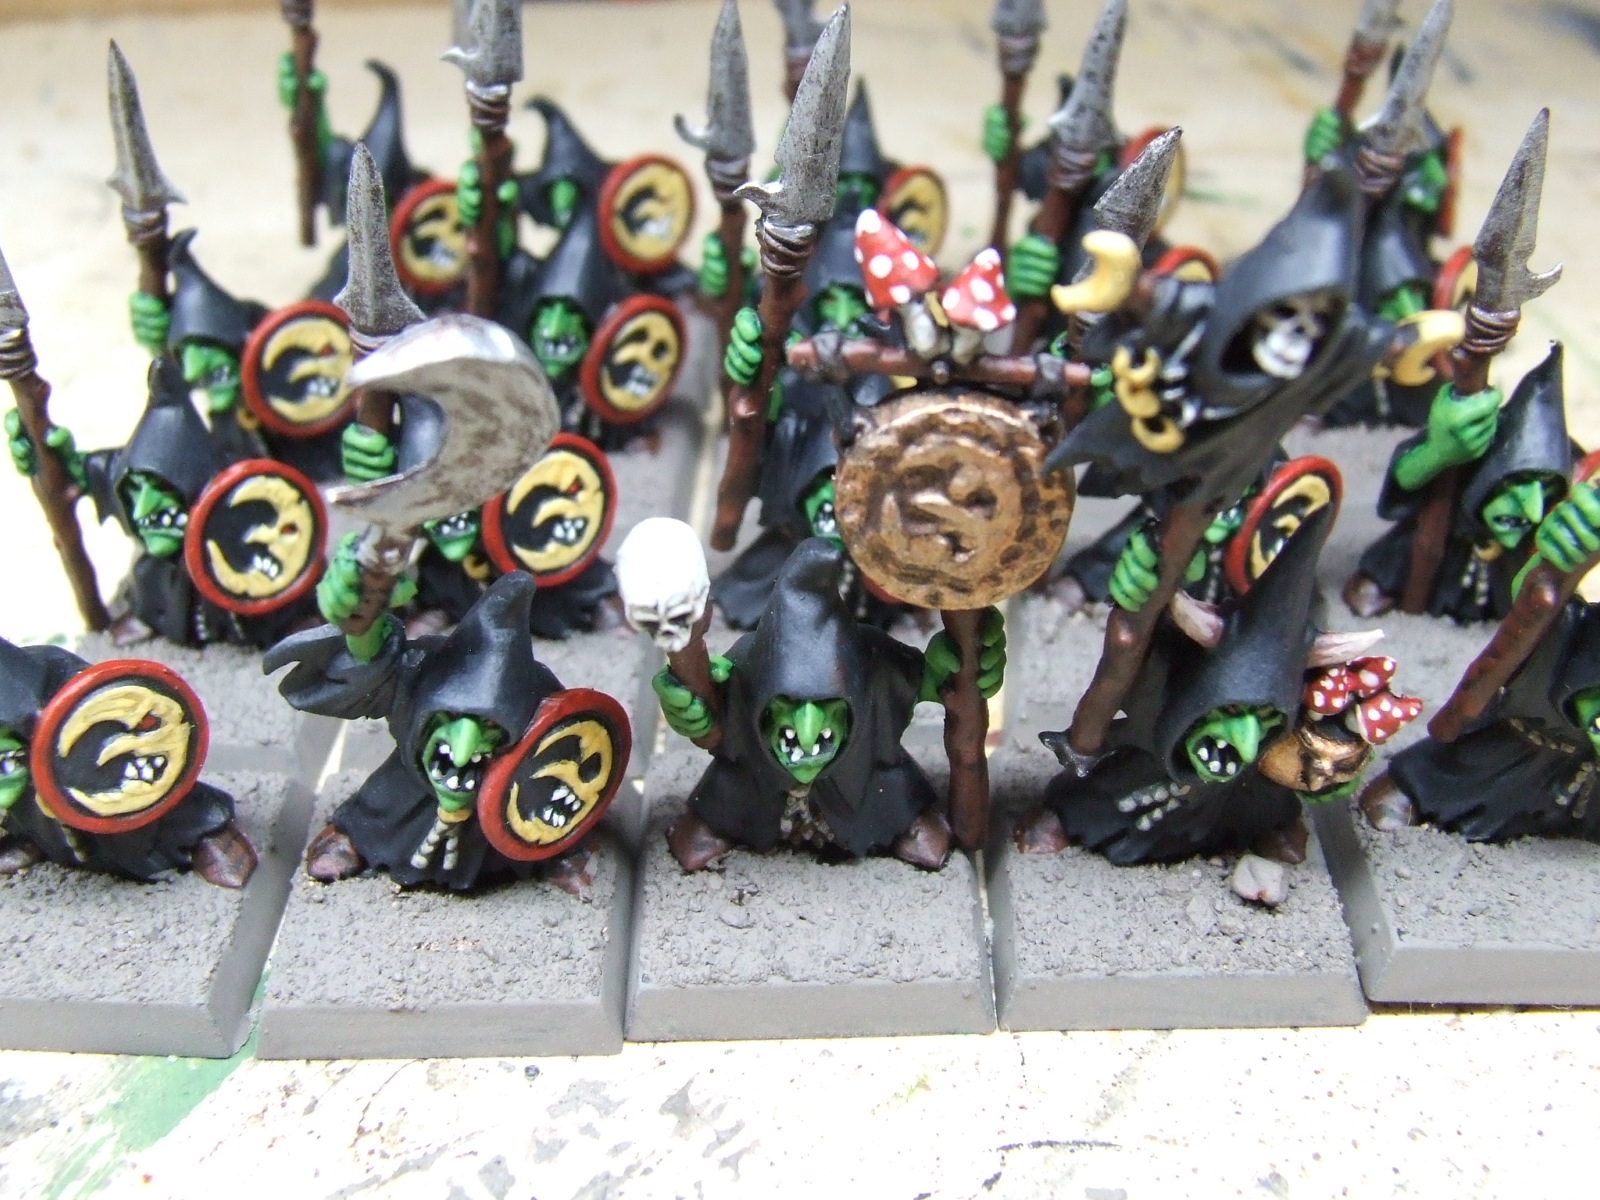

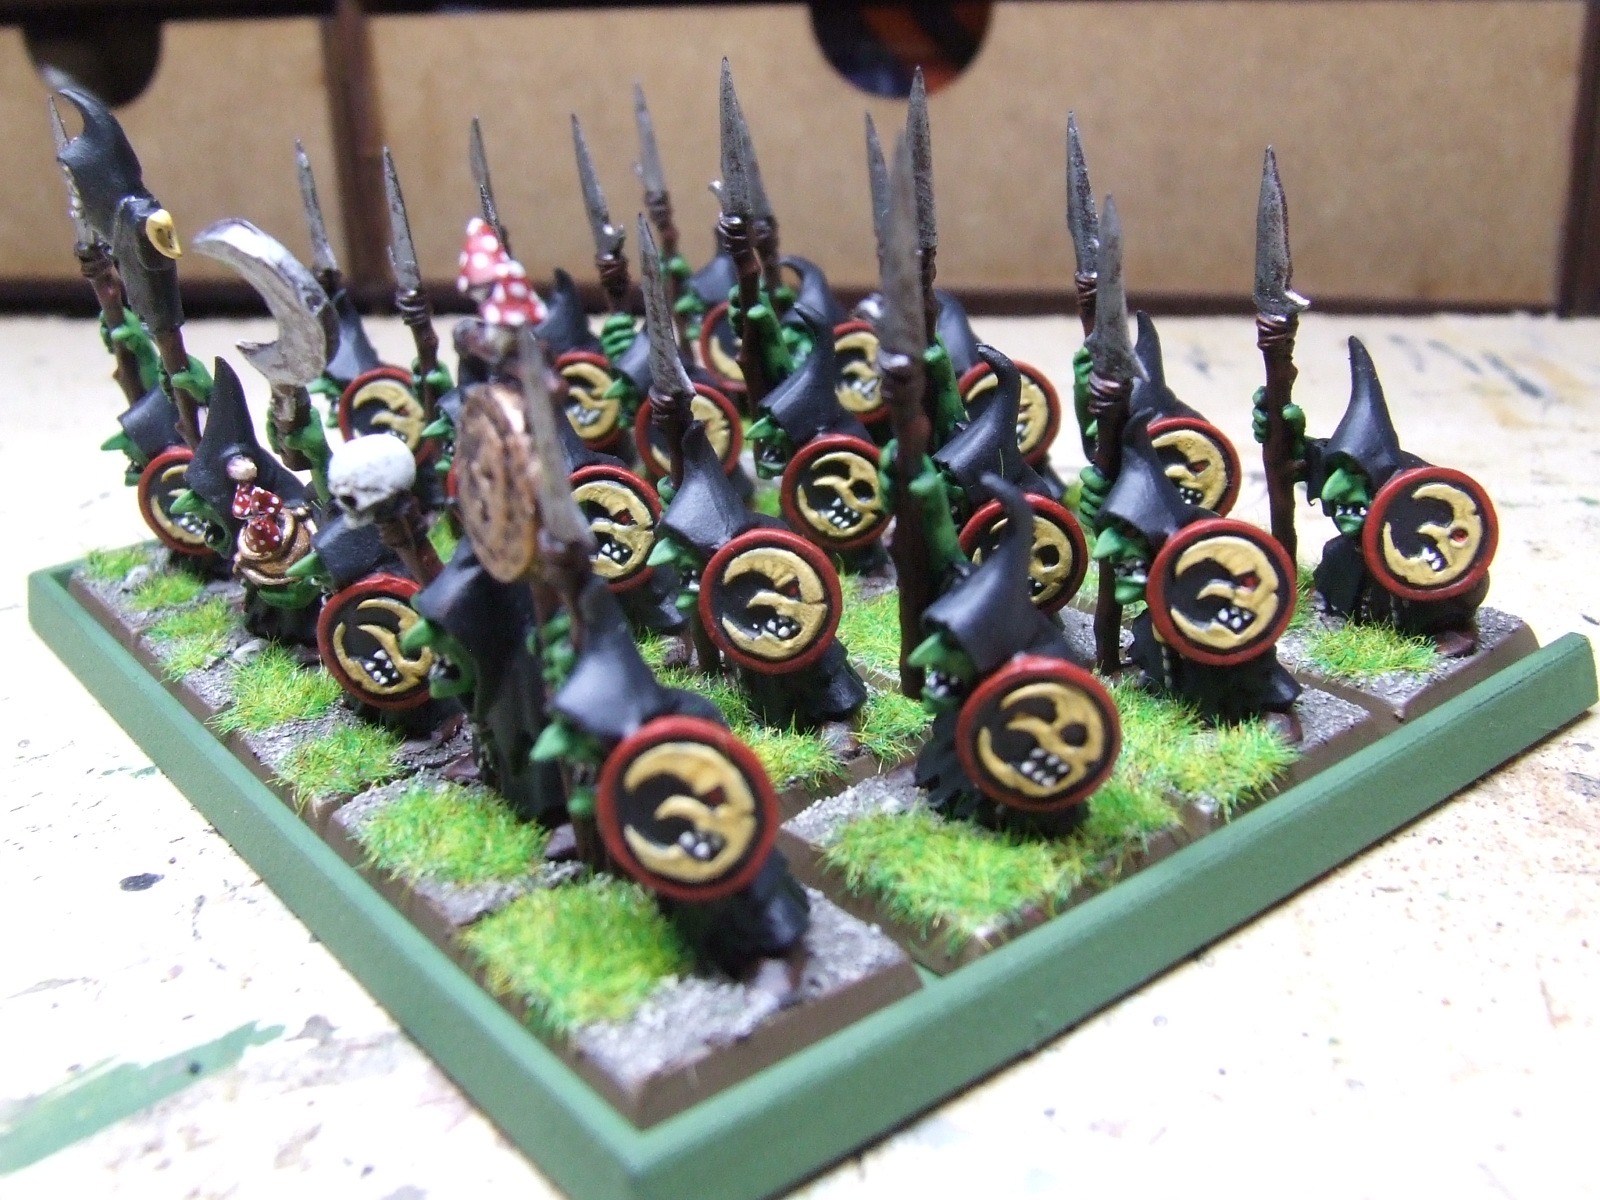
So that is this unit complete.
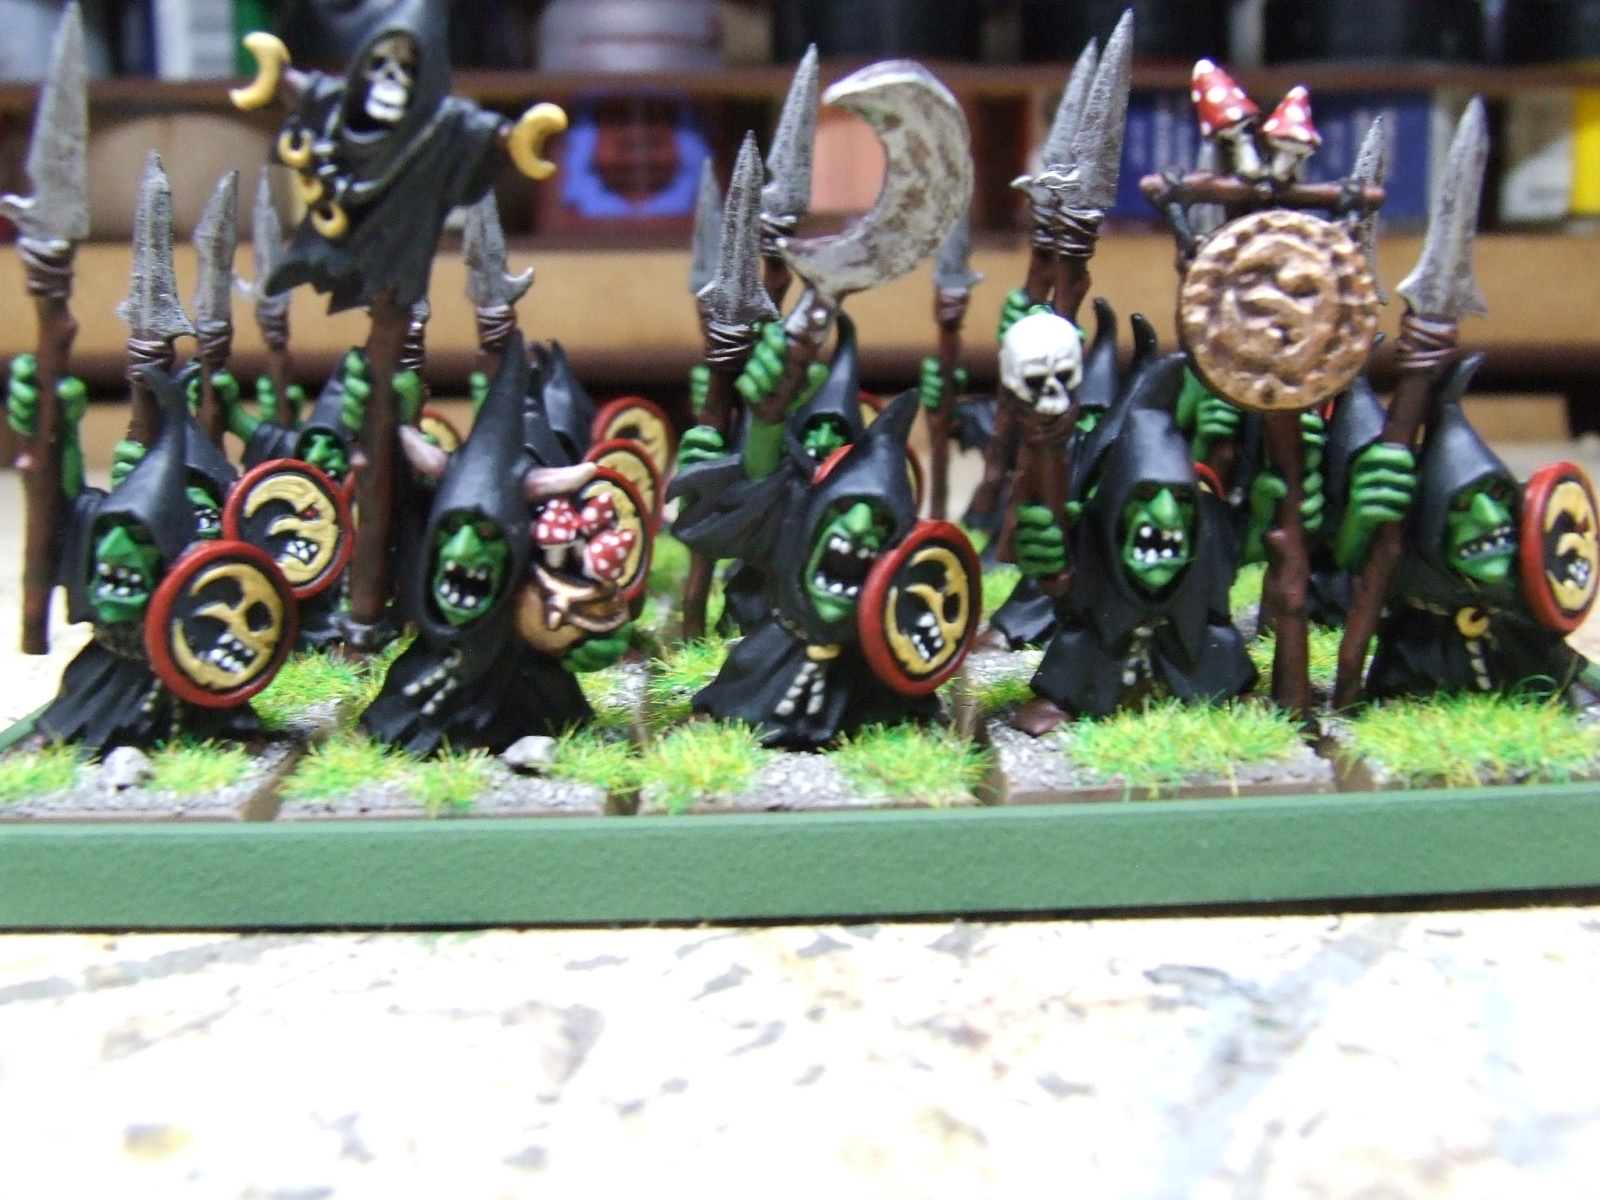

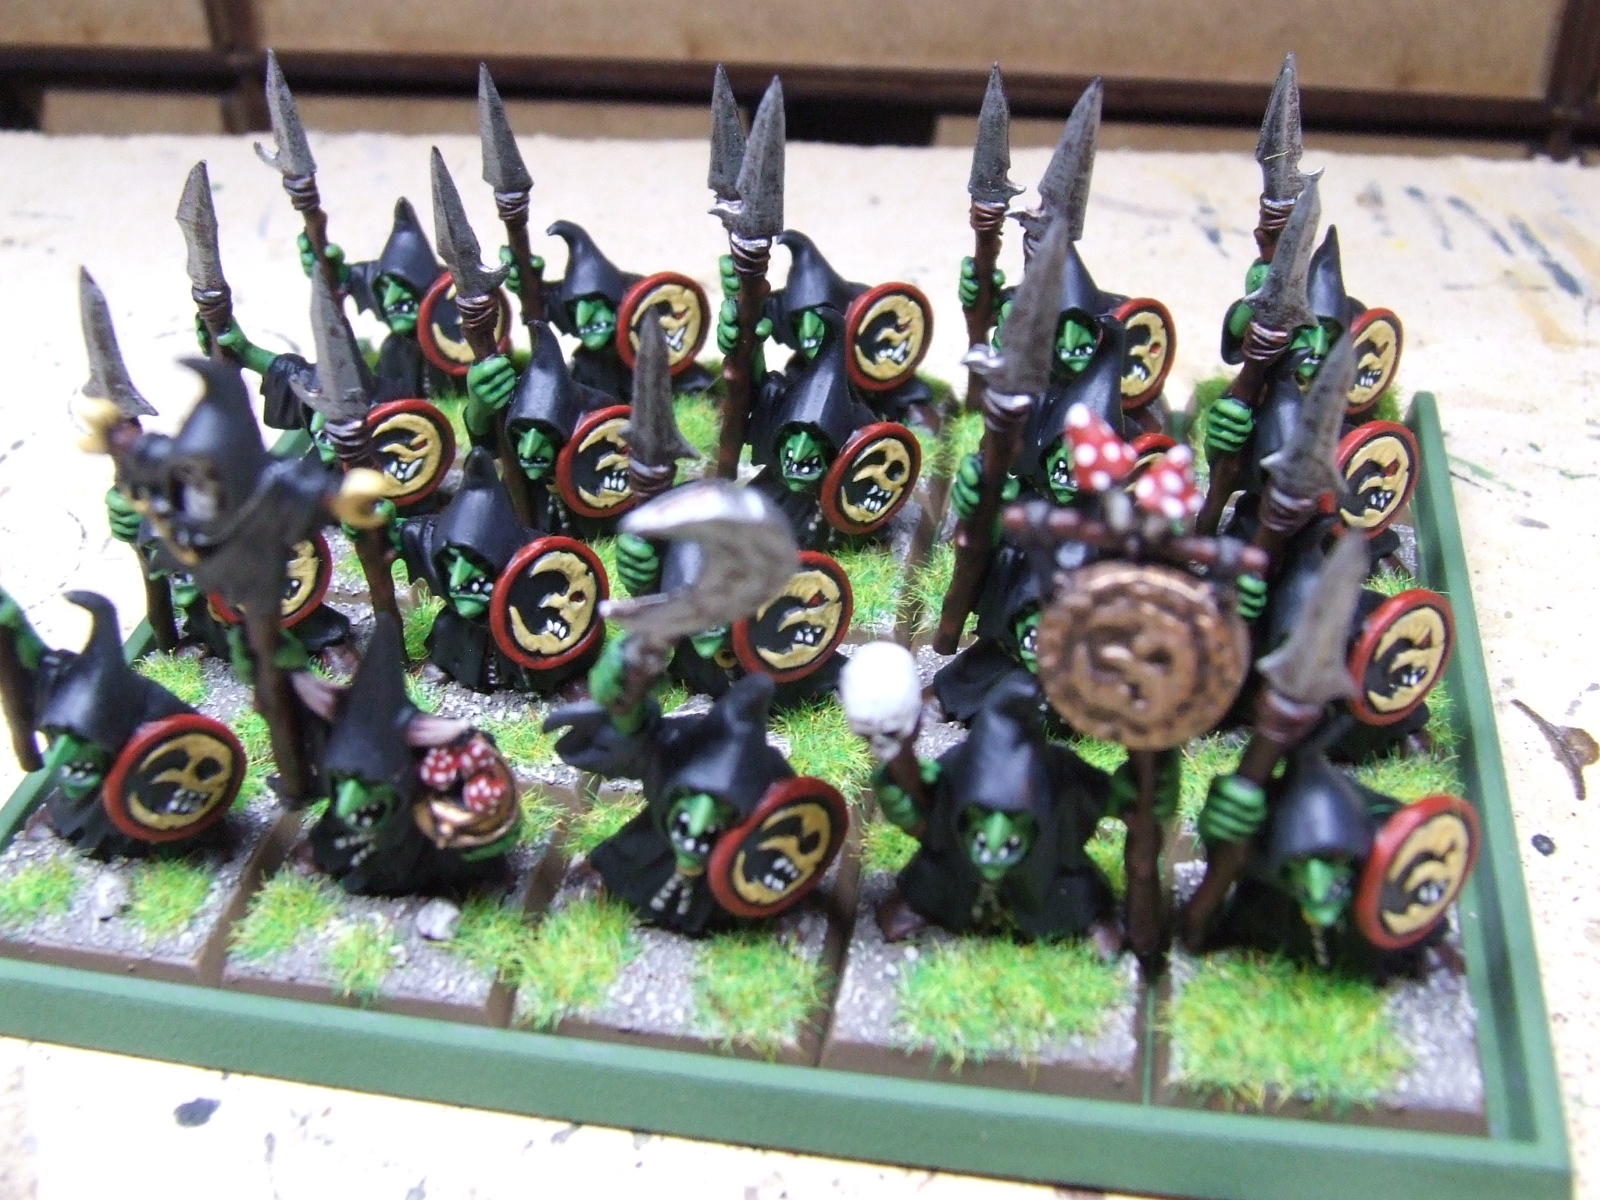
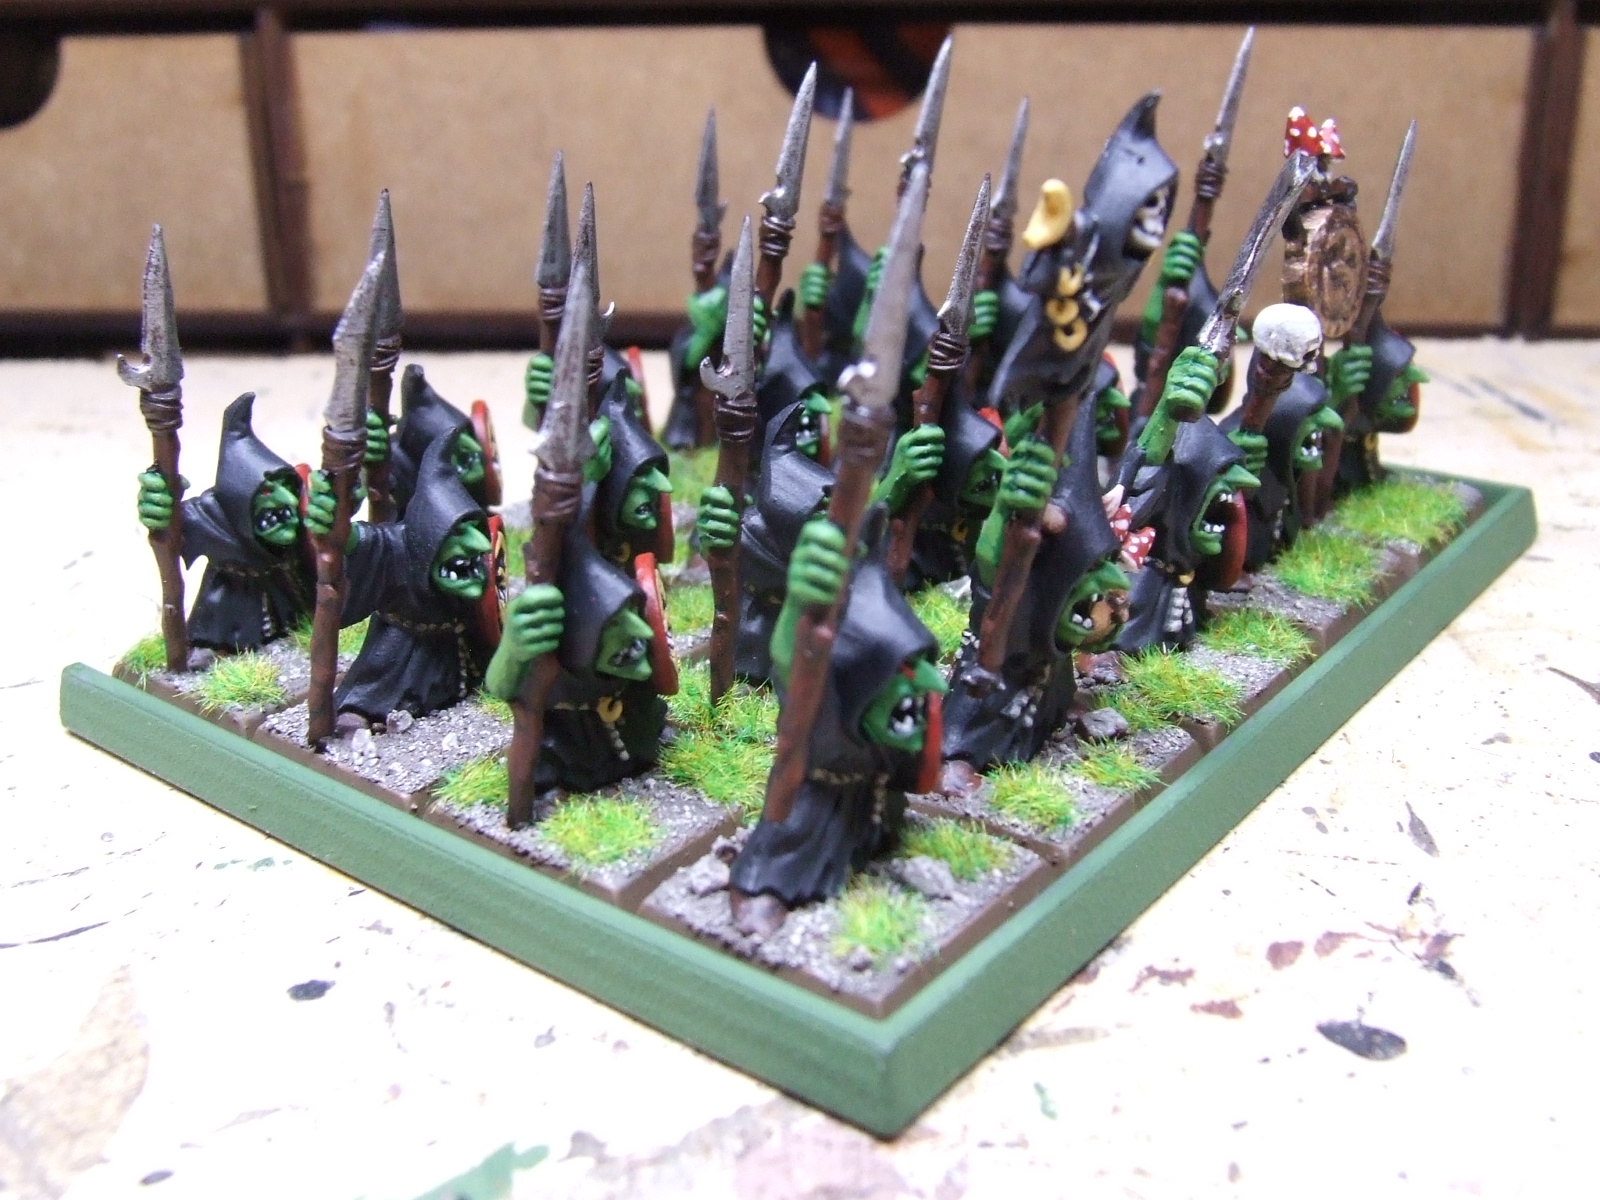
I still have a half complete unit of wolf riders ( visible in the background on 1 of the photos at the start of the project), Spider riders and troll to do, but rather than getting bored painting similar things for the next part I will move to another selection of Old Skool minis, maybe something from even further back in time!
Not the most productive week
Well between the hazards of working, bad weather and a general lack of motivation its not been the most productive week! However I have managed to add a few more touches to the Gobbos.
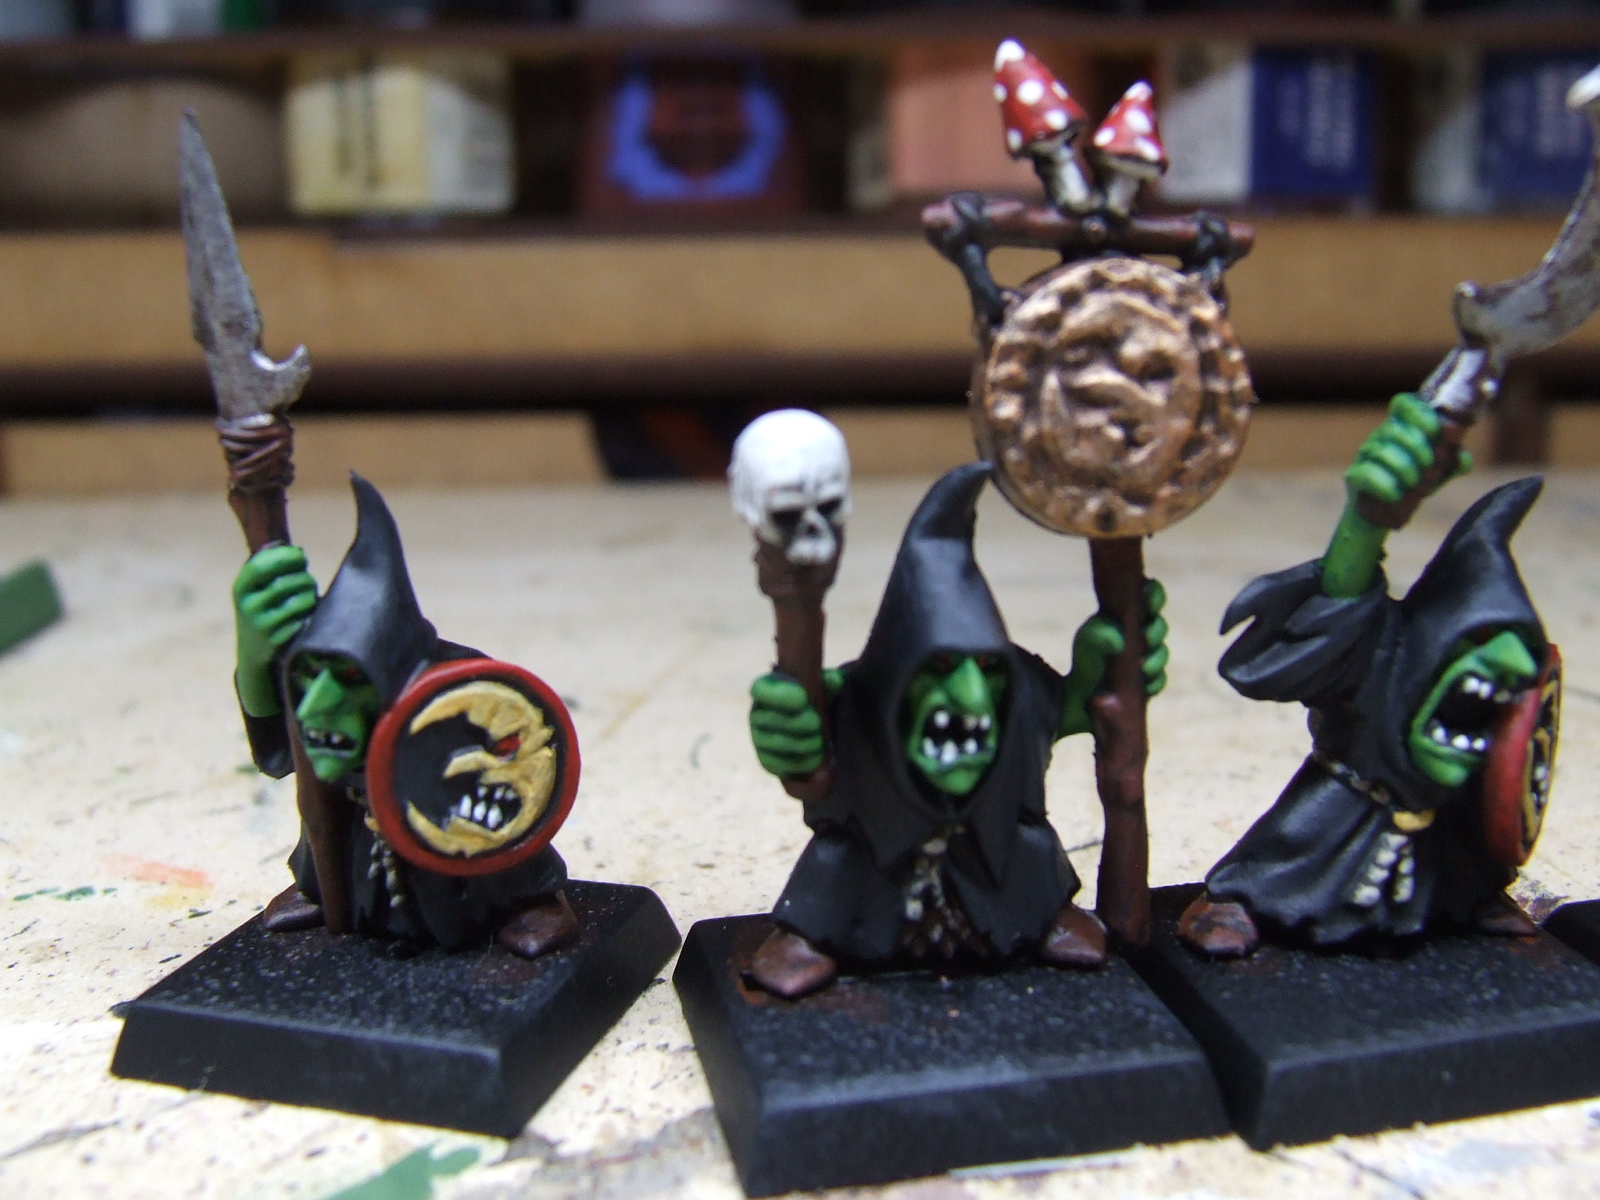
I had originally missed the skulls on the standard and mace head from command figures. These were given a coat of Graveyard Earth. I still have plenty of this having found a box of 5 new pots in a job lot of minis I brought from Ebay! Sorry its not for sale! LOL!
I had also missed the horns on the Shamans hood so these were done with a mix of doombull brown and a generic yellow ochre
I then washed the skin with orc flesh wash.
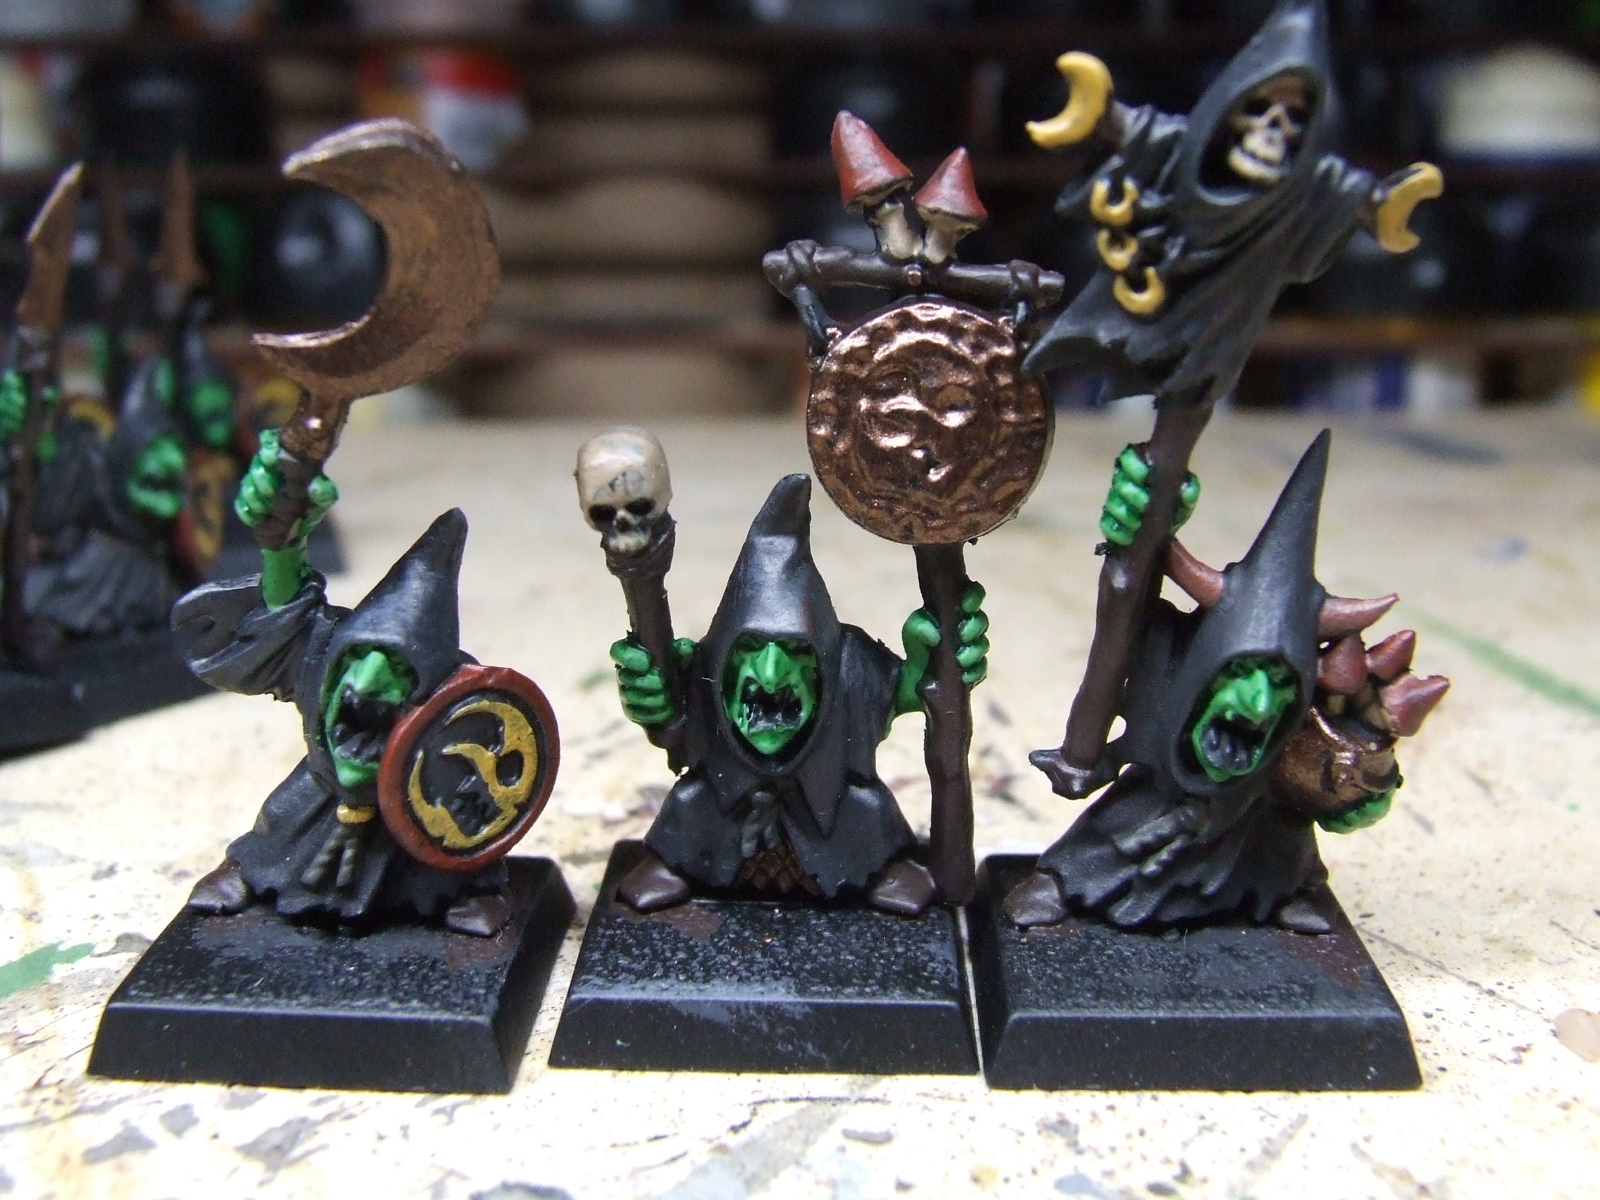
Spear shafts, boots and belt pouches were given a coat of raw doombull brown.
A blob of scarlet for the eyes on the gobbos and the shield moon design was followed by a highlight of Goblin Green and Golden Yellow to the skin.
By preference I usually only paint in eyes on character or officer figures but as the eyes are so large visible on these Goblins it was unavoidable in this case.
I then mixed Golden Yellow with Yellow Ochre 70/30% for the moon designs and trinkets.
The final task this week was applying a second coat of scarlet/doombull brown to the shield rims. I use a wet palette for mixing, absolutely essential if you mix your own colours, so was fortunate to still have the original basecoat mix to which I just added more scarlet to create a mid tone.

And so it begins .....
As it says in the title it begins! I have never attempted a project before so bare with me! I have a rather large lead/plastic mountain of shame (pride?) that goes back over… hummmm … years! (I don’t even want to think about it!) So as we are once again in lockdown, although I still do have to work, I thought that it was time to do some painting. Well before Xmas I had actually prepared a load of GW Night Goblins from the Battle for Skull Pass, for my 15 yr old Godson to paint on one of his stop over weekends, but this was cancelled due to the second mini lockdown. Feeling a bit fed up I then started the first couple of units. It was only on completion of these 2 units that I realized I should have started a project … So here it is!
Firstly … here are the completed units
I have now started the 3rd unit, another unit of spear goblins. To make things easy following a quick mould line clean up I sprayed the minis with Halfords Black Primer

Following on from the spray it was just a matter of brushing on black paint into the recesses that the spray hadn’t penetrated.
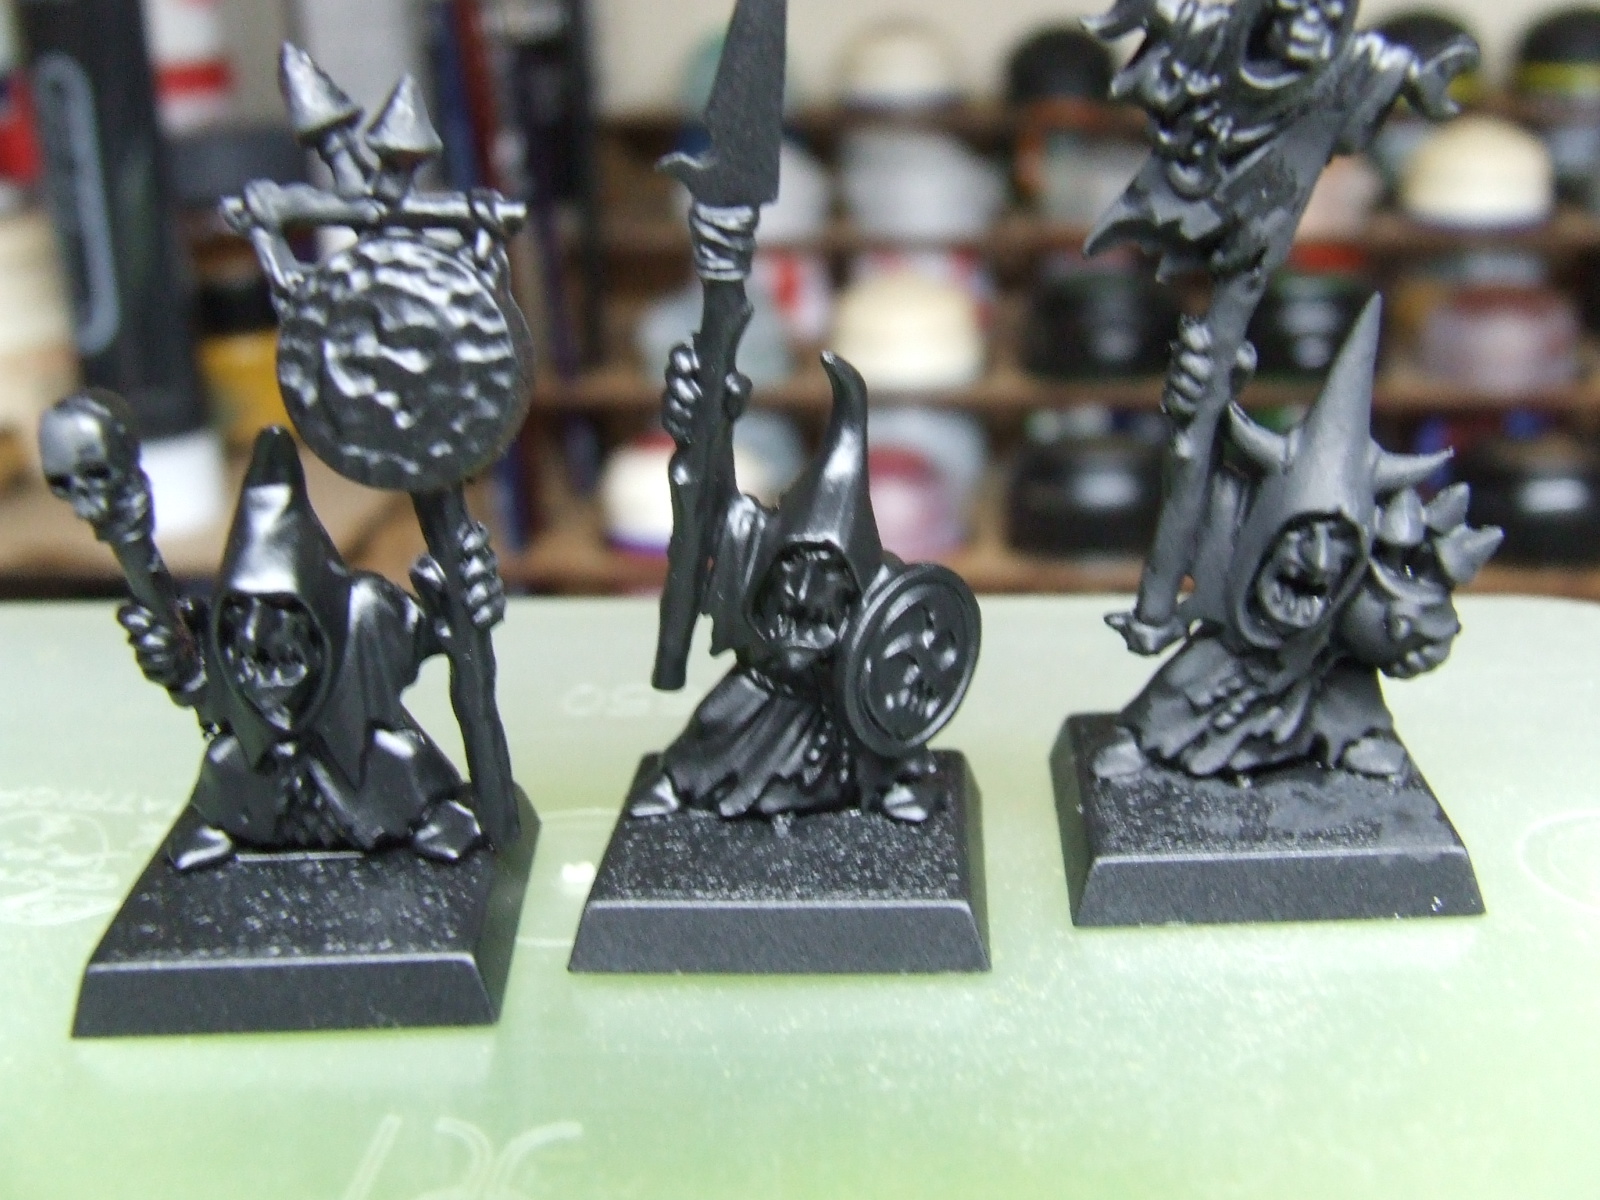
A quick dry brush with dark grey all over and voila!. I generally mix my own colours, I have many different paints from a range of manufacturers and being an old timer couldn’t give an exact formula! I just added ceramite white to the generic WH Smiths black until it looked right!
As these are just being done to my wargames standard I don’t often do 3 stage painting, except for flesh or yellows and reds, so just the single coat of dark grey!
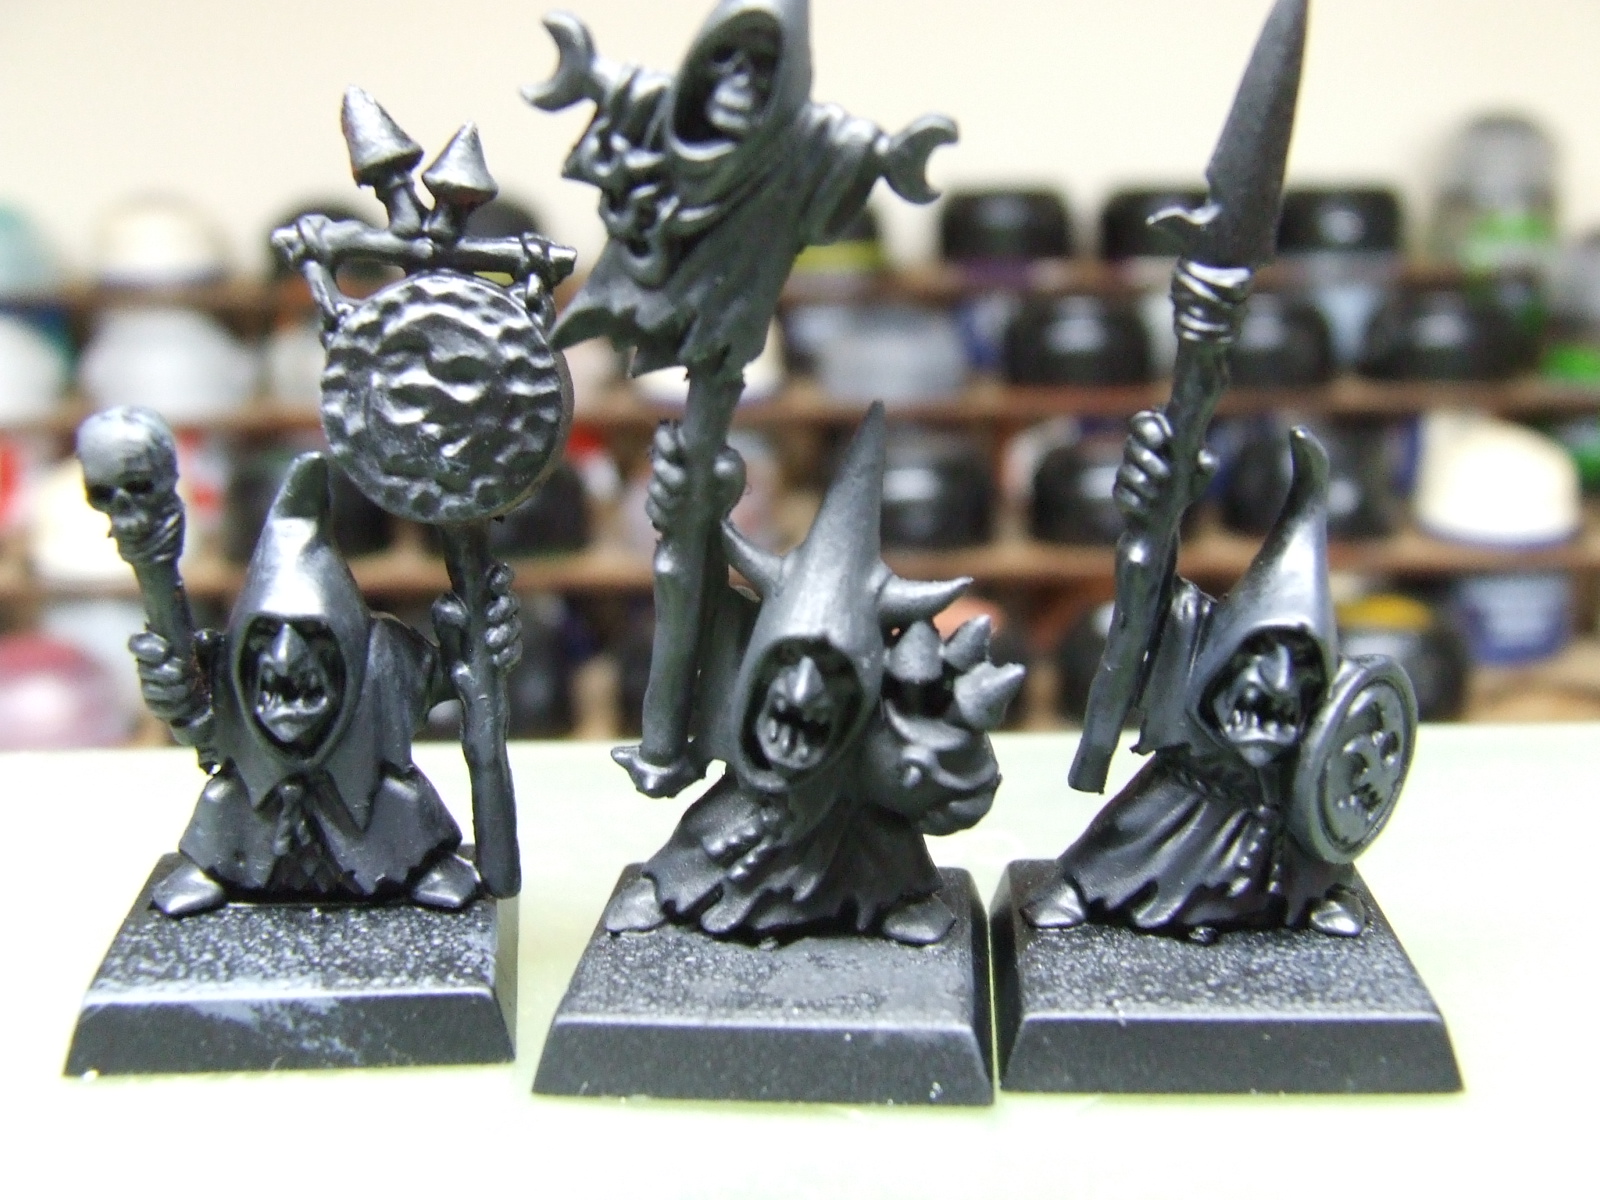
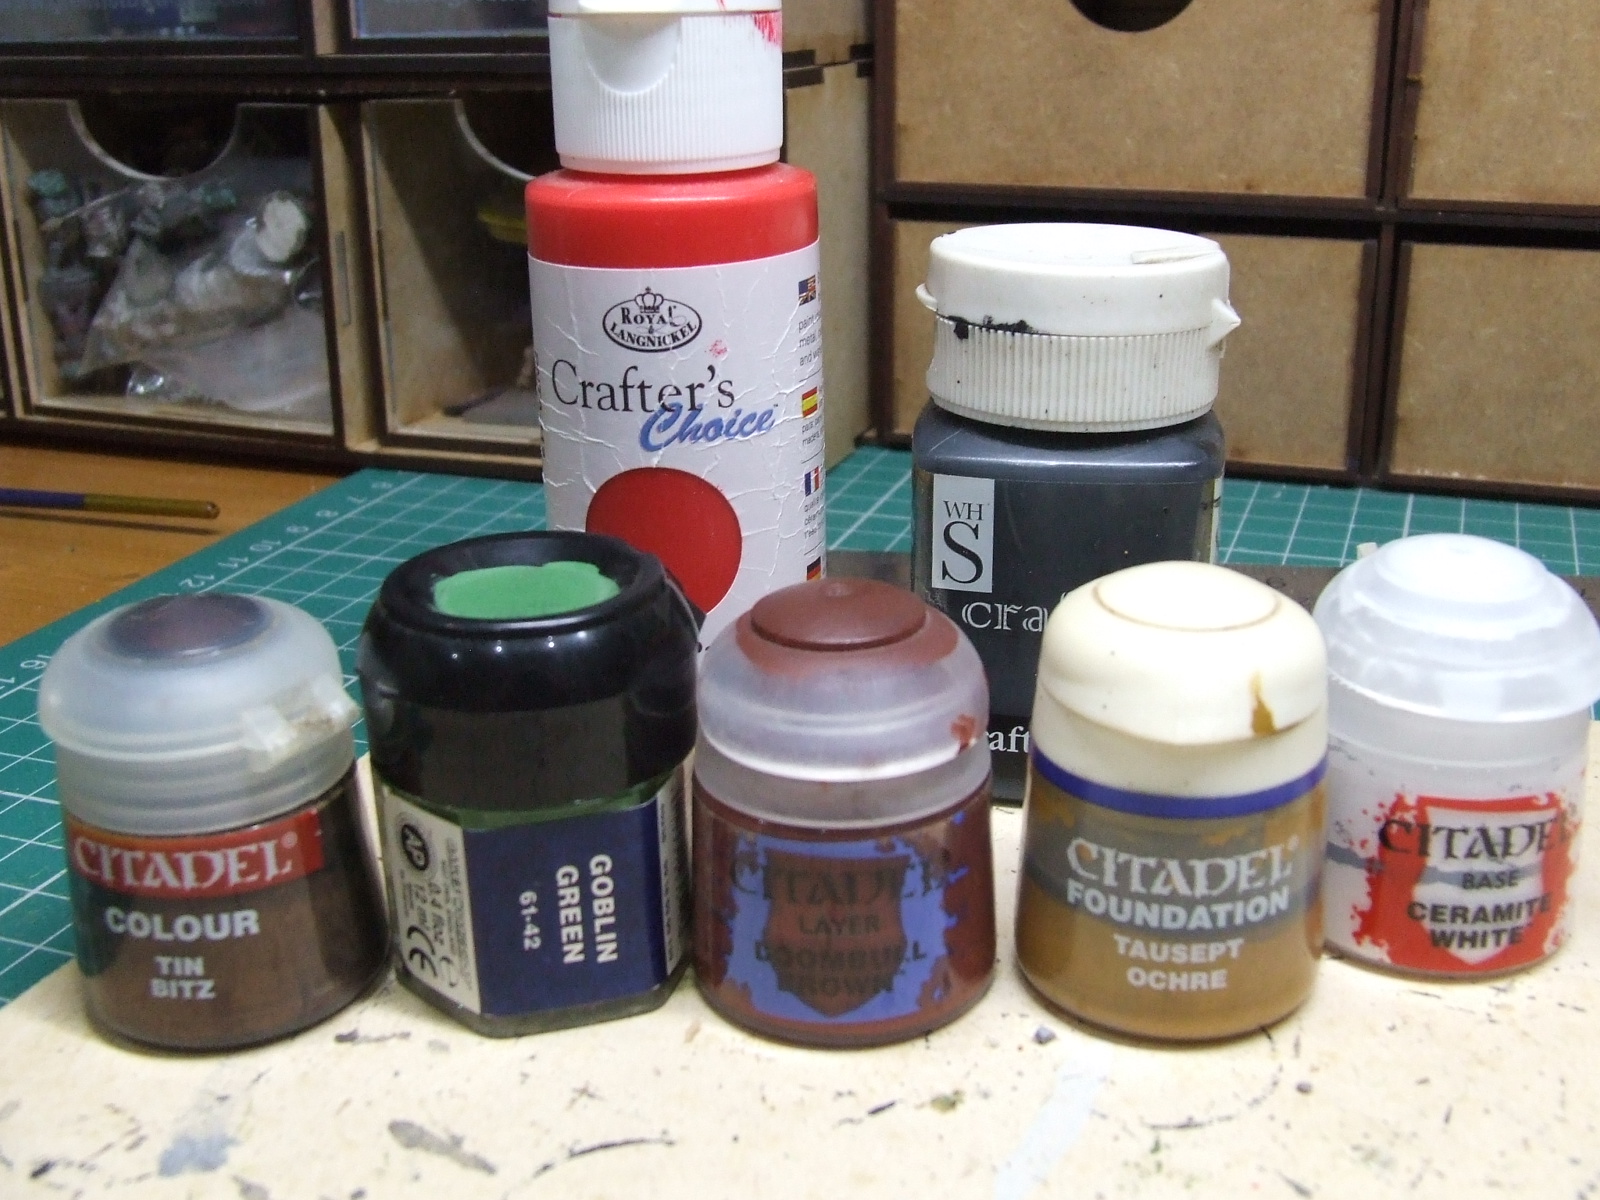
On to the basecoats. For the basecoats I used the following
Tin Bitz for the metal. As these are Gobbo’s I like a nice rusty/dirty look and tin bitz is ideal for this.
Doombull Brown + black for spearshafts, backs of shields where visible and pouches.
Tausept Ochre for the shield “evil moon”.
A generic scarlet +Doombull Brown for the shield rim and tops of mushrooms.
And finally the infamous Goblin Green for the skin.
So here they are with base coats applied