


![1918 Spring Offensive Wargame | Full Rules Overview with John & Gerry (WW1 Tabletop Game) [7 Days Early Access]](https://images.beastsofwar.com/2026/03/unboxing-warfulcrum-games-1918-spring-offensive-review-coverimage1-225-127.jpeg)


Digital dice roller


Recommendations: 392
About the Project
This is the 21st century, not the Stone Age! Still rolling little shaped bits of bone to generate a bit of randomness in your gaming? Get with the future guys!
Related Genre: Game Aid
Related Contest: Spring Clean Hobby Challenge (Old)
This Project is Active
Brother Badger
Contrast paints do a lot of heavy lifting in my painting. But that’s not to say it’s a case of slap it on and call it done. I still like the look of a neatly edge-highlight-ed model, and the slightly cartoon-y look of a high-contrast colour scheme.
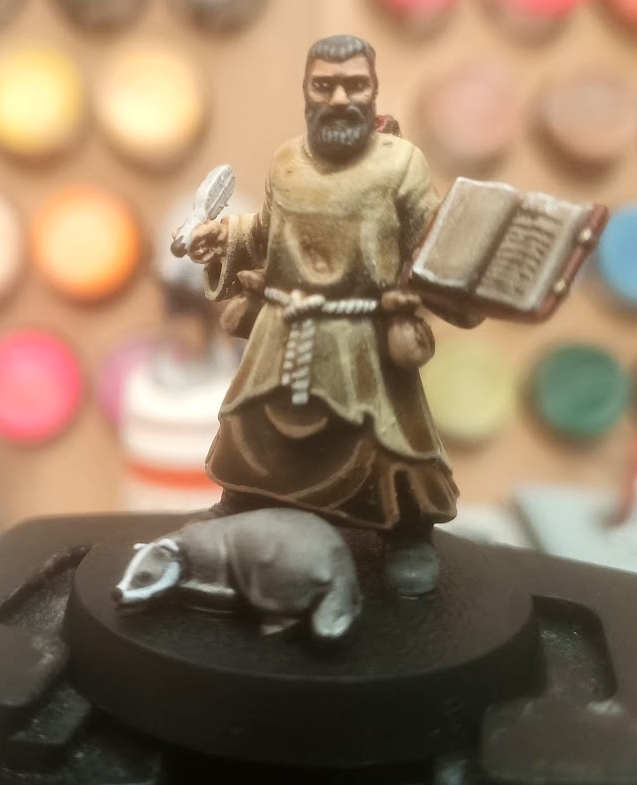
I’ve spent years trying to improve my painting technique yet every time I finish a model, it’s clearly “one of mine”. Even my wife noticed it – in a display of different miniatures, she says she can always pick out the ones I’ve painted.
I spent ages trying to “lose” my own style – feeling that it should be “better” somehow – the contrast higher, the blends smoother, the details more detailed, the colours more exciting…..
In the end, I’ve finally learned to accept my painting style. It’s not the best in the world. But it’s noticeably “me”. In any other endeavour, to have your own recognisable style would be great. As a guitar player, I’d love if people heard my playing and could immediately tell it was me. As an artist, to paint a picture and know others could recognise the brushwork would be delightful.
So I’ve learned to accept (if not yet fully embrace) my own painting style for miniatures and stop trying to replicate someone else’s style.
I think this model of Badger Ben is typical of my current style of painting; zenith primer, slap on some contrast paint, get the eyes done, a t-shape for the nose, upside-down triangles for cheeks, a bit of edge highlighting and on to the next one!
The Girthy One
Sometimes you don’t question why, and just get on with the job you’ve been given. I felt a little bit like that while painting up Horatio’s personal visions of the OTT crew.
I’m not sure about the fetish for loin-cloths and topless heroes. But those were just the designs I had to work with, so set about painting what I’d been given!
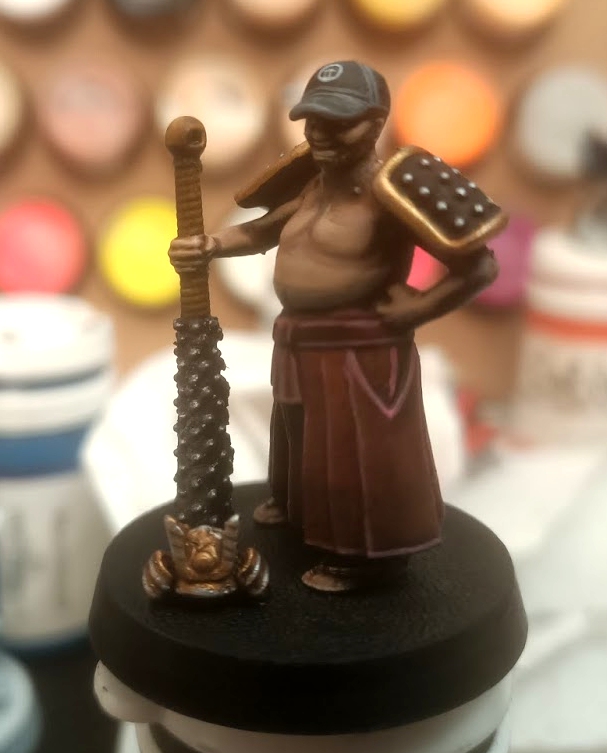 Using my amazing L33t HaX0r skills in Blender, I modified the original .stl to add a bit of "girth" to our "Girthy One" (the original would be more accurately described as "the scrawny one" which I felt didn't do justice to our samurai hero)
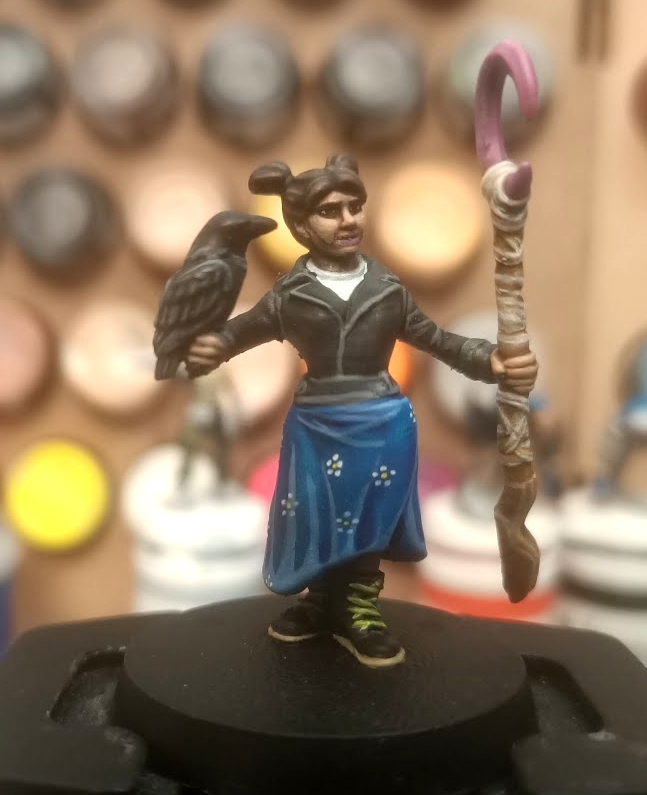
The Pastel Raven
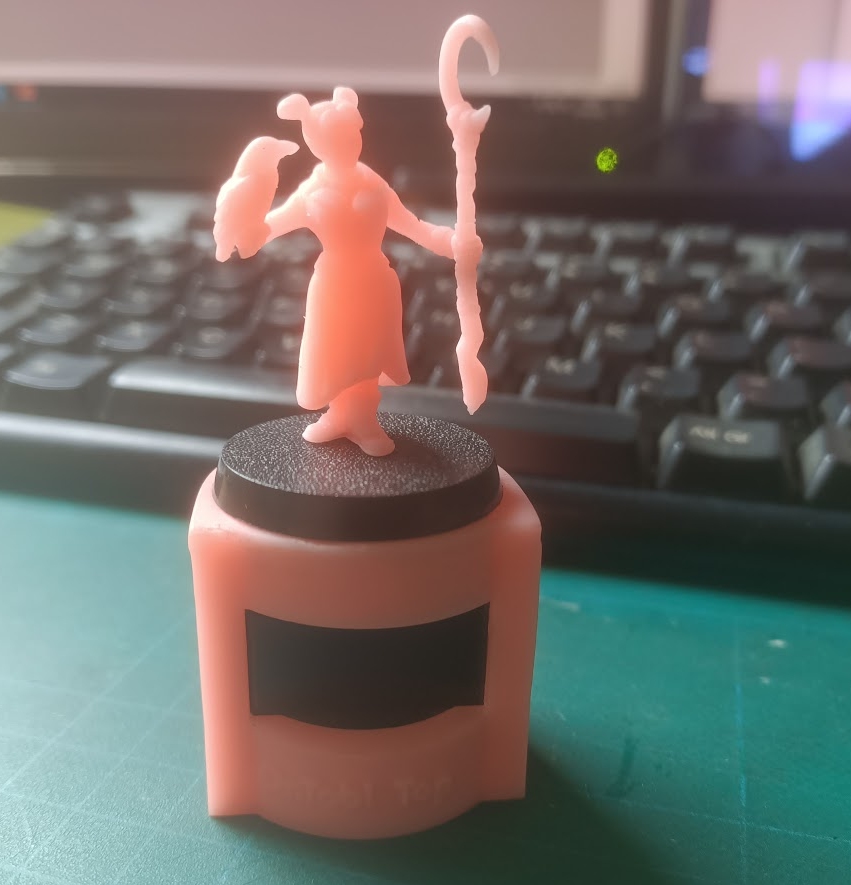
Free is a relatively new member of the team but is already a regular part of the weekender team. It seemed churlish to leave her out and the thought of her bravely smiling at everyone else as they opened their “gifts from afar” was just heartbreaking.
So behind the backs of the others, I told Free what we were up to, and asked her to provide an idea of what she’d like as a mini-me. More than just an idea, she replied with an .stl file attached to an email.
Biker jacket? Dr Martens boots? Tiny raven? Check, check, check!
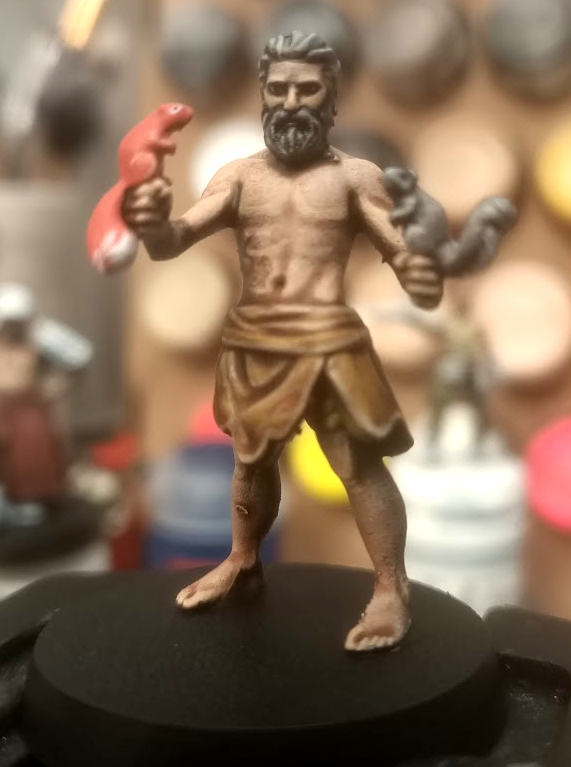
The Squirrel Master
I scaled this model up to about 120% to accurately portray the fact that this character is meant to represent a 6′ 7″ hairy giant.
Unable to decide whether to go with grey or red squirrels, I decided to take the cowards way out and paint one of each.
 (wow these photos are really unforgiving when viewed so close up - in real life, the miniatures honestly look a lot better!)
Captain Alpha Strike
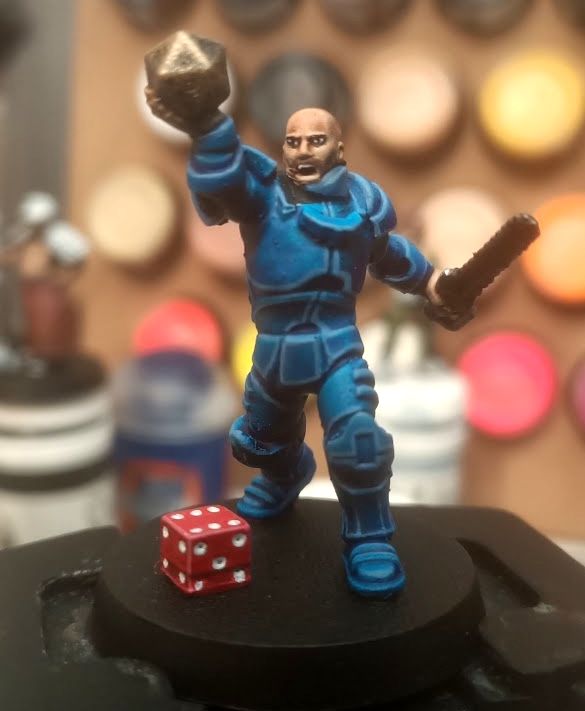
I never again want to see, let alone paint, another character in Space Marine-type armour, after painting all these panel lines!
Adding the "toppers"
Of course, there was always going to be more to this project than just some boring old electronics. The whole point of creating an enclosure with a 35mm diameter was so that it could act as a “plinth” for a beautifully painted miniature on a 32mm base.
Not only is this an electronic dice roller, but can be a “mascot stand” for players in their D&D campaigns or simply a little something to place on the tabletop to intimidate their opponents (while wow-ing them with techno-cool at the same time).
In fact, the entire project was designed, from the very start, as a collaboration with OTT member Horatio Noseblower to create something cool for a series of miniatures he’d designed on the Hero Forge website.
A few months earlier, I’d printed off a load of miniatures and posted them to the USA for him to paint – the idea being that while he was painting the minis, I would make the bases for them to stand on, completing a cool inter-continental, global members collab. as gift items for the OnTableTop crew.
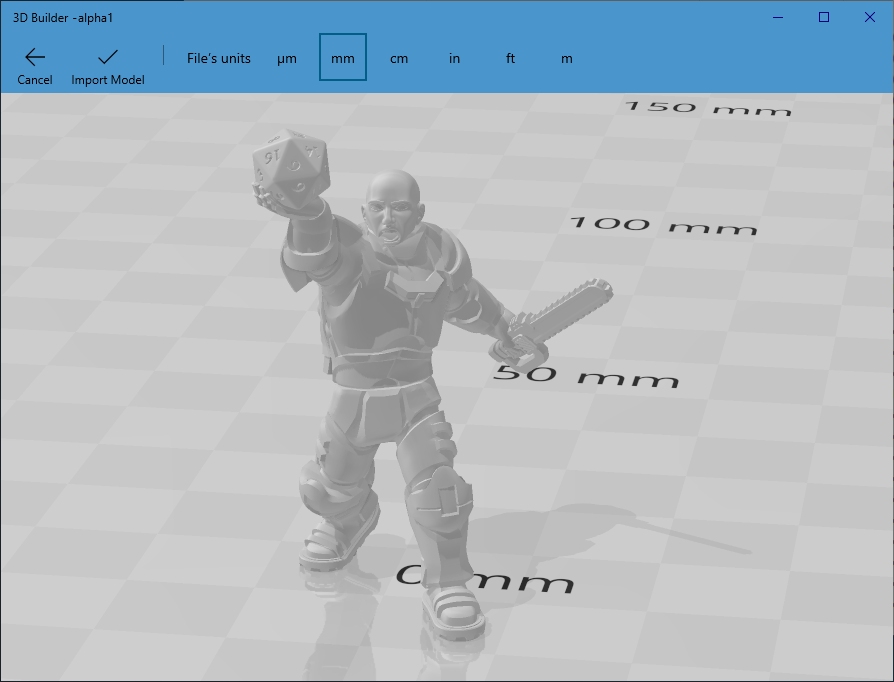
Here’s “Captain Alpha Strike” in his 3d rendered form.
The months passed by and things went a little quiet on the US front. So while I was waiting for the custom PCBs to be delivered (thanks to a global pandemic, and the disaster-that-nobody-wants-to-talk-about-any-more that is Brexit, things seem to take an awful lot longer to arrive in the UK from anywhere “overseas”) I took to printing out duplicates of Horatio’s miniature designs and cracked out the paints…
Fitting it all together
Speaking of enclosures, after a quick rinse and final cure, my first three enclosures were ready.
Everything looks quite promising at this early stage….

….but I’ve yet to work out what happened to my letter ‘E’ or the OTT logo? Maybe there were some inverted normals or something?
I’ll have to get those sorted out before the next print run! In the meantime, I might try painting them in on these and hope nobody notices!
One thing I hadn’t noticed was that a lot of phone chargers now have quite chunky plugs on the micro USB end. And I’d only allowed for a small hole on the side of the enclosure to plug the charger into. I needed to modify the battery charger so that the micro USB plug didn’t sit “behind” the wall of resin, so that a charger would actually plug into the socket.

A bit of clumsy knife-work and a bit of filing later, and it was a nice, snug fit.

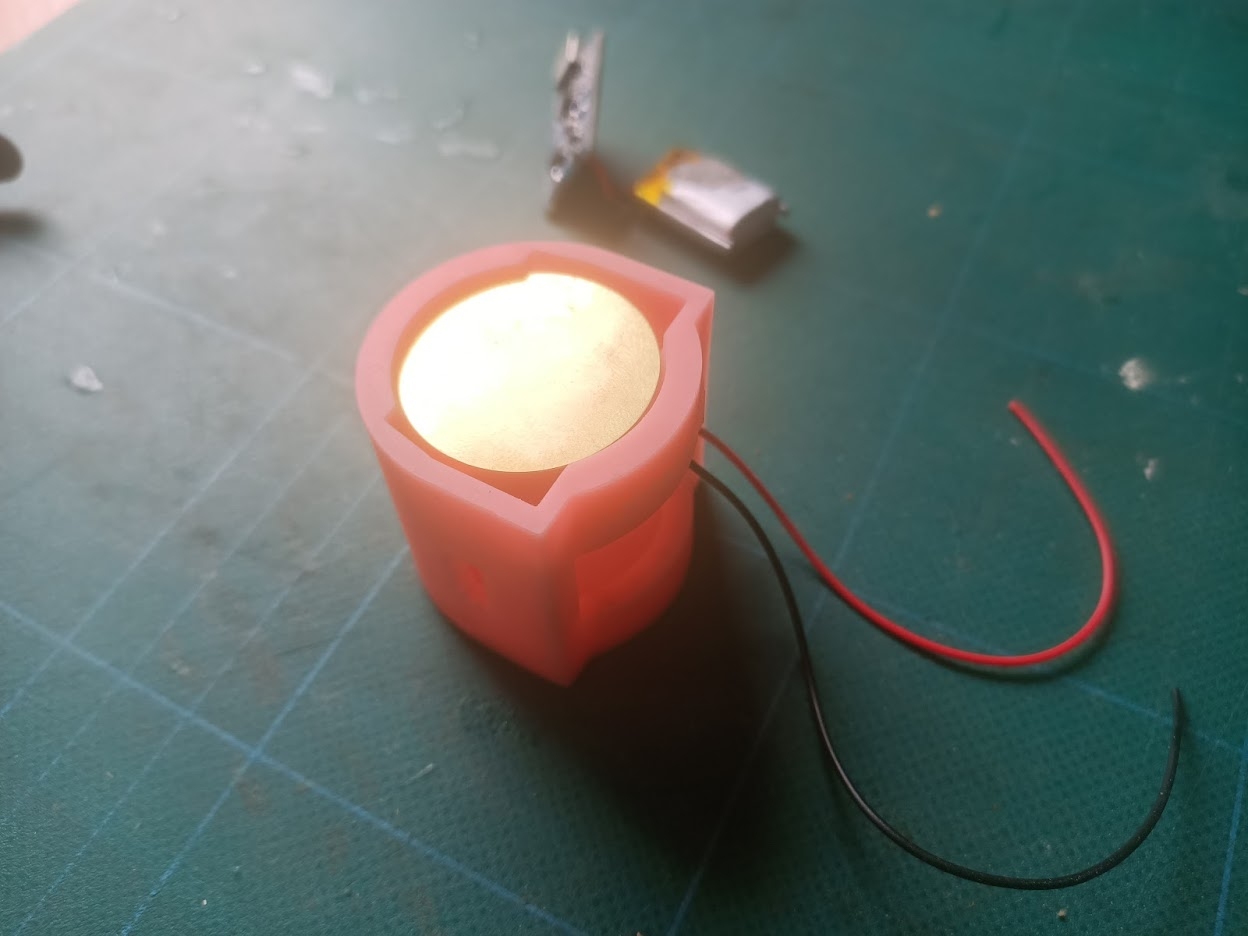
The little lip I left in the bottom of the enclosure….
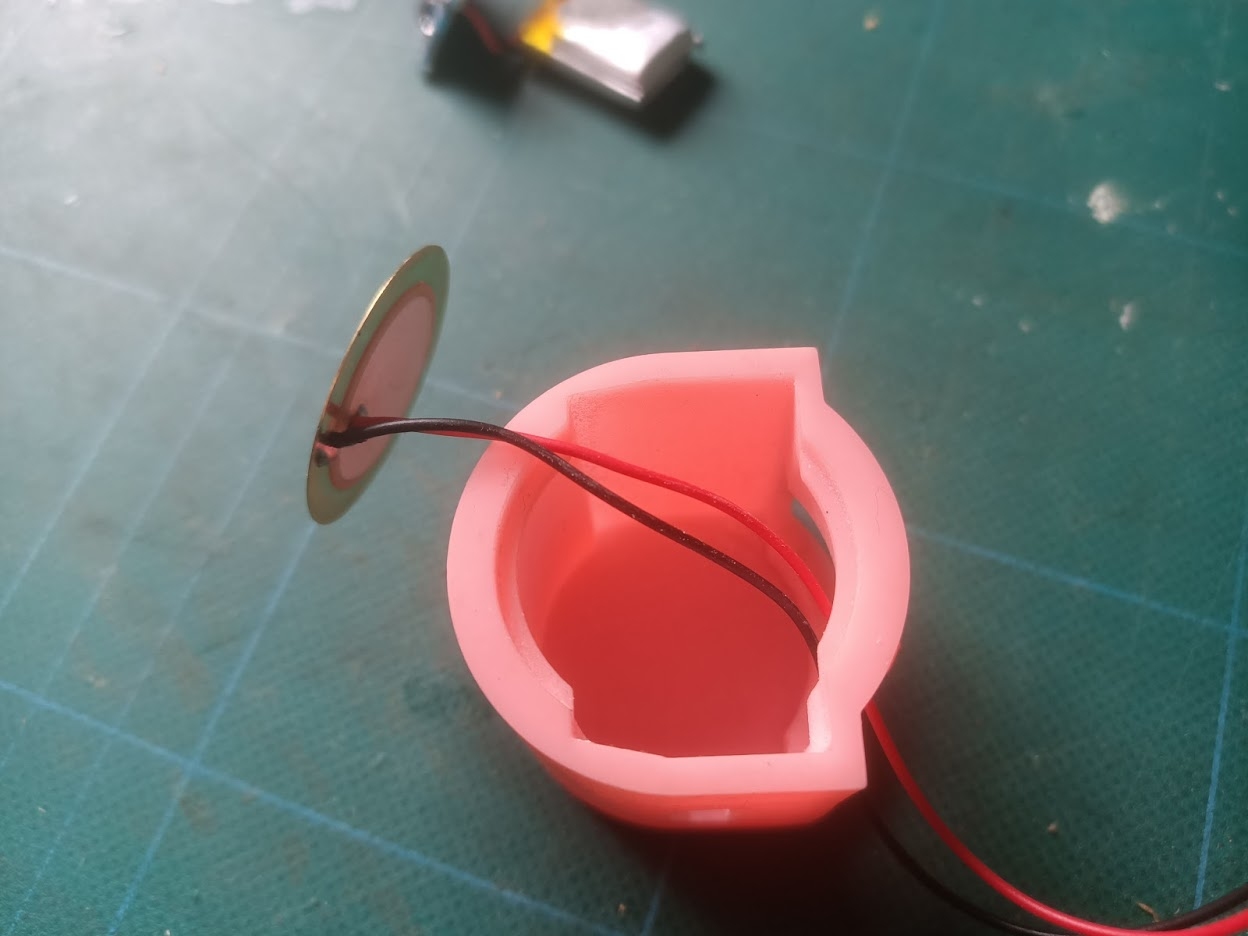
….seats the piezo sensor just perfectly!
Making the controller board PCB
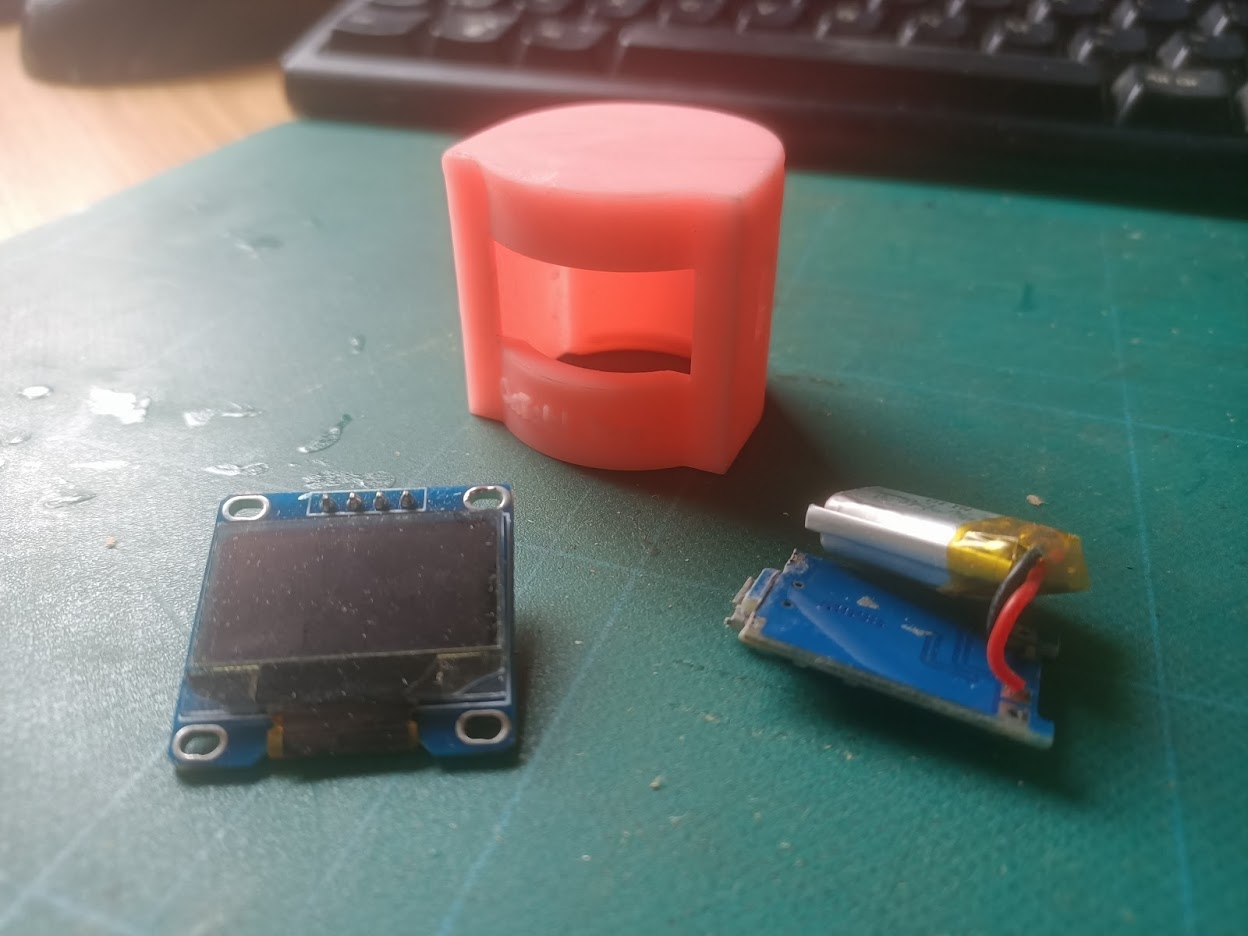
While the enclosure was printing, I set about designing the controller board for the LCD.
It’s really little more than an AVR chip with the diode and resistor from the earlier piezo schematic, a decoupling capacitor (to provide a steady supply voltage) and a 4-pin connector to join it to the LCD pins.
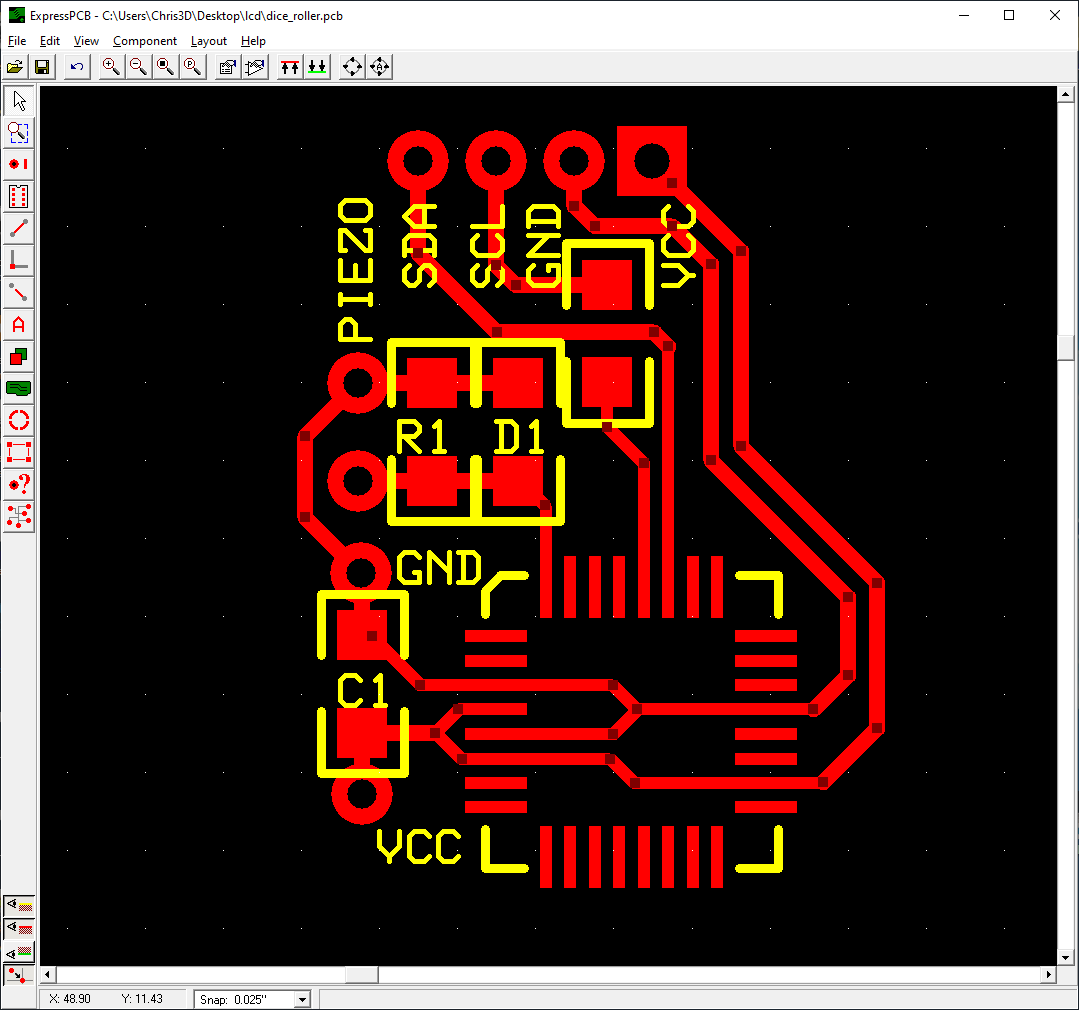
The whole thing fits onto a tiny PCB smaller than the actual LCD controller board, so I’m pretty confident that everything is going to fit inside the enclosures…


![StarCraft Tabletop Miniatures Game Pre-Orders Live Now [Updated]](https://images.beastsofwar.com/2026/03/starcraft-tmg-news-cover-600-338.jpg)


