


![NO Weekender Or Cult Of Games XLBS This Weekend [Updated]](https://images.beastsofwar.com/2026/03/No_Weekender_and_XLBS_this_Weekend-225-127.jpg)


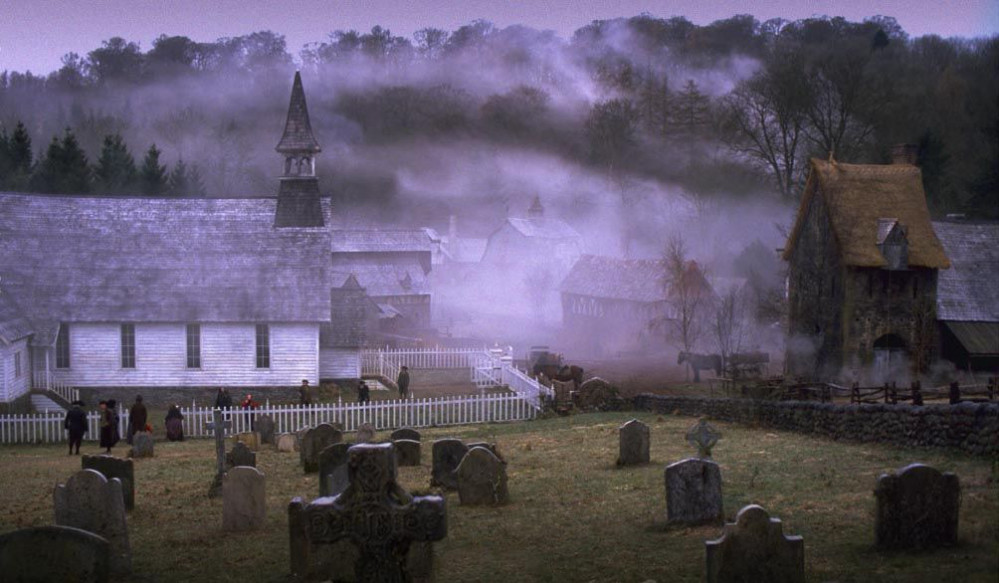
“Sleepy Hollow” or 18th Century terrain & Minis


Recommendations: 735
About the Project
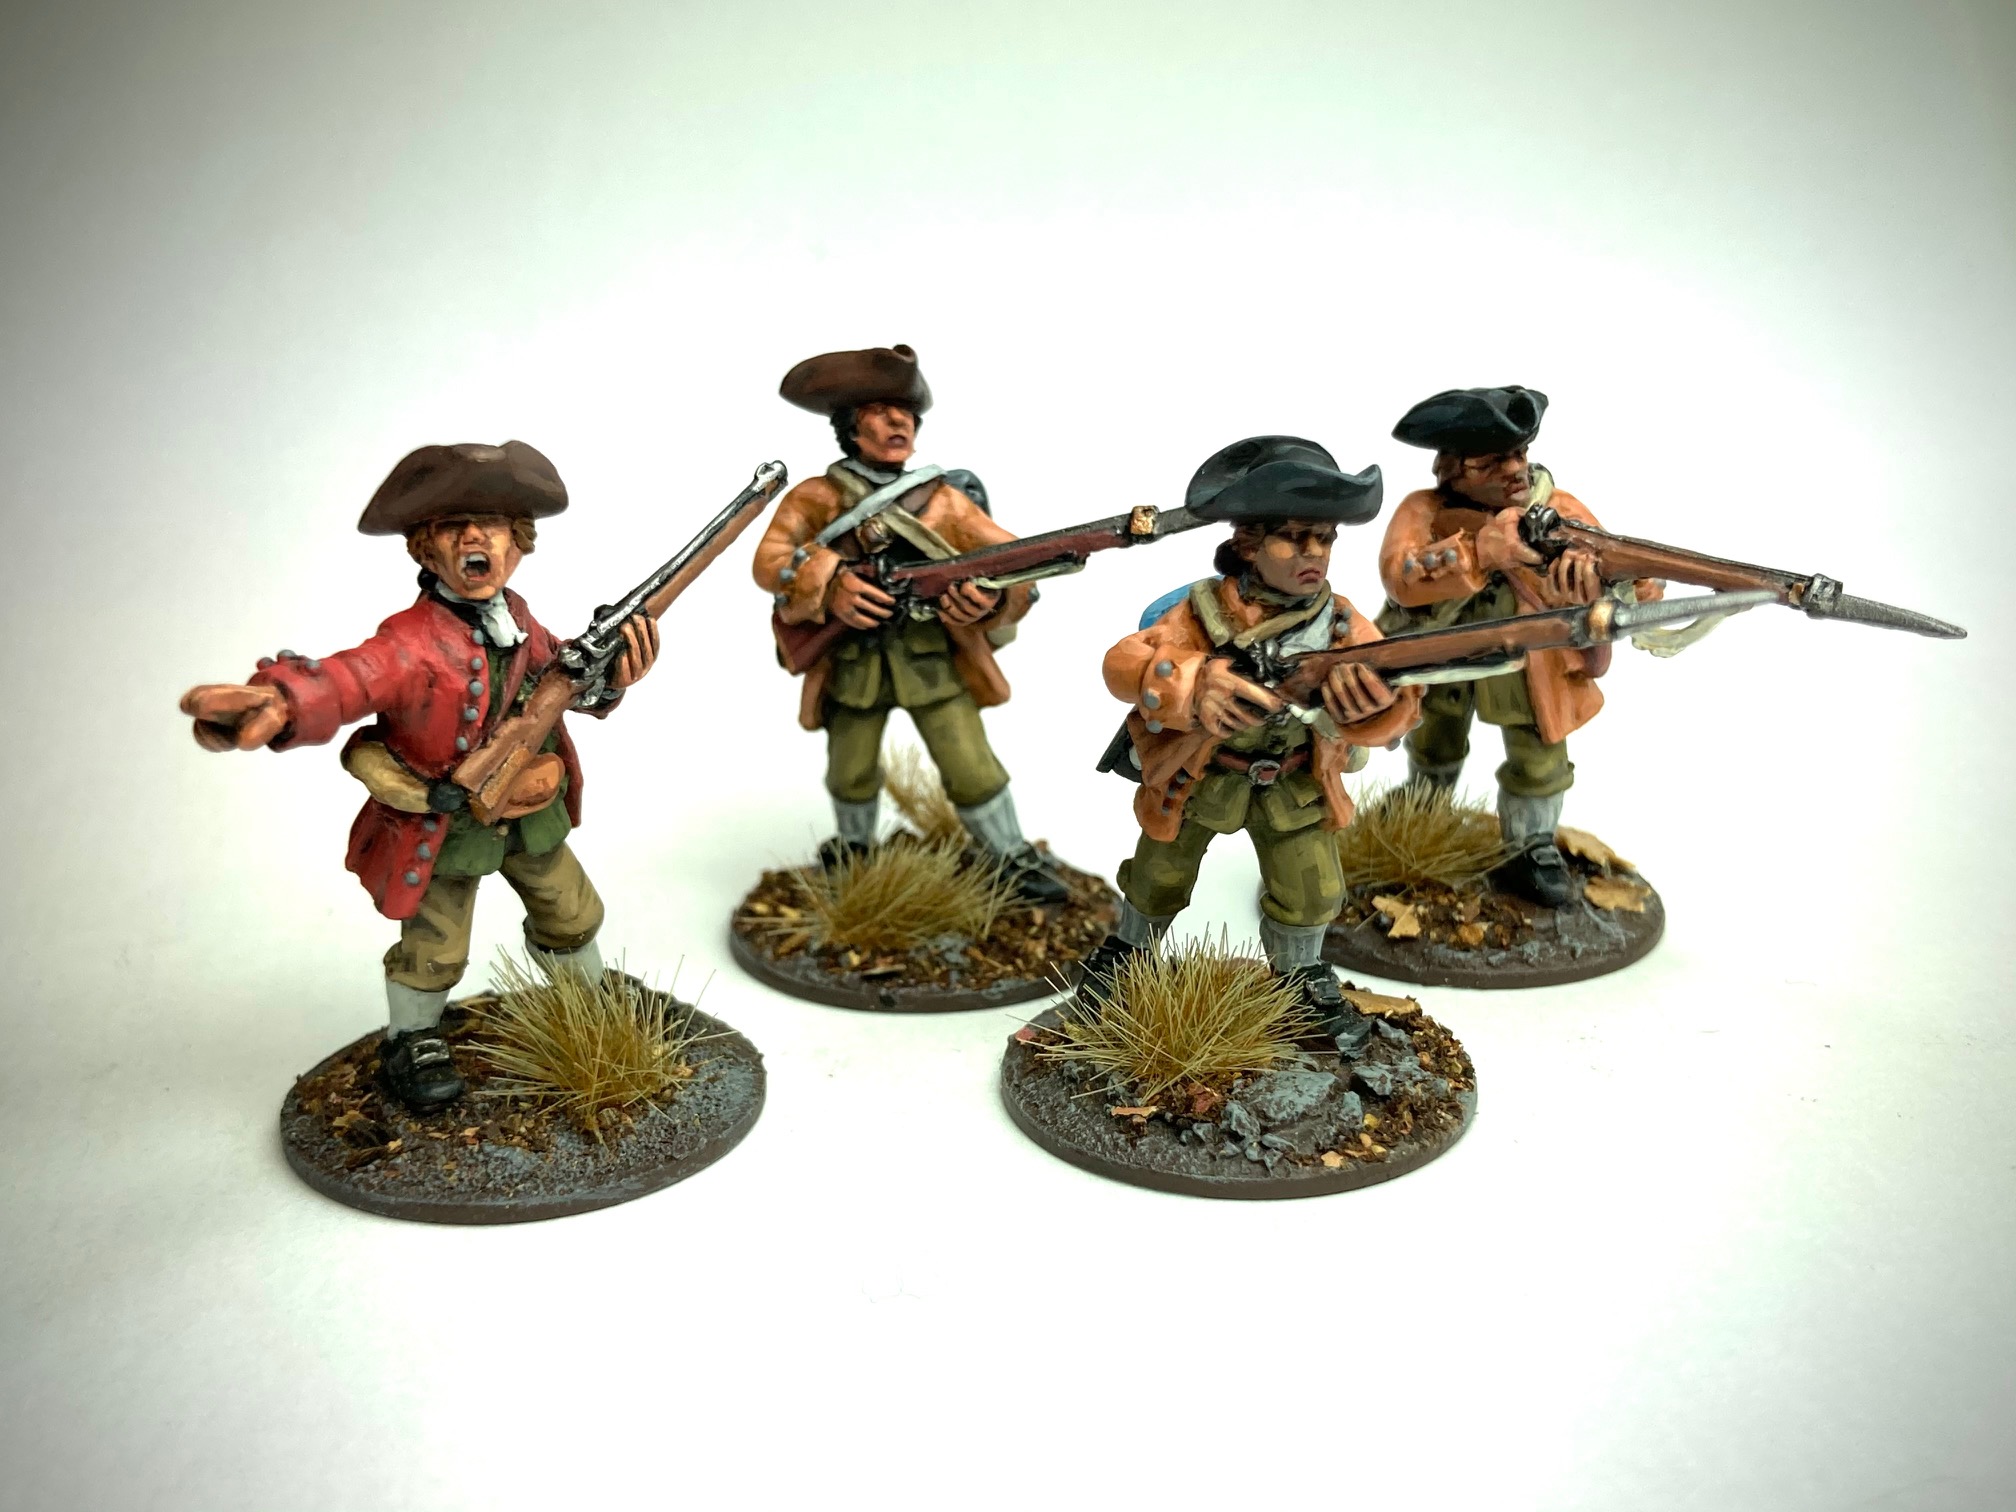
Set in the 18th century Hudson Valley US, this project is part historical and horror. The terrain will be farmland, stone walls and buildings inspired by Dutch architecture of the time. The miniatures will be mostly Galloping Major and Wargames Foundry. I will be collecting and painting small minis for skirmish games with the intent to build up to larger games like Sharpe Practice taking place during the French & Indian War.
Related Company: Wargames Foundry
Related Genre: Historical
This Project is Active
Pig Pen
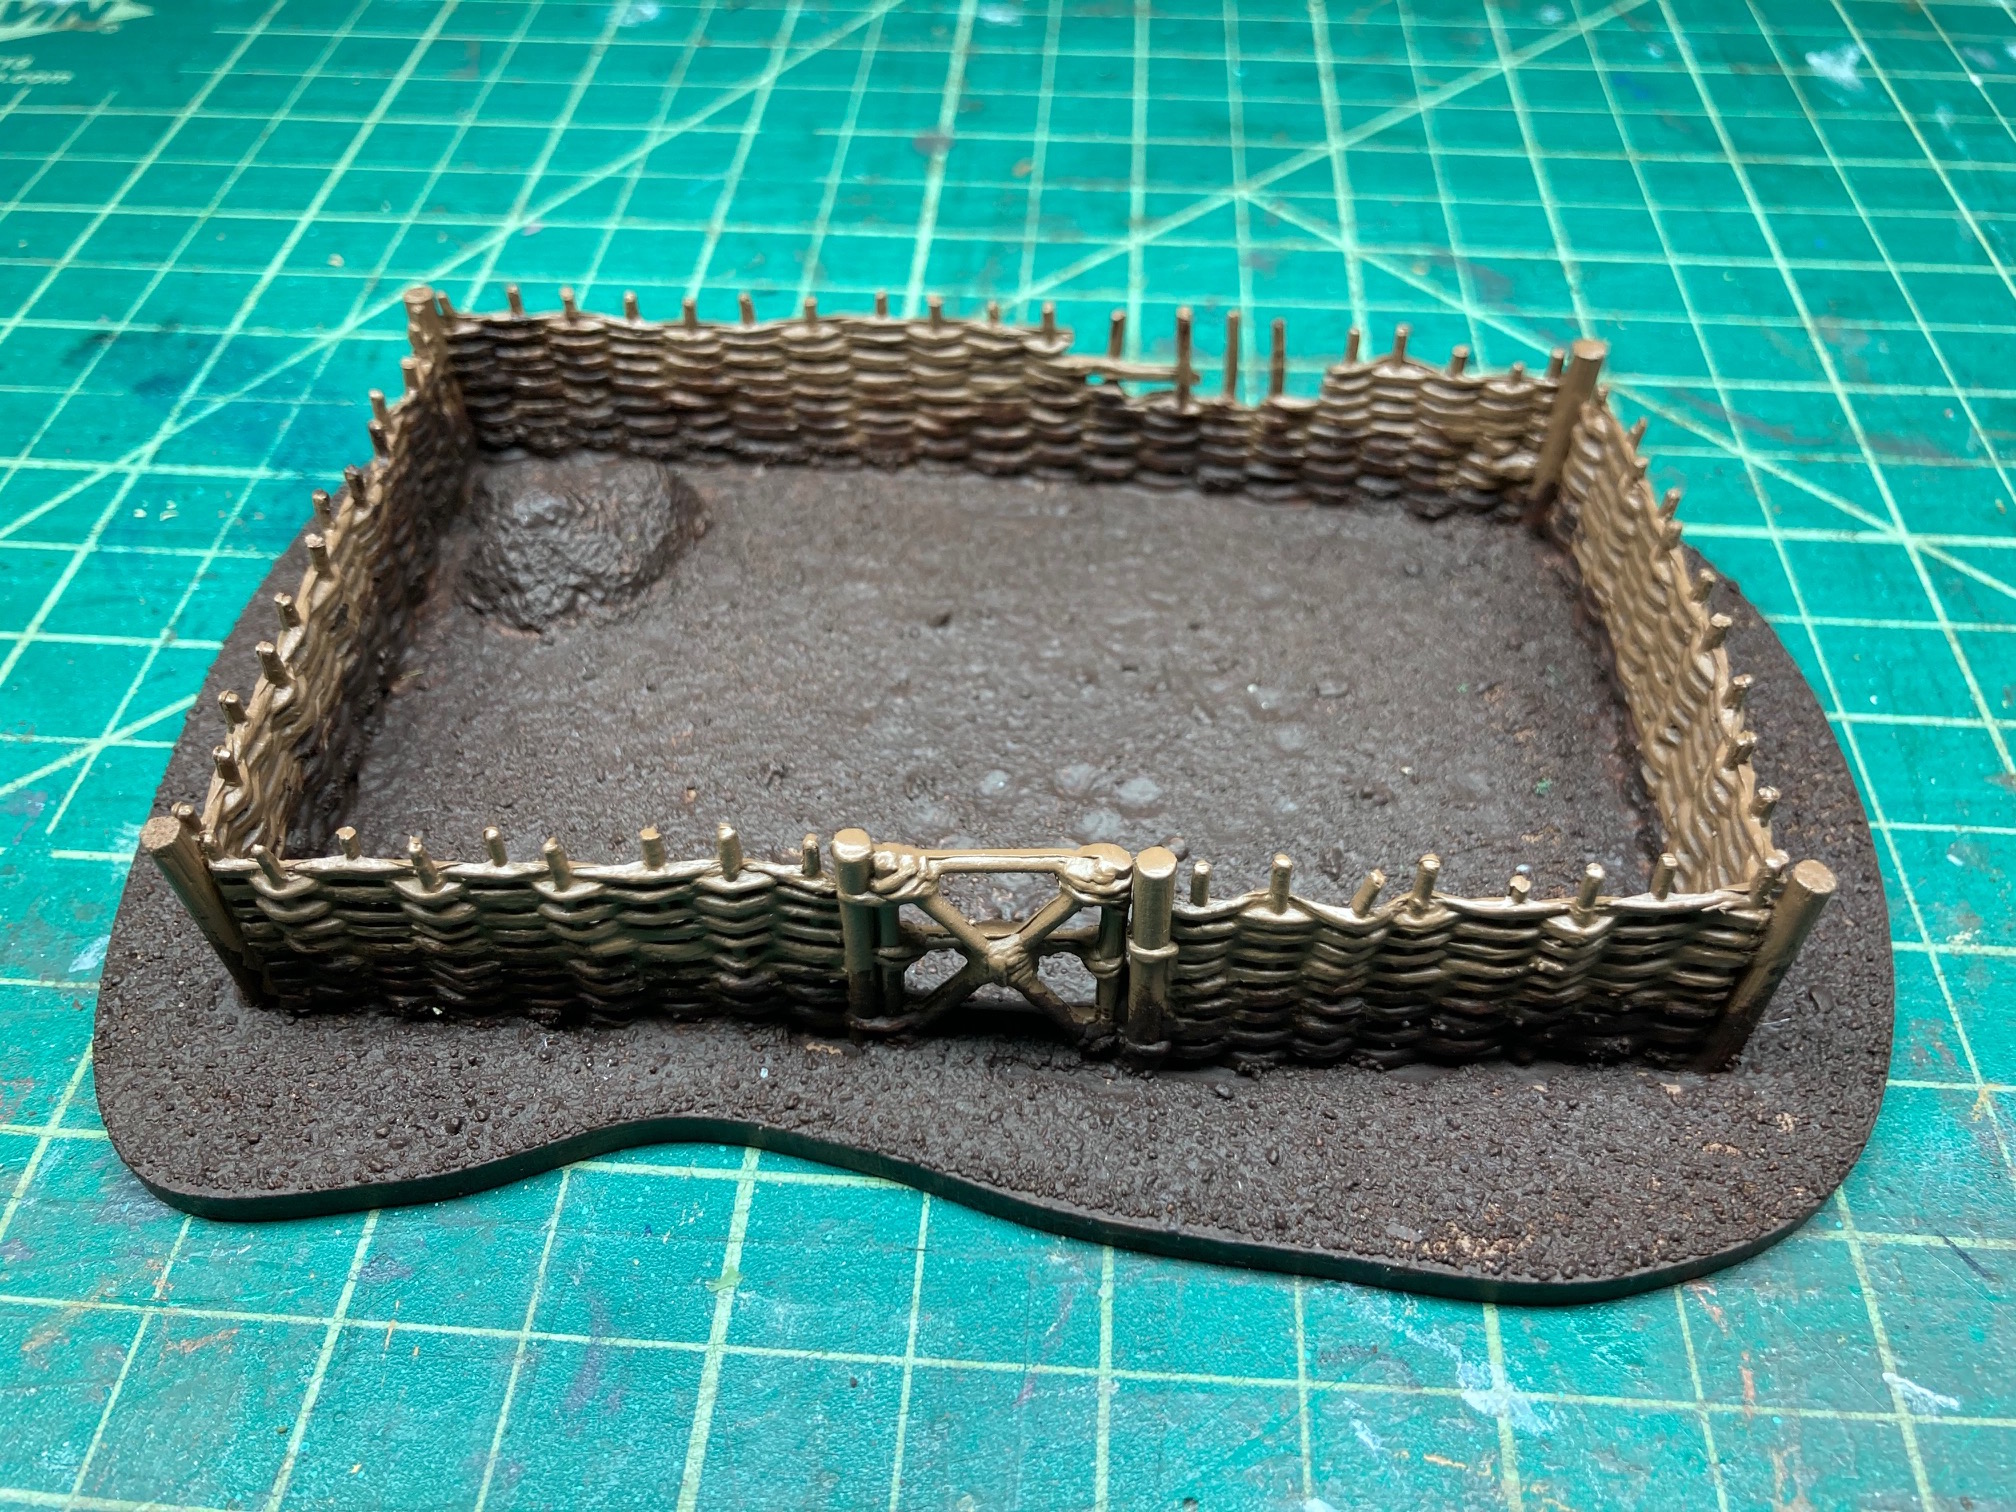
Once again Render wattle fencing around the pen. Wood filer to represent muck. I pressed some dips here and there for texture. Brush on the main base color, in this case Burnt umber. Still looking for some pigs. I have four somewhere in the studio. I just hope I don’t get distracted with whatever else I find looking for them.
Still a WIP.
Cheers!
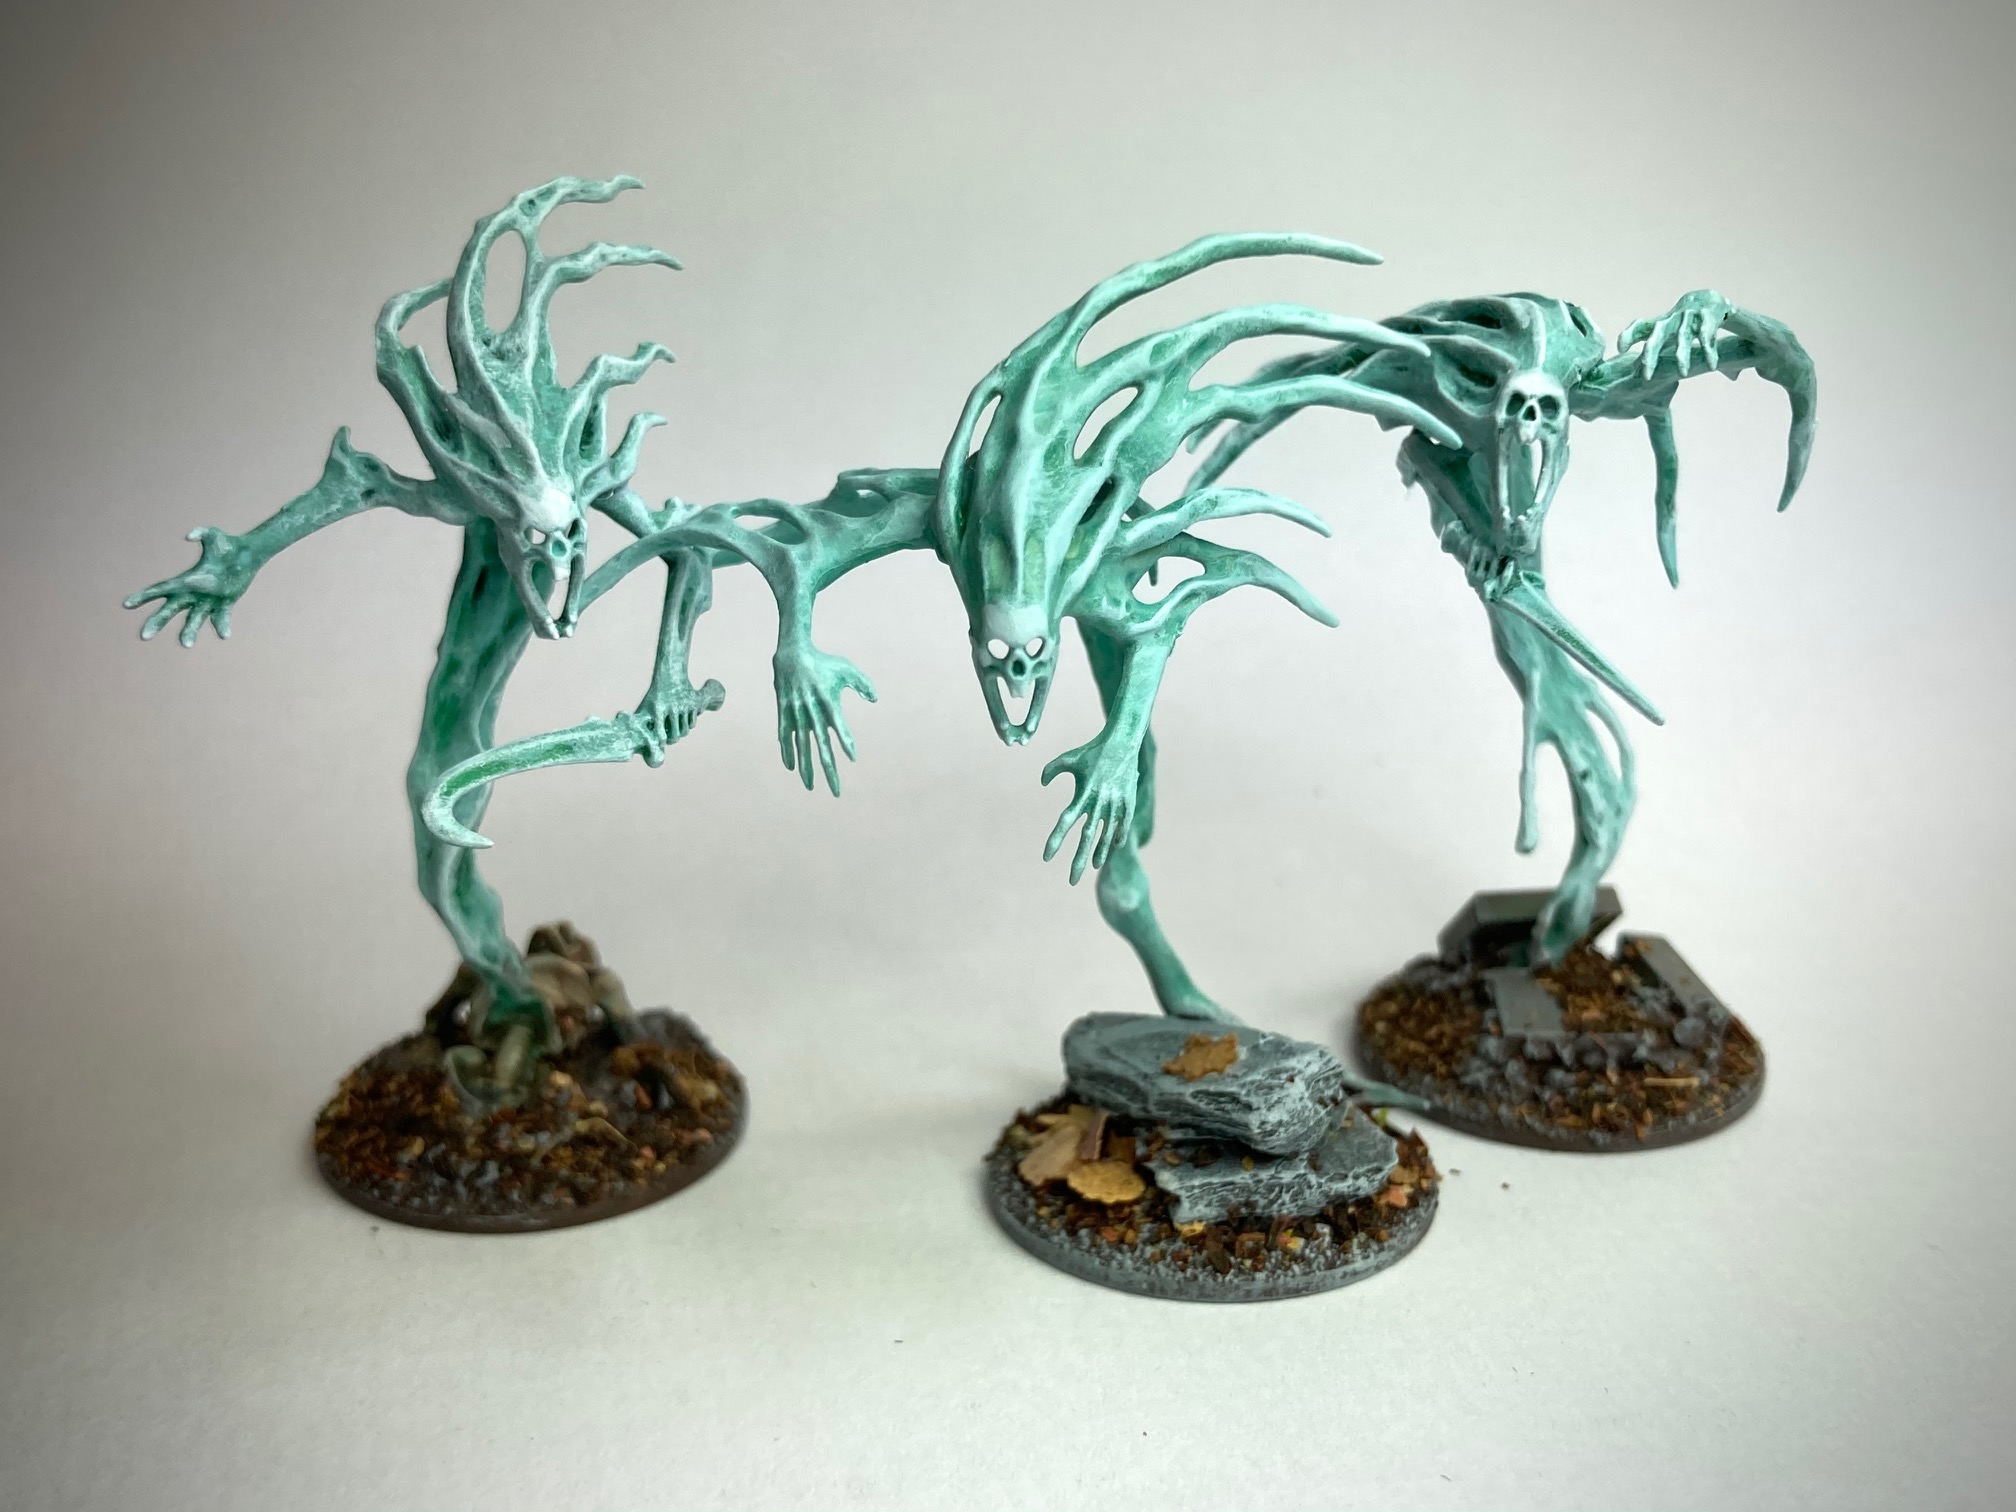
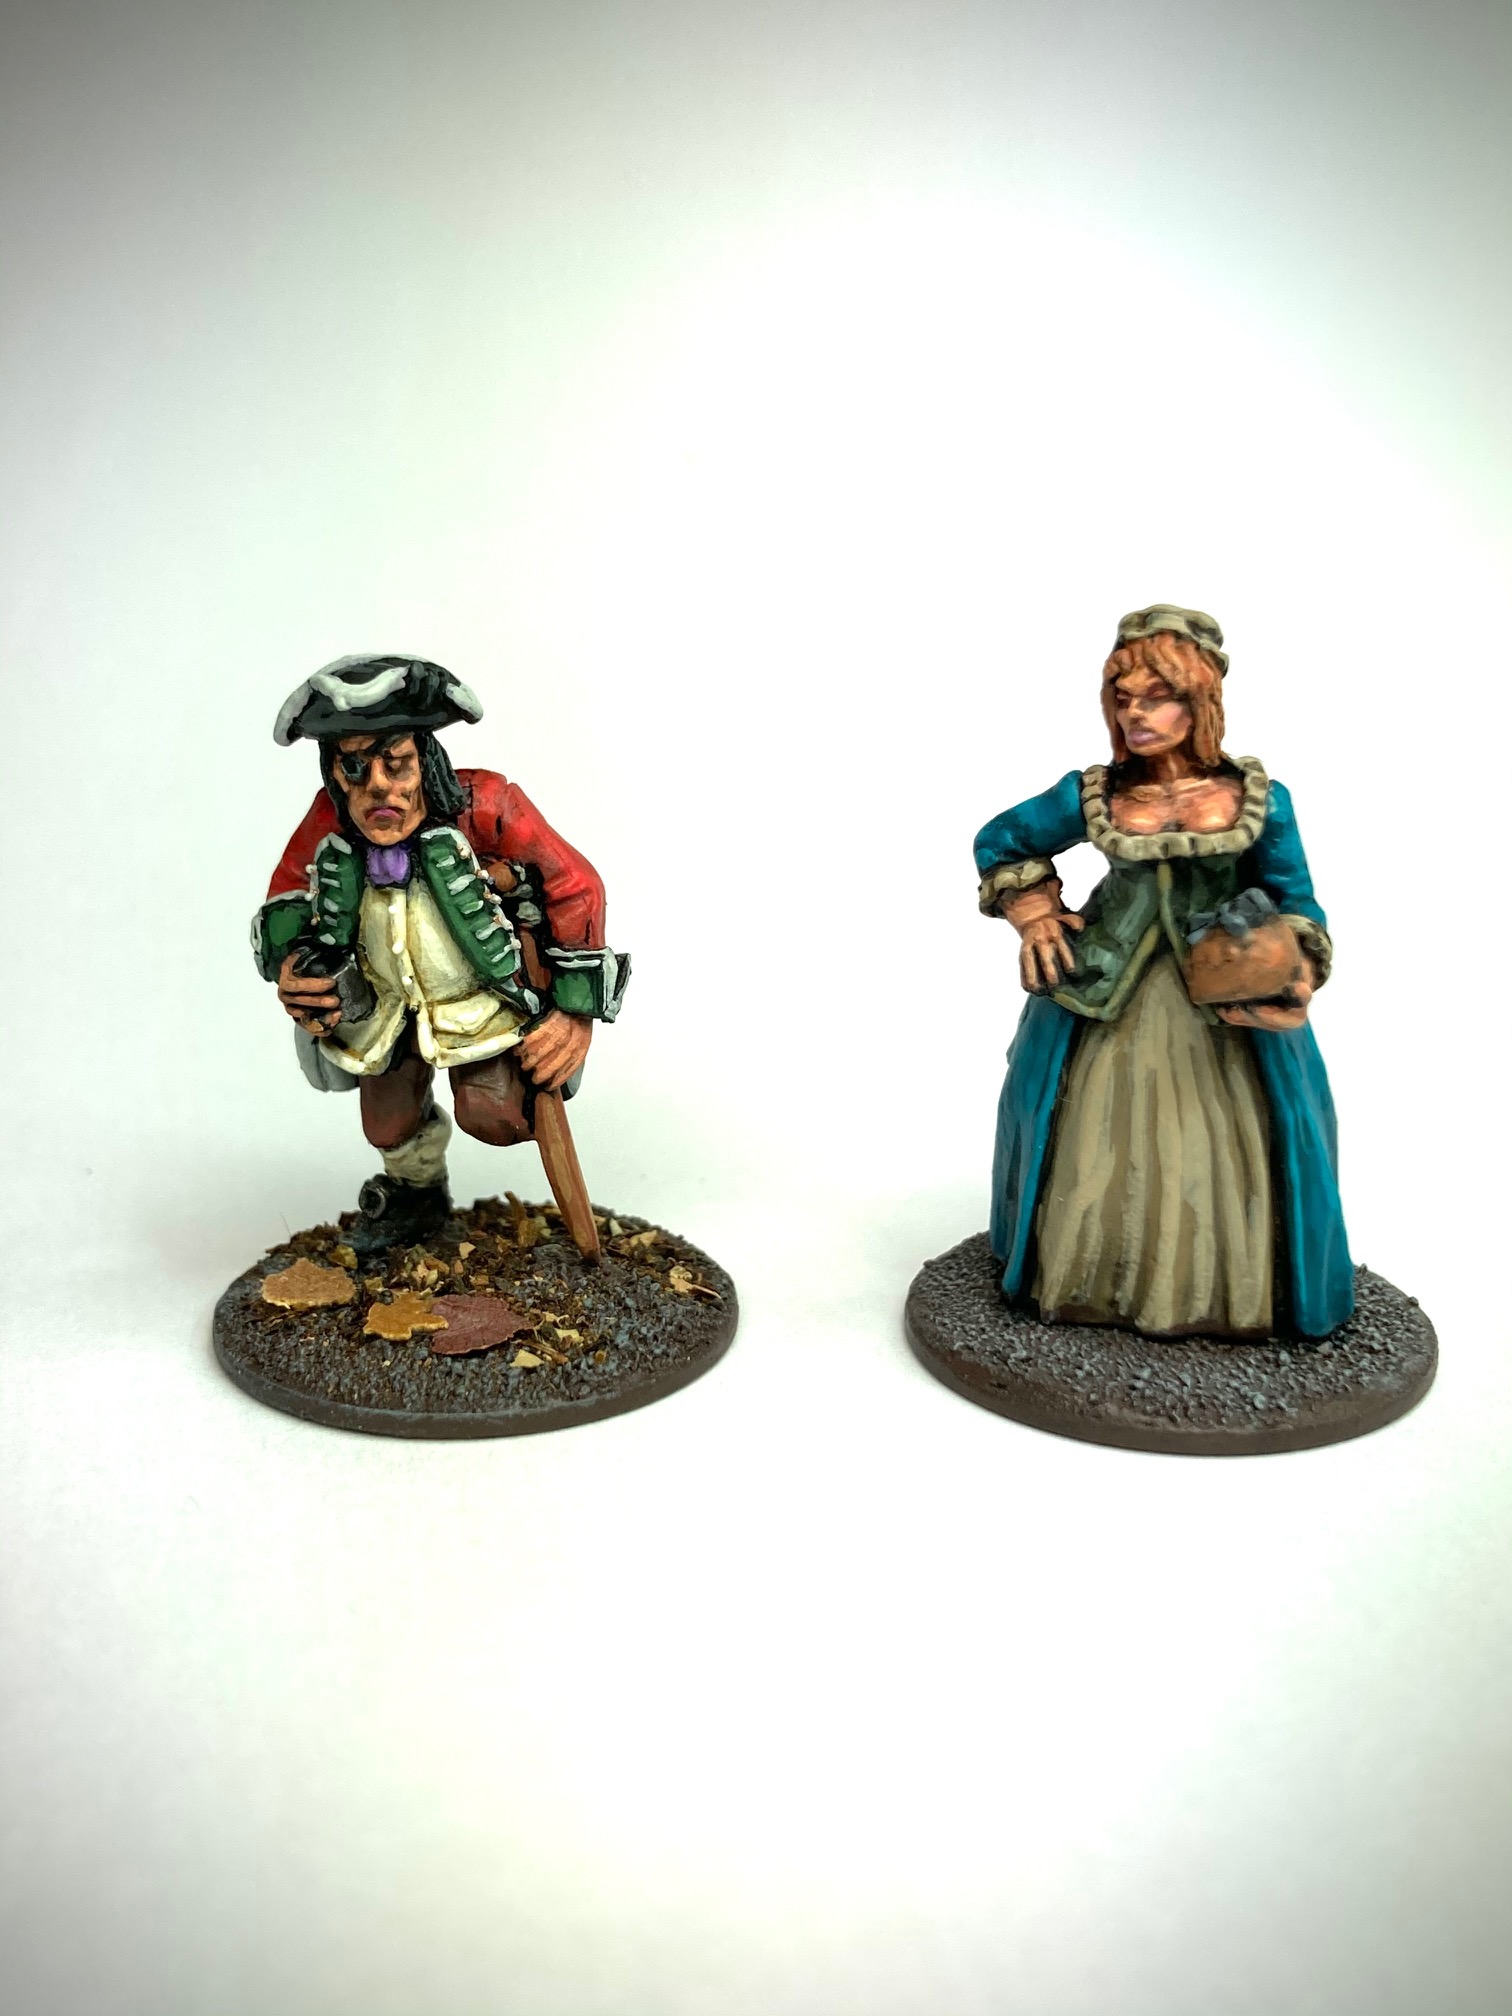
Conte Loup de Luna
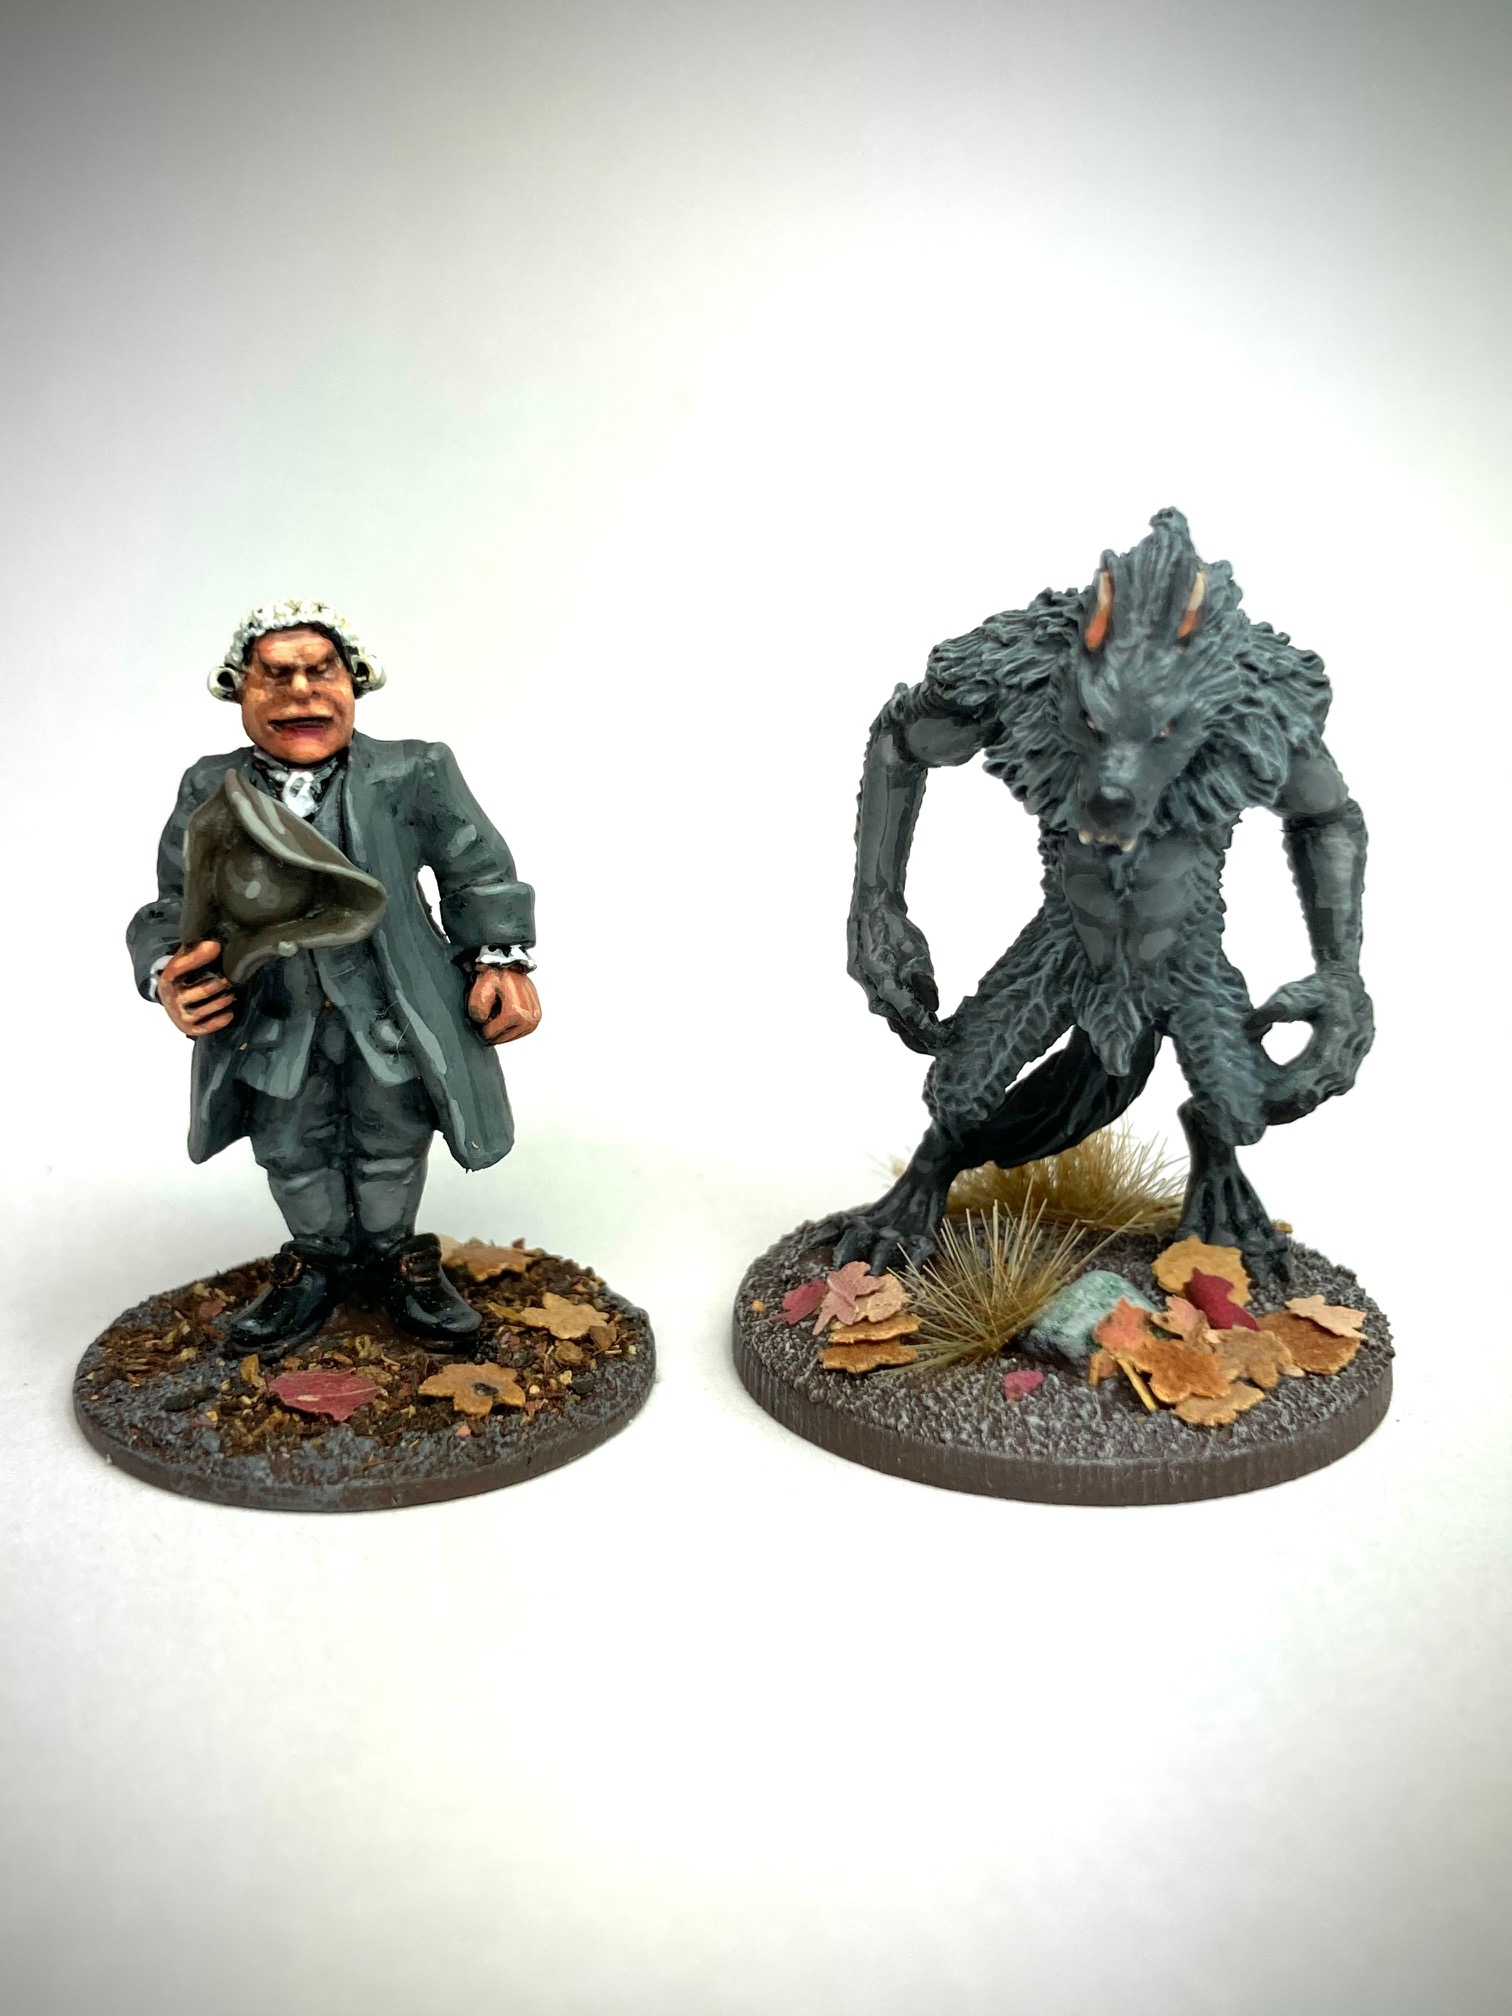 L. The Conte and his alter ego R.
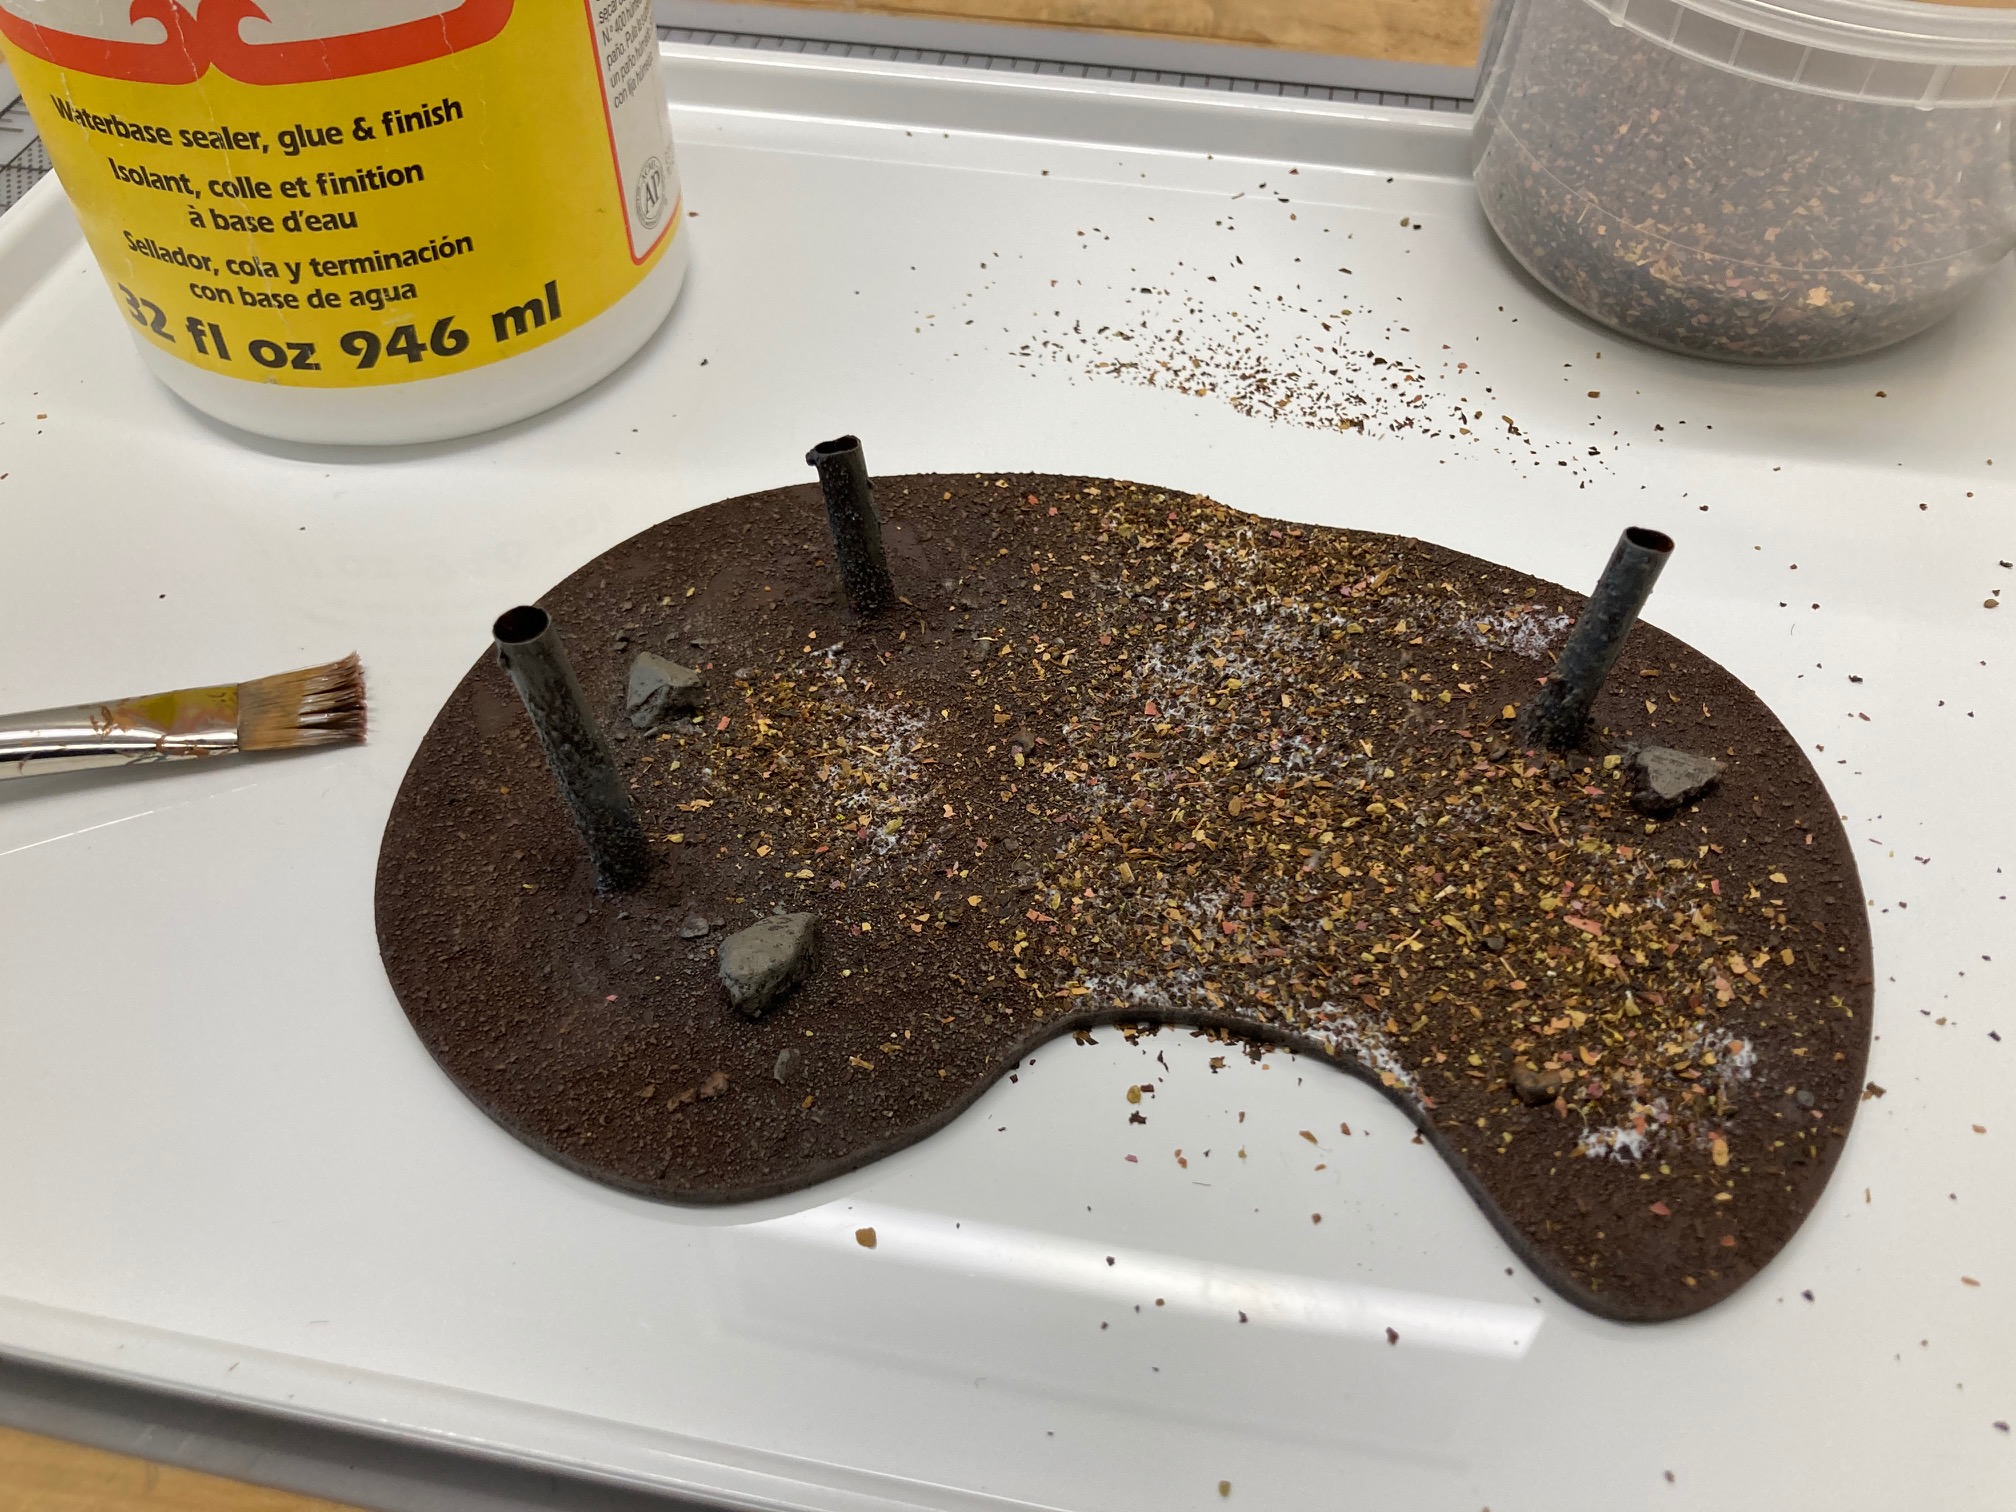
 Deep Woods
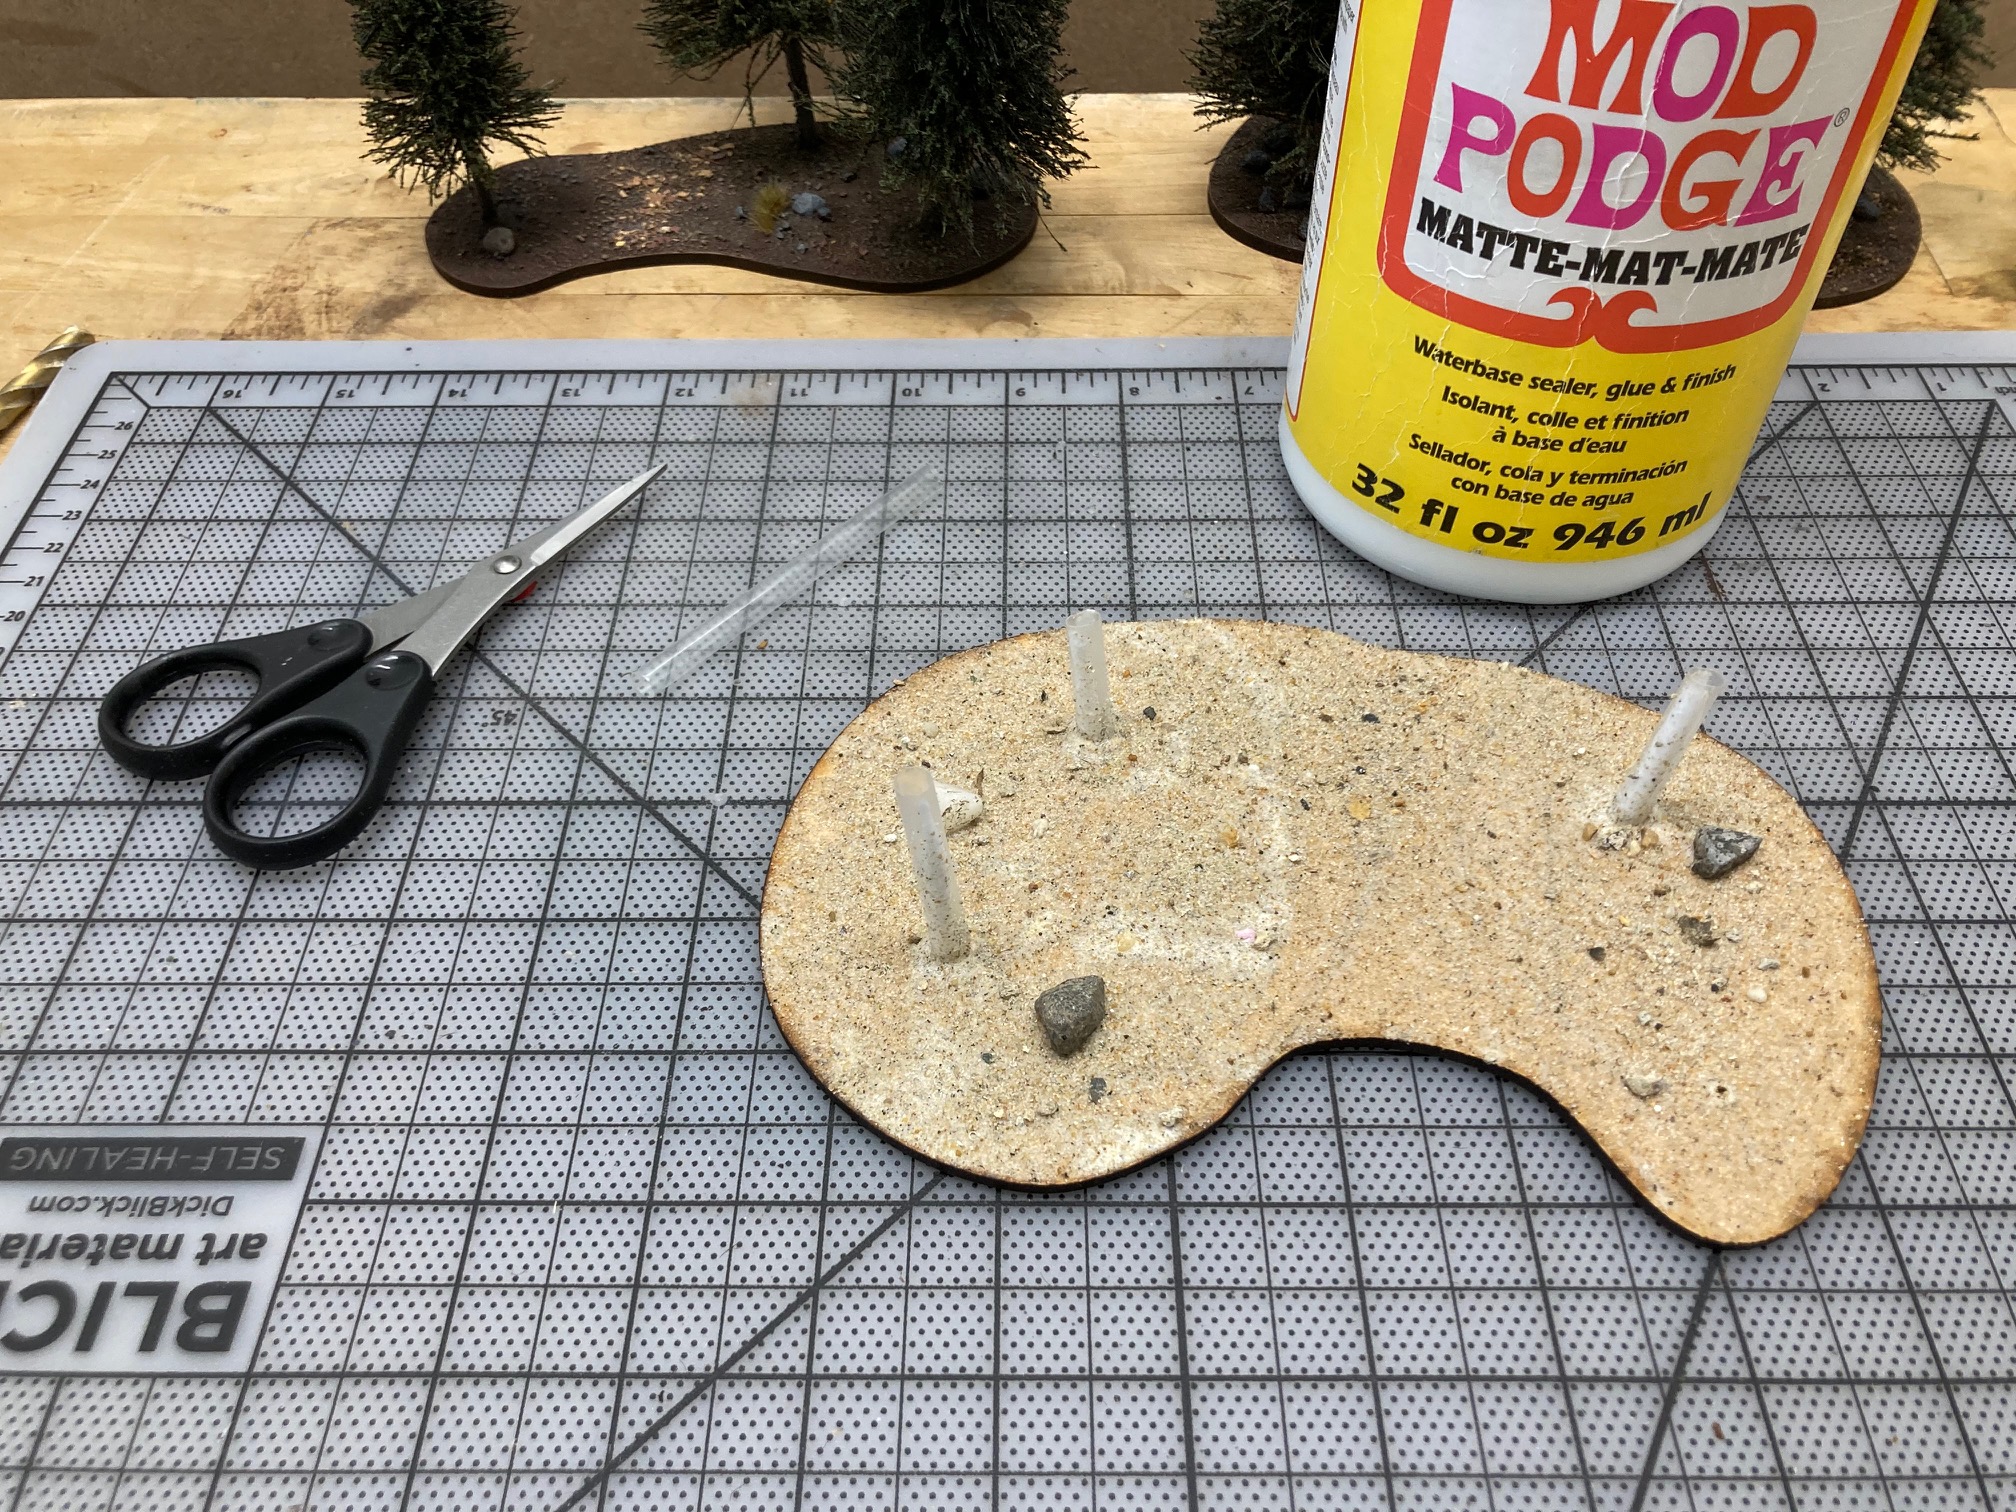
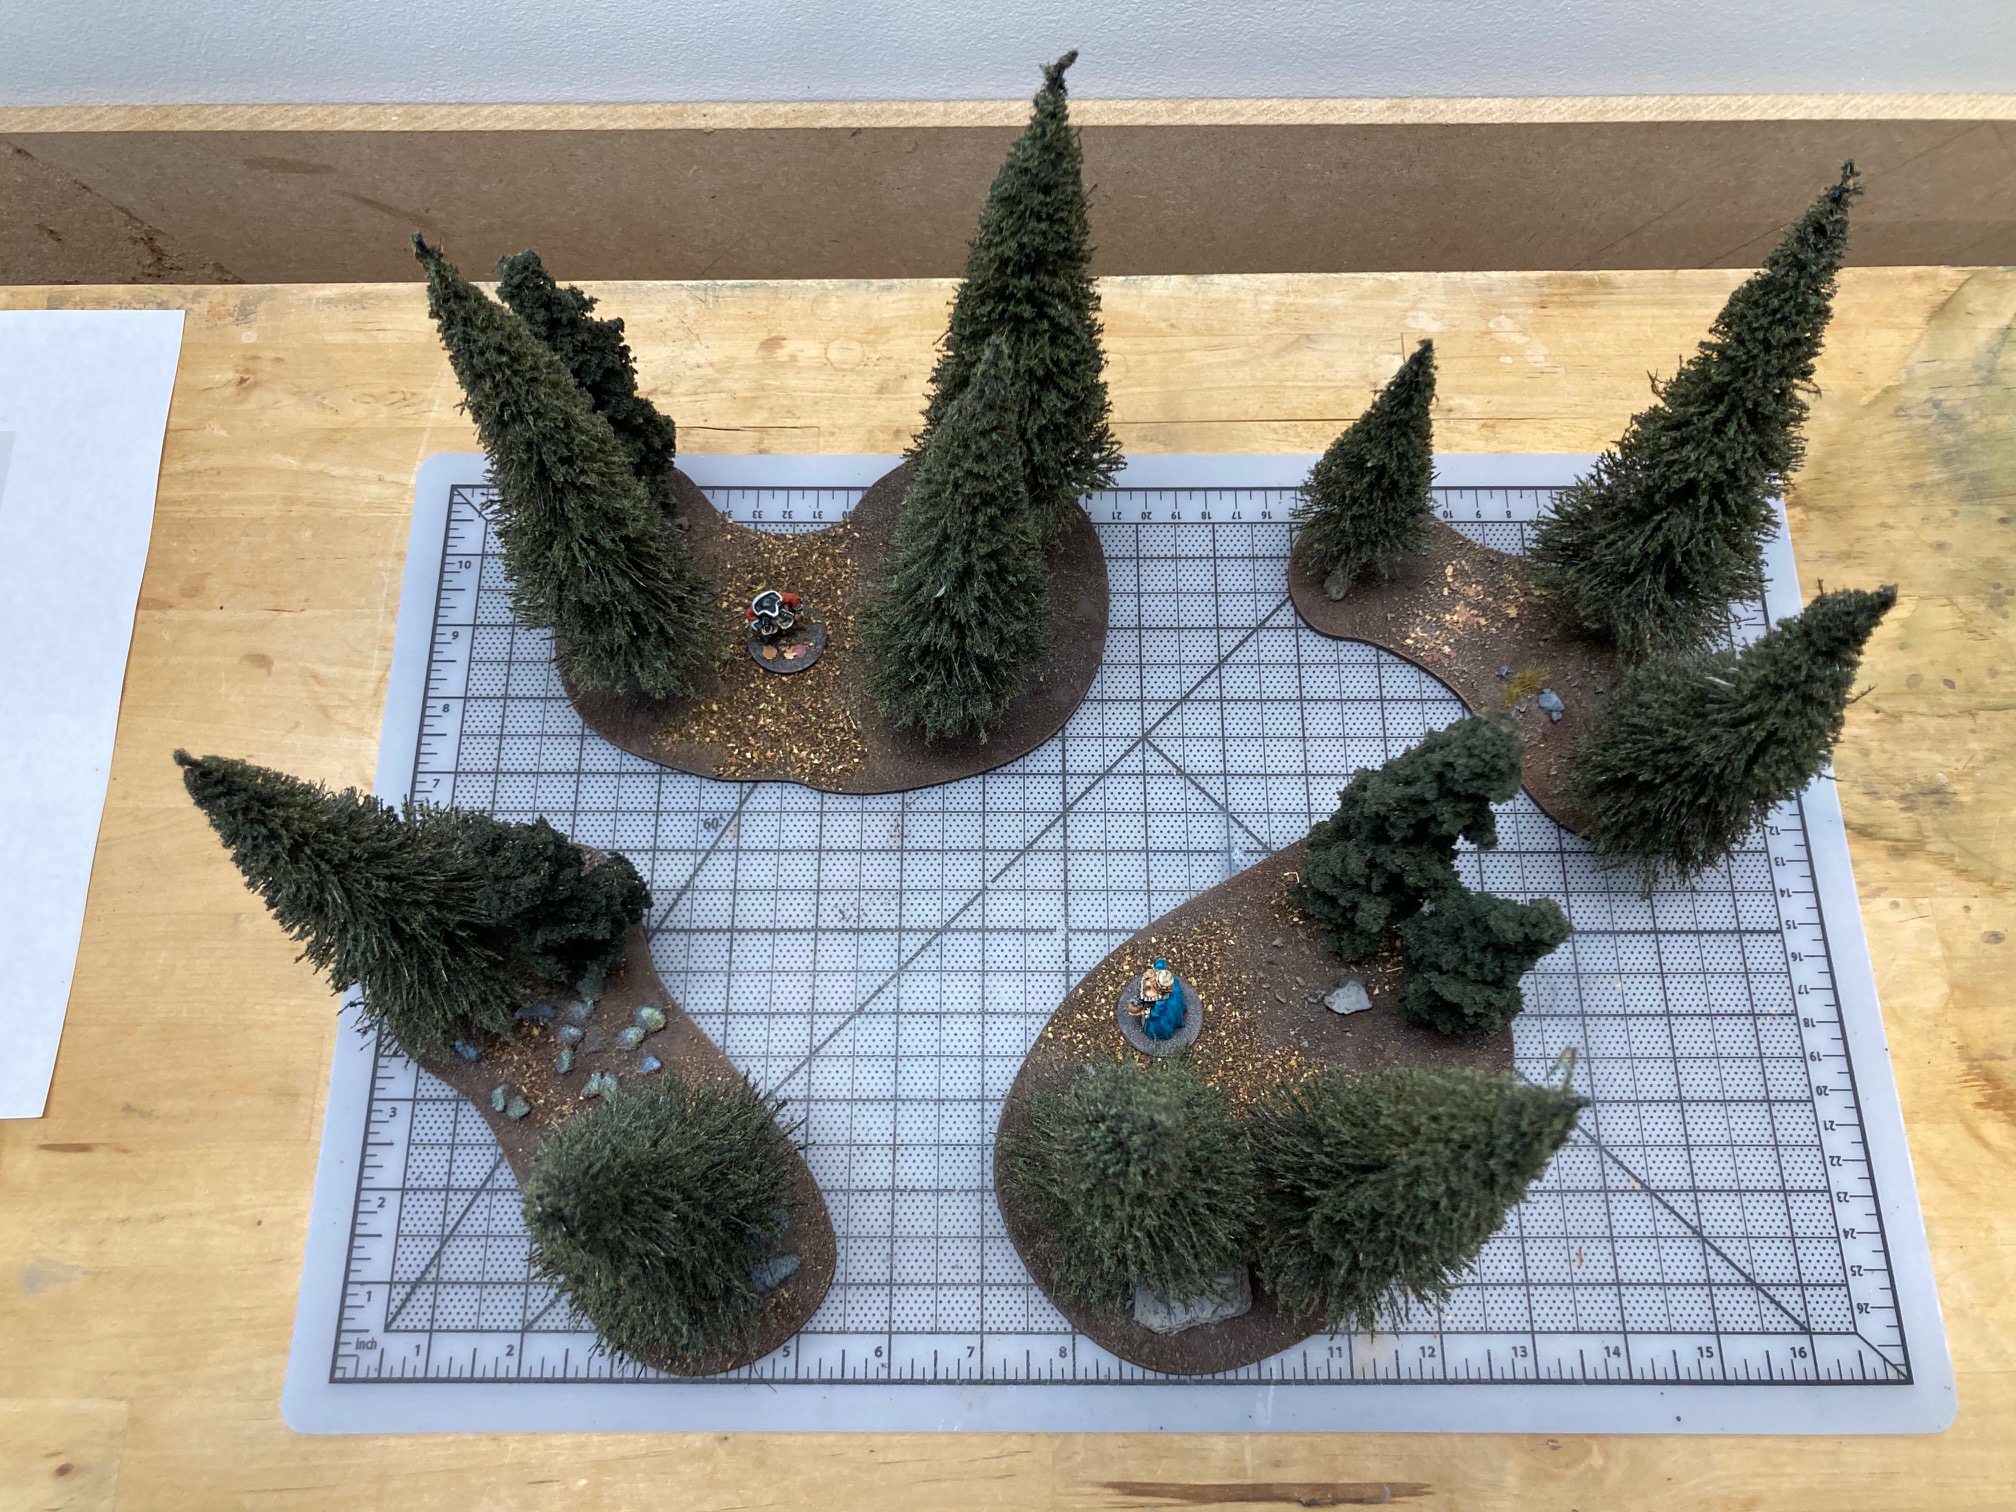
Step 1: Drill holes for plastic straw to act as tree trunks. I like to leave a clear path through the base for playability.
Step 2: Cover the base with Mod Podge and brush glue up the straw as well. Sprinkle with sand on the base and straws for texture. Add some rock if you like.
Put aside to dry.

Step 3: Brush on a base color (I used Burnt Umber) to the whole thing, including the straw tree trunks.

Step 4: Dry brush a lighter tone of your base color. Let dry a minute and then dry brush another lighter color.
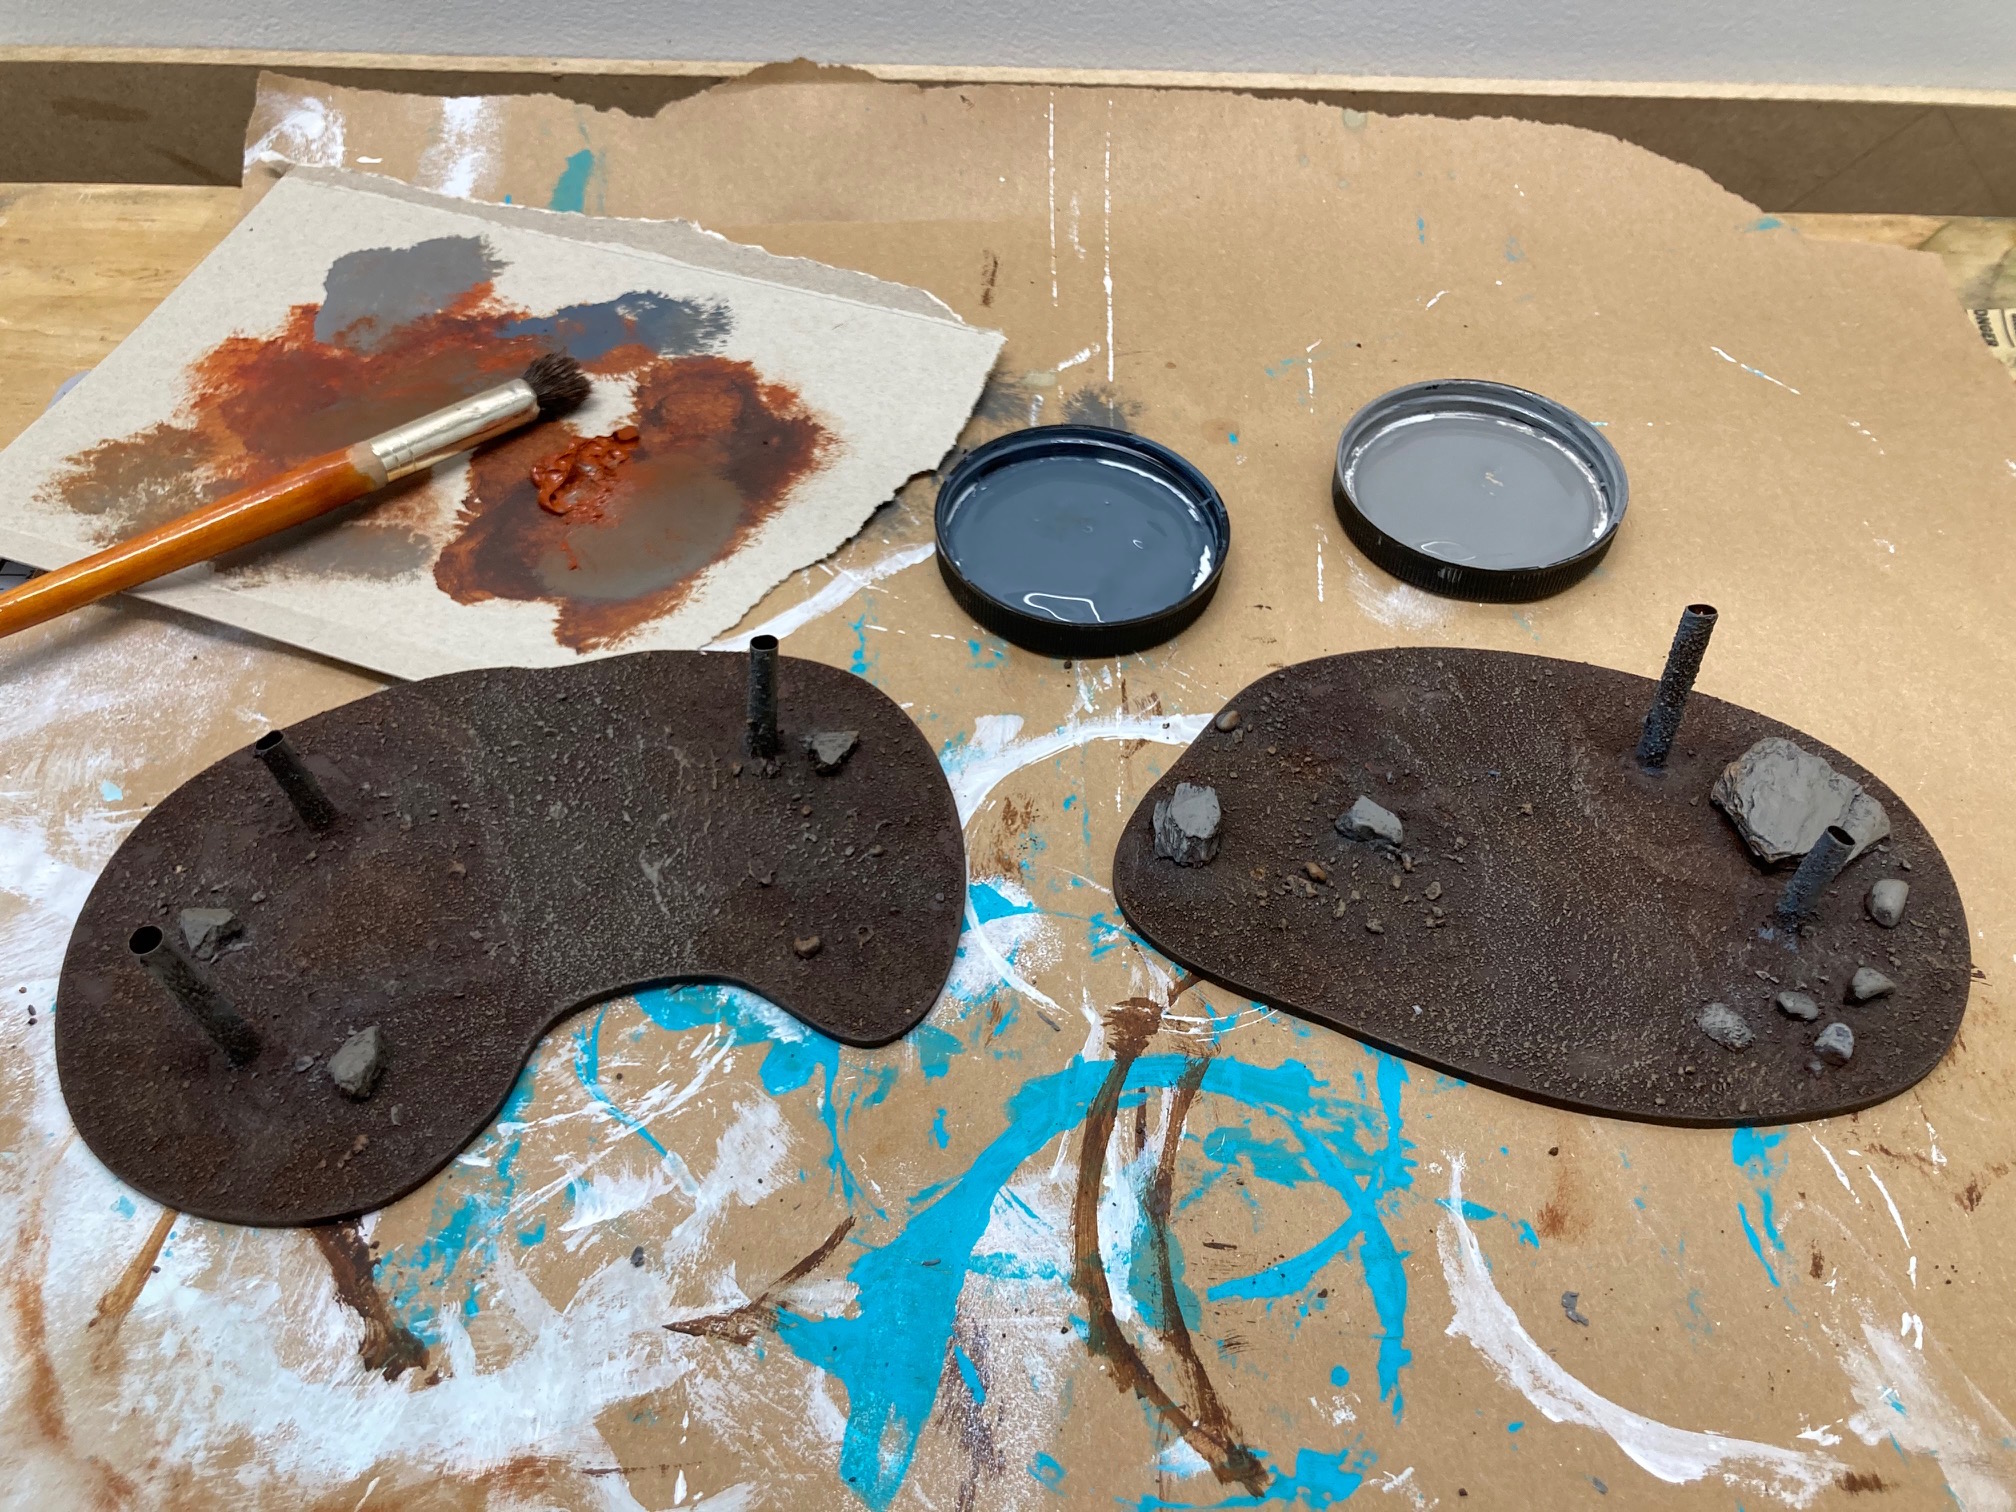
Step 5: Dry brush random patches of dark grey/brown mix to the base. Dry brush stones grey.
Step 6: Dry brush patches of light grey/brown mix to path and smaller random patches. Light grey dry brush rocks.
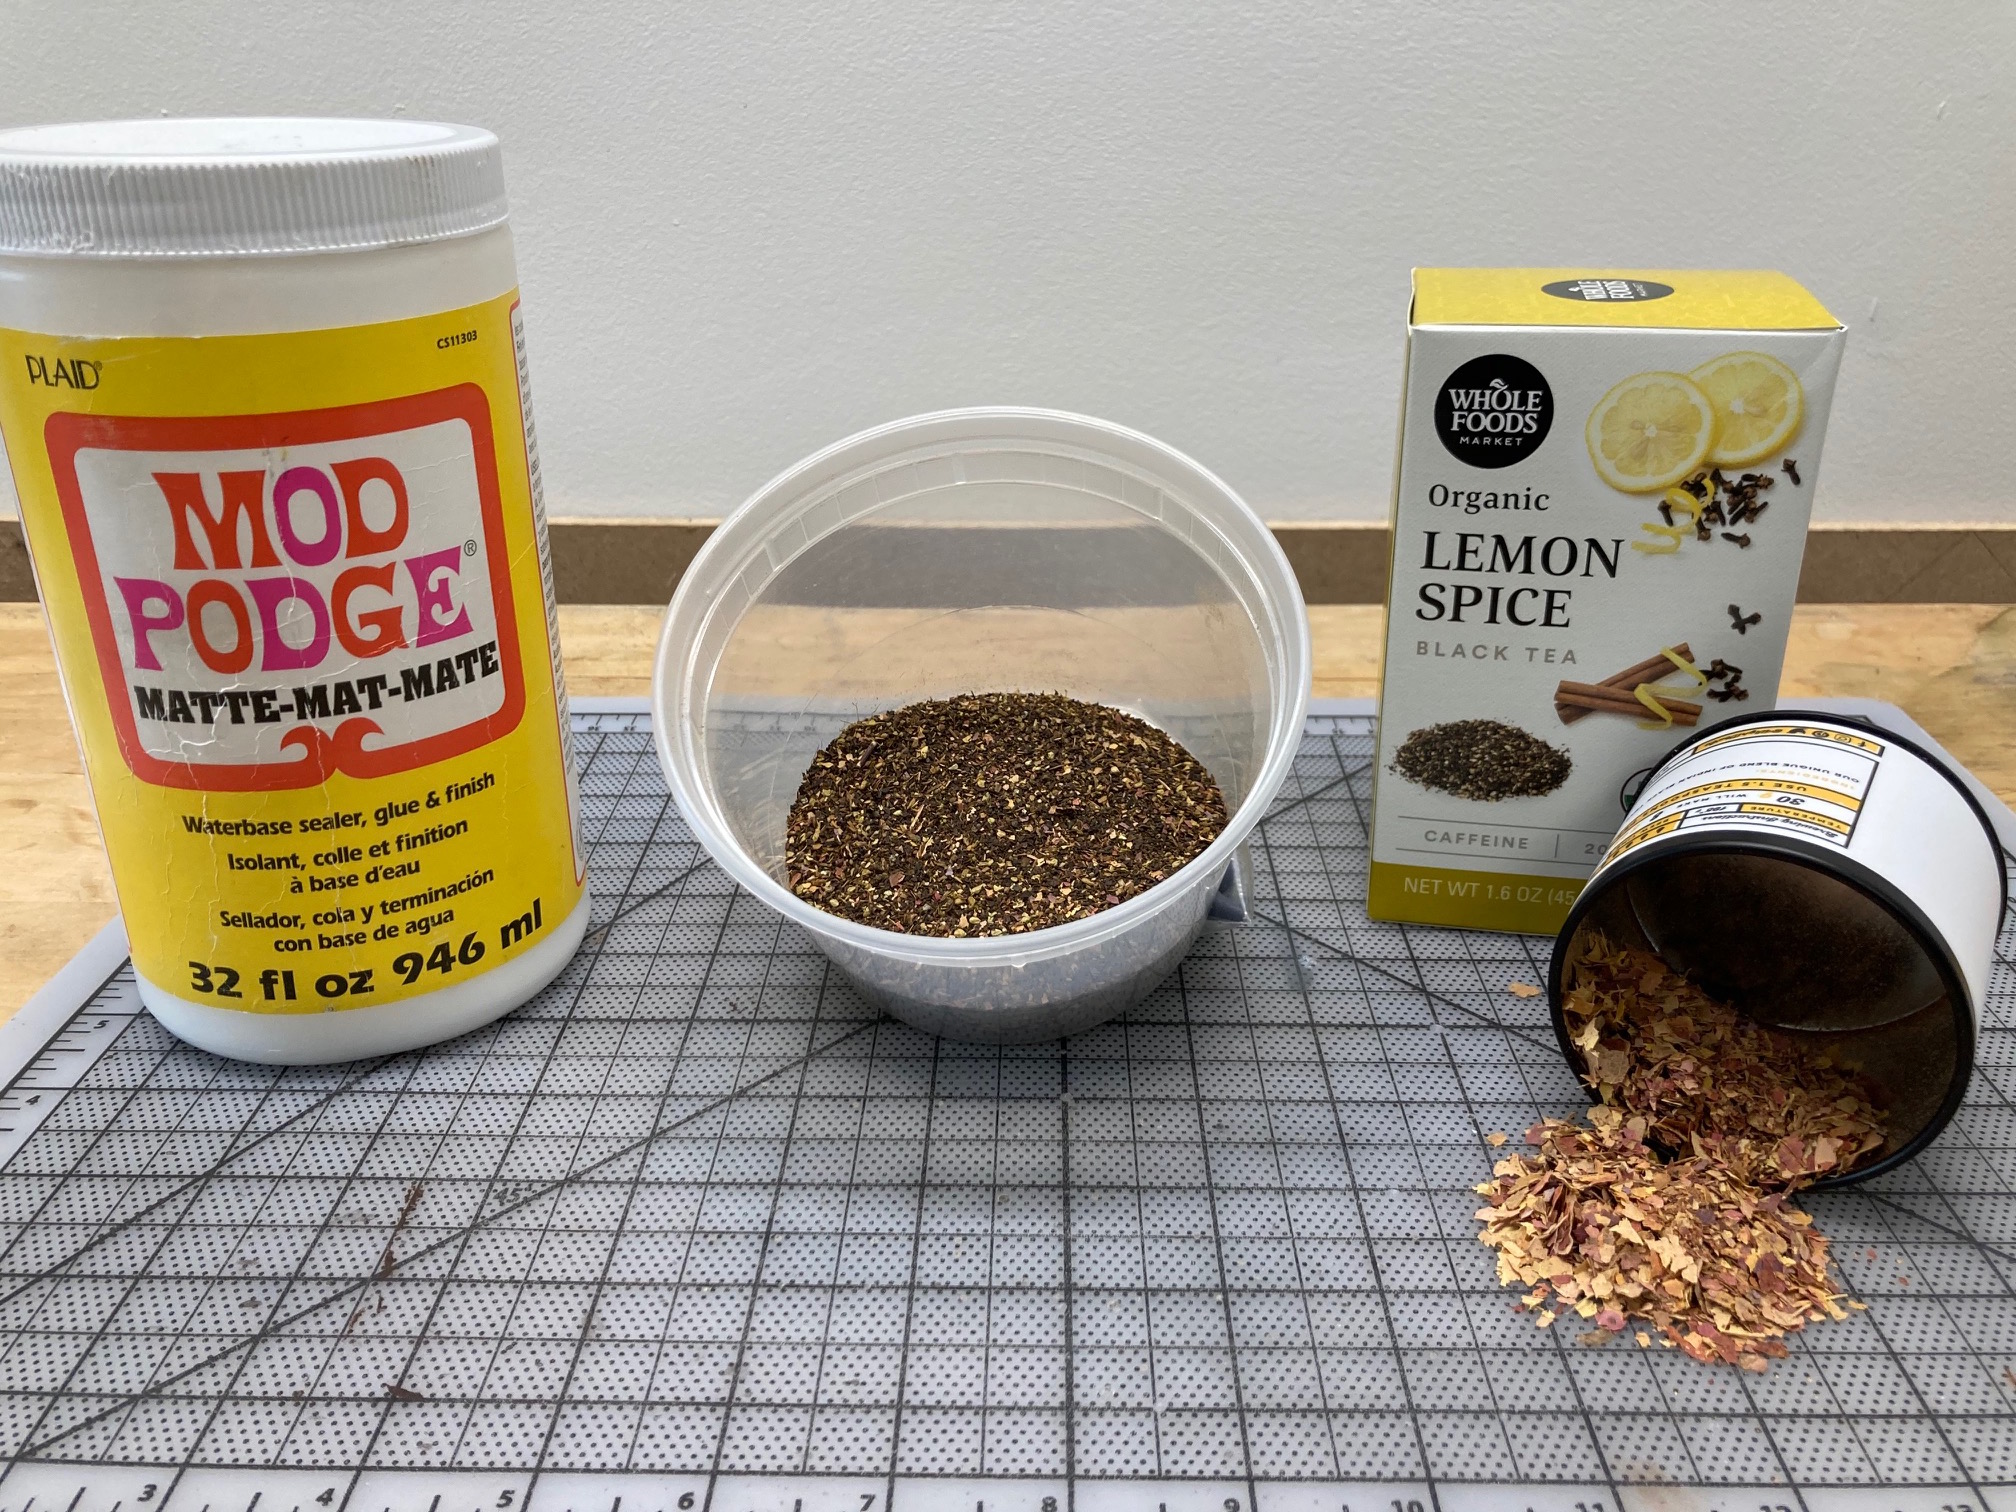
On all bases having to do with this project, I’m making my own mix. Mix black tea (use a loose tea with 1 – 2mm grains, so no PG tips) with crumbled up dry red & yellow fall leaves. Rub the leaves through a sieve if needed. You get a realistic ground cover that smells great too.
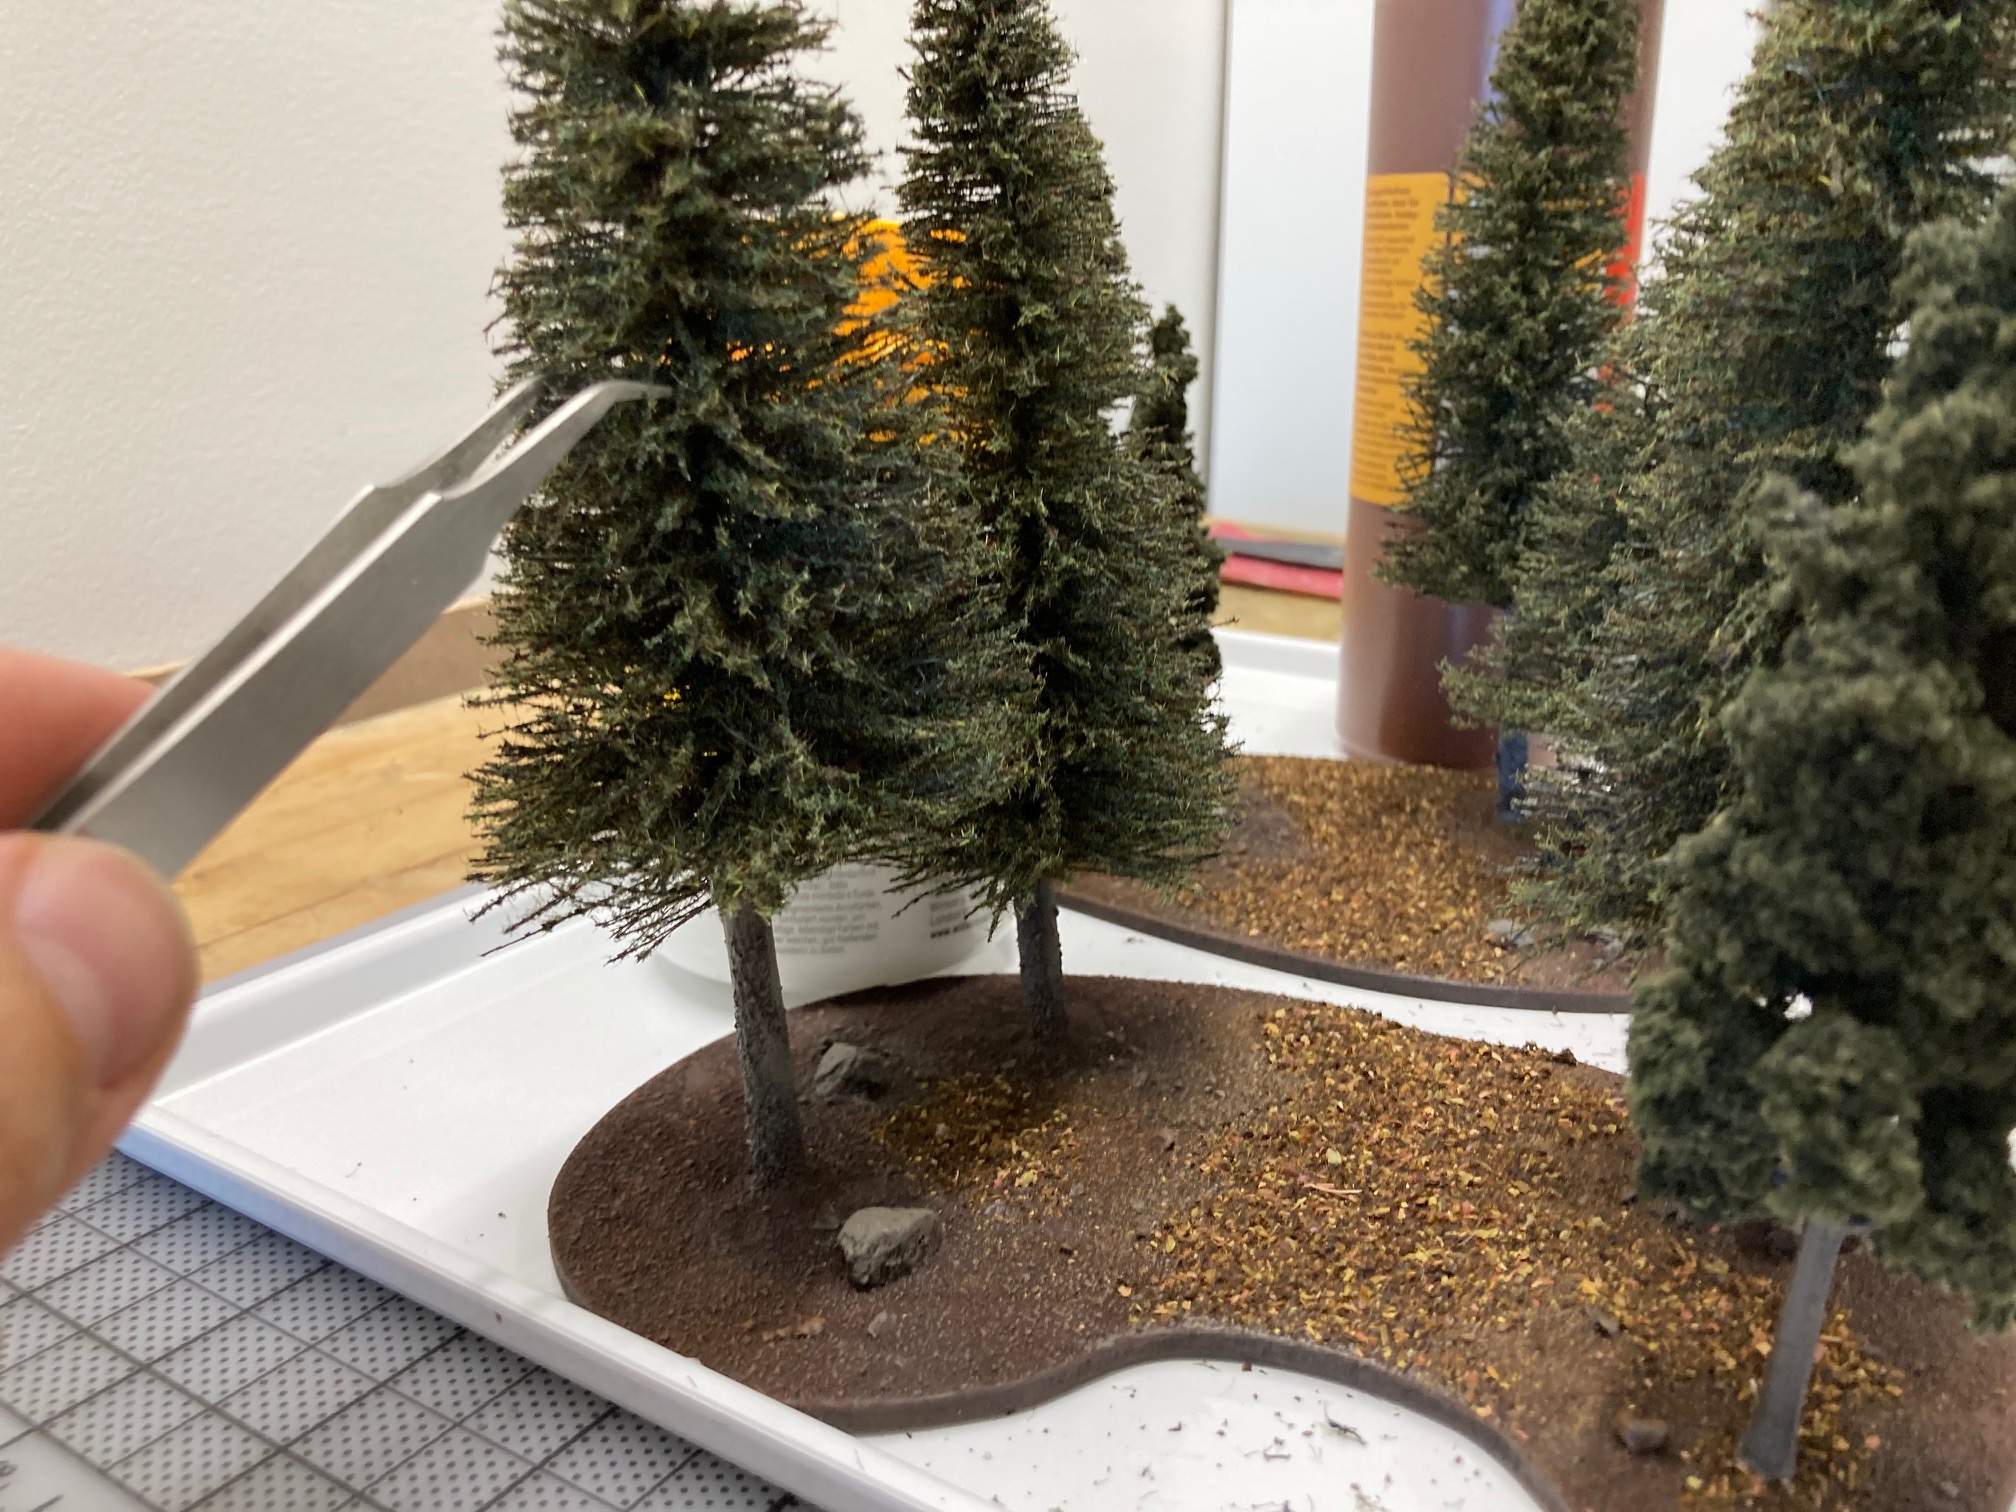
Step 7: Brush on Mod Podge wherever you would like and sprinkle on some of the ground cover.
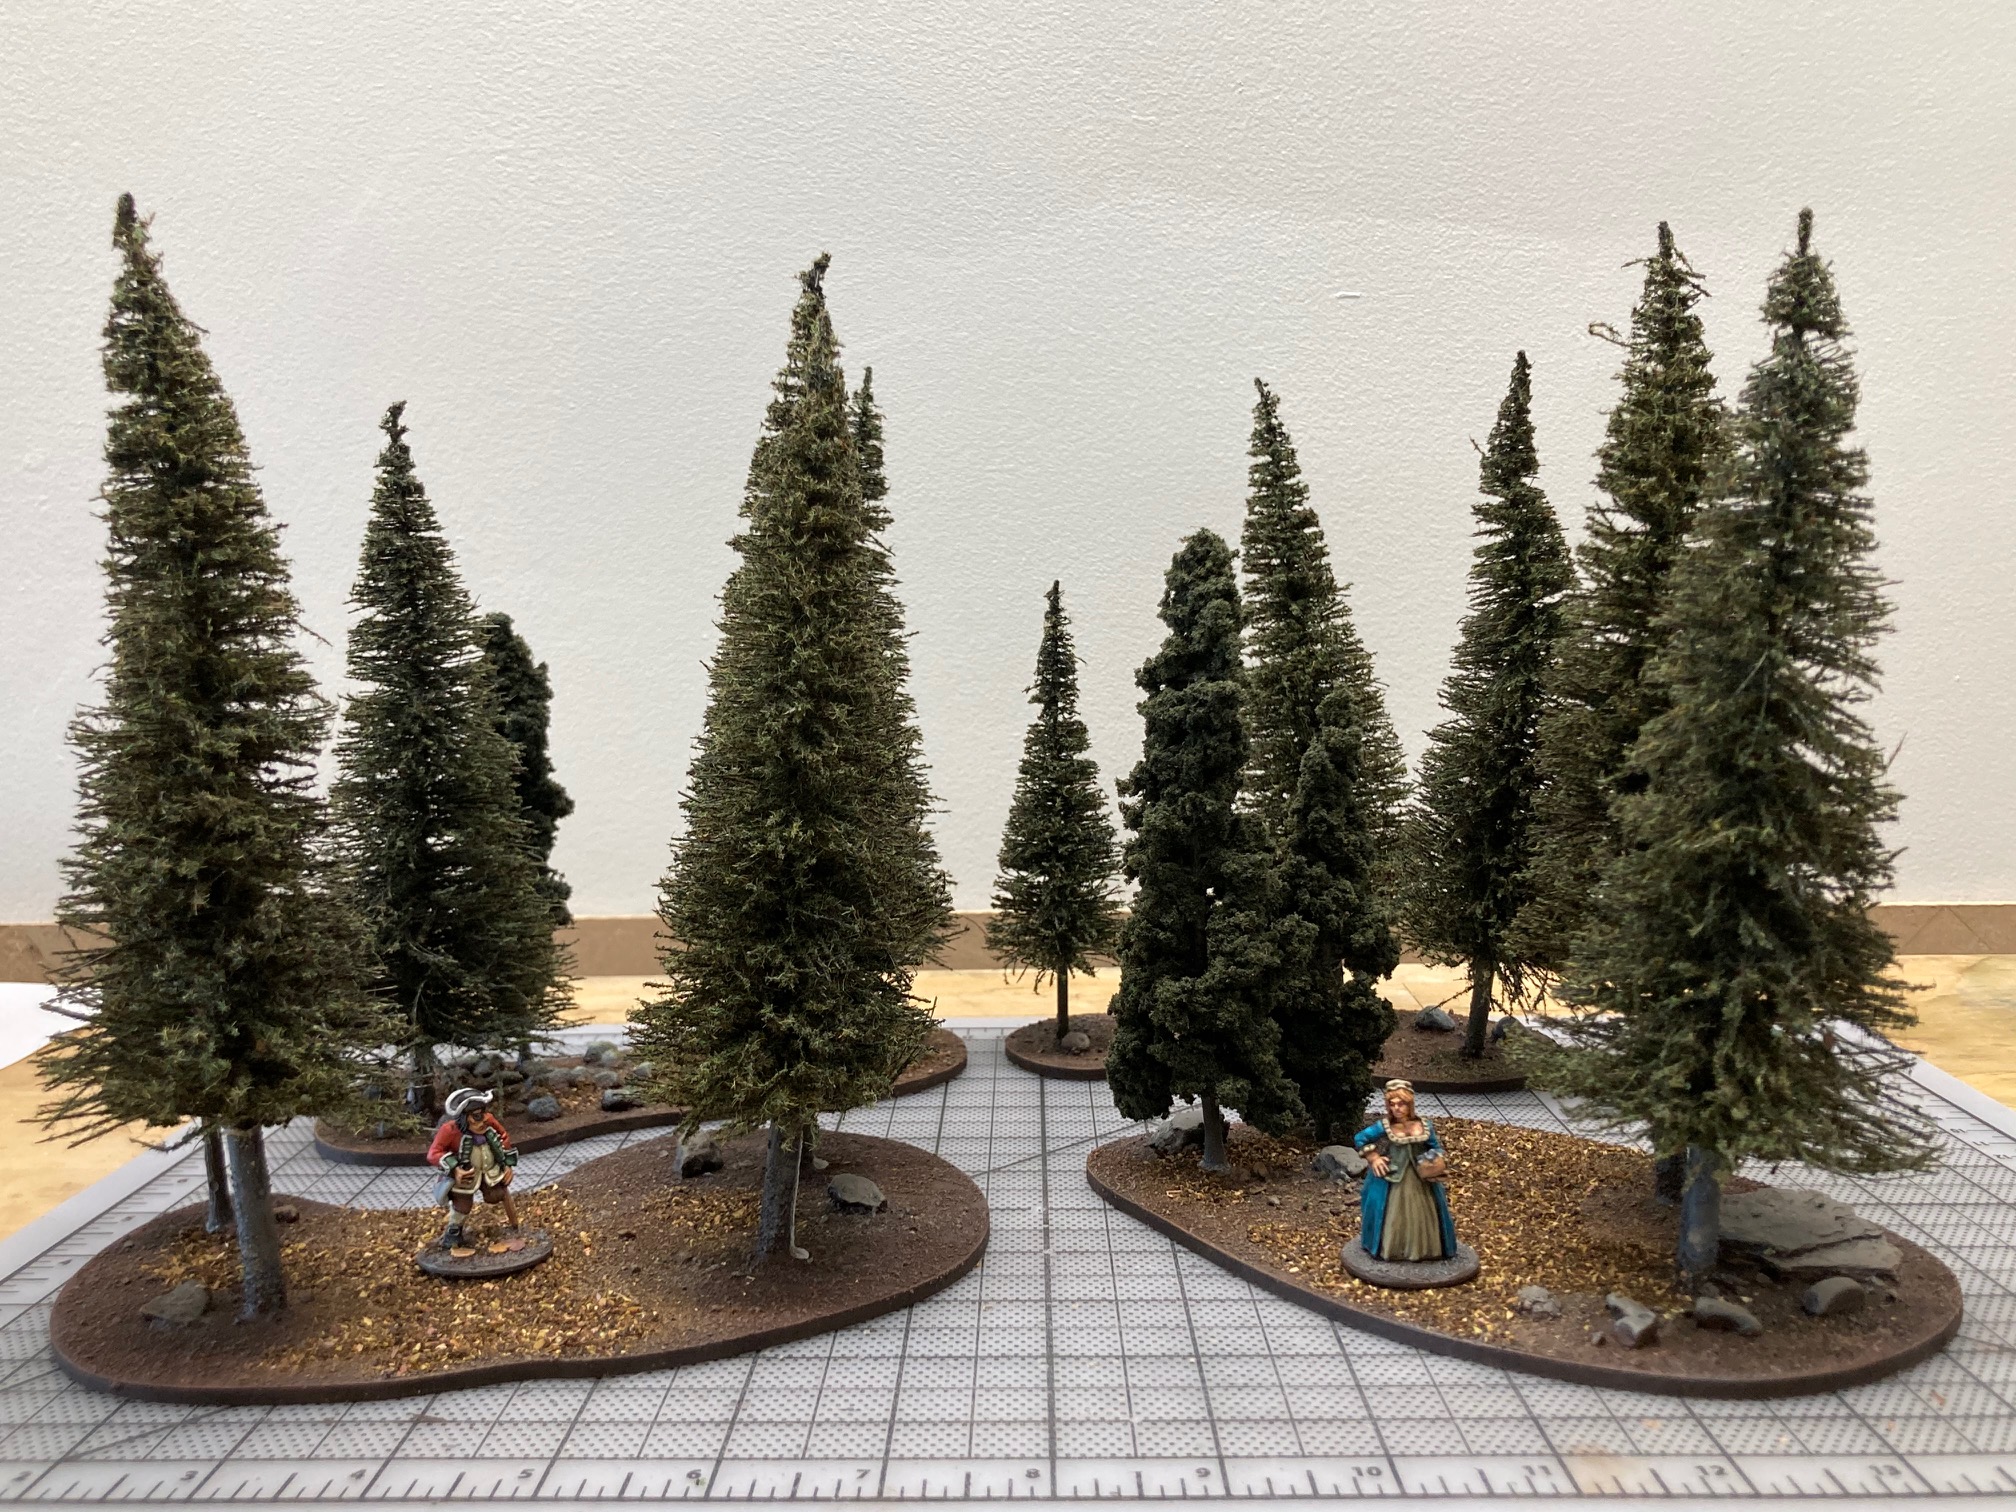
Step 8: Super glue O scale pine trees into straw slots. Put aside to dry.
Cheers!
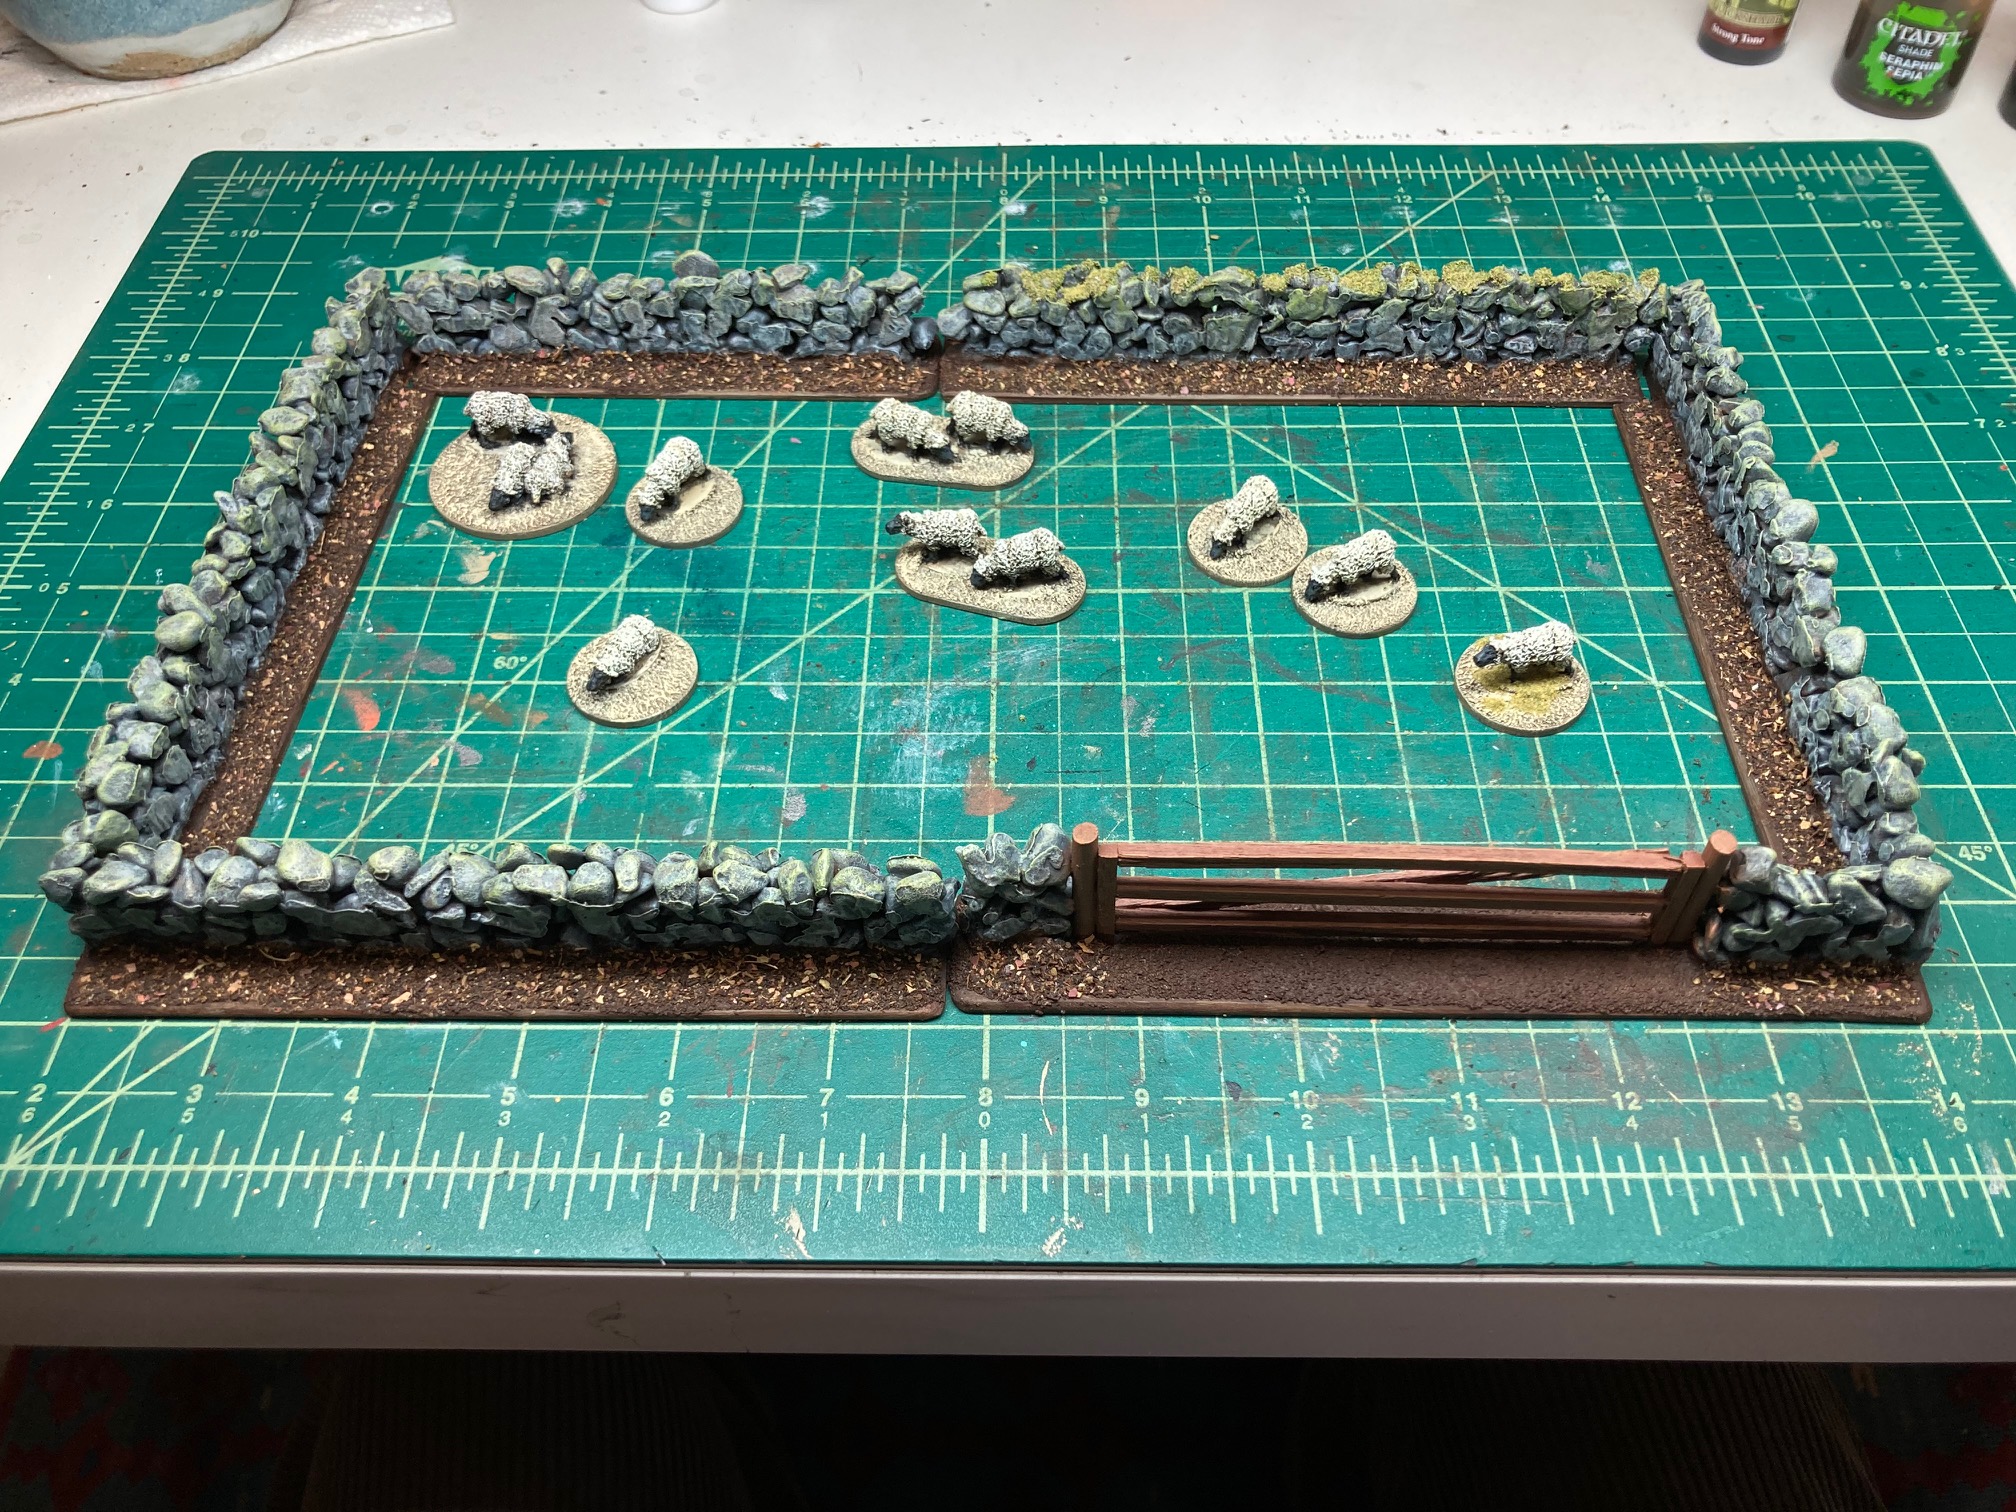
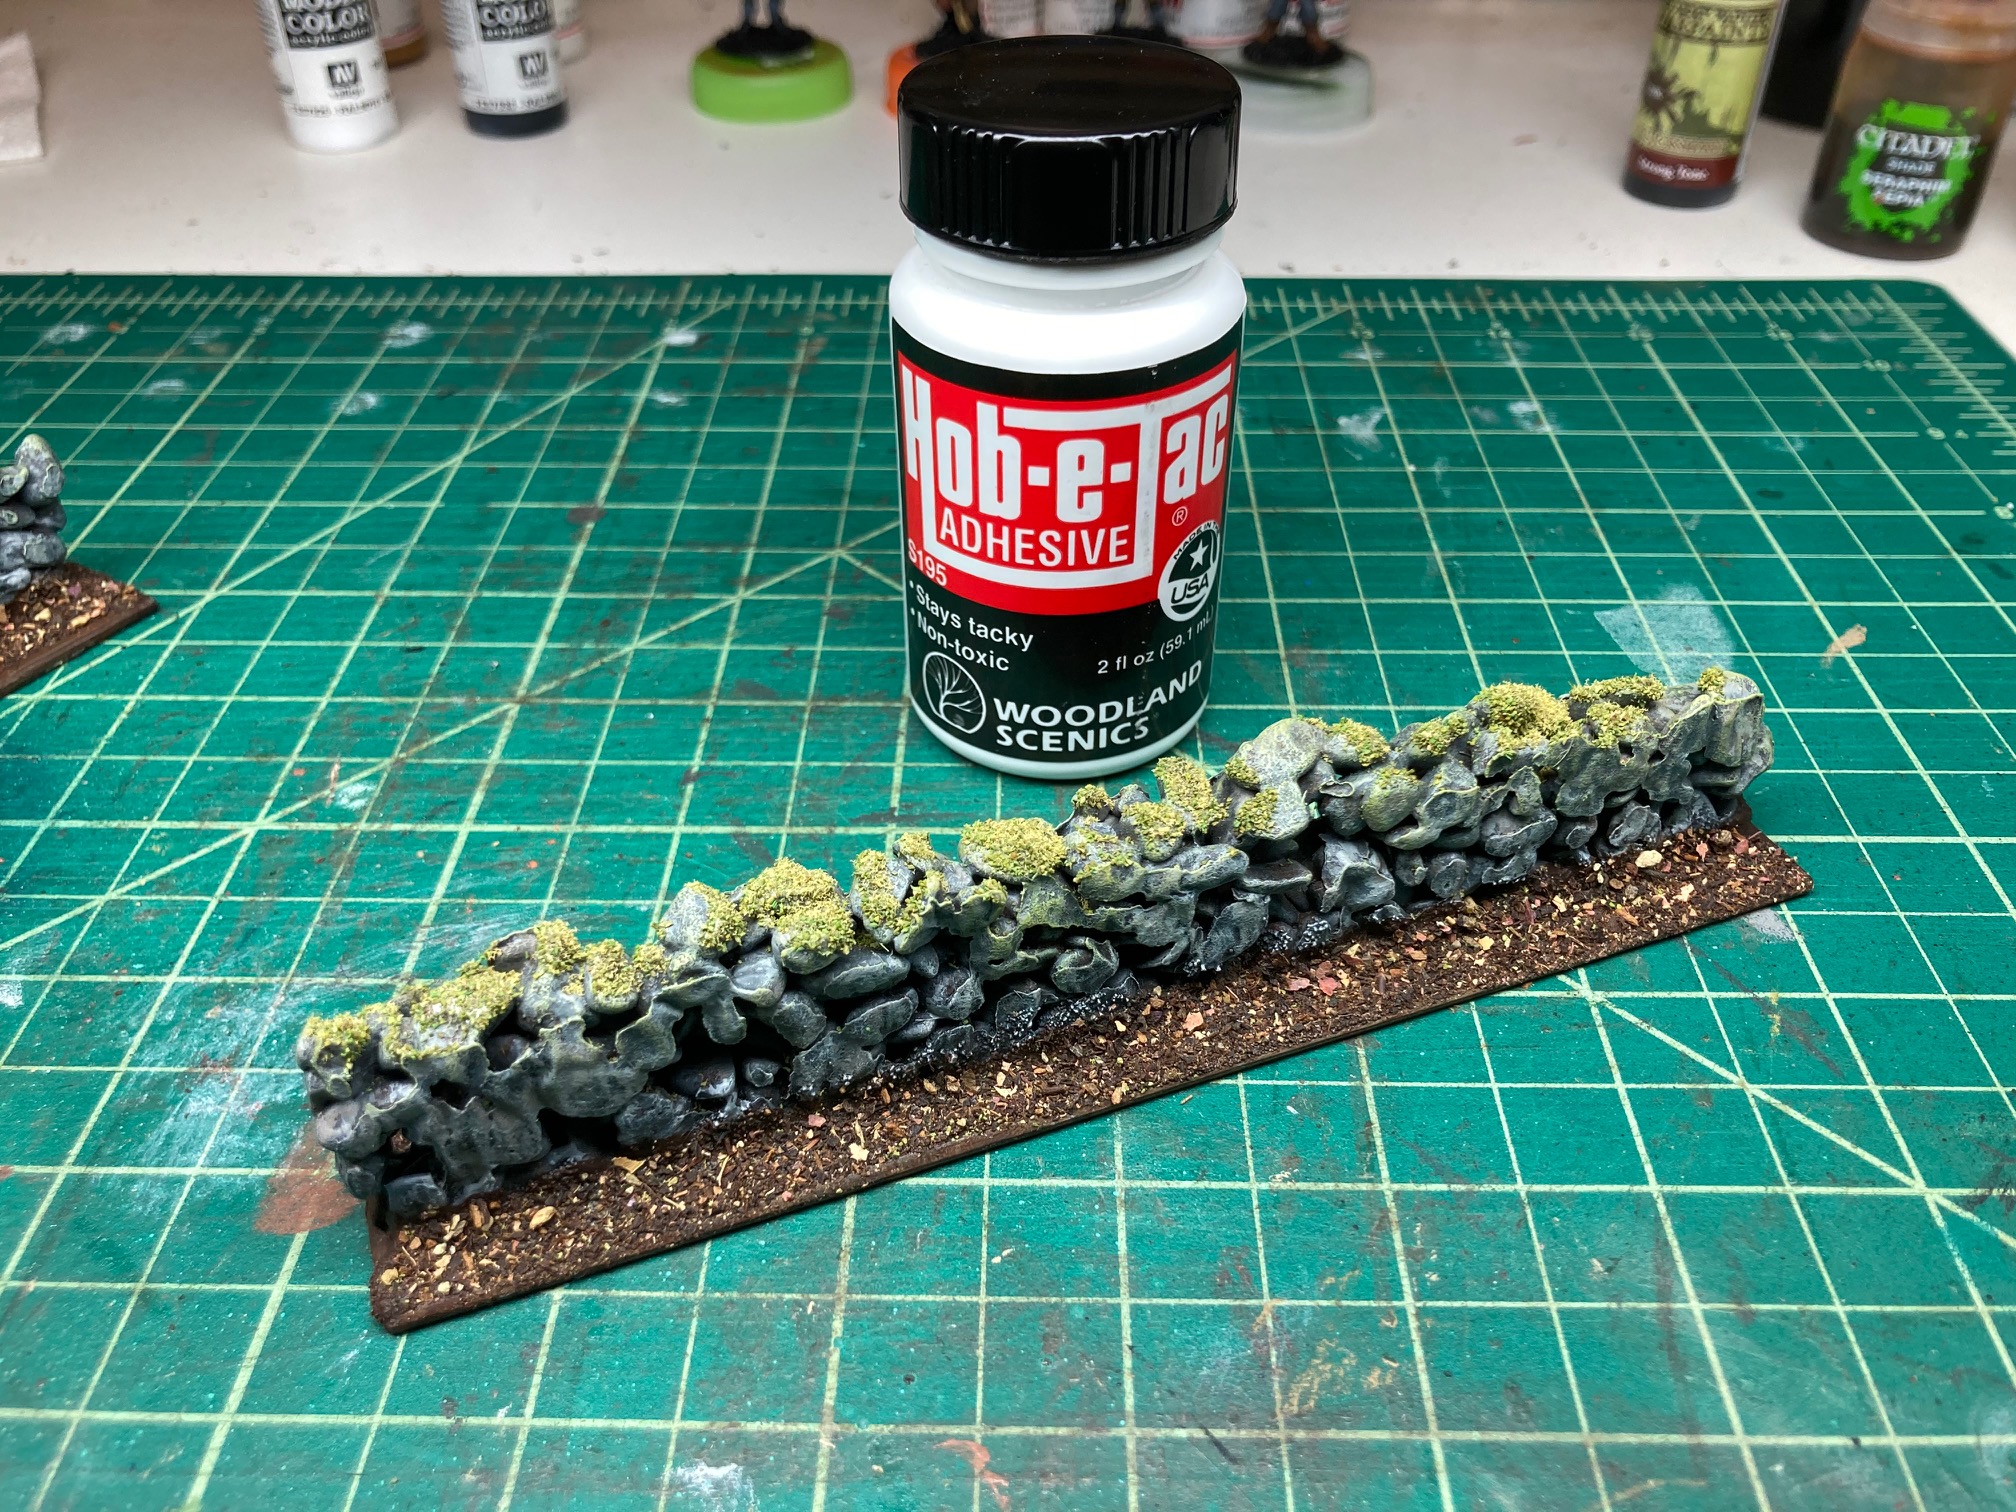
Quick and Easy Stone Walls - Get jigy with it!
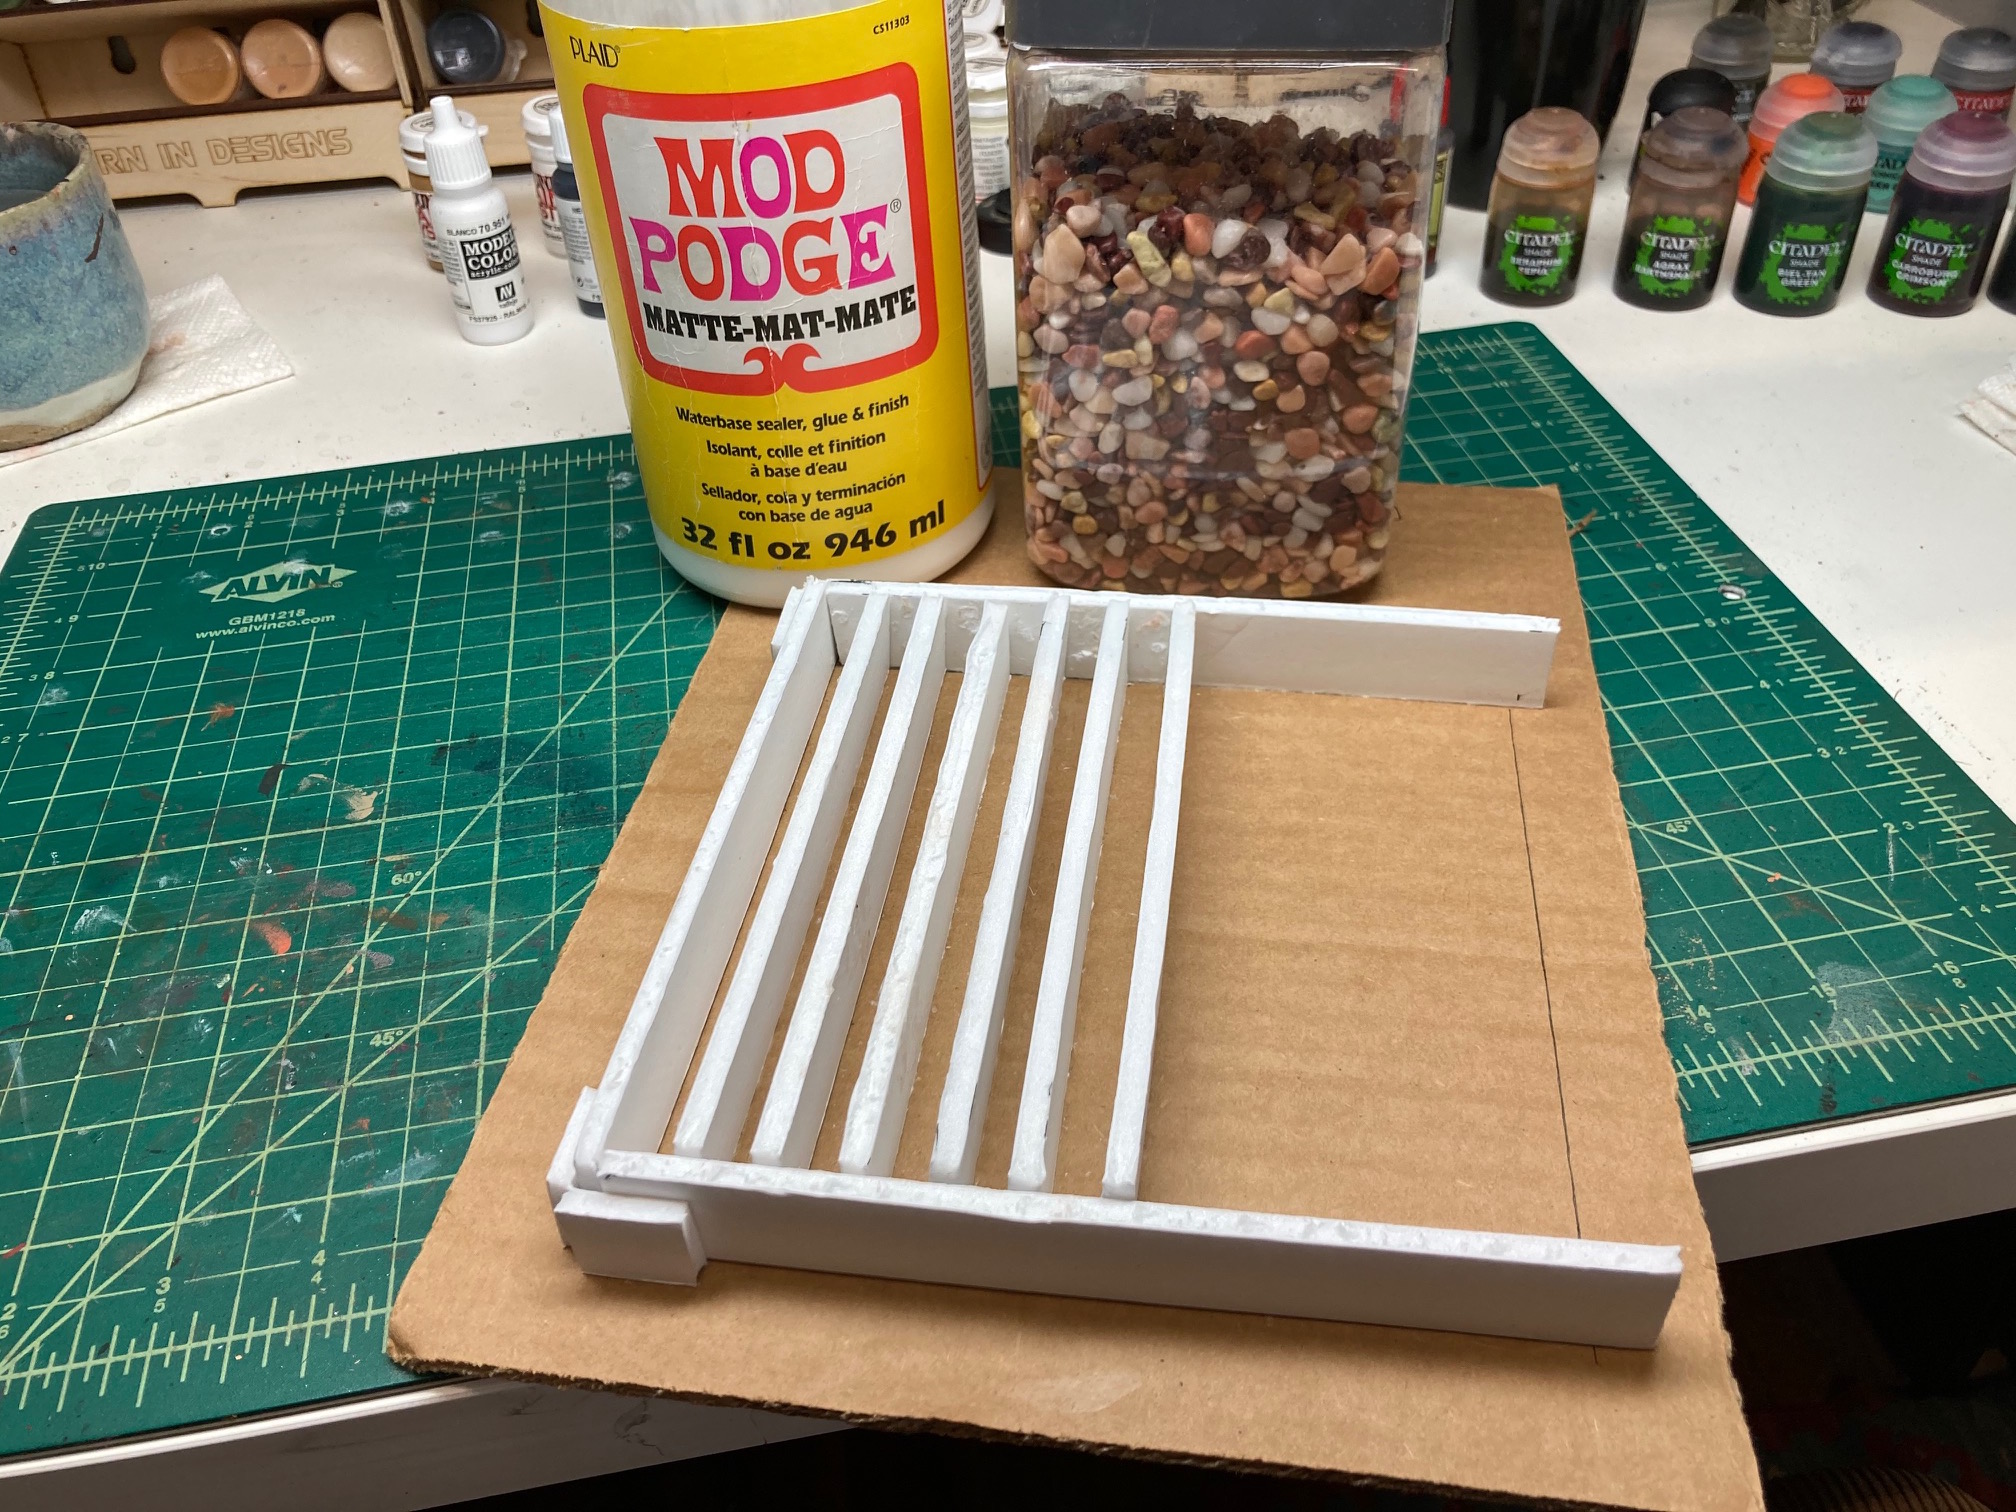
I’m going for an old and cinimatic look to my terrain for this project. Know that this may not make modern stone walls.
Step 1: I made a jig out of foam core using a lego spacer 8″ long 3/4″ tall and one brick in width. Jig done.
Now to be able to reuse this jig you HAVE to do the next step.
Step 2: Cut parchment paper strips as long and a bit wider to slip into each row.
Step 3: Mix up some Mod Podge 4/1 with water and add small stones. Using a small spoon scoop and place into each jig some of the Podge-stone mix. Make sure to press down into each corner and that you have an even distribution of stone mix from end to end. Once your finished filling, gently tap the jig onto your work surface a few times.
Step 4: Put the jig aside to dry for 24hours. Then carefully remove each one and again allow to dry. The more water you use the longer it will take. for me another 24 hours. Once the glue is dry simply peel the parchment paper off. You may need to fill small gaps or irregularities.
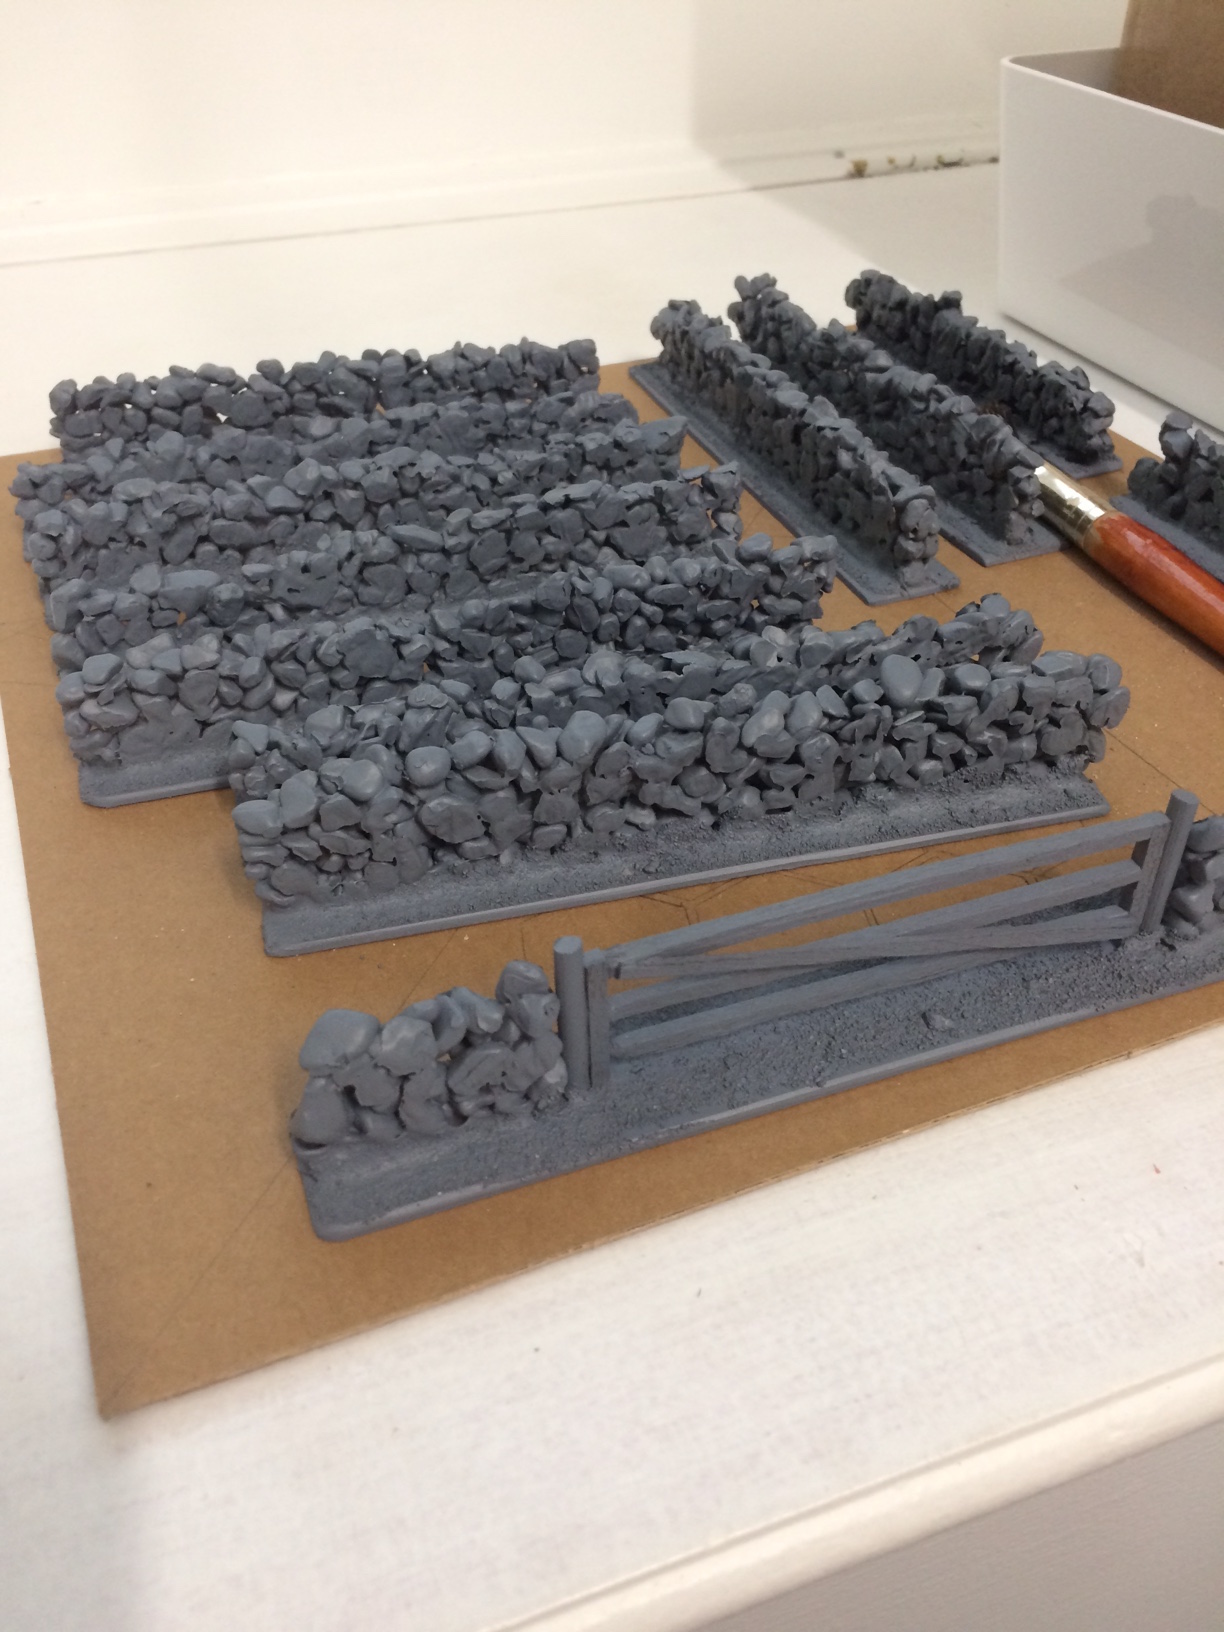
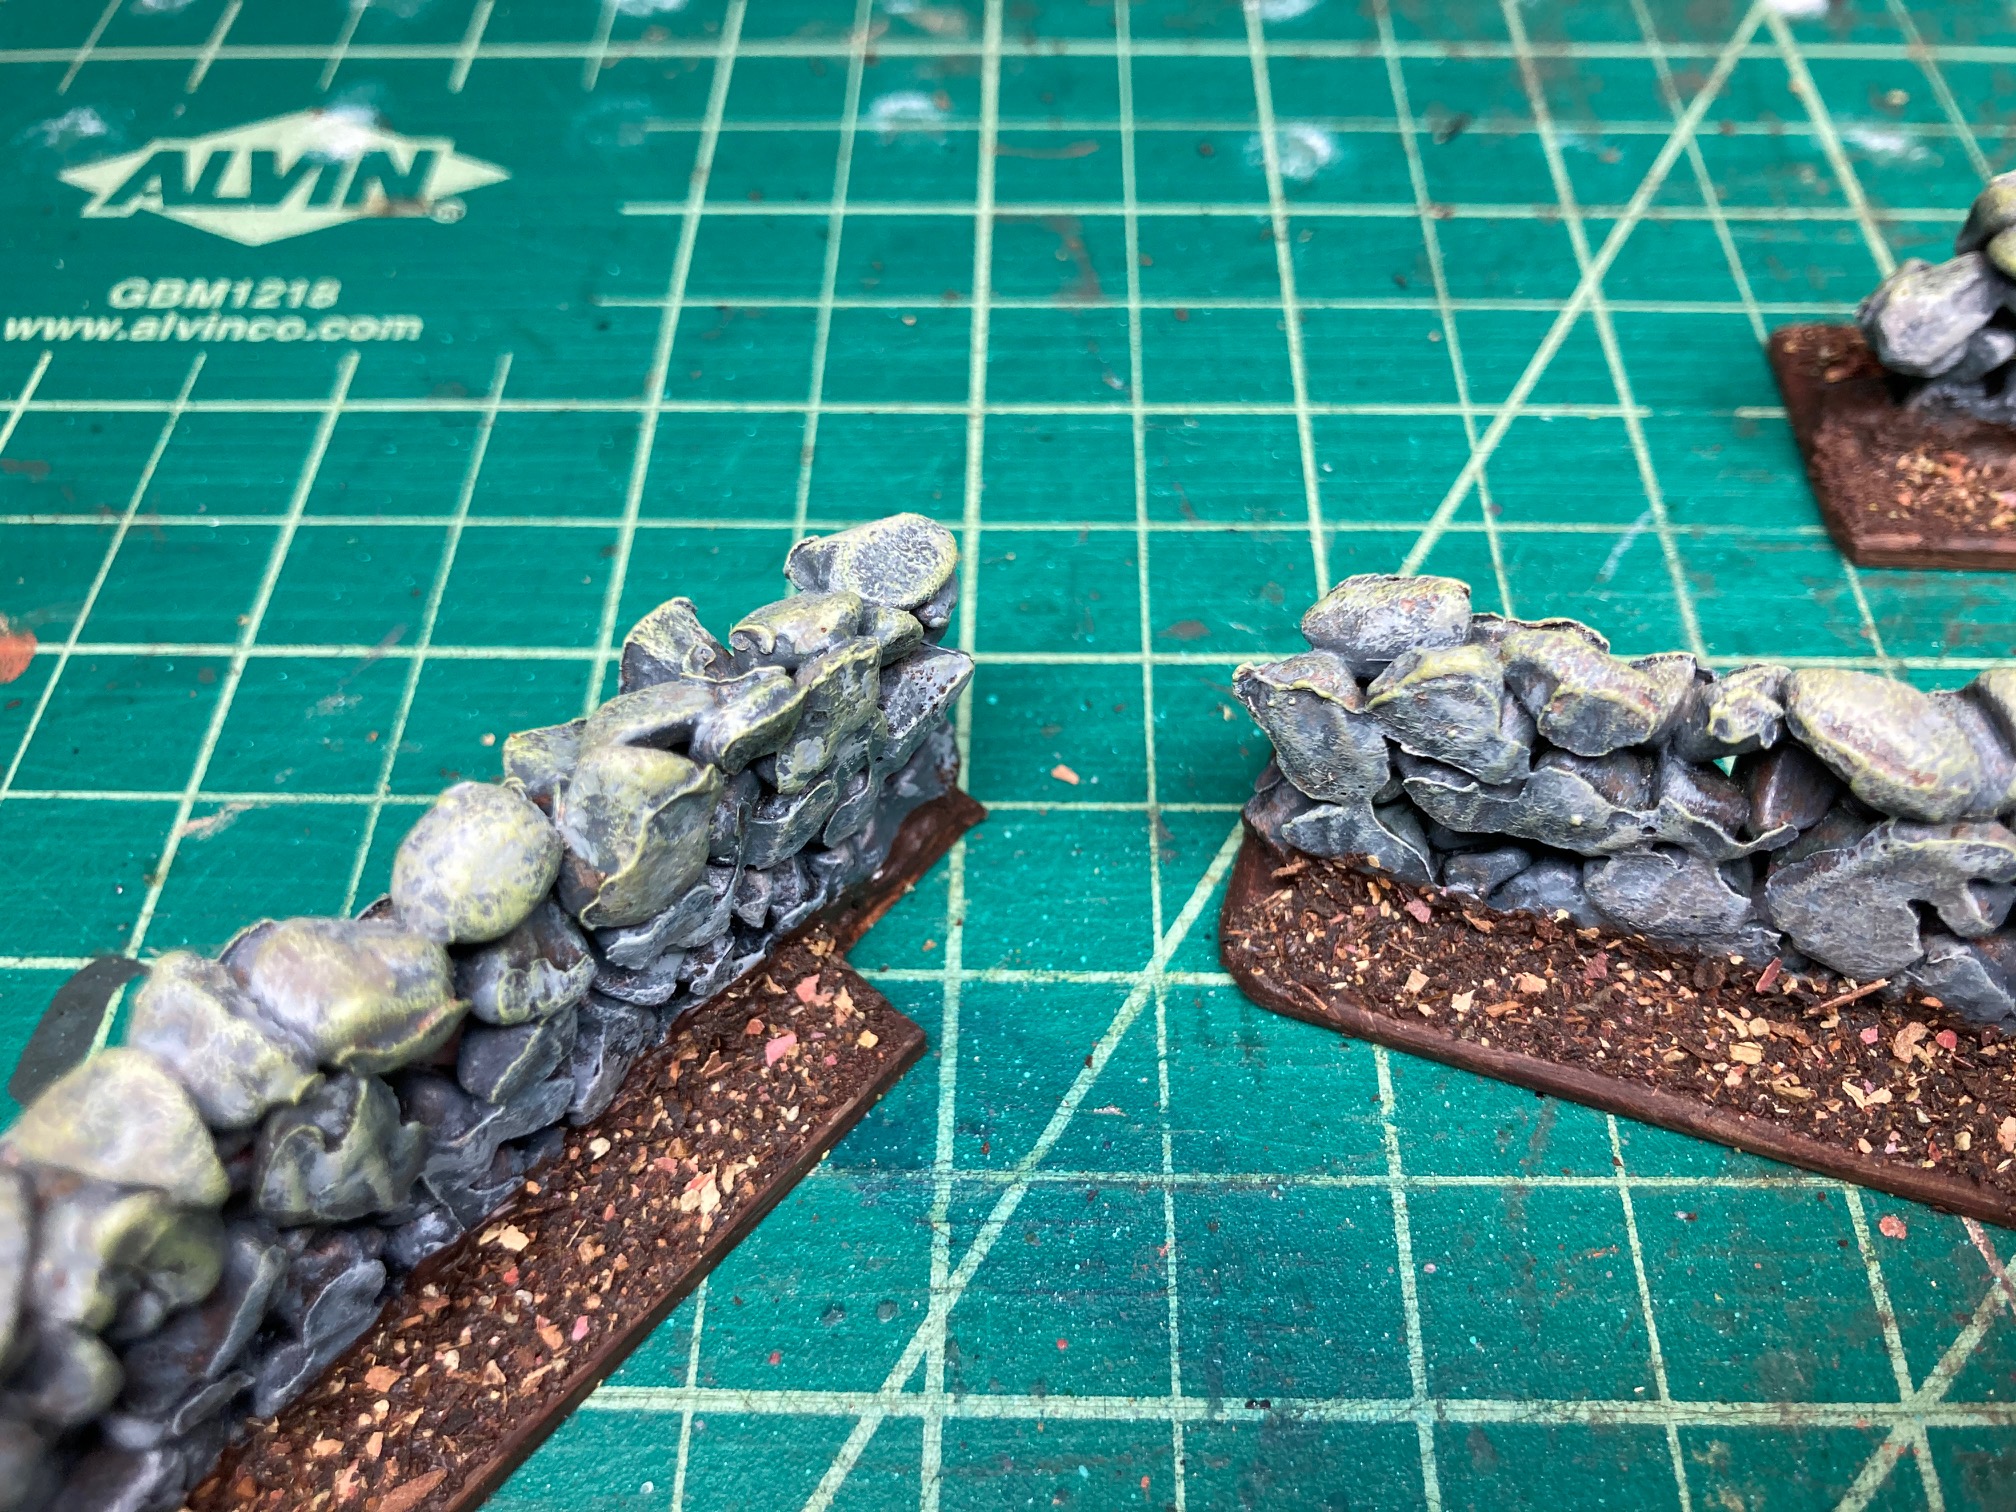
I then based the wall strips, spray primed and Dark tone washed them. You can notch your bases to create corner pieces.
A Cemetery
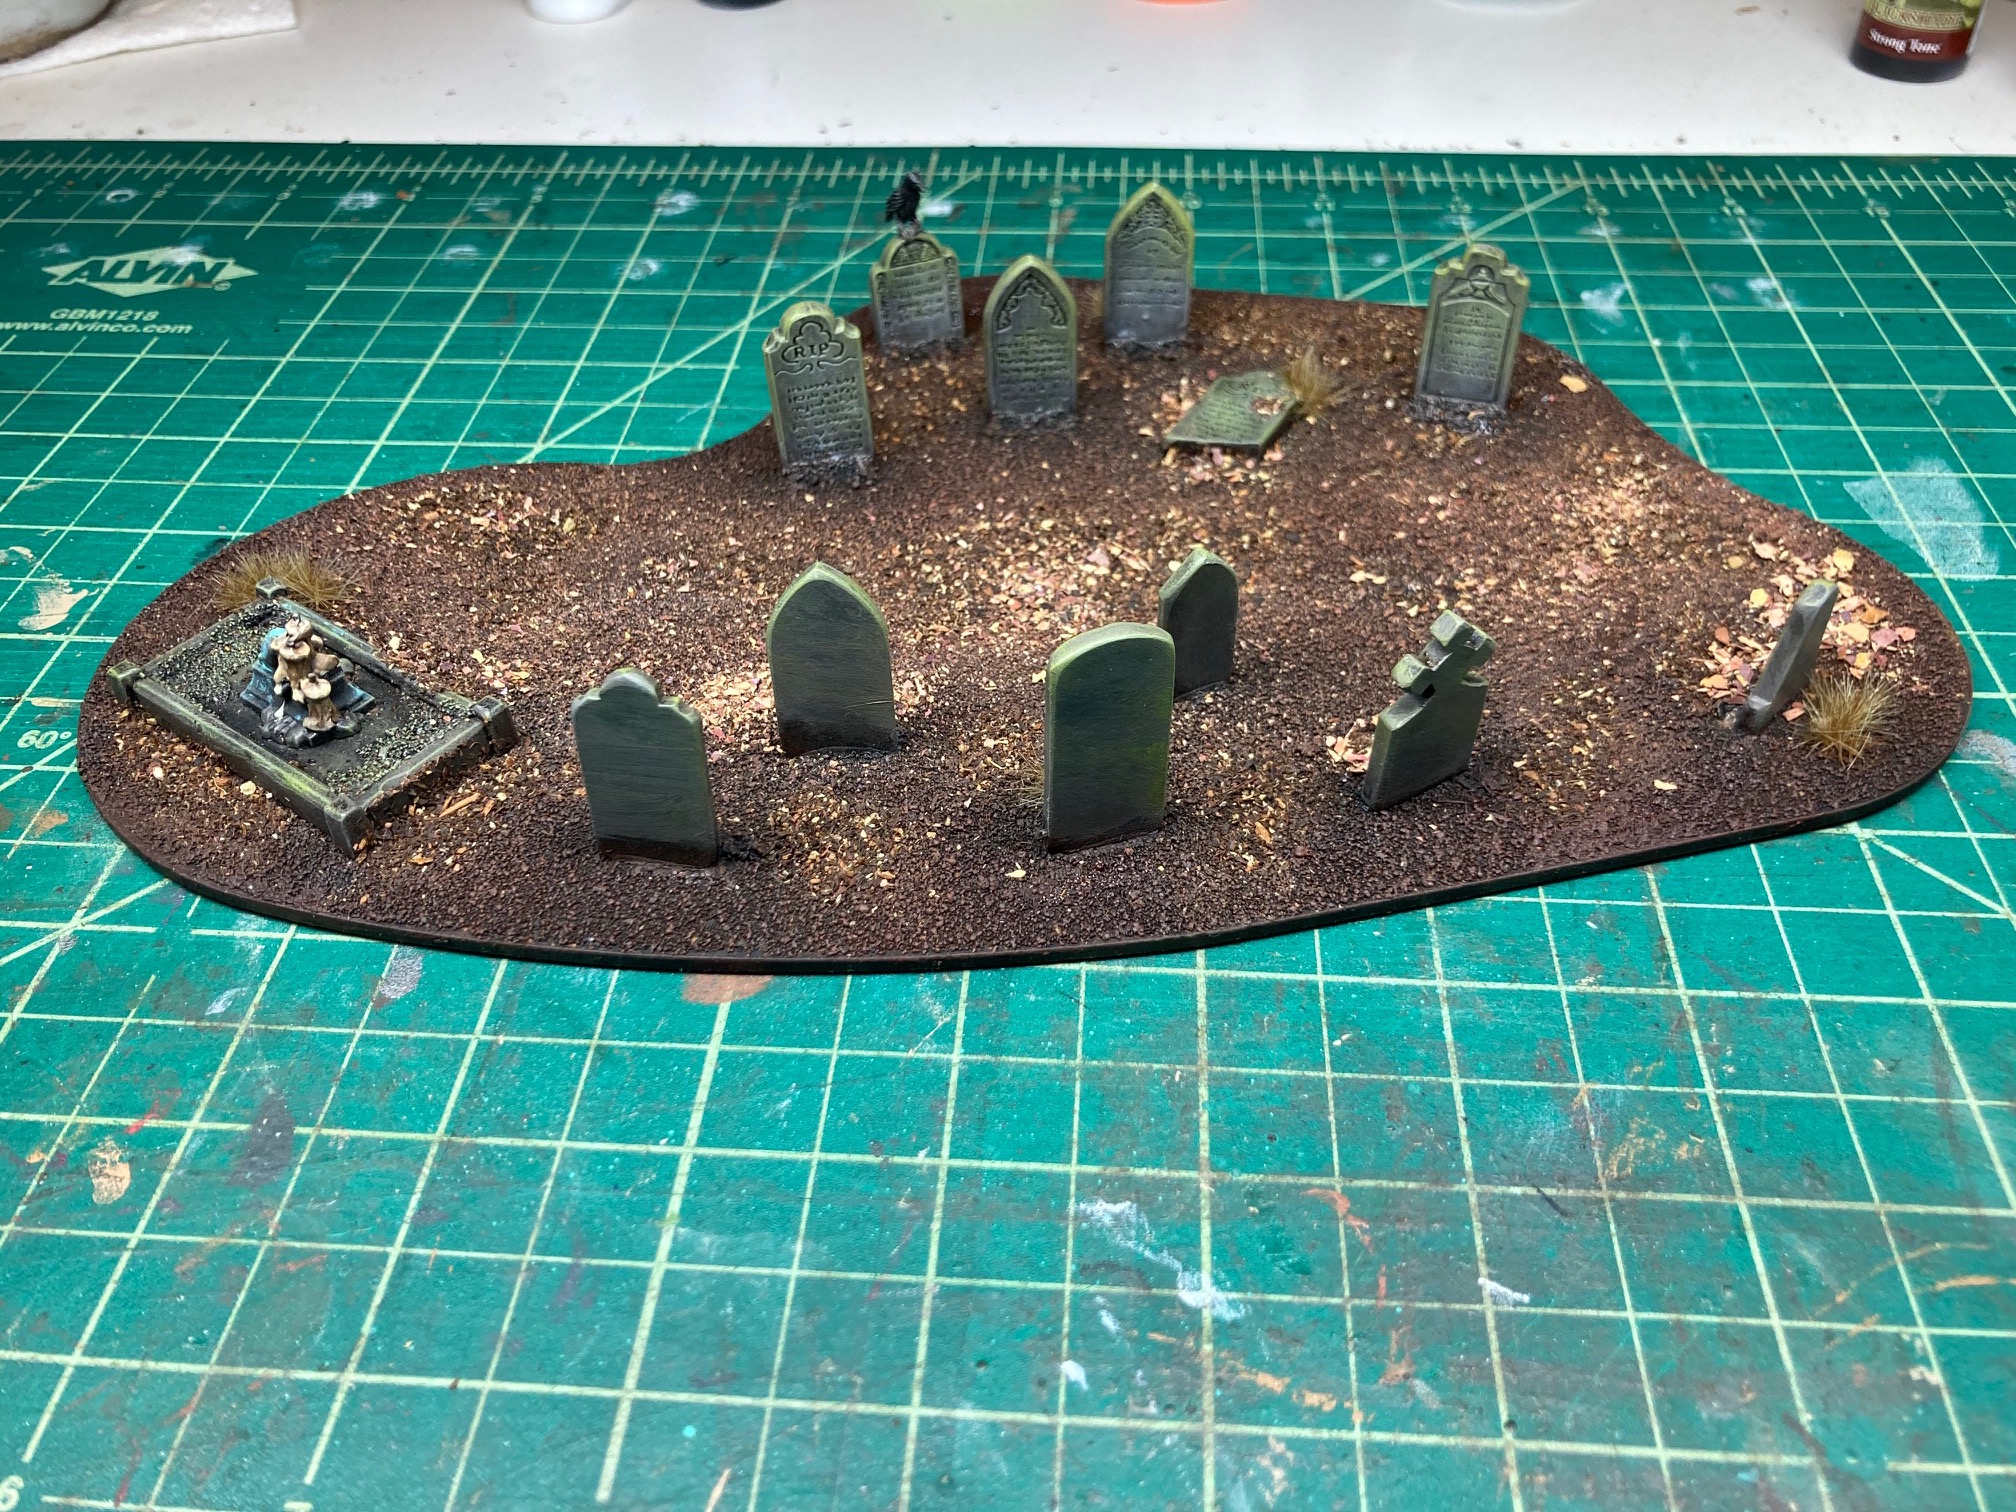
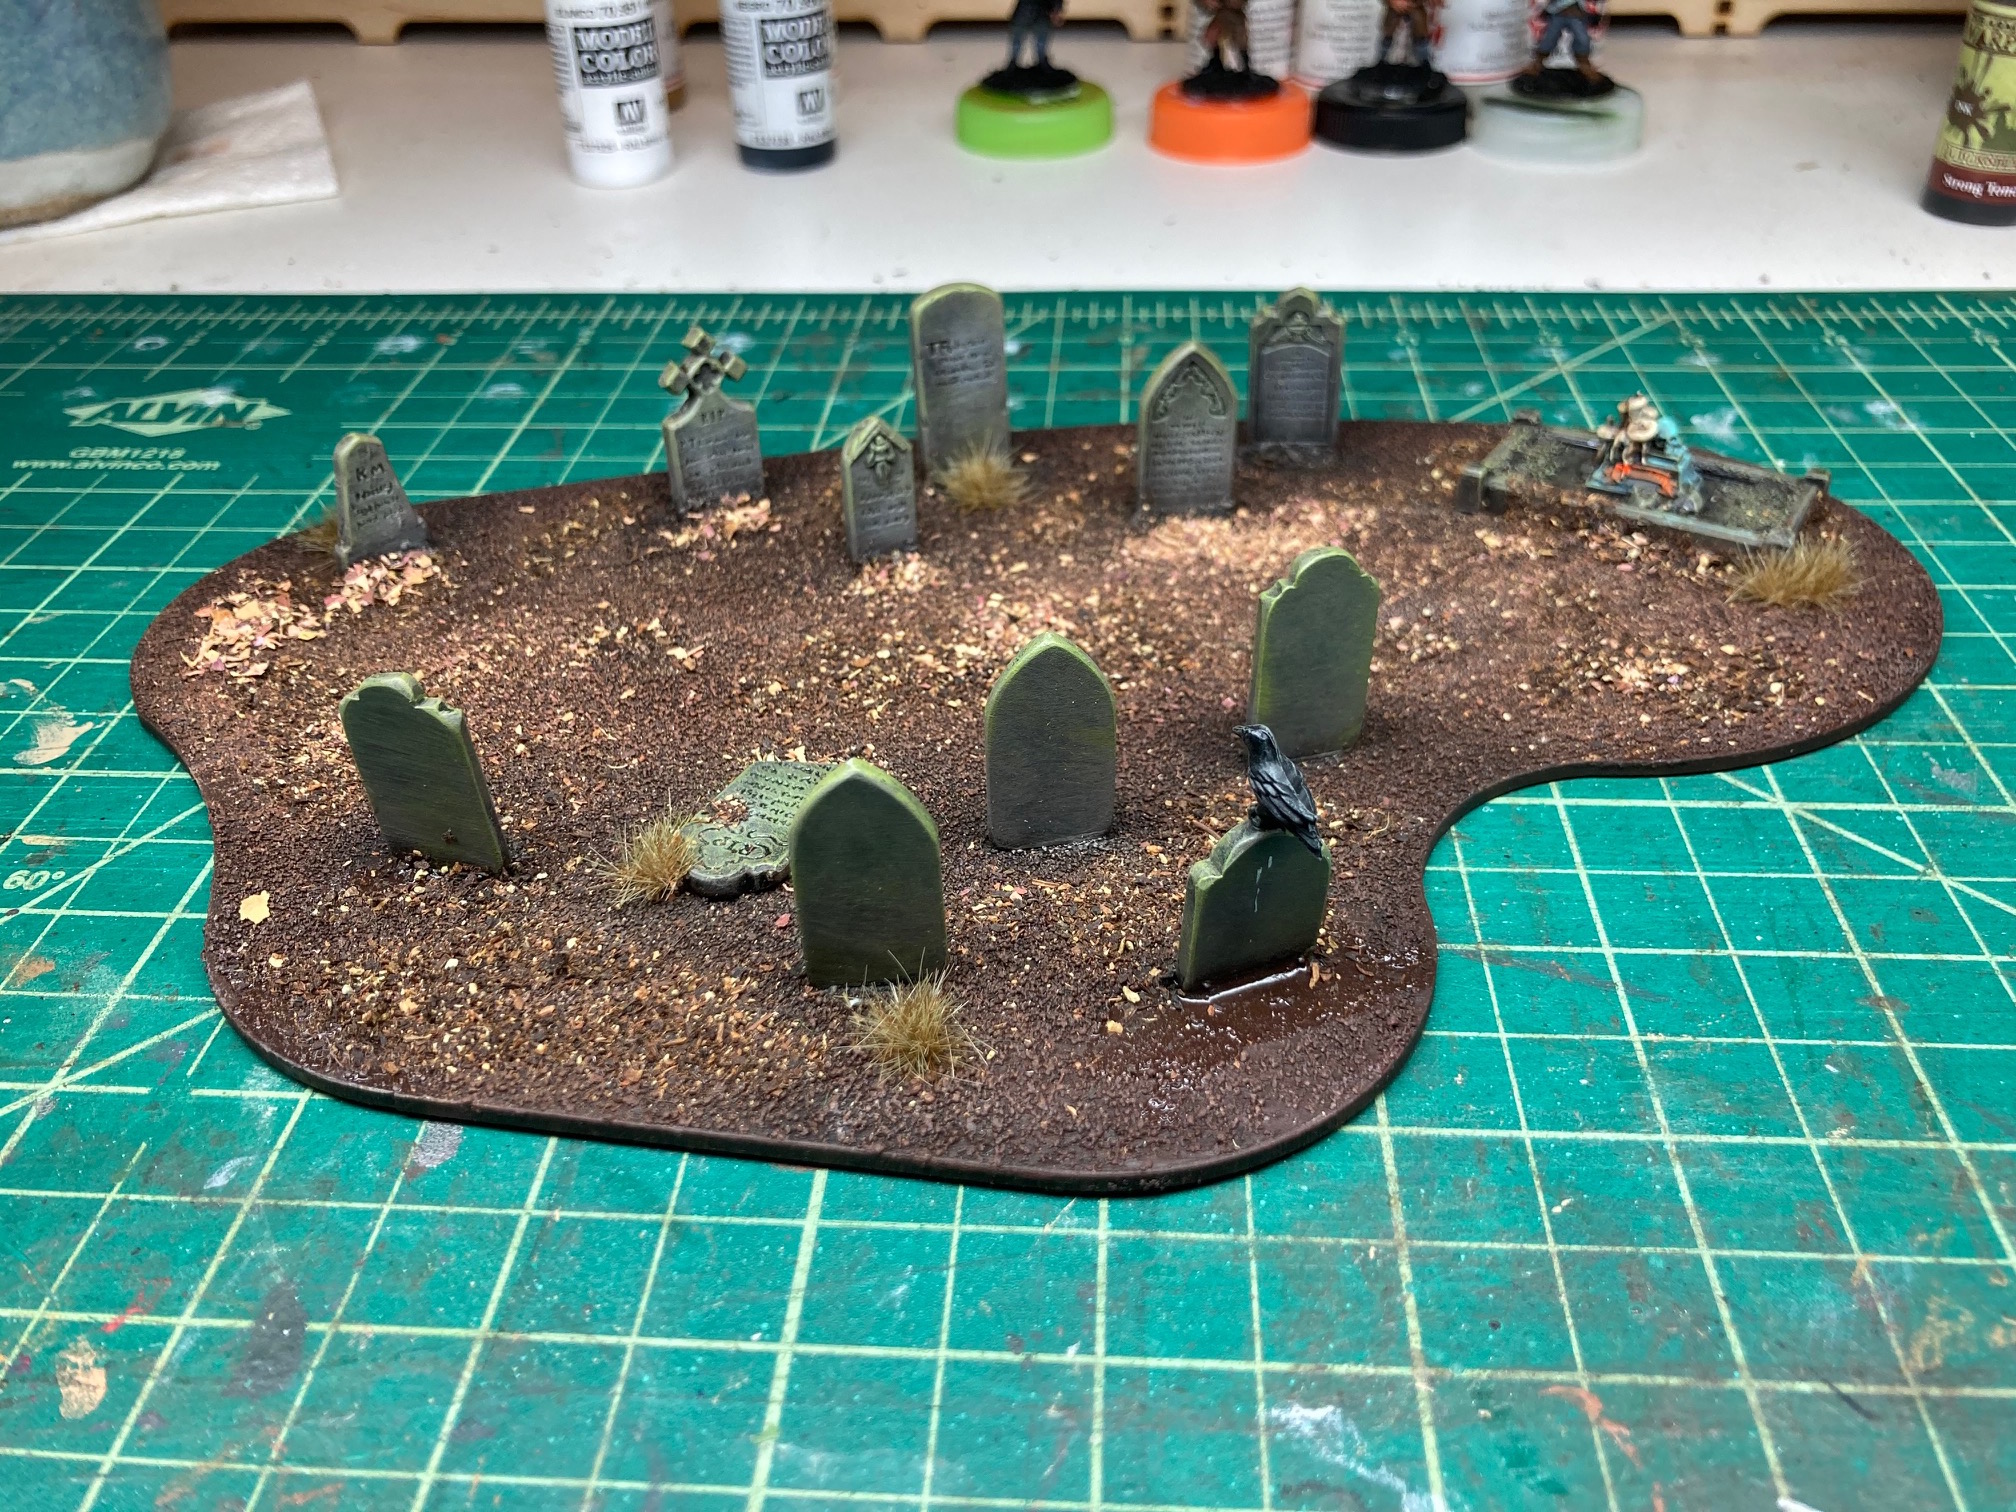
Apologies for not having WIP photo’s. The graves and crow are from Renedra. They make a fantasy grave stones set that I think is cracking for this.


