![Make Your Own Star Wars: Legion Heroes! Rebel Agent & Officer Set Review [7 Days Early Access]](https://images.beastsofwar.com/2025/12/unboxing-atomic-mass-games-star-wars-legion-rebel-alliance-agent-_-officer-coverimage-225-127.jpg)


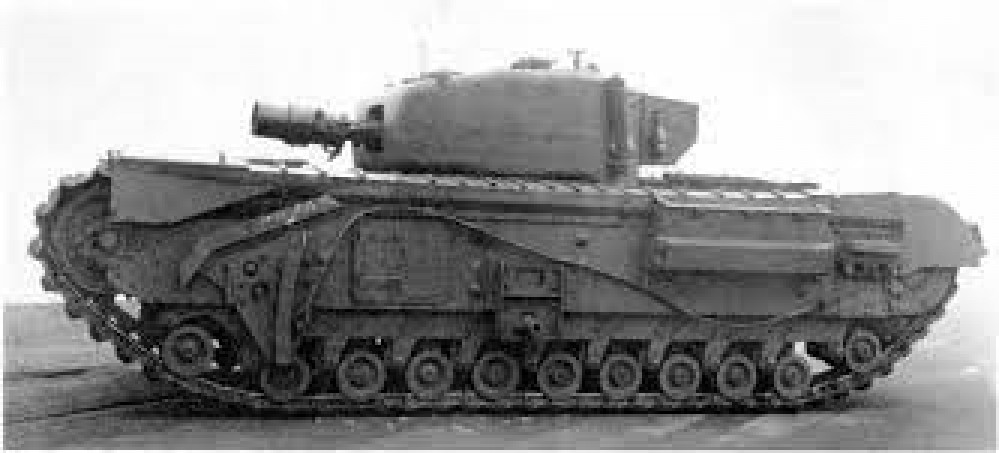
How to be an Armoured Farmer, building Hobart’s Funnies in Glorious 15mm (and maybe 28mm if they arrive in time!)


Recommendations: 2233
About the Project
Right then, having avoided any sort of Spring cleaning challenge in the past, I have decided to use this year's one to get something done that I have been gathering bits for over the past few years and finally finish and assemble all of my Hobart's Funnies. To get technical these are Armoured Vehicle Royal Engineers (AVRE) tanks, using the Churchill chassis as a base. I will also throw in some Sherman Crabs (Flail tanks). I have gathered a few books for reference so that I can paint and mark them up for one of the Armoured Assault Squadrons Royal Engineer (either 77, or 79) that landed ashore at Sword Beach and were the very first to see action on that beach; Plus the Sherman Crabs of A Squadron 22nd Dragoons. Whilst I want to be able to use the finished tanks in games depicting the D Day Landings (in Flames of War and Chain of Command at 15mm) I also want then to be versatile enough to be able to be used in later engagements that the 79th Armoured Division took part in (which is pretty much everything!). I hope you will find this of interest if you ever want to branch out into what the modern day Royal Engineers affectionately call being an armoured farmer.
Related Game: Flames of War: The World War II Miniatures Game
Related Company: Battlefront Miniatures
Related Genre: Historical
Related Contest: Spring Clean Hobby Challenge (Old)
This Project is Active
AVRE Bobbin Conversion Cont'd
 I then glued the other piece of C channel to complete the front supports
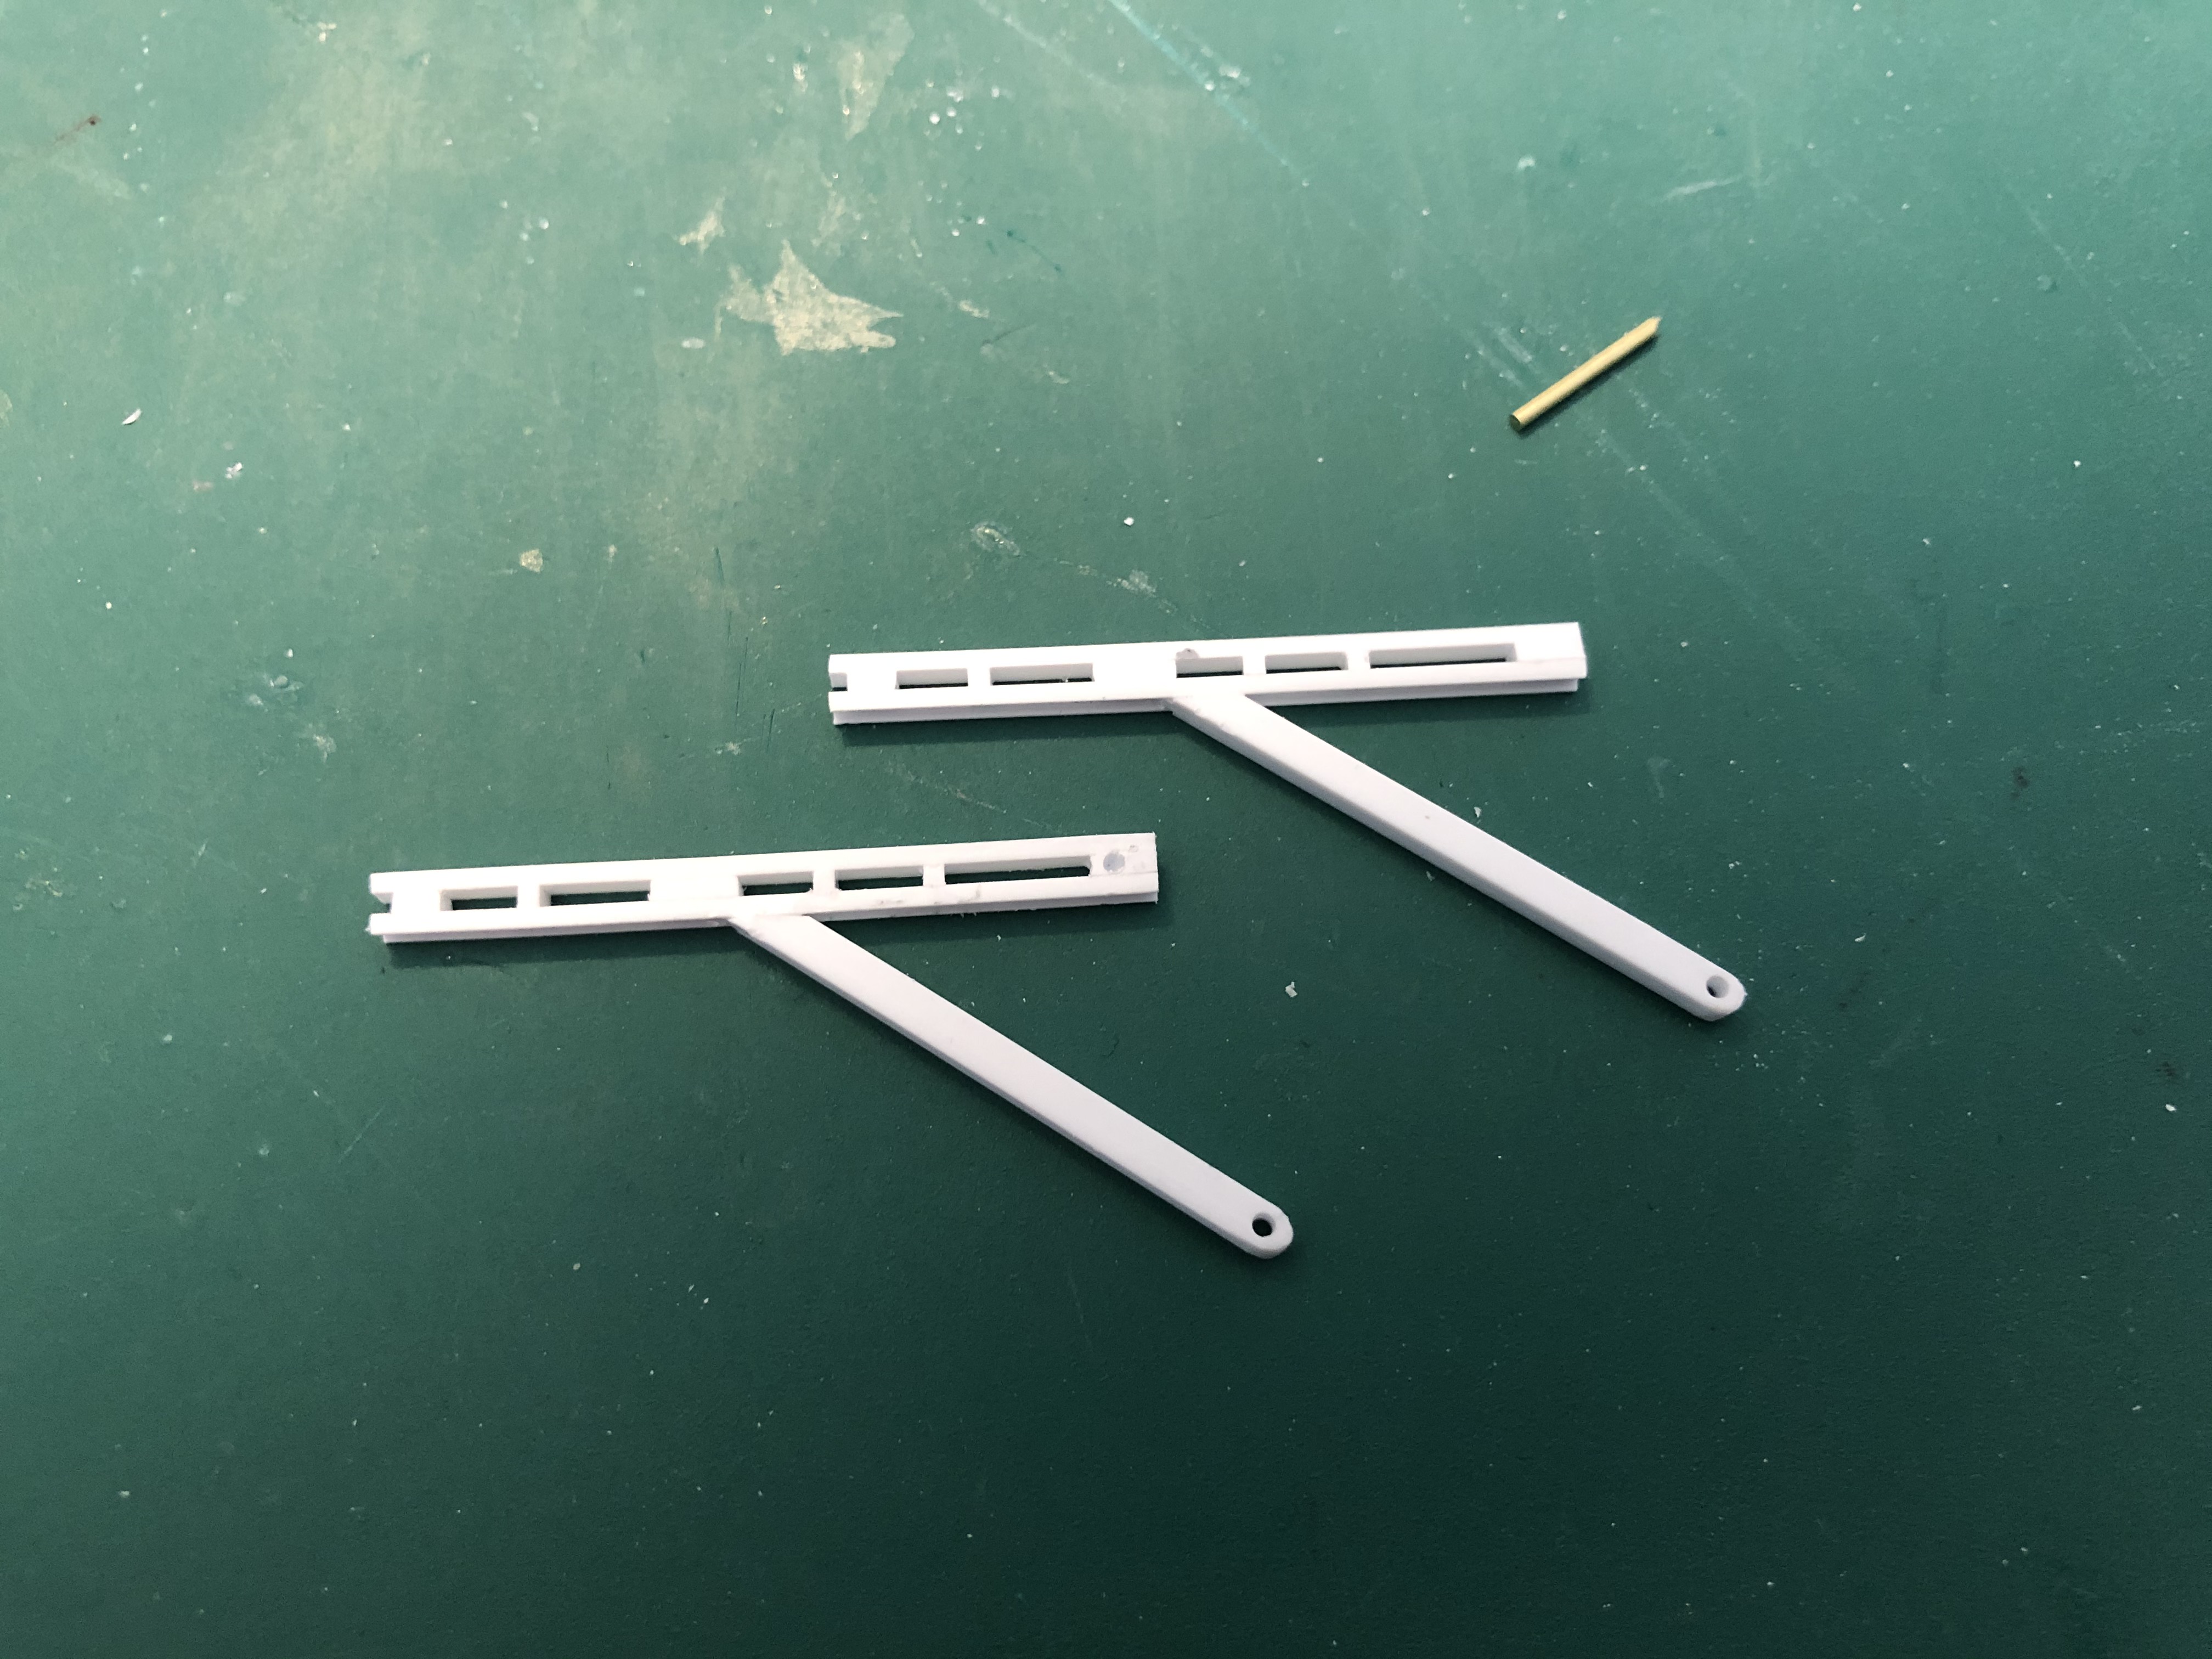 I then offered up the front and rear supports on the tank and then blue tacked them in place. I then marked up the rear support and cut it to shape. following another mock up on the tank I was happy to glue it in place..
AVRE Bobbin Conversion Cont'd
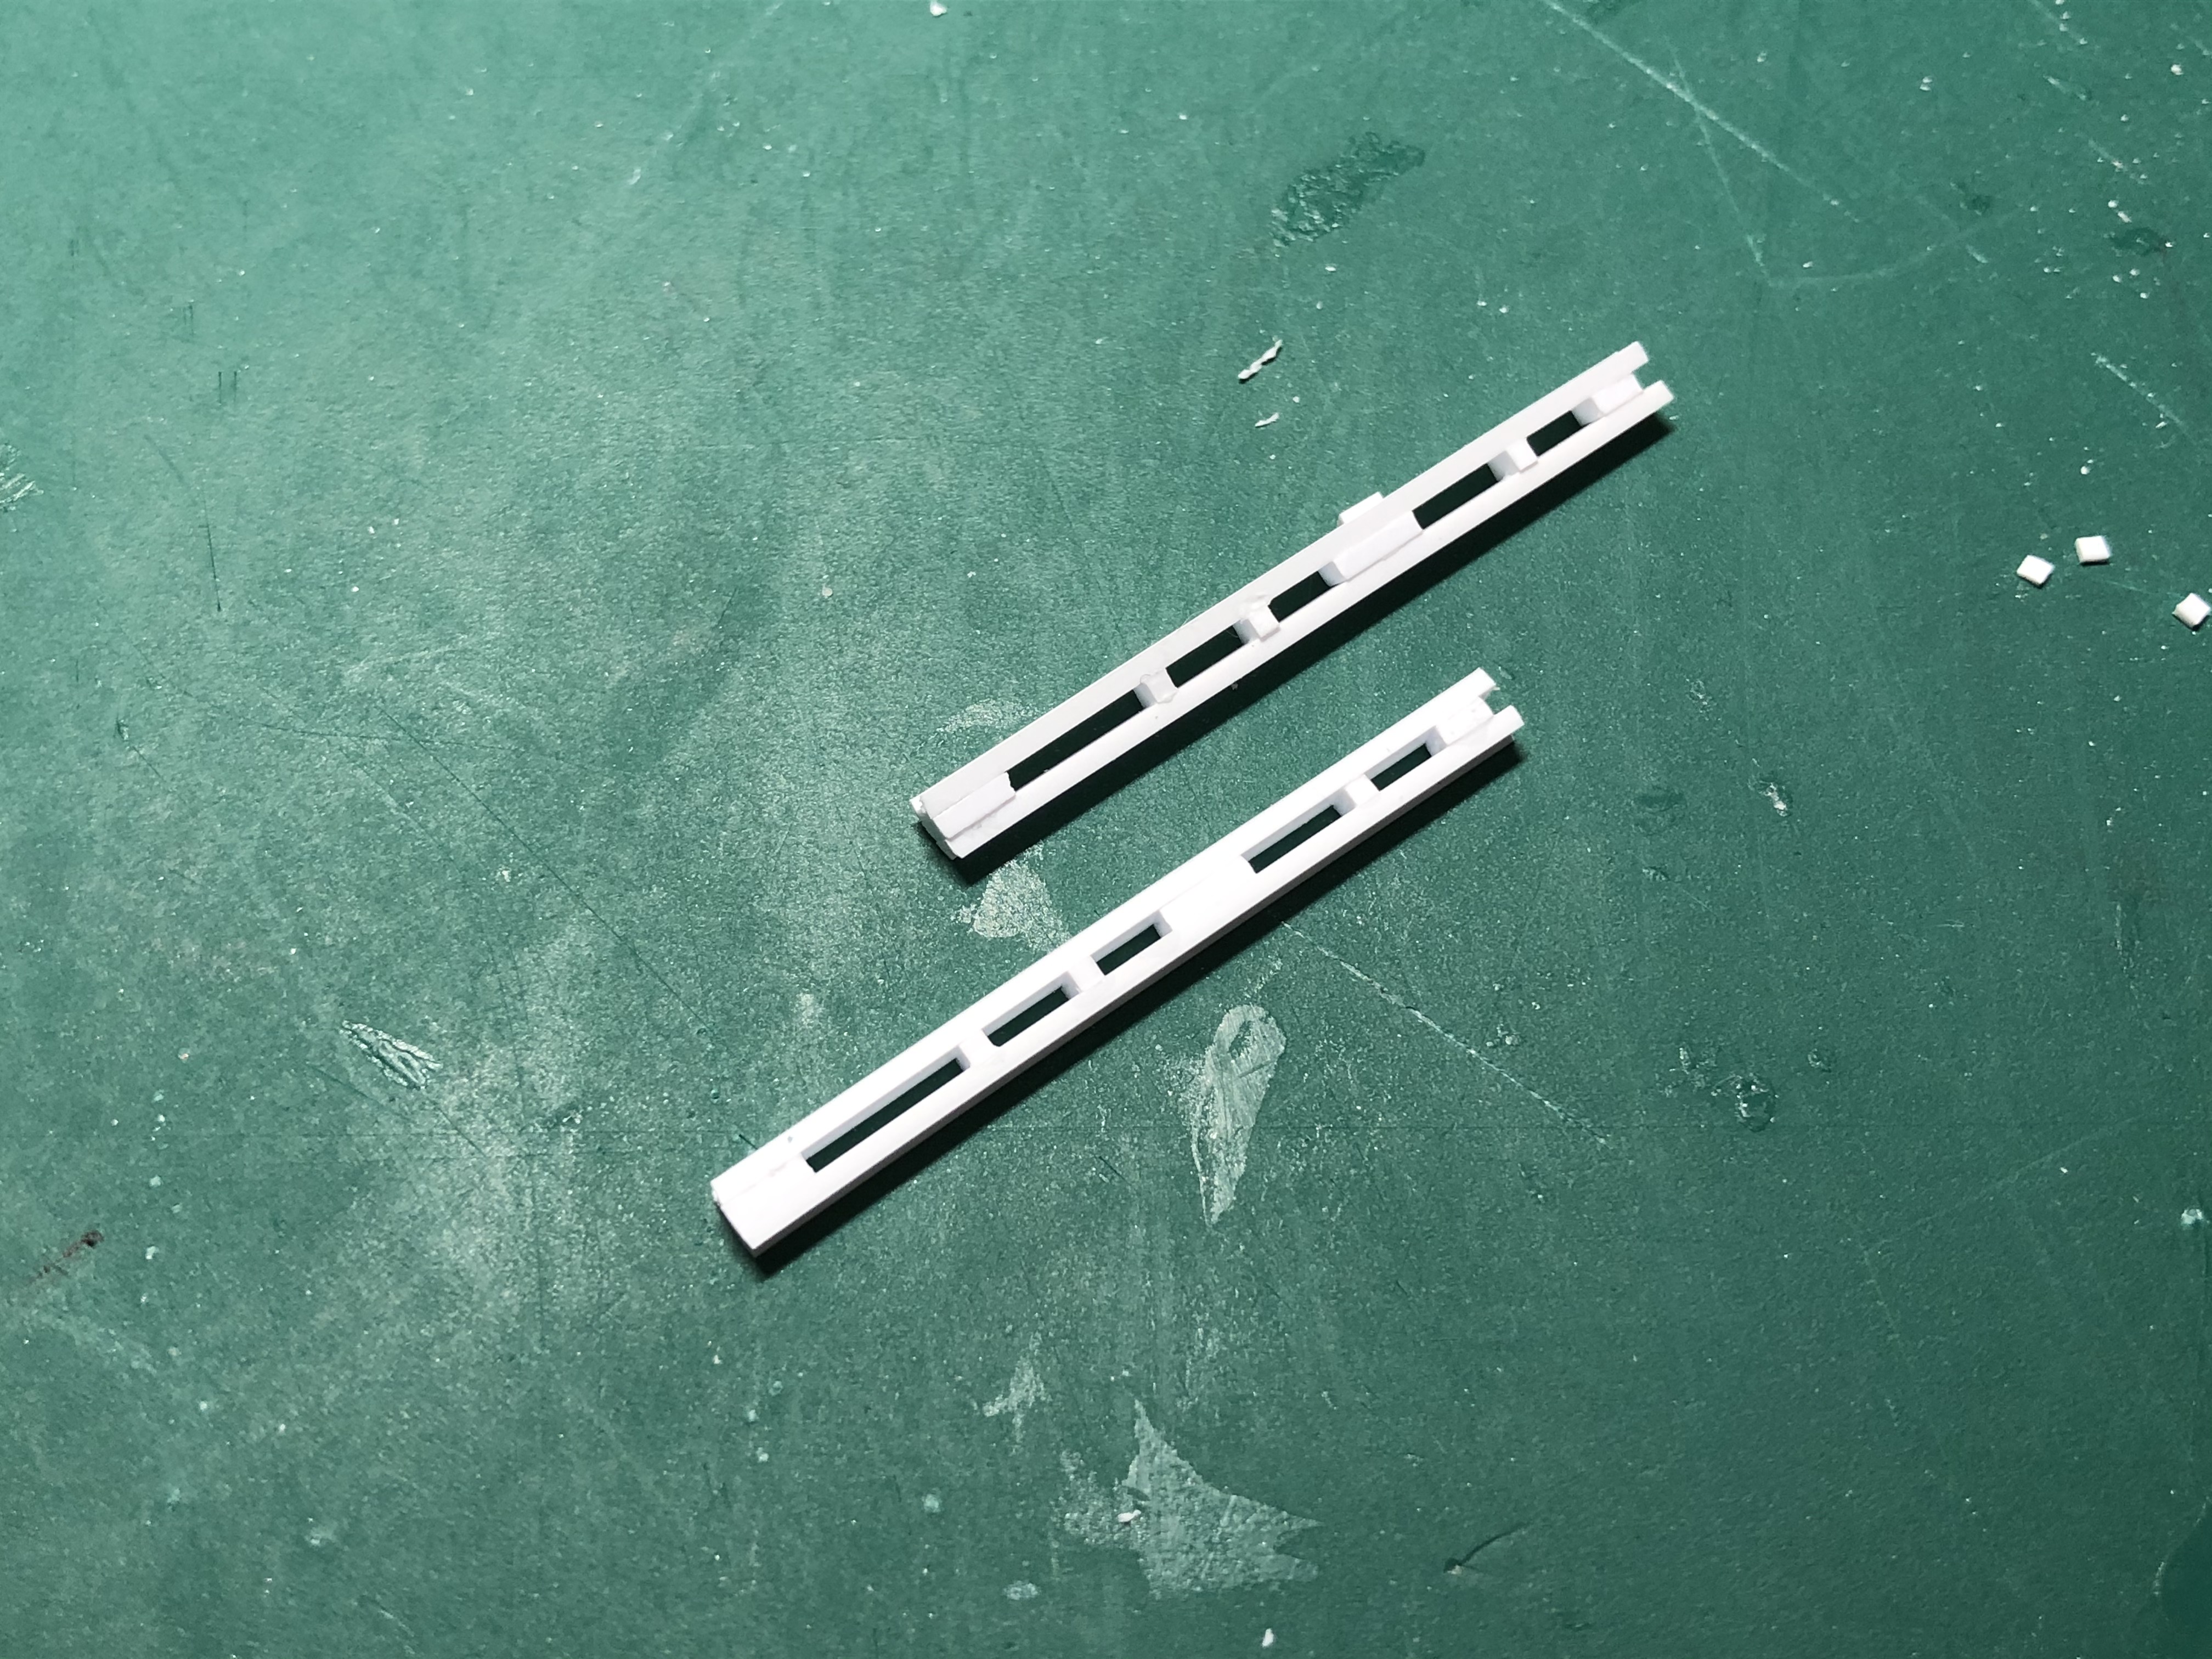
Next up was the most fiddly bit, the front support arms. Each were made from two lengths of C channel (2mm x 1mm), and the infill pieces from 2mm x 1mm sections and 1mm square sections.
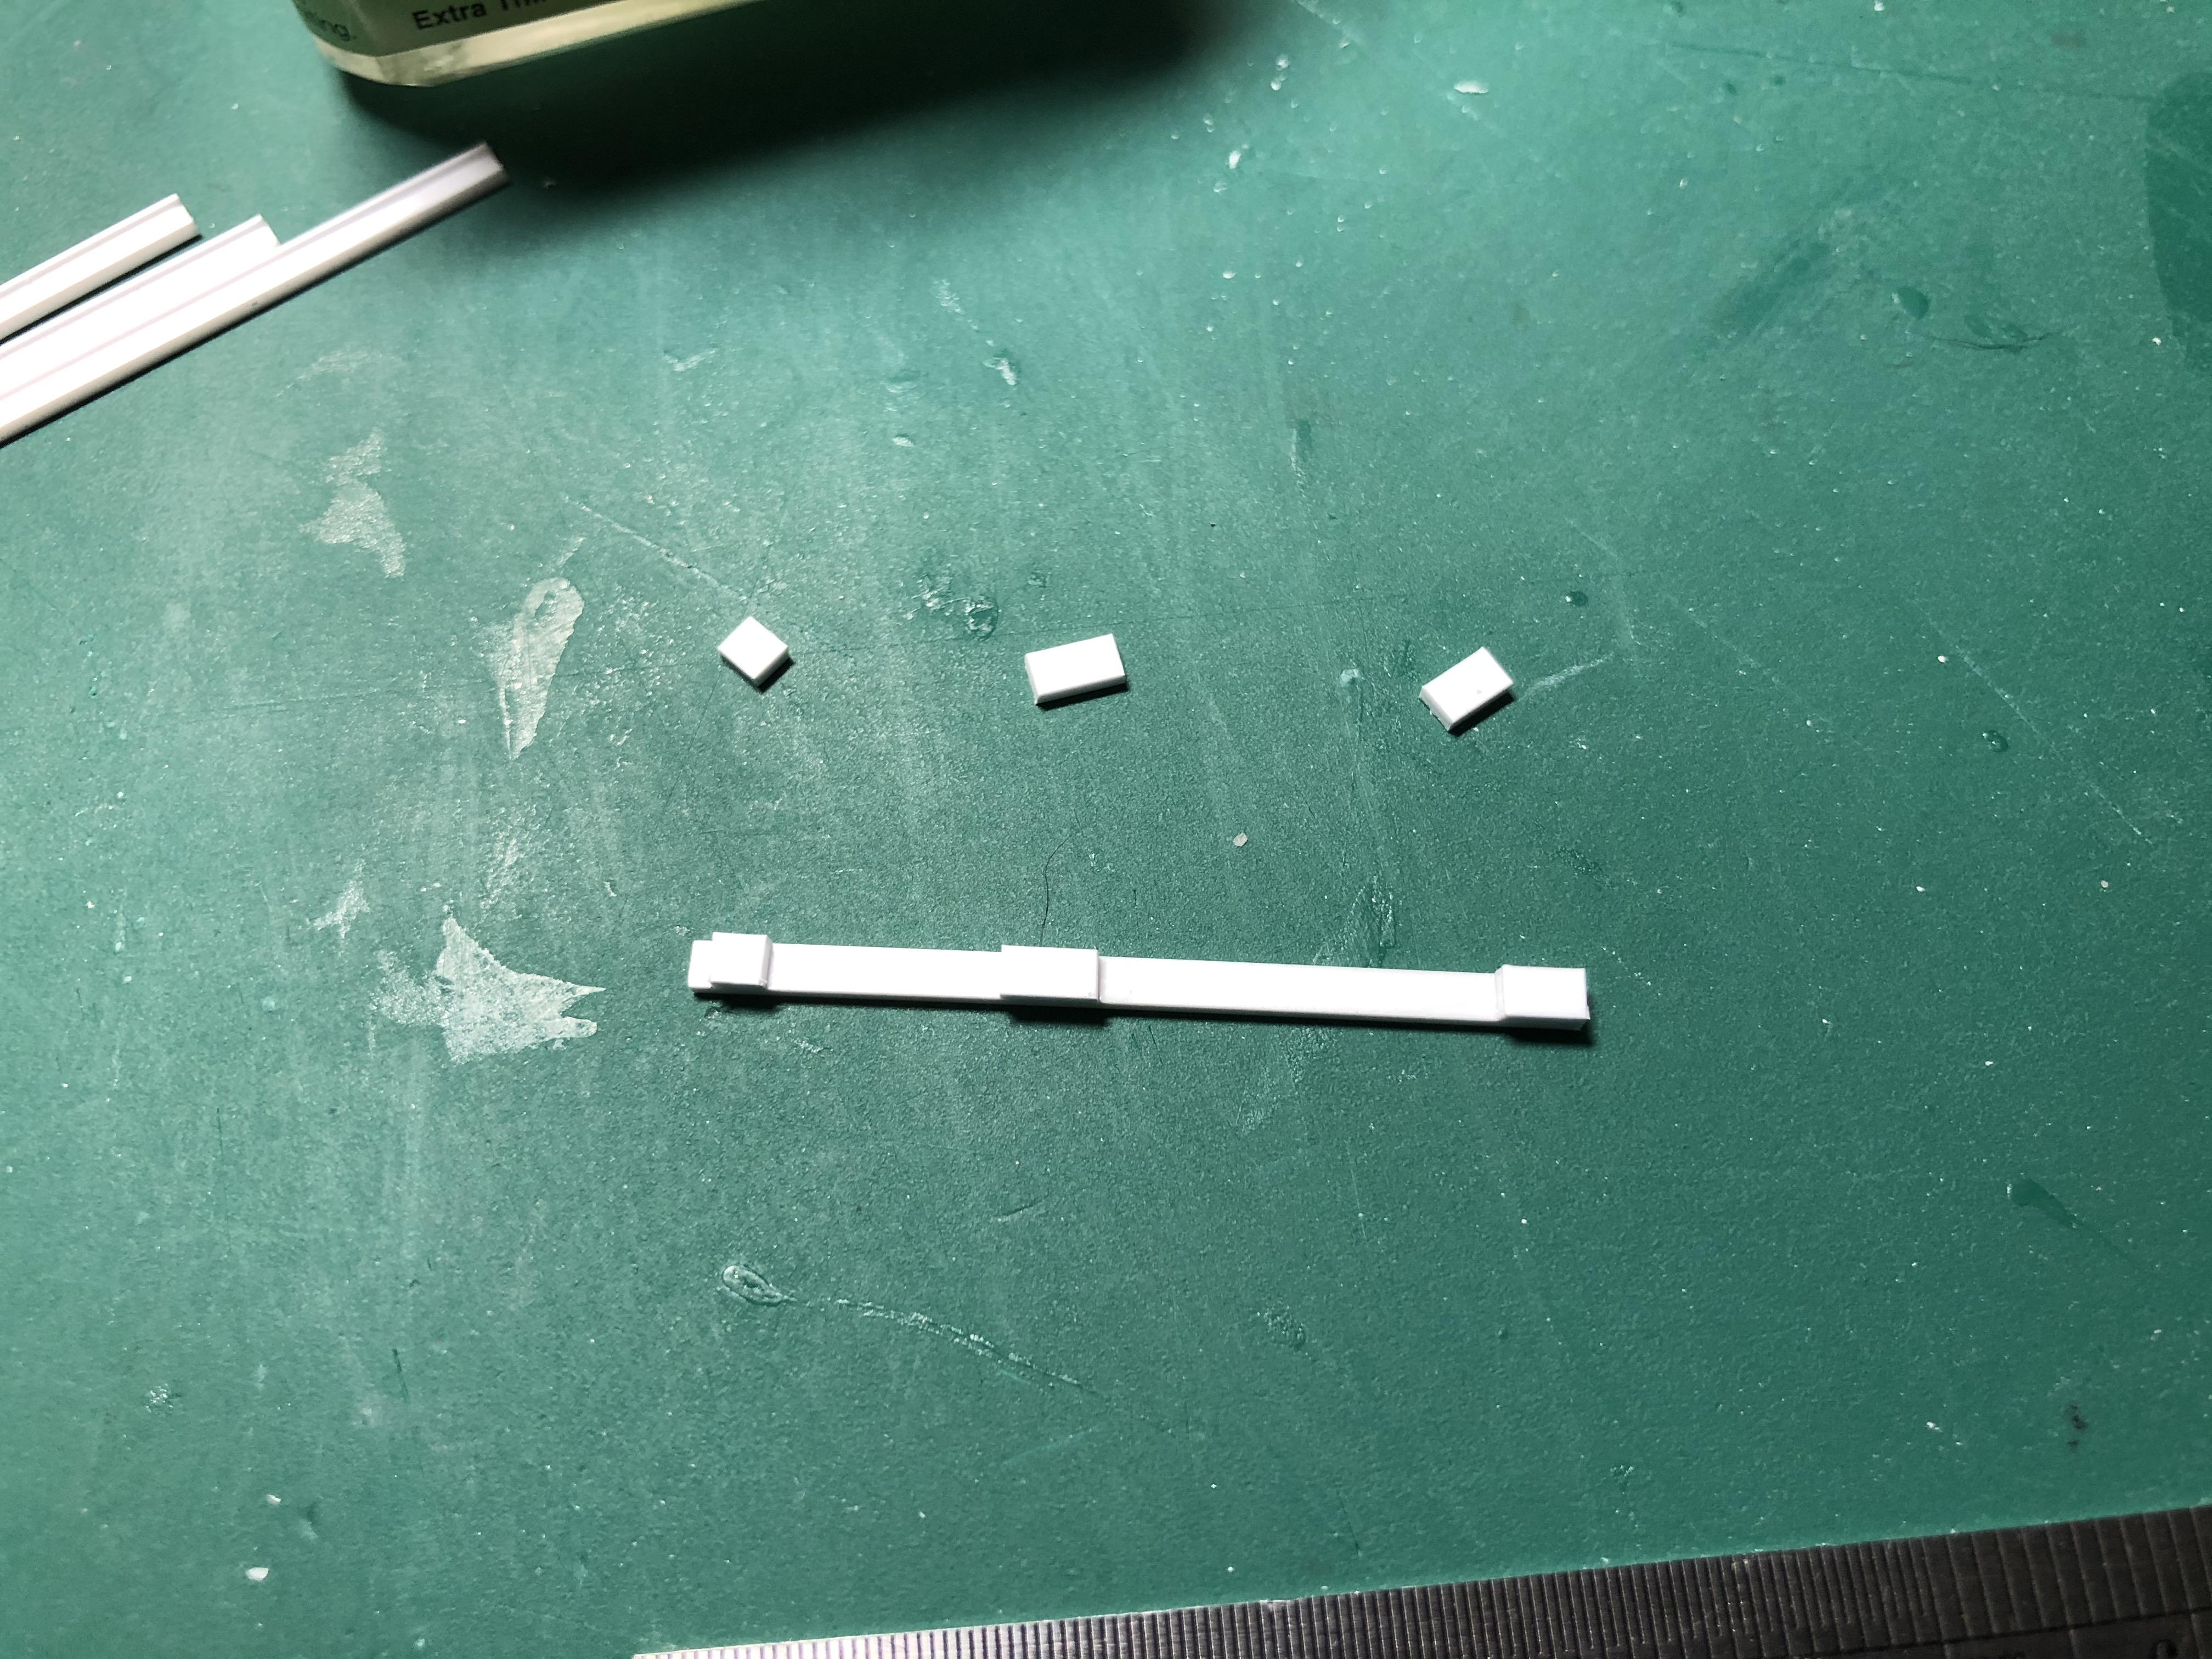 The main infills were from 2mm x 1mm sections, three of in total, each being 2, 3 & 4mm long
 Using a ruler, I then glued them in place.
 Using the same process I then cut 1mm square sections and glued them in place. I cut them slightly larger than required, so they cut be cut flush once the two halves were glued together.
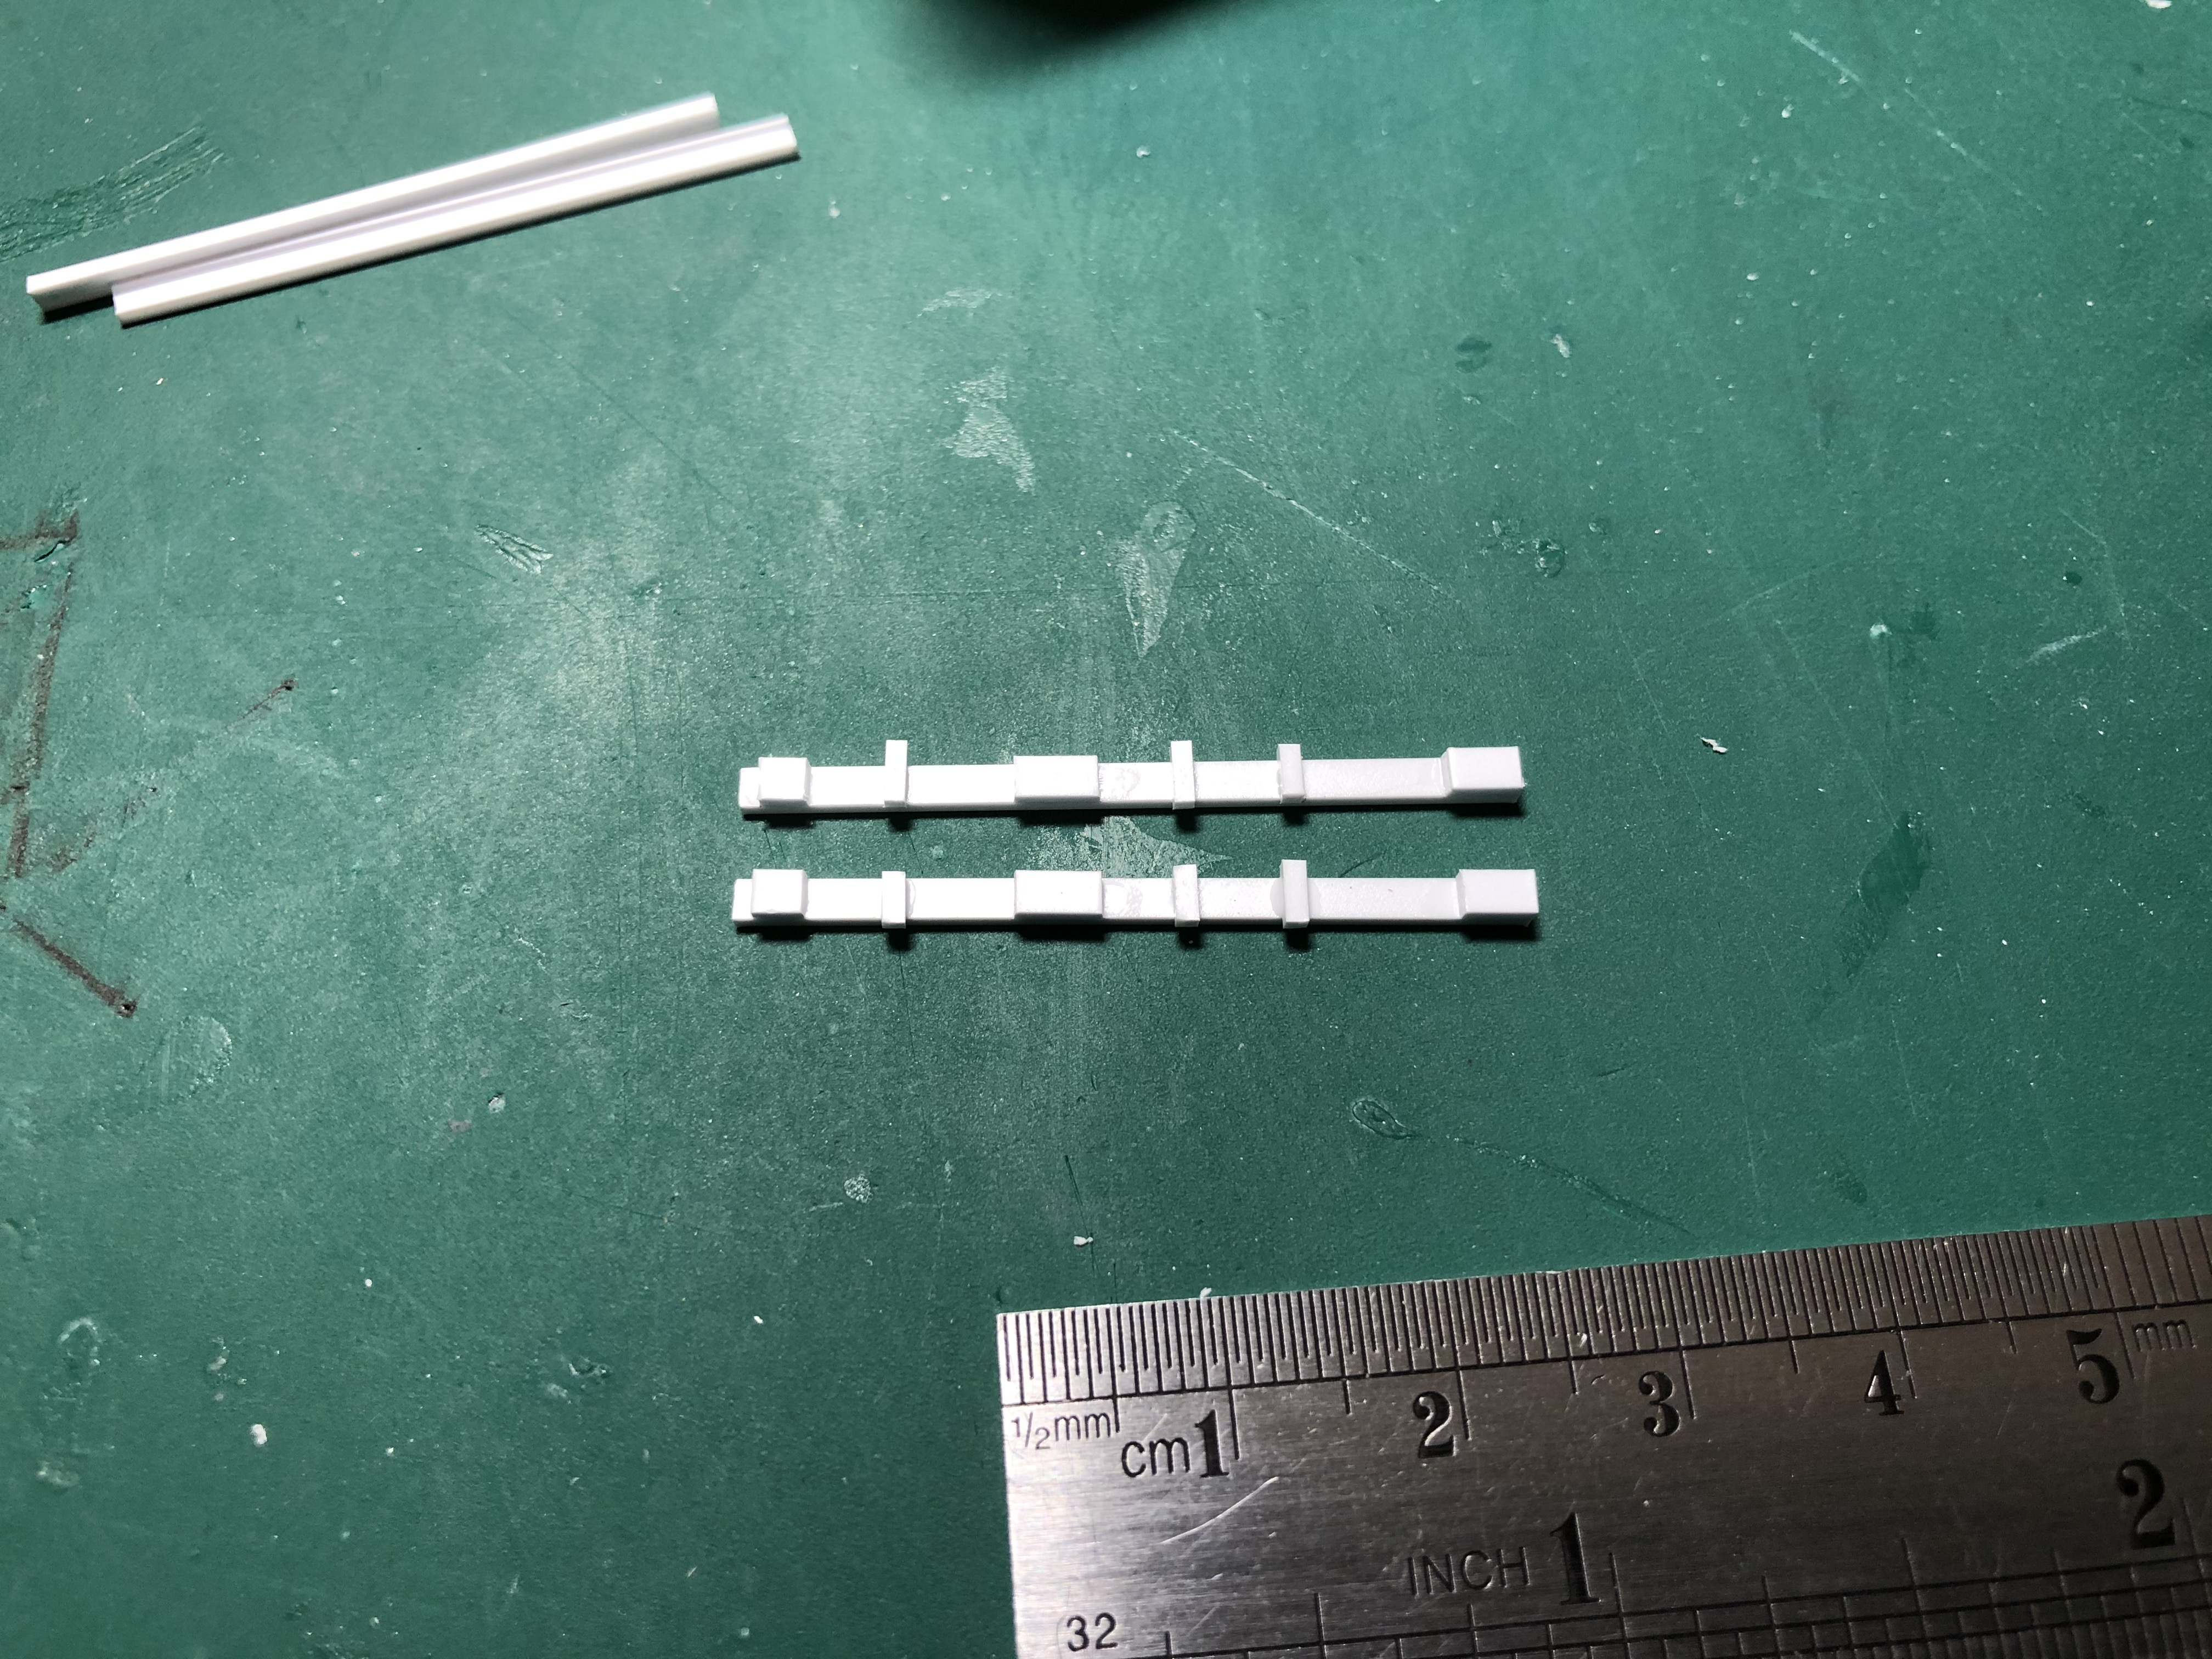 I then matched the second support infill pieces so it looked uniform.
AVRE Bobbin Conversion Cont'd
First off I cut out the rear support arms, these were then drilled with a 1mm dia drill bit and the end rounded off. The other end will be cut off at an angle to match with the C Channel section of the front support arm.
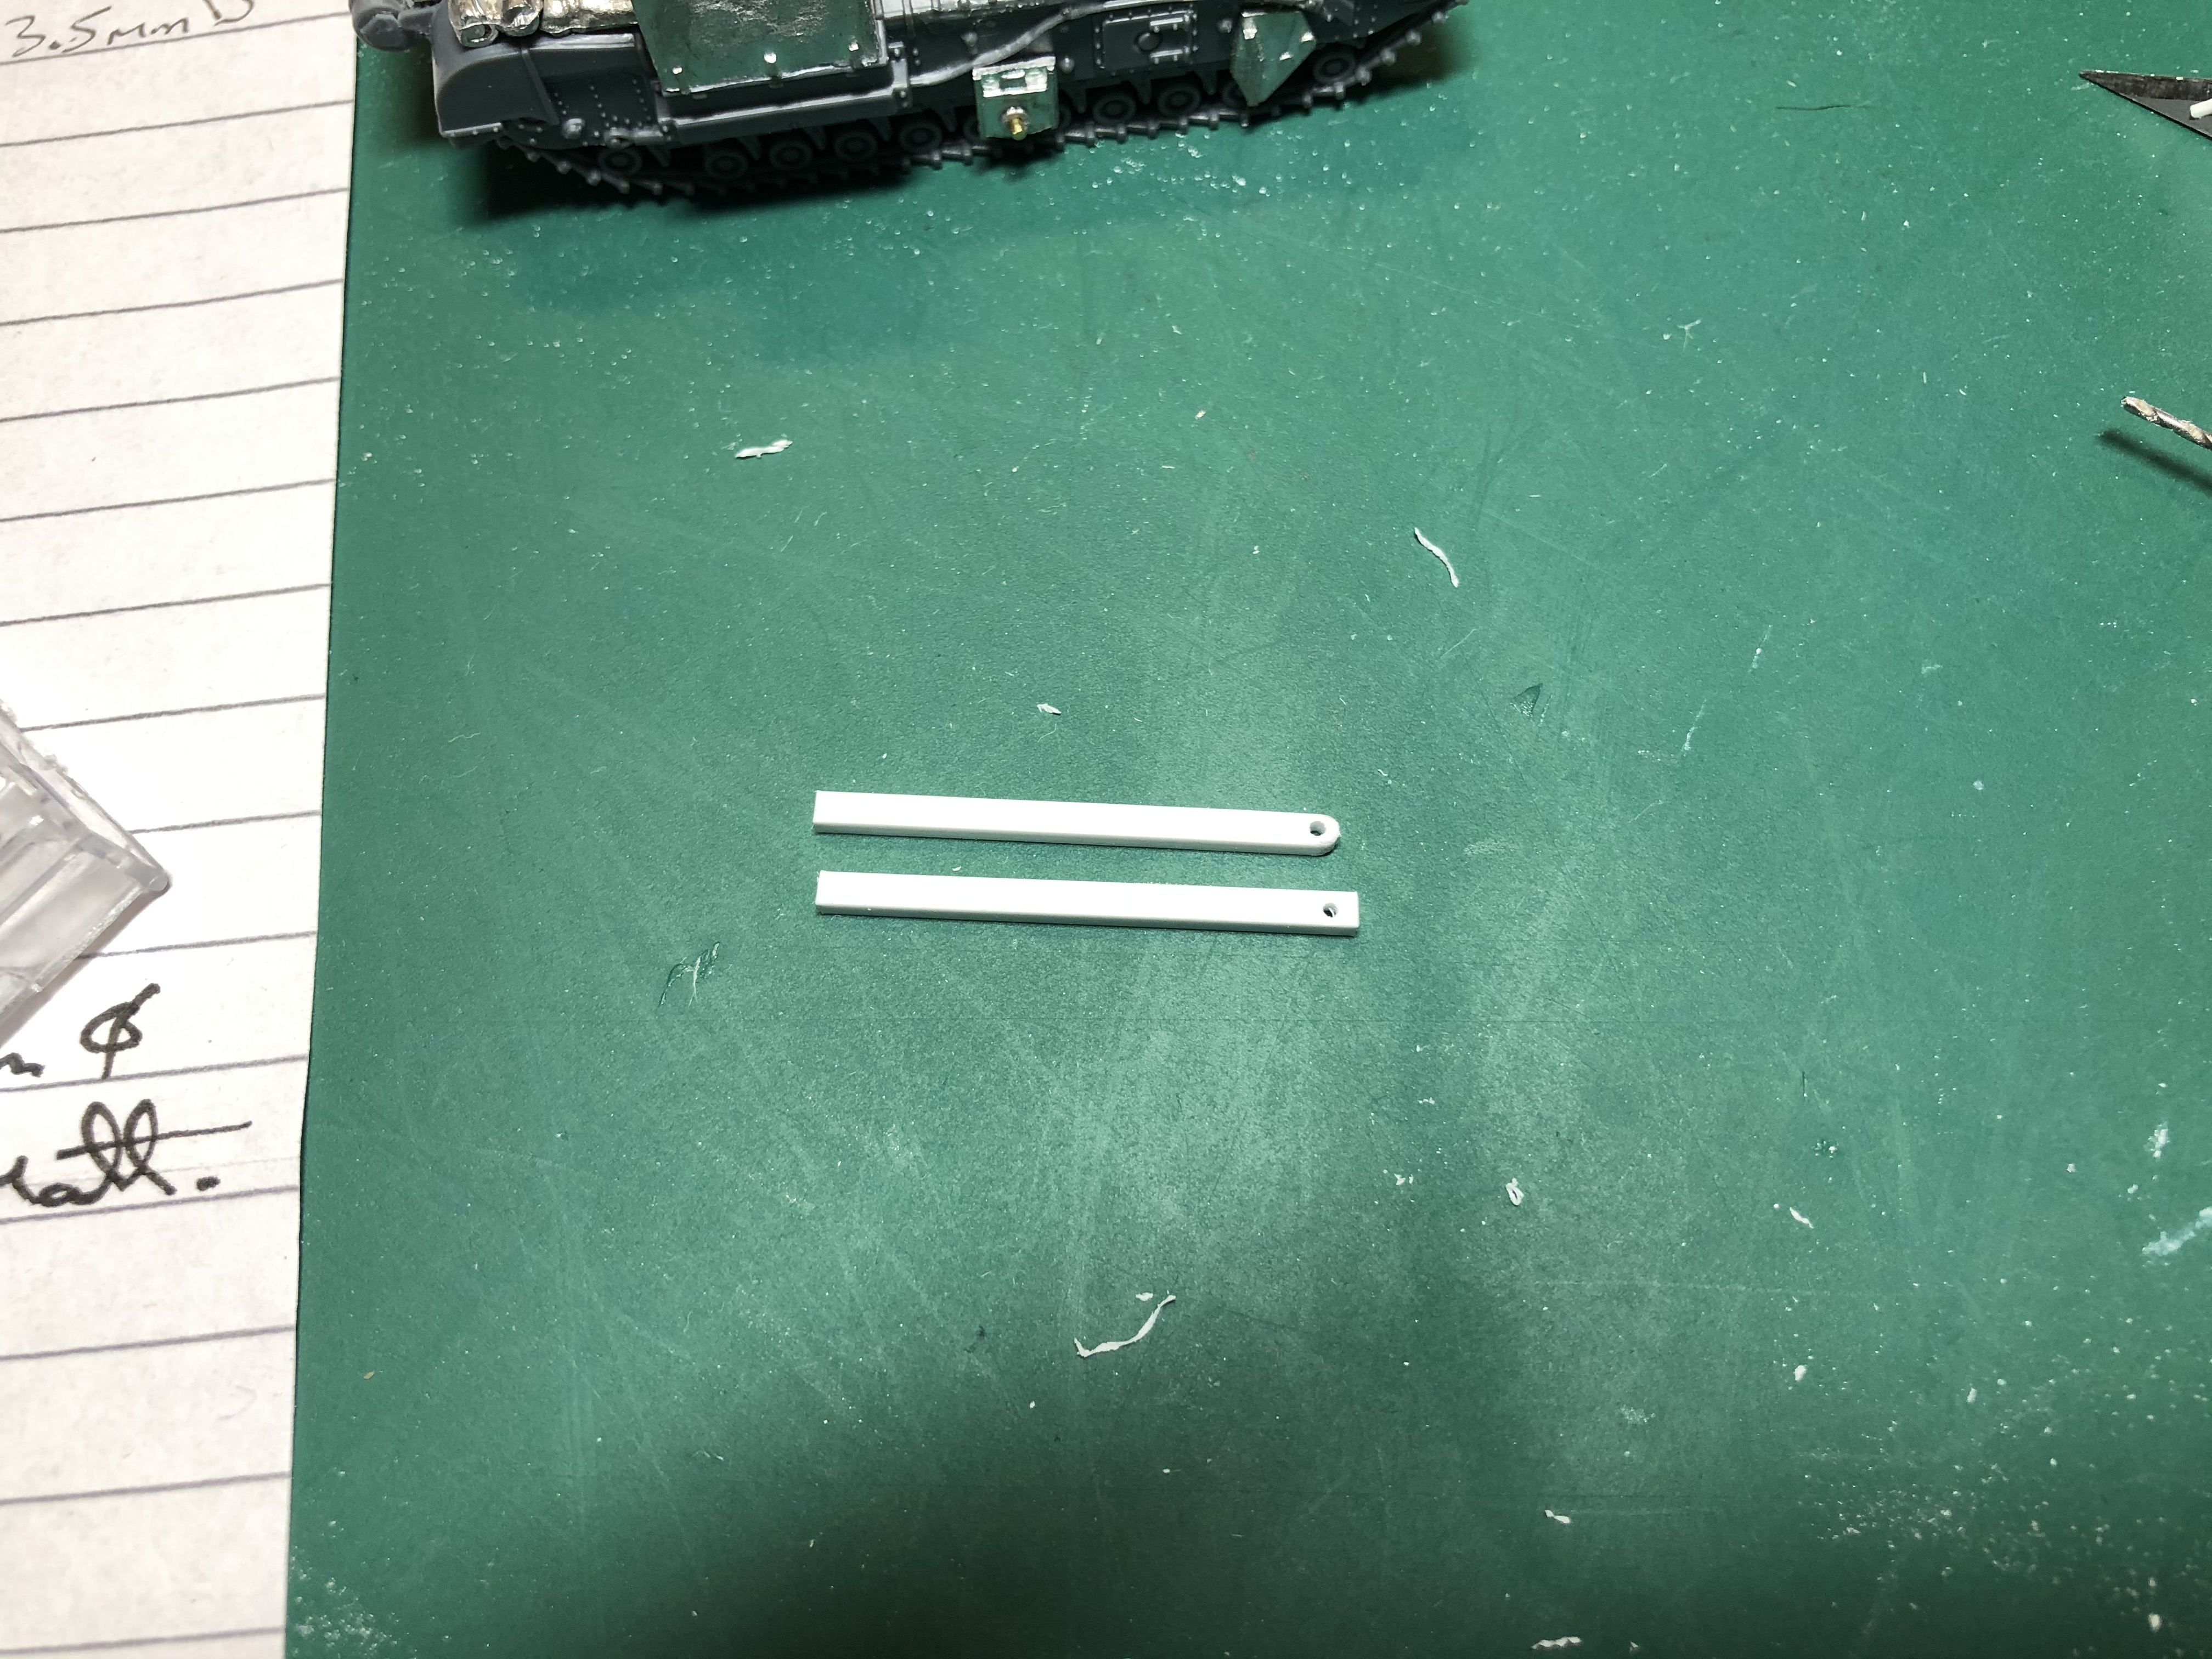 A little before and after on the rear support arms
AVRE Bobbin Conversion
With having the advantage of a 28mm version to scale off, I took measurements, sketched up the main support arms and then calculated the 15mm measurements from this information.
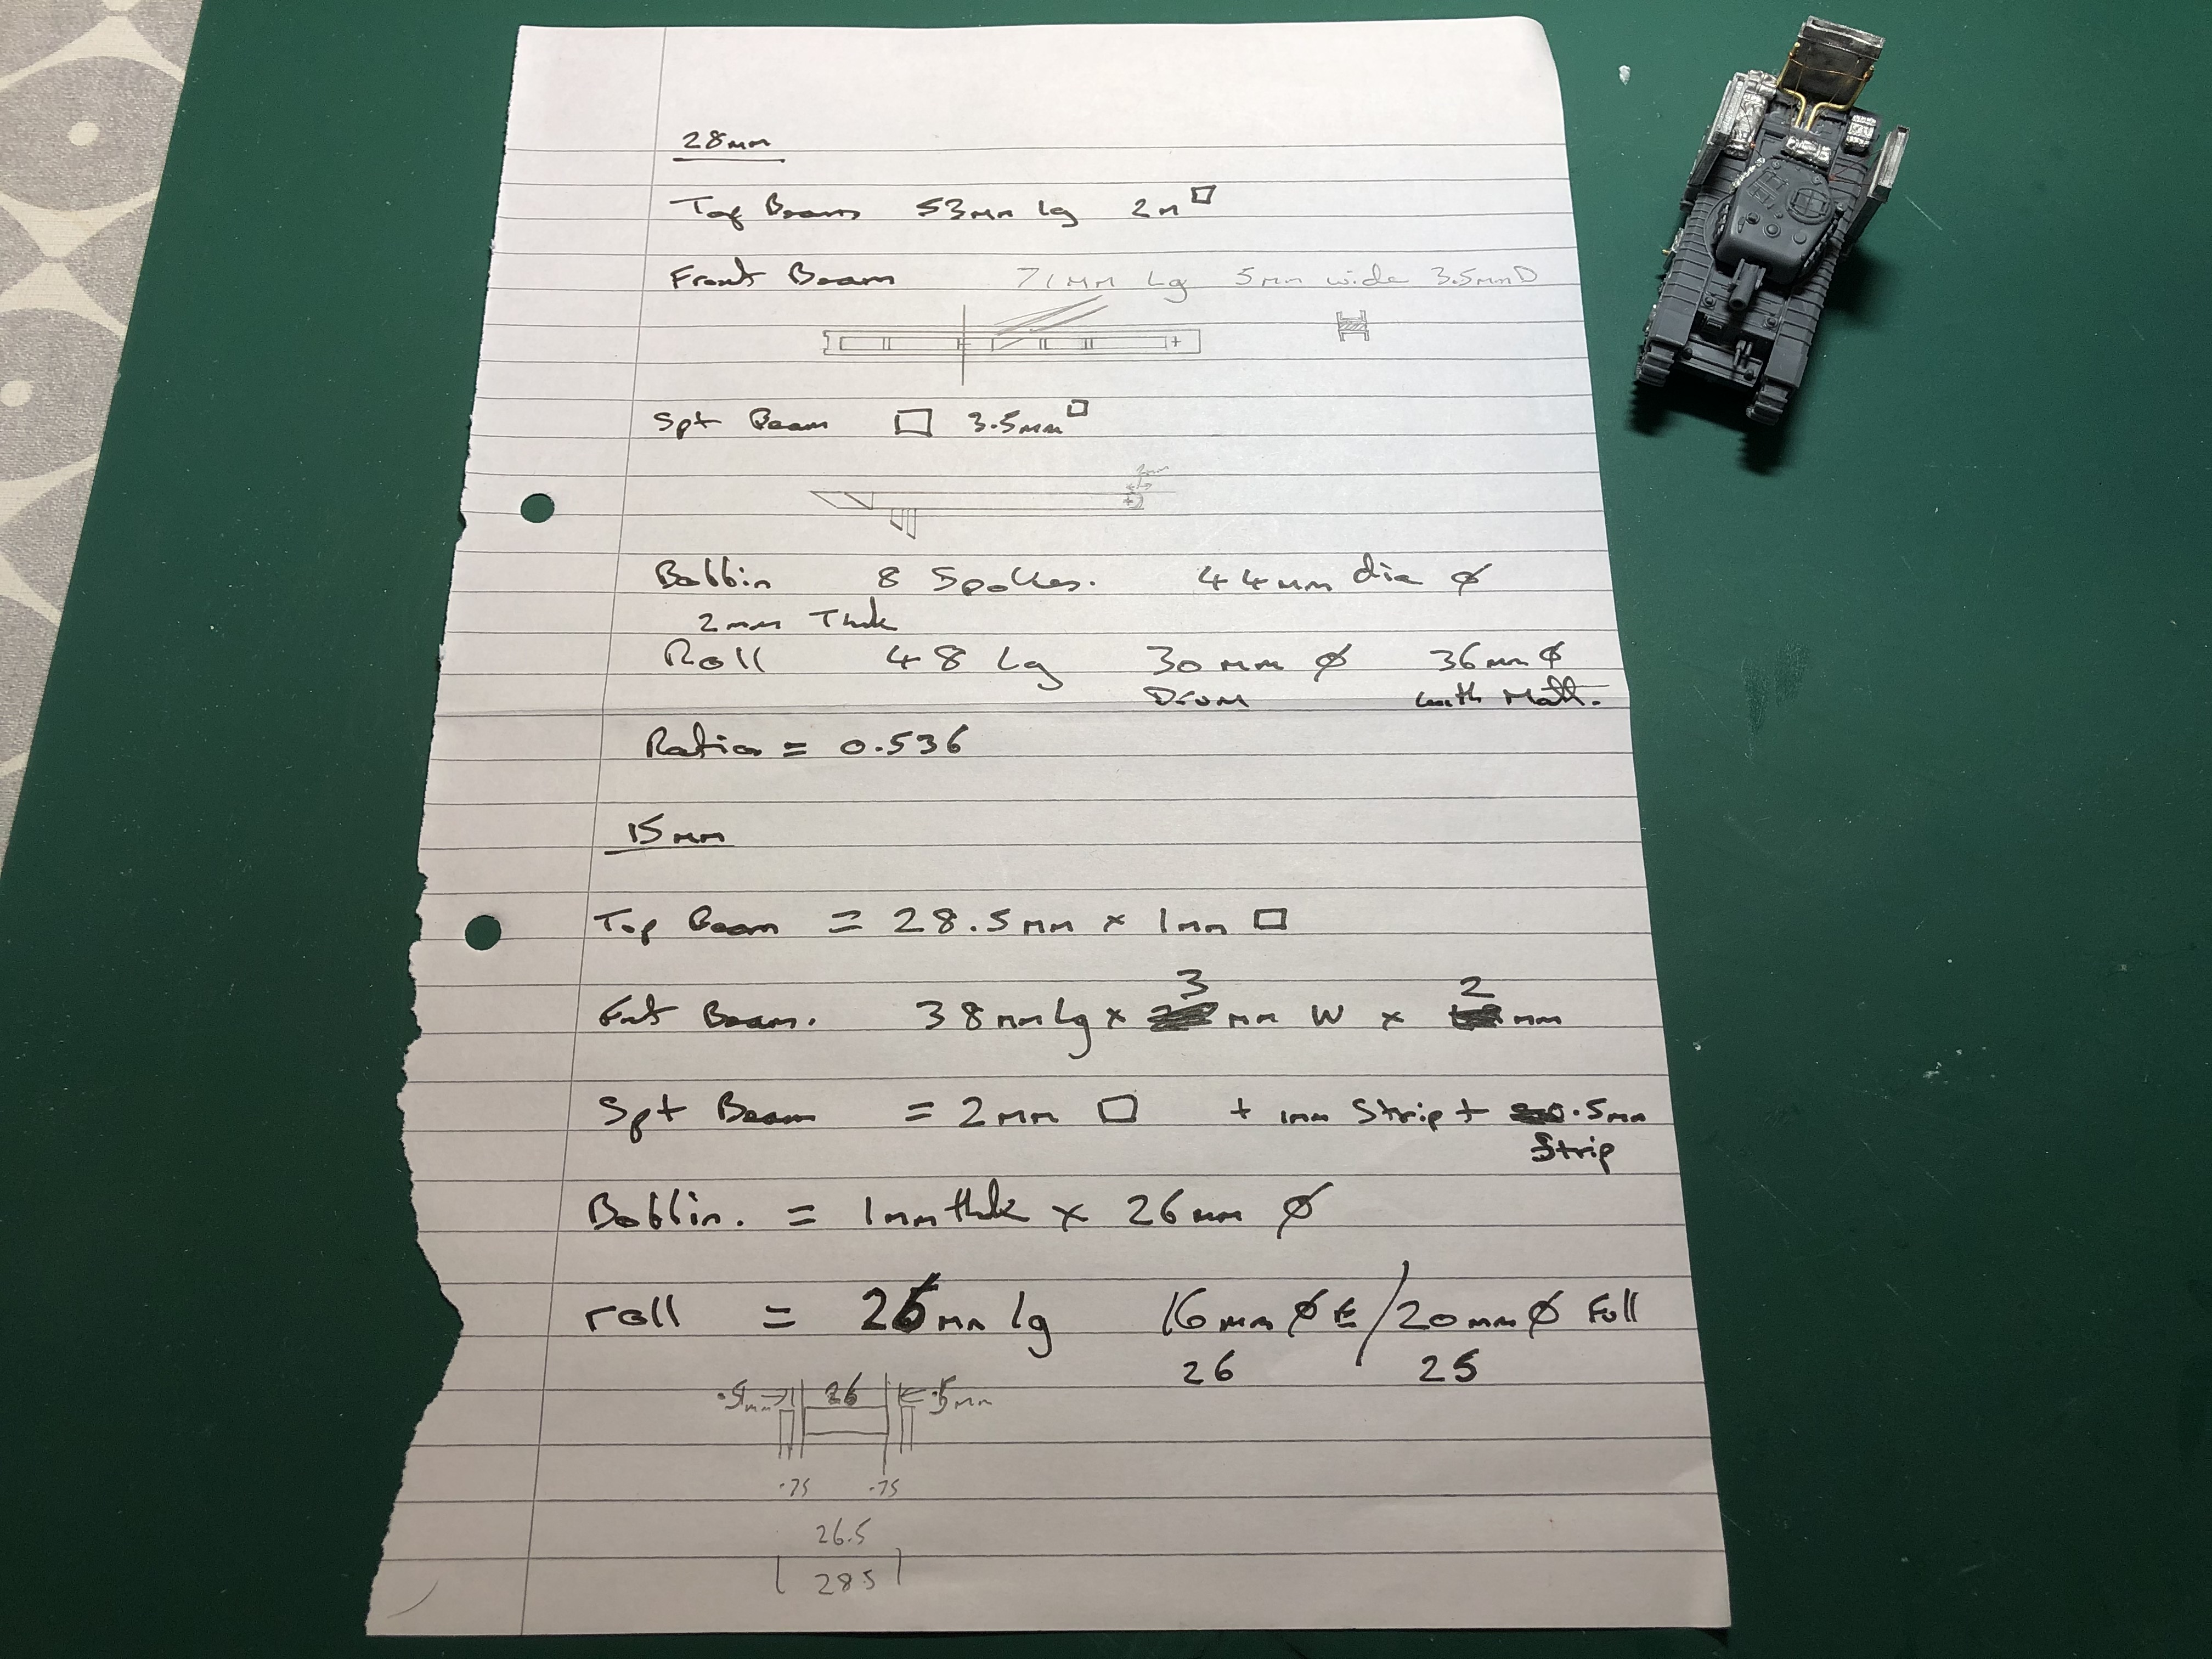 if you can read my writing here are the main scaled measurements for a 15mm Bobbin AVRE
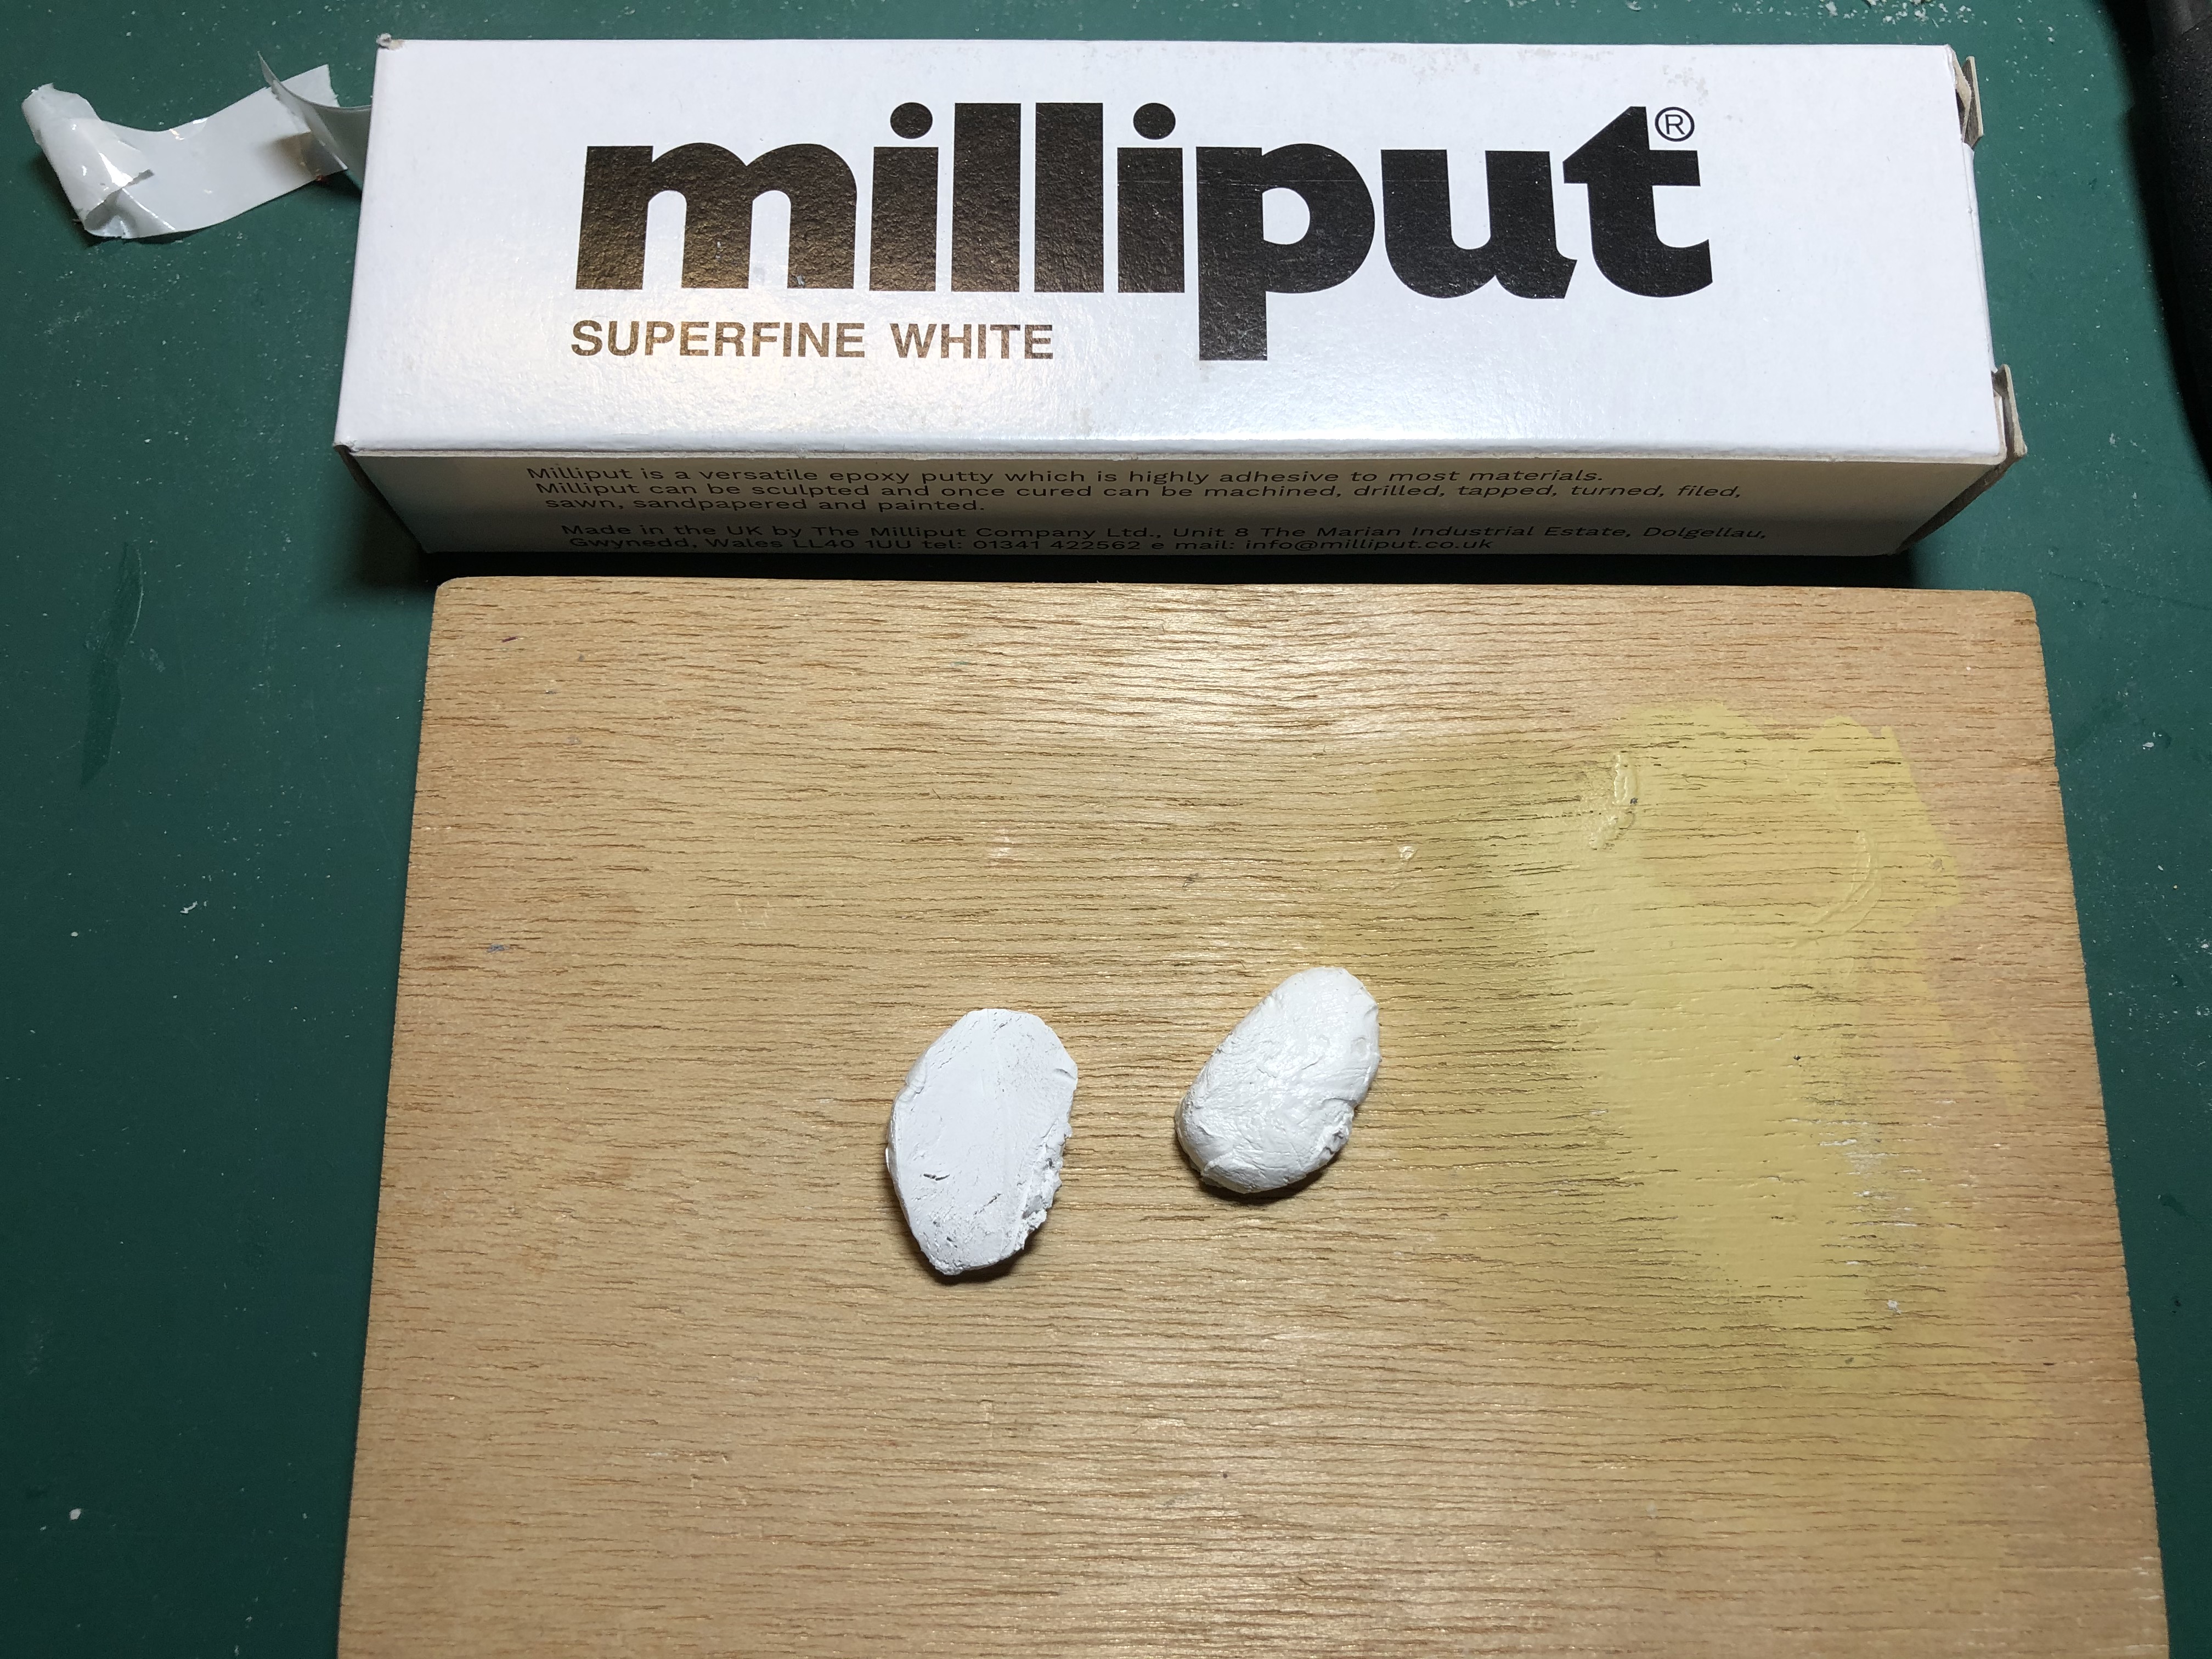
A little bit of filling
Now I know that this may be heresy in certain circles but I have a confession…
I think green stuff is just a tiny bit…
Shit!
Coming from a scale modelling background originally before I got seriously into all things Games Workshop I had never used green stuff, my go to modelling compound was and is Milliput and the best of these is superfine white. There are loads of other varieties for different uses and colours and I have found it to be great for filling and sculpting. The use of Milliput is the same as for green stuff, you take equal portions of each bar and mix them until it is an even colour. The only issue with superfine is that both parts are white, so that you must mix it for at least three minutes.
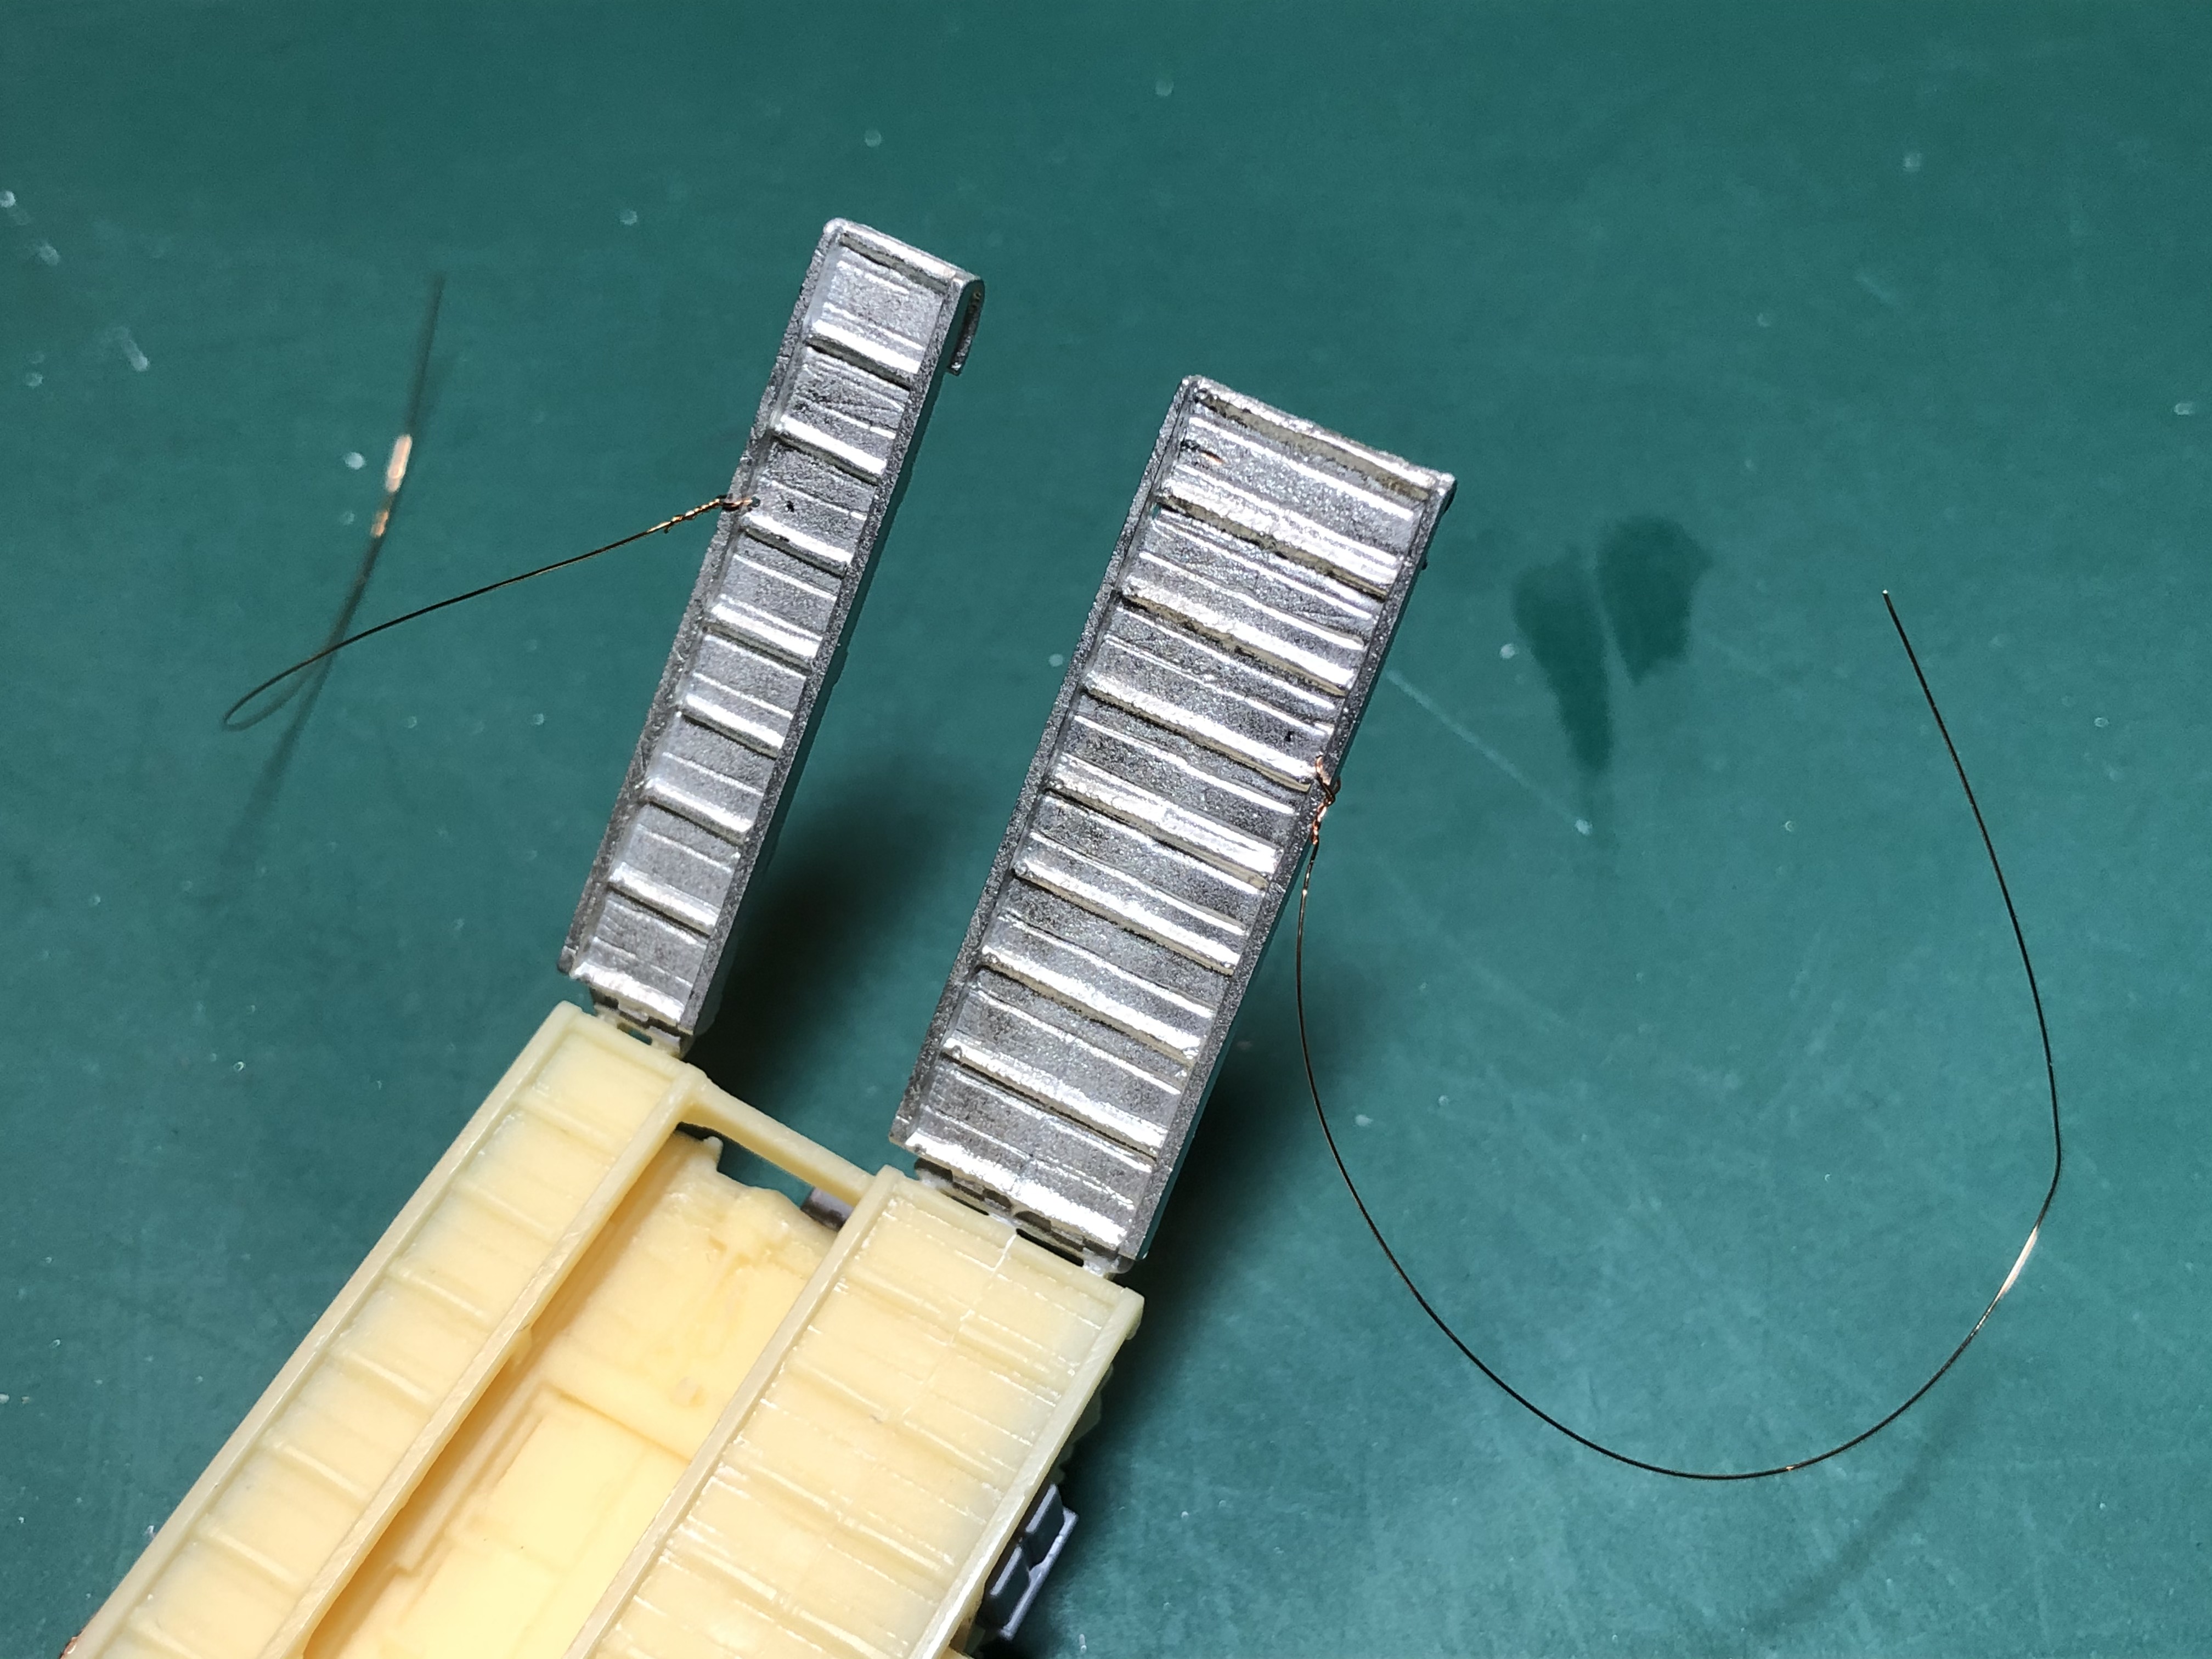
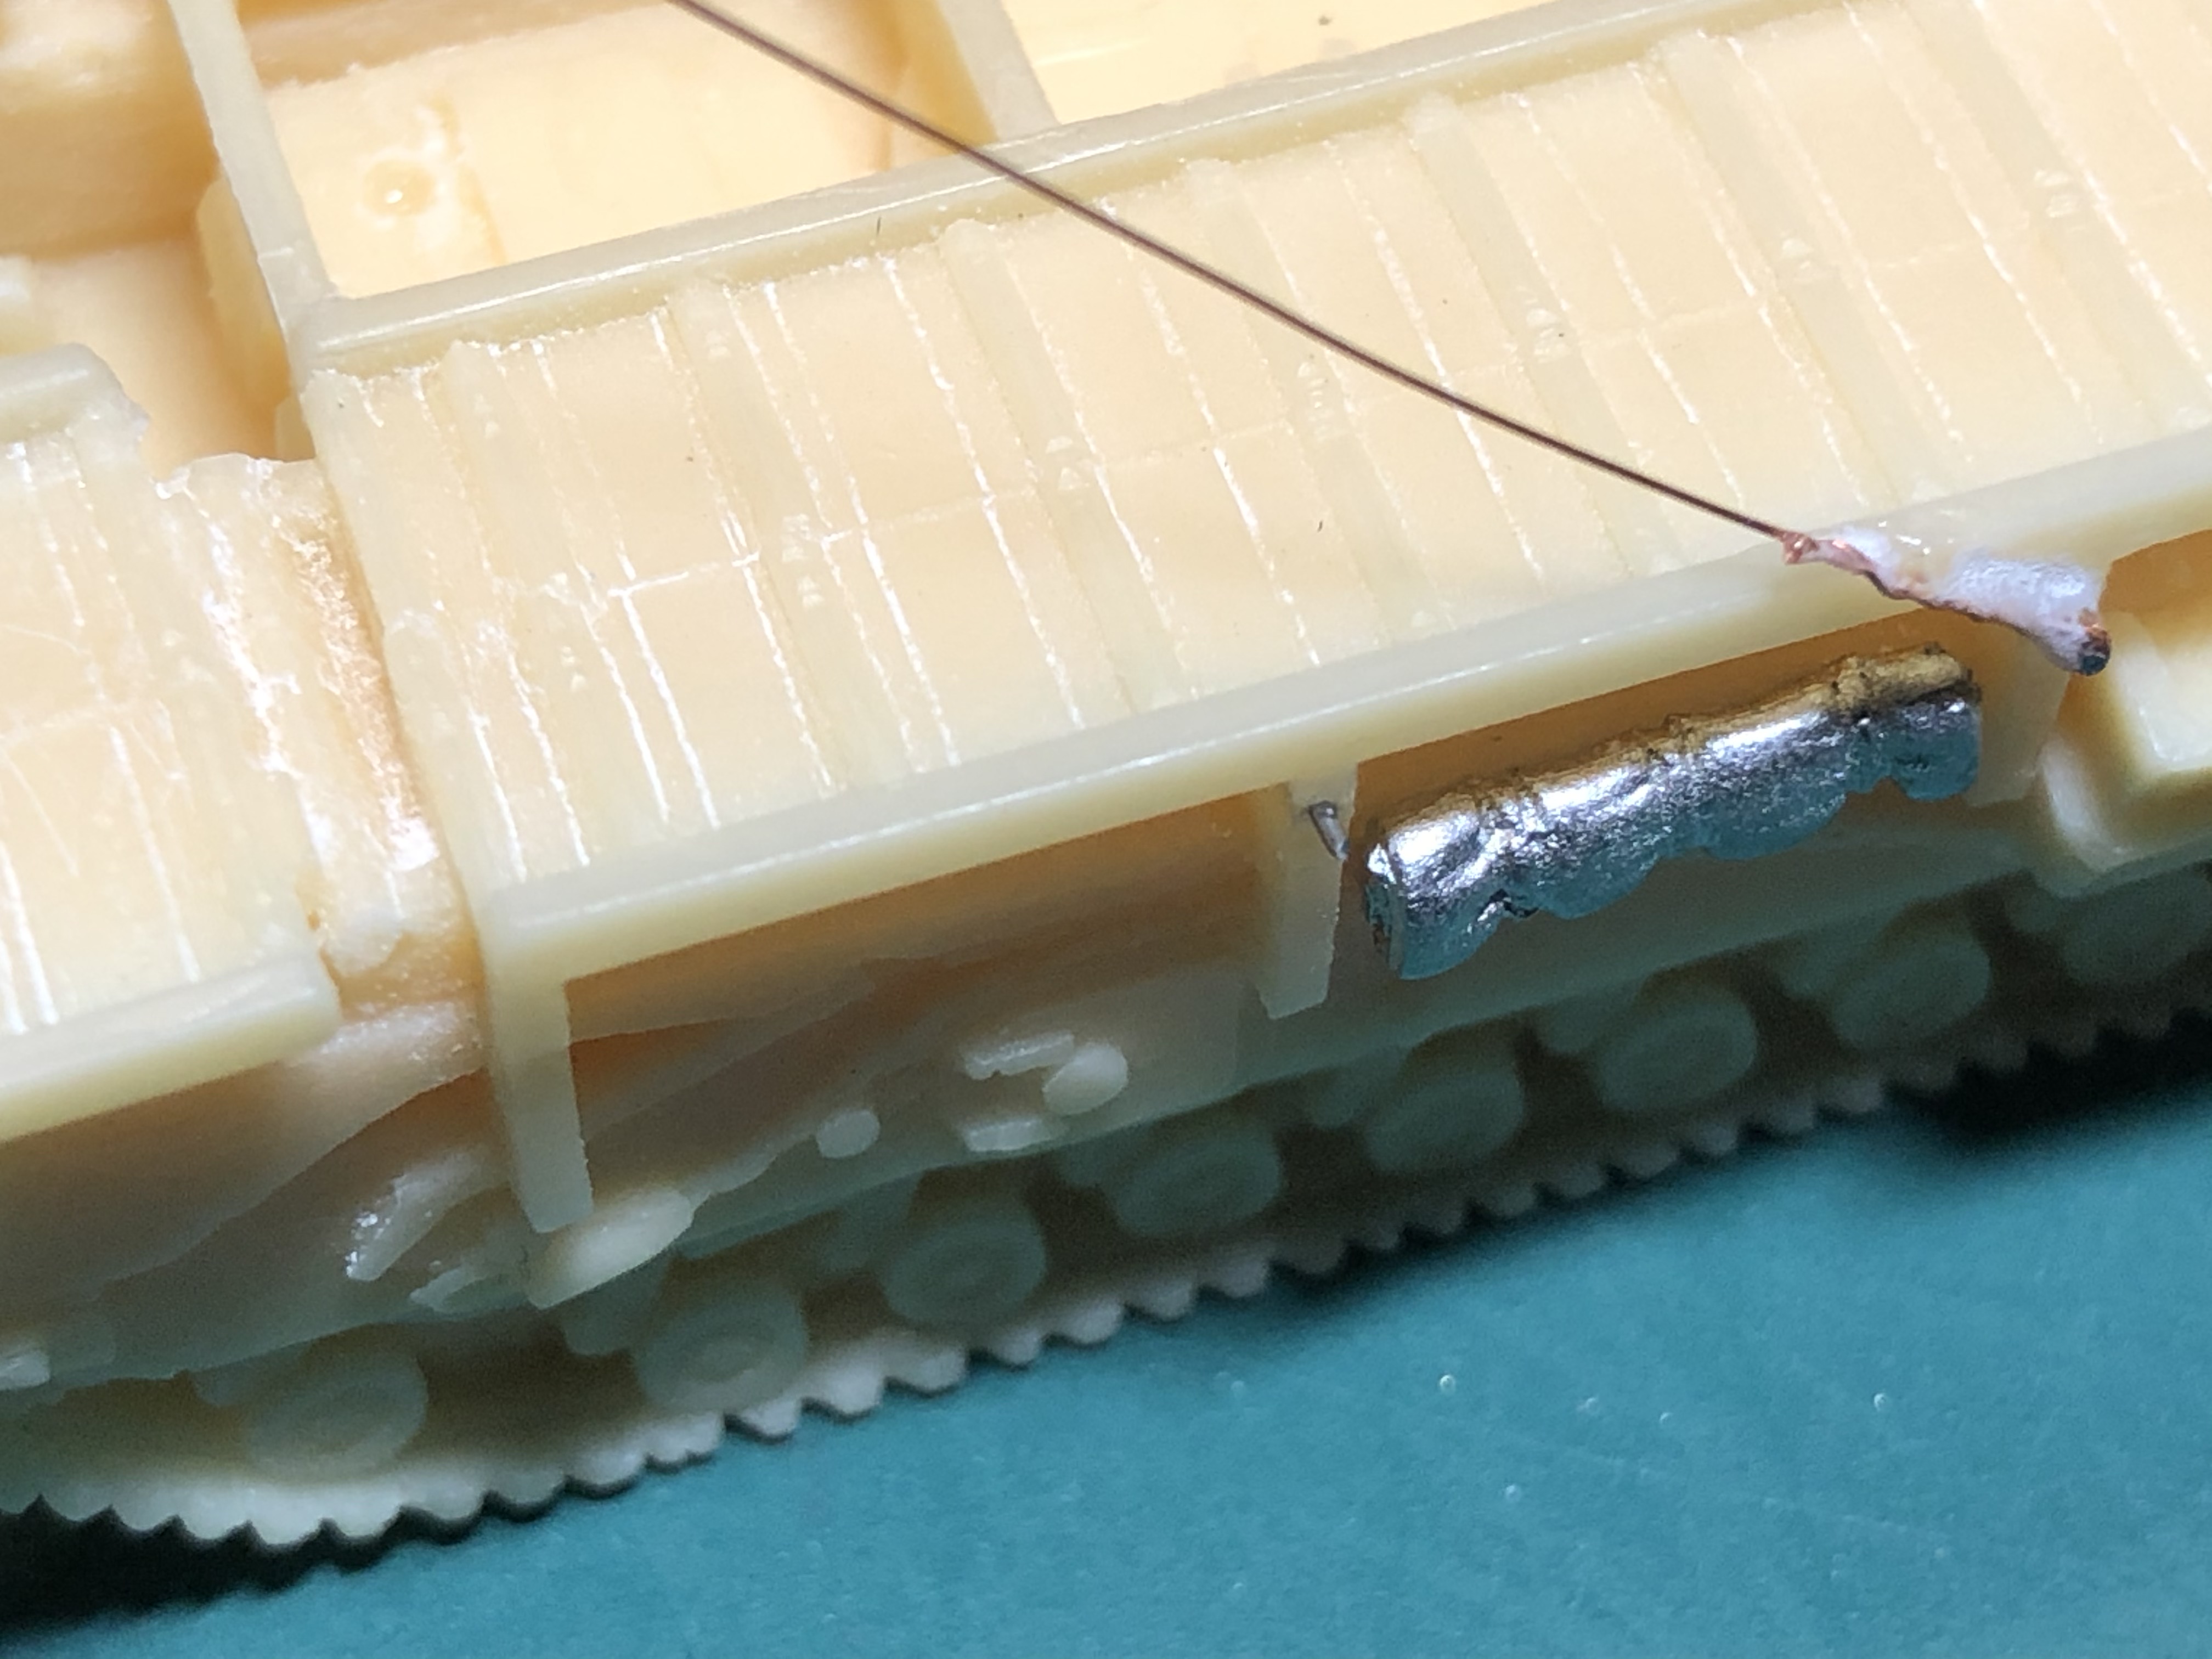
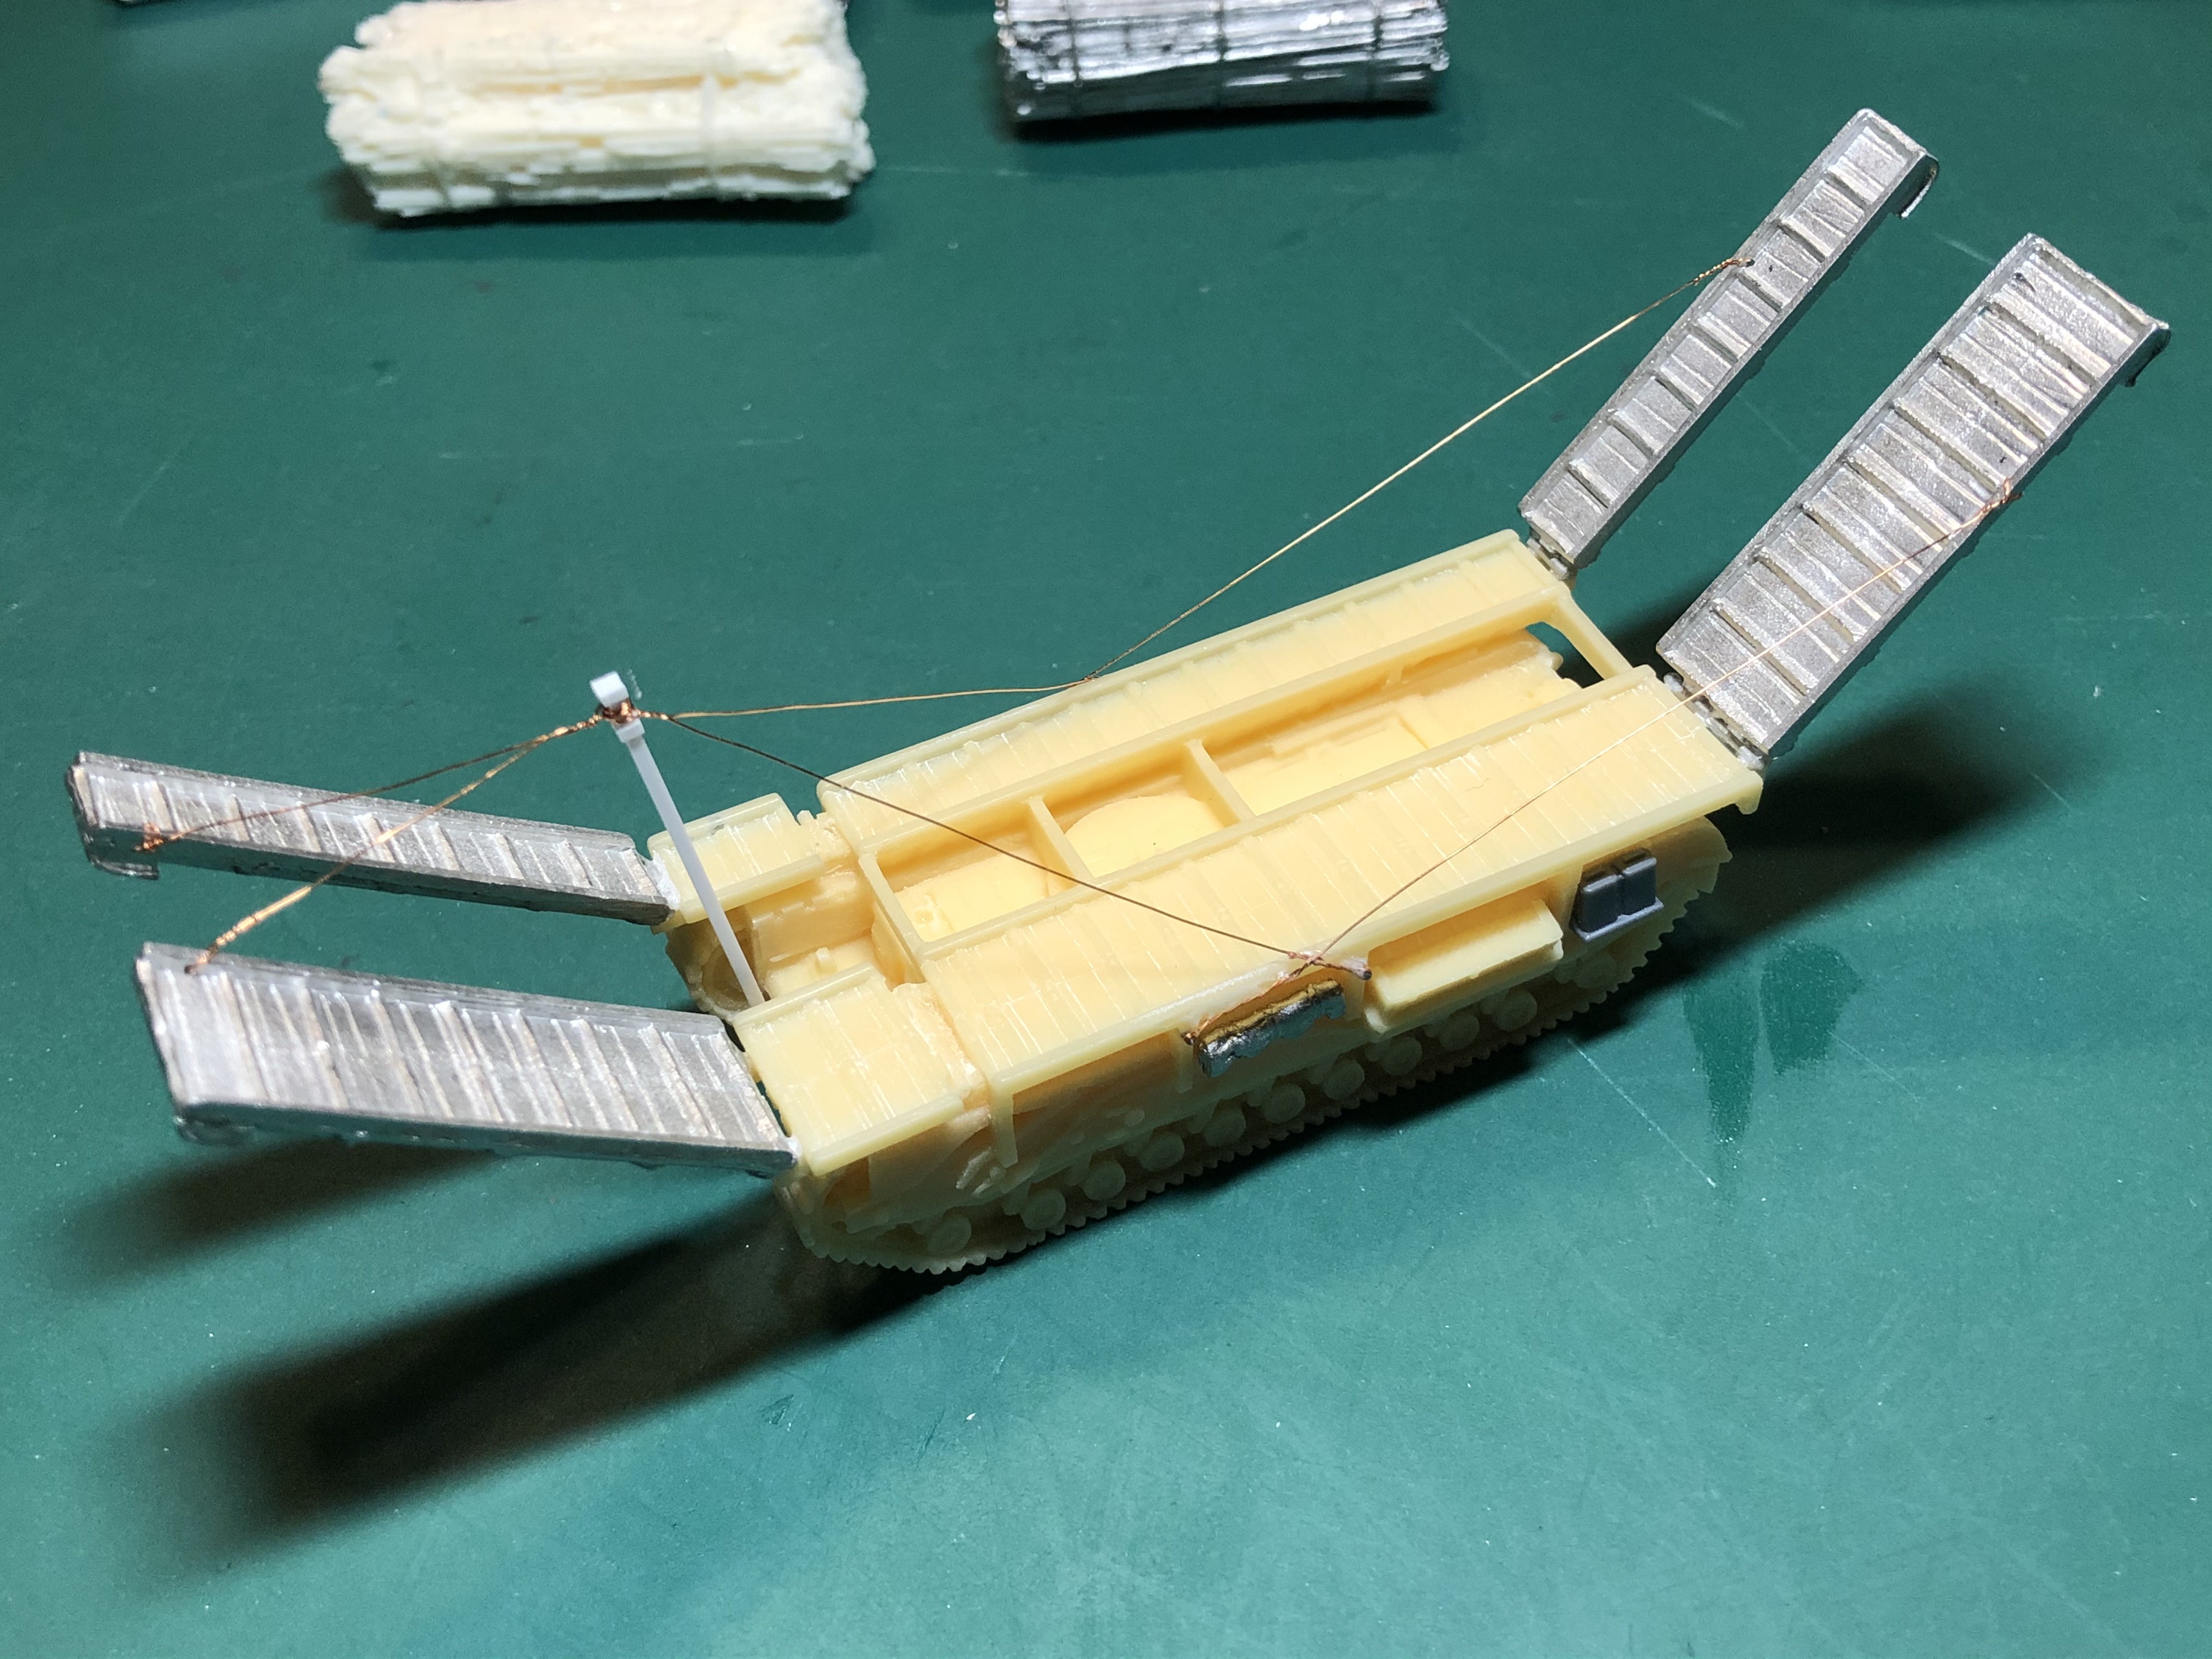
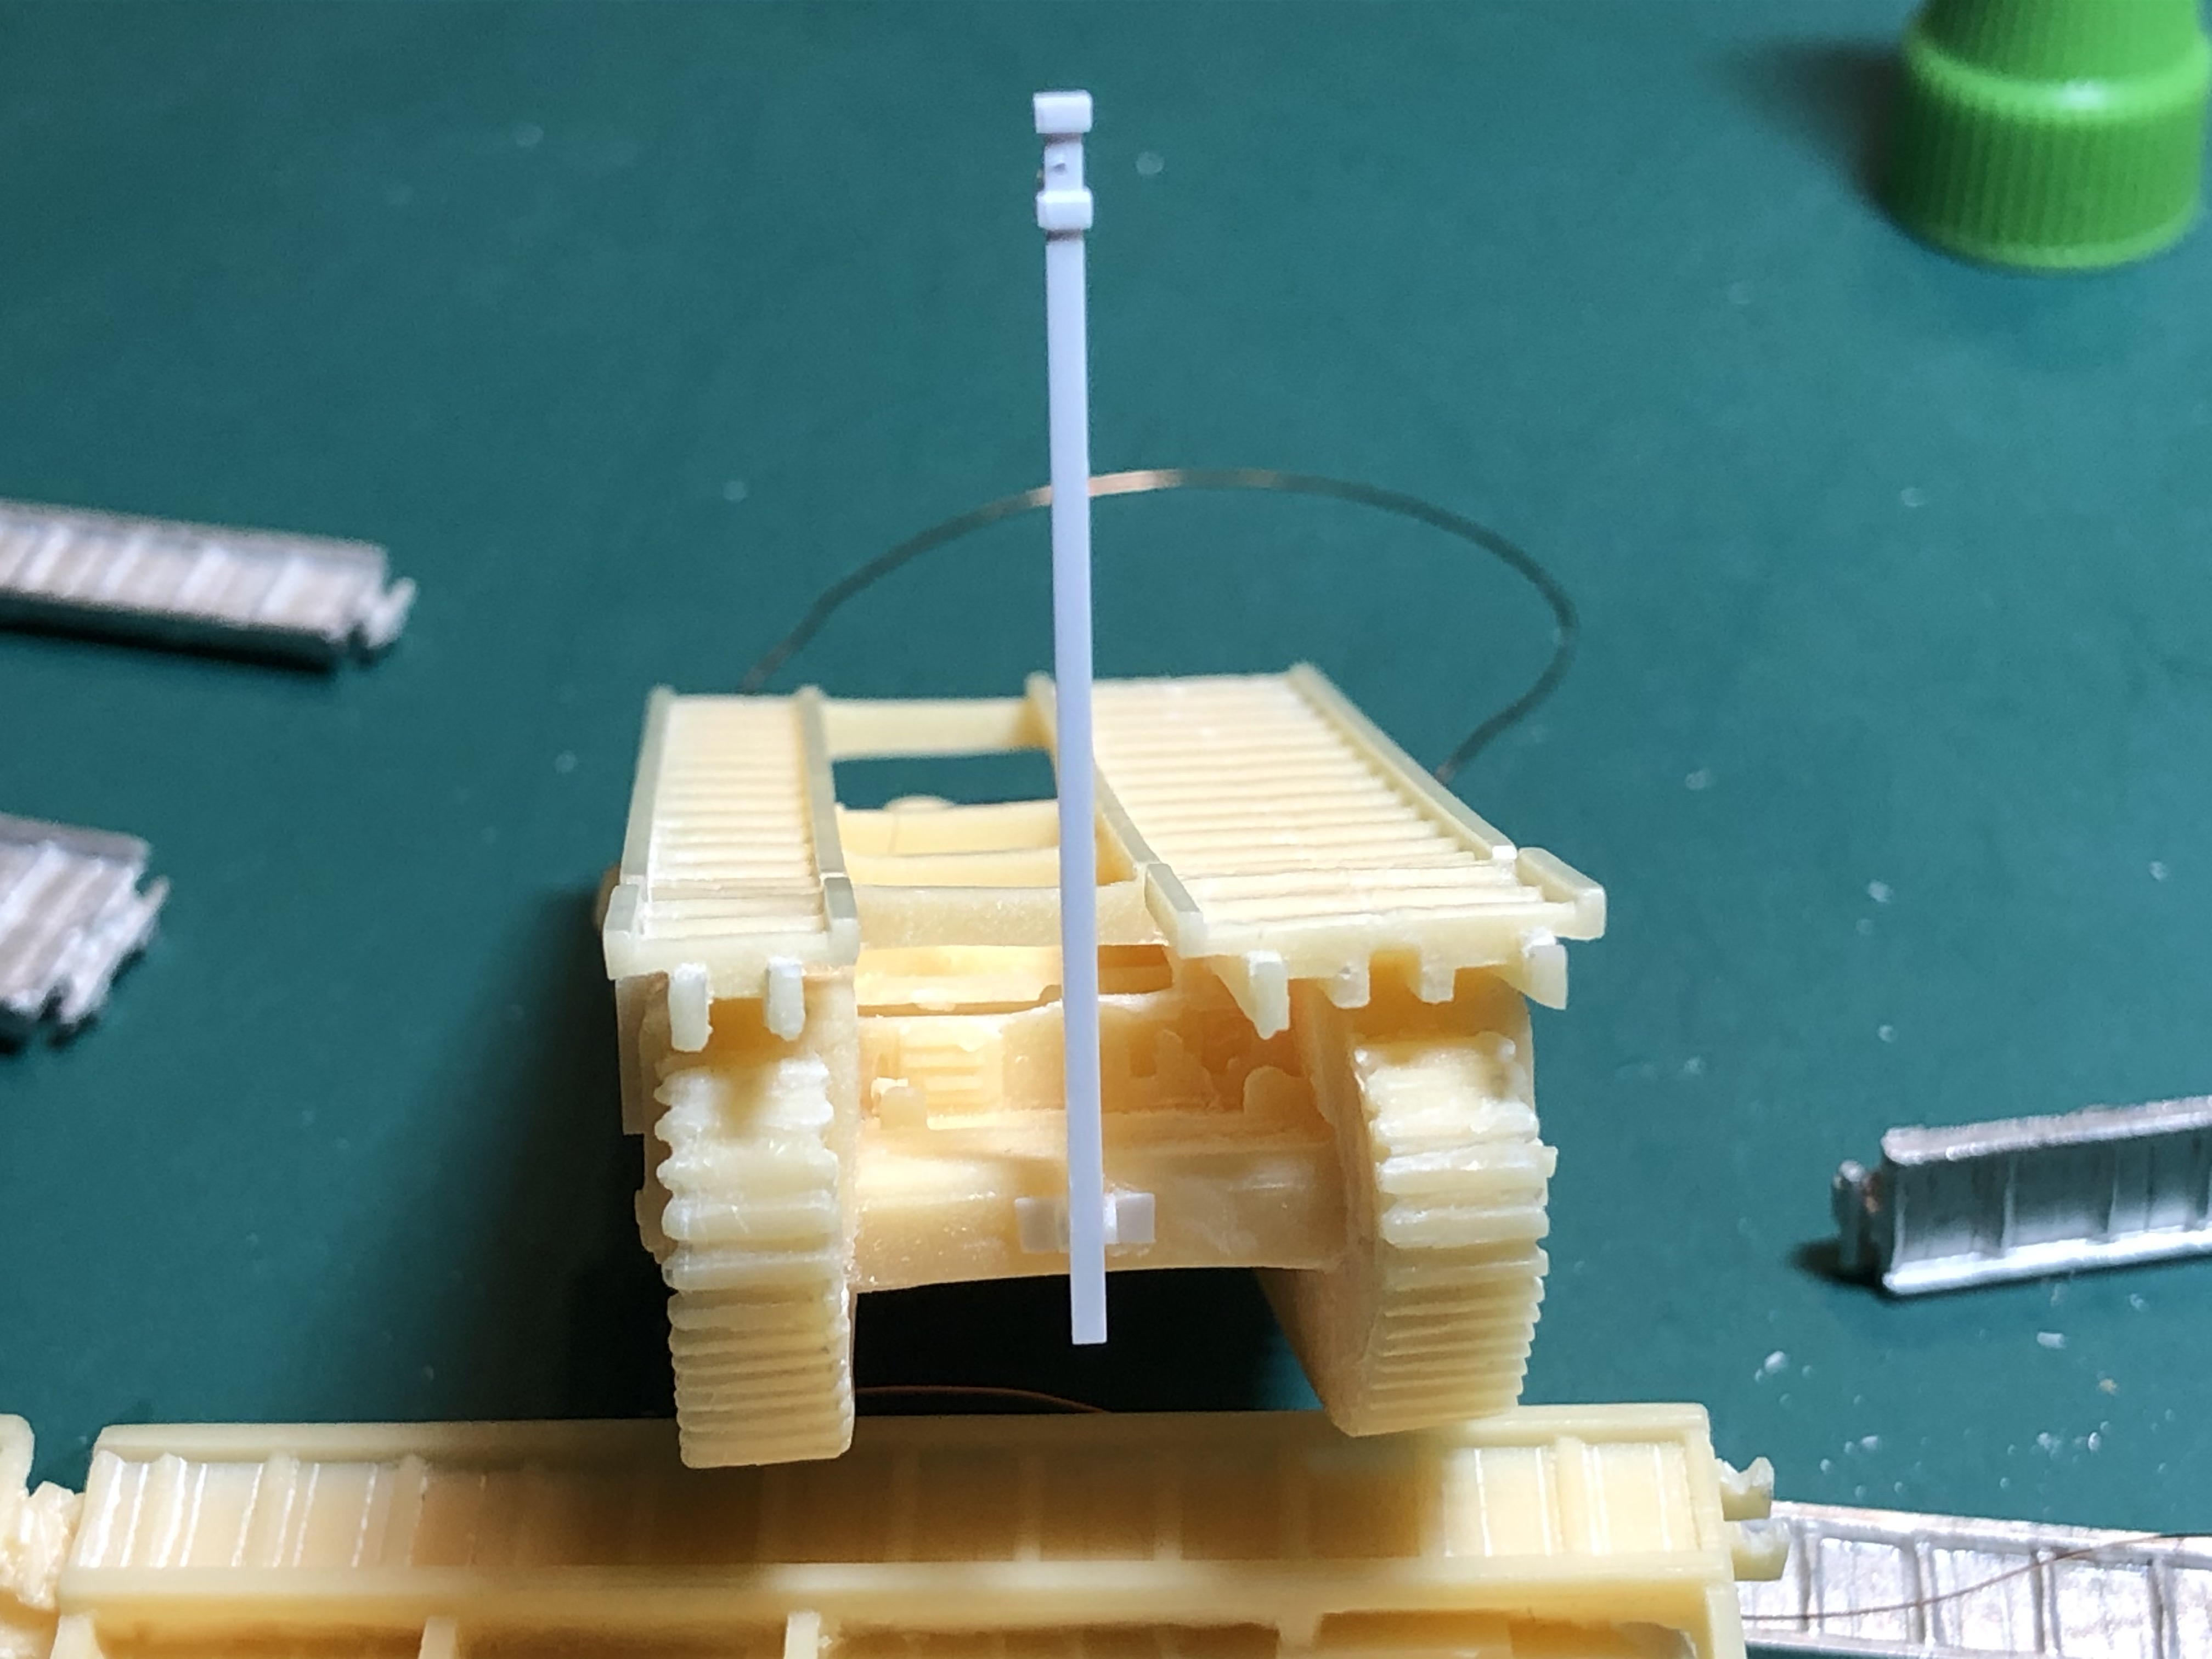
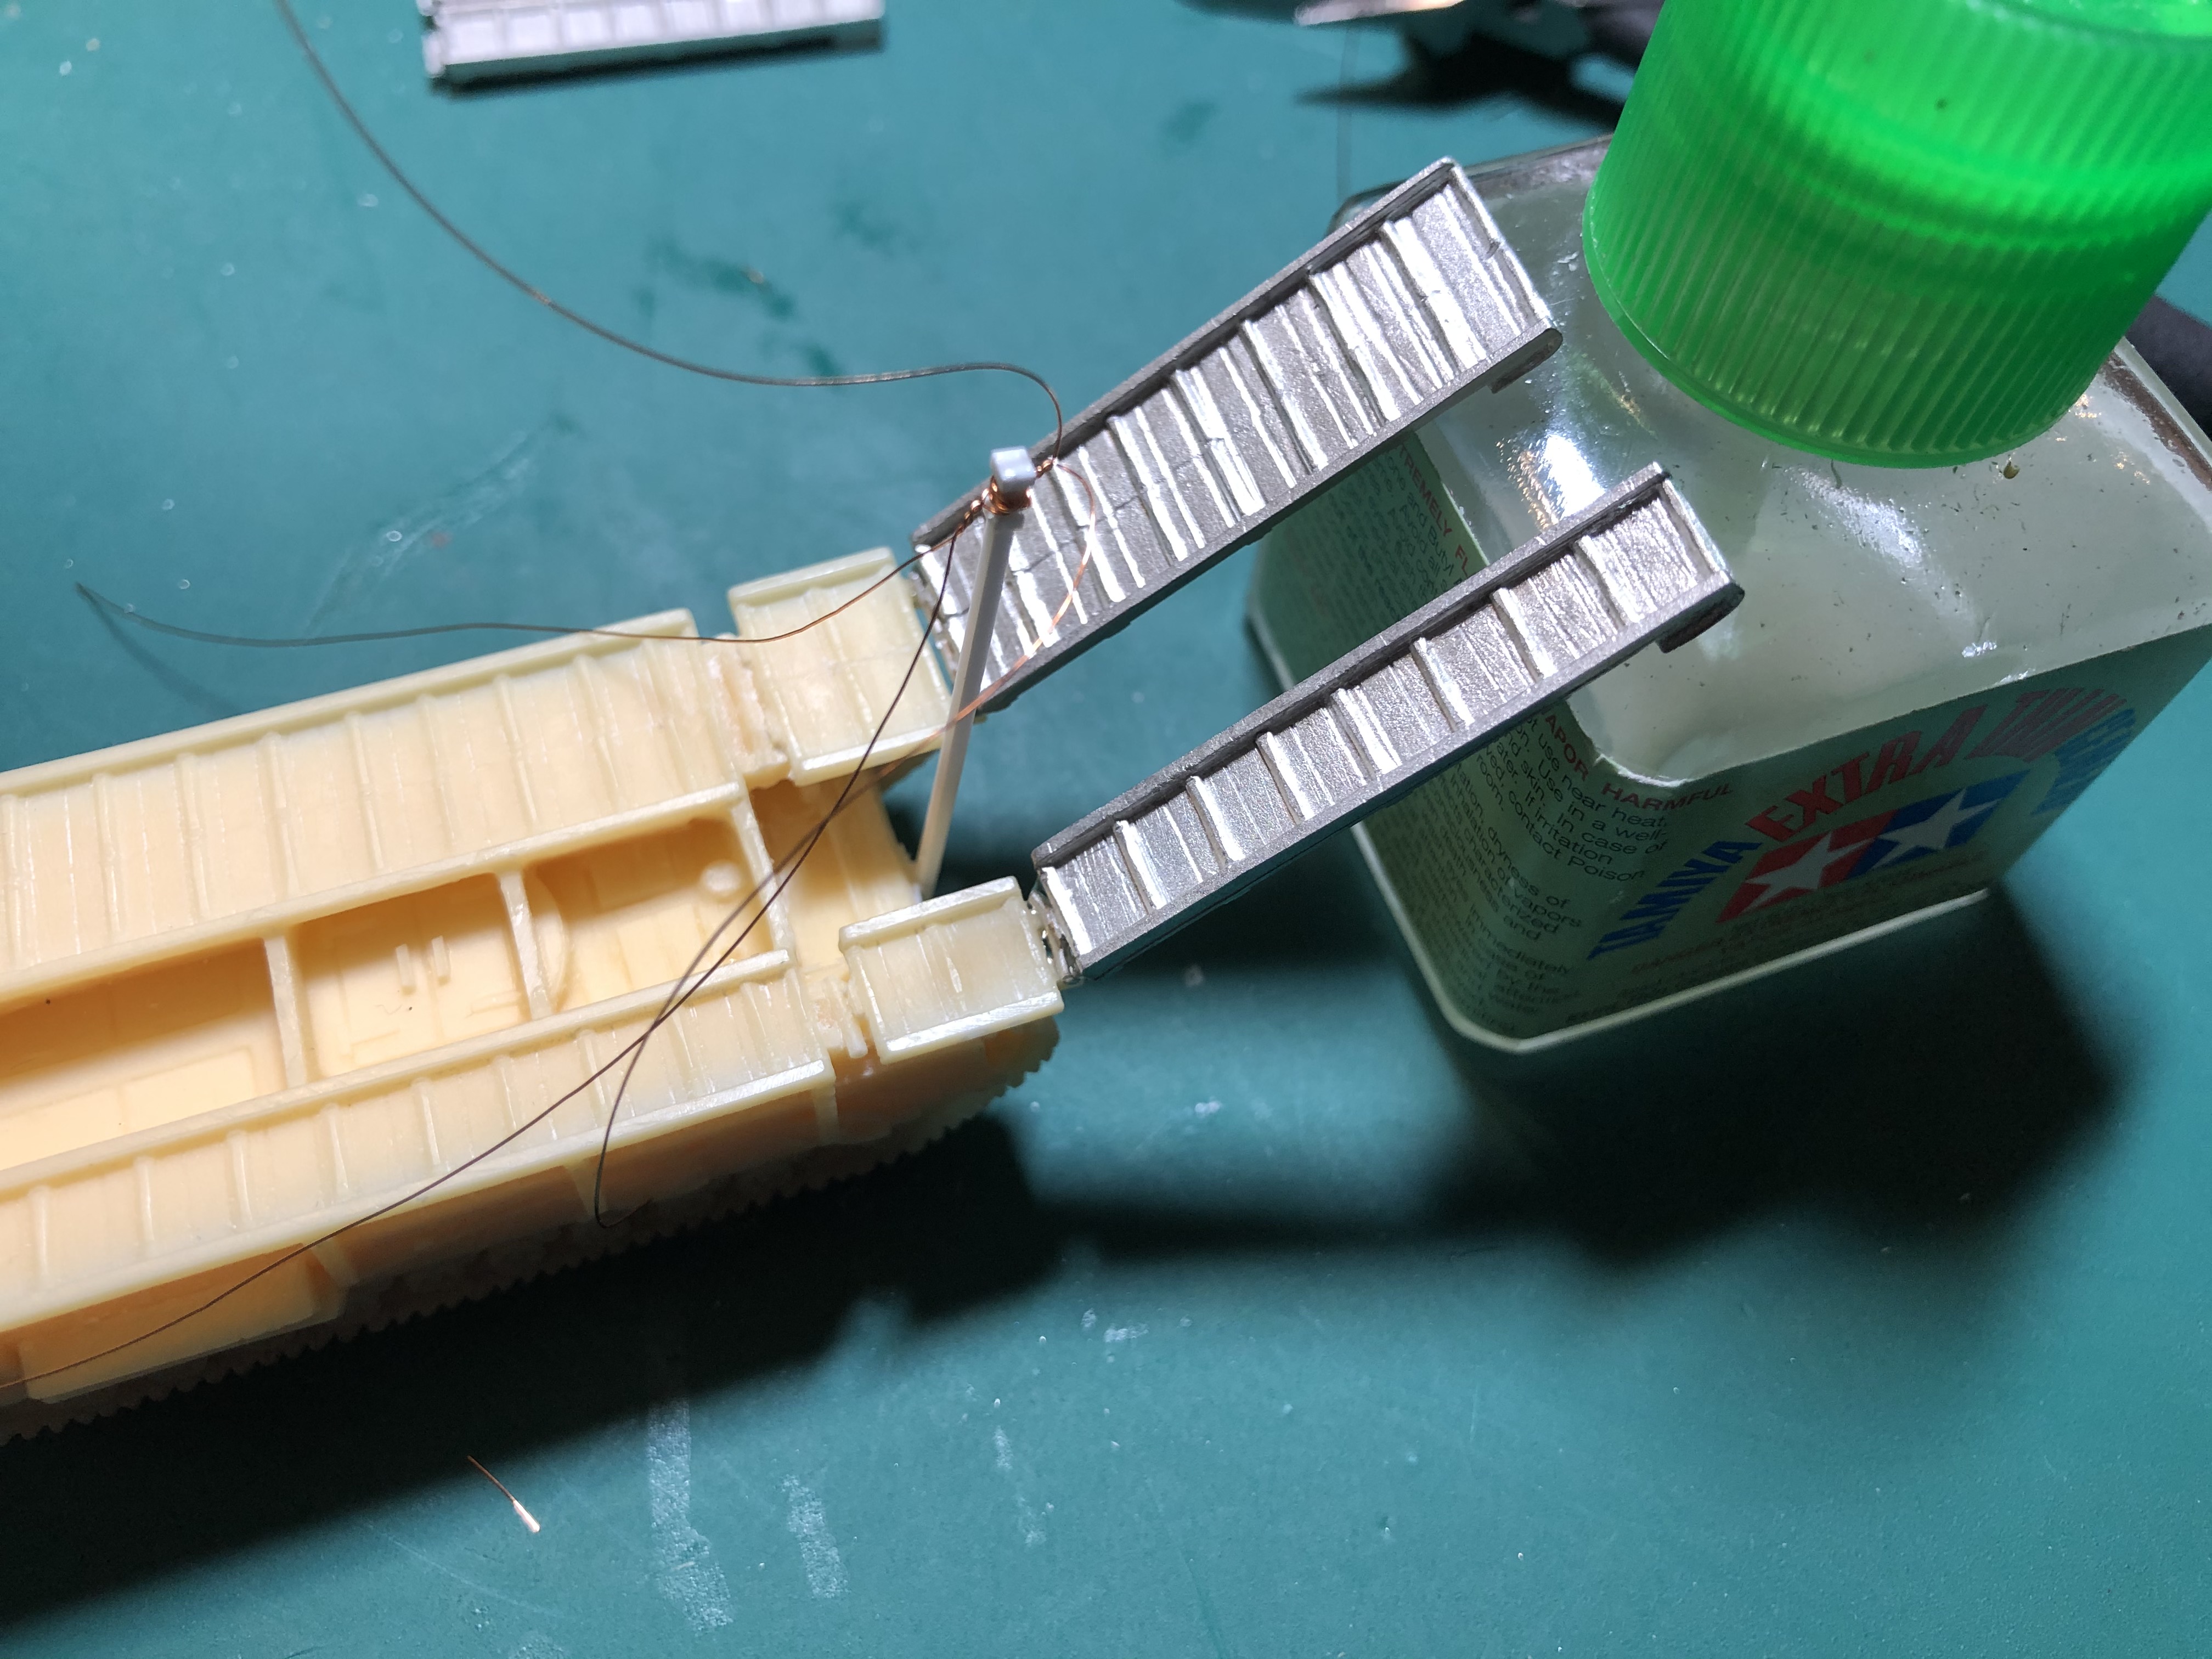
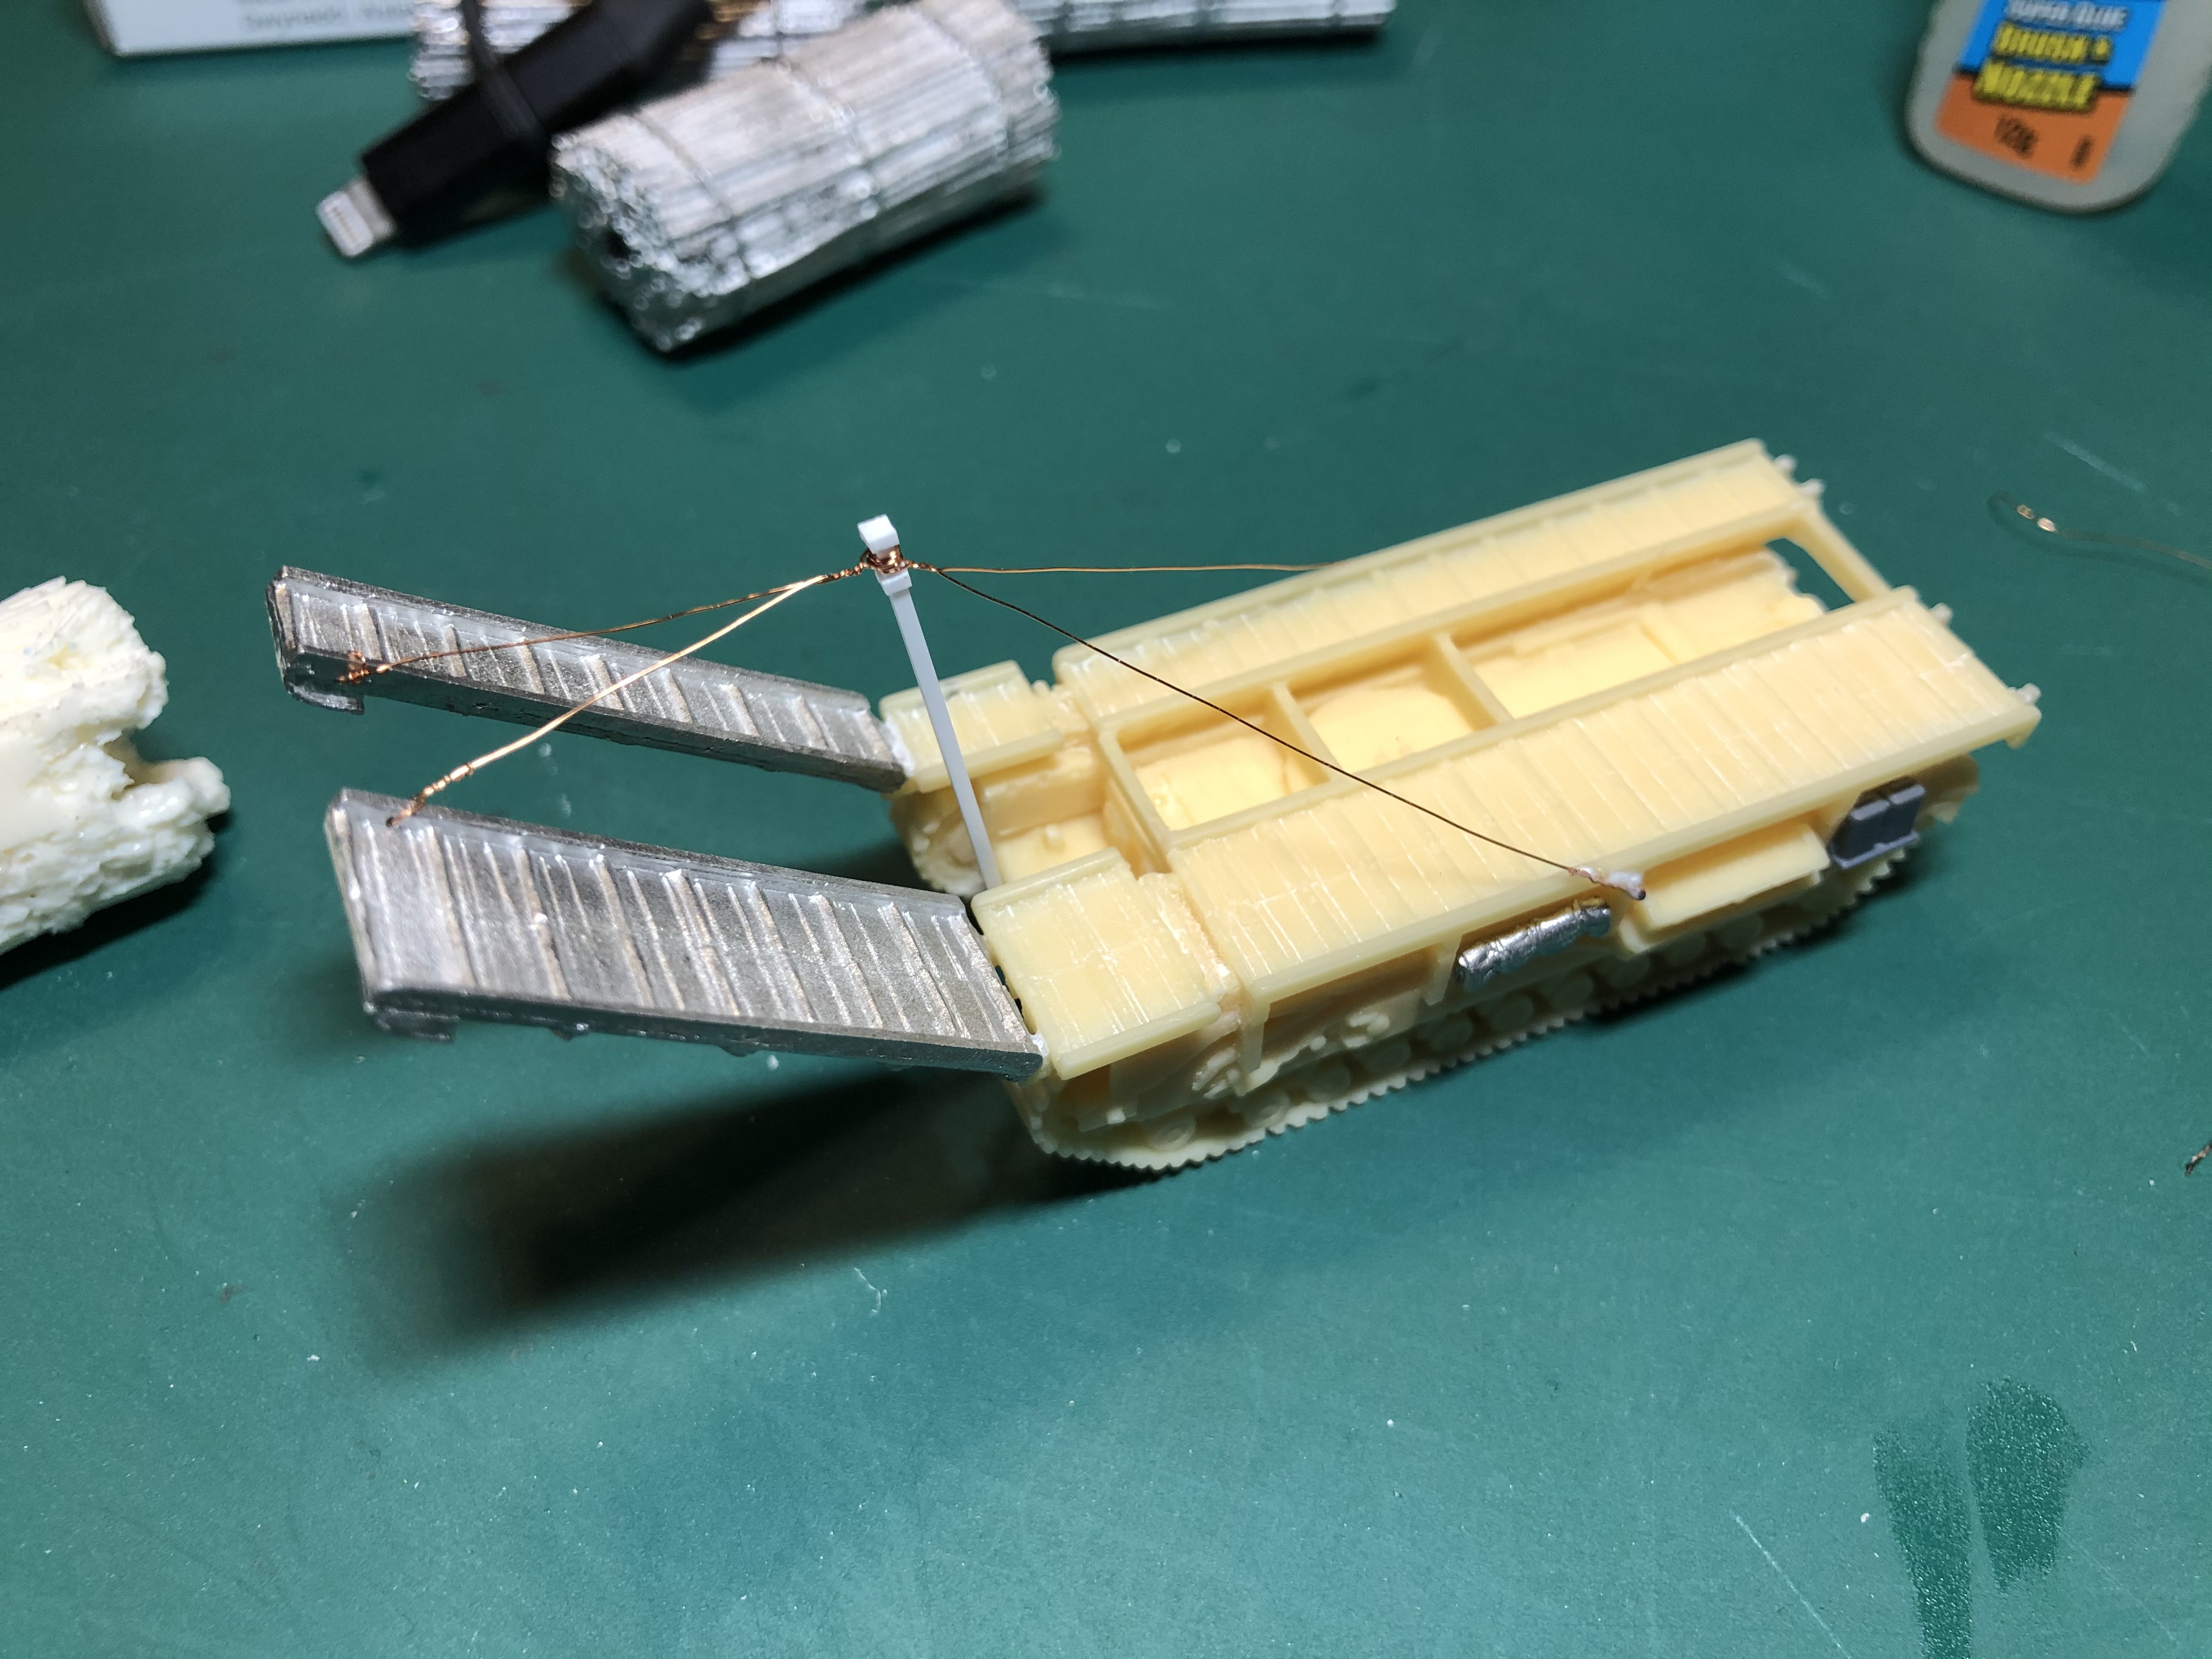
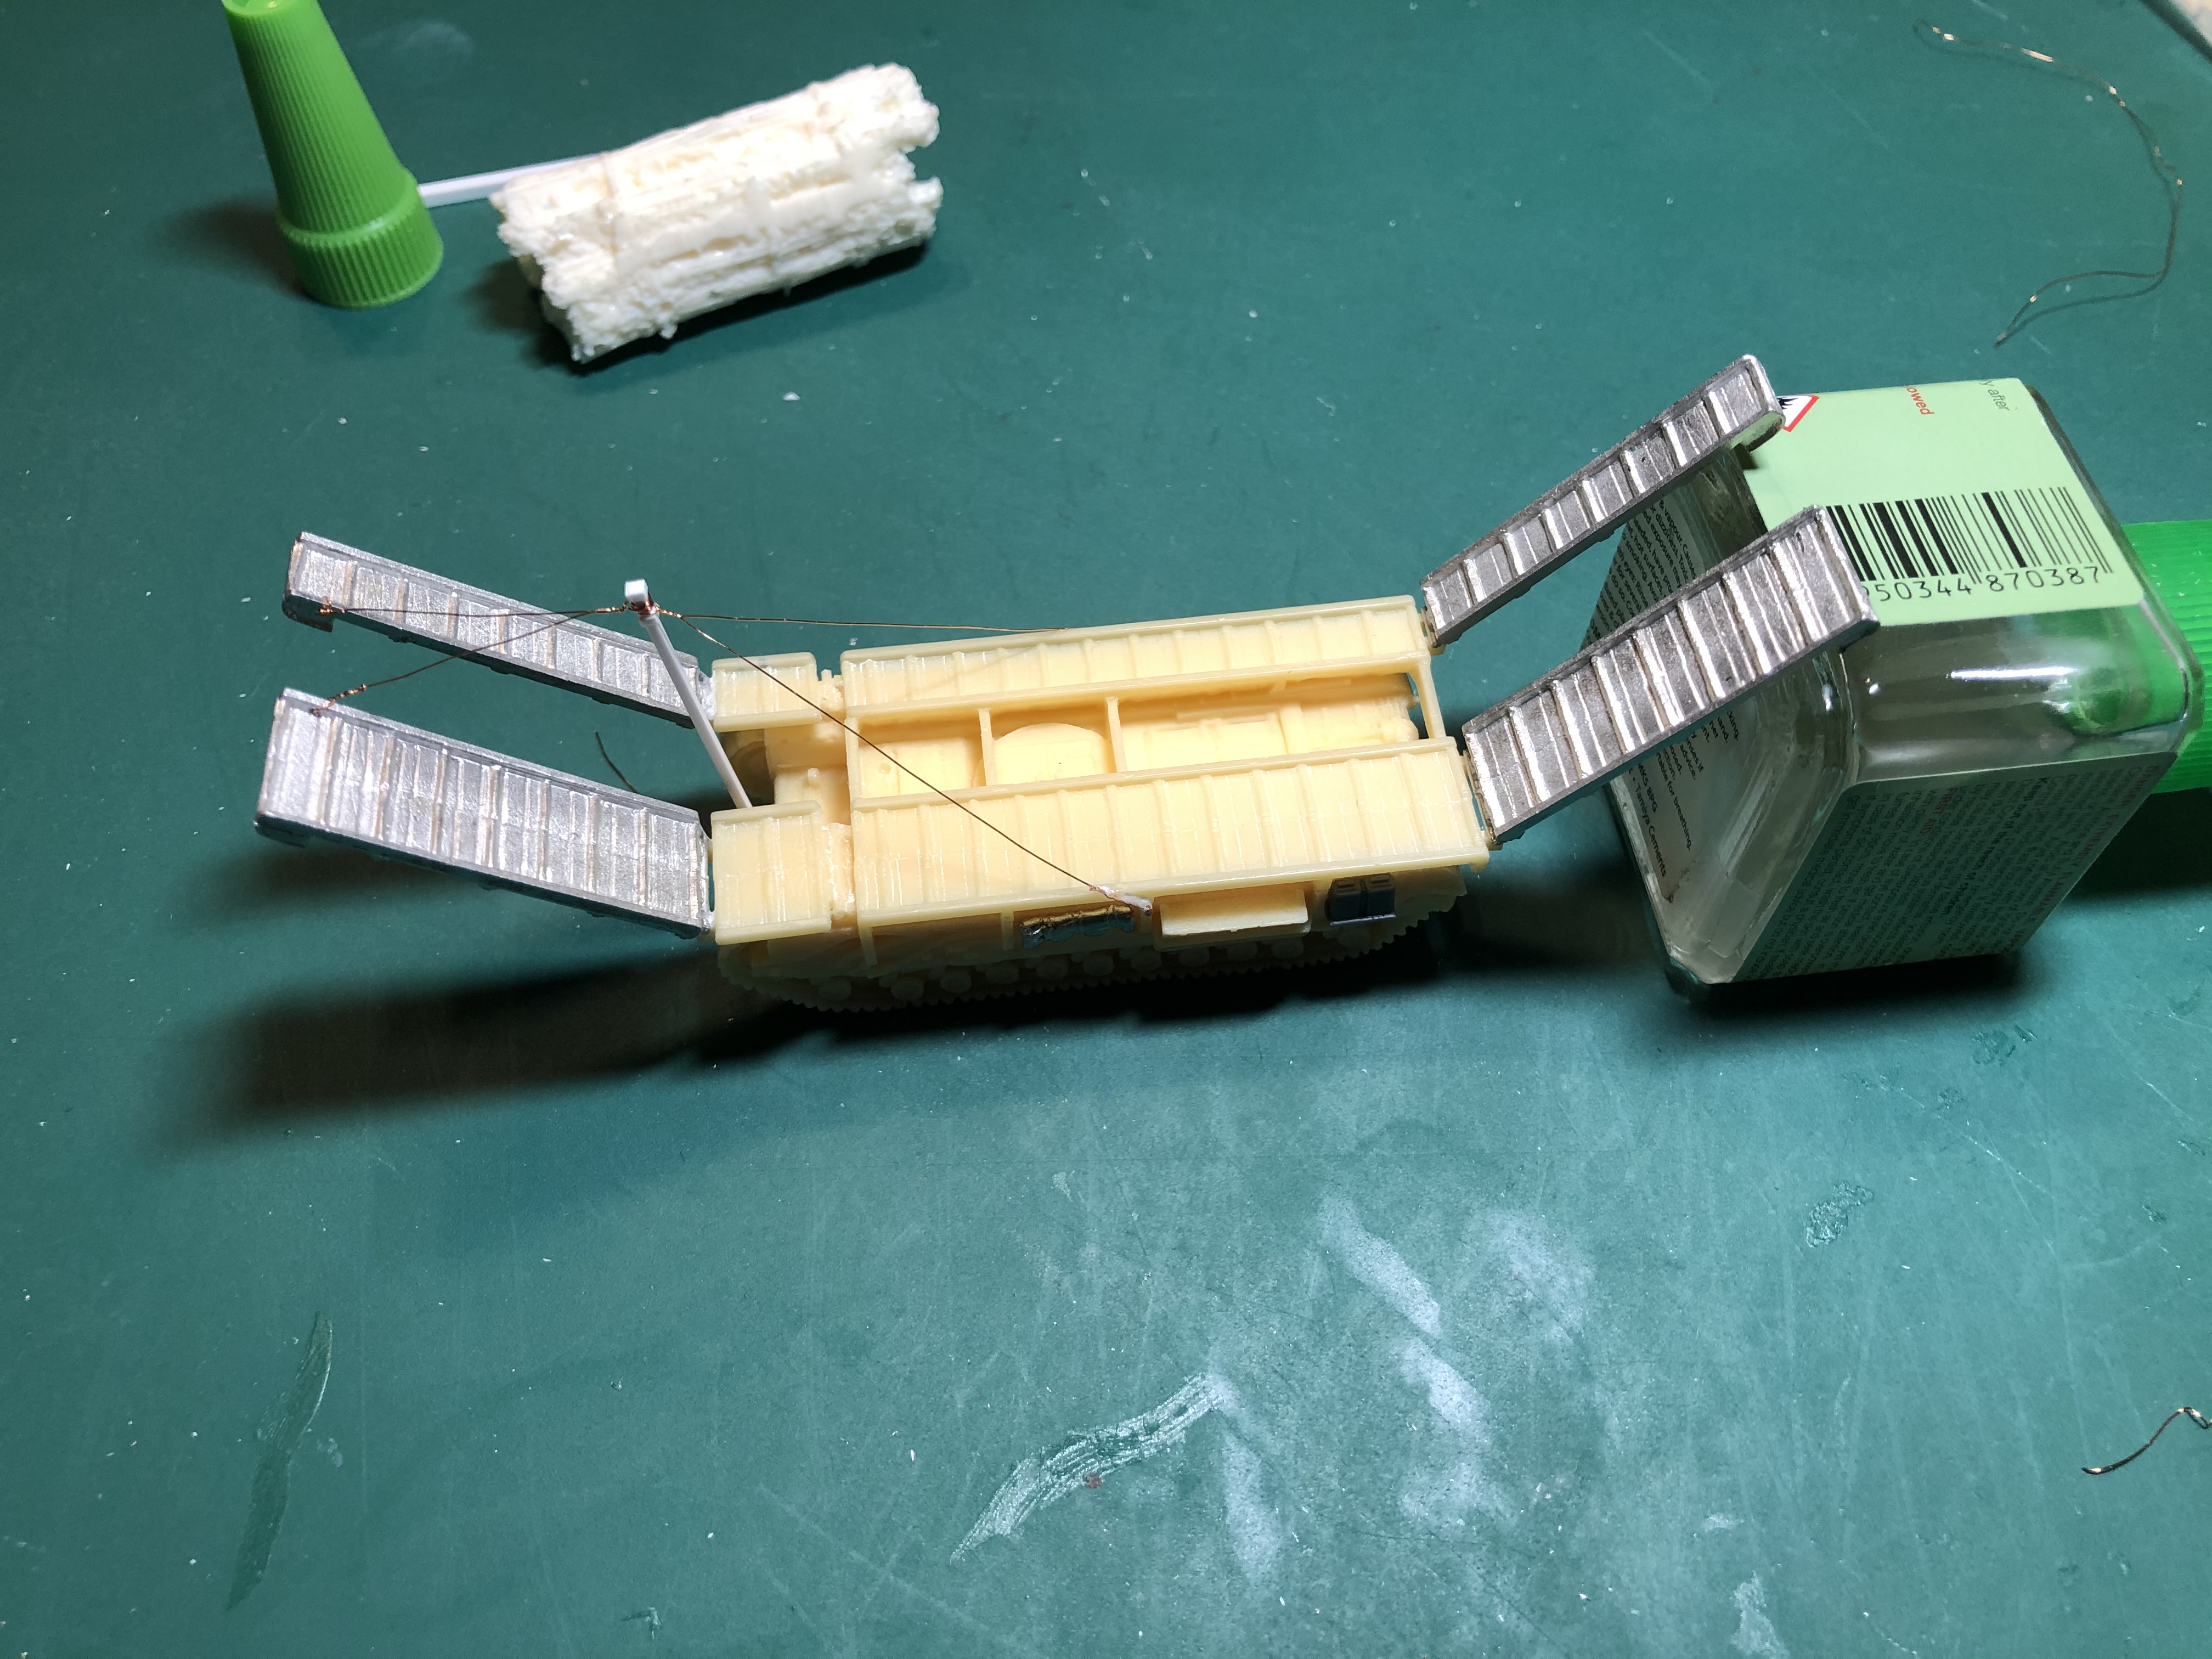
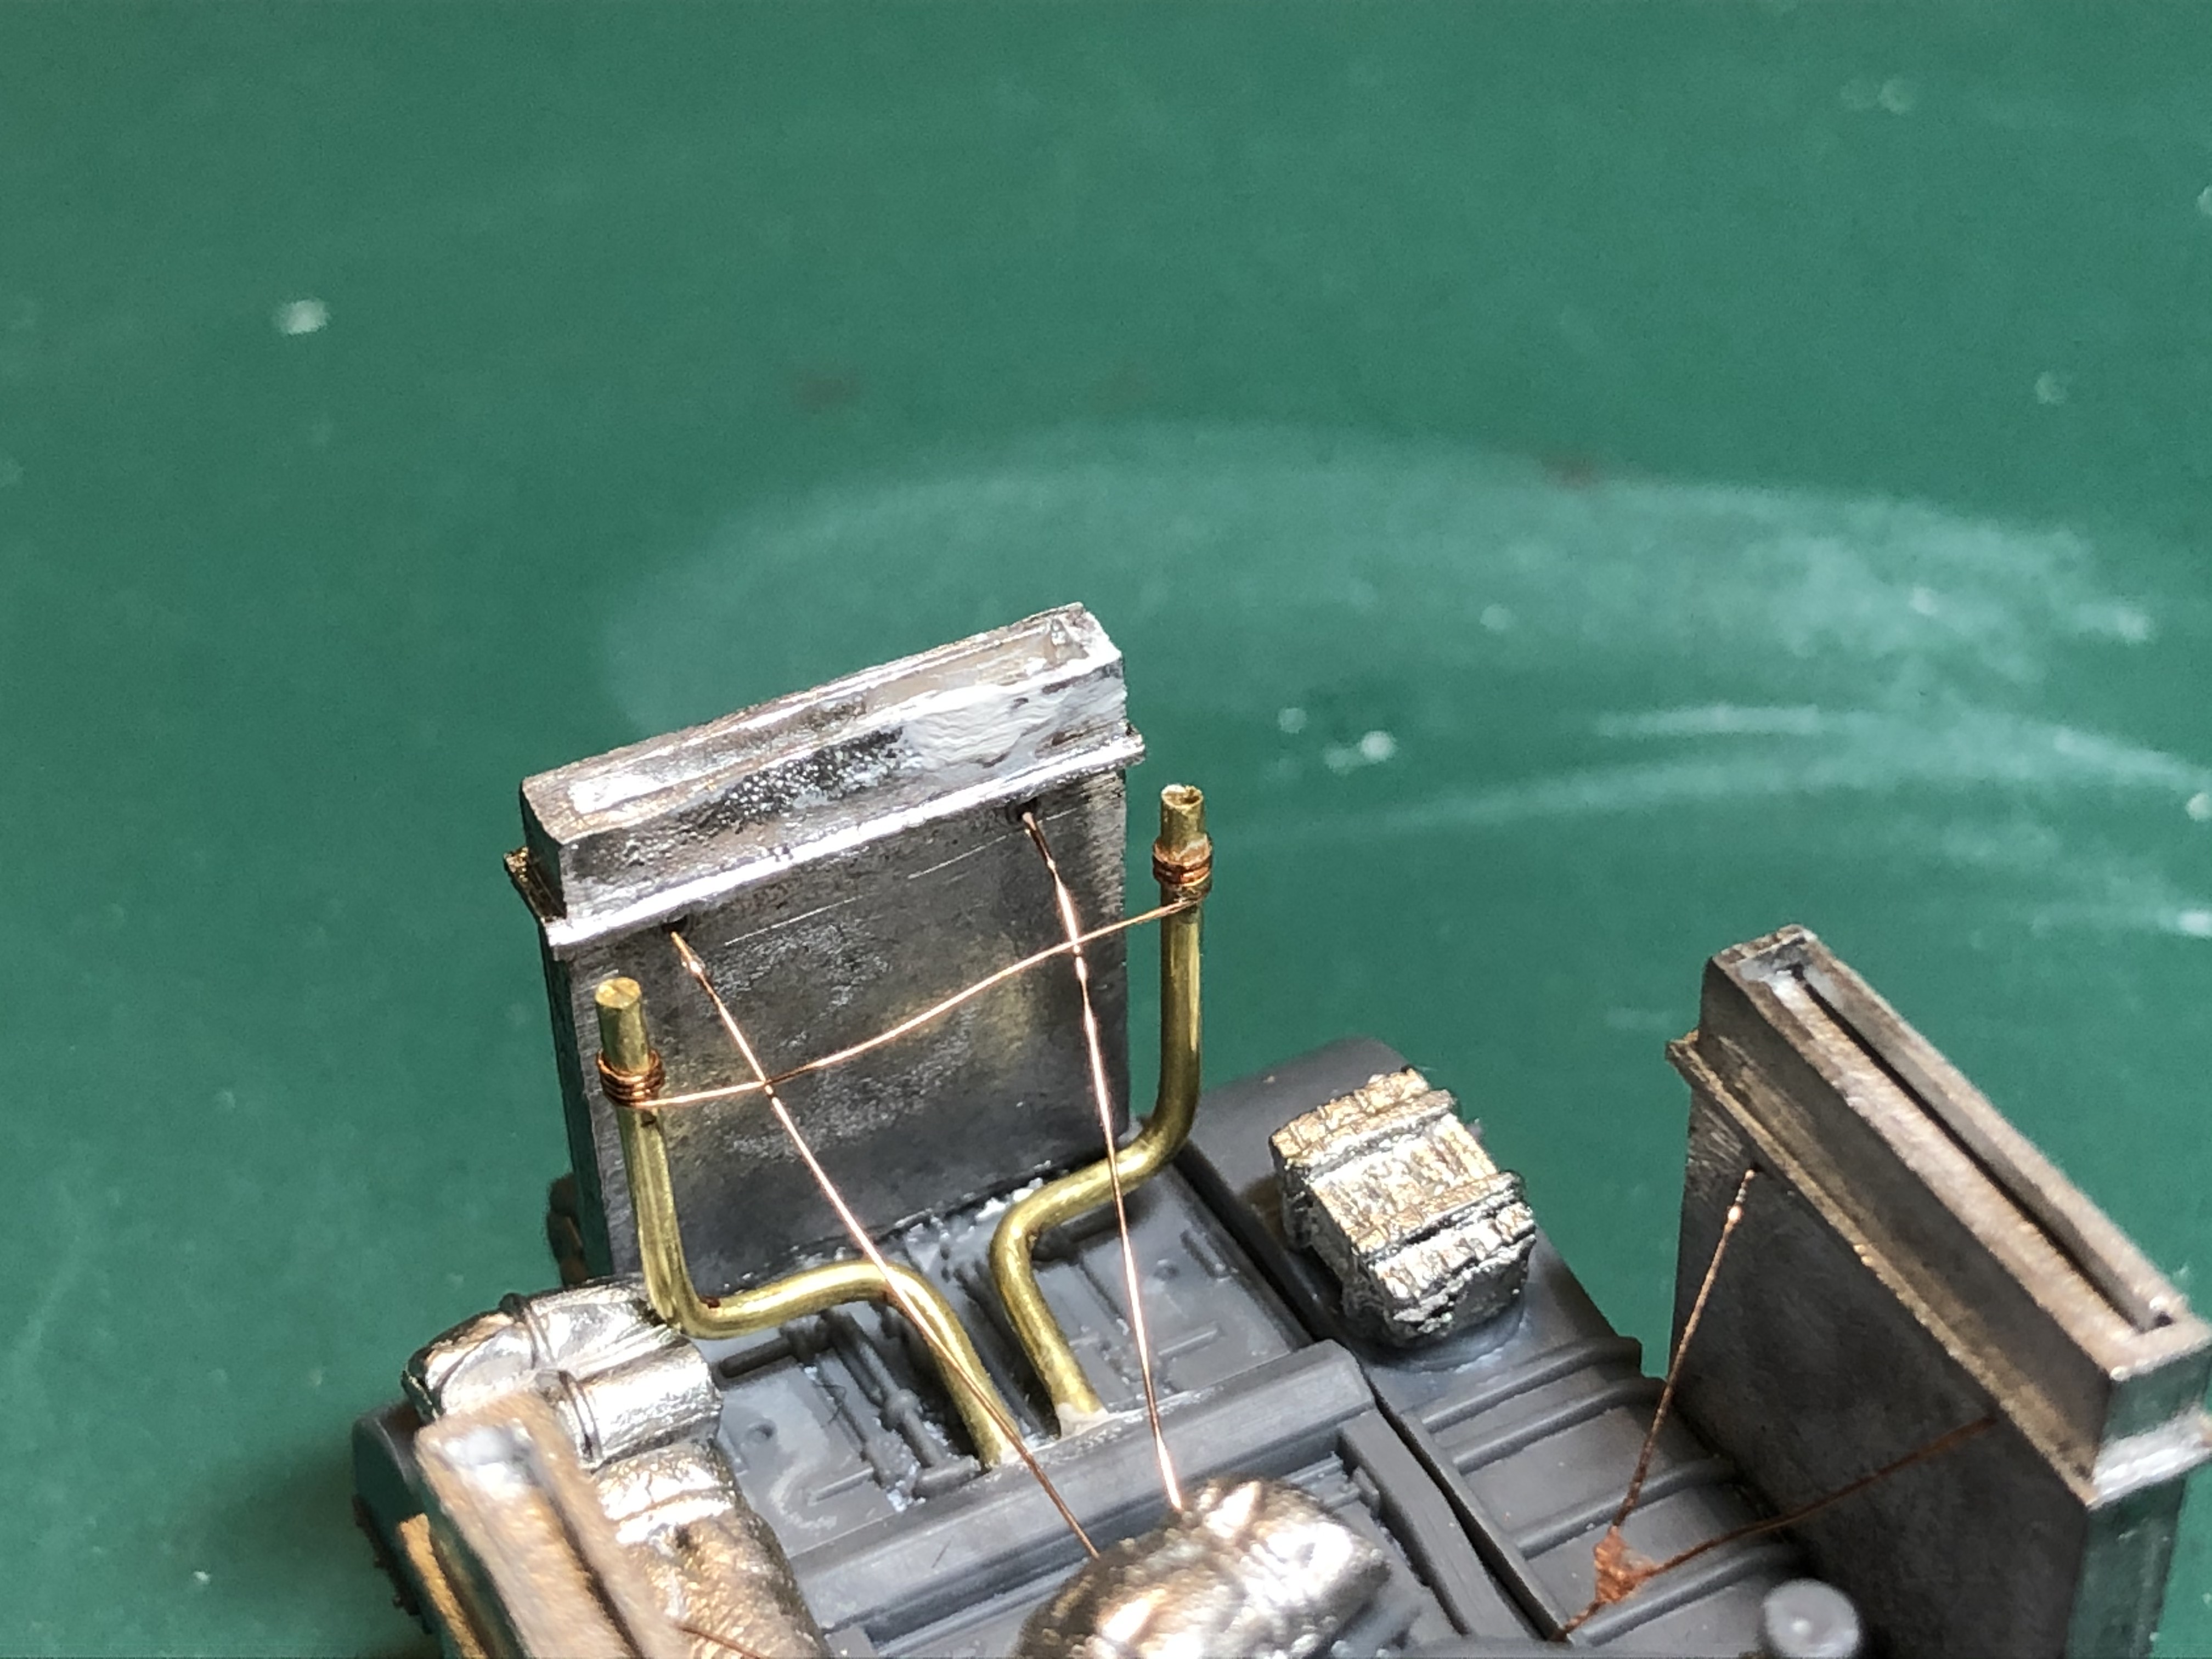
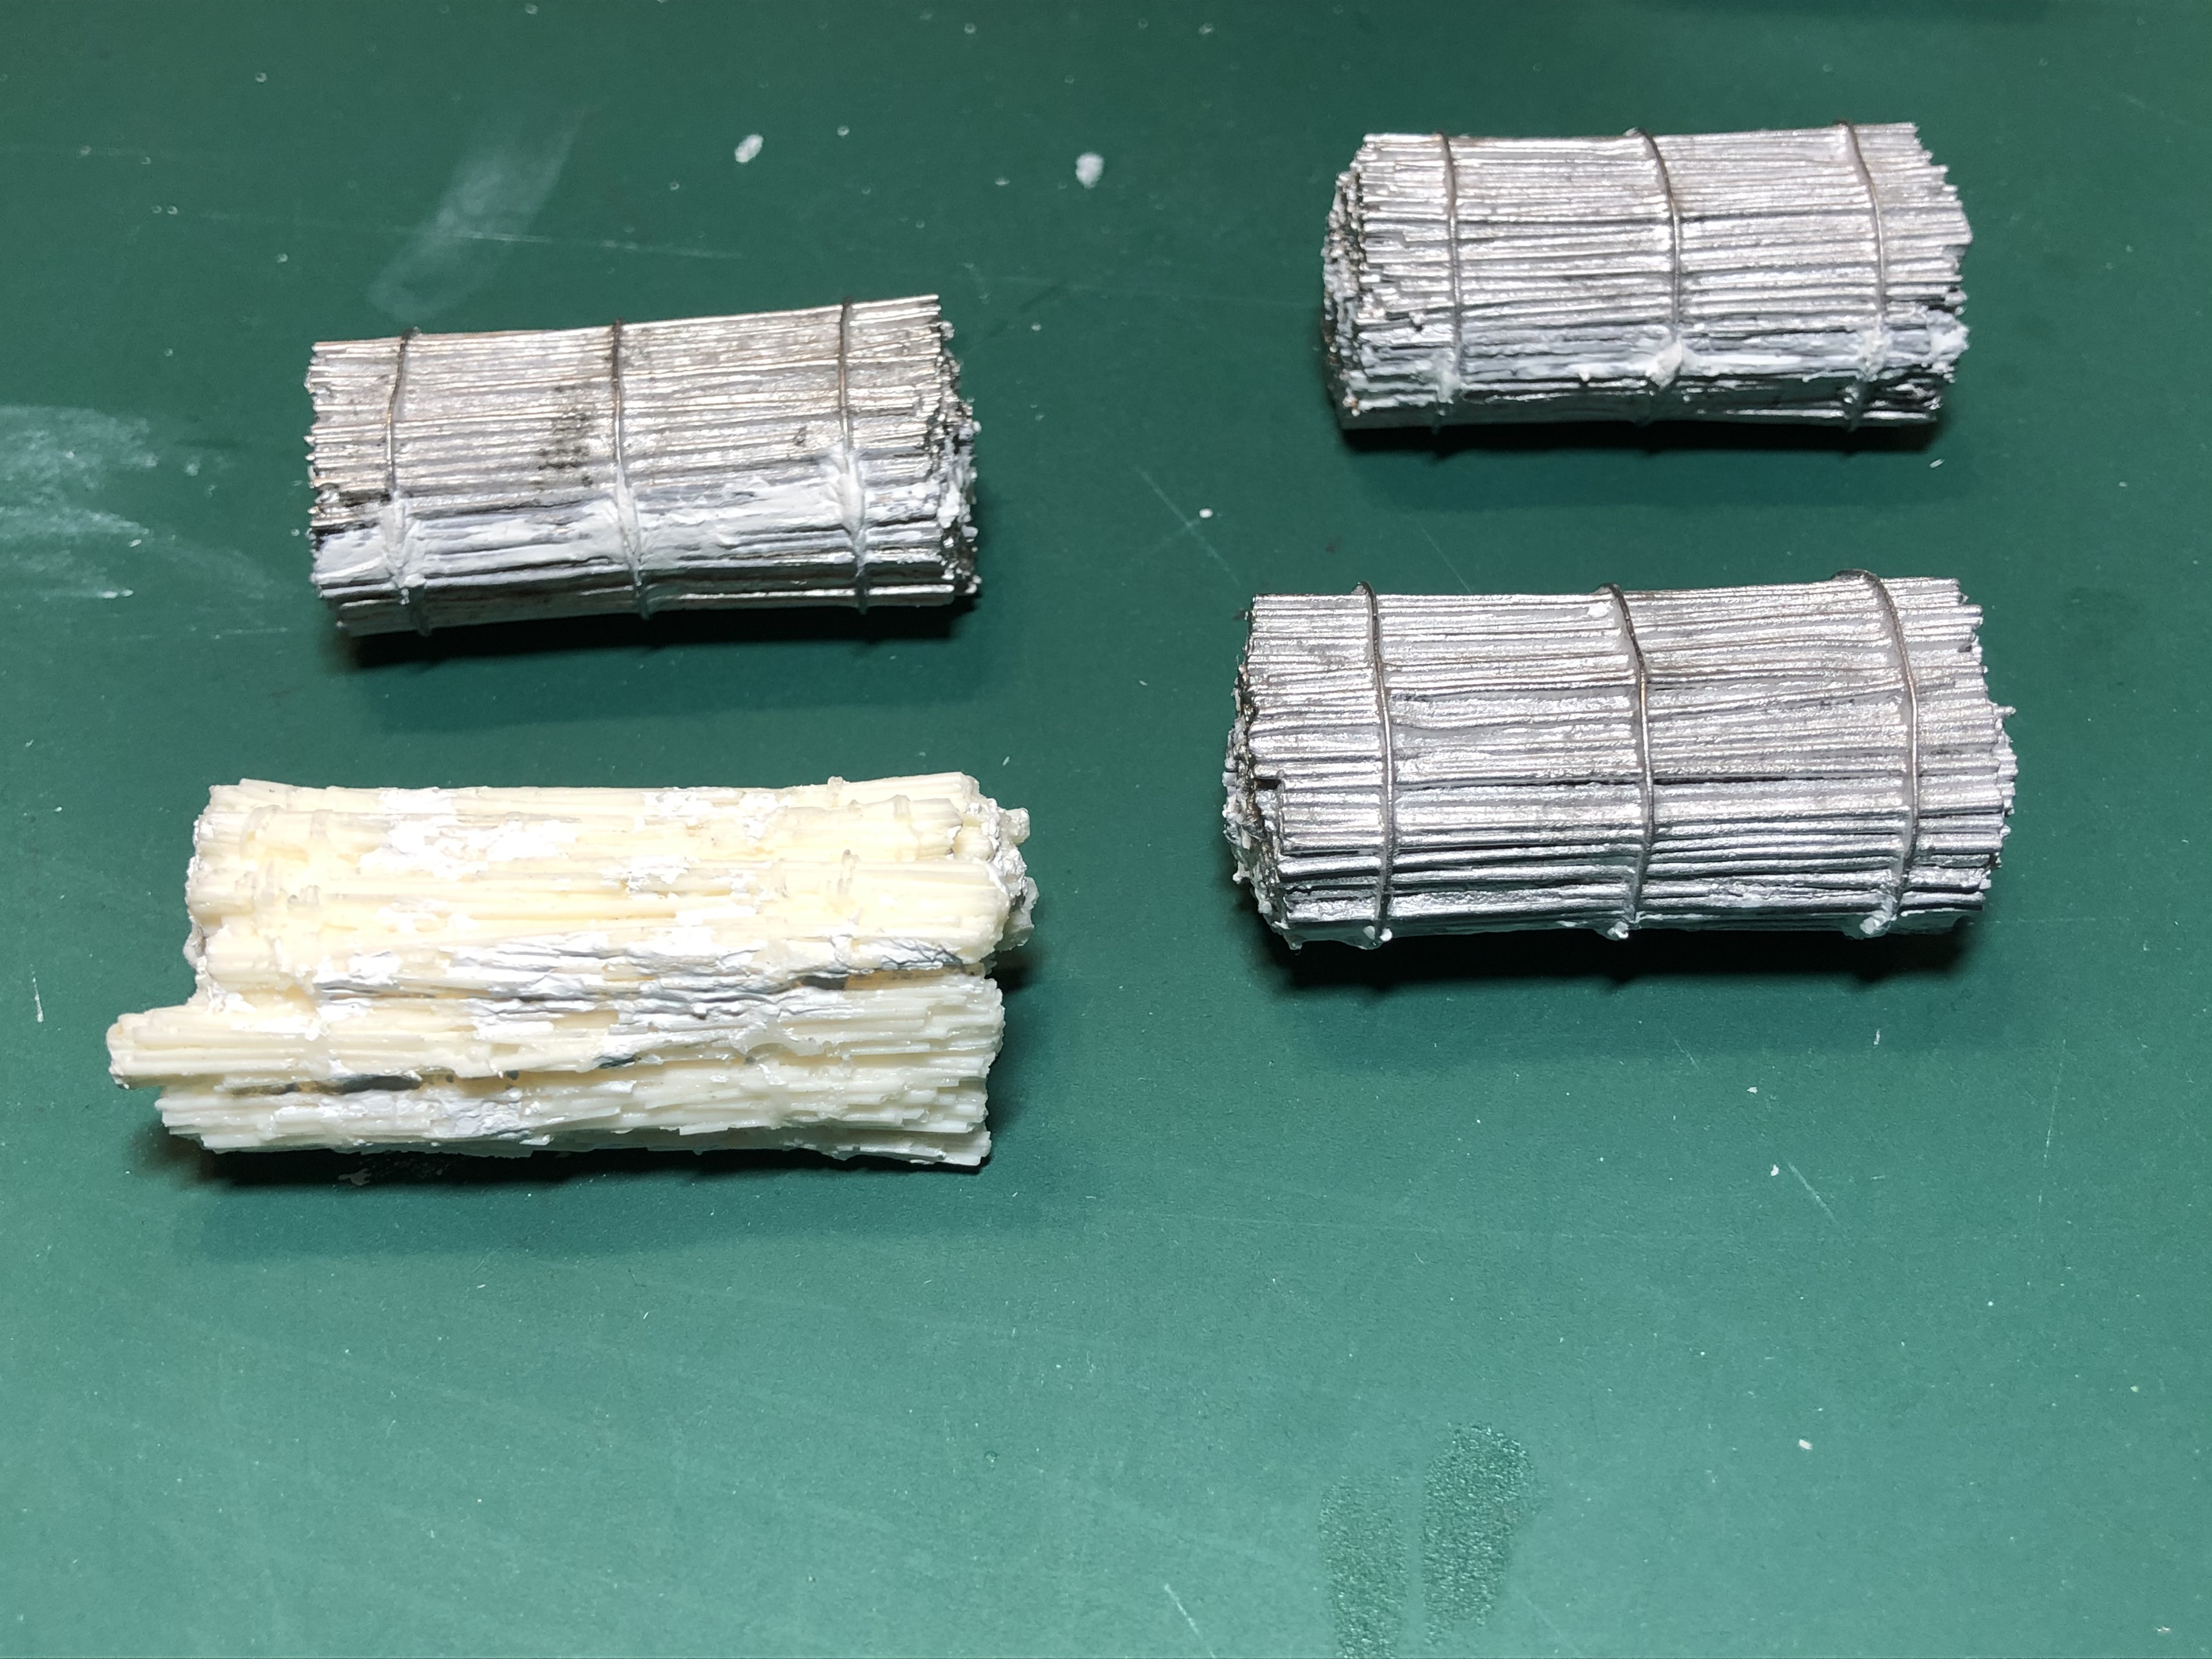
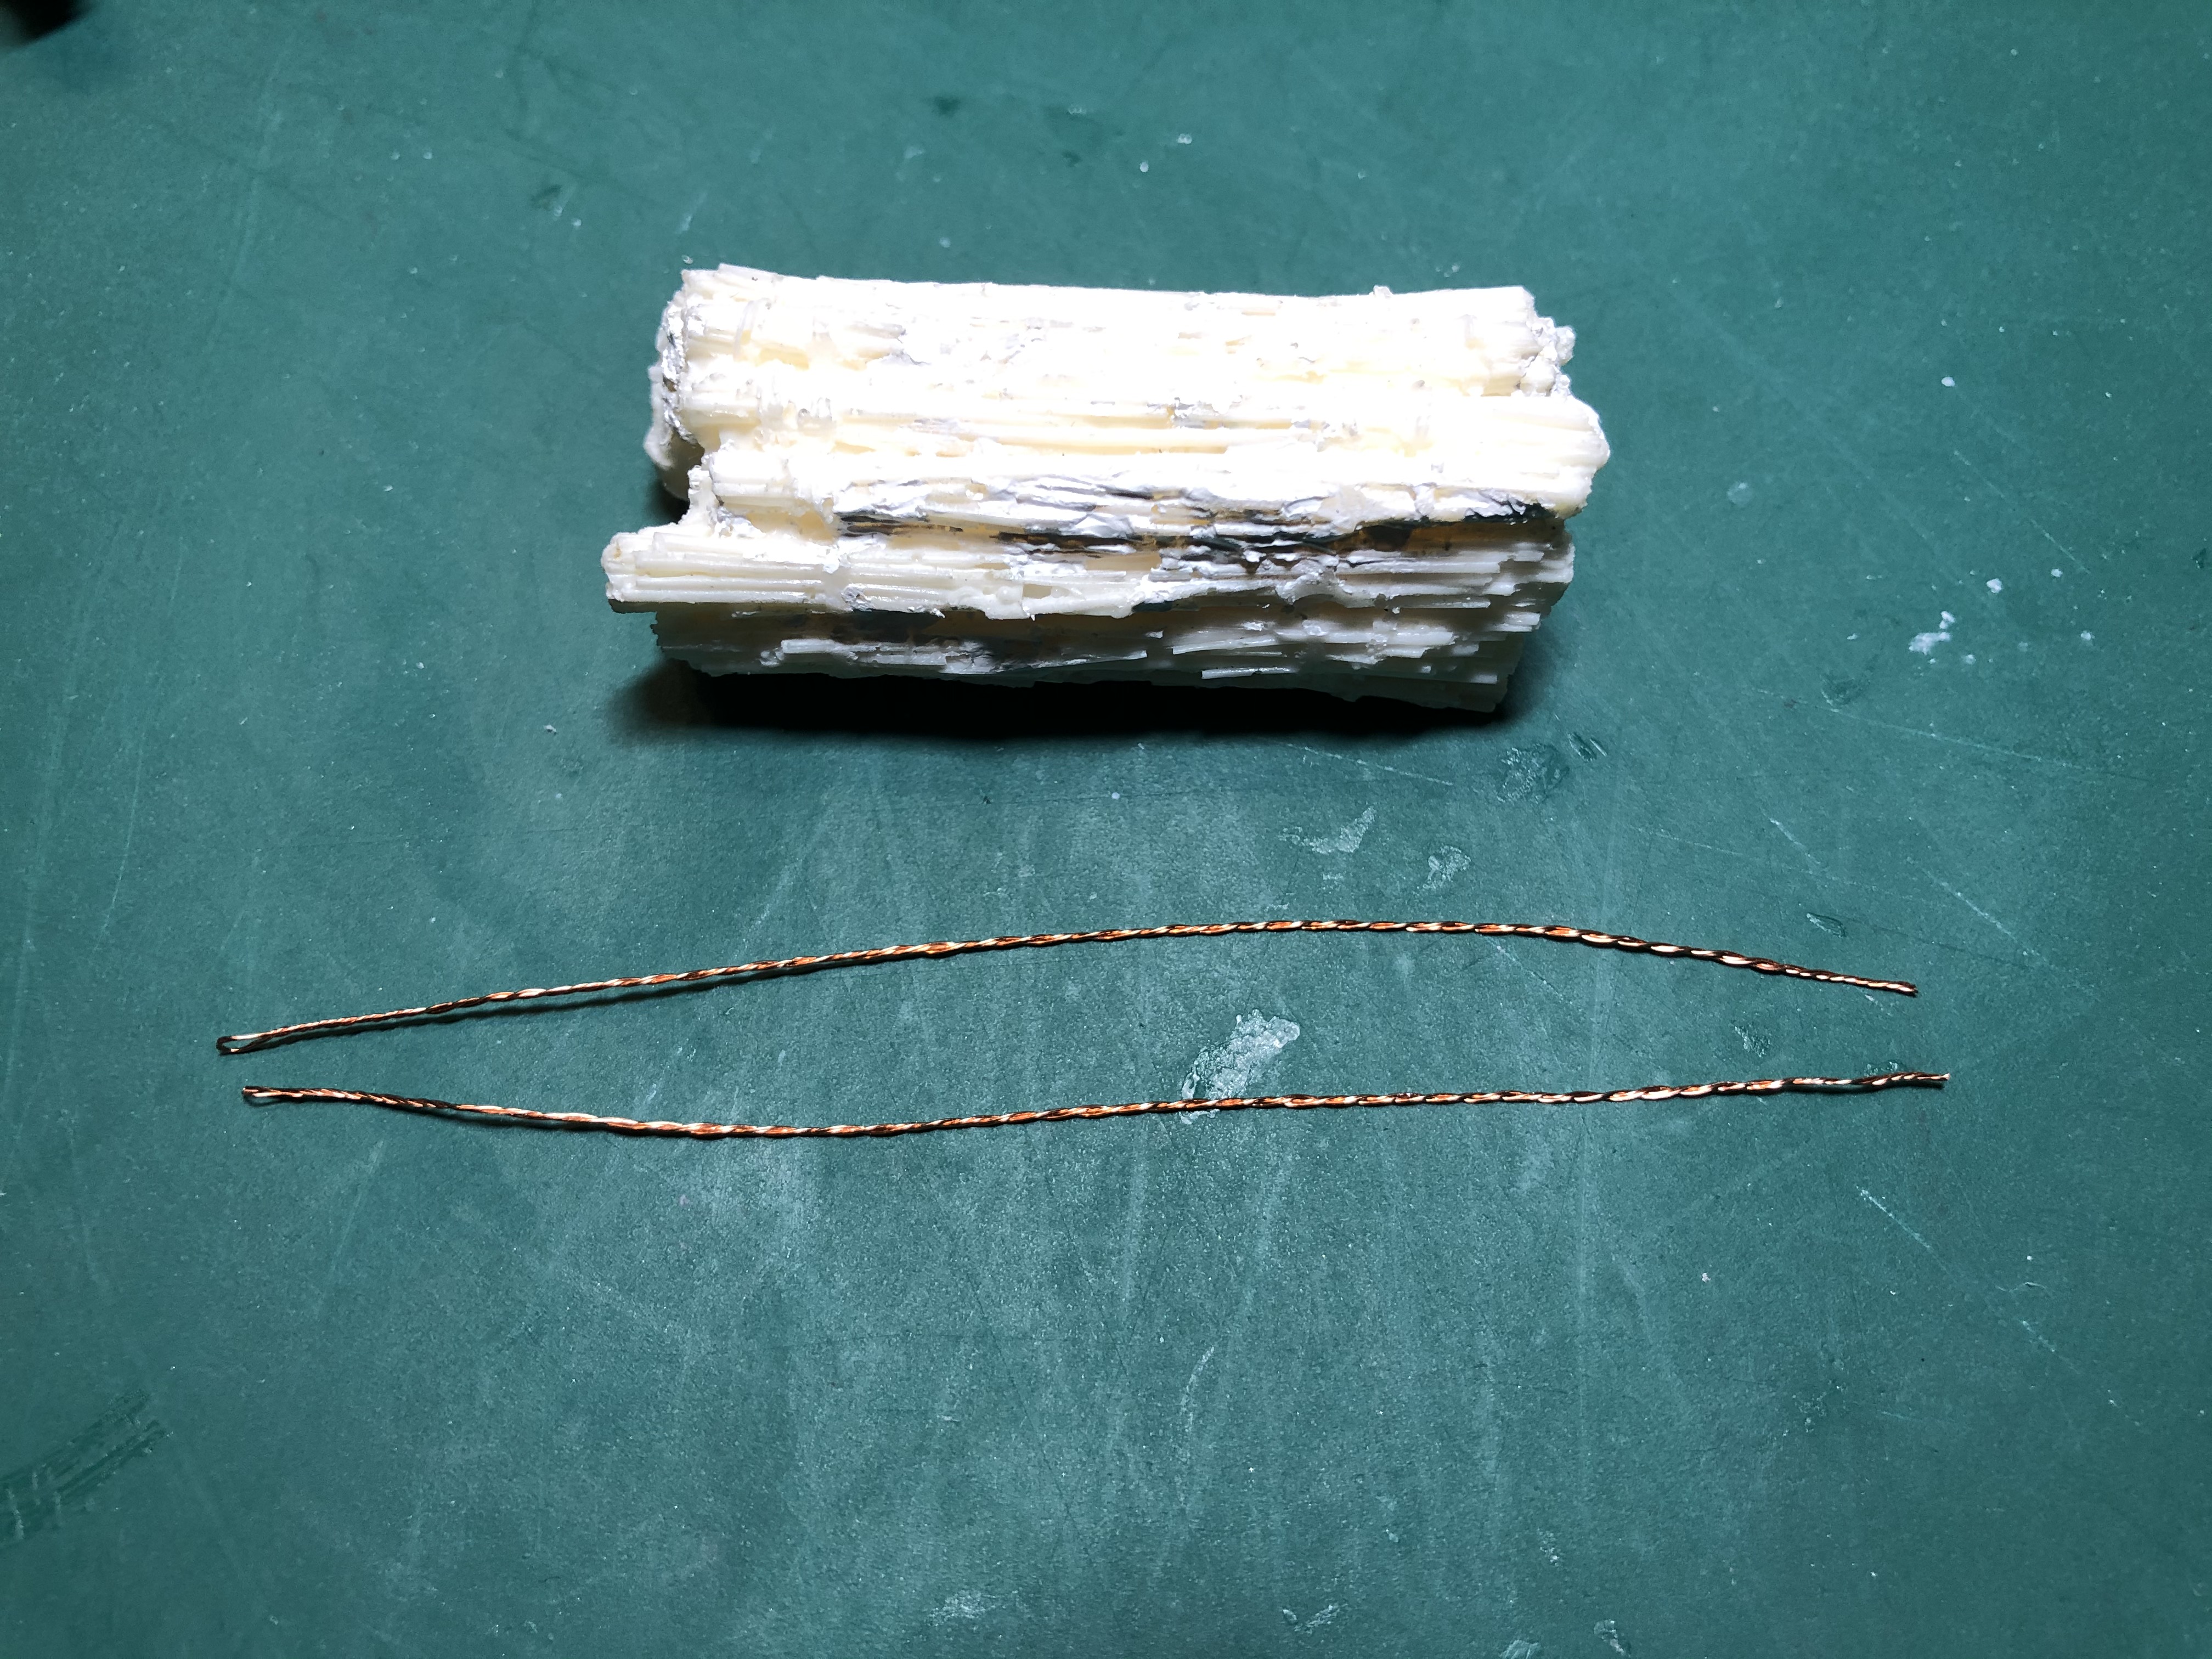
Fortunately, there was very little filling required. There was a small piece missing from a wading duct and the joints for the fascines need filling. The worst part was the resin fascine which had a lot of air bubbles. After filling, I noticed that the modelled retaining wires didn’t look great, so I cut them off and made my own ones by looping copper wire @4 times and then twisted them together. I then created a loop at one end so that I could wrap them around the fascine and then back on itself to give a tight finish.