


![How To Paint Moonstone’s Nanny | Goblin King Games [7 Days Early Access]](https://images.beastsofwar.com/2024/12/3CU-Gobin-King-Games-Moonstone-Shades-Nanny-coverimage-225-127.jpg)


Rocky Terrain Refresh – A Spring Clean


Recommendations: 49
About the Project
Well over 10 years ago I bought these pieces of terrain from a stall at a local wargames show. While they’ve served their time on the table through many battles I’ve wanted to either replace them with something better or scratch build something better myself. Then I thought, why not build on what I have, I could tidy up and enhance these rocks and make them look much better.
Related Genre: General
Related Contest: Spring Clean Hobby Challenge (Old)
This Project is Completed
First Steps
Well over 10 years ago I bought these pieces of terrain from a stall at a local wargames show. While they’ve served their time on the table through many battles I’ve wanted to either replace them with something better or scratch build something better myself. Then I thought, why not build on what I have, I could tidy up and enhance these rocks and make them look much better.

As you can see from these pictures of past games the “rocks” are really just pieces of bark that have been glued to a sand covered base, with maybe some floc added for interest.
I had twelve pieces of this terrain and after a bit of thought I took some of the smaller pieces of bark off their bases and glued them on top of others to make some taller rocks, much better for blocking lines of sight or climbing for a shooting vantage point.
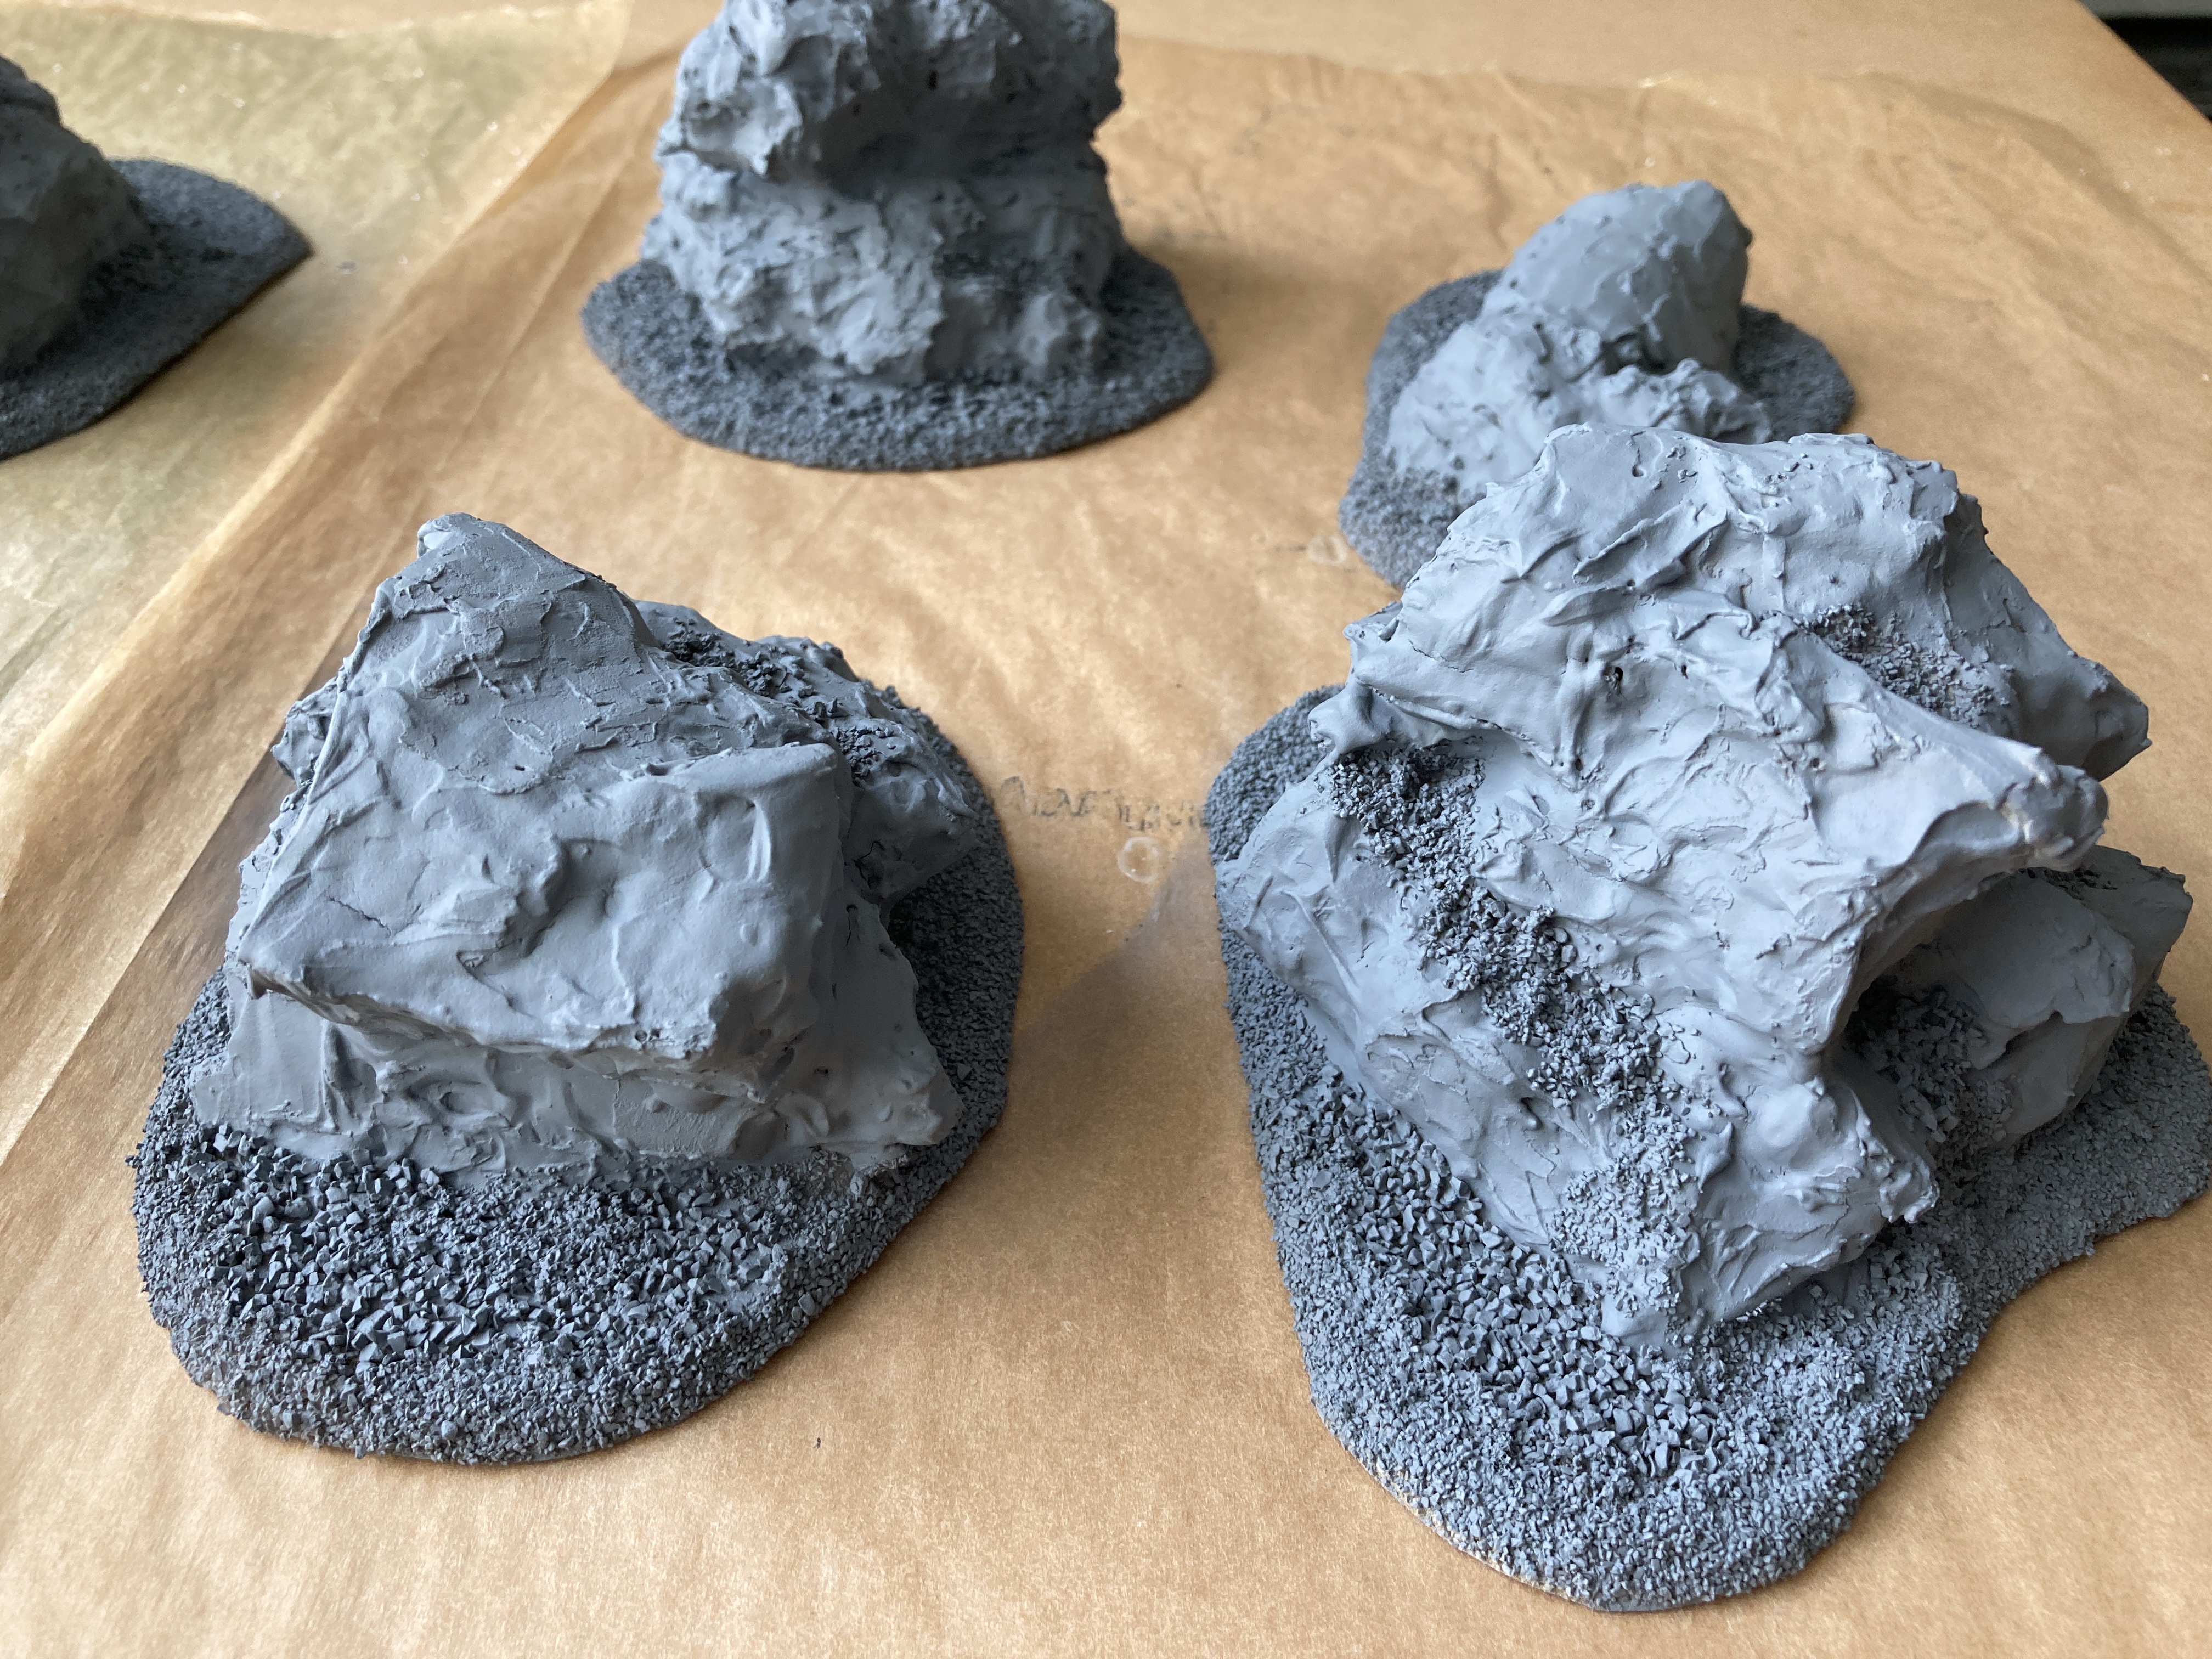
Then using my trusty tub of ready mixed filler I started to cover over the bark, a bit like icing a cake.


While filling I did add some of the large holes and gaps with cork sheeting just to cut down on the amount of filler being used, not to mention the weight and dry times.
So over half a tub of filler later this is currently what I have.
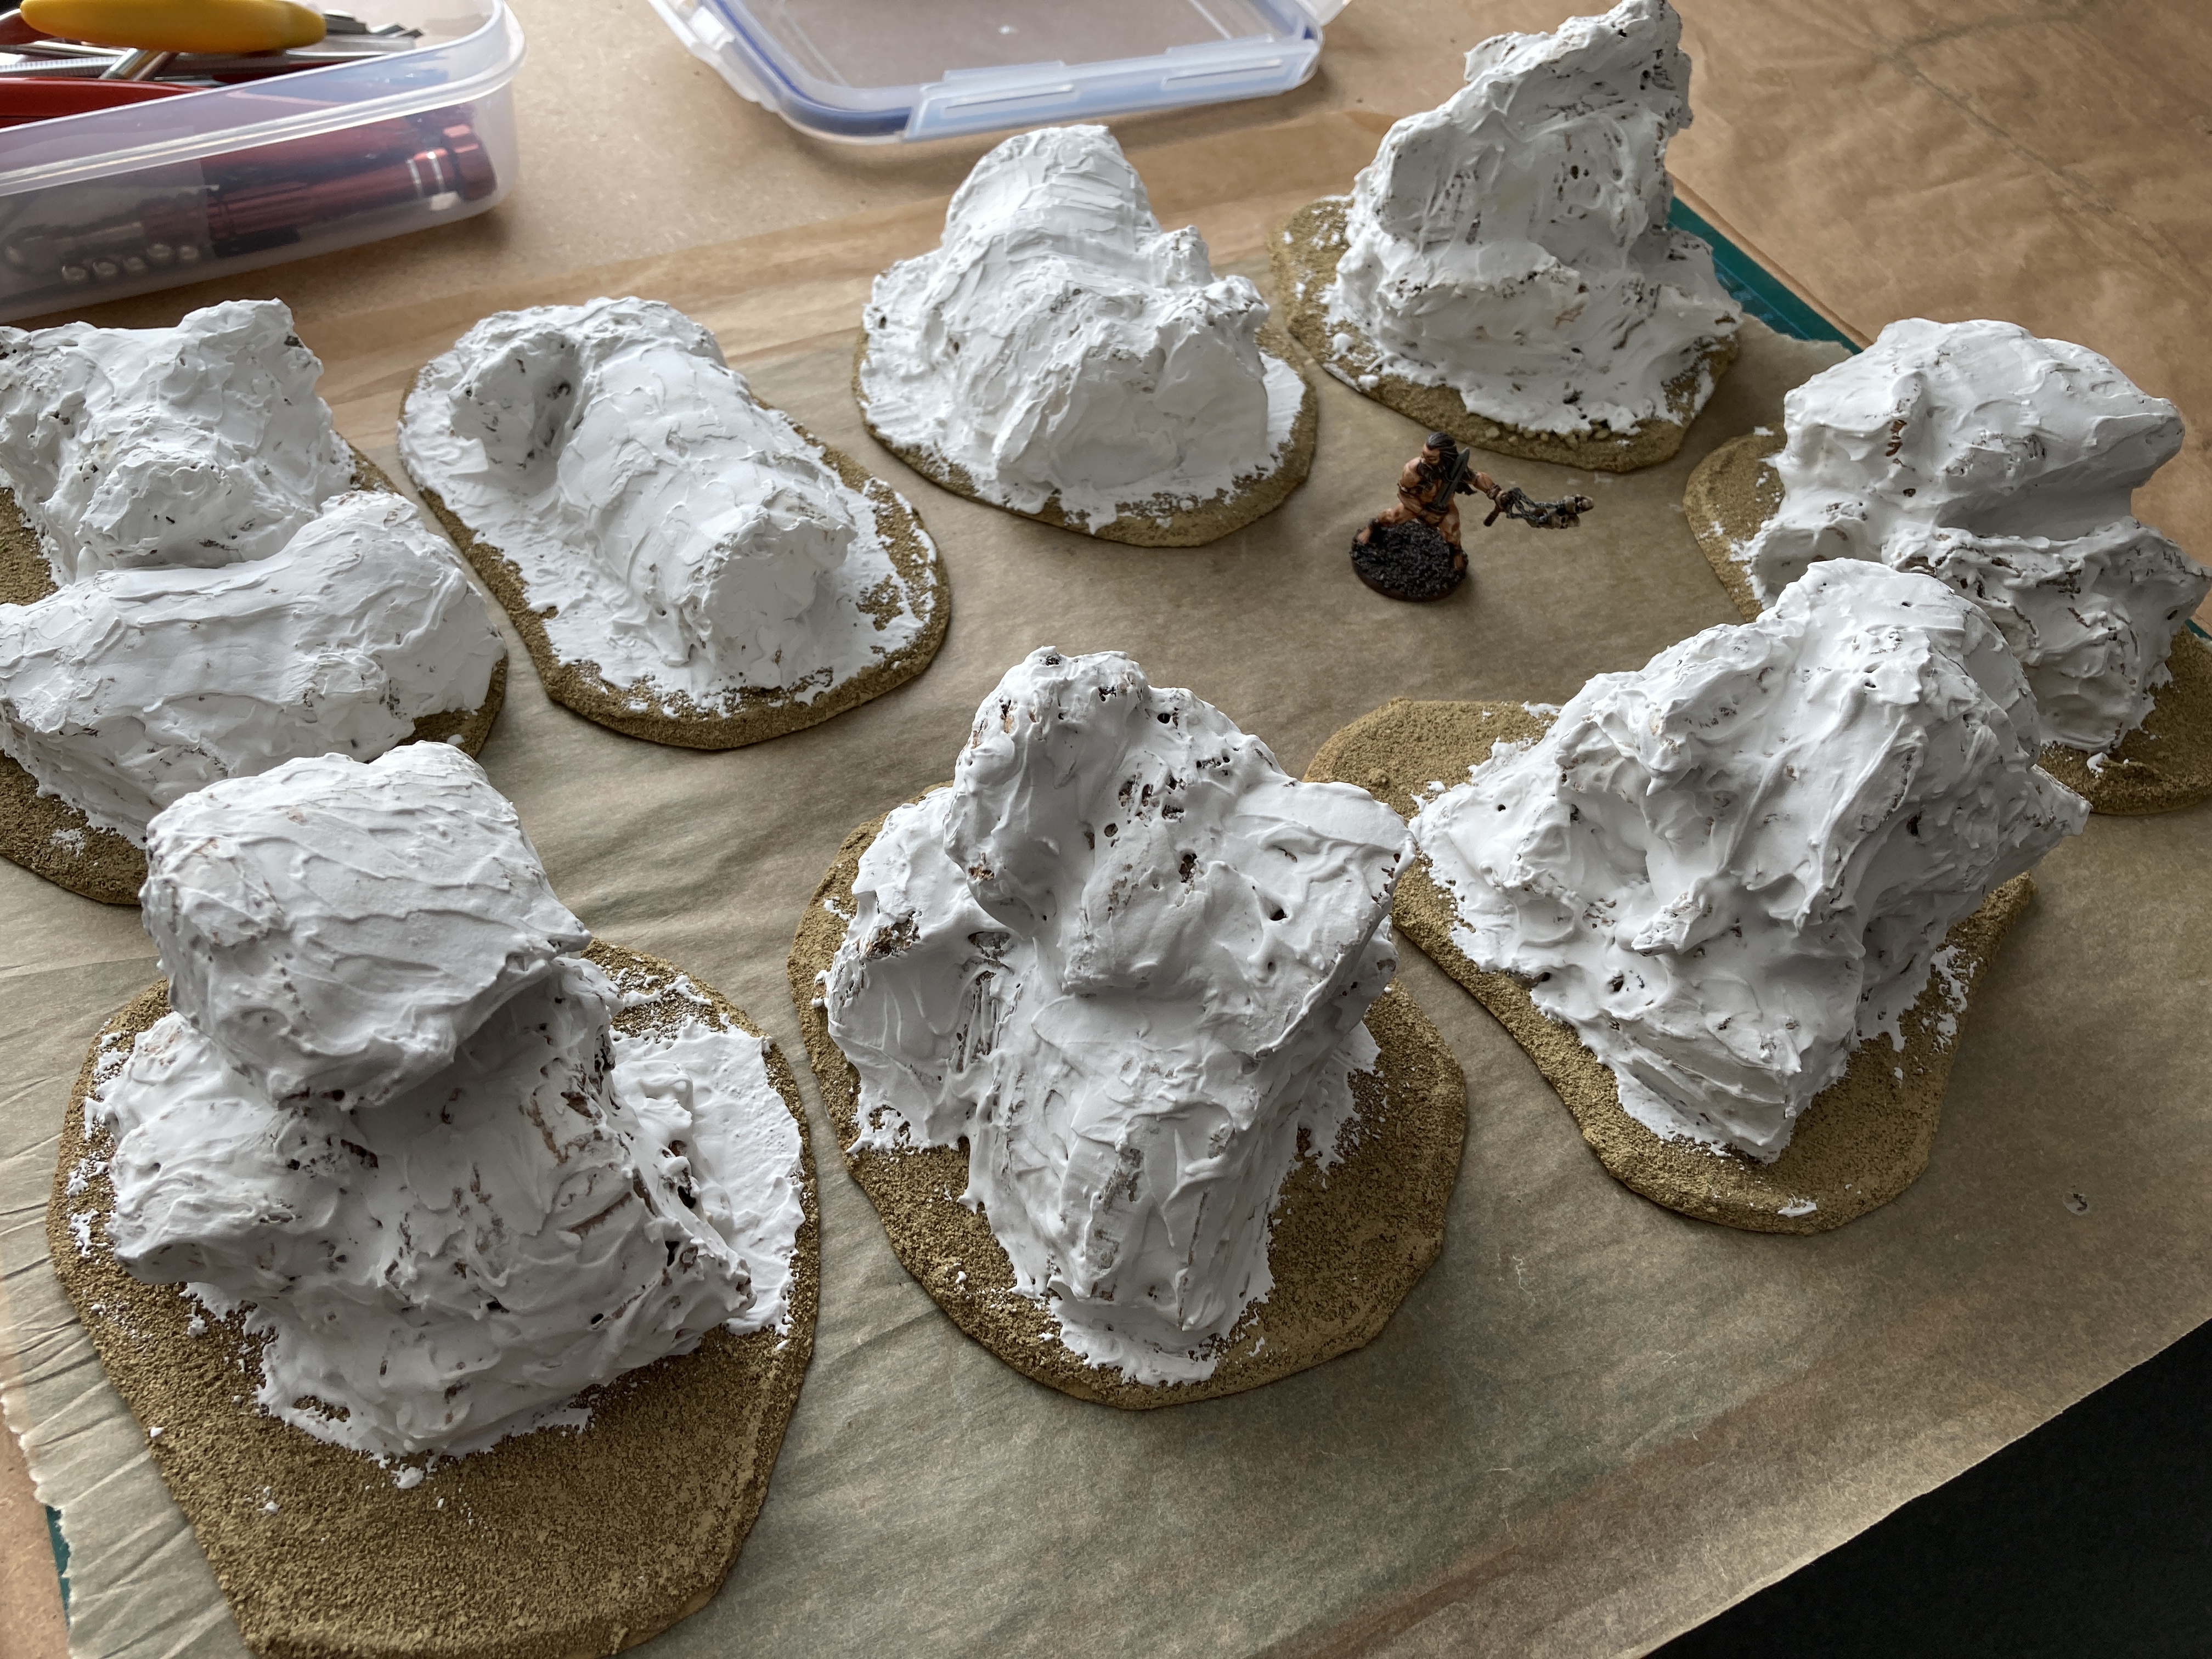
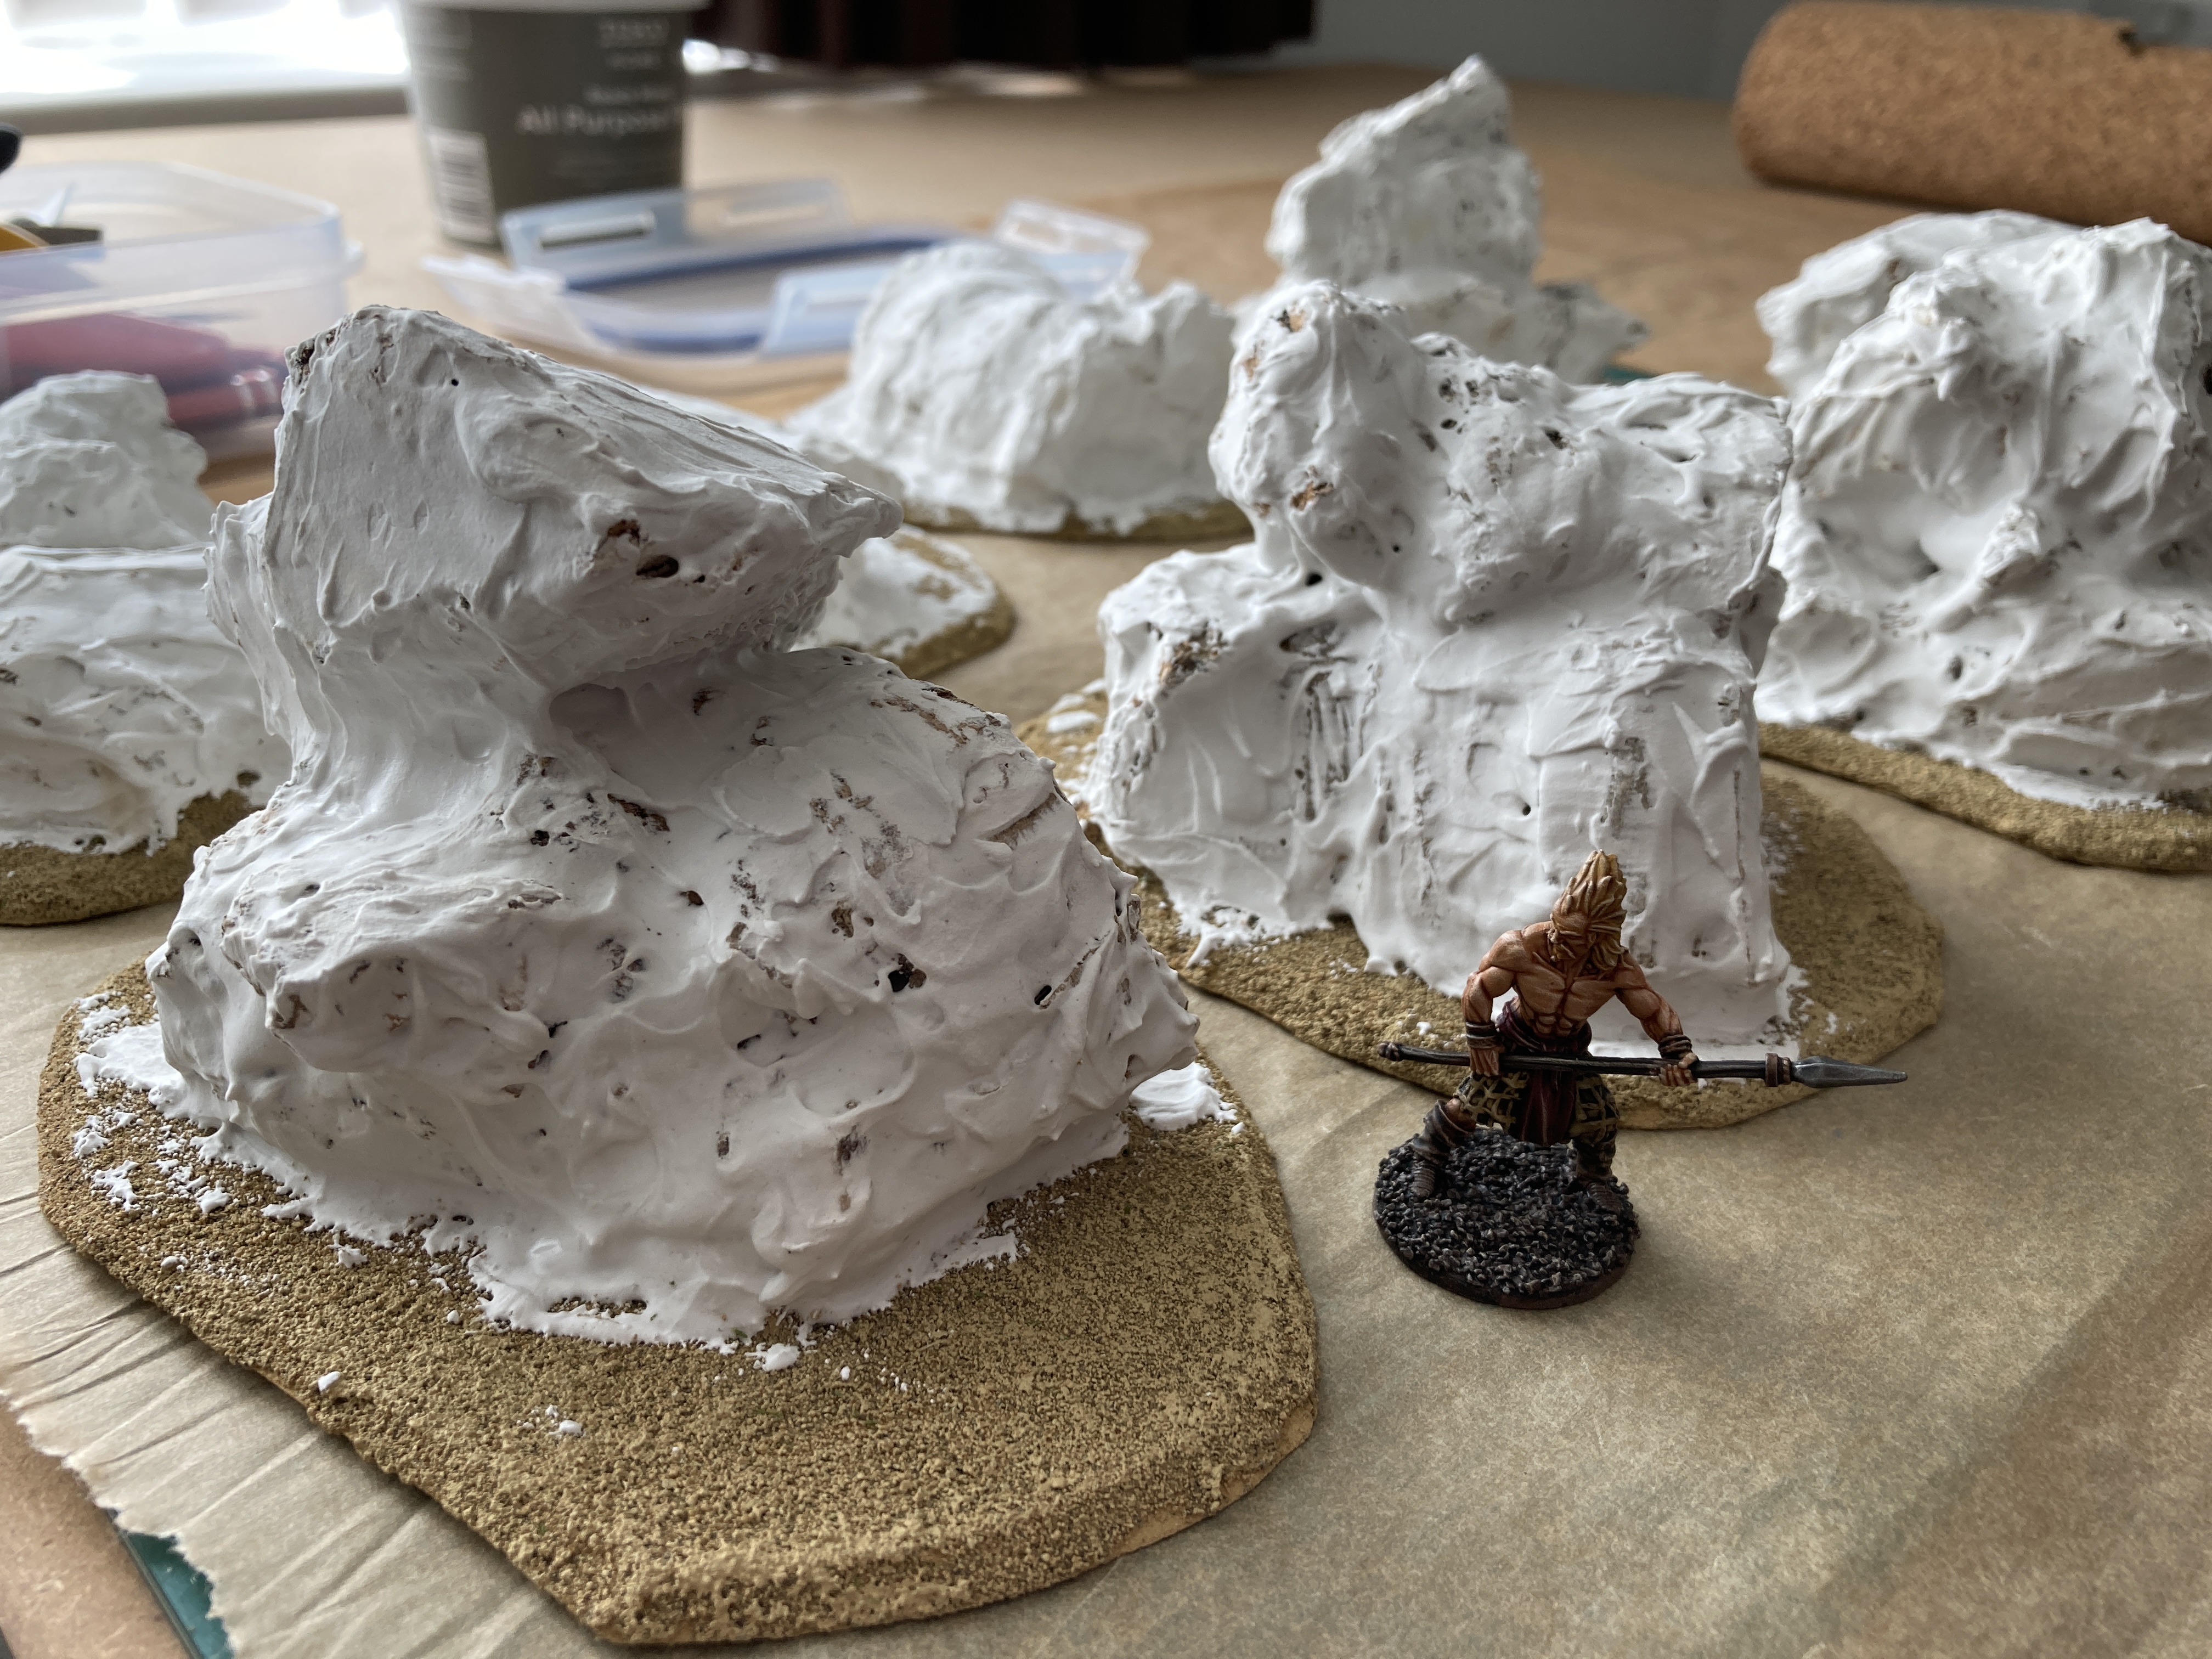
Now I’m going to have to wait a good day for it to dry thoroughly. I’ll probably give the rocks one more pass with filler for a better finish as this first one was mainly to get the bark covered and fill up any holes.
After that I’ll add various grades of sand on the base and parts of the rocks before priming the whole lot.
Adding Rocks to the Rocks
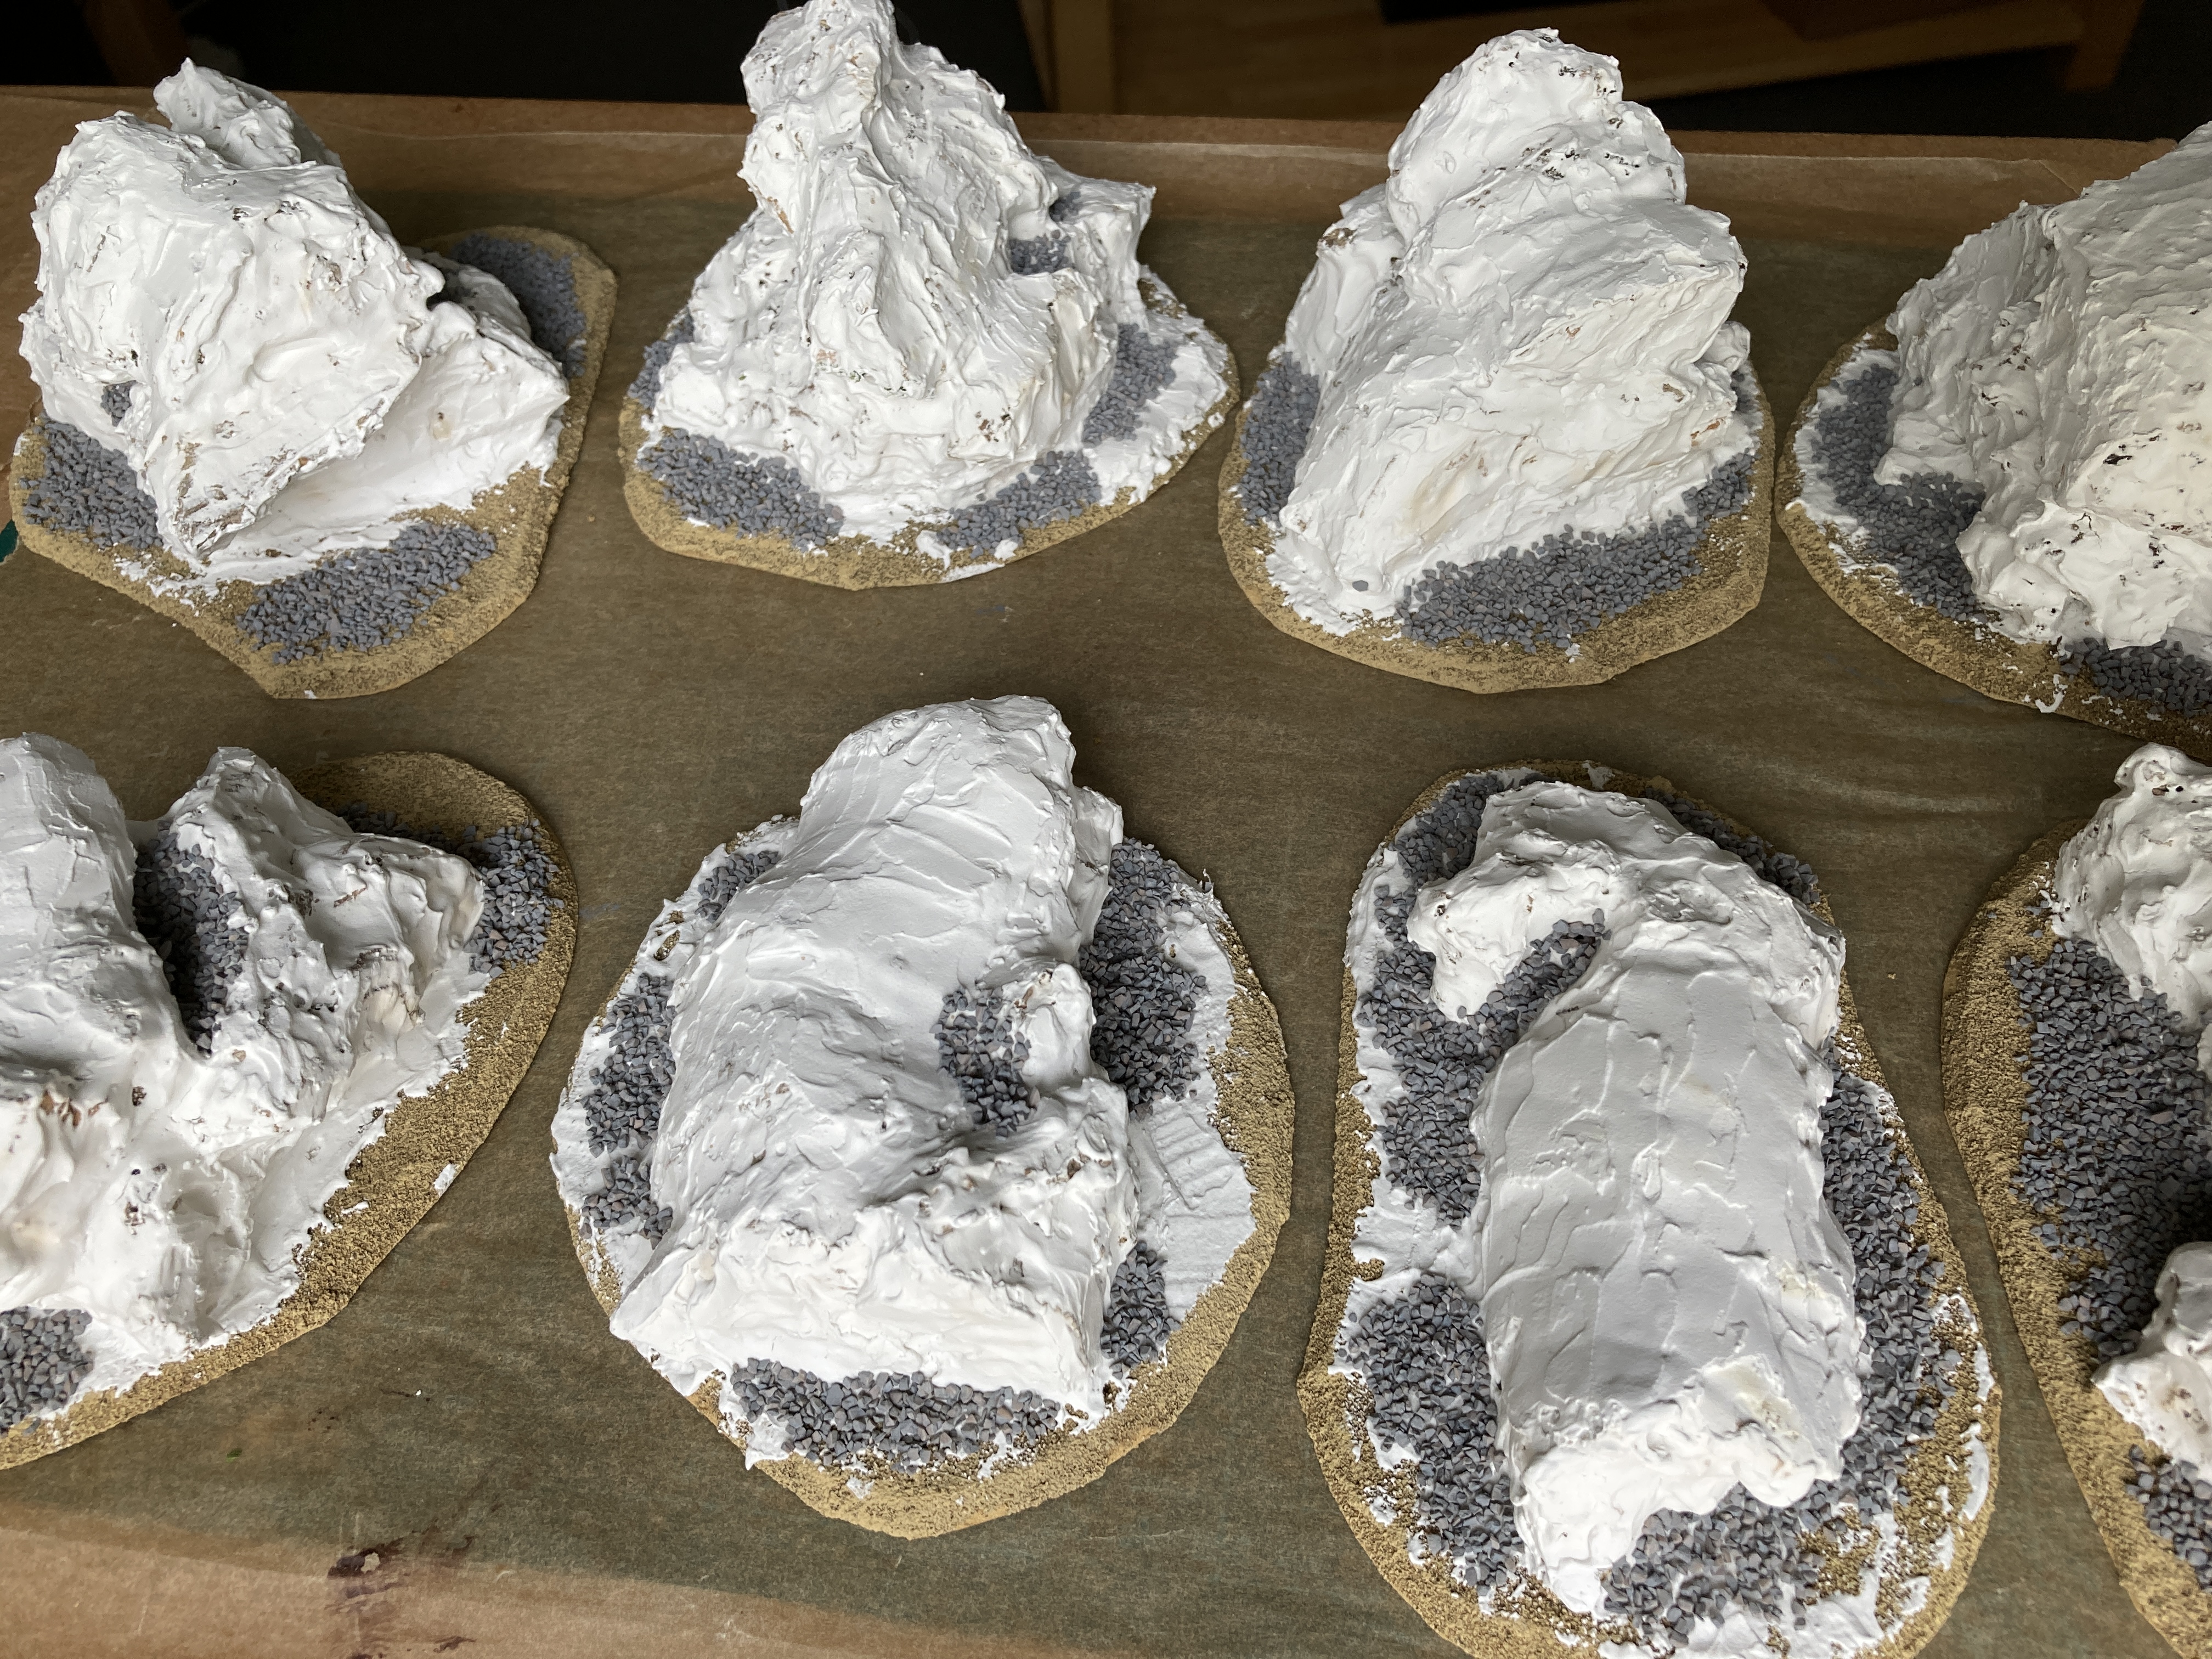
First up I’ve added some coarse railway aggregate around the sides and in the depressions of the rocks.
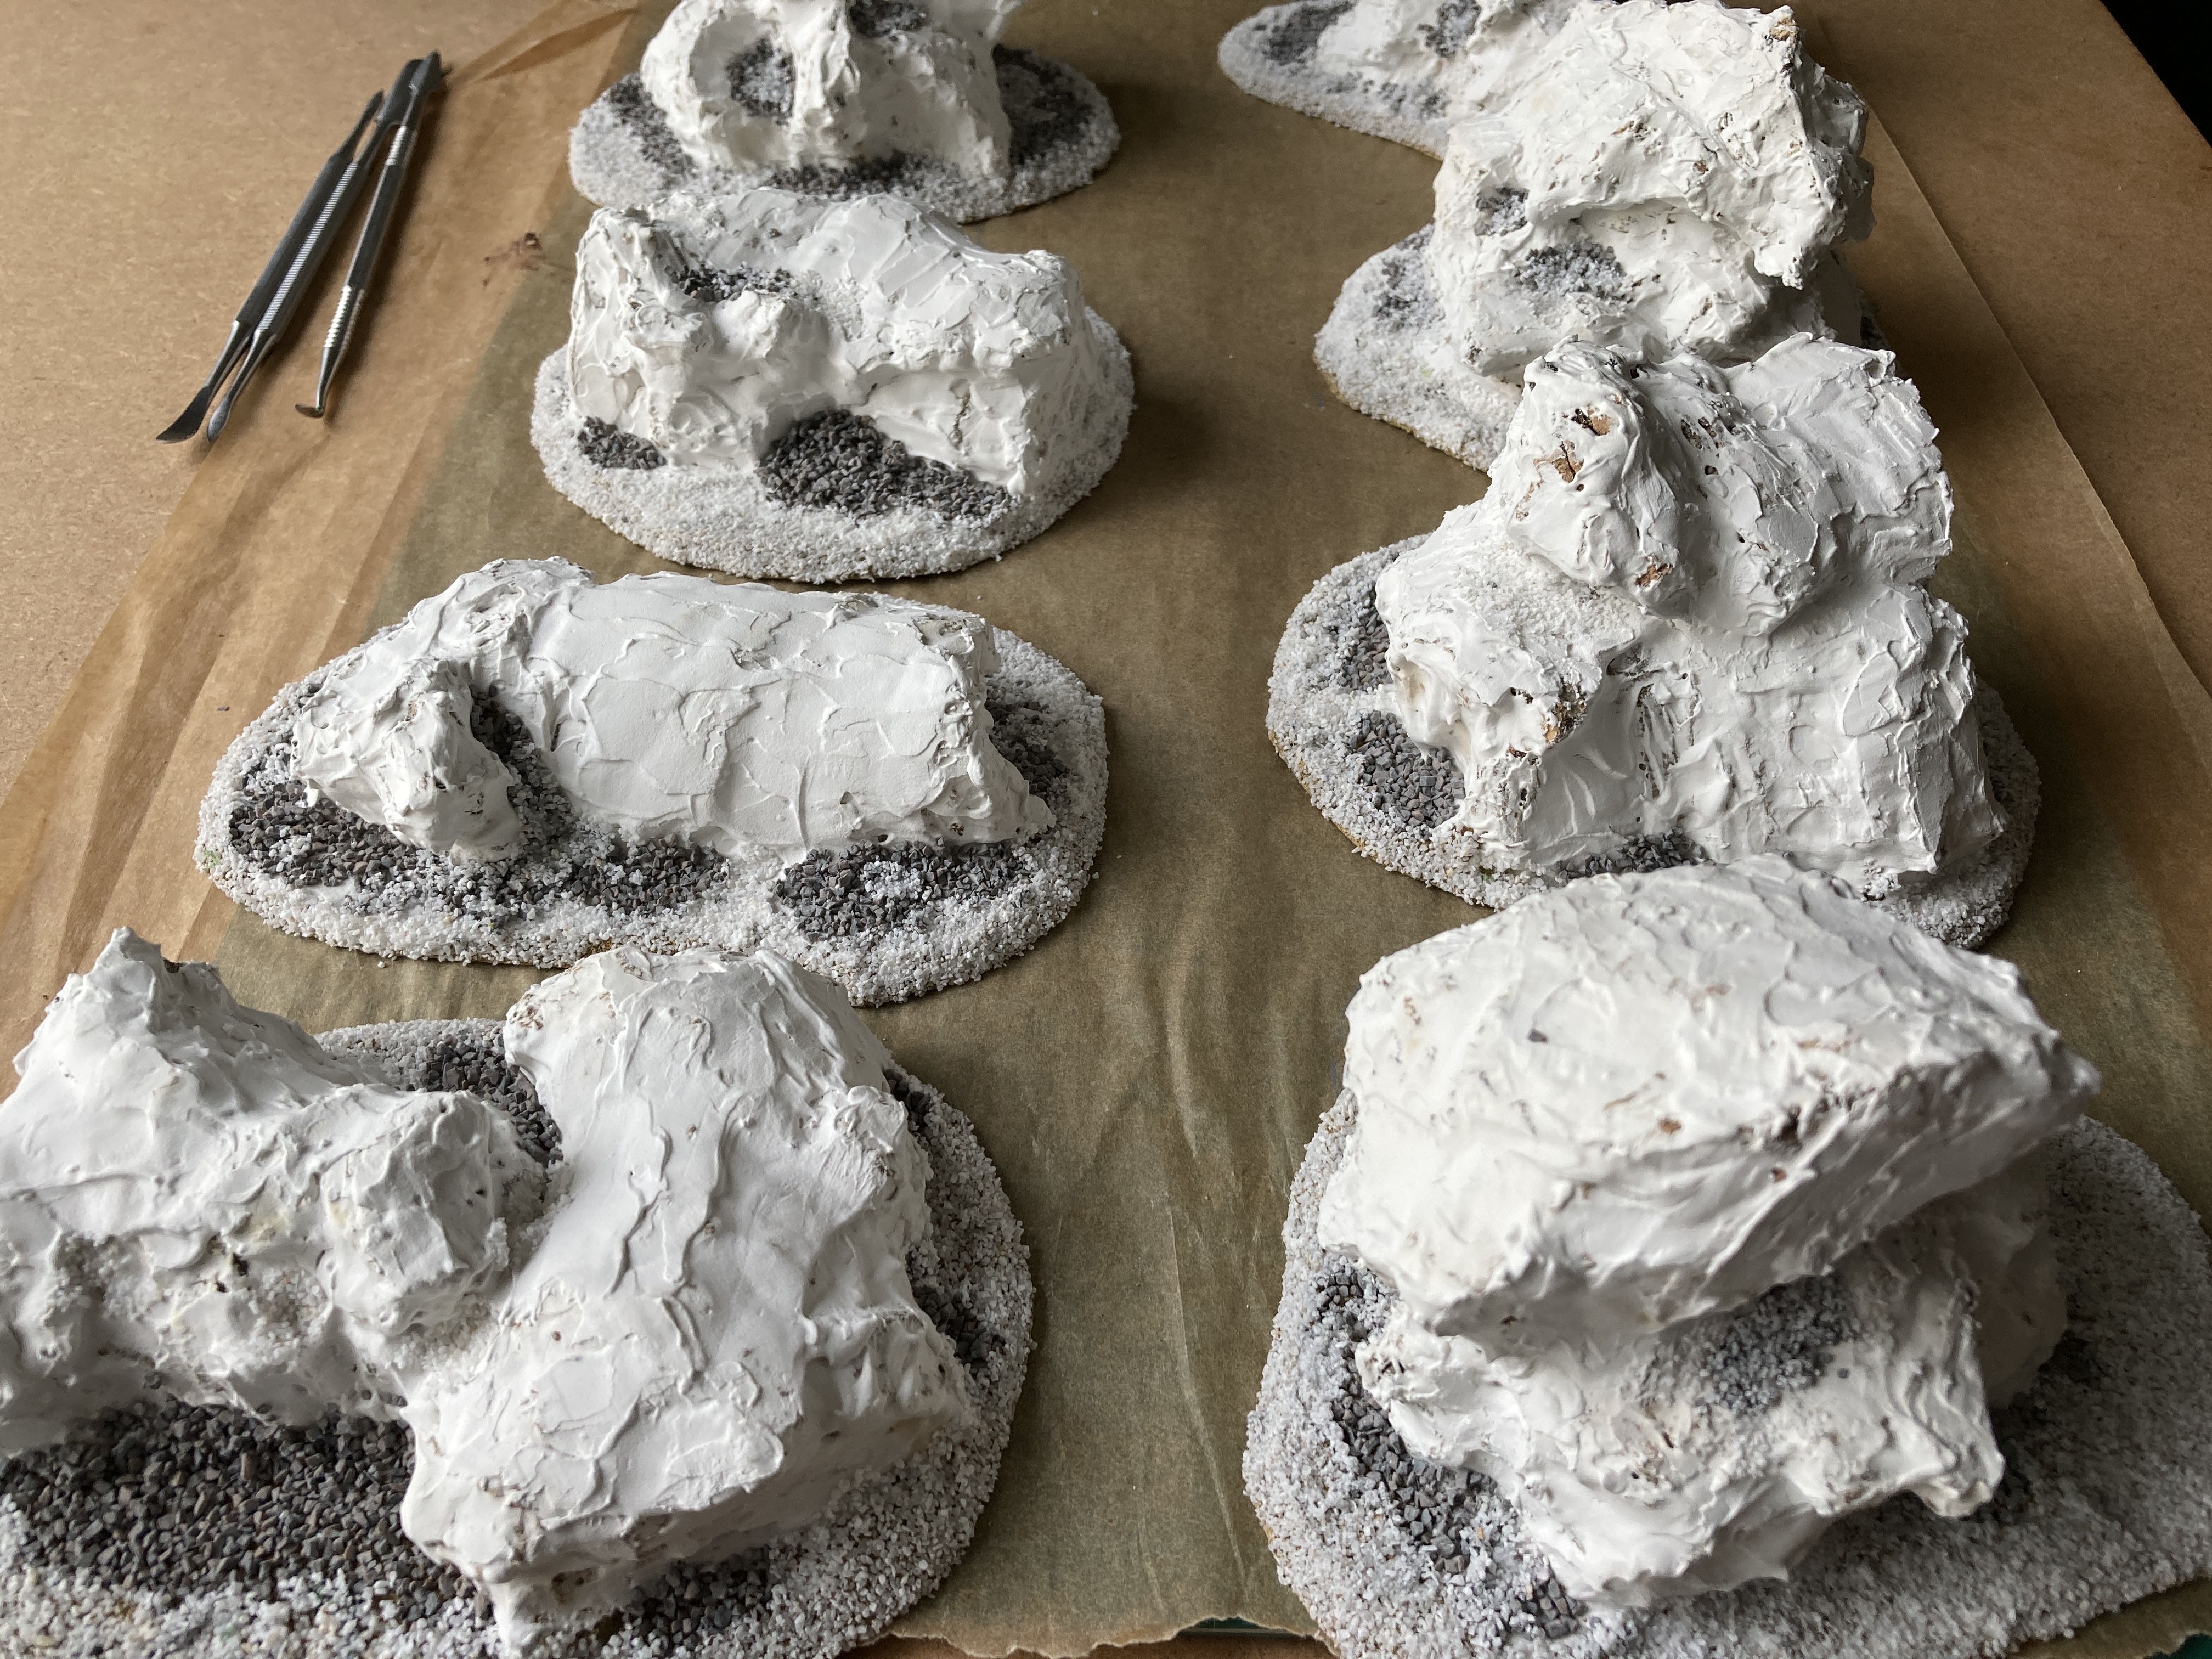

This was followed by my usual fine basing sand, some of which was also added to small areas on the rocks themselves.
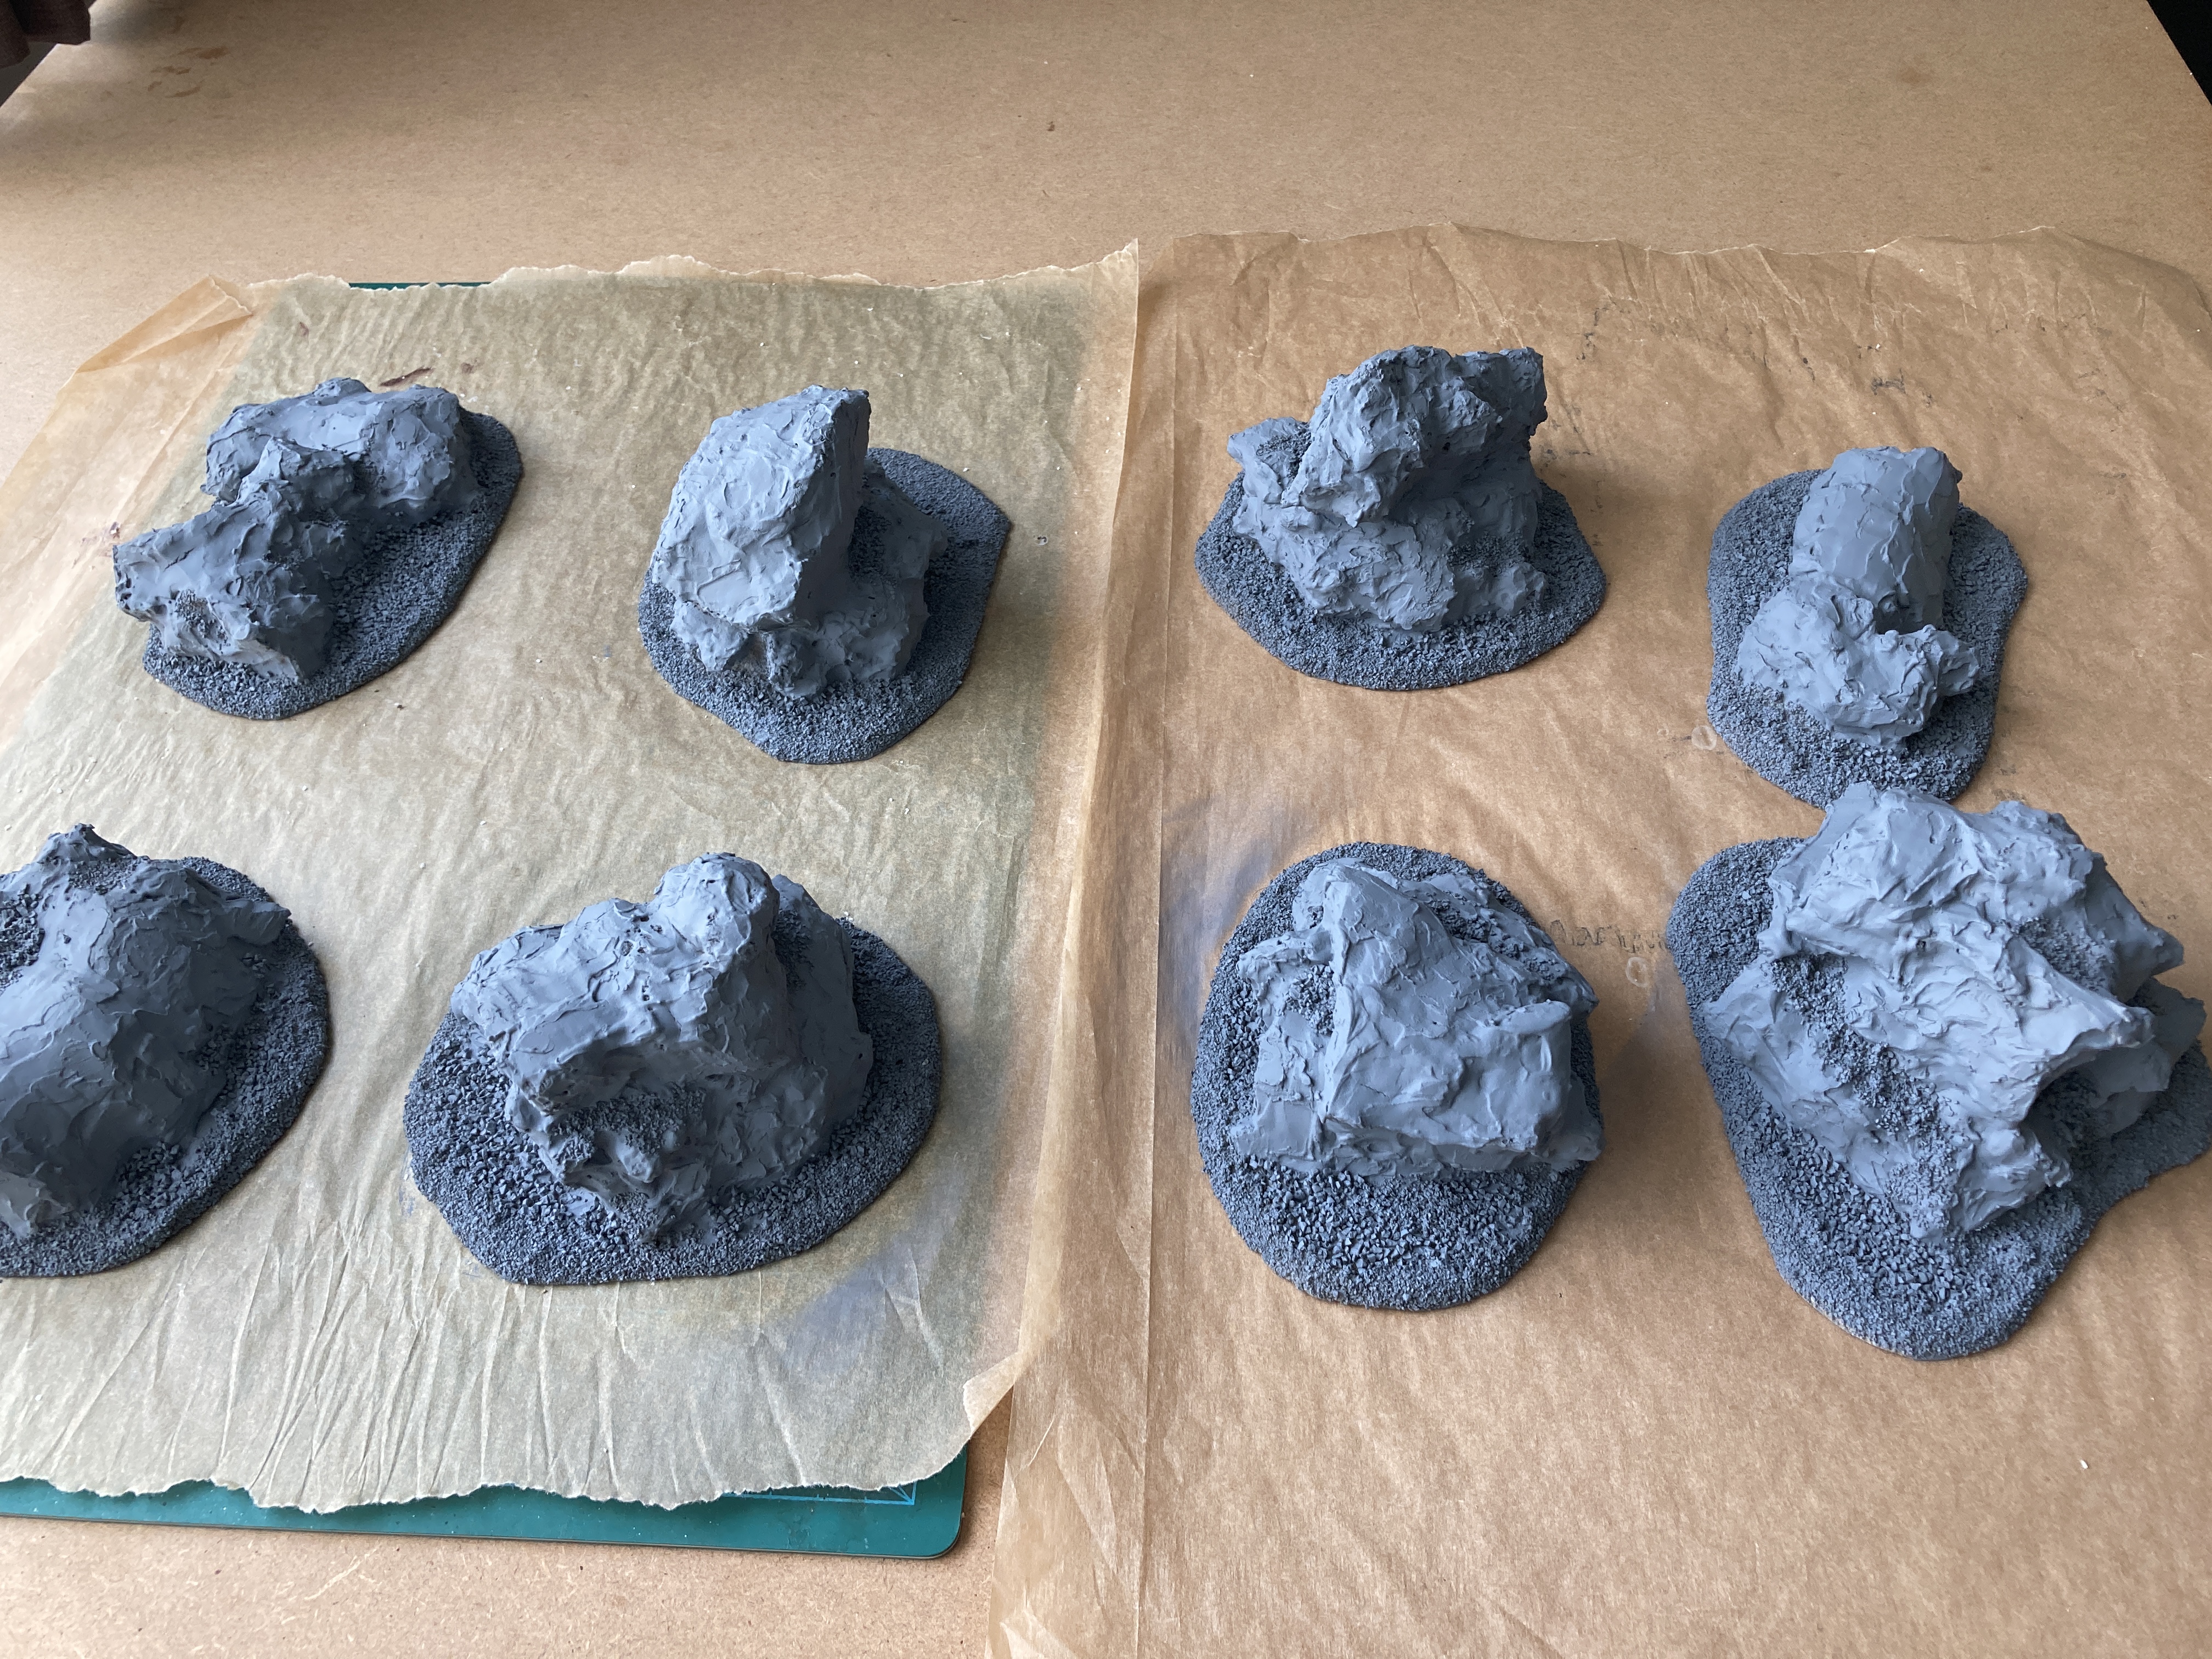
This is what they look like after a thorough spray of Halfords grey primer.
Next up is the painting.
The Painting and Finishing Touches
I didn’t want to paint the rocks with just lighter variants of grey drybrushing as I wanted the terrain pieces to be used in a variety of landscapes.
For paint, rather than using the standard tiny expensive pots of miniature paint I used tubes of inexpensive craft acrylic I got from Hobbycraft a year or so ago.
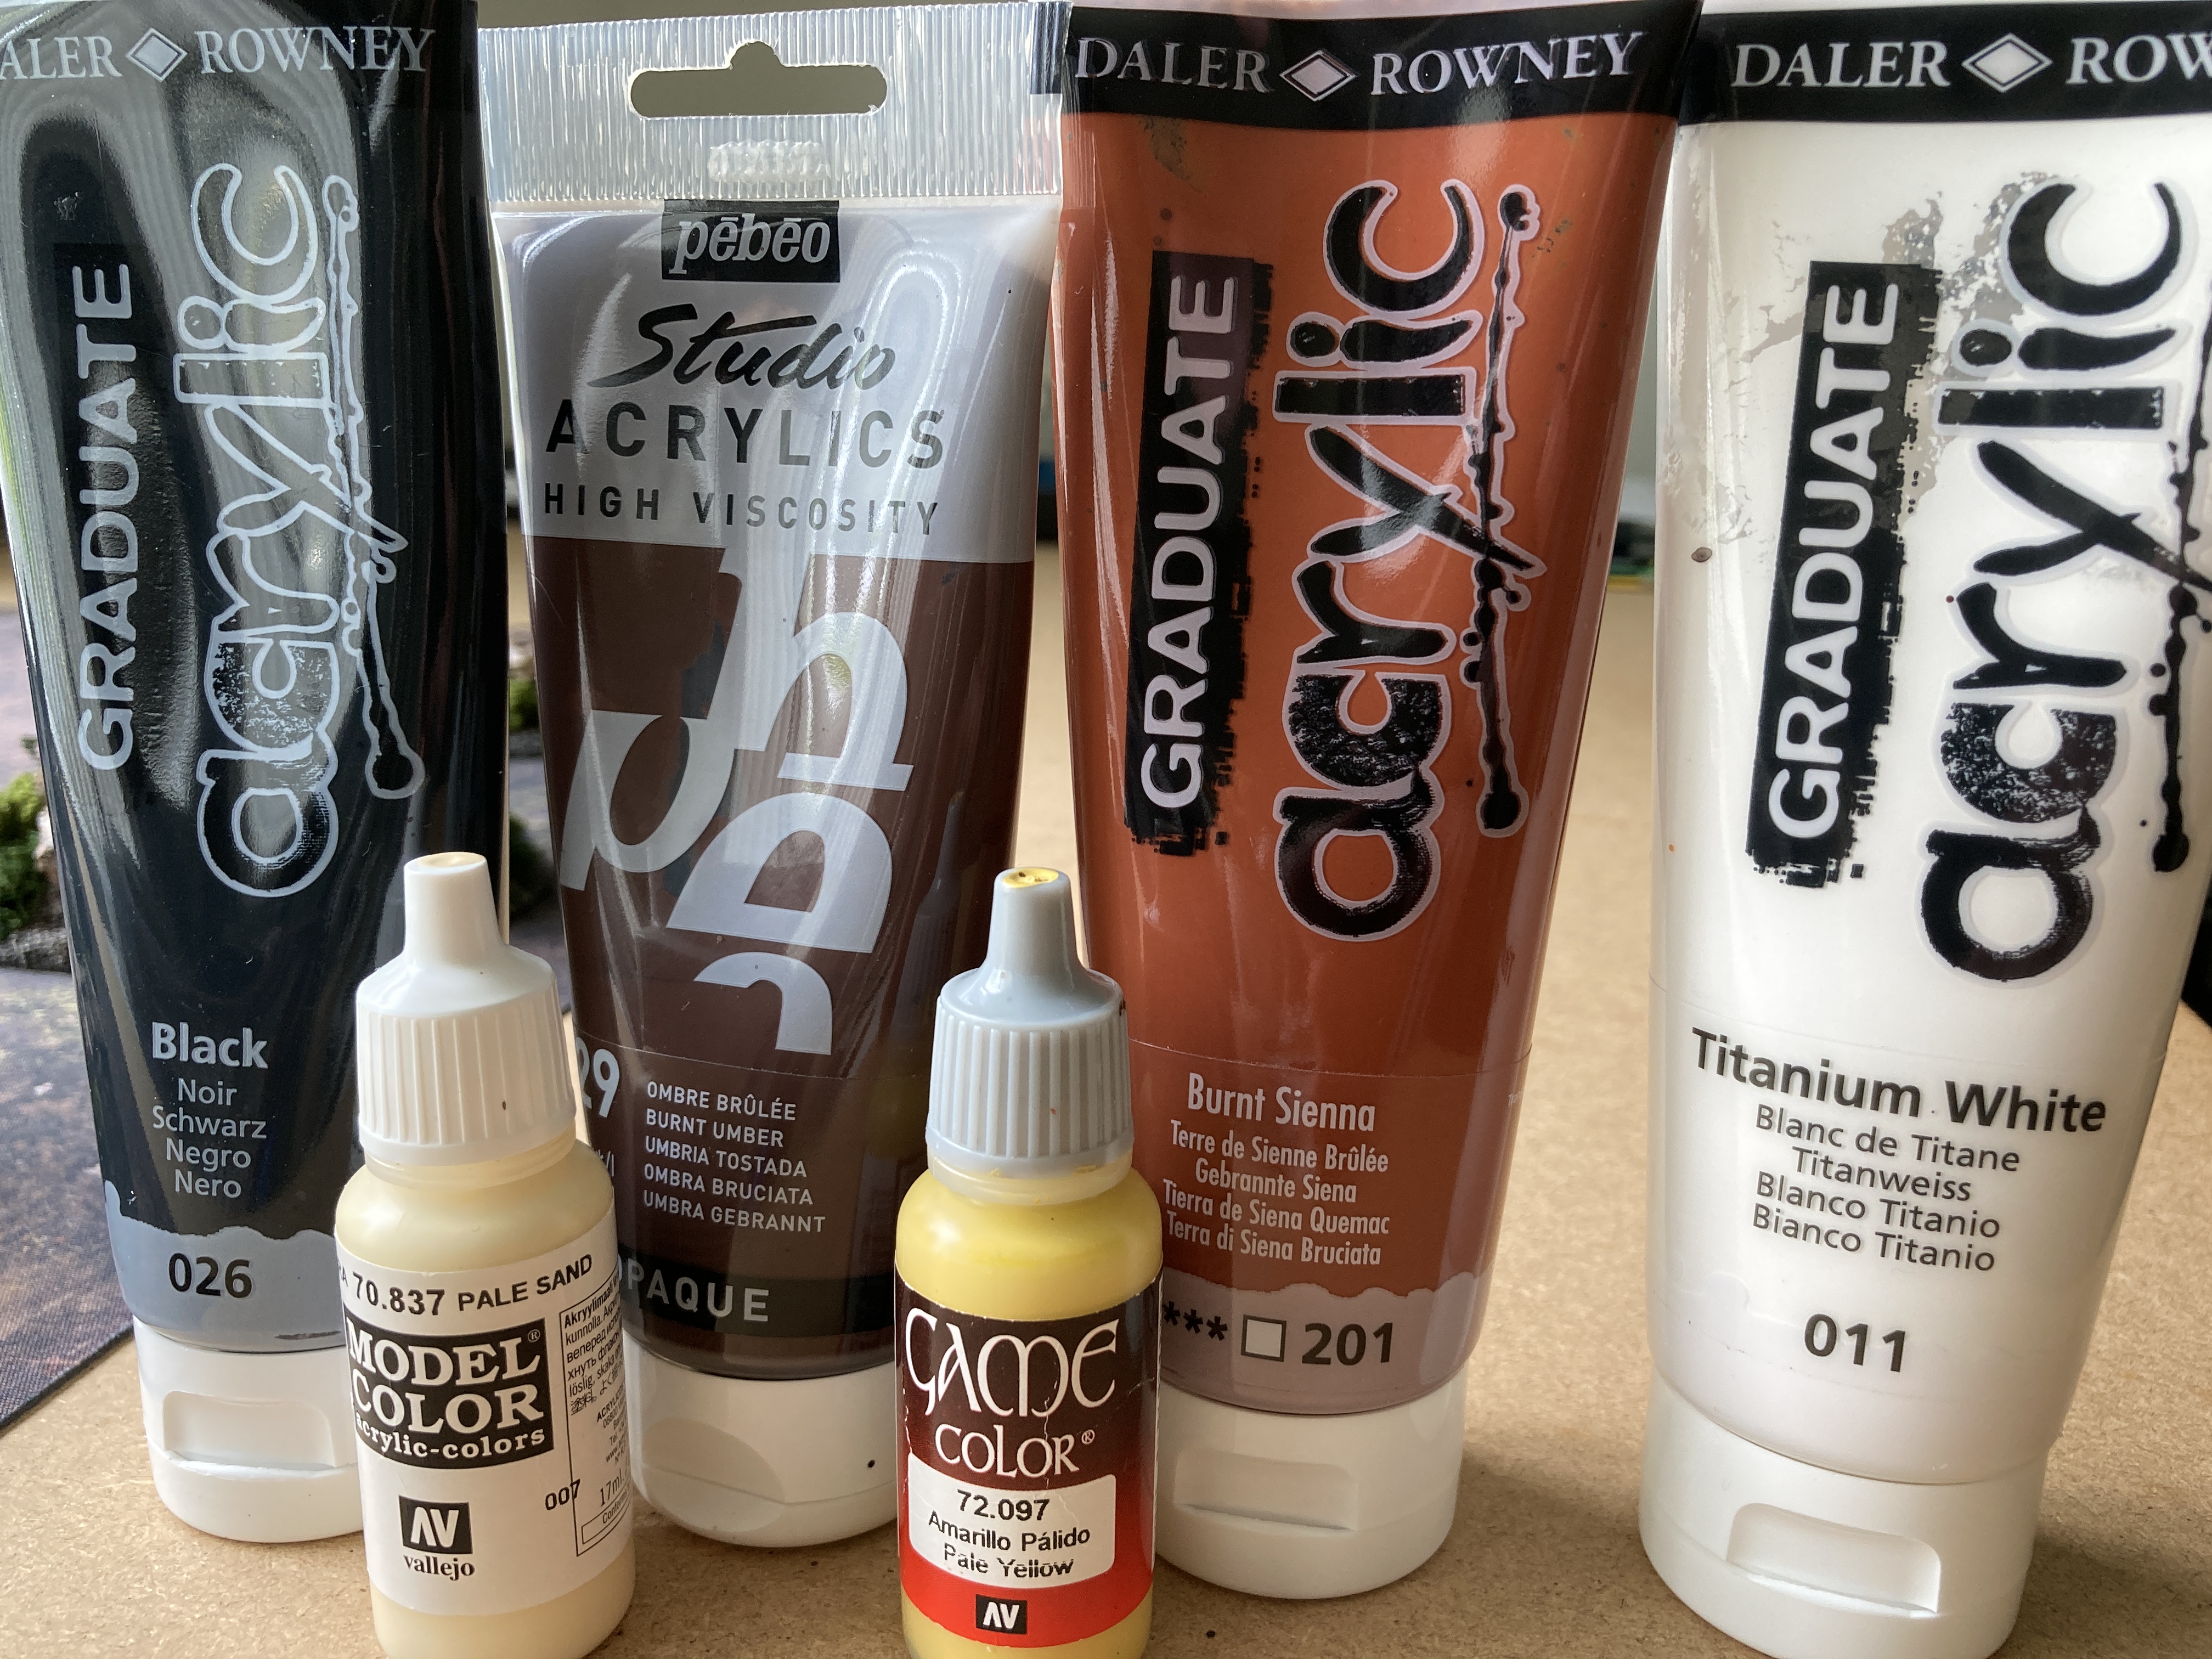
Ok I lied in that I used some miniature paints, but only a small quantity. The two colours have been added to my list for the next time I go shopping for hobby materials.
I don’t have any pics of the process during the painting as I got carried away and forgot.
To start with I covered the whole terrain with a watered down Burnt Umber (the dark brown), with a little washing up liquid added to improve the flow, allowing the paint to seep into the nooks and crannies. Once this was dry I painted in random patches burnt sienna (the lighter brown), followed by a lighter mix of first burnt umber and white then burnt sienna and white. Finally I did a few patches and dottings with the Vallejo pale yellow.
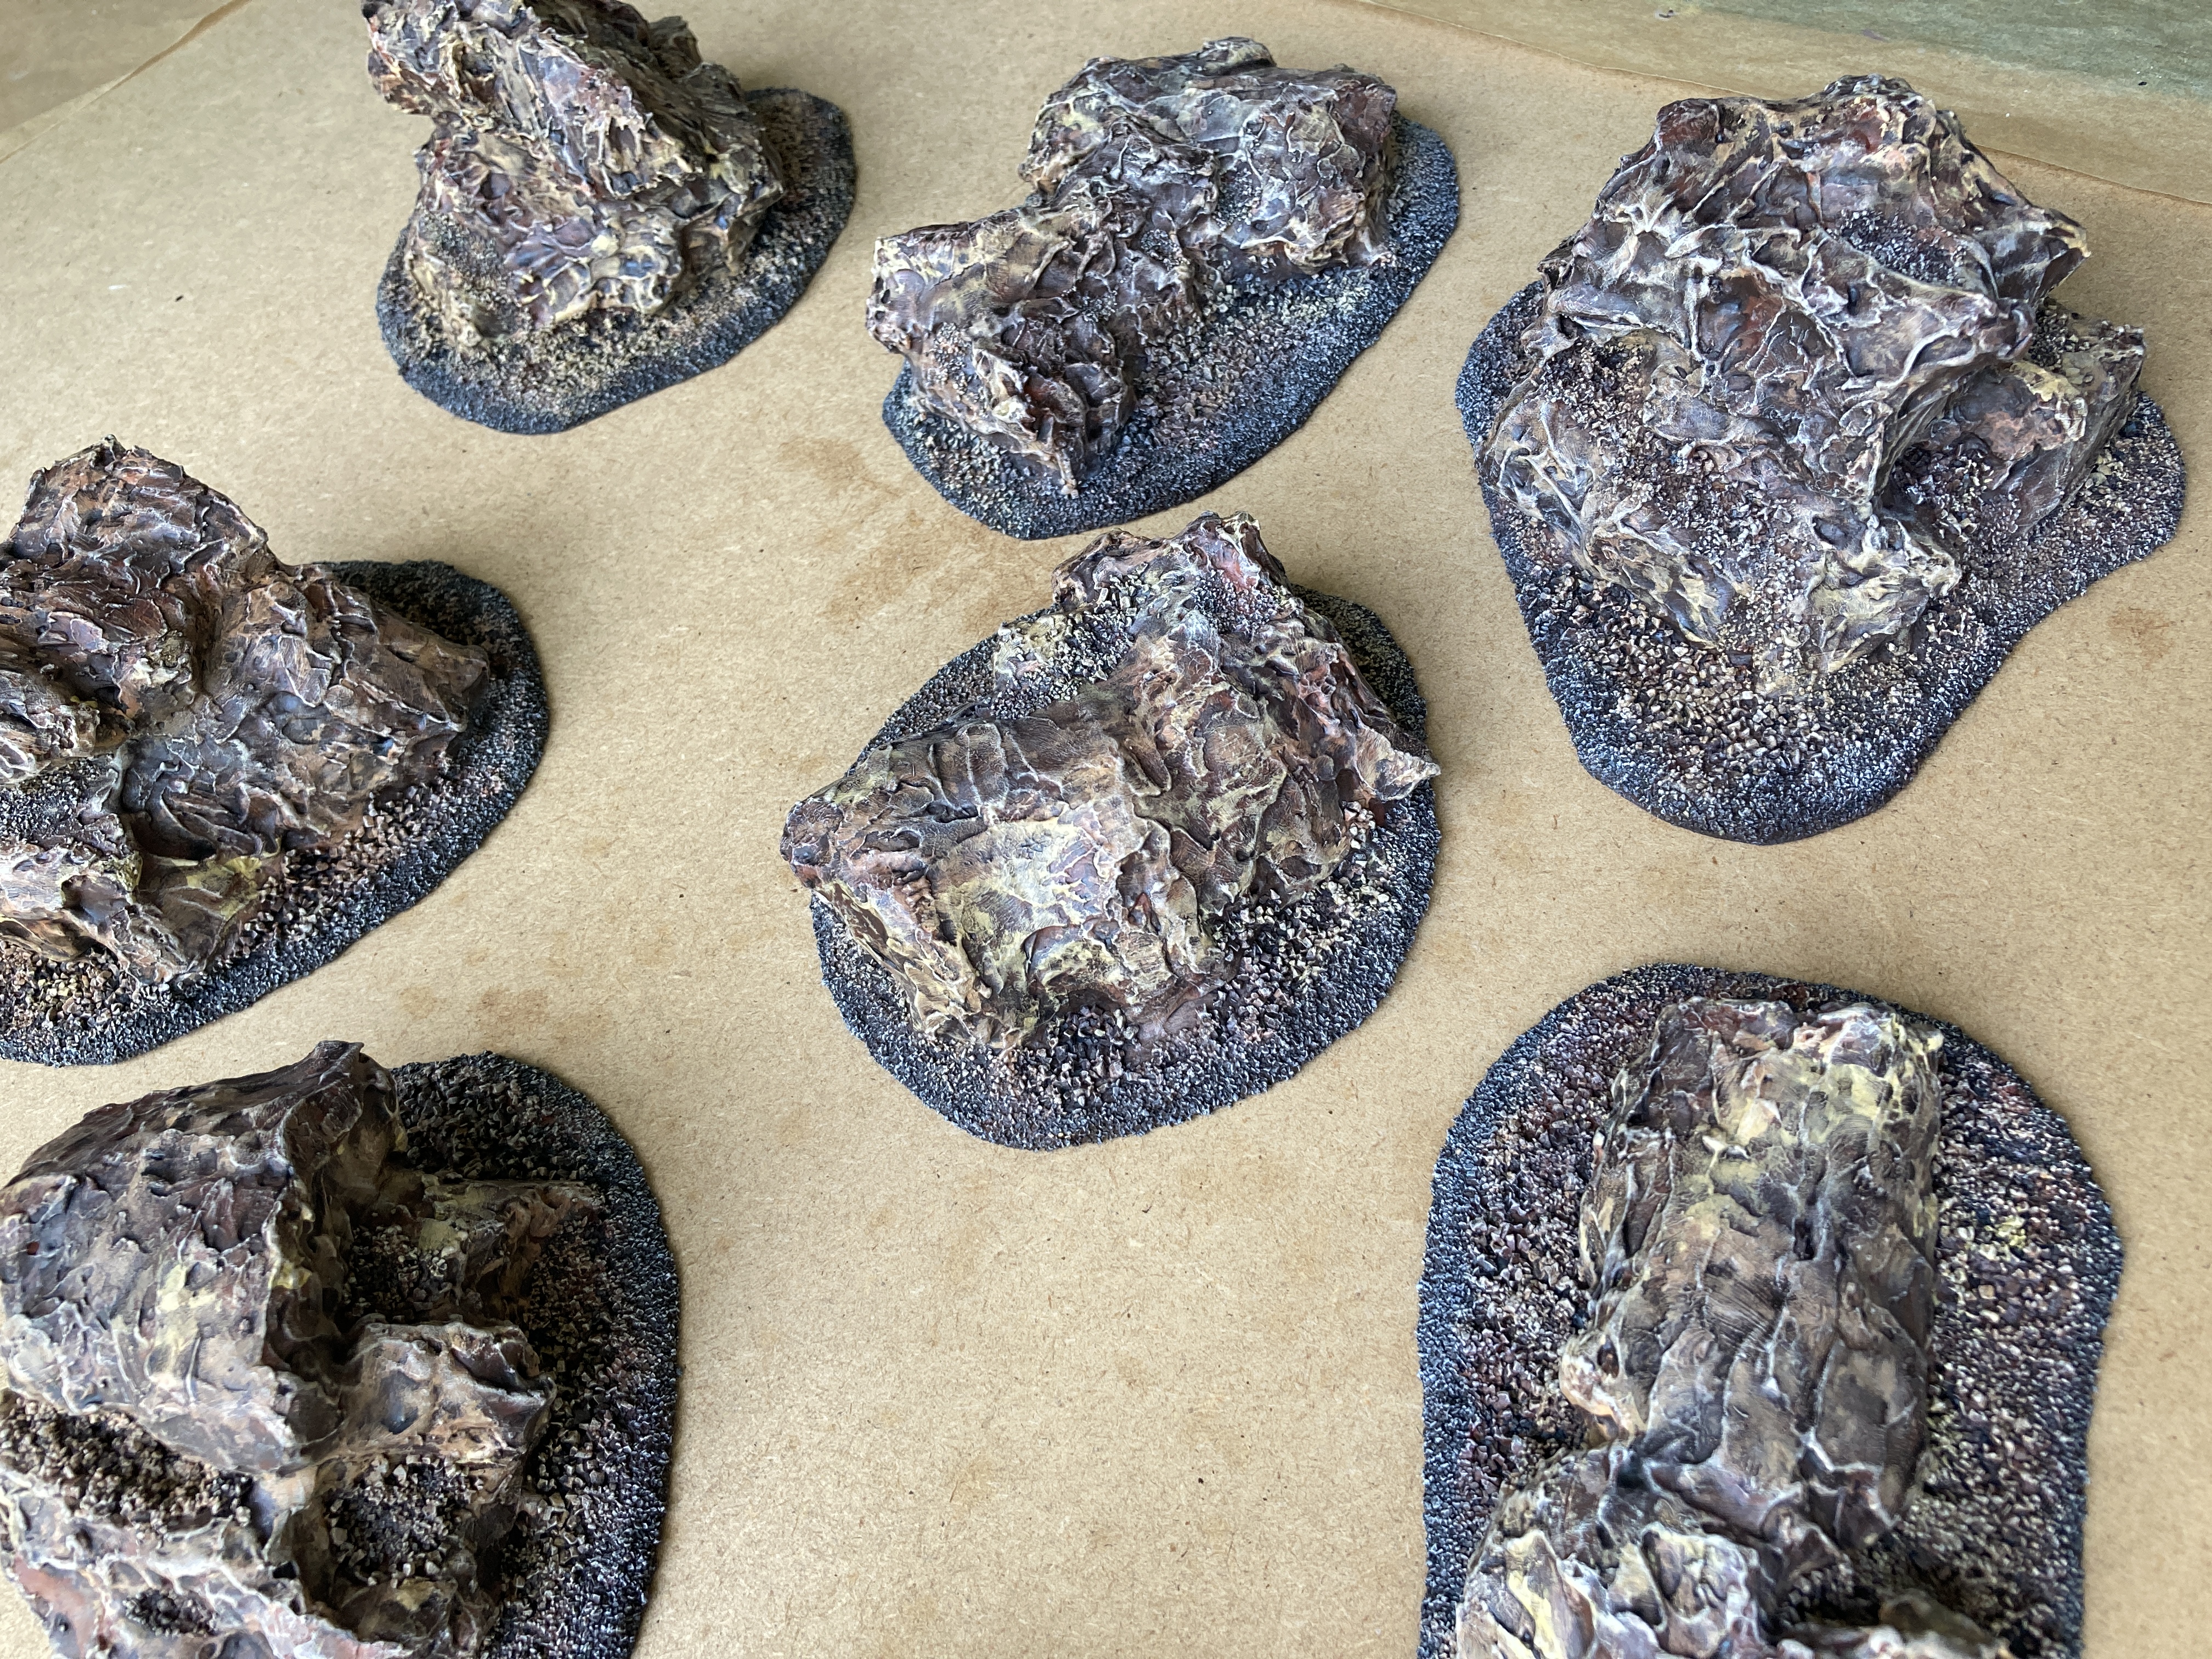
The whole lot was drybrushed with pale sand, just to bring out the texture.
Finally I made a wash of black and burnt umber, plenty of water and washing up liquid which covered the whole terrain pieces.
Here’s what I ended up with.

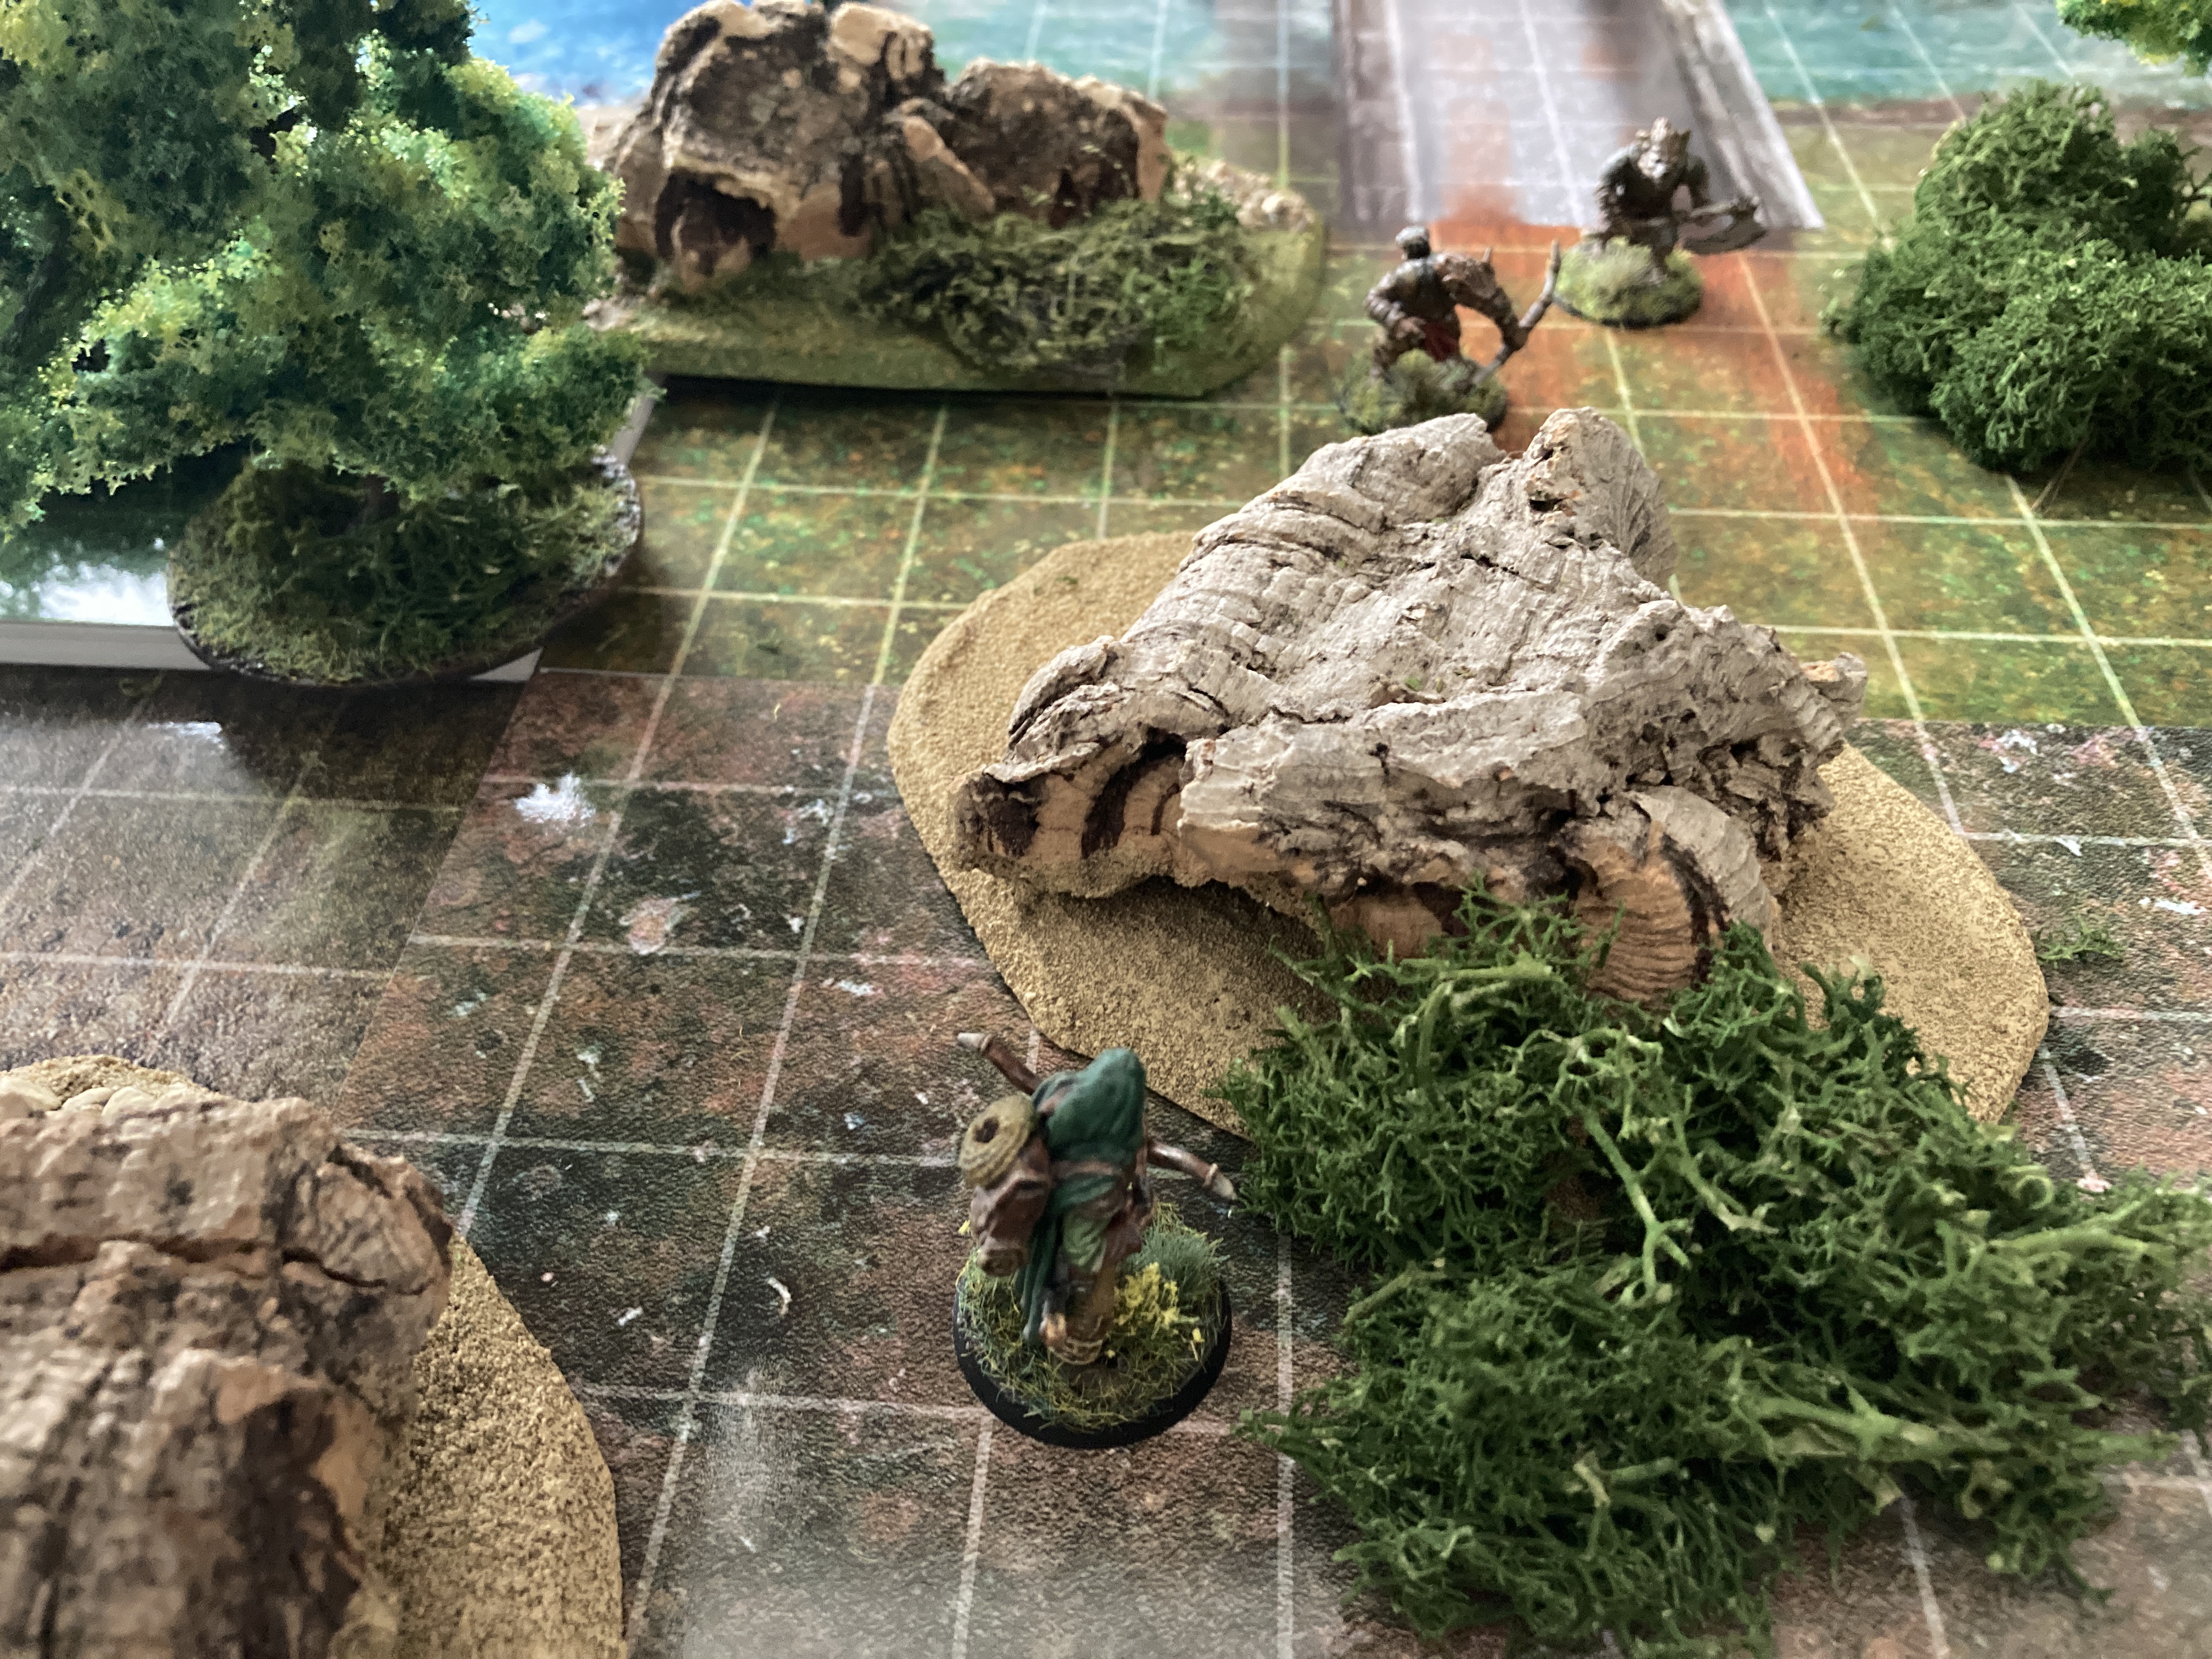
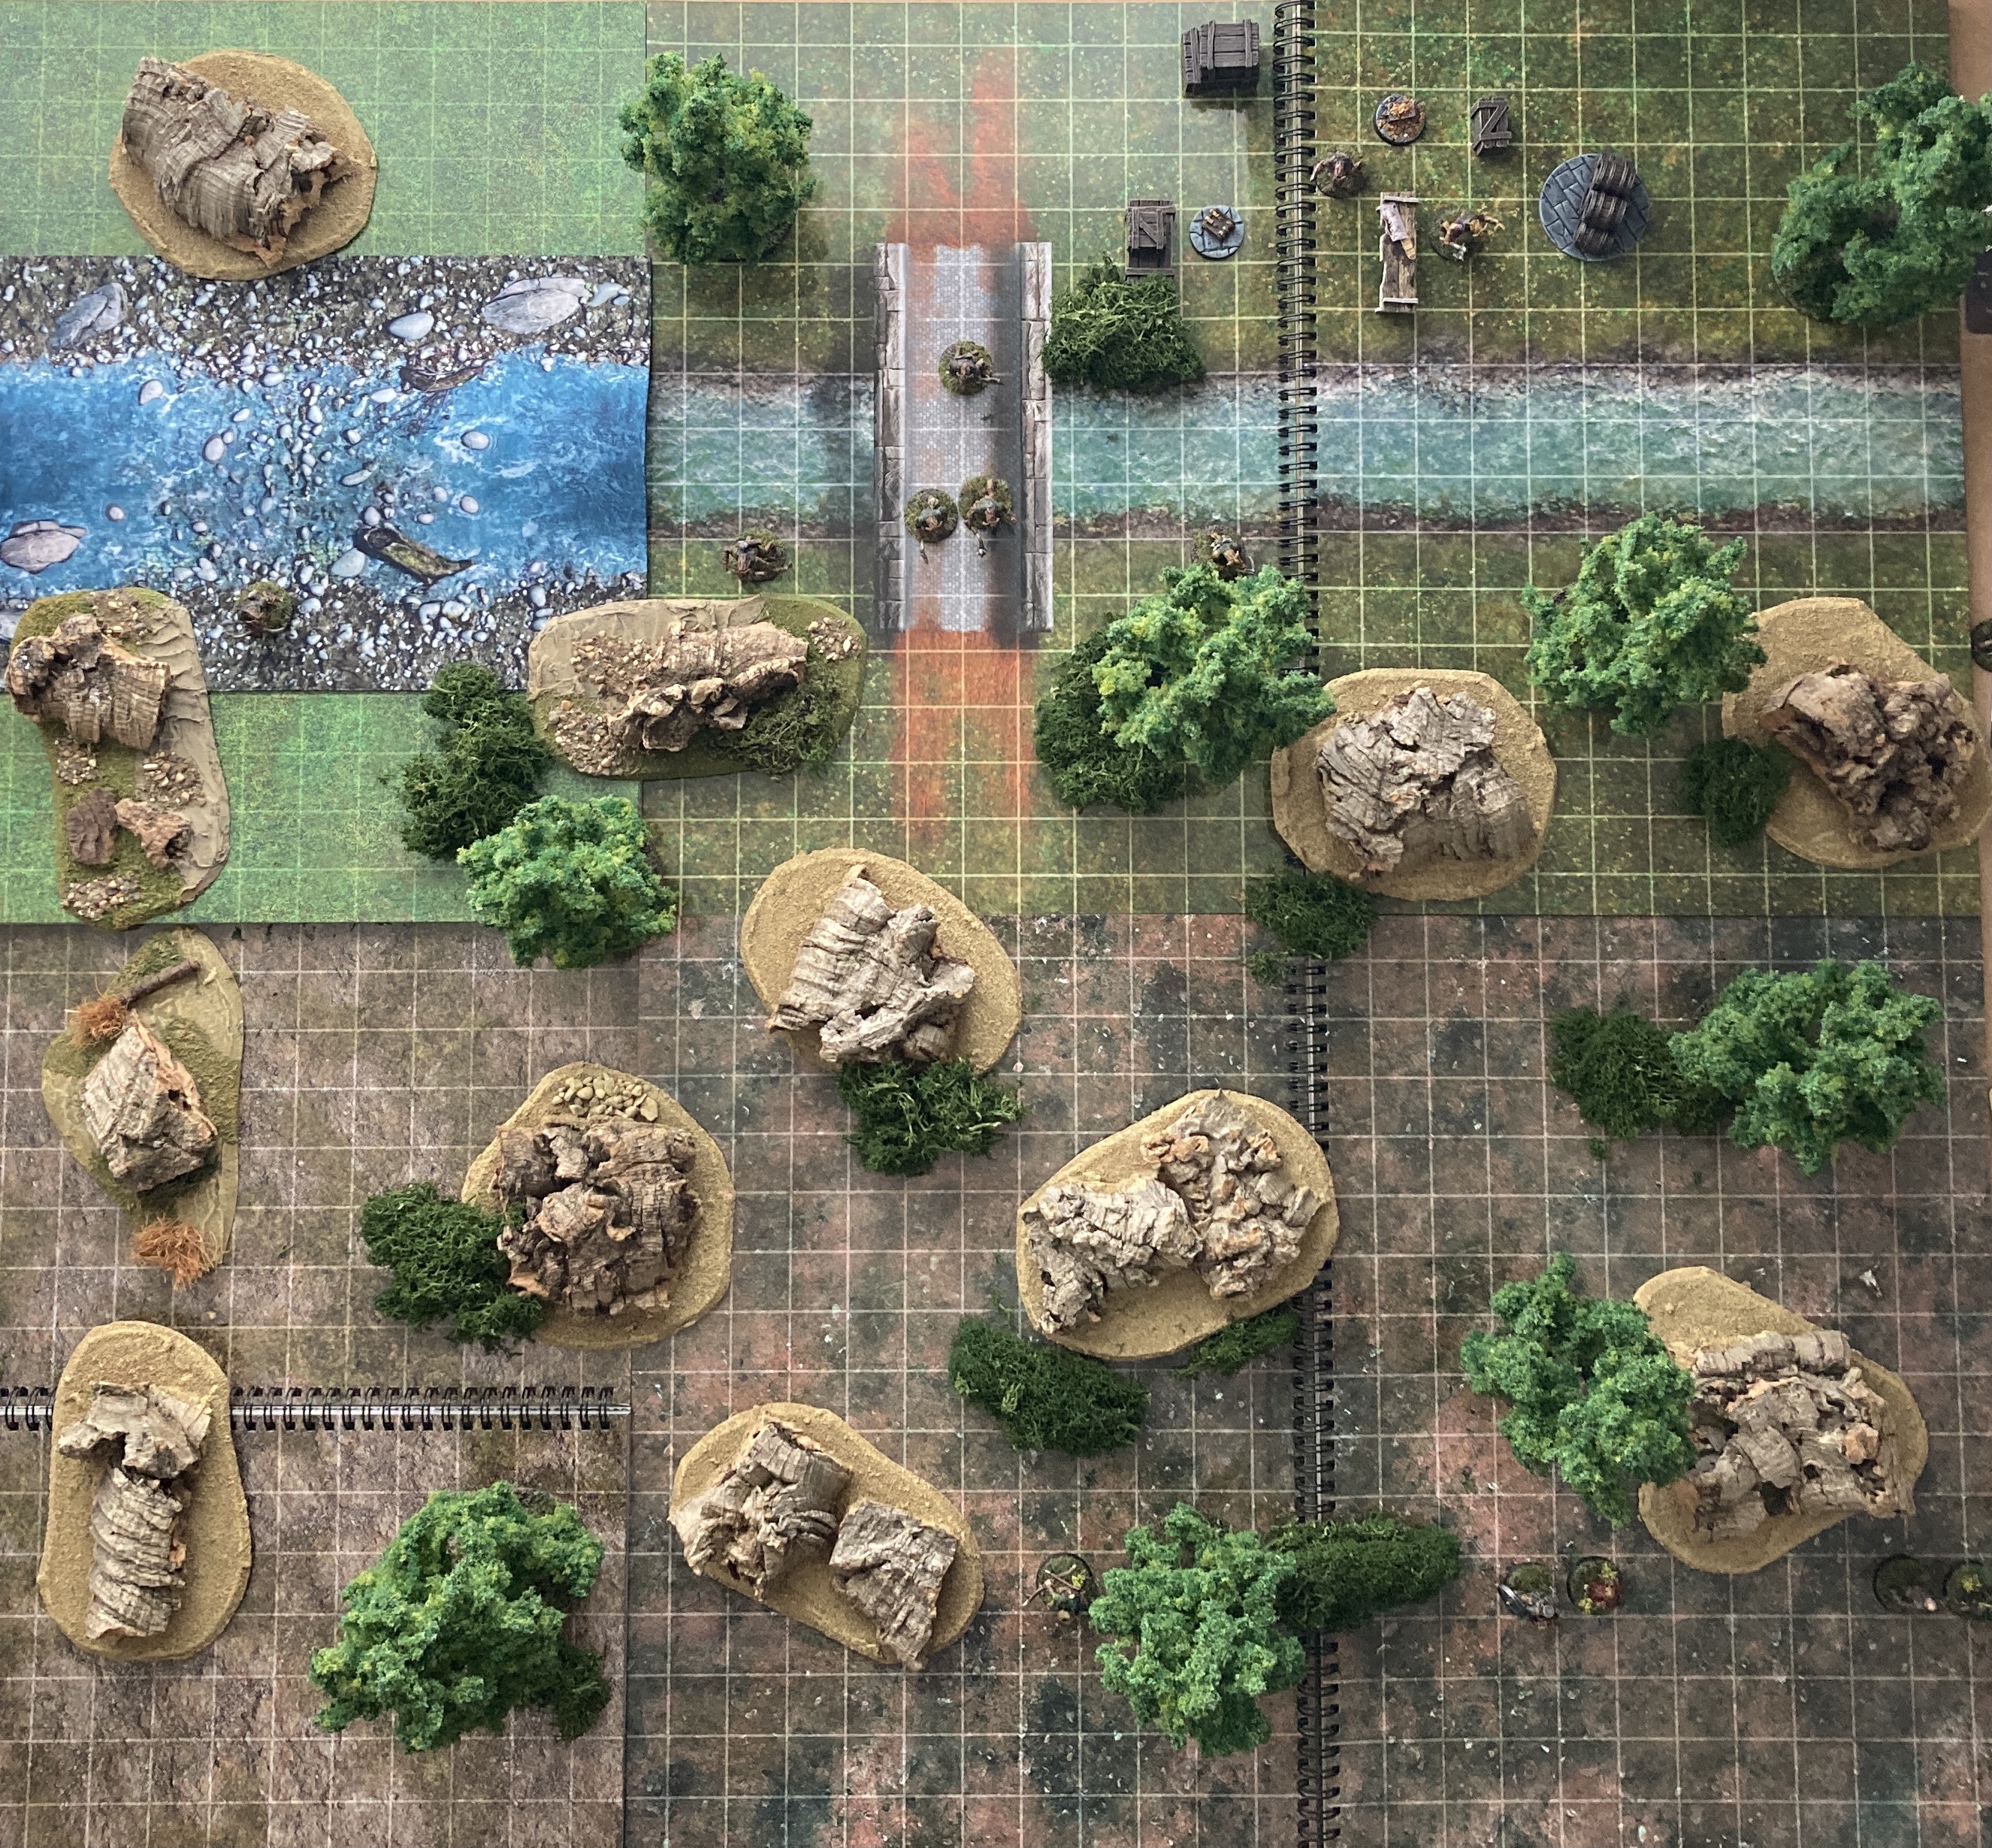
I was pretty happy with the result so next up I added some foliage and after sealing with watered down pva glue and yet more washing up liquid as a flow aid this is what the finished terrain pieces look like.

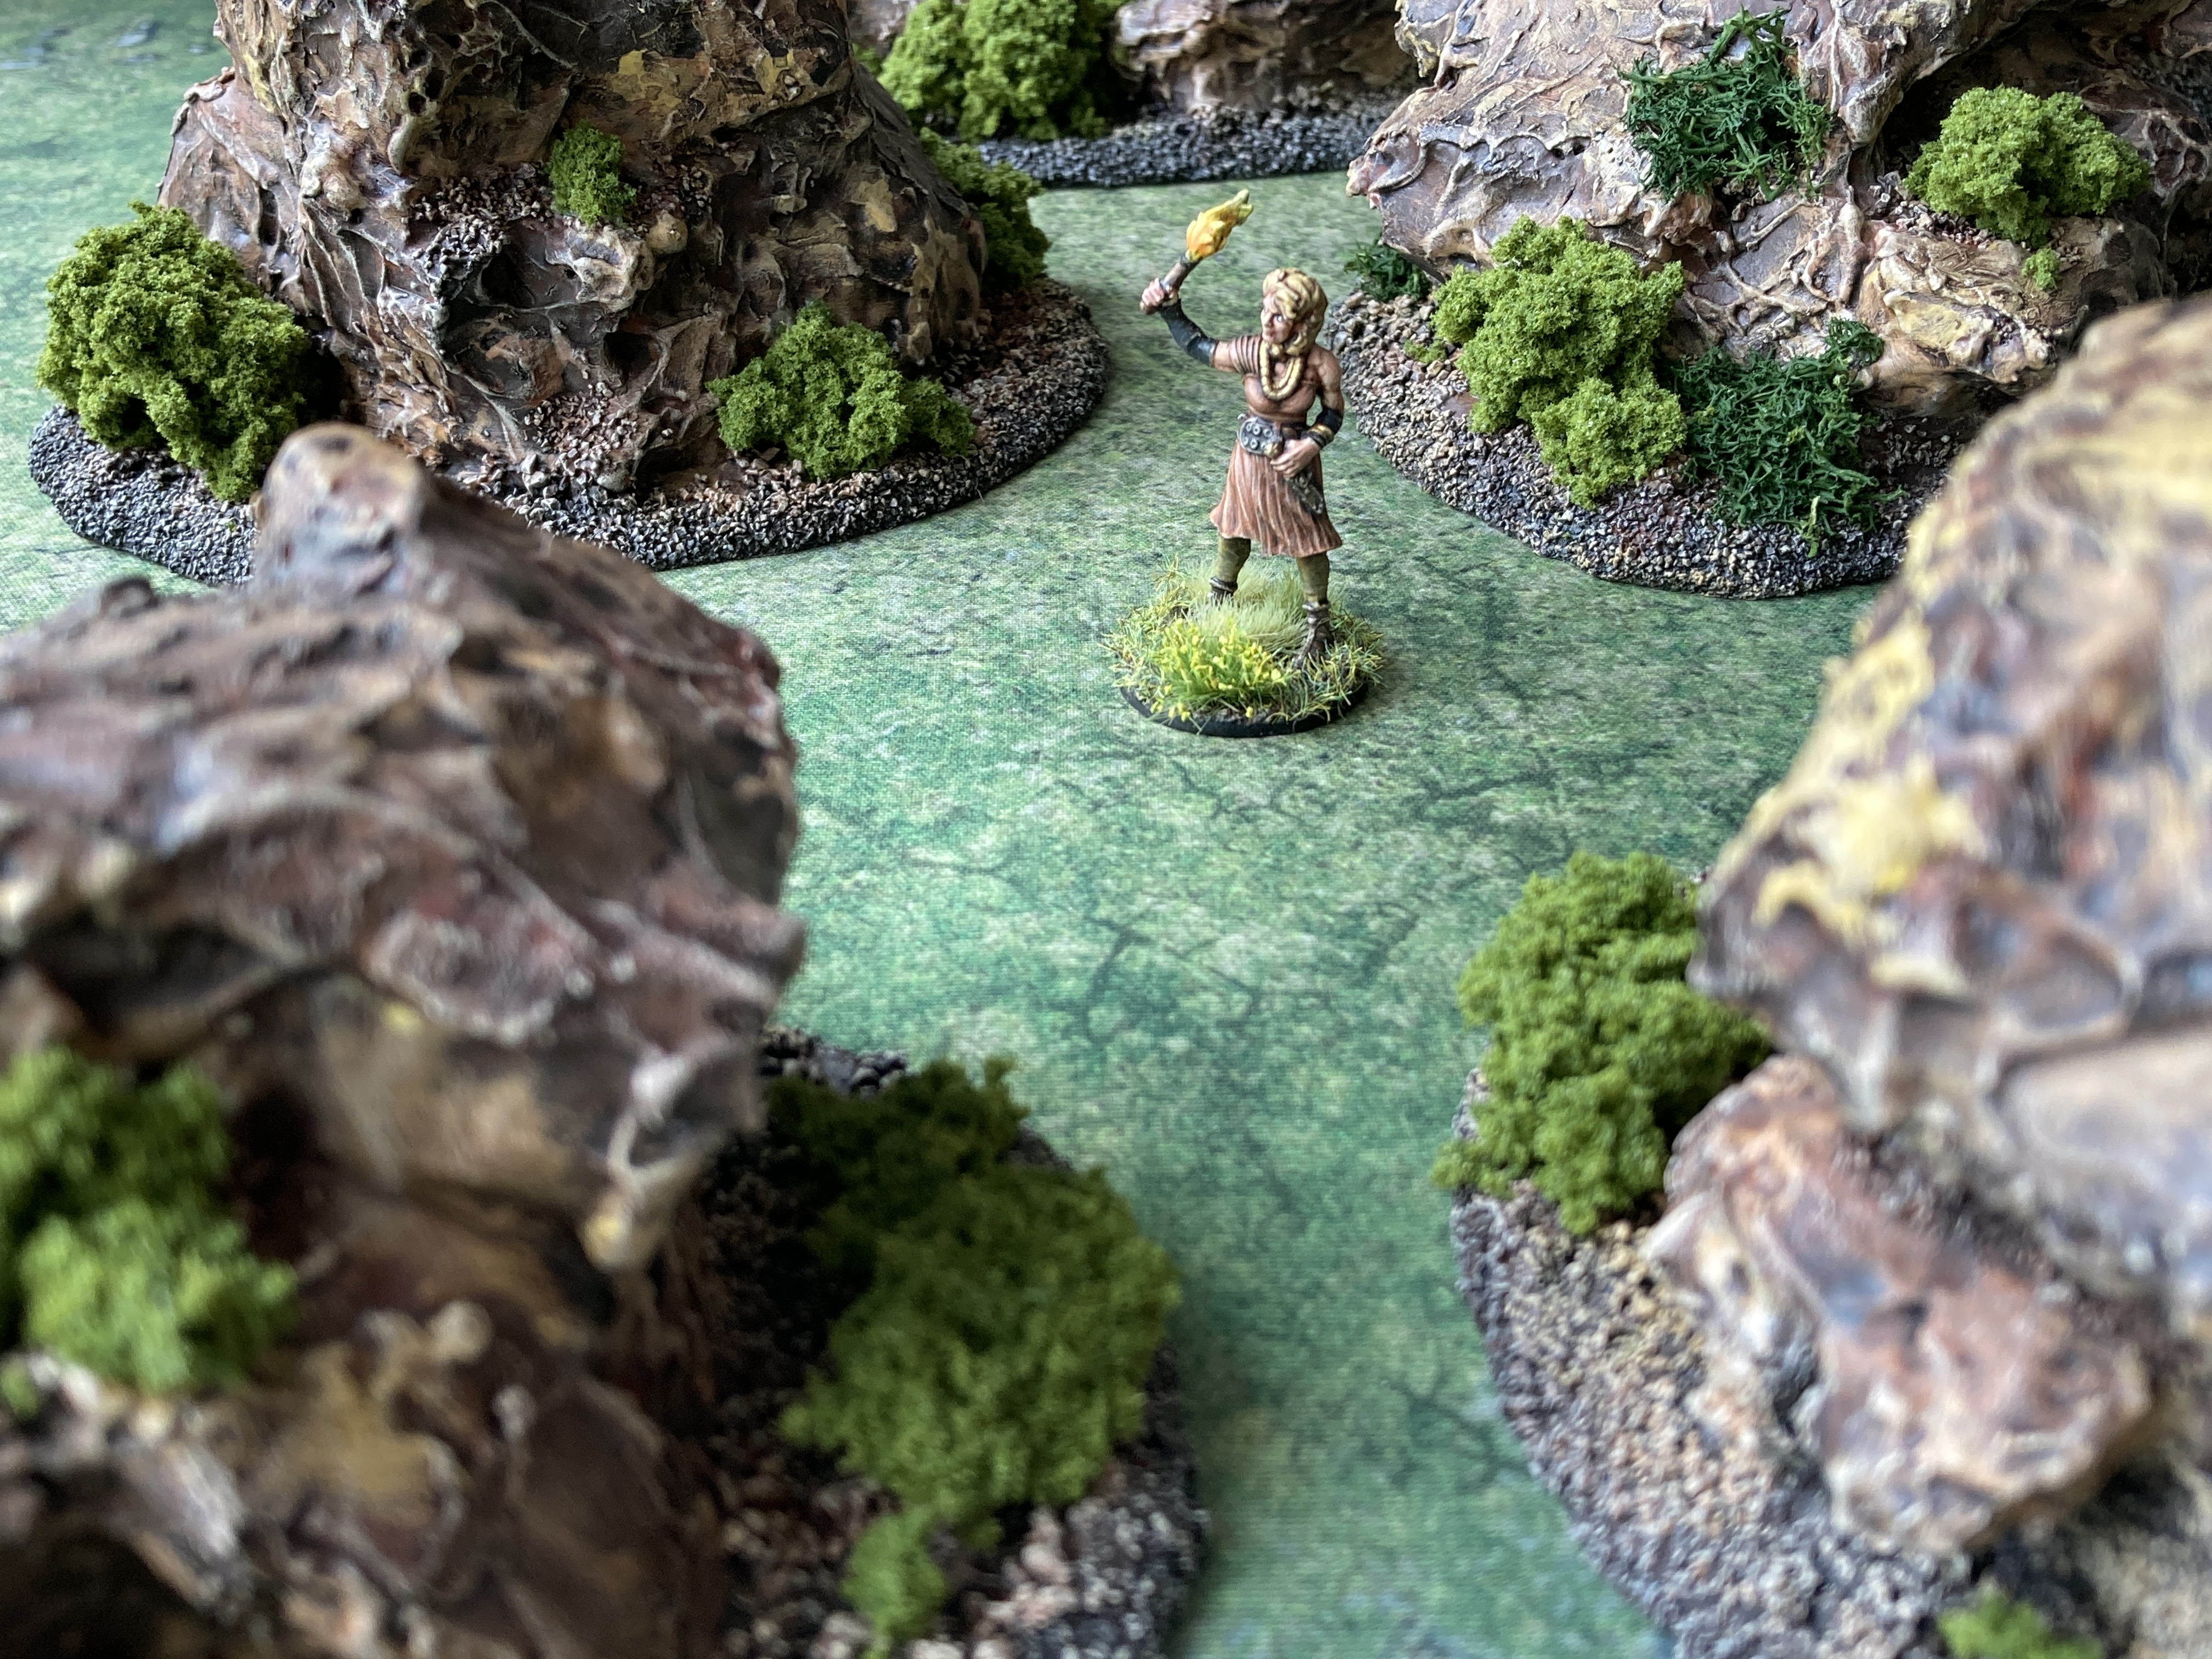
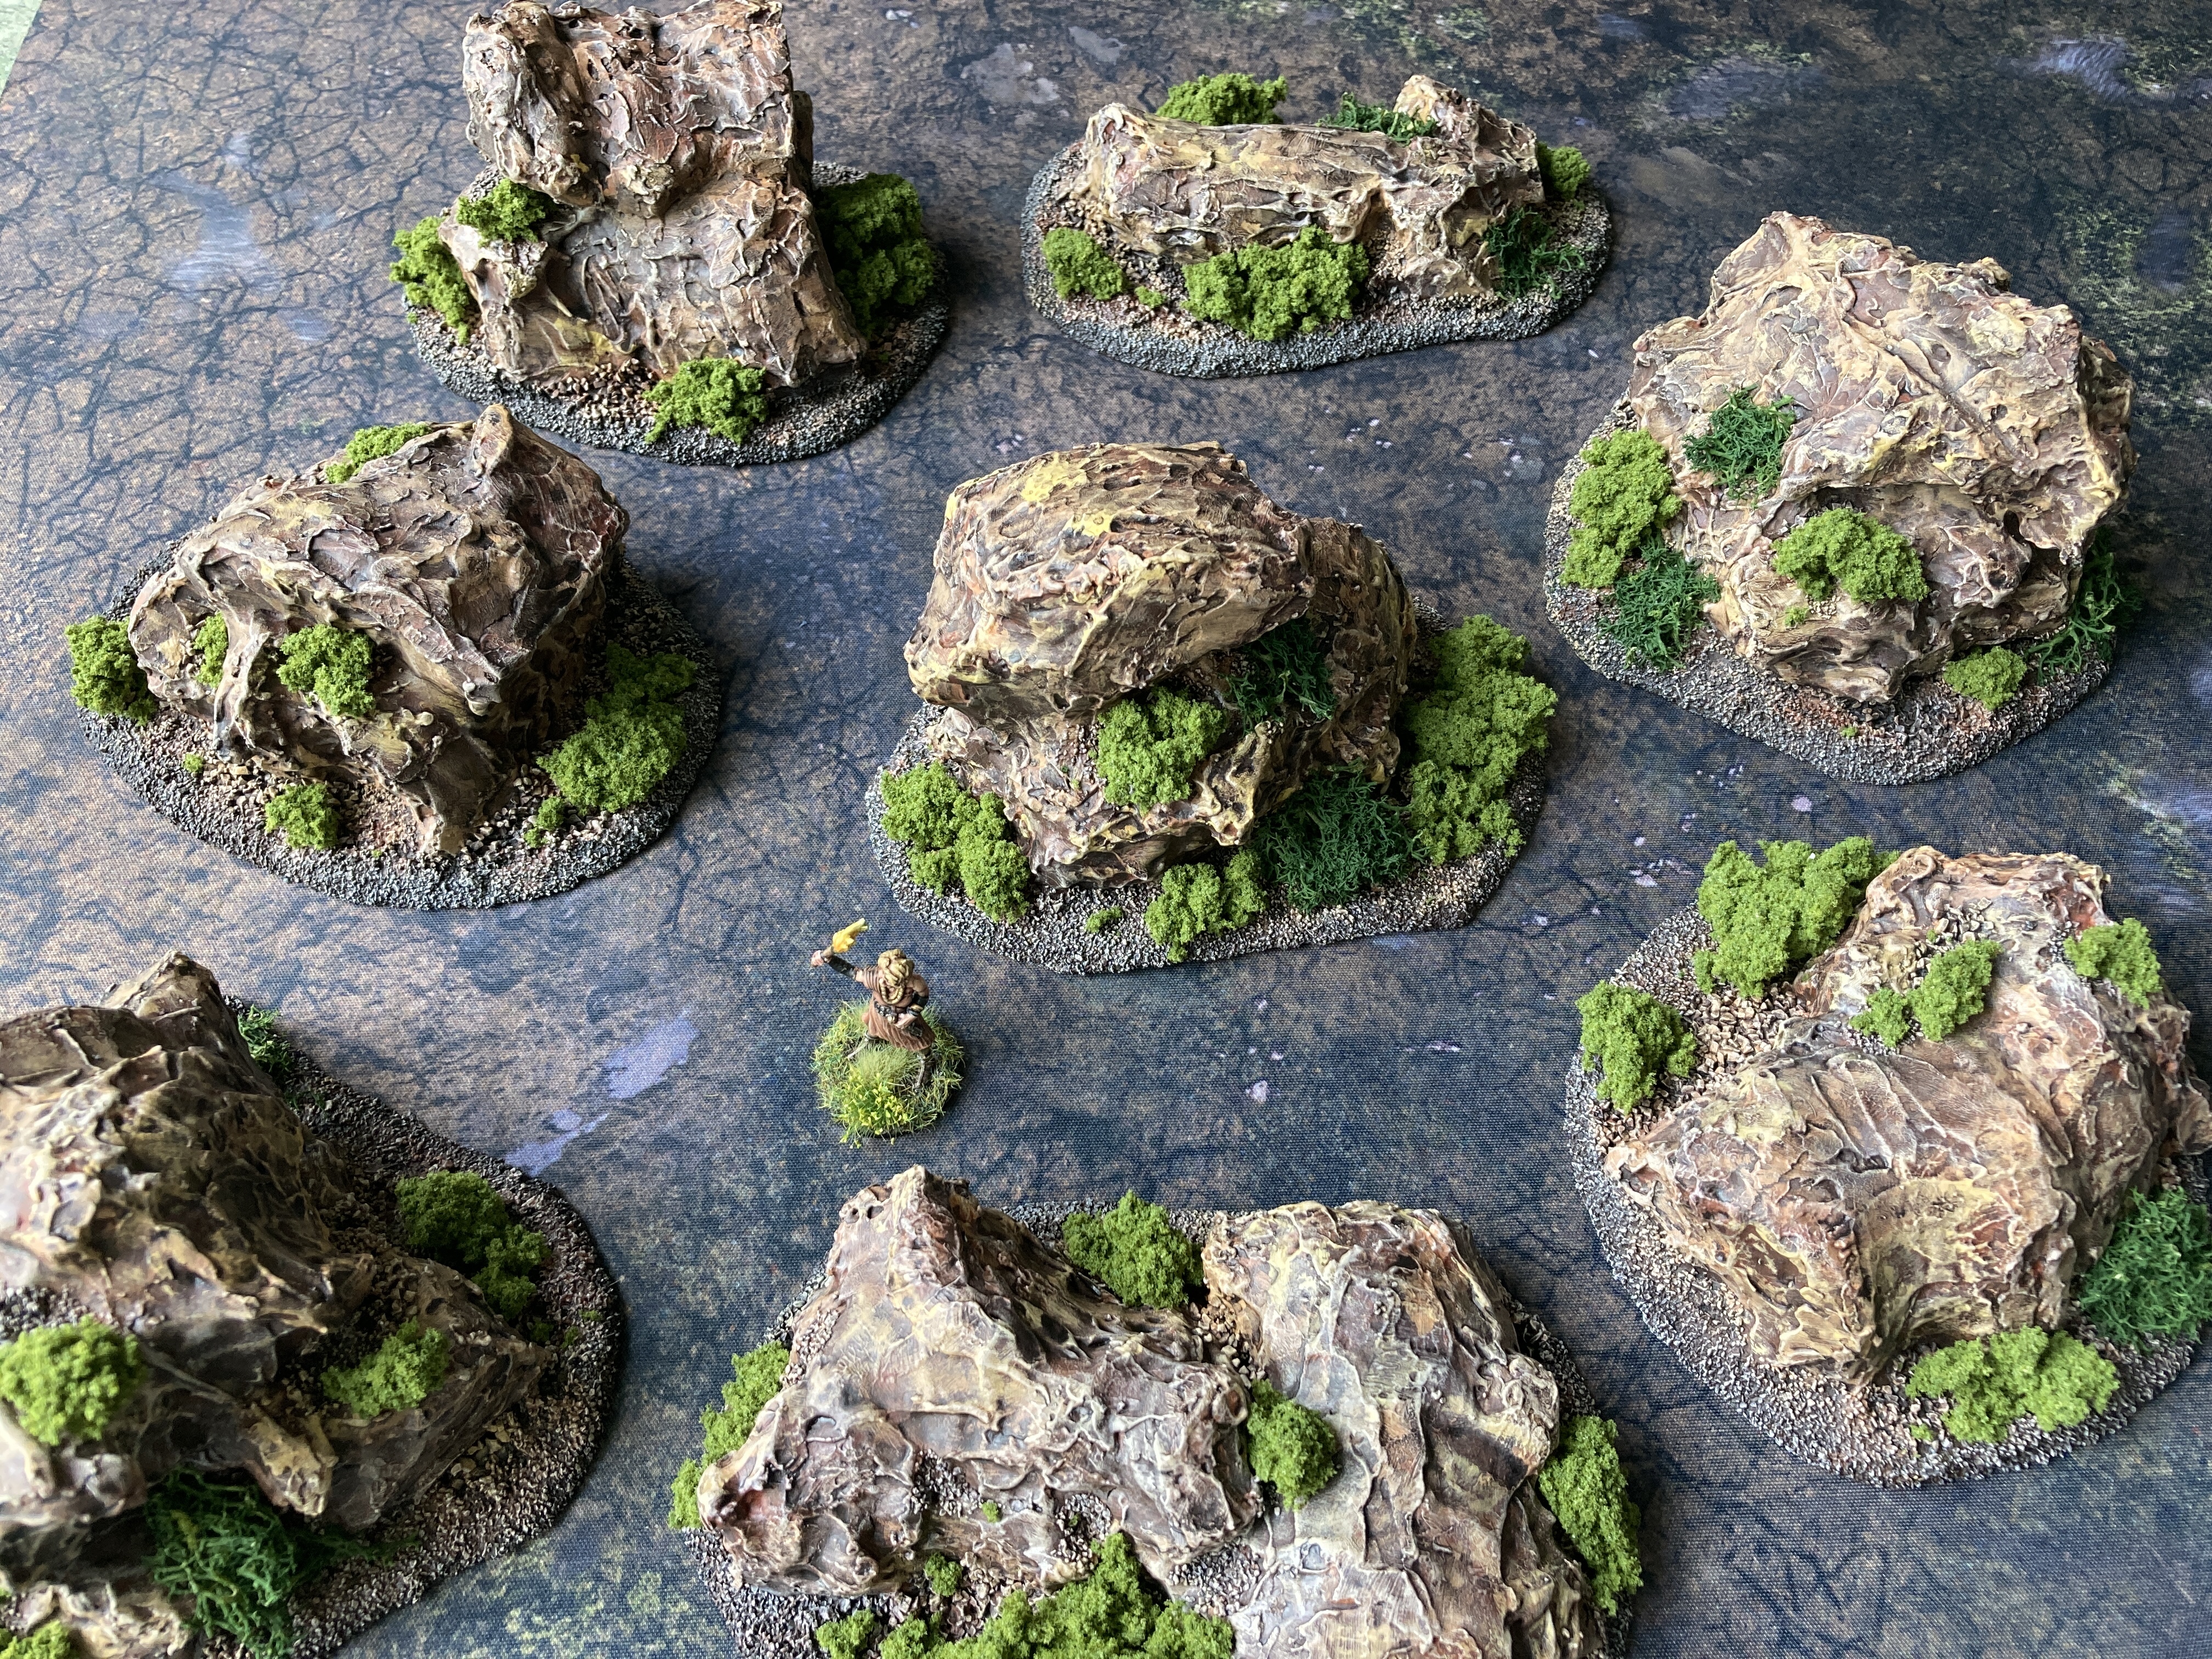
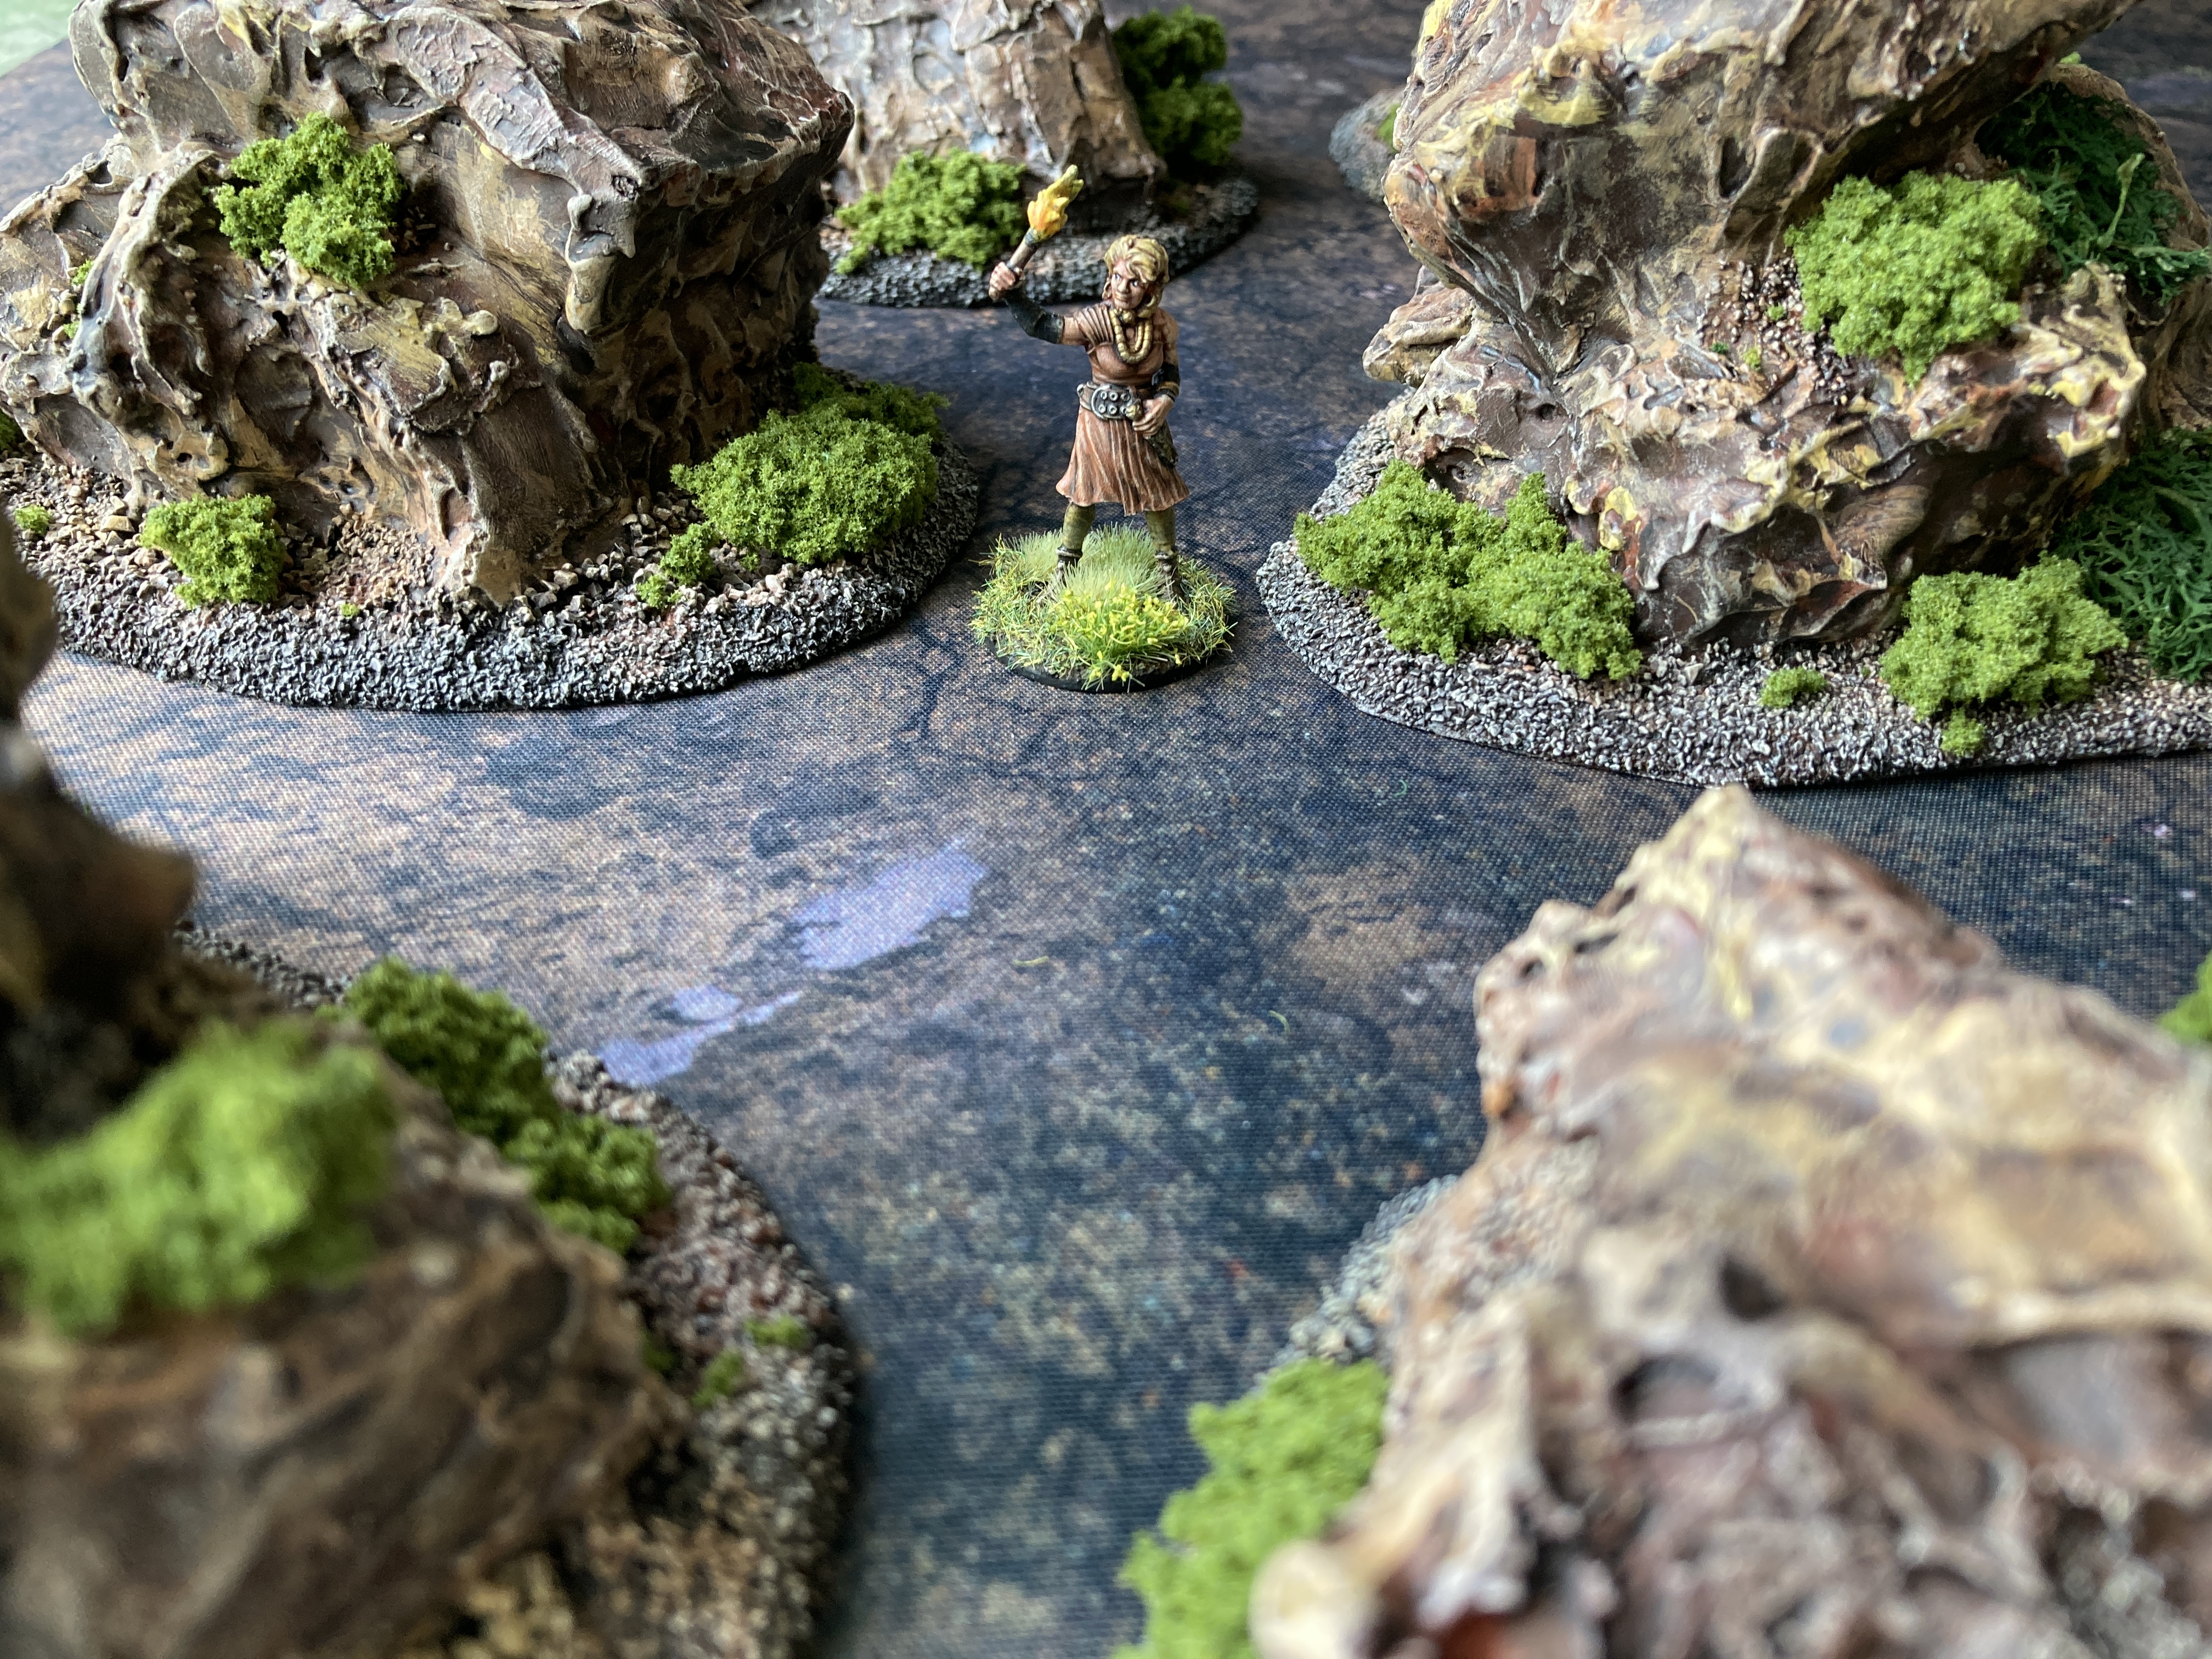
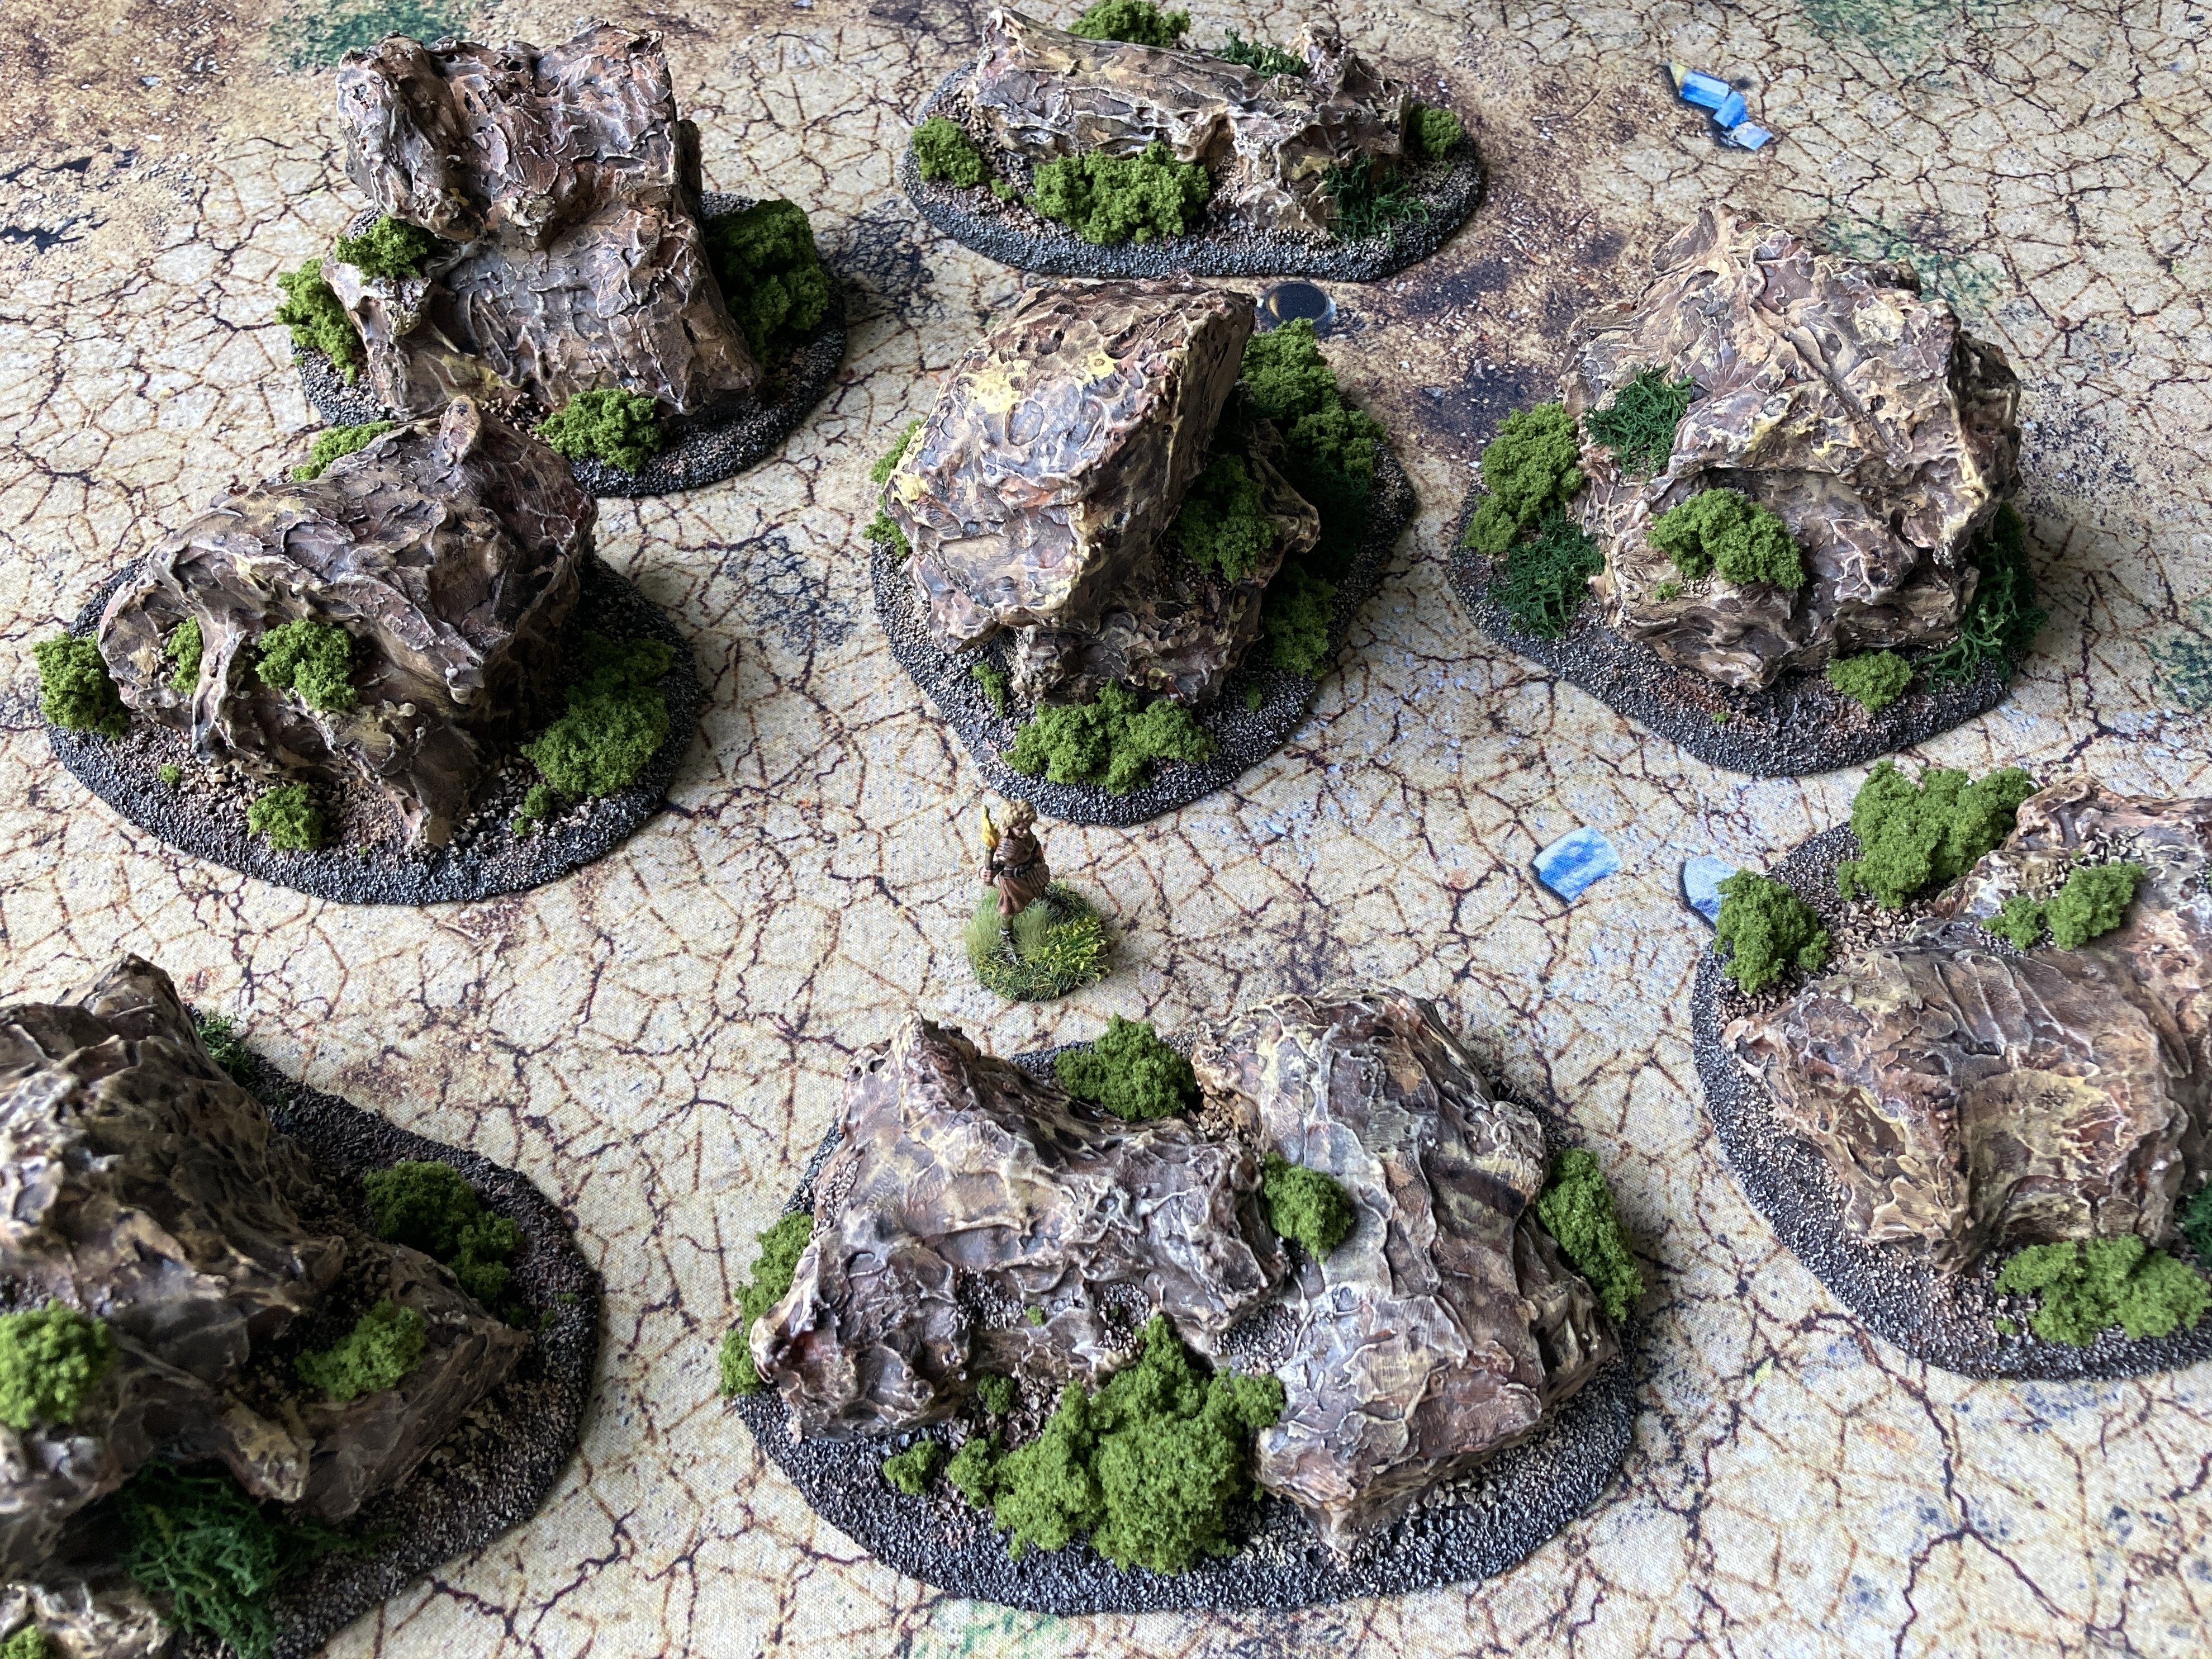
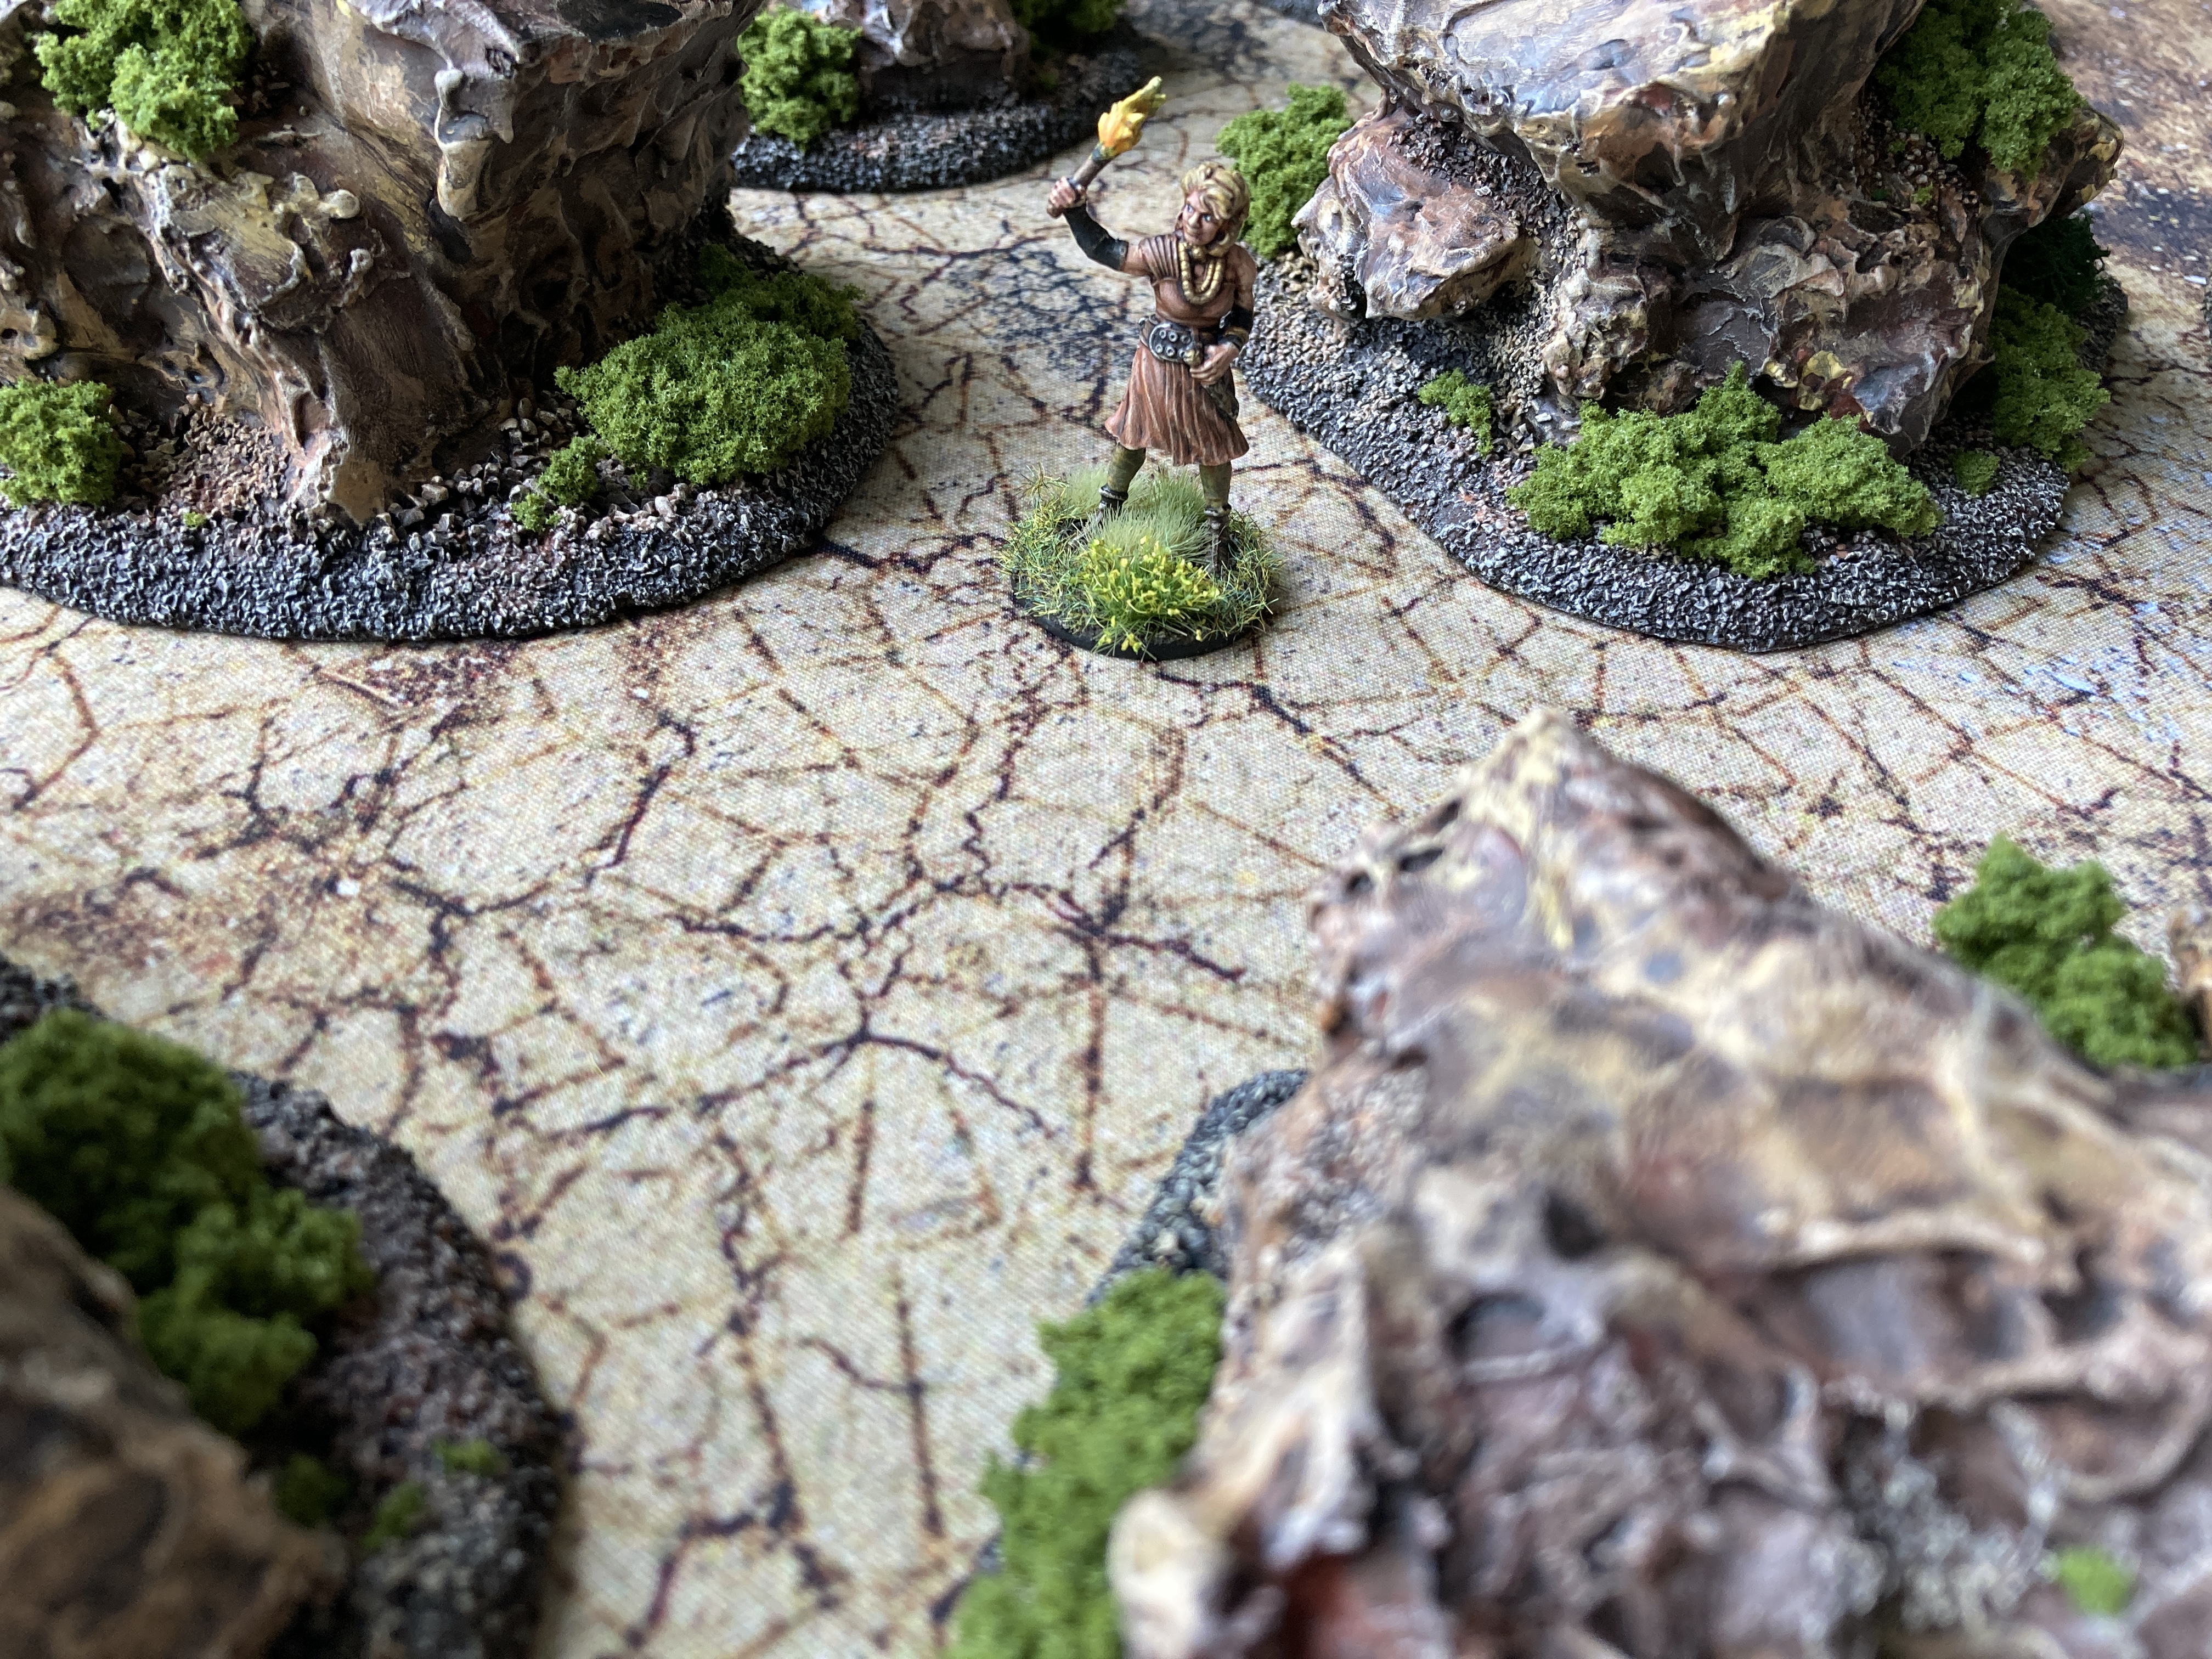
I thought I’d show the rocks on different mats to see how well they fit with different tables. I’m pretty happy and confident that they’ll work well in a large variety of games.
I did think about adding more foliage and static grass but I think I prefer the more stony bases.
I’m calling this project complete. I set out to improve my old collection of rock terrain and I think I achieved that. I’m looking forward to getting some games in with these new rocks.


