


![Very Cool! Make Your Own Star Wars: Legion Imperial Agent & Officer | Review [7 Days Early Access]](https://images.beastsofwar.com/2025/12/Star-Wars-Imperial-Agent-_-Officer-coverimage-V3-225-127.jpg)


Aeon Trespass: Odyssey (ATO) by Lawnor


Recommendations: 557
About the Project
Aeon Trespass: Odyssey, by Into the Unknown. It's a Kingdom Death-esque board game with a world/map exploration phase. Stuff gets painted, and maybe even played with. KS link: https://www.kickstarter.com/projects/kingdomsforlorn/aeon-trespass-odyssey
Related Game: Aeon Trespass: Odyssey
Related Company: Into The Unknown
Related Genre: Fantasy
Related Contest: Spring Clean Hobby Challenge 2025
This Project is Active
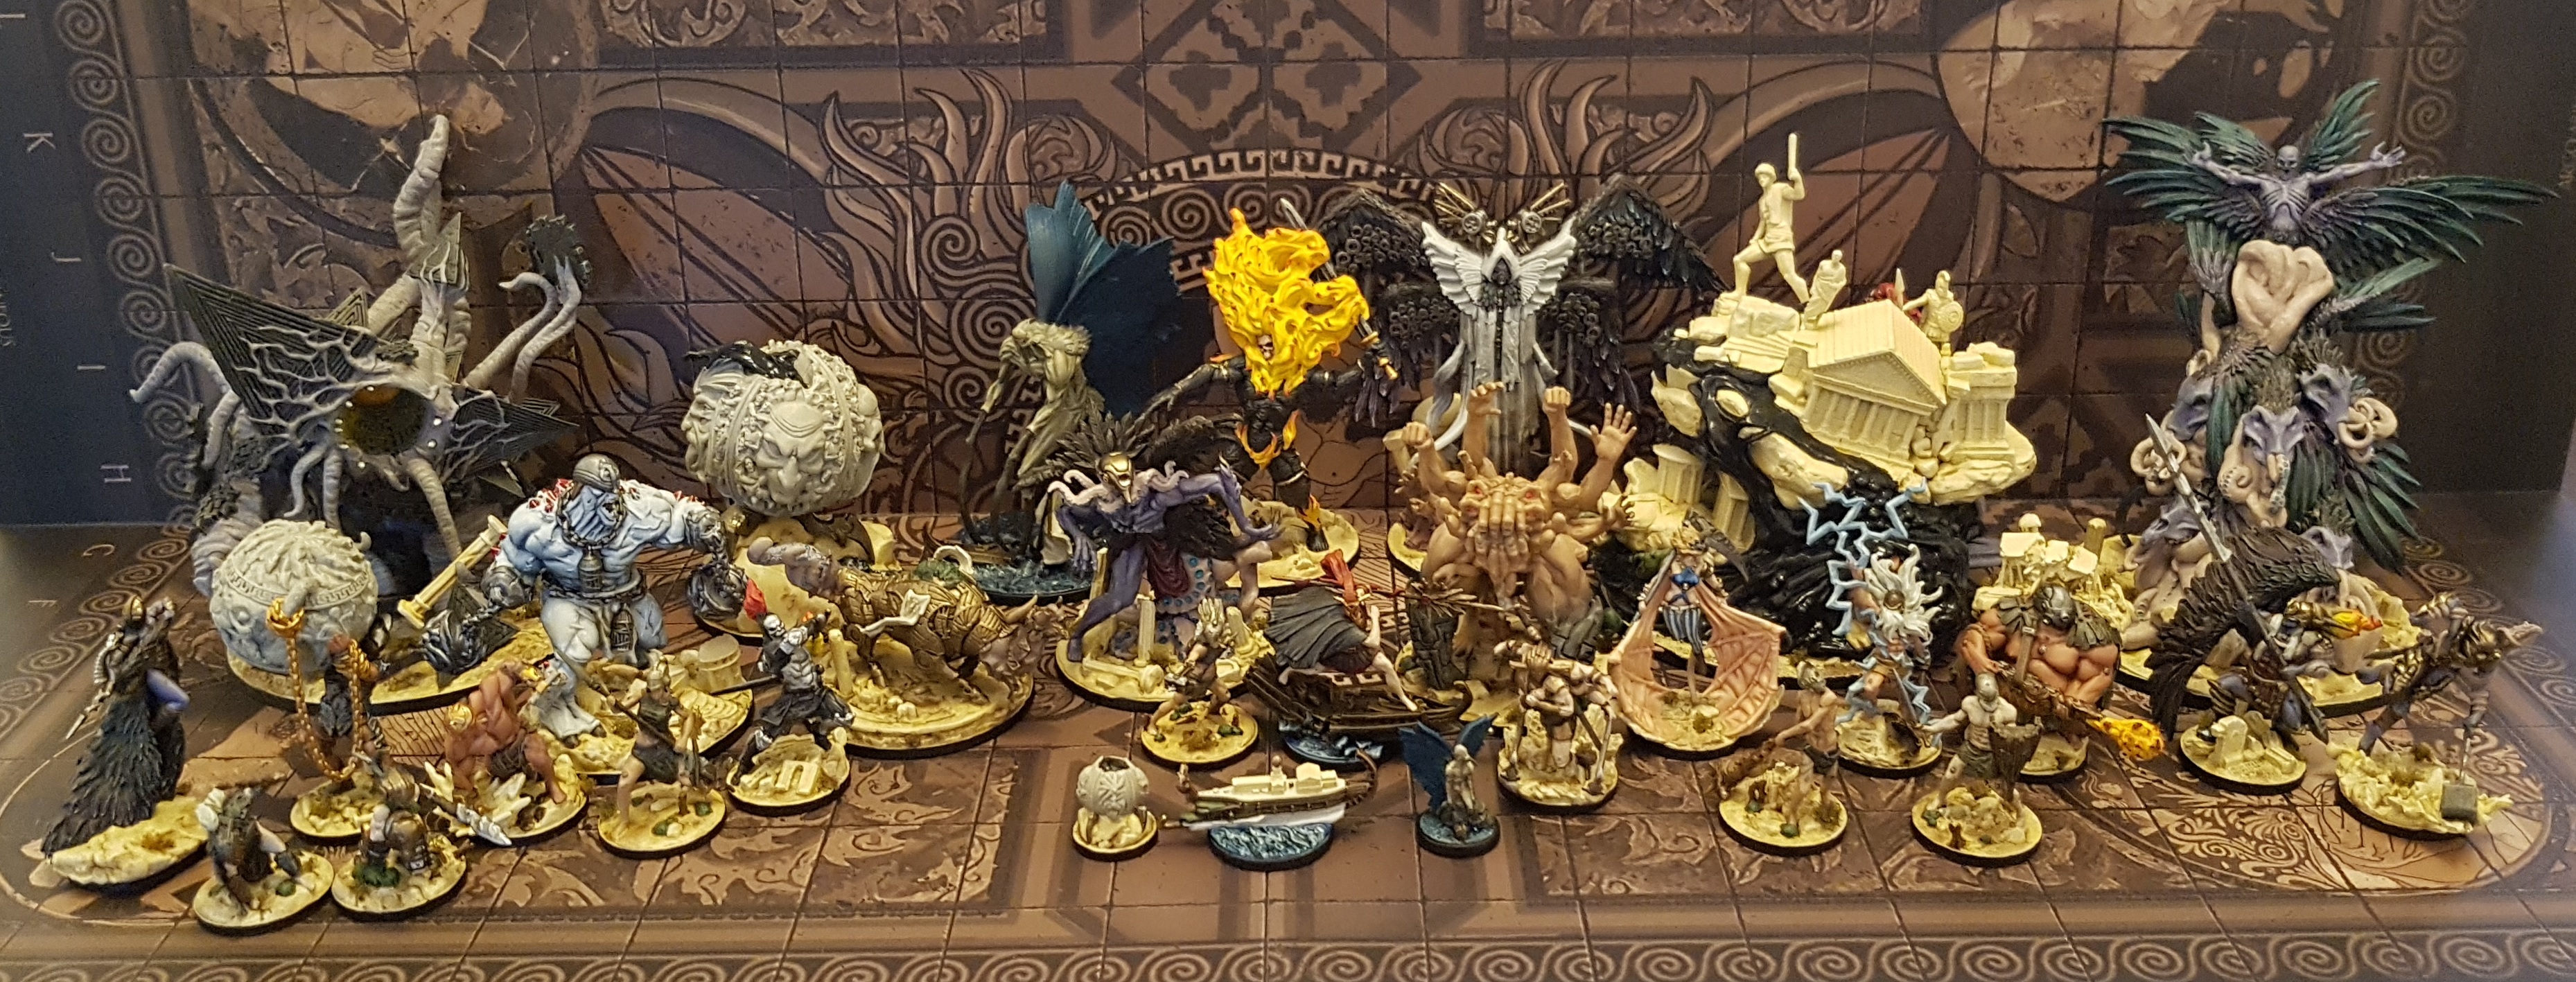
Group Shot
Here’s a group shot of all the finished minis. I got them together to demo some games over the 4 day weekend, but I seemed to get allergic to something in that room while I was finishing off Gloomhaven Jaws of the Lion. I decided to let the room air and paint instead, but I did get as far as taking this pic. Dry itchy eyeballs and a runny nose destroyed my motivation. I’ve had the windows open at all times. Hopefully that’s cleared the air in there enough?
I’ve the coming week off work and it’s one of my goals to get this game played enough to form an opinion before the kickstarter starts in a few weeks.
Cycle 3: Sun Descendant
Here we go. The final game piece from Wave 1. Wave 2 is due later this year, but we all know kickstarters always suffer delays. I think that’s 31 models and 12 plug and play parts finished. I’m leaving Helios unpainted for now. He has no in game use and is just an extra for painting. They suggest using him as a first player token, but he’s way too tall and would get knocked over every time someone reaches across the table. Plus, I don’t want someone constantly handling my paintwork. It’ll chip and wear off quickly. I’ve got models that need painting before they can be built and put on the table. I’ll come back to Helios once they’re done, or if Helios gains some rules.
Purple Flesh
This scheme is looted and modified from Vallejo’s Non-Death Chaos set. For some reason, theirs looks blue even though it’s painted using purple paints. I swear they cheat.
Zenithal Preshade
Wash 2:1 VMC 72.048 Sombre Grey: VMC 72.016 Royal Purple (My zenithal blacks were too dominant, so I ended up applying something thicker than a wash to cover this up, and probably 2-3 coats. Ideally, you want a smooth black to white transition before you begin, and then use a very thin wash over it to tint it. I learned from doing this on the Harpy and applied a smoother zenithal prime, but I still didn’t thin my wash down far enough. I’ll have to look for a smaller model to really experiment with this later, when I’m not pushing to Get Stuff Done.
Shade with Royal Purple
Highlight with base
Highlight with base with increasing amounts of VMC72.003 Pale Flesh
Feathers
Base with a single coat of thinned P3 Umbral Umber and mixing medium (Almost a wash this time. Thinner than on earlier models) over a zenithal prime. I could see lots of the white showing through, but it was tinted brown.
Wash with Vallejo Black Ink thinned about 2:6 with Instar Water+. It’s like water, but better. Don’t ask me how. All I know is everyone swears they won’t go back to water after. Using water in a wash can lead to tide marks and I wanted to avoid that.
Drybrush with P3 Frostbite, and then selectively with White.
Mix up 2:3 glazes of P3 Turquoise Ink and Water+, and Vallejo Violet Ink and Water+, keeping you 2:6 Black Ink mix to hand
Glaze on the colours where appropriate, allowing them to mix a little where they meet. Apply another coat of the black ink wash anywhere not getting colour, again allowing transitions to blend.
Tentacles
Tentacle Flesh:
Base: P3 Troolblood Highlight, P3 Ryn Flesh & P3 Carnal Pink
Wash: Base +Traitor Green
Wash: Above+ Beaten Purple
Highlight: Ryn Flesh, Carnal Pink, and P3Menoth White Highlight
Blue Suckers:
Base: VMC 70.866 Turquoise
Highlight middle with VMC 70.808 Blue Green
Highlight middle by adding more and more Reaper 09150 Bloodless Skin or any other off-white to the Blue Green
Teeth
Based with P3 Menoth White Base
Washed with GW Agrax Earthshade
Reclaimed with P3 Menoth White Base
Highlighted with P3 Menoth White Highlight
Human Flesh
Based with P3 Midlund Flesh
Highlighted with P3 Ryn Flesh
White Cloth
Base with Reaper 09149 Mouldy Skin
Highlight with P3 Morrow White (Or any pure white)
Wash with Reaper Mouldy Skin
Grey Stone
Base: VMC 70.869 Basalt Grey Airbrushed on for transition. Do after flesh base colour but before detail so you can fix unwanted overspray
Drybrush: P3 Jack Bone, maybe even P3 Menoth White Base
Wash: GW Nuln Oil
Revisit drybrushing if desired
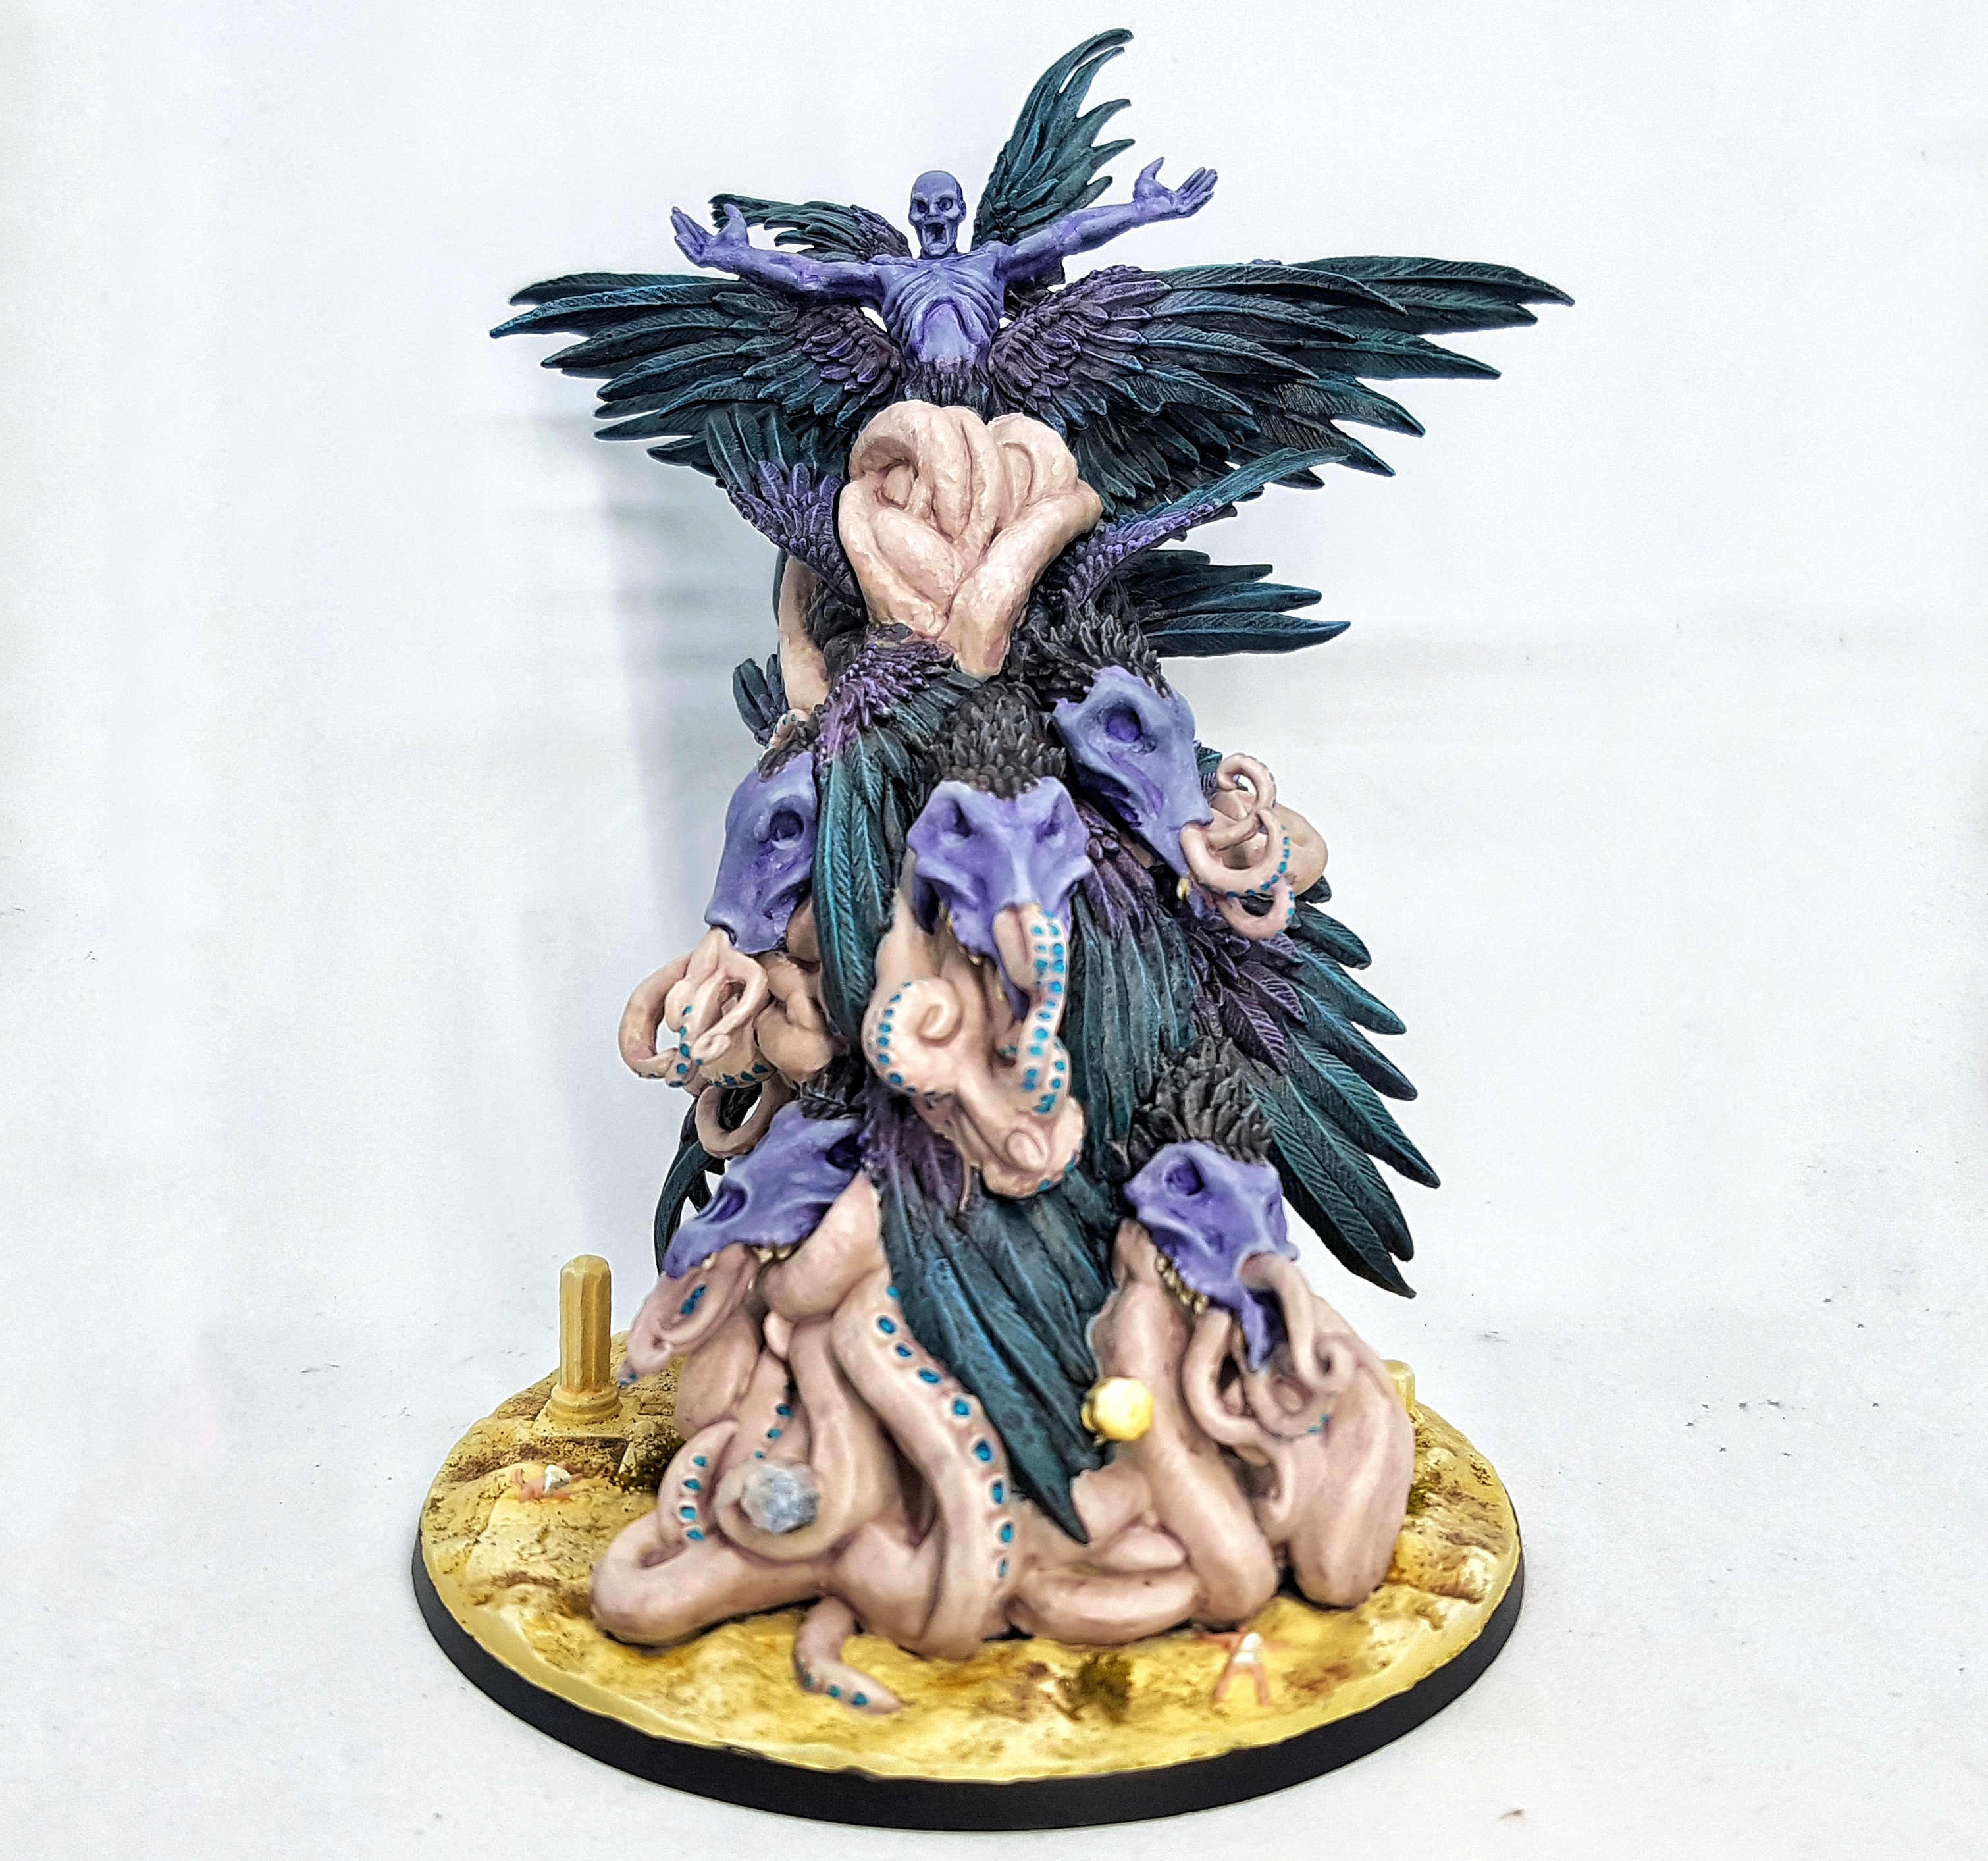
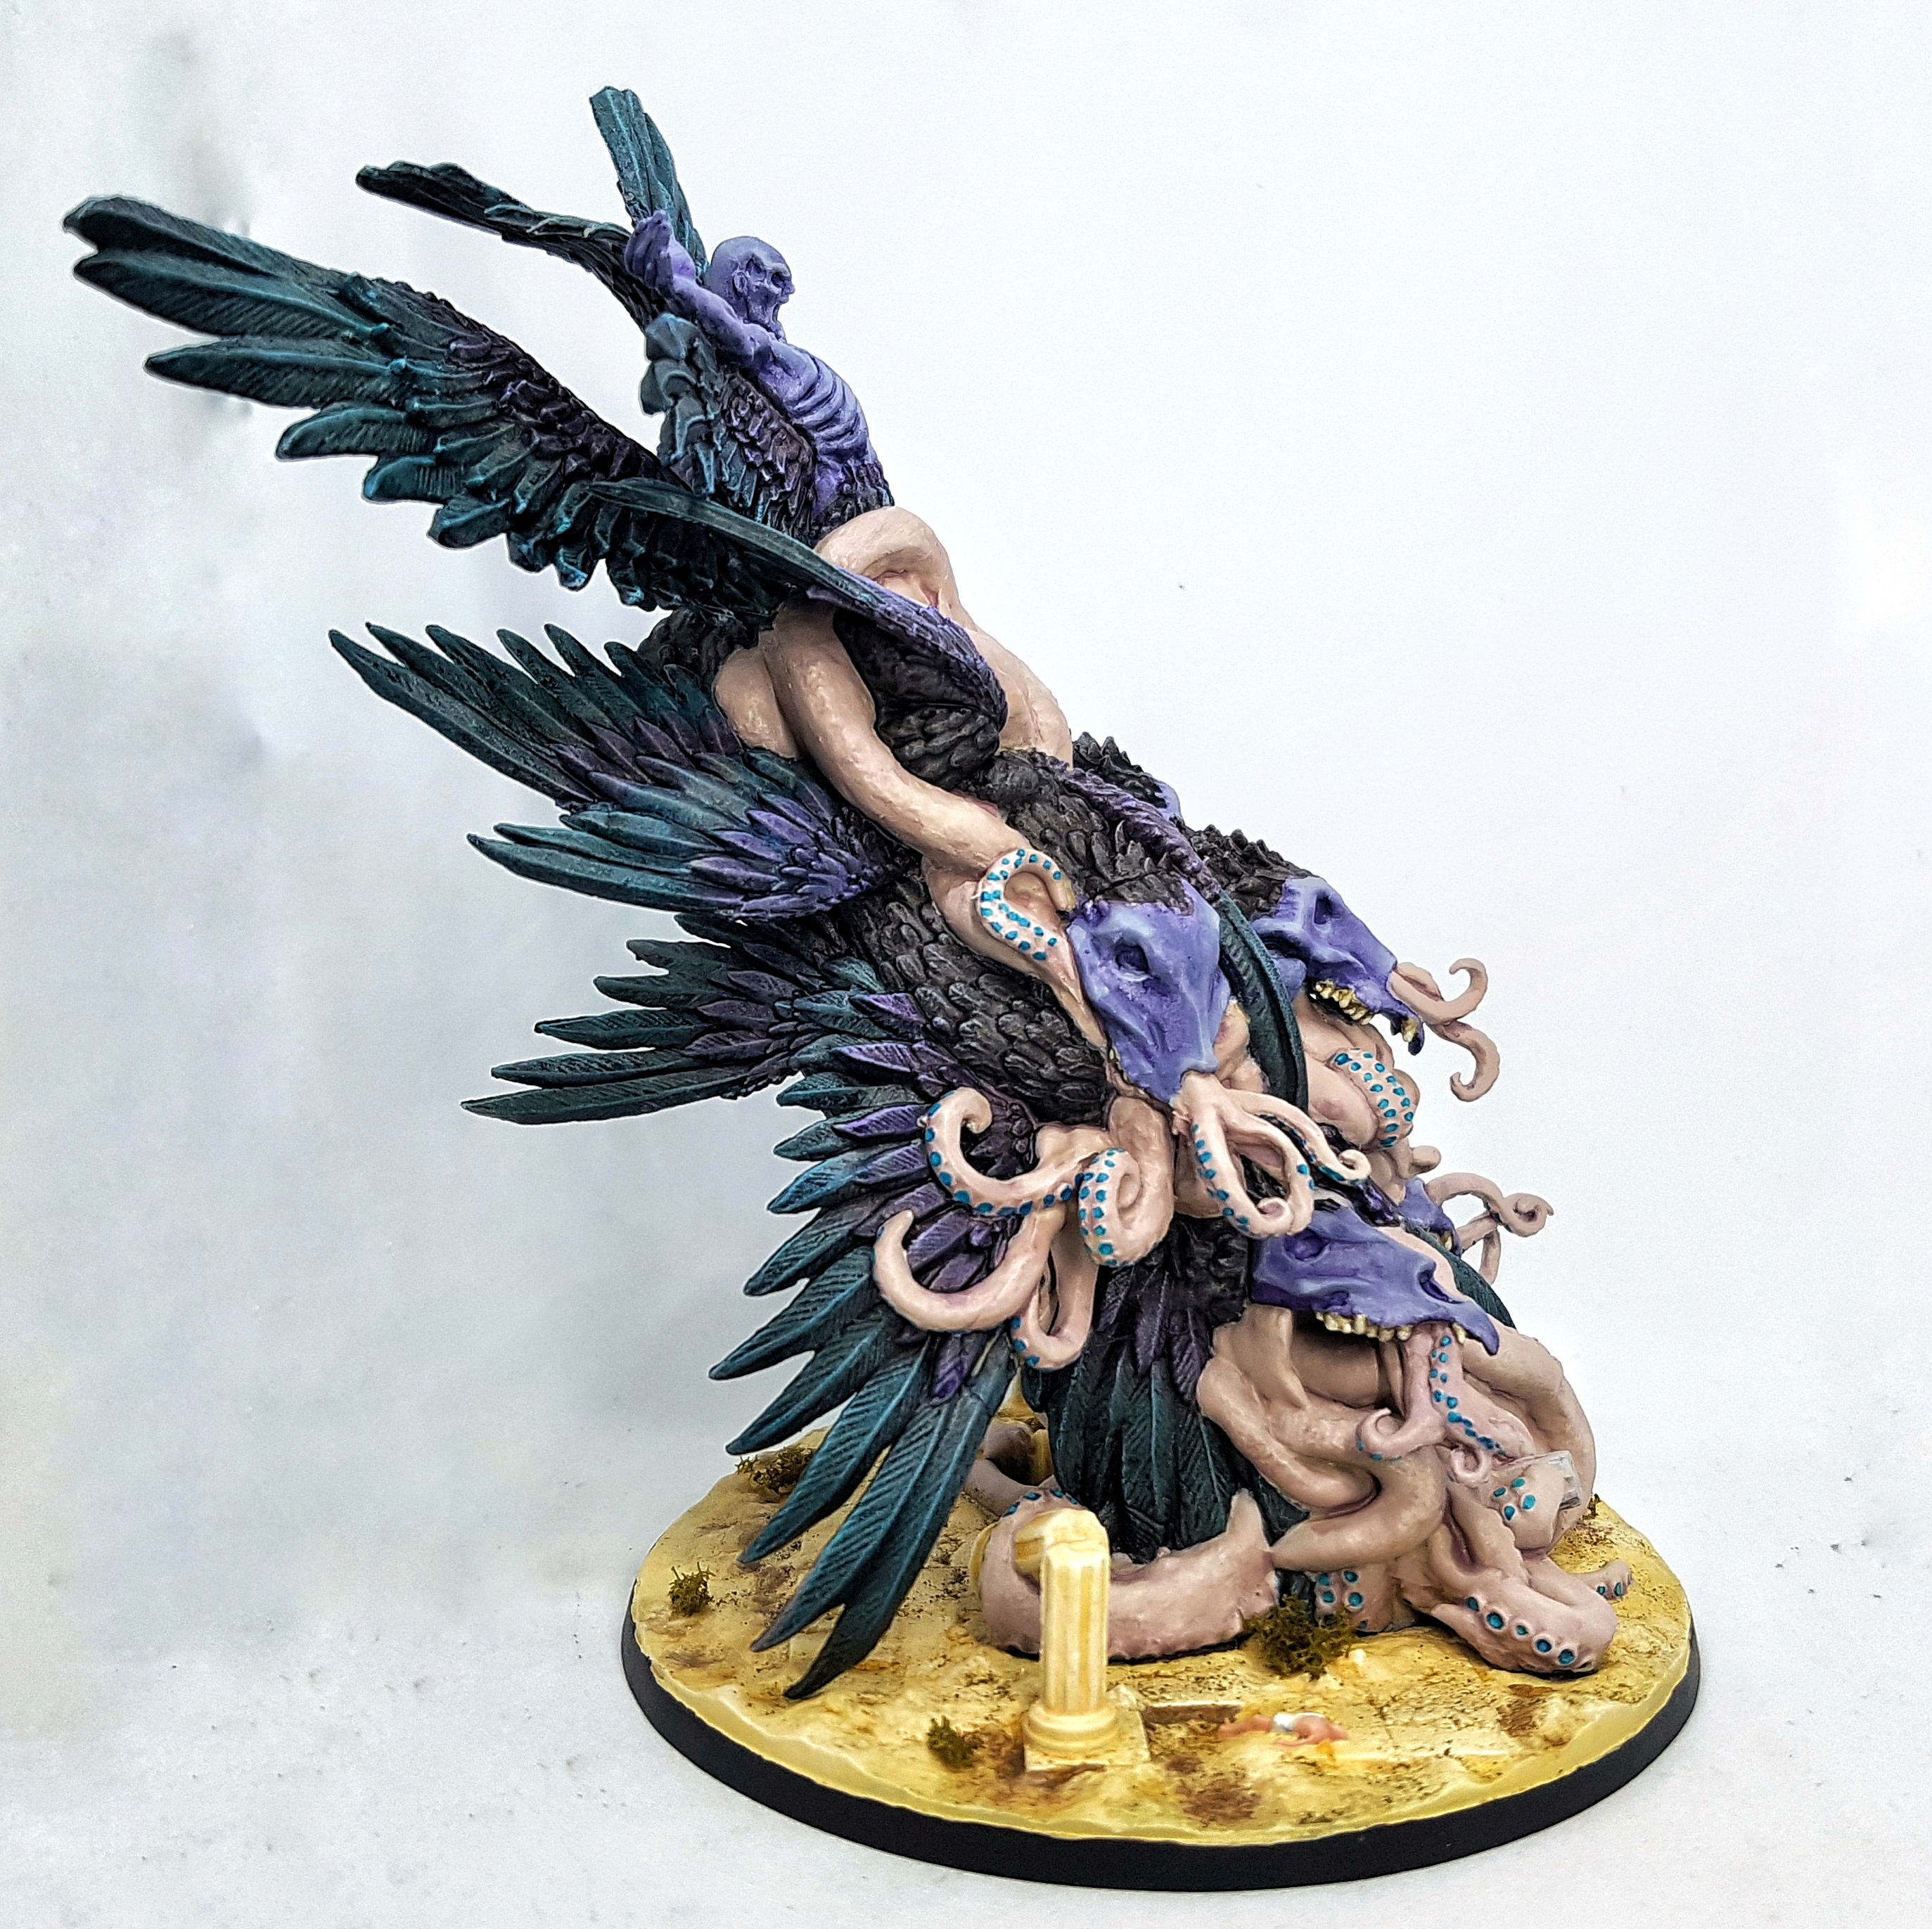
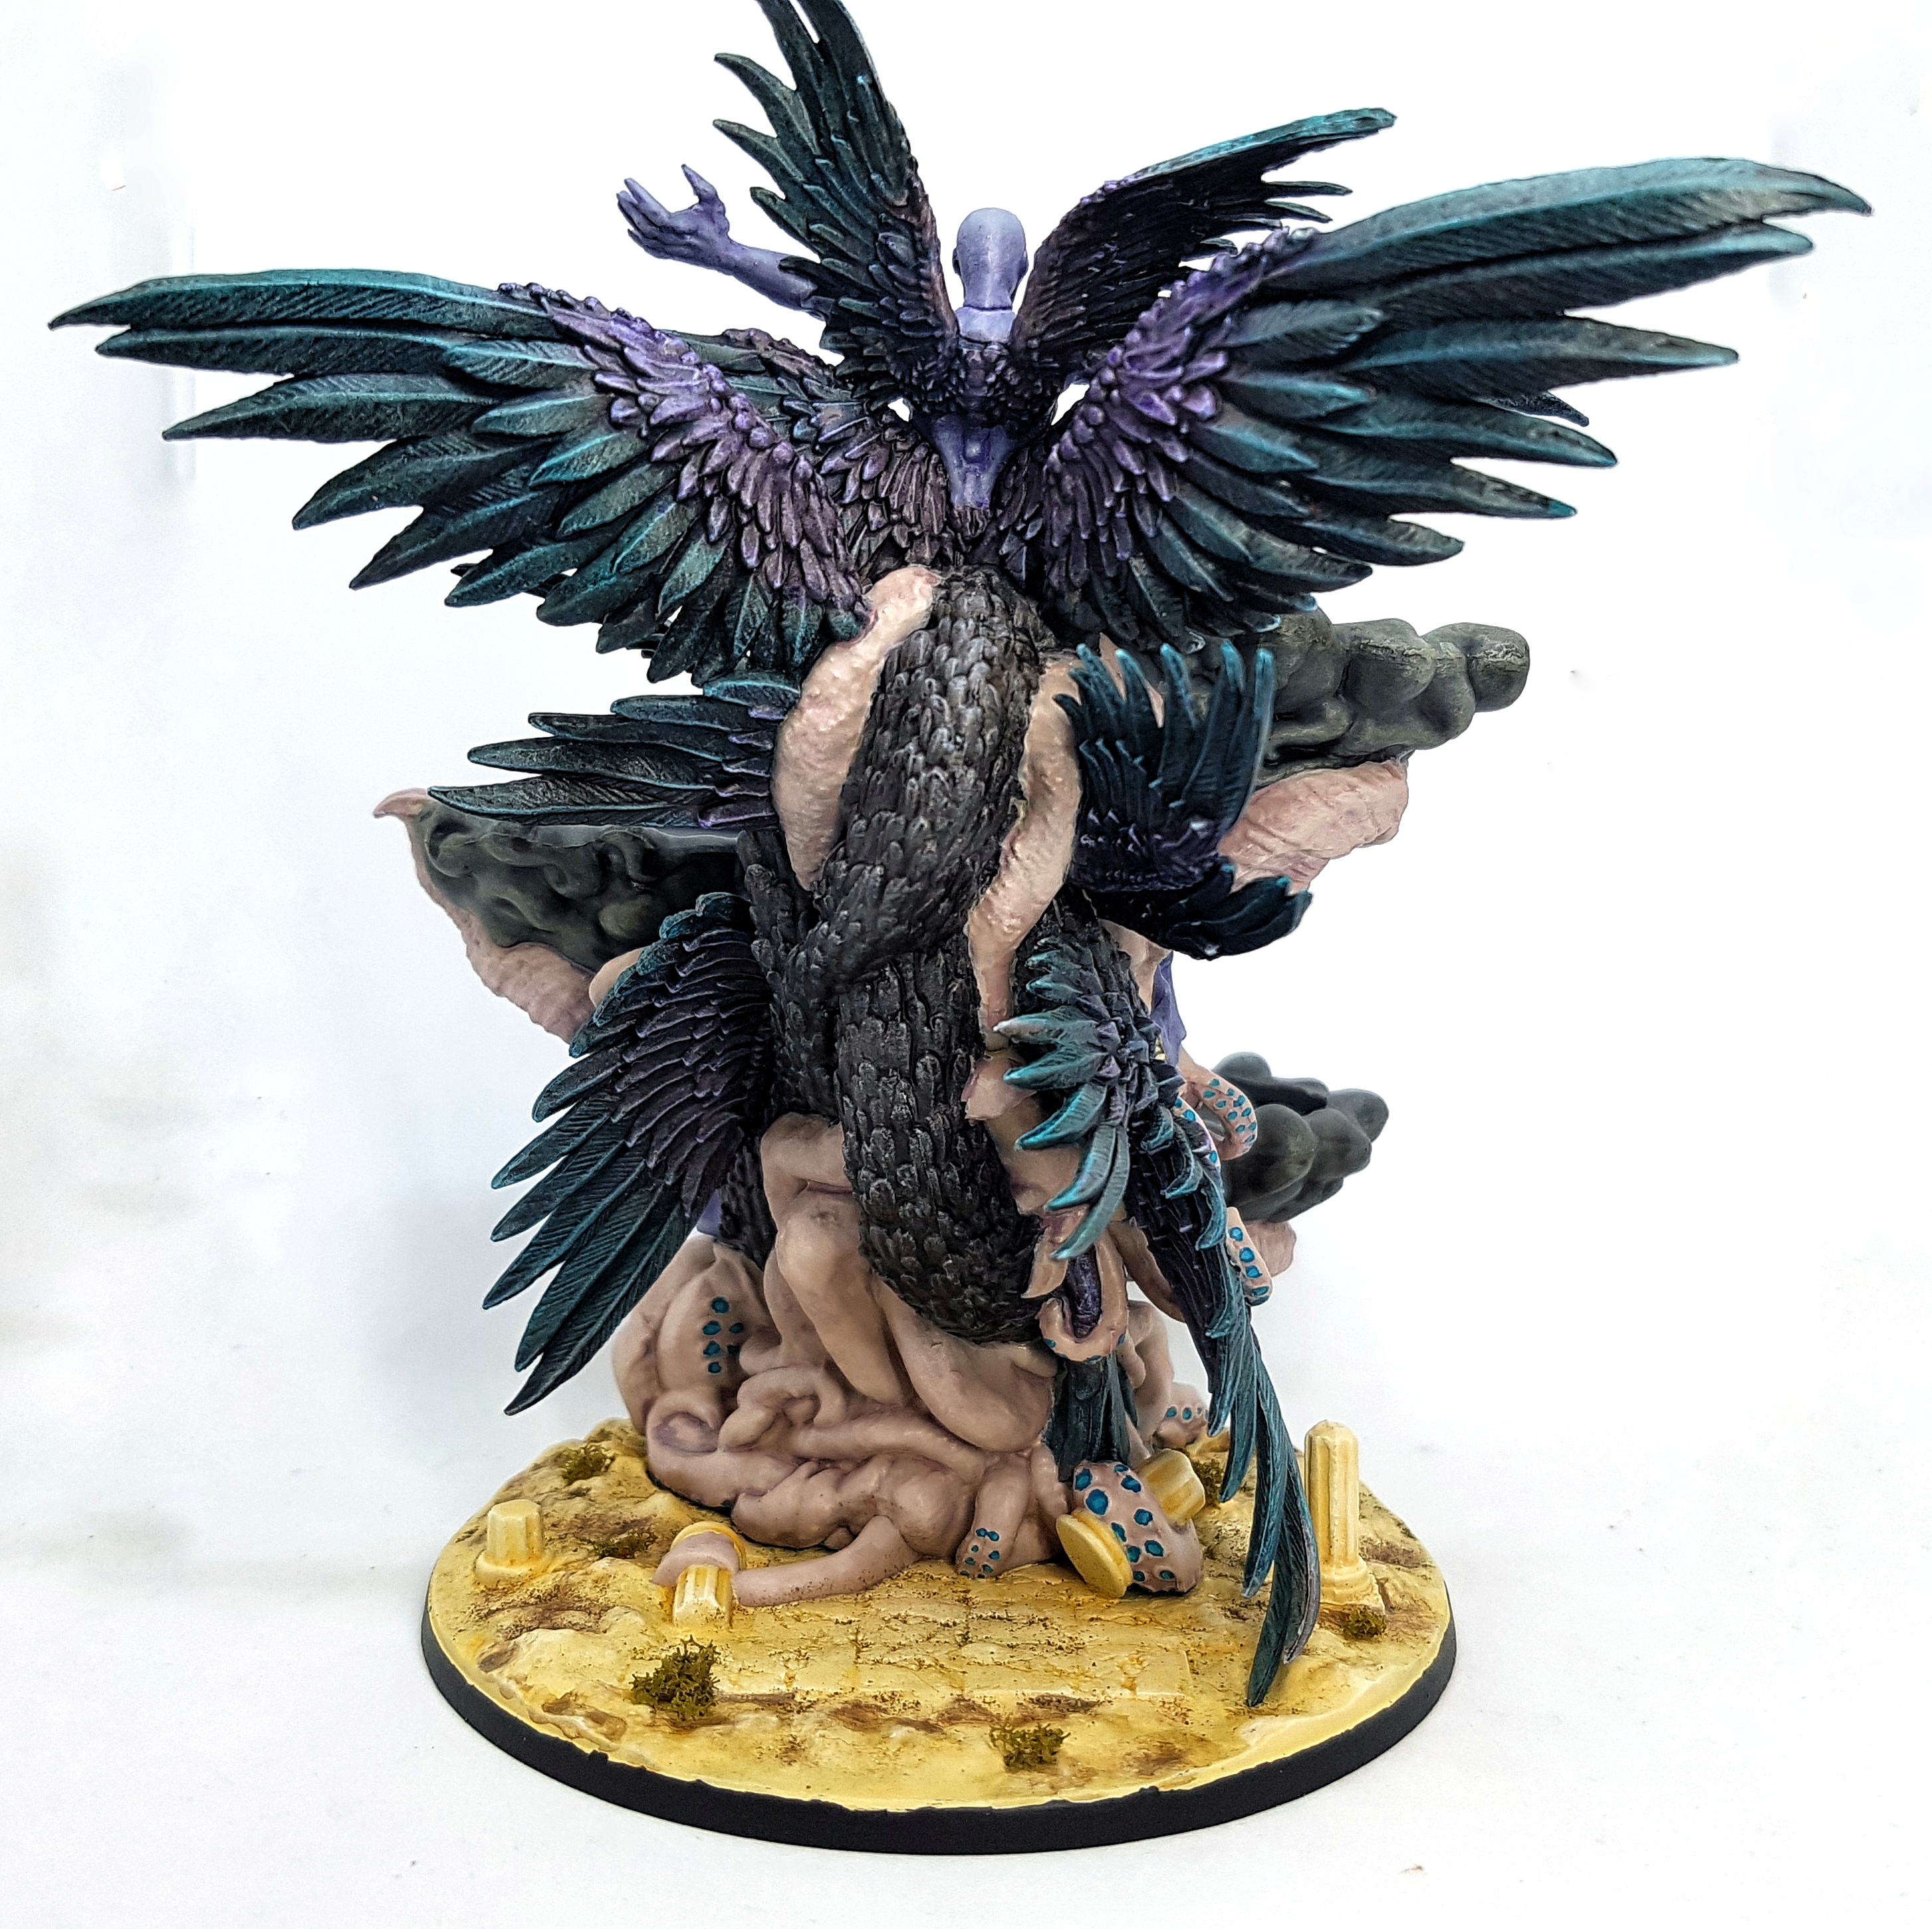
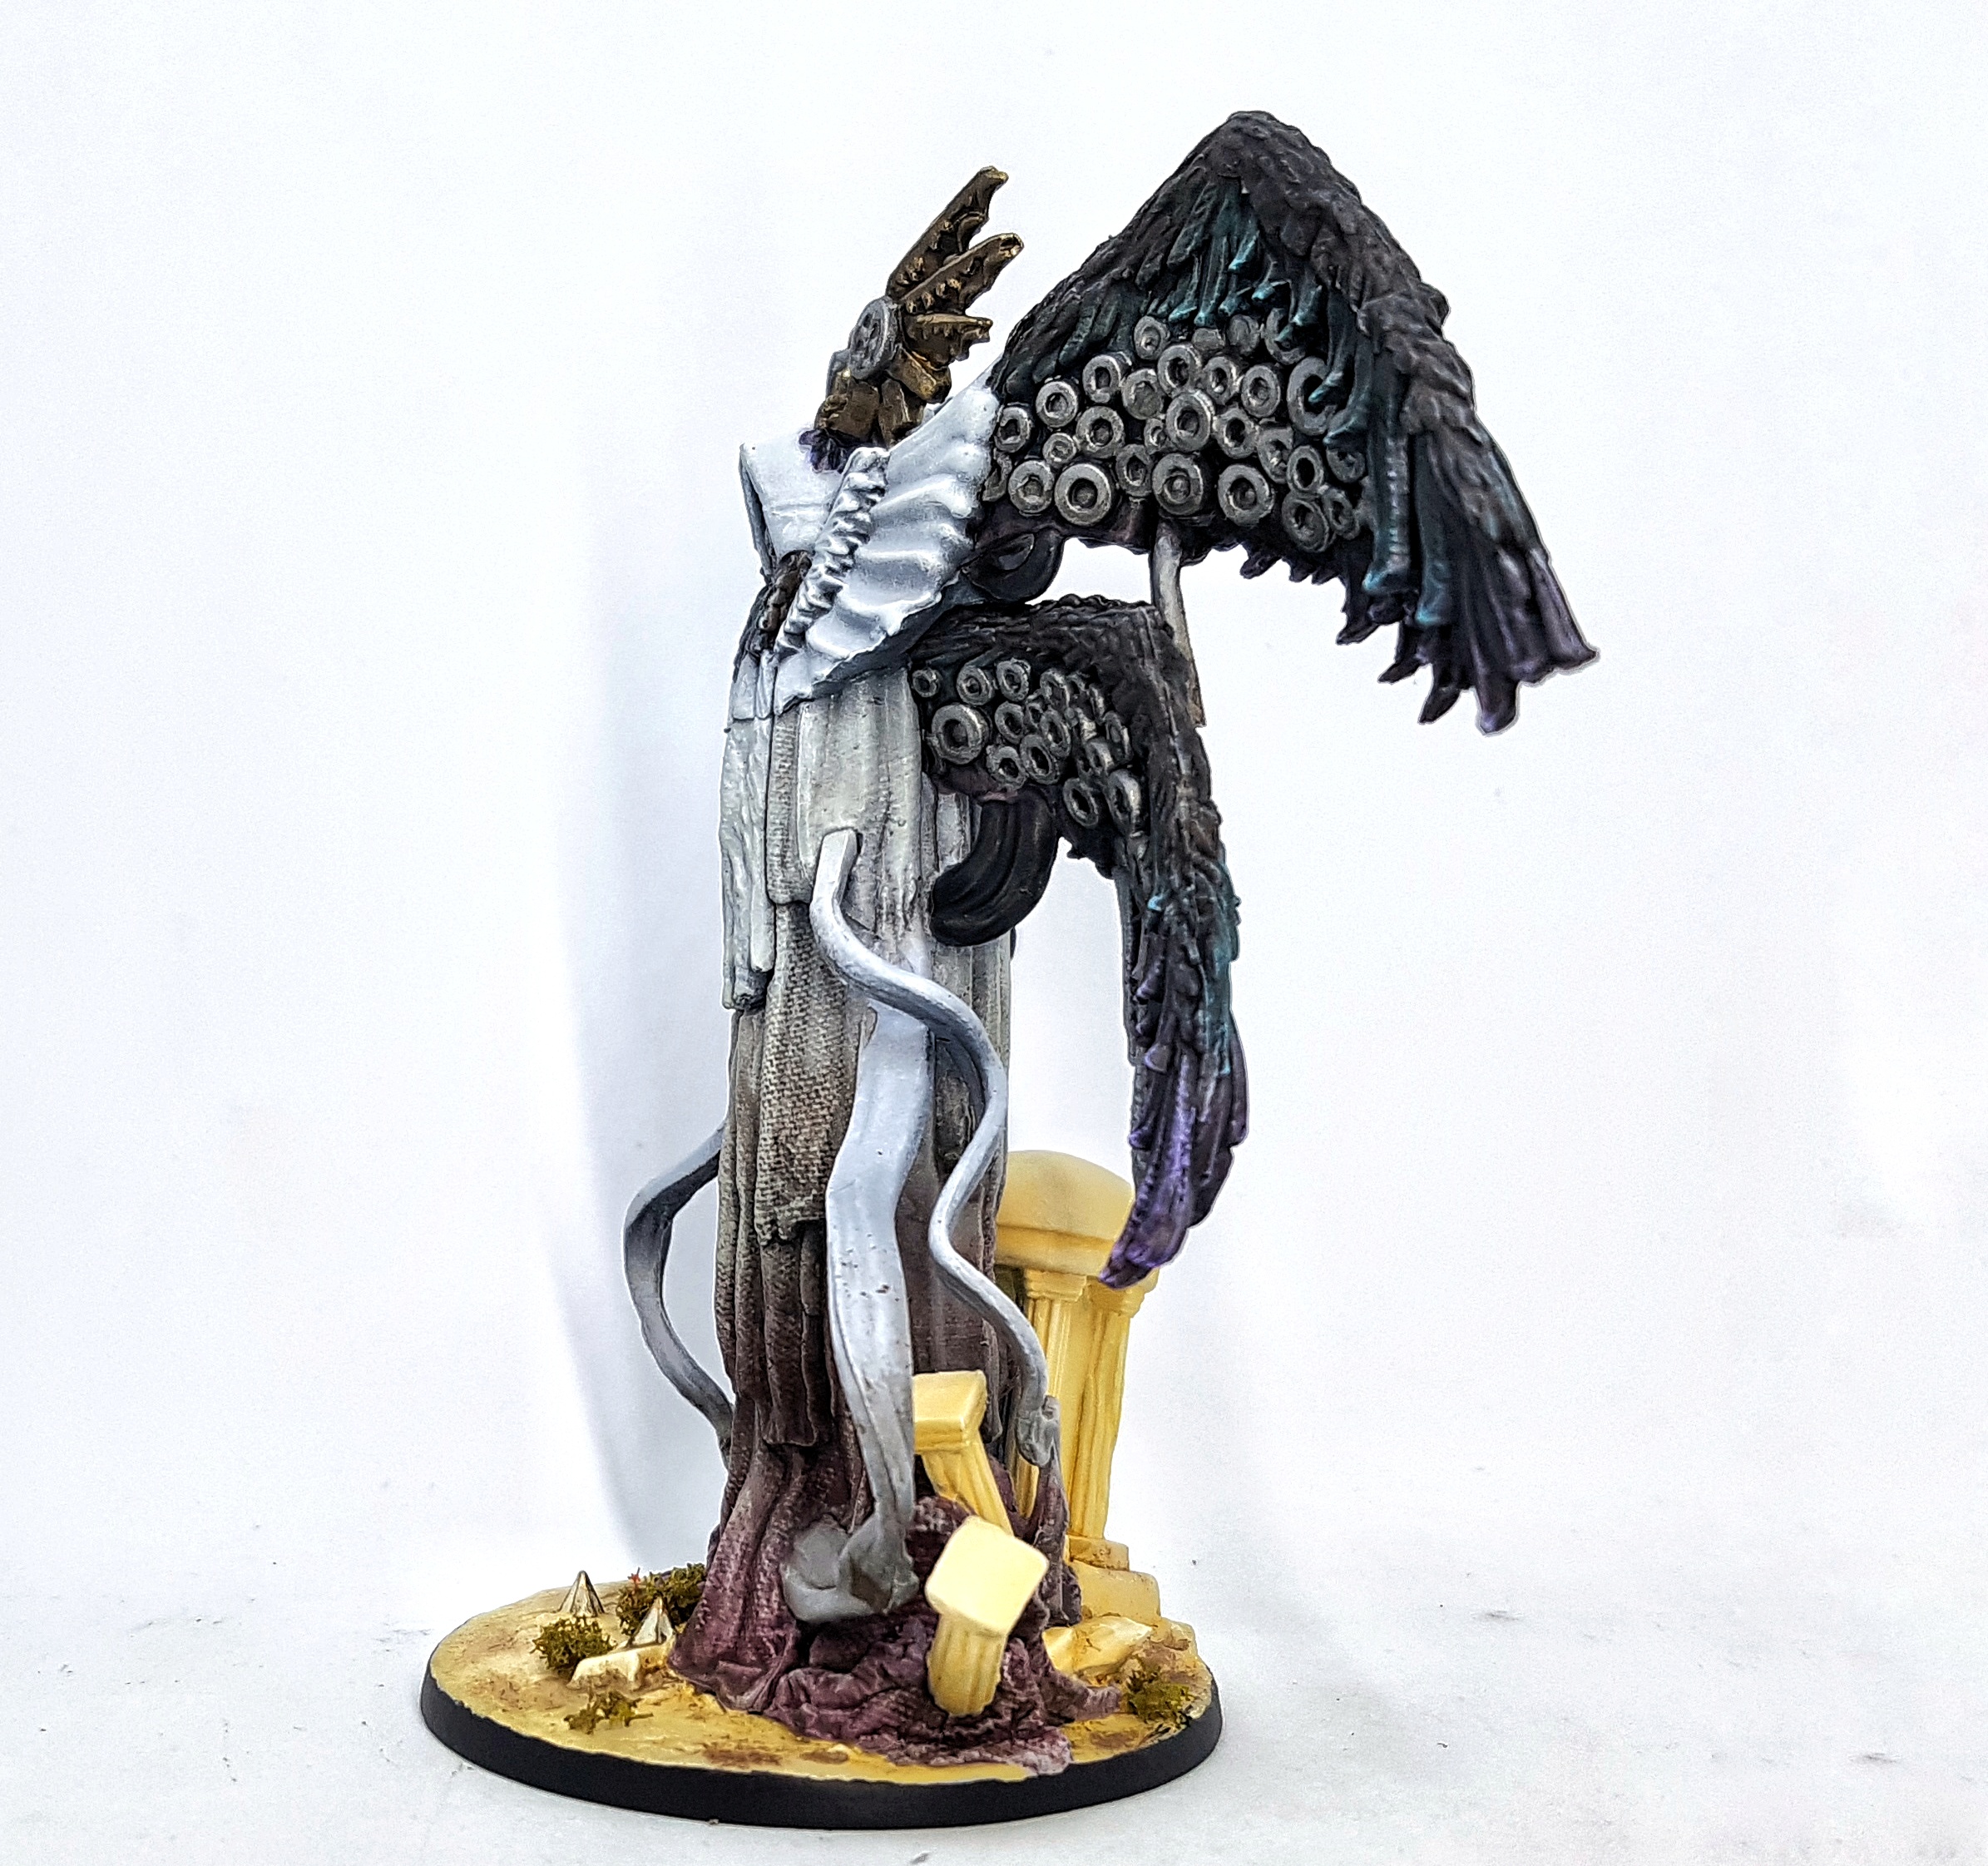
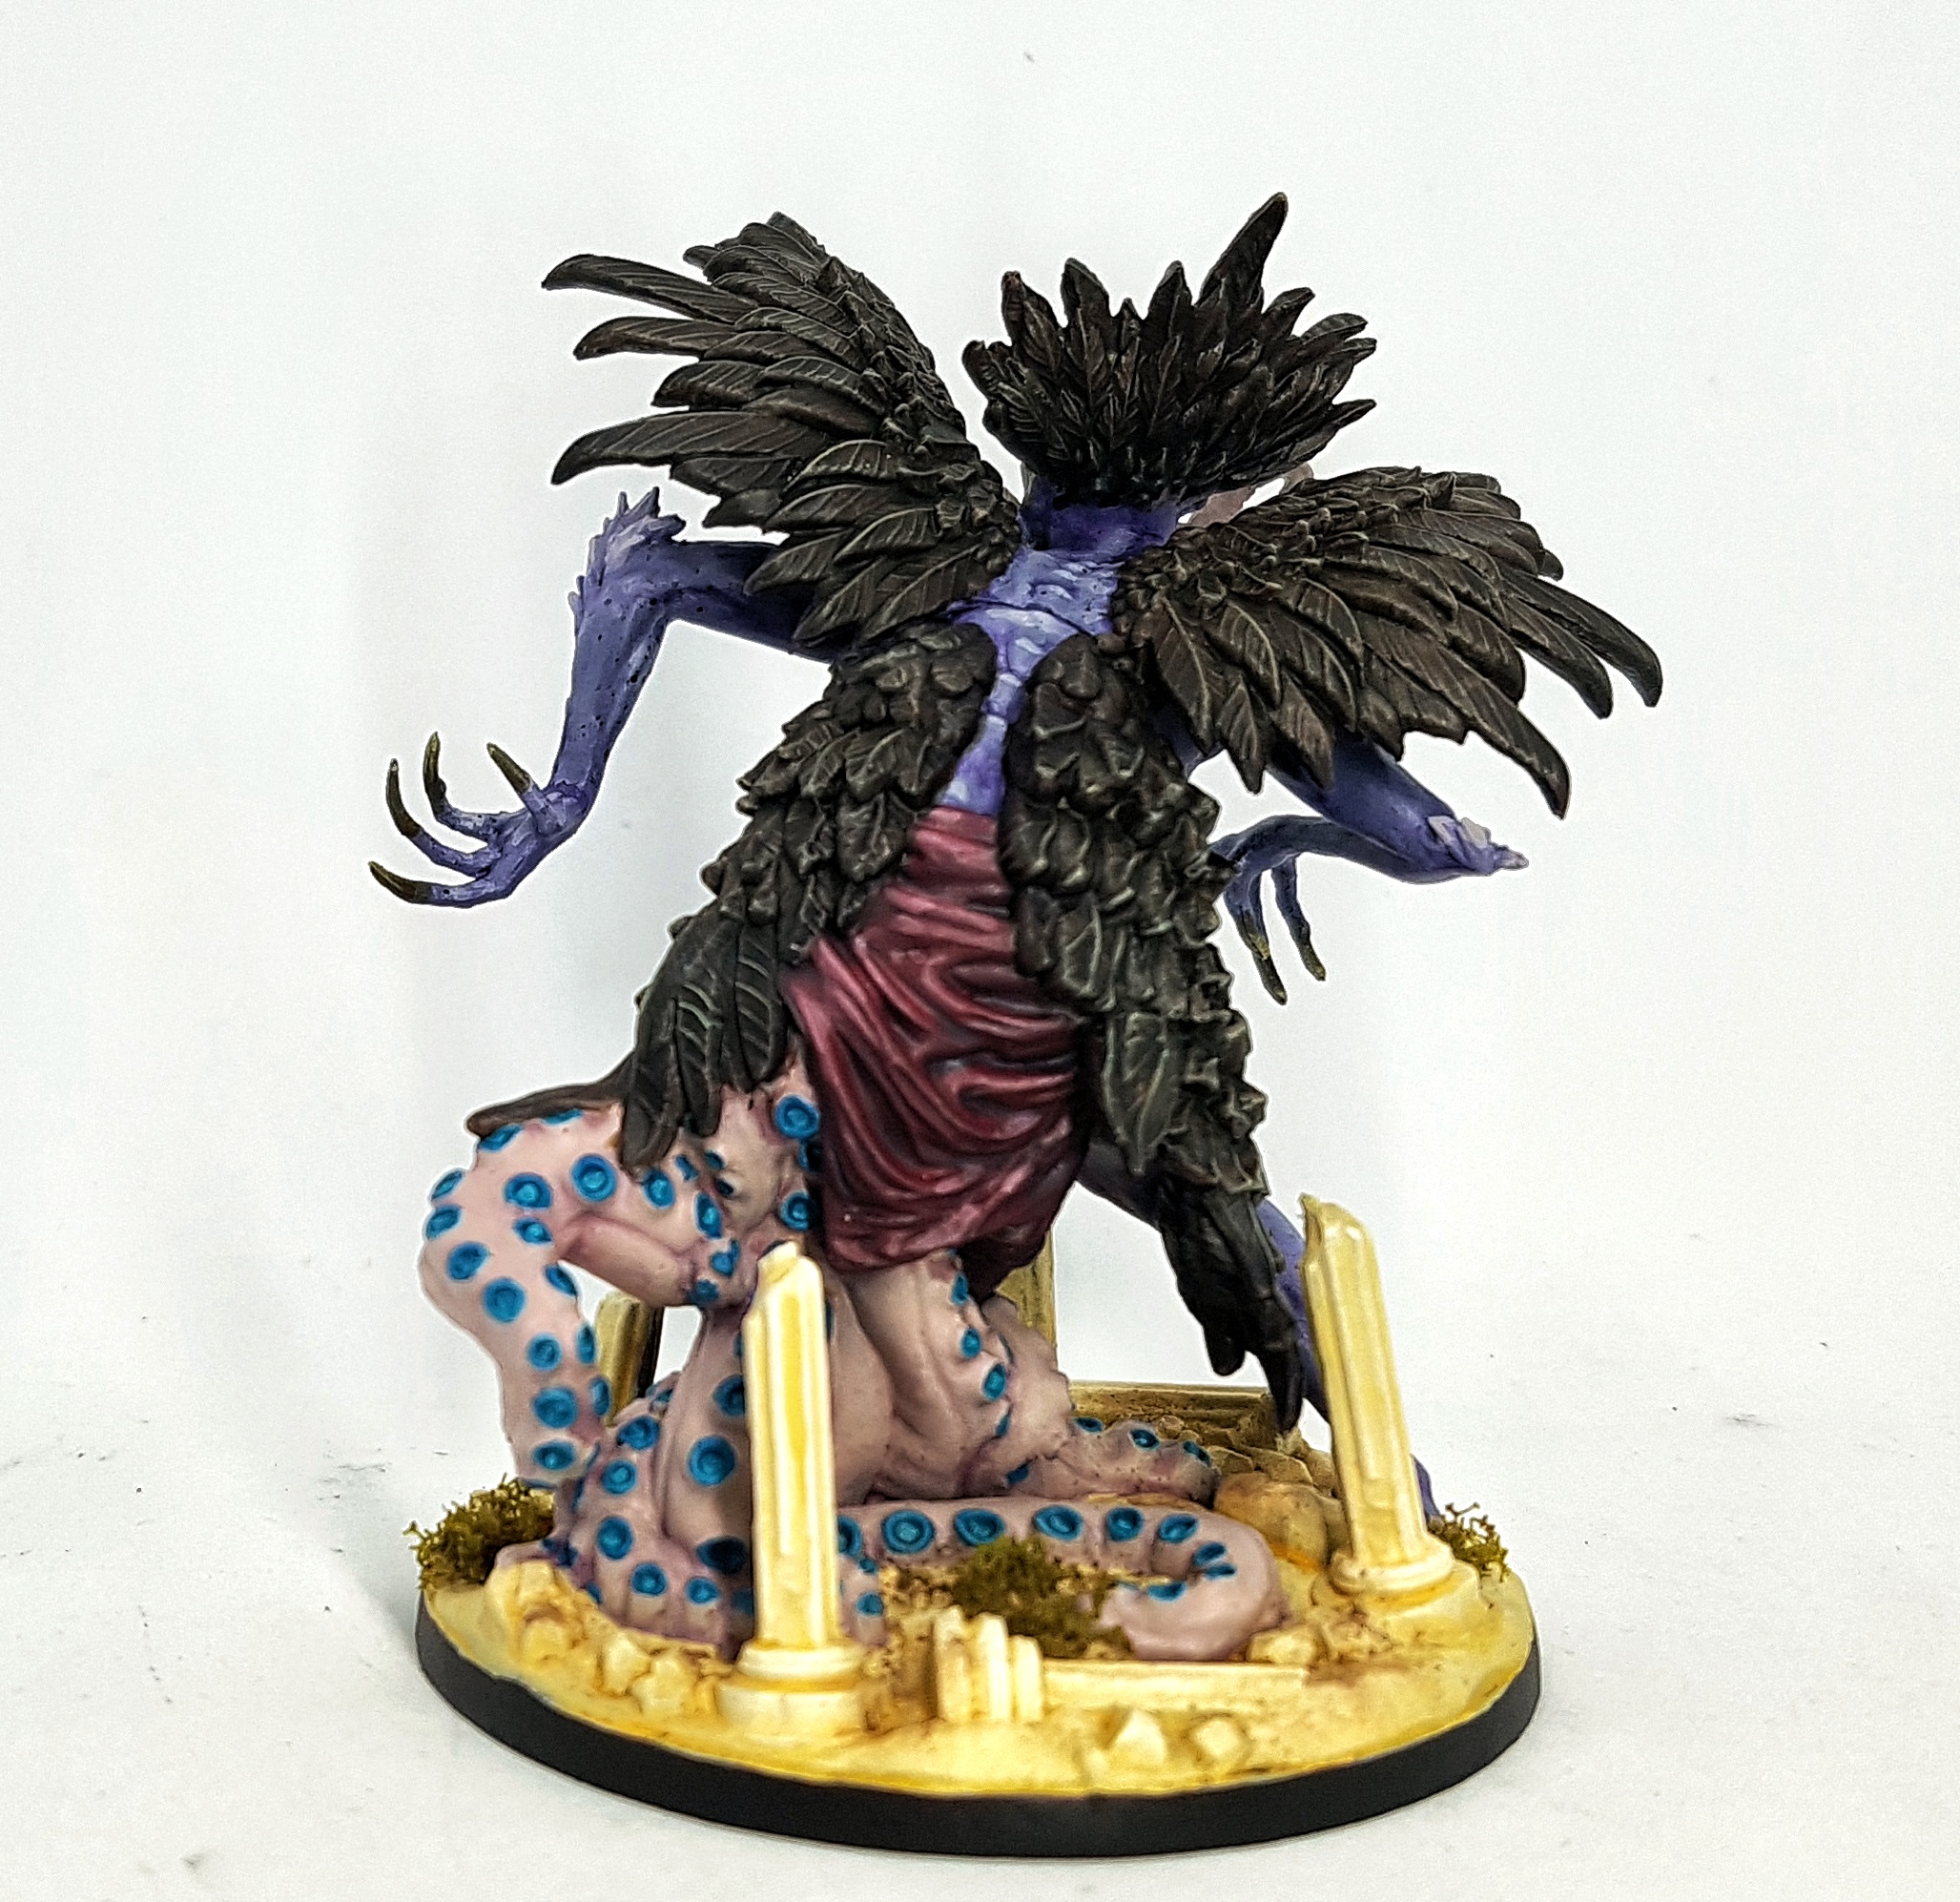
I deliberately did not paint the eyes. I don’t think it has any we can see. I suspect the human and animal parts are not real. Some animals have fake eyes and faces on the decoration to scare off predators or distract prey. I think that’s what’s going on here (I’ve not read it’s lore). I think prey is supposed to be too busy making eye contact with one of those purple faces to not notice the lower wings and tentacles opening up to reveal a face with an octopus beak, or rows and rows of teeth that the tentacles lash out and pull you towards.
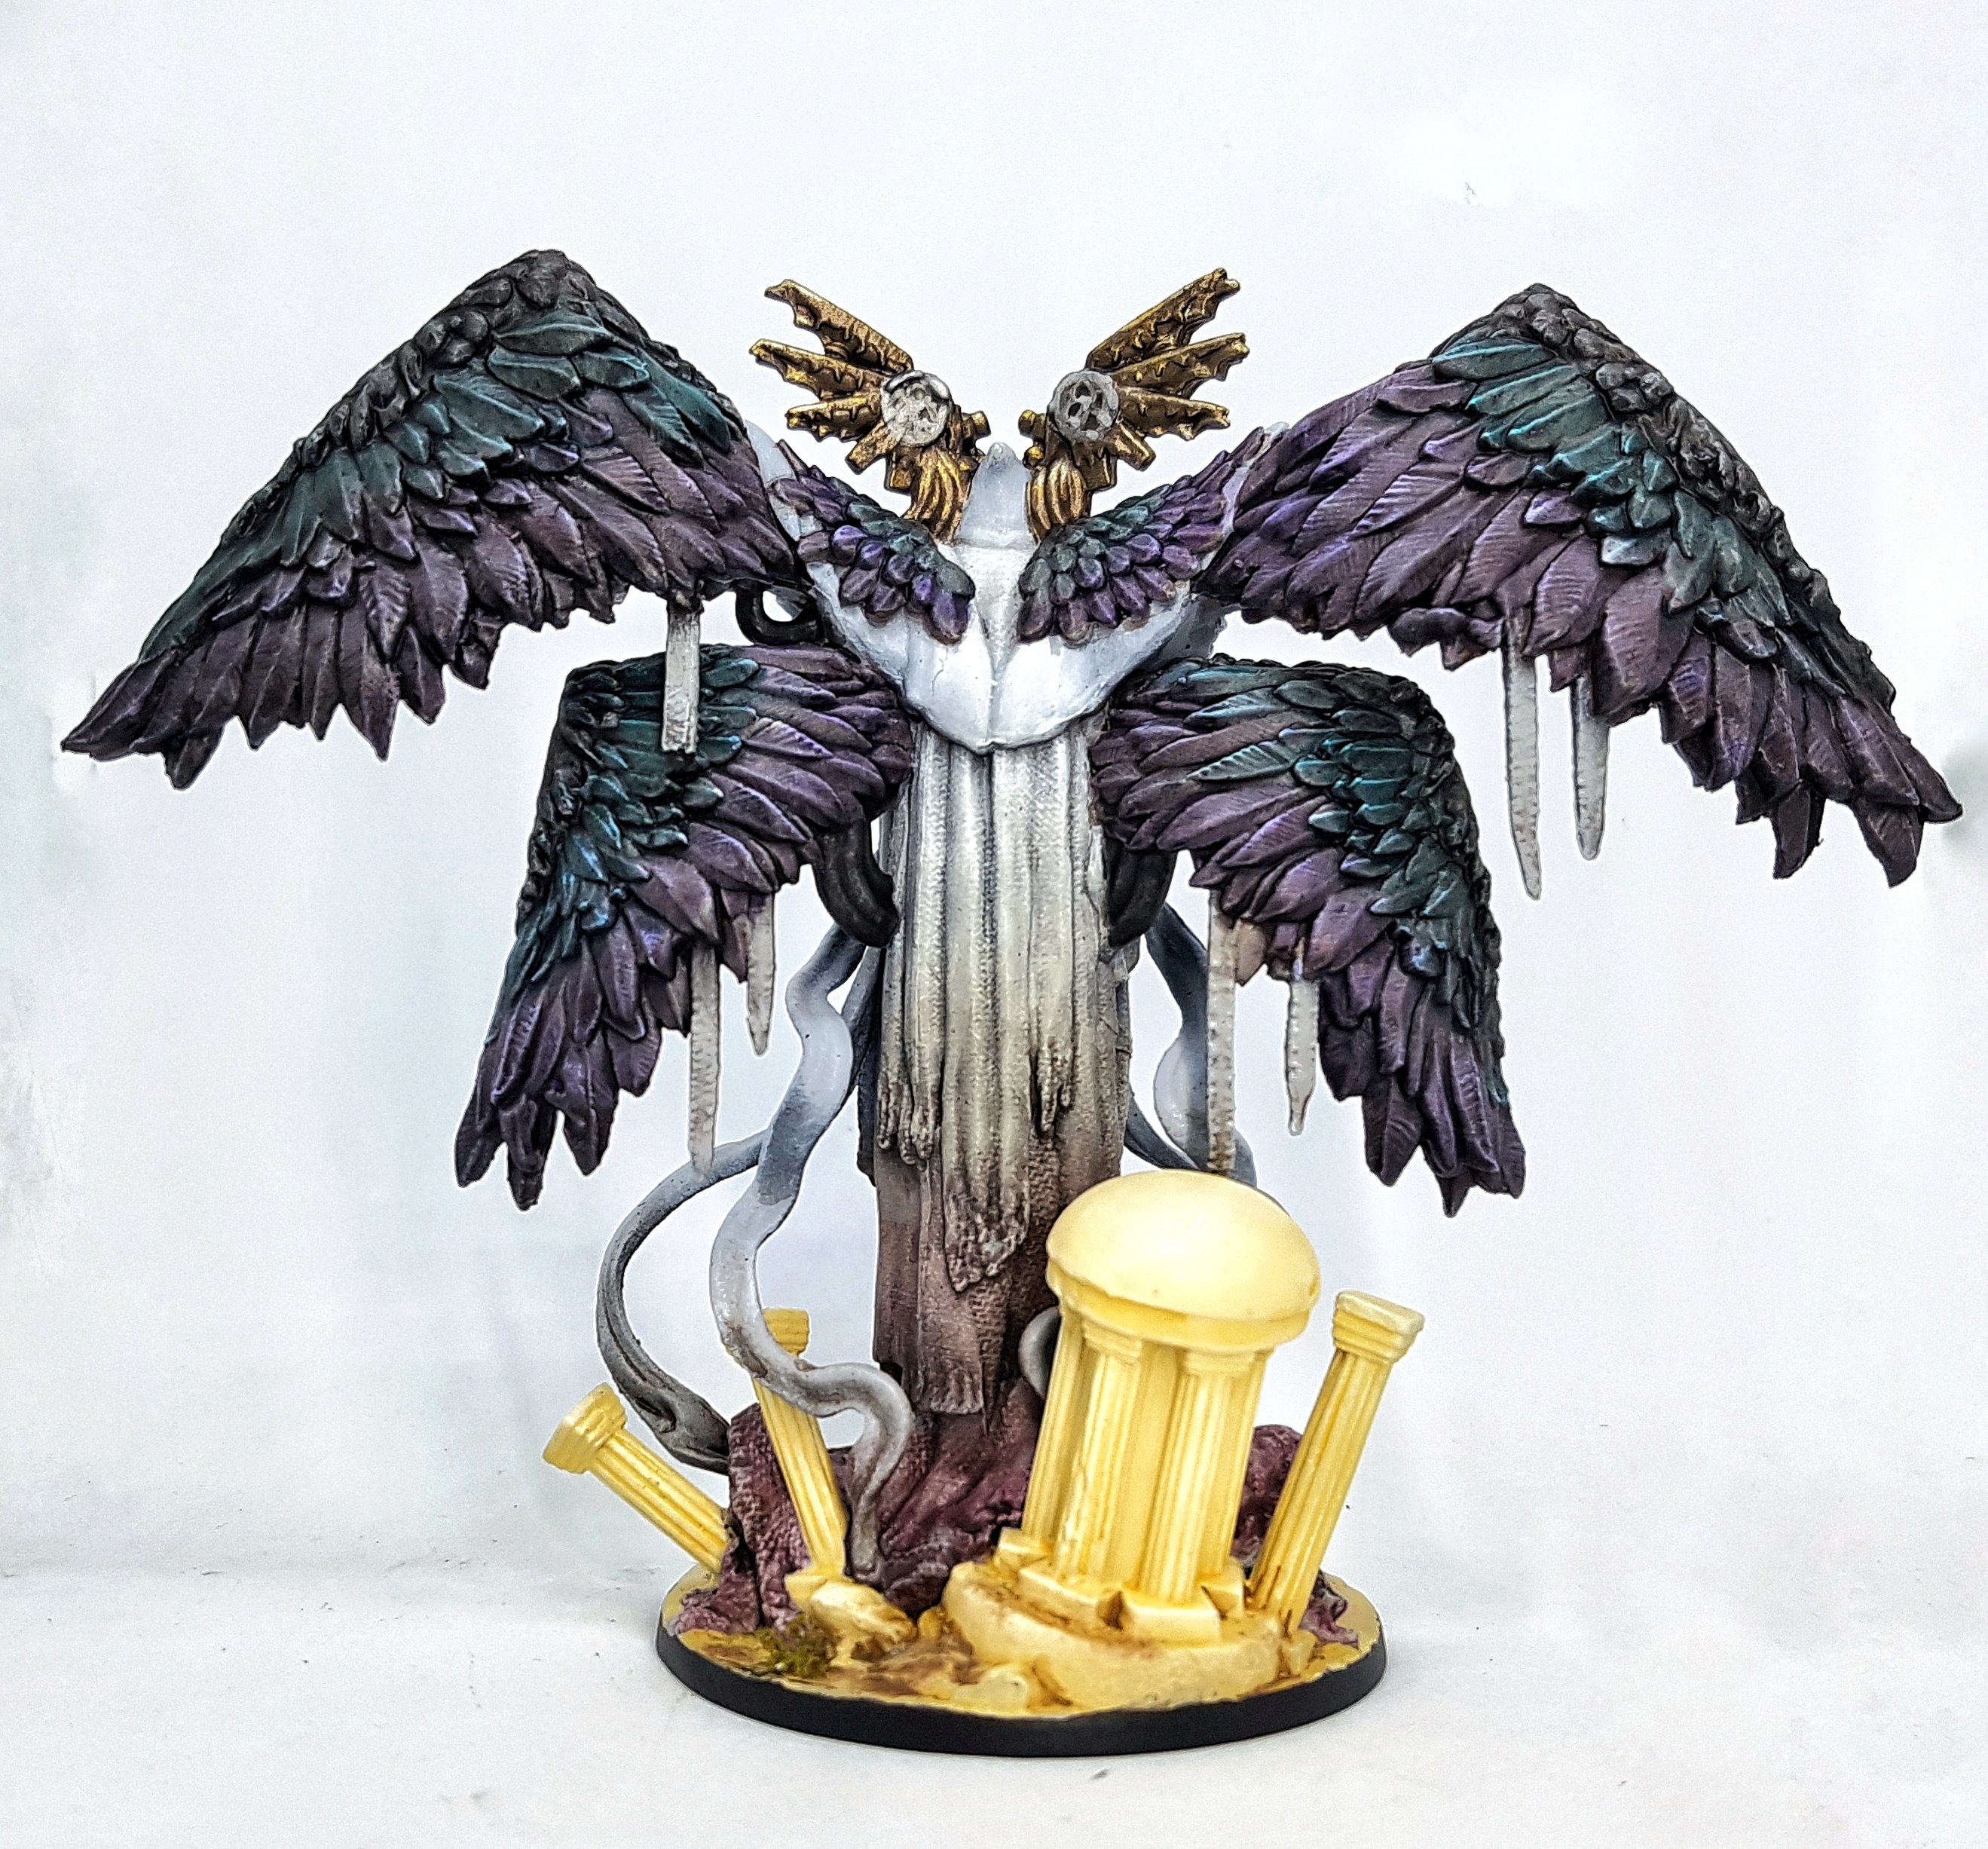
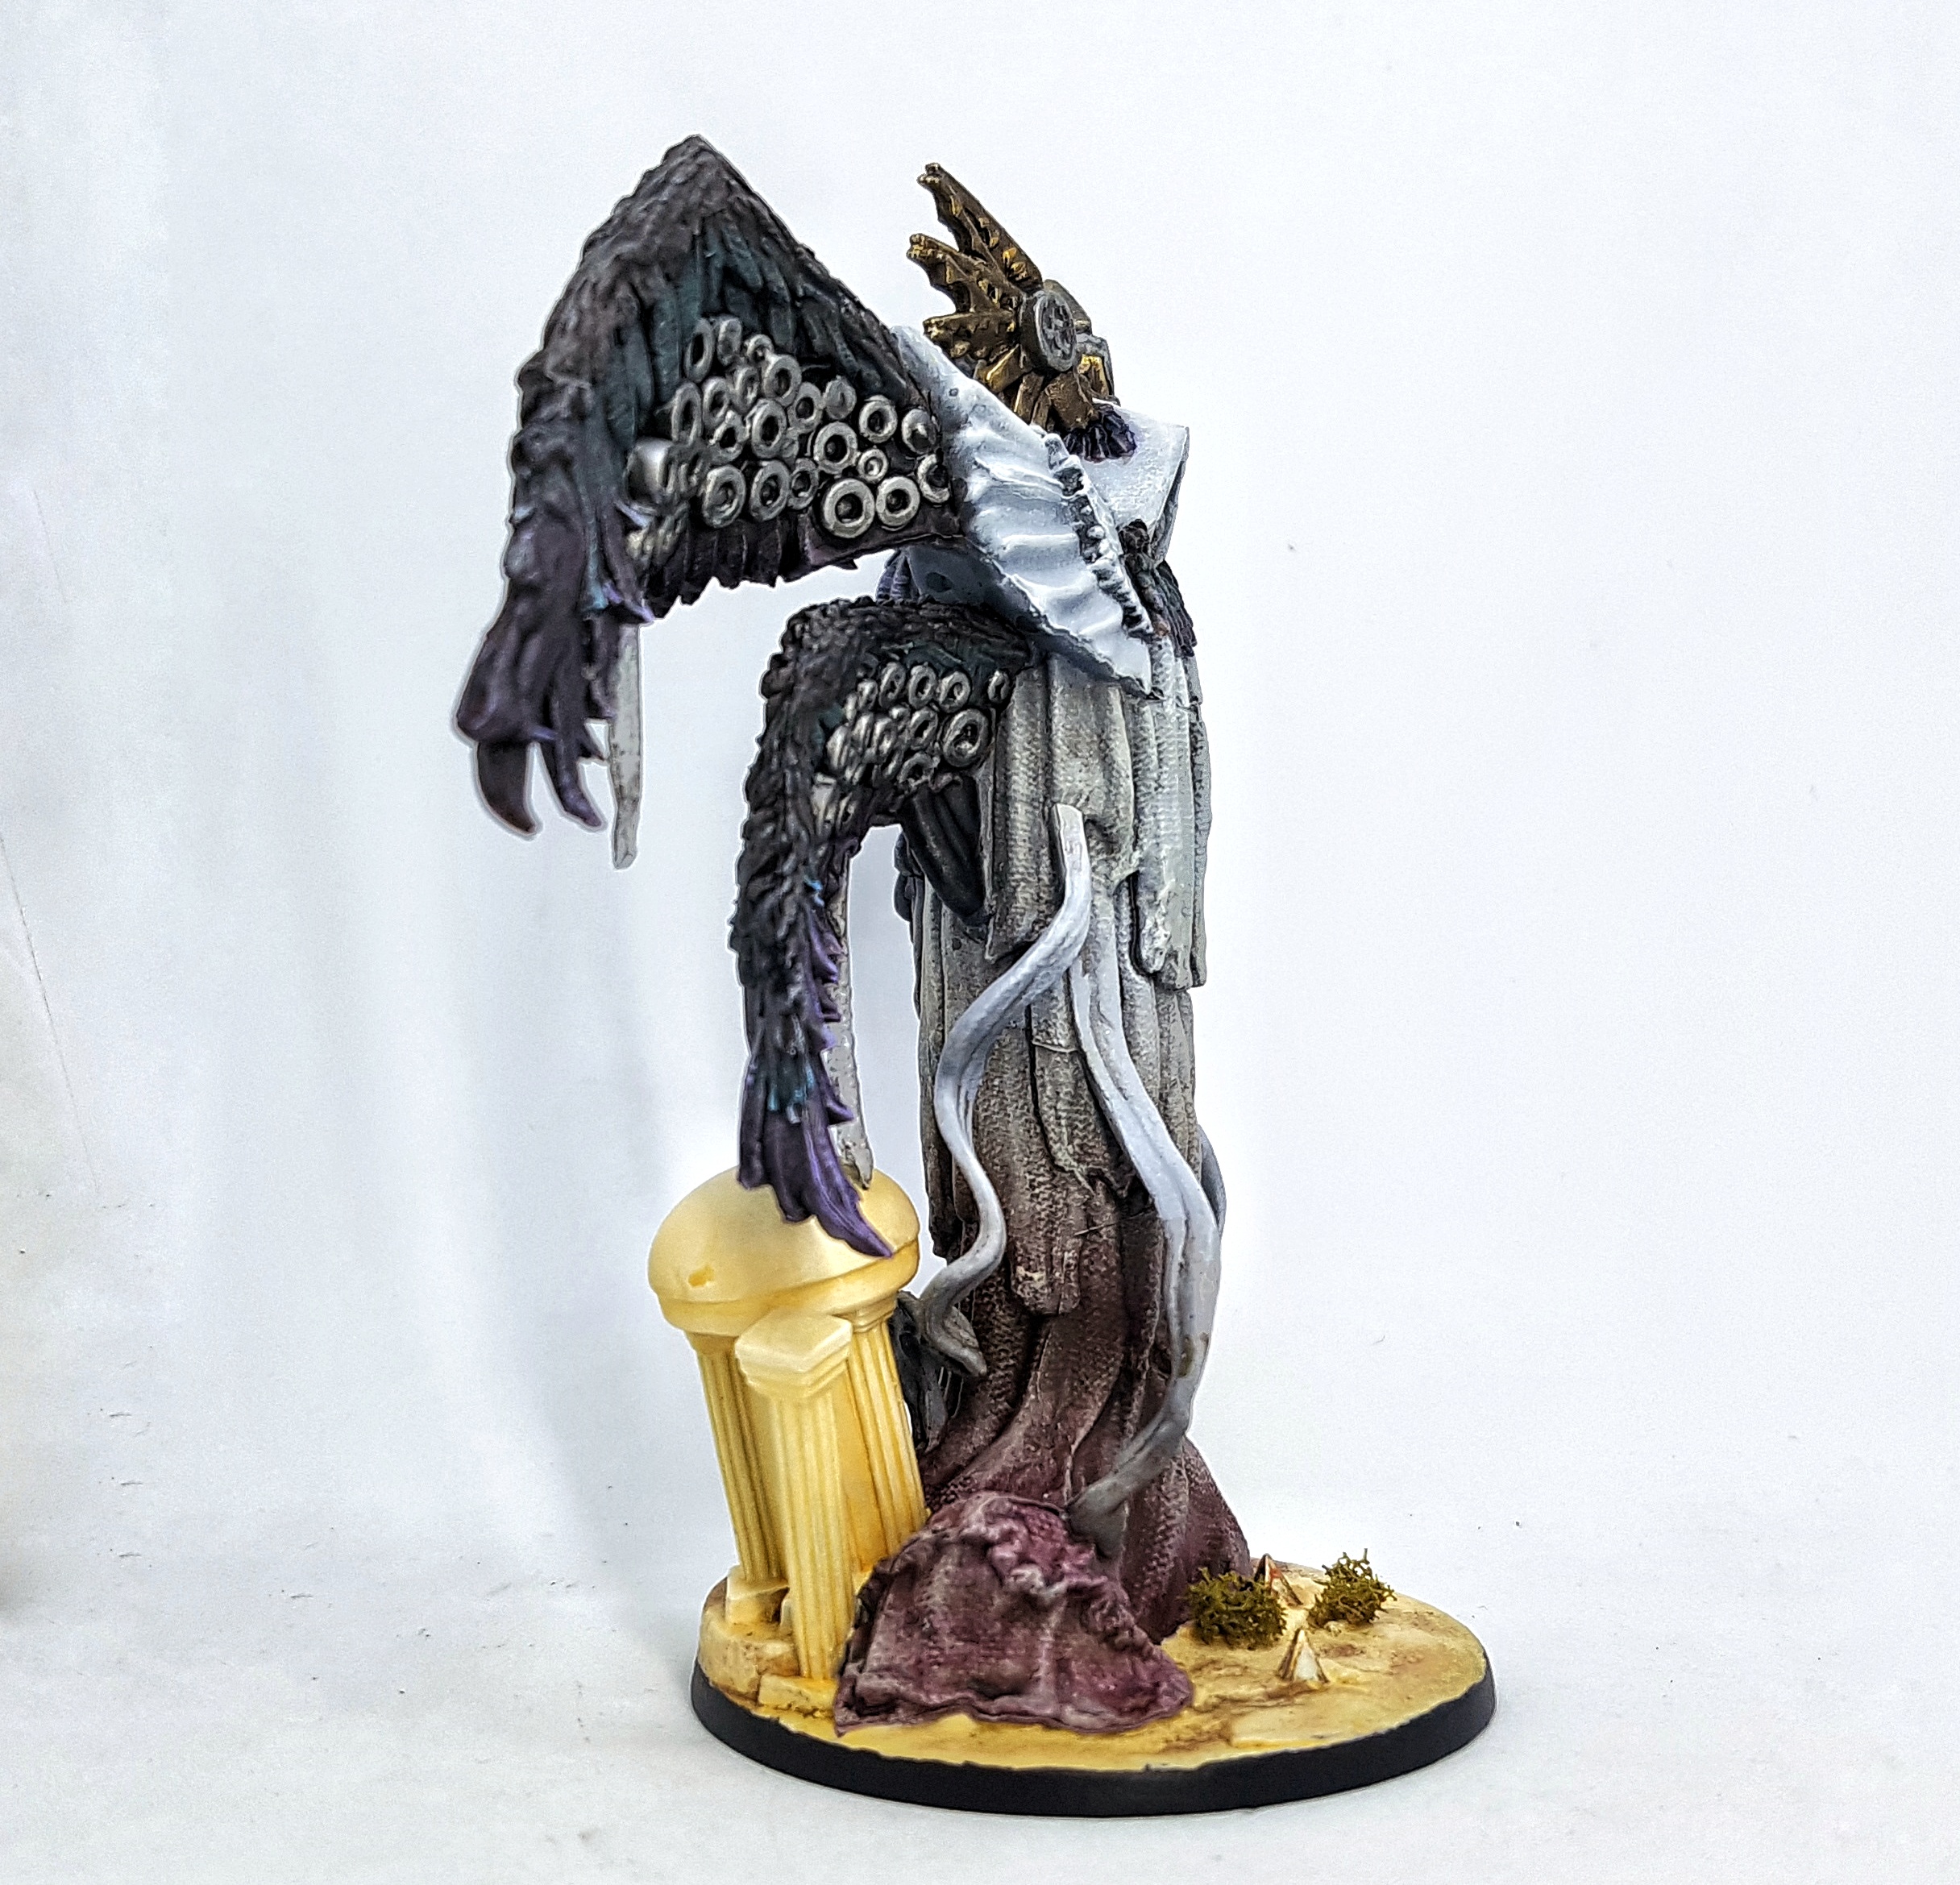
Once again, this guy comes with plug and play platforms. See pics below bot with and without them.
 I did notice that unpainted pillar and have since painted it, but the updated photo is not as good. See the below image with the platforms as evidence
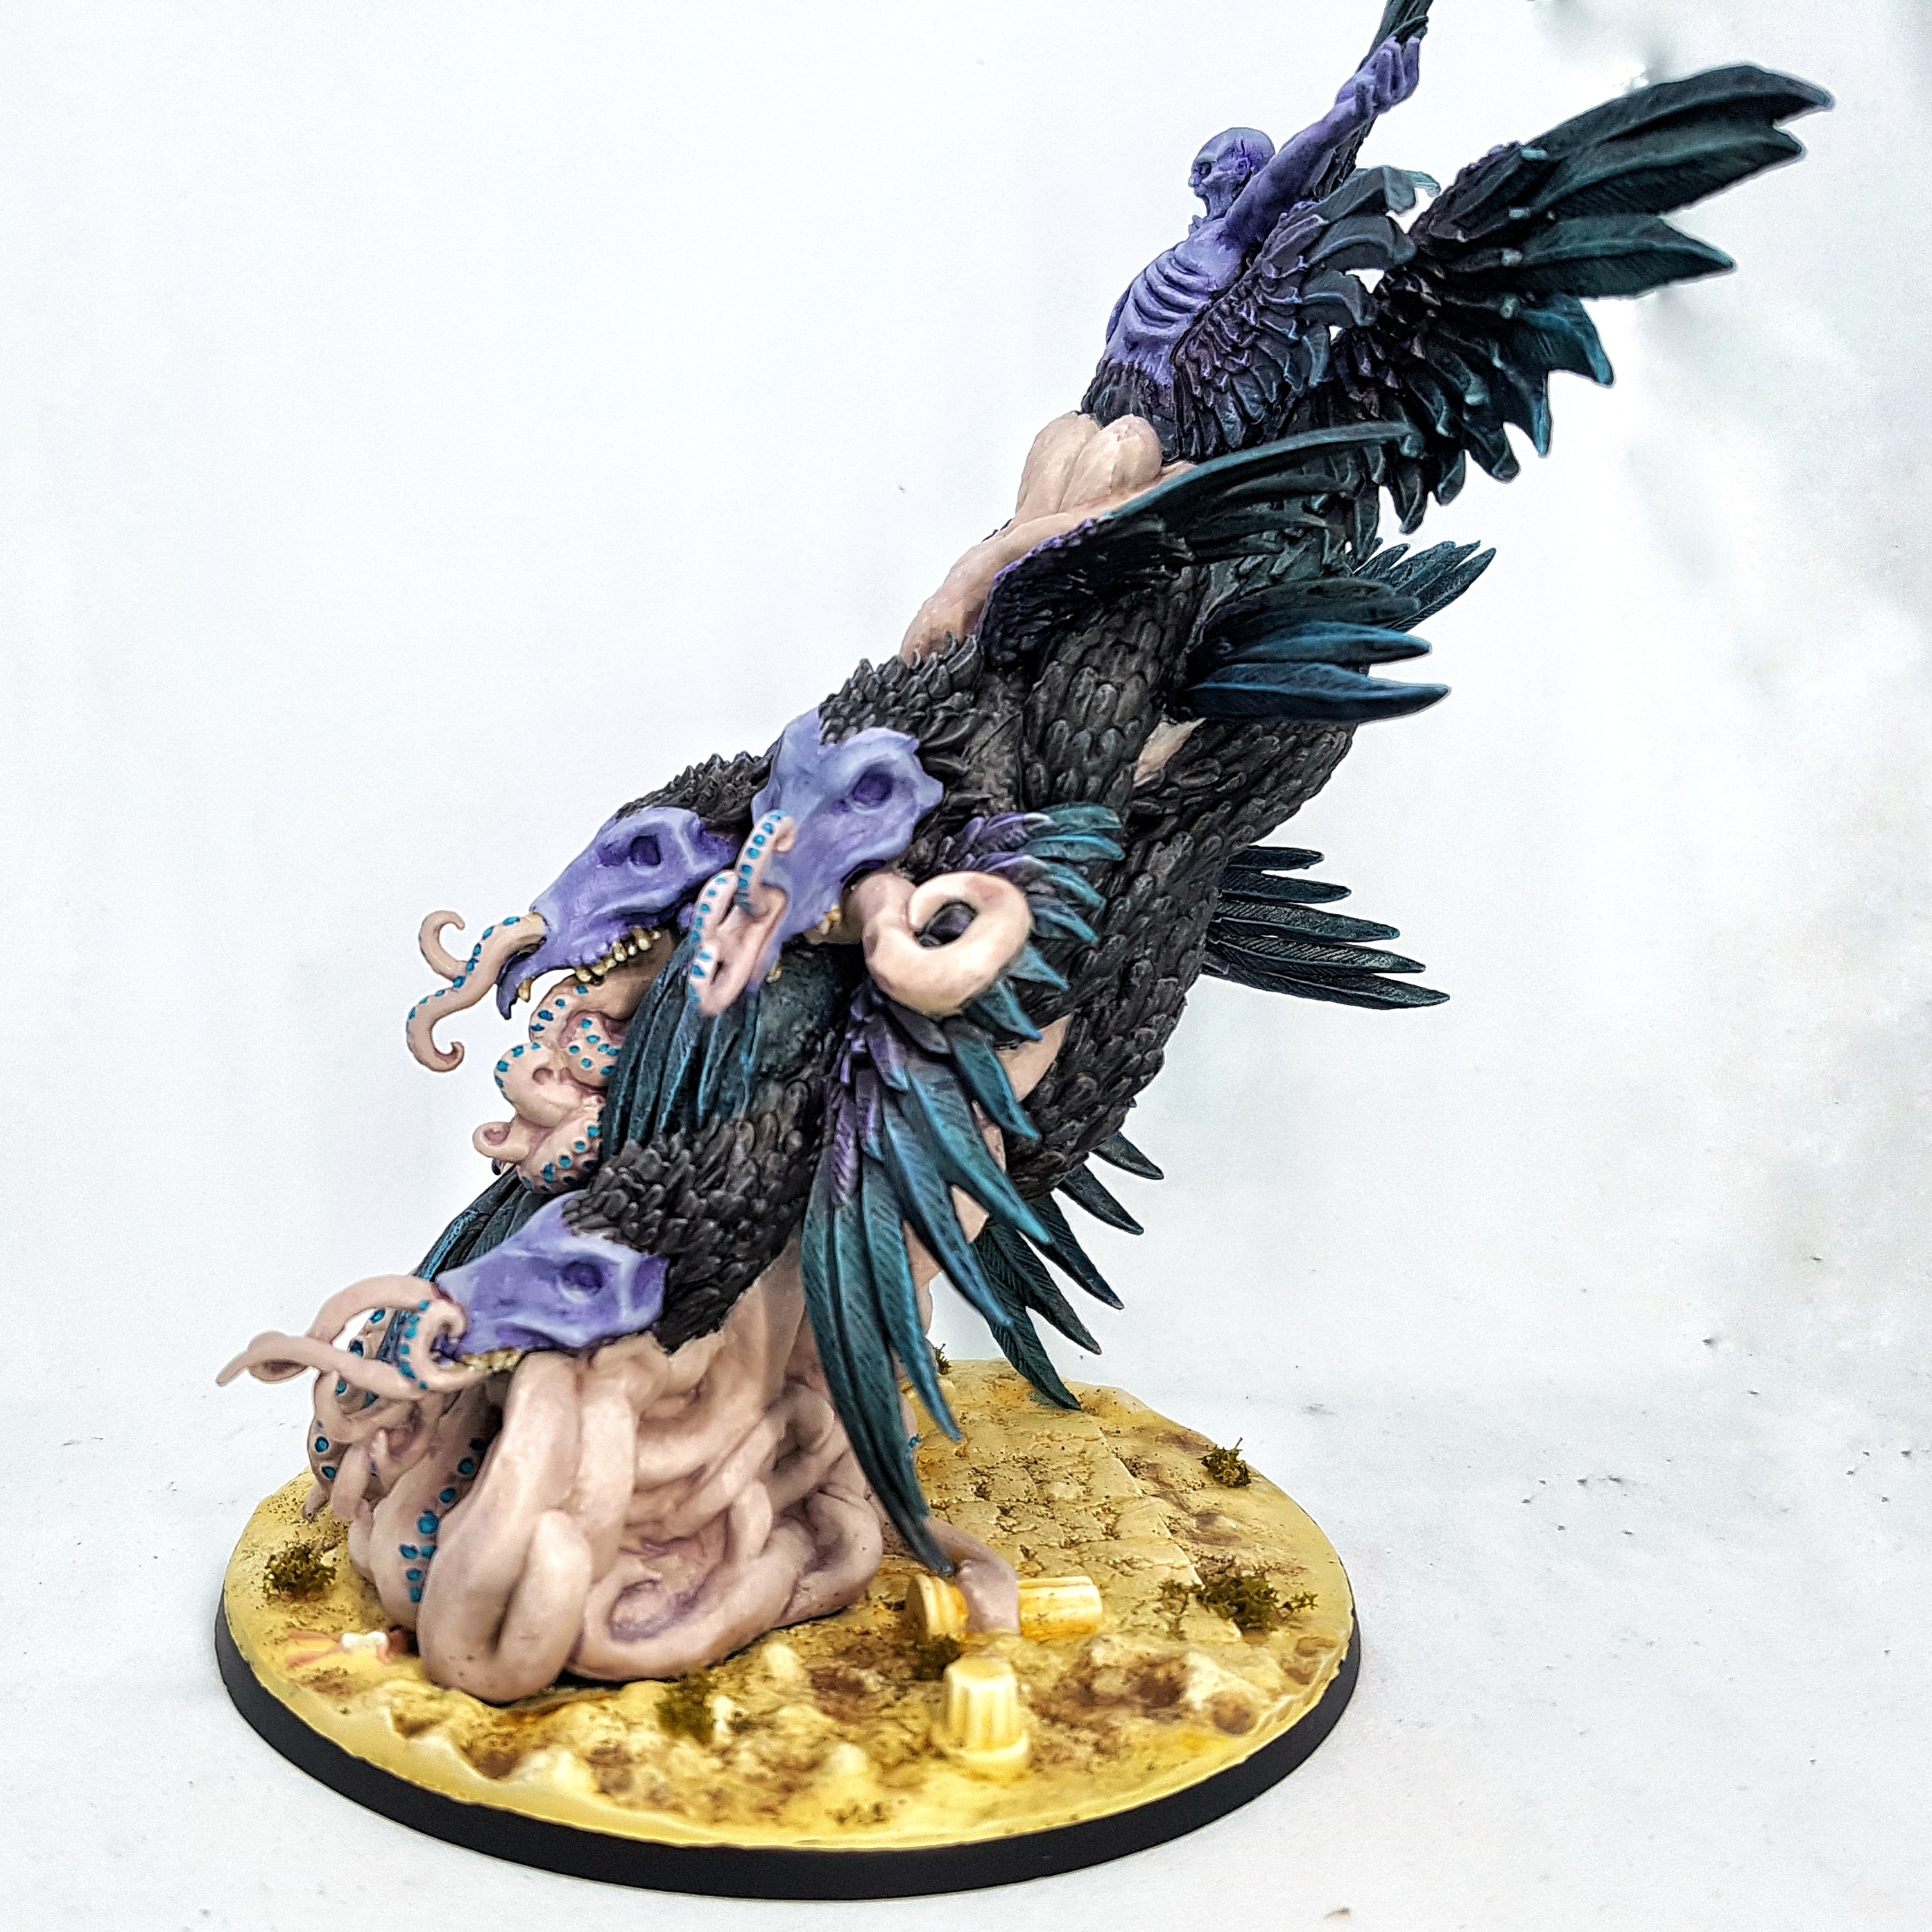
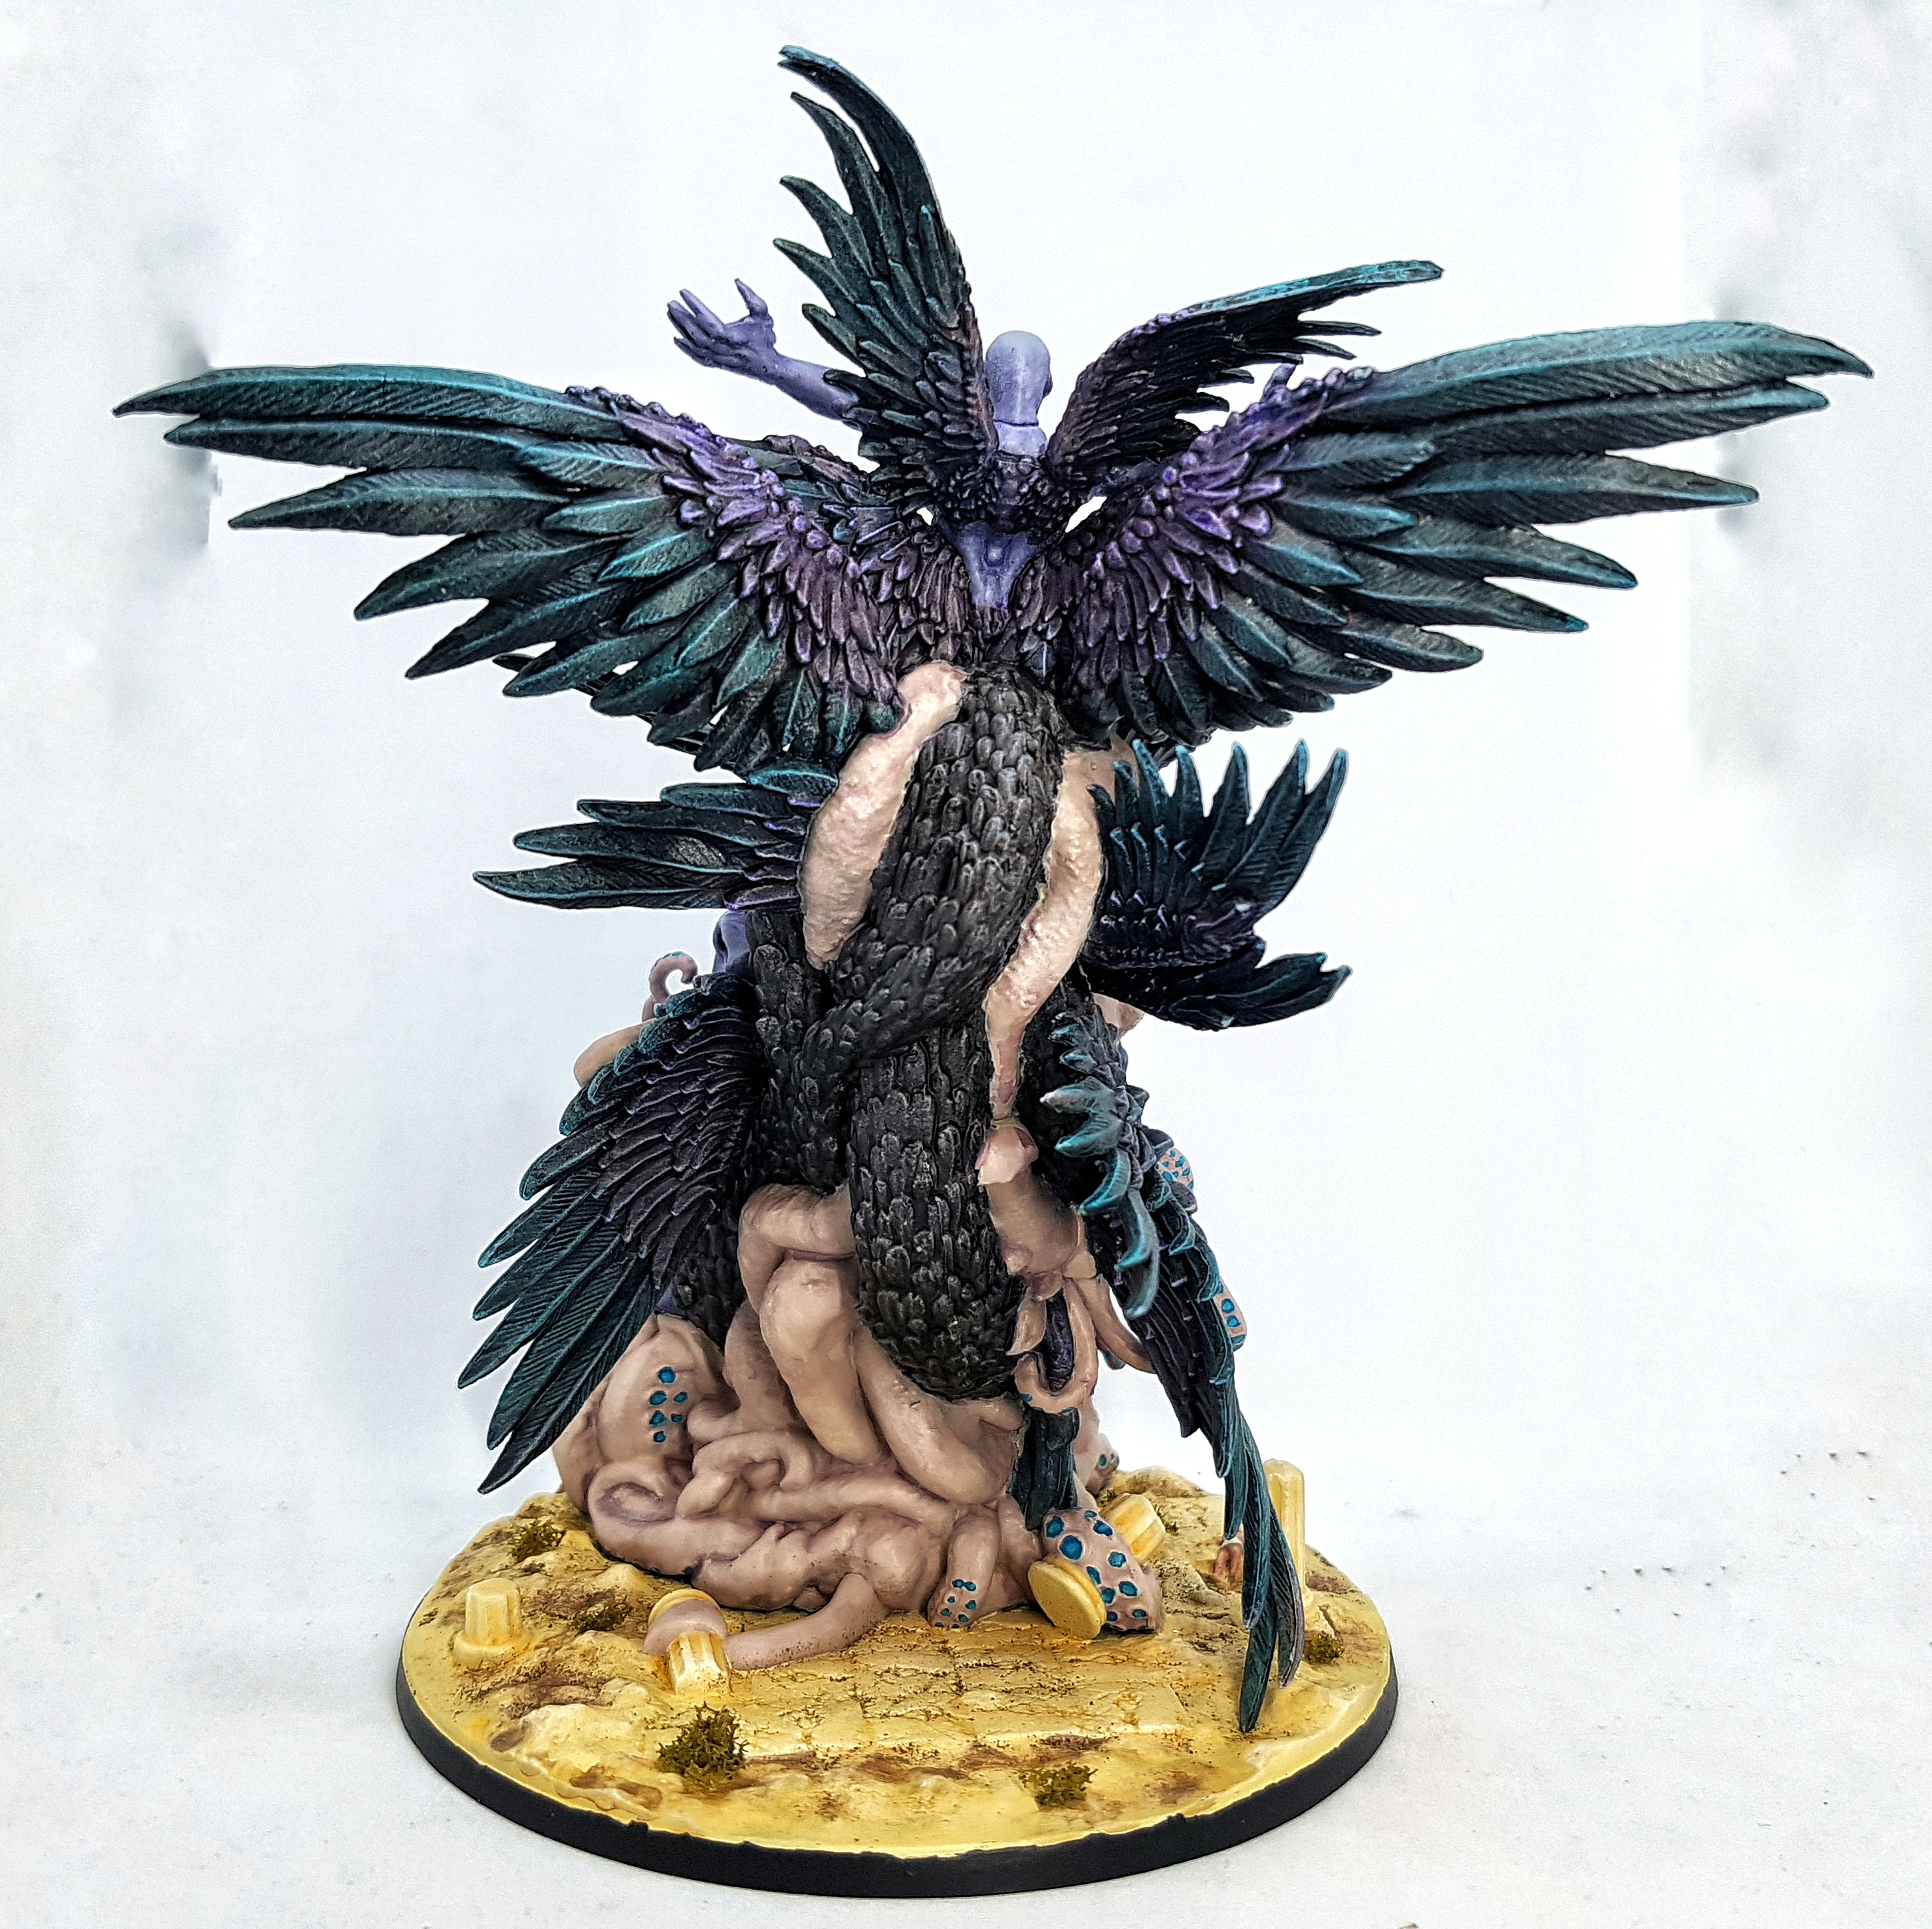
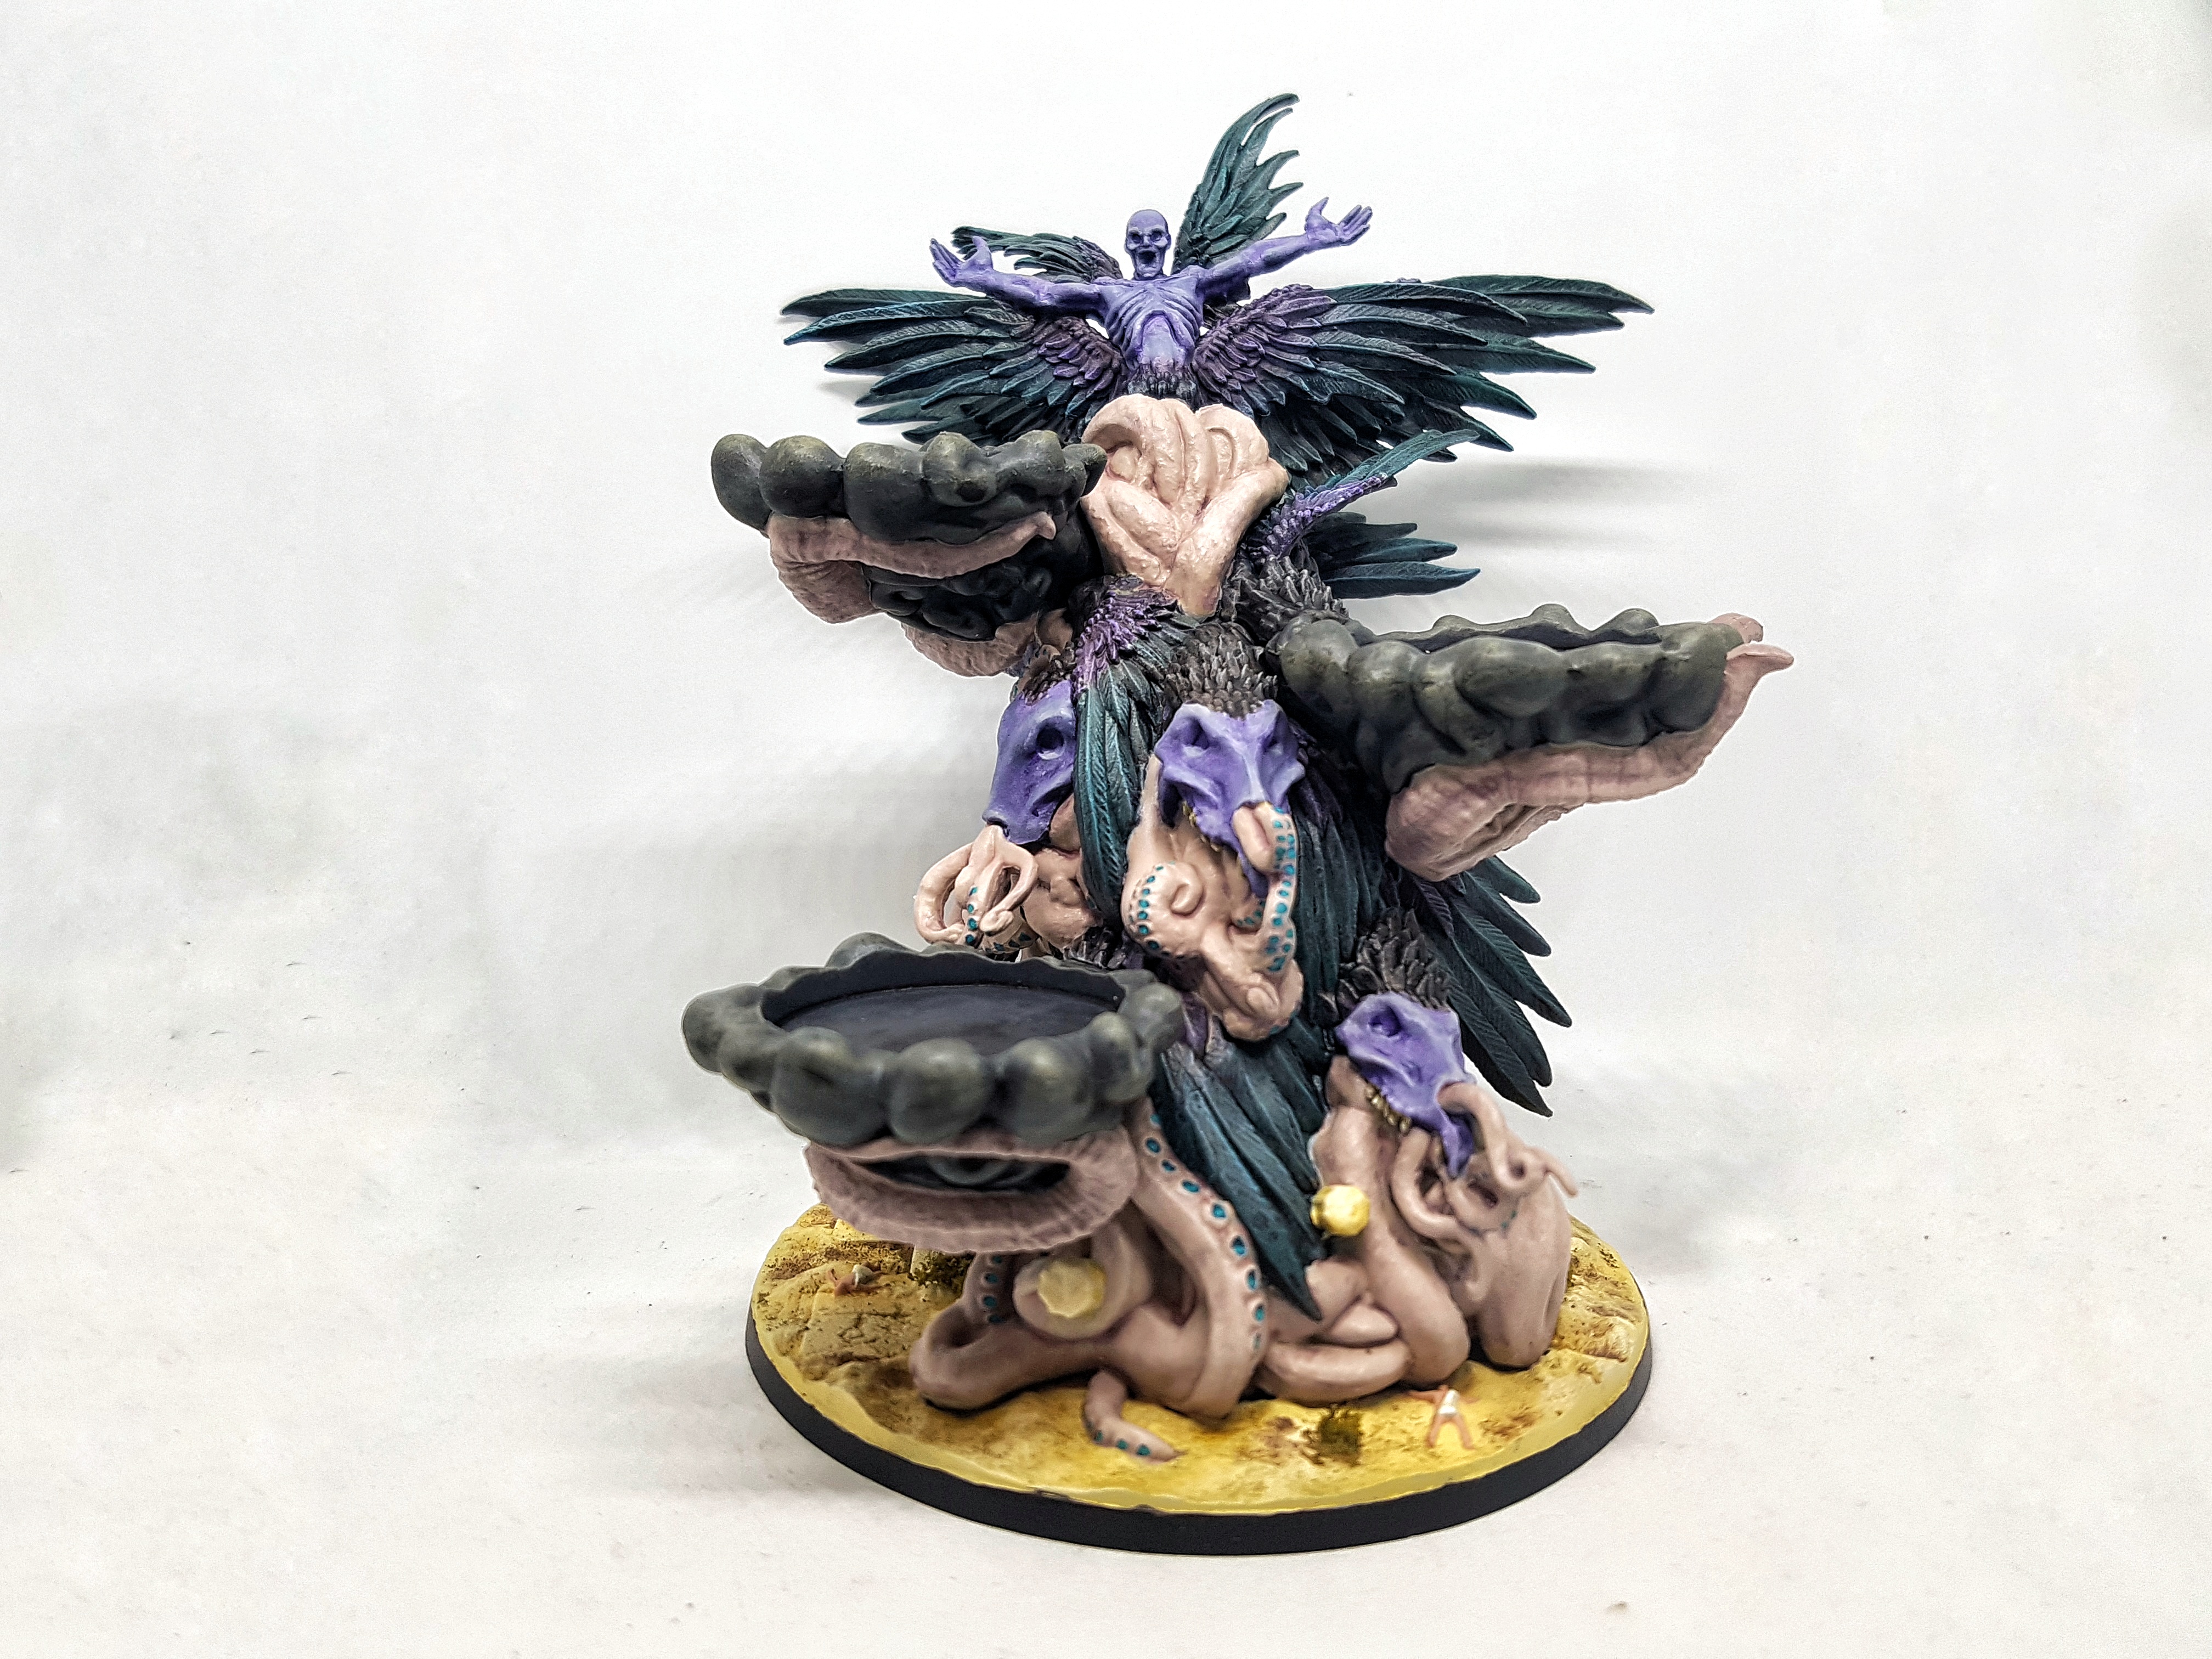 See? I did paint that pillar just beneath the bottom platform.
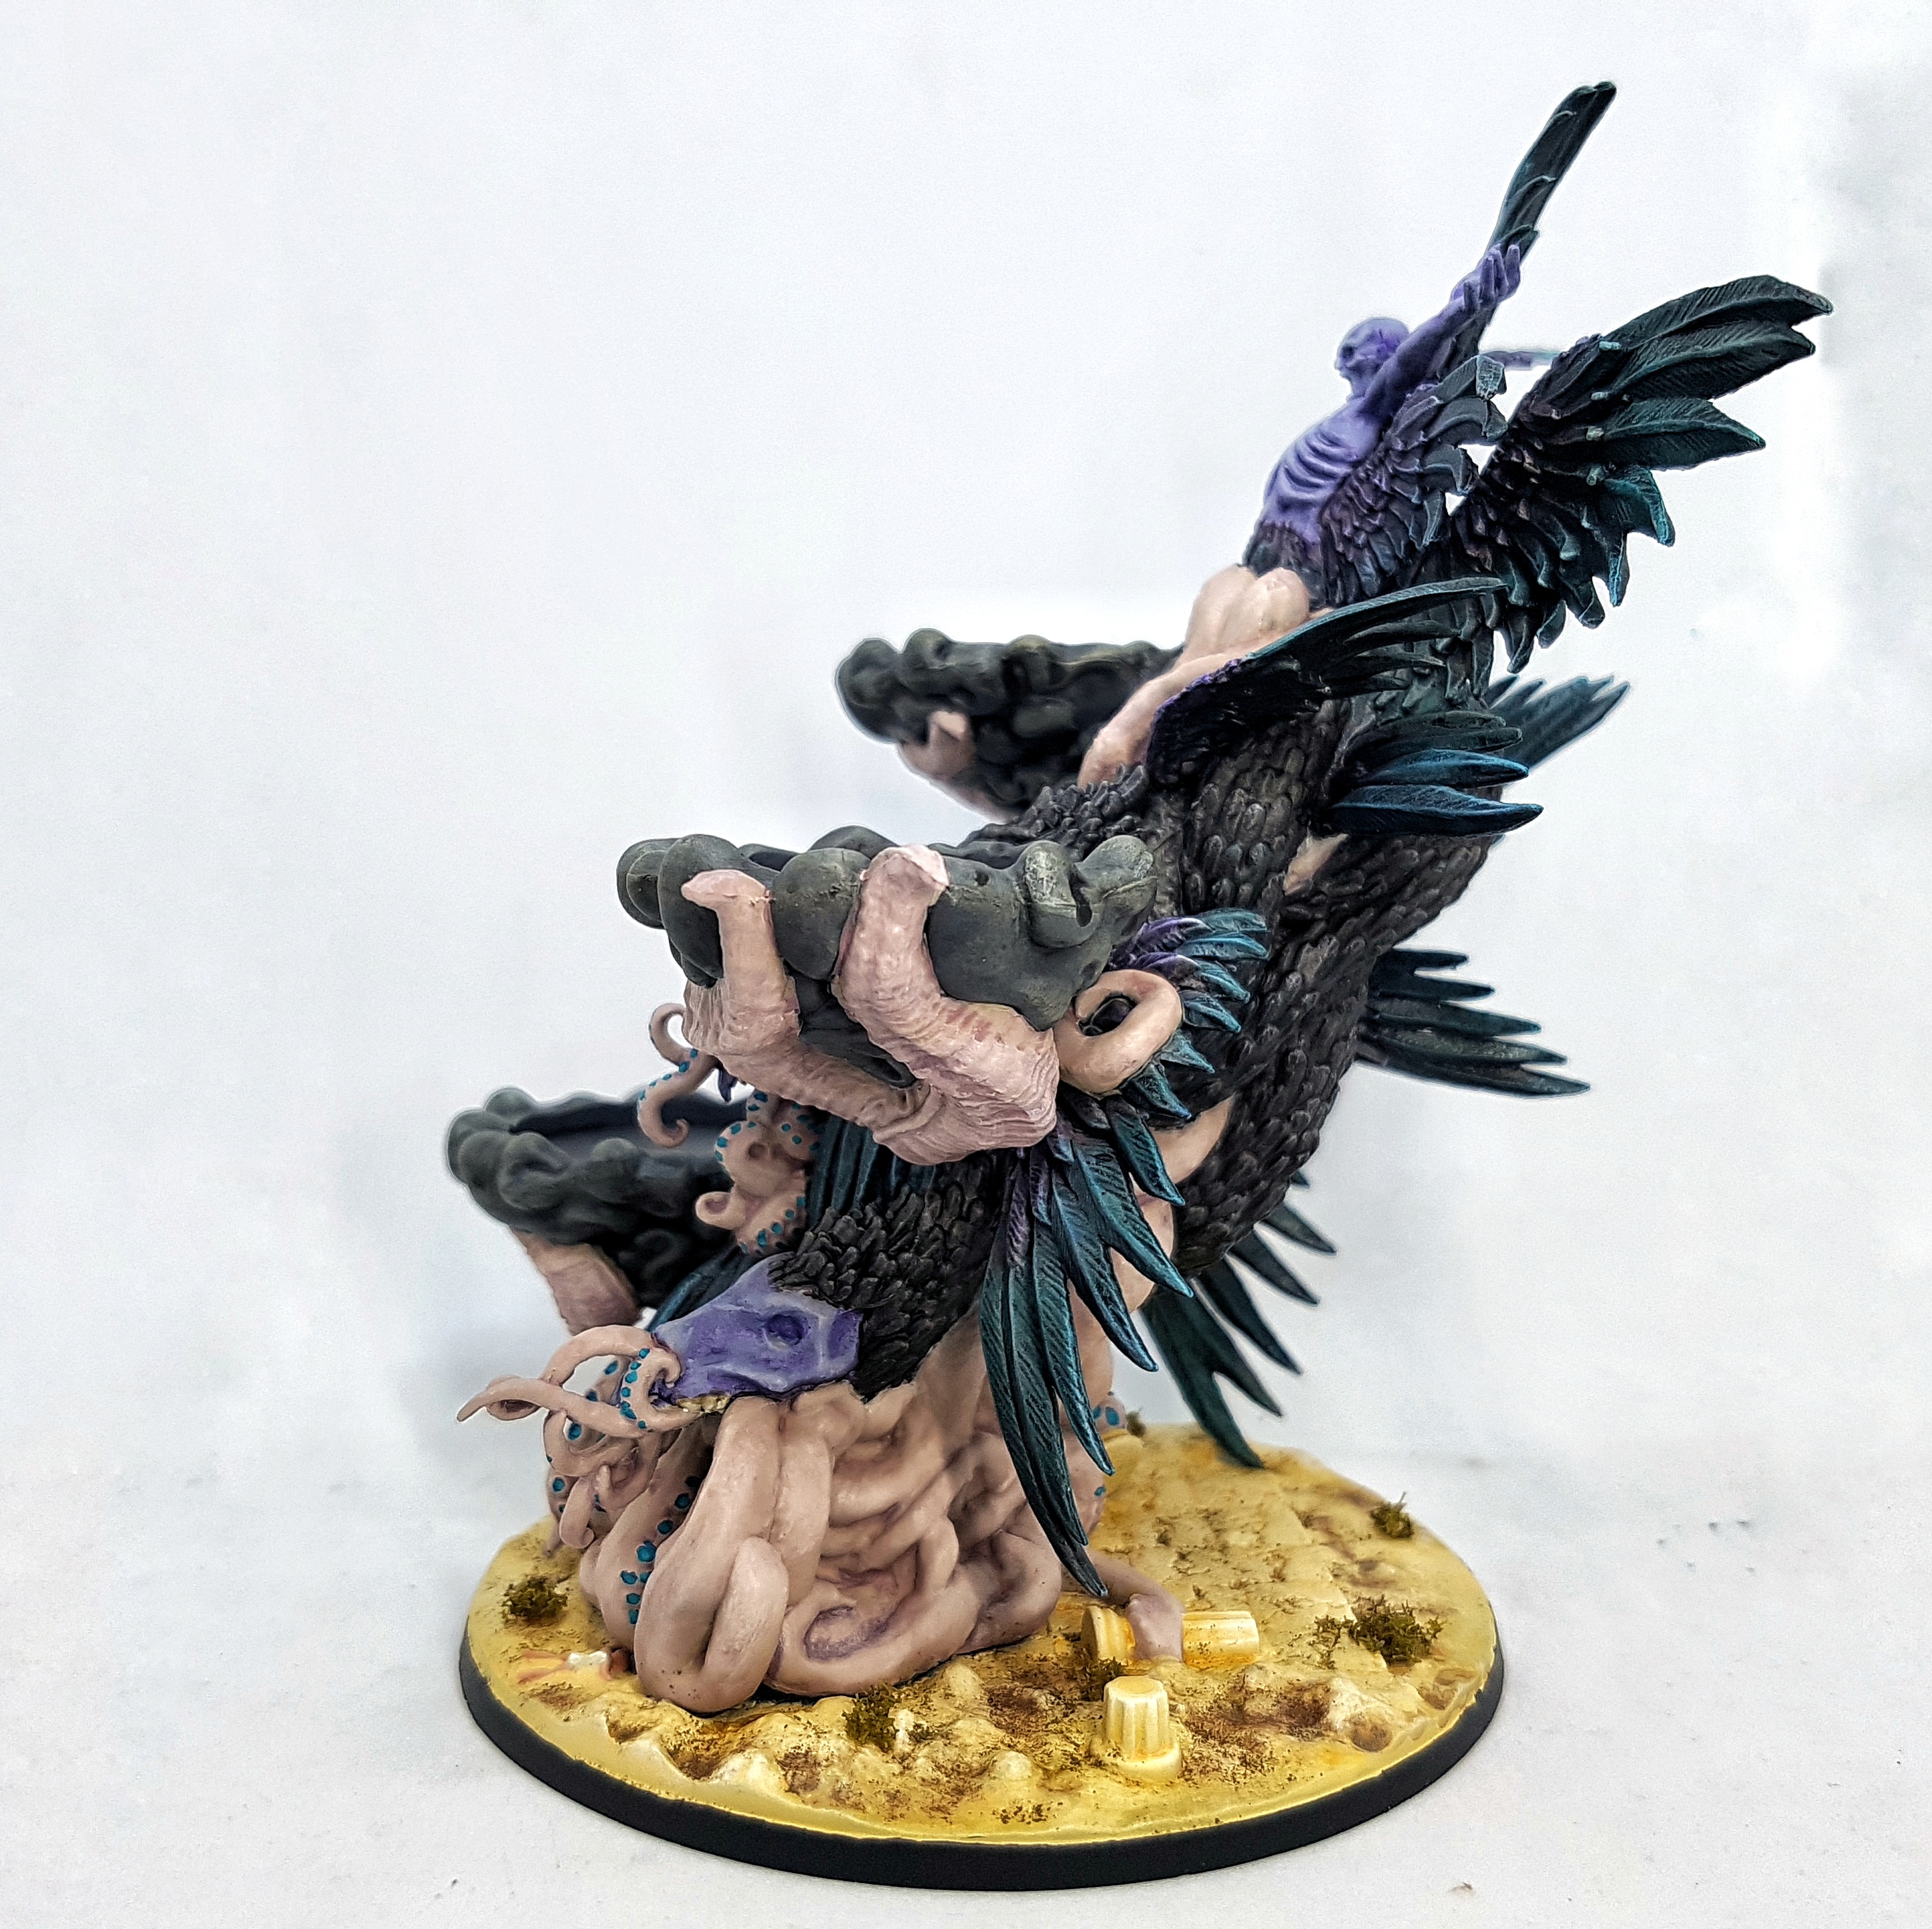

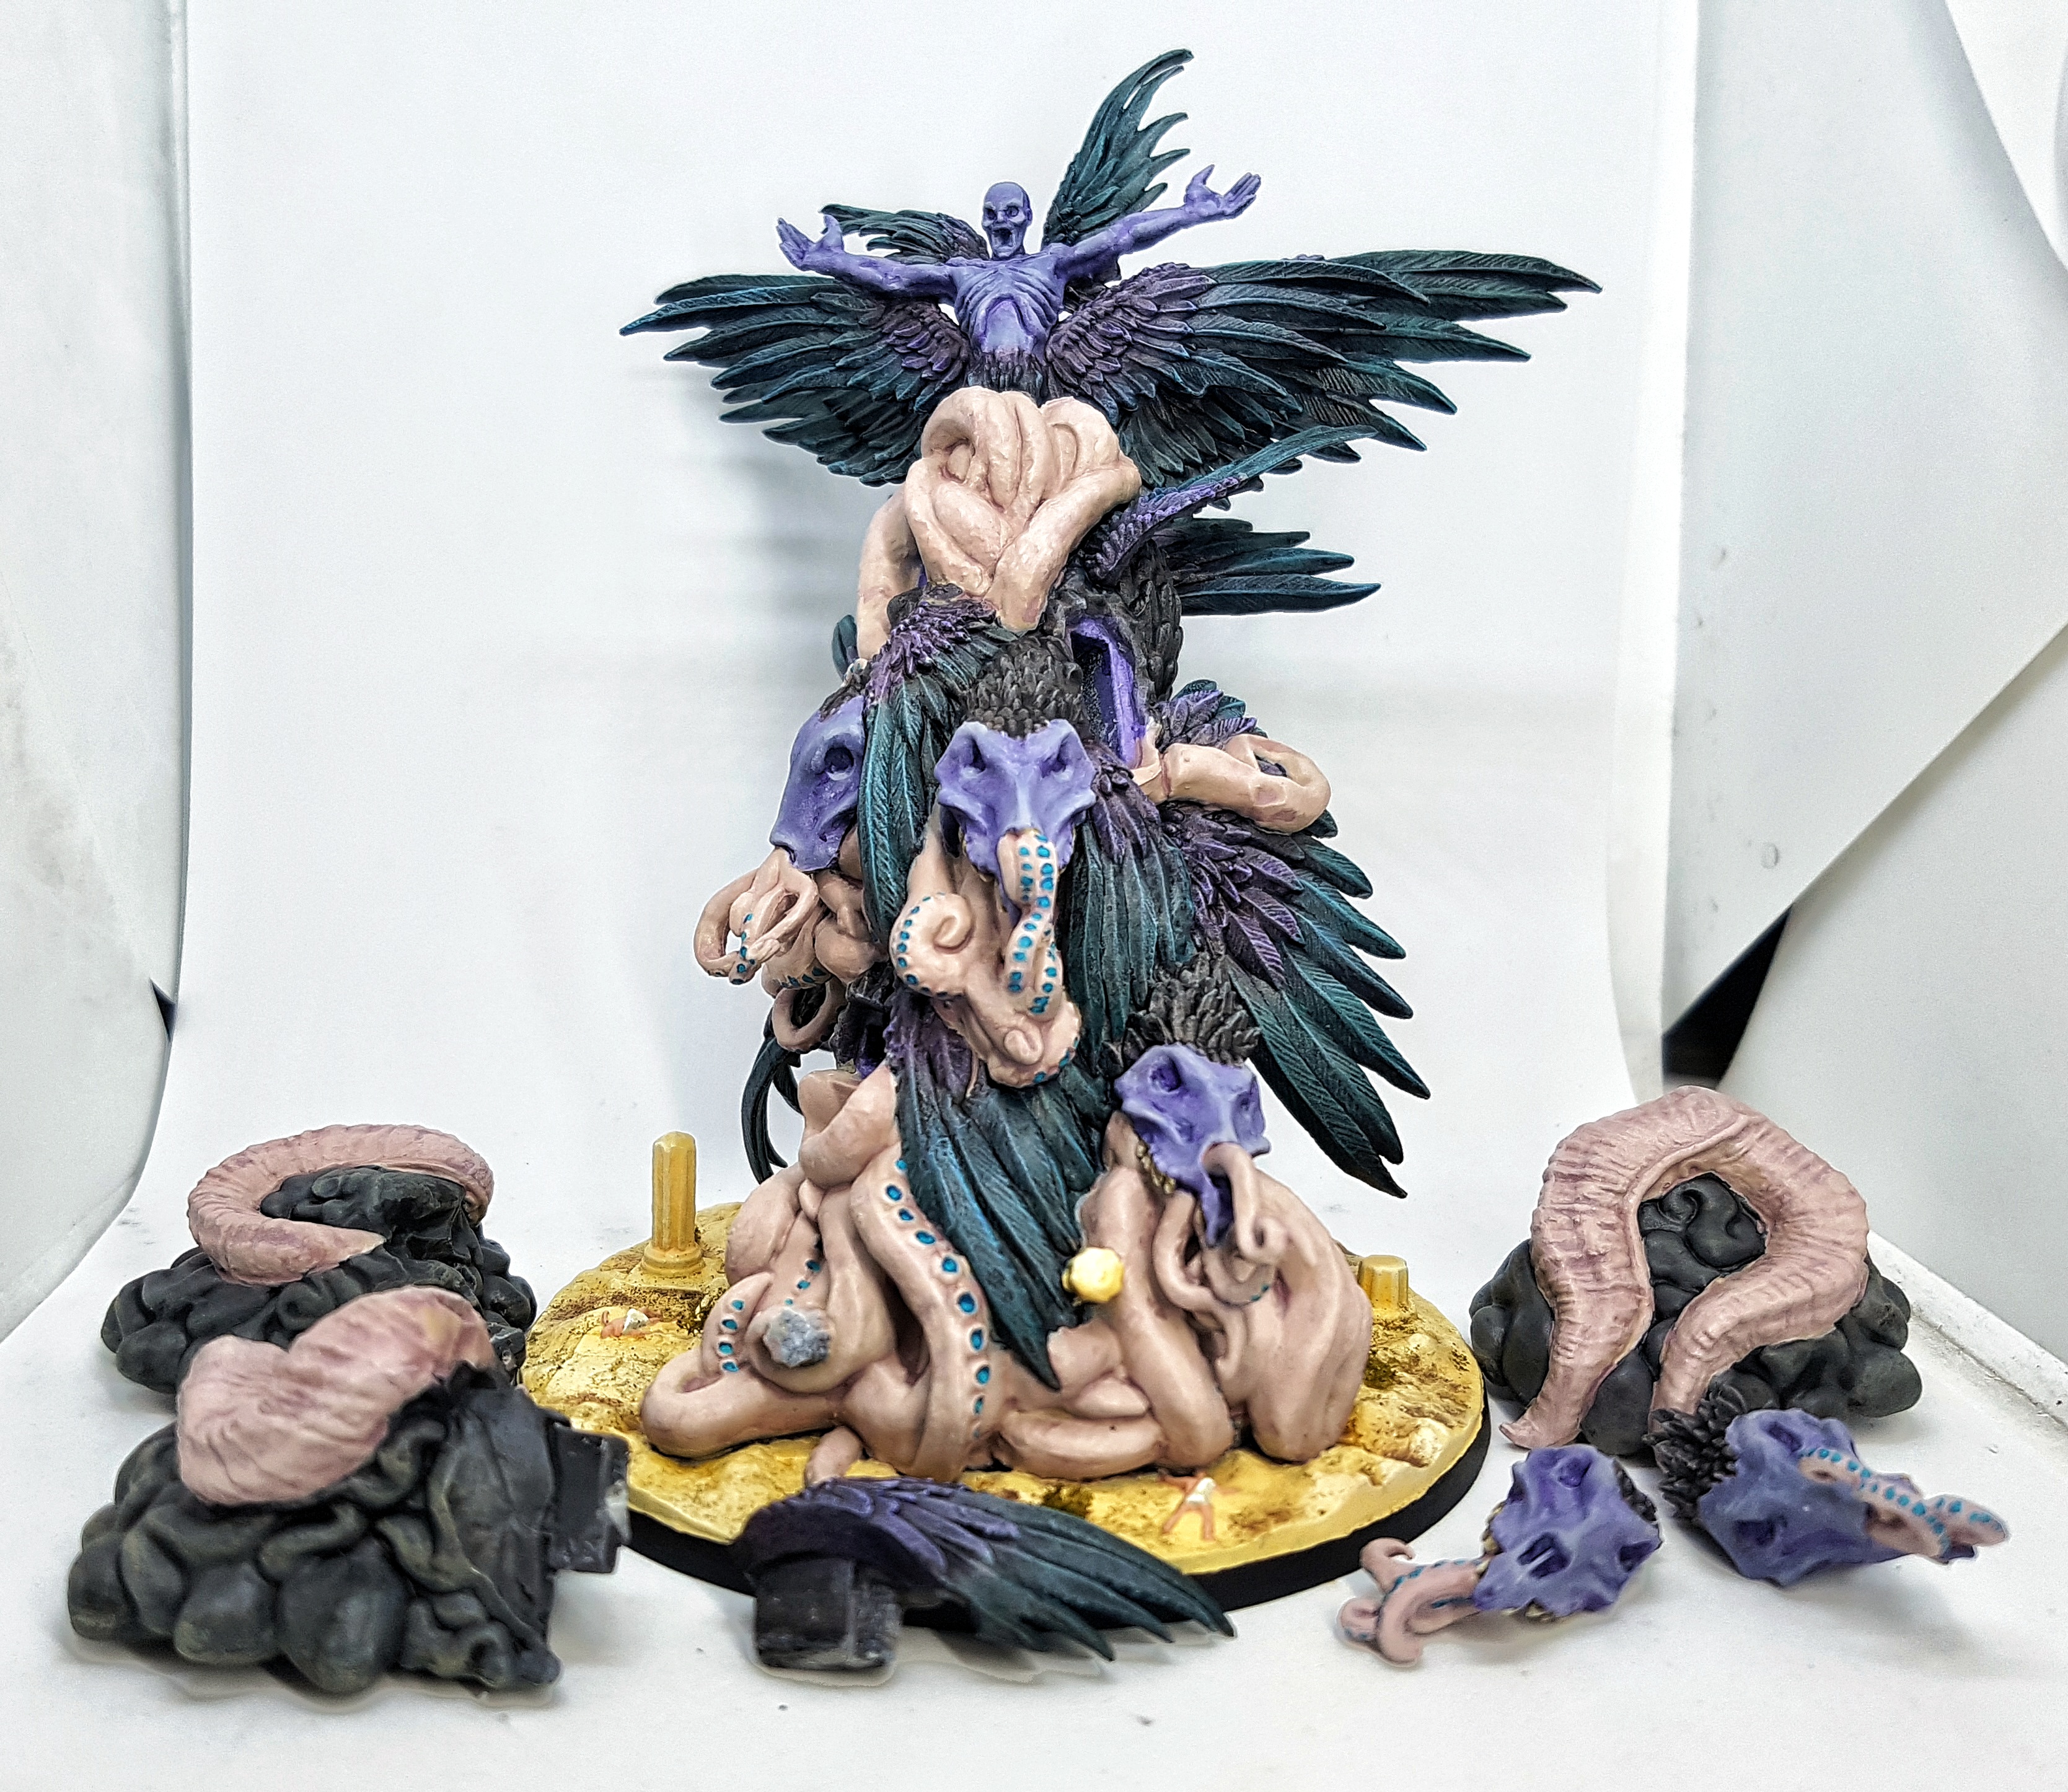
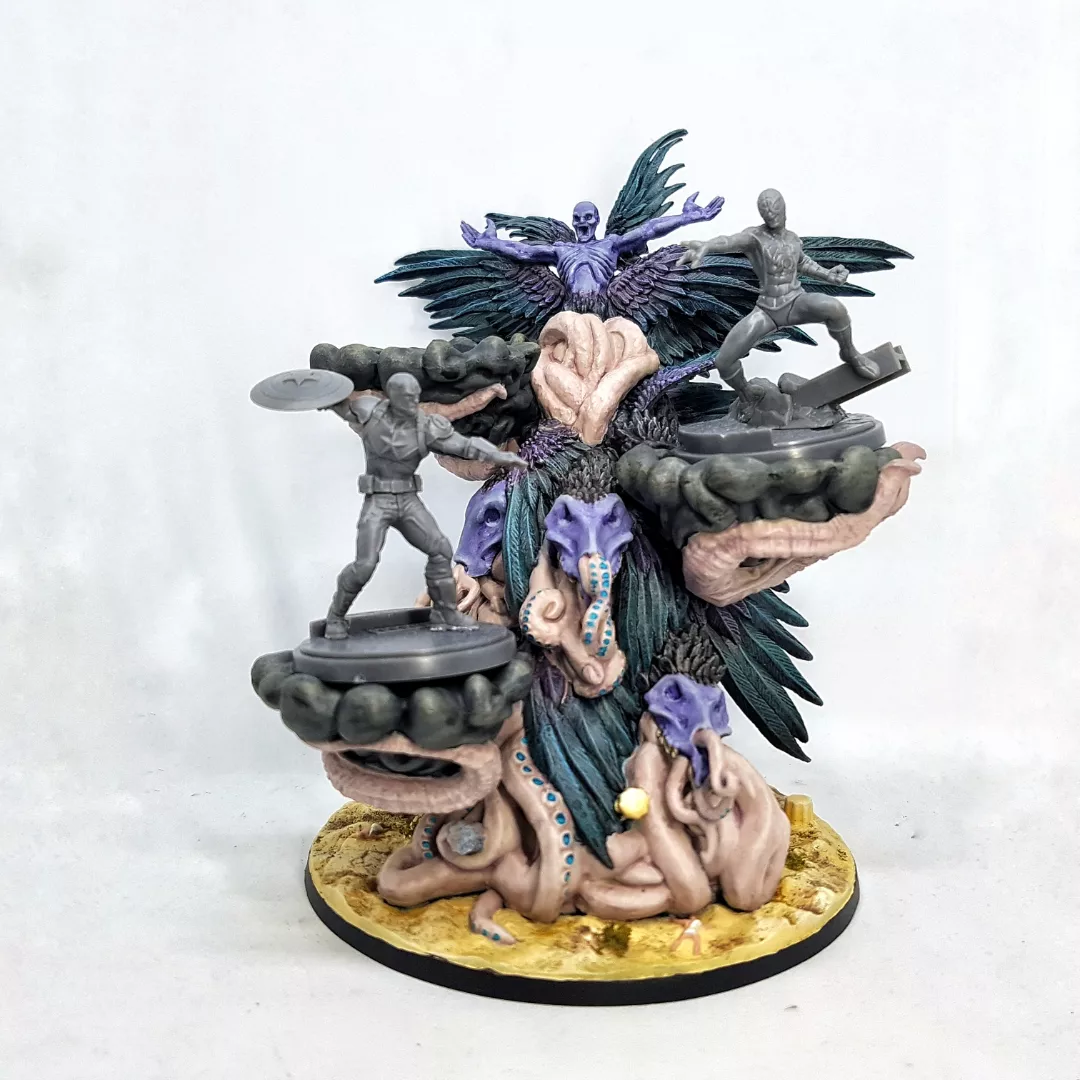
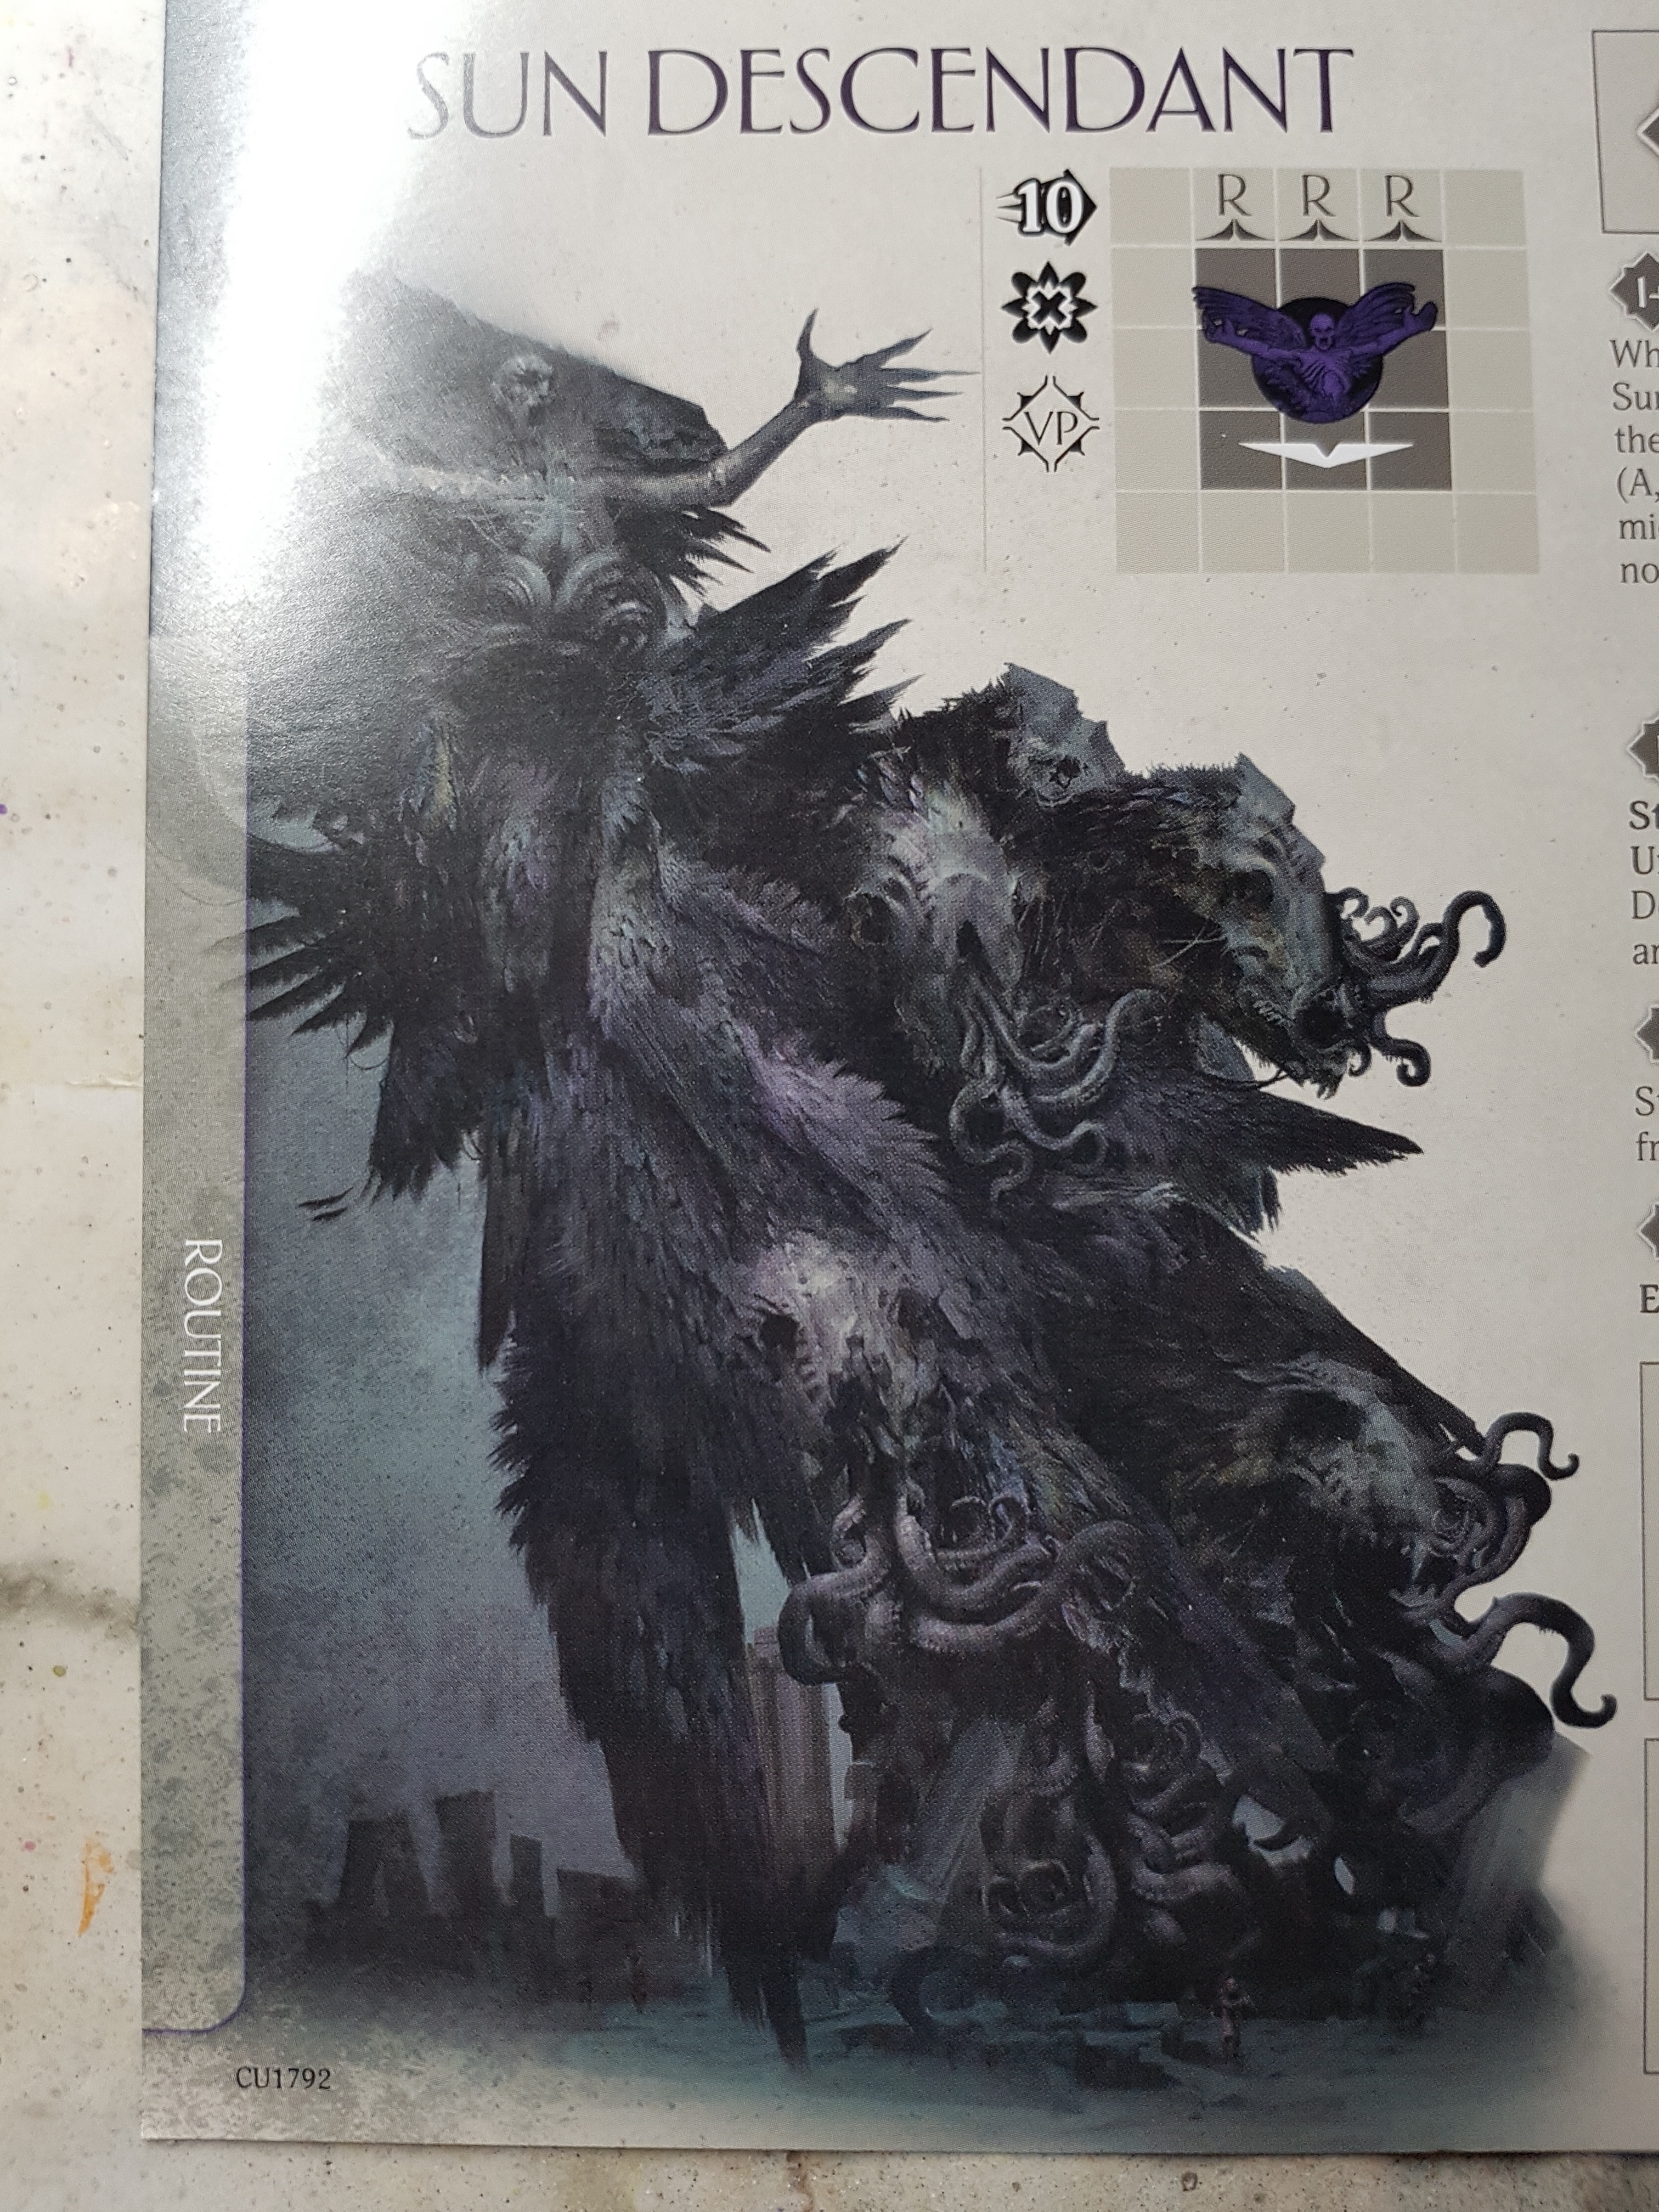

The last 4 pics in the gallery show him with the modular parts detached, with the platforms on and some MCP models using them (They were the only models nearby), the art from his stat card (All darkness and shadows. Moody and cool, but not super helpful for working out what’s what, or suggesting what colour anything is supposed to be), and a pic of a painted piece I think I got from their Facebook page?
ATO is returning to Kickstarter on 16th May 2023 for a second printing, if anyone is interested:
Just a reminder! Aeon Trespass: Odyssey returns to crowdfunding May 16th 2023! Mark your calendars! The campaign will encompass a second printing of the Core Game, its Expansions, all original add-ons, and much more!
There will be new add-ons (Obol dice for card haters ;p), as well as new gameplay content. As mentioned above, there are no major rules revisions planned, there is not much to fix or re-balance! We’ve made a hell of a robust game! If nothing changes, the few errata-ed game components will be simply offered to the original backers for free or bundled with something fun!
My plan is to play through the Prelude intro module over the 4 day Easter weekend so I can work out if I want to throw more money at this before the KS goes live, and decide if I want extra dice and perhaps the luxury tiles. I need to finish the final 6 missions from Gloomhaven Jaws of the Lion first. Gonna try for that this weekend now I’m all done with this and it’s not freezing in my games room anymore (stupid winter, stupid UK government, and stupid corporate greed!) There will be another KS later on for the Expandalone, ATO: The Twelve Sins of Herakles.
If you want to follow them on KS so you get notifications of these projects, the link is HERE.
I’ll be back on this project after Easter with some group shots of the minis, pics of the game in use, and my opinions on the Prelude module and the game. I don’t plan on getting deep in to the game until Wave 2 is at least on the boats. I don’t want to have months, perhaps years between cycles 3 and 4 as I’ll “lose my place” in the story, and forget how things work. I also suspect there might be some elements yet to arrive that can be accessed during Cycles 1-3. I wonder if this will be a game I’ll only want to play through once as it’s so narratively led so I may as well make sure I have all my content available so it’s not missed or wasted. I do want to go back and play more Kingdom Death campaigns, but that’s far more sandboxy so it’s a different exprience.
 They're a Polish company, but they went with the American date format?
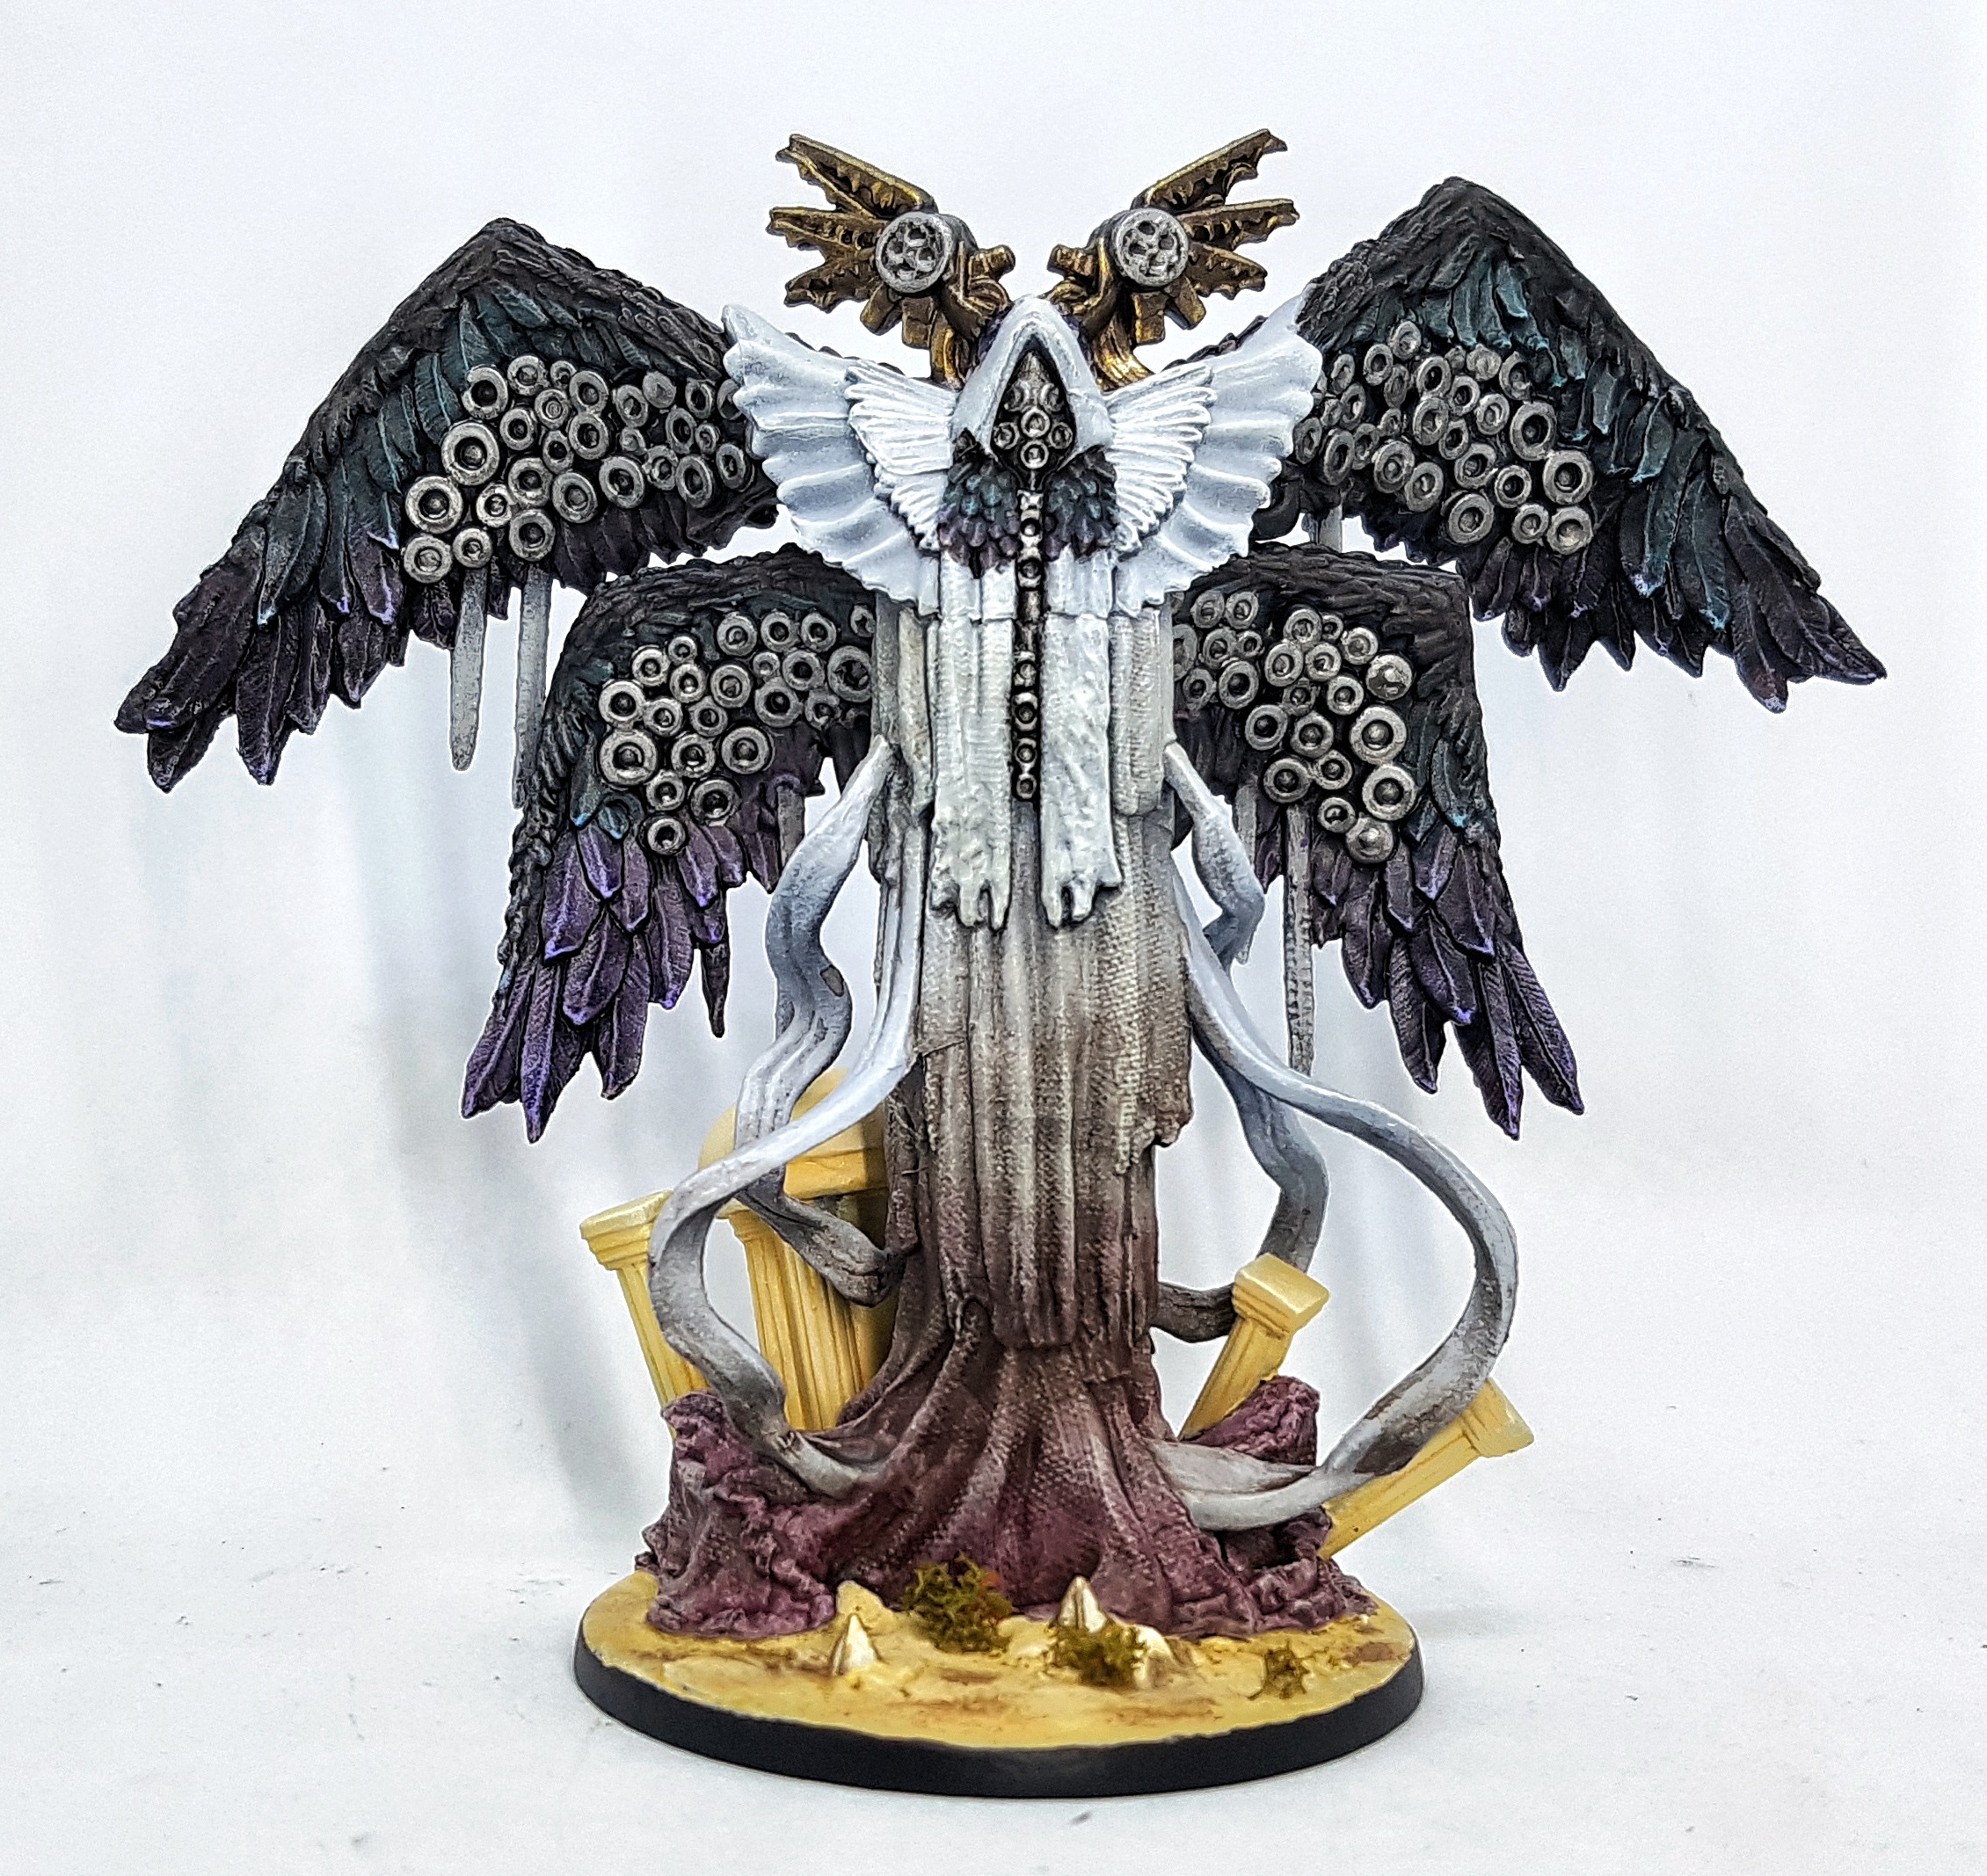
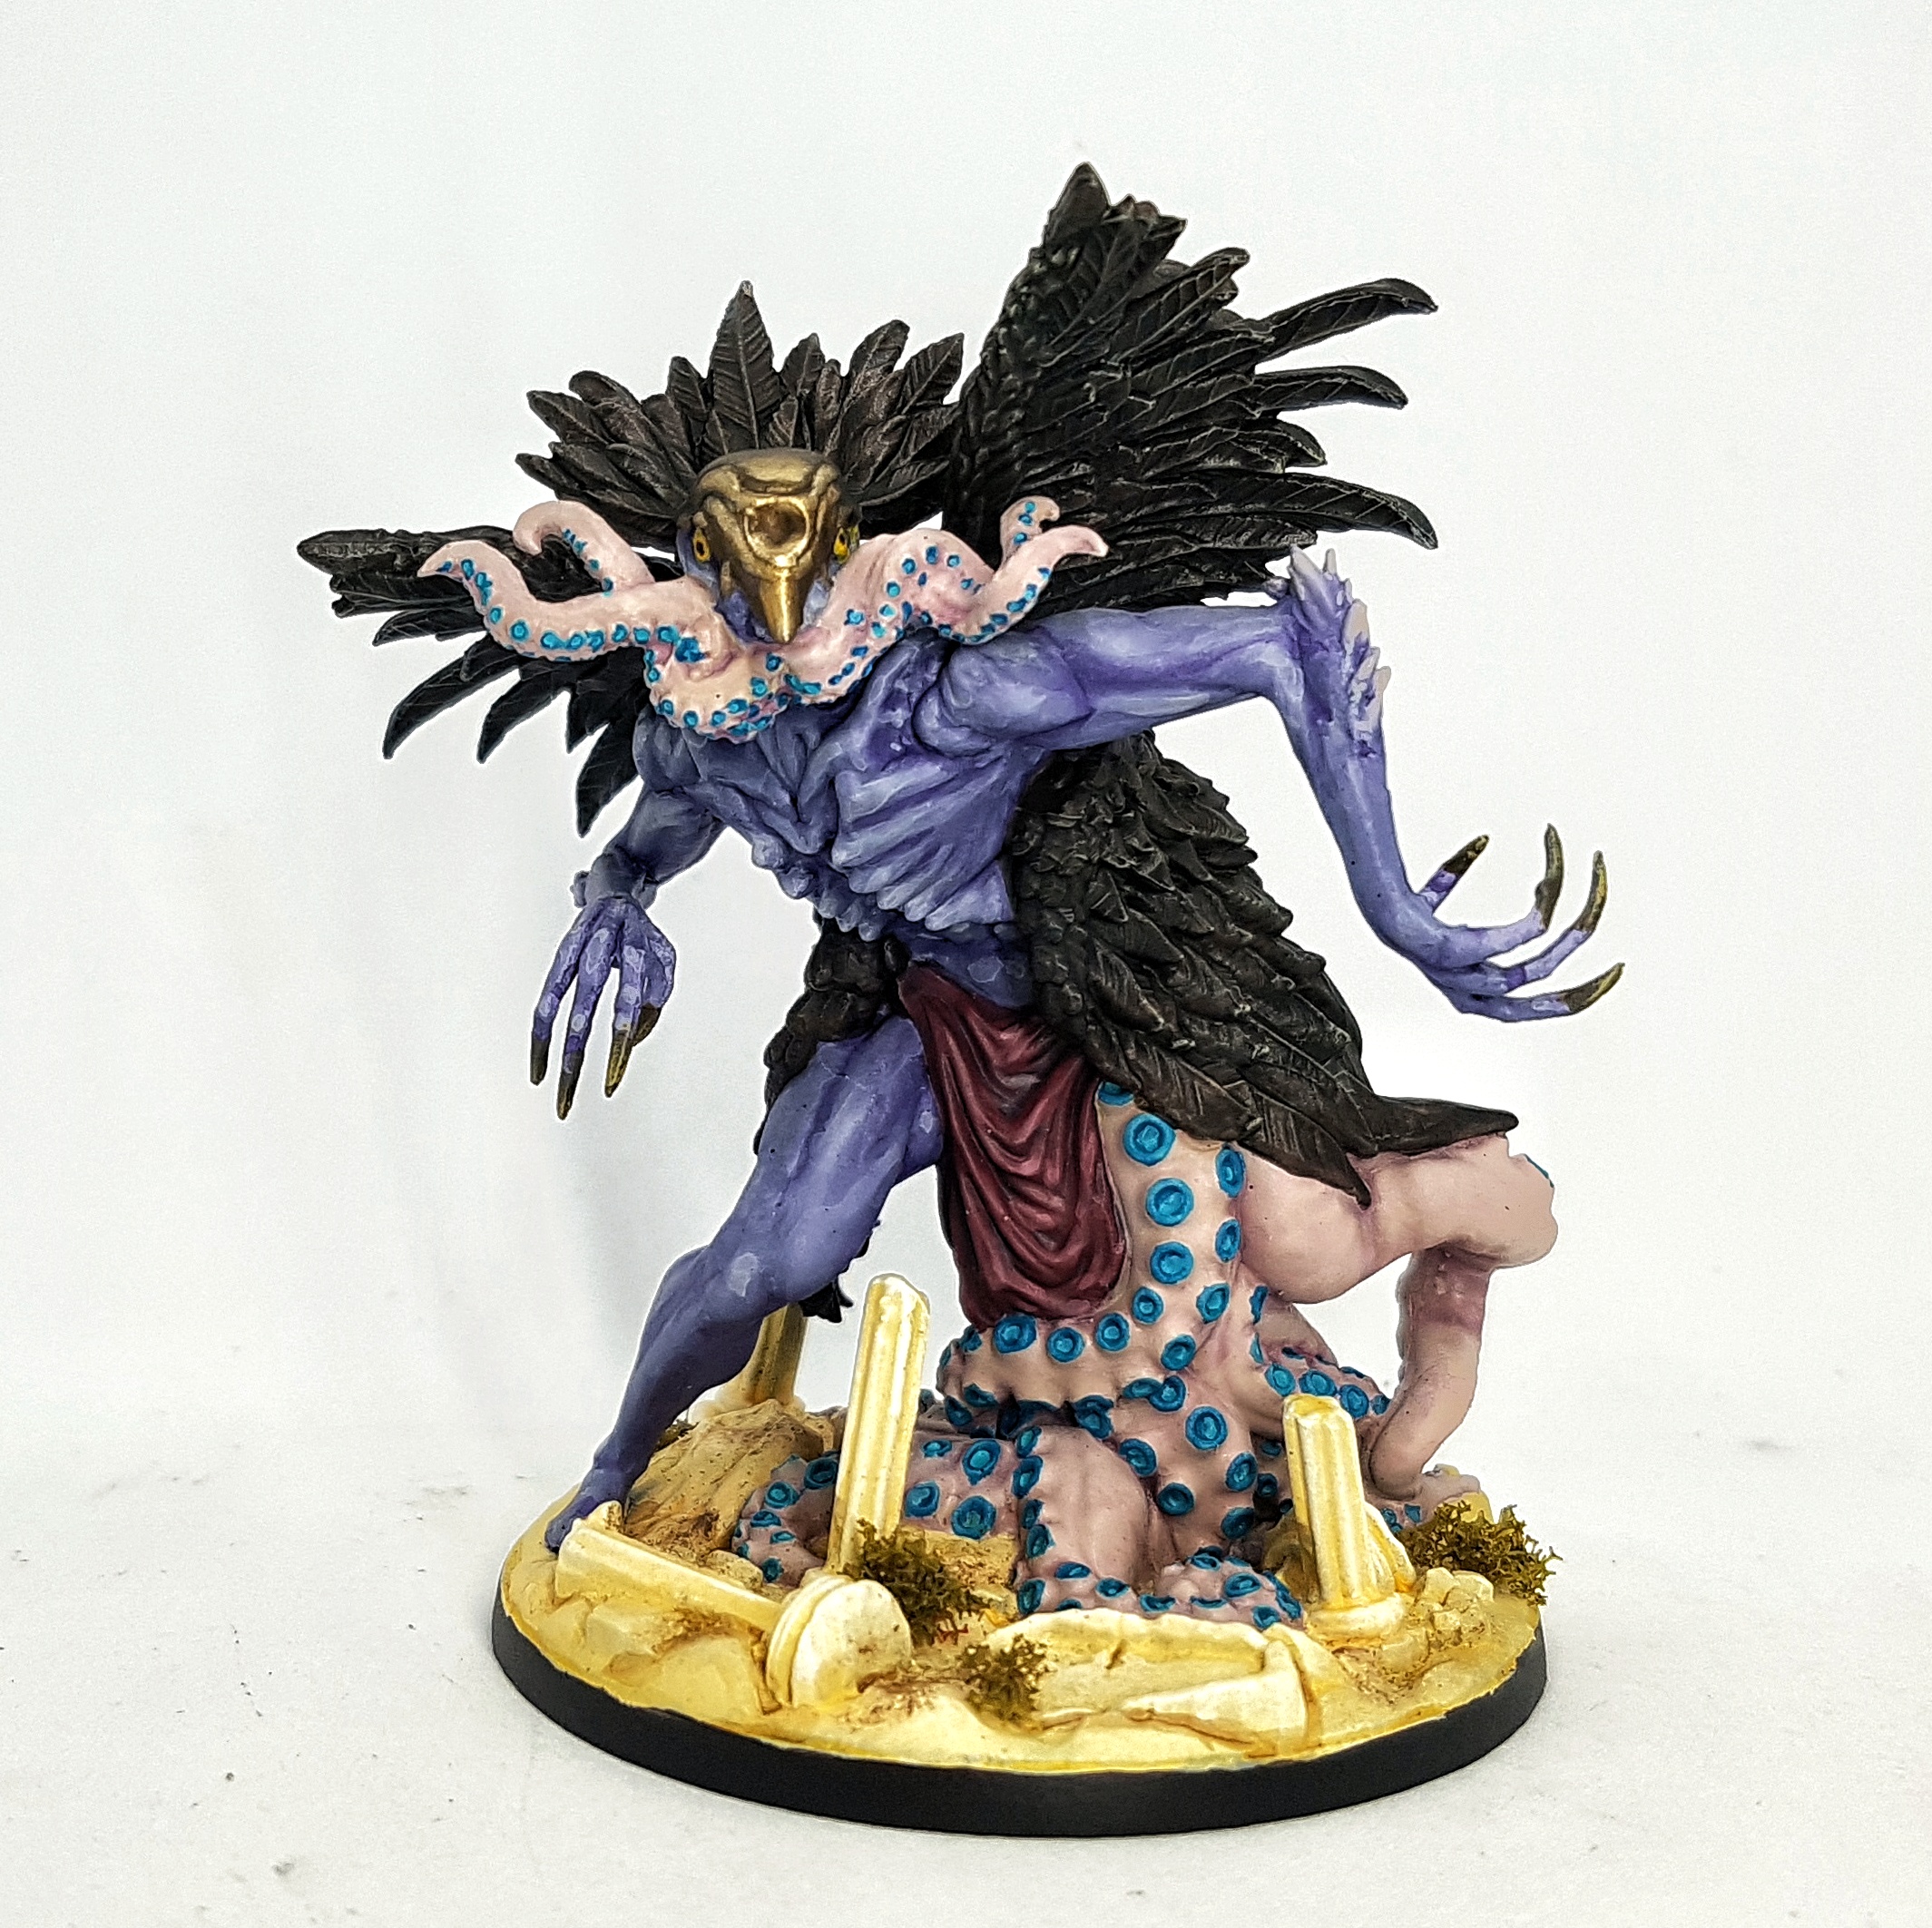
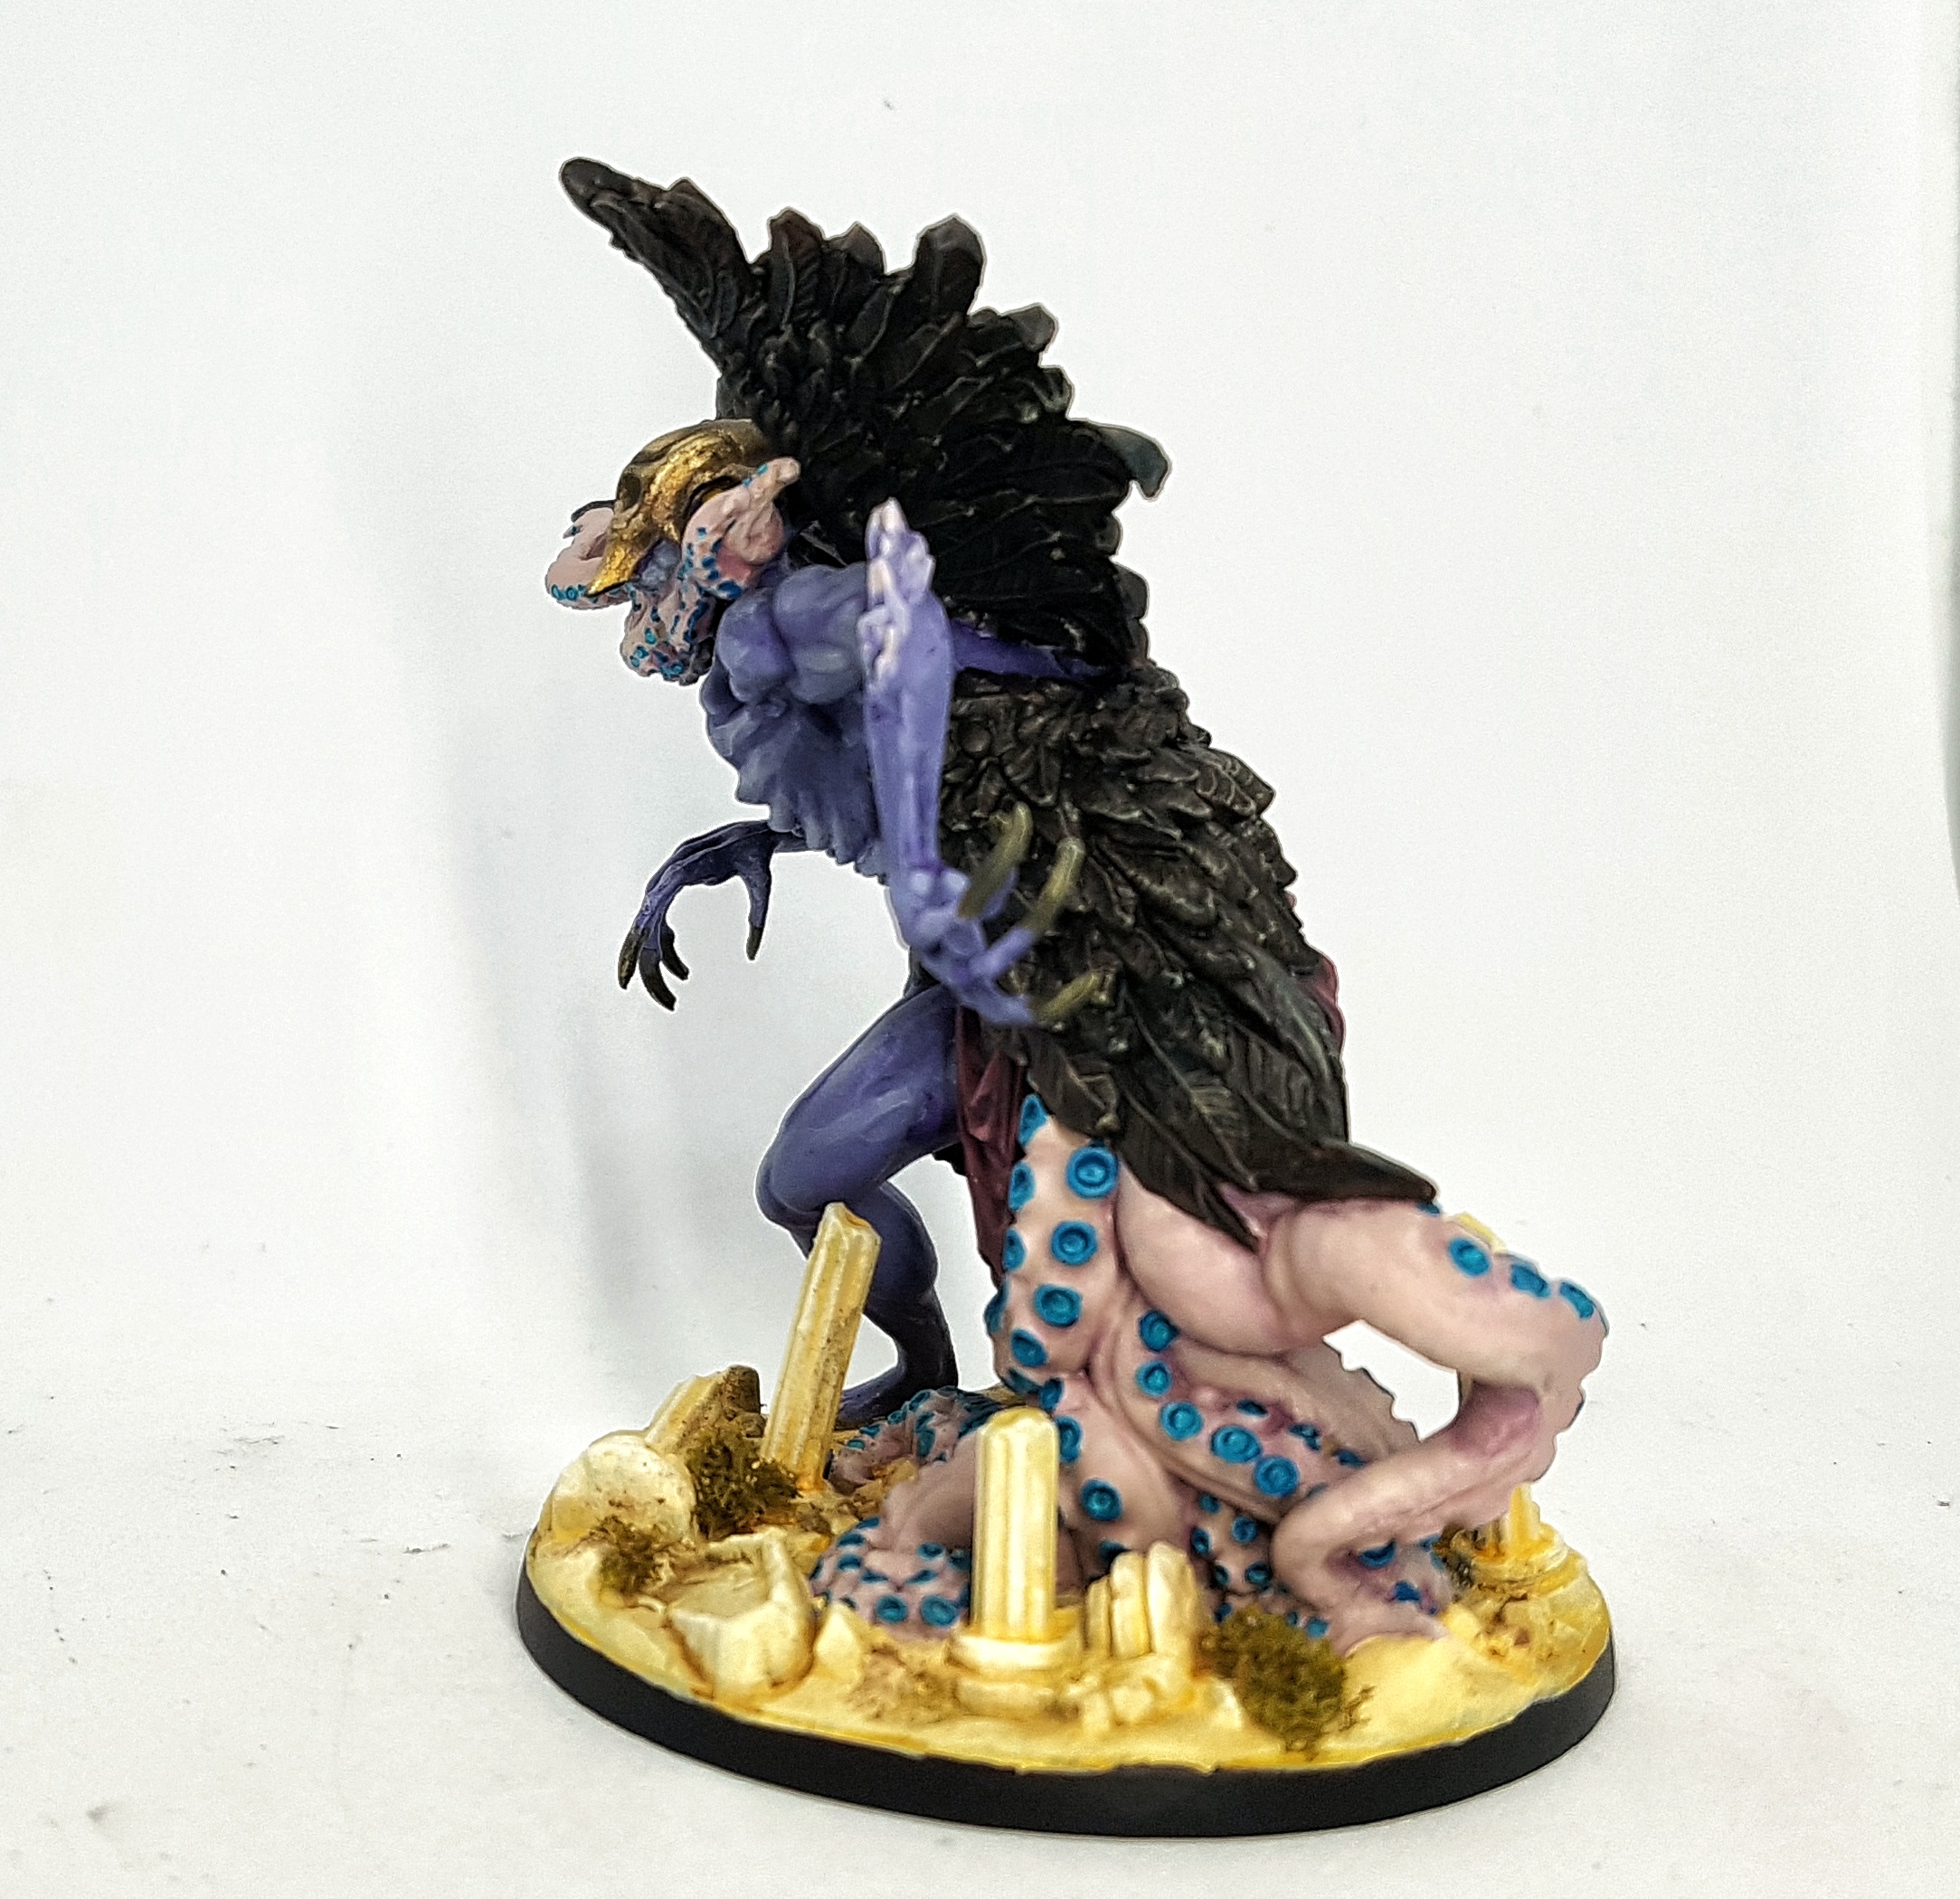
Cycle 3: Hypertime Oracle
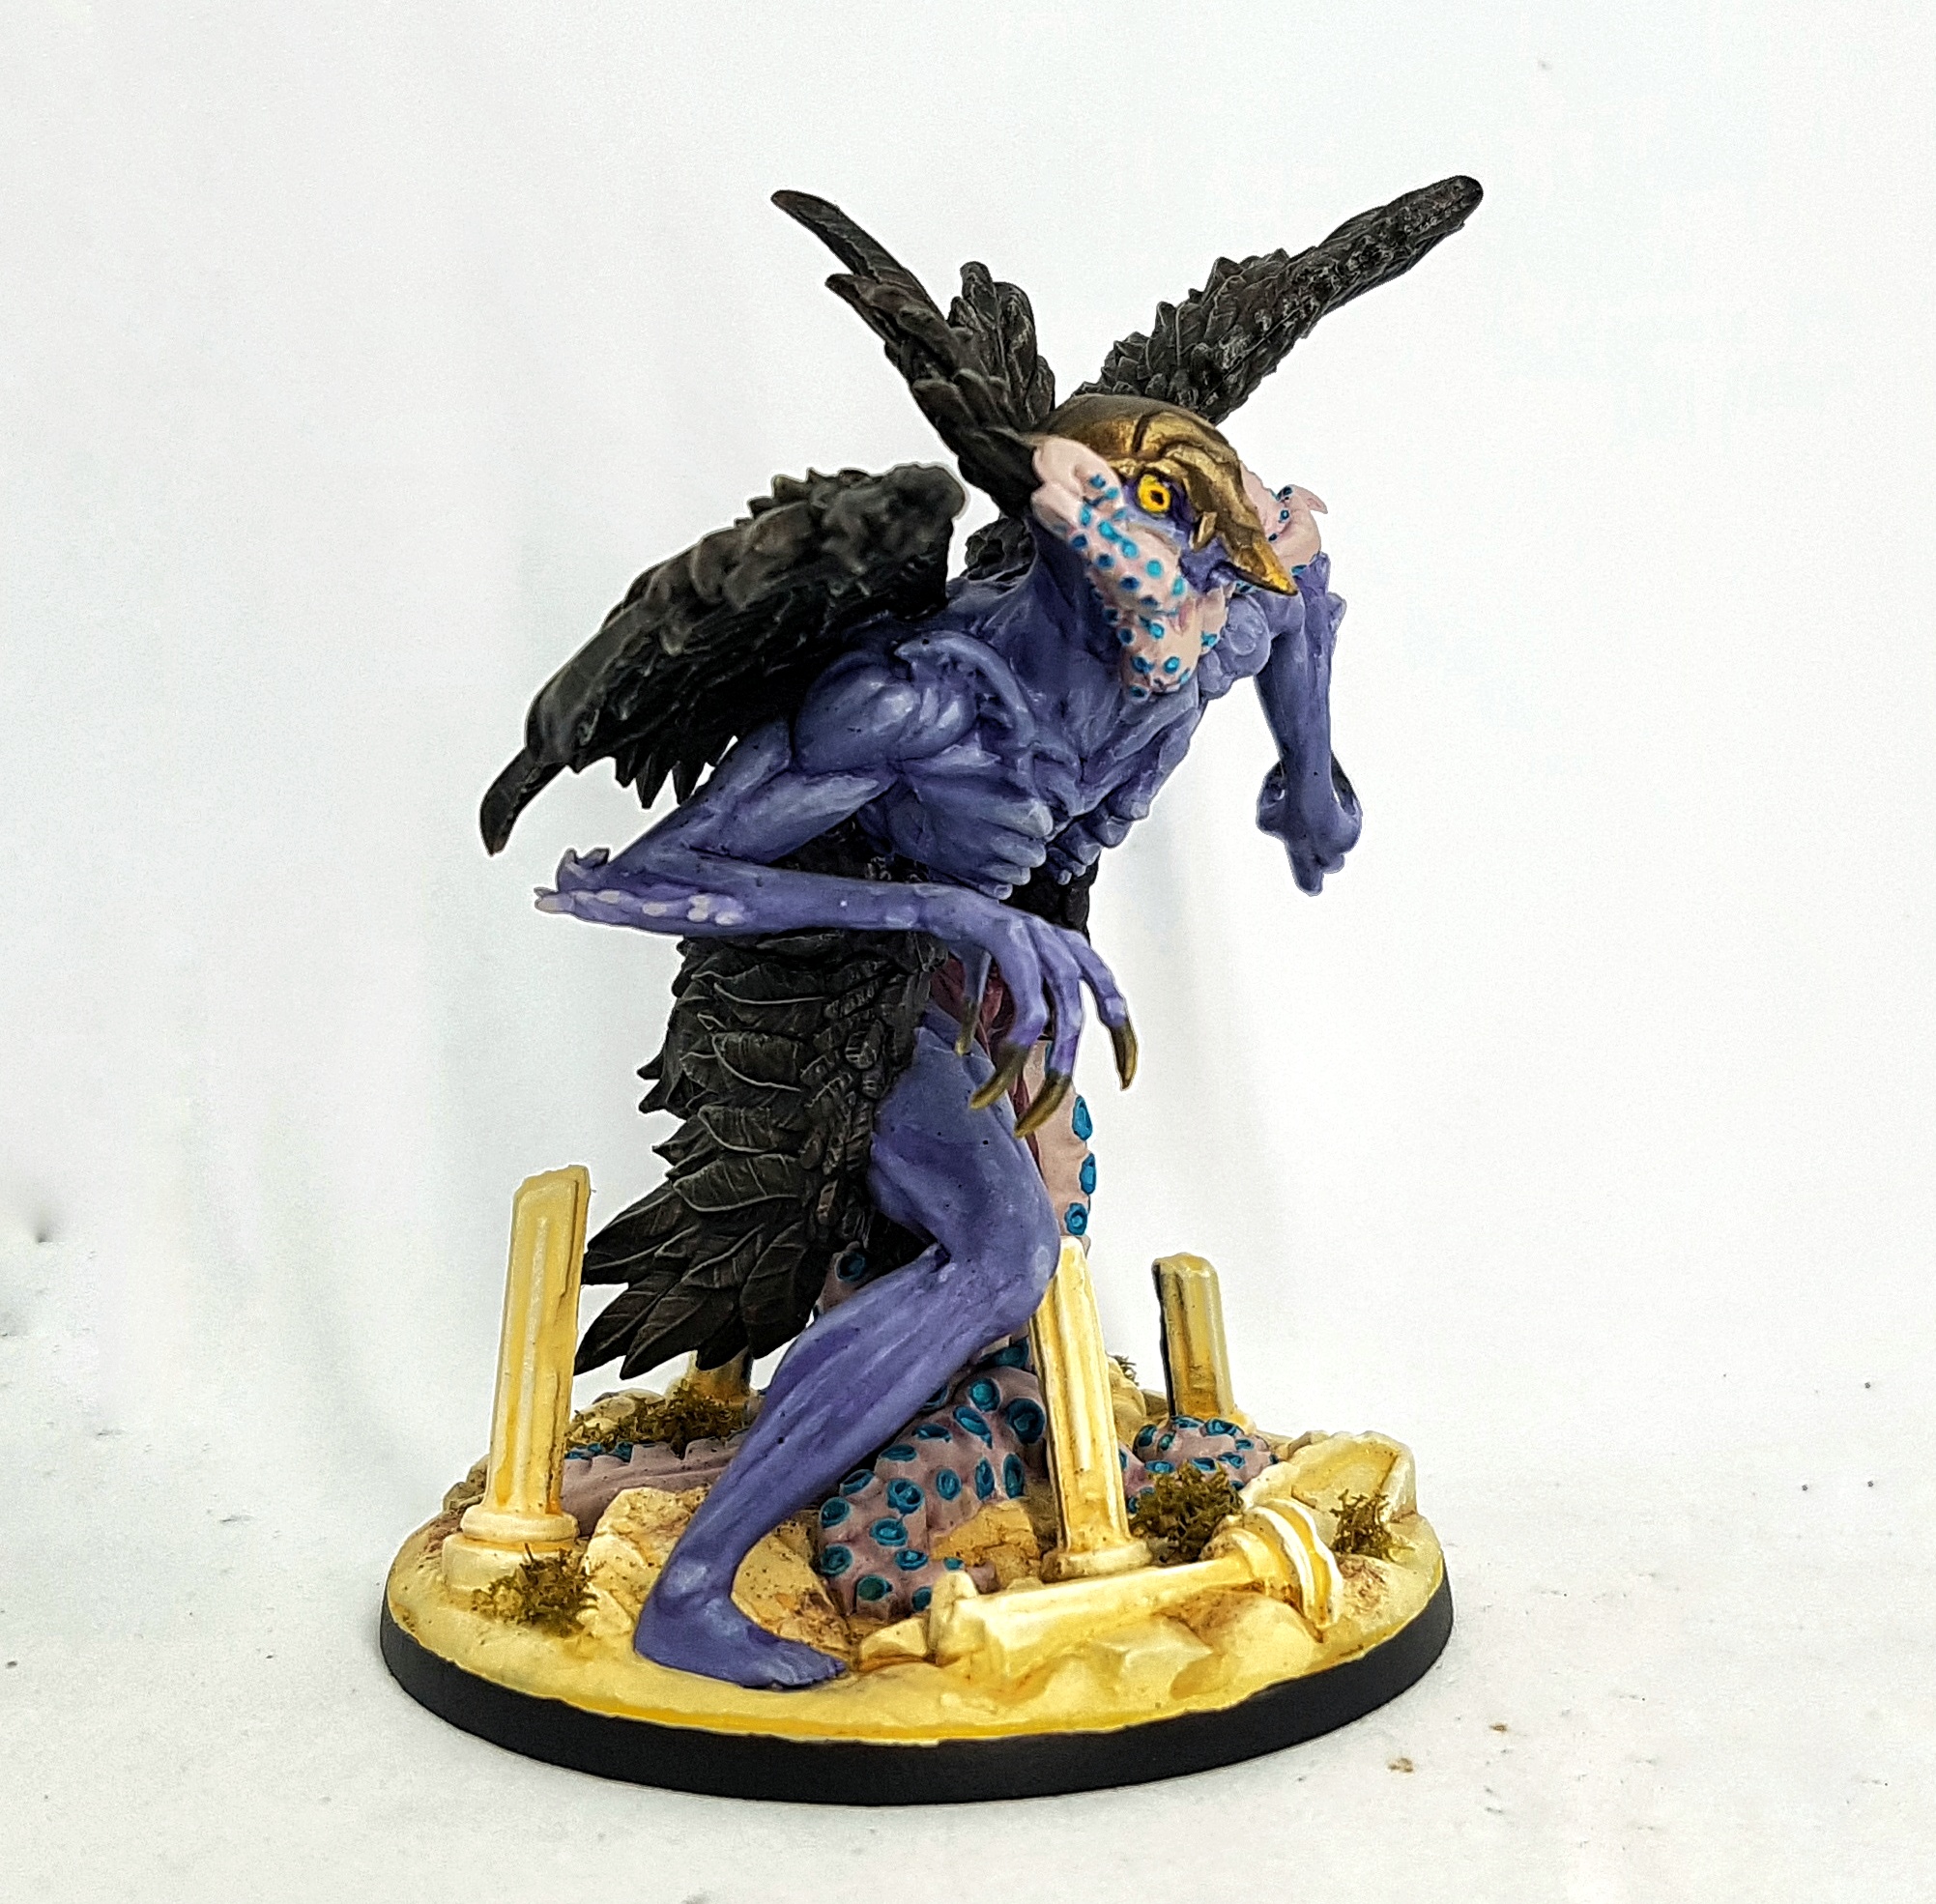
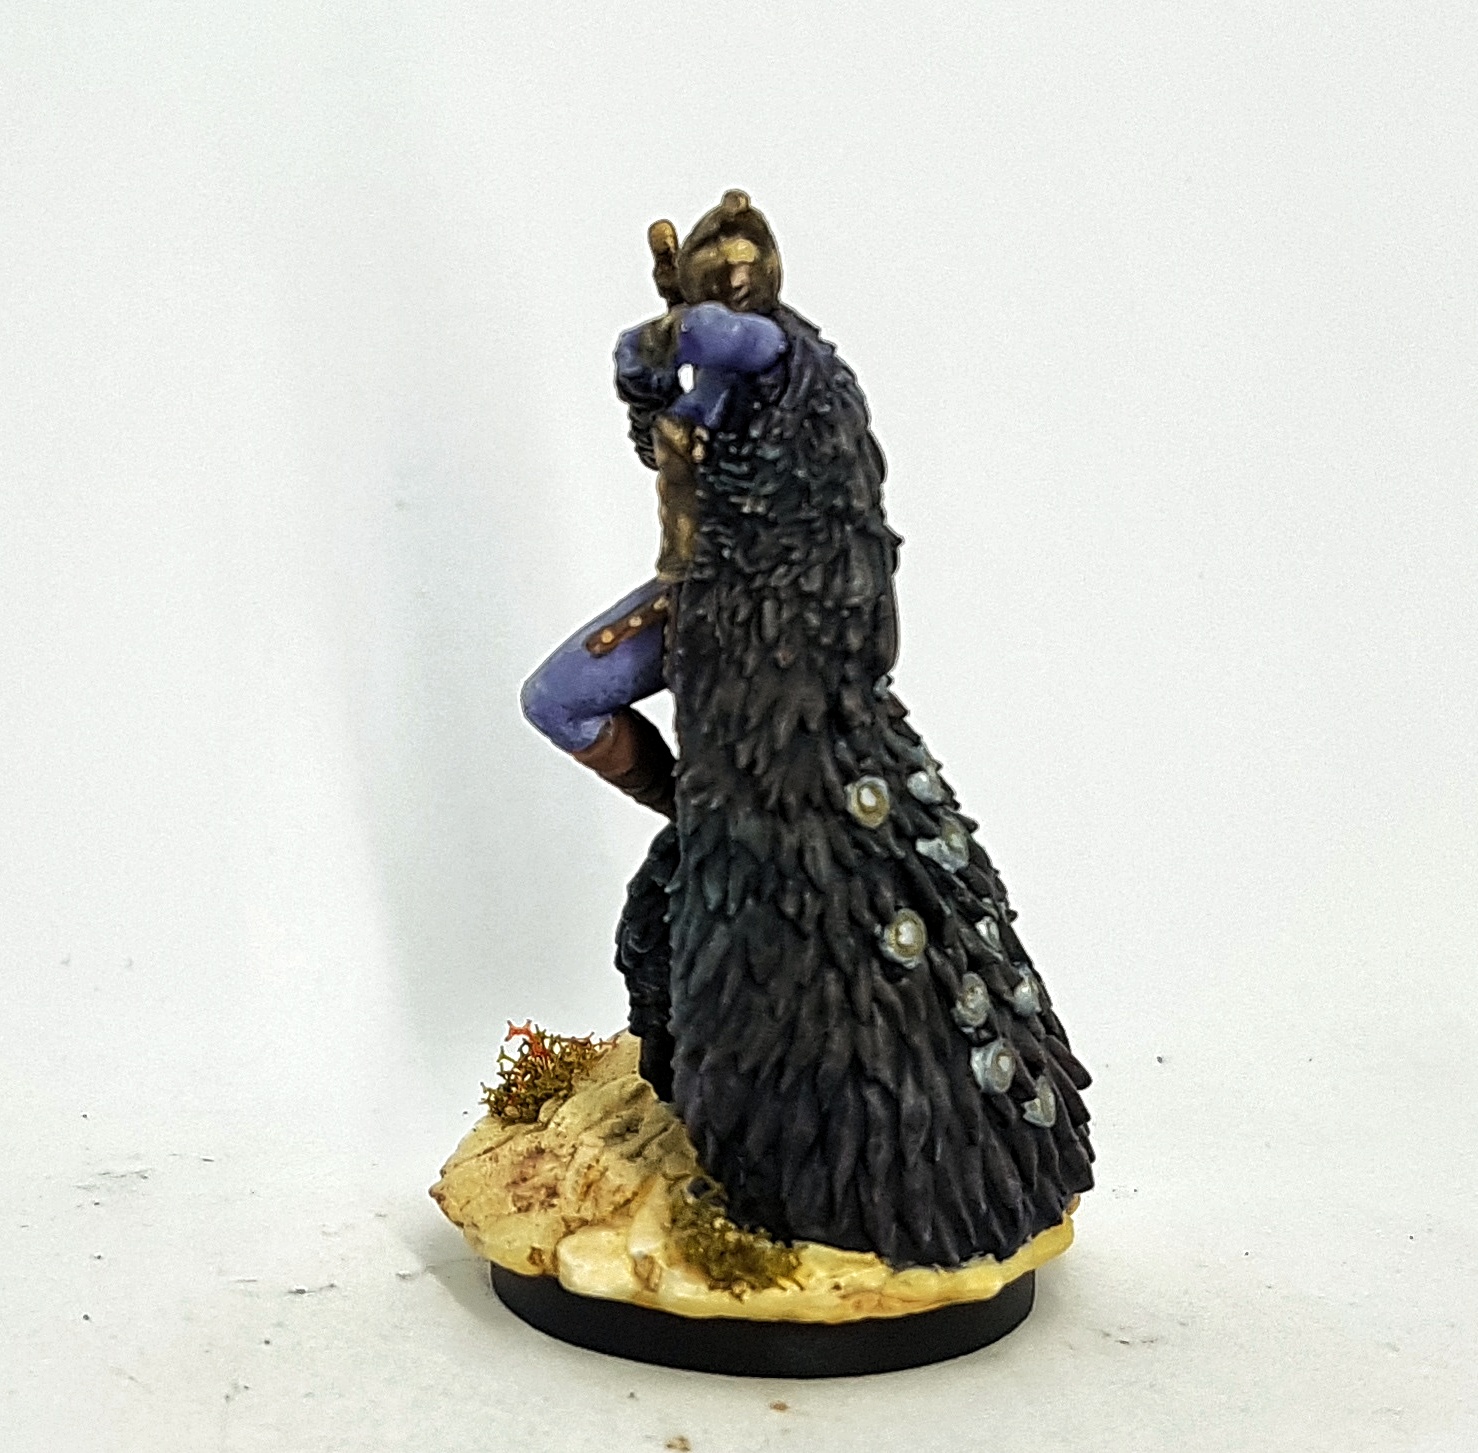
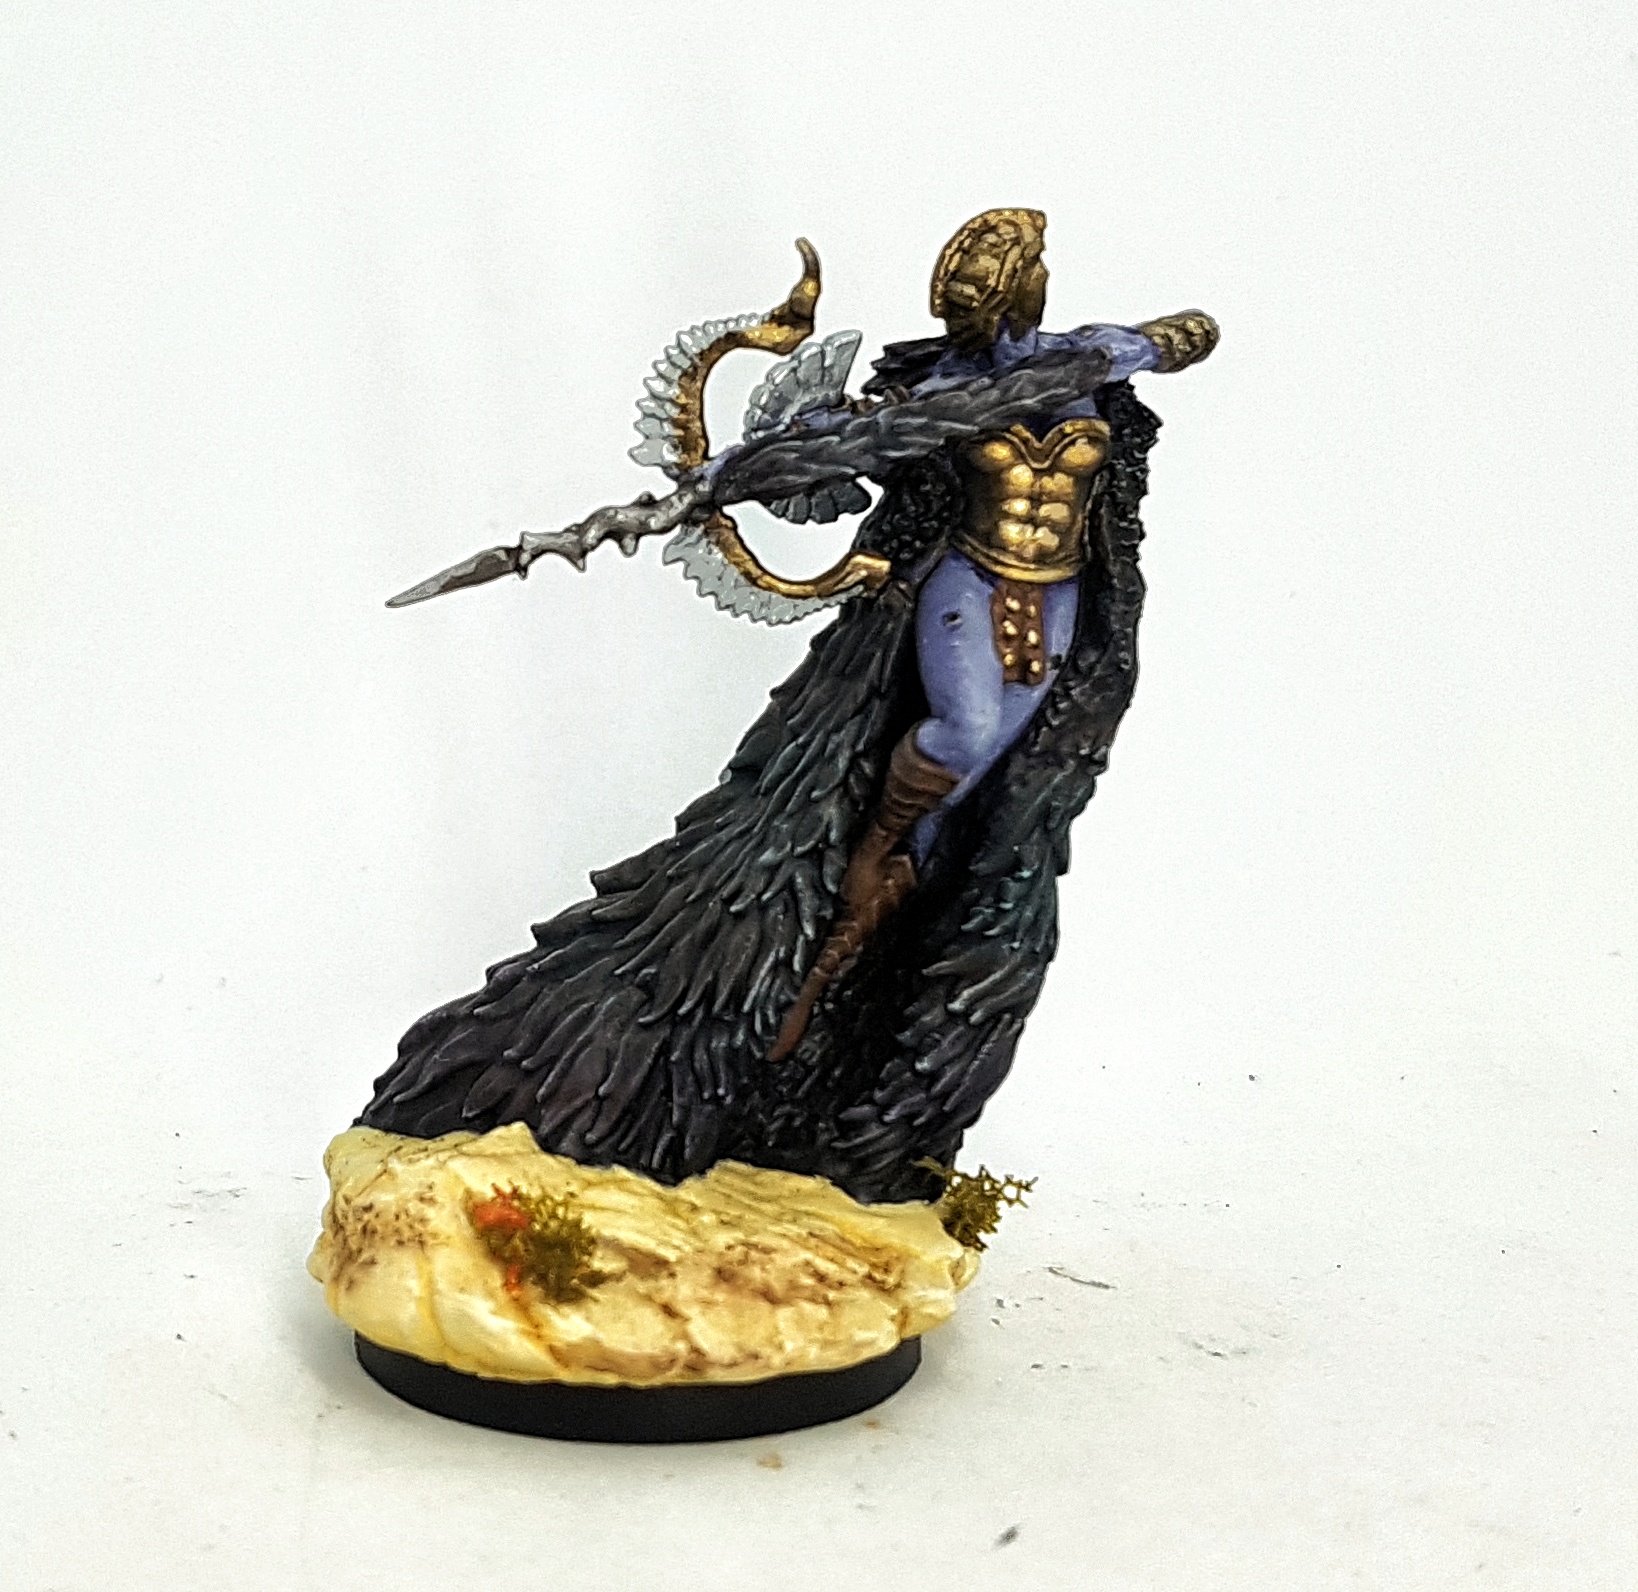
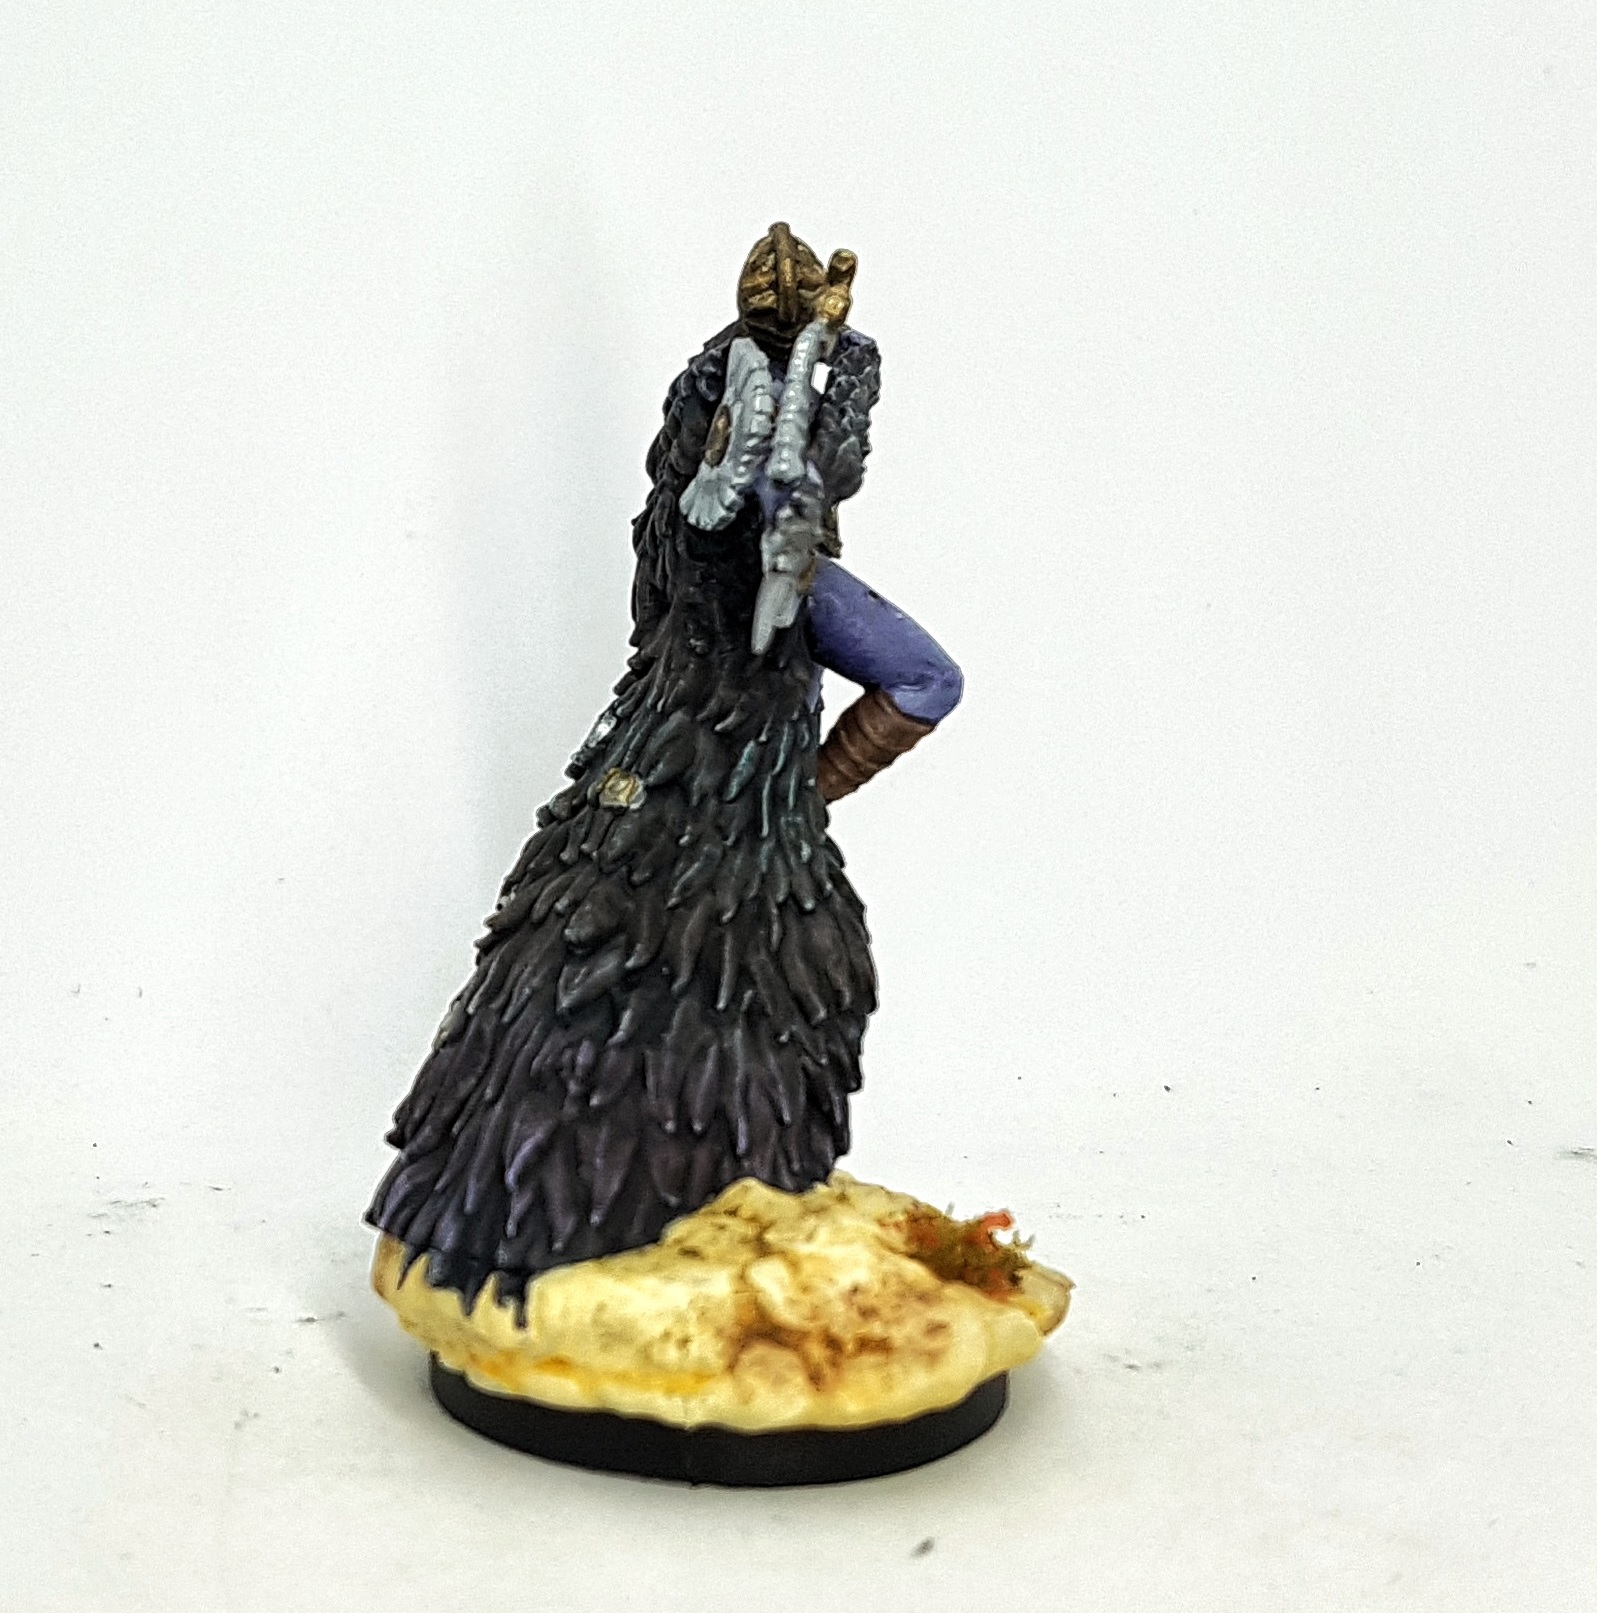
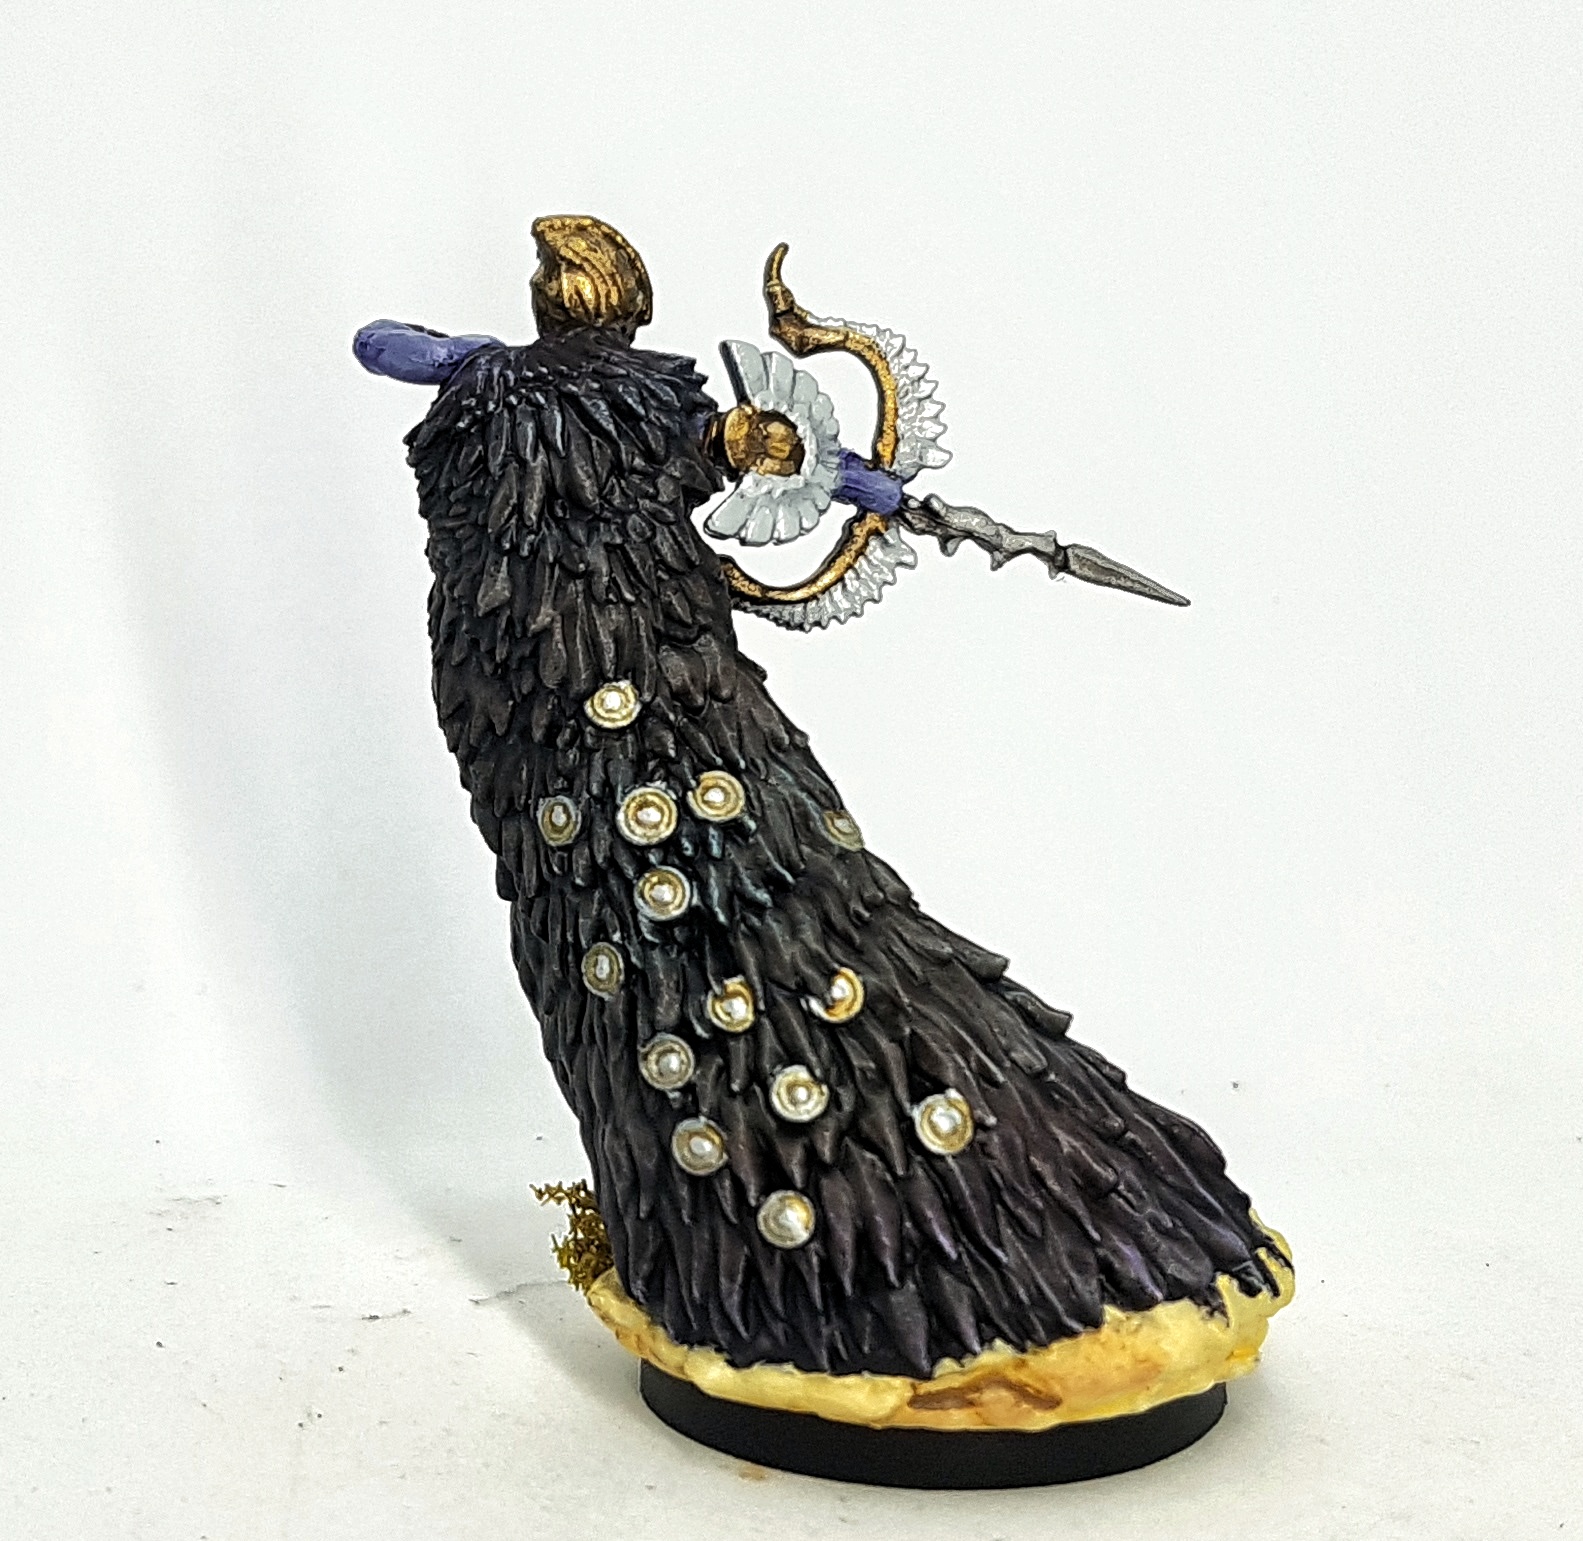
This is definitely an interesting design. I’ve still no idea what those circles are on the wings. I wasn’t sure if they were more tentacle suckers, but they look metal on the studio version. Are they walls of speakers? Portals through time and space? Or is he just trying to sell you a watch in a back alley? I’ve no idea yet.
Just one more game piece to paint and Wave 1 is completely table ready. I hope to get started over the Easter weekend or soon after. I’ve 6 games of Gloomhaven: Jaws of the Lion to finish first though. I suspect a battle report won’t work so well for this but I’ll likely be back here with pics and opinions soon after.
Dirty White Cloth
Start with a zenithal prime
Zenithally airbrush VMC 70.990 Light Grey
Zenithally airbrush VMC 70.990 Light Grey Mixed with VMC 70.951 White
Zenithally airbrush VMC 70.951 White
Pinwash shade with VMC 70.994 Dark Grey
Mix up a wash of P3 Sanguine base mixed with just enough p3 Battlefield Brown to darken it
Prepare some Italeri Wash Oiled Earth 4953AP wash
Apply them both where you see fit, sticking to the textured linen/canvas sections, and avoid the smooth cloth. Allow them to bled in to each other then dry them off.
Keep applying them one at a time, mostly drying between coats. Build up layers and layers of dirt this way
Throw in a single layer of GW Athonian Camoshade at the dirtiest point
Put a single layer of GW Carroburg Crimson towards the bottom where the red would be the dominant tone
Work with the two original washes until you are happy. I’ve no idea how many layers I put in, and their placement varied each time.
When you’re happy, gently drybrush Reaper 09149 Mouldy Skin over the lower/dirtier parts
Gently drybrush Reaper 09150 over the cleaner and higher up dirty regions
Drybrush pure white as a highlight over the clean white areas.
Wings
Same as earlier, but the darker colours were thinned further
Base with a single coat of thinned P3 Umbral Umber and mixing medium (Almost a wash this time. Thinner than on earlier models) over a zenithal prime. I could see lots of the white showing through, but it was tinted brown.
Wash with Vallejo Black Ink thinned about 2:6 with Instar Water+. It’s like water, but better. Don’t ask me how. All I know is everyone swears they won’t go back to water after. Using water in a wash can lead to tide marks and I wanted to avoid that.
Drybrush with P3 Frostbite, and then selectively with White.
Mix up 2:3 glazes of P3 Turquoise Ink and Water+, and Vallejo Violet Ink and Water+, keeping you 2:6 Black Ink mix to hand
Glaze on the colours where appropriate, allowing them to mix a little where they meet. Apply another coat of the black ink wash anywhere not getting colour, again allowing transitions to blend.
Gold
Base Darkstar Blackened Bronze
Wash GW Agrax Earthshade
Highlight with base
Highlight with base and Darkstar Royal Gold
Highlight with Royal Gold
Highlight with Royal Gold mixed with Darkstar Pale Gold
Highlight with Pale Gold
Mini pyramids on base had their middles painted with Reaper 09150 Bloodless Skin
Iron
Base P3 Pig Iron
Wash GW Nuln Oil
Highlight Pig Iron
Highlight P3 Cold Steel
Highlight P3 Cold Steel mixed with Quicksilver
Highlight P3 Quicksilver
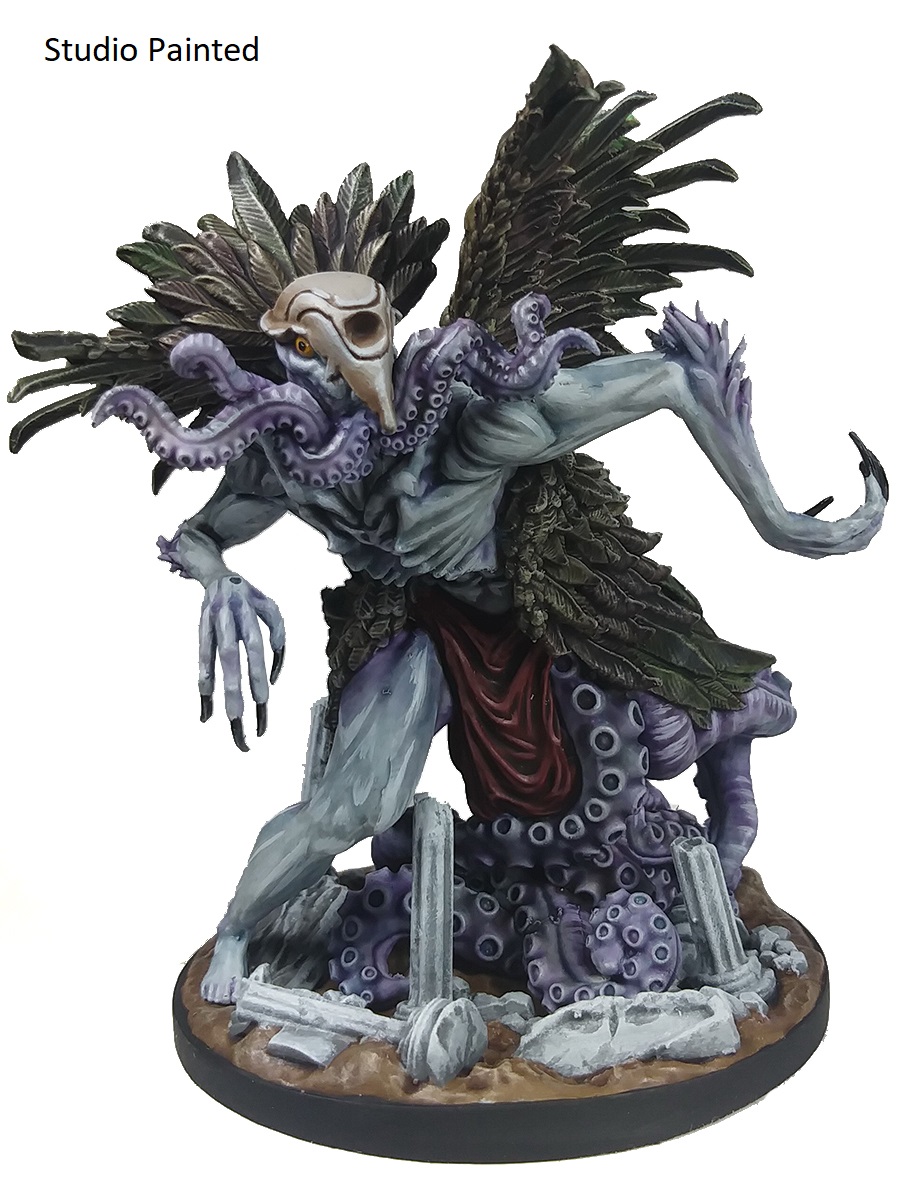
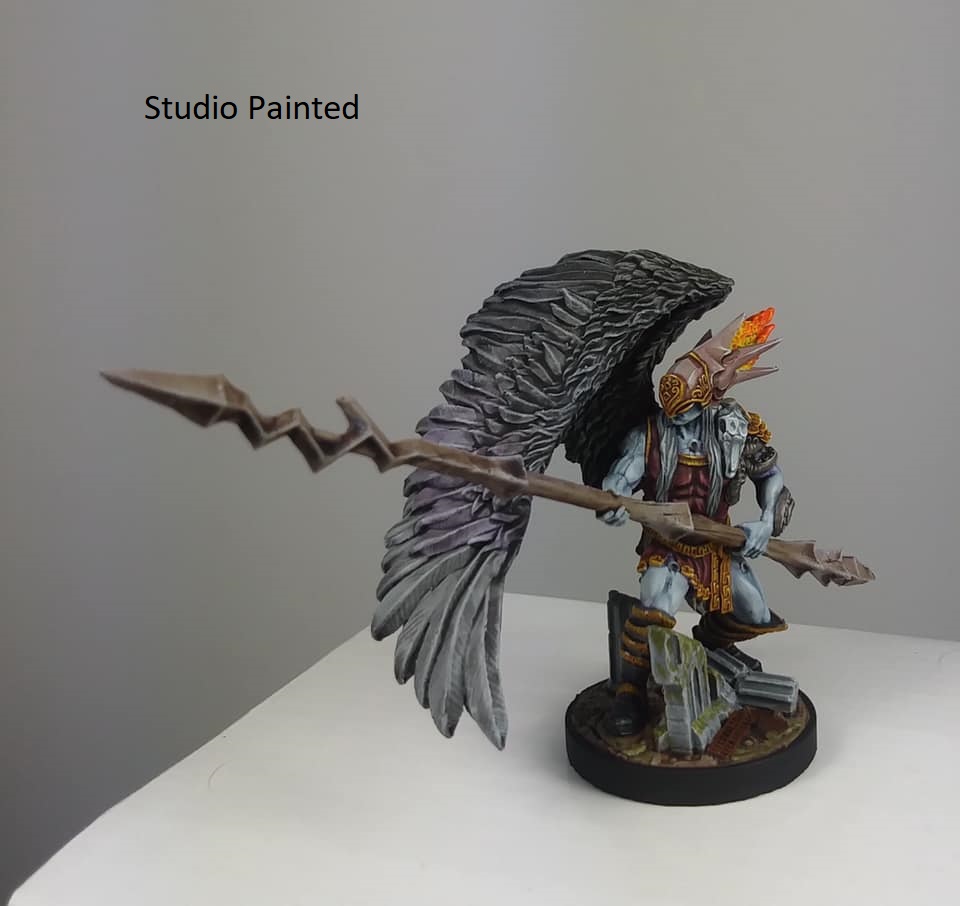
 Art from stat card. Super helpful. So it's grey on grey with grey parts contrasted by more grey? Gotcha.
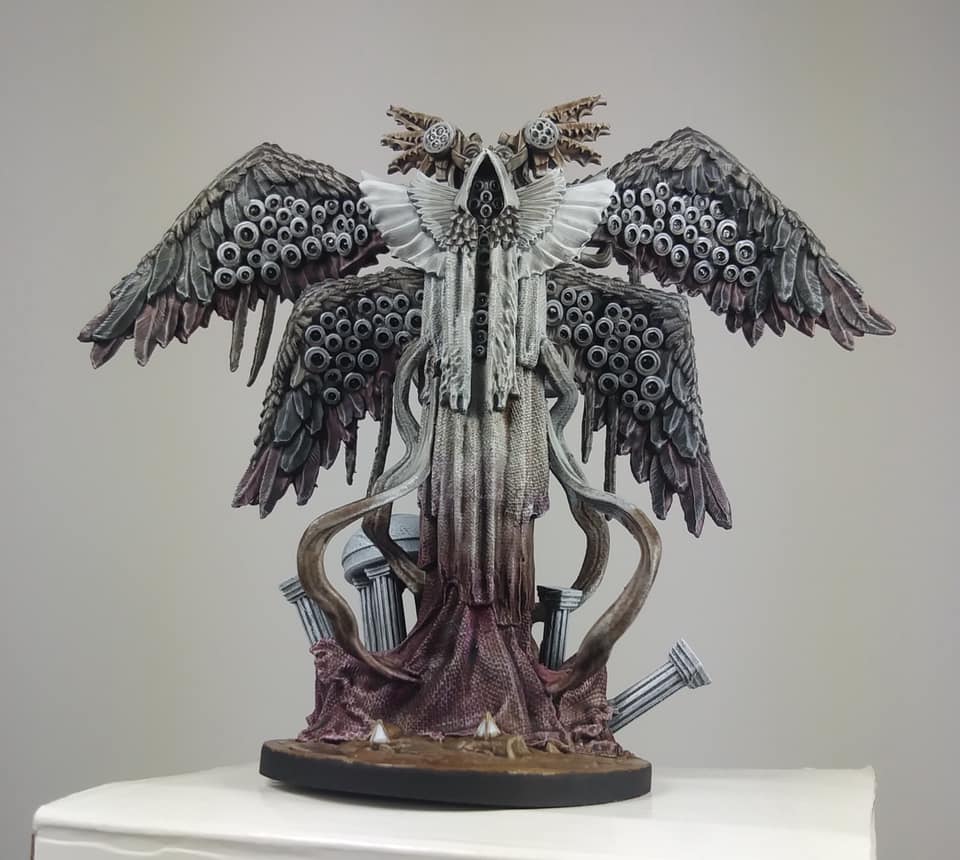 Studio painted piece. Much more informative and inspiring. It's a dirt angel. I can work with that.
Cycle 3: Nyx Skyseer Titan
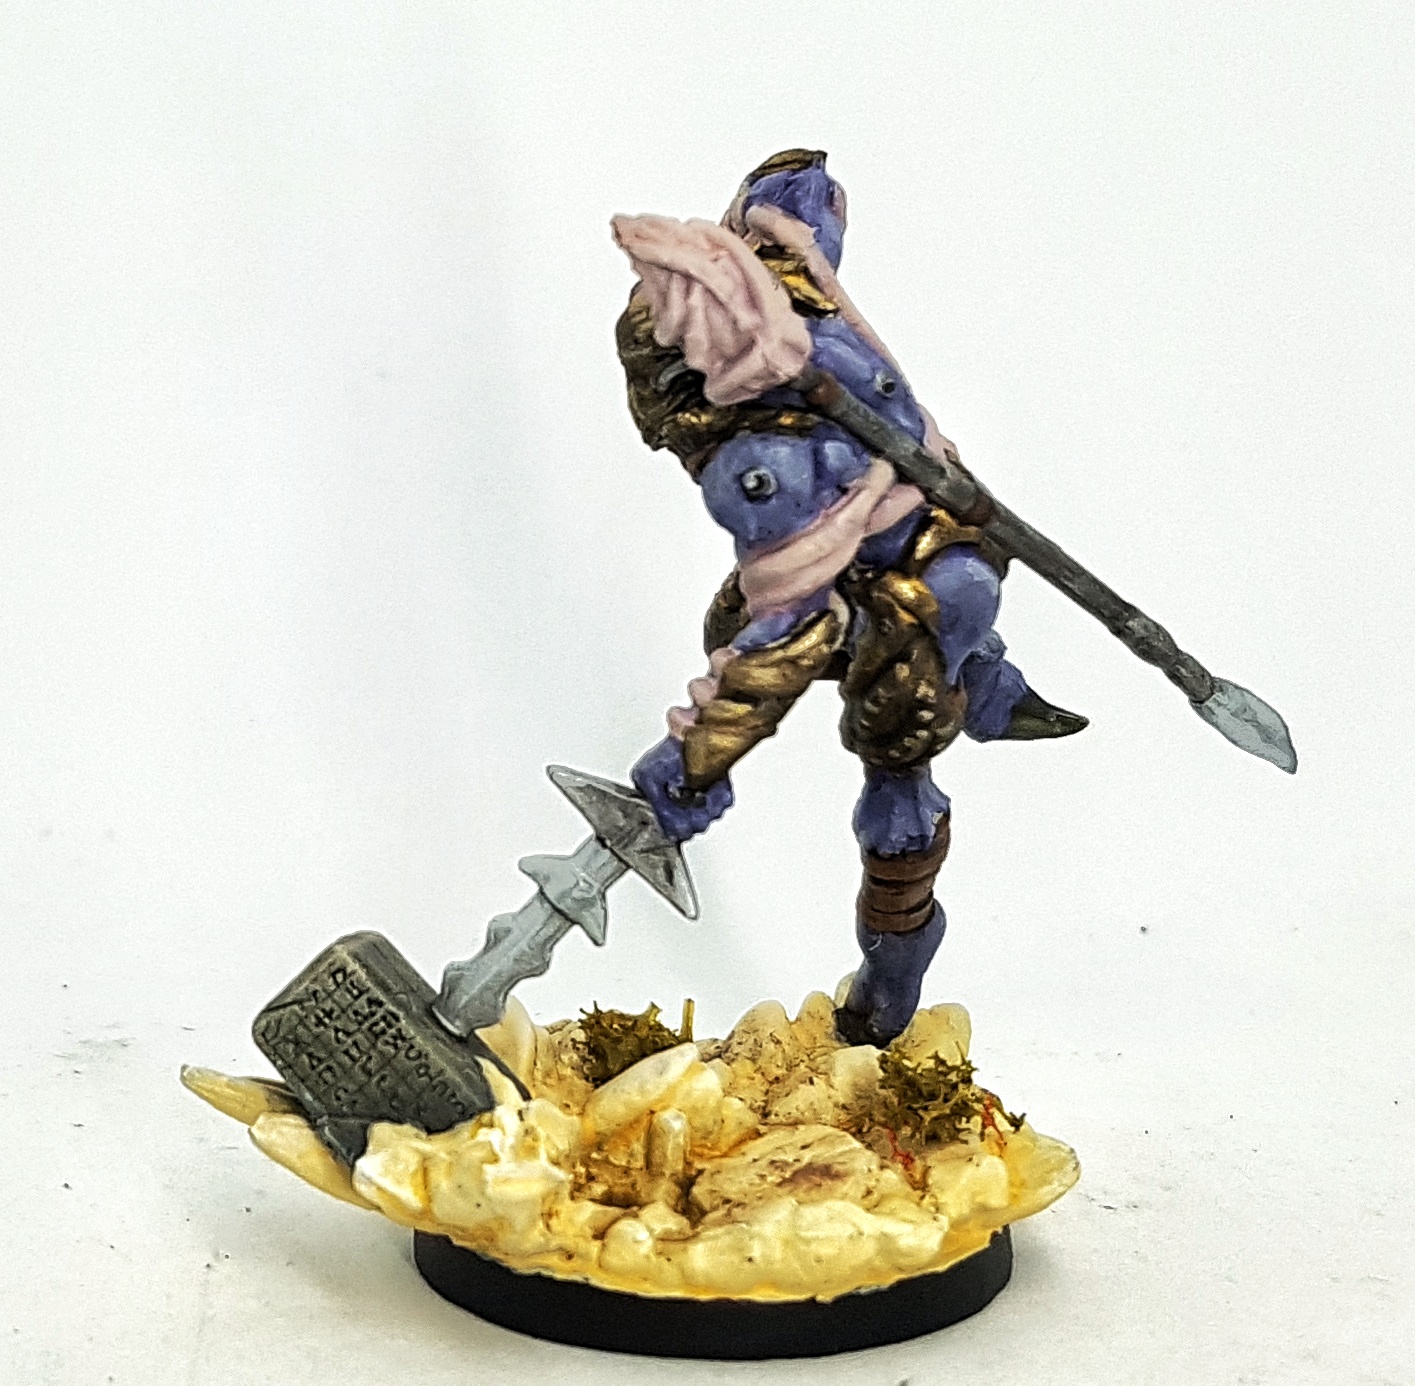
This is a cross promotional model with a game called Midara I don’t know anything about. It’s a nice mini. I think I heard that completing it’s story in ATO might allow you to influence a game of Midara you’re also playing?
Wings
Undercoat P3 Ryn Flesh (my bottle of Elven Flesh had por coverage. I think it had been sat on my shelf for too long and just wasn’t mixing properly)
Base GSW 1845 Elven Flesh
Shade GSW 1827 Blushing Flesh
Highlight GSW 1844 Pale Flesh
Spots: Careful dots of GW Agrax Earthshade, GW Athonian Camoshade and Coatd’Arms 133 Ink Flesh Wash
Gaze the dots with thinned GSW Pale Flesh
Torso
Base P3 Ryn Flesh mixed with P3 Menoth White Base
Wash with base mixed with a little P3 Sanguine Highlight
Wash with base mixed with a little P3 Battledress Green
Targeted wash of Battledress Green mixed with Sanguine Highlight
Highlight with base
Highlight with base mixed with P3 Menoth White Highlight
Highlight glints with Menoth White Highlight only
Blonde Hair:
Base: Reaper 09256 Blond Shadow
Wash: Coat d’Arms Flesh Ink
Drybrush: Reaper 09257 Blond Hair
Drybrush: Reaper 09258 Blond Highlight
White Trousers
Base: Andrea Color White 1 Base
Shade: Andrea Color White 6, 2nd Shadow
Highlight: Andrea Color White 1 Base
Highlight: Andrea Color White 1 Base and P3 Morrow White
Highlight: Morrow White
Blue Cloth
Base with P3 Cygnar Blue base
Shade with VMC 70.899 Dark Prussian Blue mixed with P3 Coal Black
Highlight with base
Highlight with base mixed with P3 Cygnar Blue Highlight
Highlight with Cygnar Blue Highlight
Highlight with Cygnar Blue Highlight mixed with P3 Frostbite
Die inside a little then repair white stripes
Die a little more and repair blue stripes
Deep breaths. Continue
Socks and Boots
Socks: VMC 70.994 Dark Grey
Boots: P3 Battledress Green
Drybrush Boots with P3 Rucksack Tan
Wash both with GW Agrax Earthshade
Gold
Base Darkstar Blackened Bronze
Wash GW Agrax Earthshade
Highlight with base
Highlight with base and Darkstar Royal Gold
Highlight with Royal Gold
Highlight with Royal Gold mixed with Darkstar Pale Gold
Highlight with Pale Gold
Irons
Undercoat black
Base Mission models MMM-002 Cold Rolled Steel
Highlight with Base mixed with VGC 72.056 Chainmail Silver
Highlight with Chainmail Silver
Highlight with Chainmail Silver mixed with VMA 71.064 Chrome
Highlight with Chrome
Targeted wash with Italeria 4953AP Oiled Earth wash
Claws
Base P3 Cryx bane Base
Drybrush P3 Hammerfall Khaki
Wash GW Athonian Camoshade (Can skip. Didn’t do much)
Wash GW Seraphim Sepia
 Art from stat card
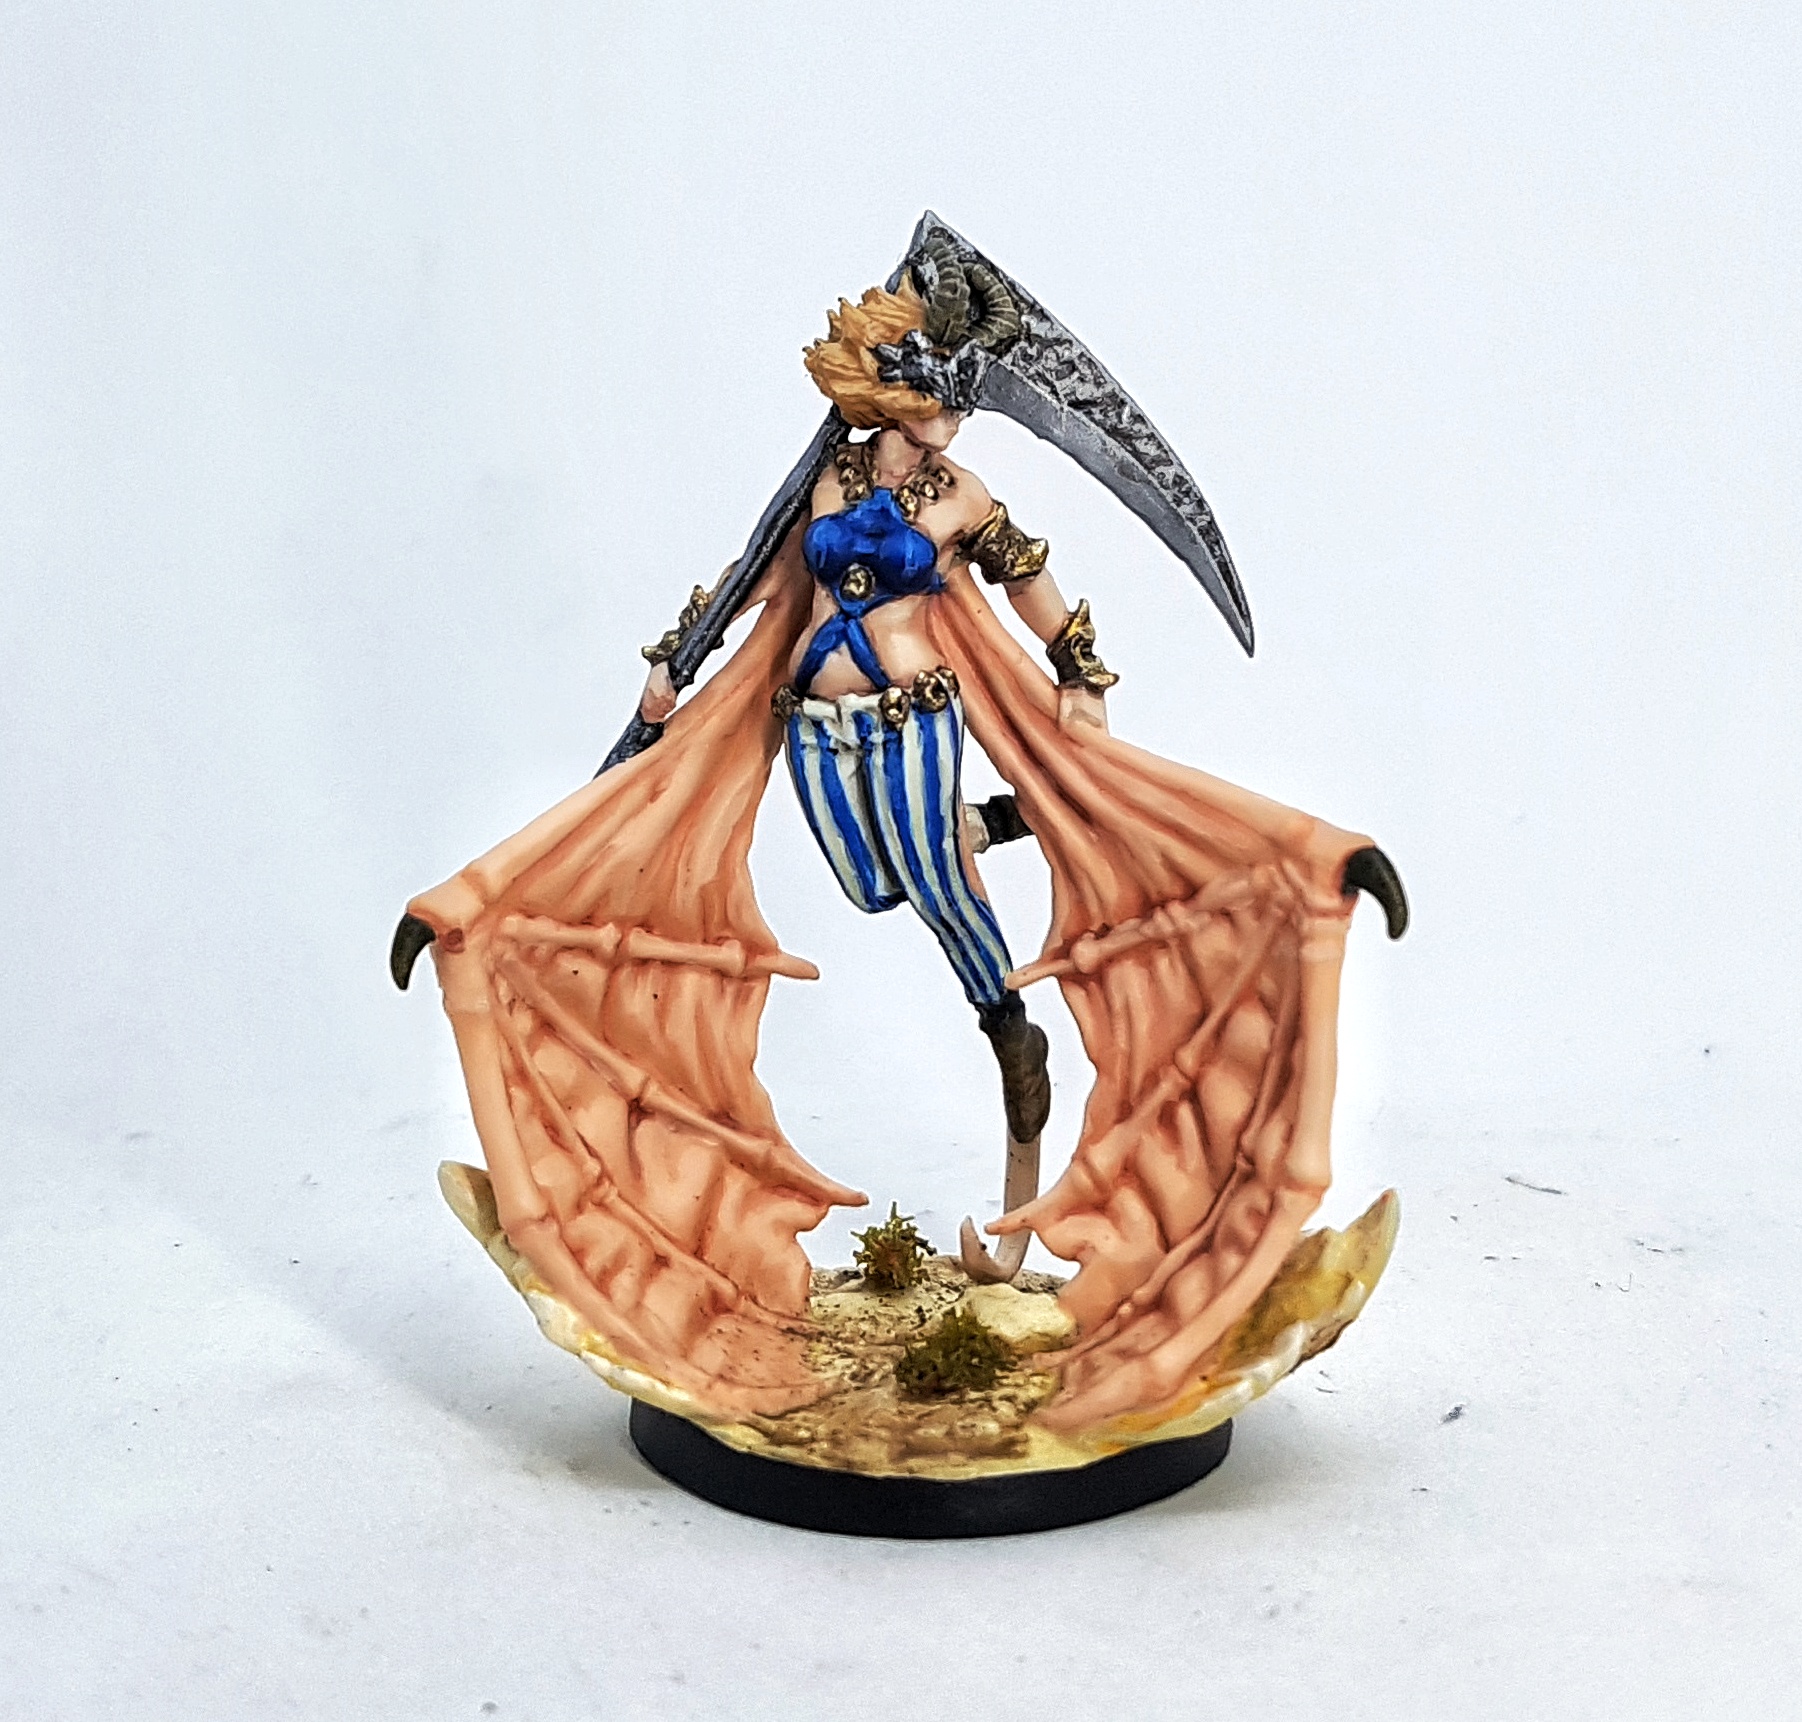
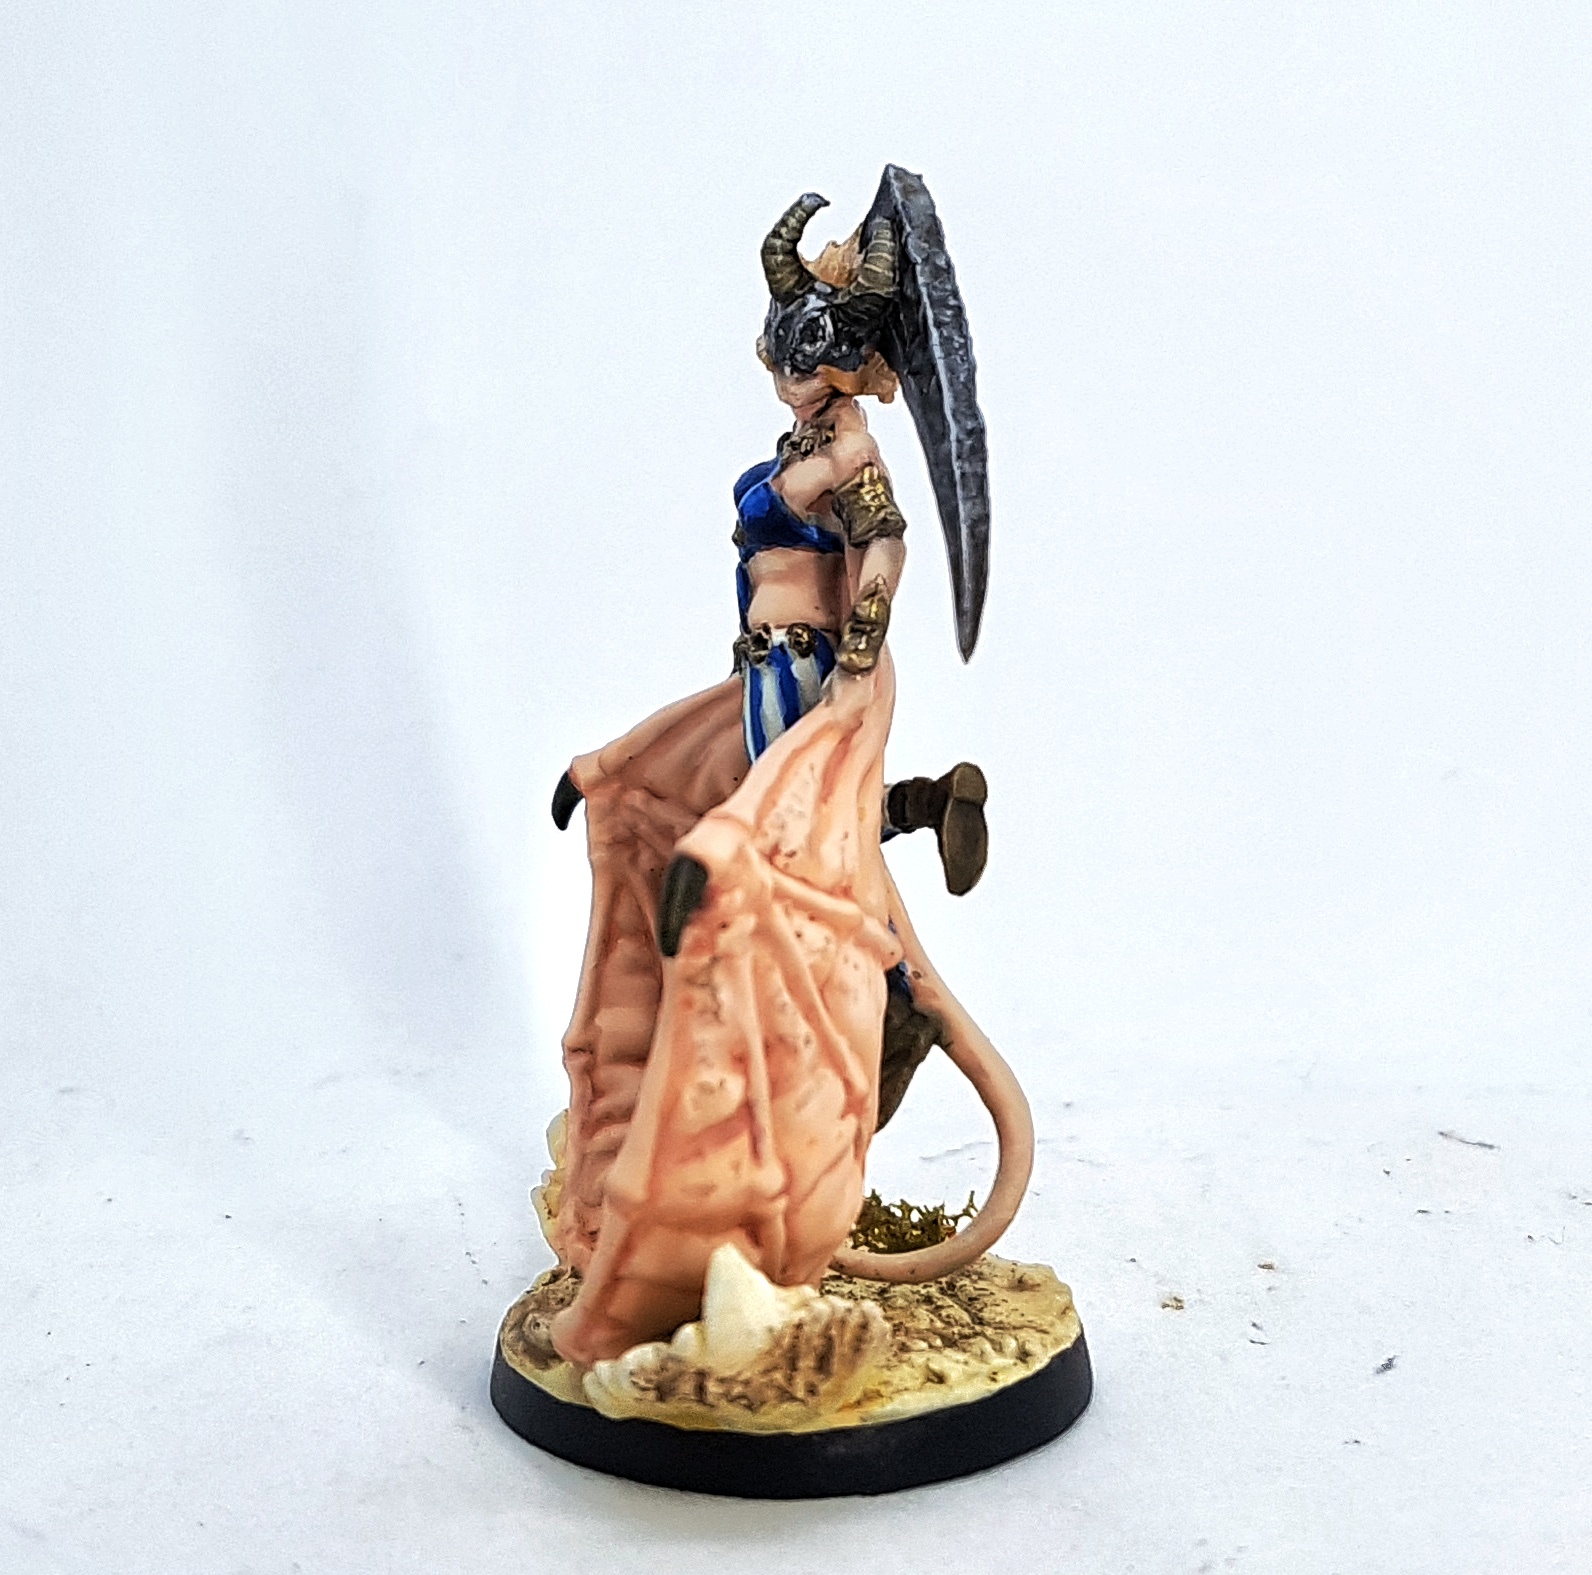
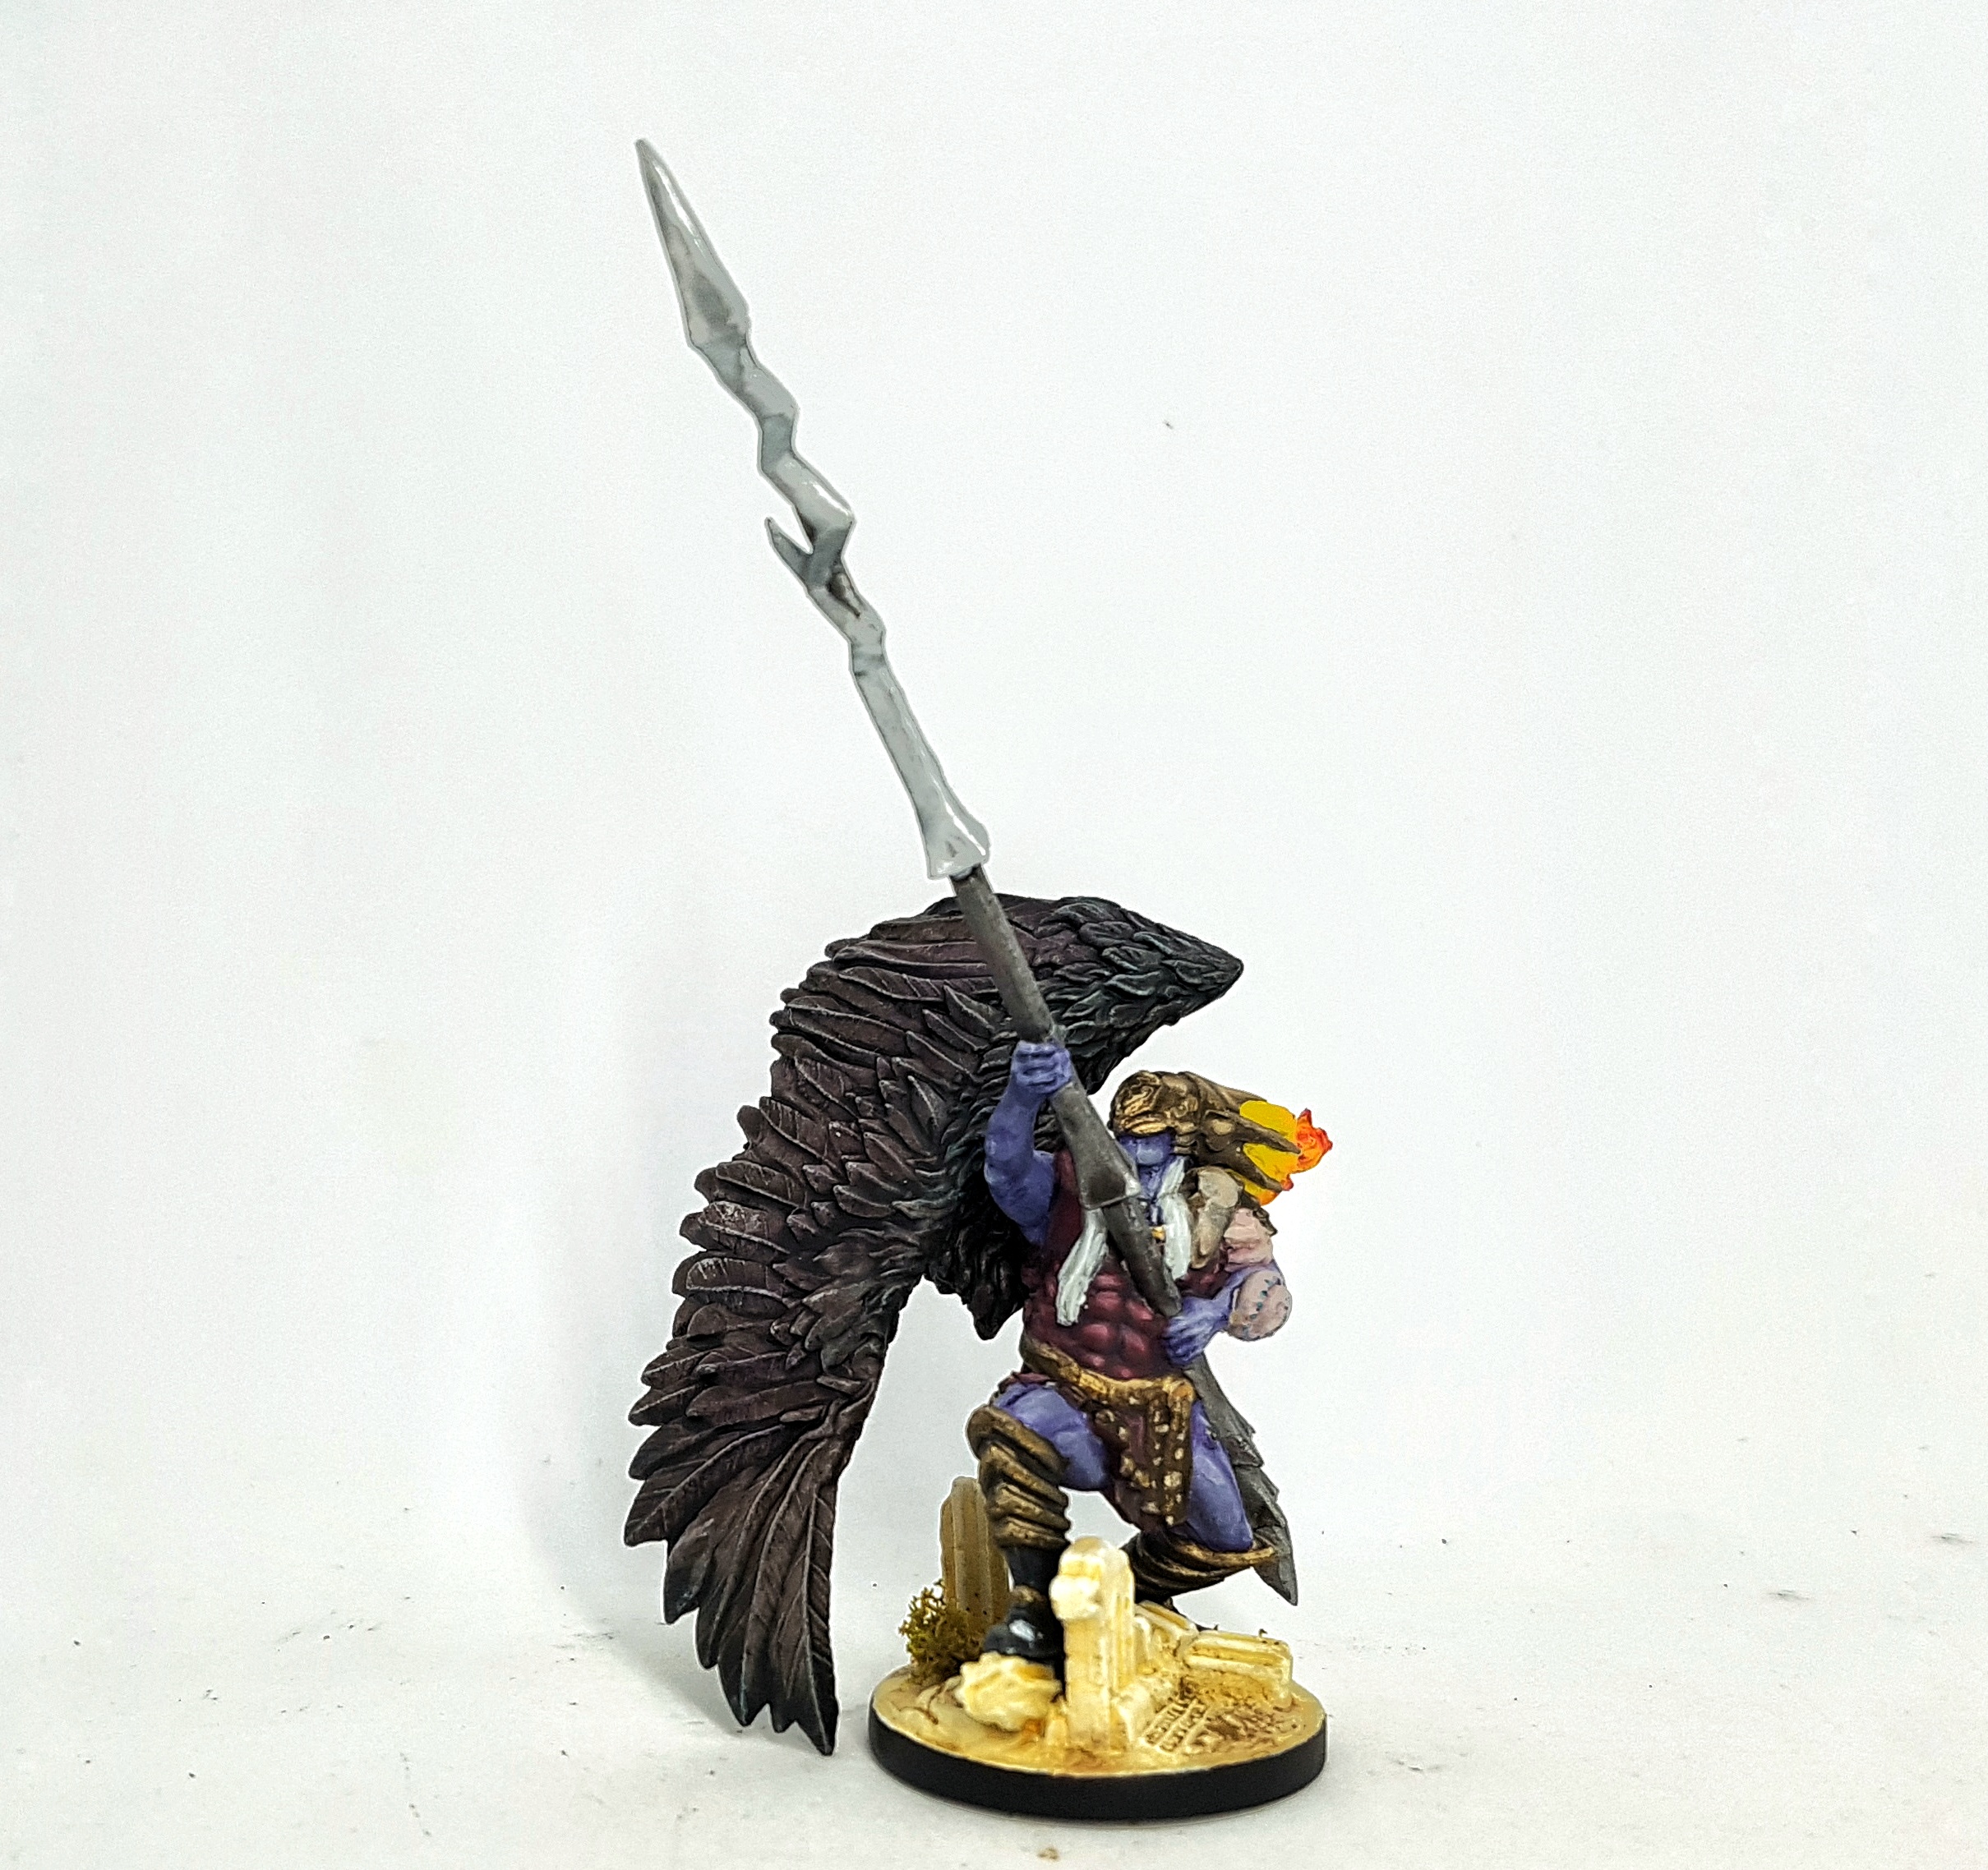
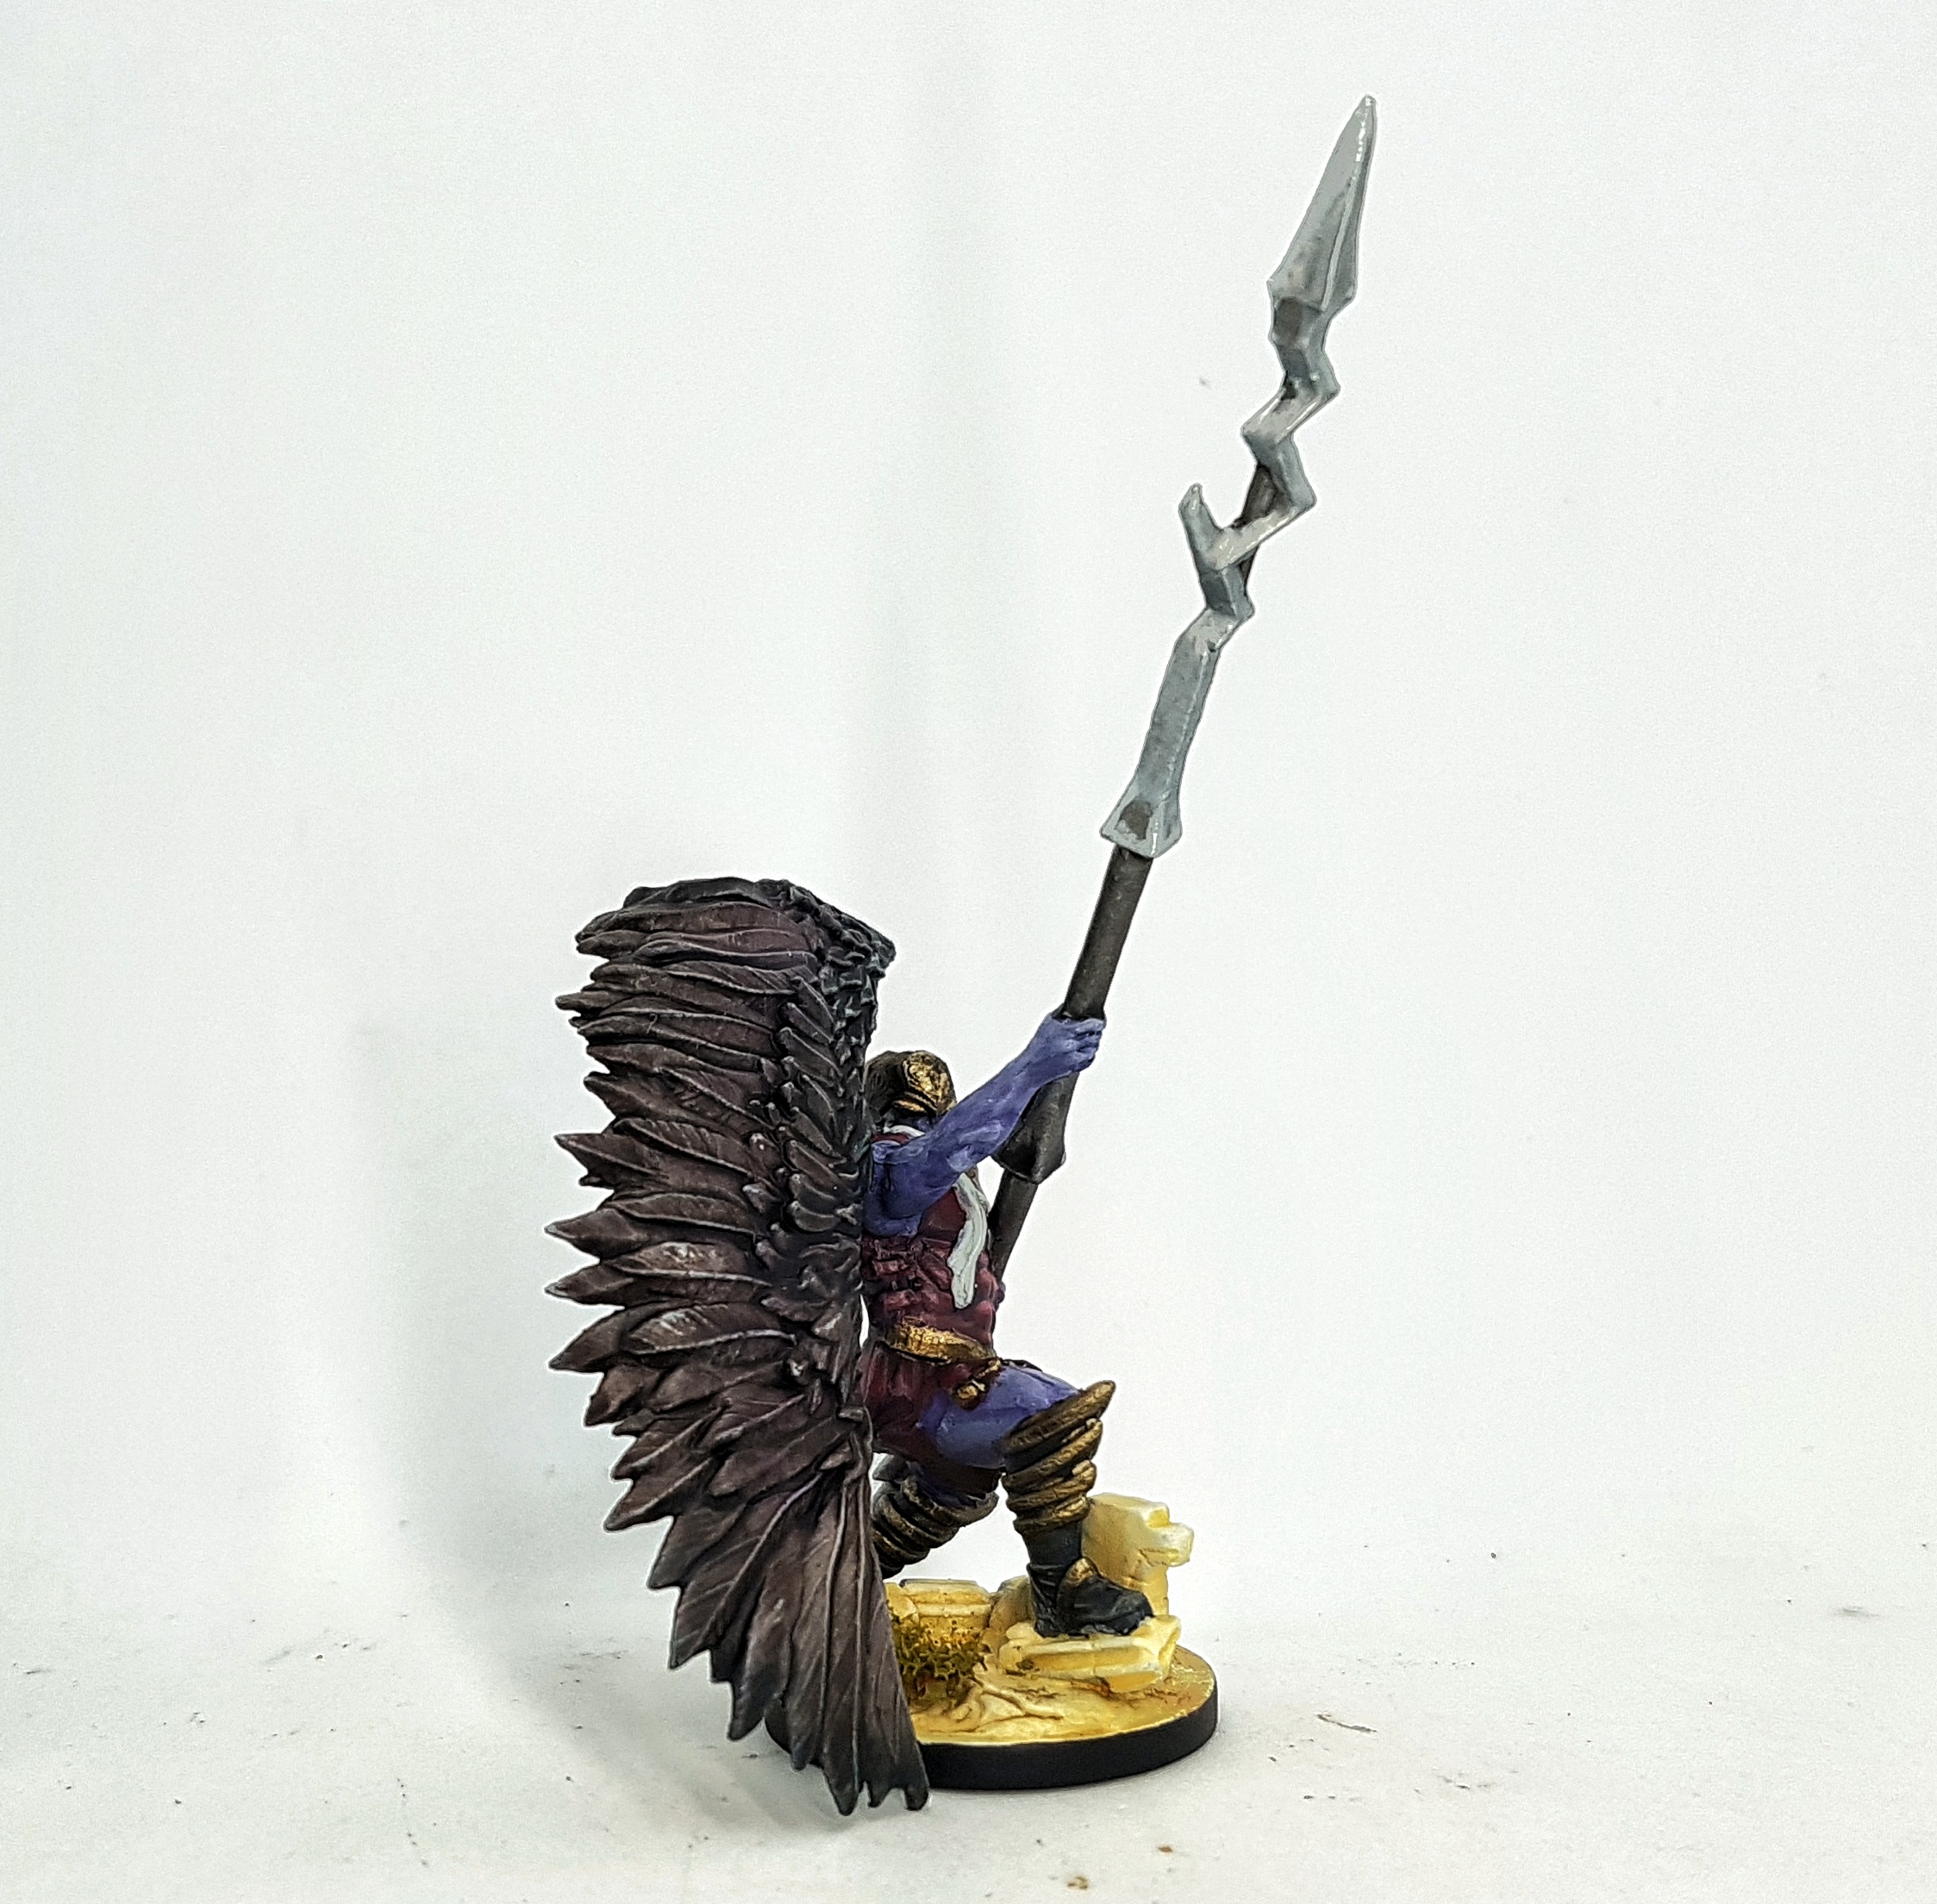
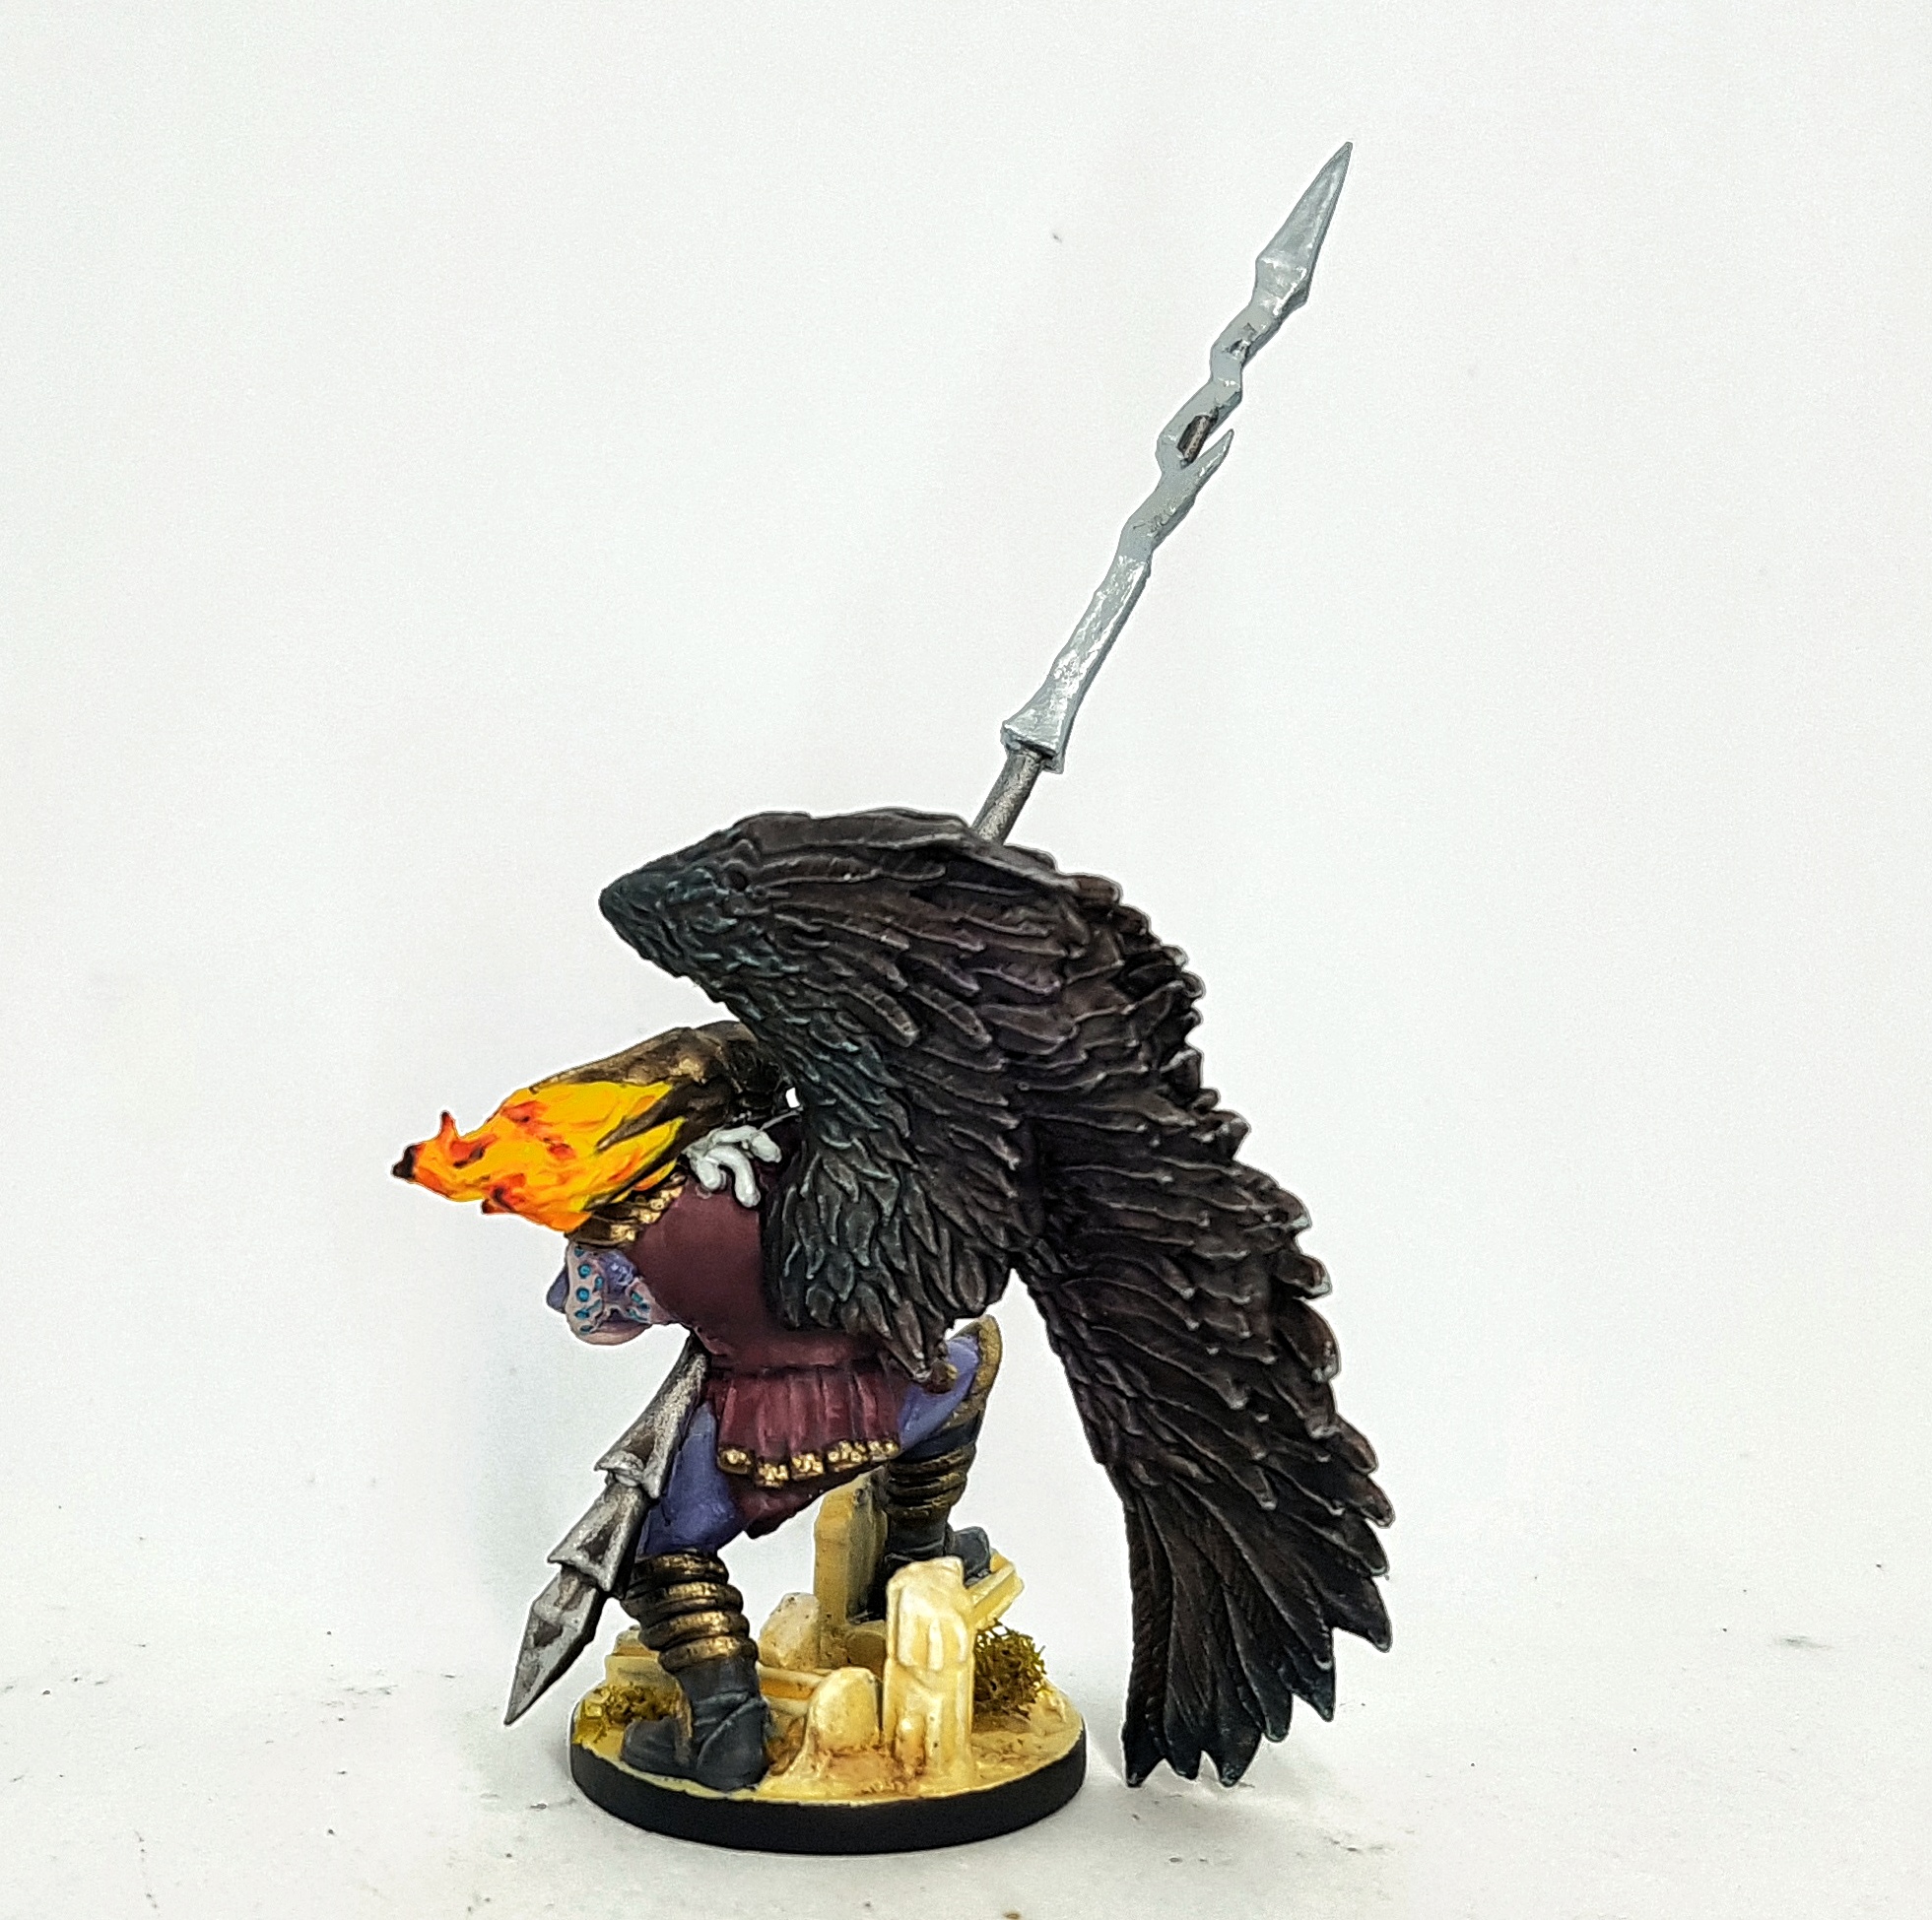
Cycle 3: Icarian Harpy, and Ascender, Dawnburner and Returner Titans
I took a weekend off painting to play games with friends, but now I’m back with 4 more finished models. This leaves only 3 more game pieces to paint and I’m done. I’m going to book a week off in April and I’d like this finished before then. Even if I do one model a week I should be done before then.
Harpy Flesh
This scheme is looted and modified from Vallejo’s Non-Death Chaos set. For some reason, theirs looks blue even though it’s painted using purple paints. i swear they cheat.
Zenithal Preshade
Wash 2:1 VMC 72.048 Sombre Grey: VMC 72.016 Royal Purple (My zenithal blacks were too dominant, so I ended up applying something thicker than a wash to cover this up, and probably 2-3 coats. Ideally, you want a smooth black to white transition before you begin, and then use a very thin wash over it to tint it. I failed at that by not reading ahead when priming. Next time I hope to remember and try this guide properly.
Shade with Royal Purple
Highlight with base
Highlight with base with increasing amounts of VMC72.003 Pale Flesh
Burgandy
Base P3 Sanguine base
Wash Sanguine Base mixed with P3 Exile Blue
Wash with above with a little P3 Coal Black
Highlight with base
Highlight with P3 Sanguine Highlight
Highlight with P3 Sanguine Highlight mixed with p3 Menoth White Base
Nails
Base P3 Cryx Bane Base
Drybrush P3 Thrall Flesh
Drybrush P3 Menoth White Base, avoiding near the flesh
Drybrush P3 Menoth White Highlight towards the tips
Wash GW Nuln Oil
Eyes
Base with P3 Heartfire
Pupil is any black
Harpy Wings
Base with a single coat of thinned P3 Umbral Umber over a zenithal prime. I could see lots of the white showing through, but it was tinted brown.
Wash with Vallejo Black Ink thinned about 2:3 with Instar Water+. It’s like water, but better. Don’t ask me how. All I know is everyone swears they won’t go back to water after. Using water in a wash can lead to tide marks and I wanted to avoid that.
Wash with GW Athonian Camoshade. it’s a dirty green. I want swampy dirtiness.
VERY lightly drybrush with P3 Thrall Flesh (Zombie skin)
Titan Wings
Base with a single coat of thinned P3 Umbral Umber over a zenithal prime. I could see lots of the white showing through, but it was tinted brown.
Wash with Vallejo Black Ink thinned about 2:3 with Instar Water+. It’s like water, but better. Don’t ask me how. All I know is everyone swears they won’t go back to water after. Using water in a wash can lead to tide marks and I wanted to avoid that.
Very lightly Drybrush with P3 Frostbite, and then selectively with White.
Mix up 2:3 glazes of Black and Water+, and P3 Turquoise Ink and Water+, and Vallejo Violet Ink and Water+
Glaze on a band of the purple around the bottom of the cloak.
While still wet, glaze on a band of black above it, encouraging the two to mix
Repeat with the turquoise
Repeat with the black
Tint with turquoise and then purple around the collar, never letting any of it dry before the next glaze.
Leather
Base P3 Bootstrap Leather
Drybrush/layer P3 Hammerfall khaki
Wash GW Agrax Earthshade
Gold
Base Darkstar Blackened Bronze
Wash Secret Weapon Sewer Water
Layer Blackened Bronze
Layer Blackened Bronze mixed with Darkstar Royal Gold
Layer Darkstar Royal Gold
Layer Darkstar Royal Gold mixed with Darkstar Pale Gold
Layer Darkstar Pale Gold
Iron
Base P3 Pig Iron
Wash GW Nuln Oil
Layer P3 Cold Steel
Layer P3 Quick Silver
Steel
Base VMC 72.063 Chainmail Silver
Wash Chainmail Silver mixed with P3 Pig Iron
Highlight with base
Highlight with VMA 71.064 Chrome
Metal disk things on back
Base VMC 72.063 Chainmail Silver
Wash GW Seraphim Sepia
Highlight with base
Tentacle Flesh:
Base: P3 Troolblood Highlight, P3 Ryn Flesh & P3 Carnal Pink
Wash: Base +Traitor Green
Wash: Above+ Beaten Purple
Highlight: Ryn Flesh, Carnal Pink, and P3Menoth White Highlight
Blue Suckers:
Base: VMC 70.866 Turquoise
Highlight middle with VMC 70.808 Blue Green
Highlight middle by adding more and more Reaper 09150 Bloodless Skin or any other off-white to the Blue Green
Fire:
Undercoat: White
Base: Mr Paint MRP-F005 Deep Yellow
Highlight: Deep Yellow and Mr Paint MRP-F008 Fire Orange
Highlight: Fire Orange
Highlight: Fire Orange and Mr paint MRP-F013 Deep Red
Highlight: Deep Red
Apply Coat d’Arms Ink Wash Yellow to recesses to brighten further
Glaze thinned white carefully to the hottest recesses
Just before varnishing I got some Kromlech Soot Black pigment on a finger and touched it gently to the model to add some just to the high points. The varnish then sealed this in.
Grey-White Hair
Base: P3 Morrow White and Reaper 09148 Ghoul Skin
Wash: Ghoul Skin
Highlight with base and then add more and more white for further highlights
——————————————————————————————-
Icarian Harpy
Ascender Titan

Dawnburner Titan
Returner Titan

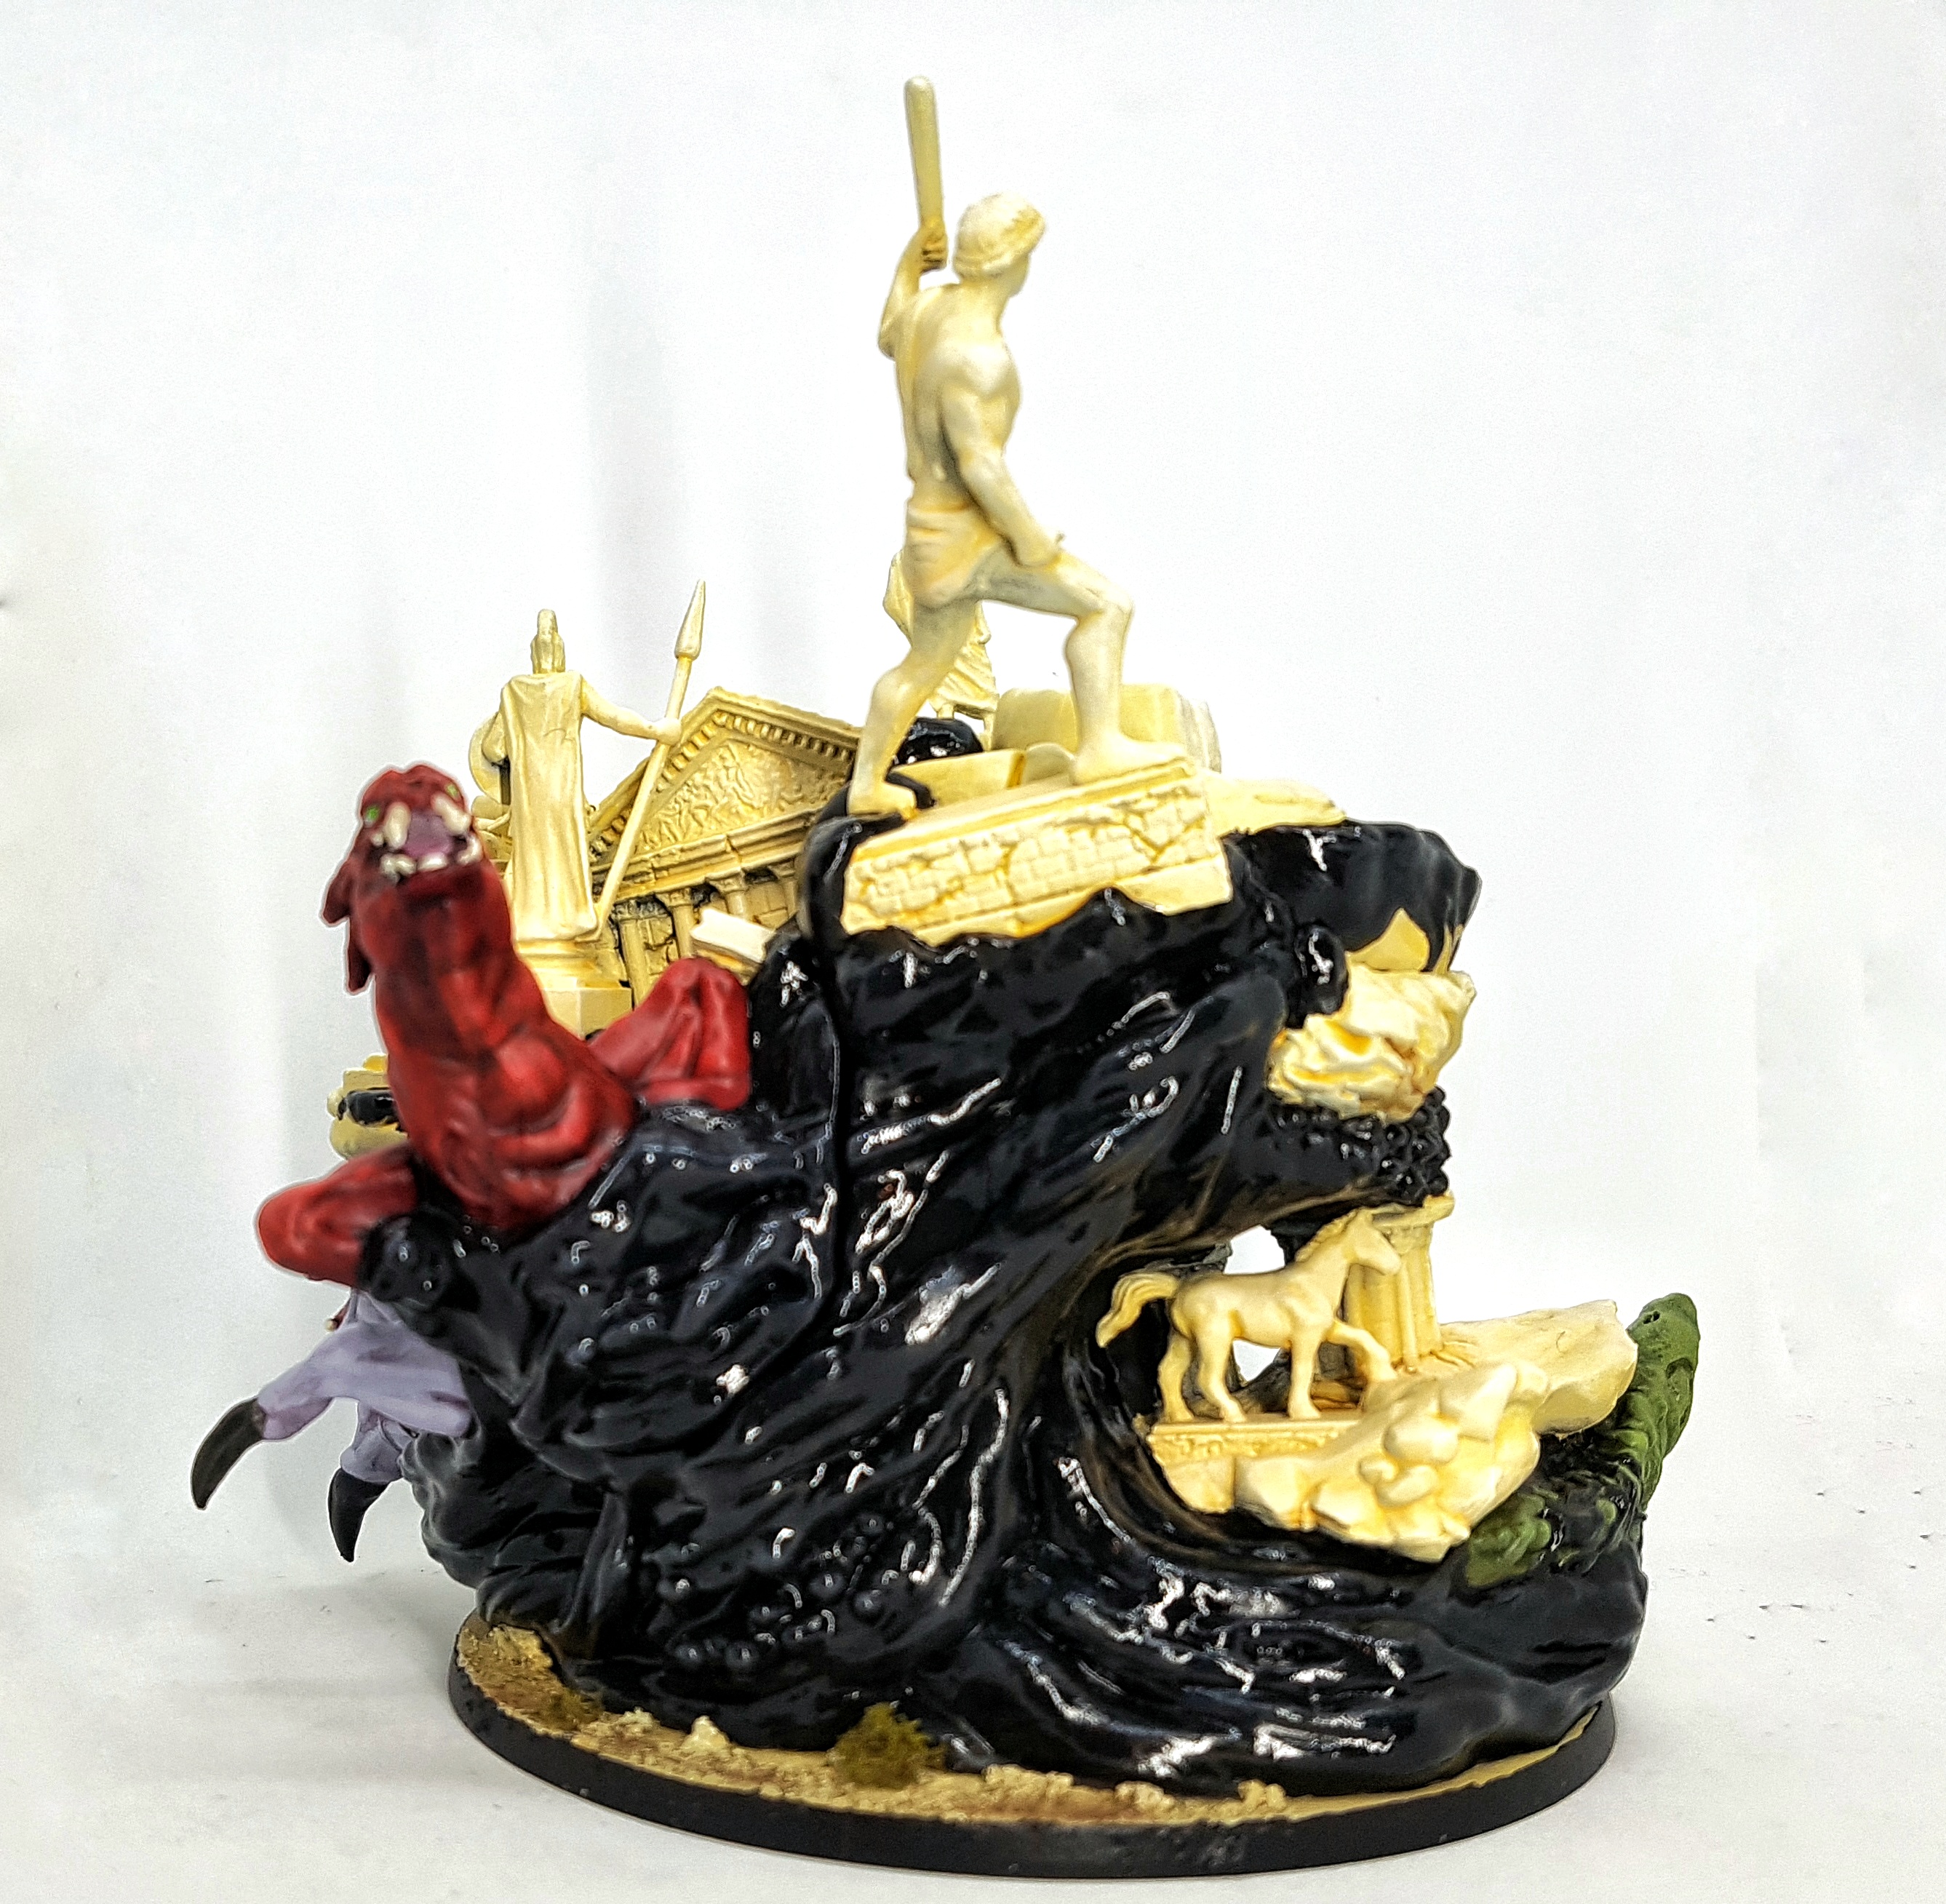
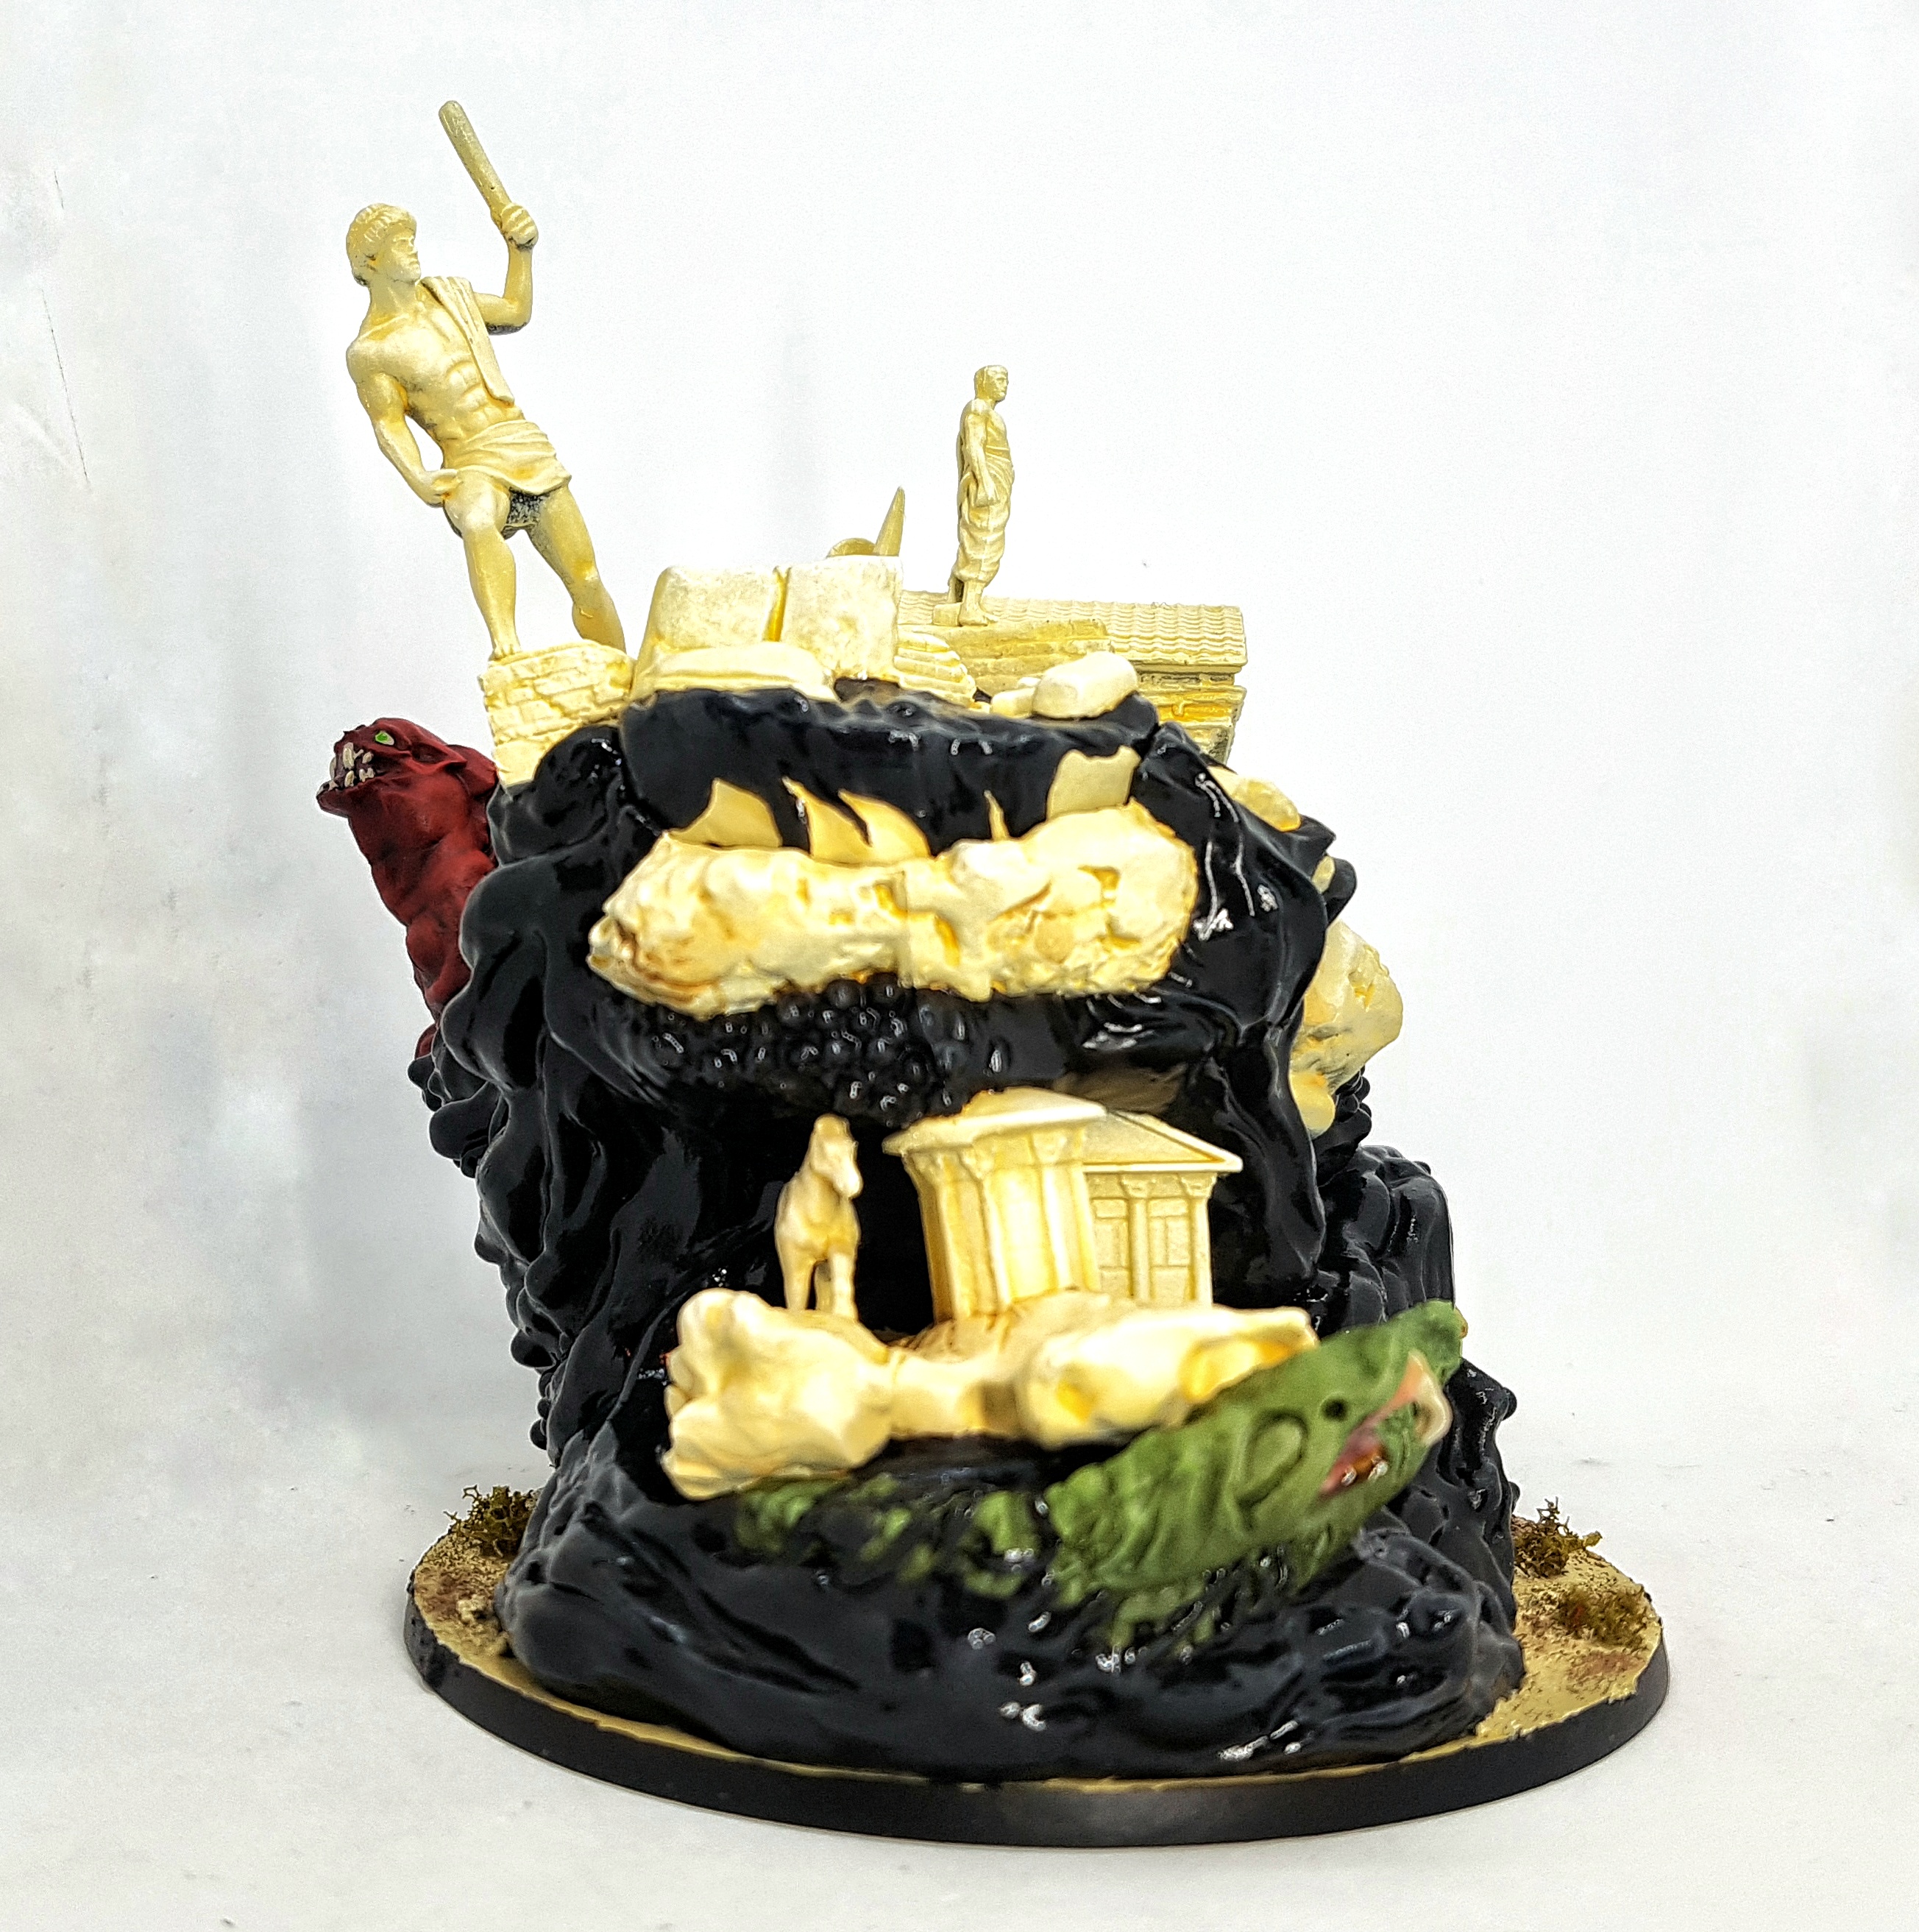
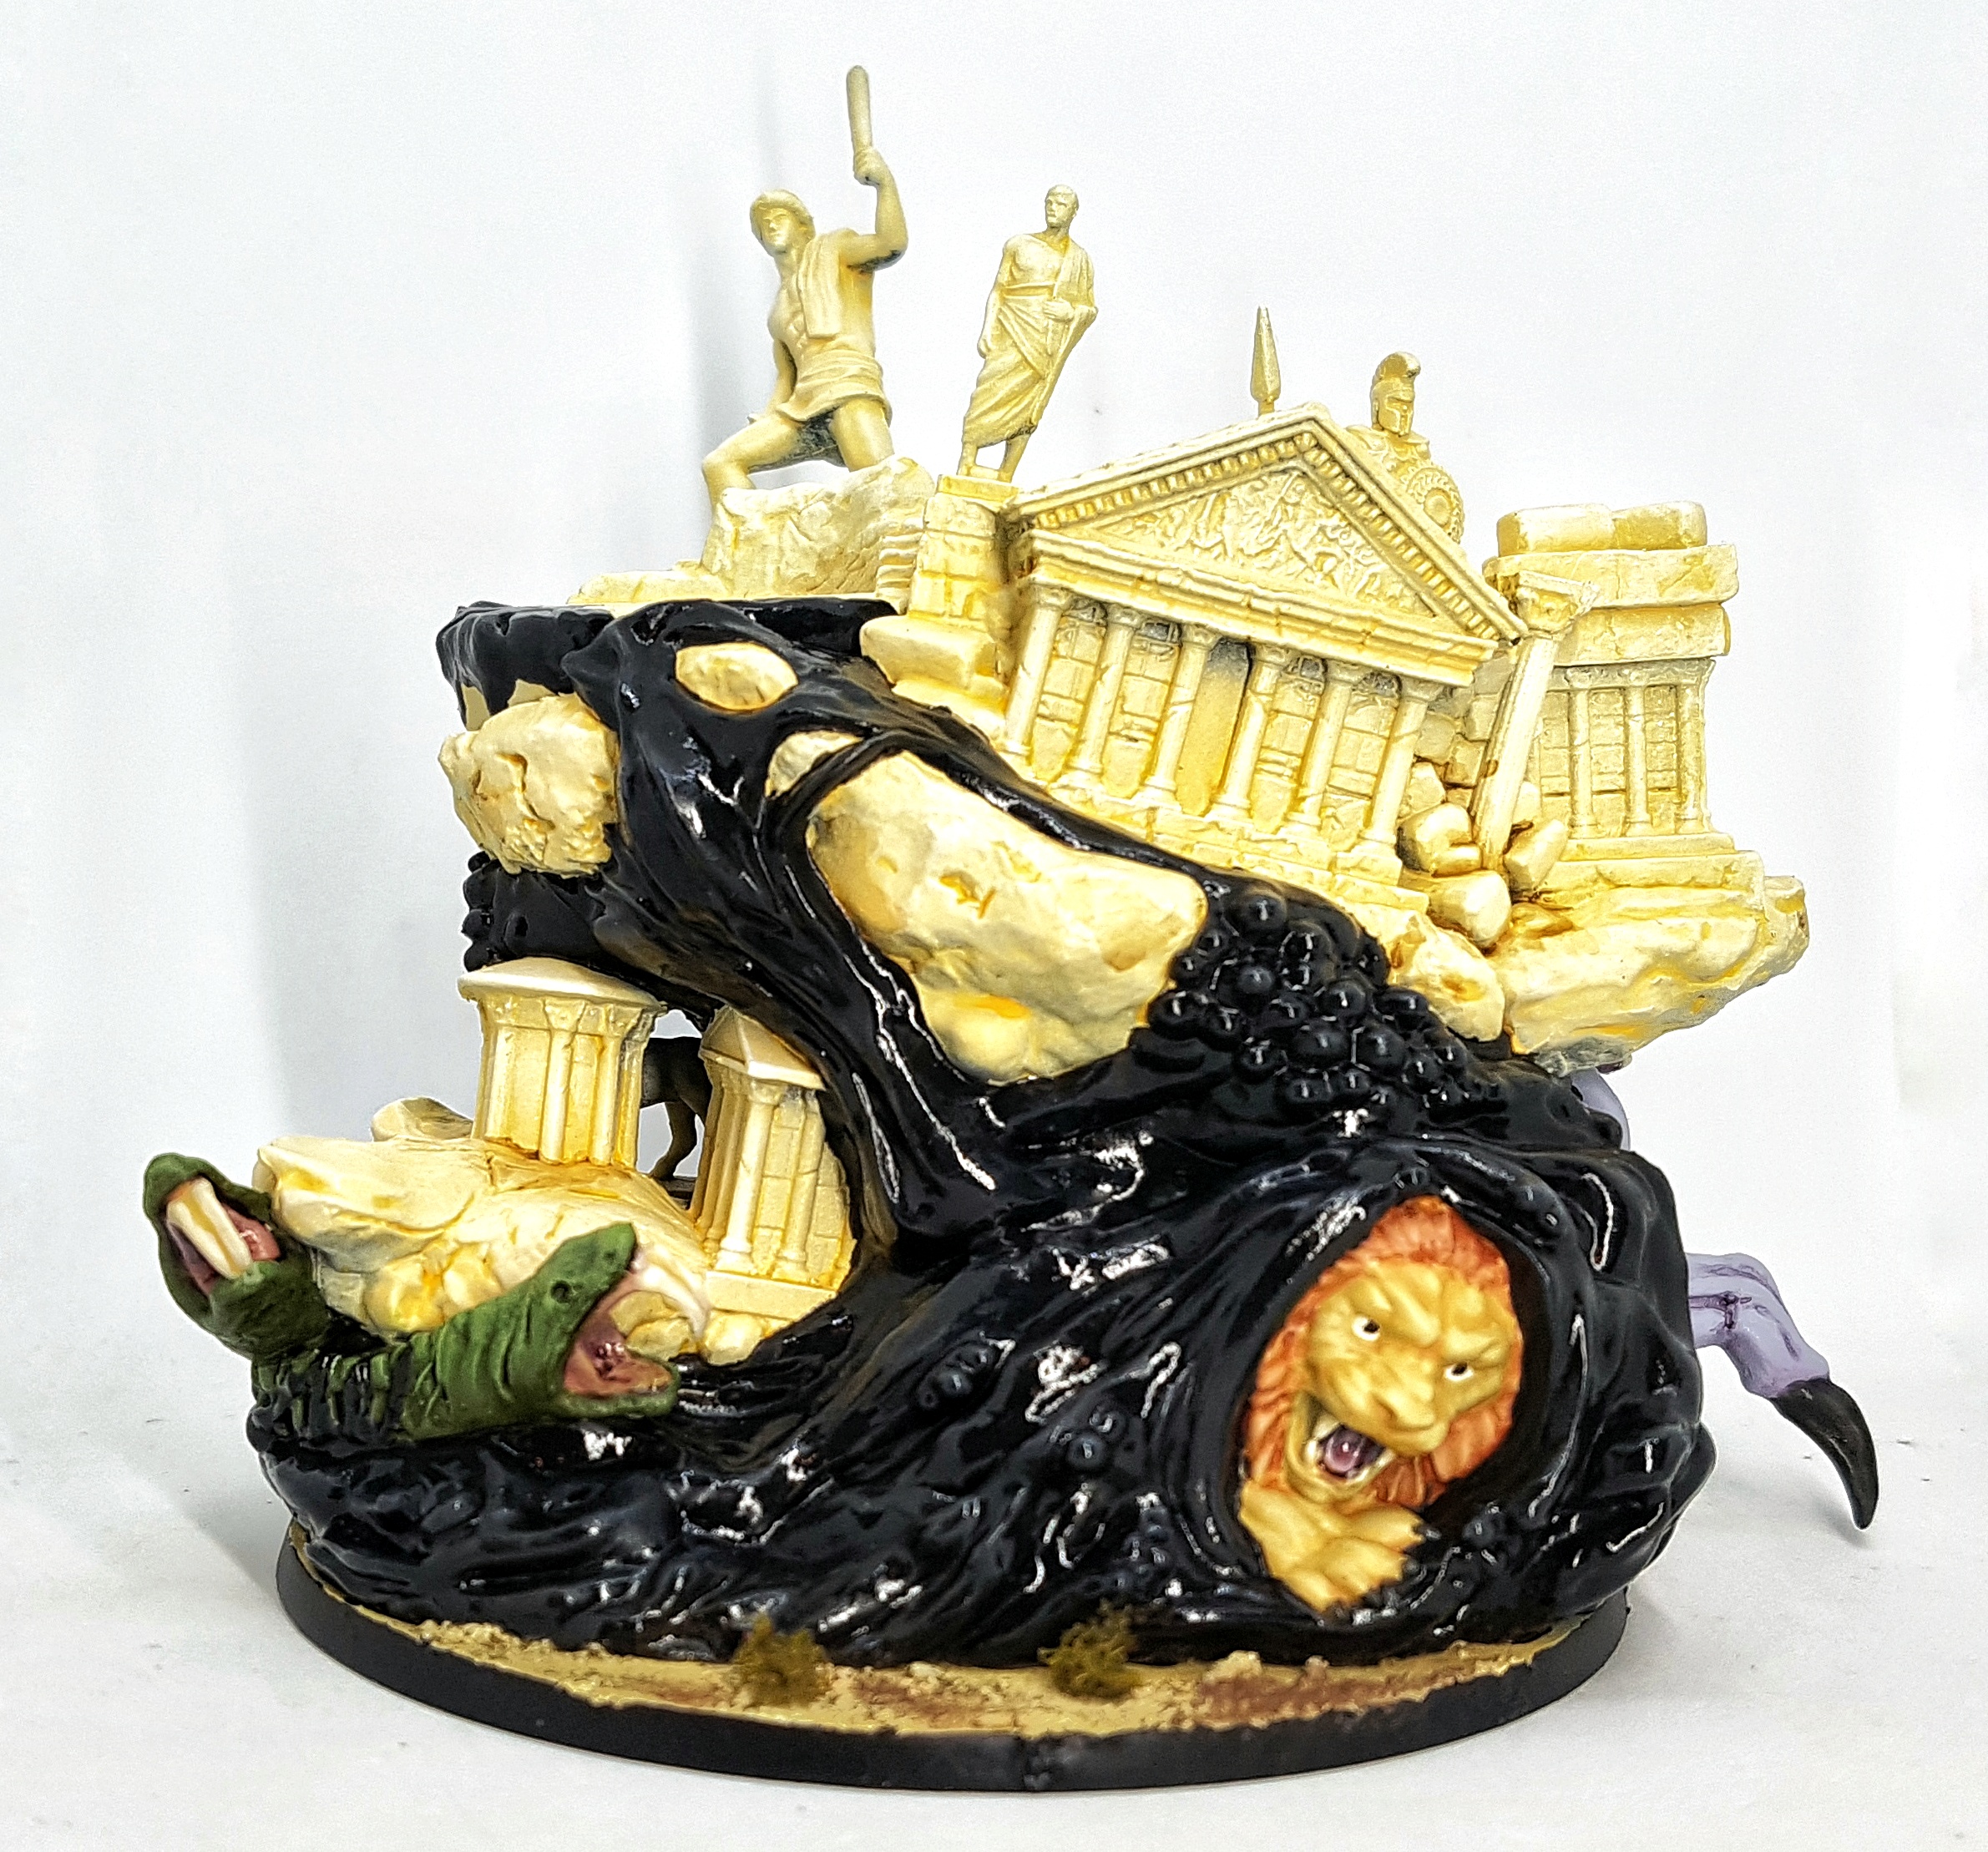
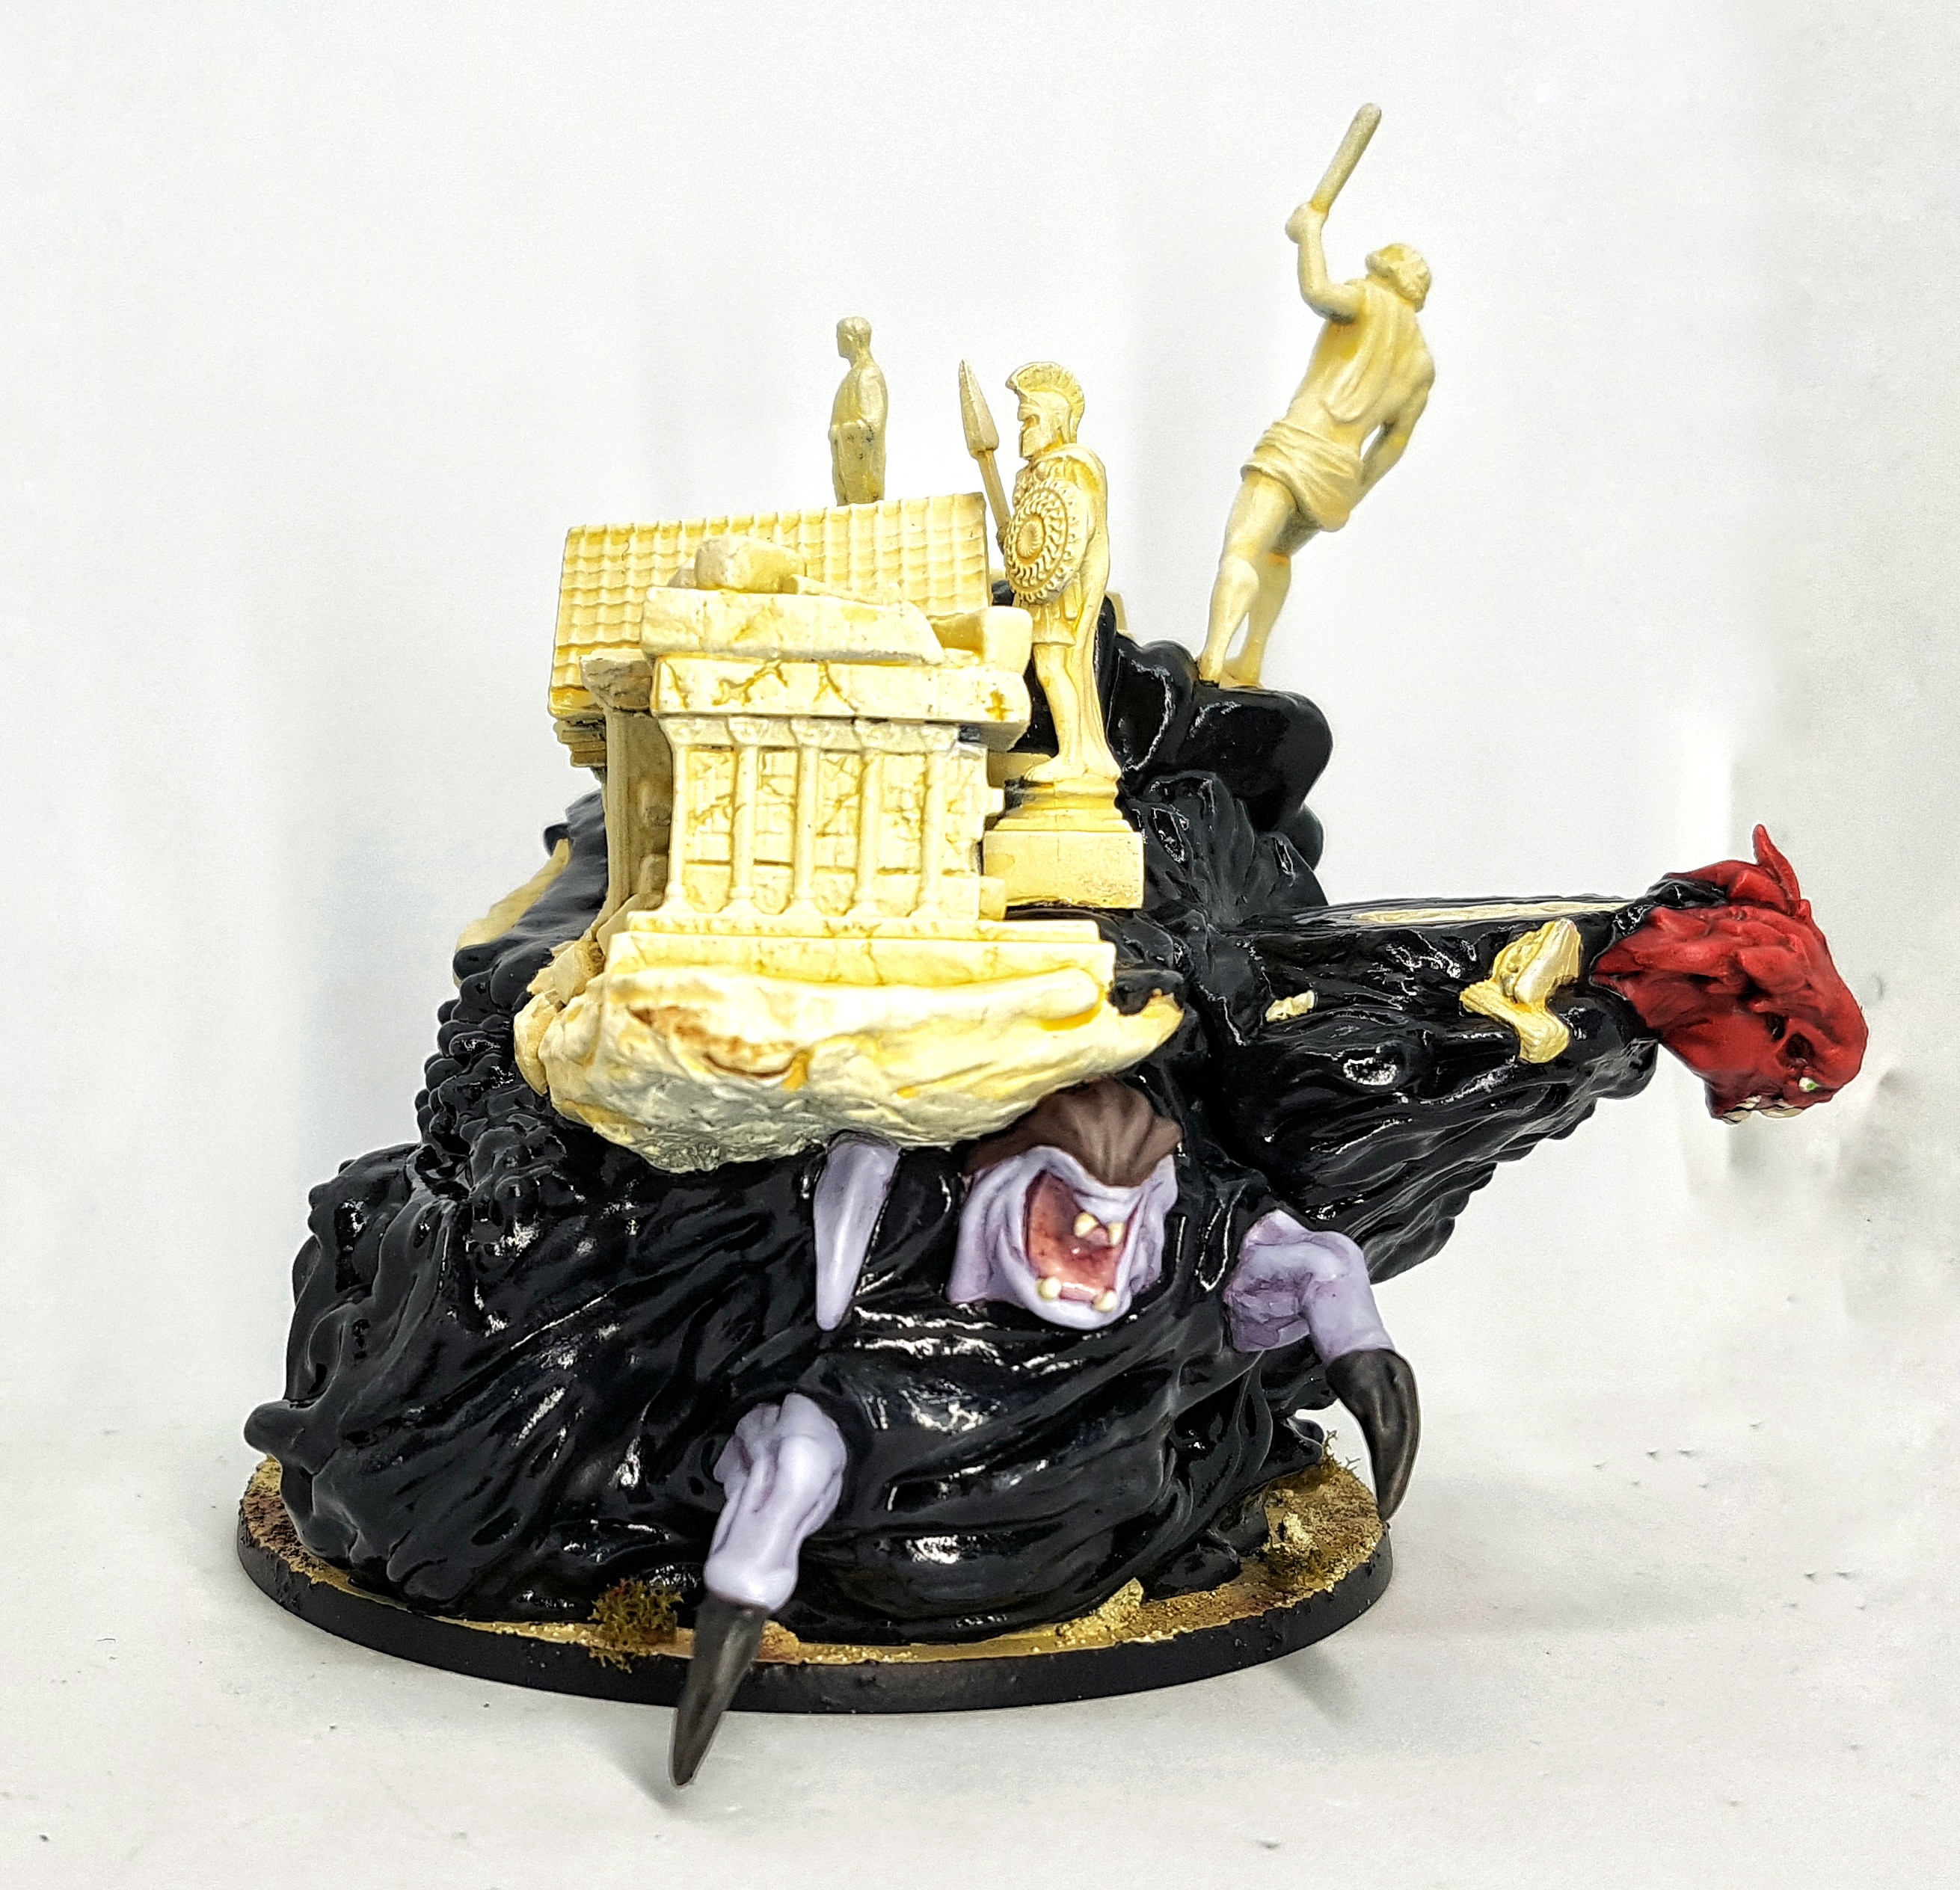
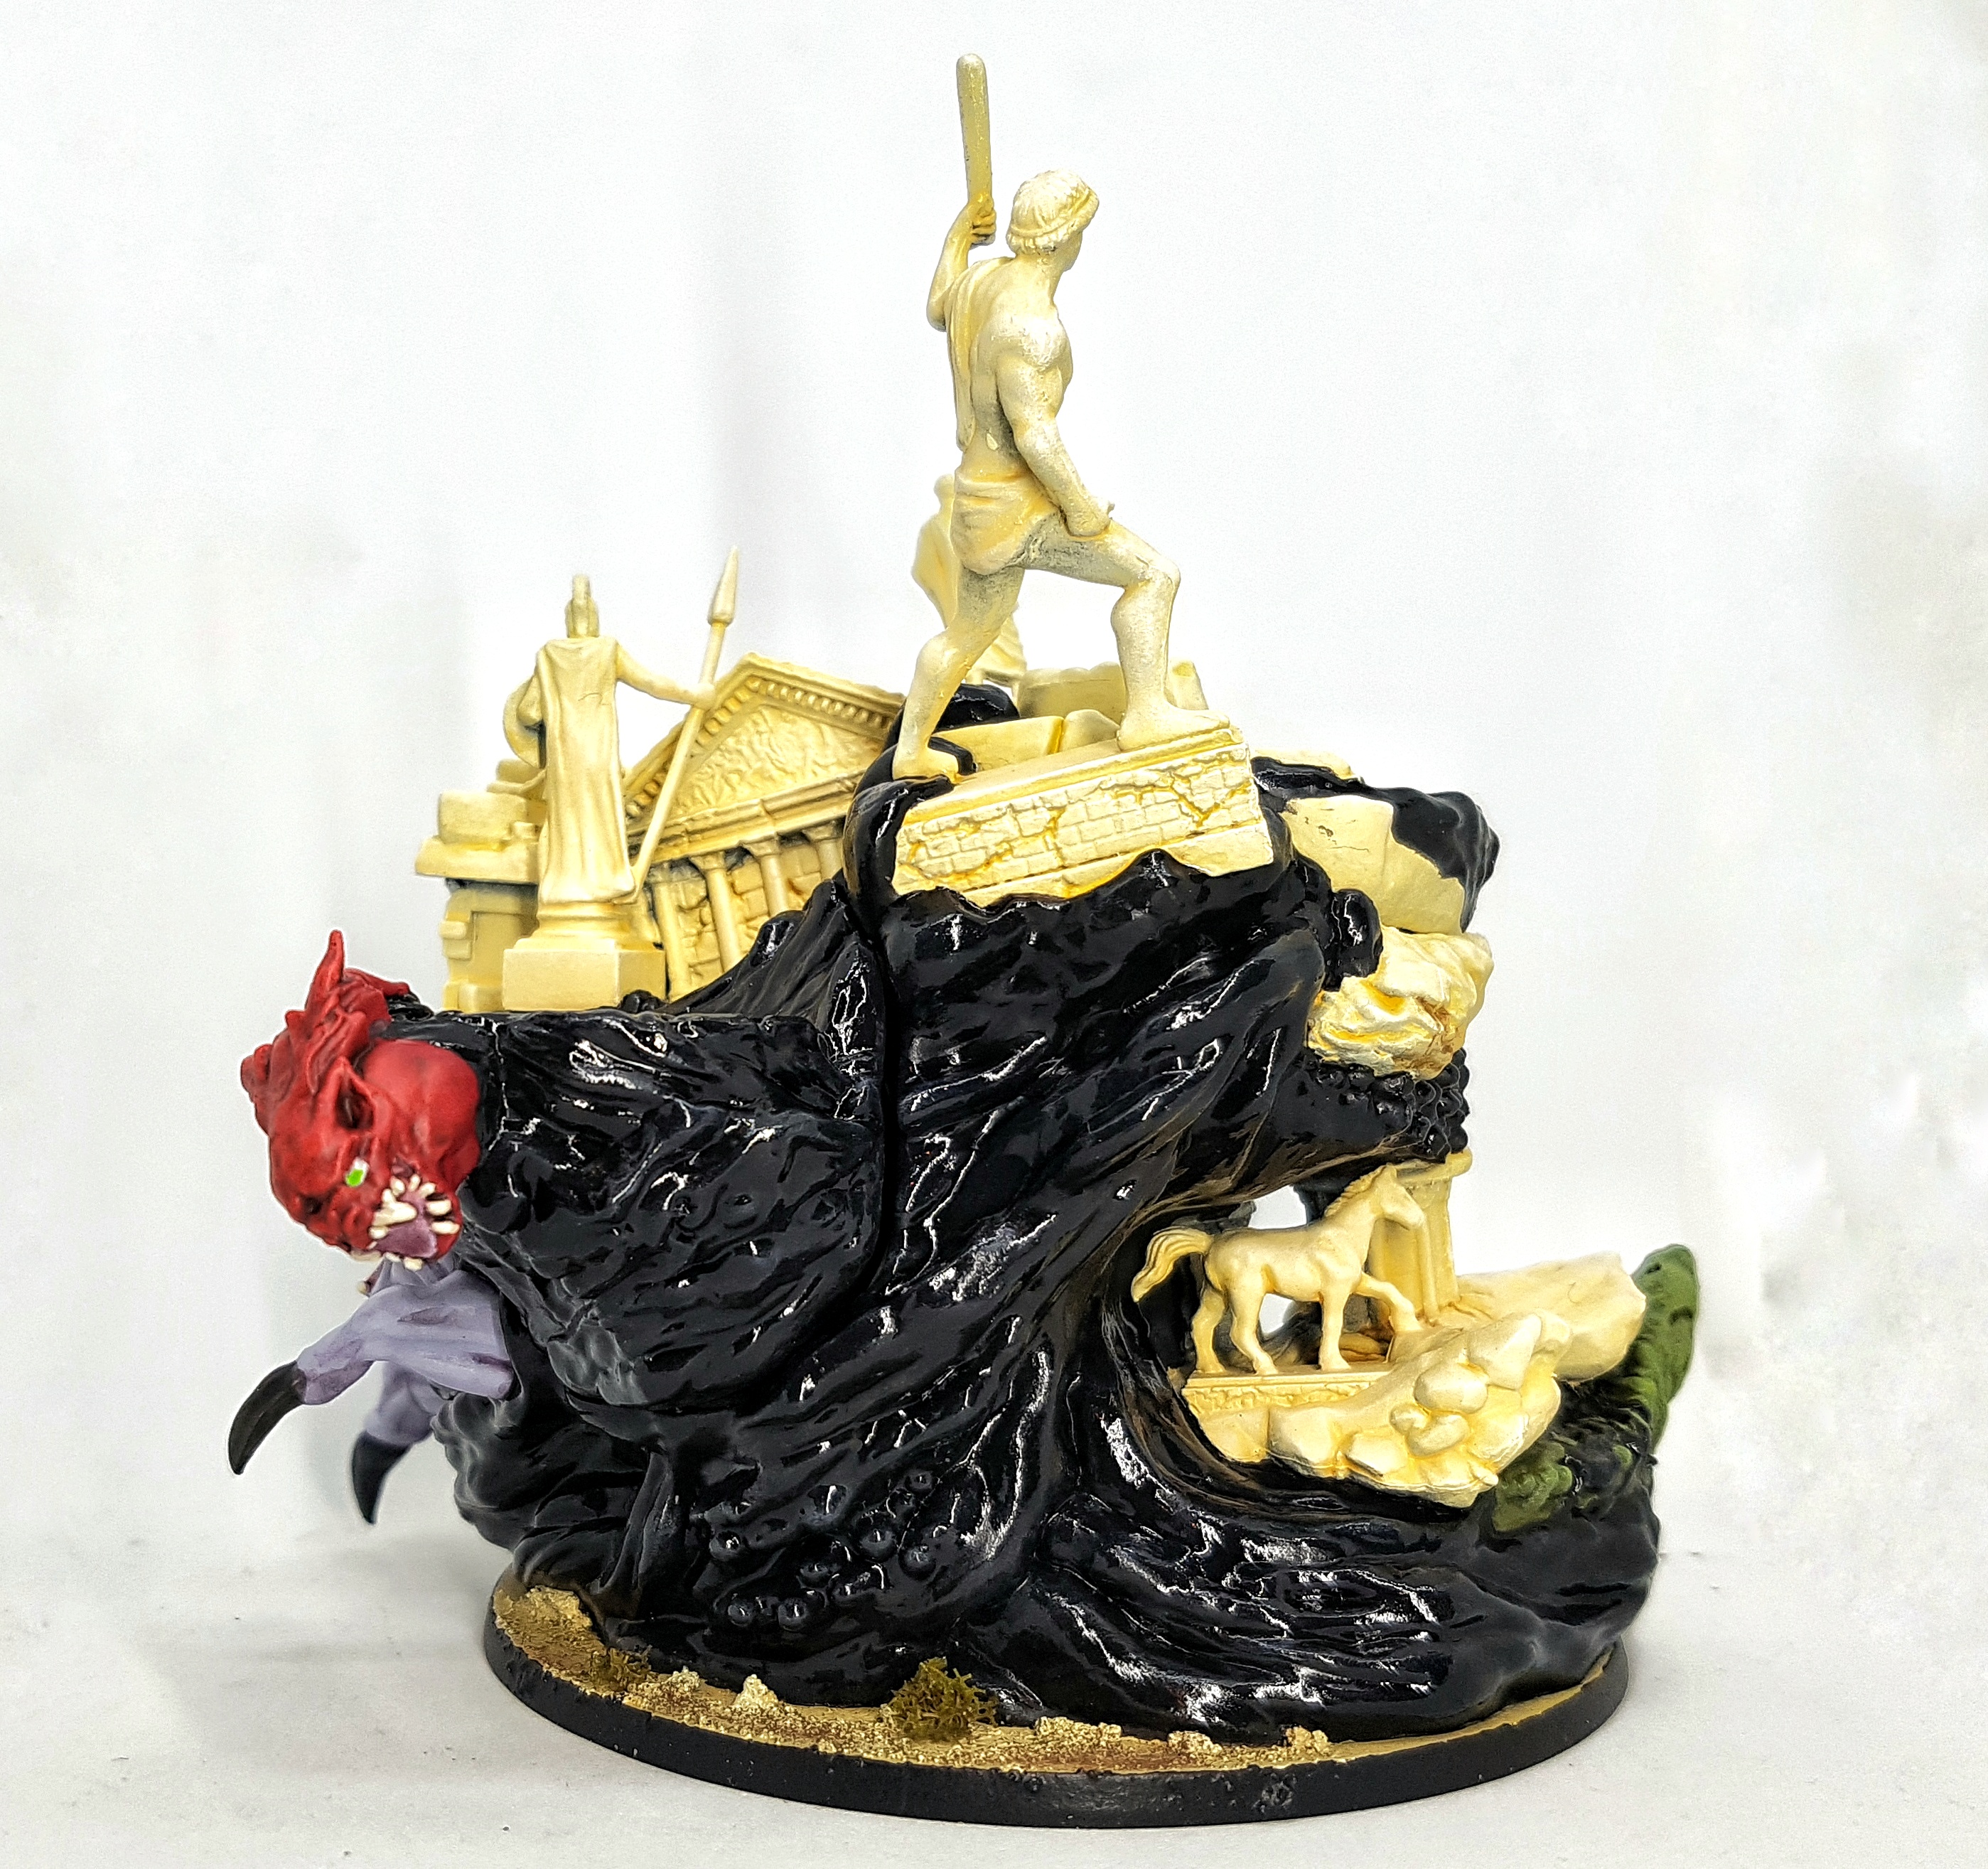
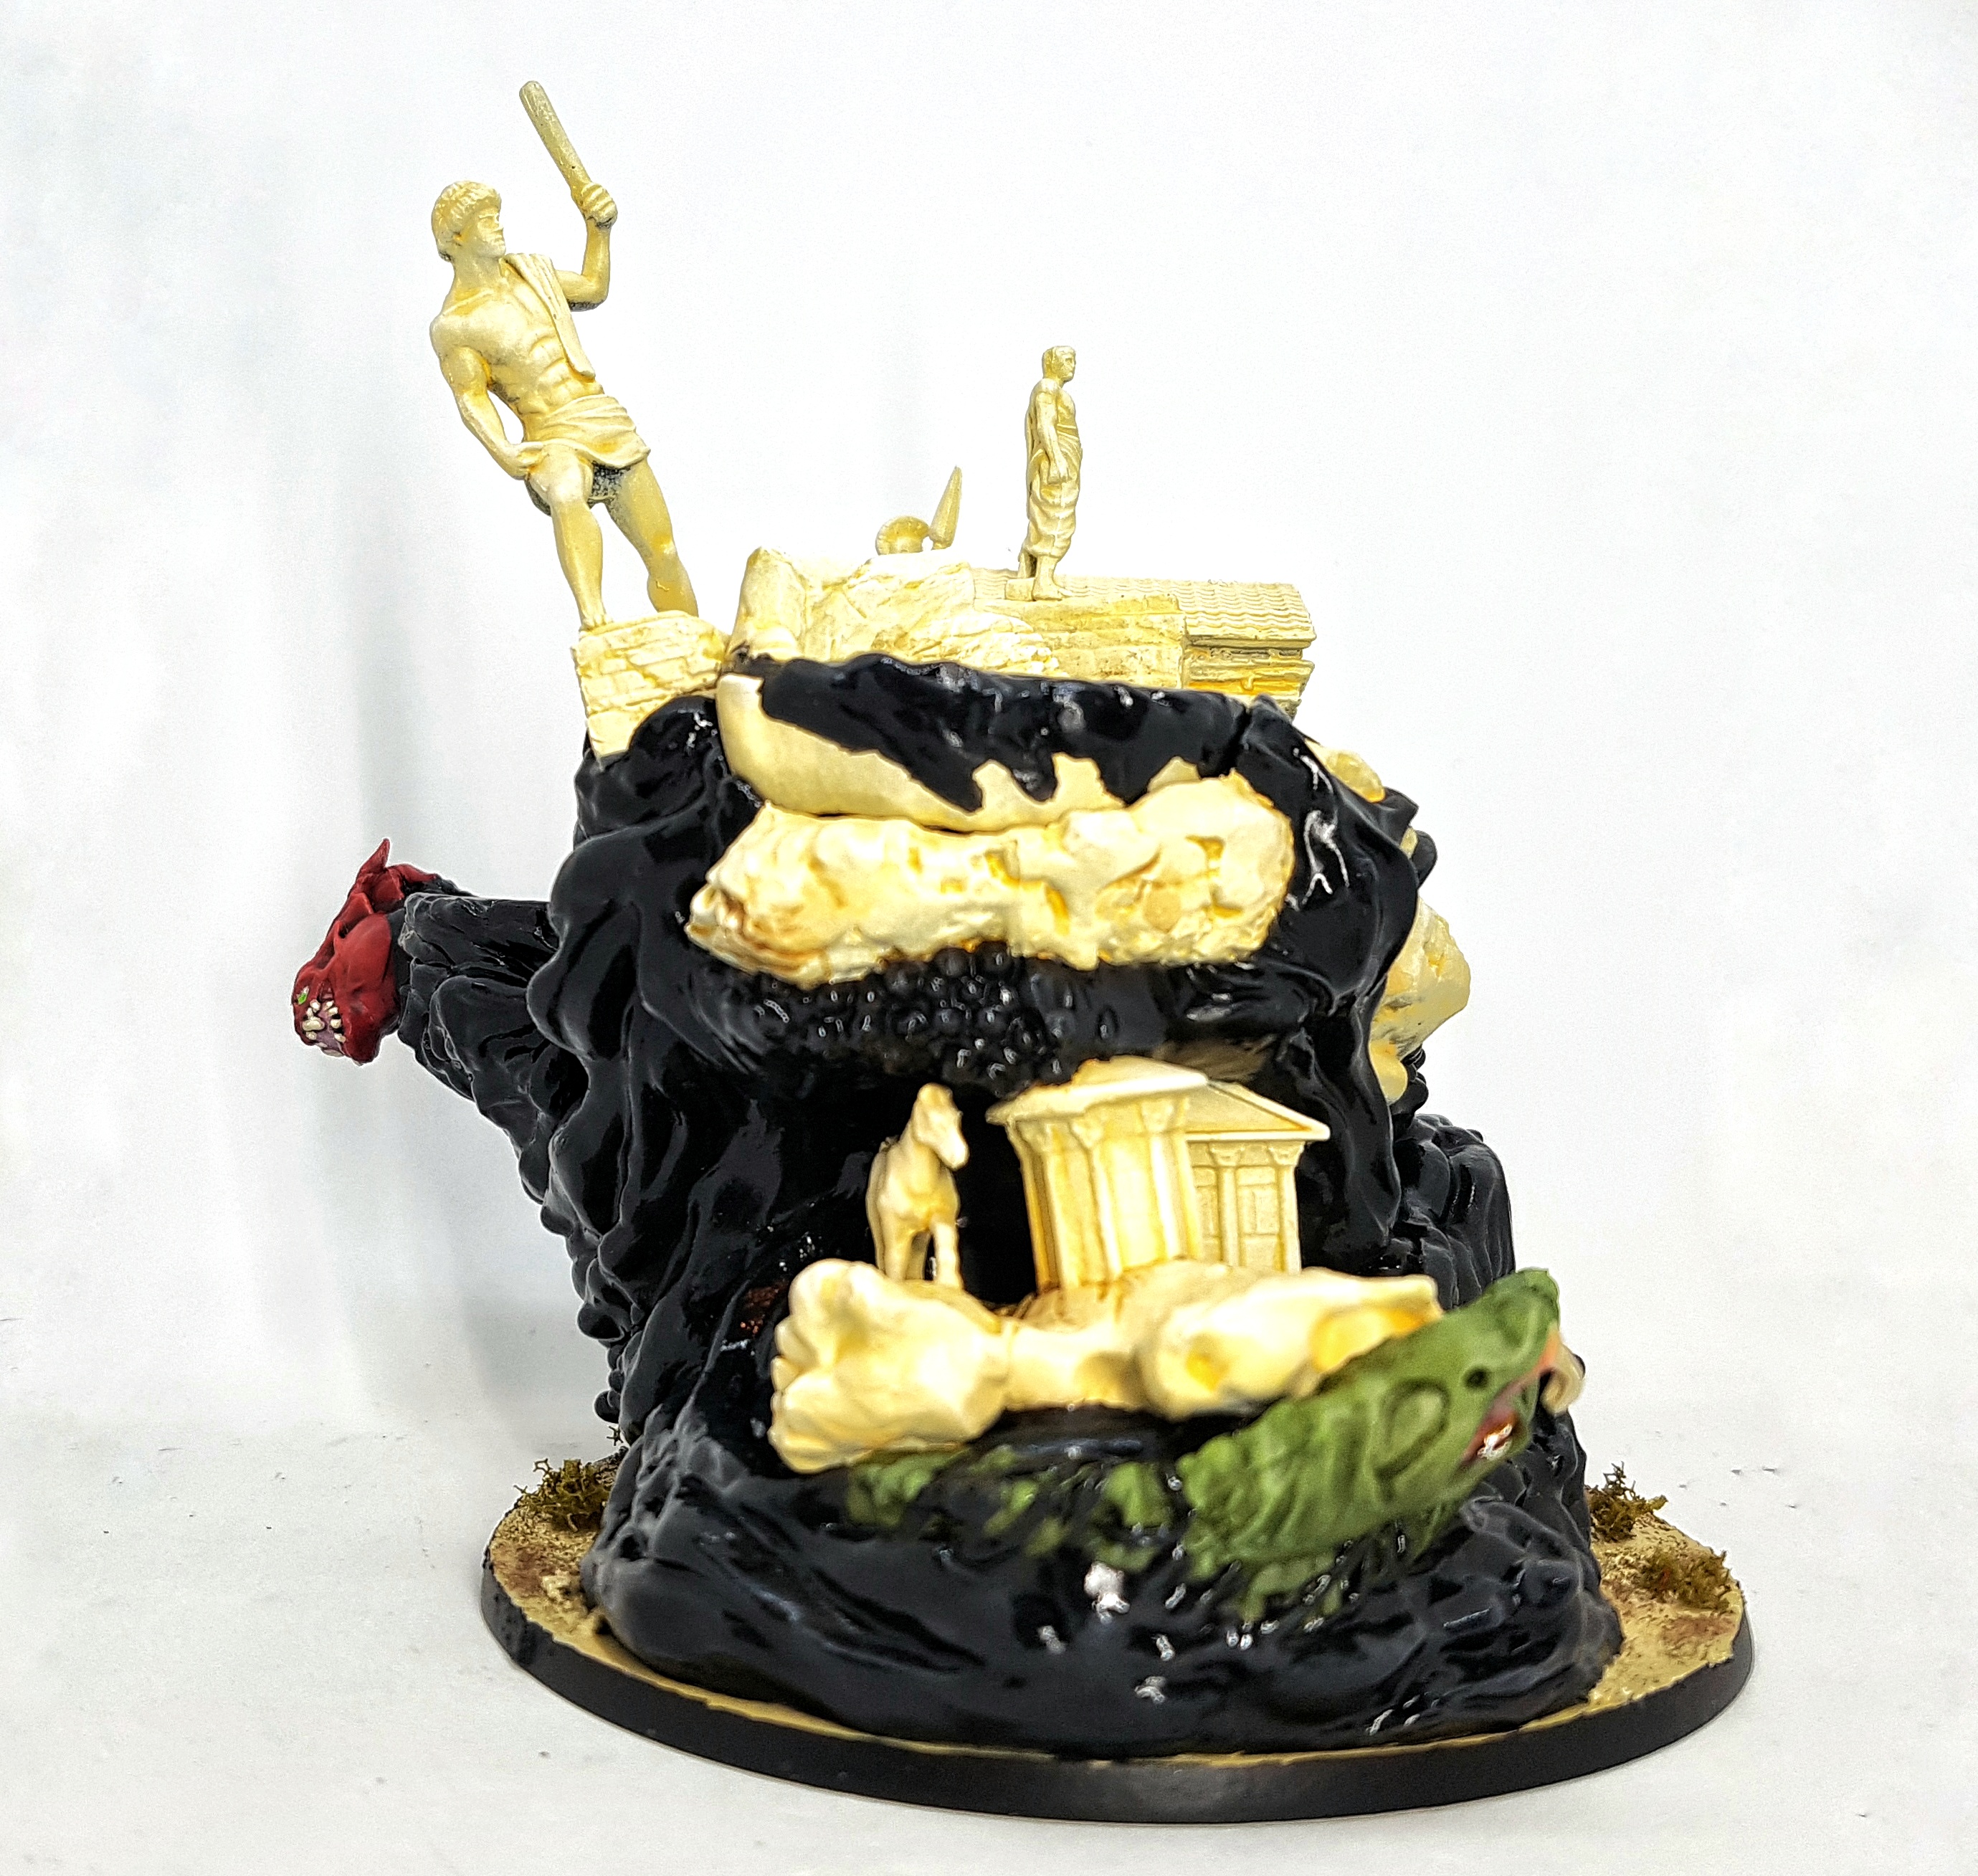
Cycle 2: Chimera Metastasios
I hate this piece. It’s a mess. It’s hard to look and and hard to understand what’s going on. Plus, this is the only piece of art I can find for it. How helpful is this? They’ve hidden everything useful under all that text. It may as well not have a picture.
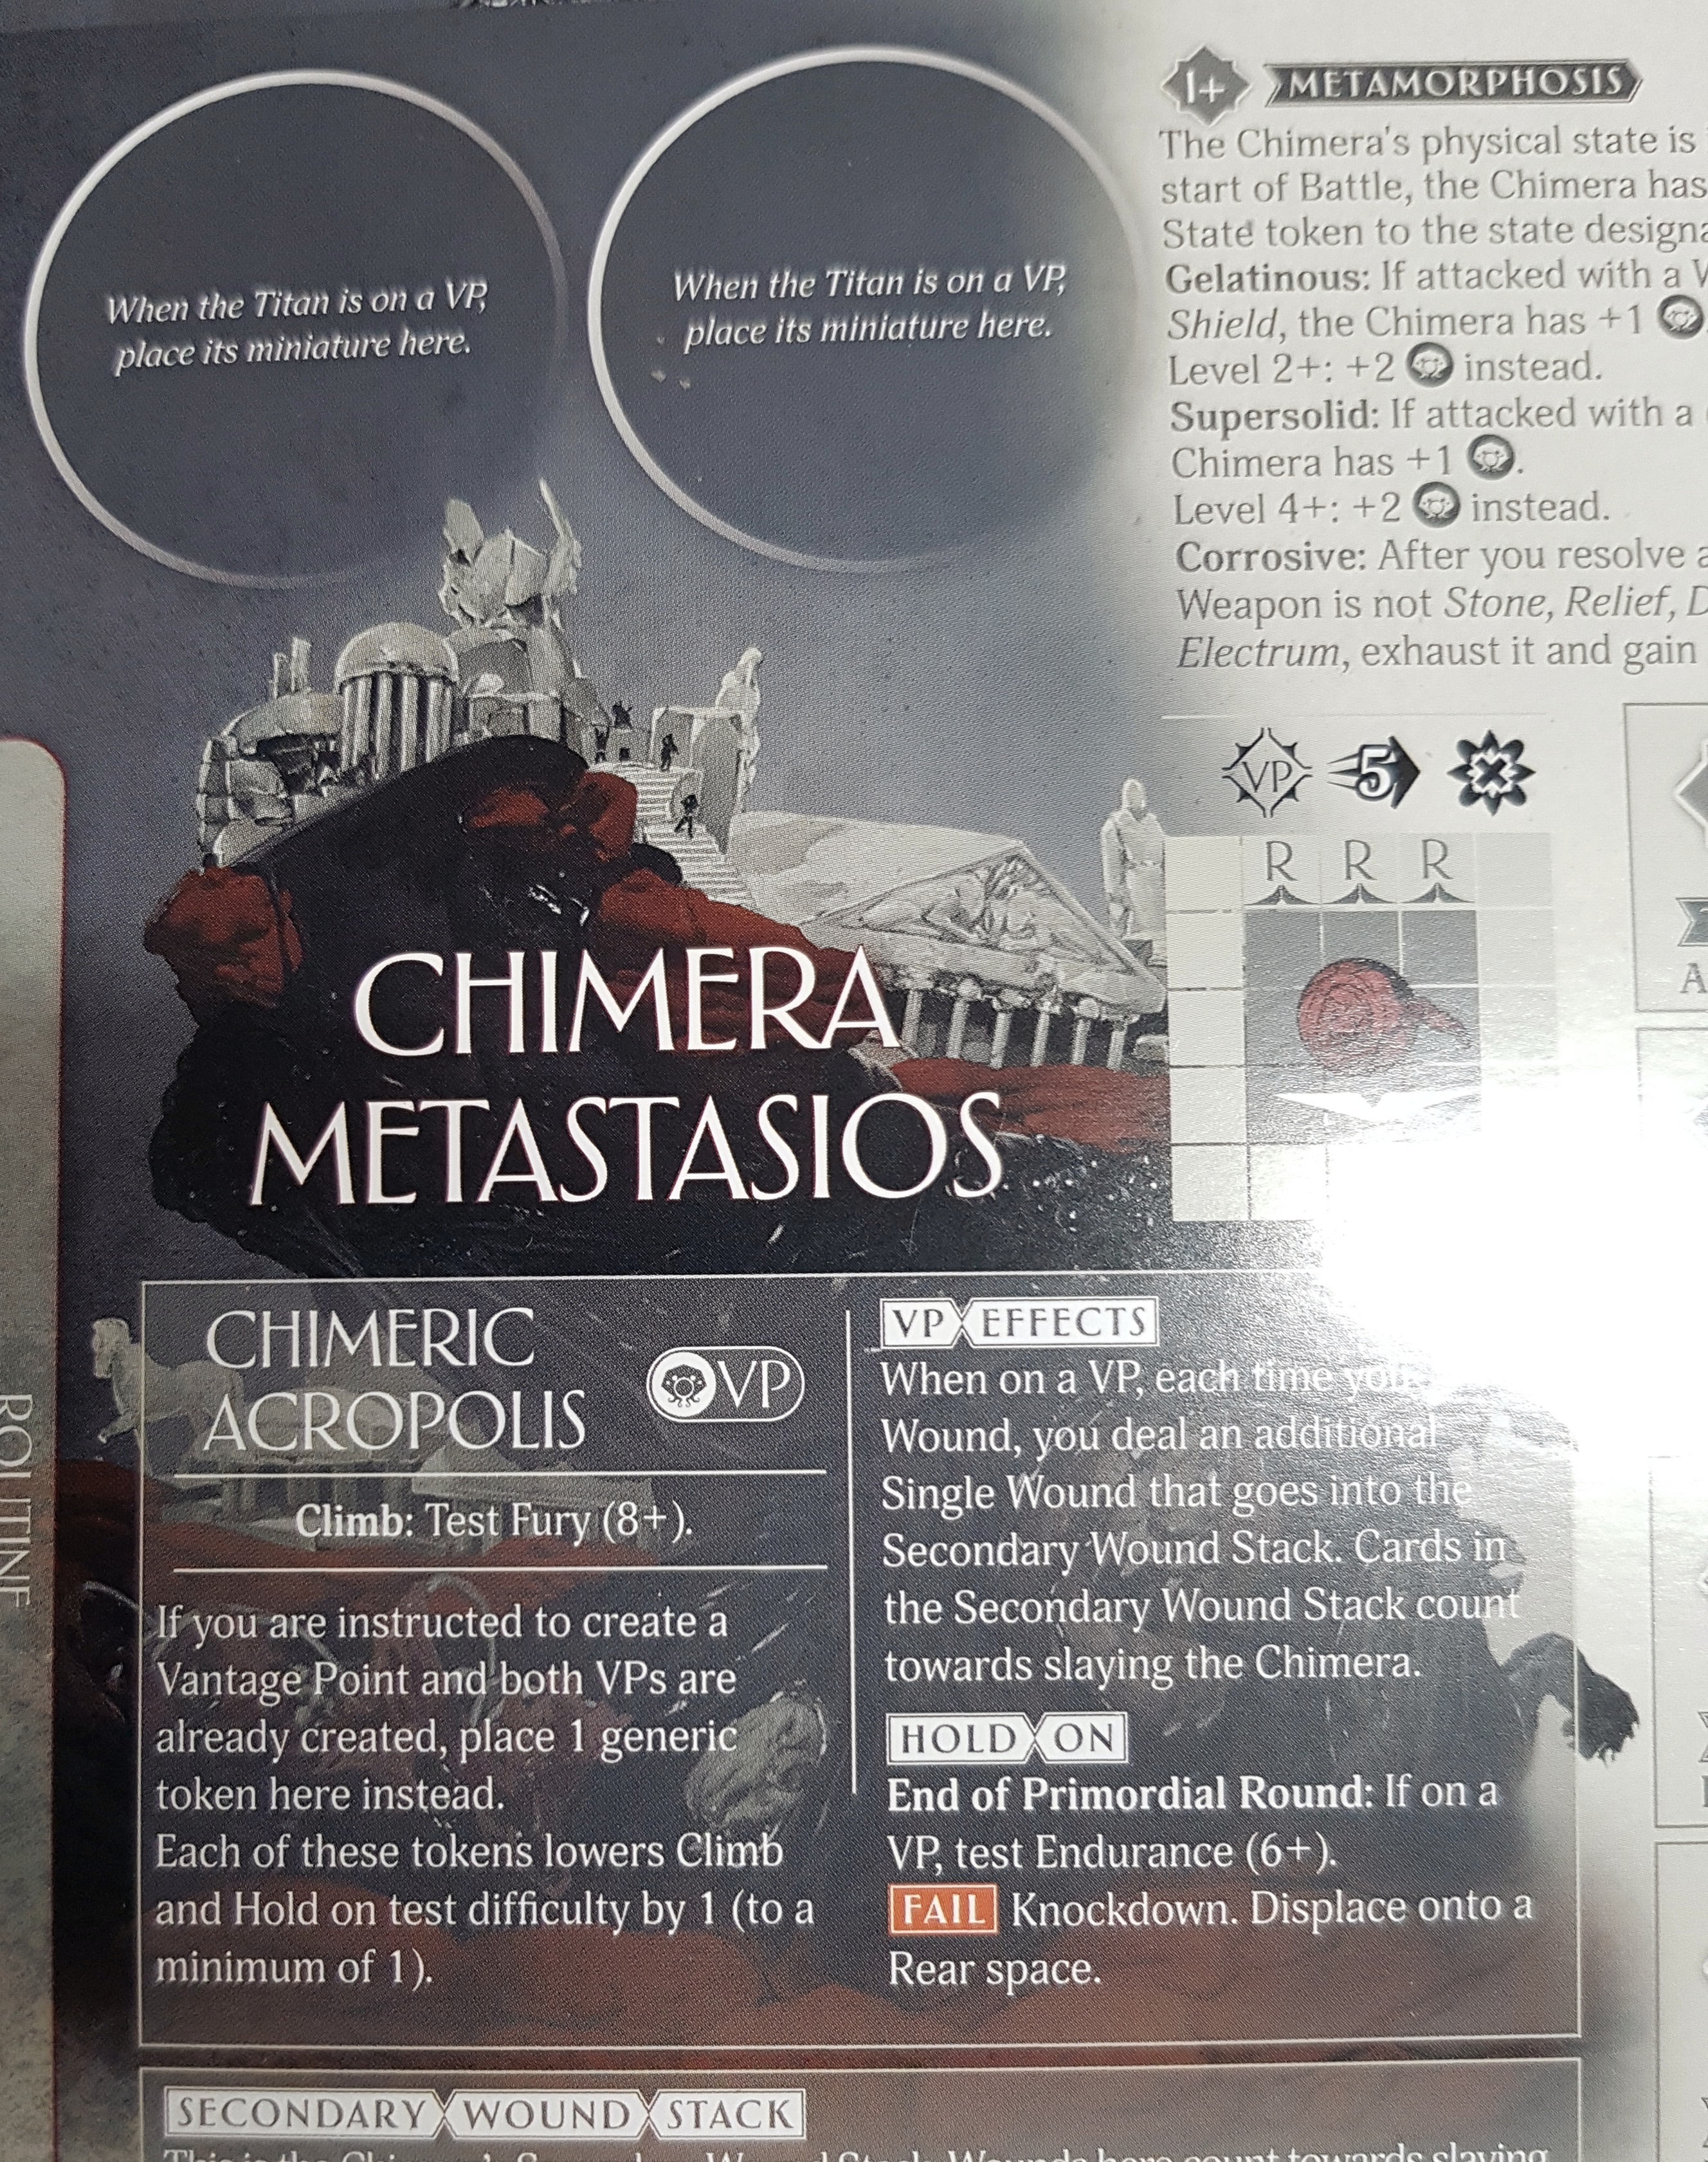
So let’s turn to the fluff to try and understand what on earth is going on here:
“Chimera Metastasios is what happens when you store too much volatile black ambrosia and monster parts in one place. The Chimera is a gelatinous slime that consumes all biological matter it comes in contact with. Hunger is all it knows, so it’s drawn to cities, cemeteries and battlefields.
For such an enormous creature, the Chimera is great at hiding: it uses ruins as a shell and camouflage and moves under the cover of night. A creeping city that can crush you in your sleep, what a tarrying though.
The Chimera has a variety of caustic attacks, some melee, some ranged, it can also use the abilities of the half-digested mythological creatures still trying to break free from the slime. The Chimera’s body dissolves metals as easily as flesh, rendering most weapons one use only and can harden to become solid matter.”
So basically it’s a huge gelatinous cube? I can work with that. It’s still overly busy. I really don’t like all those statues in different scales so close together. Even if the buildings have been dragged closer to each other it doesn’t work for me. Why is the lion the size of a building? Are there lions that big? Same for the snakes. What are the other two creatures? I’ve seen nothing to explain what they are or how they should look. They didn’t even bother to texture the base. It’s got smooth flat areas around it I had to texture myself. Not an issue, but they didn’t do this for other models.
I hate this piece. It has no focus and is just a mass of busyness and distractions.
Anyway, on with the paint scheme.
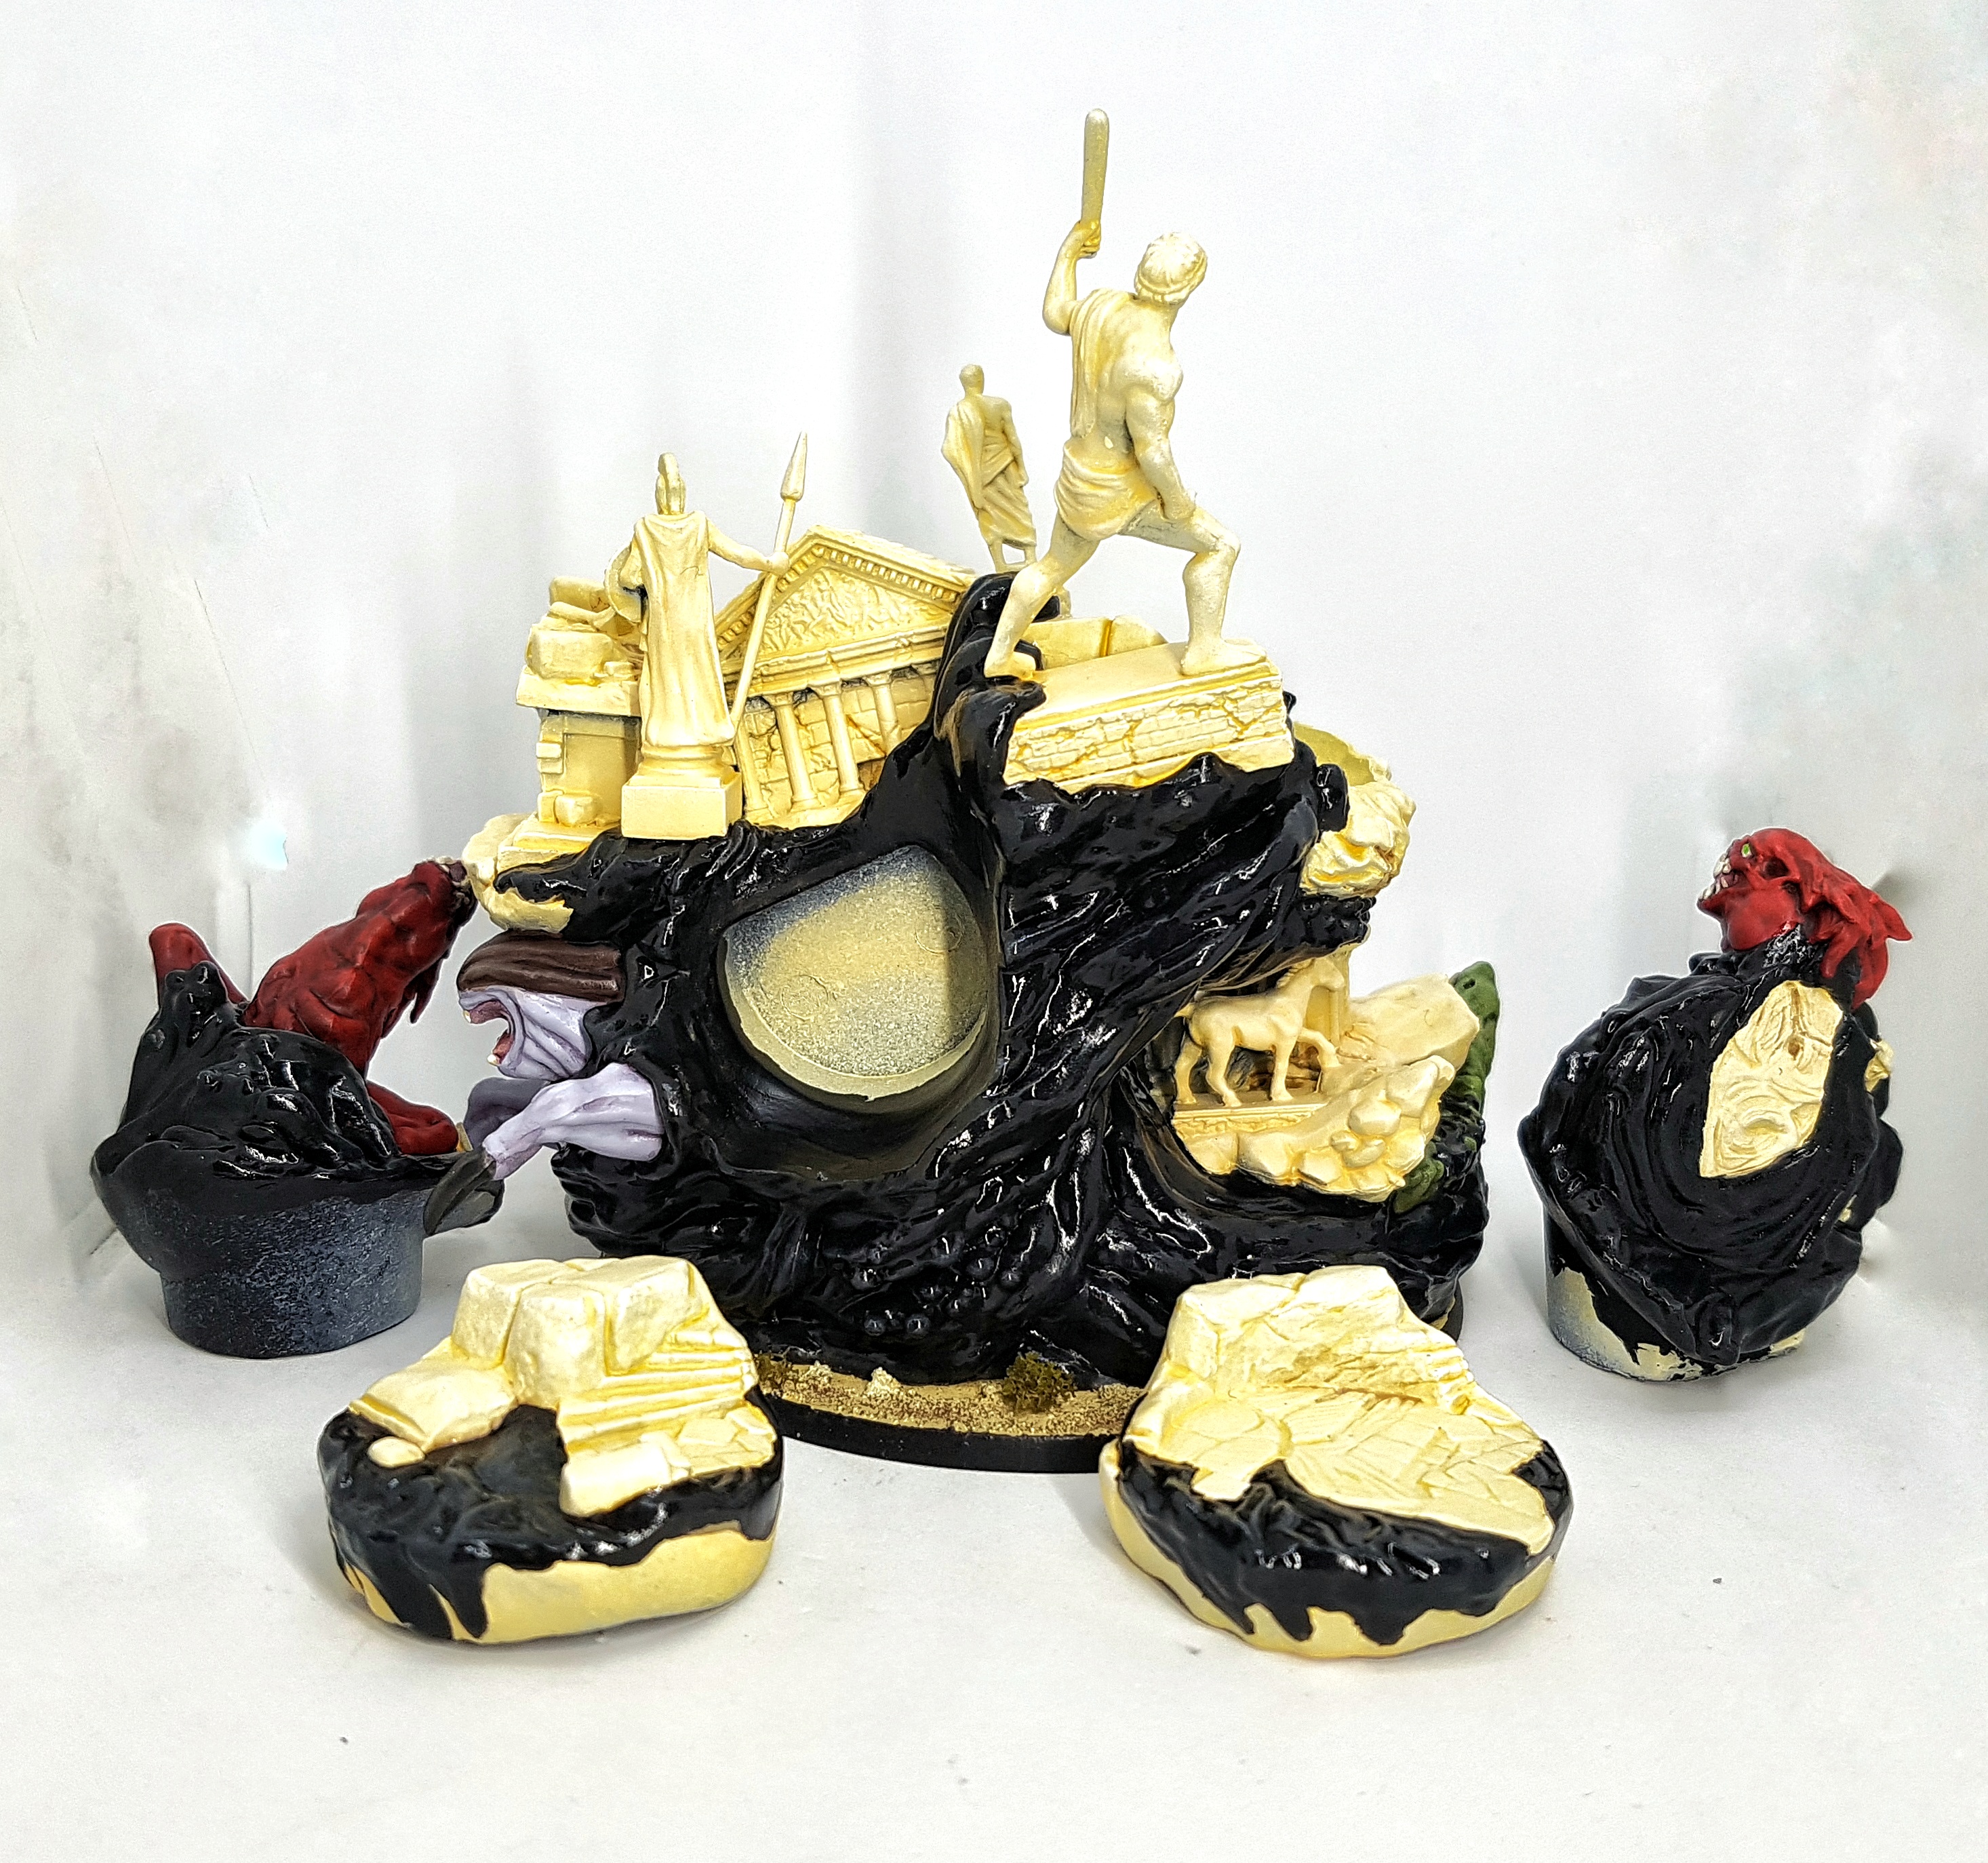 Chimera with all it's modular parts
The stone was painted first using my standard basing method described earlier in this thread. I left the black ooze until last as it would have great coverage and also be harder to paint over. This lets me be a little messy with the other paint jobs. It also means that any black I paint will be on top of everything else, which reinforces the idea that the ooze is swallowing it.
Snakes
Base: 2 parts P3 Cryx Bane Base, 2 parts P3 Wurm Green, 1 part P3 Cryx Bane Highlight
Wash: P3 Ordic Olive mixed with P3 Armour Wash
Drybrush: Wurm Green
Drybrush: Wurn Green mixed with P3 Thrall Flesh
Lion
Base: 2 parts P3 Mouldy Ochre to 1 part P3 Thrall Flesh
Wash: P3 Rucksack Tan
Reclaim with base
Highlight: Base mixed with P3 Menoth White Highlight
Highlight 2: Add more Menoth White Highlight
Wash/glaze hair: P3 Skorne Red mixed with P3 Bloodstone. Do 2-3 coats as needed. Re-highlight and apply wash again. Maybe repeat until happy.
Bug Legged Thing Flesh???
Base: P3 Frostbite with just a dot of P3 Exile Blue and P3 Skorne Red. Just enough to tint the final colour so it’s still light blue but you can “feel” both the red and dark blue at the same time.
Wash: base with a little more Exile Blue and Skorne Red
Recess only Wash: Skorne Red mixed with Exile Blue
Highlight: reclaim with base
Highlight: Base with P3 Morrow White
Highlight: Push up to pure Morrow White on the sharpest edges only
Bug Legged Thing Carapace???
Base: P3 Battlefield Brown, P3 Umbral Umber and P3 Gun Corps Brown
Wash: P3 Thamar Black, P3 Brown Ink and p3 Red Ink
Highlight: Reclaim base
Highlight: Battlefield Brown and Hammerfall Khaki
Highlight: above with more Hammerfall Khaki
The other Monster Thing I Painted Red
Base: VGC 72.012 Scarlett Red
Wash: GW Carroburg Crimson
Drybrush: GW Evil Sunz Scarlet
Drybrush: GW Wild Rider Red
(I just wanted this done at this point. I should have been layering and gotten brighter tones)
Basecoat Eyes: P3 Menoth White Highlight
Pupil: P3 Necrotite Green
Mouths
Wash insides GW Carrouburg Crimson
Base Teeth: P3 Menoth White Base
The snakes had a thin line of GW Seraphim Sepia painted between their two fangs to separate them
Highlight: P3 Menoth White Highlight
Give the insides a coat of gloss varnish once all other varnishing is finished.
Black Ooze
Base: Revell Aqua Colour 36106 Tar Black
Drybrush: Tar Black with a little Revell Aqua Colour 36174 Gunship Grey
Drybrush: Above mix with a little Revell Aqua Colour 36176 Light Grey
Drybrush: above with more Light Grey
Glaze with GW Nuln Oil to smooth the transition out and add depth
Give it a coat of gloss varnish once all other varnishing is finished.
I should have pushed the highlights further with a drybrush of pure white. Most of the highlights got lost in the wash, leaving the gloss varnish to do all the heavy lifting. Had I cared for this model and wanted to sink the time in I could have tried for layering the highlights.
Here it is, with all the pure monster non-platform modules attached
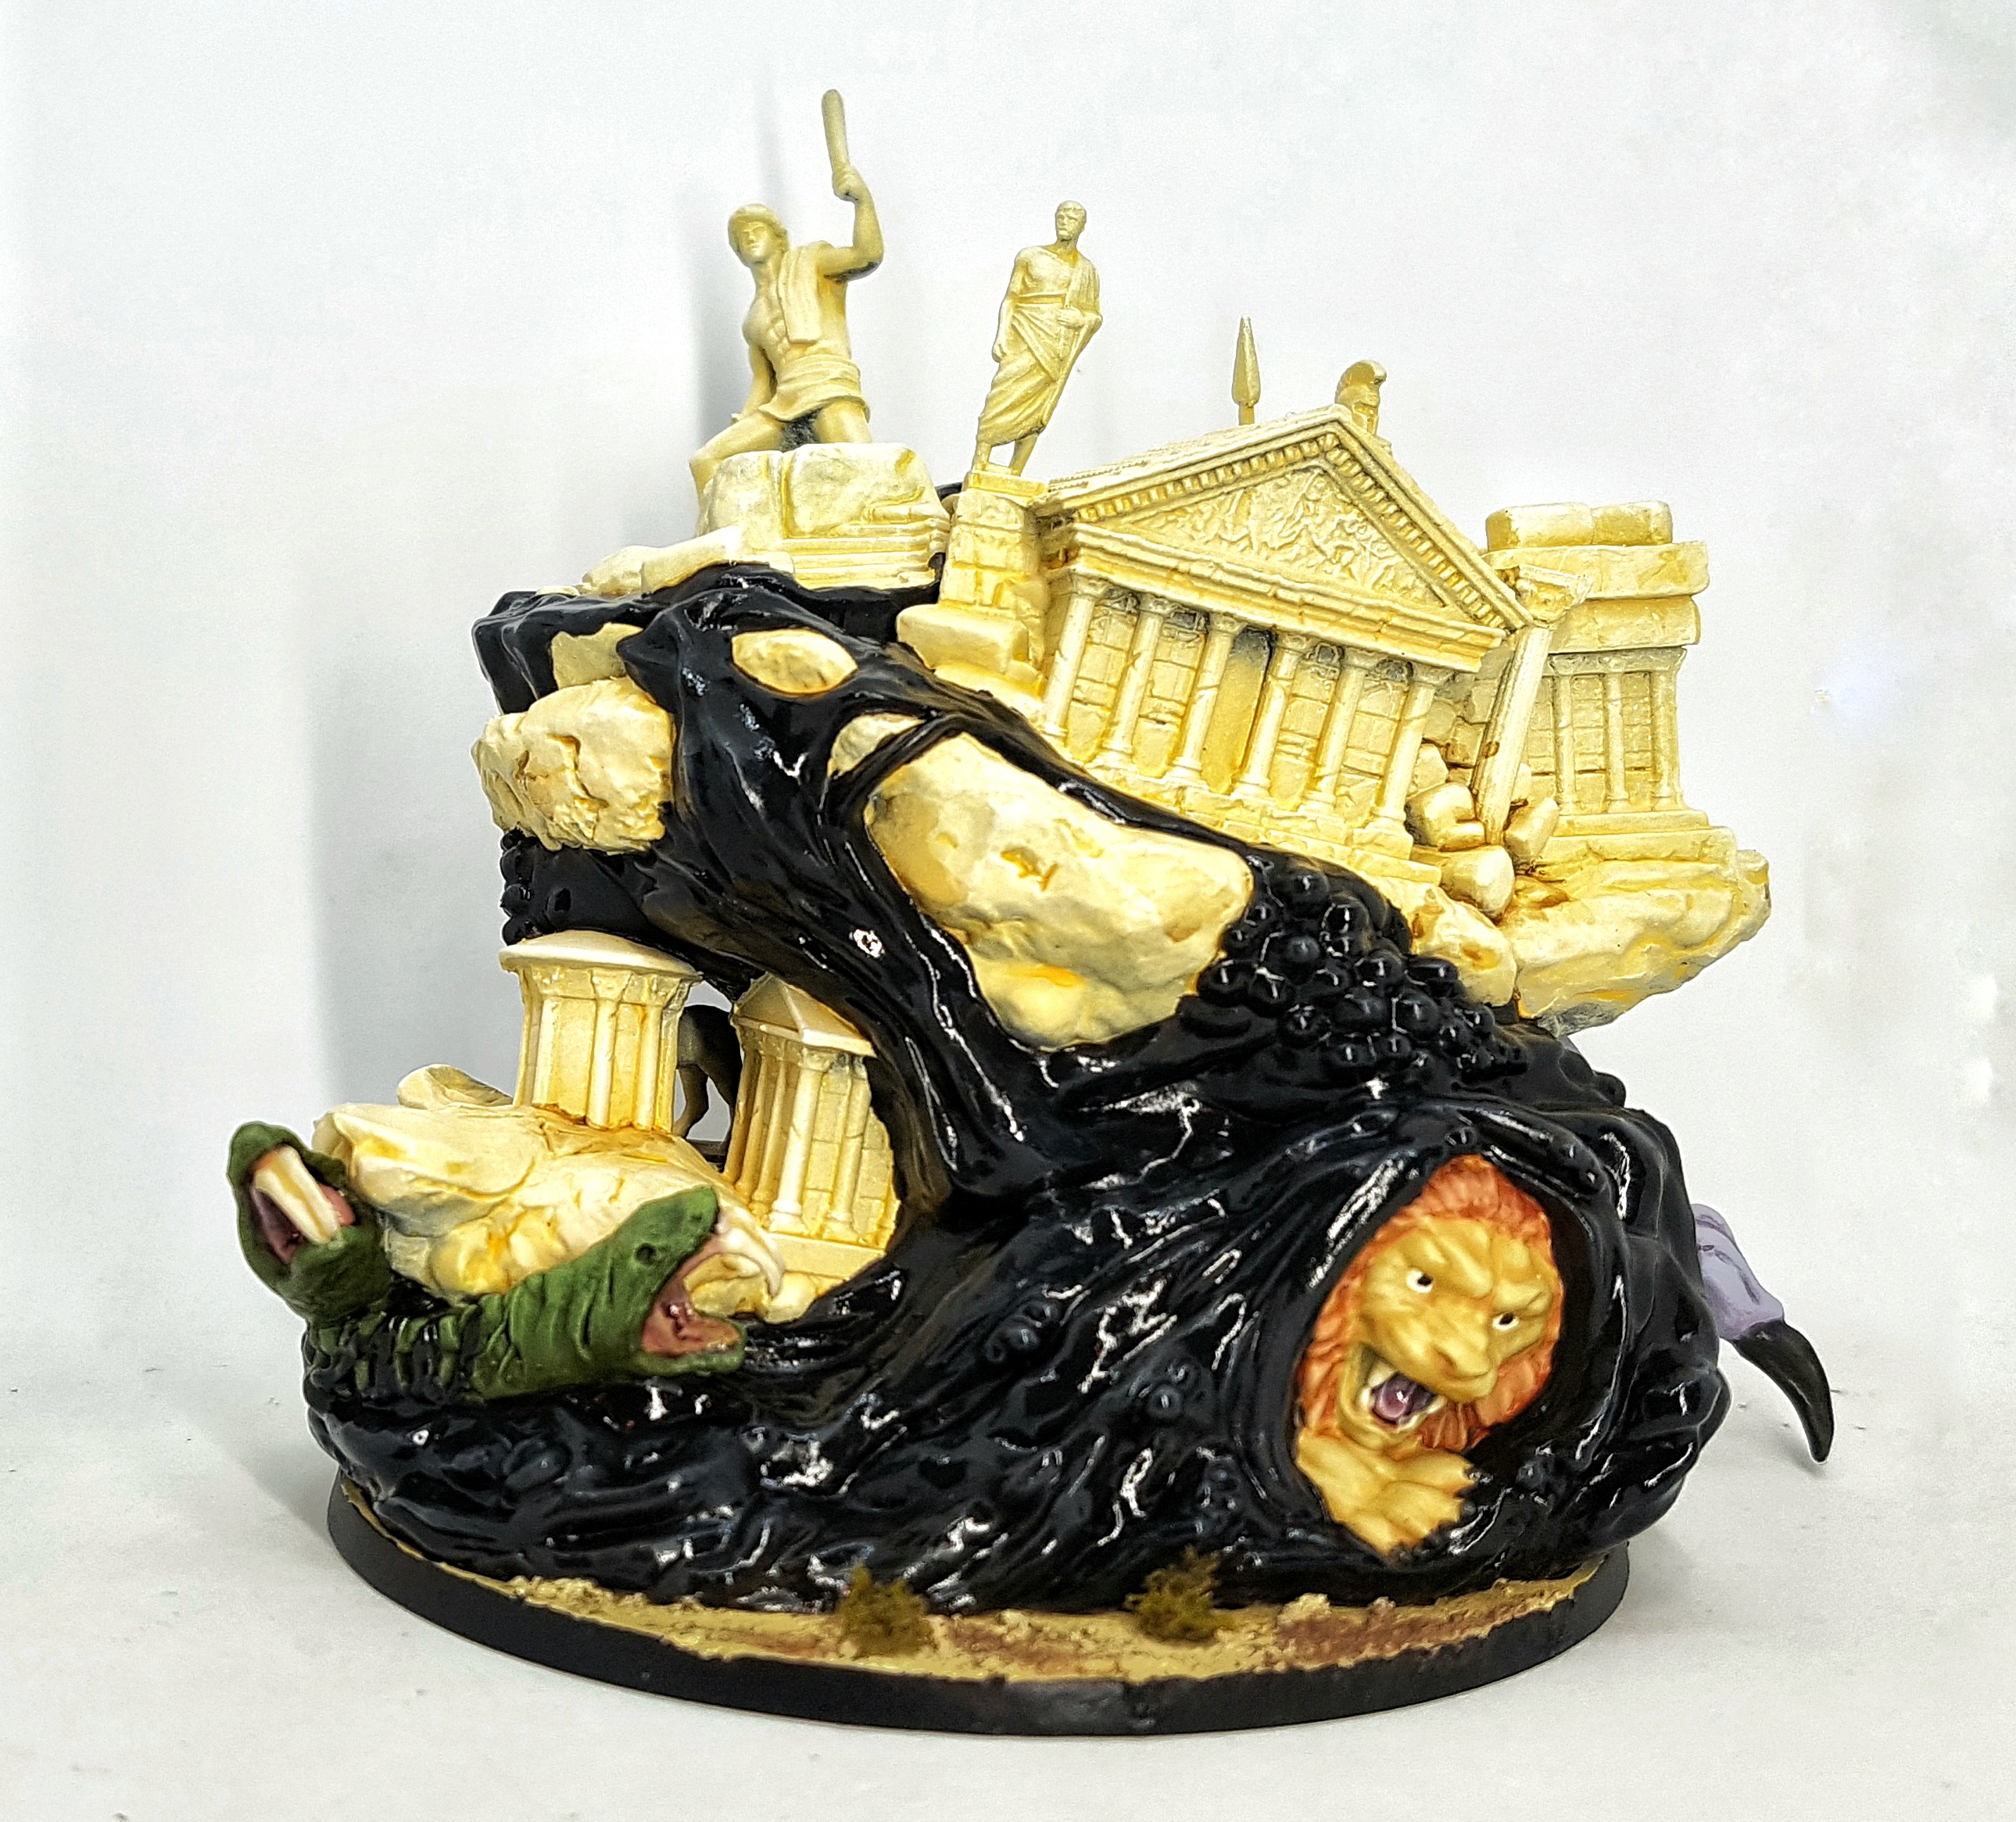
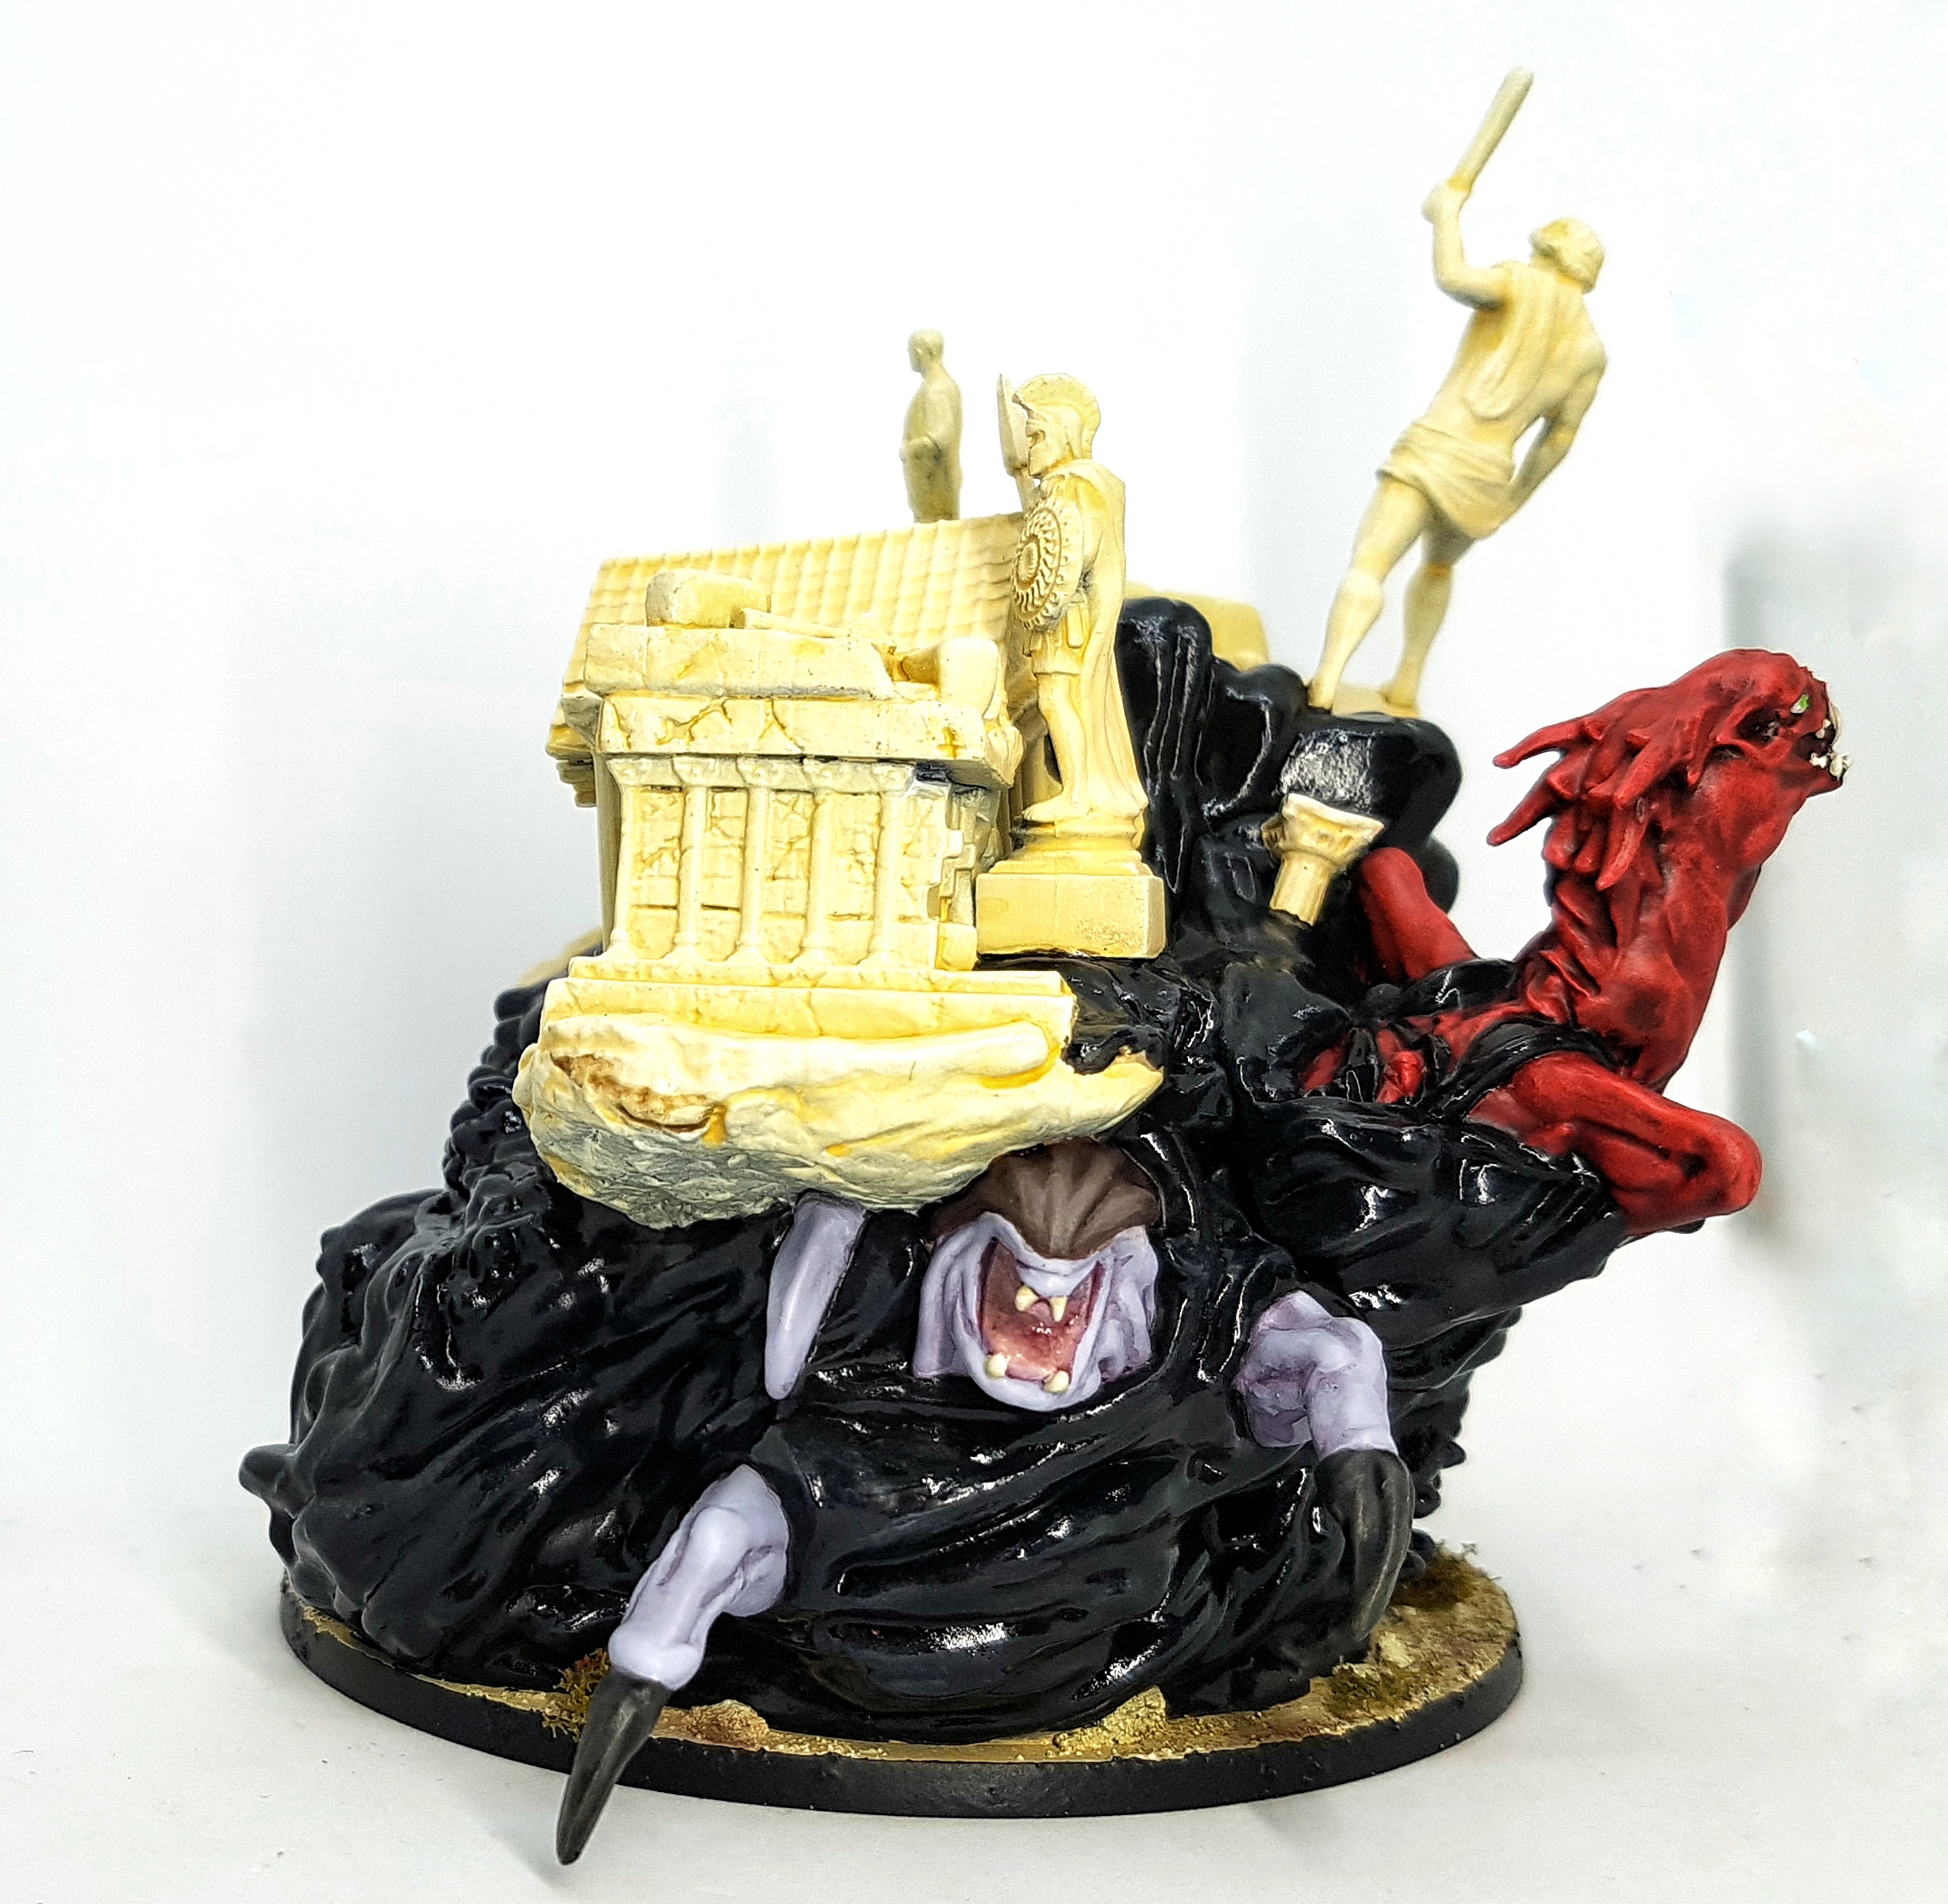
Here he is with all the platform modules attached
That’s the last of Cycle 2 done. There are 7 models in wave 3, and an 8th model in the box, purely for painting. The end is in sight. I haven’t made a decision on how to paint the feathers on the Cycle 3 minis yet. perhaps I need to google for “Cthulu feather wings” and see what comes up?
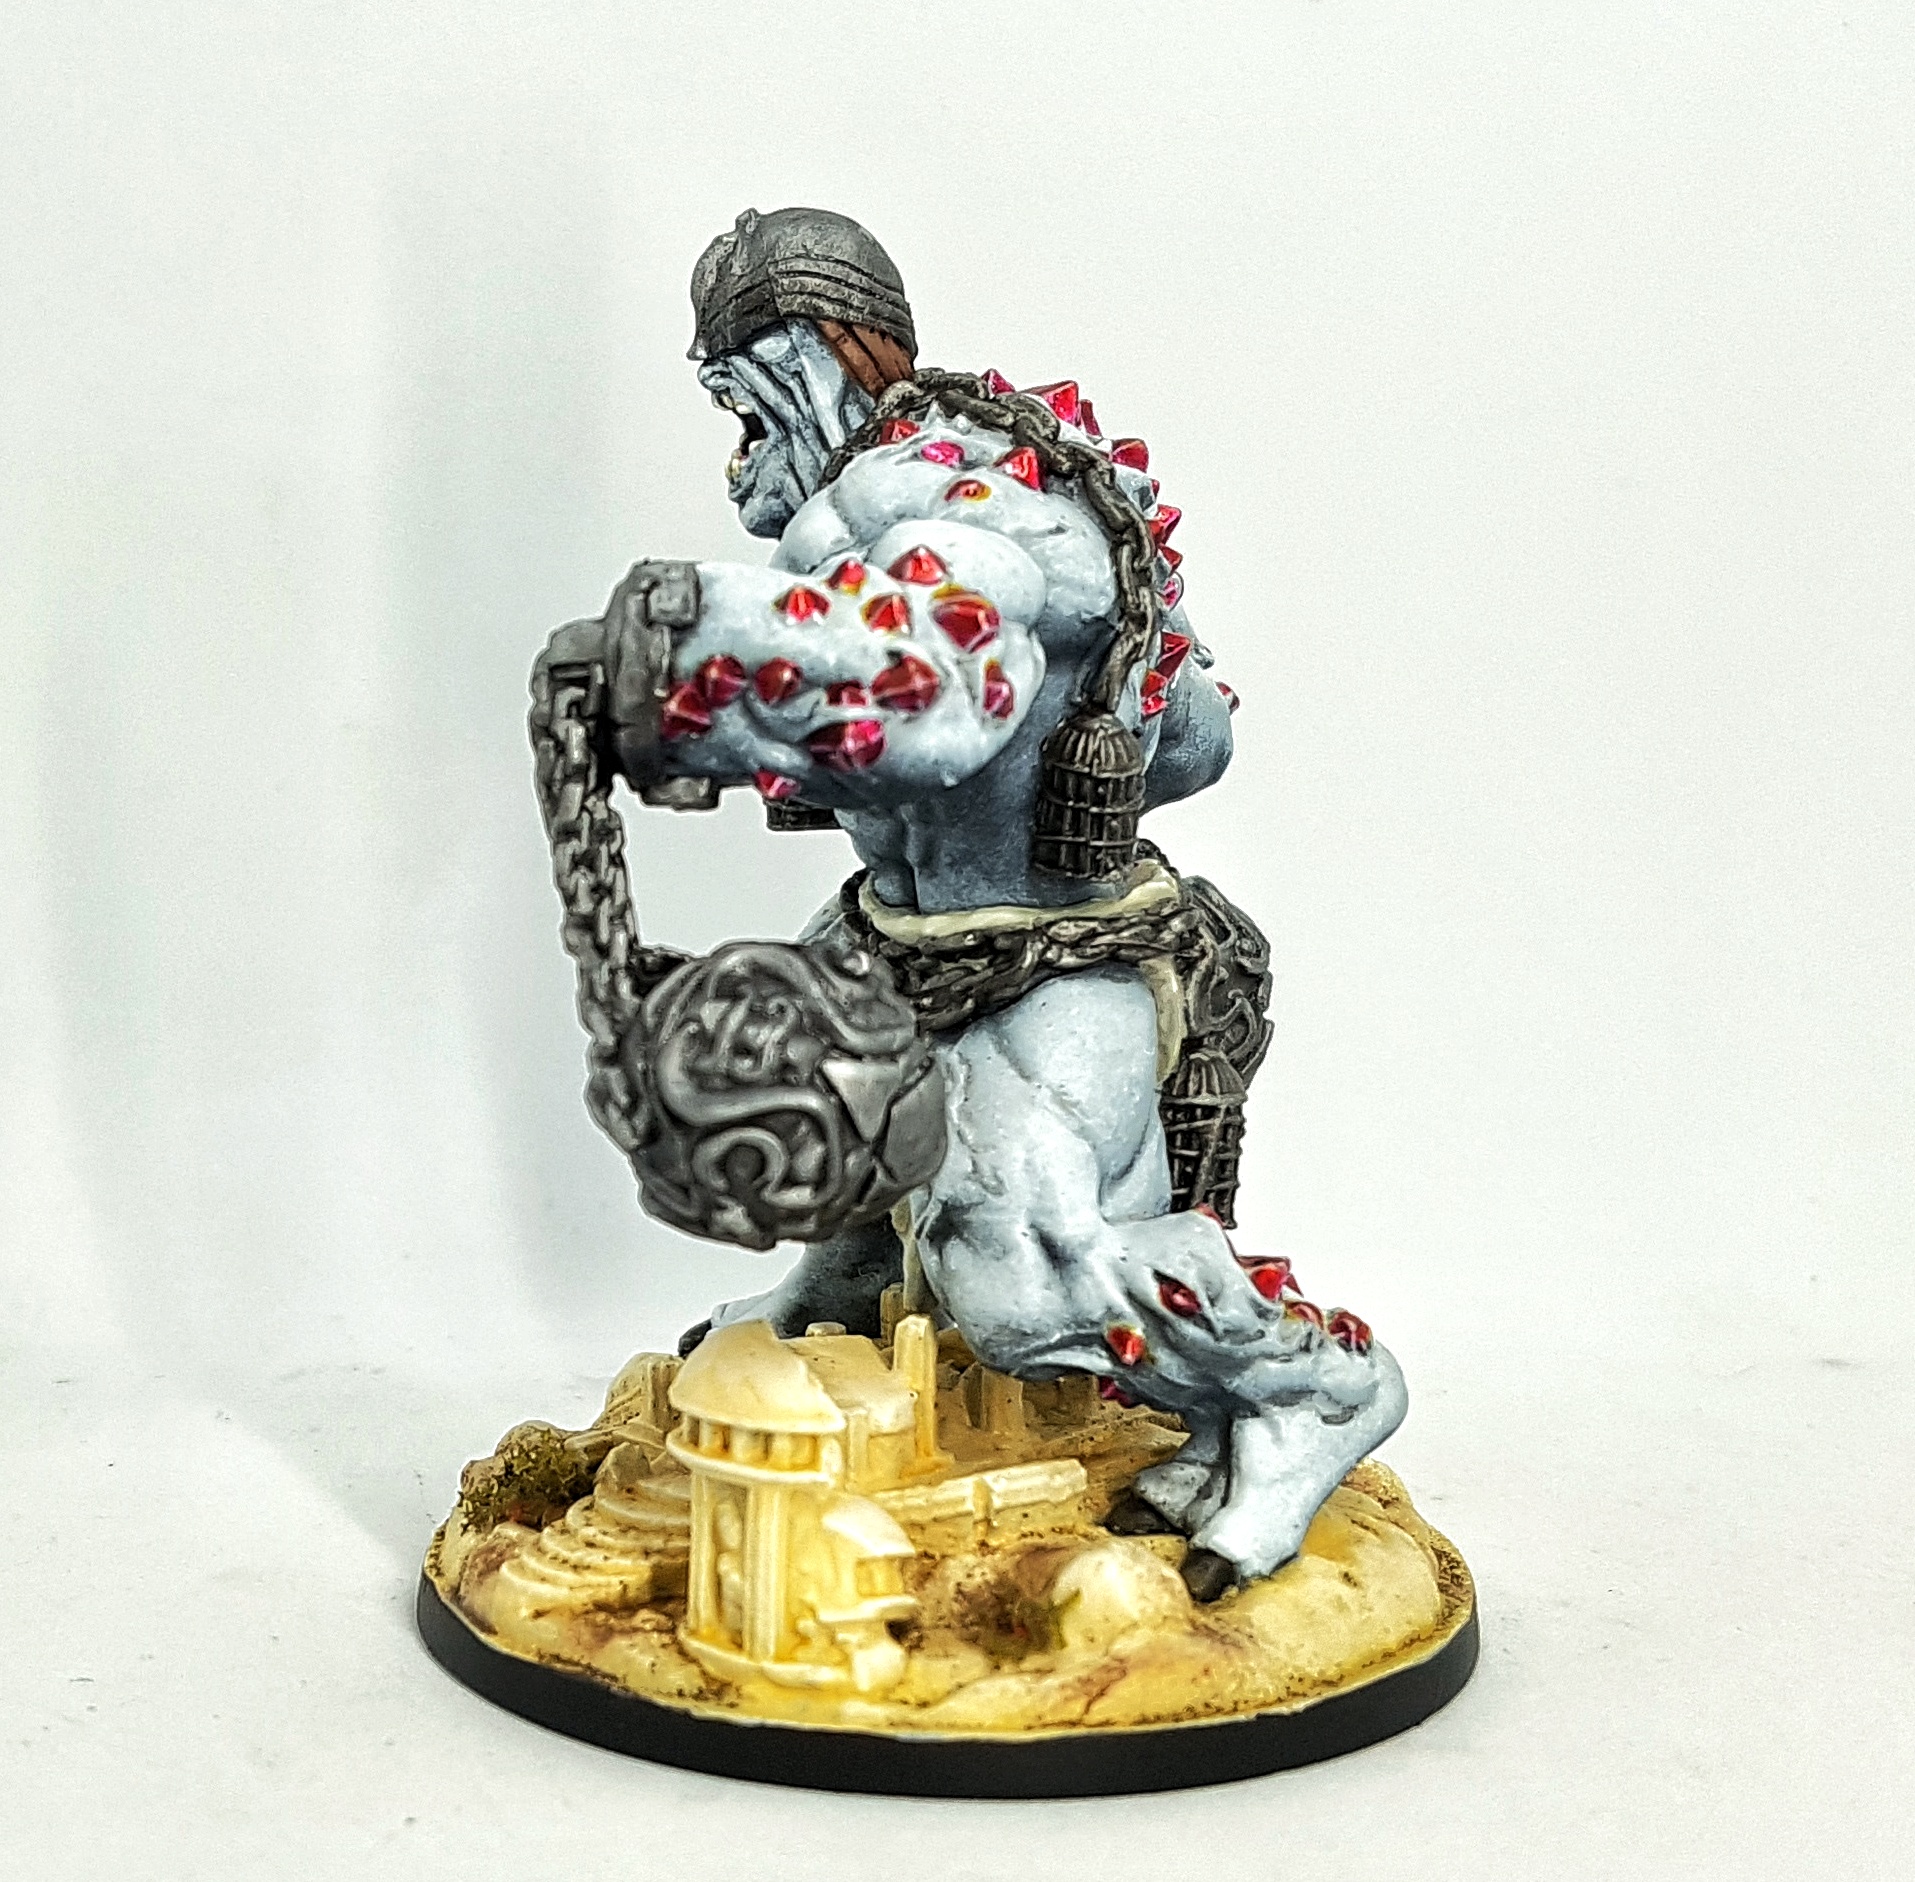
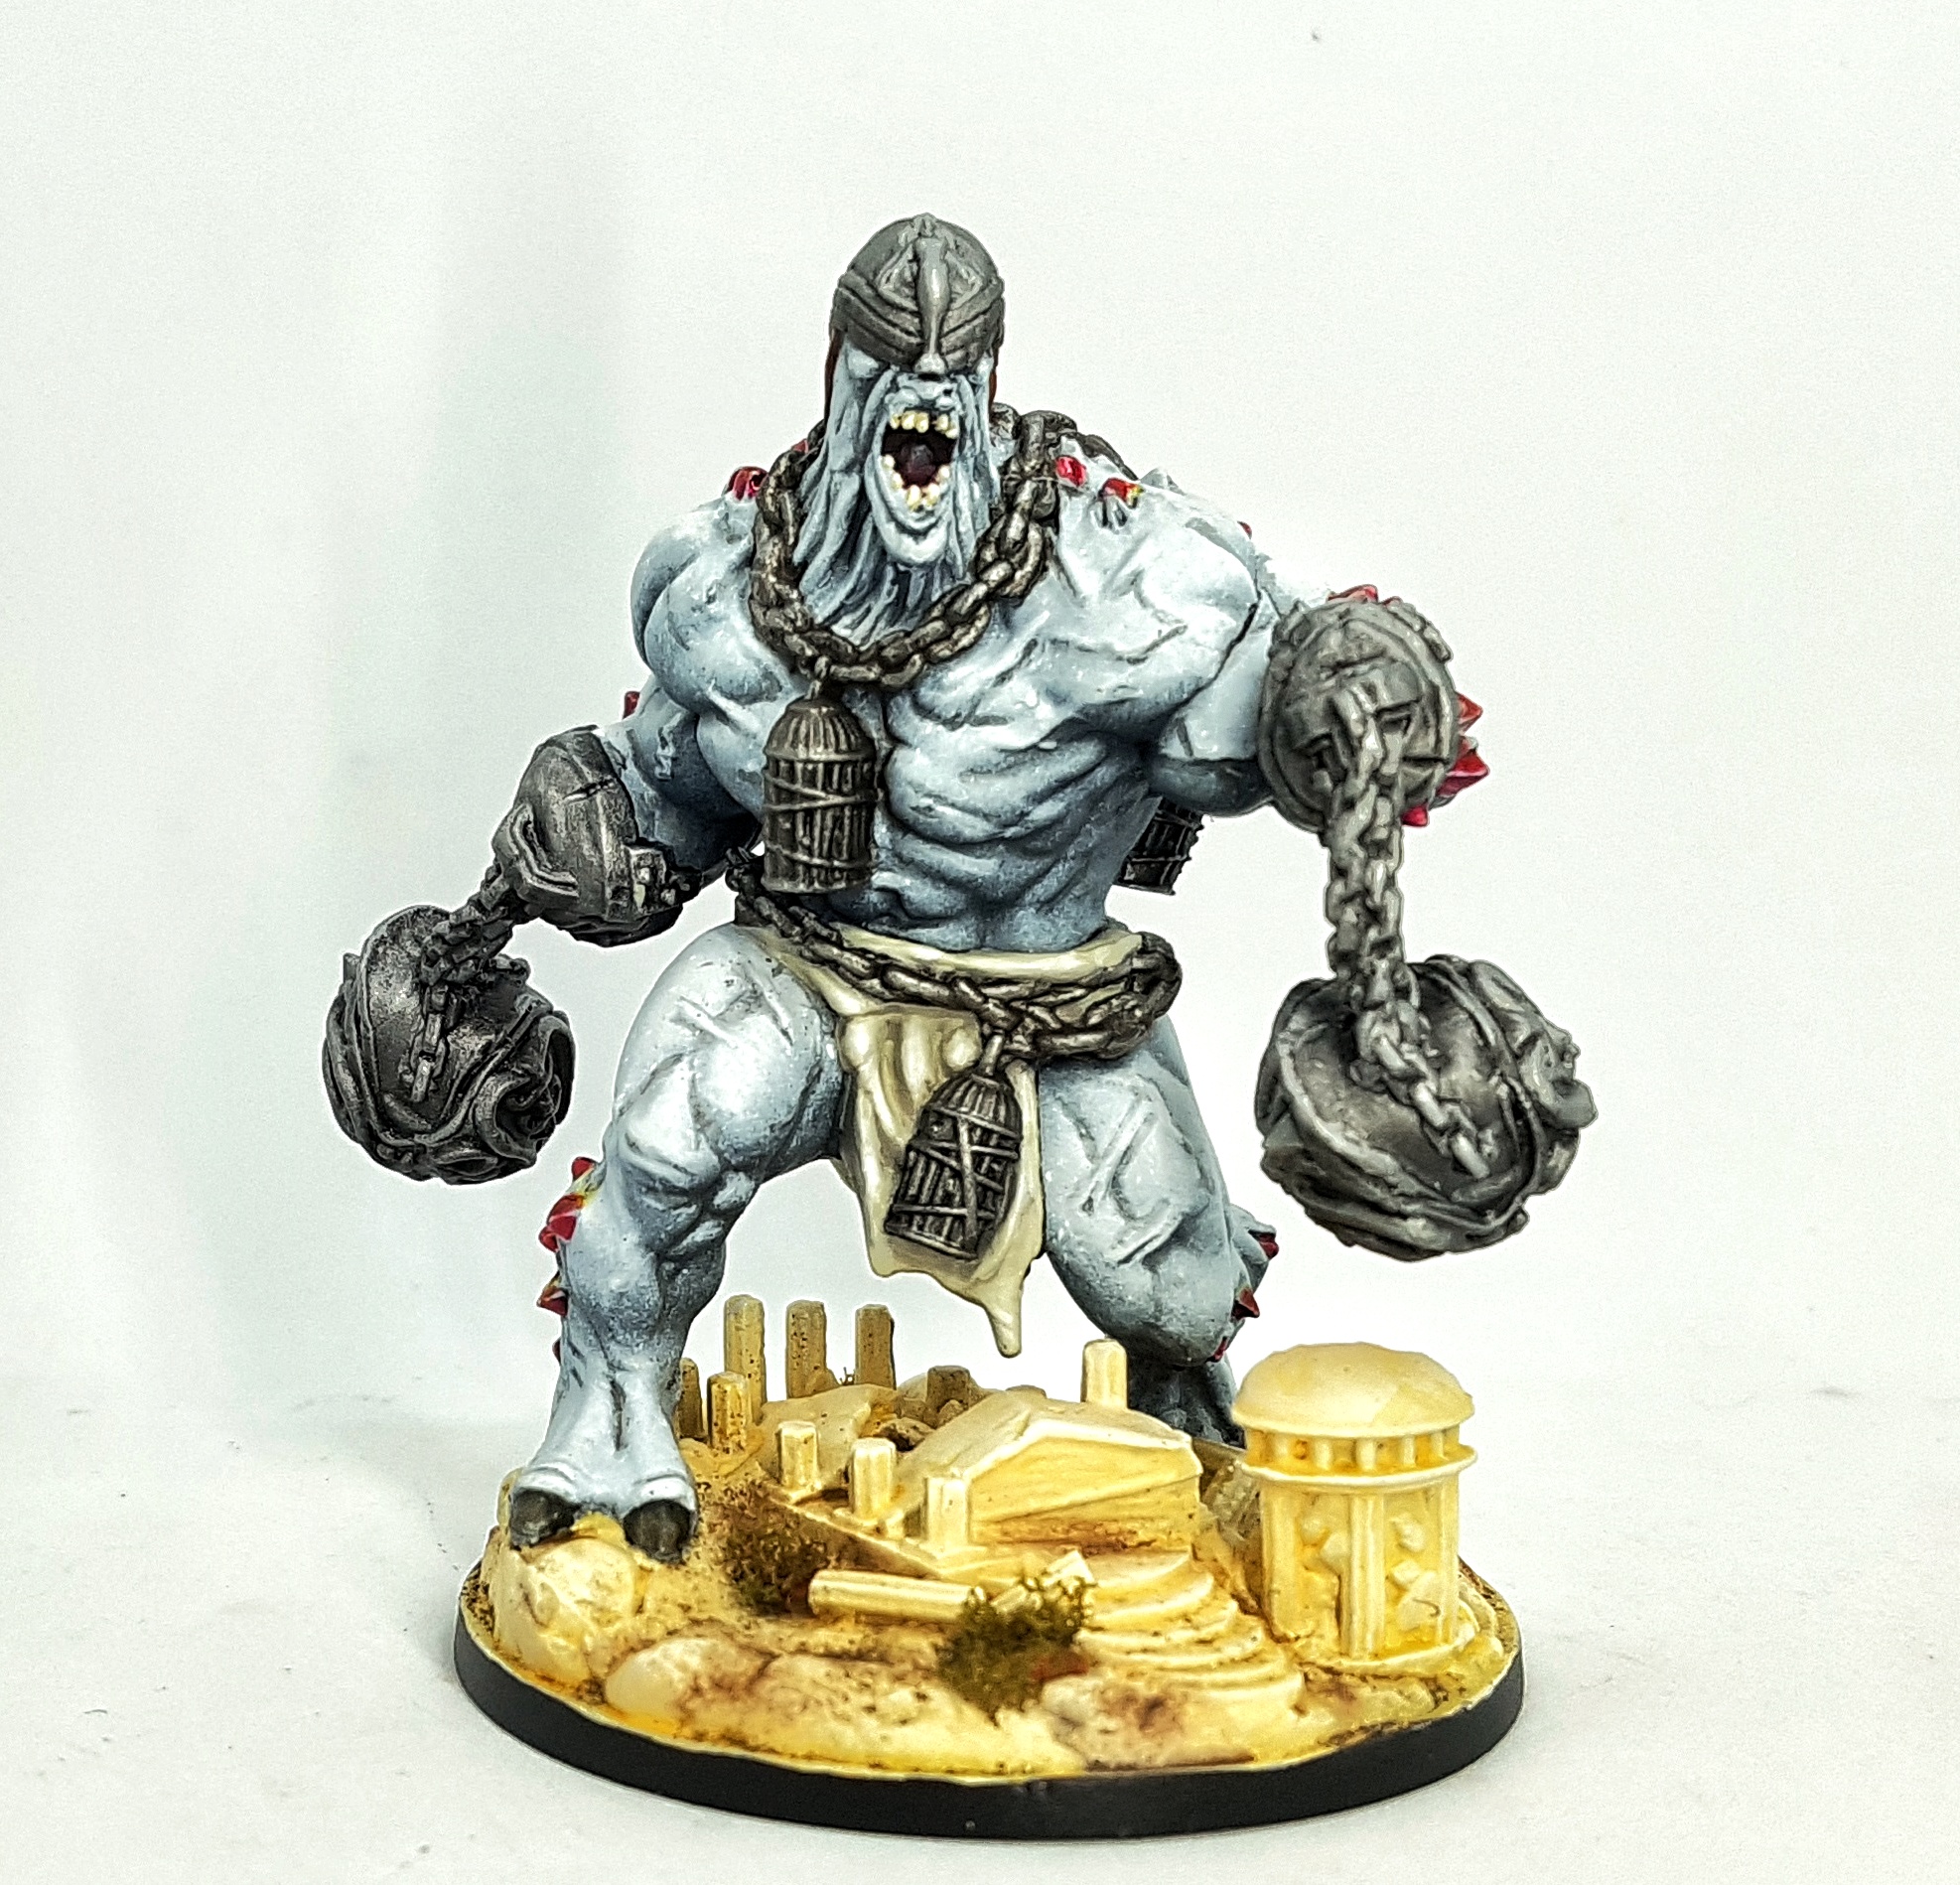
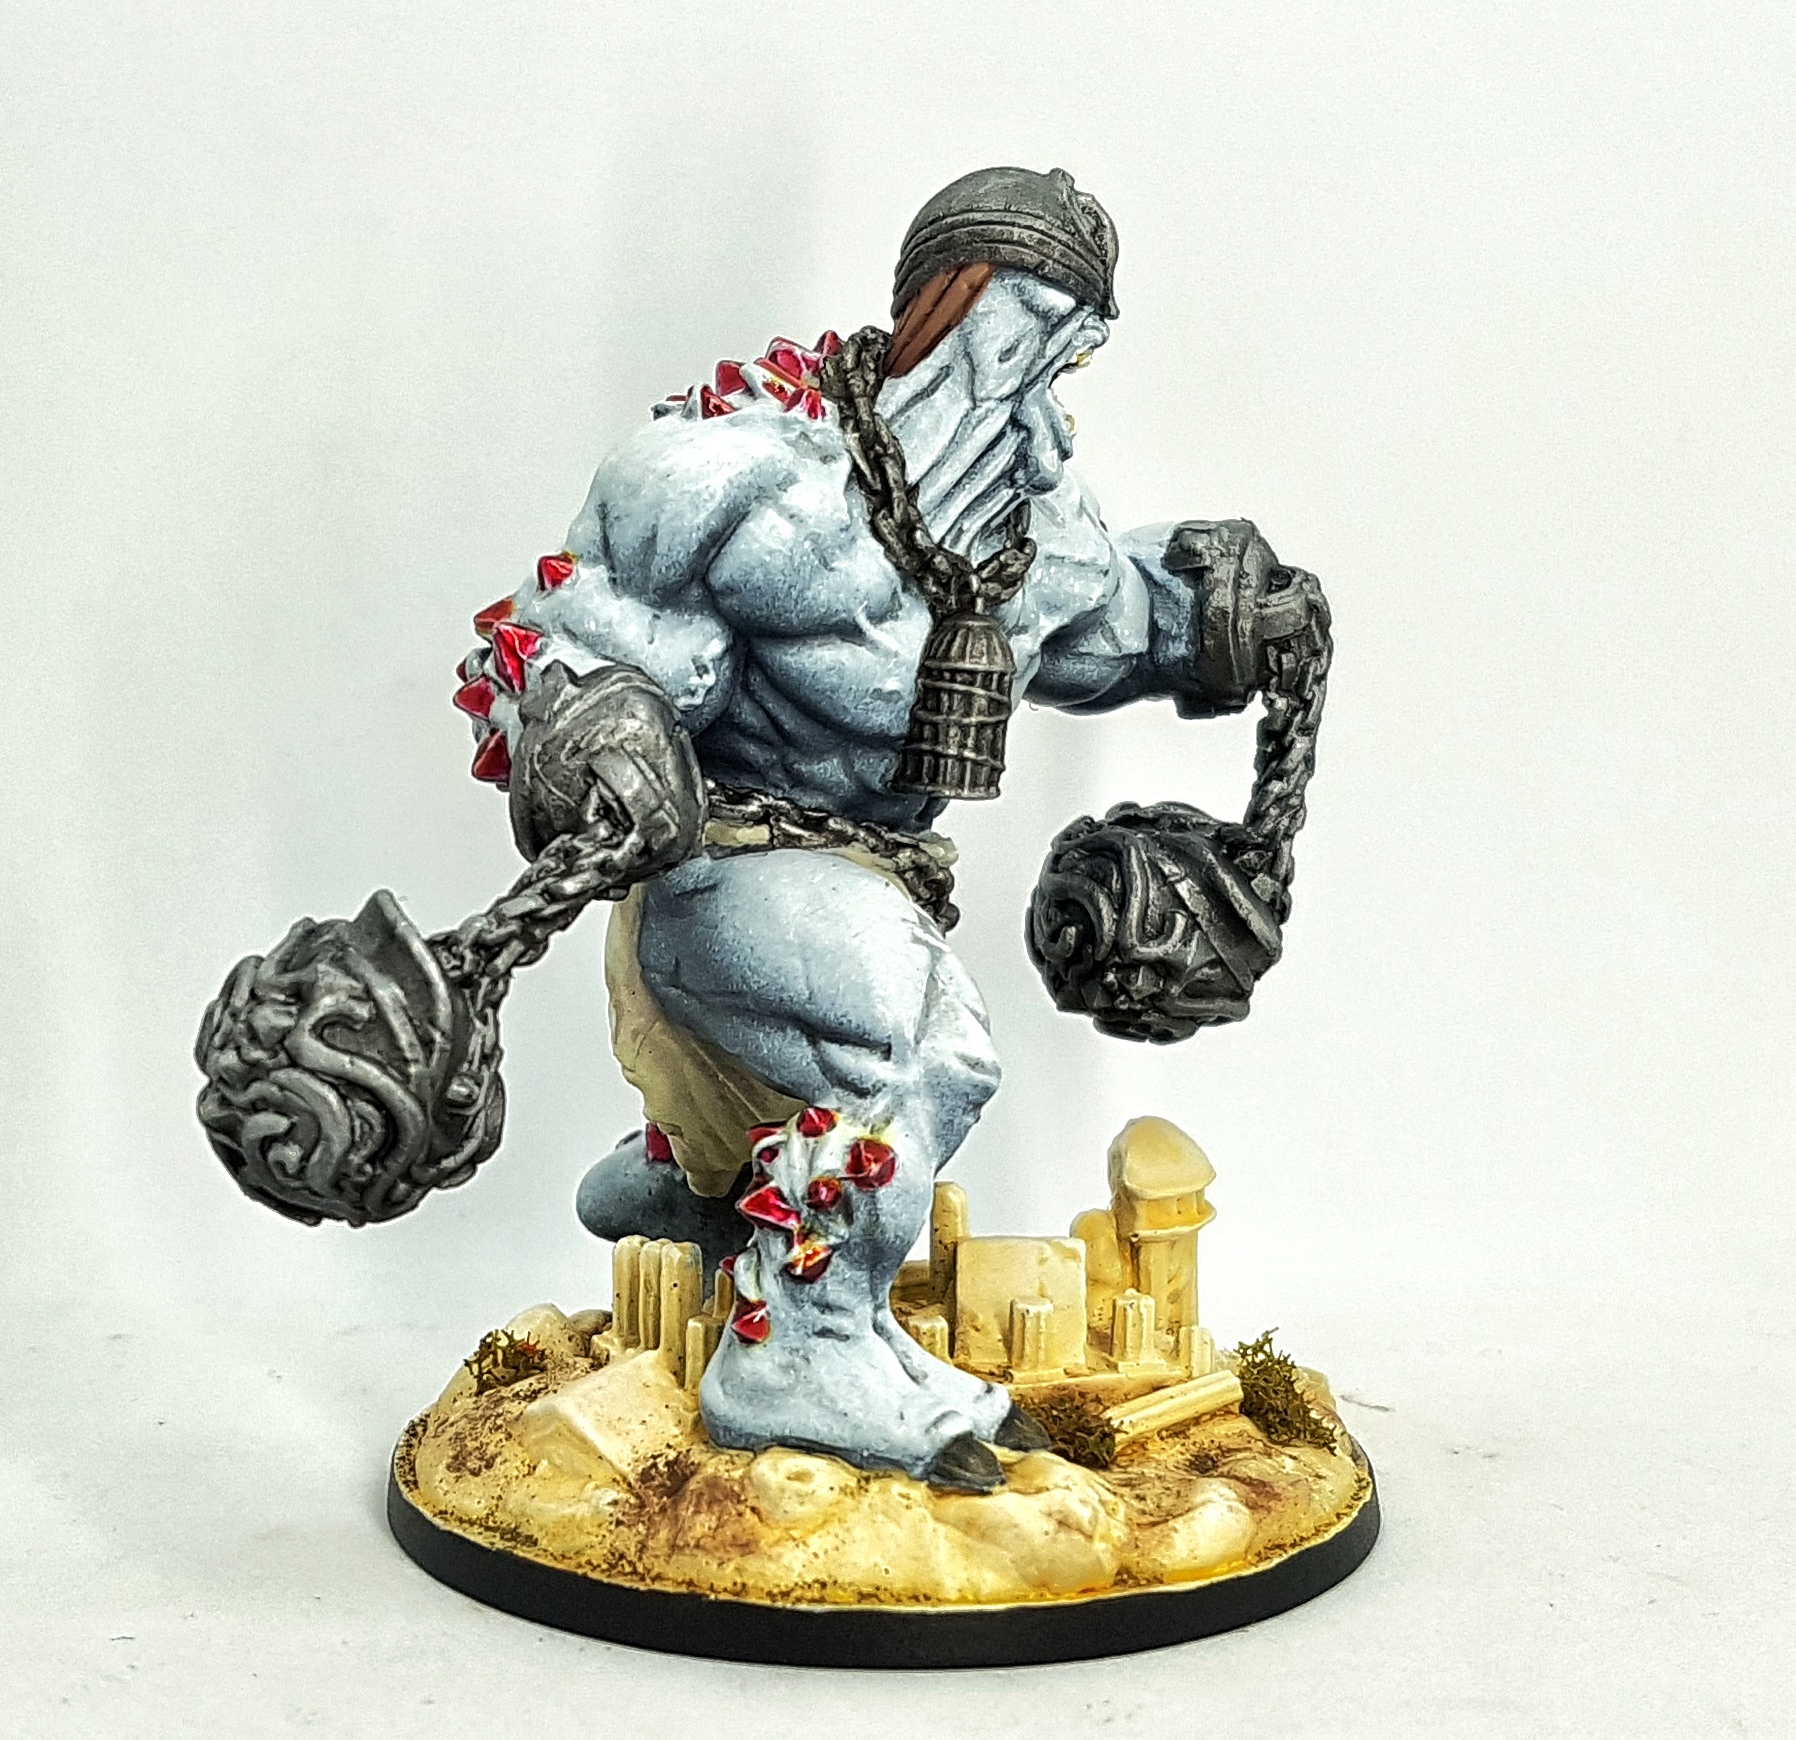
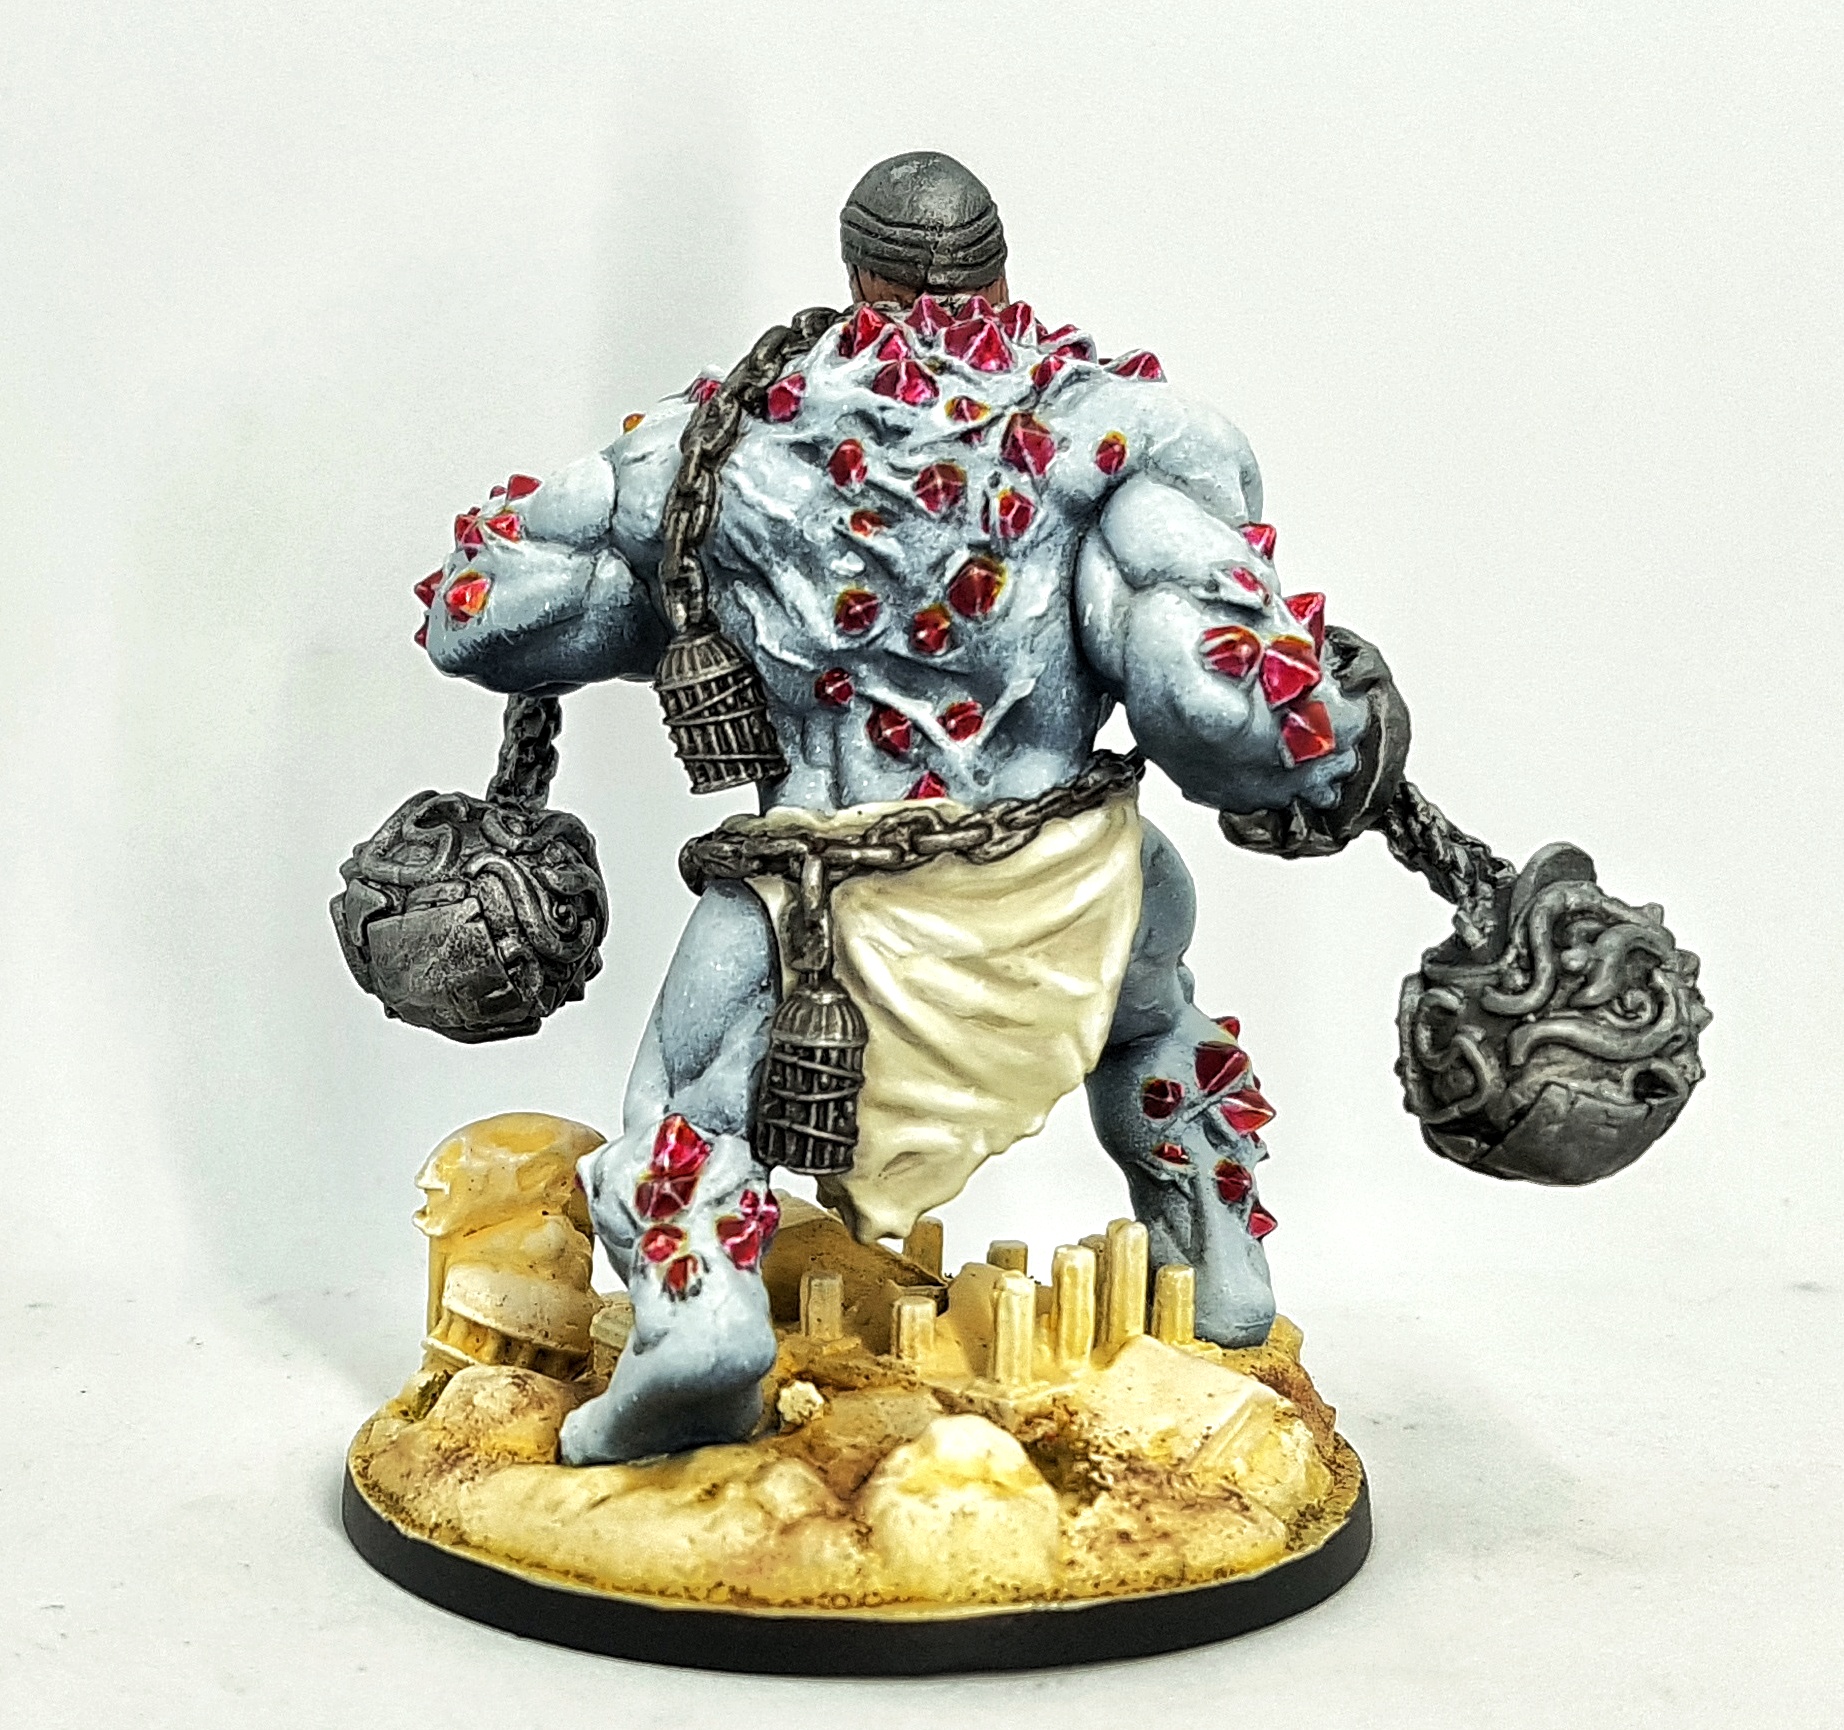
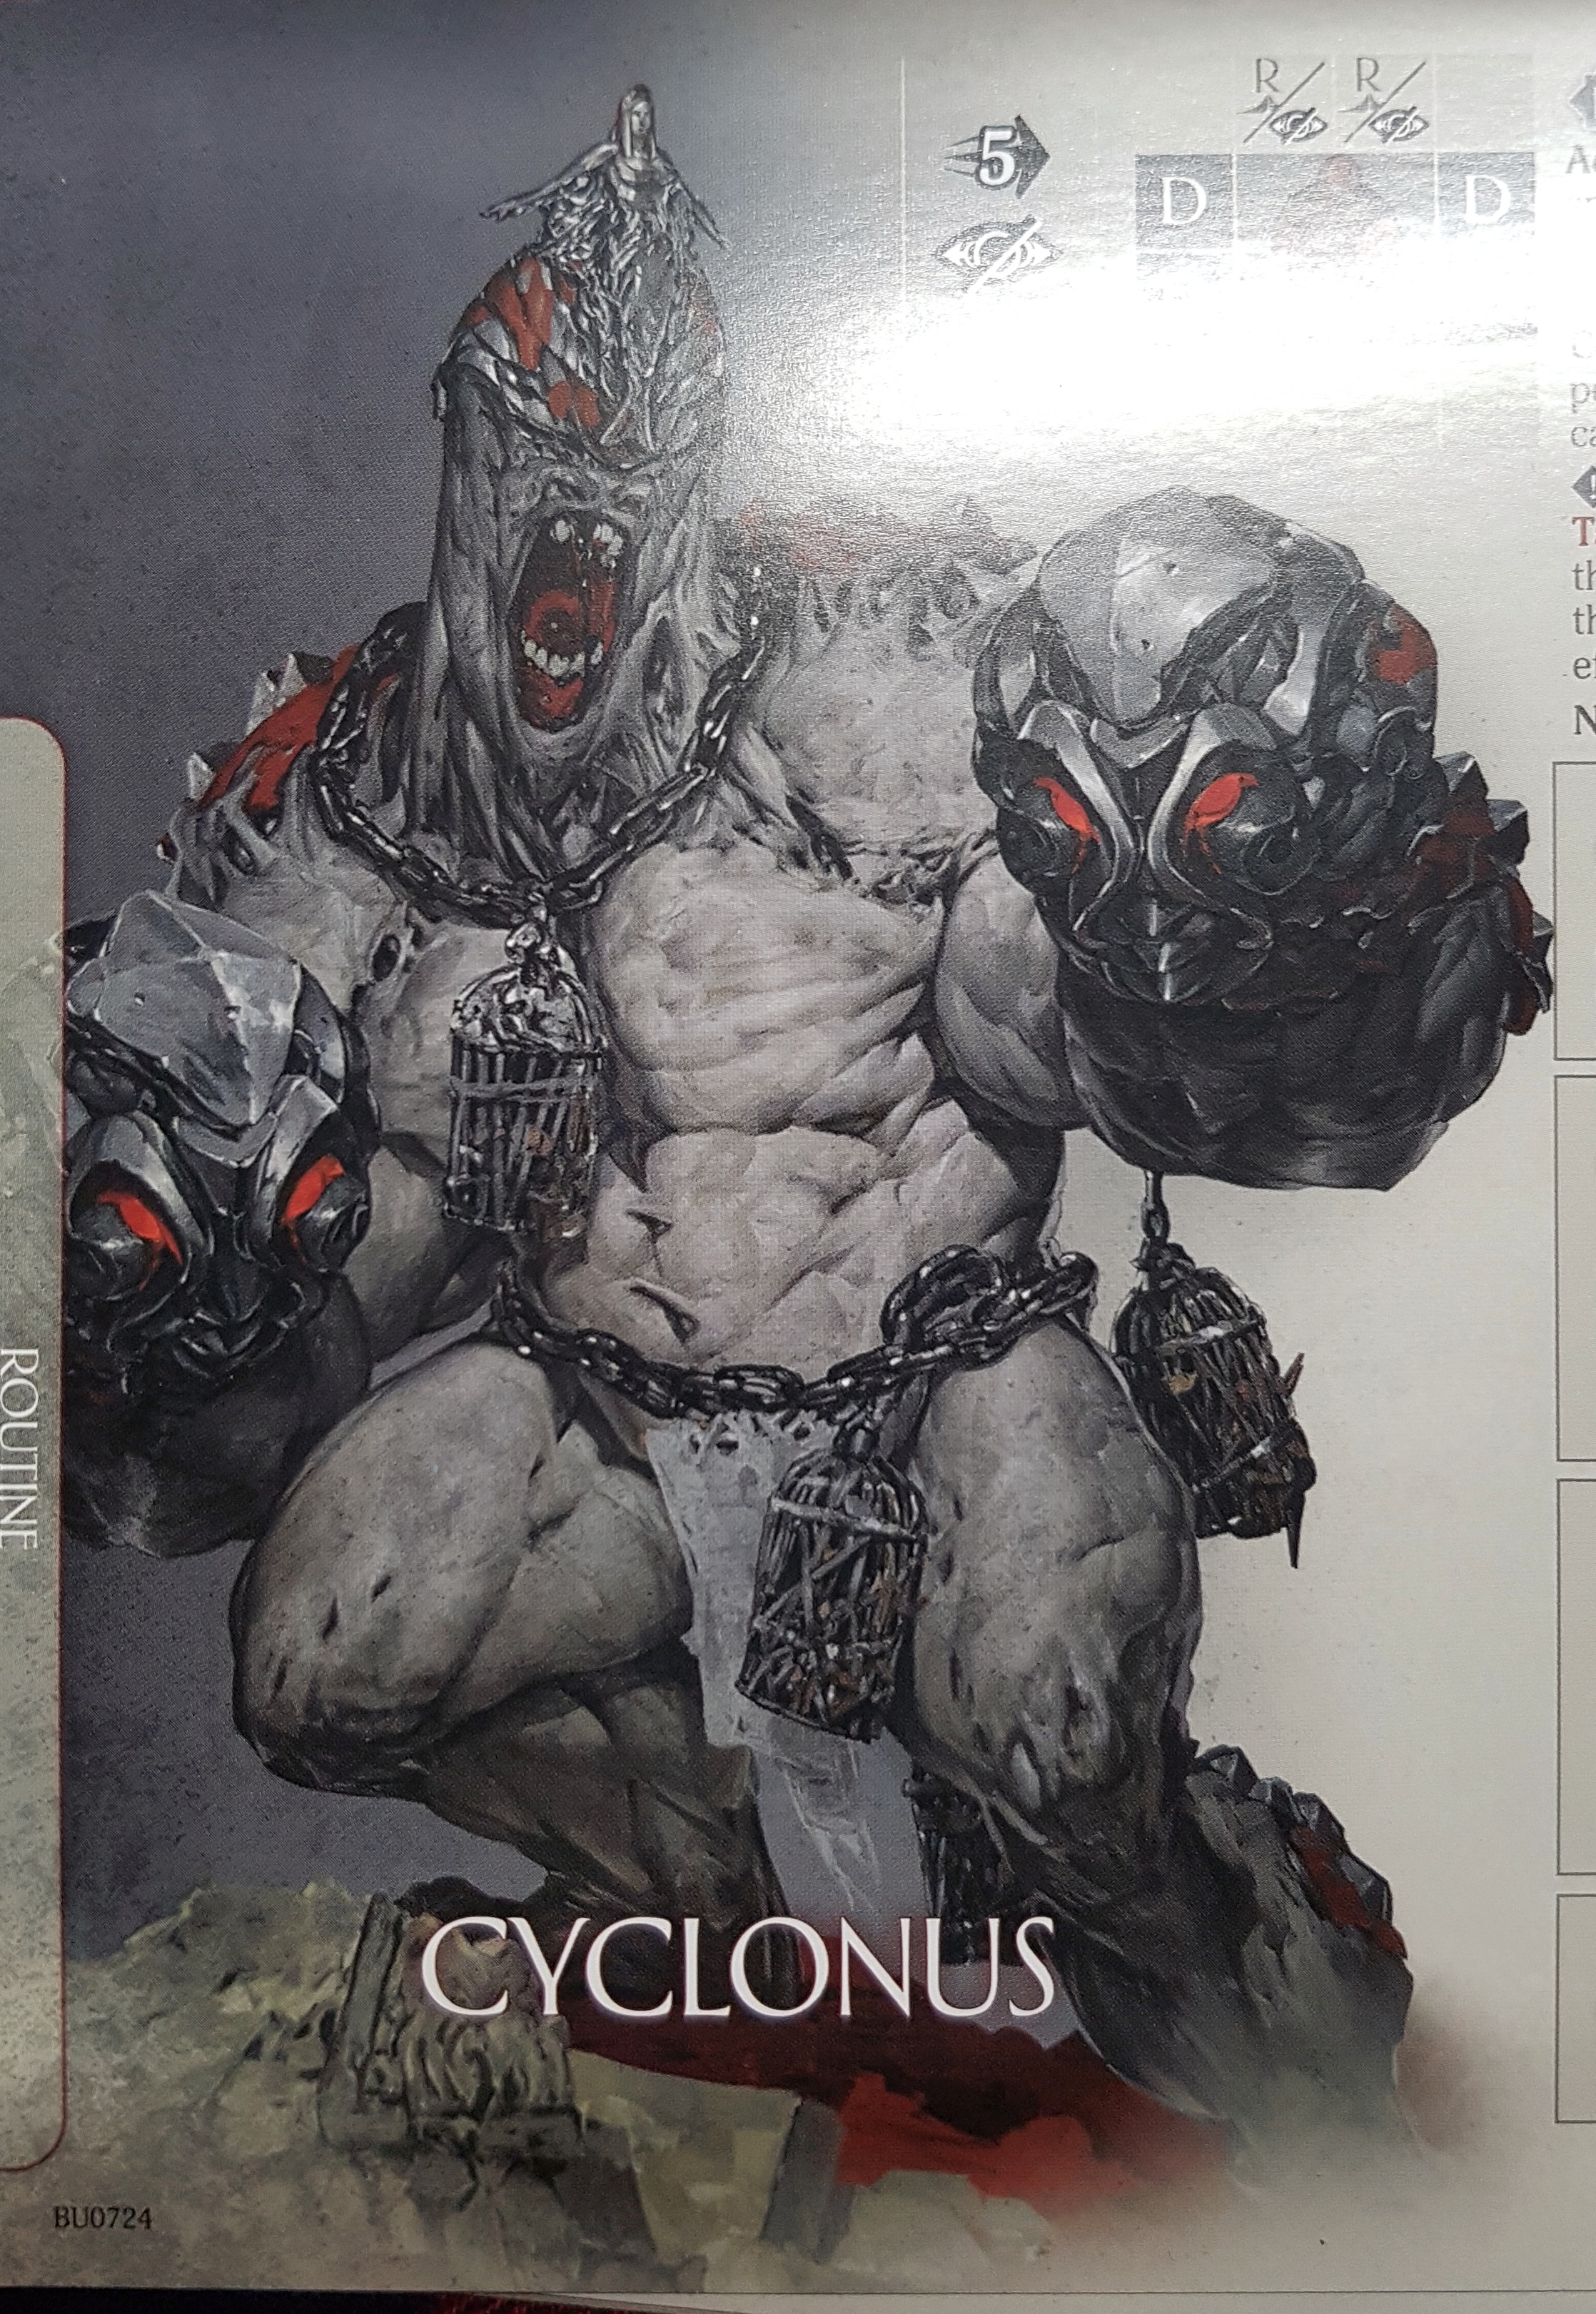
Cycle 2: Cyclonus
Not a bad model. I couldn’t figure out what all the red pieces on the art related to on the model, so I went with the spirit/feel of the art, rather than translating it literally.
White Flesh
Airbrush: VMC 70.904 Dark Grey
Airbrush: Above with VMC 70.906 Pale Grey leaving only the deepest recesses and undersides
Airbrush: Pale Grey, leaving more of the undersides alone
Airbrush: Pale Grey and VMC 70.951 White for more of a zenithal prime
Airbrush: above with more white and more zenithally
Airbrush: Just white and just from directly above
Pin wash/shade: Dark Grey
Layer & edge Highlight: White
Toe nails
Base: P3 Cryx Bane Base
Paint thin lines of thinned P3 Hammerfall Khaki
Paint thin lines of thinned P3 Thrall Flesh
Paint thin lines of thinned P3 Morrow White
Wash with GW Nuln Oil
Wash with GW Seraphim Sepia
Red Gems
Base VGC 72.056 Chainmail Sliver
Glaze many times with A.MIG-093 Crystal Red
Glaze upper surfaces with A.MIG-097 Crystal Orange
Leather Hat
Base: P3 Bootstrap Leather
Wash: GW Carroburg Crimson
Layer then Drybrush: P3 Hammerfal Khaki
Steel Balls
Base: Mission Models MMM-002 Cold Rolled Steel
Wash: Jan’s Magimix (6-8 Parts GW Nuln Oil, 6-8 Parts GW Agrax Earthshade, 5-6 Parts Lahmium Medium, 2 parts Athonian Camoshade. Thanks, Januinevision)
Drybrush : P3 Pig Iron
Drybrush then edge highlight: P3 Quick Silver
Mouth
Wash inside: Carrouburg Crimson
Base Teeth: P3 Menoth White Base
Highlight Teeth: P3 Menoth White Highlight
Iron Chains and Cages
Base: P3 Pig Iron
Wash: Italeri Wash Oiled Earth 4953AP 2-3 times (I was testing it)
Wash: GW Nuln Oil
Wash: Italeri Wash Oiled Earth 4953AP over cage insides to reclaim some grime
Edge highlight: P3 Cold Steel
White Cloth
Base: Andrea Color White 1 Base
Shade: Andrea Color White 6, 2nd Shadow
Highlight: Andrea Color White 1 Base
Highlight: Andrea Color White 1 Base and P3 Morrow White
Highlight: Morrow White
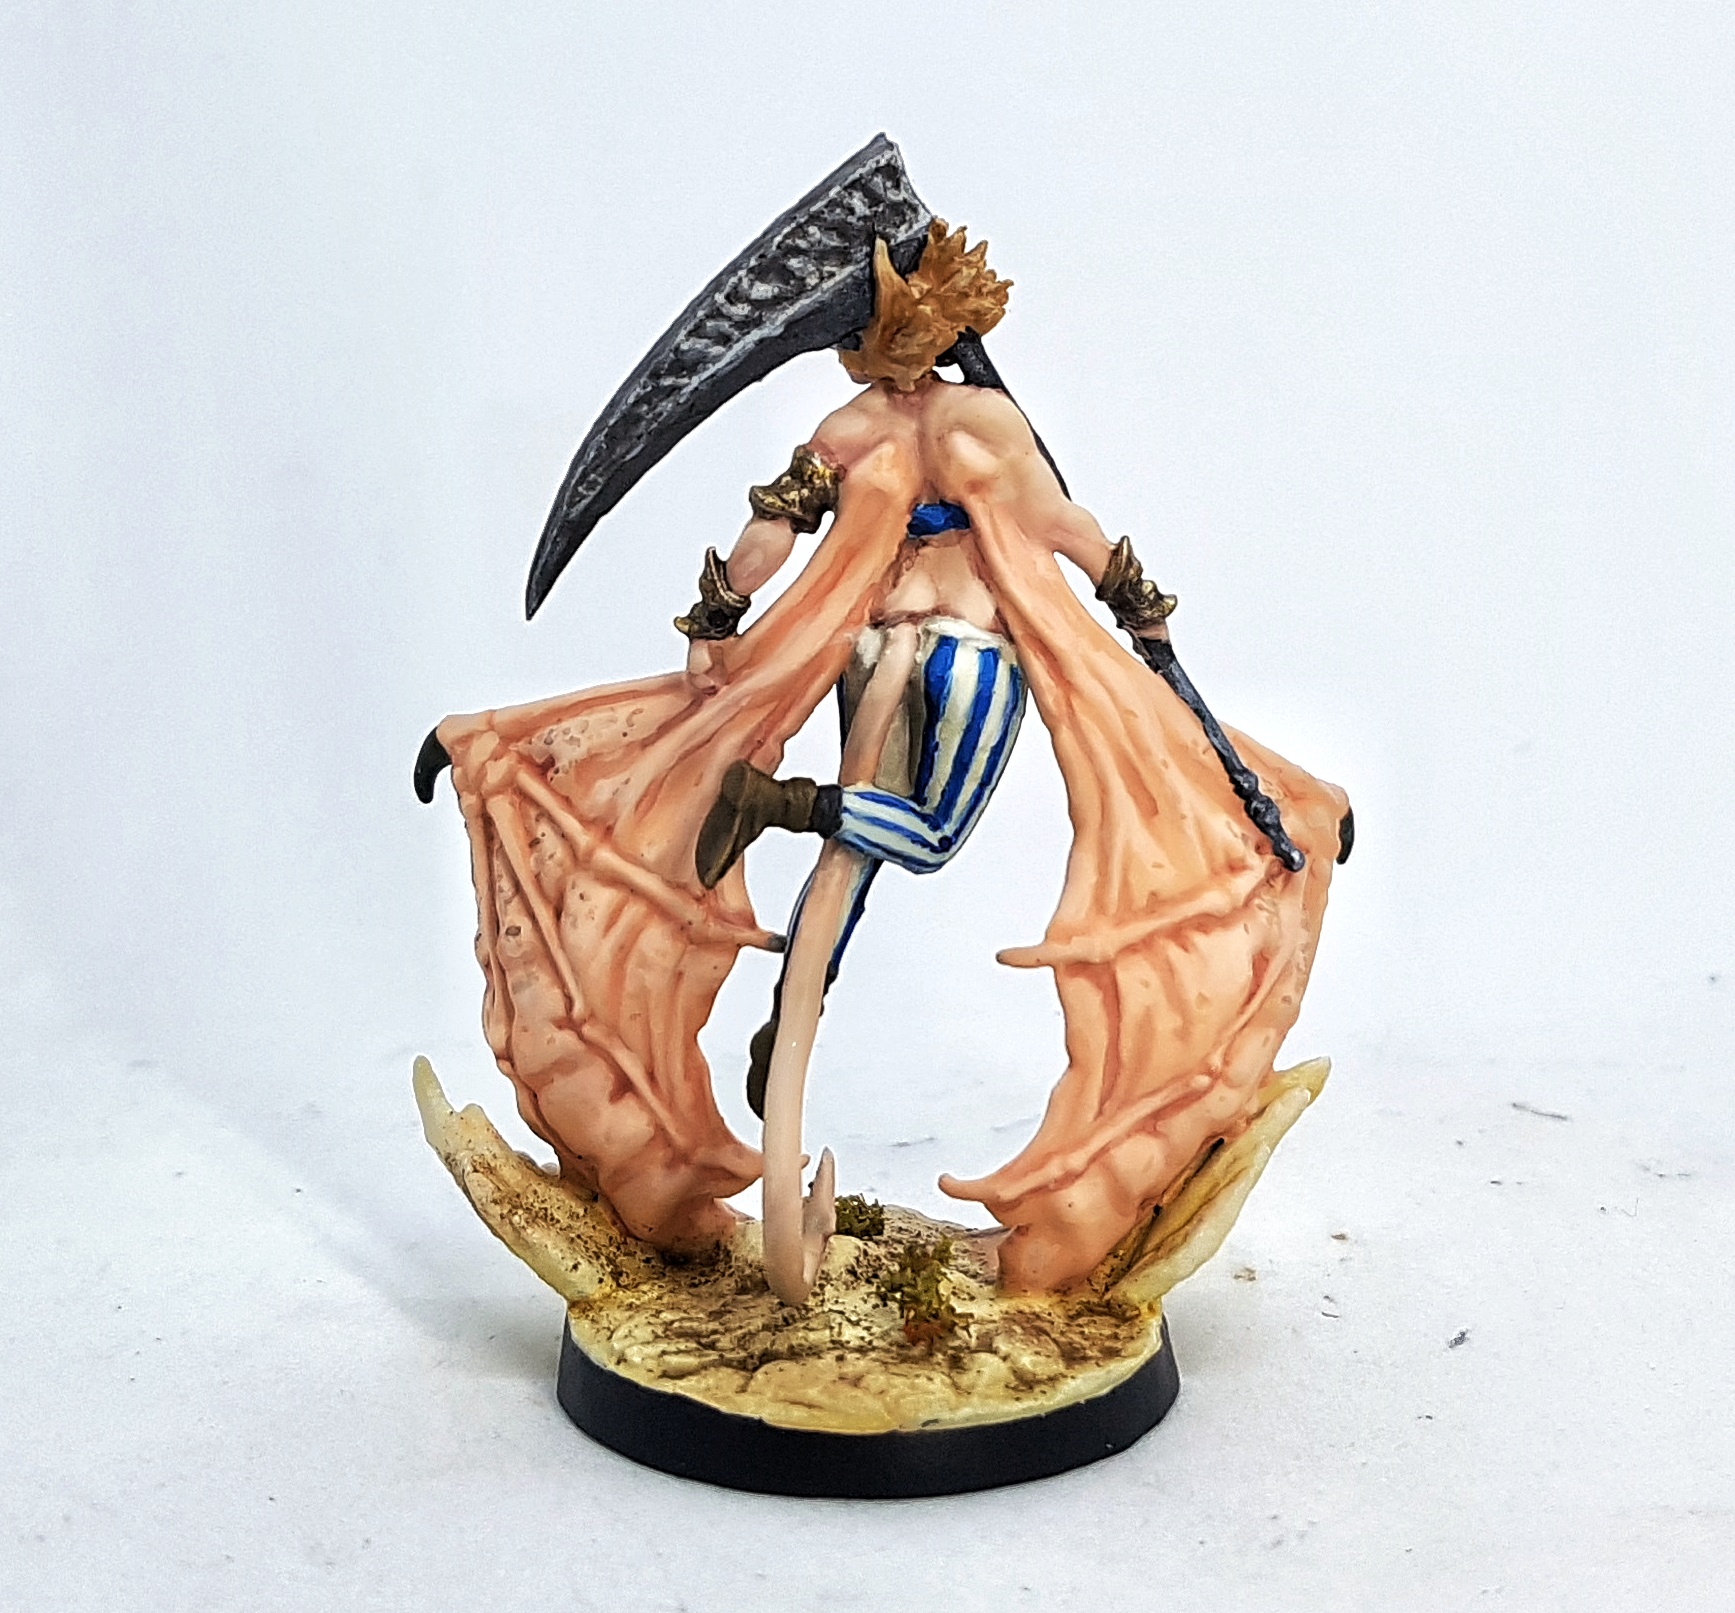
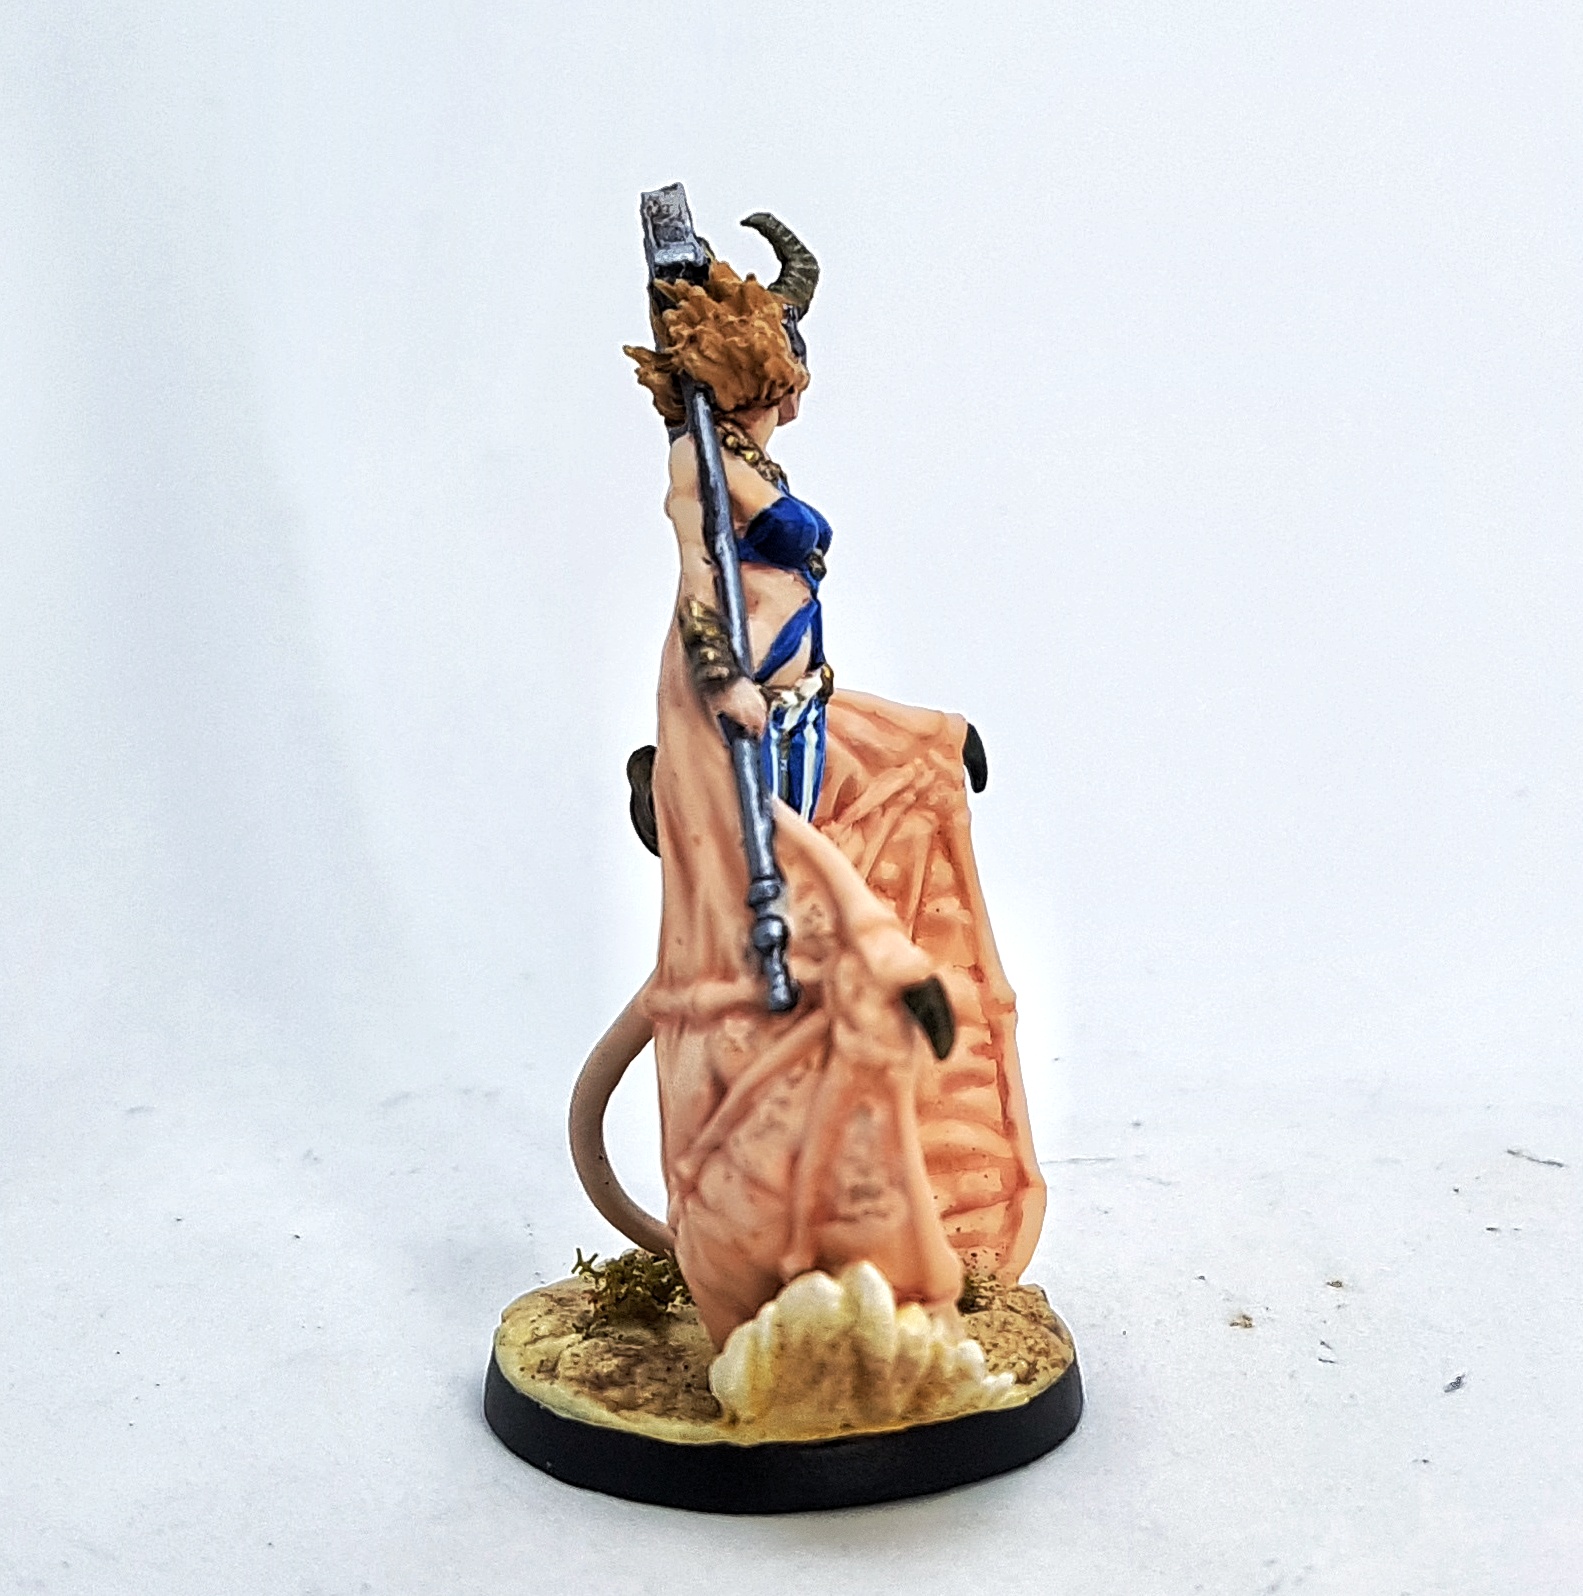
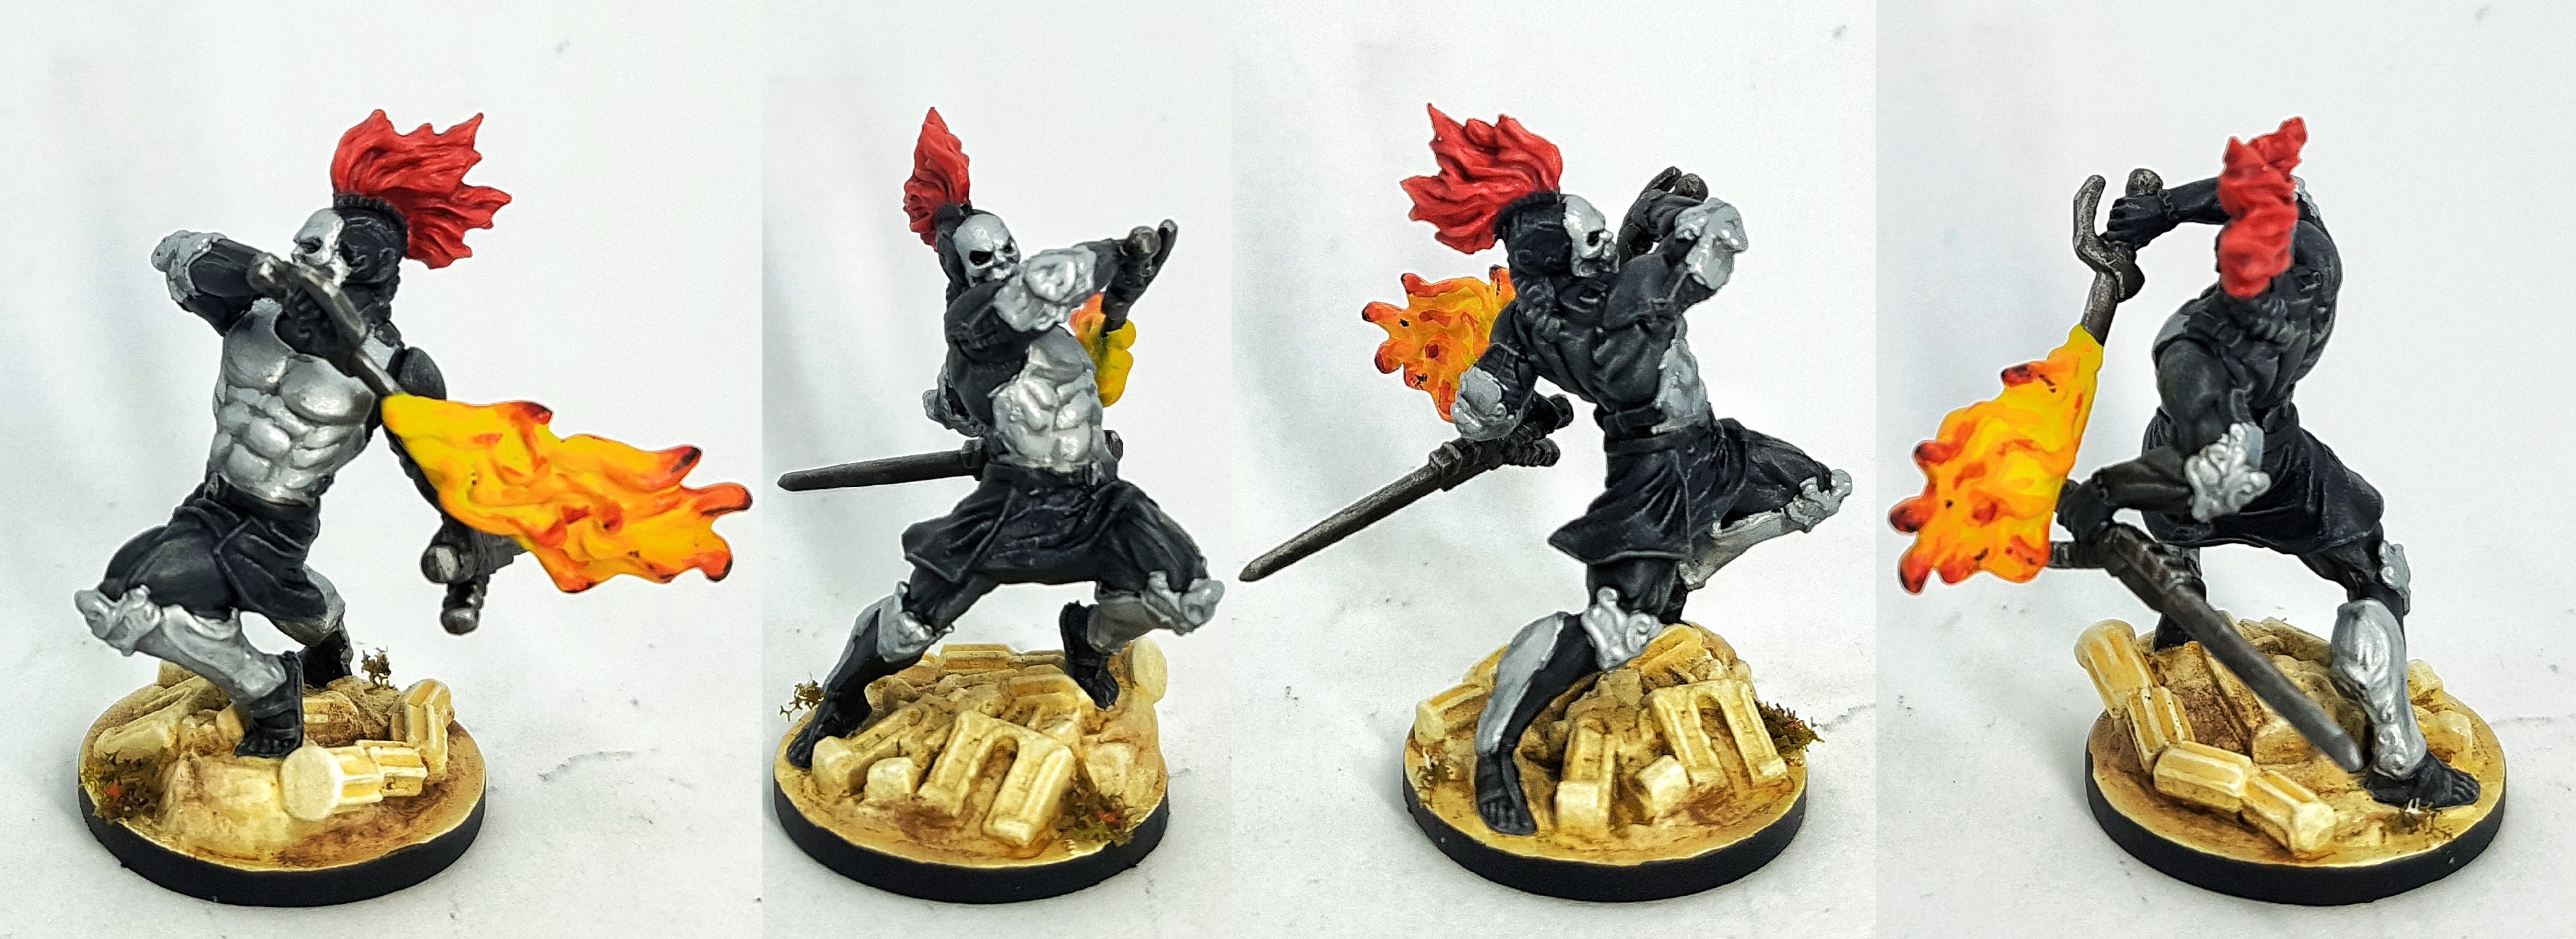
Cycle 2: The Nietzschean and The Abysswatcher Titan
These two shared a common colour scheme so they got painted at the same time. I suspect they are both made out of the abyss and that’s why their flesh and clothes are the same colour. At least that’s how they look in the studio art.
Before I did anything else, I undercoated the flames white and airbrushed the yellow in to ensure it was as vibrant as possible. I then painted everything else, leaving the flames until last. That way I could clean up any mistakes, and it makes more sense for the fire to overlap on to other areas than for the clothing to overlap or be on top of the fire.
Bone
Base: P3 Beast Hide
Stipple: Thinned P3 Jack Bone
Stipple: P3 Menoth White Highlight
Glaze: P3 Brown Ink
Glint Highlight: P3 Morrow White
Black Flesh
Base: VMC70.994 Dark Grey
Drybrush: P3 Menoth White Base
Wash: GW Nuln Oil
Drybrush: P3 Menoth White Base to highest/shiniest parts only
Black Cloth
(Watcher skirt and helmet)
Base: VMC: 90.995 German Grey
Drybrush: P3 Sickly Skin
Wash: GW Nuln Oil
Drybrush: P3 Sickly Skin to highest/shiniest parts only
Bronze/Gold Trim
Base: Darkstar Blackened Bronze
Highlight: Blackened Bronze with Darkstar Royal Gold
Highlight: Above with more with Darkstar Royal Gold
Highlight: Royal Gold
Glint Highlight: Darkstar Pale Gold
Chrome/Silver
Base: VGC 72.053Chainmail Silver
Shade: Thinned Chainmail Silver with P3 Pig Iron
Highlight: Chainmail Silver
Highlight: Chainmail Silver with VMA 71.064 Chrome
Highlight: Above with more Chrome
Highlight: Chrome
Other Golds
Base: GW Retributor Gold
Highlight: P3 Solid Gold
Wash: GW Seraphim Sepia
Highlight: P3 Solid Gold
Steel
Undercoat: Black
Base: Mision Models MMM-002 Cold Rolled Steel
Highlight: P3 Pig iron
Highlight: P3 Quick Silver
Wash: Jan’s Magimix (6-8 Parts GW Nuln Oil, 6-8 Parts GW Agrax Earthshade, 5-6 Parts Lahmium Medium, 2 parts Athonian Camoshade. Thanks, Januinevision)
Highlight: P3 Quick Silver
Red
Base: GW Evil Sunz Scarlet
Shade: GW Khorne Red
Highlight: GW Wild Rider Red
Human Flesh
Base: P3 Midlund Flesh
Wash: P3 Khardic Flesh
Highlight: Midlund Flesh
Highlight: Midlund Flesh and P3 Ryn Flesh
Highlight: Ryn Flesh
White Cloth
Base: Andrea Color White 1 Base
Shade: Andrea Color White 6, 2nd Shadow
Highlight: Andrea Color White 1 Base
Highlight: Andrea Color White 1 Base and P3 Morrow White
Highlight: Morrow White
Blonde Hair:
Base: Reaper 09256 Blond Shadow
Wash: Coat d’Arms Flesh Ink
Drybrush: Reaper 09257 Blond Hair
Drybrush: Reaper 09258 Blond Highlight
Fire:
Undercoat: White
Base: Mr Paint MRP-F005 Deep Yellow
Highlight: Deep Yellow and Mr Paint MRP-F008 Fire Orange
Highlight: Fire Orange
Highlight: Fire Orange and Mr paint MRP-F013 Deep Red
Highlight: Deep Red
Apply Coat d’Arms Ink Wash Yellow to recesses to brighten further
Glaze thinned white carefully to the hottest recesses
Just before varnishing I got some Kromlech Soot Black pigment on a finger and touched it gently to the model to add some just to the high points. The varnish then sealed this in.
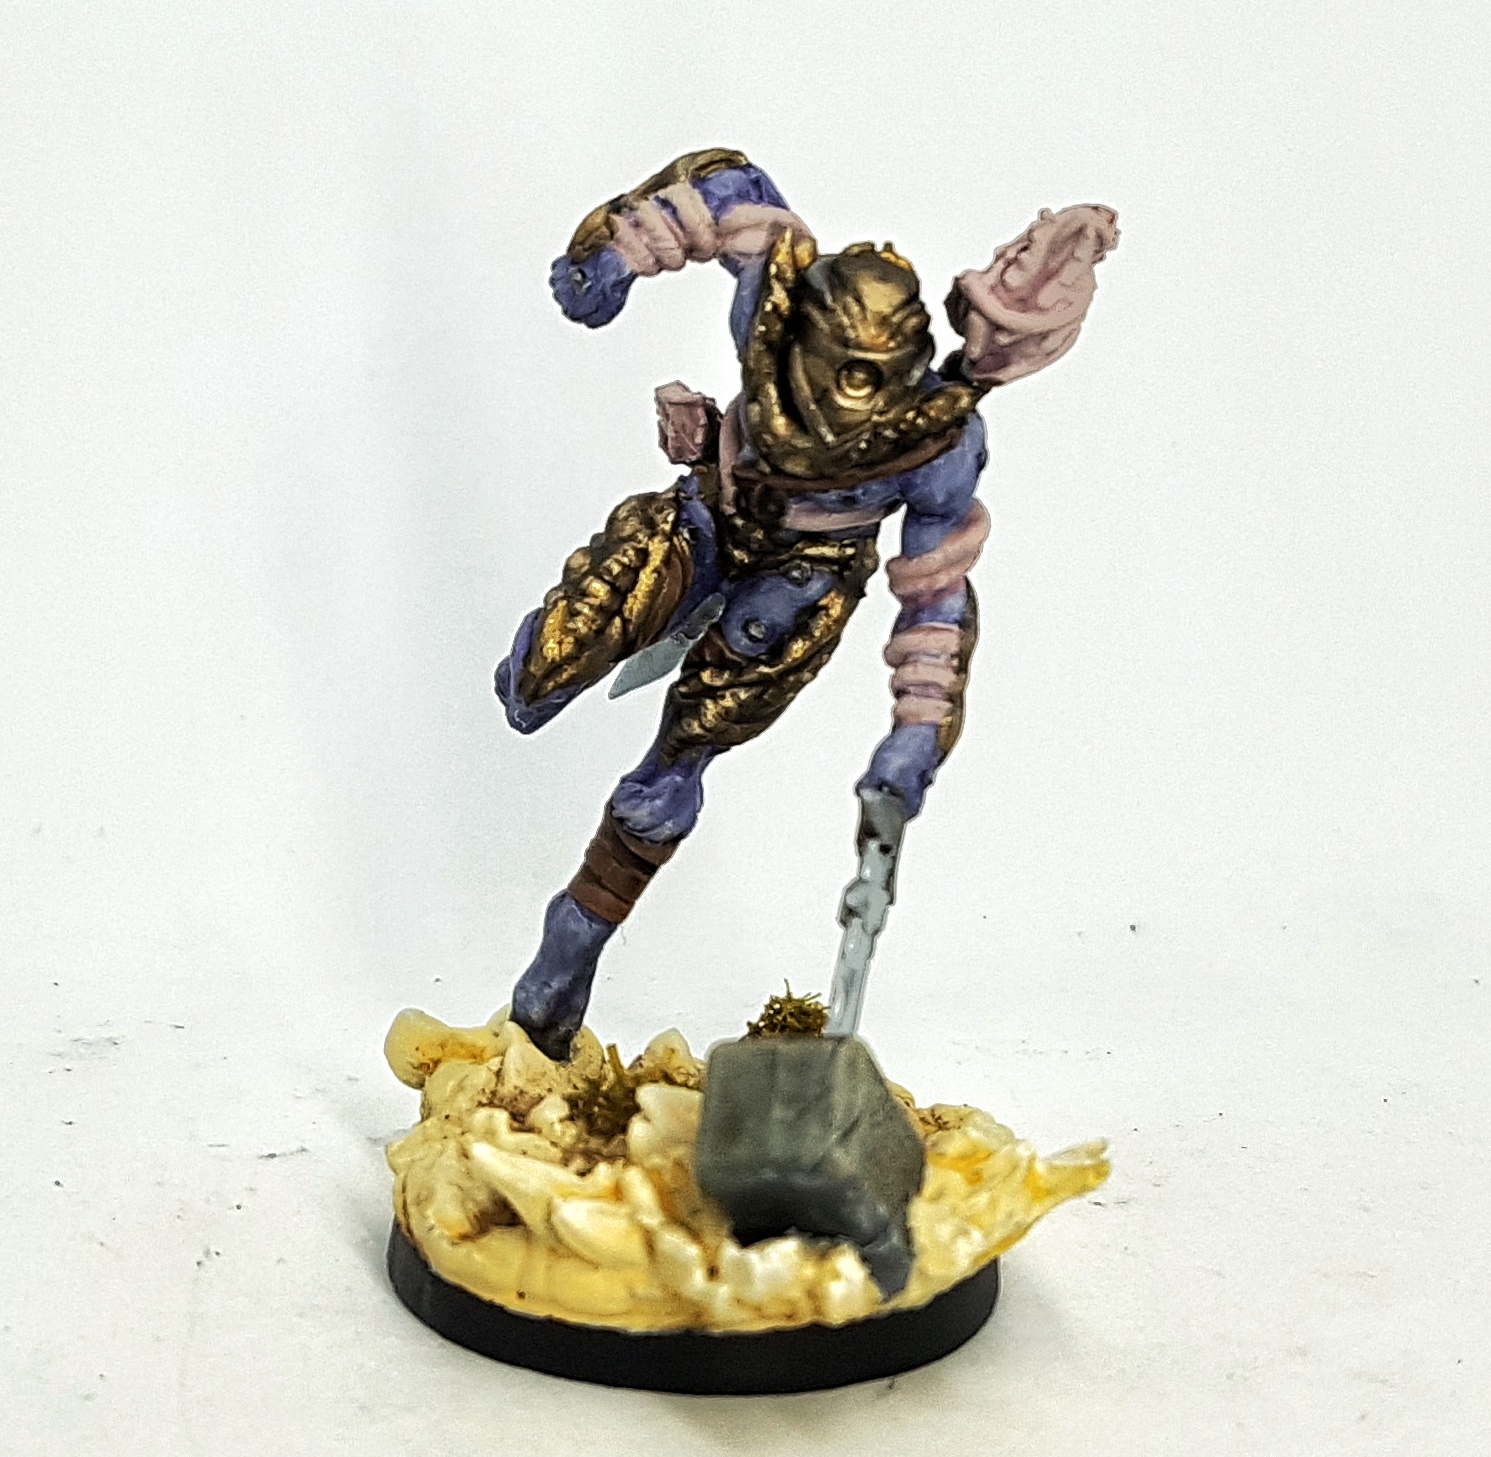
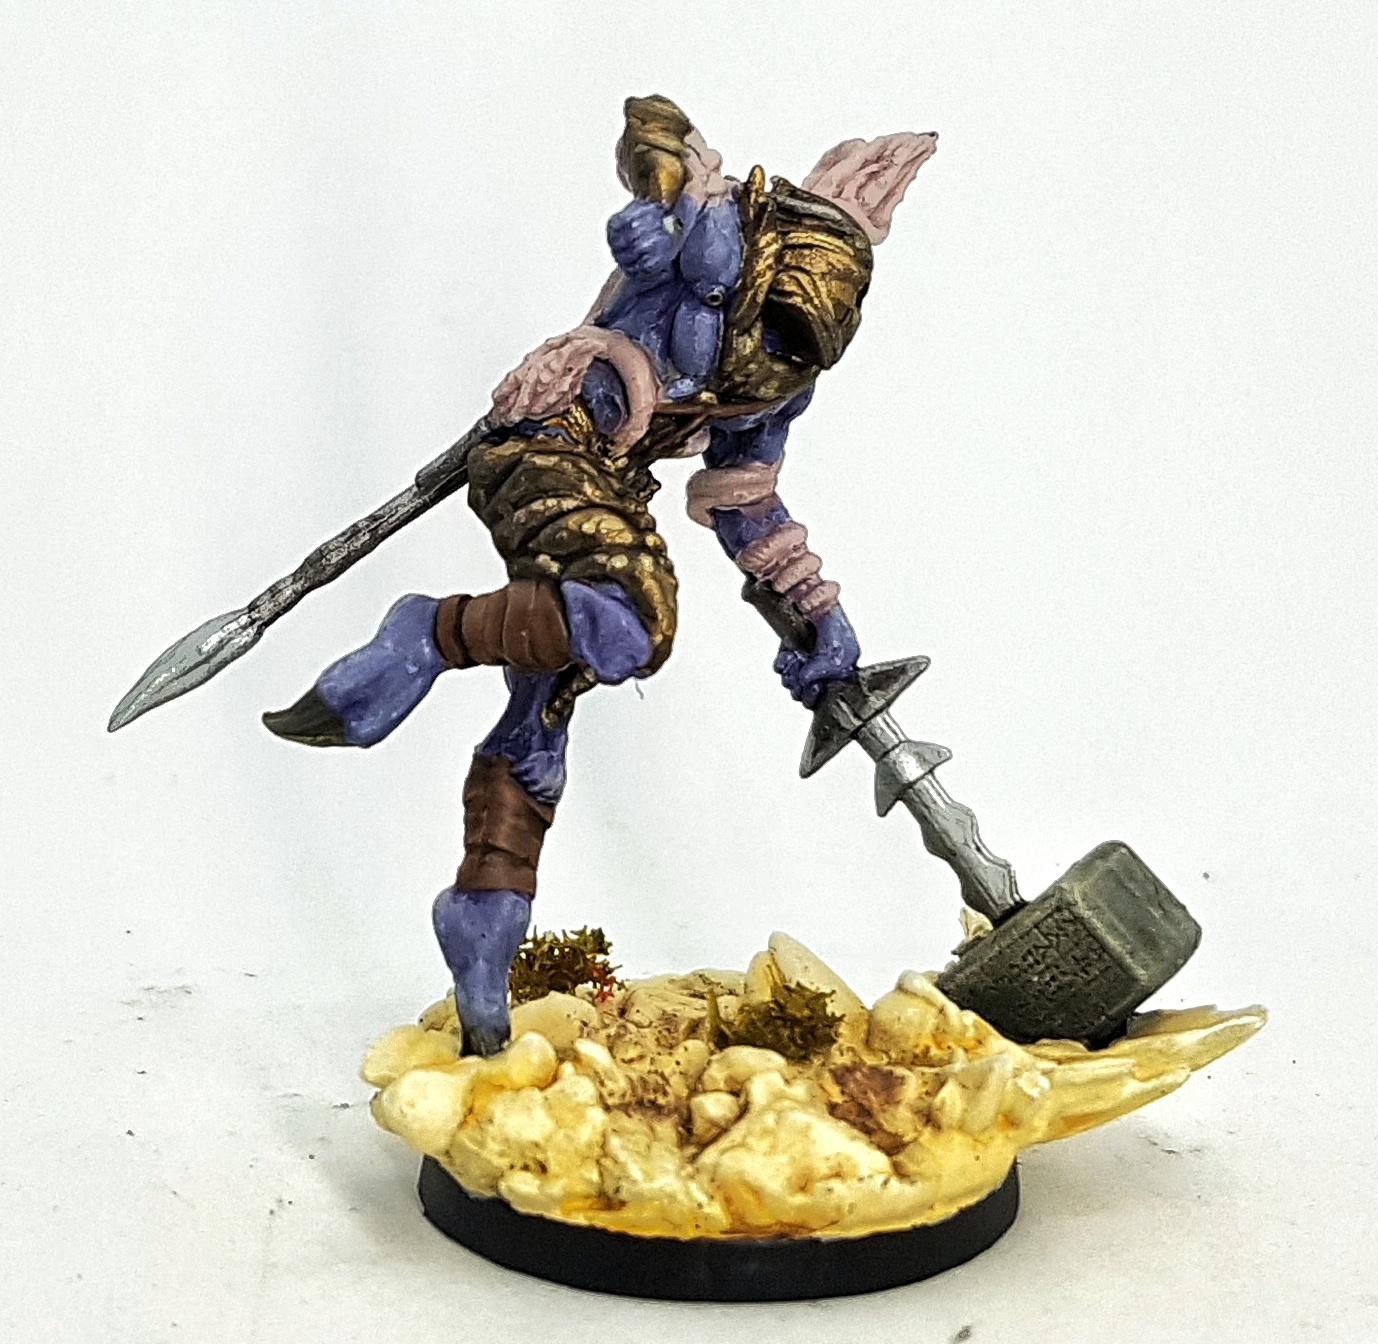
 Abysswatcher Titan
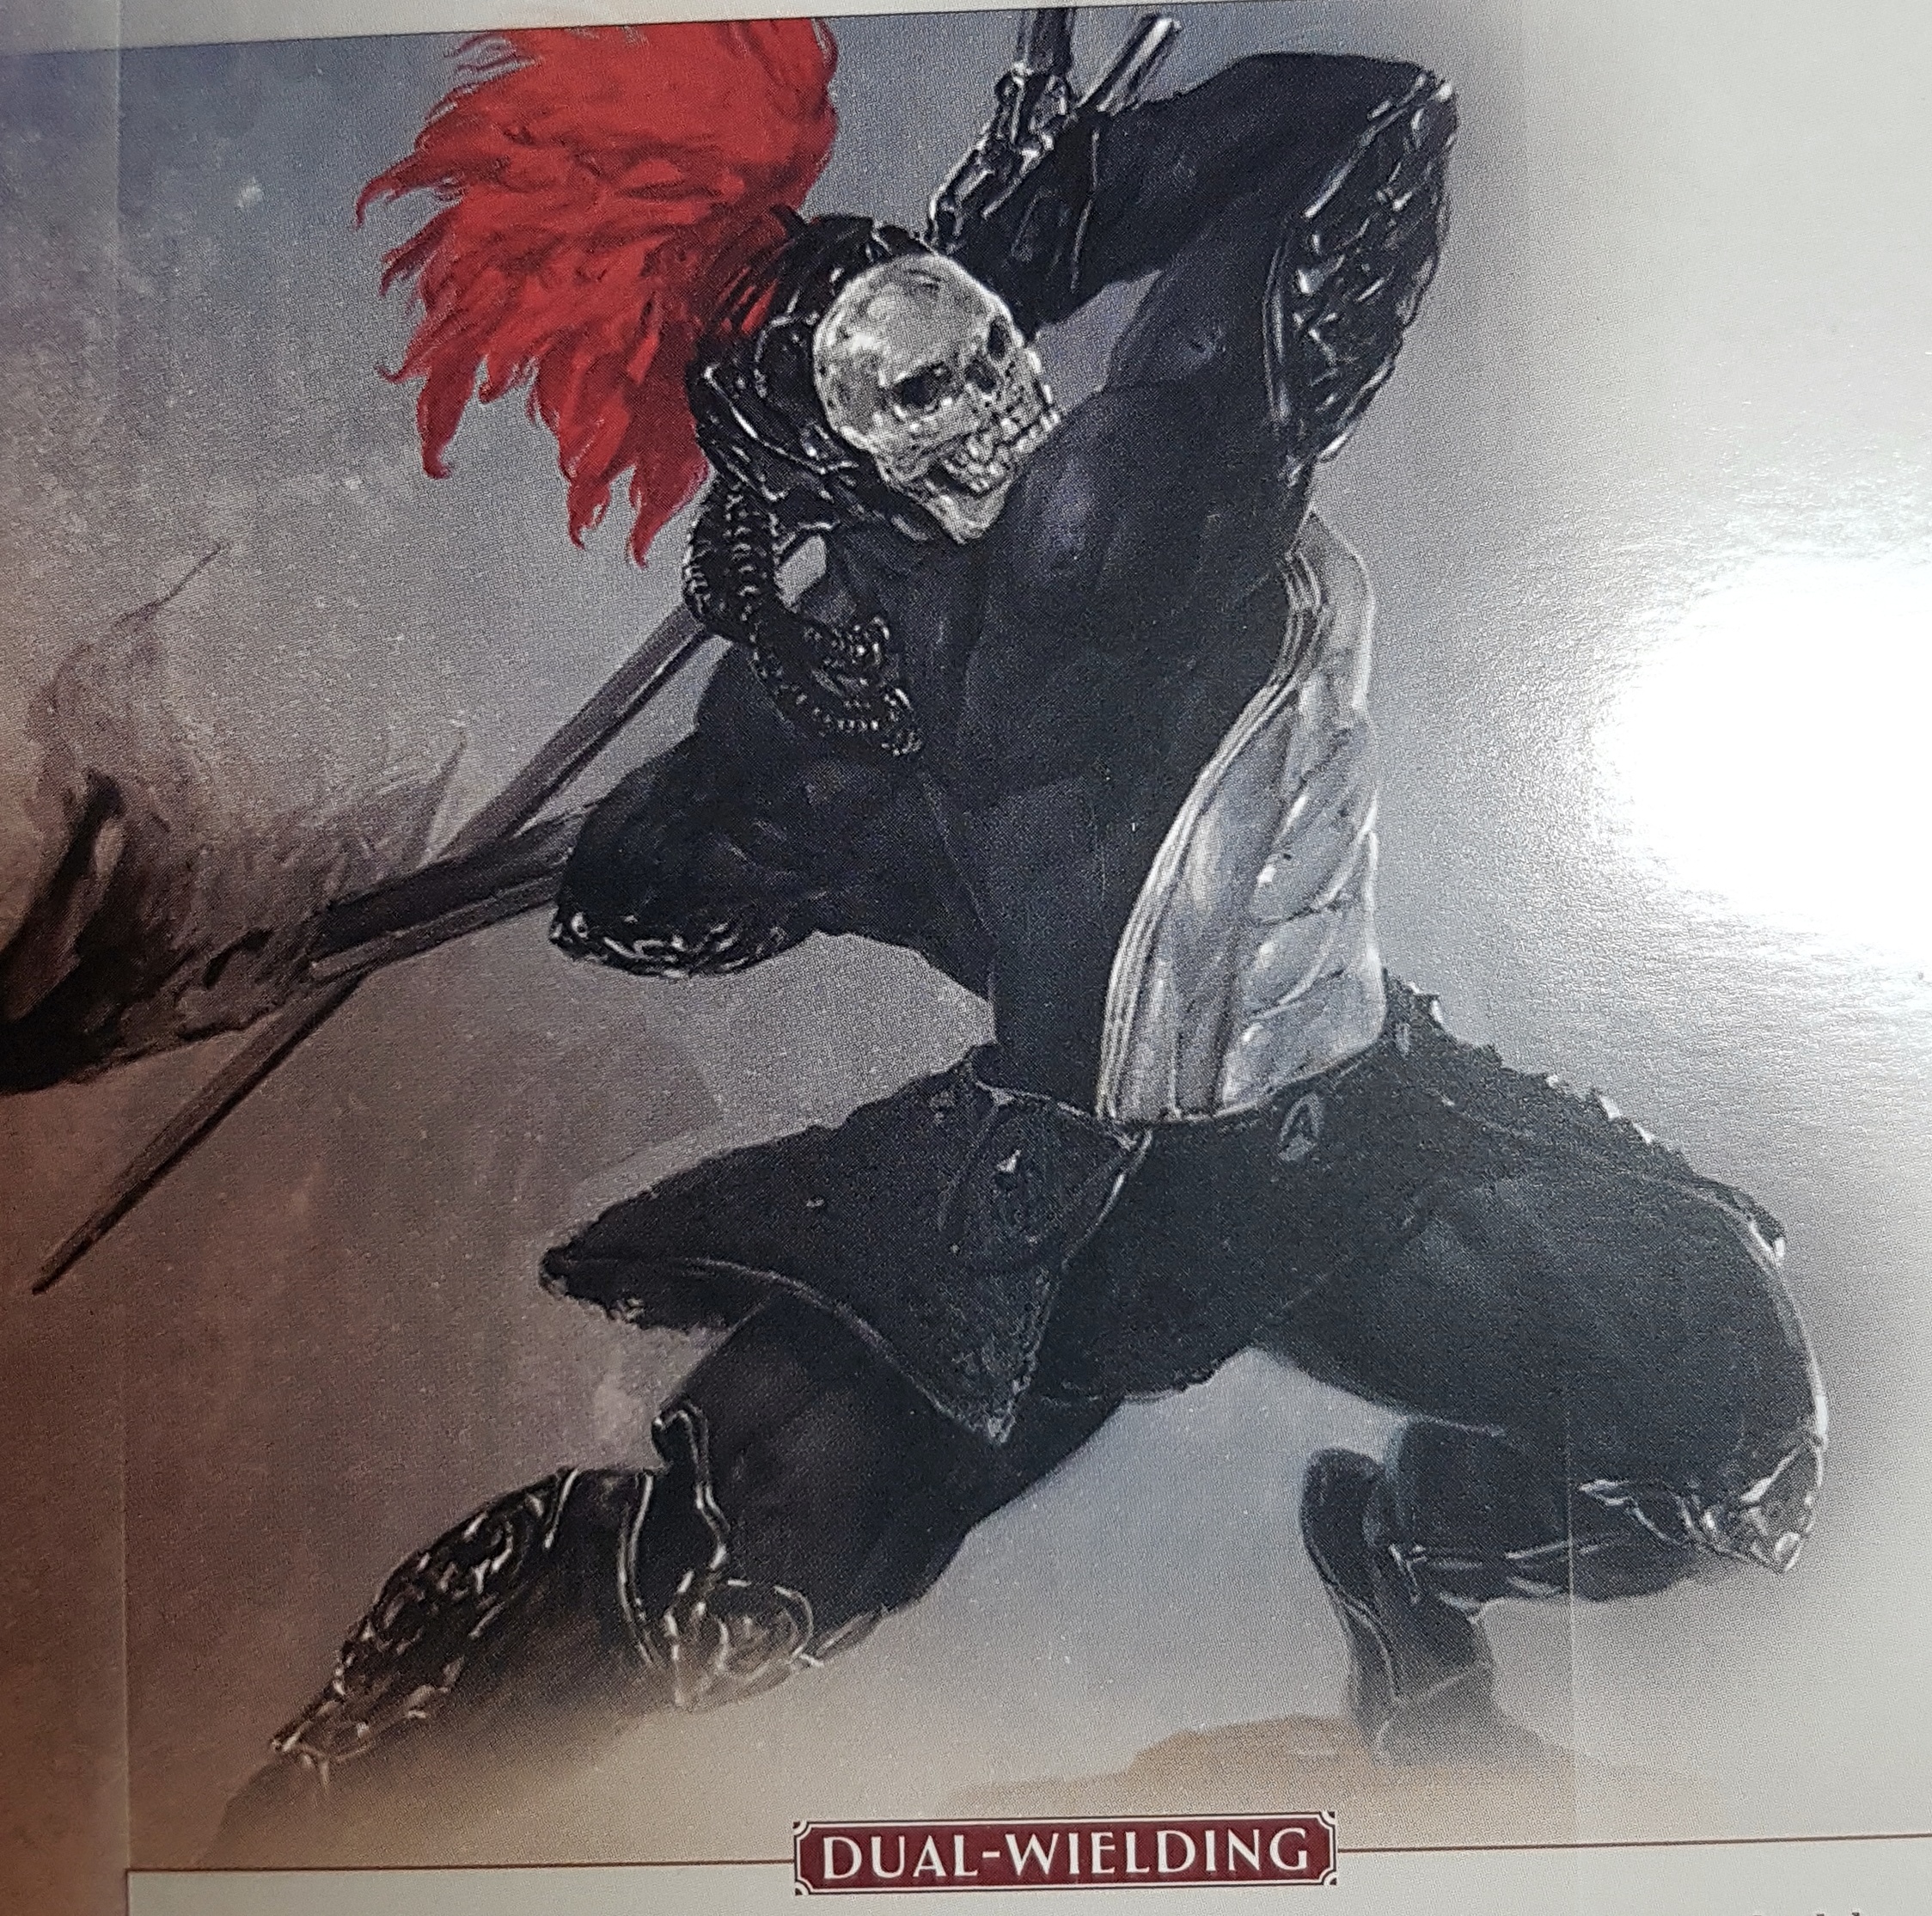 Abysswatcher Titan concept art
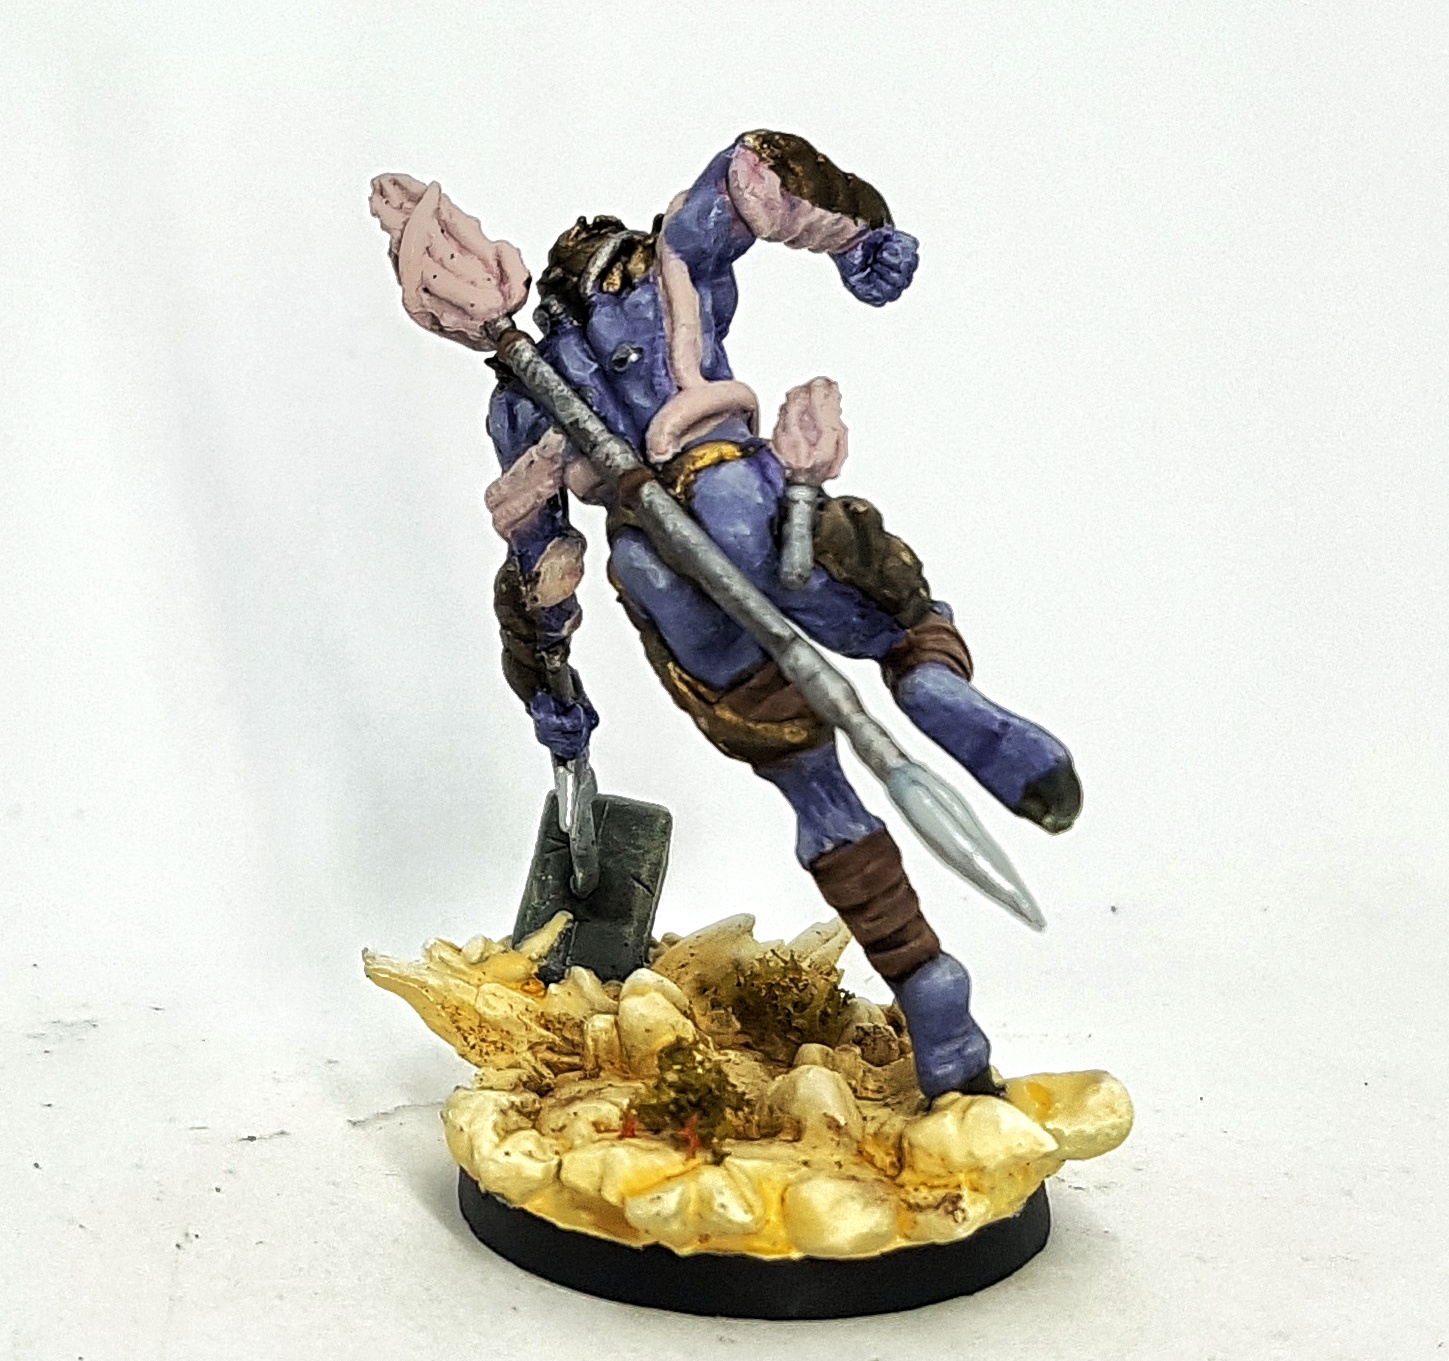
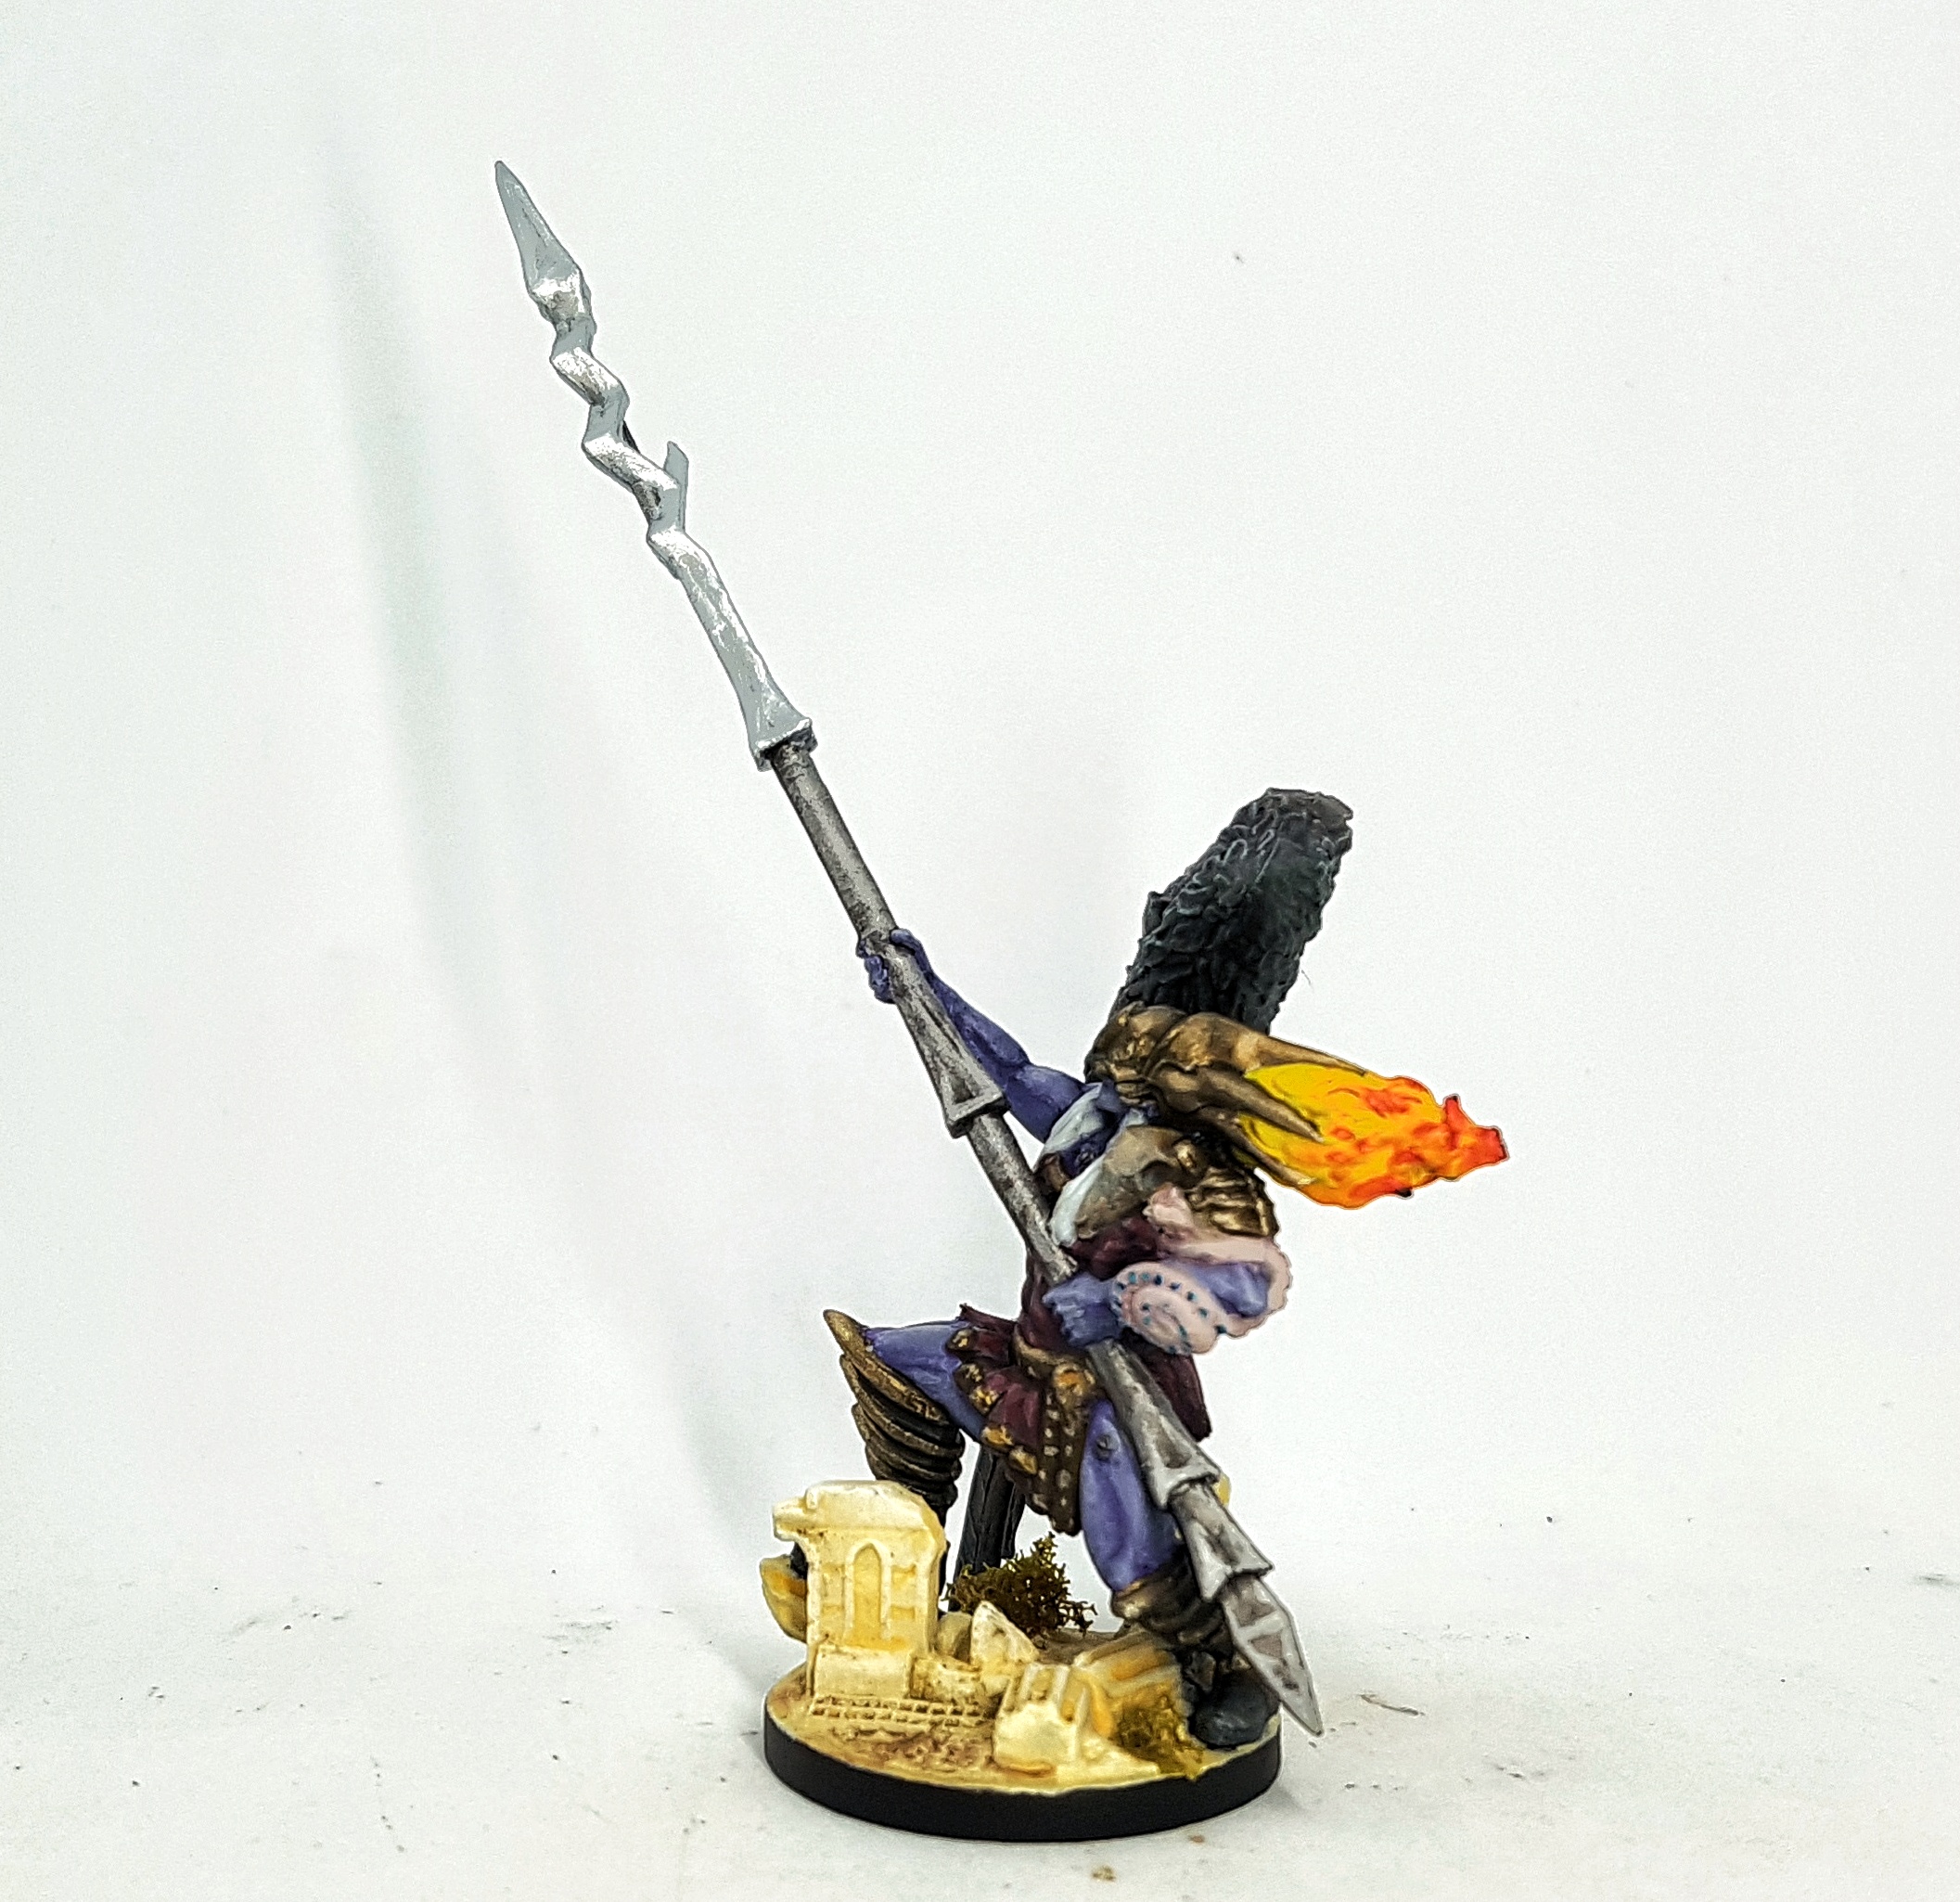
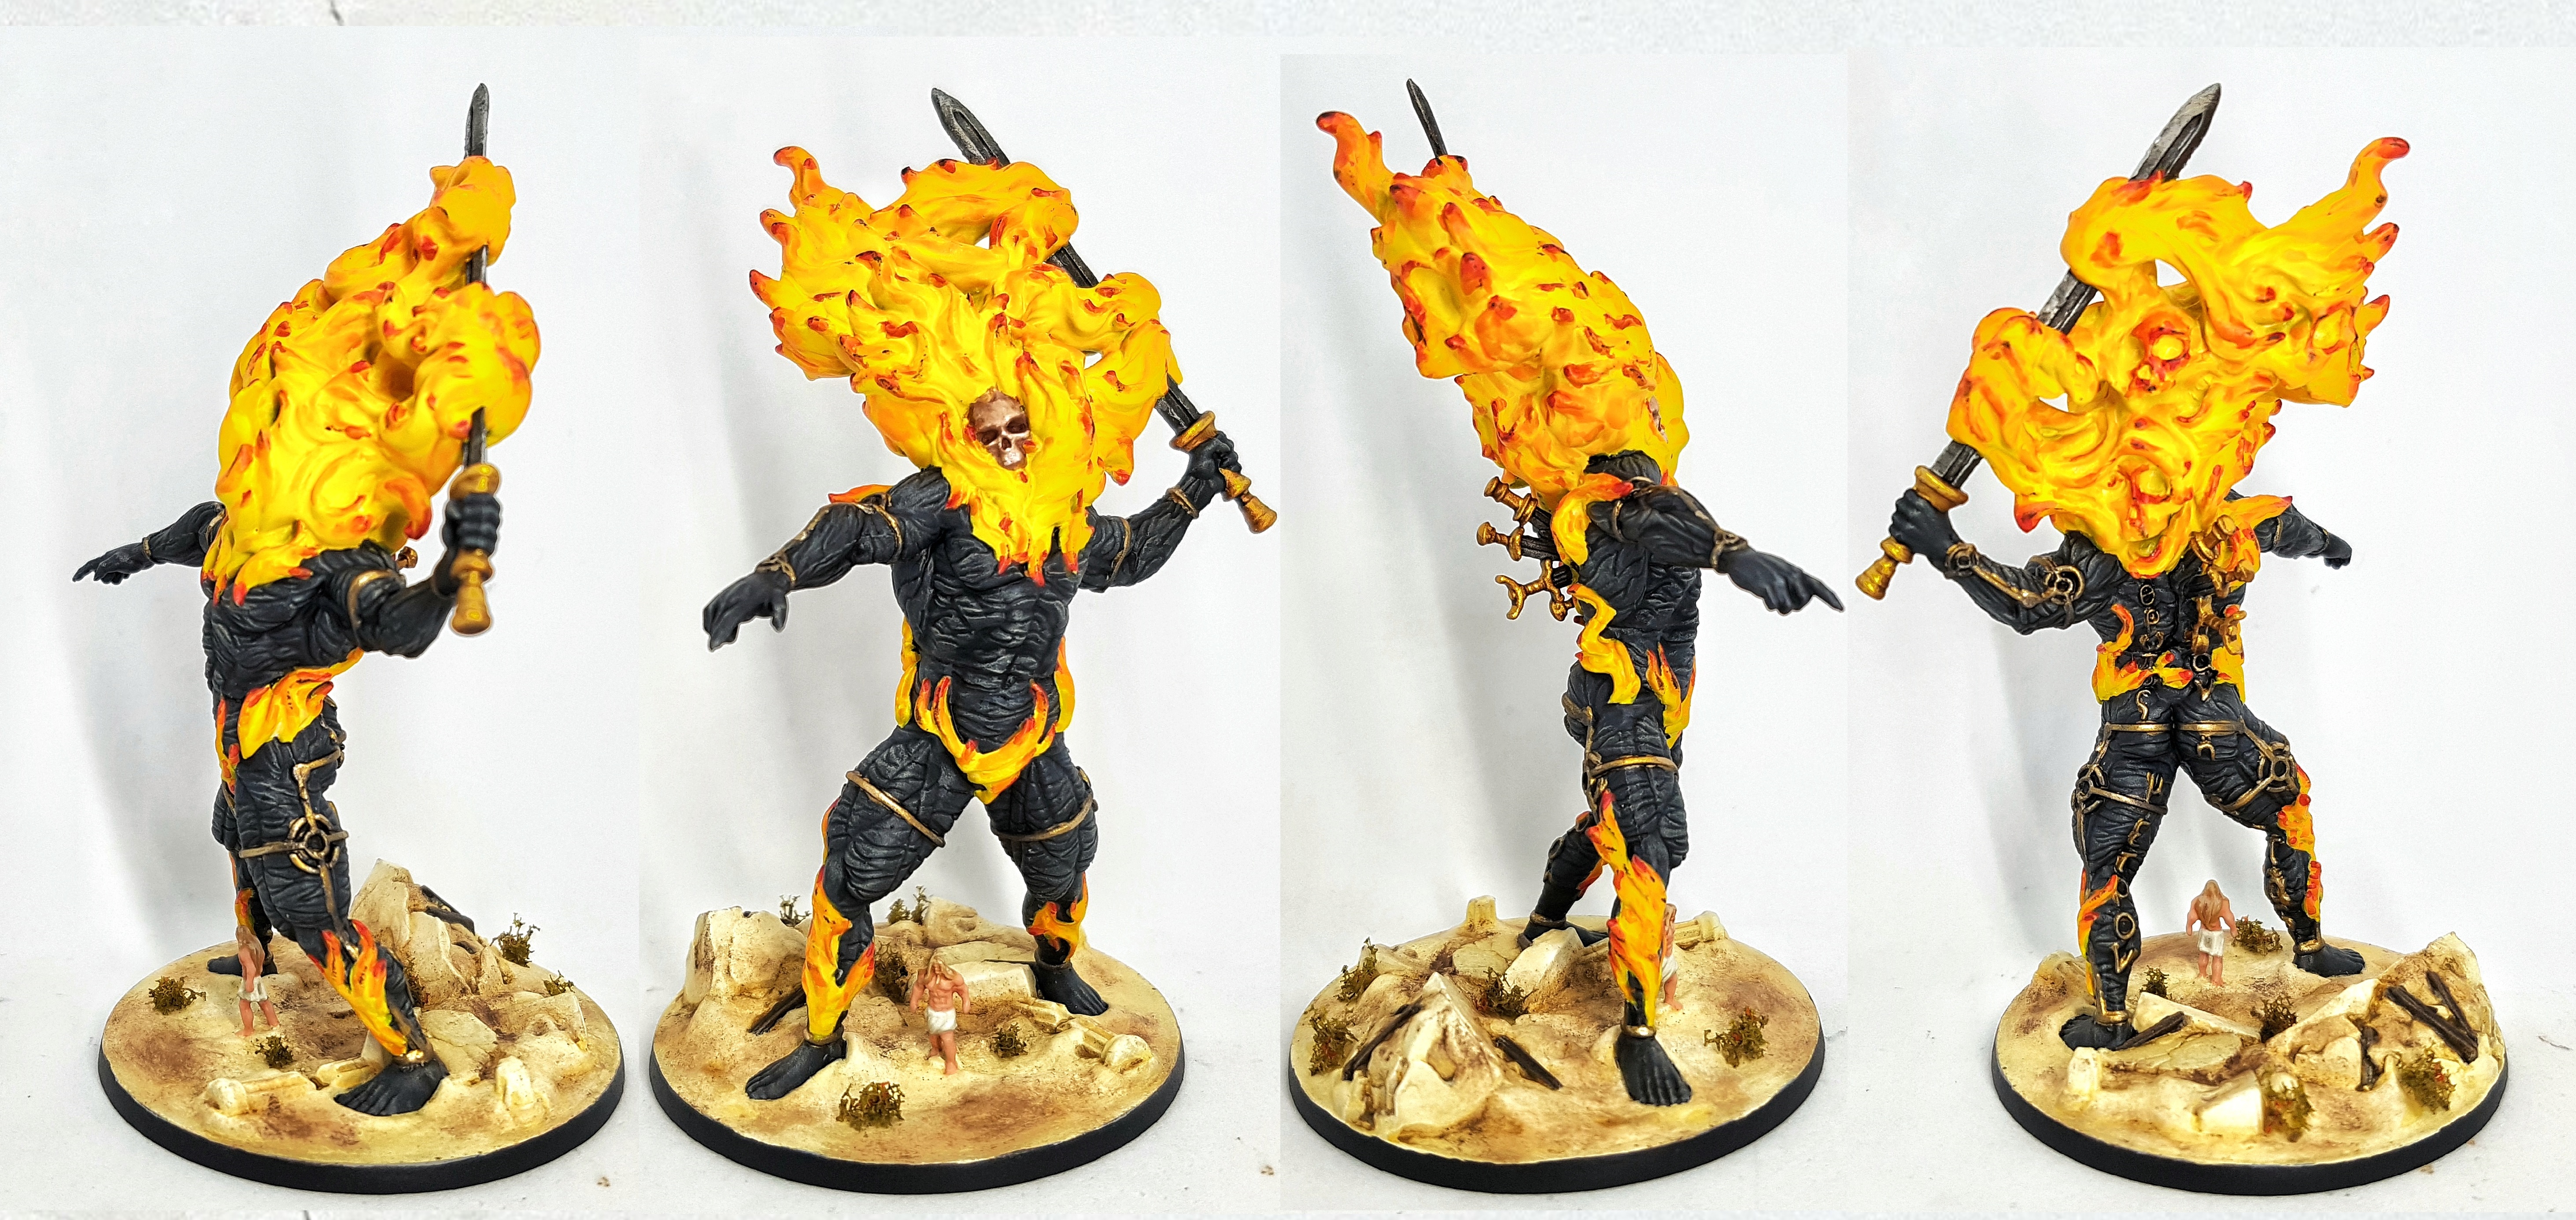 The Nietzschean
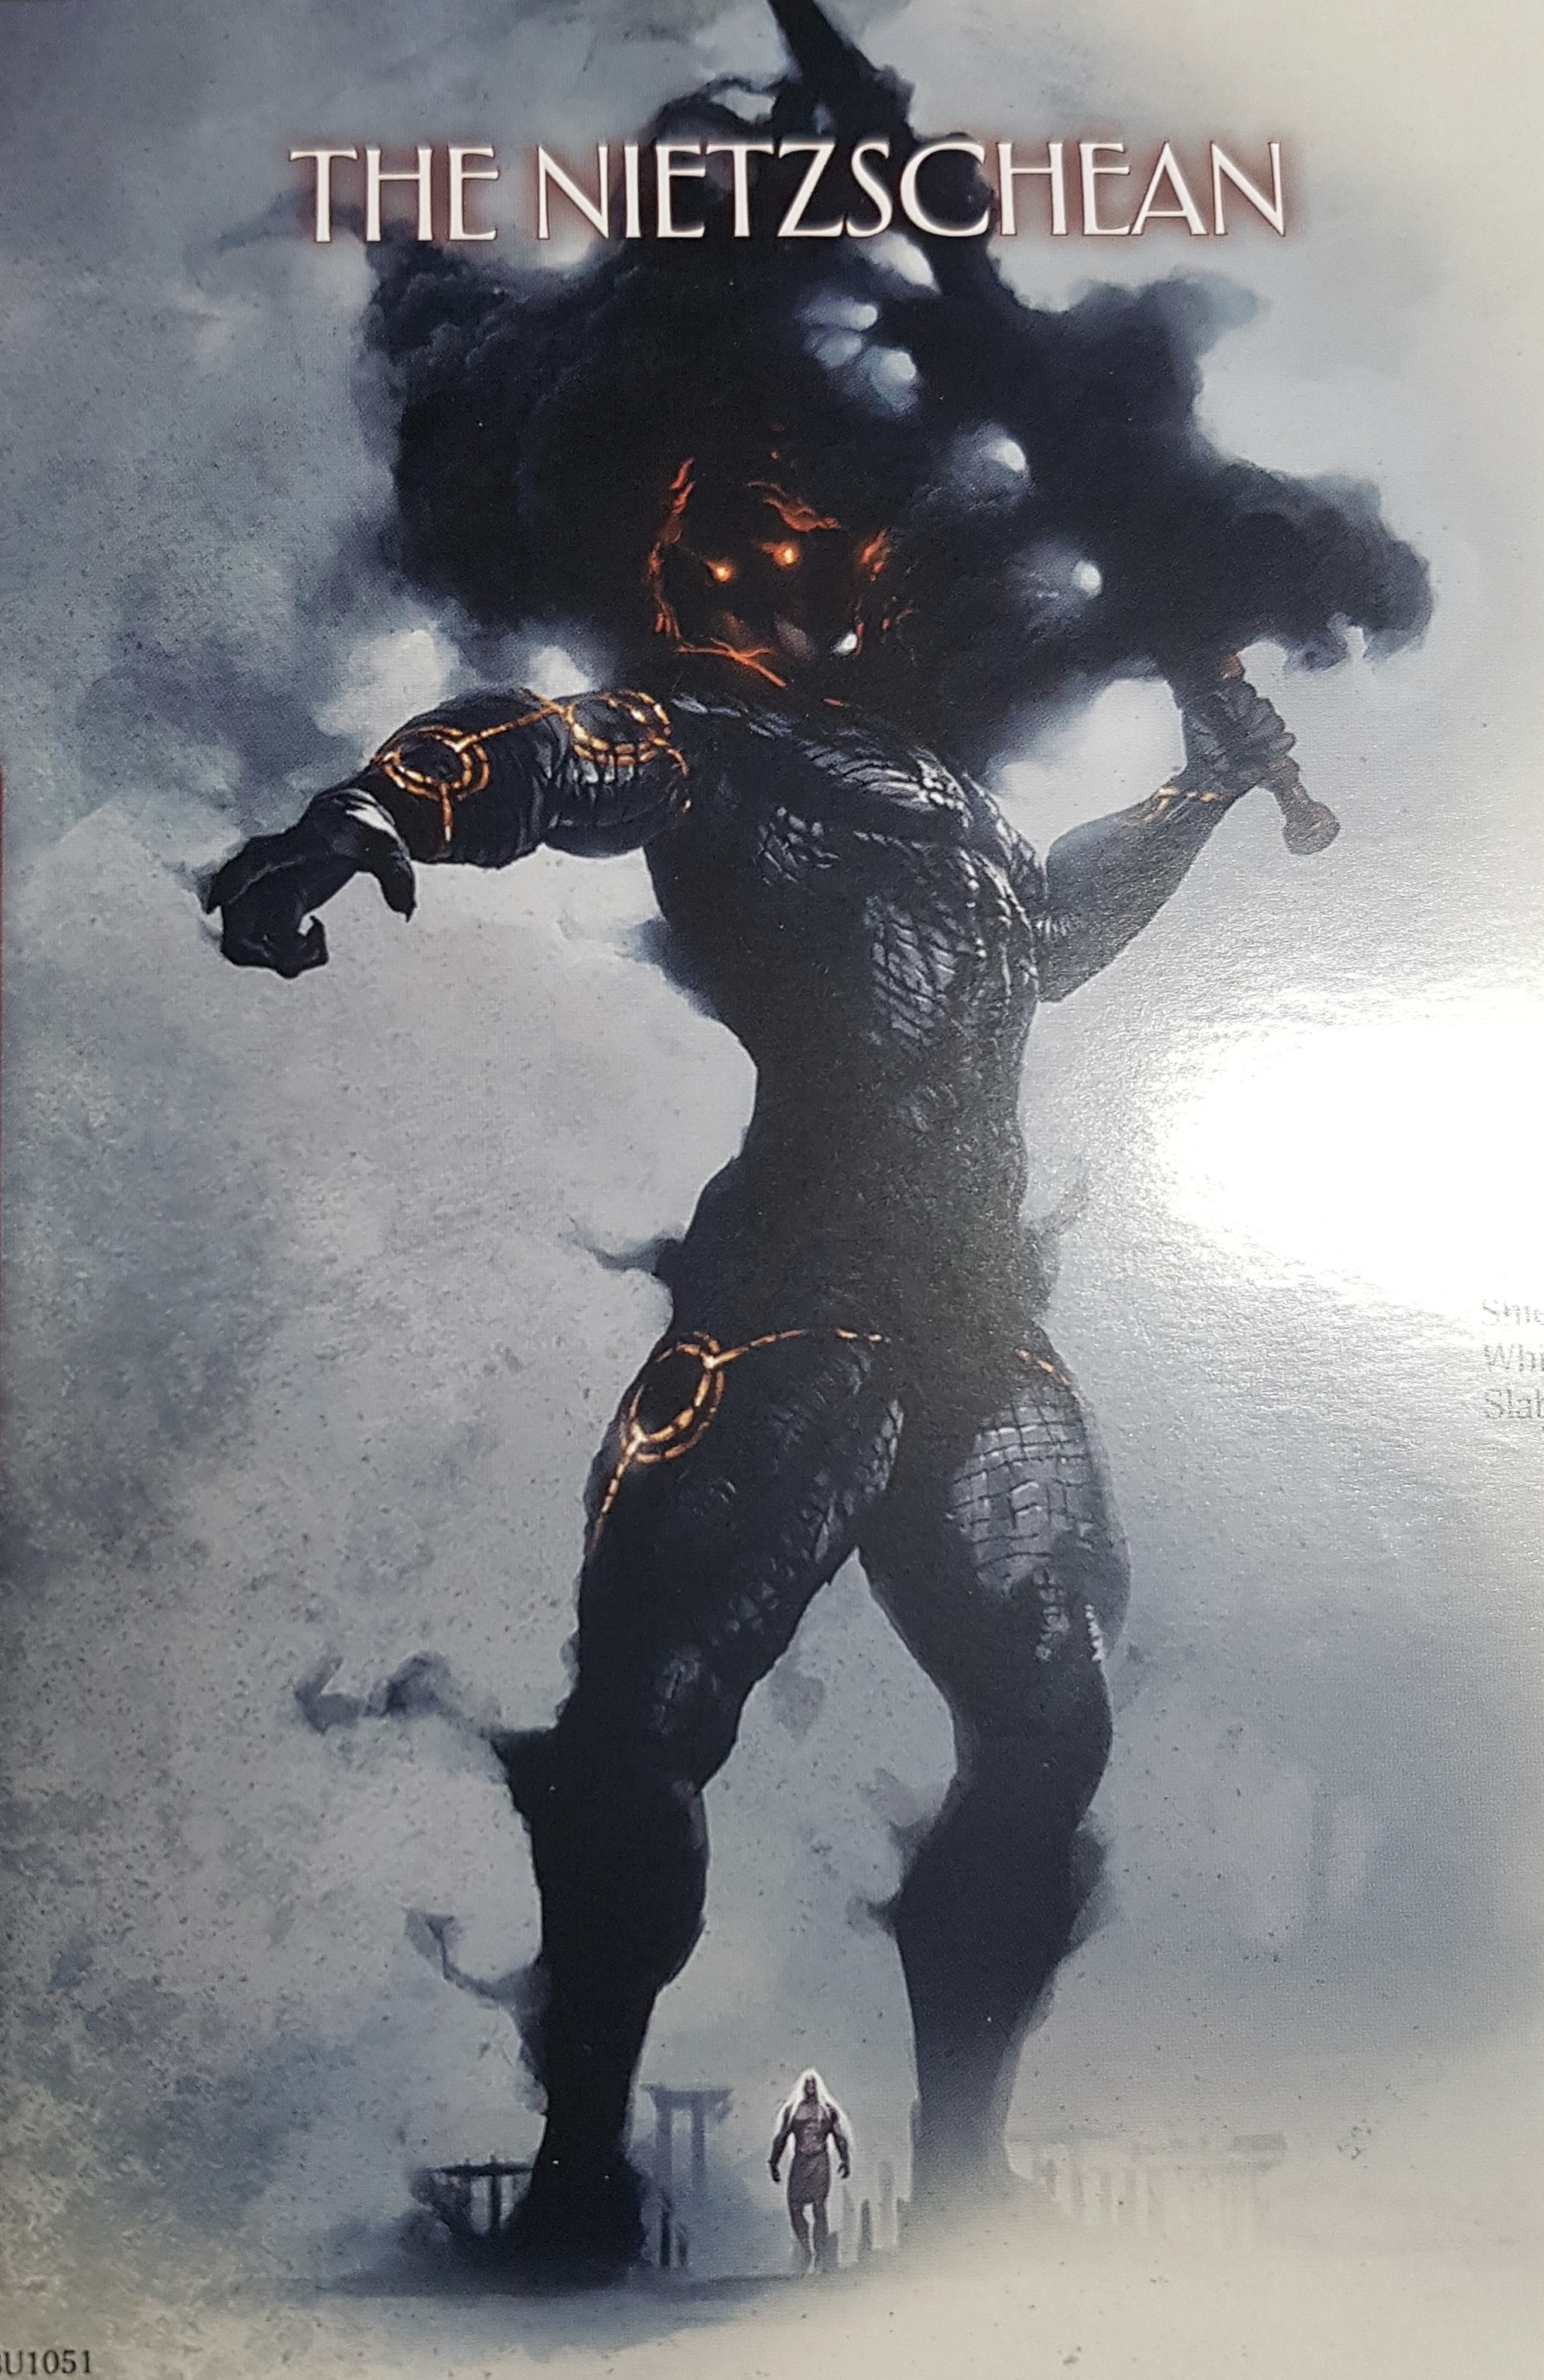 The Nietzschean concept art
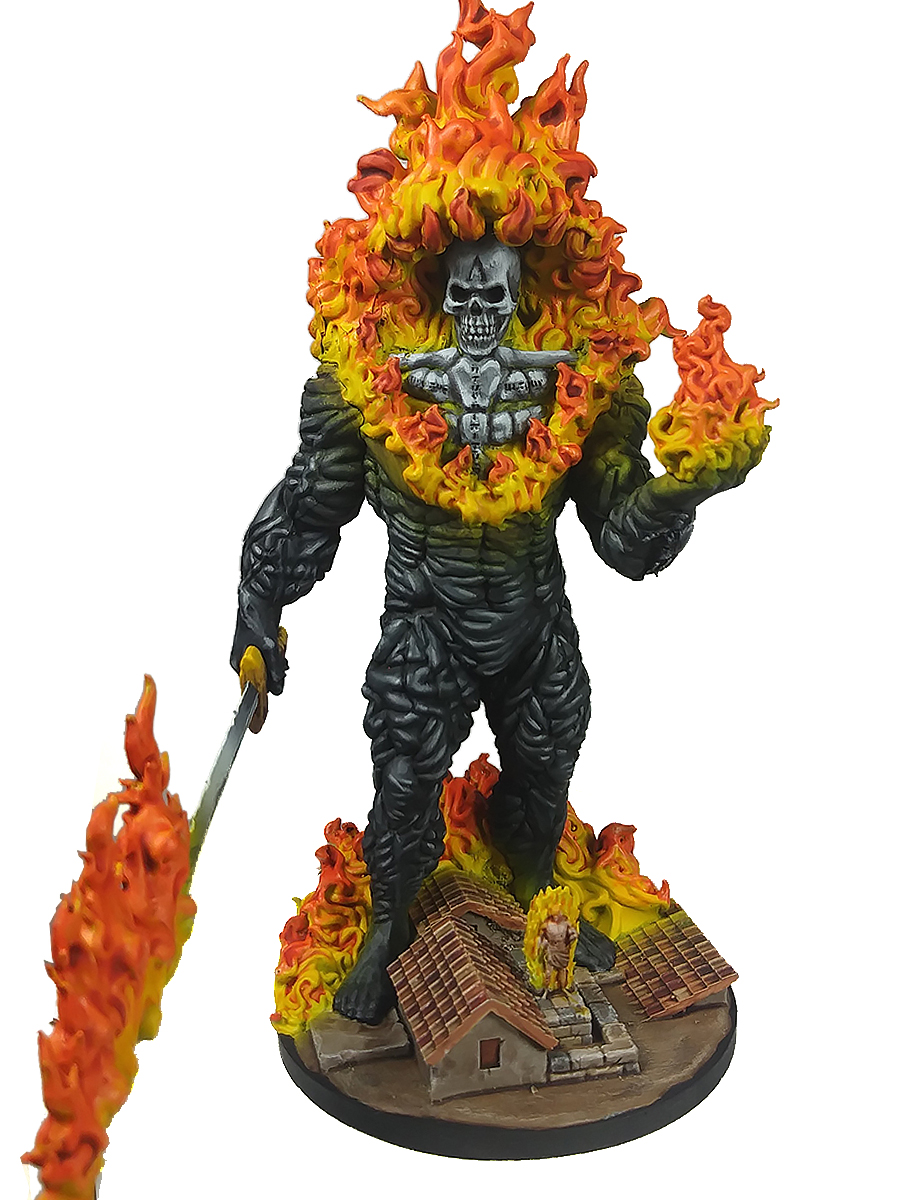 Studio paint job for the original design of The Nietzschean. He got changed after the KS finished.


