


![How To Paint Moonstone’s Nanny | Goblin King Games [7 Days Early Access]](https://images.beastsofwar.com/2024/12/3CU-Gobin-King-Games-Moonstone-Shades-Nanny-coverimage-225-127.jpg)


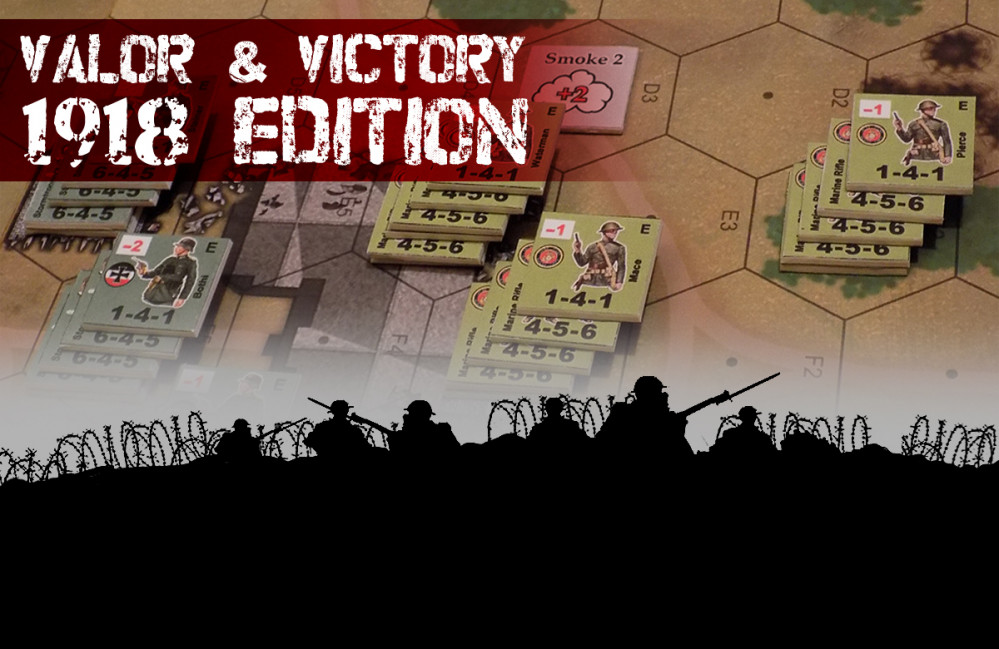
Valor & Victory - 1918 (German v. French Megagame)


Trench Assault! (Final Part) - Valor & Victory 1918 Edition
The epic battle in the German trench network … concludes!
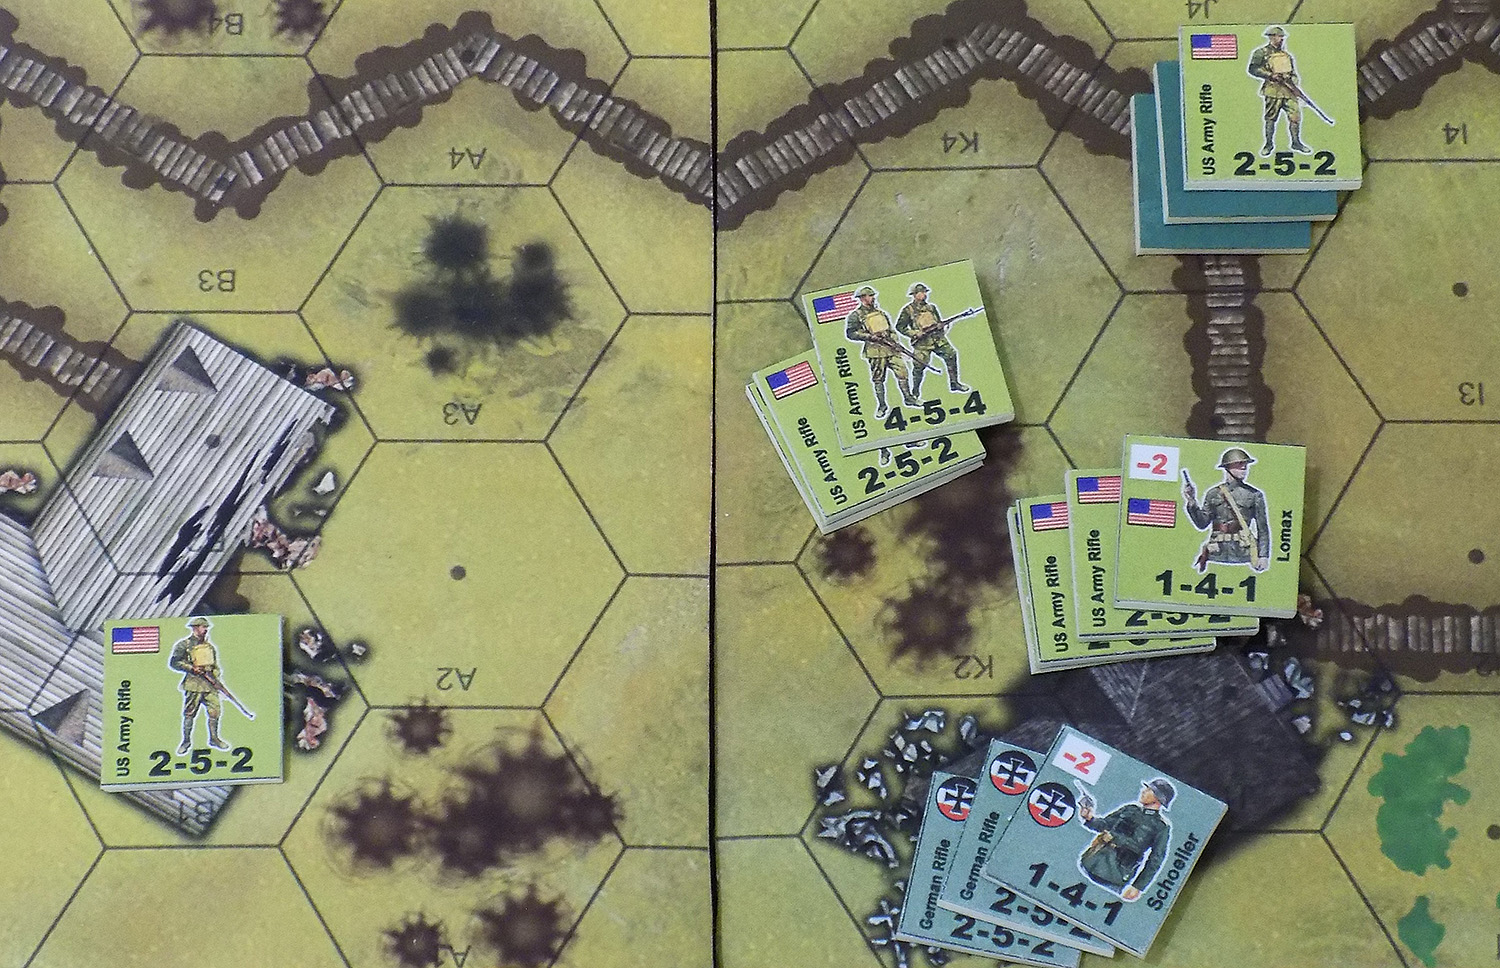
Captain Lomax has no choice but to lead another bloodbath assault on the Habeck House. A staggering five casualty points are inflicted by German opportunity fire (Schoeller applies a -2 leadership bonus) and then Lomax leads the assault in with the few men he has left. It’s another massacre, and by the time I figure out the math, yes … Lomax has succeeded in the assault, so Schoeller’s teams are eliminated and the Habeck House again changes hands … but the required casualty points for the assault (3 for Schoeller’s units in the hex + 3 for the building’s defense bonus) exceeds the number of casualty points Lomax still has.
Yes, the two platoons have wiped each other out.
Badly wounded, Captain Lomax is carried off the field by her shaken, dazed survivors, and sends an orderly with a message to Captain Pollock in the south. “German bunker cleared. It’s up to you now!”
Fortunately for Captain Pollock, there isn’t much left in the way of German resistance. Lomax and Saunders, Schoeller and Habeck, they all really went “all in” on possession of that building (and the +3 defense bonus it confers to whoever occupies it). Consolidating with Lt. Ferber, Pollock prepares to push north, out of the German reserve trenches, through their communication trenches, and into his first immediate target, the remaining German mortar pit.
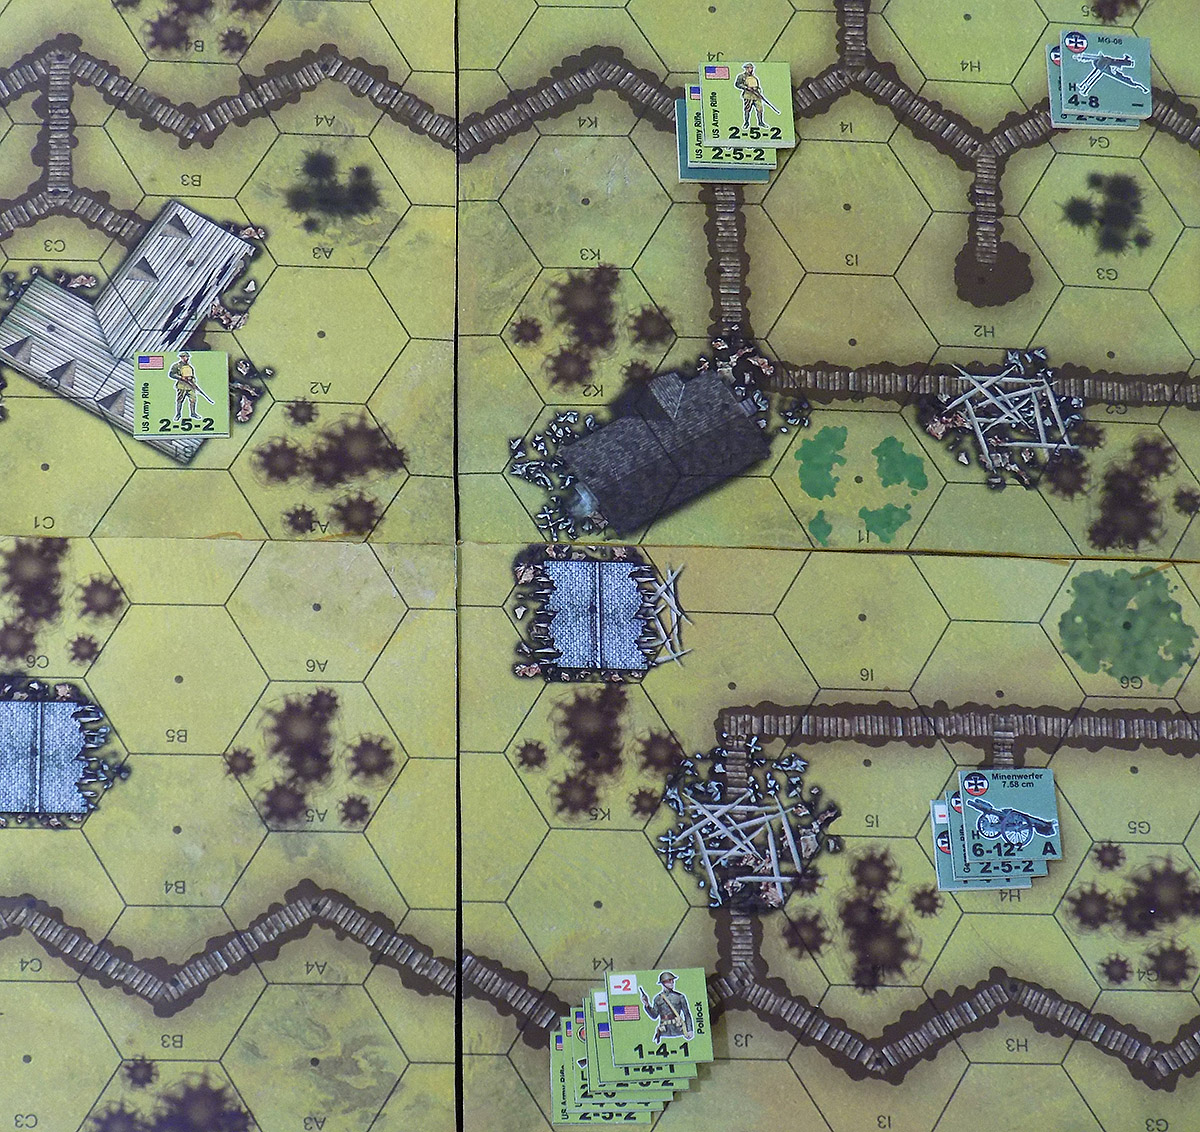
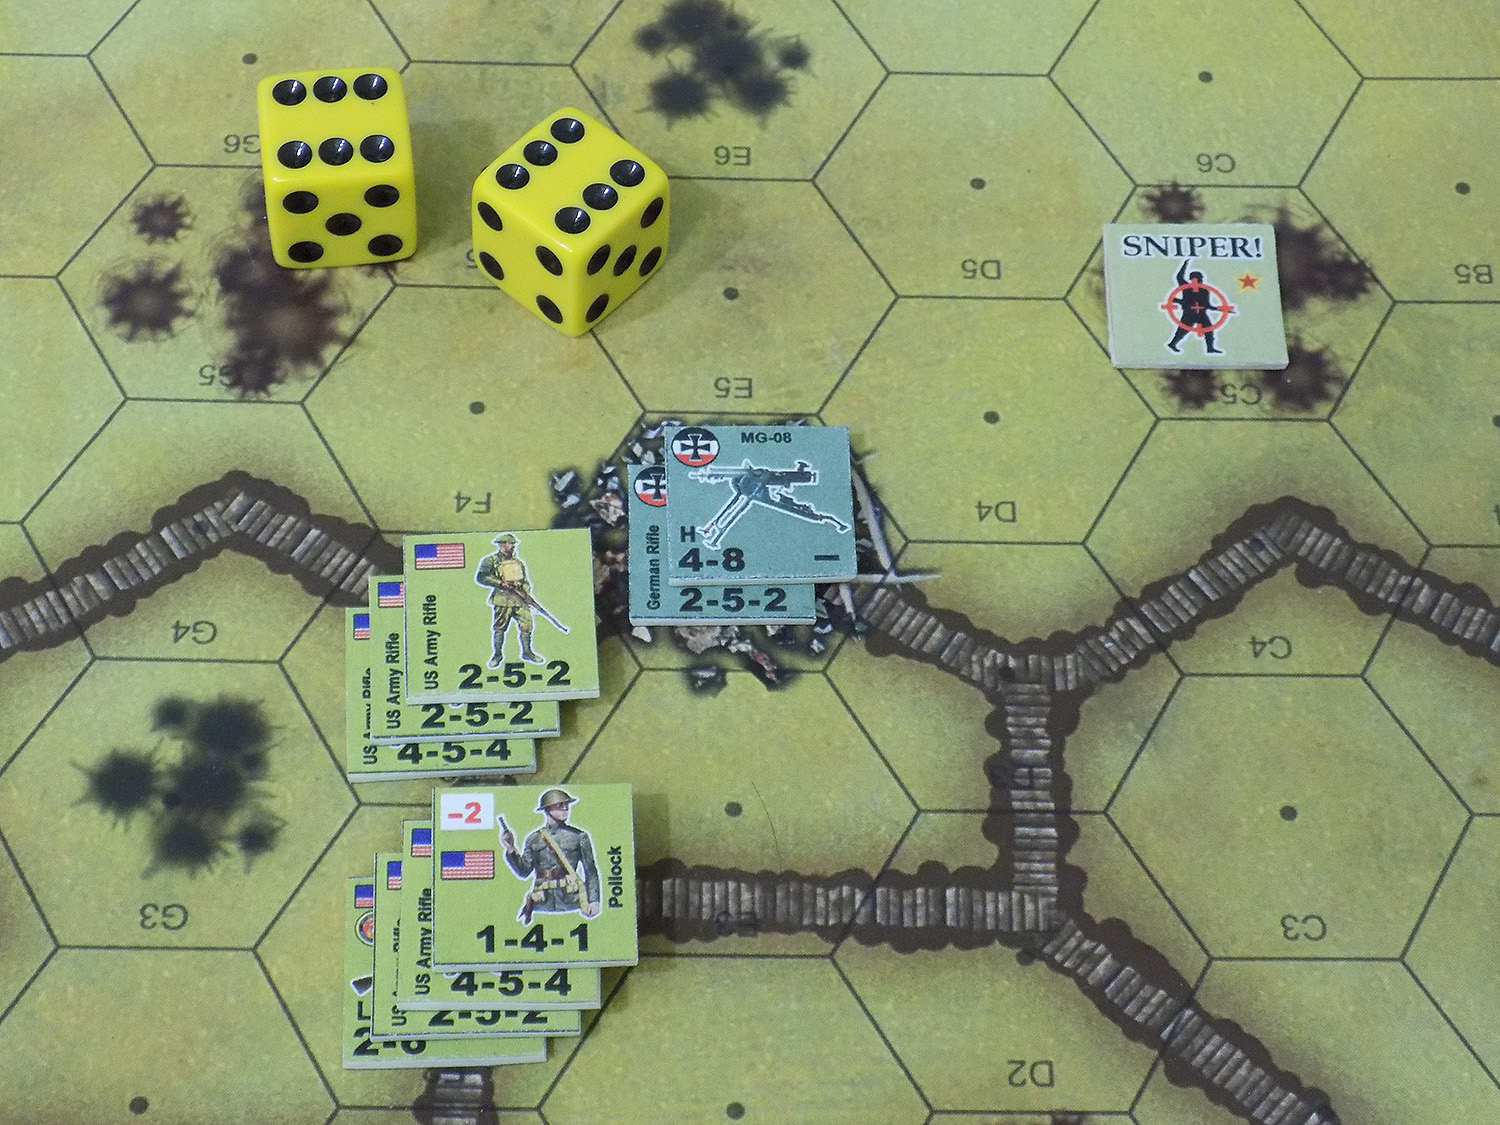
Pollock leads his assault in at the beginning of American Turn 5. Fortunately, heavy weapons like the mortar cannot help with opportunity fire, and Pollock and his men are within the weapon’s minimum range anyway (“6” is the firepower, “12” is the range, the small “2” after that is the minimum range. However, there is a mortar crew (half squad with rifles and pistols) and a German leutnant in there with a -1 leadership bonus. Pollock has chosen a route of assault that includes craters, slowing him down but he’s very close anyway and he wants the cover bonus. He only takes a casualty point to opportunity fire, which he resolved by pinning a fire team. Then the assault goes in and with a “5”, wipes out the mortar position.
Again, Pollock opts to pin units to account for his required casualty points (pretty much his whole stack). He feels safe doing this because (a) there are no German units nearby to counter-assault, (b) he occupies the German trench, which is a trench with a +2 cover bonus, and (c) he has a -2 leadership bonus, which will make it very likely he will rally these men at the end of his turn anyway.
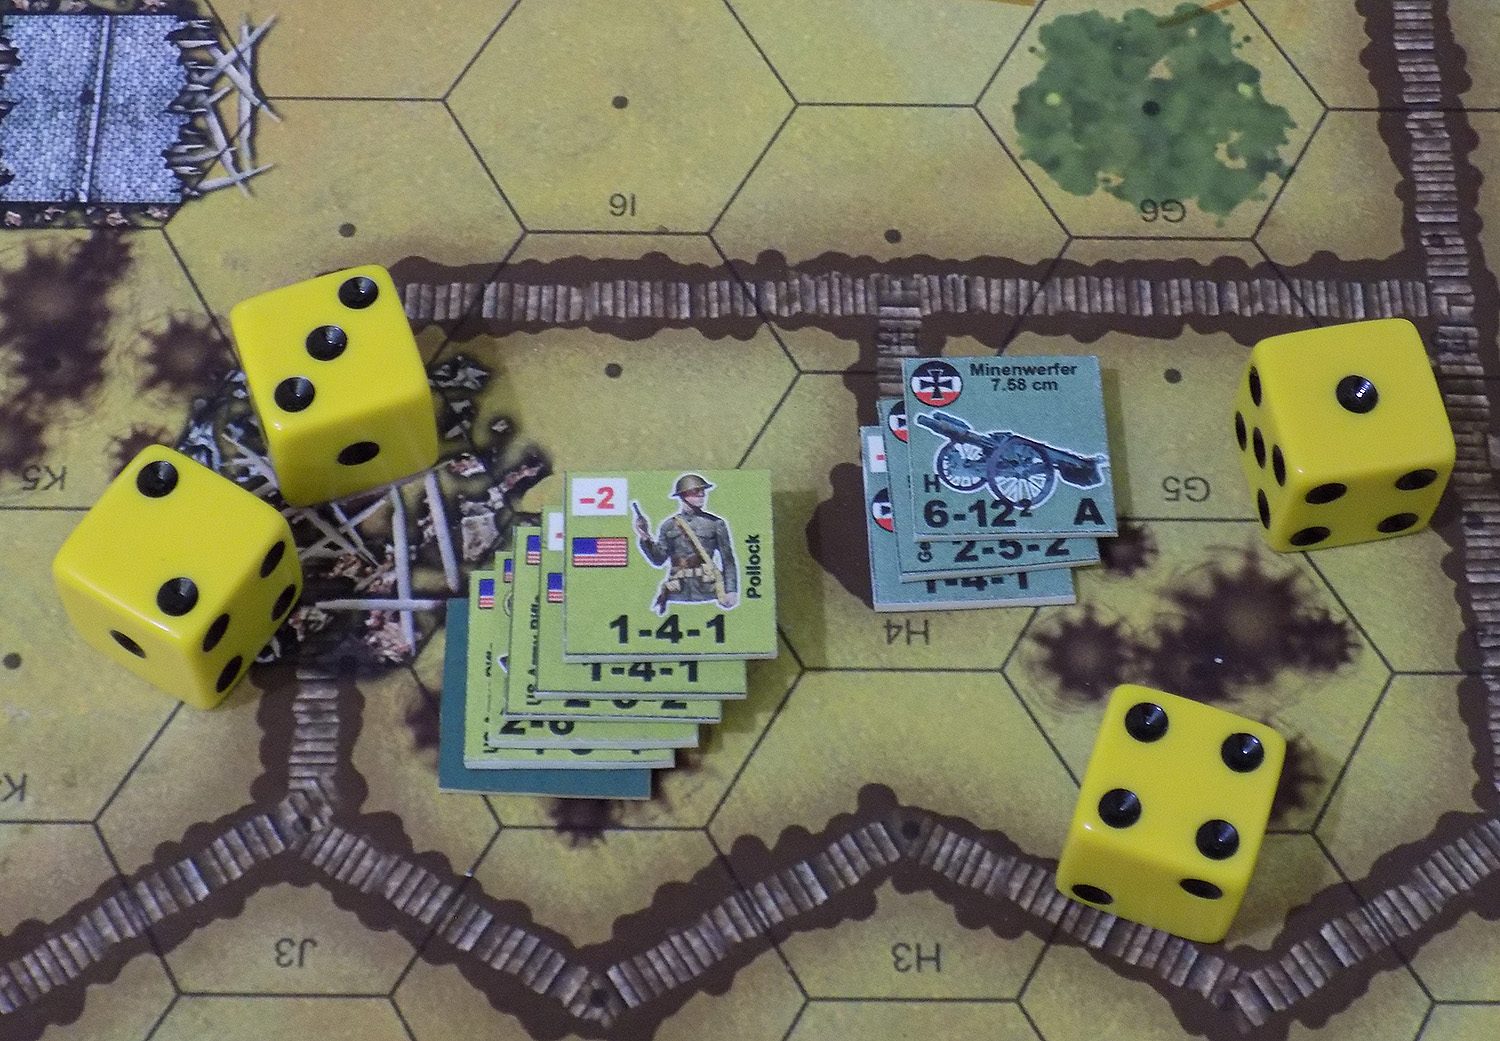
On the American Turn 6 (German MG fire has no lines of sight, so relocates to a rubble position for better defense), the Americans finally catch a bonafide stroke of excellent luck. No clever tactics here, they just get damned, damned lucky. German opportunity fire gets the worst possible roll, a 12. Not only doe sit do no damage to the approaching American infantry, but when an infantry unit rolls a 12 on an attack roll in this game, an enemy sniper suddenly appears. Snipers are handled in a rather abstract way in this game, they appear as if by magic anywhere within LOS of the enemy unit that rolled the boxcars. So the American sniper pops up in t hose craters (apparently he’s been belly-crawling through no-mans land all this time) and immediately attacks the German MG team. Sniper attacks are very simple, they roll a d6 minus the cover bonus of the target hex, and apply that many casualty points.
The sniper rolls a 4, -1 for the rubble, thus inflicting 3 casualty points. Only 2 German casualty points are in the hex, so they are wiped out. Pollock’s men assault t he hex only to find the Germans already dead or wounded by the sniper. It’s an anticlimactic ending, but by this point the Americans are just glad they aren’t taking any more casualties.
Thus ends the game. So did the Americans win?
Well, they cleared the German trenches in the allotted time … barely (Valor & Victory scenarios typically last six turns). So … yes. But did they take too many casualties? Possibly. This was a playtest game of the new trench boards, so I didn’t try to set up detailed victory conditions. But in a more formal, finalized scenario, the Americans would have had to take the trench in the allotted time, and have “x” number of intact squads left to meet German counterattack from off the south edge of the table.
So with only 27 officers and men out of an original assault force of 198 … I don’t know if I would call this an American victory. Those early assaults were very ham-fisted, not very tactical, and very bloody. Then again, many German diaries and battle reports of the actual period recount that this is just how American units tended to fight in 1918 – fresh to the war so still very brave to the point of recklessness, but tactically somewhat unskilled.
Again, just because 171 Americans and 174 Germans have been “eliminated” doesn’t mean they are all dead. Their units have been rendered combat ineffective. The usual estimations for early 20th Century combat usually runs about half the men in a “combat ineffective” unit being actual casualties, with about one third of the casualties being killed outright. So German and American losses each ran about 27 killed and 54 wounded (81 total casualties).
As for the trench boards, there are a few clarifications I want to draw up for lines of sight, but other than that I think they worked great. As for Valor & Victory, every time I play this game I’m reminded again how much I love it. It’s quick, easy, extremely tactical, pleasantly realistic (without mind-numbing levels of detail) and best of all, it’s free. It’s a little bit of work to print the boards and counters …
… but definitely worth it if hard-core tactical, historical wargaming is your thing.


Leave a Reply