


![How To Paint Moonstone’s Nanny | Goblin King Games [7 Days Early Access]](https://images.beastsofwar.com/2024/12/3CU-Gobin-King-Games-Moonstone-Shades-Nanny-coverimage-225-127.jpg)


Valor & Victory - 1918 (German v. French Megagame)


Trench Assault! (Part Five) - Valor & Victory 1918 Edition
Good afternoon, Beasts of War history fans …
Okay, time to wrap up the trench battle in Valor & Victory: Great War 1918 Edition.
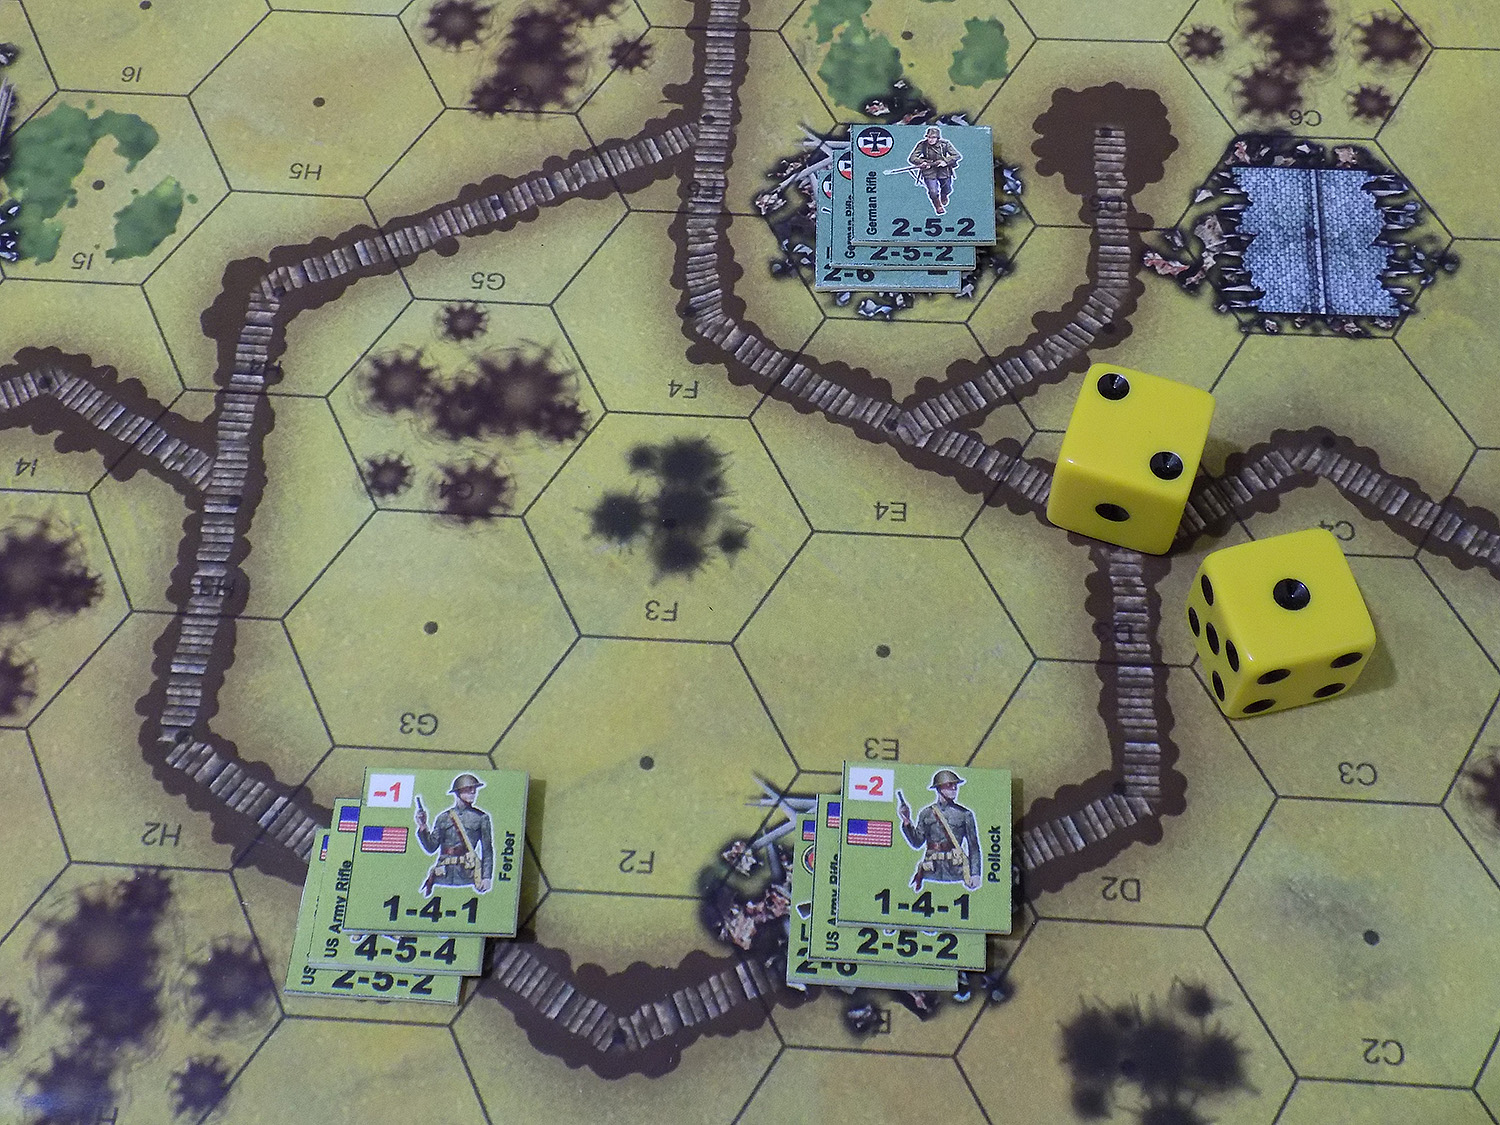
We start off in the southern part of the breached German trench system, where Captain Pollock wants to assault the next German strongpoint but cut down on his company’s losses. Casualties are becoming a real problem here, the Americans are in serious danger of running out of men before the Germans run out of trenches.
Normally in Valor & Victory, the proper methodology to these kinds of assaults is usually a rough representation of real-life military “fire and maneuver” tactics, where your “base of fire” element force pours down fire on the target and pins them down, while your “maneuver” element flanks to one side or the other and assaults.
We’ve been running into two problems on this trench table, though. One, once we’re down in the trenches, there is almost never a long enough line of sight for any kind of “base of fire” or “overwatch” element. Two, the weapons of 1918 just aren’t powerful enough to seriously weaken or even pin significant units, the Americans have felt compelled to simply launch the assault “cold” (and pay the predictably horrific cost in casualty points).
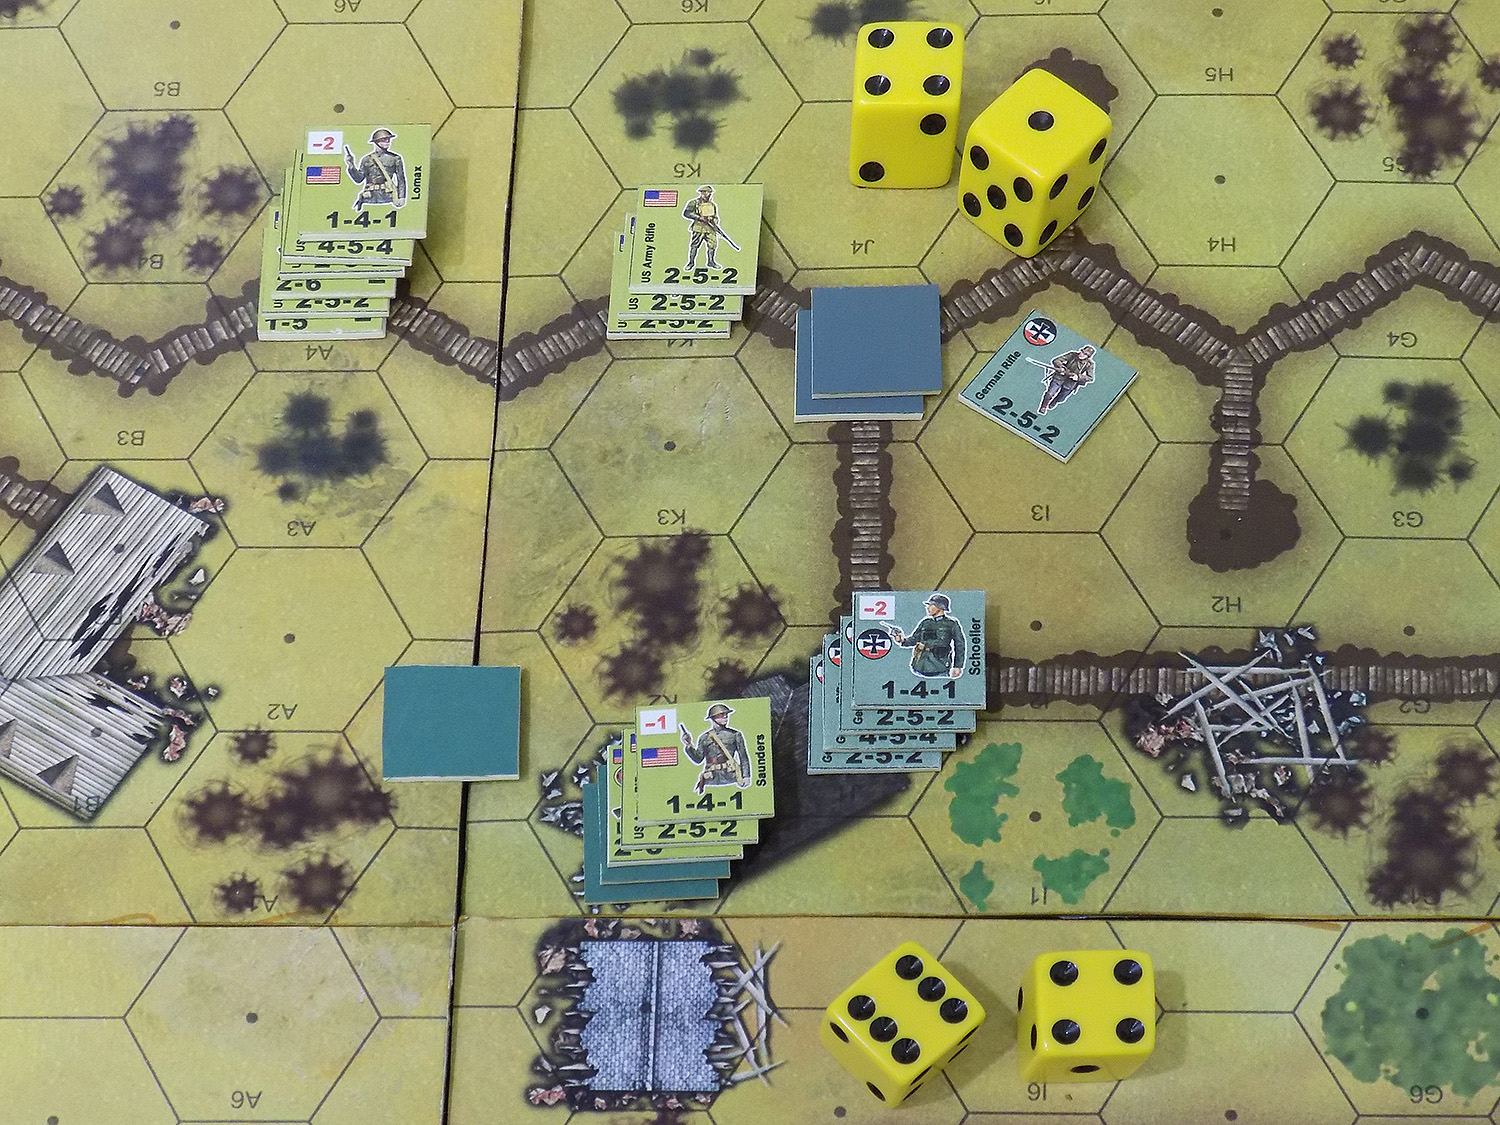
Here, though, the Americans at last have no choice. Pollock and his half-squad (carrying a Lewis Gun) elect to put down fire on the Germans in that rubble pile, while Lt. Ferber leads the assault. The math works out that Pollock’s stack is better as the overwatch, because his -2 leadership bonus actually yields more of a benefit than the additional 2 points of firepower in Ferber’s stack.
But Captain Pollock scores huge on the dice Check out that “3”! Remember that low rolls are better in this game! Not only does Pollock and his Lewis Gun team pin down the two German half-squads in that stack (one of them is carrying an MG 08 15 LMG), but actually kills them outright! No assault is even necessary!
Up north, Captain Lomax is up against more serious opposition. That ruined building the Germans occupy (Leutnant Habeck) gives a +3 defense bonus, and is manned by 16 men, including another LMG. Habeck himself also confers a -1 leadership bonus. That is going to be one tough nut to crack.
Lomax’s stack unloads on Habeck’s position, with a “6” pins one of the half squads. It’s not much, but as Lieutenant Saunders prepares his men for the grim assault, every little bit will help.
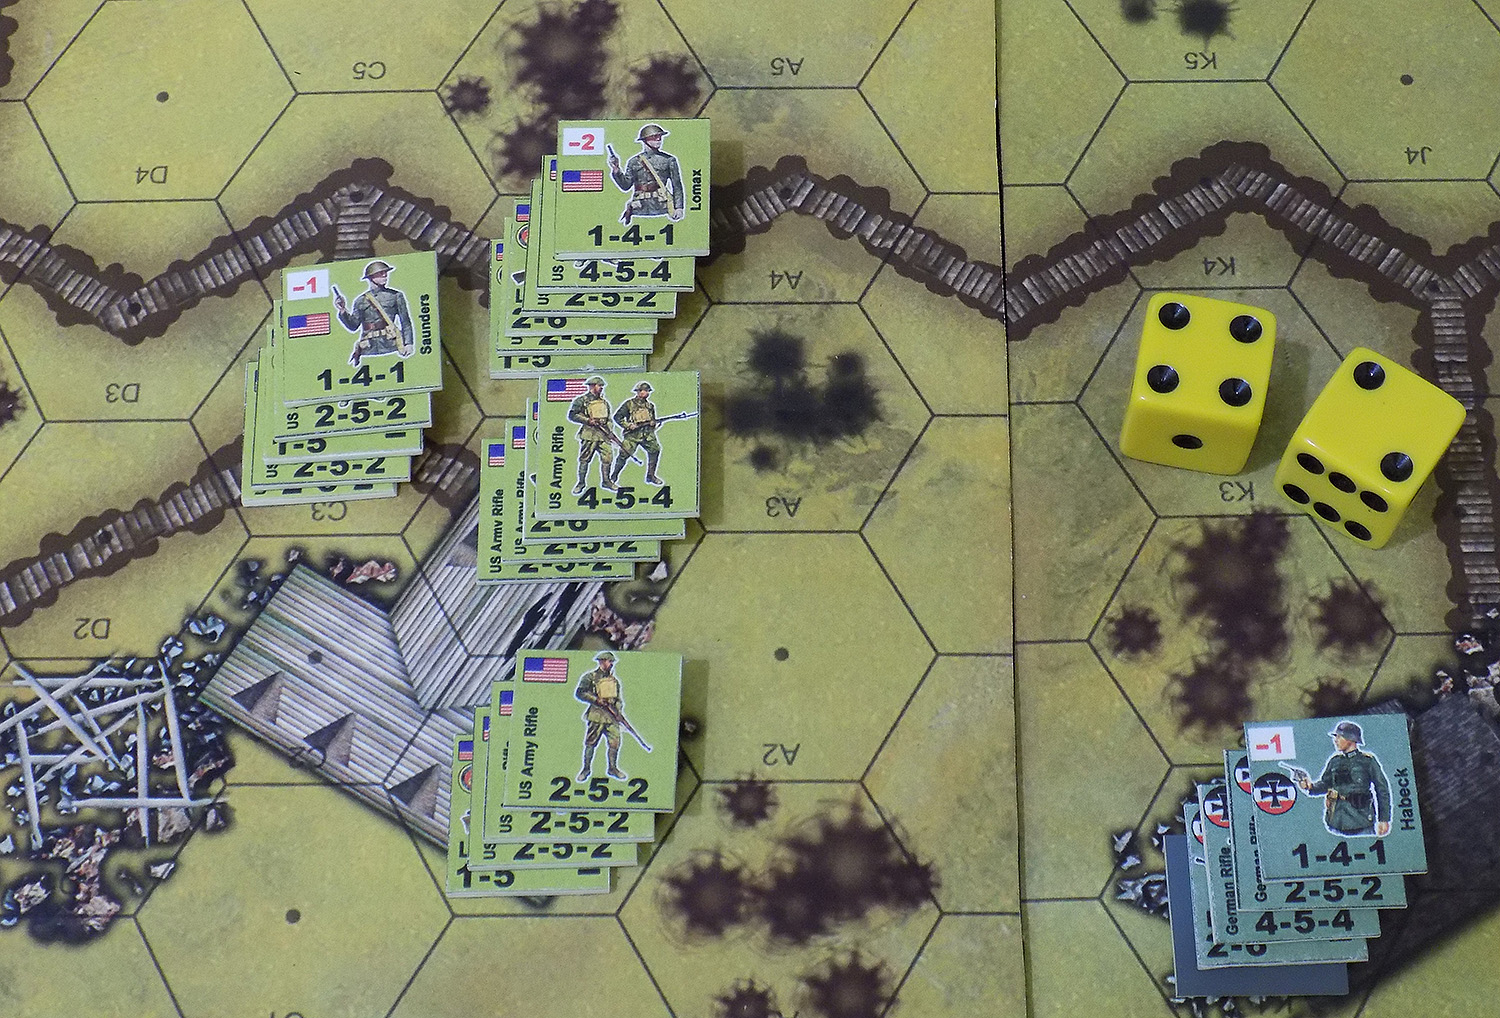
The assault goes in, and German opportunity fire is horrendous. Two half squads are eliminated outright, a third is pinned down. Saunders keeps feeding more men into the charge, not stopping until is stack is at maximum allowed for one hex. At least now they’re in a crater, when they launch the assault.
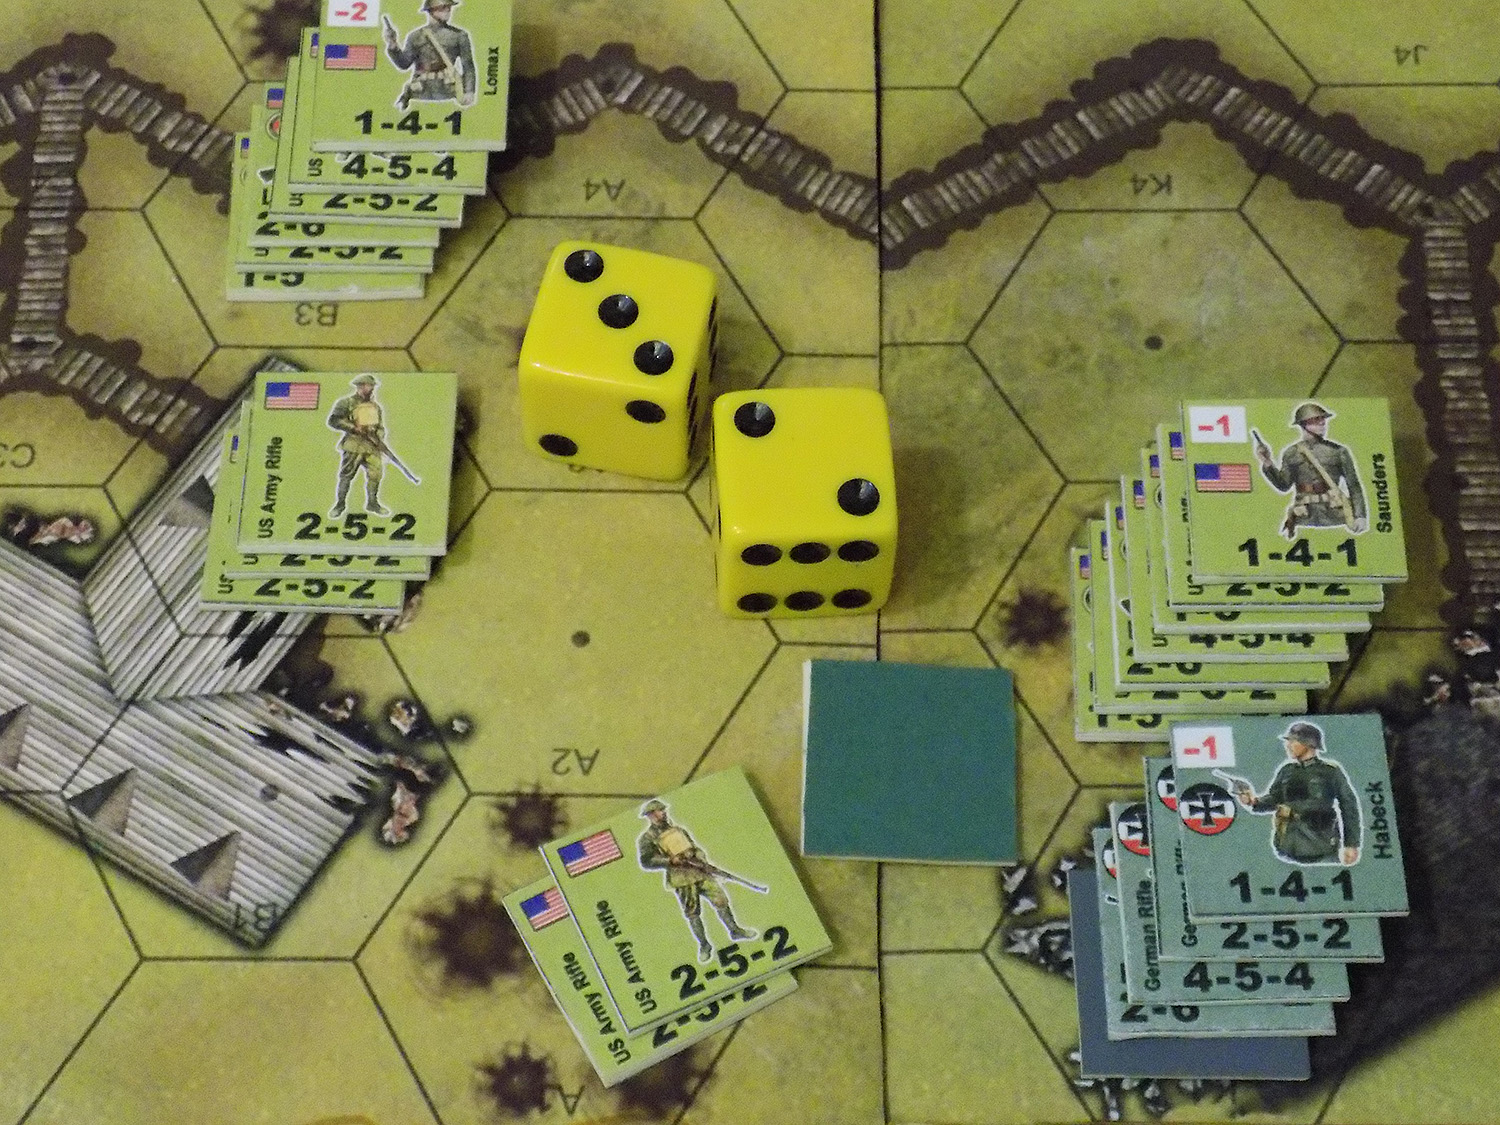
Saunders’ assault clears eliminates Habeck’s platoon and clears the position. In an effort to keep casualties down, Saunders elects to “pin” some of his units rather than let them be eliminated (owning player gets to choose how to account for required casualty points, as long as he accounts for all points inflicted by the enemy). The trade off is, when you’re pinning you must pin much MORE than if you’re taking eliminated casualties. Saunders is gambling that he can rally his units before the Germans can counter-assault (any assault that hits pinned units – pinned units are automatically eliminated at no cost to the attacker). He gets to apply a -1 bonus to his difficulty on this roll (leadership). However he doesn’t roll very well, and two of his fireteams remain pinned as sure enough, Hauptmann Schoeller leads his men in for a counter-assault.
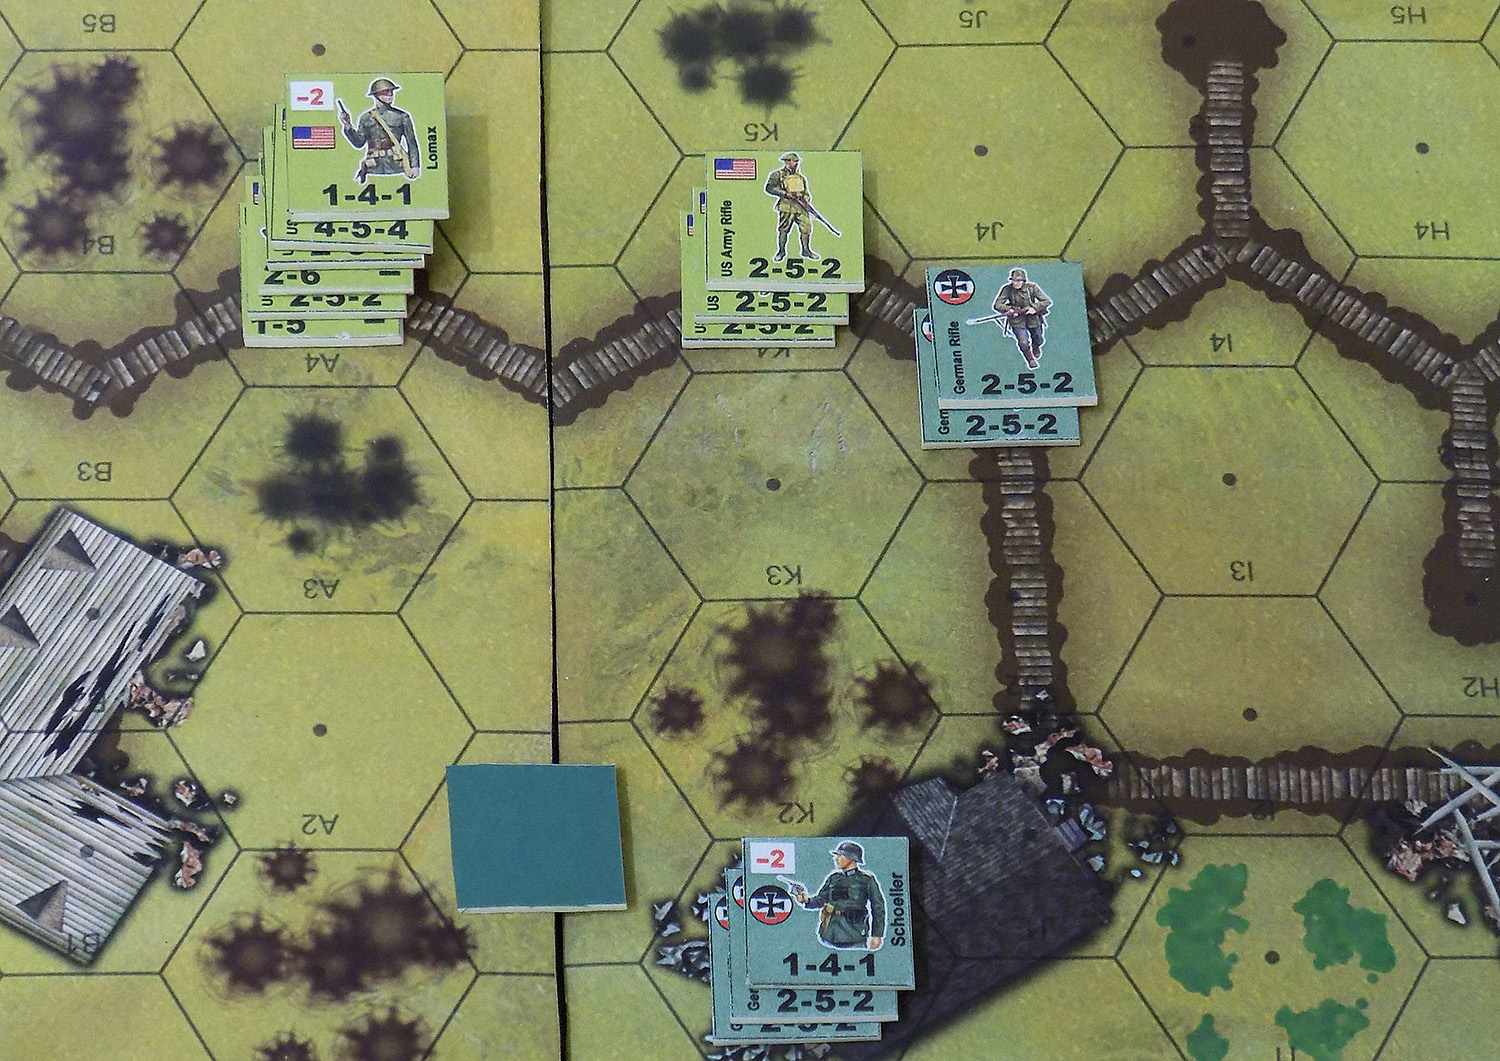
Now Lomax has foreseen this possibility. Note the three 2-5-2 fireteams deployed forward at the trench junction, ready to take opportunity fire on the Germans as they make that left turn down the trench to attack Saunders in the “Habeck House.” Sure enough, Schoeller sends units through this junction, and those three American rifle teams knock down one German fire team and pin two more. But then Schoeller himself leads more troops down that trench (and those 2-5-2s have already fired). They reach the building for their assault. Saunders’ men take opportunity fire, but have two major drawbacks here … they are badly weakened since two of their units are still pinned (and can’t contribute) and the German assault is already in the other half of the building, so gets the =3 building cover bonus (this is now an assault inside a ruined German bunker)!
Saunders’ opportunity fire does nothing (note the “10” – a rather bad roll). Schoeller’s assault goes in, and Saunders’ pinned units are immediately and automatically eliminated… even before the dice are rolled.
Saunder’s squads are eliminated (killed, wounded, captured, scattered, or otherwise rendered combat ineffective). Schoeller has paid a steep price for this assault, but again has re-taken “Habeck House!” The two half-squads up at the trench junction have rallied, and it looks like the Germans might still manage to repel this American assault!
This highlights the dangers of trying to pin too many of your units to account for casualty points, rather than “bite the bullet” and kill a smaller number of them. In the long run, Saunders wound up losing much more. Furthermore, setting up proper overwatch positions (like Lomax’s three fireteams at the trench junction) can help with preventing enemy counterassaults. Also, care must be taken to not assault units too deep into enemy positions, where you wind up being closer to enemy counterattack units than you are to friendly supporting units. And finally, the importance of leaders who can rally pinned units and prepare them to meet that enemy counter-assault.
In short, this game is fast, simple, and brutal, but also very tactical. The tactics are hidden in the turn sequence, the math, the bonus, the resolution tables. It’s not laid out on cards or stat lines. You have to practice the game, learn how squads and platoons work in overwatch, base of fire, and maneuver elements …
…and we’re not even using ALL the rules (MG fire lanes, assault movement, etc.).


Leave a Reply