![O-12 Infinity Fast Response! Firebat Attack Wing Unboxing & Review [7 Days Early Access]](https://images.beastsofwar.com/2026/01/unboxing-corvus-belli-infinity-firebat-attack-wing-coverimage-225-127.jpg)


Infinity Terrain


Recommendations: 942
About the Project
designing, Building and painting Infinity terrain, plain and not so simple...
Related Game: Infinity
Related Company: Corvus Belli
Related Genre: Science Fiction
This Project is Completed
Milestone achieved!
I started this project late last year and started this project in May. My goal was to make an upgraded Ice Storm Mototronica set I could use on my tables of infinity. I would then branch off and make my own things based on my experience of sort of copying others designs/ Even though they were 2D and were only ever meant for to be 2D. I expected this would take a few months. Through distraction and expansion it had taken about three times that from conception. I am glad the initial phase is done.
I have learned a little (probably a lot) on my way not only am I at now at one with my crap laser cutter. I know what it can and cant do and how to get over the quirks of materials and software. I also learned a lot on assembly for efficacy and cleanness.
These are lessons I can take on in the next step of this project for making more of my own buildings.
I already have a medical centre in mind but I am open to other types of non-residential buildings so if you have a suggestion let me know. The power hubs need to power something and the management modules need to manager things as well.
Enough of the future and the past. Now for the present! I have finished though I have just seen in the photo’s I have missed off some weathering powder. So 99% finished.
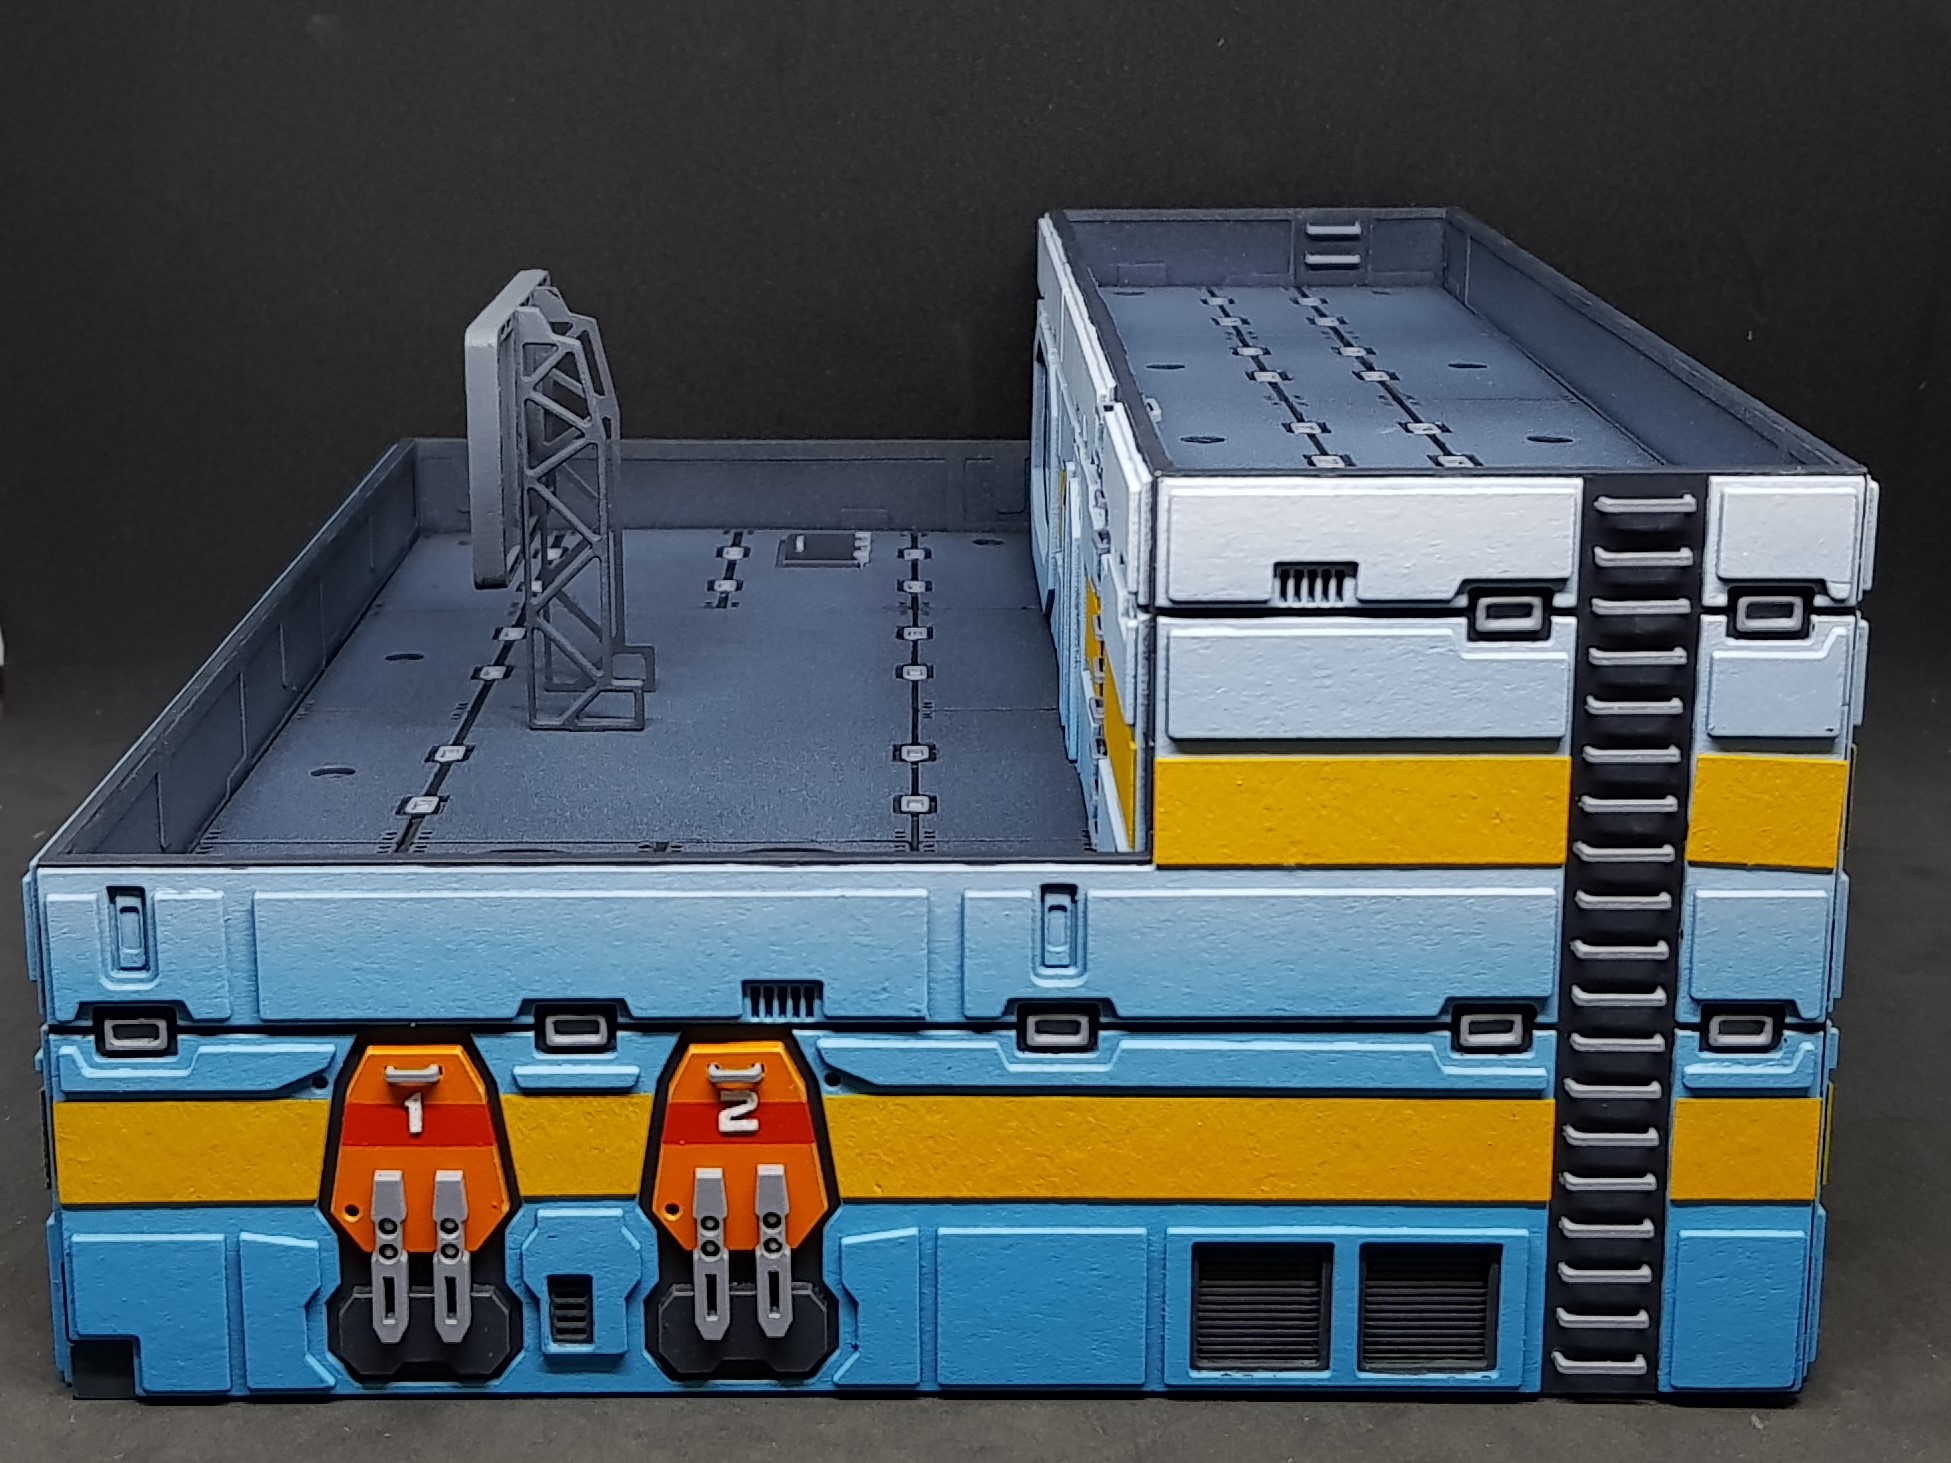
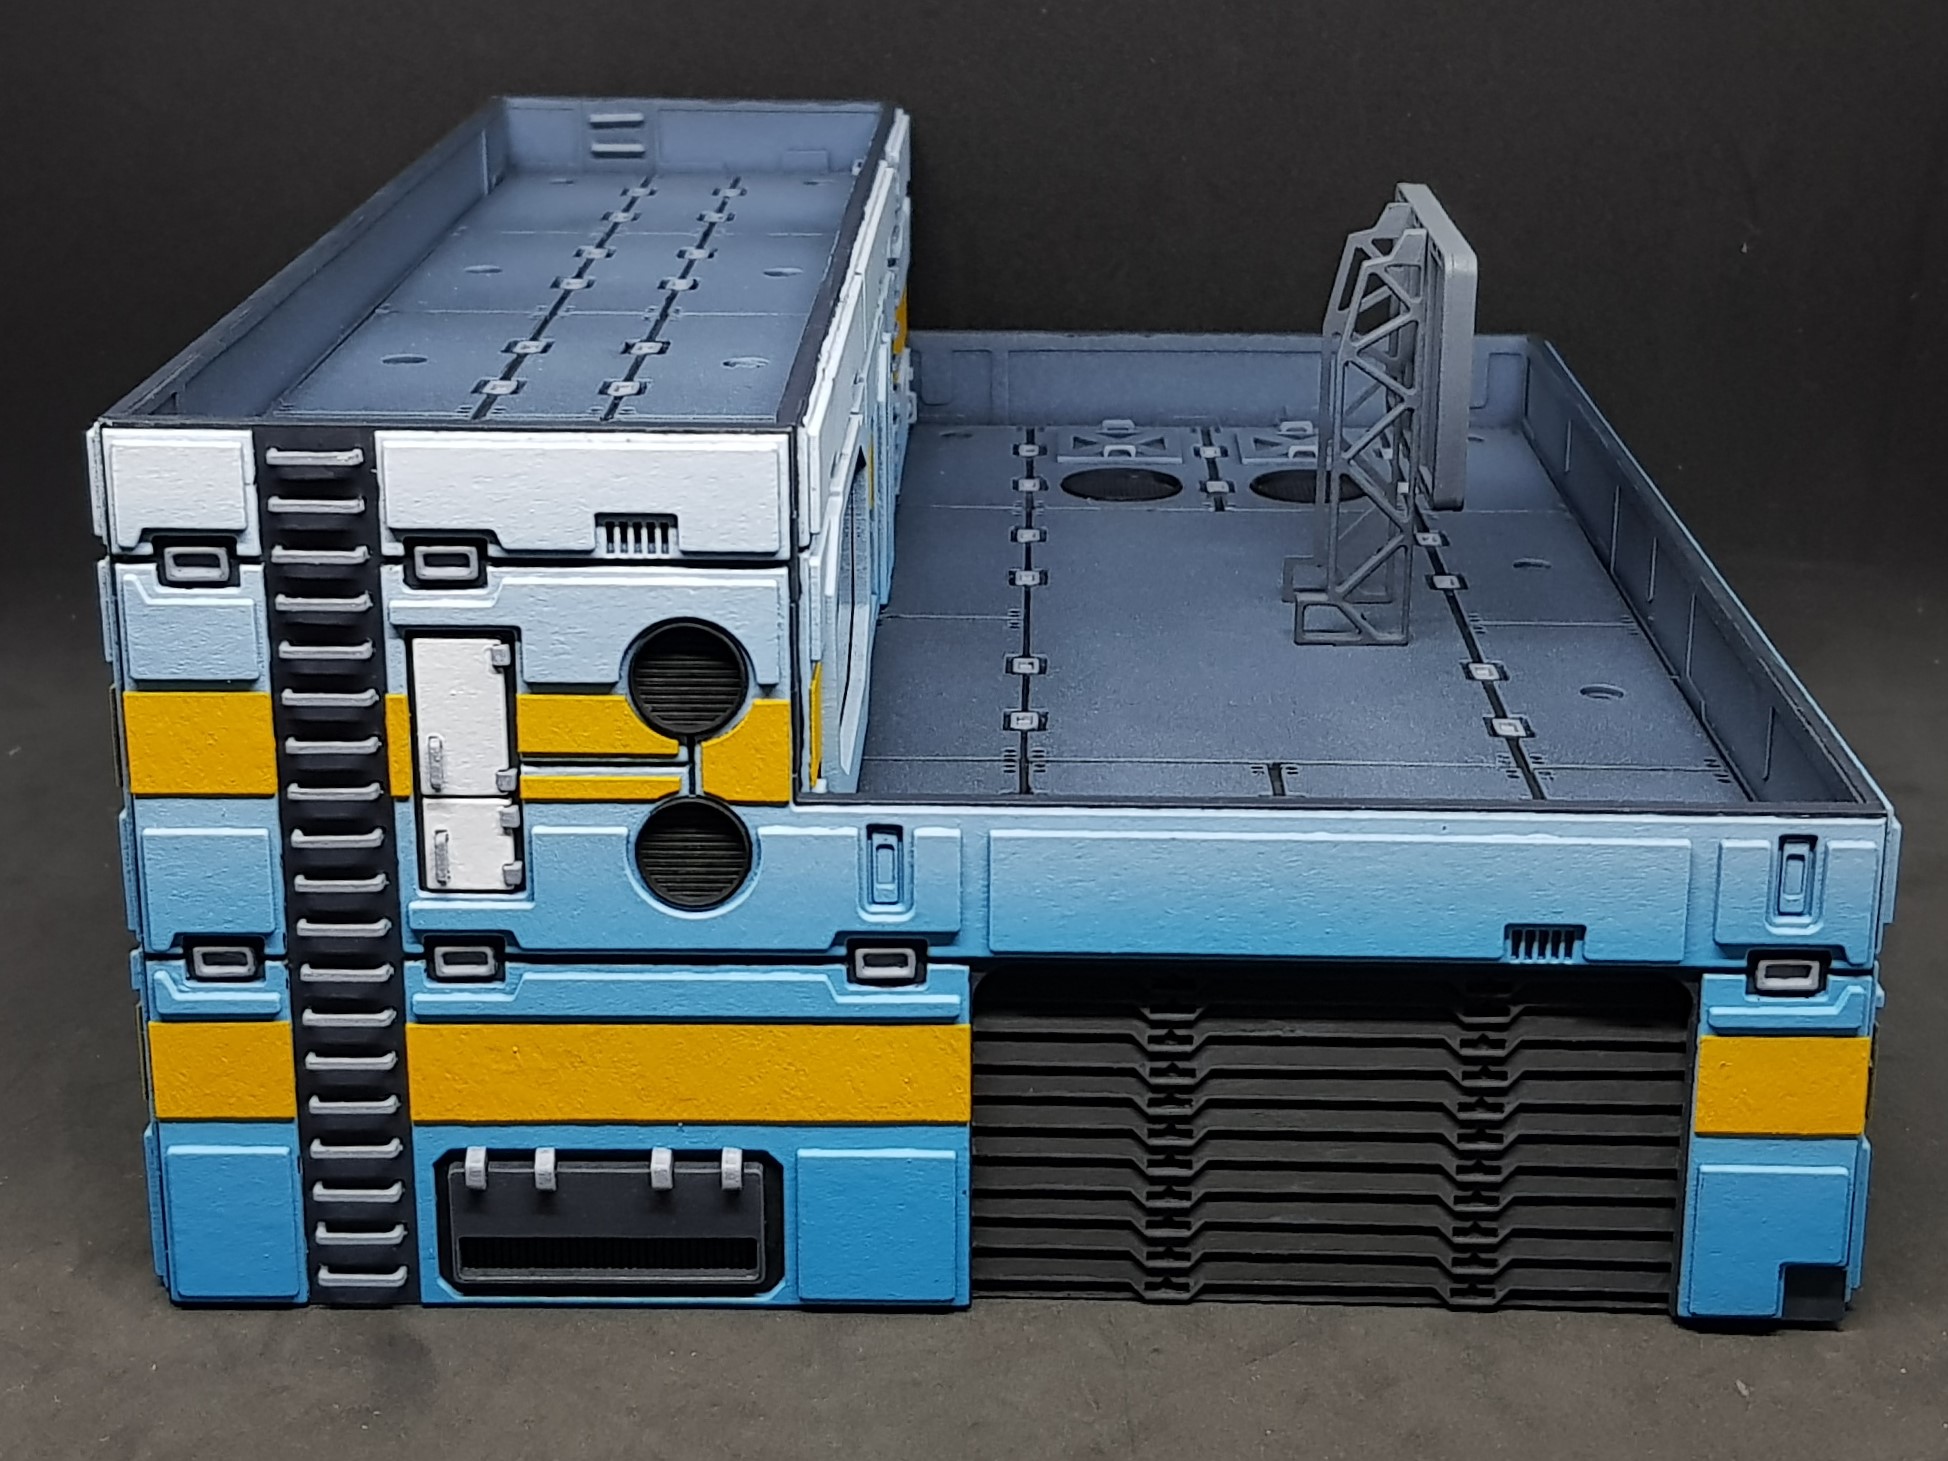
 All three Main Management Modules.
 The three roofs side by side.
 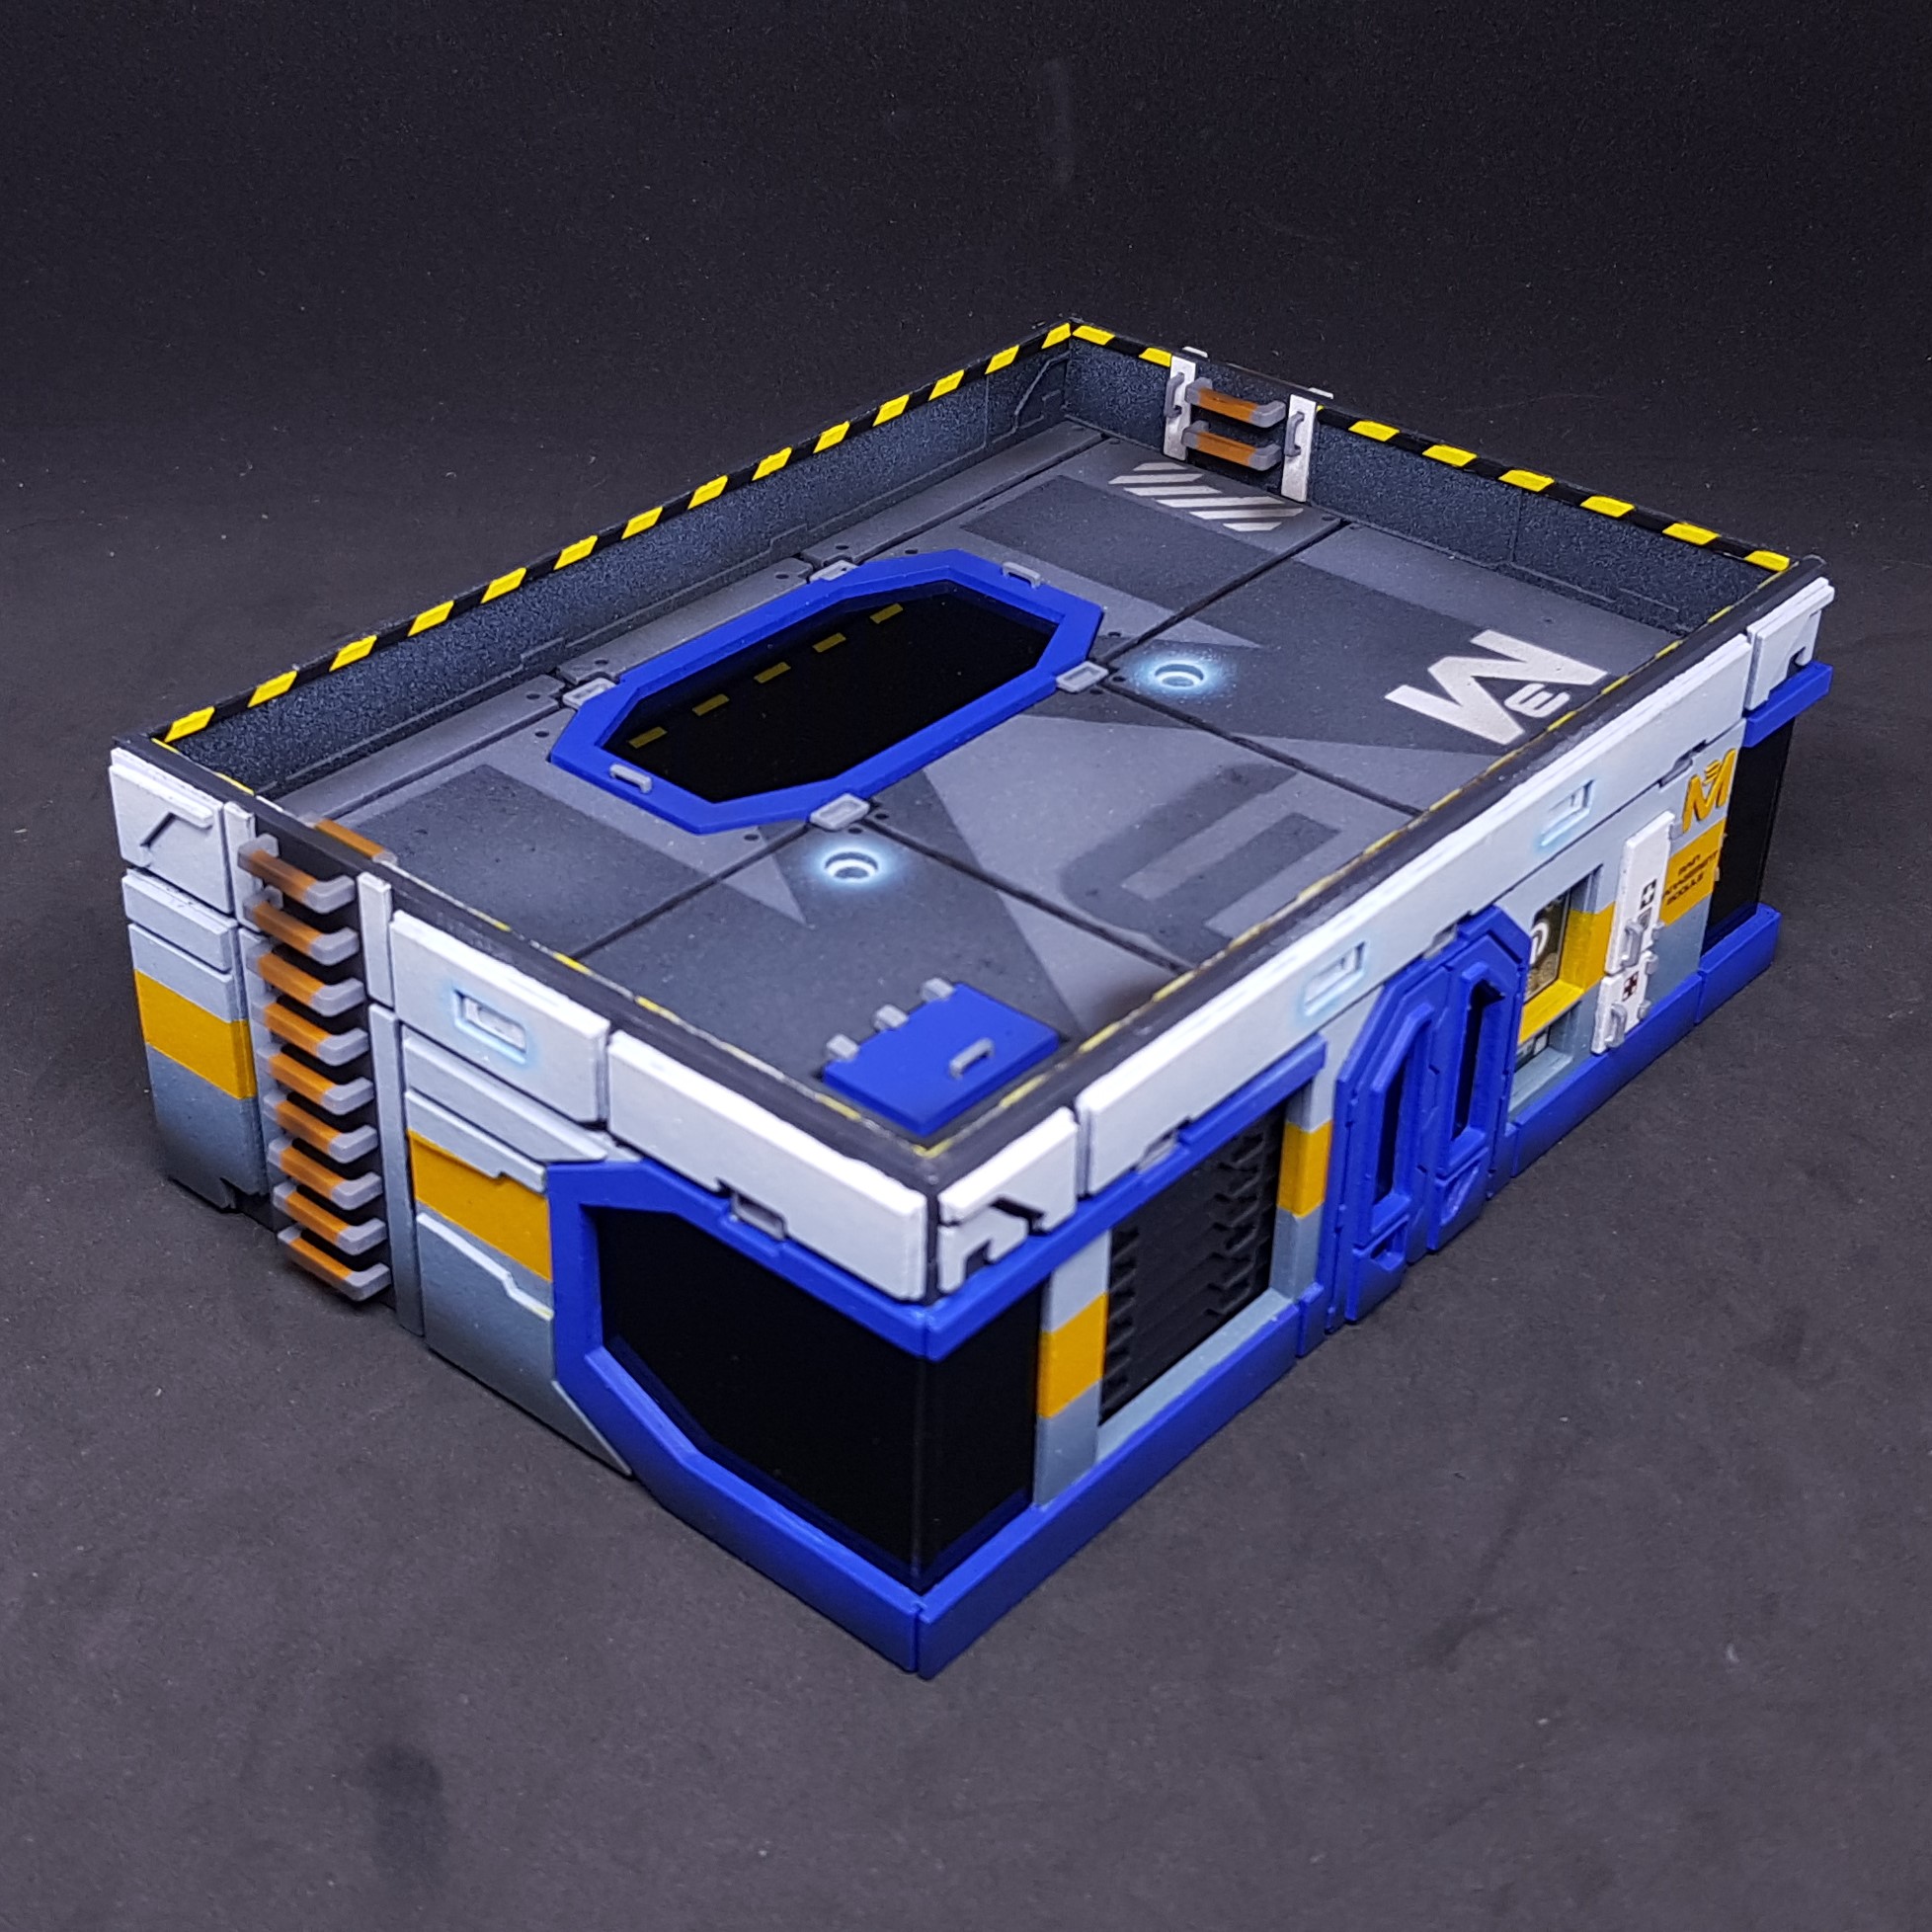 Front side of Main Management Module 3.
 Back side of Main Management Module 3.
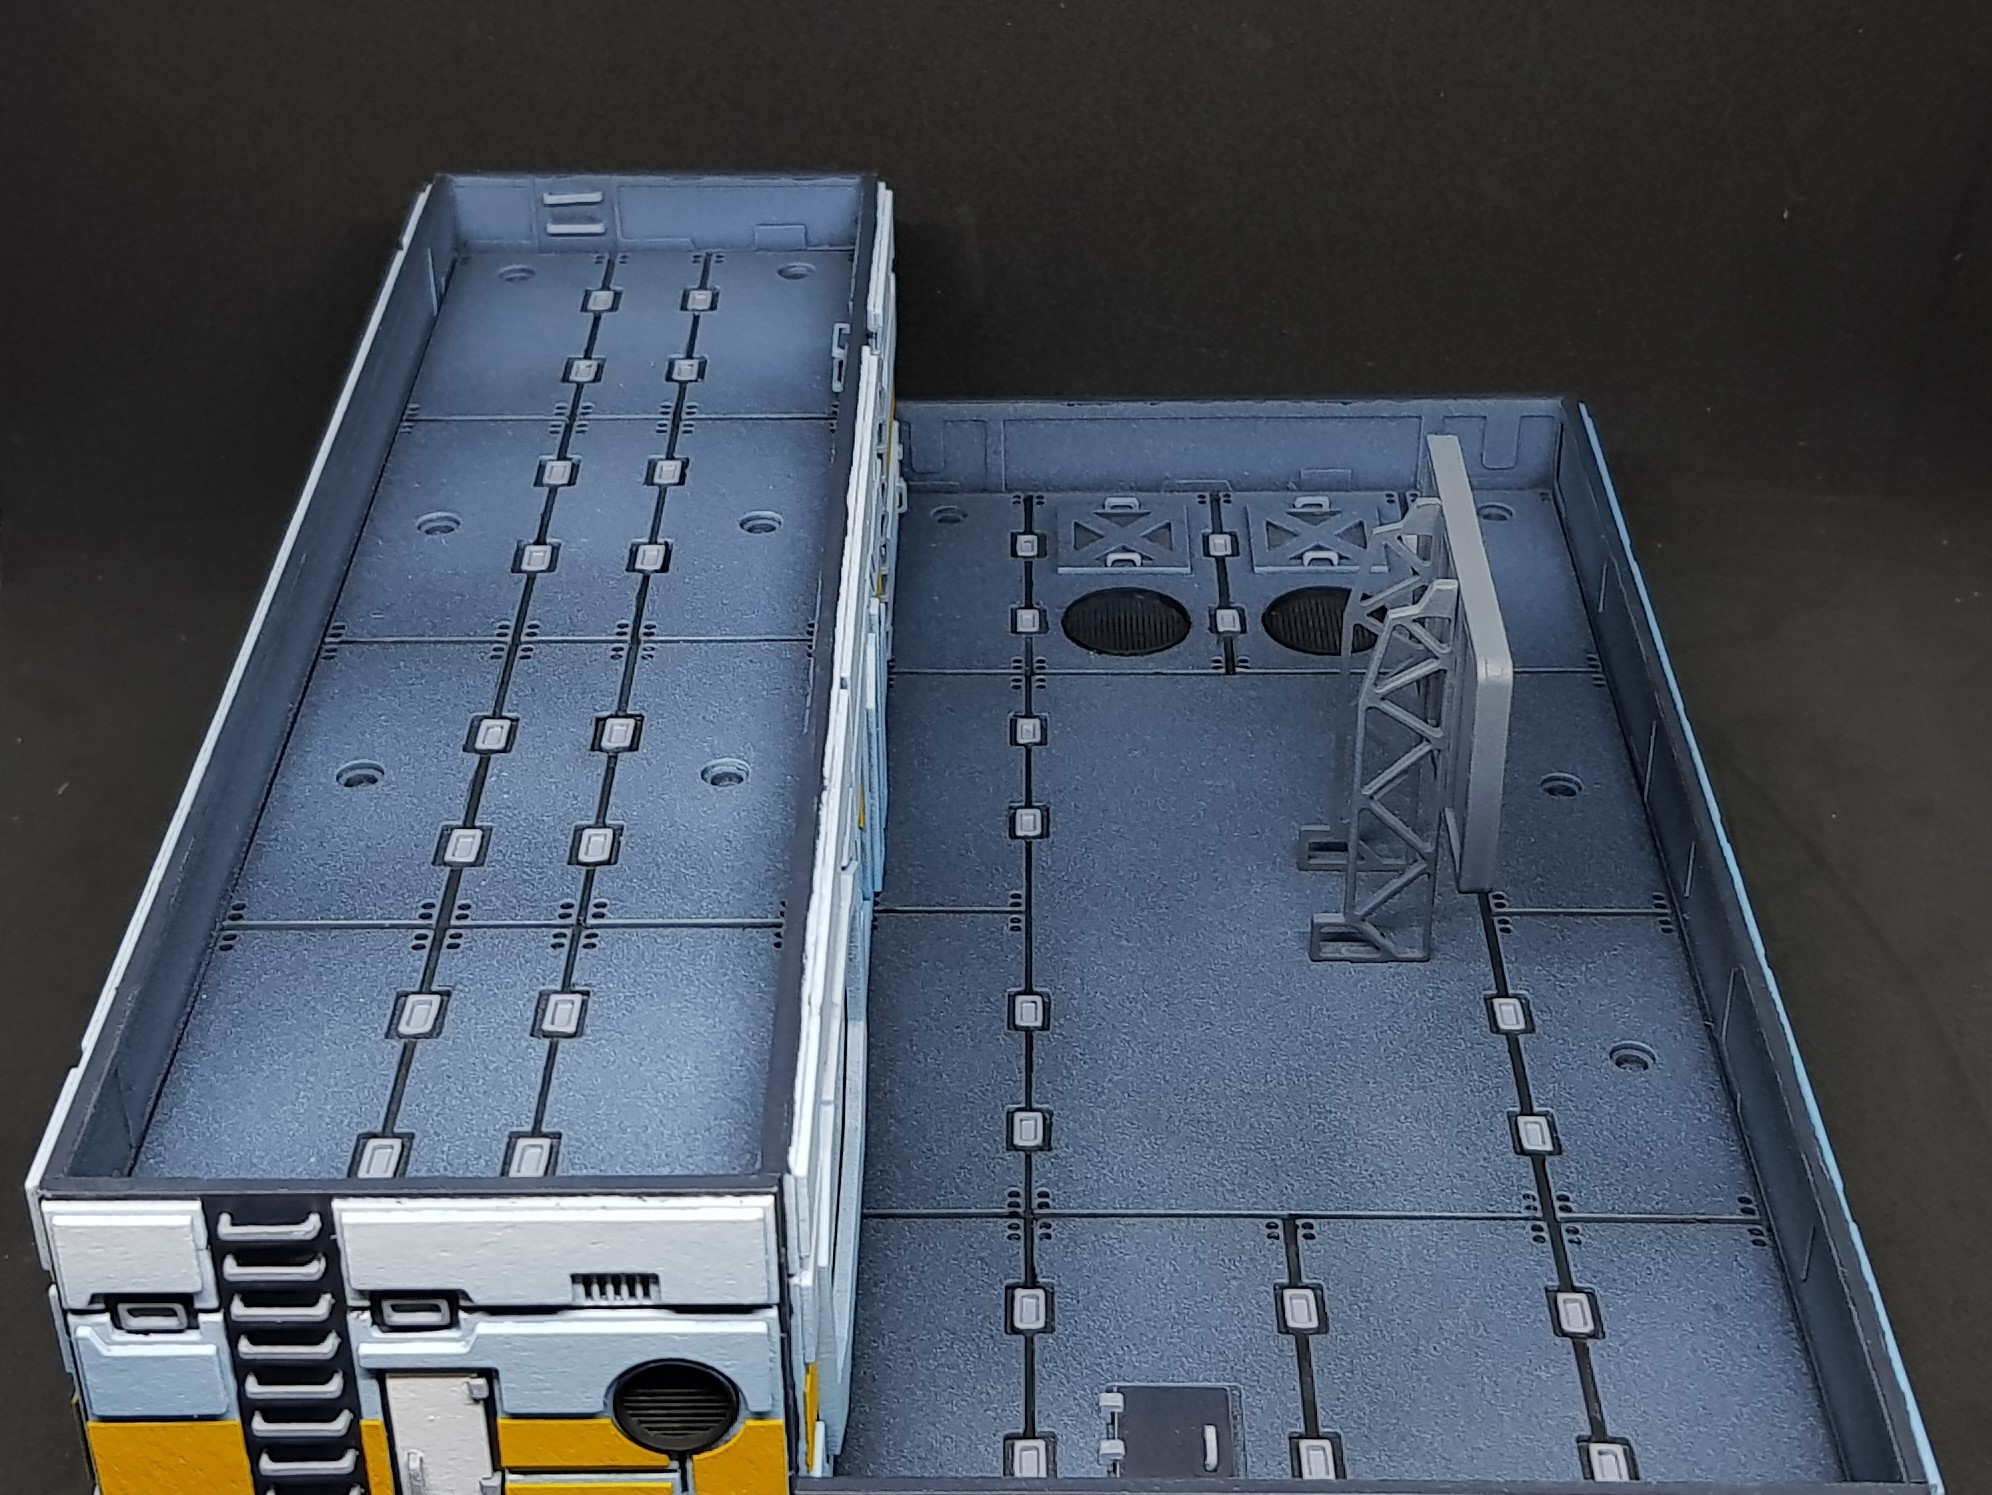
 Operation Ice Storm starter sceanery. (too big for my little light box)
So there I have it. Milestone achieved. The only thing missing is some resin 3D printed components. I have my fingers crossed for Christmas so this may expand and complicate my building options.
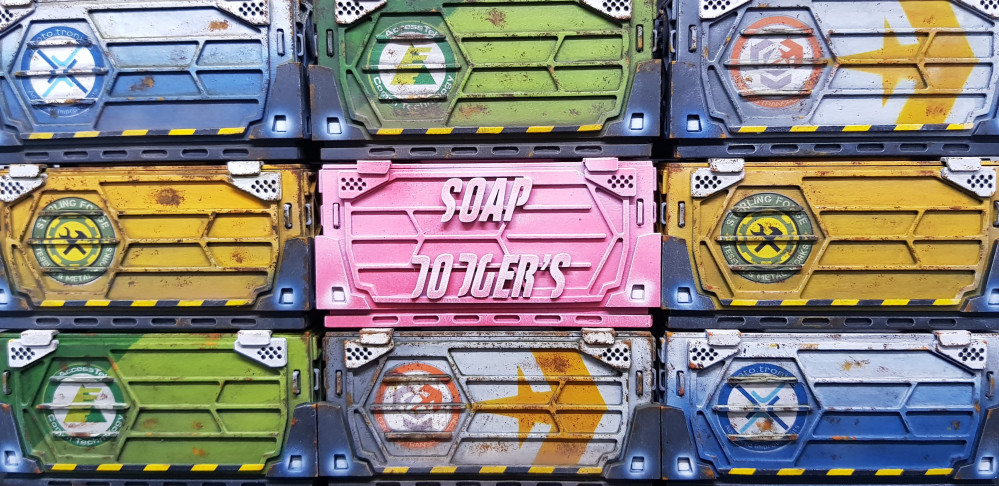
So far for infinity only I have:
- 11 Containers
- 3 Power Hubs
- 3 Management Modules
- 1 Vending machine
- 1 Plan Lab
I thought about just moving onto the next starter set. I don’t want to do this. I want to finish a table full of sceanery first then do one more starter set type probably JSA.
Plans I have started:
- Large billboards
- Medical centre
Thoughts I have had:
- Vehicle pad (never seen one of these I like and would include a vehicle)
- Workshop of some kind
- Robotics factory
Please feel free to let me know any suggestions which would fit this setting. I am thinking small scale start-up companies and research based additions with scope for levels, glass and visible sections but not interior play. It does need to have a narrative of some sort.
Oh well I hope you have enjoyed this so far, I gave enjoyed looking through it again and this is great for remembering lessons and how I done things. More to come!
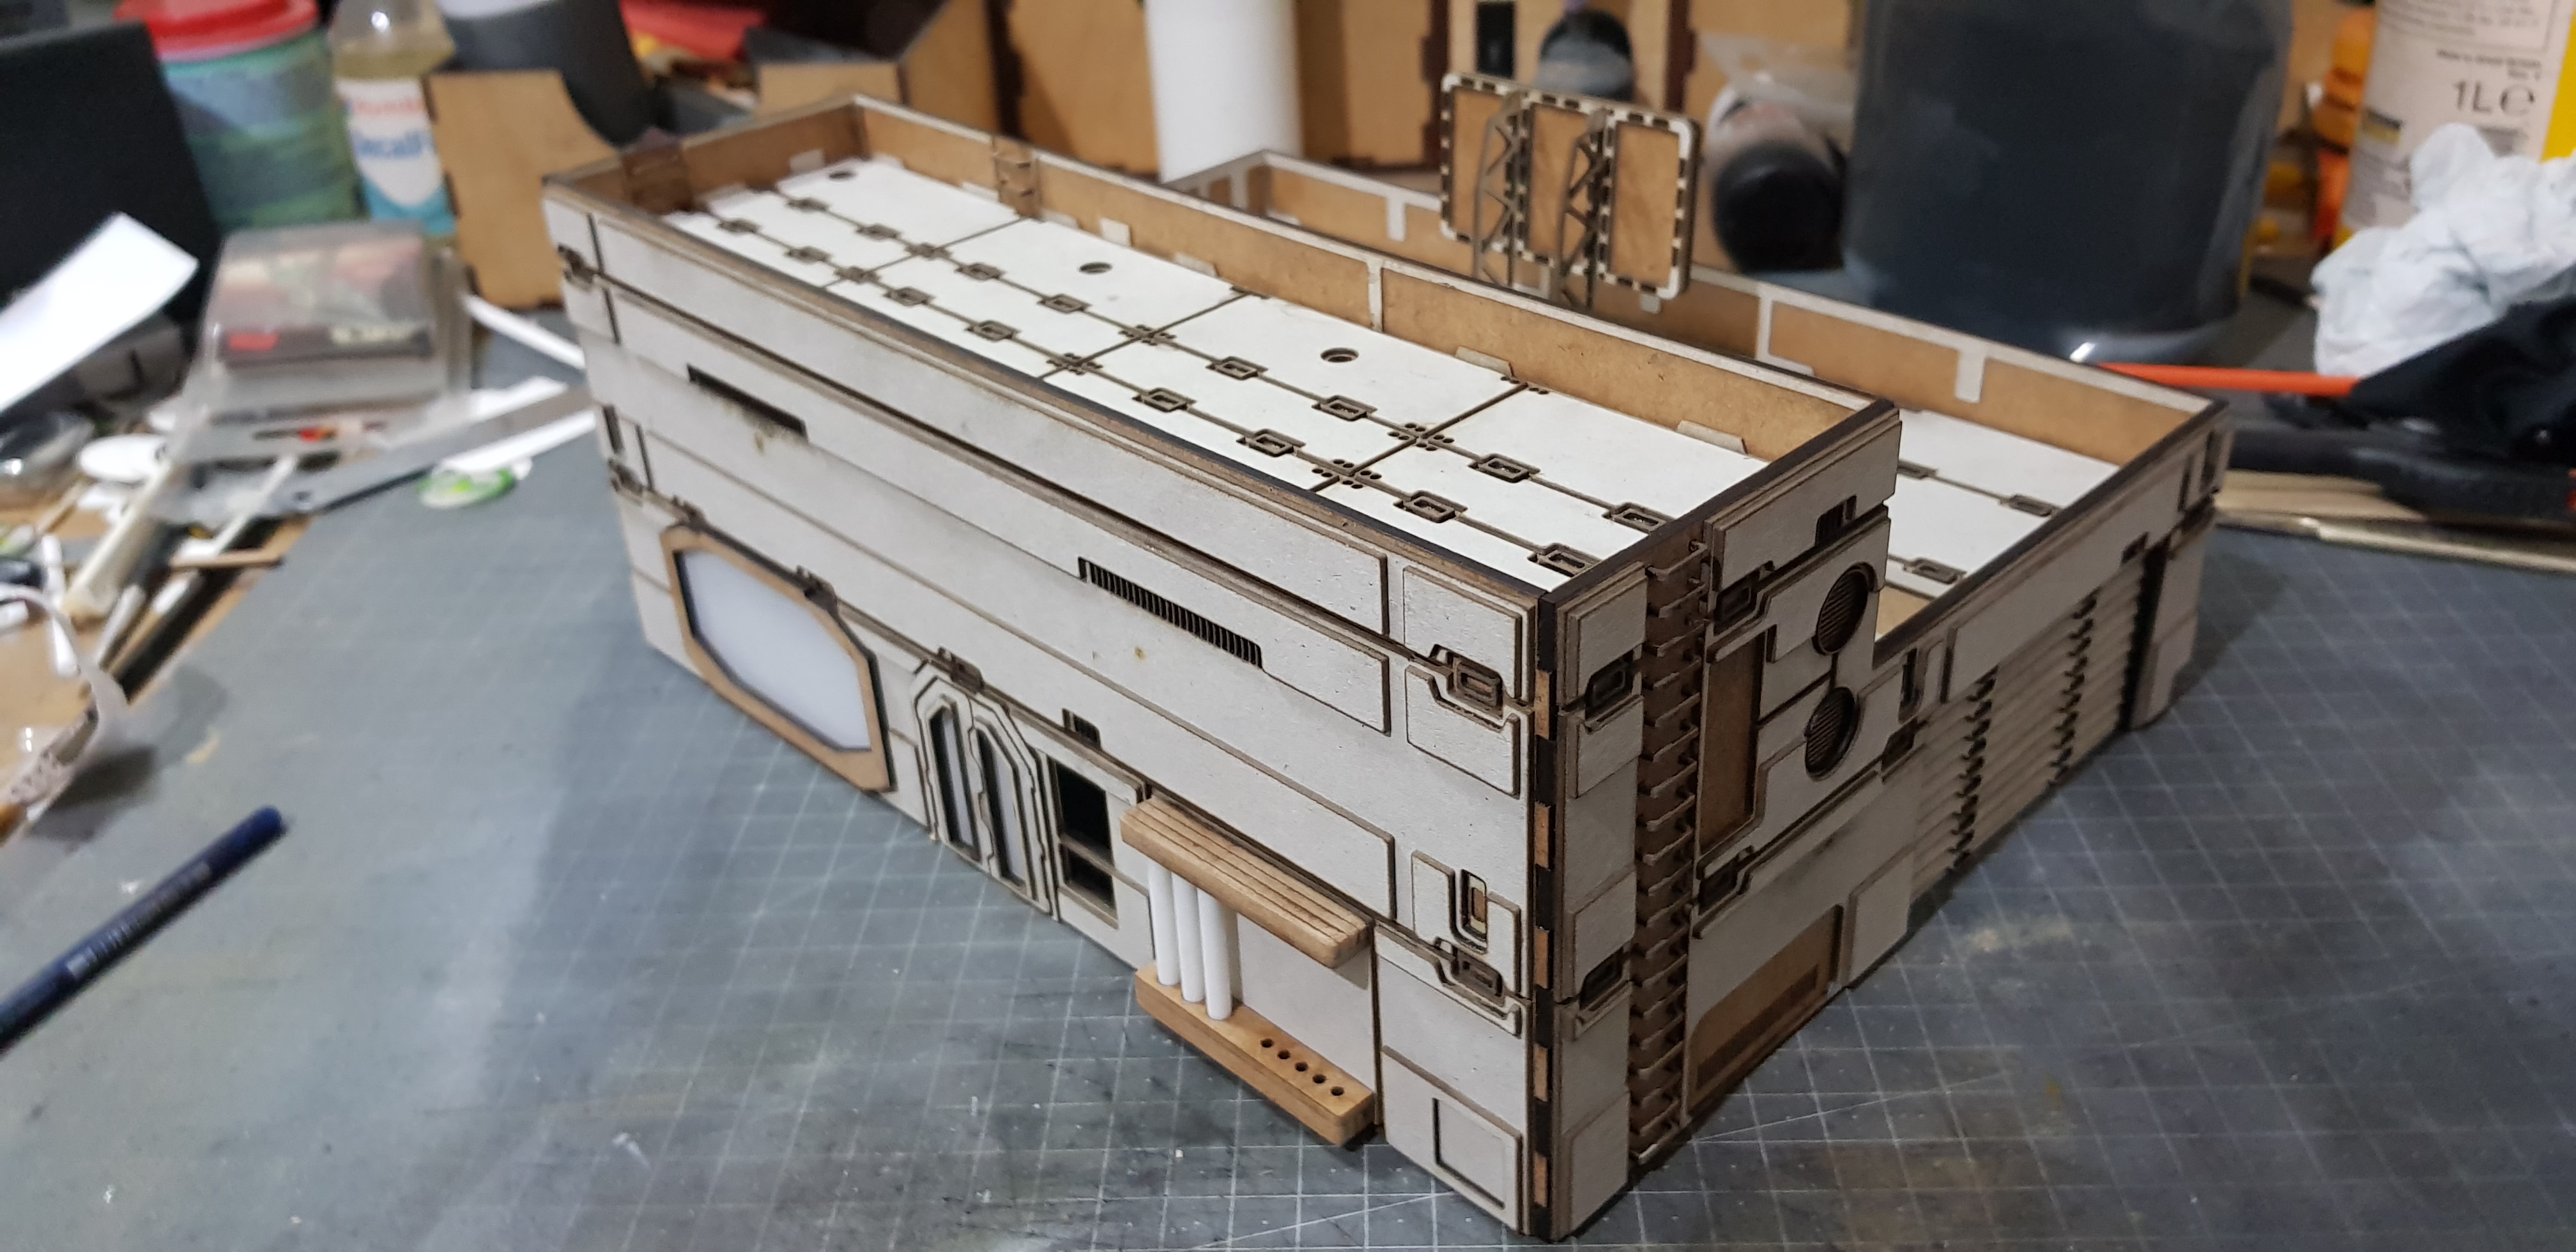
Unnamed building
Do I started on the Medi Centre. And then gave up due to what I wanted. I couldn’t get to look right with the constraints I gave myself. It needed to look Moto-tronica and conform to design rules set out in the starter set. I didn’t achieve this. So that got ripped up about Wednesday last week.
I took the overall dimensions and the idea of making it a double high building and decided to make a futuristic garage for repairing cars. or even small factory I didn’t want to complicate this and wanted a quick win. I think I want at least another 2 high buildings and then some incidentals to finish this set off.
One thing I have not came up with is a name. It needs to be a long name but still under the same theme.
e.g. Main Management Module, Power Hub. ???????? HELP! it just needs to be sort of long due to the amount of room I have
It has a small advertisement space probably not for this building and uses design elements from all three original pieces of terrain.
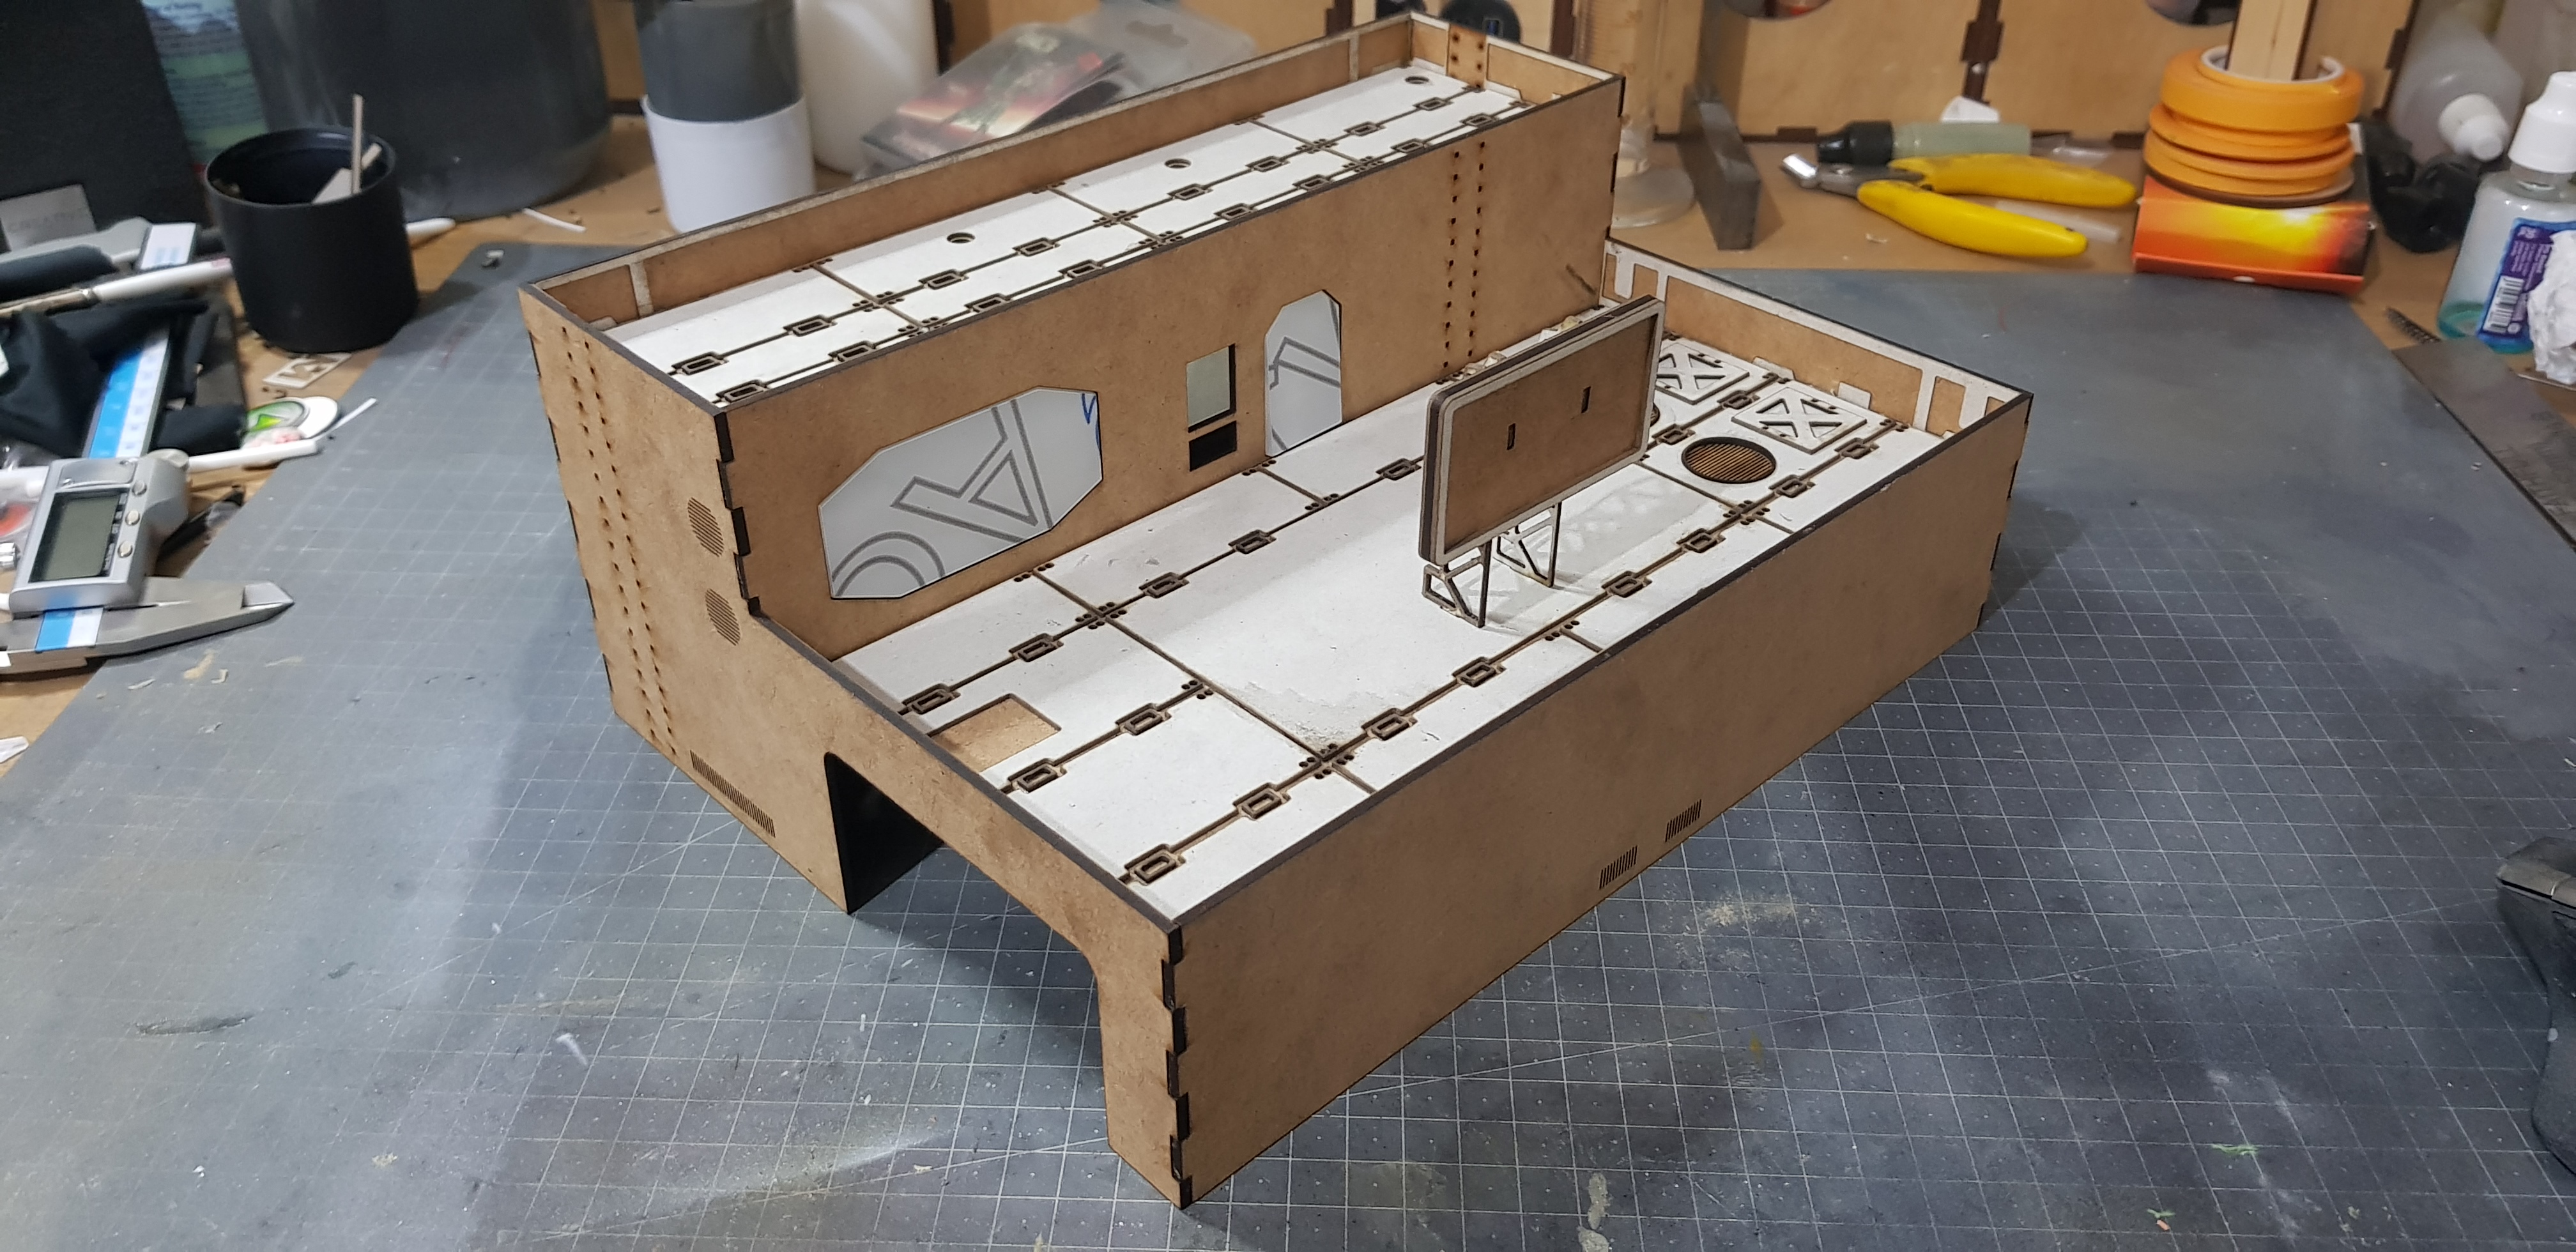
 Finished drawing and flats for laser cutting.
 This was done between Wednesday night and finished on Saturday. Today was cutting day!
After some troubleshooting with the design some limited tweaks were made. I had the floor of the lower level cutting across the garage entrance for example.
Everything was cut and I have started the building process. I think this is going to be more along the lines of the power hub paint scheme. than the management module. Again quick wins are the order of the day. I don’t want another 3 month build.
I started to stick everything down with PVA and superglue. Mostly the card to the MDF I used PVA and MDF to MDF I used superglue.
here is where I am up to just now.
 The back of the building.
  Front of the building.
 Two things I need to make decisions on is the name of the building and the main colour to paint it. Feel free to let me know any ideas.
I already have greens, pinks, purples, blues, and greys and yellows. I think I may need to give this more thought.
As for the name I am tempted by Garage Mcgarageface or Factory Mcfactoryface but I don’t think this will fit the theme.
More to come.
progress on the Unnamed building
Bit of work done this weekend. at a point where I am happy with. Going to leave the rest for next weekend.
I continued to assemble the Unnamed building this was mostly done with PVA clamps where needed on some parts.
I also used the left over parts to mount the separately painted sections. For the thin yellow sections I mounted these using upturned masking tape.
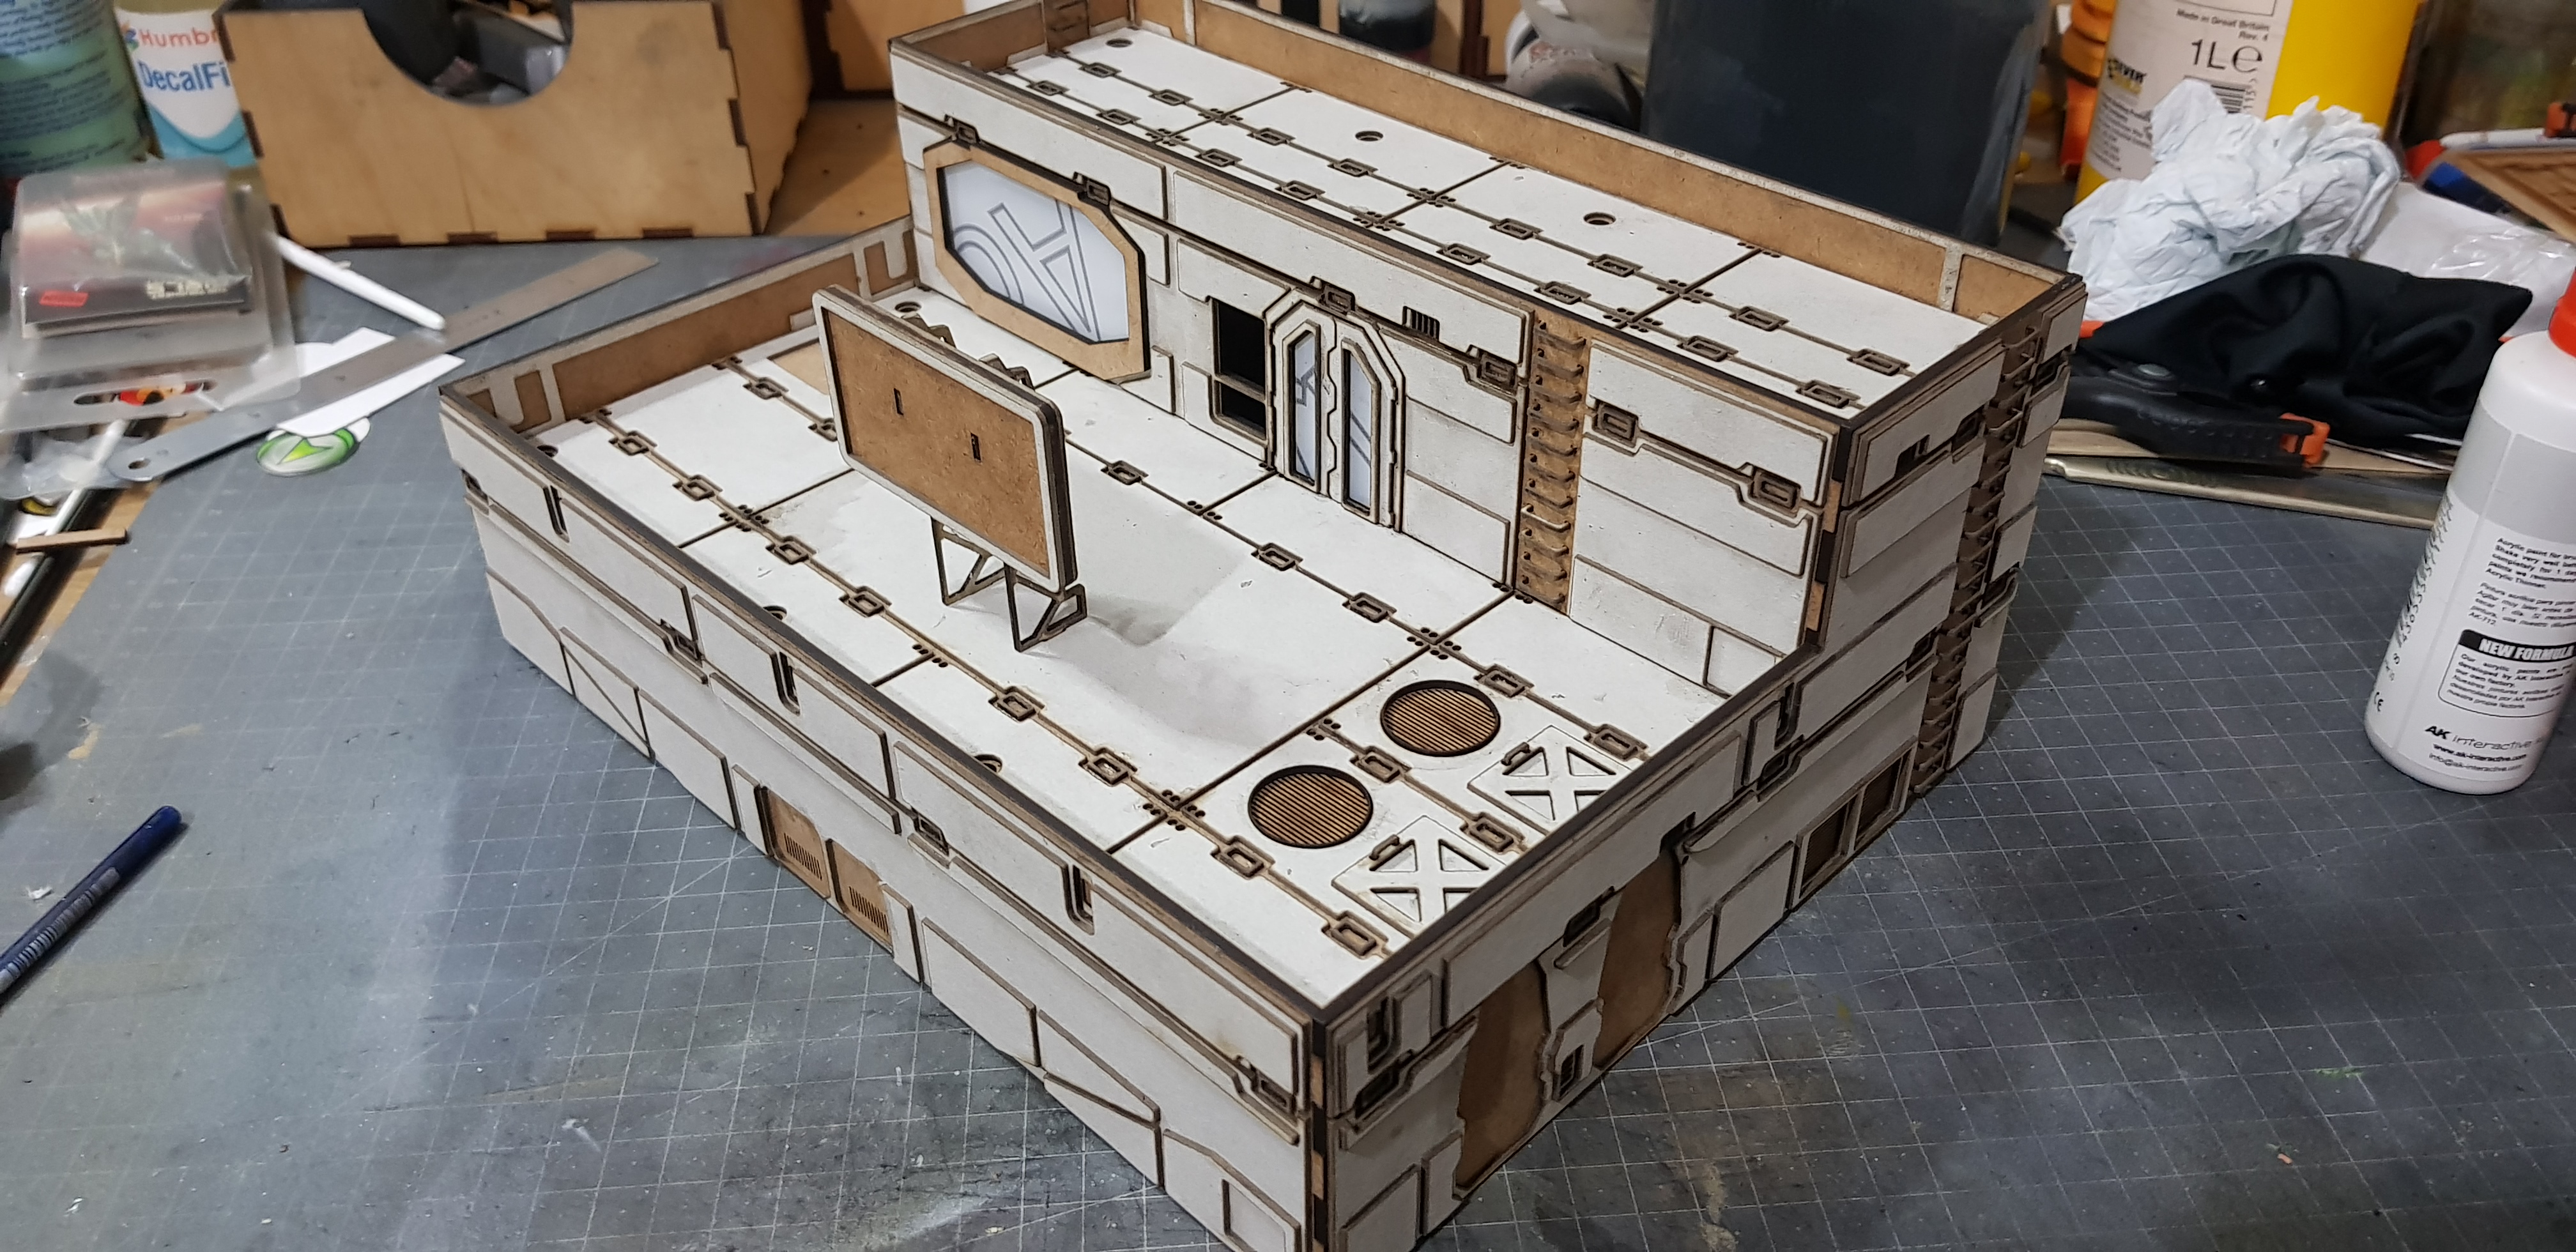

Then came the priming. I used pound shop spray paint to give everything a zenith. this really shows the detail of the model and helps make painting decisions.
I then done the main face over the building this was done in an electric type blue faded up to white in three sections.
I also painted the separate sections after this I went in with the multiple colours and painted them by hand.
I also sprayed black on one side of the window sections.
After everything was sprayed I went in and painted the blacks and greys required.
I used some cables to make up the front section and also printed and glued in the advertisement.
The rest of the components were added with PVA.


So I still don’t have a name for this to add and I need to do some weathering and some transfers. I hope this will add some extra detail without adding much more steps. I also have to do two control panels.
This is a bit of a Frankenstein’s monster of a building combining what’s in all the others.
I don’t mind this but I think for the next building I will do something that’s not of the same architectural style. It may take longer but it should add some variety for the set.
 Building with models on it.
 So that’s my progress for this week. Quite a bit if I do say so myself. I think as soon as the extra detail goes on this will make it pop.
More to come but hopefully one last instalment for this section of the project.
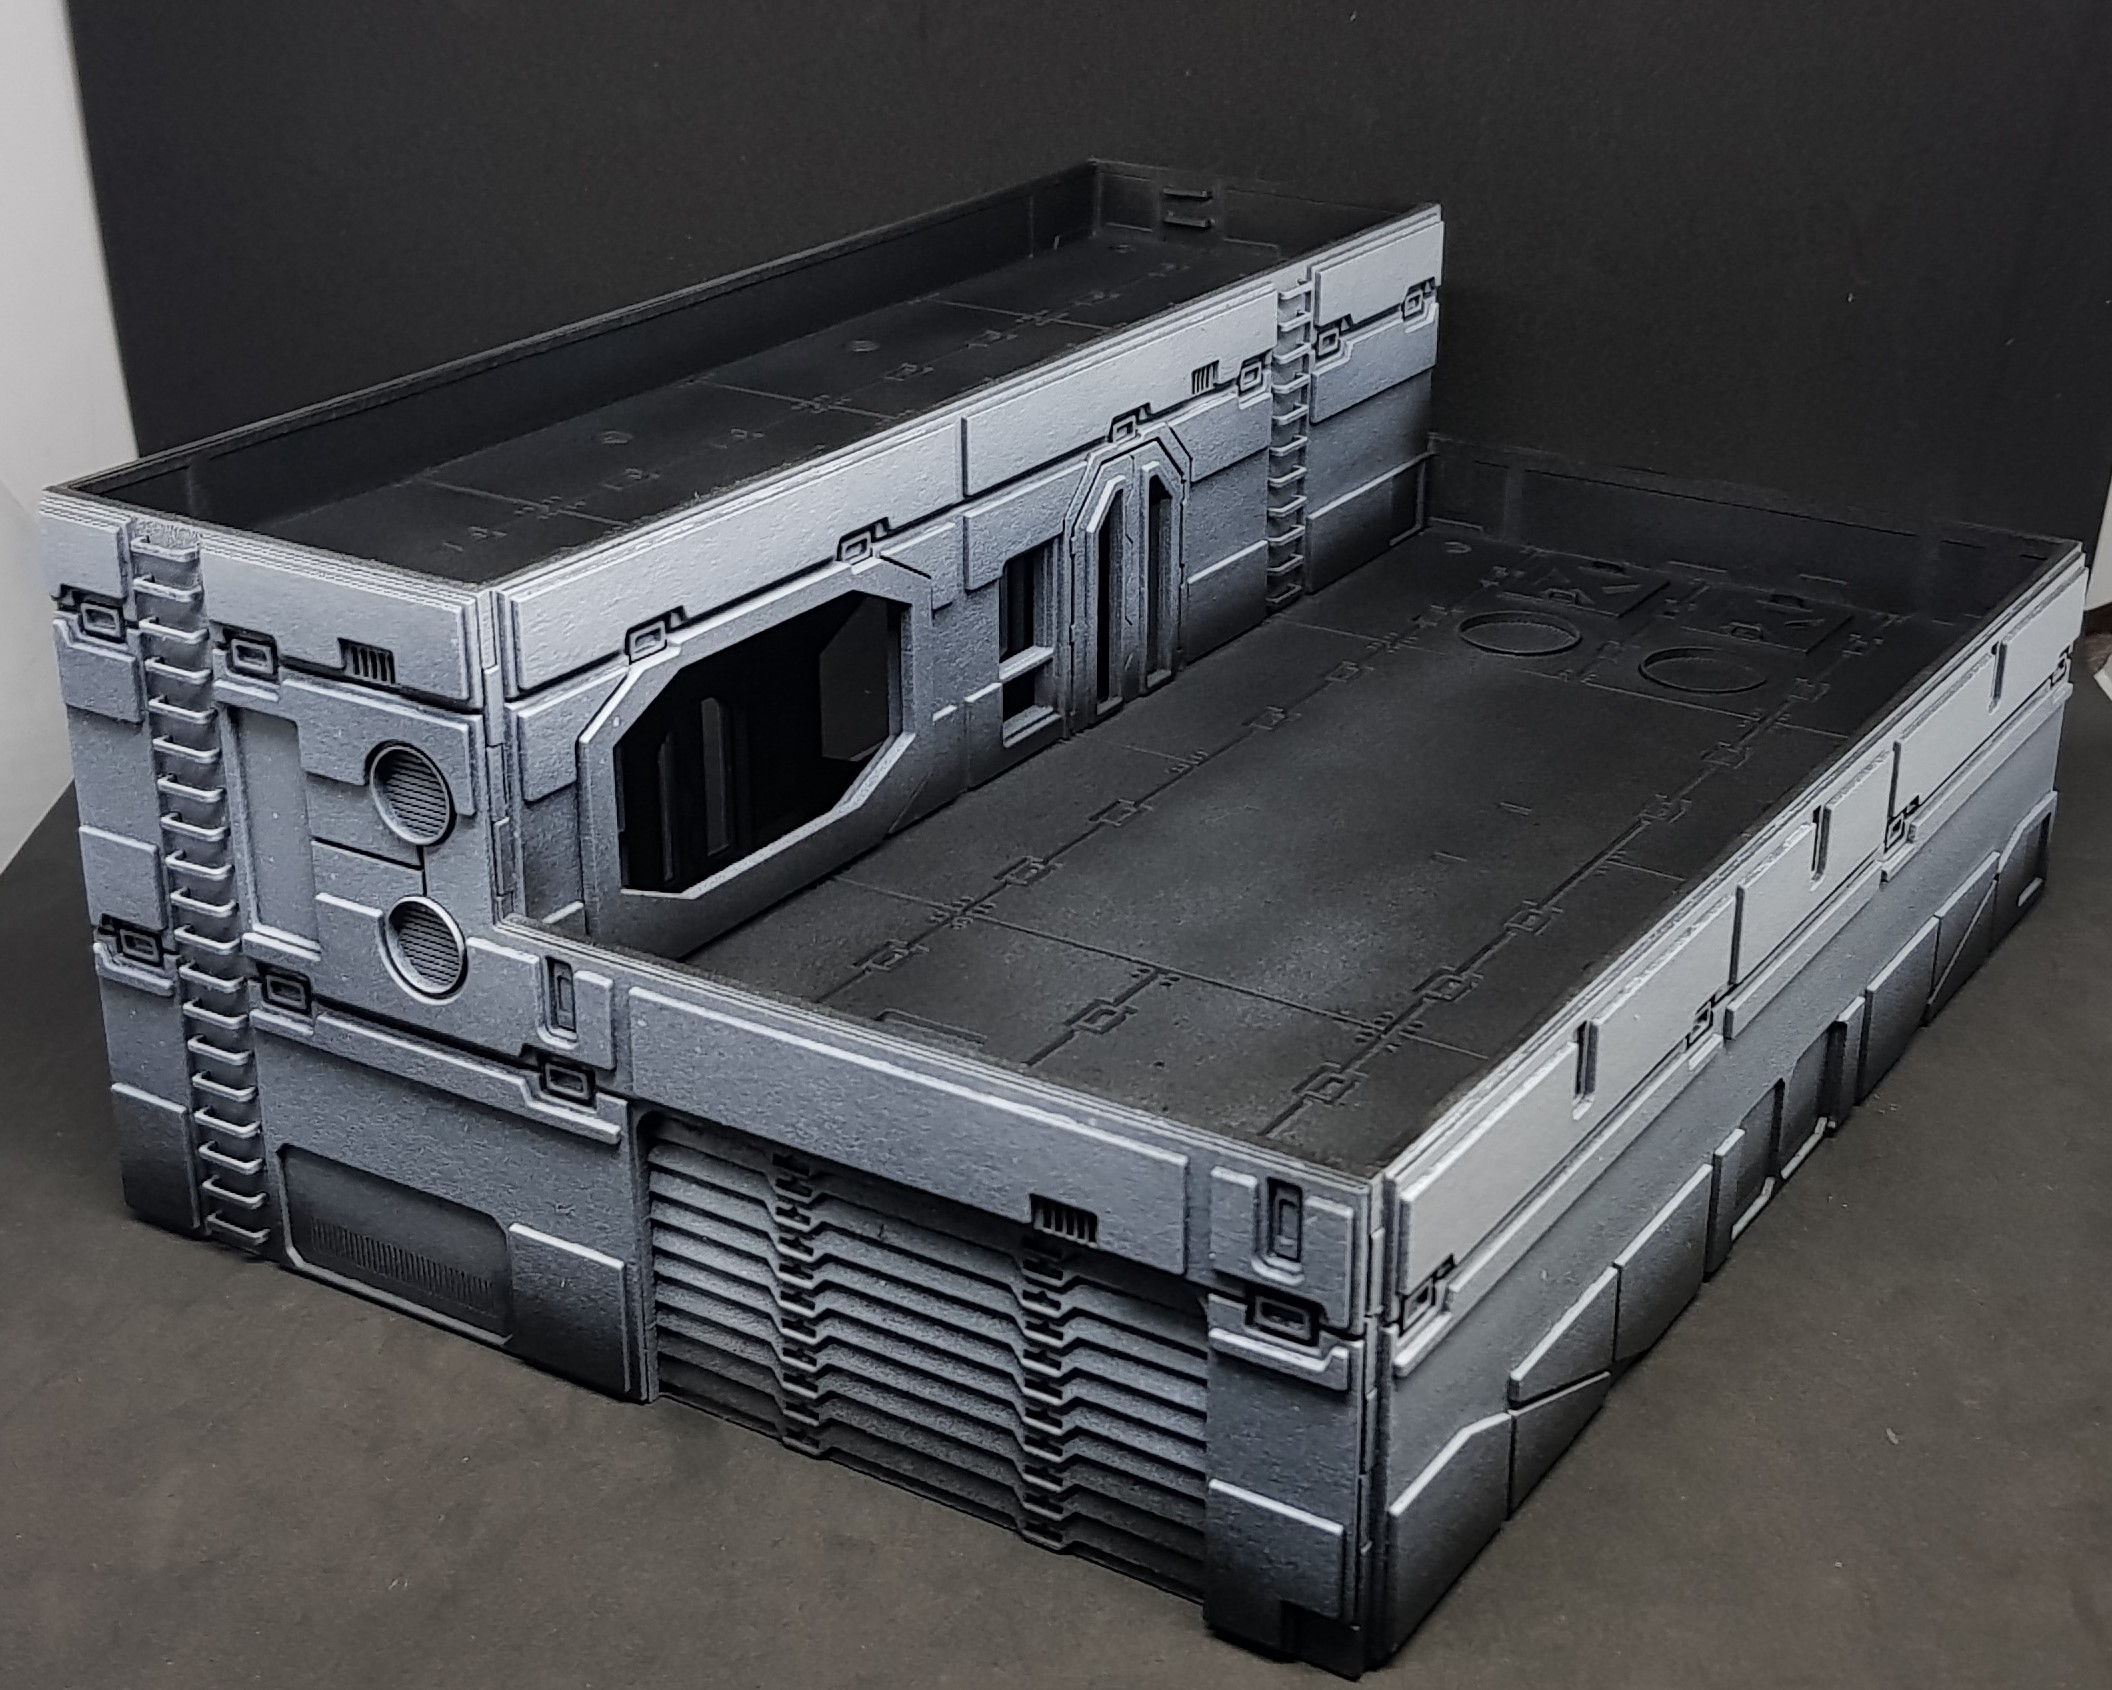
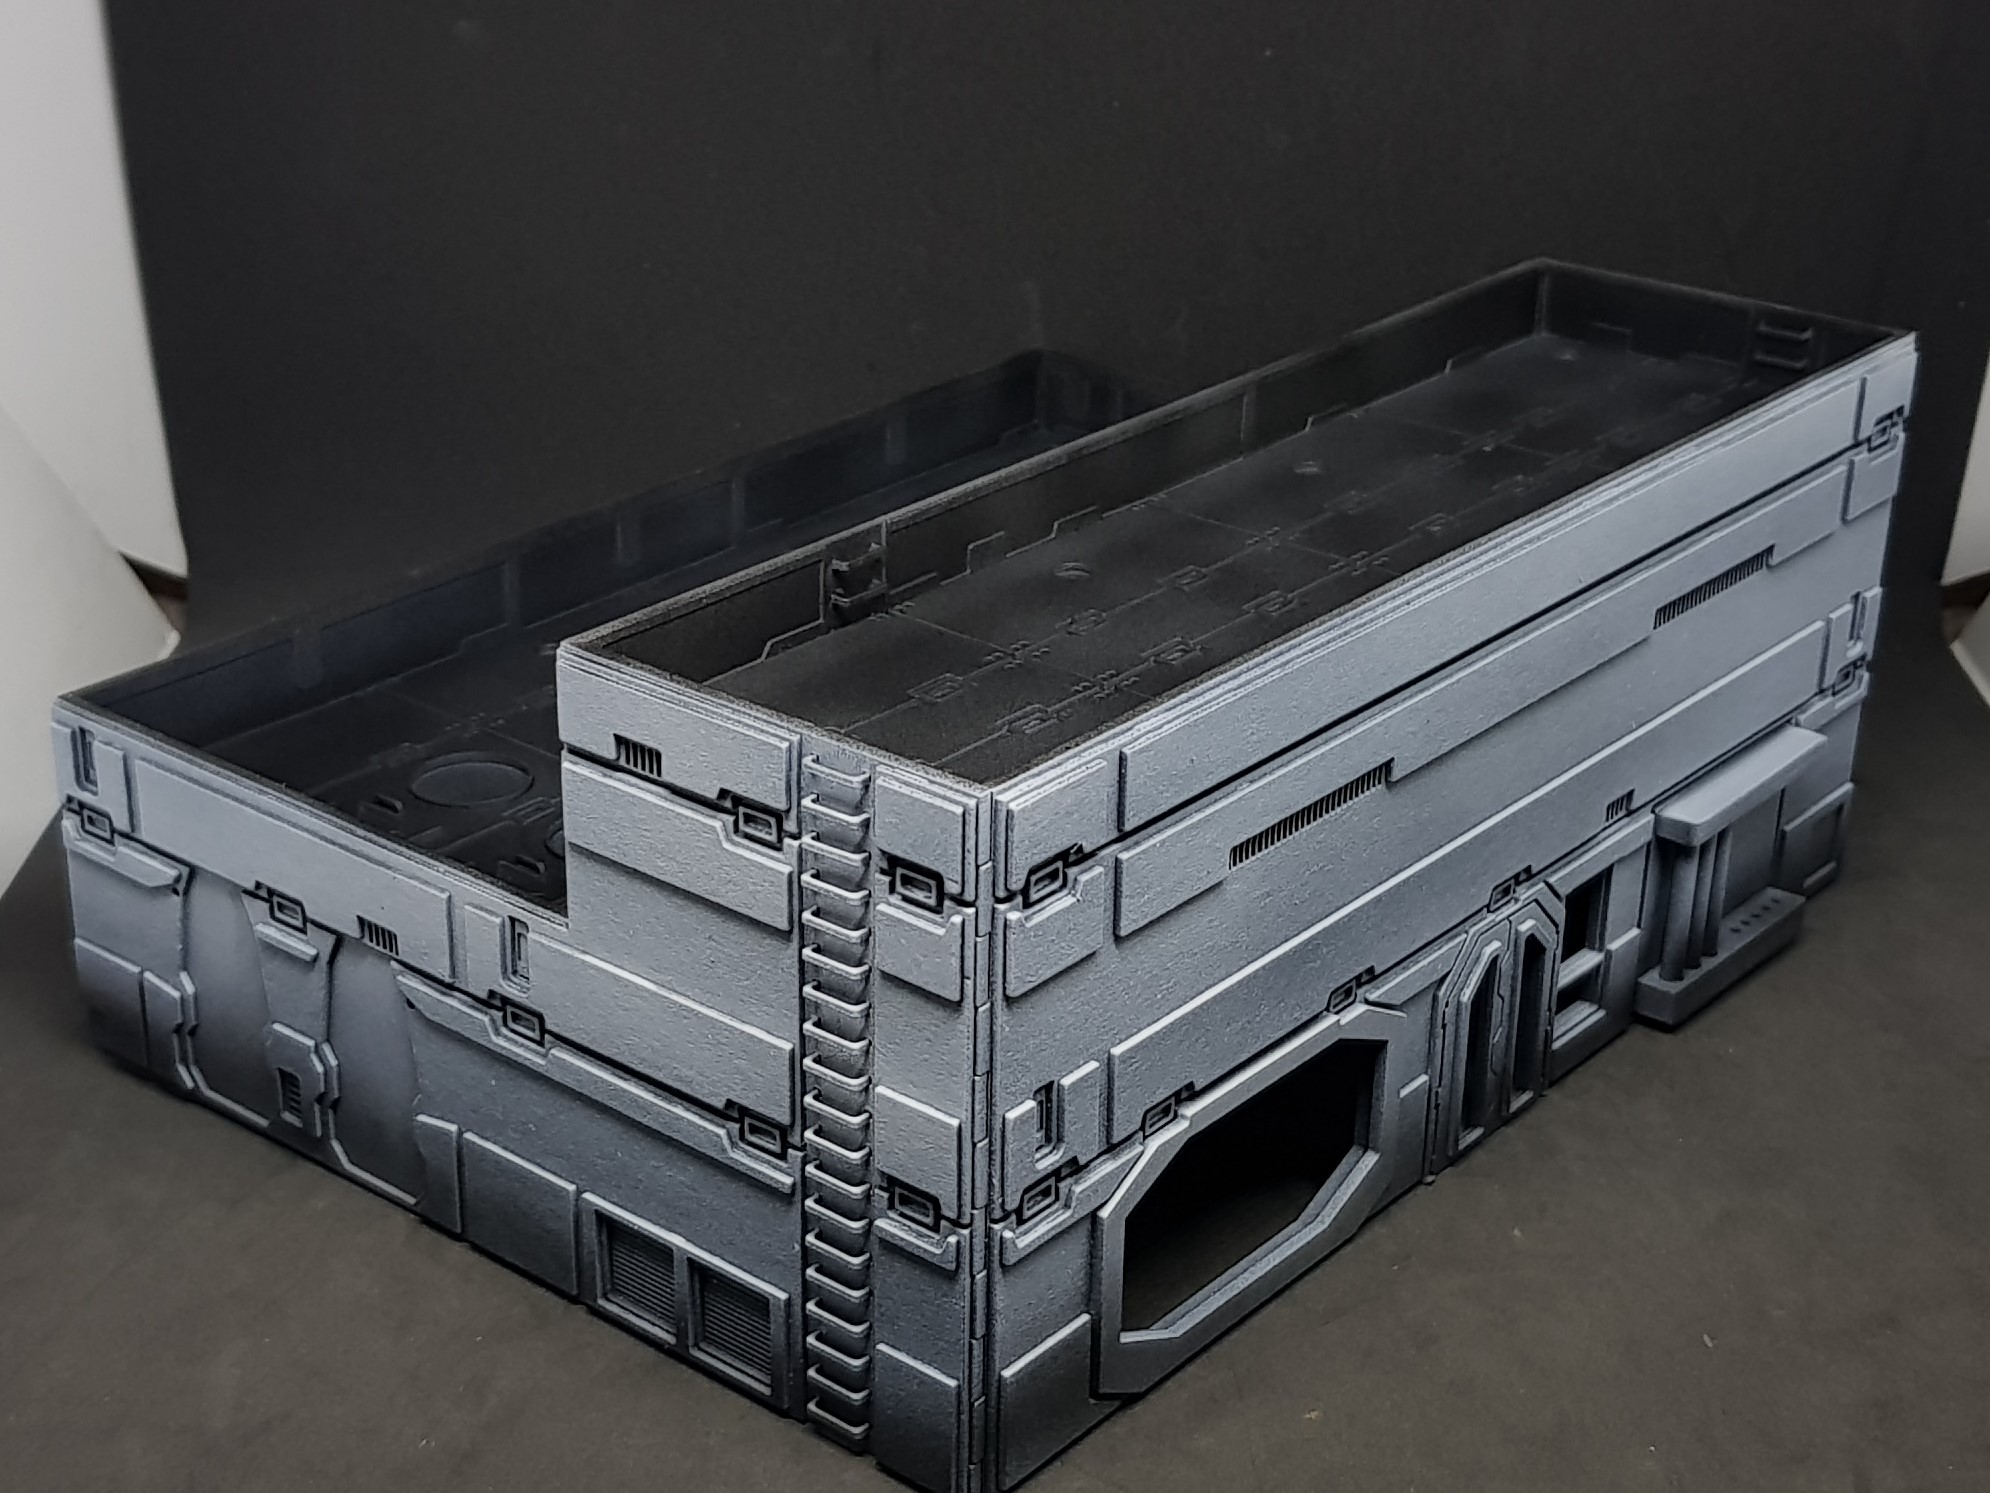
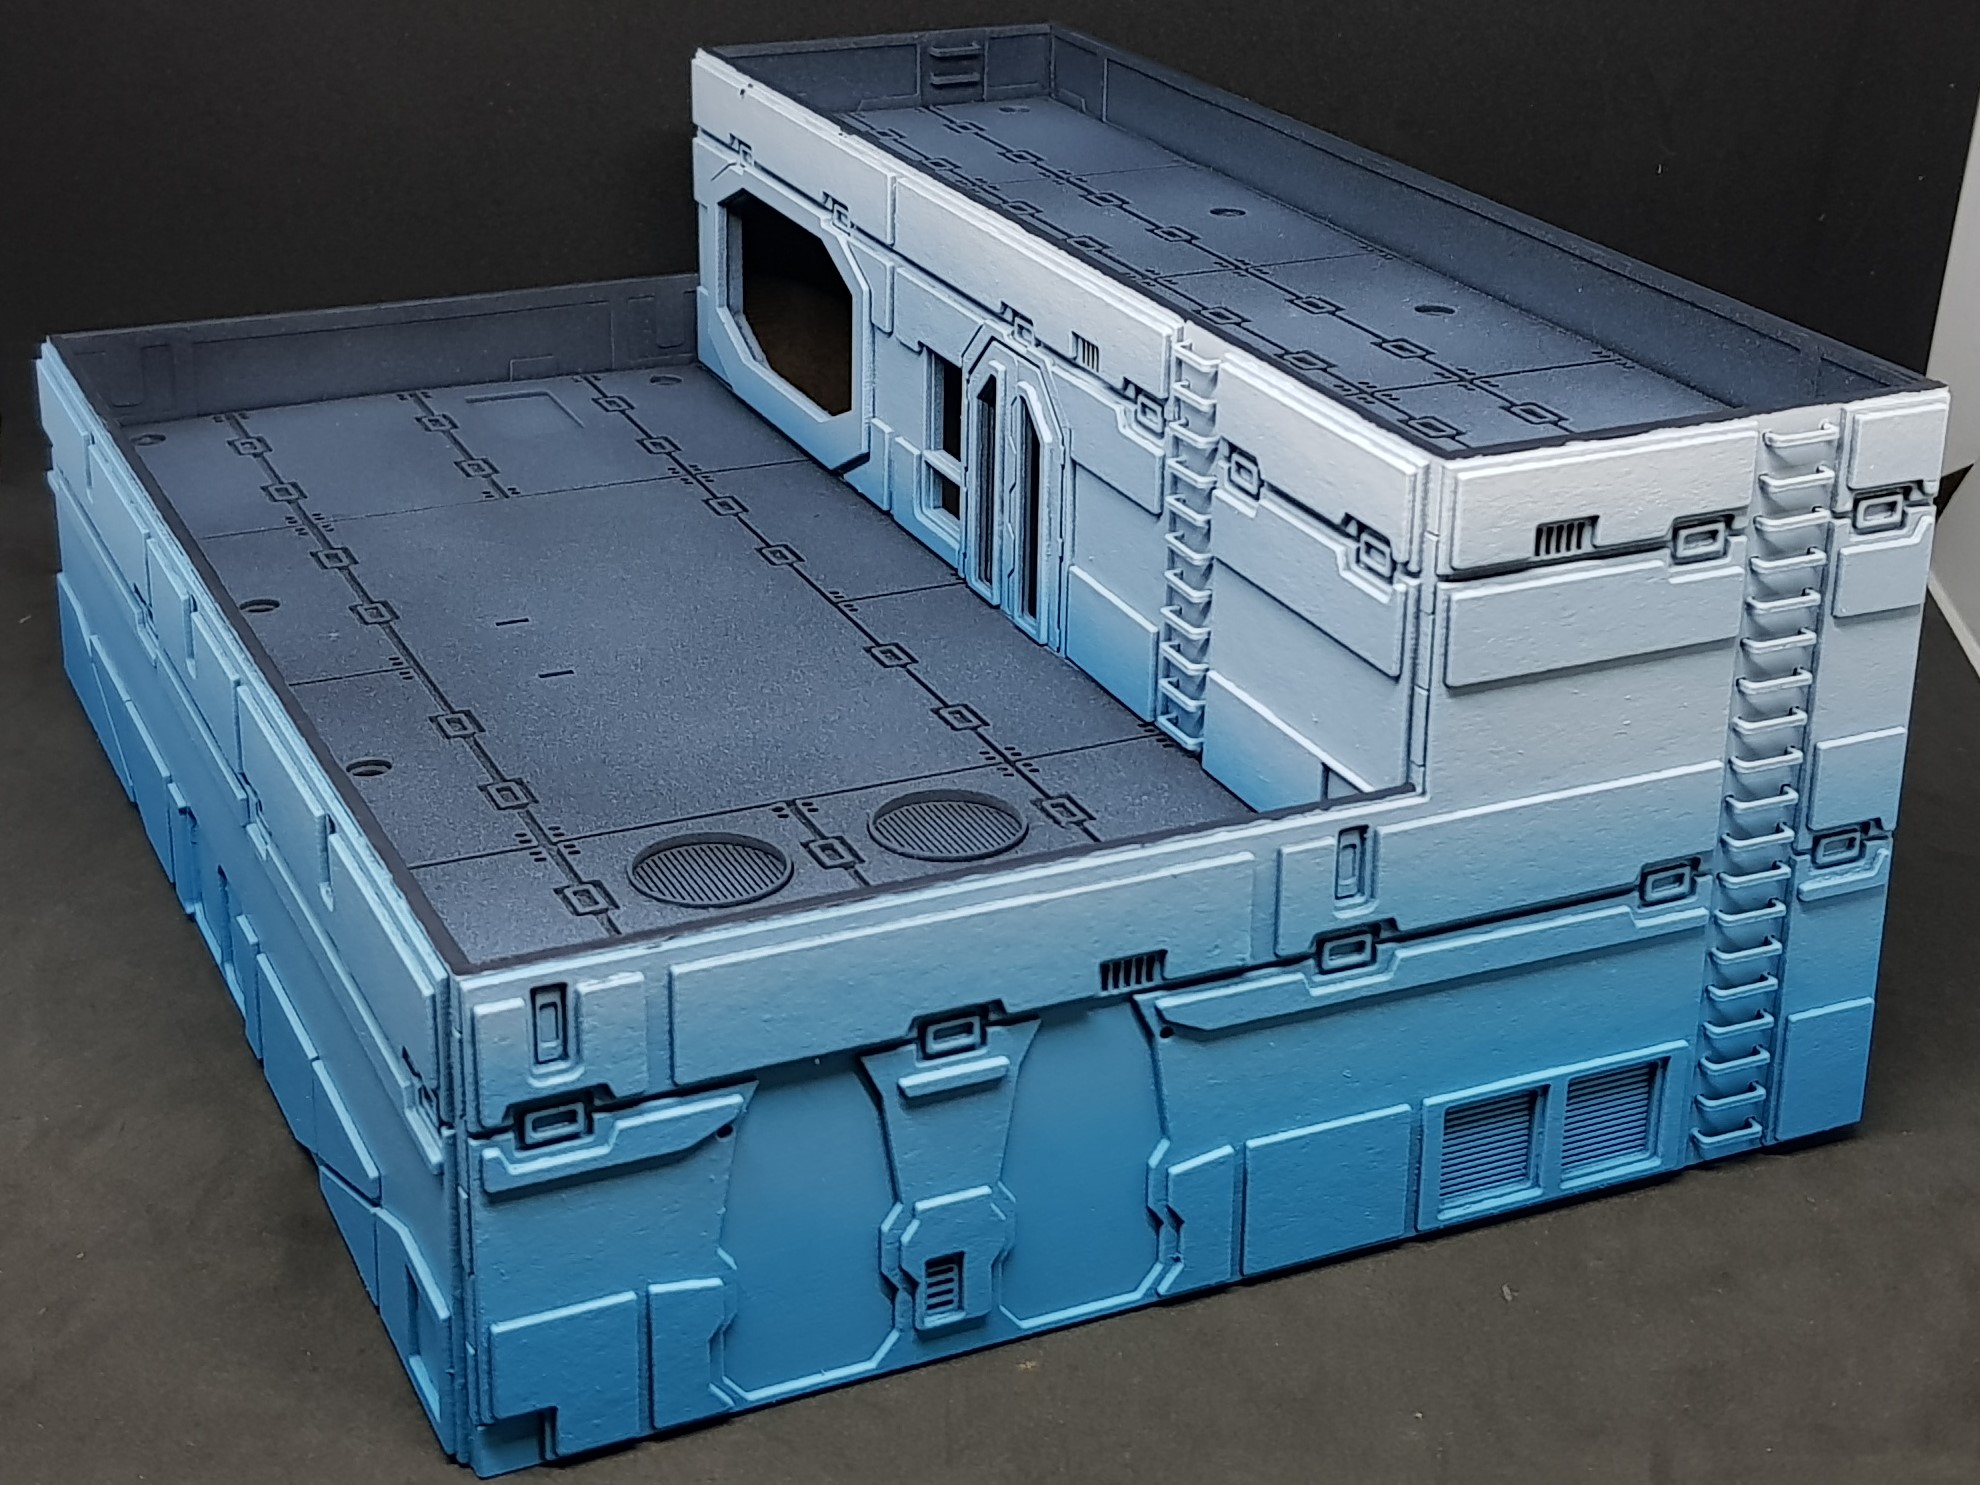
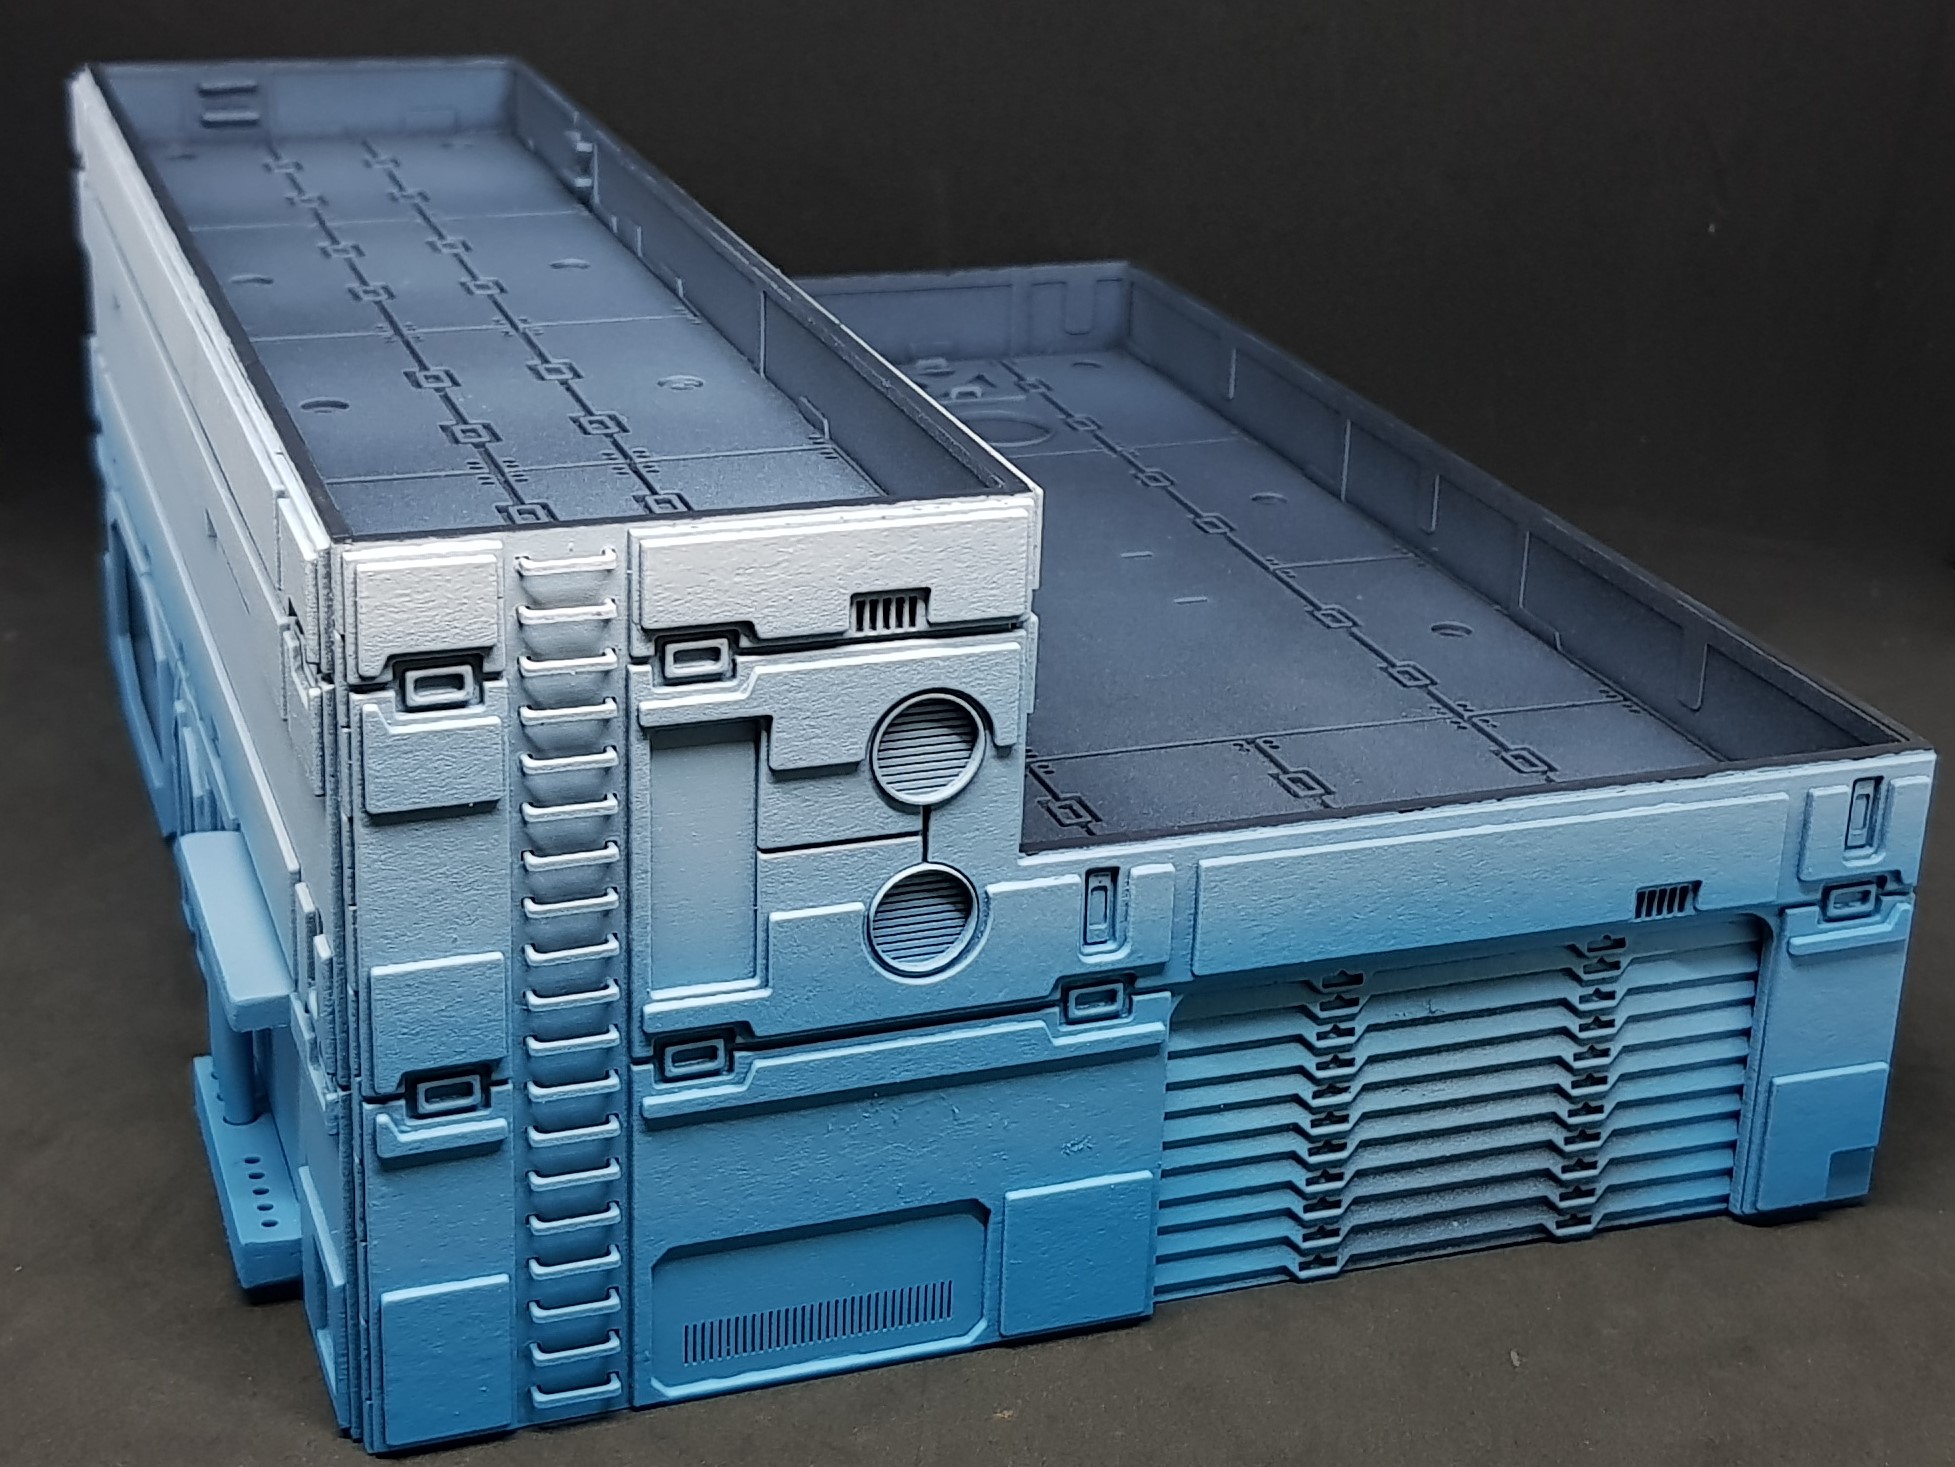
Automated Factory Completion
It has a name and it is Automated Factory! Didn’t do anything midweek on this but did find some time today to finish it up.
The name which was laser cut and then glued with PVA this didn’t go as well as I wanted and I ended up with some slime like residue around some of the letters. I think this was soot from the laser cutter mixed with PVA. I cleaned most of this up but this left some scratches on the paint.
The main additions are the transfers as described on other buildings bellow. After this everything got a satin varnish to protect it.
I cut some masks for the windows and also made some screens for the control screens again by printing this out and using some gloss varnish on them.
I used my airbrush to go around the base of the model and in the corners as well as add soot from the exhausts.
I then airbrushed the lights by going in with white then blue then white again.
Finishing everything of with some weathering powder on limited sections.
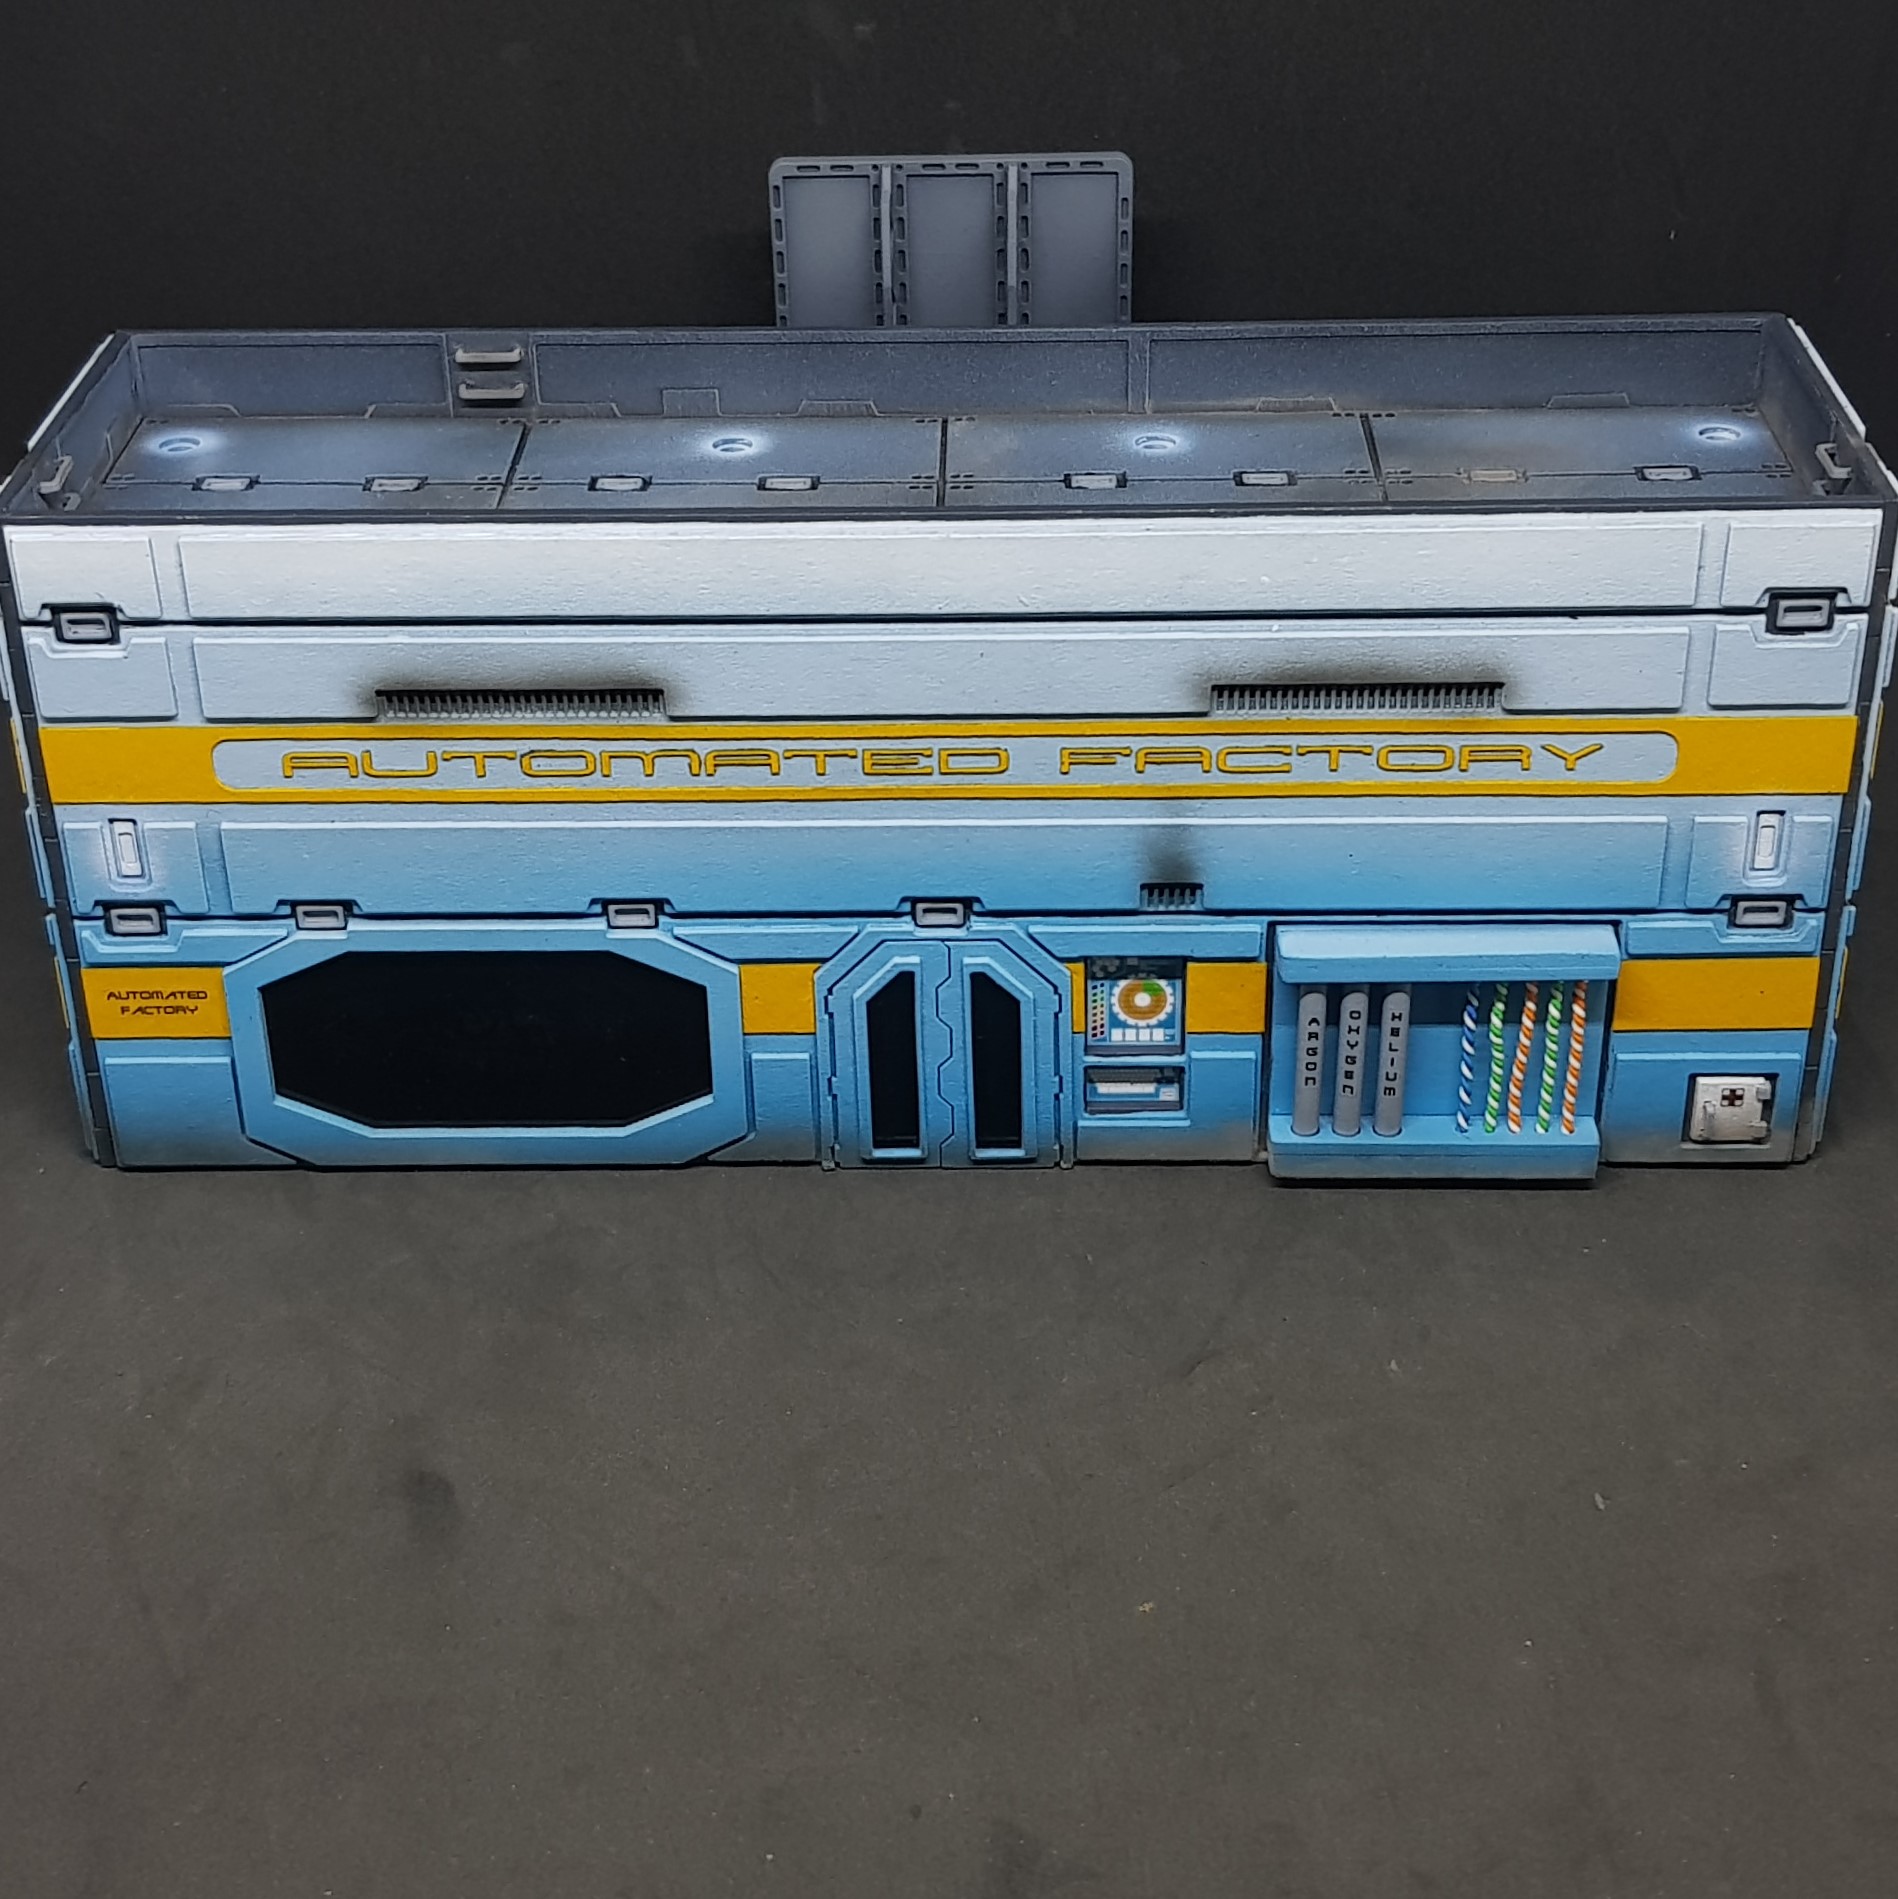 Front
Front Back
Back Side entrance
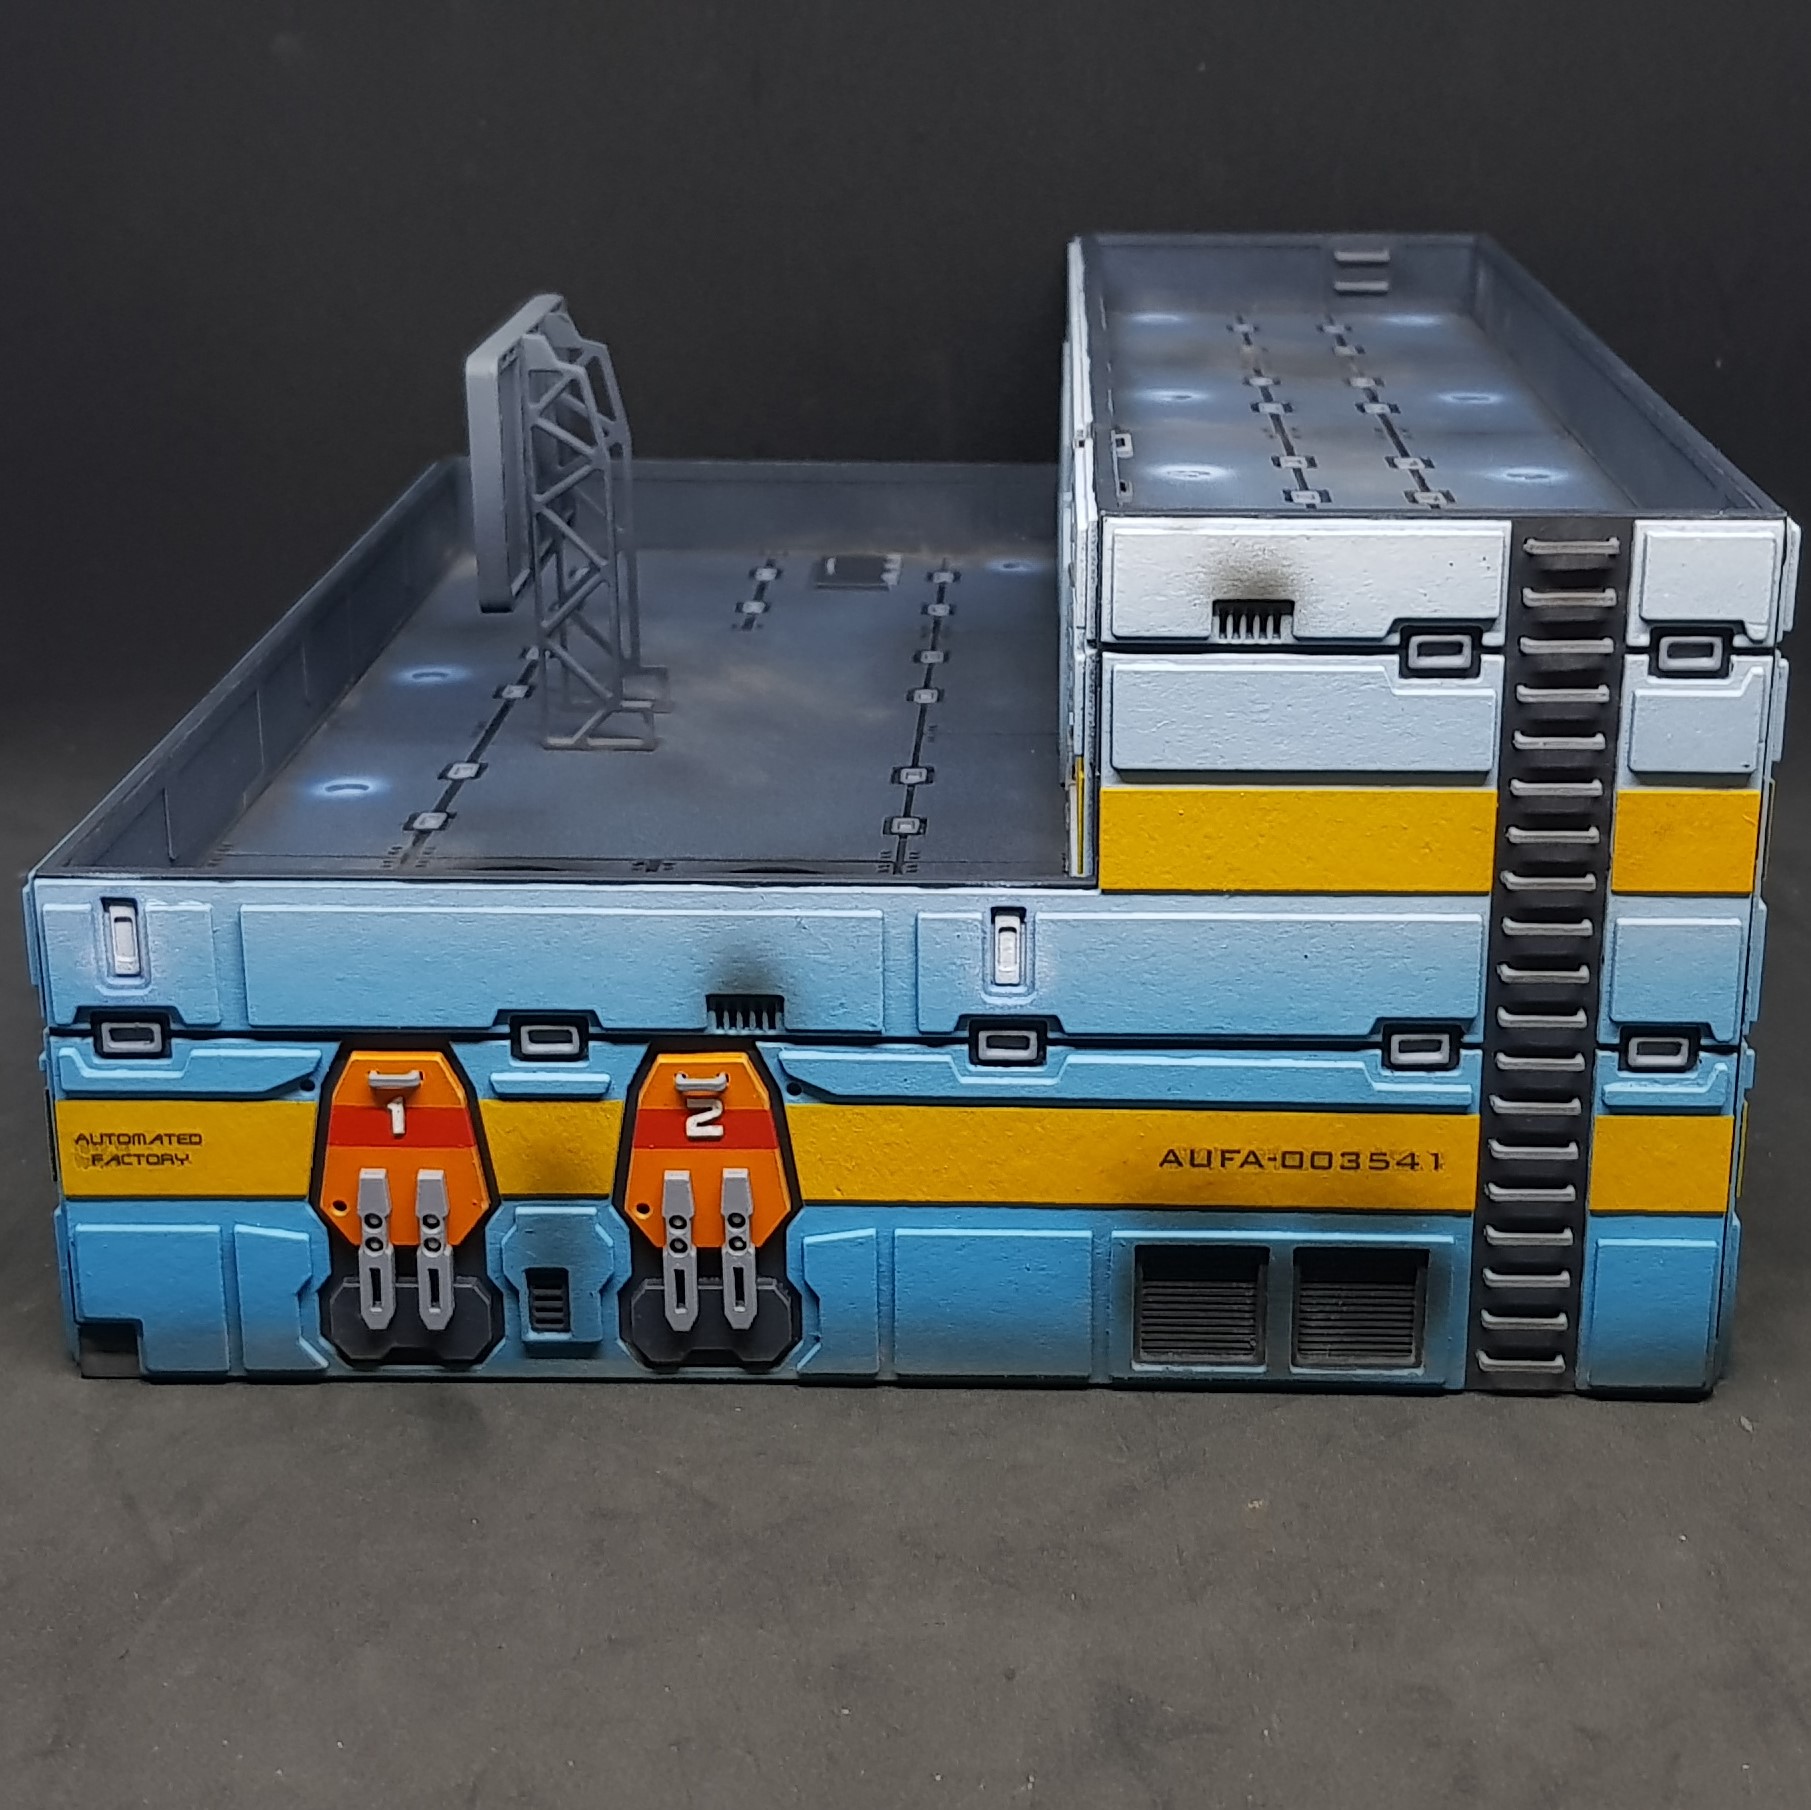 Supplemental power Side
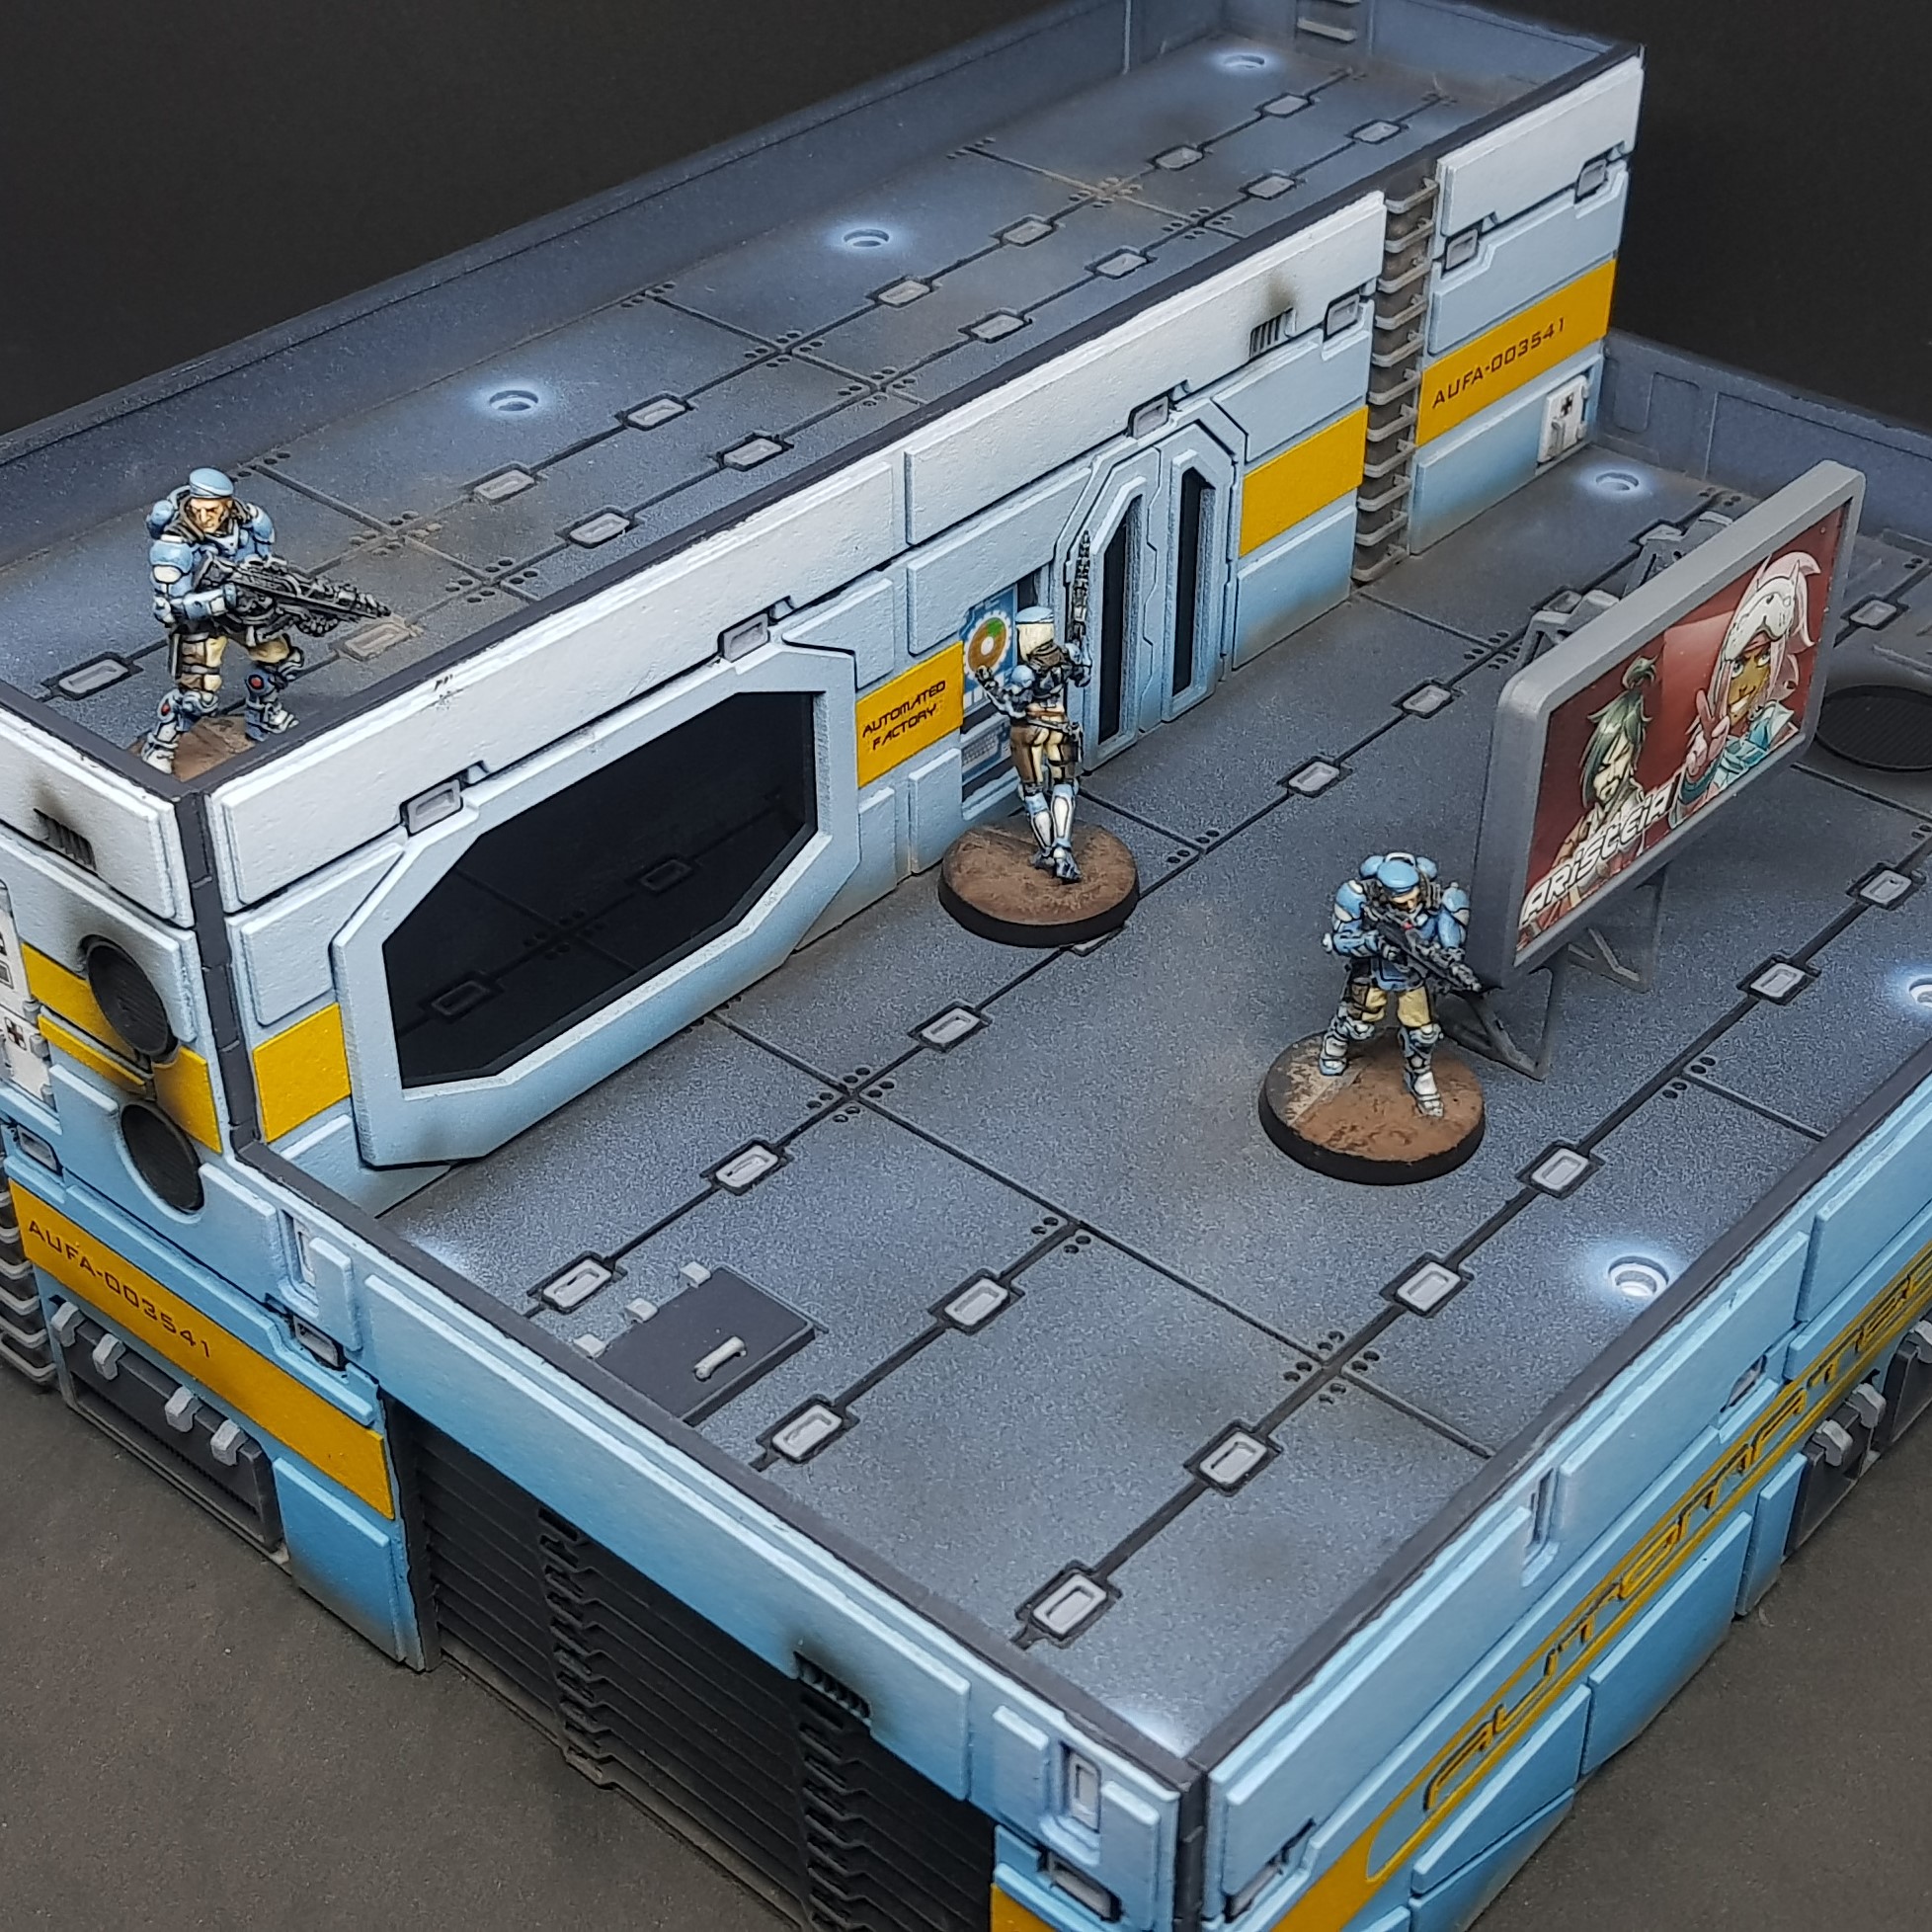 Roof with models
So this was quick, which was planned. It didn’t go on for 3 months or a year in some cases. It was quite fun and will add some height to my table.
It is a pain to photograph as it’s so large. I will need to think about this in the future but I don’t think I will do such a large footprint for a building for this set again.
Overall think it will be a good addition to my Moto-tronica set. I want some kind of communications building this may end up being tall but smaller then all the other buildings.
I think this is it for this year I need to paint some models instead, infinity and others so this may take a back seat at least for a time.
More to come, at some point.
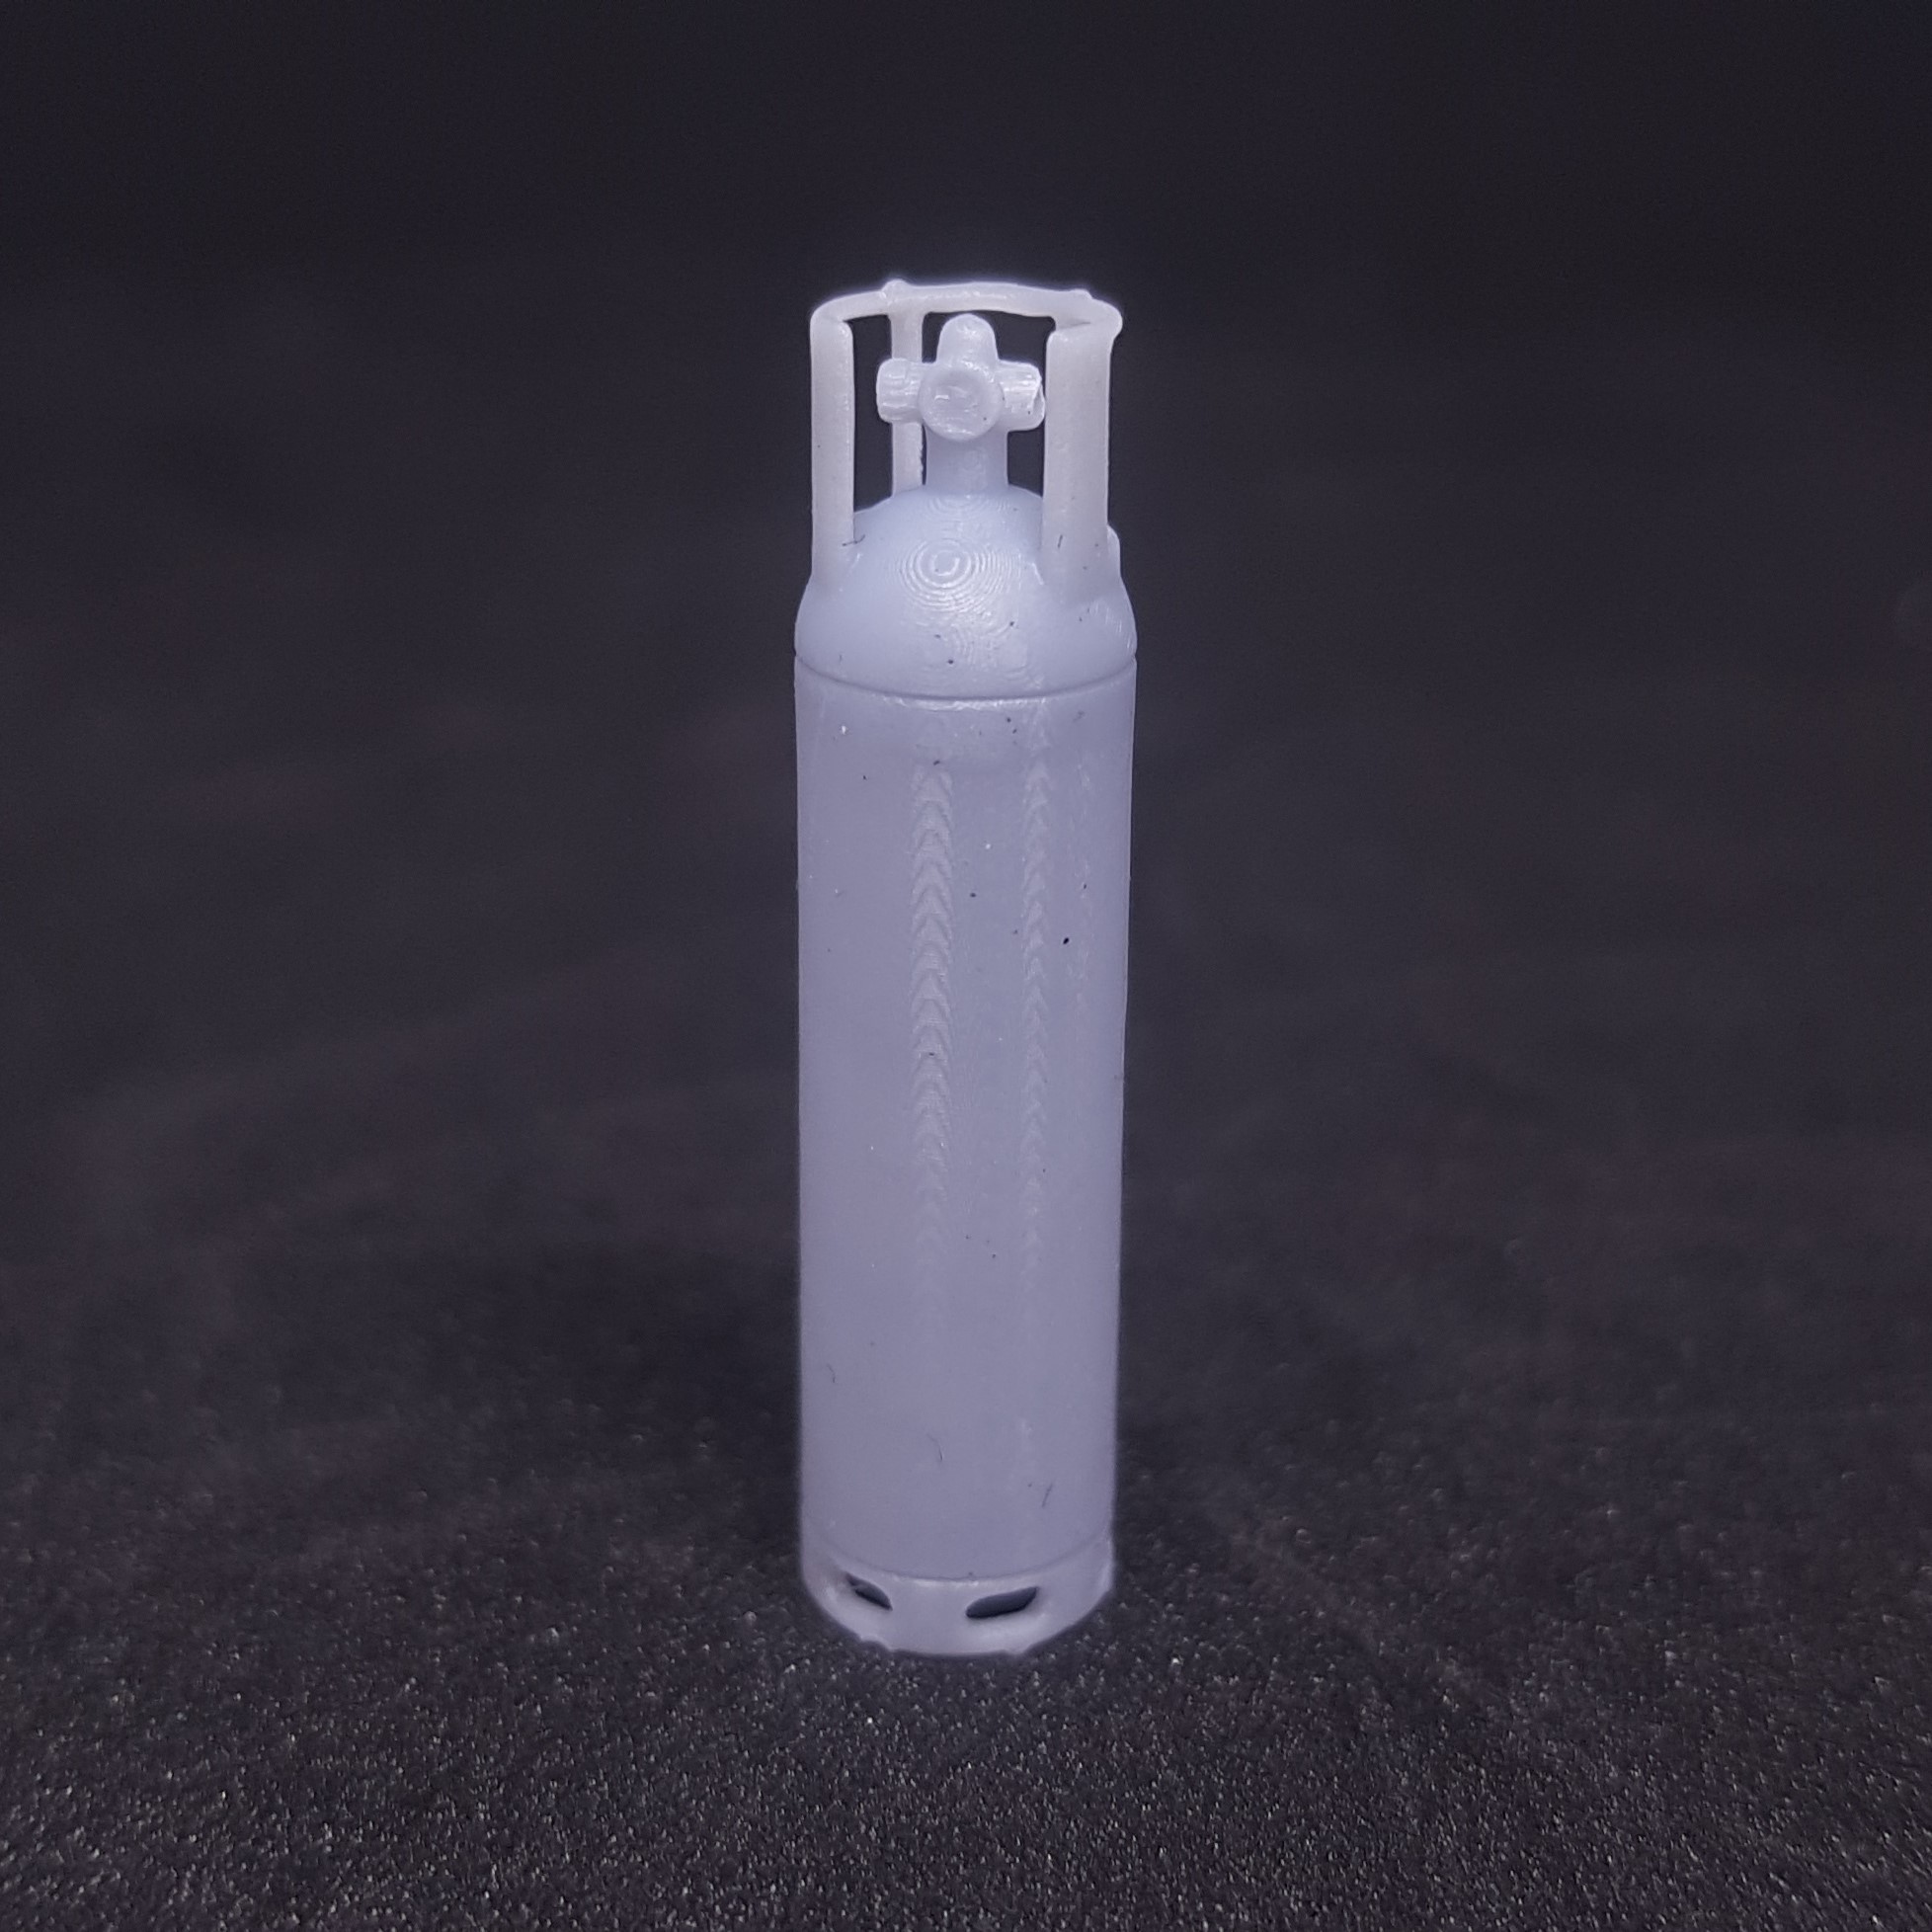
Compressed gas bottle
So I thought I was done for making sceanery this year… Turns out that’s something I don’t know how to do. I got my 3D printer for Christmas (arrived yesterday) but before it arrived I had a look at what I could print. Turns out I am either very picky or the quality of objects available is quite poor, I think it’s a bit of both.
So I turned to software I have not used before and started to try and learn. I used YouTube tutorials and read. None of it went in but it was a good way to get some sleep. I do have an ambitious aircraft I want to make for a landing may but my skills are not there yet.
I needed to do something simpler. There is a reason when I learned CAD 20 years ago we started by making cubes and pyramids starting with an aircraft was very naïve but I have learned a lot and put this to better use starting with some garnish terrain to go with my existing stuff.
I looked at gas bottles seemed to bit with the theme of the moto-tronica set. This took a bit of time and I didn’t know how detailed I could make this. There are lots of details that didn’t print clearly due to the scale but there are hints of them which add to the overall aesthetic.
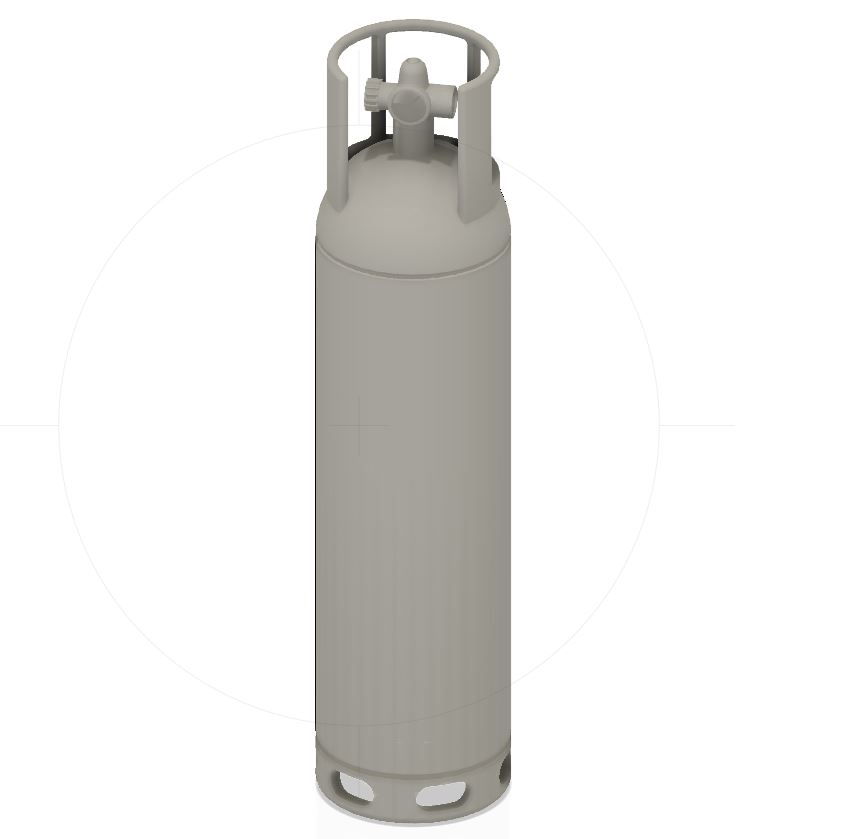 Image of the gas bottle I drawn This is 29mm tall by 7mm in thichness. It's designed to be hollow to save resin.
 So I had my model and I got my printer delivered to work yesterday.
I got an Anycubic Photon but along with this I got another ultrasonic cleaner and nail lamp to finish off the curing along with lots of IPA (alcohol).
I added supports and sliced my model. This was angled at 45 degrees to help the print.
I started it off and boom! 4 hours later I had 9 gas bottles. These printed better than my expectations and used next to no resin. The only issue I found is where the supports meet the model. To the naked eye I cant see layer lines but in these photos you can just make them out.
 One view of the printed bottle
 Another view of the printed bottle including the hole for the 1mm pipe which surprisingly printed.
 After cleaning and curing the print I went ahead and undercoated it and zenithed it.
Here you can see the layer lines but again these are not visible when just looking at the object.
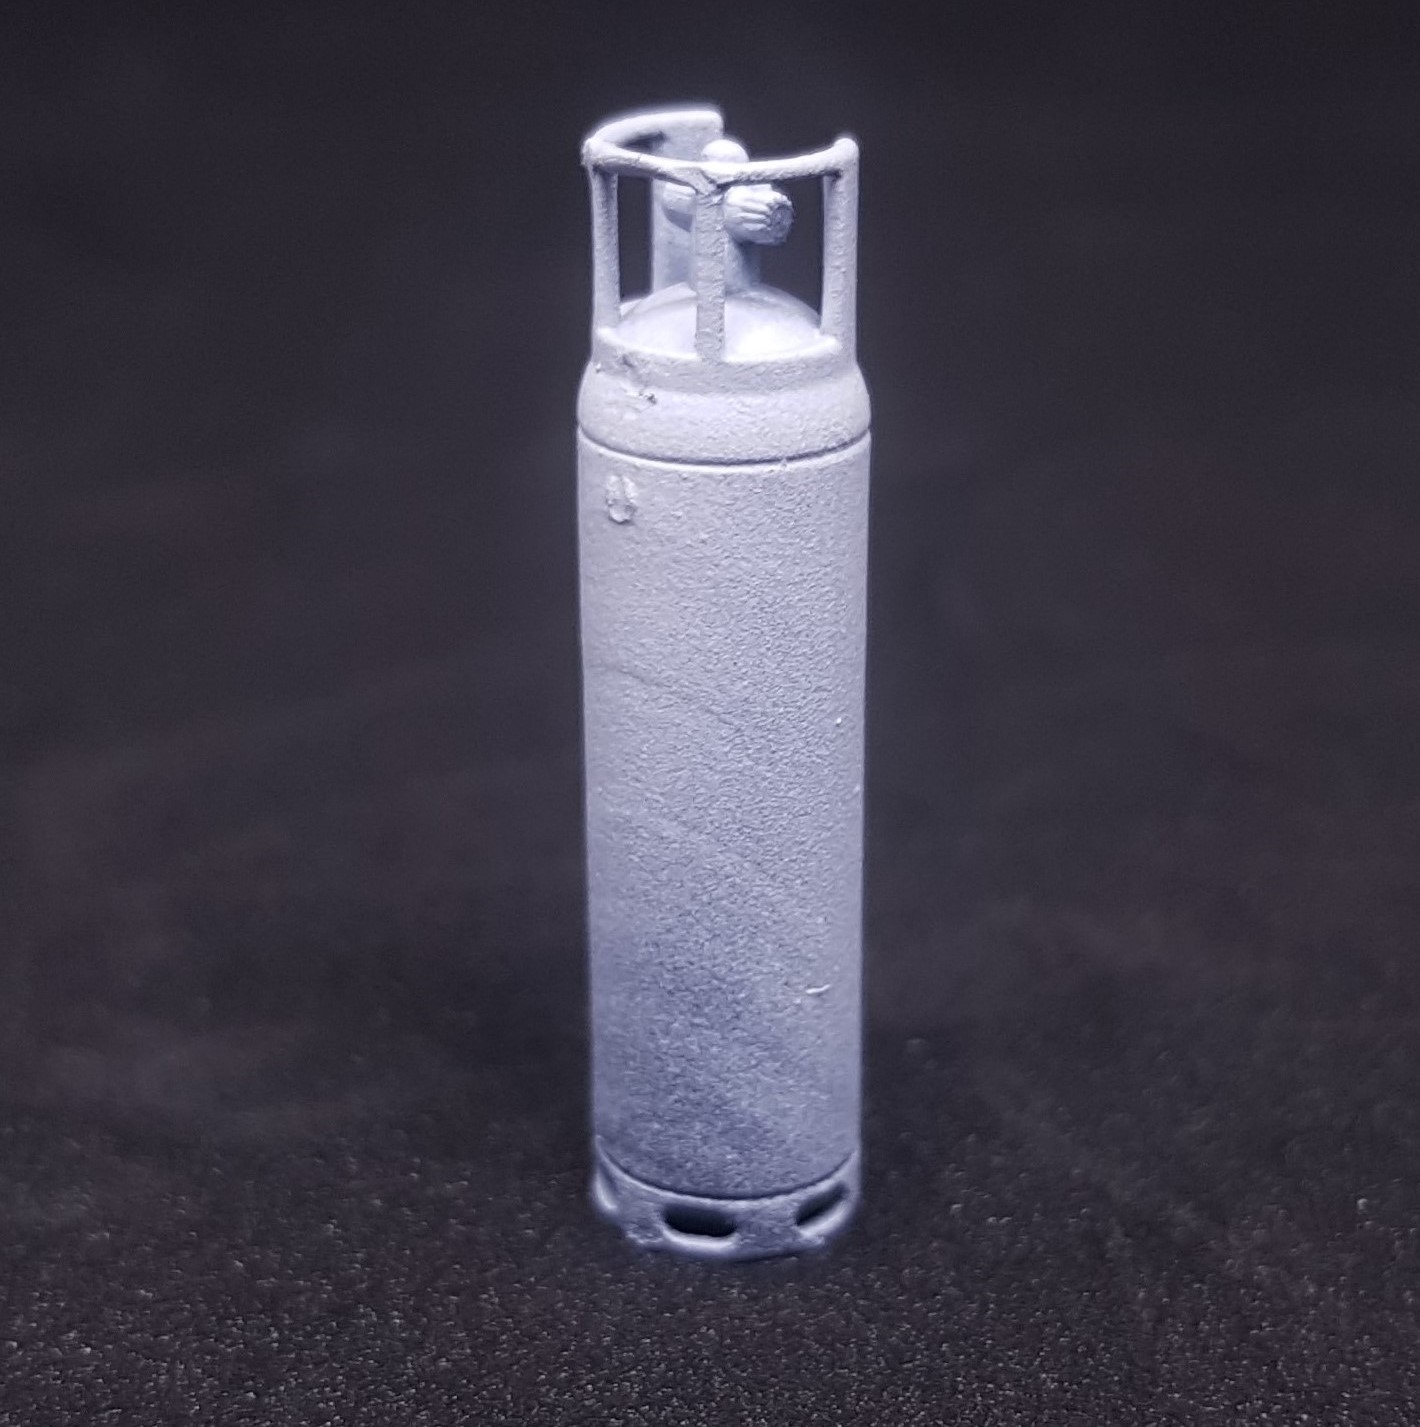 Primed print.
 I went ahead and painted as normal. This didn’t seem any different from painting a resin or plastic model.
 Model for scale and the simply painted gas bottle
 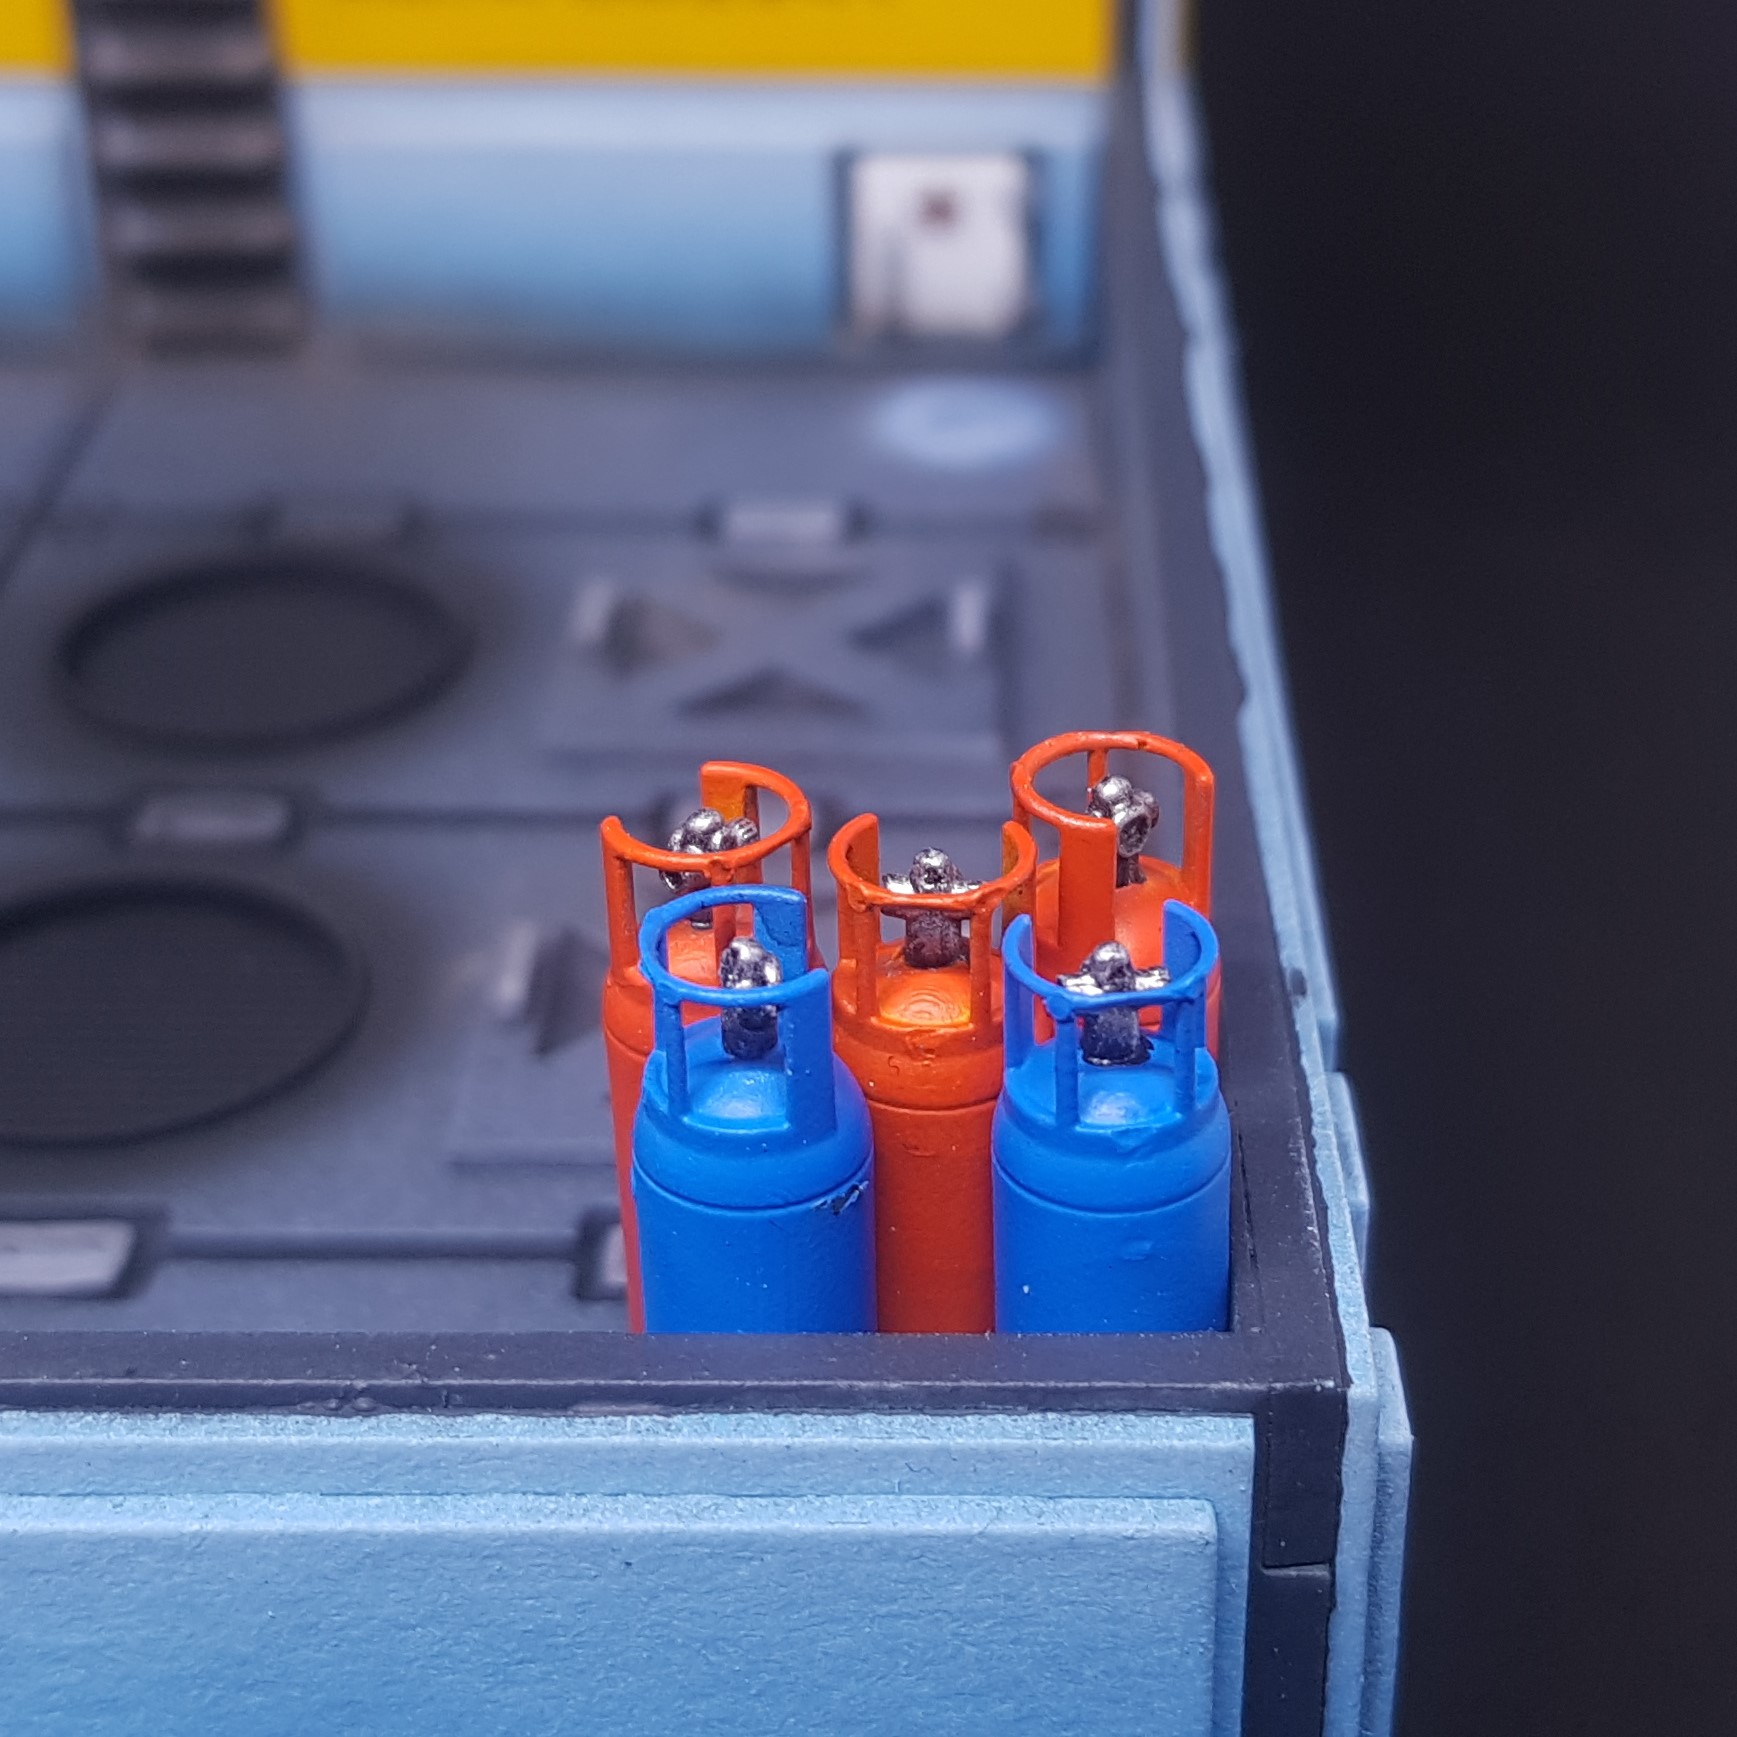 Bottles in place on a terrain piece. I think a few more of this type of thing will really bring everything to life.
 So that’s it a quick project to finish the year with. Its a good starting point with new software, hardware, material and processes. Good thing is that I can make as many or as few of these as I need. Looking forward to getting deeper into 3D printing, mixing this with laser cutting and hand crafting some more terrain and models. I can really see the potential in this!
More to come!
20mm box
I thought this year was over. Well I will be right in over 6 hours my time. But I spent my Sunday evening designing my next 3d object to try to print. I put it on overnight went to work this morning and then came home to see what I got.
 Design for 20mm box.
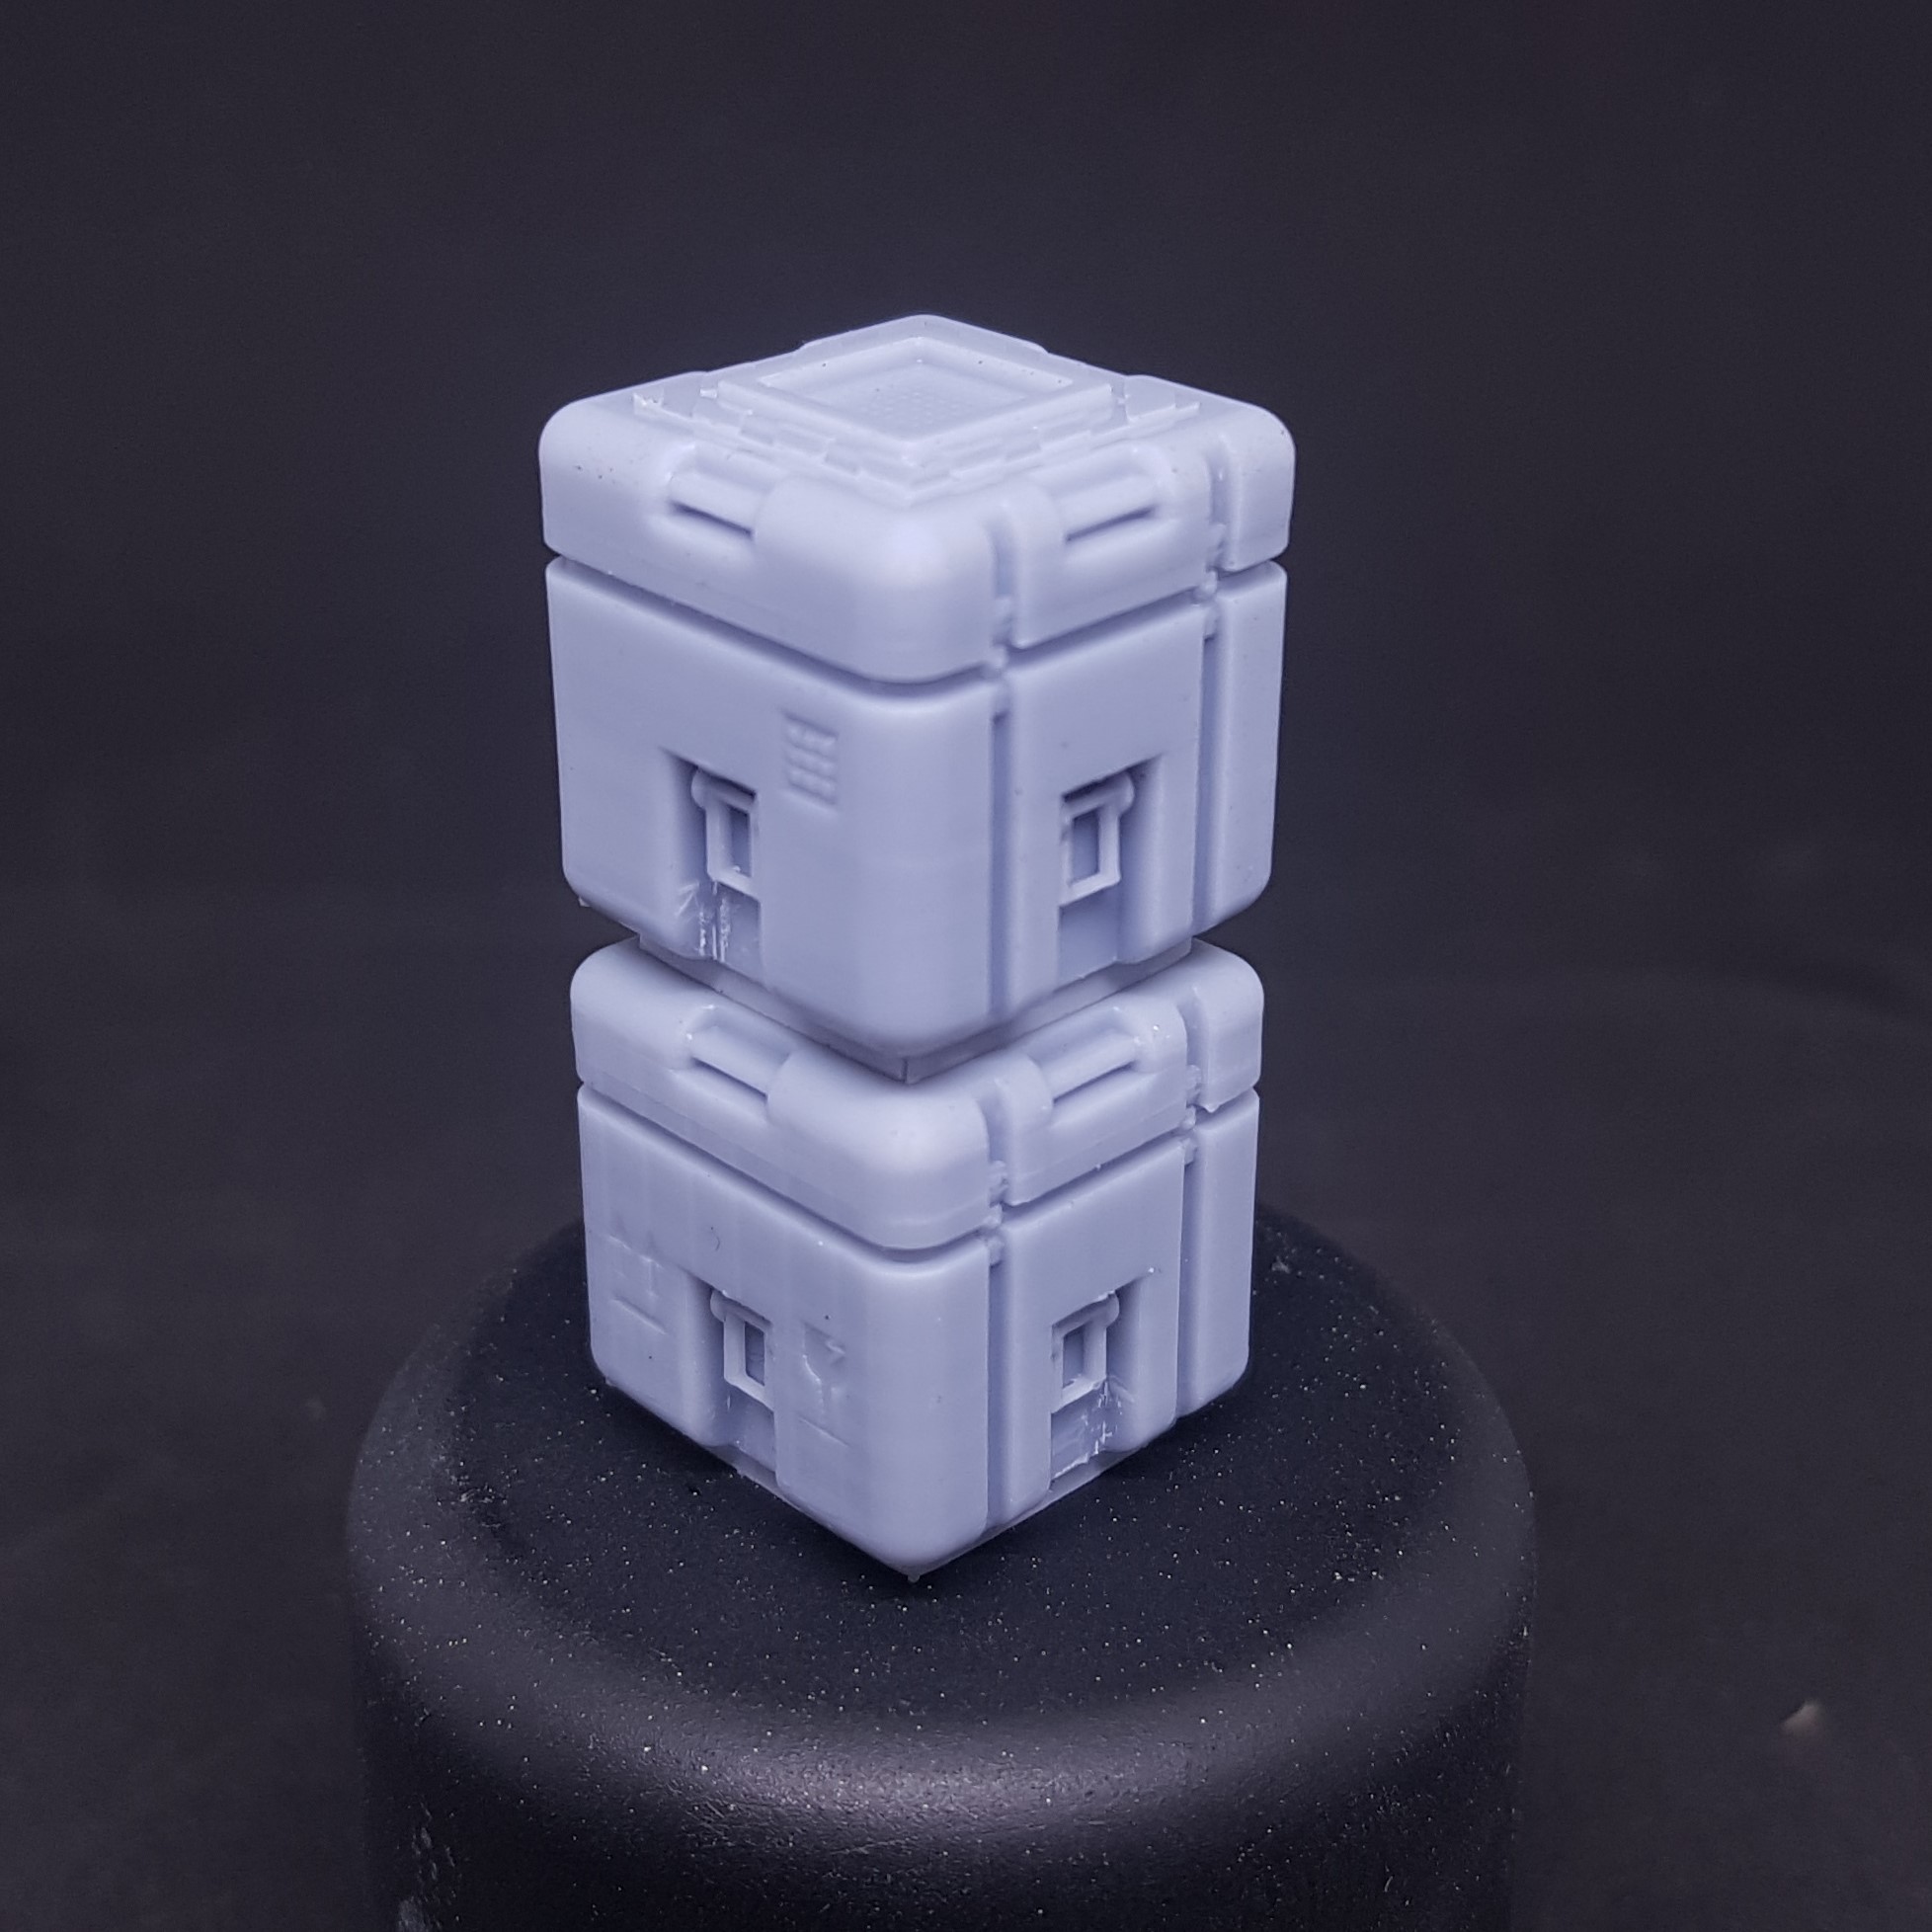 Printed boxes.
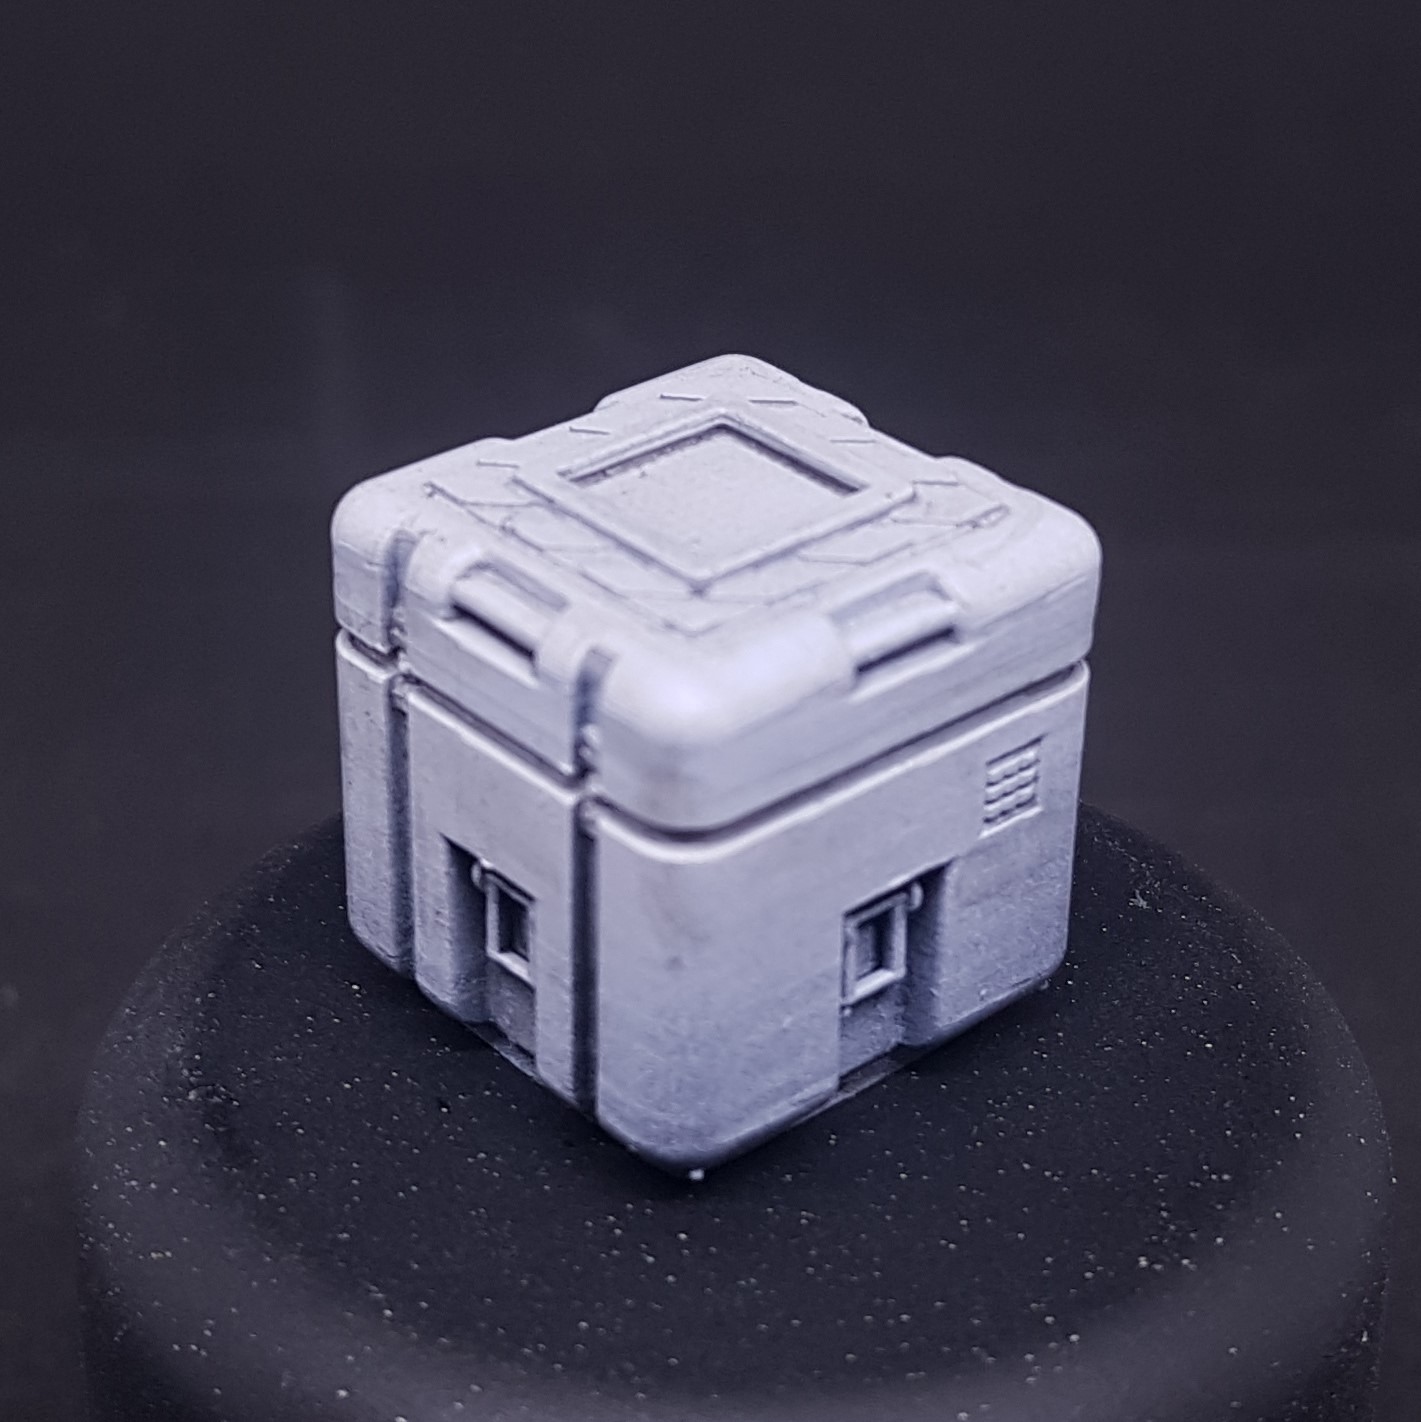 Zenithed and washed box one side.
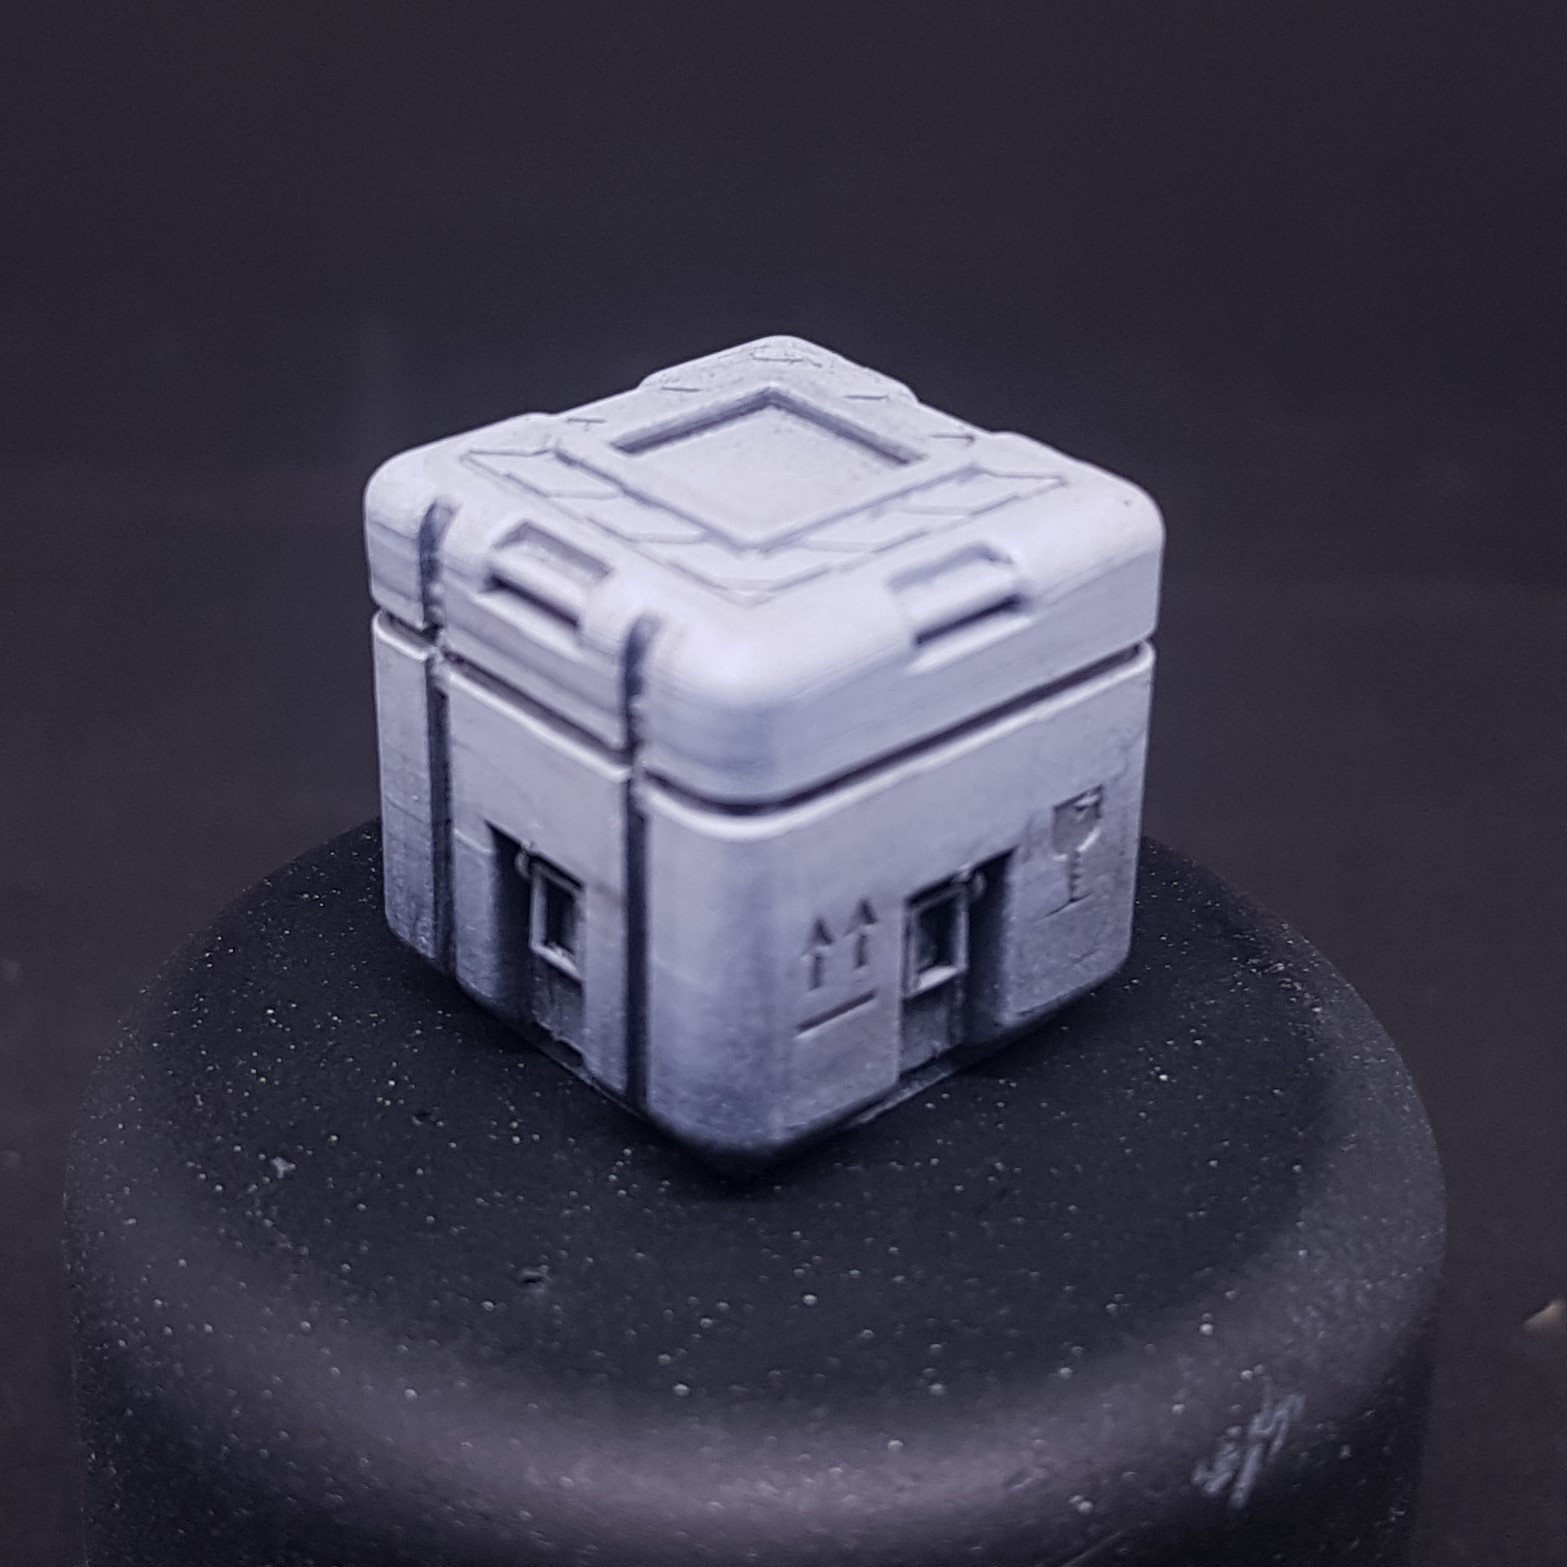 Zenithed and washed box other side.
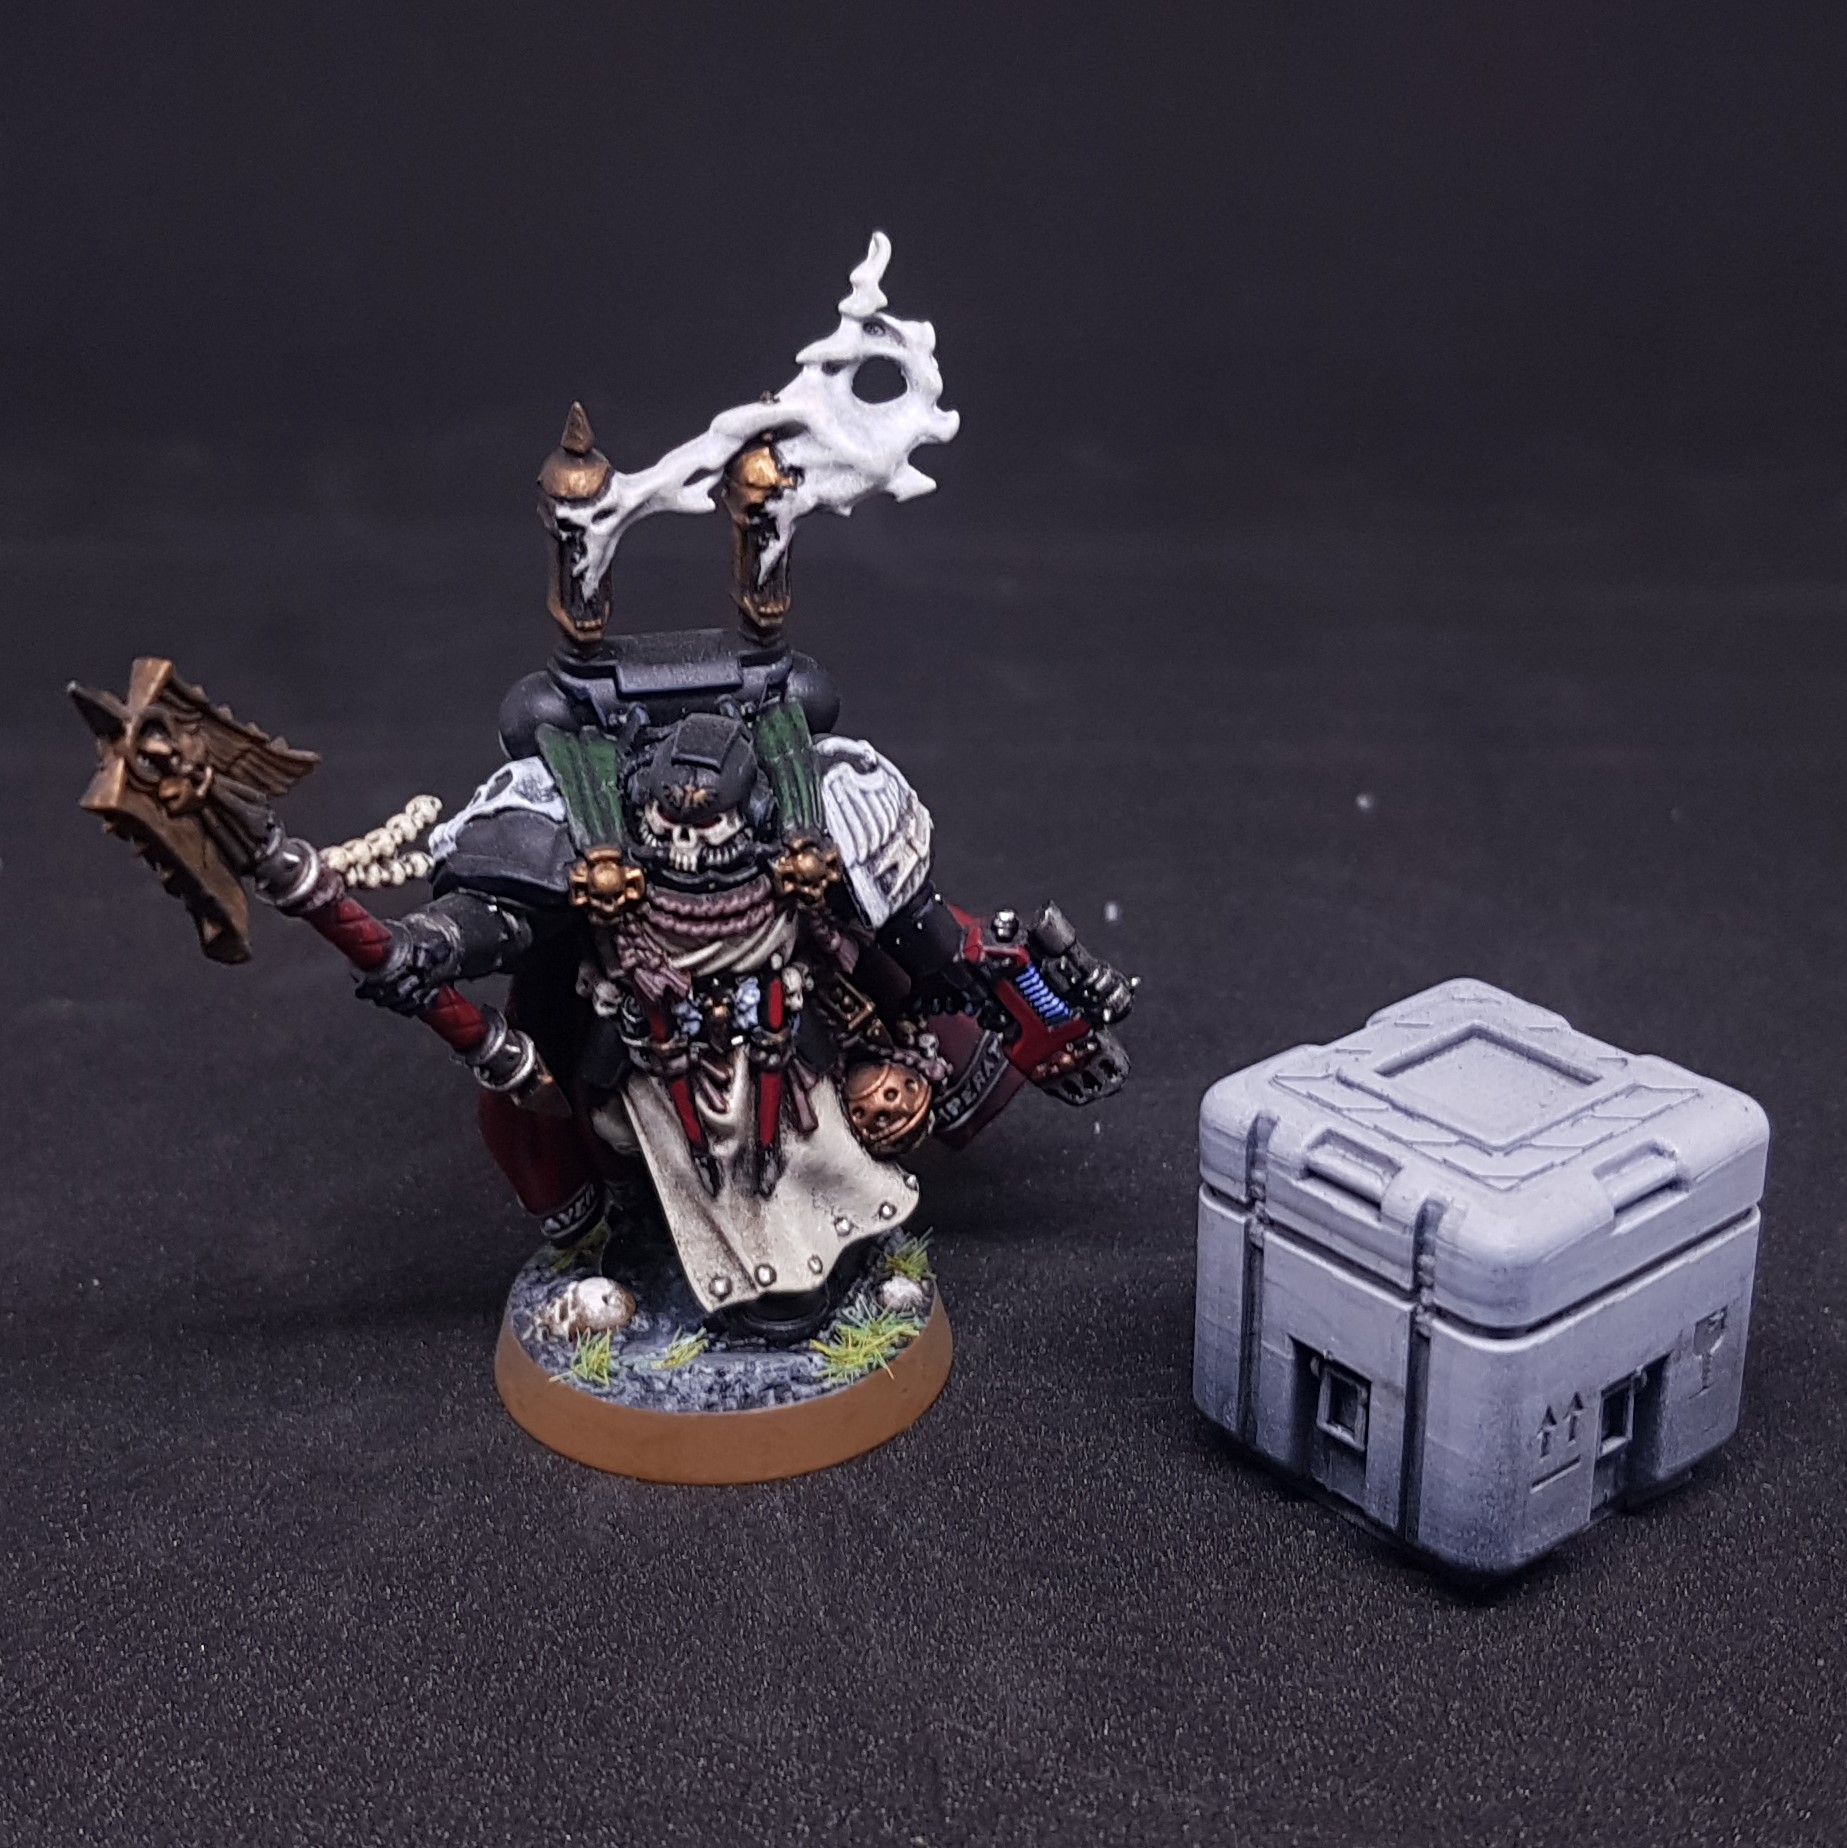 Box with model for scale.
 So 4 of these printed. Surprisingly with all the designed details visible though I am calling this V1.0
This needs some work:
- Some supports adhered to the under hangs on the sides and some caused issues and weaknesses on the bottom lip.
- I messed up just plonking this in my sonic cleaner you can see the basket marks on the model. (not so much when painted)
- There is absolutely no need to be able to run a scalpel under the handles these could be a part of the main body and fix the support issue.
- The holes on the top are so fine. I need to exaggerate the detail to make it look better
- I need to thicken the bottom stackable lip to make this more ridged and make it larger to accommodate paint thickness better. I may make the top detail more pronounced.
Still very pleased with the outcome The finished updated versions will be much better but this will need to wait until the new year.
Happy Hogmanay and lets get smashed 😀
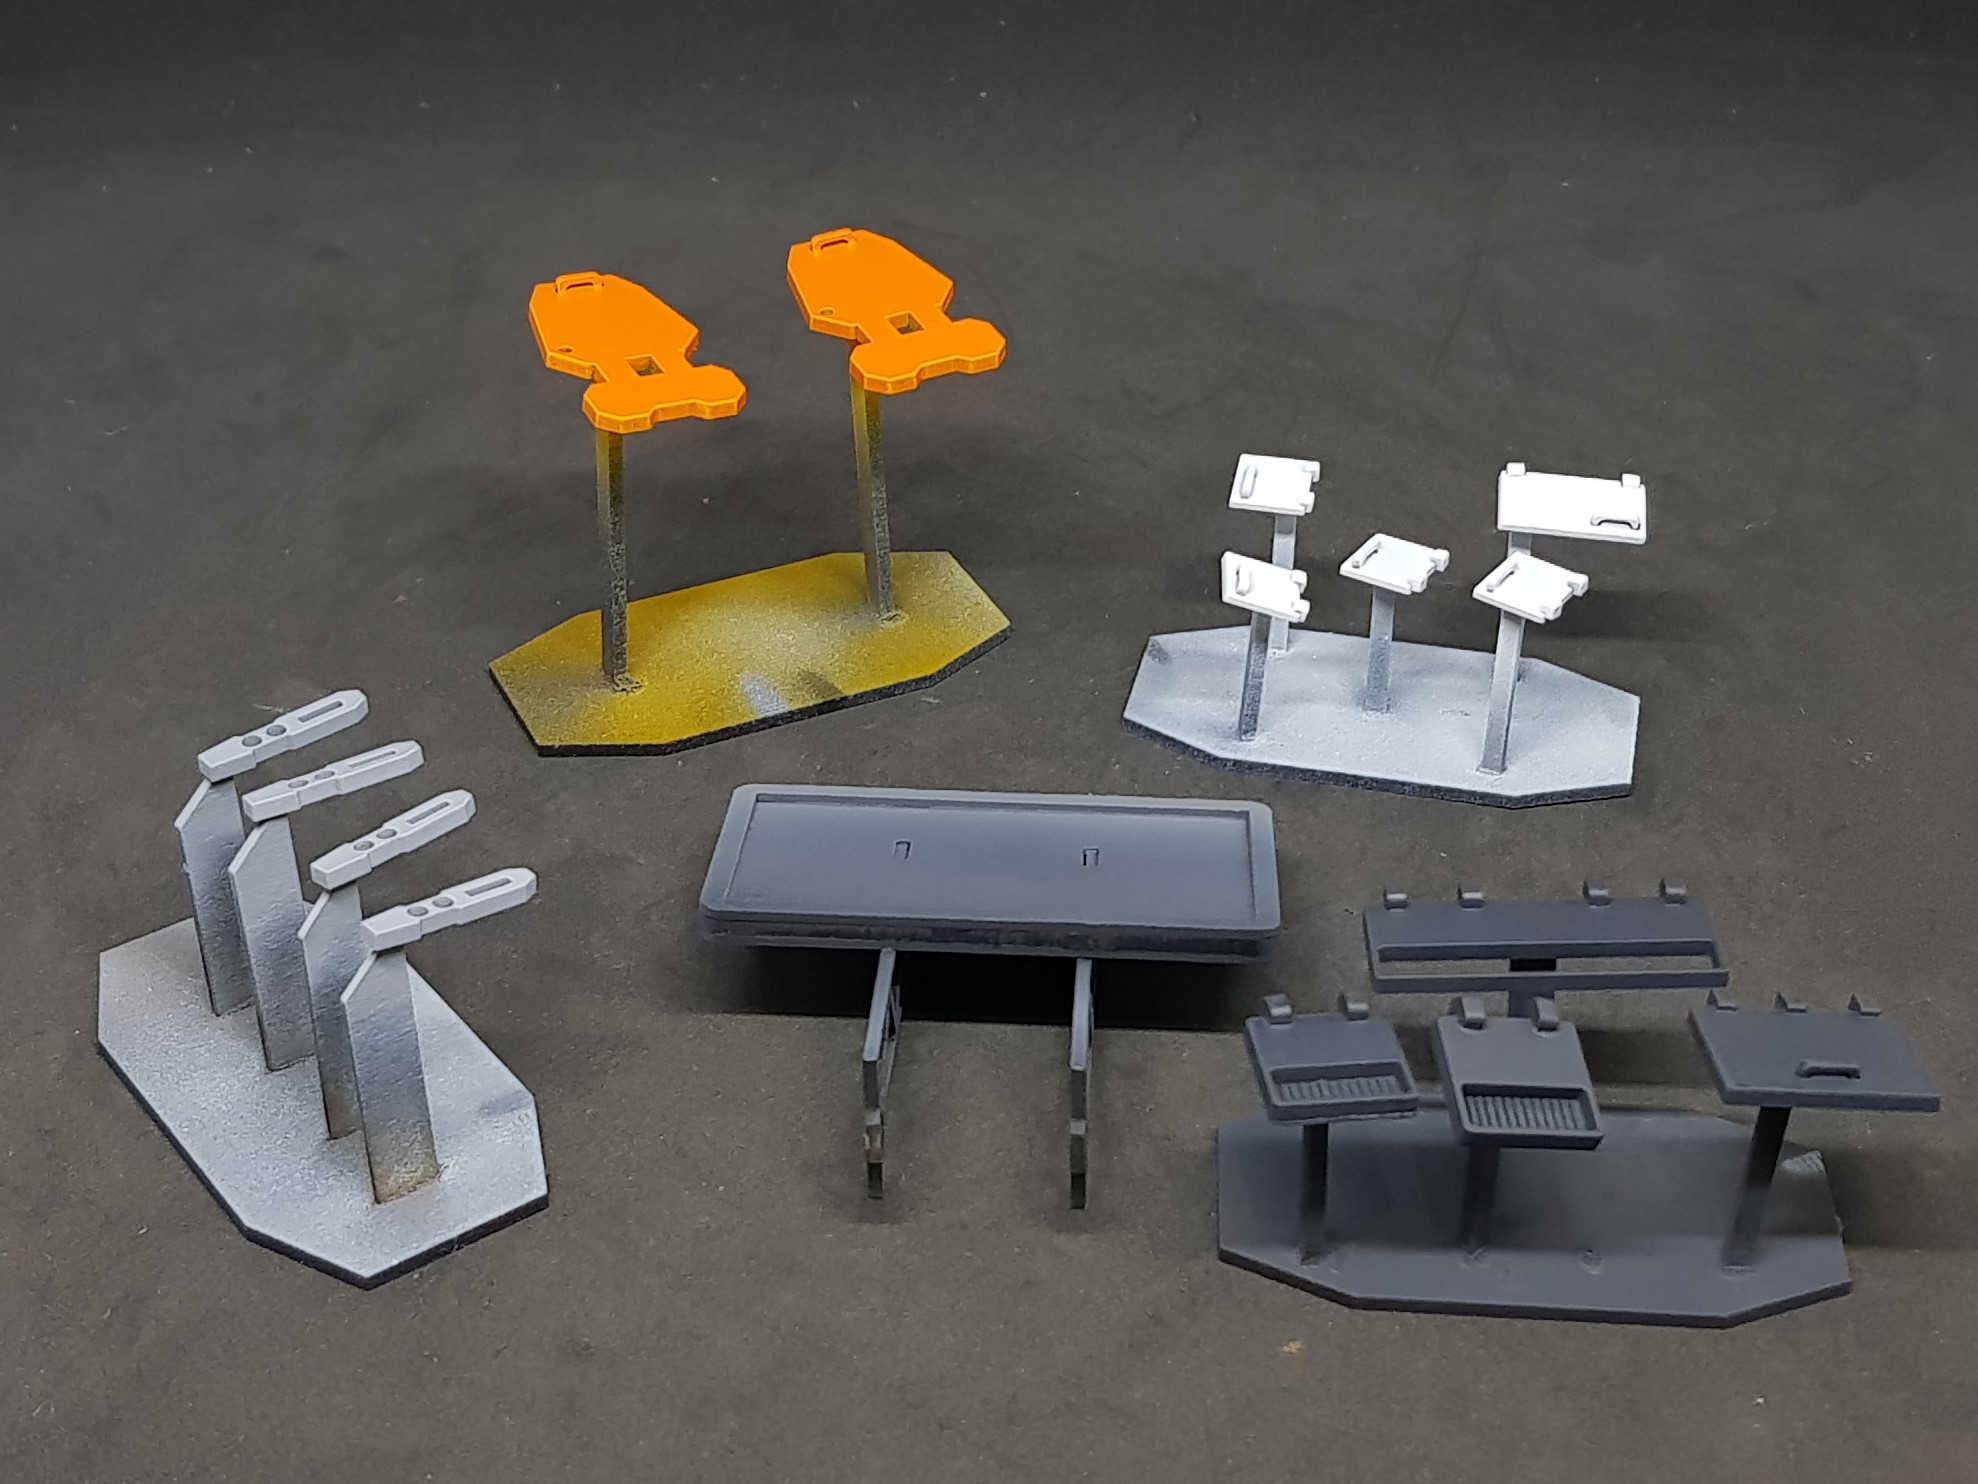
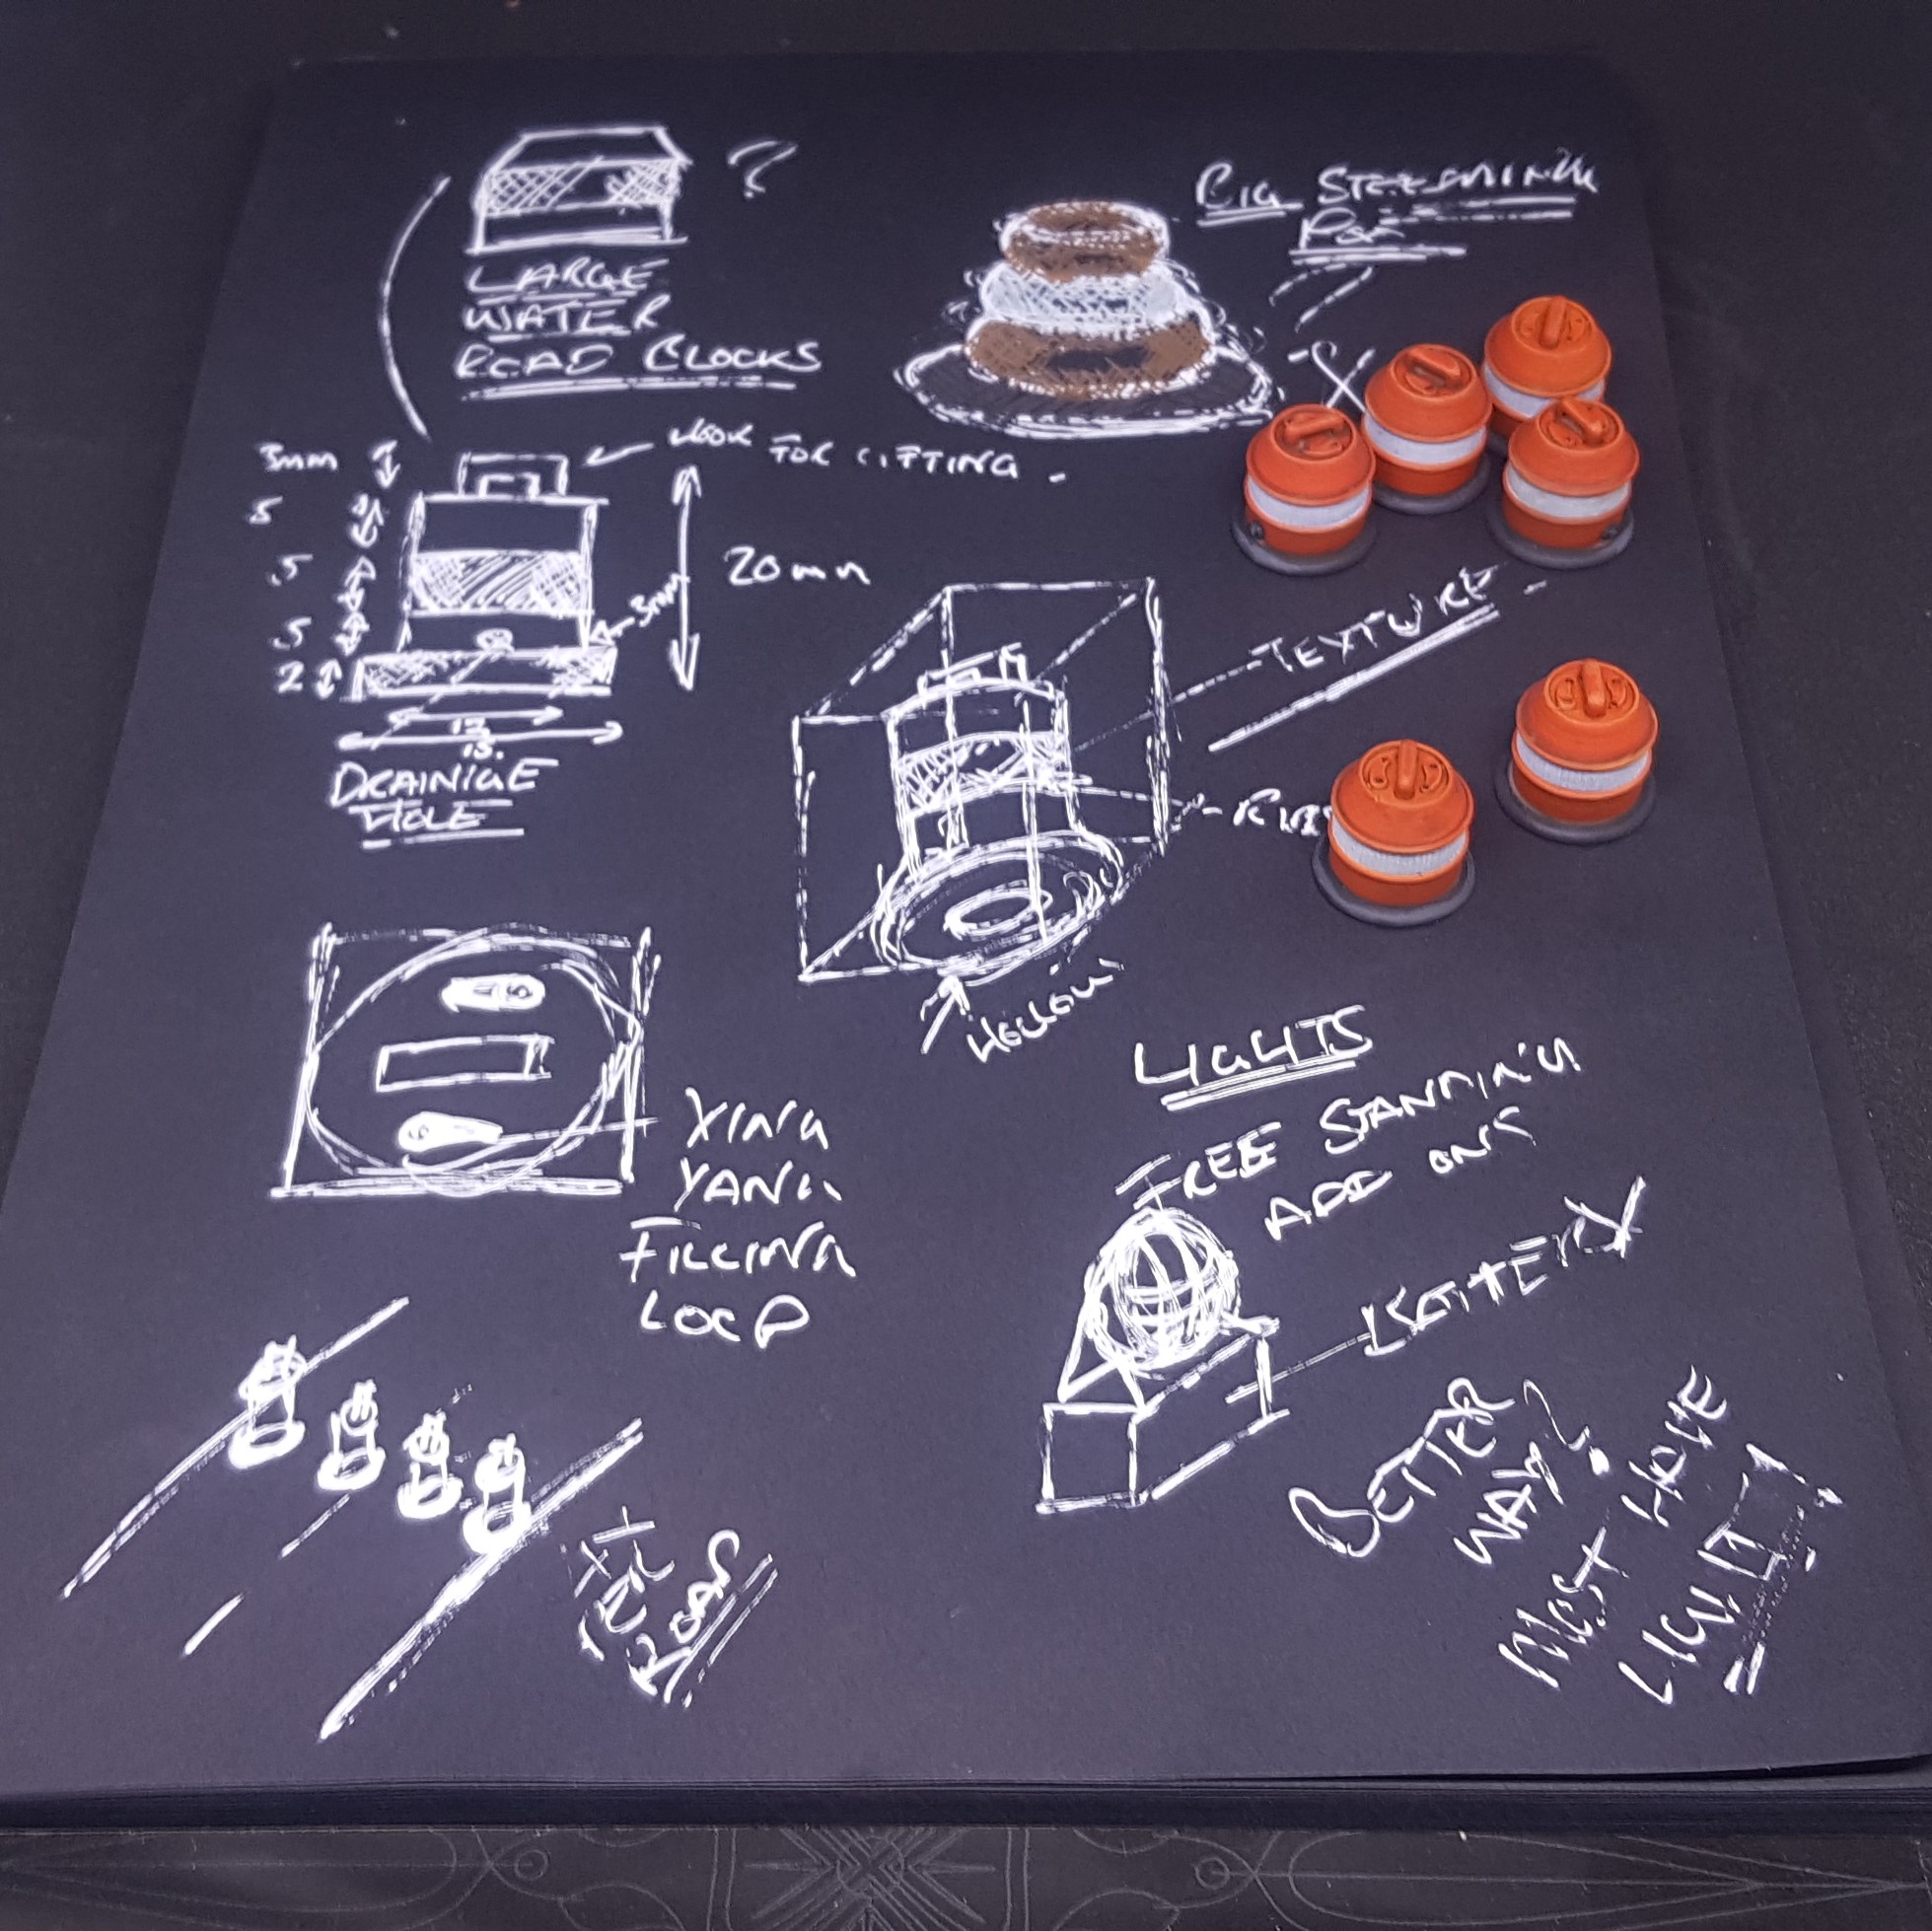
The start of a street / industial furniture set and plans for the future.
After the inclusion of a 3d printer and getting used to this. I have decided to do a street furniture pack for my infinity boards. The box and gas cylinder was a good start but I think more is to come and as this is the first post of the project in 2019 I think it’s a good time to set out my plans.
First of all a catch-up on this week.
I have had the resin printer learning curve this week with a fair few failures / issues with prints. This has mostly been trying to get more speed out of the printer and resin combo, I pushed it past the point in which more time was required due to layer height I think I have found the sweet spot/compromise for speed and quality for the grey resin I am using.
I think I am giving up on angling my prints for printing as well due to more supports being required and the marks this places on the surface. I still use supports but this tends to be thick bottom supports and very thin (0.20mm) supports higher up. Seems to work well.
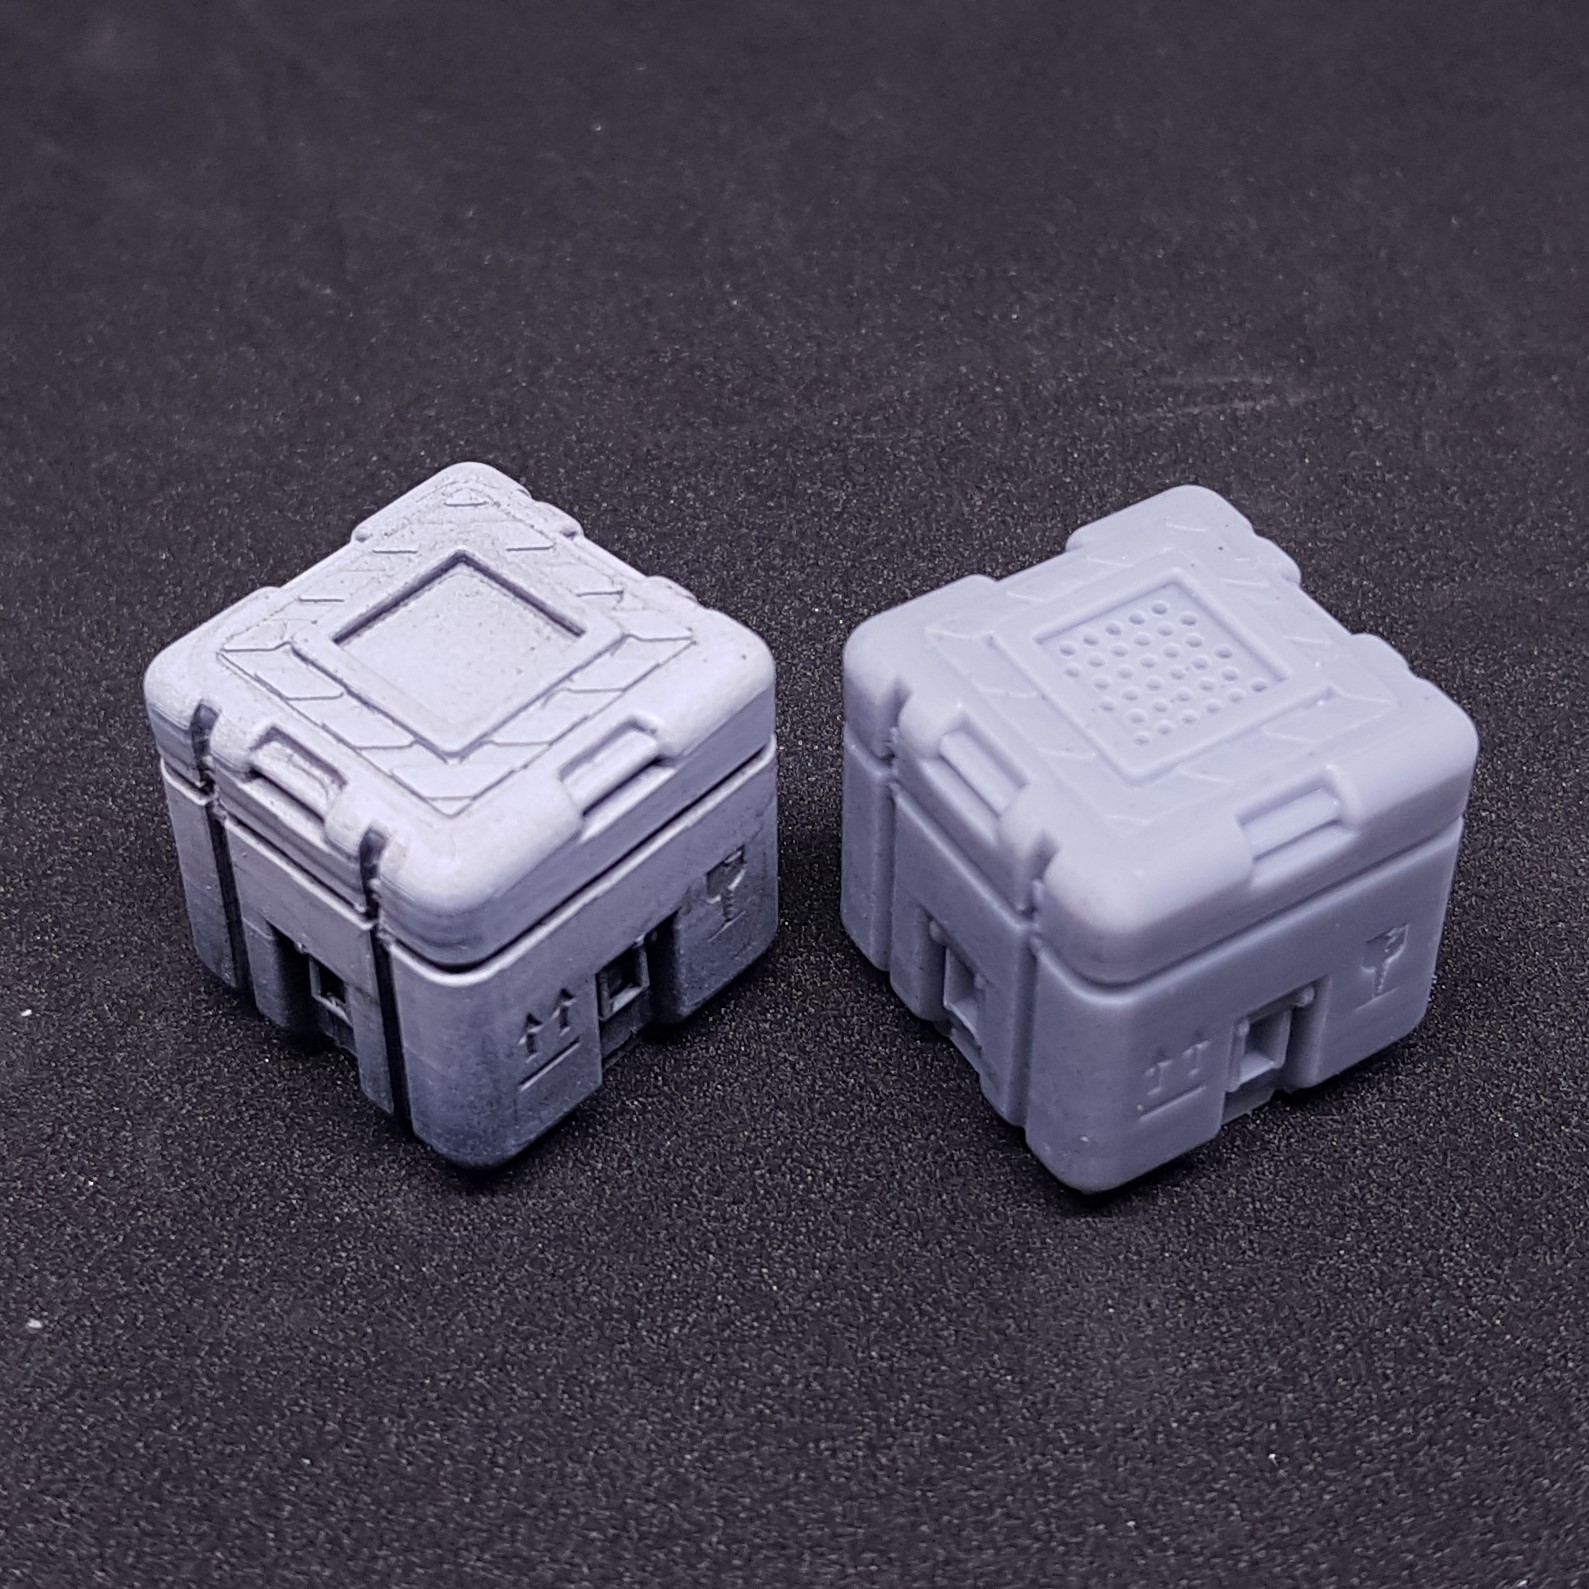
The redesign of the cube has completed. I got out a few ok prints but changed the angle back to vertical and this fixed most issues. Only occasionally I get the odd clogged vent holes on the top of the cube, I have not pointed any yet but have 15 of these made so far. Still to paint but I think these will be coloured tops and grey bottoms with the colour indicating the contents.
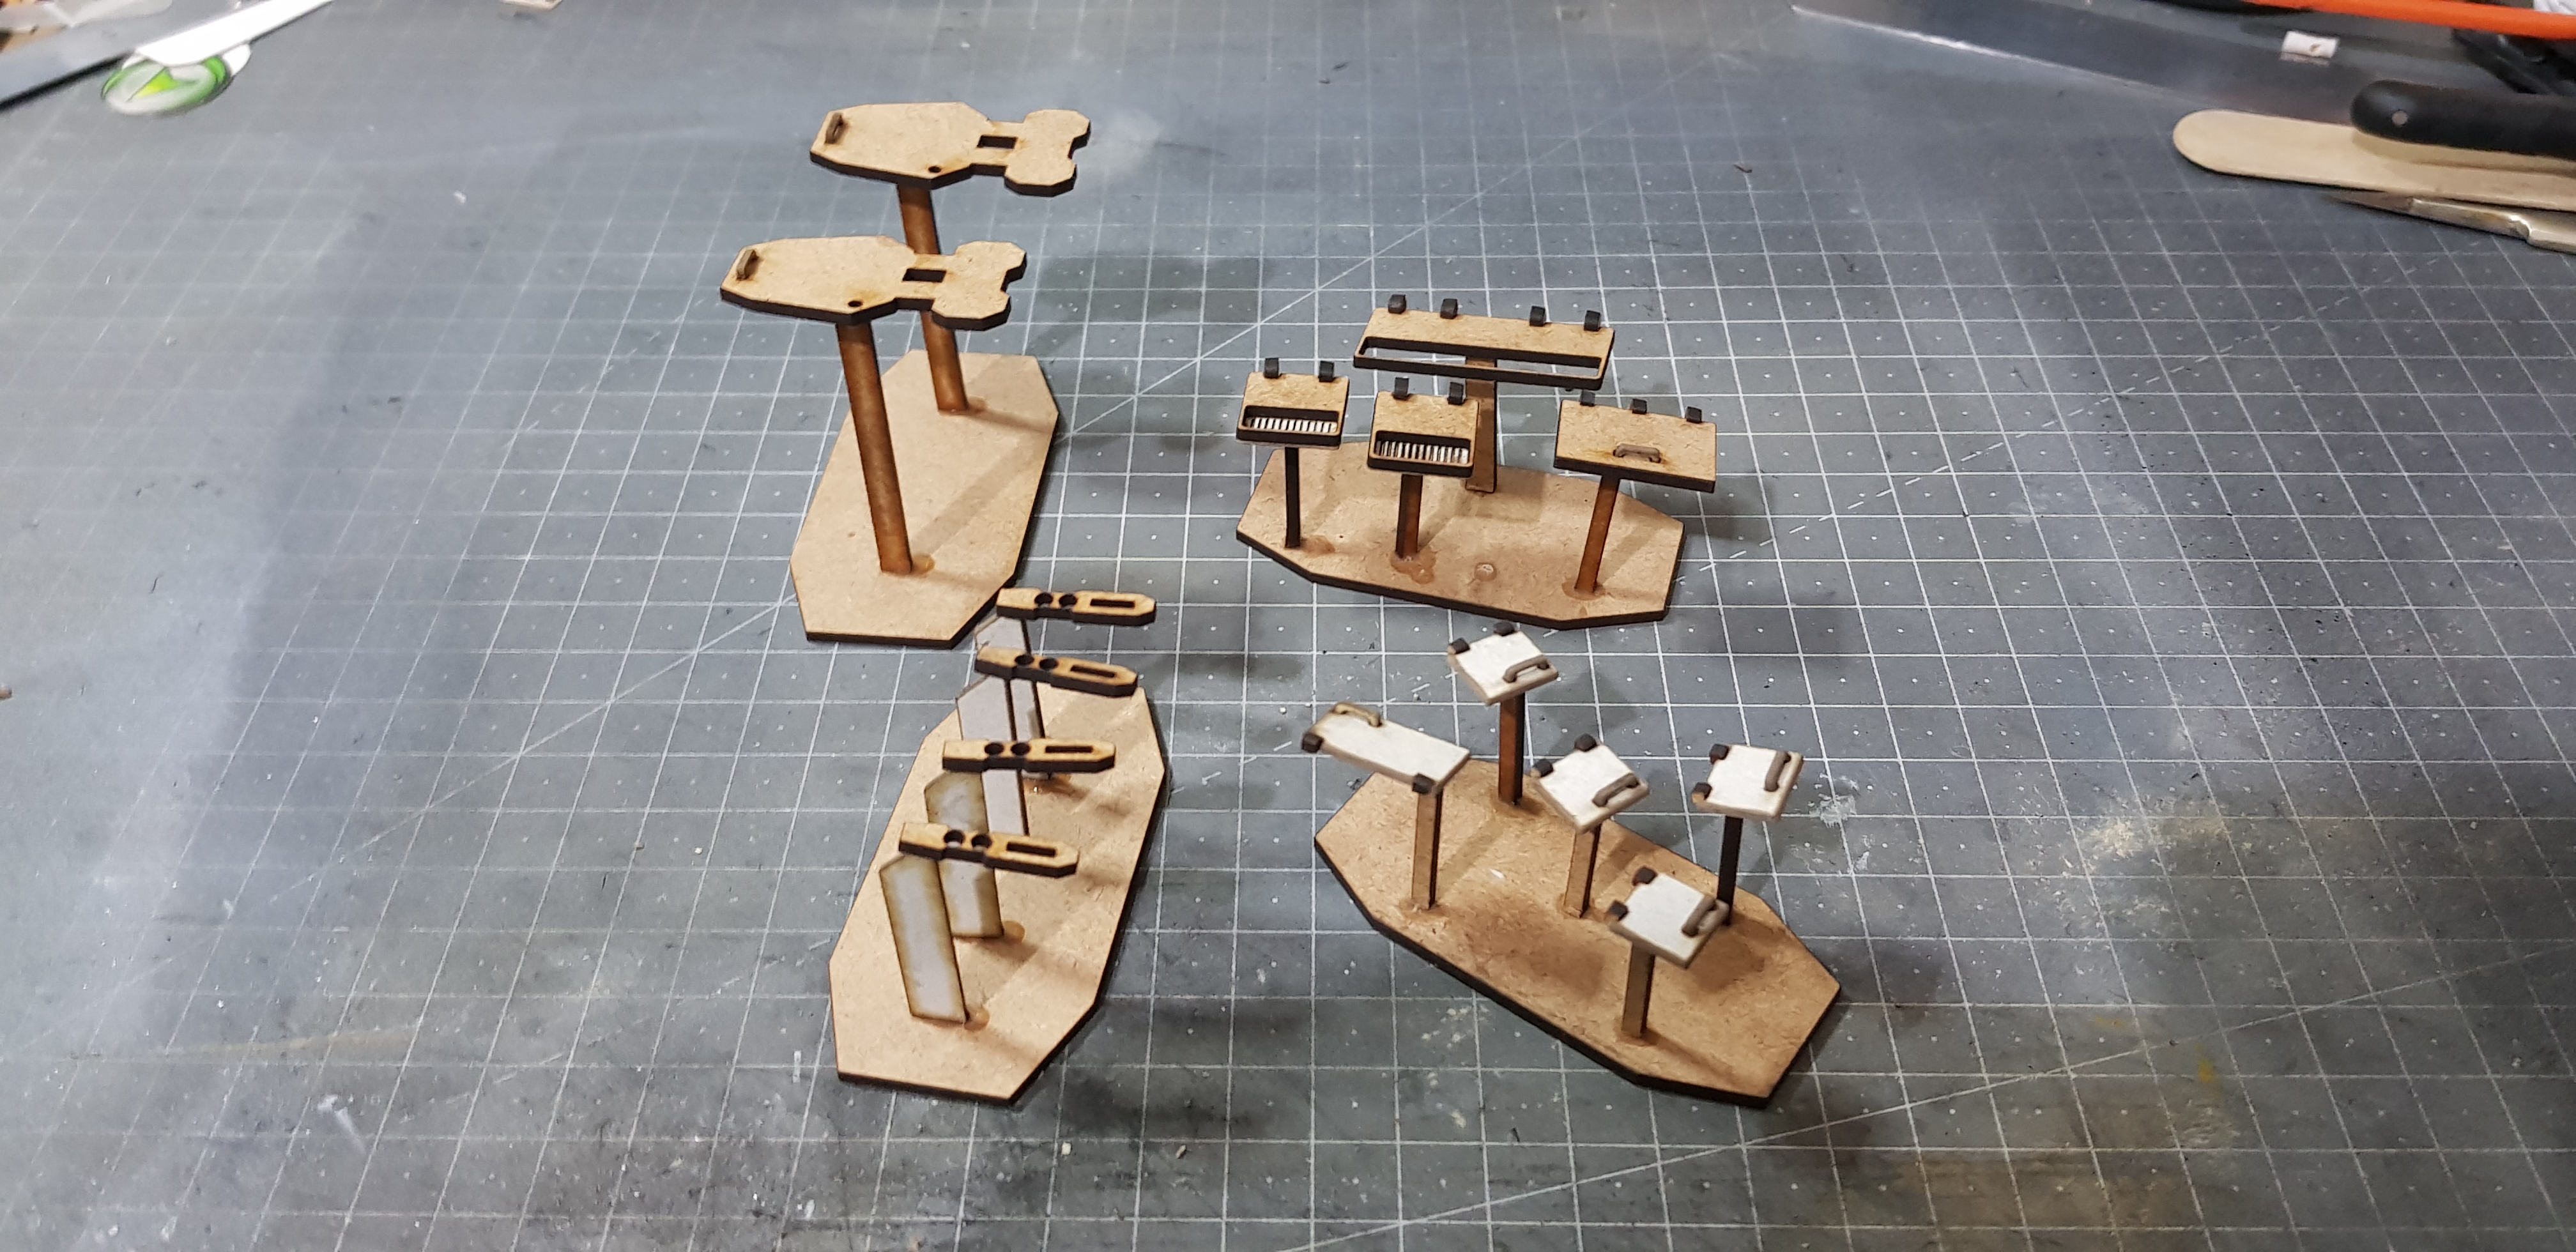
I have made traffic barriers. liquid drums and road blacks so far but I will show these on a separate post.
 Box top with much larger holes, joined and enlarged handles.
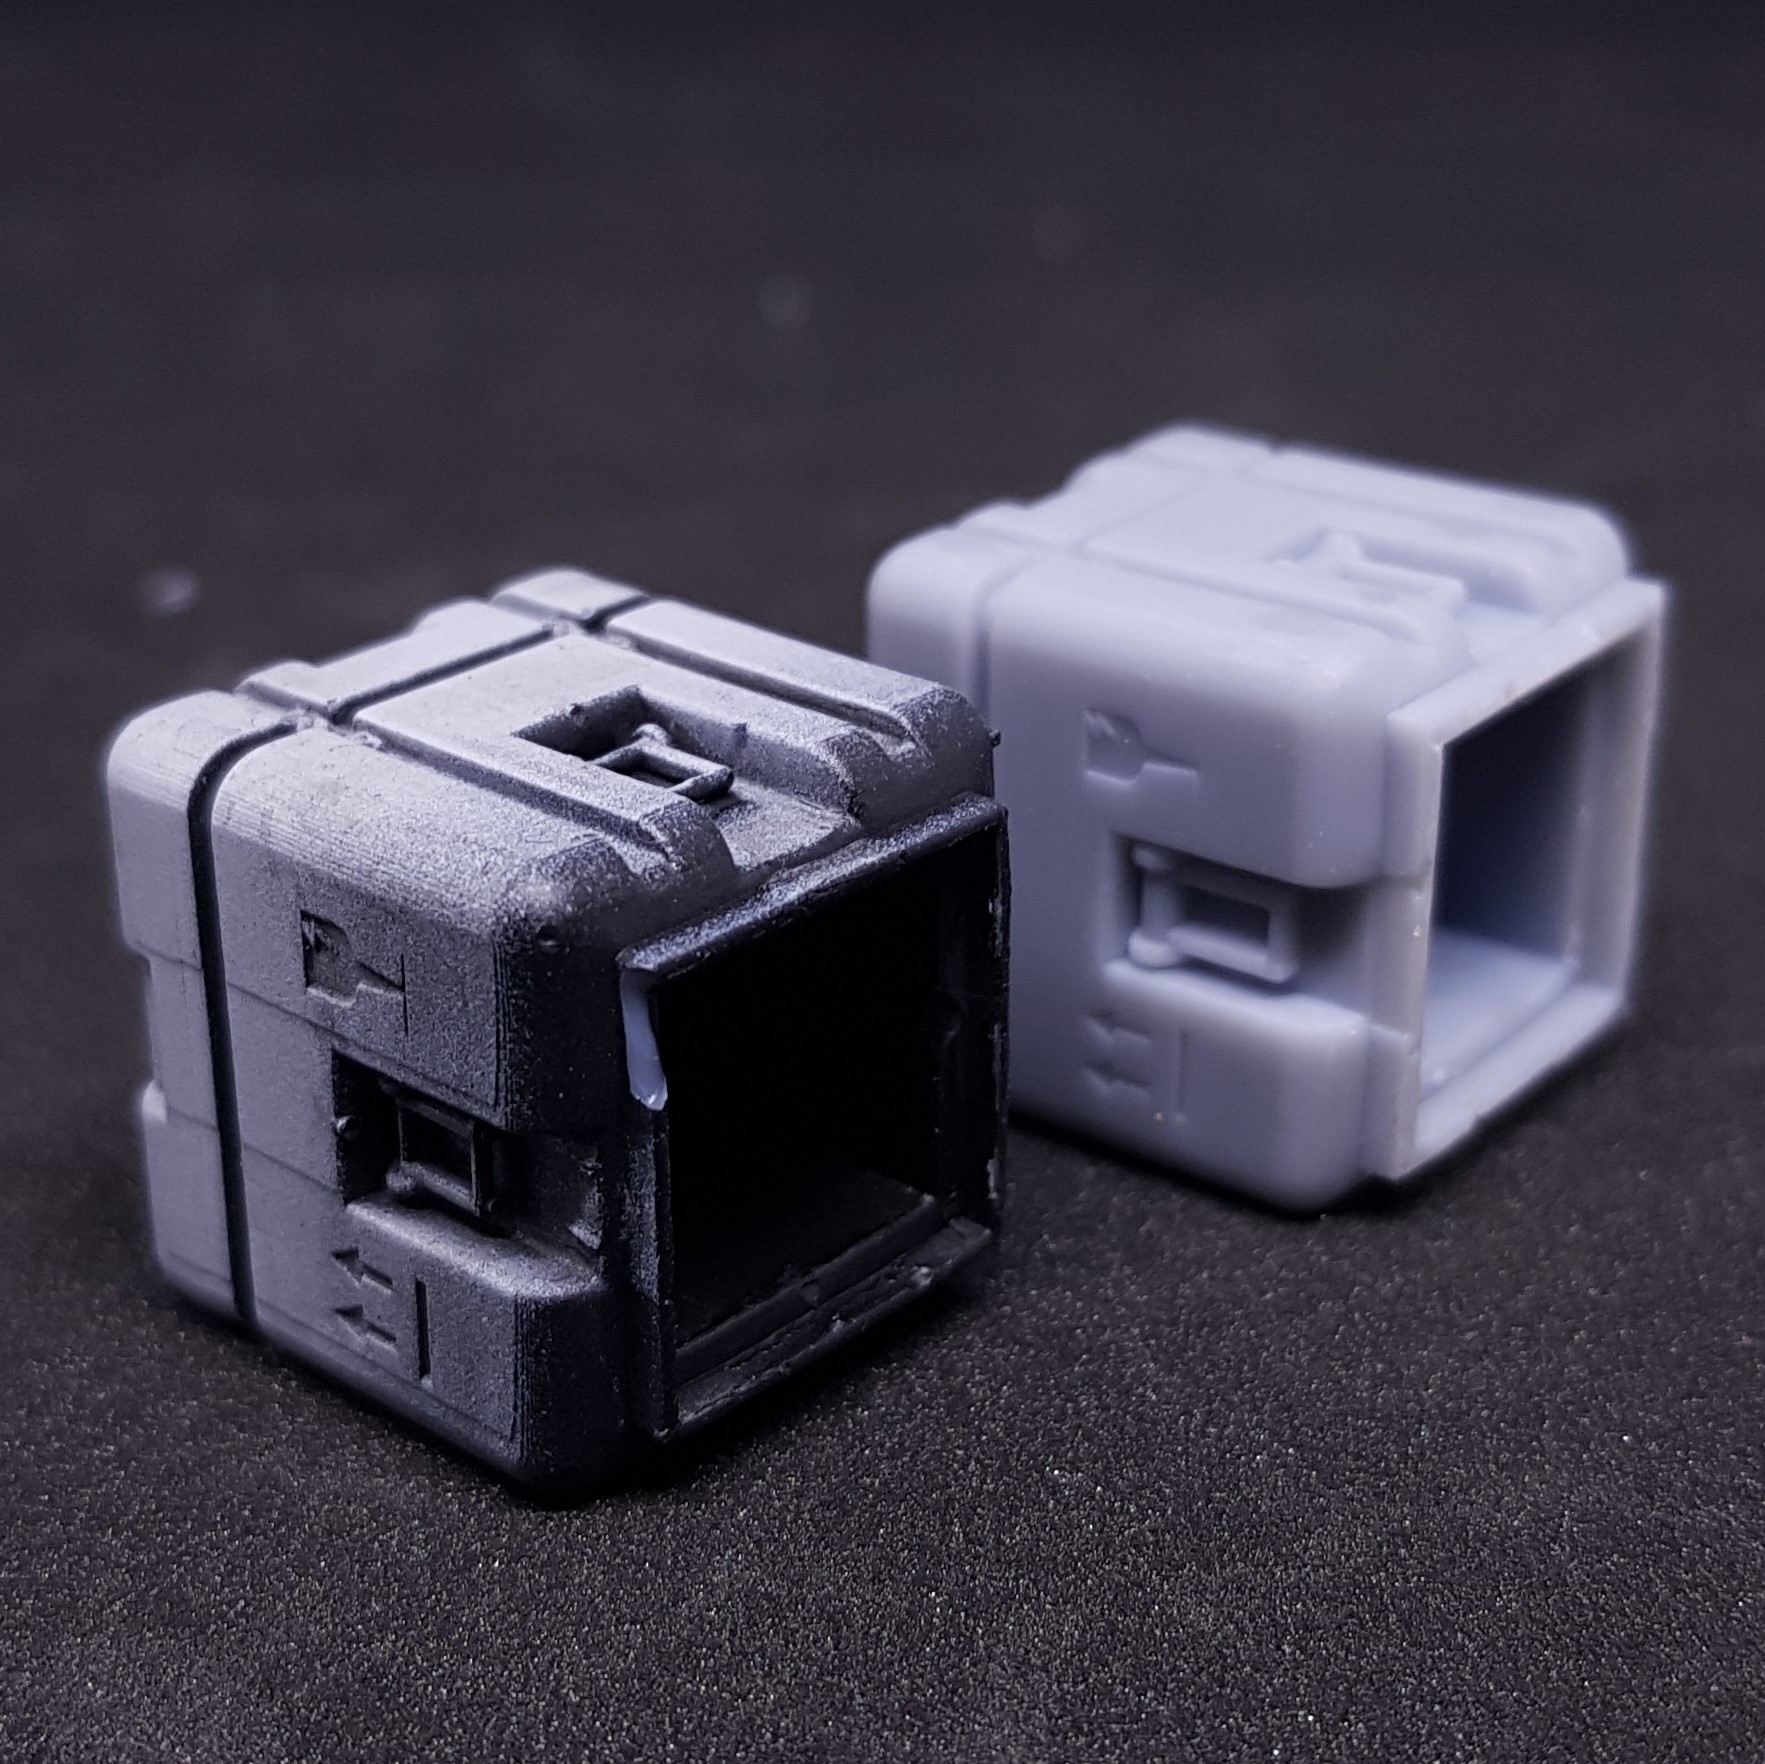 Box bottom with thickened and enlarged bottom for easier tacking and strength.
Onto my Plans for 2019 infinity.
I wanted a plan set out so if I go “what should I make next?” I have a list to pick from. I think with this it will finish off this set and give elements for other sets. This may not be an exhaustive list. I want to make the kind of things that are either expensive to buy, I don’t like the ones I have seen or that are very niche and not available.
Things to design / Build in 2019
Gas cylinders – Resin
20mm Box – Resin
Barrels – Resin
Bins – Resin
Large water road blocks / cones – Resin
Road bollards / rails – Resin
More different box / package – Resin
free standing consoles x3 – Resin
US style road blocks – Resin
Smaller gas canisters – Resin
Truck – Resin
Dumpsters – Resin
Gas cylinders container – Resin
Rectangular boxes – Resin
Small Food shops – Resin/Laser
Com Tower Resin/Laser – Resin/Laser
Large Billboard – Resin/Laser
Small Free standing advertising – Resin/Laser
Landing Pad – Resin/Laser
Small shuttle / dropship – Resin
Armoury / Security office – Resin/Laser
fuel / car charging station – Resin/Laser
lamp posts – Resin
Pleasure / suicide booths – Resin/Laser
Fire Hydrant – Resin
Tree / flower planters – Resin/Laser
Road dividers – Resin
Civilian drone / delivery system – Resin/Laser
Underlined objects have been done already.
This is not an exhaustive or binding list I am sure there will be more but this is something to be getting on with.
More to come, Very quickly this time.
Large water road blocks / cones
I will show everything from my working through to completion for the water road block.
I hate my drawings as I am not very good at it unless I spend hours and hours this is not a natural talent but a means to an end in this case so please save your judgements.
I find when using 3D design tools only a lot of time is wasted “thinking” before trying to get the software to do what you envision.
For me not being very proficient in the tools I am using, it’s beneficial to have a plan before I open up the software. I often do very quick sketches I have found these are not normally detailed enough. I have a weird head thing with black on white so sketching on white paper is difficult I lose focus and quite often give up in longer sessions. It’s the same with reading which is why I read on my kindle with white text and black background.
The great thing was I drew a rough plan for this on Friday night. 3d Designed this on Saturday morning and printed and painted in the afternoon. Quite odd thinking about something, going to sleep and having it in your hand within 24 hours. That’s probably quicker than most delivery services and faster than I can make a decisions on spending money on models.
 Sketch and finished model.
  3D model done in fusion 360
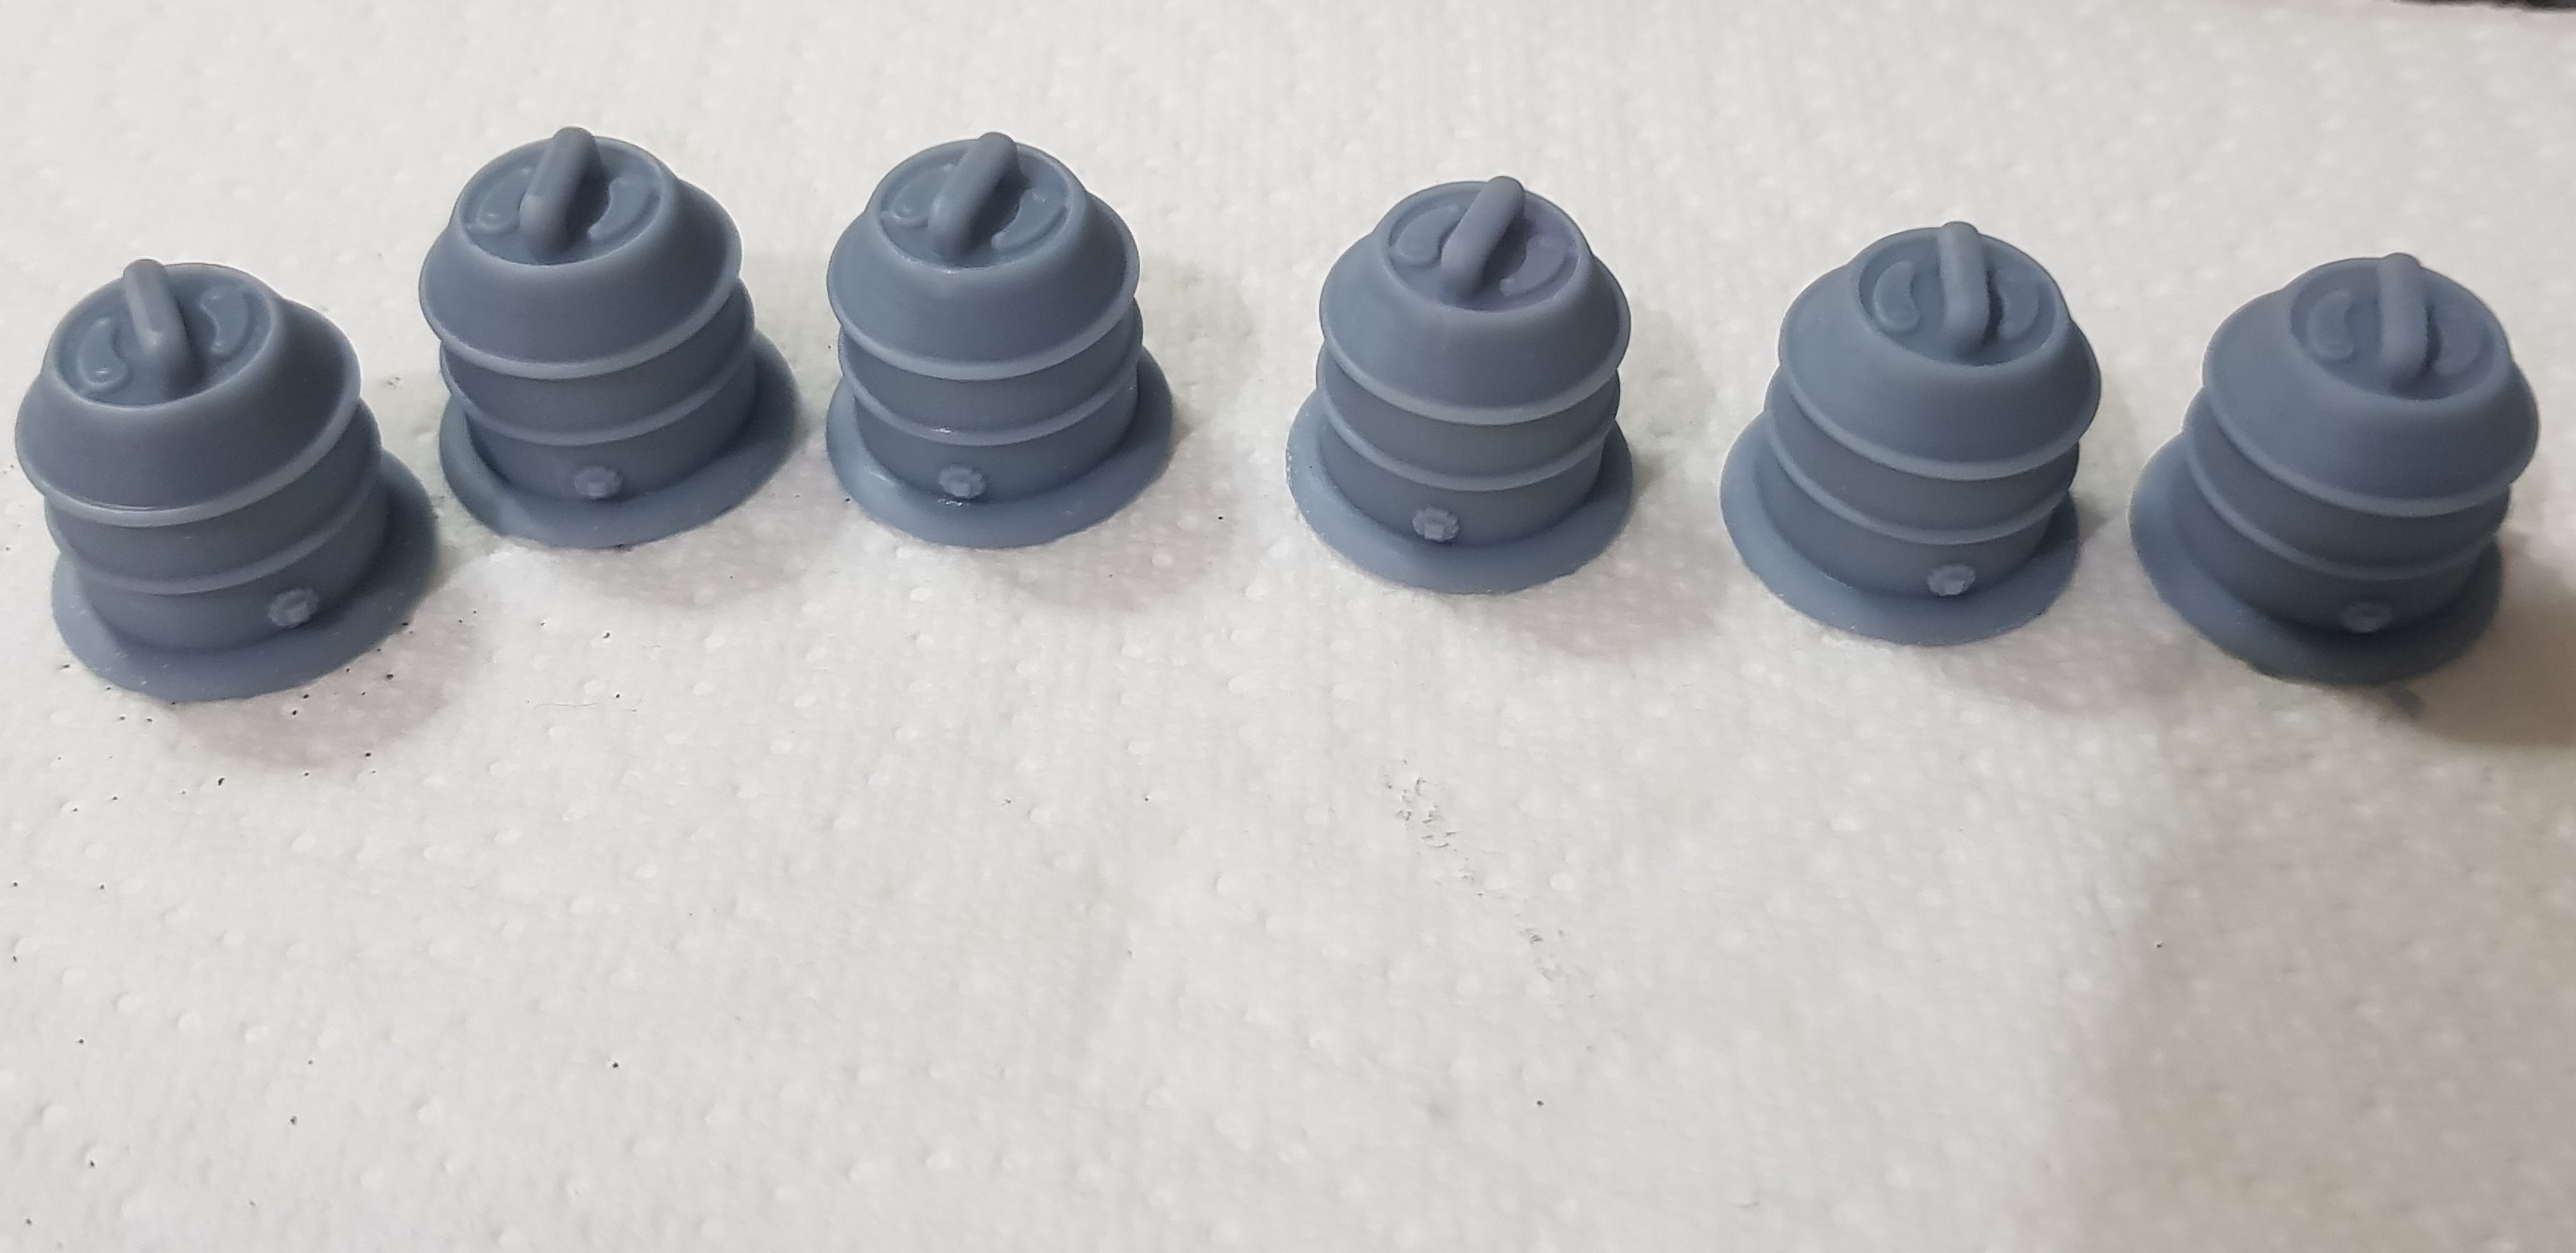 3D Print removed from sprue/supports and cleaned in alcohol.
 Primed, note the texture on the centre section was deliberate and ment to look reflective.
  Drybrushed the centre in white so give a reflective texture and basked then spreayed orange.
 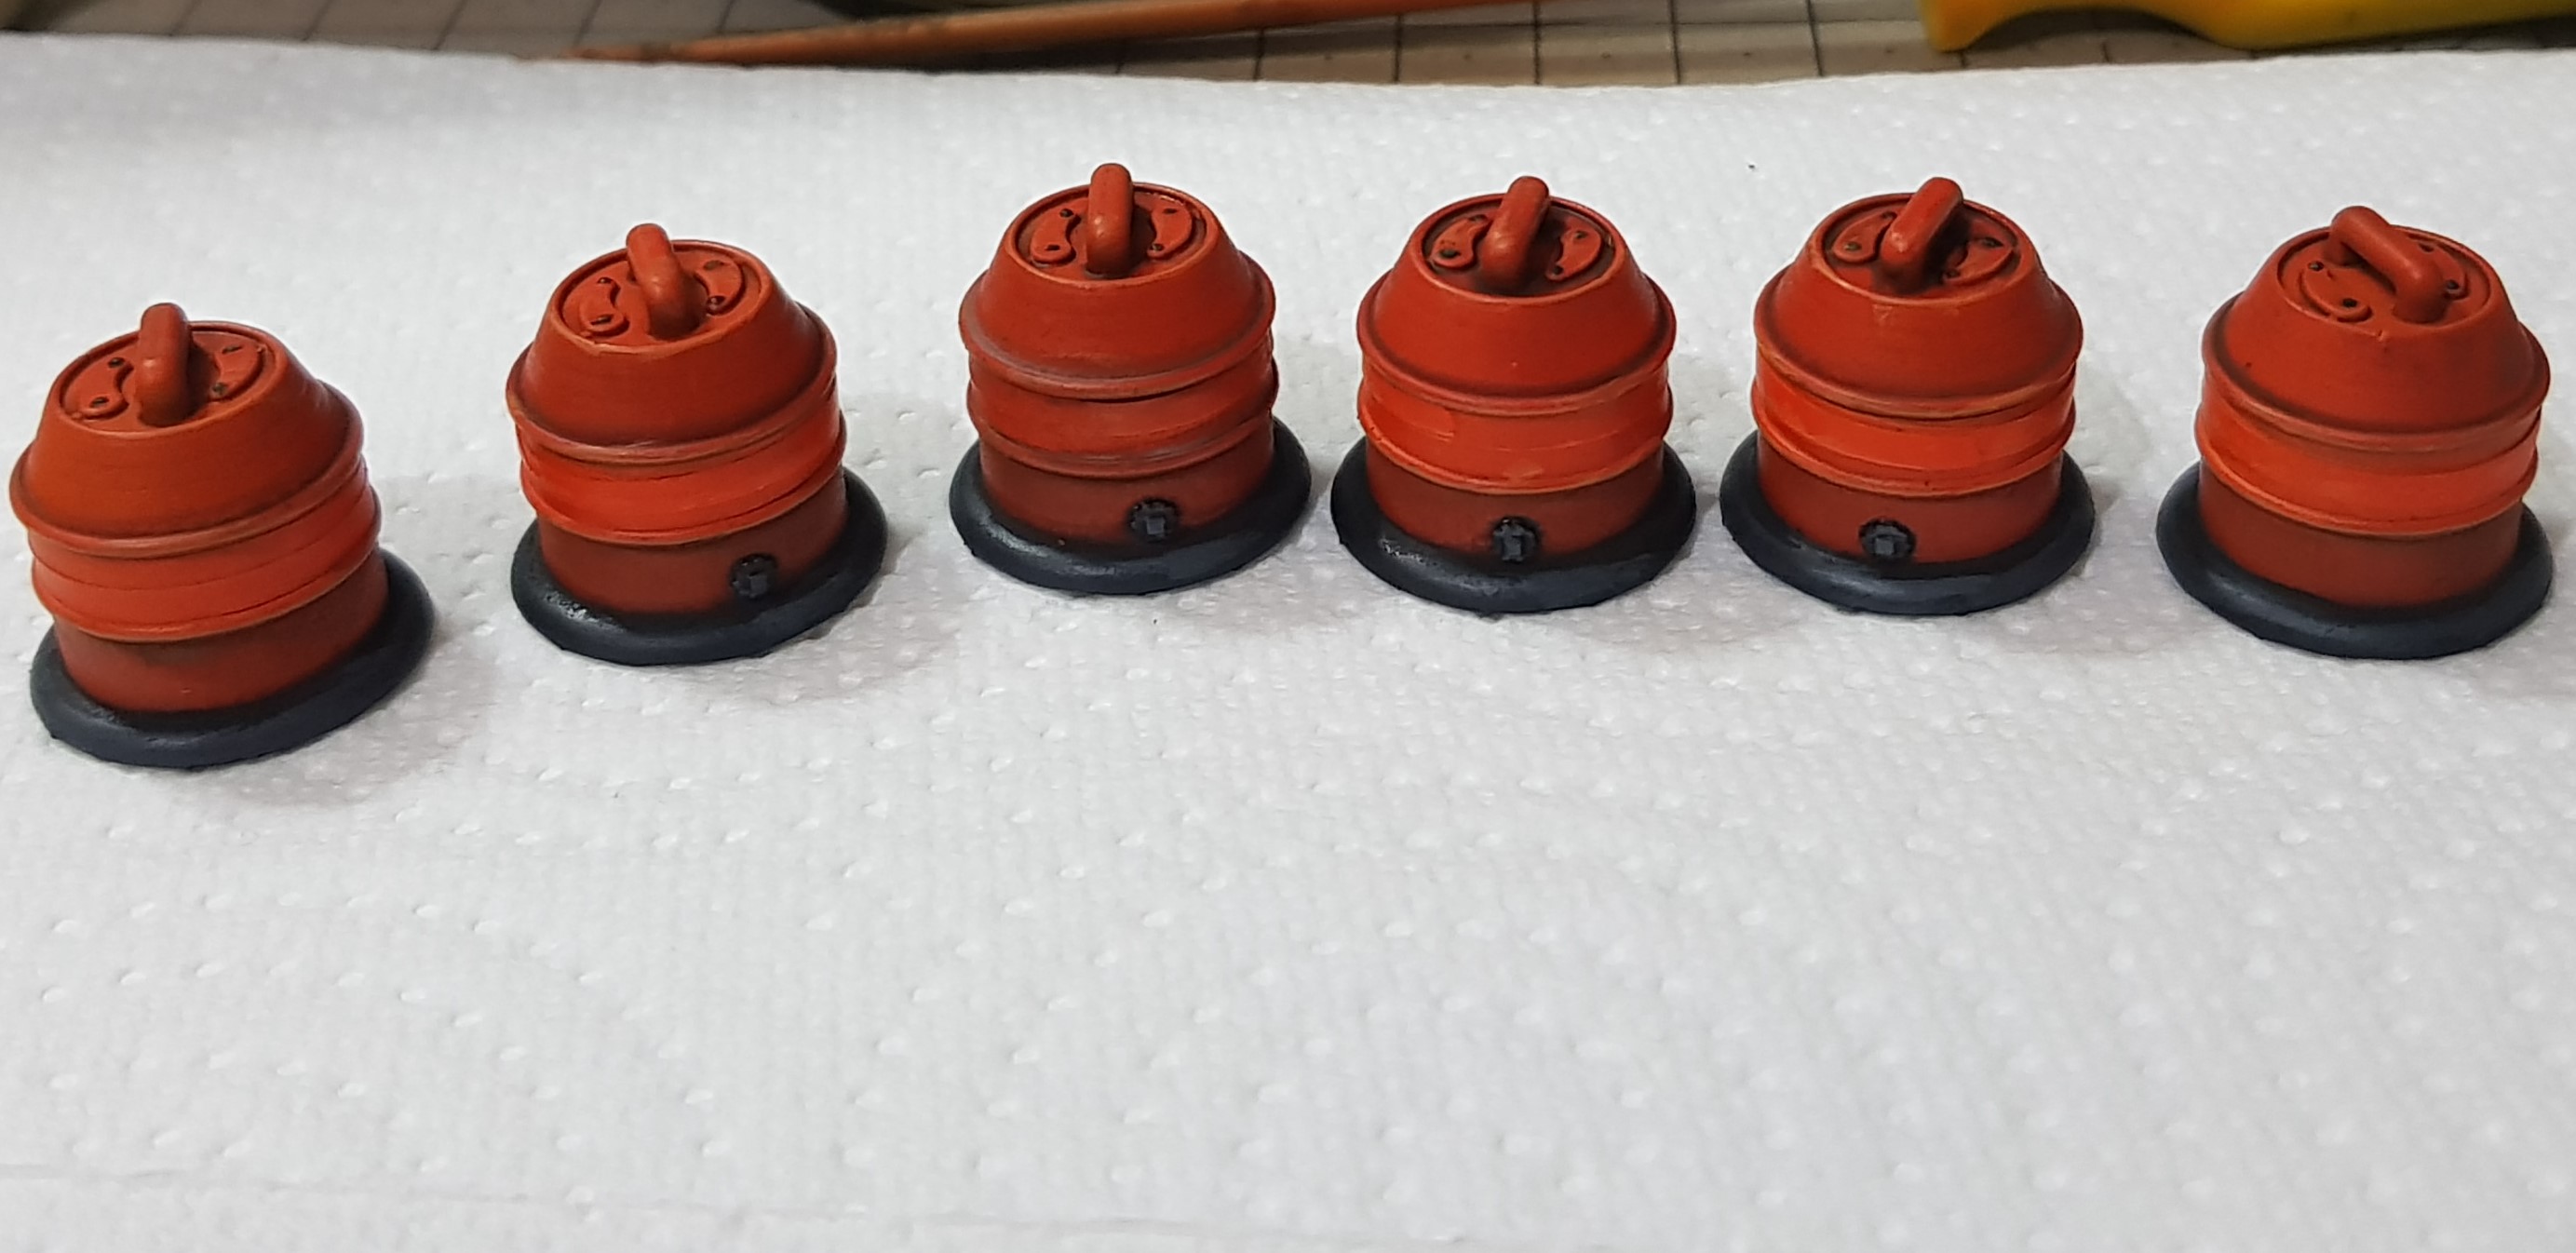 Hand painted the black and high lighted and washed with brown leaving the mask on
 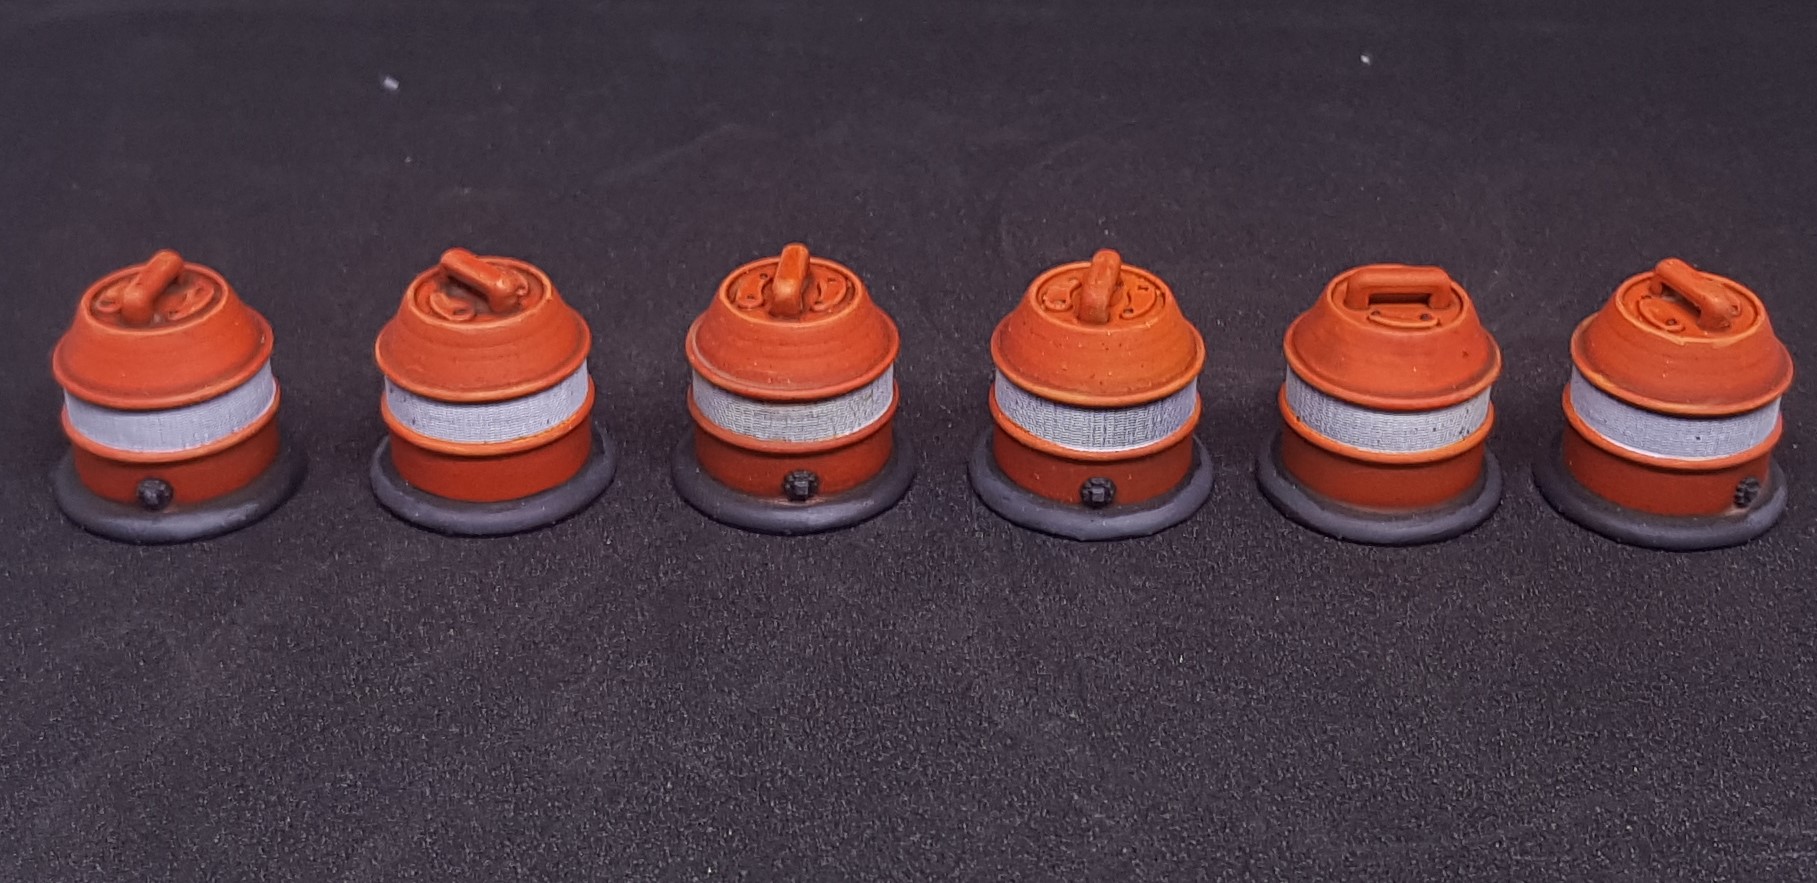 Masking removed and then matt varnished. Finished.
 I don’t think this is ground breaking but this is the workflow I am following with the 3D printer. I am trying not to just print a large amount of unpainted grey.
The model is simple but then so is the object. I think any more detail would be to much hence the removal of the list that I stated MUST HAVE! These will look great on my infinity table and should give a good narrative to why there are no vehicles going down roads mid play. Also not something I have seen you can buy which makes me happy.
More to come next is barrels but not as detailed on the process as this could get dull fast 🙂
More to come.