


![A Perfect Zombie Apocalypse Starter Set? Civilians & Survivors Review | Wargames Atlantic [7 Days Early Access]](https://images.beastsofwar.com/2026/01/unboxing-wargames-atlantic-civilians-_-survivors-1_2-coverimage-225-127.jpg)
![Wild Australia Wargaming? 28mm Ned Kelly Gang & Victorian Police Review [7 Days Early Access]](https://images.beastsofwar.com/2026/01/unboxing-traders-galaxy-australiana-ned-kelly-gang-_-victorian-police-coverimage-225-127.jpg)


Horatio’s Firstmate: Orktober 2020


Recommendations: 160
About the Project
Inspired by the commentary on the XLBS that yes @hobbyhub there can never be enough love for the green hordes. Its the same rationale as second breakfast and elevensies that promotes this project as follow on from Orktober 2019 and a general getting in gear to actually finishing a backburner project that has almost a decade of history to it.
Related Company: Black Scorpion Miniatures
Related Genre: Pirate
This Project is Completed
Plugging away at planking

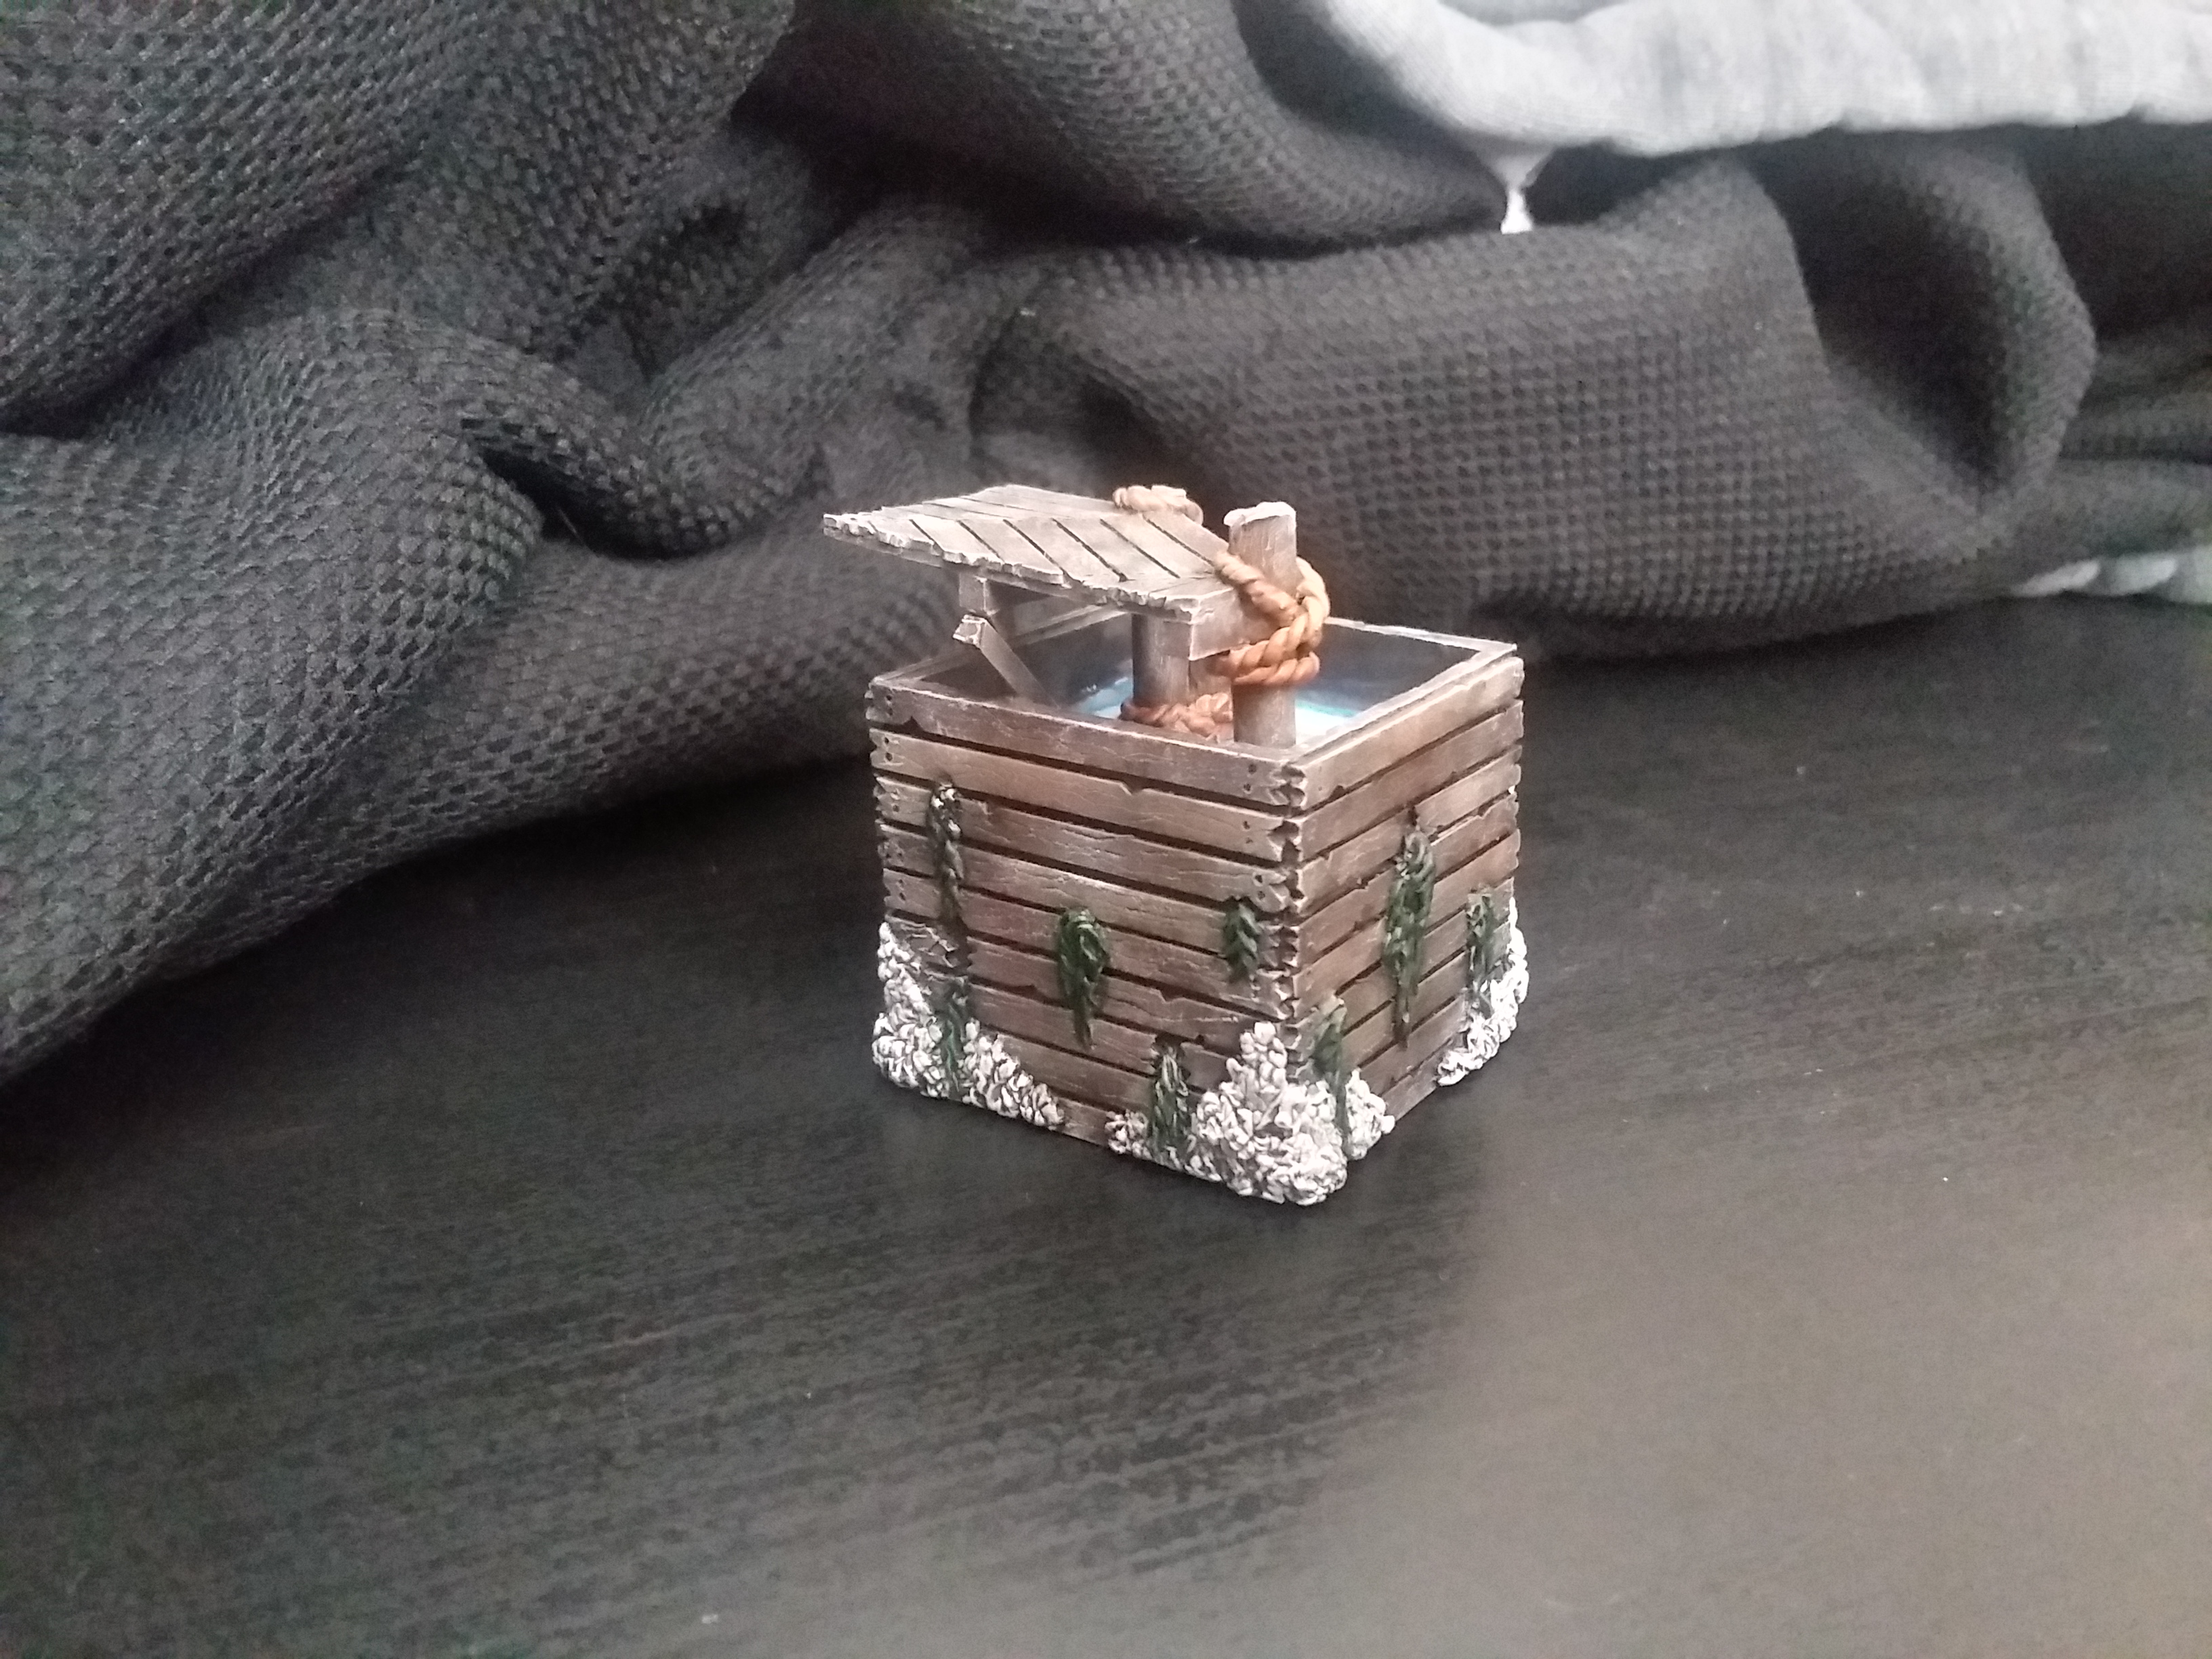
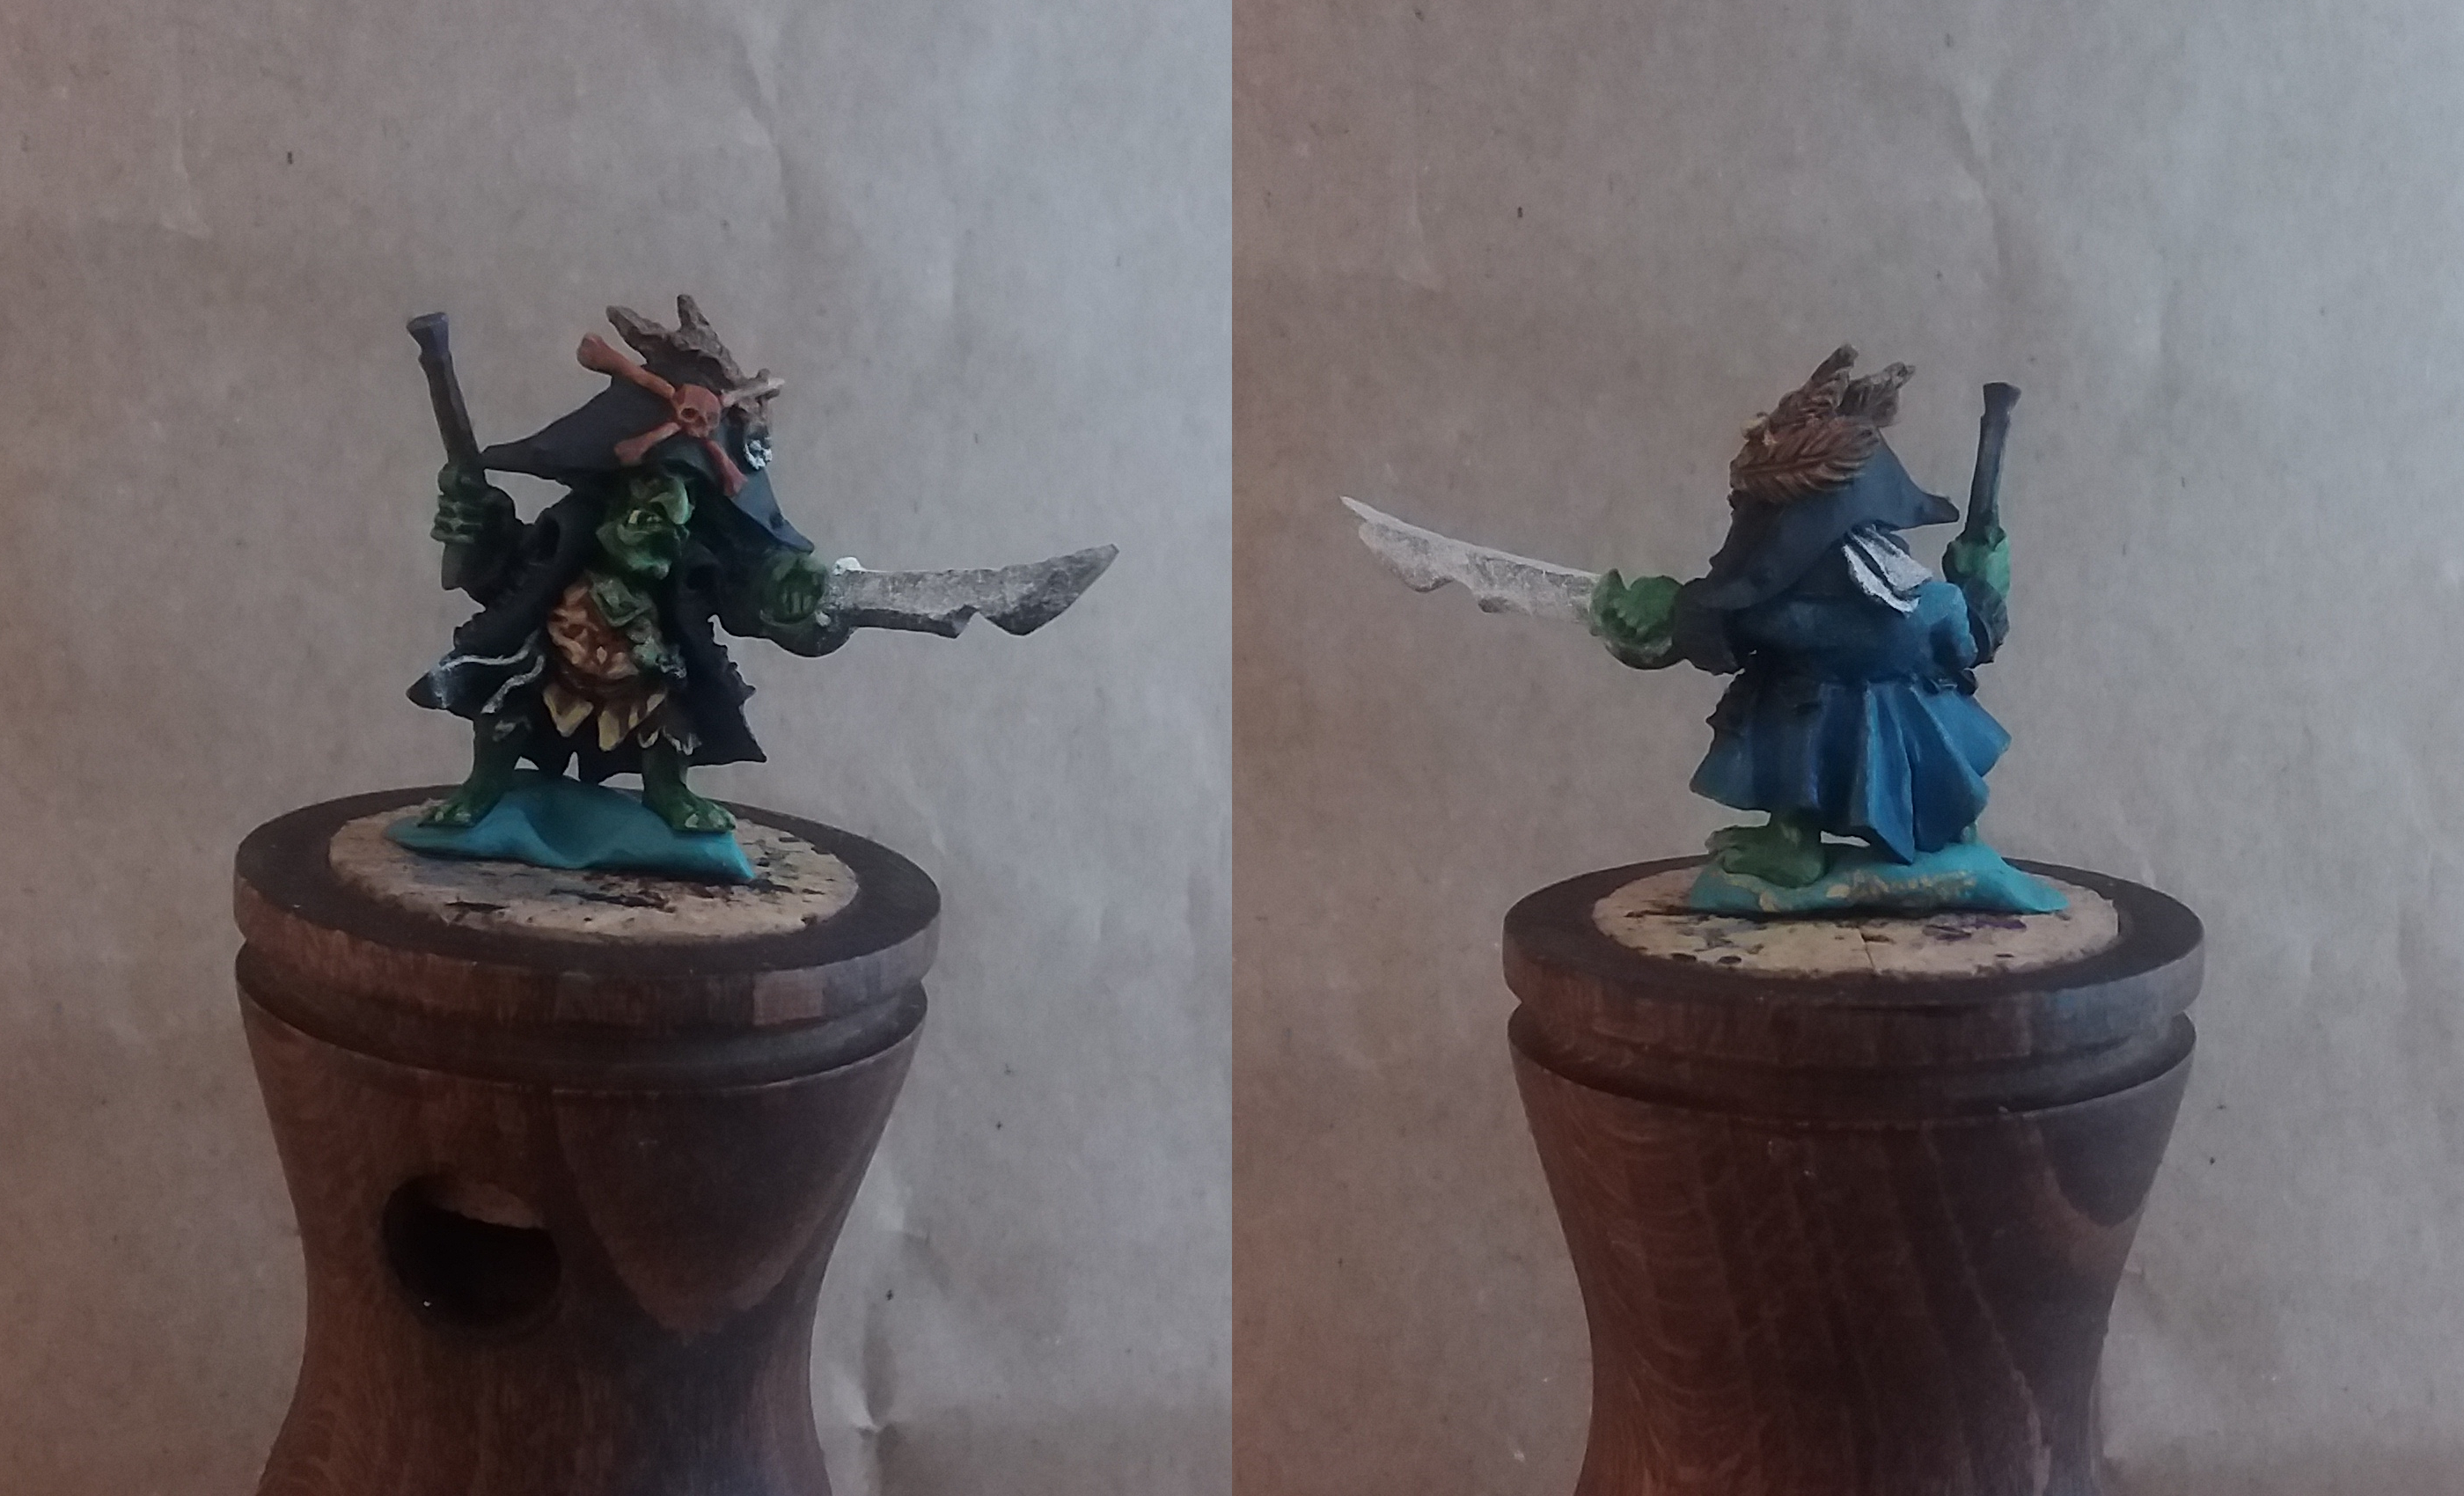
Thinking for a moment, as I got done with the planks on the nautical base for my project, my figure needed a name. I’ve come up with Msr. Raulfe Chumwash, who stands as proud firstmate to the esteemed Cpt. Horatio Noseblower, with an air of stale lutefisk about him.
I’ve been tempted to name the beloved vessel that they command ‘That Sinking Feeling’ as homage to the capabilities of orky gestalt field generation that keeps it afloat. The sheer humor of the nautical news of several vessel’s crews and captains, such as the Squidpot Scallywags or Barnacle Bess and her Crimson Sirens, being overtaken by That Sinking Feeling is too good to overlook.
I skipped on using the grey wash as I thought I might be able to put down some more drybrush. I touched up the base with RMS Yellowed Bone and RMS Linen White. After getting the paint down I see that the grain detail is pretty much too small to see unless you really get up close. If I washed it with anything darker the faded effect would be knocked out and ineffective. So far so good with the panel liner as well since it flows so easily. I’m quite pleased with the way the planks look.
VMC Sky Grey (70989) was my base for the barnacles that was washed with GW Nuln Oil. I drybrushed over all that with RMS Linen White and then a final highlight of RMS Pure White.
The rope line wrapped around the pylons were base coated with VMC Medium Flesh (860) and then washes with GW Reikland Fleshshade. So far this really looks good setting off the interior where I’ll put in the resin. I brushed the bottm with VMA Wolf Grey and then a very thin coat of RMS Brilliant Blue to give an underwater swirling pattern. This I think will be good experimenting for the future. The colors also work with the base VMA Dark Green (72.728) for the seaweed that I’ll incorporate into coloring gob flesh. I think that VMC Azure (70.902) and the touches of Brilliant Blue on the crab hidden in the seaweed will be things to play with further with a bit more time. I also look forward to the water effects. So much fun to be had.
Washing with your chum with chum
 Getting coverage in most parts
Starting to go about Msr. Chumwash now I’m laying down RMS Templar Blue for the jacket with VMC Dark Prussian Blue(899) mixed into the folds. I hit the gob skin with the VMA Dark Green like the seaweed on the base and will turn to some higher contrast to make Raulfe pop better . For the shirt VMC Tan Yellow (70912) gets the honor of the base hue that will get a light wash and a few highlights. Liking the way it started to turn out I put down a glaze of VMA Goblin Green (72.730) and then worked in a little of the Tan Yellow for highlights. As far as the other key colors I’ll dig back into the project notes for Horatio Noseblower to tie the palette together. Hell, thinking about that I should look back anyway and play about. Normally I’m pretty bad at keeping notes for future reference and just play it by sight as I have my paints arranged roughly in ROYGBIV with a section devoted to neutrals. Metallics and technicals have their own space that keeps me from doing somethig stupid and reaching for them while working chromatics.
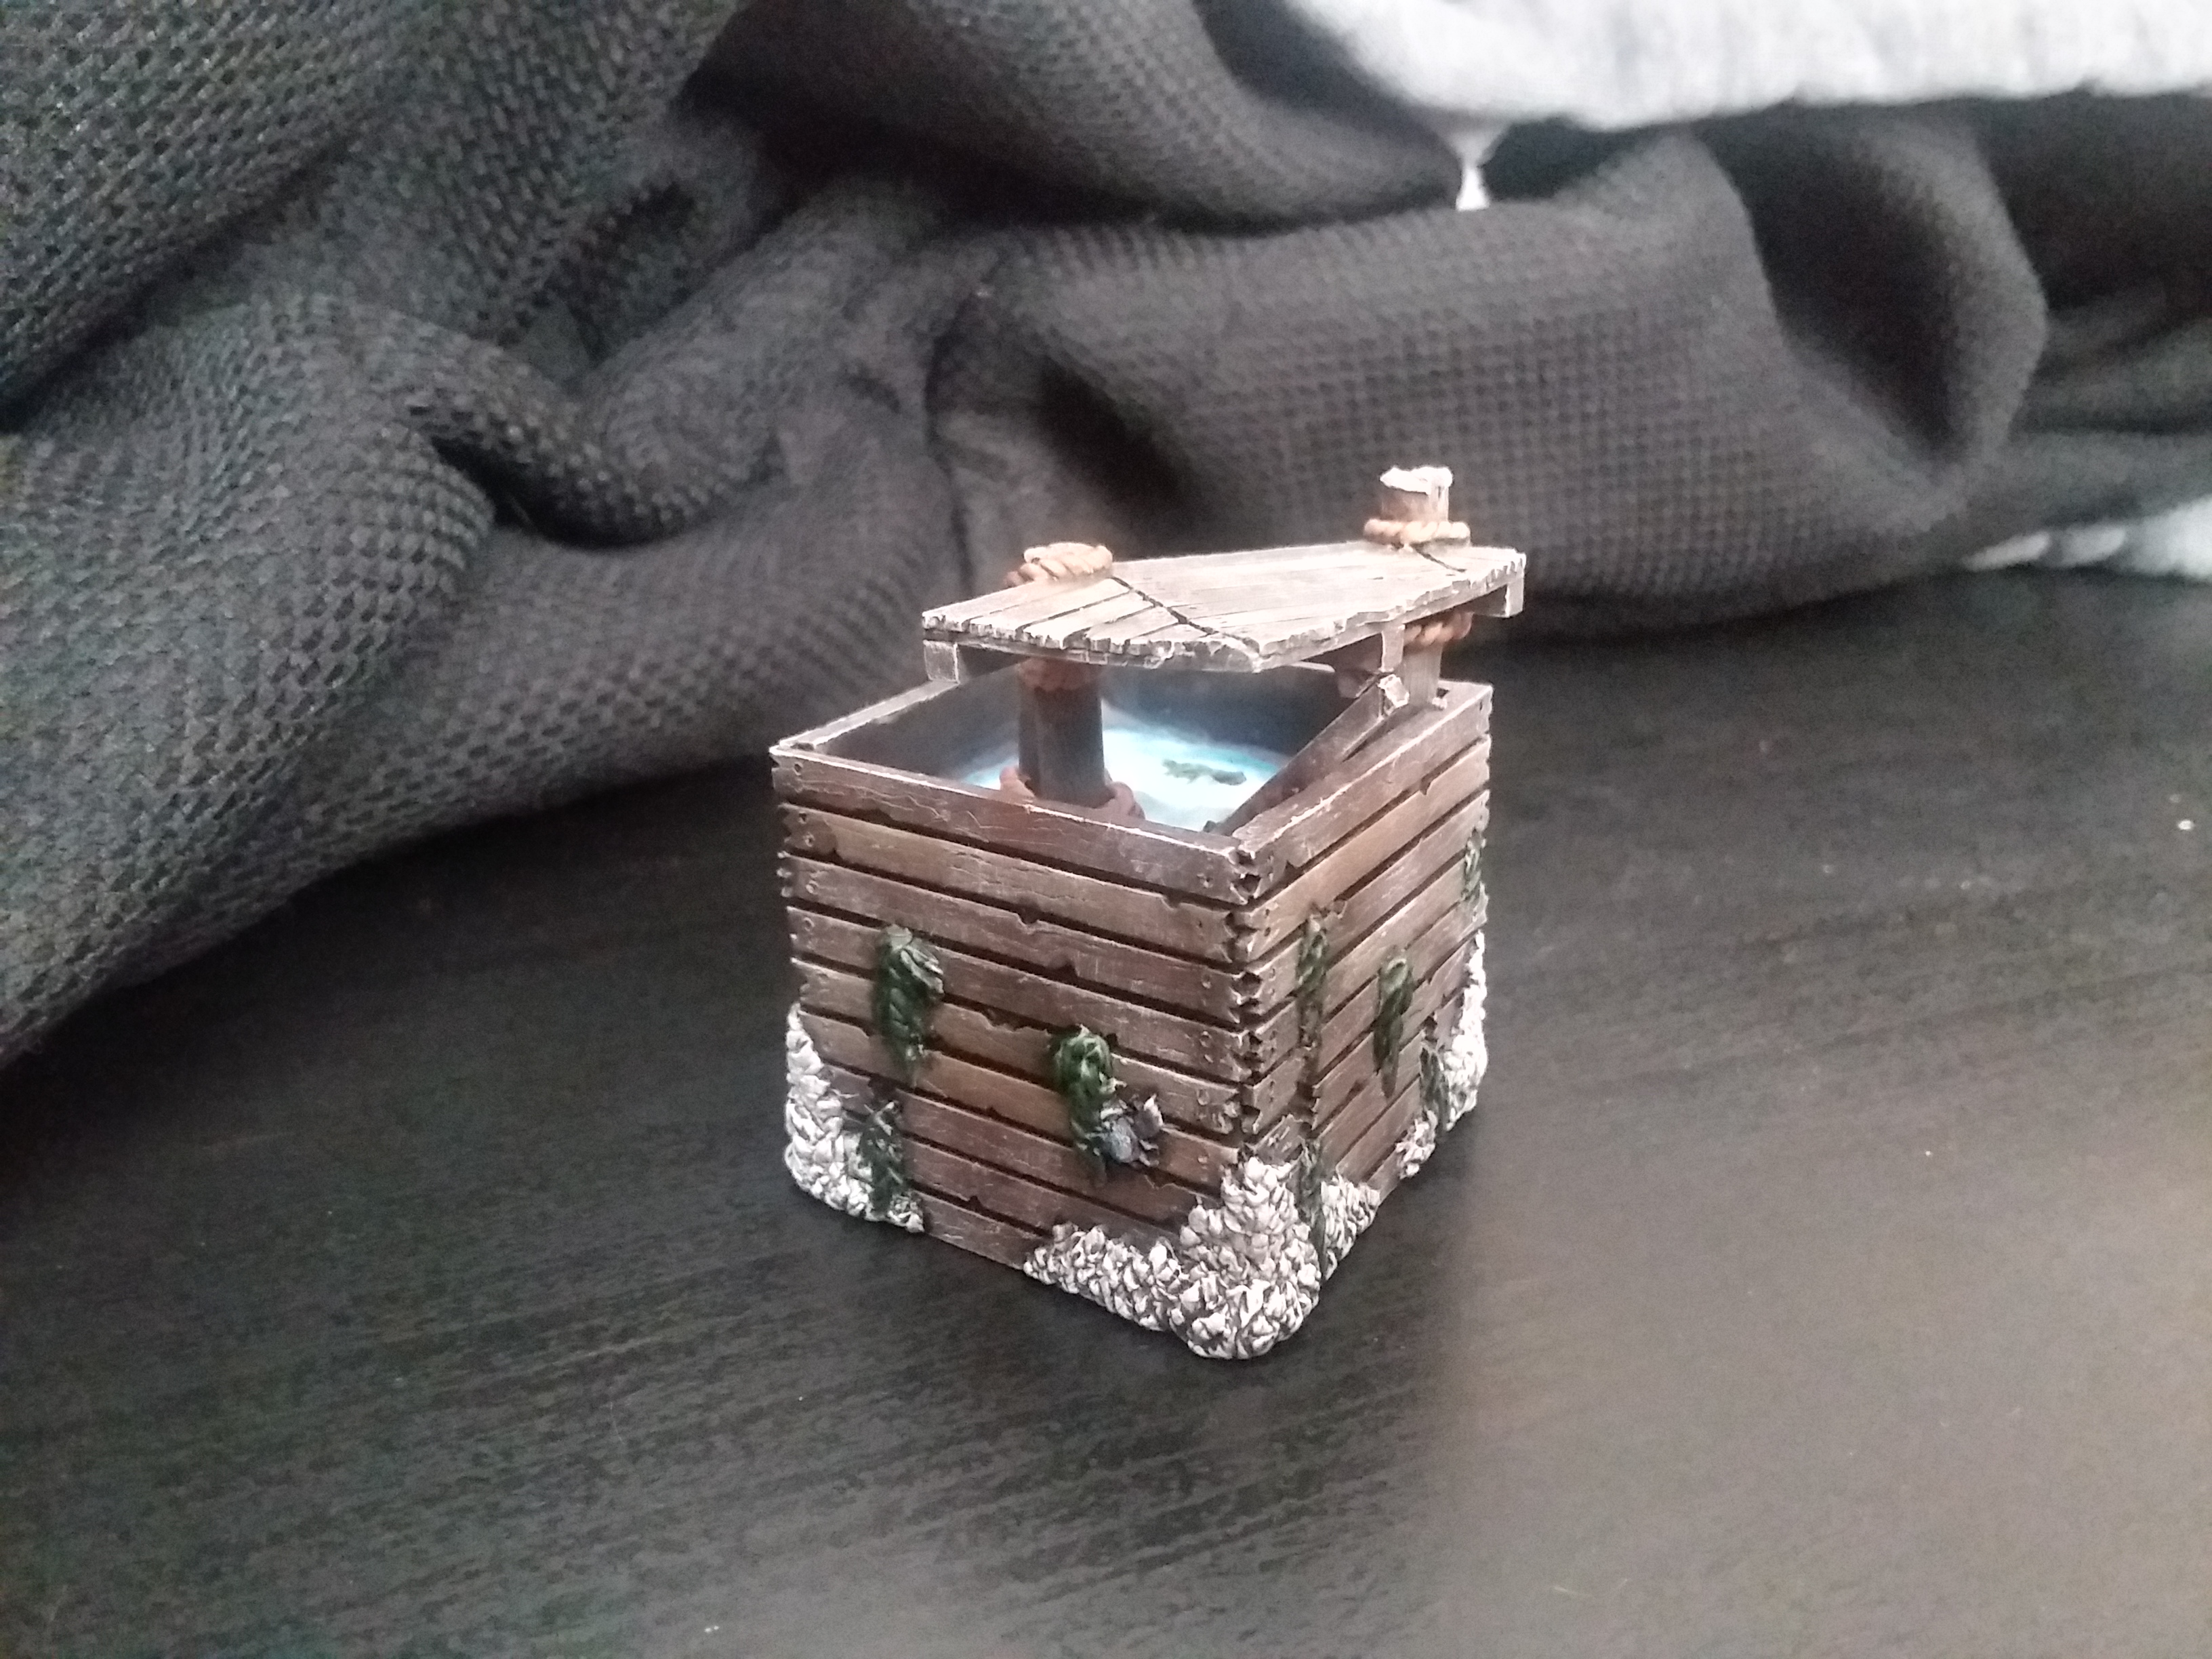
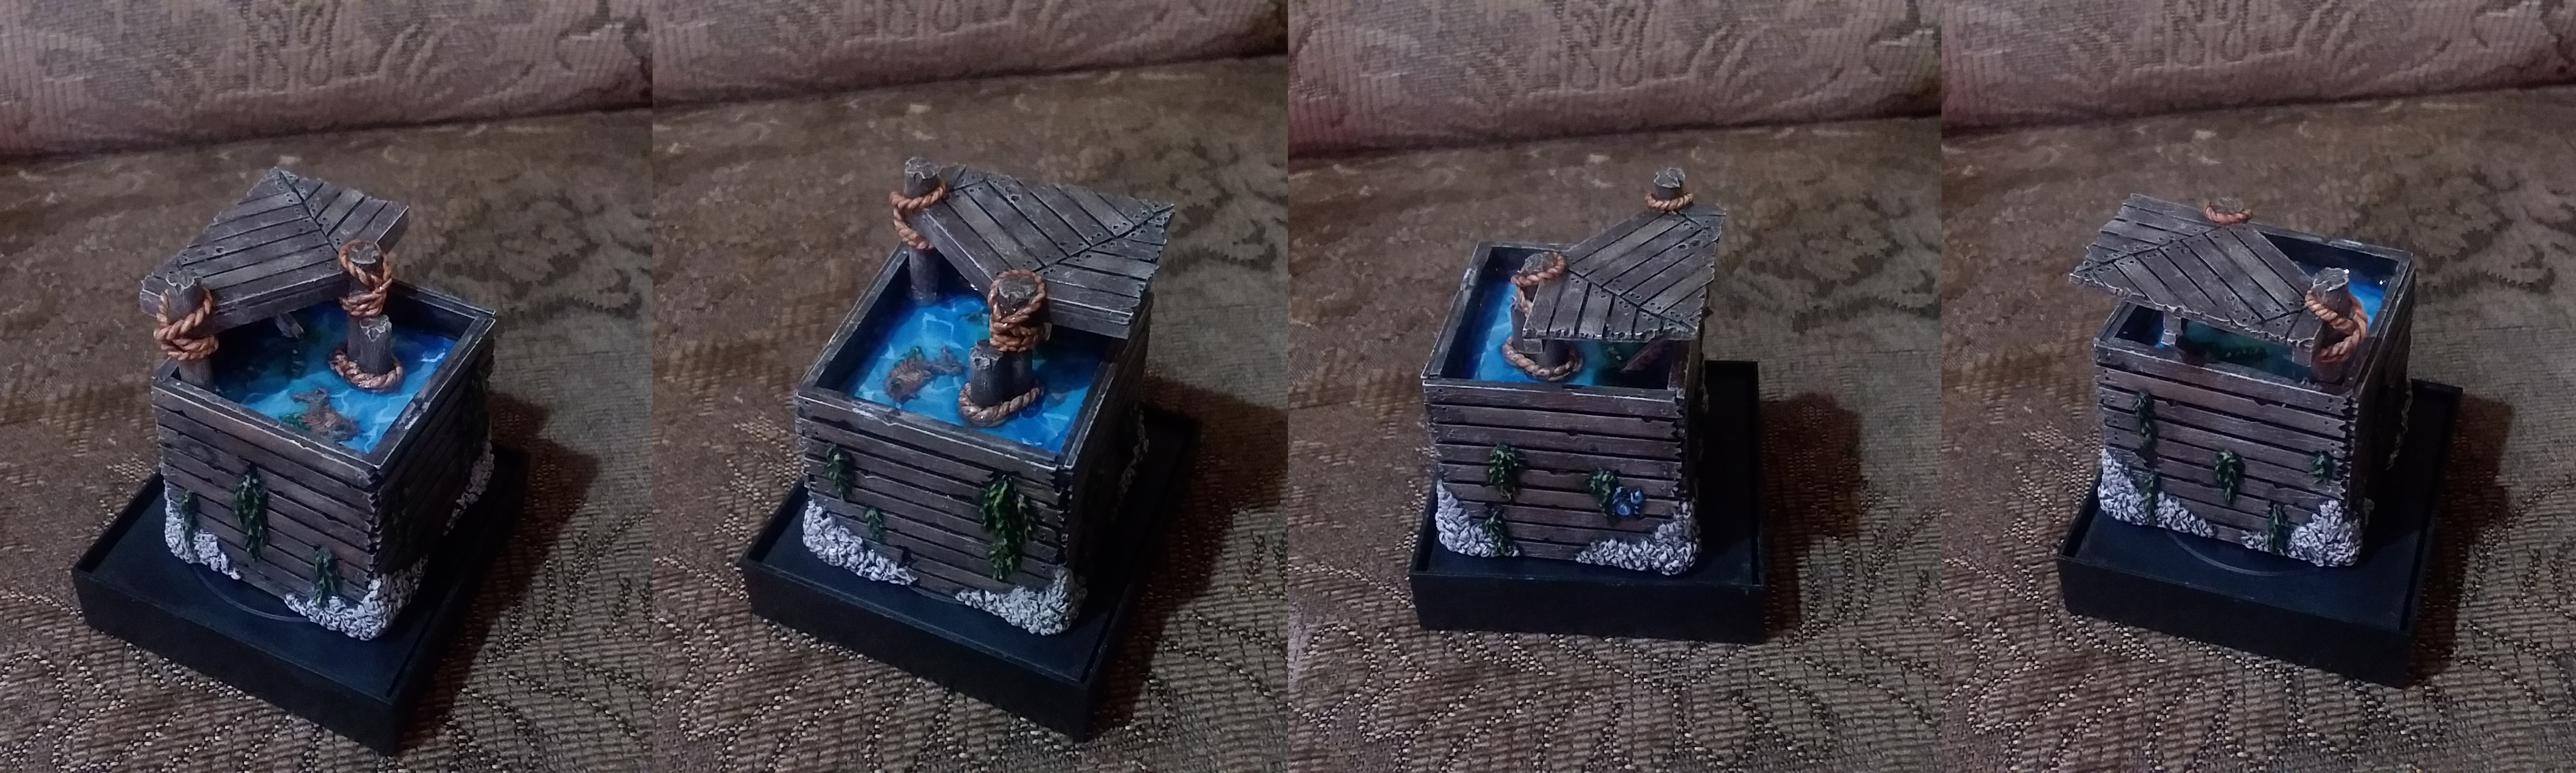 Boards done, seaweed done, water started and dead fish set
So I’ve gone ahead and jumped onto my mini base again and I’ve tossed some highlights to the seaweed. First was VGC Camouflage Green (72.031) and then touched it up with some VMC Yellow Green (70954). That was a bit bright and too yellow so I tried toning it down with GW Waywatcher Green. Not a bad result from the way things are going so far. The contrast stands quite hard on the vegetation so I think it’ll withstand the 2′-2″ test. Outside of that I revisited the water to show some sort of light that shimmers under the waves. Research of images showed that I was very far off before so I drew in some white lines to imitate the break in surface reflection. I hope to get some good result from that under a barely tinted layer of Vallejo still water effect. This will all go under some clear gel medium shown in a previously added video.
I dropped in some resin for the clear water thinking that it’d be neat to experiment. I’m not at all humored by the fact that it took days to have this thing dry. I read the directions and saw “apply in thin layers”. Yeah, the directions to lay no more than 3mm per layer and wait 24hrs for cure doesn’t seem entirely true. The first layer was more around about the directed mark (not really thick at all) with some P3 blue ink for fun. After 2 days the stuff was still slightly moldable. Once it was all set the clear layers went down and the rotting fish was set for visual interest. More thin layer water was set down. This is such a pain in the ass but barely adding anything at a time seems to work. I think I’ve also noticed that the slight touch of Waywatcher Green was reactivated with the resin, since I hadn’t sealed that part, and tinged the water a slight green under the pier. *shrug* This has bee experiment so far so I thinnk its good to know for future reference.
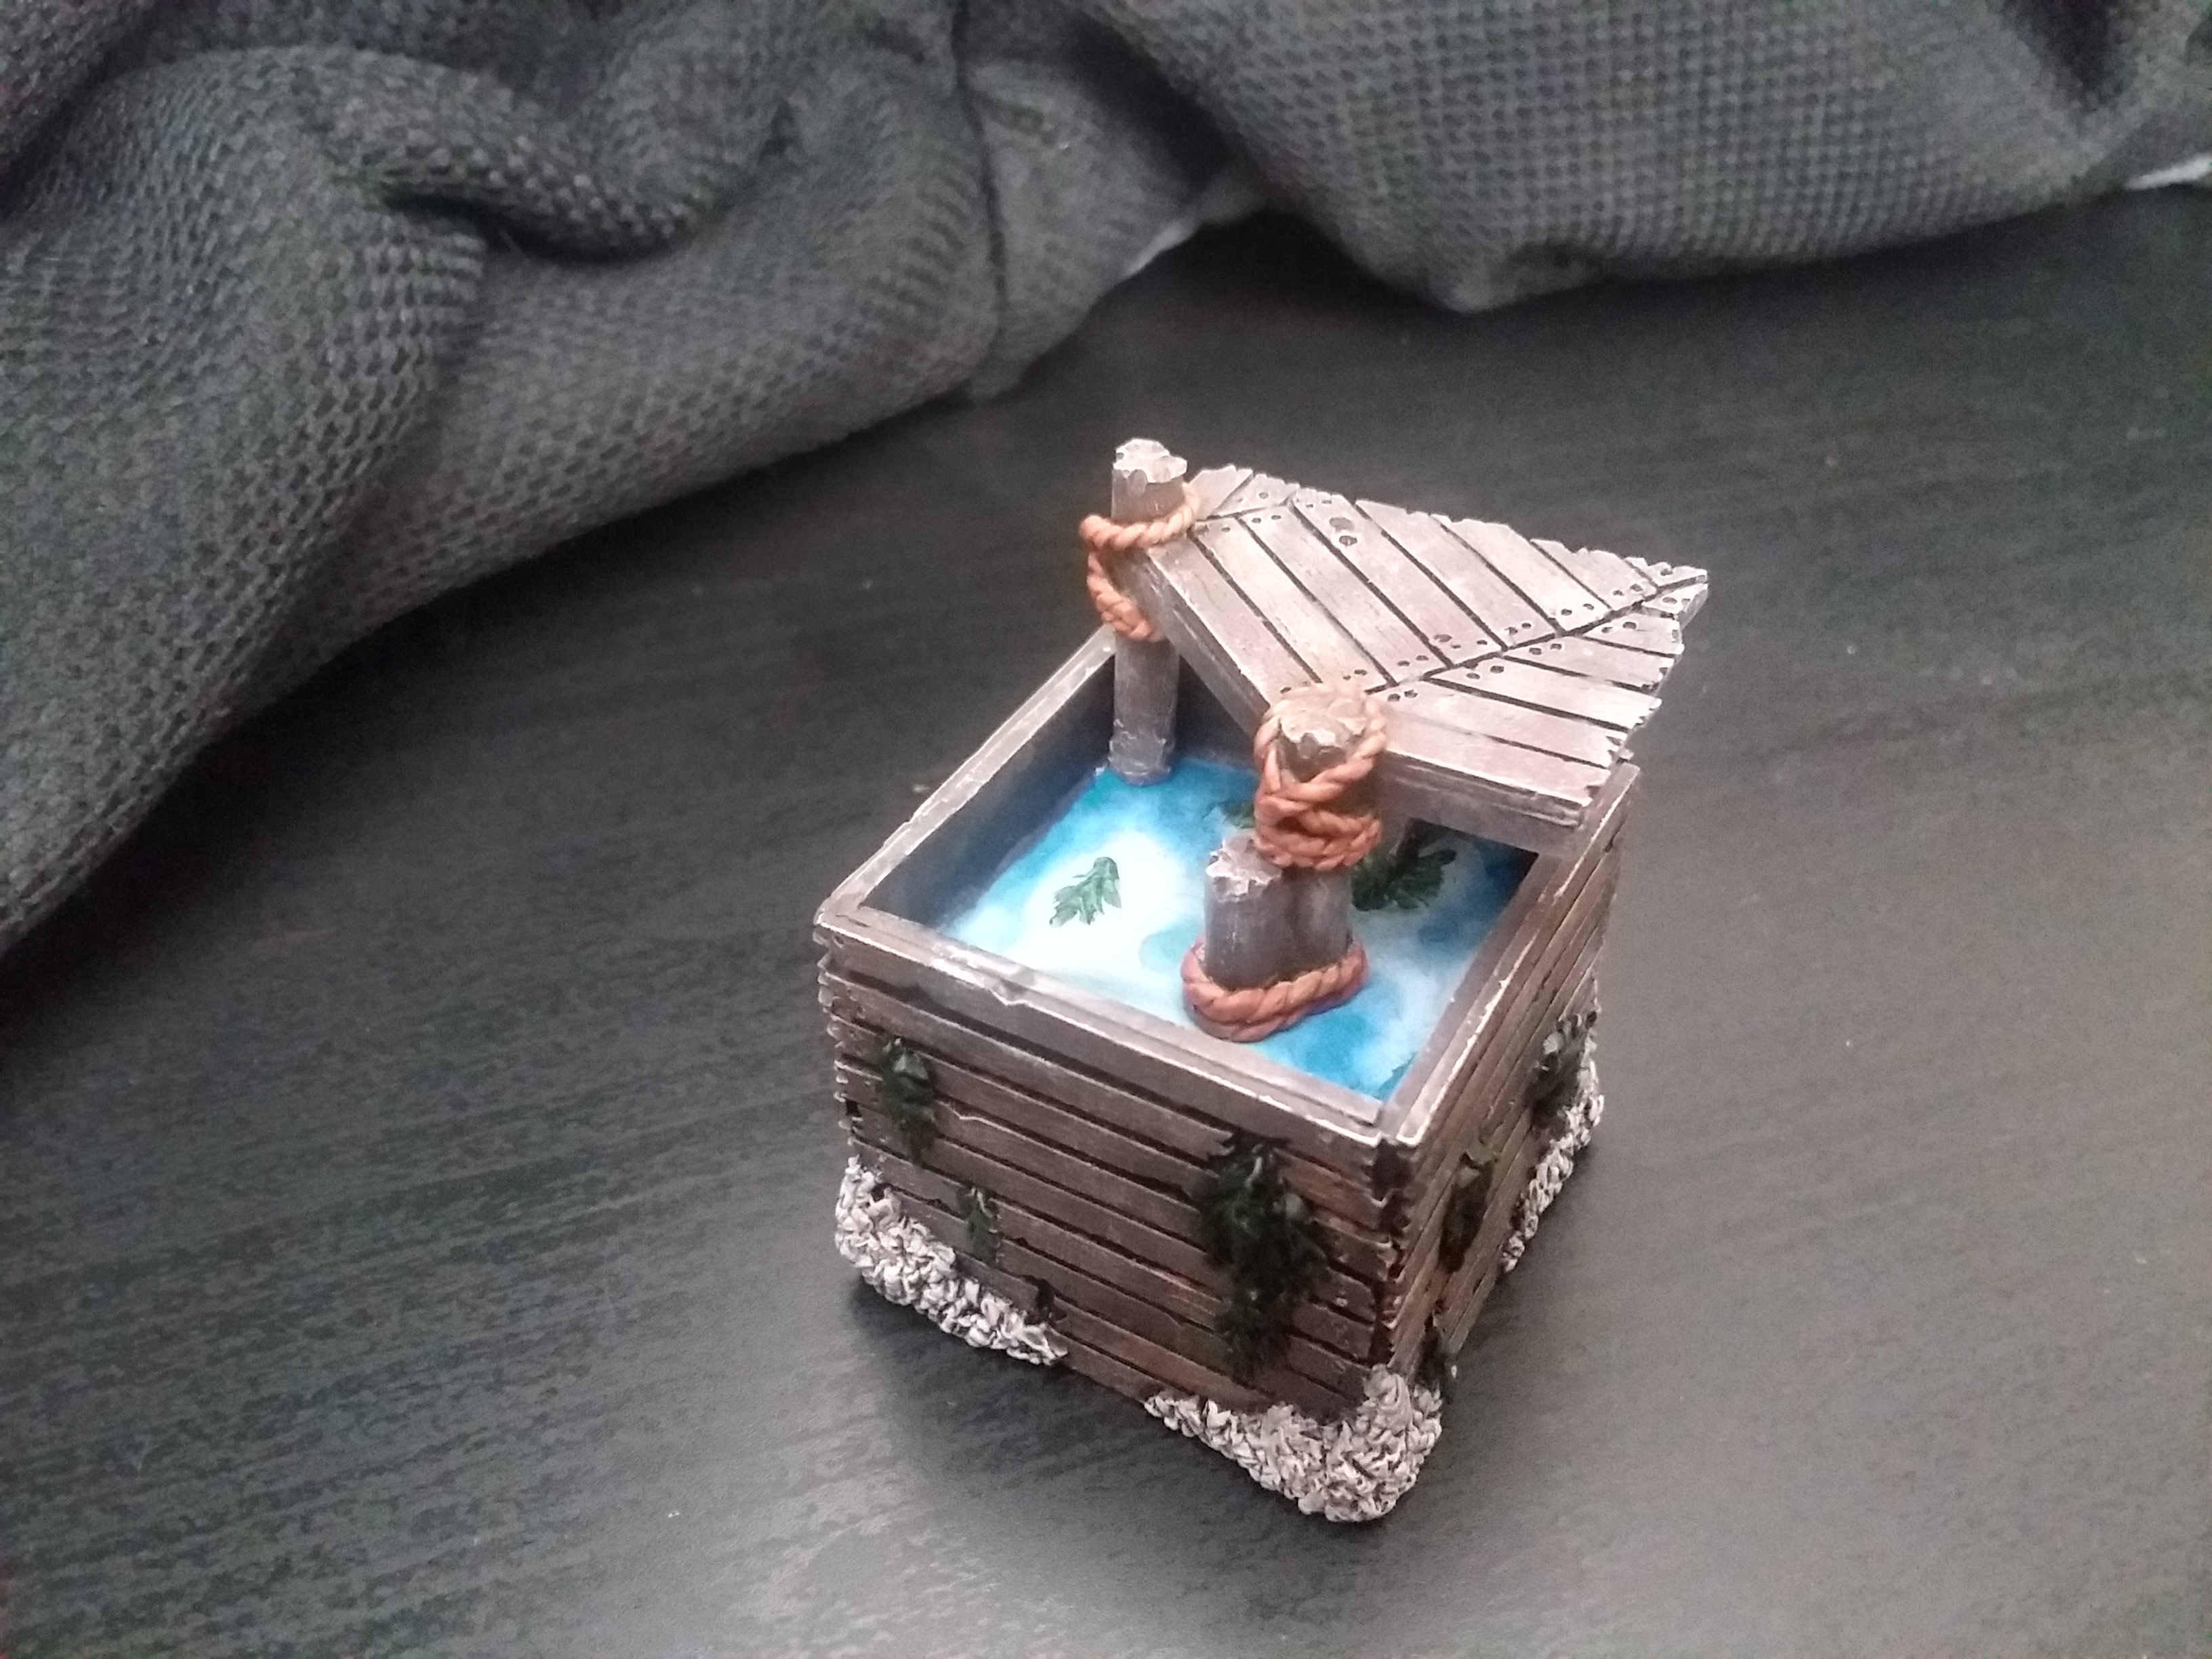
Its all clear to me
Thinking about what I could do to build the water spraying from between the planking I might’ve found an answer in greenstuff. I’ll first sculpt the spray as a positive and then use my most recent acquisition of silicone putty from the OTT store to create hollow molds. From there I’ll use the other part of the same order, clear UV reactive resin, and avoid what I first planned with using superglue. Then again I’m experimenting with fishing line and dragging it through the water effect resin for random offshoots (reminders of bad nights at the bar and the morning after not intended). Superglue thankfully remains clear and won’t mess with the effect in future as far as I can tell. We will all see the results in time.
The most recent result of the last still water pour has shown pulling from objects in the base as it was curing. There were tears in the material and it looked very bad. I have since added more resin and filled the voids to ensure a mostly level surface for the final wave work to be done. I am hurrying to try a d be done by the end of the month but these have been unforeseen mishaps with the new medium.
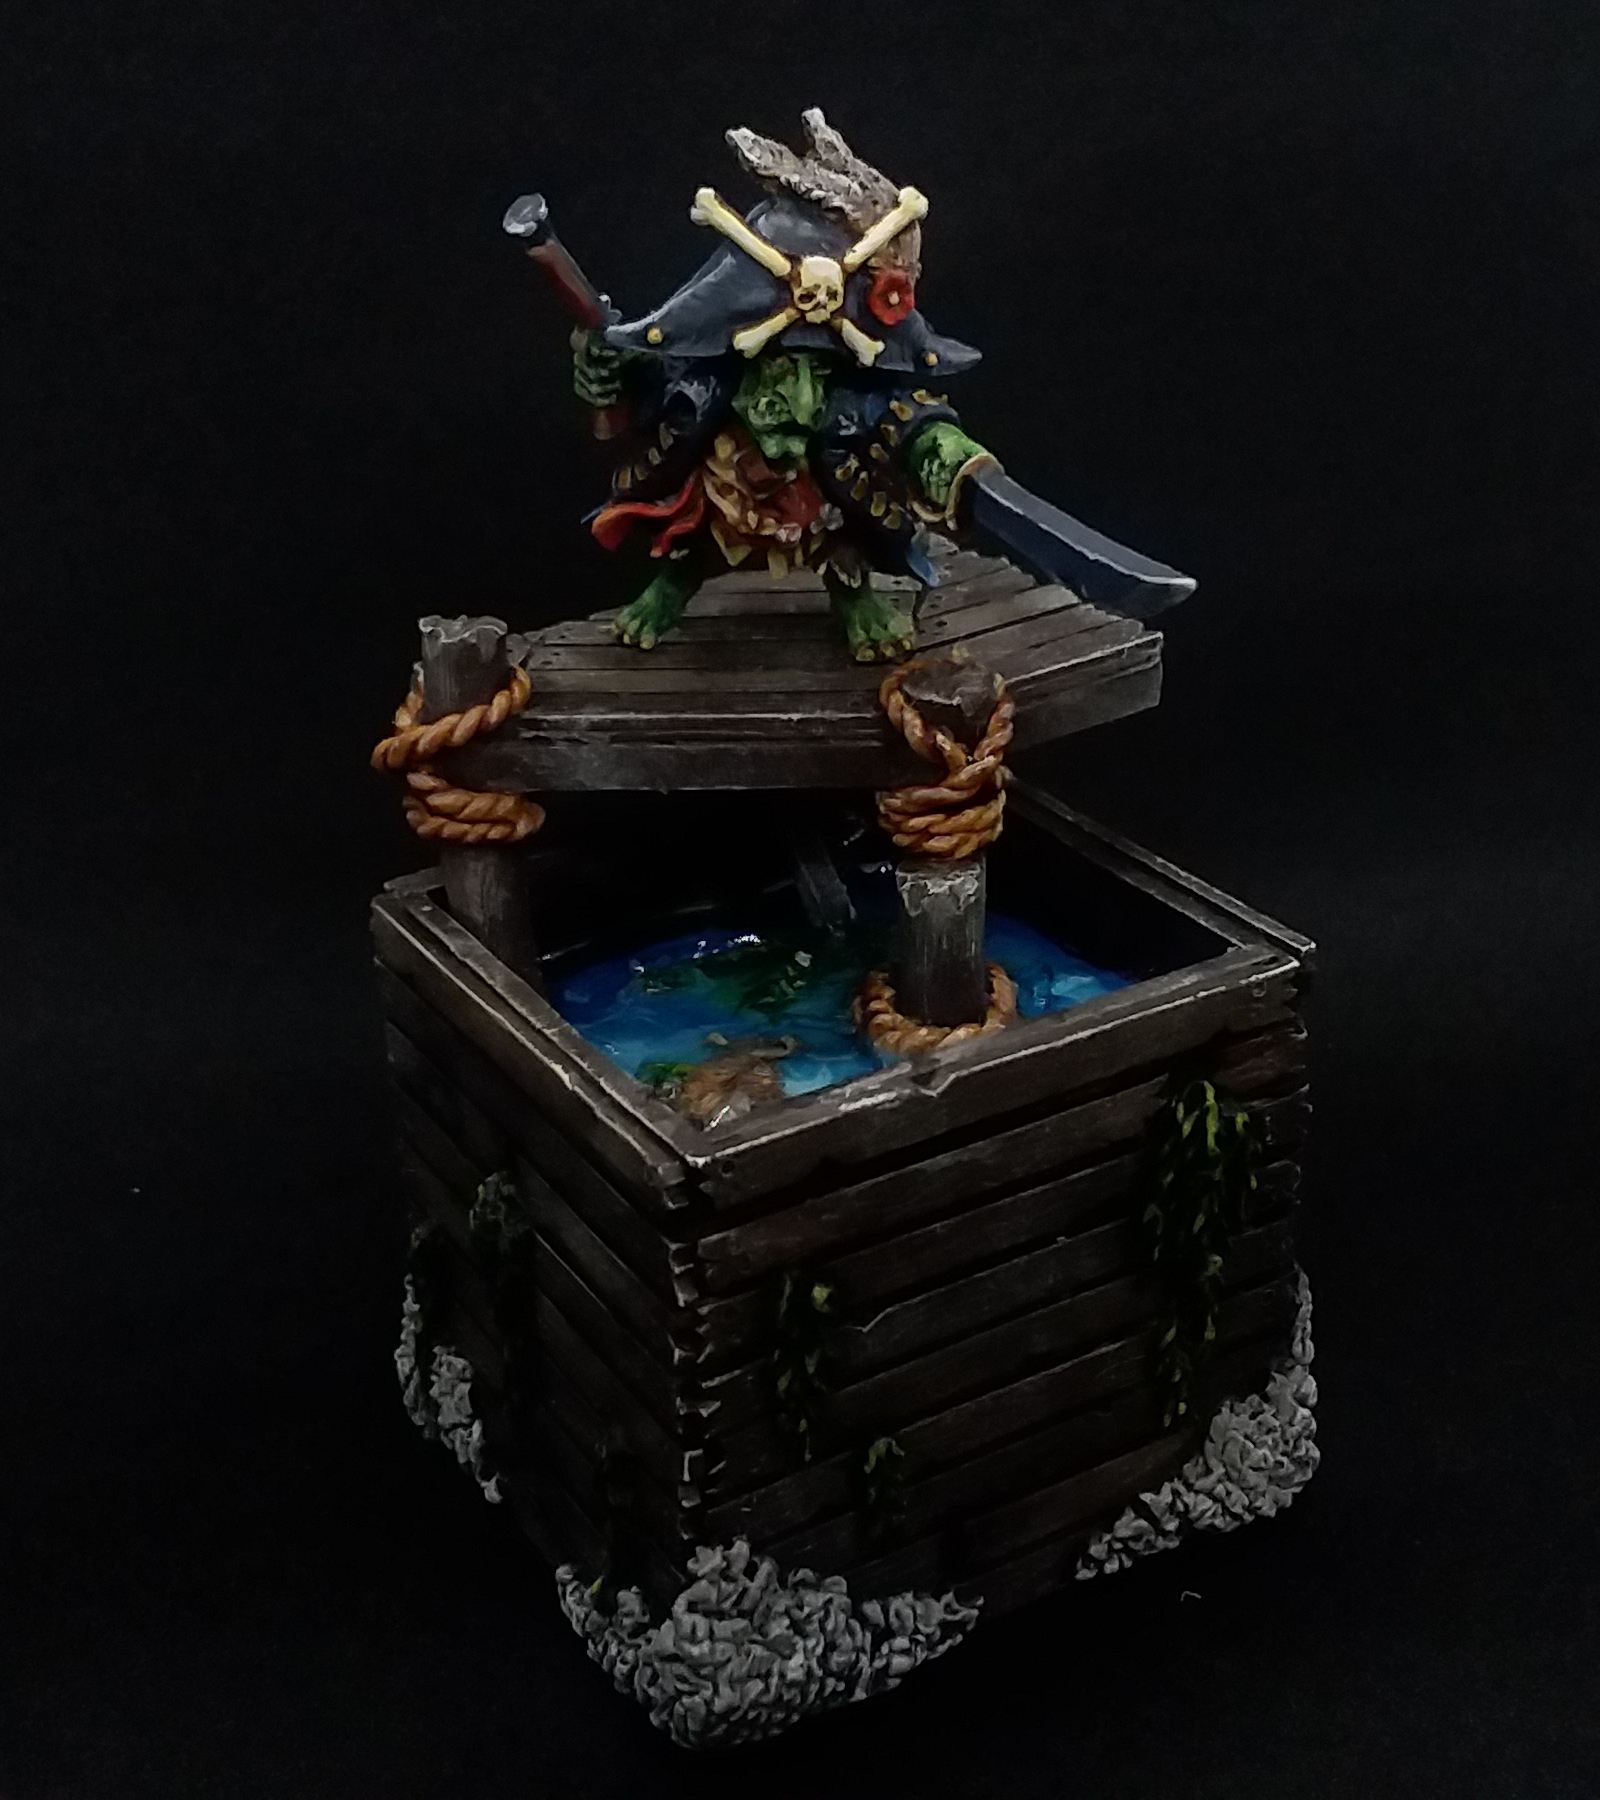
Calling it done
 All sides present and accounted for
Ok, I lost my full post at length and pretty much irritated beyond words right now to write at length.
I got my new Greenstuff world lightbox for the pics. I set my phone to ISO 200 and WB 5500K (daylight) for the lowest light setting of the box.
I’m calling it all done after laying my cat to rest and trying to jumpstart myself out of a funk with completing my project. This has been good to finish off but there is not enough left to add on to make it any greater than I anticipated.
 A little peek into the chum churning recessed base