


Waaagh! It’s Spring Clean 2023!


Recommendations: 283
About the Project
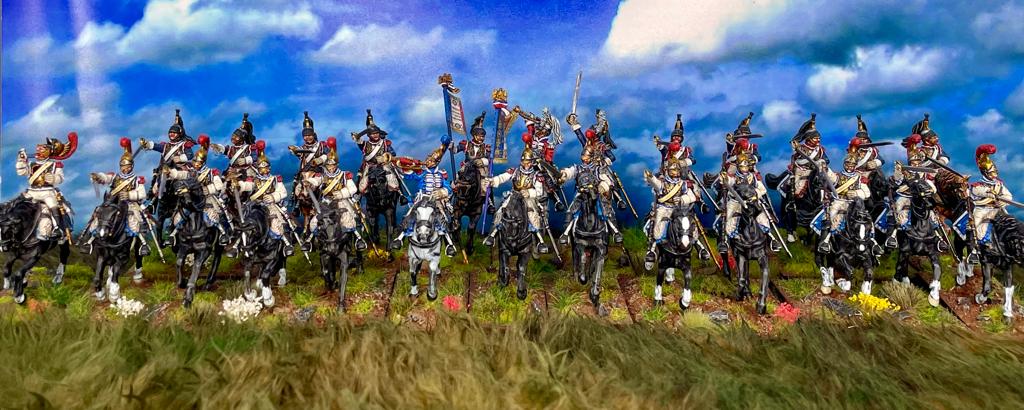
My project goal last year was to attempt to paint as many French Napoleonic cavalry as I possibly could. Here I would like to paint at least two more regiments. I would also like to complete all the 40K Orks that are currently hiding in the garage. So along with Napoleonics and Sci/Fi I will also be dipping into the following: WWII, Wars of the Roses, and anything and everything that I find lurking in my pile of shame!
Related Genre: General
Related Contest: Spring Clean Hobby Challenge 2023
This Project is Active
Conclusion and Final Thoughts
Well did I achieve all my goals, no. Am I disappointed, no. I always think I’ll be able to paint more than I can and constantly forget how long it will take me to paint something especially with the amount of conversion and sculpting work I do on certain pieces such as the Cossack conversion I completed.
So in total I painted sixty five Wars of the Roses figures, seventeen WWII, two Napoleonic Cavalry, three Lord of the Rings figures five 40K Orks and a Saxon Huscarl. Making ninety three figures in total which is just more than one figure per challenge day.
I also finished four Carabinier horses and assembled their riders. I also put together every 40K Ork I had in the garage and cleaned and corrected ones I had previously assembled. Every Perry Plastic Wars of the Roses figure that I have has also been assembled and is ready to paint.
In addition I made myself a new wargame ‘teddy bear’ fur mat, made a small wood of trees and up skilled my know how in taking effective miniature photography.
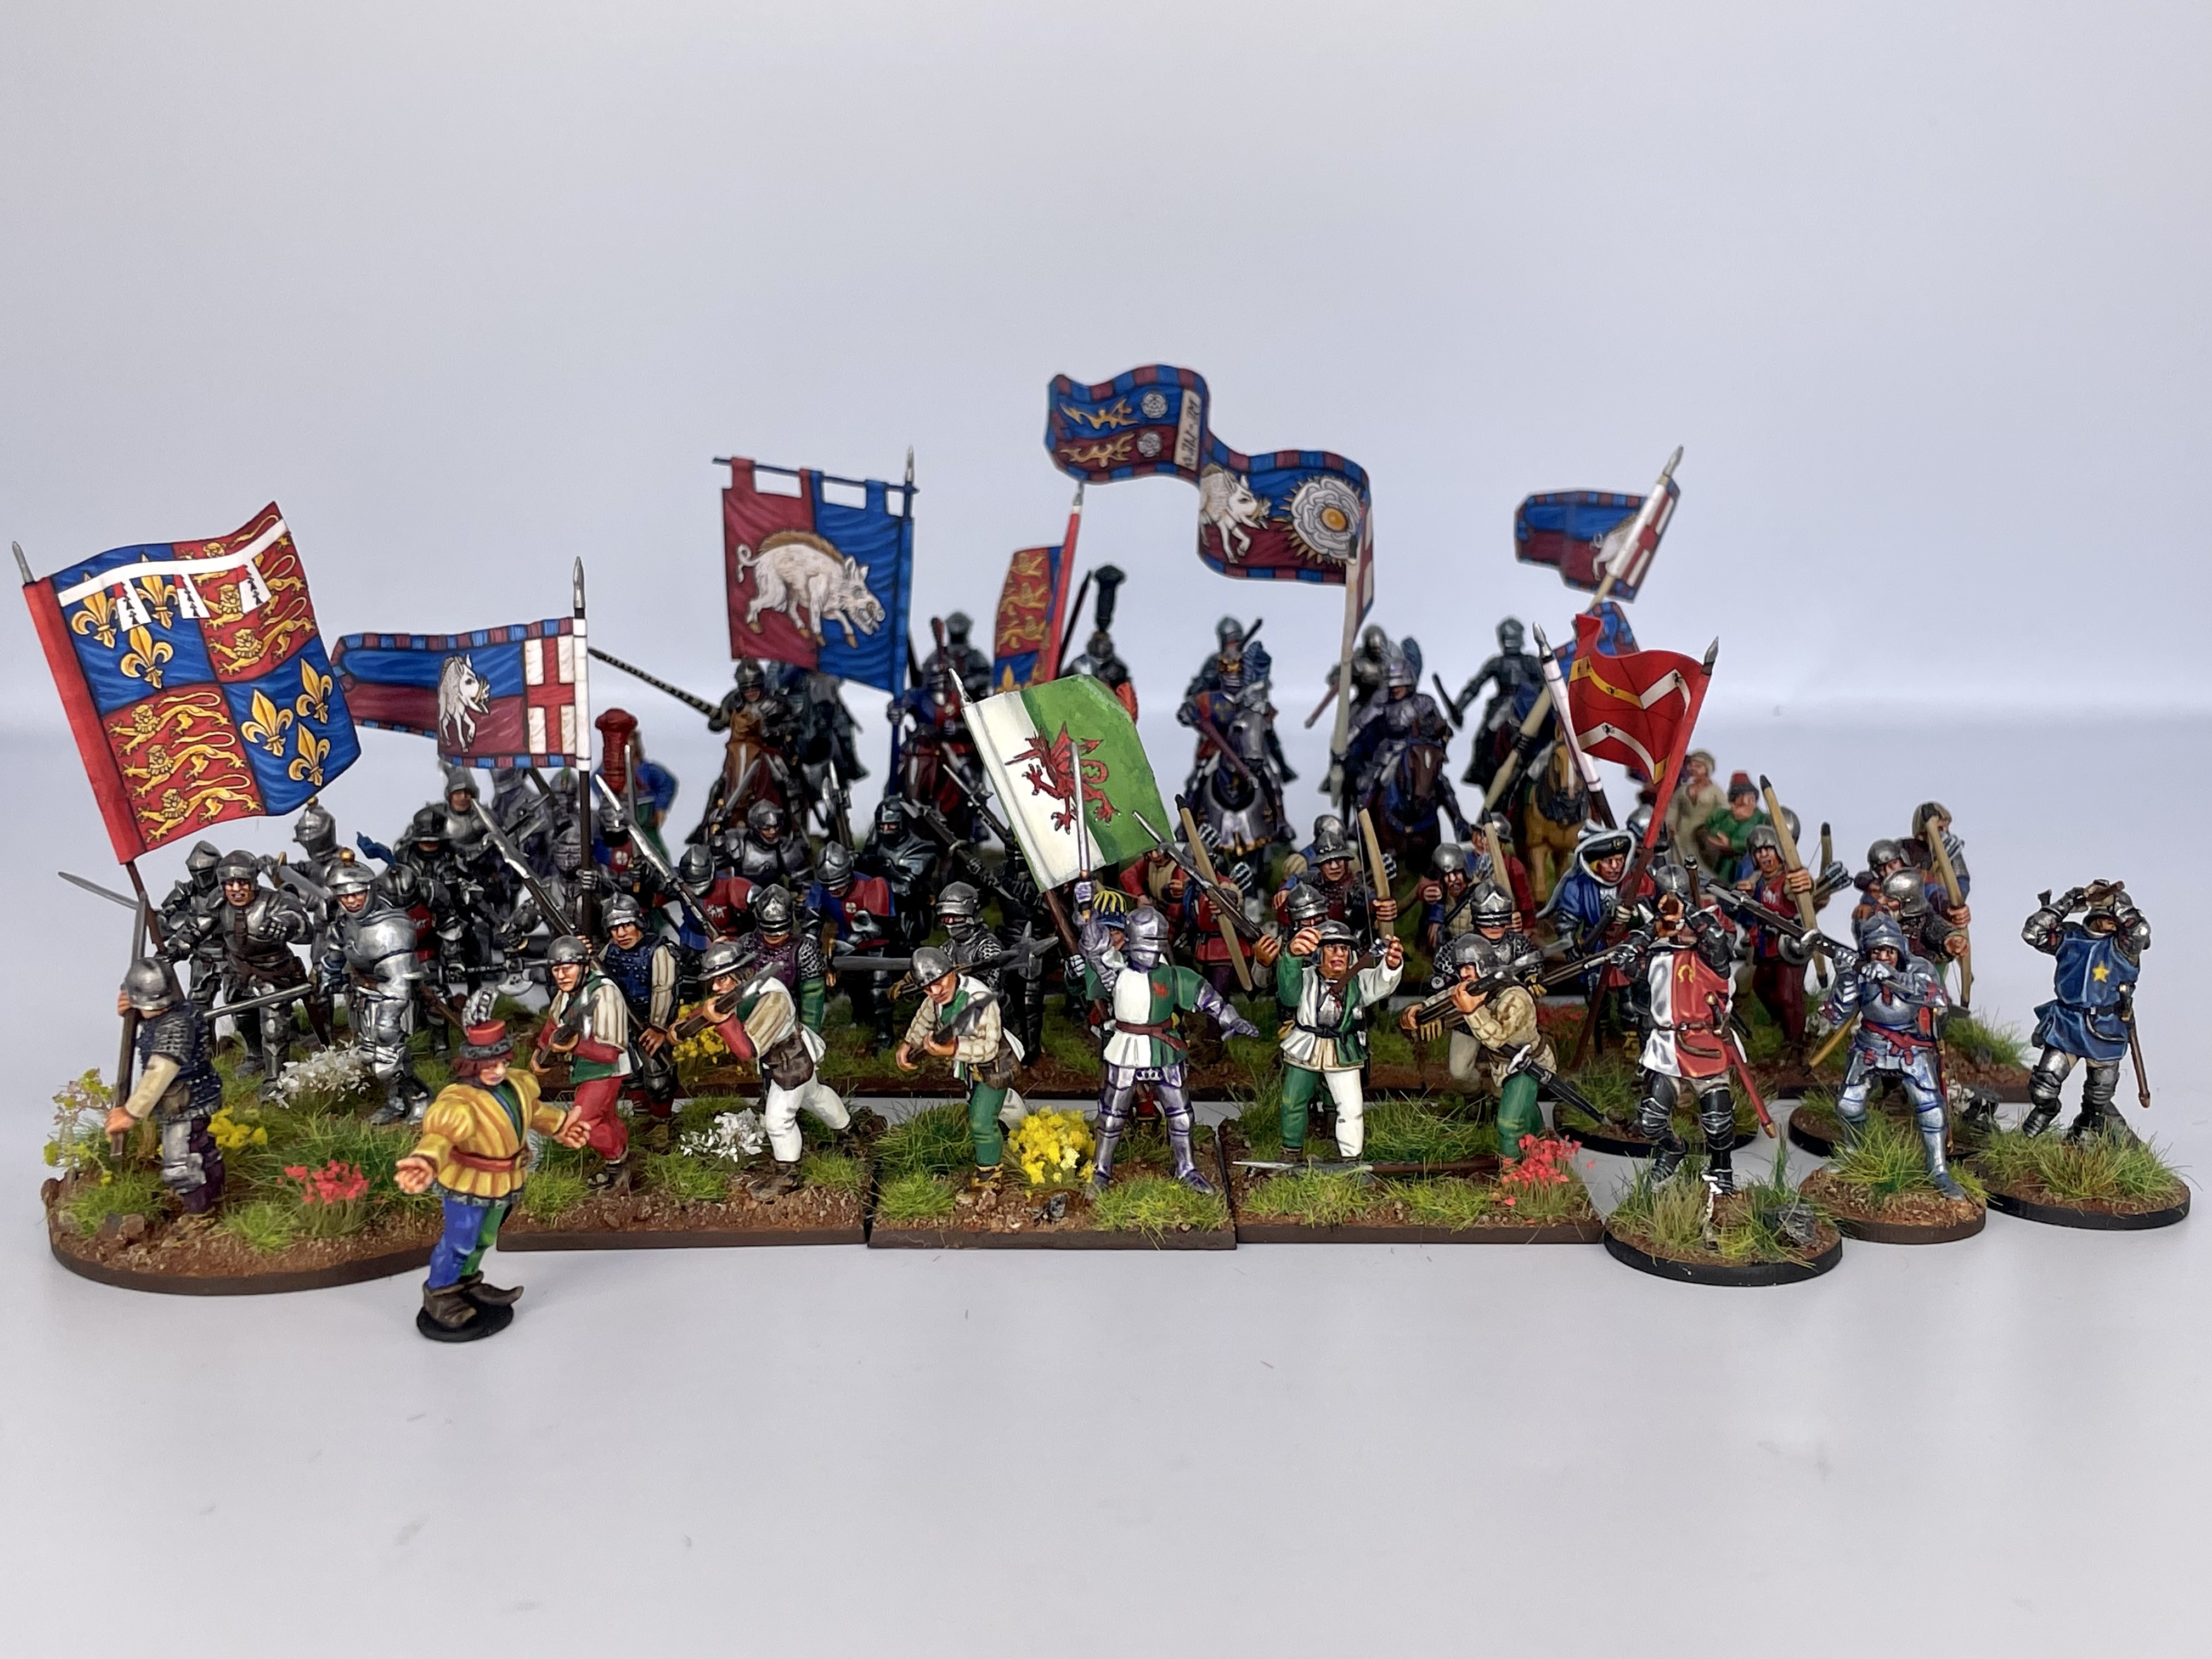
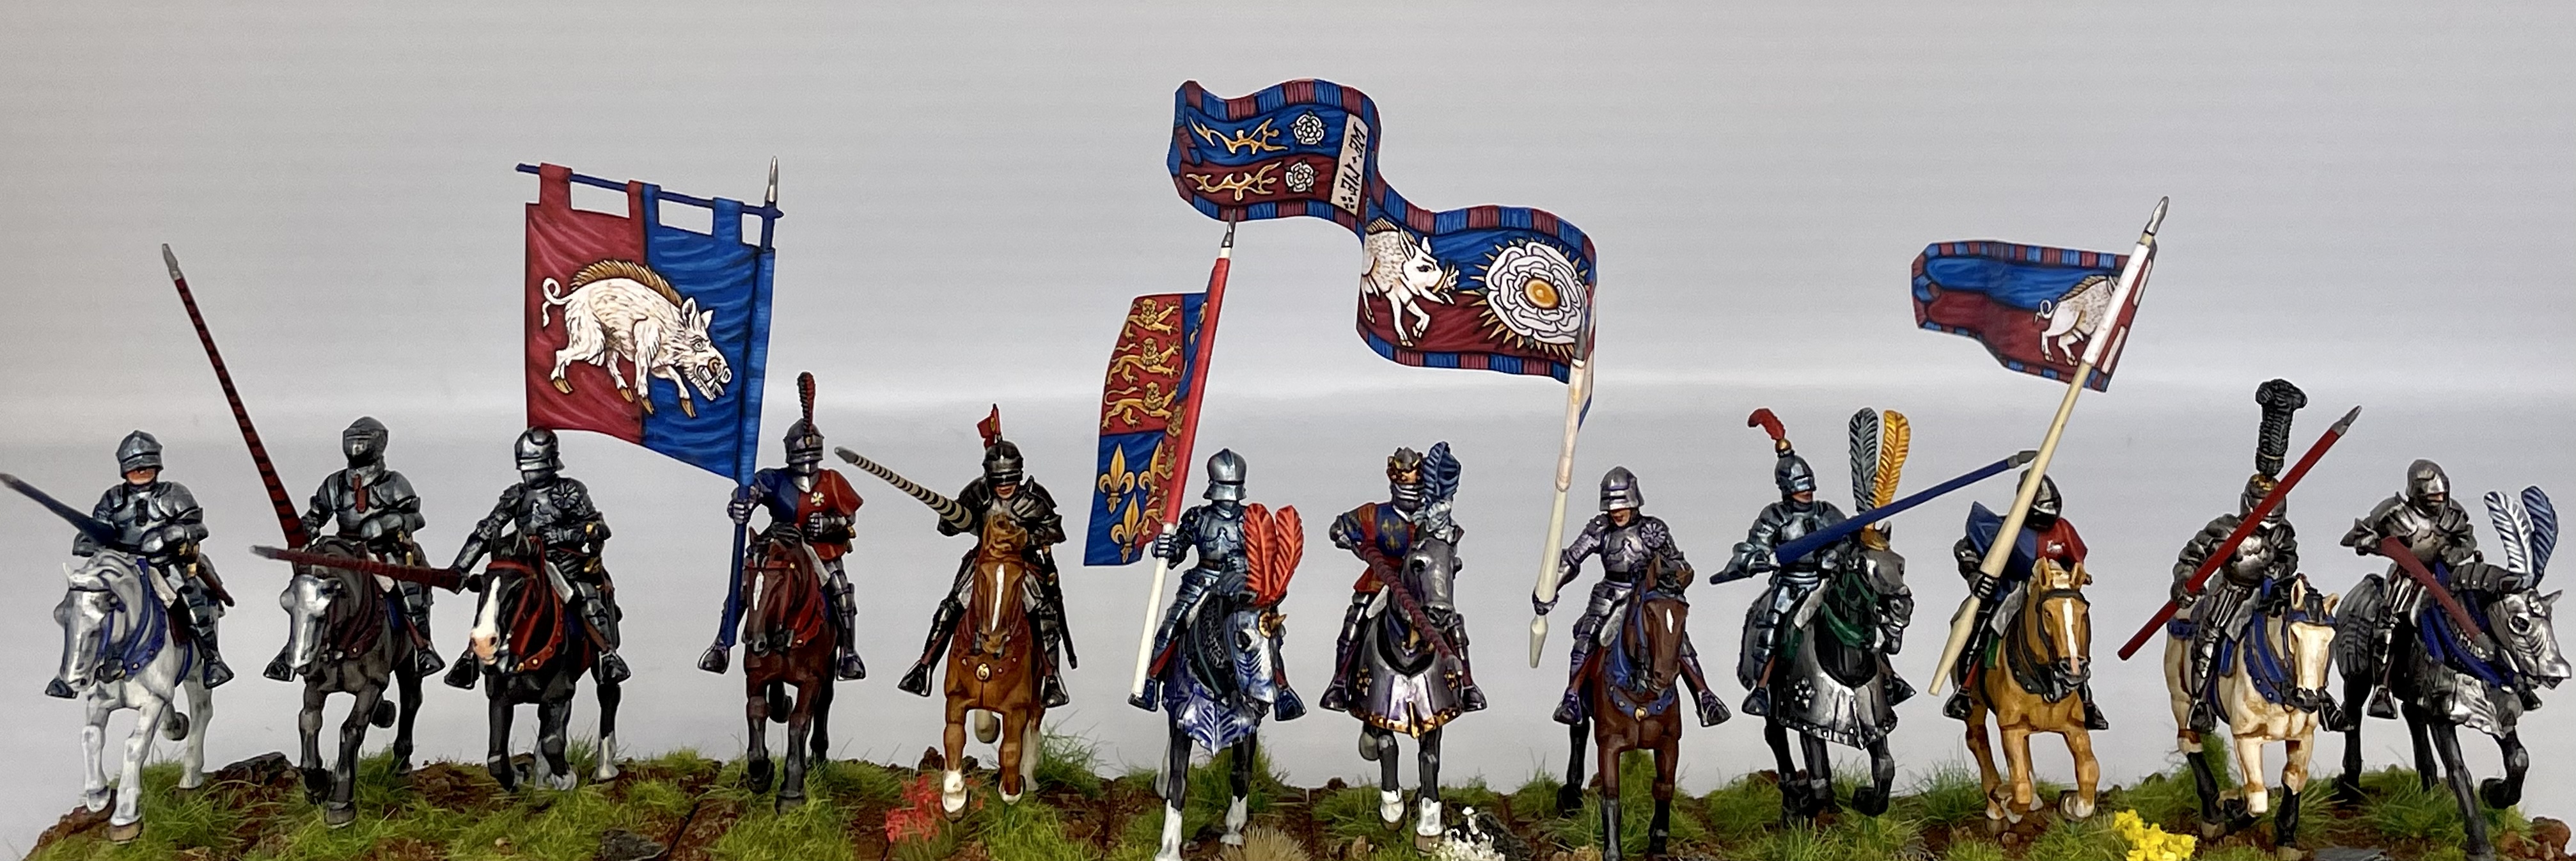
Highlights of my project are the Cossack vignette and my ‘reproductions’ of Wars of the Roses art. I was especially proud of my Three Hunters Lord of the Rings miniatures featuring on the show Cult of Paint as well as also receiving an email from White Dwarf expressing their interest in featuring these models in a future edition. The tutorials I have completed will also be a useful reminder on how I painted certain models when I come to tackle something similar in the future. I have taken a group photo of all the Wars of the Roses models I competed over the course of the challenge which can be seen below.
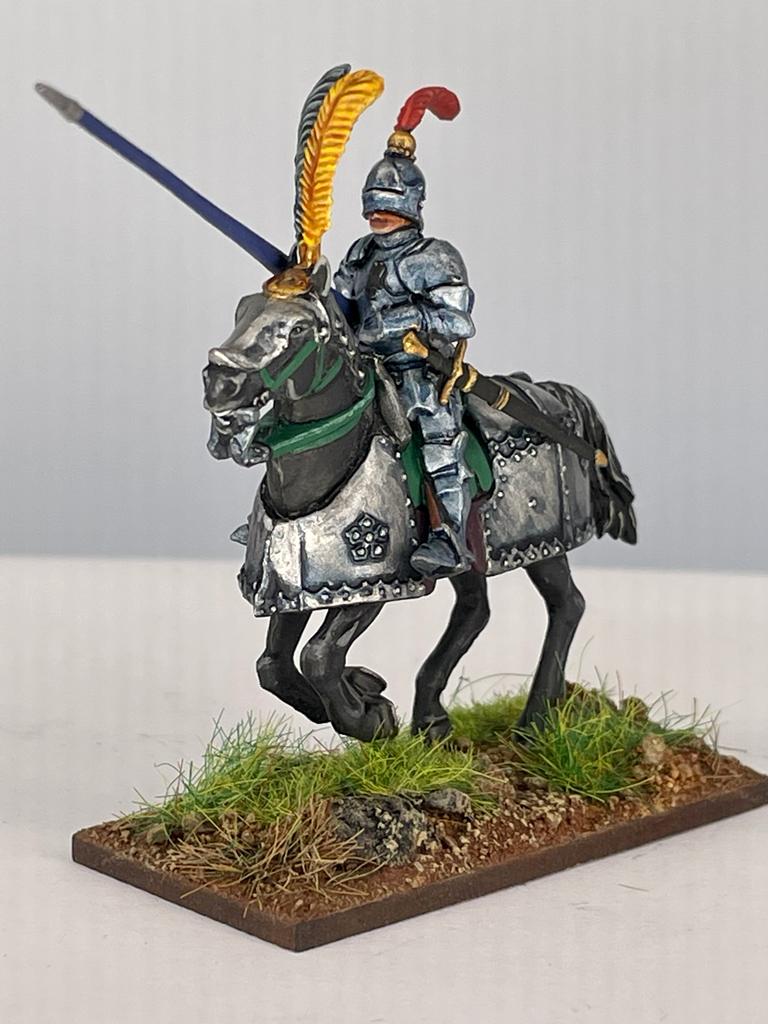
Perry French Carabinier
This is the last thing I finished before the deadline. I used a different palette for the black horse than the one I used in my previous tutorial. I worked from a black base. I then painted all the horse apart from the deepest recesses with Petroleum Grey. The model was then washed with diluted black ink and finally highlighted with thin Rainy Grey. All the colours are from Scale 75.

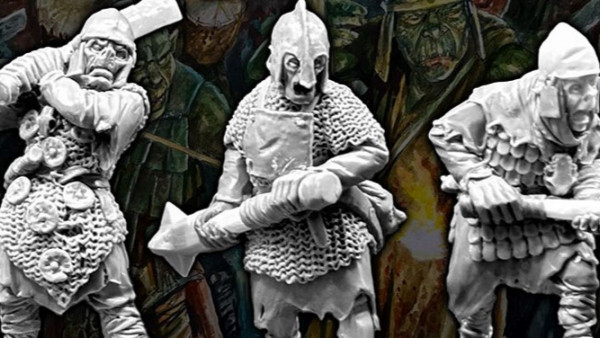
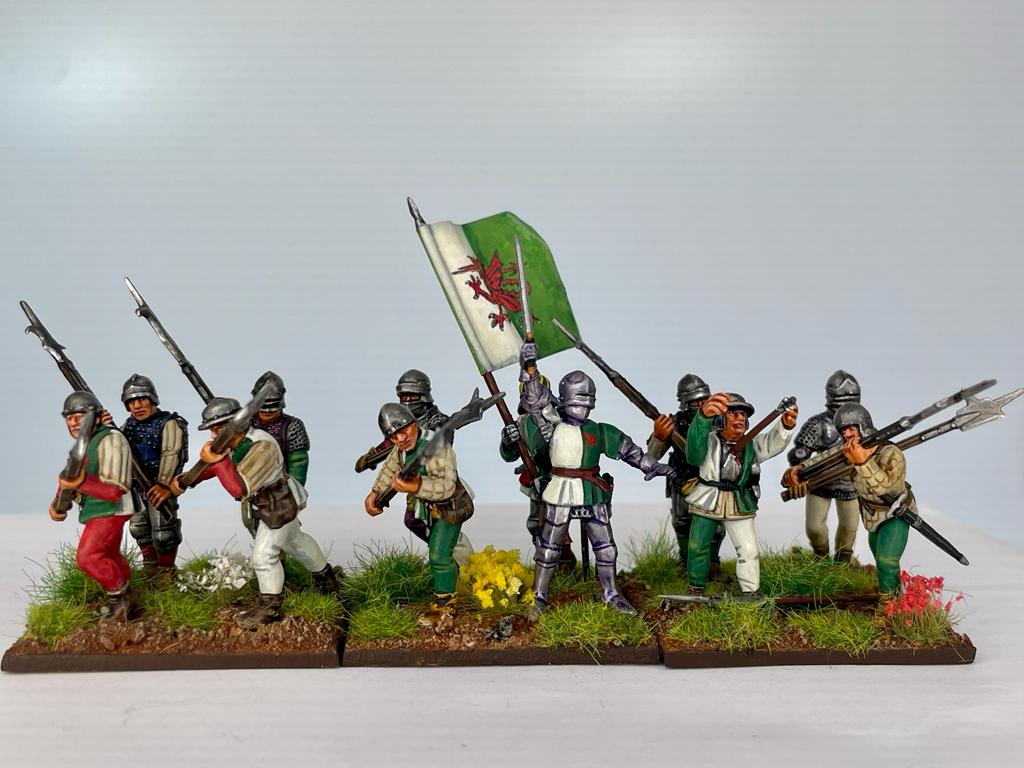
Tudor bill unit Wars of the Roses.
These were all made from the Perry boxes and not only from the Bill and Bow set. There are a variety of other heads and arms used although primarily they are from that set. The falling one with the arrow in his chest was made using two arms from the mercenaries boxed set. The pike was removed from one of the arms and they were positioned to look like the arrow had just hit him. The arrow was cut from a bunch of arrows that come in the box. I drilled a small hole into his chest and glued it in place. The blood effects are easily done with GW Blood for the Blood God. The flag is a free one available from the Wargaming At The Outpost GY facebook site. As my printer at home is not great I used it as an outline and totally repainted it.
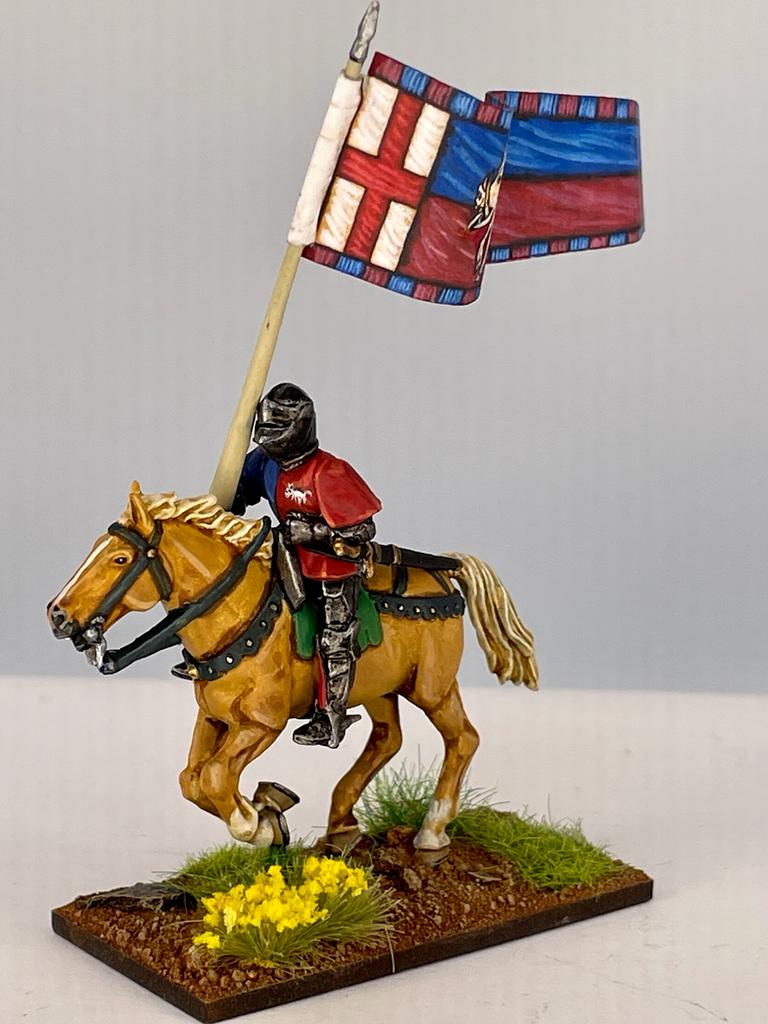
Richard Duke of Gloucester.
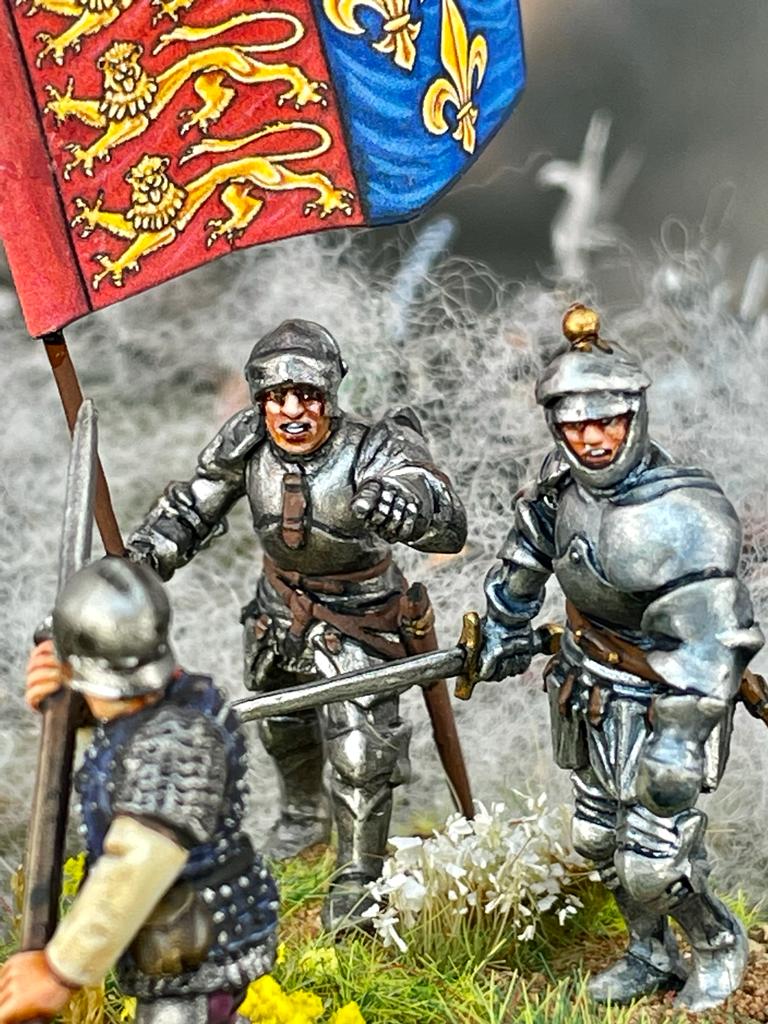
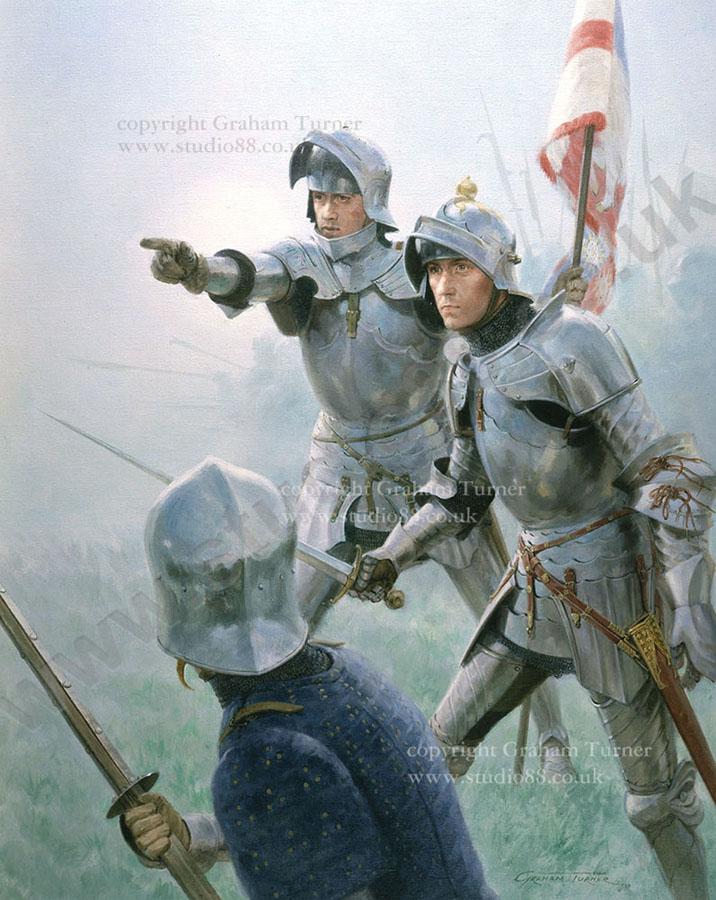
Richard Duke of Gloucester at the battle of Barnet 14th April 1471. This will be the last of my representations of Richard III from my Wars of the Roses project that I will have time to finish before the Spring Clean ends. I based this on the excellent painting by Graham Turner. Graham has kindly corresponded with me over several matters regarding my interpretations of his work. I carefully chose and assembled the Perry Miniatures parts to help me to mirror his painting. I altered the pole arm carried by the infantryman in the foreground to better match the painting. Richard’s helm also needed to be converted and I used bits from a couple of helmets for this. Finding a suitable pointing arm was a boon even though here it is the wrong pointing arm as it is the opposite one in the painting. The banner bearer’s right arm was originally cast with a sword. I cut this away and replaced it with a pole I made out of wire. I crushed one end with pliers and filed it to a point. I deliberately went for a finer quality finish for the Duke’s armour than his standard bearer. The flag is by Petesflags. I will include a copy of his painting so my vignette can be compared to it. I used pulled apart packing material from Perry boxes to simulate the mist. If you look carefully in the background you can see Perry Billmen as in the original painting.
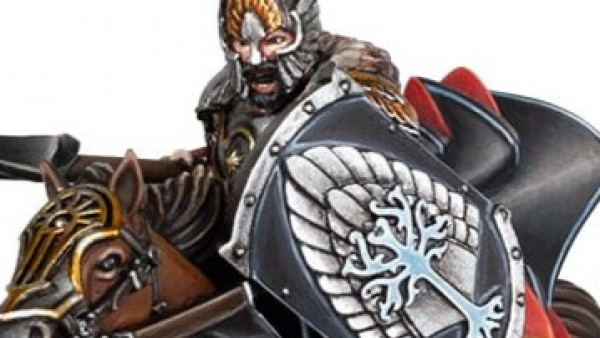
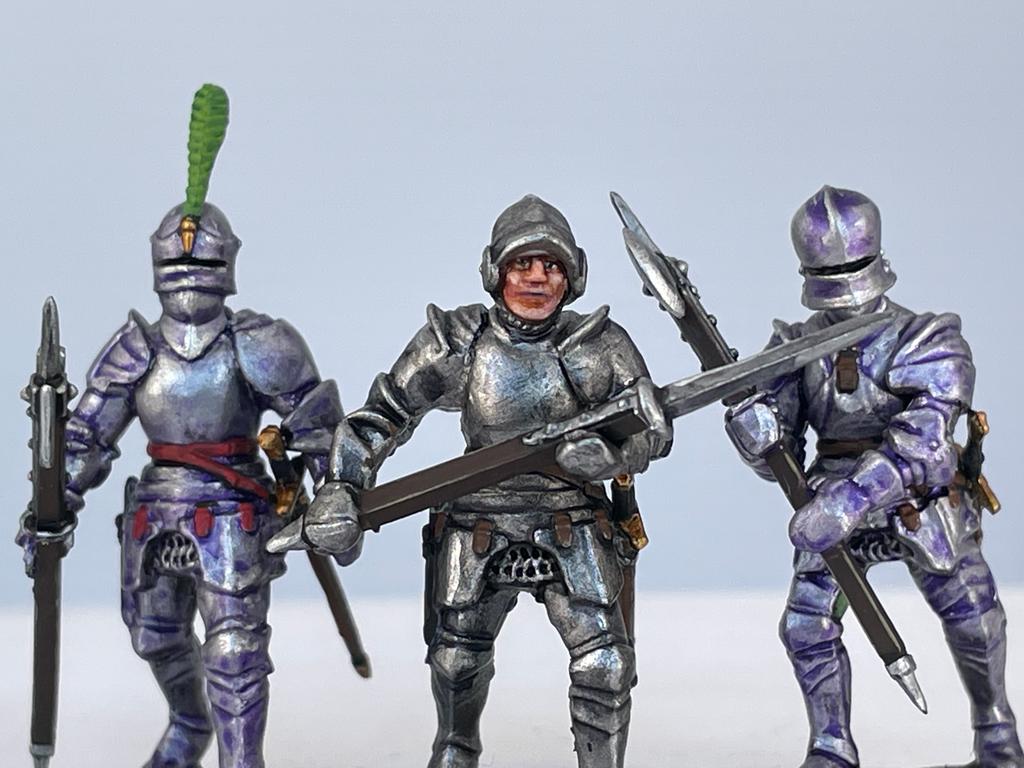
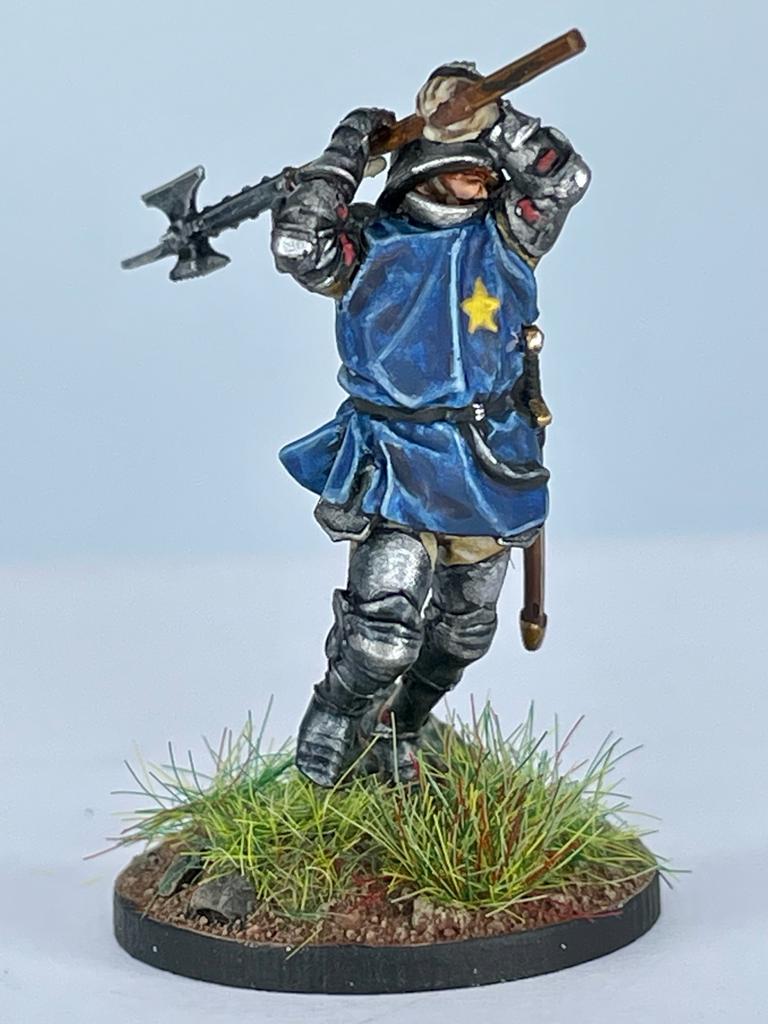
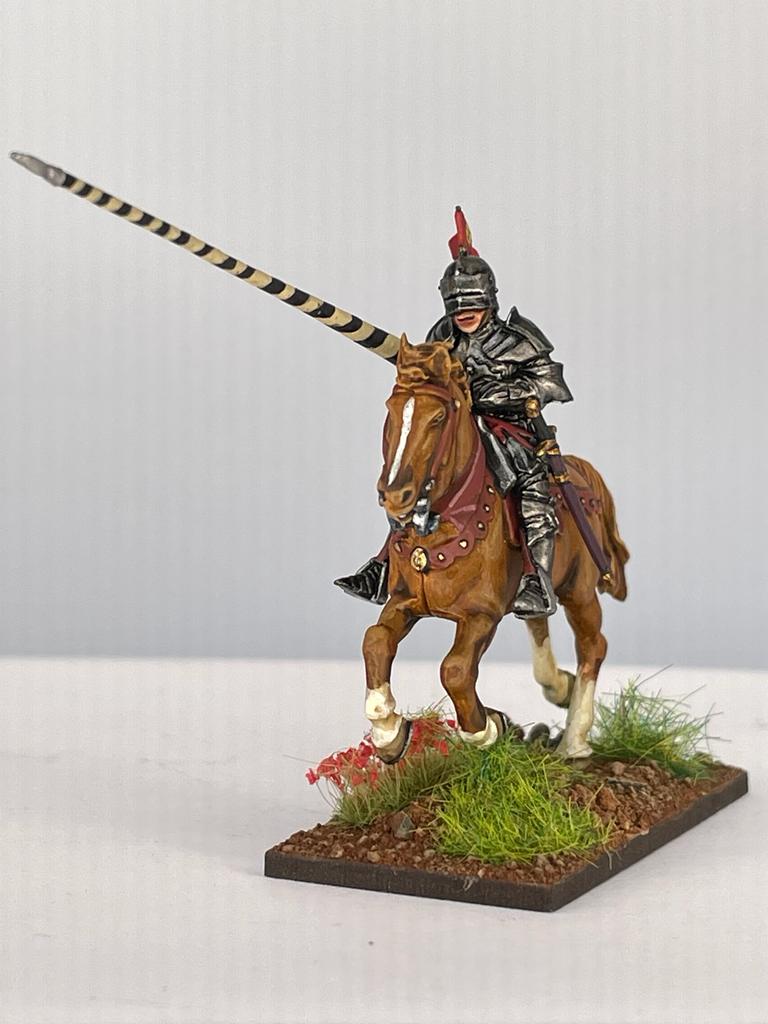
RaggedStaffMinis Knight Variant
This is the last of the figures I had the opportunity to paint. It is similar to the first one I showed but this one had no helmet. I painted it in a simple NMM black. I sketched out the highlights with diluted Administratum Grey and further highlights were done with Ulthuan Grey. Edge highlights were also done with this colour. I wasn’t happy with the larger areas of highlighting and glazed them all back with diluted black paint. This resulted in a more realistic smoother blended finish. Spot highlights were done with Vallejo Ivory to make the armour pop.
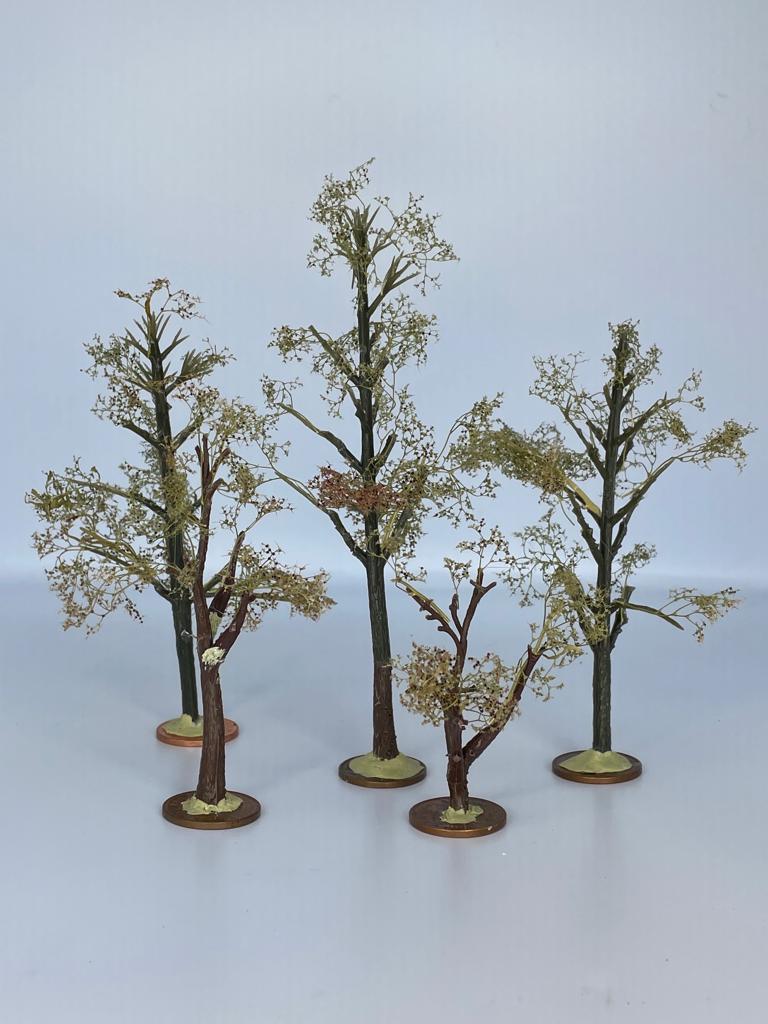
Making trees out of Seafoam
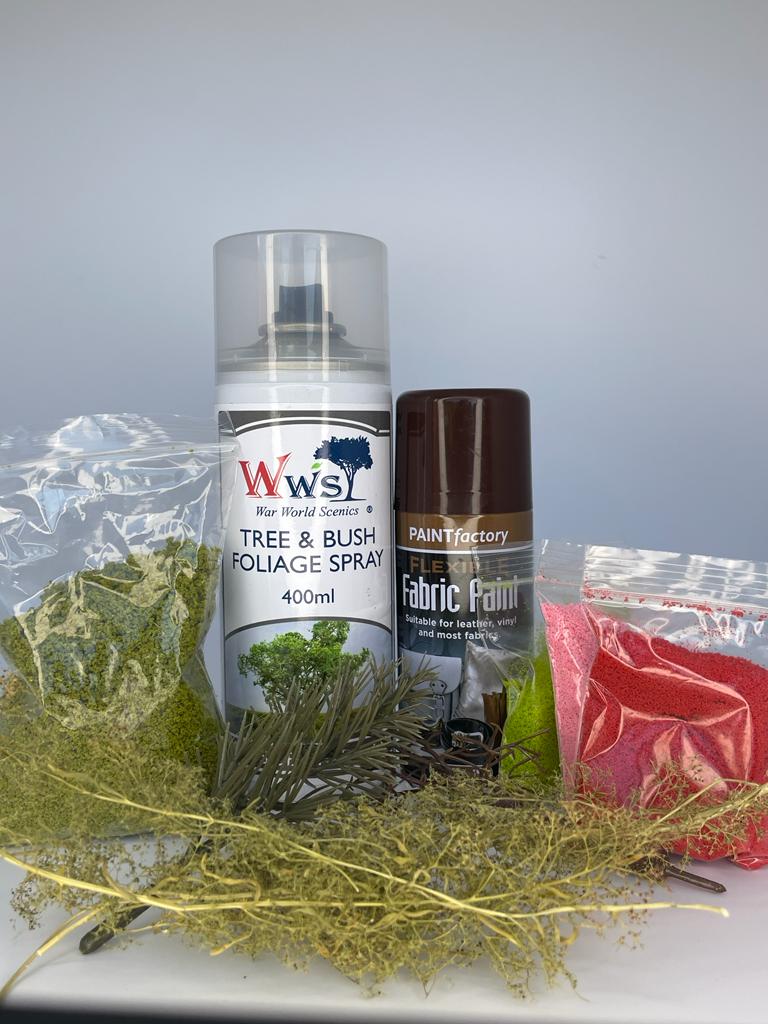
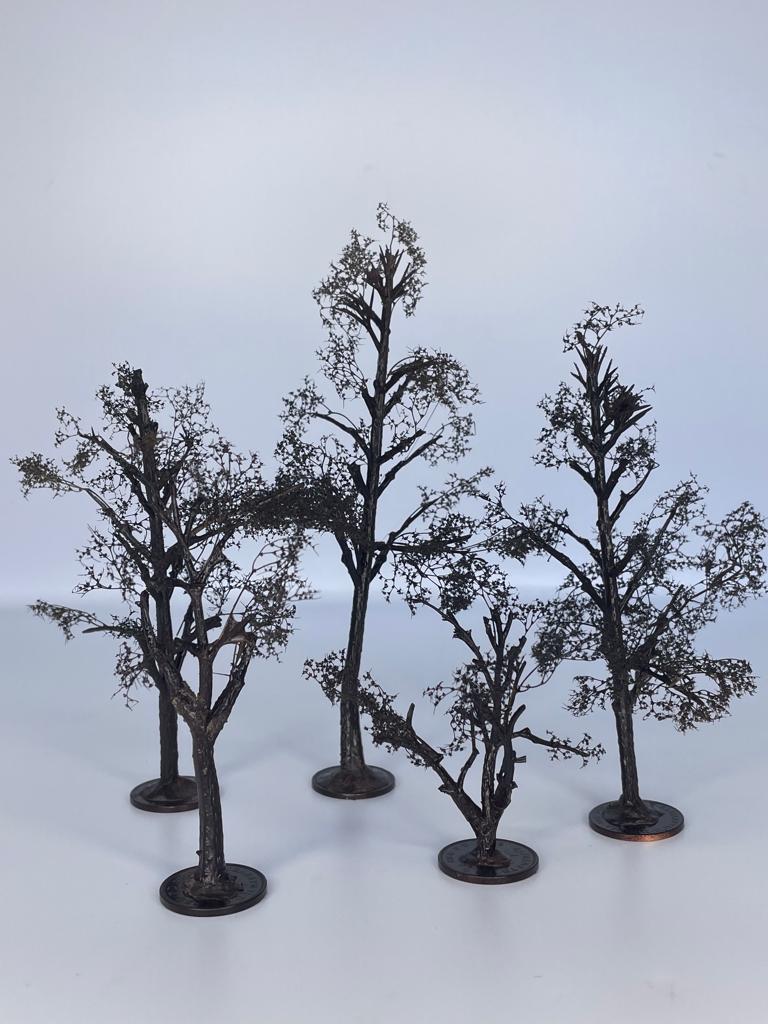
As I mentioned in my post on making Richard’s charge at Bosworth I needed some background trees. I always thought that those made out of seafoam ( teloxis aristata) looked great and although I knew they would not be particularly sturdy I was not concerned as I primarily wanted them to be used for when I photograph my miniatures. I purchased WSS Scenics realistic Spring tree kit and some extra plastic tree armatures from ebay. The latter were extremely cheap. Photo one shows what I worked with. The kit itself does not come with very clear instructiuons but a few tutorials on Youtube were a great help. As you can see in the photo I have included the two types of tree armature I had purchased and some of the seafoam, the four different types of flock from the kit and I purchased some cheap brown rattle can paints and some not so cheap tree and brush foliage spray again from WSS.
The first stage (photo 2) involves pruning a lot of the branches off the plastic trees. and then gluing them to 2p coins. I then added a band of milliput around the bottom of the bases. The tall tree at the back is made by combining one of the trees trunks from ebay with a WSS one. I drilled out a hole in each trunk using a wowstick and inserted a piece of wire to make the join more secure. The two parts were then joined with superglue.
In the third photo I have attached the seafoam. Take your time with this and cut small branches off the main pieces that are supplied in the kit. Do not use superglue for this as cheap contact adhesive works best.
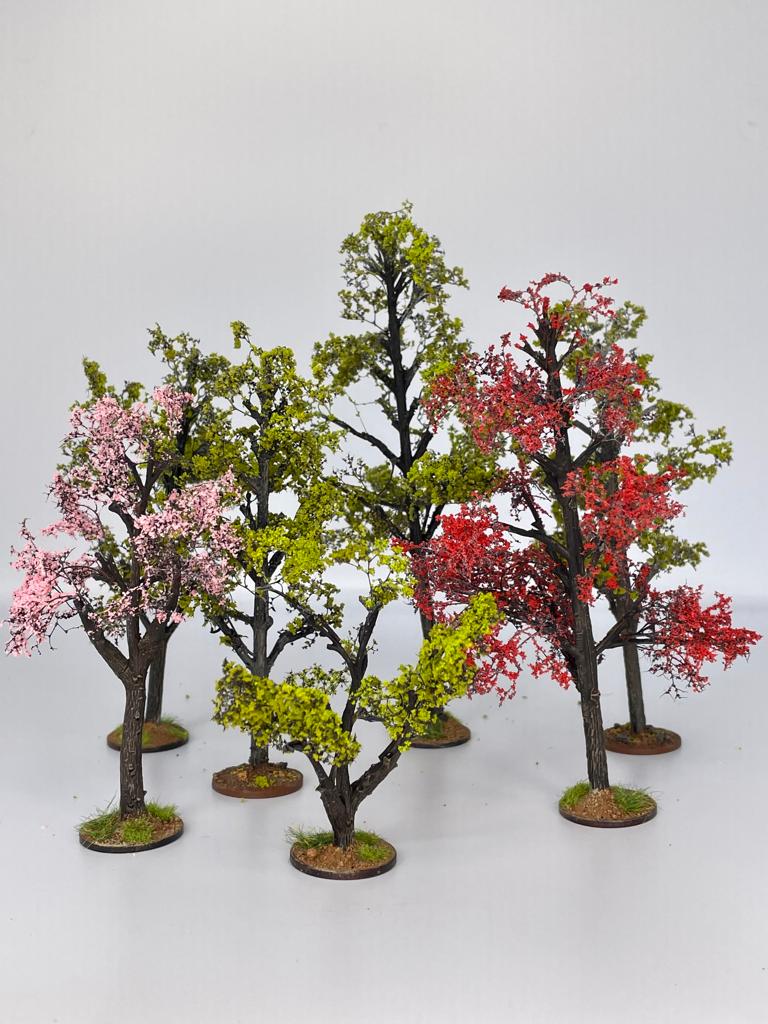
I then sprayed the trees with the brown paint (the trunks and branches were dry brushed with GW Zandri Dust)I mentioned earlier before adding the flock with the foliage spray. The pack comes with a bright pink and red flock to be used as blossom and to be honest I thought both were way too bright and would result in unrealsitic looking trees. However on looking at images online I thought the colours looked okay and the resulting trees I made with them are my favourite. The green trees are made using the thicker green flock with the lighter flock then applied over the top. ( photos 4 and 5).
The foliage spray left a grey residue and I therefore washed the branches with GW Agrax Earthshade before dry brushing again with the Zandri Dust. I thought the finished trees looked a little sparse so I added more branches of seafoam and repeated the above steps. I finally finished the bases and took a picture of the trees on my teddy bear fur mat with some of the figures I have completed as part of the Spring Clean.

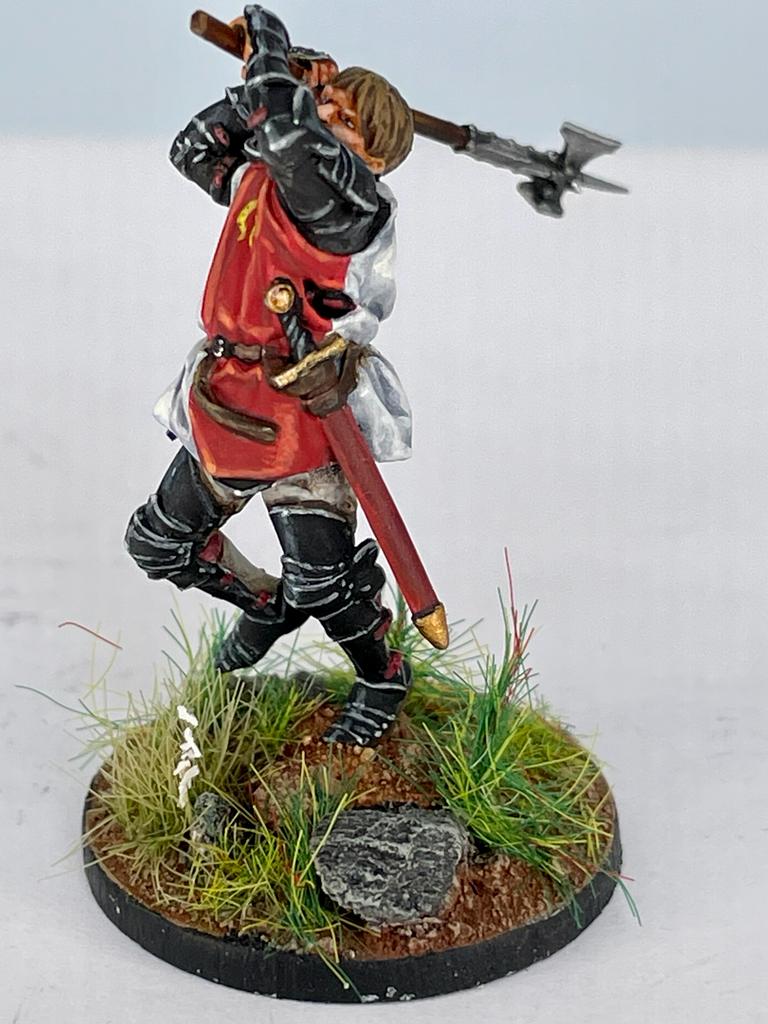
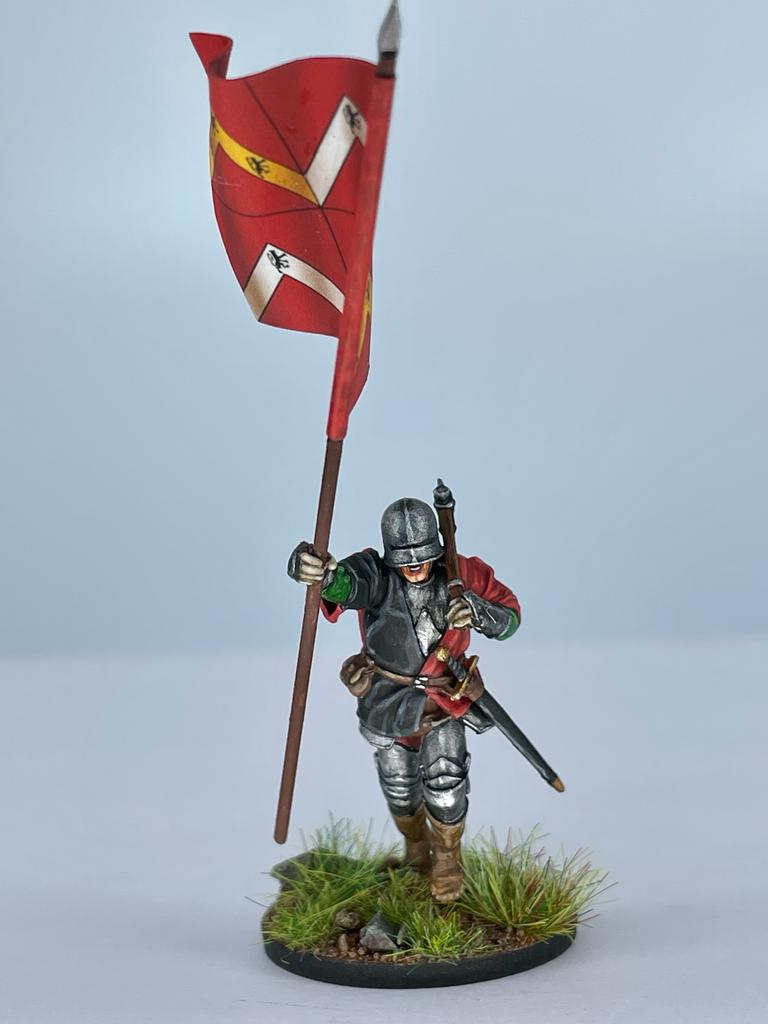
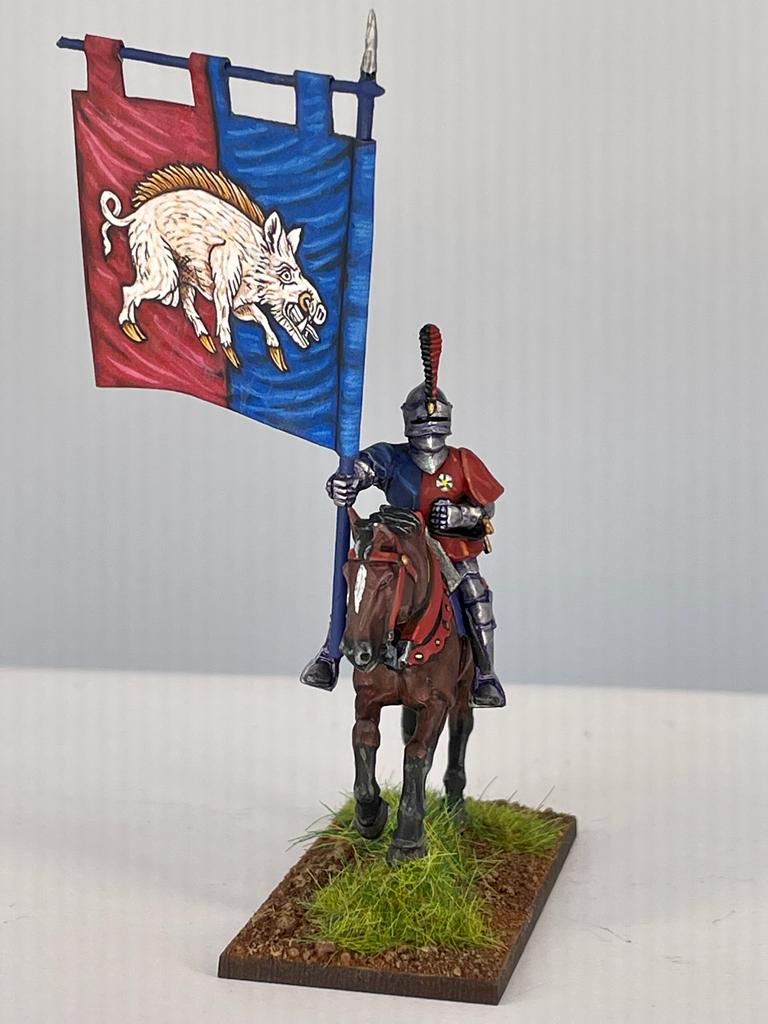
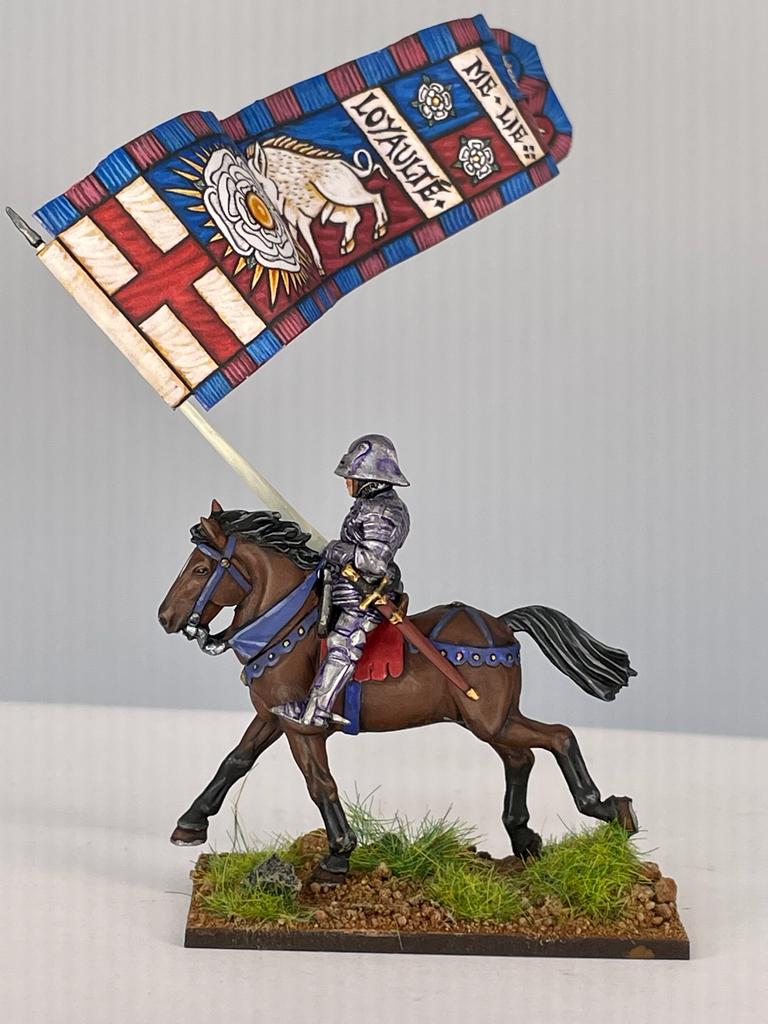
RaggedStaffMinis Wars of the Roses Banner Bearer
One of my favourite figures from the range. The banner is from one of the Perry Miniatures box sets although I have added extra details to it to give more of a 3D look to folds and raised parts of the ‘cloth’. The miniature is actually designed to have the leading hand wielding the warhammer but I swapped them around and was pleased with the finished pose.
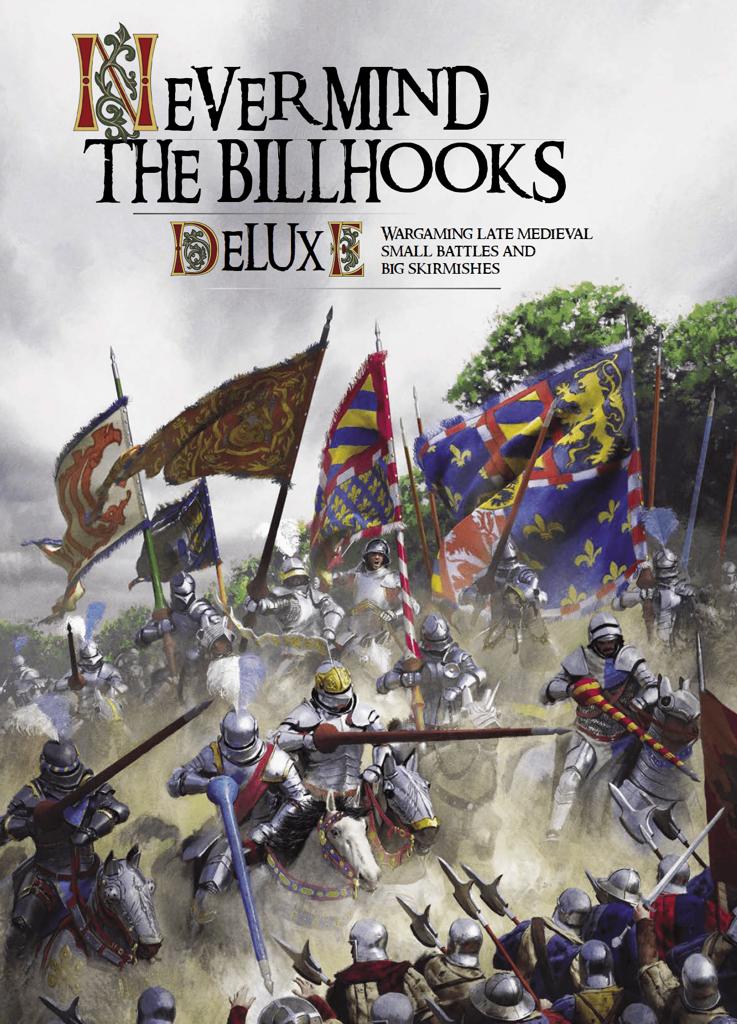
Never Mind The Billhooks Deluxe.
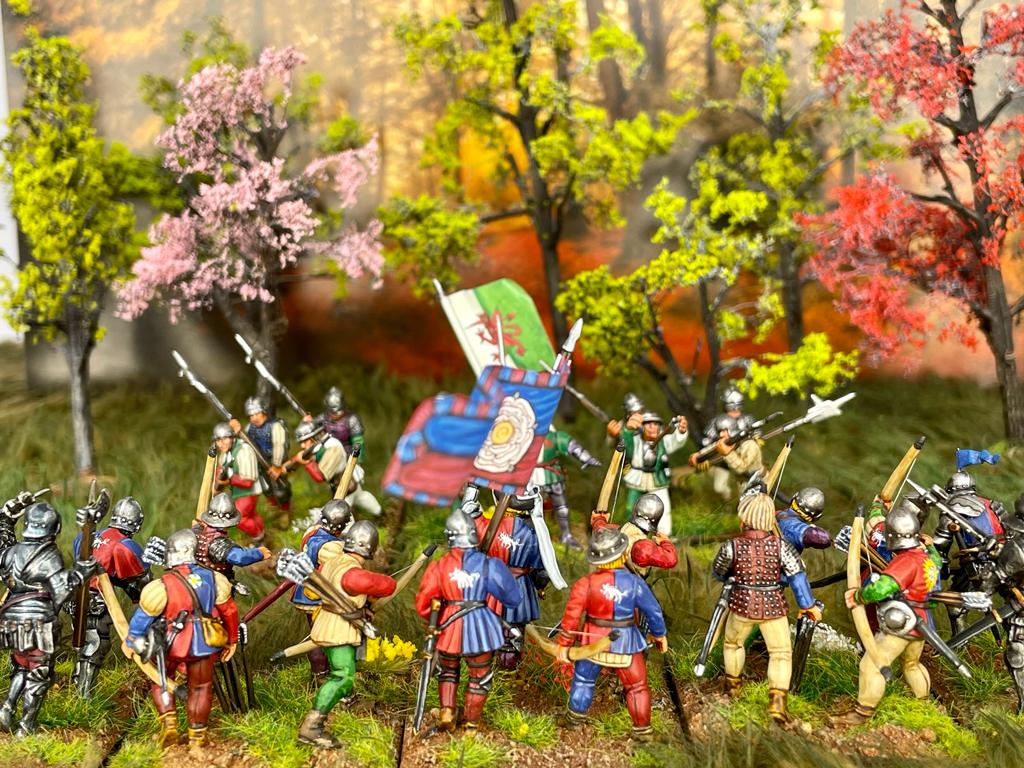
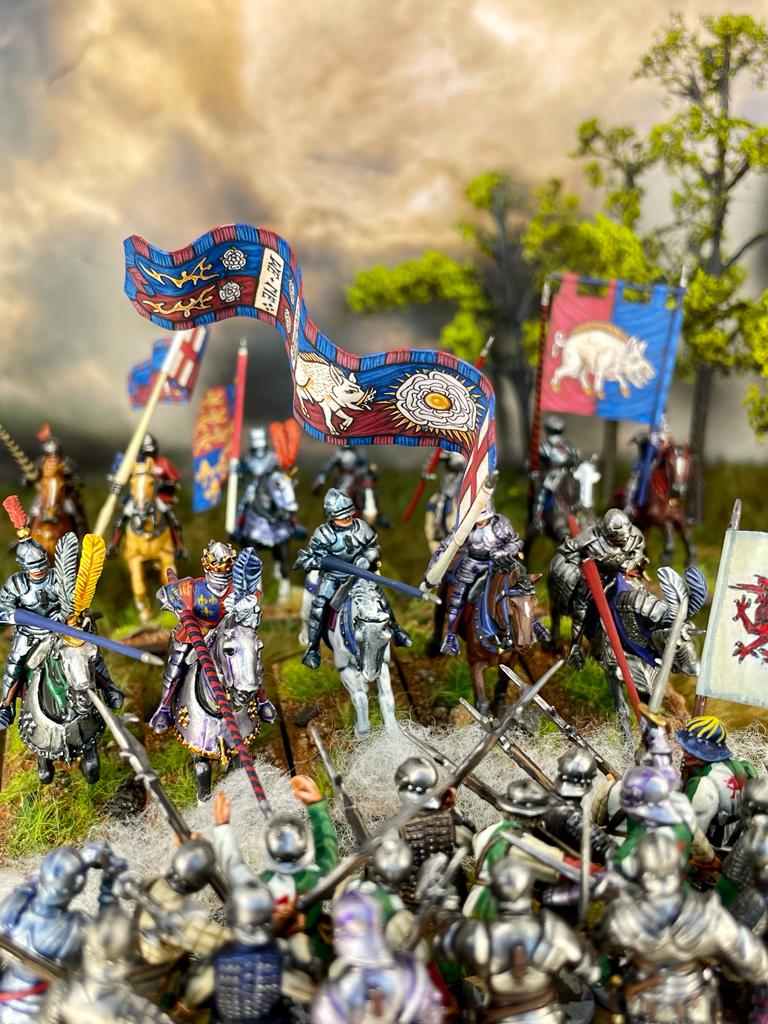
When I first saw the artwork for this I wanted to recreate it in miniature. The art shows a unit of Burgundian Knights charging into a Swiss infantry unit. I wanted to alter it to fit my own Richard III at Bosworth project. I swapped the Knights out for Richard and his retinue Knights. He can be seen in the front row just about to spear an unfortunate billman. His personal banner bearer Sir Percival Thirlwall is also in the front rank. The charge was instigated when Richard spotted Henry Tudor and his retinue in an isolated position on the battlefield. In reality a formed unit of heavy billmen in front of Henry would have dissuaded Richard from making his ill fated charge. To make the ‘history’ work in my head I imagined that a small unit of bills and men at arms have managed to come between Richard and his prize.
To get this to work I had to add a few things (or skills) to my collection. This included the teddy bear mat I described earlier, more trees ( more about this later) and to raise my game in the photograph department ( see my previous article). One of the most difficult things was to get the angle of the photograph correct so that it would mirror the original painting.
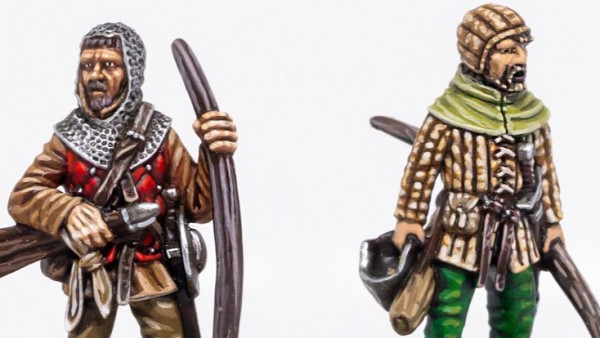
RaggedStaffMinis Archer Captain
These 28mm scale models are all lovely characters. The figure can also be modeled with a hand weapon. Again this is another superb example of the talent behind Reconquer Designs working from Martin Brook’s brief. Please see my earlier piece in the project showing how I string bows in this scale.
Perry Miniatures Foot Knights 1450-1500
I painted these to join the infantry in the foreground for the photograph I wanted to do to replicate The Never Mind The Billhooks Deluxe cover art. Although here they are part of a Tudor Bill unit they actually will be used in a dismounted unit of Richard III with his retinue. As they are not wearing surcoats that was easy to do. Please see my guide to painting armour earlier on on this project for the methods I used. The kit is mainly designed to produce action poses but I wanted a more ‘at rest’ look for the unit as they might have appeared during the early morning on Bosworth Field.
Using Phone Apps
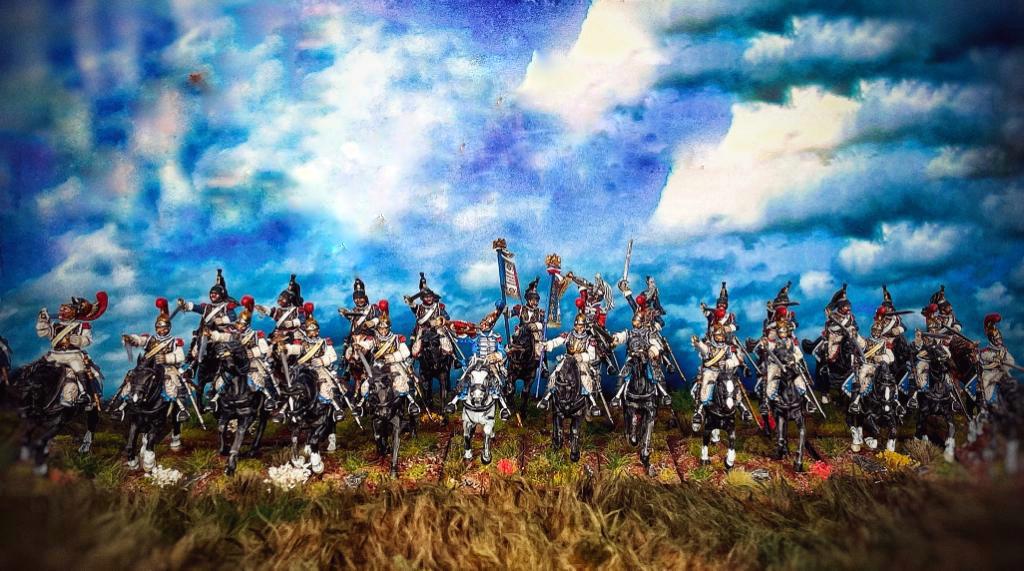
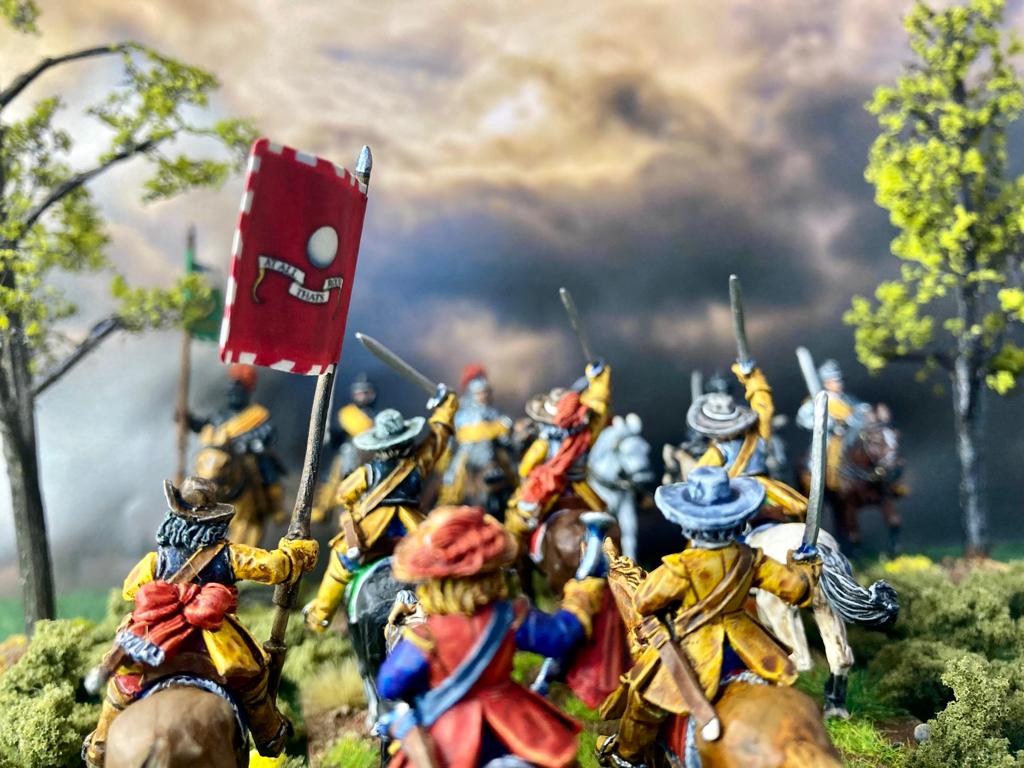
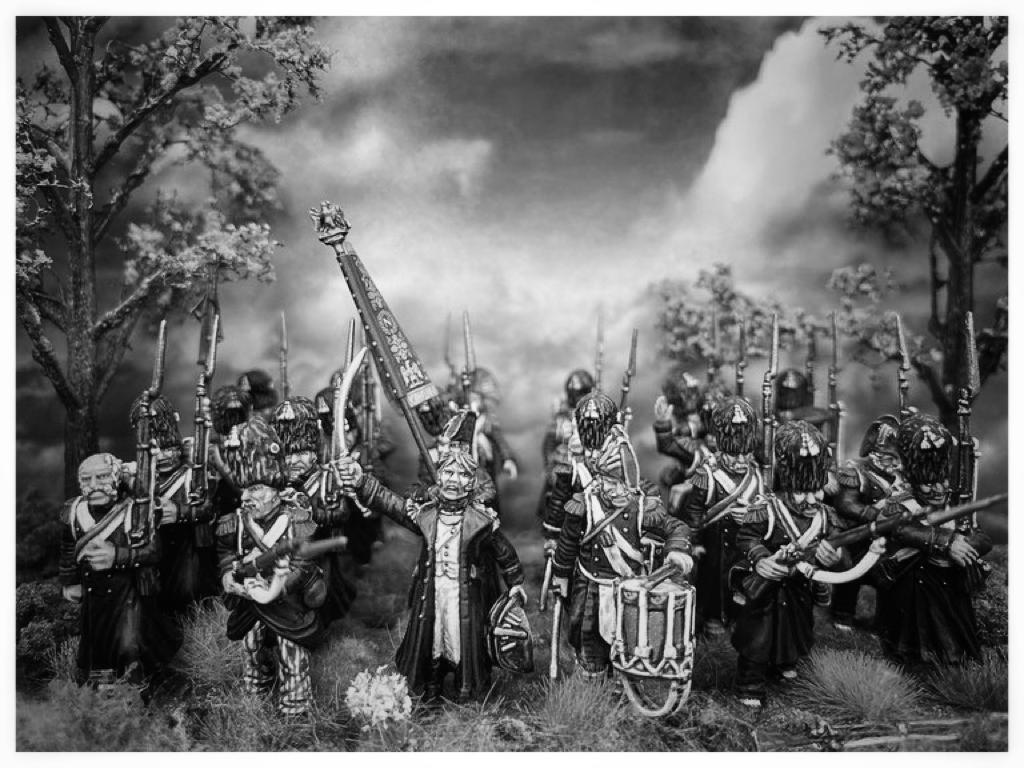
Obviously not from my pile of shame but something I have been dying to do for ages was explore phone apps to improve or vary the look of my photographed miniatures. I downloaded the popular app Snapseed and although I am far from an expert with it I think it has a lot of potential. With the charging heavy French cavalry I expanded the scene and tried to give it more of a painting look rather than a photograph. I went for a moody look to the ECW scene darkened the clouds and blurred out the trees. This is probably my favourite before and after photo. The last scene changes the picture obviously from colour to black and white but I have also added a frame which again gives it more of a painting than a photograph look to the miniatures.

New Wars of the Roses figures
I was lucky to be sent some pre-release figures by Martin Brook from 7th Son wargaming channel. He is going to be releasing a range of Wars of the Roses figures which will be available shortly as soon as he adds one more figure to his range. His Etsy store will be RaggedStaffMinis. The figures have been designed by the very talented Marcos from Reconquer designs and are a joy to paint.
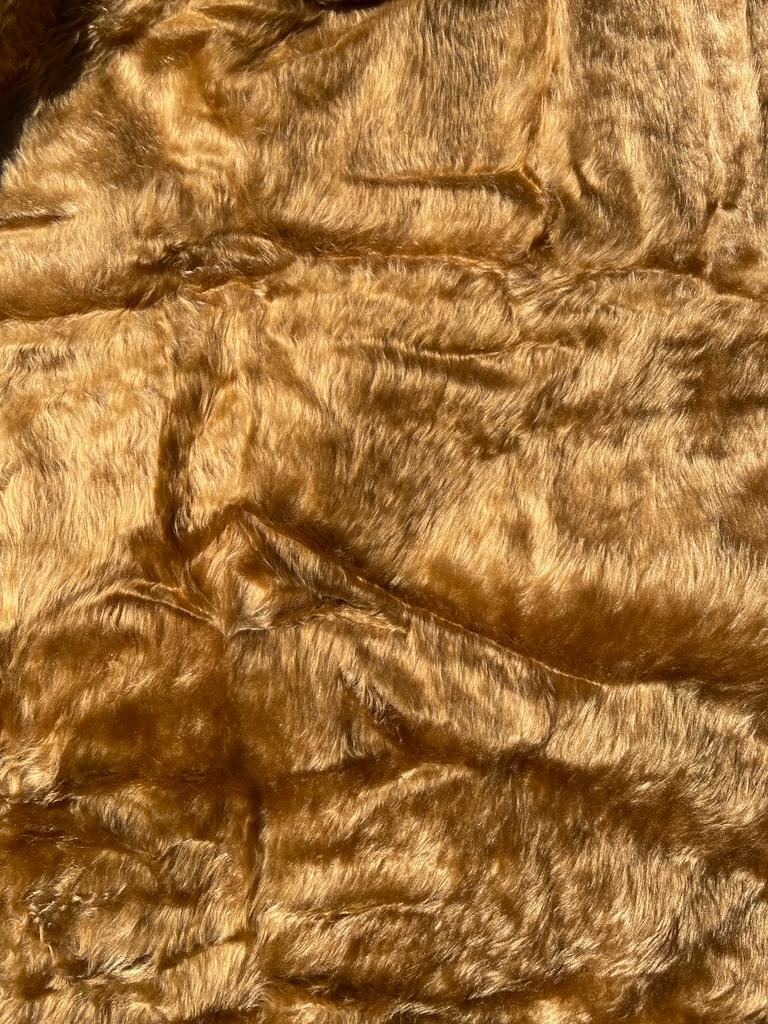
Teddy bear fur mat
I came across an excellent blog showing you how to make one. I purchased a large piece from Amazon called Antelope Brown ( see first photo) and also bought some cheap hobby paint from Home Bargains and B and M (see photo). The three different colours were blended into each other and resulted in a pleasing effect. Having not read the blog properly I applied the paint directly to the mat and should have placed it on my hands and rubbed it in. This resulted in me having to spend a lot longer combing the fur and trying to get tats out. However I was pleased with the final effect and it looks good with the figures arrayed on it. Note these are for eye candy purposes only and I did not paint the cavalry as part of this years challenge.


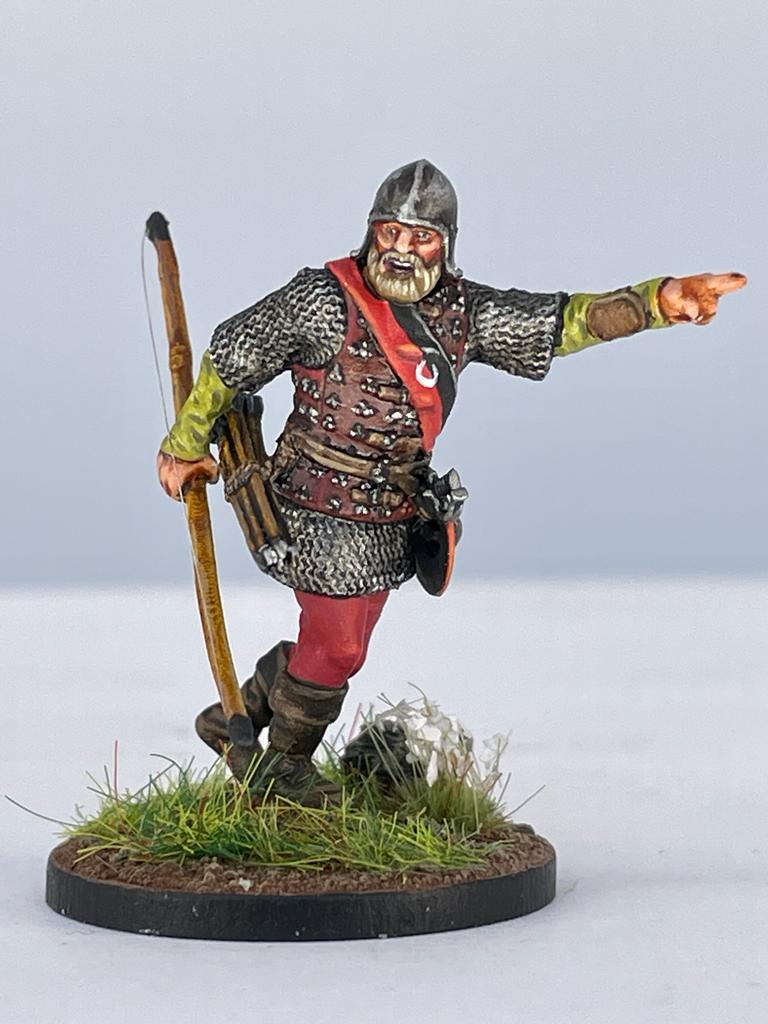
Richard III Bow Unit
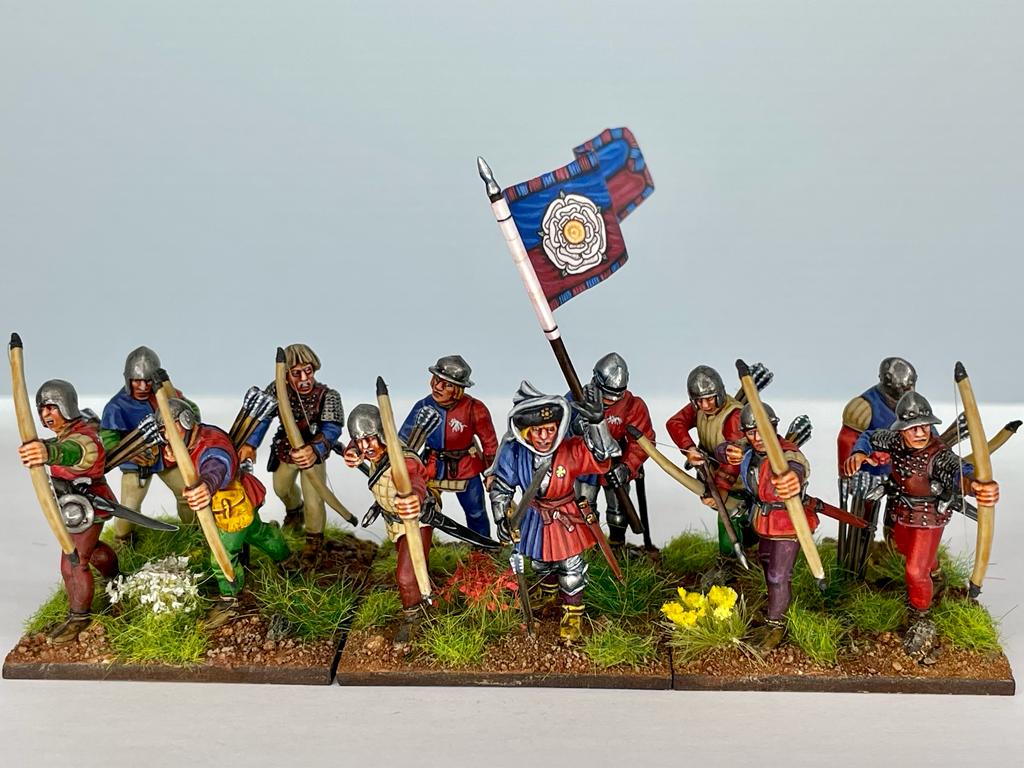
These miniatures were all made from Perry plastic kits primarily the Bill and Bow set for the Wars of the Roses. The bow strings were kindly donated from my wife’s head. I have tried thin string before and the hair results in a much more in scale look. A loose knot is tied on one end of the hair and inserted over the bow. This is then tightened and a small dot of superglue is applied. The other end is the done in the same way but also ensure that the bow string is tight. This is tricky but results in a nice effect.
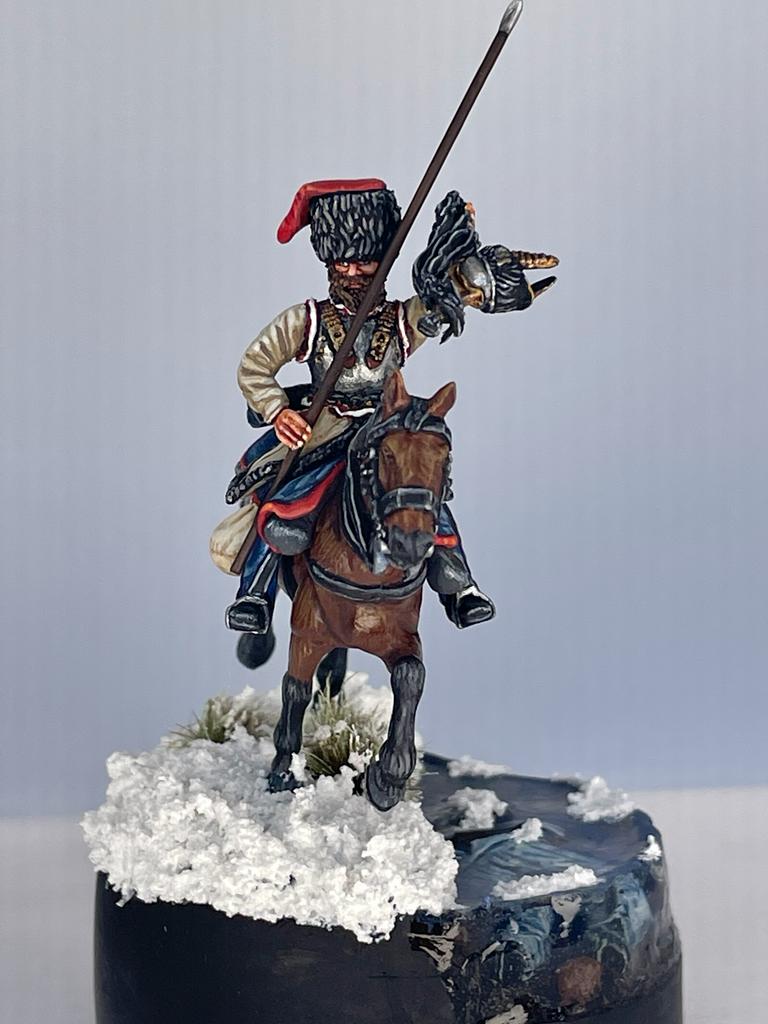
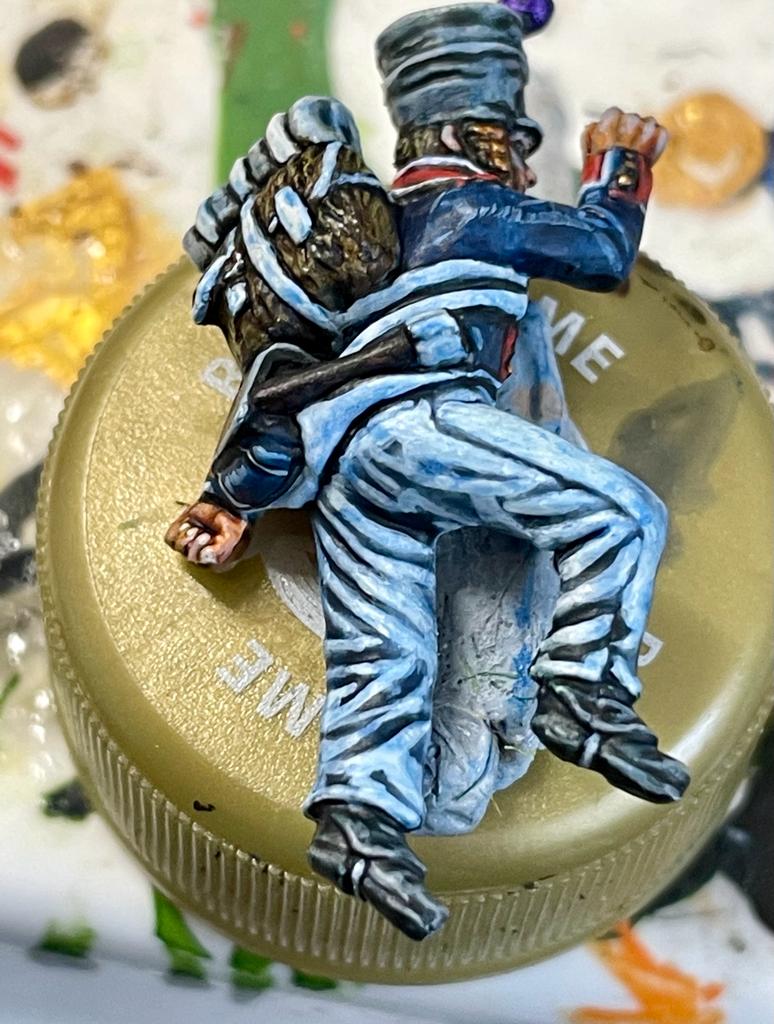
Completed Cossack 1812 Vignette.
I painted this to the best of my ability and invested quite a few hours into it. Like the base I also tried a few techniques that I had not attempted before. I was hugely impressed with Andy Wardle’s Golden Demon Elrond piece and wanted to try the horse fur method he had used. Luckily I came across a video by Vince Vintrella on Youtube where he explains how you can apply fur texture to horses. Overall I was pleased with the conversion and hopefully my sculpting fits with the parts I had used from the Perry kits.
French Casualty under the ice 1812
The base of my Cossack Vignette features a dead French line infantryman. I attempted to follow Megzike’s tutorial on Youtube to make the ice and adapted it to the products I had available. I built up the base to make the river bank with Milliput. The bank and bed of the stream were made with sand and grit. Once painted I then added the figure. I used Tamiya masking tape to form the barrier in which I was going to pour the resin. I had chosen Vallejo still water for this . I would have been better off using a two part epoxy resin as the Vallejo product is only really suitable for shallow pours. This resulted in me having to apply several layers.
The surface was crystal clear but the masking tape left a residue on the side and even though I attempted to clean it off with turps it was still quite cloudy. I painted with a brush more resin onto the sides and the eventual result looked like solid ice which I was fairly pleased with. I roughed up the surface of the ‘ice’ on the top of the base with sand paper to represent frost and then glazed this with blue and white paint. The base was finished with Vallejo snow and a couple of dead looking tufts which I also applied the snow product to. The cossack was then pinned onto the base.
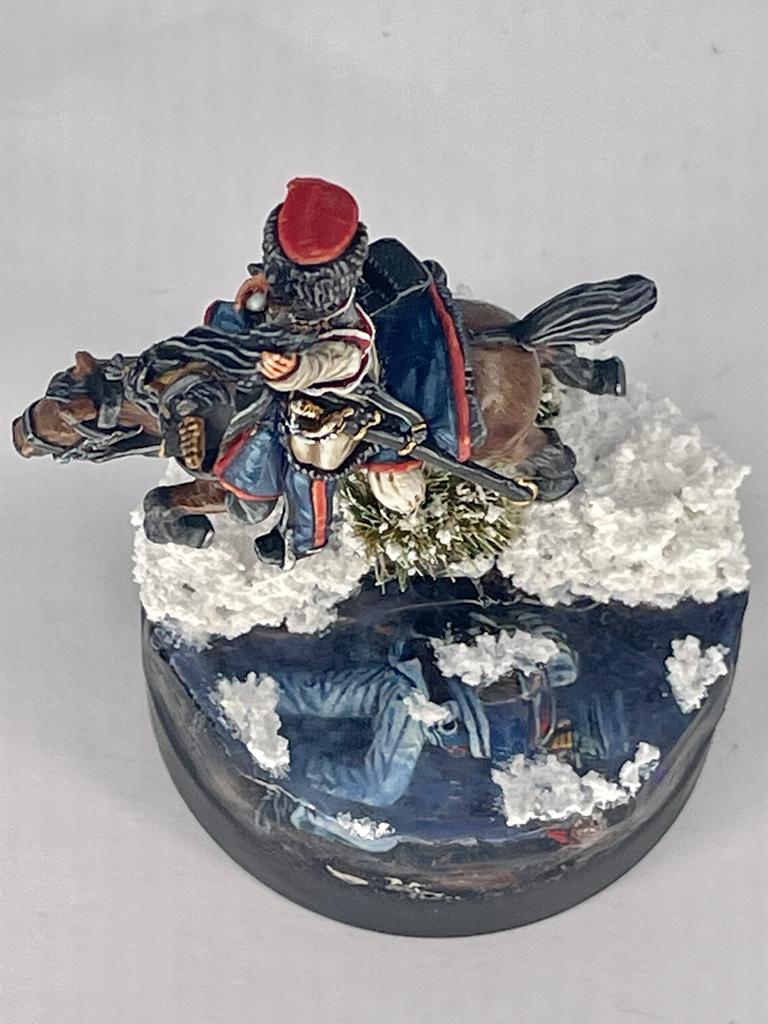
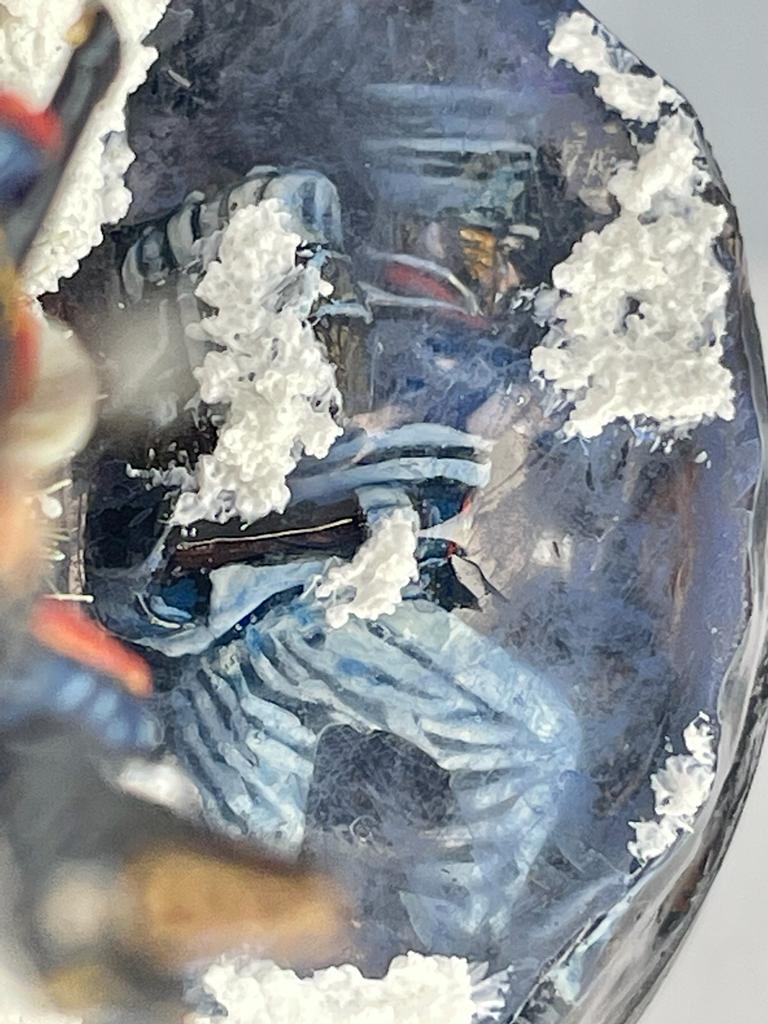
French Casualty figure for Cossack Vignette.
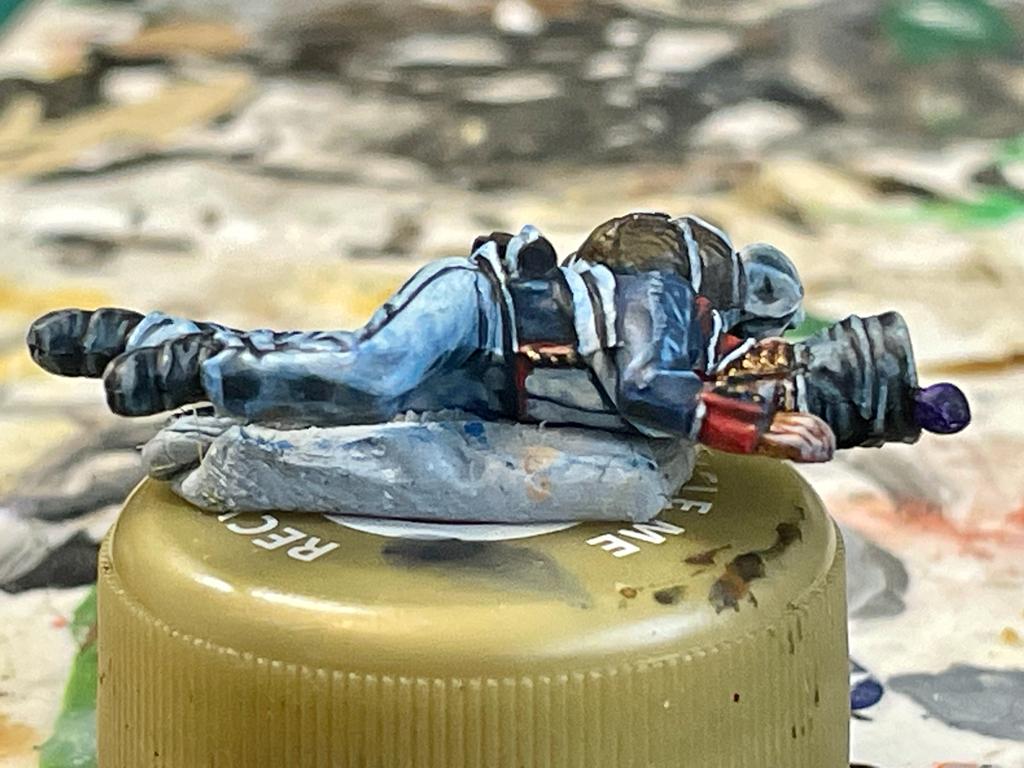
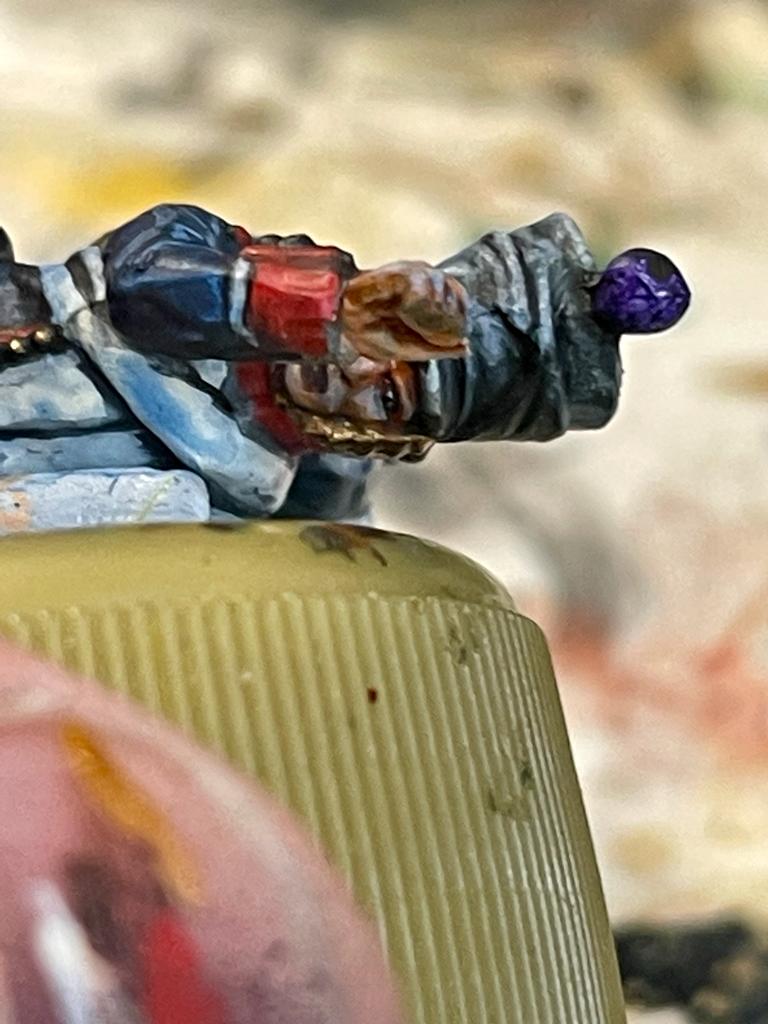
This is a Perry sculpt and comes with several of their cavalry sets. I painted the model as normal then glazed heavily thinned blue ink all over the model to accentuate the bitter cold. The figure will eventually be placed under ‘ice ‘ when the vignette is completed.
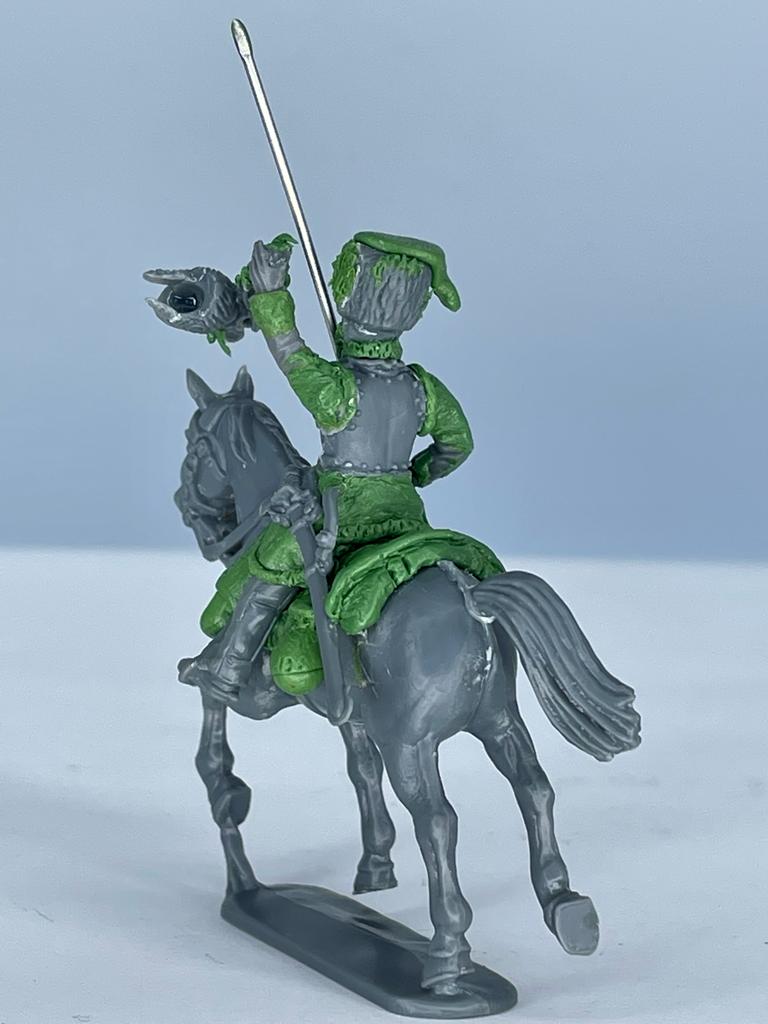
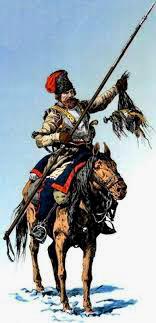
Russian Cossack Retreat from Moscow 1812
I wanted to recreate the painting below. This was a complicated kit bash and also involved a lot of sculpting with Greenstuff. The right arm (nearly all the parts are Perry Miniatures plastics) is from one of the Wars of The Roses boxes, the left is a French line infantry officers, the body, torso horse and helmet are from the French Heavy cavalry box and the head and legs are from the French Chasseurs.
All the shoulder detail and buttons etc were removed from the arms. The buttons were also removed from the legs. The helmet horsehair was altered and additions were made with putty. The head was cut and drilled out of the helmet. All the saddlery was removed from the horse. I also removed the plume and bag from the chasseurs hat and added a new bag to it.
I sculpted all of the new saddle, bags and blankets etc. I refined a lot of the details ( adding facial hair etc) and sculpted more fur on the bearskin and added a coat with fur trim to the model. Finally I added a wire lance ( the point was filed) and a cartridge box from a Warlord French line infantryman and a sword from the Heavy Cavalry box by Perry.
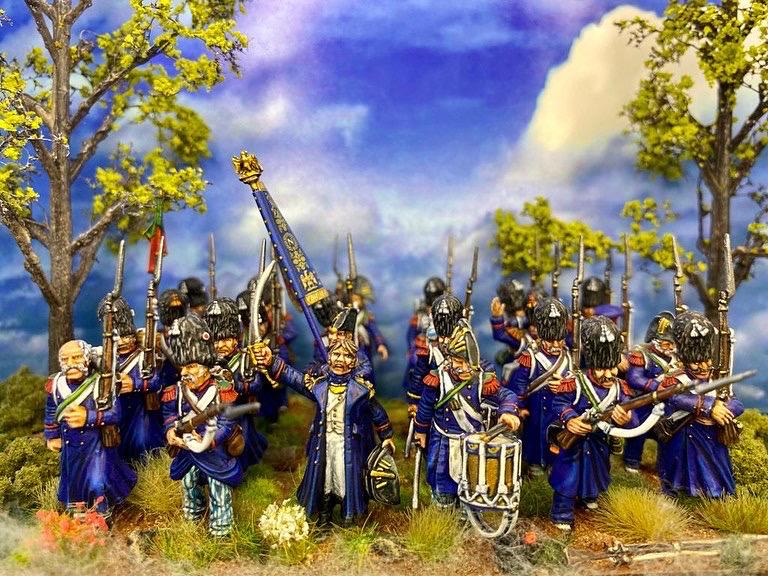
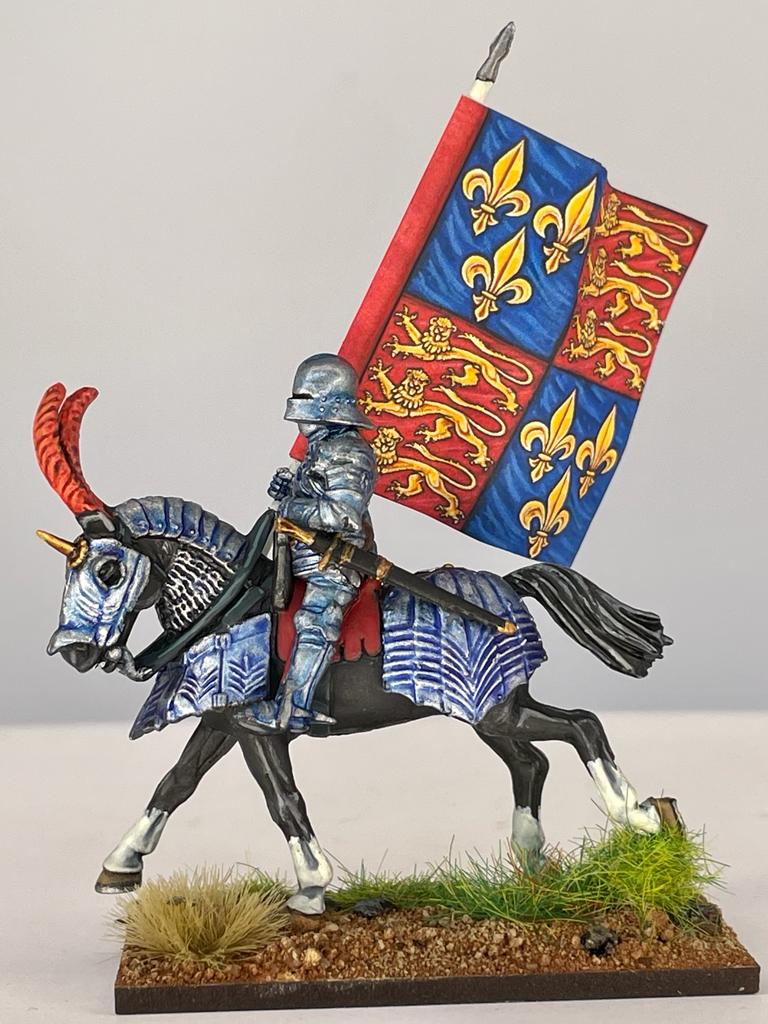
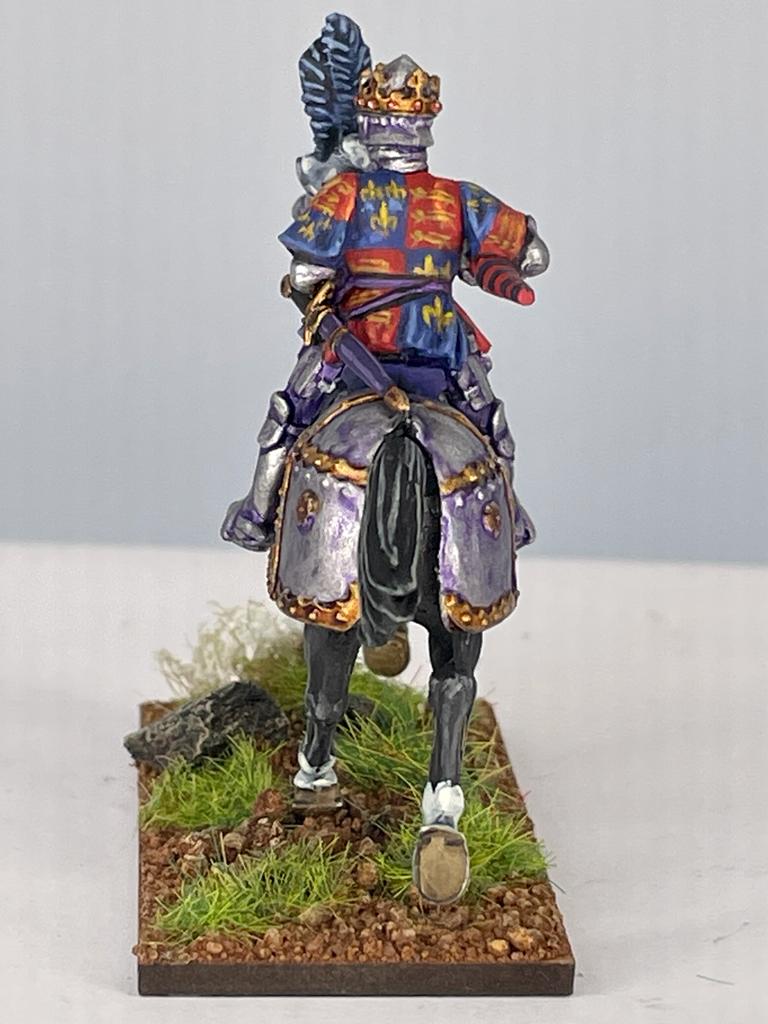
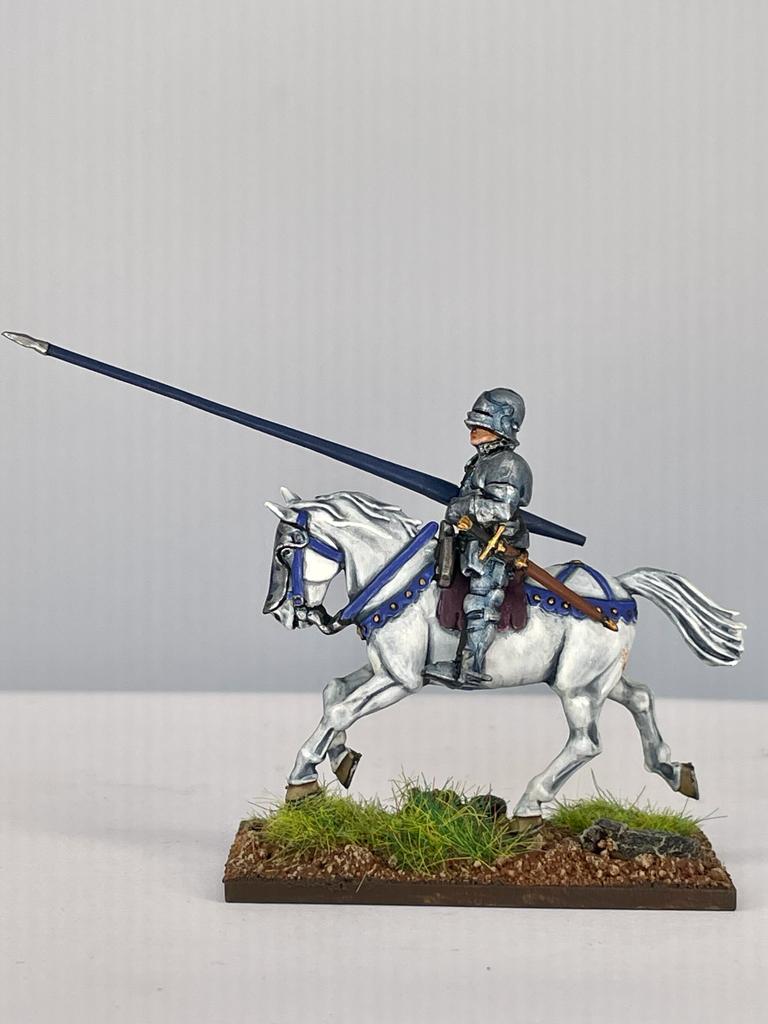
Richard III and Retinue Knights. Bosworth 1485.
I have already showed one of the knights and Richard but I have now managed to complete the rest of the unit. Michael Perry has done a superb job with these and I used heads from several different Wars of the Roses plastic boxed sets, although there is more than enough variety even within the box to make every figure unique. I altered the charging lance arms on several to make more of them with couched lance and to make sure that these arms matched the armour sculpted on the torsos.
I painted the knights and horses separately to enable me to access details easier especially with the knights where I had to paint livery badges on their tabards. Richard’s royal coat of arms would have been impossible to do otherwise with the detail I wanted to portray. The only snag I found was that a lot of the bodies wouldn’t fit onto the horses because of the angle I had glued their swords scabbards on. This resulted in me having to remove them, refit them and tidy up where necessary. The flags are by the very talented Petes Flags.

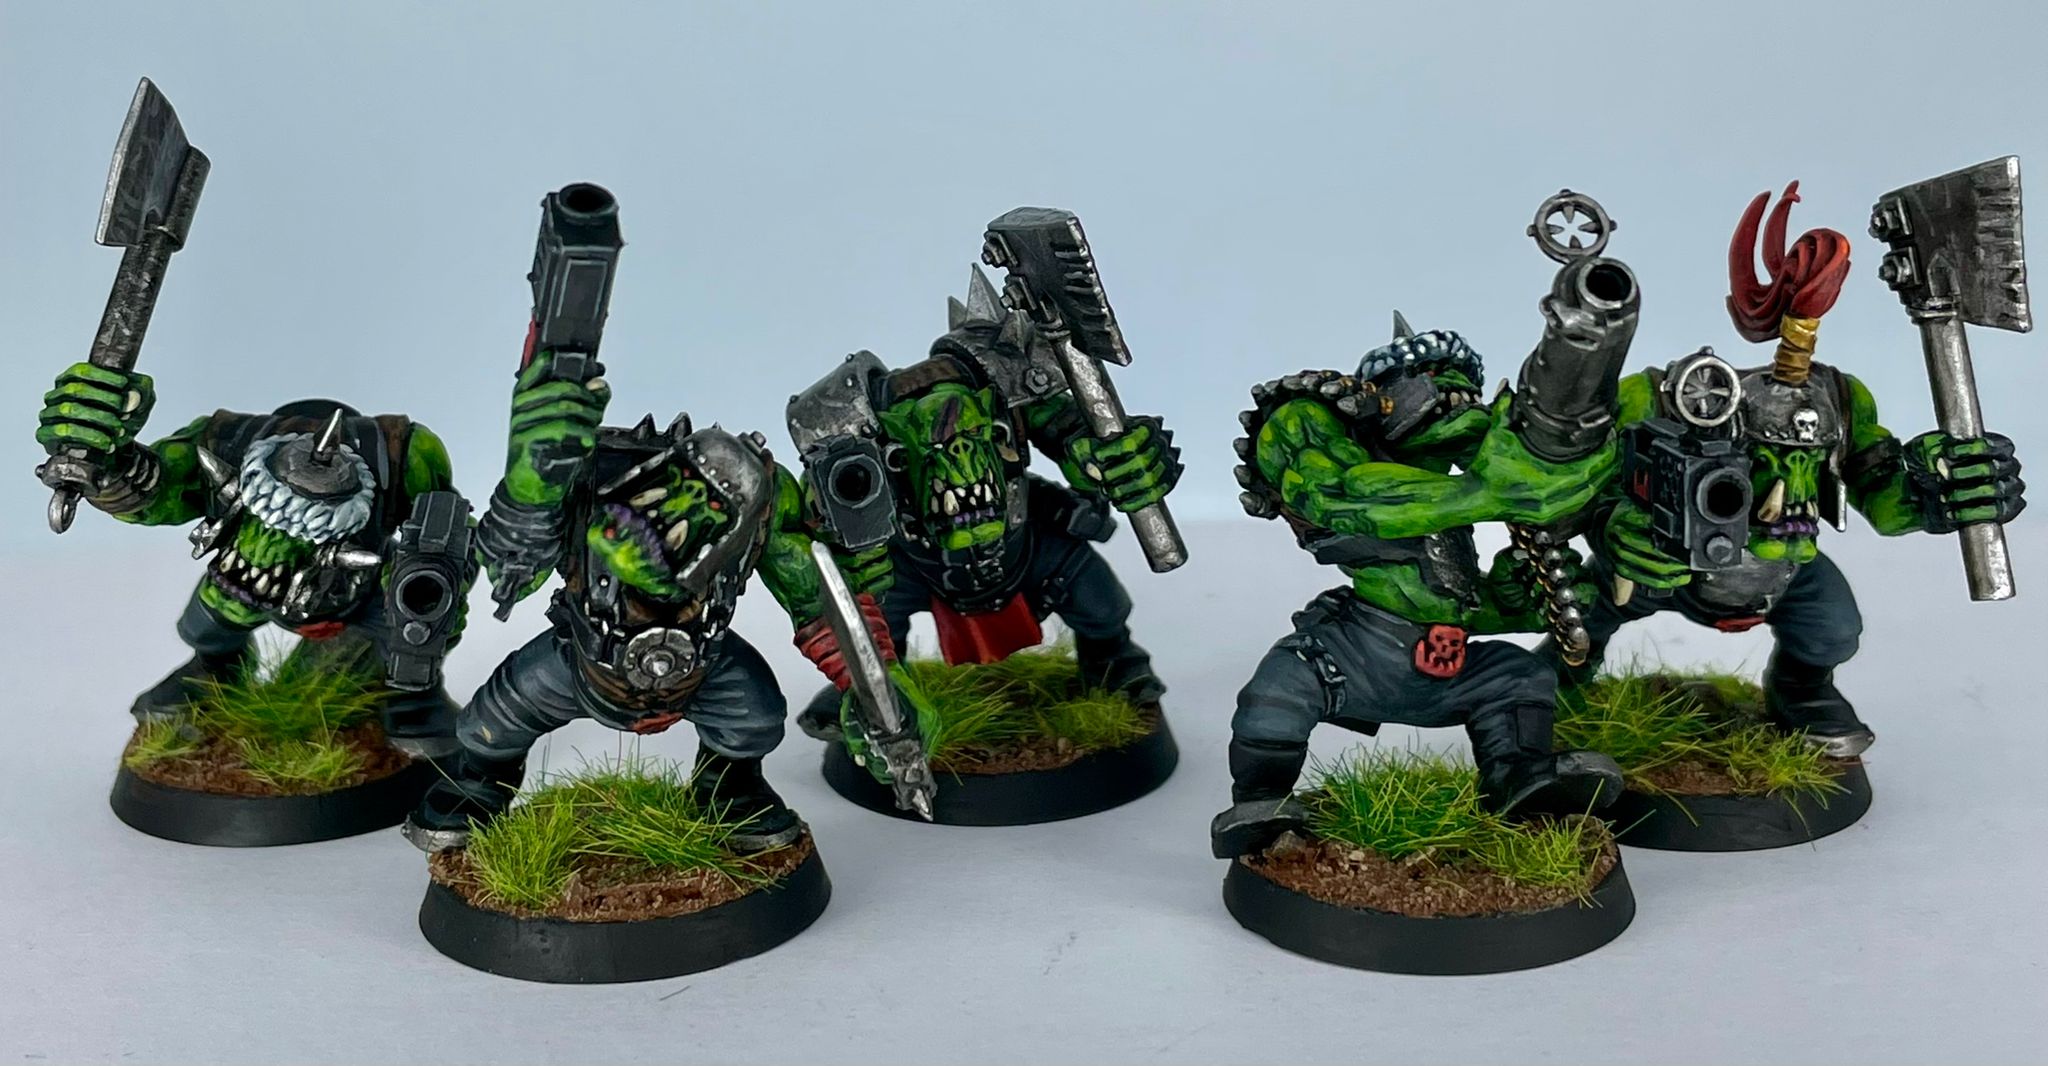
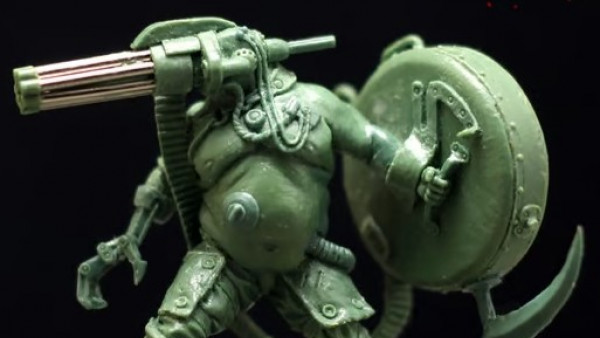
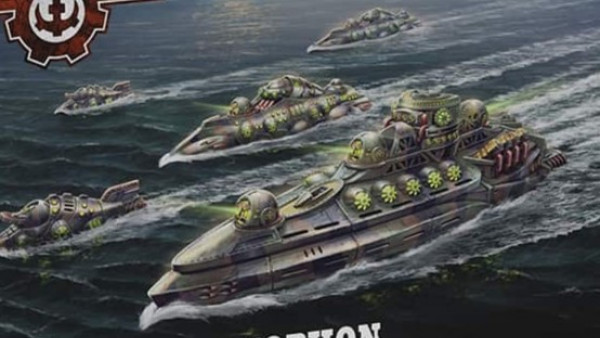
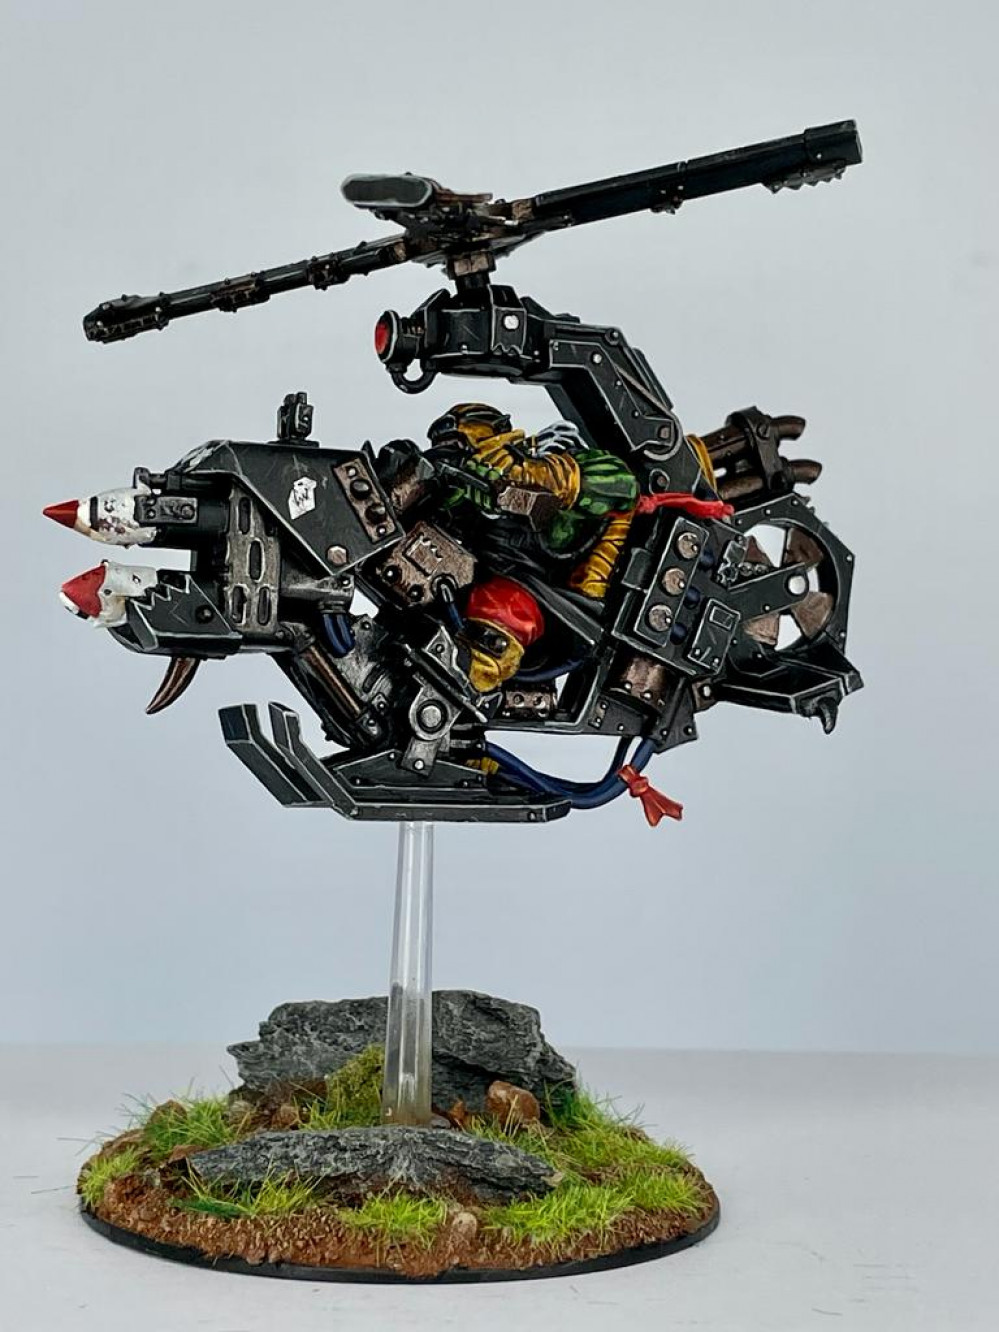
Goff Orks

I must have assembled these about twenty years ago. After correcting a lot of my originally shoddy work I added some extra bits to them and drilled out all the barrels and vents on the guns barrels. My Wow stick makes light work of such tasks. I used a variety of blacks to ensure the model had a lot of tonal variation. I started from a black Halfords spray undercoat. The trousers were base coated Scale 75 Graphene Grey and I used this colour mixed with Vallejo Ivory to highlight the cloth. Petroleum Grey from Scale 75 was used to shade the cloth. Brown leather was basecoated GW Rhinox hide and this was then highlighted with GW Doombull Brown, Mournfang Brown and finally with XV88. Several of the belts and ammo packs etc were simply highlighted with ( for the boots ) Graphene Grey and the rest of the black areas with GW Administratum Grey.
Red was used as a spot colour on all the minis. Mephiston Red was highlighted with Evil Sunz Scarlet and Wild Rider Red and a sparingly applied extreme highlight of Fire Dragon Bright. Shading was either on the plume Liquitex Raw Umber Ink or on cloth areas Mephiston Red mixed with Word Bearers Red by GW.
The skin was base coated with the very old GW Goblin Green ( yes I still have two useable pots!) and then washed with a heavily diluted mix of Sap Green and Carbon Black inks by Liquitex. The original colour was the reapplied and highlighted with this mixed with Army Painter Daemonic Yellow. Brush applied Vallejo Matt varnish matted down the glossy ink. The skin was finished with a glaze of Inktense Yellow by Scale75.
Metal areas were base coated with GW Leadbelcher and then washed with diluted Carbon Black Ink. The original colour was then glazed back and edge highlights and scratches added with GW Stormhost Silver.