


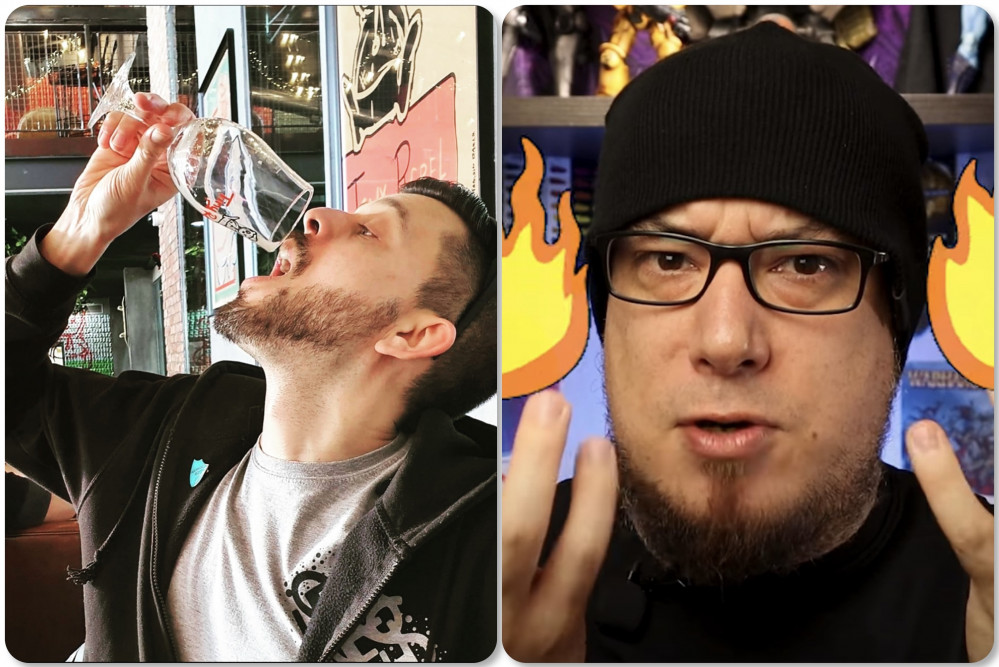
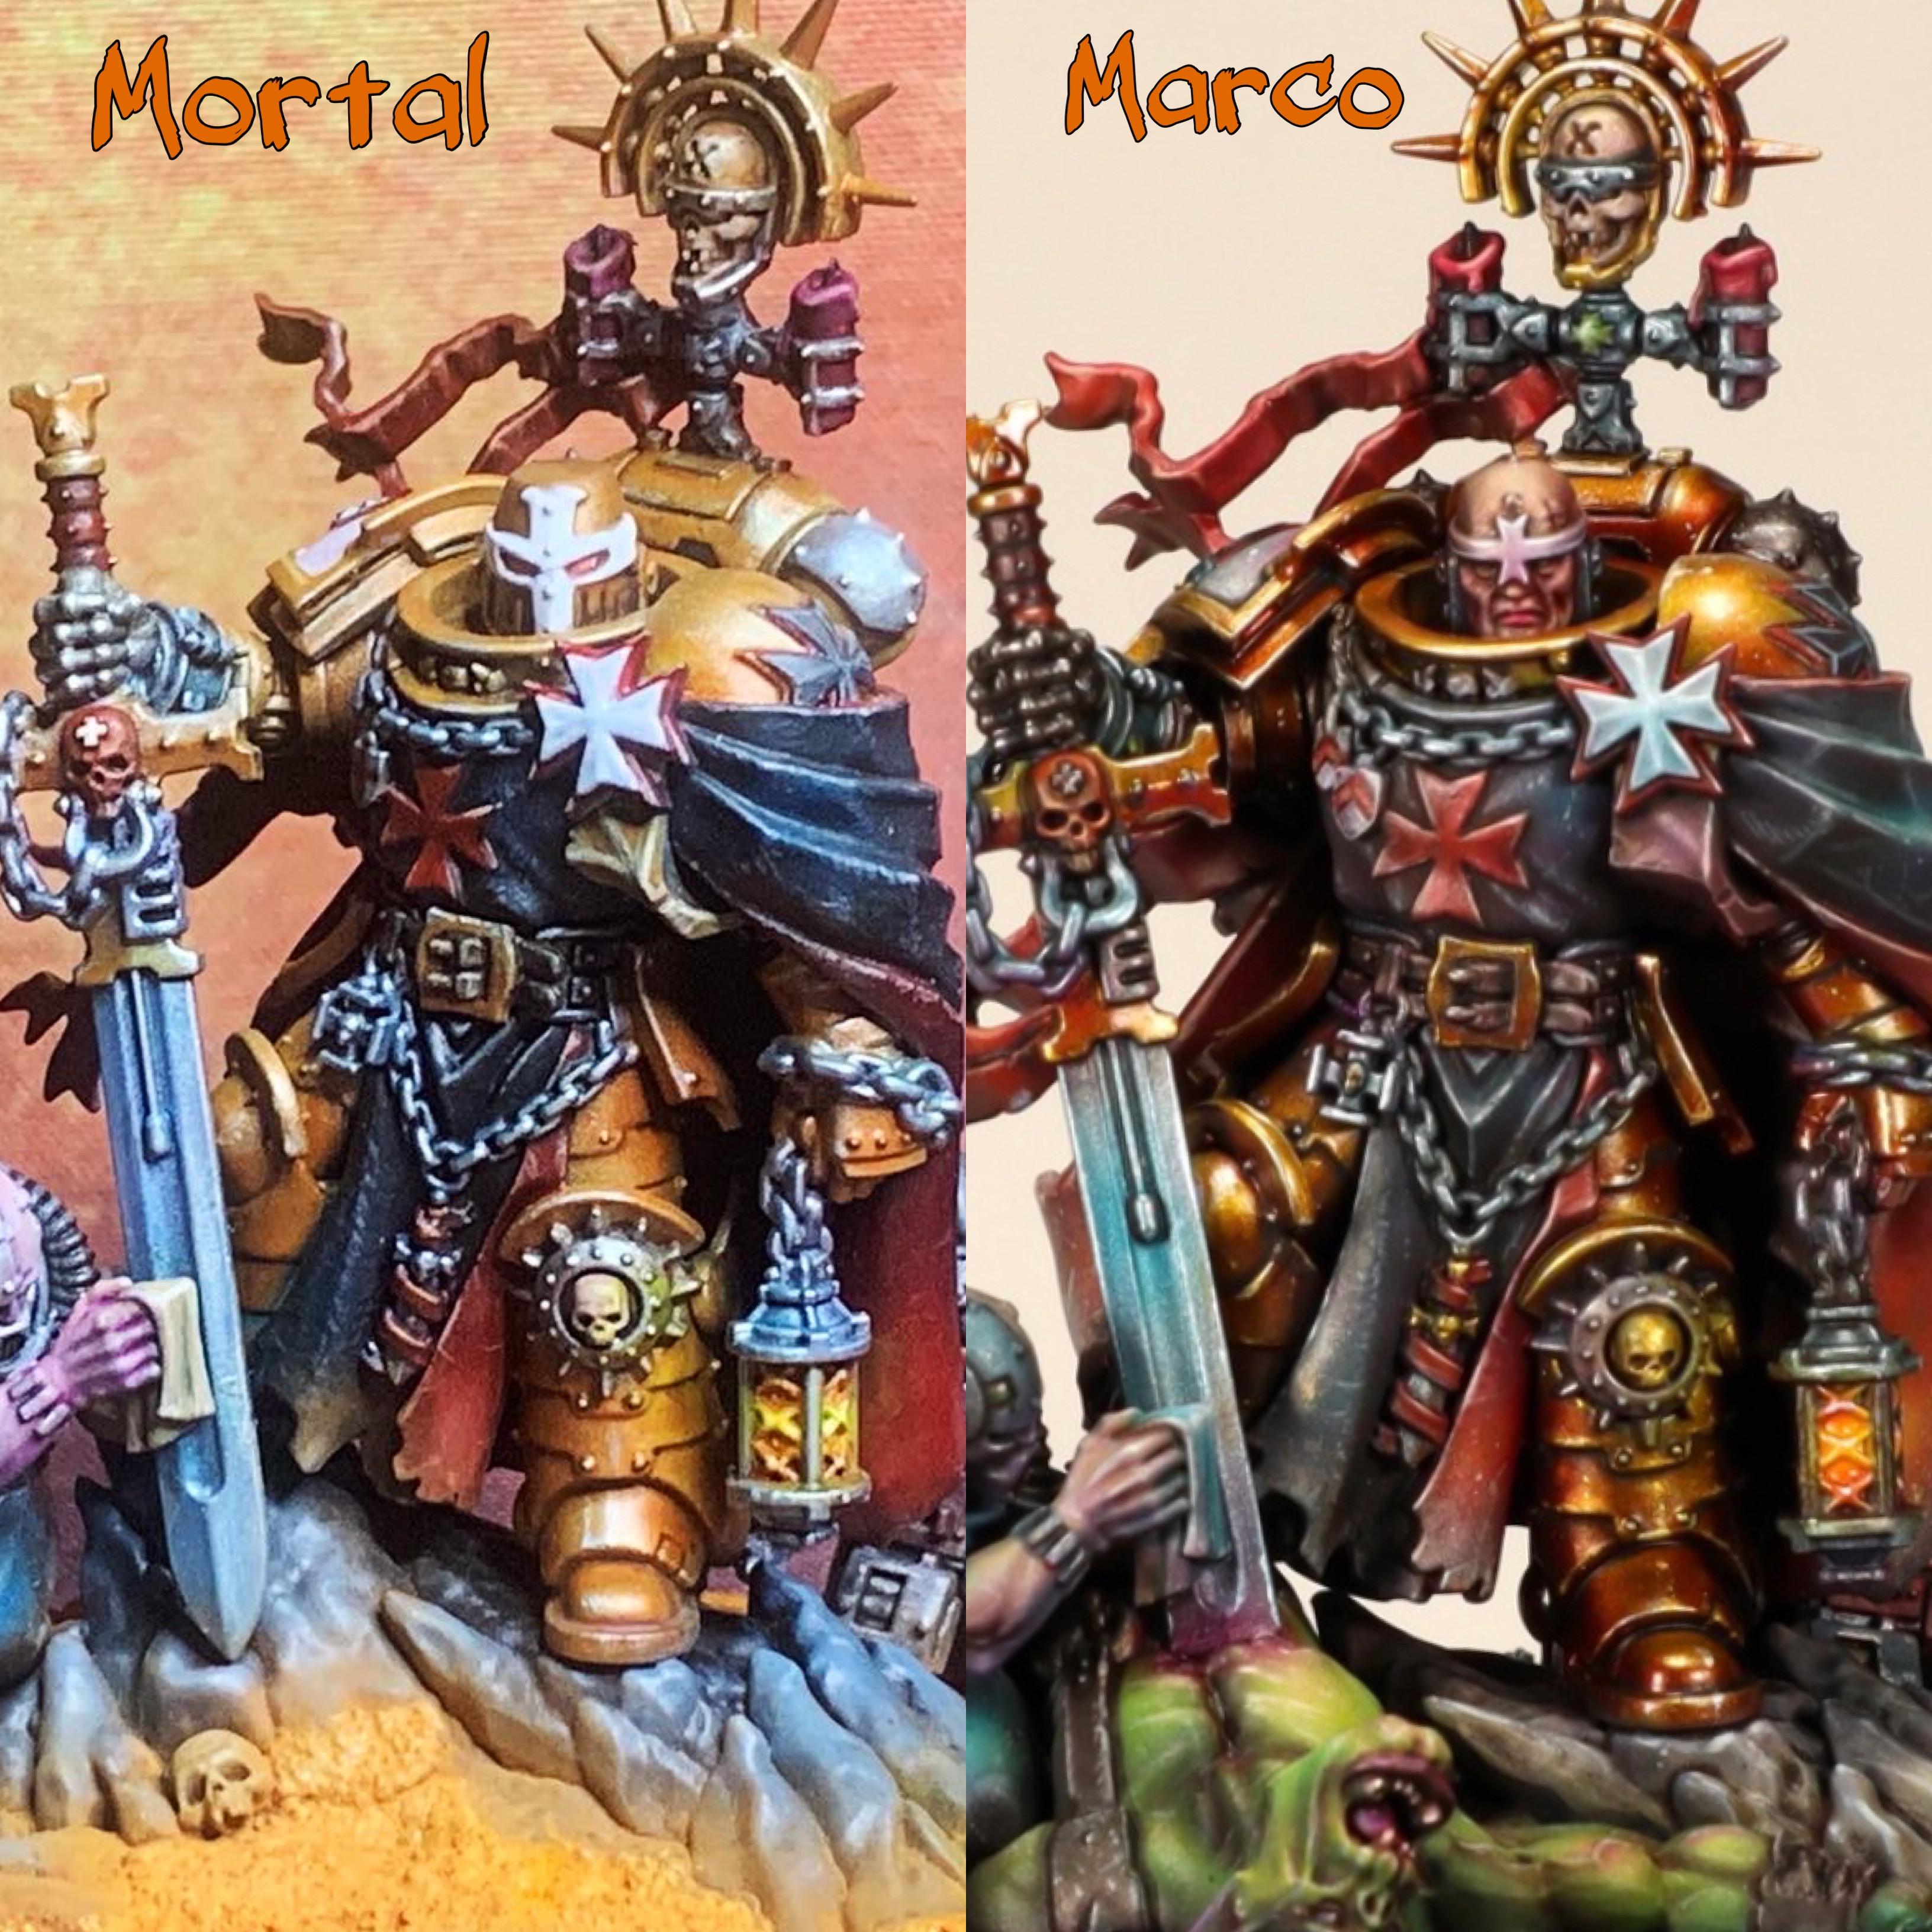
Mortal vs Marco


Recommendations: 371
About the Project
Choose your god wisely. What happens when a mere mortal has aspirations to emulate a higher power? When does a tutorial just become showing off? Does David get crushed by Goliath, or does the sling swing true once more? Choose your god wisely….
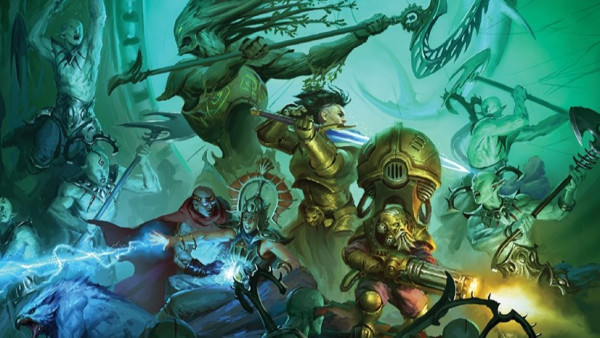
Related Game: Warhammer 40,000
Related Company: Games Workshop
Related Genre: Science Fiction
Related Contest: Spring Clean Hobby Challenge 2023
This Project is Completed
It’s on like Donkey Kong!
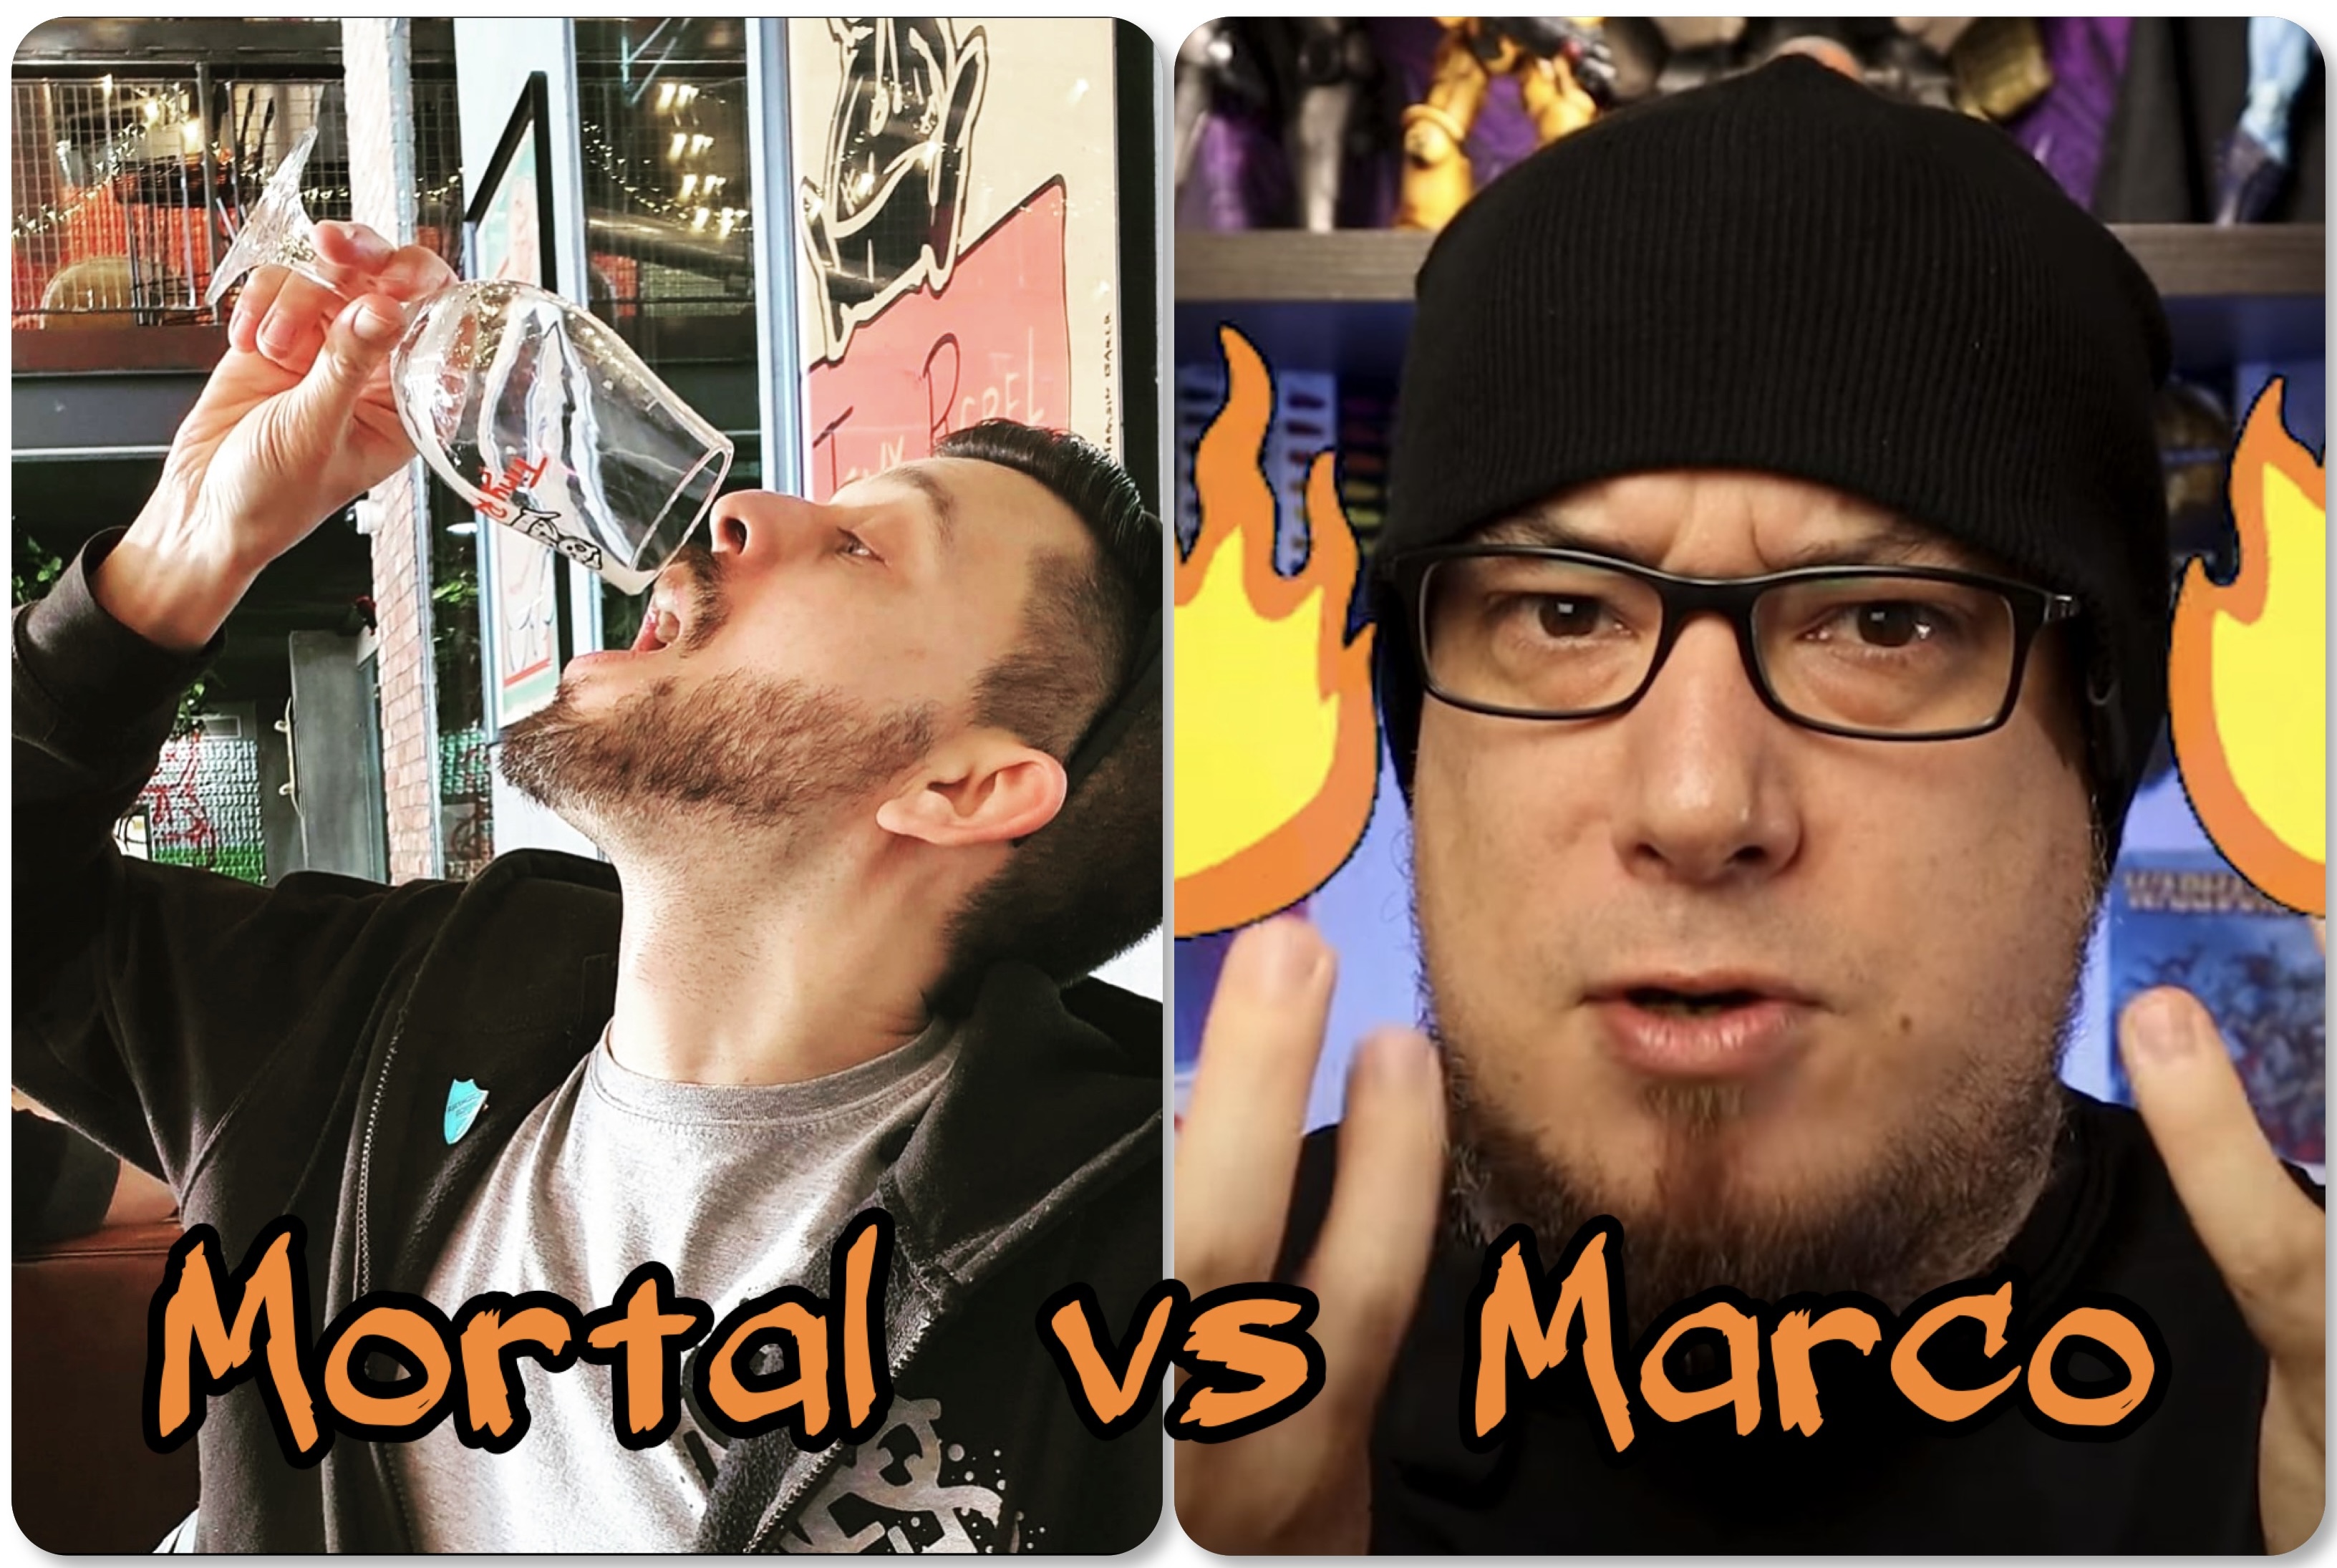
We’re all fans of Marco Frisoni right? The way he effortlessly ‘speedpaints’ his way through characters and warbands, churning out seemingly competition-standard results in under 4 hours.
I’ve learned tons of techniques, tips and tricks from him over the years but I had never attempted to follow along with one of his ‘tutorials’ until December 2021….when I decided to give it a go.
‘Merry Christmas’ by Ed Sheeran and Elton John was top of the charts, the Black Templars had just had their range revamped, and a new High Marshall Helbrecht model had just been released. This was the video that Marco released the month prior, the one I decided to paint along to:
The reason why this project is now a 2023 Spring Clean Challenge entry will become clear shortly, but I’ll save the spoilers 😂
Step 1: The Value Sketch
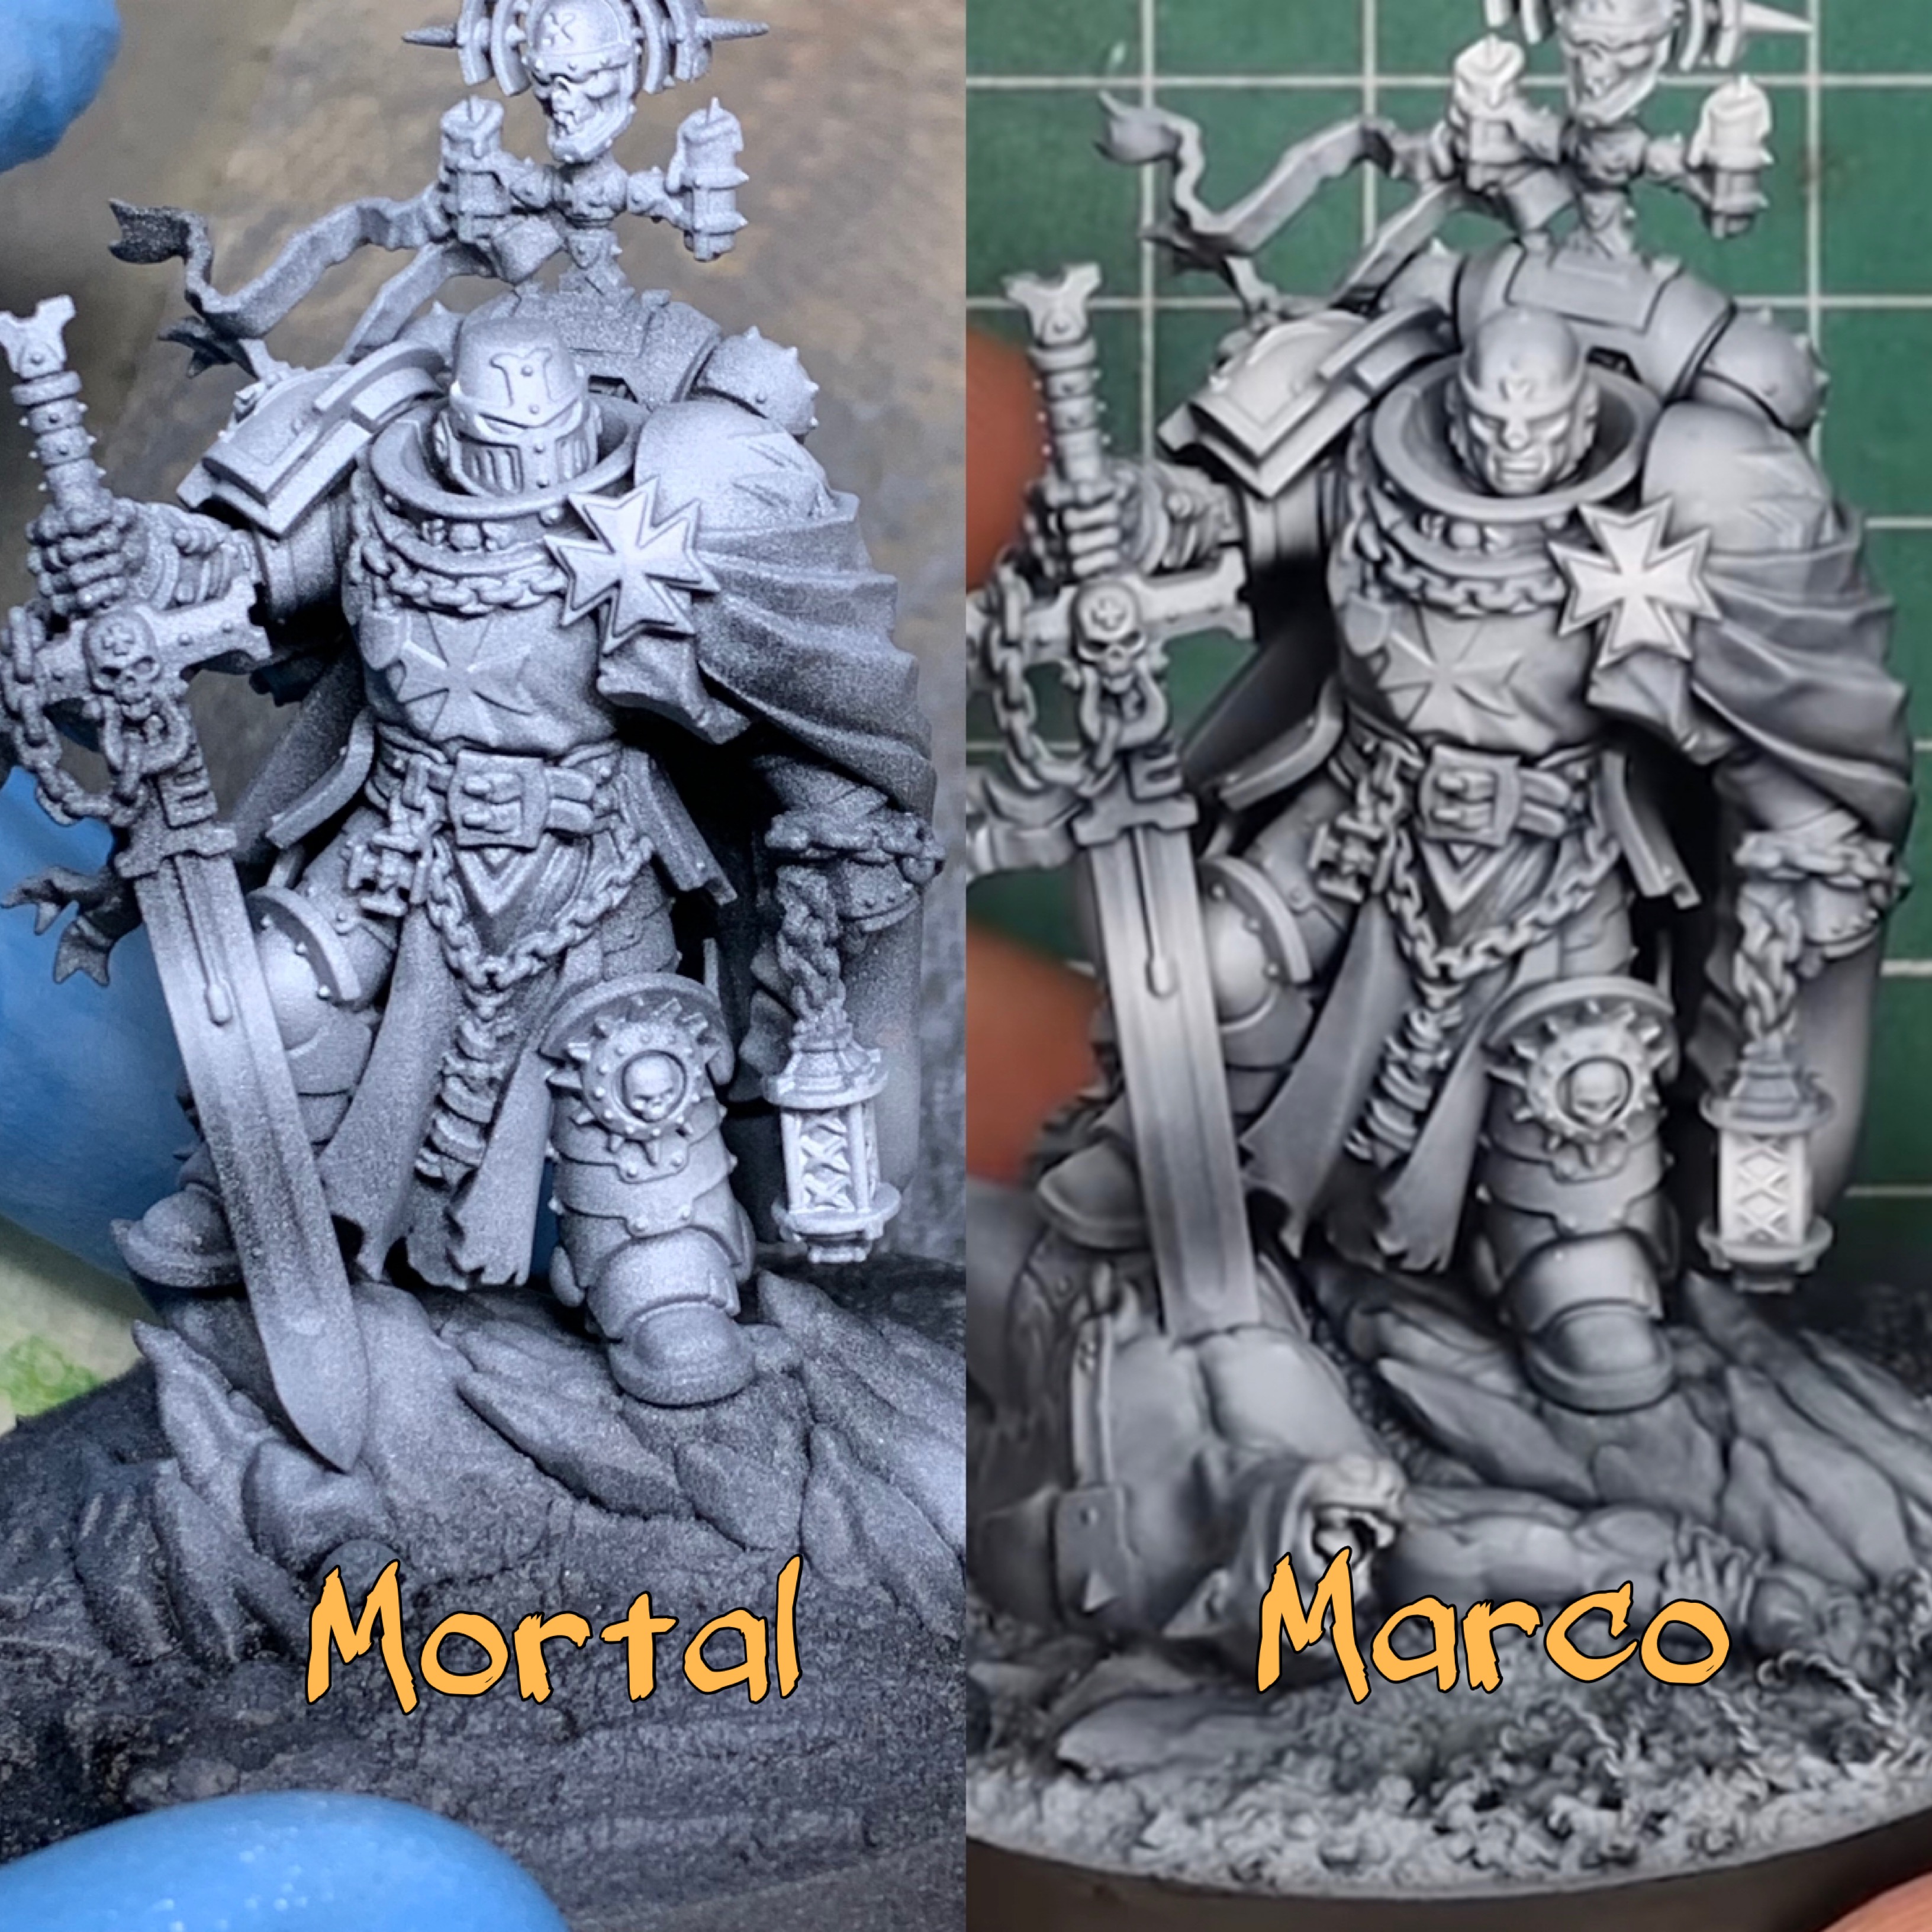
The staple of all Marco videos, the value sketch using the airbrush. White ink over black primer. His looks a bit smoother close up, but that’s not a problem, it’s a close enough match at this stage. I was also snagging screenshots of his stuff from YouTube and comparing to my phone photos so they are not equal in terms of image quality but I’ll swallow the excuses down and crack on with the story…
Oh, and I didn’t want the ork on the base, nor the unhelmeted head, but I allowed myself those variances to make sure I ended up with a model I actually wanted, and might even use in my army.
Step 3: Chromatic Black
He’s at it already! No common-or-garden black paint for Marco, oh no, he’s making his own chromatic black from Talassar Blue and Gryph-Hound Orange. (Yes I had to buy those specially).
No problem though, I could replicate that, and I might use this method again – it’s a nice Contrast type black.
Again, still happy with where this was at this stage.
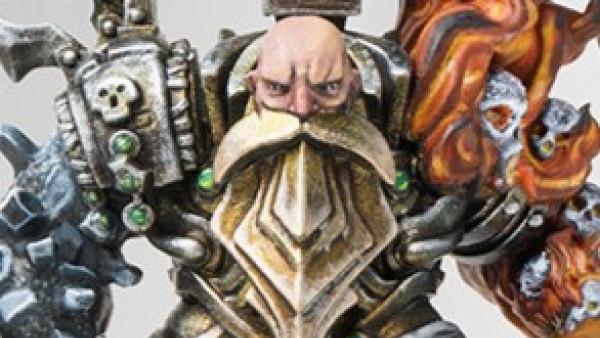
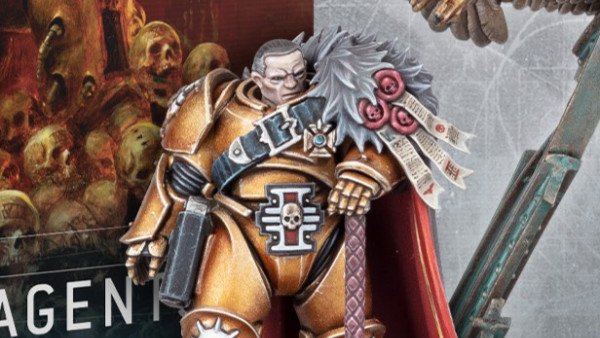
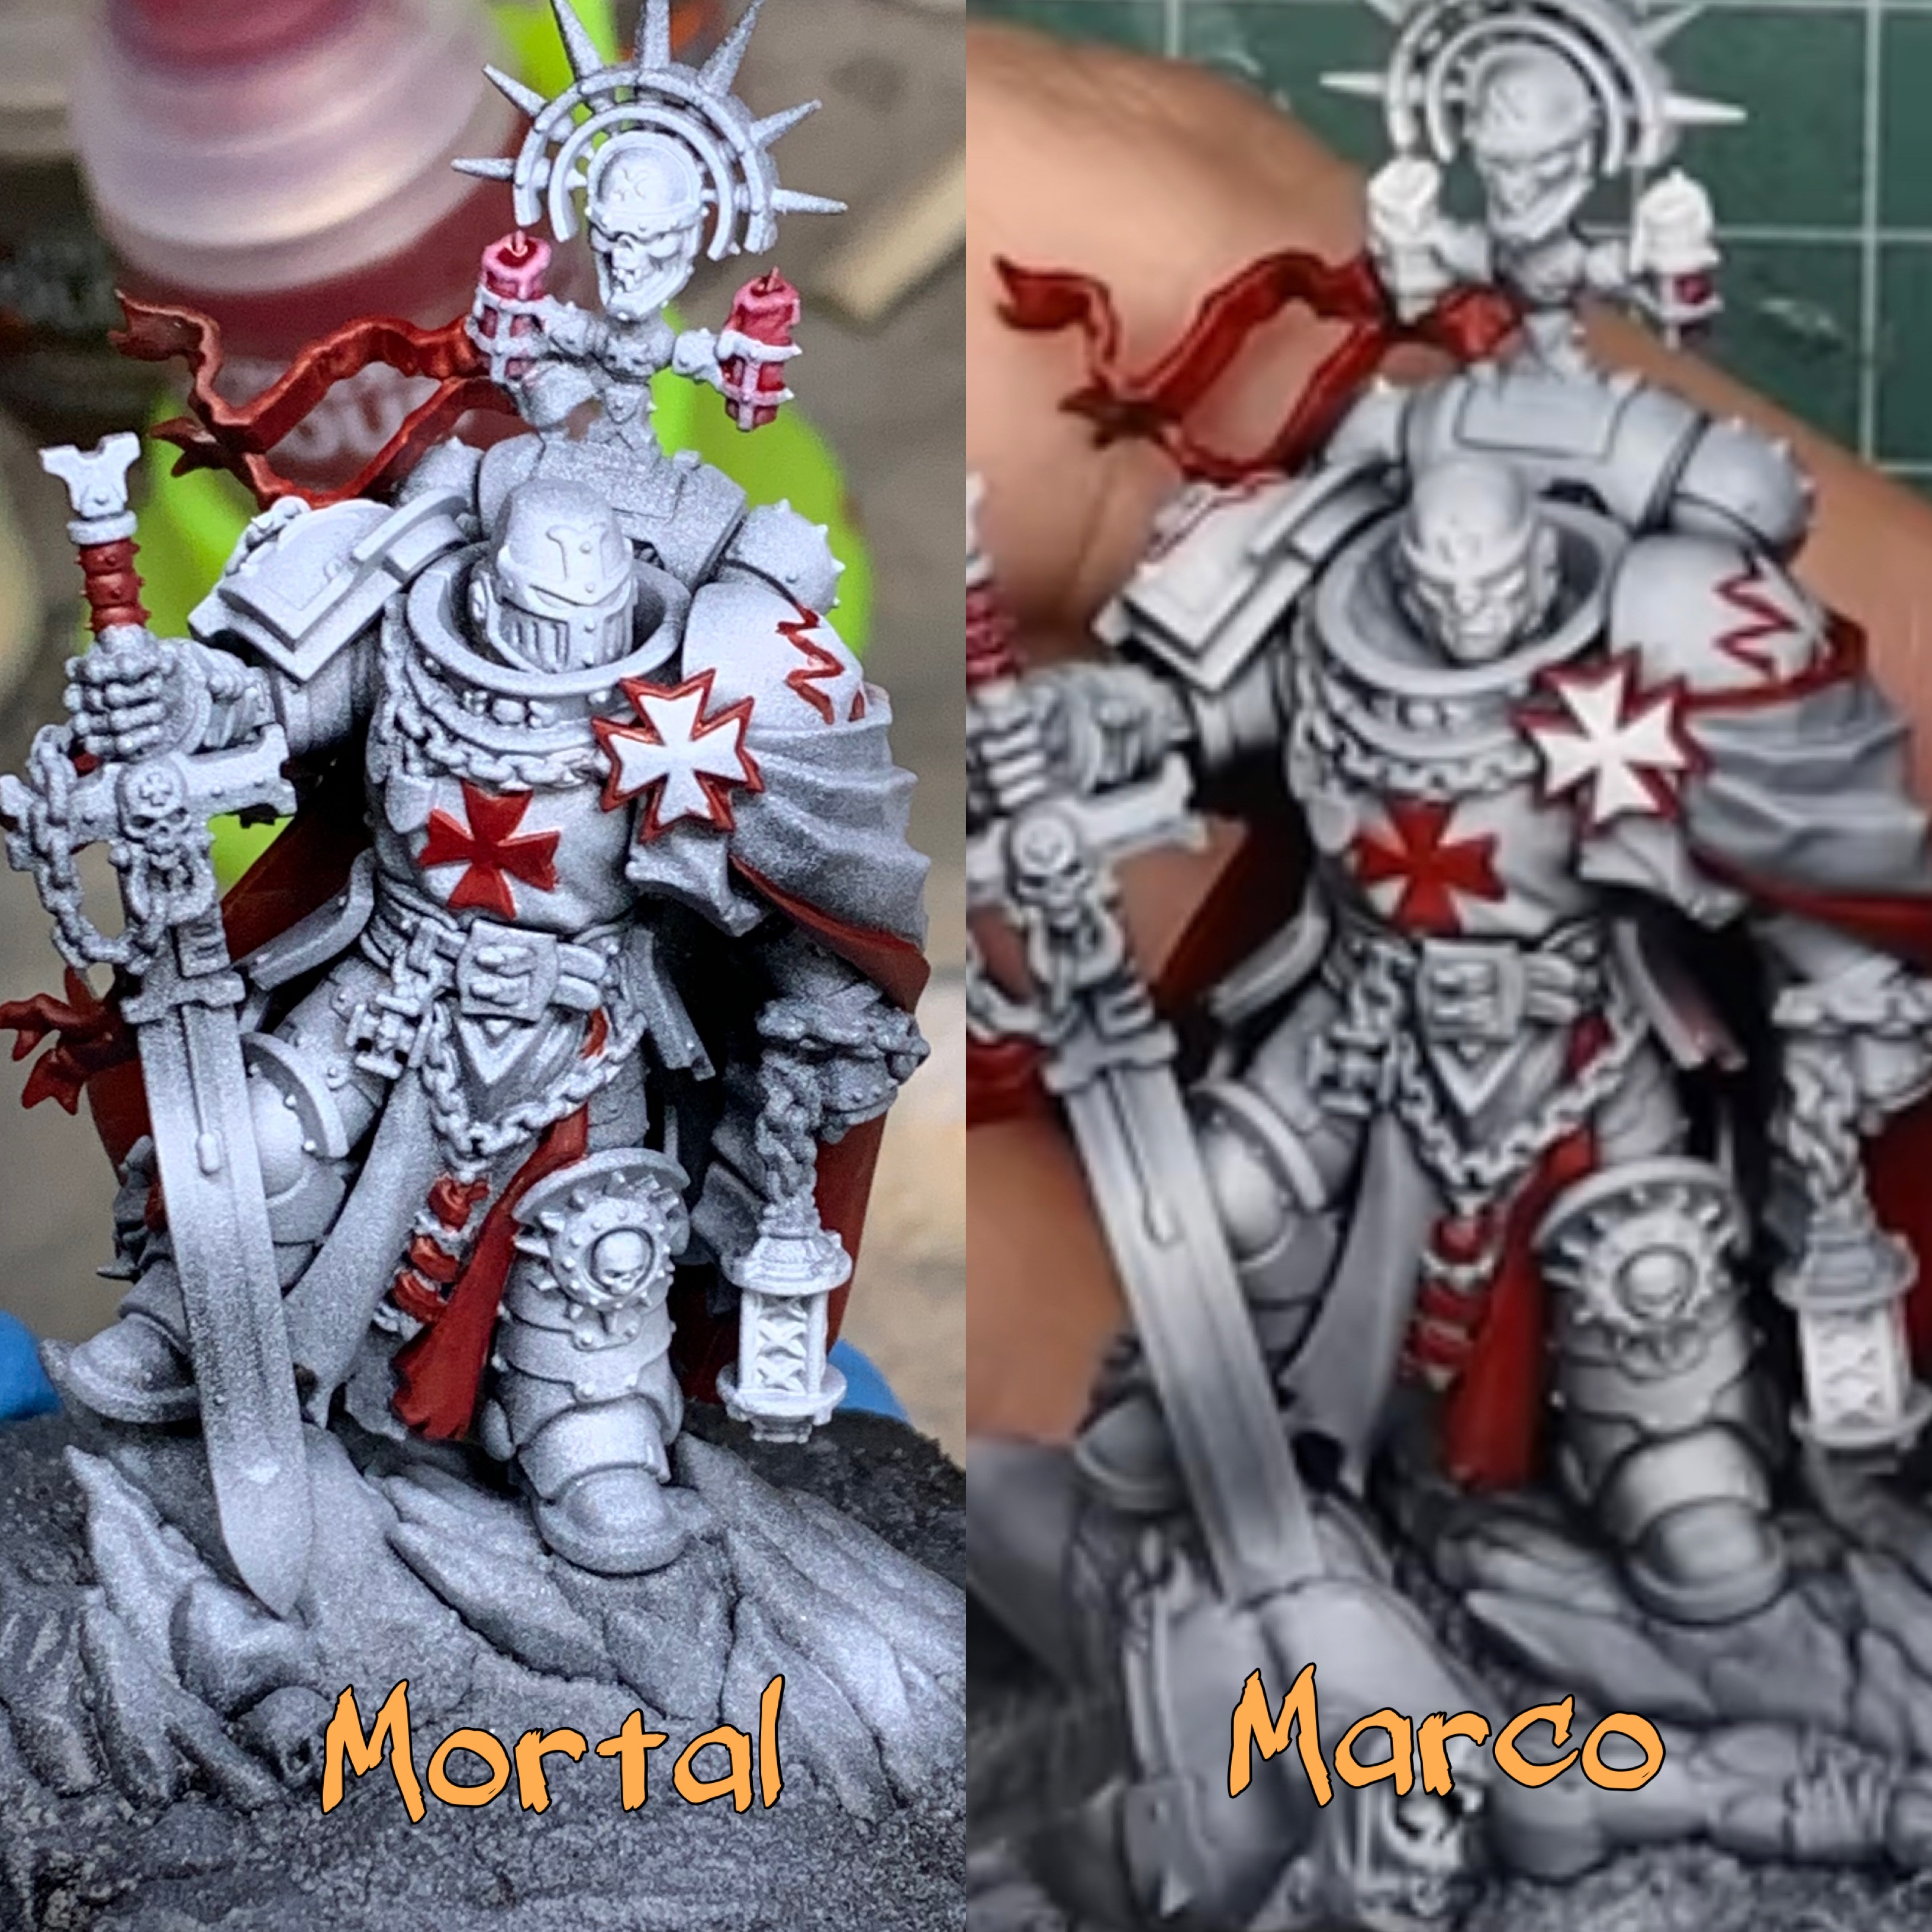
Step 4: Gold. Always Believe in your Soul.
Helbrecht’s armour is a nice shiny gold. Cool – there are plenty of gold paints on the market right?! GW make some decent ones. Vallejo even better. And Scale 75’s are my favourite.
But…wait, what?! This is Marco’s idea of the ingredients required to make gold:
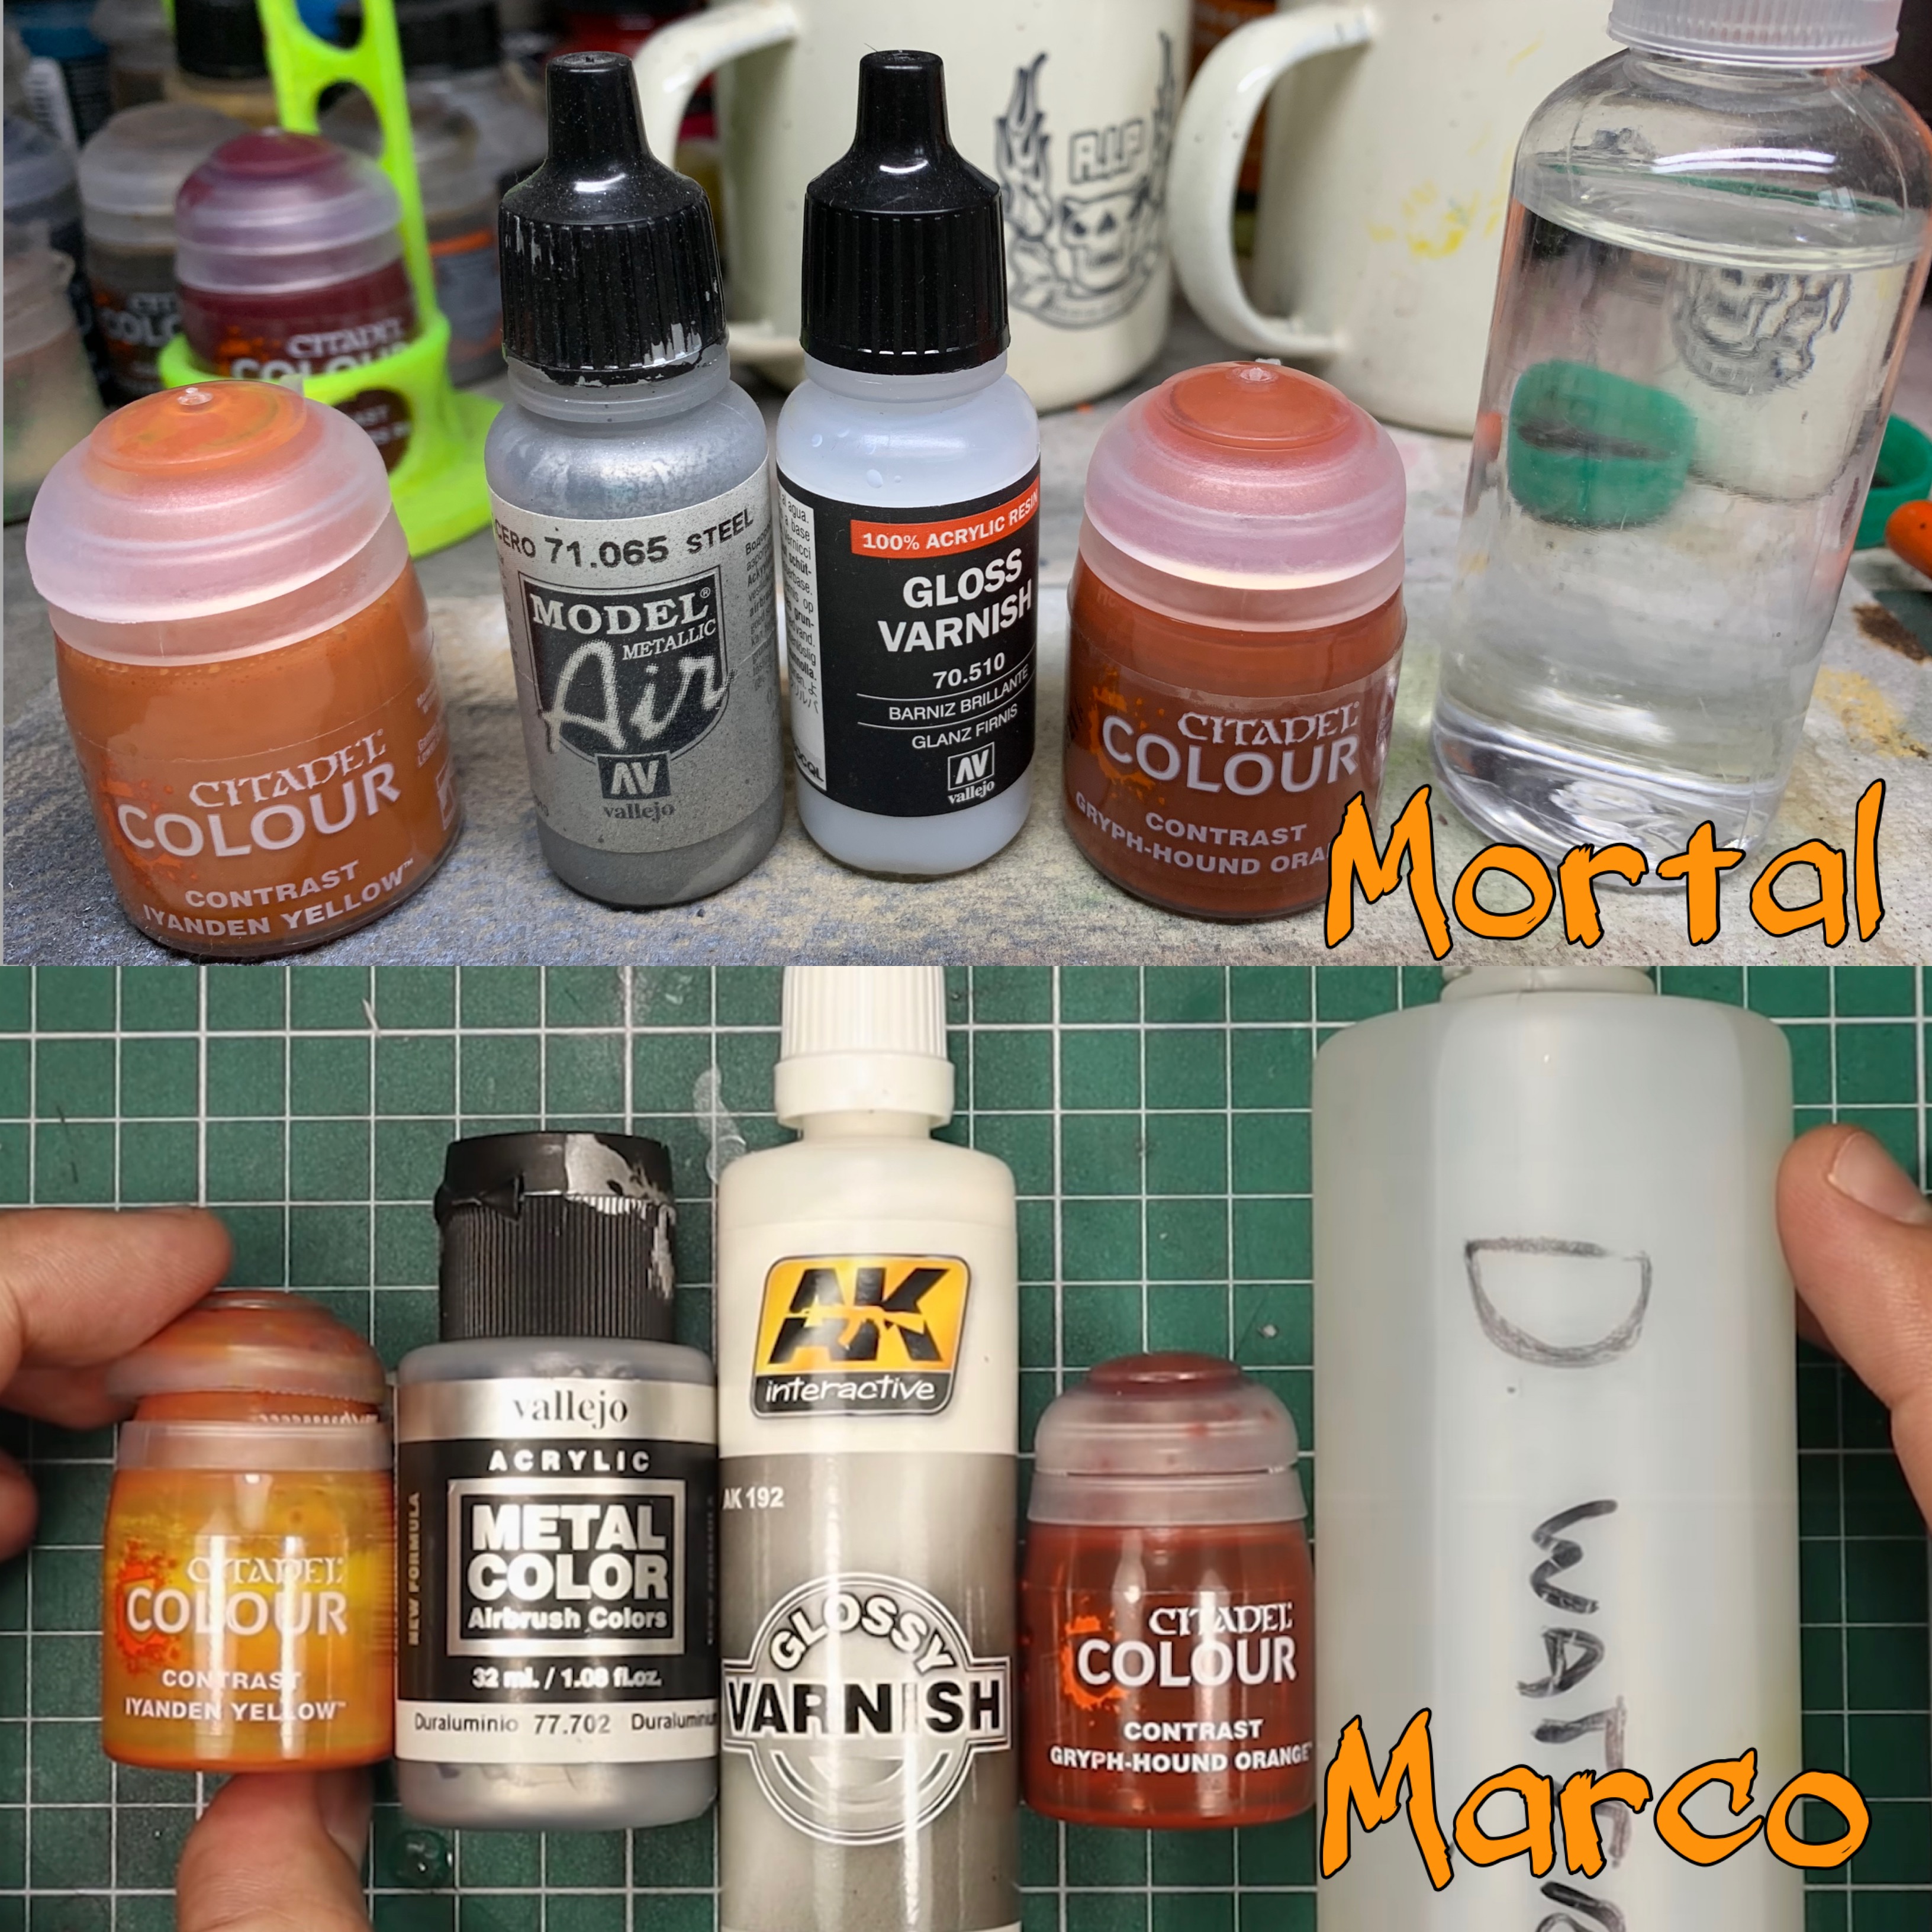
No bother – I can do this – another Contrast paint I’ll probably never use again, but we’re in too deep now to stop!

His is slightly more towards yellow than mine, but I know he’s going to make it more orange later so I’m ok with it being this close.
At this stage I’m actually really happy with the process and the match.
Step 5 & 6: Putting the Servants to Work, and Polishing the Silver

In these steps we add the little servitor dudes to the base (yes, Marco had me buying 3 new Instant Colours just to do their skin!), and paint the silver parts. Marco mixed blue contrast paint with regular silver paint. Yes, I went a bit too heavy on the blue at the time this pic was taken but that will get corrected.
Step 7: Take an Airbrush and Hoon Paint all Over the Neatly Painted Base Colours Like Some Kind of Animal!
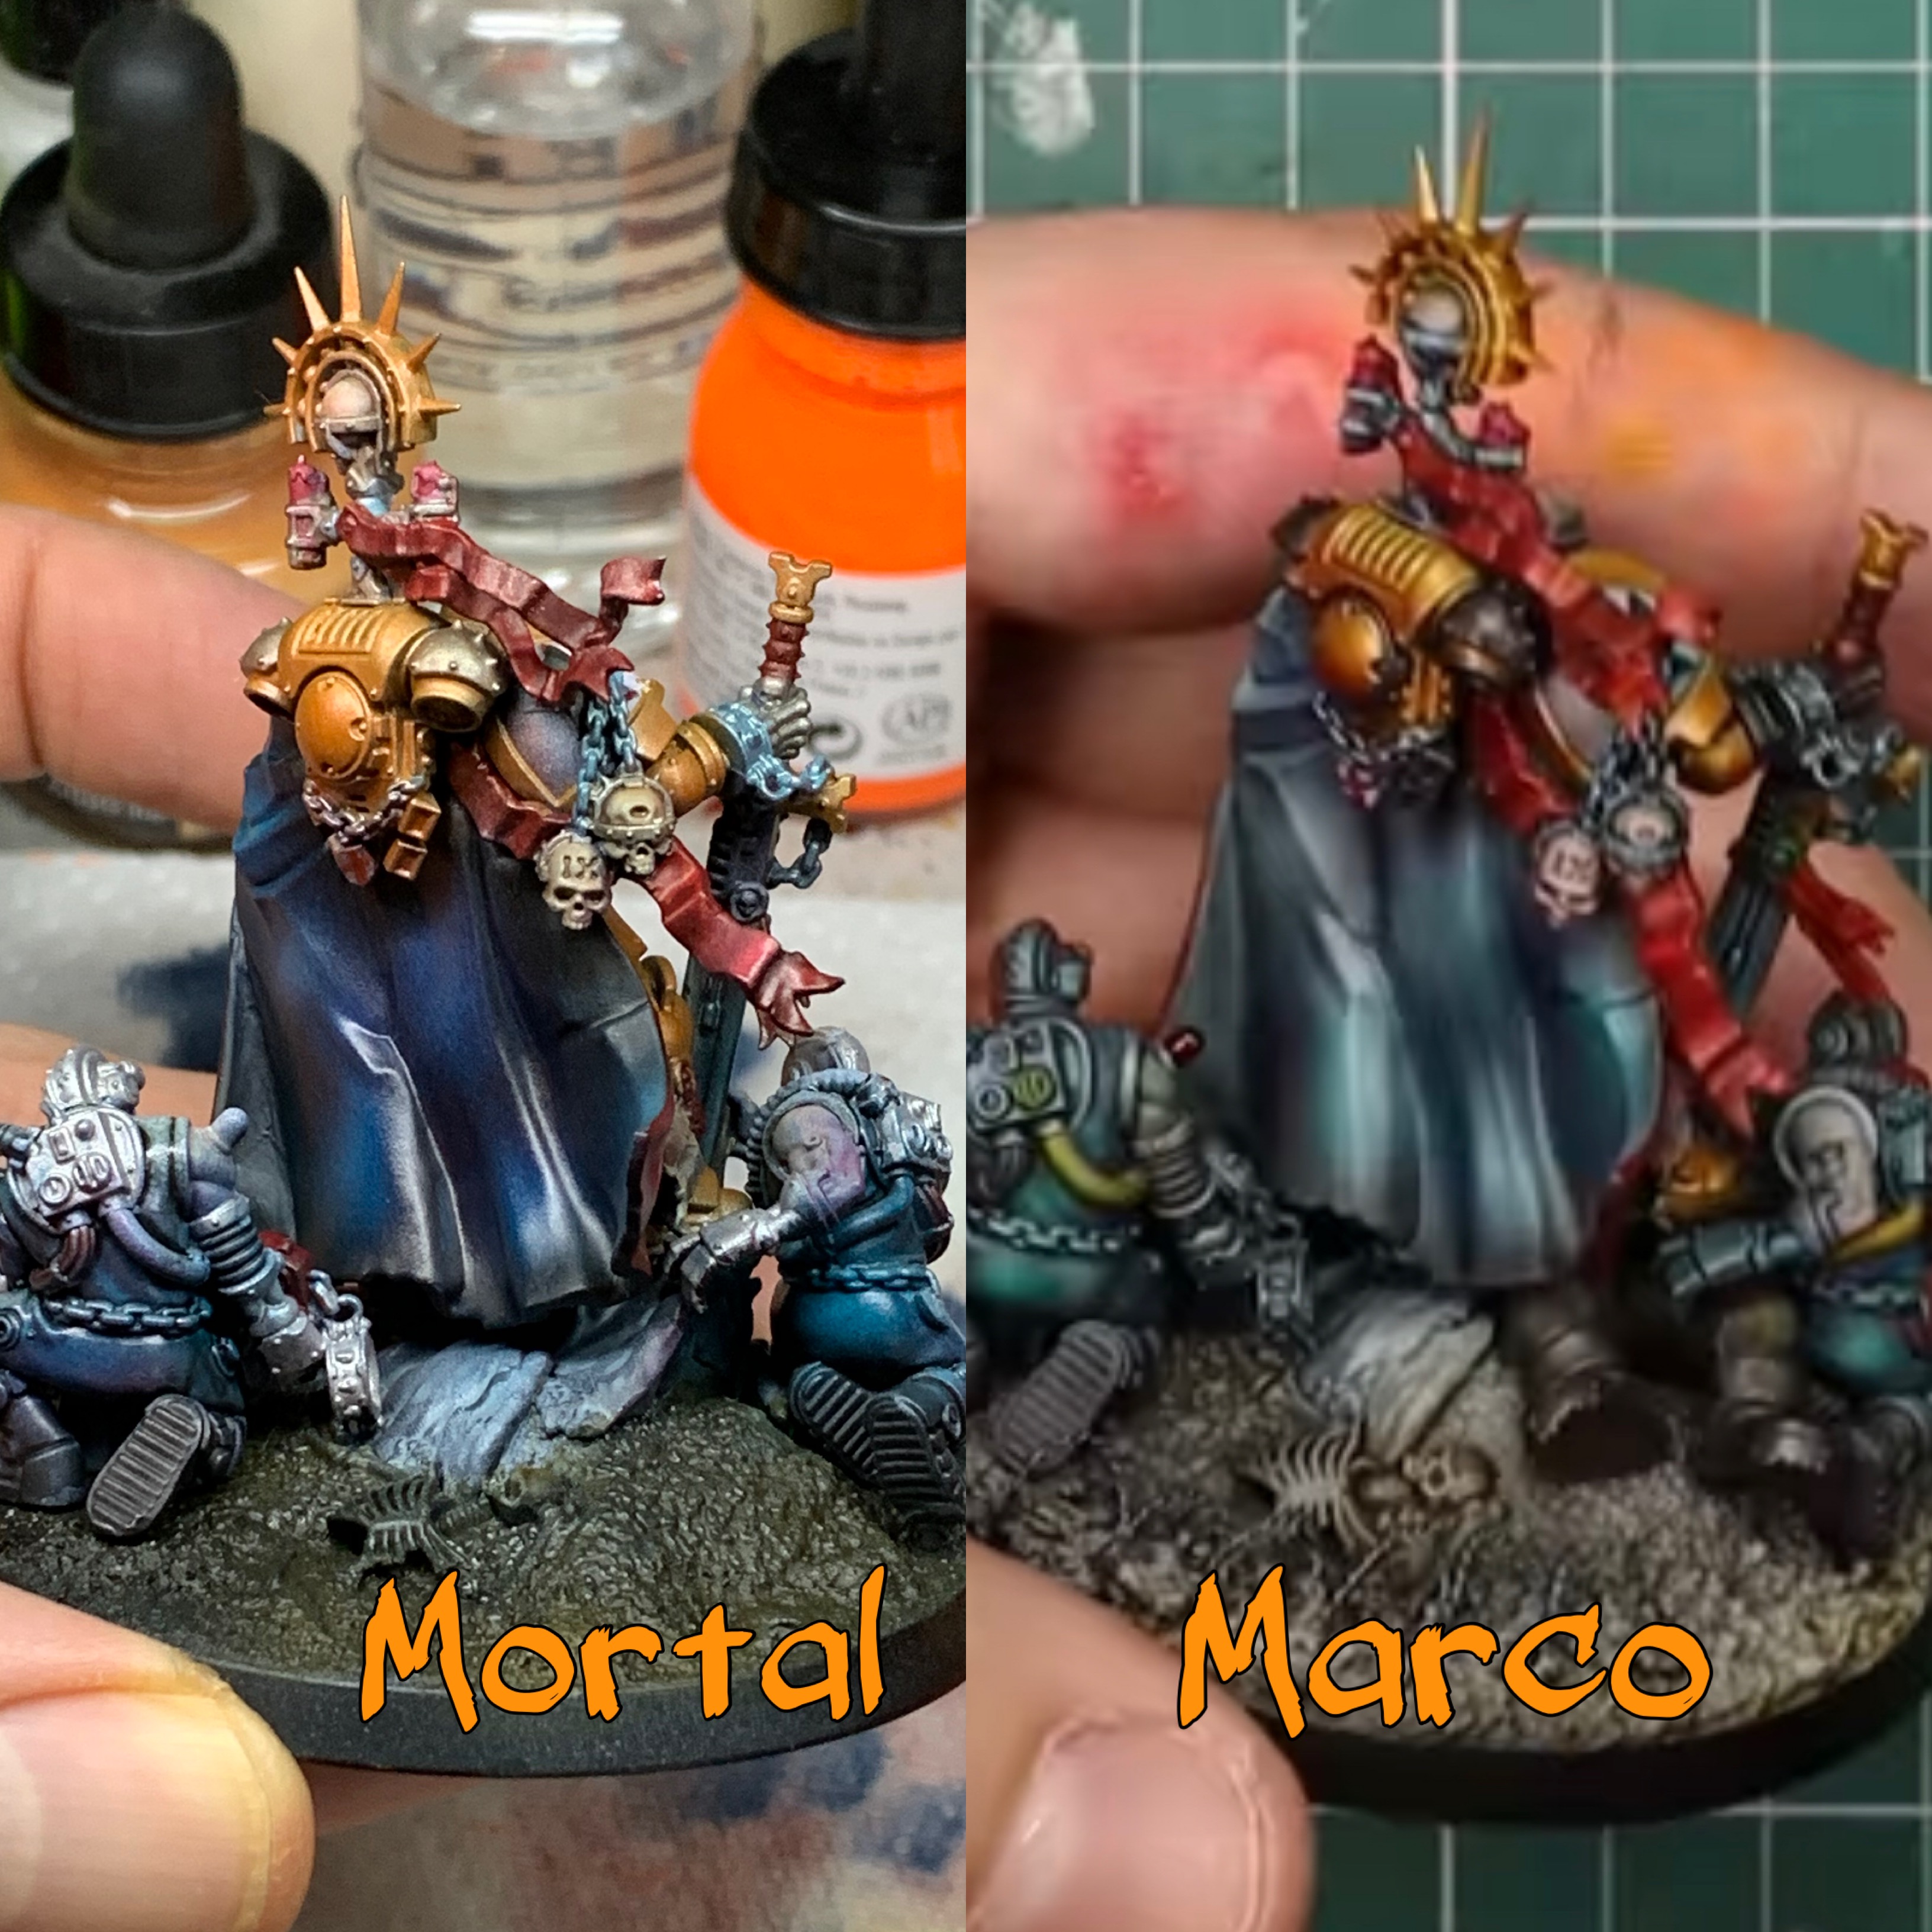
Ok, I’m clinging on for dear life now. Marco has broken out the airbrush and seems to think it’s funny to tint tiny details with seemingly no regard for overspray. His god-like powers compel the paint to land in the right places. Me, however? It was like giving a firehose to a 5 year old child. Like giving surgical tools to a Neanderthal. It was never going to work.
It wasn’t too bad as pictured above. My ham-fistedness could just about cope with the cape.
But Marco had clearly decided to pull a Mo Farah on me and kicked for home, leaving me taking a piss in the gutter with Paula Radcliffe.
From the front…yuck!

Spring is Sprung, the Grass is Riz. I Wonder Where the Birdies is.
Ah, springtime. That time of the year when winter finally feels like it’s on the way out, daffodils bloom and birds sing. Oh, and the OTT team make you feel really bad about all the projects you haven’t finished inspire you to return to old projects….ahem..
Should I! Dare I?
Well, given I have just posted a bunch of pictures I took 15 months ago, clearly I am!
Taking Stock and Making Decisions
Ok, so here I am now staring at this:

How to proceed? As I see it I have a few options:
1. Strip it (or re-prime it) and start again
2. Fix the errors and finish the model in my own way
3. Fix the errors and try to pick the Marco tutorial back up
4. Chuck it back in the box and pretend it never happened.
Realistically it’s options 2 and 3 that are on the table. Therefore, whichever I choose, I need to see if I can wind it back to a pre-error situation. Which means fixing the overspray.
Then – the next step for both options would be the same. A pinline oil wash.
So I may as well undertake those two steps while I am deciding how to proceed. Hopefully the act of getting started will grease the wheels sufficiently to get this done!
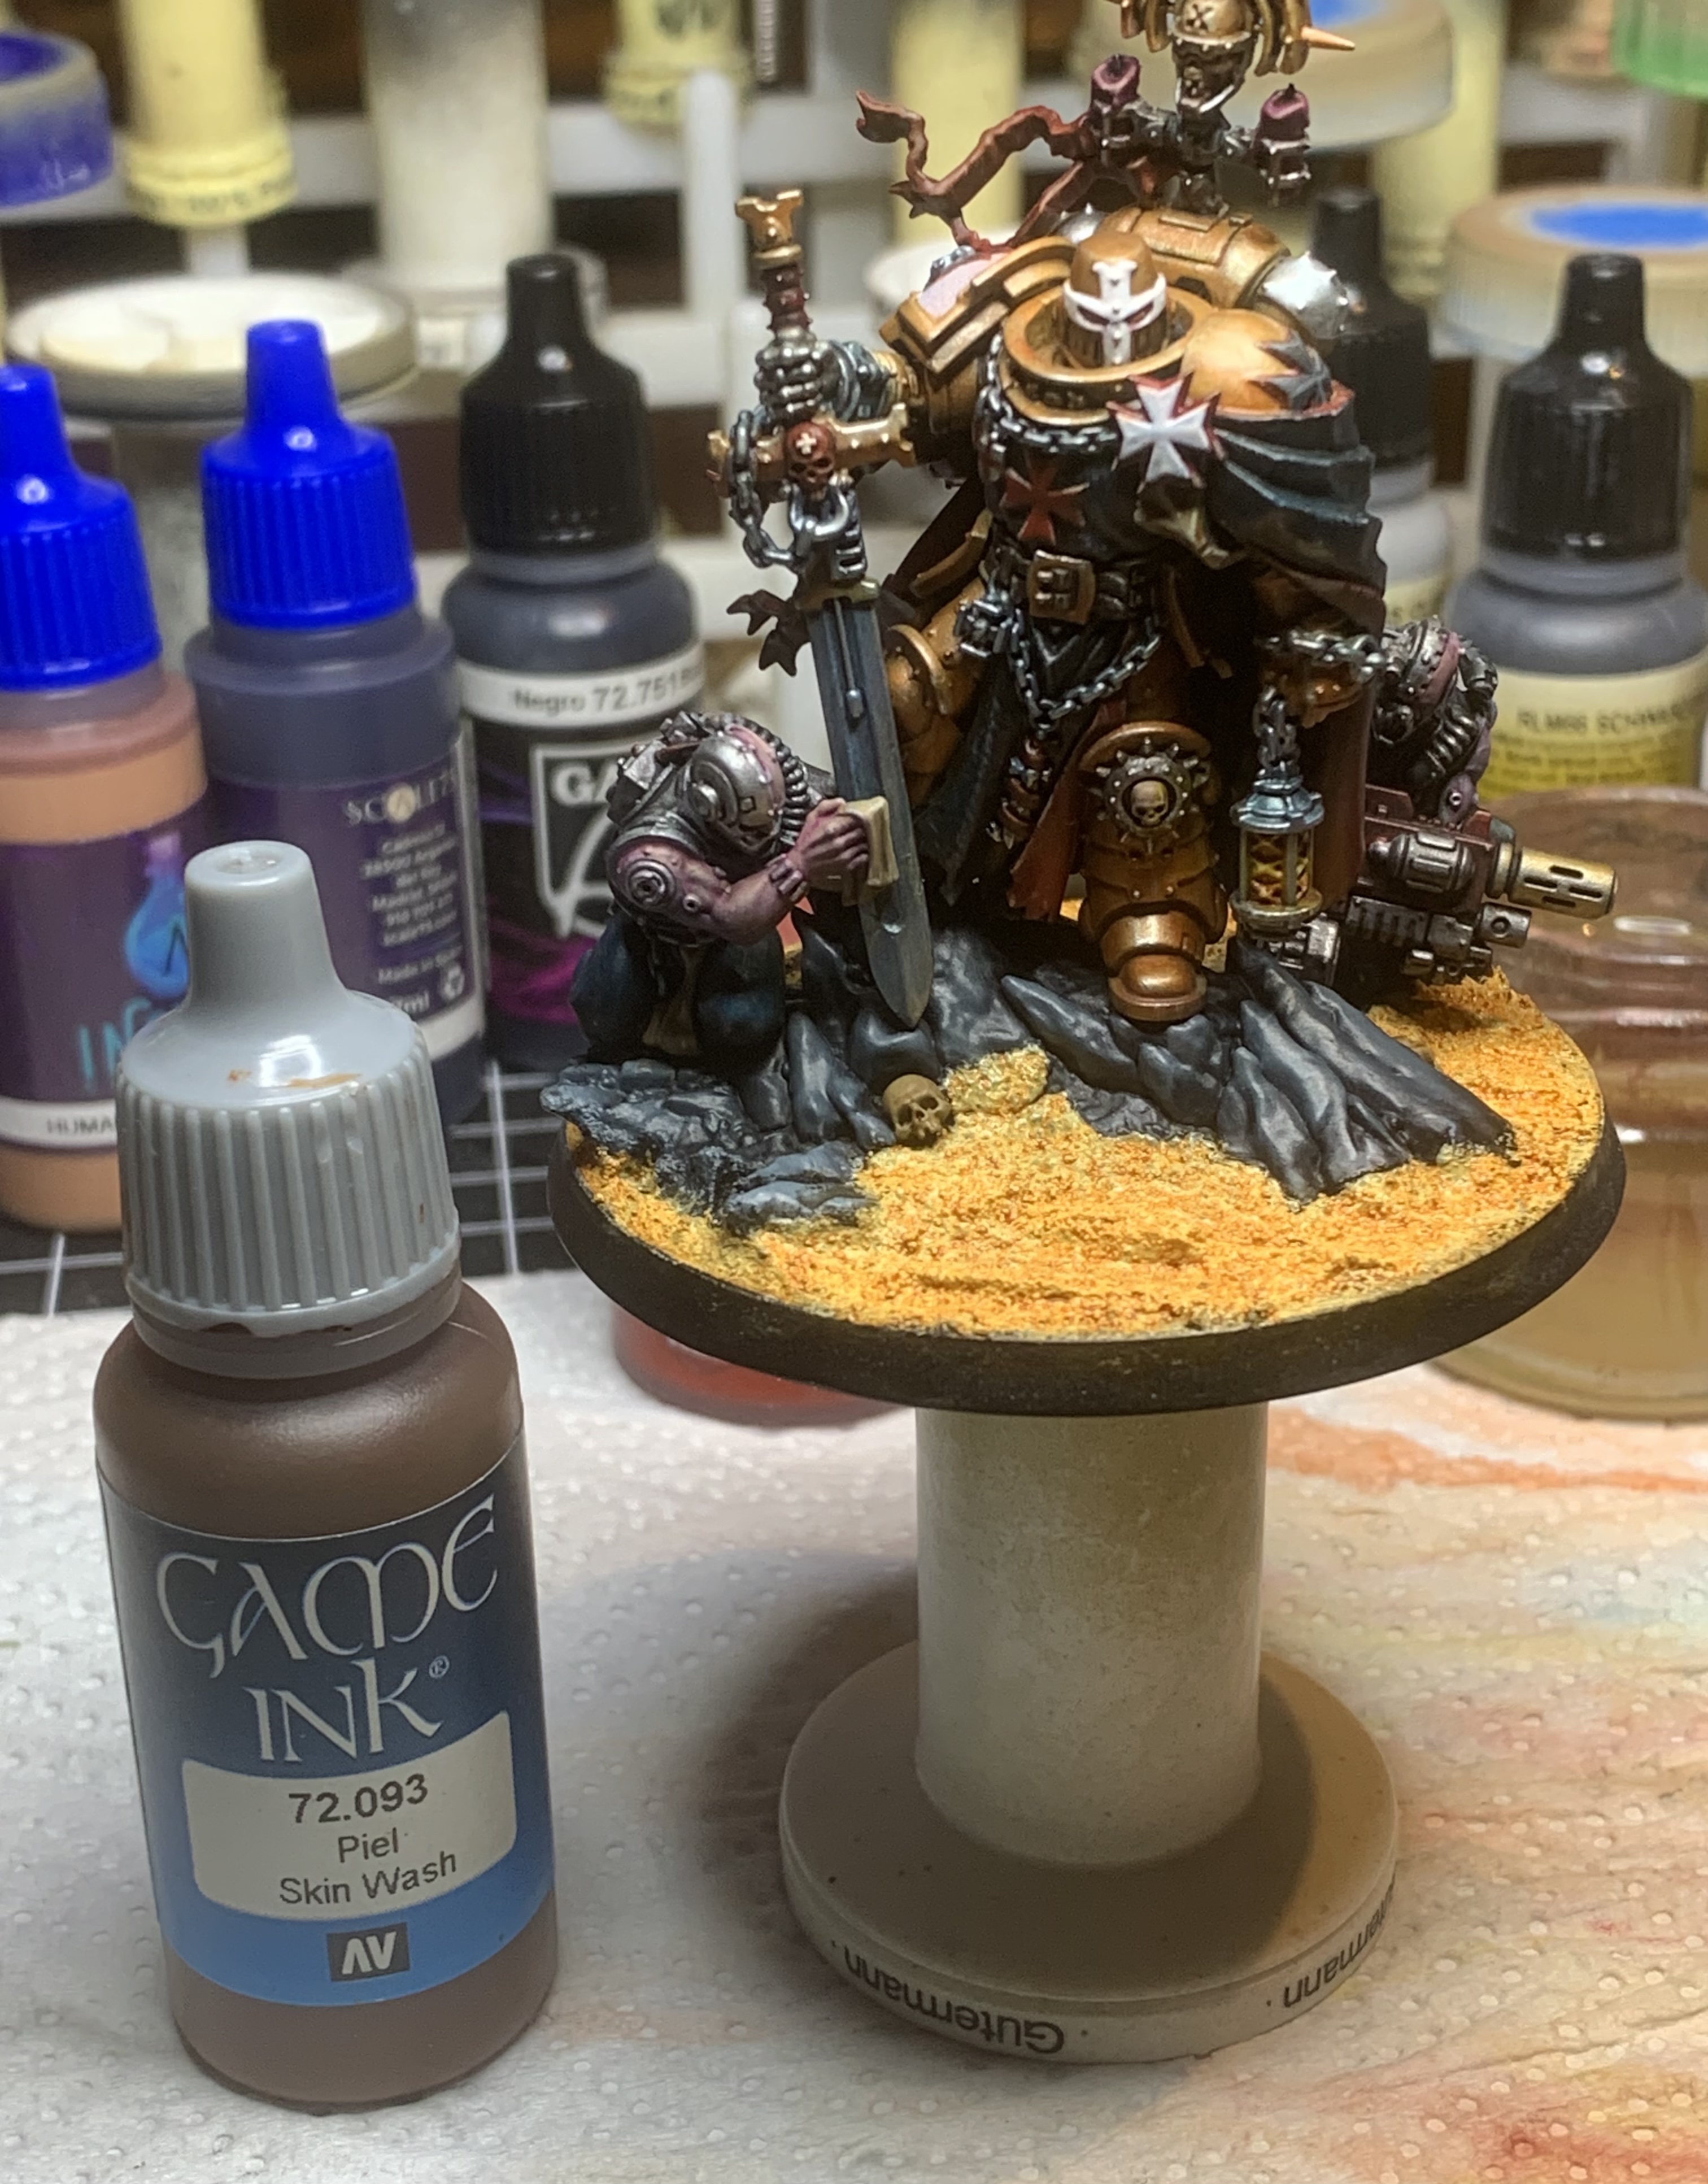
Step 10: Fix the Overspray
Thankfully, in my wisdom 15 months ago, I kept some of the gold mix in a dropper bottle. Even more thankfully it was still liquid! So I don’t need to re-mix the gold. It doesn’t quite match what’s on the model after its orange ink tint, but a glaze of orange contrast paint gets it close.
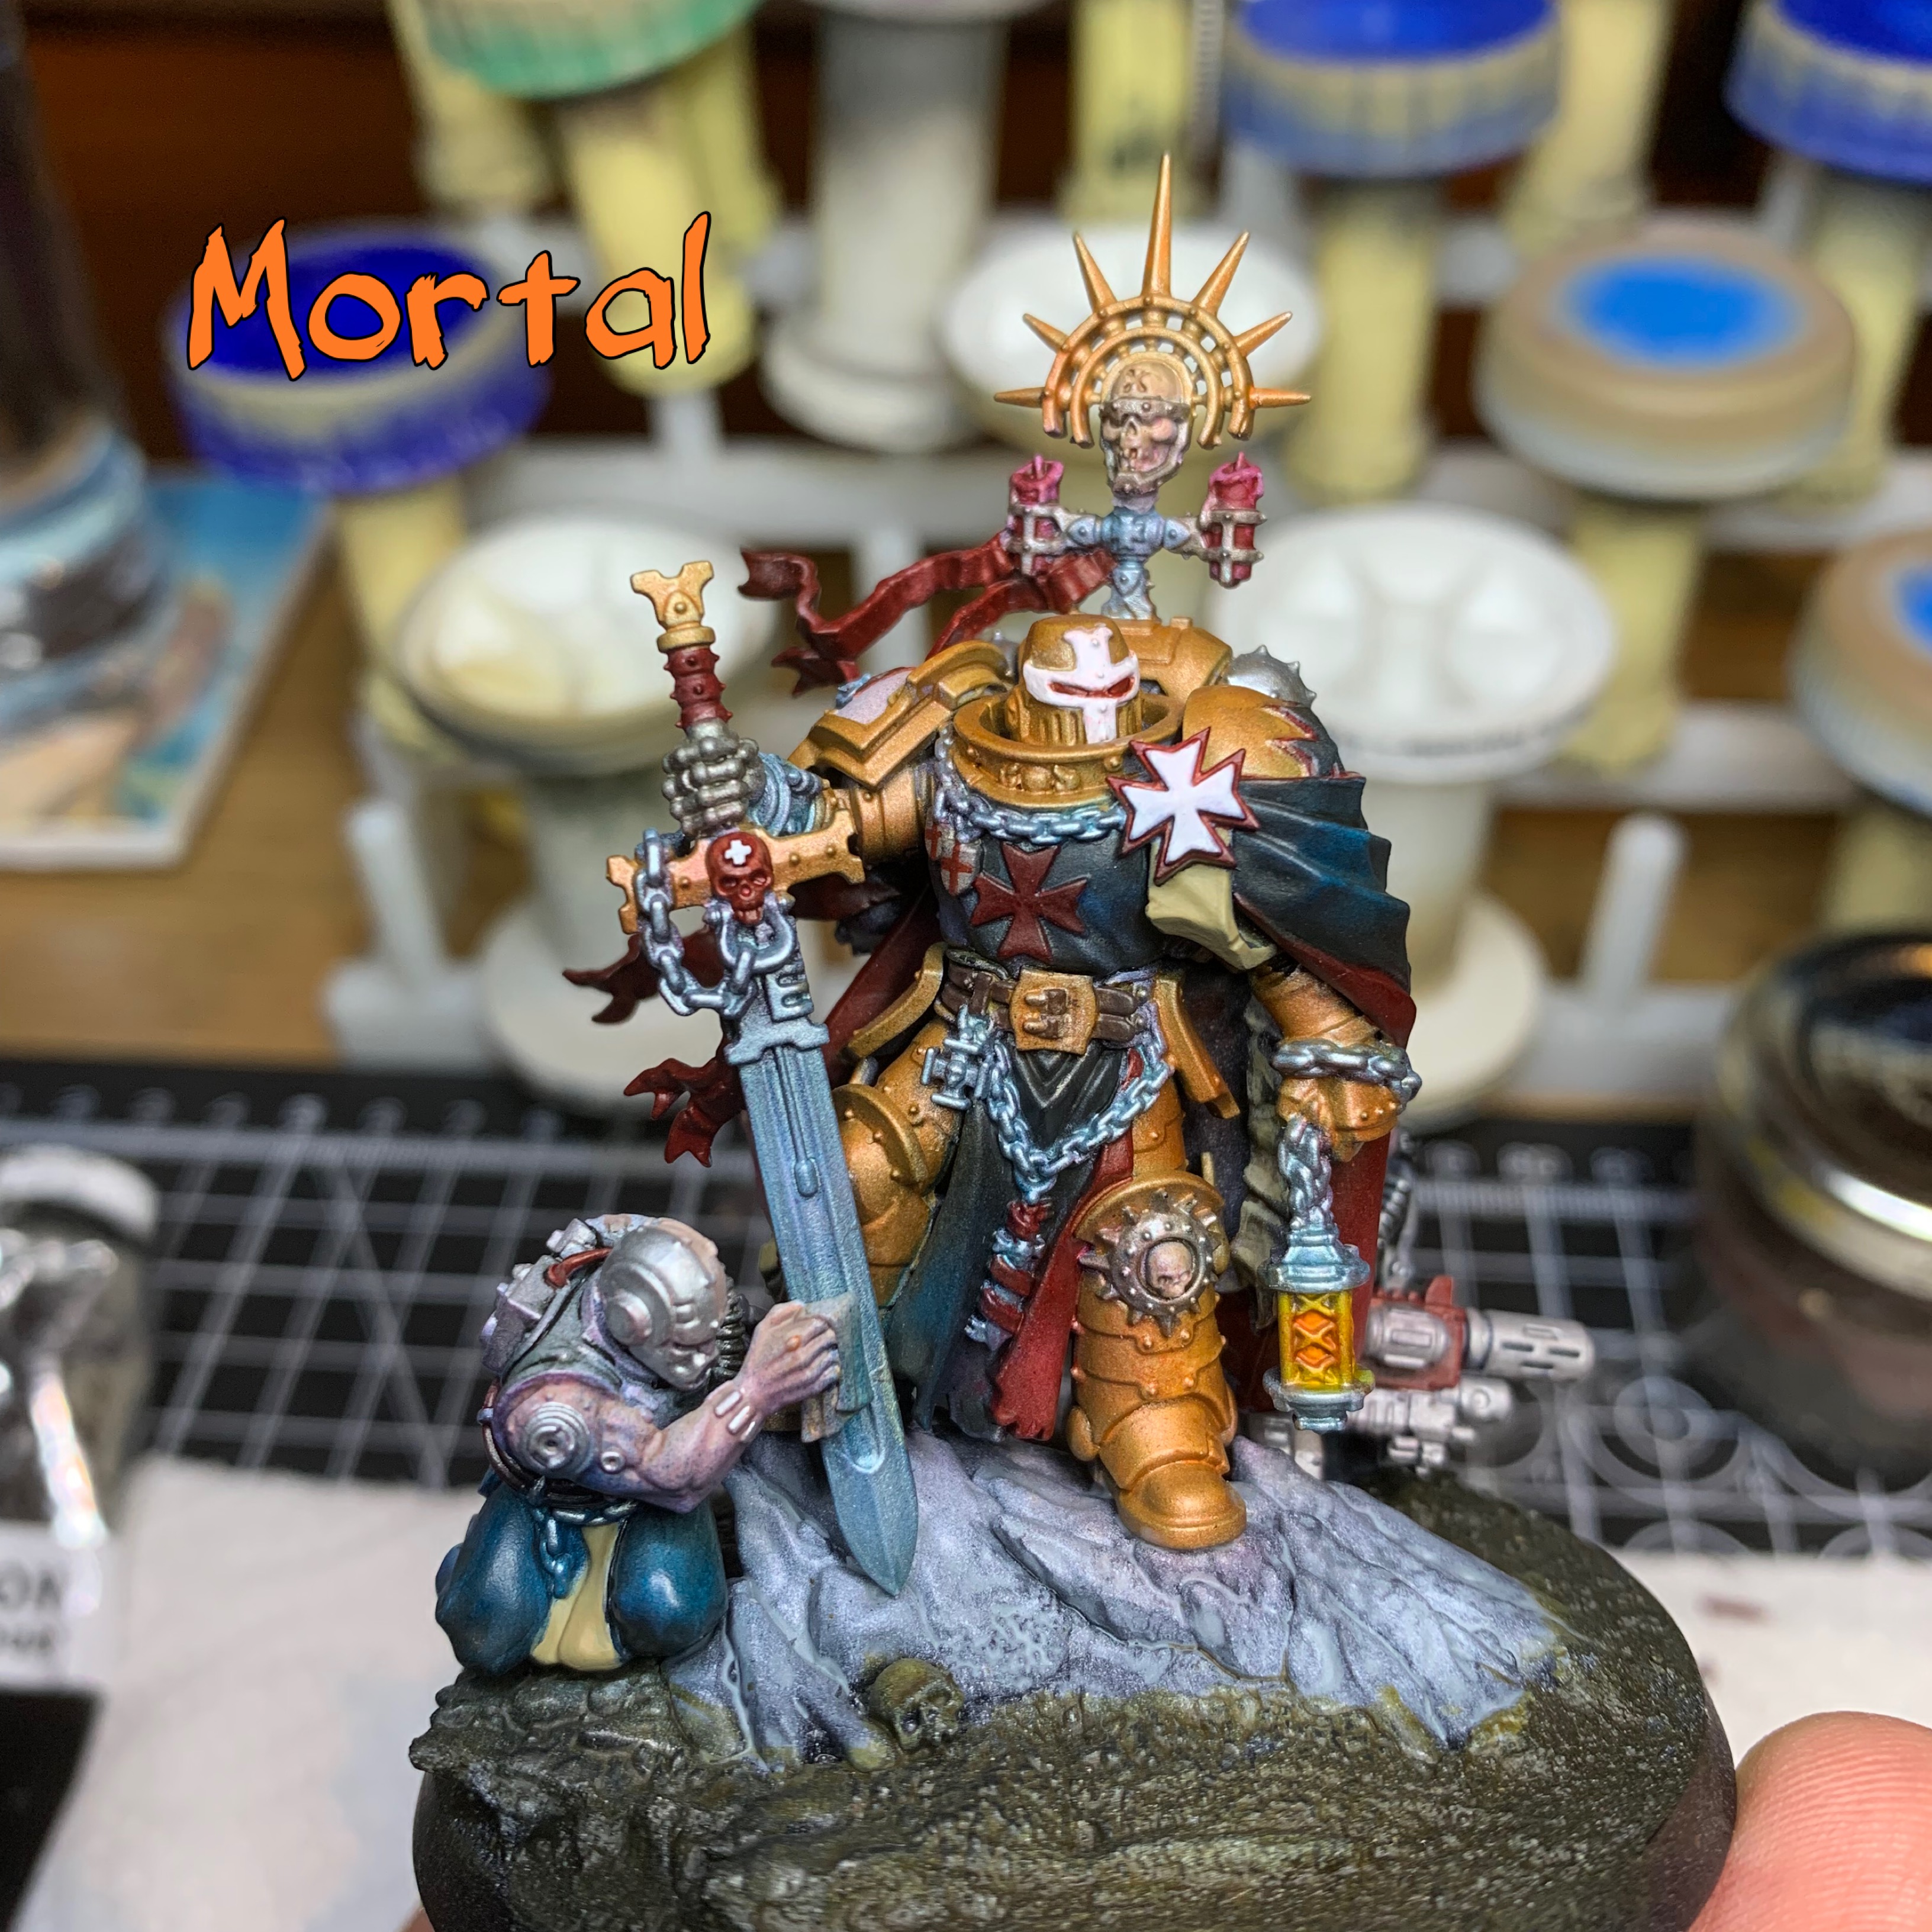
That’s got it a bit neater, and I am less embarrassed by the sight of it now!
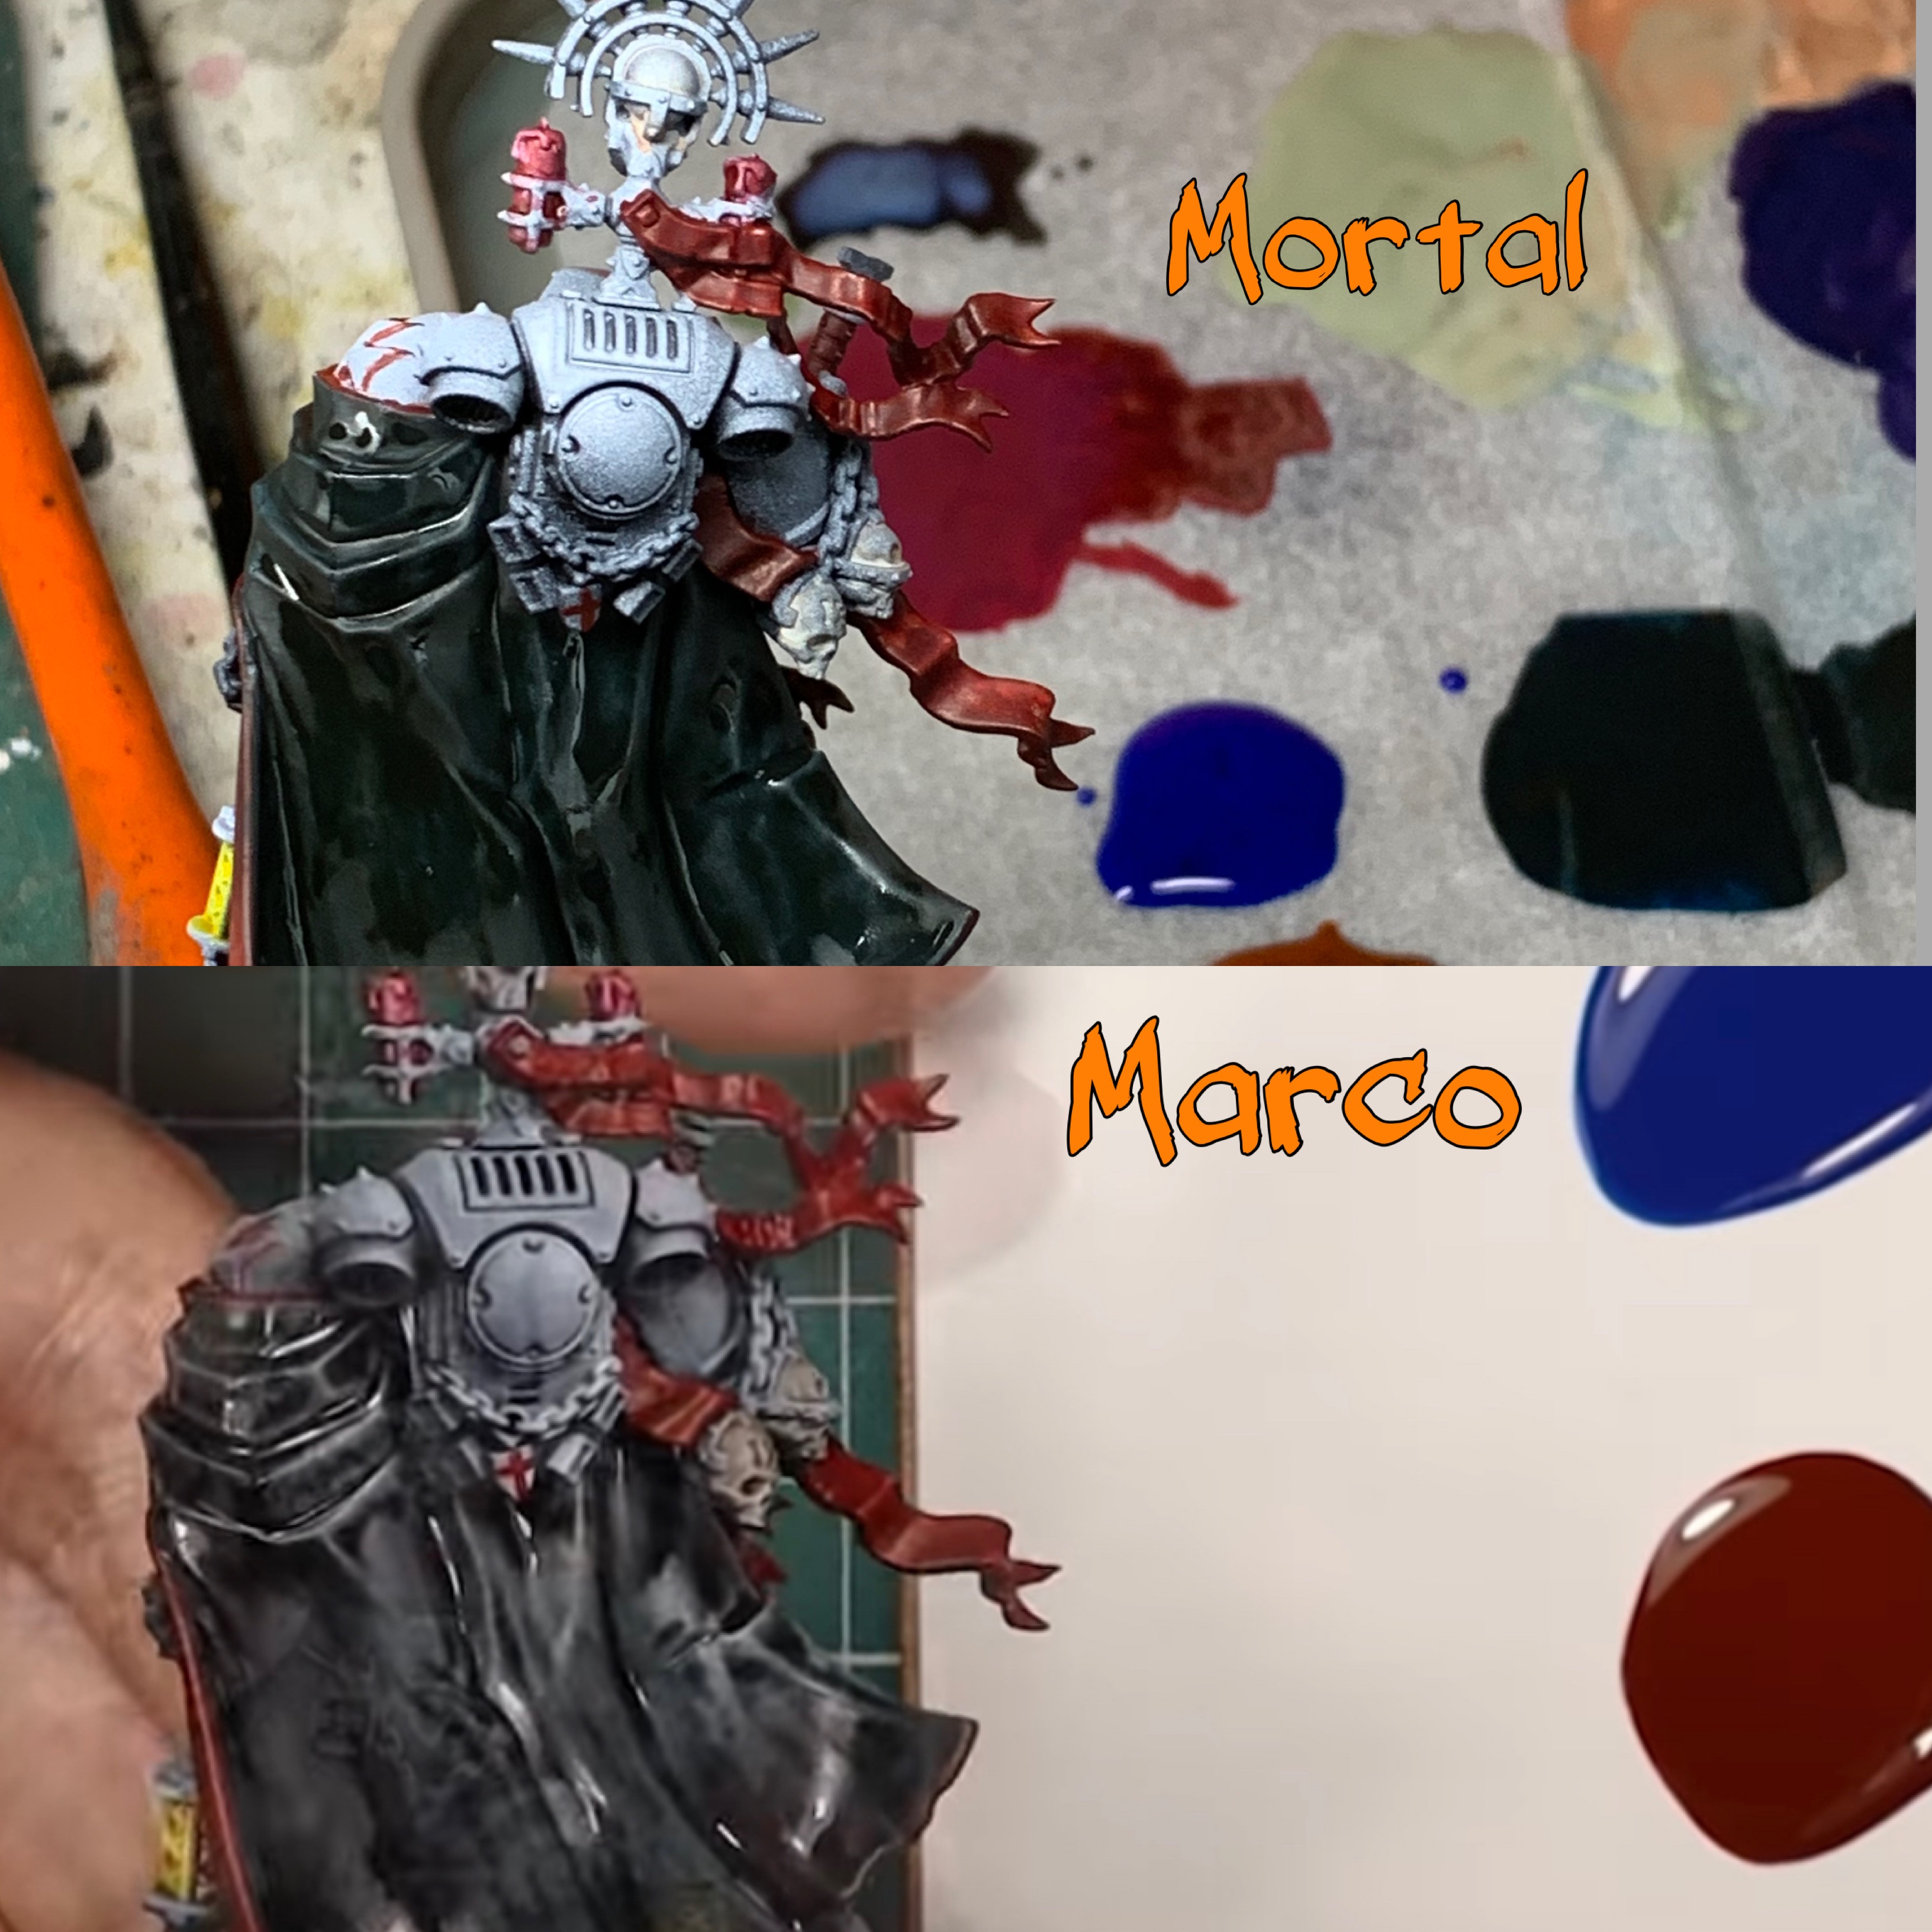
Step 11: Black Oil Pinline Wash
The staple of any Marco tutorial and, for some time now, a staple of my own process. Oil (or enamel) washes.
Unfortunately for me, only a pinwash here. I would have loved a heavier oil application as that is more in my comfort zone than what is to come after this, but this I can do.
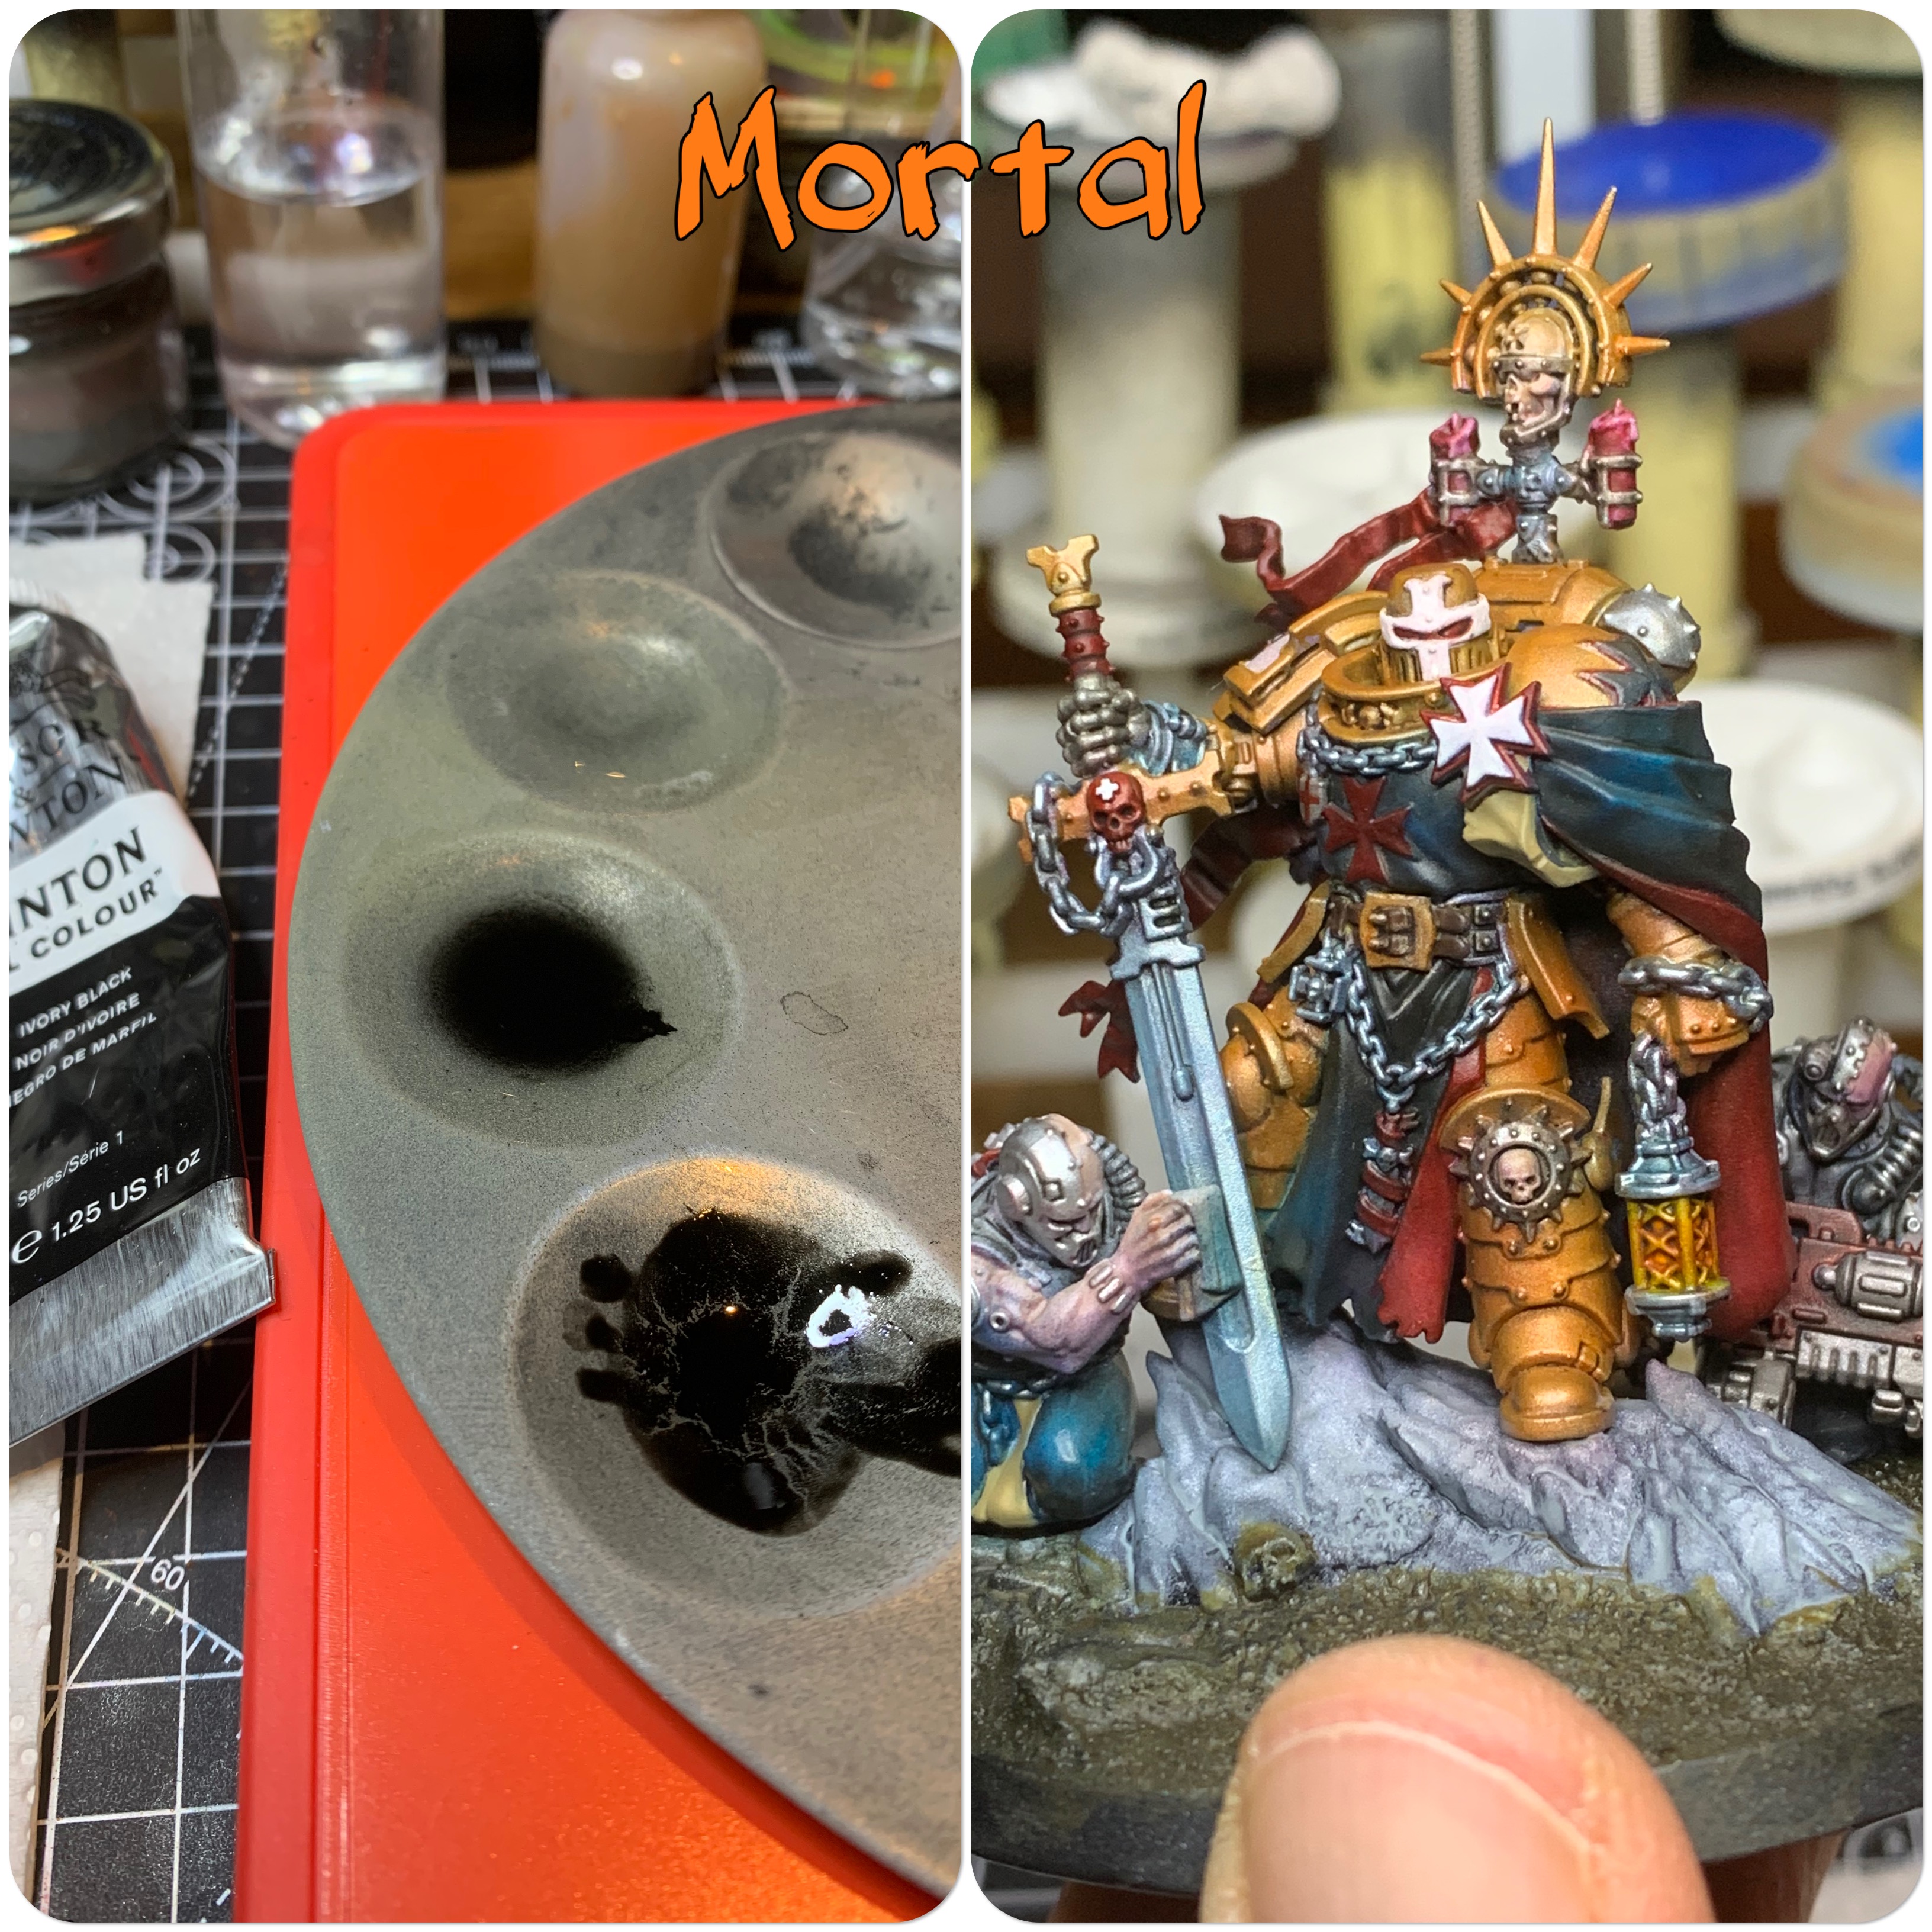
That’s got it looking a little crisper.
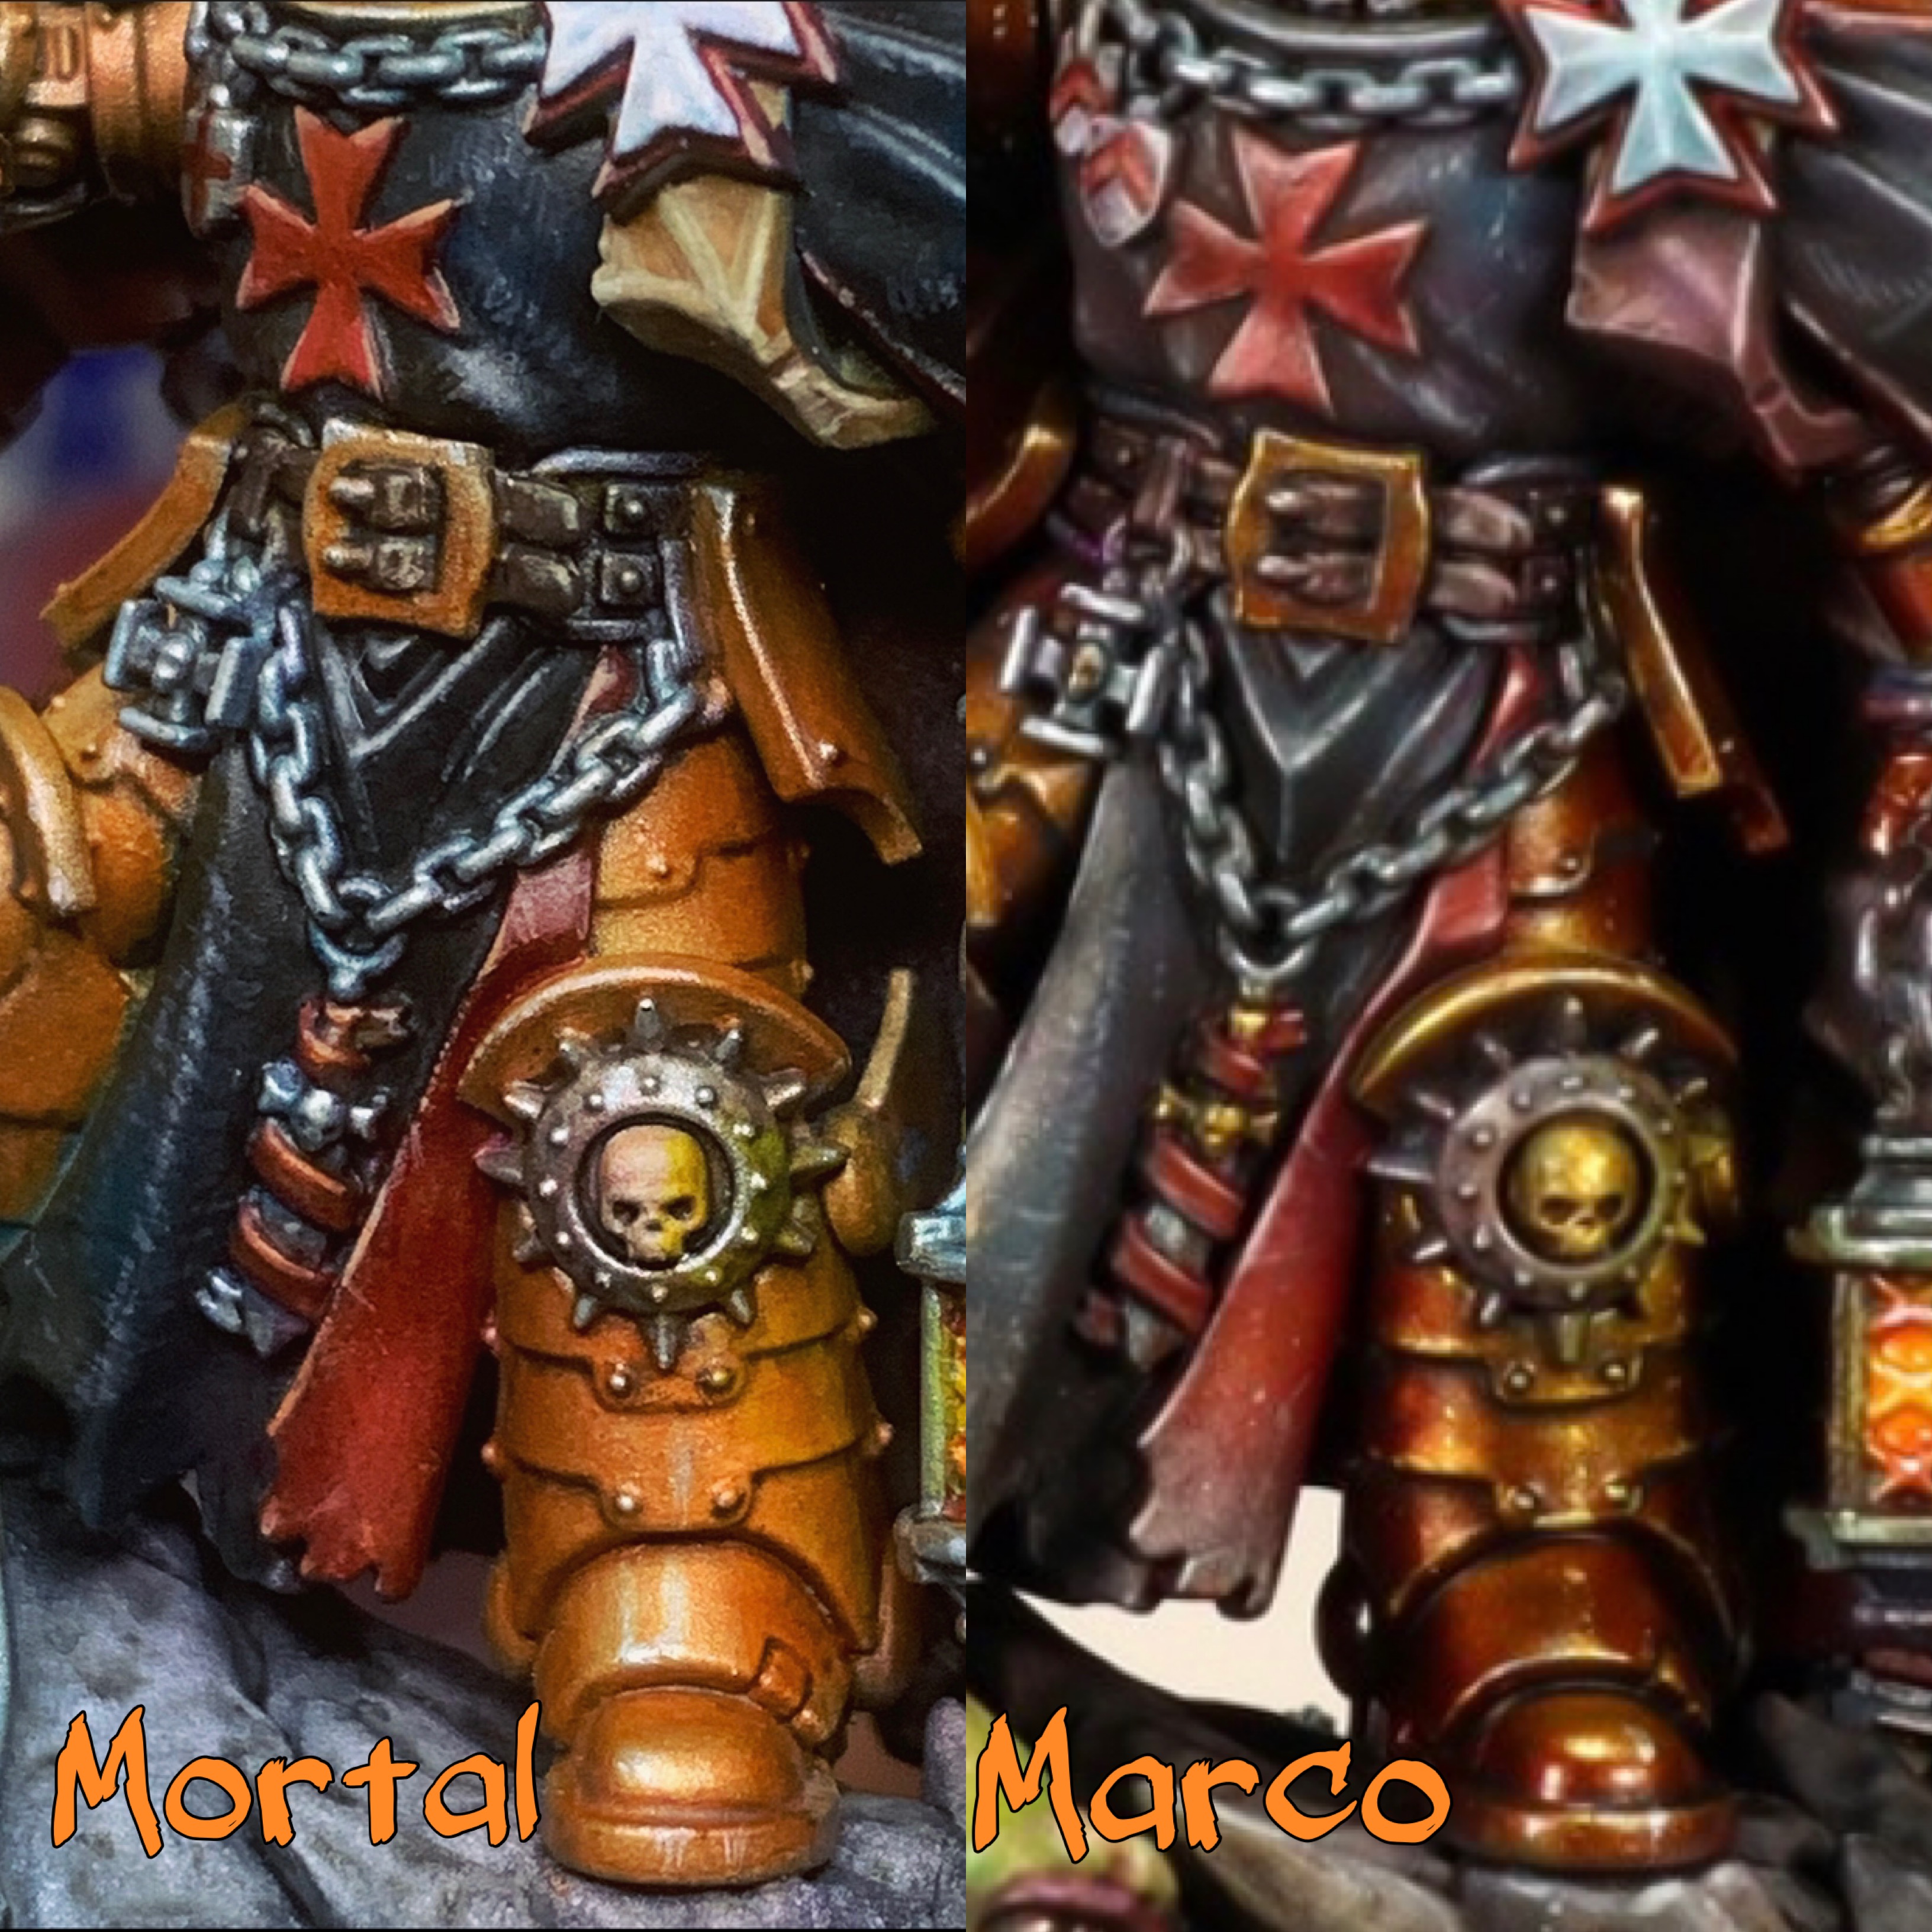
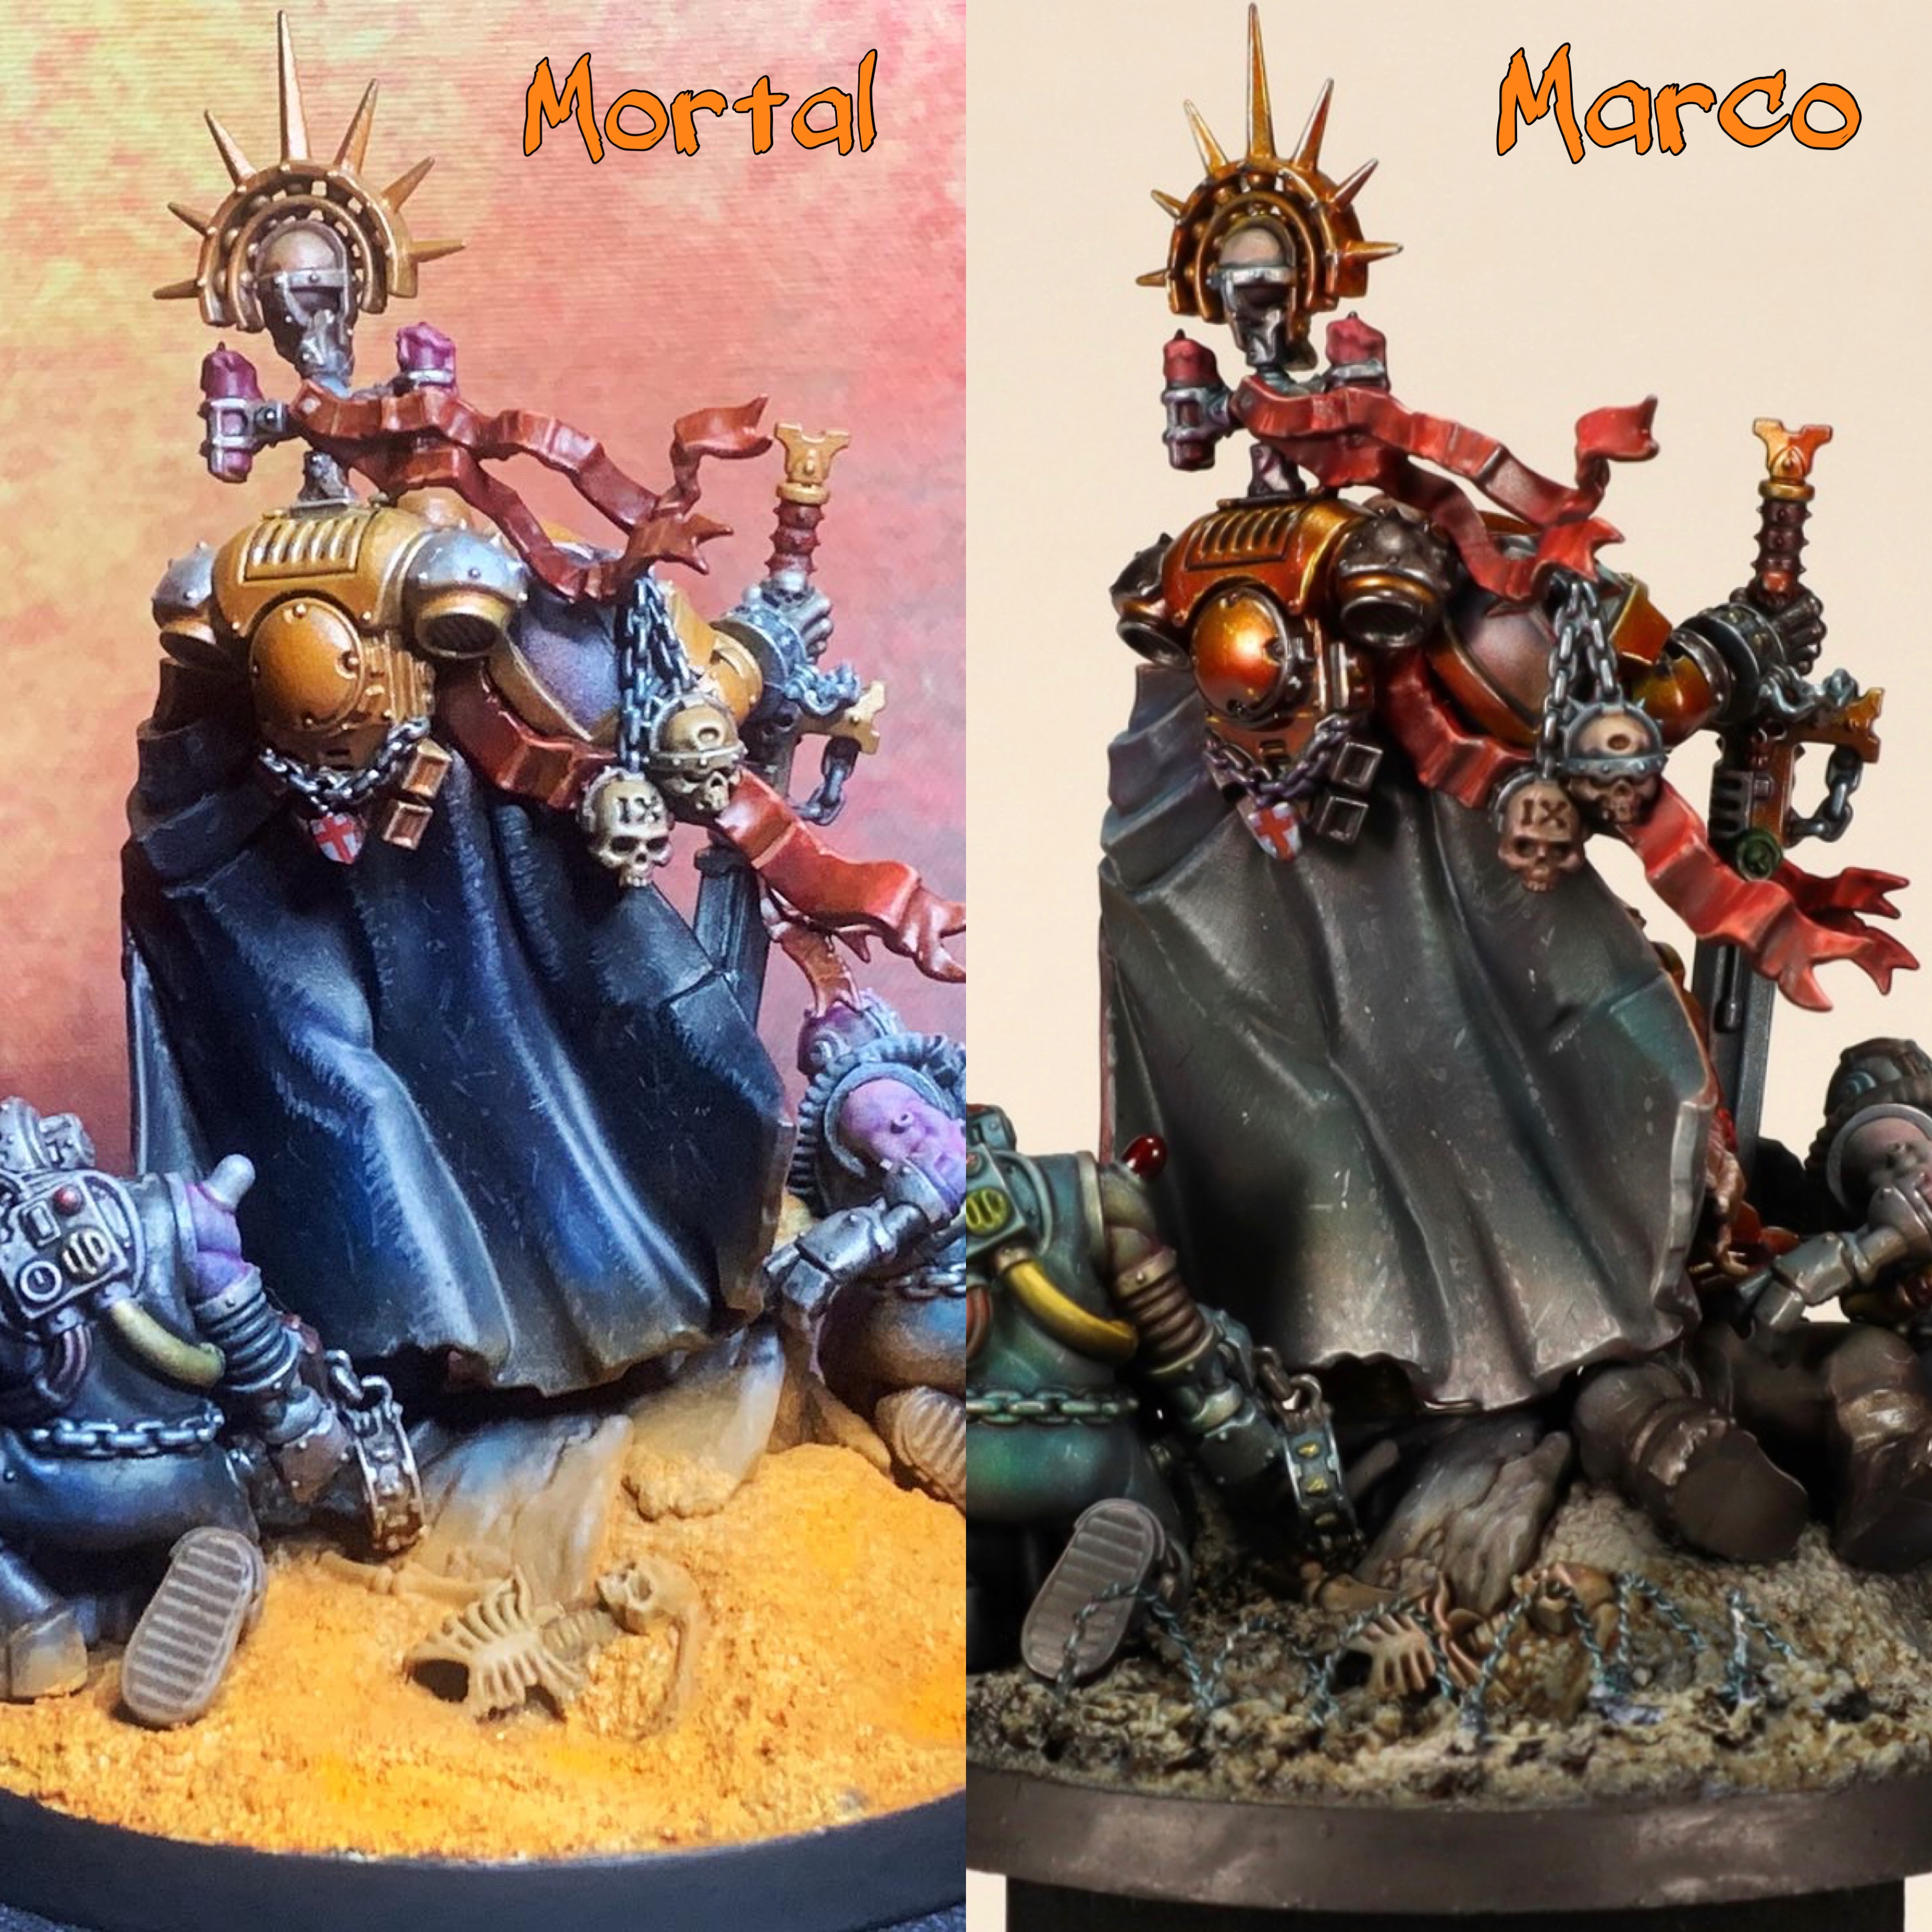
So that leaves us here. Trying to find the closest comparison from Marco’s video, and this is about as close a comparison photo as I can get. Even compensating for the high contrast he runs on his camera, his is clearly deeper, richer and more contrasty than mine.
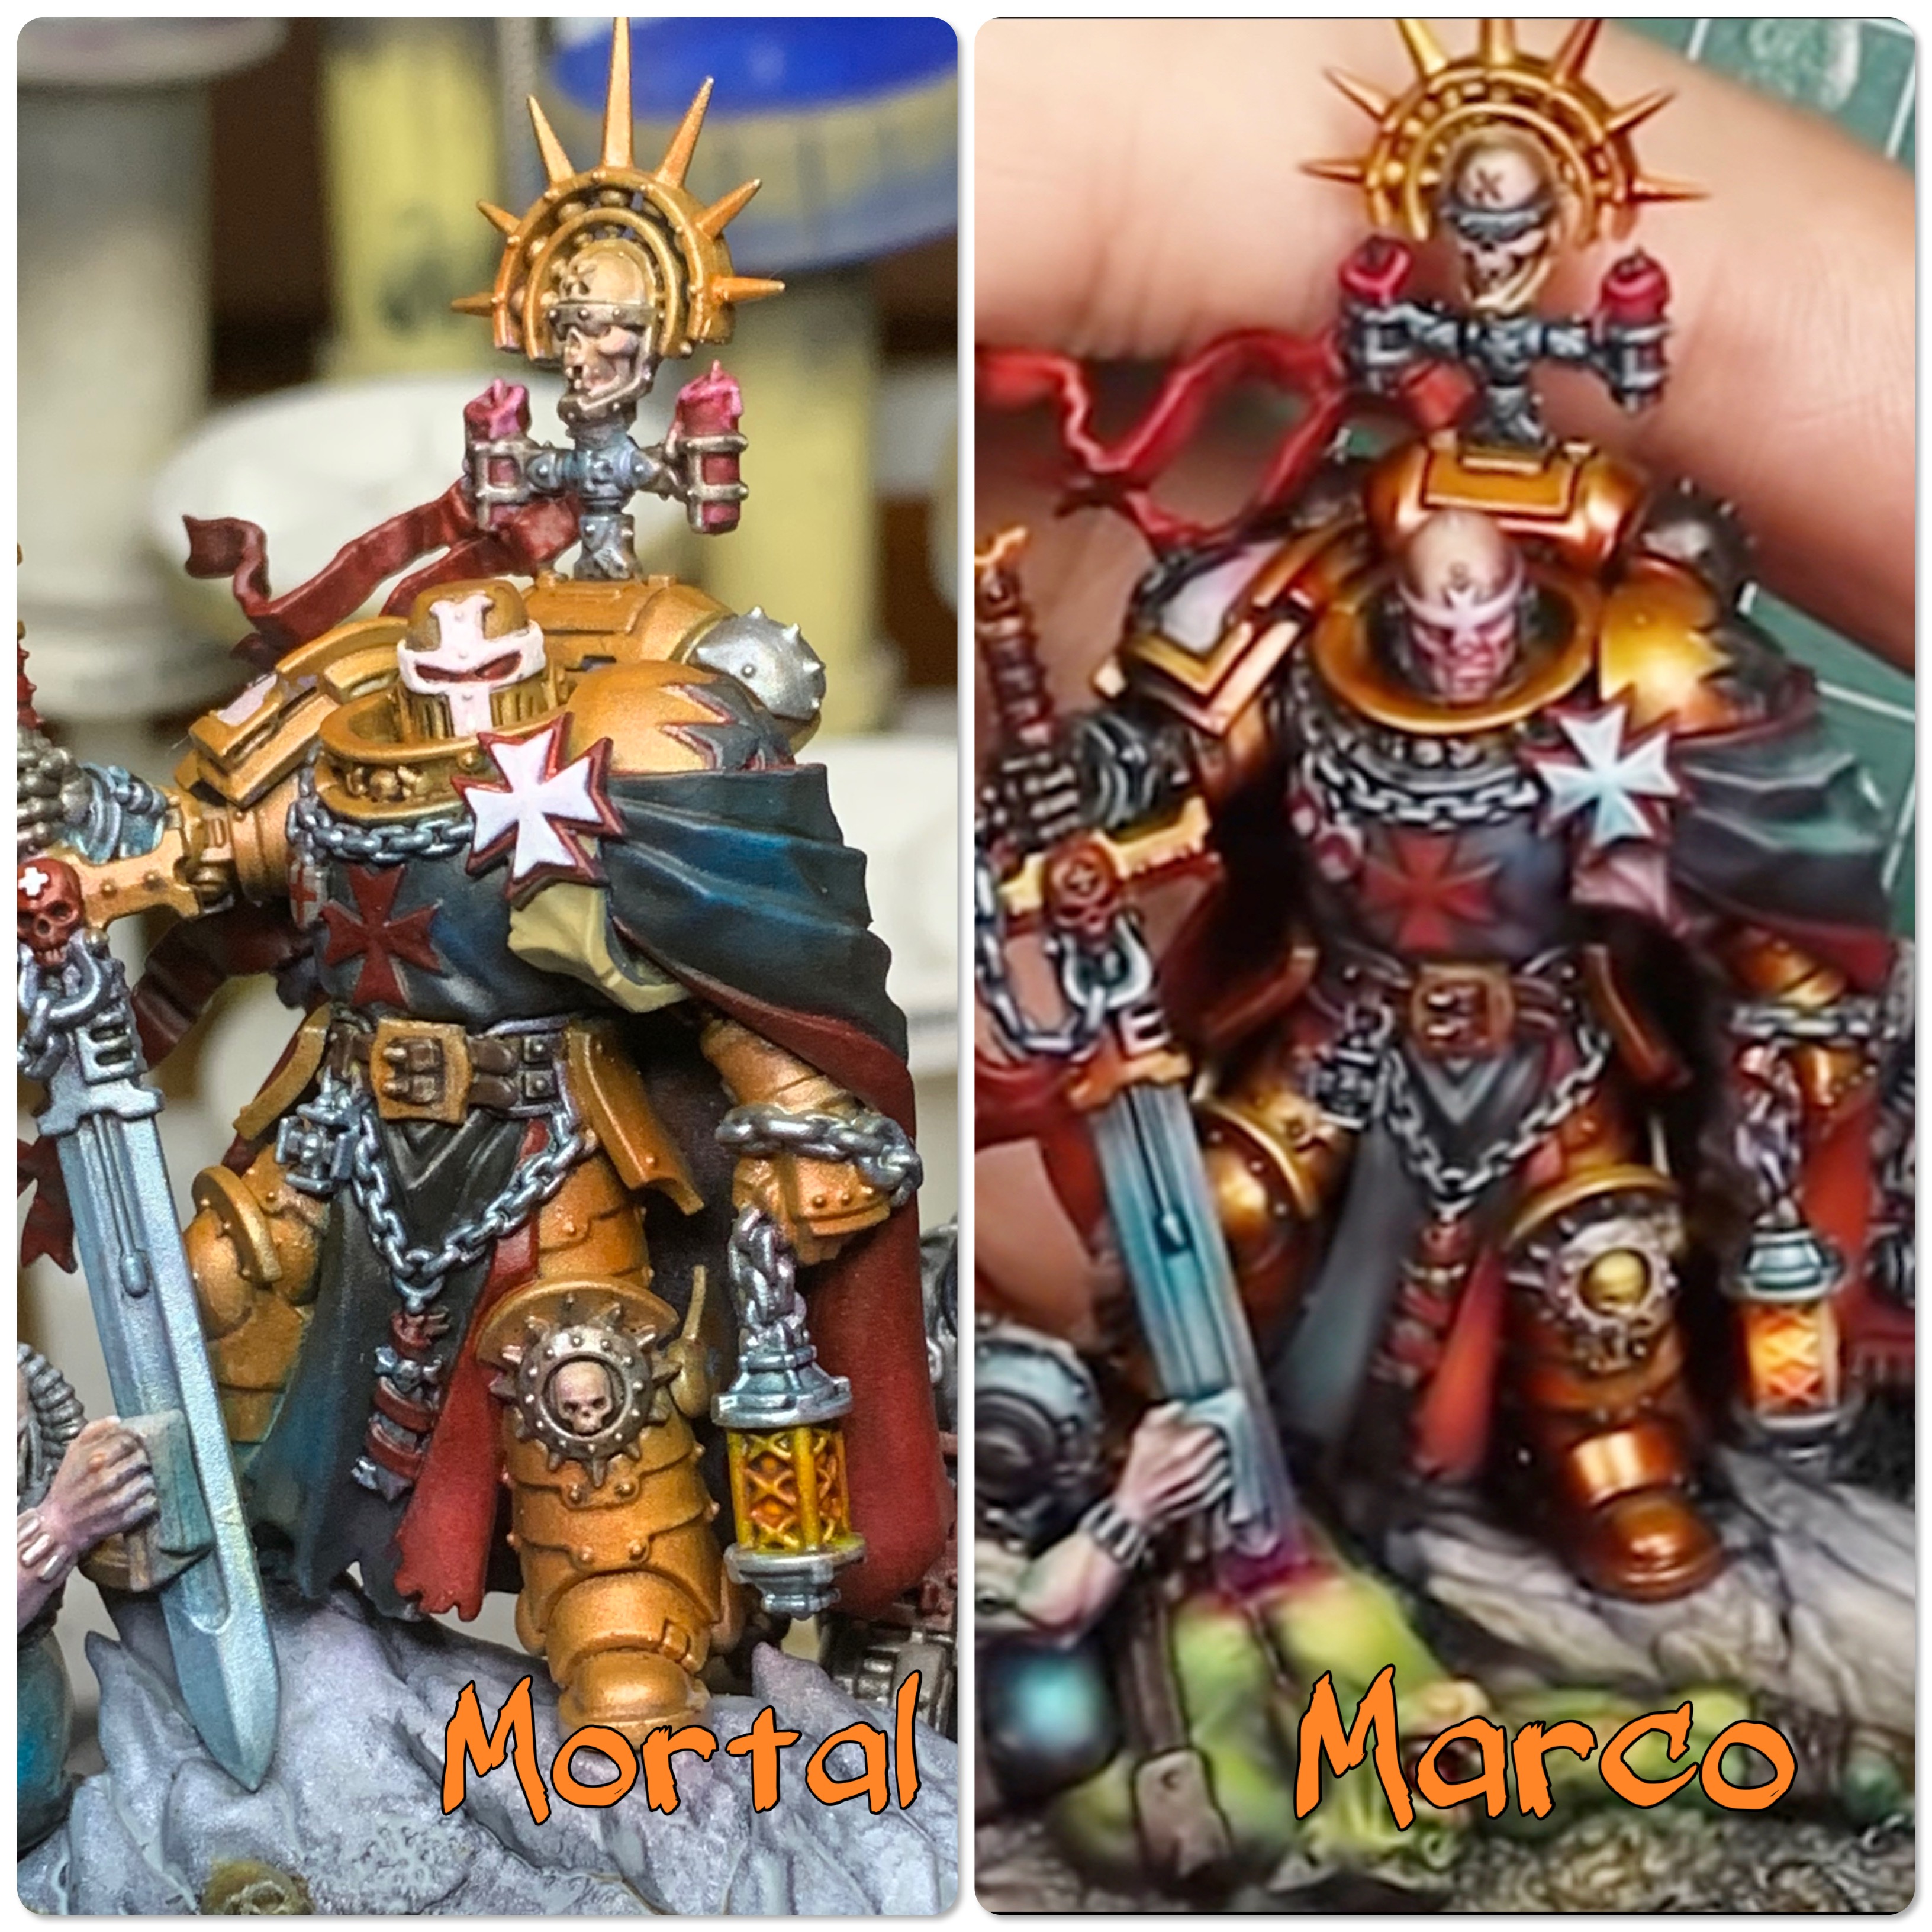
Now this brings us to a really important point about the challenge of following along with a tutorial such as this. Marco painted the model in 4 hours. This video is less than 30 mins long. Even allowing for a 2x speed up of the actual painting, there is a lot you don’t see.
”Sign up to my Patreon for every little line and brushstroke” is the sales pitch.
So it’s clear to me that I am missing steps that are creating this divergence between mine and his models.
Coupled with that, the next stages have Marco reaching for his infinite paint supply – a supply that I am less motivated to replicate:
So, it’s decision time, how to proceed?!
Buy £100 worth of heavy body acrylics and sign up for the Patreon to follow each brushstroke?
Or crack on my own way?
Cue Training Montage!
So I had a think, and it occurred to me that I’ve watched a lot of Marco videos. A lot. And to be honest, there is nothing he is doing in this video that he hasn’t shown before. Ok, so he always seems to reach for a new paint range that I don’t own, but the techniques aren’t new and I’ve tried many of them before.
So in a way he’s been preparing me for this for years. I don’t need to copy every brushstroke! I need to use what I have learned, and put it into practise.
Maybe I can’t replicate his style, or reproduce his mastery of the medium, but I can push myself to get as close as I can to the end result.
Time to double my efforts! Cue training montage!

Step 12: No More Steps - Just Paint!
My only reference now is Marco’s final piece. I’m zooming in and using what I see to inform my painting, but I am now free of steps and method, I’m just painting what I see using whatever paints I have to hand, and putting my own spin on it where I feel I prefer something different (for example the colour of the ribbon thing).
I’m motivated to crack on, and it’s getting closer to the result I’m looking for!
The wider shot of where I’m at currently (anything out of this shot hasn’t had attention yet!):
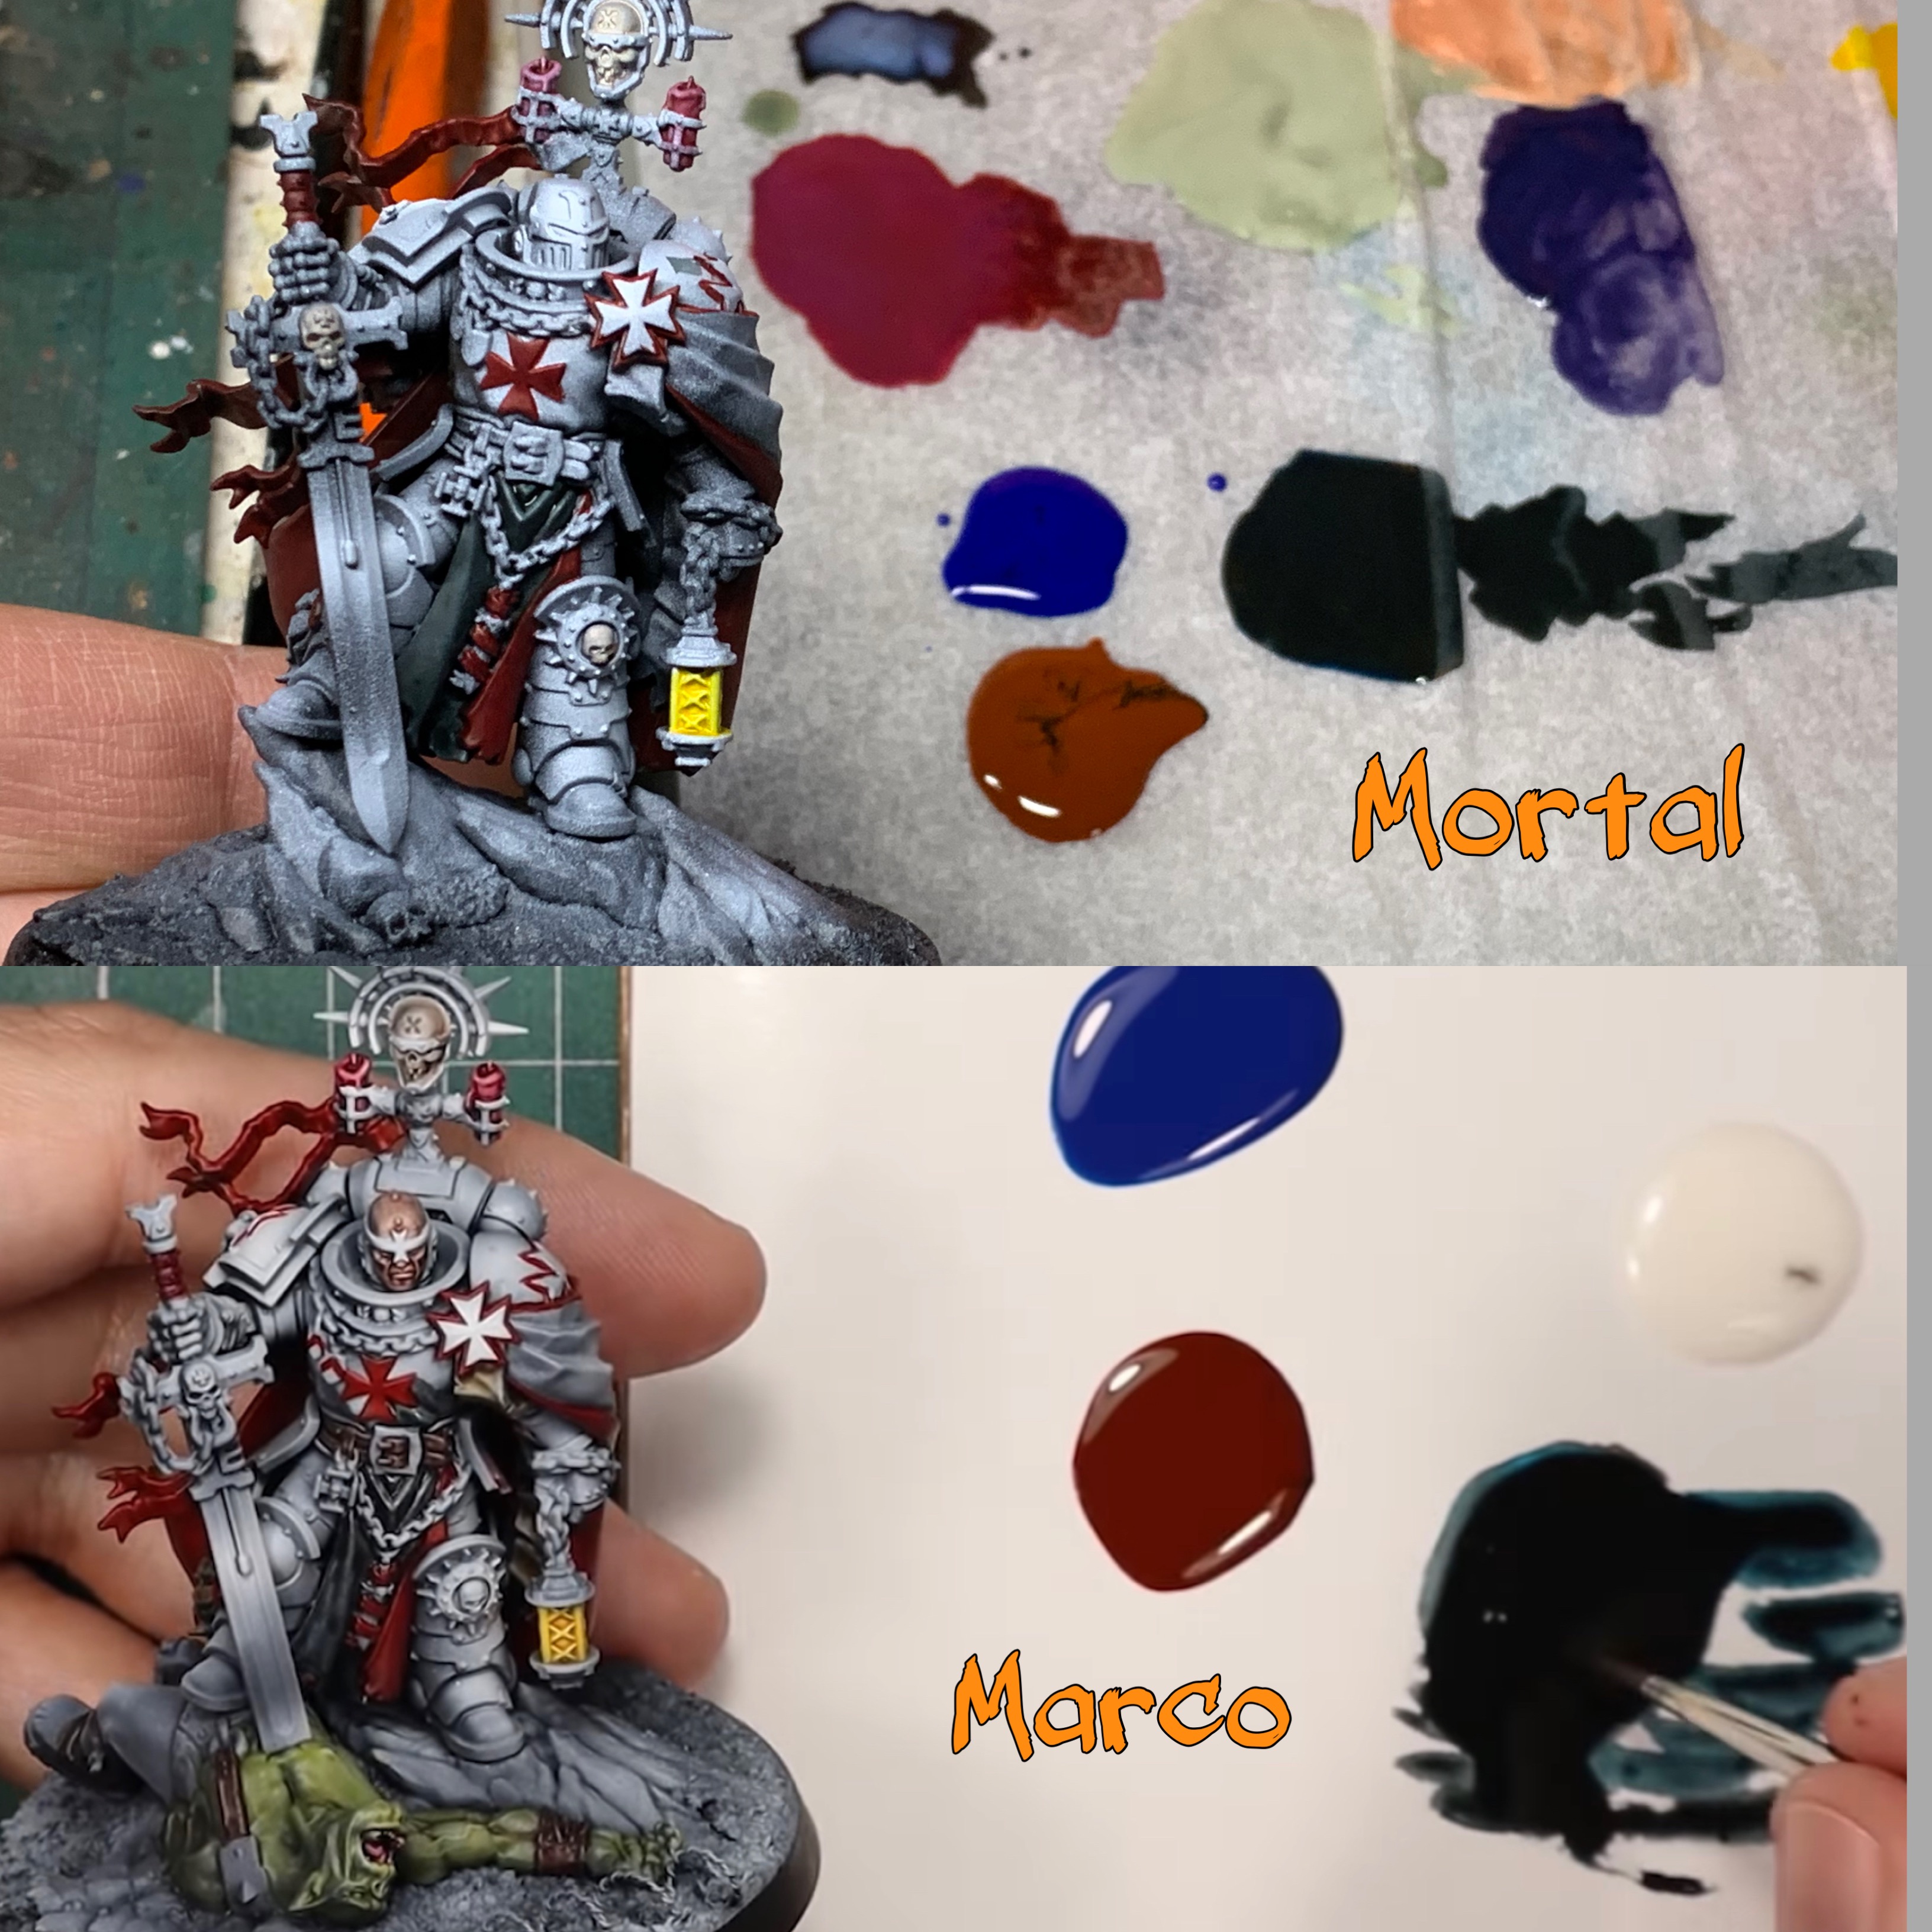
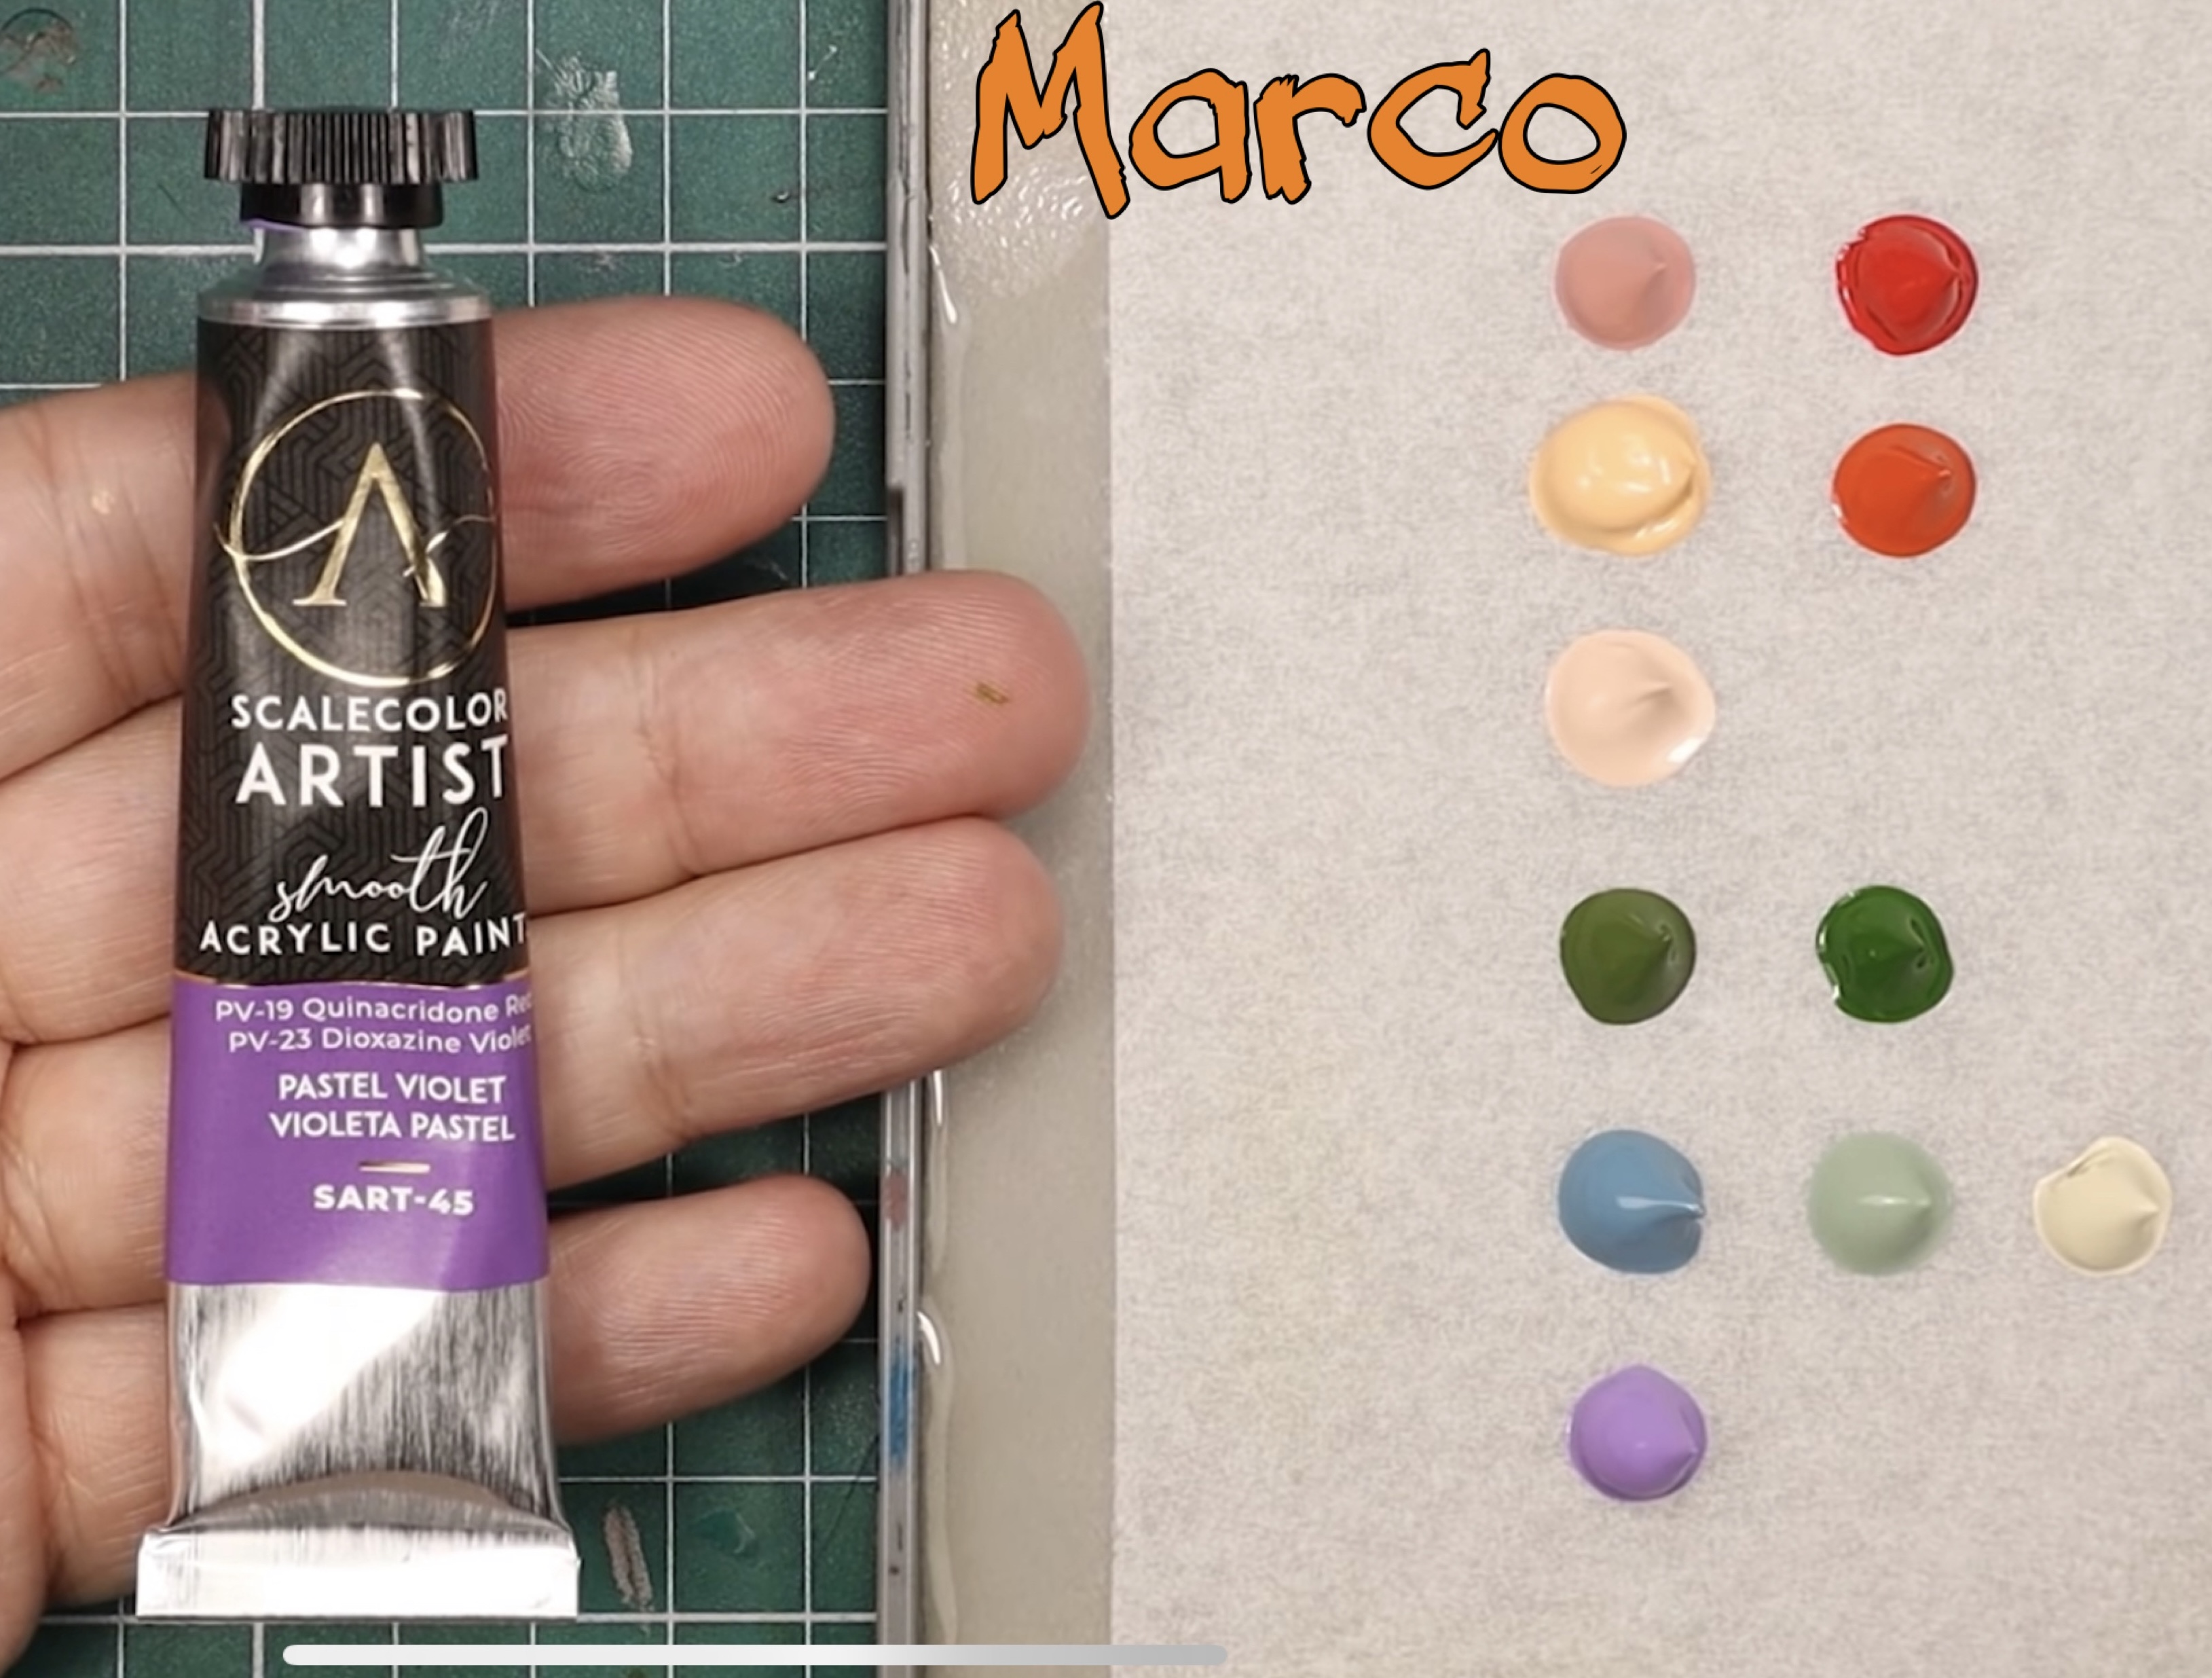
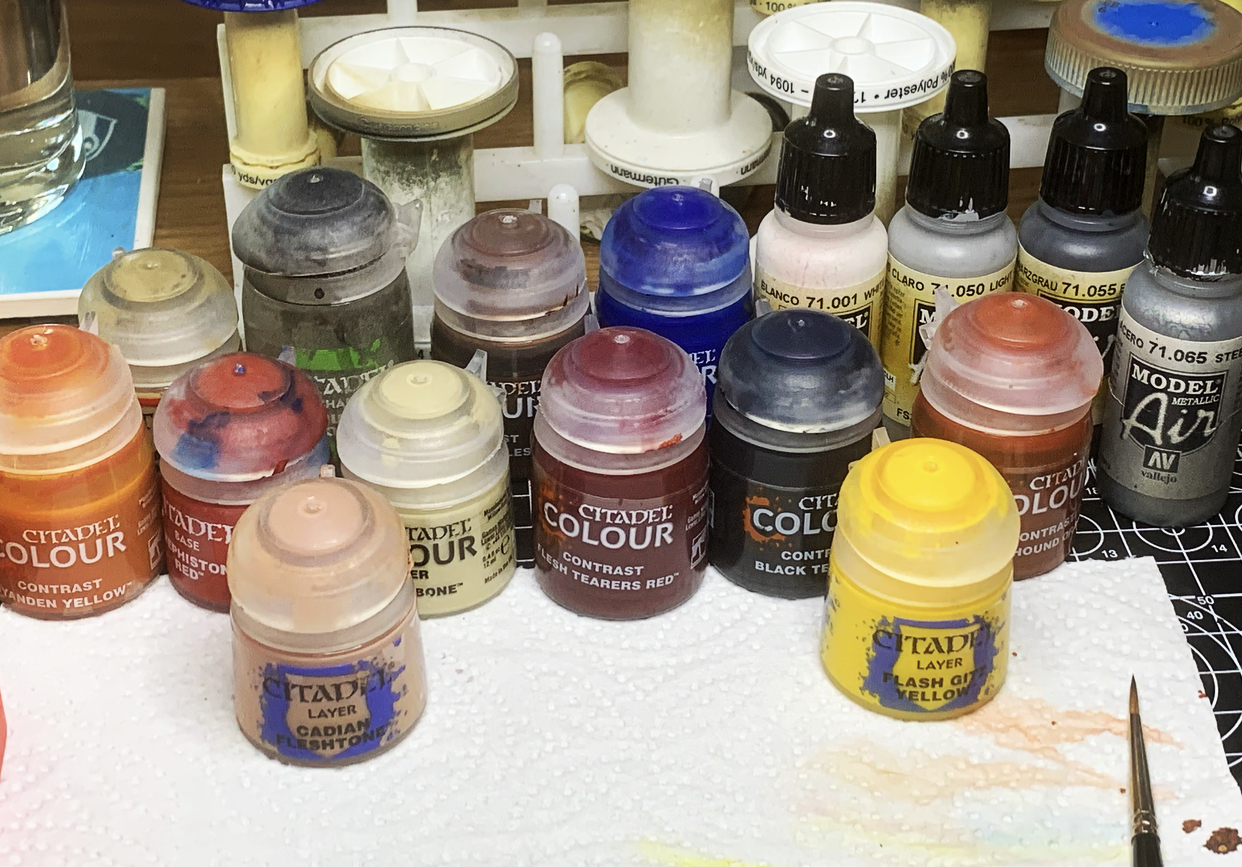
Whilst I am not following ‘steps’ now, I do want to make sure I document what paints I’ve used in these later stages whilst I still have the palette in front of me to jog the memory:
Armour: Marco’s Mix, Gryph-Hound Orange and Vallejo Steel
Black cloak detailing: Vallejo Black-Grey and Light Grey
Silver Highlights – Vallejo Steel
Red Parts: Flesh Tearers Red, Mephiston Red, Cadian Fleshtone (highlight)
Lantern Glow: Gryph-Hound Orange, Flesh Tearers Red, Flash Gita Yellow
Red Cloak – Flesh Tearers Red (glaze), Cadian Fleshtone (highlight)
Beige Ribbon: Zandri Dust, Guilliman Flesh (wash), Ushabti Bone (highlight)
All white parts and spot highlights: Vallejo White

It’s all about the Base, no Rebels
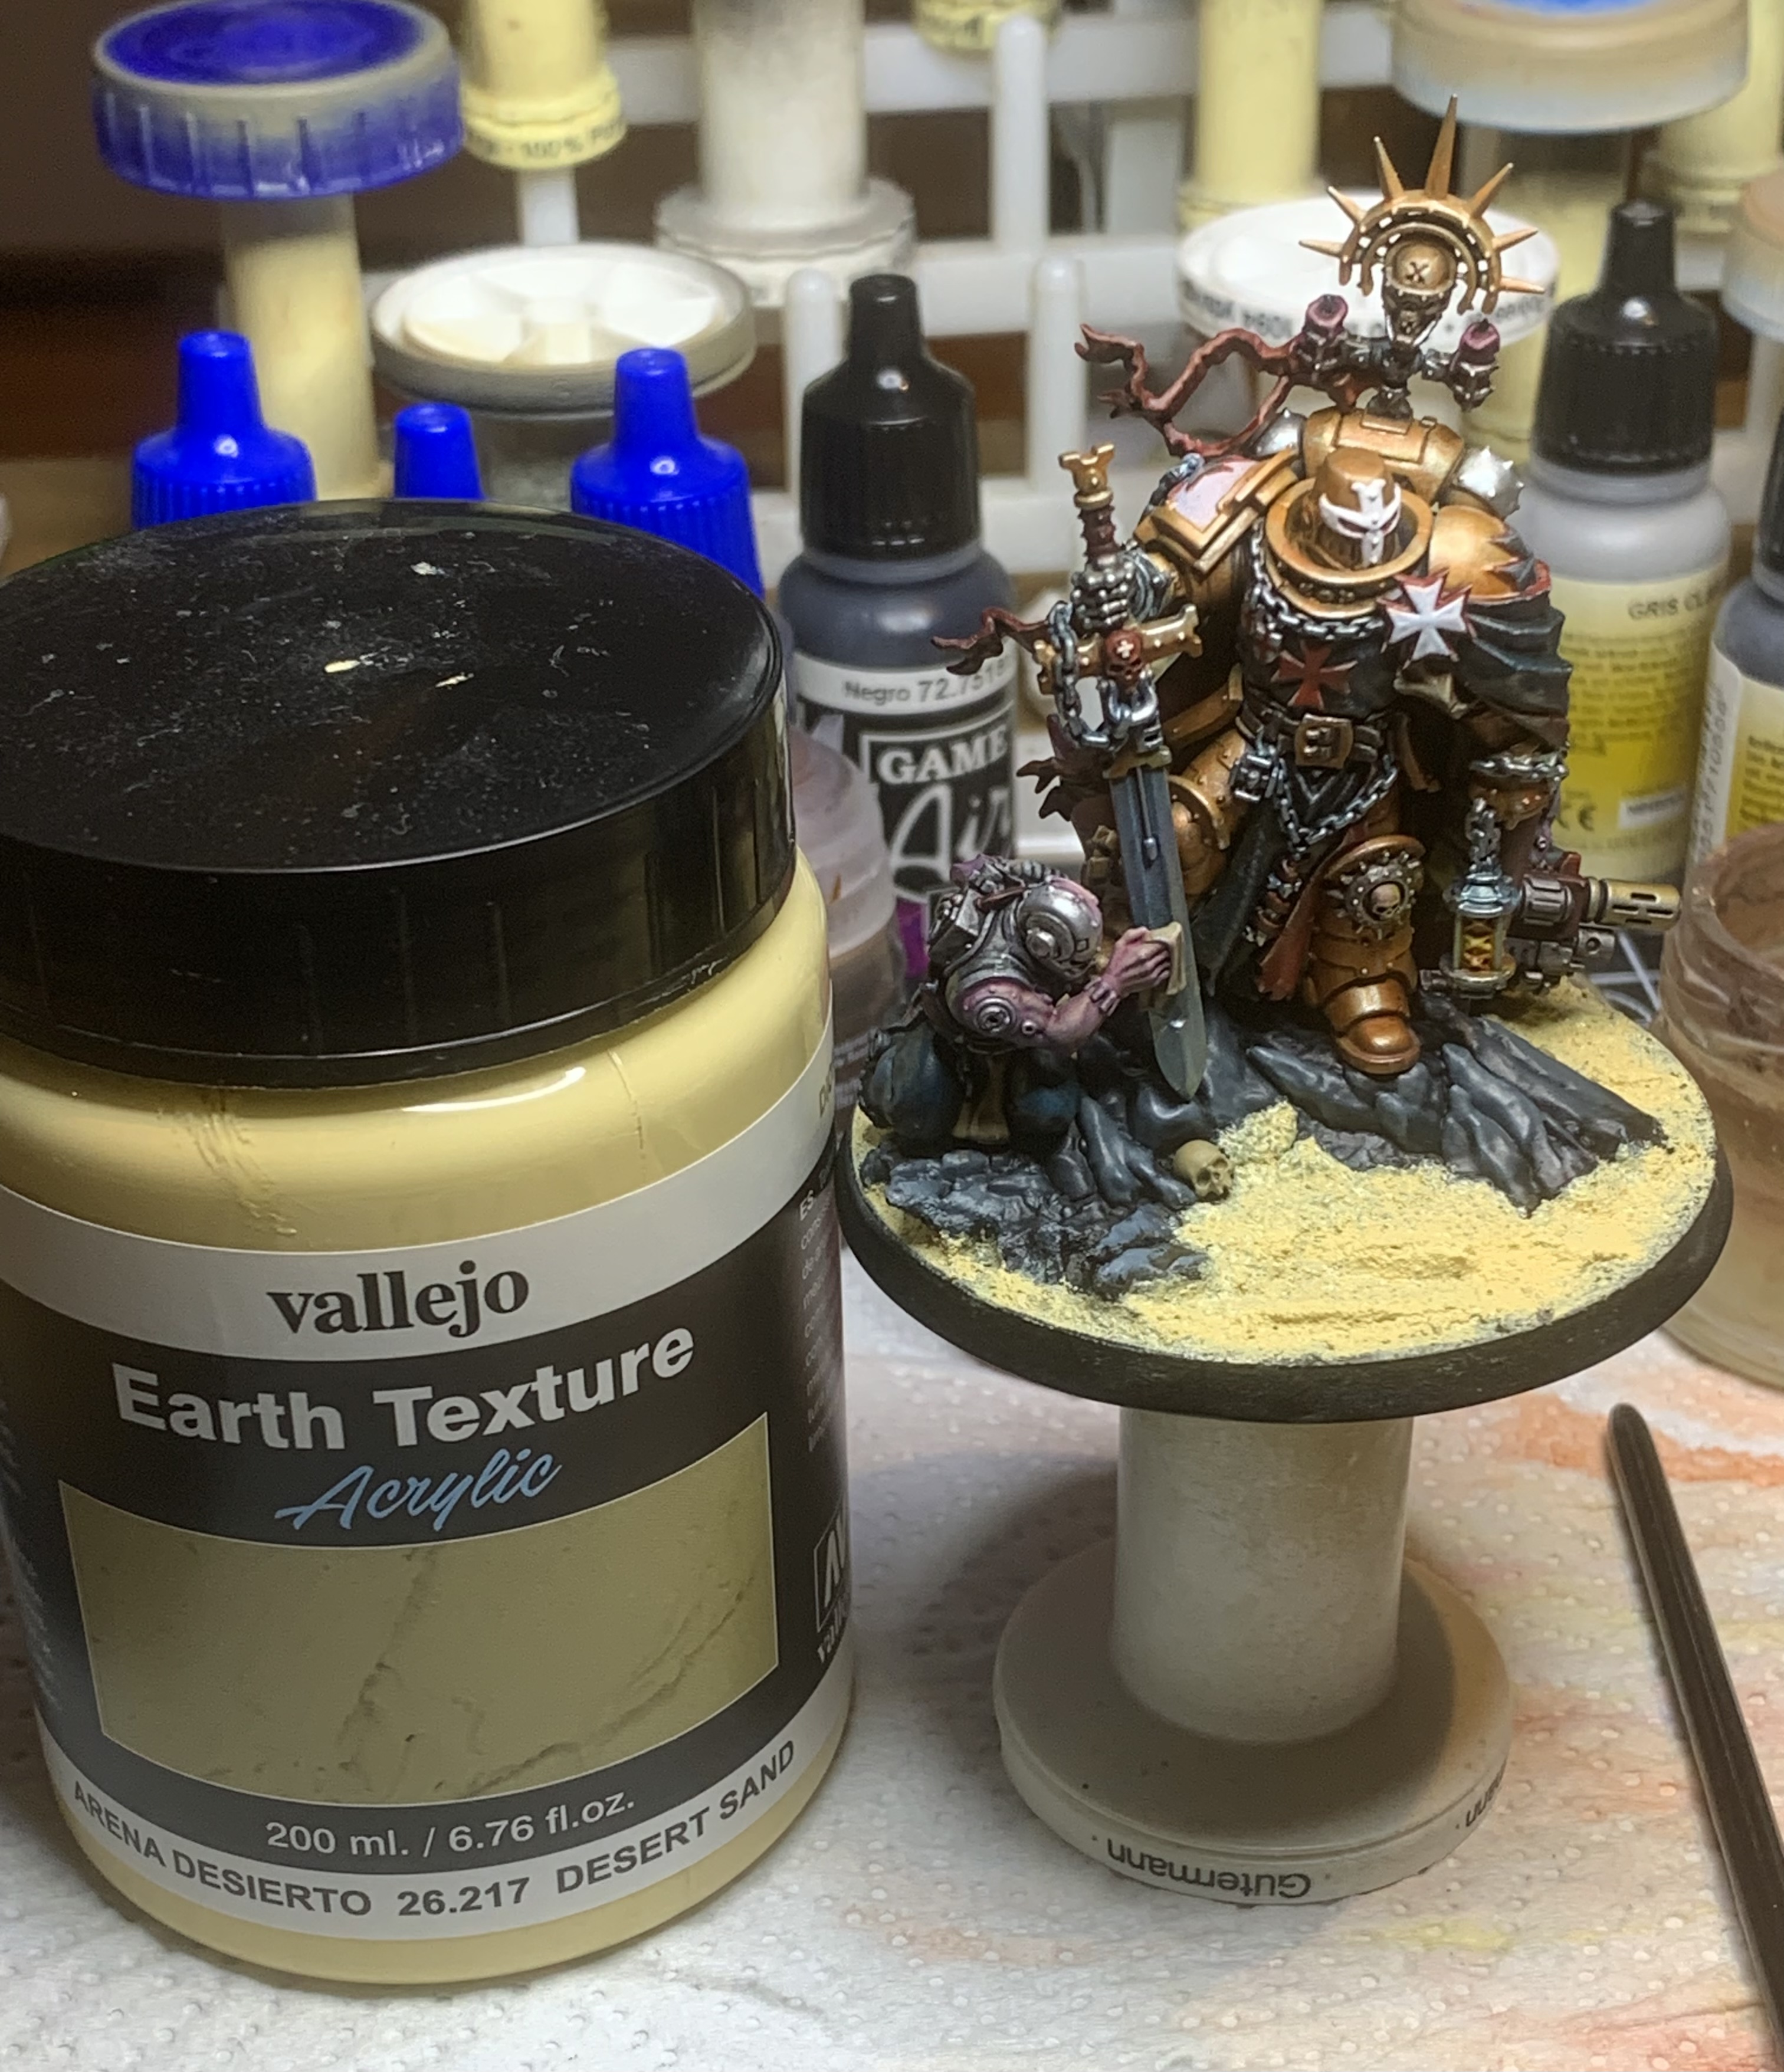
I’ve now got to the point where I’d like to see it with the base done to get the overall effect and identify any last tweaks.
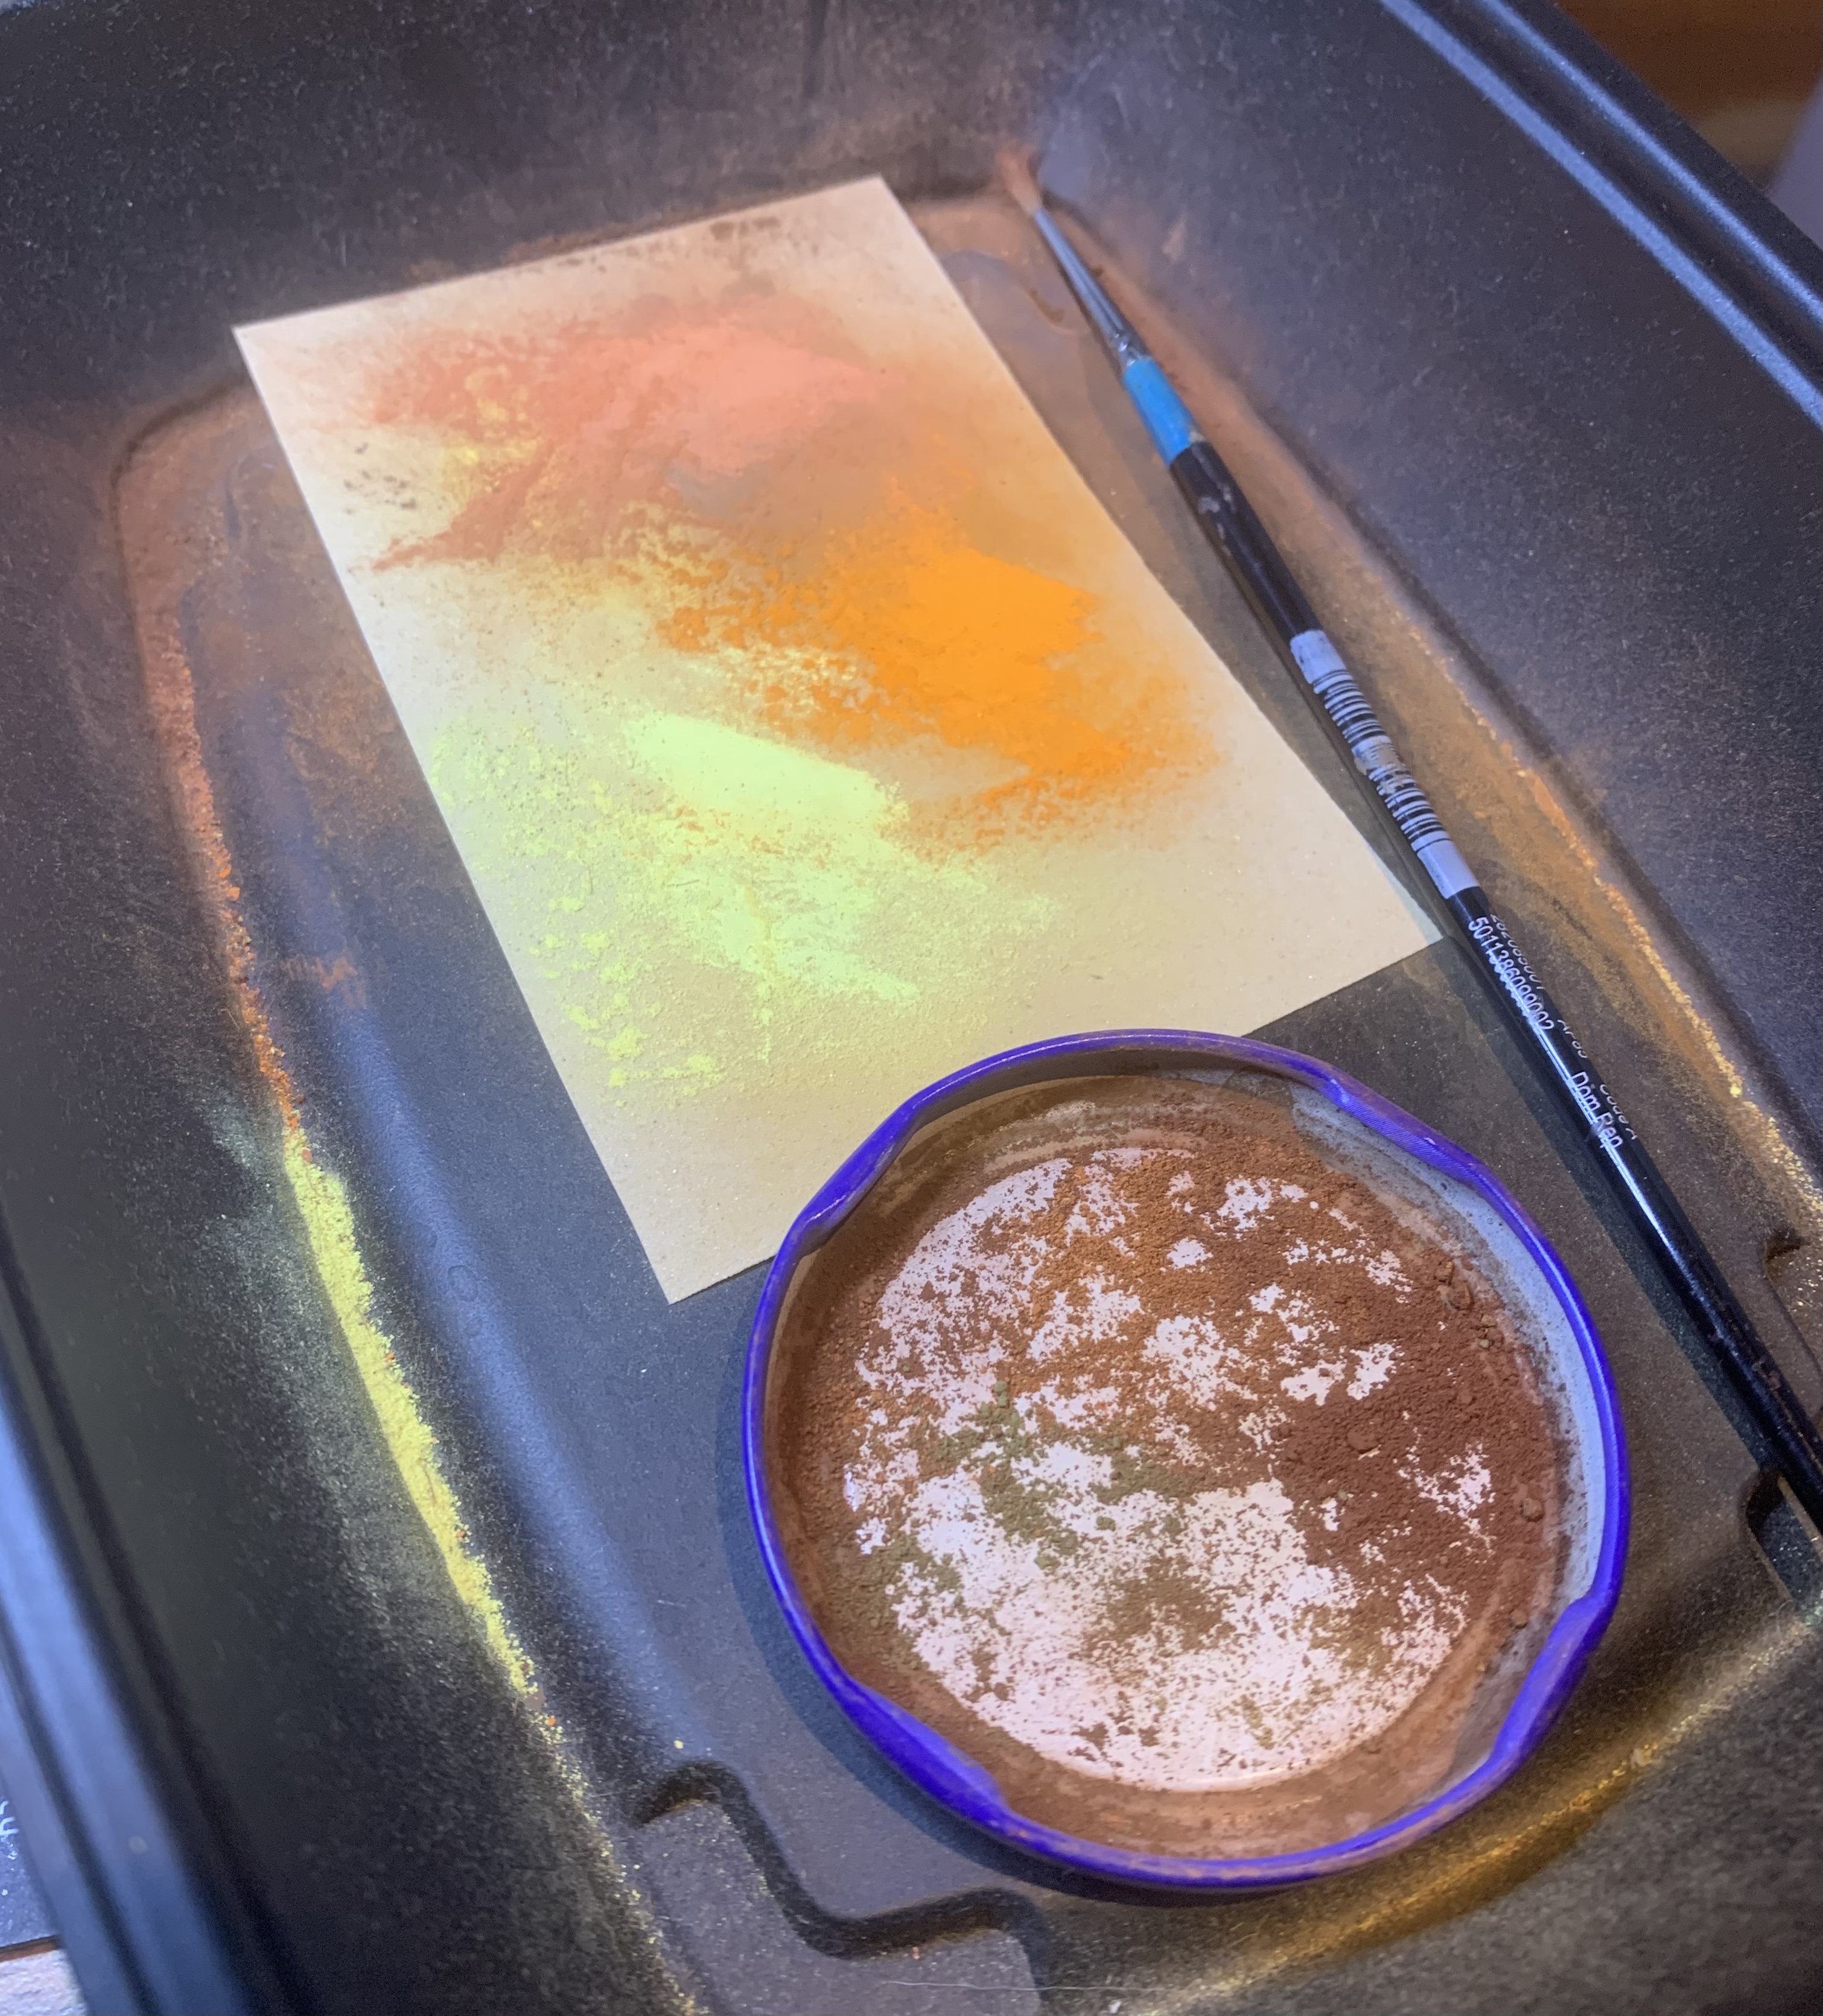
Simple process of texture paste, wash, and weathering powders (some of which are ground pastels).
Is it Finished?
Time to take some quick snaps to see how it’s looking, and ponder whether it’s actually done.

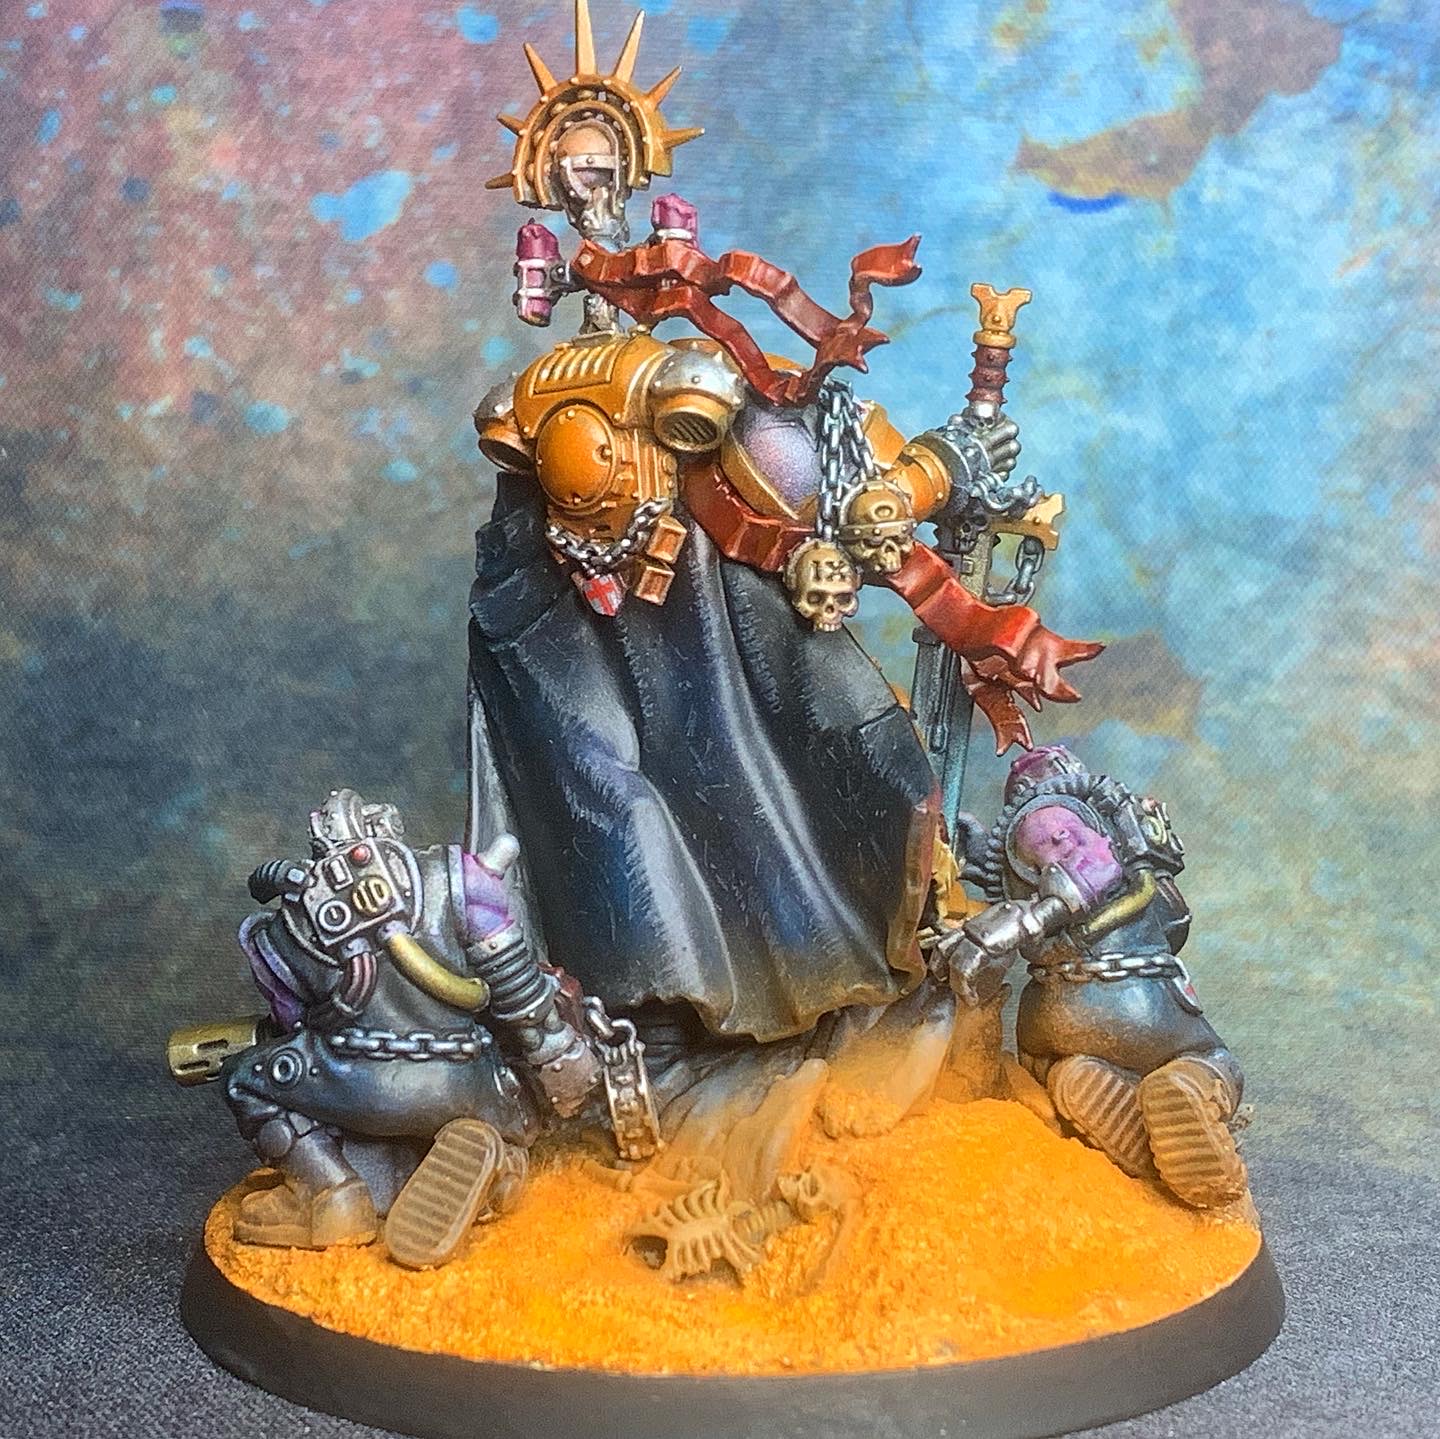
Done, Done, Onto the Next One
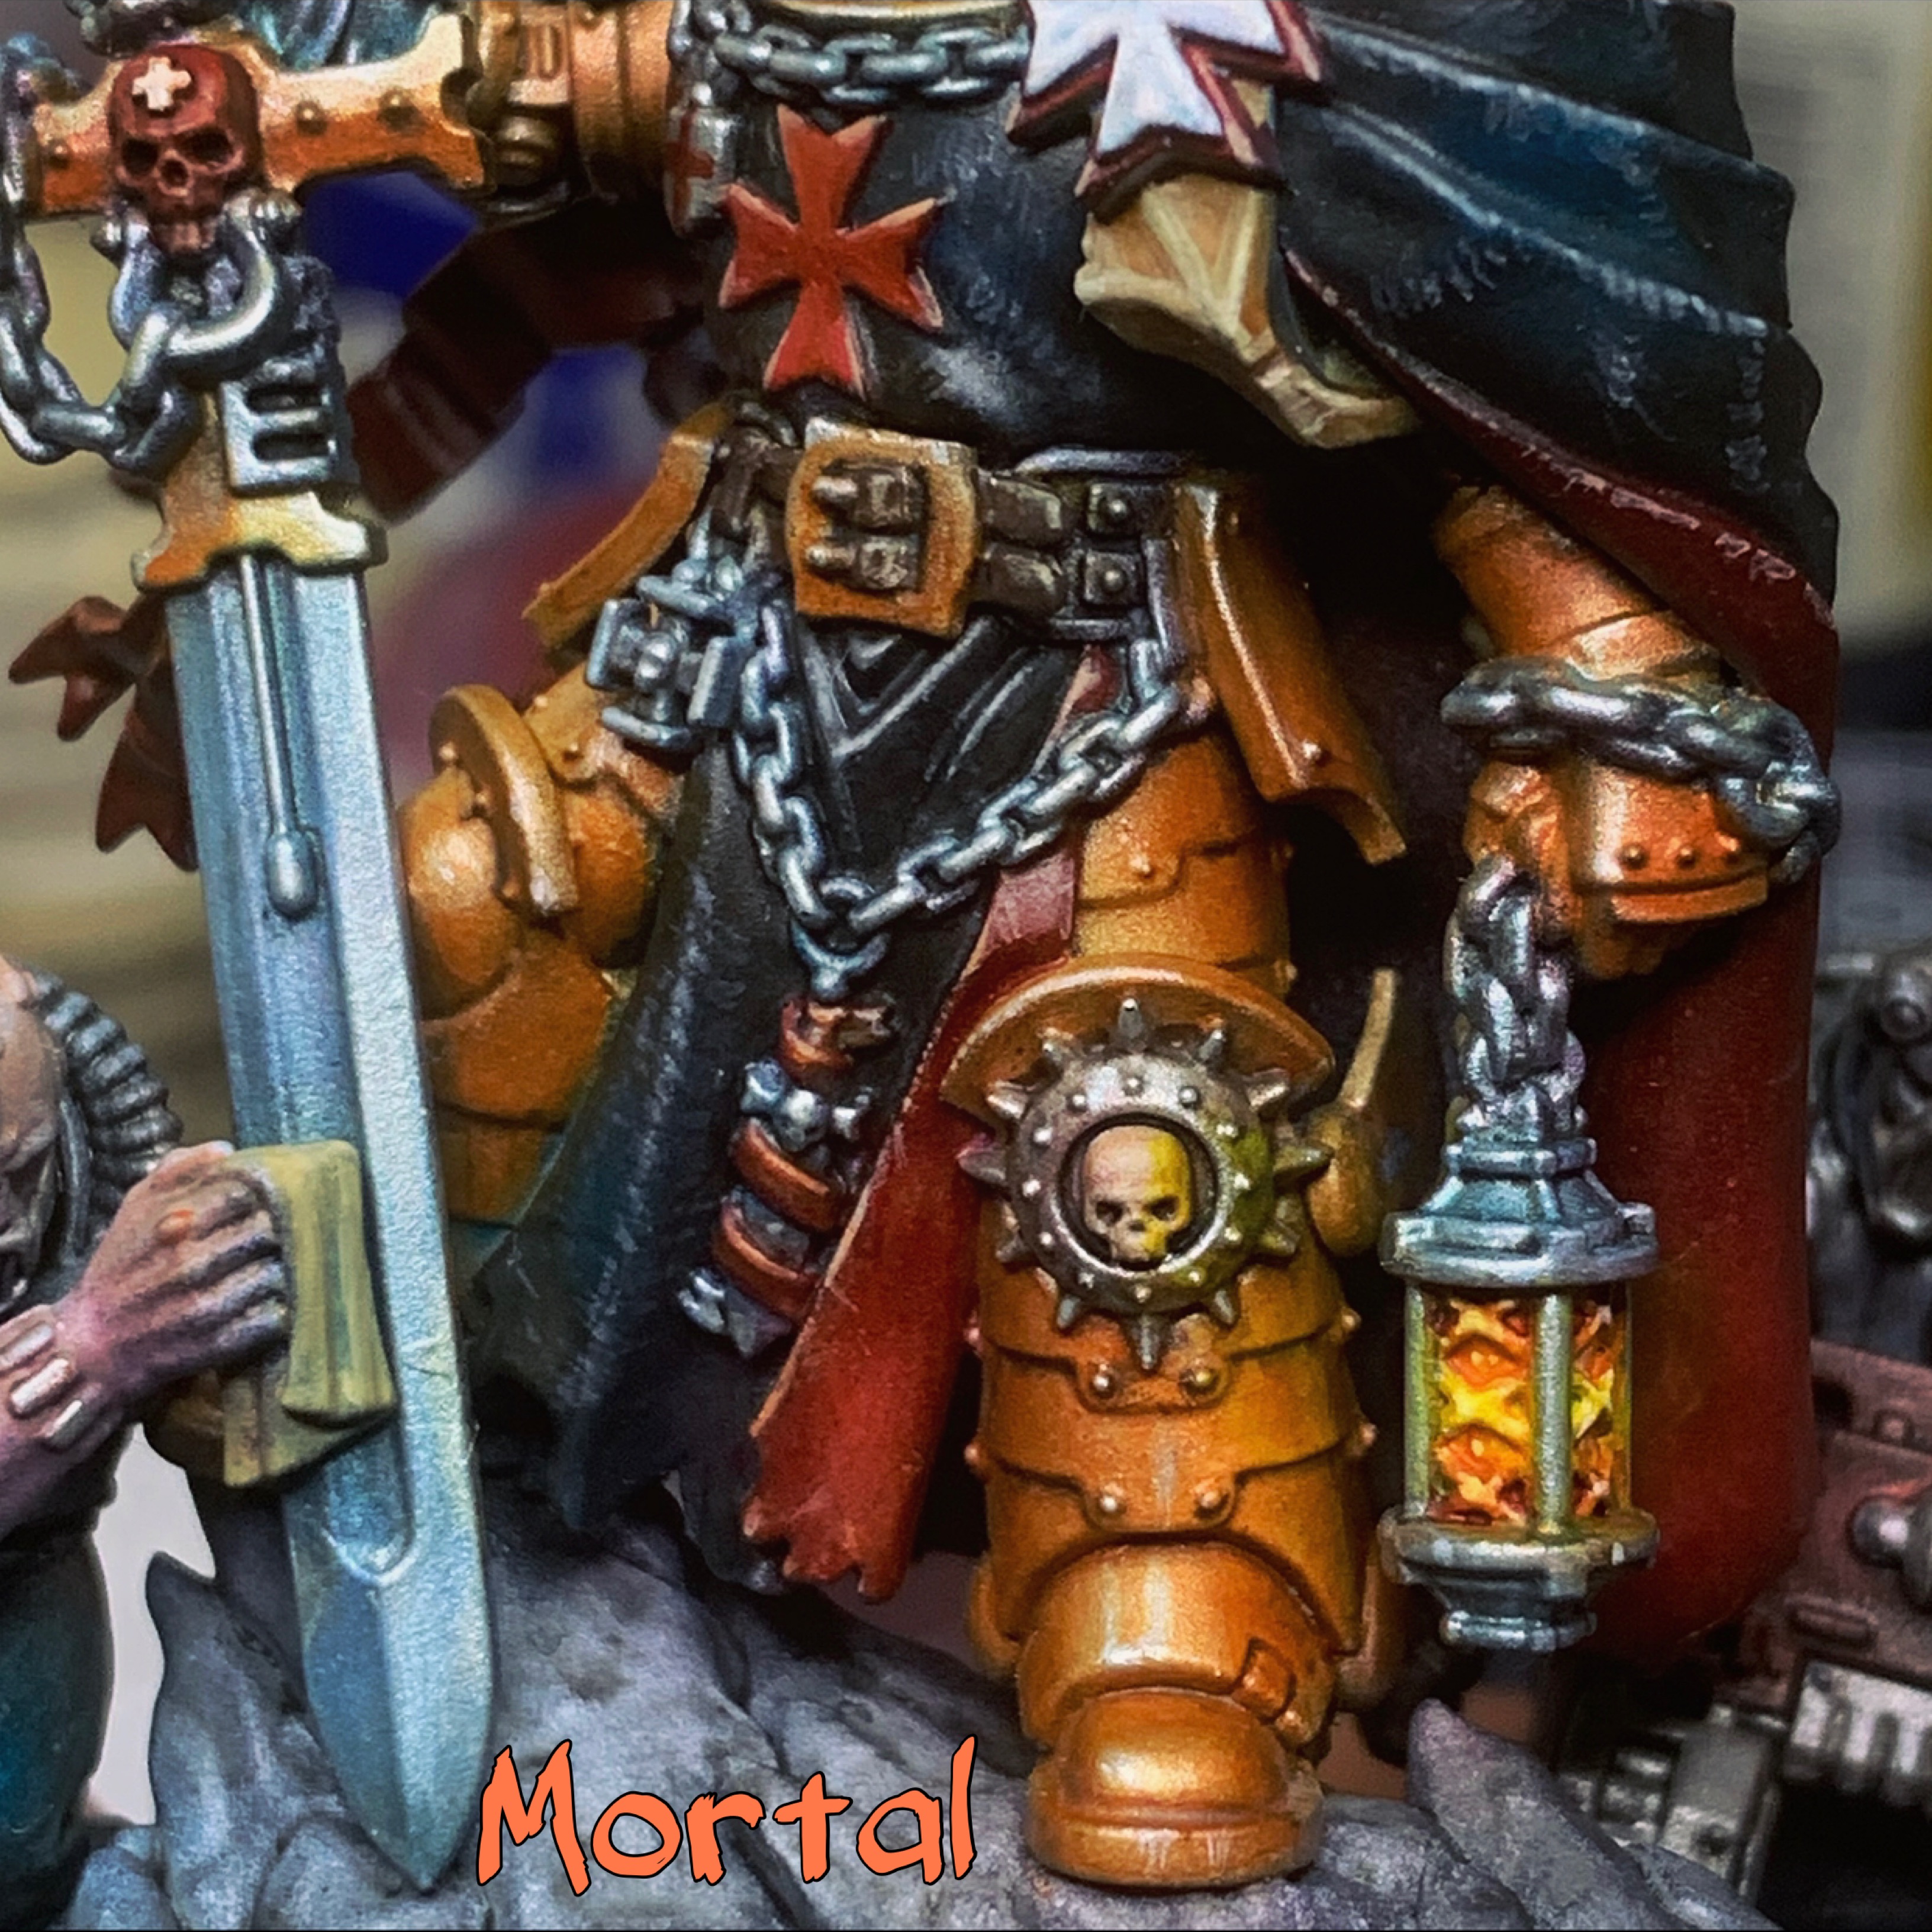
Ok, time to call it done. No more brush strokes from me will make it any better. Some final photos in slightly moodier lighting to get a better final comparison.

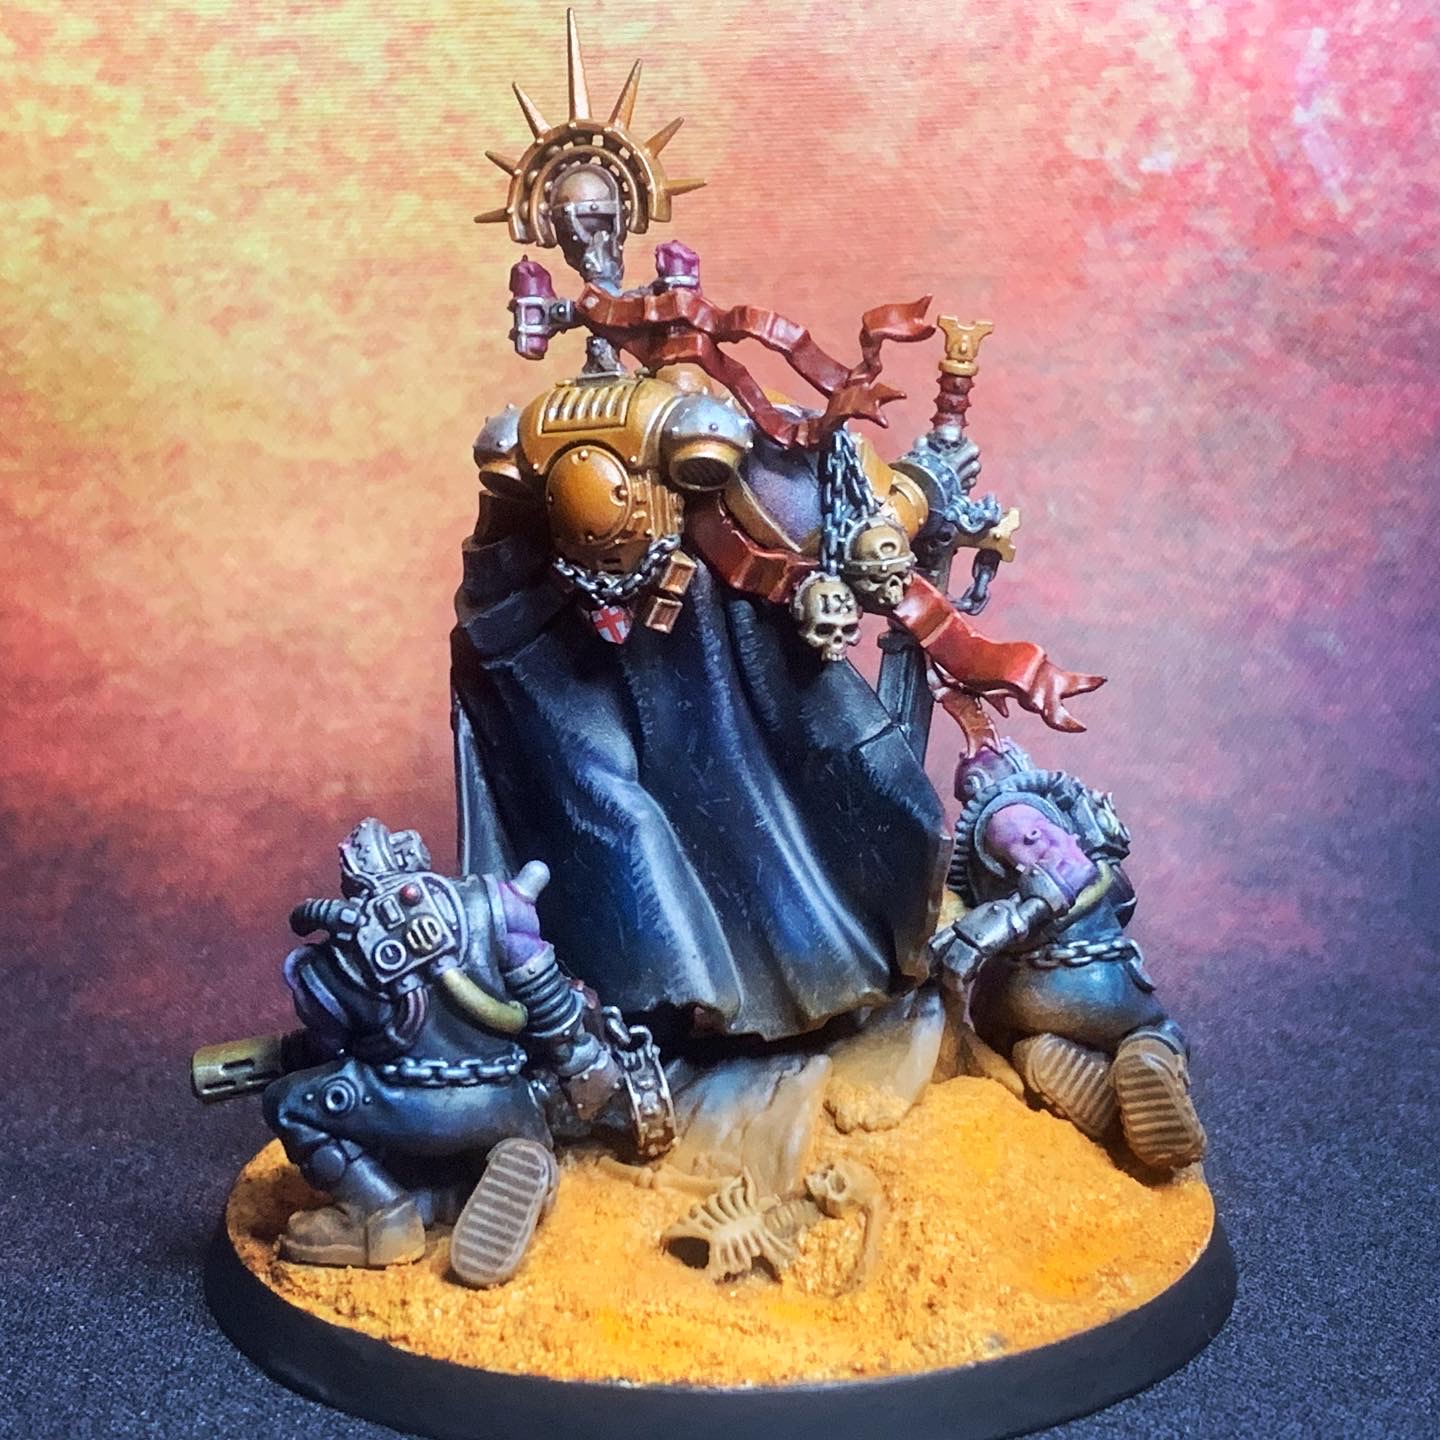
Final Reflections
The model is now done from my perspective. If I continue working on it I am more likely to make a mess than I am to make an improvement. I’ve pushed myself as far as I can on this one.
So was it worthwhile and what have I learned?
Firstly, there is no denying that this is now one of my best painted models. So it was definitely worth it. I couldn’t follow Marco step for step all the way through, but being able to follow along in the early stages, and then having his final result as a reference image, meant that I was able to finish the model to a decent standard.
For me, following tutorials can be a bit like using a SatNav. Brilliant when it all goes smoothly but, because you aren’t engaging your own brain, you are just as likely to drive into a lake if the guide goes awry.
When I gave up last year, I was teetering on the edge of that lake and I didn’t know how to stop myself from falling in. But I am really glad I re-engaged my own brain 15 months later and plotted a way out of trouble.
The other interesting thing was that I spent a lot of time looking at the model, especially towards the end, and thinking “is it good?”. When you’ve spent that much time zoomed in, trying to pick out brushstroke-level details you lose the ability to take in the whole effect. You really can’t see the wood for the trees.
Contrast that with how an artist works (and Marco certainly is that) and it becomes clear where their mastery lies. They start with big broad colours, shapes and patterns, looking for an overall effect and setting a mood. They then gradually tighten up the picture until everything is detailed and crisp. You don’t learn that easily. The technical skill to execute it is important, but the vision to work with colours and light to create a mood is pure art.
“Speed painting” to an artist just means that they stop at a certain level of “crispness”, but because they’ve set the mood etc the model still looks great. If you really zoom into Marco’s model you can see all kinds of artefacts and overspray (not as bad as mine was!) which have just been left. But you really don’t see them unless you go looking for them. The overall effect is there, and the ‘imperfections’ are almost a positive thing.
So whilst I may have got close-ish to a Marco result (as close as I can get it anyway), I now see how far I am away from his level of mastery. Firstly, mine took several multiples of the 4 hours he took! Also it has also shown me with greater clarity what that mastery actually involves and what it takes to achieve it. So that is educational but also inspirational. I know how I can get better, and specifically what I need to practice in order to do so. I learned more from trying to do it myself than I’ve learned from all the Marco videos I’ve watched. Theory only takes you so far.
So thank you Master Marco. It’s been an emotional rollercoaster but a very worthwhile one. I don’t intend to do it again any time soon, but I’ve taken a lot from the experience which will make me a better painter in the future!
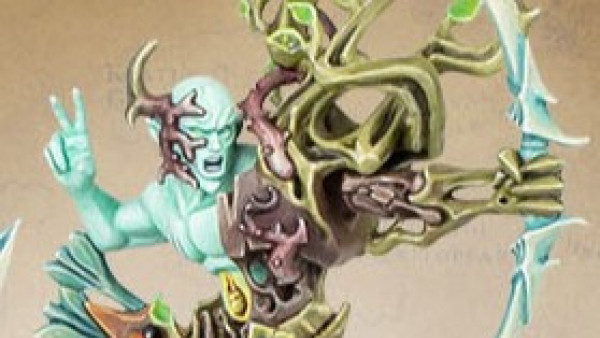
All that Glitters is Gold!

Well, that’s a lovely way to close this project! I really appreciate the golden button and being featured in this week’s community spotlight!