


![Very Cool! Make Your Own Star Wars: Legion Imperial Agent & Officer | Review [7 Days Early Access]](https://images.beastsofwar.com/2025/12/Star-Wars-Imperial-Agent-_-Officer-coverimage-V3-225-127.jpg)


Getting Into D&D 5e Adventures


Recommendations: 227
About the Project
My family and friends recently got into Dungeons and Dragons. I haven't played for many years and now I've taken on the role of DM for our games. One of my favorite parts of the game is preparing maps, tokens, figures, etc for the sessions. I finished the last chapter of Dragons of Stormwreck Isle earlier in December. I plan on running Dragon of Icespire Peak from the Essentials Kit next. This will follow my progress creating the maps, tokens, etc for the adventures.
Related Game: Dungeons & Dragons
Related Company: Wizards of the Coast
Related Genre: Fantasy
Related Contest: Dungeonalia 2023
This Project is Active
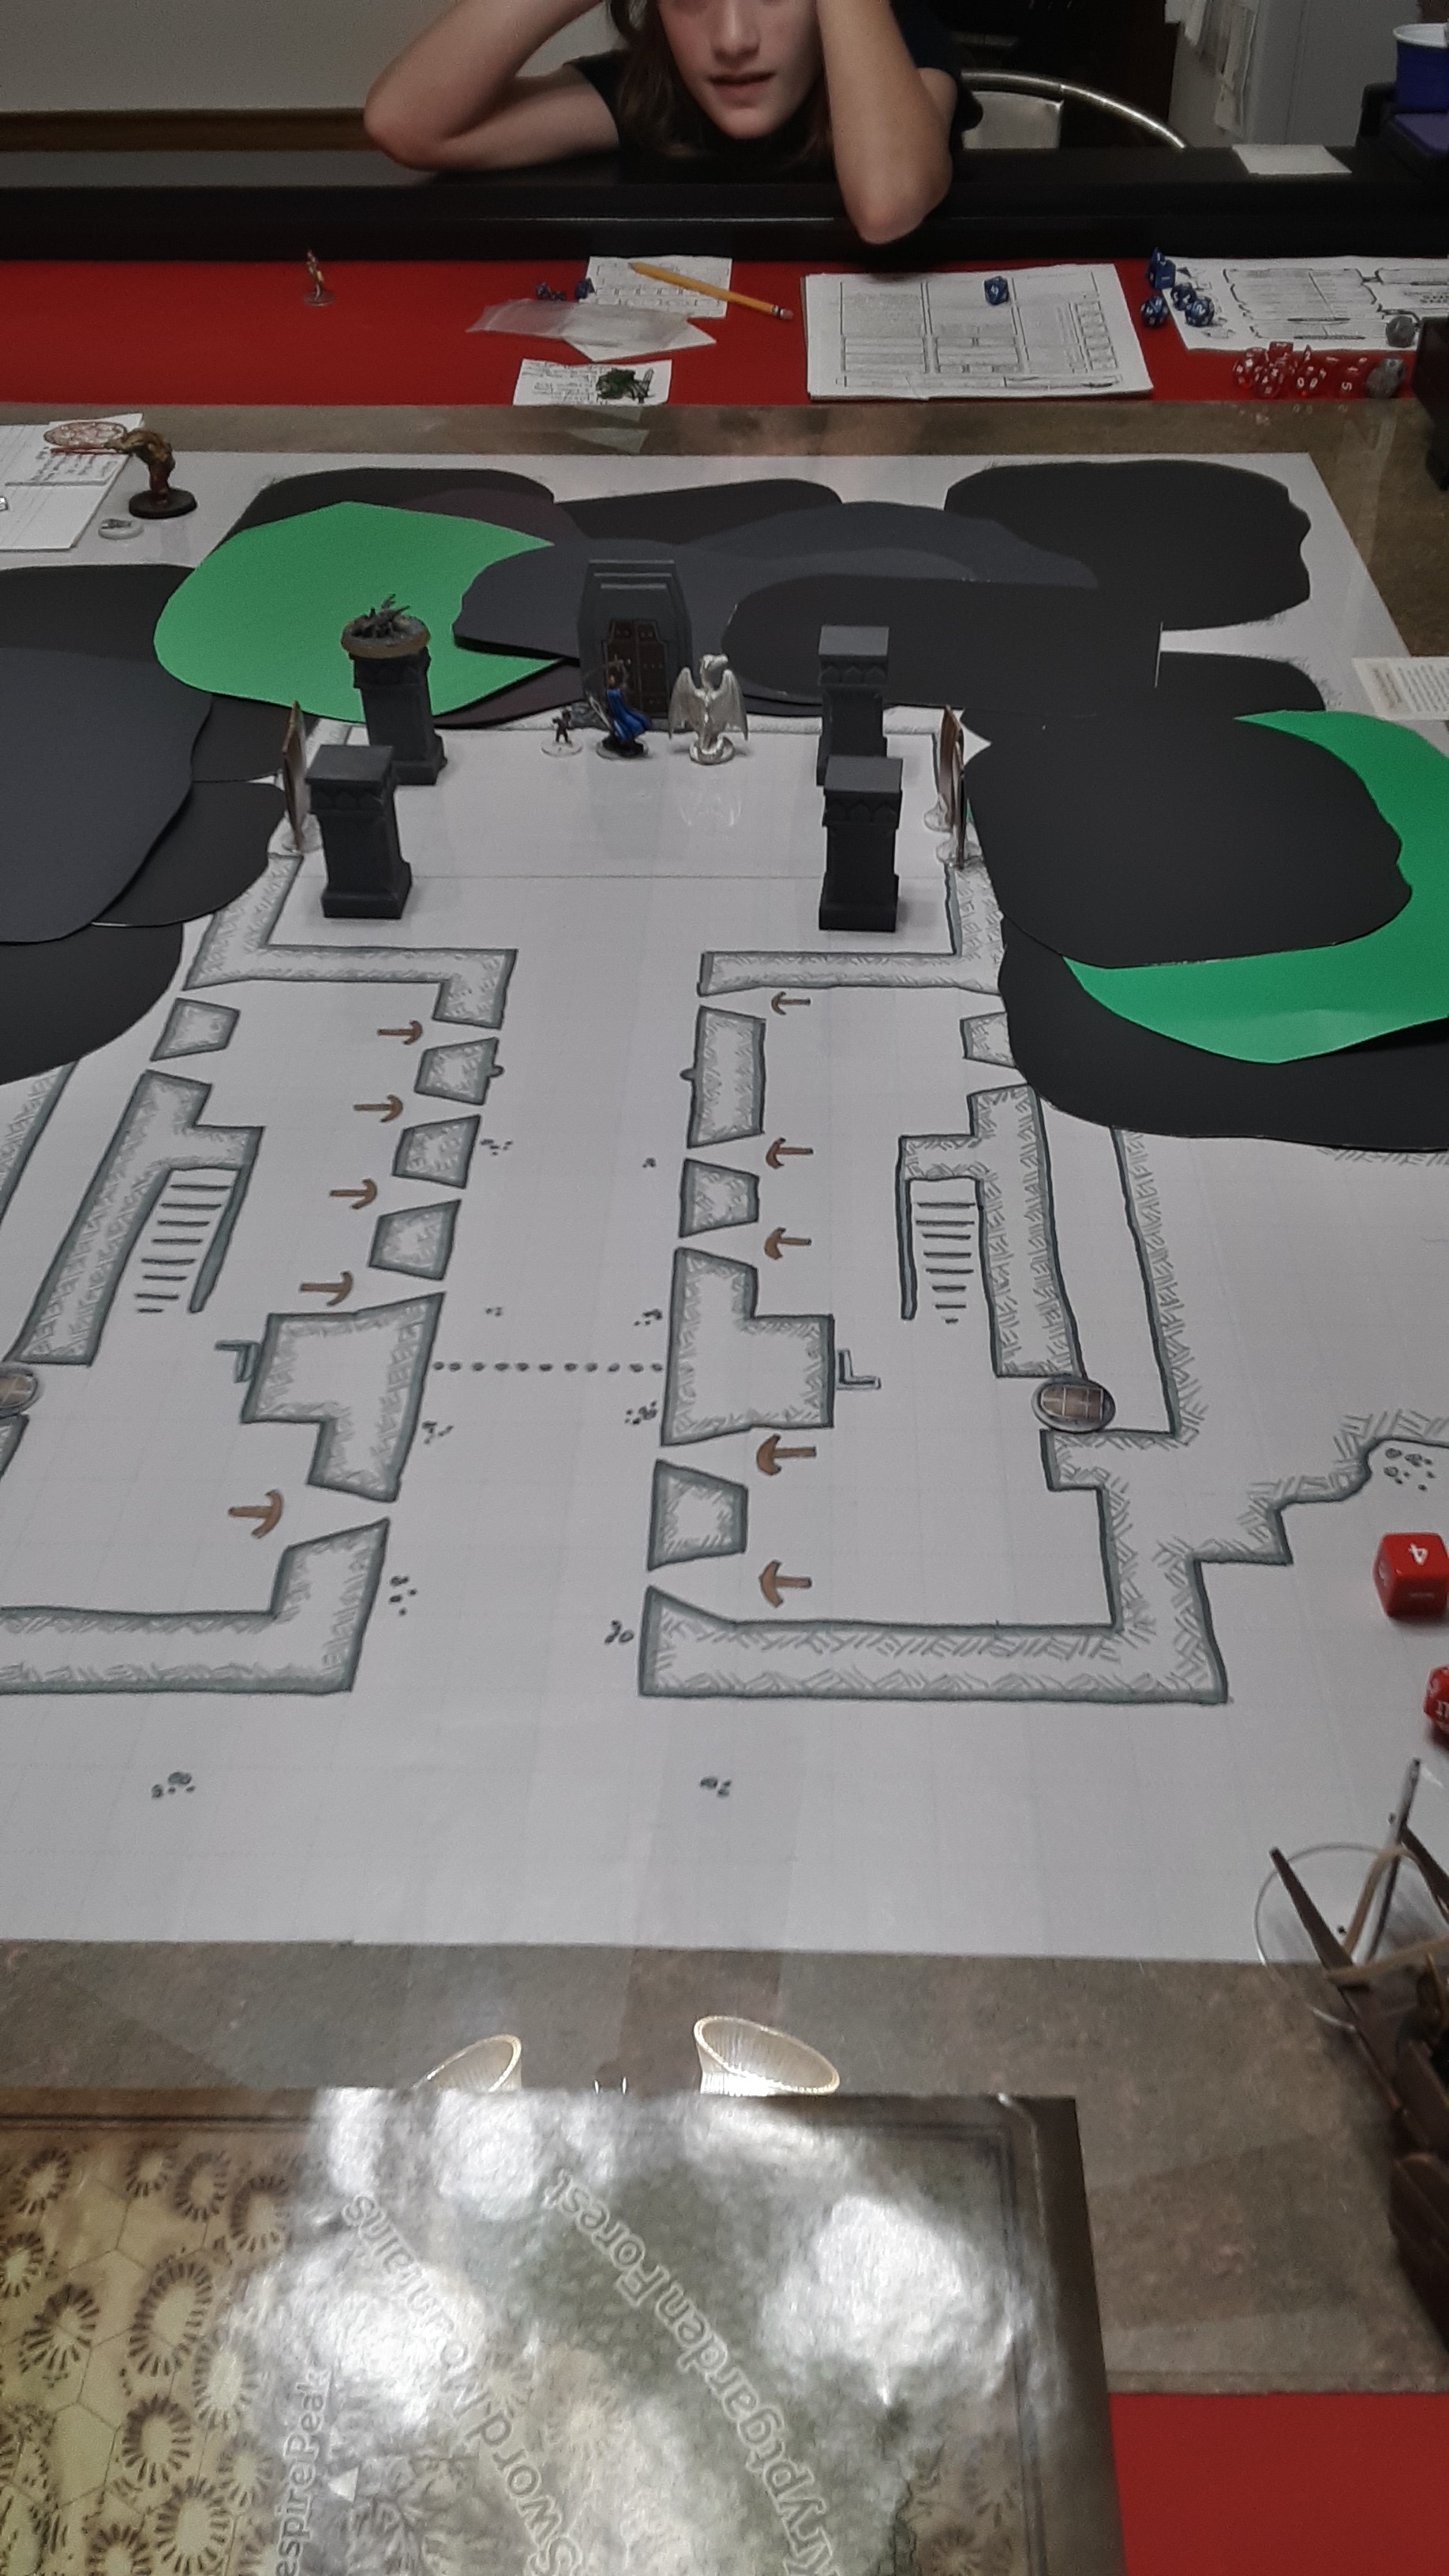
Dragon of Icespire Peak: Preparing for the Woodland Manse
As you could tell from the title of this entry, the players decided that there next quest would be to the Woodland Manse. Falcon the Hunter sent word to the town that he needed help with a preemptive attack against the orcs gather in Never Winter Woods.
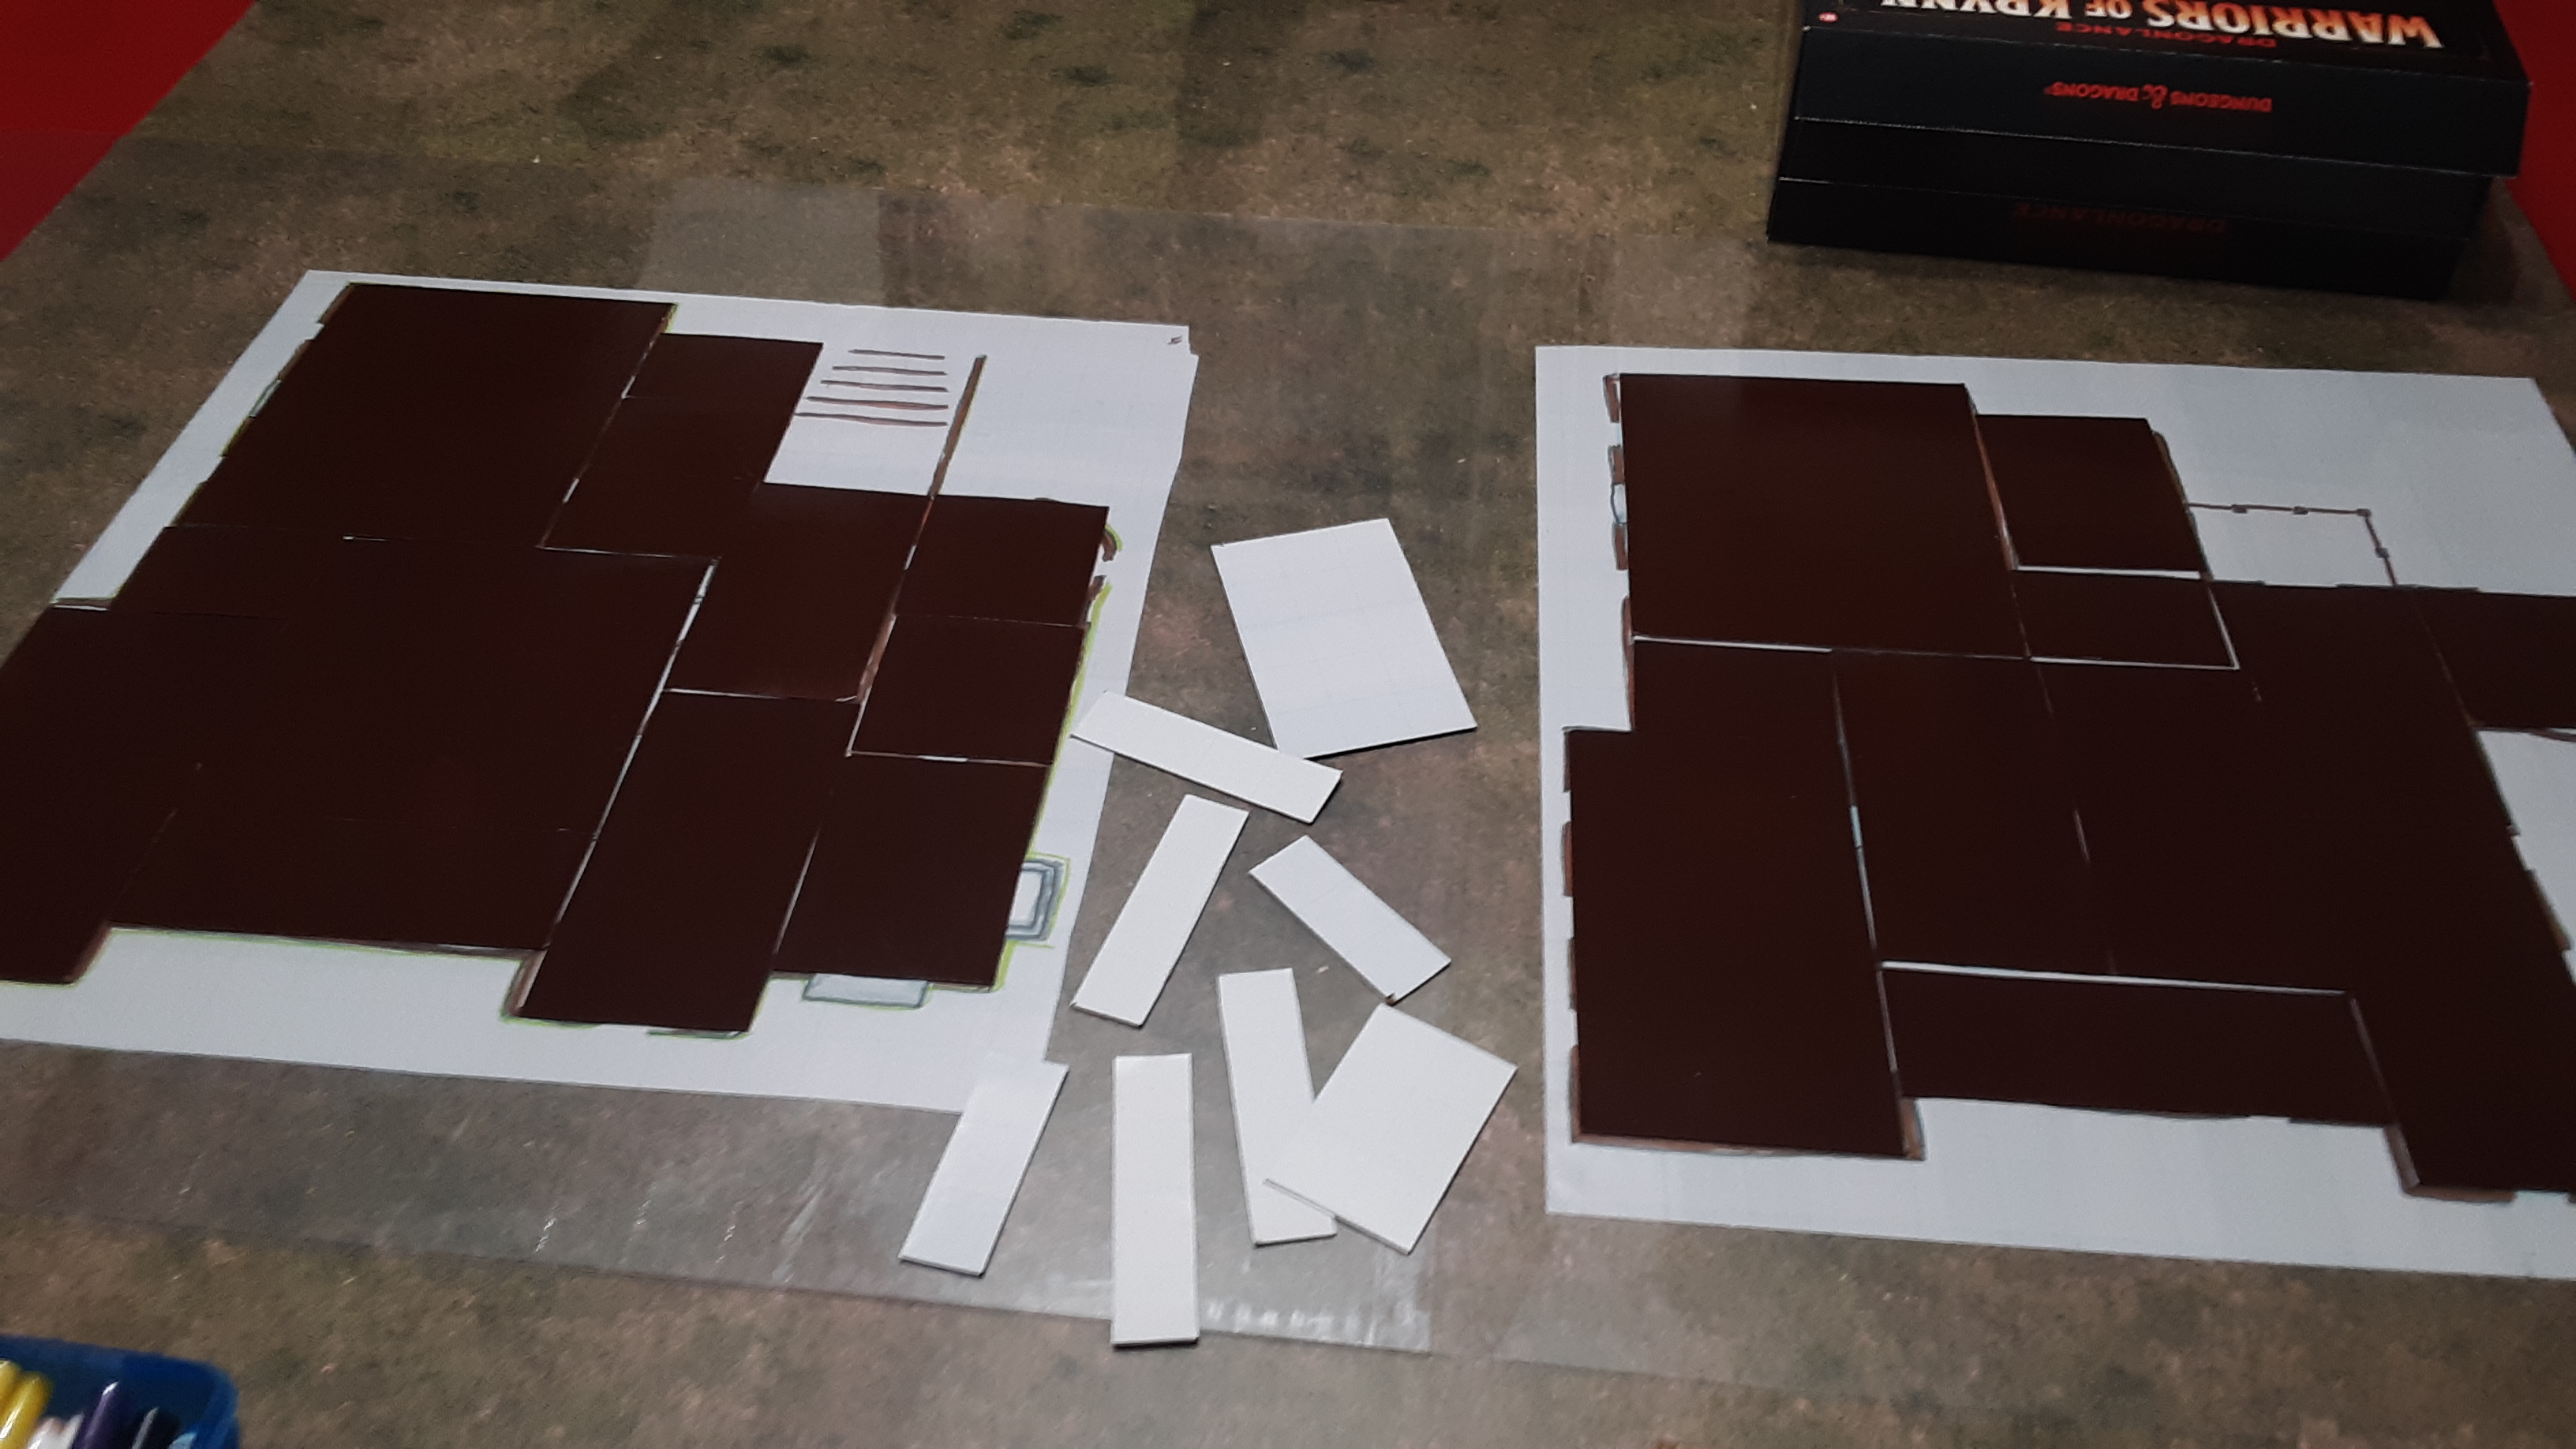
Once again, I went with my go-to process of cheap wrapping paper and markers to create the layout of the Manse. I didn’t go as detailed with the interiors as I have in the past, hoping to reuse these maps for other adventures in the future.

I traced out the basic layout of the first floor and then filled in a few of the details (walls, fire places, etc). For doors, I planned on using the paper cut out doors I’ve used for past adventures.
 Starting the 2nd Floor
The second floor came along nicely. I was very happy that these maps weren’t going to be as big as Axeholm!
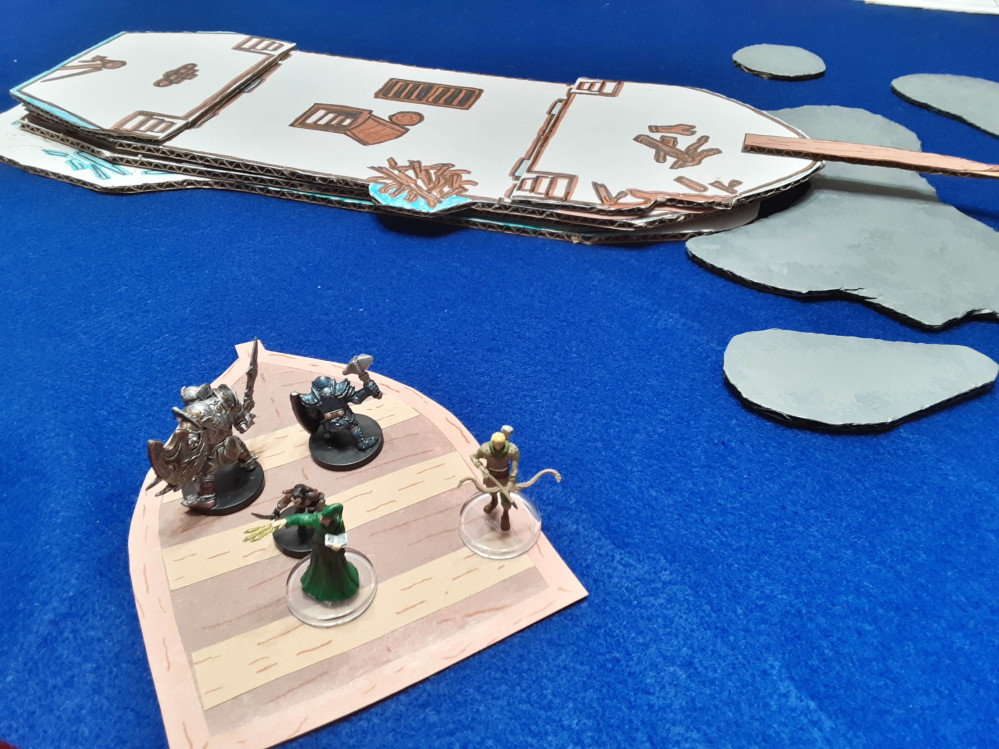
 The finished maps
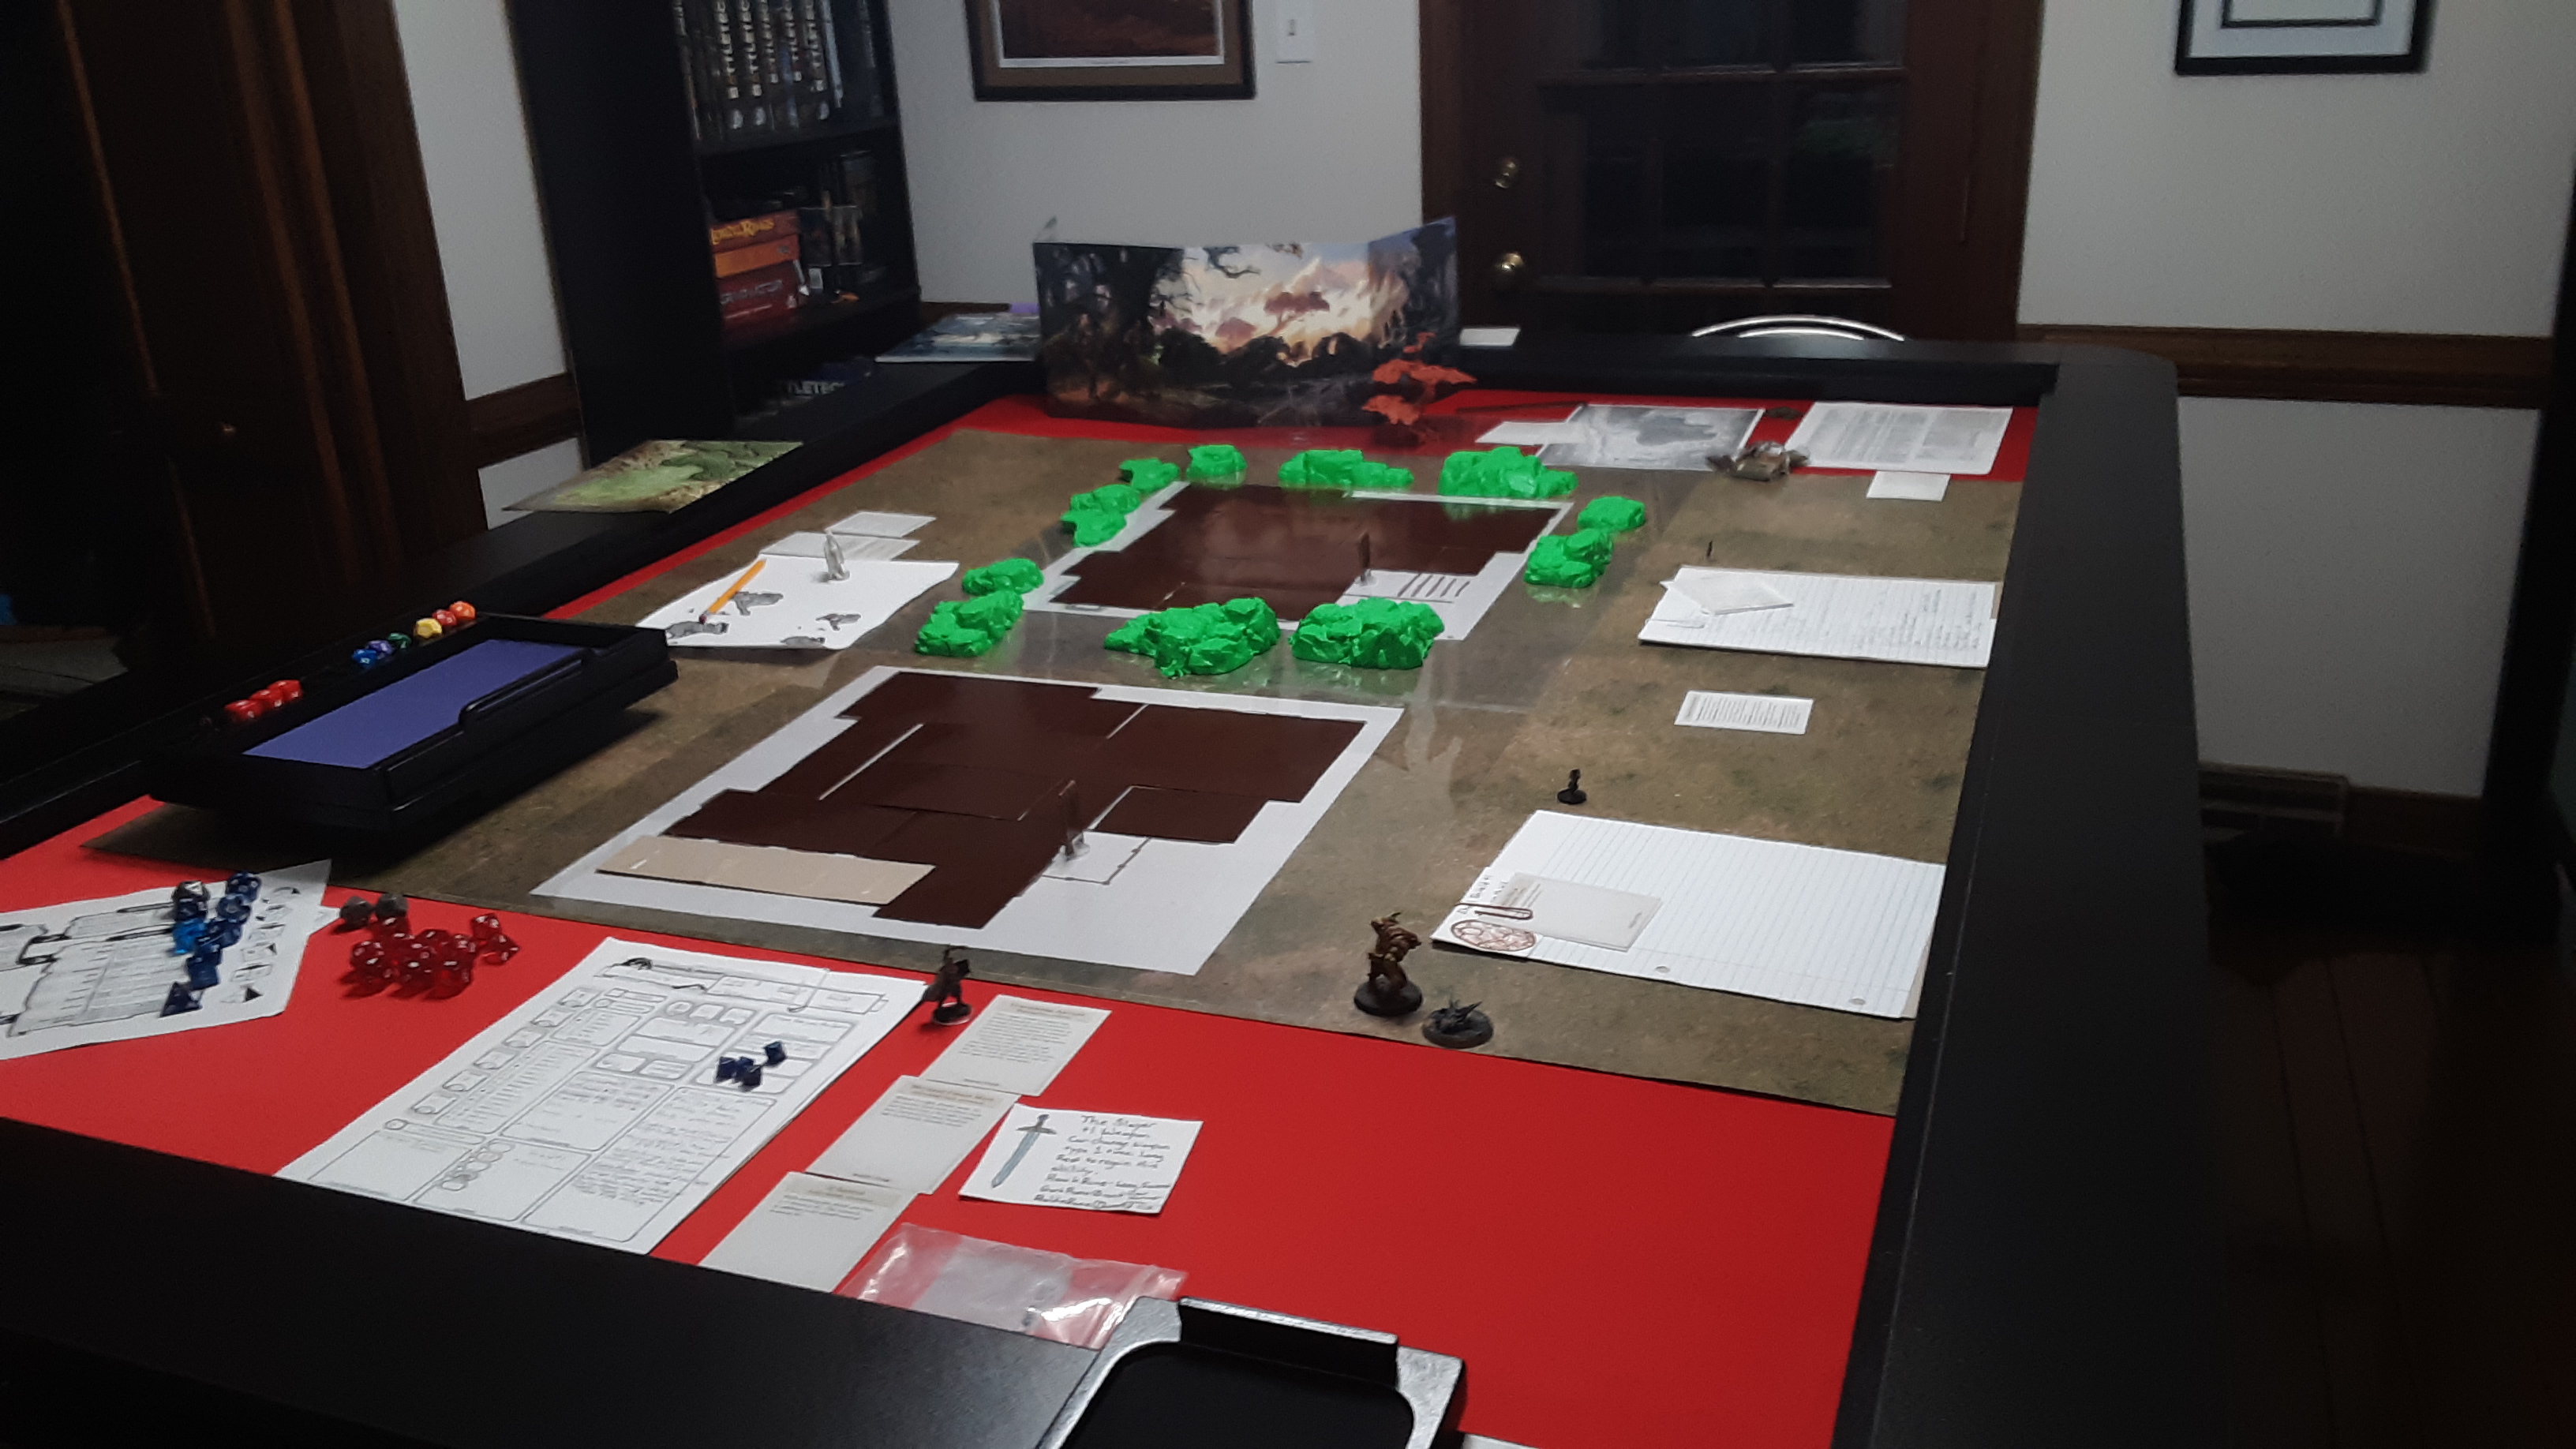
I knew my large construction paper cut outs wouldn’t work well for the exploration of the Manse. I decided to use some cereal boxes to cut out covers for the unexplored rooms. I sprayed one side of the box with brown spray paint.
I decided this might be a good time to make some grid tiles for future adventures. I glued the wrapping paper, grid side up, to the cardboard. It was easy after that point. All I needed to do was measure out the room sizes by square and cut them out. The laid over the maps perfectly.
 Tiles covering the maps
The last thing to do was prep the table with the terrain. I had everything ready about a week in advance. I used some of the Dungeon and Lasers eleven wood terrain to represent pumpkin patches around the building too.
Everything was all set for the party to take on the Woodland Manse.
Dragon of Icespire Peak Session 6, Axeholm
I didn’t take the best notes during this game, but we started off this quest with the introduction of a new player joining our group. This was a friend of mine that was interested in trying out D&D and thought trying the game out with kids would be a great introduction for him. After we talked through his character creation, we introduced him to the rest of the party in the town of Phandalin.
If you read my last post with the DM notes, I had his character come to the region to pass along a side quest to the adventuring party’s friends/henchmen. Captain Pinchy, their giant crab friend from the Tower of Storms question, was being called upon by the good dragon from the the Dragon of Stormwreck Isle adventures we finished last December. Philbo, Sir Richard’s squire, offered to escort Captain Pinchy to the coast so he could make his way to Stormwreck Isle.
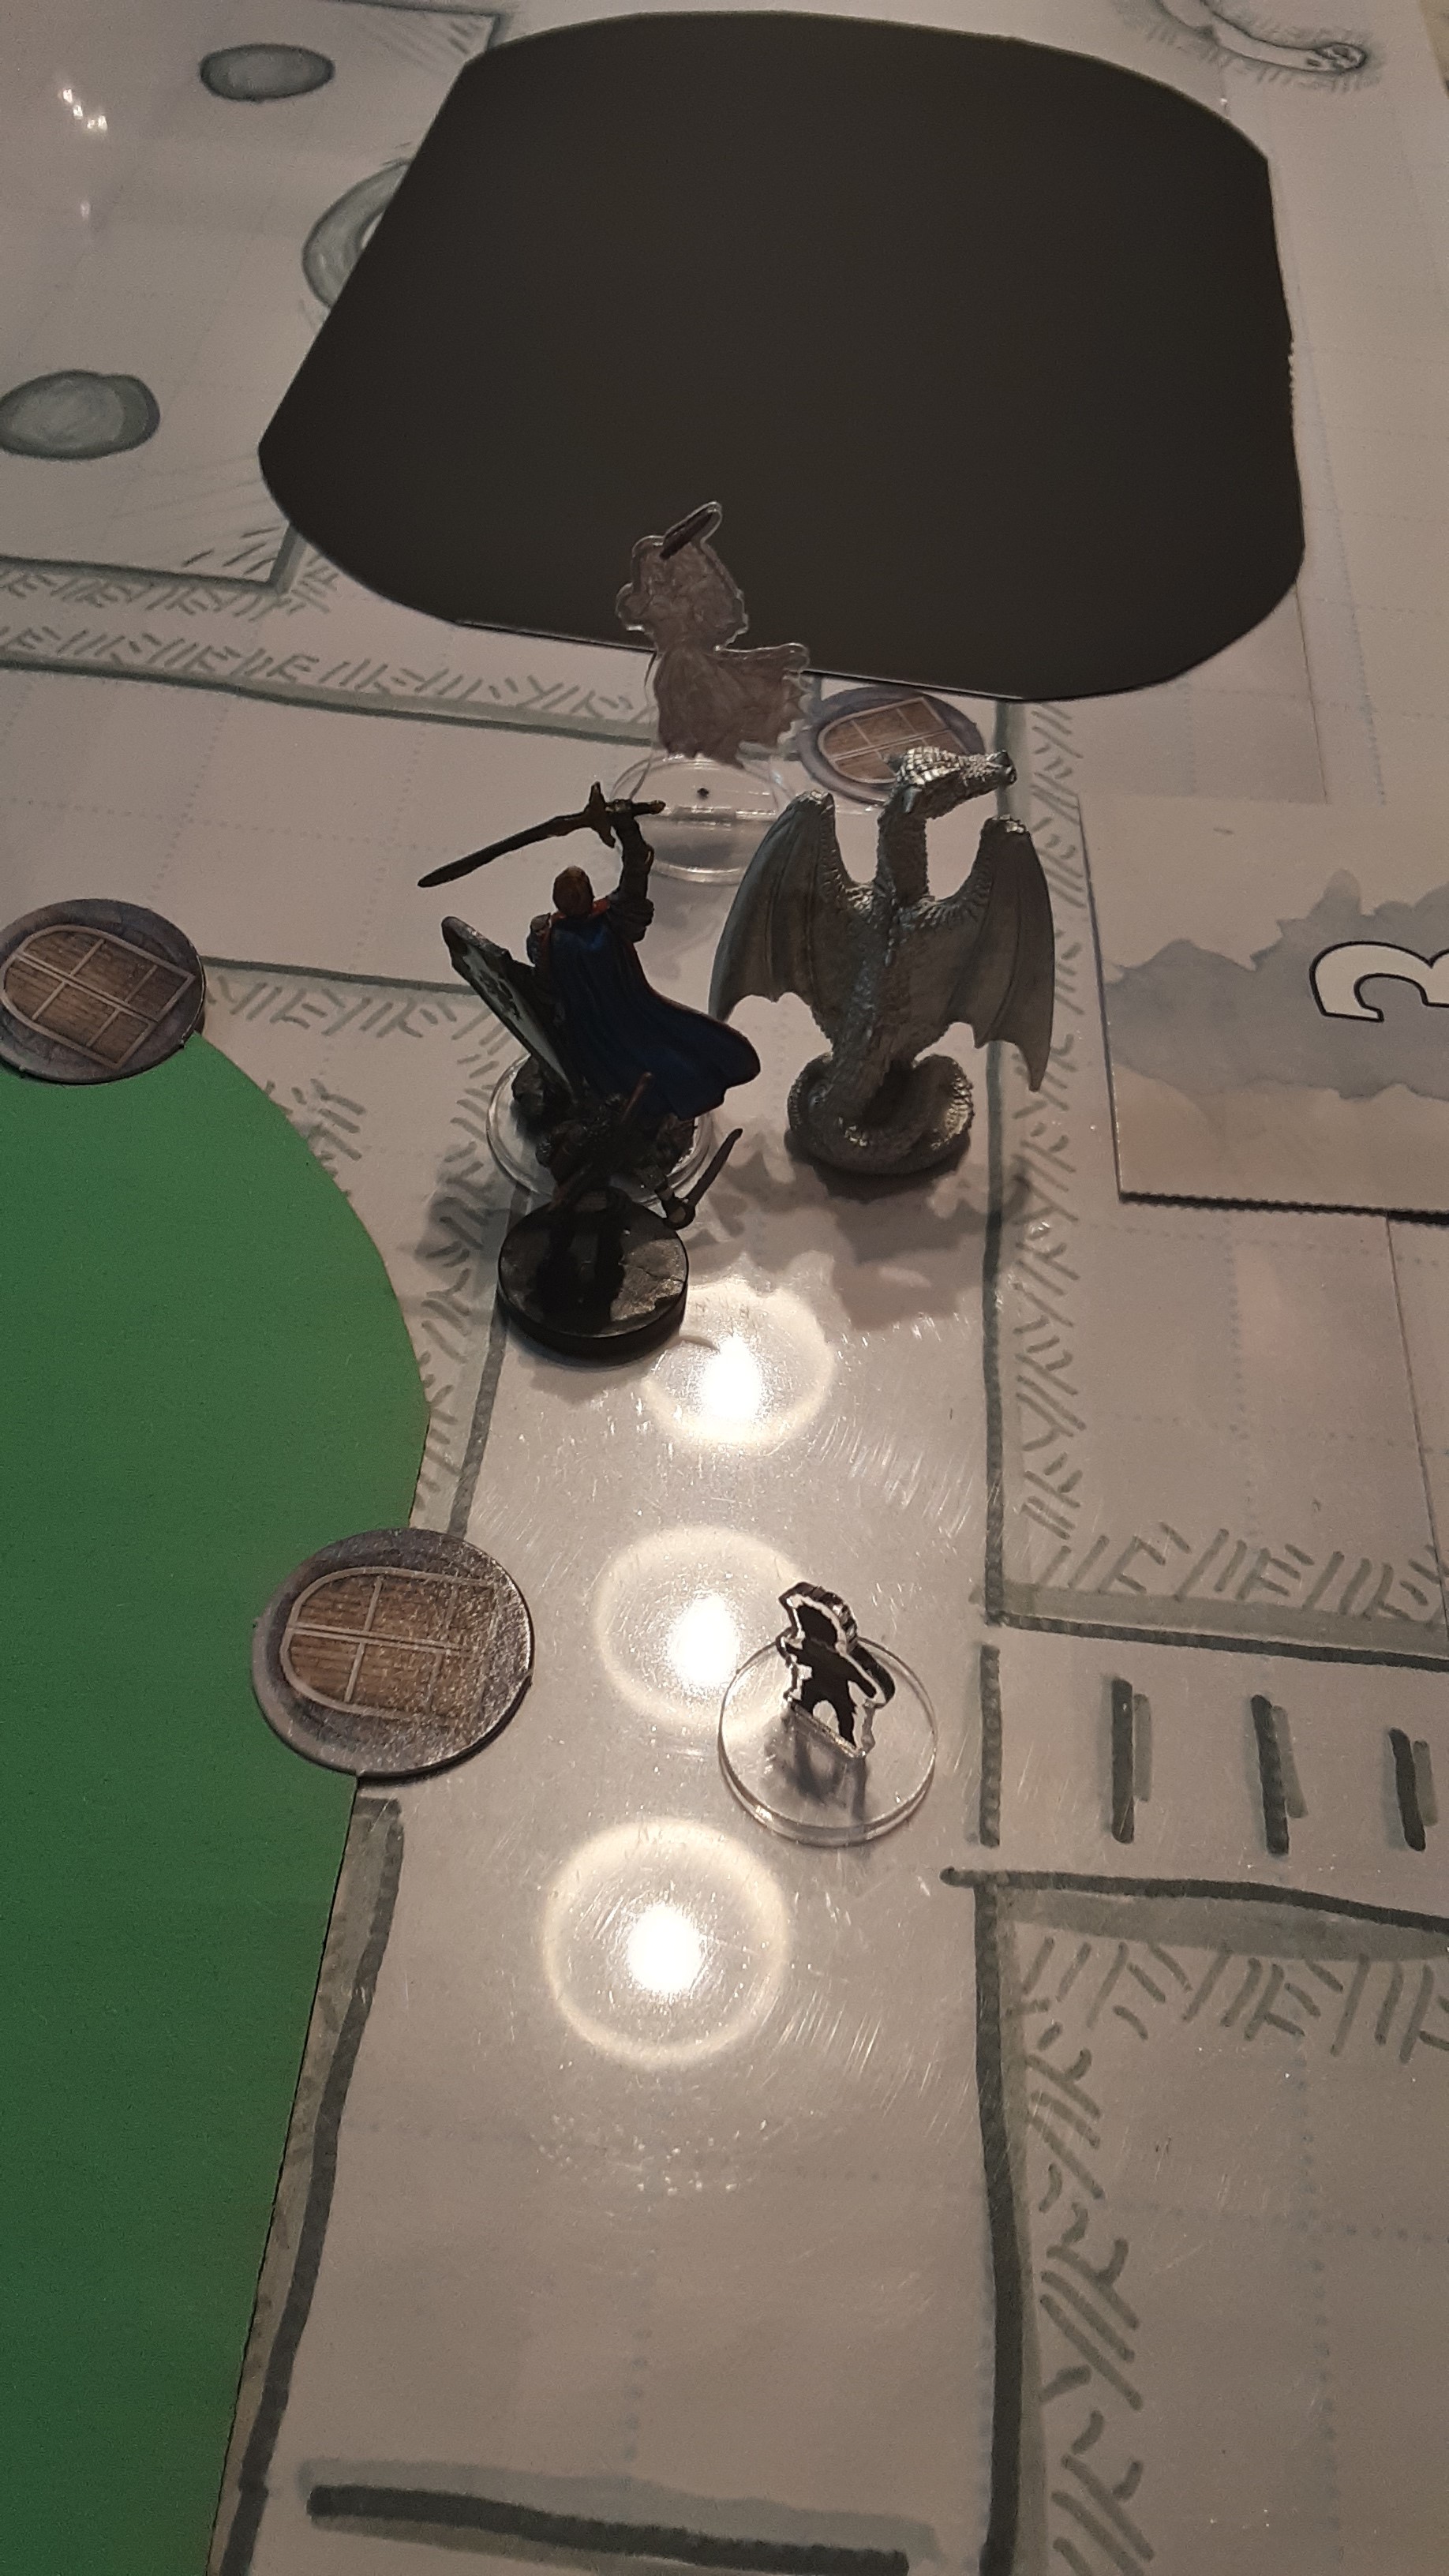
The new player character introduced themselves to the group, a dragonborn druid. Sadly, I don’t have a good mini for this player’s character and I ended up using a metal dragon mini I’ve had for a while. I figured this would be close enough for now.
The group was happy for the help on their upcoming quest. After preparing for the trip, they learned some rumors of Axeholm from the Dwarves they came across during the Dwarven Excavation quest. They shared some backstory that also tied the Axeholm adventure to the first quest the party took on, the windmill at Umberage Hill. These dwarves also asked to come along so they could continue their research into the dwarven ruins in the mountains around Phandalin.
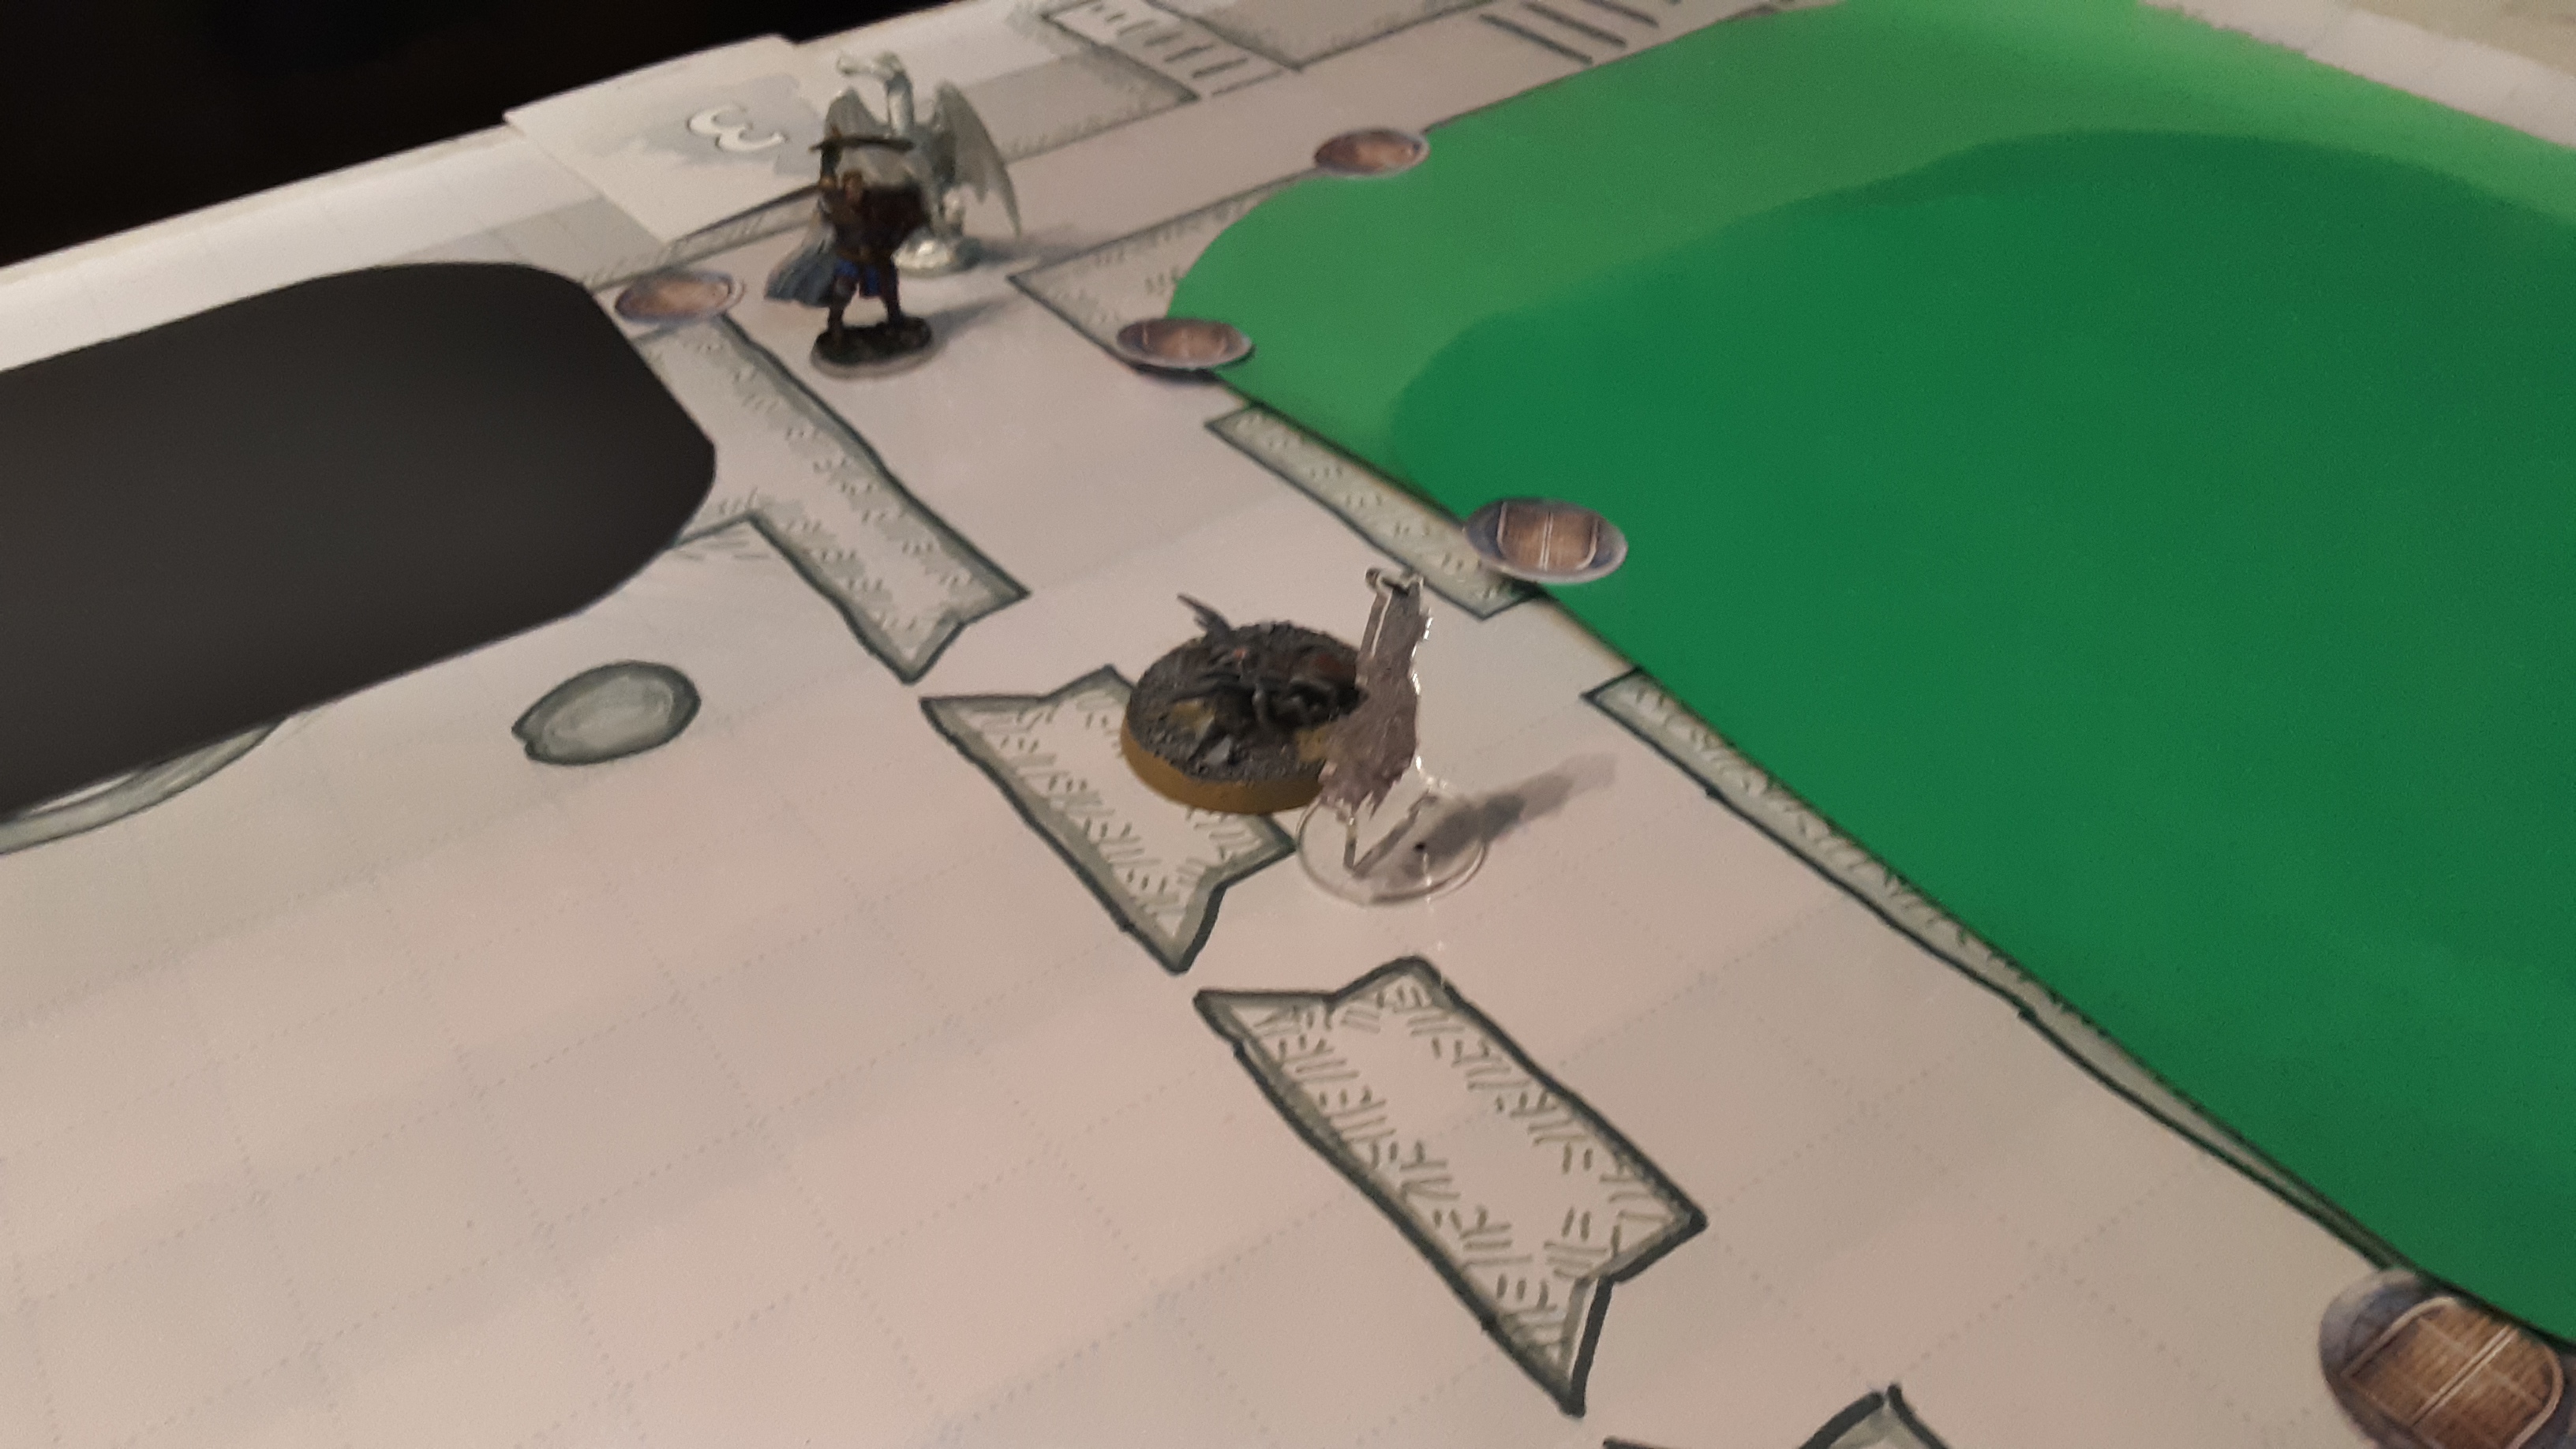
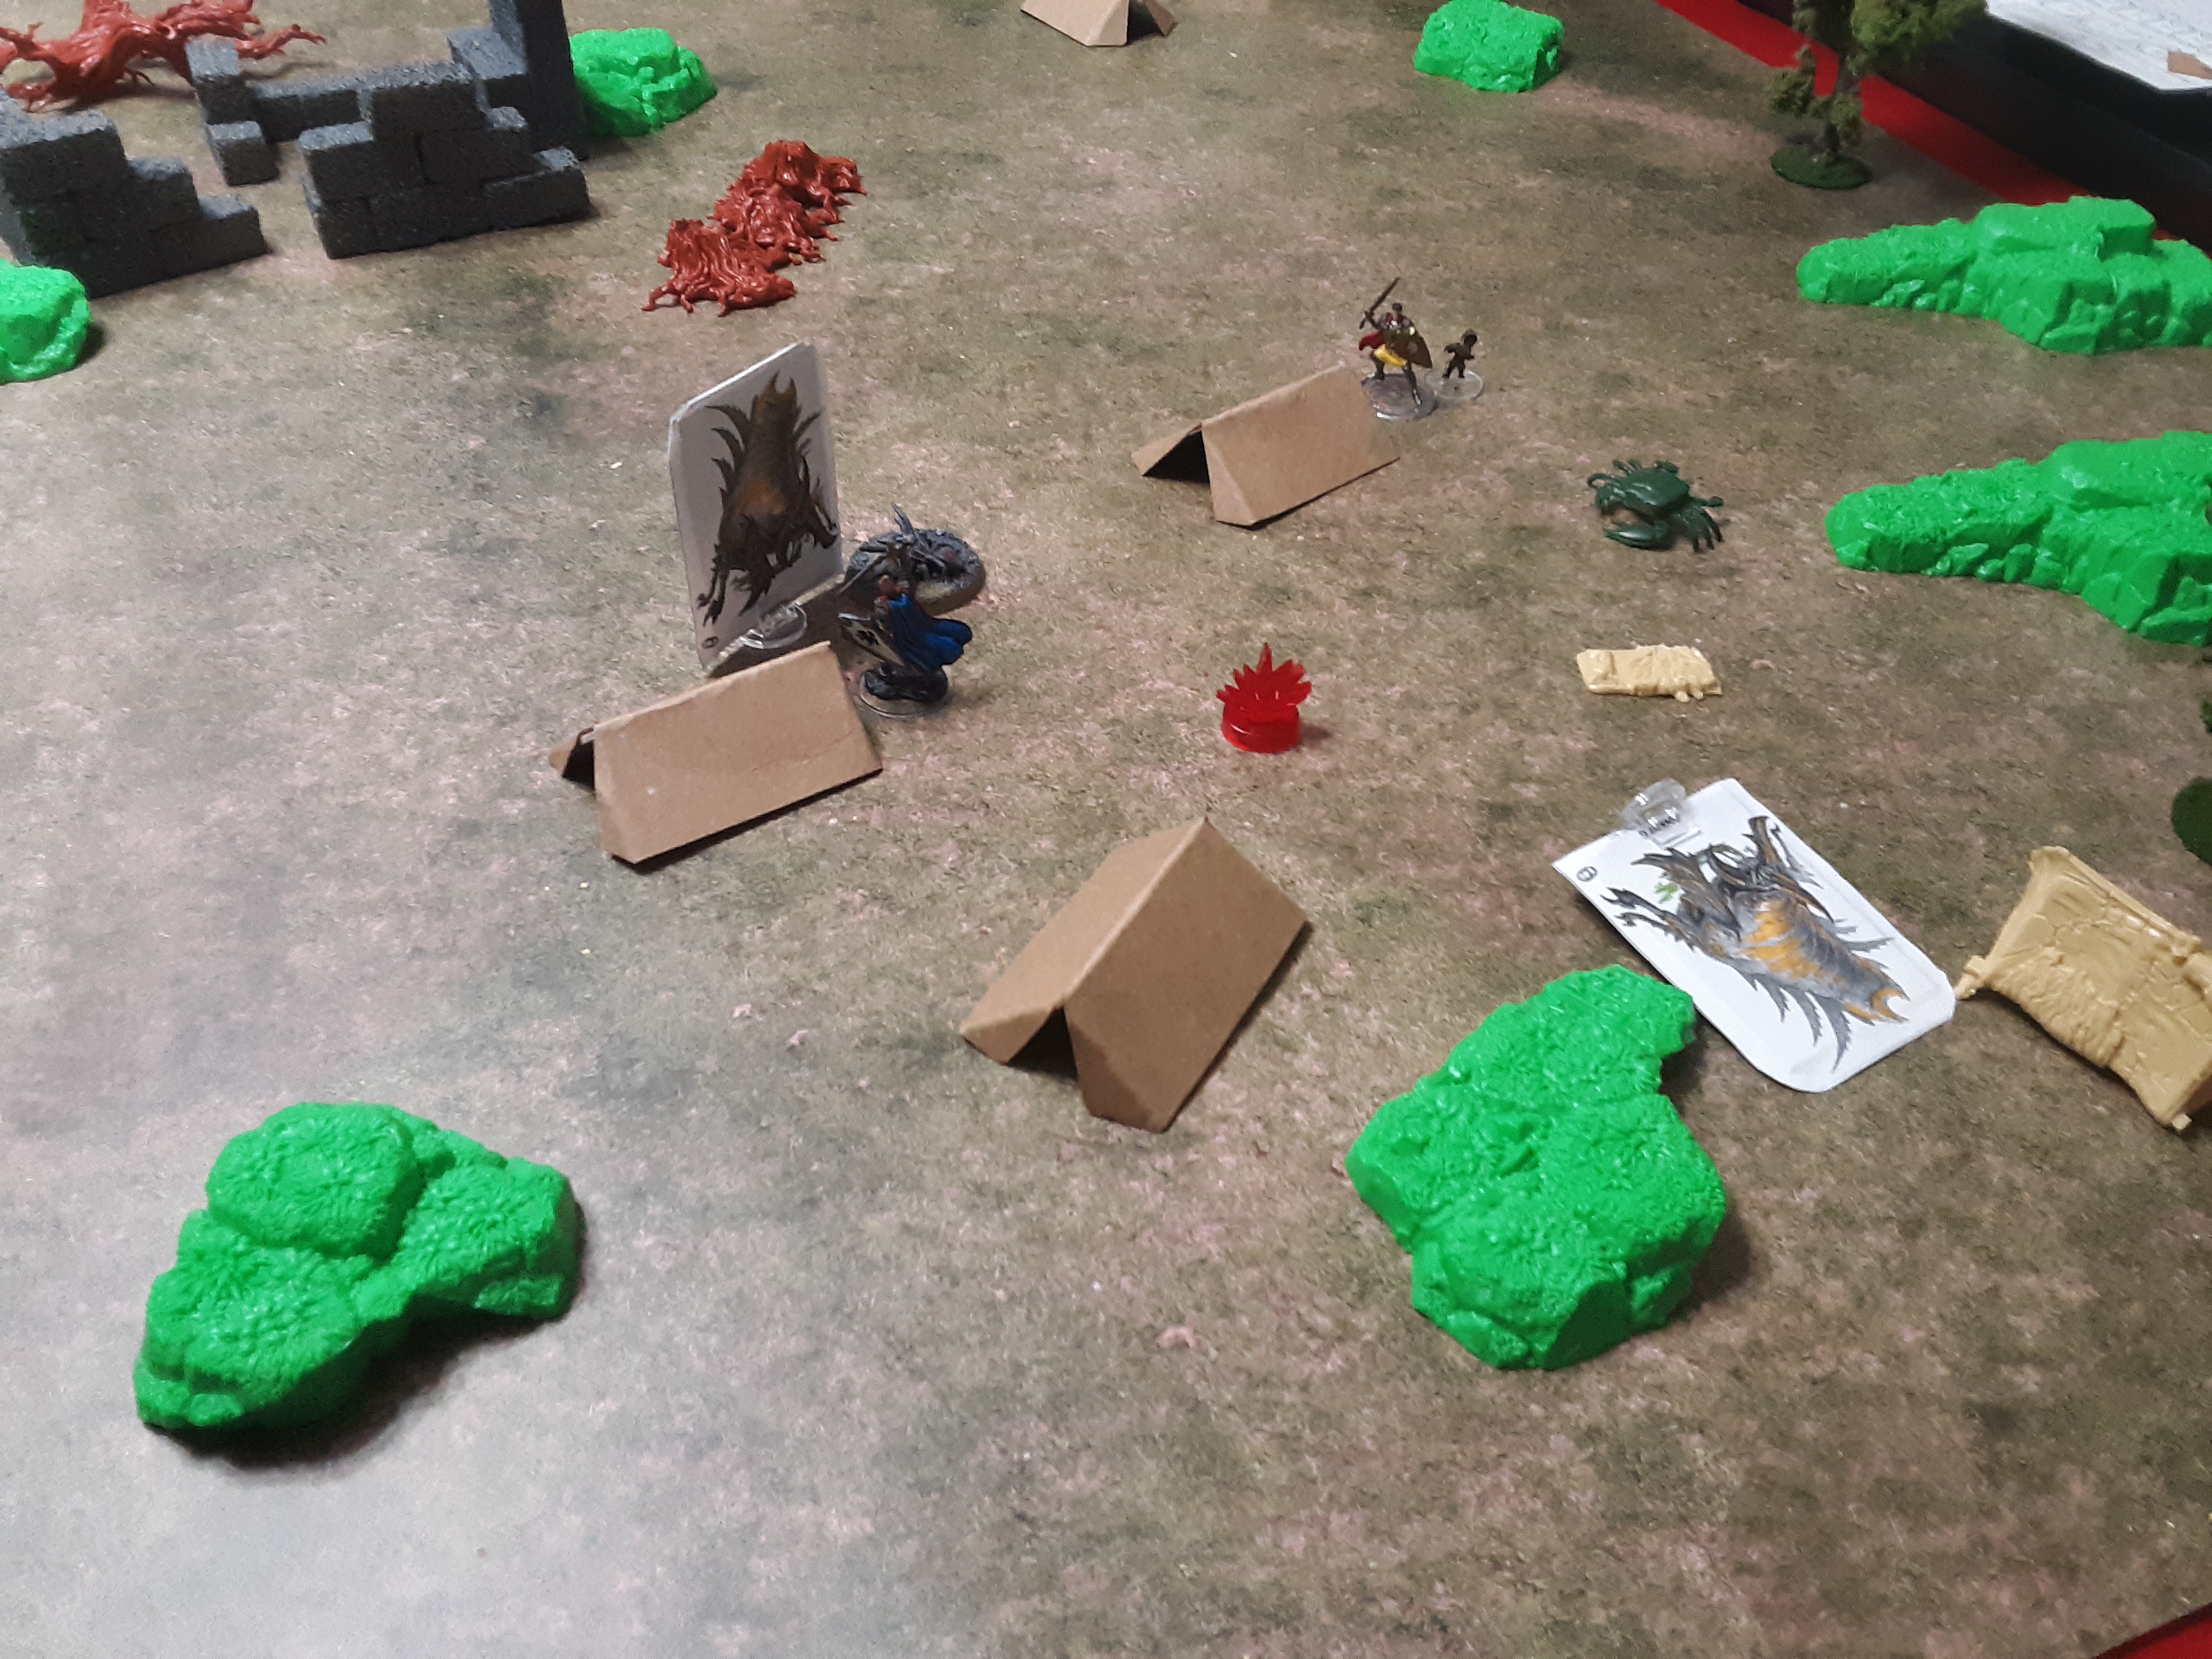
 The Manticore attacks the party at the site of their first adventure, the windmill at Umberage Hill
The party set off toward axeholm and could see the windmill in the distance as they traveled through the familiar cairnes on the hilltop. They spotted the Manticore they delt with on their first quest, looking much healthier. I thought this would be a good introduction to combat for our newest player and let the rest of the party take some revenge on the Manticore before they made it to Axeholm. The Manticore was defeated after a few rounds of combat.
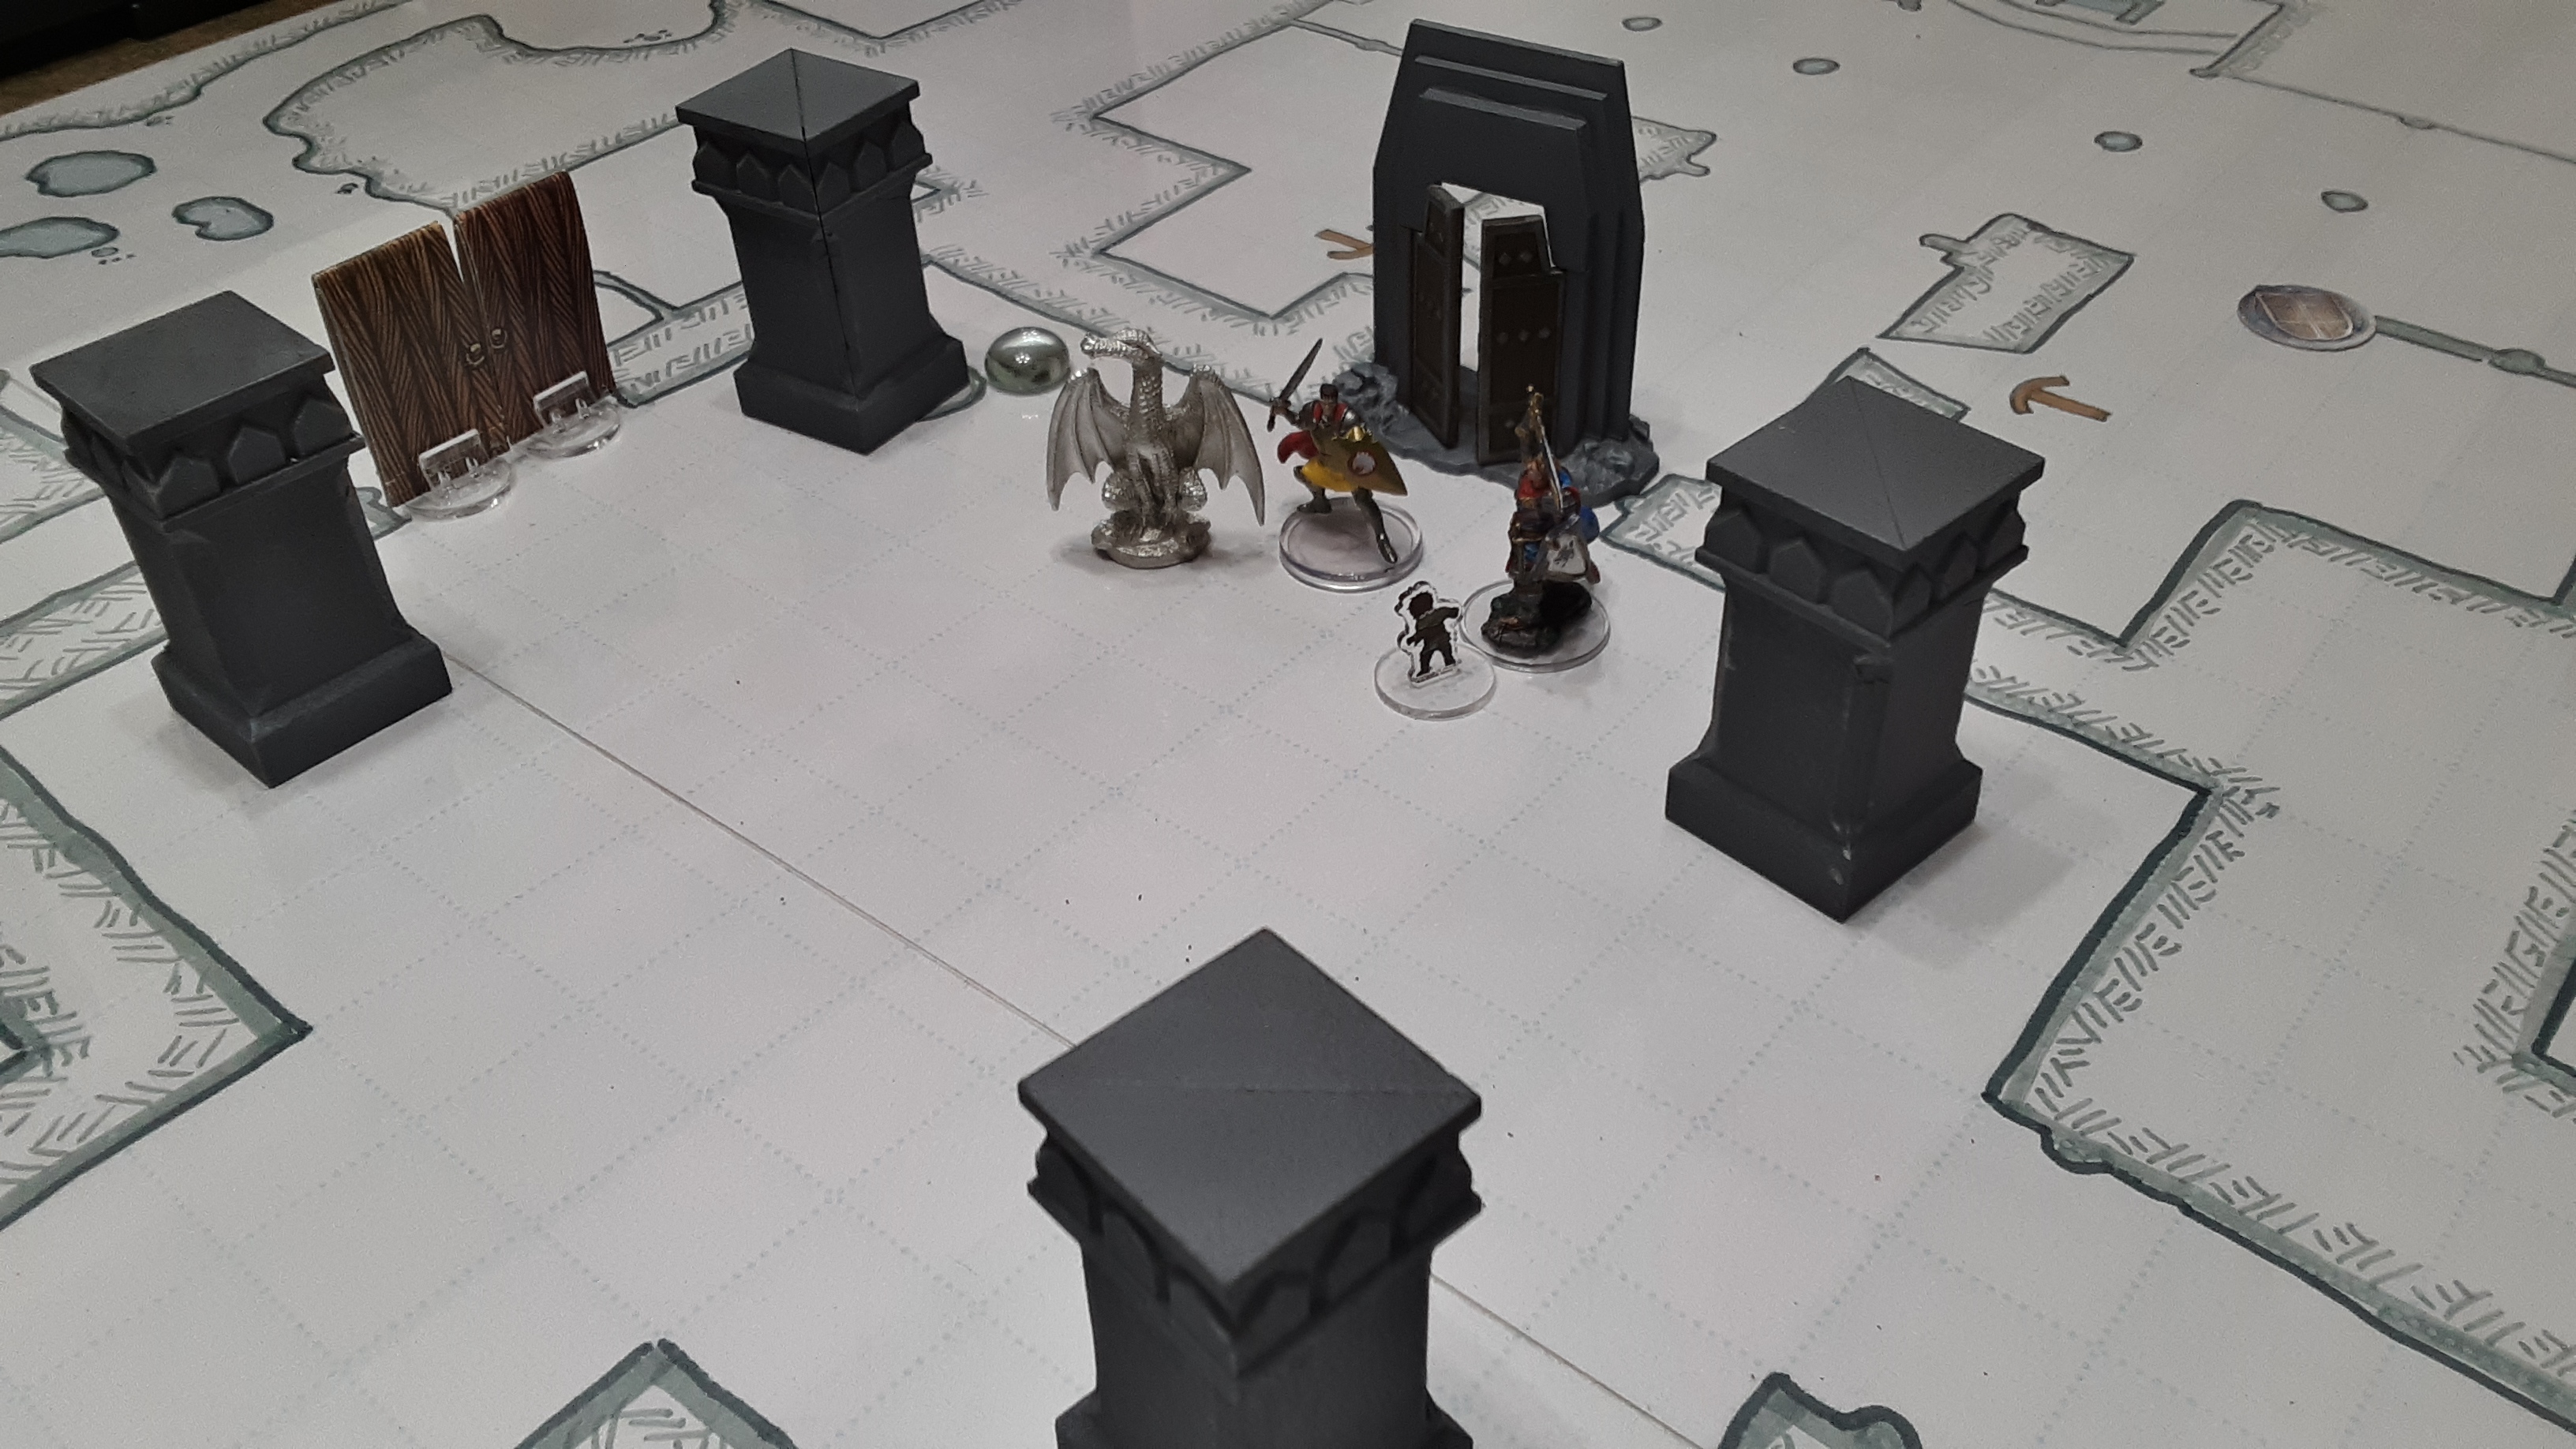
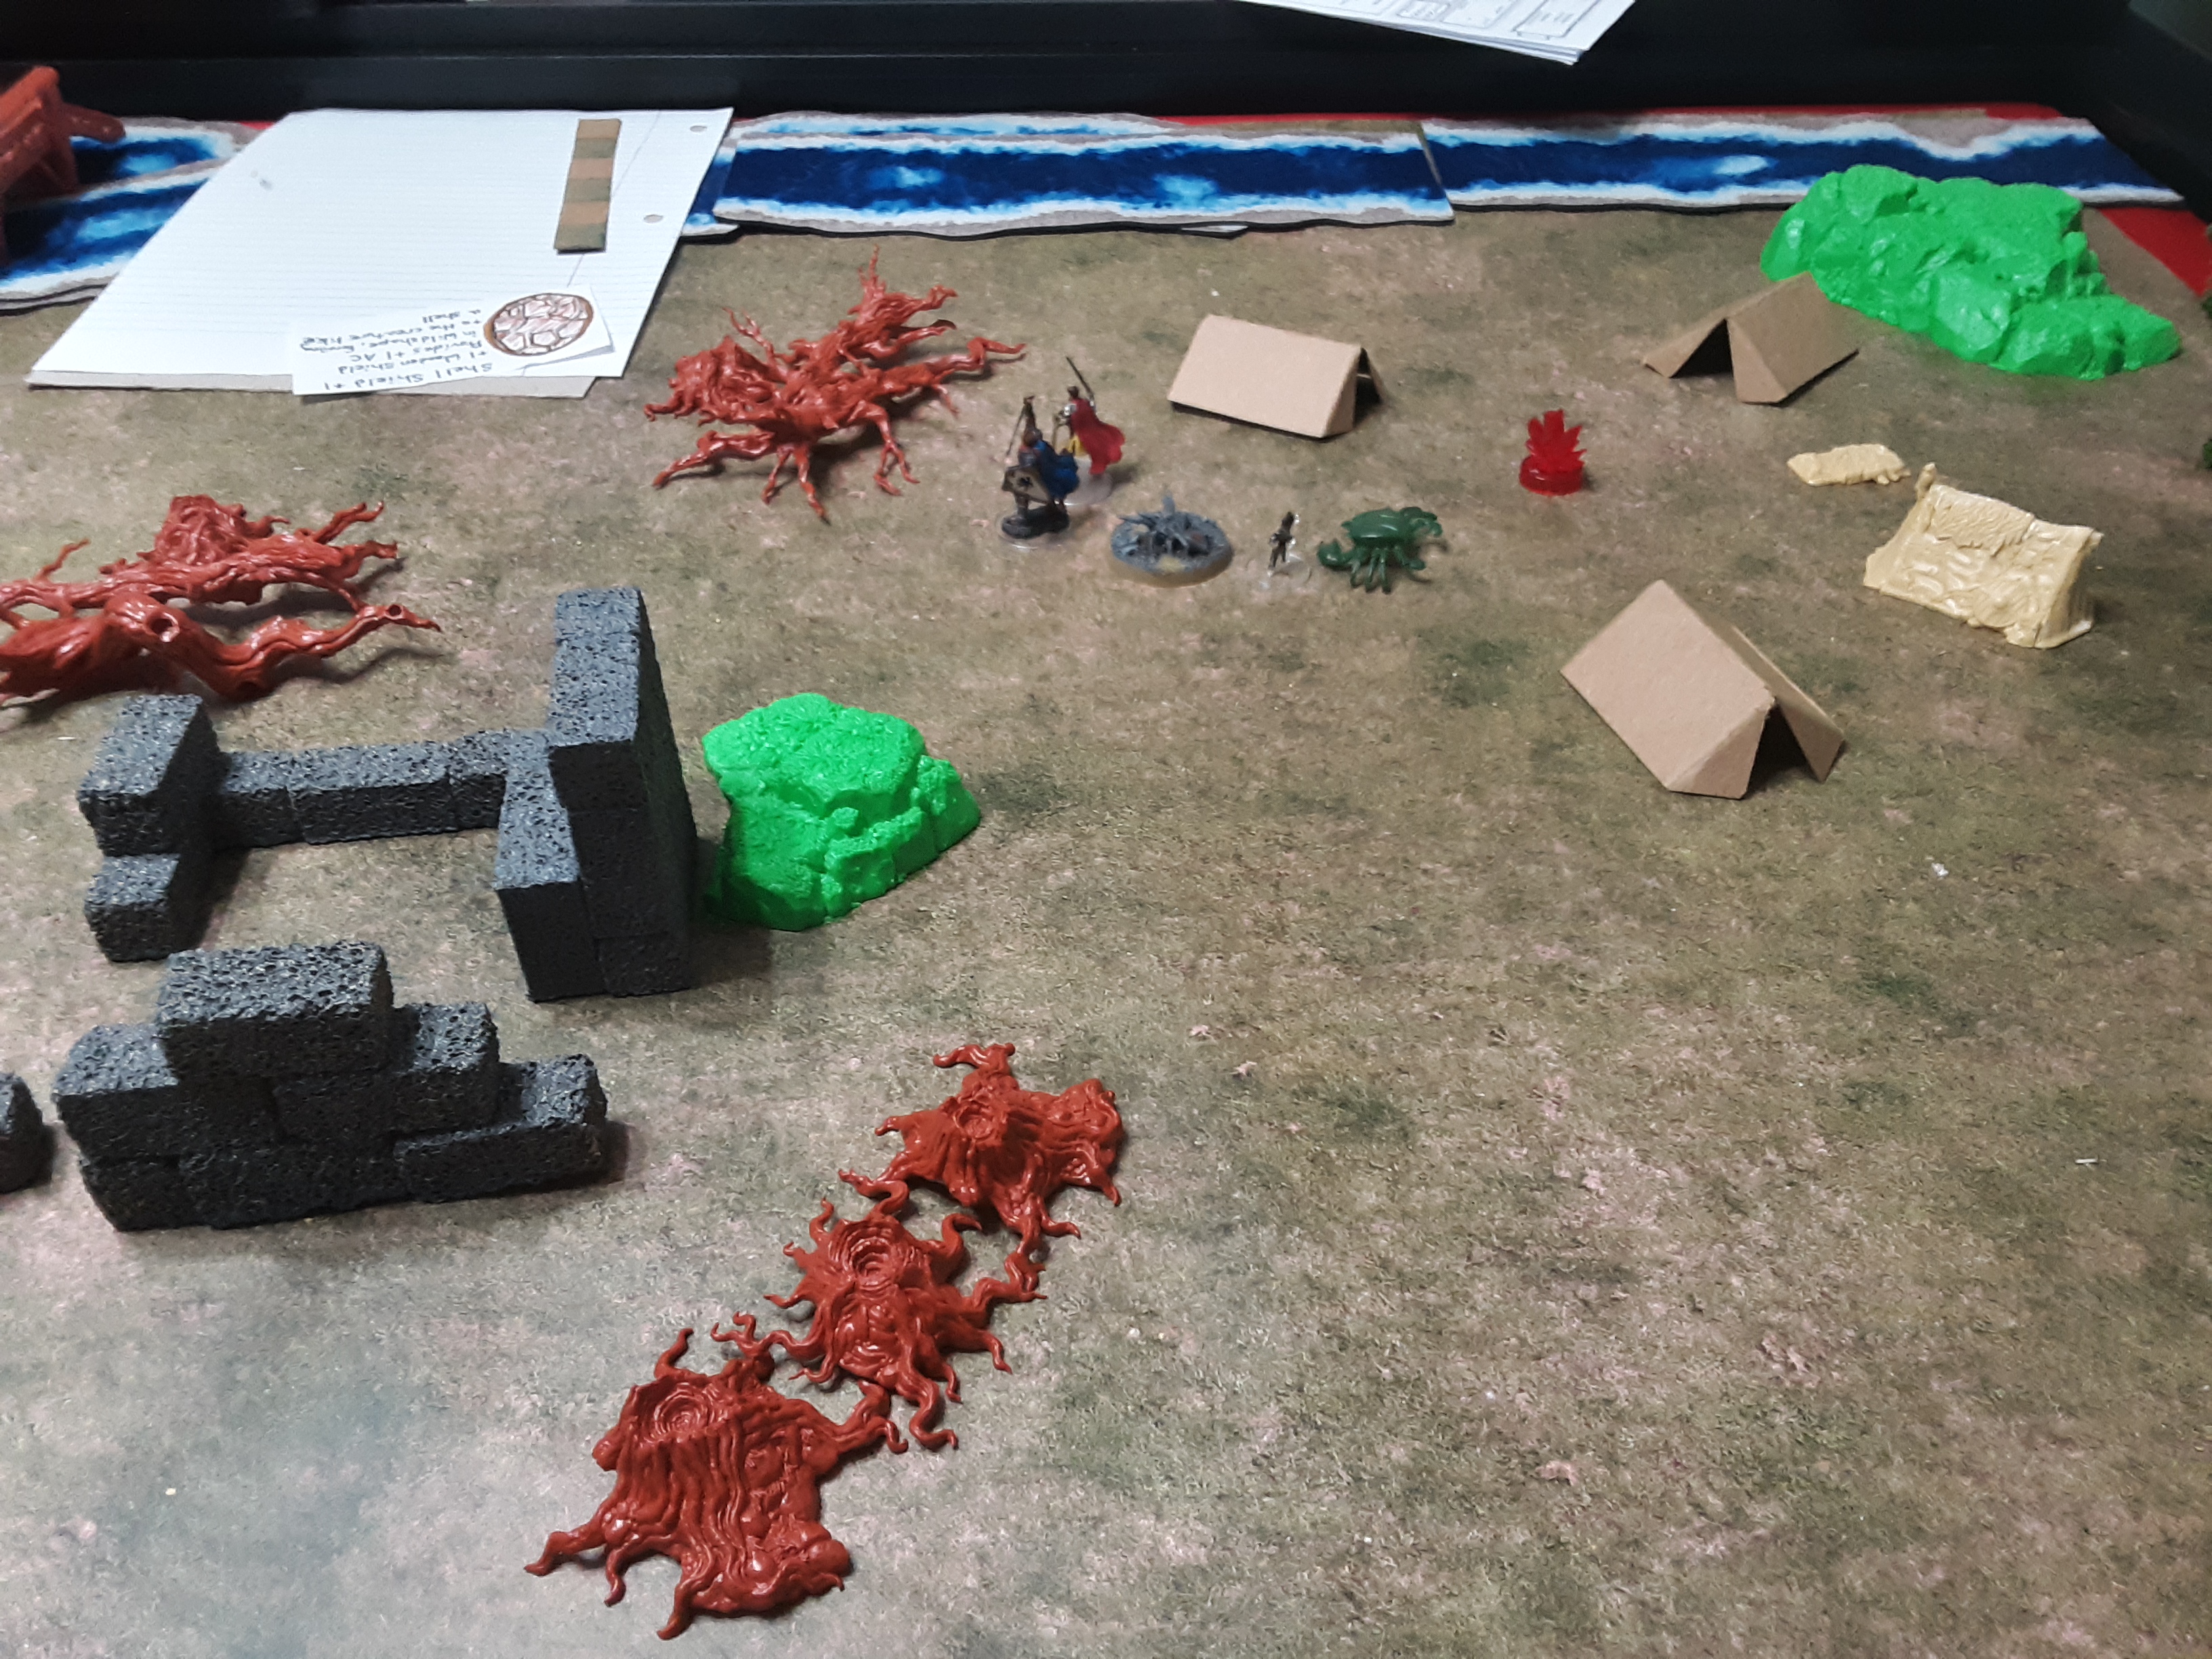
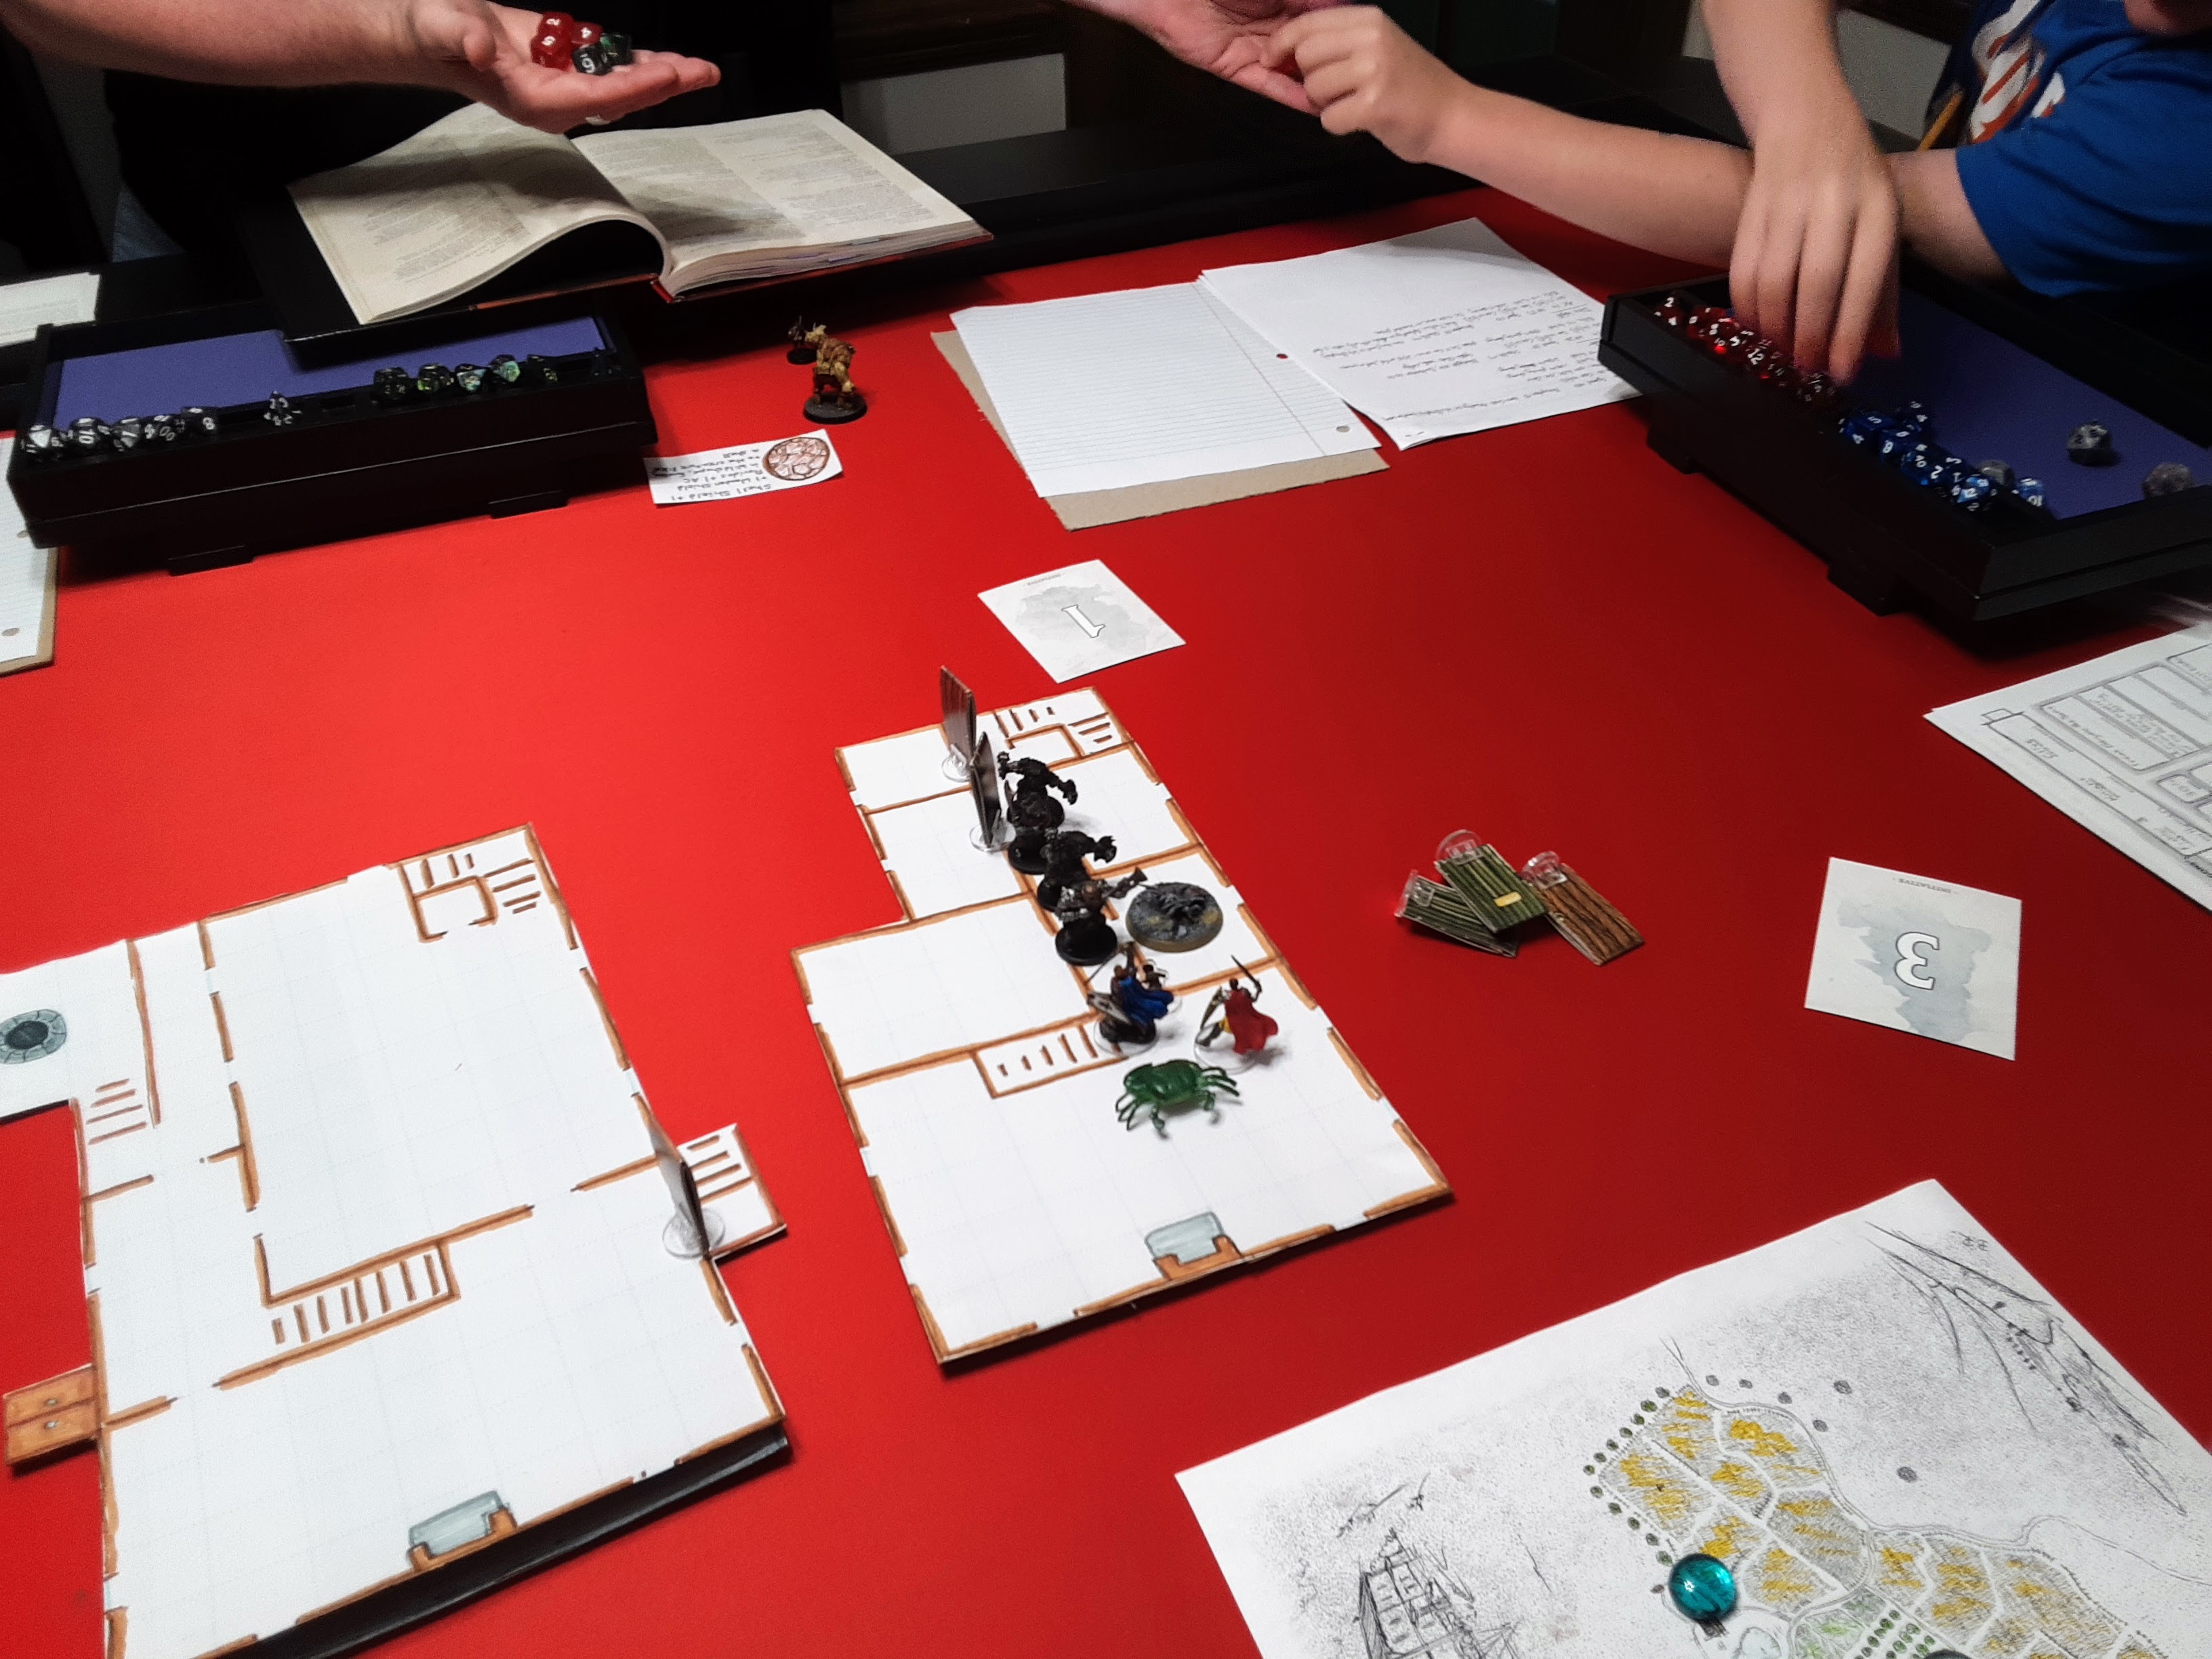
 Arrival at the old dwarven fort, Axeholm
The party made it to Axeholm and began hearing some wailing inside the old fort. The dwarves decided to stay outside until the party knew the fort was clear of danger. The druids used their shapeshifting abilities to crawl through the lower levels arrow slits and raise the portcullis.
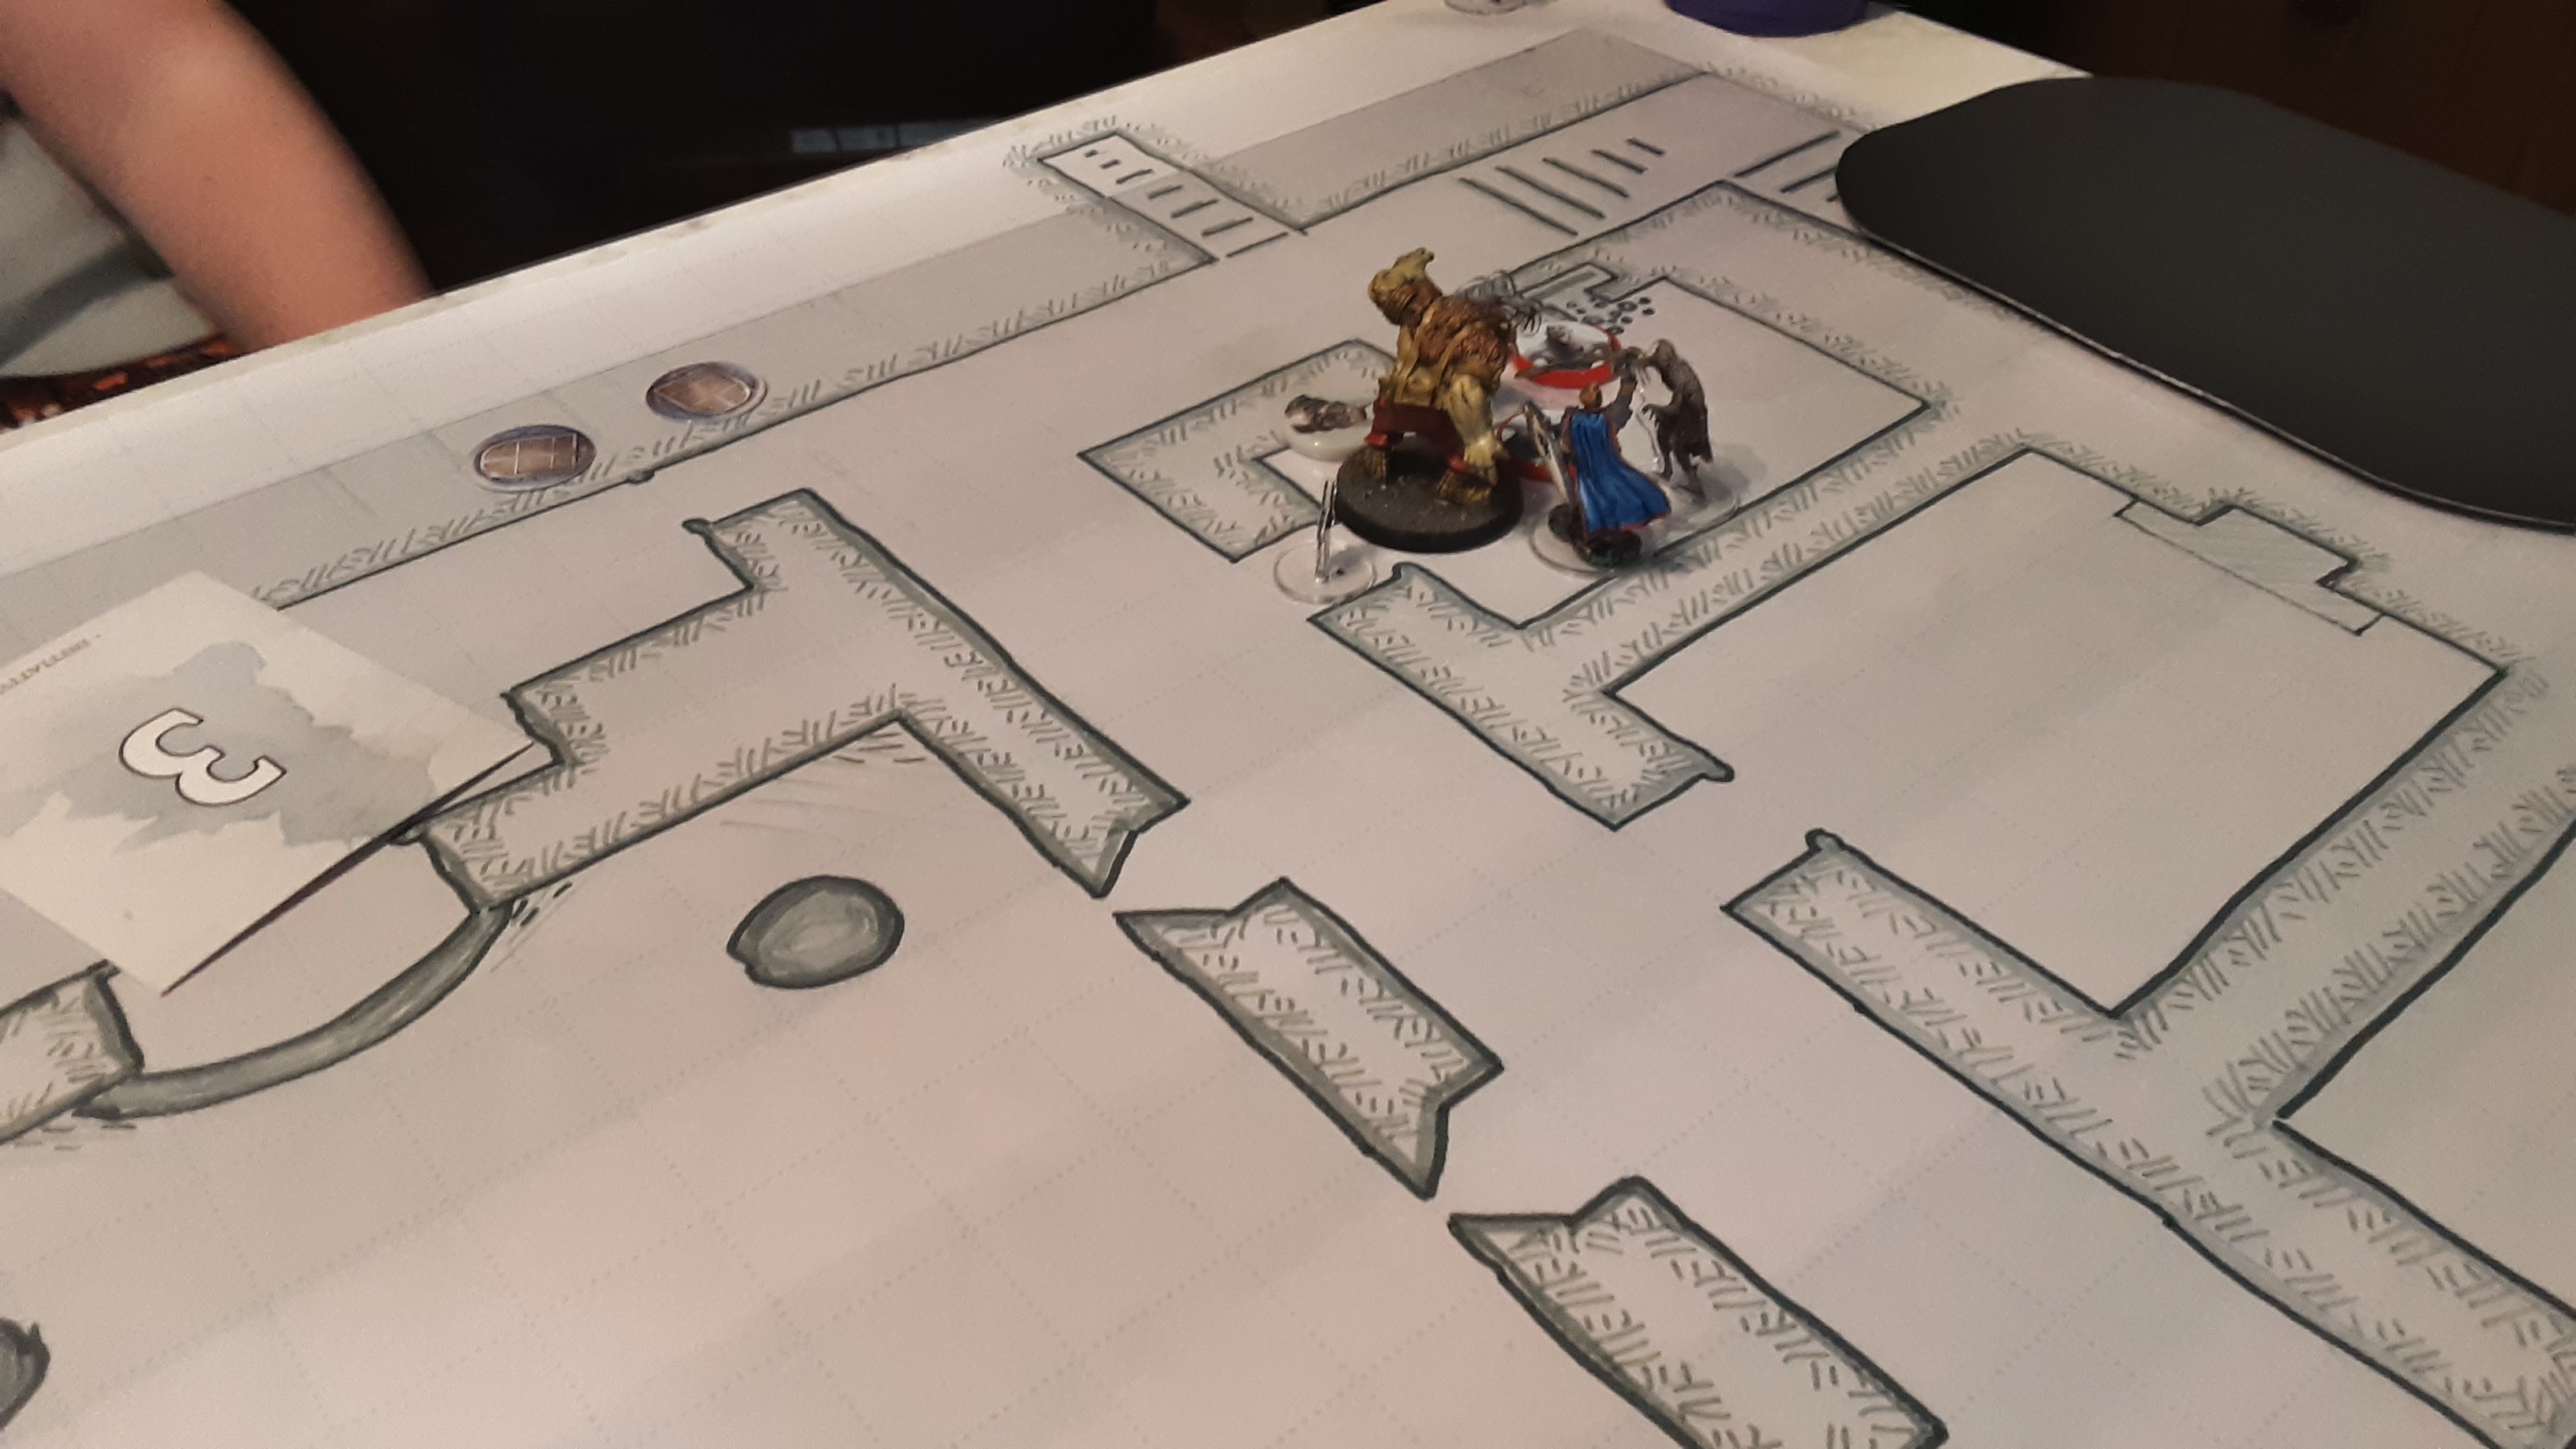
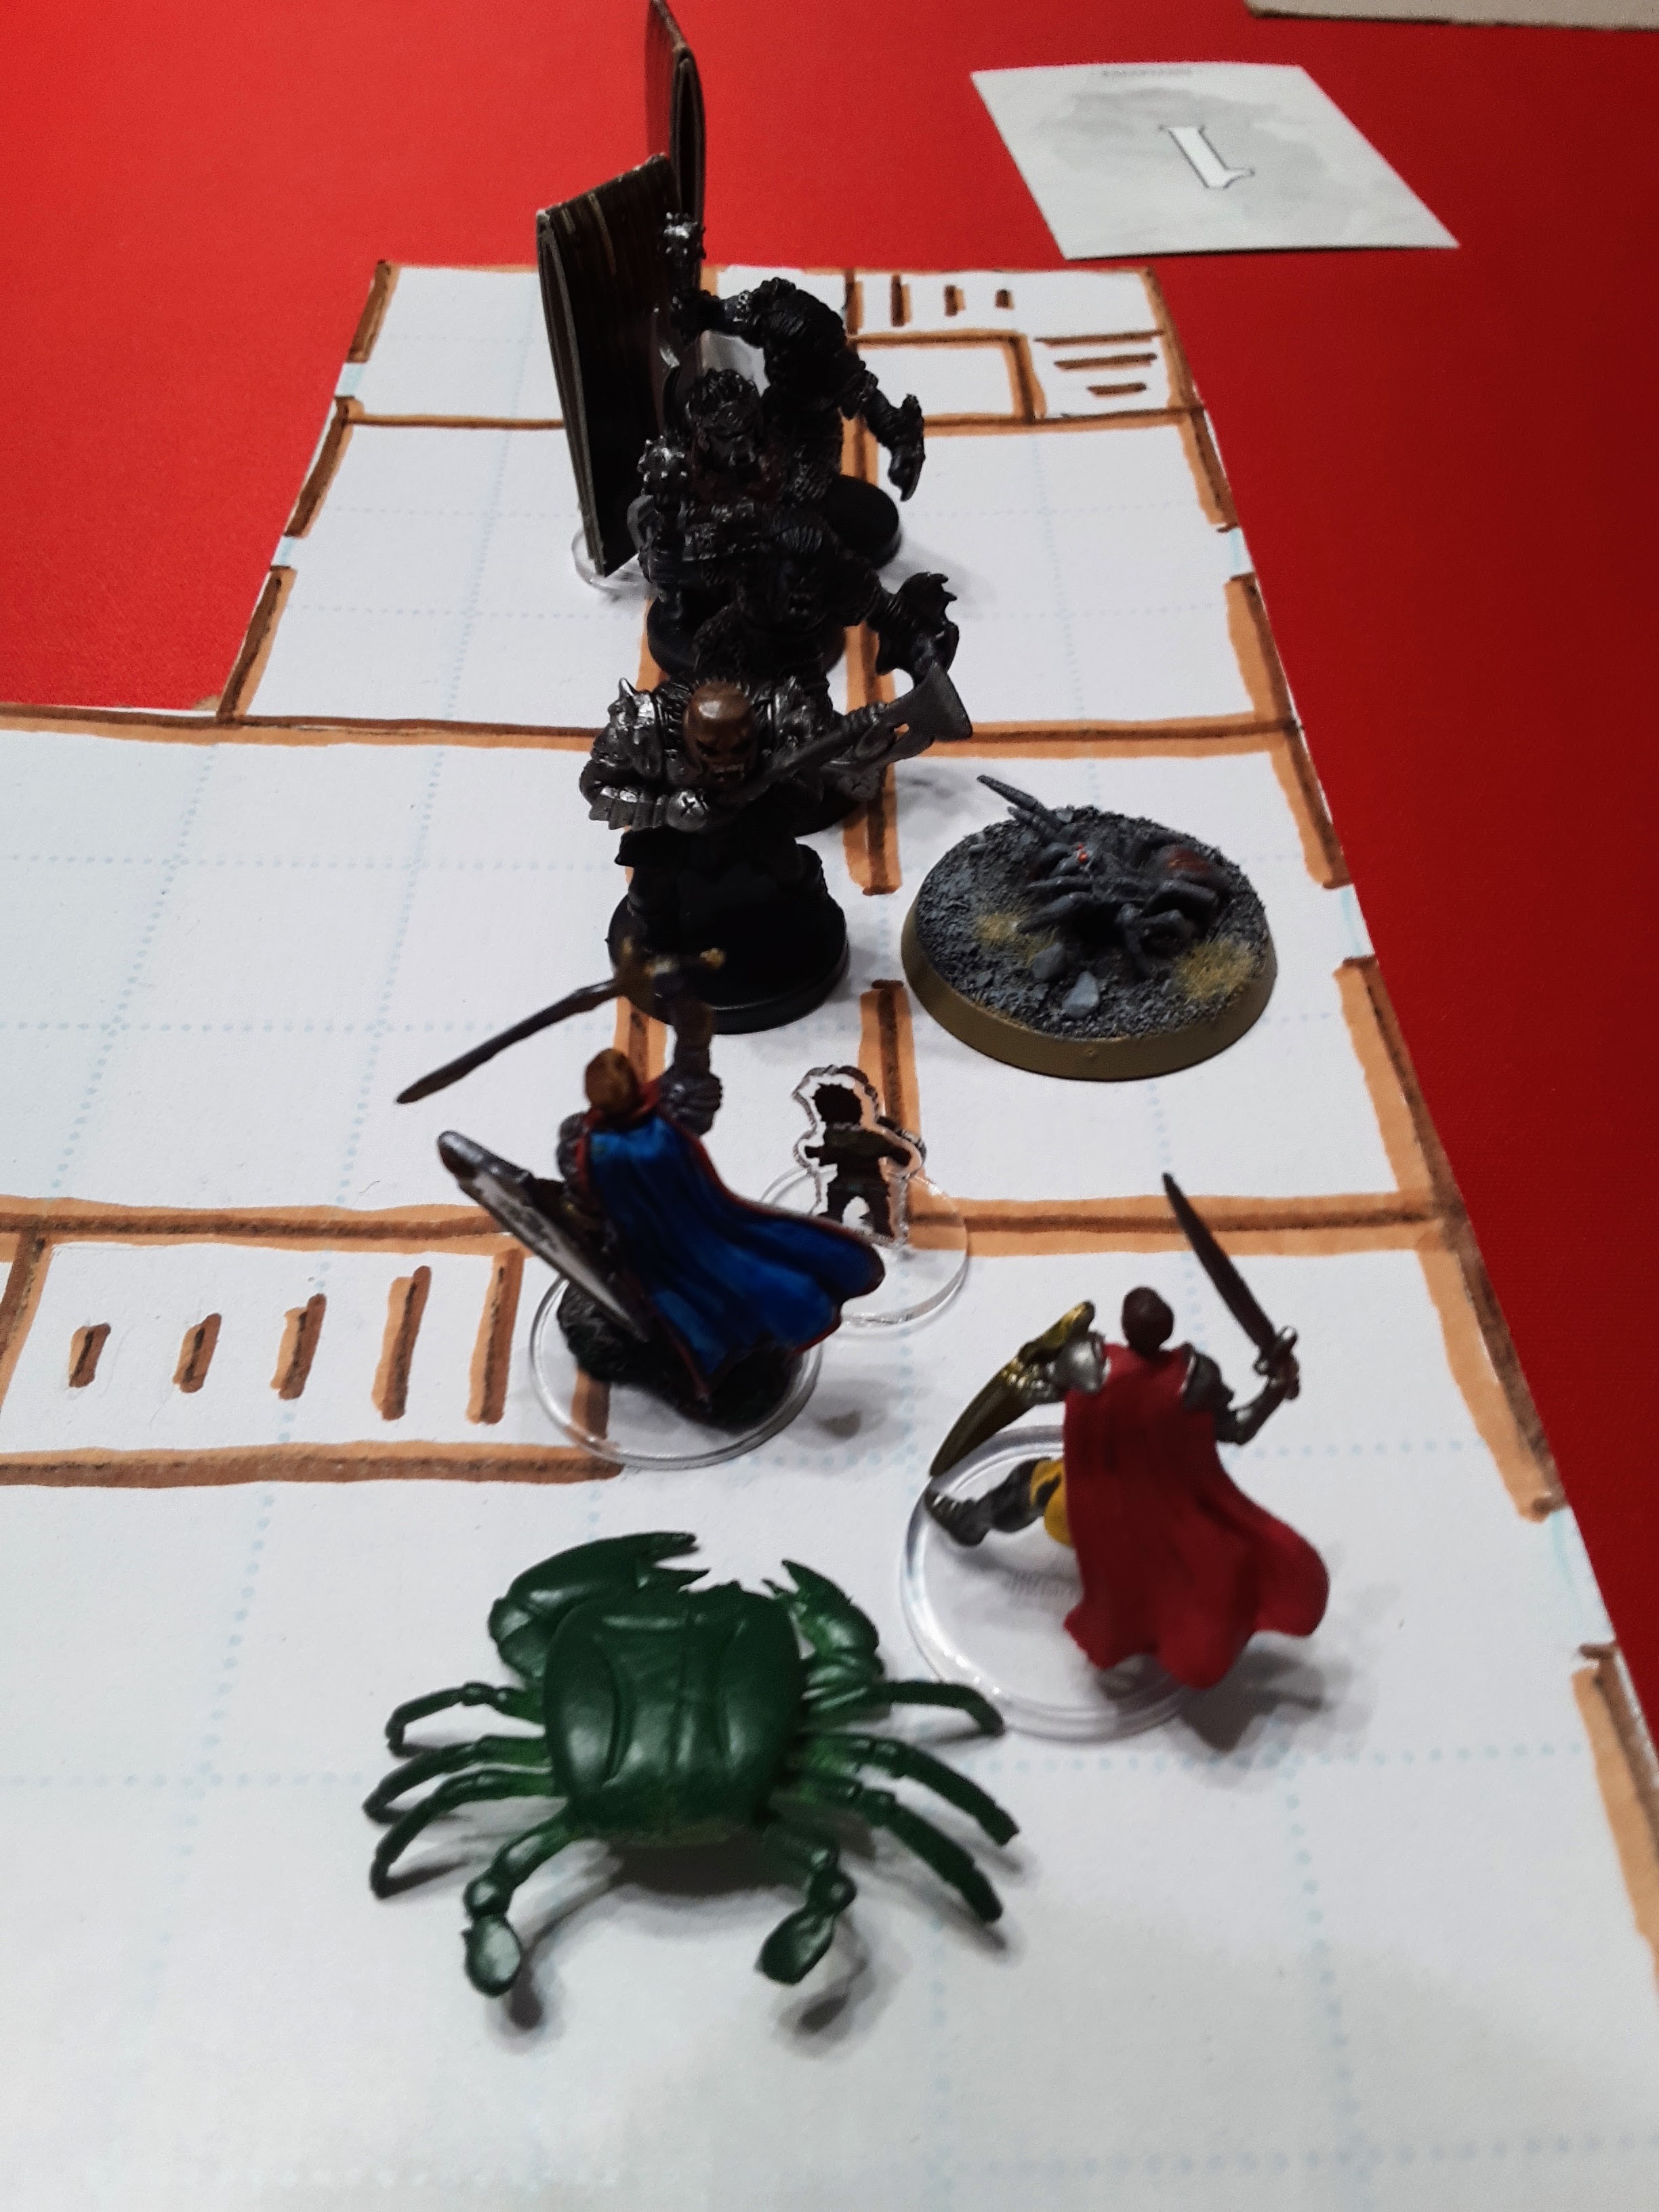
The party began exploring the lower level halls, coming across a few ghouls, with evidence that they were either worshipers of Abbathor or Mordiaran. They also found a highly ornate shield during their investigations (Sheild +1). They also came across what appeared to be the former leader of the fort, having betrayed the priests of Abbathor, driving his golden ax into a priests skull while they ate in the back hall. The players were able to defeat this Ghoul and collected the shards of the golden ax.
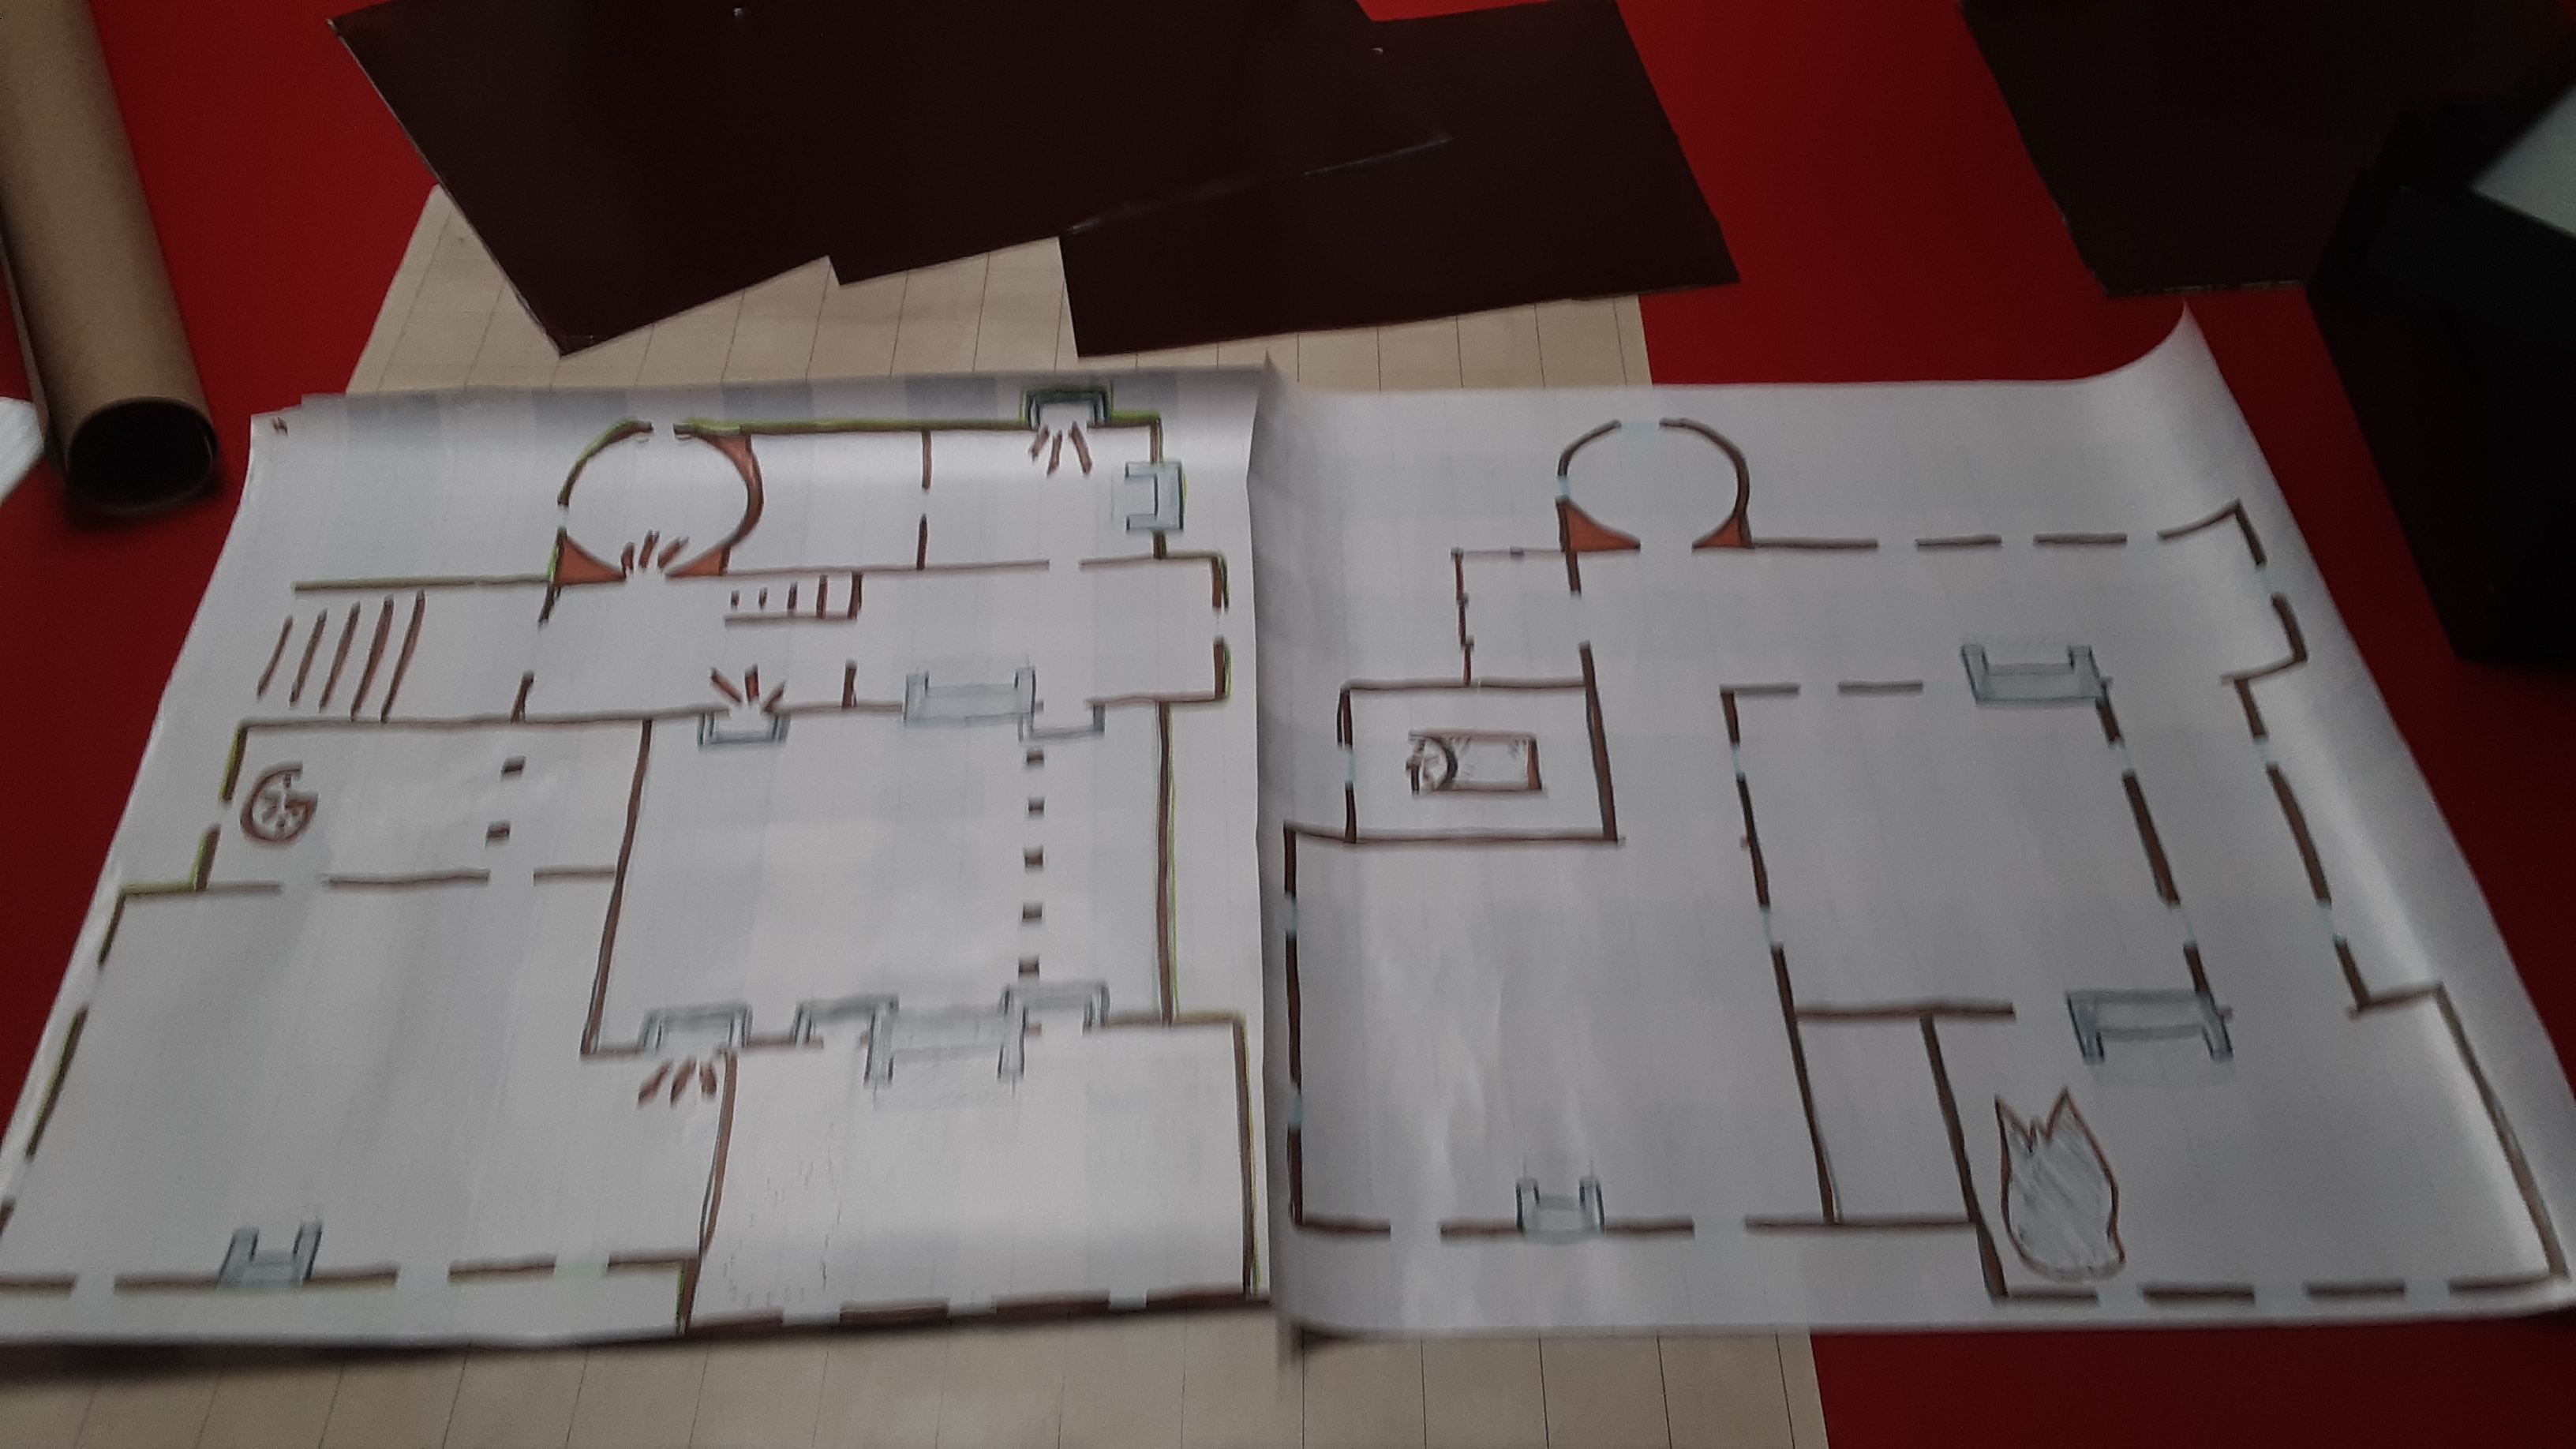
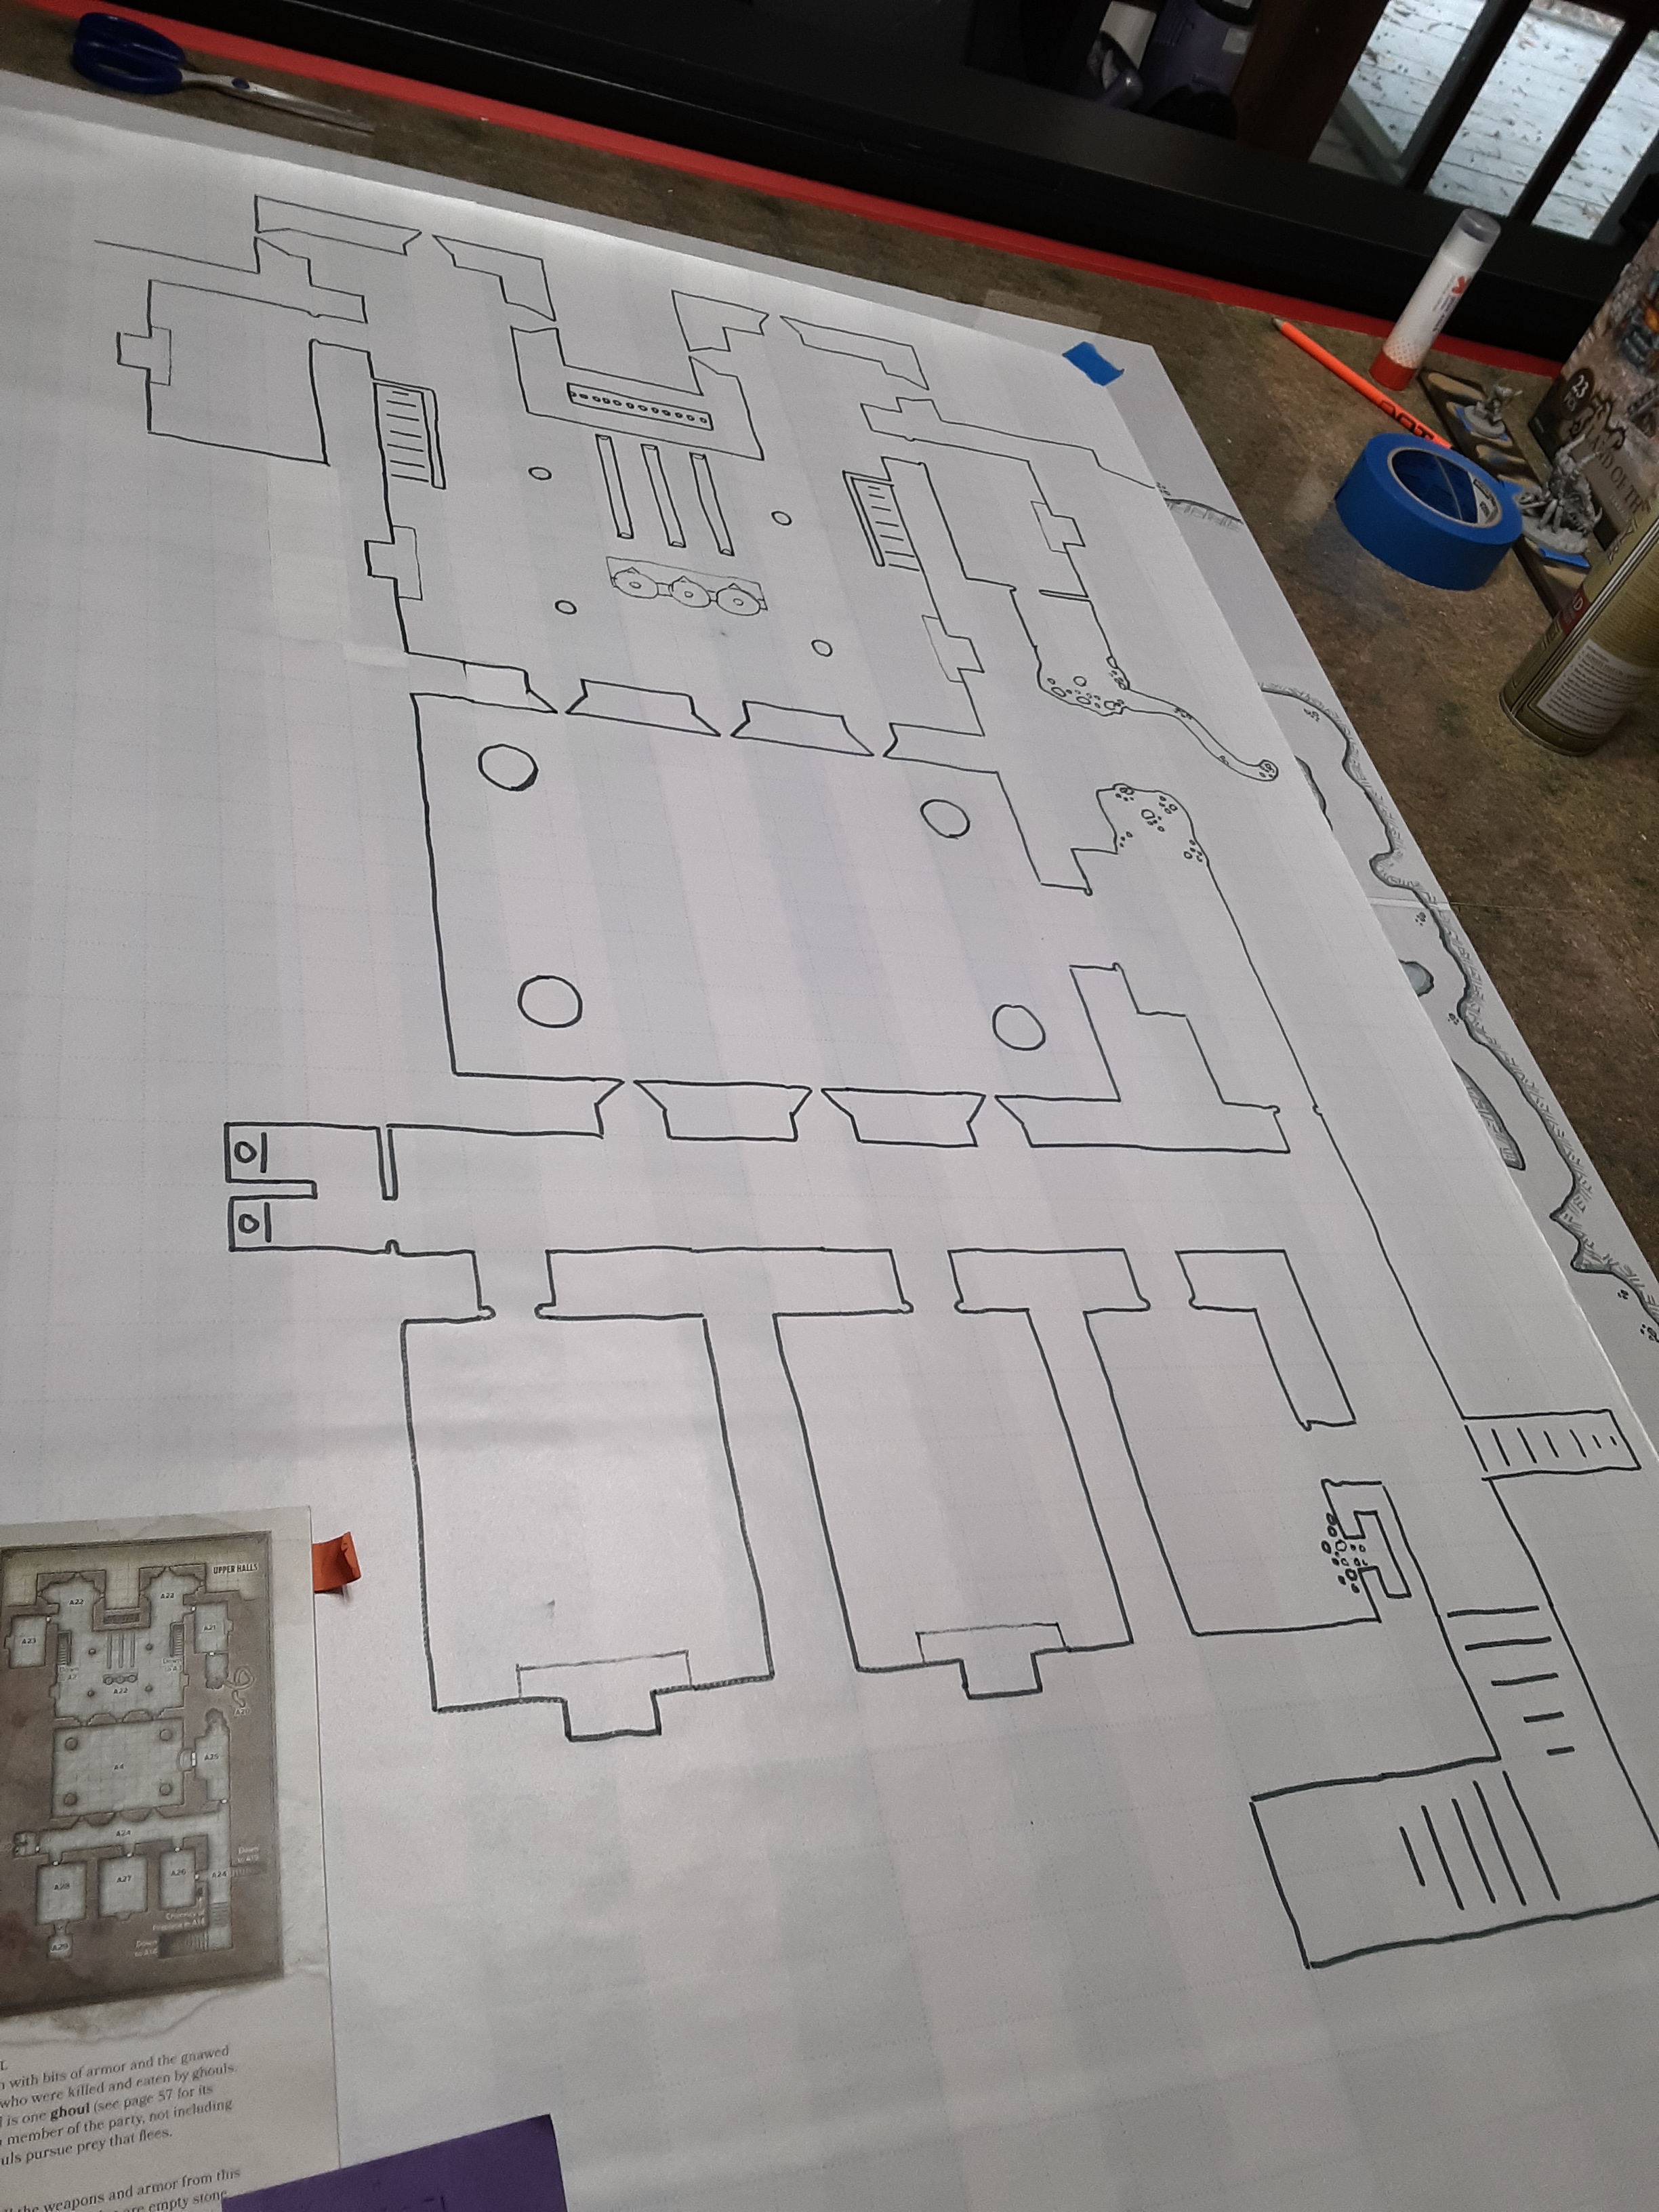
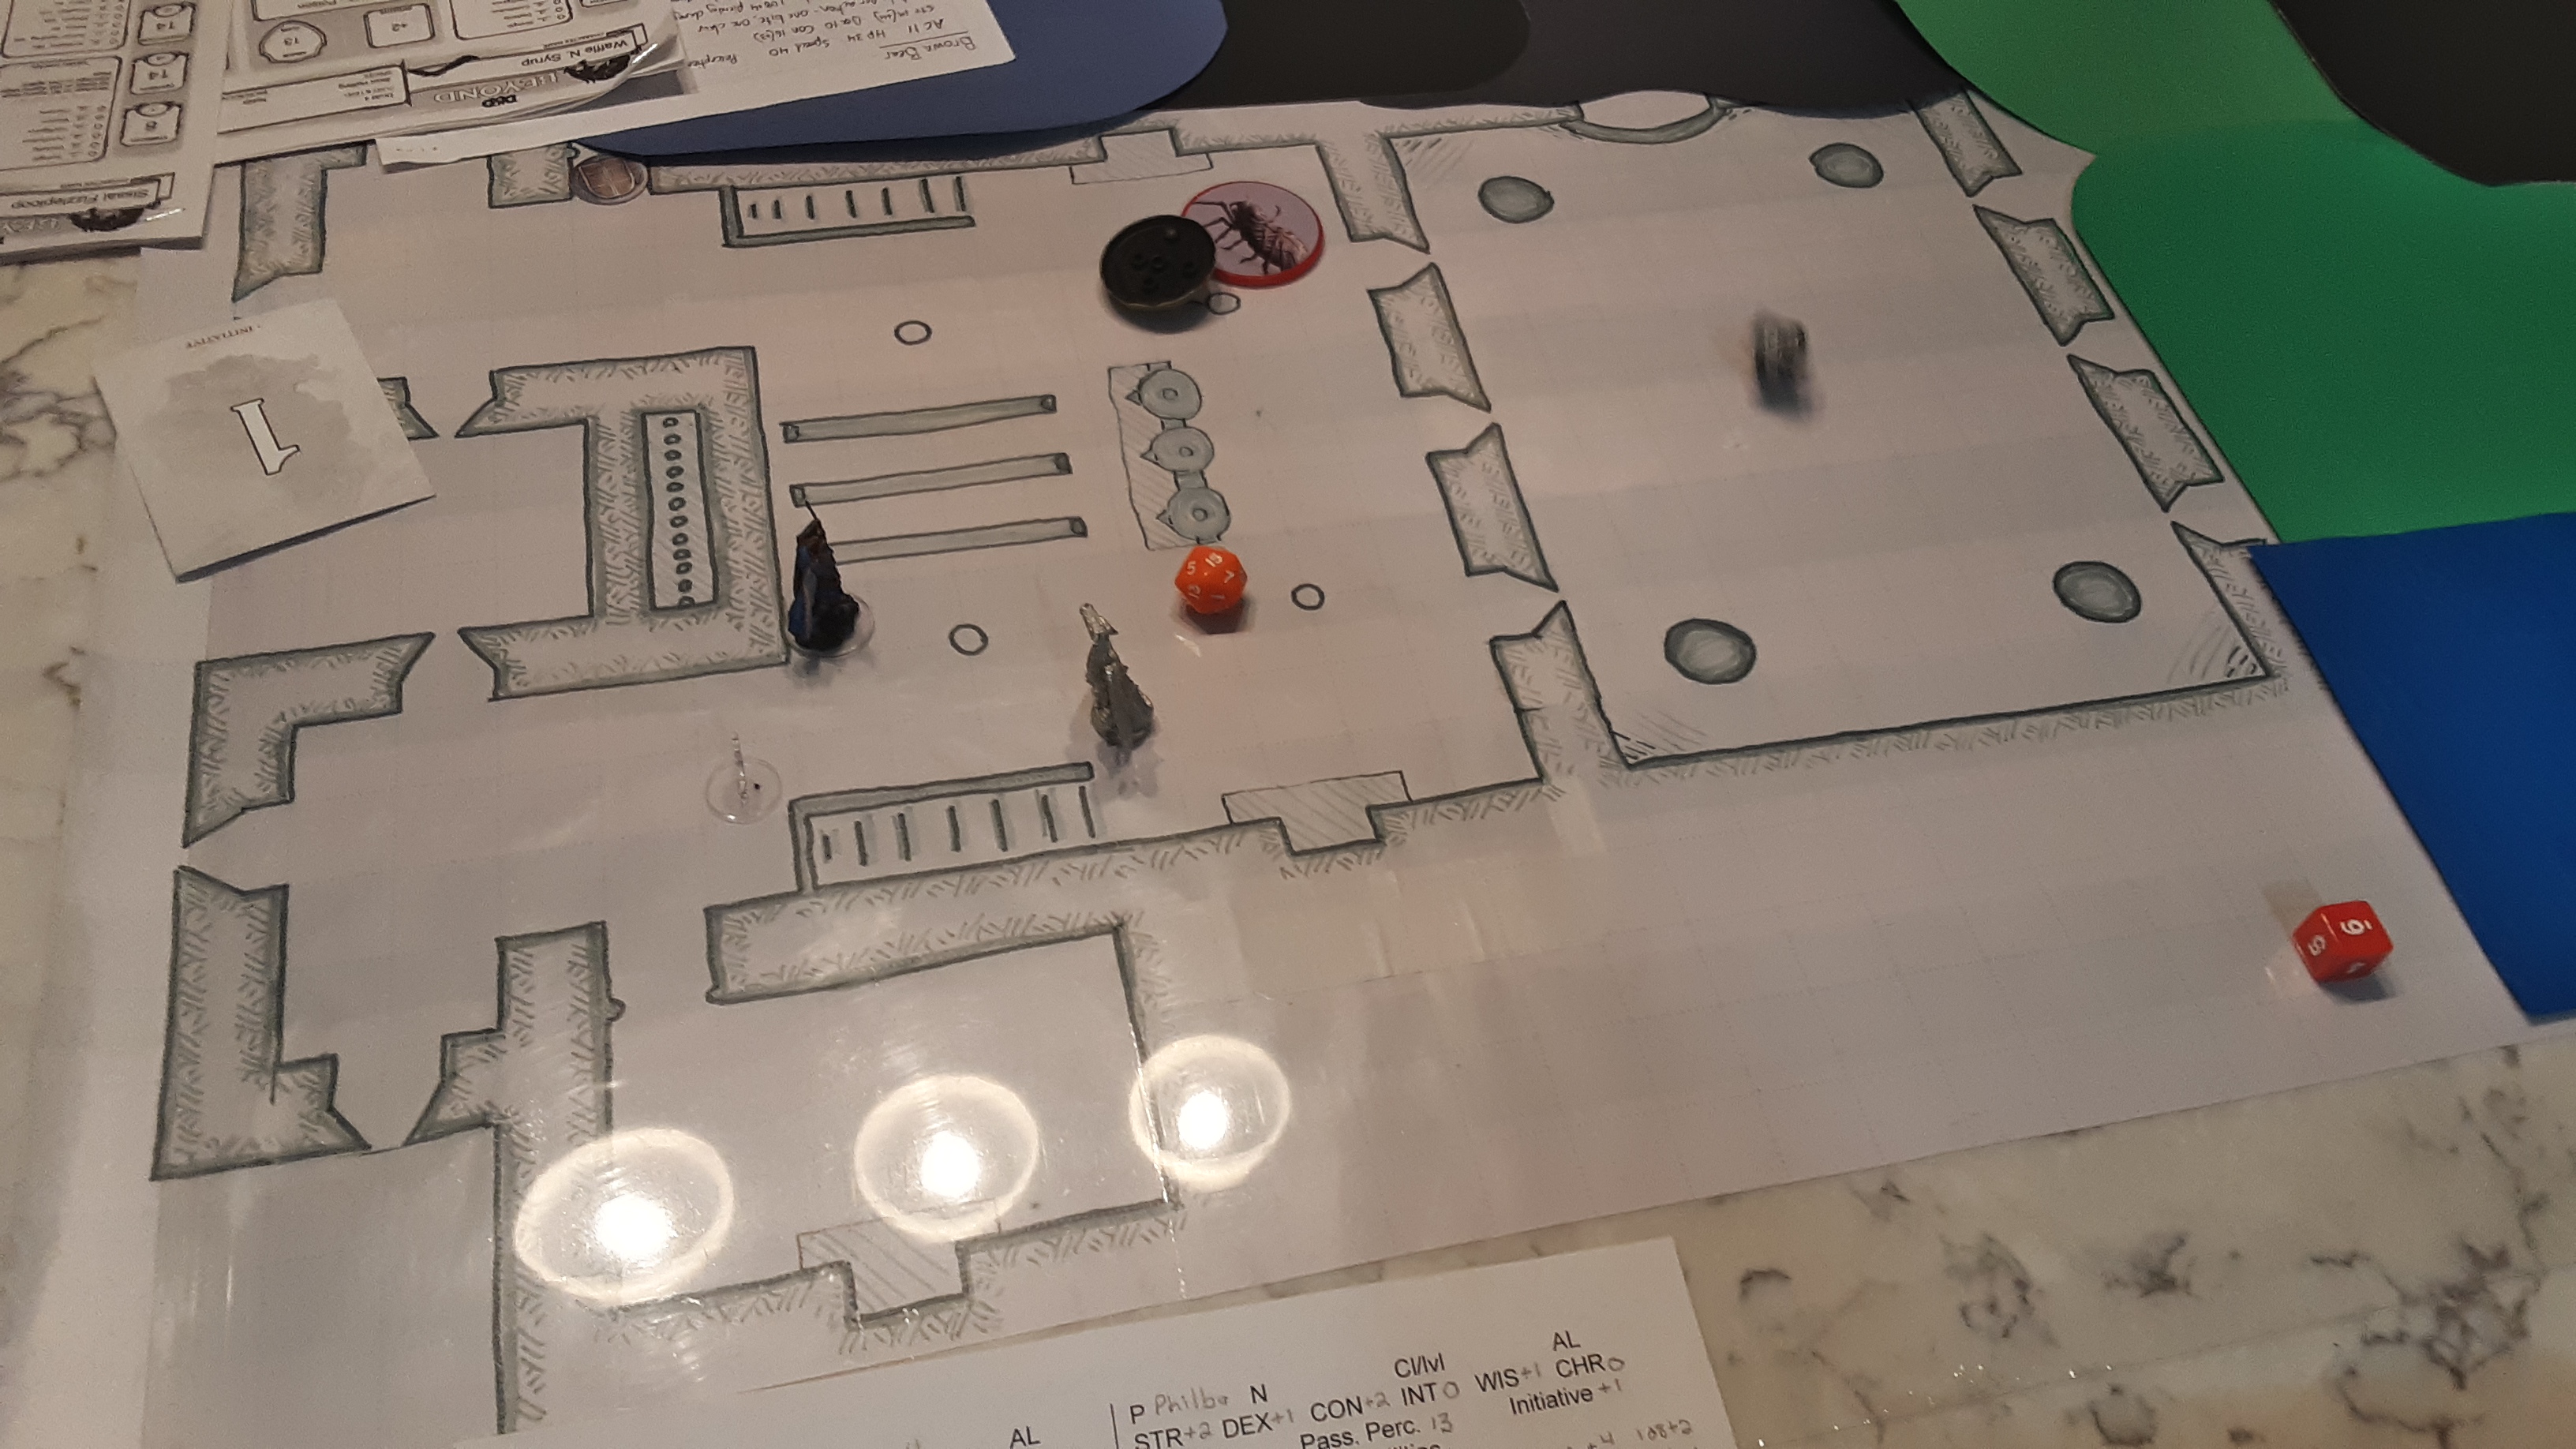 Exploring the upper level of the fort.
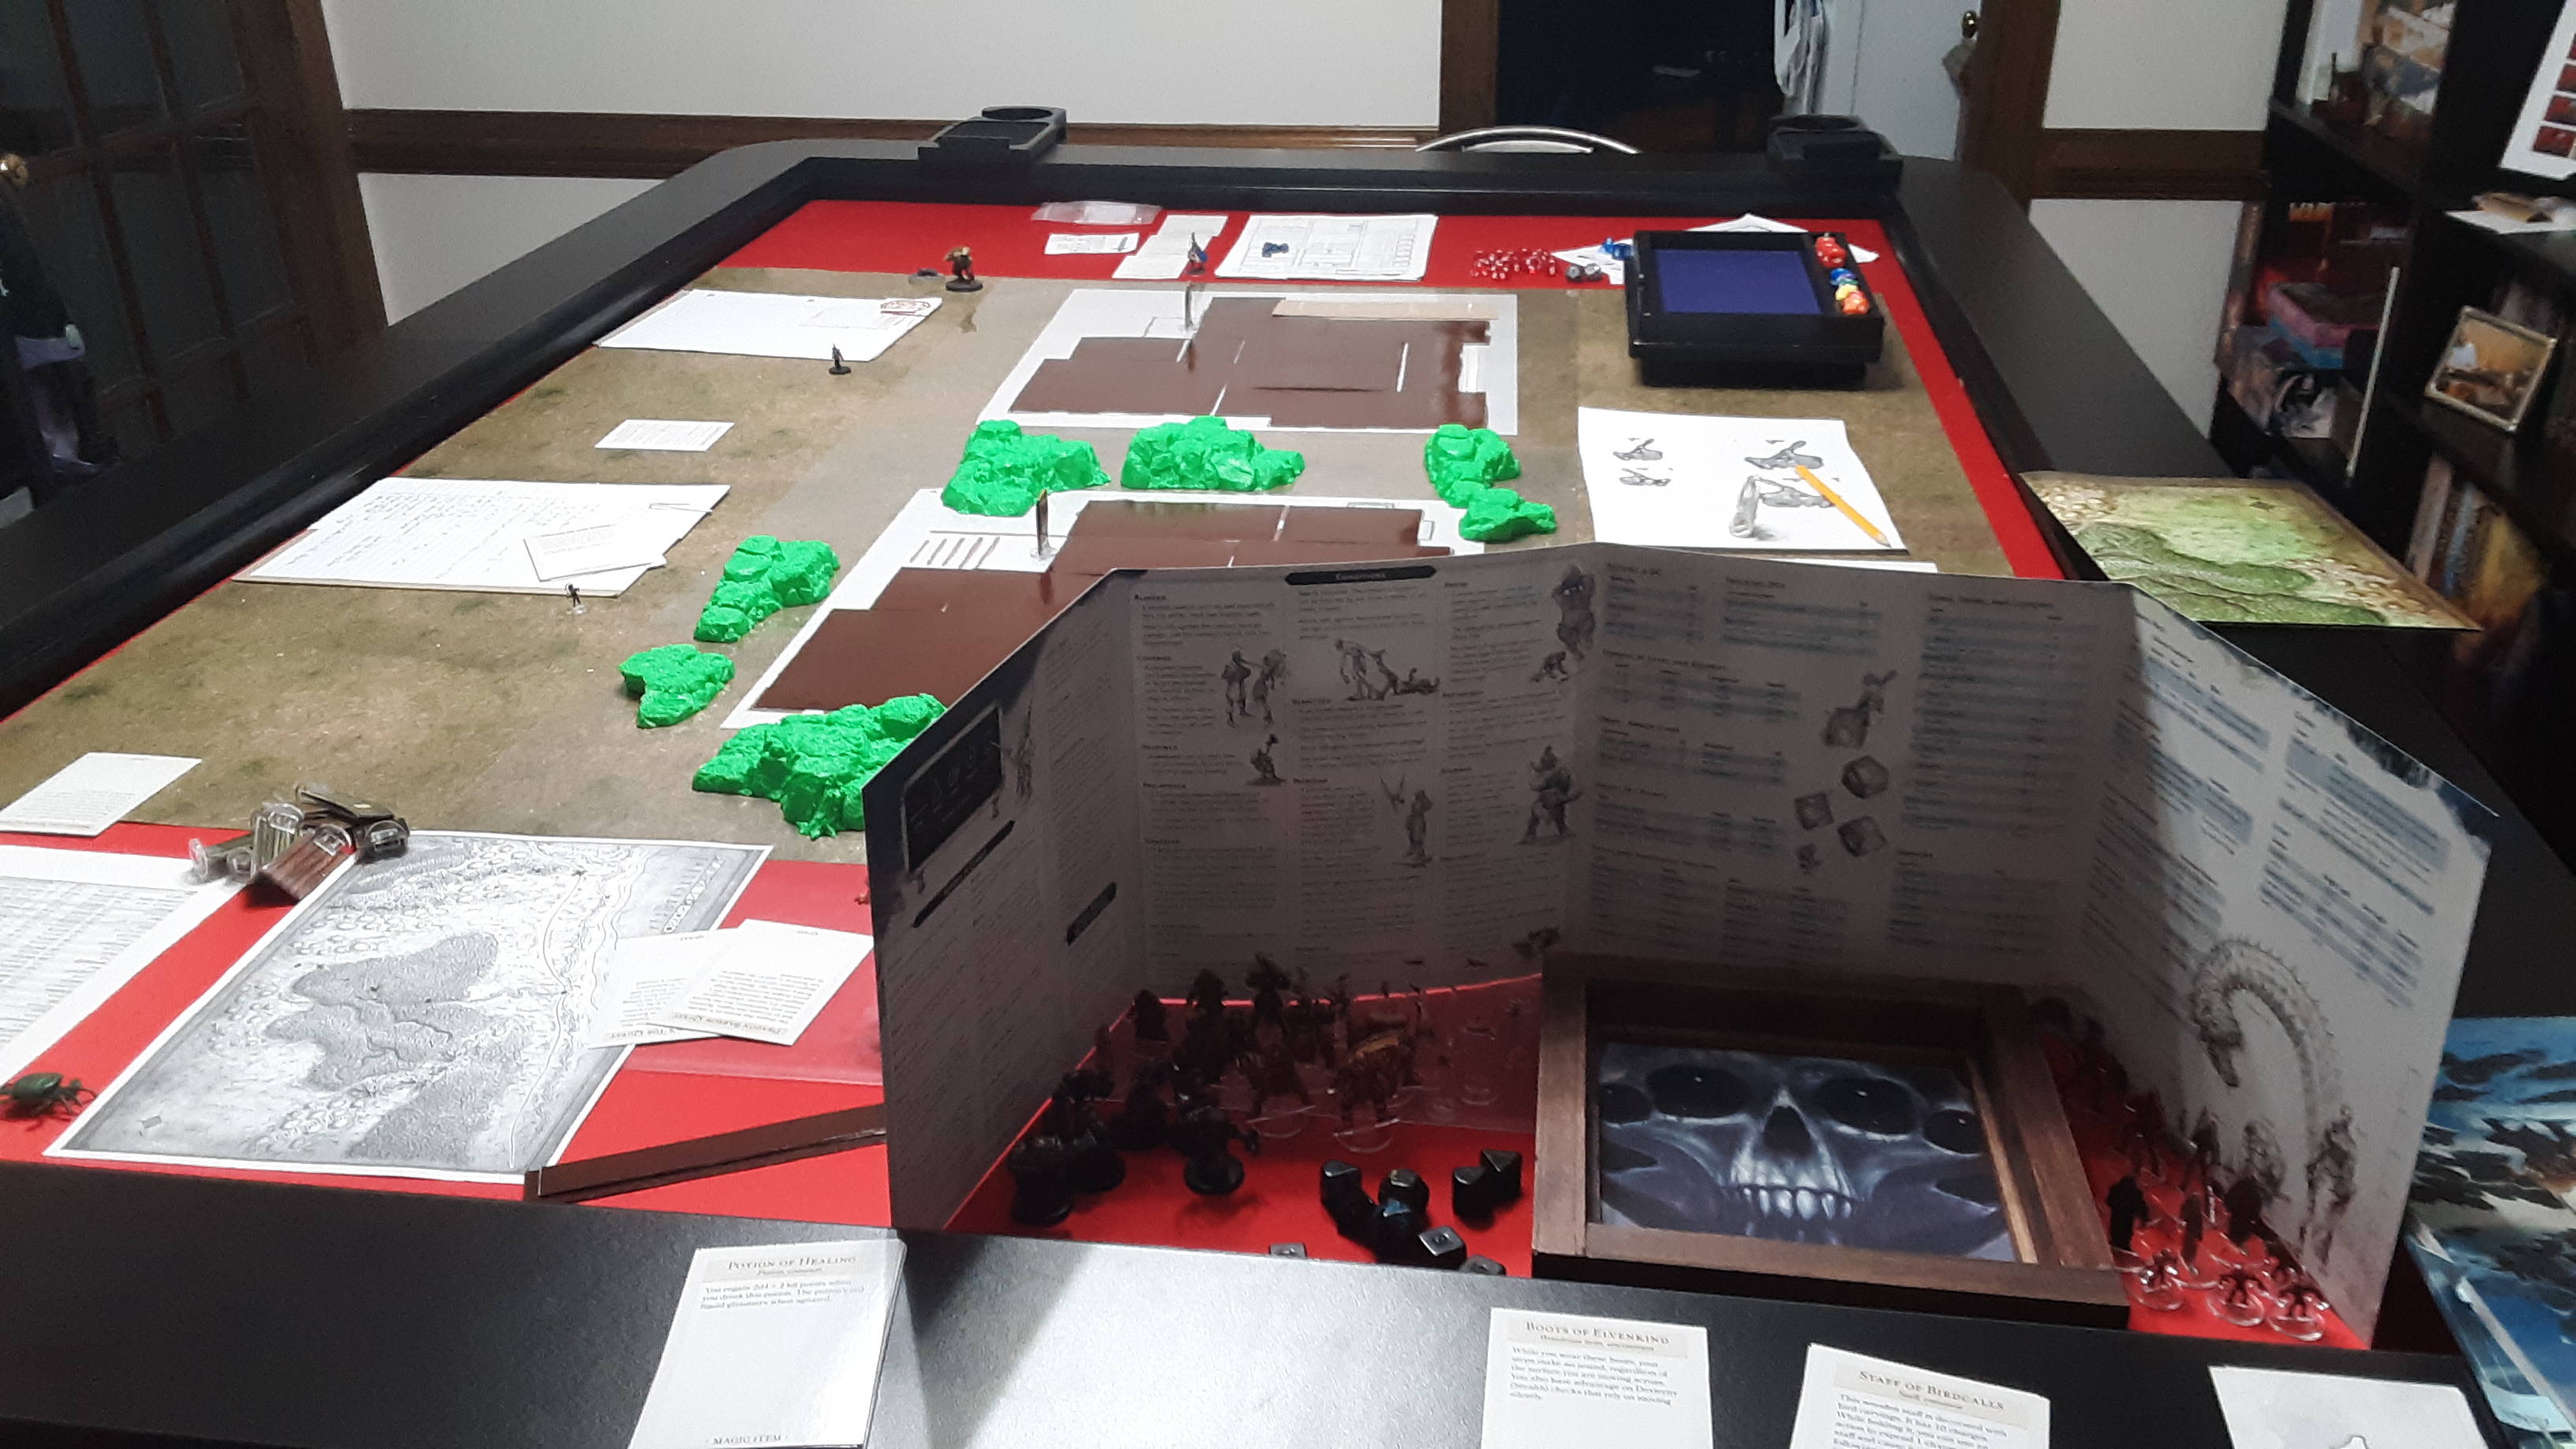
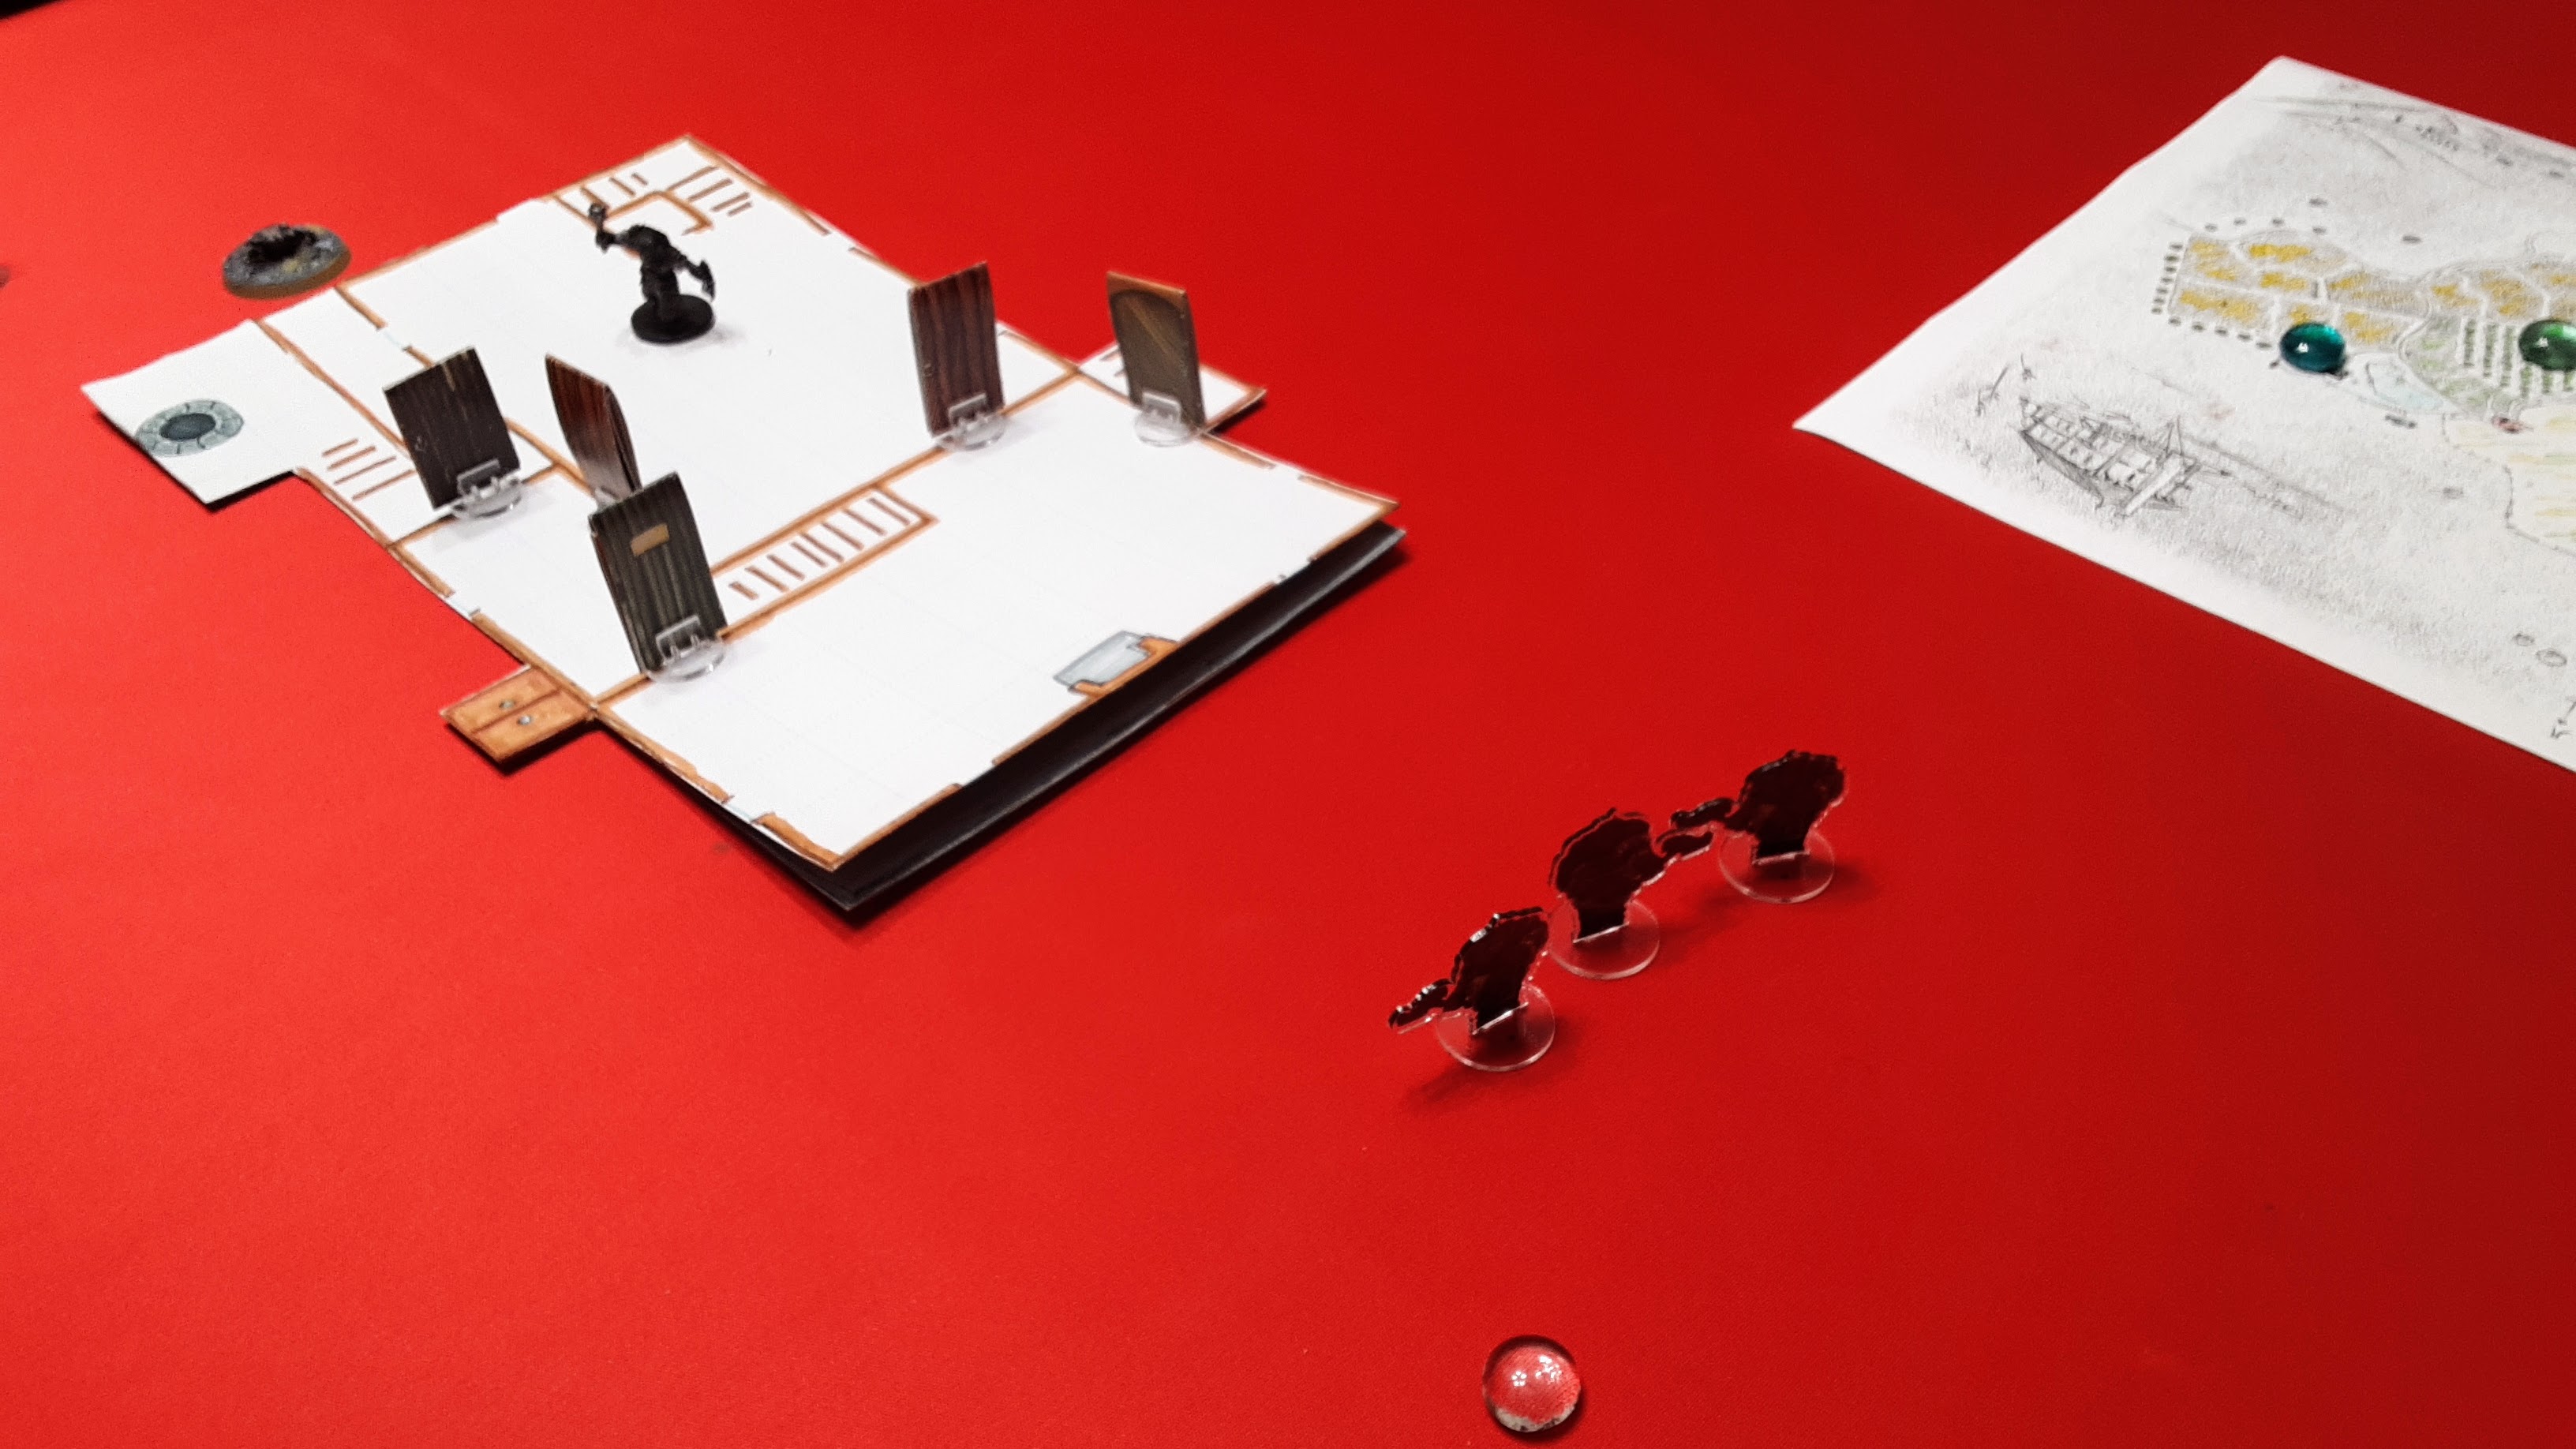
After exploring they decided to head to the second level of Axeholm. I didn’t realize when prepping, but the players would have to go to the second level before traveling back down to the first level to discover everything. I decided to set up the second floor map on one of my kitchen counters and kept the first floor map on the gaming table.
They explored the front of the forts second level first. They came across giant spiders during this exploration. They were also able to look across the mustering hall, a large area that spans the first and second floor in height. Across the hall they saw a blue glowing figure moving past the arrow slits on the opposite side.
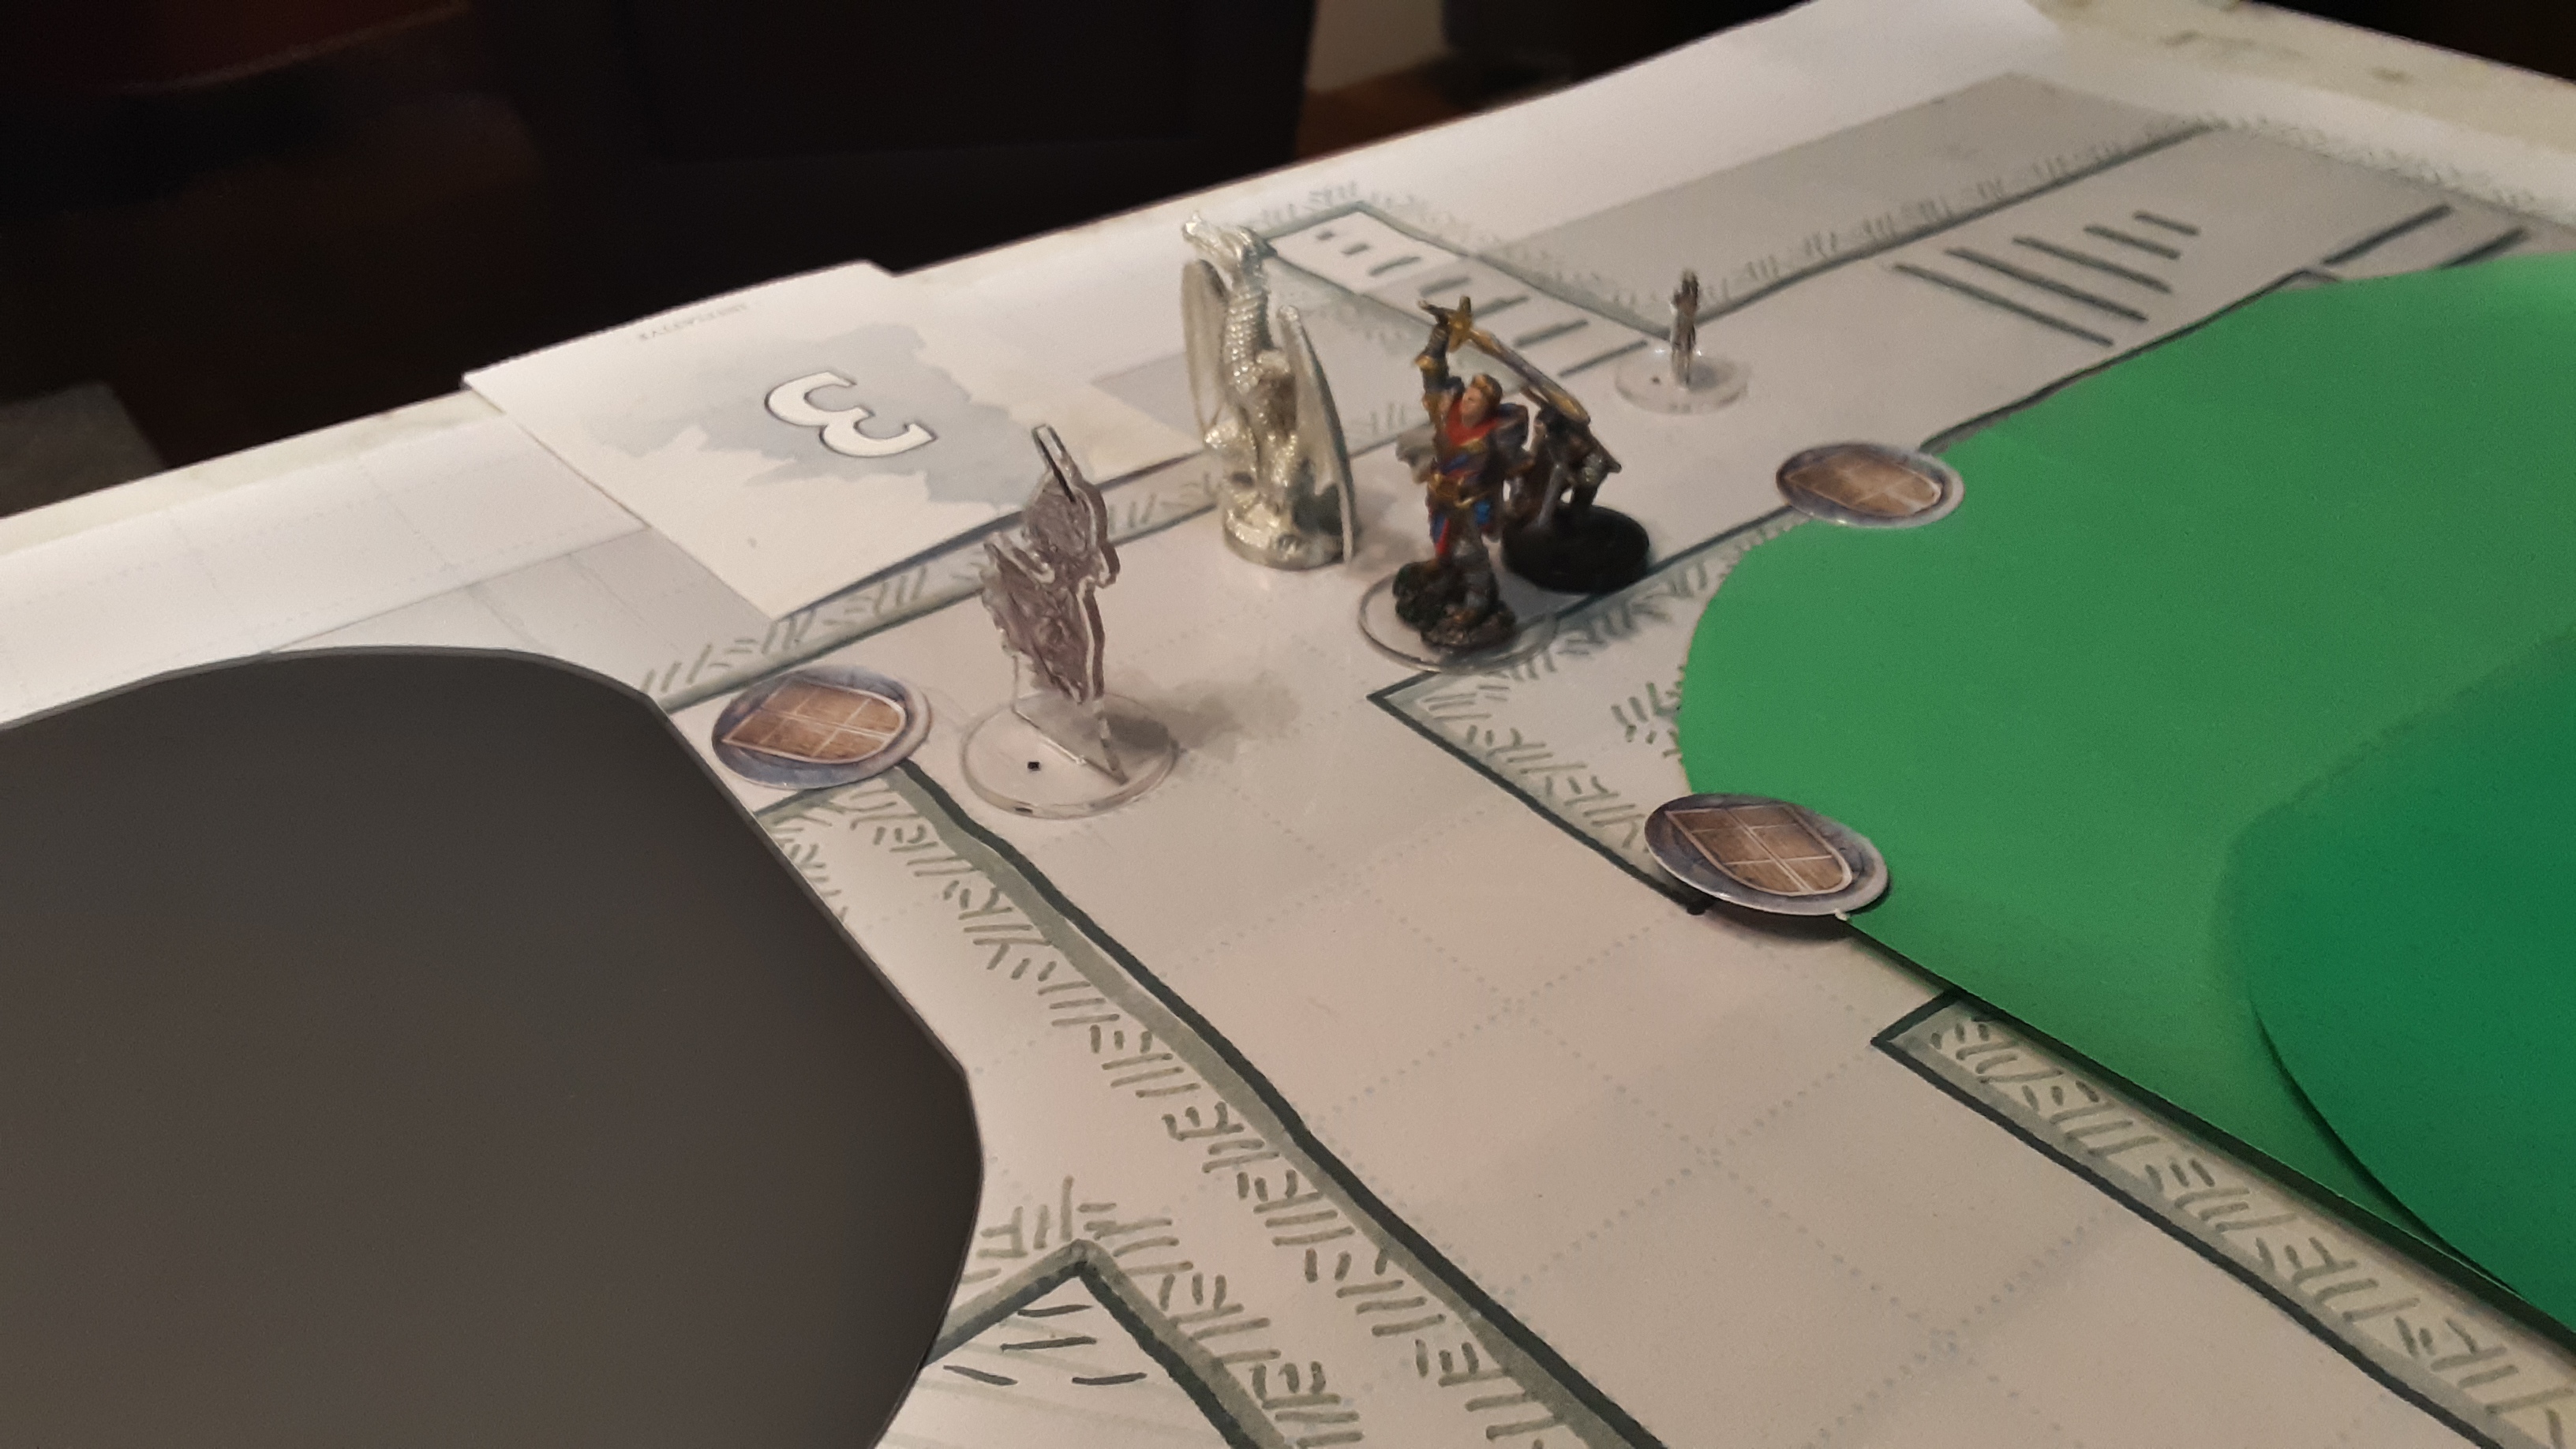
They headed back down and after some additional exploration of the 1st floor they headed up to the back half of the fort’s 2nd floor. They came around the corner and came face to face with a banshee. This banshee is detailed in my DM notes, but is basically an elven ambassador that was held captive and killed before the battle between the two dwarven factions. The party and I learned that banshees are no joke in 5th edition. Most of the players failed their saves against fear and couldn’t approach the banshee as it used it wail and other attacks. They came up with a plan to retreat around the corner and banshee passed through the walls and came around to attack them. This helped by allowing some of the players a chance to attack it in closer range. After a tense battle, the banshee was slain.
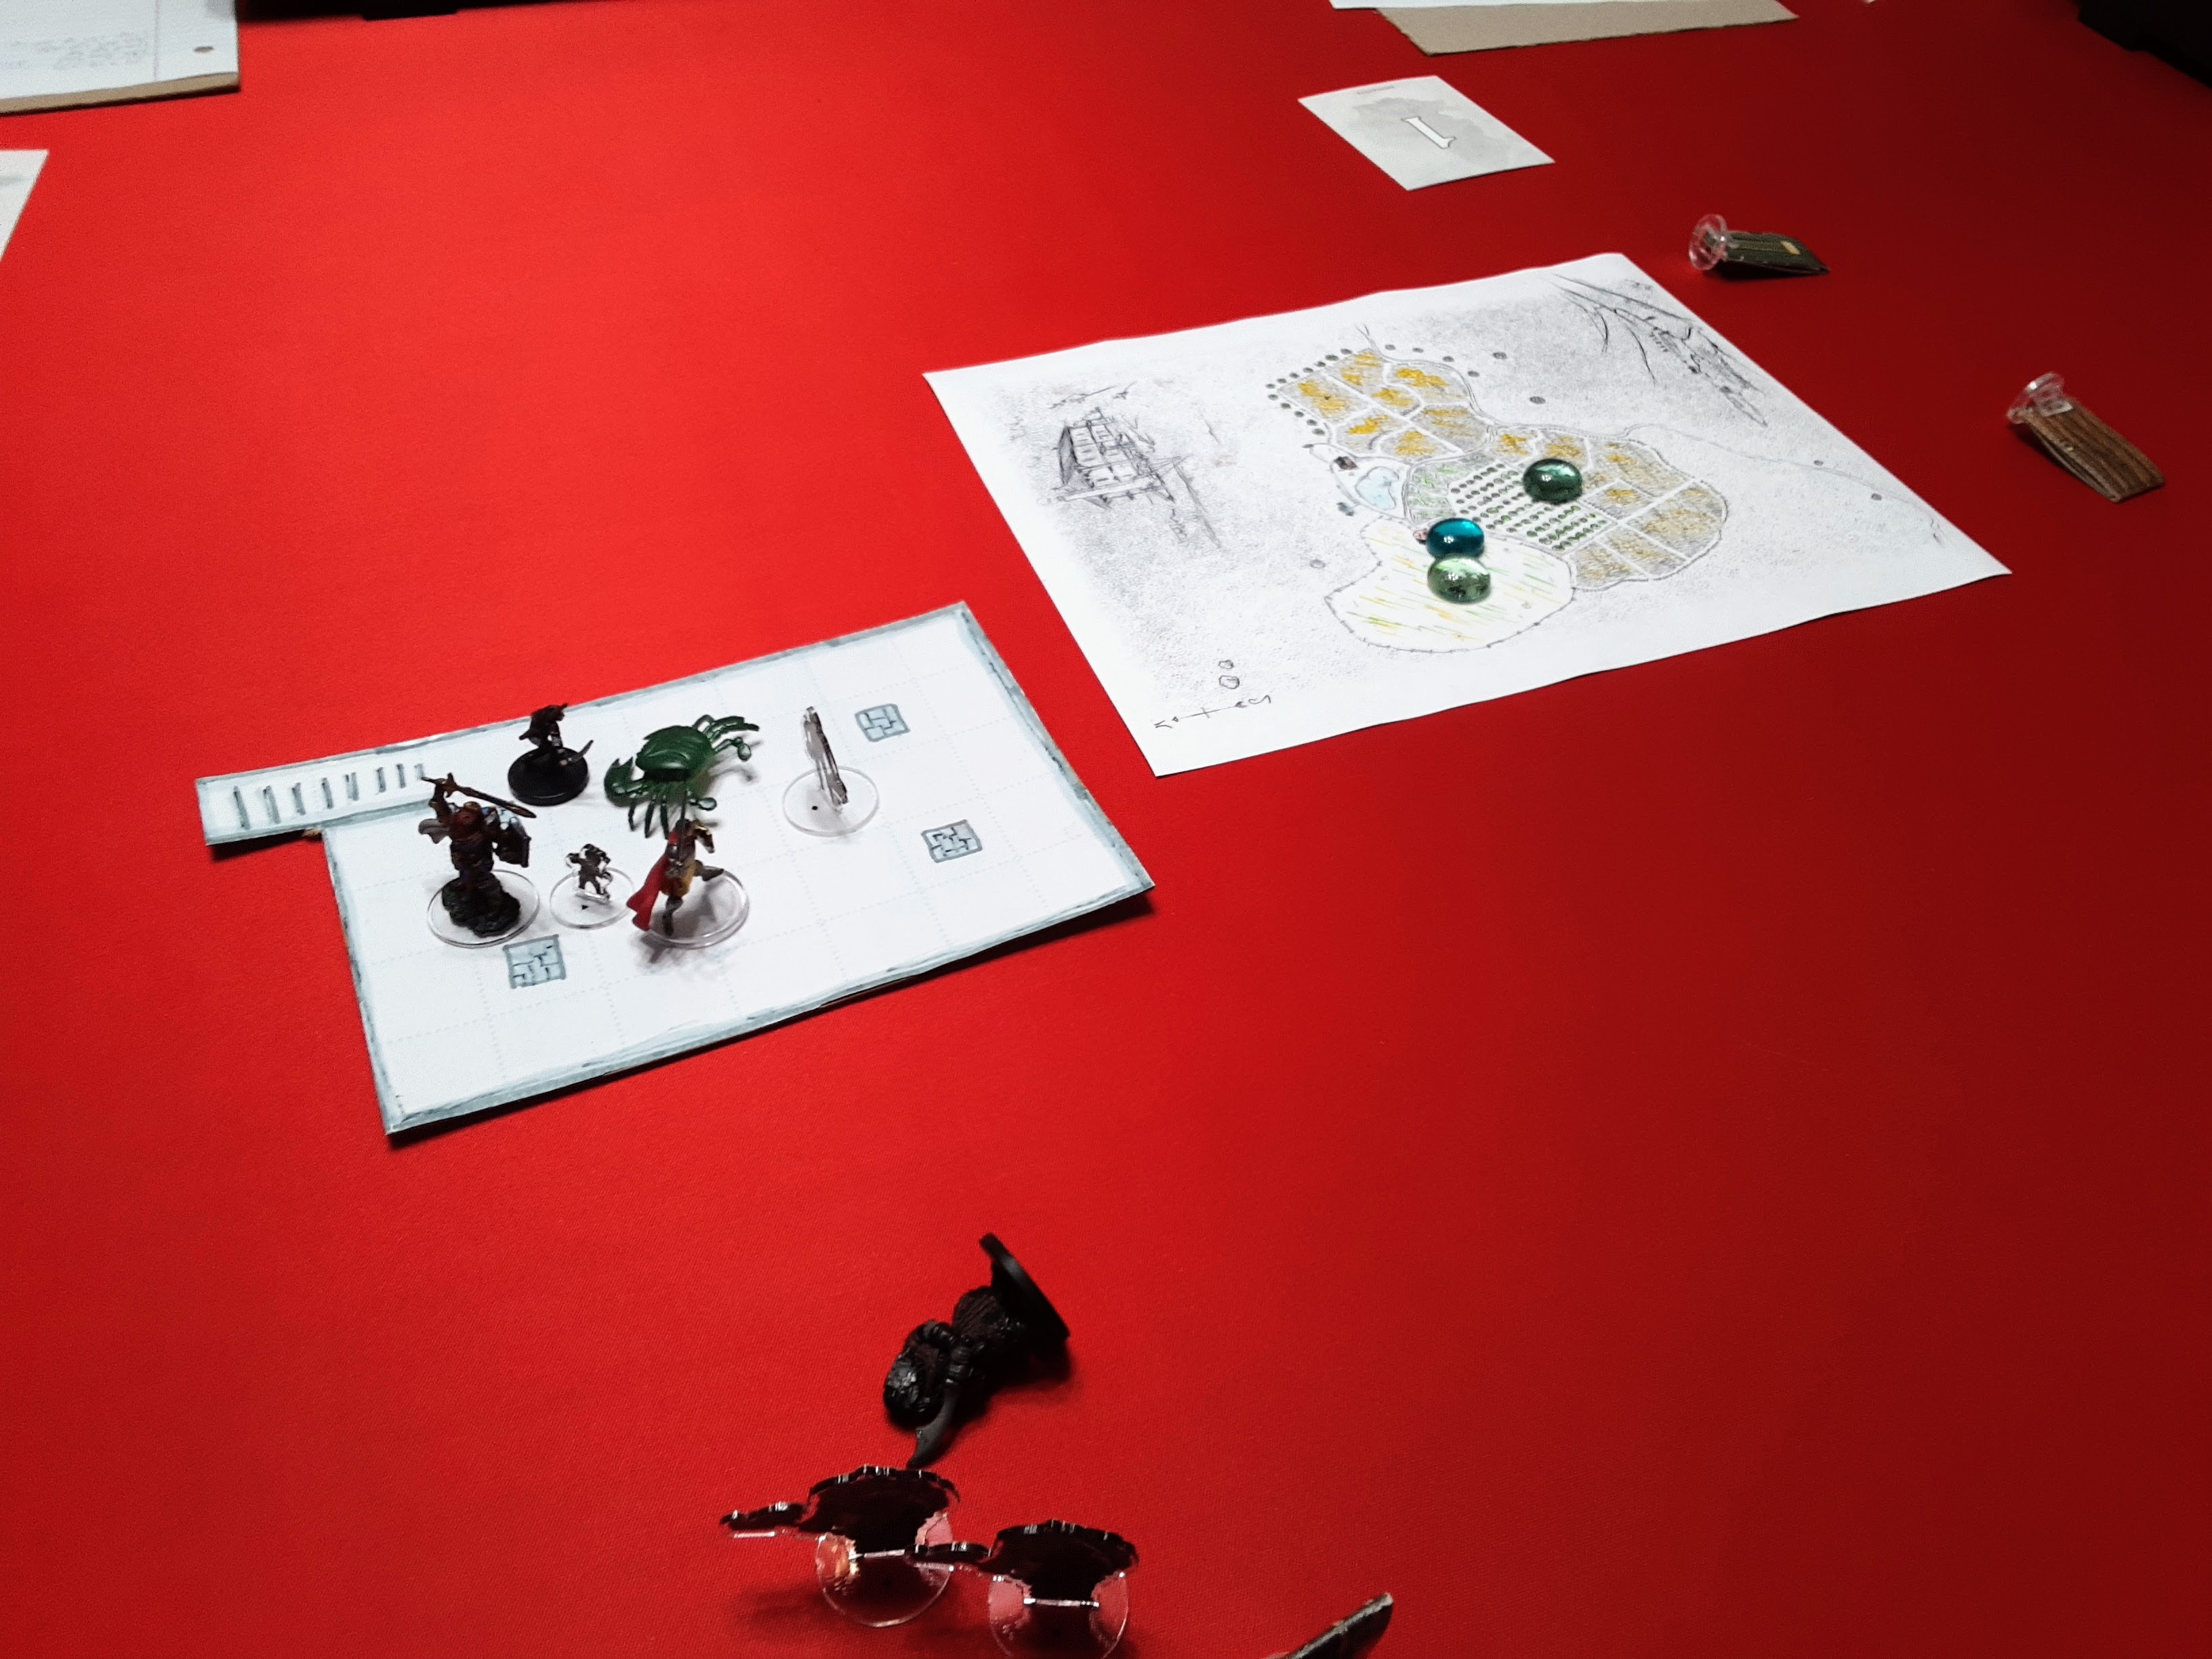
The party continued their exploration of the upper levels, discovering hidden treasures, and later a bathroom full of ghouls coming through the walls. The party finished exploring a few unexplored rooms and gathered their loot. They shared what they found with the Dwarves. The dwarven researchers decided to stay at the fort, asking to keep the broken golden ax, sharing that it was more of a scepter of status and rule over Axeholm than a weapon, and that it should remain with the fort.
The party traveled back to Phandalin, collected their reward, and decided on their next quest. The choice being between Mountain’s Toe Gold Mine, Dragon Barrow, and Woodland Manse. The knight really wanted to go to Dragon Barrow, hearing that there was a sword there, but the party voted and decided that The Woodland Manse would be there next quest.
Sept 2024 Gold Button Award
 It was great to see that I was awarded a Golden Button back in September. They used an image of the party fighting orcs at Butterskull Ranch, Sissal the Warlock, Waffle the Druid, Sir Richard the Fighter, Philbo the Squire, and Capt. Pinchy the Giant Crab.
Dragon of Icespire Peak: Preparing for Axeholm
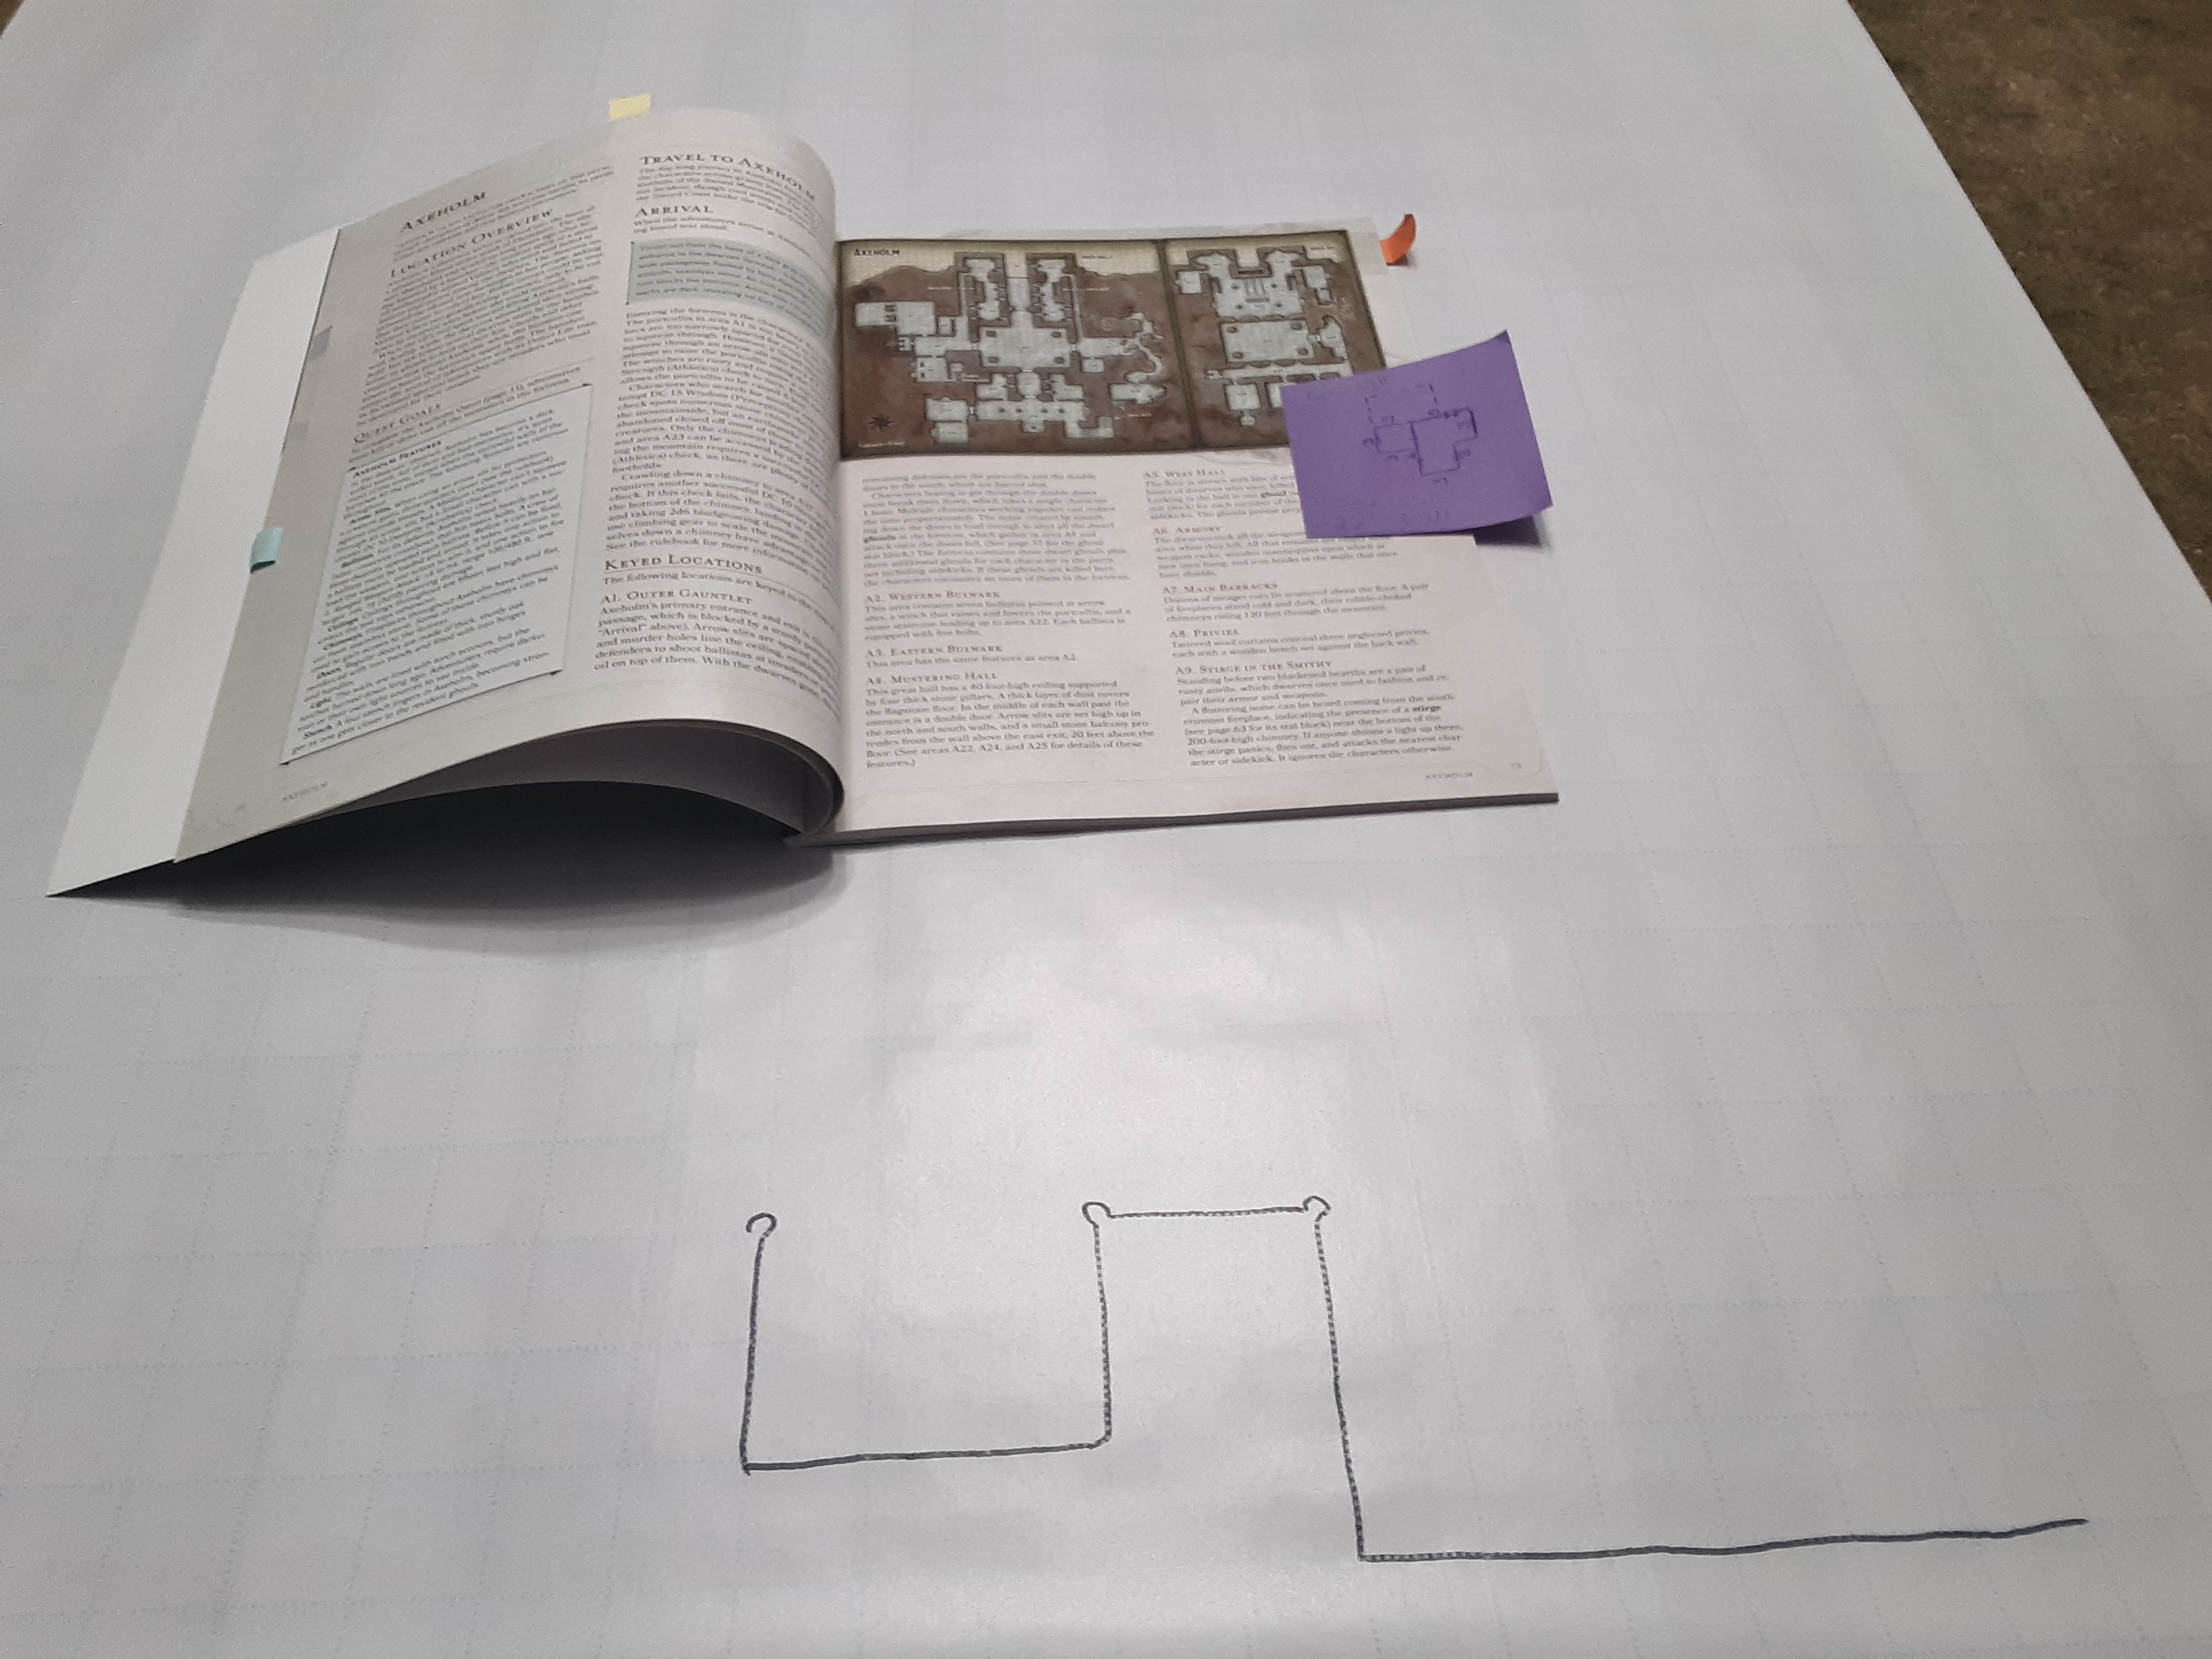
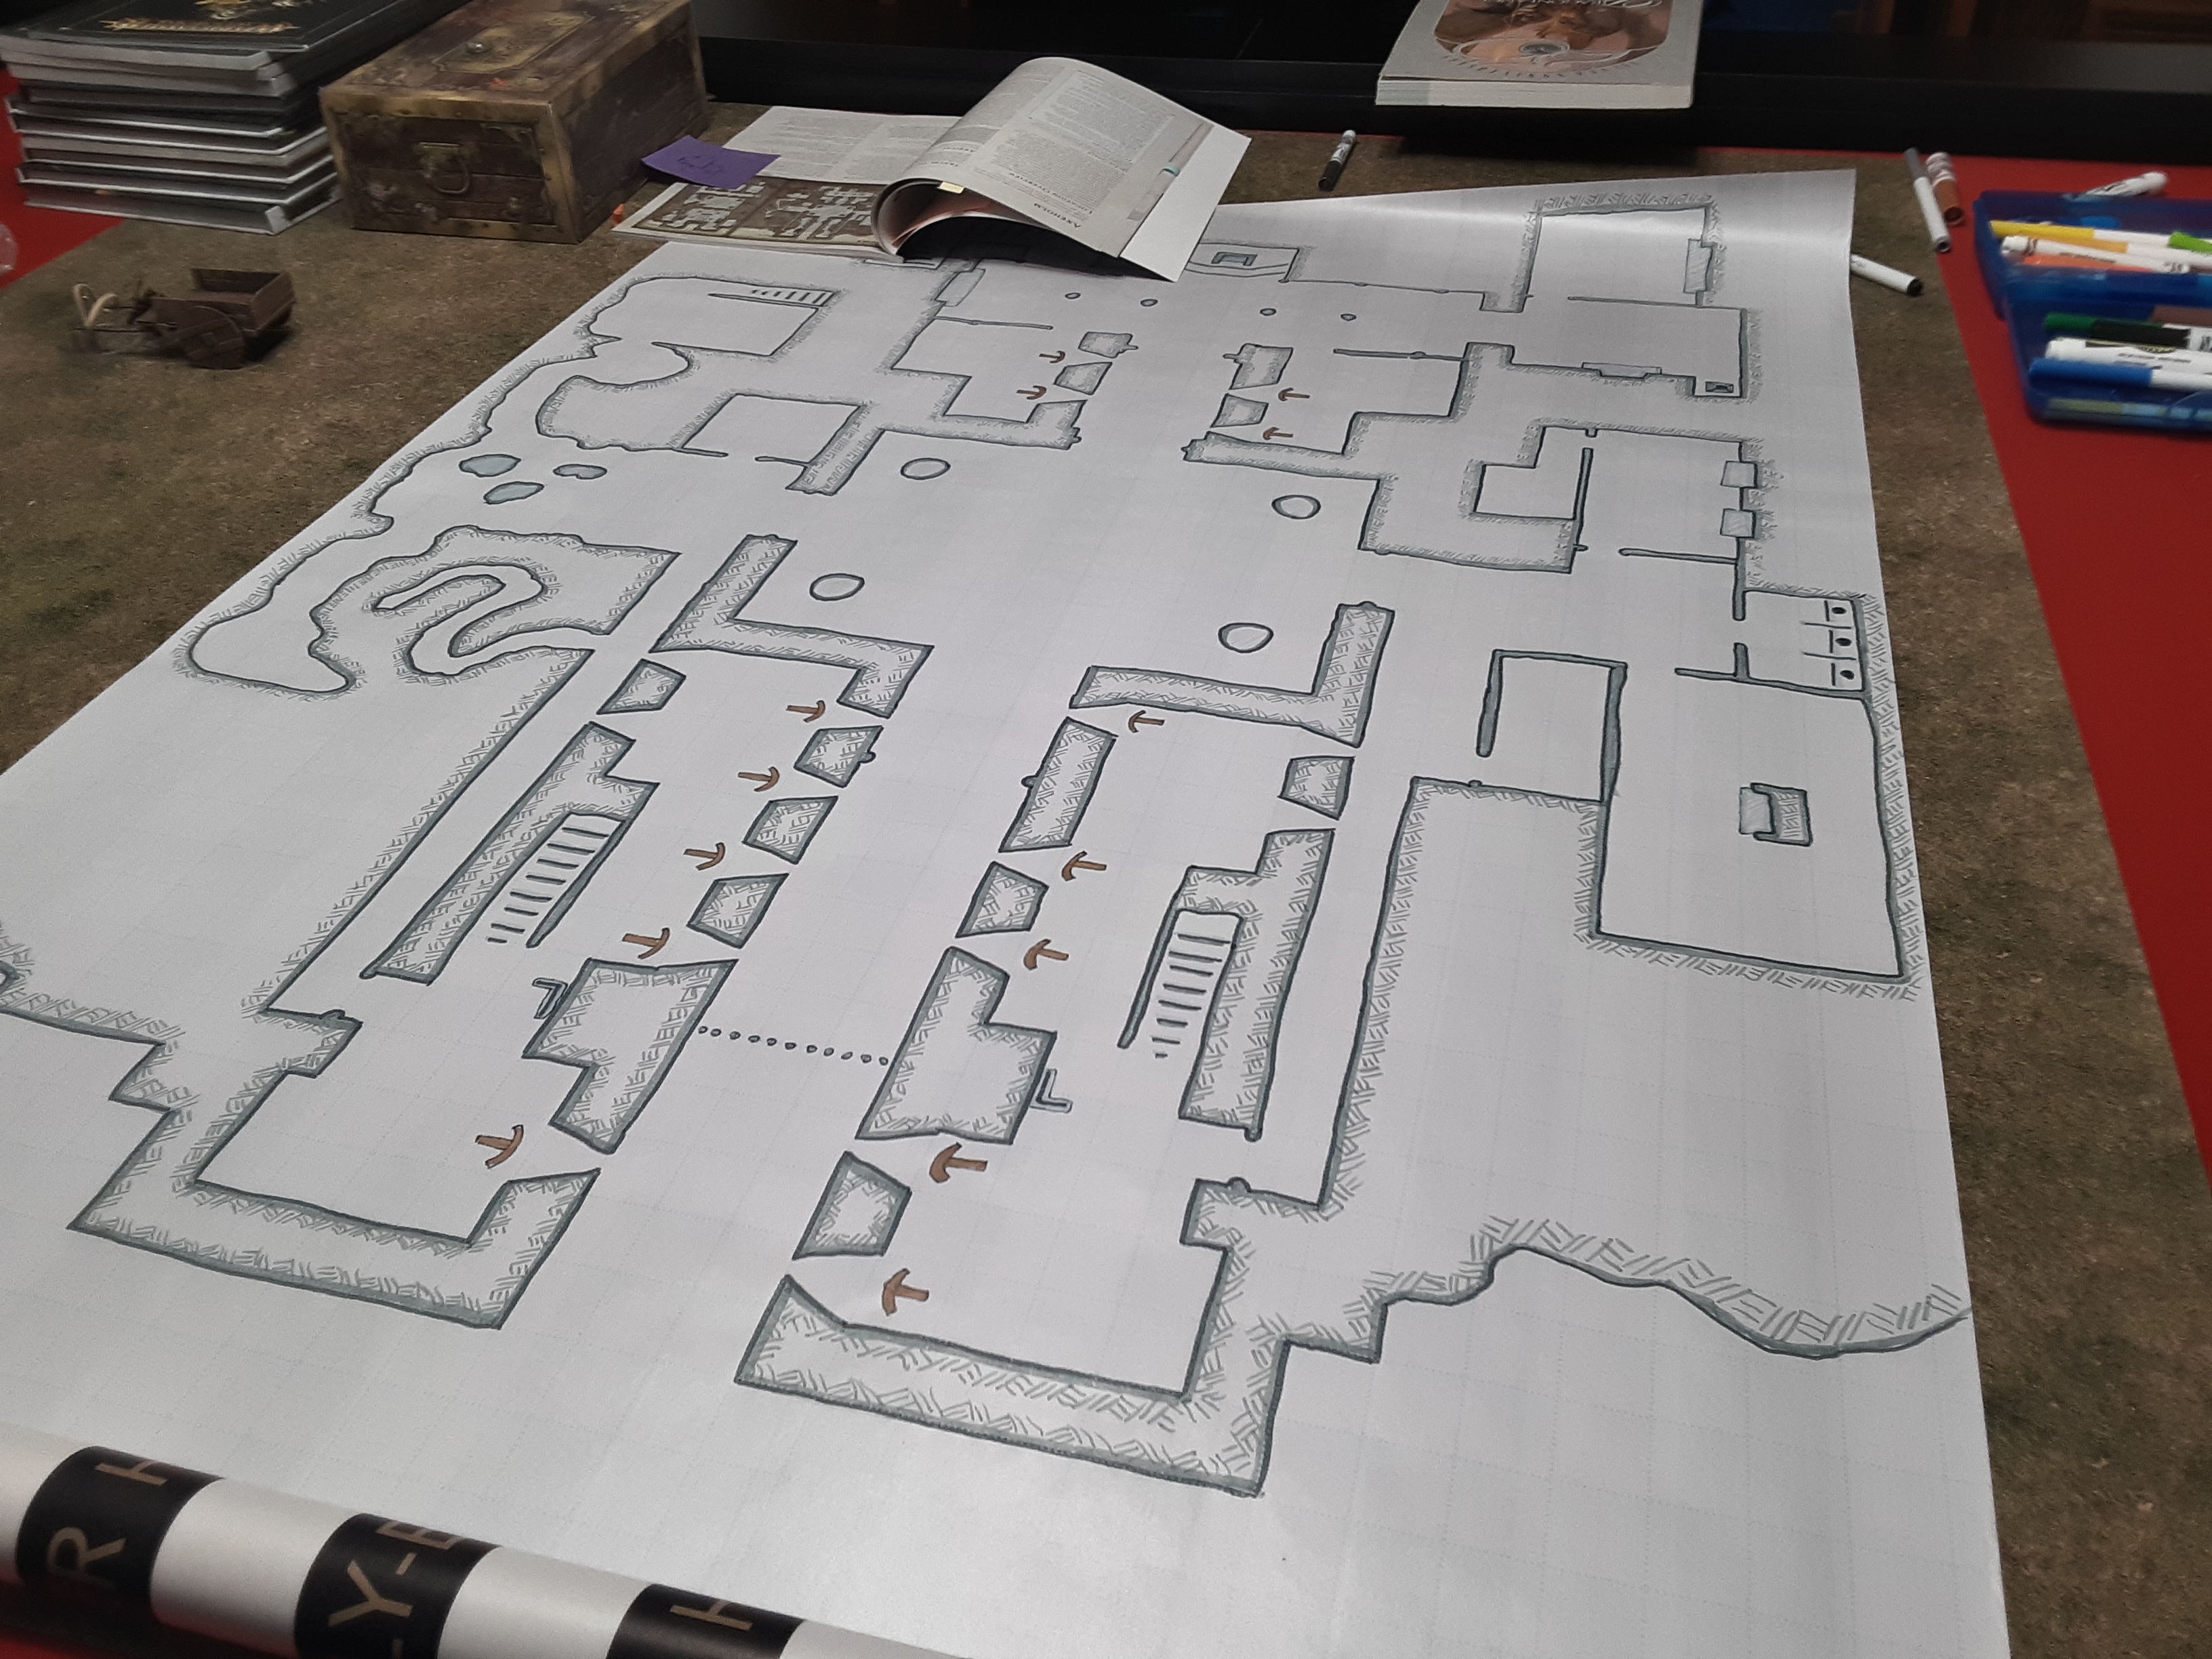
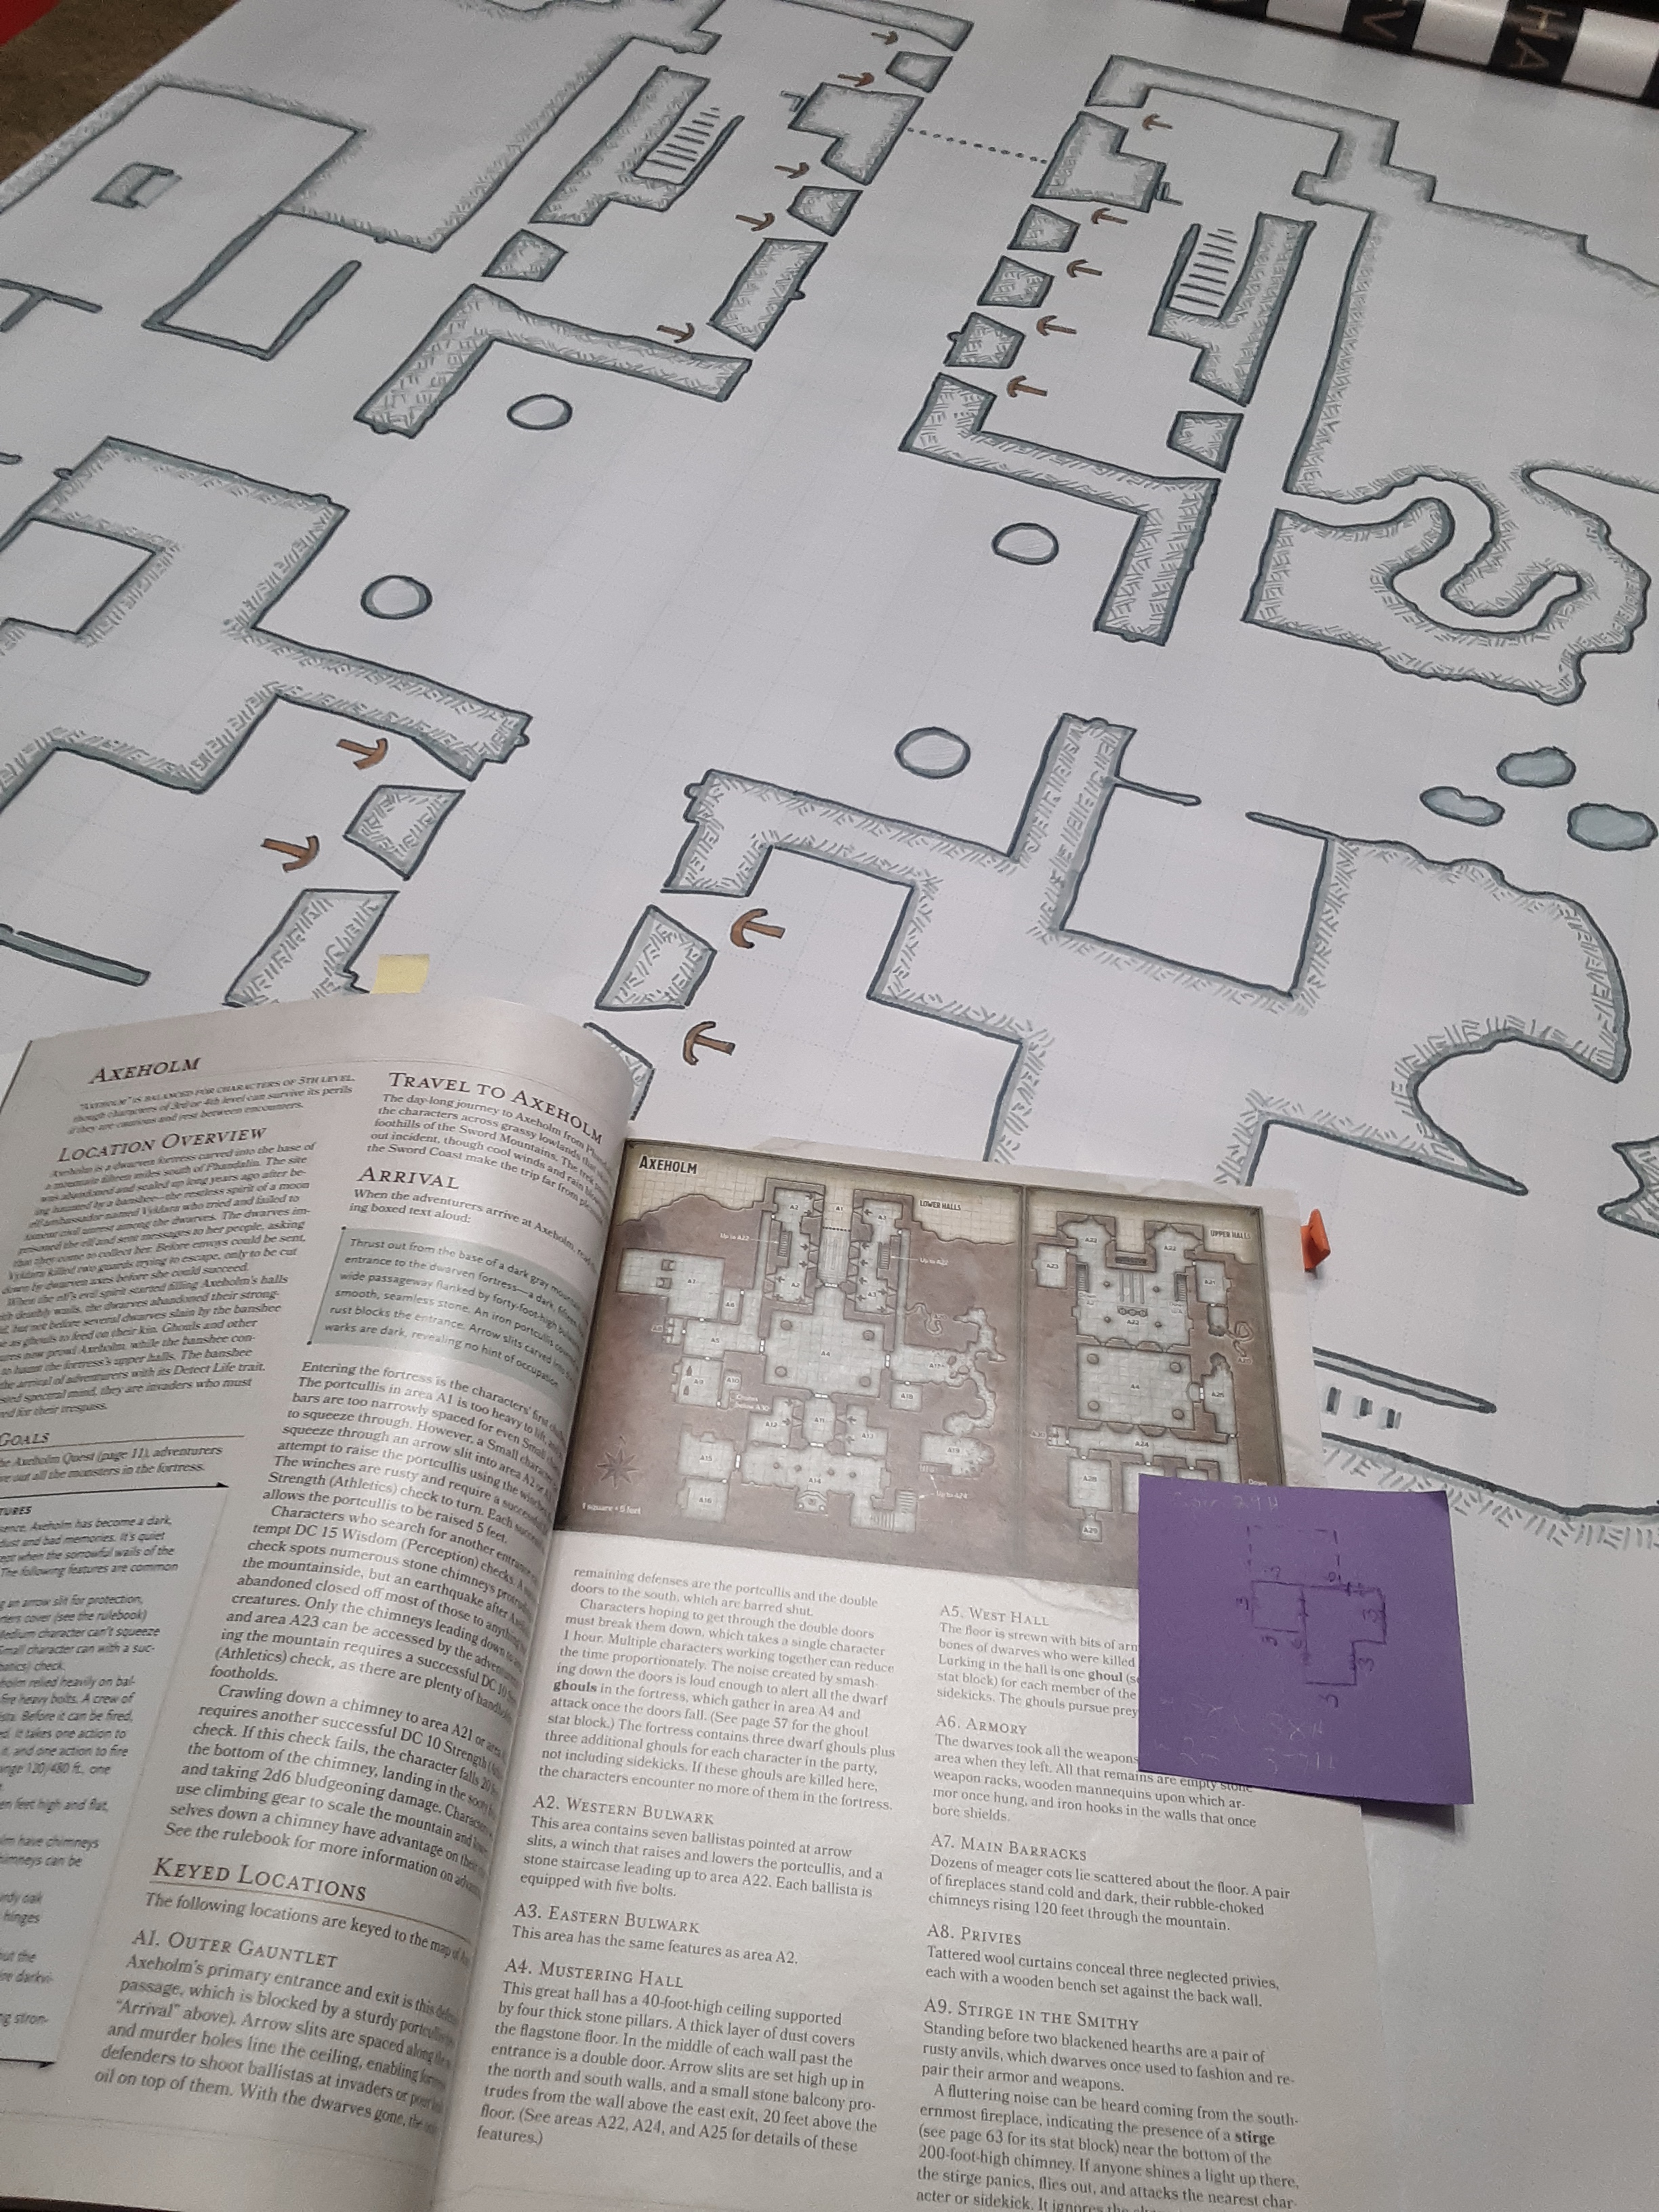
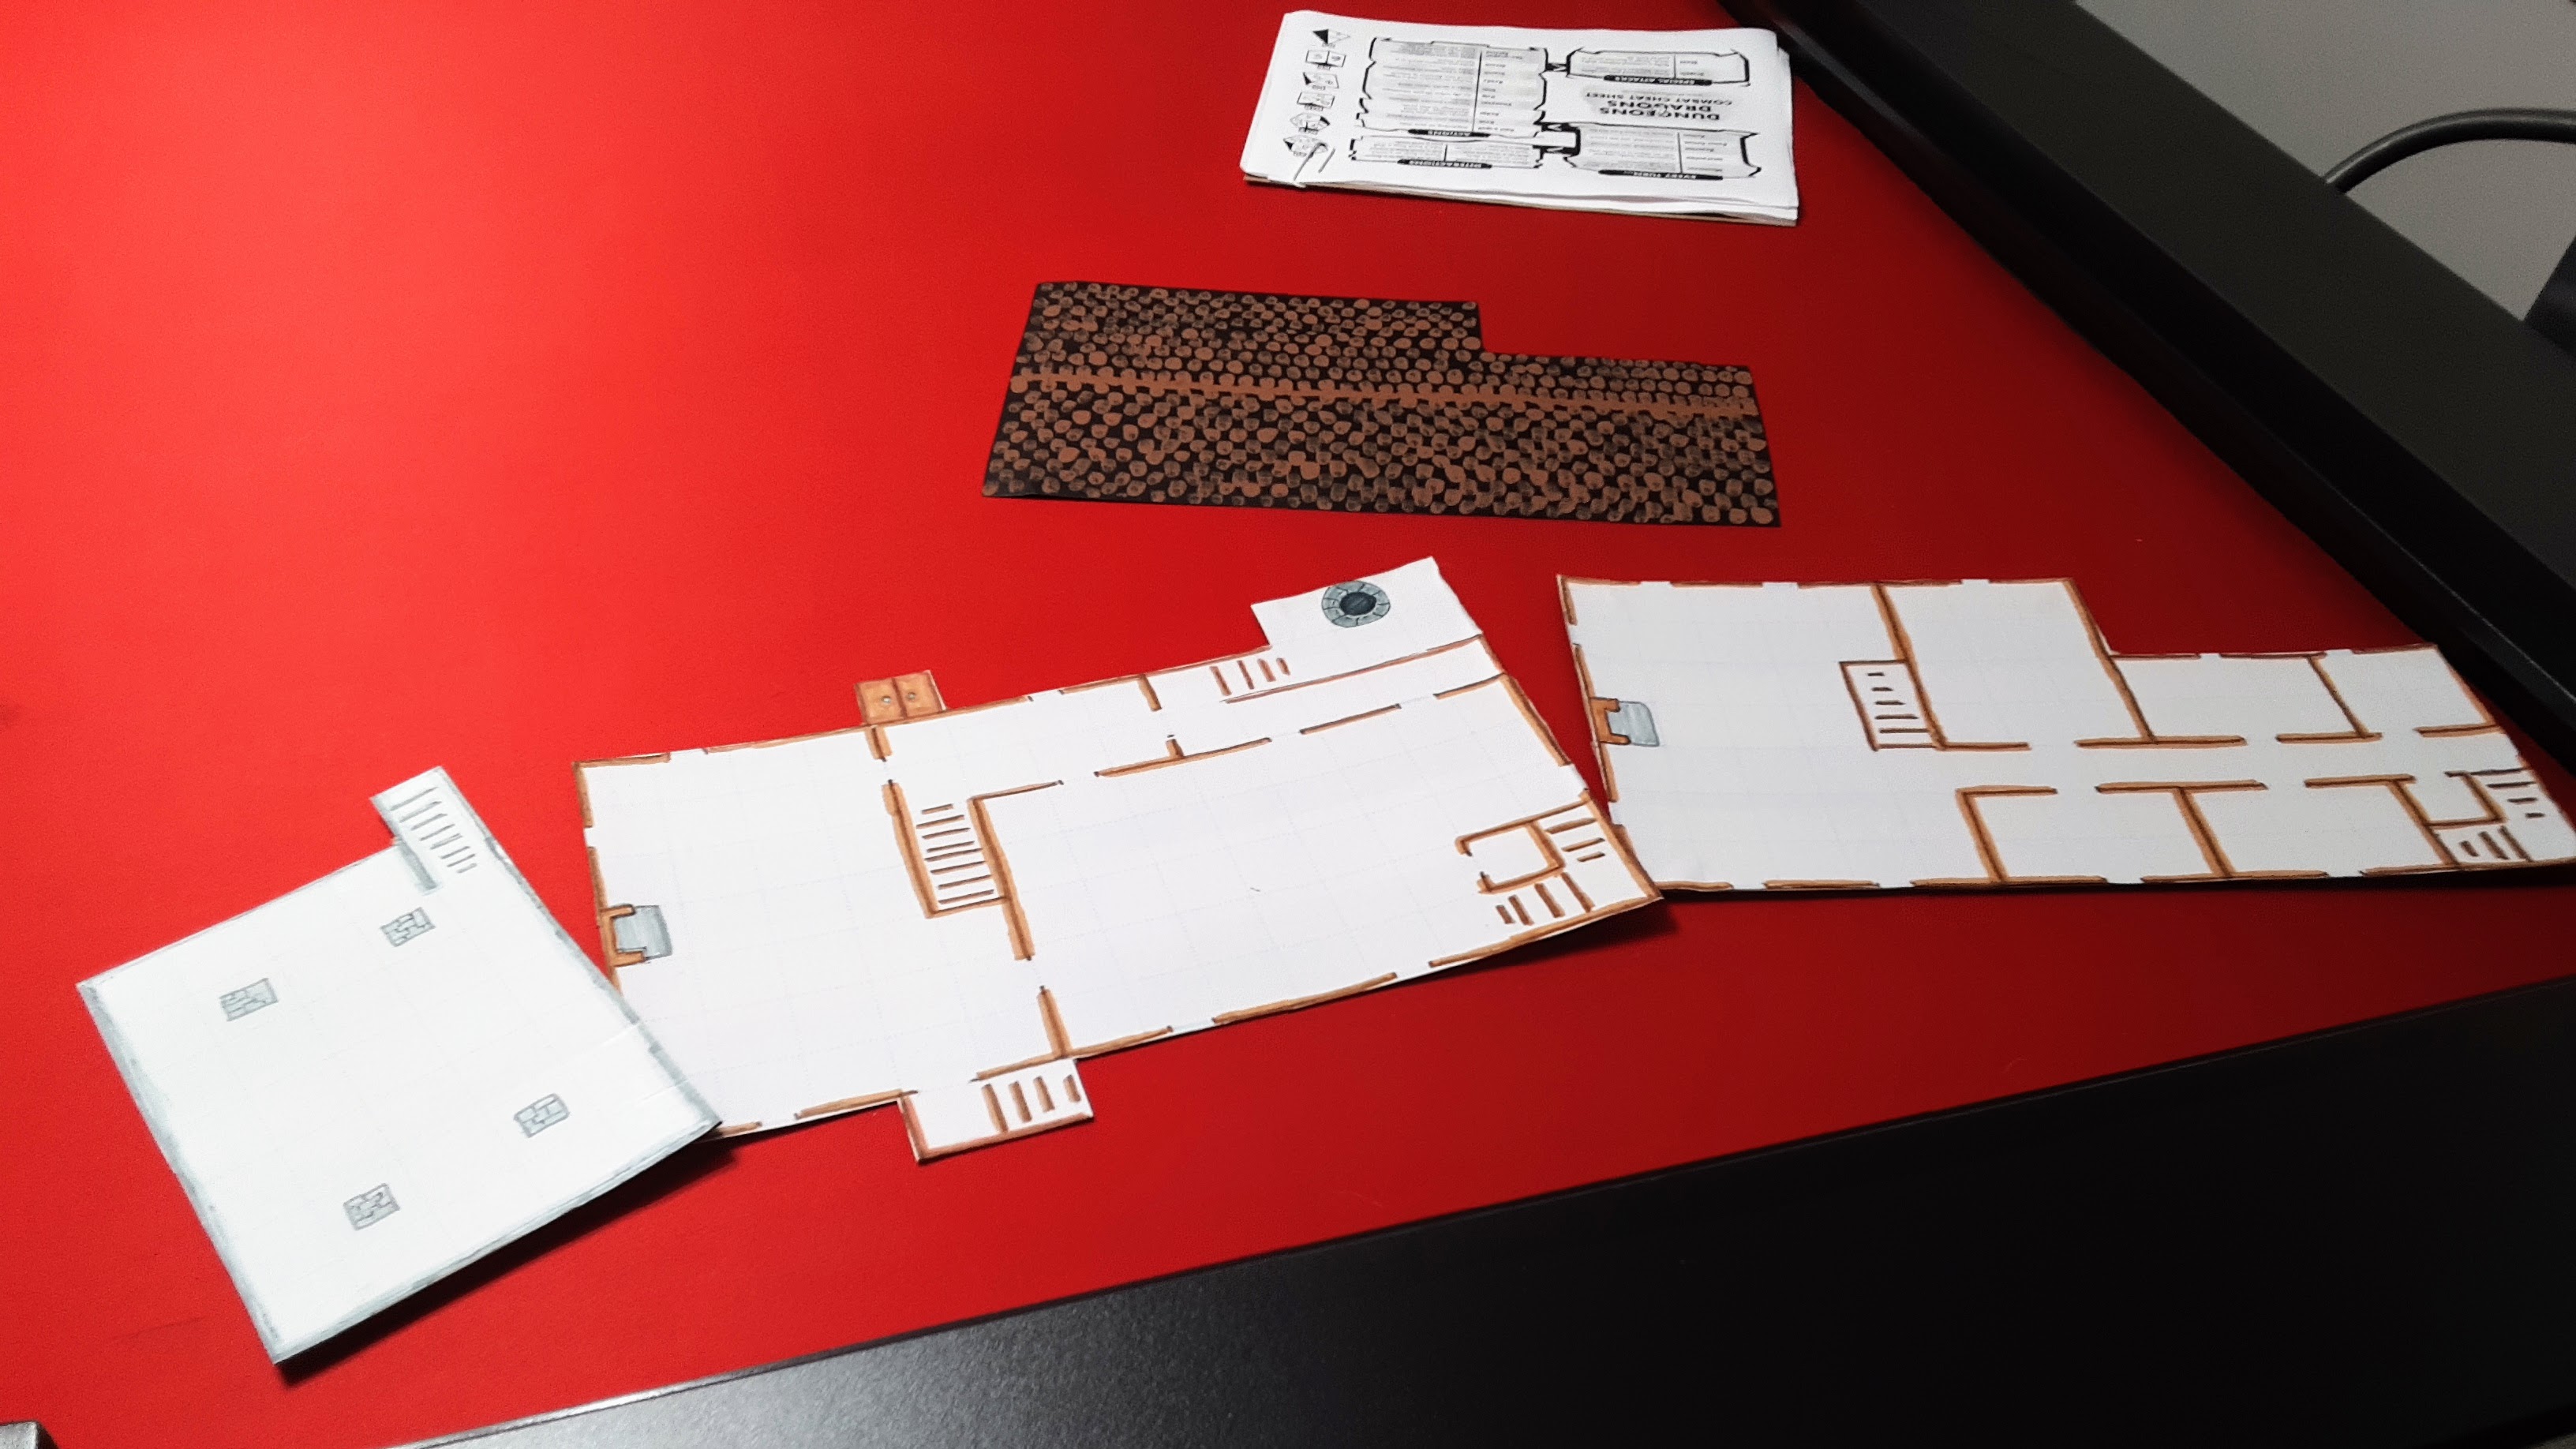
The adventuring party chose the Axeholm Quest at the end of their last adventure. This quest has one of the larger areas and included a multi-level fortress.
I ended up using my go-to process of wrapping paper and markers to make the battle map for the game.
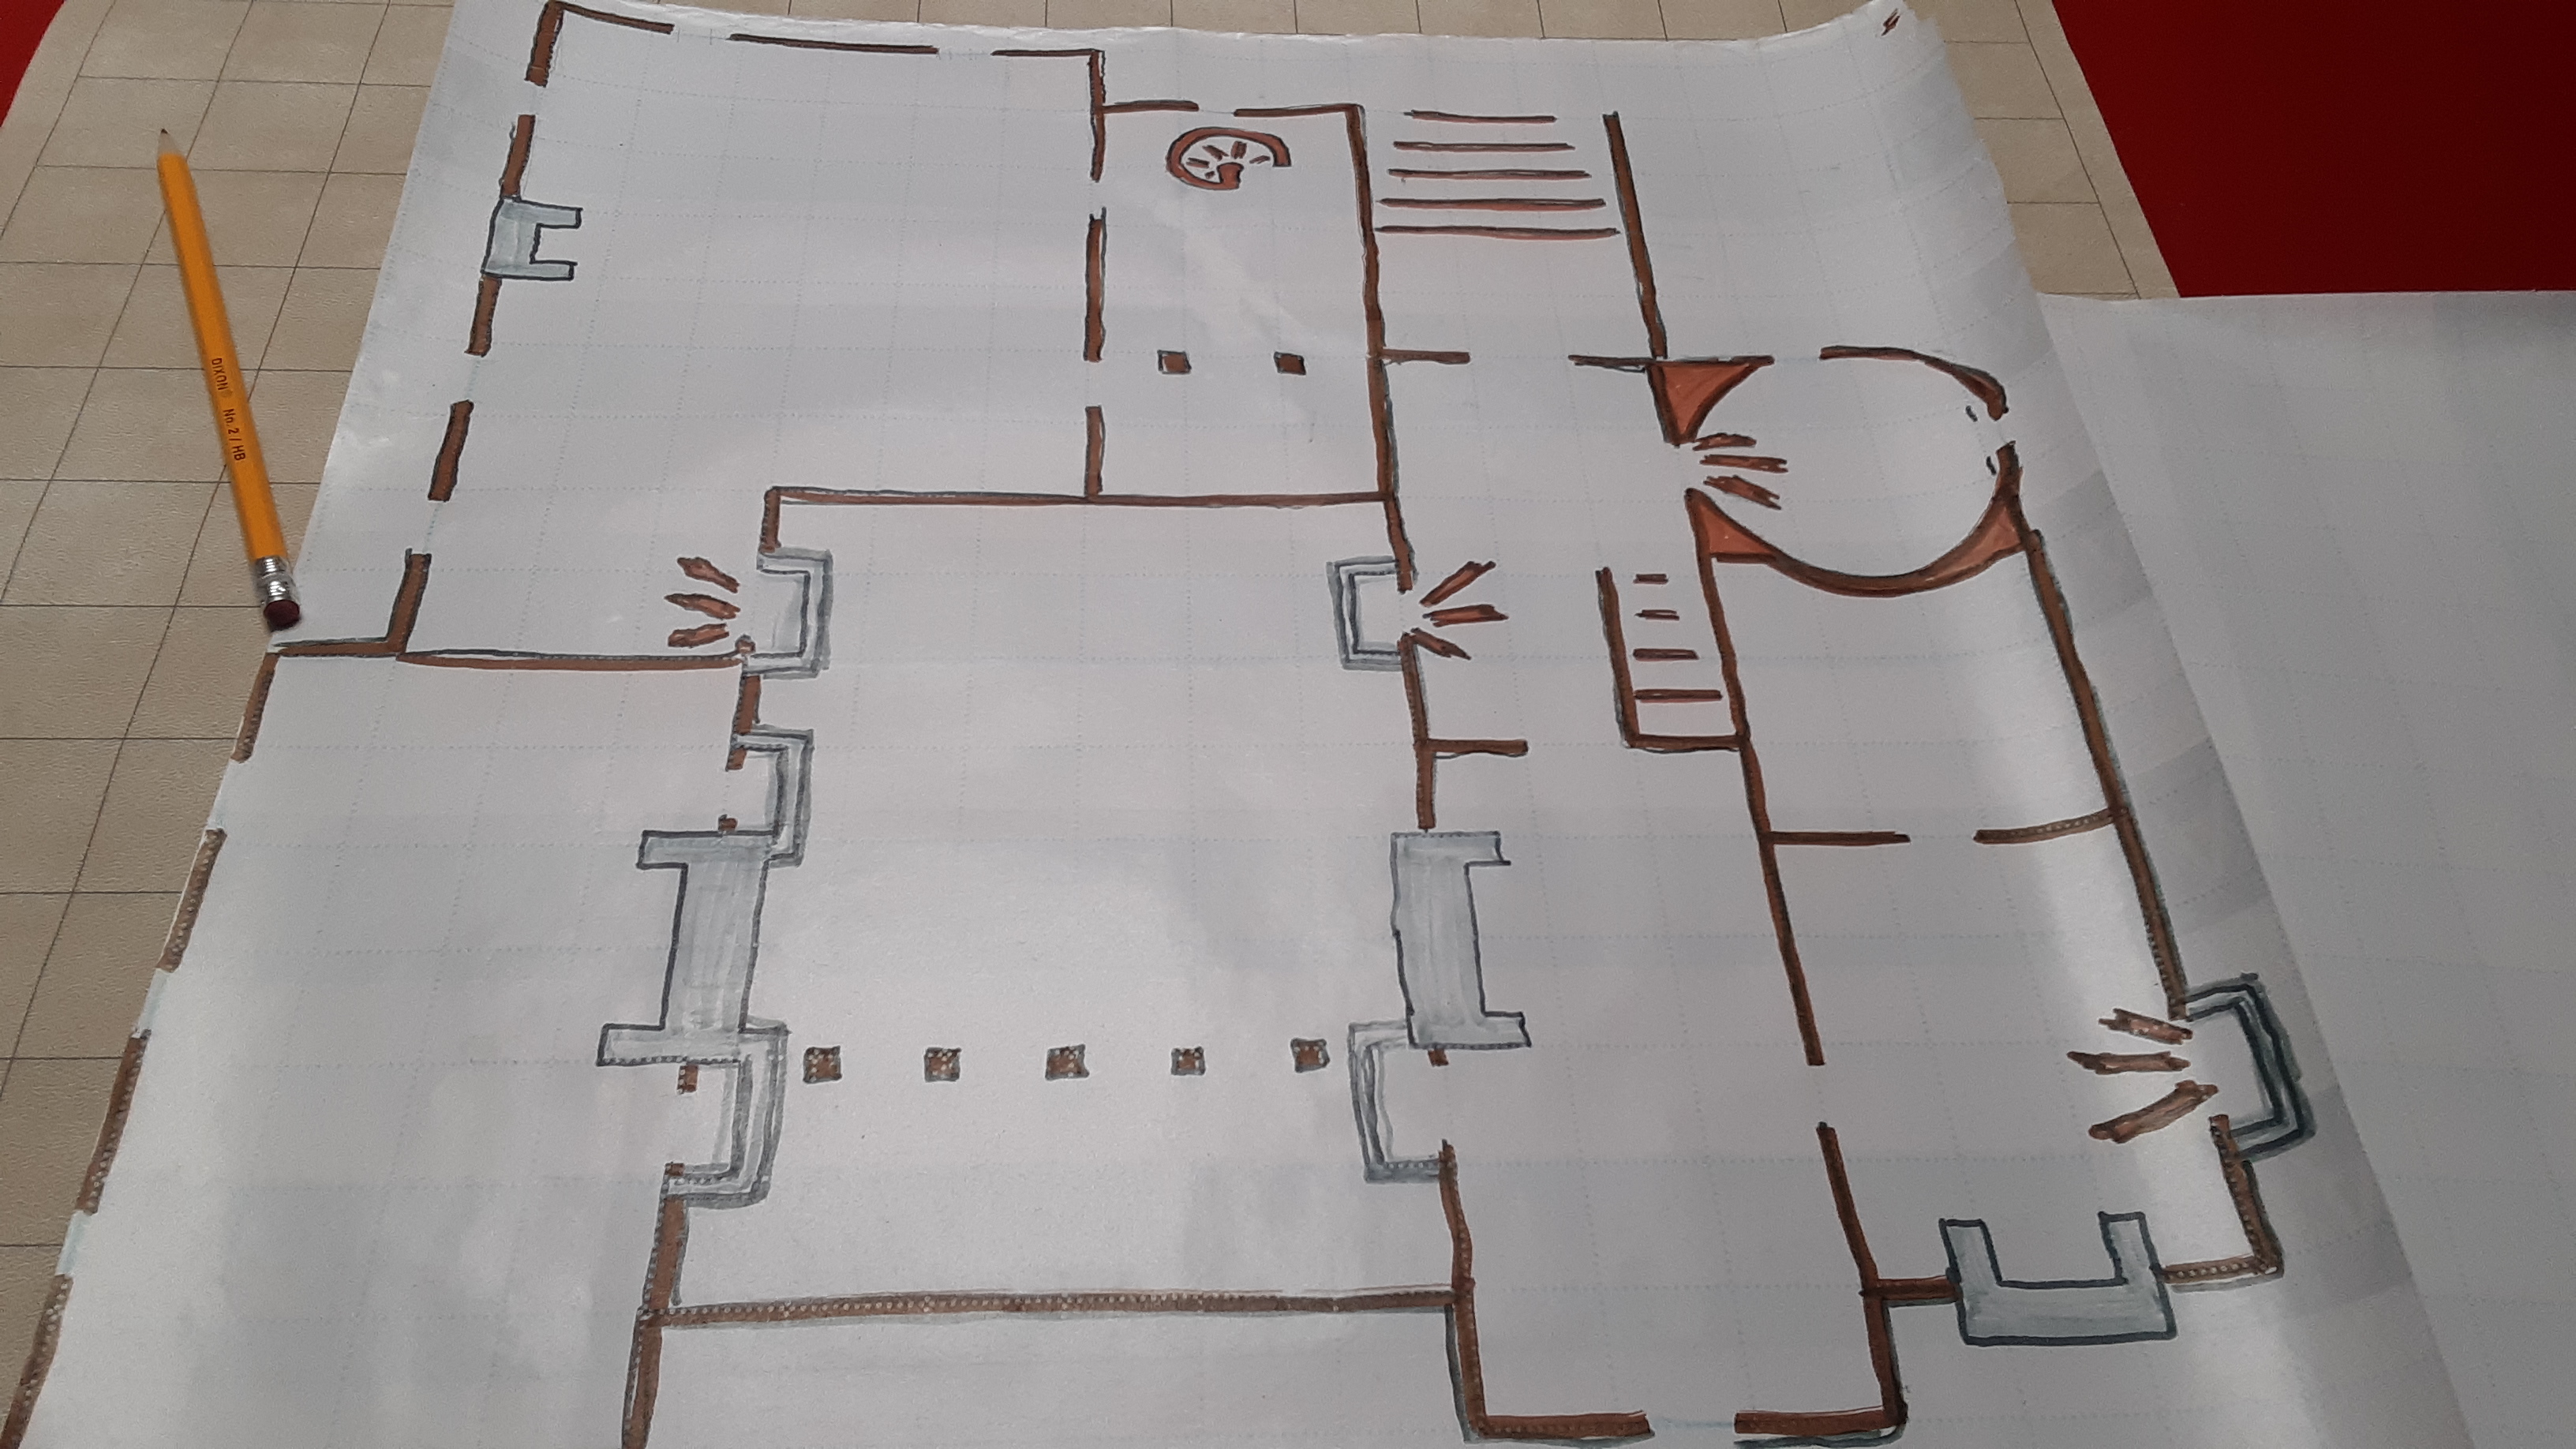
I started with level 1 of the fortress. I like to make hash-marks to indicate dead space in the dungeons, but I started to regret this process toward the end…so…many…hash-marks…
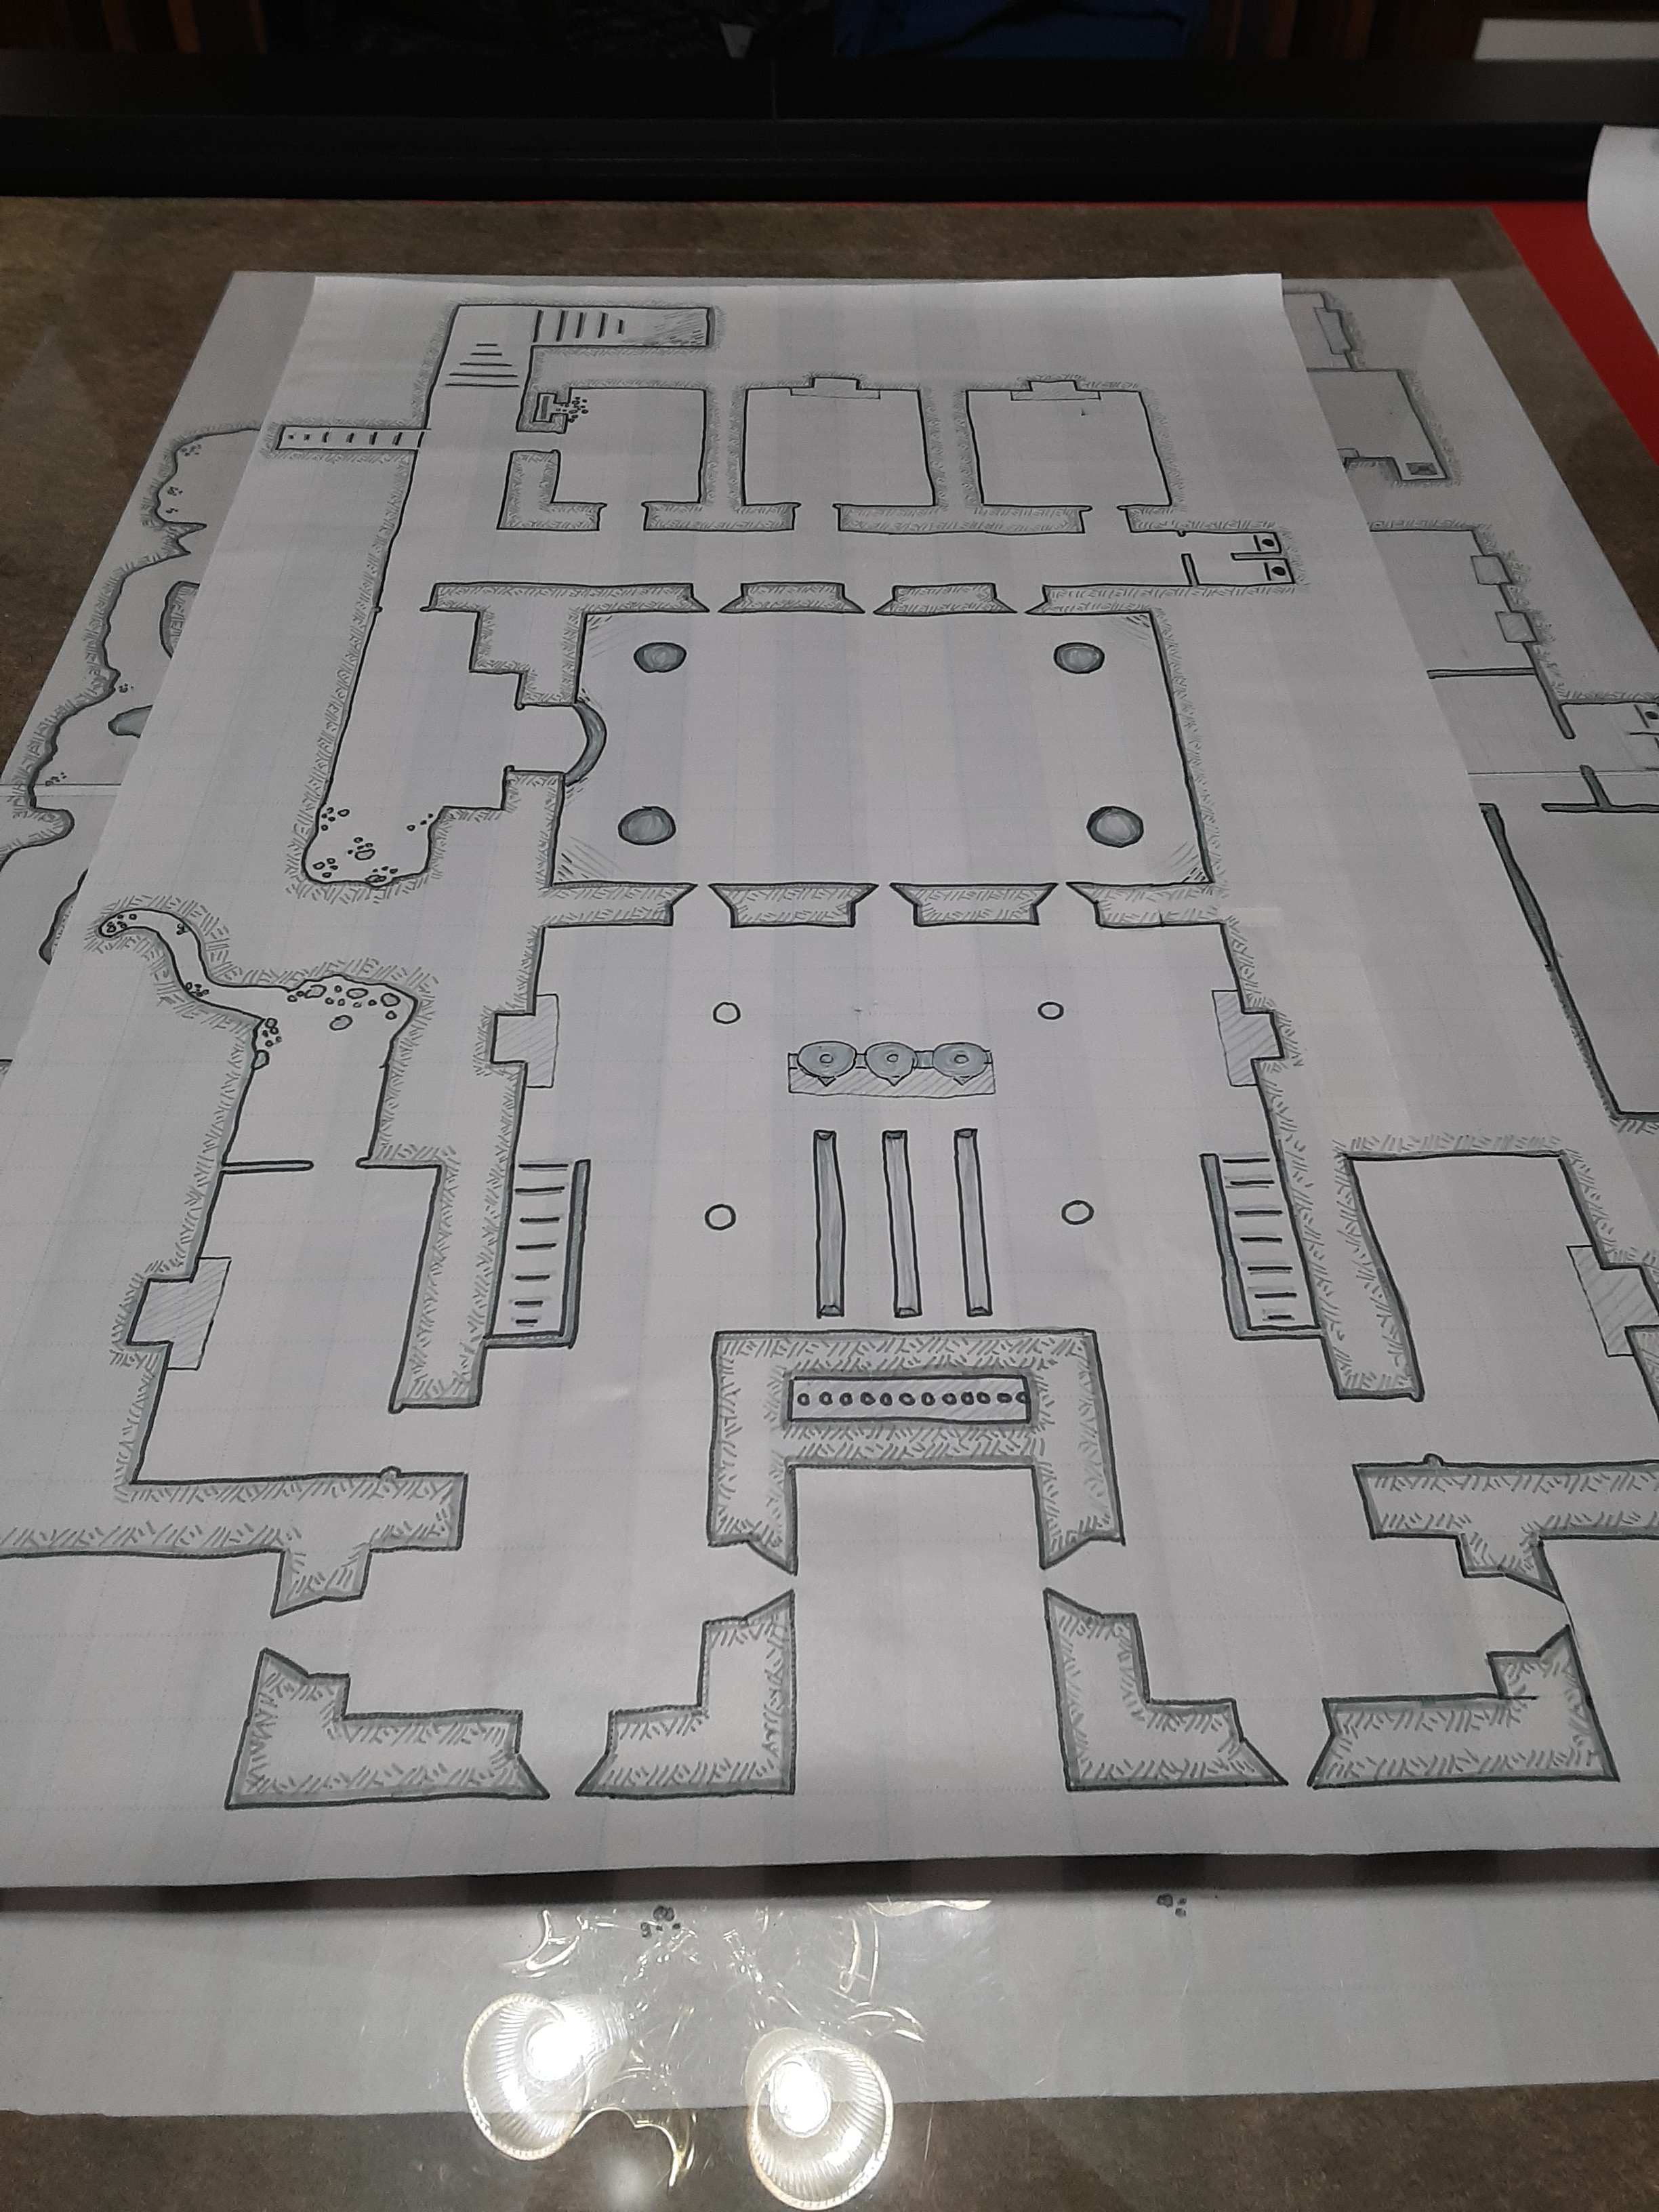
I was limited to my wrapping paper width and ended up having to make some of the rooms smaller than the maps found in the Dragon of Icespire Peak book.
I placed wrapping paper over level 1 so I’d be able to match up all the locations as I drew level 2.
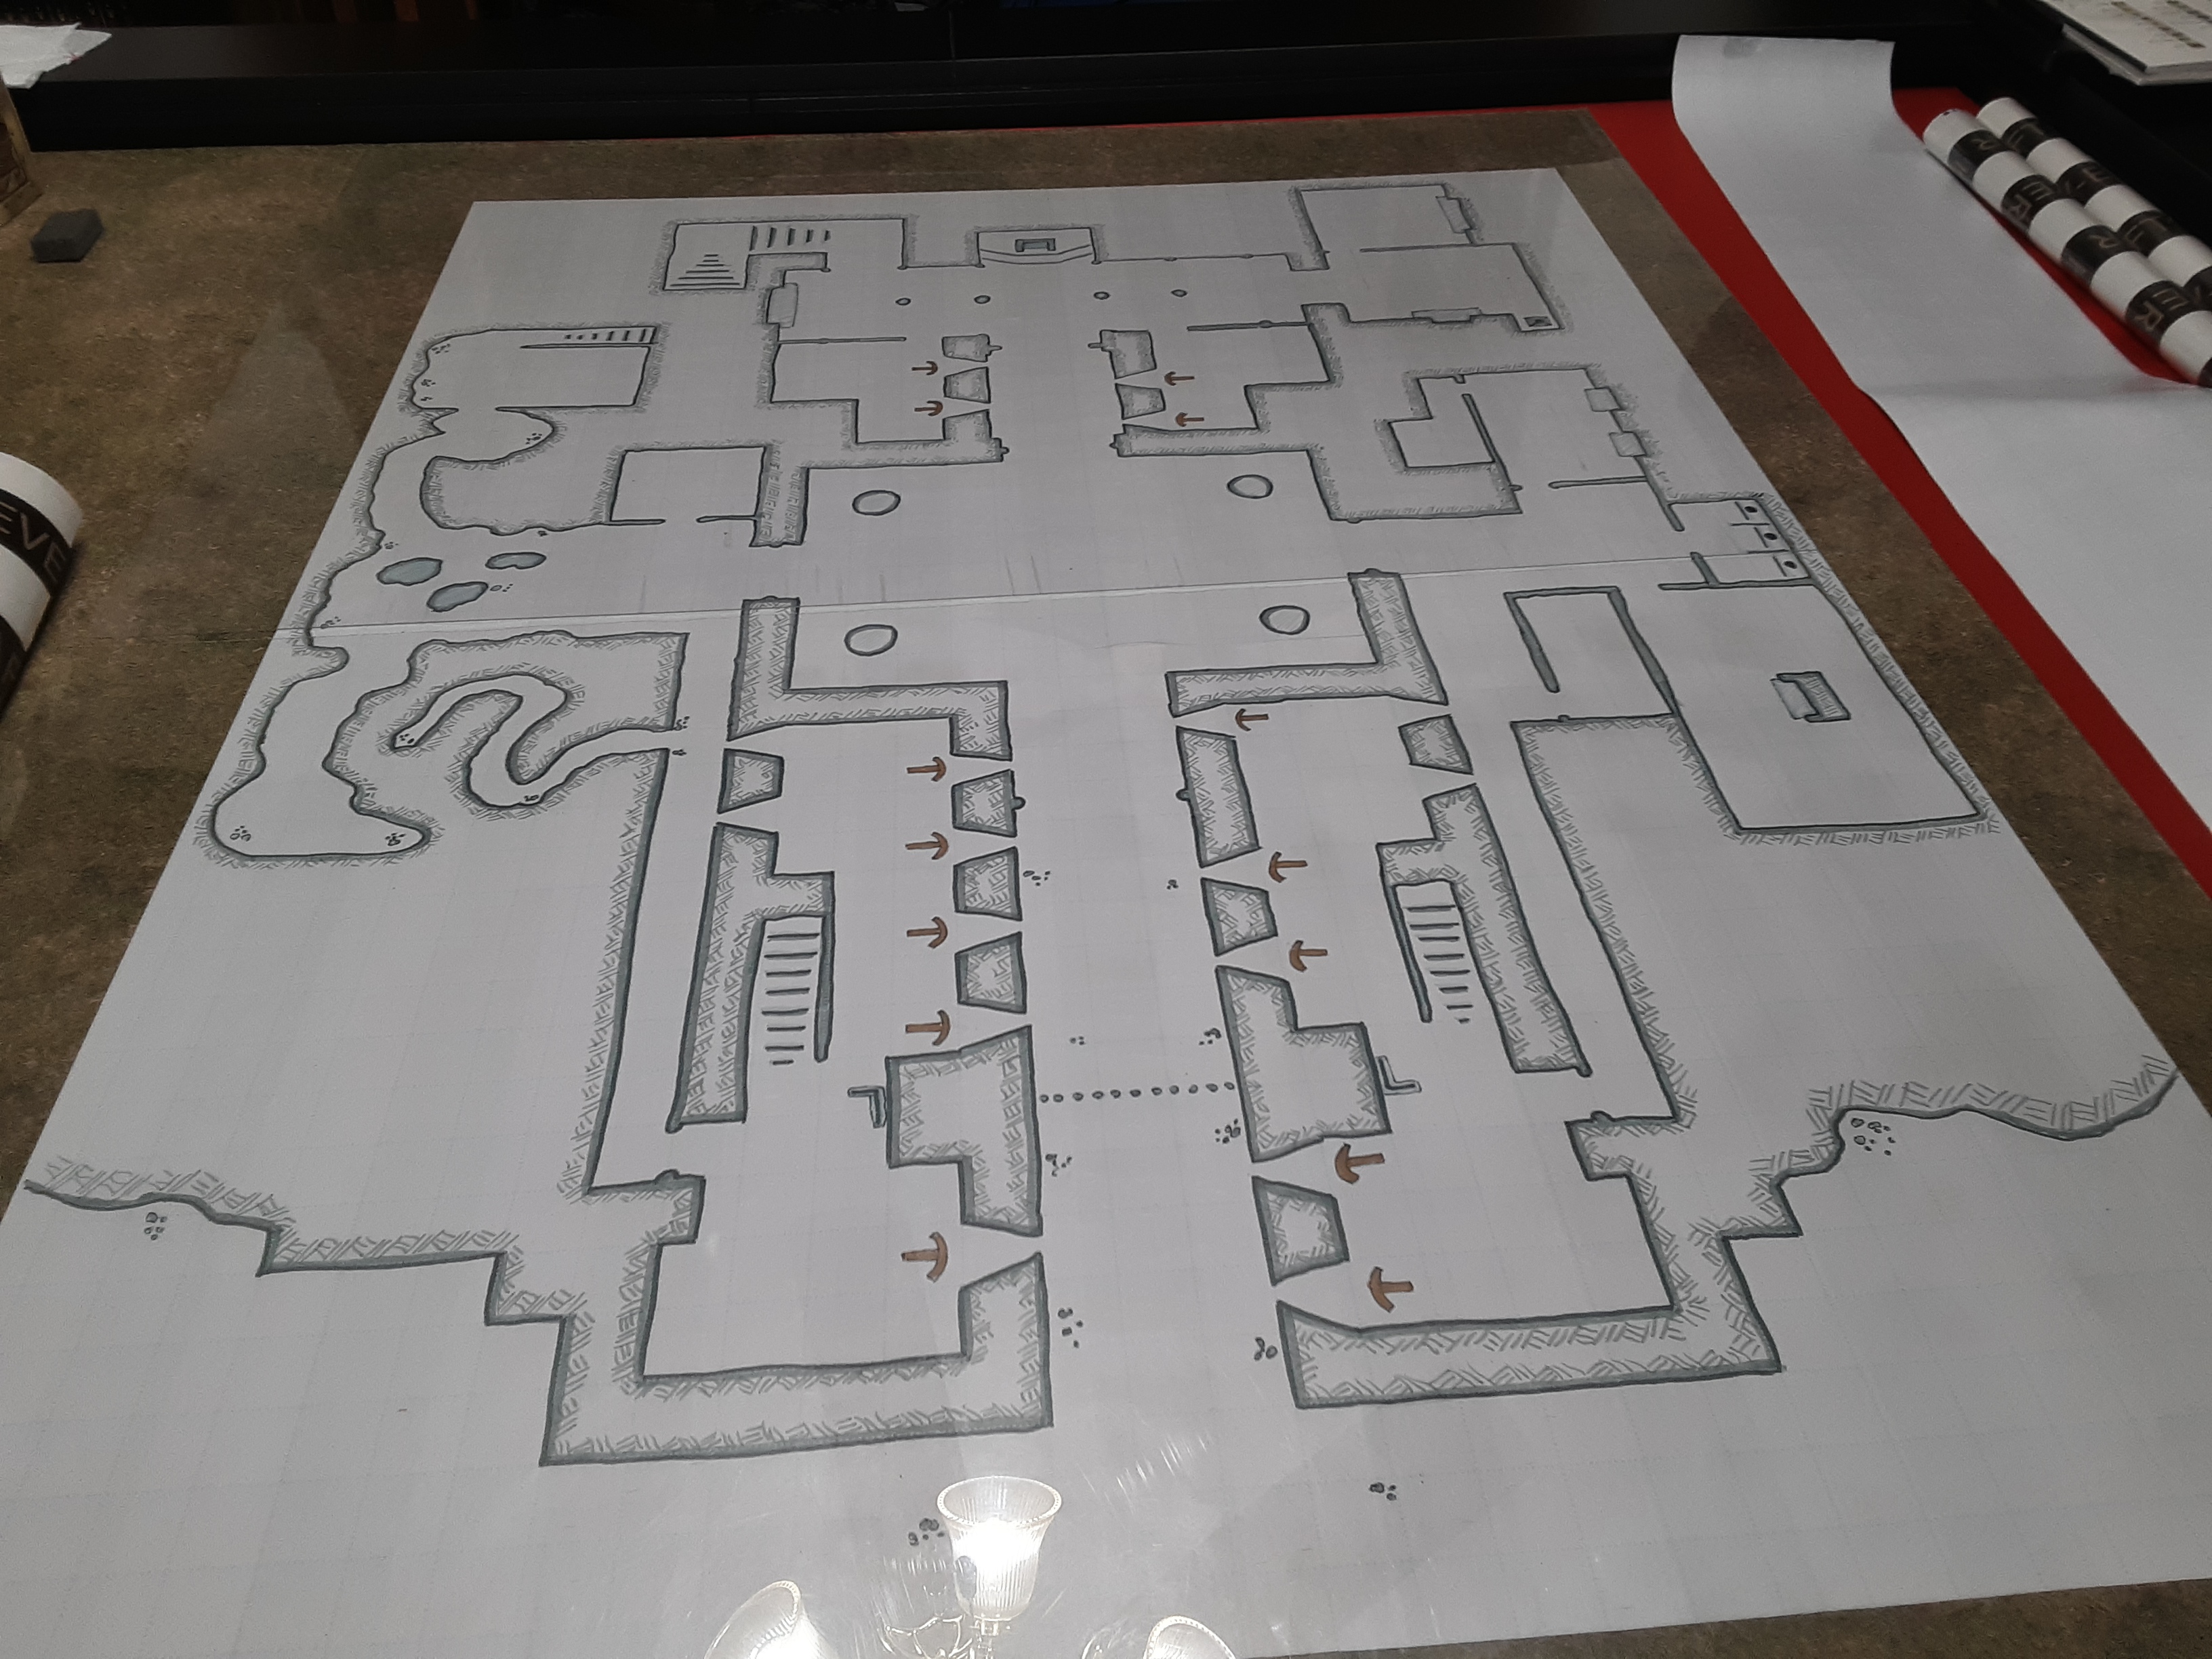
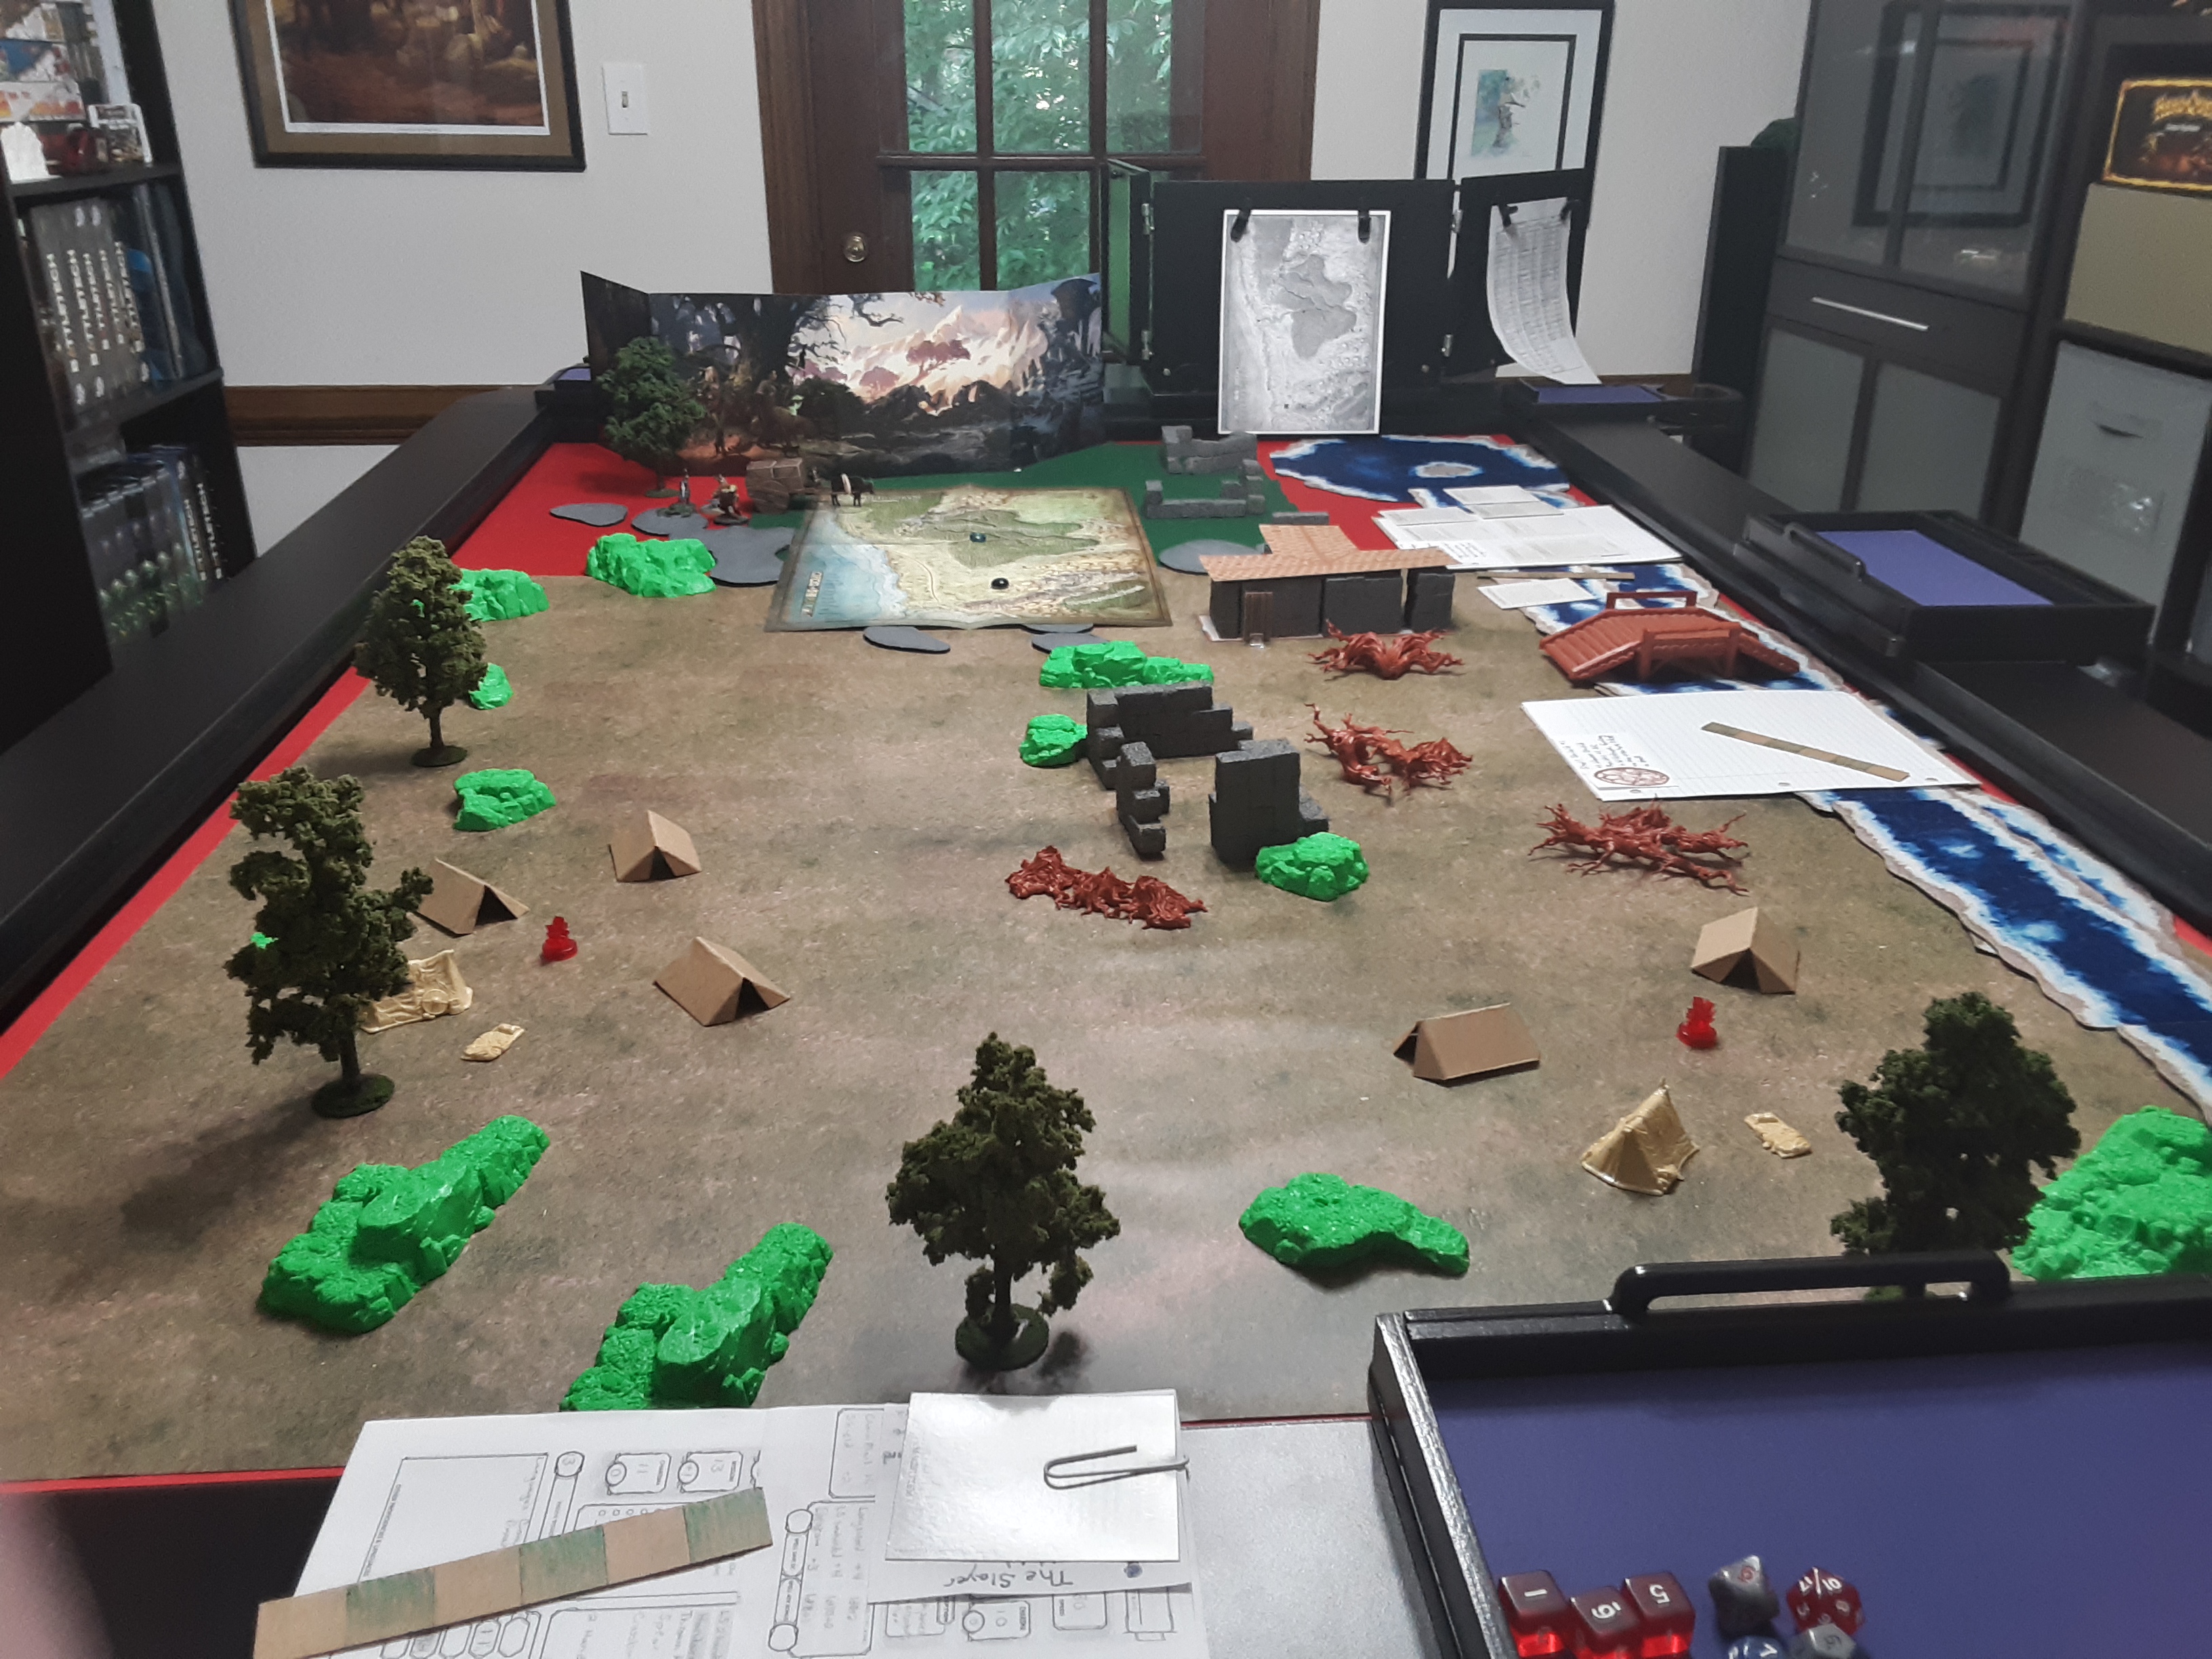
I prepared the table for the game by laying out level 1 of Axeholm and covering the unrevealed locations with paper.
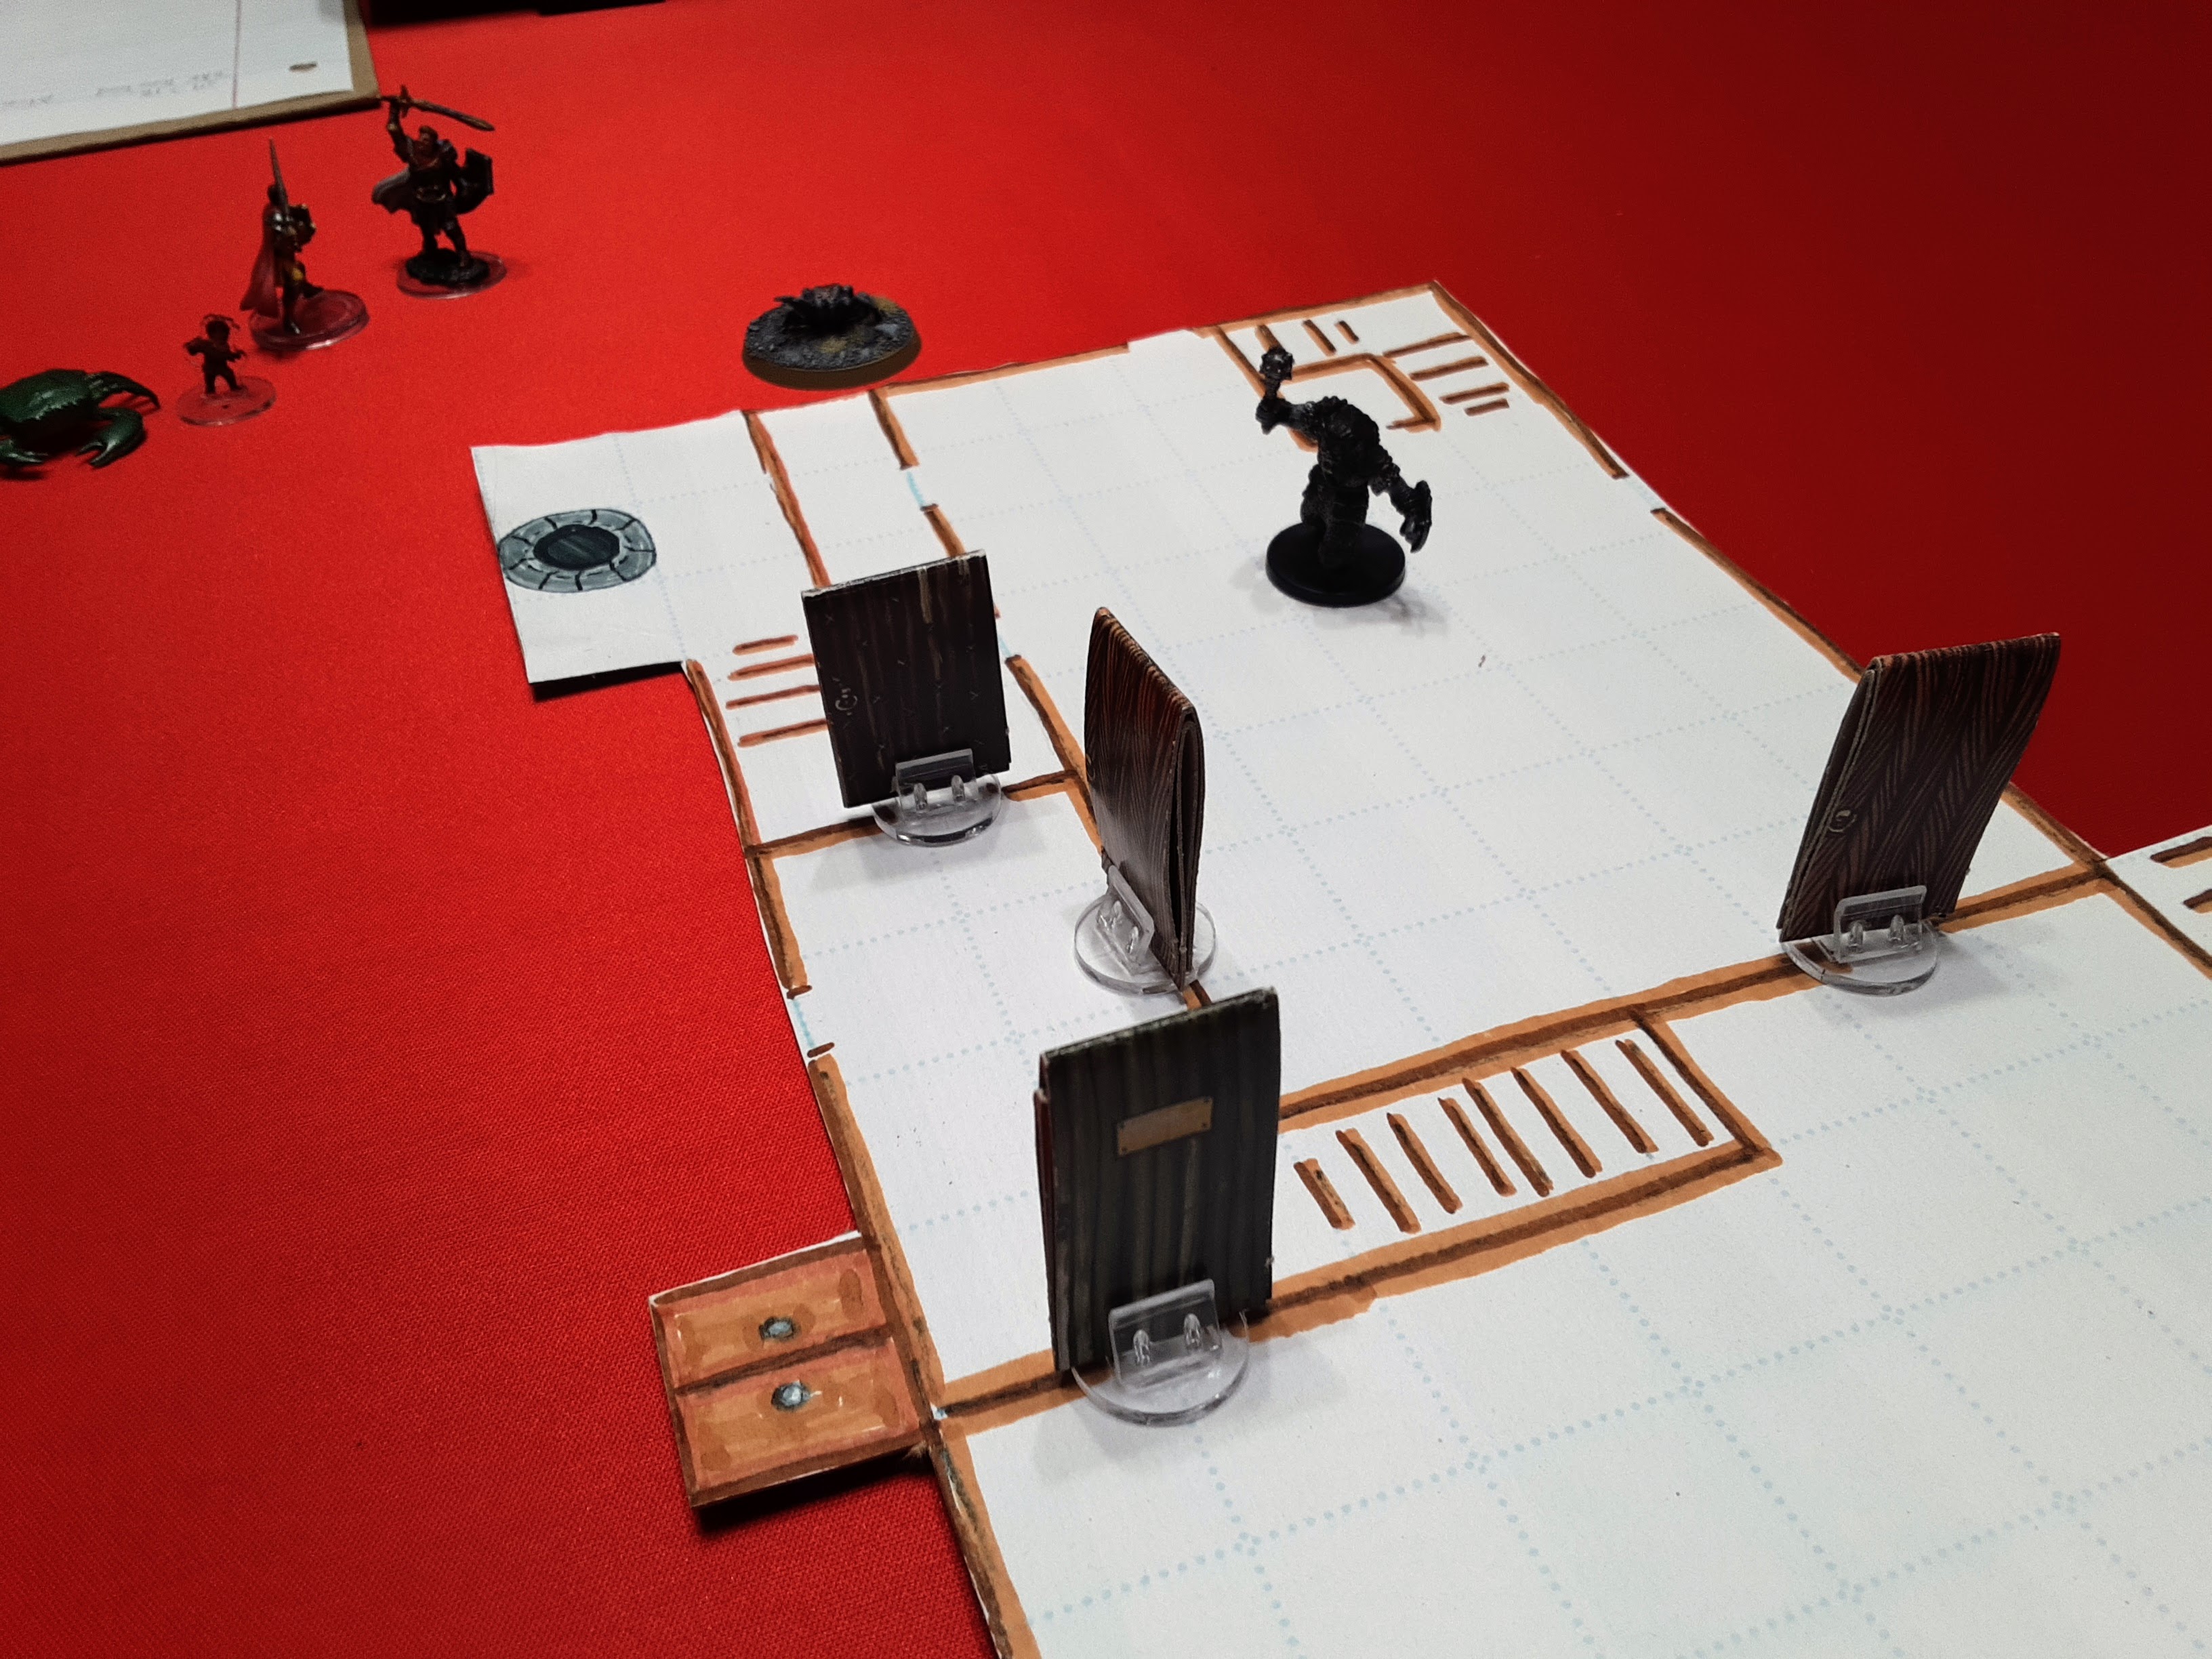
A new player was going to join us for this game and I decided that the group should have a small combat to kick off the quest. The adventures have to travel past the location of their first quest, Umbrage Hill, and I decided that the Manticore would make a great combat for everyone (and also highlight how much more powerful they are at their new levels). I placed a blank battle-map I was gifted over the fortress map to play out this combat.
I finished up my DM notes before the game. I wrote in an introduction for the new player and decided to add a side quest for the henchmen so they wouldn’t be available. This was to encourage the party to welcome in the help.
My DM Notes are below if you’d like to read them.
- Introducing XXX’s Character
- In your travels you come upon a group of adventurerers, they appear about as experienced as you are. They are a Human Wizard, Dwarven Cleric, Elf Fighter, and a Warforged Paladin.
- They light up when they hear you’ll be traveling toward Phandalin. They have a message that needs delivered to an adventuring group that is in that area. They asked this group to help the people deal with a white dragon in the area while they investigated problems in the north.
- They need a letter delivered from their patron, a Bronze Dragon that presides over Stormwreck Isle.
- The letter is to inform them that the sea elves have heard rumor that one of their people, Mirral, had died. Prior to the Mirral’s death they heard it had created a magical hat for a giant crab. They would like to know what happened to Mirral and hope the giant crab and tell them the story. Runara would like this Giant Crab to come to Stormwreck and meet with these elves. The sea elves have also noticed an increase in storms along the Sword Coast and think this story may help them in their investigation.
- The letter provides a location for the Giant Crab to go so he can get to Stormwreck Isle
- Provide XXX with a choice of magical items + 100 gp
- While traveling the High Road you hear rumors of a Red Demon near an old lighhouse.
- Adventurers Preparing for the Quest
-
- Introduce XXX’s Character to the group, and share the letter contents
- Captain Pinchy would like an escort by the Squire (incentivise the players to have the new player instead of extra henchmen join the mission)
- Gathering Rumors:
- A red demon was spotted by the high road near the Tower of Storms
- Dwarves from Excavation Site
- Had been exploring the area after learning about Axeholm through some of the notes and information they learned from the Temple of Abbathor
- Fled the area when they saw the Dragon approaching
- The Dwarves fled Axeholm over 100 years ago. They found a letter associated with the Fort.
- The letter was from an elf, Vyldara, a Moon Elf Ambassador that failed to prevent unrest between dwarven peoples. She was imprisoned by Axeholms Castellan and the followers of Mordian, a dwarven god of creation. They suspected she was in league with the other dwarves of the area, worshippers of Abbathor, the dwarves from the excavation site
- She overheard the dwarves planning a banquet in the name of peace with he worshippers of Abbathor, but the Castellan was planning on poisoning the High Priest of Abbathor, vile acts that filled her with anger.
- She mentioned the Castellan became paranoid and began gathering precious items in his room to hide somewhere in the fortress.
- Other evidence points to a betrayal by the worshippers of Abbathor, where they would feign a desire for peace only to attack the the dwarves of Axeholm when the banquet began. After the betrayal, many of the dwarven guards feld, others stayed behind an locked the entrance in defiance of their bretheren. Letting their rage consume them.
- They believe a final battle between the Mordiaran and Abbador followers occurred on what is now Umberage Hill
- They’d like to travel with the group through Umberage hill and back to axeholm to investigate the site after the adventureres clear the location
-
- Travel through Umberage
- As you approach the familiar area umberage hill, you see the familiar site of cairnes and greenery. You can hear the creeking of the windmill in the distance.
- The Manticore has made a lair of the Windmill, do the characters notice the Manticore peaking out behind the ruins of the house and wind mill
- The Manticore begins flying toward the group to attack (no surprise for either group)
- Arrival at Axeholm (read description pg 12)
- The dwarves park their cart outside the fortress and will not enter until the site had been cleared.
- A4: Mustering Hall: pg 13: Bodies of dwarves dressed in white and steel studded leather among bodies of dwarves dressed in the familiar red leather with gold studs of the Abbathor followers from the Dwarven Excavation
- A15: Dining room pg 14: A single dwarf, long dead, skin dried, and pulled tight, a long grey beard and hair, in an extravagant suit of gold studded armor, sits at the head of the table, a shard of golden axe in his skull.
- A14: Throne Room: The greater Ghoul holds a broken golden axe strapped to his wrist
- A27 Banshees Bedchamber: searching you find a finely crafted writing set of elven make. Additoinal letters and notes appear to be written in an elvish code
- Other locations as written in the module
- After completing the adventure (killing or driving out the monsters)
- Uneventful heading back
- Townmanster Wester’s house: His ½ brother is standing outside speaking through the door. He bows and steps back when he sees you approach.
- Harbin Wester slides single coins from under the door for the group and asks them to post two more quests on the job board.
- Next Adventureres
- Mountain’s Toe Gold Mine
- Dragon Barrow
- Woodland Manse
Dragon of Icespire Peak Session 5, Loggers Camp
I spent some time typing up my DM notes. I could only think of one thing when I was prepping for the game. The movie Tremors. I decided to add a few fun moments from the movie to the adventure. I added my DM notes at the bottom of this entry if you’d like to check those out.
I prepped the table the night before the game.
 I didn't take many pictures of the game this time around. Good thing I had some inspiration from one of my favorite movies for this adventure.
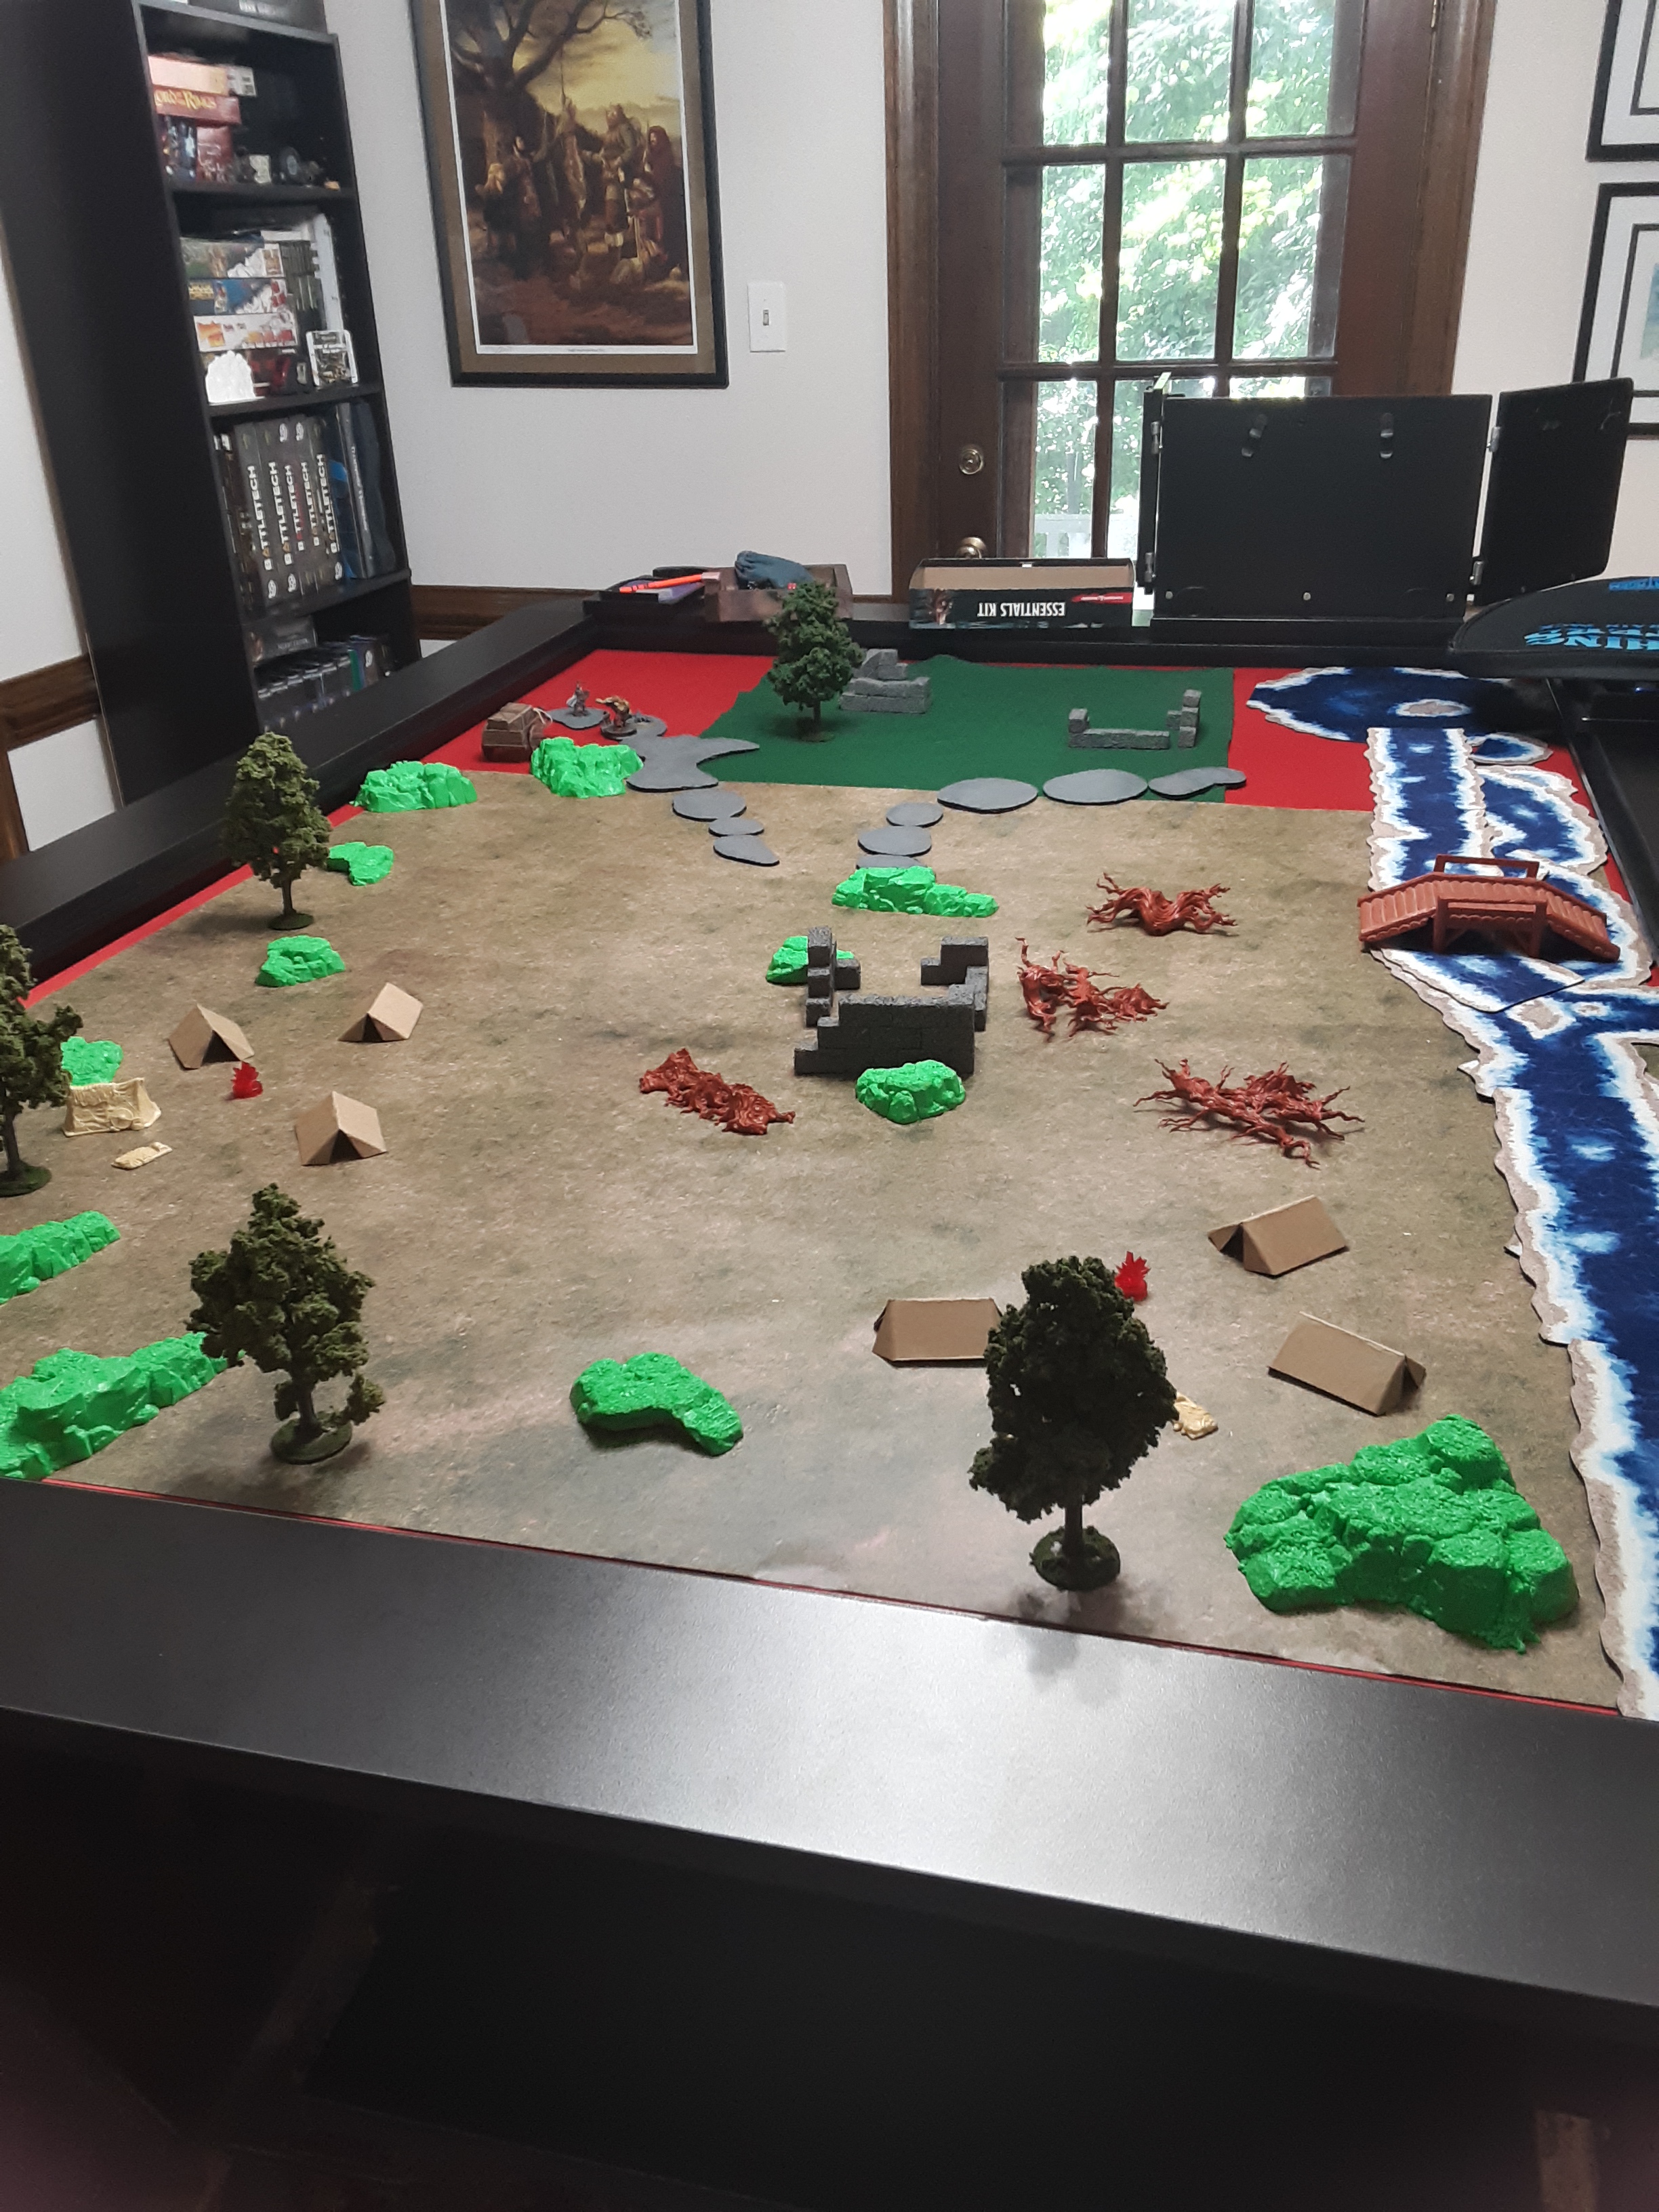
The Adventurers started their day by gathering some rumors at the local tavern. They heard about the newest location of the Dragon and “red winged demon”. Some townsfolk passed along that a hunter has a lodge in Neverwinter and they saw that no matter how they traveled, they’d be spending a night in the Neverwinter Woods. They decided to head to Falcon’s Hunting Lodge before traveling to the Logging Camp. The thought was it would be worth the cost of a bottle of wine to gain entrance to Falcon’s lodge for a safe nights rest. After gathering the camp supplies, a borrowed cart and ox, they set off on their quest.
The party traveled on the Triboar Trail and then cut north through Neverwinter Woods. They came across a clearing in the woods and saw a boar with a group of pigs. The Adventurers noticed that the pigs were branded “BAK”. This was a group of pigs that escaped from Butterskull Ranch, the previous adventure.
As the party discussed the situation, the boar took off to the east and the rest of the pigs scattered into the woods. The Adventurers decided not to pursue, knowing how hard it would be capture the pigs. They sent a message back through their sending stones, a magic item picked up from the Dwarven Excavation Question, to the Knight’s retainers in town. They asked him to share the news of the pigs to Big Al, the owner of the Ranch and these pigs.
They continued on toward the Hunting Lodge


After some more time traveling they came across Falcon’s Hunting Lodge. After being greeted at the gate and presenting the wine, the party was welcomed and provided a place to stay for the evening.
The party set off in the morning from Falcon’s Hunting Lodge toward the Loggers Camp in the west. They followed a trail along the river. They began to hear something in the woods and after a few failed and then successful perception rolls, they followed crows and saw a logger up in the tree. The Druid shifted into an animal form and investigated the logger, finding him dead from dehydration.
They continued on and came across the camp. They decided to leave the wagon and supplies outside of camp when they noticed how quiet the camp was.
Coming from the east, they saw two tent encampments and decided to investigate the one to the South.
I didn’t take any prep pictures of the tents, but I used a set of of tents from the Elven Forest Dungeons and Lasers Elven Forest set. The other tents were made from cardstock. I drew a template and folded them into shape. I might add some paint in the future, but they made it quick and easy to get them on the table for game day.

The party of adventurers investigated the southern camp. They saw the empty tents and scattered belongings of the loggers scattered about this part of the camp. During the investigation an Ankheg burst from the ground…and was quickly dispatched after it spit acid at the party. Afterwards, one of the characters noticed a mound of soil and went to investigate. They saw a head resting inside and nudging it, it fell to the side revealing it was all that was left of a logger. Another Ankeg burst from the ground. The characters were able to quickly dispatch this one and looked over the creatures. One of the players rolled really high on a check and I decided they knew quite a bit about Ankhegs and let them harvest the acid glands.
The characters continued their investigation, seeing devastation in the northern campsite. They began to cautiously move around camp.
They spotted odd tracks in an old stone building at the center of camp. The tracks appeared to be pig like. They ended up finding 13 figures made of sticks, hair, and blood, hidden in the remains of the chimney.
They began to move around this building and came under attack by another Ankheg. This creature severely wounded their companion, Captain Pinchy, before it was killed.
 You broke into the wrong gosh darn loggers camp!
They moved to investigate the main logging building and while they looked in the window, they saw the wooden floor boards begin to lift and move like a wave toward them as another Ankheg burst out. This Ankheg broke out of the wrong gosh darn supply room! The party quickly dispatched the final Ankheg in the area.
They discovered Townmaster Harbin Westers’ half brother, cowering on a desk. They finally had him come out and offered their protection.
The party continued their investigation and came across a trail of blood that led to an elevated area of the camp with hard stony ground. There they found a logger that had died from blood loss. He had dragged himself to that area to escape the Ankhegs, that couldn’t burrow in the hard ground.
The party decided to take Tibor Wester back to Falcon’s Hunting Lodge with them so they could all recover and rest before traveling back to town.
Upon further inspection of the stick figures they found in the Loggers Camp, they determined these were some kind of religious cursed item. After leaving Falcon’s Hunting Lodge, they destroyed the figures in a fire (releasing the curse).
They made it back to Phandalin, collected their reward, and selected their next quest.
Axeholm
Here are my DM notes
- Adventurers Preparing for the Quest
- Gathering Rumors:
- Falcon’s Hunting Lodge
- Read the entry on page 9
- A red demon was spotted in the mountains to the south, near an area called Axeholm
- The Dragon was spotted on the Triboar trail. Destroyed a wagon train, killed 2, took Ox
- Loggers
- Loggers have set up camps along the river to transport logs to Neverwinter
- Tibor Wester is the ½ brother of Harbin Wester. Get’s his suppplies from Phandalin
- There are 12 loggers that work at the camp, plus Tibor
- Falcon’s Hunting Lodge
- Picking up Supplies
- Harbin has made arrangements at Barthen’s Provisions, read text on pg 34
- Each crate holds enough provisions to sustain everyone for 1 month (2 total)
- Barthen, “If you intend to vist Falcon’s Hunting Lodge on the way, you better buy a bottle of fine wine (10gp) and give it to him as a gift”
- Harbin has made arrangements at Barthen’s Provisions, read text on pg 34
- Gathering Rumors:
- Traveling to the Camp
- You can travel 24 miles per day and the camp is more than 50 miles north of Phandalin
- They can head directly north or veer east and stay at Falcon’s Hunting Lodge
- The party member with highest Wisdom (Survival) needs to check for each hex
- DC 10, fail causes the party to get lost for 1d4 miles
- Day 1: Nothing noteable occurs, can camp near the woods or a few miles in
- Day 2: Camp in Woods or head to Falcons Hunting Lodge pg 24
- Around mid day you all see about 60 feet ahead of you, a wild board stands in a small clearing. Around the boar are 4 pigs. Roll a perception check
- You’re able to make out that each pig as BAK branded on them…you also notice that the Boar appears to be looking directly at you, unmoving
- If the party approaches cautiously, the Boar will stay unmoving, keeping the pigs from running
- If the party discusses capturing the pigs or the boar, the Boar will run and the pigs will begin to scatter
- What would you like to do?
- Day 3: Should arrive at the Logging camp the morning of the third day.
- Around mid day you all see about 60 feet ahead of you, a wild board stands in a small clearing. Around the boar are 4 pigs. Roll a perception check
- You can travel 24 miles per day and the camp is more than 50 miles north of Phandalin
- Nearing the camp
- You think you’re less than a mile from the Logging came when you see a clearing up ahead, roll perception
- As you’re walking along the path a small noise up in the trees catches your ear, perhaps a squirell scurrying in the branches. You begin glancing around in the trees when you see a crow swoop toward some branches further into the woods. You think there is something in the tree that has attracted the Crow.
- If they choose to approach
- You begin to work your way through the undergrowth toward the tree where the crow was last seen. As you get closer the crow begins to “caw” and looking up you see what appears to be a human, sitting on a high branch clutching the tree.
- No response is given if they call out. If they choose to investigate further
- Up the tree is a man dressed in work clothes. He’s holding a bloody ax tightly in one hand and the other arm is wrapped around the tree. He’s dead, his body stiff and unmoving.
- You think you’re less than a mile from the Logging came when you see a clearing up ahead, roll perception
- Arrival: Read the description on page 34
- Exploring the Camp
- L1: Cabin on the Rocks
- You see the remains of two cabins that have been mostly torn down
- The Ankhegs can’t burrow up here
- You discover the body of a human man, his lower leg is missing and tied off. Investigation DC 10: The stump of the leg appears to have a melted burned and bleeding appearance.
- L2: The Old Cabin and Chimney
- You see the reamins of a ruined cabin, with a fireplace that has mostly collapsed onto a stone foundation, roll a Perception Check or other DC 10
- You notice pig tracks in the wet sandy soil leading up to this area
- If the area is searched
- As you search through the rubble of the chimney, you come across 13 tiny totems, stick figures, coated in old sticky blood, and tied together with hair. Carved into the sticks are lightening bolts symbols. Roll for Religion(DC 15 Intelligence [Religion])
- You decern the totem’s purpose is to bring ill fortune to all who reside near it
- On a very high roll, you feel like the lightening bolts look similar to some of the symbols you saw in the old lighthouse.
- As you search through the rubble of the chimney, you come across 13 tiny totems, stick figures, coated in old sticky blood, and tied together with hair. Carved into the sticks are lightening bolts symbols. Roll for Religion(DC 15 Intelligence [Religion])
- You see the reamins of a ruined cabin, with a fireplace that has mostly collapsed onto a stone foundation, roll a Perception Check or other DC 10
- L3: The Cabin: Office and Tool Storage
- If they look in the windows of the Tool Storage, You see a large open area of the cabin with a wooden floor. To the north is door, the east side has a fireplace (unburning), and shelving / crates of suppies and tools lining the walls
- Perception Check: You see some of the floor boards begin to move upwards a few inches, almost creating the appearance of a wave…ROLL for Initiative
- If they look into the Back office, You see a thin well dressed sitting atop a desk that’s been pushed up against a door to the southside of the room. His hands are placed over his mouth and his eyes are closed as he slowly rocks back and forth on the desk
- What do you do?
- If they try to get his attention, he’ll sign wispering to urge them to be quiet and make a prayerful gesture mouthing “Save Me”
- Any approach to close to the building will cause the creature to begin burrowing underground toward the adventurers
- L4: The Dock
- Perception: you notice a small sucken boat under the water near the dock. It looks like it’s been broken in half.
- L5: North Camp
- You see a dead campfire and tents, messkits and scattered personal belongings (nothing of worth), you see humanoid footprints and strange marks in the soil
- Investigation Check DC 10 you deduce the humanoids were kill and possibly dragged into the sand
- L6: South Camp
- You see what looks like a large animal mound/ with something in the circle of soil
- If they approach, in the center of the mound is a Dwarf’s head. His eyes are closed like he’s sleeping.
- Pulling the head up reveals that nothing is attached. Melted, burned and bleeding
- ANKHEG ATTACK
When you return back to town. Harbin rewards them, refuses to open the door for his ½ brother and berates him for slowing down the logging business. You all have achieved Level 4!
Asks the party to place 1 more job on the board.
- Mountain’s Toe Gold Mine
- Axeholm
Dragon of Icespire Peak: Preparing for Loggers Camp
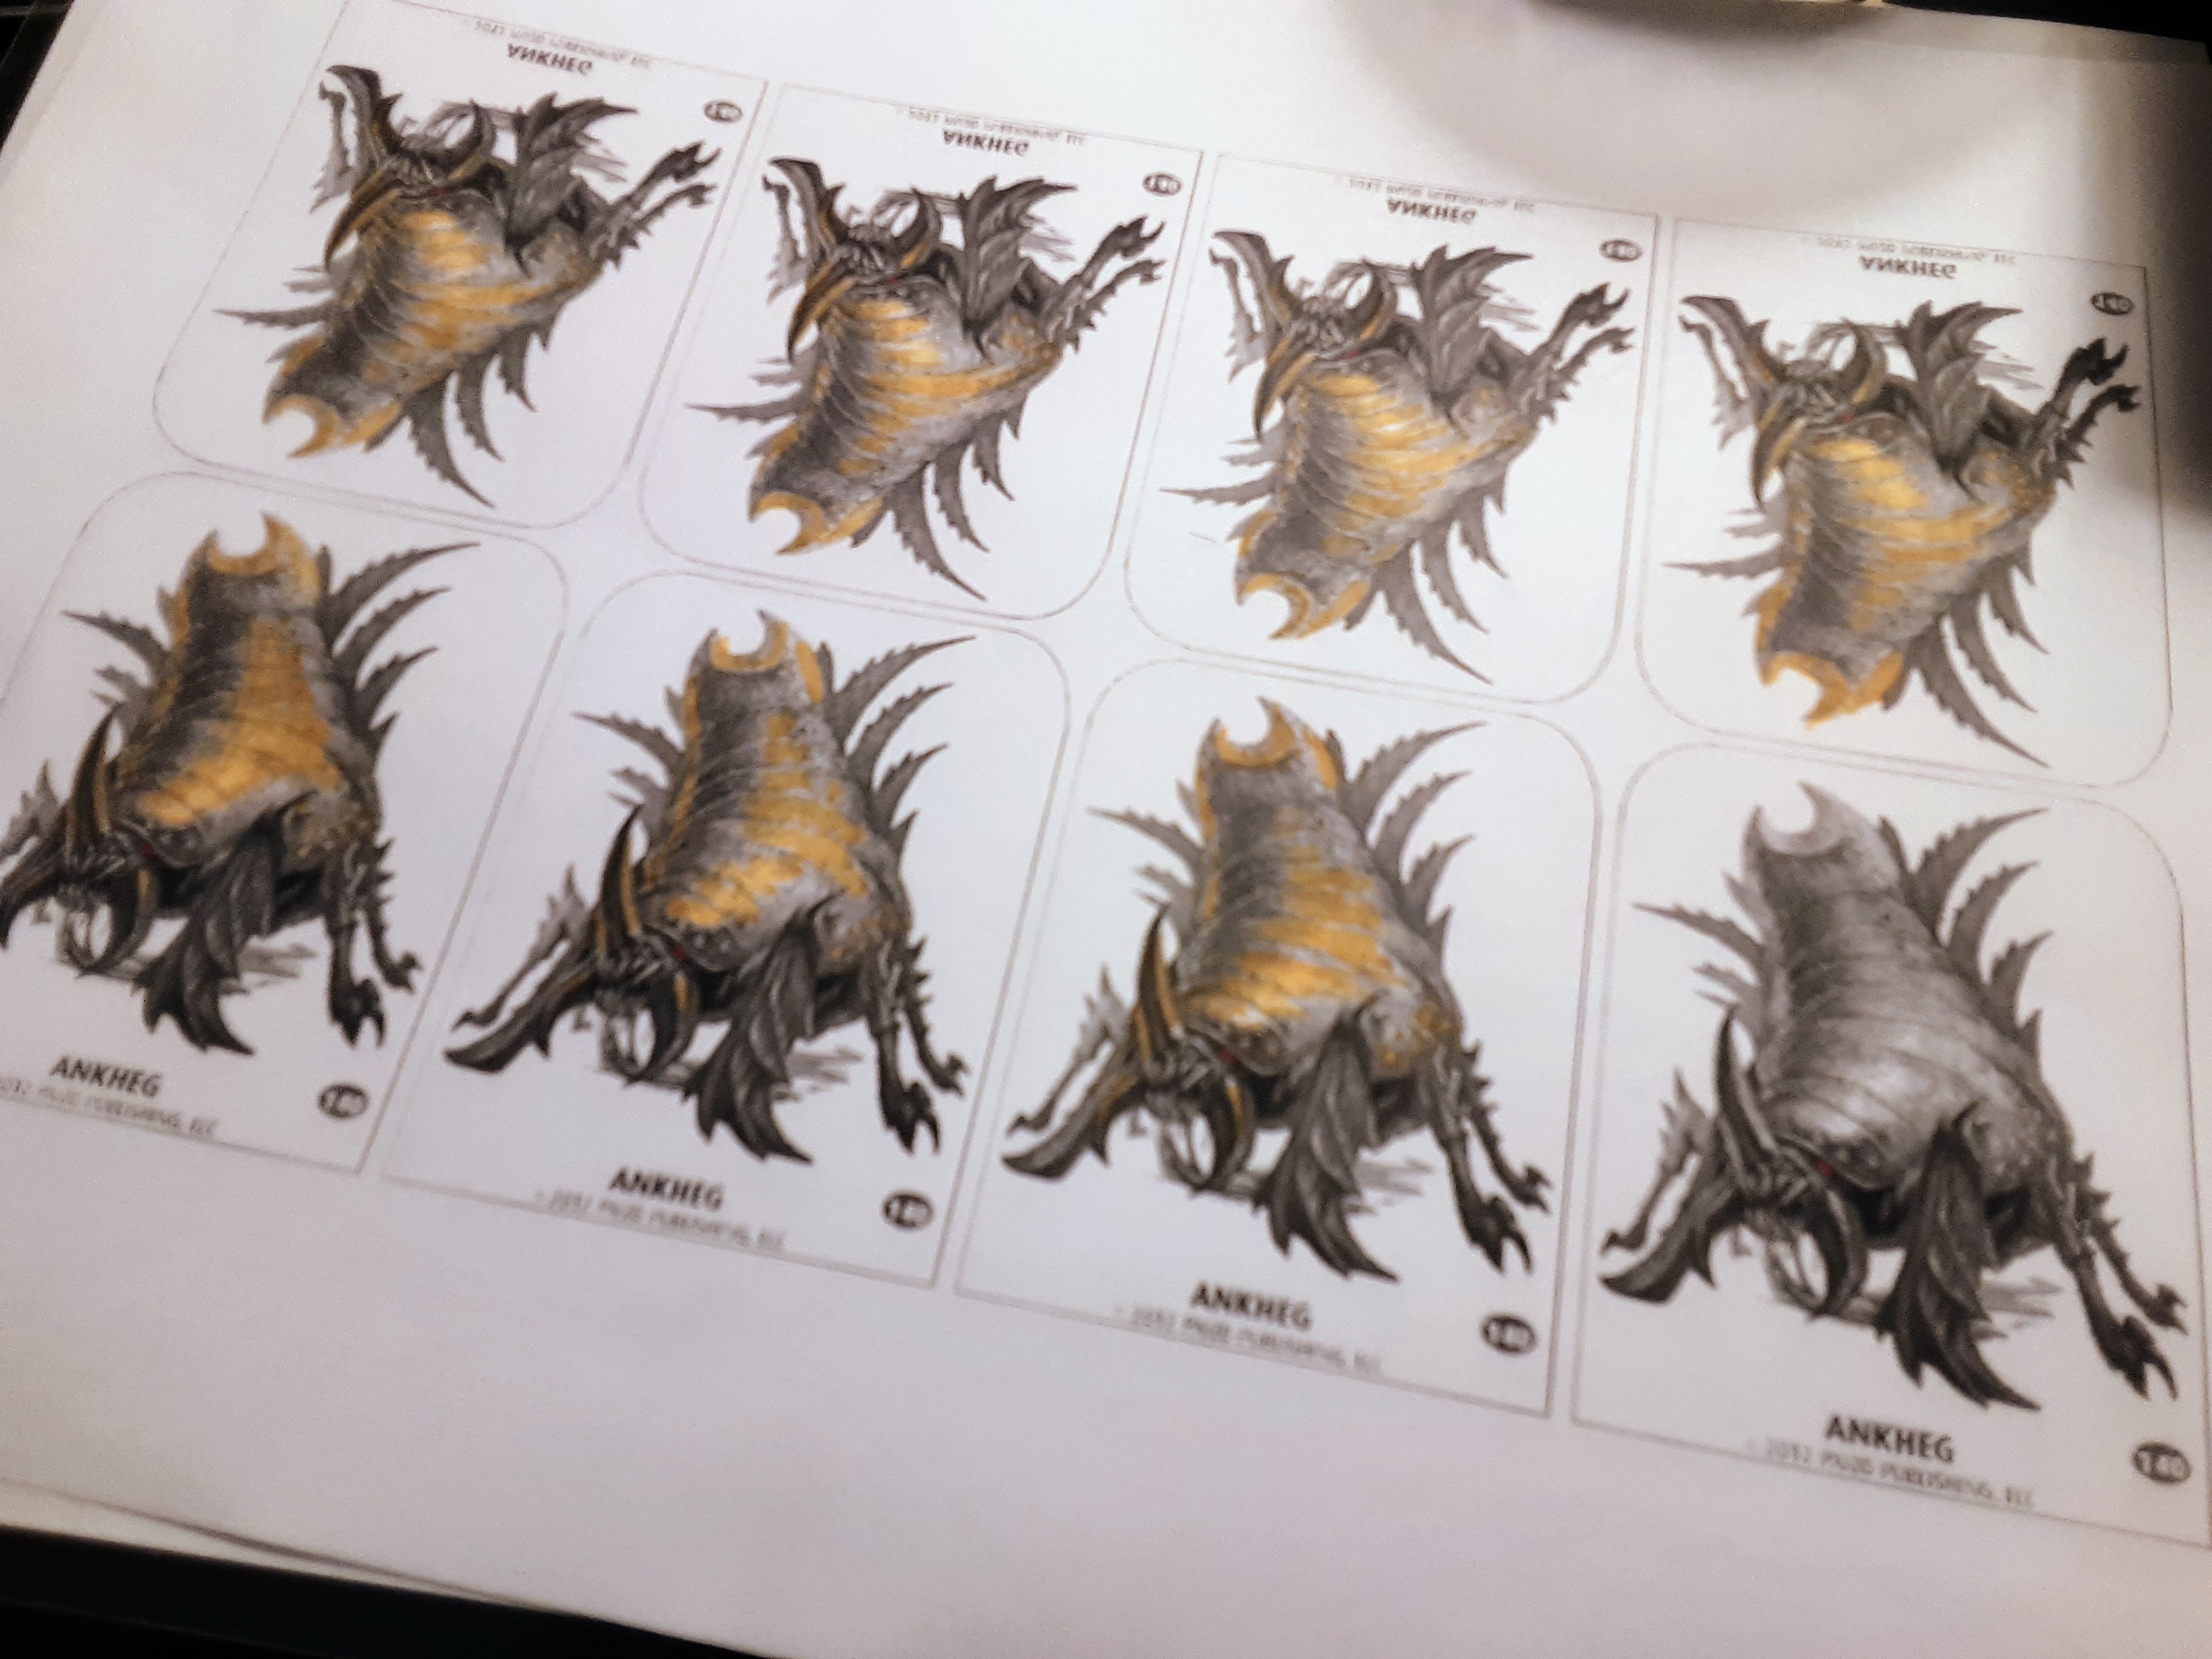
I needed to make a few things in preparation for the Loggers Camp quest. The first thing I worked on were the monsters, a group of Ankhegs lurking in the sandy soil of the camp.
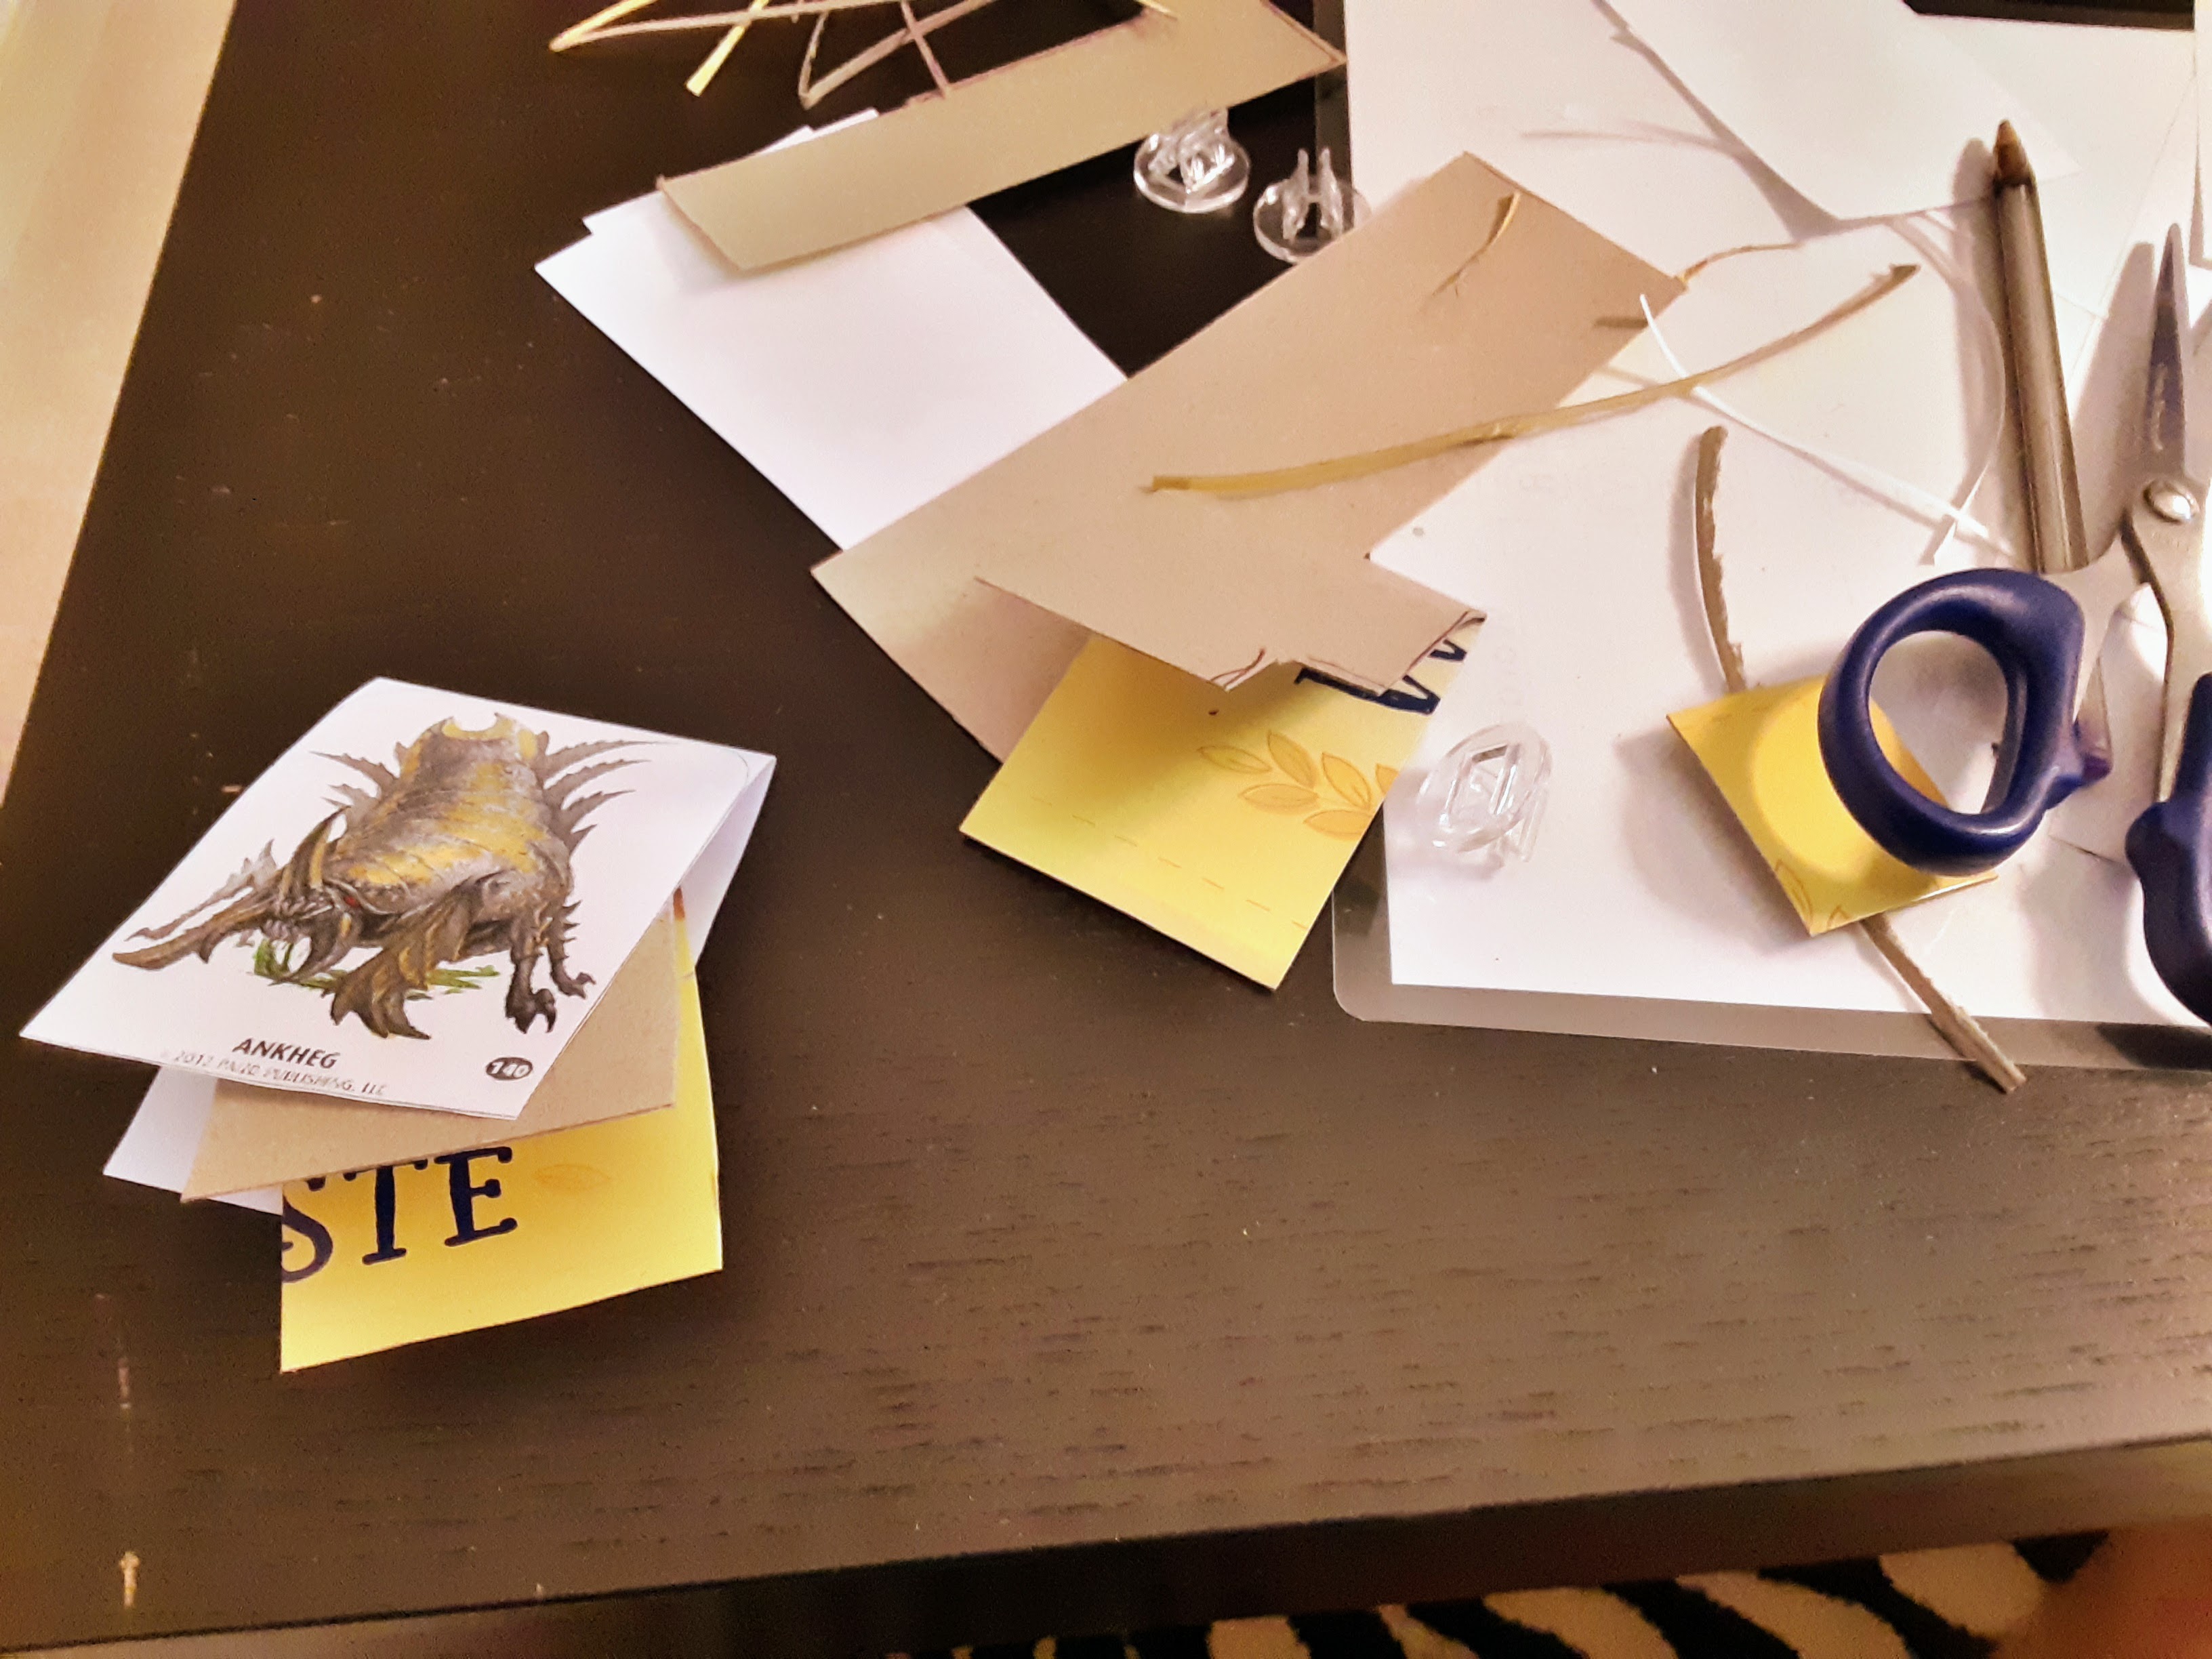
I used the Pathfinder mini pdf I own to print out some Ankhegs. I don’t have color printer at home. I decided to color them in using markers. I cut them out and glued them together with scrap cardboard in between the layers to help them fit the stands better.
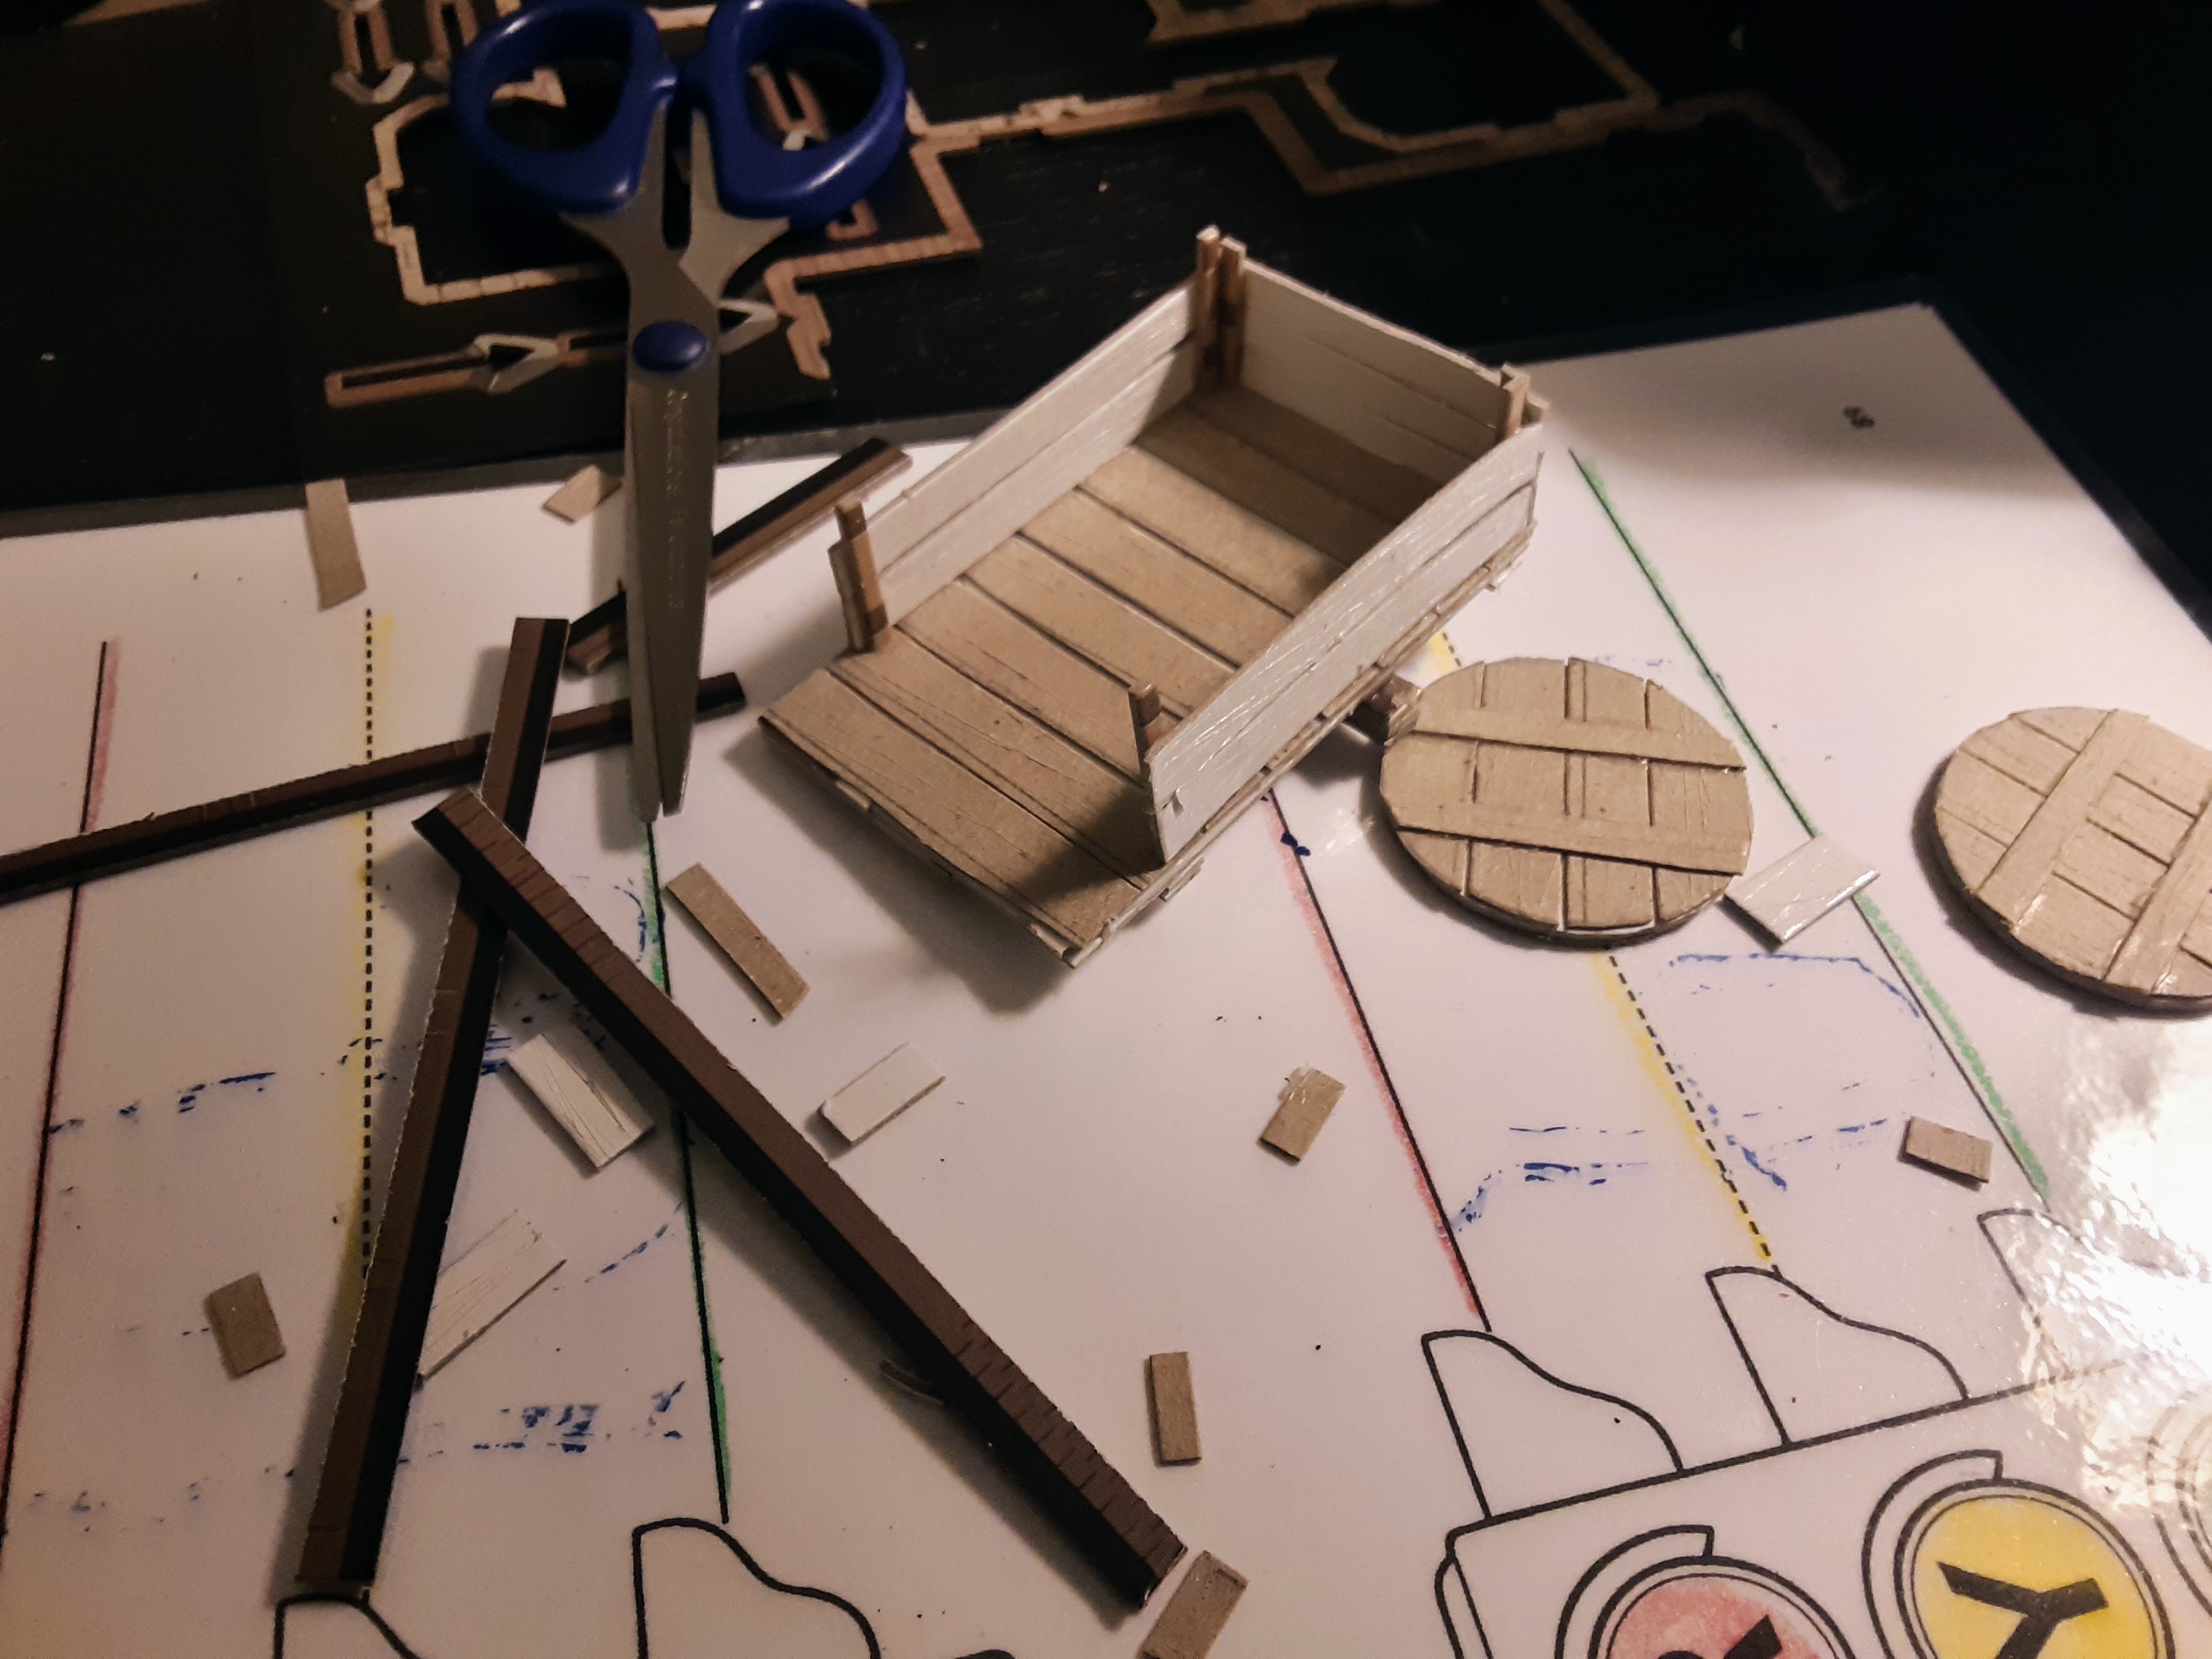
Part of the upcoming adventure involved the party delivering goods to the camp. They’re loaned a cart, two crates, and an ox for this task. I had a 2d ox and two crates (from Dungeon in a Box).
I couldn’t find a cart for sale at my FLGS so I decided to build one with scrap cardboard. I used a tutorial from the YouTube channel Selhrac Games. I used my hobby knife to carve in some random wood grain, cut the pieces and used tacky glue to put everything together.
I also made some quick cardboard tents for the camp, but I didn’t take any progress pictures. There really wasn’t much to this process. I just cut out a tent shape and then traced it on cardboard to make about 8 of them. All you need to do is fold them into shape. If ever feel the need I’ll put a little paint on them. You’ll be able to see these on my next post with game pictures.
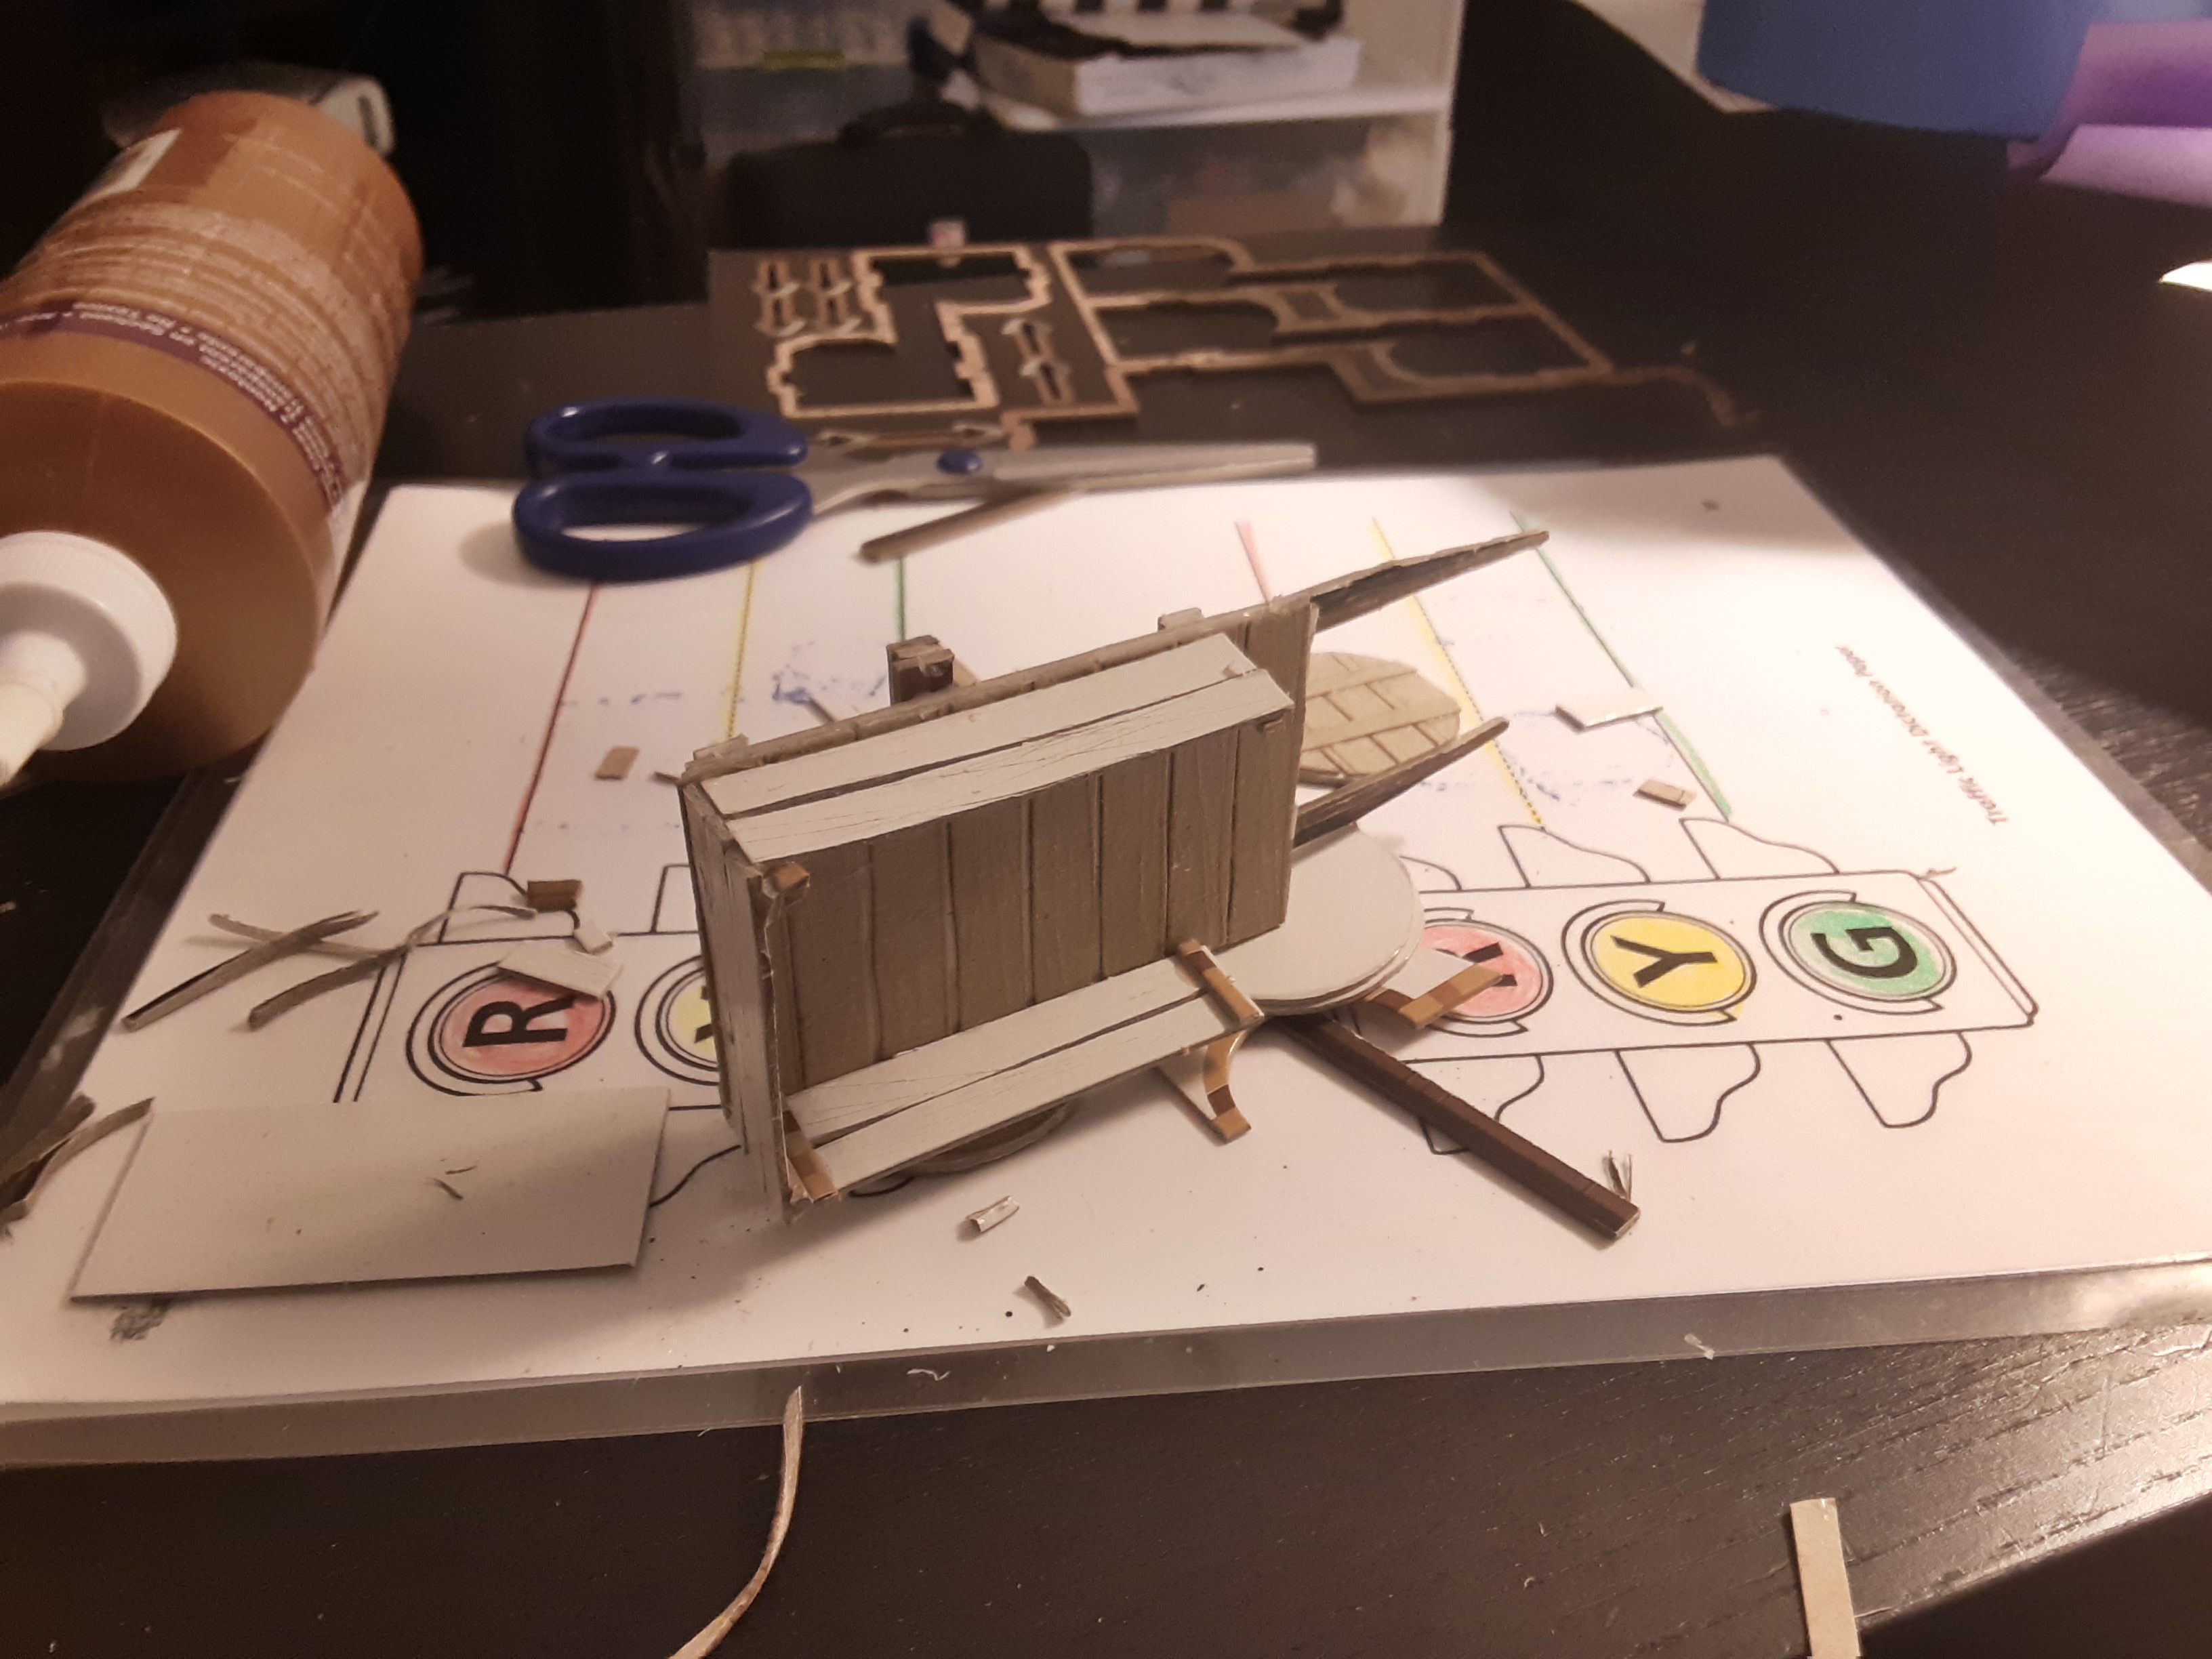
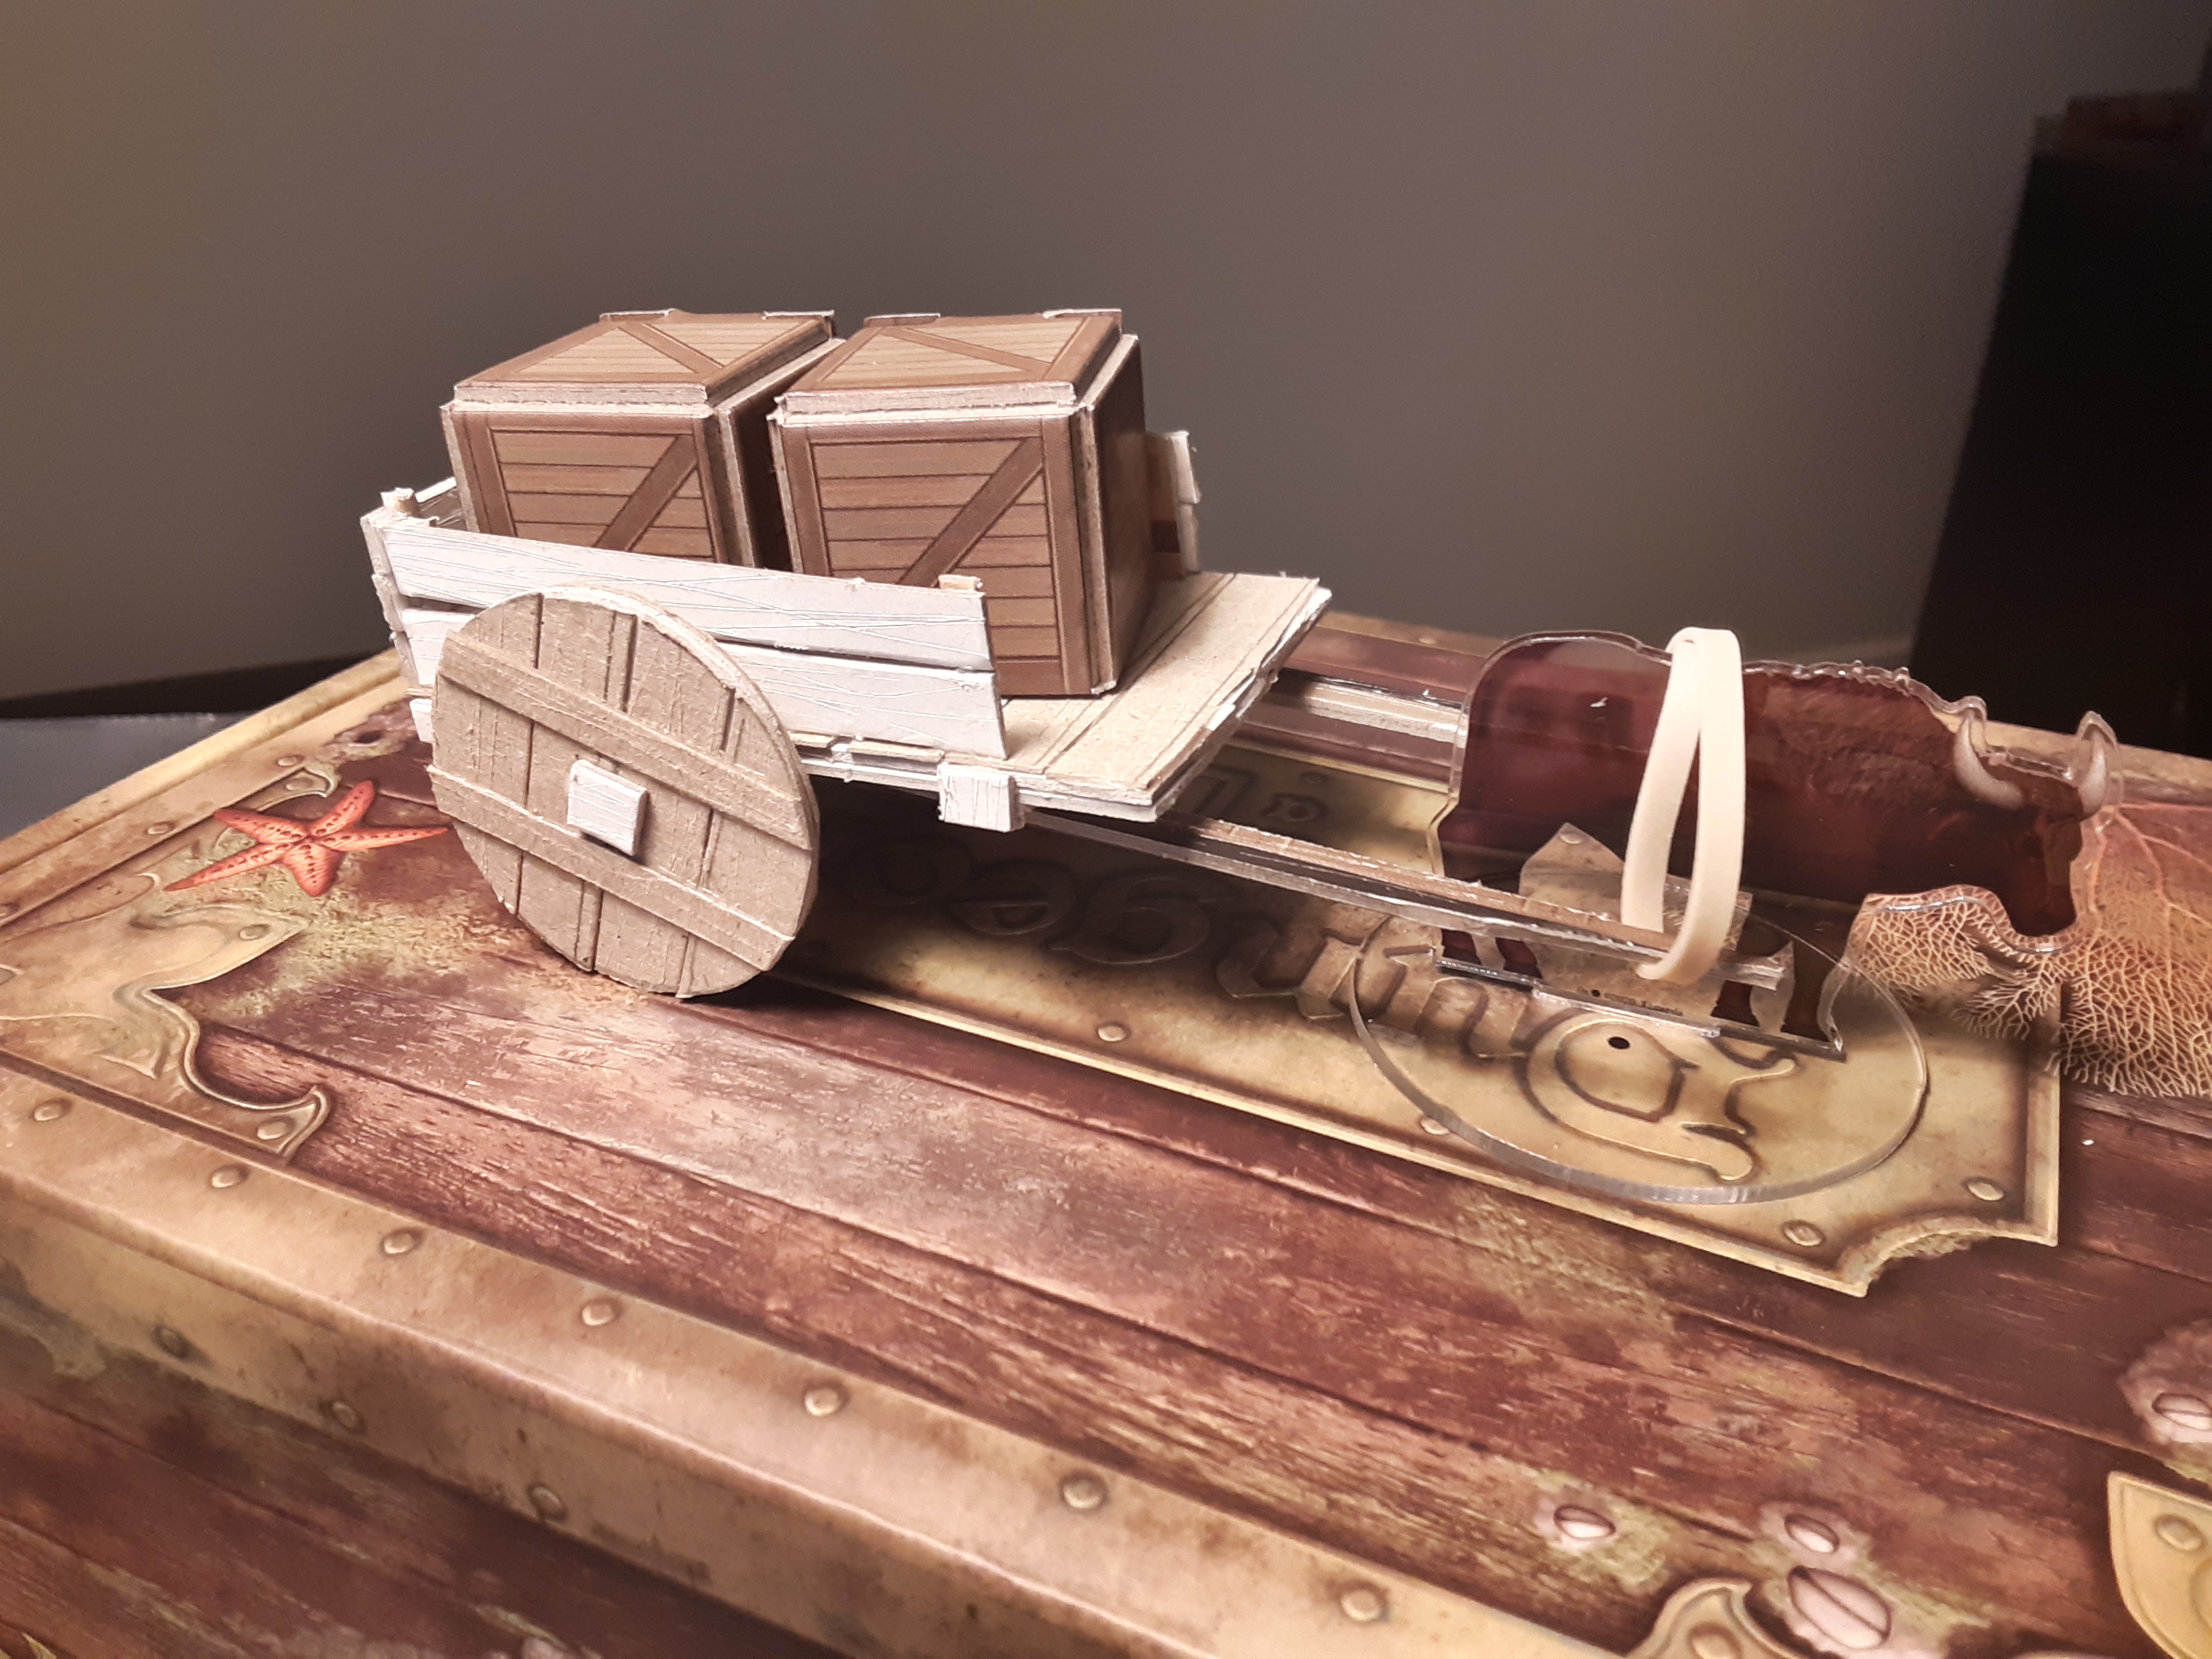
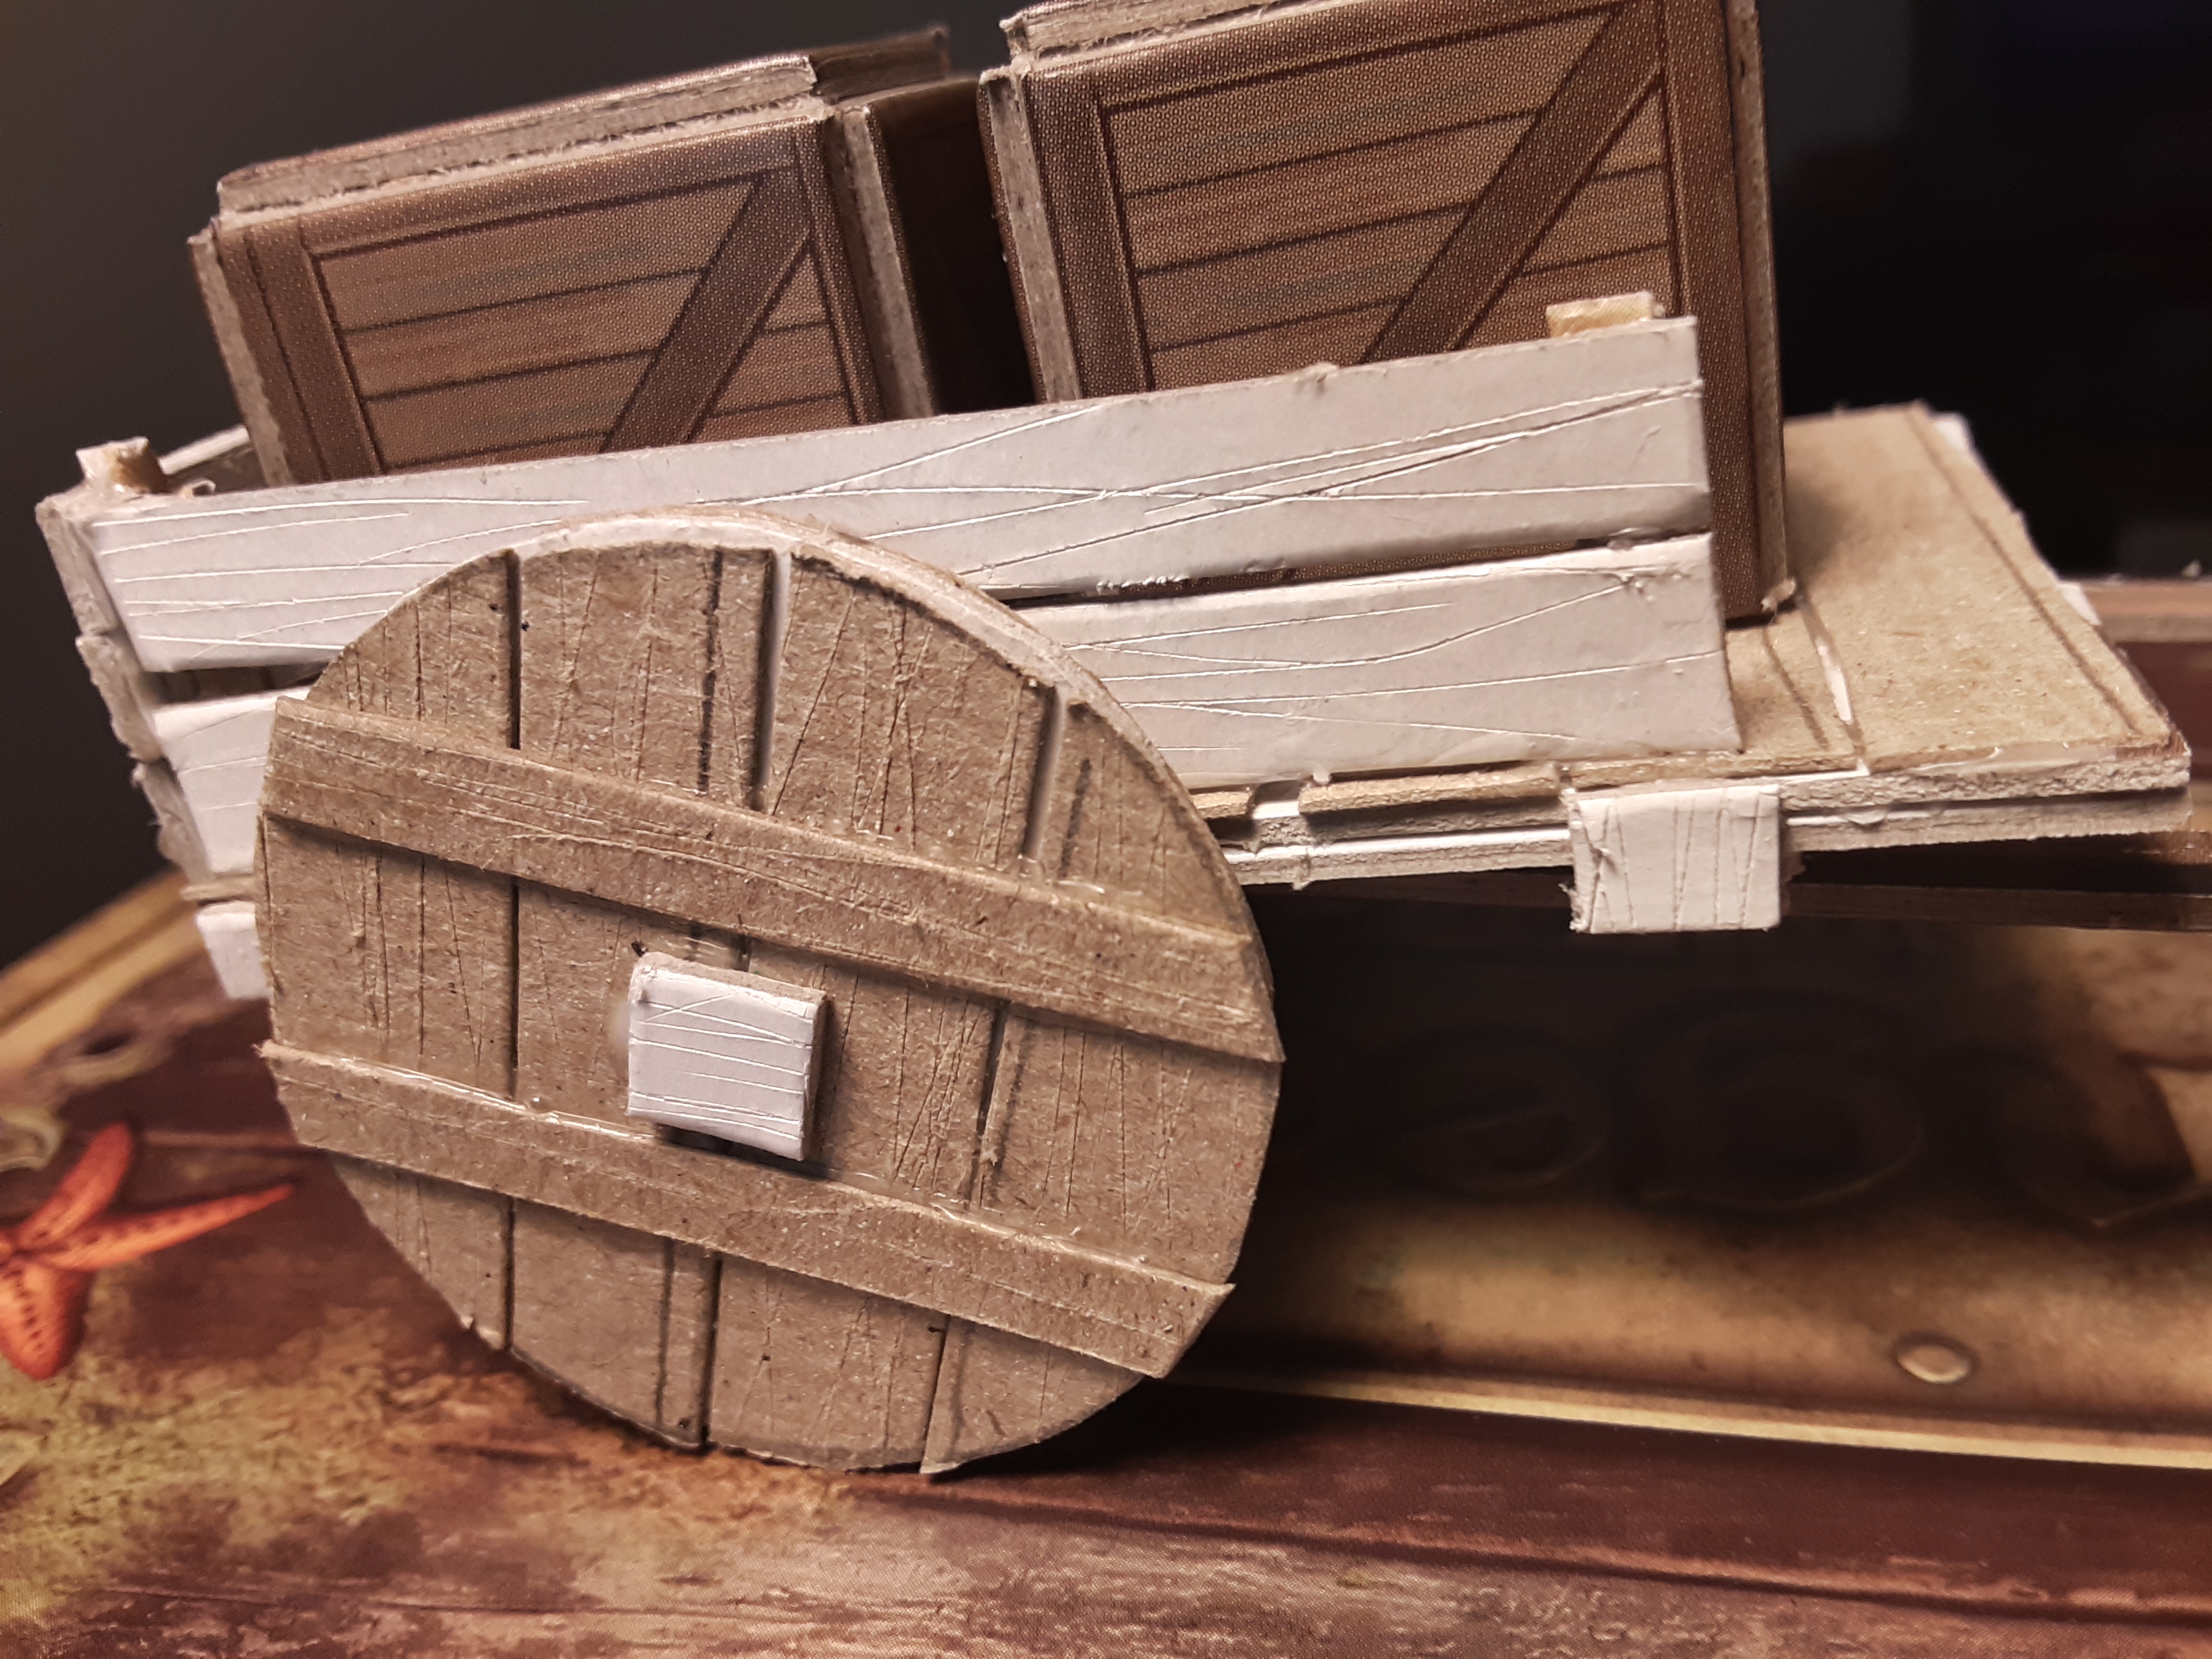
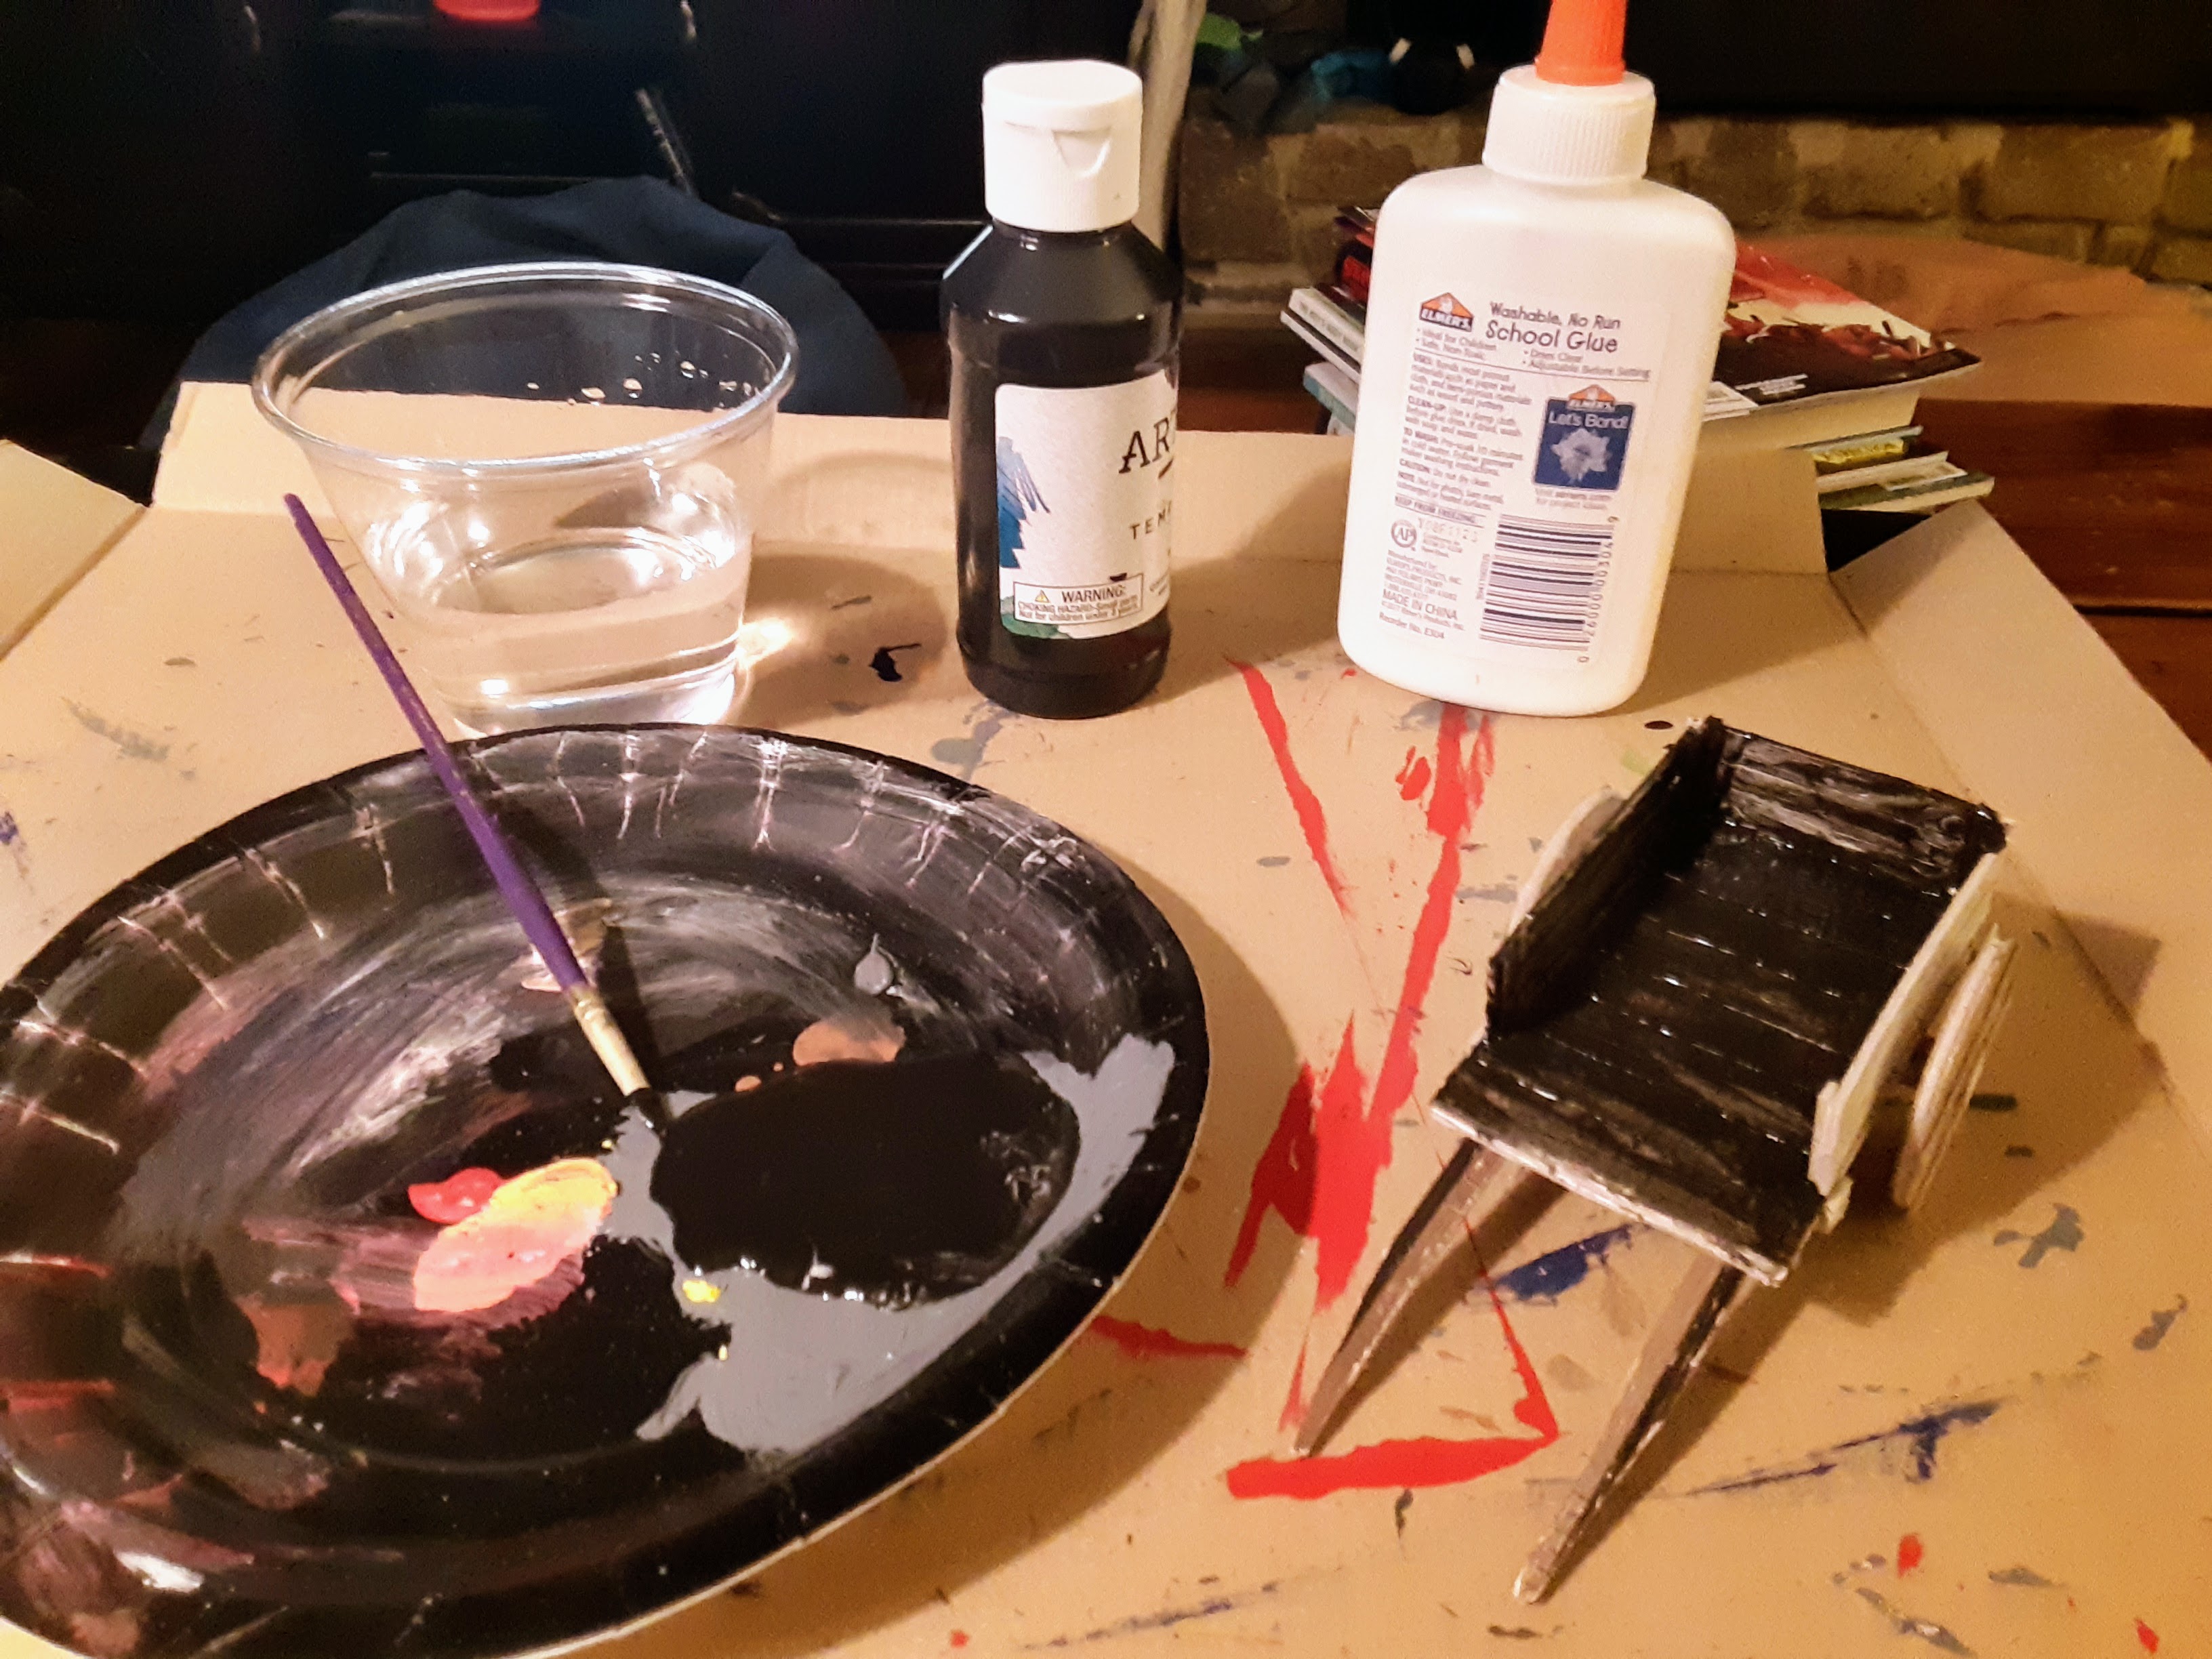
I busted out my craft painted. I mixed some black paint with pva glue, hoping this would create a nice seal on the cardboard. Once that dried I began painting brown over the cart and noticed the black paint on the white glossy cardboard would rub off. In the end I got a good coat on the cart and then dry brushed it with an almond color.
I used a rubber band as the harness on the cart. I think it turned out really well for something I made from trash and things laying around the house.
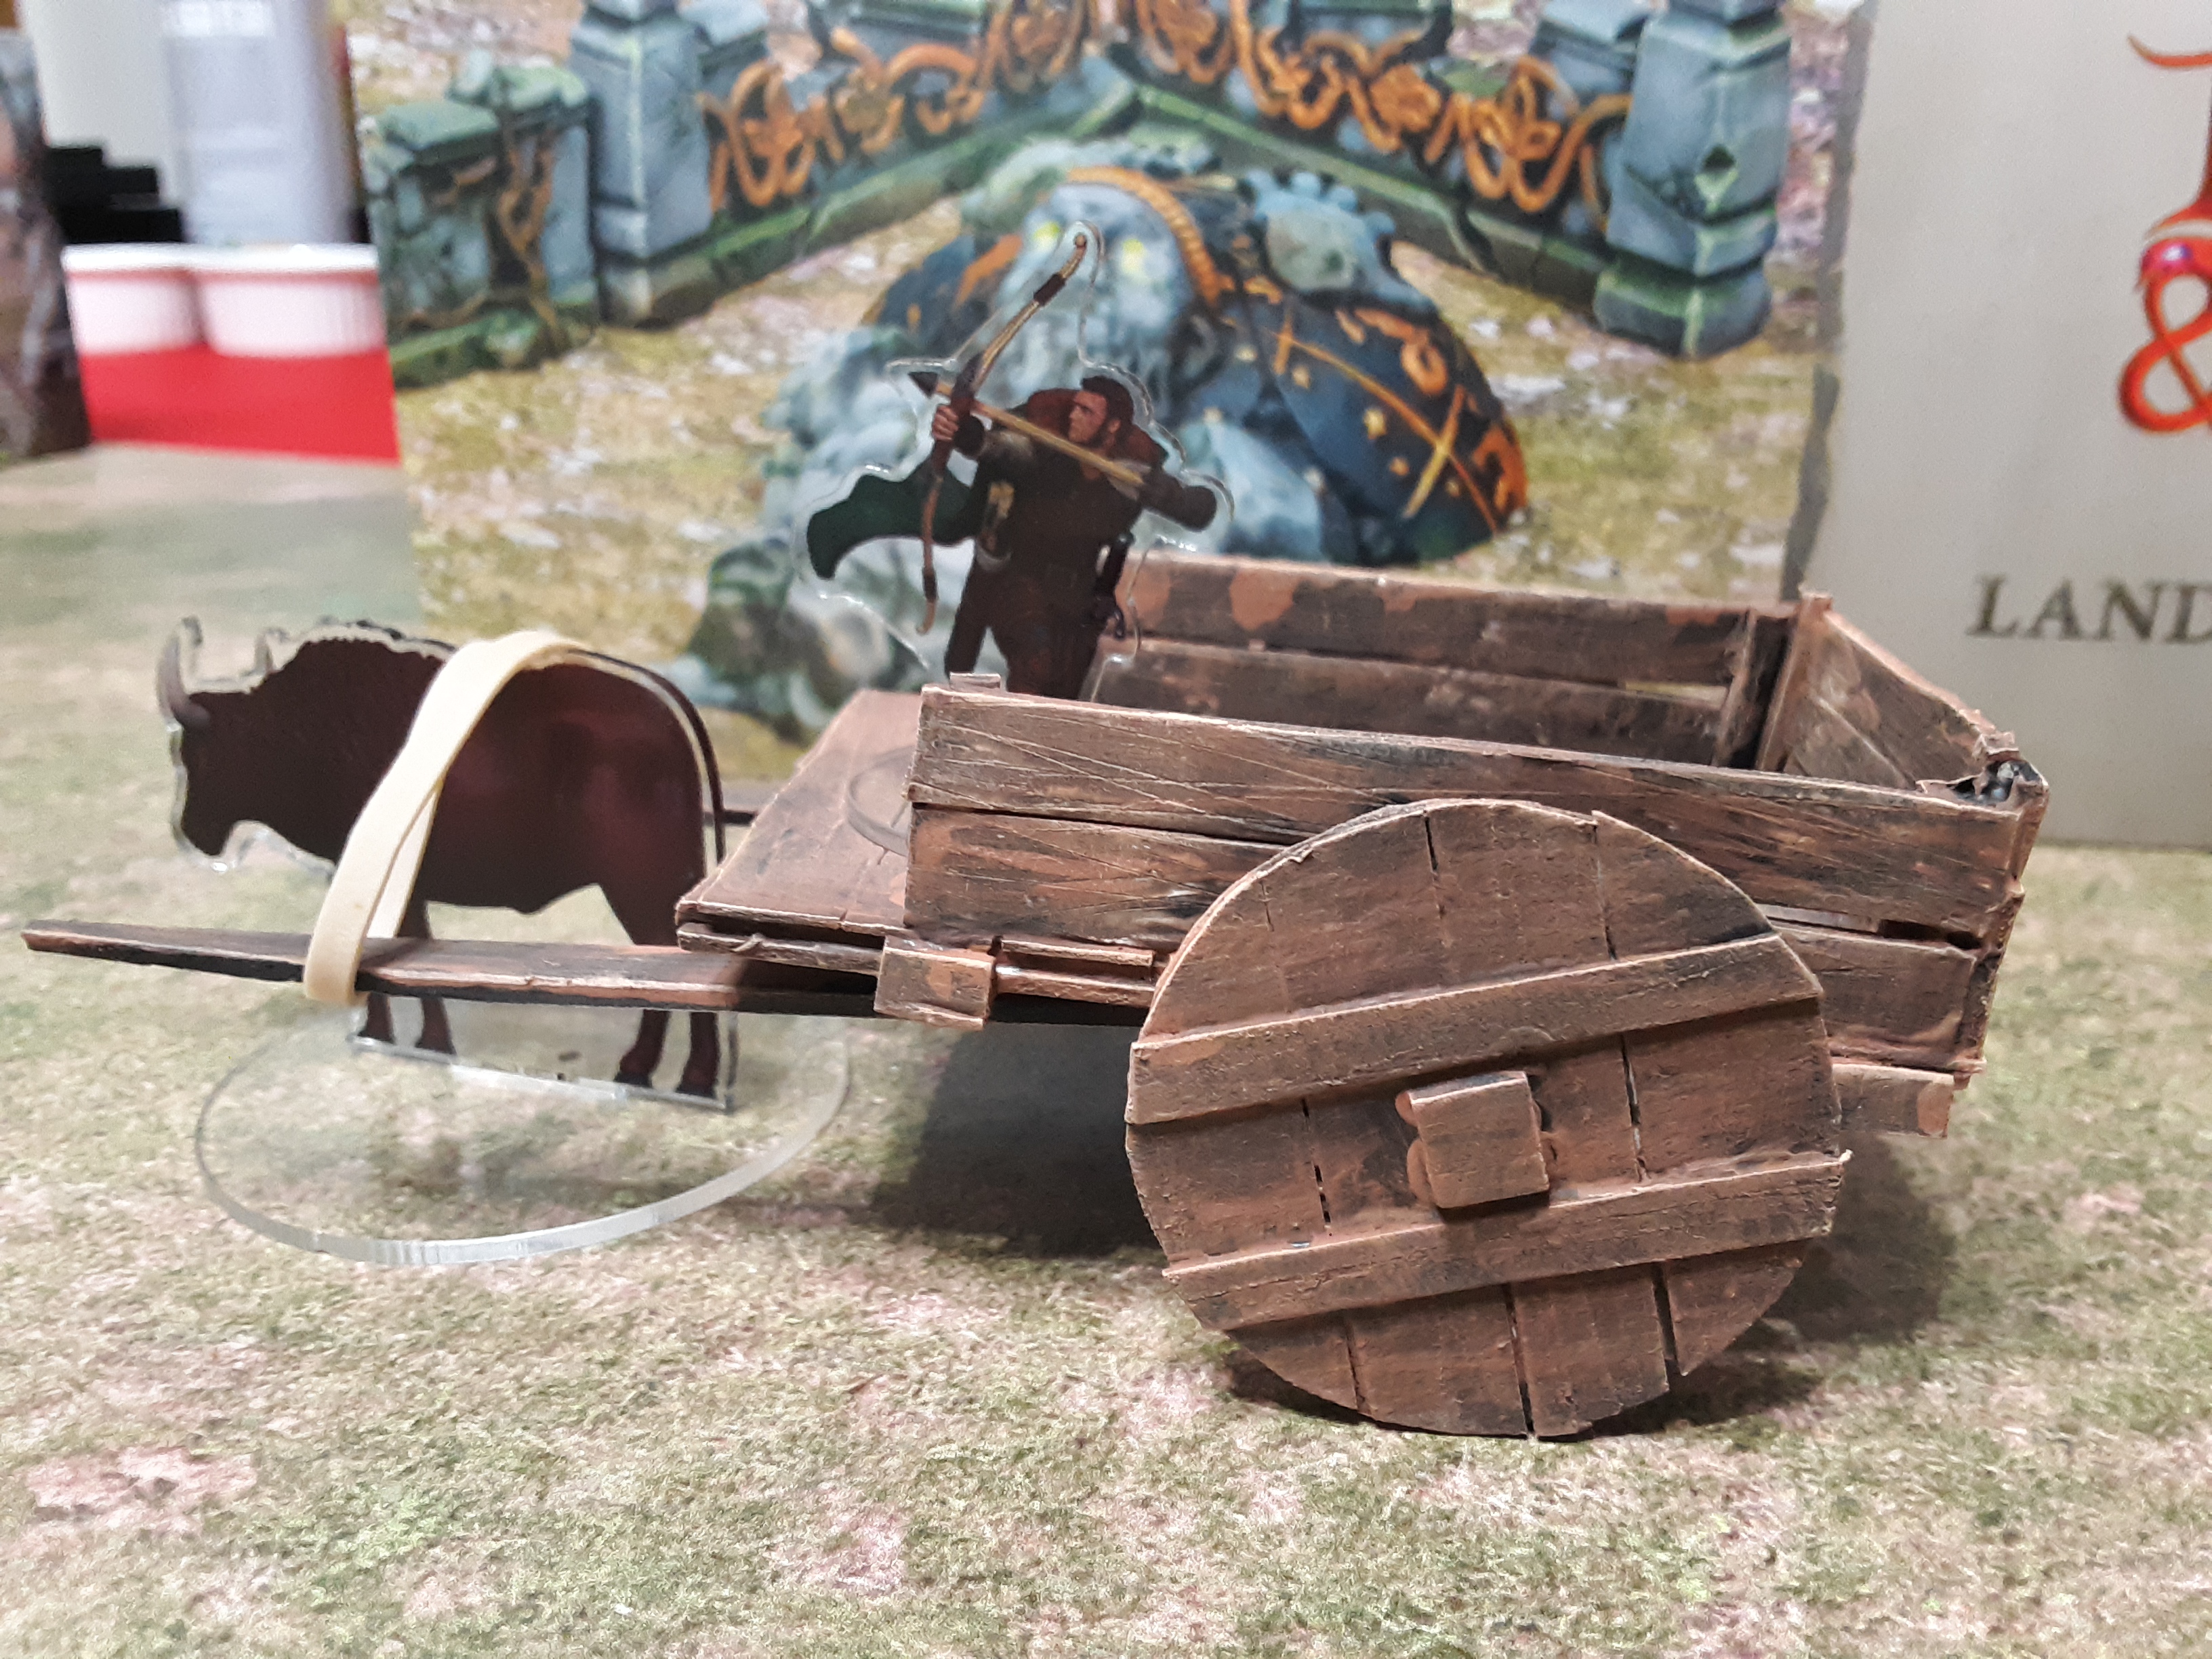 The Cart, Ox, and Driver
Dragon of Icespire Peak Session 4, Butterskull Ranch

It’s been a while since I posted an update for the Dragon of Icespire Peak campaign. I’m a few sessions behind with my posts.
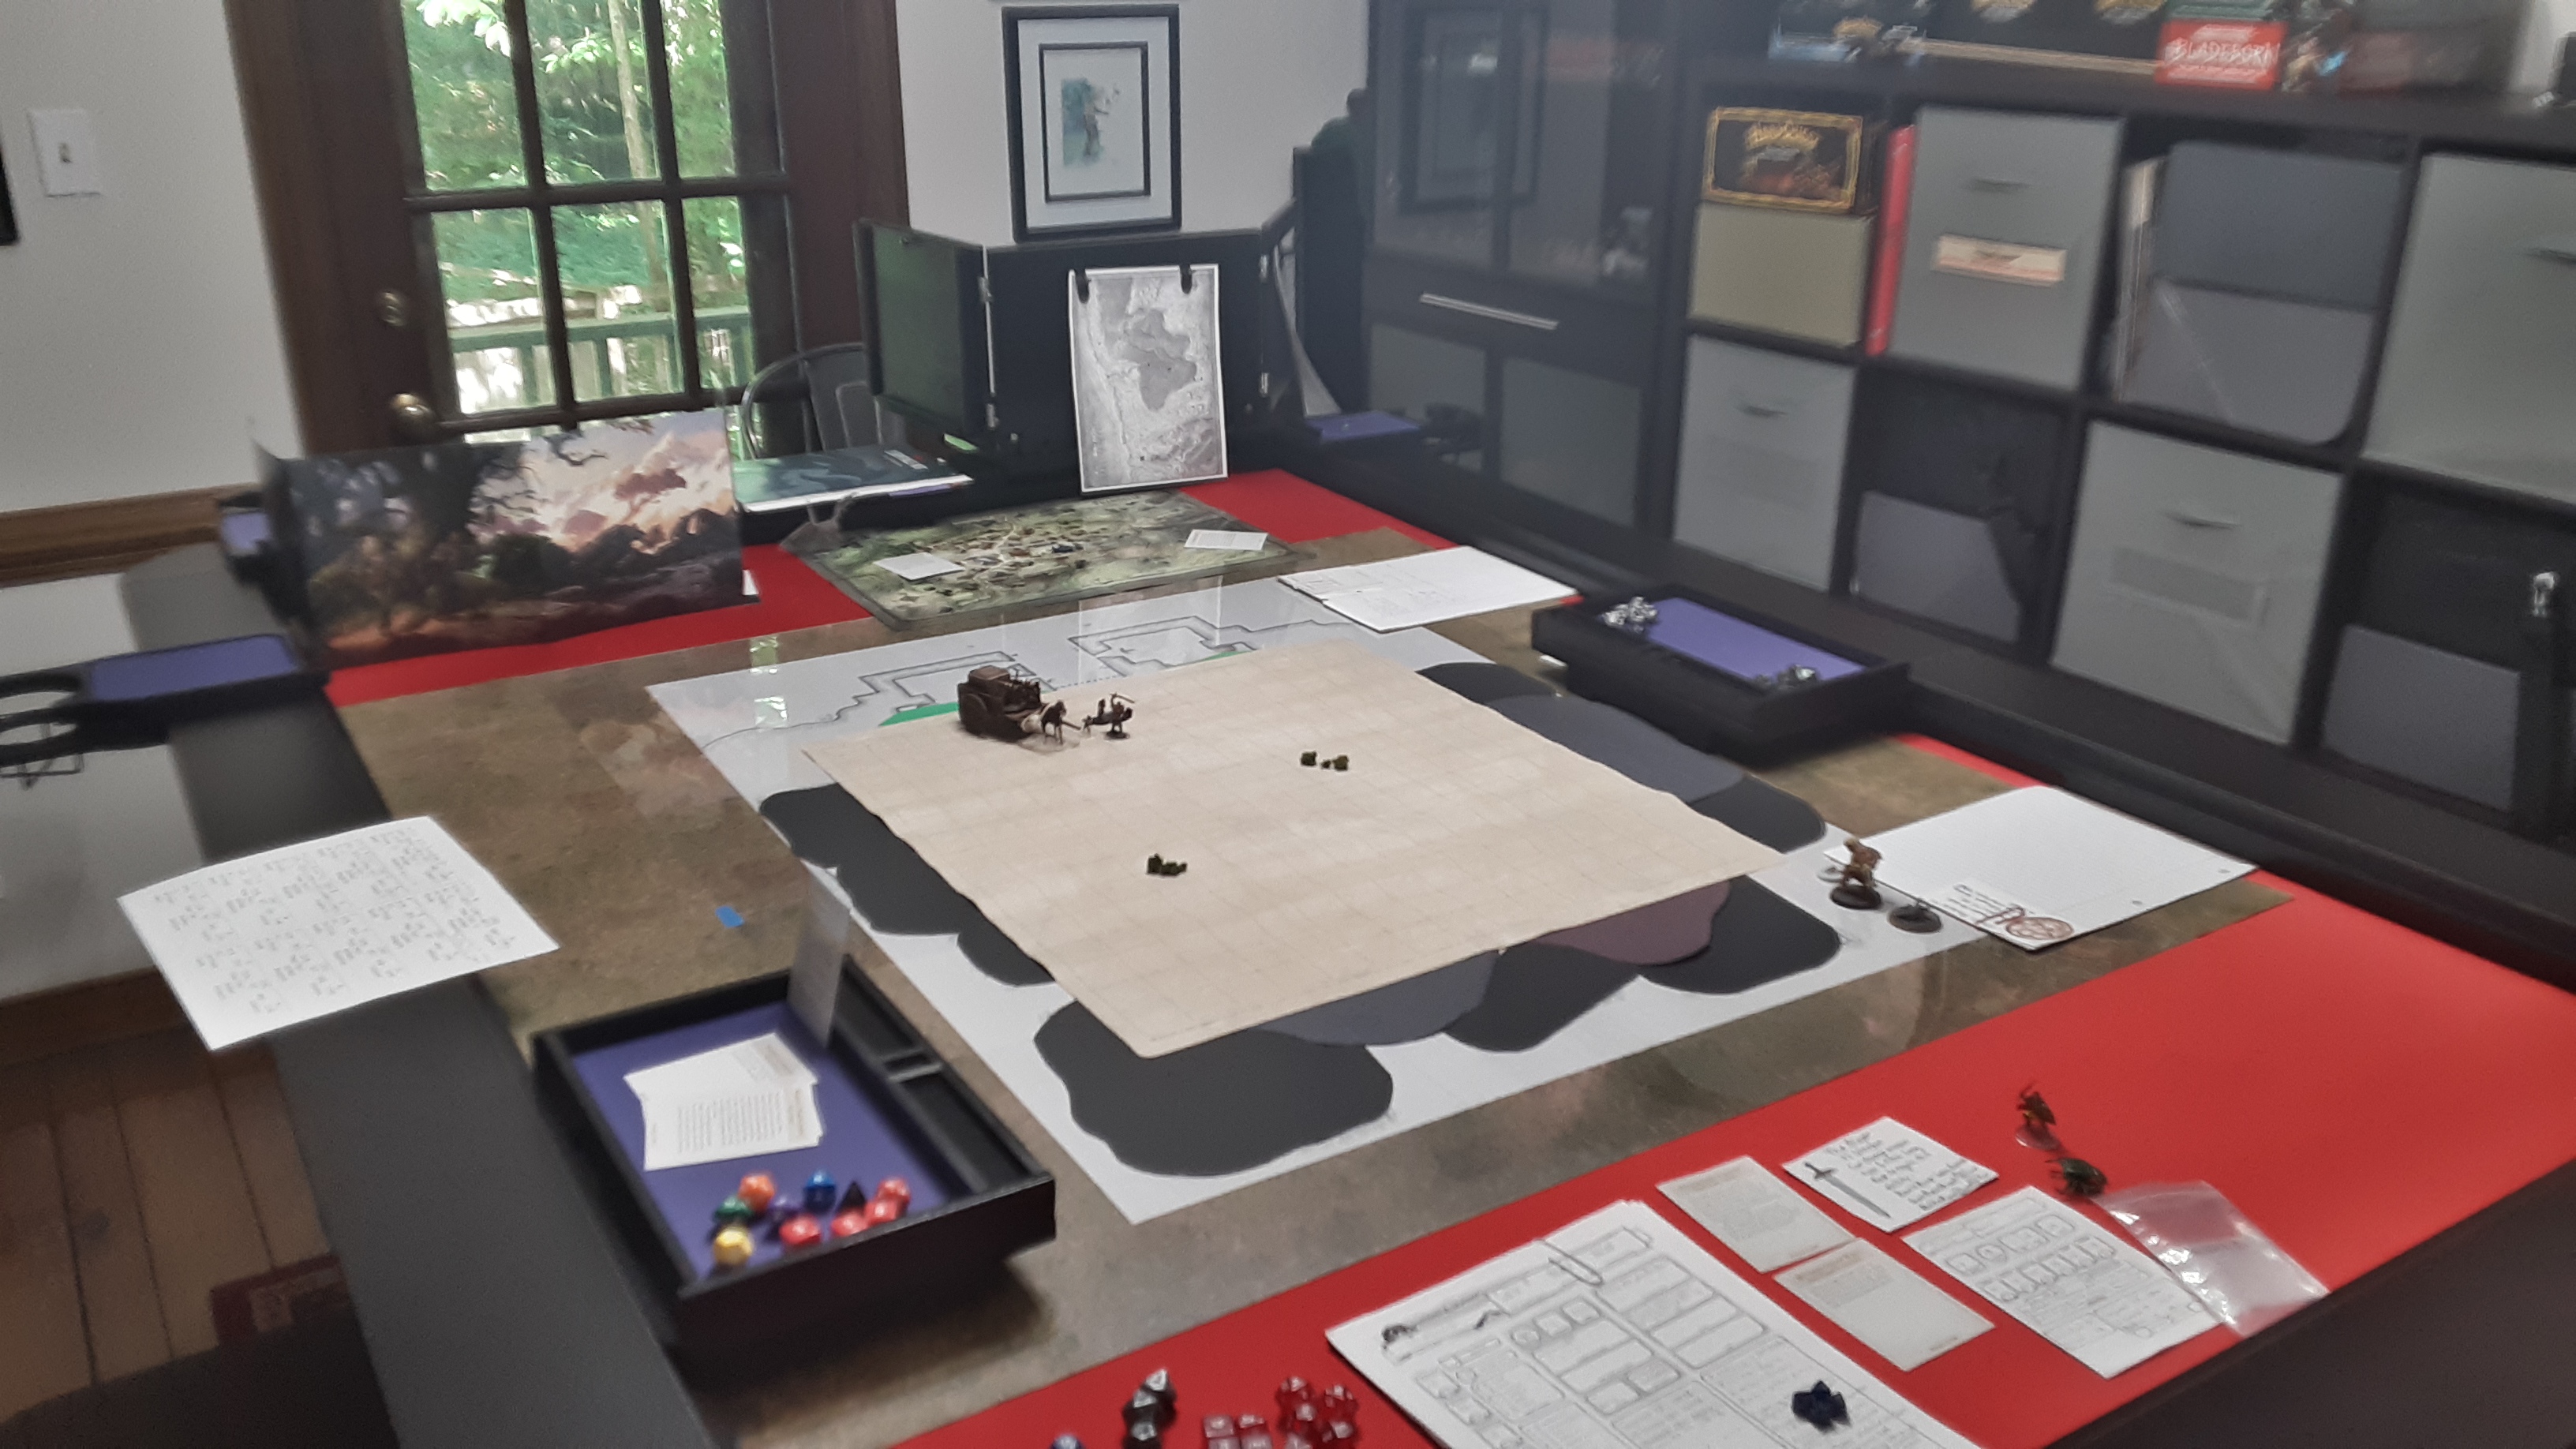
I took it a little easier when I prepped for this game. Instead of creating large battle maps, I focused on one key building and using maps to highlight where the players were on a large farm property.
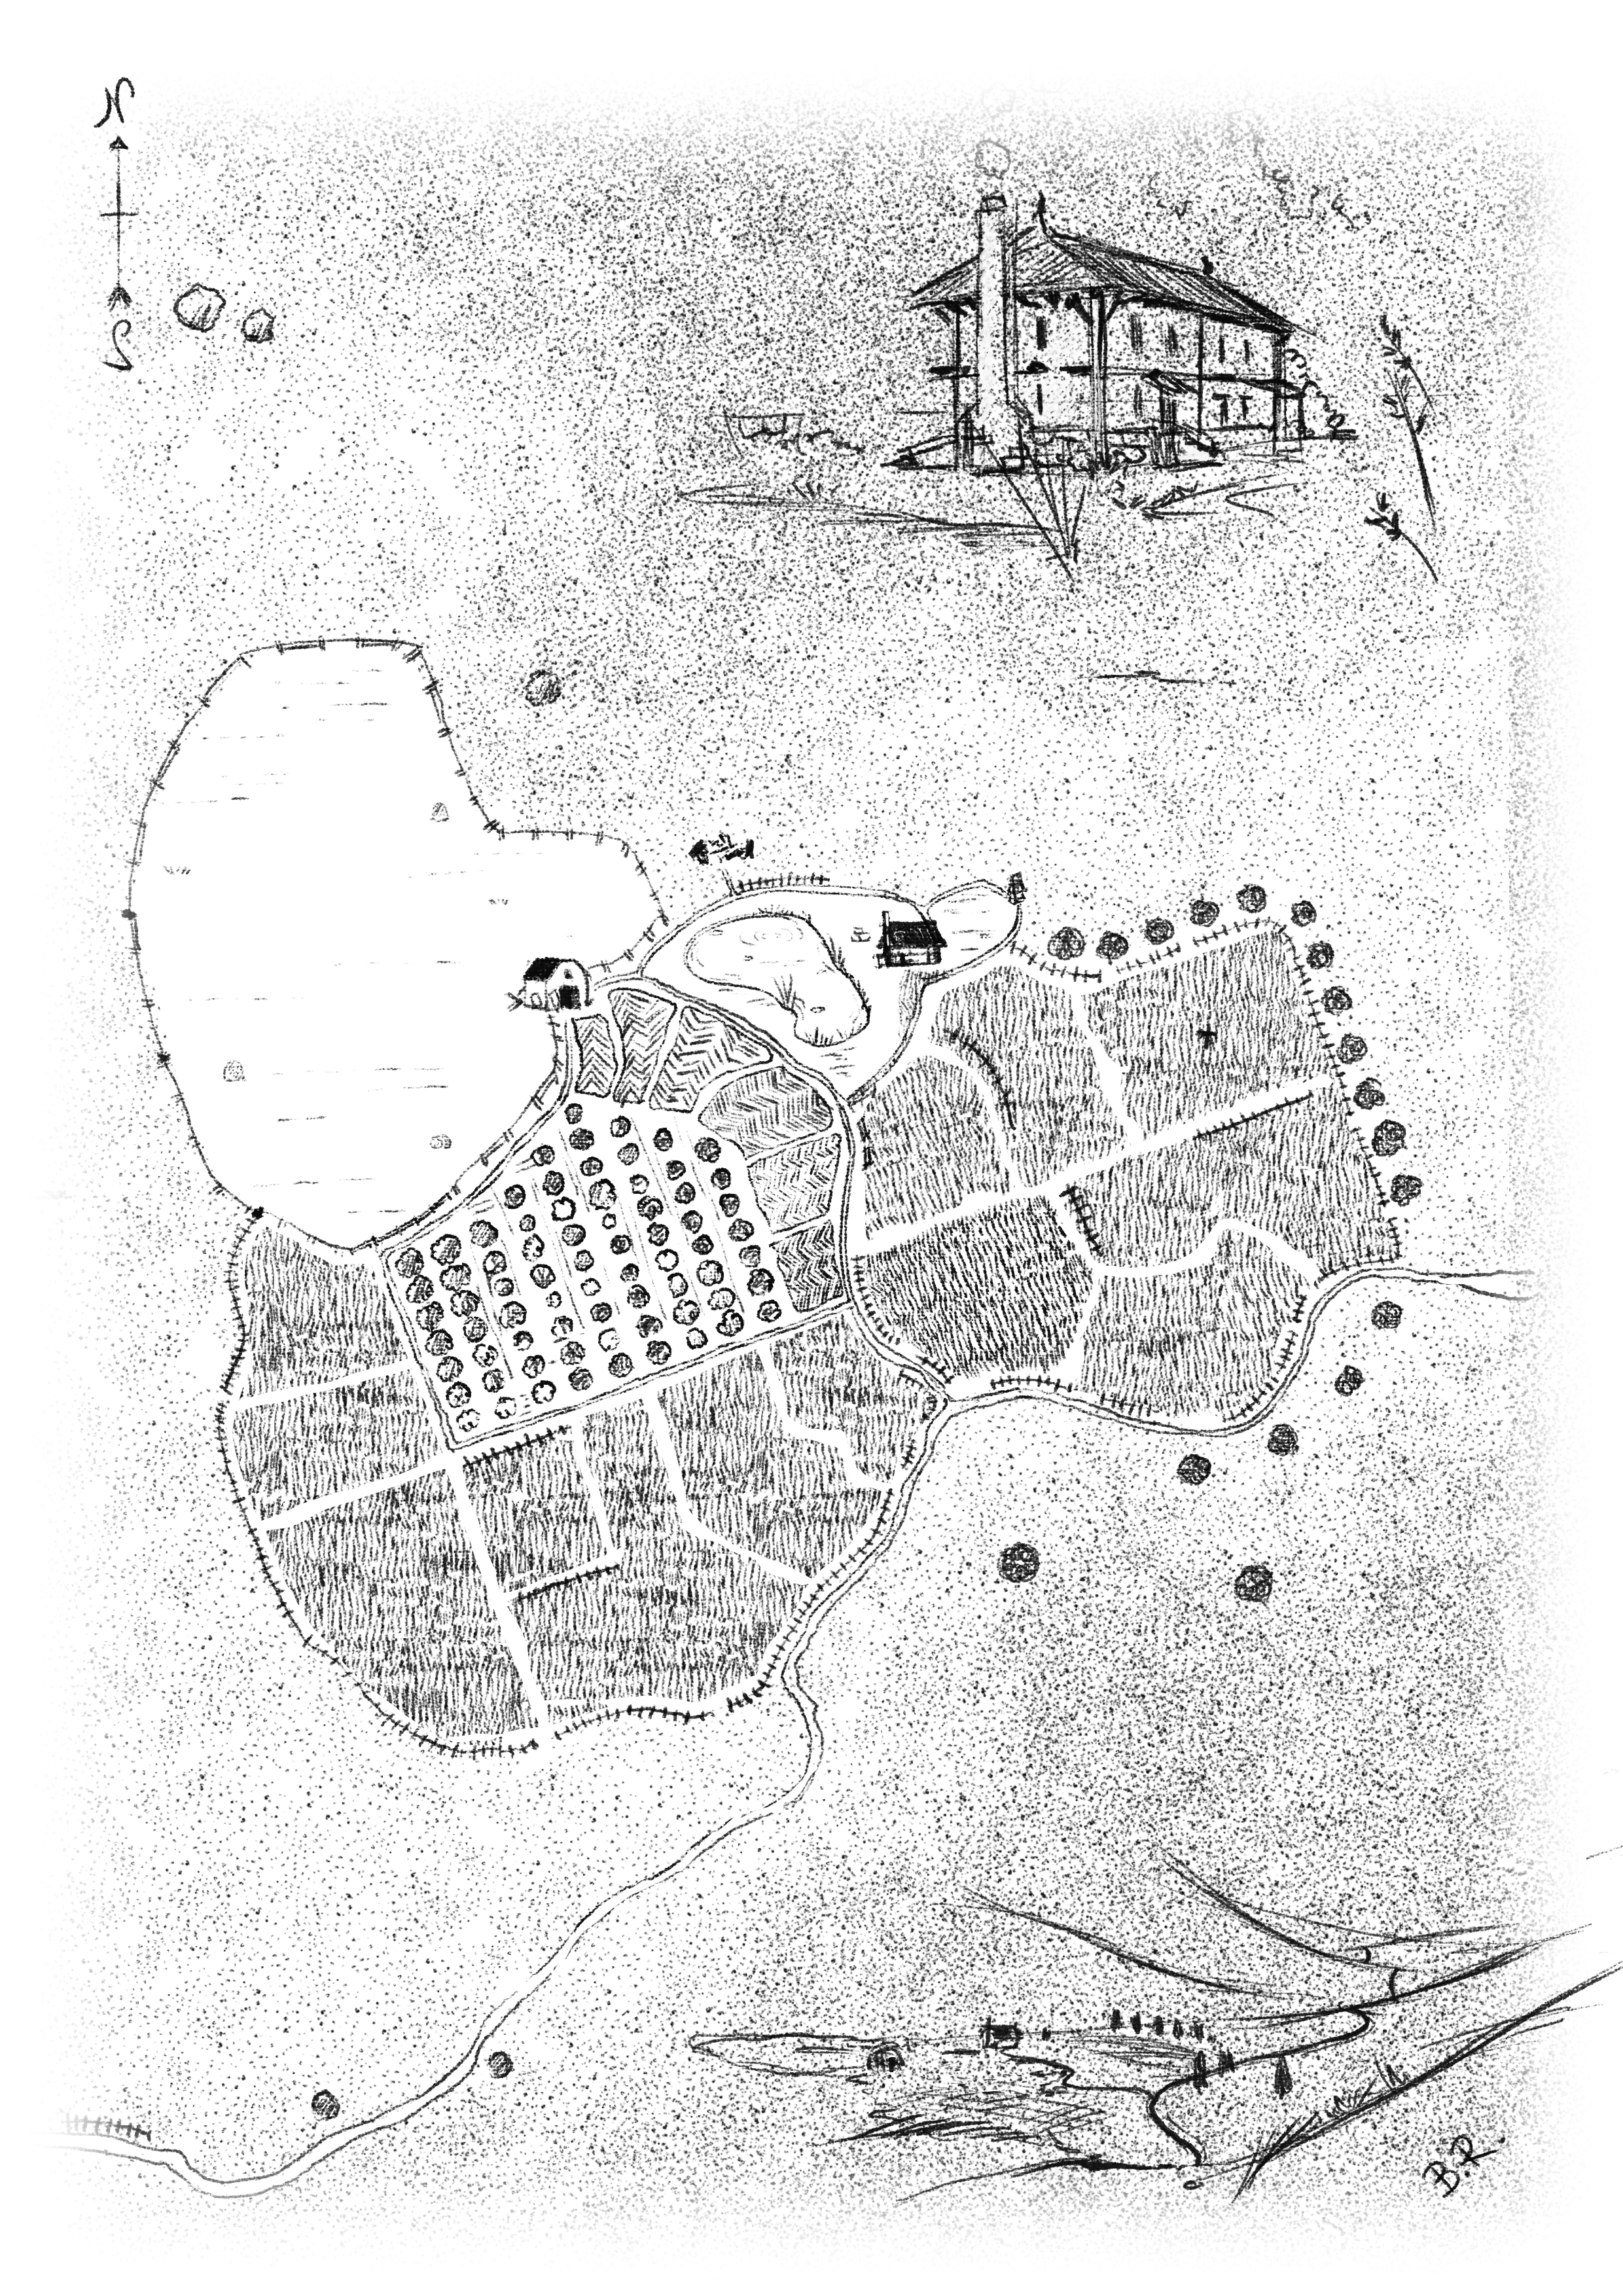
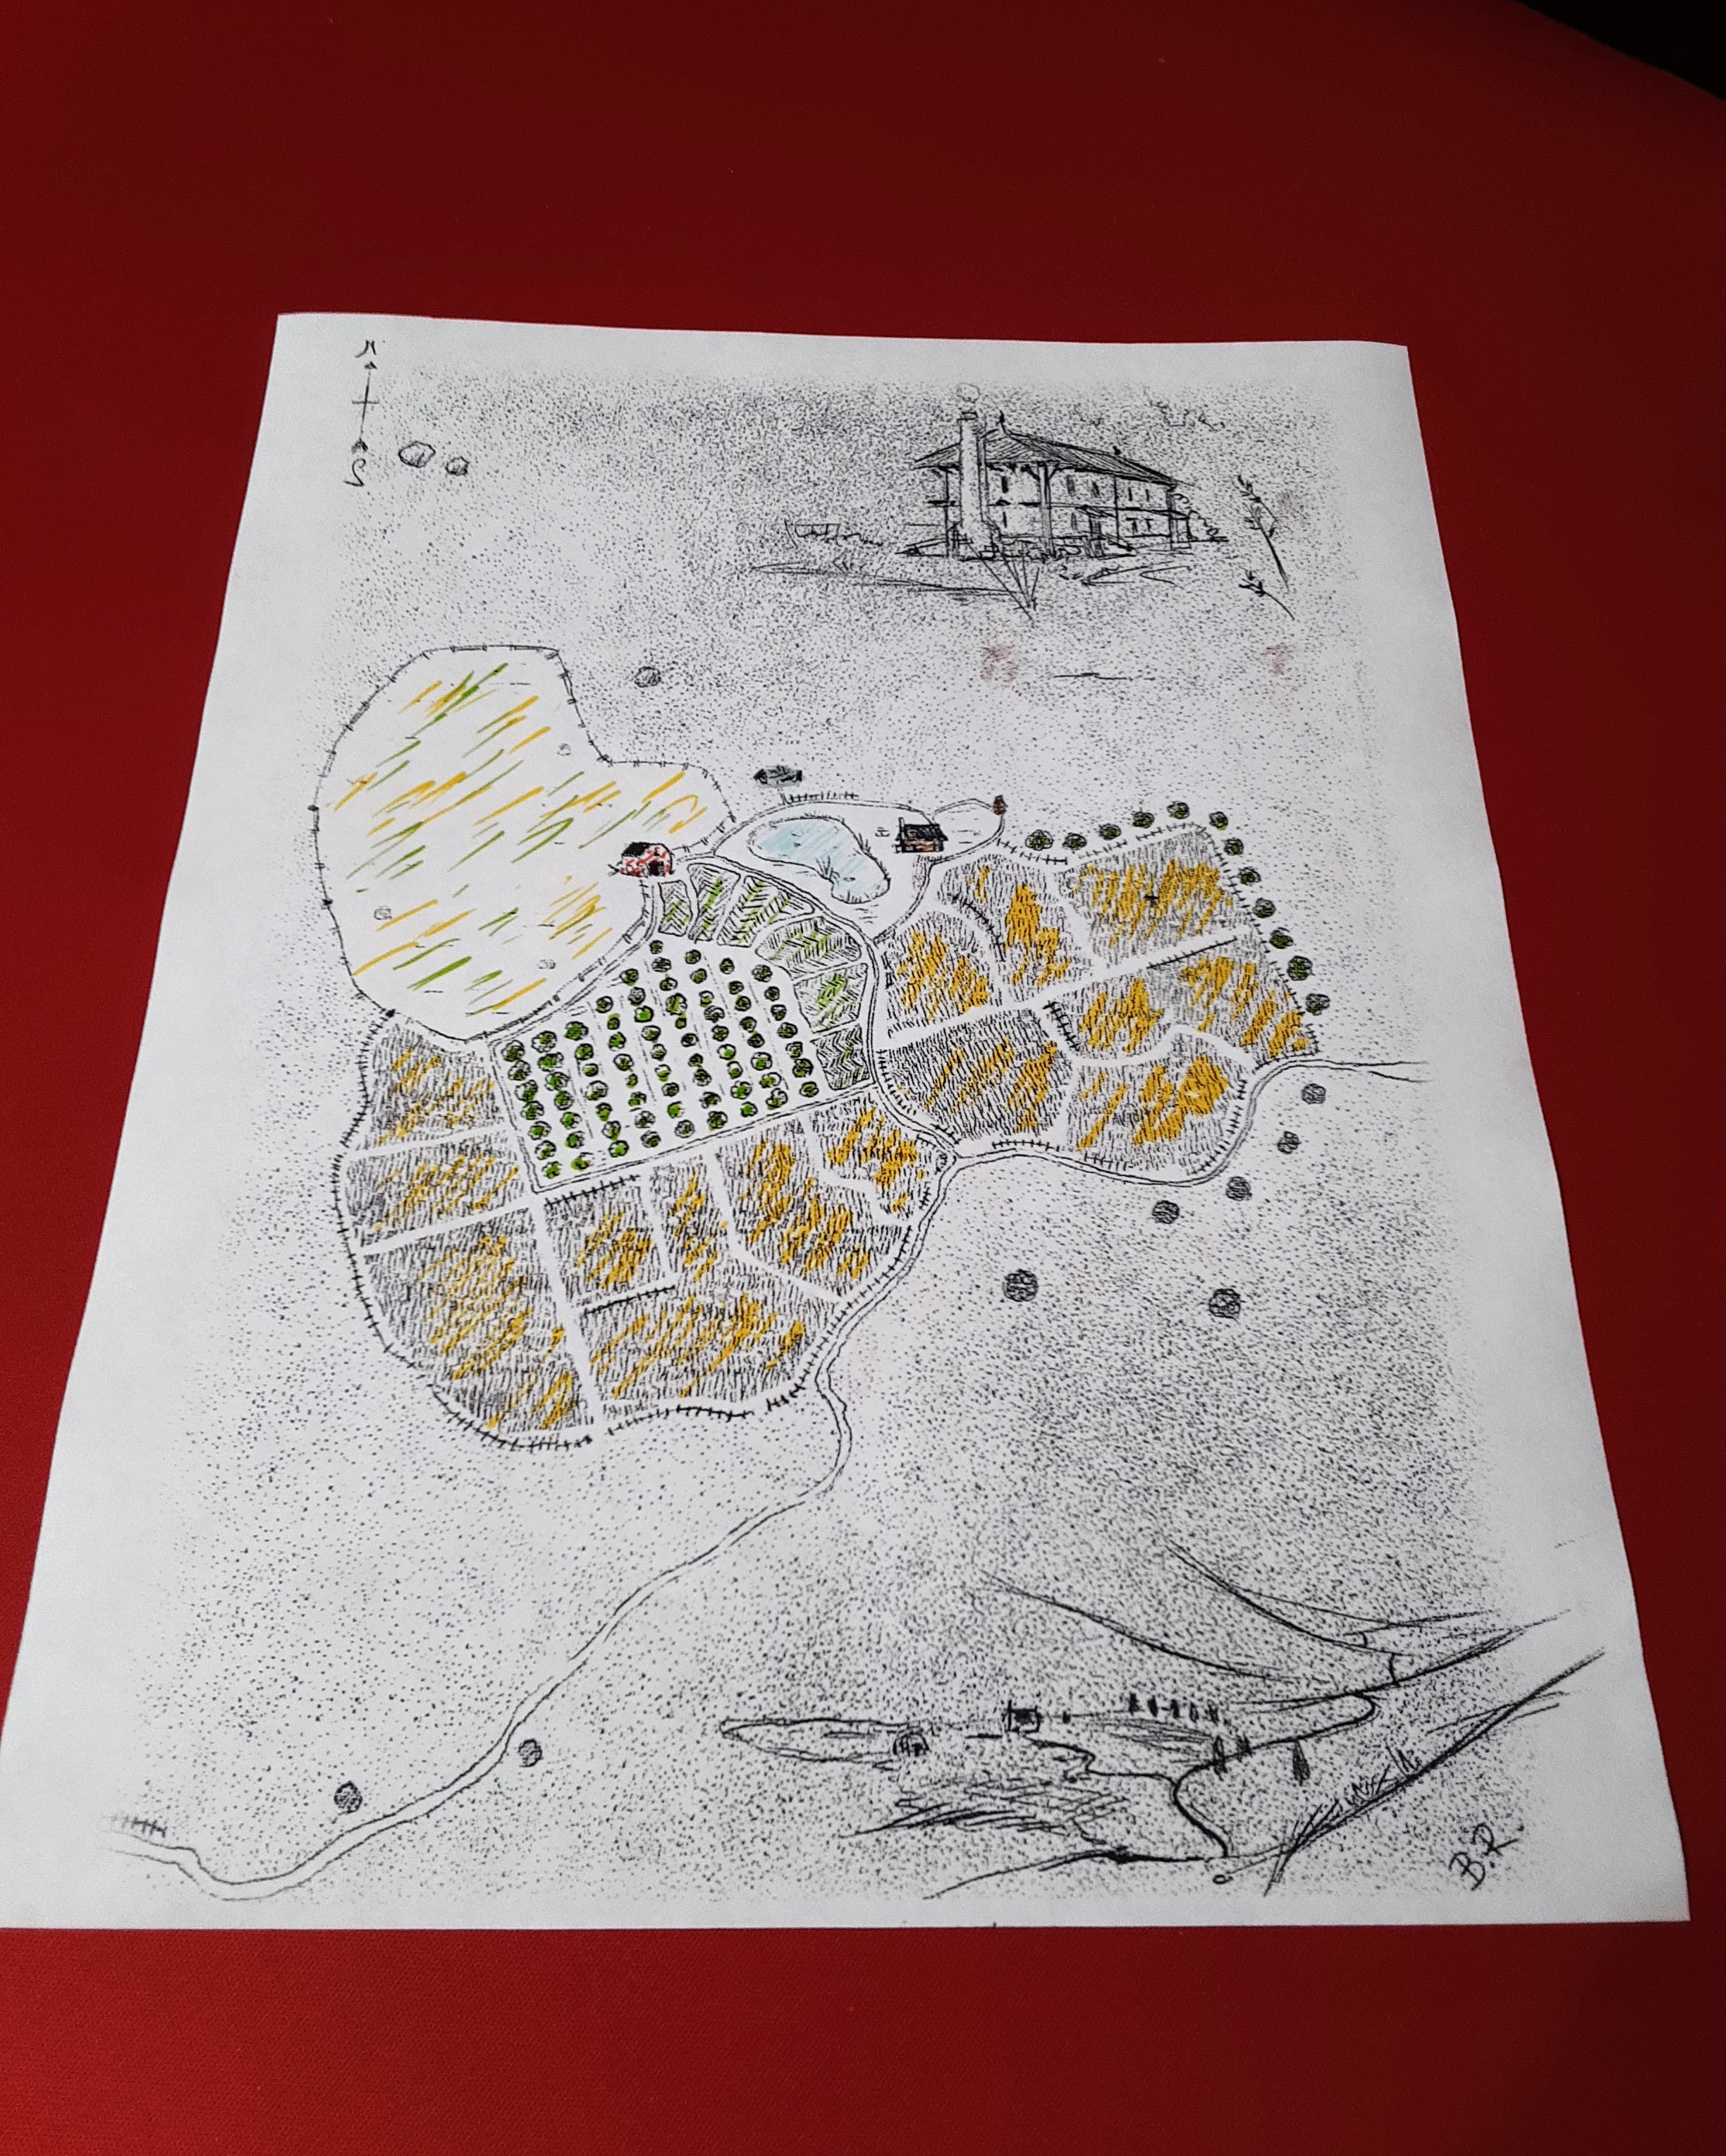
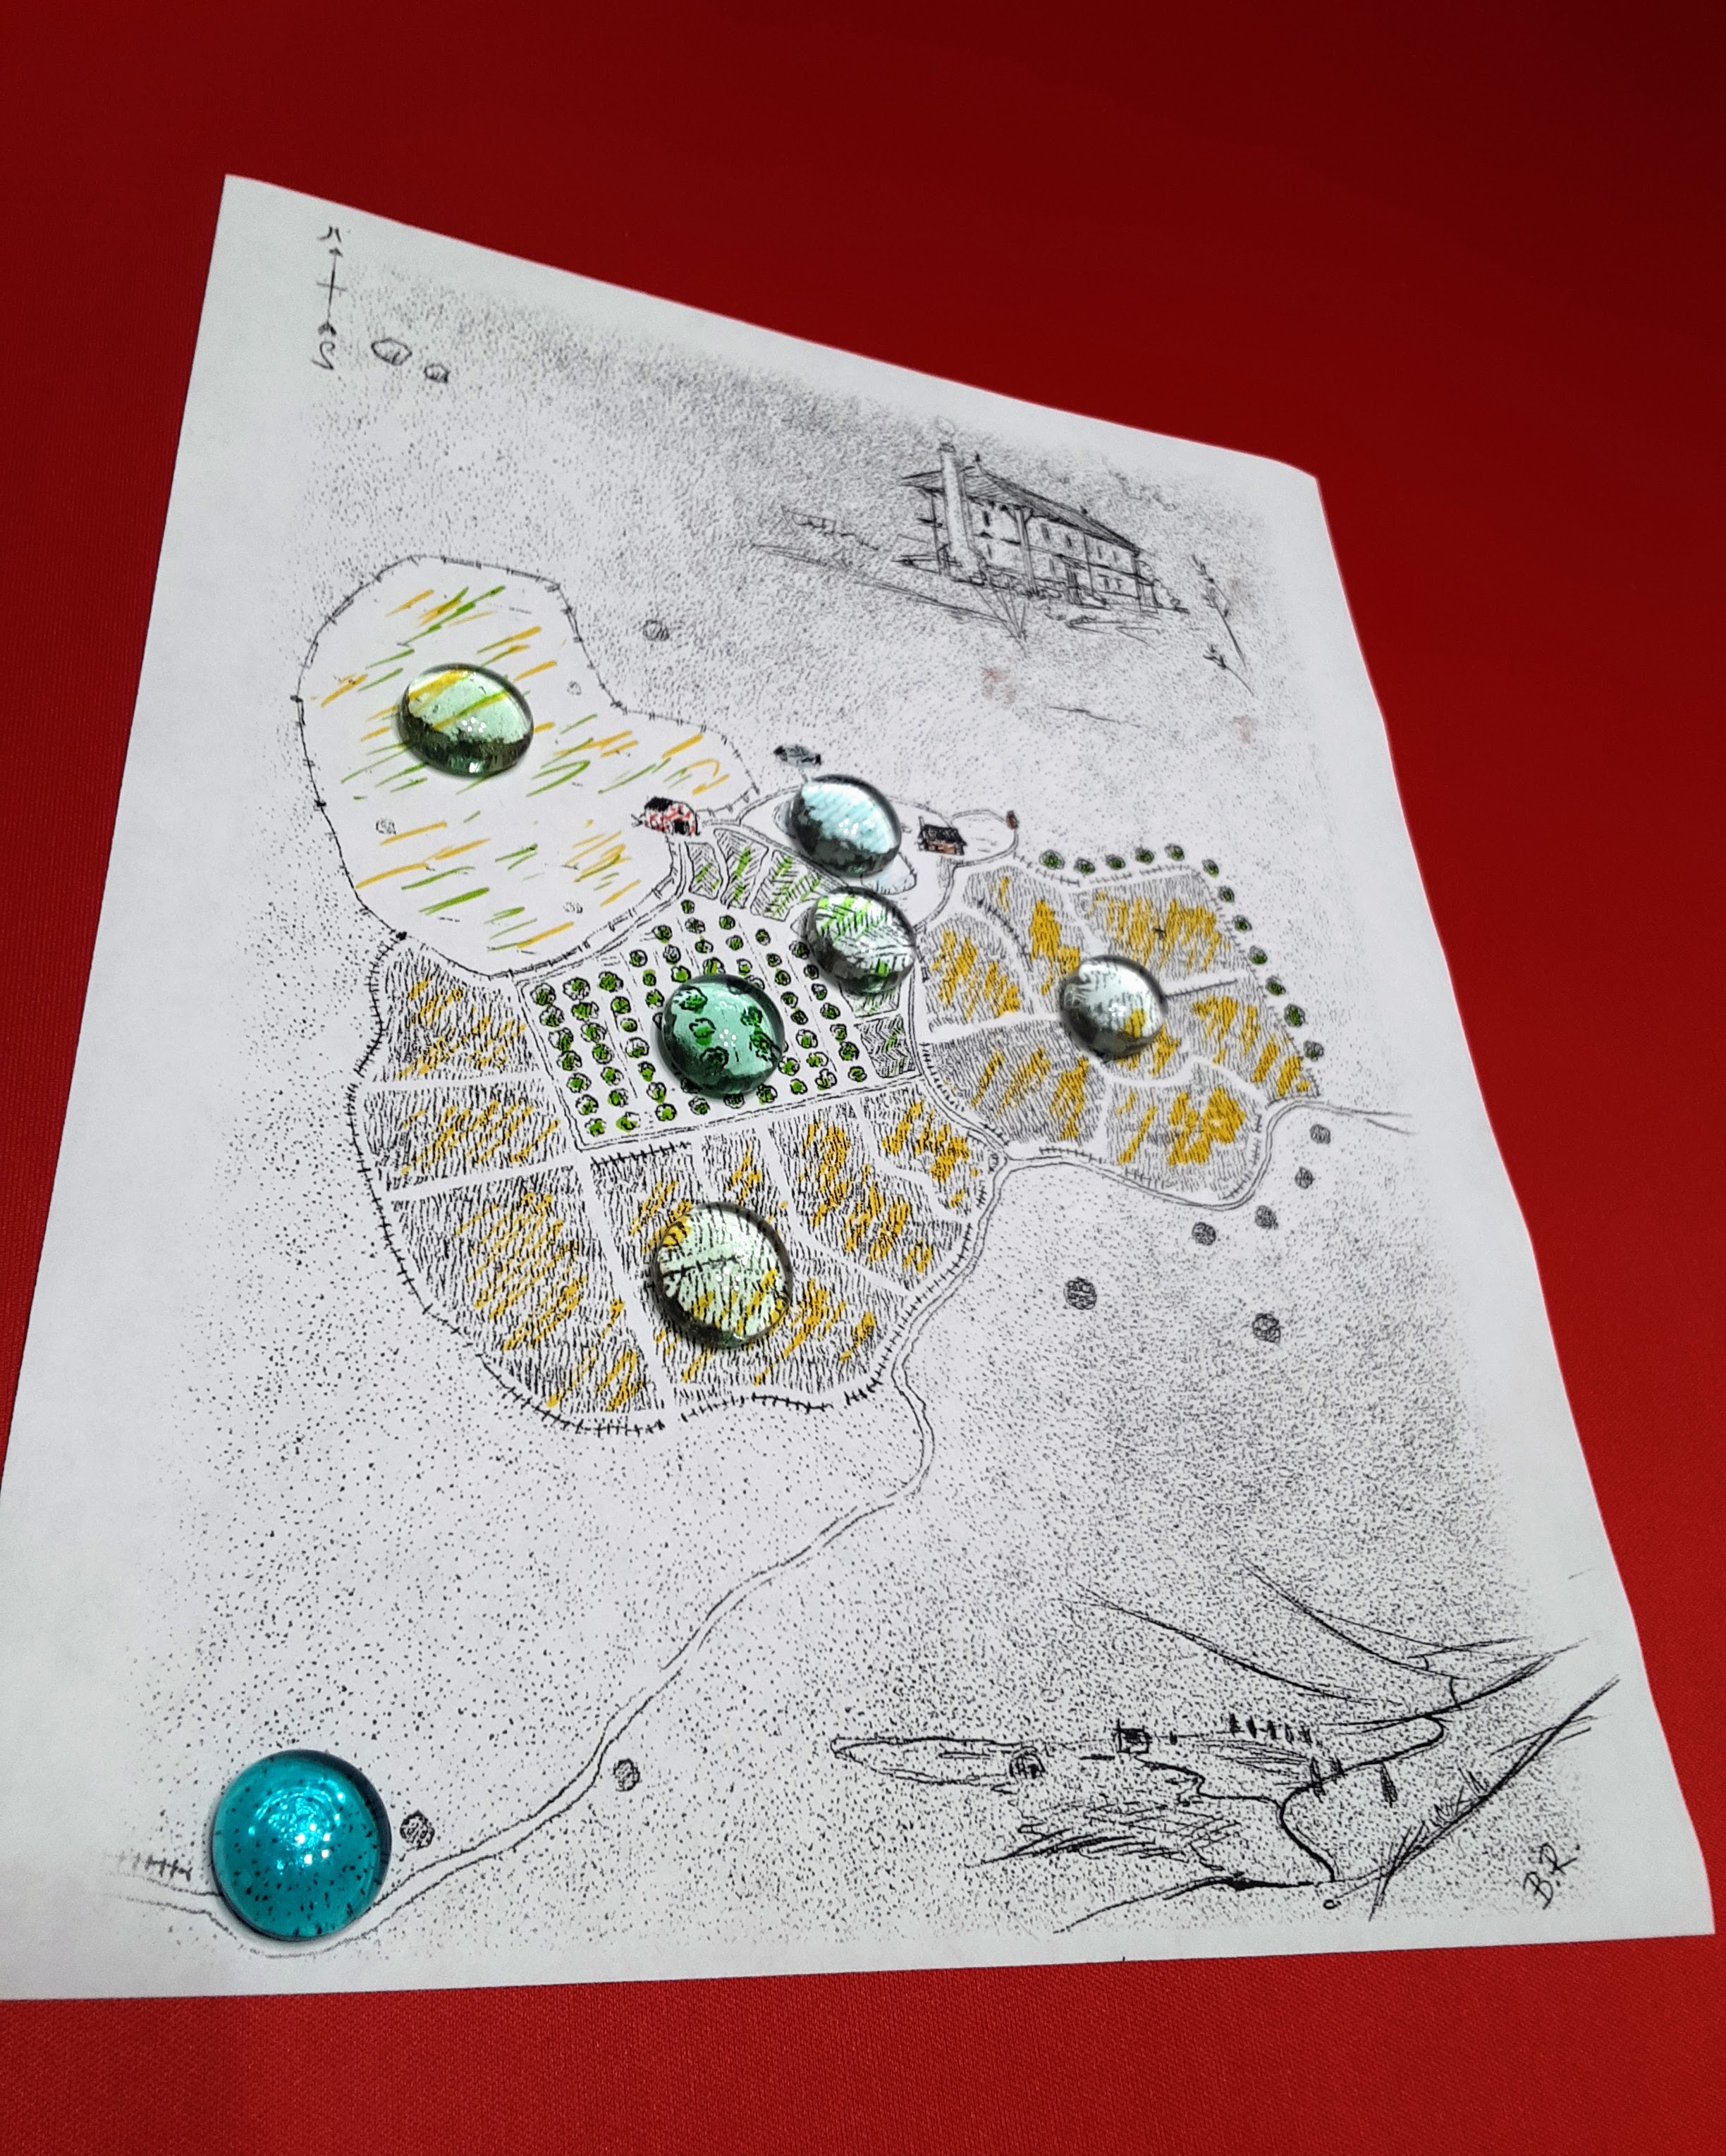
For the map, I found a nice image online for the adventure. It had a hand drawn look. I added some color to sections of the property with markers.
 Creating the Farm House for Butterskull Ranch
I didn’t take any in progress pictures of the building I made, but I used my tried and true methods to create it.
The focus of the adventure takes place in the Farm House. I started by drawing out the levels on 1 inch grid wrapping paper and then gluing it to scrap cardboard. I also made a roof using the same process that went into the windmill (the first adventure in the campaign).

I prepped the table for the game that morning.
The adventurers we’re on a quest to help deal with Orcs that have attacked and taken over Butterskull Ranch (the rancher uses a skull mold to make his butter)
We used the included map from the box set to show the overland travel to Butterskull Ranch. They stopped in a ruined town call Conyberry and came across a cow and ox with brands BAK (initials of the Ranch owner). The party decided to take them along to the Ranch.
I laid out the Ranch map with markers to indicate areas of exploration and a token to represent the party’s movement. The party had a rough estimate of the number of Orcs that attacked the Ranch, shared by a lone survivor that rode for help.
They worked there way around the ranch as the sun began to set. Coming across Orcs chasing loose animals, bodies of slain ranch hands, and they even ambushed an Orc using the outhouse. I would set aside Orc minis to denote how many the party had come across and killed during their exploration. After exploring most of the ranch, they focused on the Farmhouse.

The party approached the Farmhouse and used the druids spider form to do some scouting. They were able to see an Orc cutting up a pig on the ground floor.
The party moved in and were able to surprise the Orc and kill it without drawing the attention of any other Orcs in the building.


The party moved upstairs.
The adventurers attempted to search the upstairs and ended up drawing the attention of the Orcs when the opened a bedroom door. The party moved back as Orcs began pouring into the hallway.
Sissal the Warlock had previously been gifted the ability to use lightening 3 times during the Tower of Storms adventure. He hadn’t used it yet, but thought this was the perfect opportunity. Casting Lightening Bolt down the hallway, he was able to kill and seriously maim the Orcs. The rest of the party swiftly mopped up the rest.
 The Party Rescues Big Al in the Cellar
he party found the cellar doors after clearing the house. They found Big Al, the ranch owner, tied to a chair, the walls lined with Butterskulls.
He was most concerned about his prized dairy cow, Petunia, and was thankful the adventurers had saved her.
He went with the adventurers to seek revenge on the last of the Orcs on the farm. He gifted the adventurers a suit of Mithral Chain Mail for their help. Big Al decided to travel back to Phandalin with the party for safety until the trouble in the area was solved (the dragon had pushed the orcs out of their area into the Phandalin region).
After returning to Phandalin, the party regrouped and took a look at the two quests on the Job Board. Mountain’s Toe Gold Mine or the Logger’s Camp.
They decided to do the Logger’s Camp quest and I started prepping for the next adventure
Dragon of Icespire Peak Session 4, Butterskull Ranch

It’s been a while since I posted an update for the Dragon of Icespire Peak campaign. I’m a few sessions behind with my posts.
I took it a little easier when I prepped for this game. Instead of creating large battle maps, I focused on one key building and using maps to highlight where the players were on a large farm property.
For the map, I found a nice image online for the adventure. It had a hand drawn look. I added some color to sections of the property with markers.
 Creating the Farm House for Butterskull Ranch
I didn’t take any in progress pictures of the building I made, but I used my tried and true methods to create it.
The focus of the adventure takes place in the Farm House. I started by drawing out the levels on 1 inch grid wrapping paper and then gluing it to scrap cardboard. I also made a roof using the same process that went into the windmill (the first adventure in the campaign).

I prepped the table for the game that morning.
The adventurers we’re on a quest to help deal with Orcs that have attacked and taken over Butterskull Ranch (the rancher uses a skull mold to make his butter)
We used the included map from the box set to show the overland travel to Butterskull Ranch. They stopped in a ruined town call Conyberry and came across a cow and ox with brands BAK (initials of the Ranch owner). The party decided to take them along to the Ranch.
I laid out the Ranch map with markers to indicate areas of exploration and a token to represent the party’s movement. The party had a rough estimate of the number of Orcs that attacked the Ranch, shared by a lone survivor that rode for help.
They worked there way around the ranch as the sun began to set. Coming across Orcs chasing loose animals, bodies of slain ranch hands, and they even ambushed an Orc using the outhouse. I would set aside Orc minis to denote how many the party had come across and killed during their exploration. After exploring most of the ranch, they focused on the Farmhouse.

The party approached the Farmhouse and used the druids spider form to do some scouting. They were able to see an Orc cutting up a pig on the ground floor.
The party moved in and were able to surprise the Orc and kill it without drawing the attention of any other Orcs in the building.
The party moved upstairs.
The adventurers attempted to search the upstairs and ended up drawing the attention of the Orcs when the opened a bedroom door. The party moved back as Orcs began pouring into the hallway.
Sissal the Warlock had previously been gifted the ability to use lightening 3 times during the Tower of Storms adventure. He hadn’t used it yet, but thought this was the perfect opportunity. Casting Lightening Bolt down the hallway, he was able to kill and seriously maim the Orcs. The rest of the party swiftly mopped up the rest.
 The Party Rescues Big Al in the Cellar
he party found the cellar doors after clearing the house. They found Big Al, the ranch owner, tied to a chair, the walls lined with Butterskulls.
He was most concerned about his prized dairy cow, Petunia, and was thankful the adventurers had saved her.
He went with the adventurers to seek revenge on the last of the Orcs on the farm. He gifted the adventurers a suit of Mithral Chain Mail for their help. Big Al decided to travel back to Phandalin with the party for safety until the trouble in the area was solved (the dragon had pushed the orcs out of their area into the Phandalin region).
After returning to Phandalin, the party regrouped and took a look at the two quests on the Job Board. Mountain’s Toe Gold Mine or the Logger’s Camp.
They decided to do the Logger’s Camp quest and I started prepping for the next adventure


