


![How To Paint Moonstone’s Nanny | Goblin King Games [7 Days Early Access]](https://images.beastsofwar.com/2024/12/3CU-Gobin-King-Games-Moonstone-Shades-Nanny-coverimage-225-127.jpg)


KoW Elves are coming (finally)


Recommendations: 223
About the Project
When Mantic launched Kings of War back in the mists of time, I was immediately attracted to their version of the Elves. I thought the concept was etherial and captured for me the mystery of the race; esthetic, other-worldly, different, esoteric. Of course I then ordered far too many boxes and put them on the shelf for that moment which I knew would come (Ha!) when I would build and paint and send them onto the fields of Panathor to claim victory. But of course I didn't do that as other "shinies" caught my eye. But it's time. So here is my final attempt at bringing a KoW Elven army to the table.
Related Game: Kings of War
Related Company: Mantic Games
Related Genre: Fantasy
Related Contest: Spring Clean Hobby Challenge 2024
This Project is Active
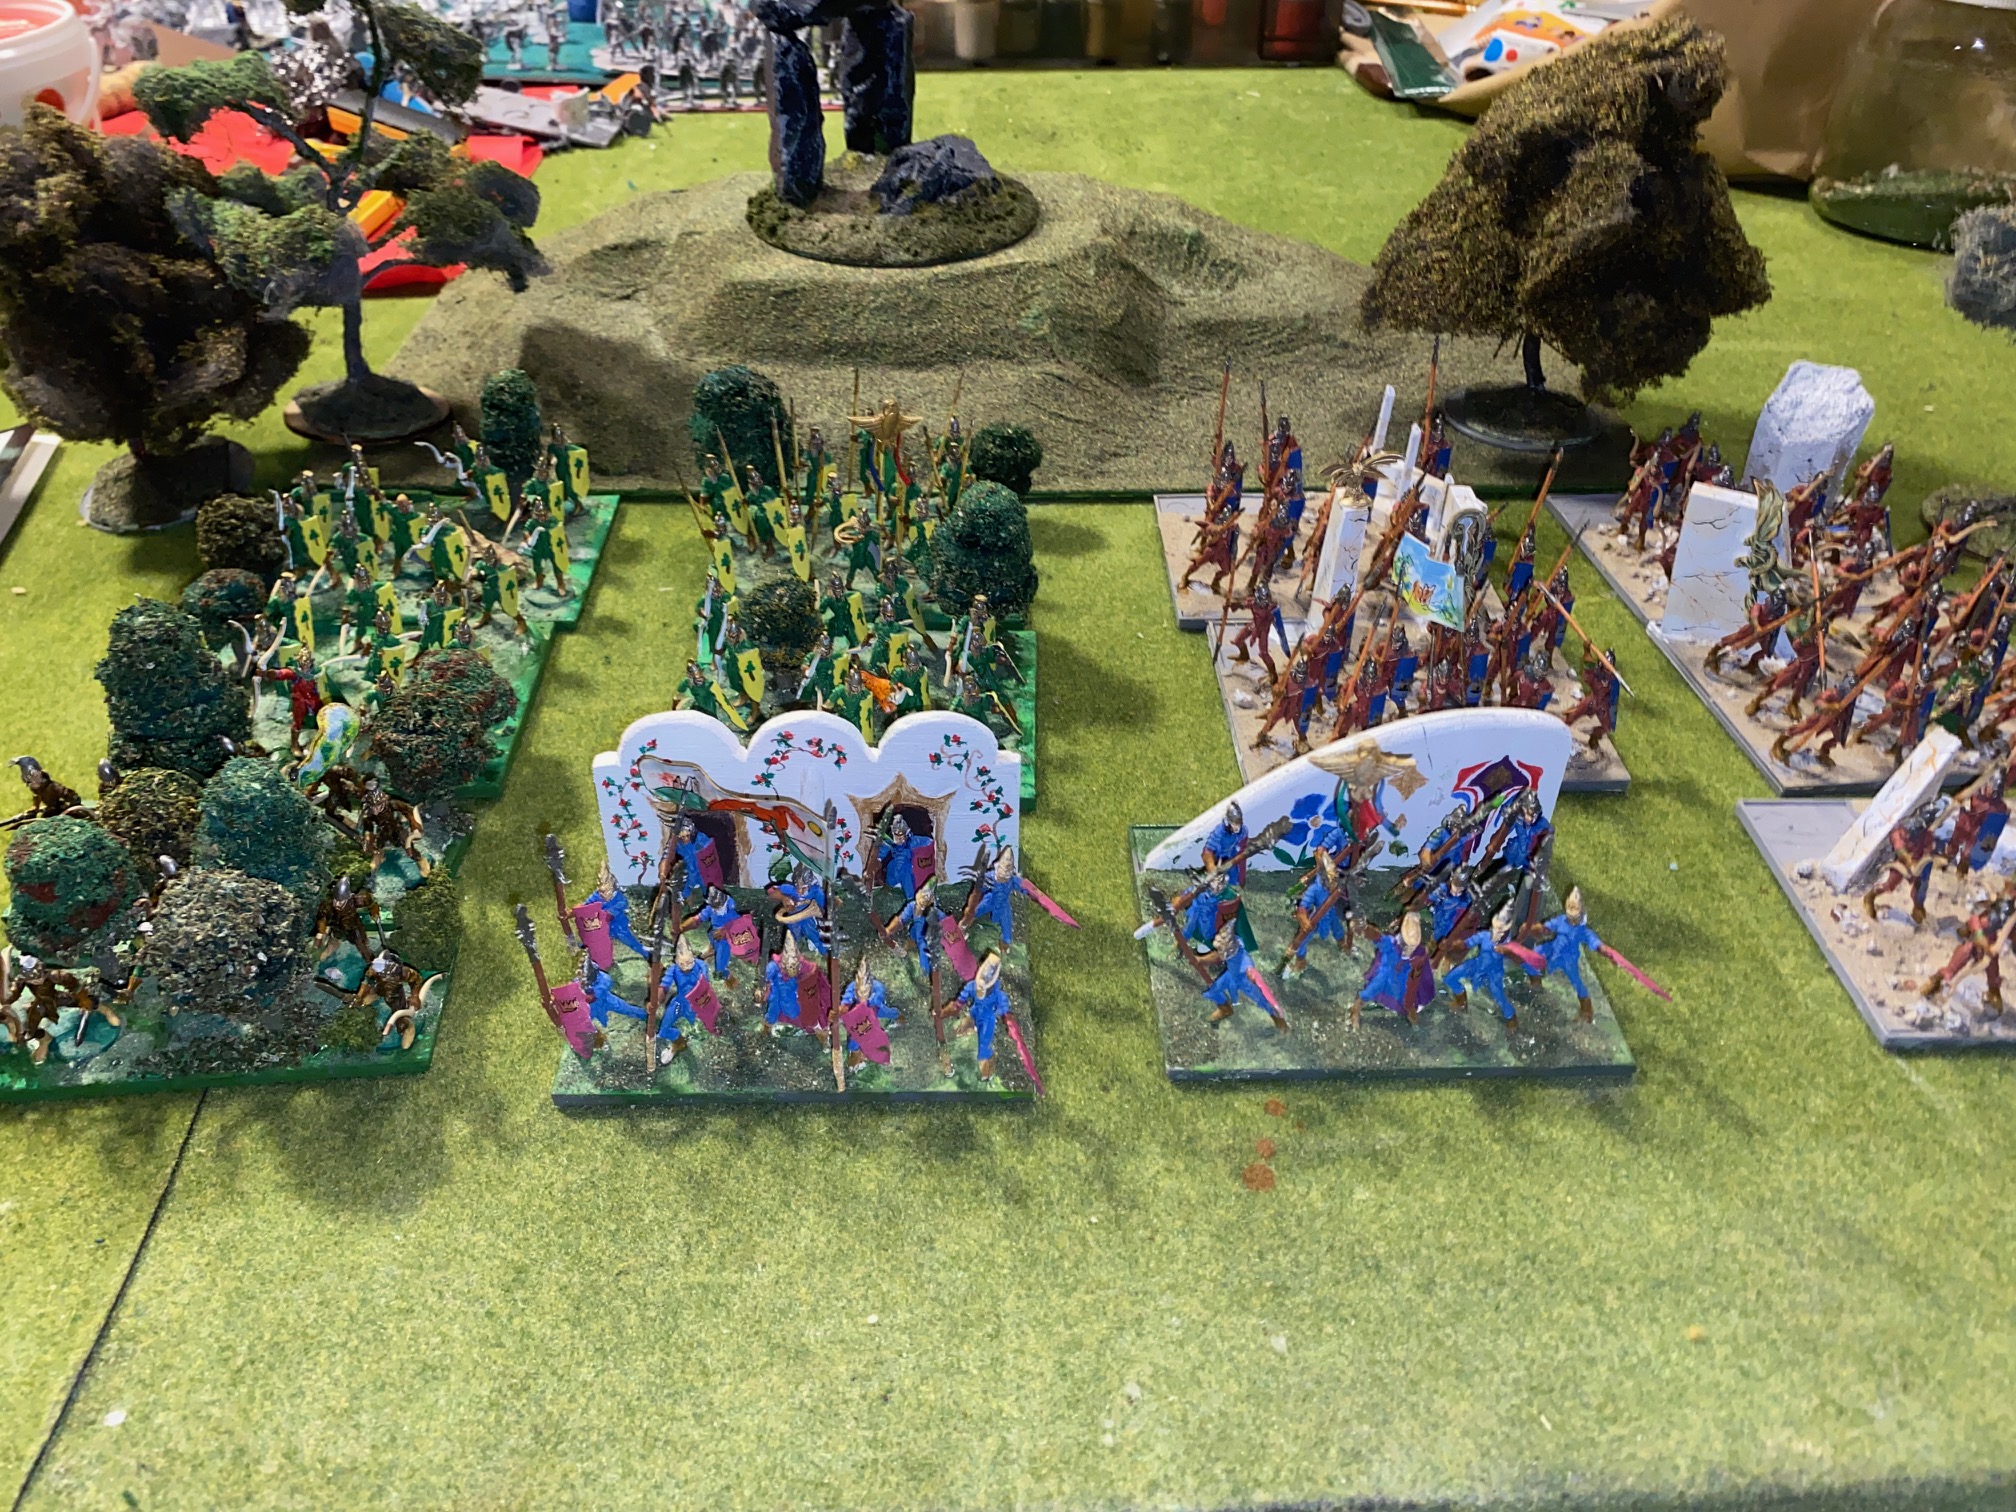
Yes, I know these aren't Elves
Before popping off to my health sabbatical, I got bored with painting Elves, so decided they needed some enemies, instead of fighting among themselves.
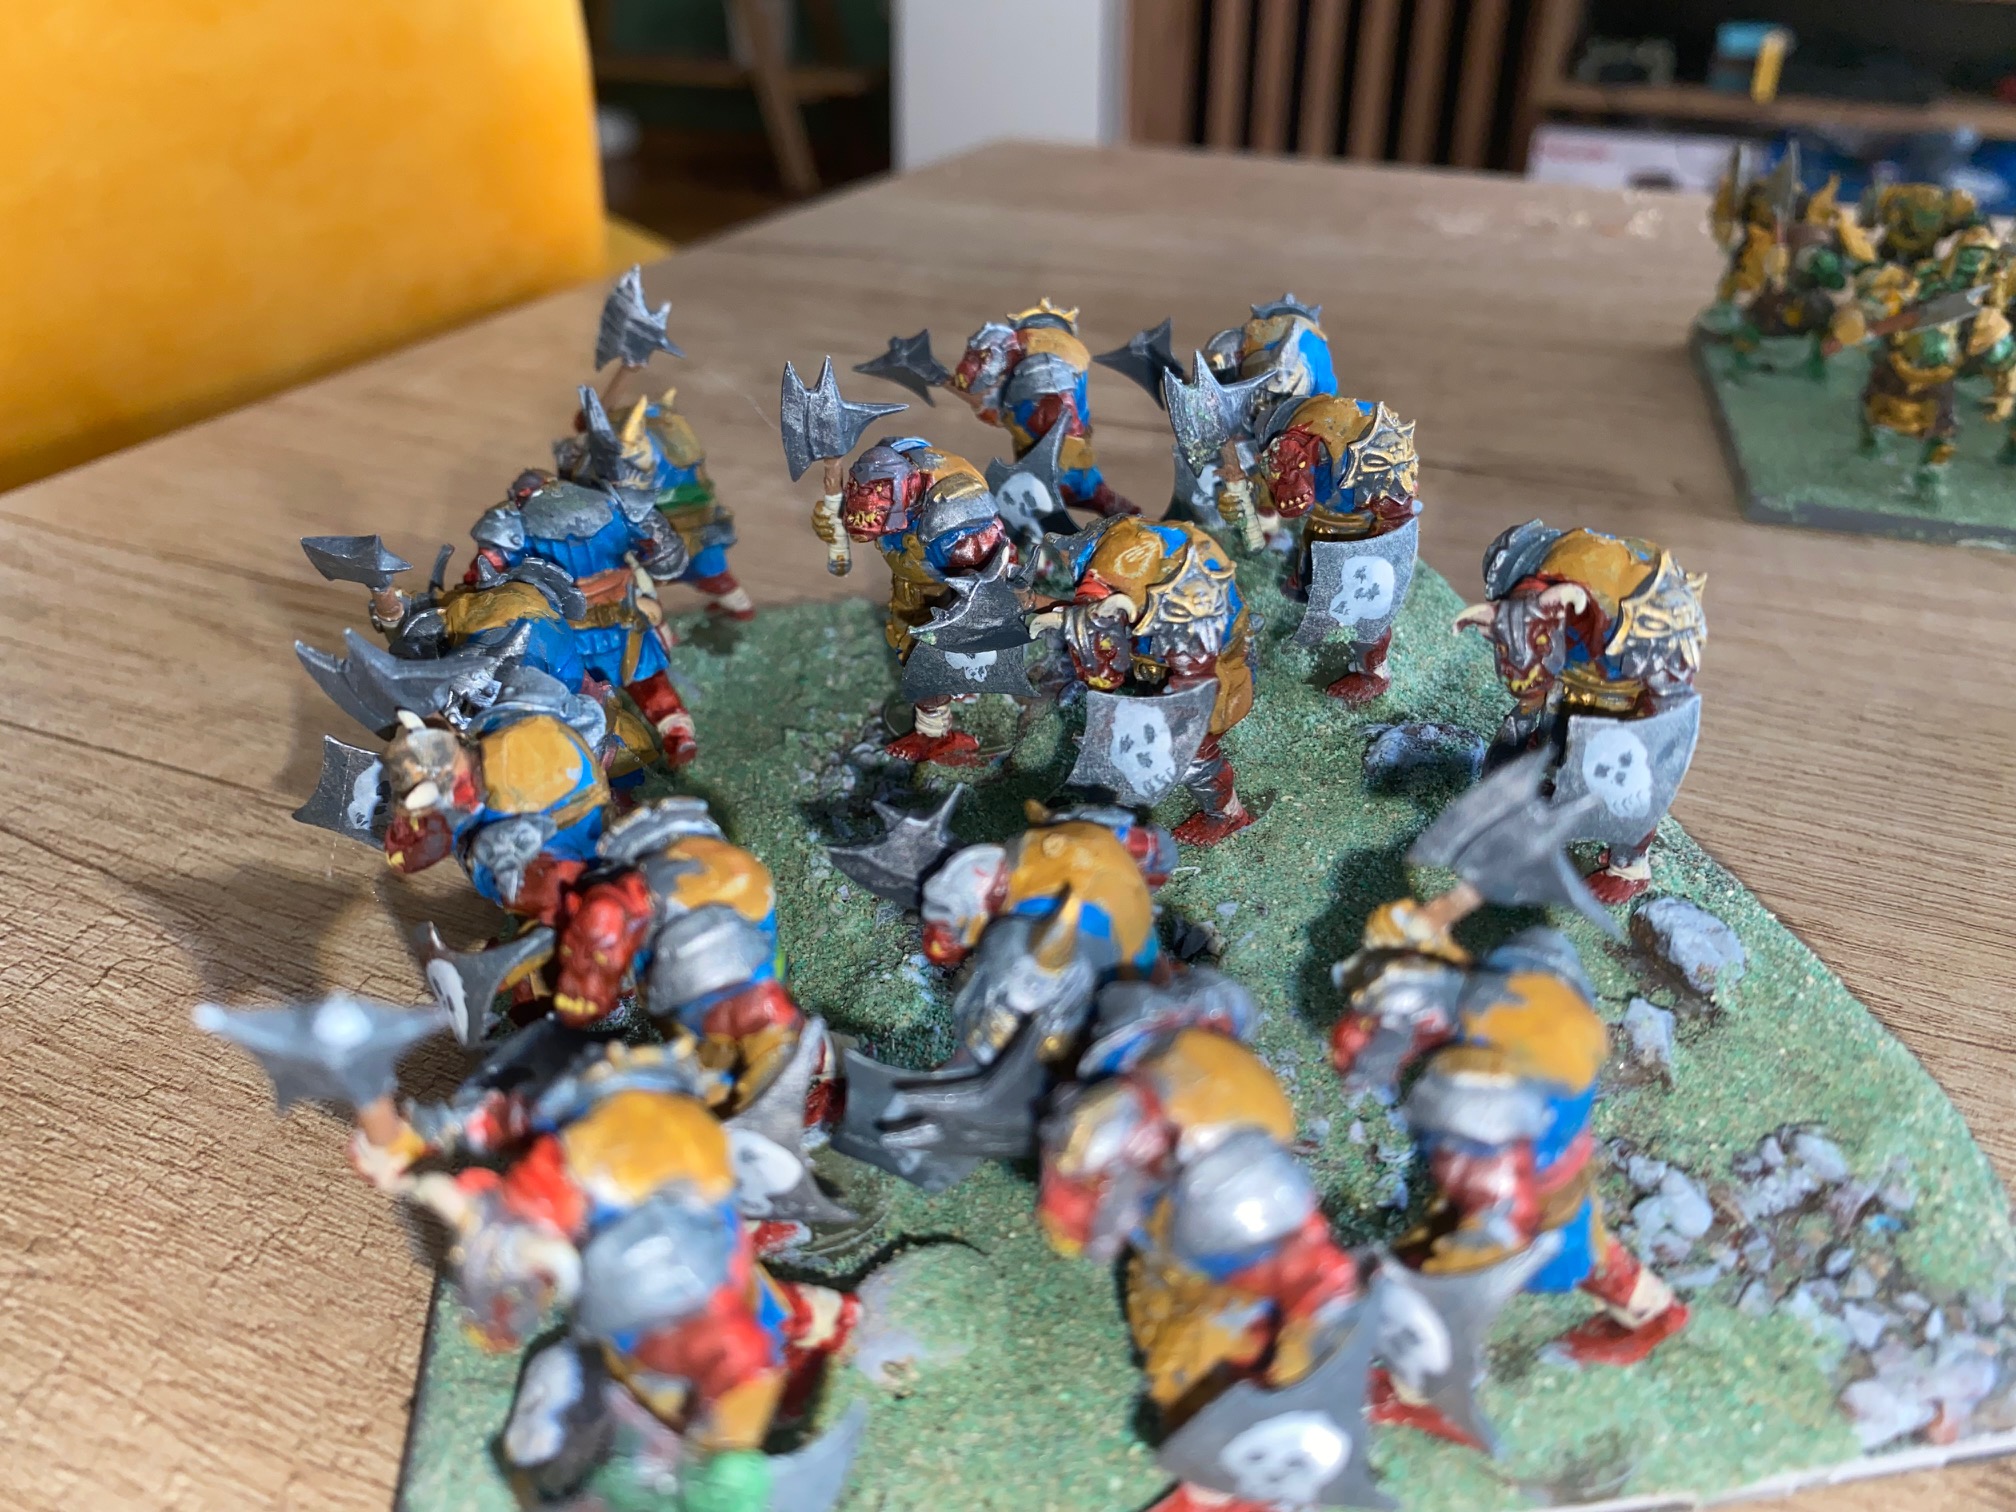
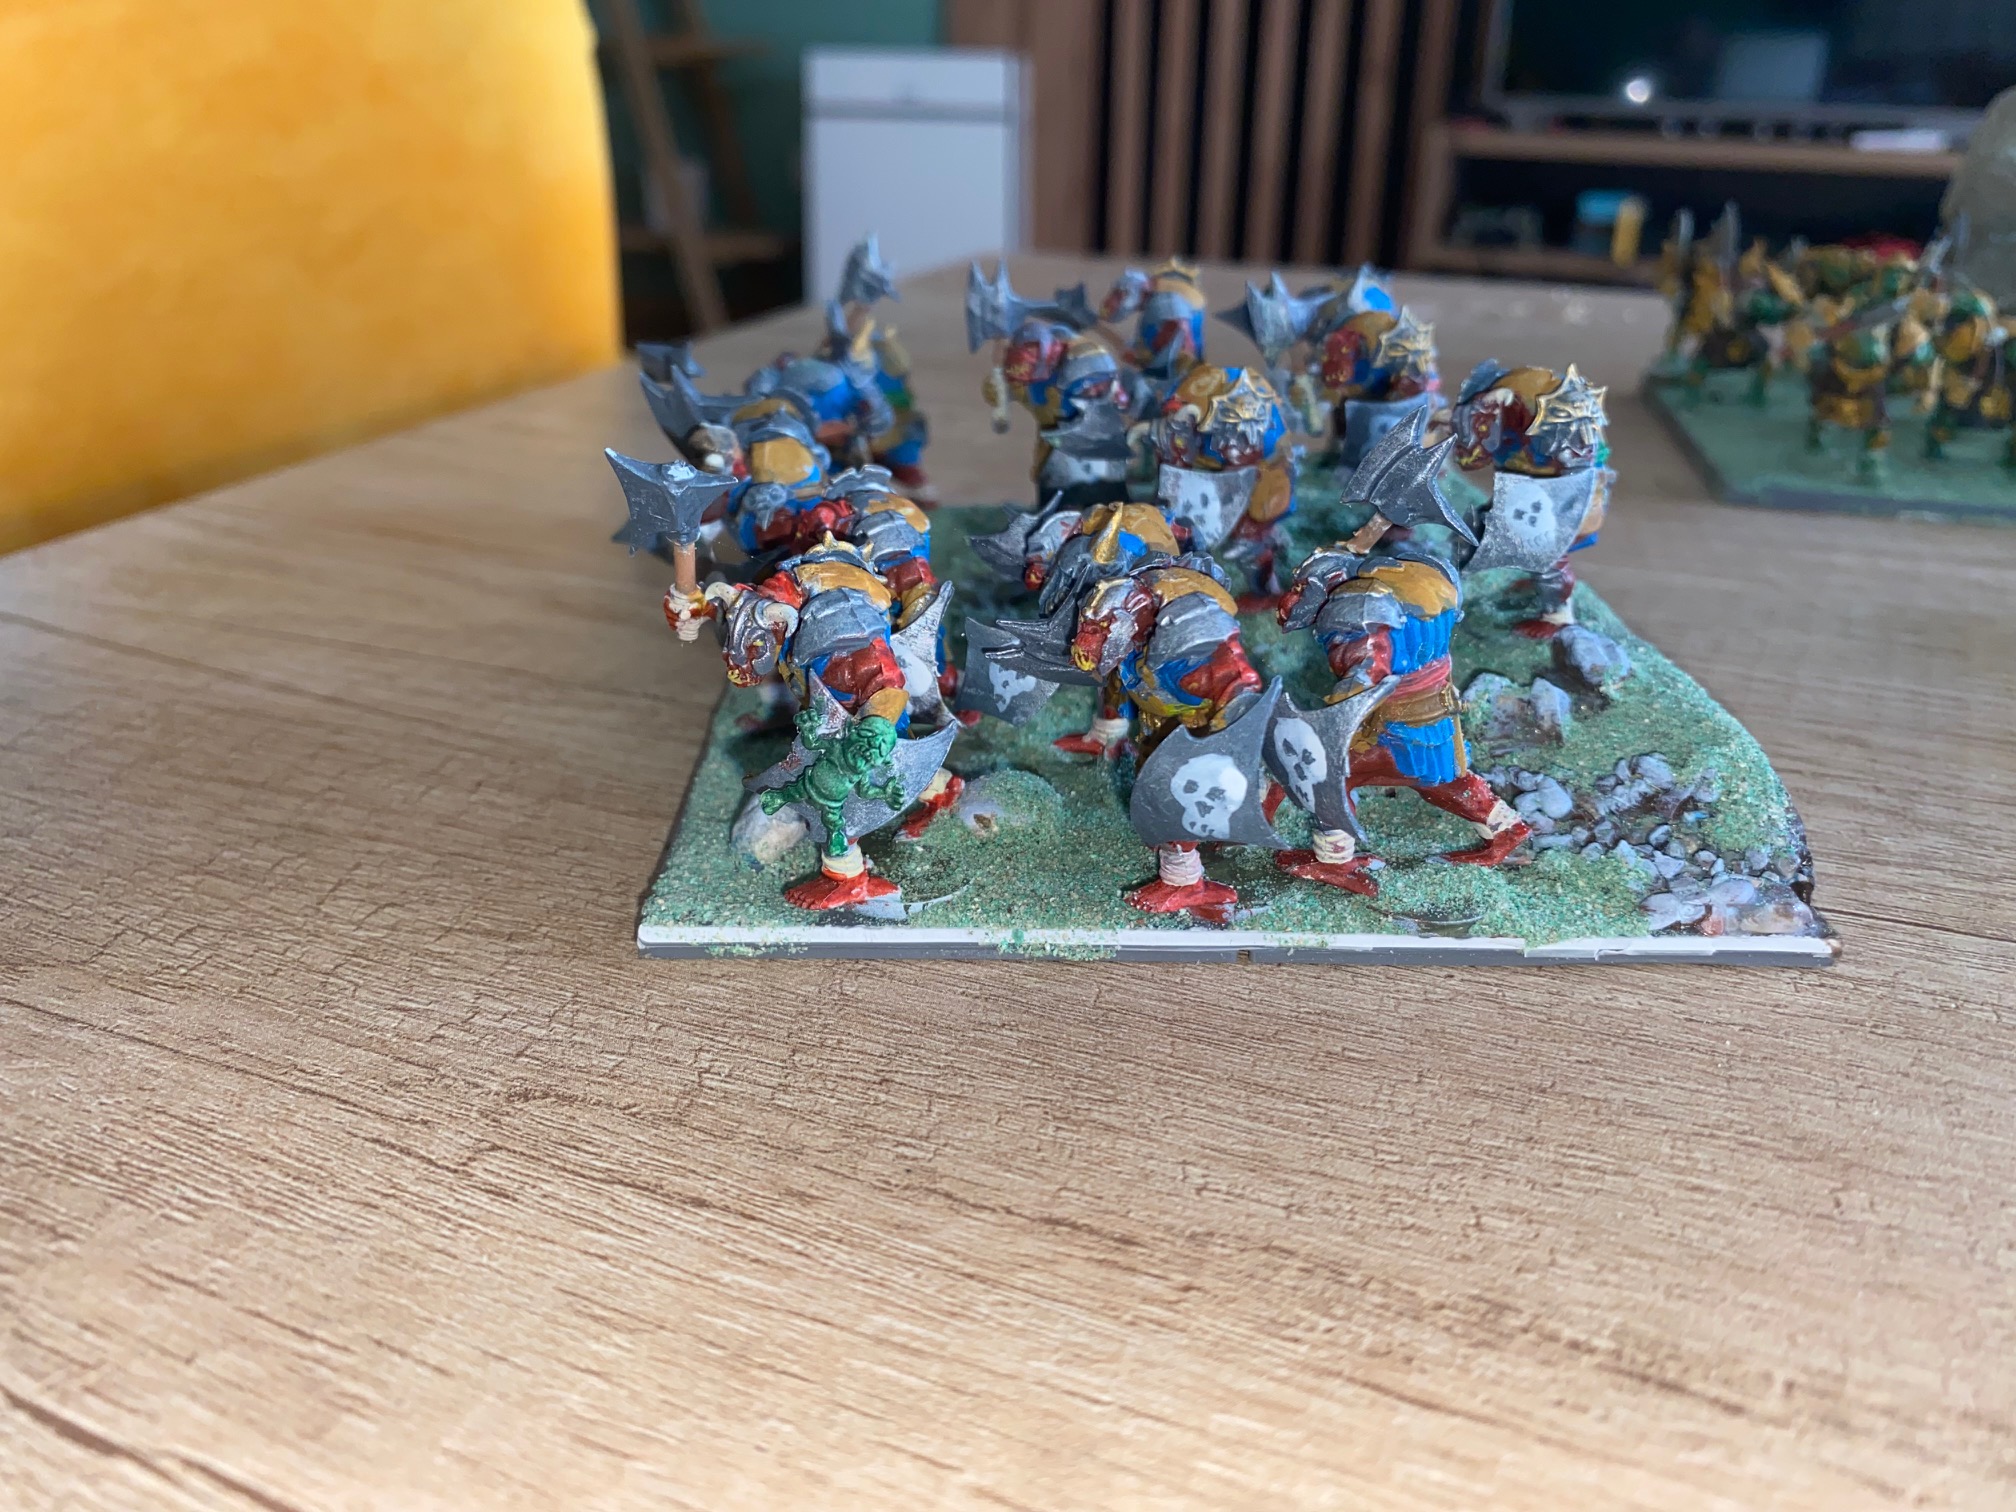
So, three different paining ideas for three regiments of Orcs.
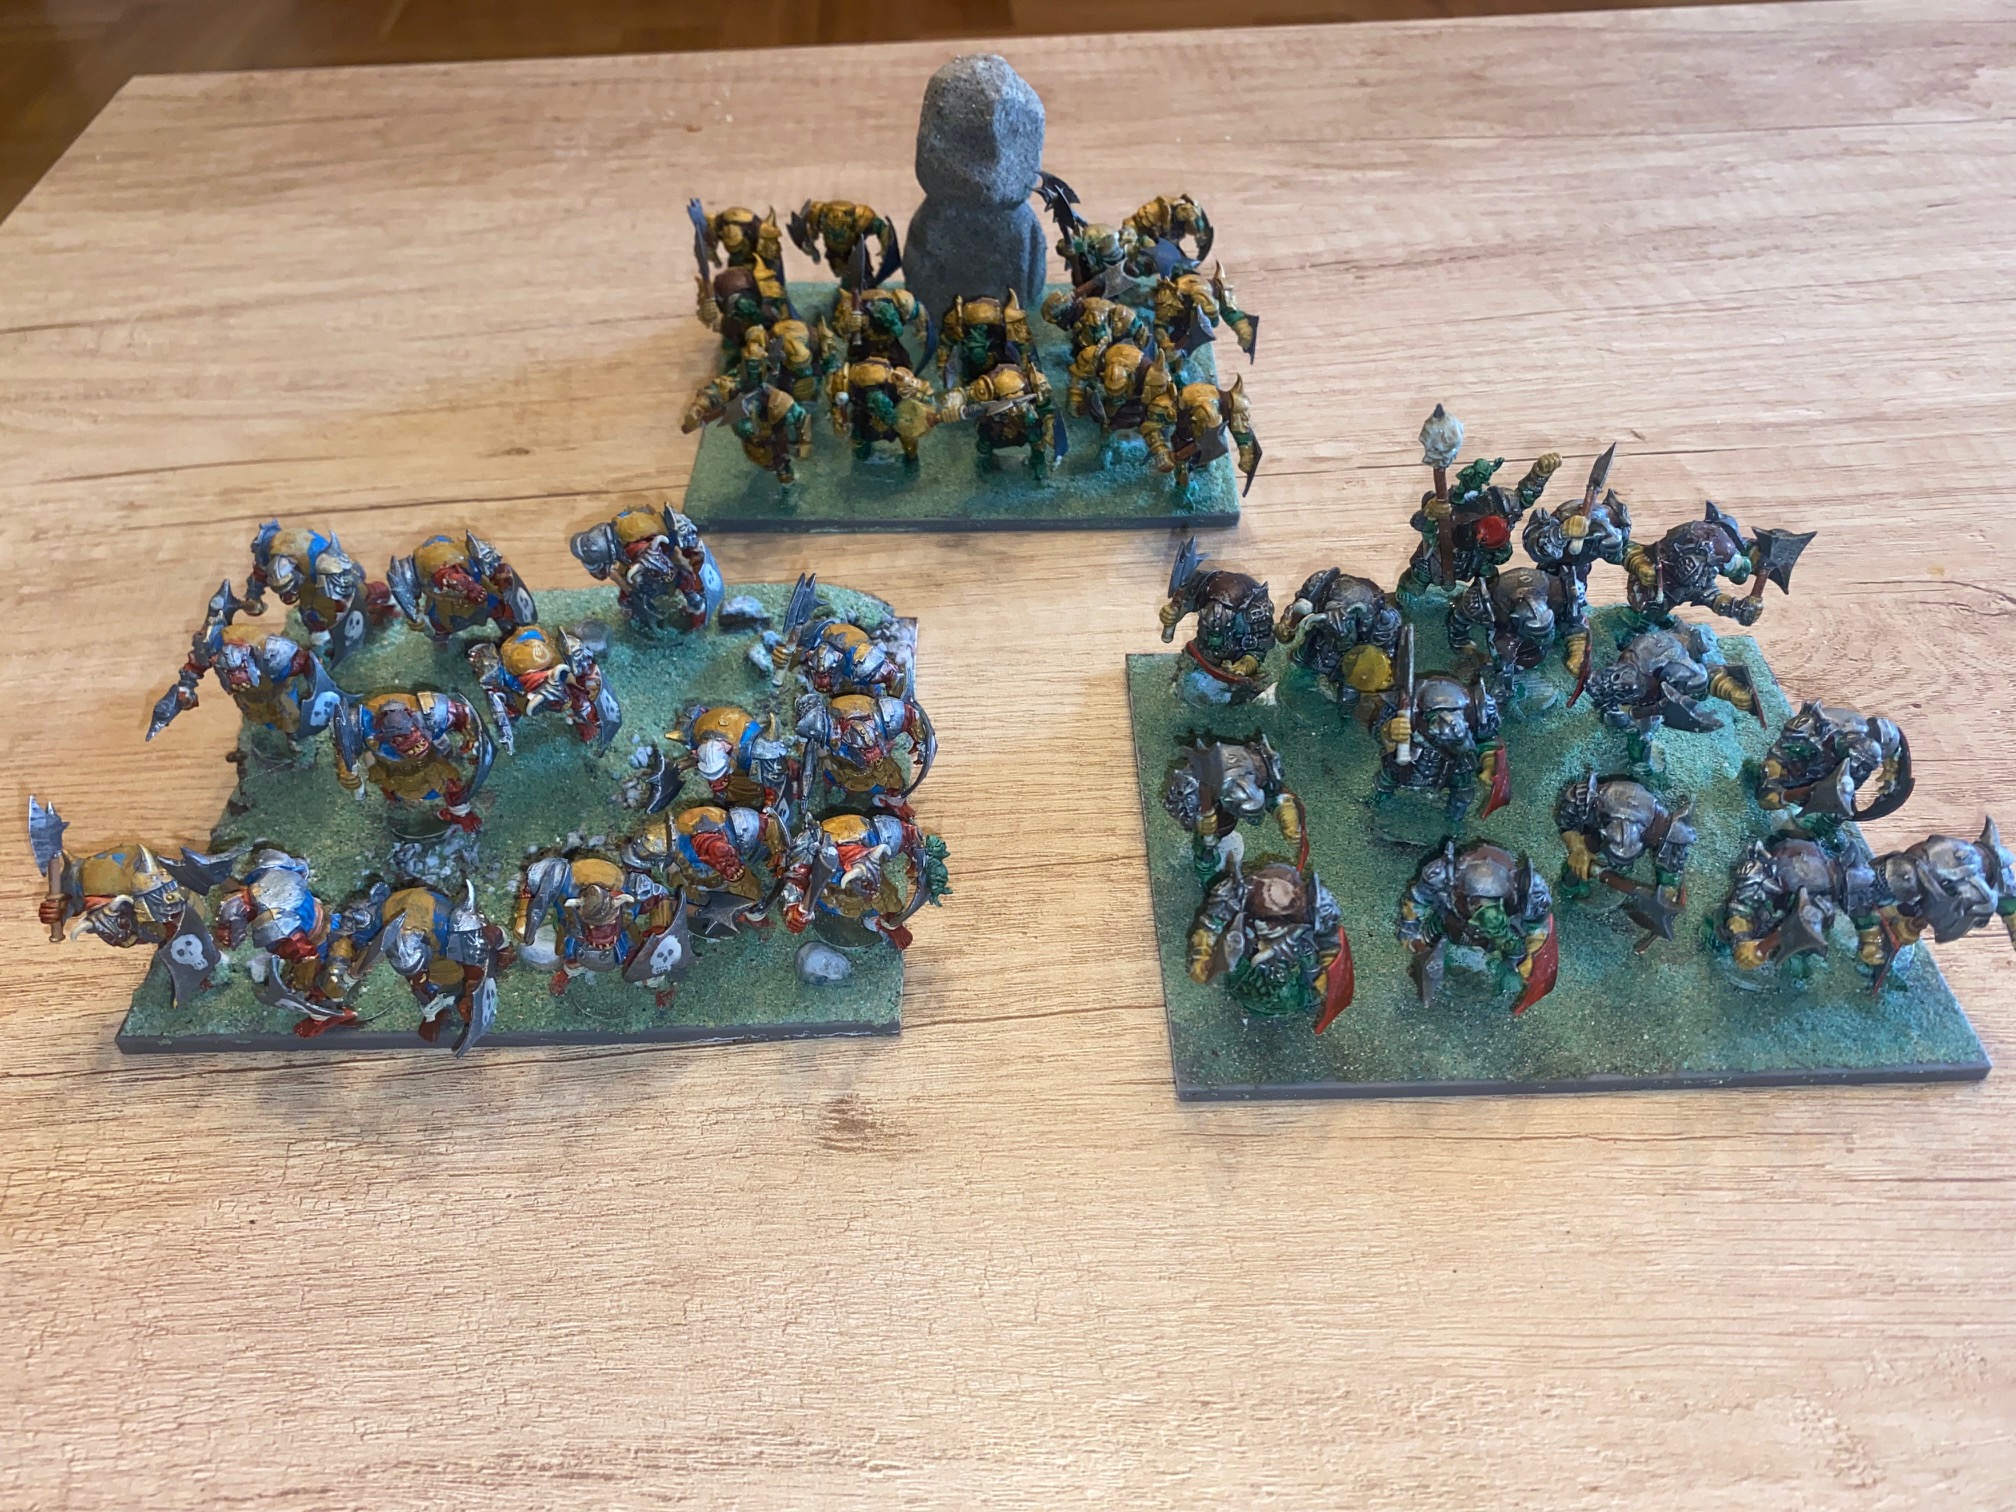 Three "uniform" schemes
I painted these Mantic Orcs mainly with contrast pants, and yes, I forgot to take pictures. But there’s nothing new or exciting here I’m afraid, so nothing really missed!
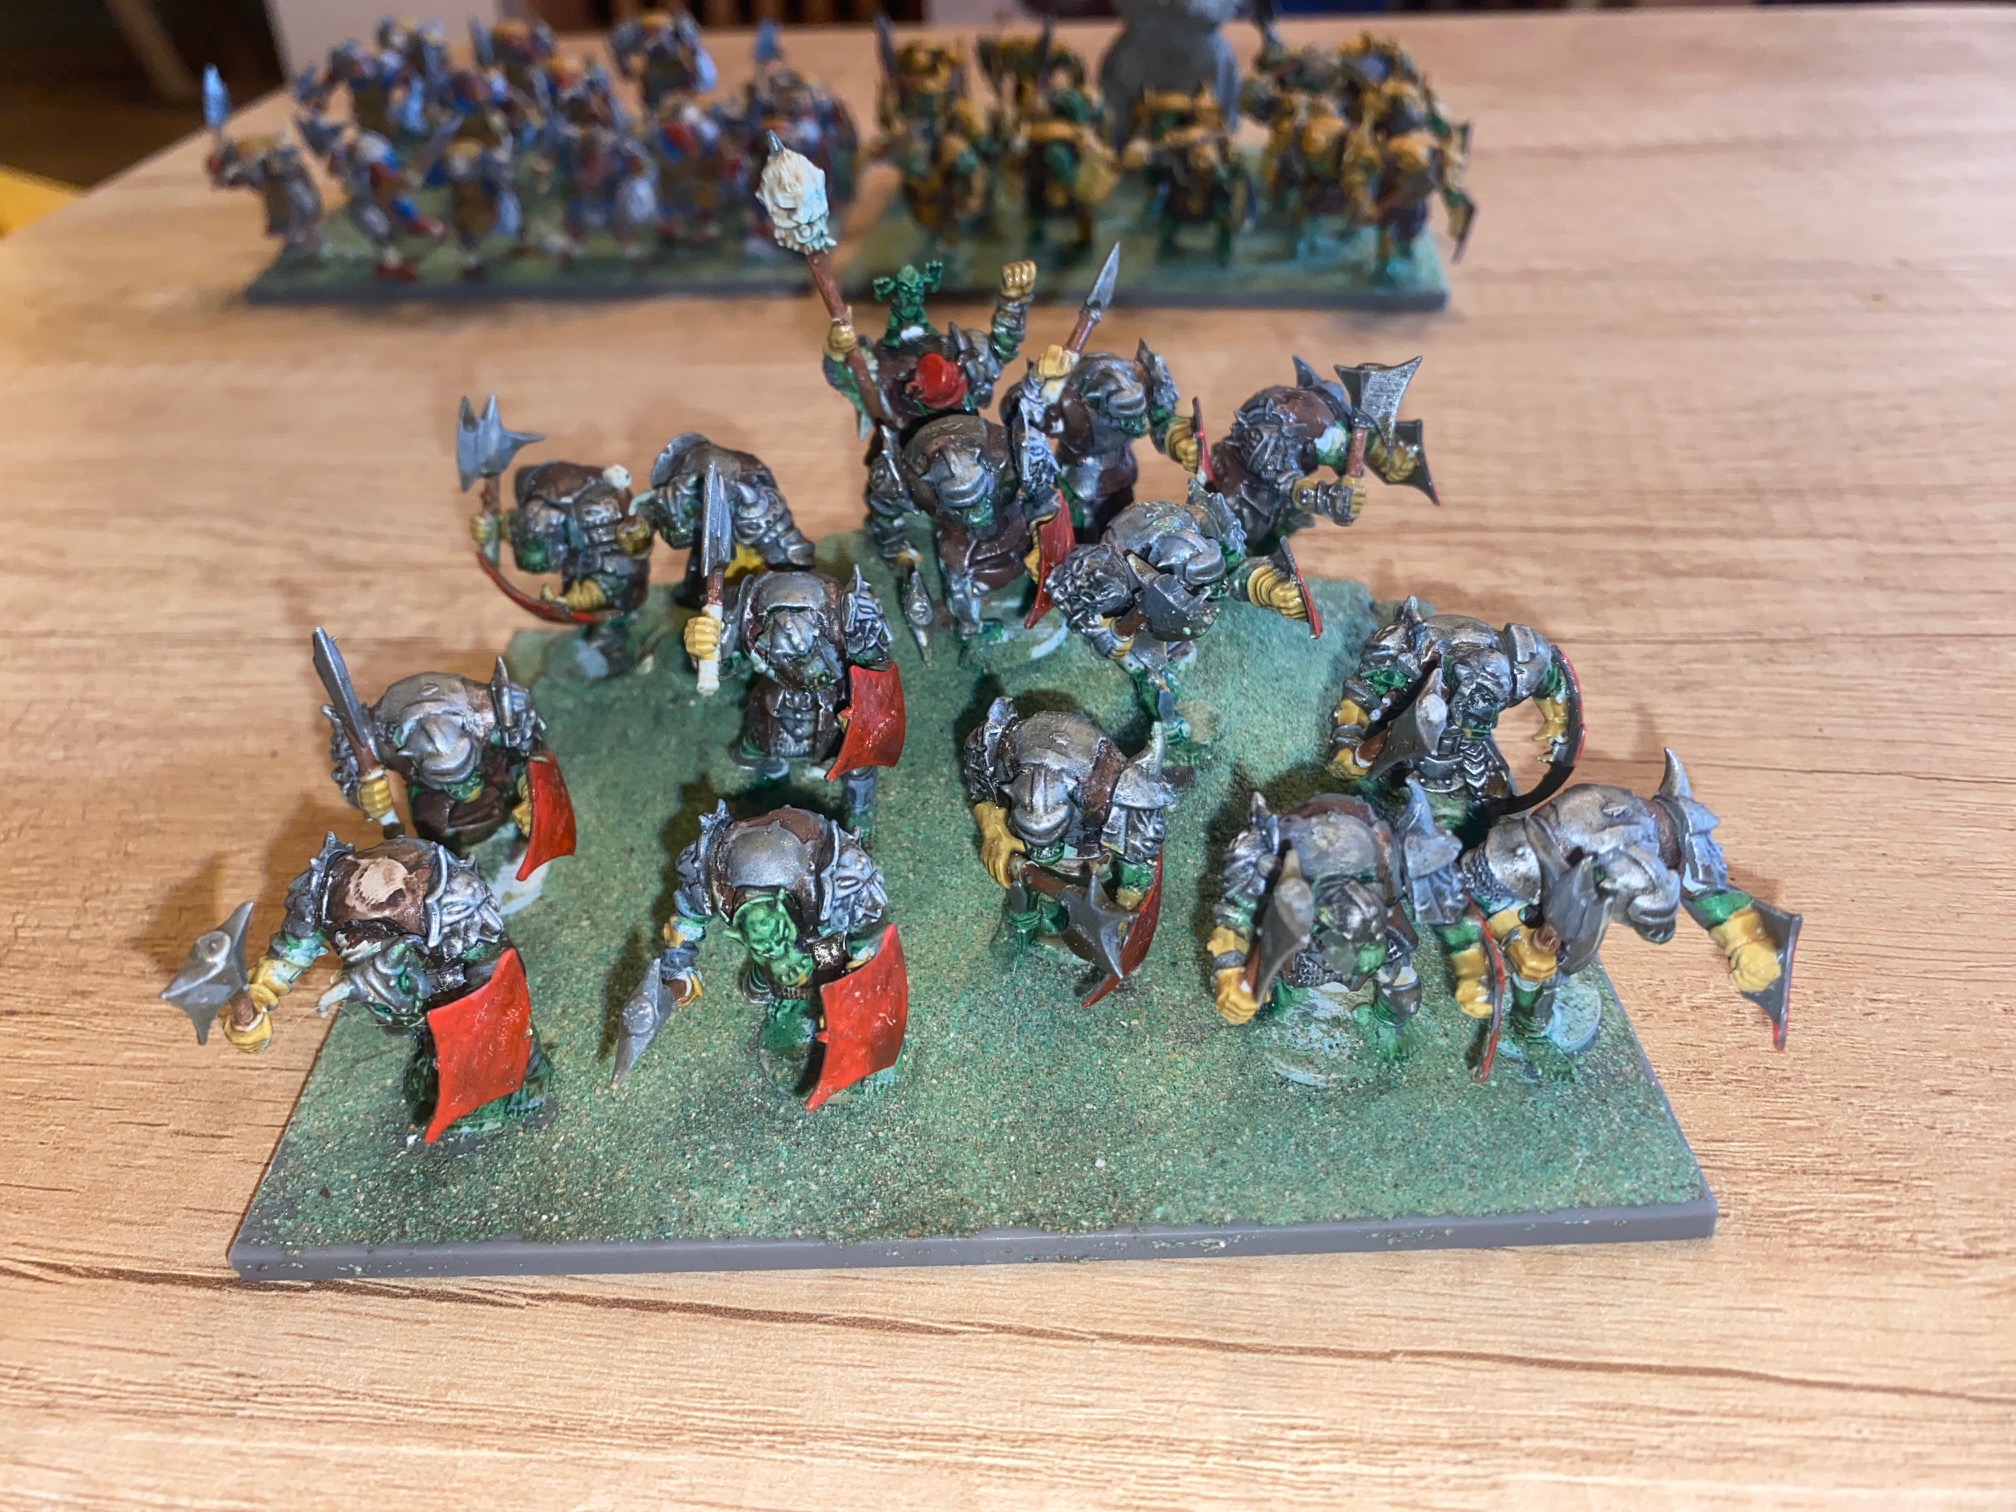
I didn’t want to paint them all the “usual” green, so mixed in a red skinned unit to add variety. I will continue with this with additional units going forwards.
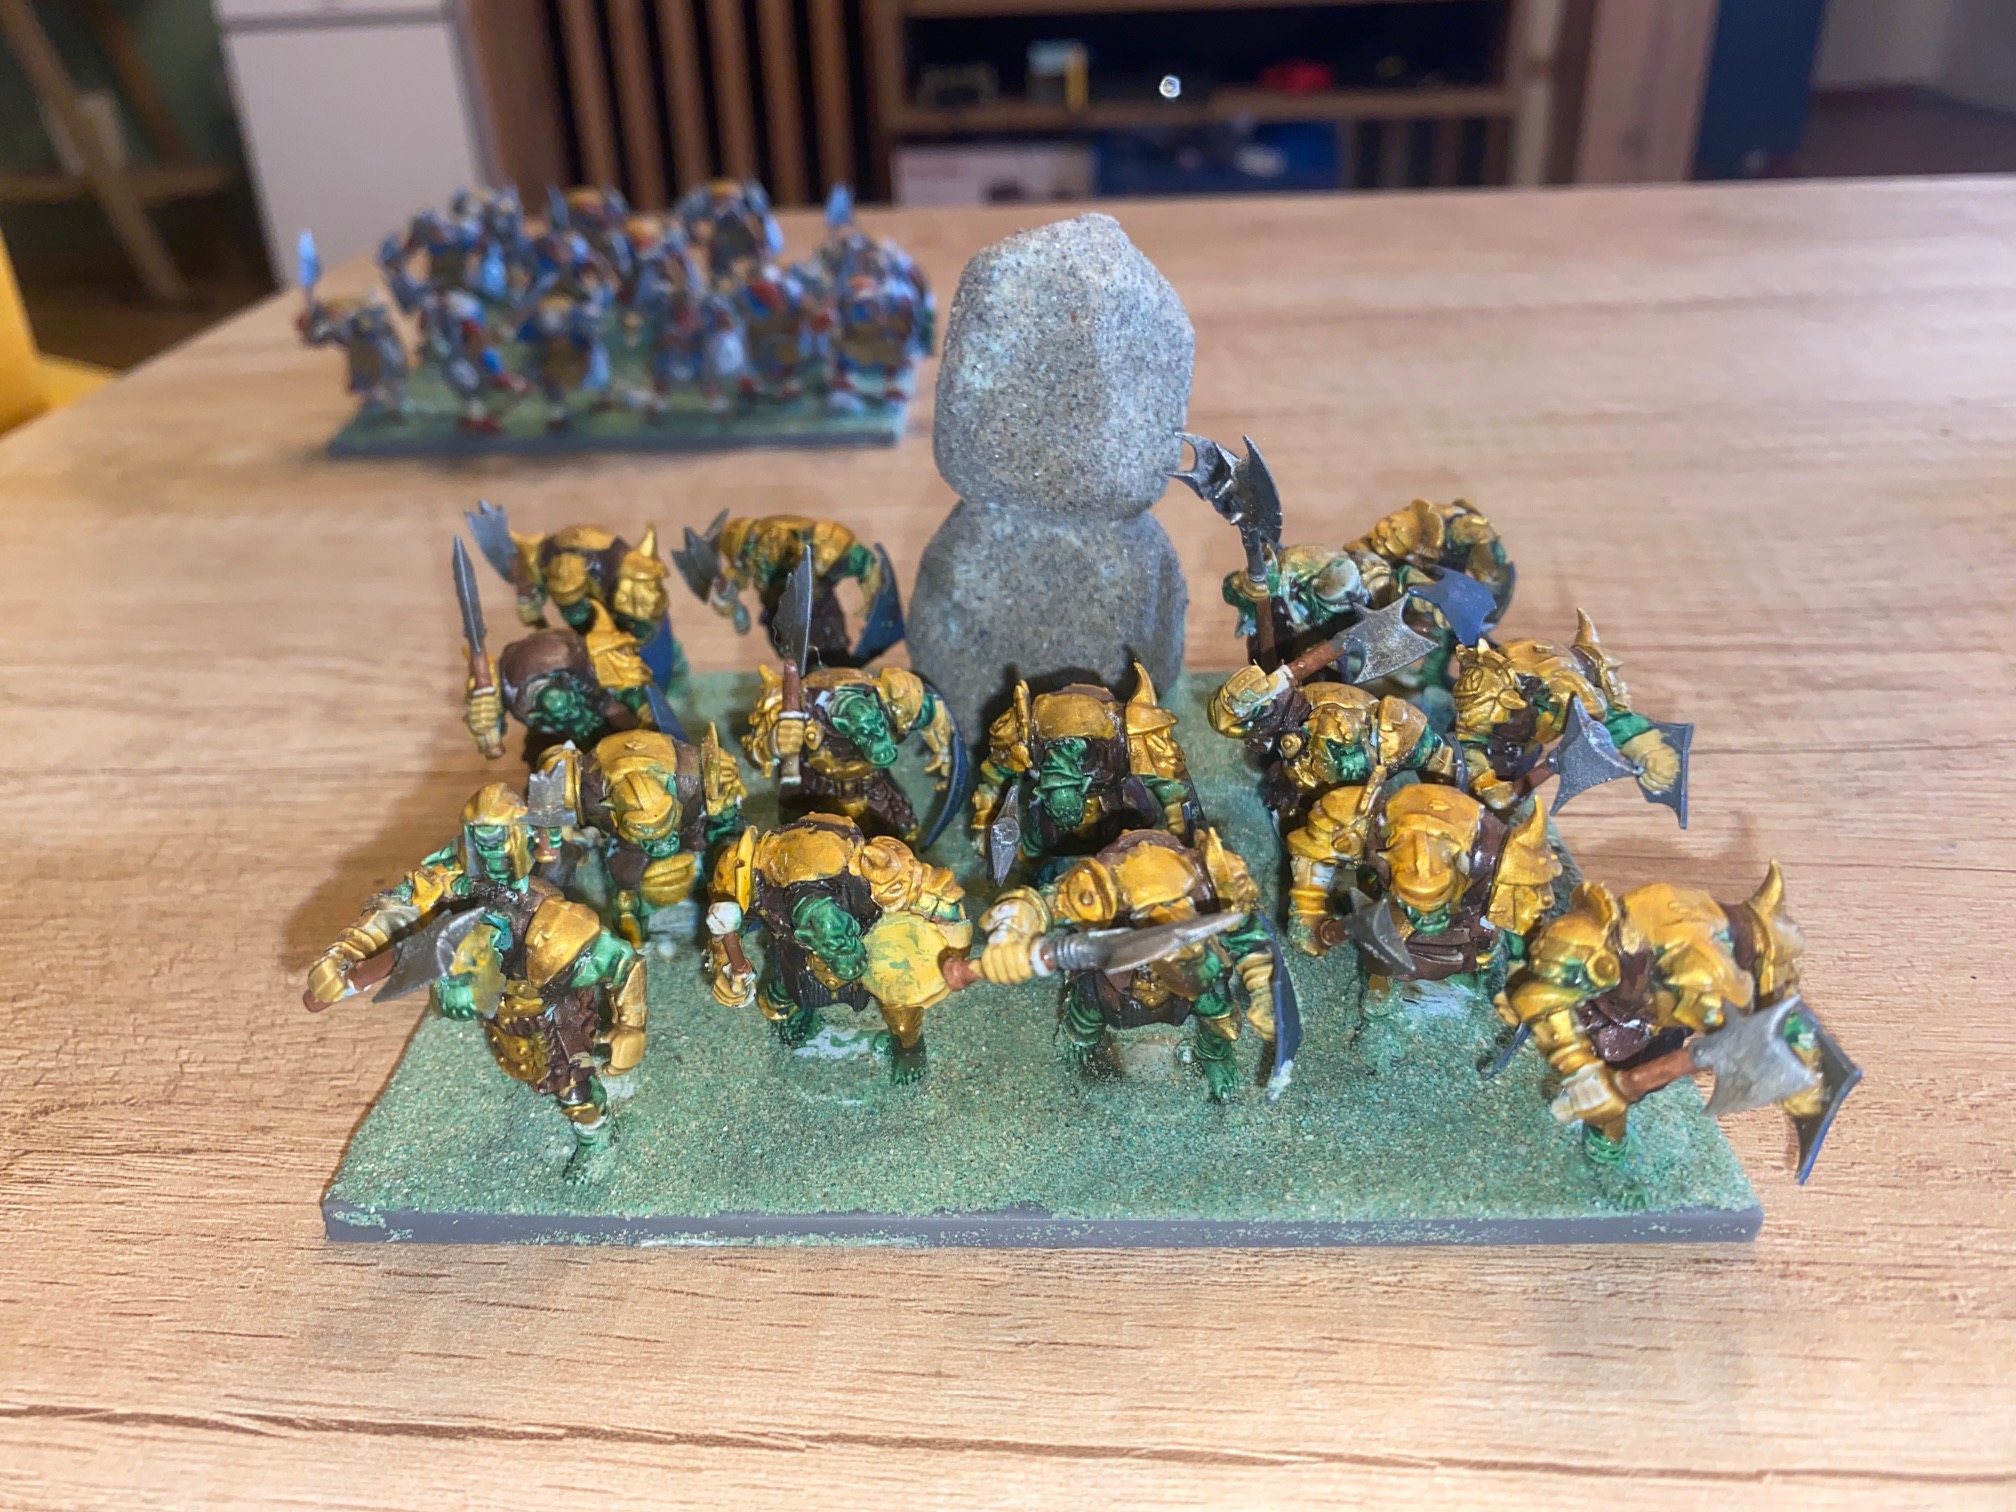
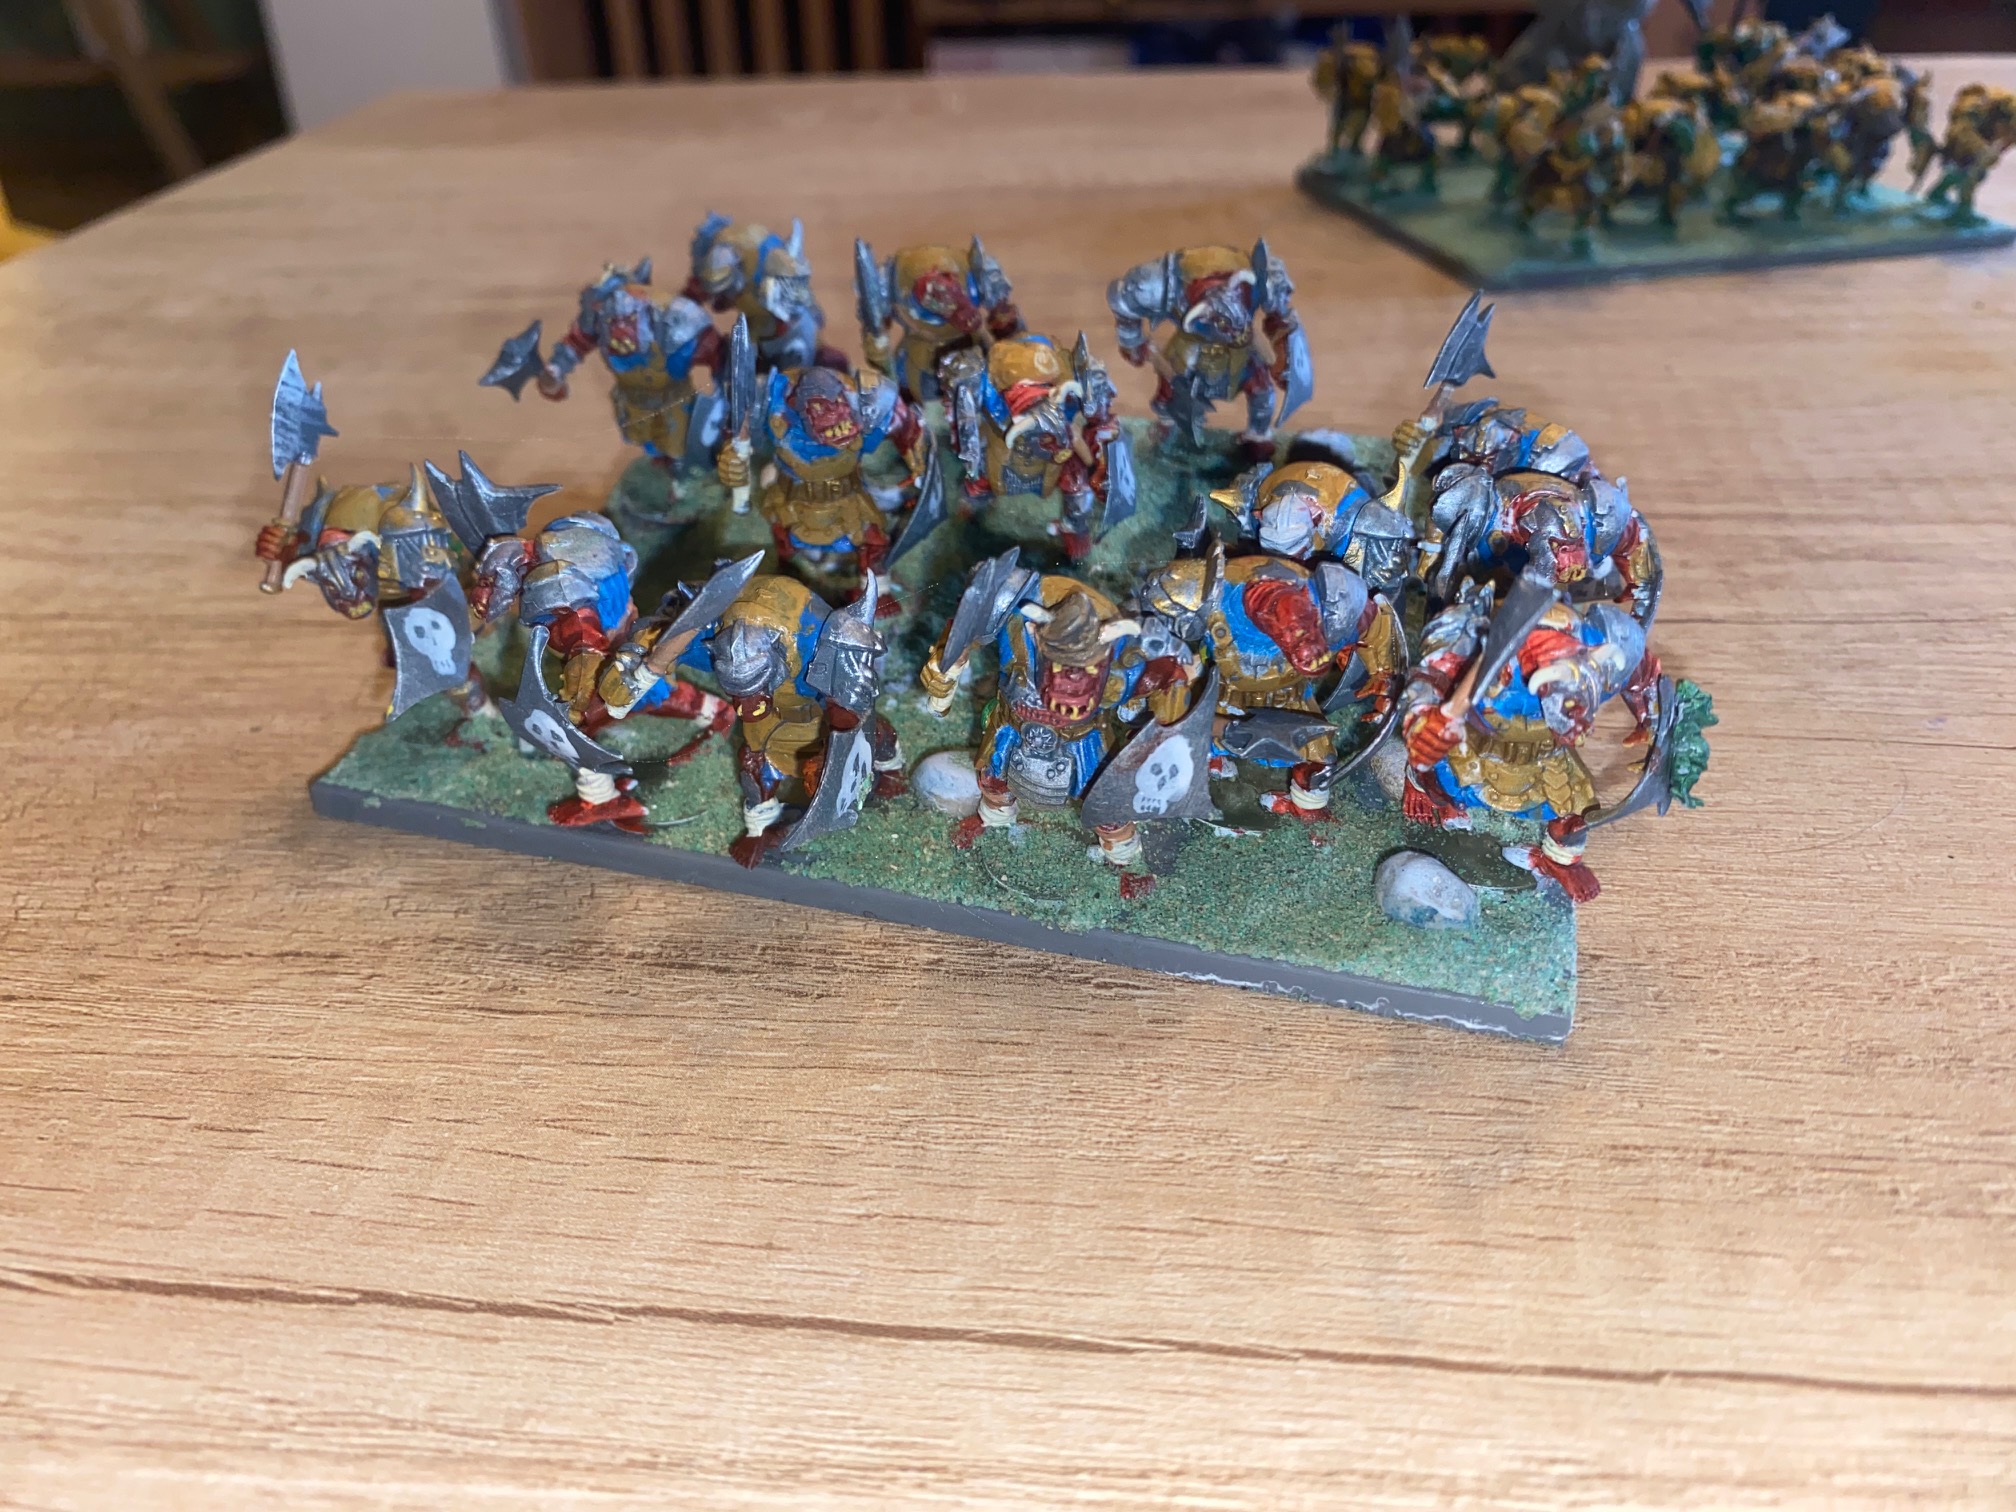
I still have to finalize the basing and make the “Statue” on the “Gold” orc base more dramatic. But it’s supposed to represent a basic idol for their “god”, whatever that is. But I’ll tart it up next.
I also need to paint some simple shield patterns on two of the units.
The “Skull” shield was done with watered down white paint and splodged on the shield and moved around with the brush to make the basic skull shape. When dry, I added the features with black paint.
I’ll add something similar on the other units.
Next, I need to finish the Elves, then make a few more Orc units and finally get to Battle!
Happy Gaming!
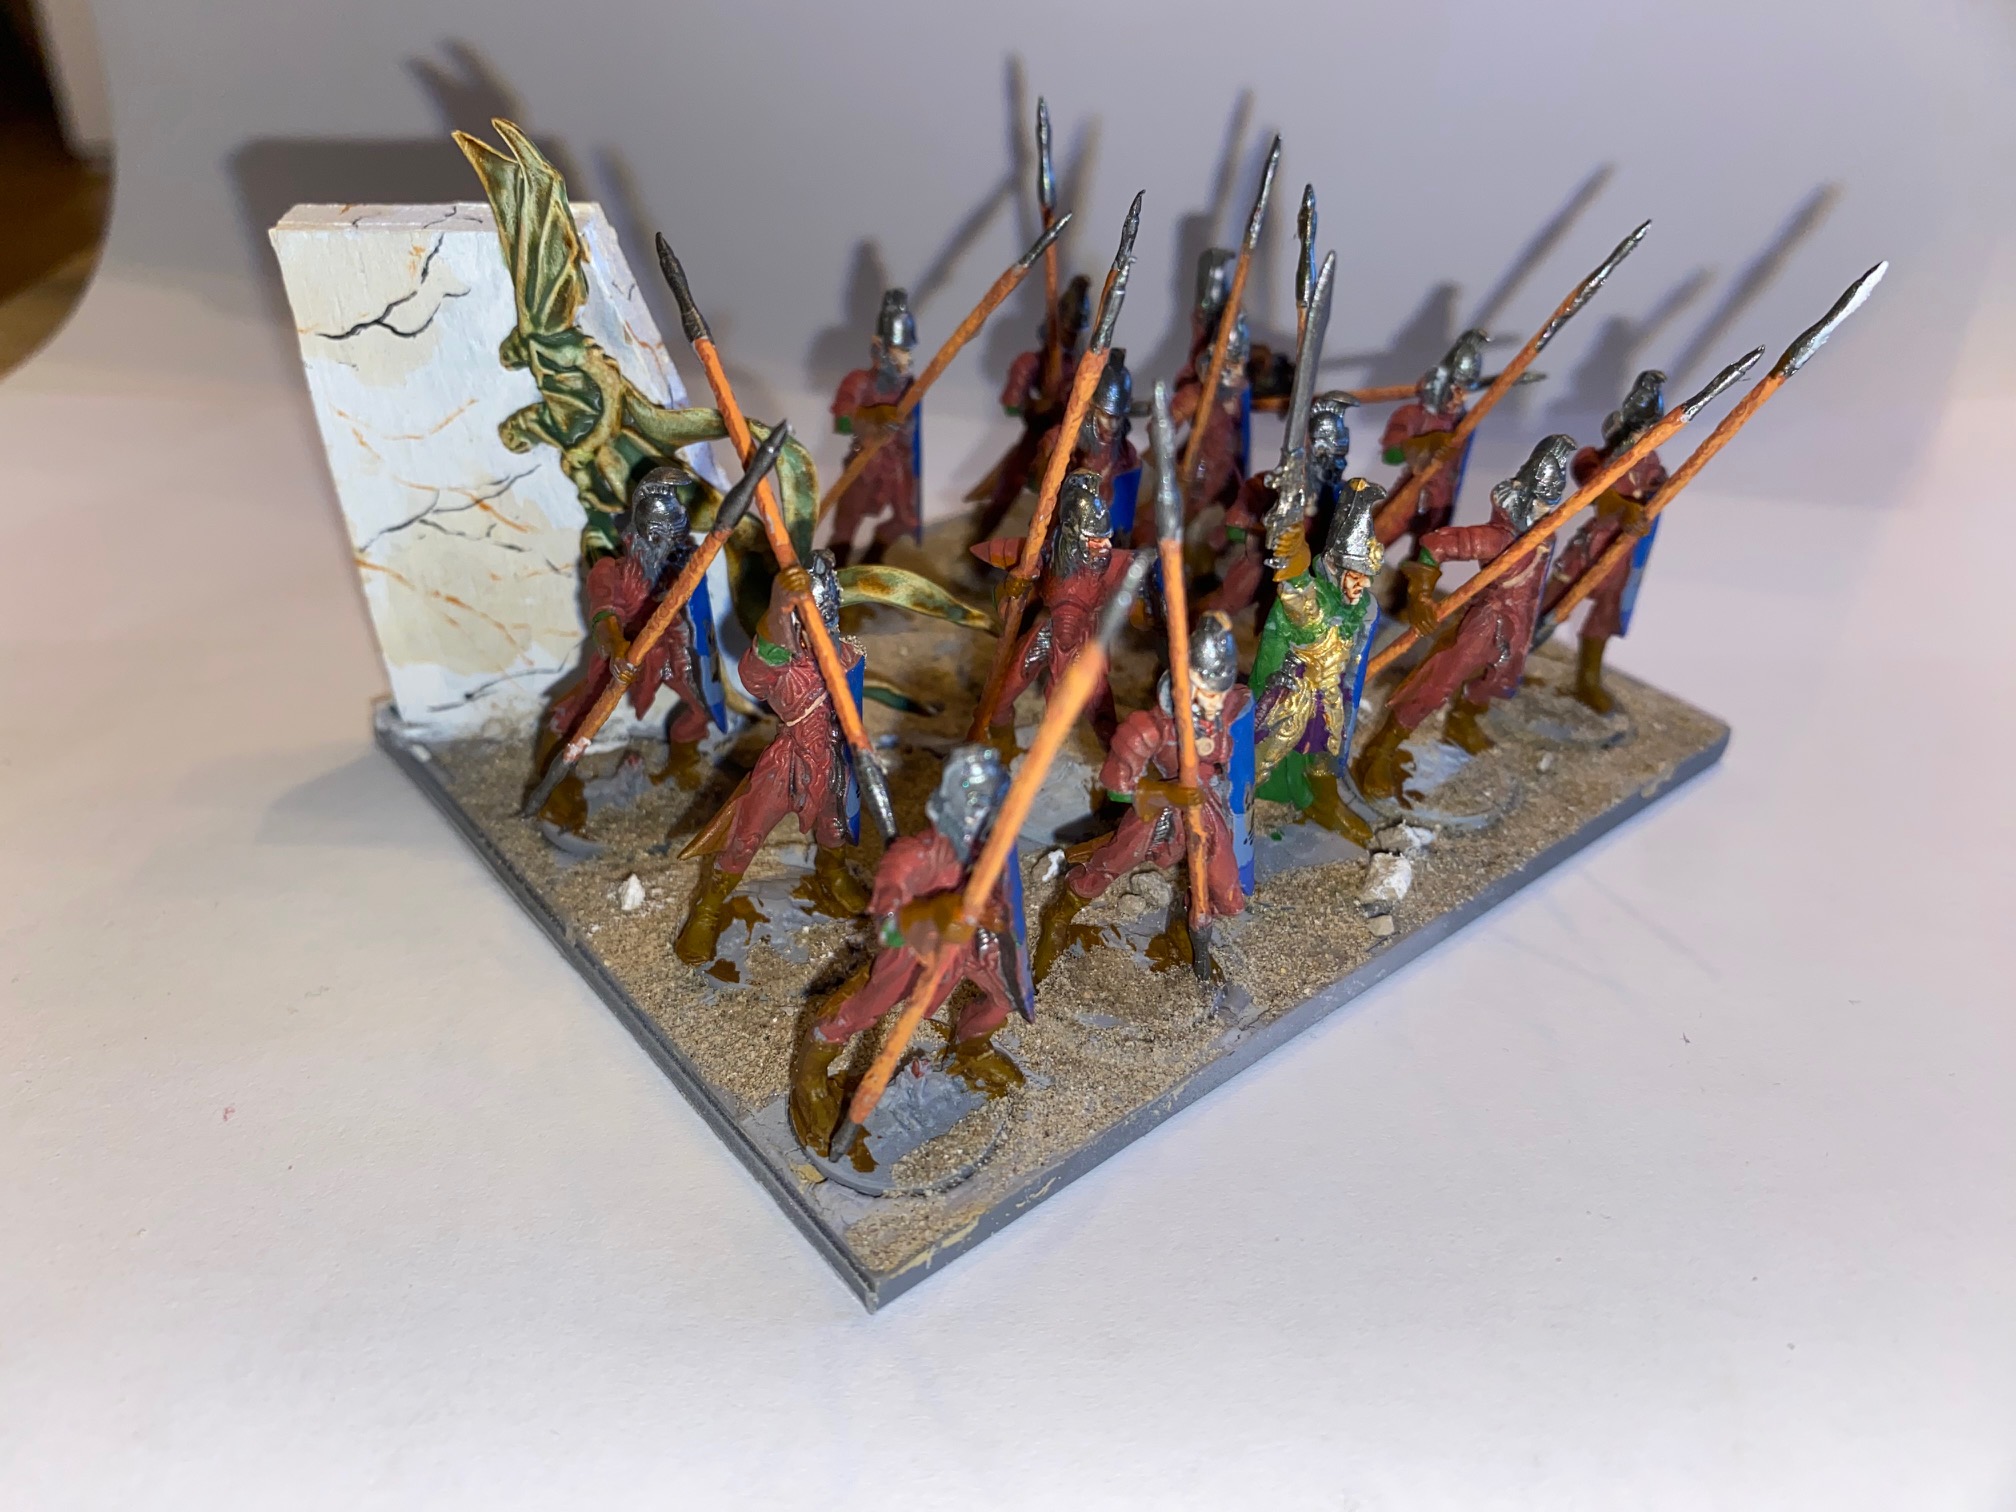
The "Royal" Regiments
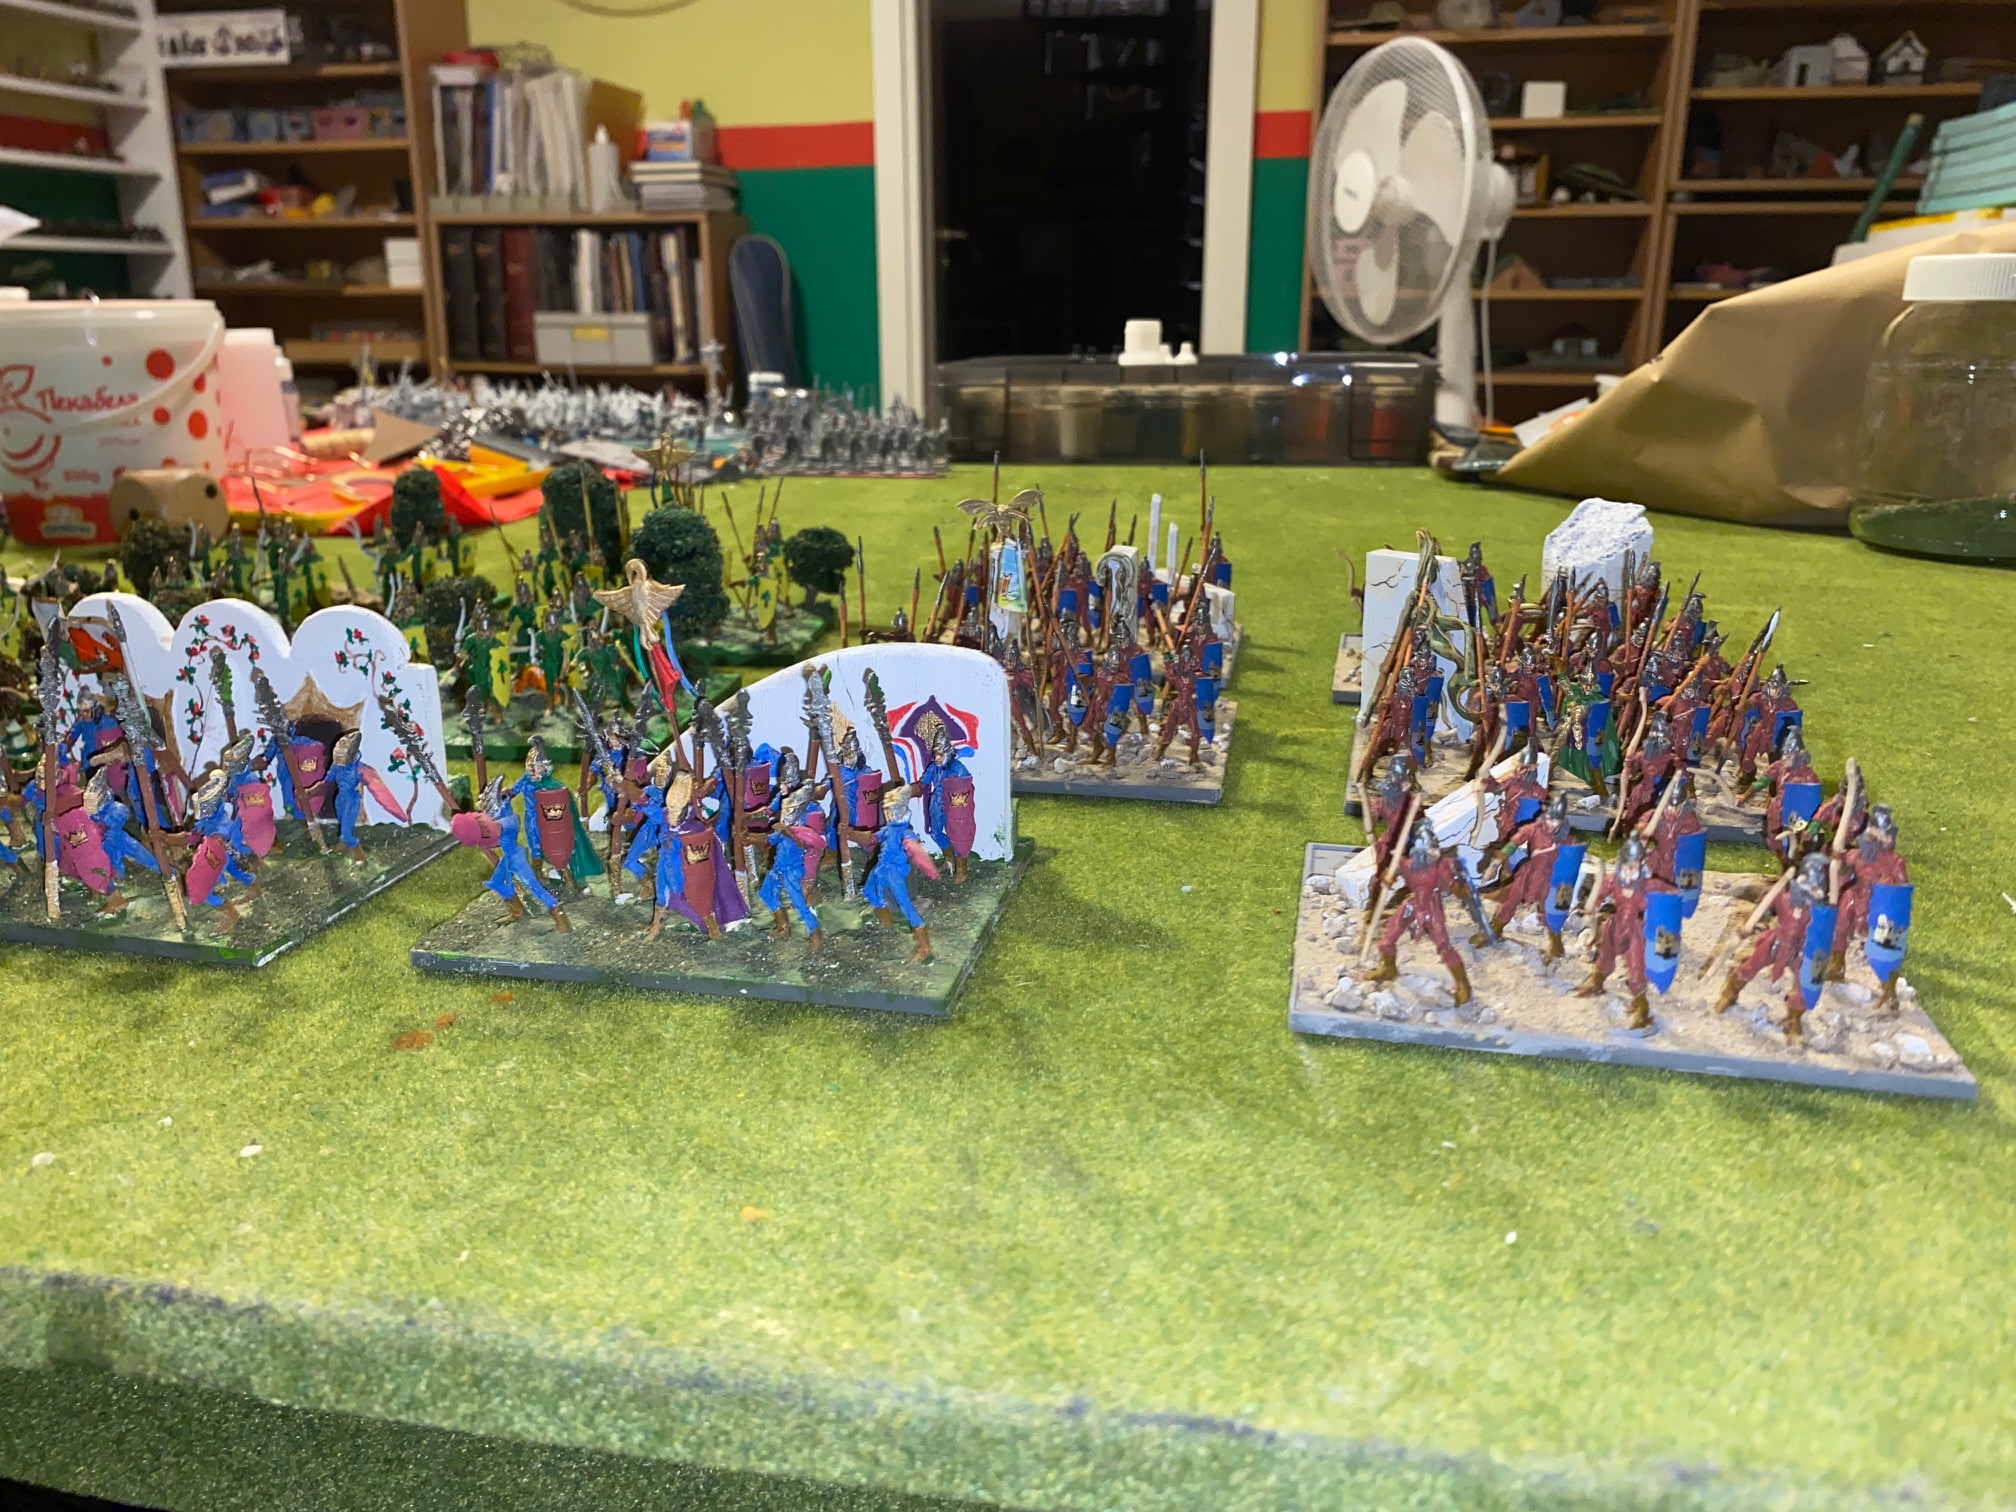
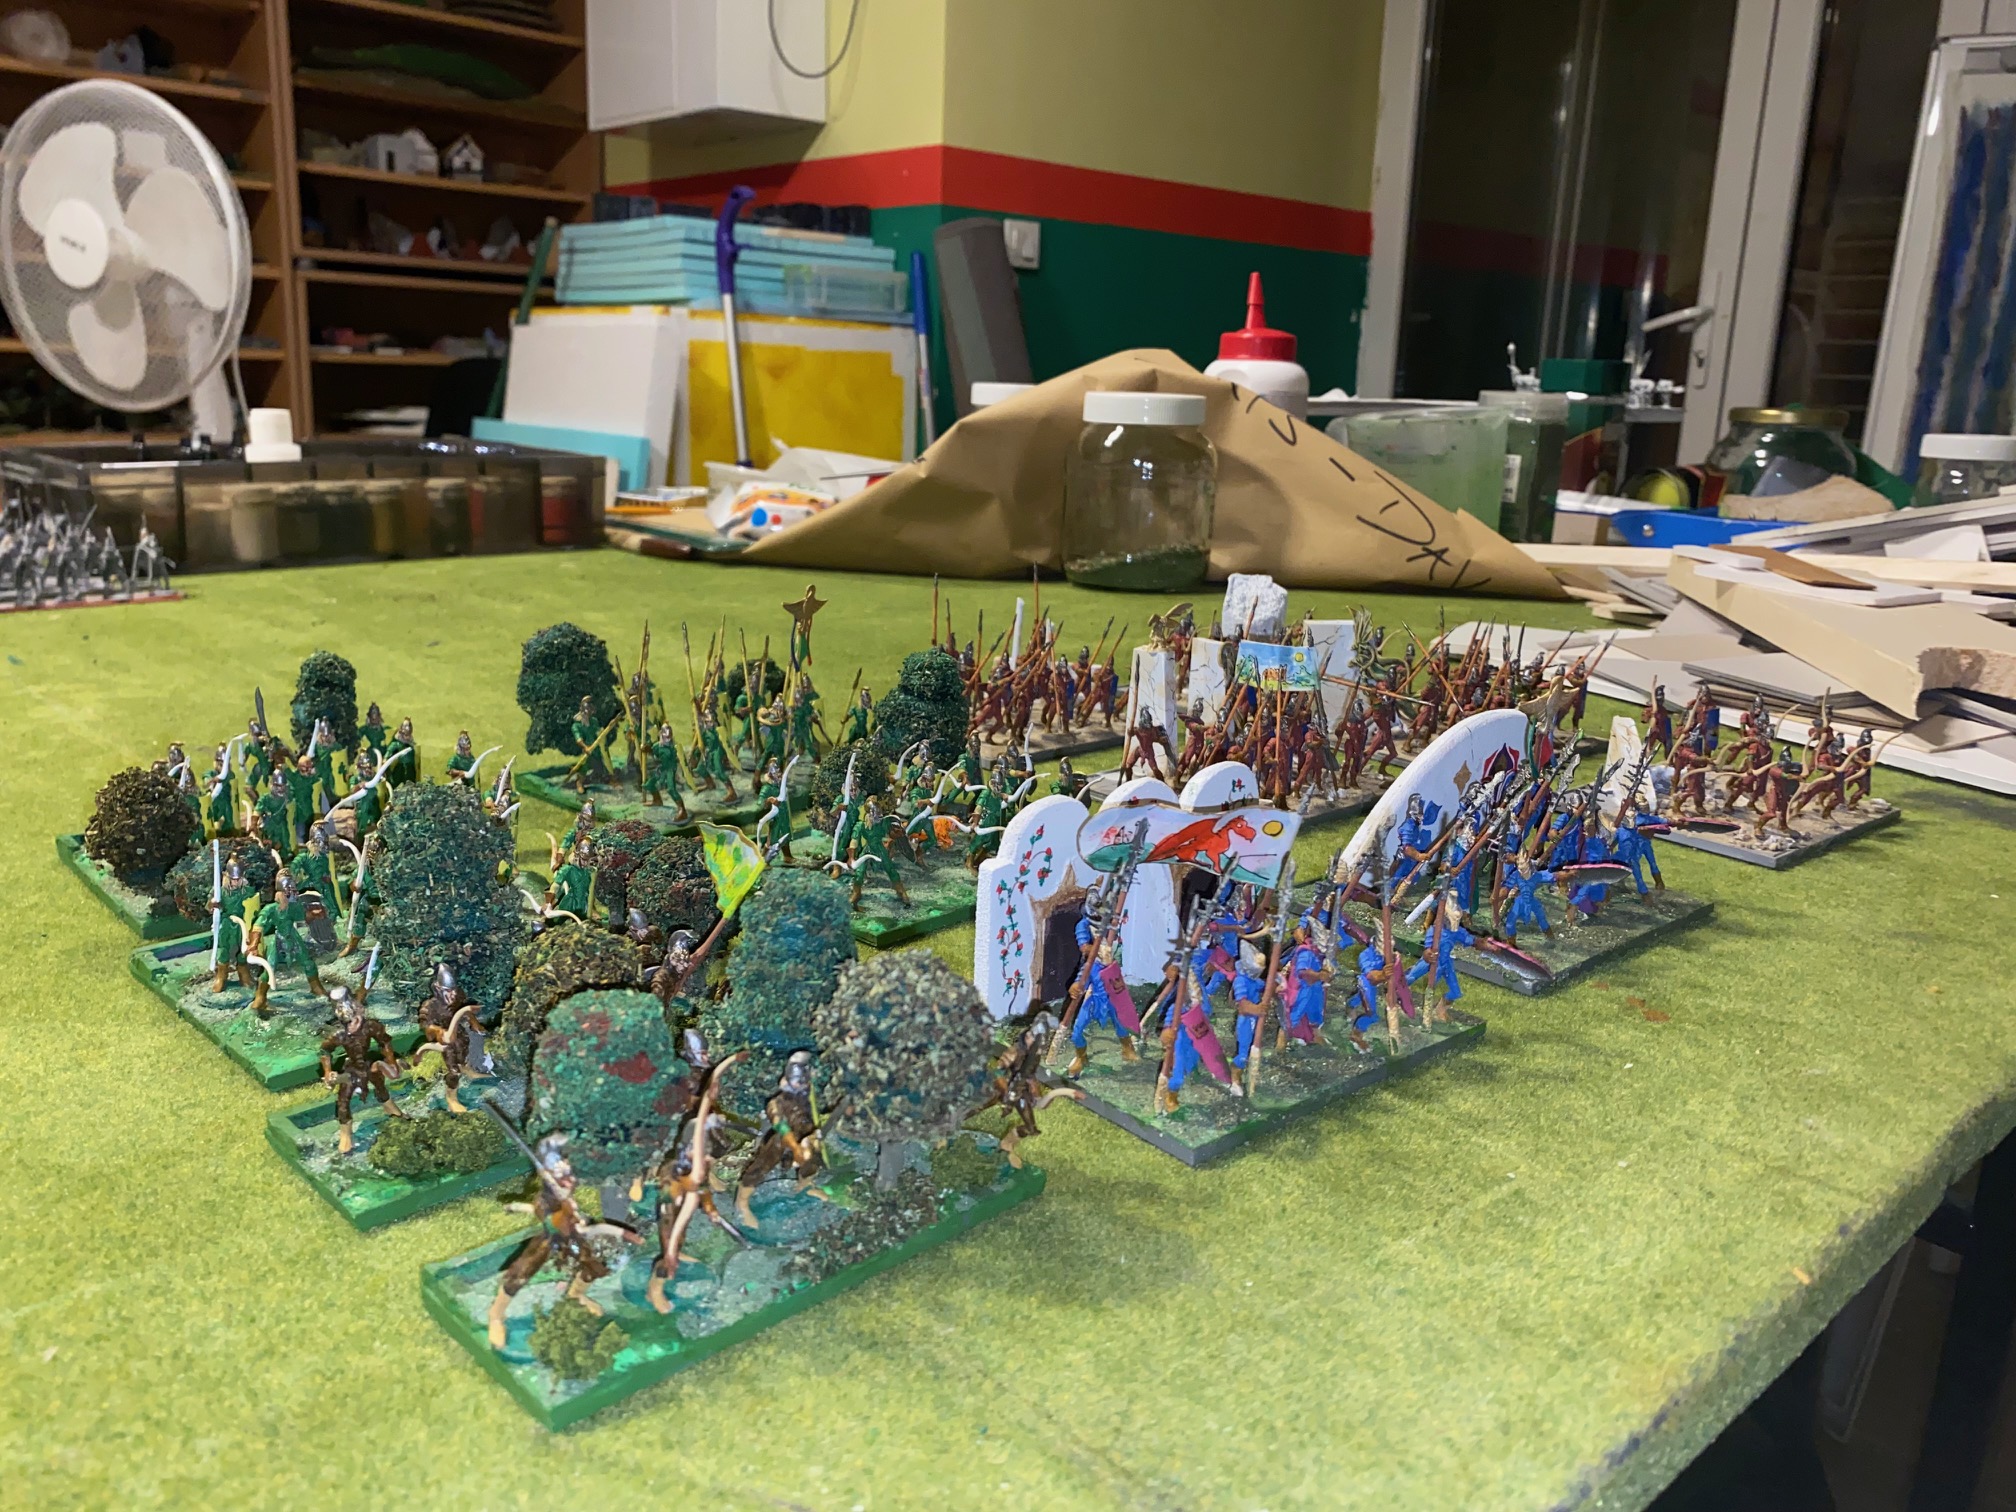
This next group of units represent the Royal guard regiments for the Elven King (or Queen). The painting job is just as in the previous units, I chose the main armor color to be a Royal Blue, but the overall approach is quick and simple paint job.
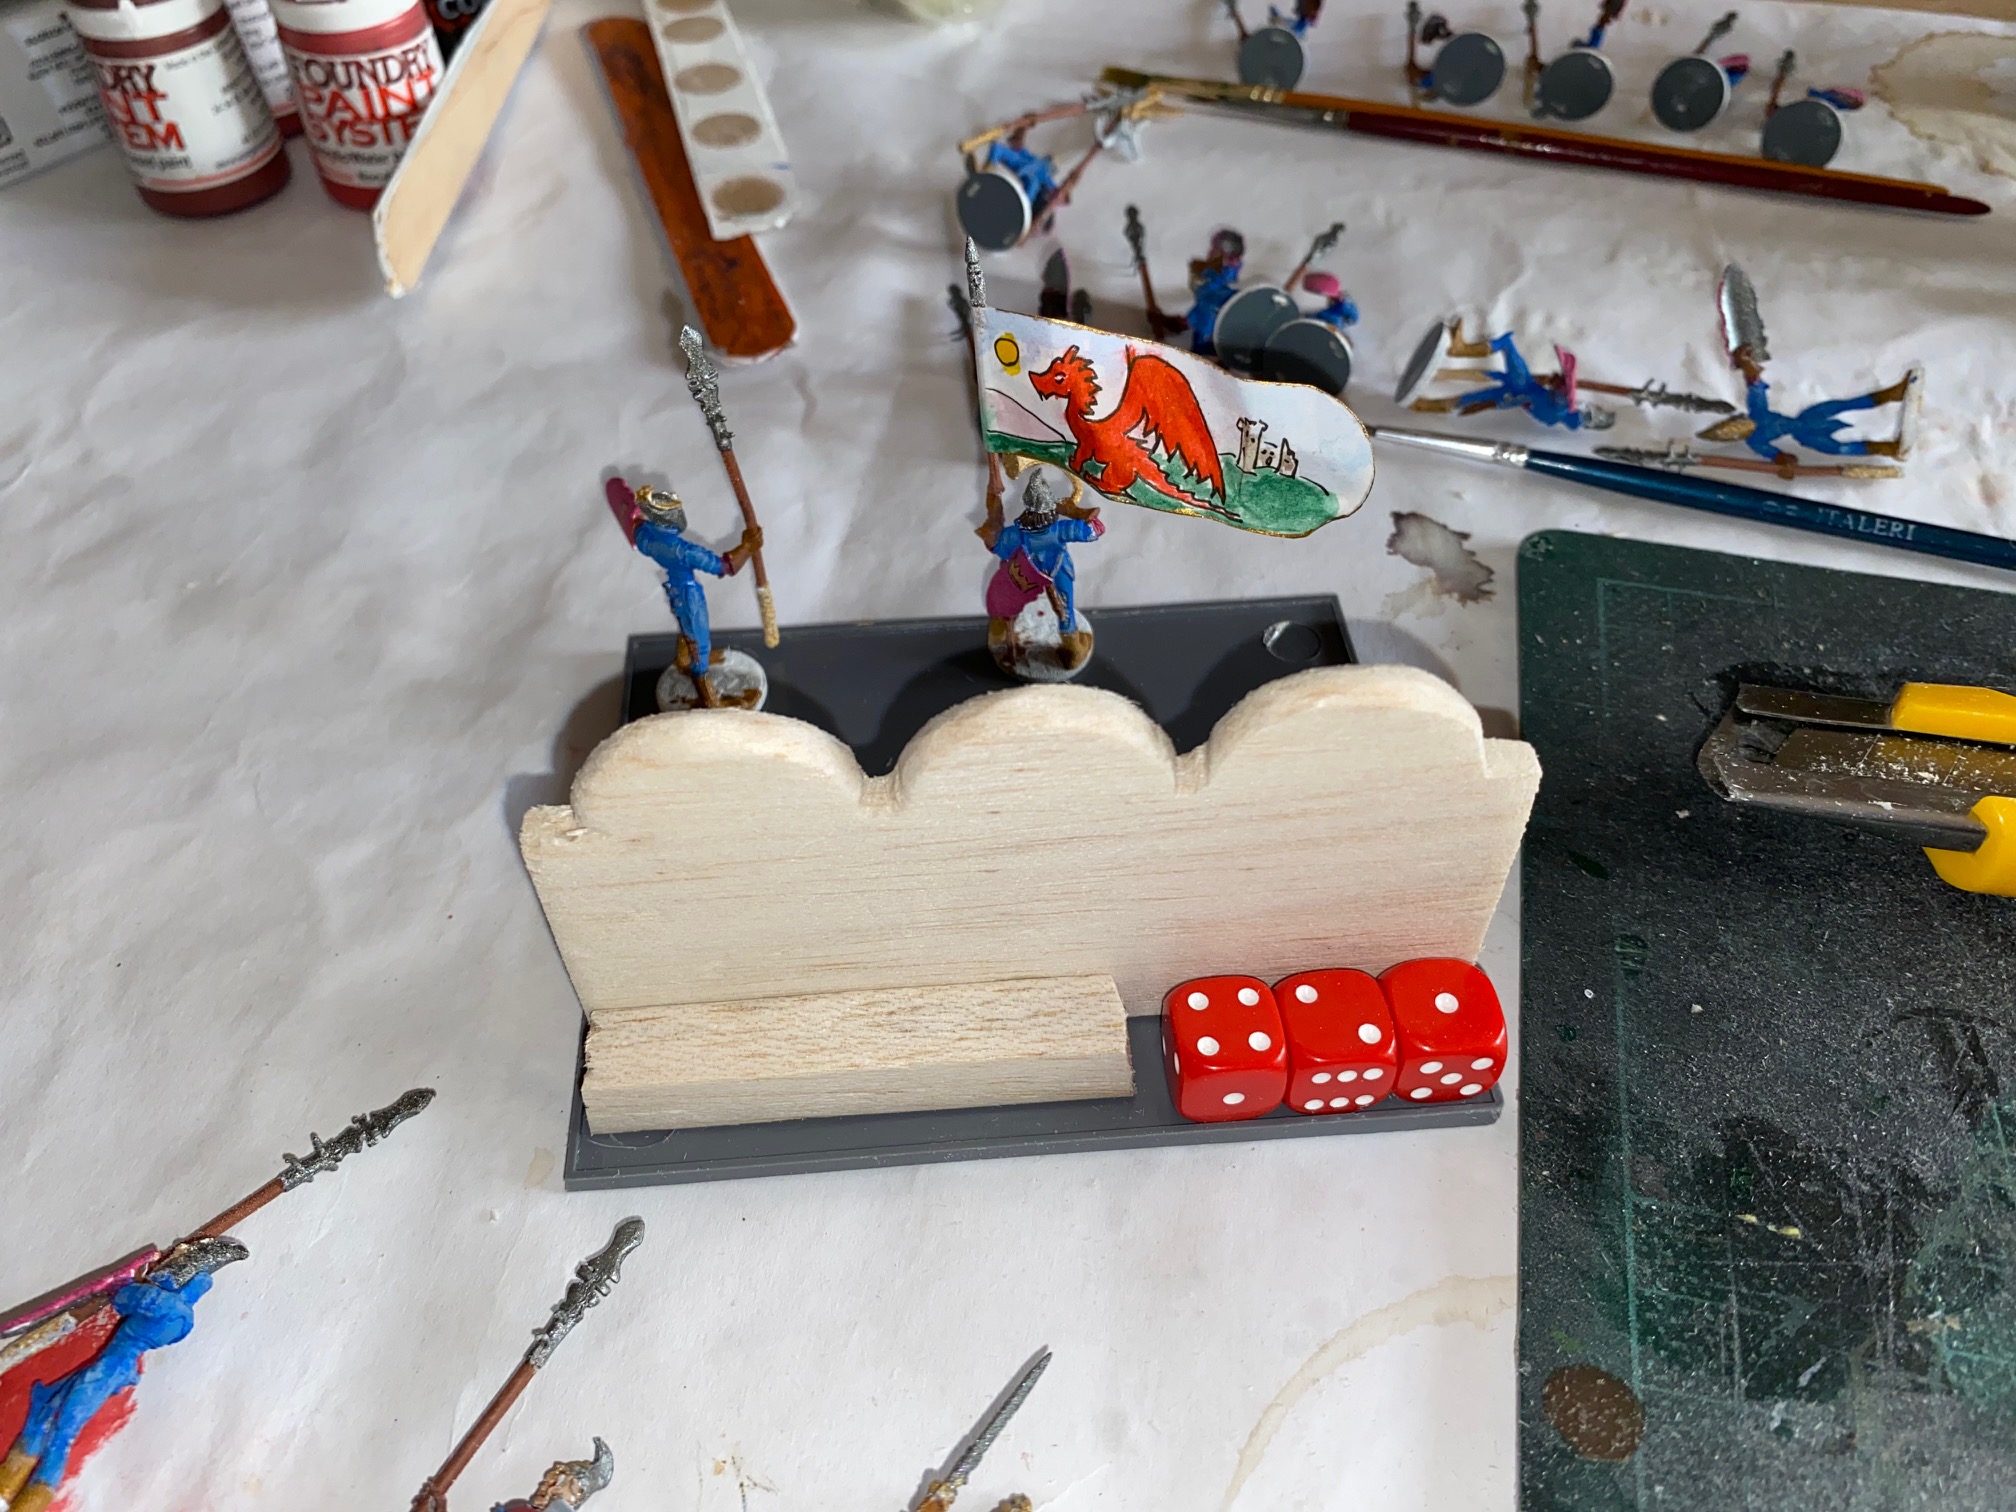
What I wanted to try differently was bases with more elaborate features and for this I wanted to make some form of “wall” to the rear of the base to present the castle or Elven ‘court’ walls.
As inspiration, I decided to go with an “Art Nouveau” style and took as a pattern a book of stencils I have has for decades (some of which adorned one of my houses many years ago).
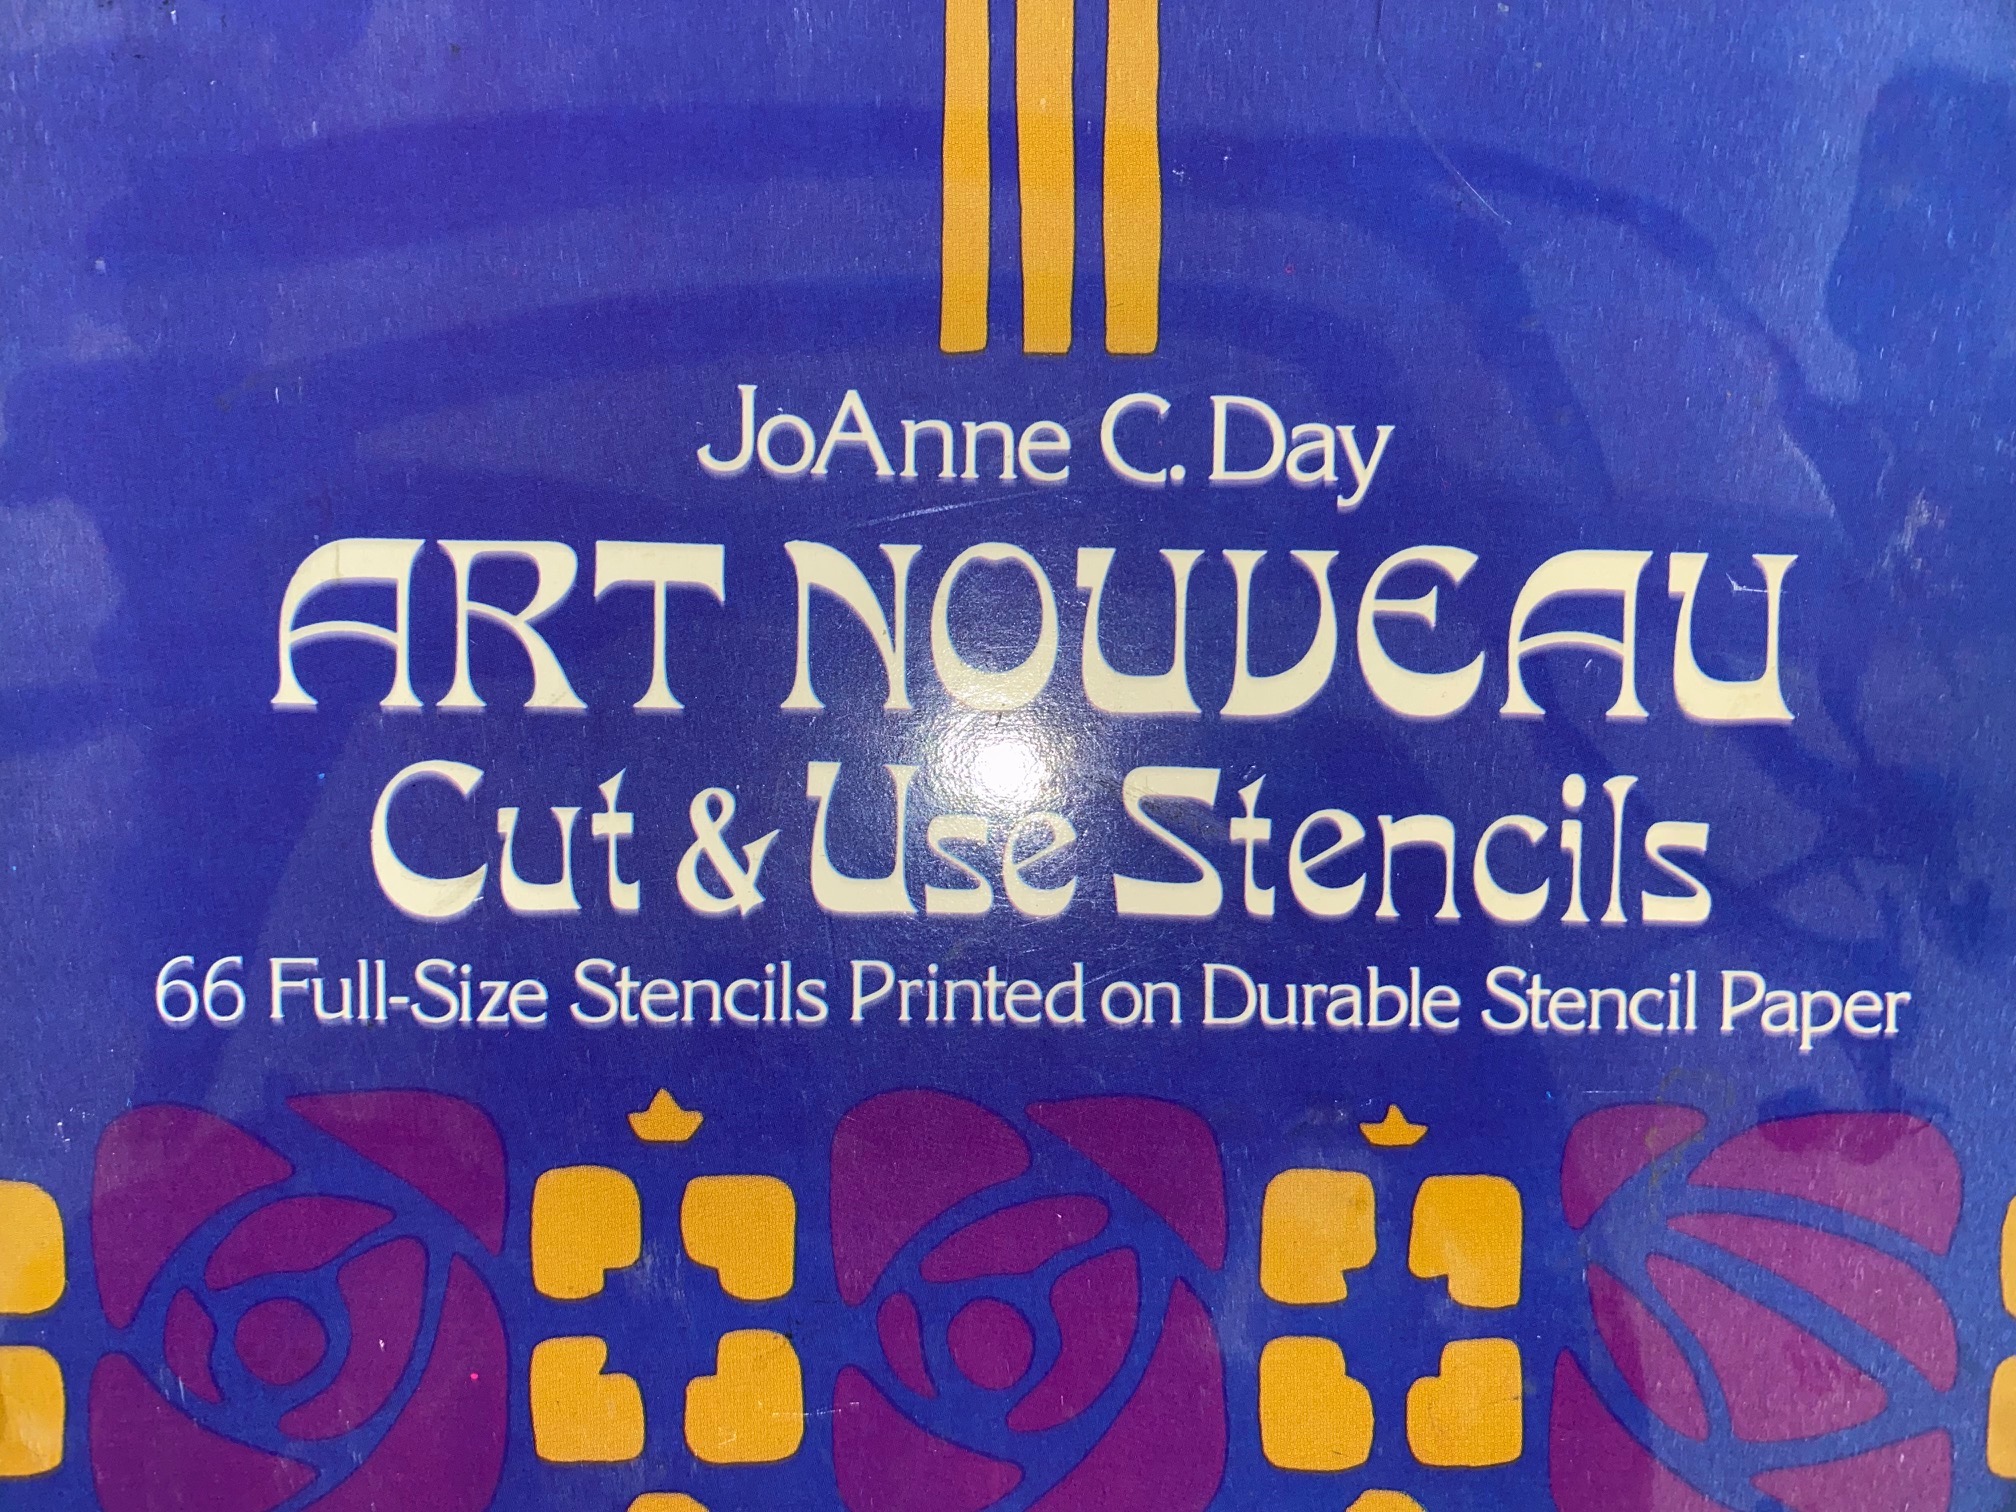 This book was used as an imagination source for the "walls"
As the basis for the walls I used balsa wood once again. I had no fixed ideas in mind as to the shape of these features, and drew simple shapes on the balsa before cutting it our roughly and sanding down the shape with fine grain sandpaper.
Balsa is easy to sand down and perhaps an alternative wood might be more secure in the long run – history will be the judge.
Shapes were made with a coin as a guide for the curved features but otherwise it was all freehand.

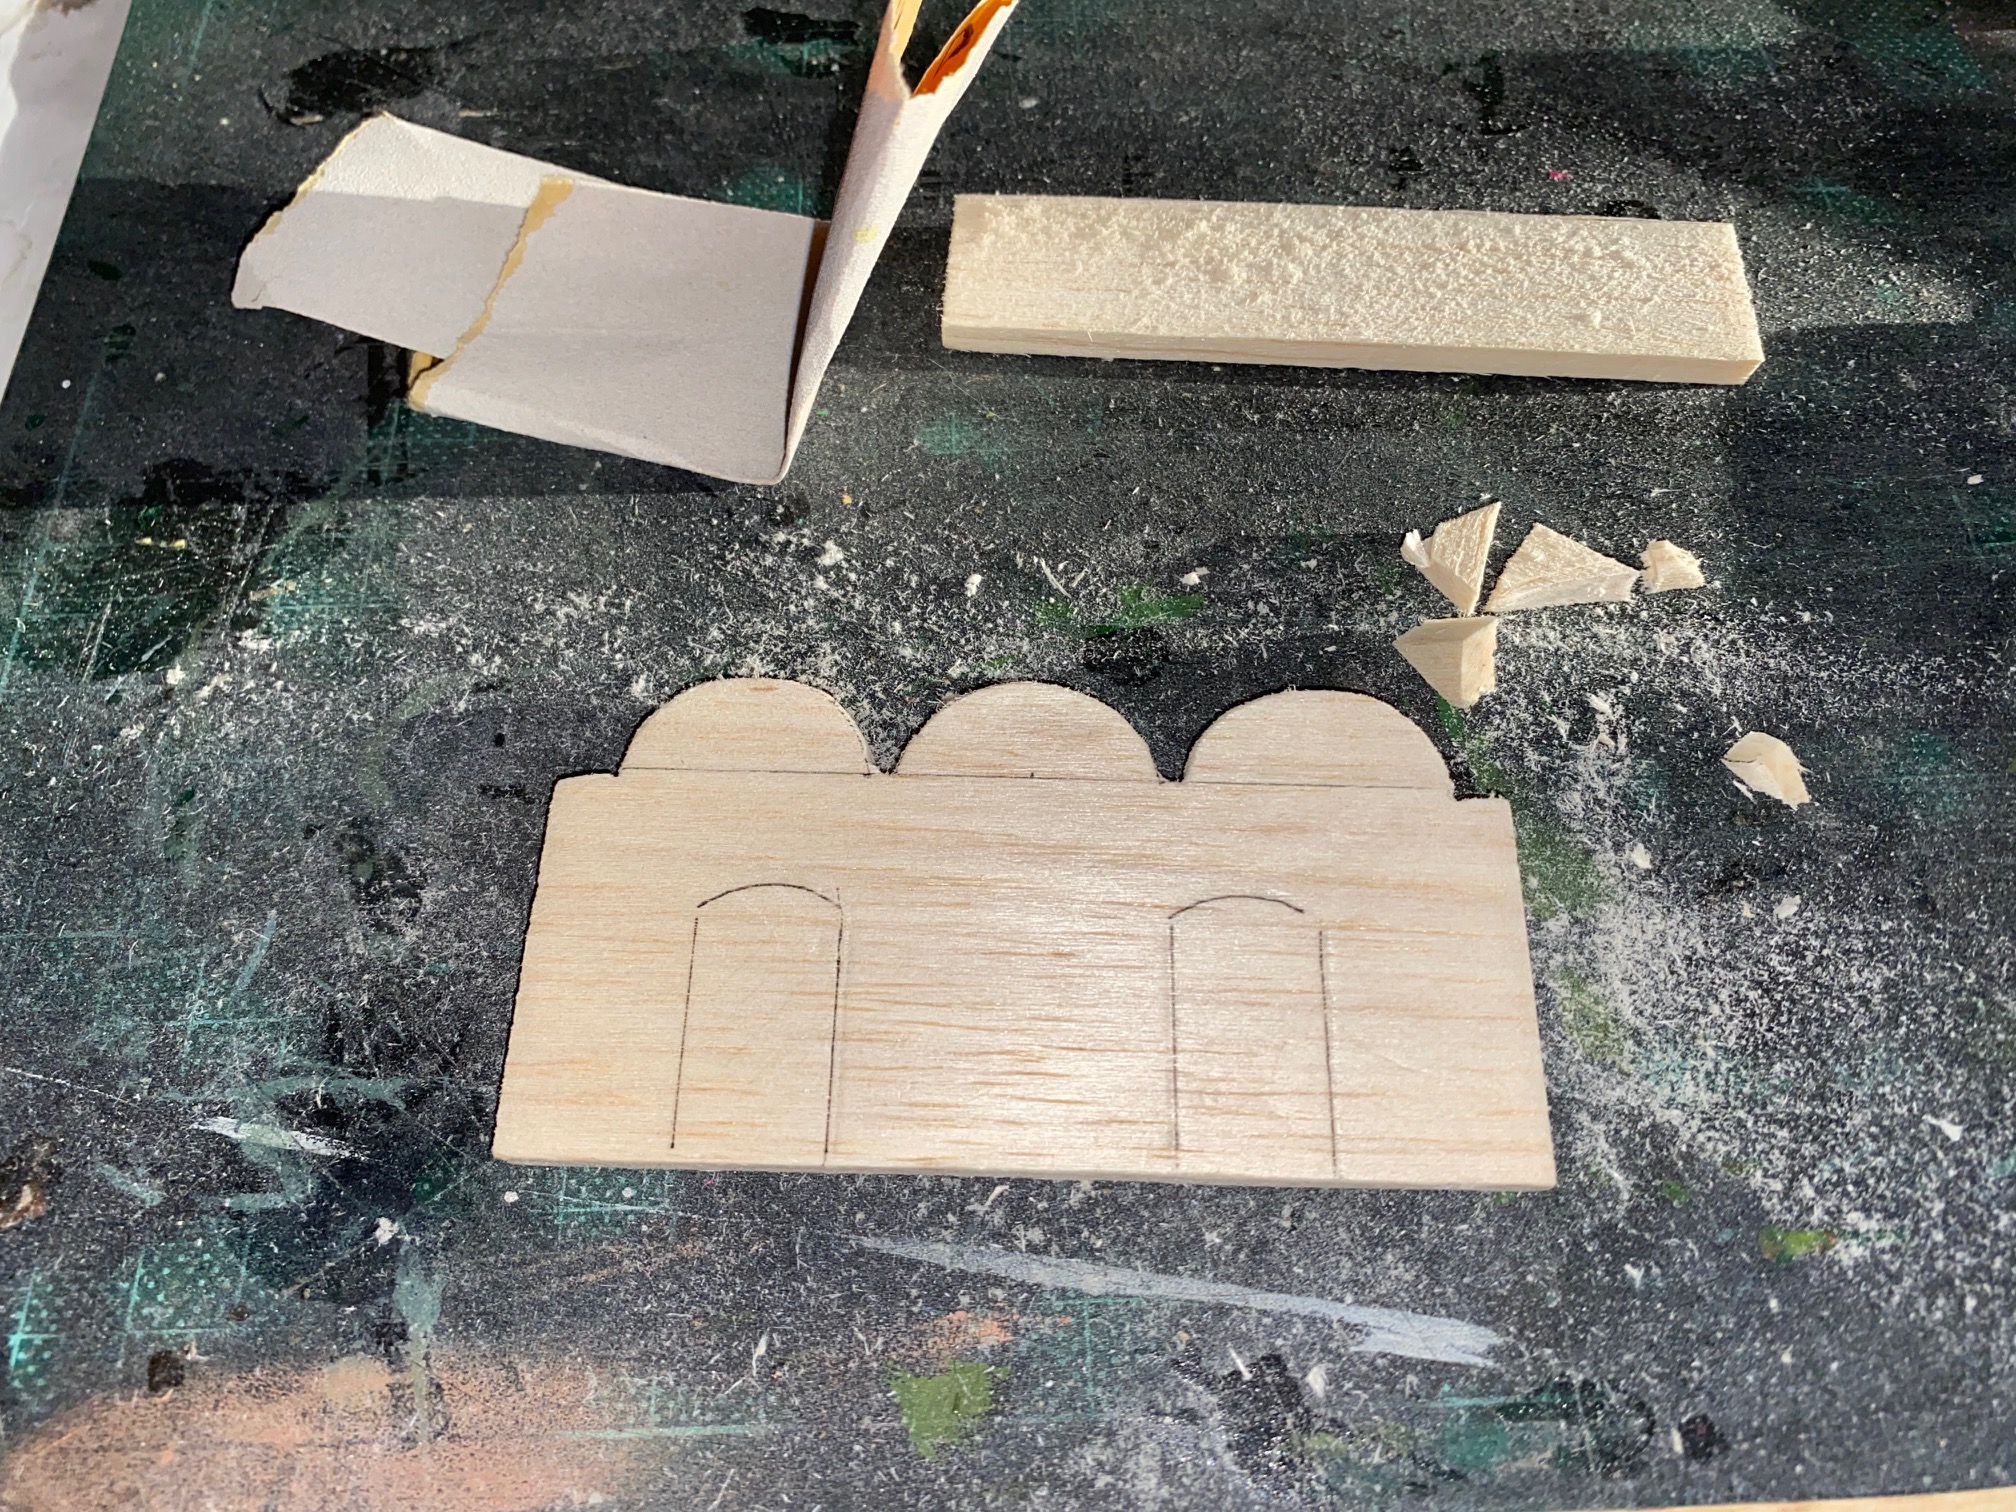

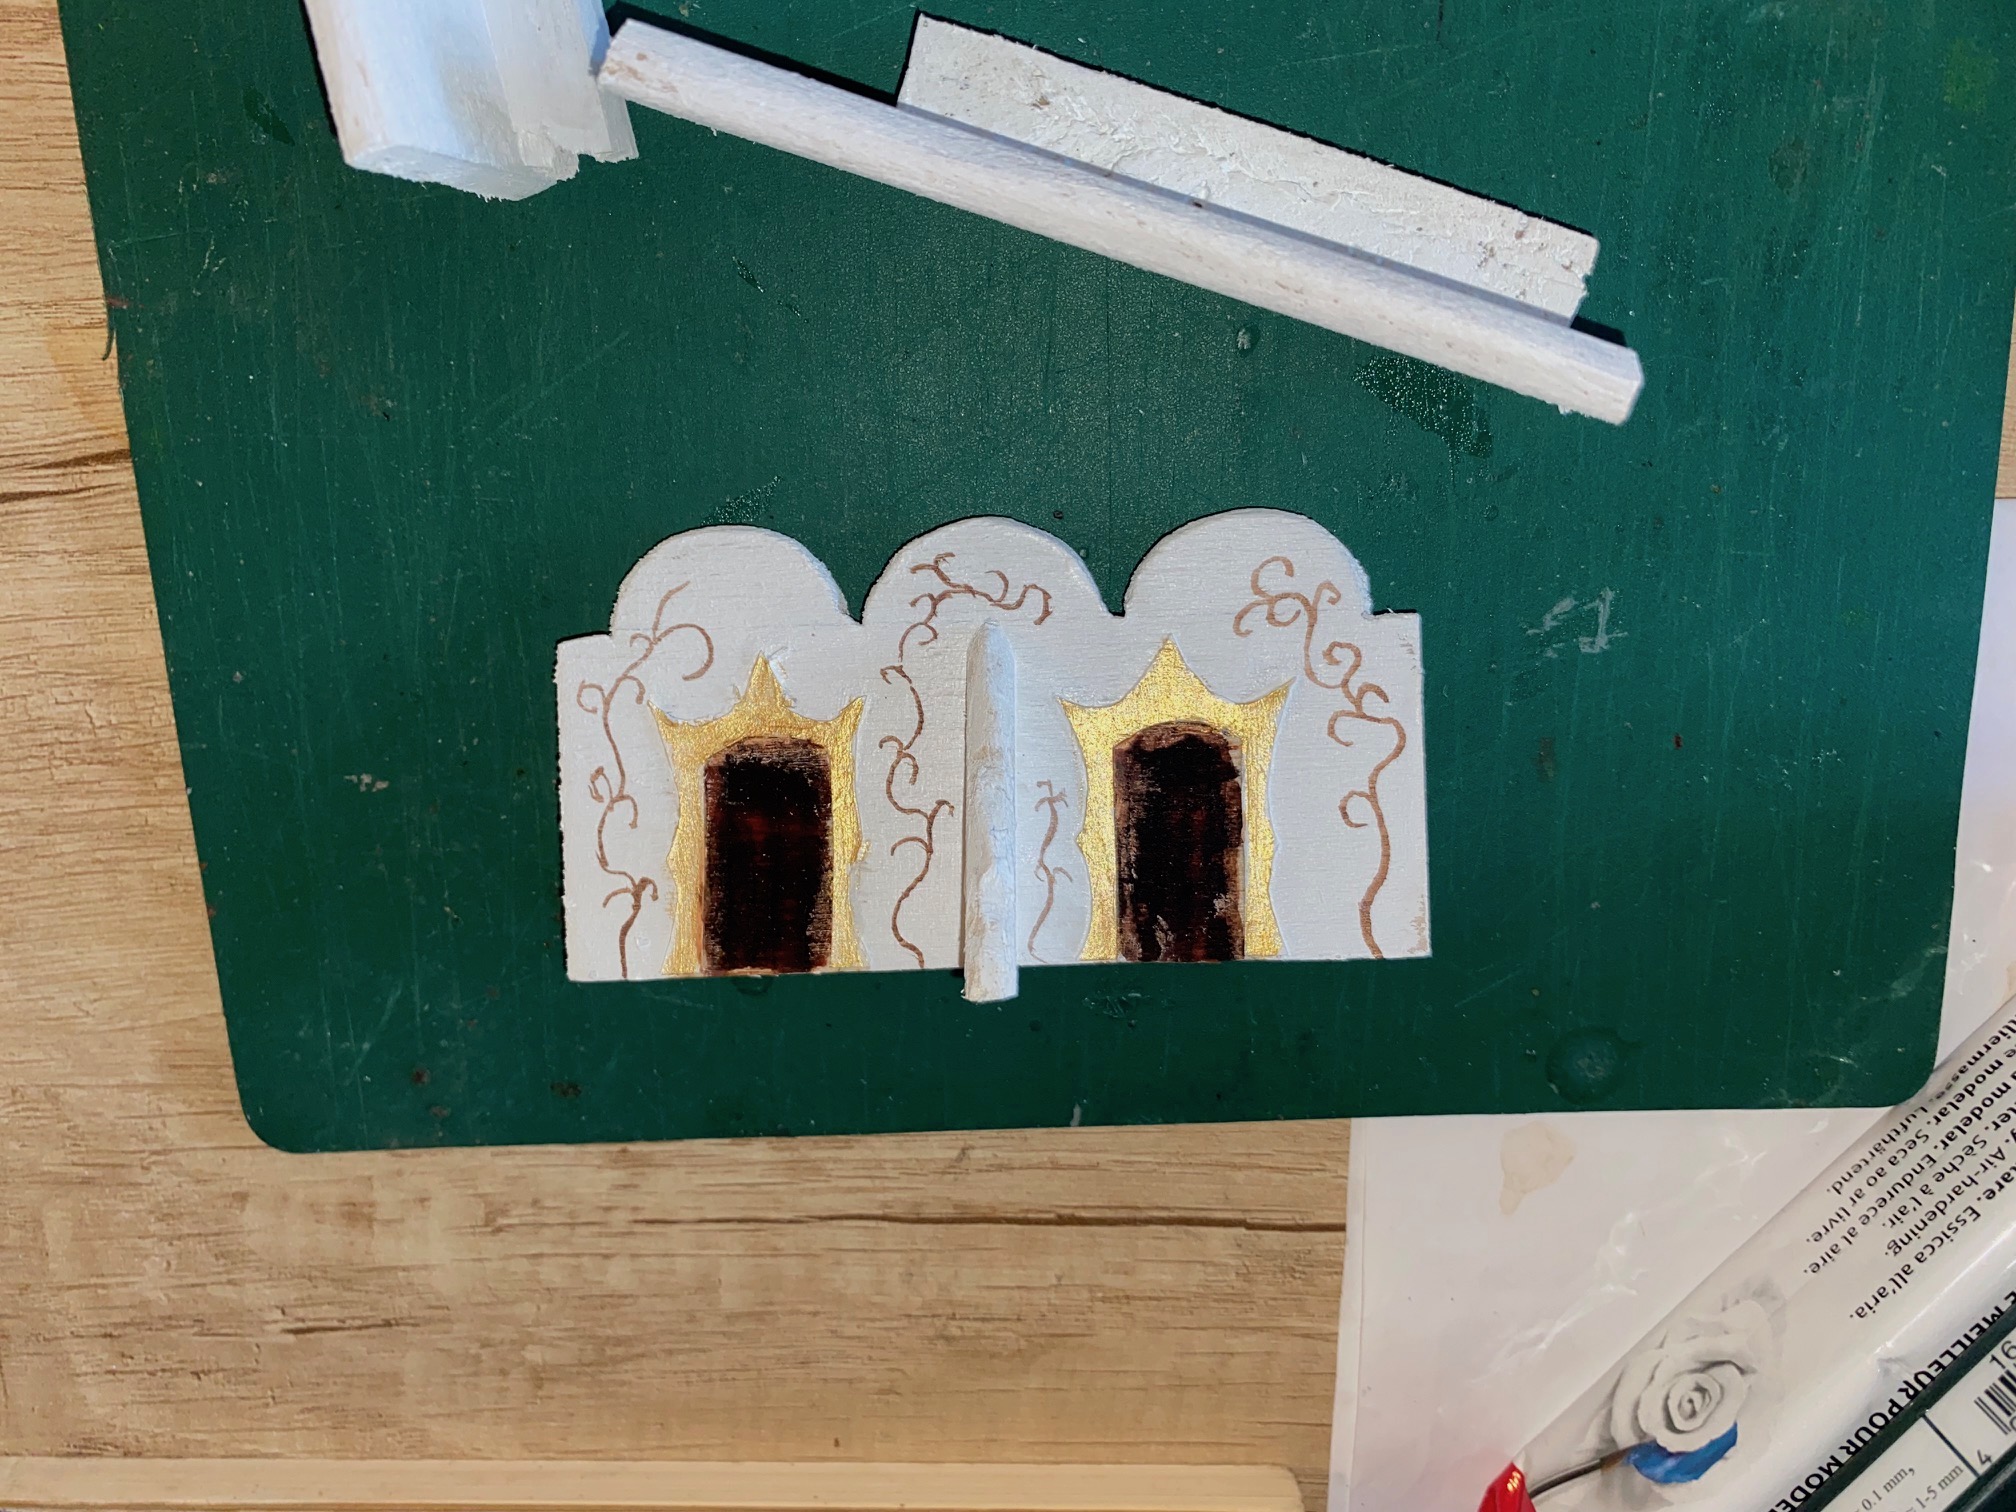
Some doors were marked on and a door frame made out of thick card. I didn’t;t make any other doorframe or windows, although it would be a simple matter to do this in the future.
A variant of shapes were made for the initial five base stands as in the pictures.
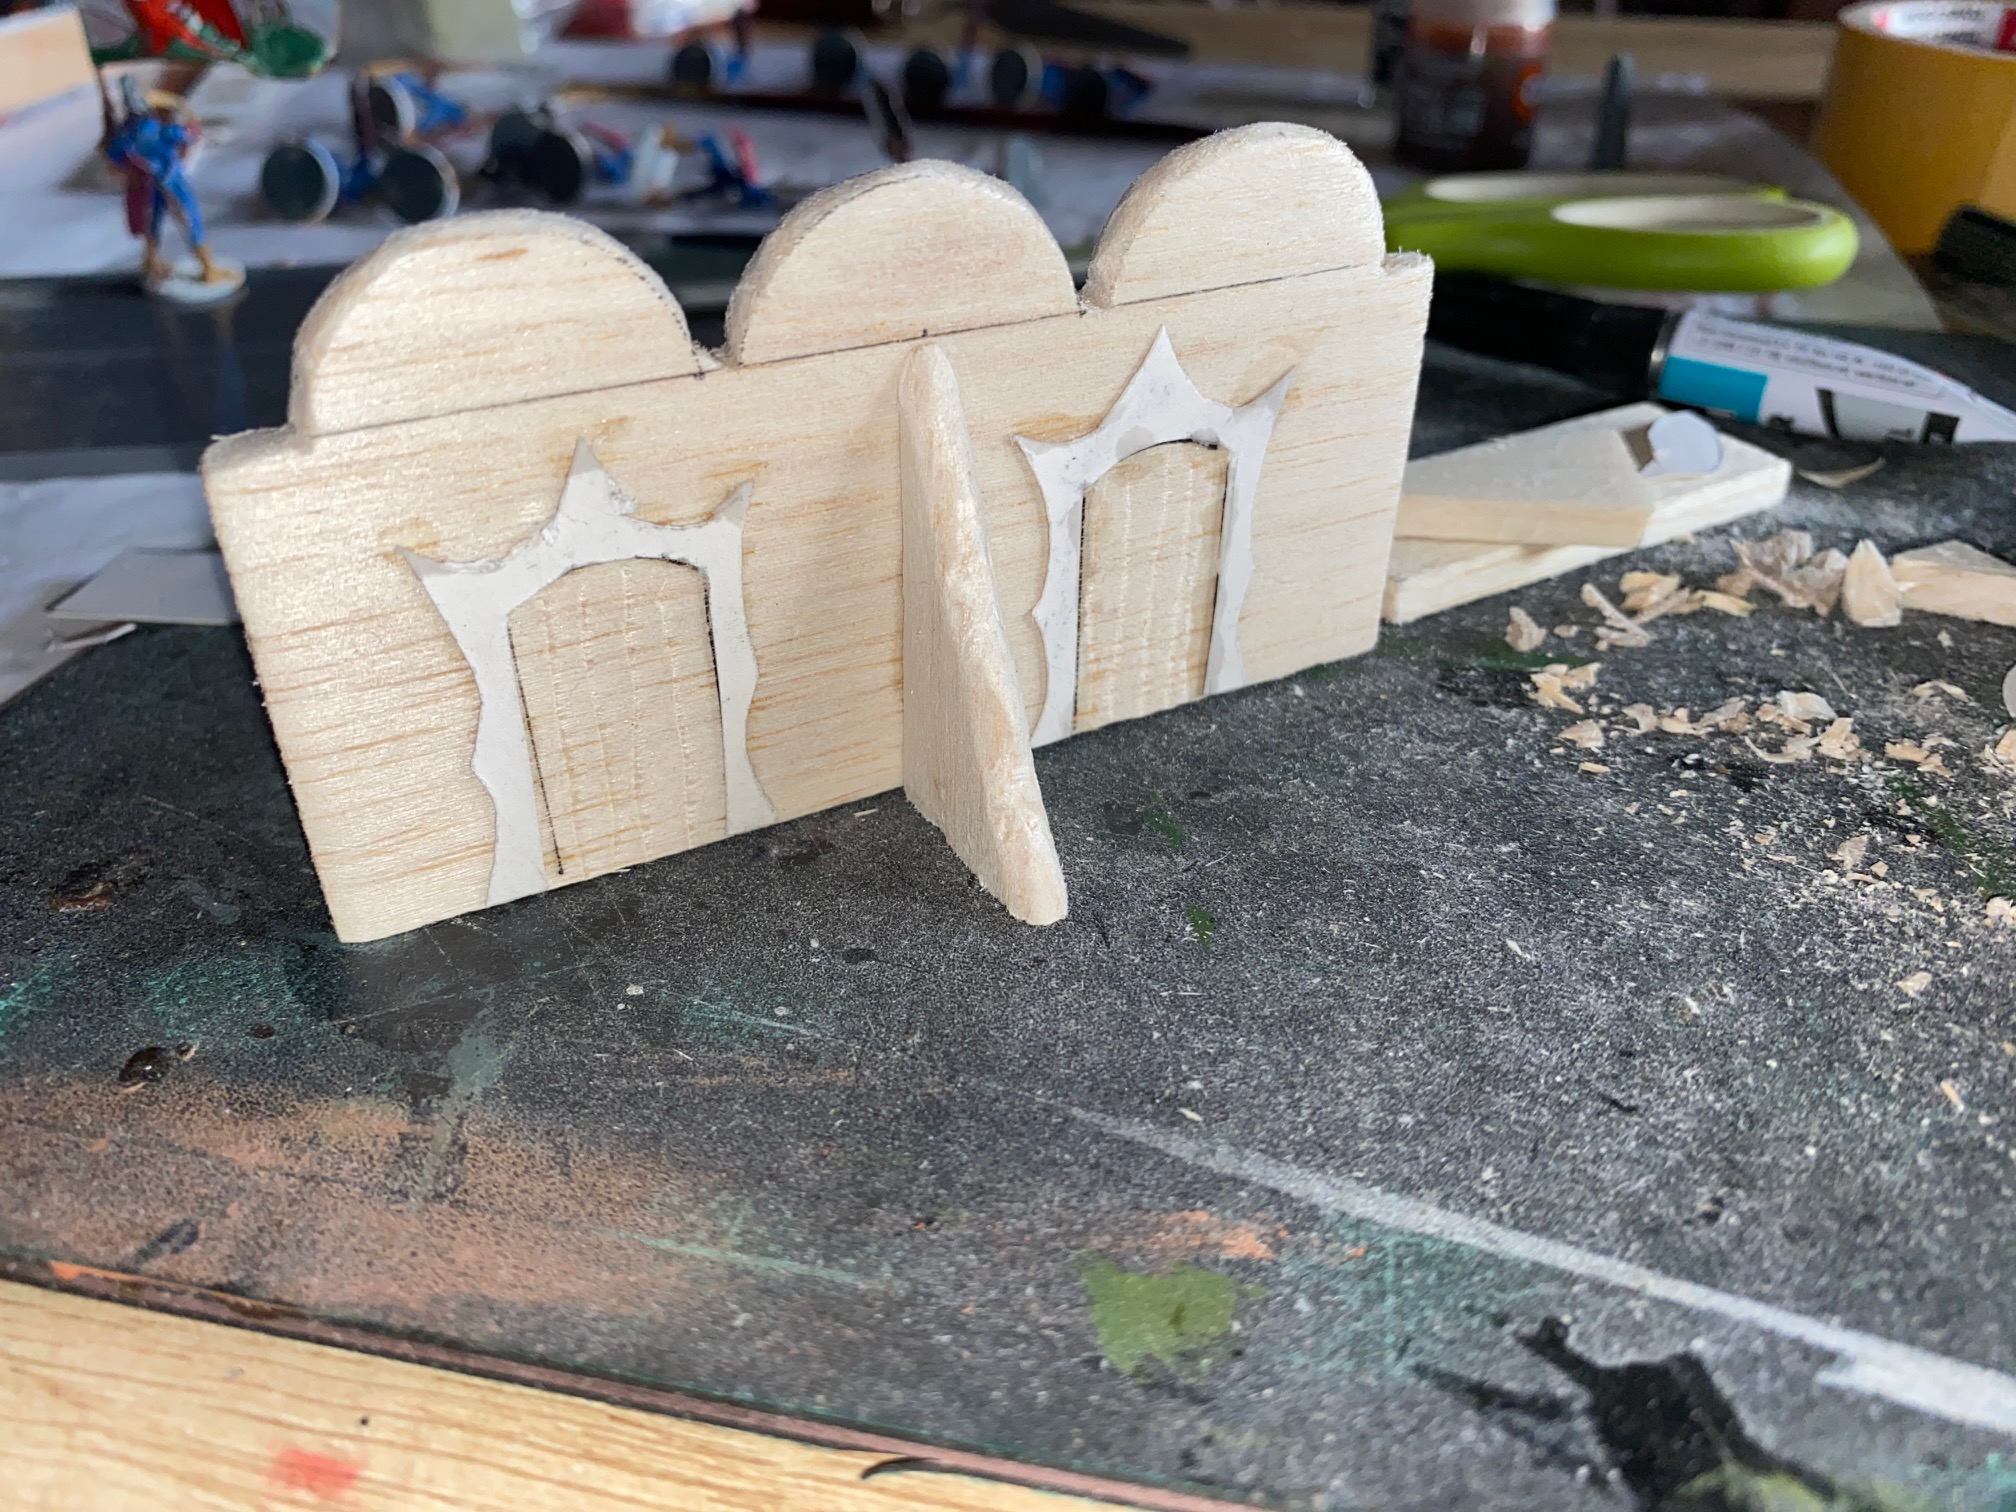
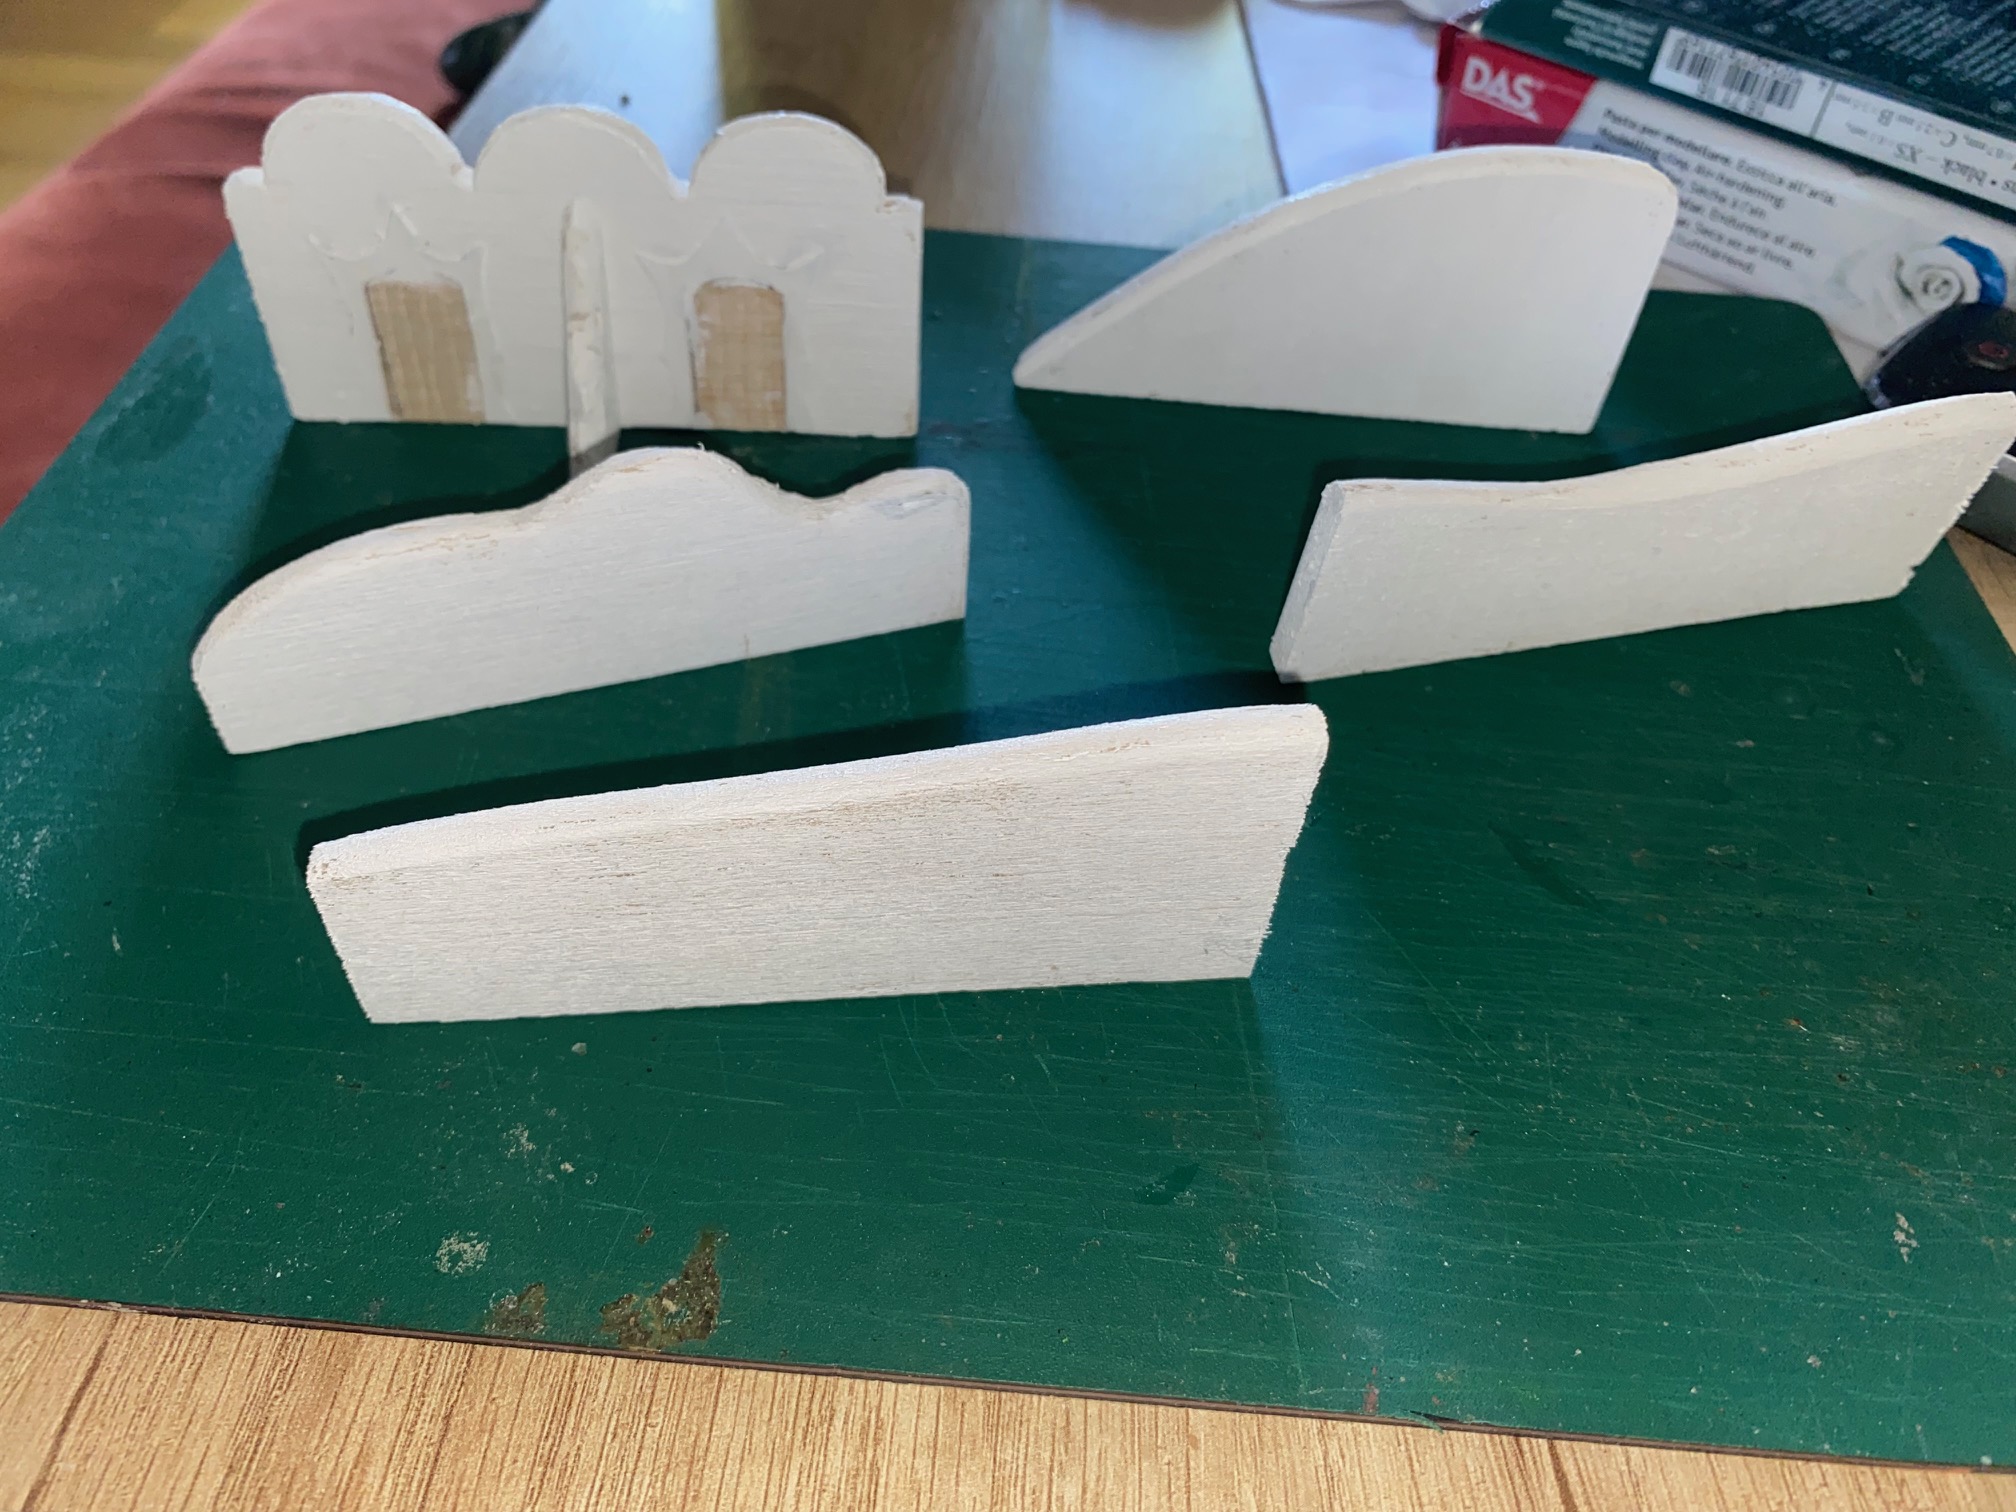
The balsa was panted with a couple of coats of white acrylic paint and then patterns of “flowing lines” were drawn on these “canvases”. On the first wall I instead painted what would become a rose garden.
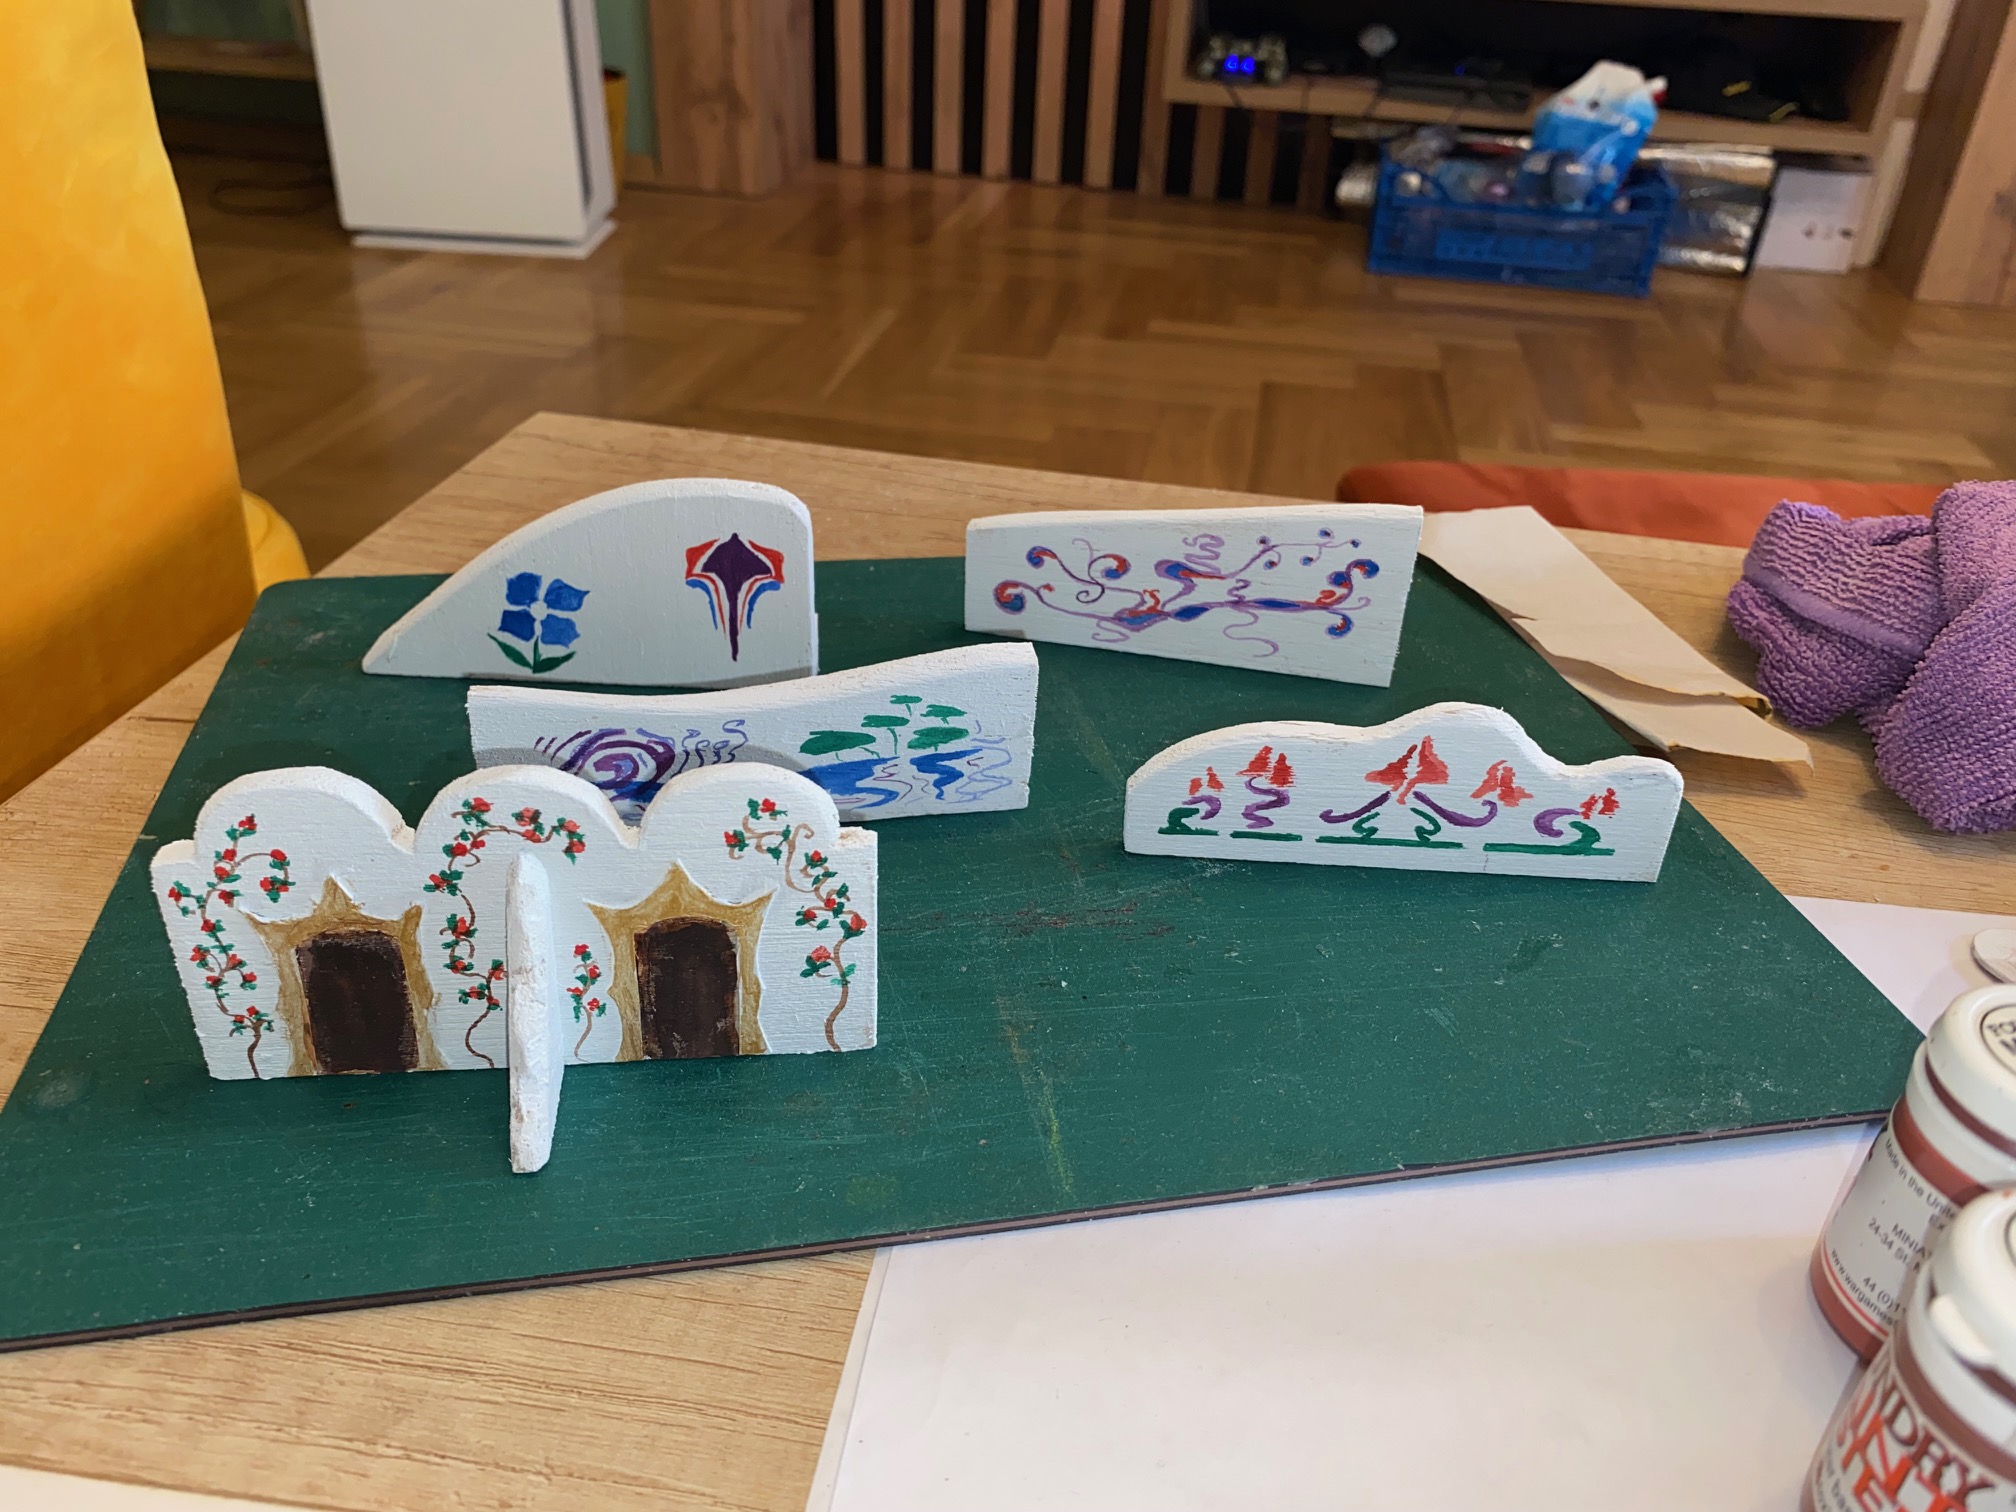
As with the other bases, I used DAS (in this case the white variety) to fill in the base and once dry painted the surface with a variety of green acrylic paints (cheap store paint is fine) and once dry added a little green colored sand to give some variety of the surface.
Other unit bases will be made the same way.
This is probably my final post during the Challenge period as I have to attend a residential rehabilitation programme and can’t take all my toys with me! The final units will be made exactly like the previous posts and I’ll post pictures next month.
In the meantime, a thumbs up to everyone taking part, there are some amazing projects in the Challenge this year and Happy Gaming!

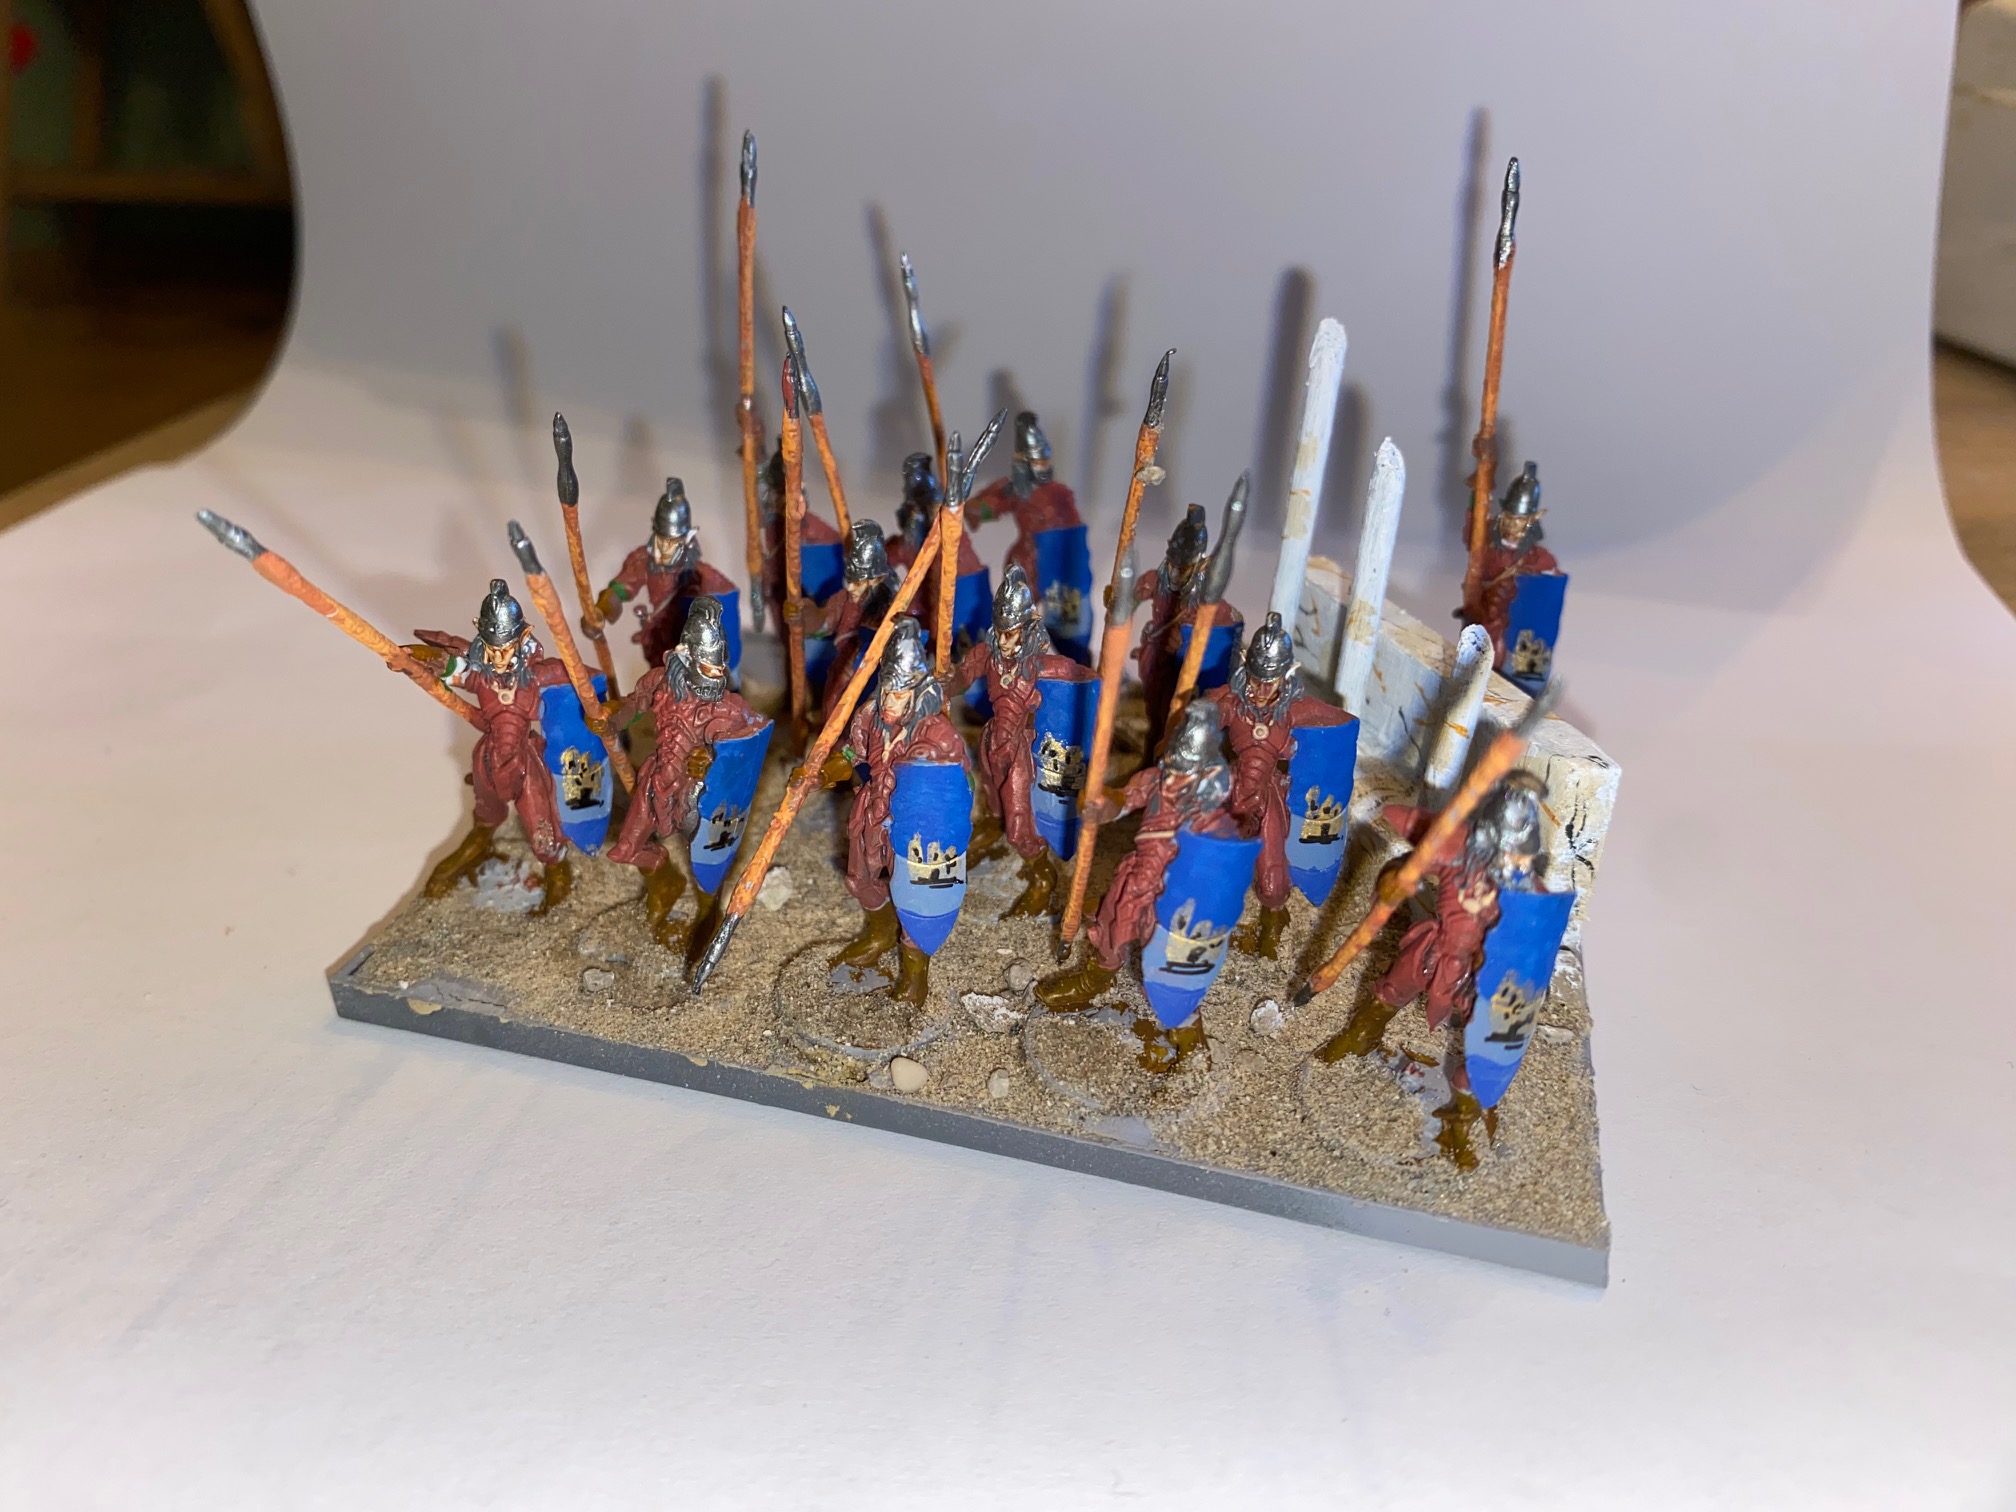
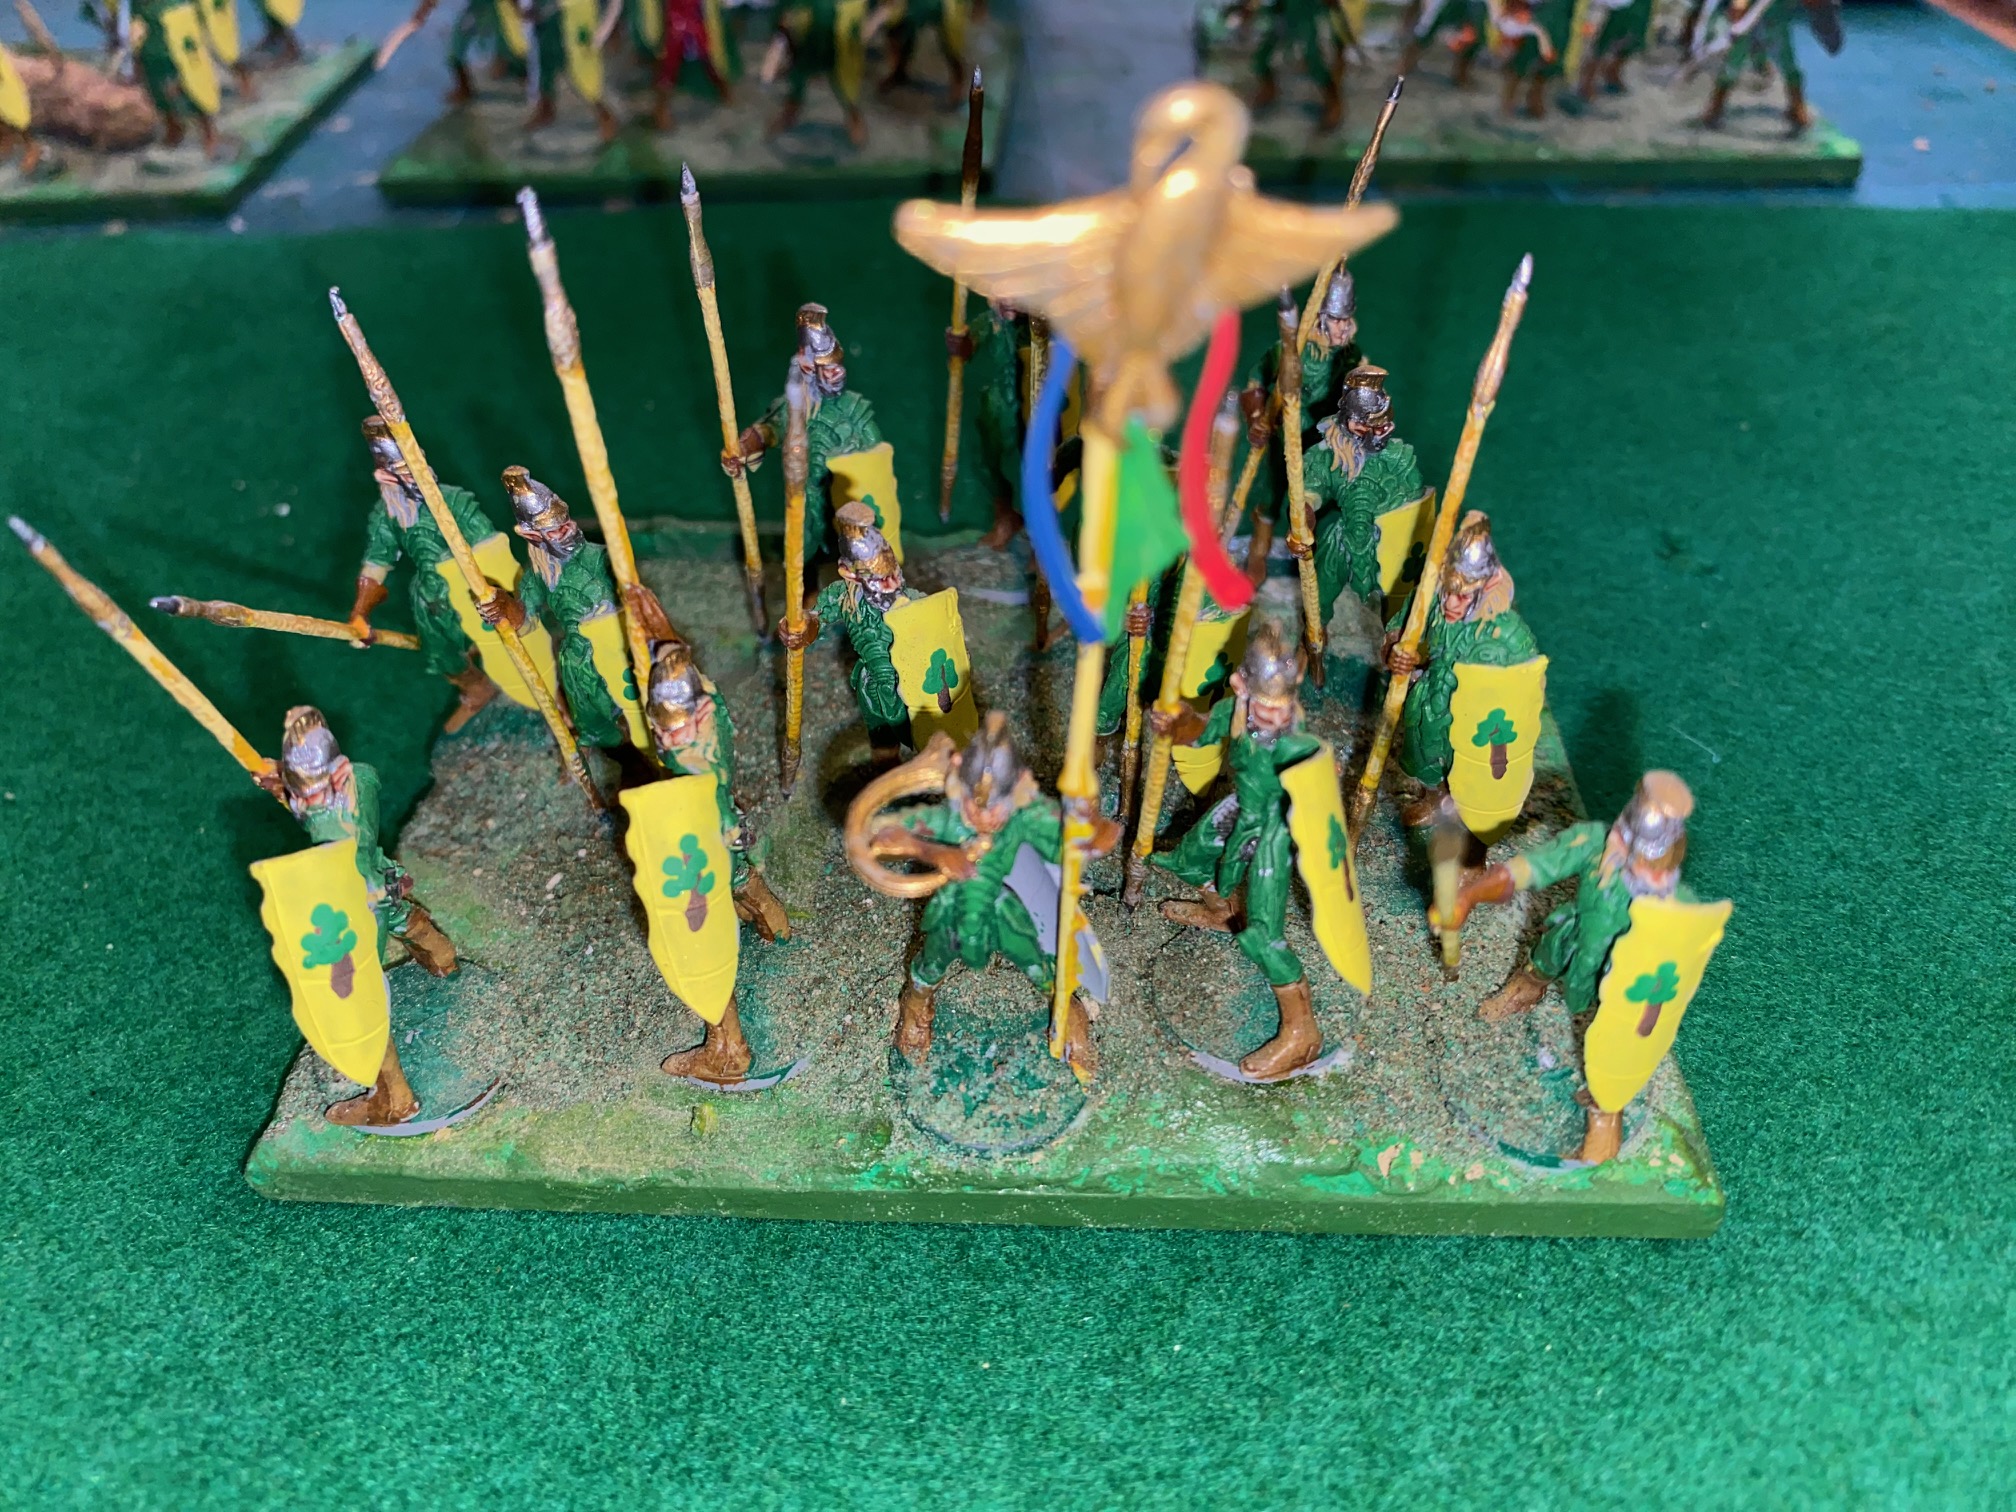
Basing the 2nd Elvish Clan
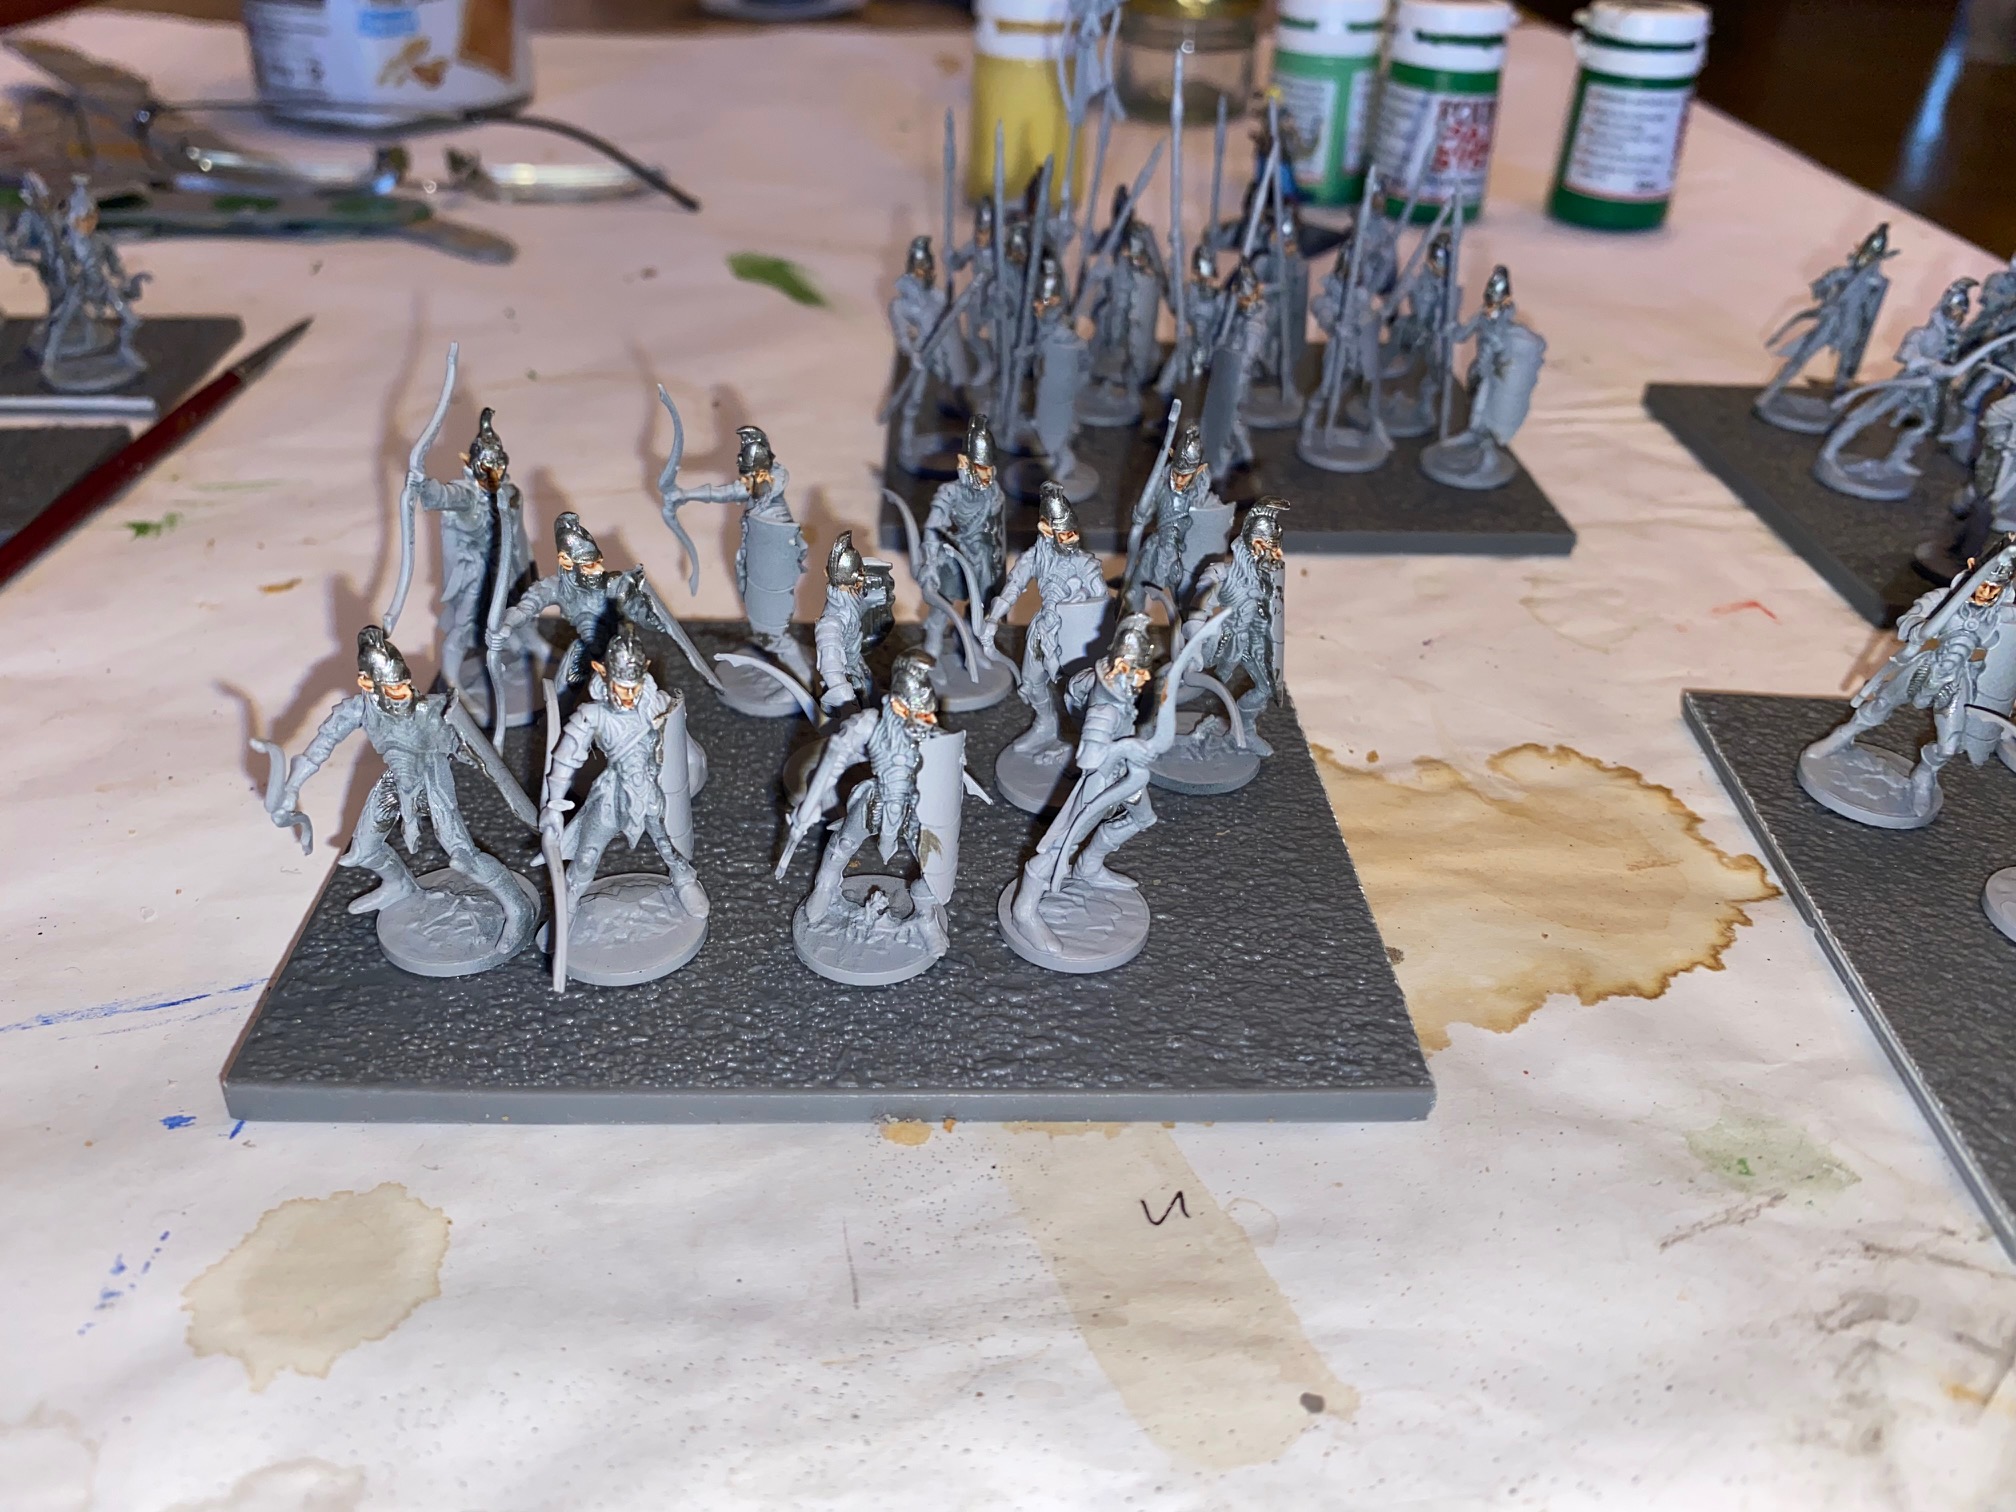
Following on from last time, I have based the Elves on the “urban” bases.
I used the familiar process of gluing the figures onto the bases in the depressions made previously with PvA and once the glue had dried, I coated he base with a slightly diluted mix of PvA / Water, probably about 80:20 mix.
Onto this glue mixture I poured a mix of small stones and sand and afterwards highlighted some of the stones with white as a nod to the white marble features of the bases.
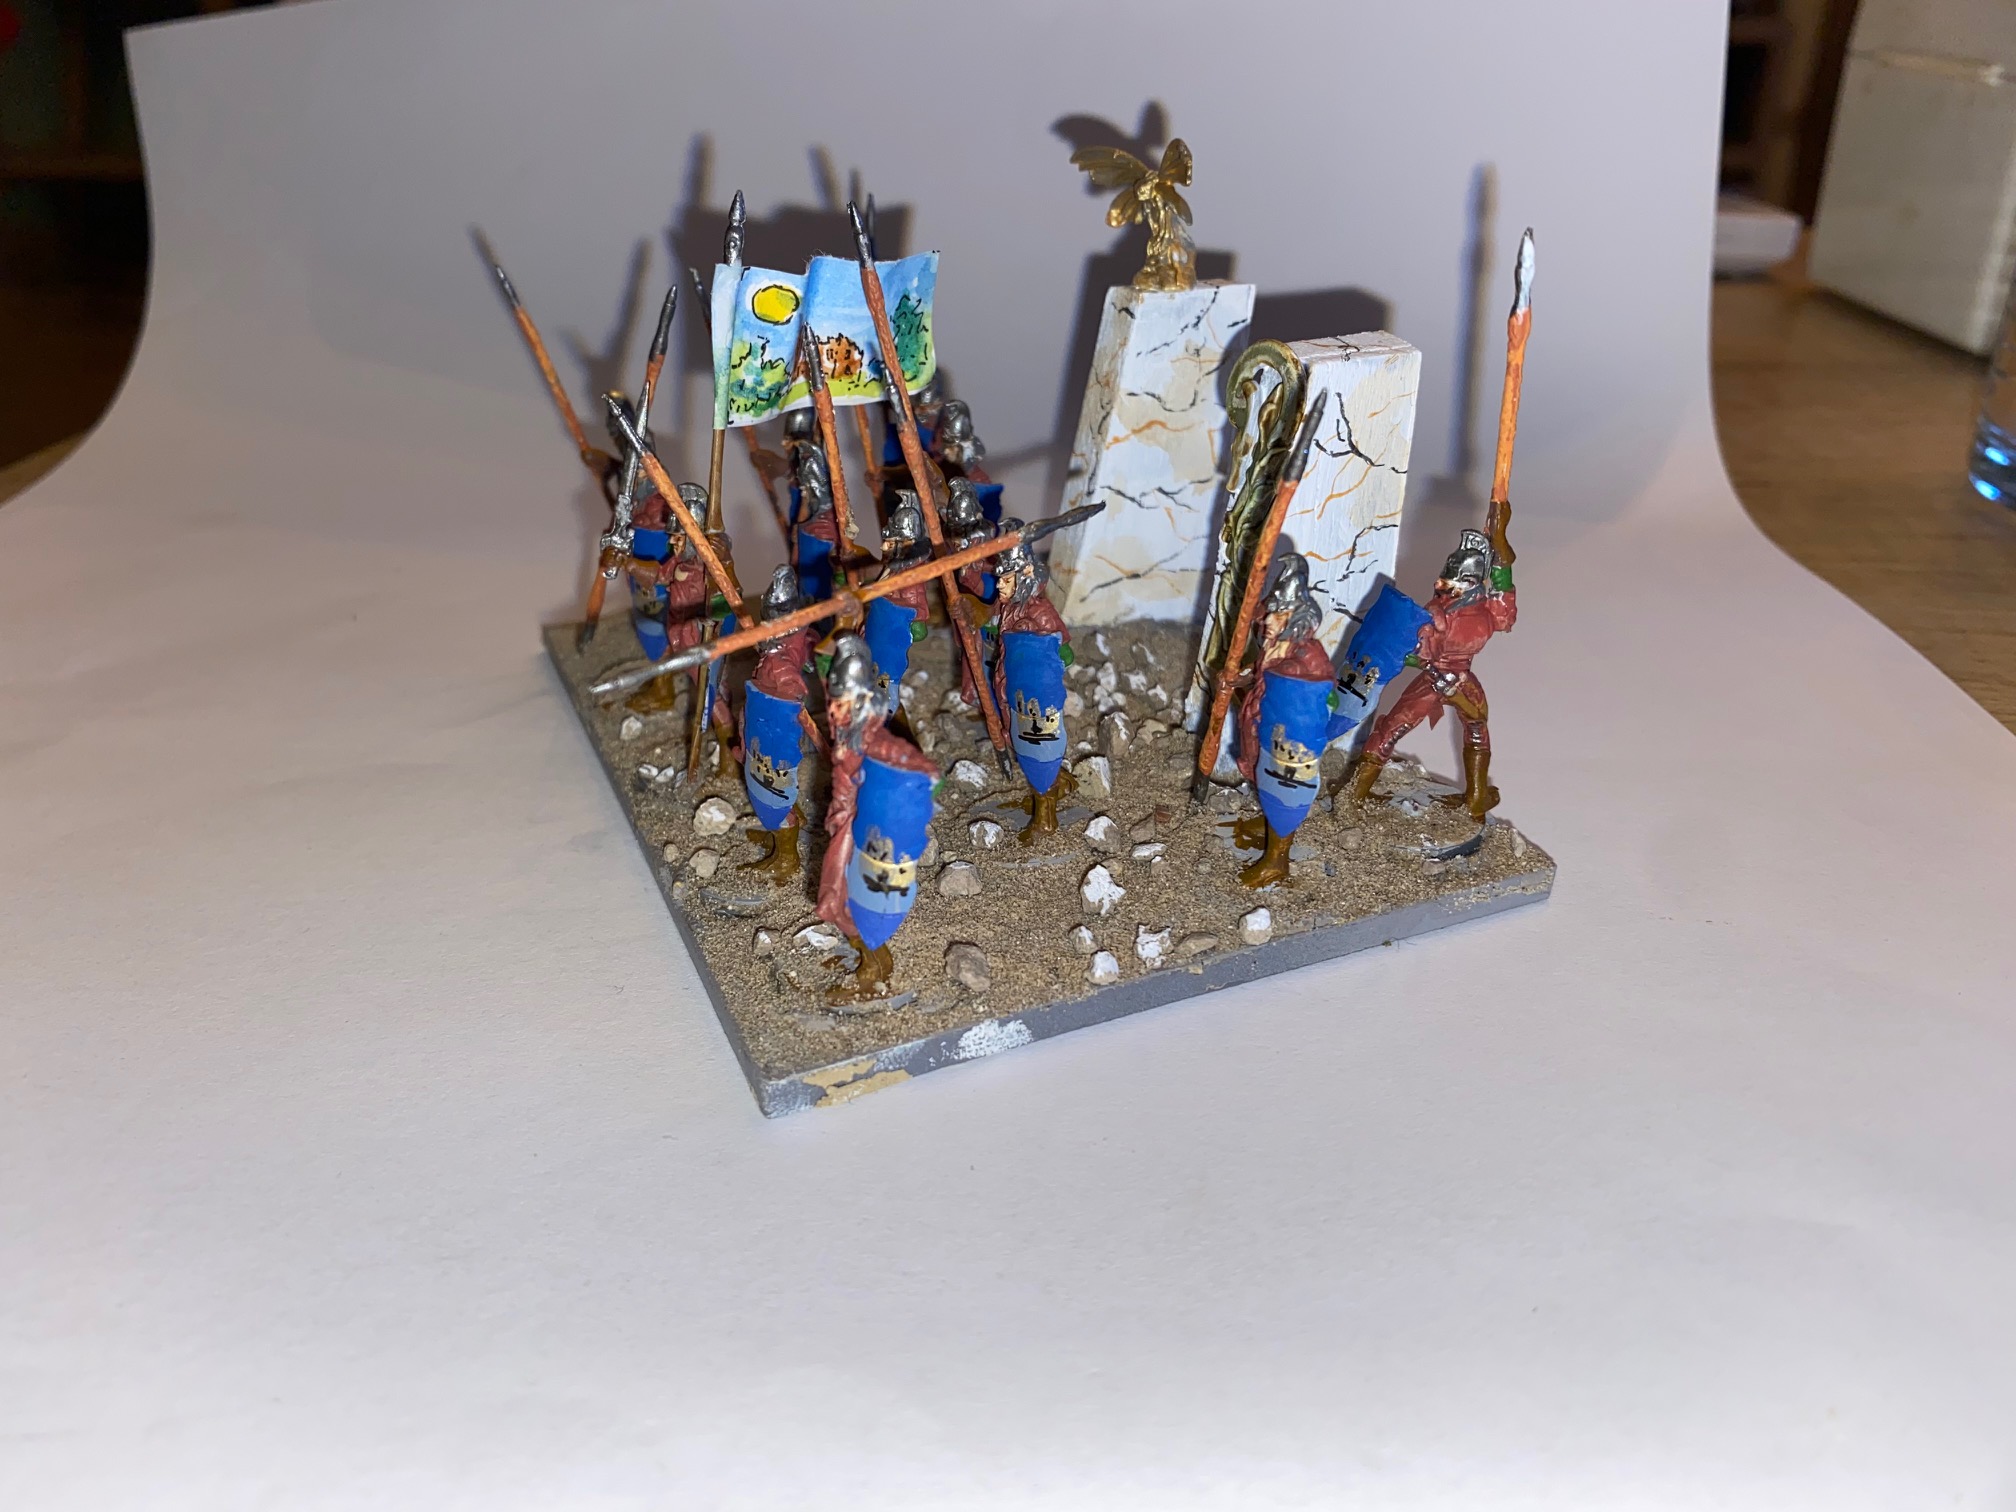
As a final touch I made a small flag for one of the units.
This was a simple drawing on a pad of watercolor paper and given a quick color with some water color paints. I think the water color paper is a better open than simple printer paper as I think it tends to buckle less obviously.
The flag isn’t meant t be a great work of art but just a small additional feature on the unit. I’ll probably do the same for at least one unit in the other Elvish clan, which will be the “Royal” Guard models.
These are based around the old Mantic “Drow” Elvish metal additions which comprise large spear/halberd type arms and crossbows. This will probably be only a couple of crossbow troops and a Unit or two of Royal Guard.
Anyway, some pictures of the final bases follow.
Happy Gaming!

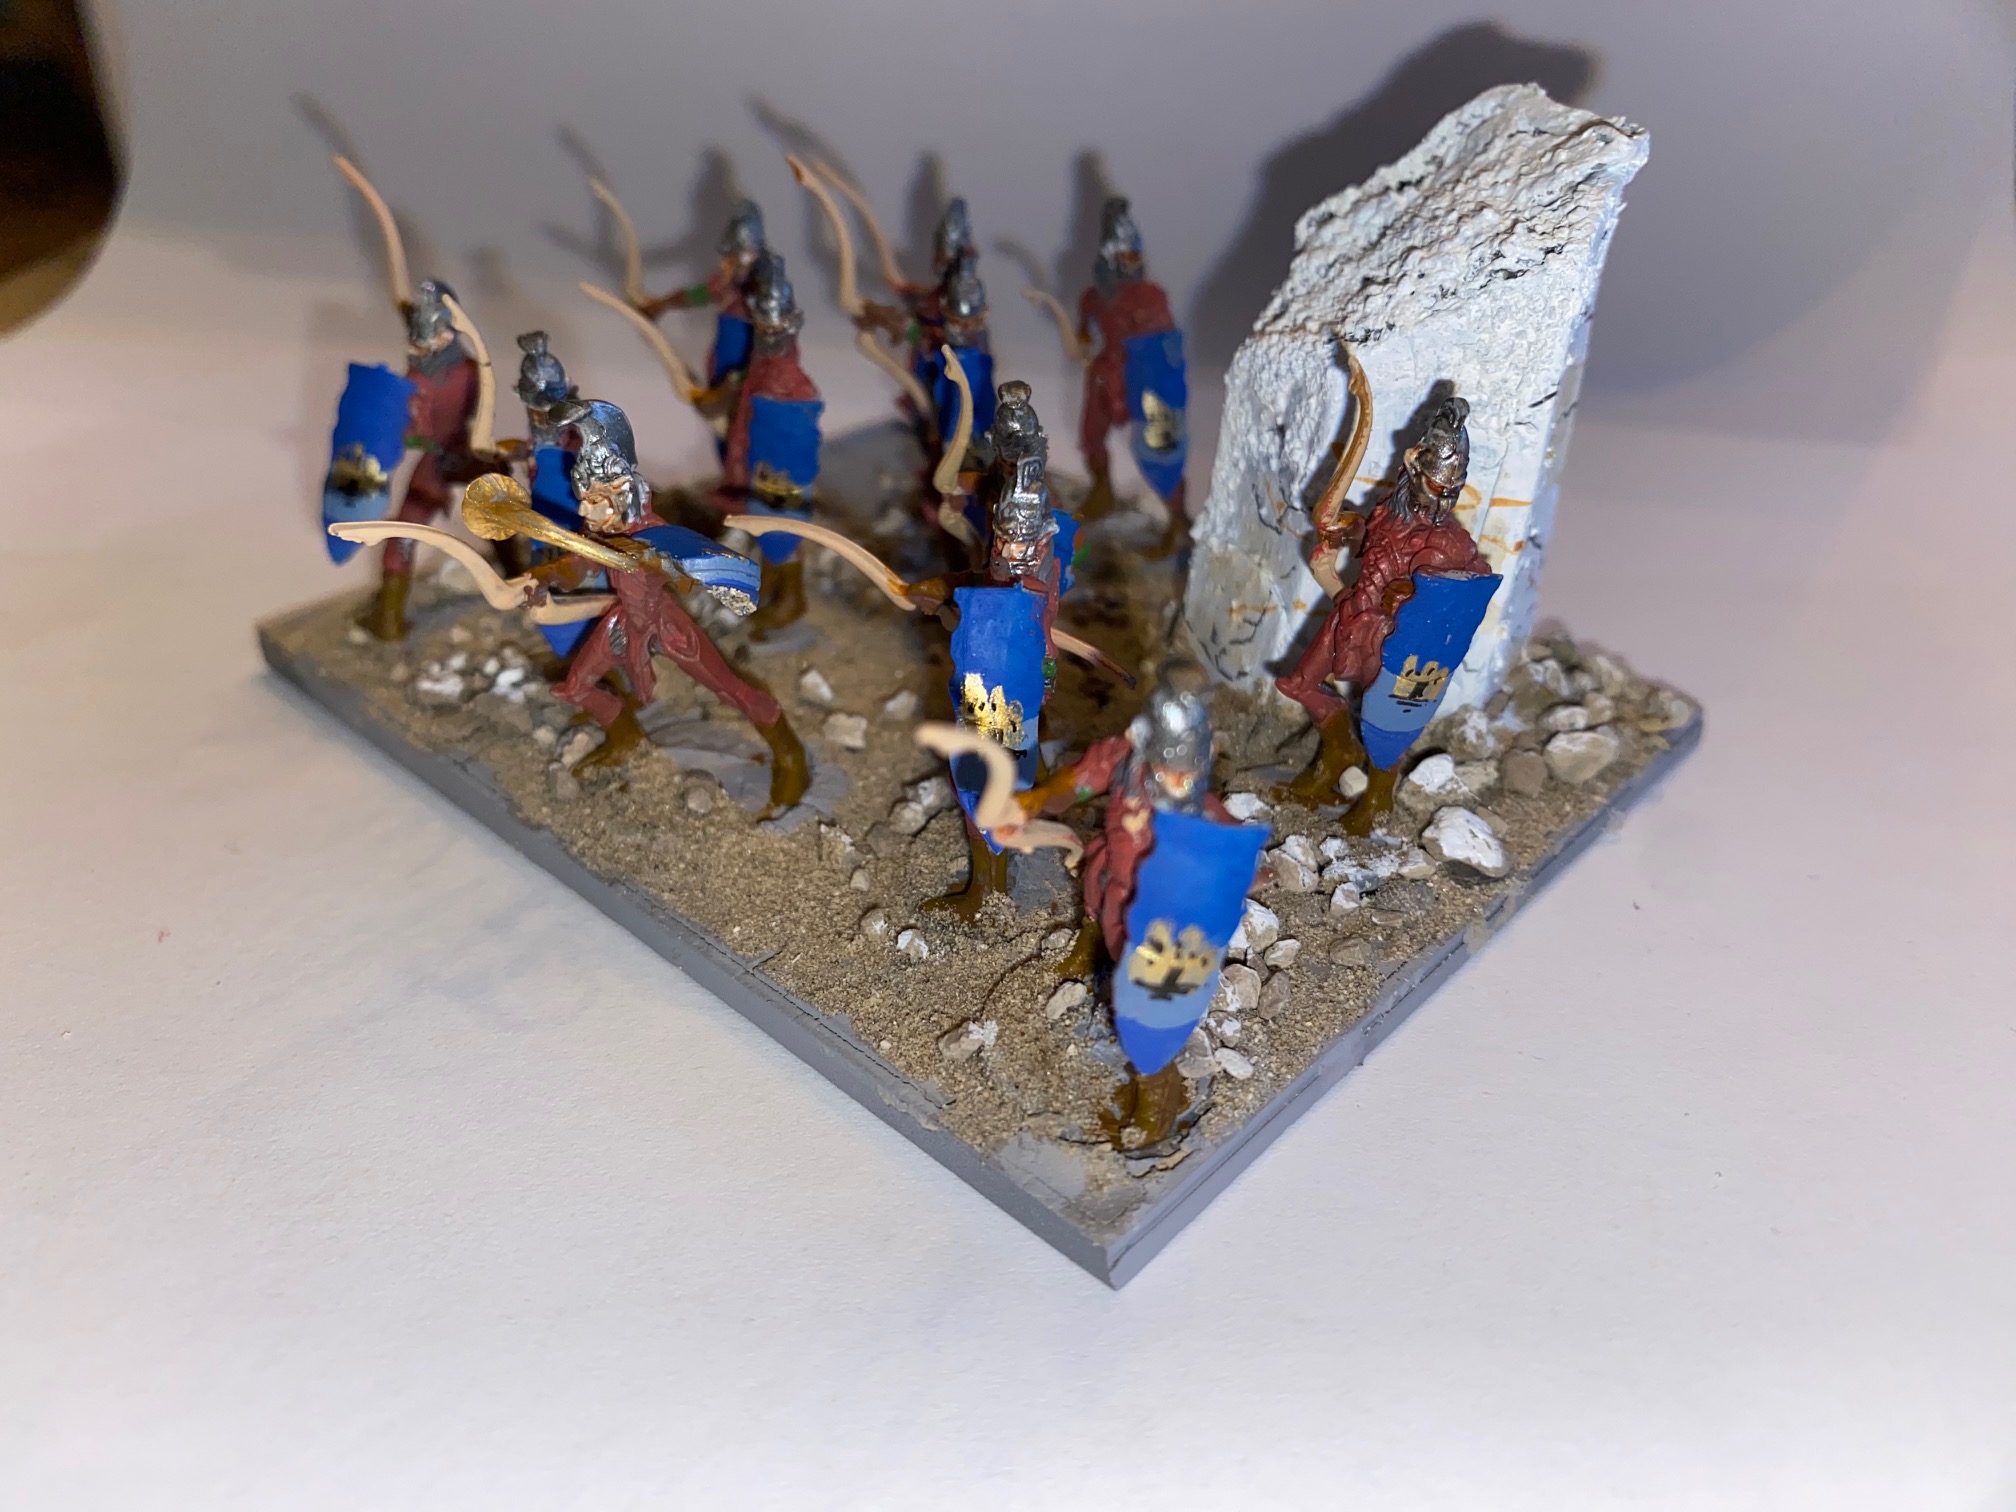
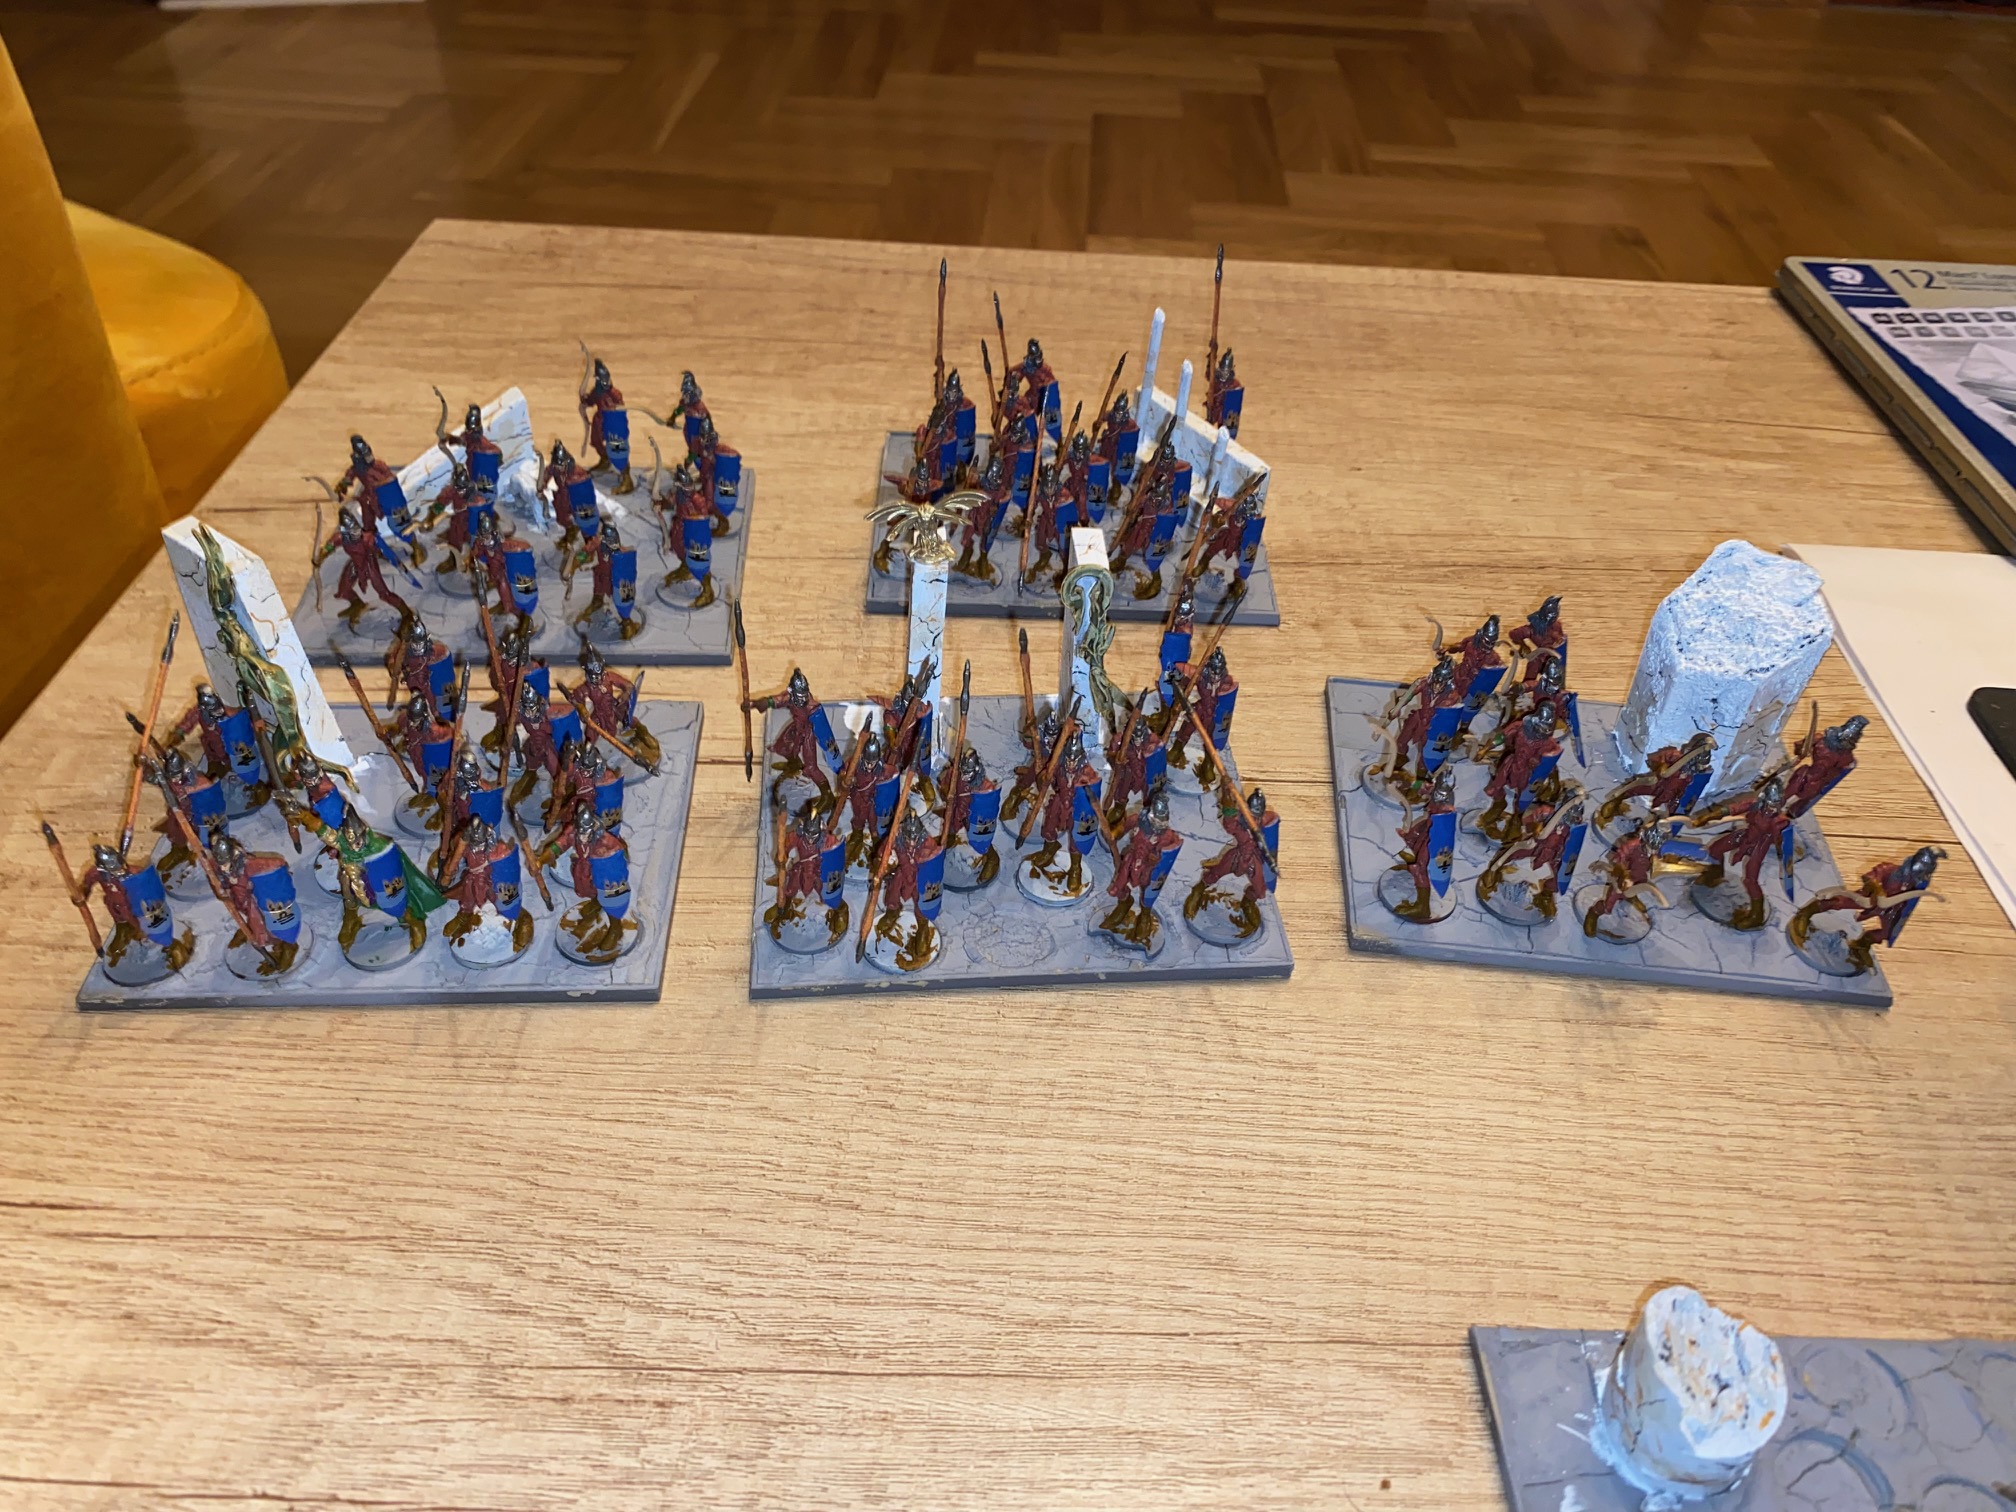
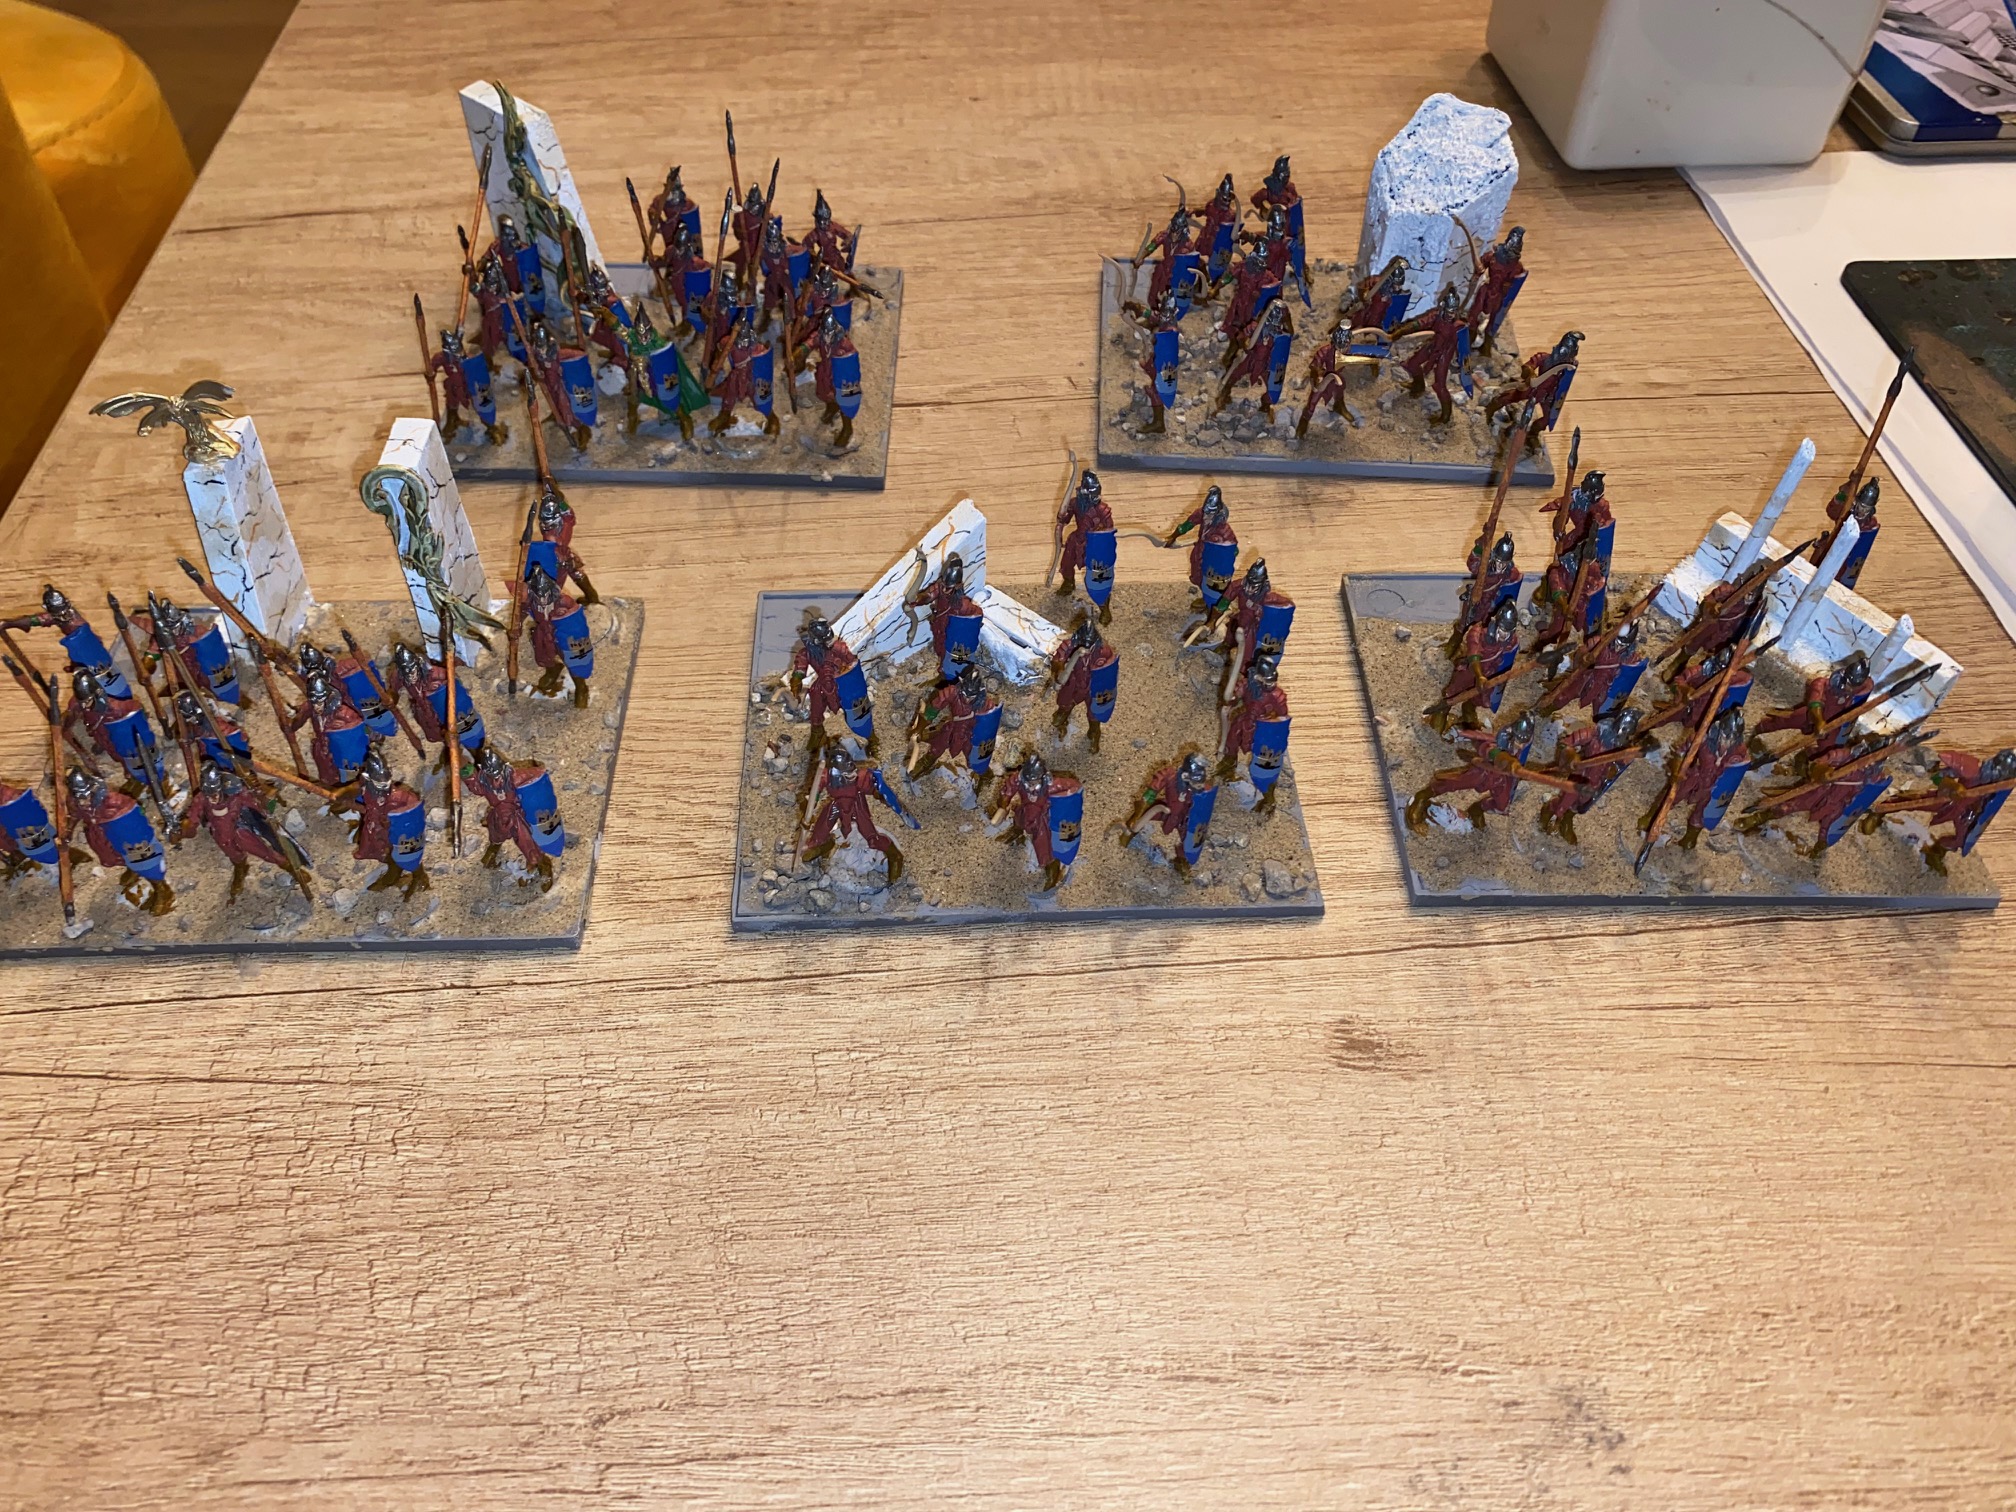
The Quallarion: Elves of the Fallen City
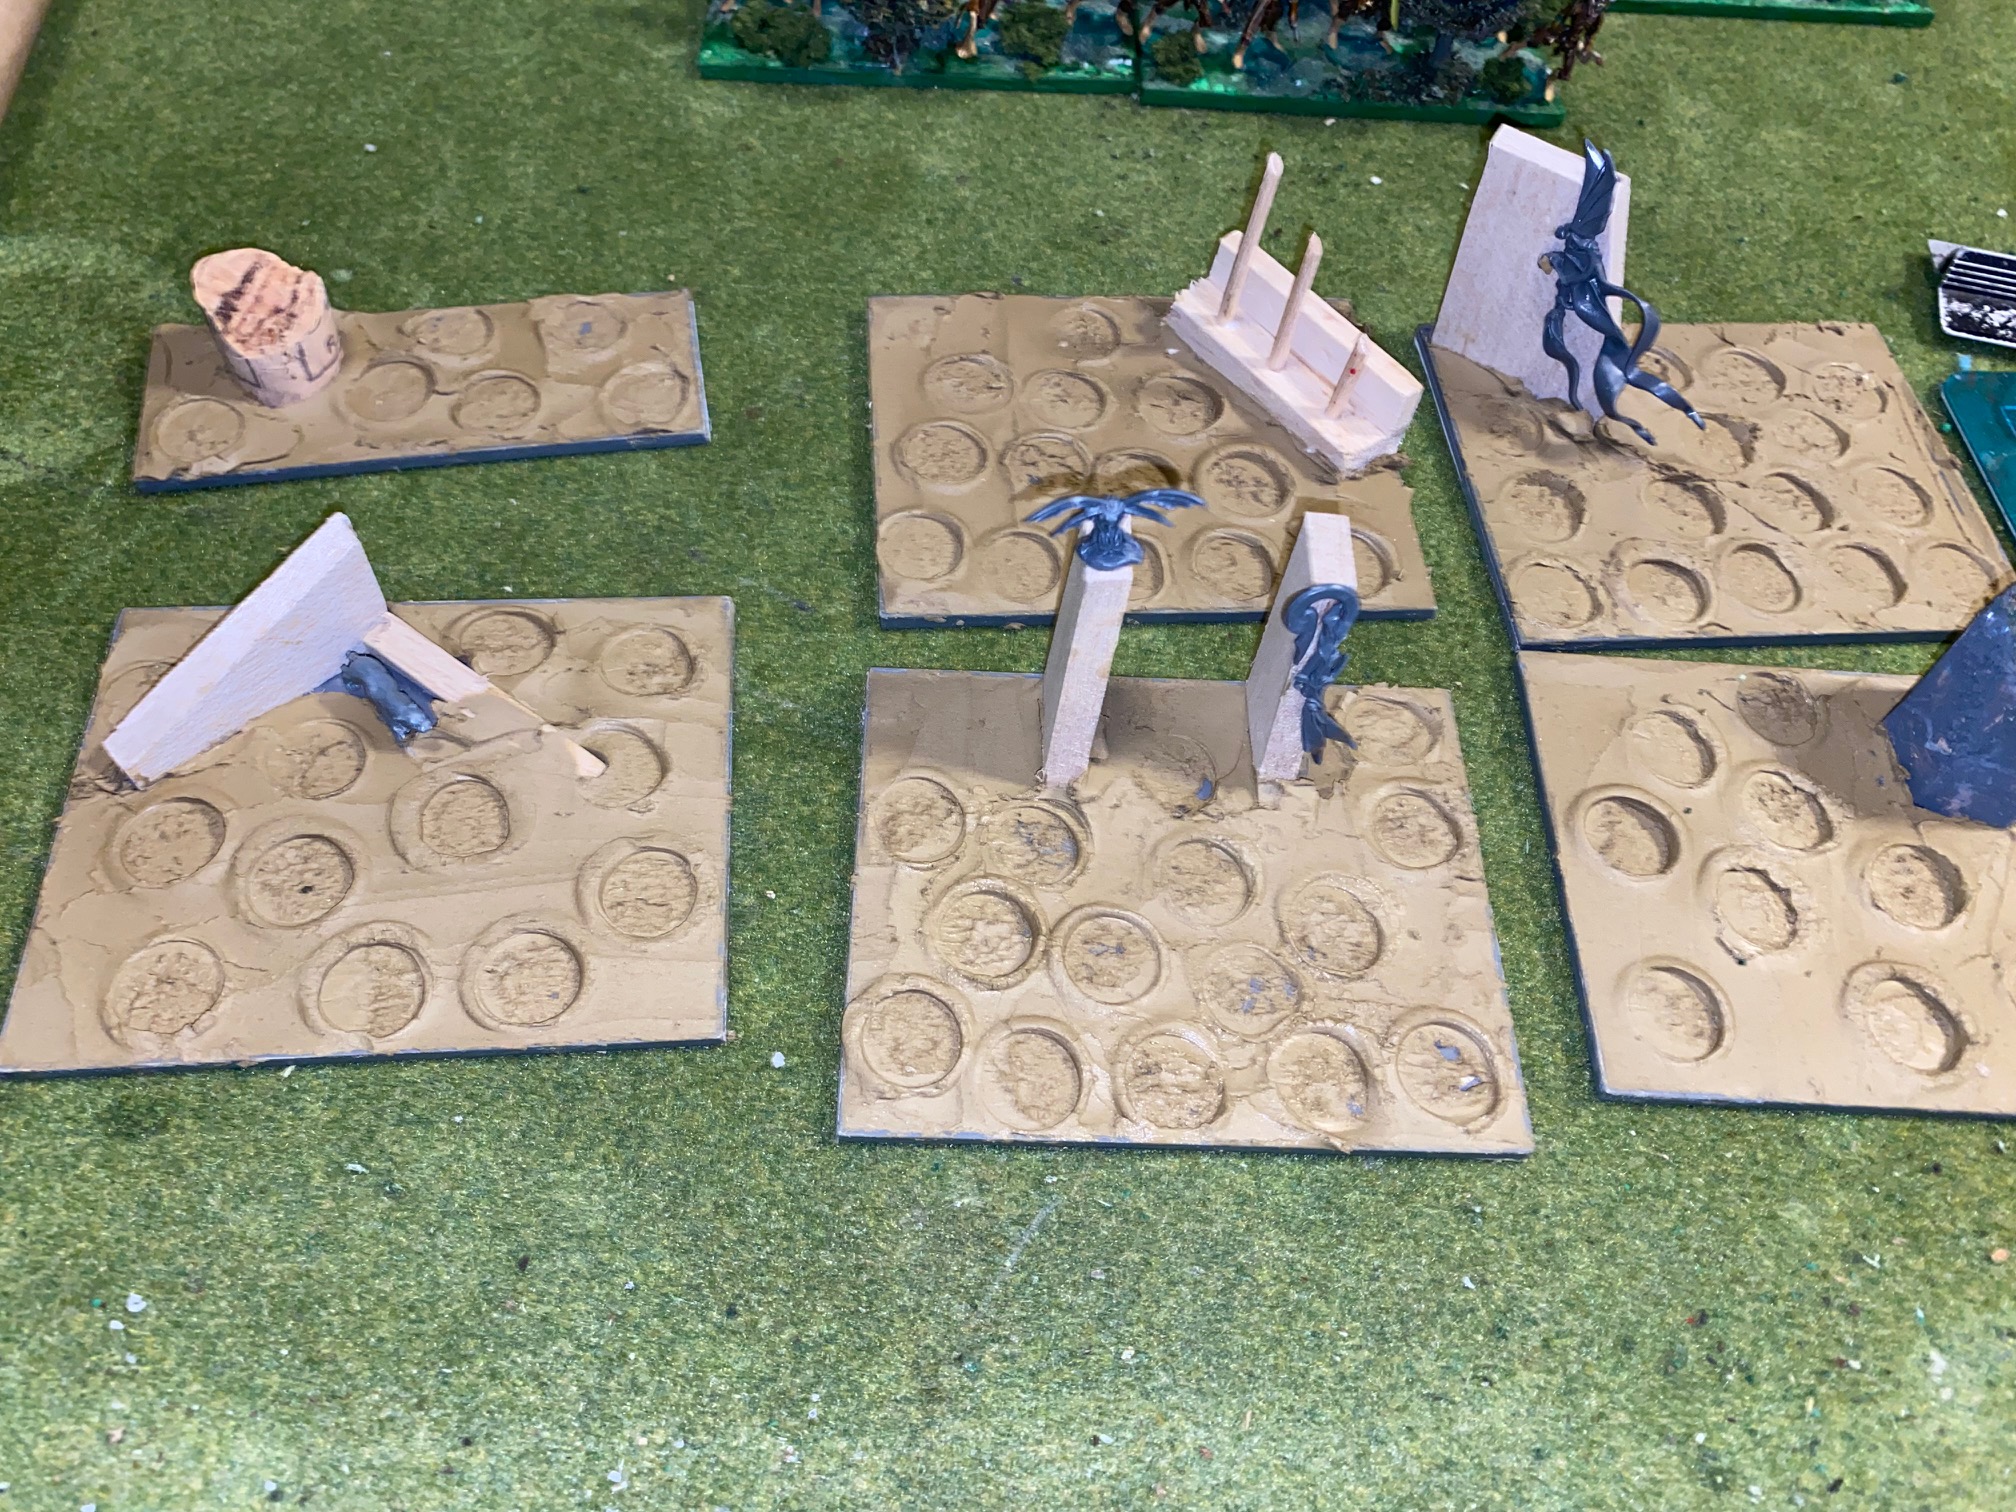
The second Elvish clan I wanted to be based around a city rather than a forest. So with this in mind, I want the bases to reflect an urban environment. So using the Mantic bases, I flipped them over as the underside of these bases is like a large container and glues down random pieces of balsa wood to resemble walls, gates etc.
A broken cork from a wine bottle became a ruined pillar, and a Smarties hexagonal box became a more elaborate column. Some odds and ends from the “bits box” were glued to these pieces to add some additional “flavour”
The air-drying clay was smoothed out onto the bases and as with the previous bases, once it had begun to dry out a little, depressions for the models was pressed into the clay to make the eventual sticking down of the figures easier later.
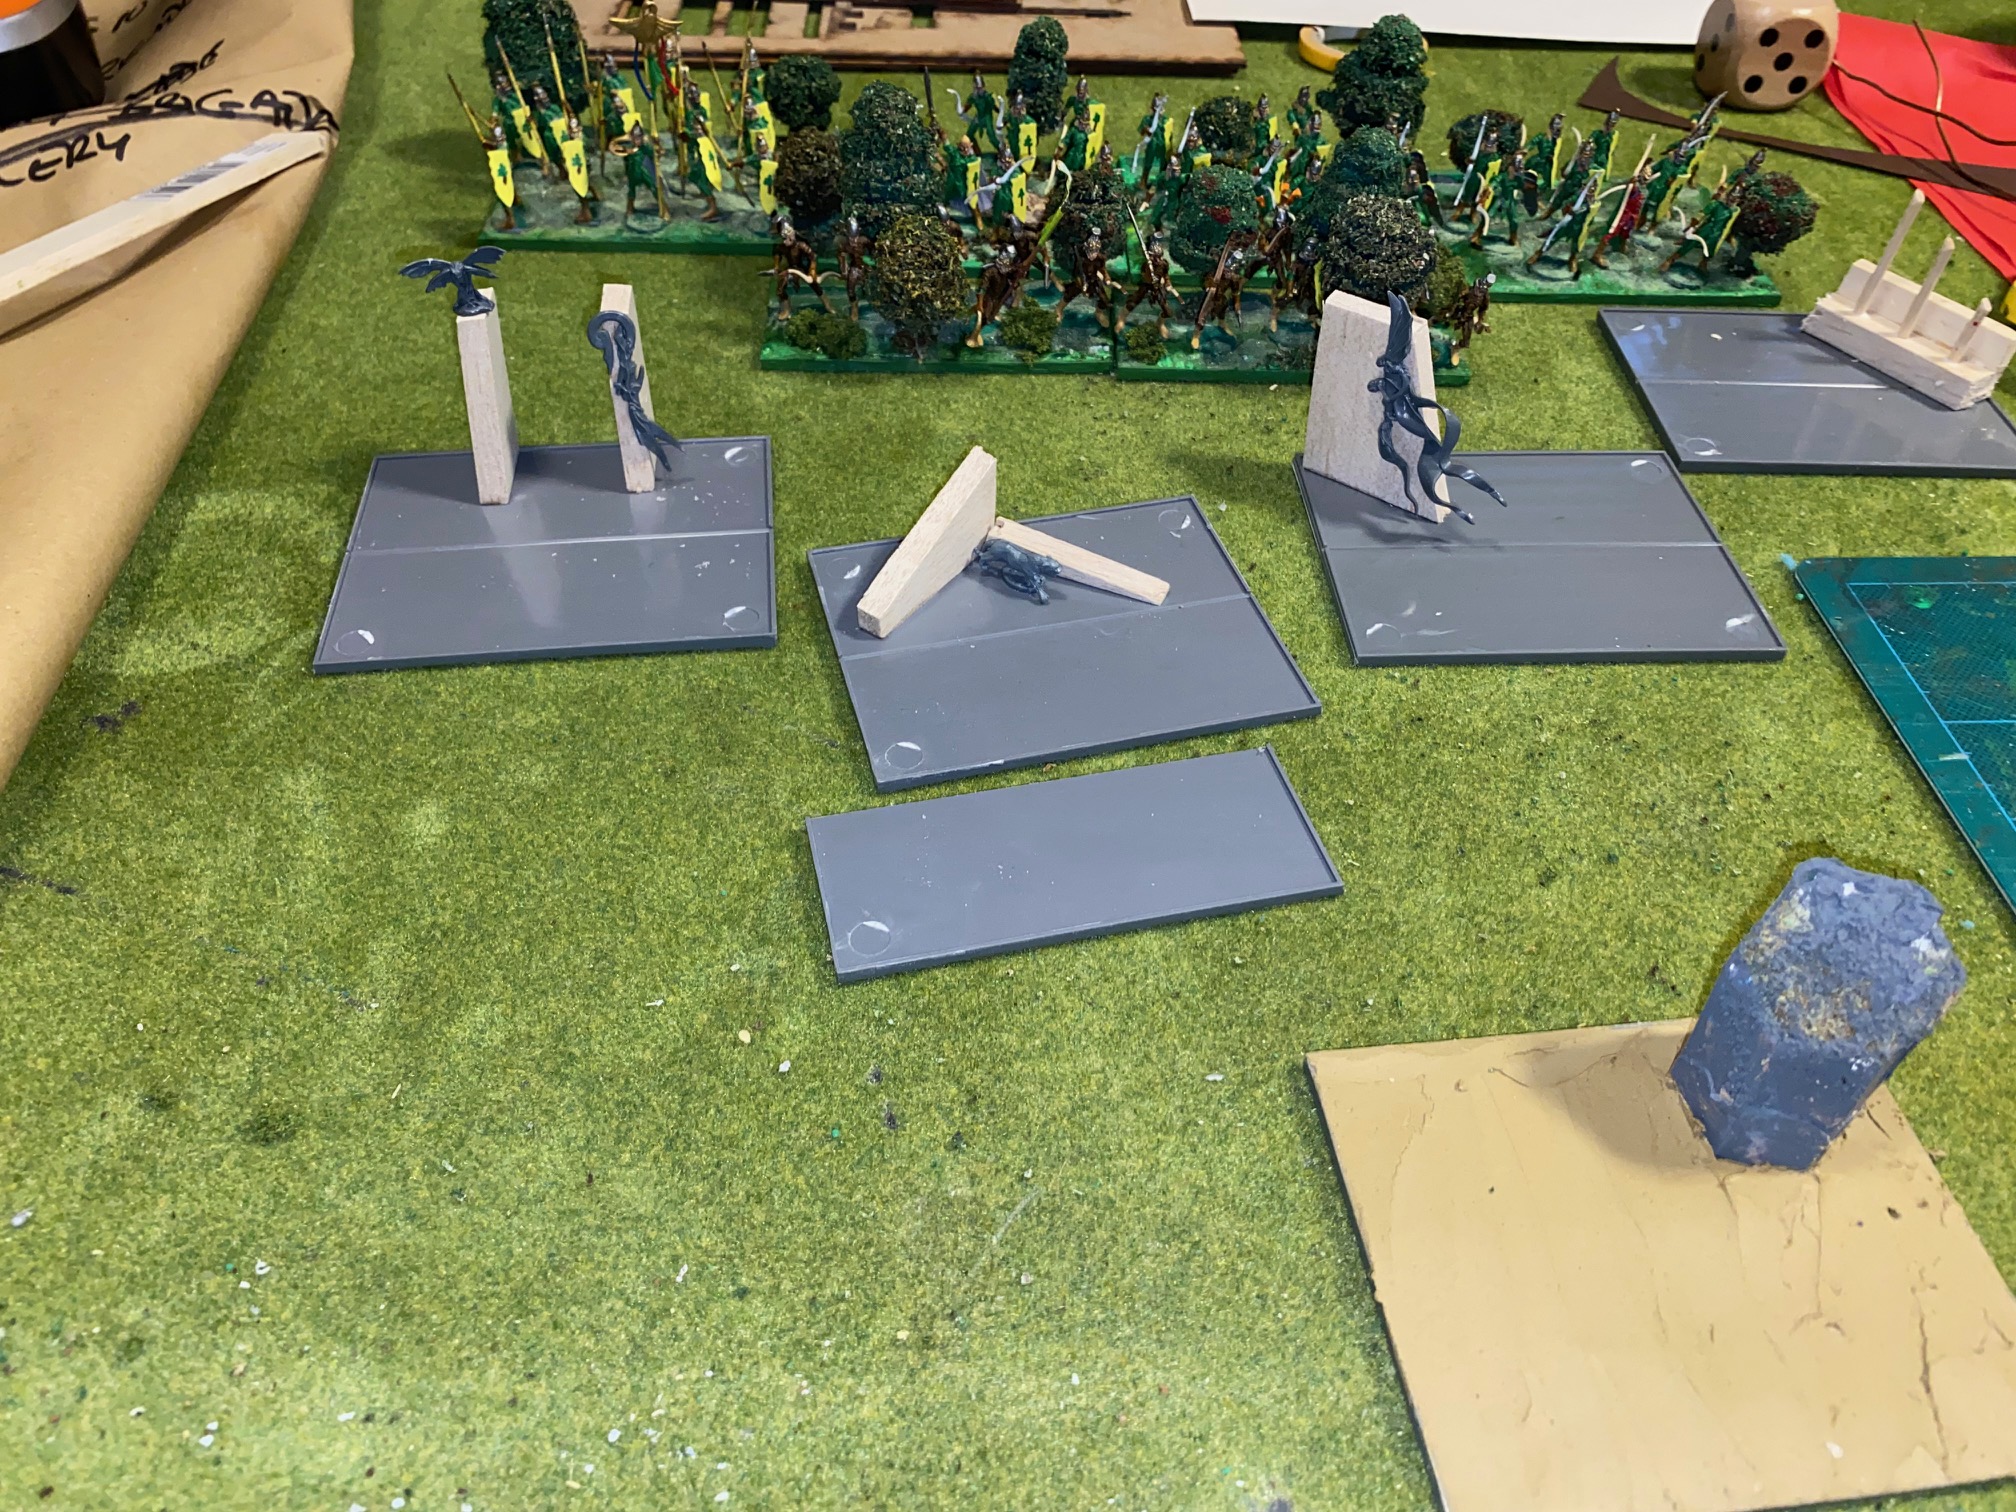
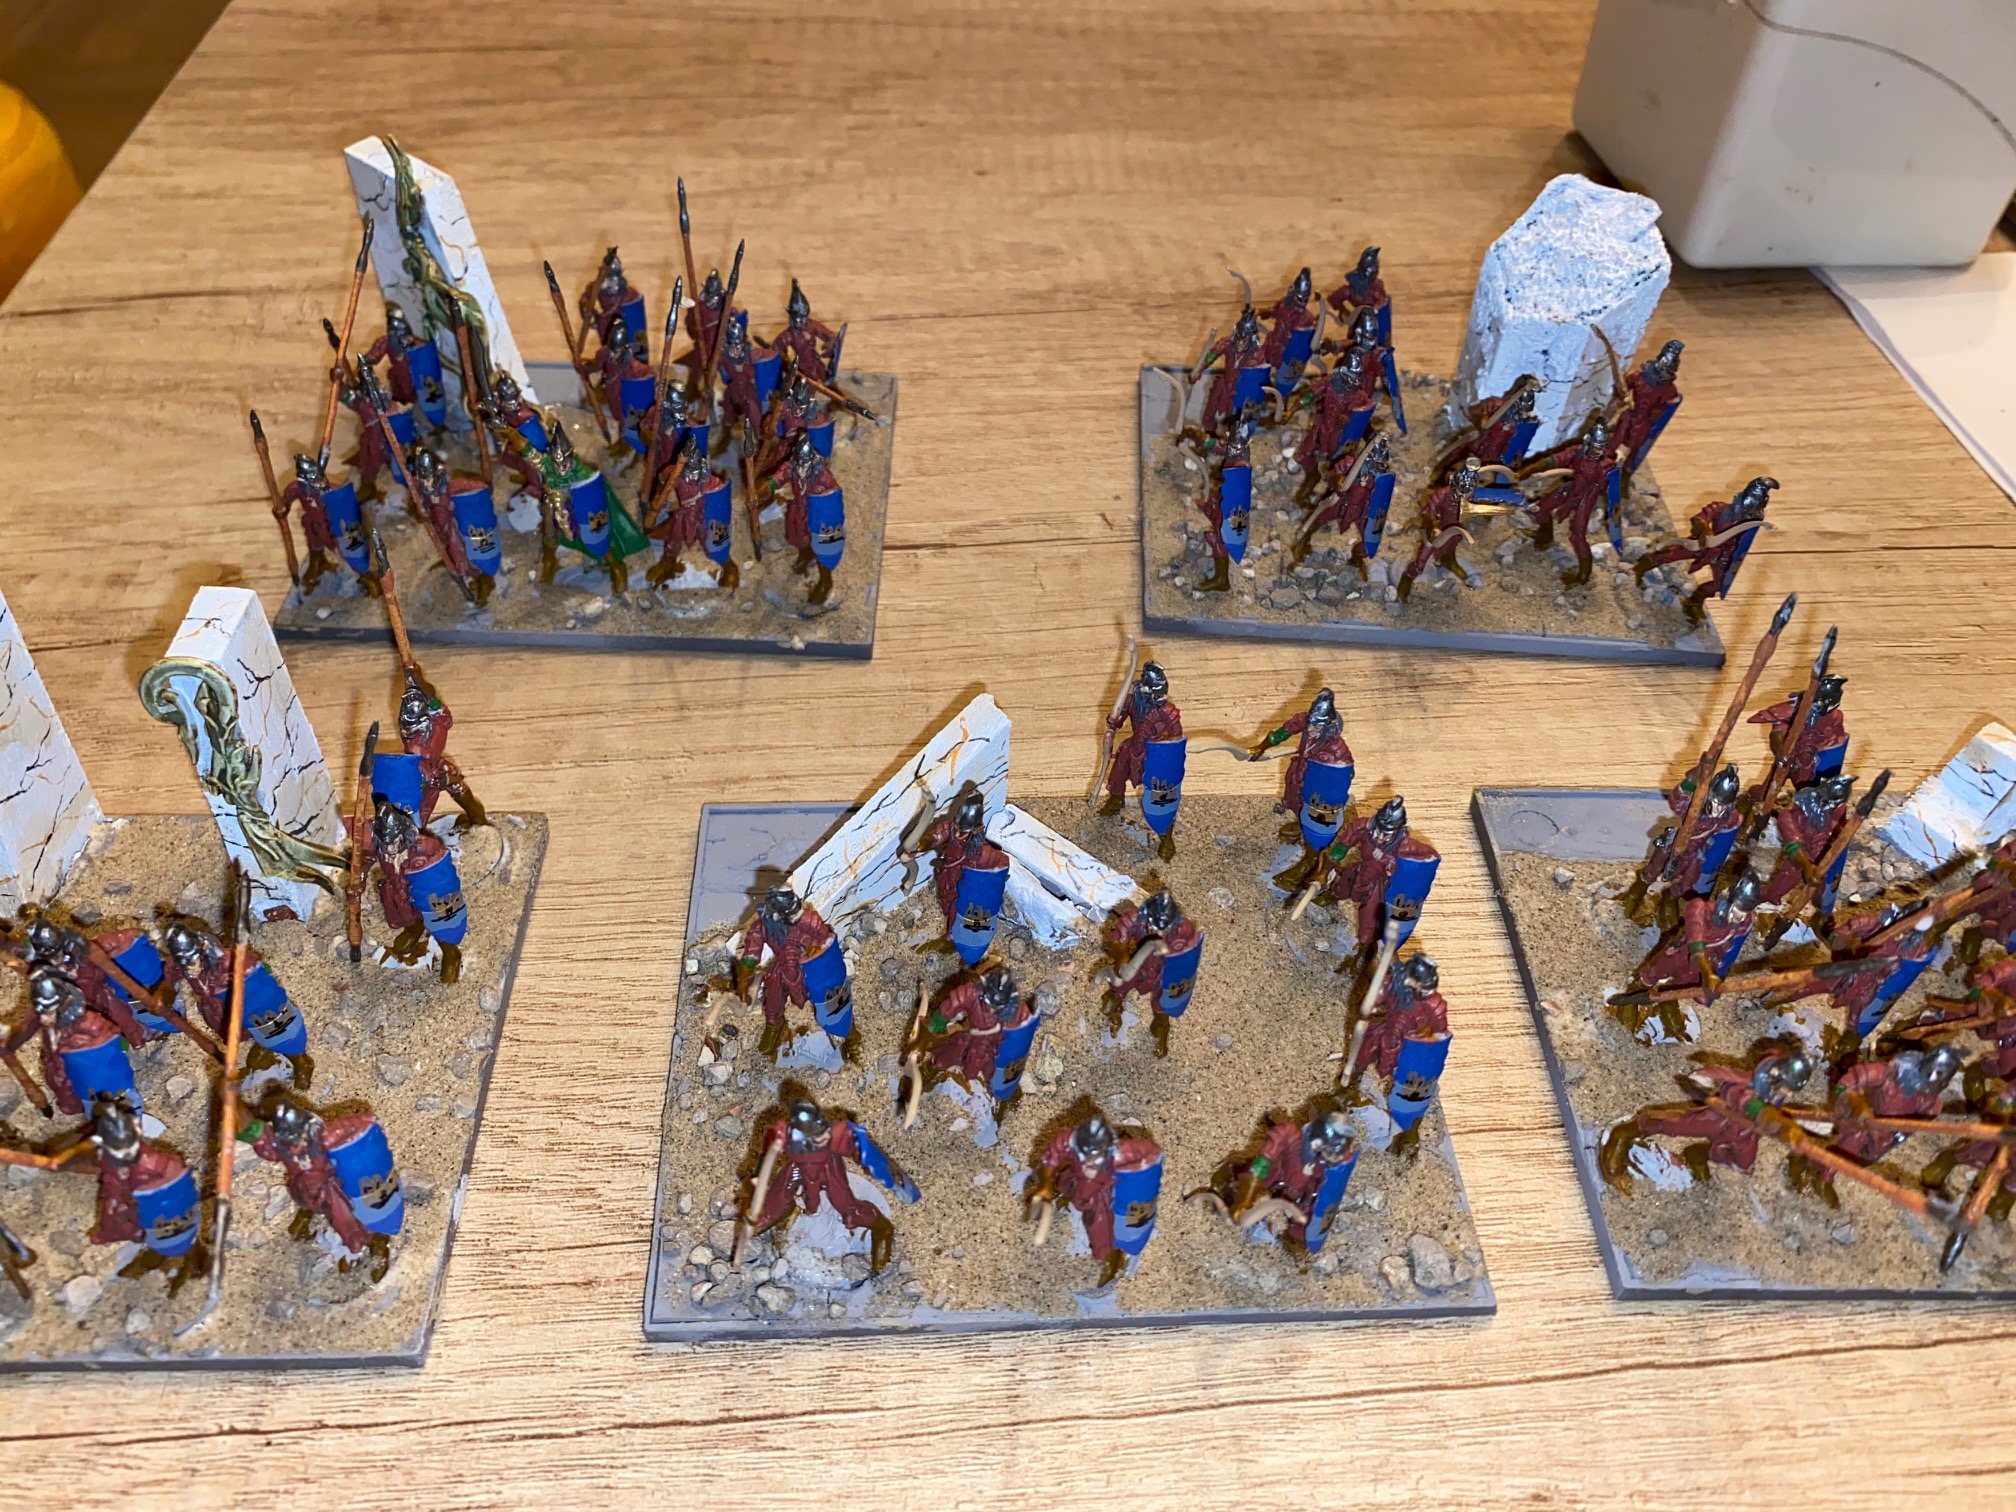
For the walls themselves I decided to try and make them look like marble. I search online for images and decided on a white/cream marble with two treads of contrasting color running through it.
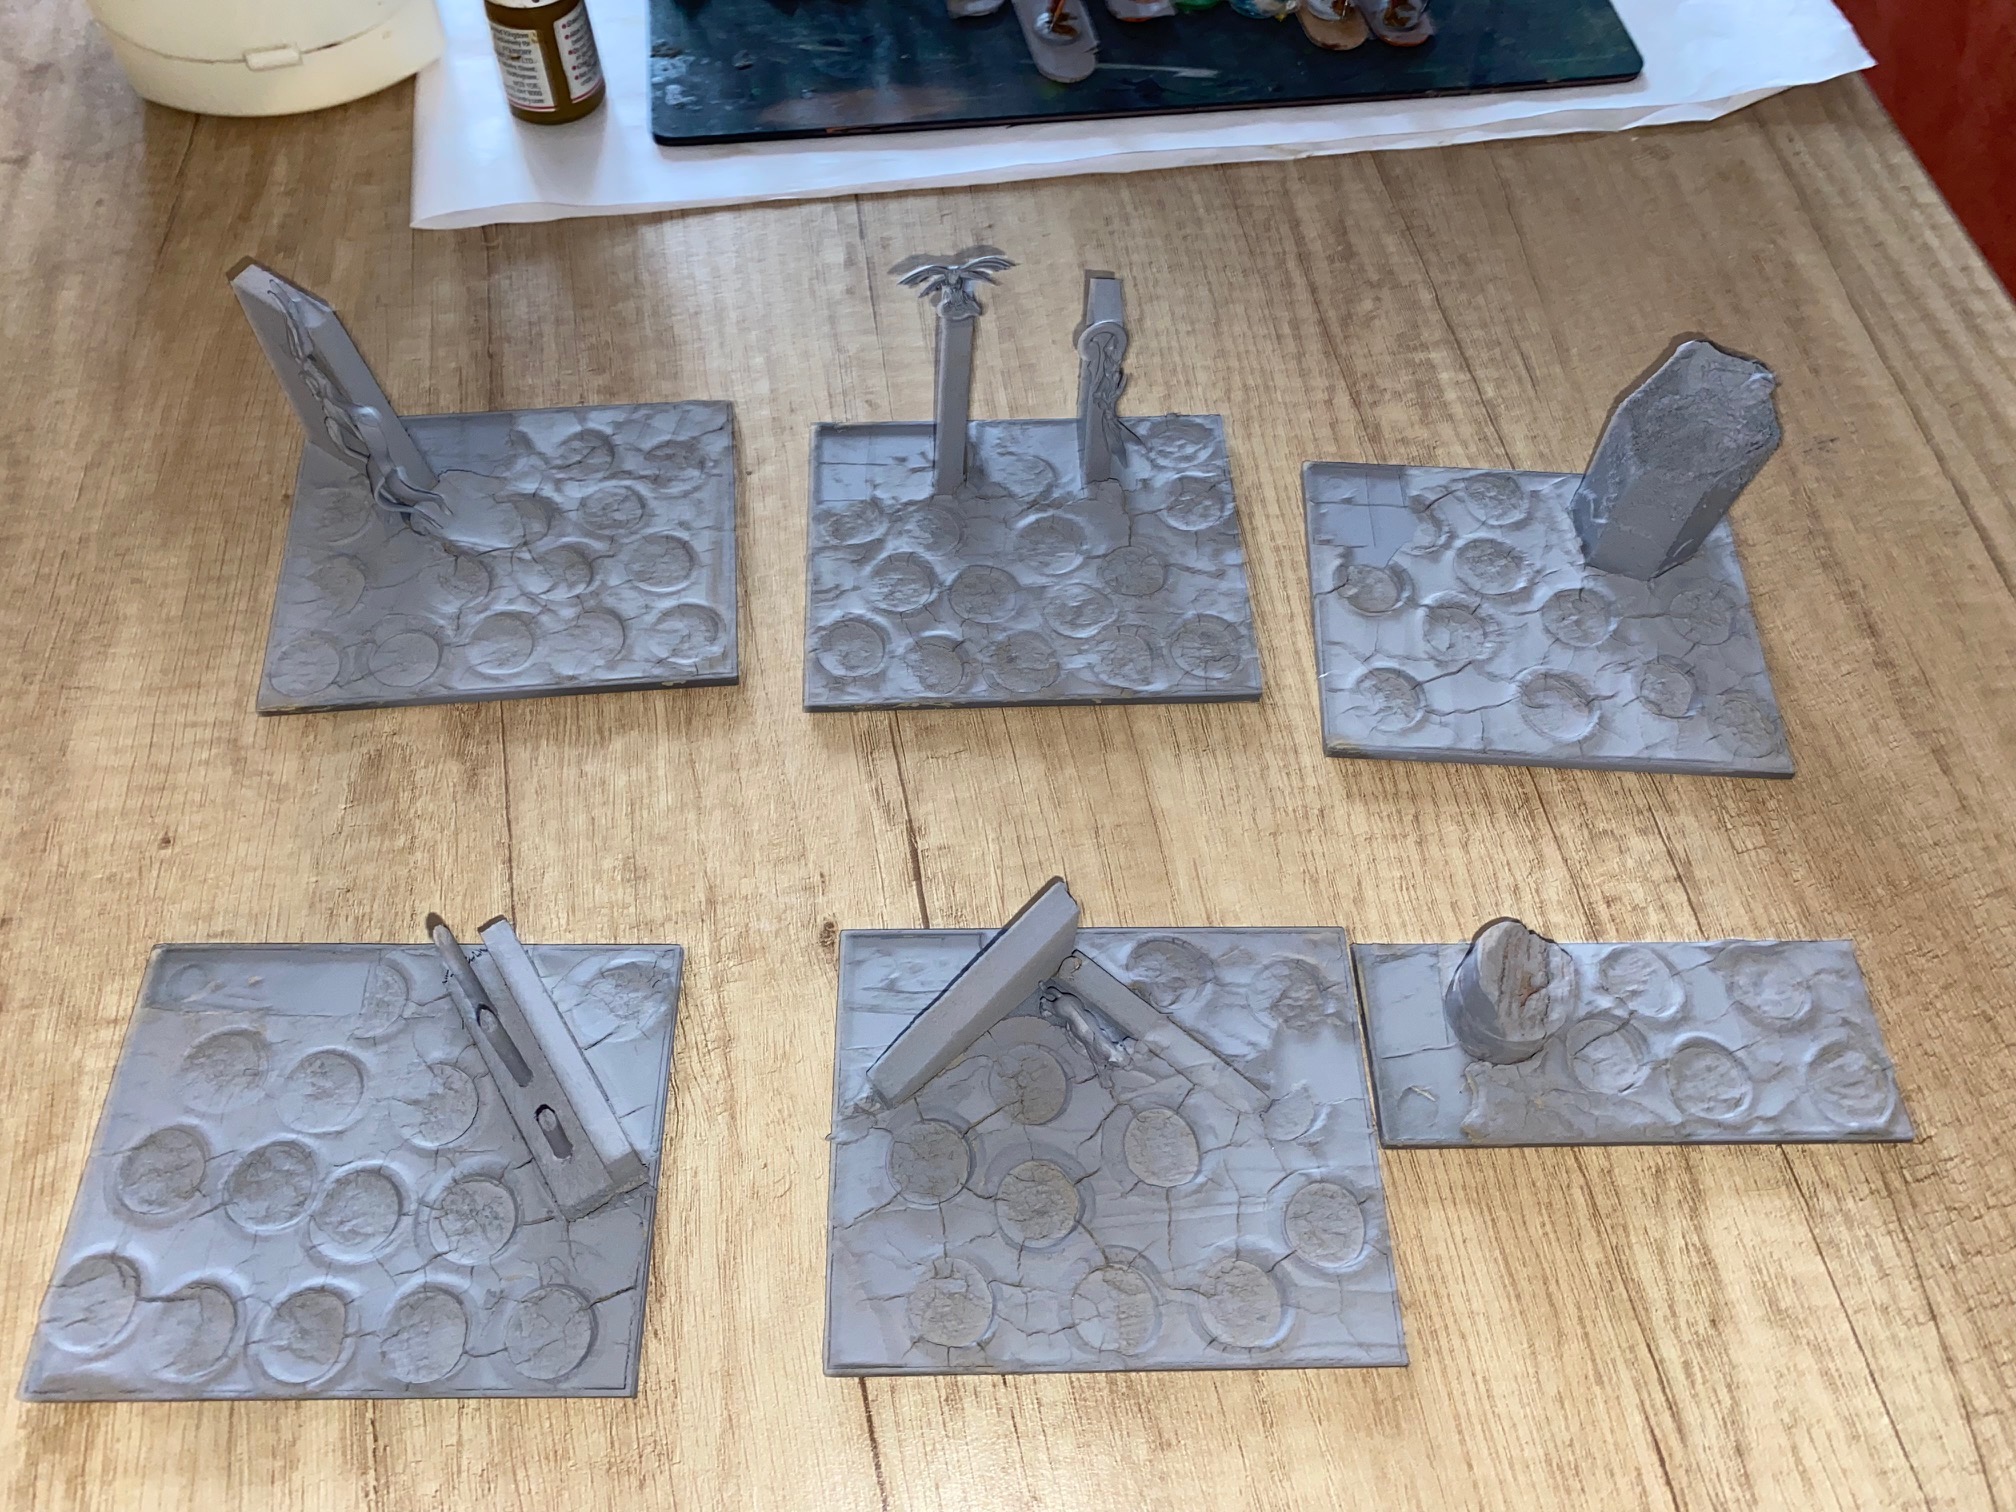
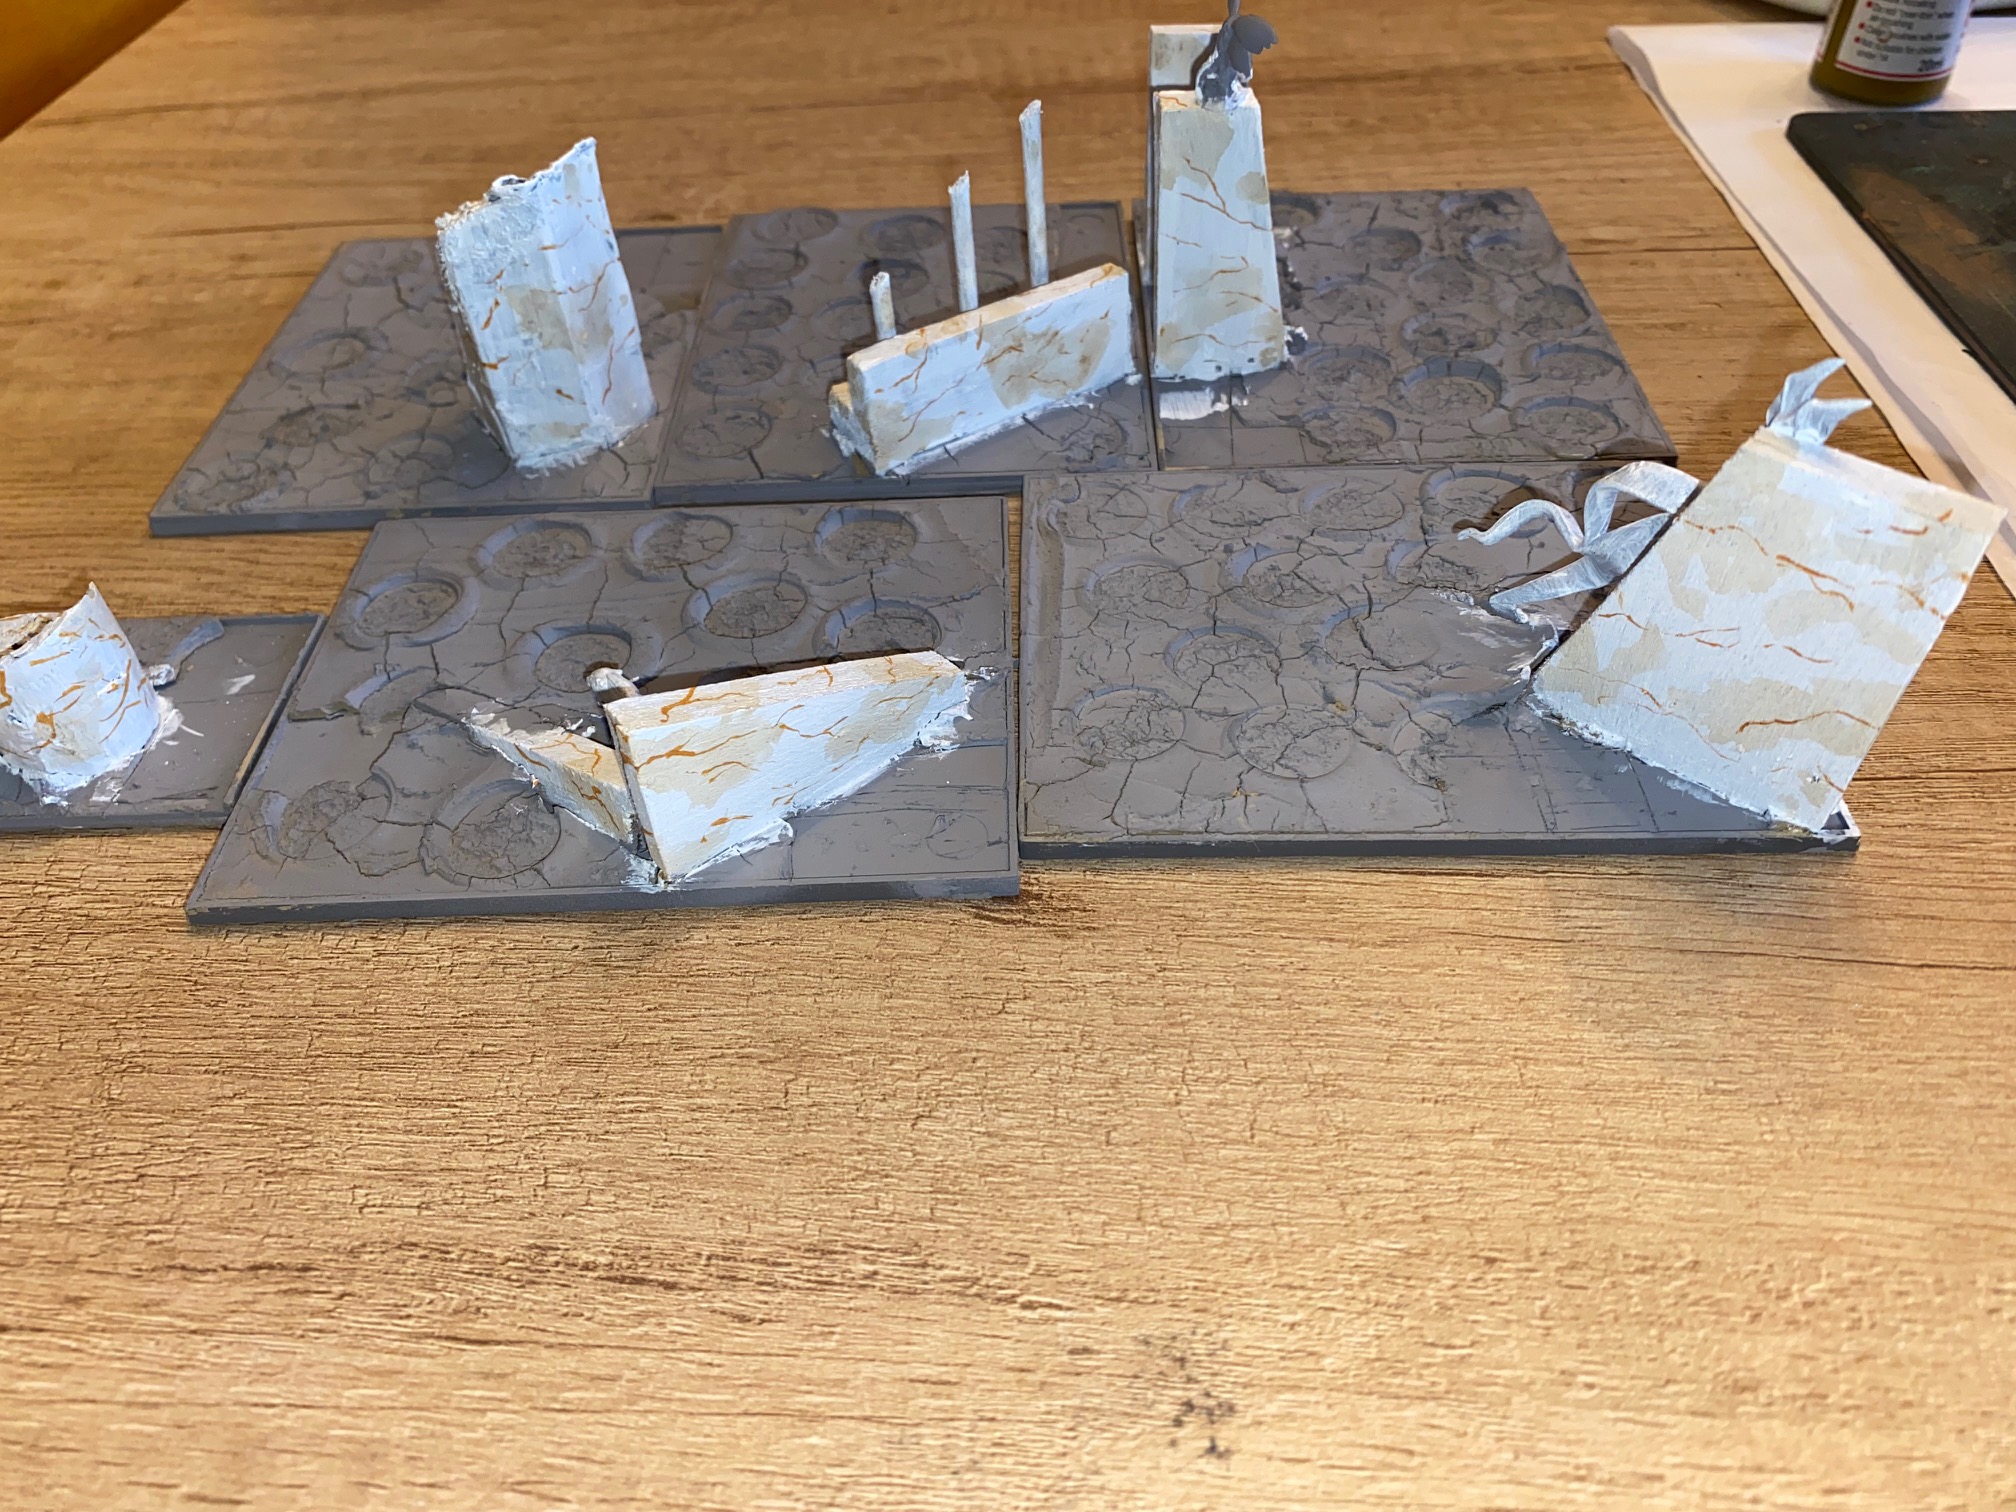
To prepare the stonework, the walls etc. were painted with three layers of acrylic white paint (standard art supplies) and one this was fully dry I diluted some Sepia Shade (Vallejo 73.200) and applied this in random patches on the surfaces of the structures.
I then mixed a brown/orange color from Vallejo Flat Brown (70.984) and Pale Flesh (72.003) to make a kind of lighter brown and using a small brush applied random lines of color to the different structures.
Once this had also dried, a final mix of Vallejo German Grey (70.995) with a touch of Ultramarine (72.022) was then applied as a contrast colour.


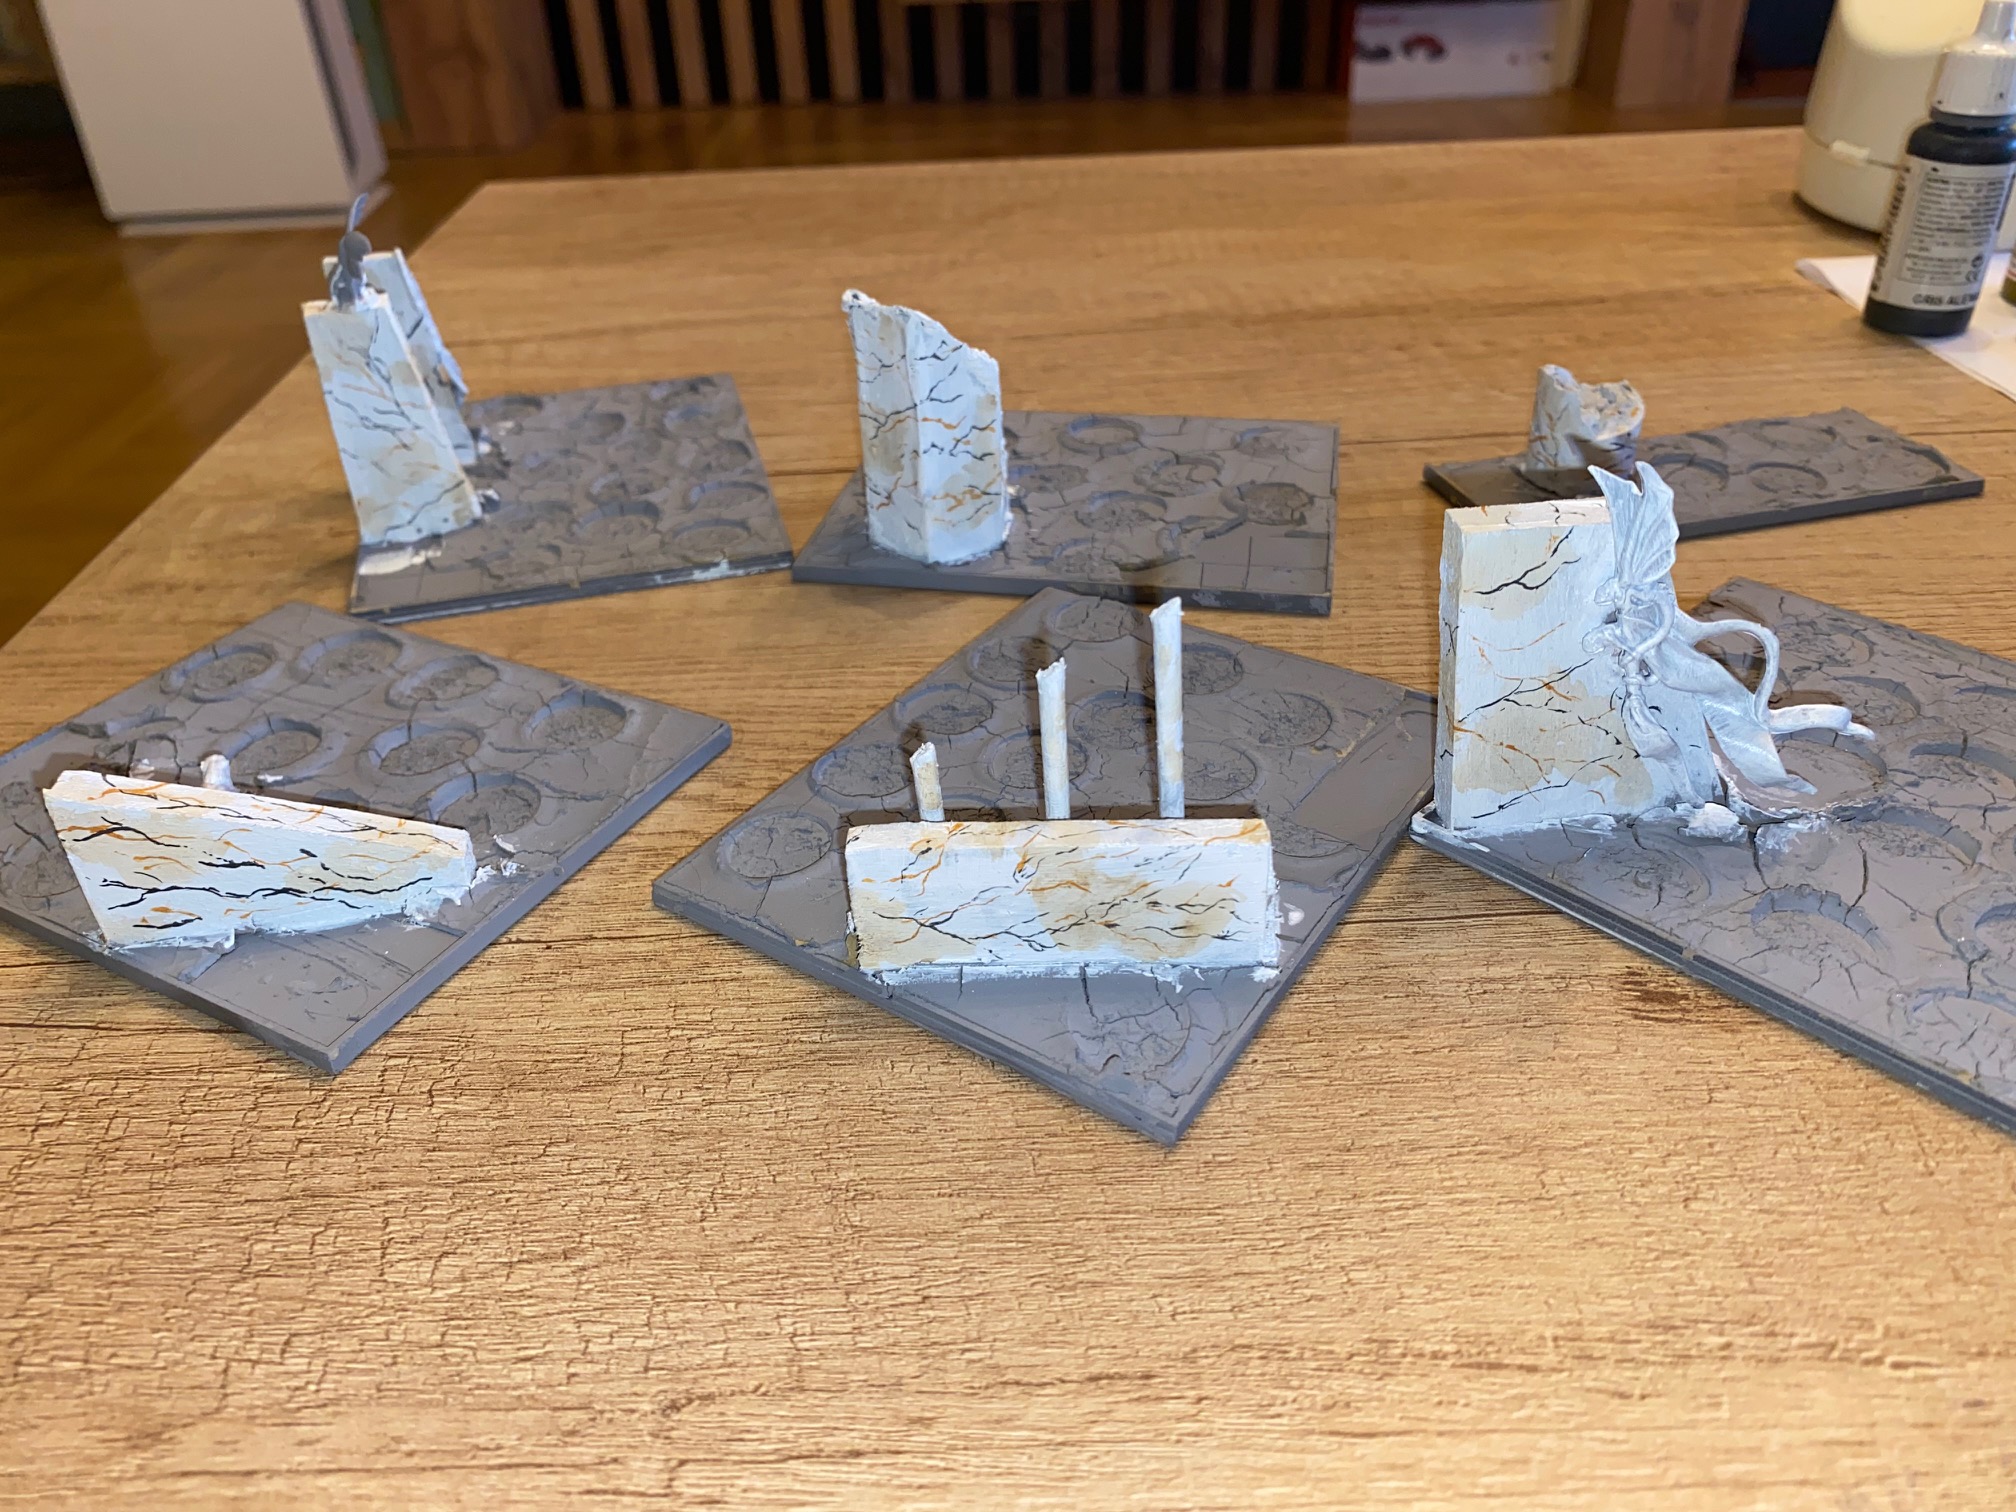
The final stage will be to add some gloss or satin varnish to the structures once everything is dried fully.
The actual models are almost finished and the next post will be the finished bases which will comprise three units of Tallspears and two of Archers, together with a troop of two-handed weapons.
In the meantime Happy Gaming!
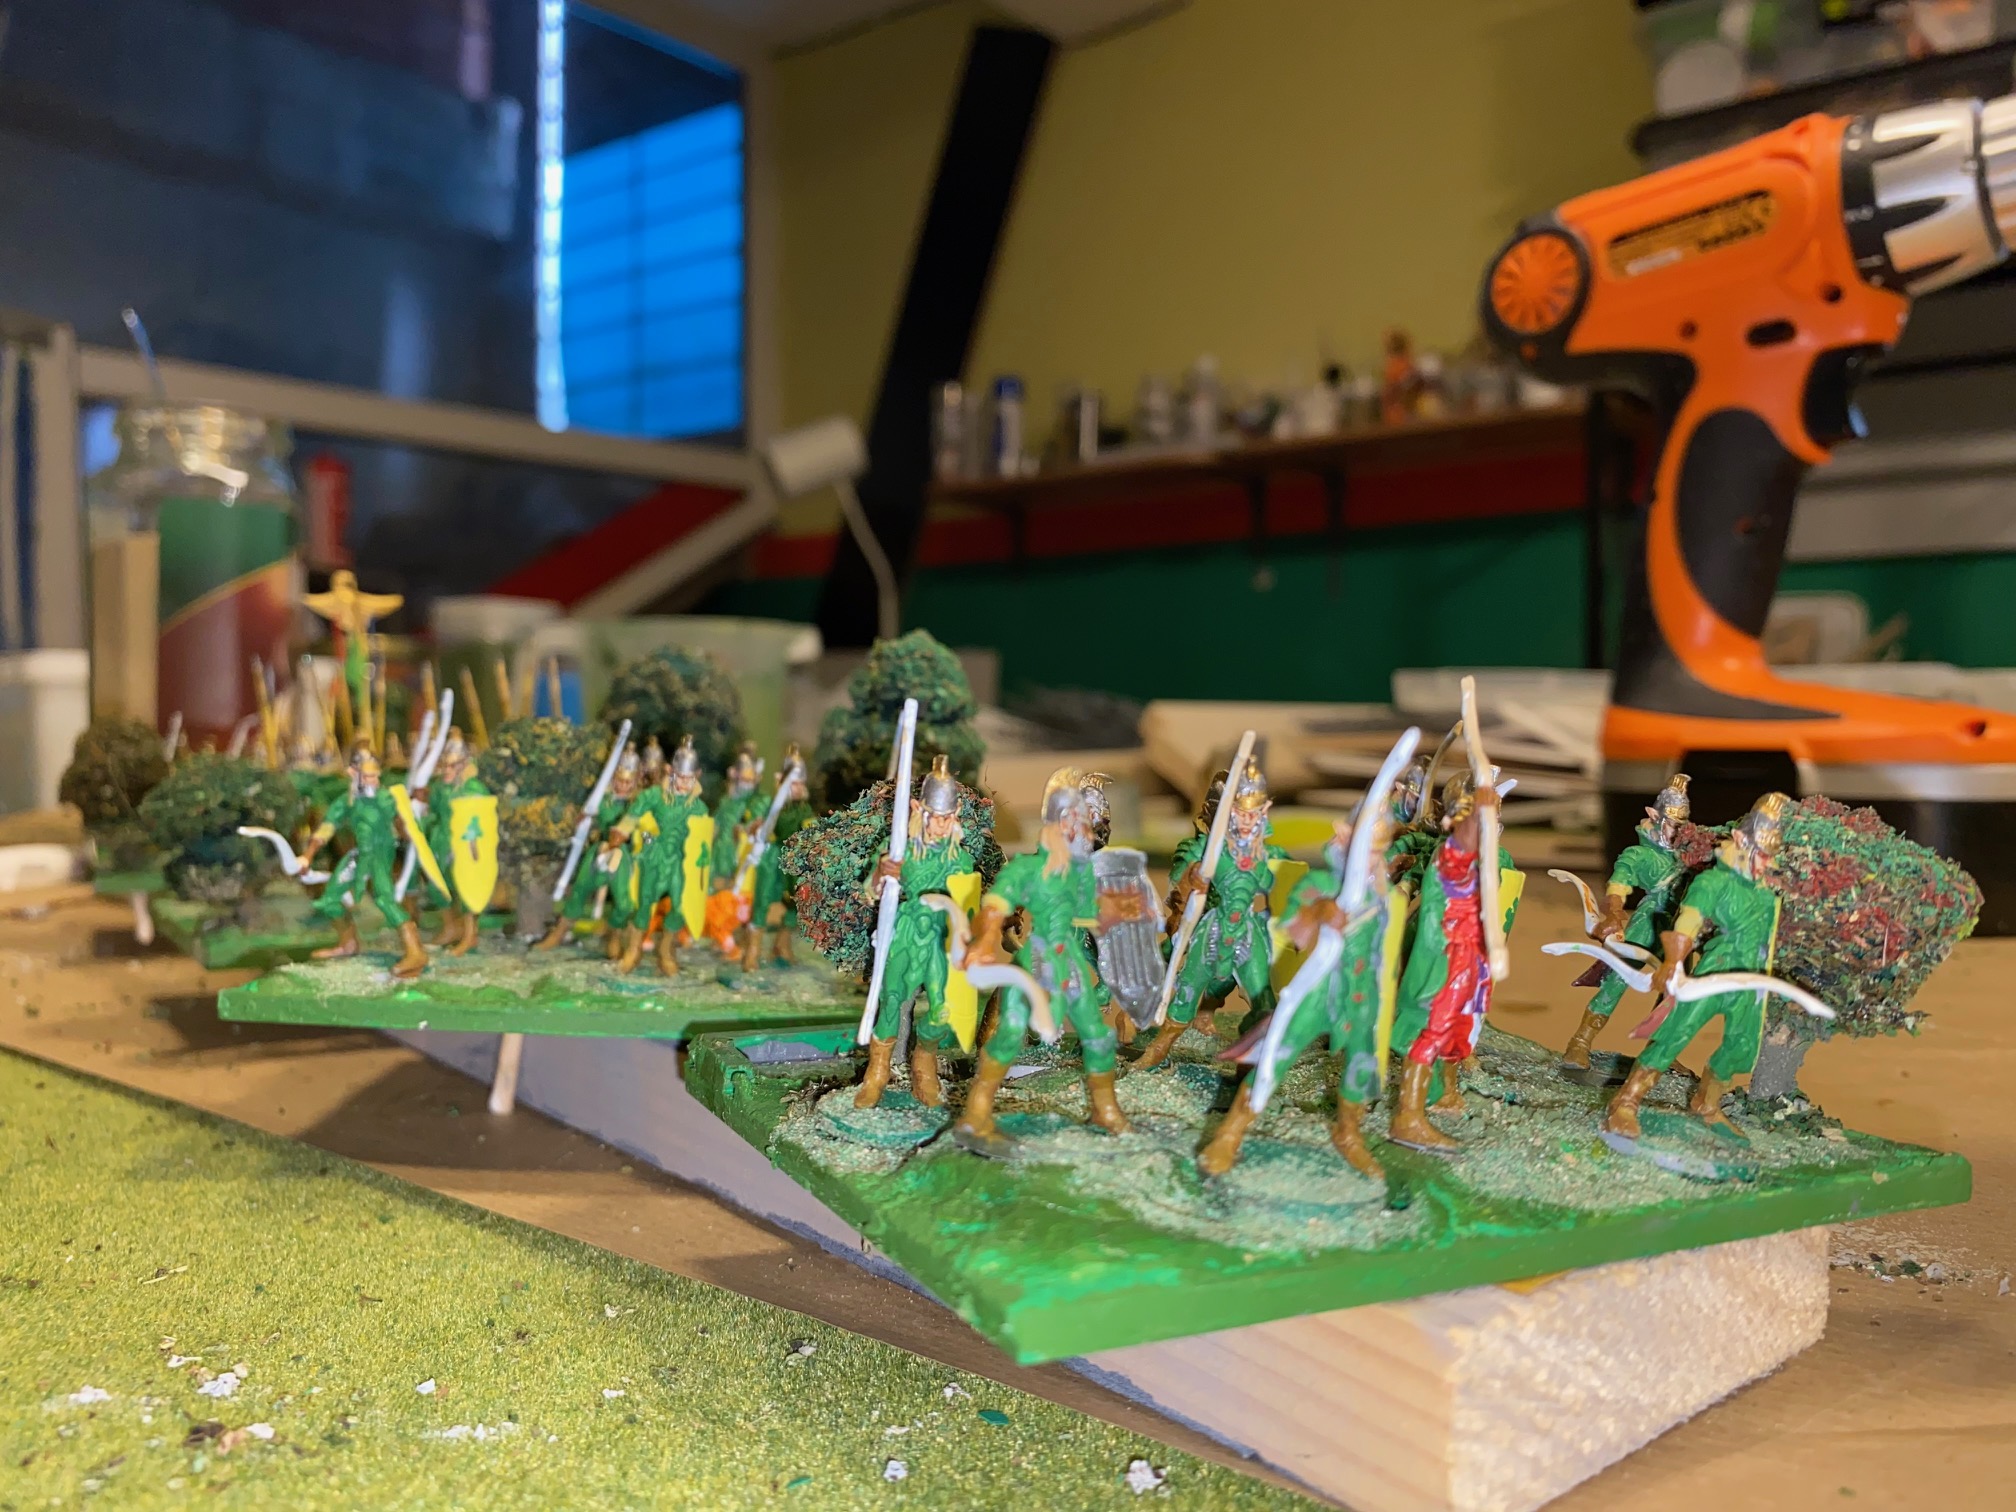
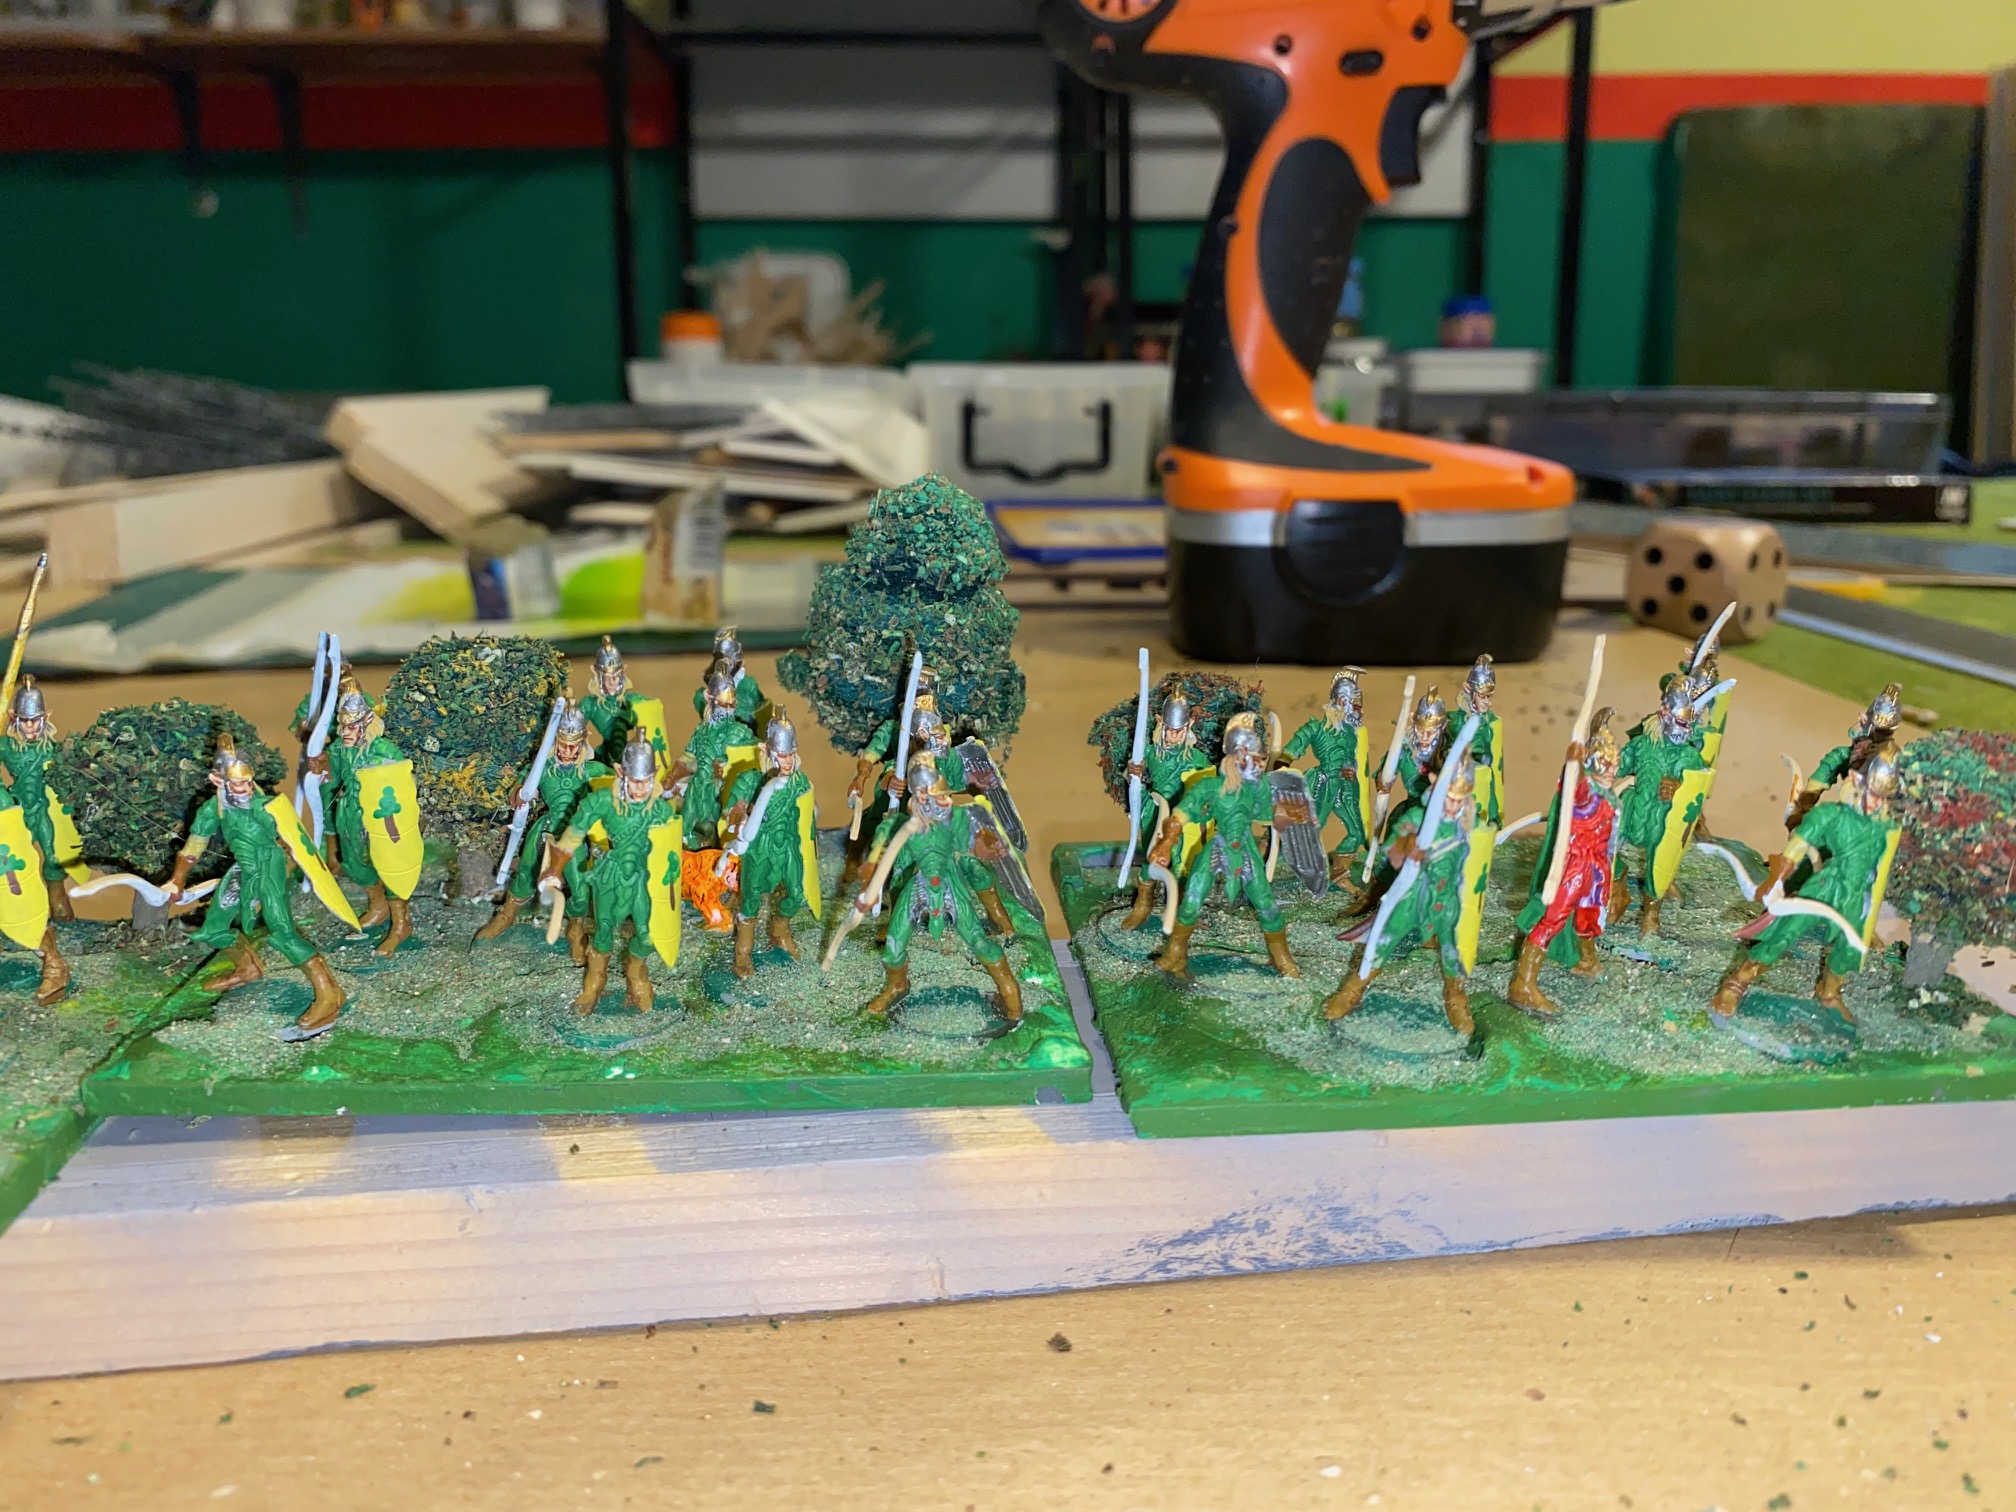
Gladestalkers
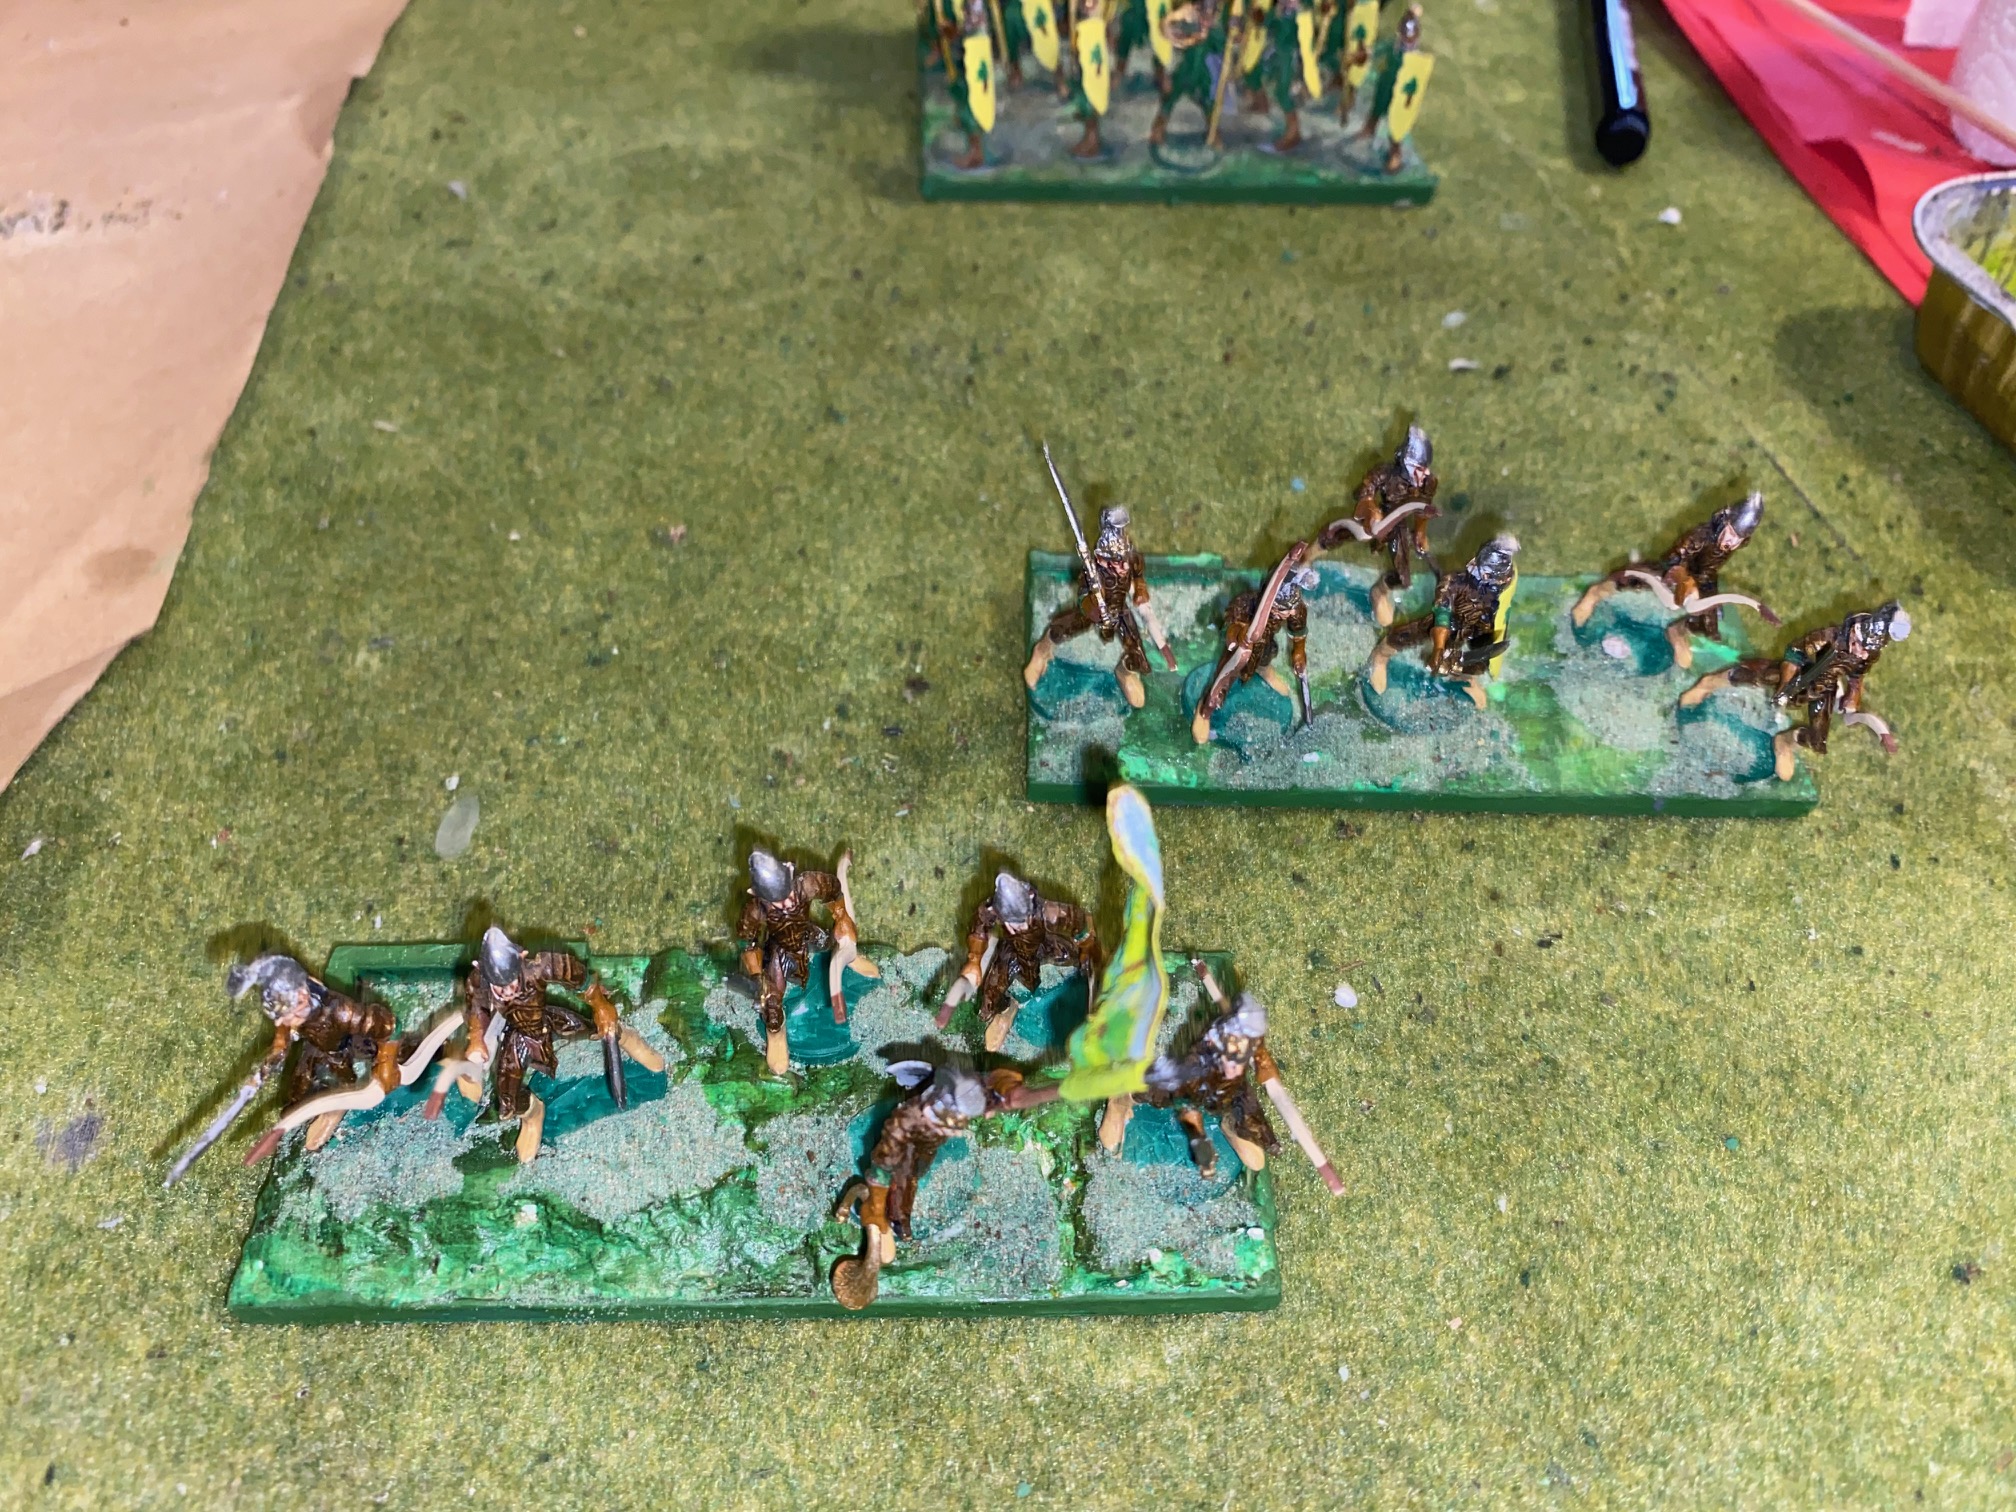
The Gladestalkers were painted in a similar way to the other main units except I tried to make their armor appear like leather, rather than Elven plate.
I picked up a Vallejo paint set for Wood and Leather which has a leaflet with some guidelines on painting various sorts of wood and leather authored by Angel Giraldez. The instructions are fairly easy to follow.
The finished paint job was a little darker than I had anticipated, but I liked the result anyway, so no loss.
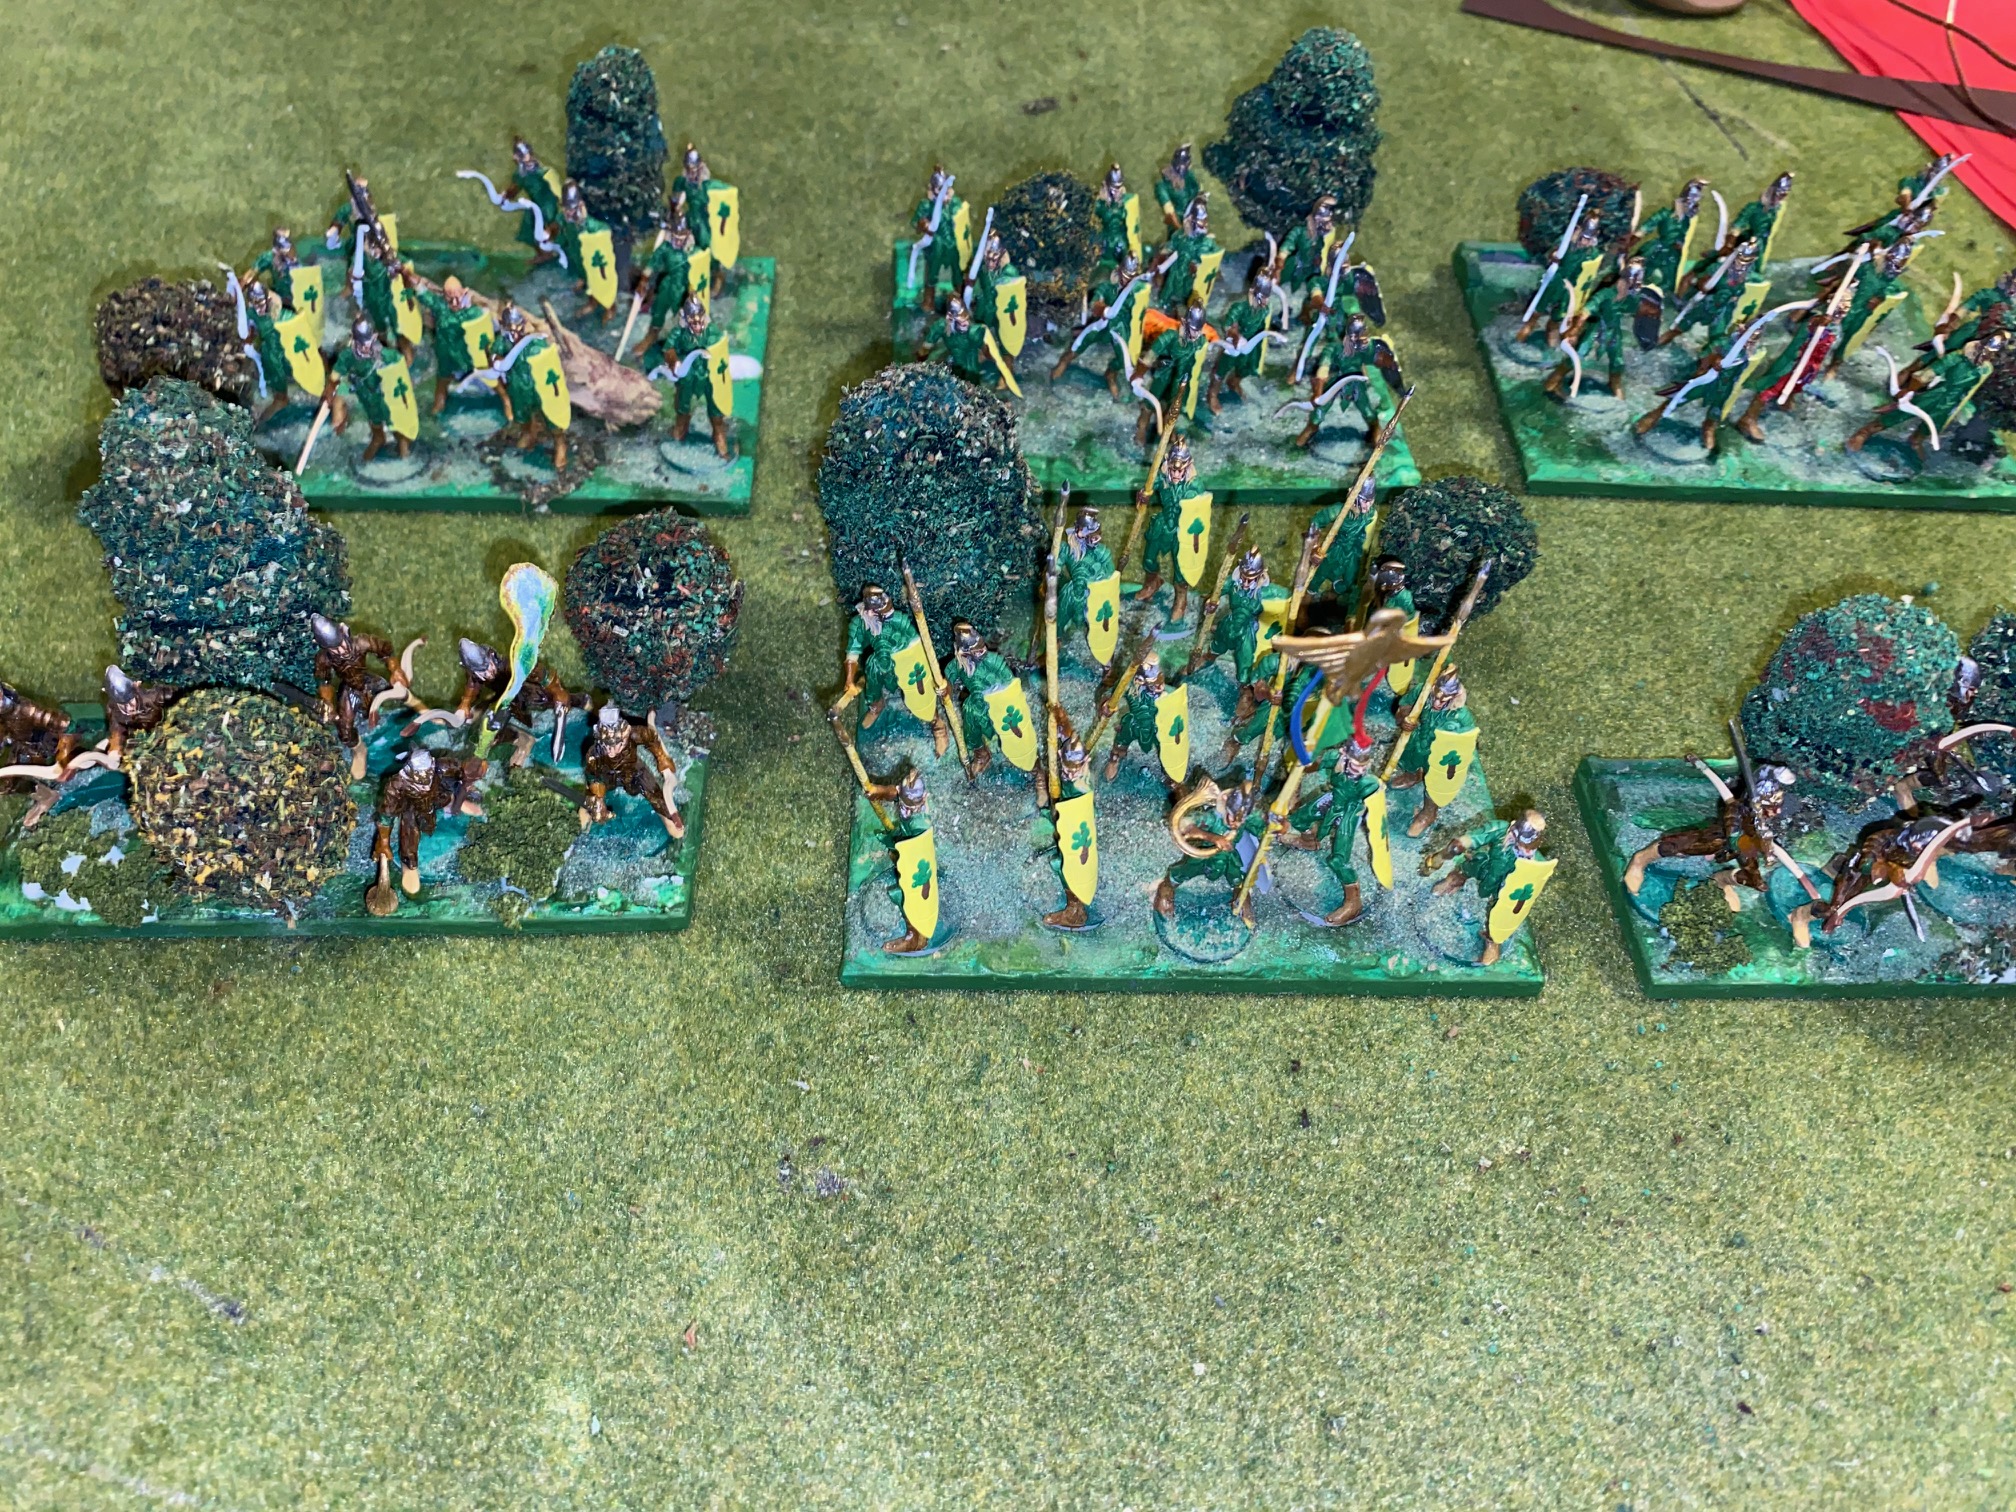
The bases were adorned with trees, shrubs, and grasses as the pictures show.
So basically the six units are done, although I’m now thinking to add a couple of Bolt Throwers into the mix before starting on a second Elven clan.
Happy Gaming!

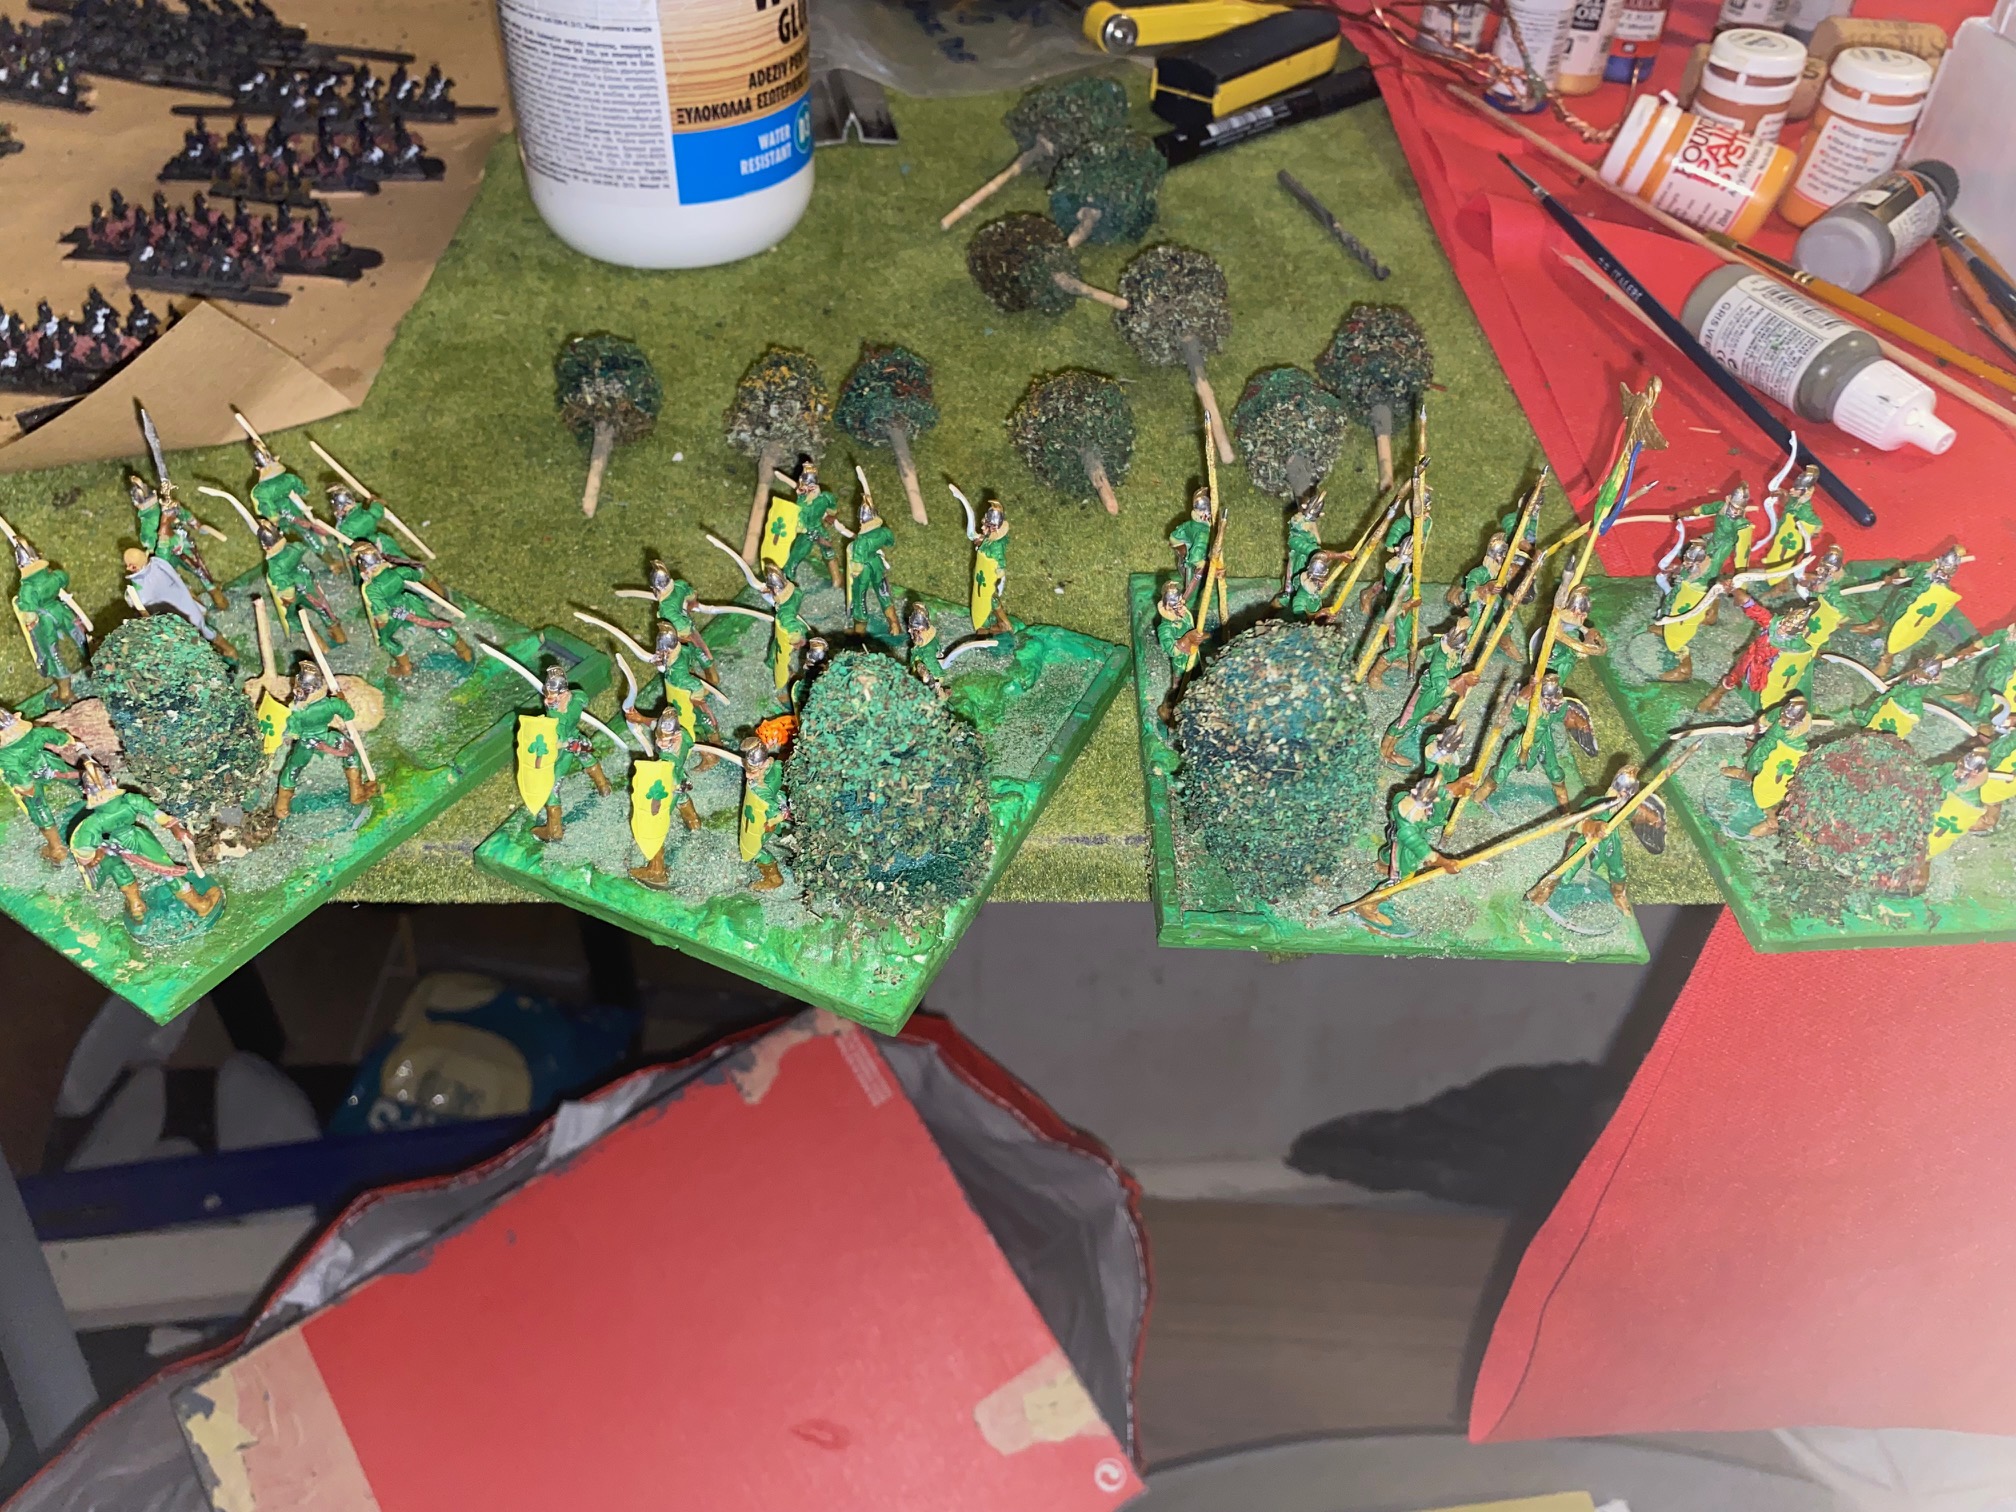
Finishing the scenic bases
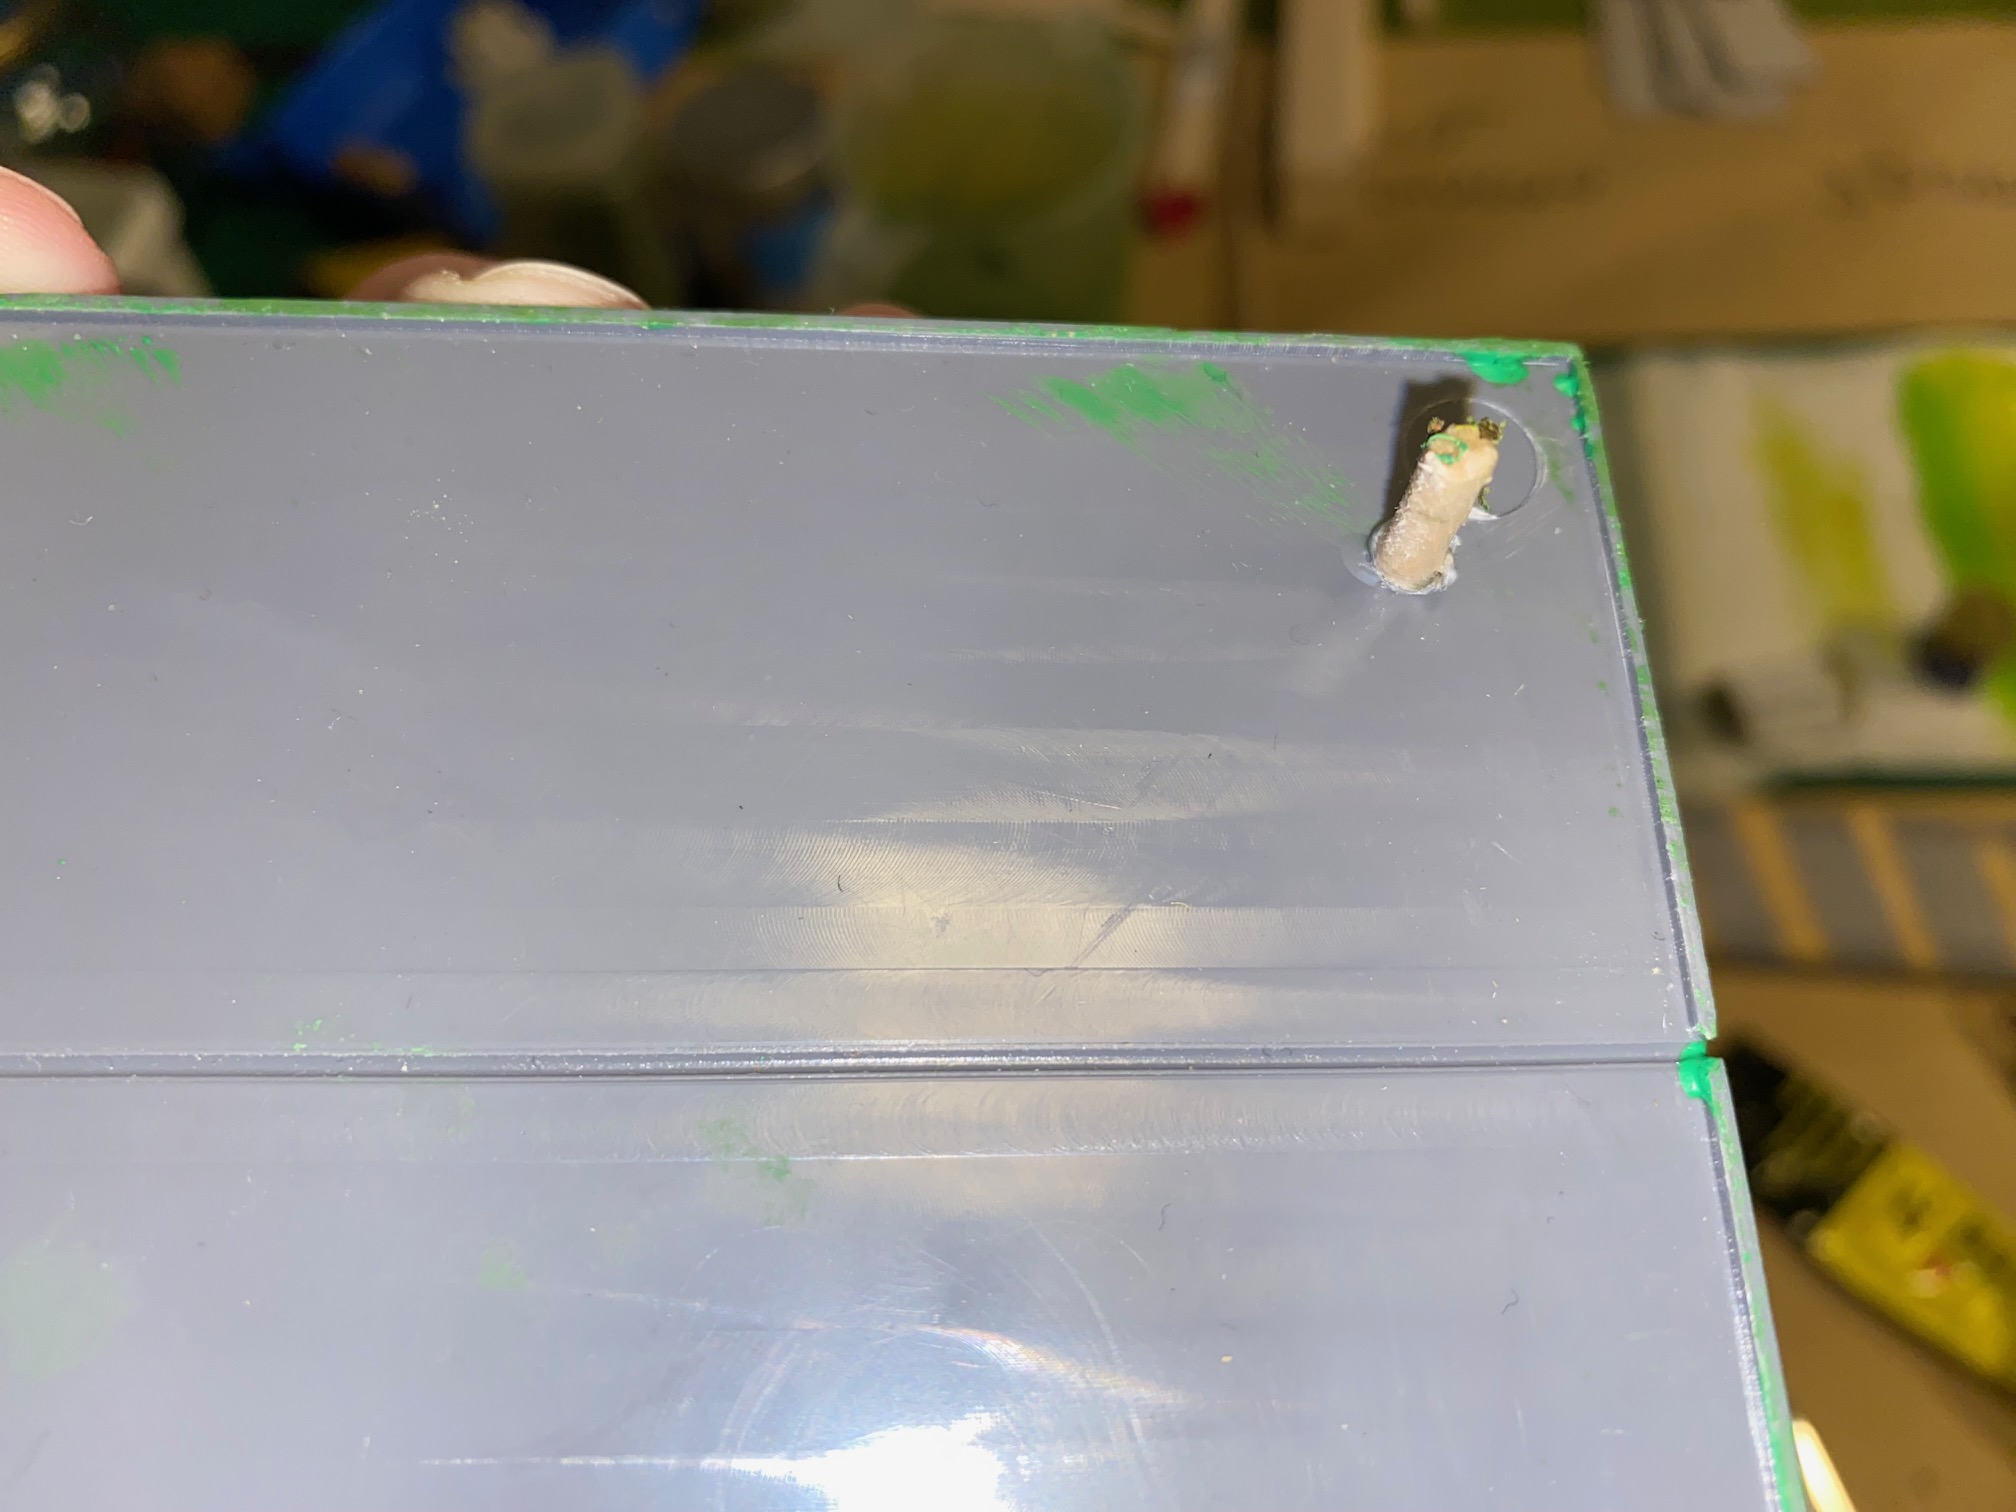
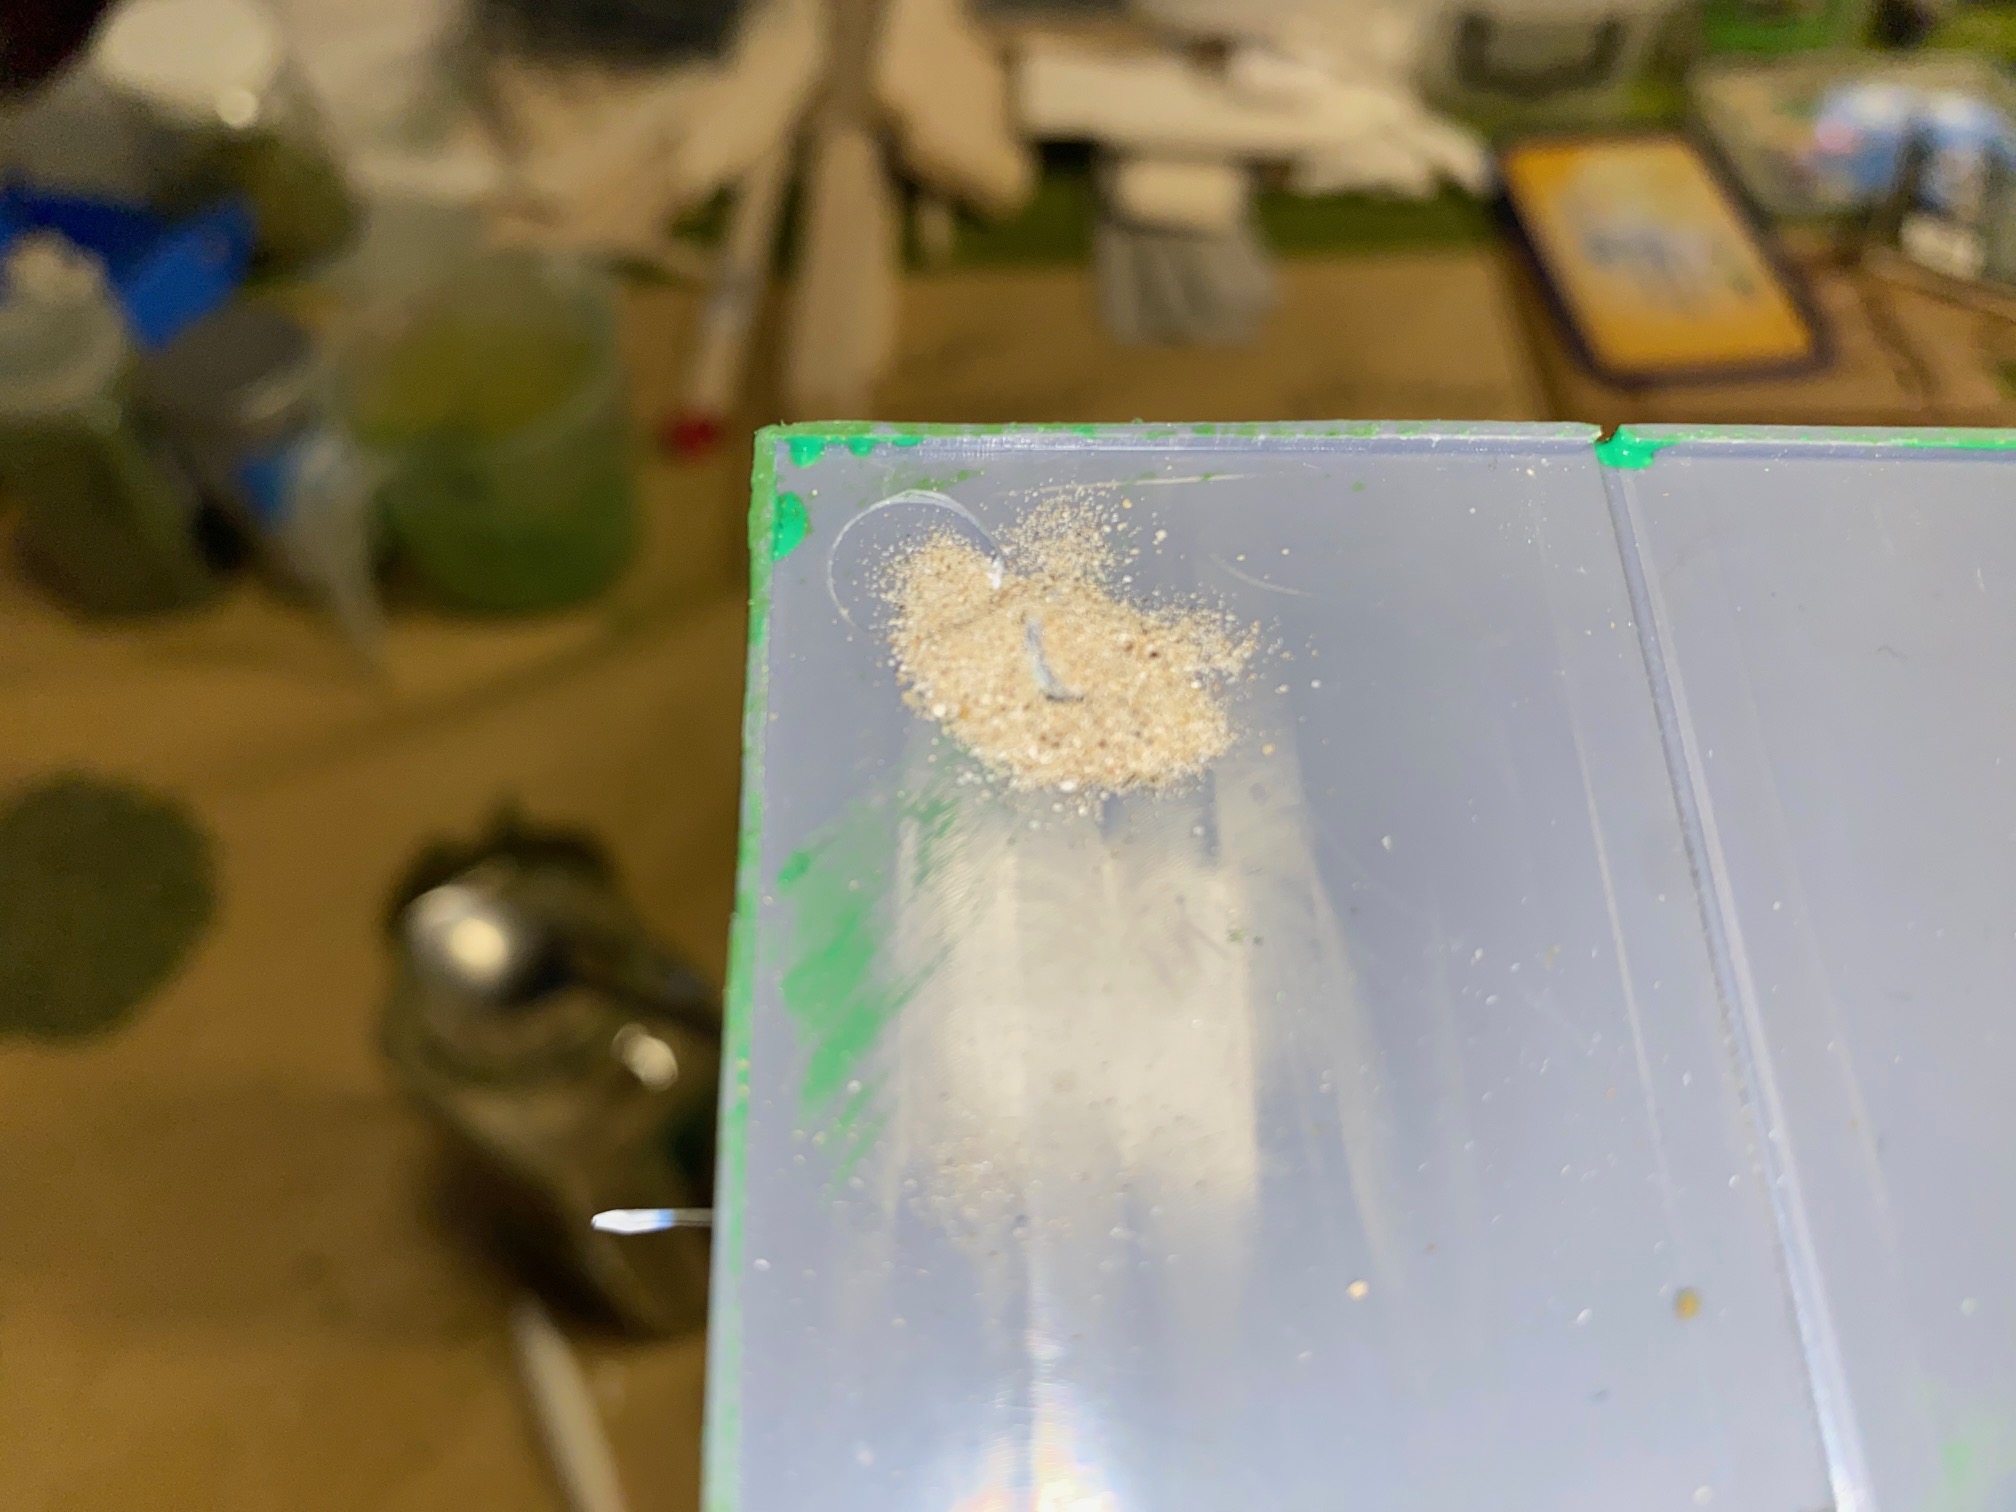
I made up a bunch of tree/shrubs and in order to secure them to the bases I used the following approach.
I drilled a small hole in the base with a variable speed drill using a drill bit as close to the skewer diameter as possible (slightly bigger). I then applied a dollop of PvA and pushed the tree all the way through until it reached a suitable height.
Additional PvA around the base of the “trunk” was applied and a small amount of ground cover added to the tree base.
Once the glue was completely dry, the skewer on the underside of the base was cut off close to the base and a small amount of fine sand was poured onto the skewer and liquid super glue was dropped onto the sand. This hardens to a solid finish which is very strong, and I hope will ensure the trees stay put during play.
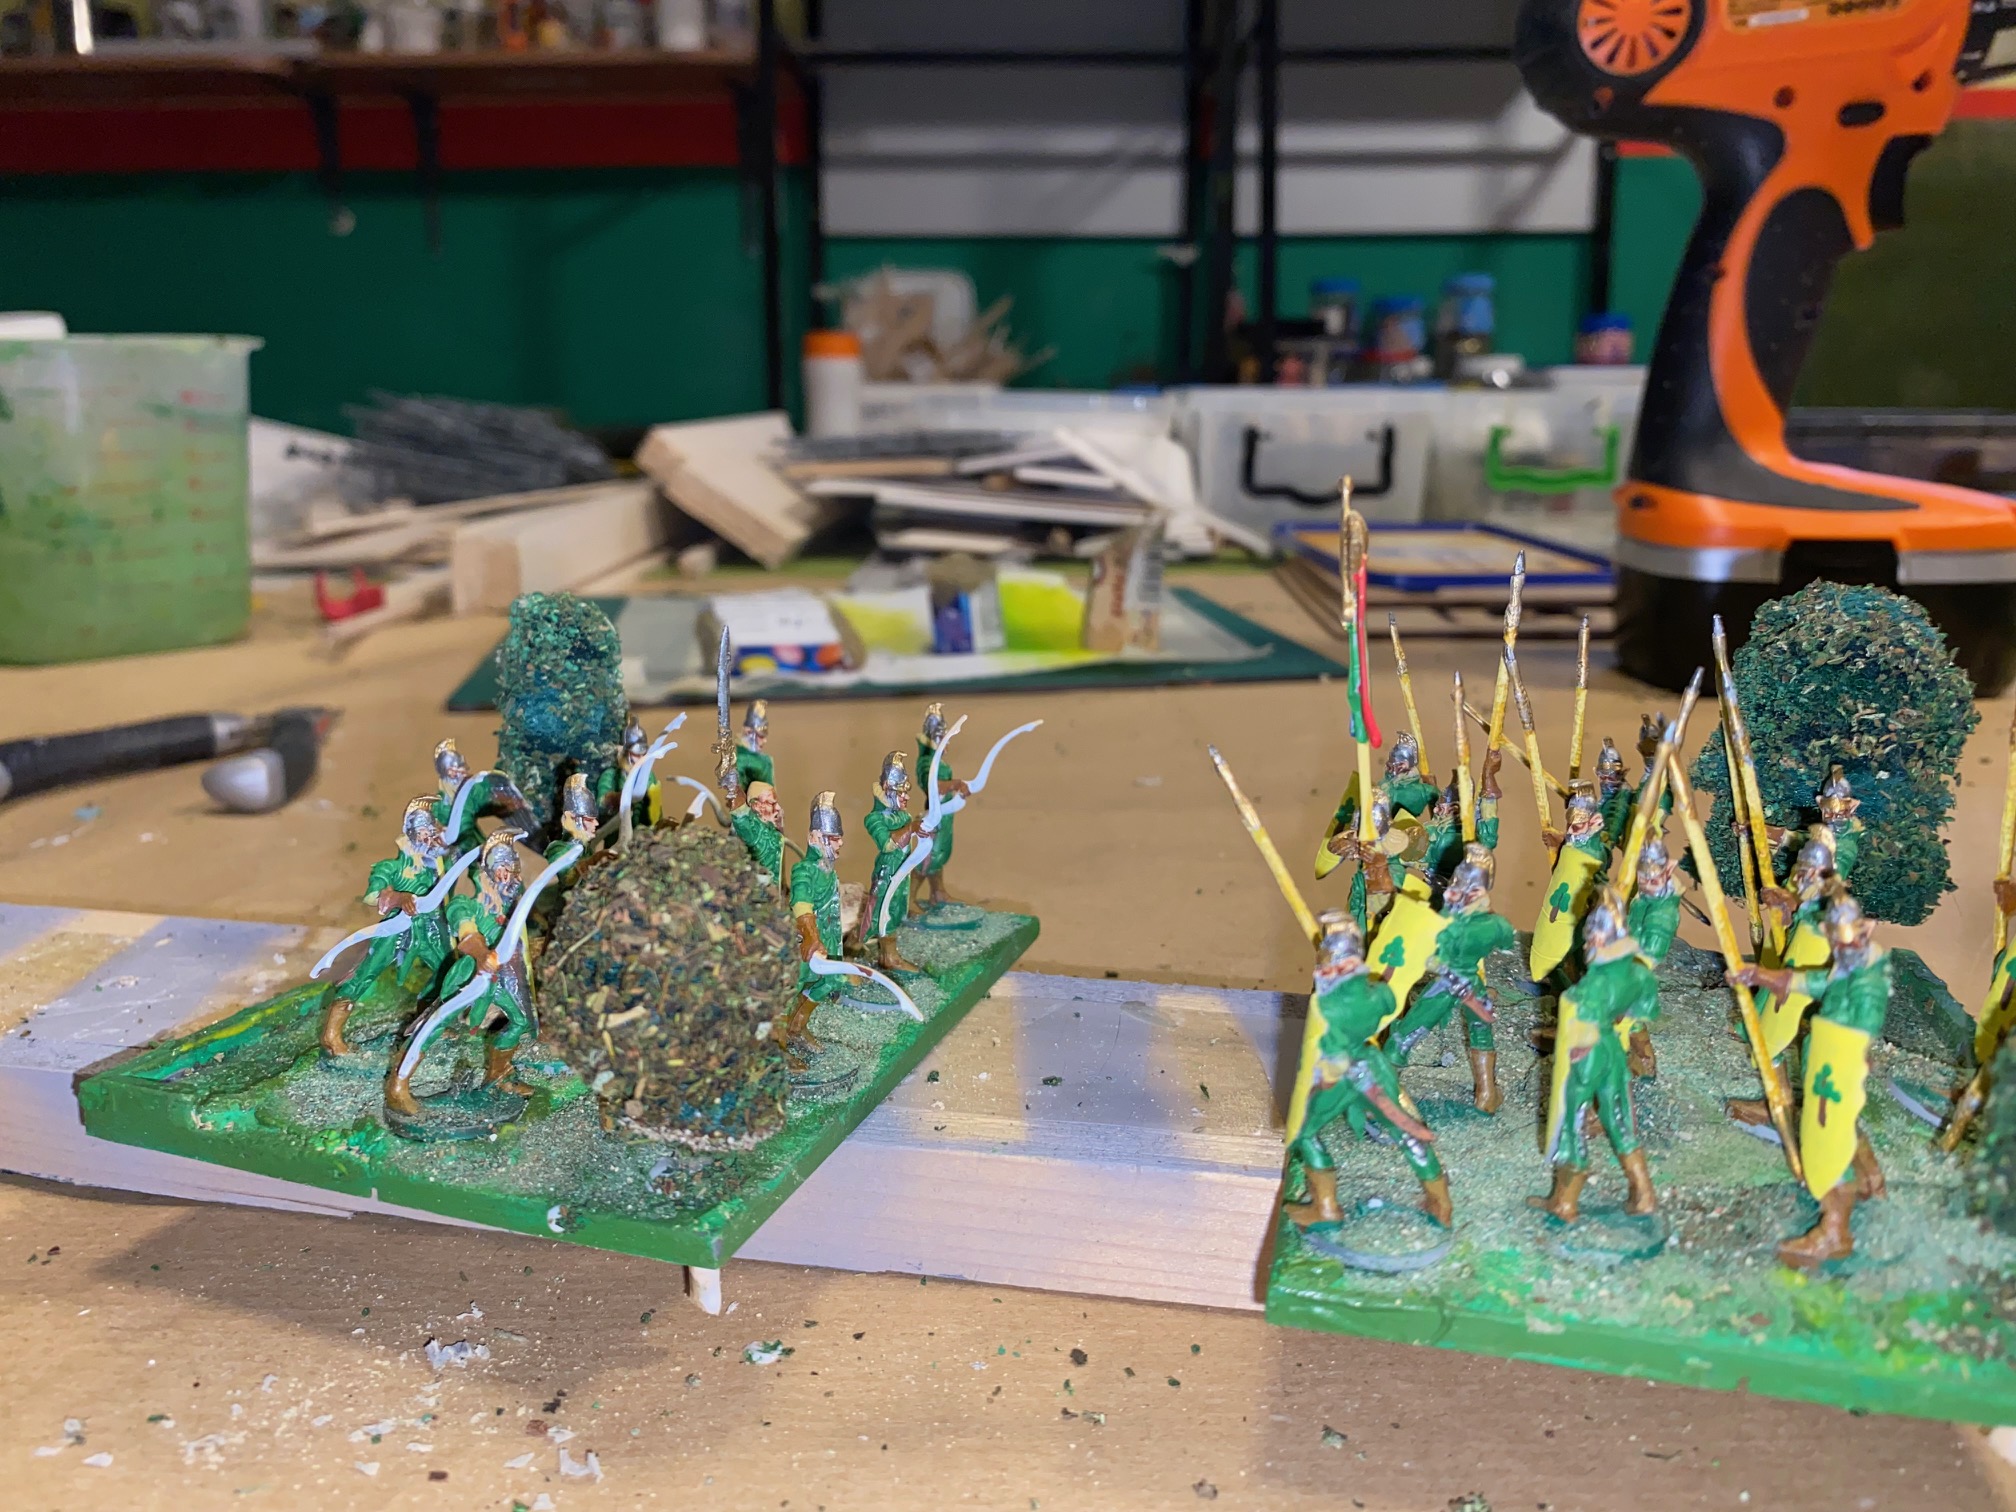
Some pictures follow.
The first four Regiments are done, although I may still add some static grass to them as a last embellishment.
Next up is to compete the two Gladestalker troop bases (I’ll post some pictures of the models next time) which I intend to have more foliage on them than the ordinary regiment units. So, maybe I’ll think about different “clutter” as well as 2/3 of the bushes/trees.
Happy Gaming!
Small trees
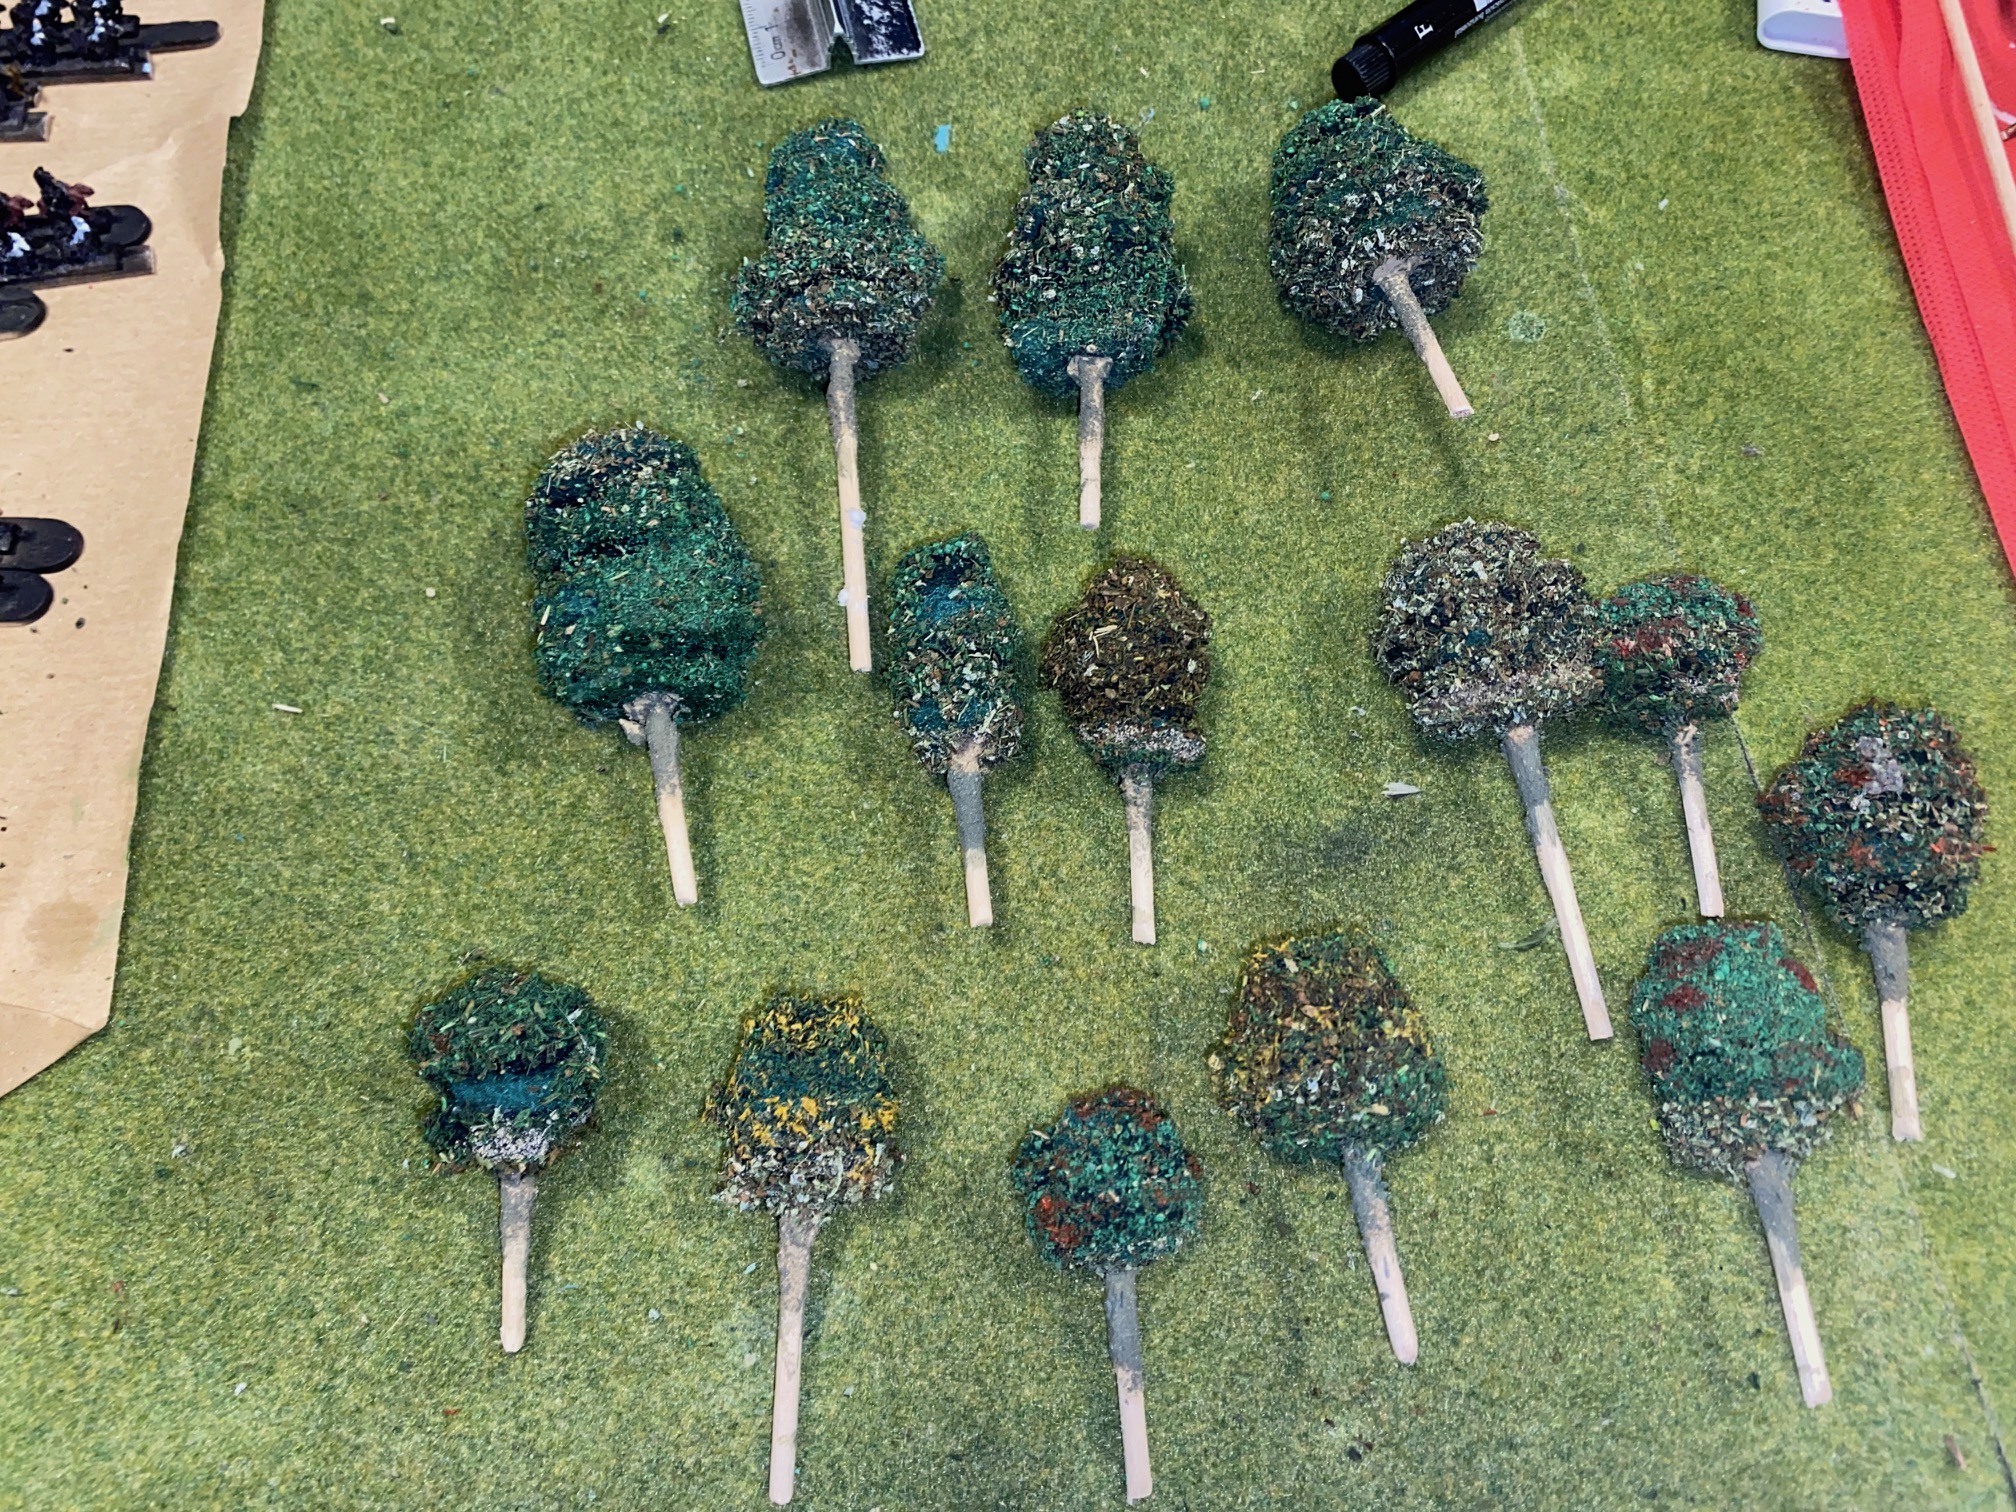
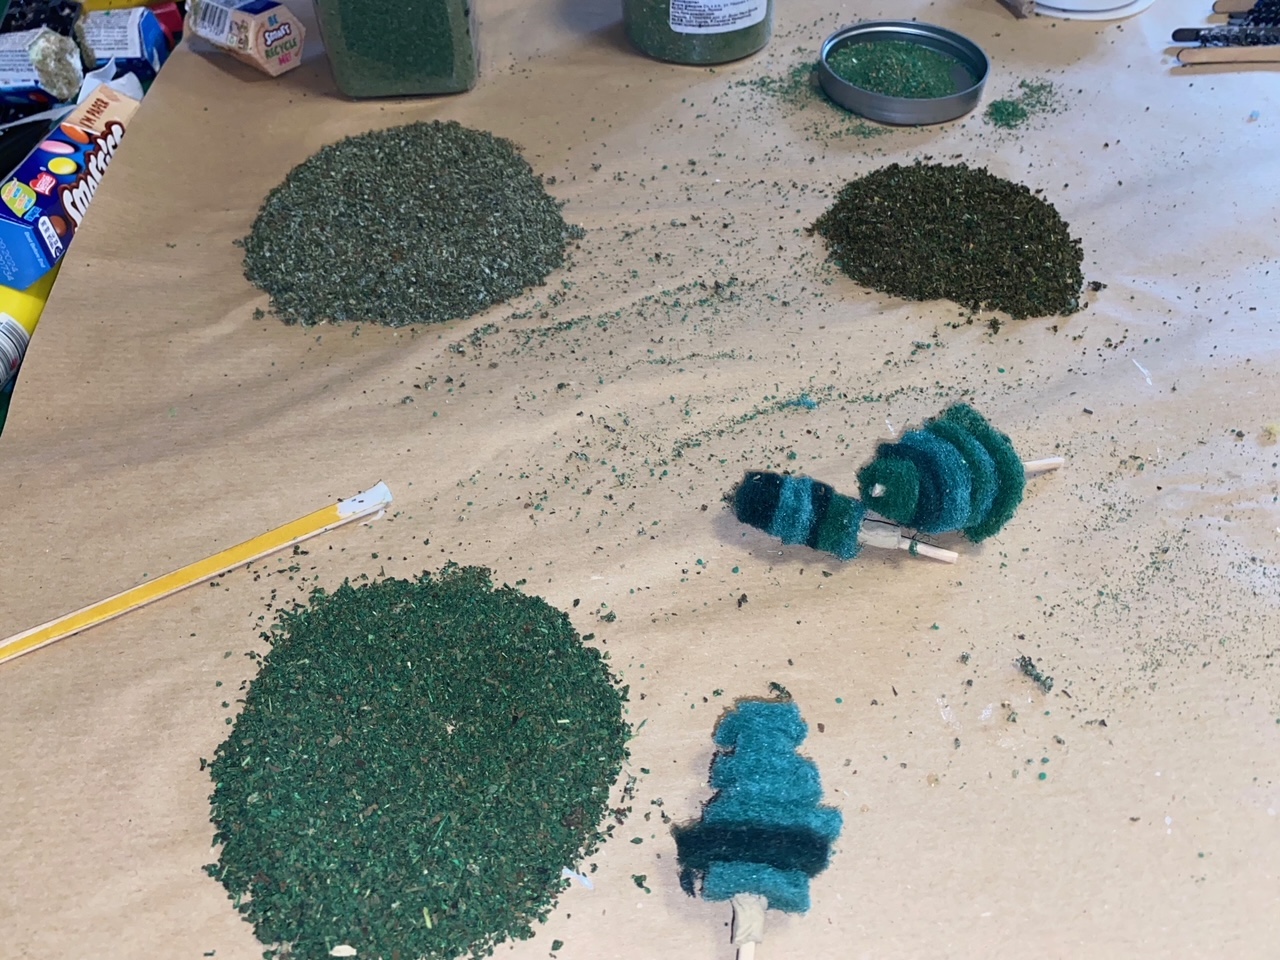
I wanted to make some small trees/shrubs/bushes to flesh out the bases and am trying out an approach using pan scrubbers and skewers. The idea is to make some rough shapes of various sizes with the pan scrubs, and secure them in layers onto the skewers with PvA.
Afterwards, the tree shape will be covered with PvA glue and various flocks etc. glues onto the tree shape.
Pictures follow.
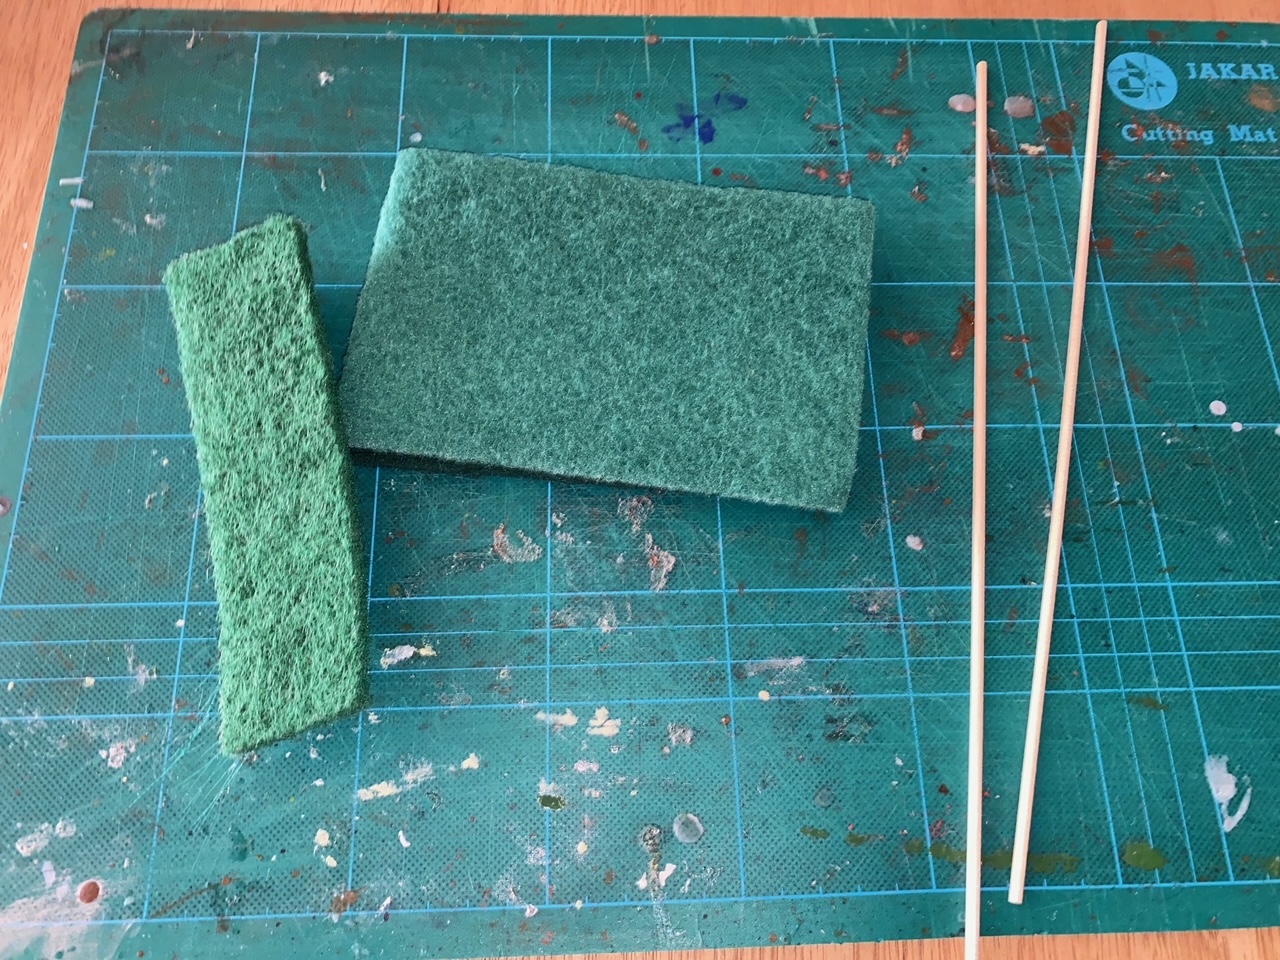

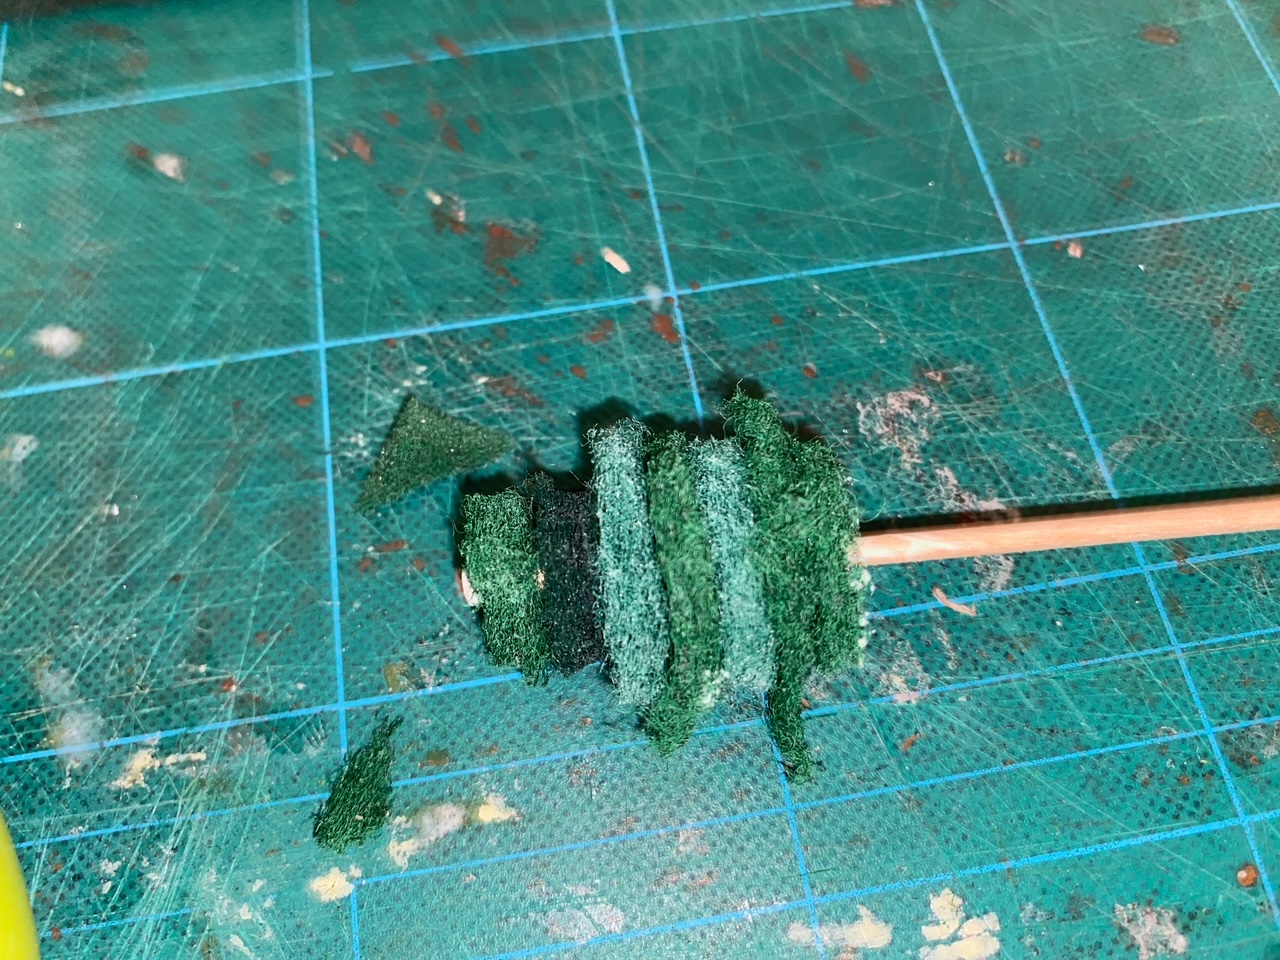

I added some DAS to the skewers, but not sure this will ‘stick’, in which case I’ll probably revert to another method and use PvA glue and sand to give the “trunk” some texture.
The tree shapes were “flocked”.
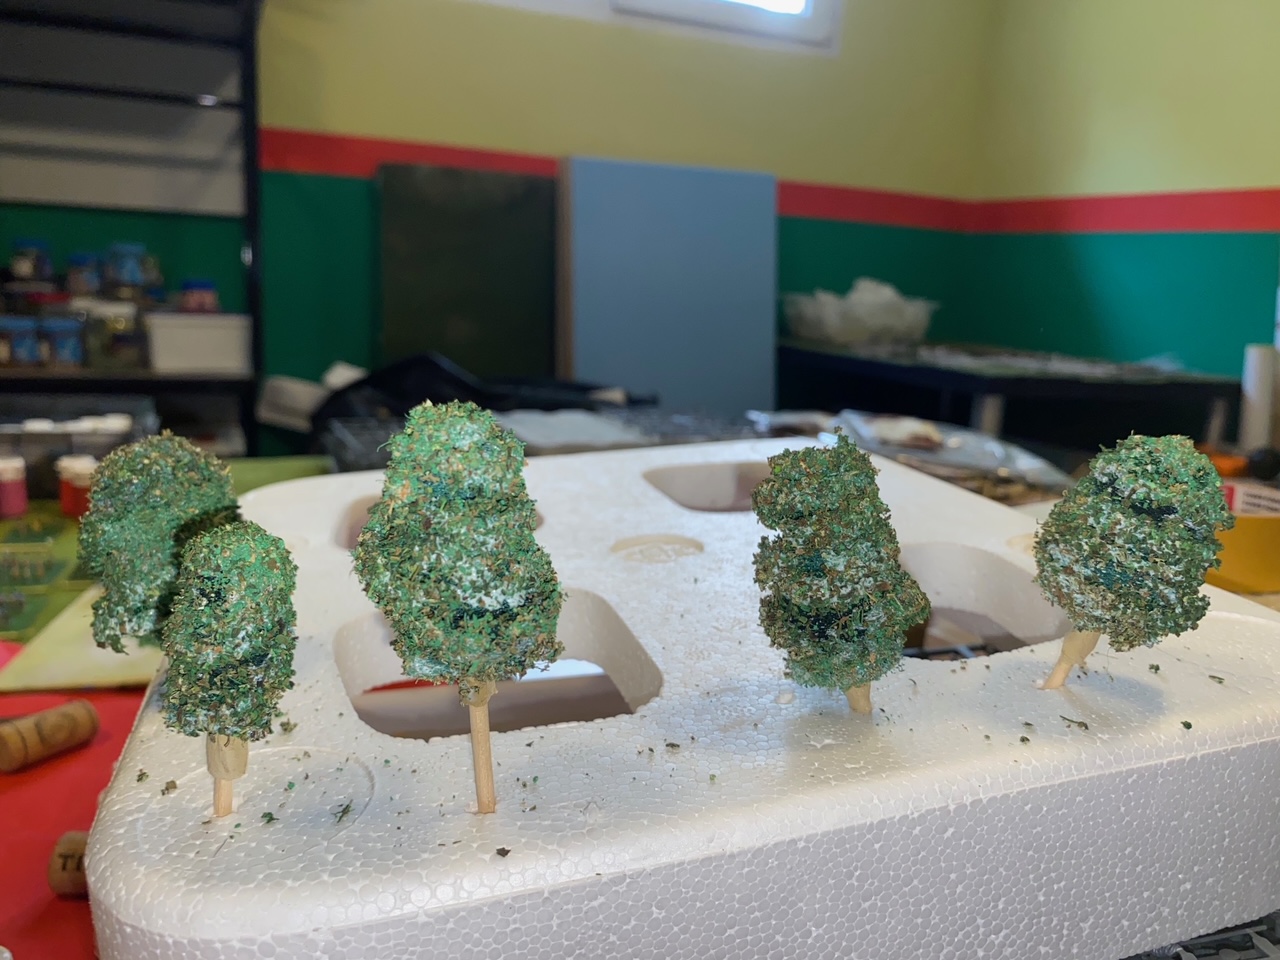
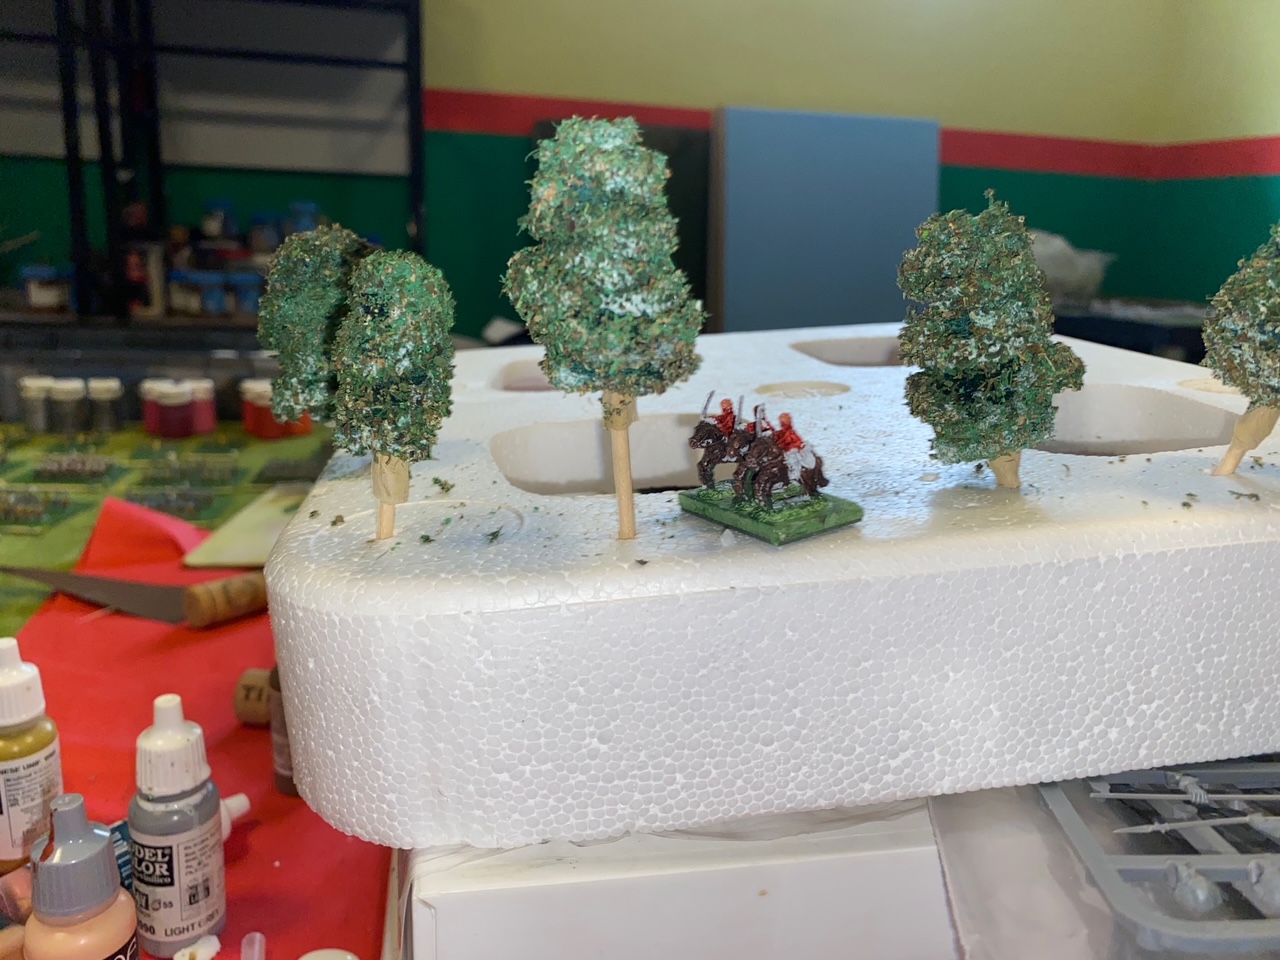
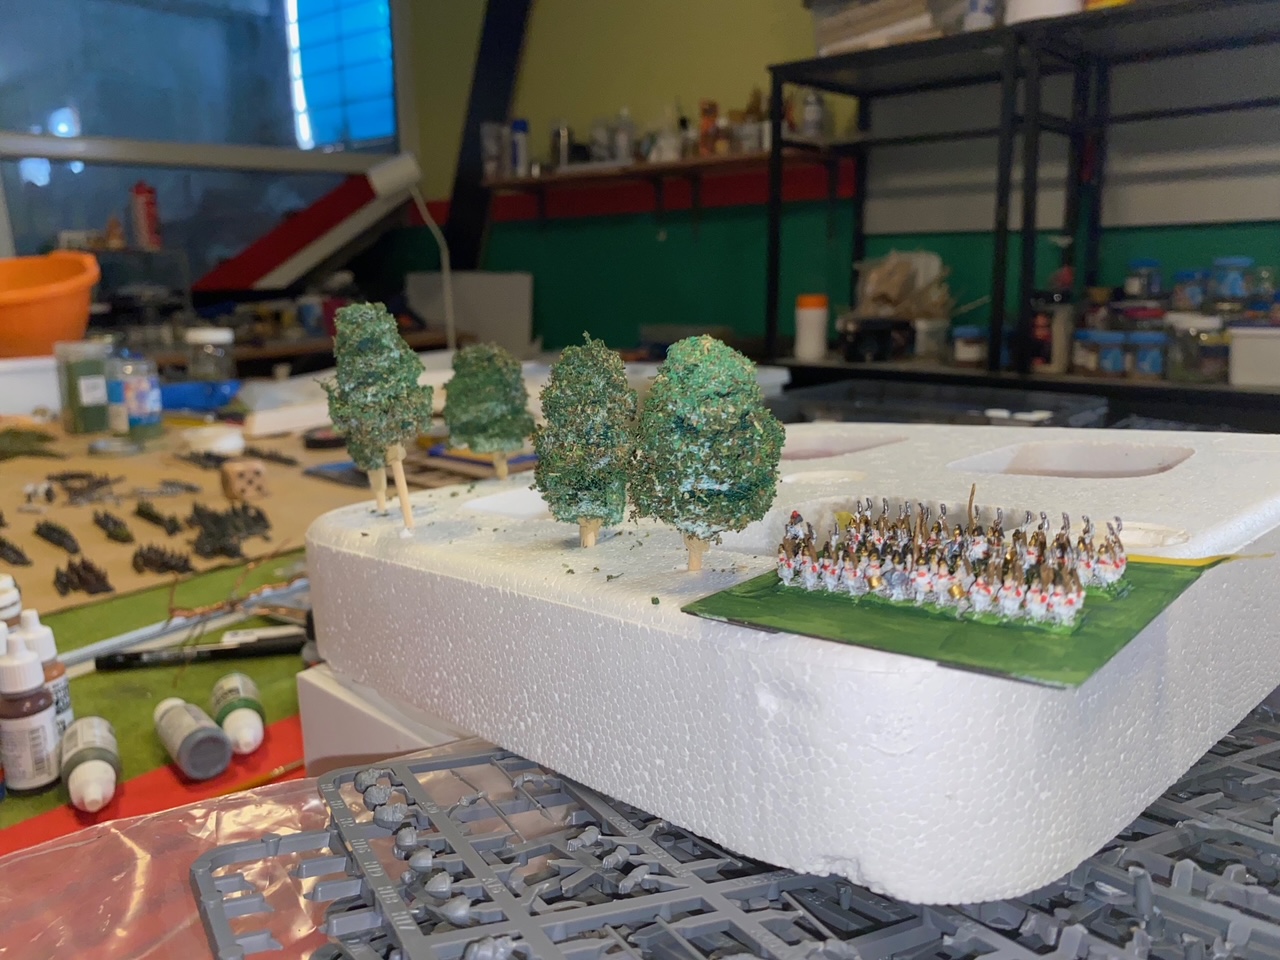
Interestingly, when I looked at the finished trees, I thought they might be a good size for other scales, and compared to my 10mm and 6mm figures, they seem to be a good fit and I might make some more just for those scales.
In any case, I’ll let them dry fully and fix some to the Elven bases in a couple of days.
Happy Gaming!
Basing part 2
Finally getting back to the project. Health-wise things are good, so no excuses!
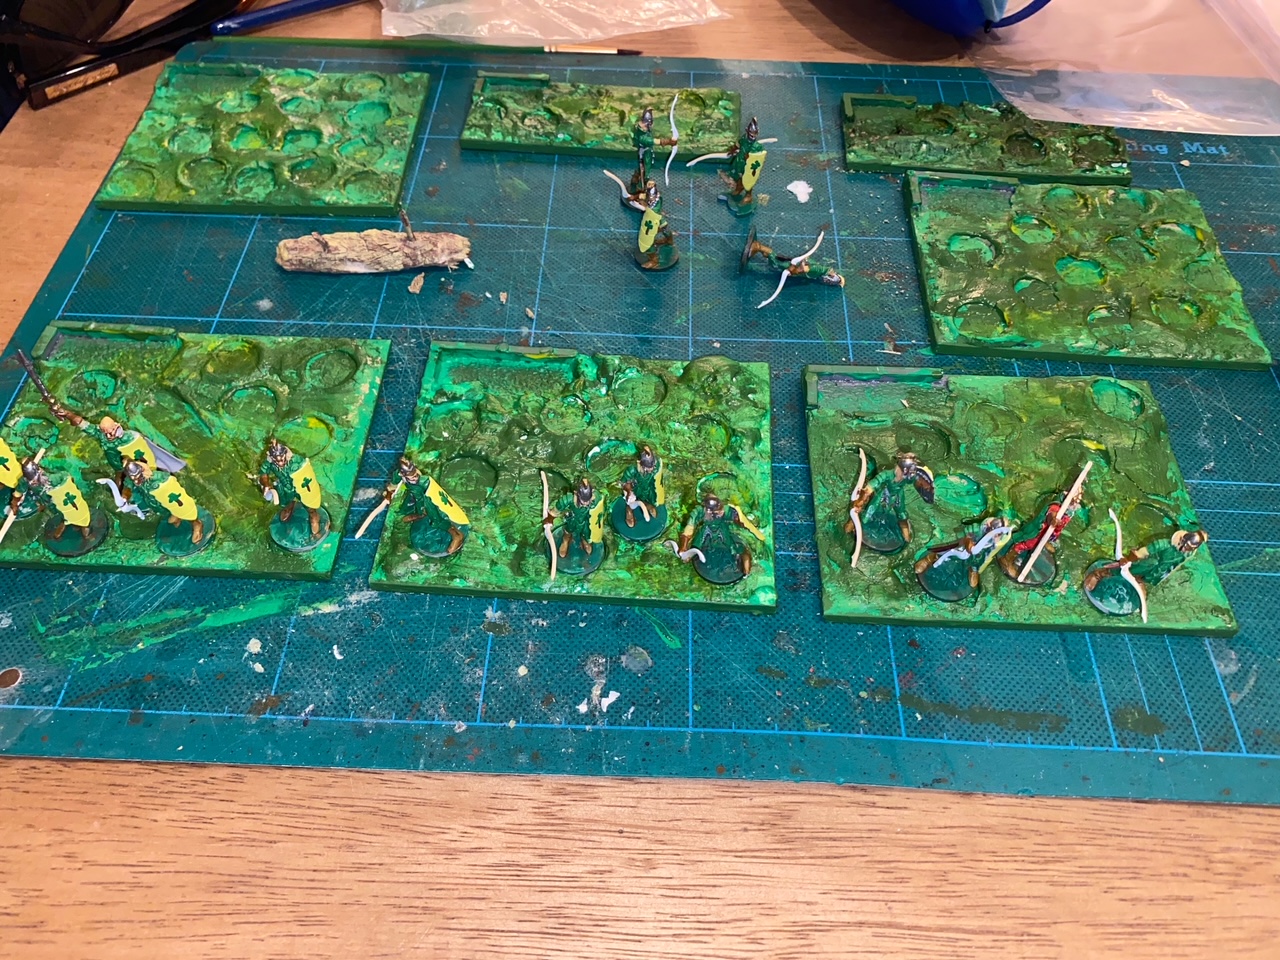
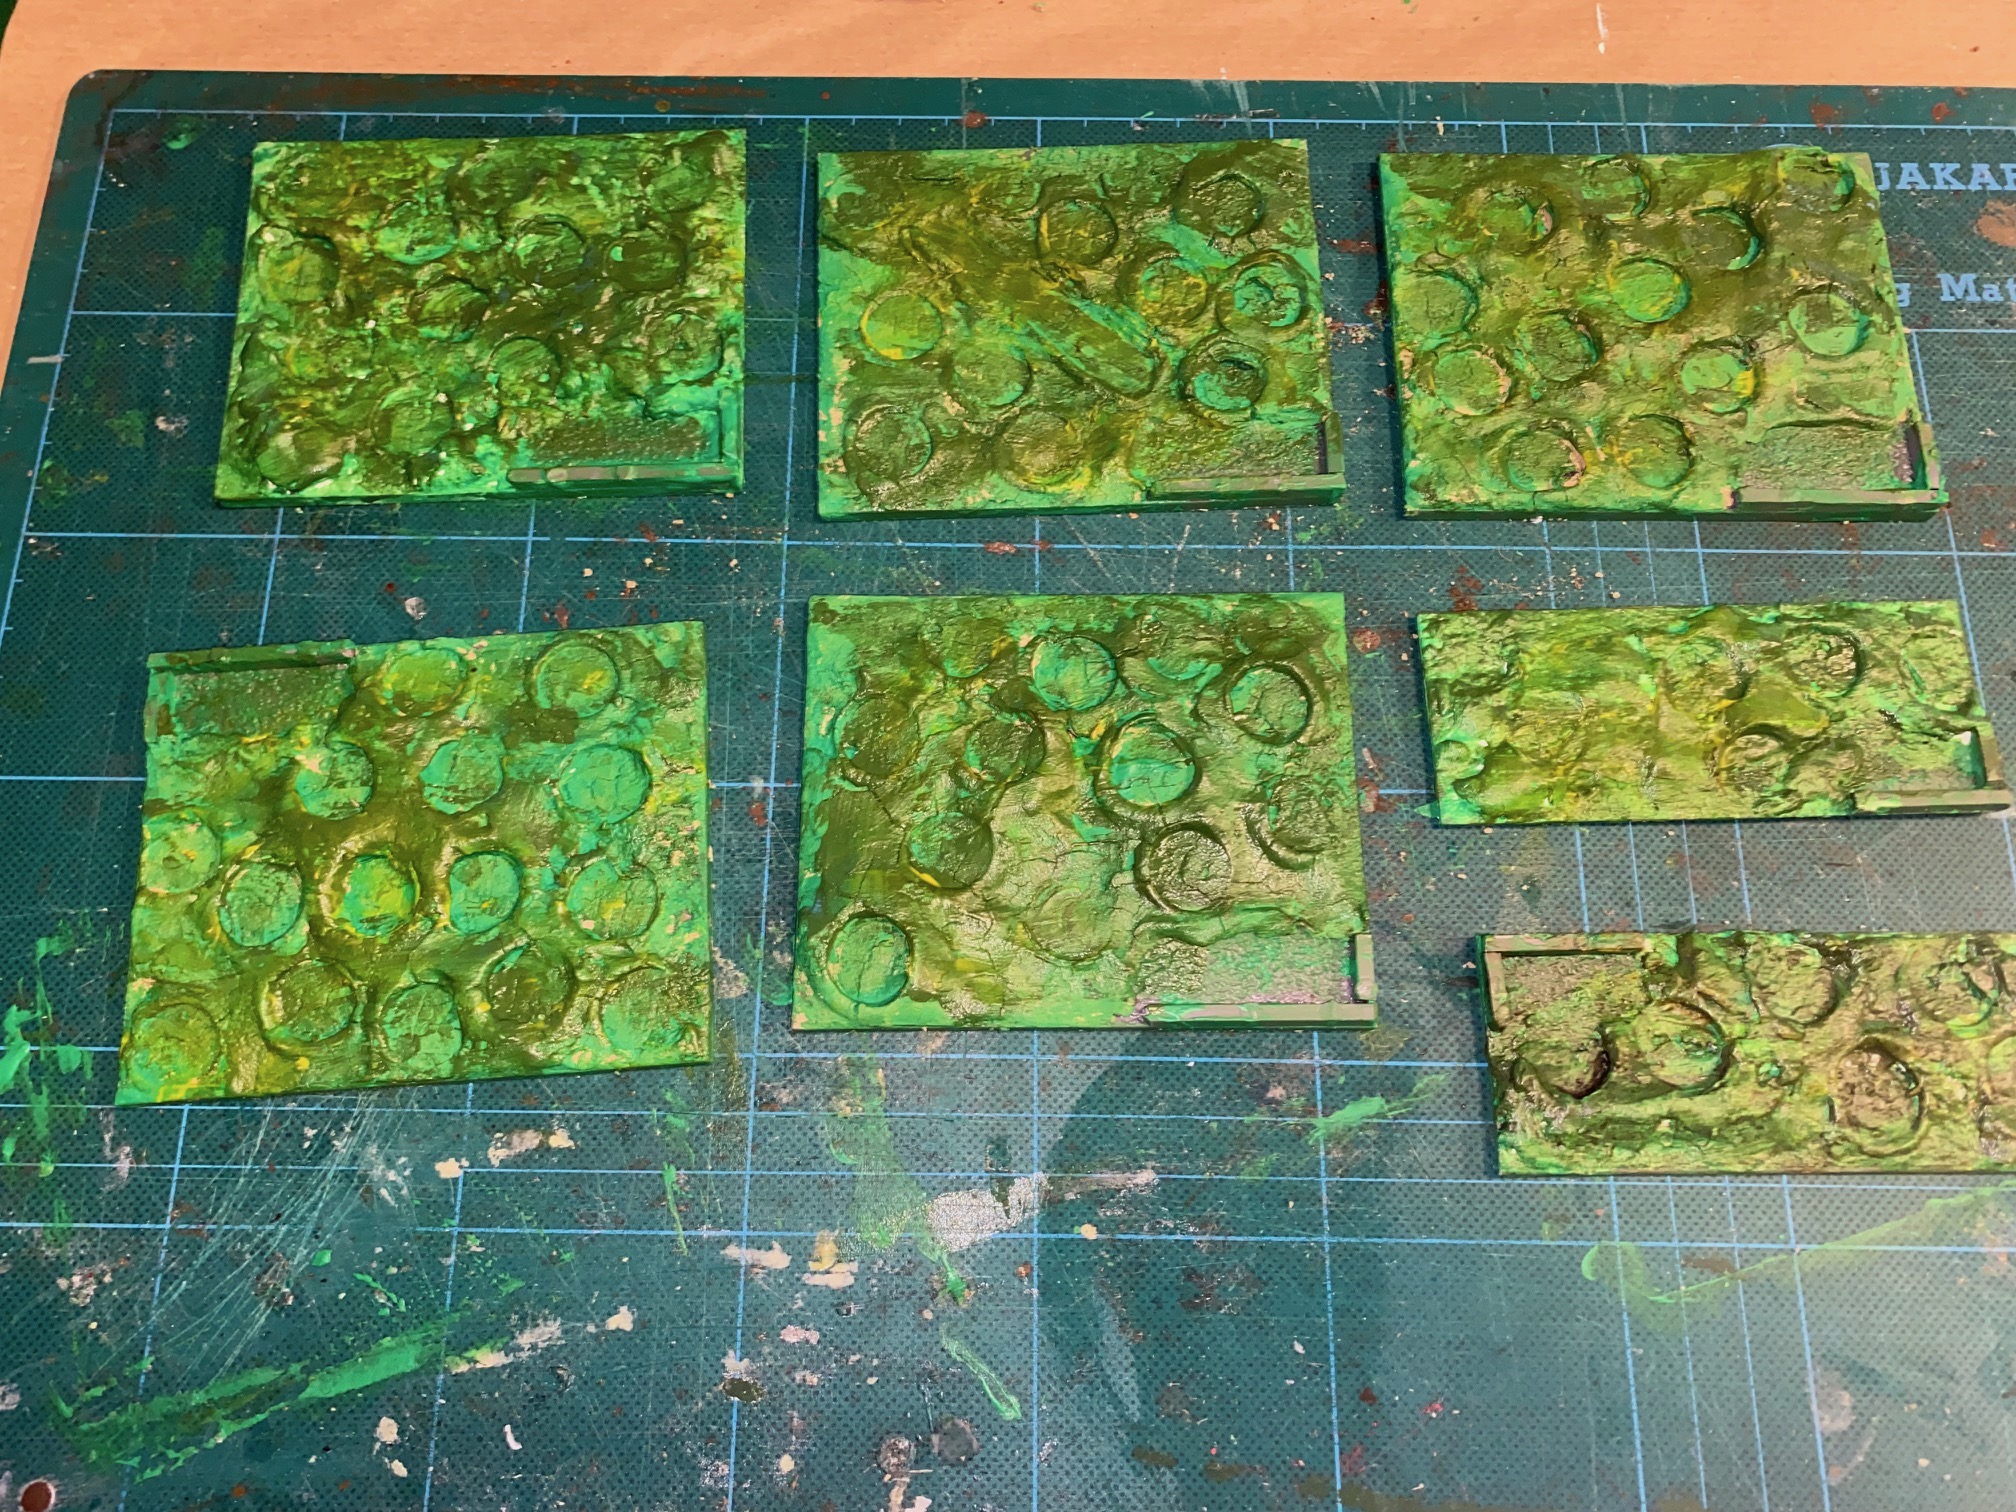
I prepared a number of bases (see last post) and the next stage was allowing 48 hours for the clay to completely dry out before layering various shades of green Acrylic paints (artists cheap colours) finishing with a light yellow. The end result seemed too bright for me, so a diluted wash of Agrax Earthshade to dampen them down and finally the edges were painted with a Vallejo green.
Colours used – Artist acrylics:
Leaf Green / Chromium green / Yellow medium
Vallejo 70922 Uniform Green


Fixing the models was a staged process. I glued down the first line then added small patches of diluted PvA (about 60/40) and dropped on to this some colored sand. The idea was to add some texture to the bases, but also the add some additional support to the figures with the PvA/Sand mix.
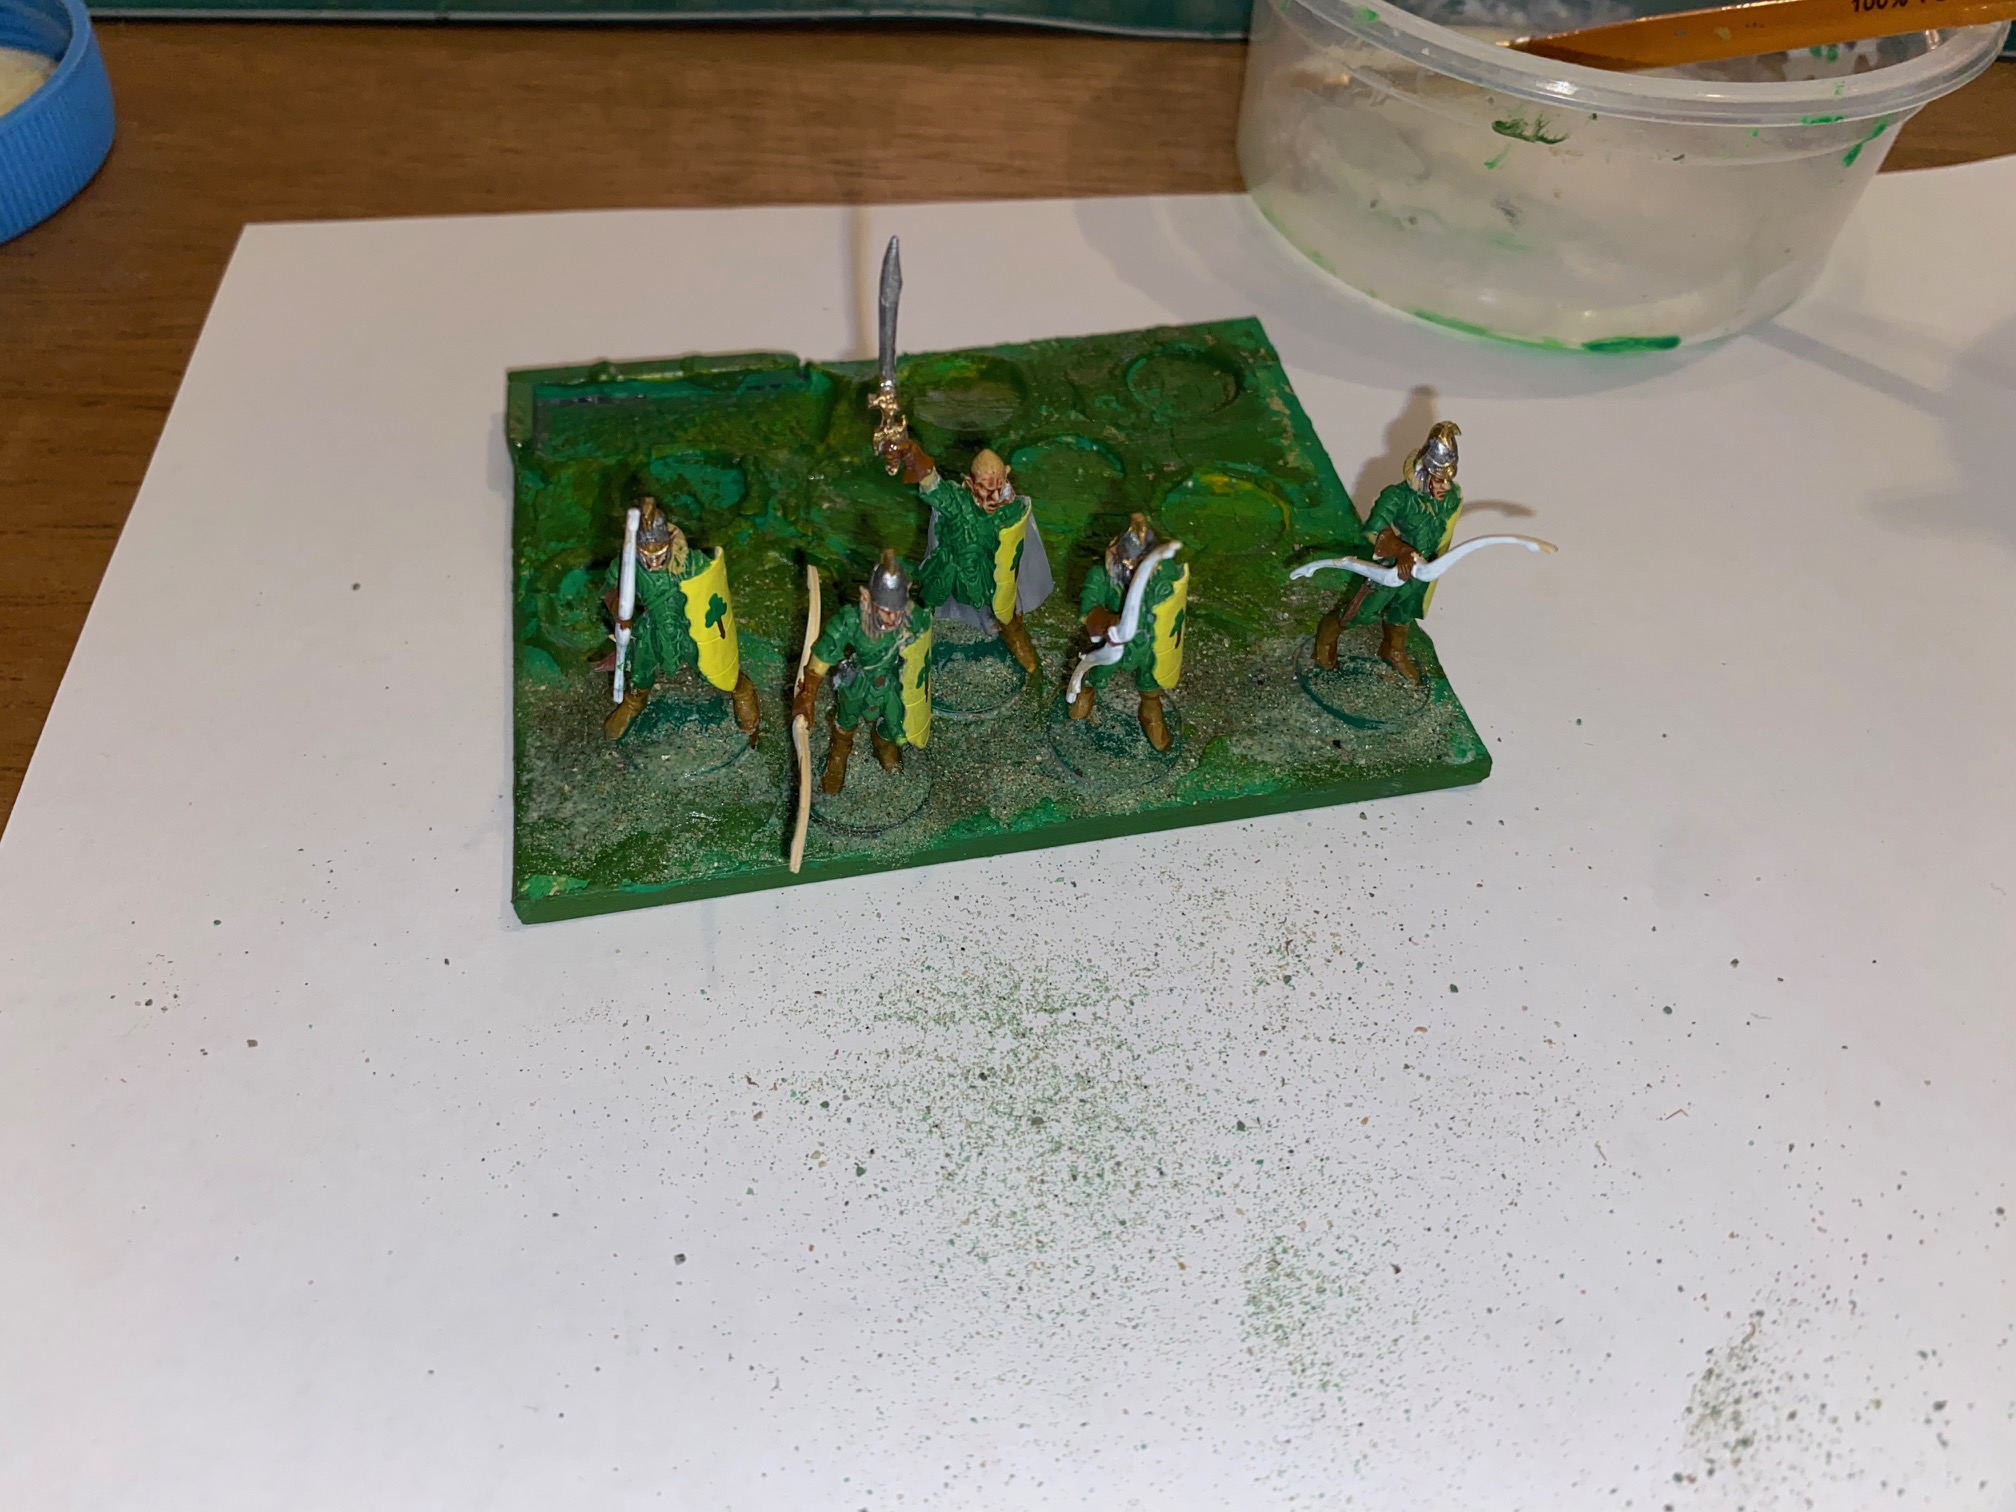
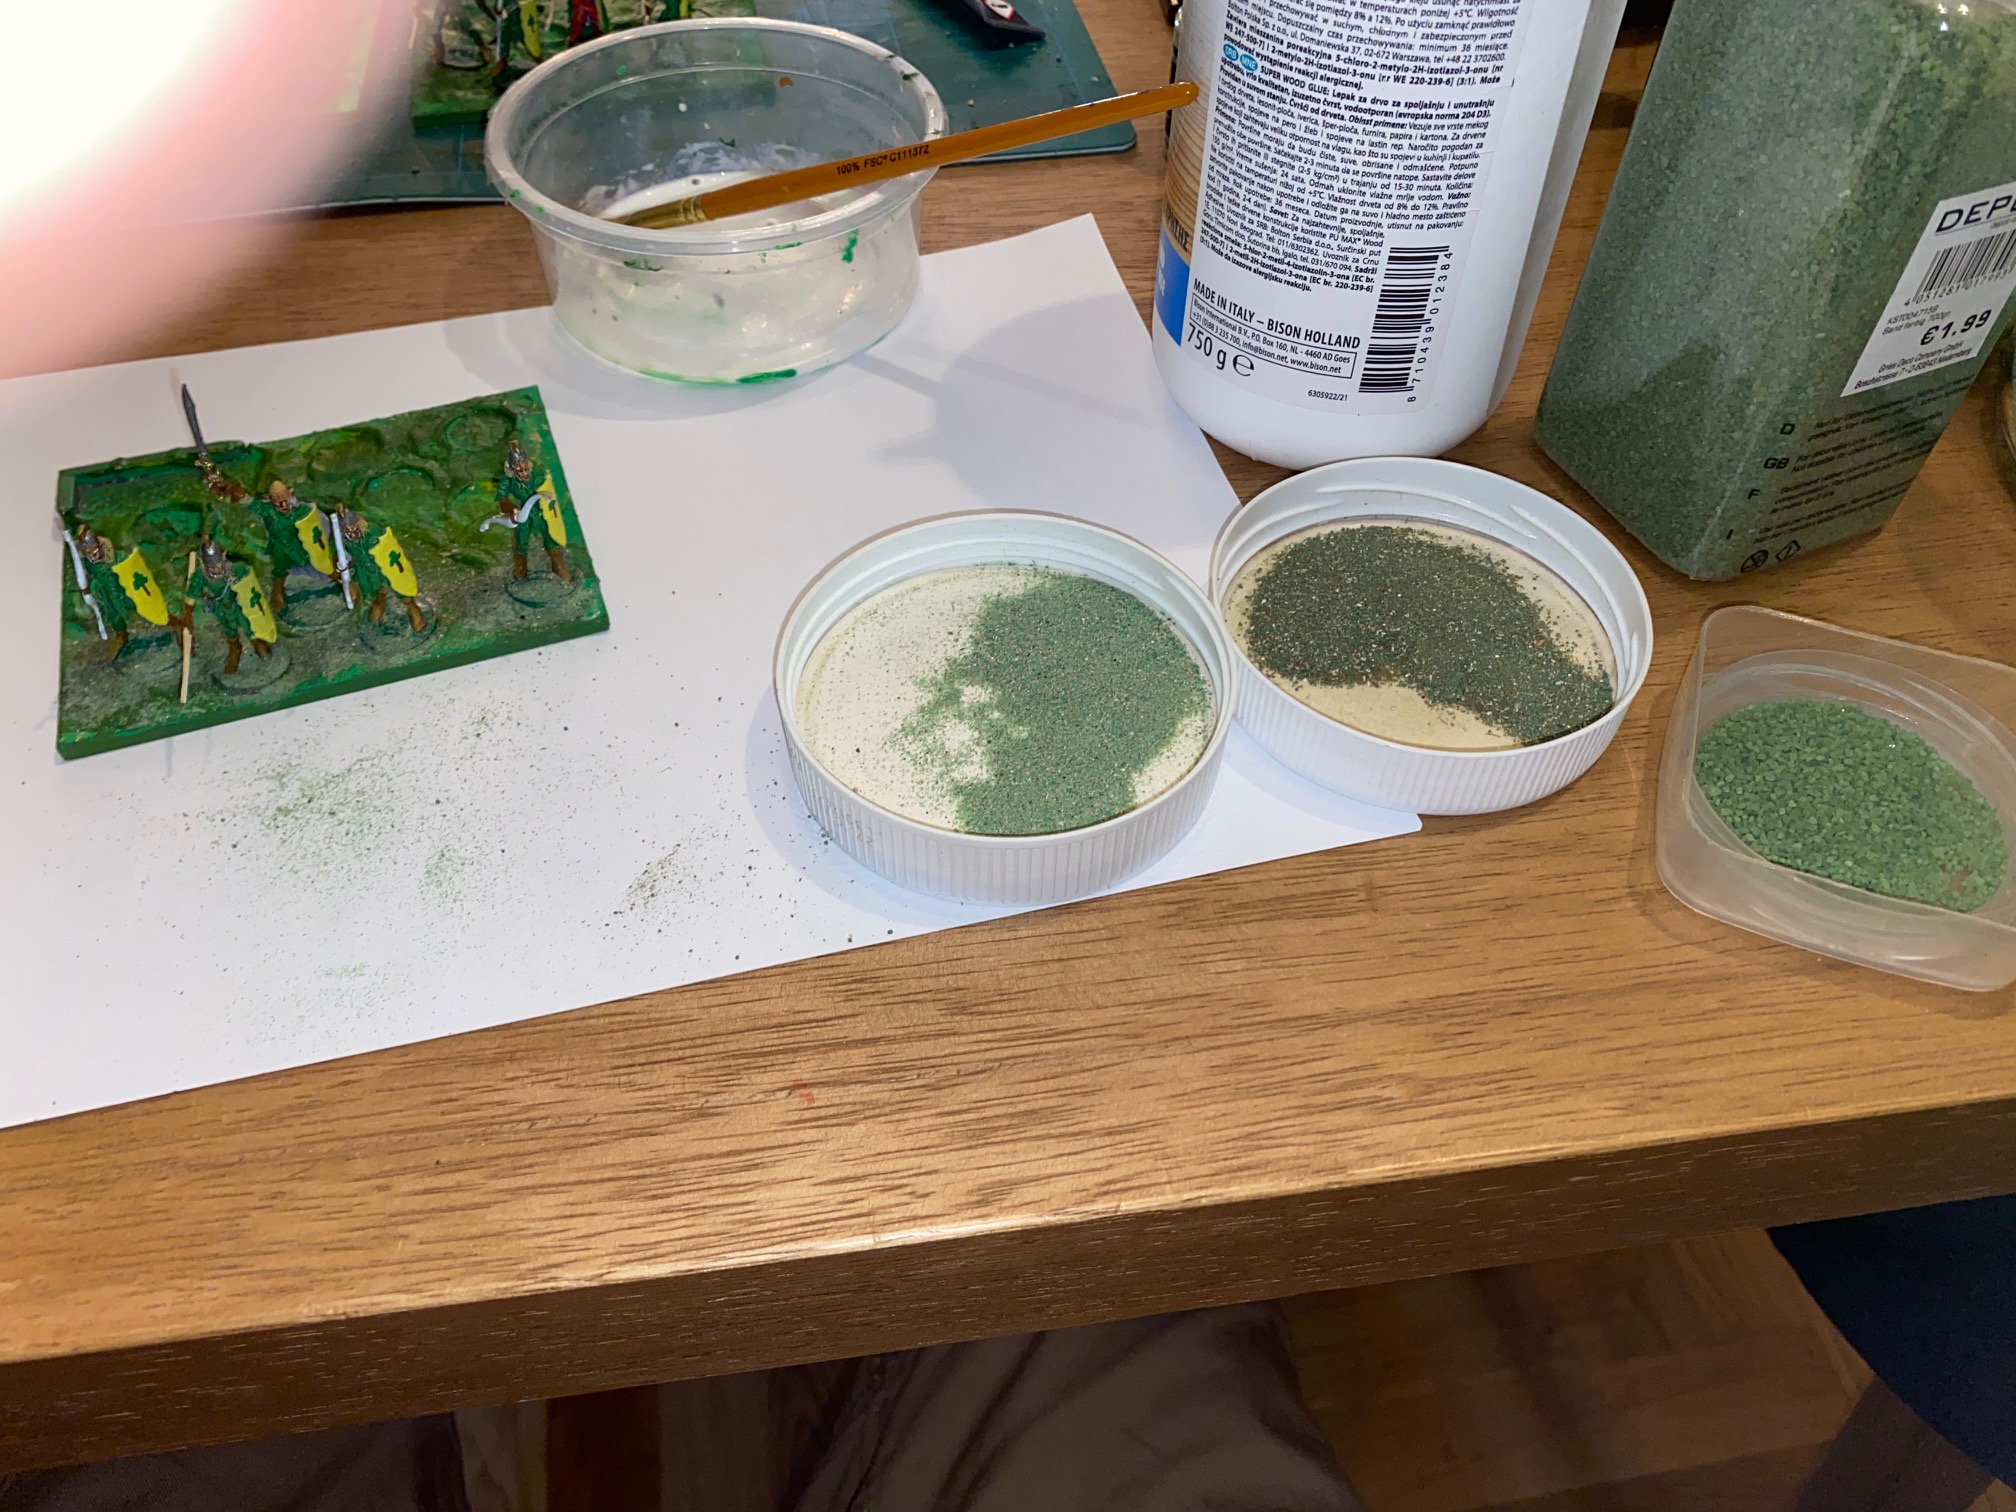
I still need to add additional foliage, eg. shrubs/trees etc. and then work on the Gladestalkers. These I think I will equip in leather rather than the Elven armor. Also I want their bases to be highly condensed with plants etc.

So, my next challenge is to make some interesting “Elven” trees etc.
Happy Gaming!
Basing part 2
Finally getting back to the project. Health-wise things are good, so no excuses!
I prepared a number of bases (see last post) and the next stage was allowing 48 hours for the clay to completely dry out before layering various shades of green Acrylic paints (artists cheap colours) finishing with a light yellow. The end result seemed too bright for me, so a diluted wash of Agrax Earthshade to dampen them down and finally the edges were painted with a Vallejo green.
Colours used – Artist acrylics:


Fixing the models was a staged process. I glued down the first line then added small patches of diluted PvA (about 60/40) and dropped on to this some colored sand. The idea was to add some texture to the bases, but also the add some additional support to the figures with the PvA/Sand mix.


I still need to add additional foliage, eg. shrubs/trees etc. and then work on the Gladestalkers. These I think I will equip in leather rather than the Elven armor. Also I want their bases to be highly condensed with plants etc.


So, my next challenge is to make some interesting “Elven” trees etc.
Happy Gaming!
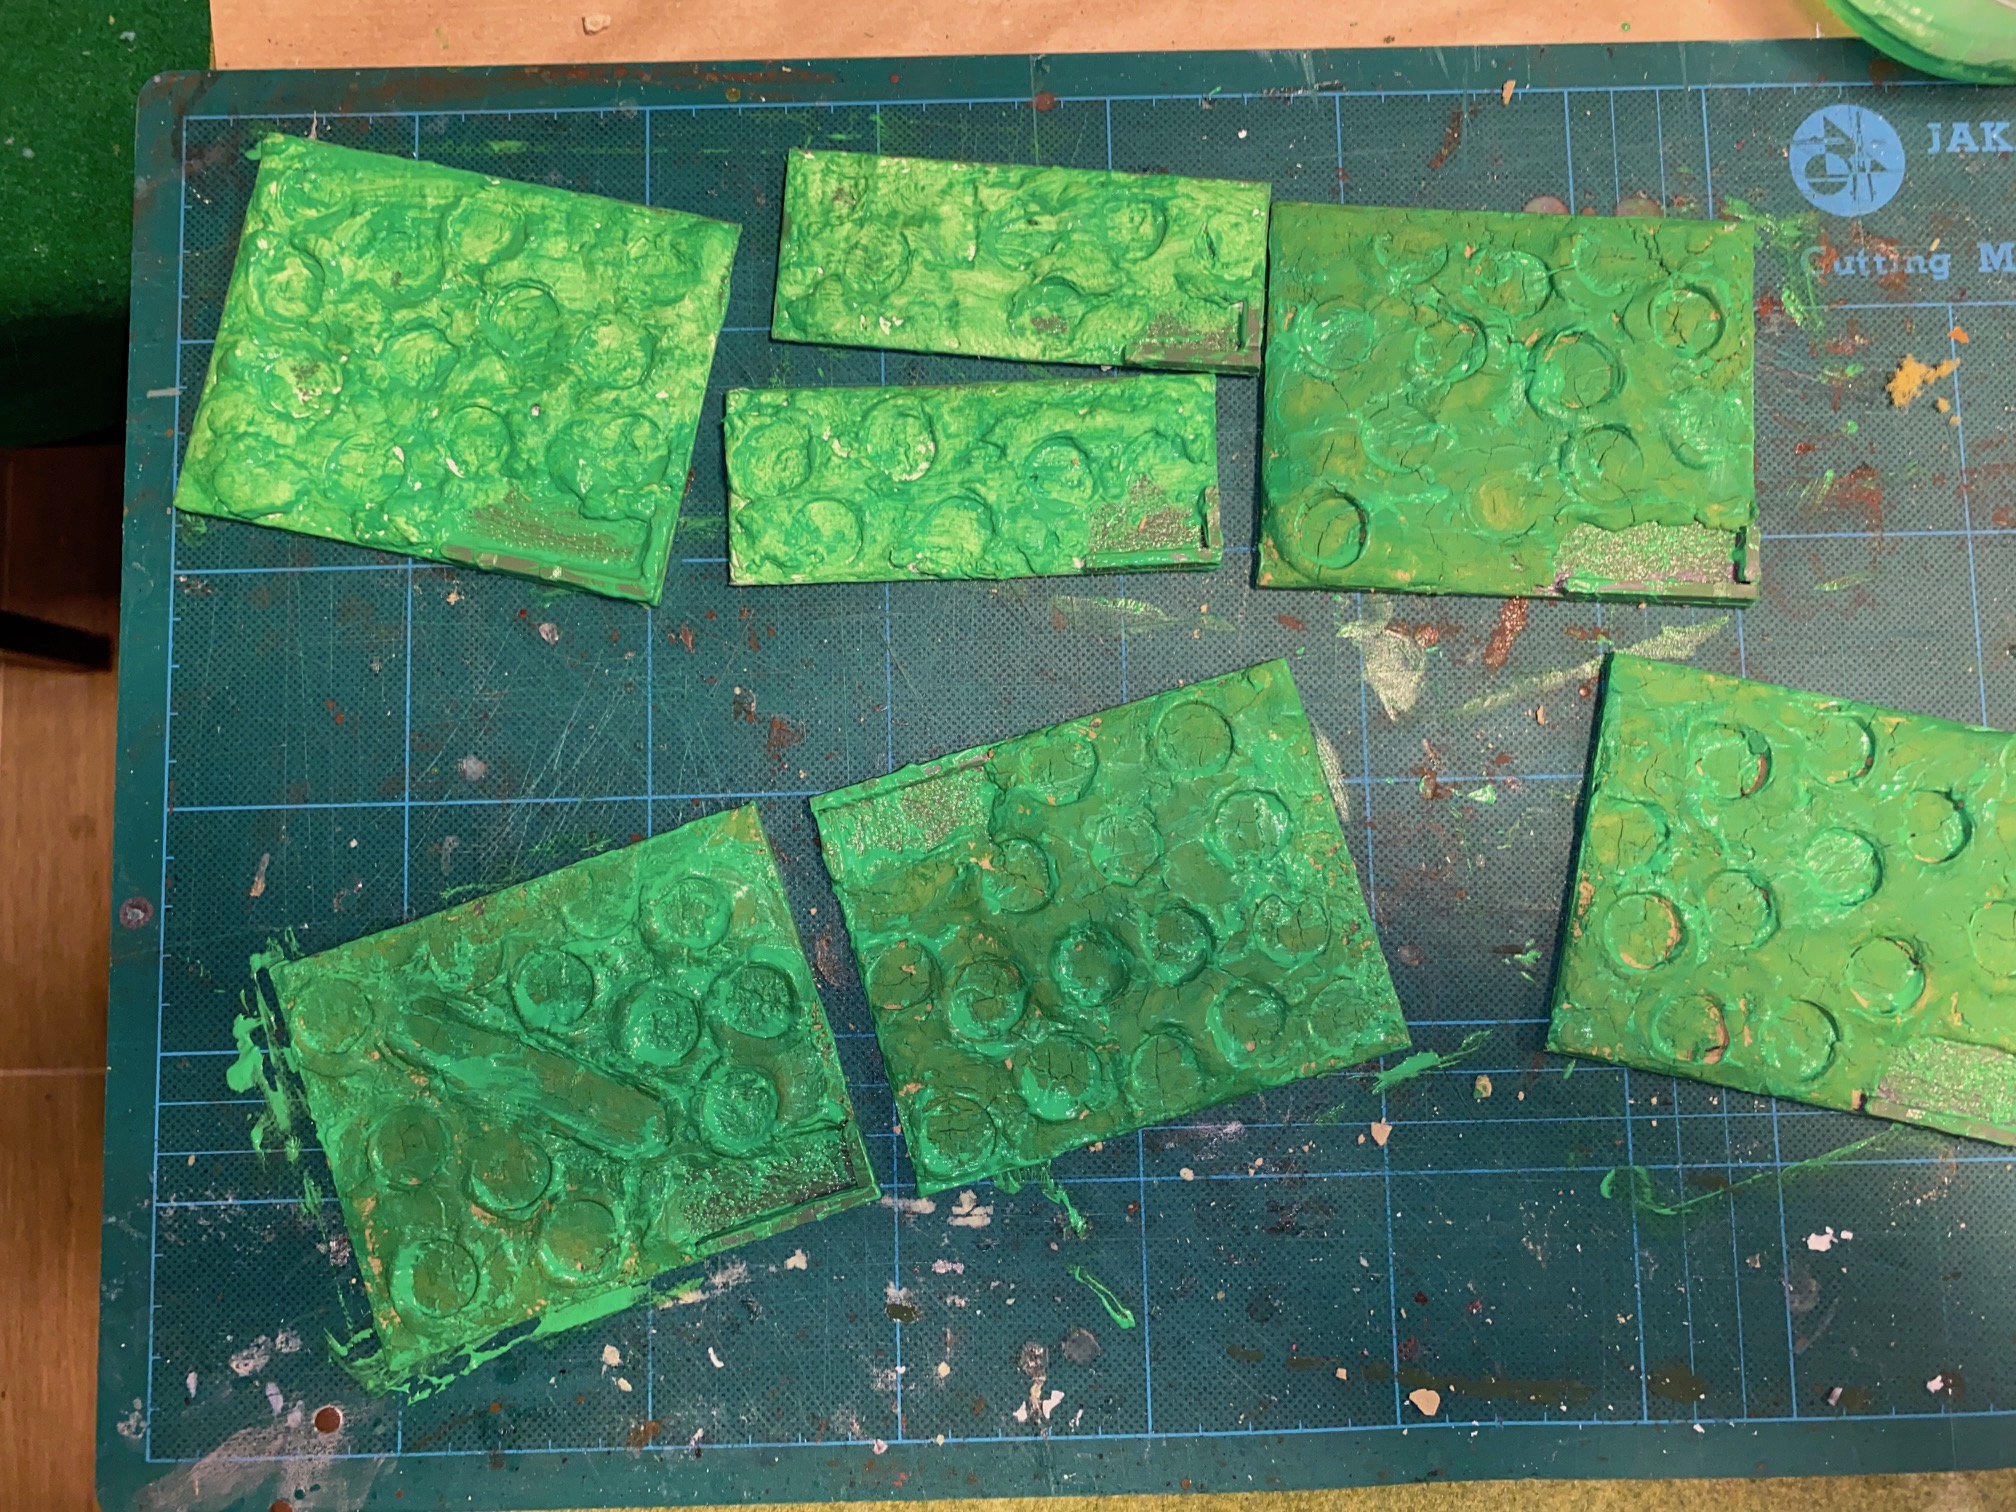
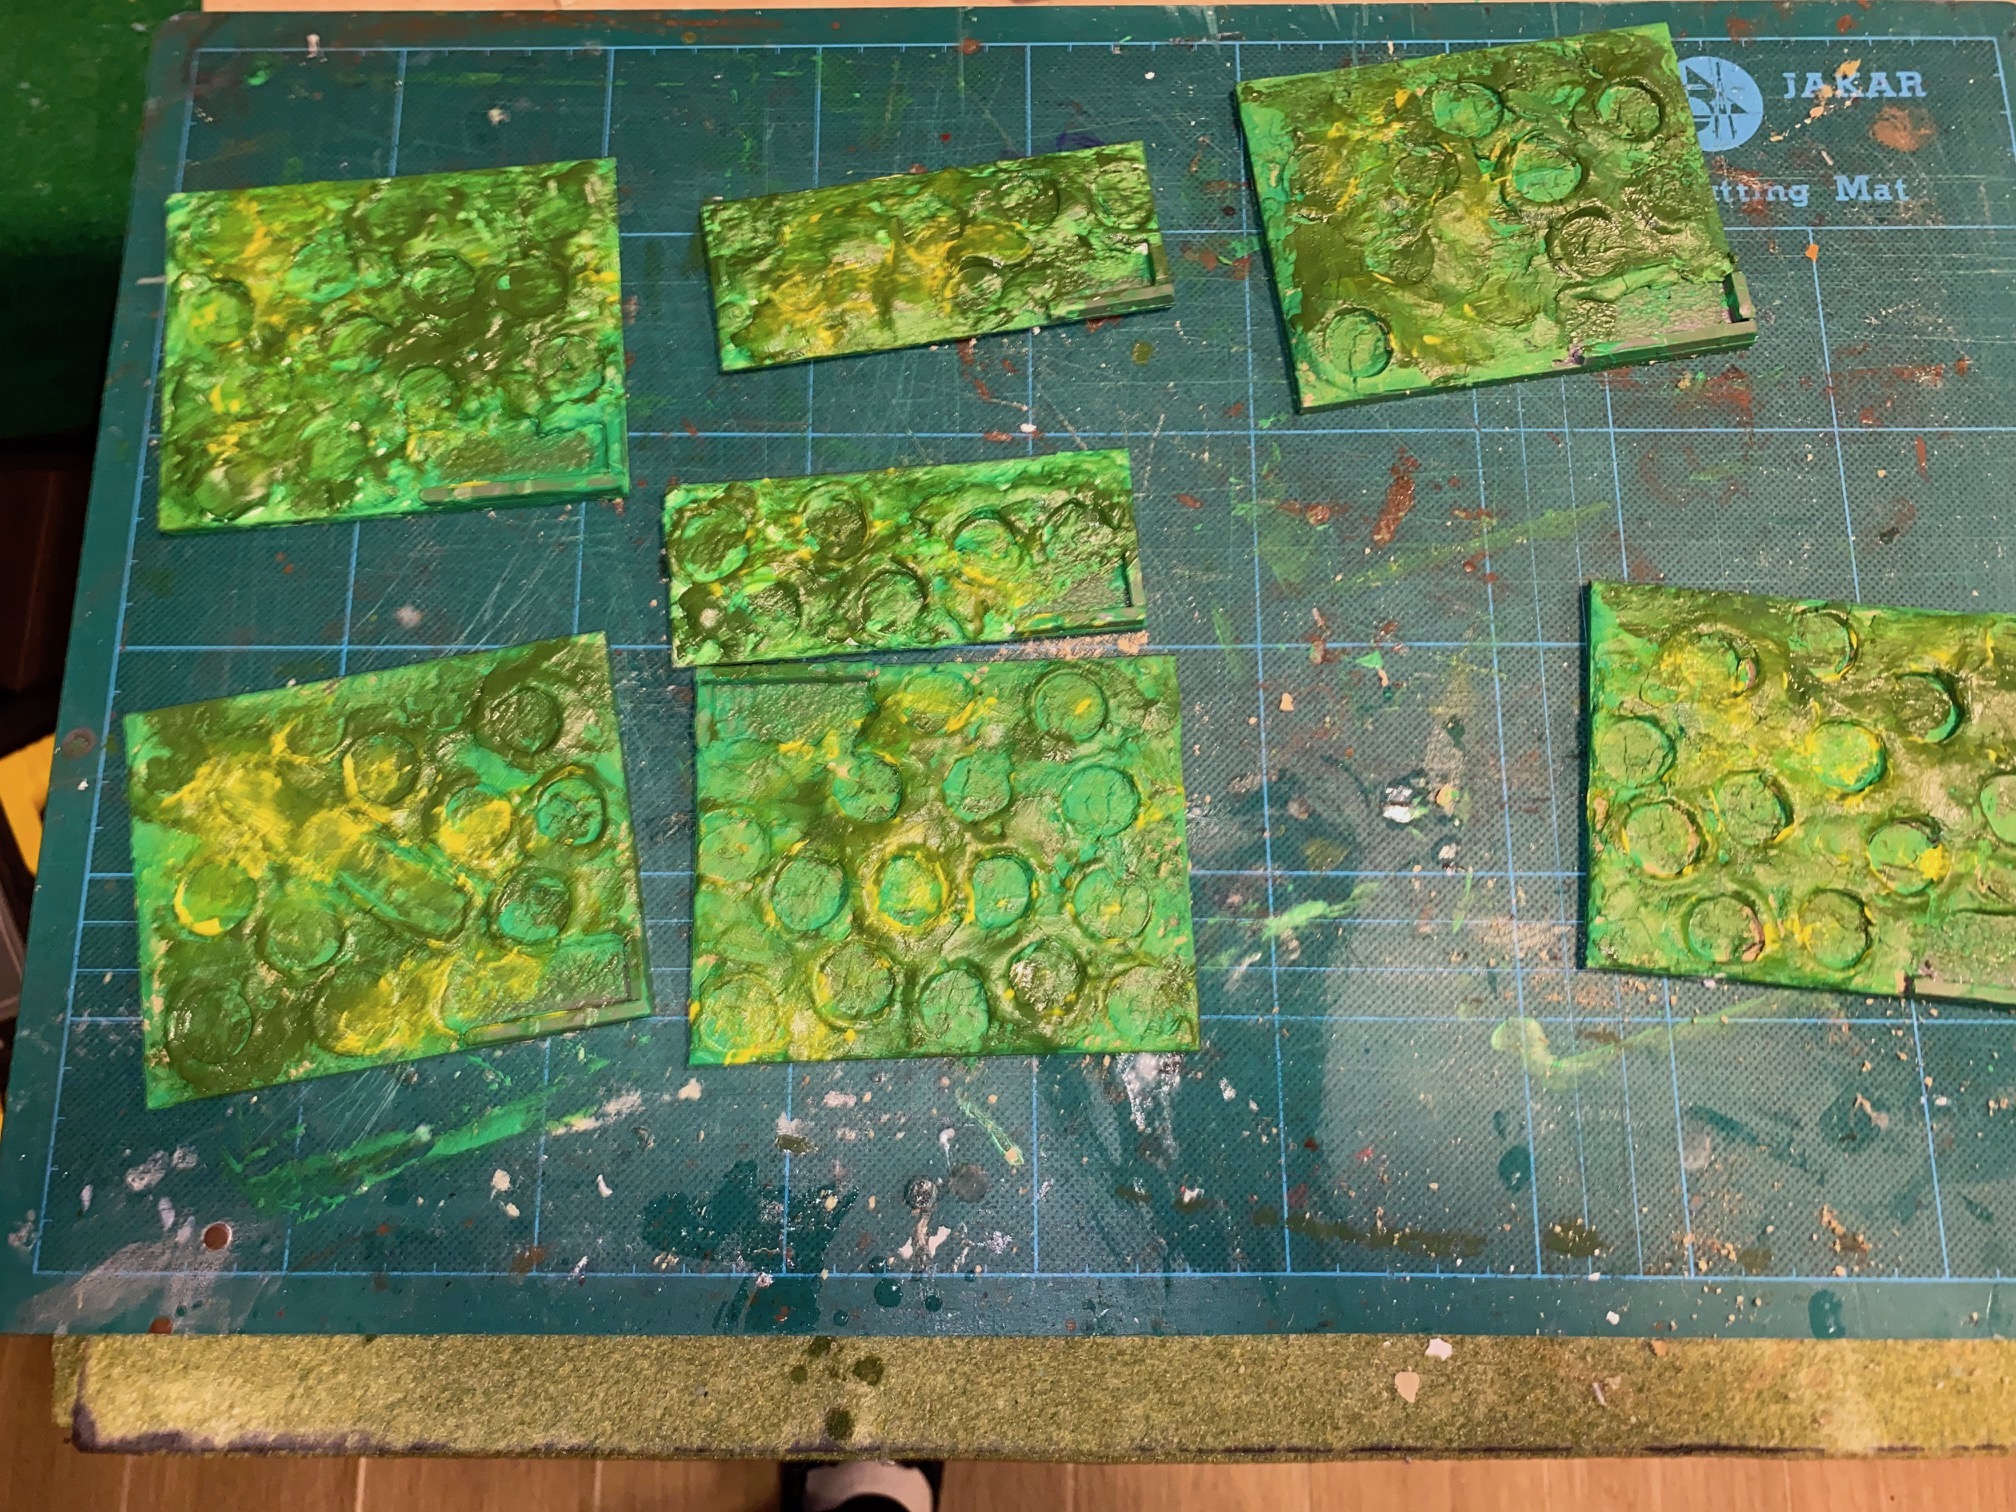
The Basing approach - Part 1
As I previously mentioned, I’ll be trying to make some “scenic” style bases for the units as I’m not a fan of true rank & file for fantasy although I love it in other periods.
So the base for the units will be Mantic’s own plastic bases, which are obviously already the exact size/footprint and these will be the foundation of the entire army.
The scenic “material” I’ll use will be DAS air drying clay which is available in different colours. I have a small amount left in white/grey, but will look to replace this with the terra-cotta color as soon as I can.
The approach is described in the few pictures that follow, but essentially the bases are given a thin coat of PvA glue and the DAS is speed on top, and while still flexible, I use another Mantic model to depress slightly the surface of the DAS so that the eventual figures will sit “in” the earth, rather than sitting on top.
Later stages will include coloring, flocking etc. – more later once the DAS is completely dry.
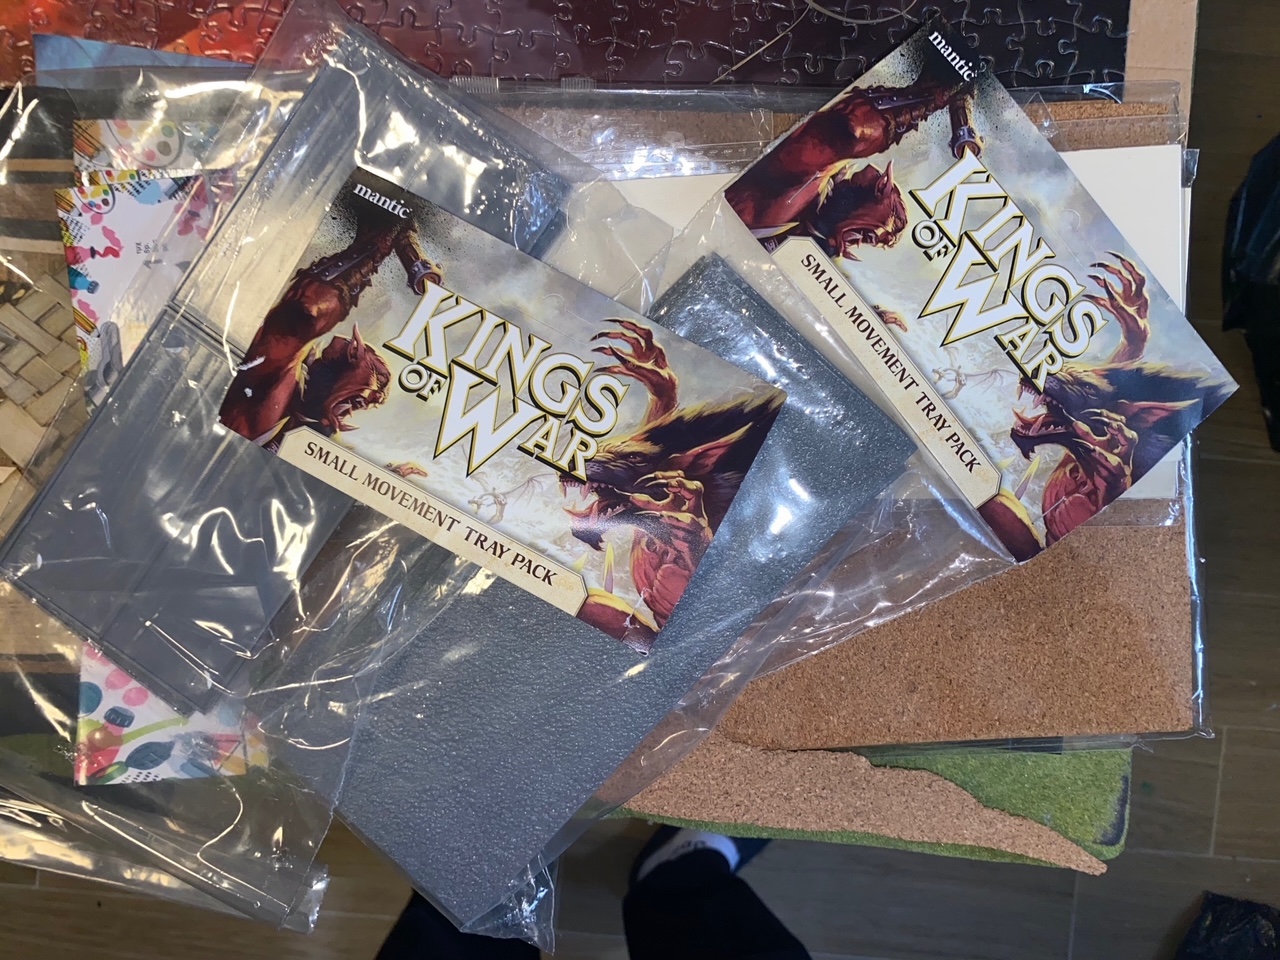 Mantic Base kits. The bases are set at "Horde" size, but can easily be broken down to Regiment / Troop sizes
 The materials. The sprue is there to make a small barrier to hold the damage dice on the bases. Adding them to the base makes sense to me and keeps the table uncluttered
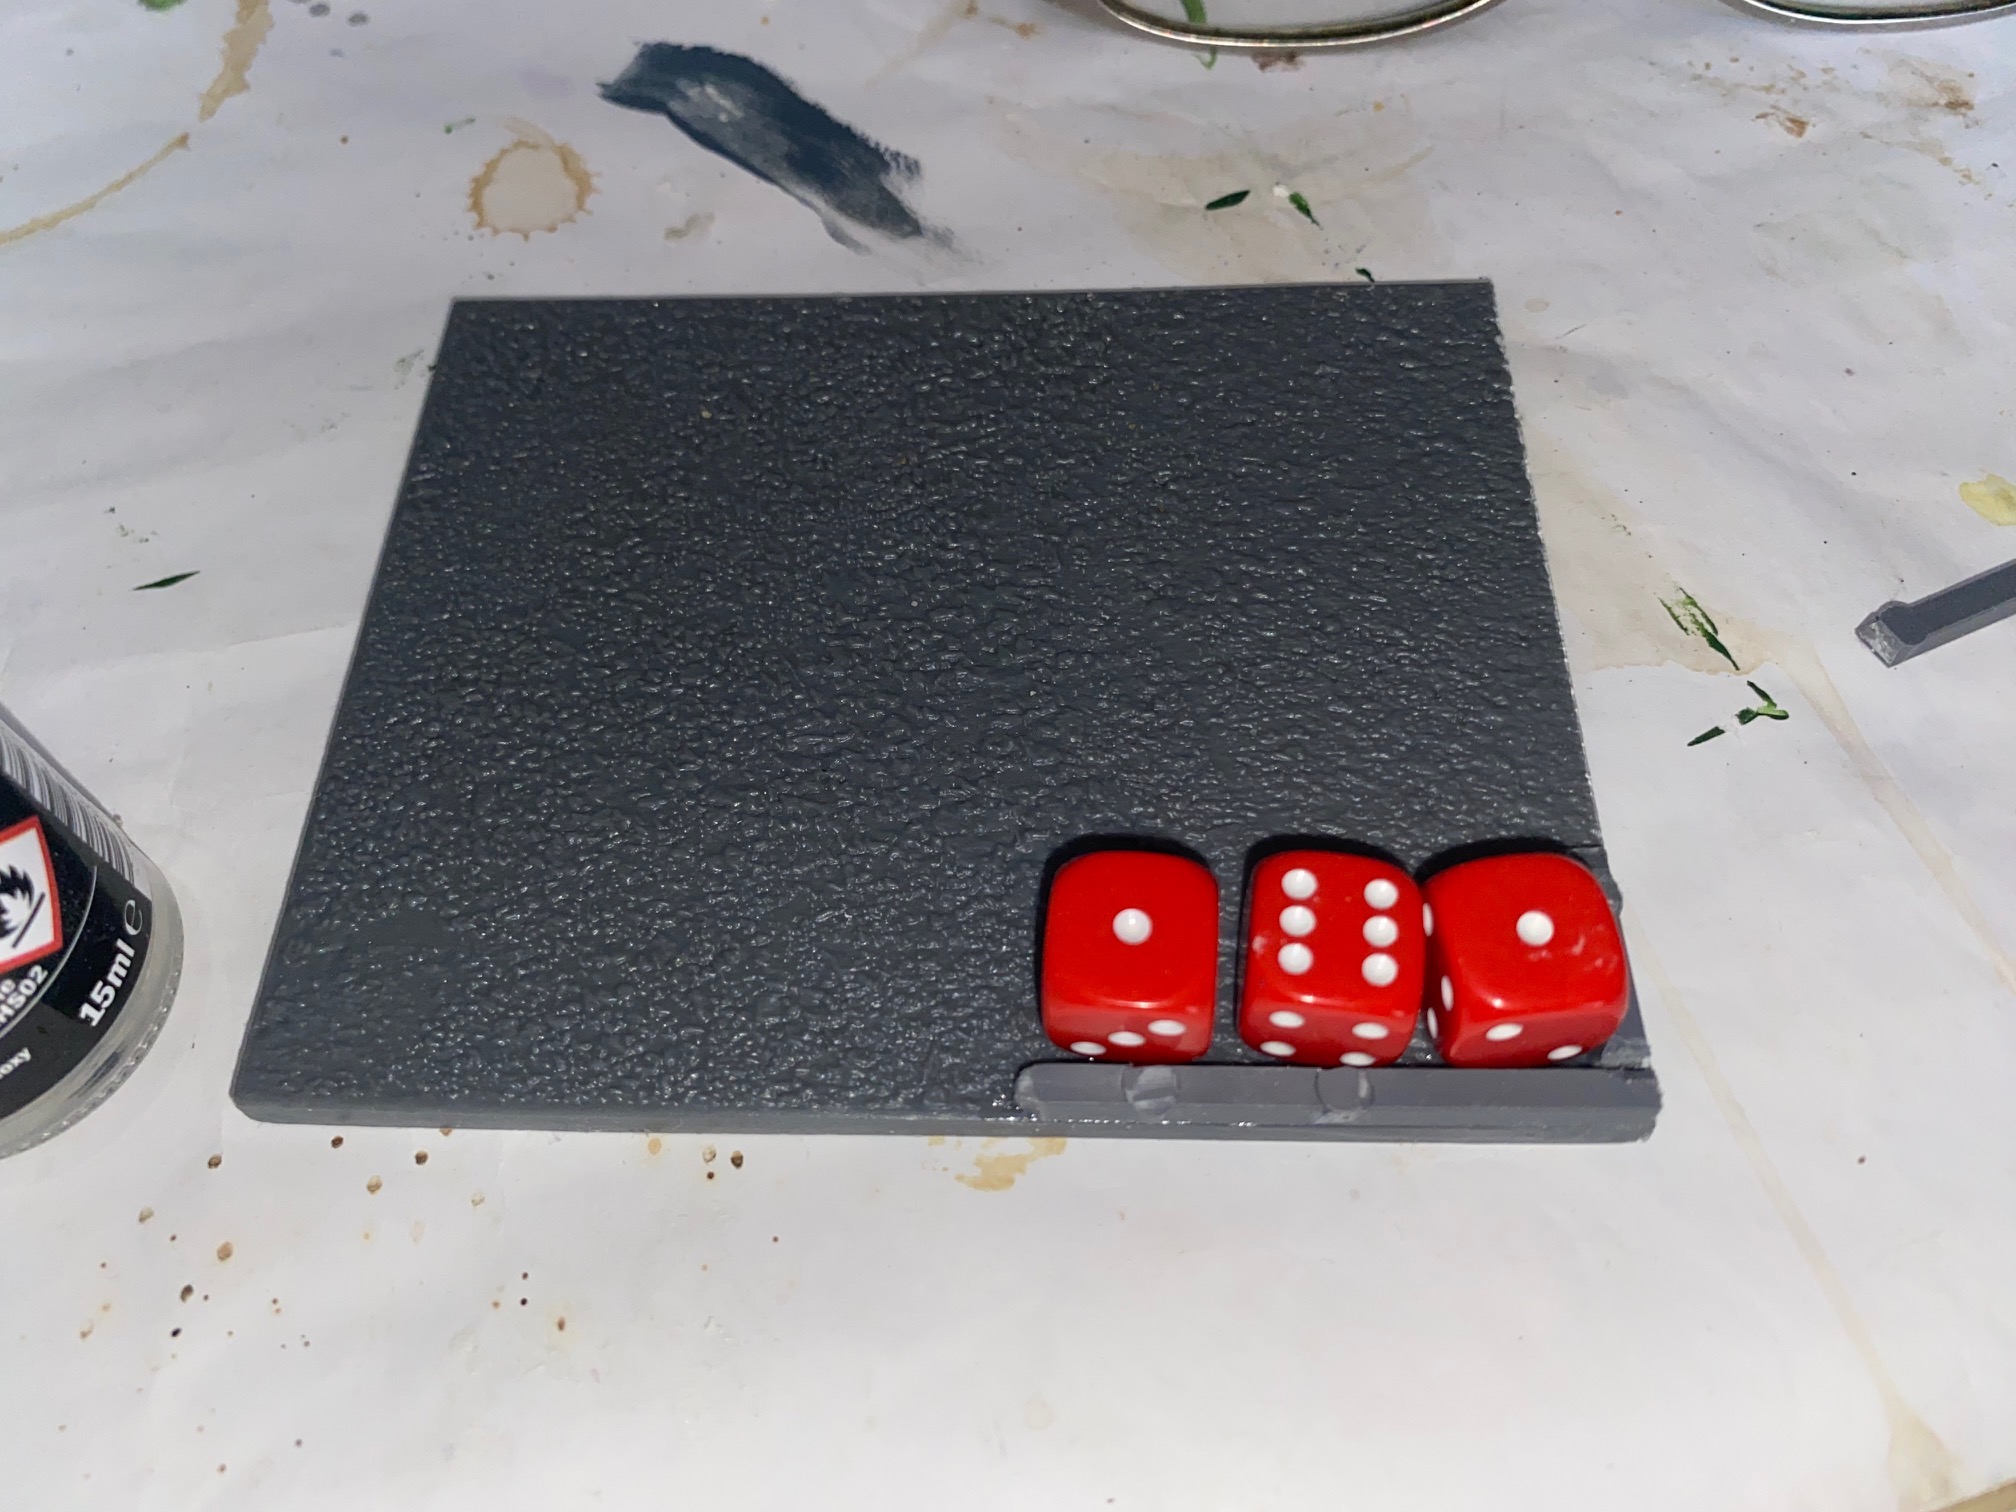 A sprue on the rear of the base and the right hand side. The rest of the dice container will be made up of the DAS clay later
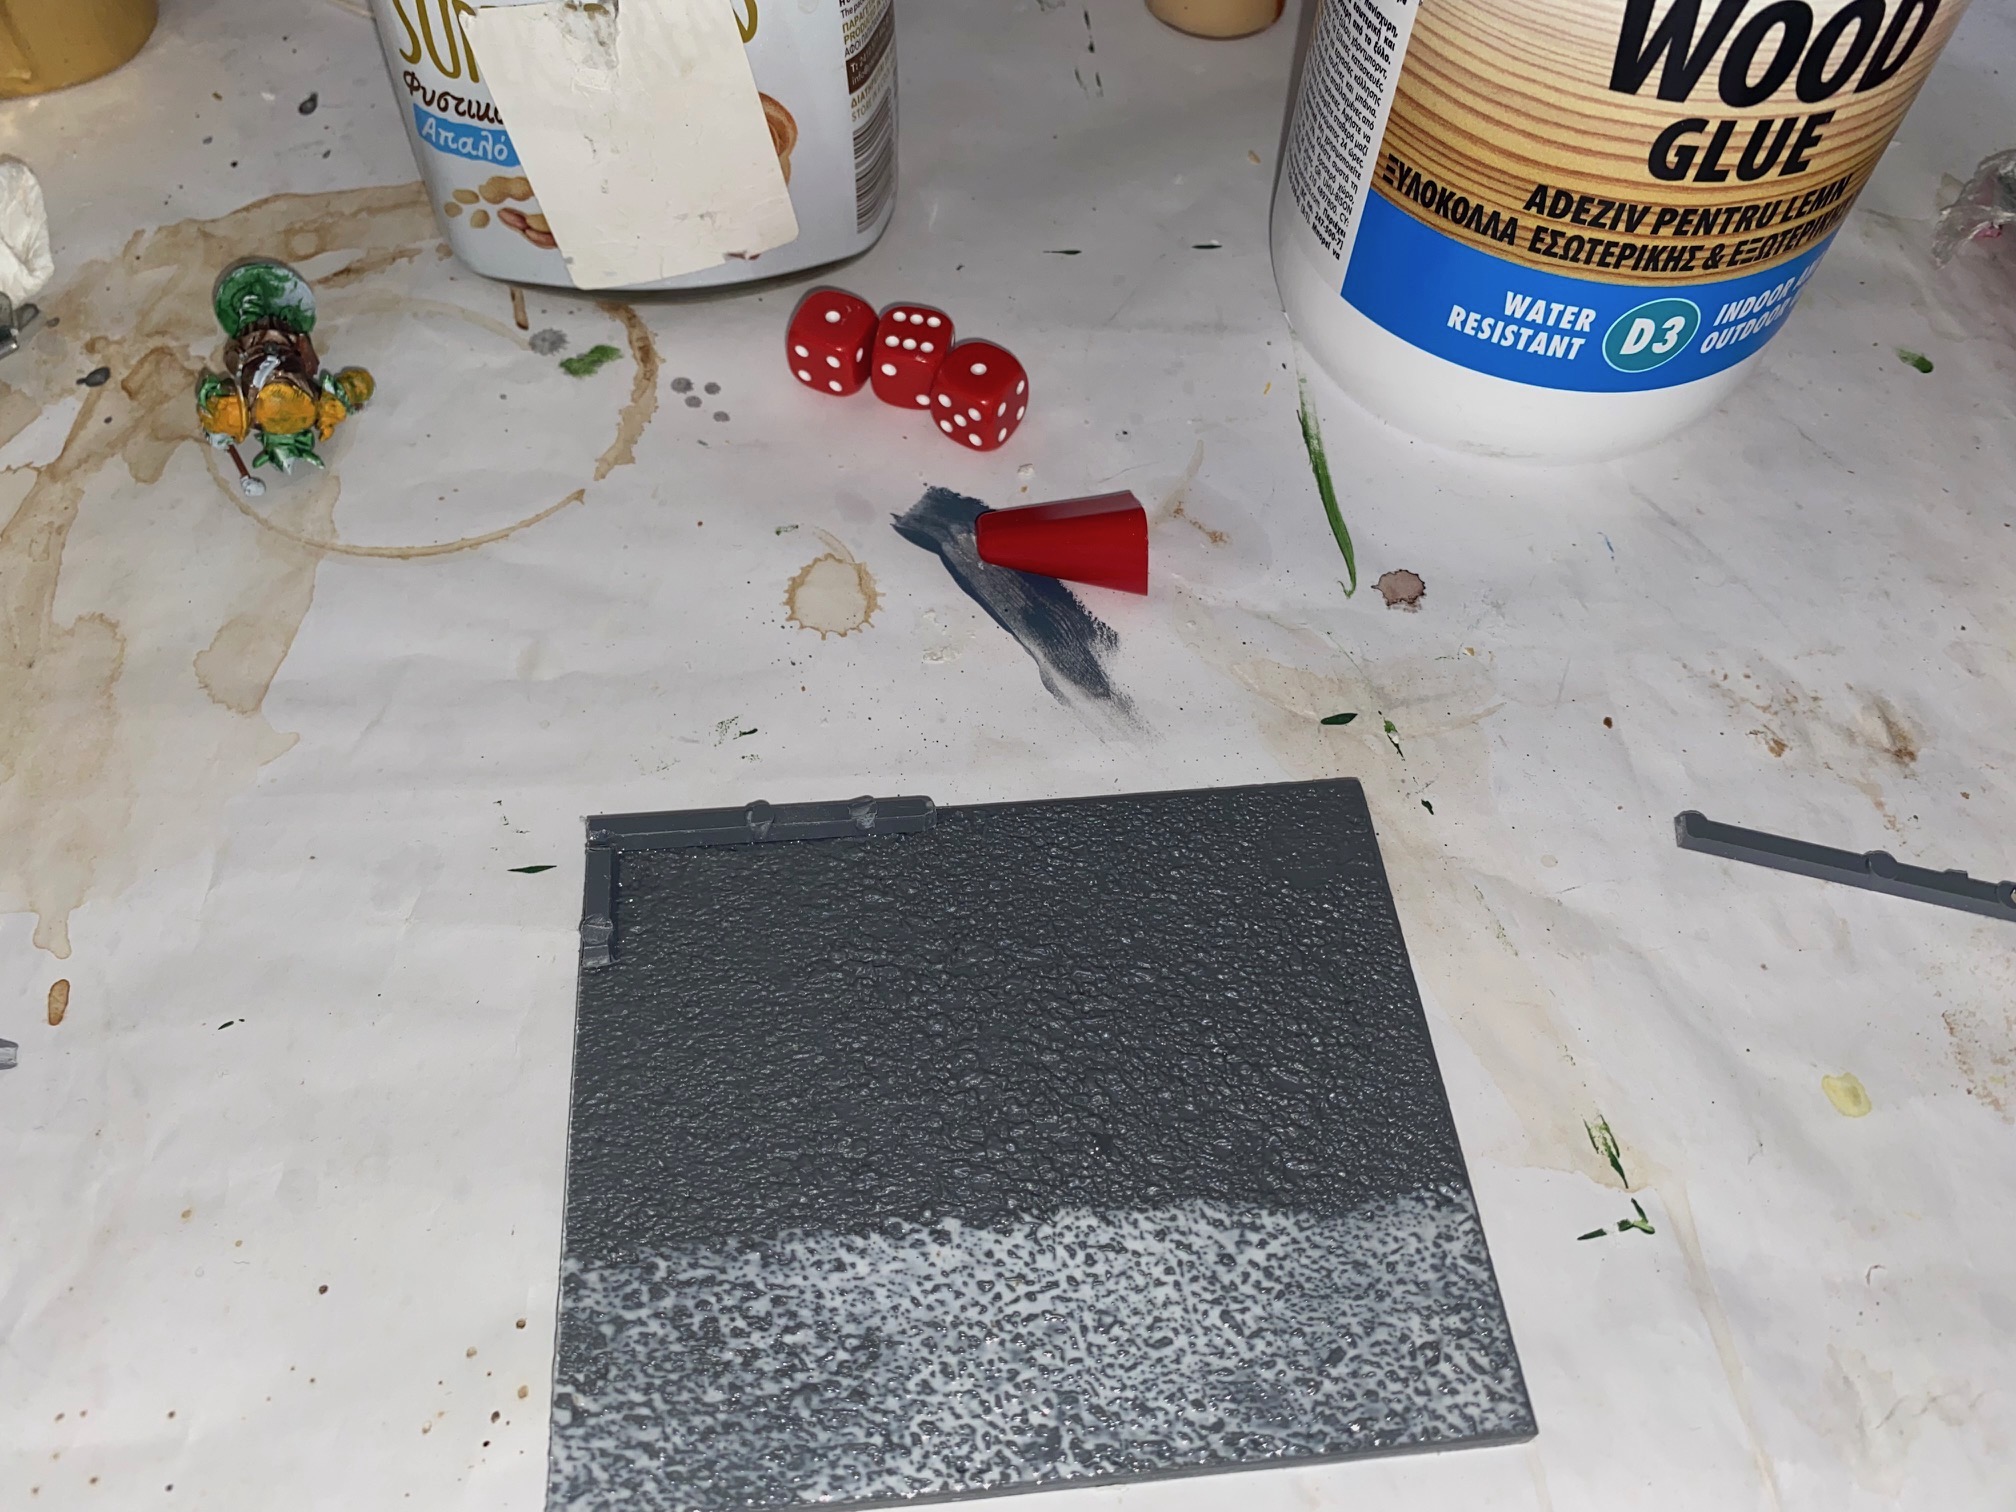 I start with a think layer of PvA glue. I'm not 100% certain it's necessary, but I think it does help to secure the DAS better on the base.
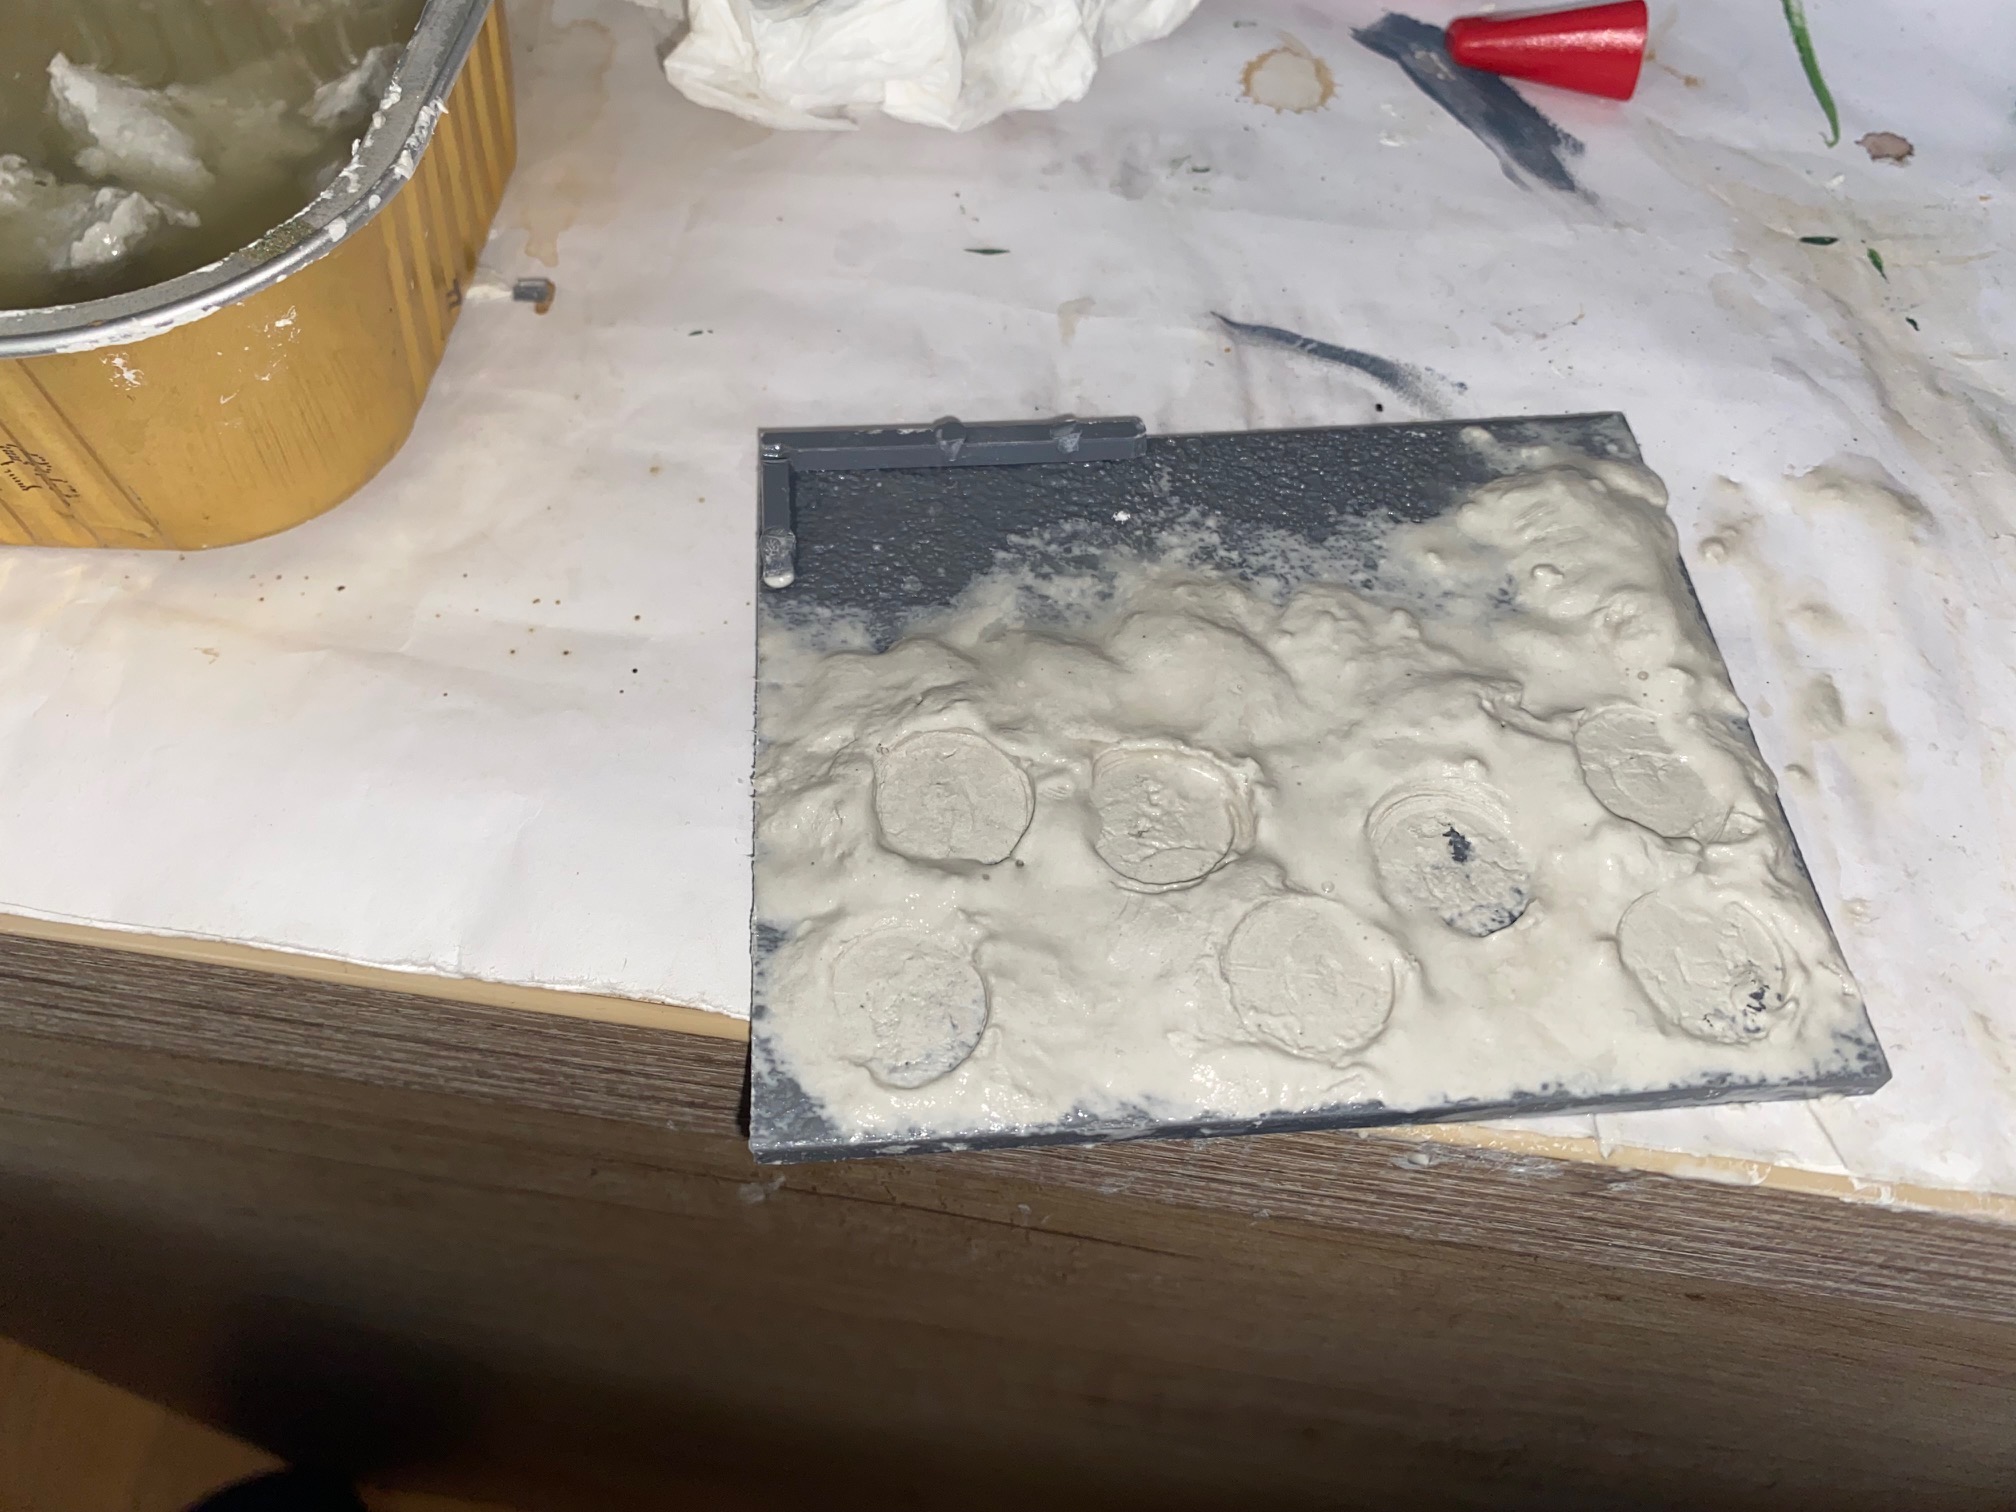 Building up the texture. The depressions were made with another Mantic model to make a space for the eventual figures to "rest" in the ground
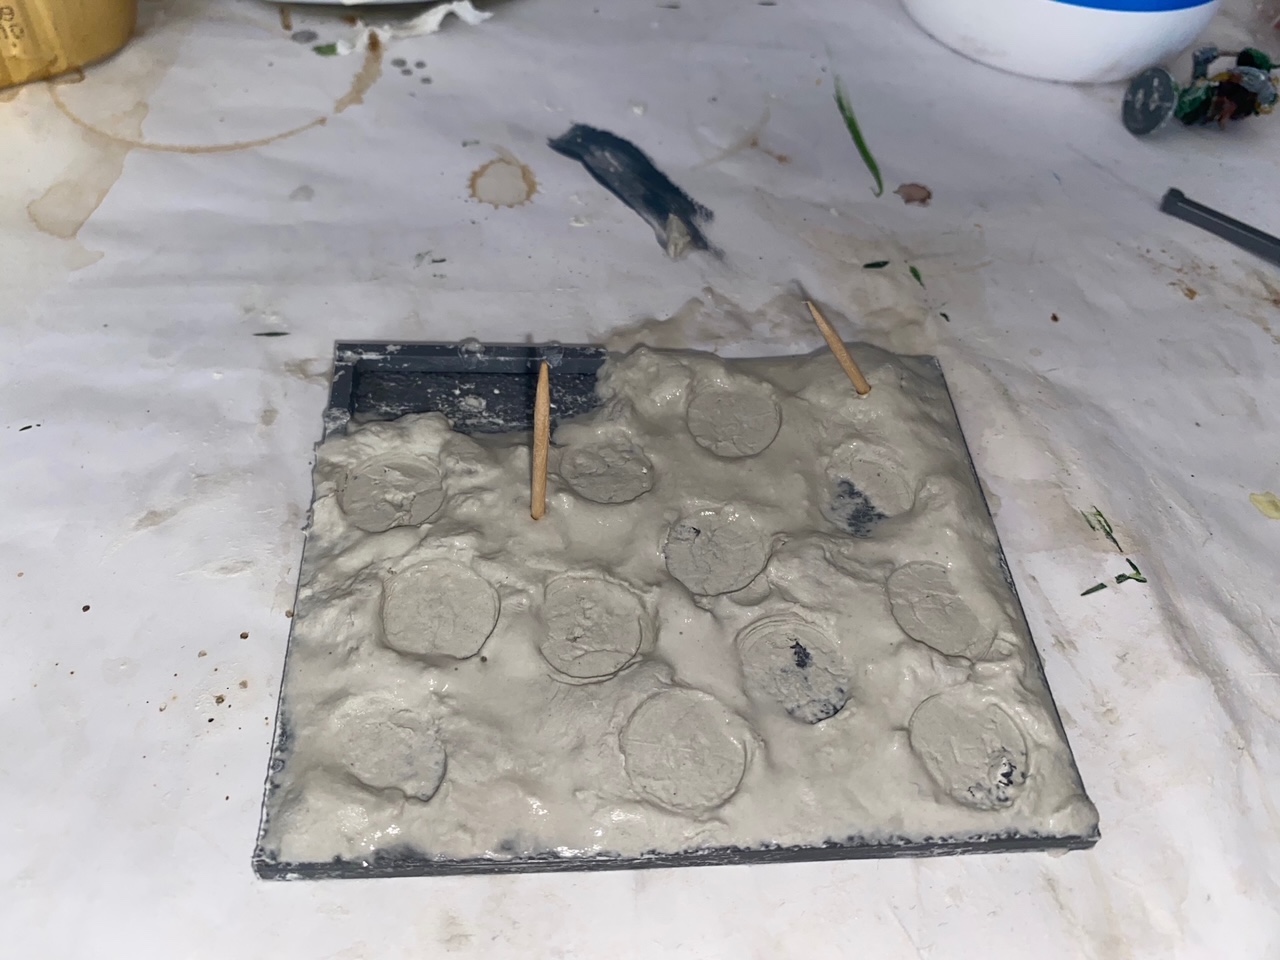 The "toothpicks" are there to indicate where a more substantial tree/shrub will be placed once everything is dried off.
So far so good (Fingers crossed). Once the base is completely dry – I’ll give it 24 hours – I’ll be giving it a base coat of acrylic greens/yellows, and then making up a few more dramatic bushes.
Now that I have had time to think about it, I’ll make up a number of scenic bases now, rather than wait until all the figures are painted.
Until next time – Happy Gaming!
Going forward from here
Quick update, with little to post. Slowly increasing my physical activities and I wanted to share my thinking about the approach going forward. I plan to try and fully complete each unit base in turn before moving onto the next one. What I want to avoid is a common situation where I ended up preparing numerous figures, sometime not fully completed, and building up another “pile of shame” without finishing things off fully.
So, this time I’ll try a more focused approach. I’ll paint up and complete the figures for a unit base, prepare the scenic base and glue/finish in full (depending on things drying etc.) before starting on the next base.
I’ll also plan to alternate the figure bases to add variety in my preparation, for example, Archer followed by Scout, then Archer followed by Spearmen etc. Dropping in a “Hero” or special figure in between.
Other small changes to the paining. I decided to drop the armour colour on the helmets crests and instead will add some Bronze for variety. The Mantic figures have lots of small features, which I will use to add extra colours to individualise some of the figures. I’ll still paint belts, scabbards etc. in a variety of leather effects, but I like the idea of adding spots of highlight colours as well. Pictures will be posted as I progress.
Scenic bases will use the Mantic unit bases (these are plastic and obviously the appropriate size for the units). I have enough, so why not? I’ll use DAS as the main material to create undulating “meadow” features, with a variety of heights and area covered. While still ‘soft’ I will also use another Mantic figure to depress the DAS sufficiently for the actual painted figures to sit “in” the ground, rather than on top of it. I hope this will make the final base more “realistic” bearing in mind I will also be covering these figure bases with sand, flock, grass etc anyway.
Trees and shrubs will be created to further enhance the base/mini-diorama to make the bases “interesting” as well as practical. Finally I will probably use slightly fewer figures than the Mantic minimum recommended numbers for two reasons. Firstly I want the scenic base to be “full” of scenery and consequently there will be less space for figures, but secondly, I’m not a tournament player – I’m solo – and can play to my own ‘rules’.
So hopefully within the next week or so I’ll have something to show. Certainly I’ll finish the first unit by then!
Happy gaming.
Clan Callathran
In my imagination of Panathor, I’ll create a number of Elven Clans/Families with some brief potted history to add some flavour to future conflicts, civil strife etc. The first of these is the Clan Callathran, famous for their skilled archers. They represent the “traditional” Wood Elves and as a consequence, when I come to base them, I’ll be looking to create a scenic base of meadows, woods and forests.
The Family Callathran are (in my world) an ancient Elven clan famous for their archery and steadfastness in the face of enemies. Their most prestigious victory was the so-called “War of the Wine Glass” where an invasion of thousands of Orcs & Goblins was repulsed by over 500 archers assembling and unleashing over 15,000 arrows in the space of 12 minutes (at least according to legend!) – about the time it takes to drink a small glass of sweet red wine.
The war was over before it began as Orcs and Goblins fell under the arrow storm, which blackened the sky and wrought havoc among their force. The clan then became the core of future Elven armies in battles against all foes and they carry their bows with pride and a calm assurance.
Being reliant on their archers almost to exception, their lack of melee combat might become a factor depending on the enemy, the terrain, and the local conditions, but it will be interesting to test them in battle. A smart battle plan will be vital, as well as use of defensive formations and effective cover.
Of course Madriga can be replaced by an Elven Prince or Archmage to add some additional melee ability. Or at some future date an additional Tallspear Regiment can stiffen their melee resolve.
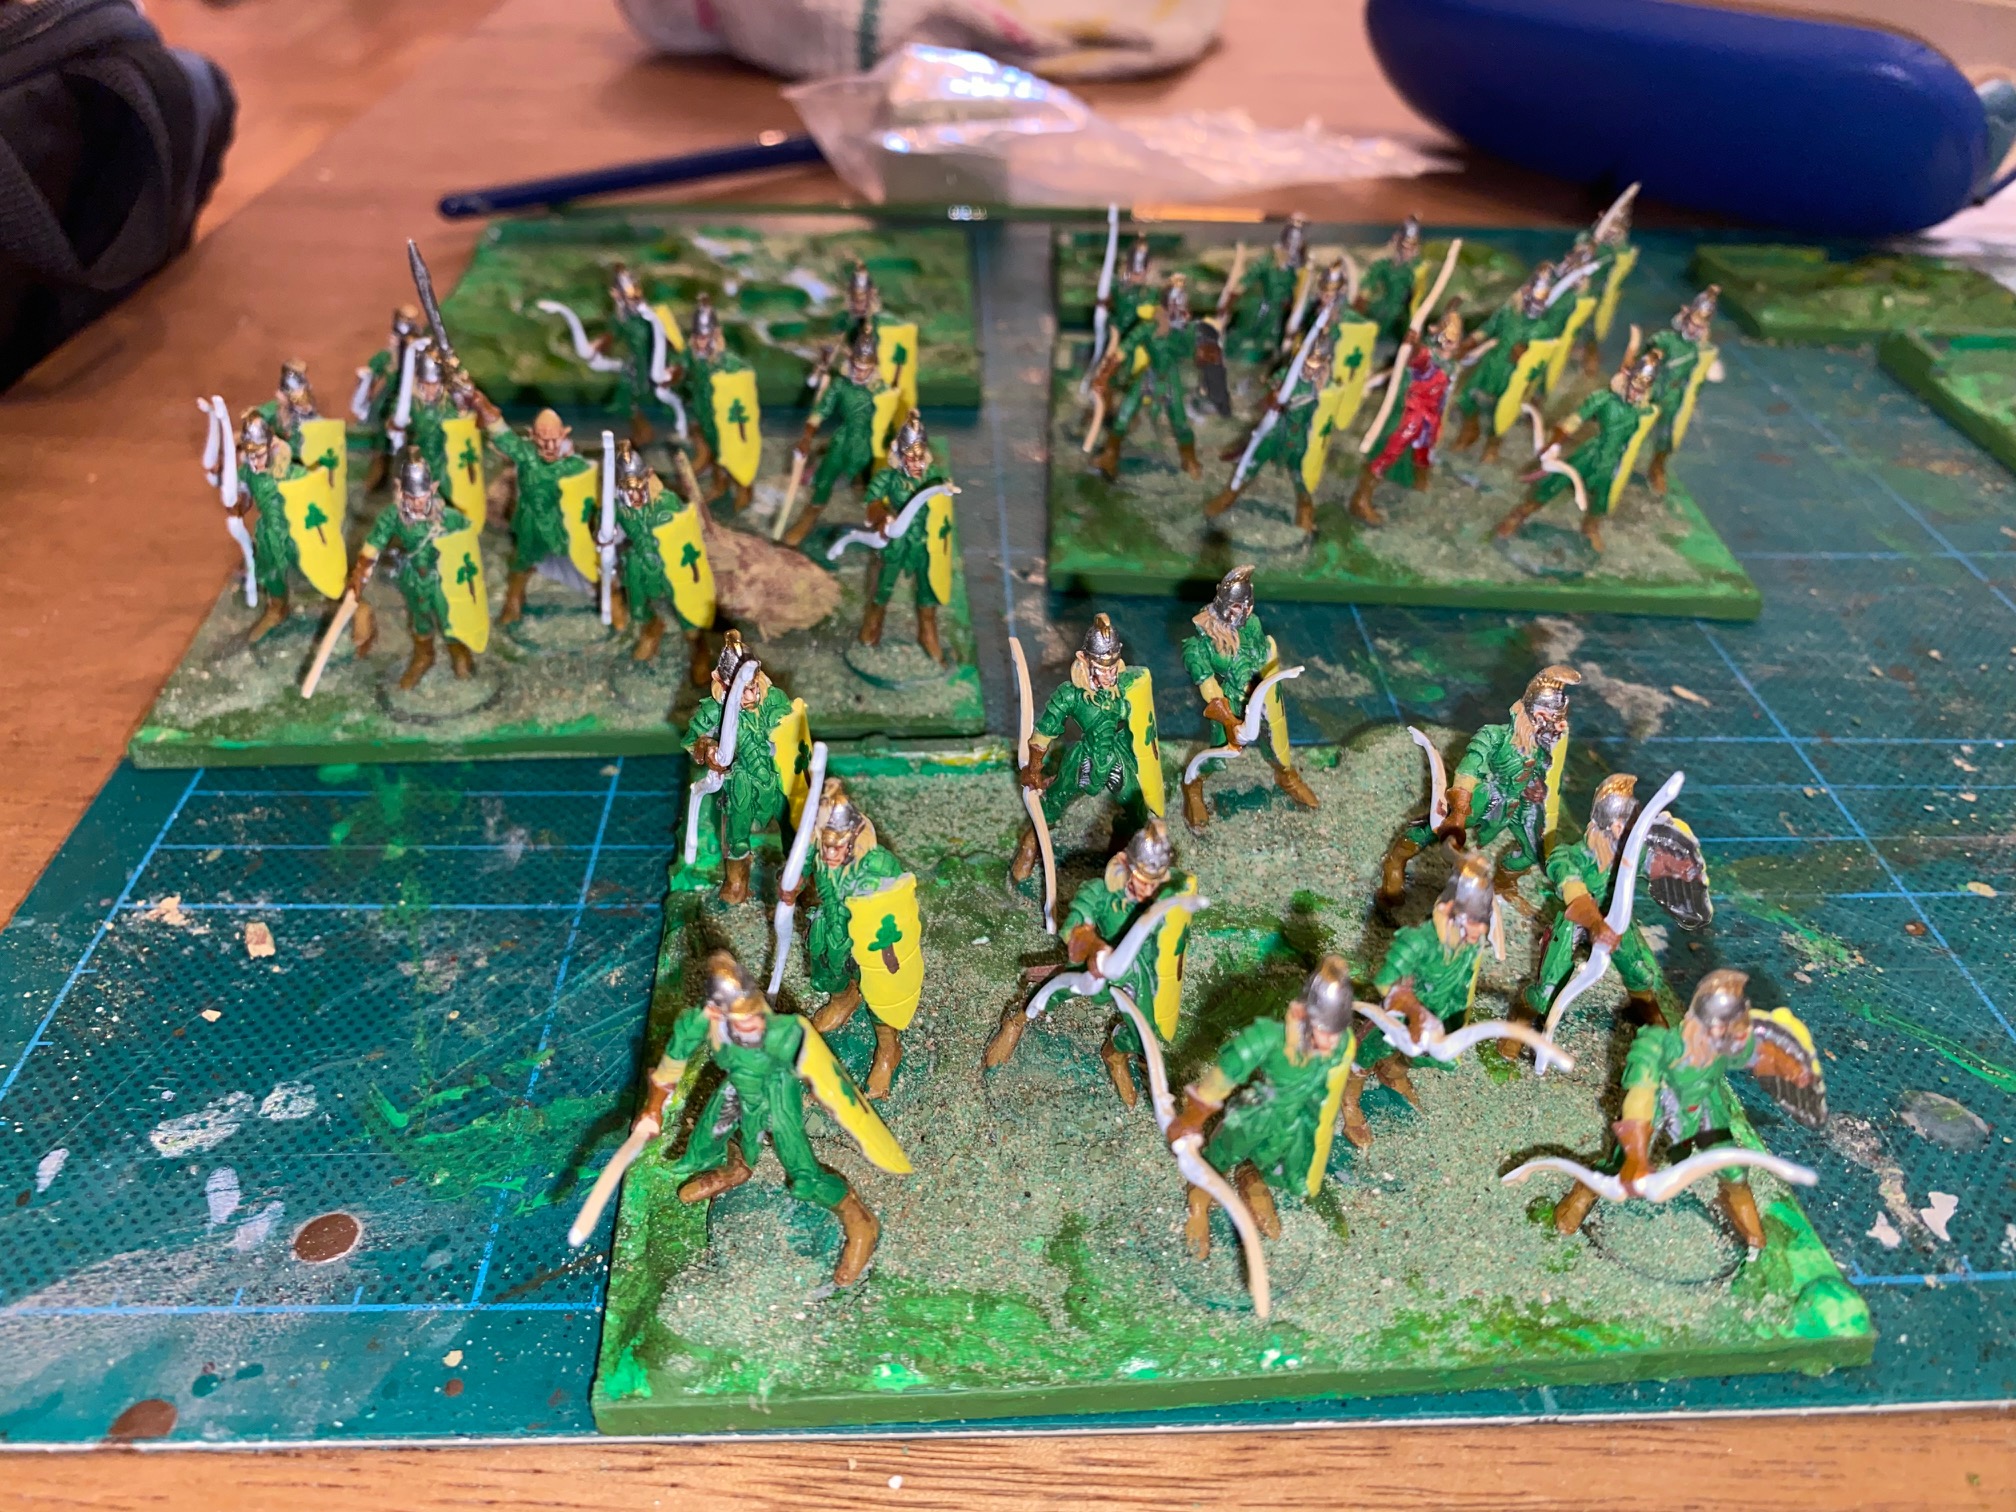
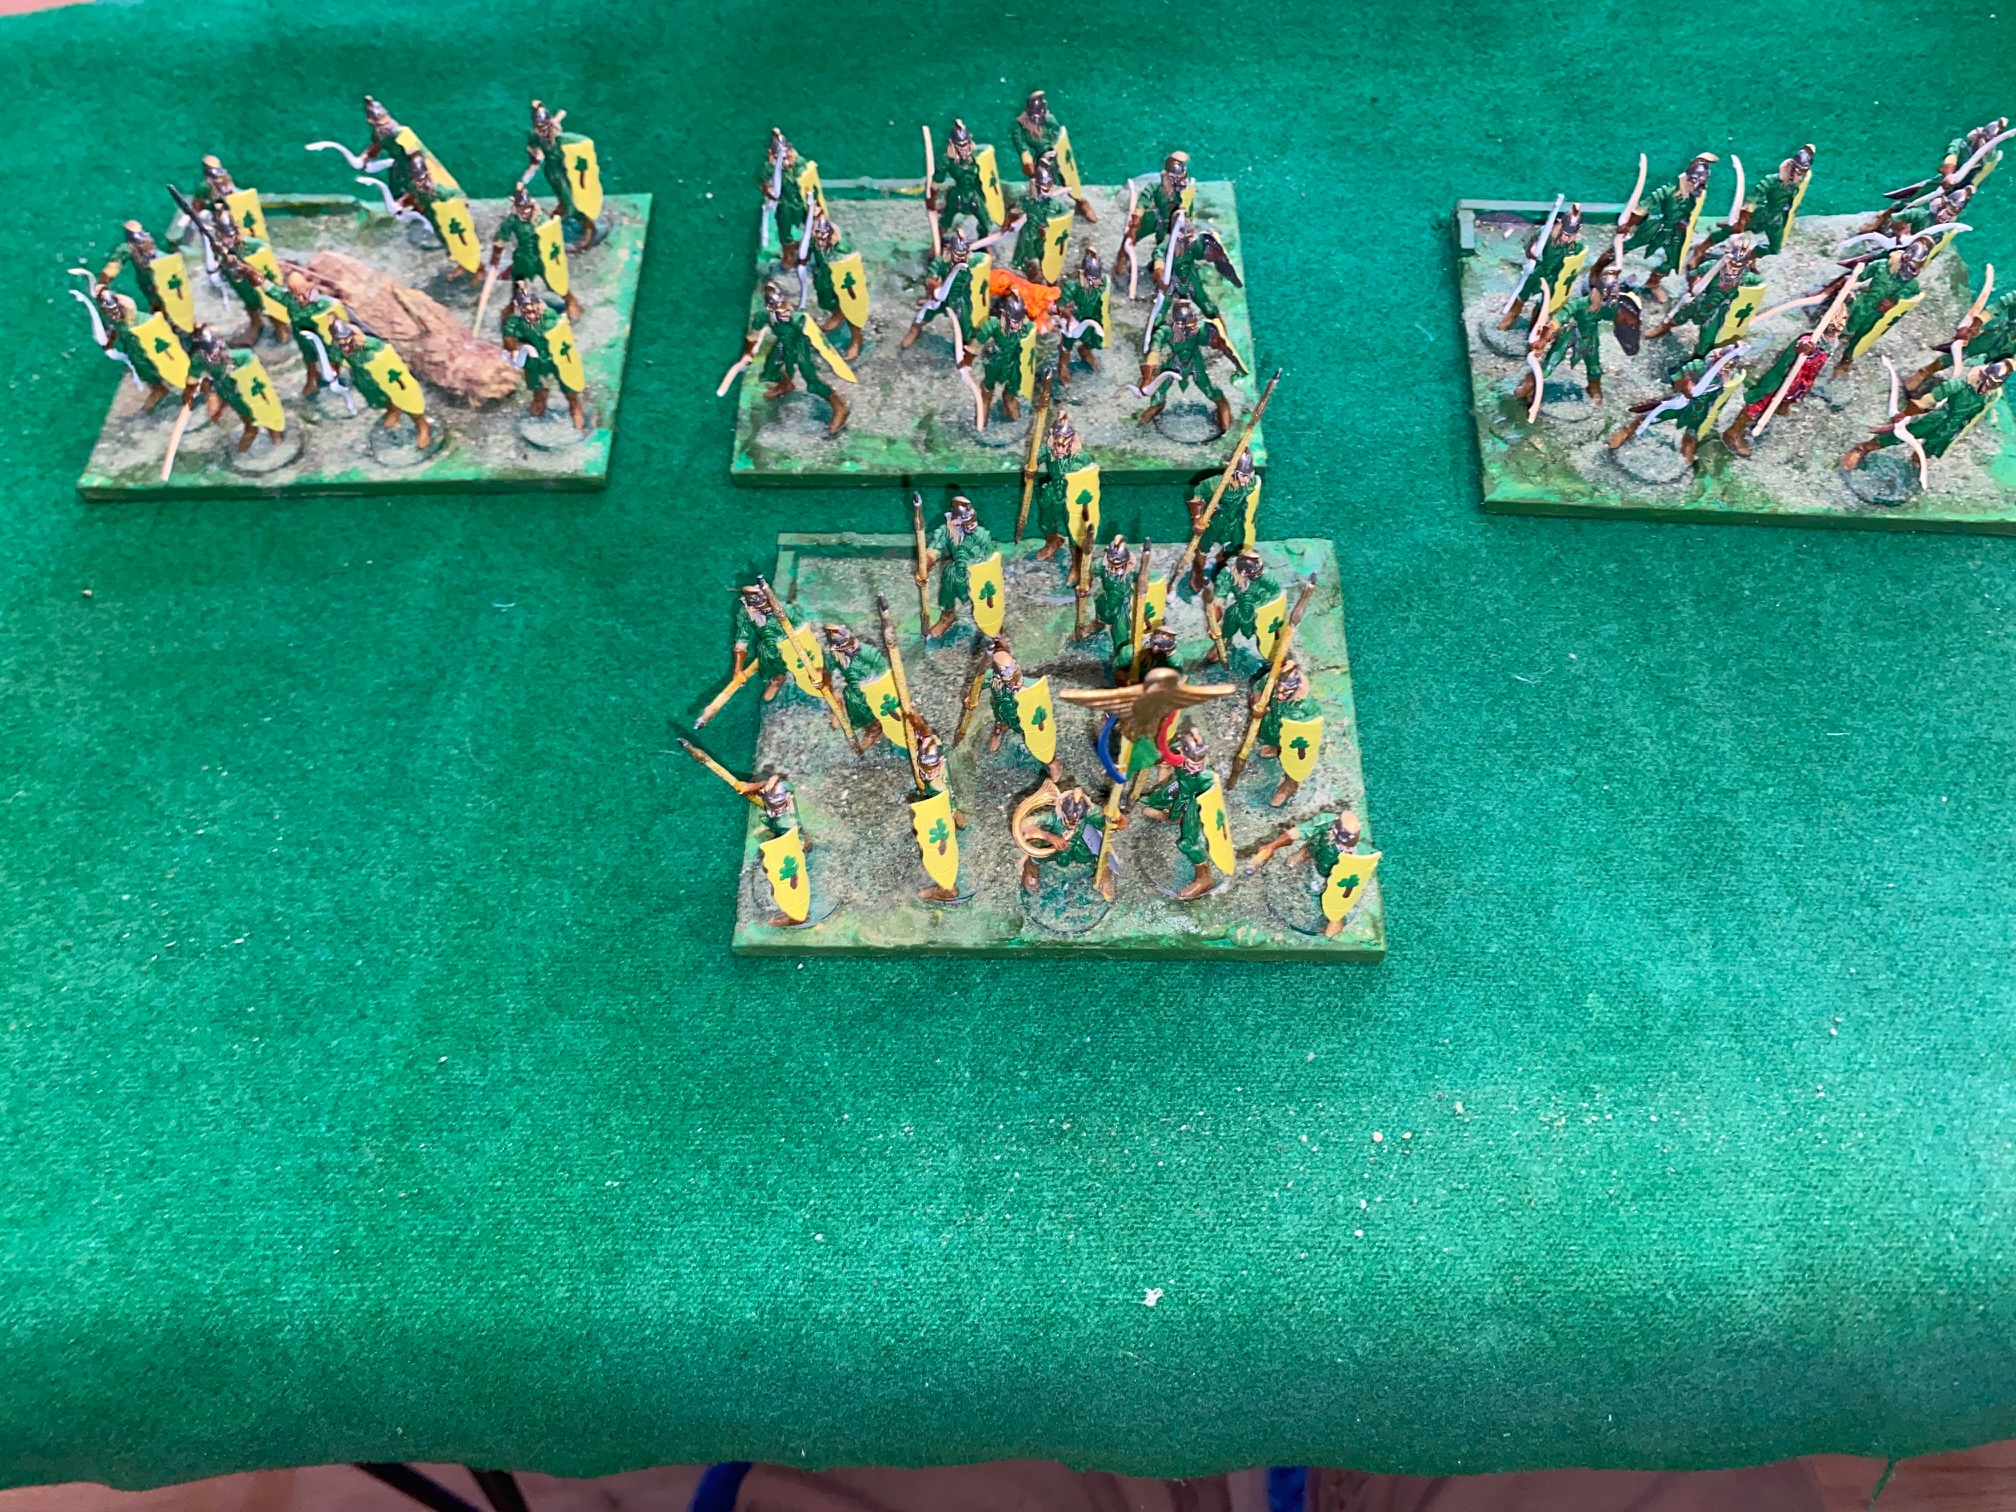
 This force is archer heavy (naturally) and will comprise three regiments of Kindred Archers (120 points each), one Regiment of Kindred Tallspears (140 points), two Troops of Kindred Gladestalkers (130 points each) and led by Madriga (125 points) for a total of 755 points.
The color scheme will follow the earlier examples, although I have omitted the step of a wash of Gunmetal, as this didn’t really add anything. Instead, I have highlighted those parts of the “sub-armor” with the same Gunmetal that seems to indicate some form of chainmail.
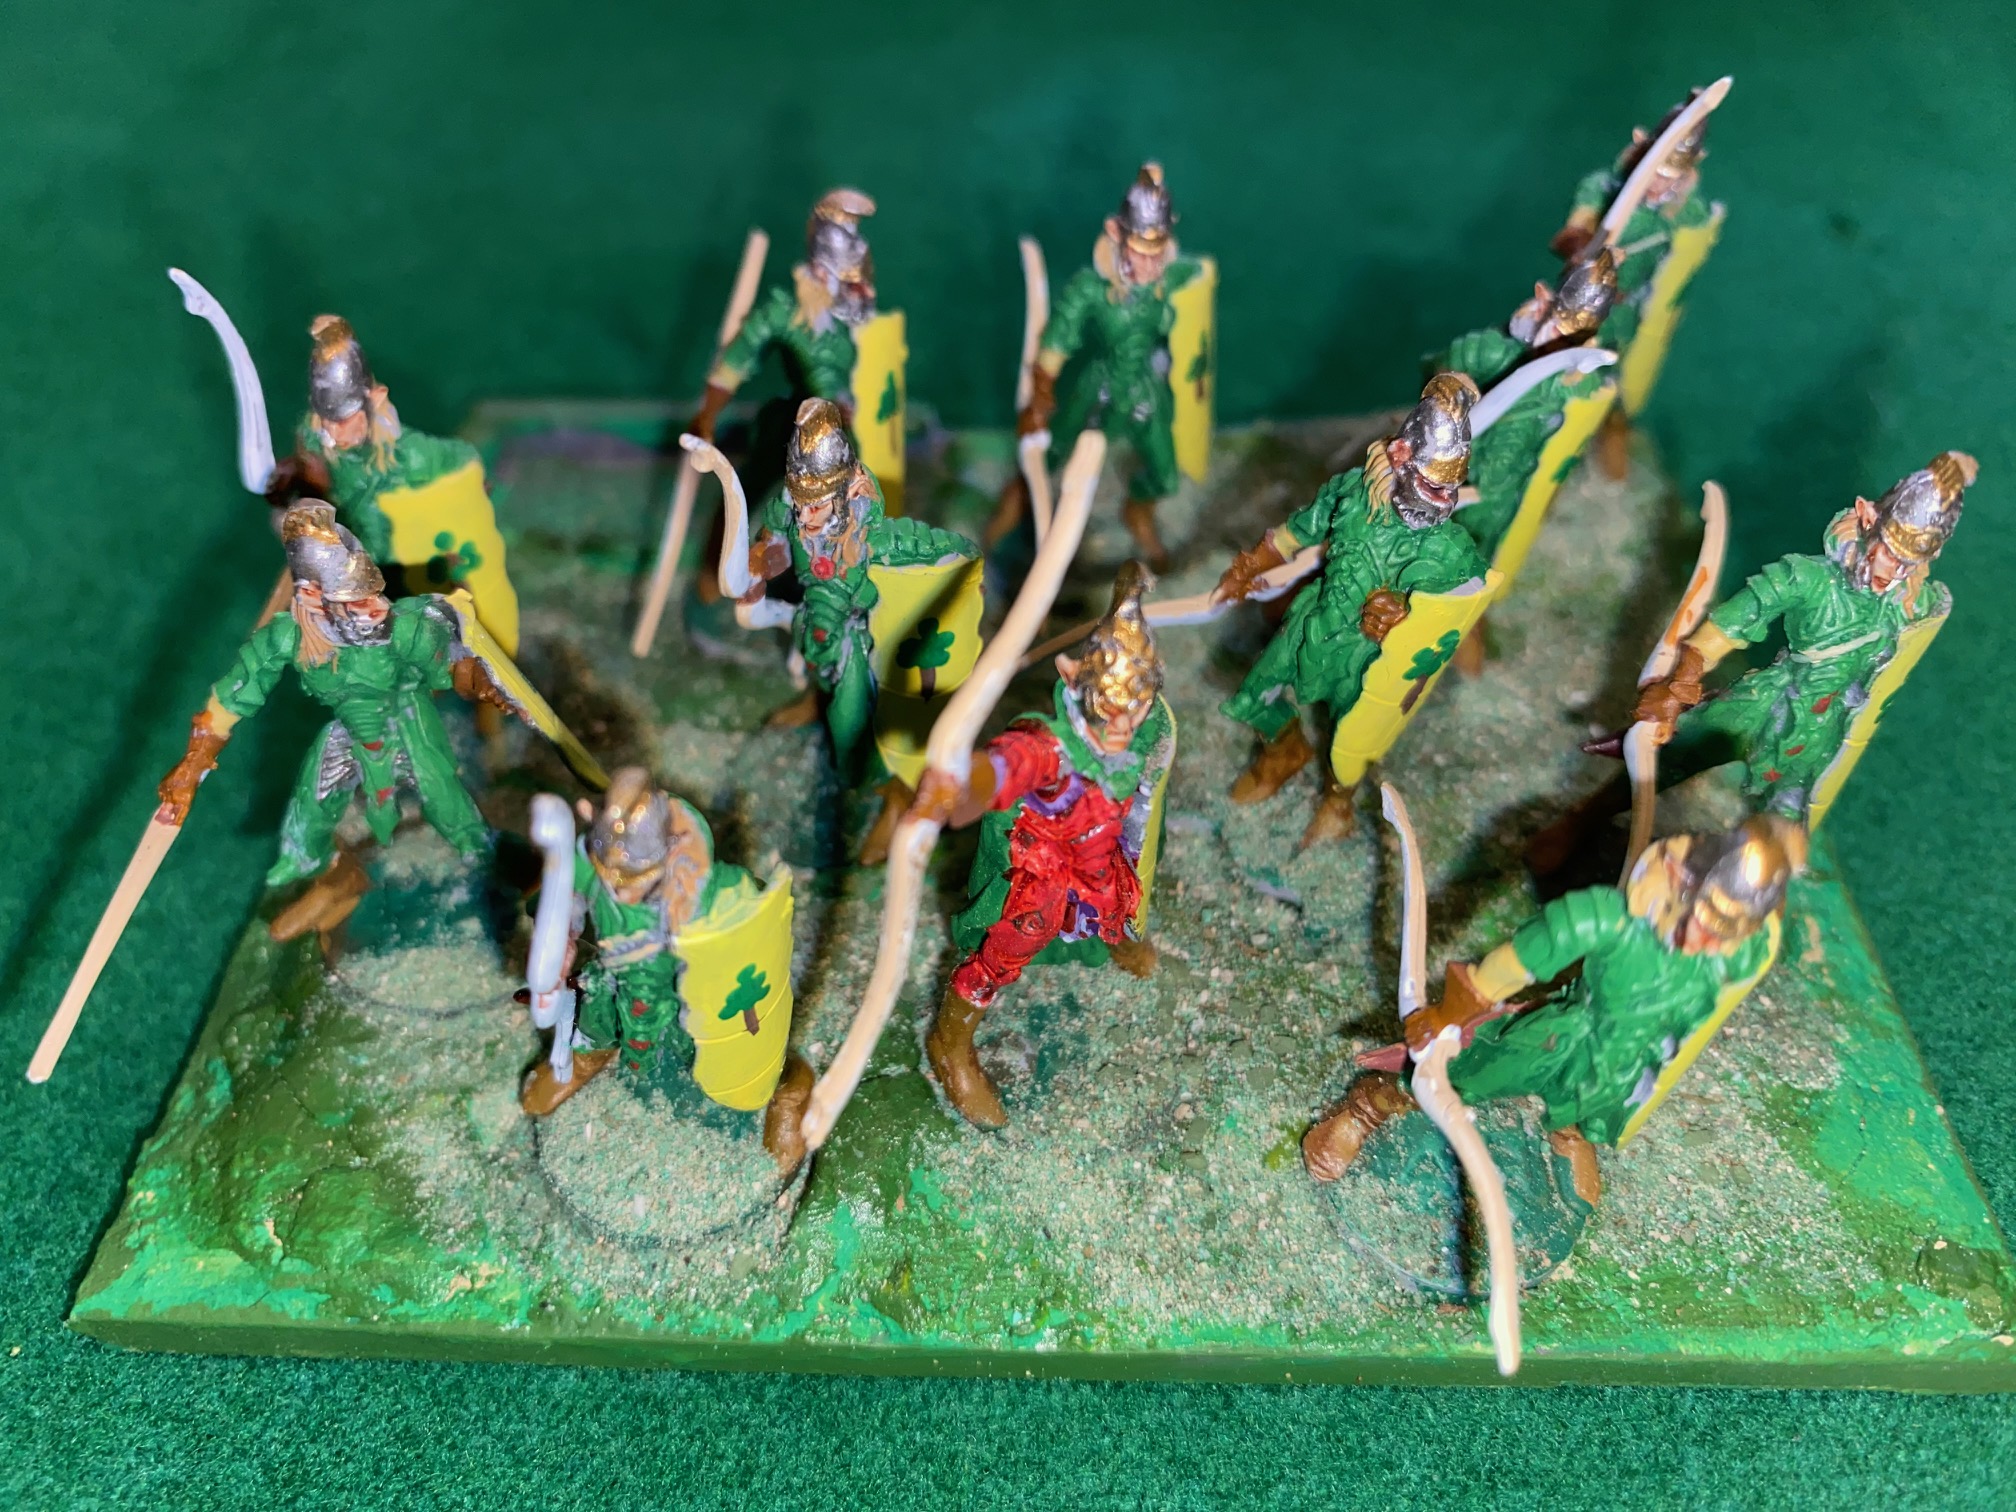
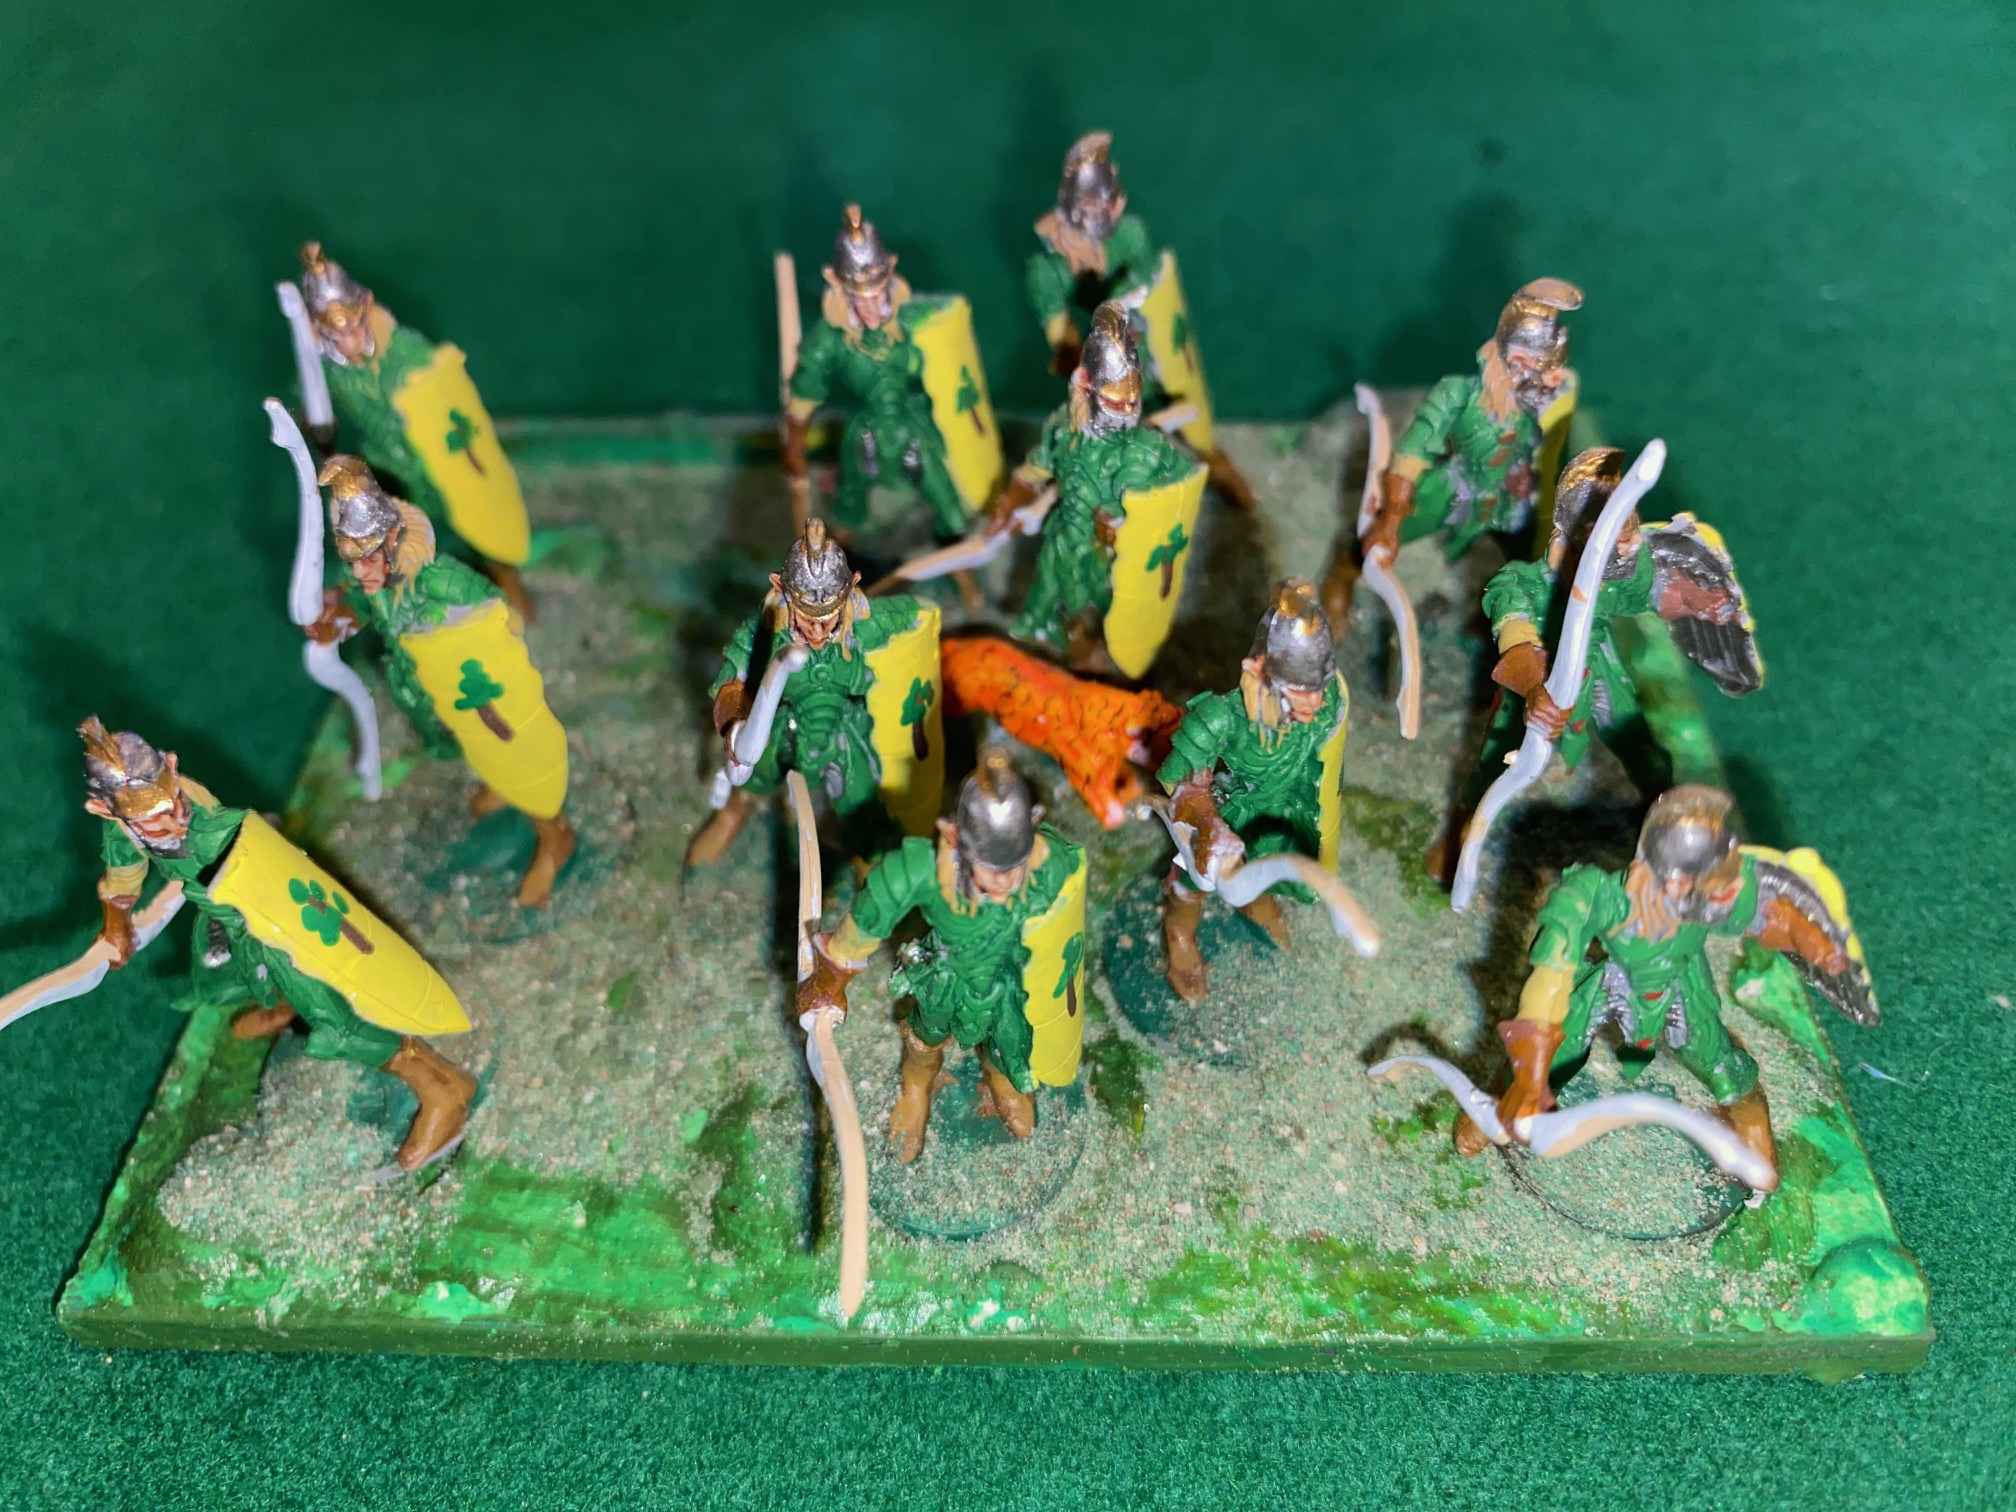
Otherwise the fact were whitened, Contrast Darkoath Flesh for their skin, and Gunmetal on all the other metal parts – helmets, swords etc.
I still am undecided on the colors of the shields and Spears, but am leaning now on having each clan equipped differently. I’ll try to create a simple shield design to hand-draw later.
 Initial painting begun.
The main armor will be Green (Foundry “Bright Green” 25), boots/gloves and sword Scabbards in various Leather effects. I’m thinking YELLOW shields and Spears at this point.
Let’s see how that goes.
Happy Gaming
Armour color scheme next step
A couple of pictures after adding the 2nd / 3rd stapes in the “Foundry” 3-step painting method. Nothing new, same colors used for the leather and armor as I the previous step, just using the next two shades n the Triad.
I used Contrast paint (Darkoath Flesh) for the faces of the Elves, and painted their hair with a base coat of Foundry “Buff Leather 7A” highlighted with Foundry Yellow 2B. For no good reason ‘ll paint all the hair the same. Just because.
 Second shade added to all the original colors
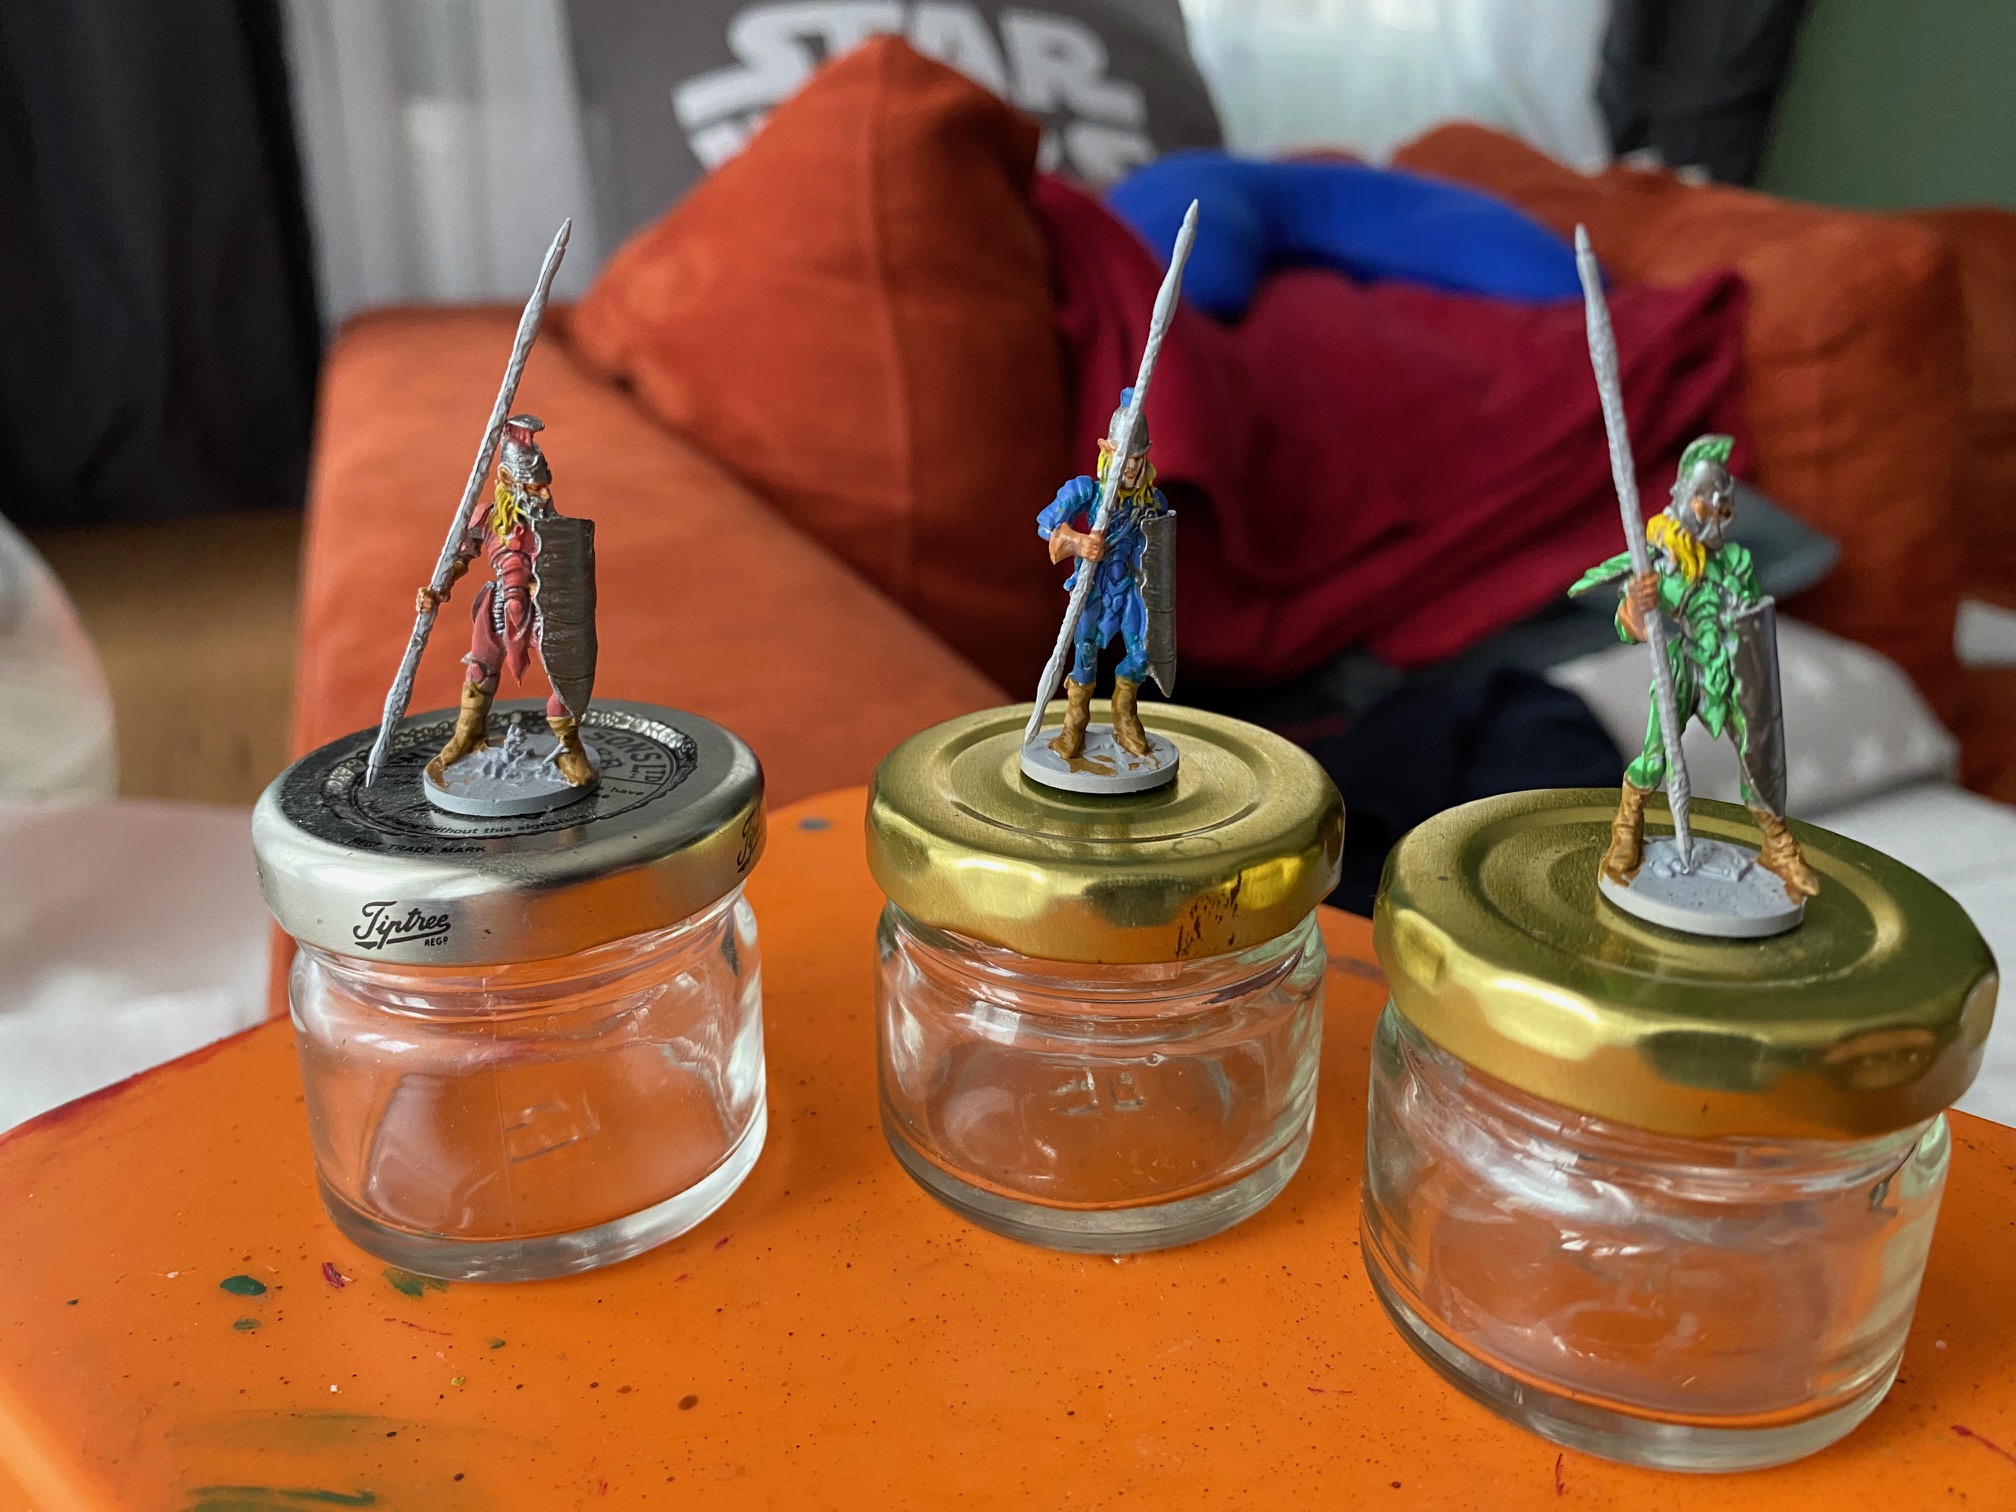 Third shade added
I’m at the stage where I need to finalize my thinking on how to proceed. There are a few final touches on the figures – sword sheaths, hilts etc. but the man color is done. The decision is what to do about the shields and spears themselves.
I’m now in two minds as I quite like the idea of family “clan” colors which would mean that each smaller army would be a self-contained group, coming together for larger wars with third parties, but also potentially internal fighting as a kind of ‘civil war’.
The question then is, would the shields/spears be uniform across the Elven army (to provide some form of consistency or if they should be all different.
Time for a wee think.
Test armor - Slow start
I’ll be taking things slowly to begin with as I recuperate, but wanted to share the first tentative steps in deciding on a color scheme for the Elves. I’ll be taking a simple approach using the “Foundry 3-step method” so don’t expect any amazing artwork!
The figures were undercoated in Grey primer and I did not try any highlighting at this stage. The only change I made was to add white to the faces so that, hopefully when flesh is added it will have more visual appeal.
Colours used are manly Foundry Triad, but I’ll be adding some Vallejo later.
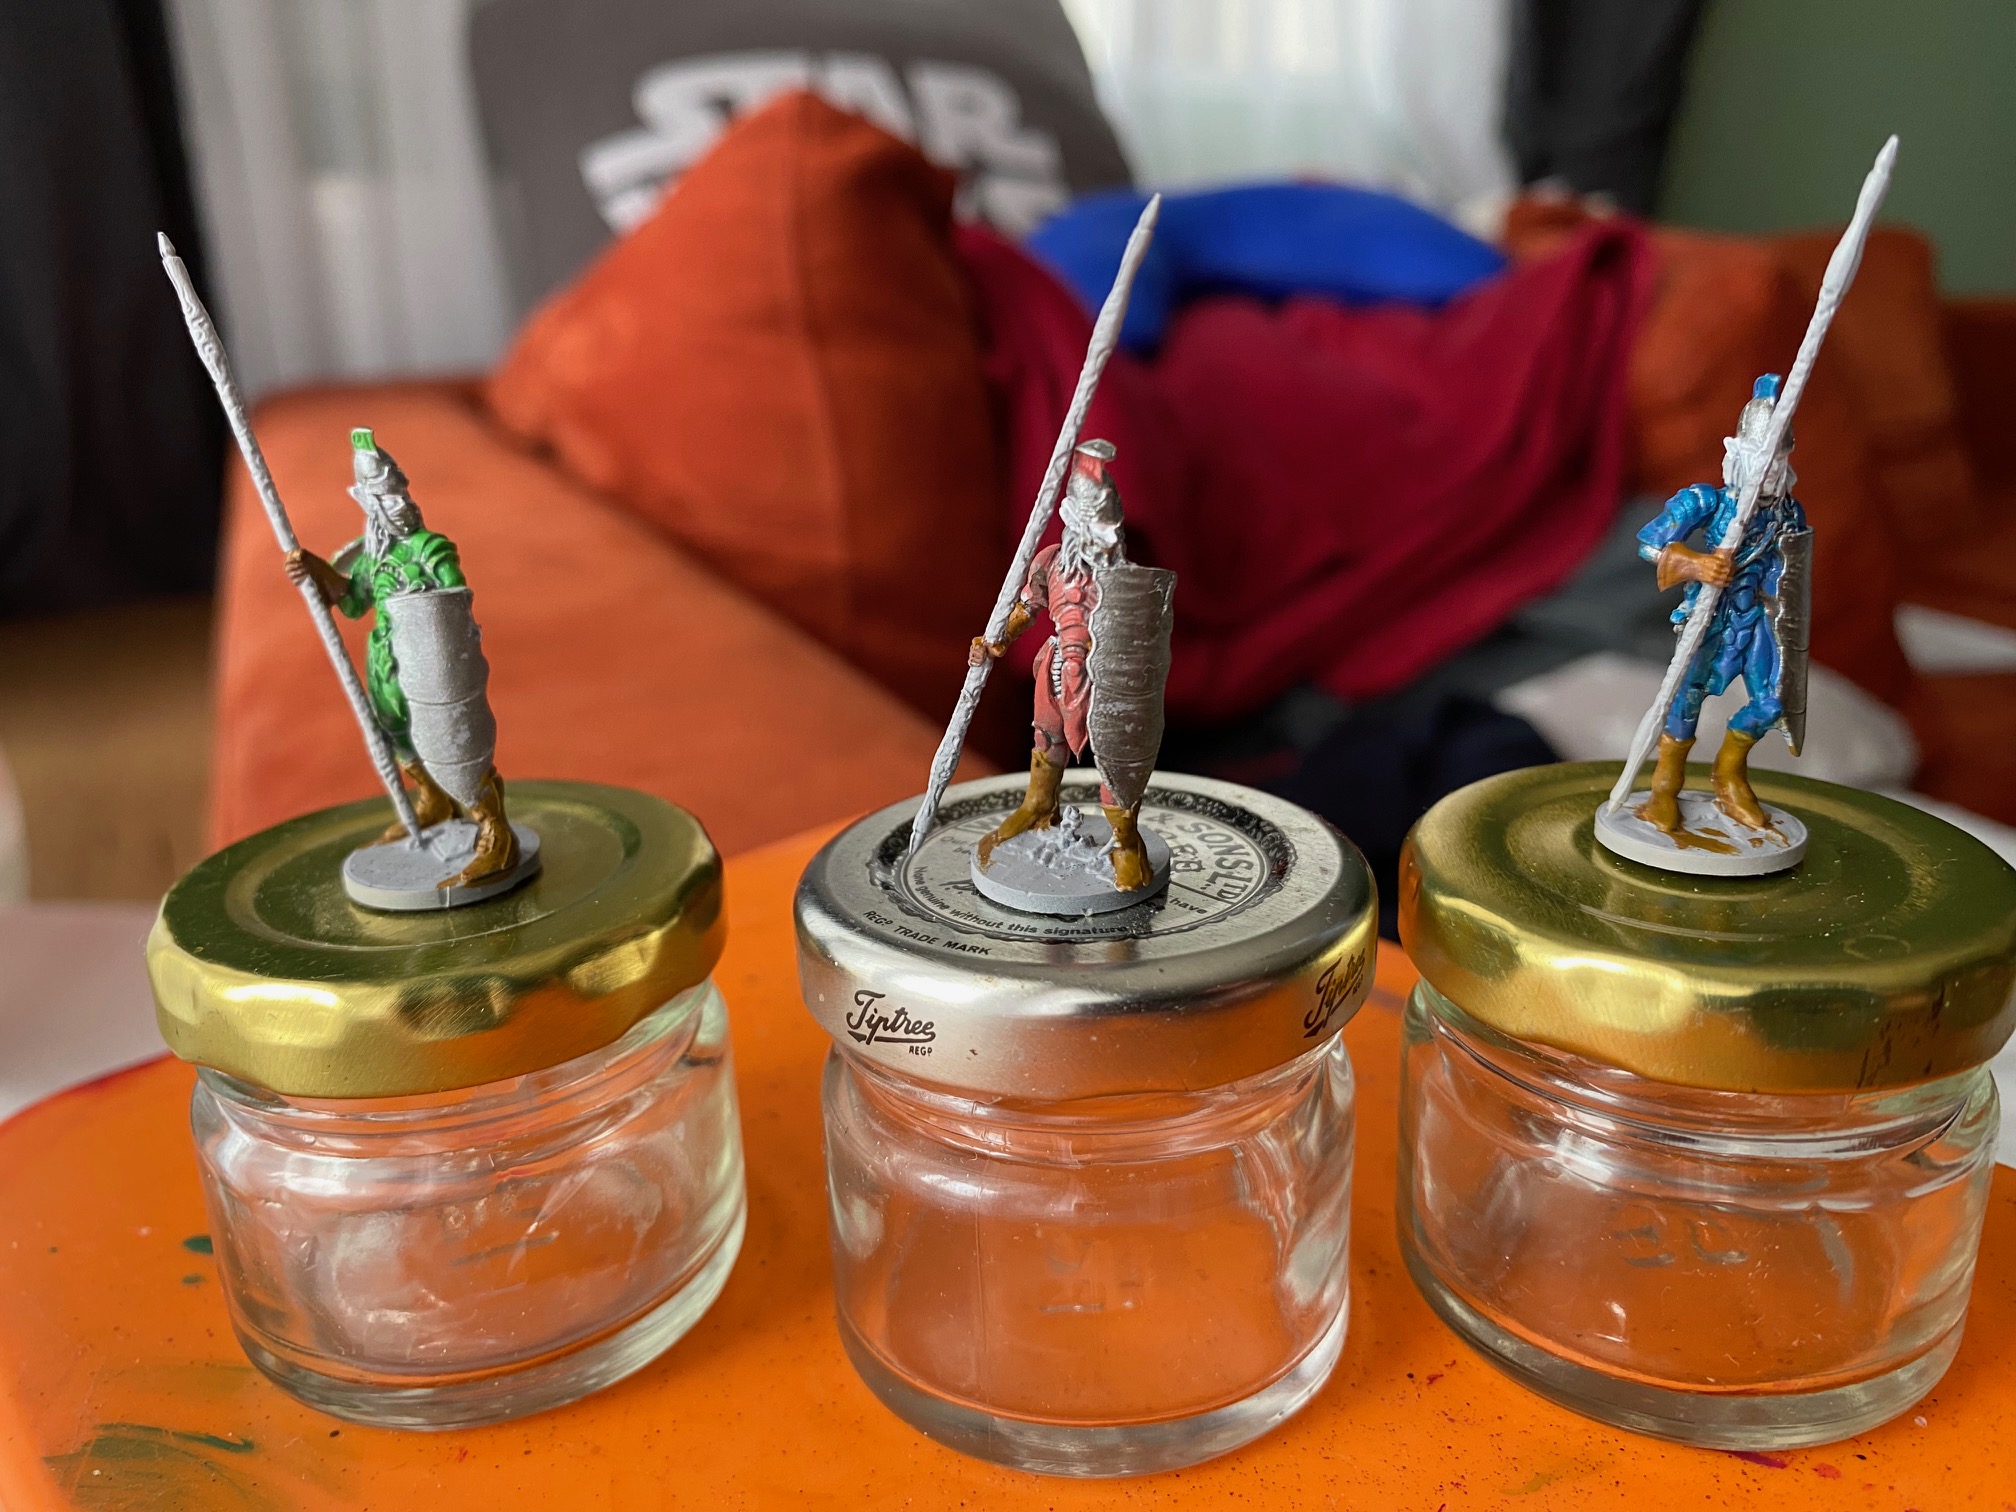
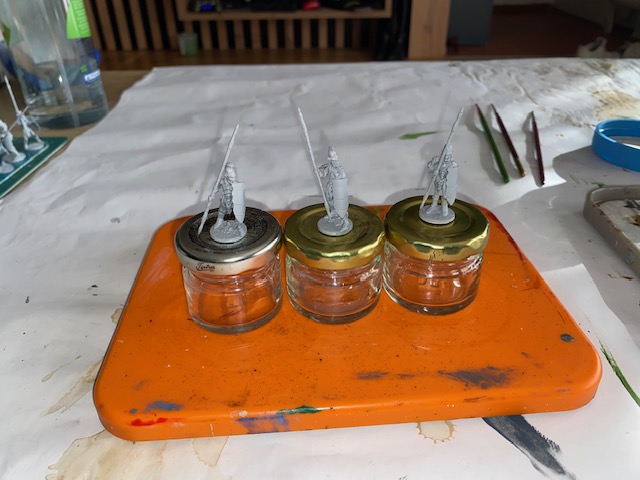 I chose three reasonably similar figures. Base coated in Grey
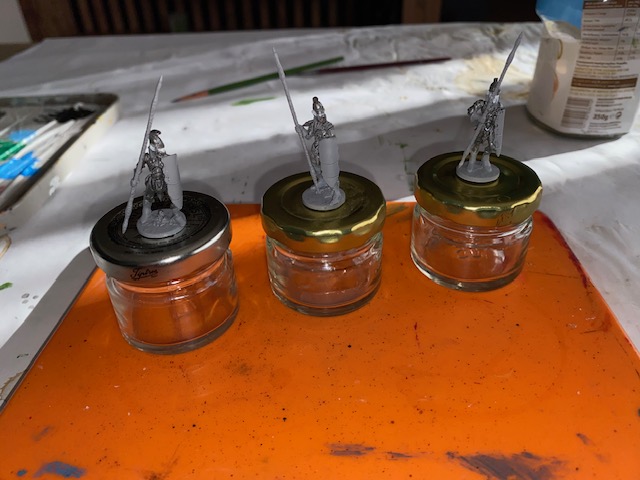 Armour painted with a wash of Vallejo Gunmetal (72054) to emphasize the individual plates, and to provide some darkness in the recesses. Helmet painted with solid Gunmetal, faces painted white
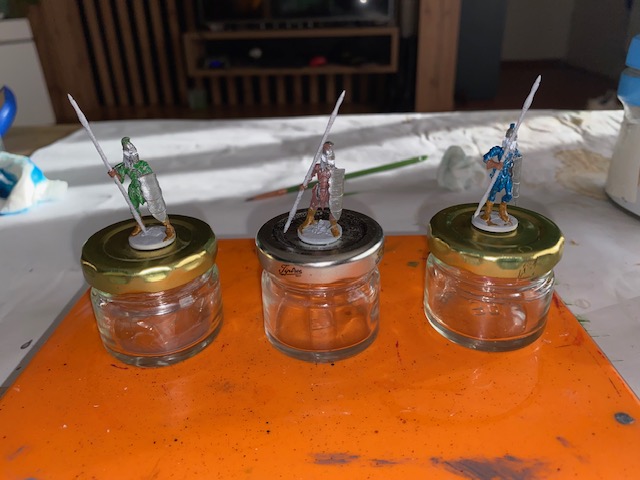 Base coats for the armor: Foundry Deep Blue (20); Madder Red (60) and Bright Green (25). Leather boots (Deep Brown Leather 54) and gloves Tan (14). I also gave the shields one coat of Gun Metal, but these will be painted a color later. I'm not sure at the moment which direction to go in
From here I’ll follow through with additional highlighting etc and find the small items to pant and emphasize. I’m also thinking of trying a different phone as the pictures do not seem to me to be particularly clear.
Now that I see them in the flesh, I am wondering whether to rethink my options and go for the totally different color schemes for each Clan. If I do that, maybe the bring uniformity, I’ll pant all the shields the same color, but perhaps add different “Family” logos?
That’s for later. Next Time I’ll finish the highlighting and try to make a final decision.
Happy Gaming
Army Colour schemes
Turning to the objective of this project – painting up an Elven army – the hard choices come now. What is the scheme going to be and what do I consider to be the rationale behind the alternative options?
The history of the Elven races is covered in the Mantic book, but I also wanted to personalise it to my own way f thinking, and to see to what extent this will/could influence the armour options for the armies.
In this regards, what would the Elven race look like “now” based on a hypothetical history of (I would assume) rivalries, inter-Elven wars/disputes, family pride and history etc. Are we to think the Elves were always a homogeneous group, or have they arrived at their current status through wars and internal battles? I think this is more likely.
To some extent I think there is a dichotomy between the Elves are “seen” by third parties, and the “real” Elven society hidden from prying eyes and “lesser” mortals. Maybe they are closer to medieval Japan with clan rivalries and decades/hundreds of years of civil war before reaching a state of relative peace, overseen by a type of Emperor/Shogun figure. How might this influence the look of the armies when the Elves do fight as one combined army?
So, I am coming to the conclusion that there are three options on a paint scheme.
Option 1: ALL Elven units are armed and equipped identically (with perhaps “Royal” units having more prestigious armour). This route requires a solid colour scheme and the “whole” is perhaps more important than the individual unit. This said, I have seen examples of armour clad Elves in “mental” armour – like medieval Man-at-Arms, ad I do not like the collective look. So this route would need a softer colour. I also think White is too stark. After all these are ethereal creatures with imbued magic and creating armour from whatever should be possible. So some form of “off-white” or pastel colour seems to be the way to go. Green/Blue come to mind.
Option 2: As above, in that all units have a basic overall colour scheme for the armour, but they can identify their “House/Clan” allegiance through flashes of other colours and perhaps Logos on shields etc. to differentiate their specific allegiance. This also offers the opportunity to have some “specialisation”, for example Clan “Morrean” may be exceptional archers and their forces would predominantly have a majority of bowman units; or Clan “Ceadar” are renowned horsemen etc. This also allows for Elf on Elf civil wars in a campaign setting based mainly on the Sengoku period in Japan.
Option 3: Go full on “all colour” armour based around units in medieval Japan or Europe (eg. Wars of the Roses unit colour schemes based on a particular Lord’s ideas). This allows for full flexibility of paint scheme, but I wonder if this loses some of the overall cohesiveness I’m looking for. (I have a large WoR army already and enjoy the variety of colours they bring to the table, but I’m not sure this is what I’m looking for for the Elves).
My feeling right now is Option 2. So I’ll make a couple of test runs with different schemes and post these up in the next week and see what they look like.
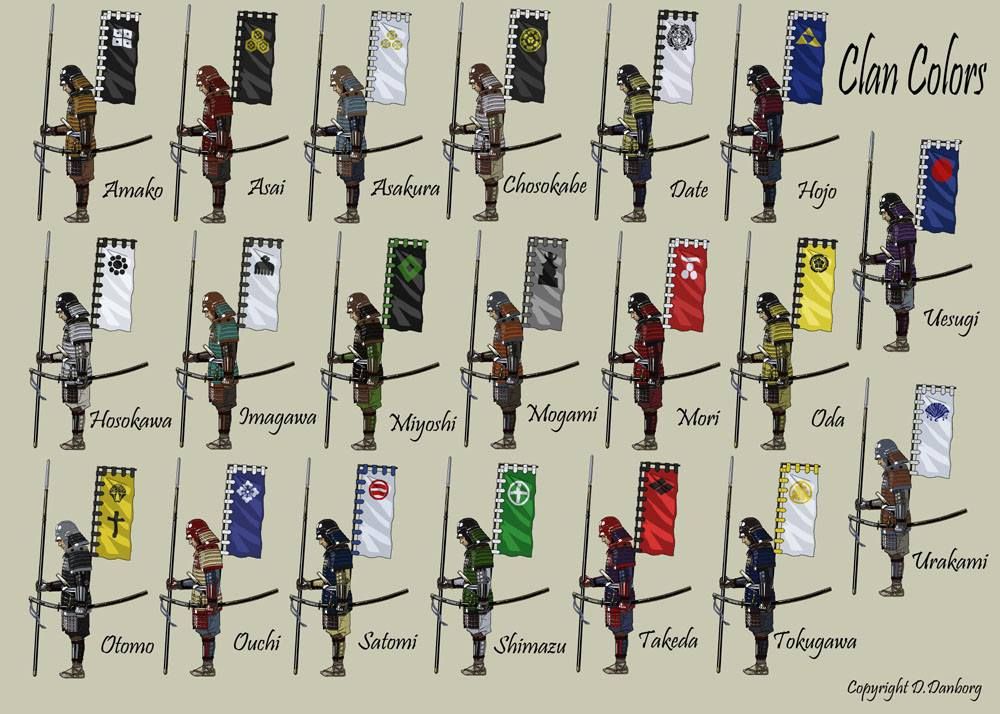 Possible inspiration for 'clan' colors
The Figures
All the figures for the Elves are Mantic Games. I built most of them at the time and then they’ve ‘rested’ in a draw for many years. I have now put them on temporary bases and they are undercoated in grey.
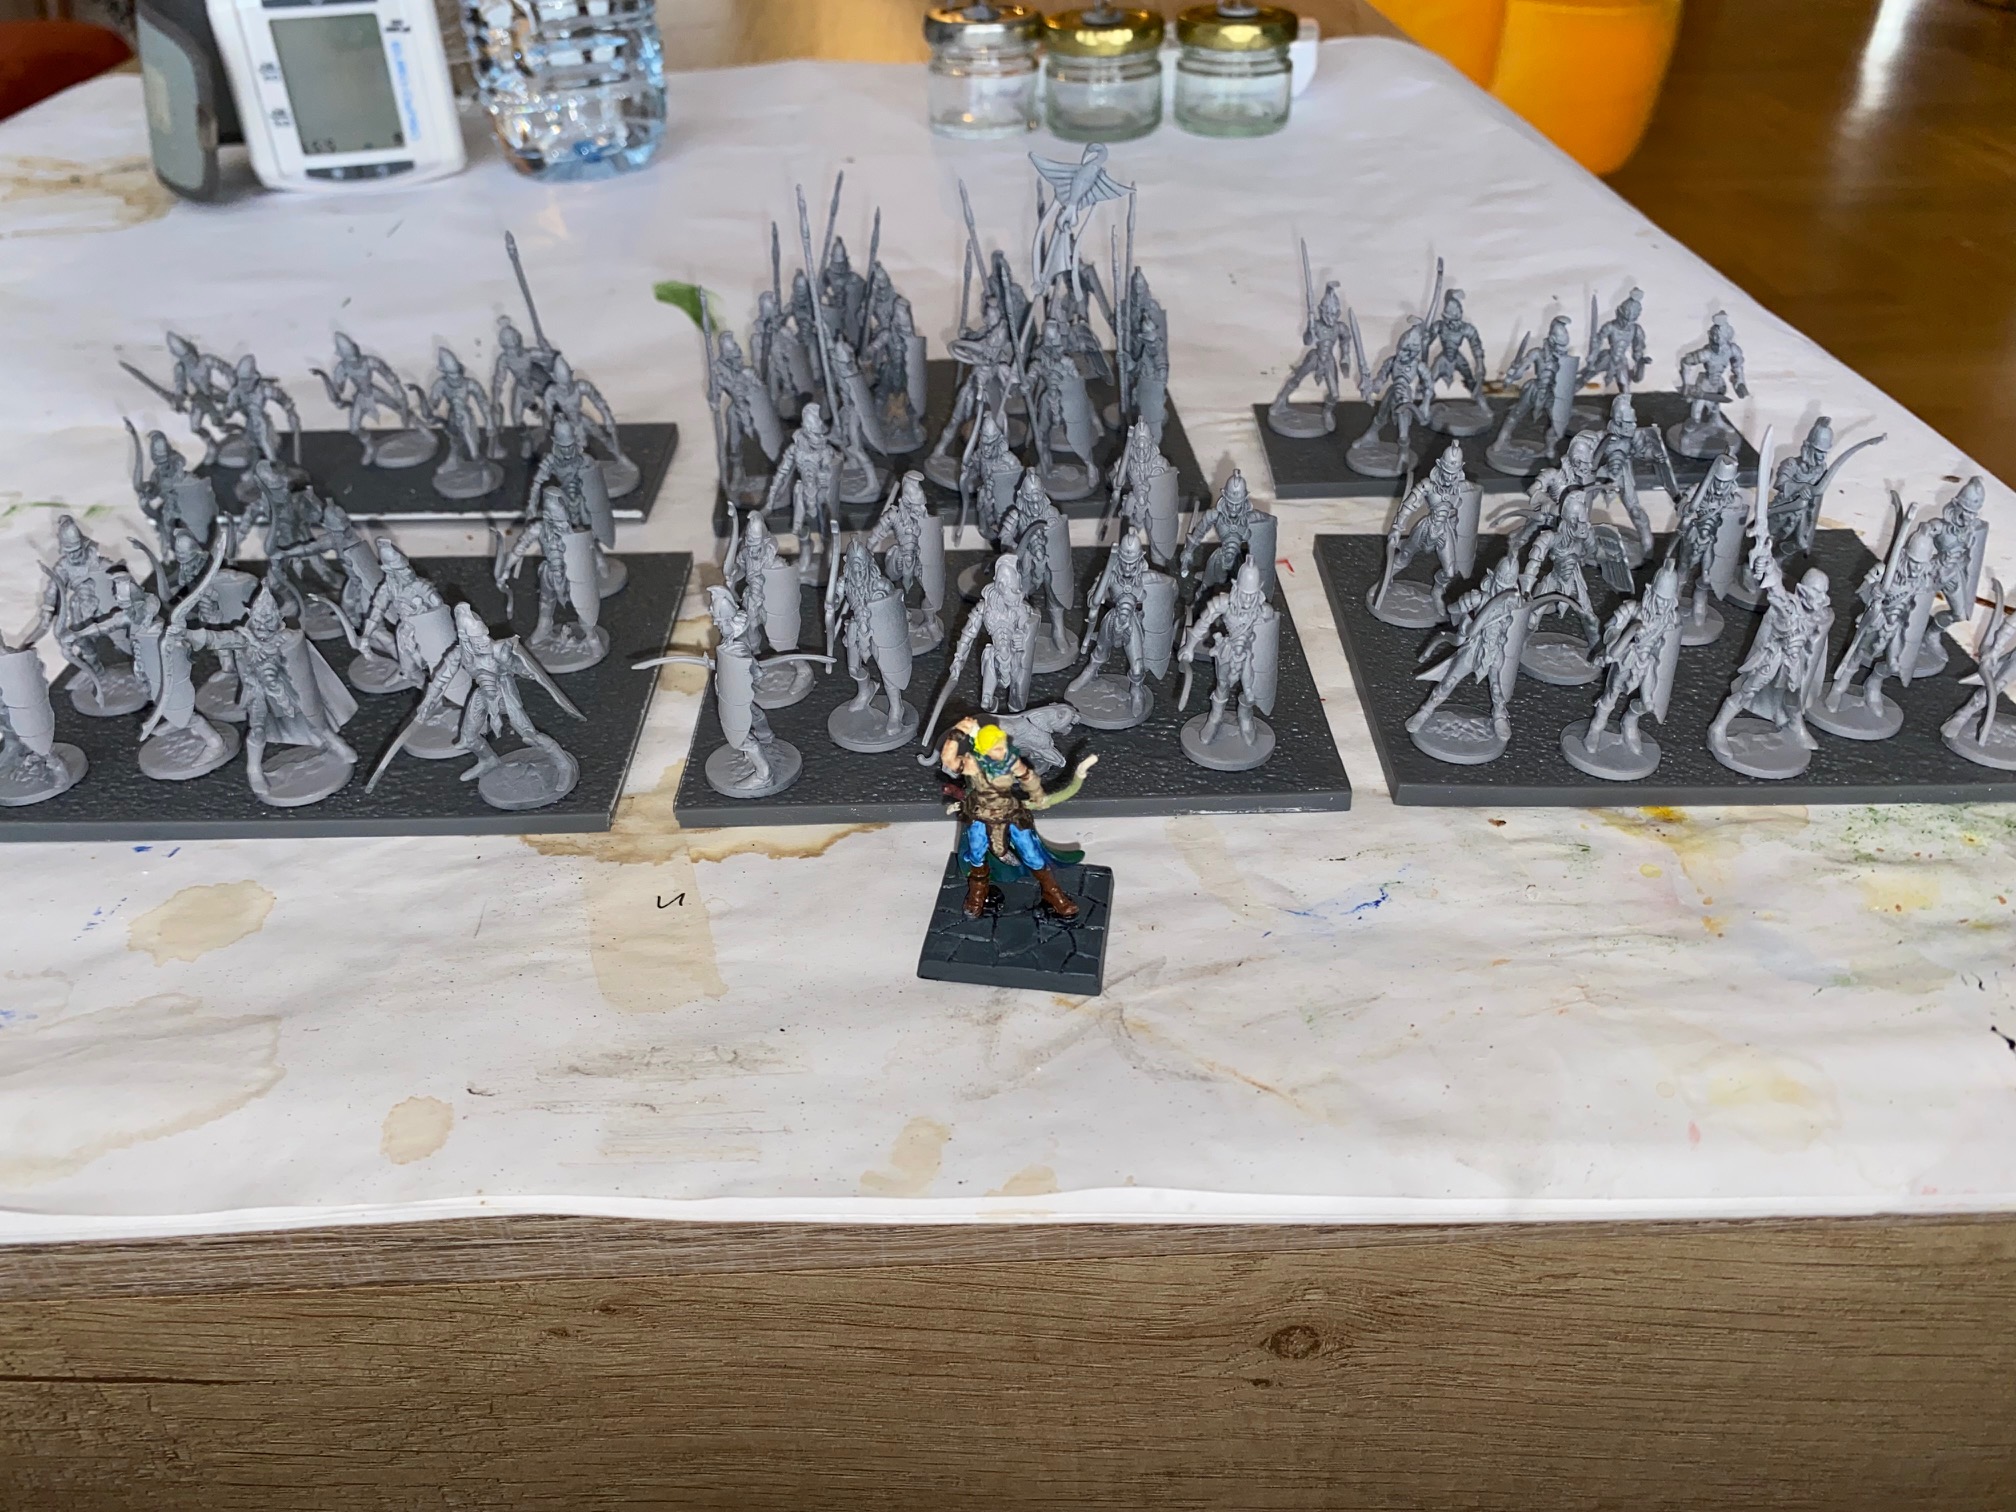
Mantic figures have limited flexibility in positioning etc. but notwithstanding here is a picture of the army so far.
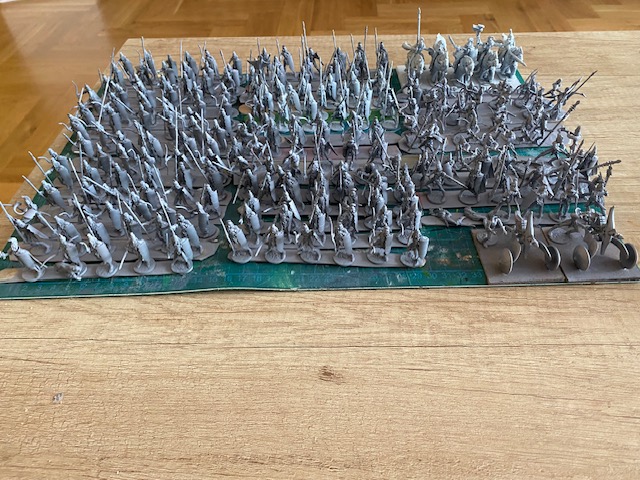 Infantry, some cavalry and Bolt throwers
In addition to the standard Elves, Mantic originally produced some metal accessories to make “Drow” with heads, different spears and crossbows. I bought some of these at the time, and with the new range of Twilight Kin, I have added these to the Elven army as specialized troops.
Add in a troop of Cavalry and a couple of Bolt throwers and this is about the entire army. I also have four unopened boxes of Spearmen which are available is necessary to build out the forces.
Finally, I have a couple of individual figures that could represent a Hero / Prince and Standard Bearer (rather then those I will include on the bases) but NO large infantry or creatures. Instead I will make a base of Battlecats, although exactly how this will fit into the overall KoW force lists I’m to yet sure =as I want then to be managed by a “Beastmaster”. I’ll think on this.
So the available figures for the army right now are:
| Spearmen | 77 |
| Archers | 80 |
| Scouts | 10 |
| Crssbowmen | 10 |
| Haldberd | 12 |
| Officers | 9 |
| Standard bearer | 8 |
| Double handed | 10 |
| Beastmaster | 1 |
I will be Multi-Basing and aim to have close to Mantic’s Minimum figure count of 15-16 figures per Regiment.
Exception will be troops of Gladestalkers, which will probably be 6 to a base, same with Crossbowmen.
So as it stands, there should be the following Unit bases
5 Regiments of Tallspears
5 Regiments of Archers
2 Troops of Scouts
2 Troops of Crossbow
1 Regiment of “House Guard” (ie. the “Drow”)
1 Troop of Double-handed Guards
1 Beastmaster
1 Troop Cavalry
2 Bolt throwers
1 “Prince”
1 Standard Bearer
By my reckoning this is a total of 2315 points (+ whatever I decide about the Beastmaster – so close to 2500 without the additional 4 boxes of Spearmen)
I also have Dungeon Saga so can use the Madriga figure and I also need to think about some kind of Mage. If I add these two figures, this would bring the overall total army value to about 2750 I think.
So, next step is to think of color scheme(s)
Should I REALLY be doing this now?
Before starting the project I wondered whether this was a good time to do it. I have enjoyed partaking in the past, but this year is different. I want to share something personal which influences the next few months. Two weeks ago I was admitted to hospital for emergency heart operation and underwent a double bypass. Everything has gone well, but inevitably I’m a bit tired and not 100% as yet. So, should I commit to a time consuming project right now?
On balance I decided that yes, this is the time. I hope this project will be intellectually stimulating and keep the old brain functioning, but I also realize that if things get too tiring I might not complete the goal.
So, I’m in, and for anyone following me, I hope I won’t let you down. The Elves Are Coming!


