


PanzerKaput’s Clash of Katanas/Test of Honour Japans


Recommendations: 218
About the Project
I have fallen back on a long love of mine Japanese Warfare and the game Test of Honour. Since the new series of Shotgun has hit TV my local club, Leicester Phat Cats, has started to get into this game and this my deployment to getting back into it.
Related Game: Test of Honour: The Samurai Miniatures Game
Related Company: Grey For Now Games
Related Genre: Historical
Related Contest: Spring Clean Hobby Challenge 2024
This Project is Active
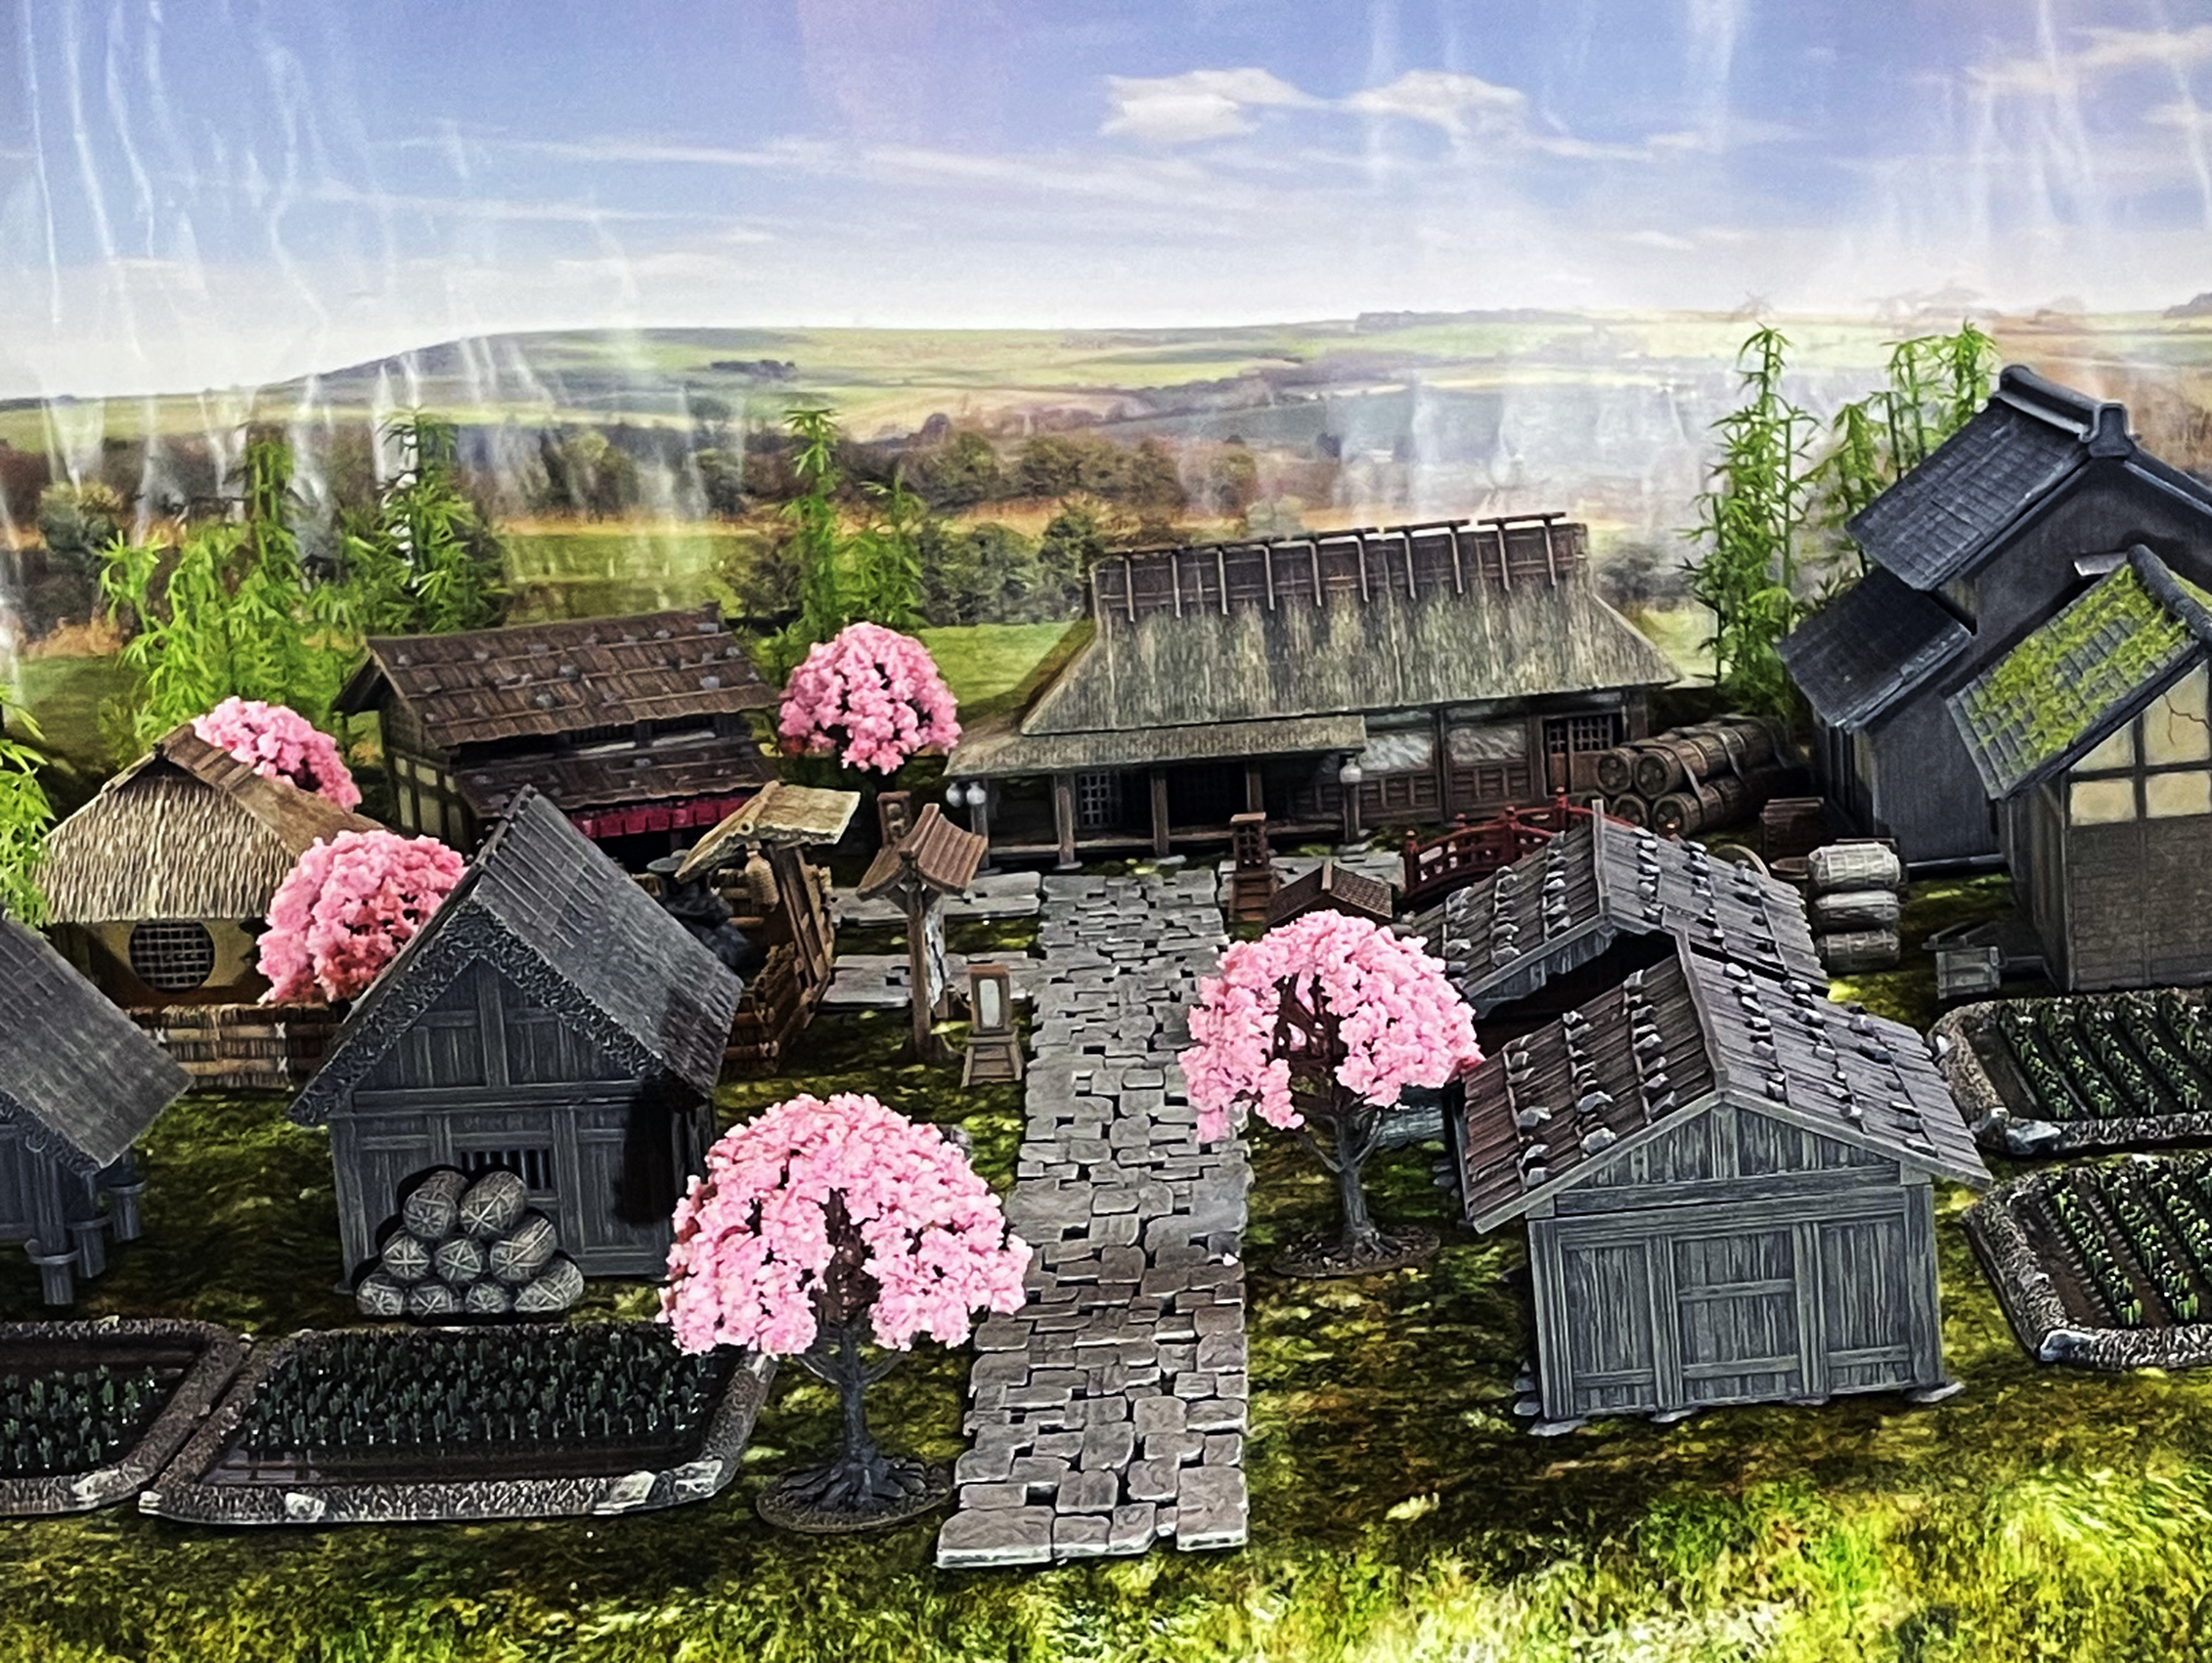
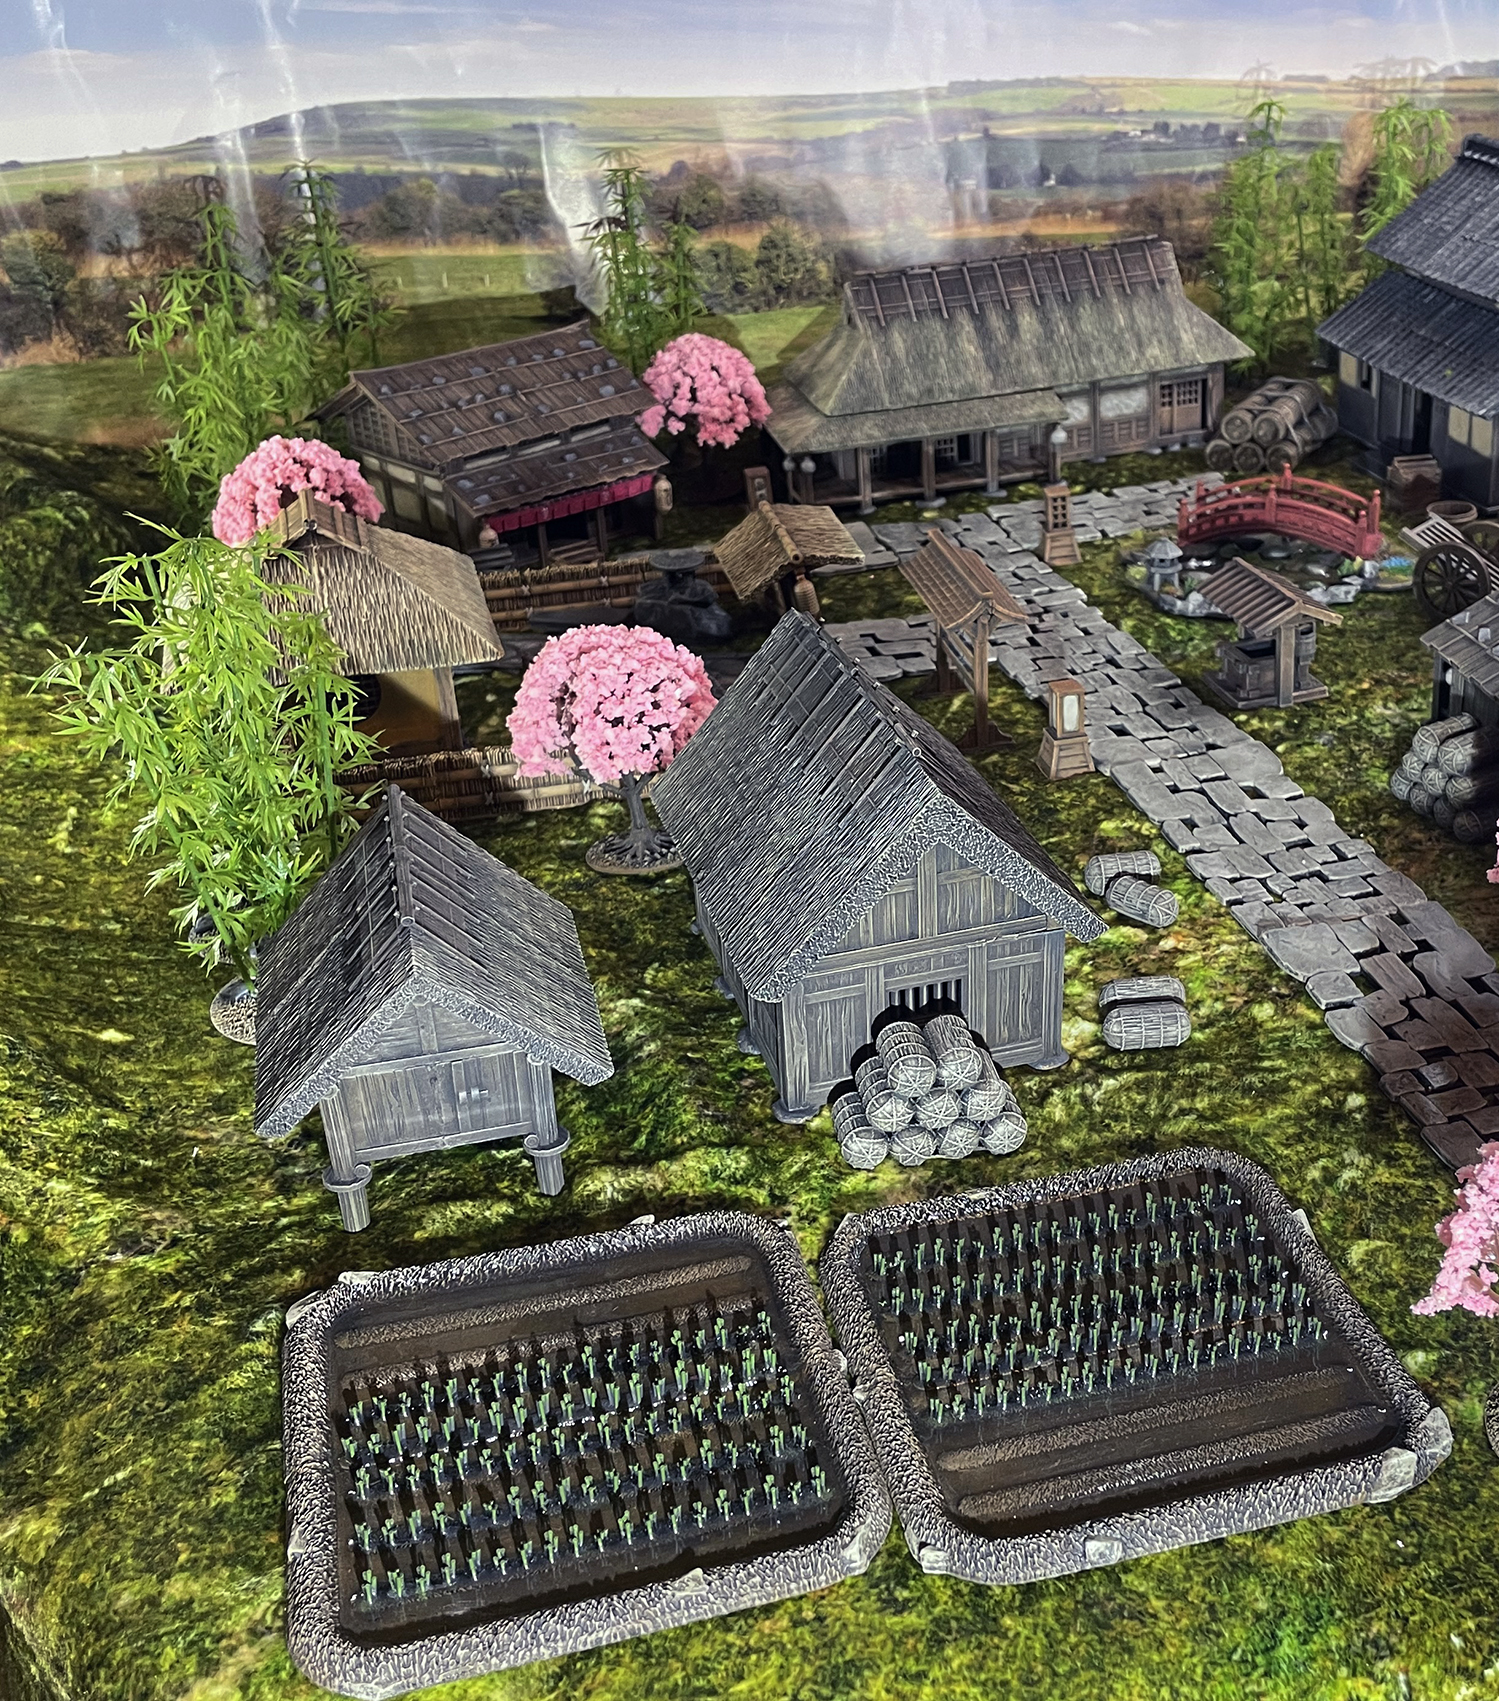
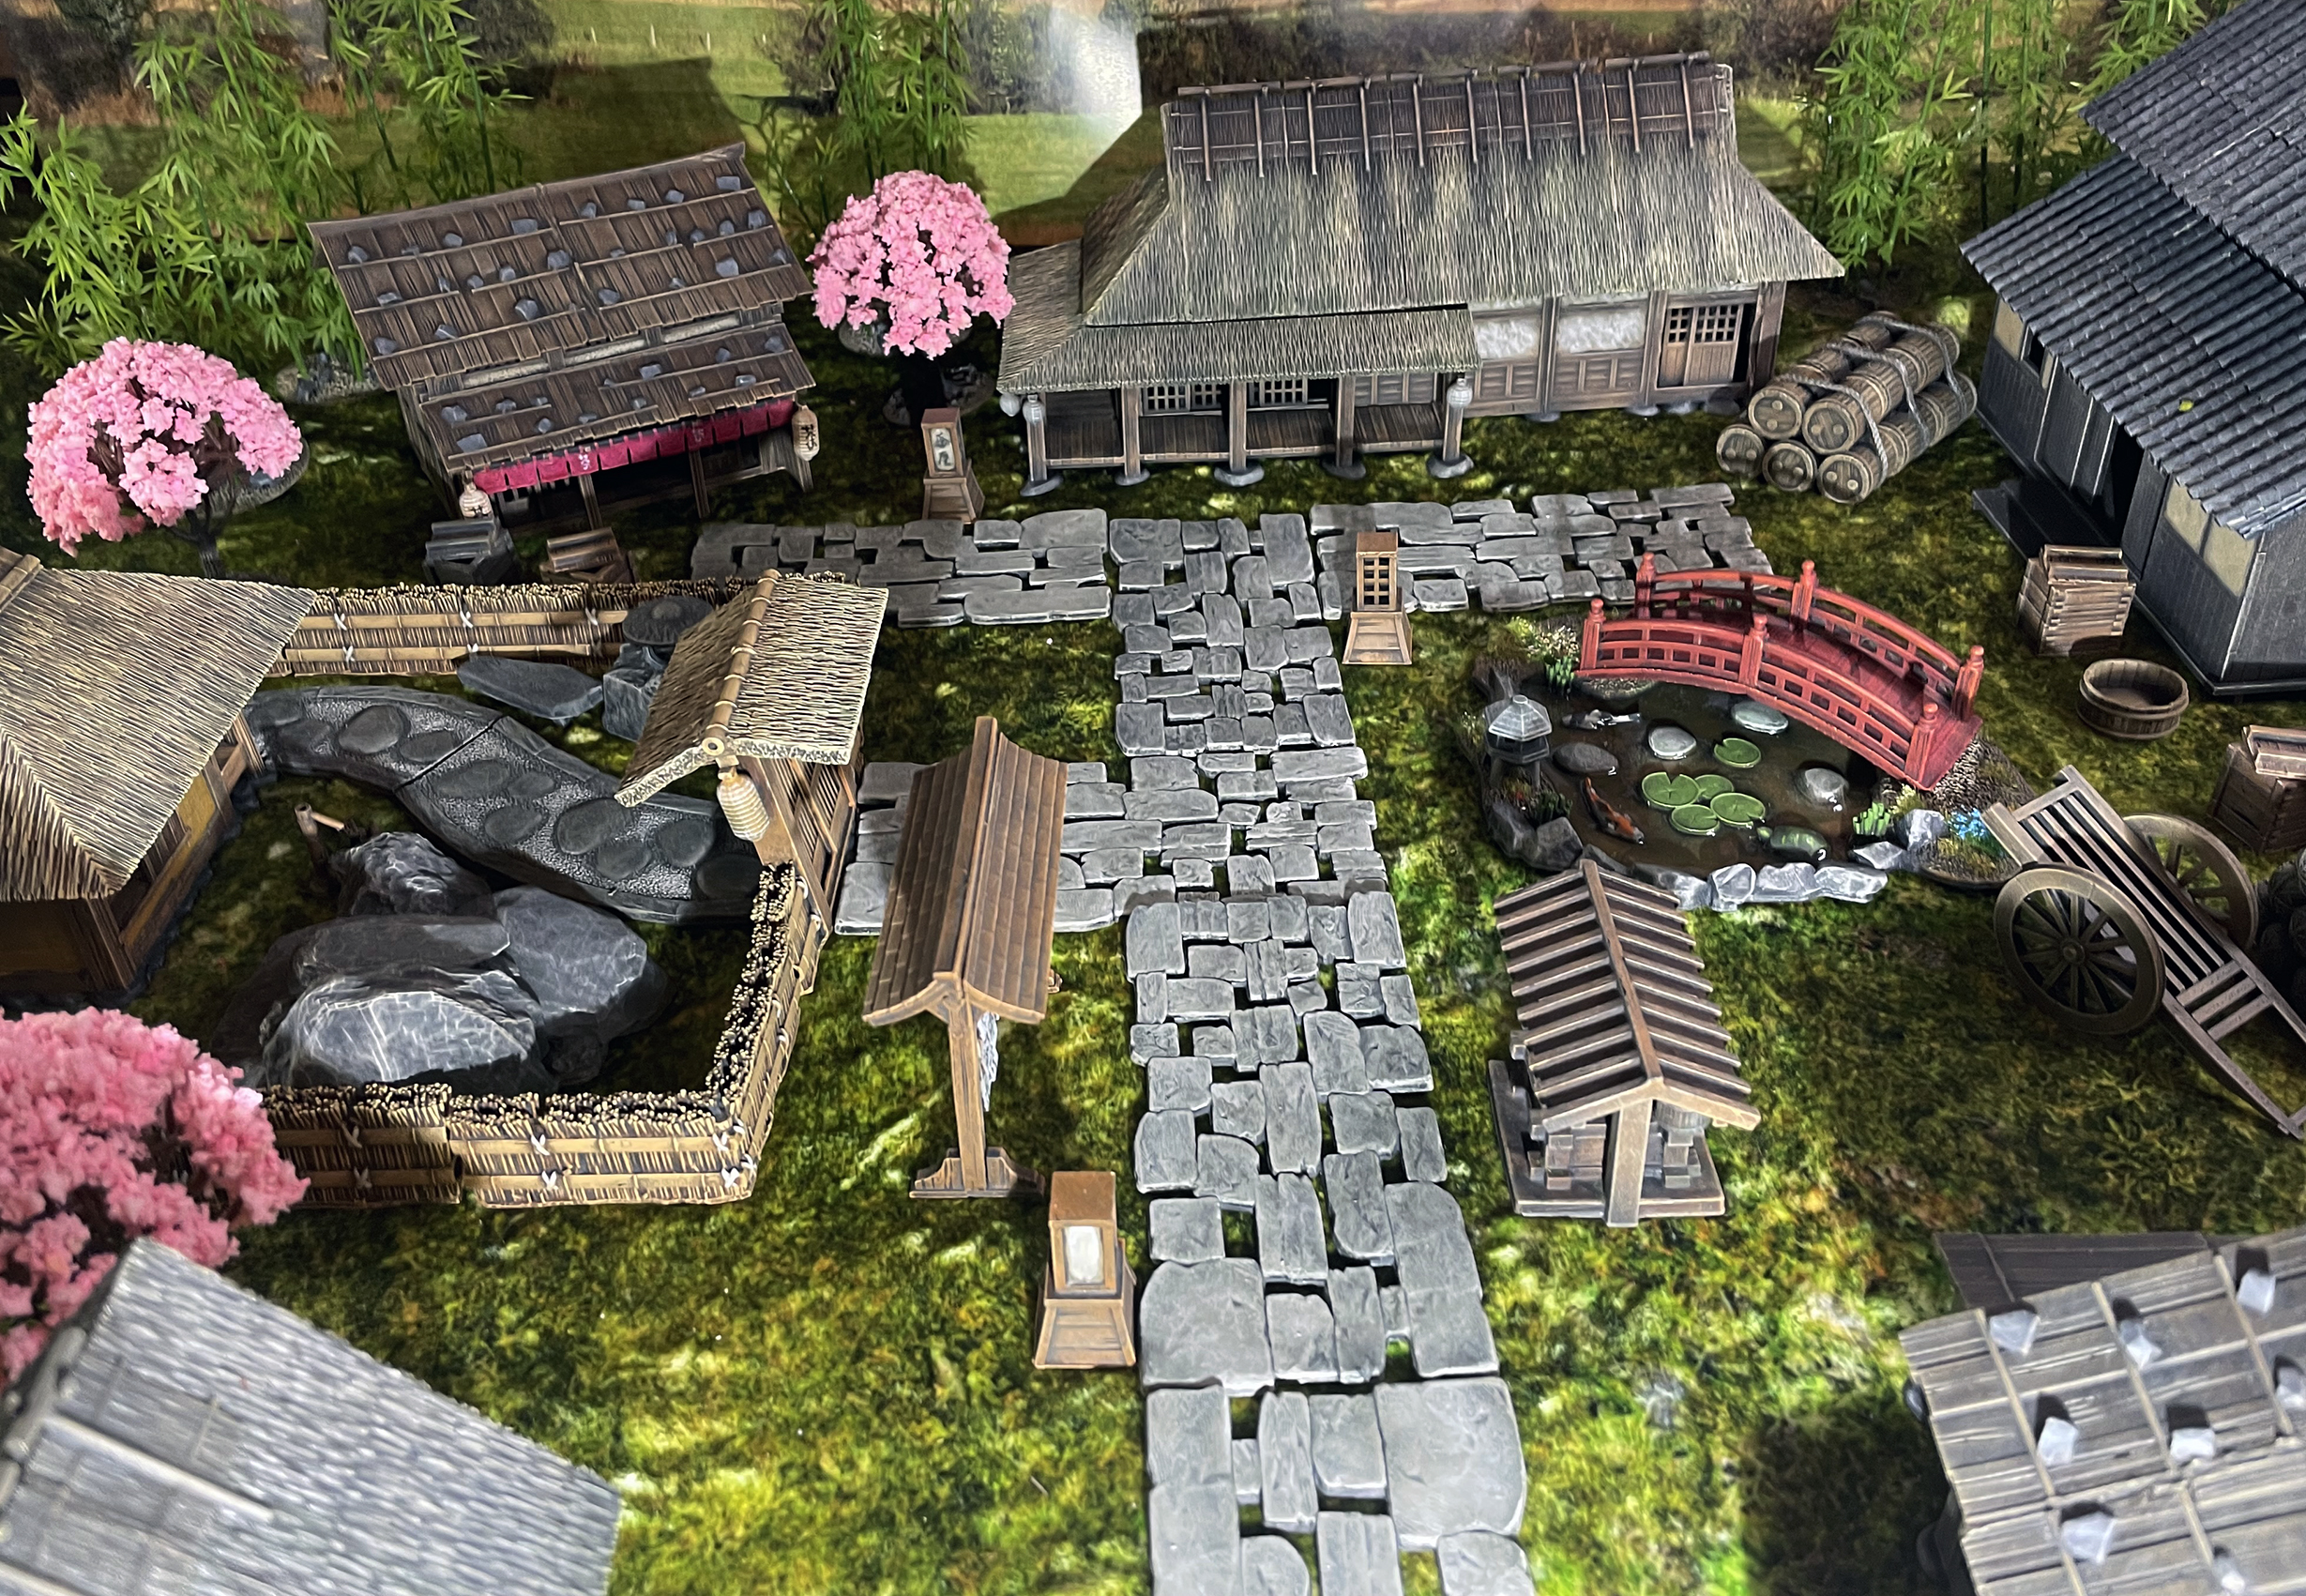
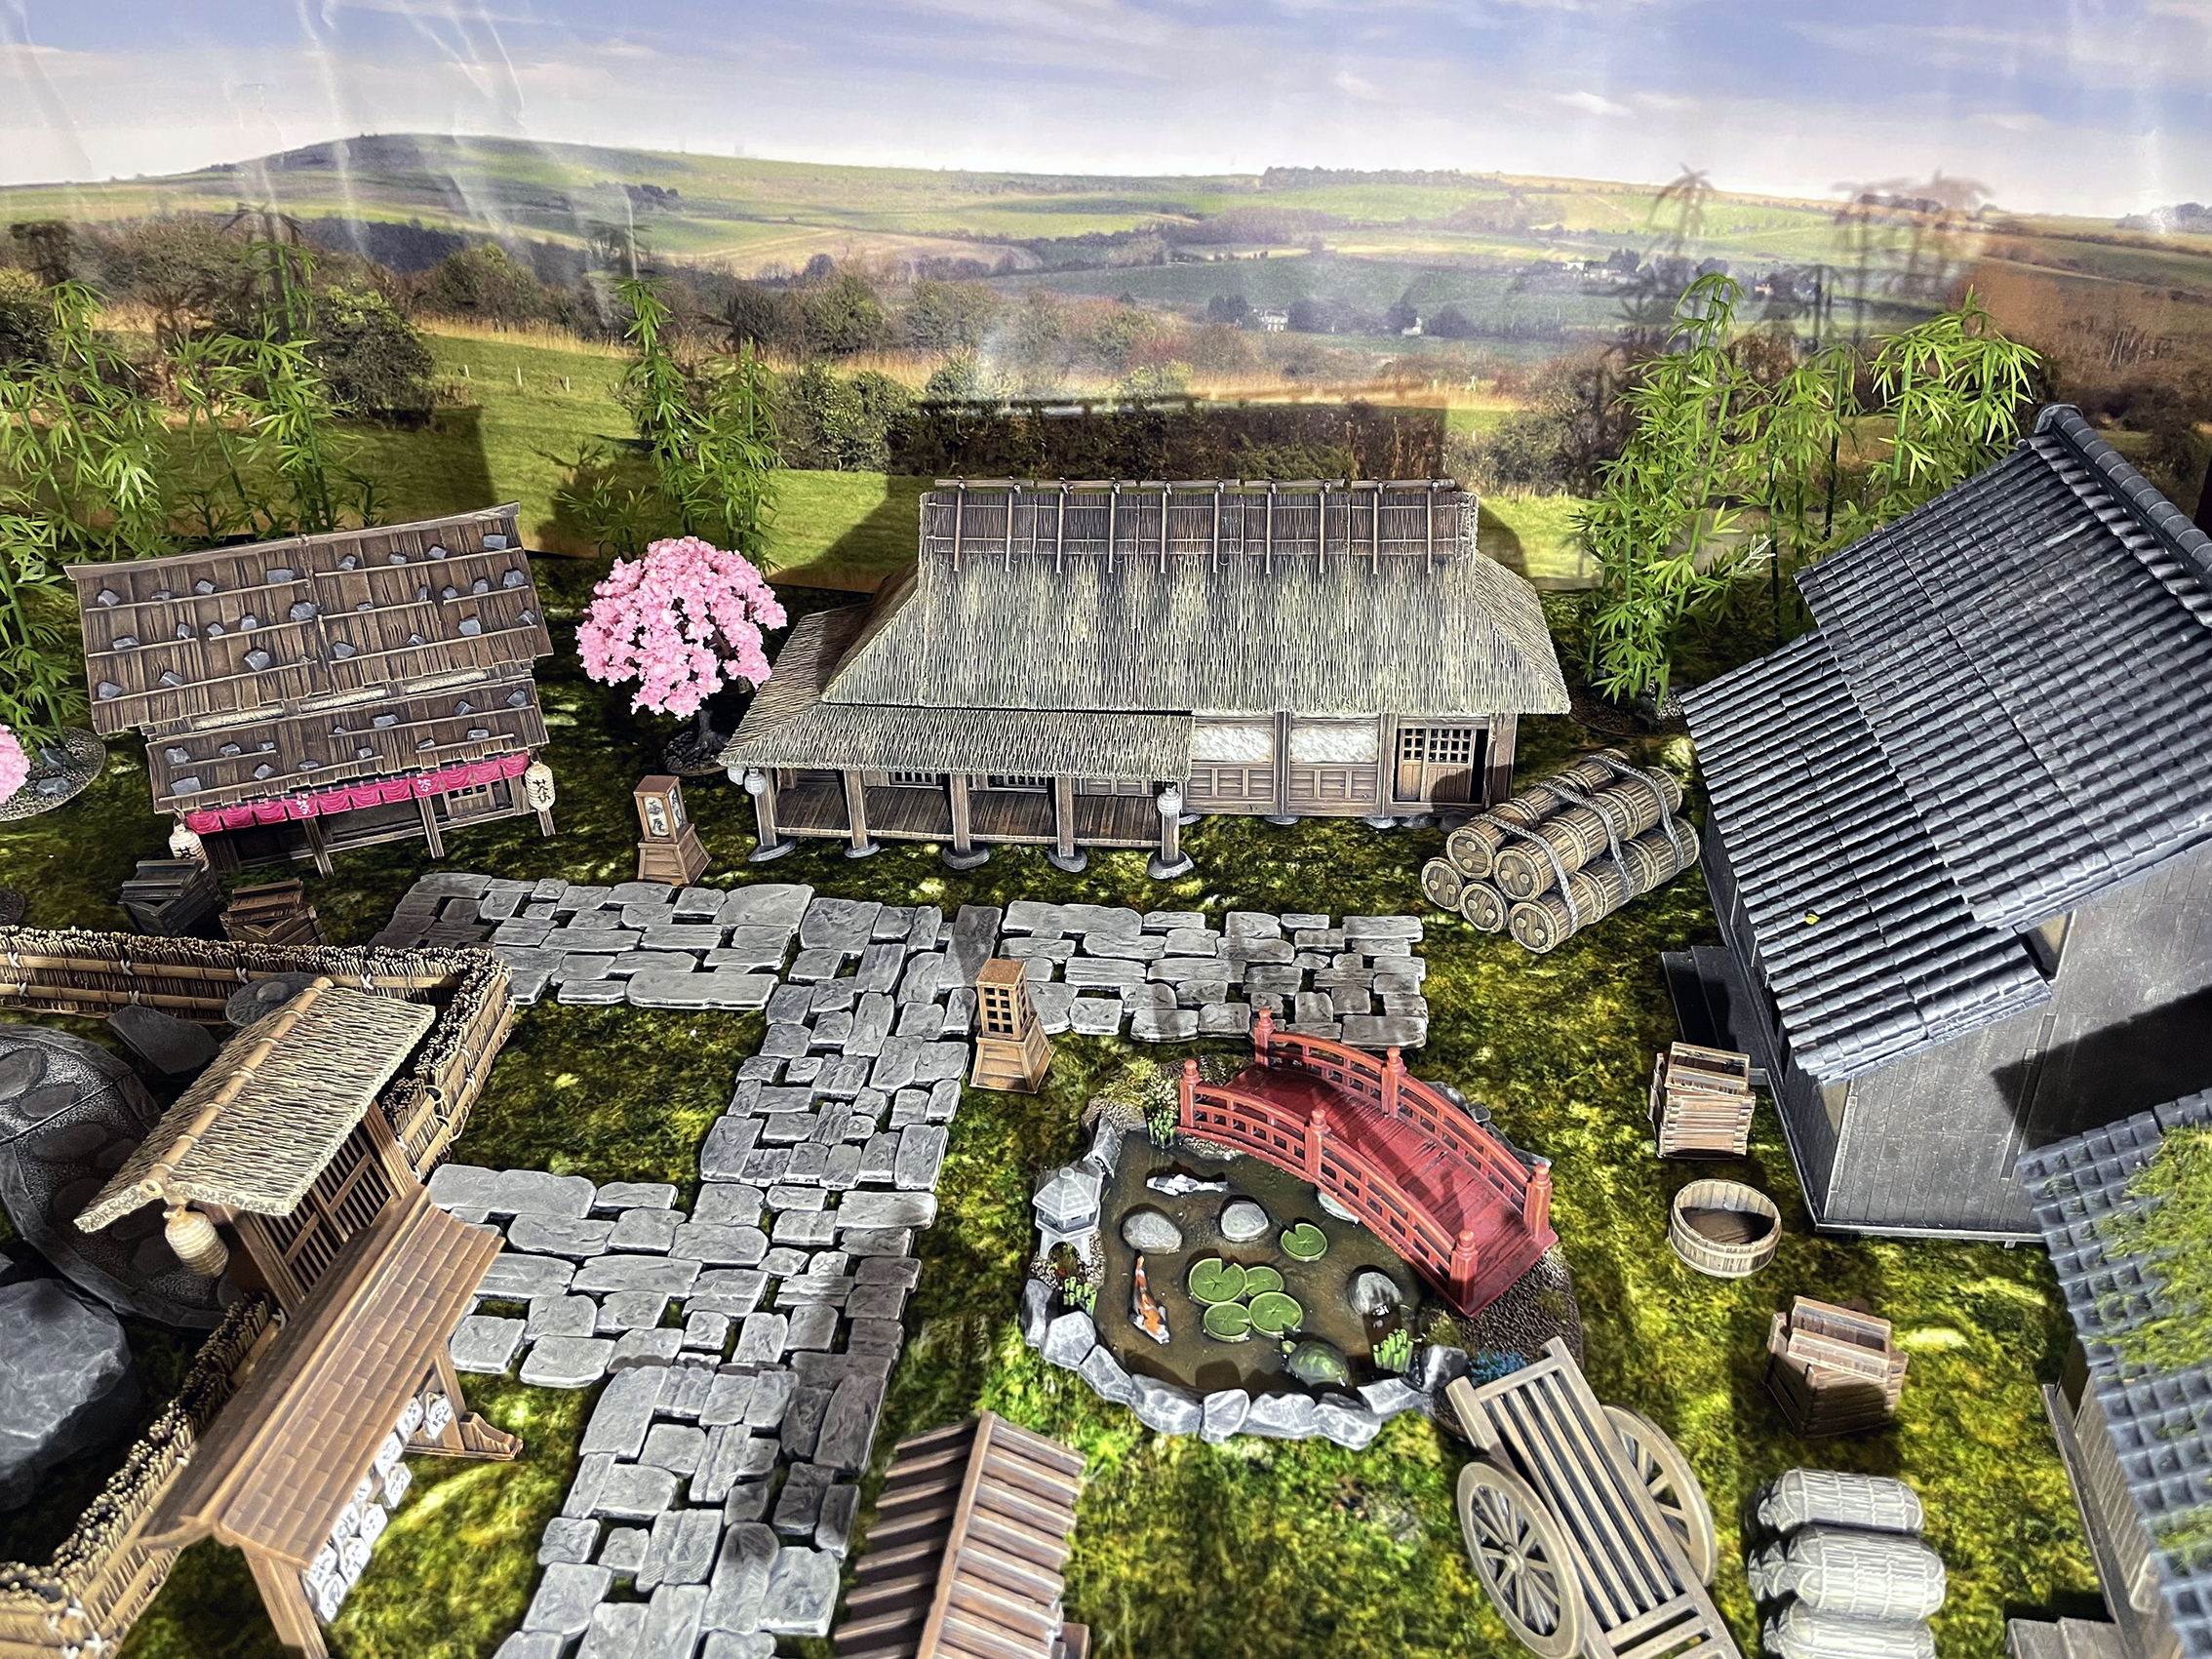
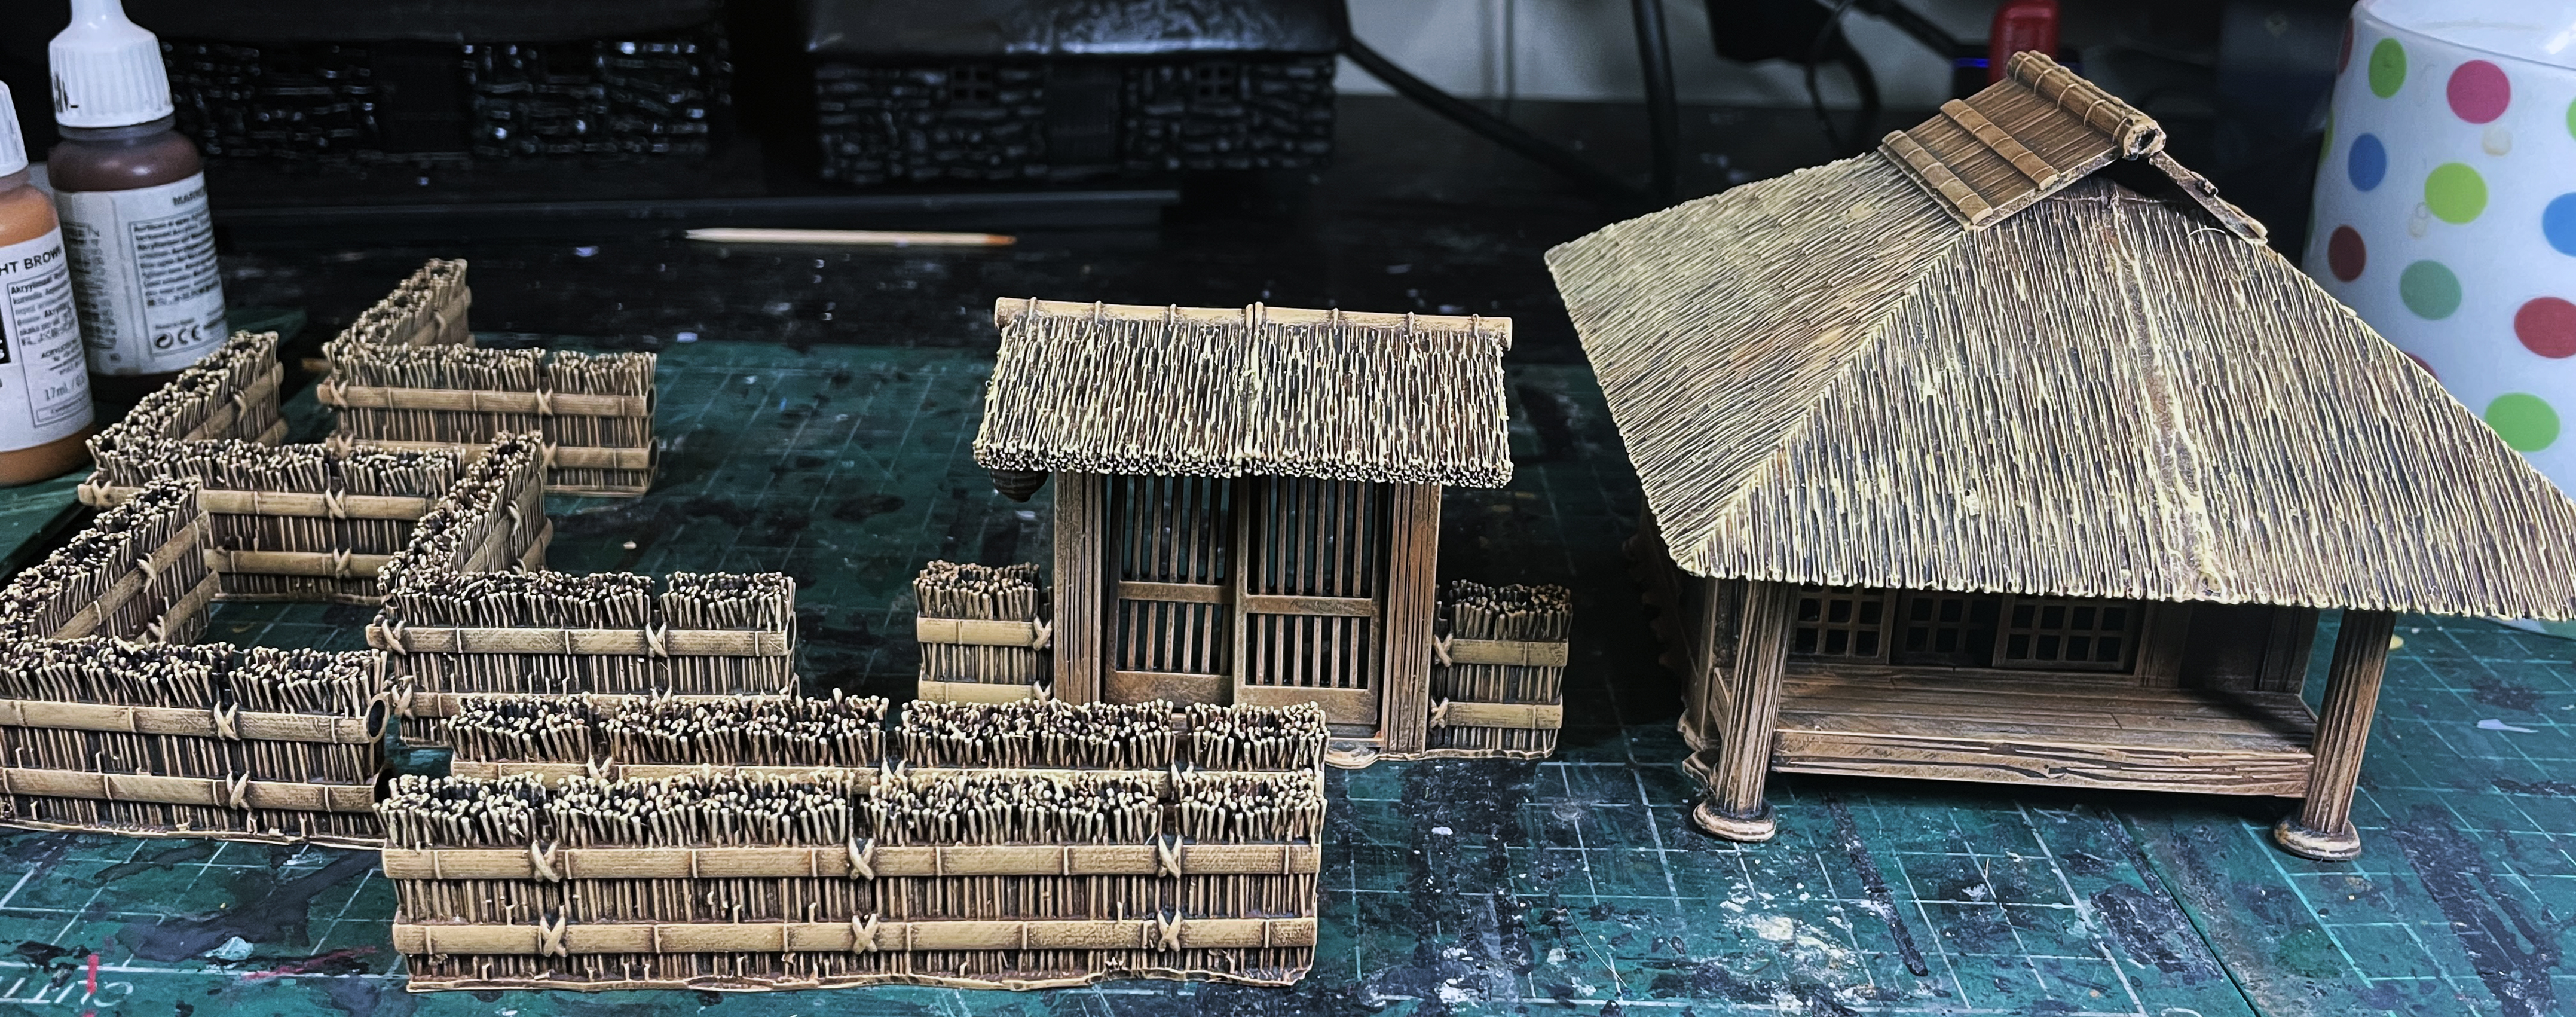
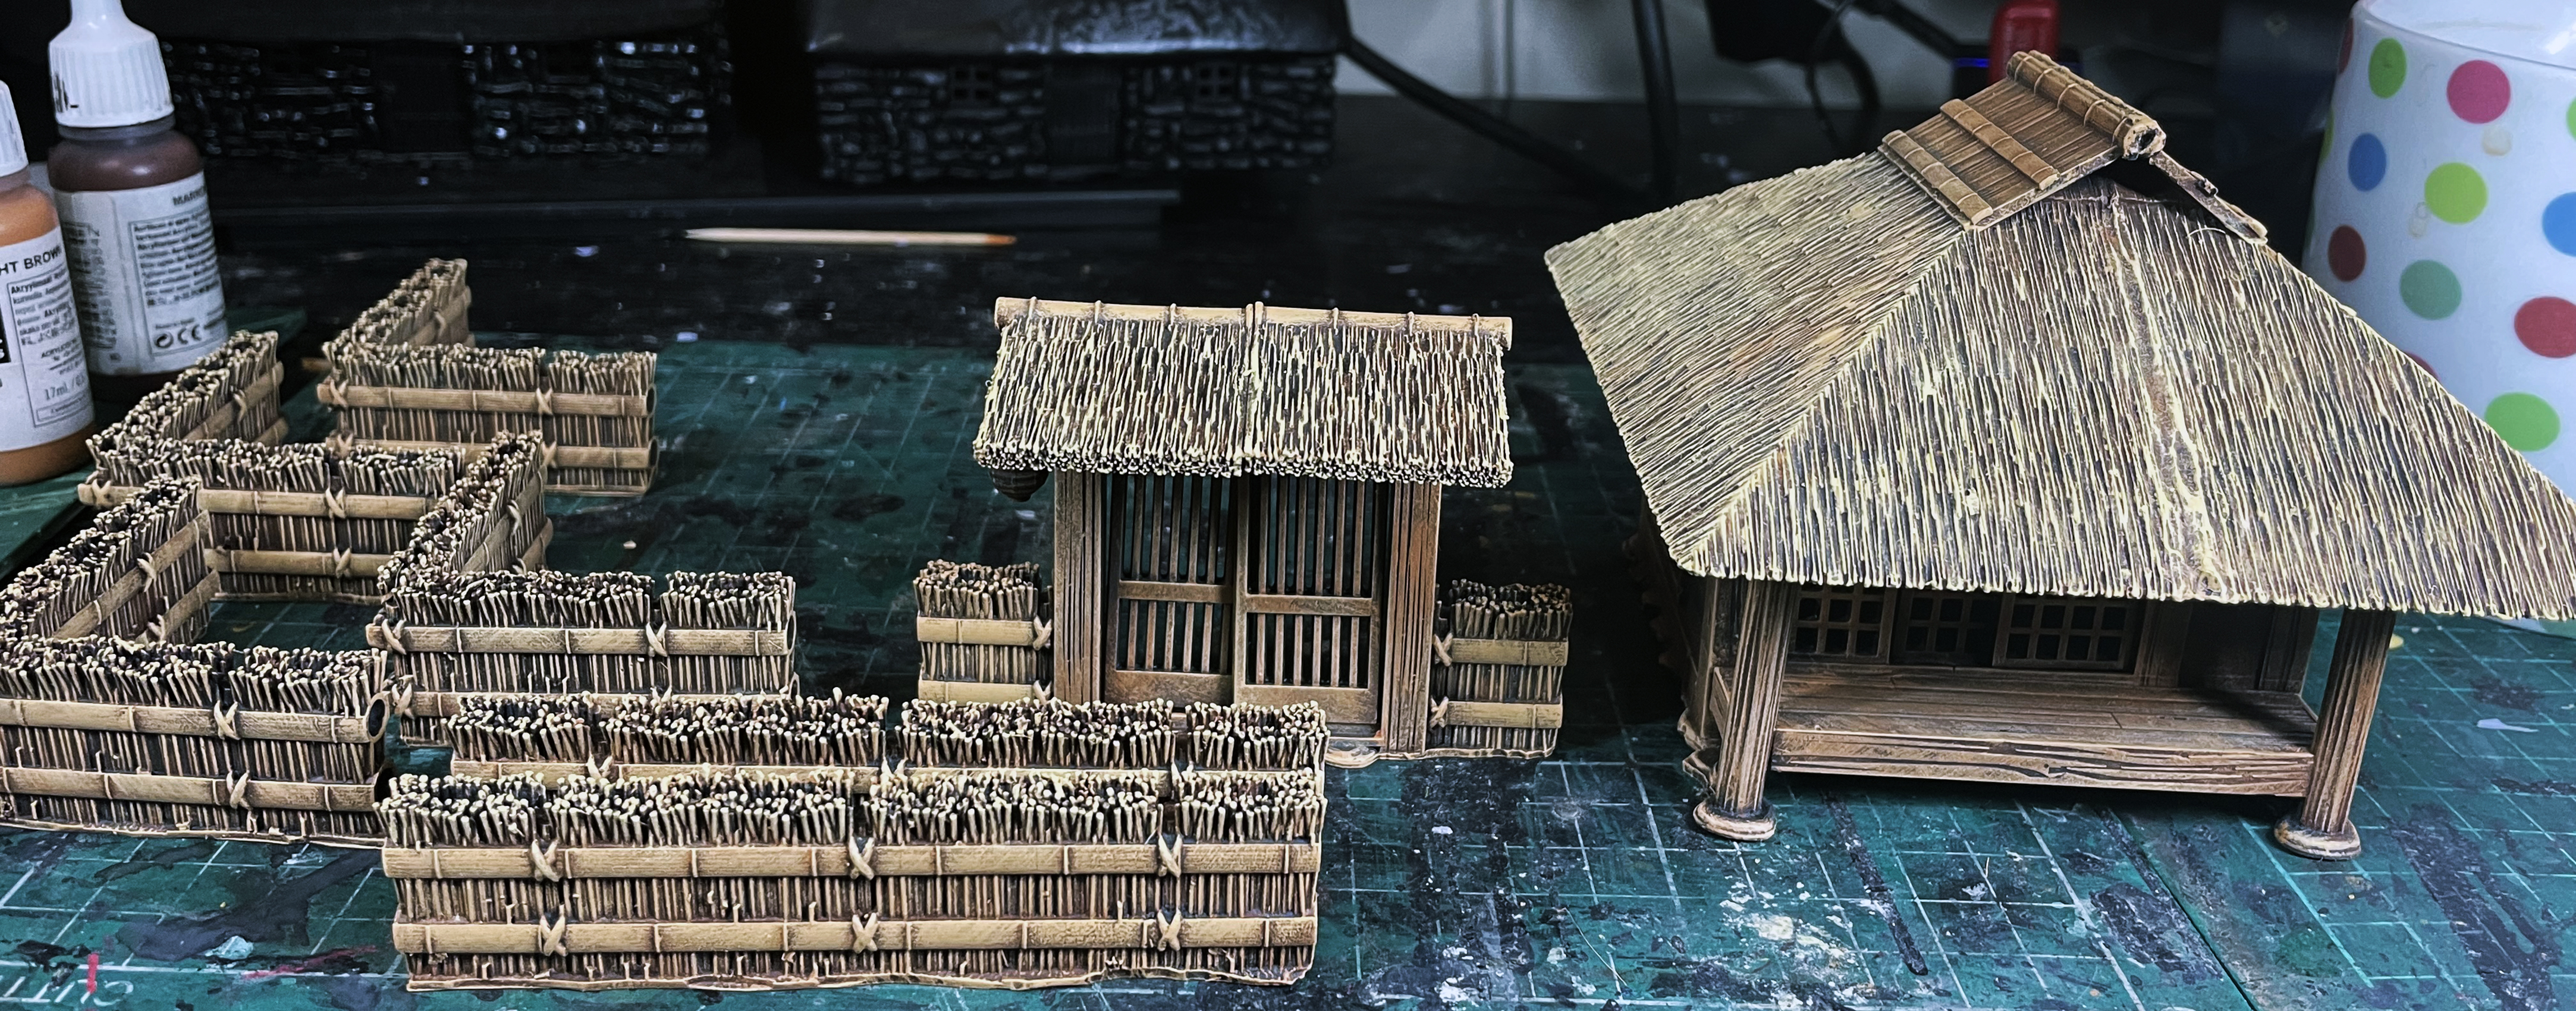
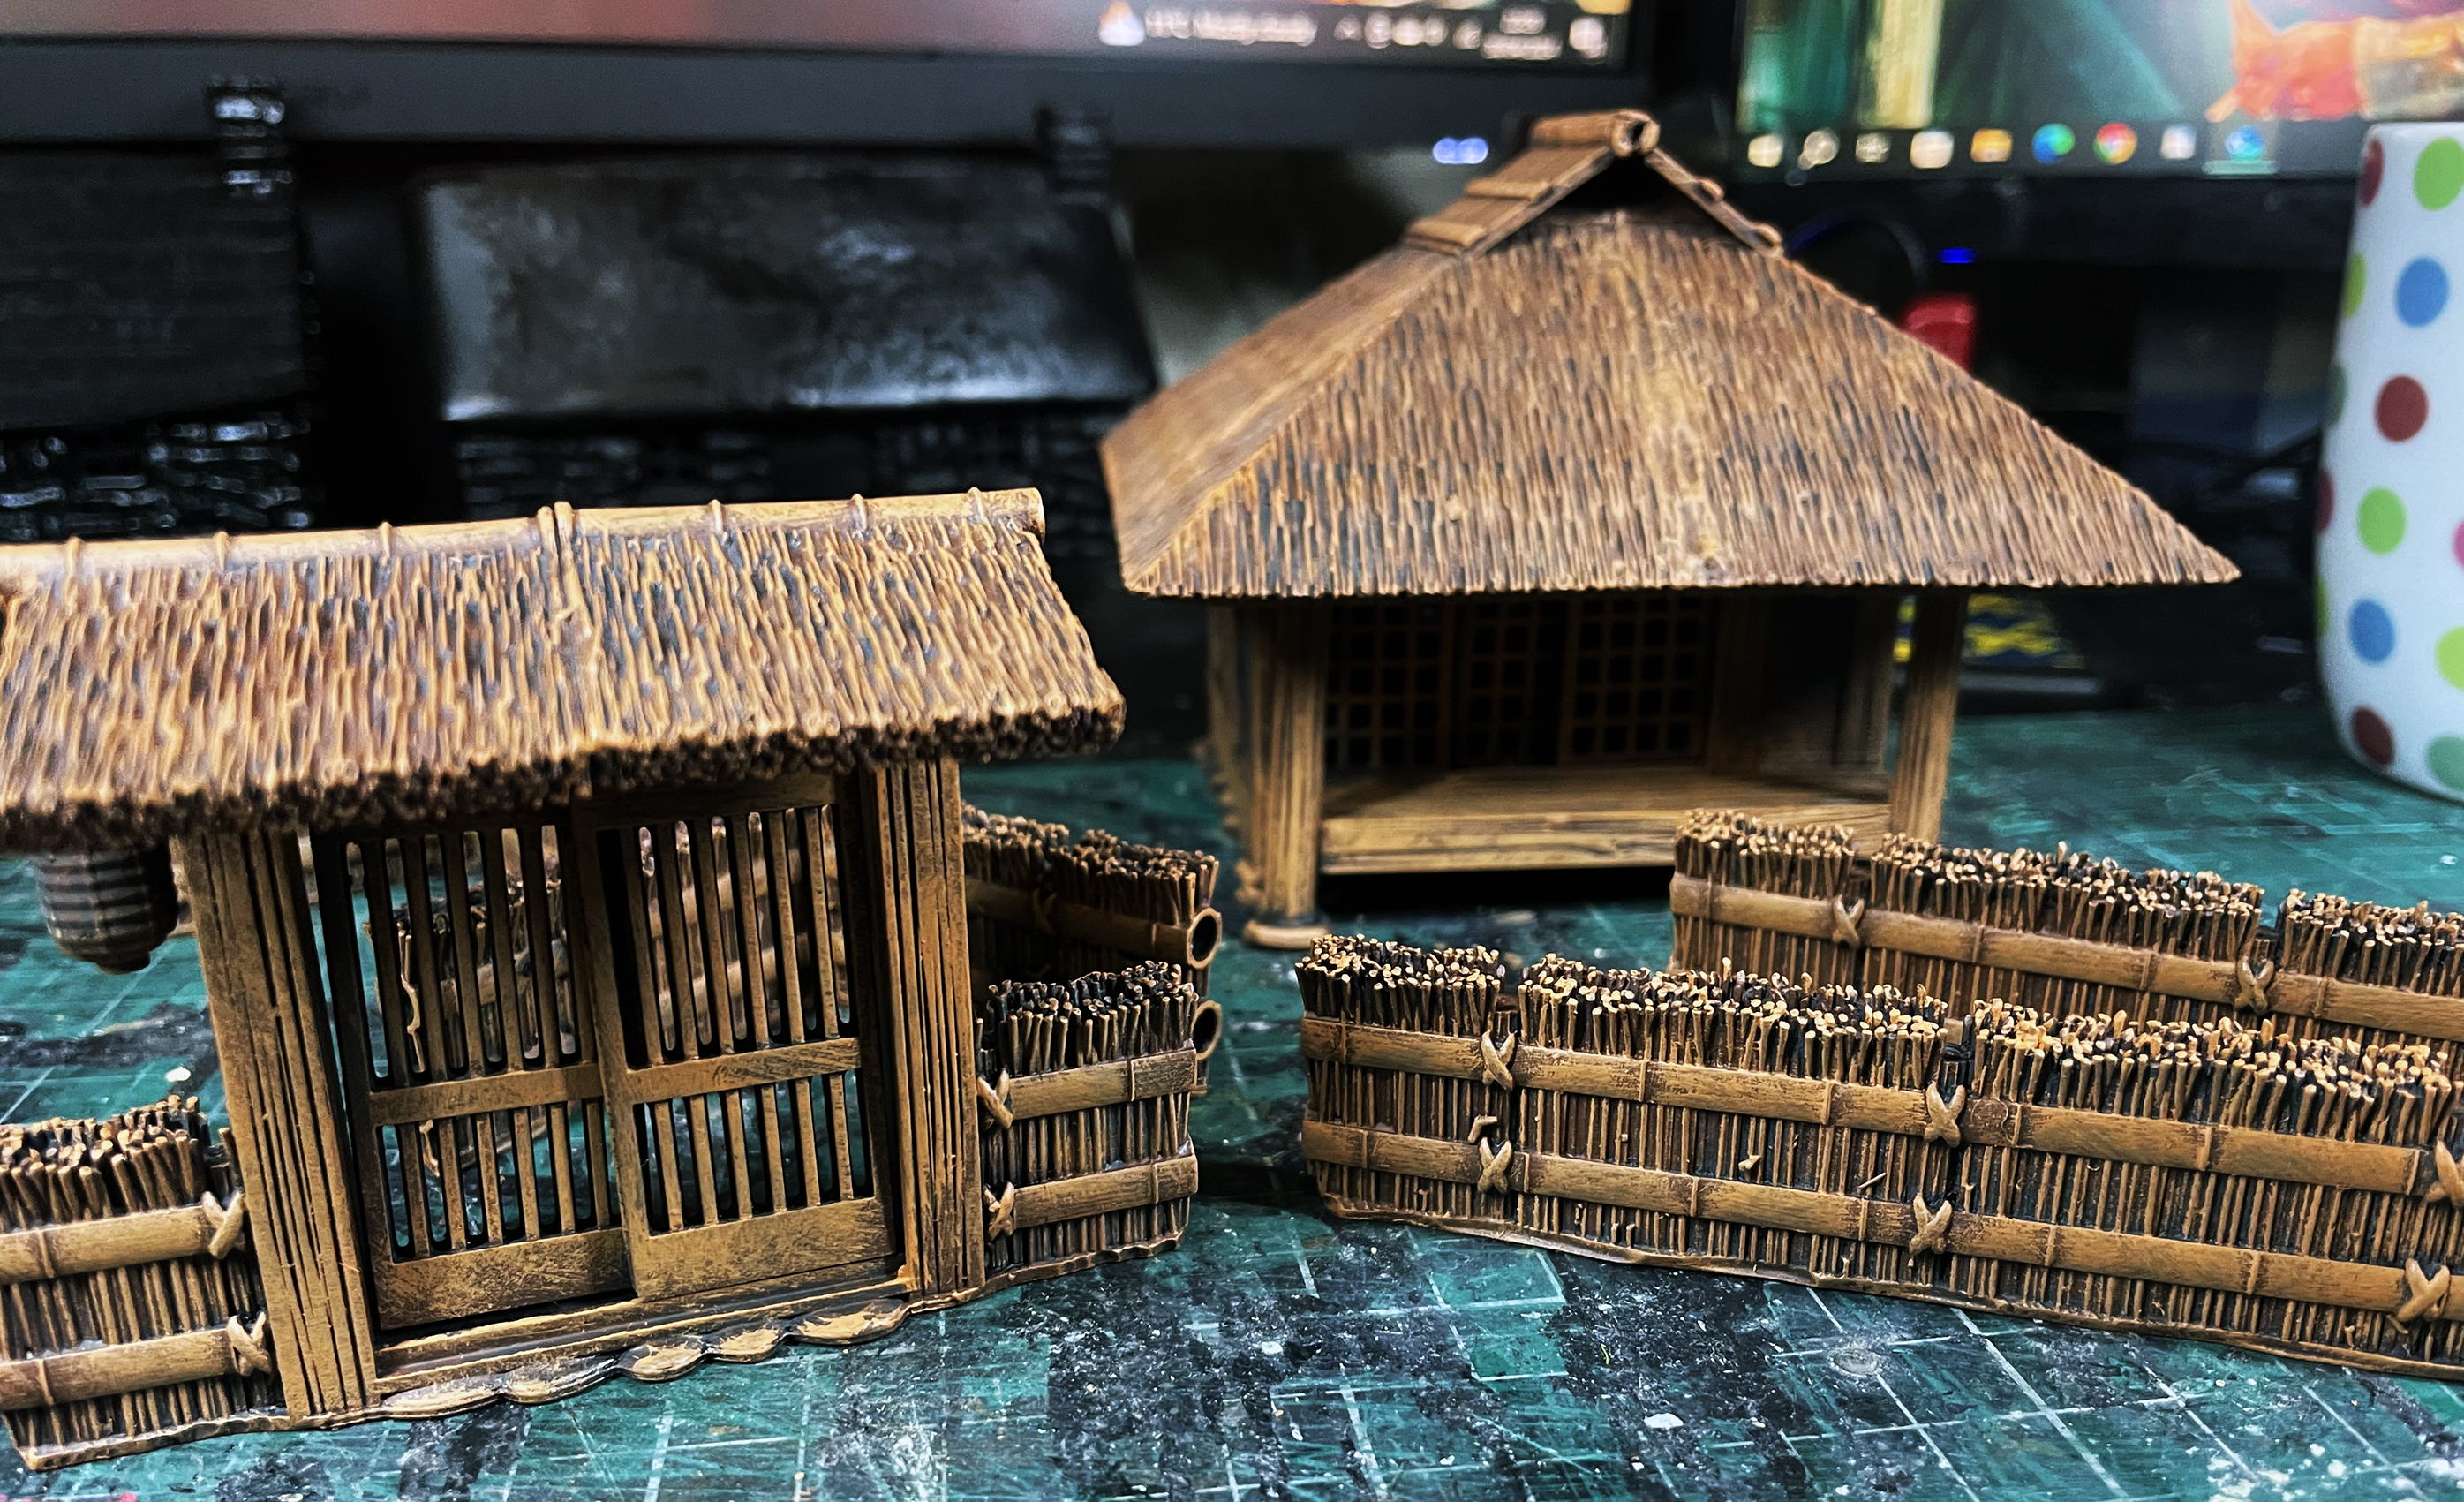
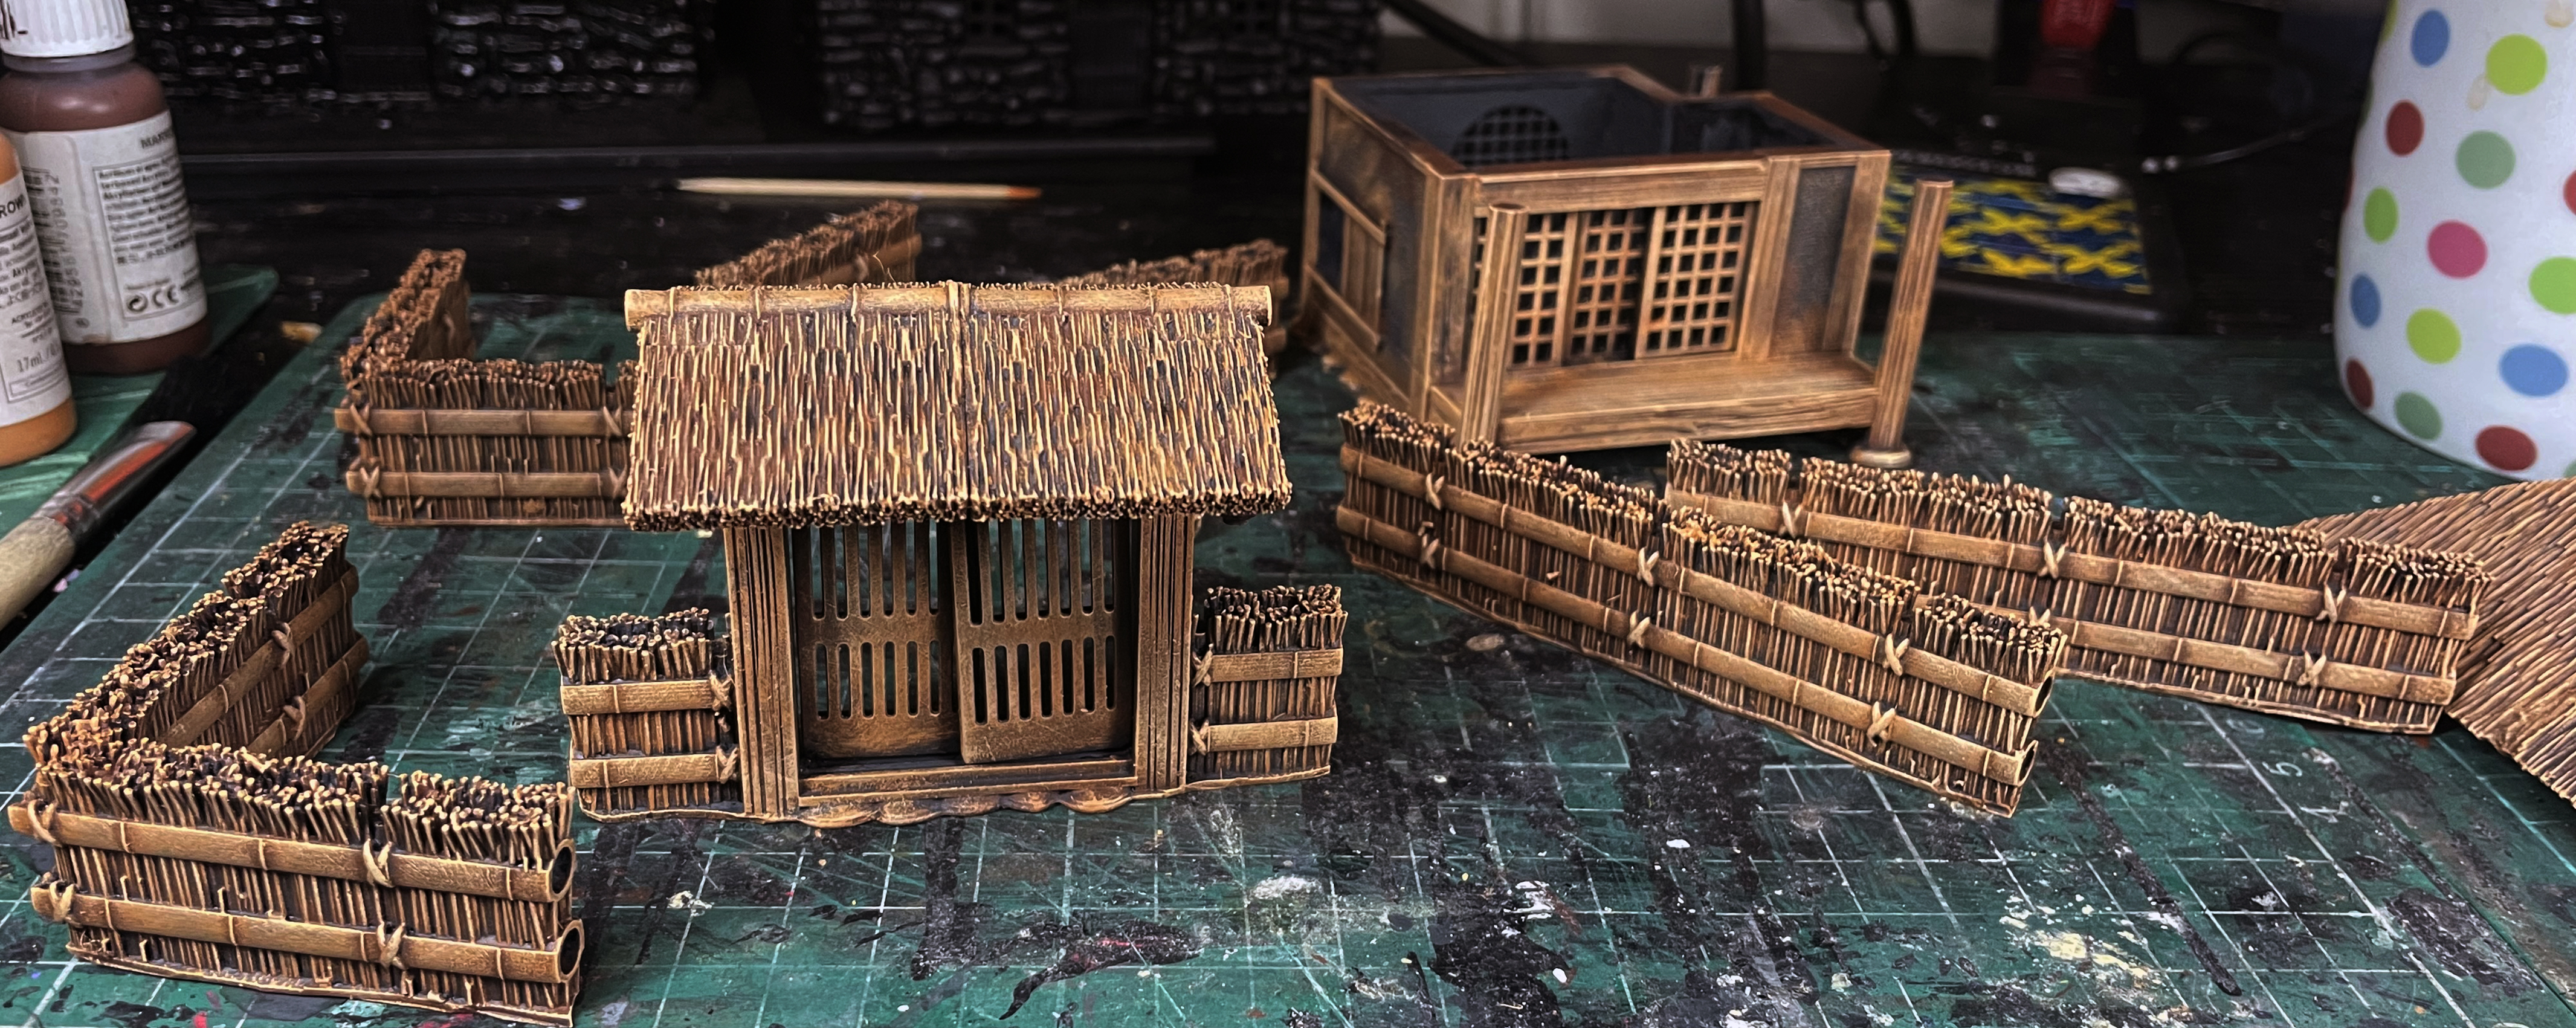
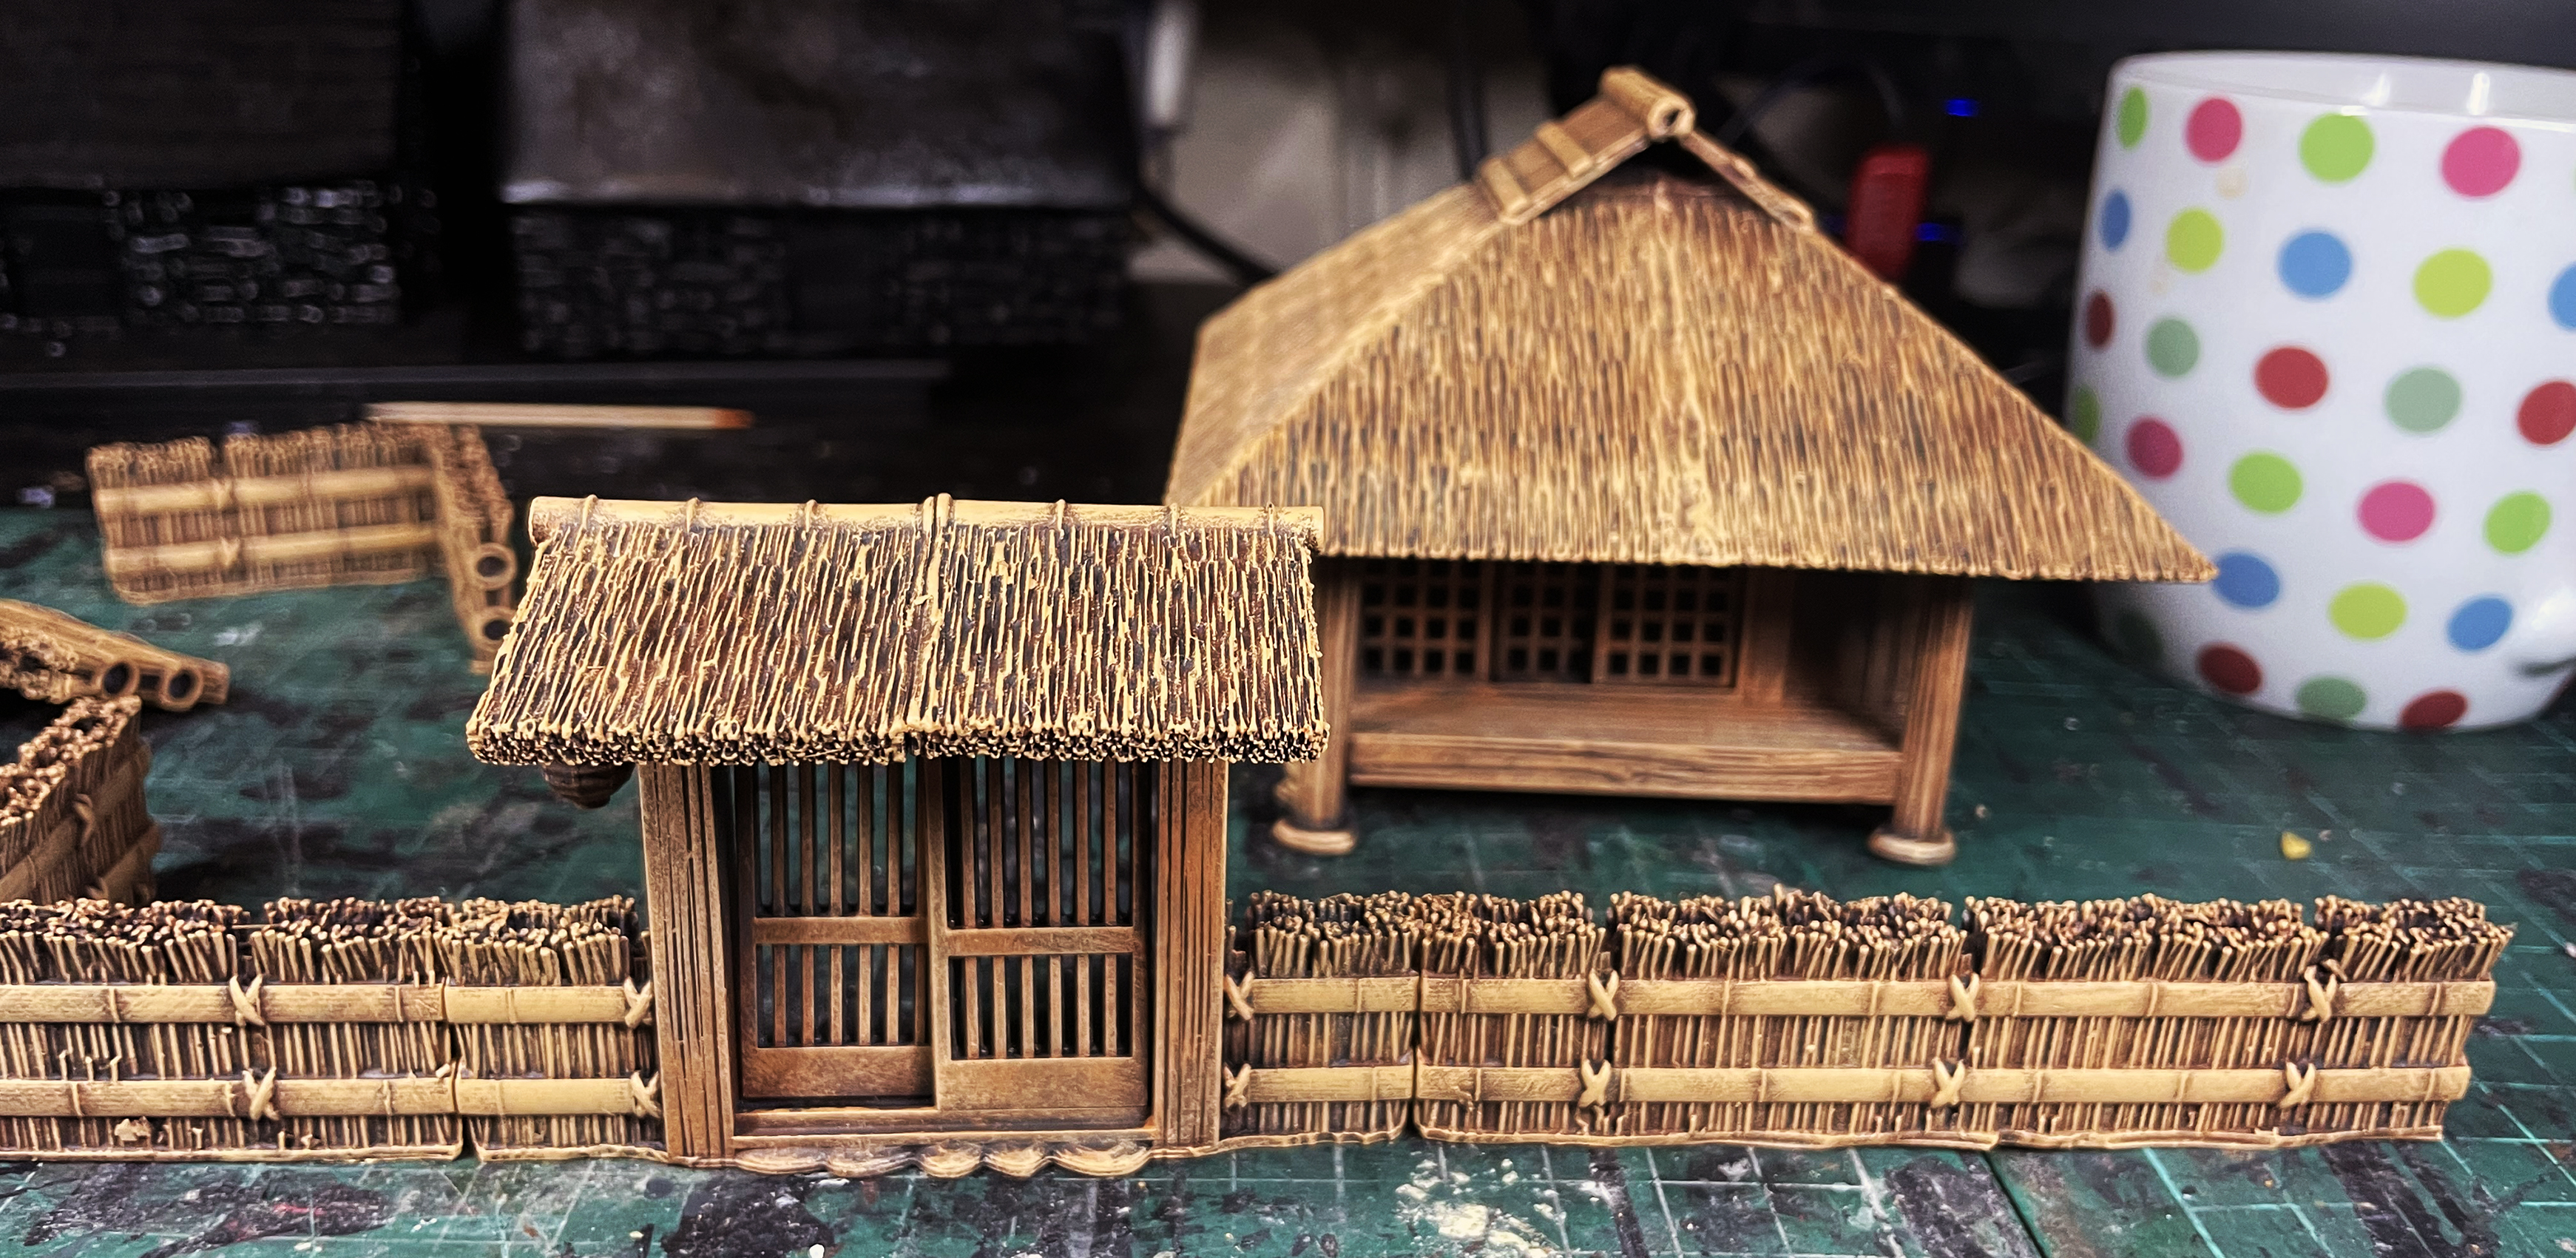
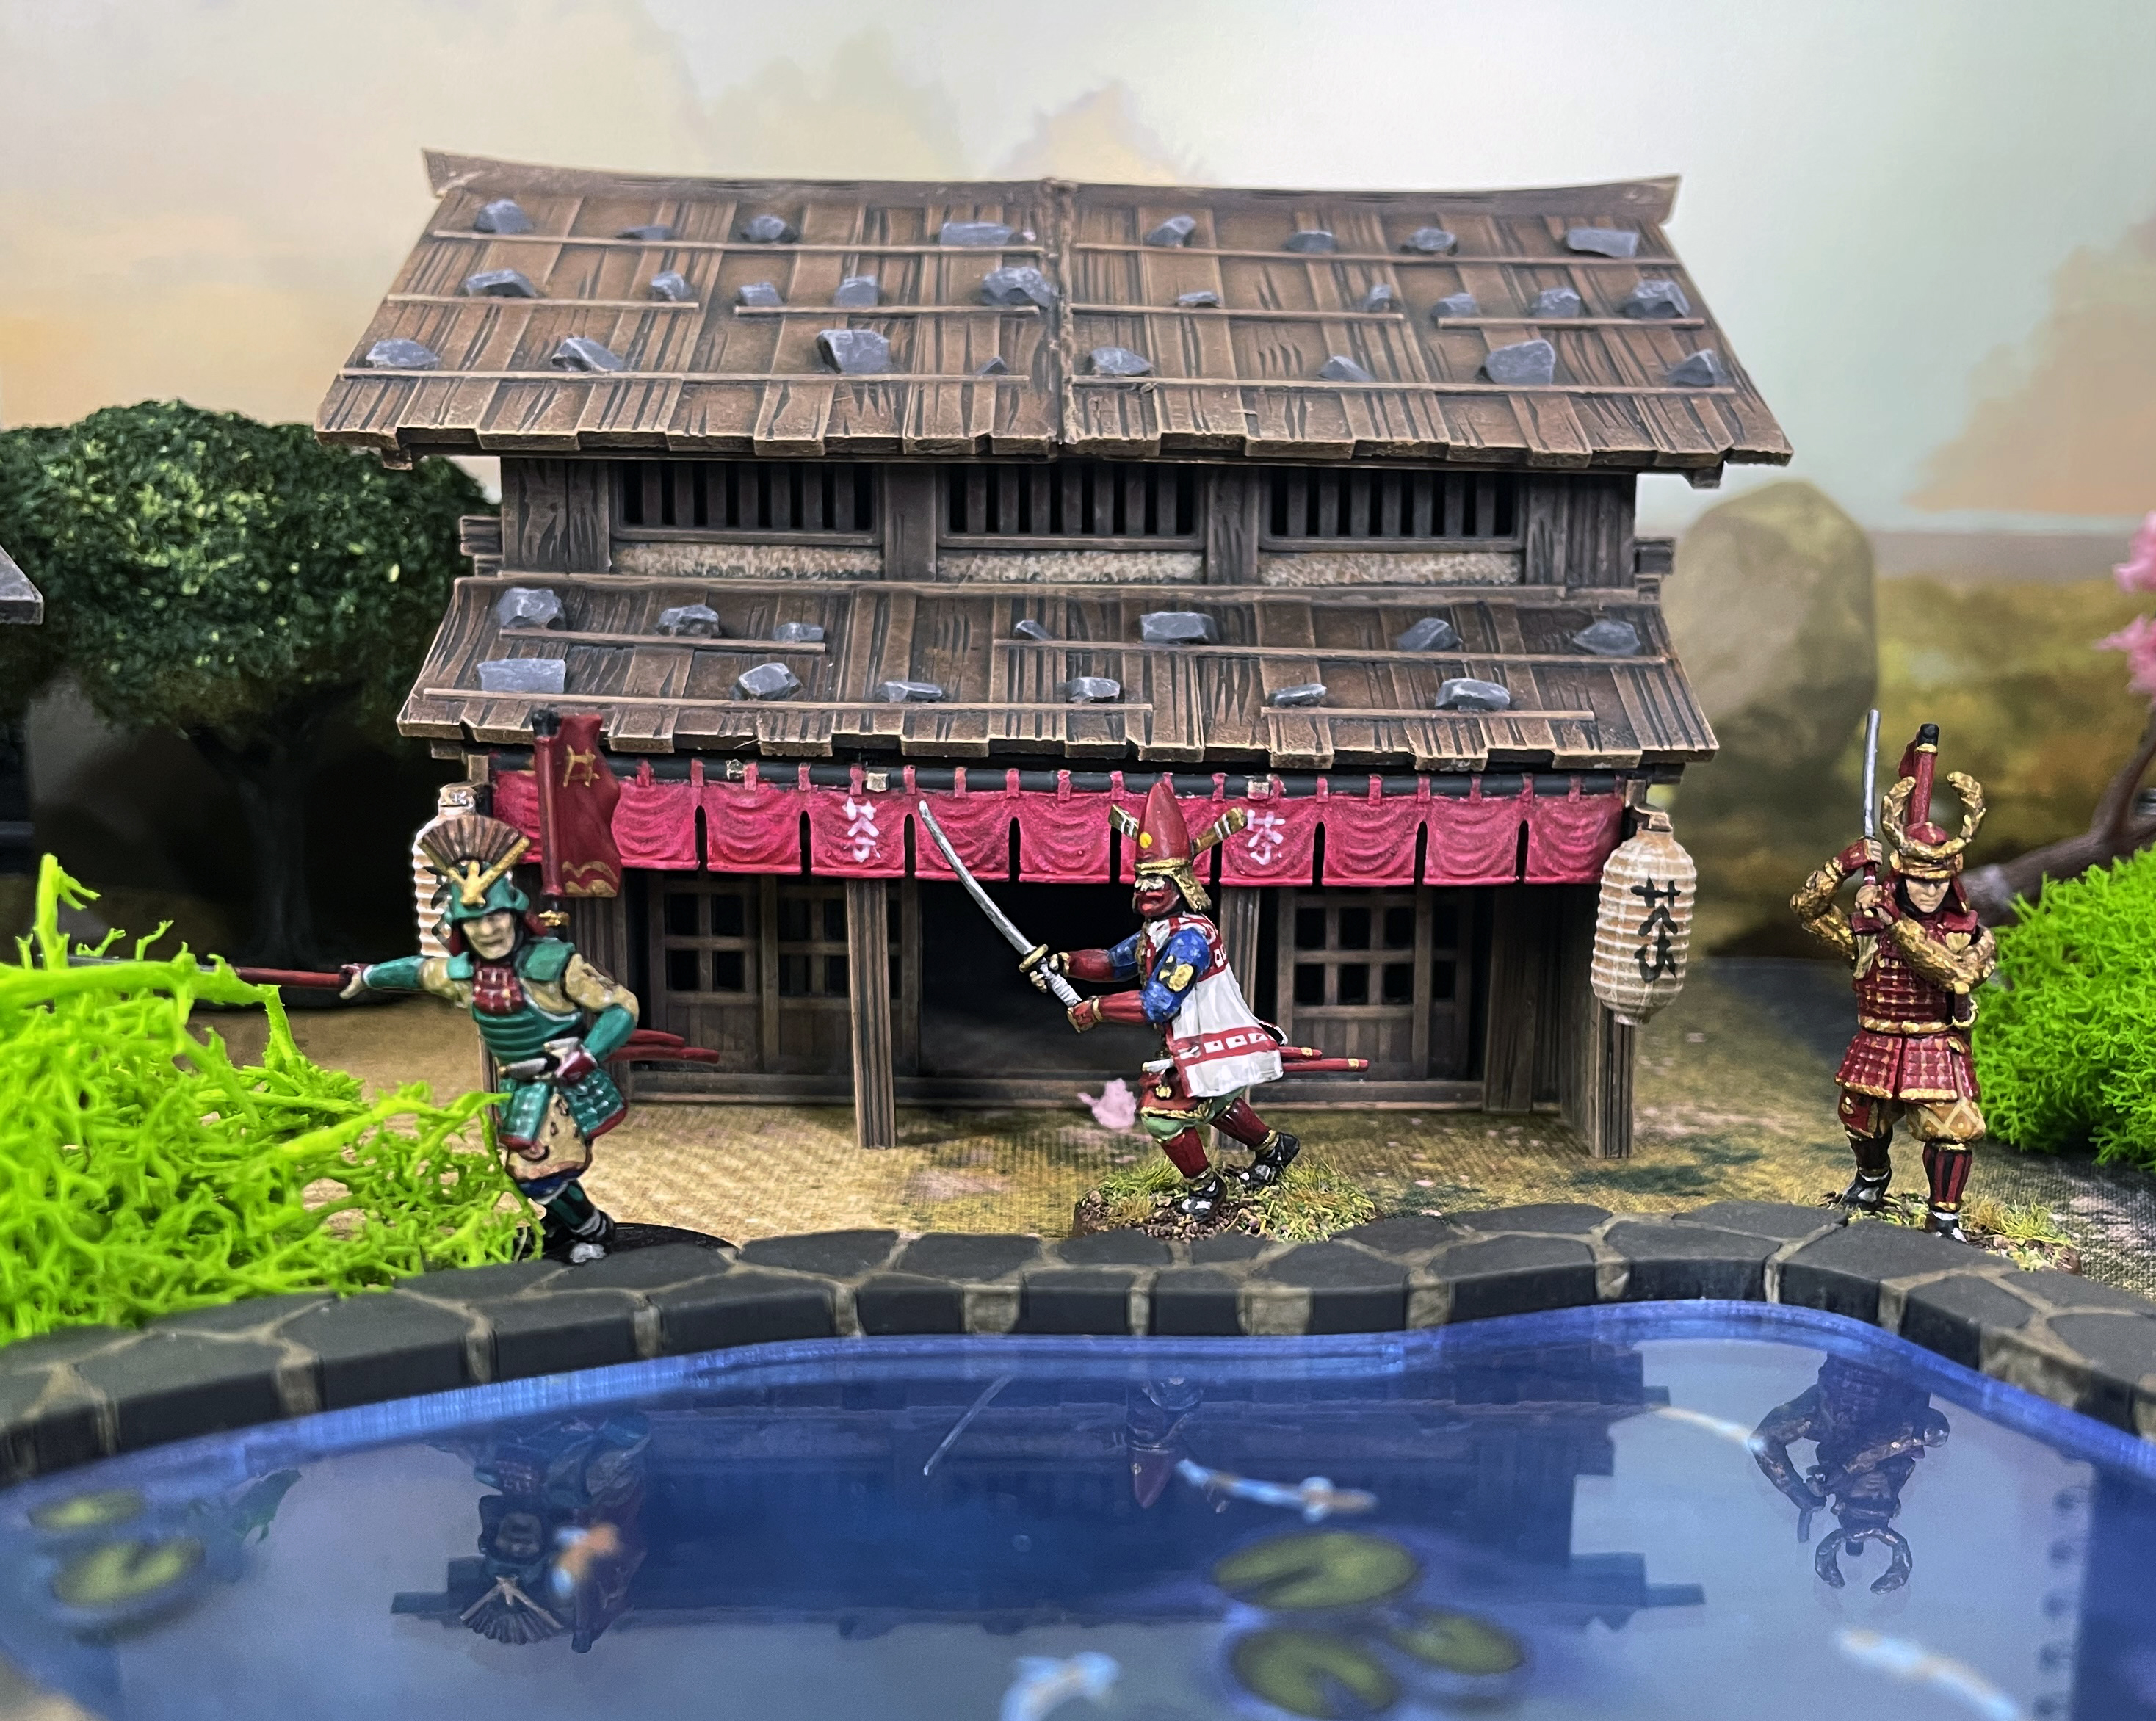
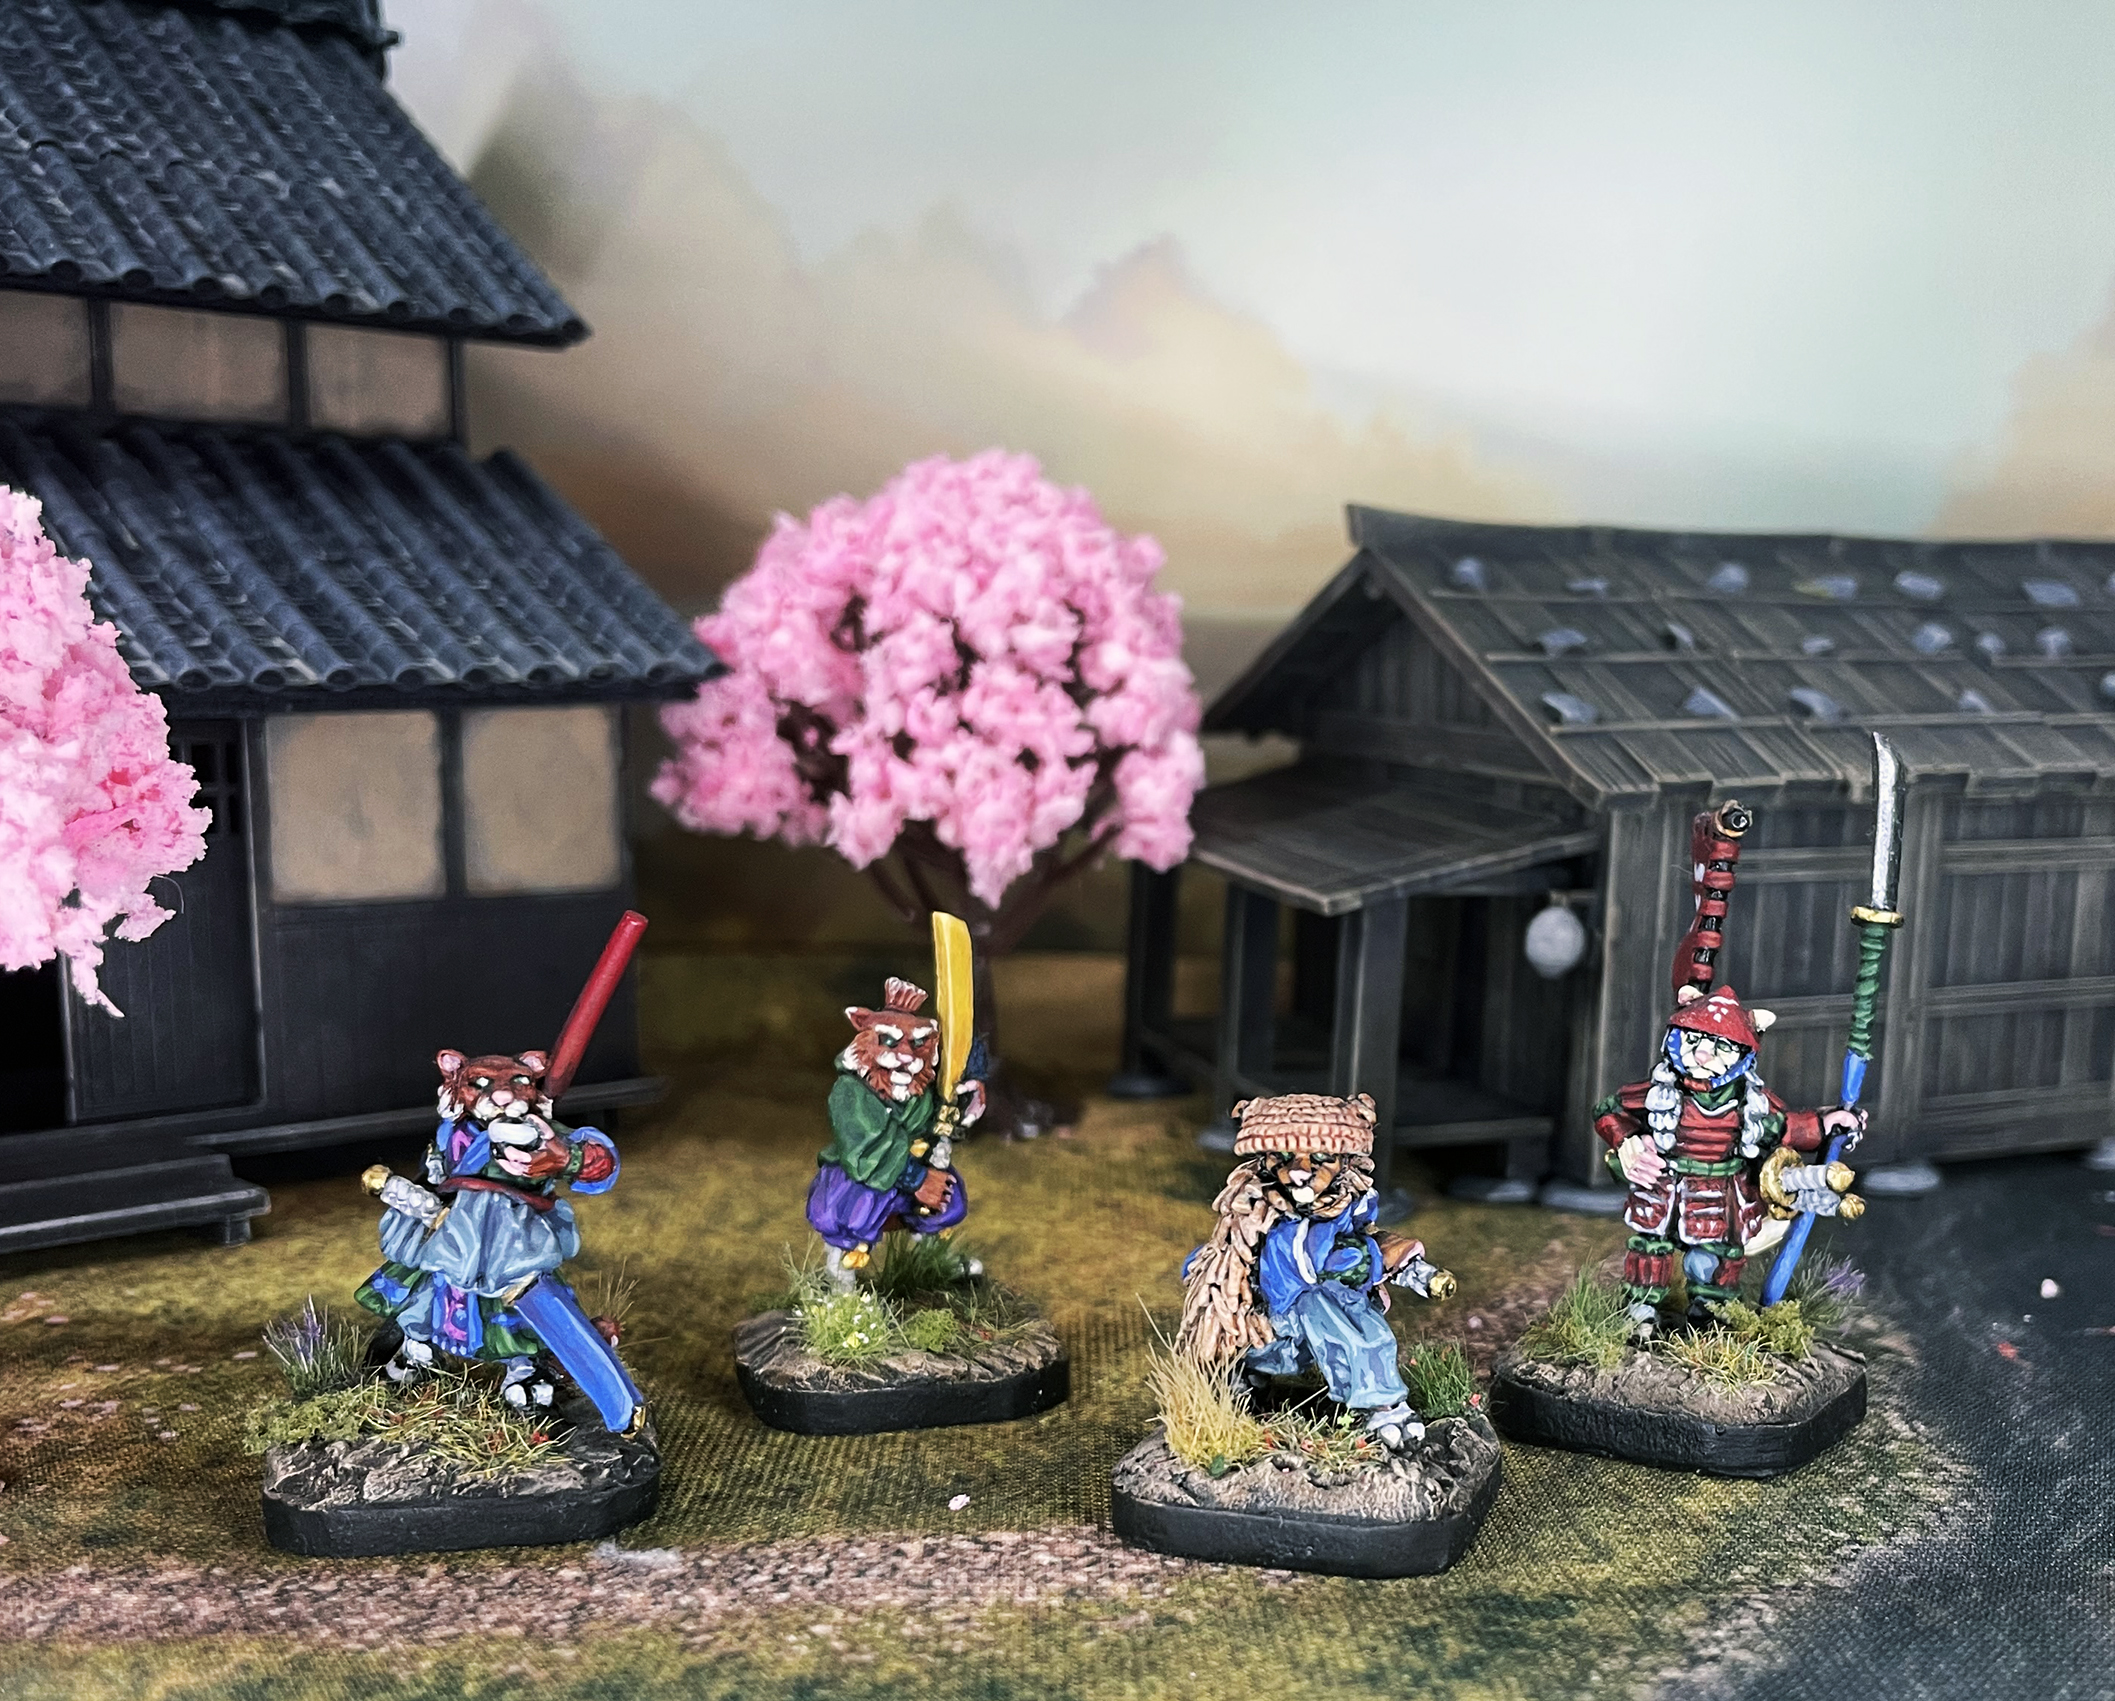
The (Nearly) Completed Village
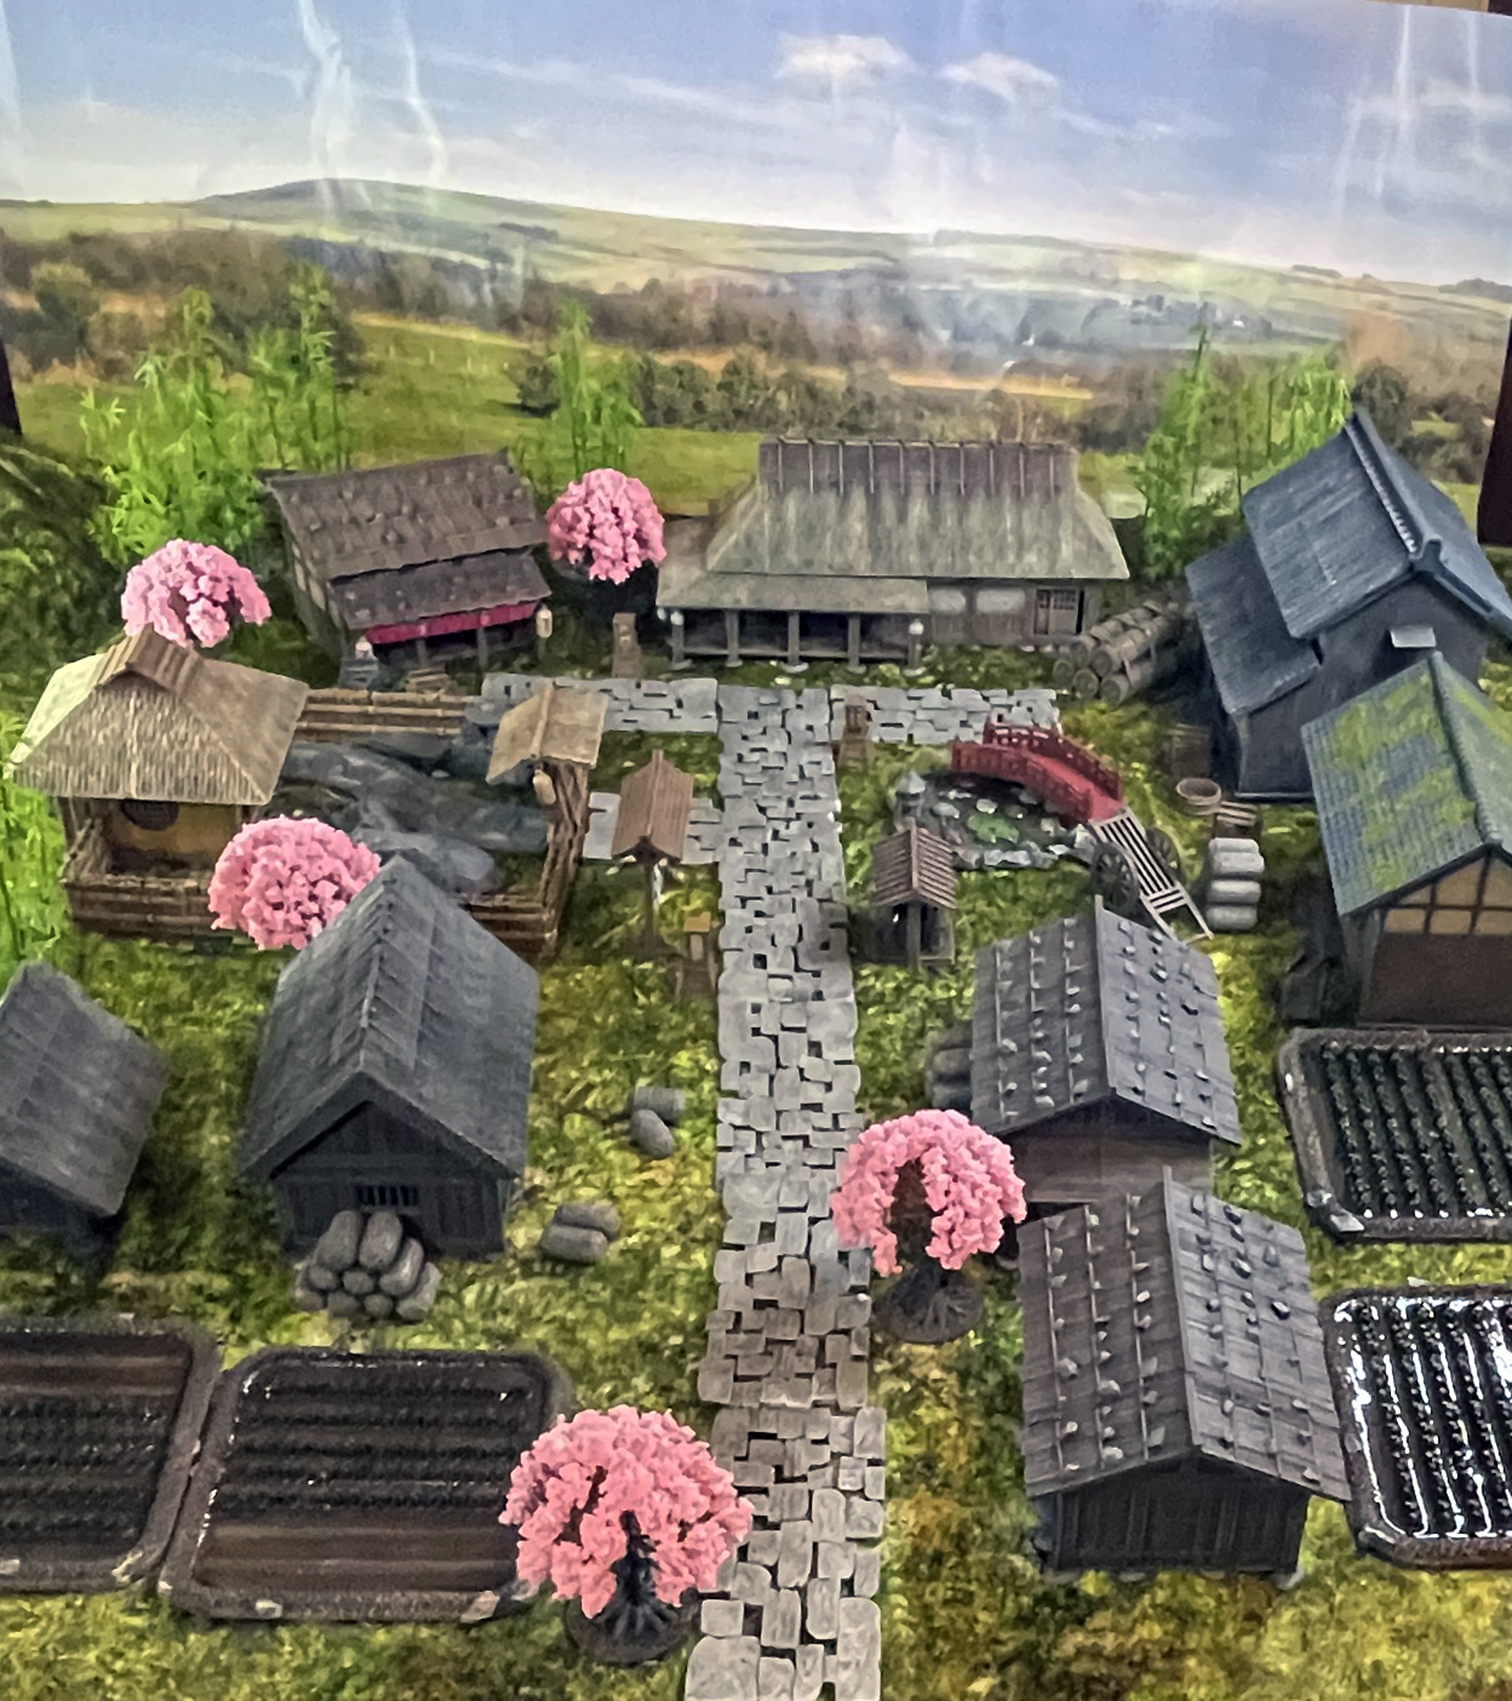
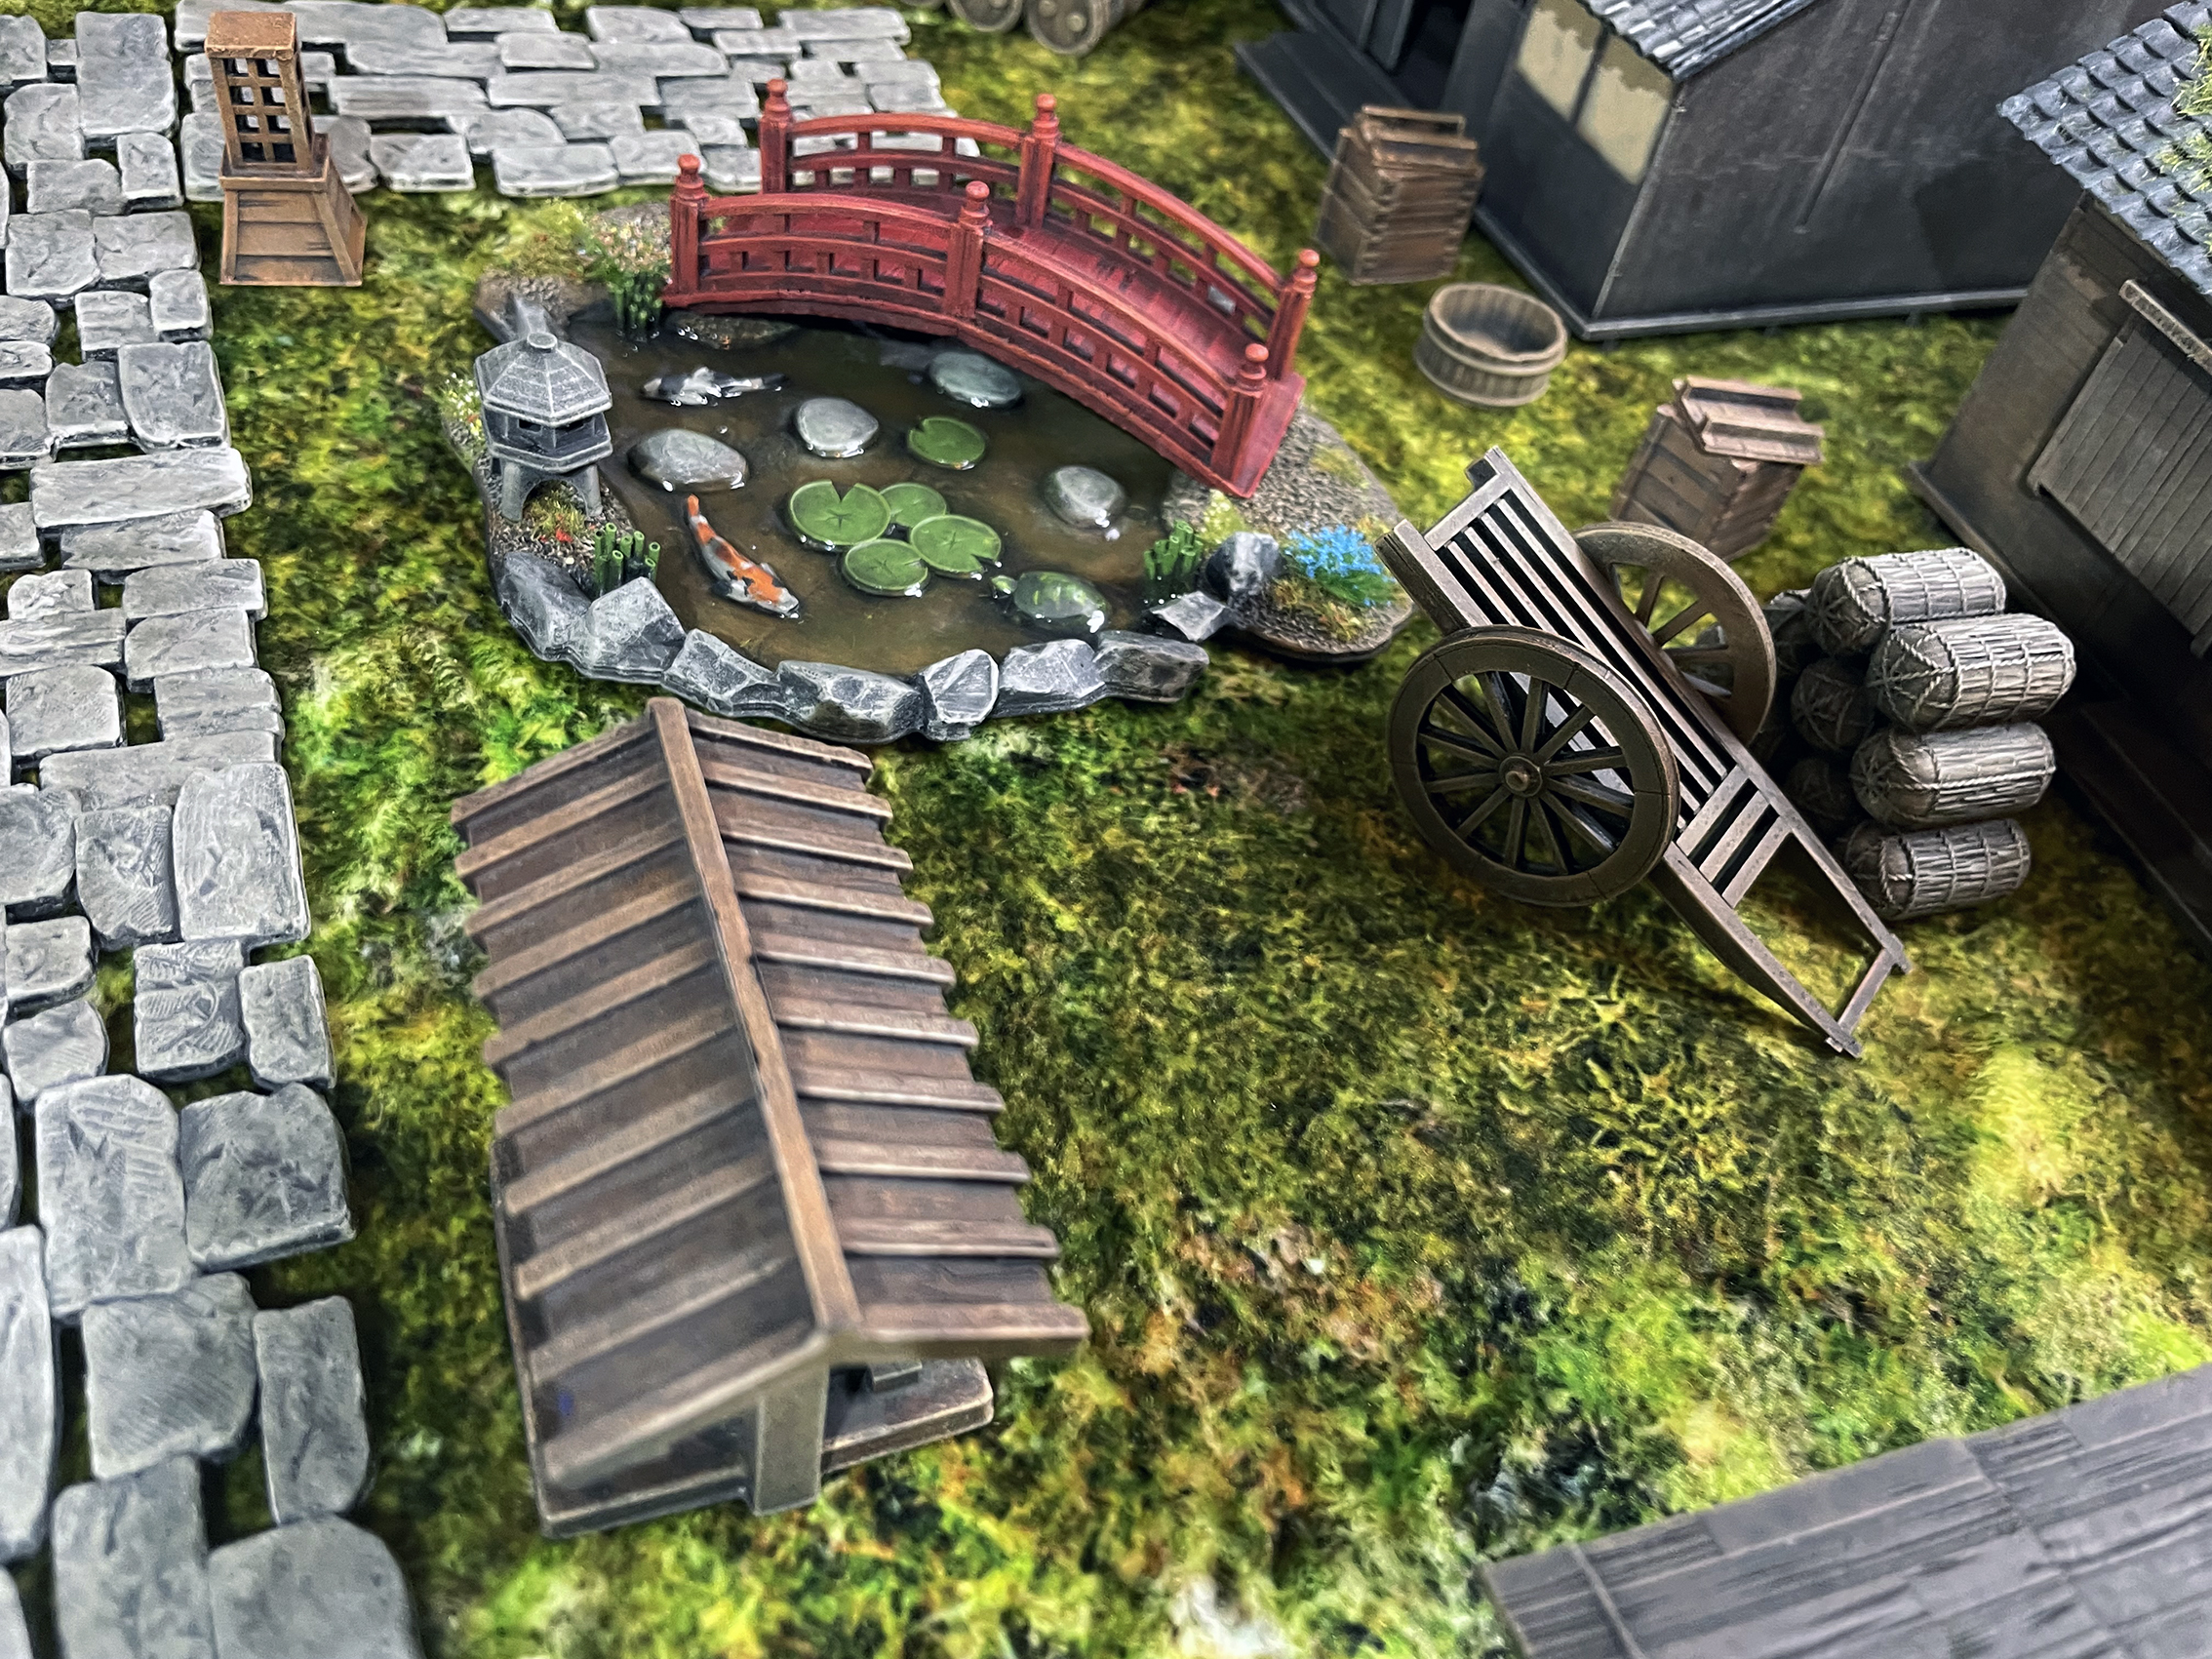
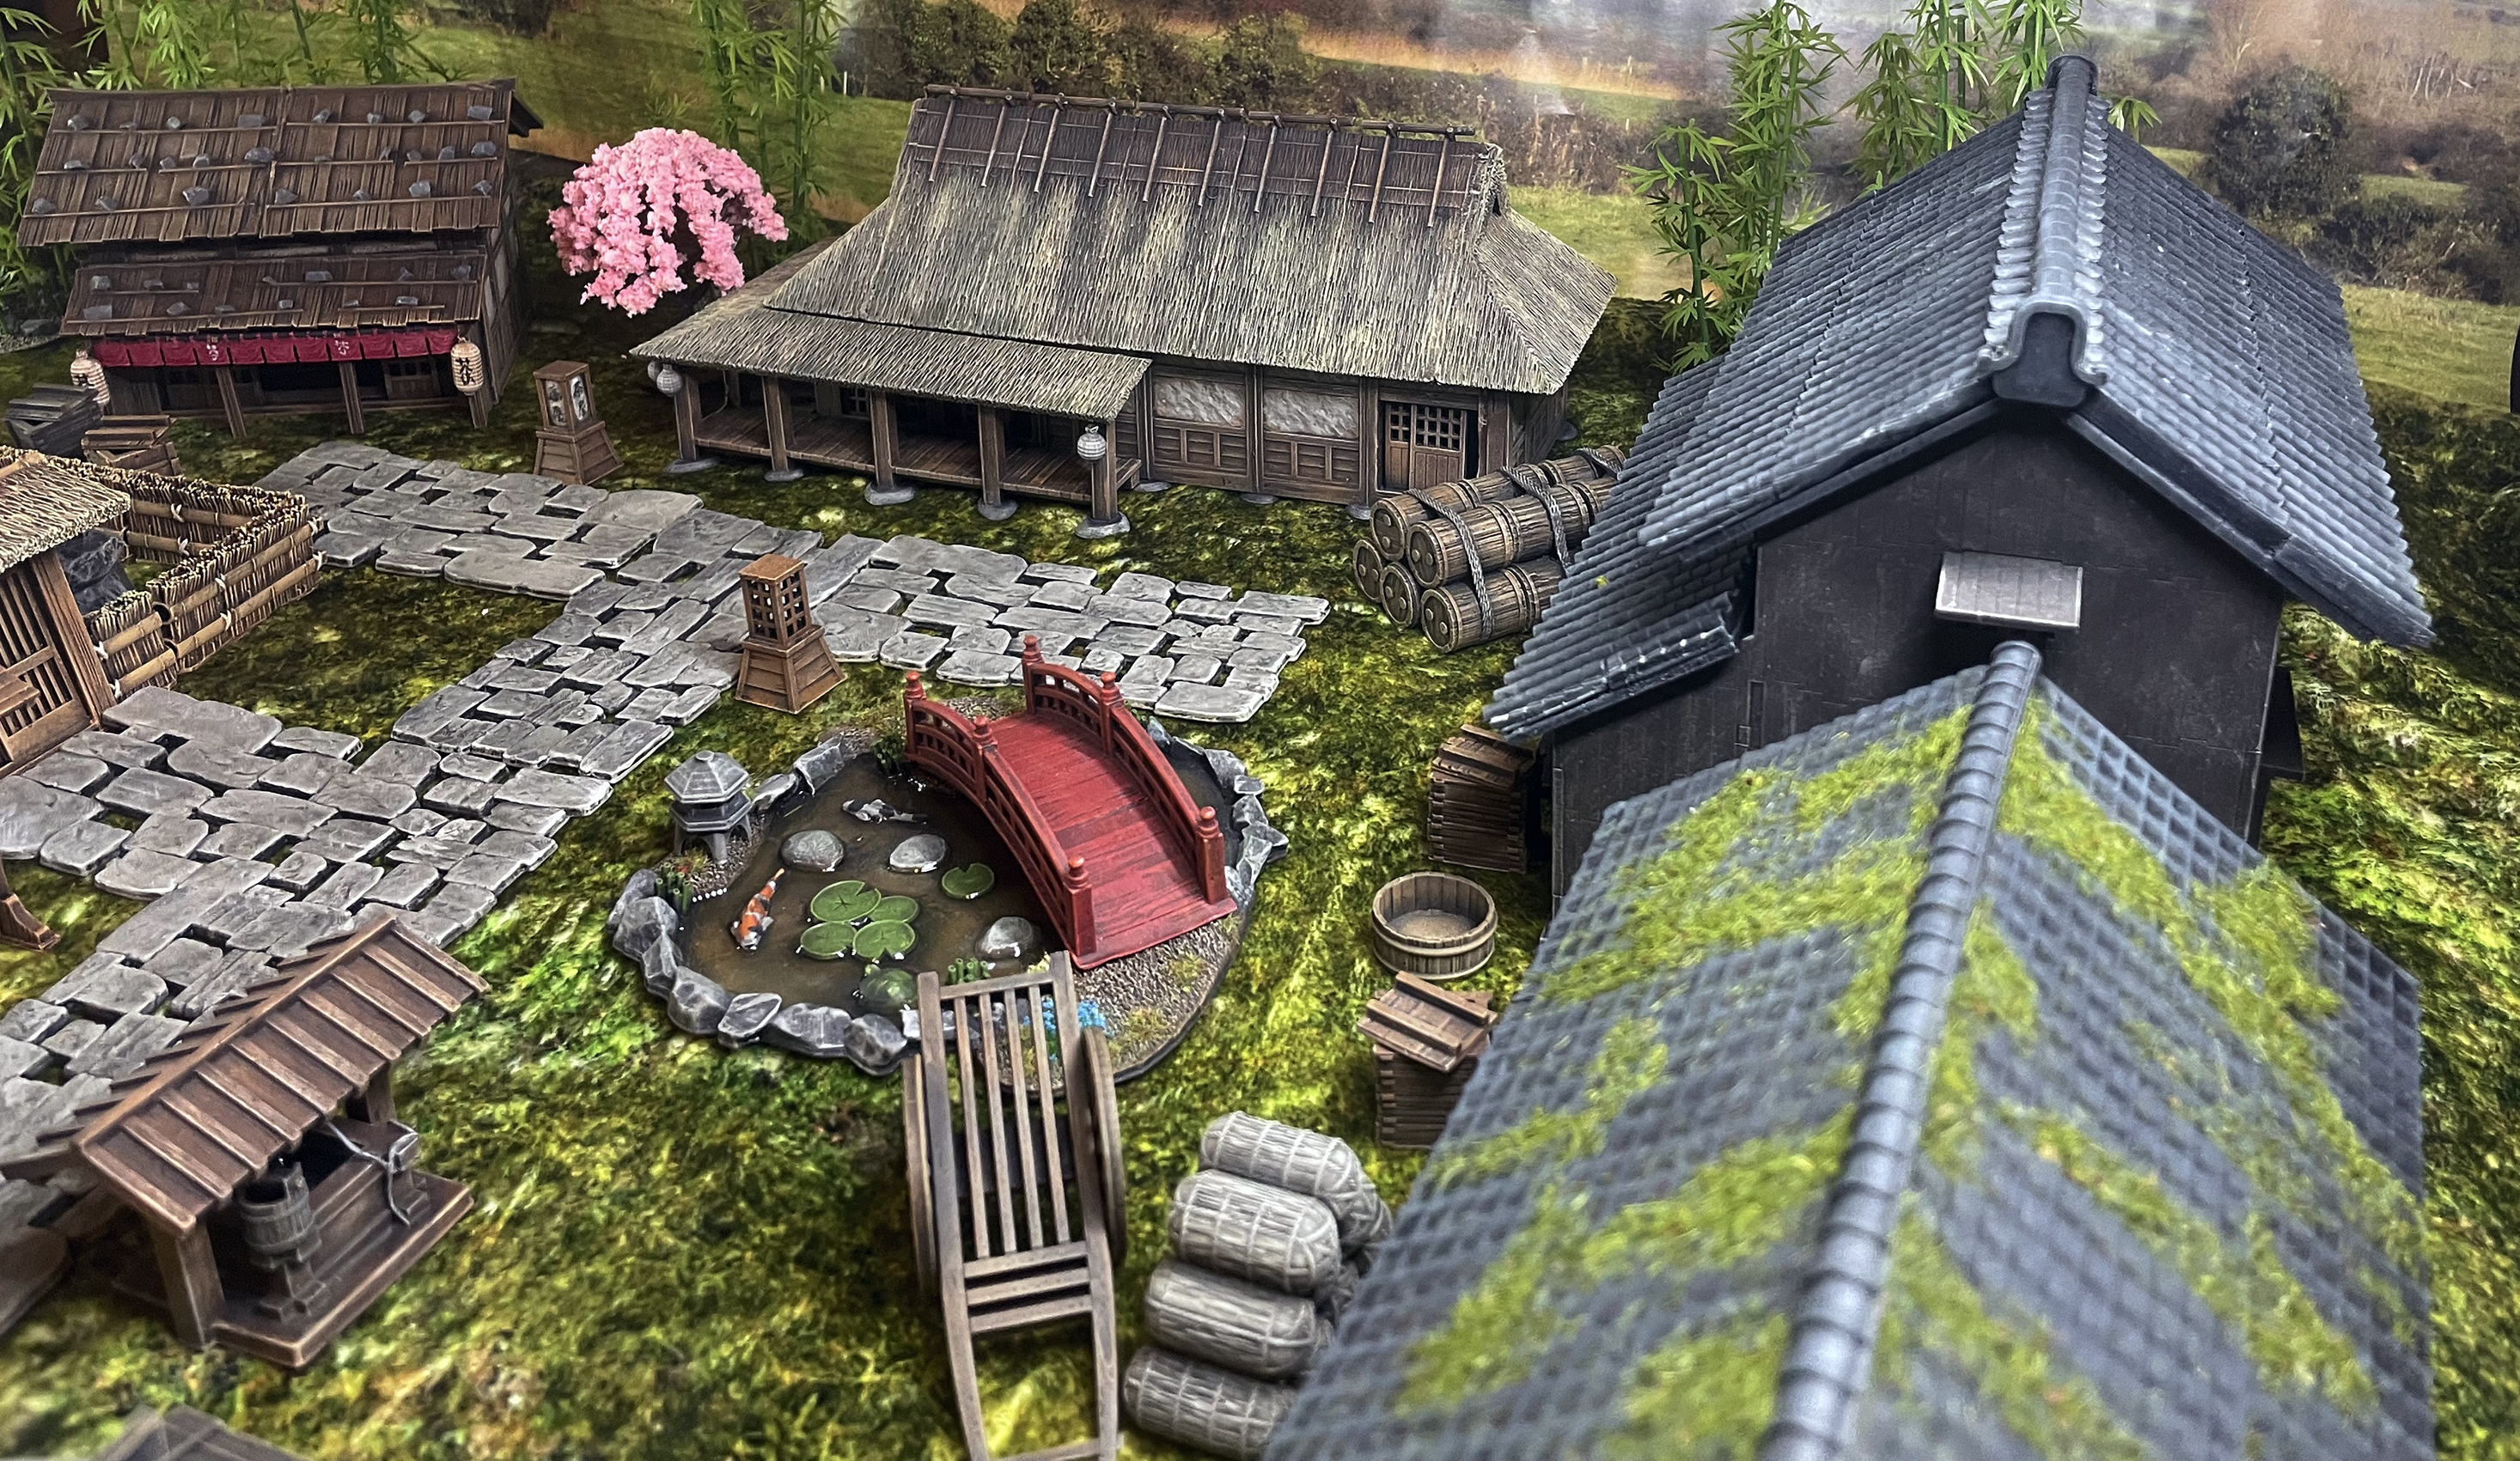
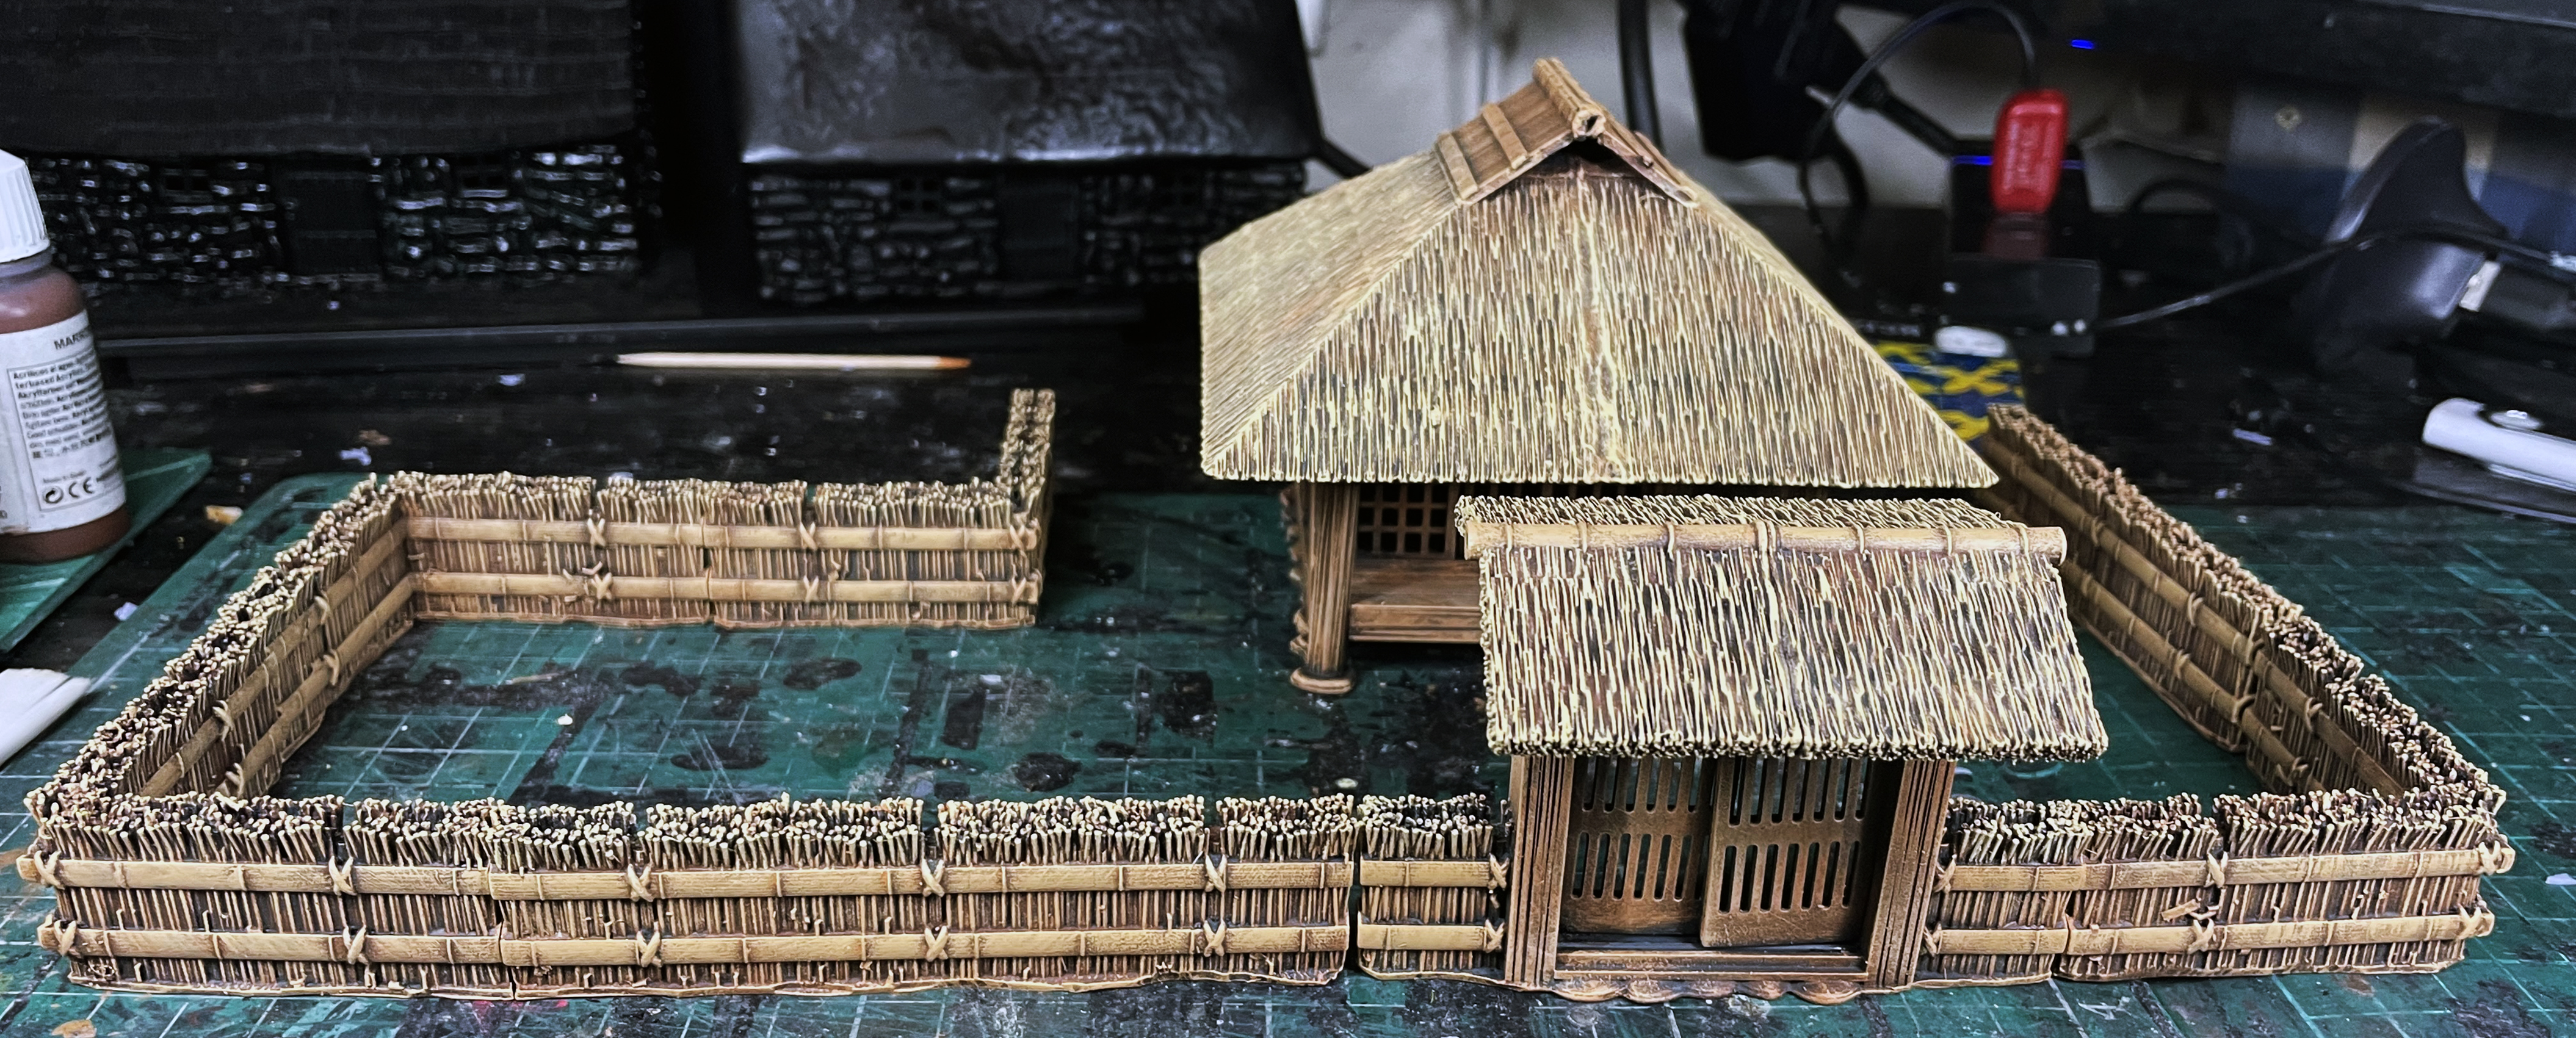
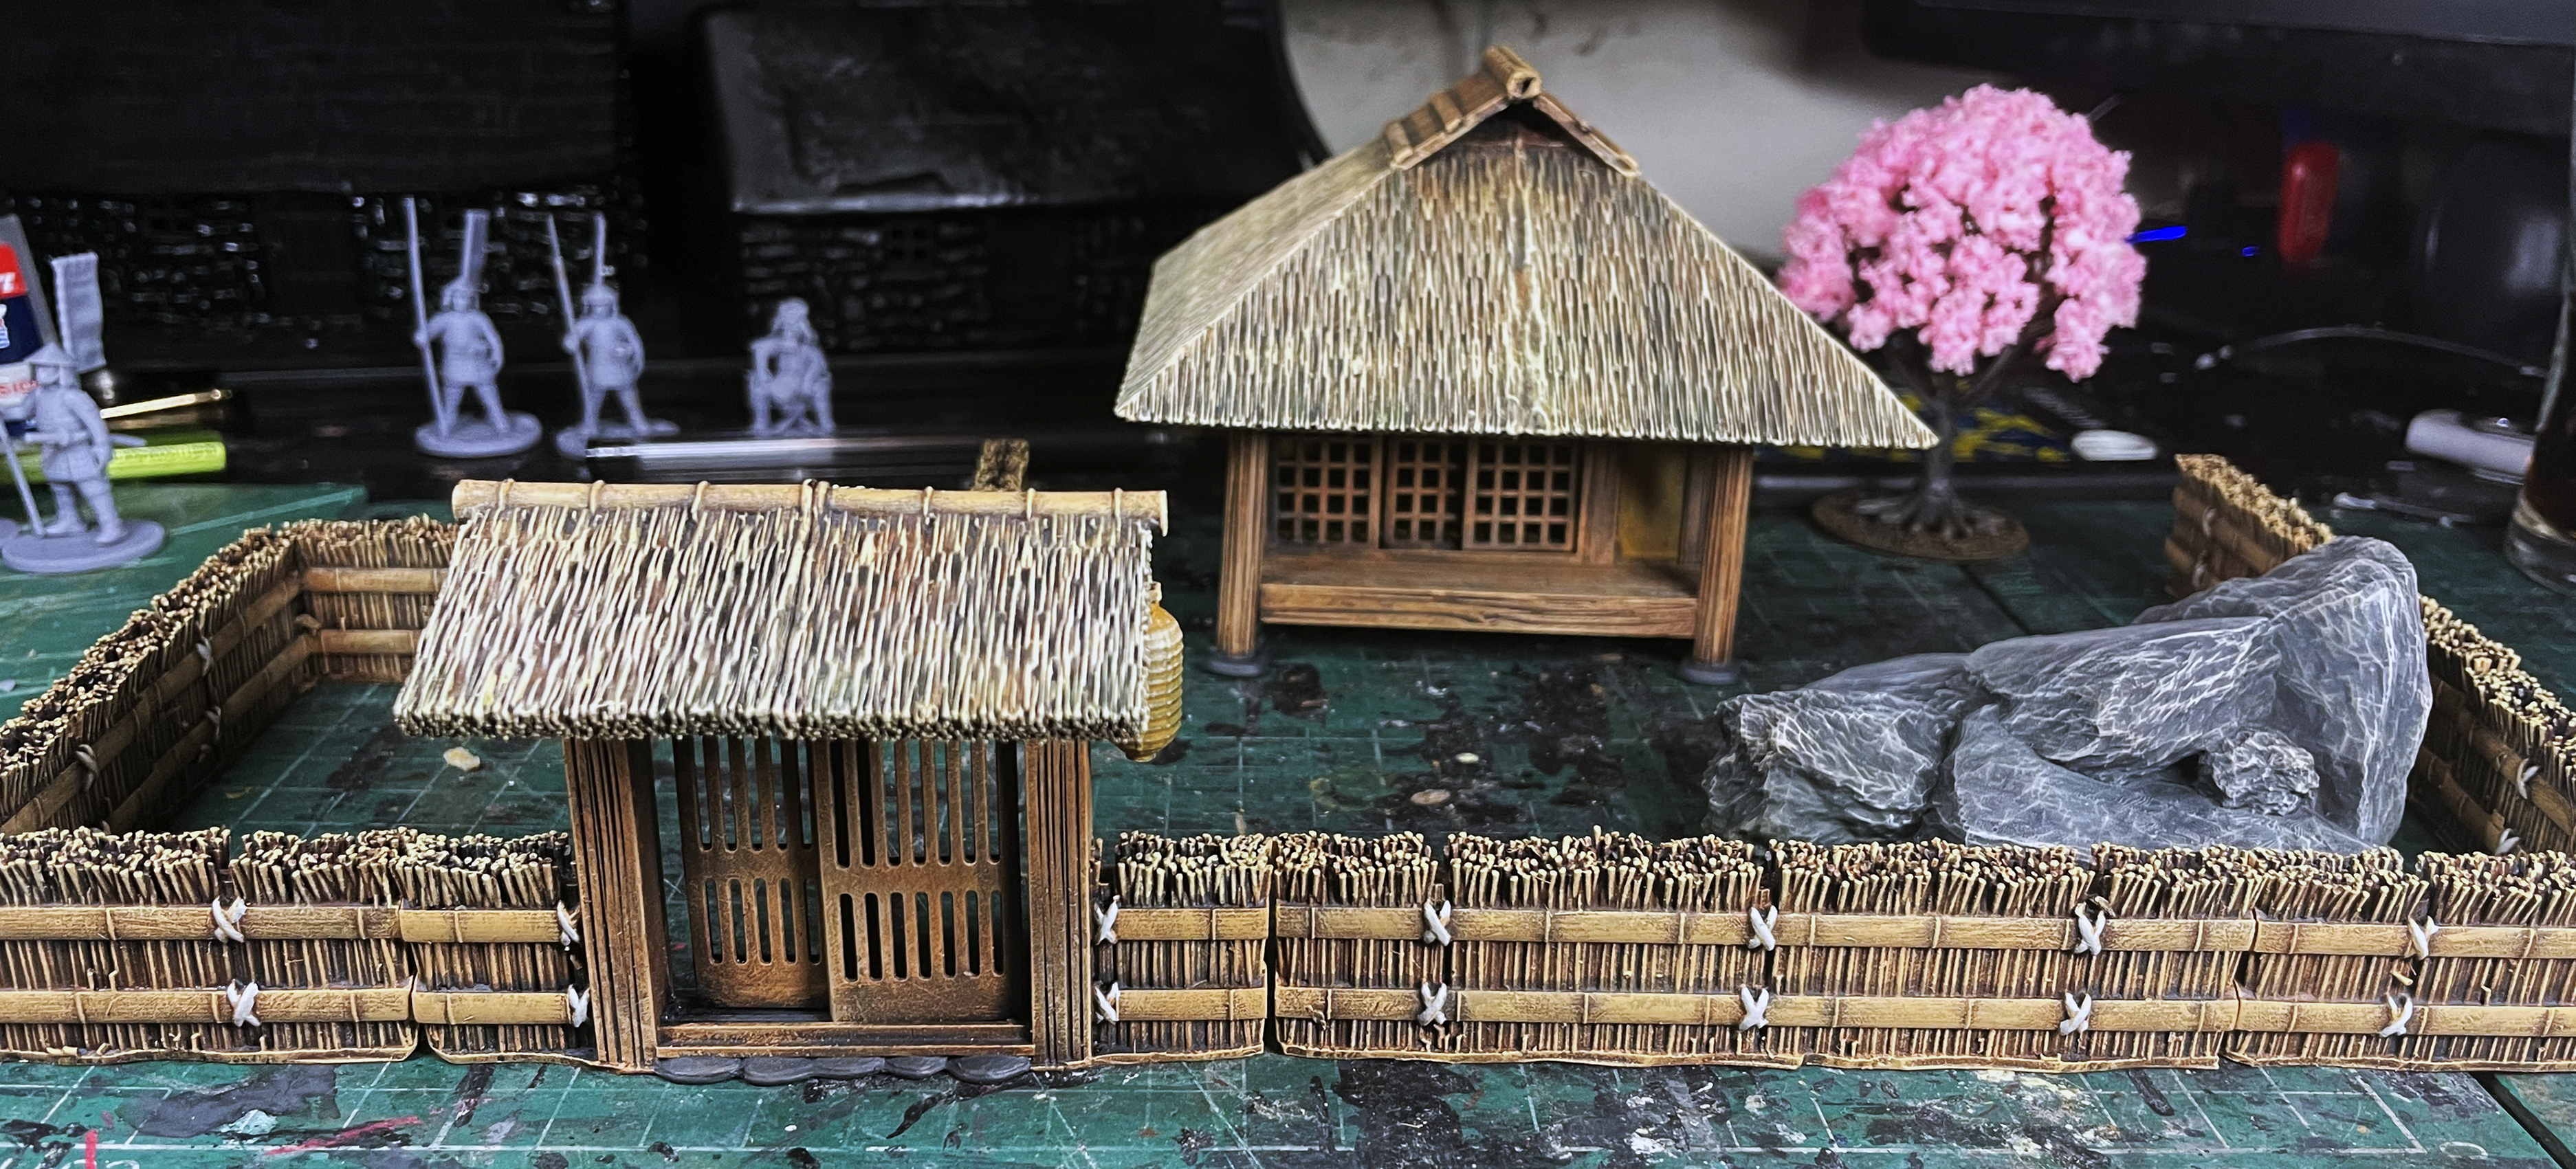
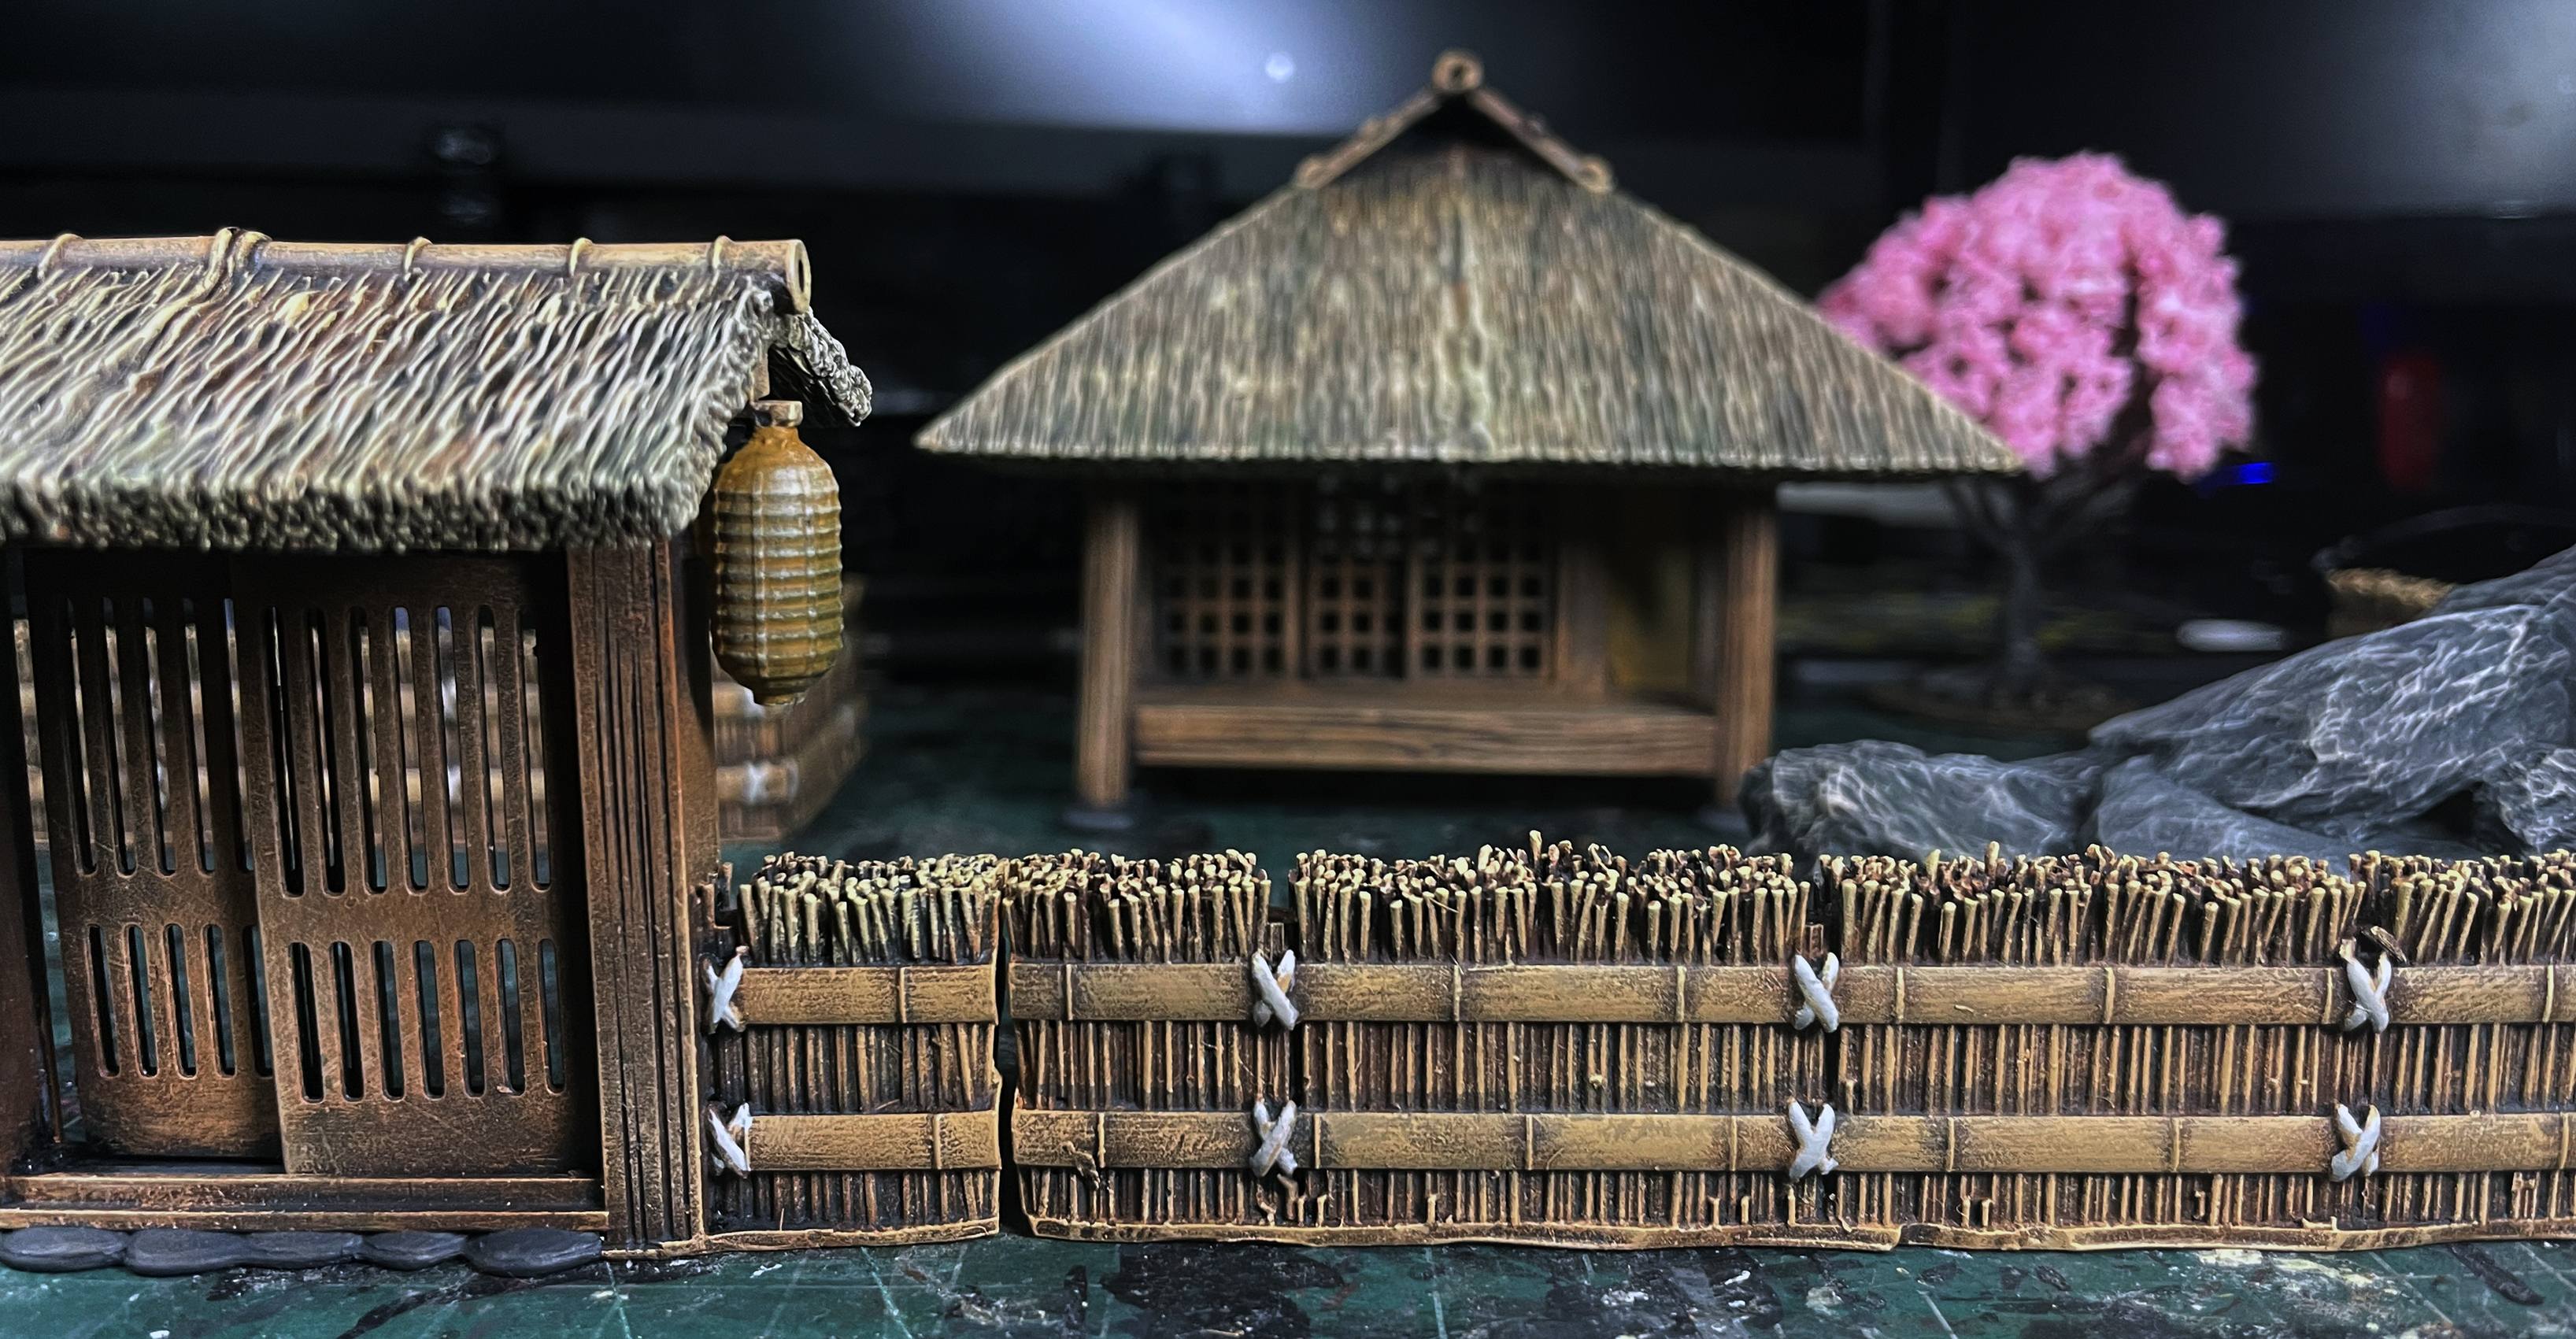
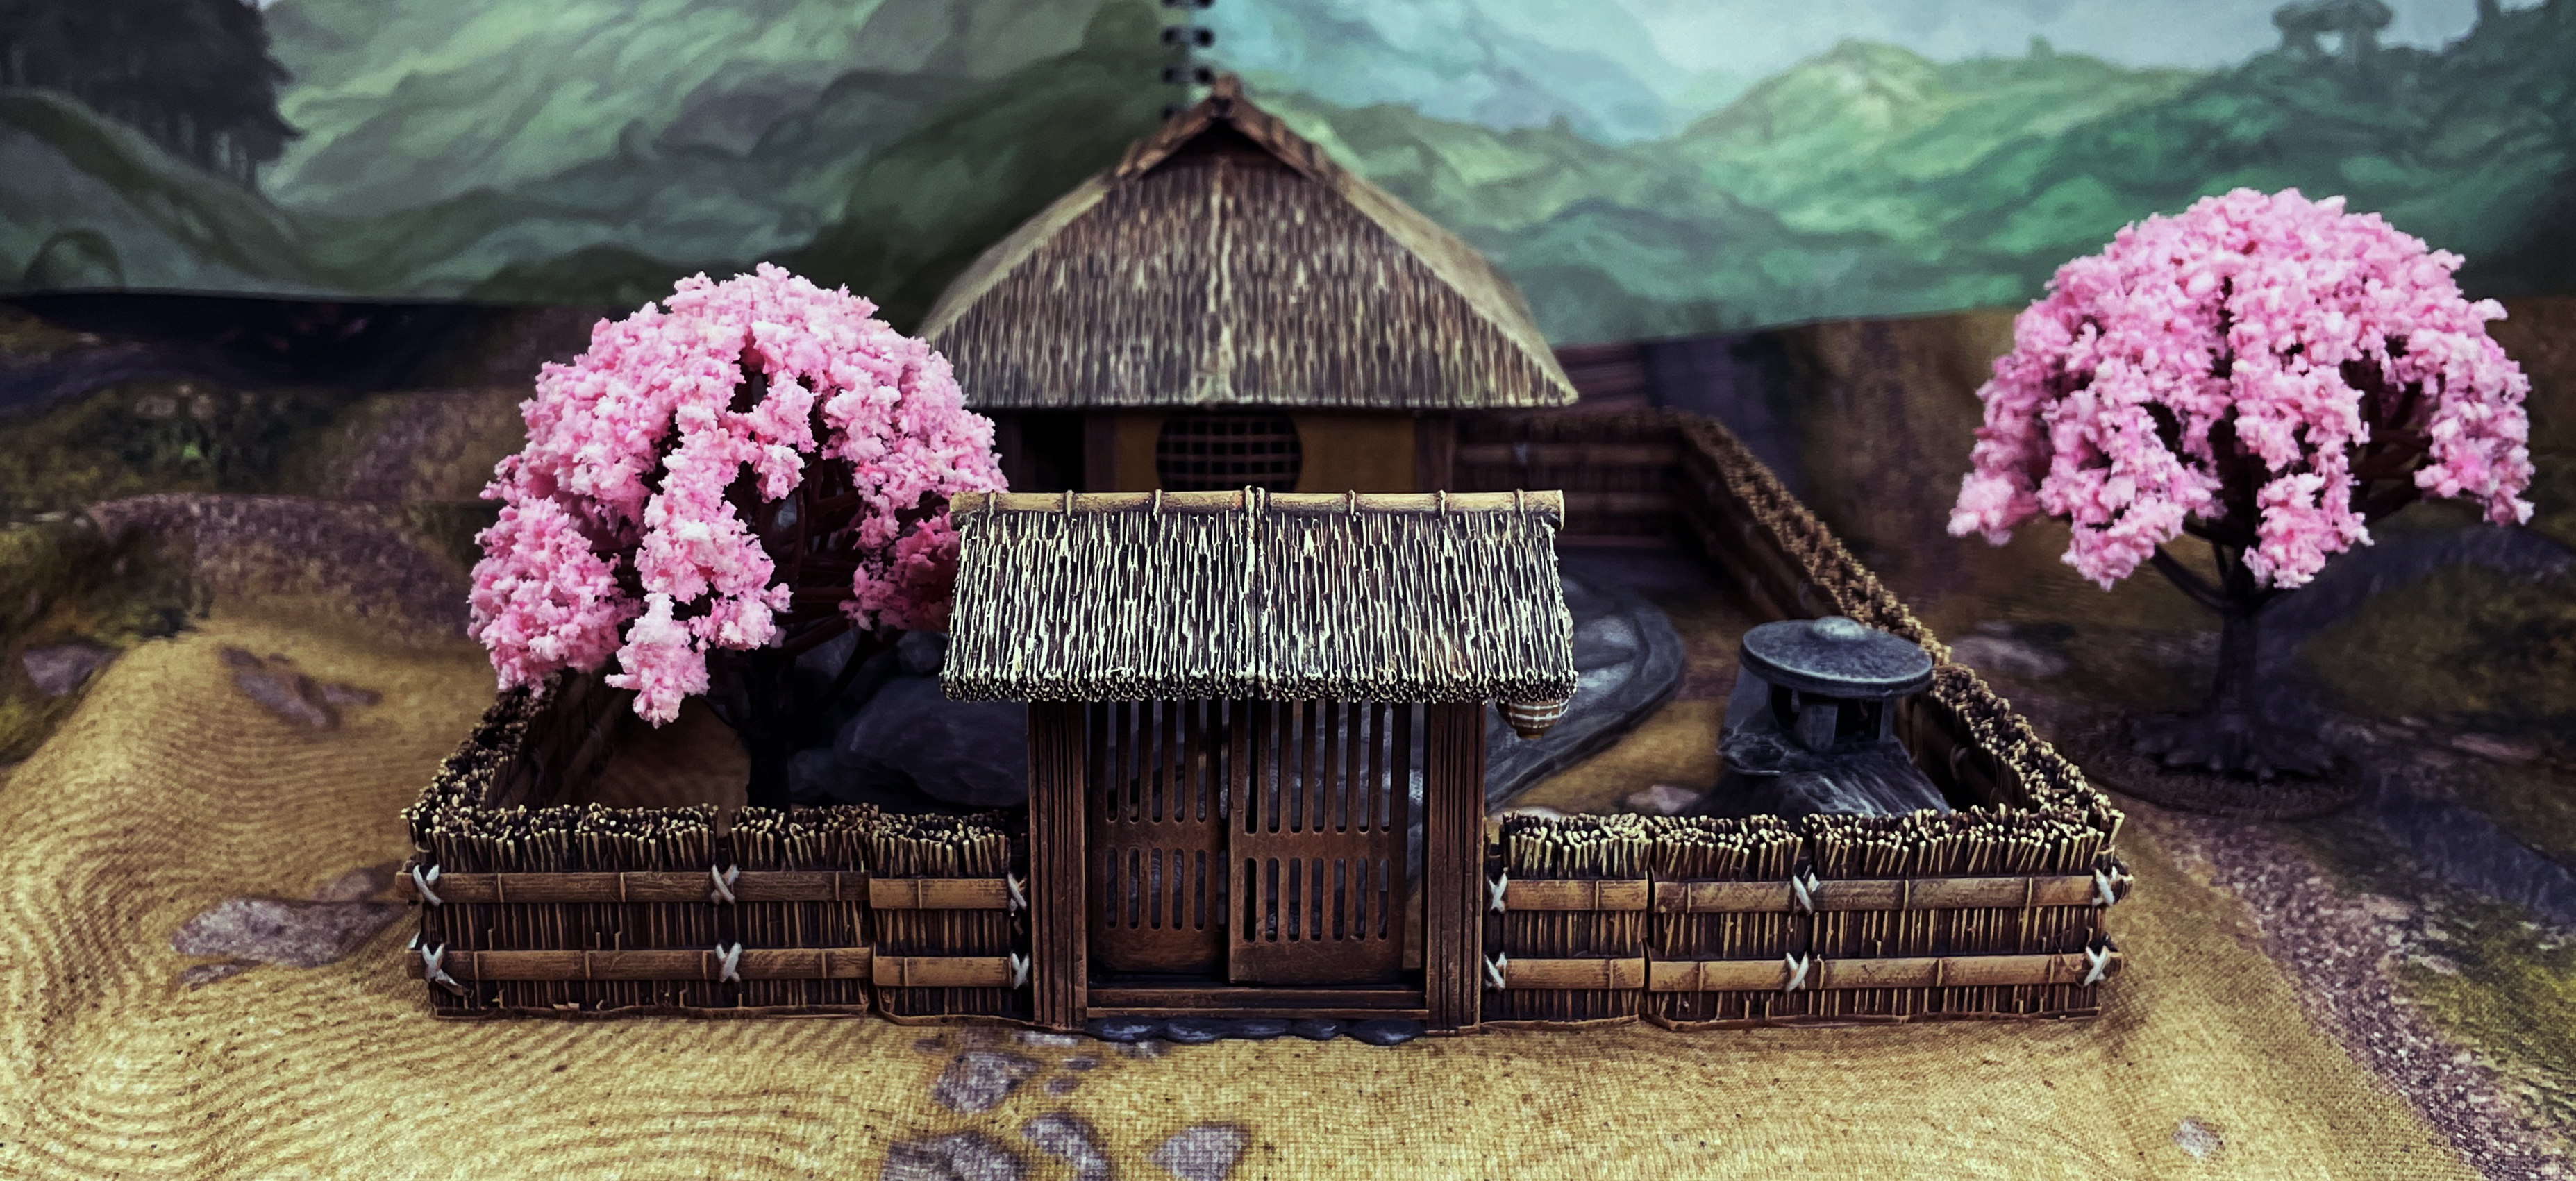
Here is the whole collection so far assembled, painted and laid out. I am rather cuffed with the whole look of the place and there is more than enough for 2 maybe 3 tables or 1 big table.
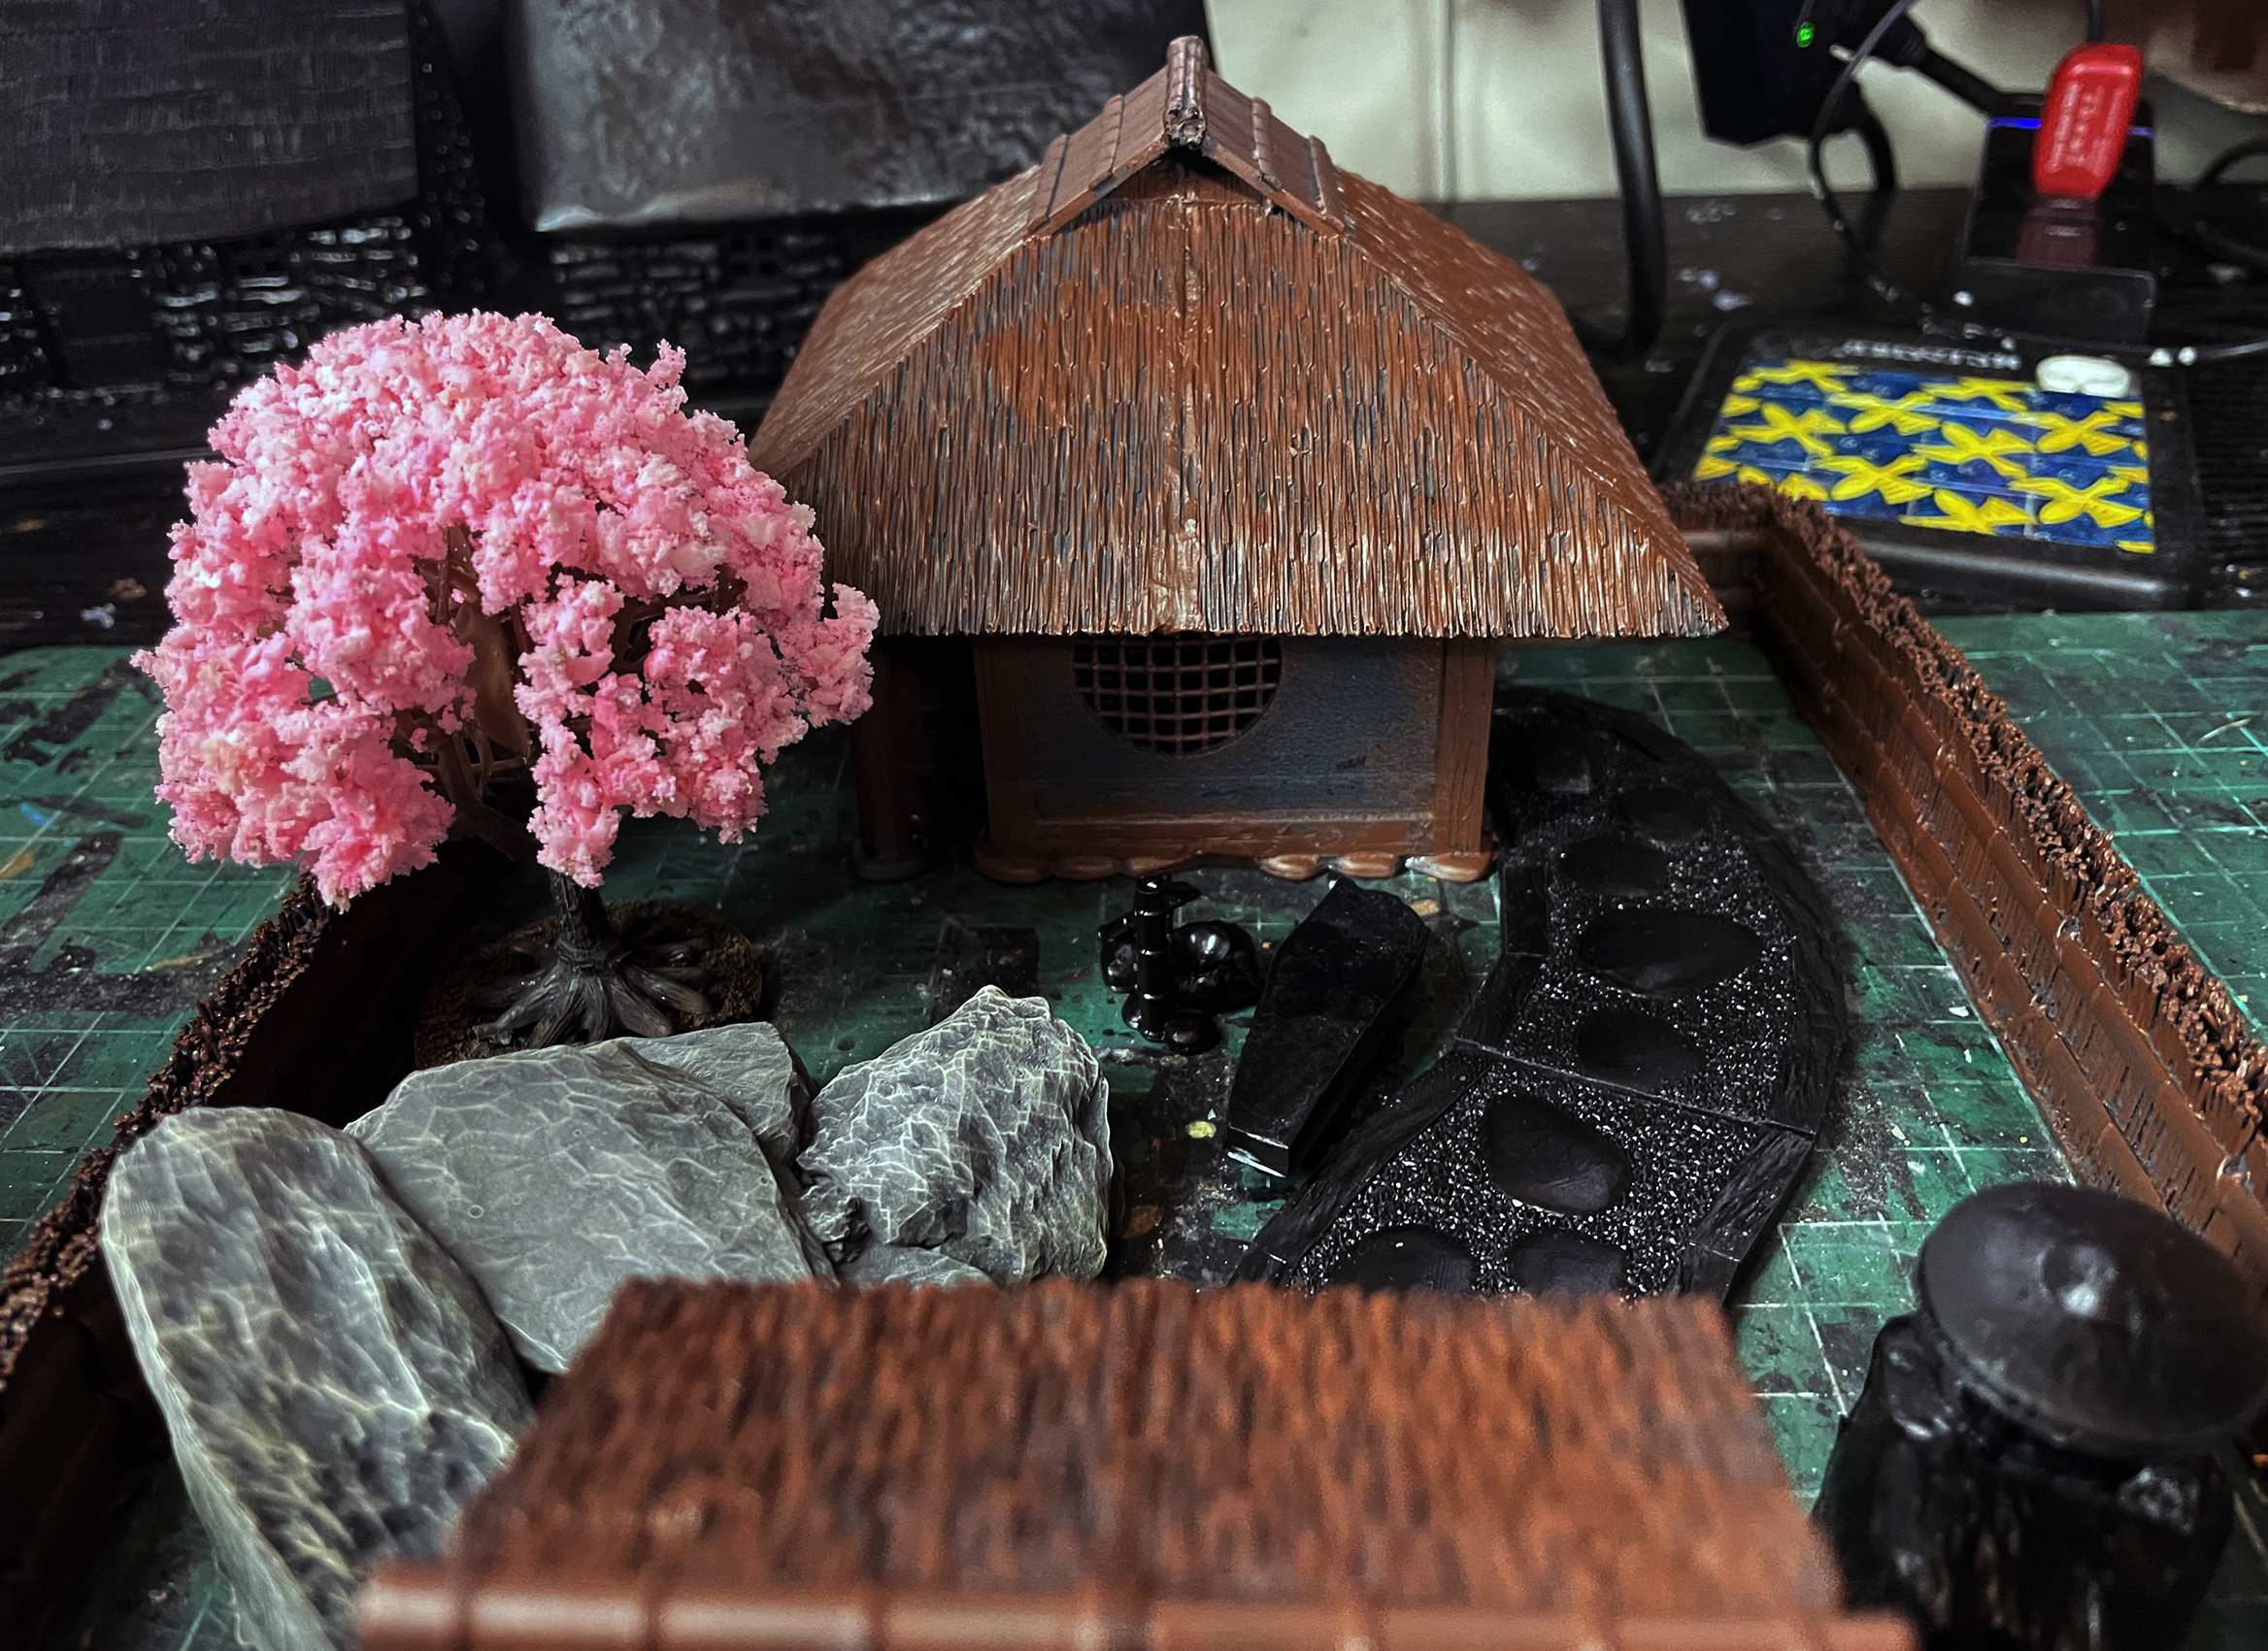
There is still a few extra bits to add, a Zen garden, a shrine, a Torri and a animal enclose and animals but mostly there. I hopefully will have these finished soon too.
The next stage is to start of painting up two forces for Test of Honour and Clash of Katanas as I cannot wait to play on this table.
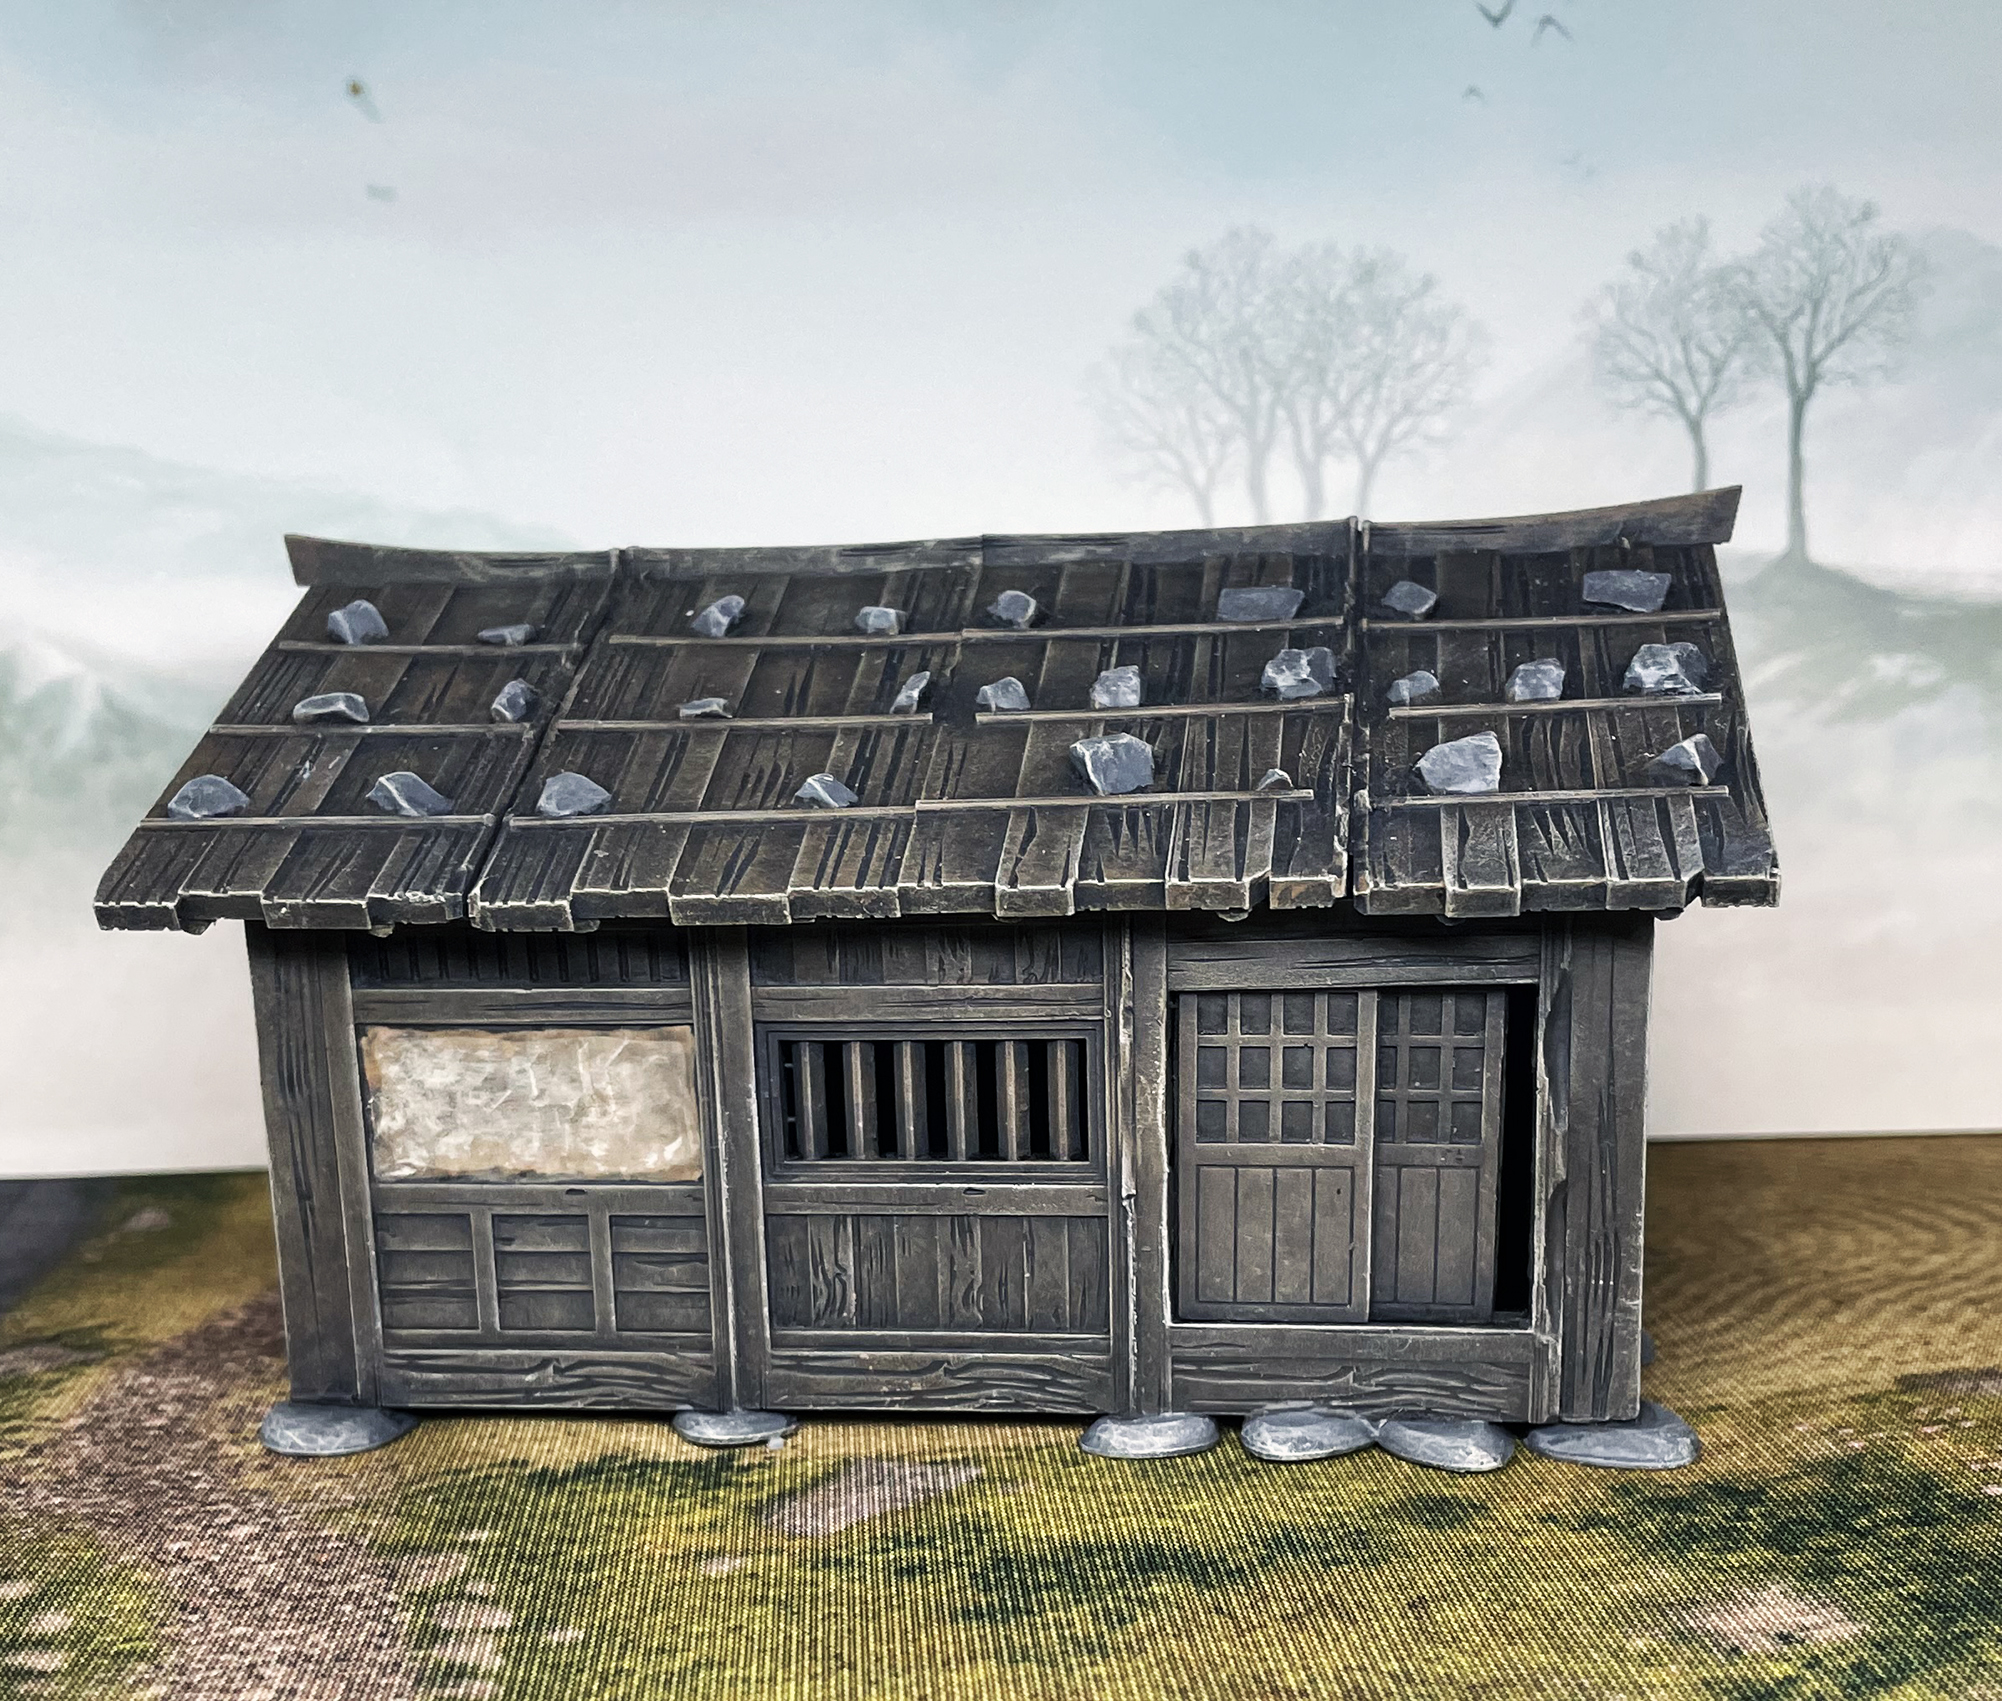
My Guide to painting Aged Thatch, Part 2
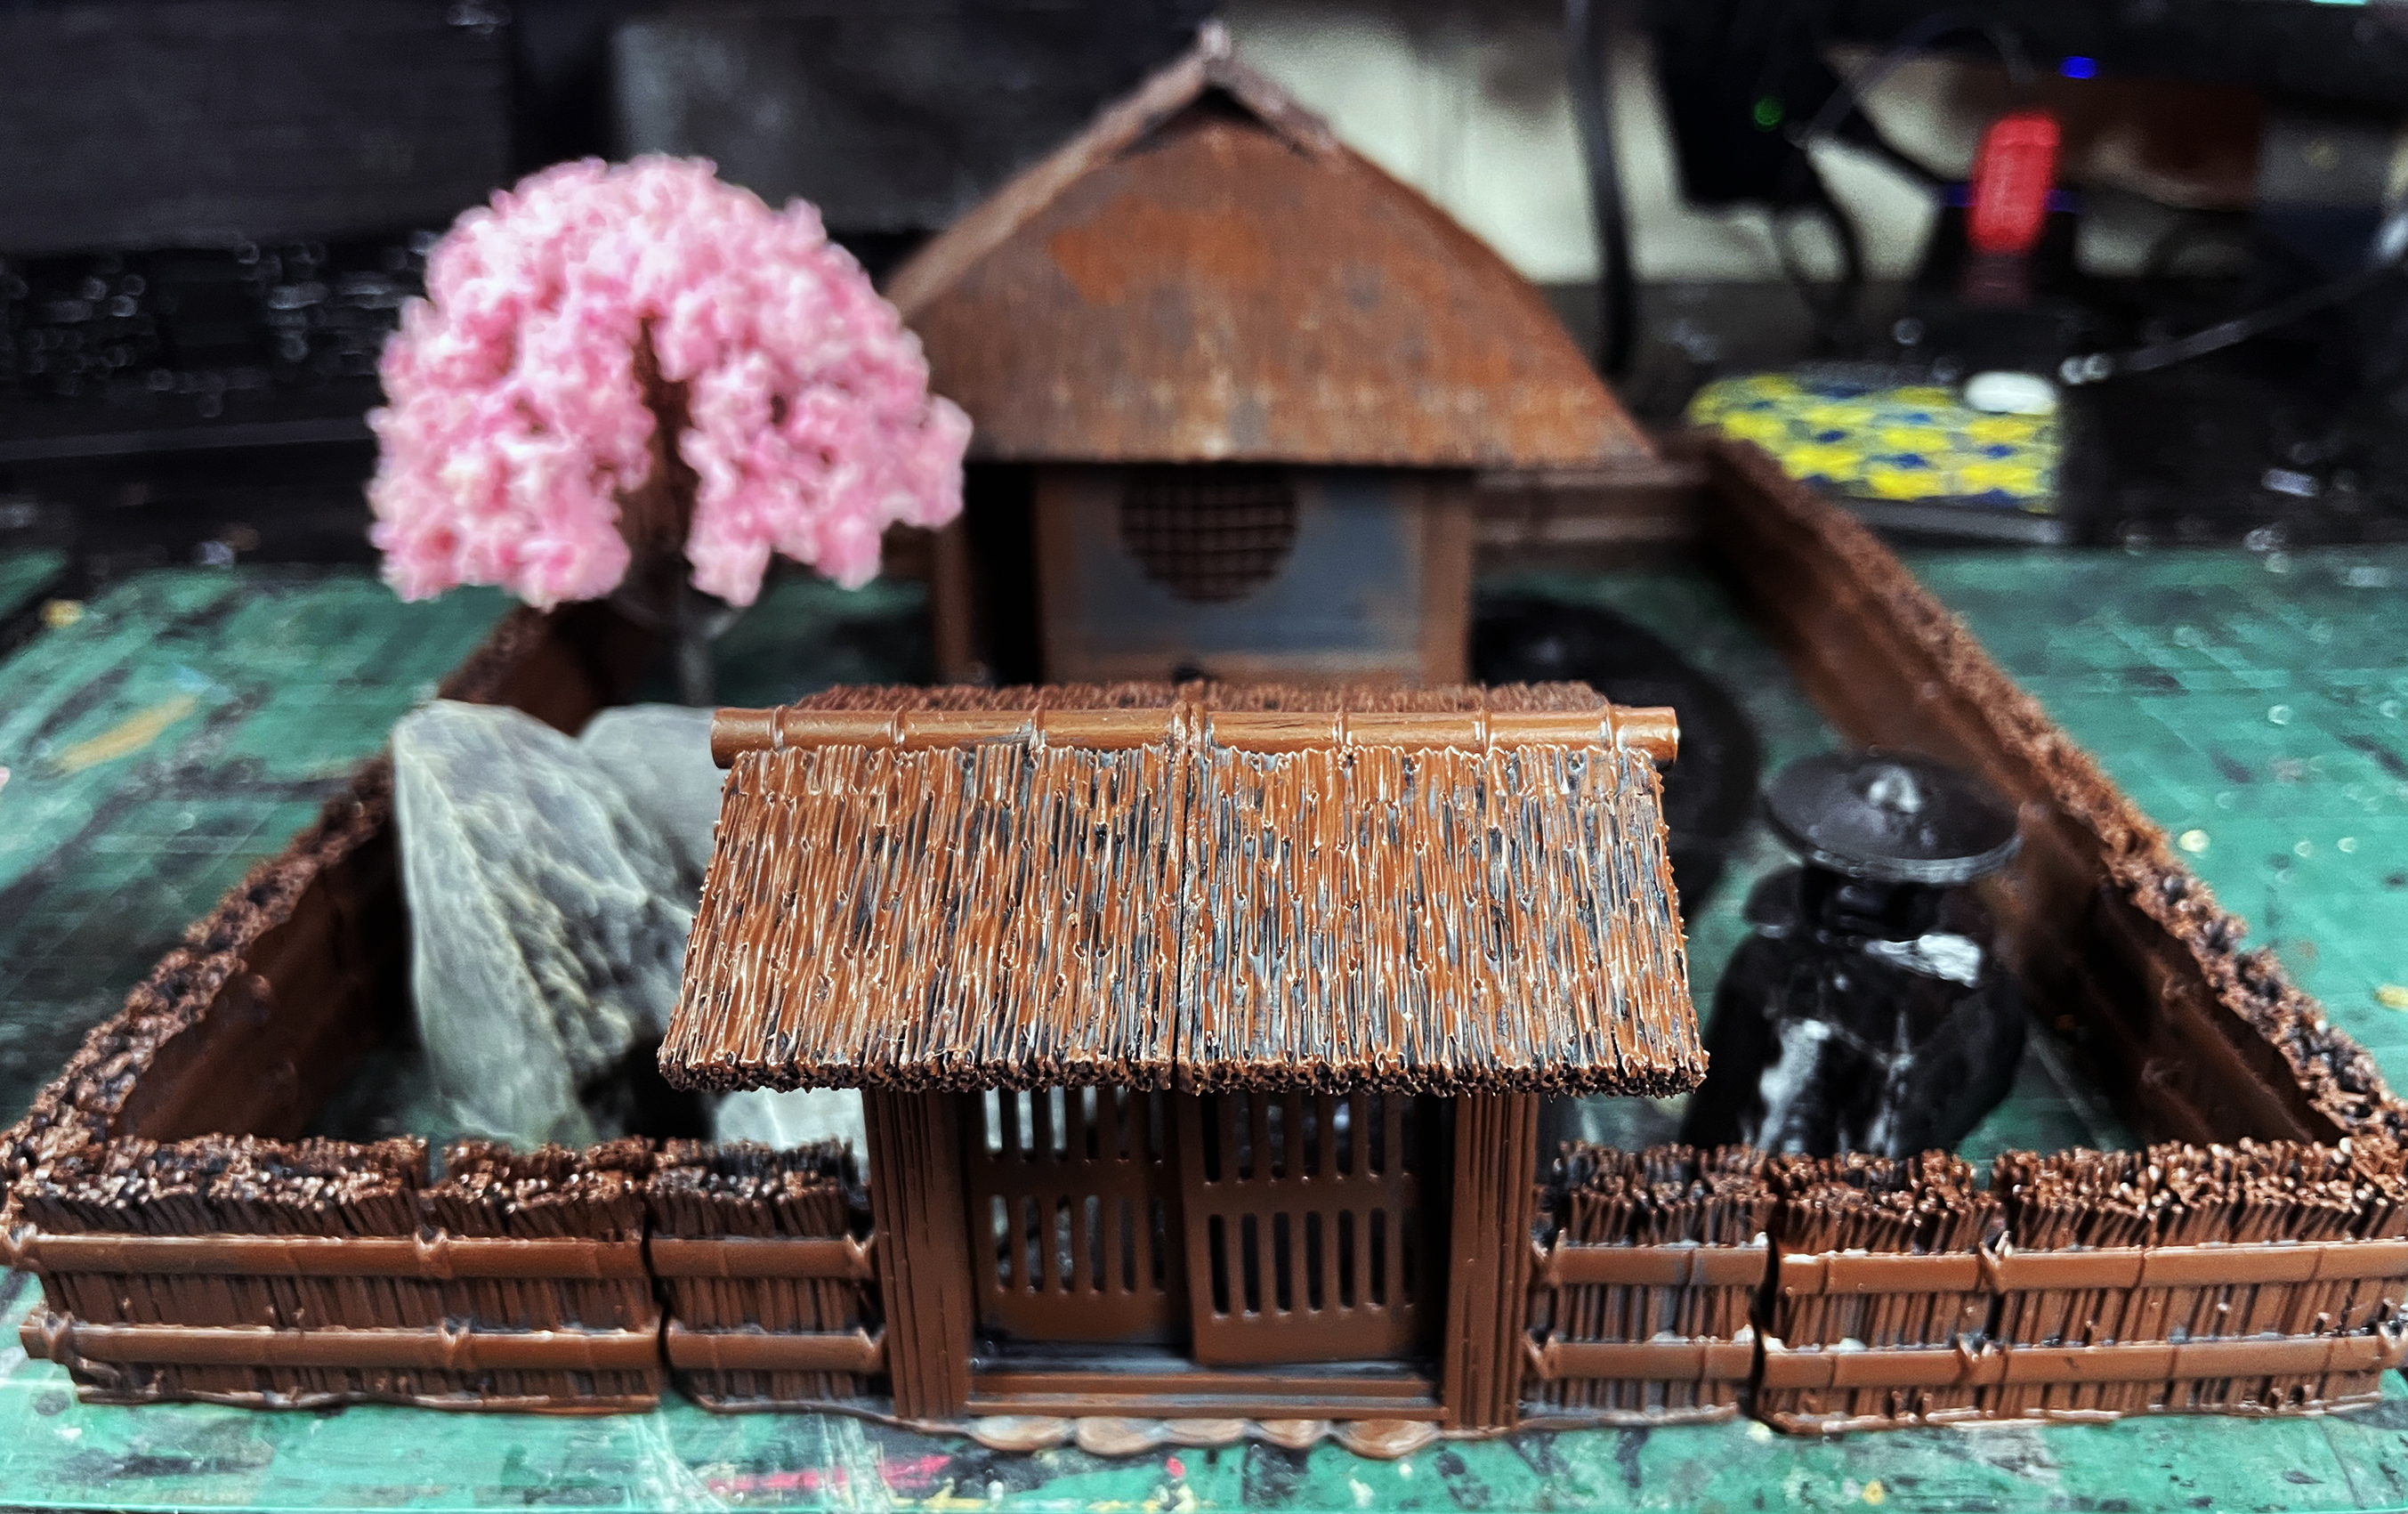
I’ve added a light drybrush of Acrylicos Vallejo Model Colour Pale Sand just to finish off the the dried, old thatch look and then I’ll be applying a wash to darken it down.
Now to add a little bit of a mossy look I have added a watery wash of Acrylicos Vallejo Model Colour German Camo Dark Green to the bottom of the thatching and to where the wood meets the thatch. I have done long strips of this colour where the sticks are, where the rain would concentrate

I’ve applied the final wash of a very watery Acrylicos Vallejo Model Colour German Grey over the whole of the roof and it is taking shape.
I’ve added a final very light drybrush of Acrylicos Vallejo Model Colour Pale Sand and the thatch is finished.
My Guide to painting Aged Thatch, Part 1

I start again on the last building for a while as I work on some little bits and pieces. I’m going do the old wood and old thatch for this one and it will be a bit of a guide to old thatch. So the first step is to paint a slightly watered down Vallejo Model Colour German Grey.
I’ve started with a Acrylicos Vallejo Model Colour Black Grey over a black primer coat, heavily brushed on and the I have drybrushed VMC German Camo Black Brown to give that earthy base colour.
The next stage is a drybrush of Acrylicos Vallejo Model Colour German Camo Beige as this is a good colour for old dried thatch.
Next I applied a drybrush of Acrylicos Vallejo Model Colour Beige to add a little warmth to the thatch.
To Be Continued
My Guide to painting New Thatch, Part 2
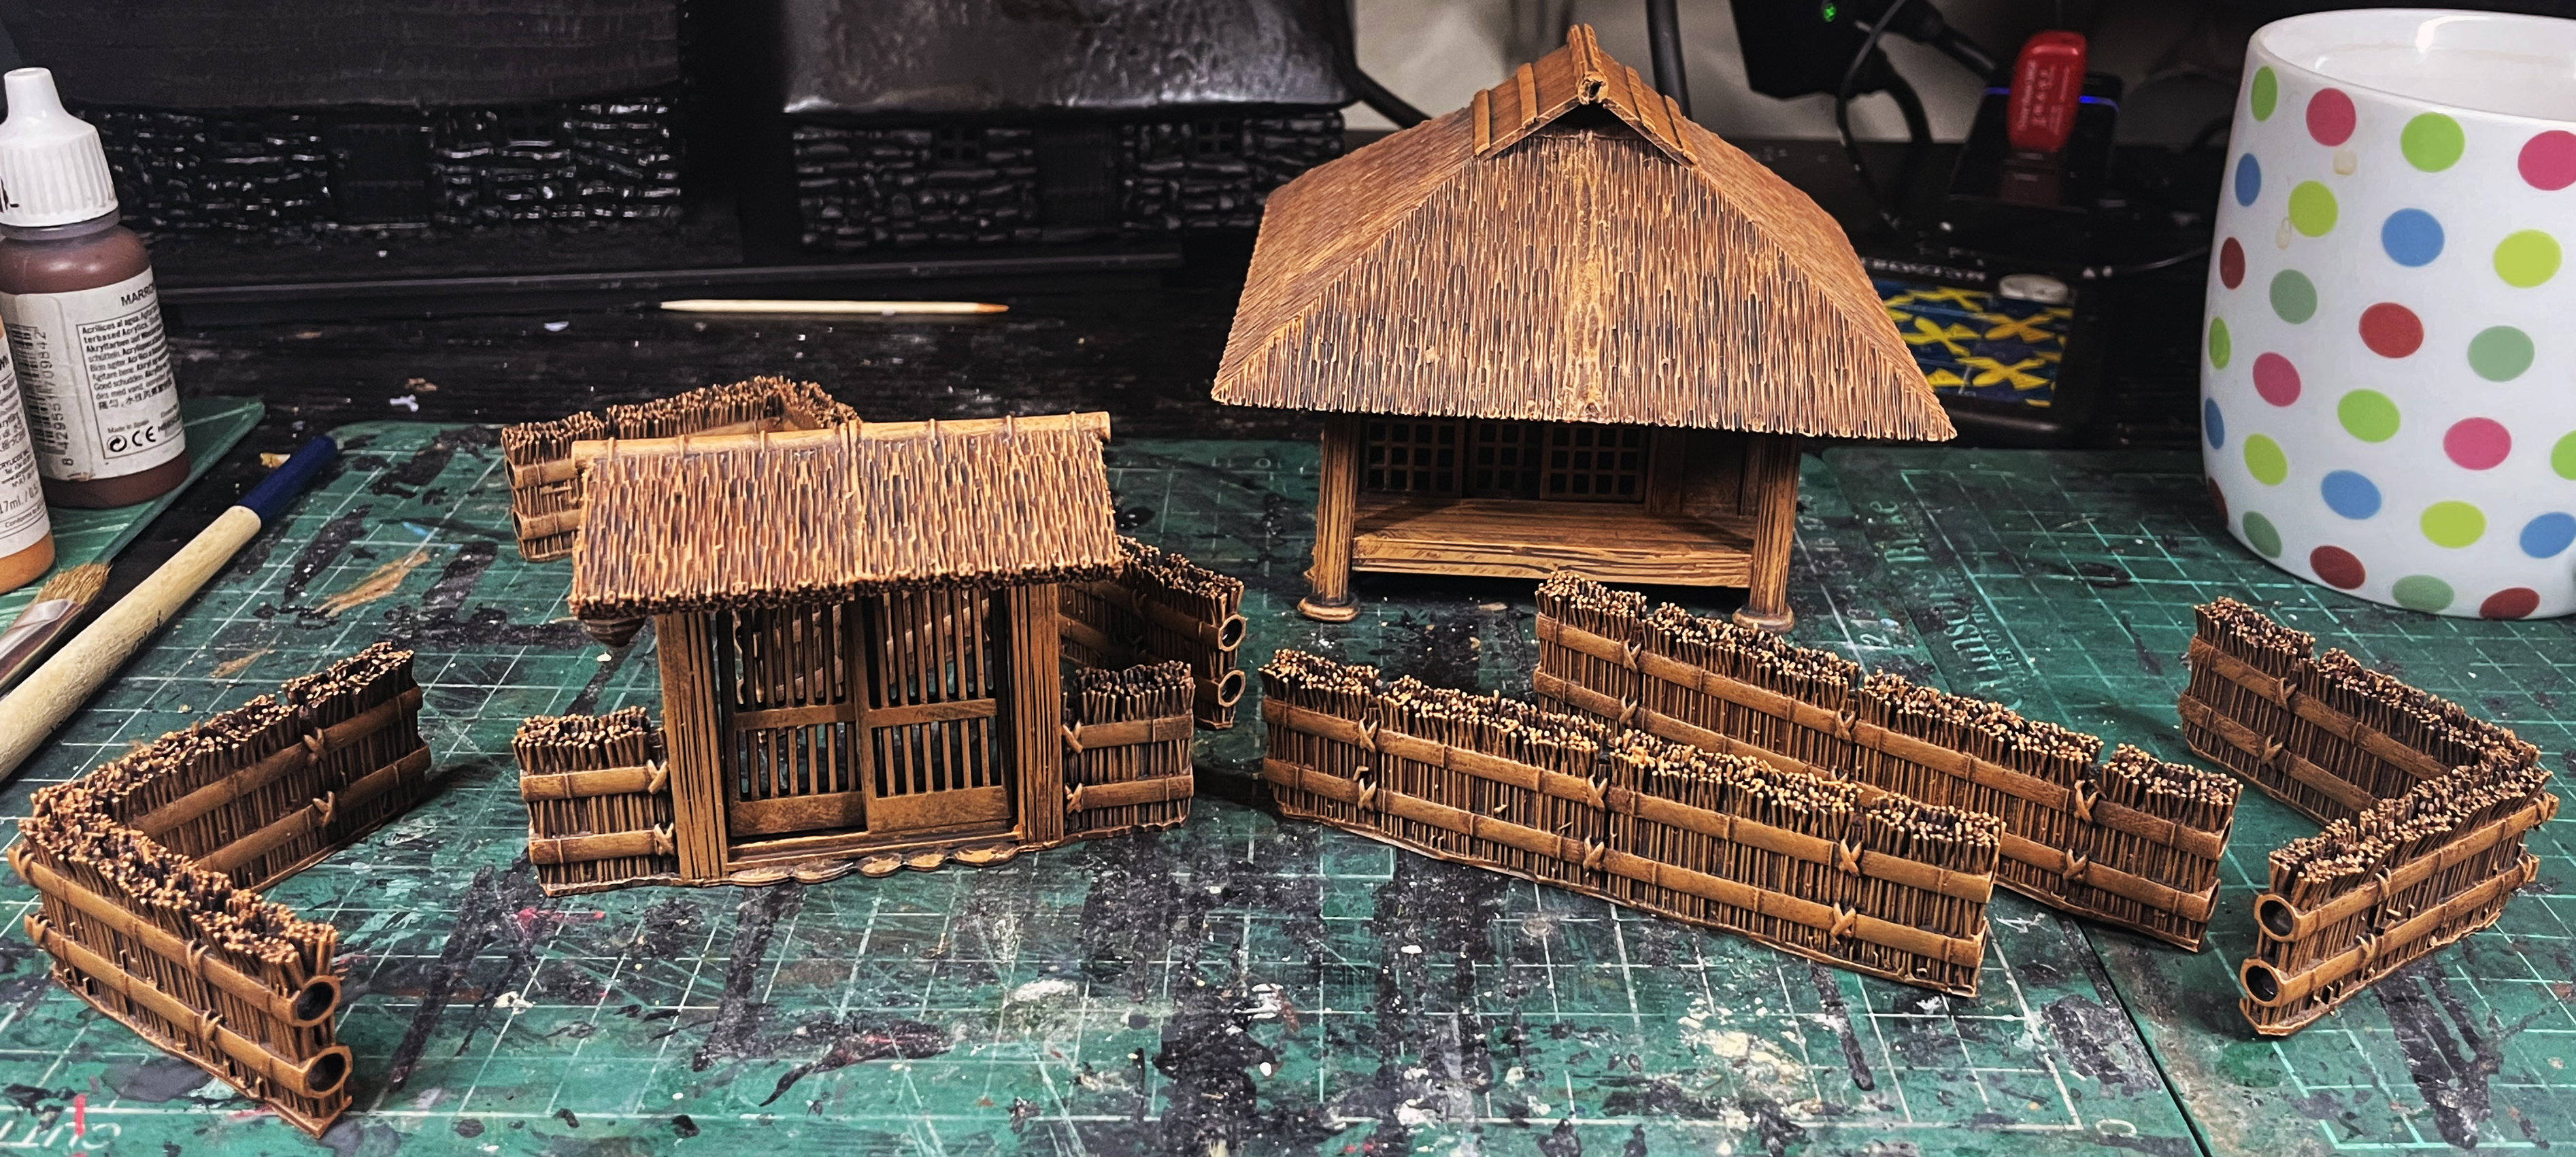
The next stage is finished in my Tea House and I’ve applied a drybrush of Acrylicos Vallejo Model Colour Iquai Sand. Next the thatching.
The start of adding colour to the thatch and I drybrush Acrylicos Vallejo Model Colour Tan Yellow to start giving it that straw colour.
The next is added using Acrylicos Vallejo Model Colour Beige to add that lovely warm yellow feel to the thatch. Because building up the layers with drybrushing its natural creating that weathered look.
Nearly the finishing stages now and I’ve added a light drybrush of Acrylicos Vallejo Model Colour Pale Sand to give it that sunbaked, bleached look and then a very thin wash of VMC German Camo Dark Green to the bottom edges for that mossy, mouldy loo
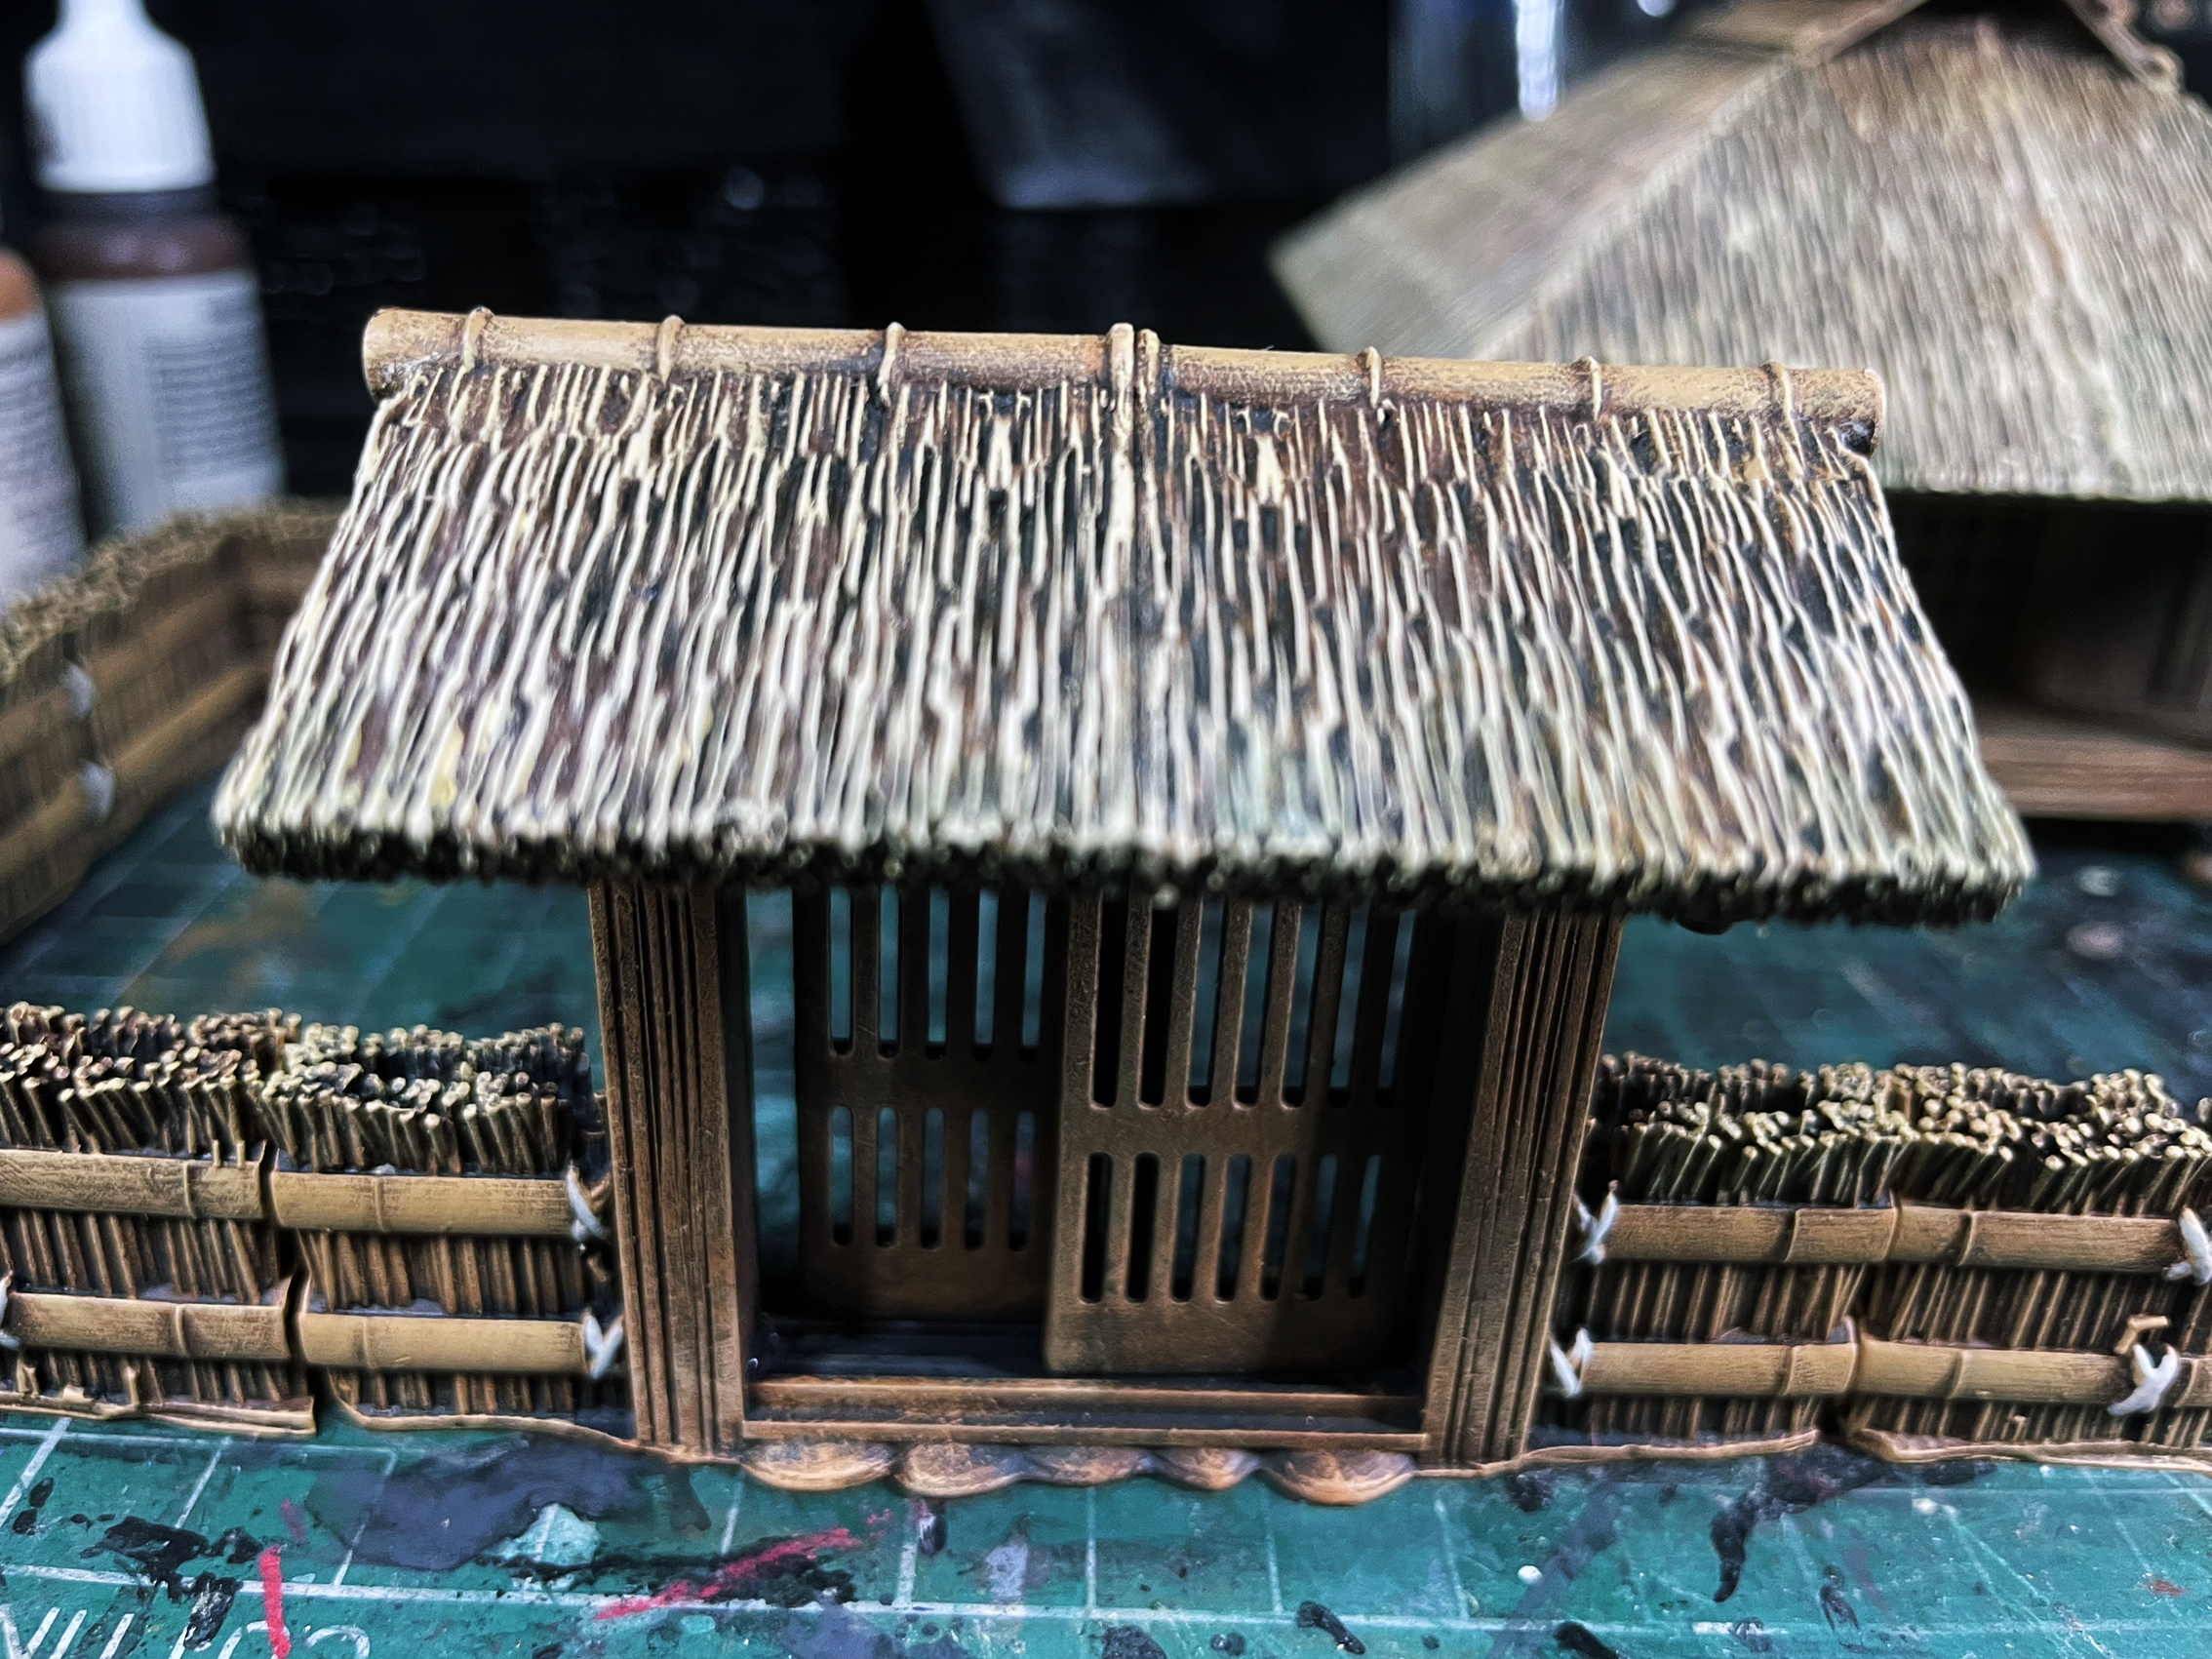

The last stage is to wash a thin coat of Acrylicos Vallejo Model Colour Black Grey over the areas of the thatch edges like at the top of the roof where the rain would run and patched on the bottom. I also added a wash of this to bamboo.
My Guide to Painting New Thatch. Part 1
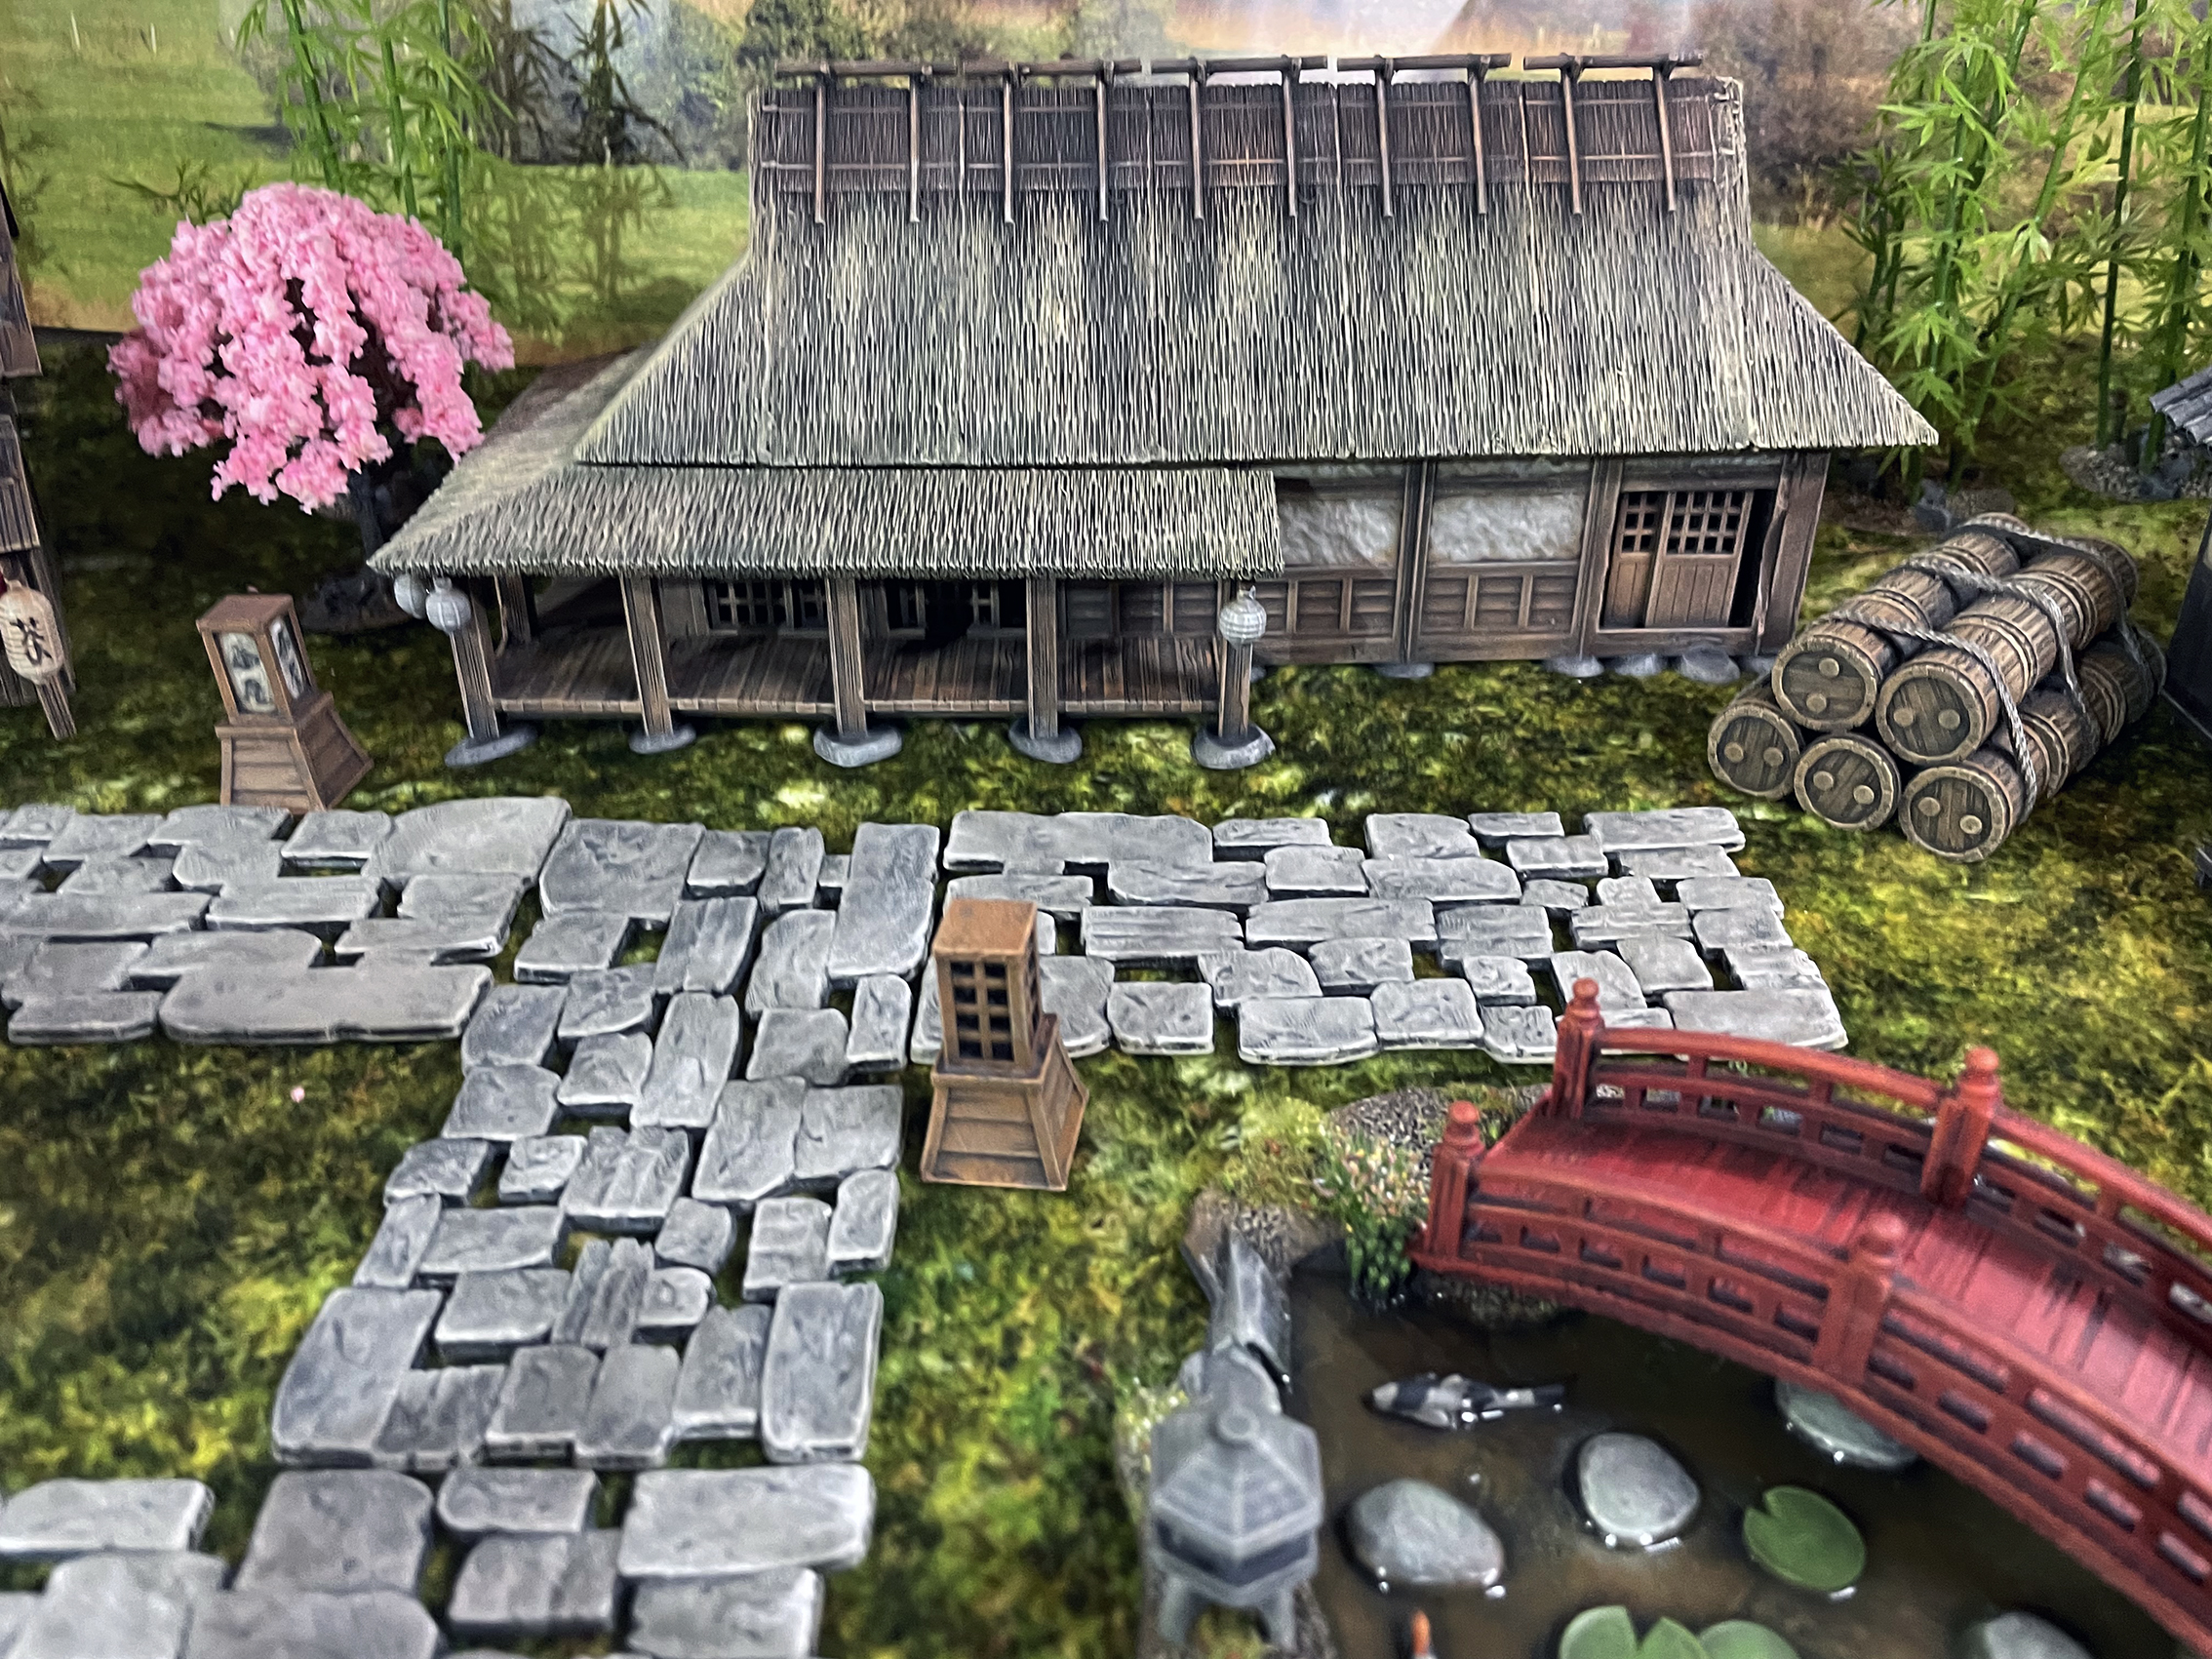
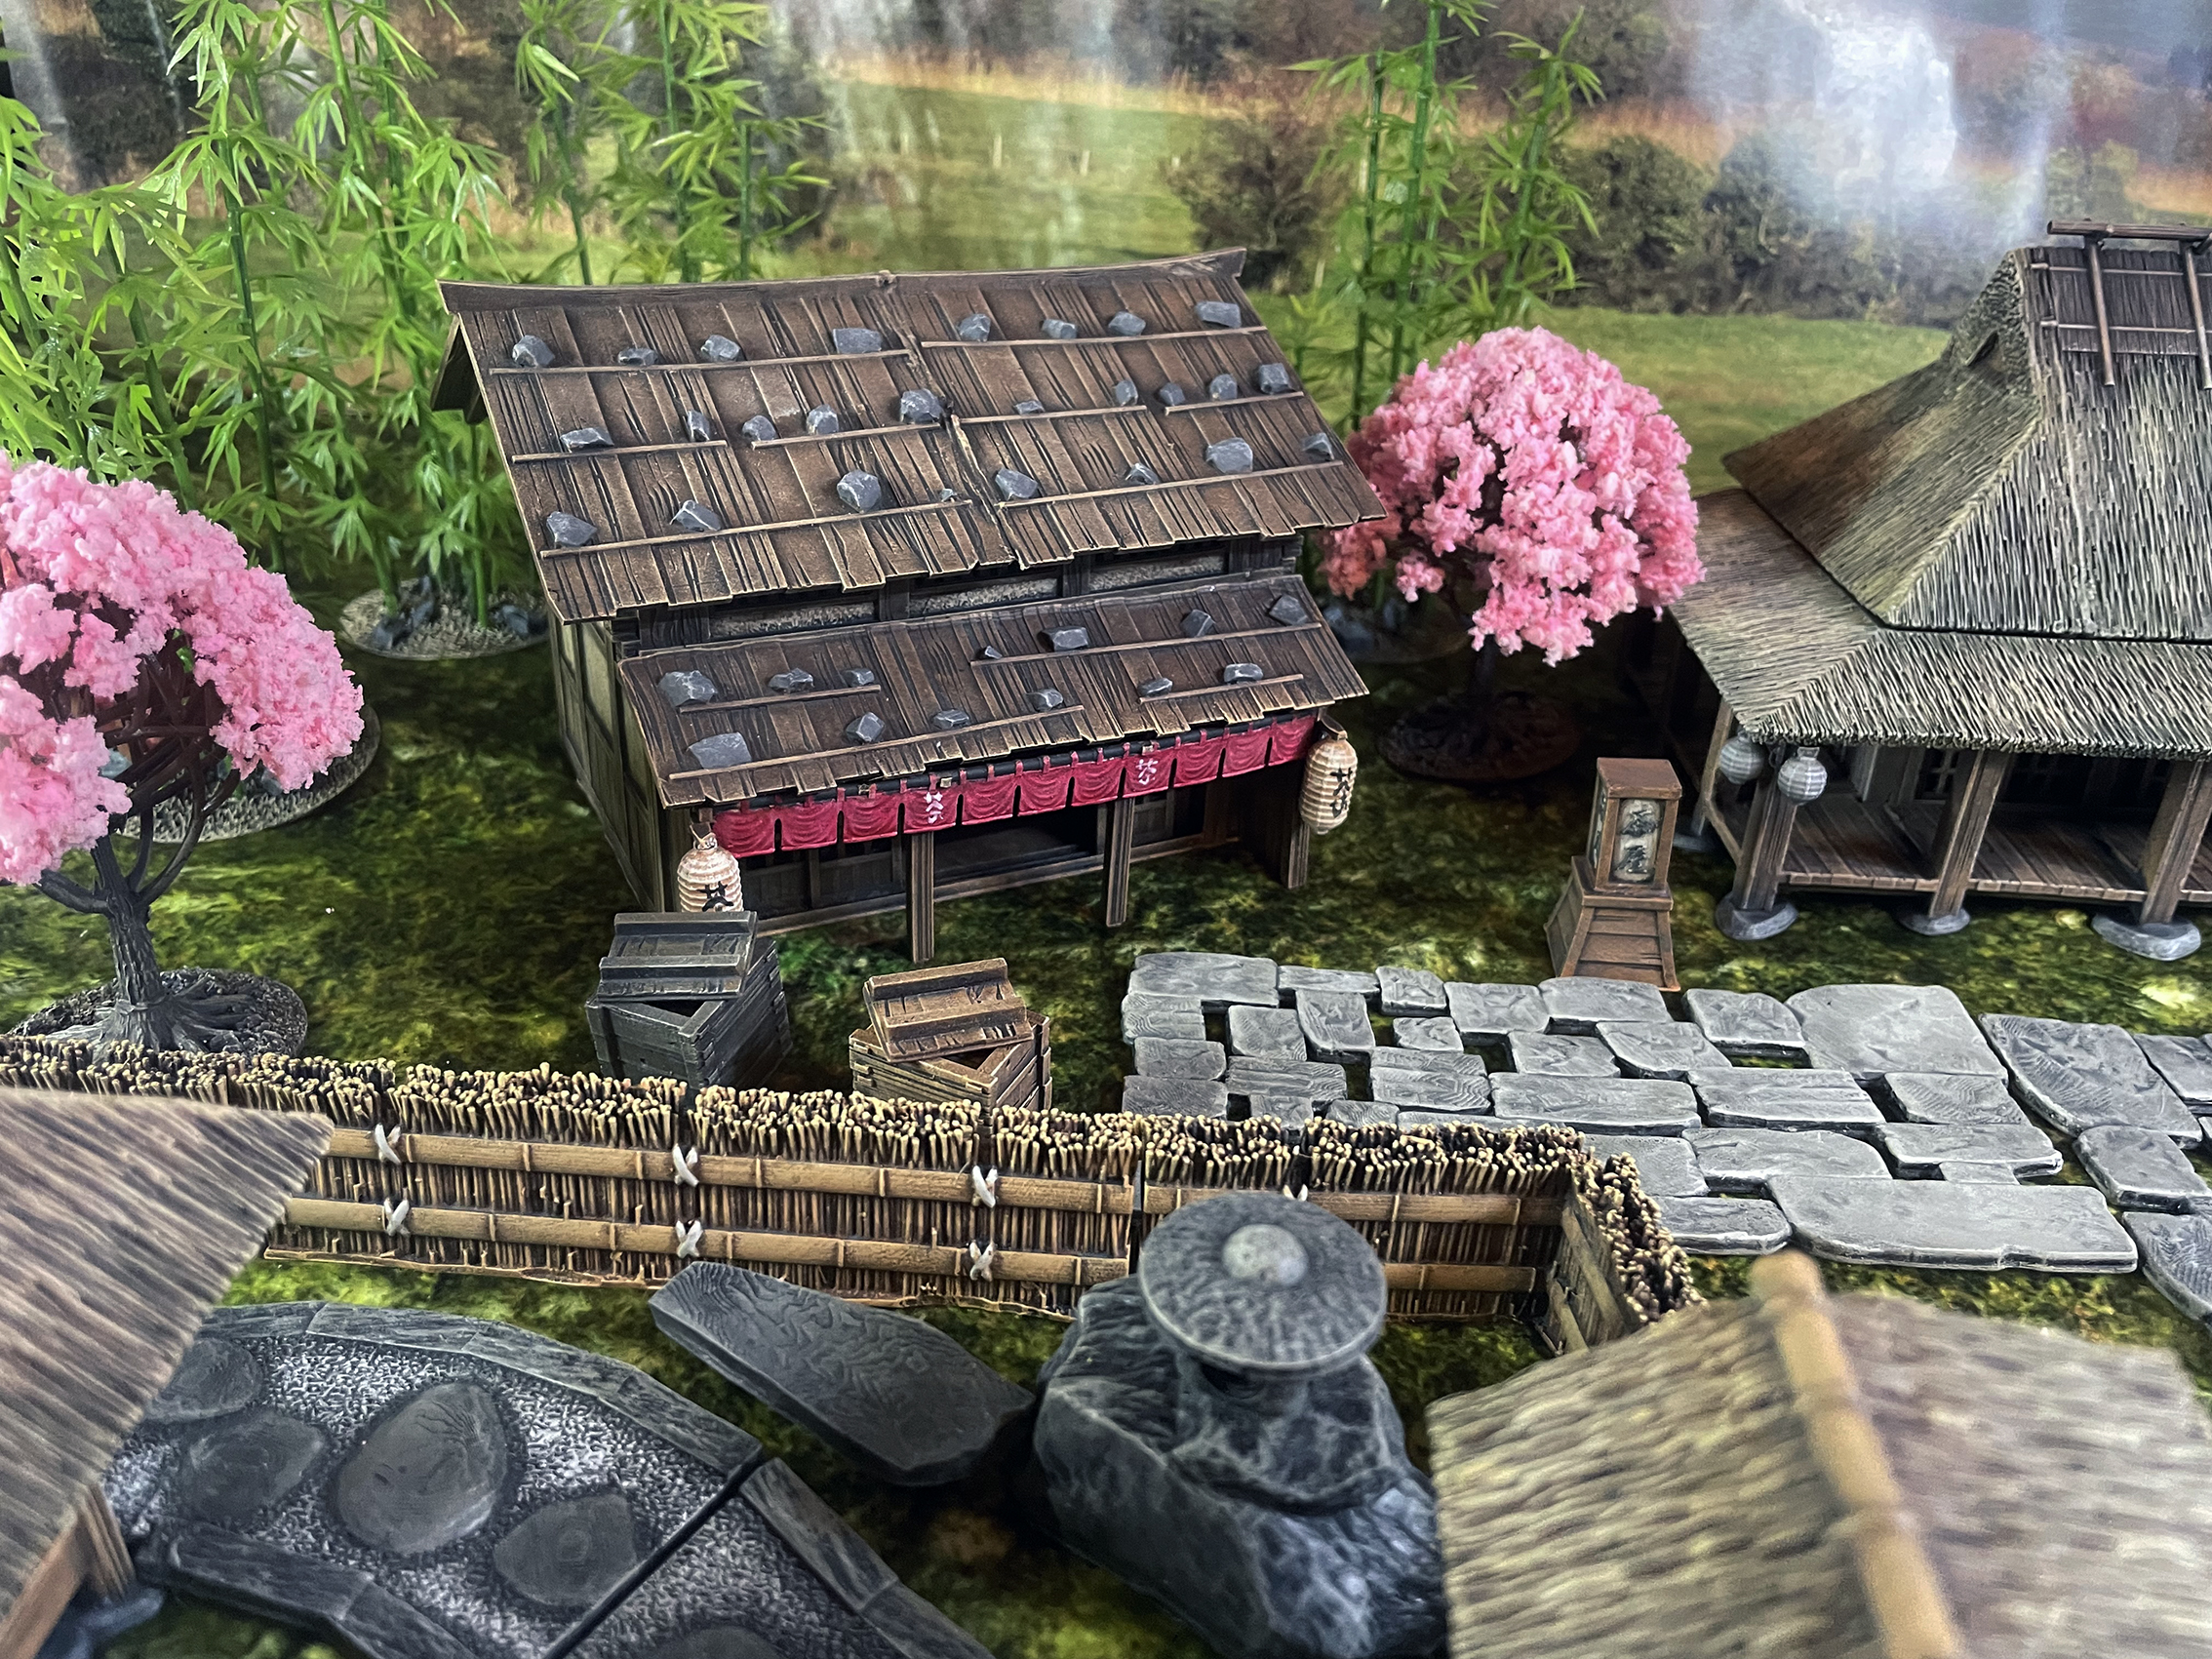
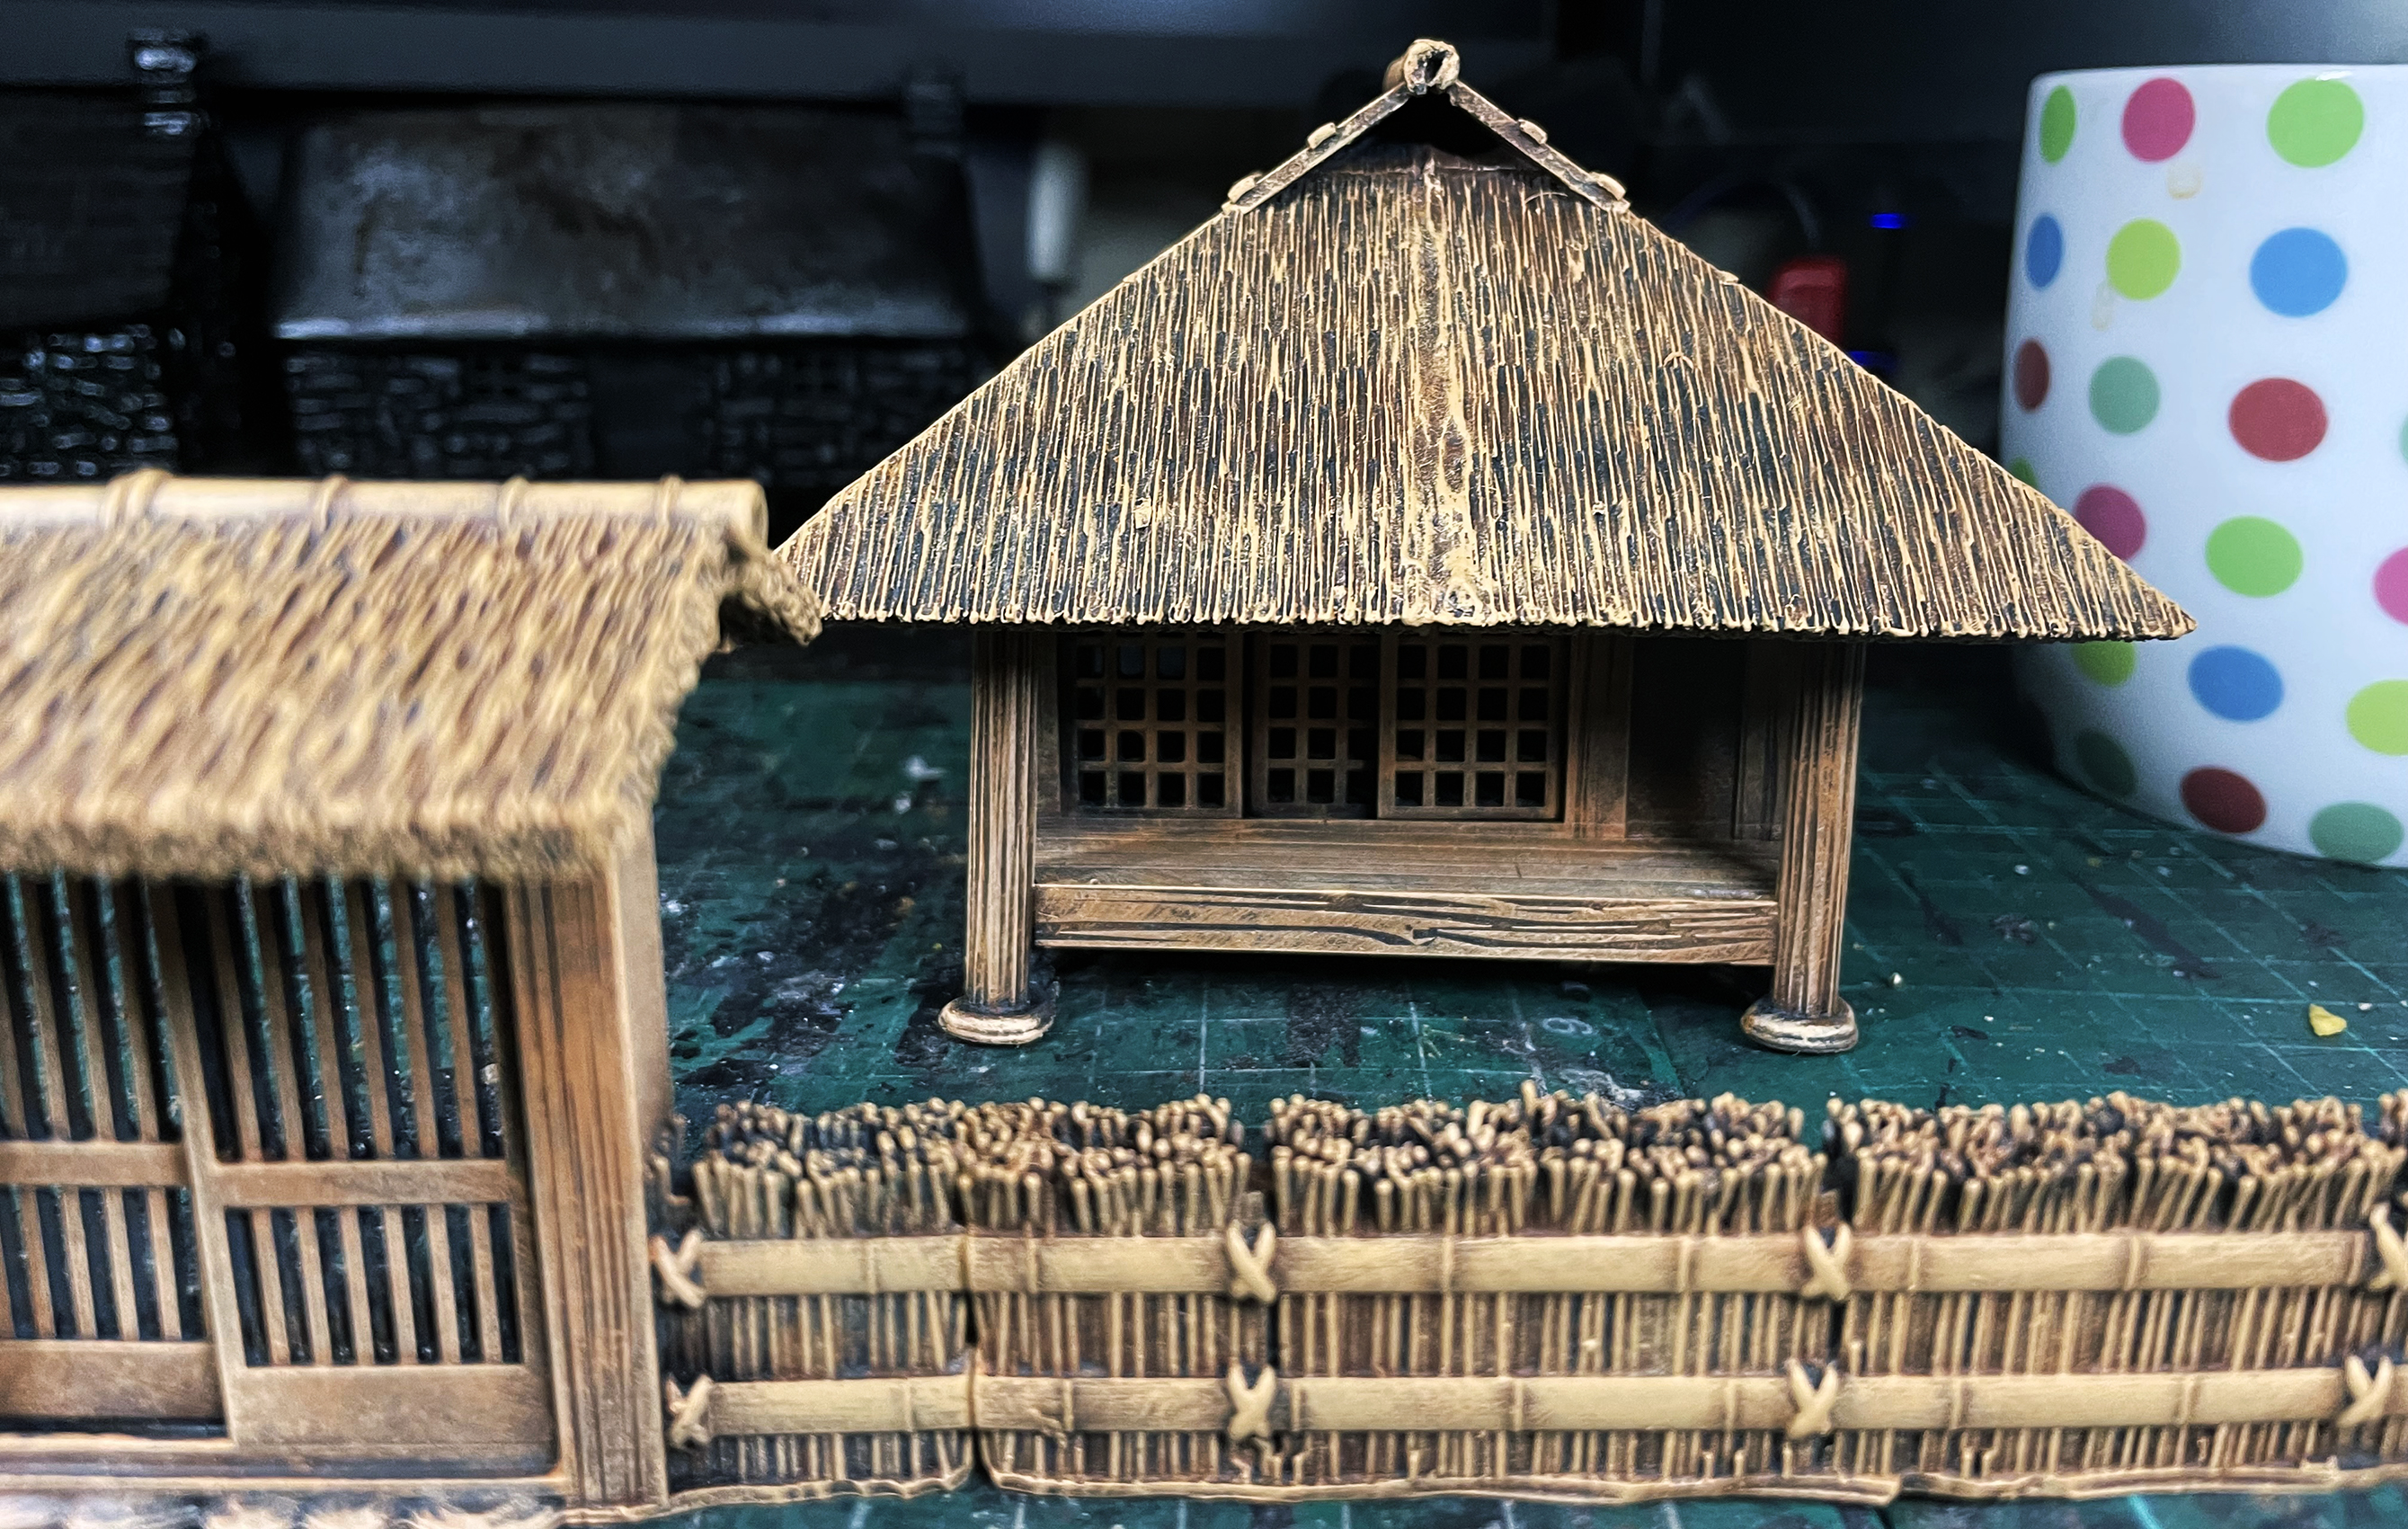
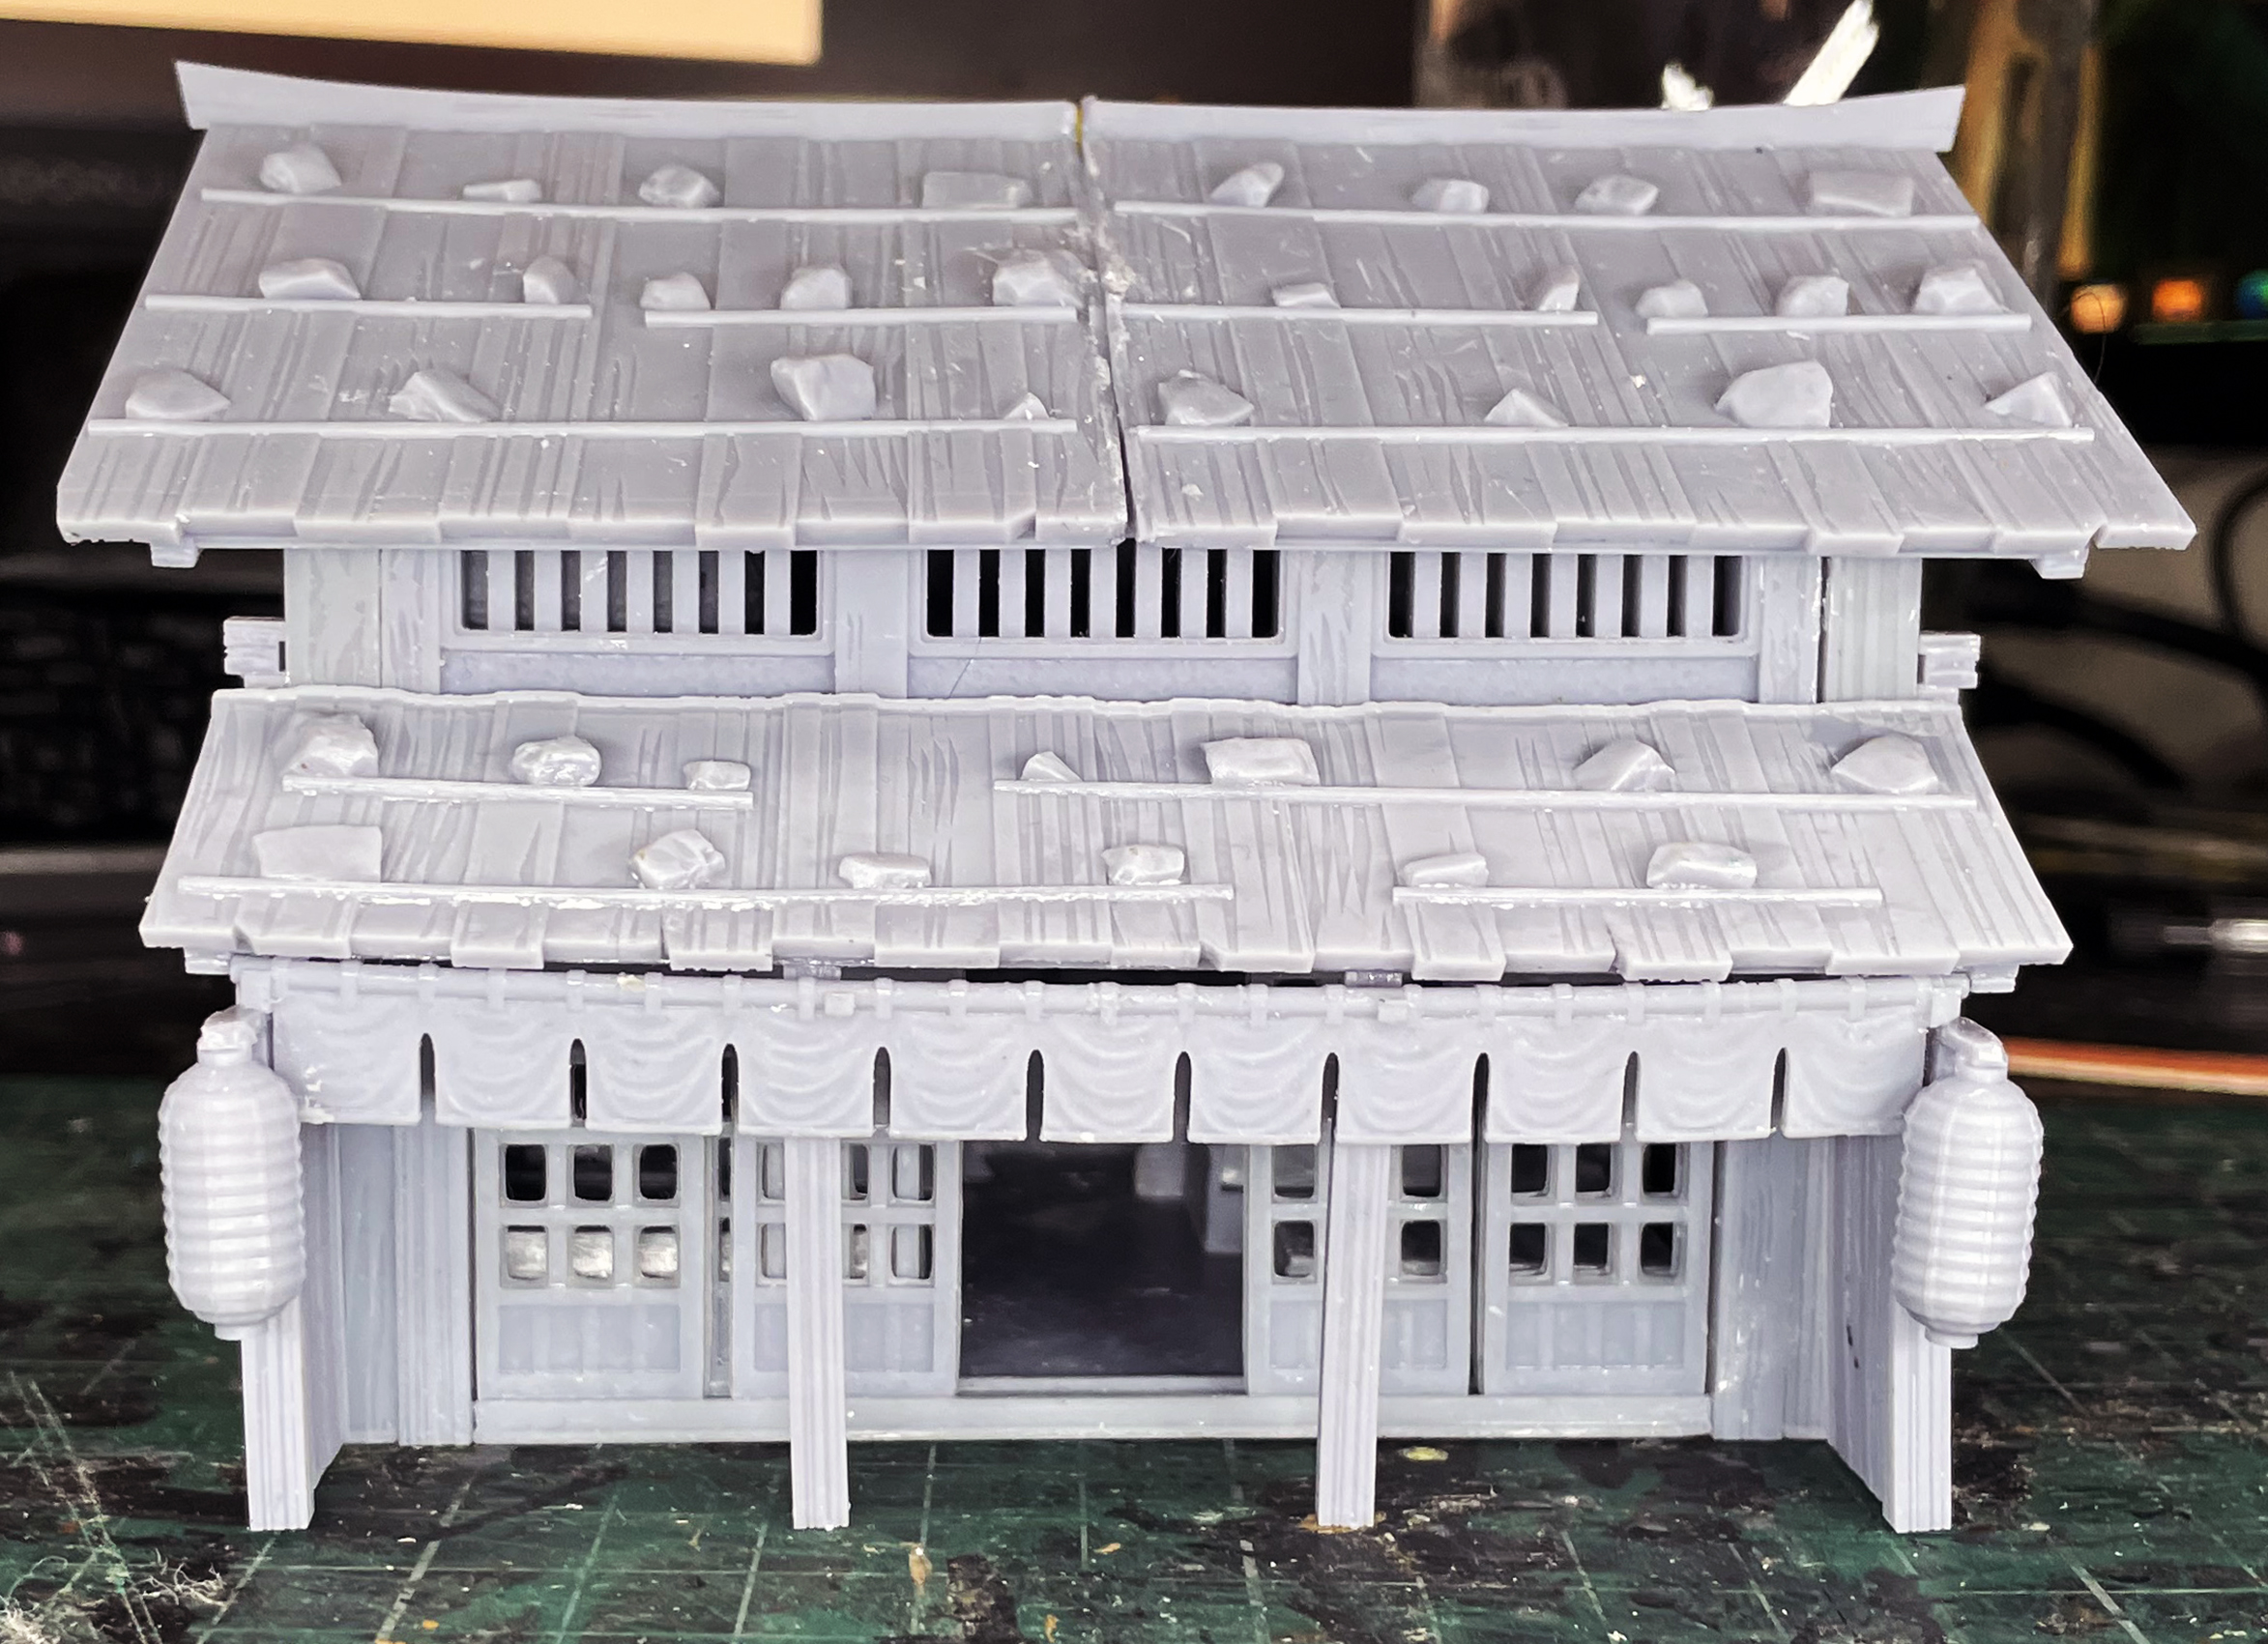
 Tea House
I’m painting this beautiful tea house from 3DAlienWorlds and I’m going to show you my guide to painting new thatch. Firstly step is to paint it in a watery Acrylicos Vallejo Panzer Grey or Black Grey over a black primer.

The next stage is to very roughly and heavy drybrush or wet brush Acrylicos Vallejo Model Colour Flat Brown so the grey coat shows through to act as shadows.
The next stage is to drybrush Acrylicos Vallejo Model Colour Light Brown. So far this is the same for the bamboo fencing and wood as well as the thatching.
The last highlight for the bamboo and the wood is Acrylicos Vallejo Model Colour Flat Flesh. This has really brought out the the bamboo colour and this was a happy mistake.
To Be Continued
My Guide to Painting Newer Wood, Part 2
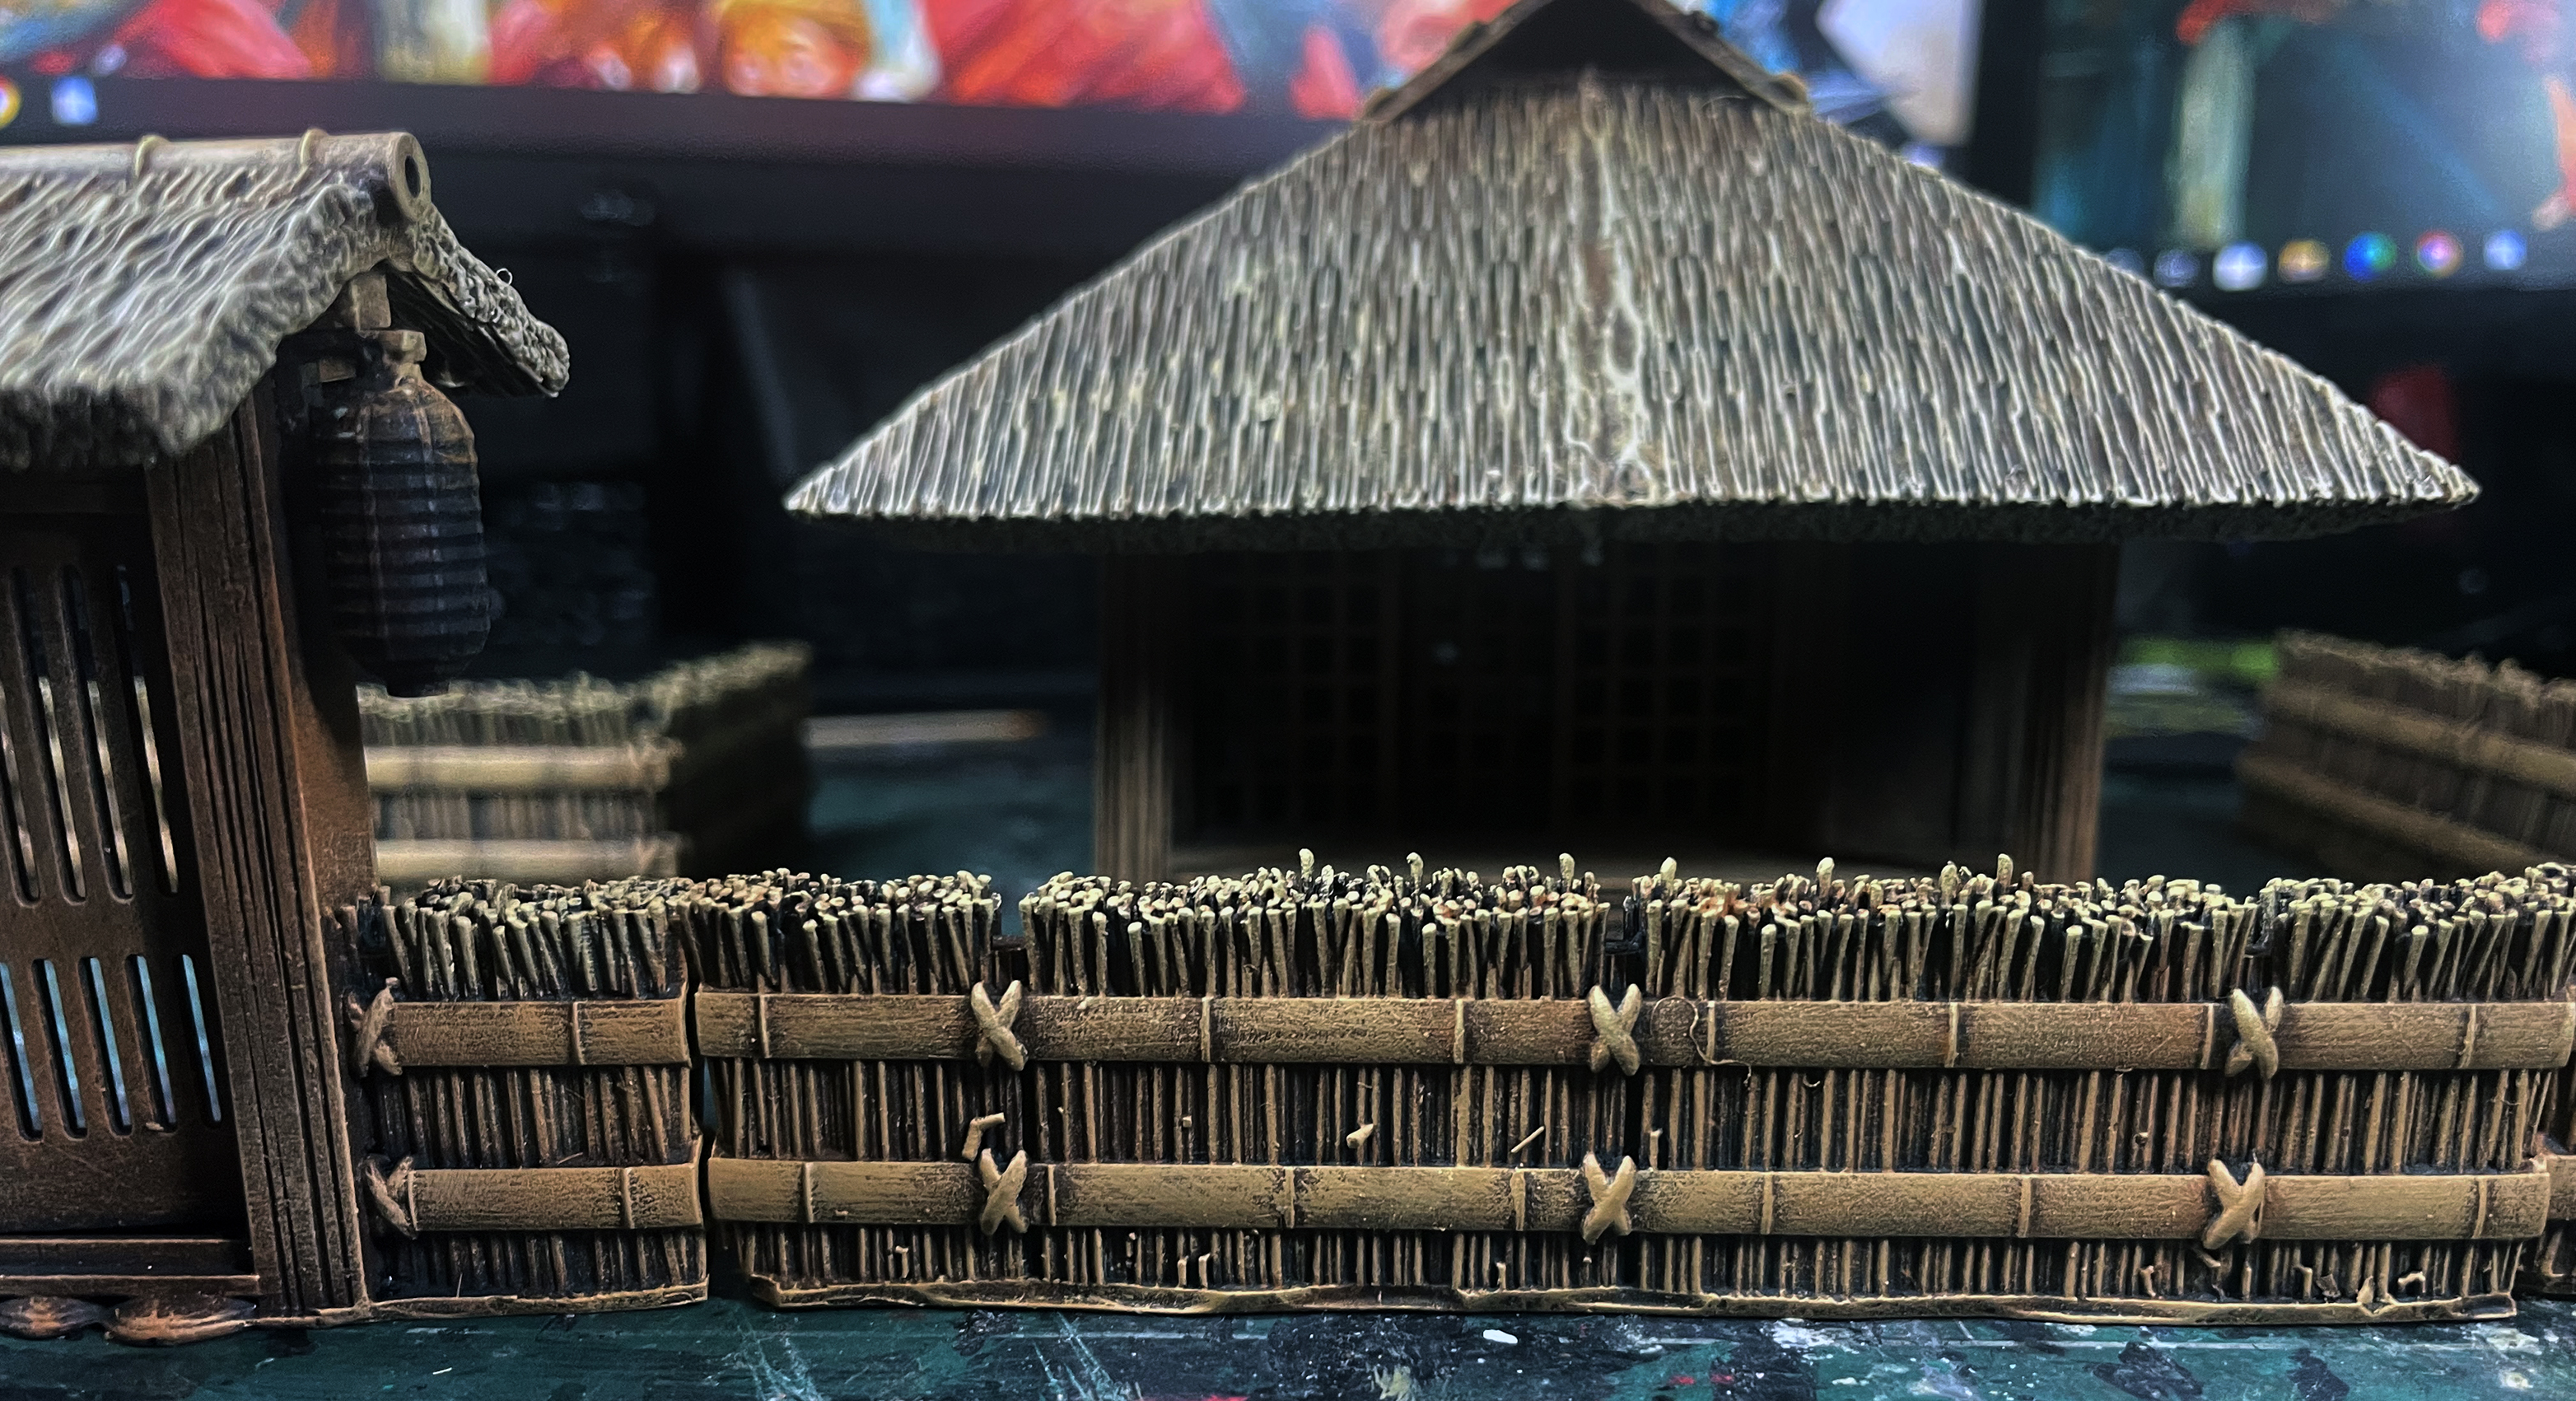
I have added the detailing to my tea shop and added the word tea to the lanterns and bunting. I’ve also added a very thin wash of Vallejo Model Colour Panzer Grey to bring all together. Starting to take shape.

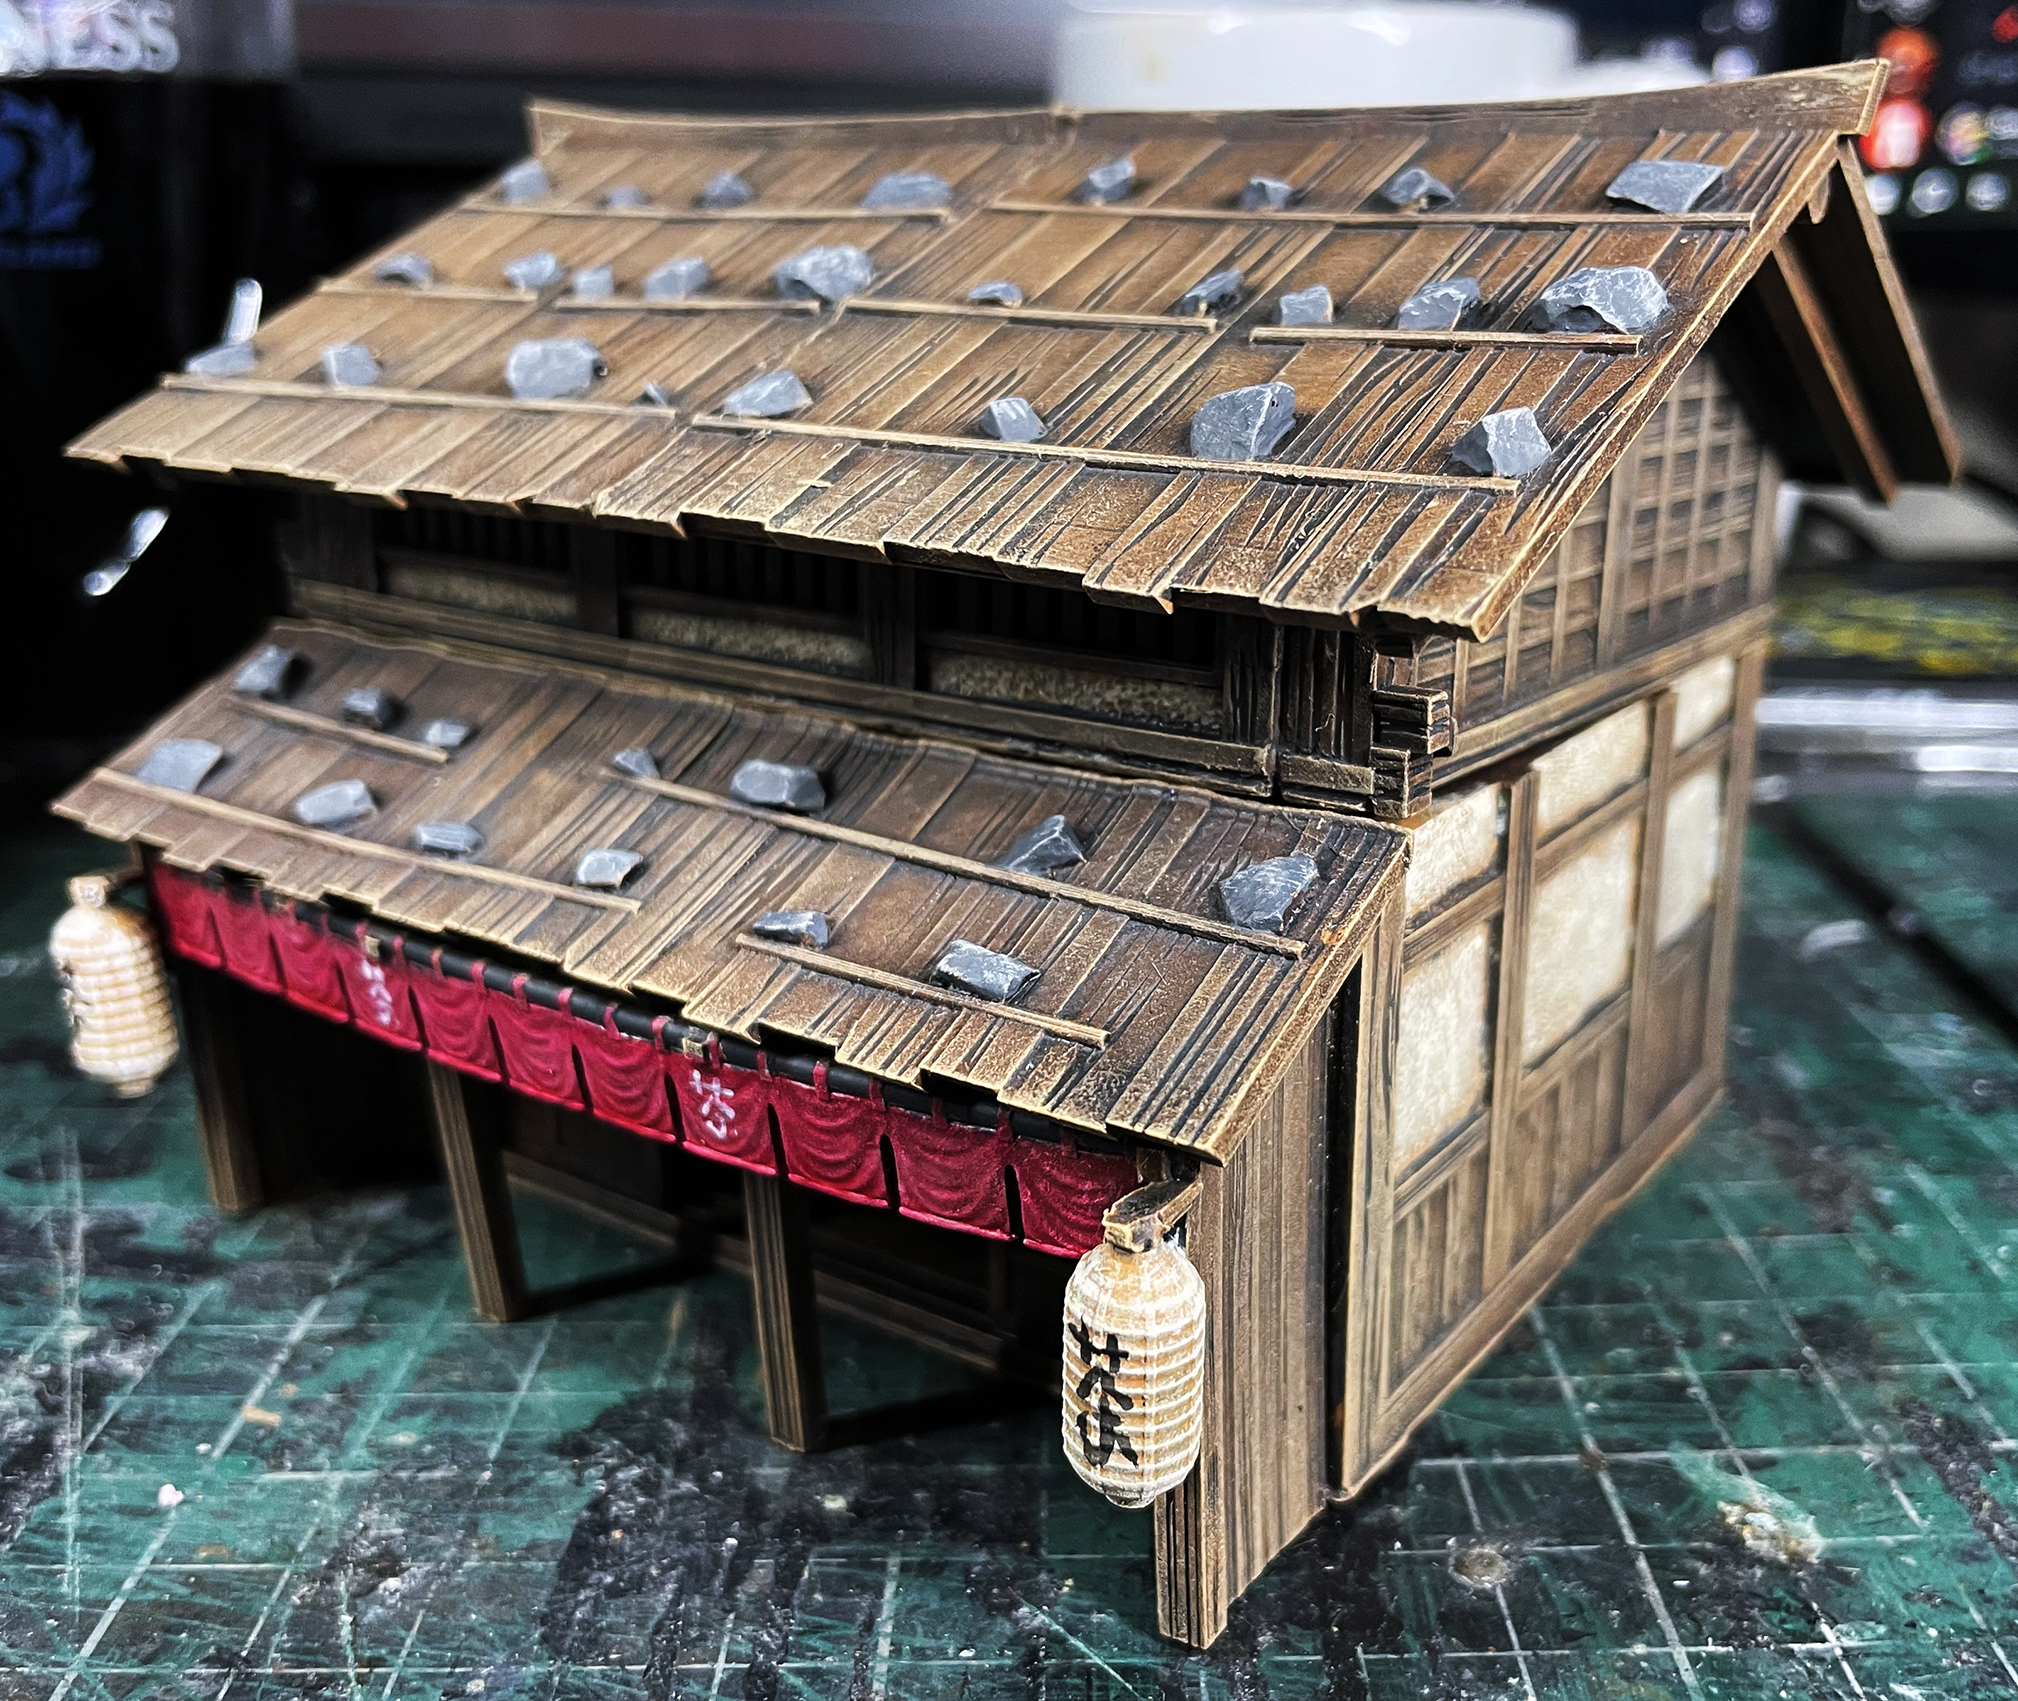
The finished Japanese building from 3DAlienWorlds for Clash of Katanas/Test of Honour. I really enjoyed painting this building and needed to get these on the table now. I finished the building off with a light dusting of Vallejo Pale Sand.
My Guide to Painting Newer Wood, Part 1

This as a guide for new wood effect. So using a 3DAlienWorlds shop, and I’m primed it black first and need I’ve painted a thin coat of Vallejo Model Colour Panzer Grey.

The second layer and as I’m wanting a nice warm colour for three new wood I’ve gone with Vallejo Flat Brown with as a colour I love for the reddy hue it has. I’ve painted this with a heavy, rough drybrush.
The next stage is completed on my 3DAlienWorlds team shop and I’ve used Vallejo Model Colour Light Brown which is a lovely rich, orangey brown. I’ve drybrush this and the building is starting to take shape.
I’ve highlighted the tea shop’s wood with a light drybrush of Vallejo Model Colour Flat Flesh to knock back the brightness a little without being too harsh. Next it’s painting all the details before adding a final wash to it.
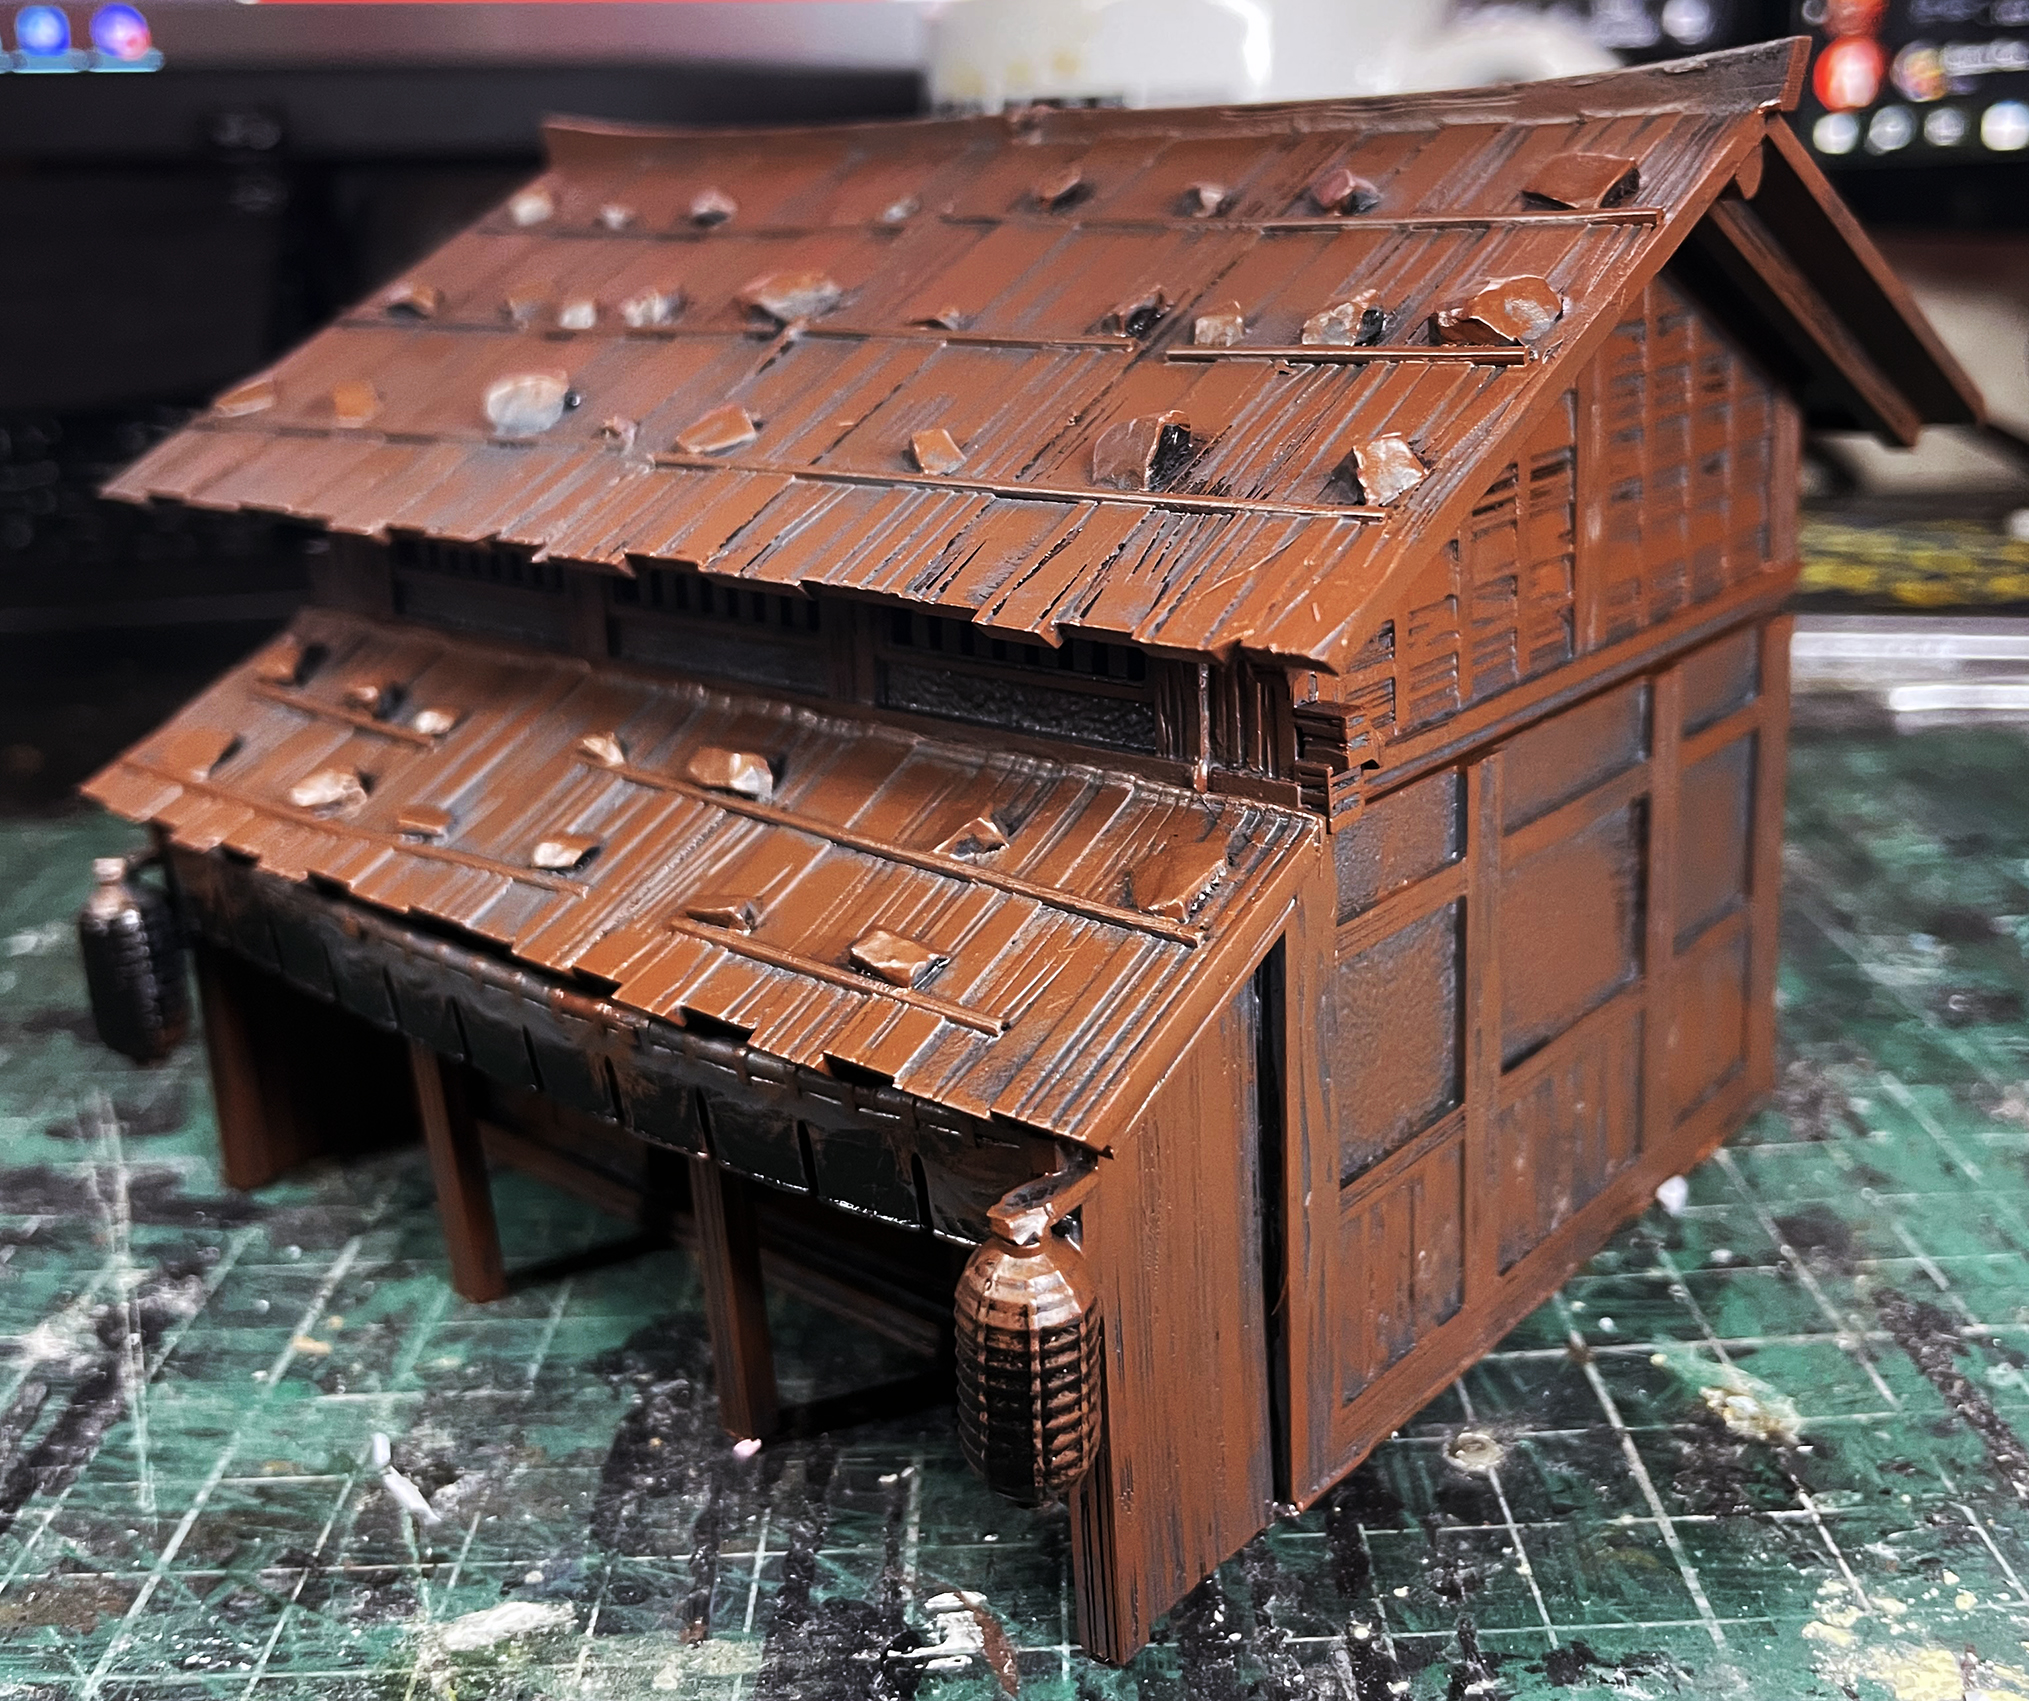
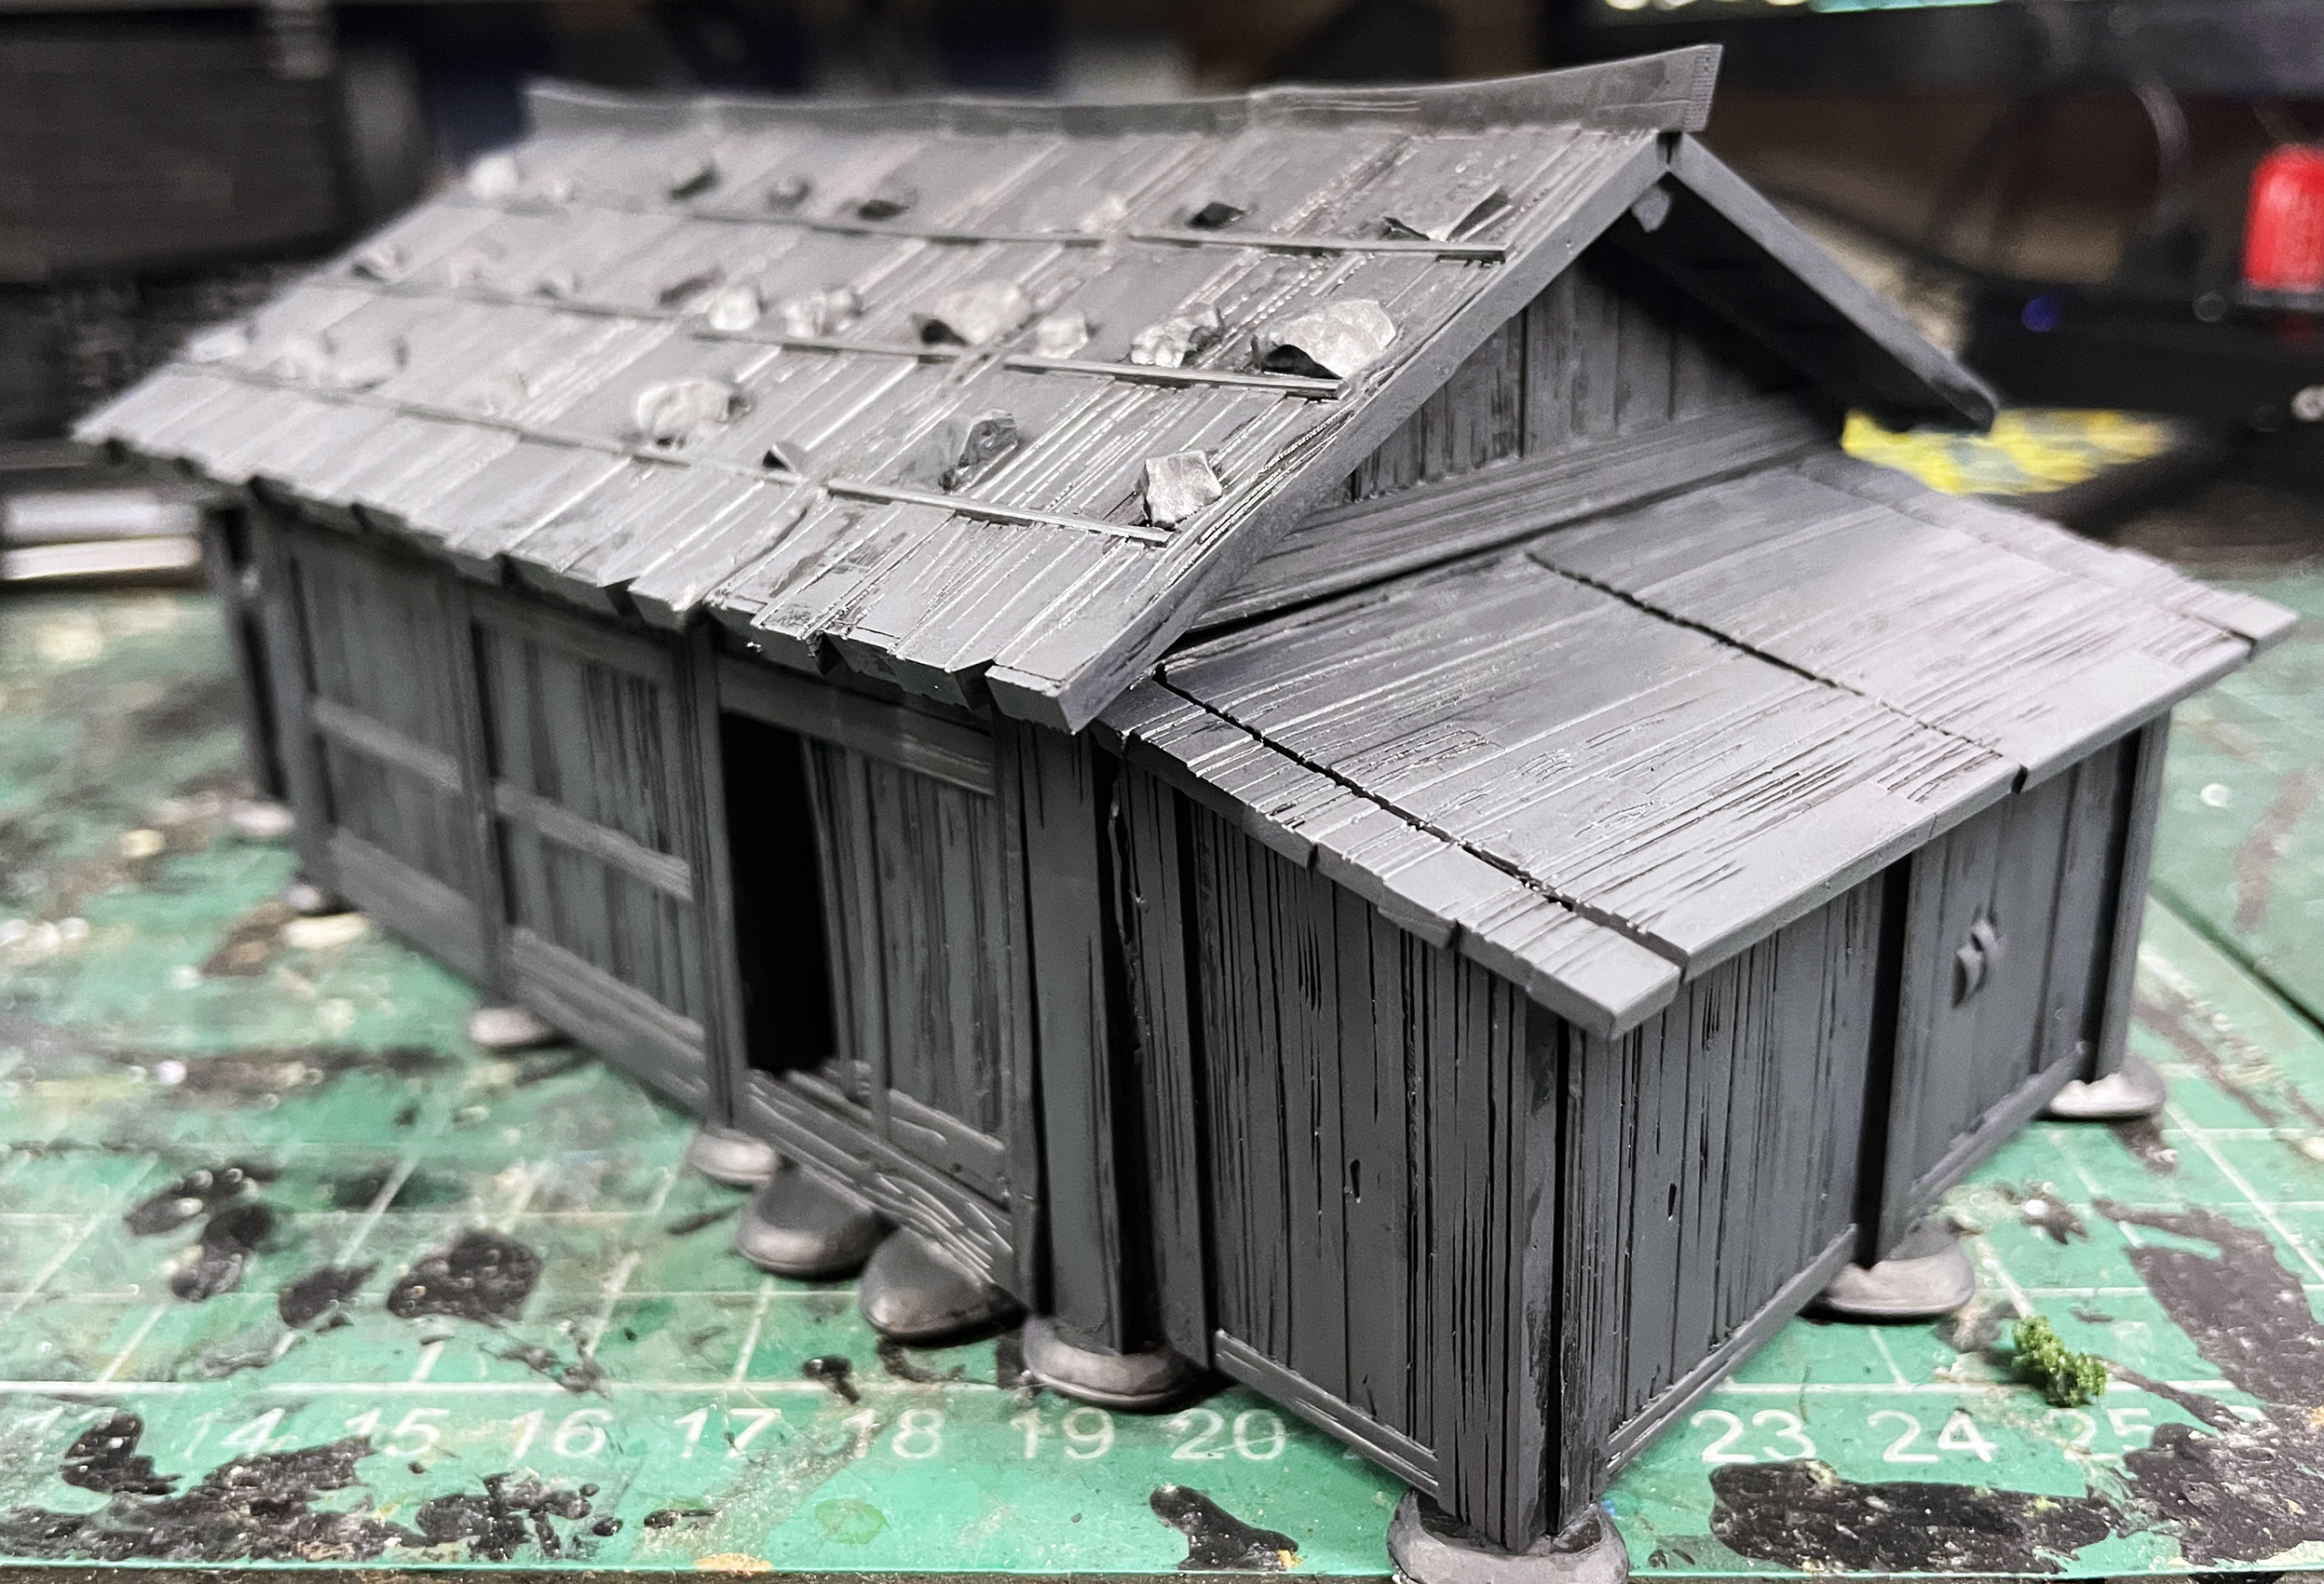
My Guide to Painting Aged Wood, Part 2
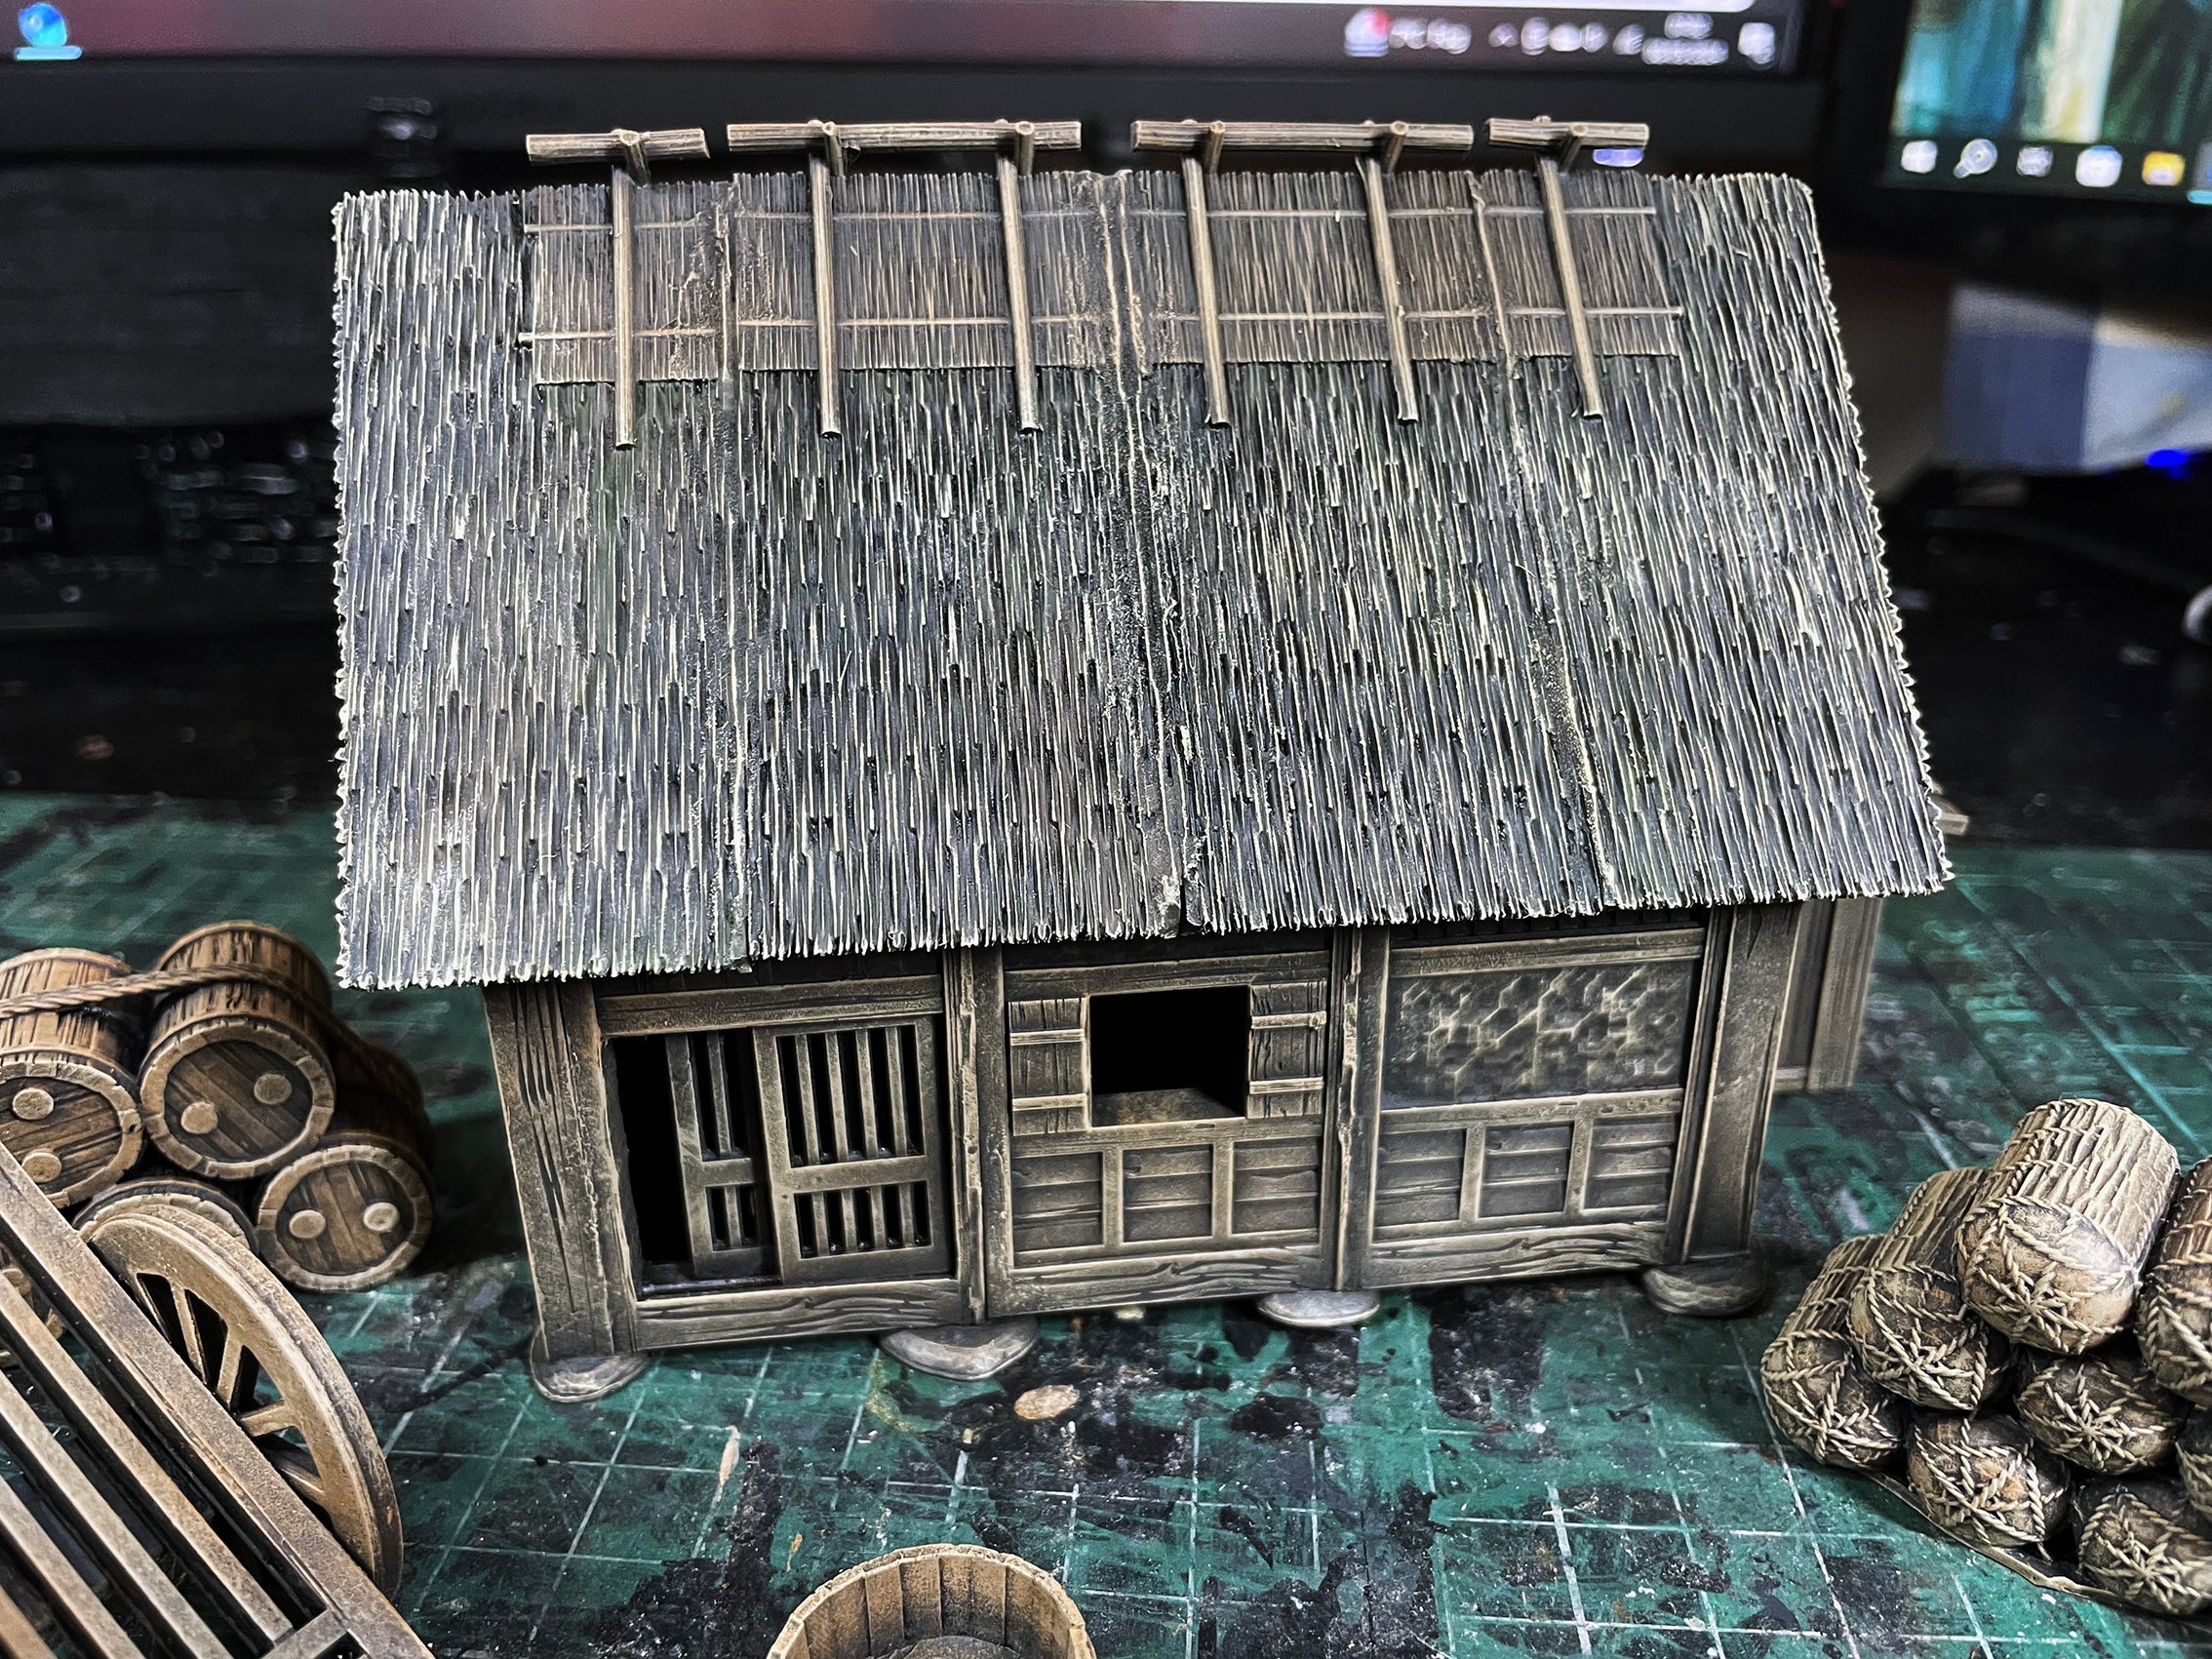
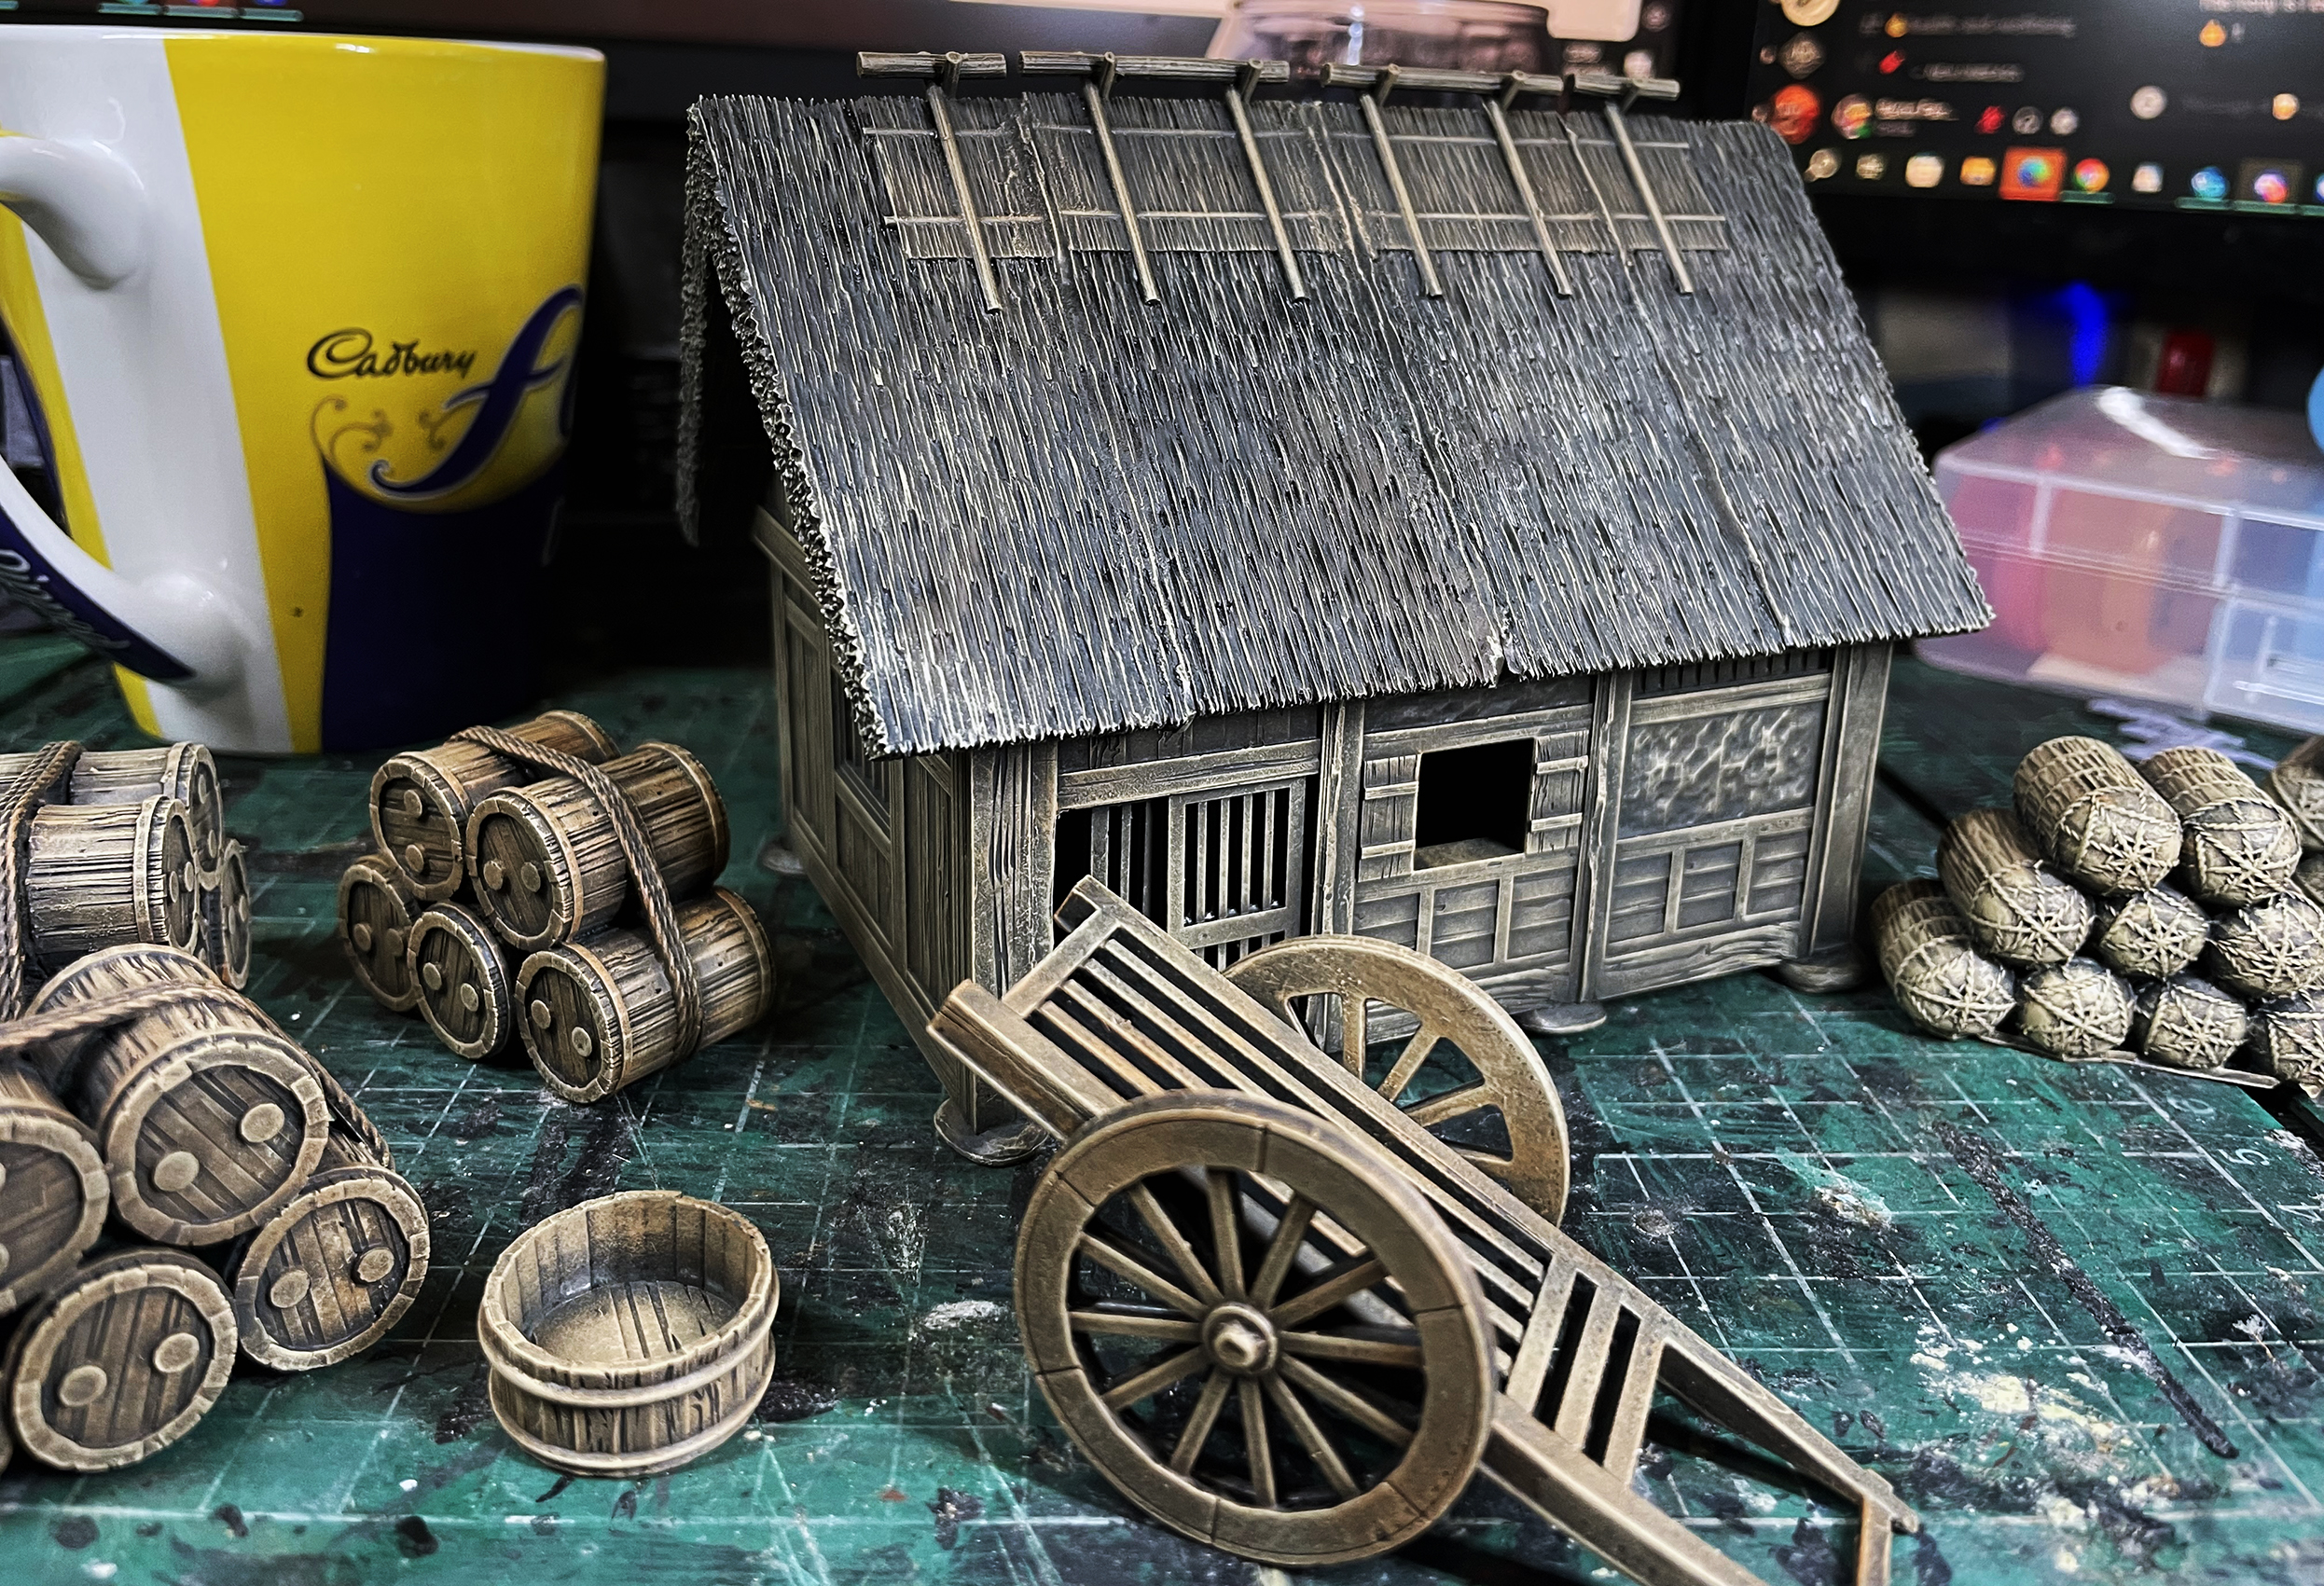
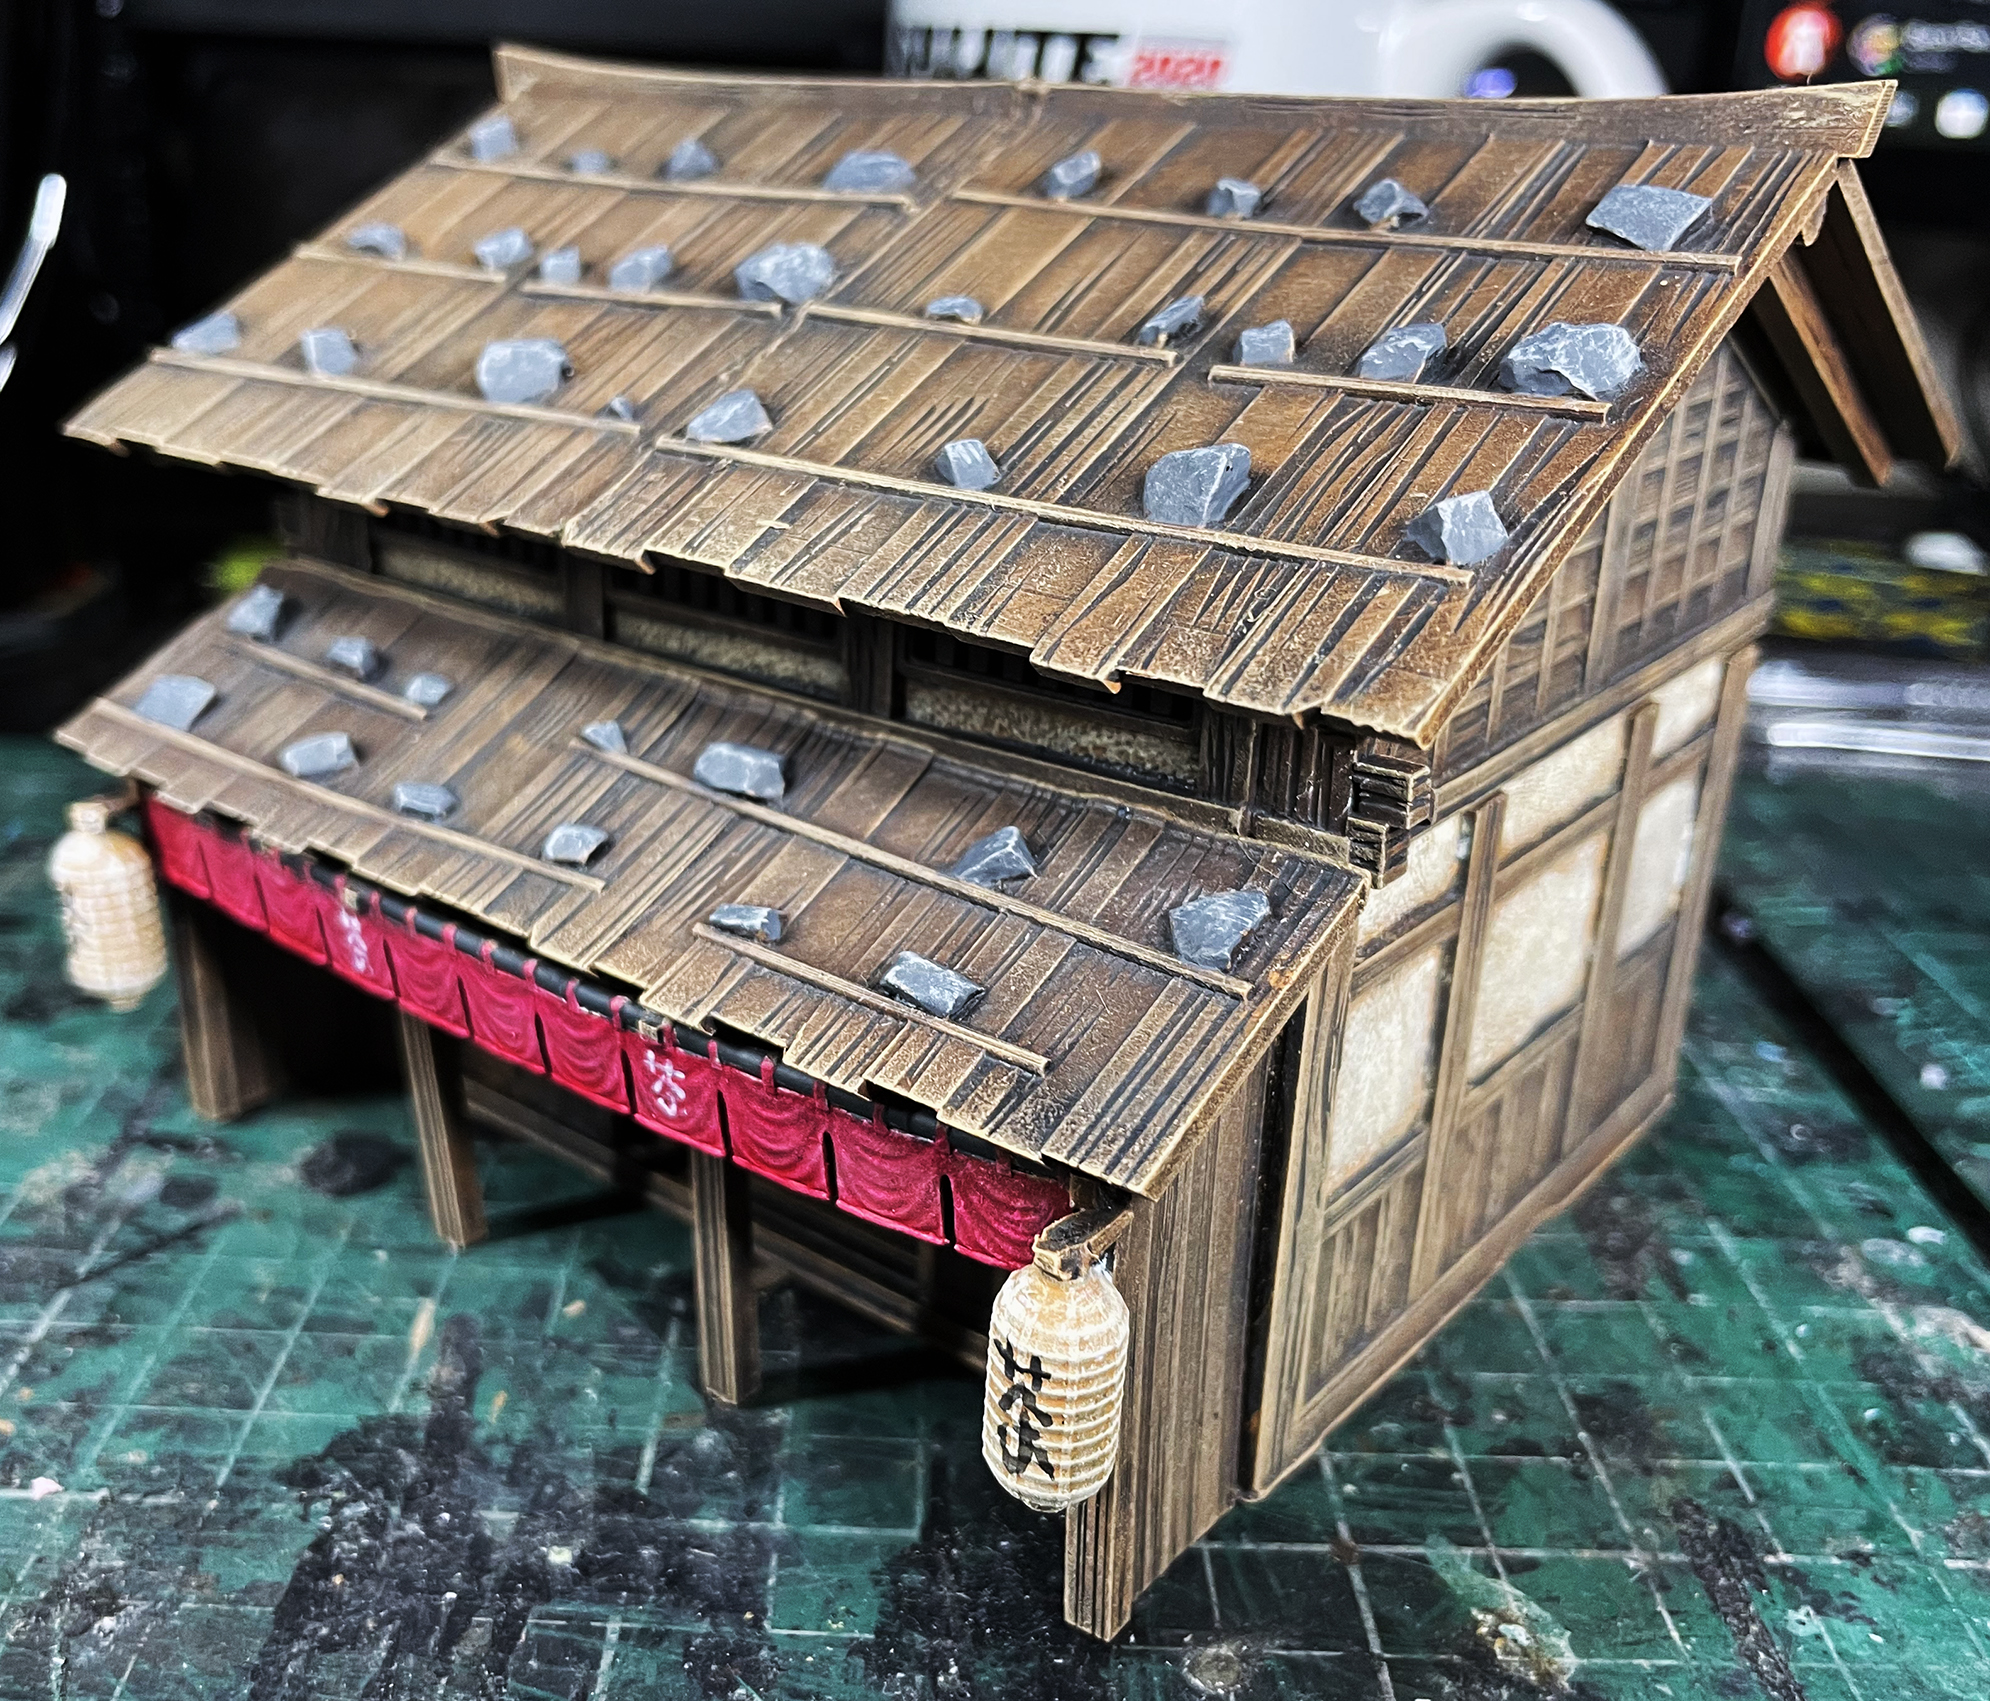
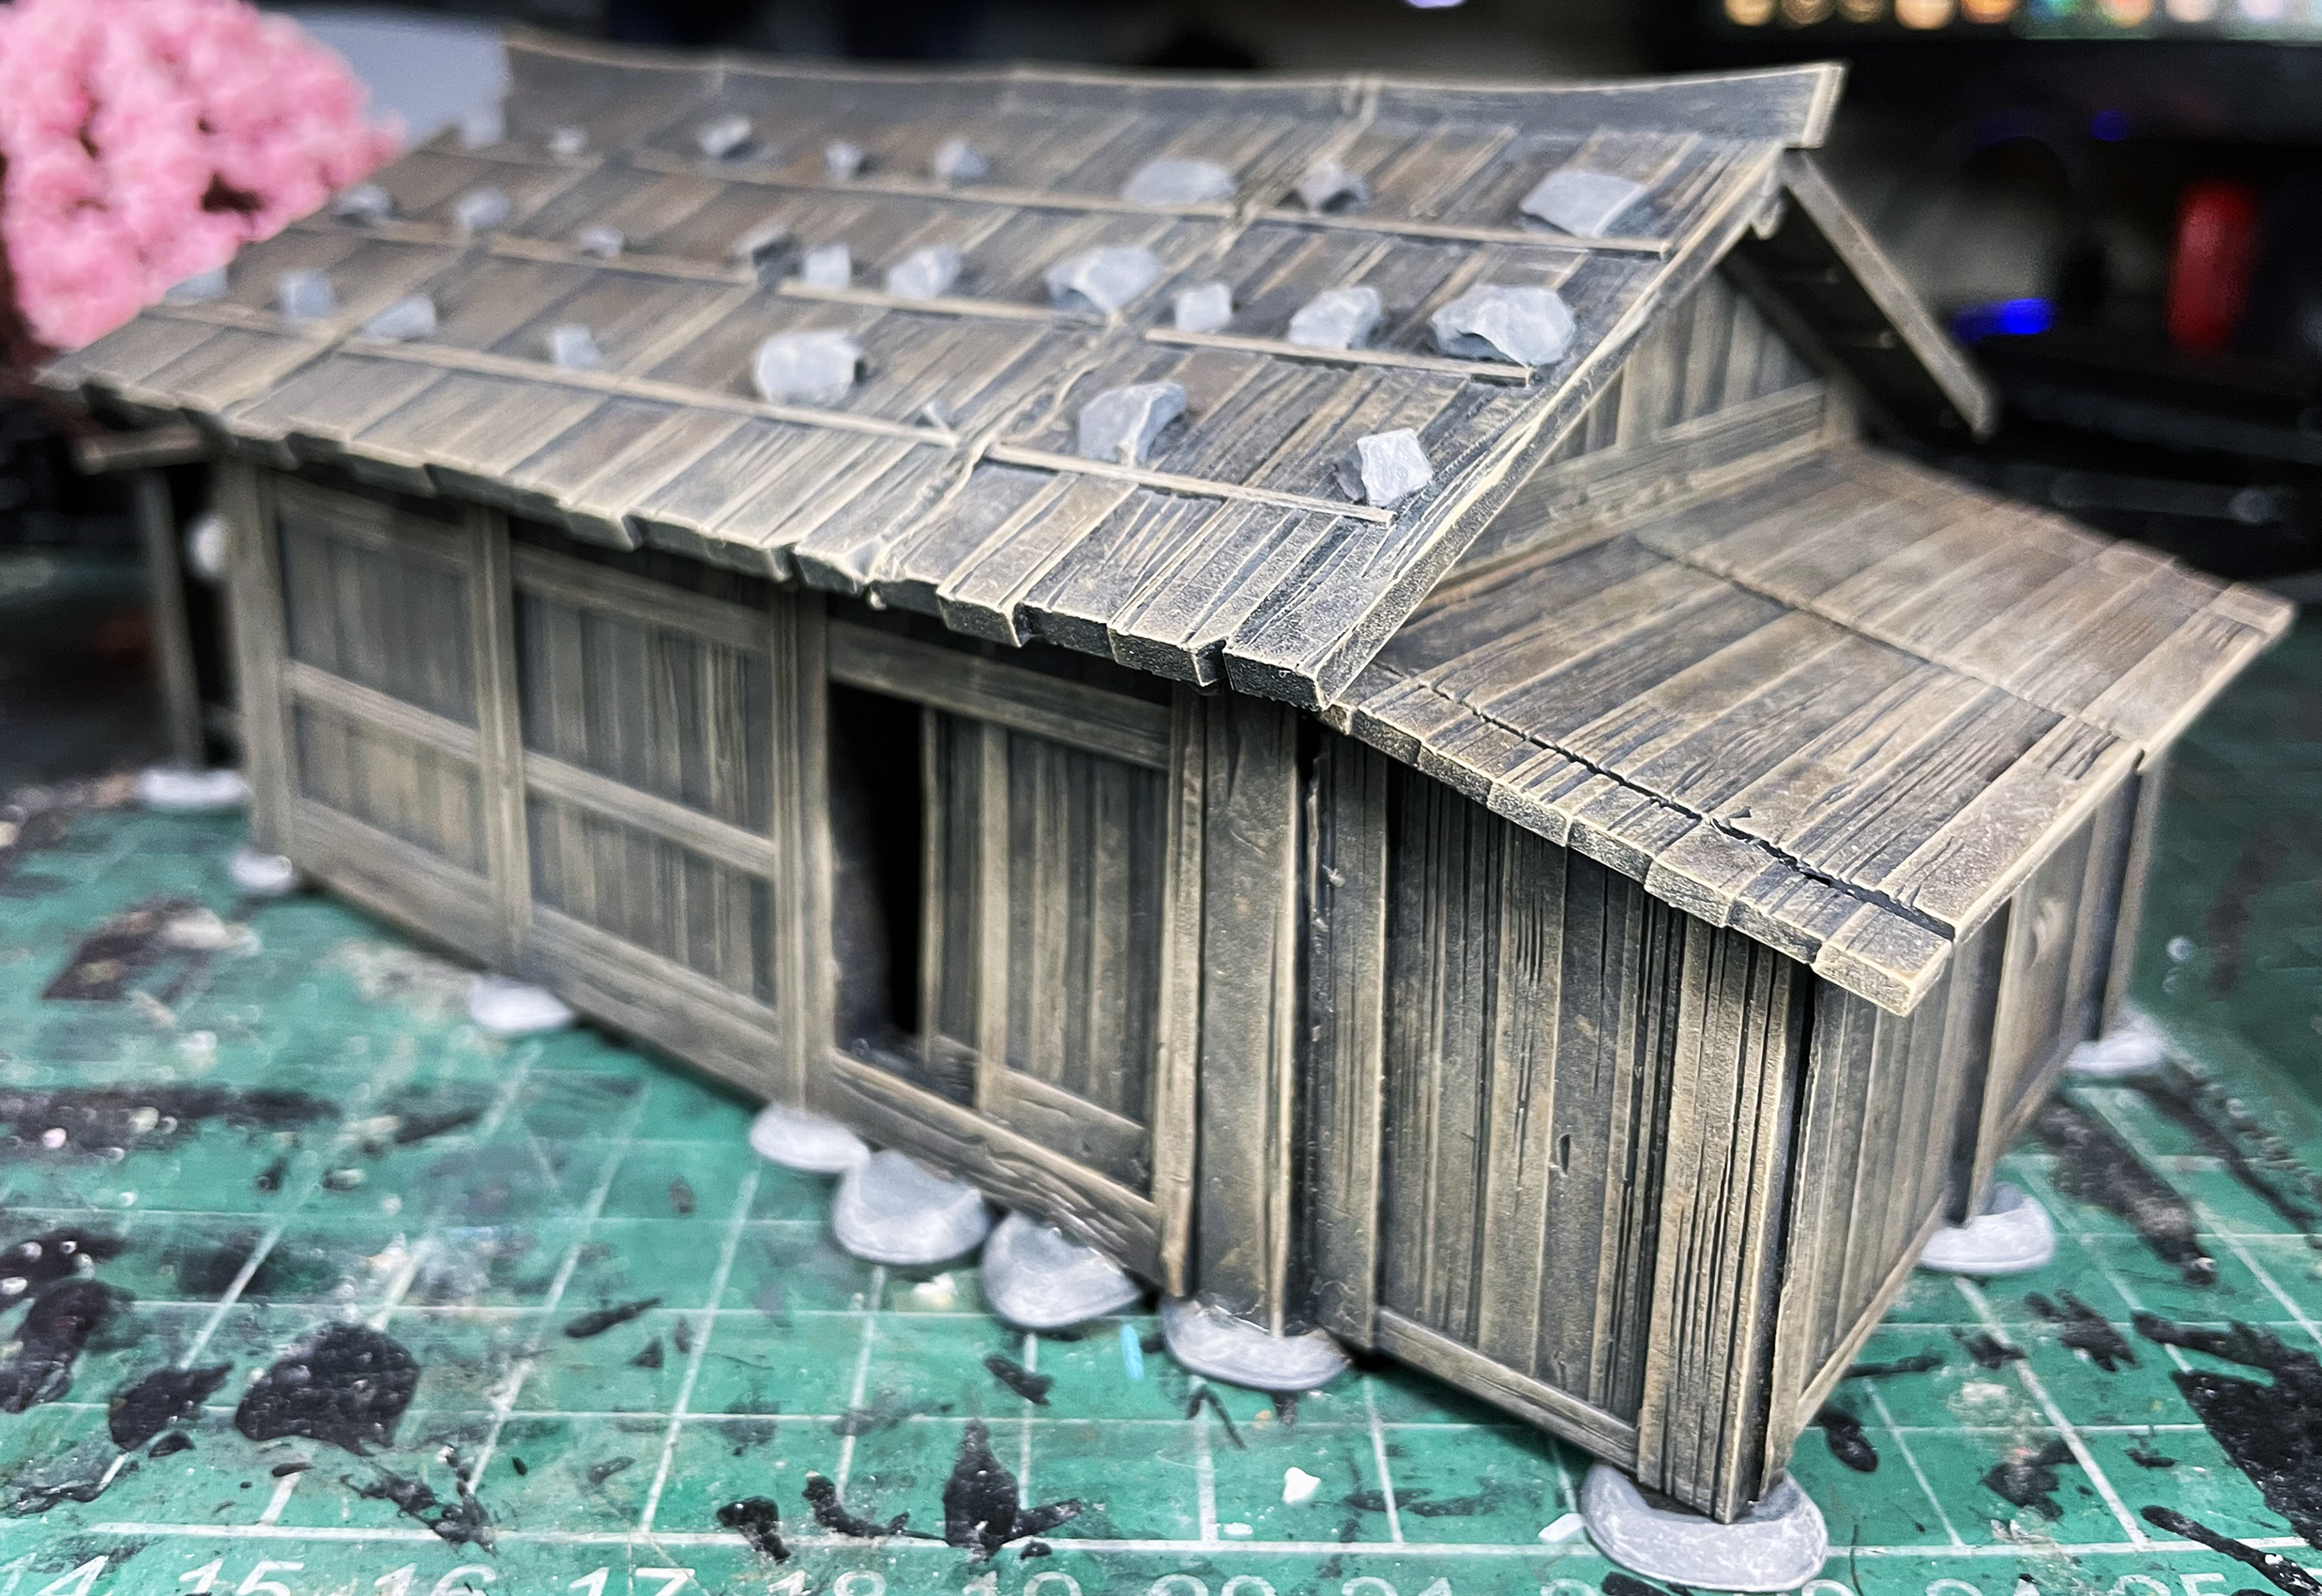
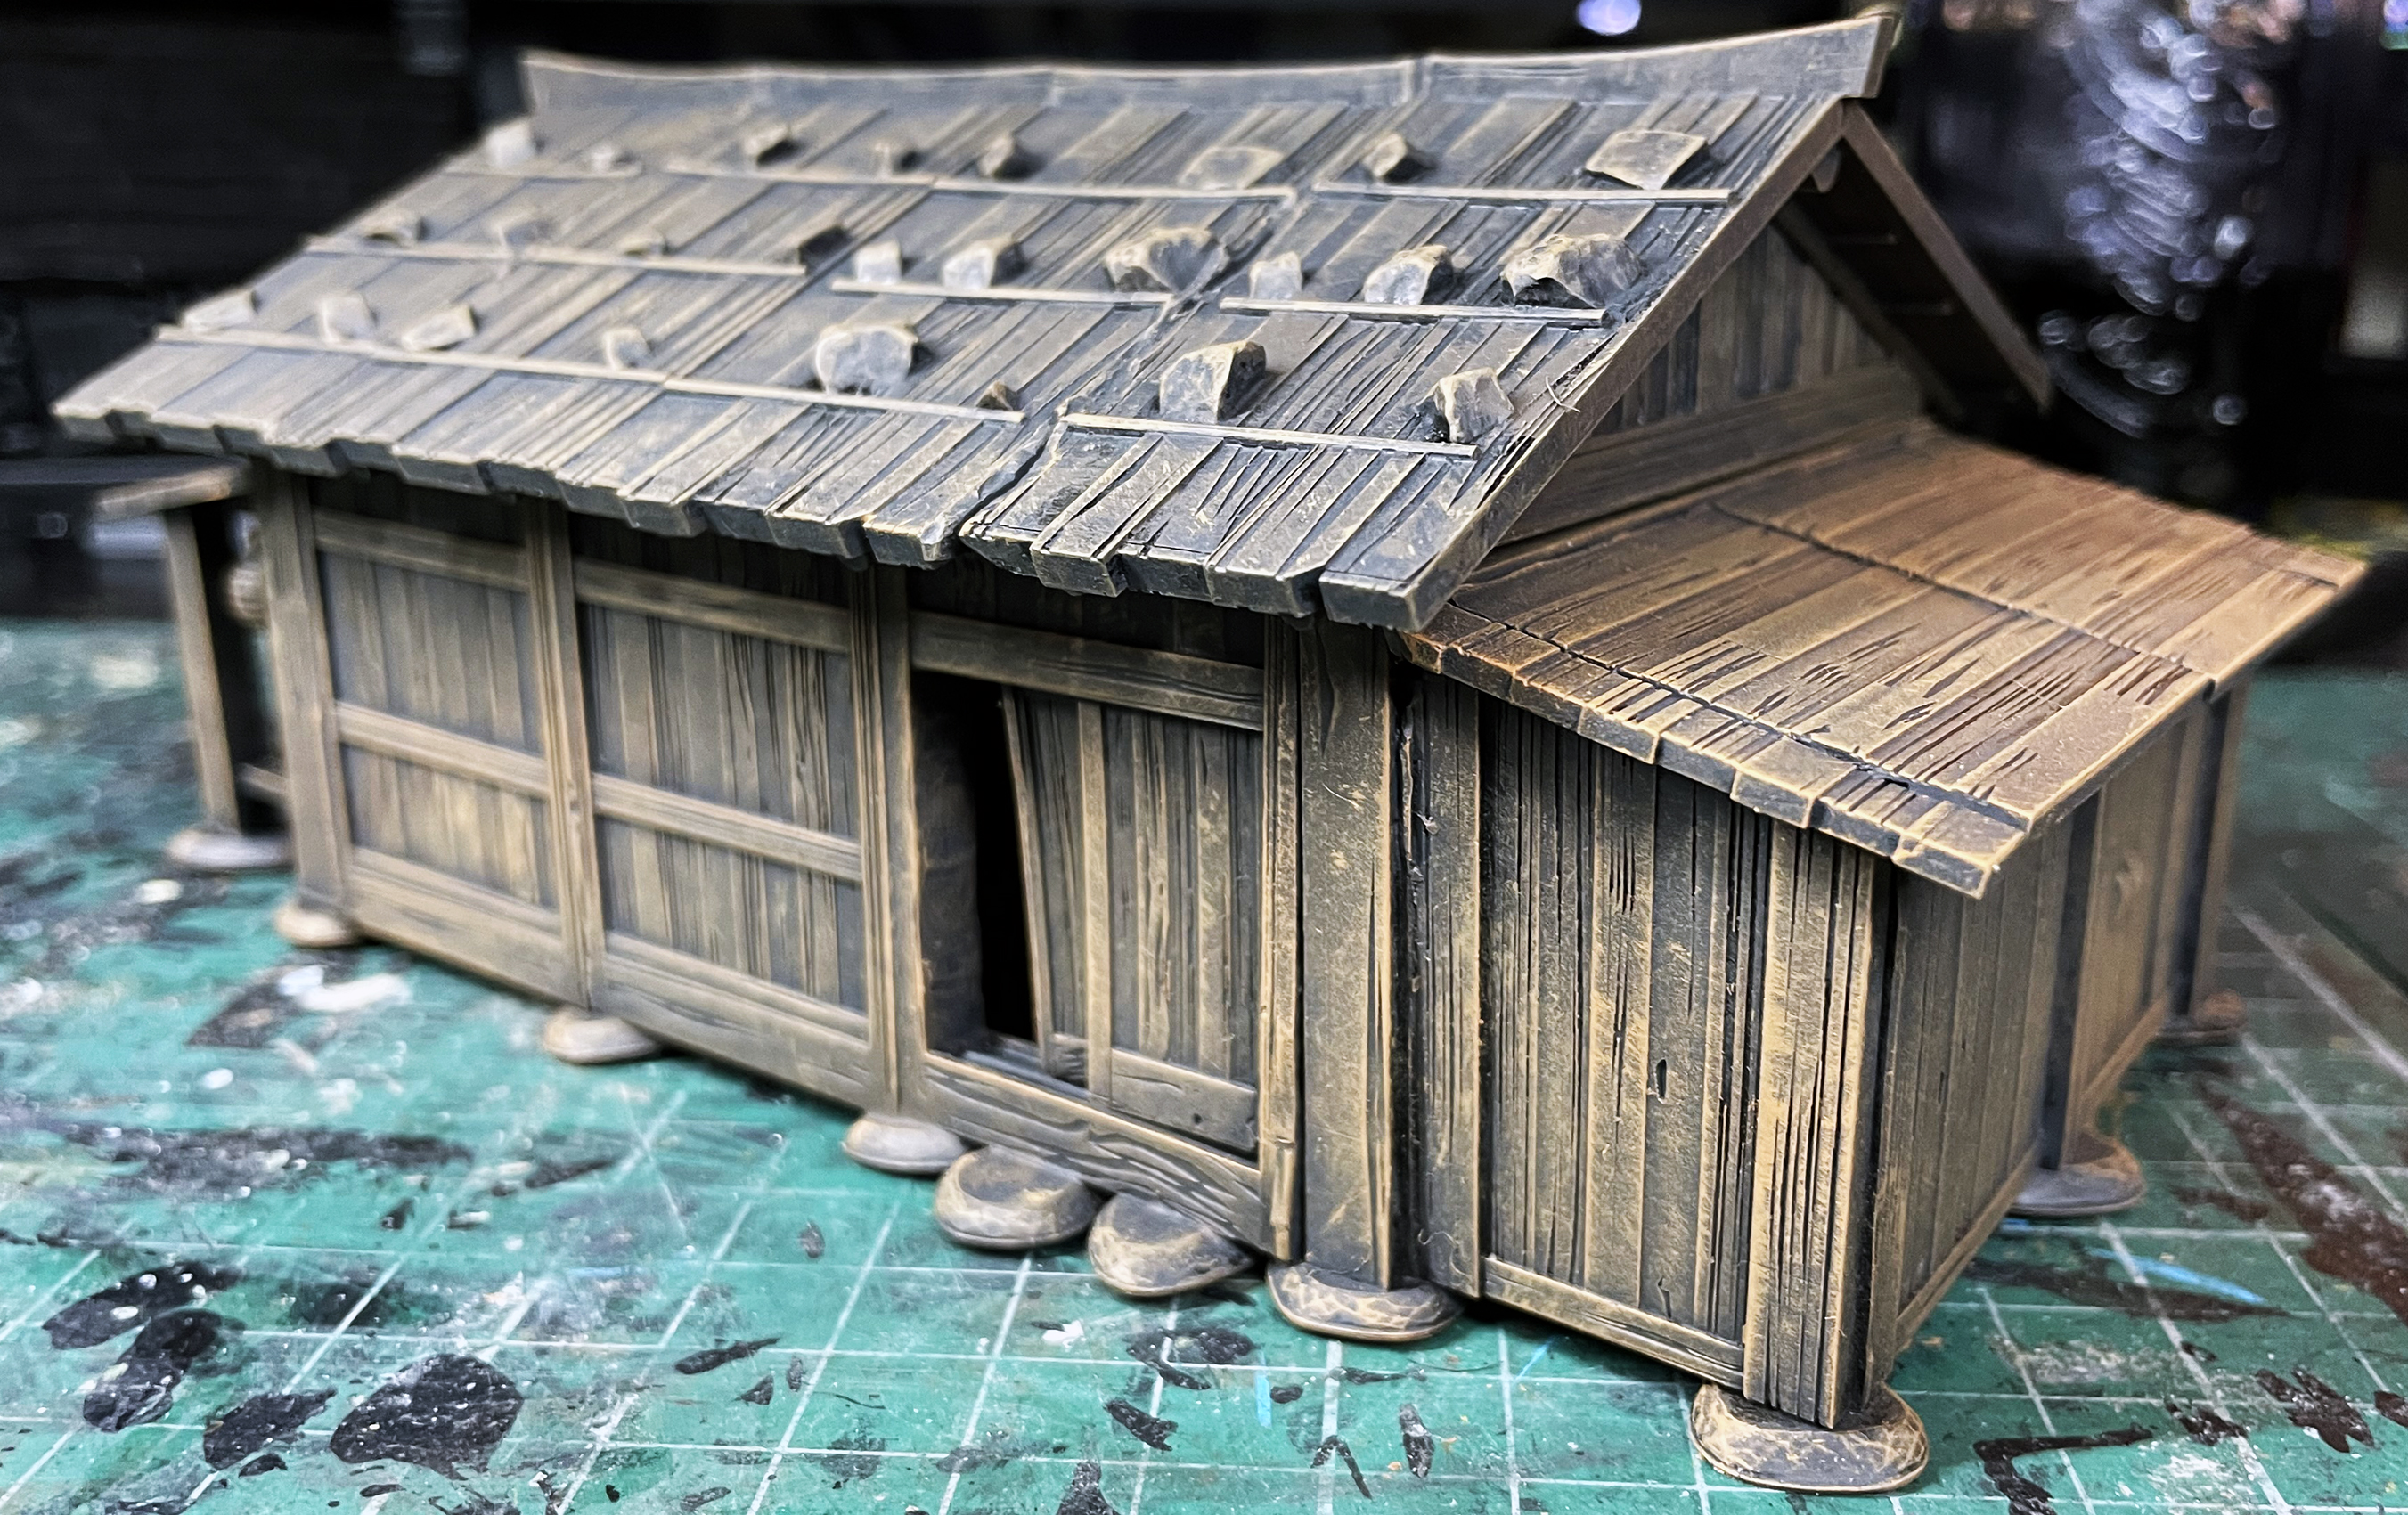
The next stage is done and drybrush of Vallejo Model Colour German Camo Beige to bring out the texture of the model and add that warm dried look
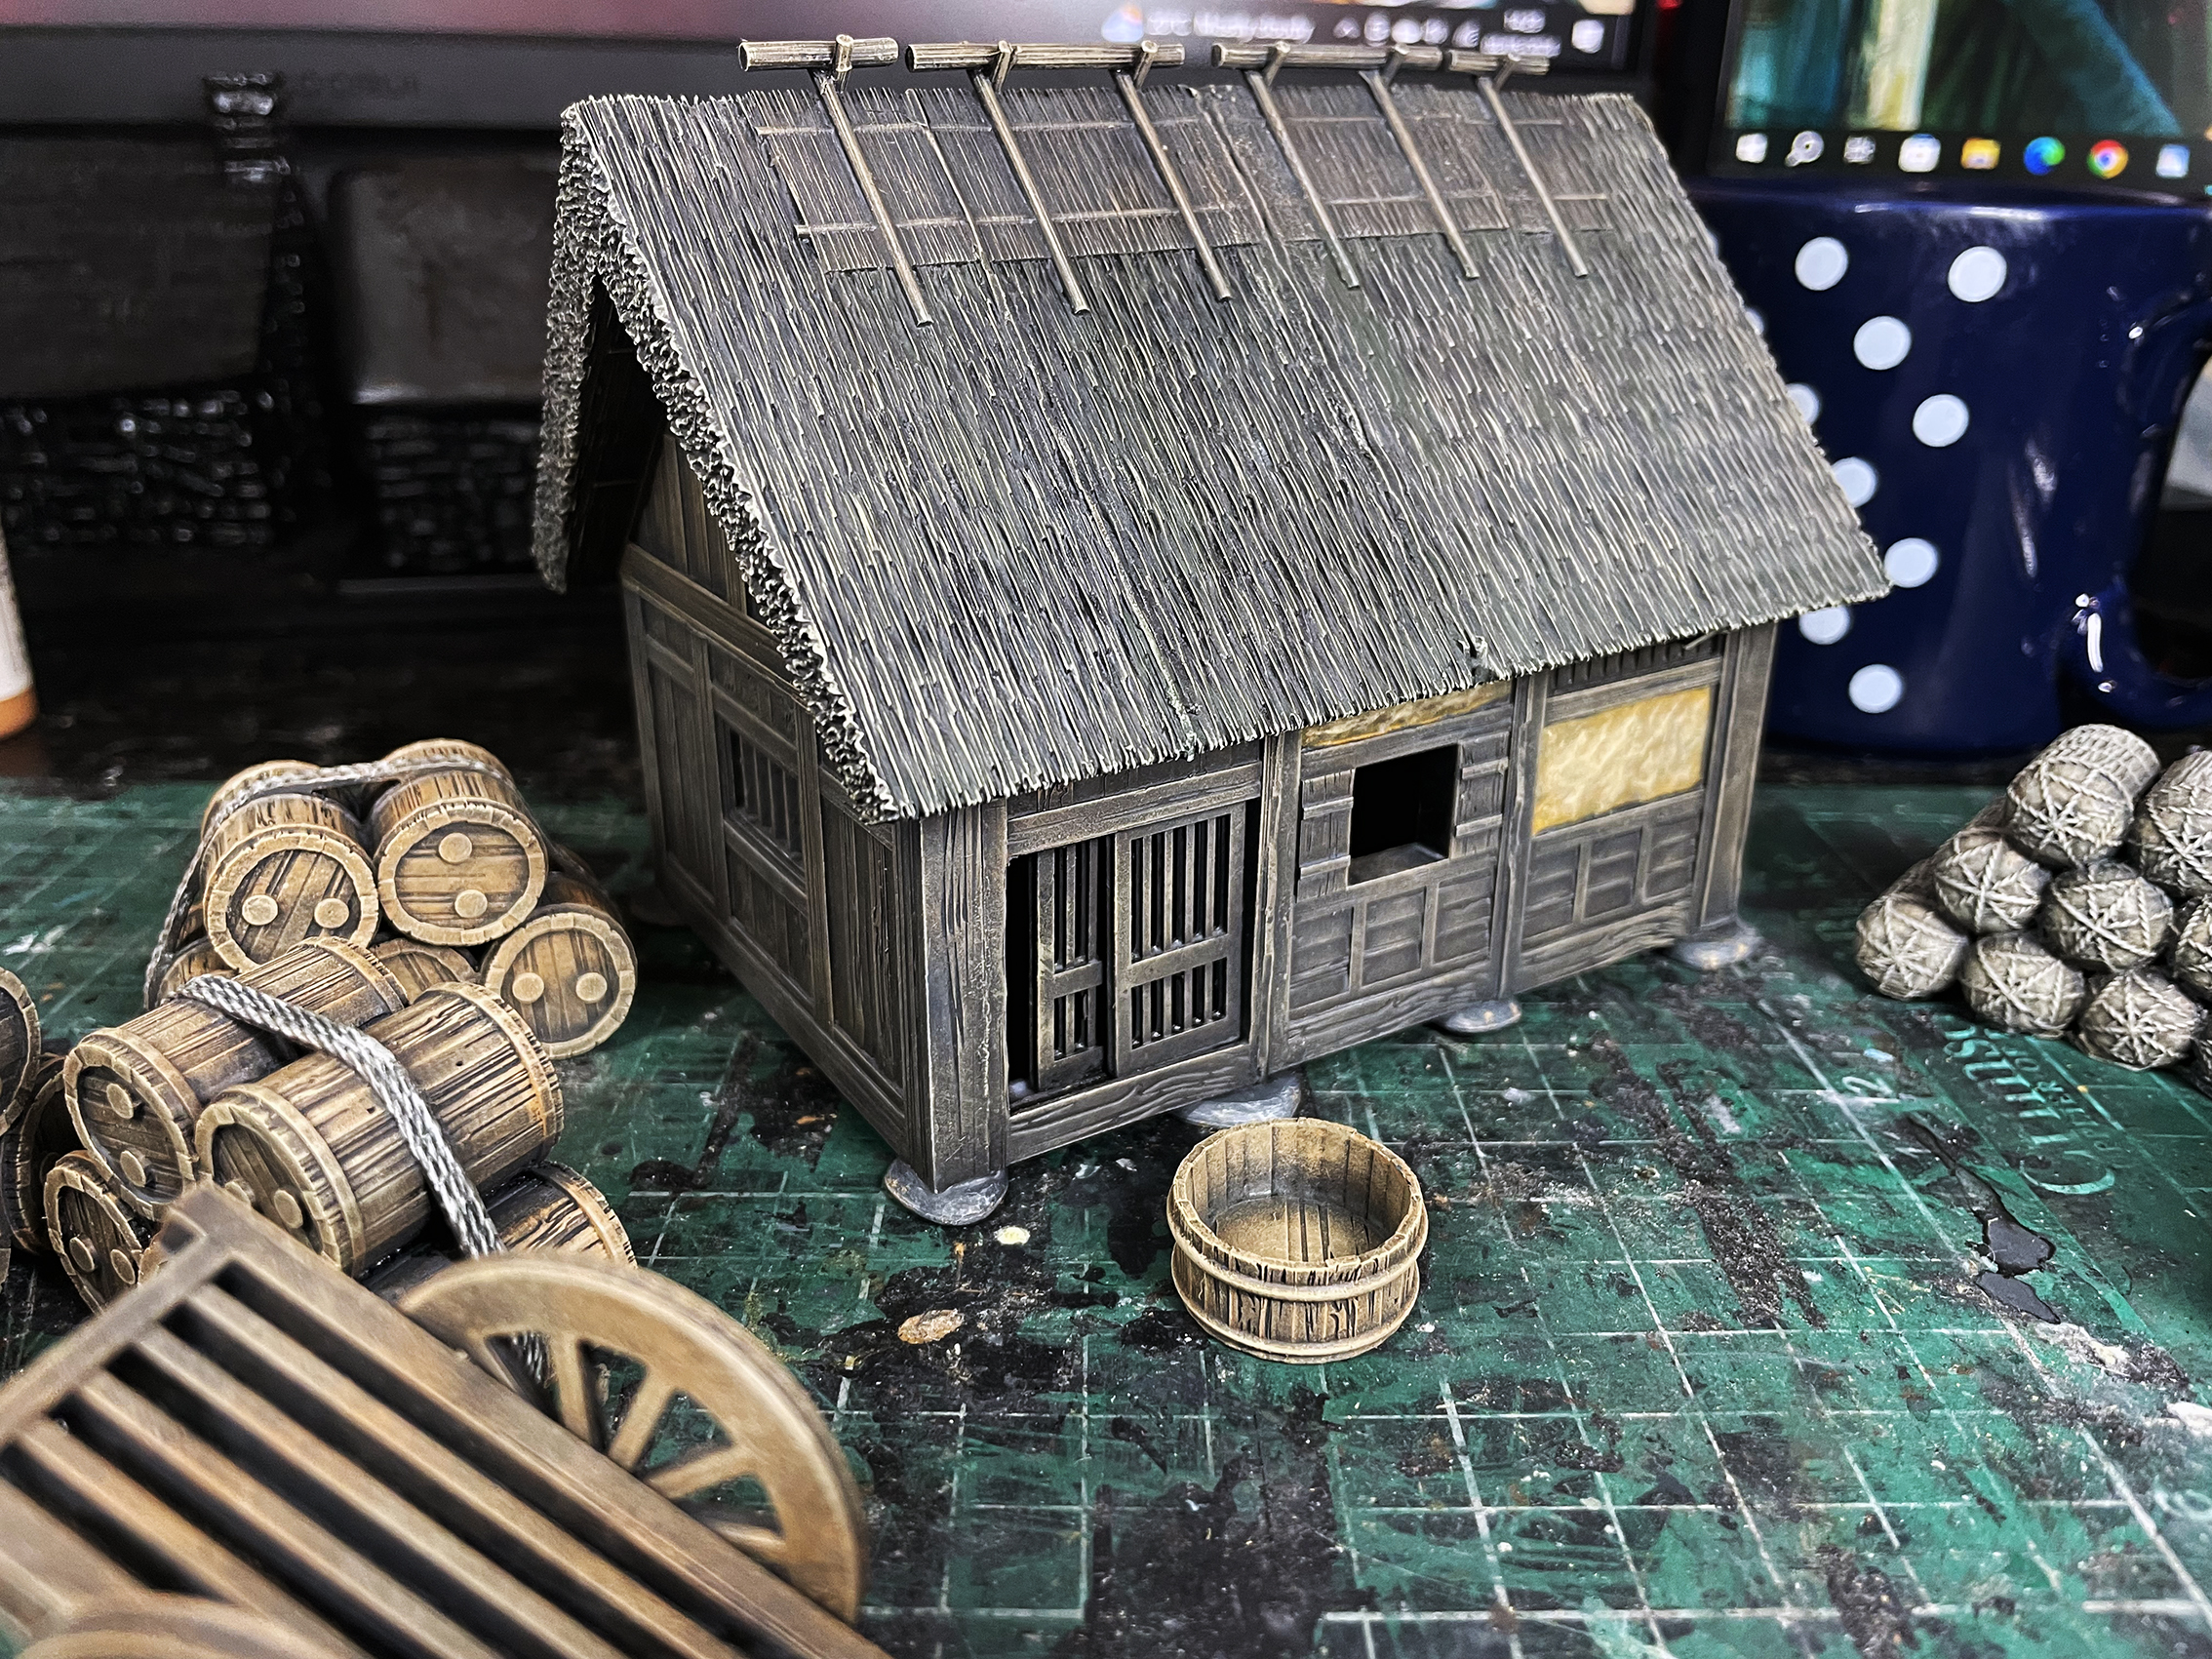
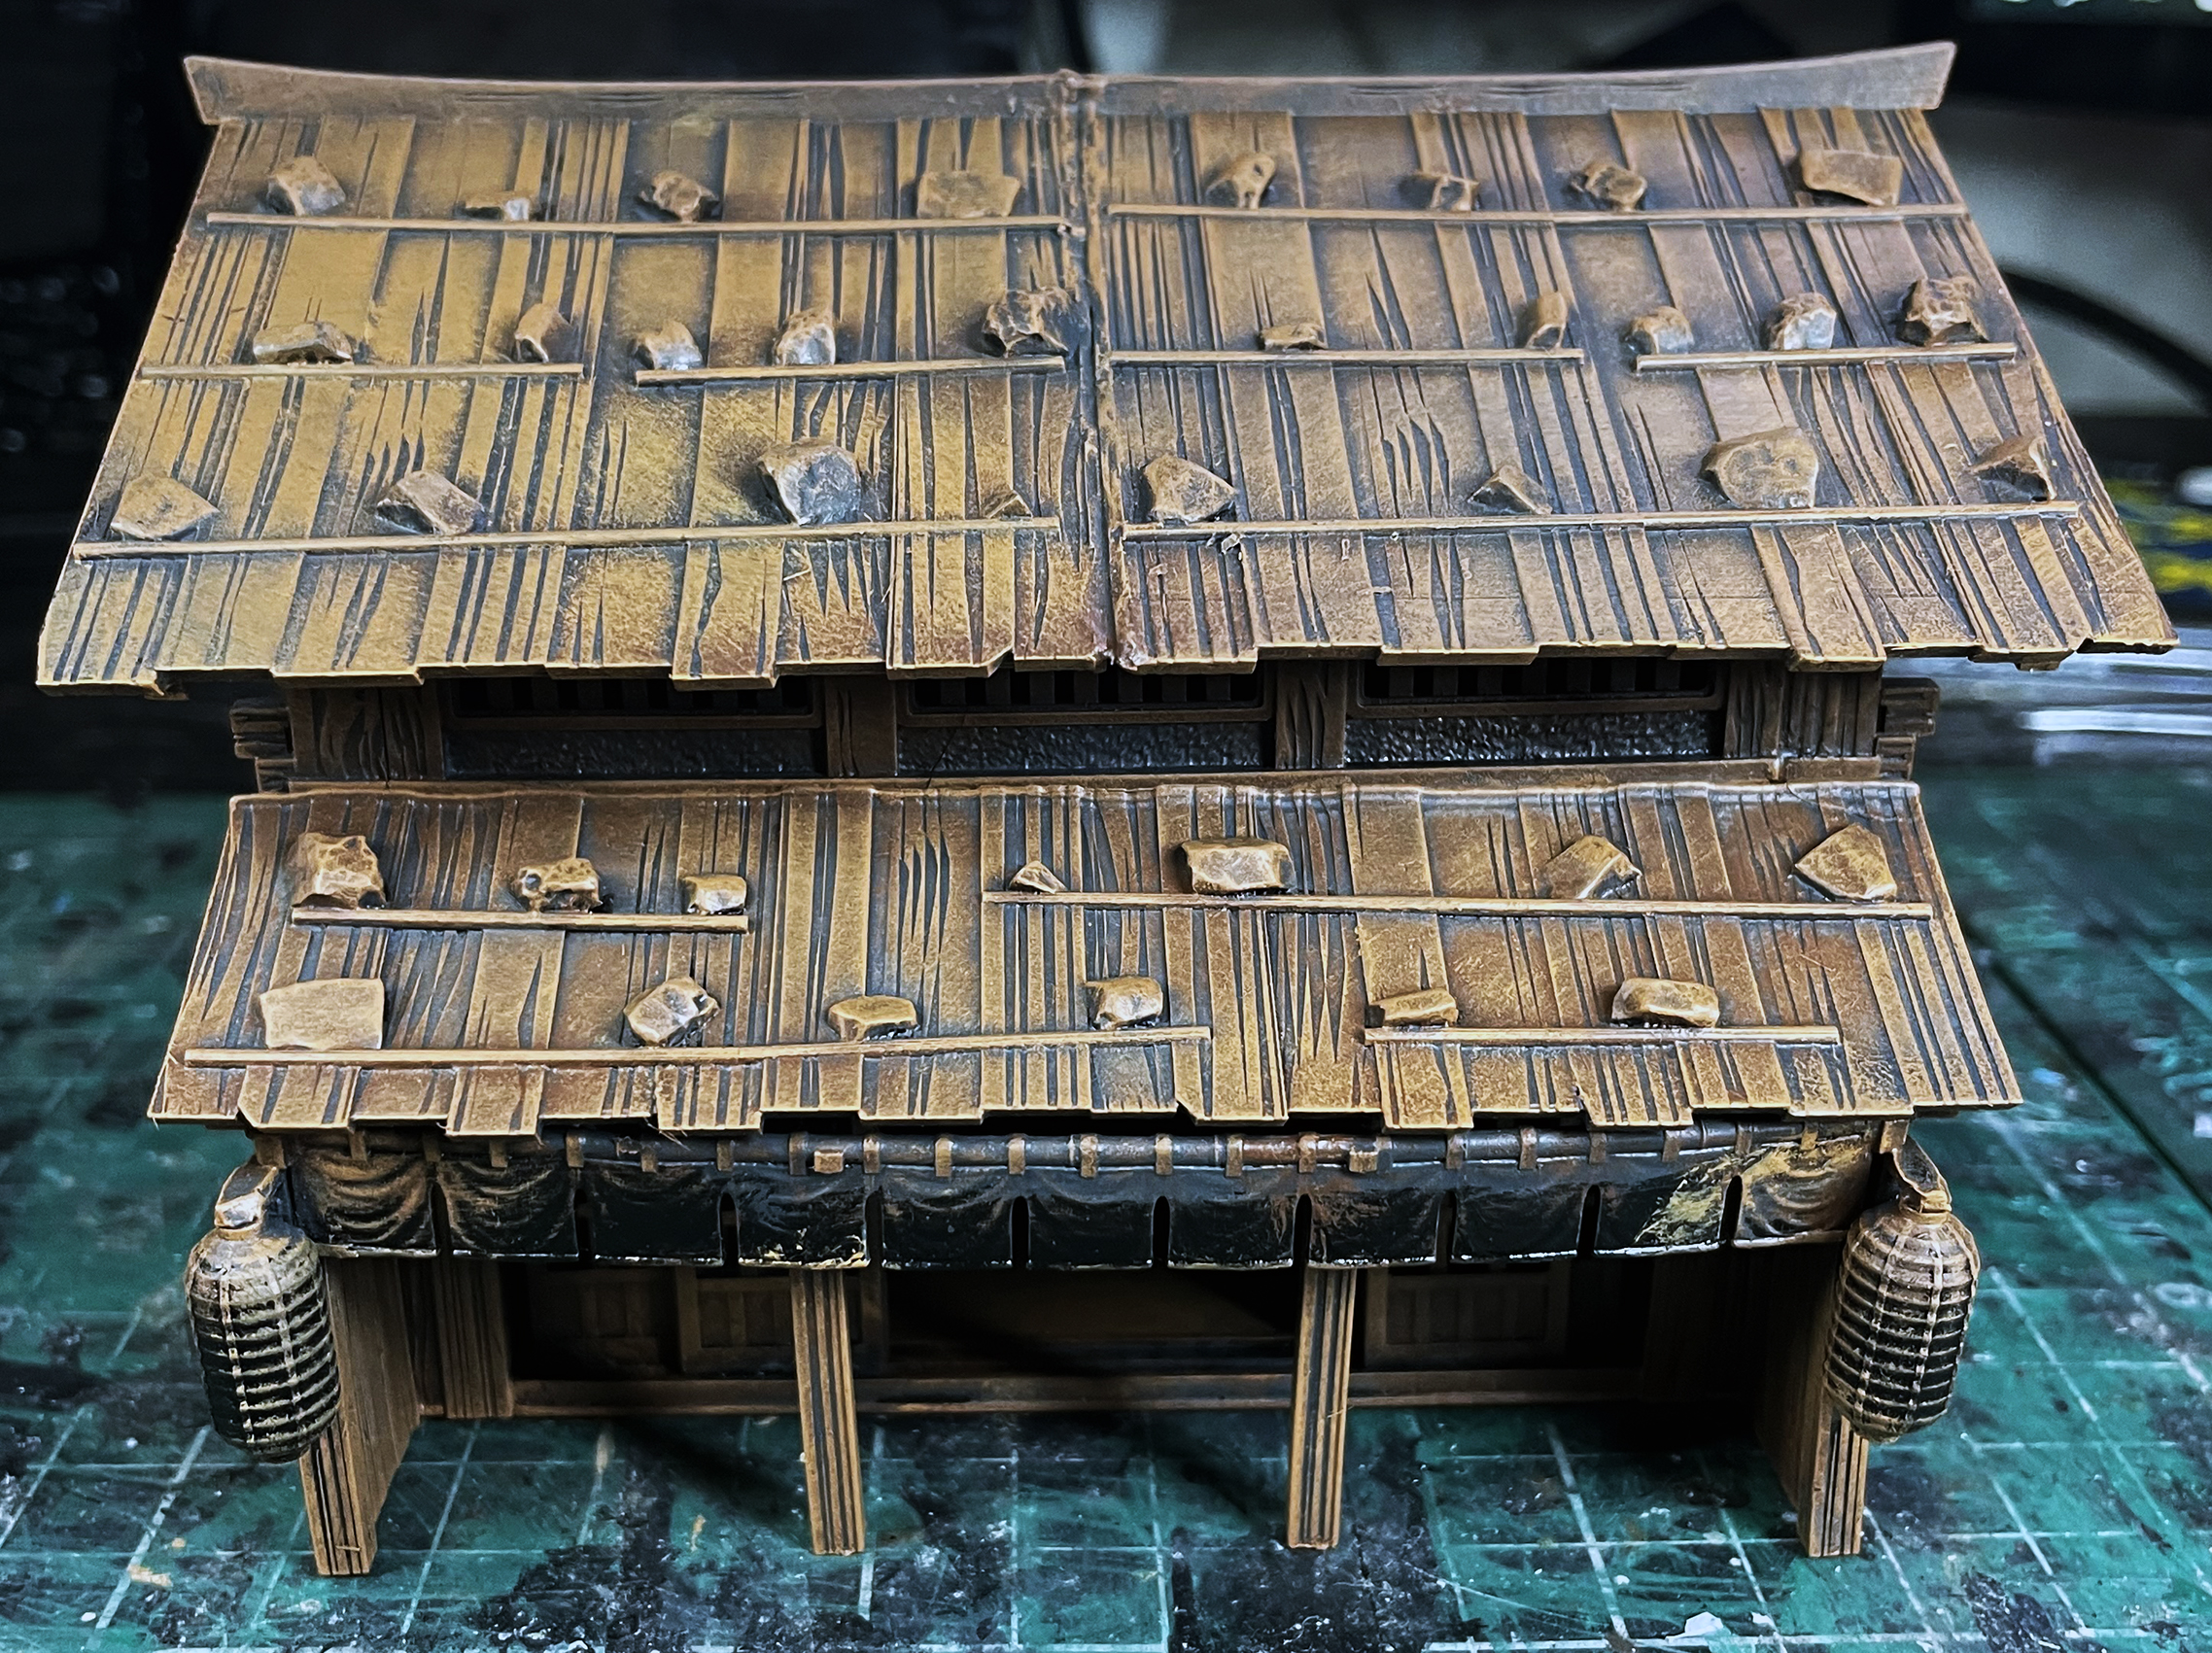
The top highlight has been done before adding colour to the stones. I used Vallejo Model Colour Iraqui Sand is a light dusting drybrush to bring out all the texture.

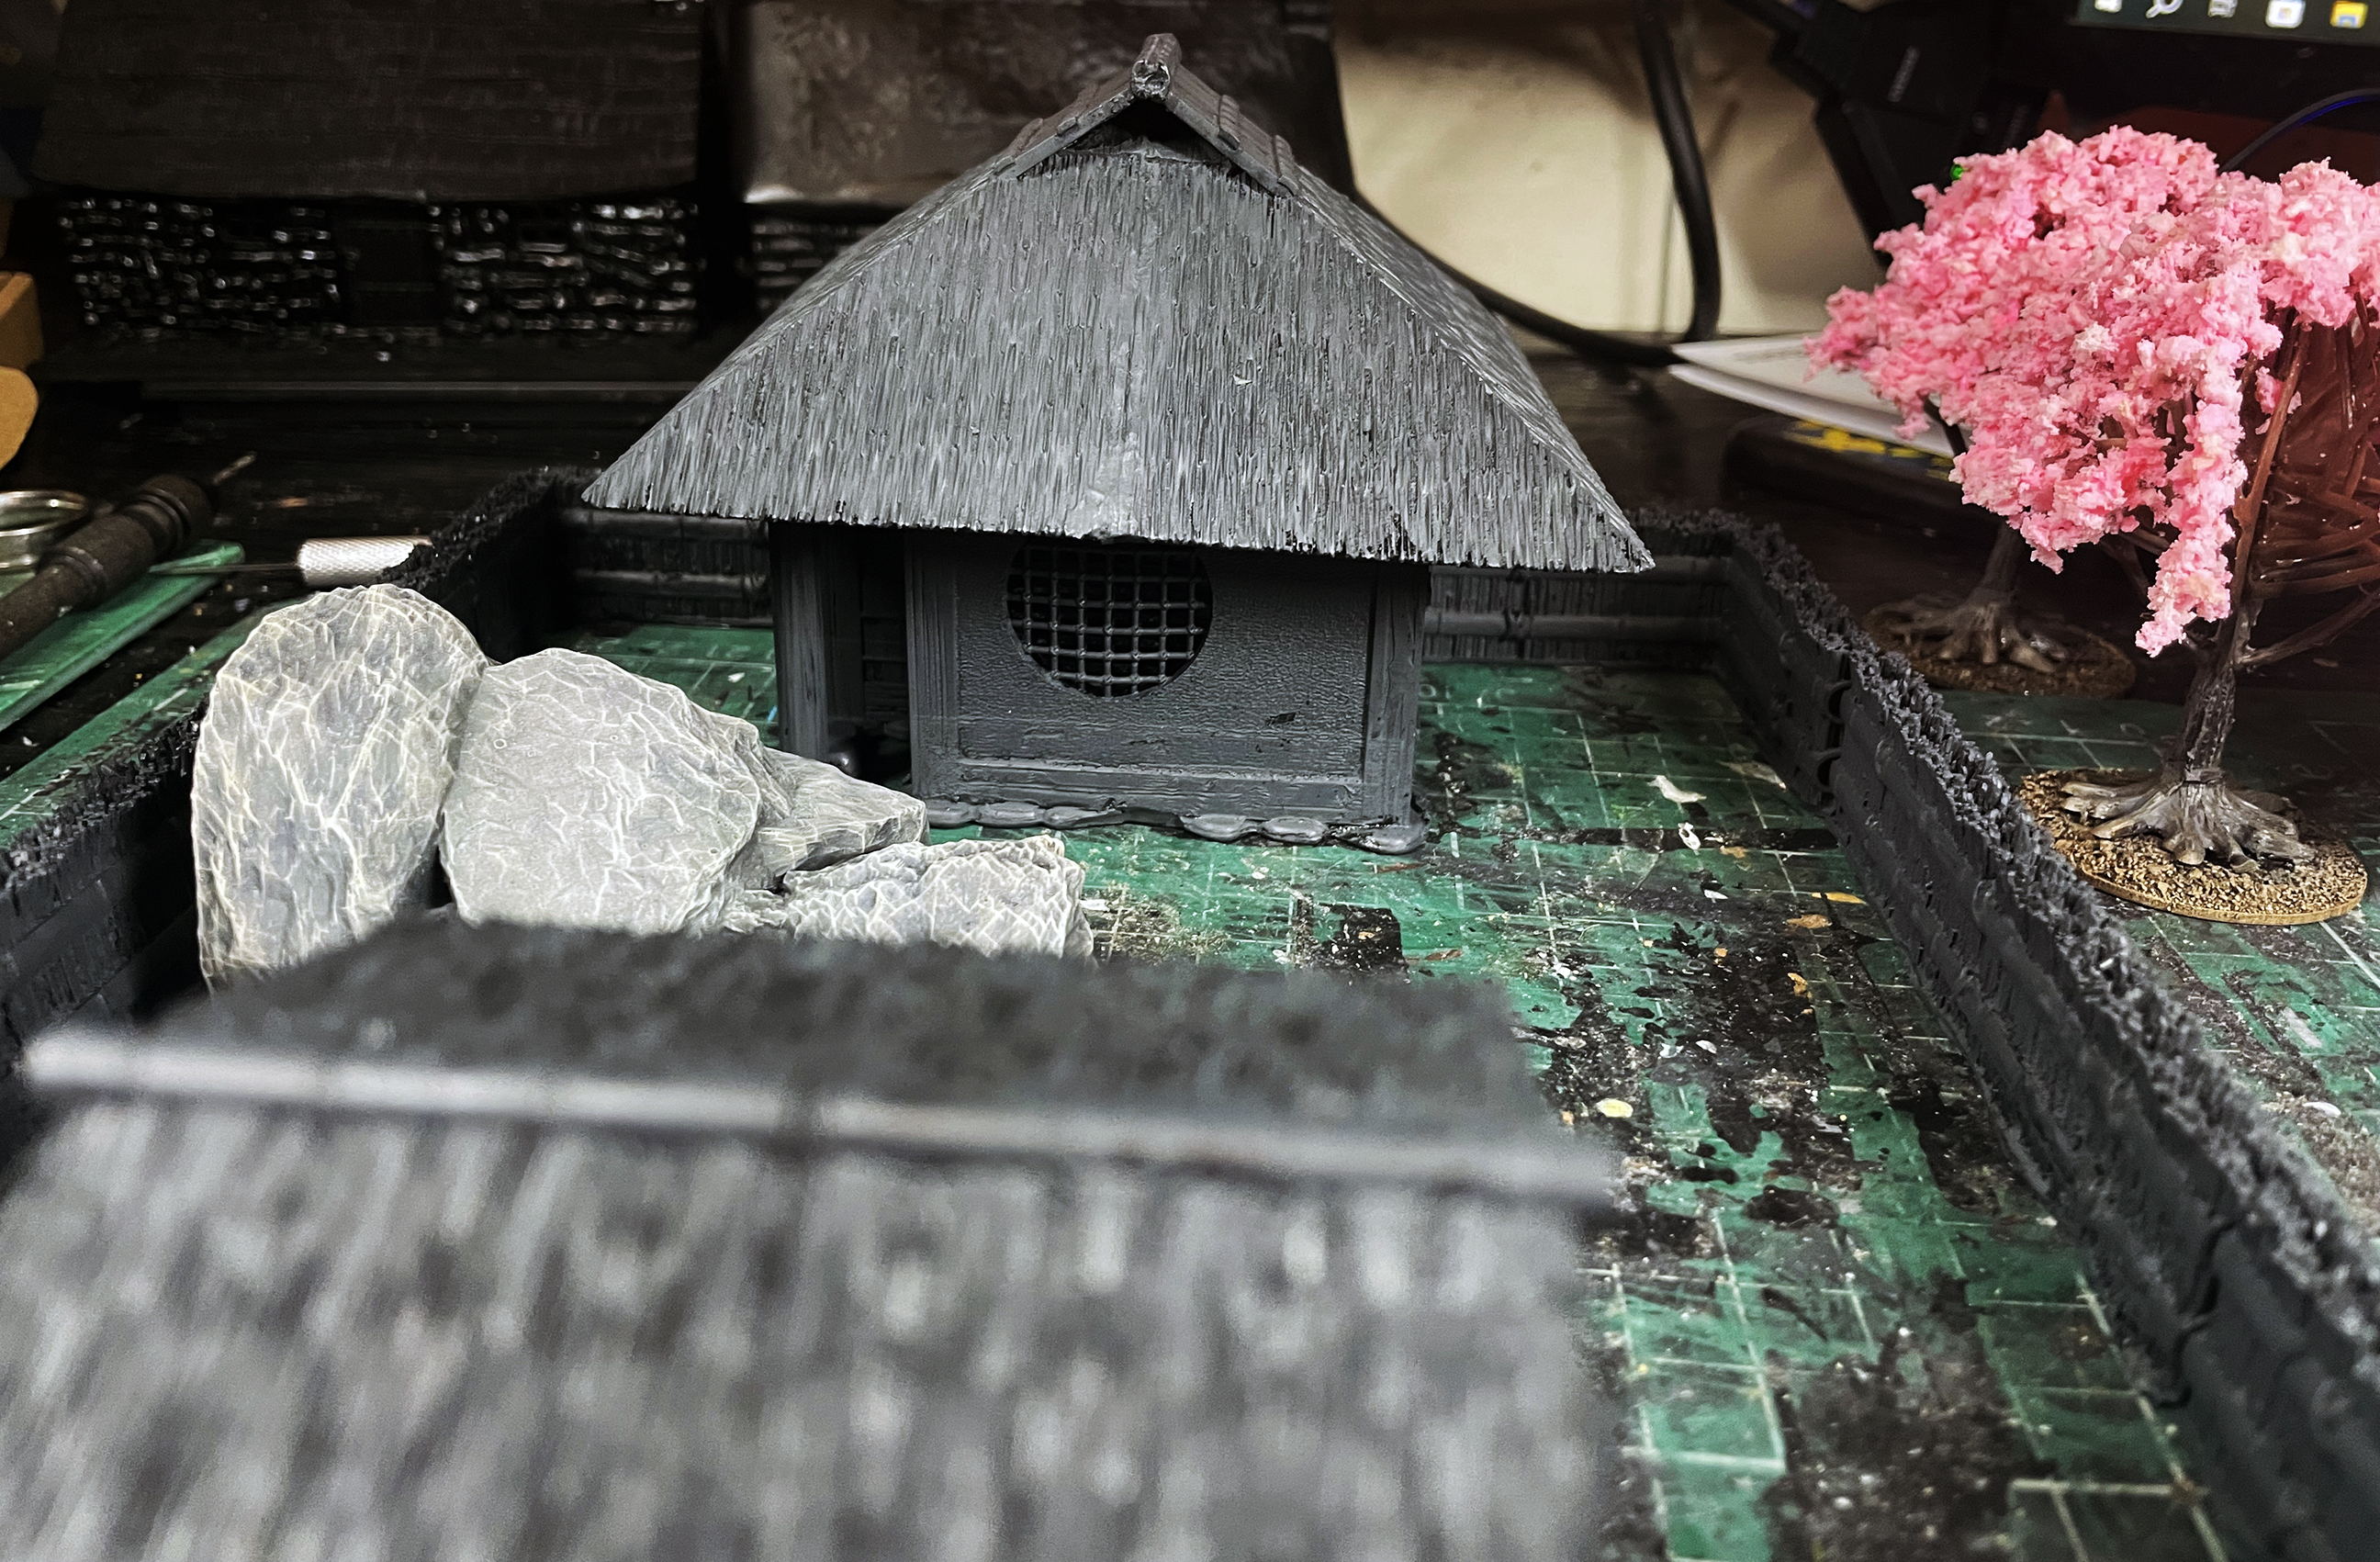
The next stage of painting my fourth Japanese building for Clash of Katanas and Test of Honour is done with the stones/rock painted with a thin coat of Vallejo Model Colour Basalt Grey and then a light drybrush of VMC Silvergrey.
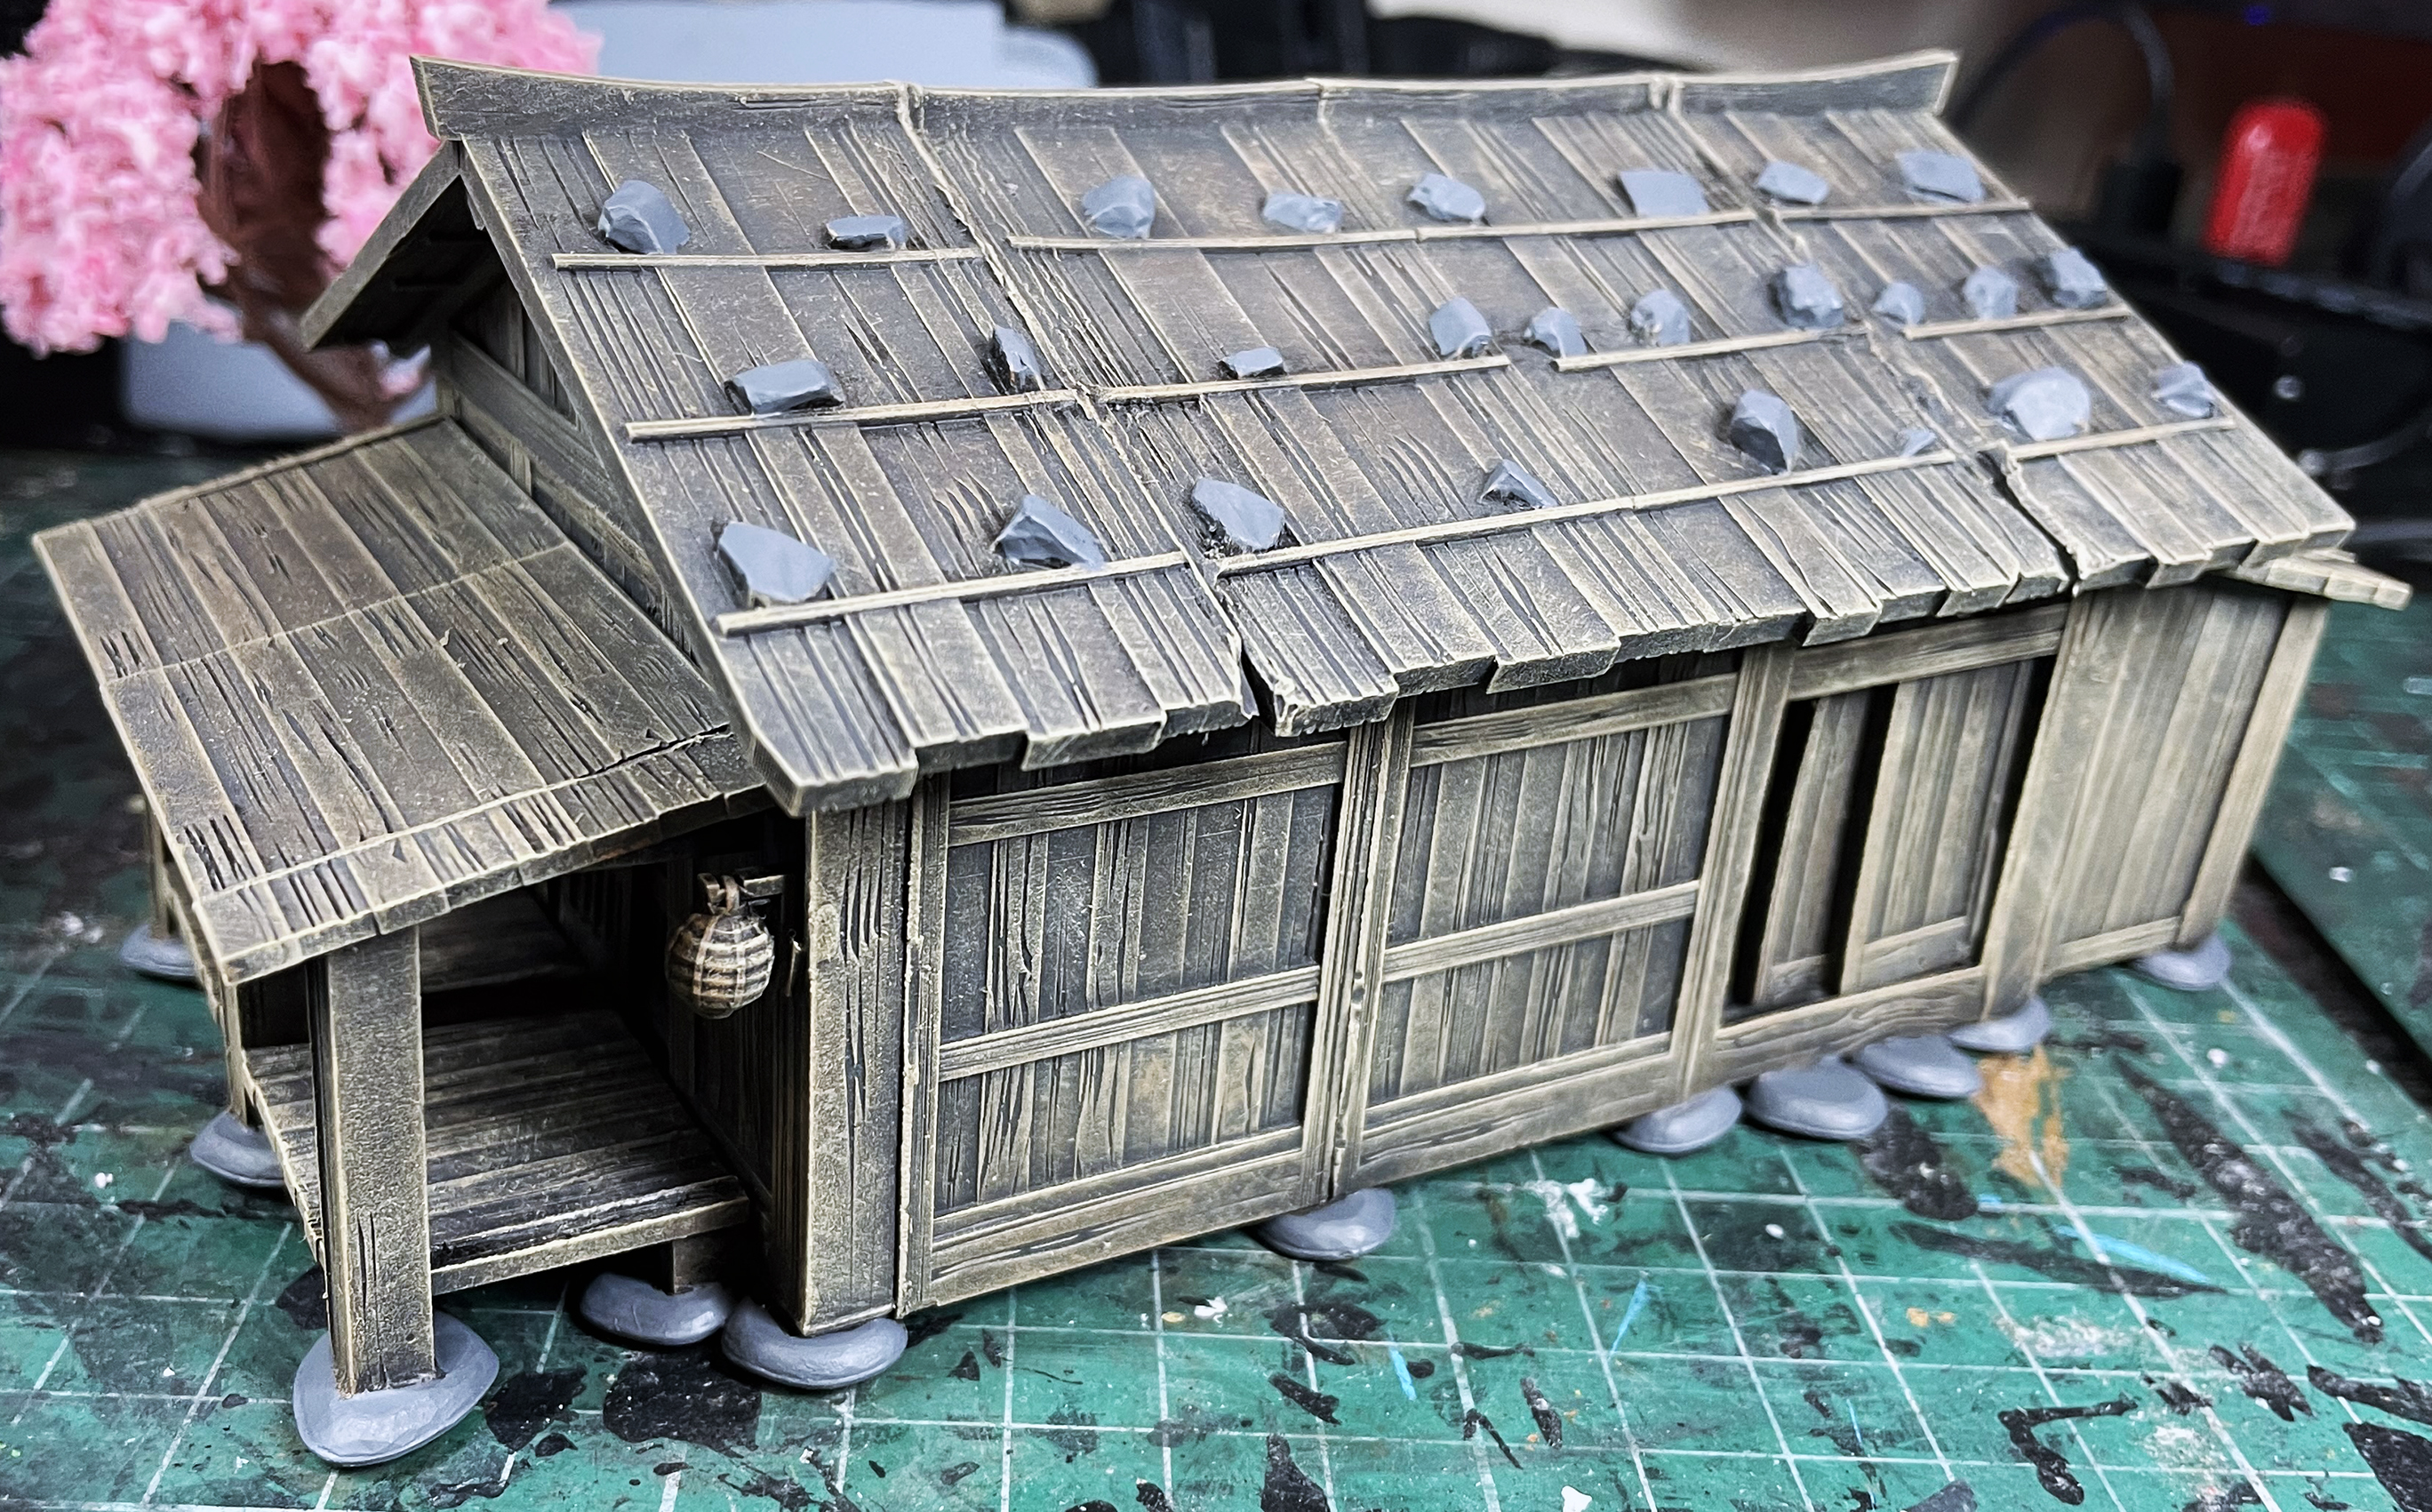
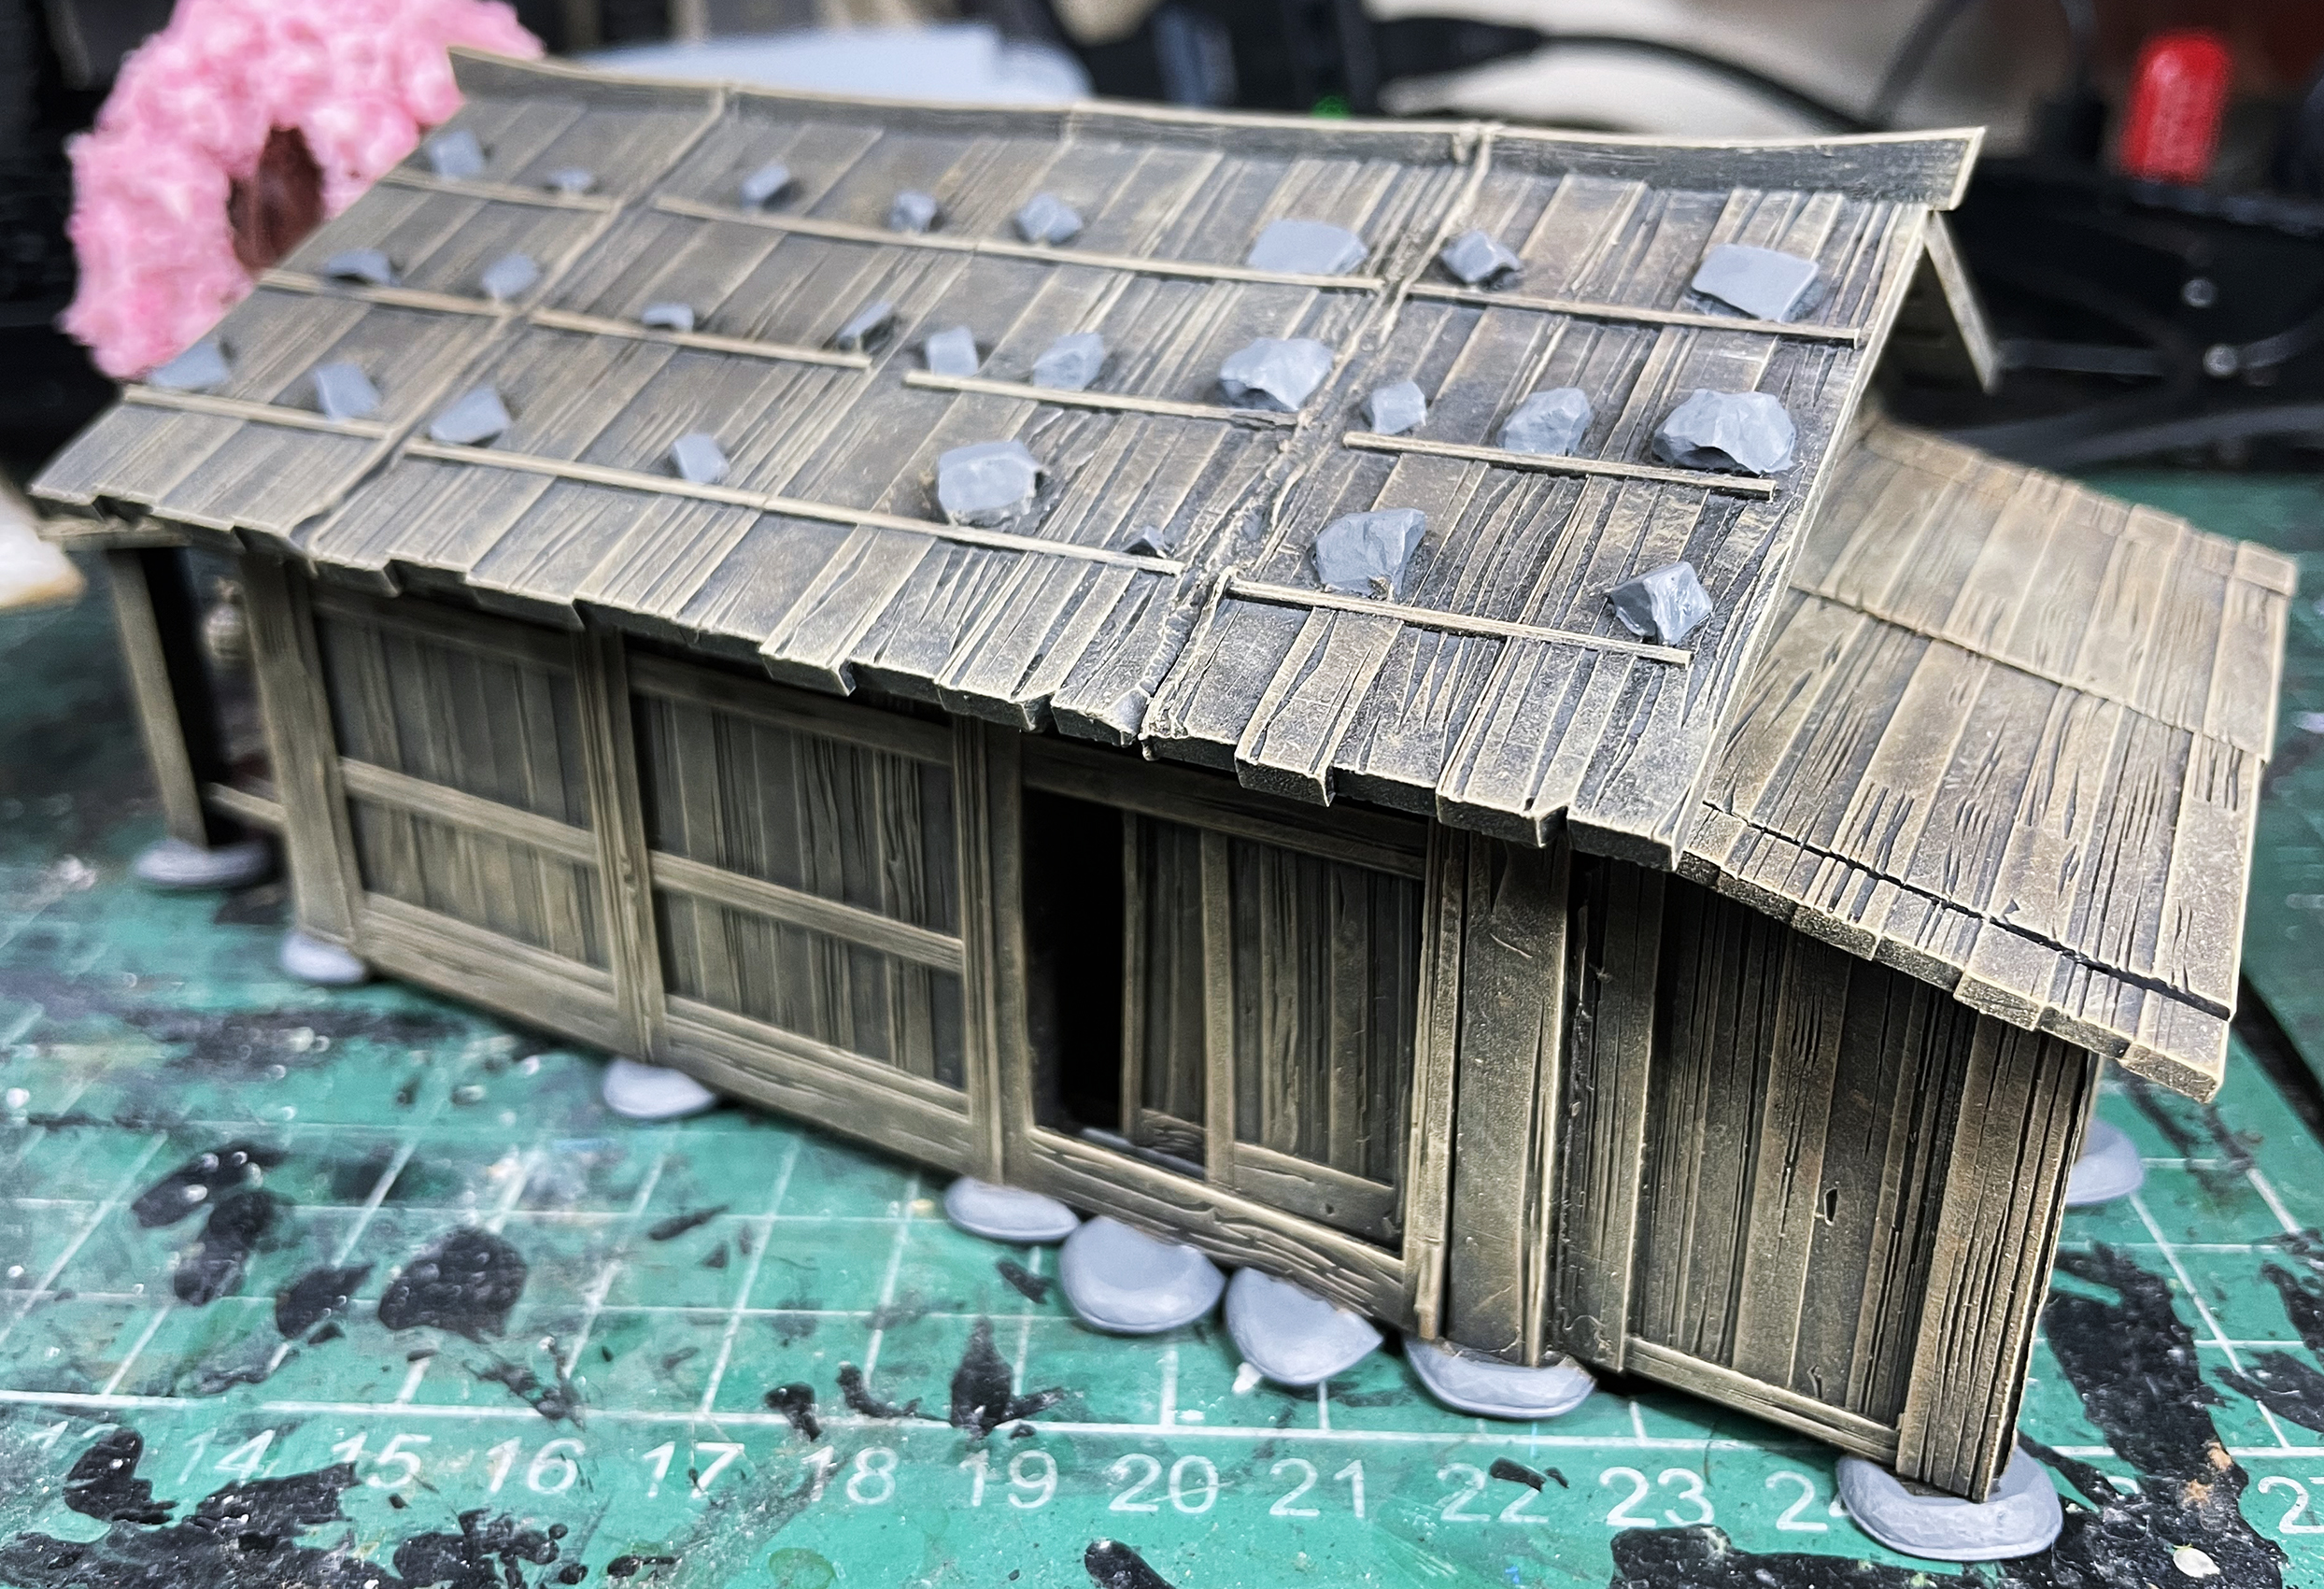

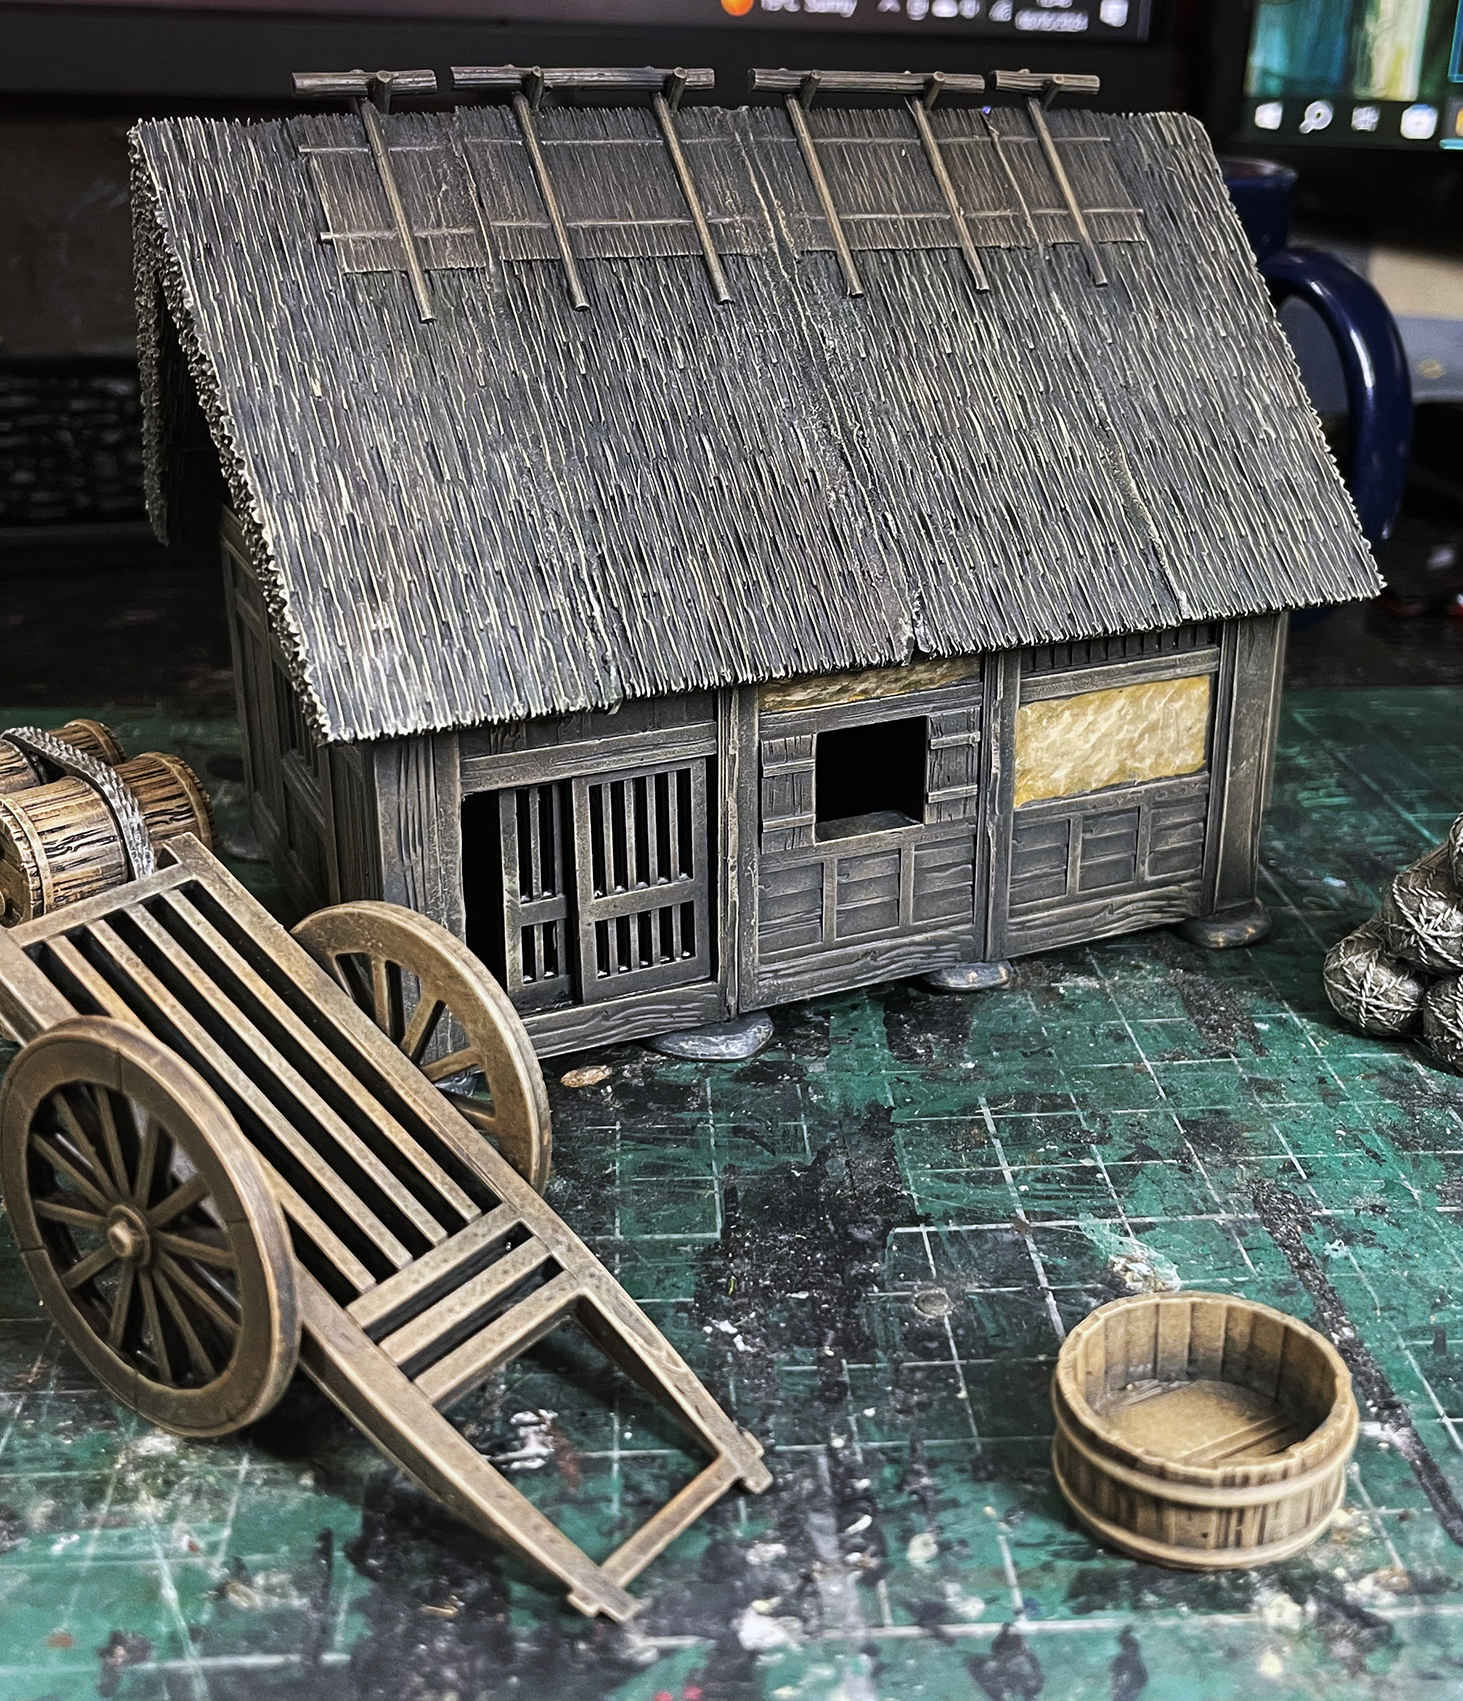
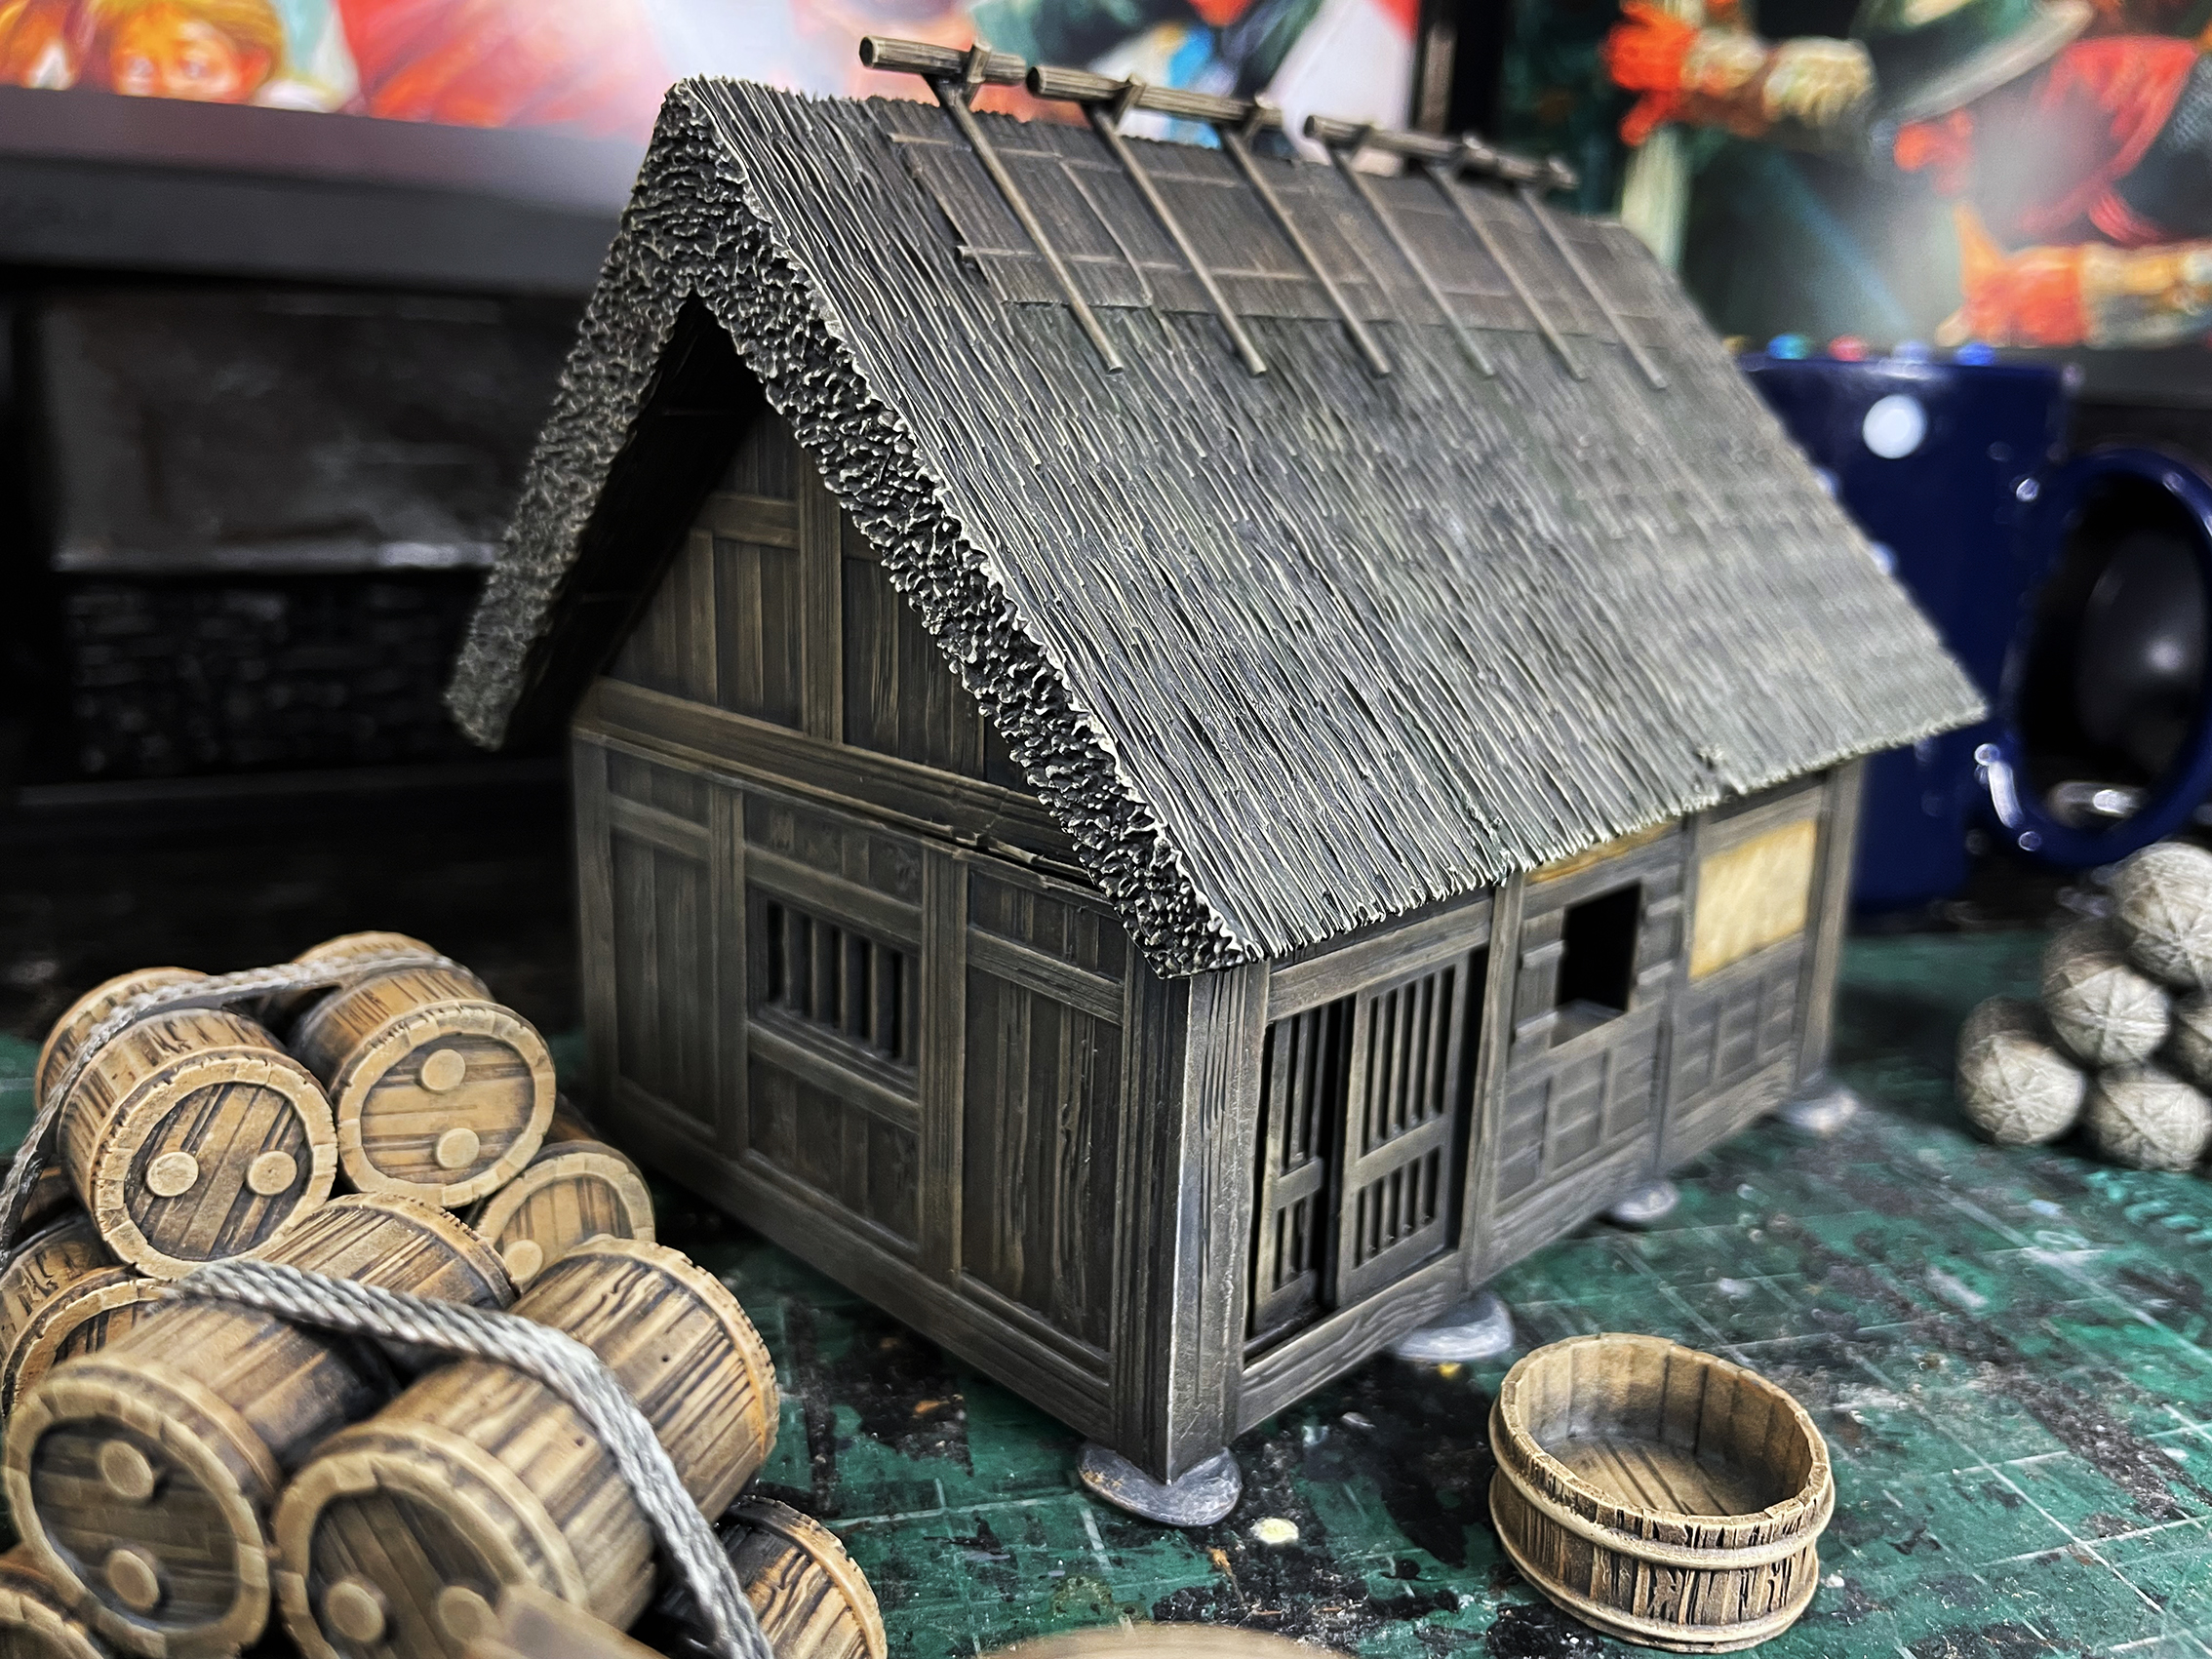
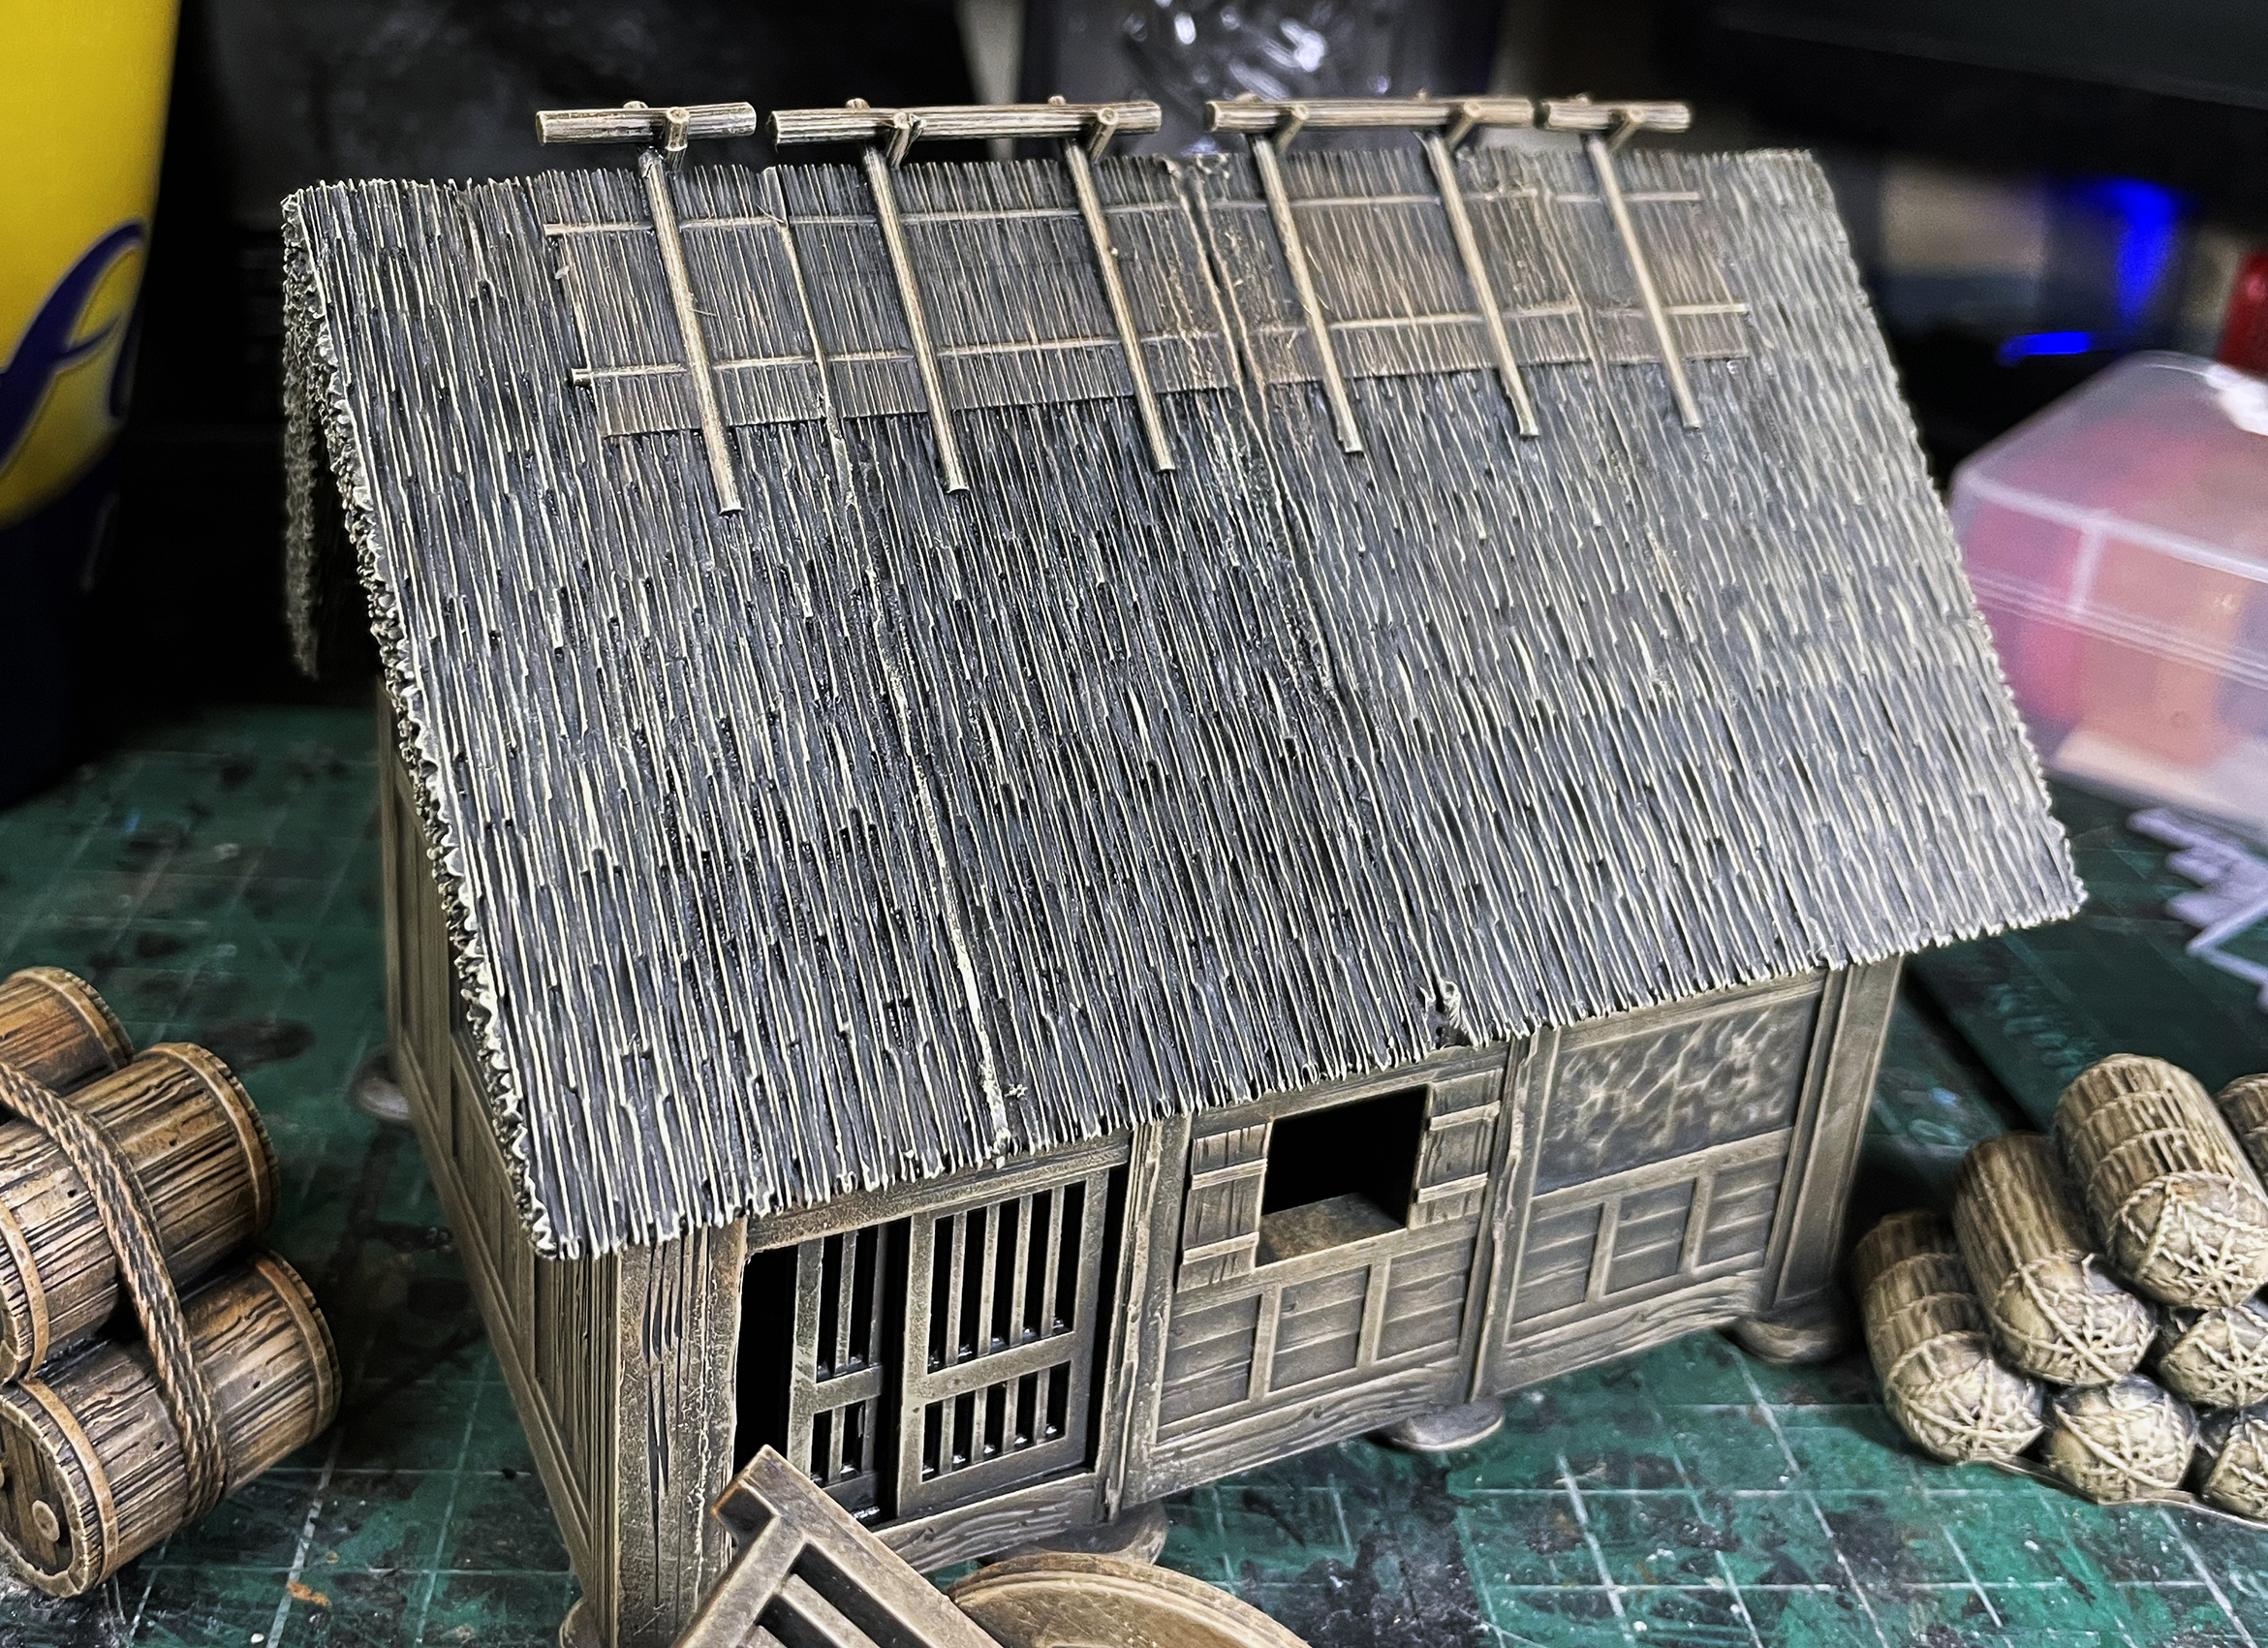
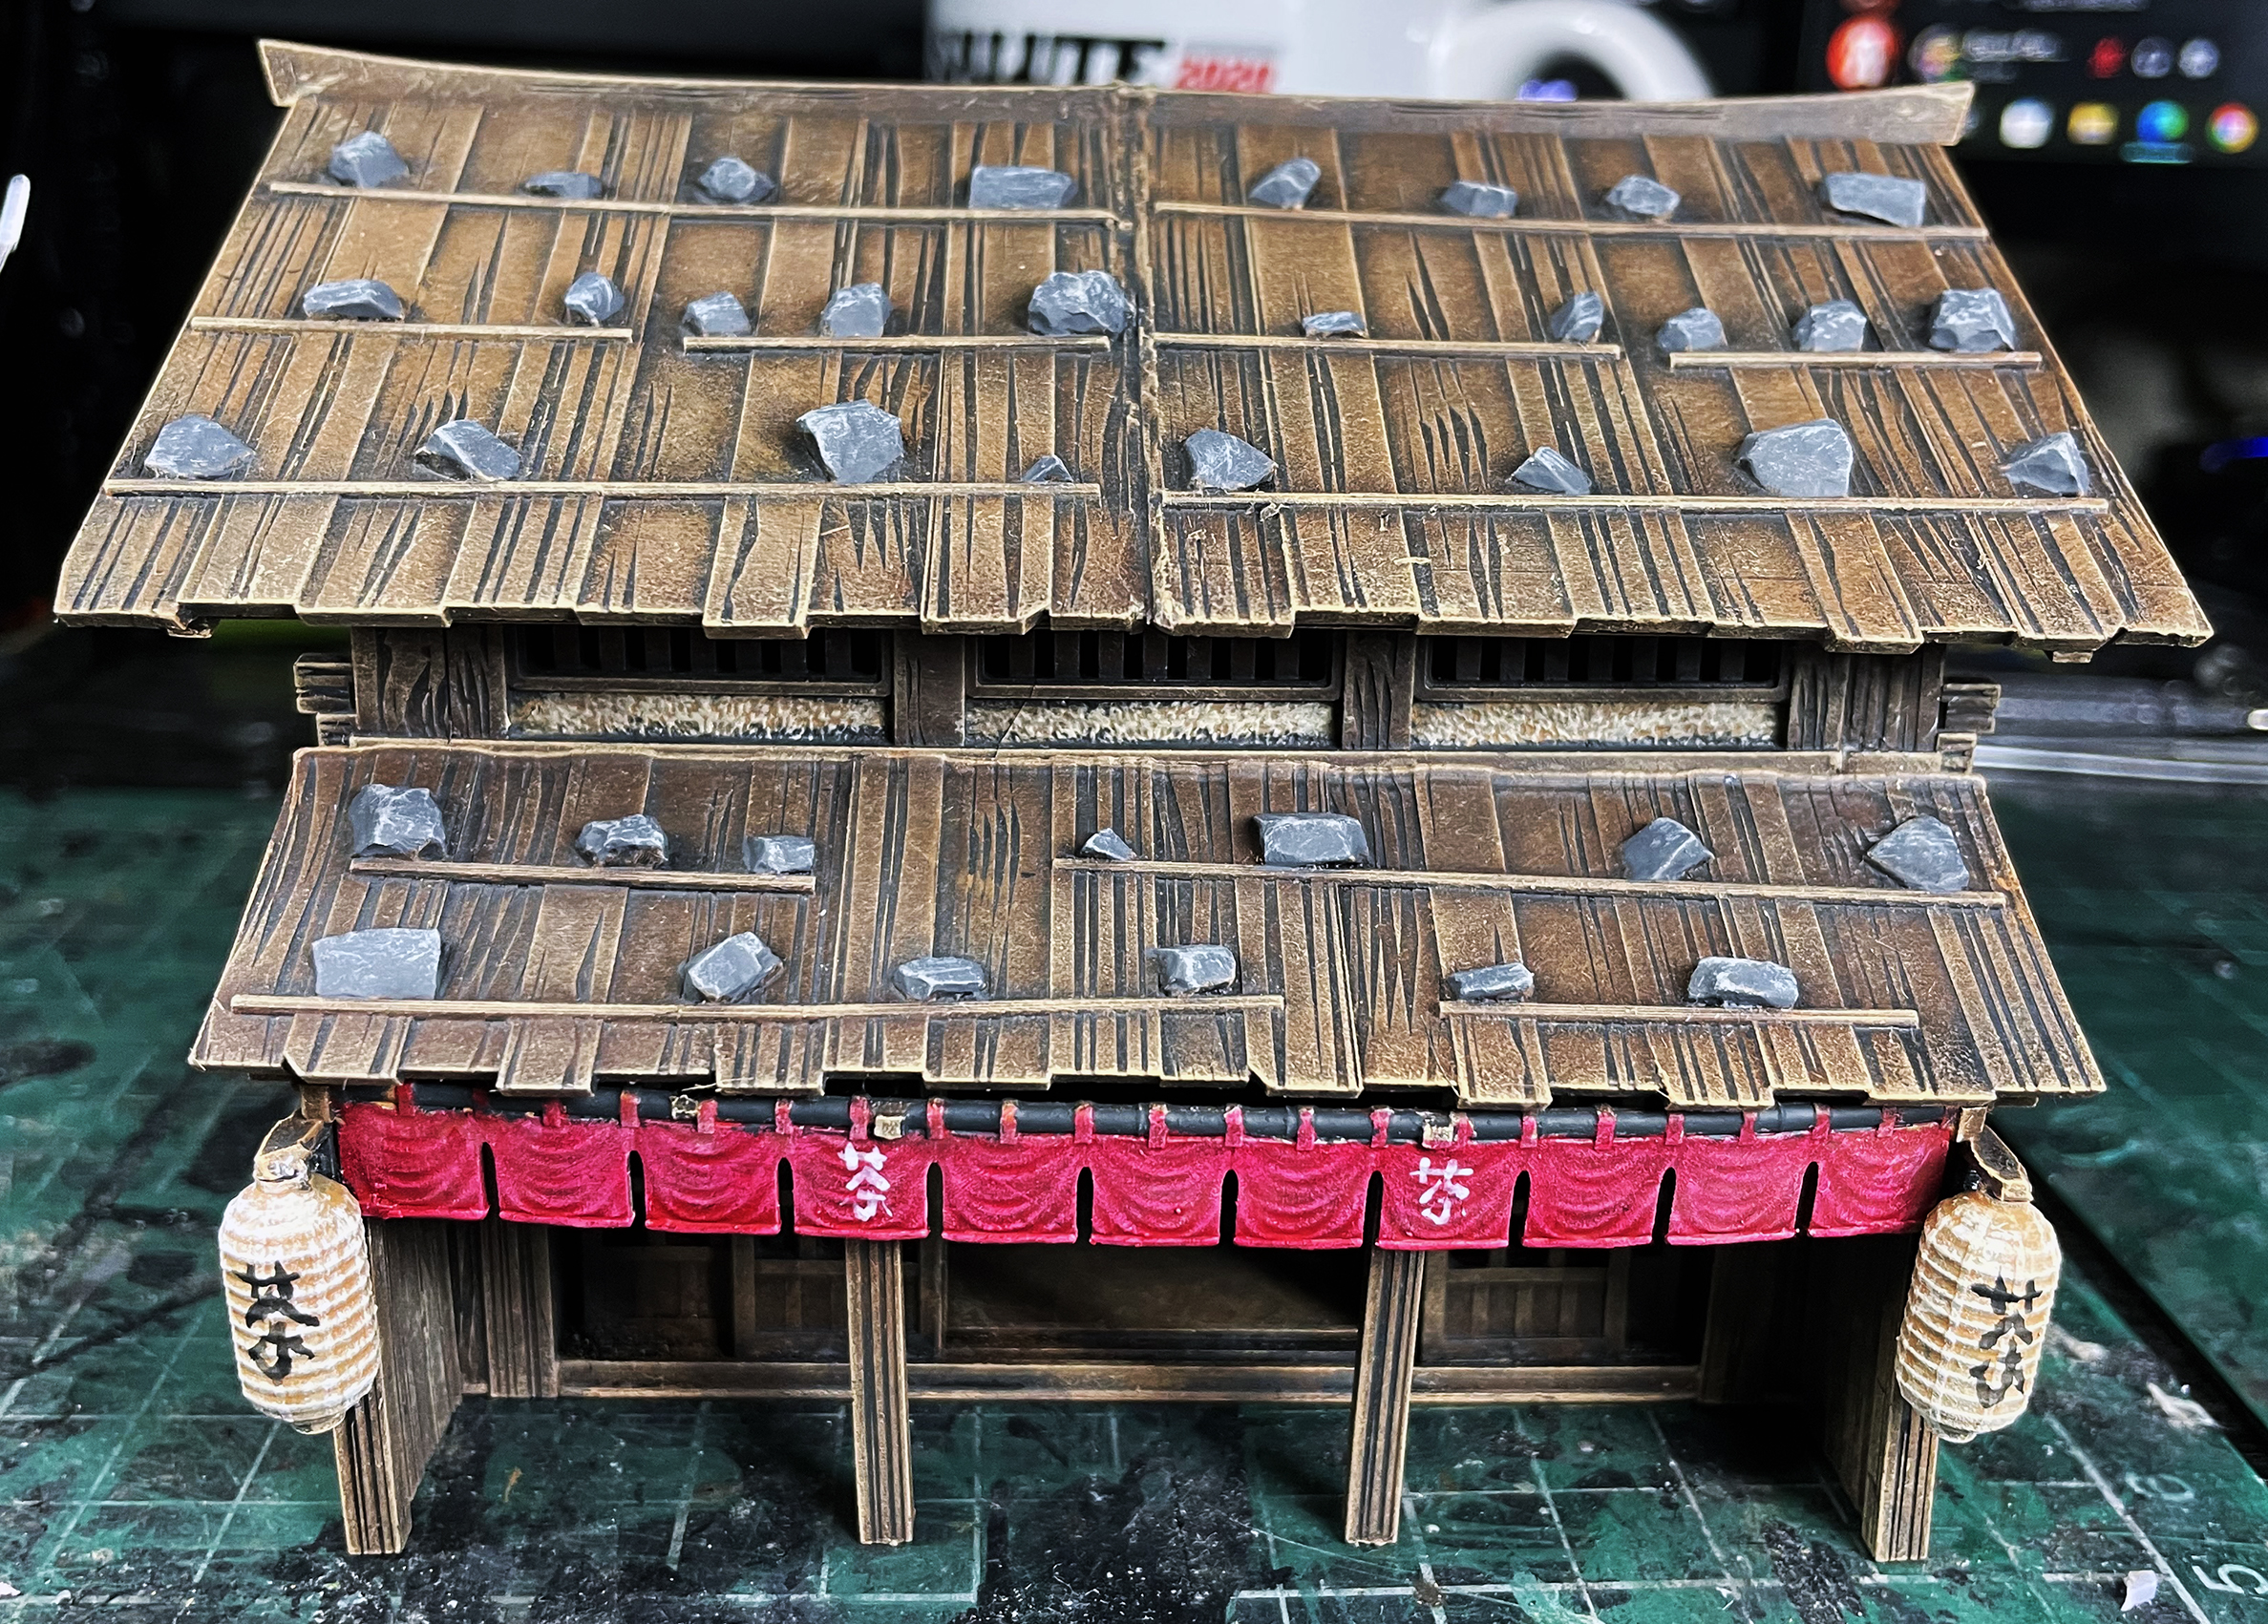
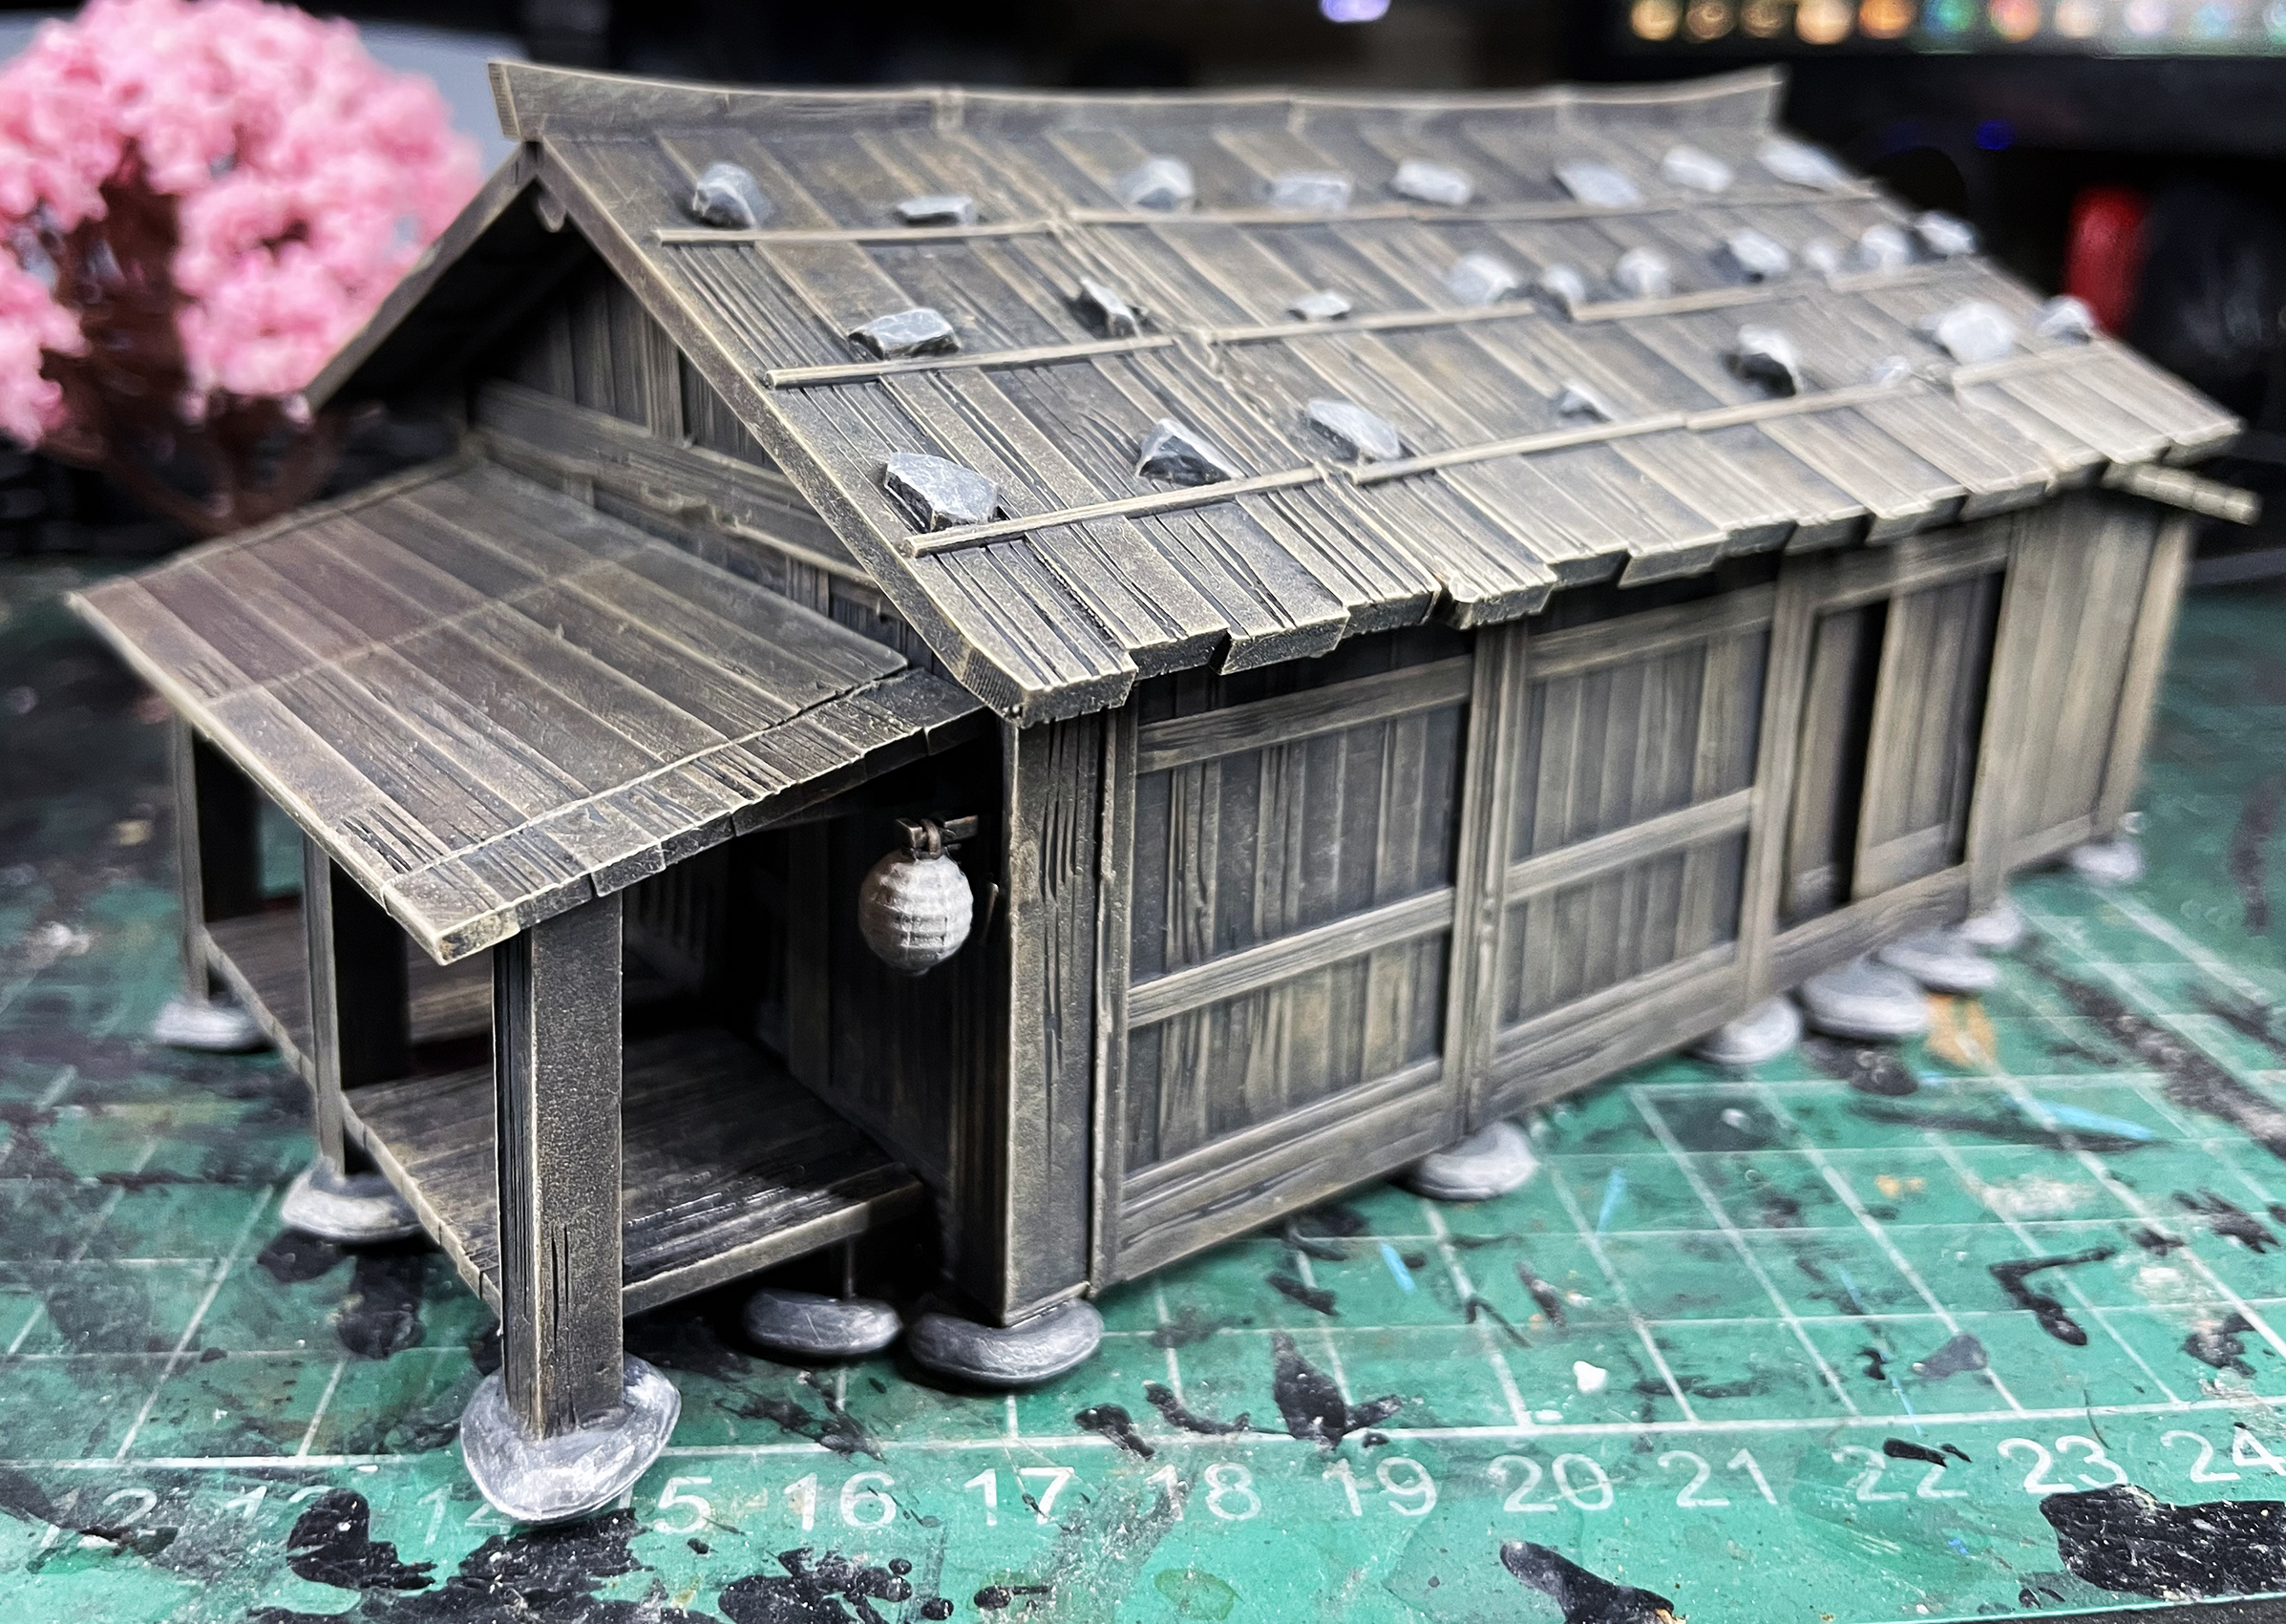
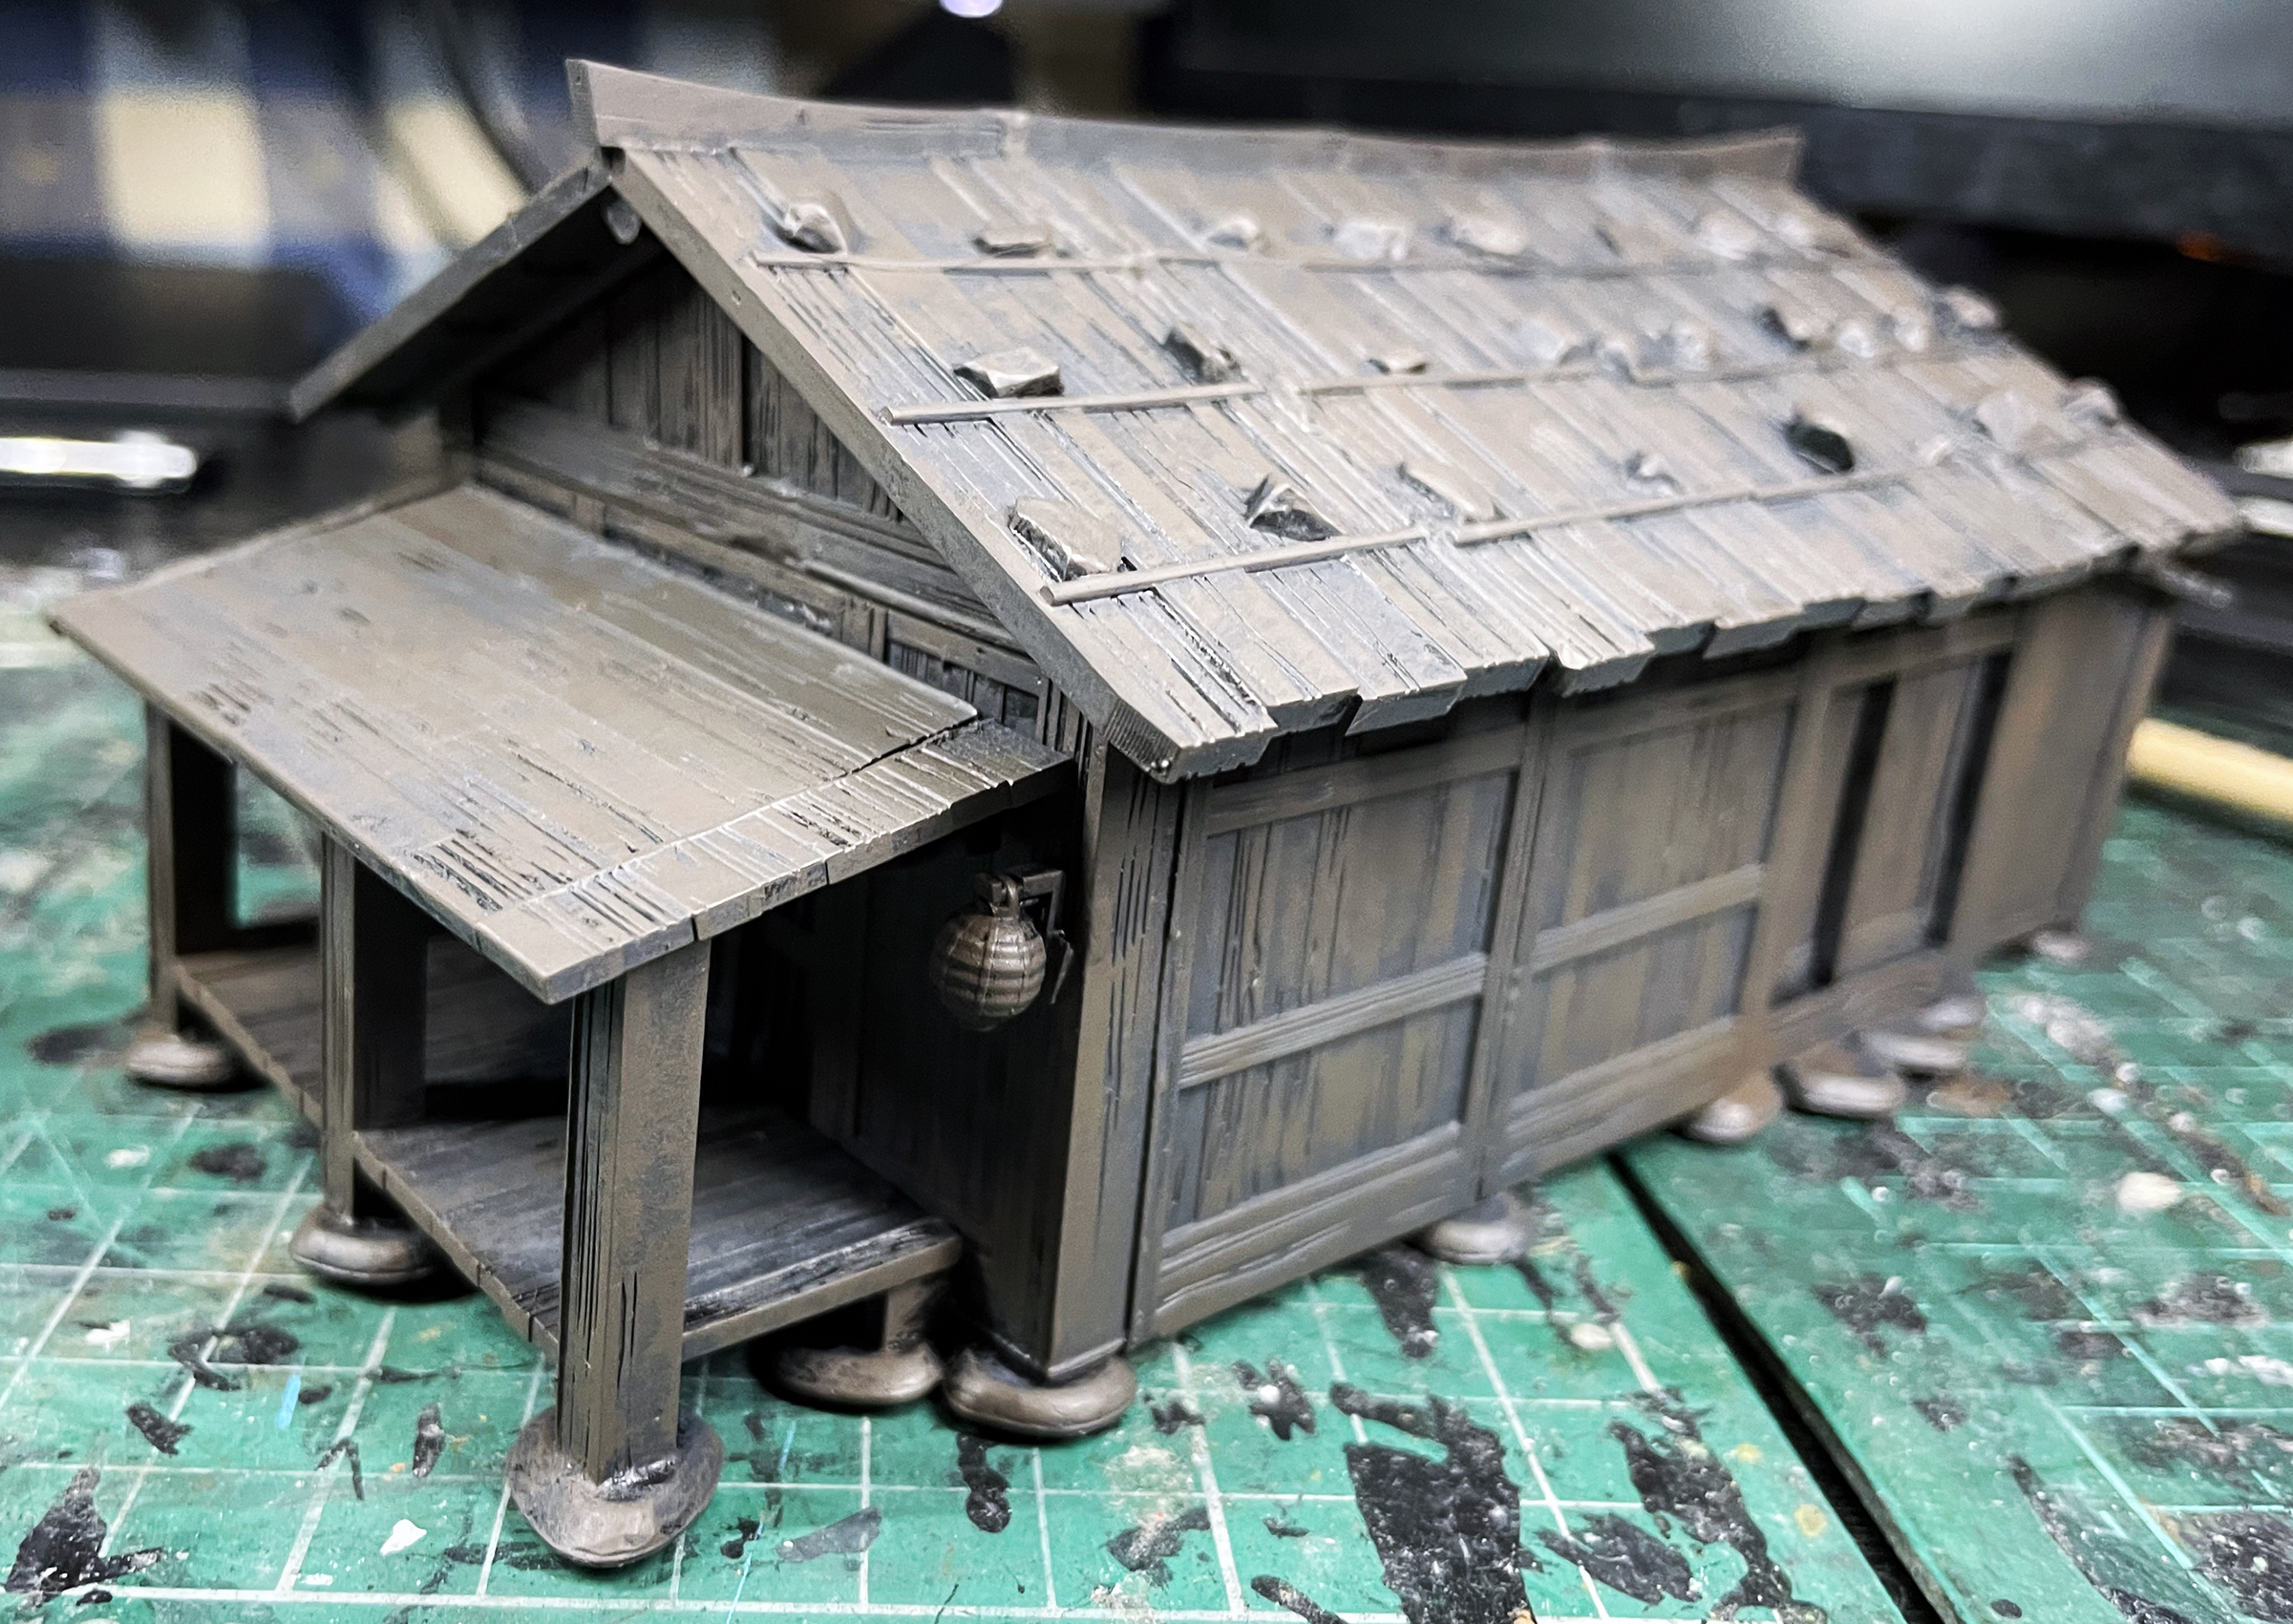
I’m in the final stages for this wonderful Japanese building from 3DAlienWorlds and you give it that aged, old look I’ve added a wash of very watery Vallejo Model Colour Panzer Grey to it. I think it get it that weathered, lived in look.
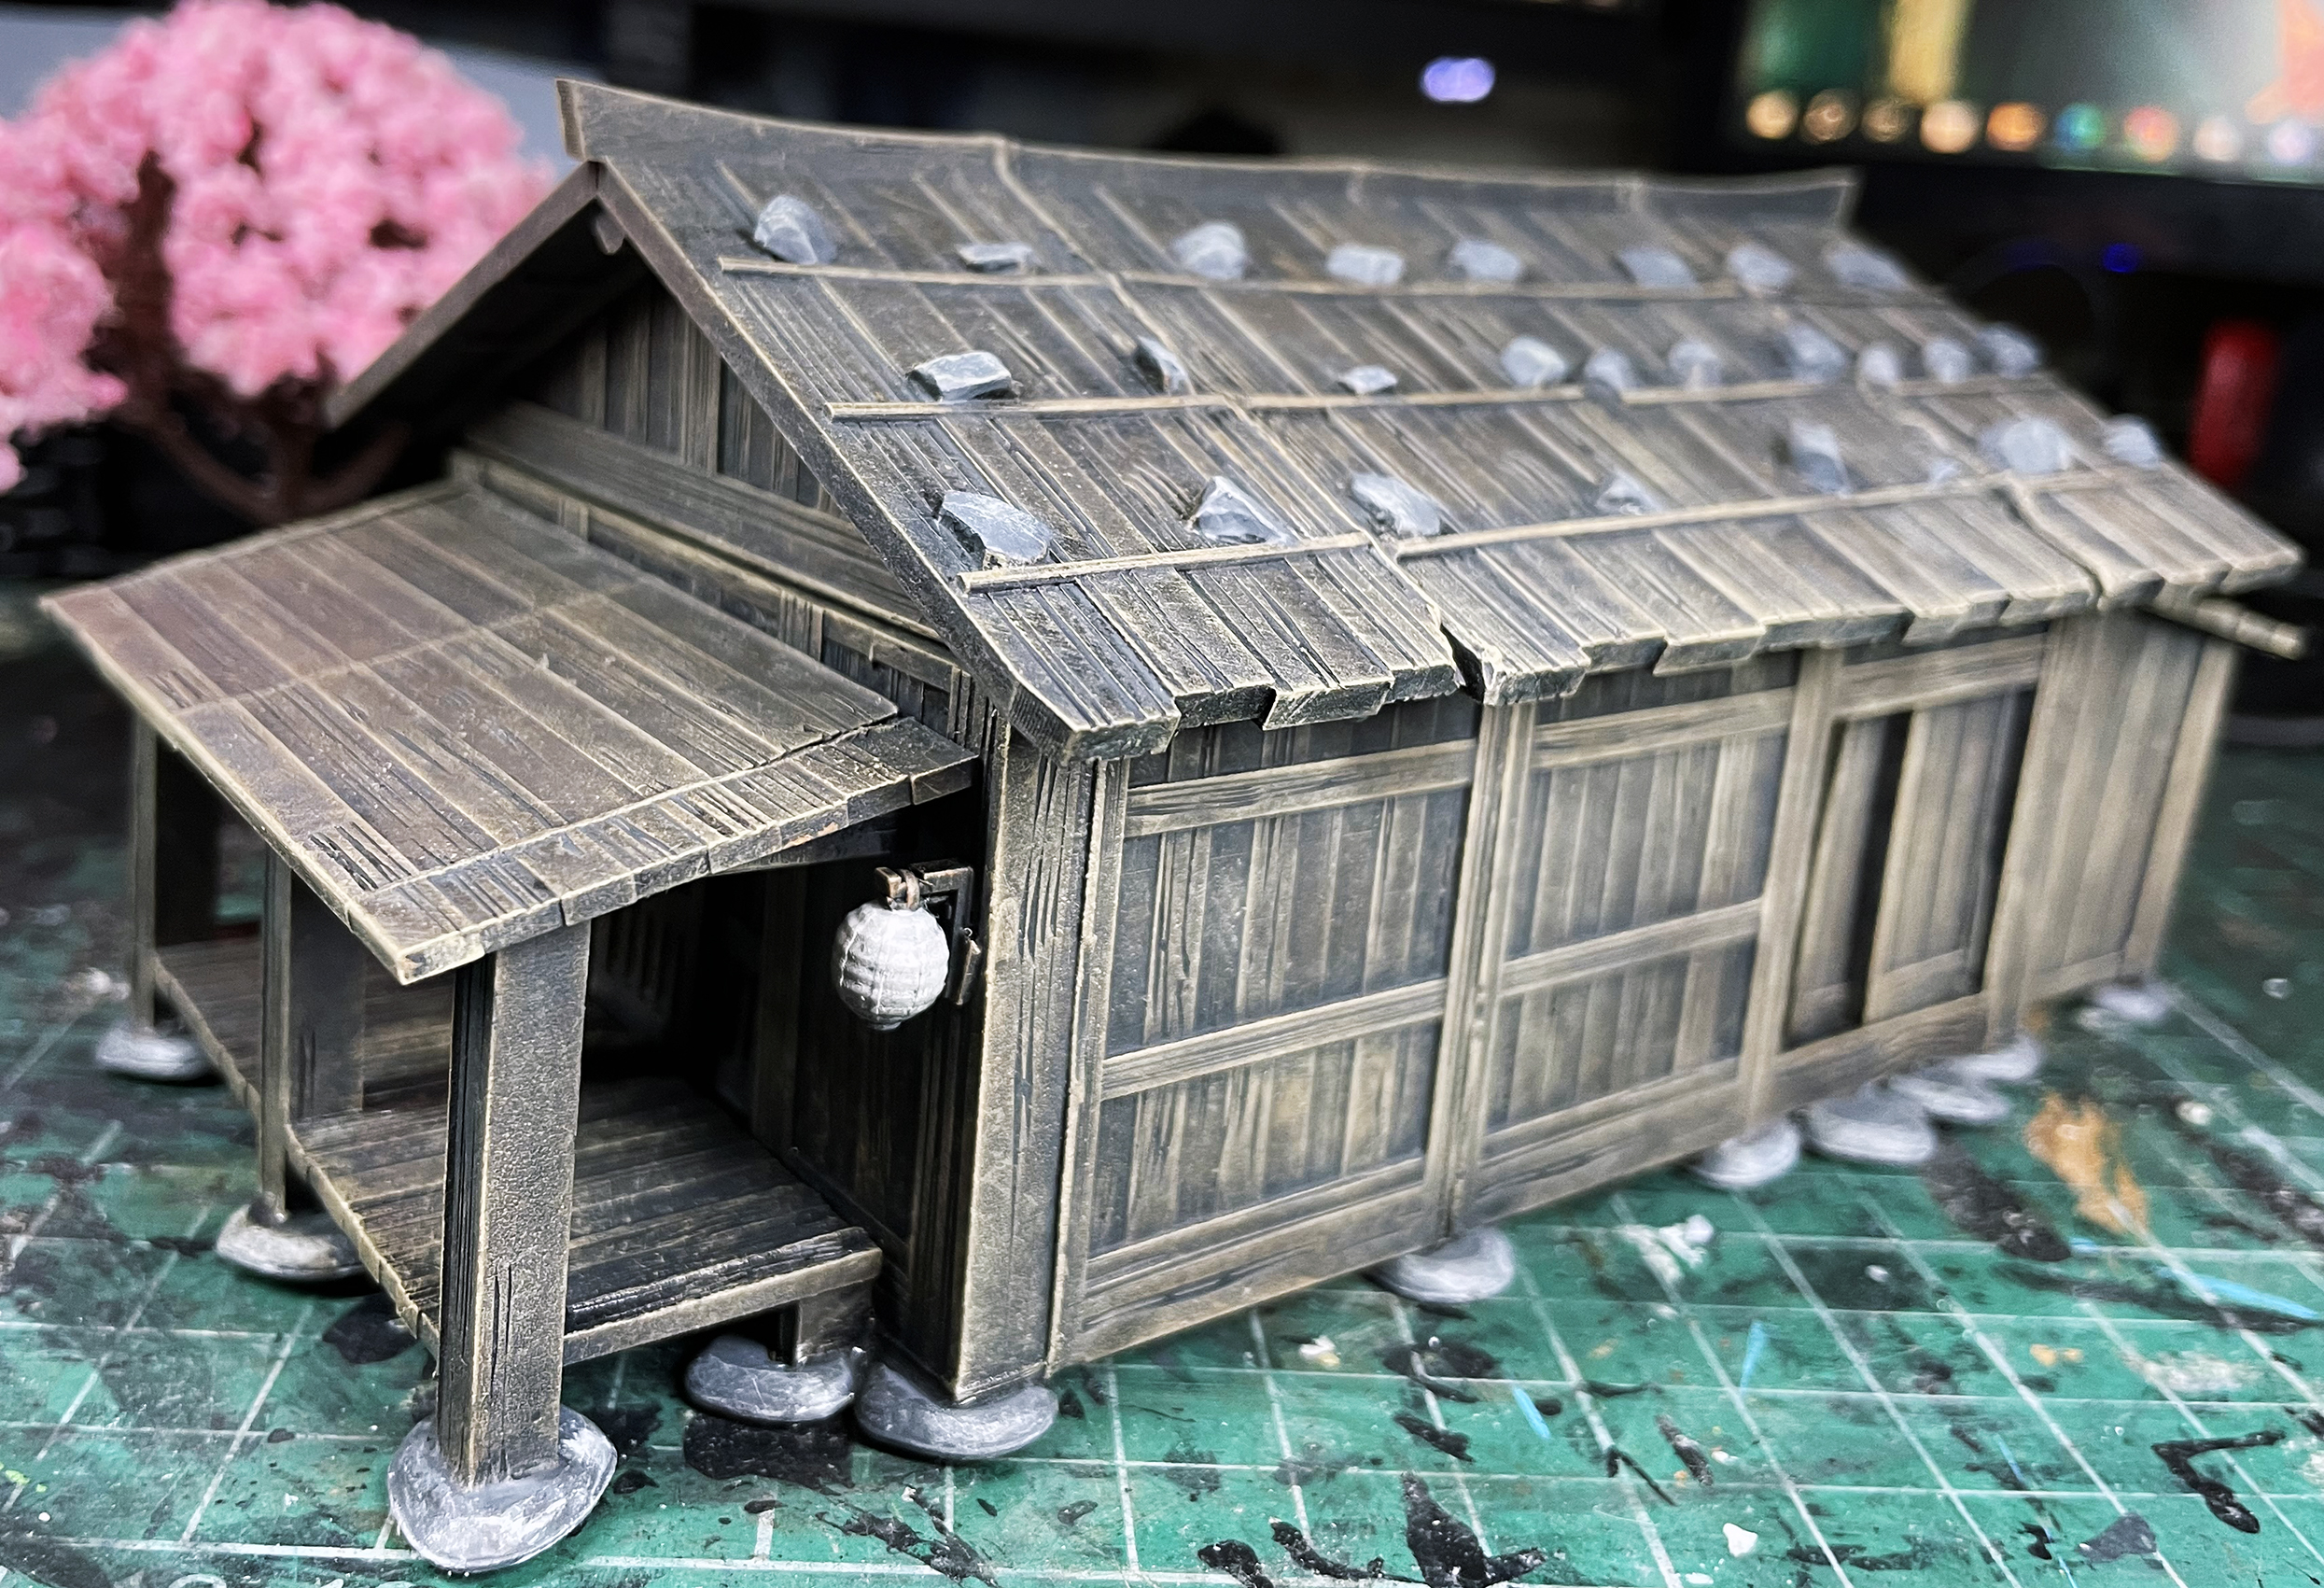
Now it is all finished with the last part done on my painting of this Japanese building from 3DAlienWorlds. To finish it all I added a very light dusting of a drybrush of Vallejo Pale Sand. Now it’s all done.

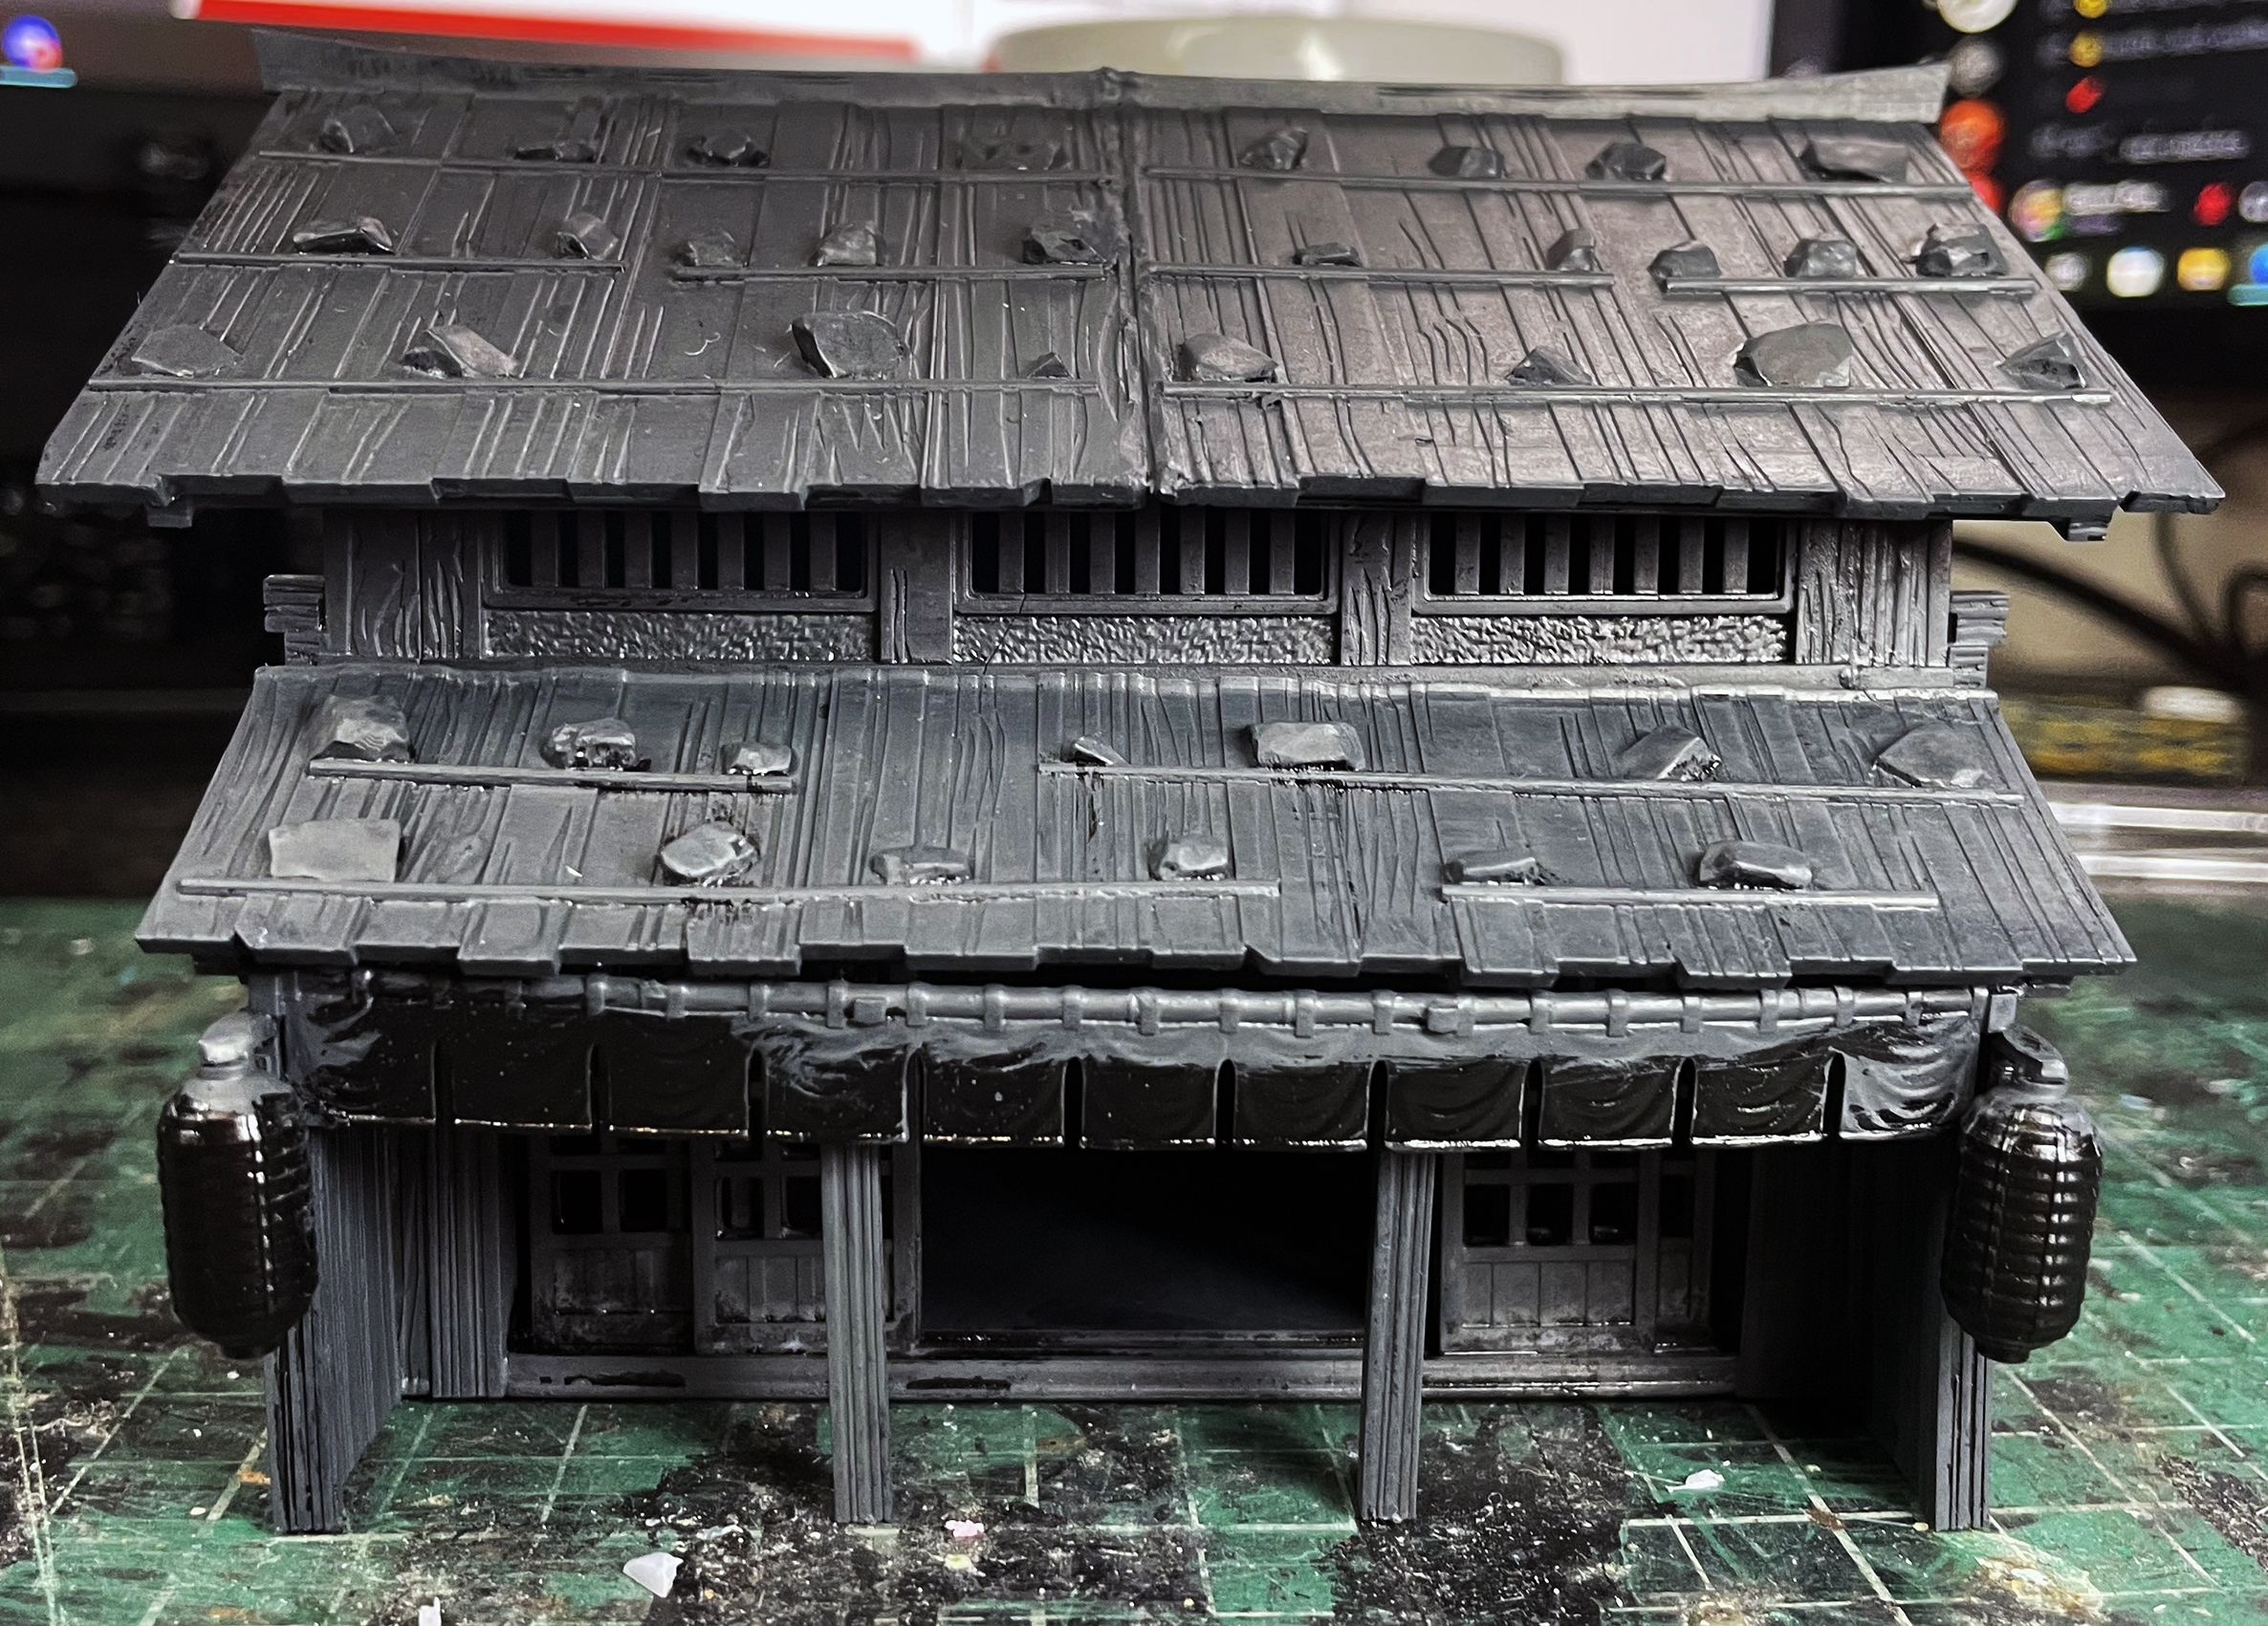
My Guide to Painting Aged Wood, Part 1
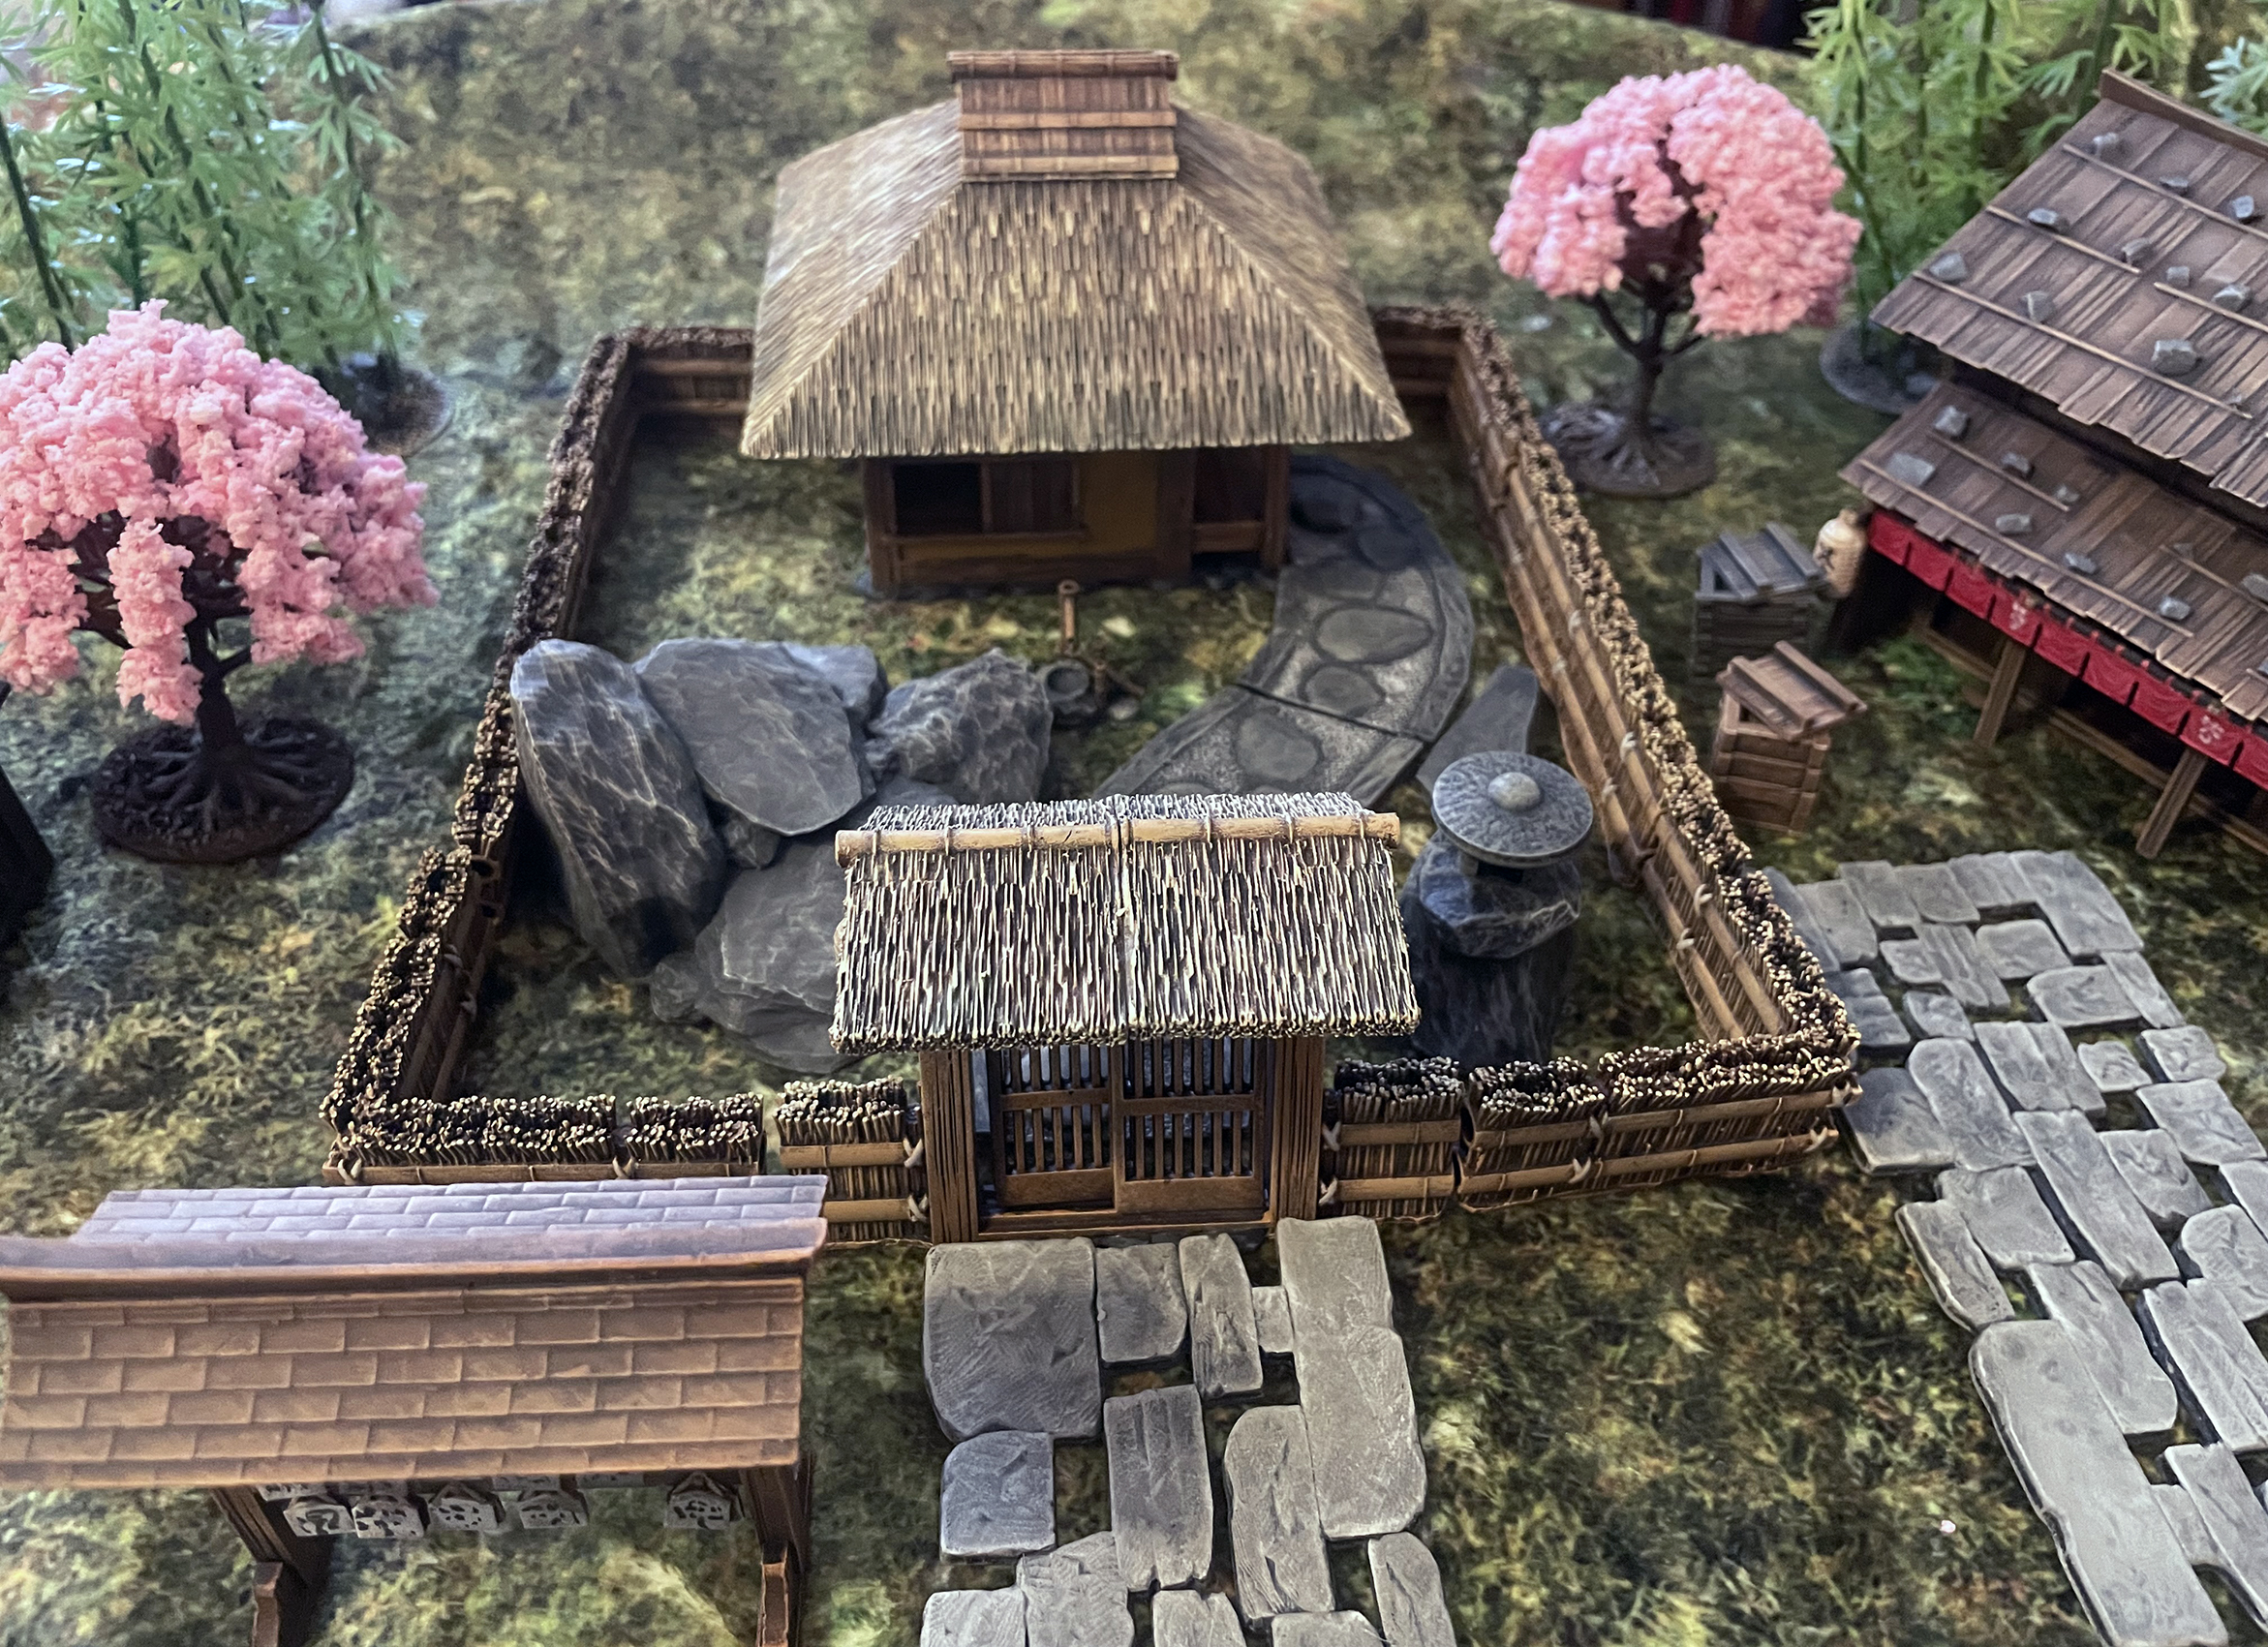
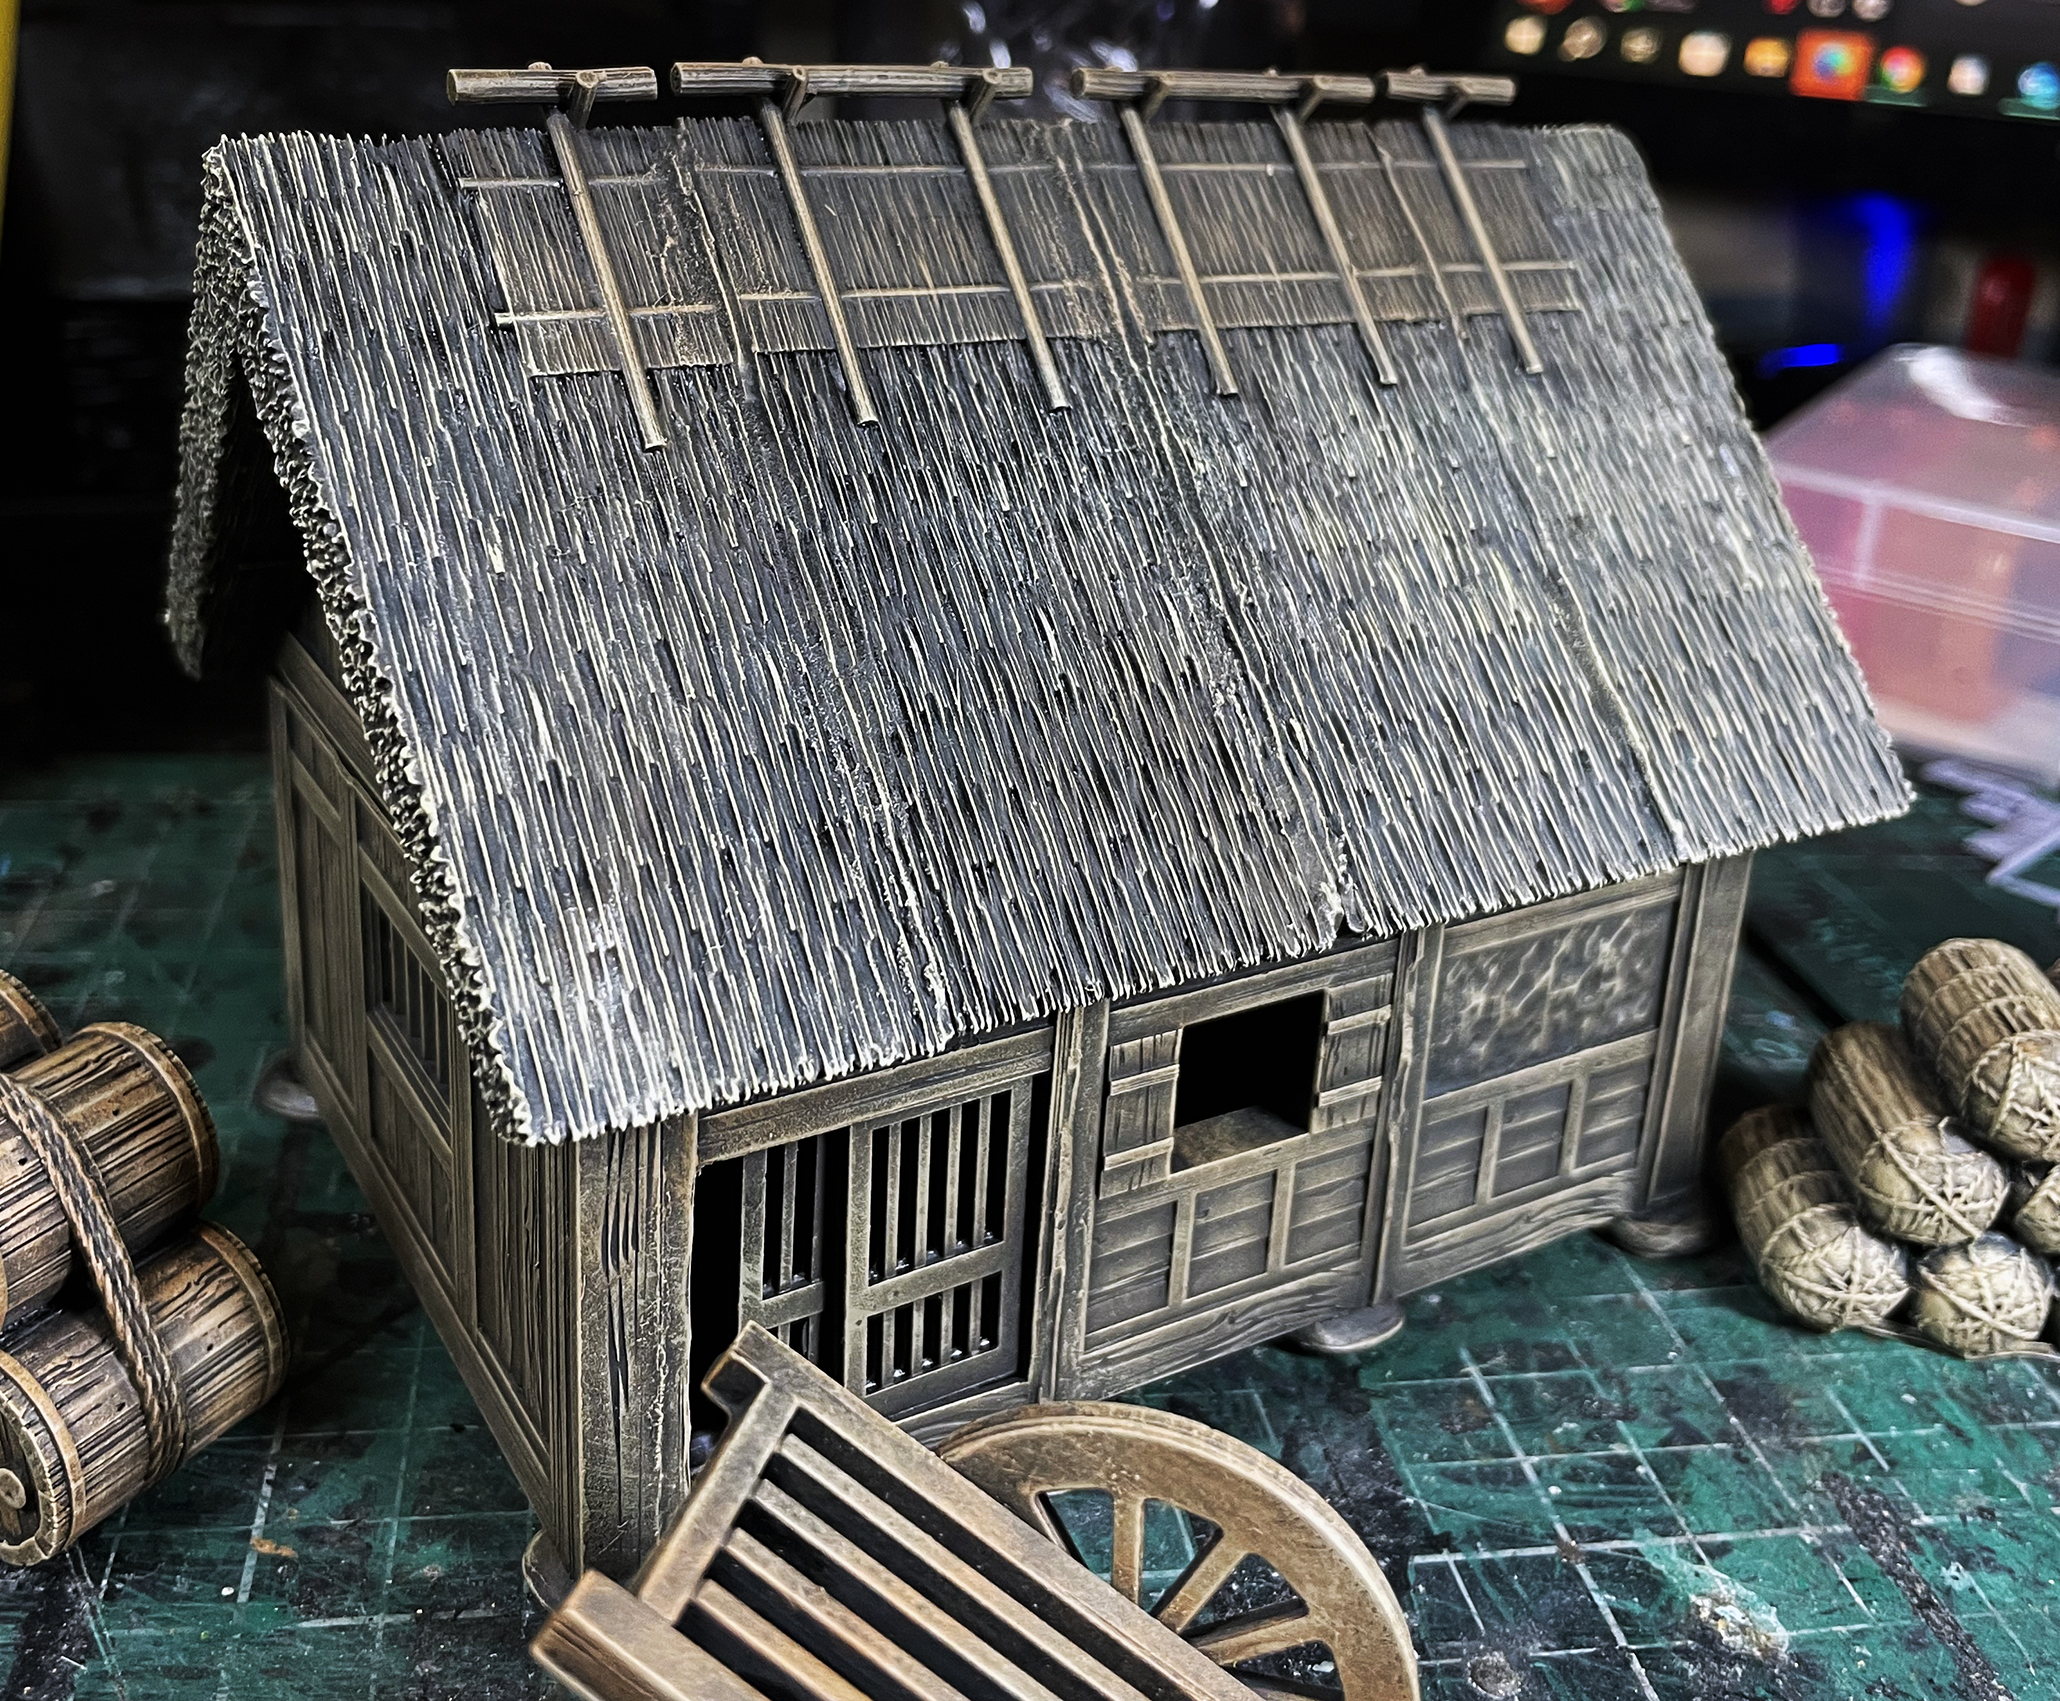
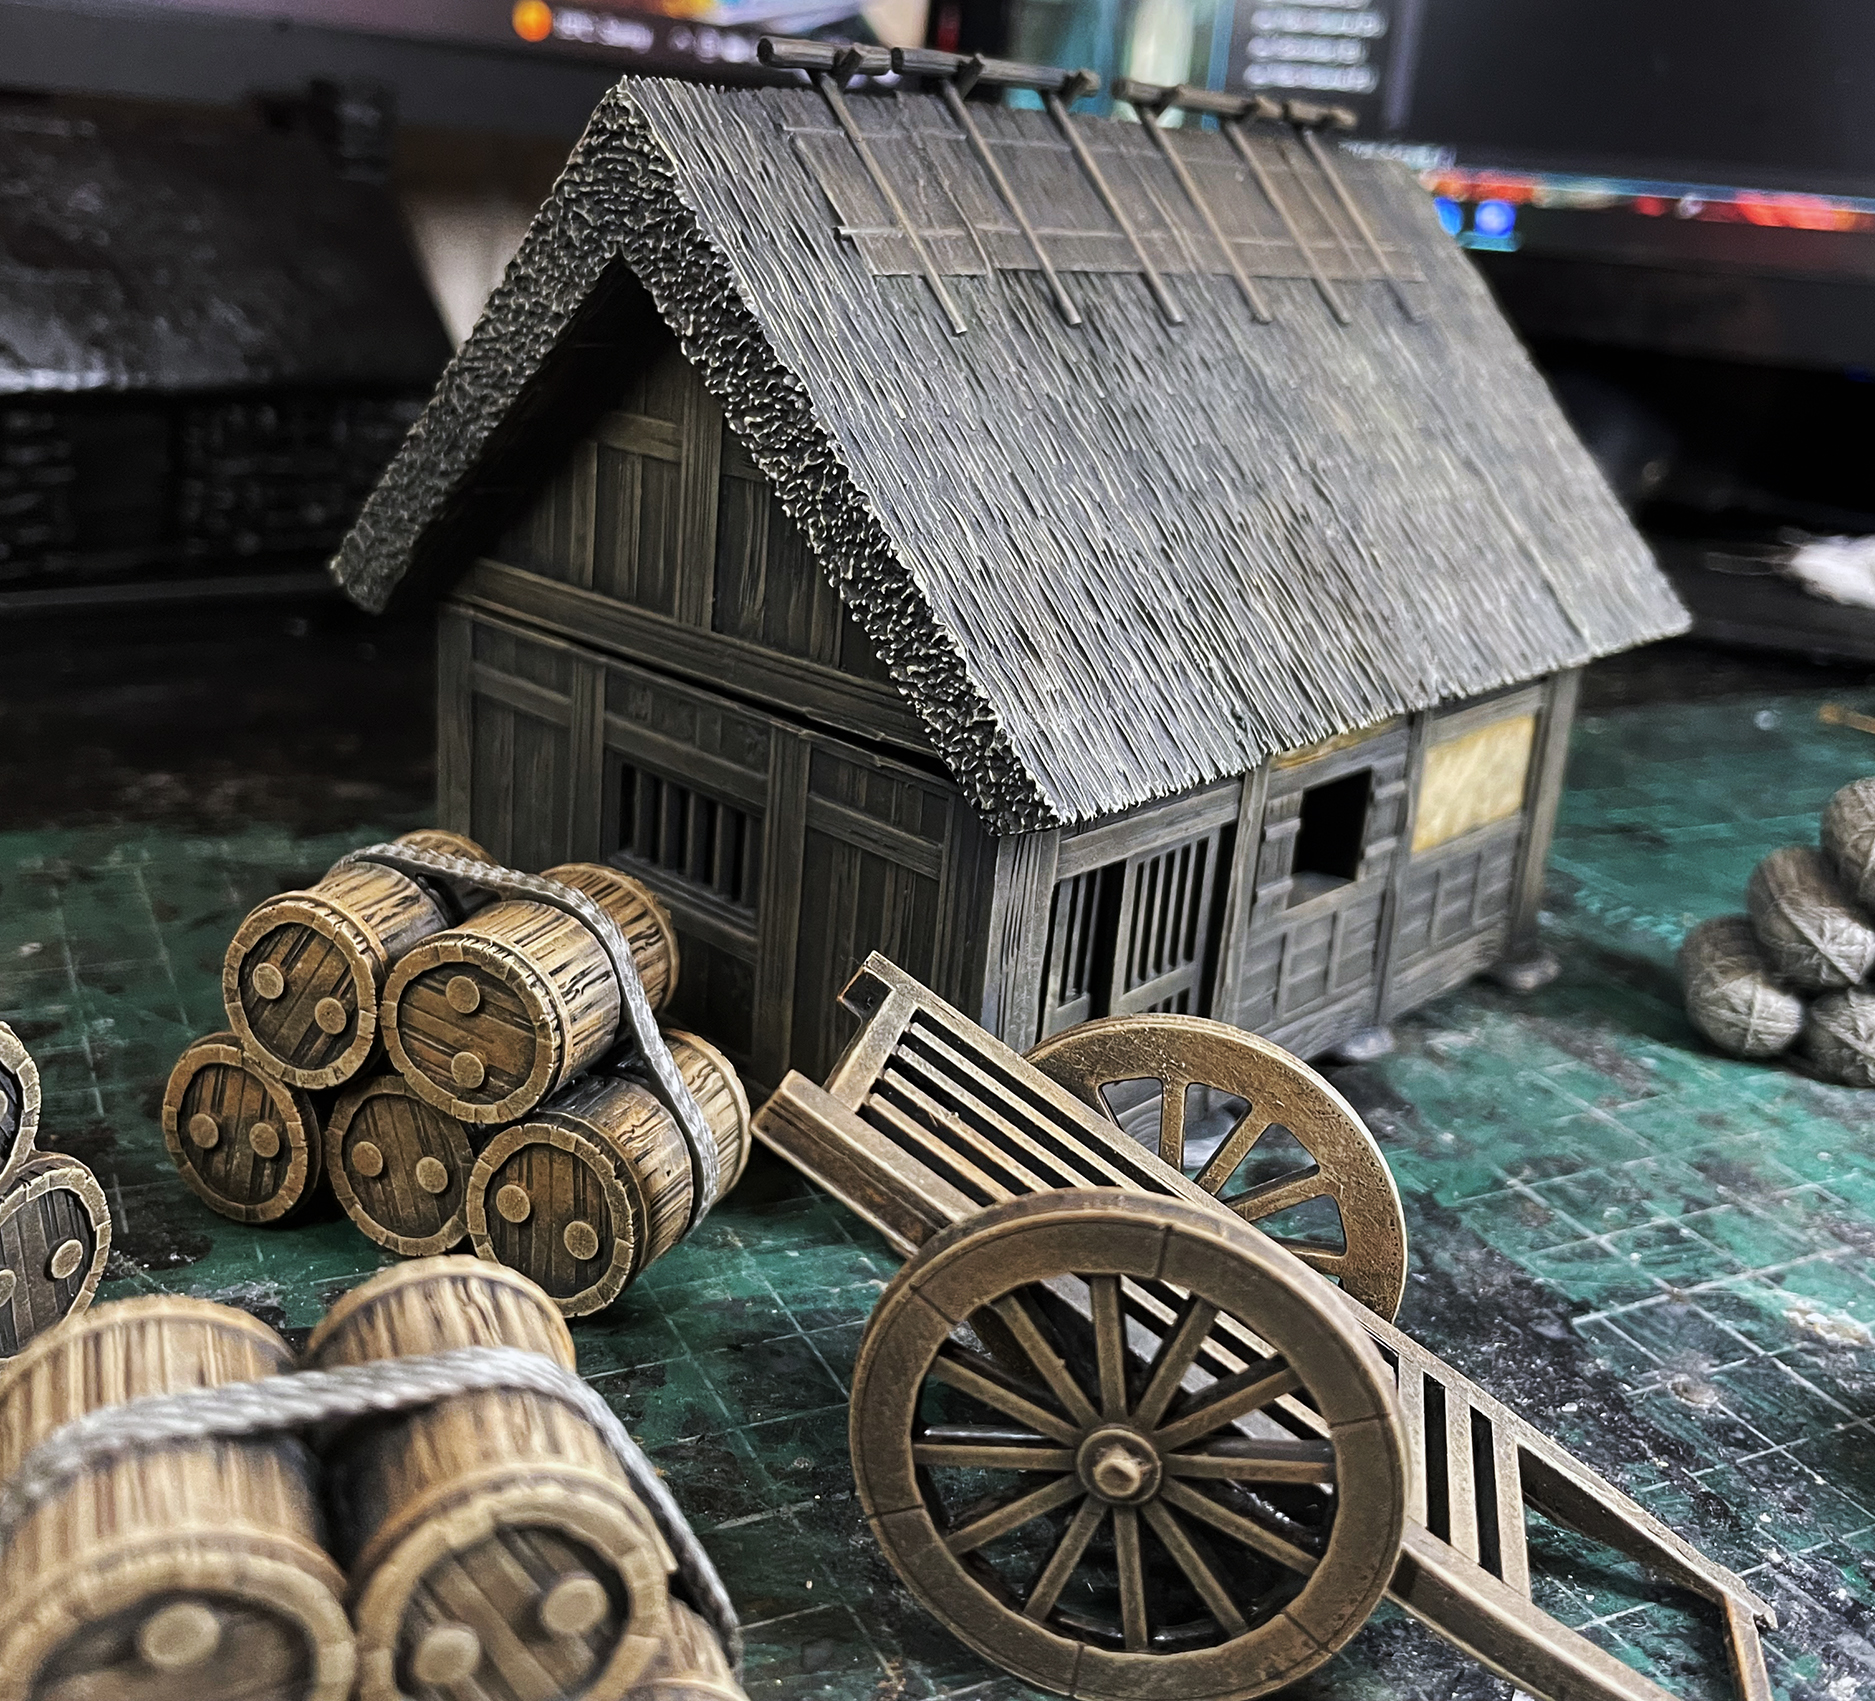
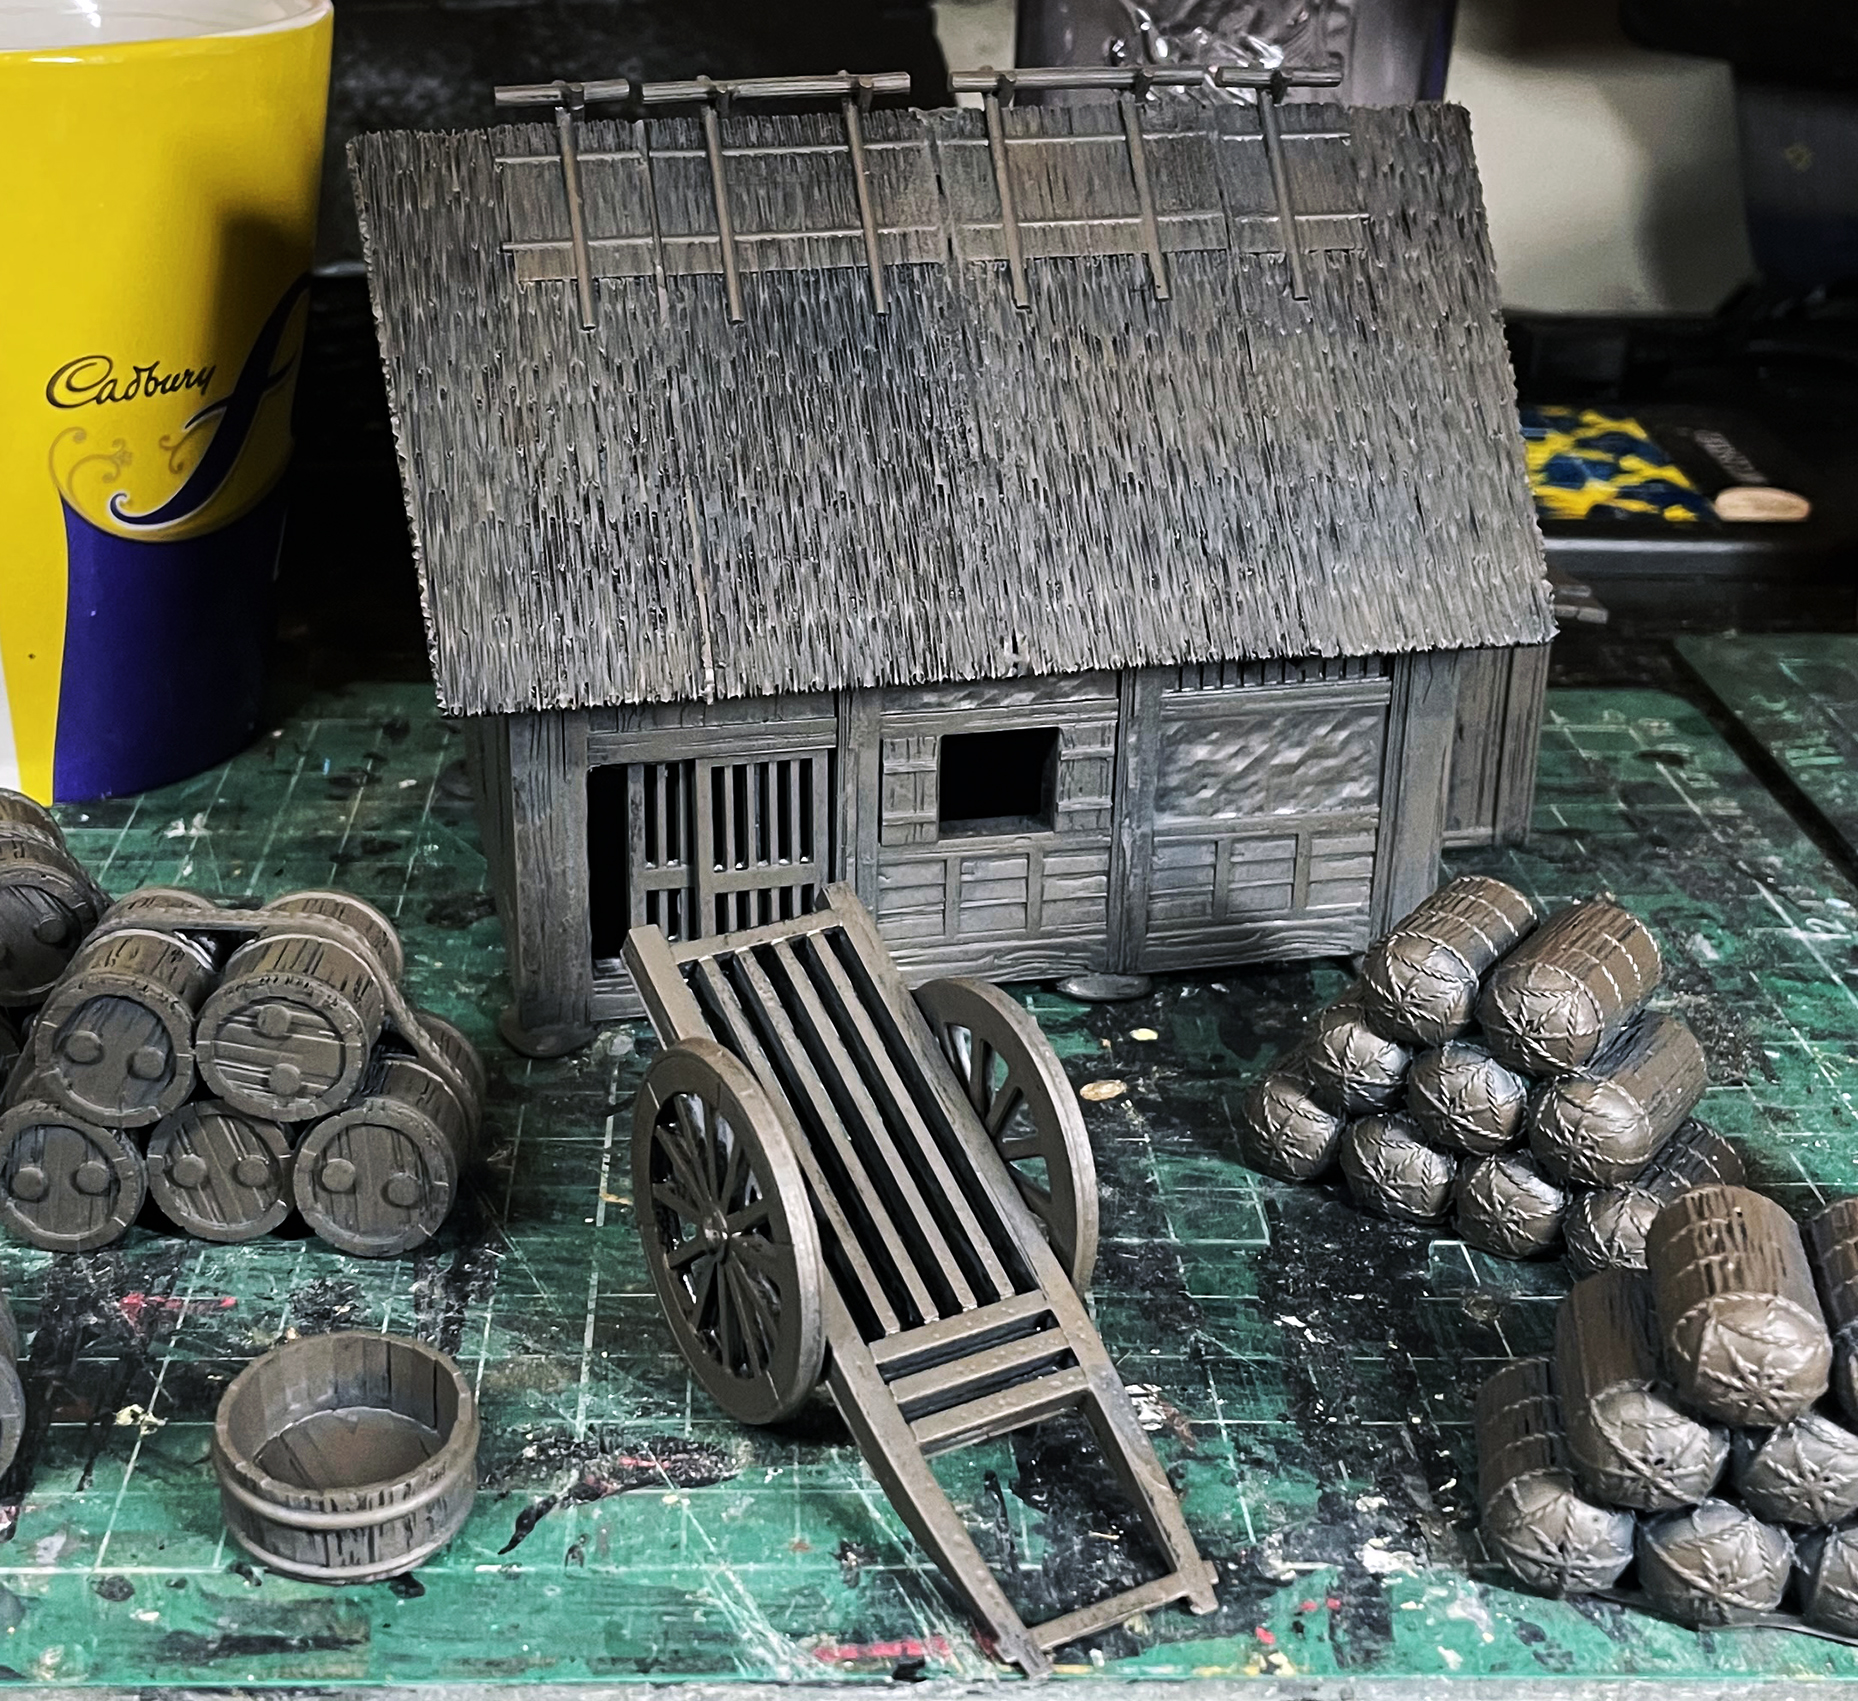
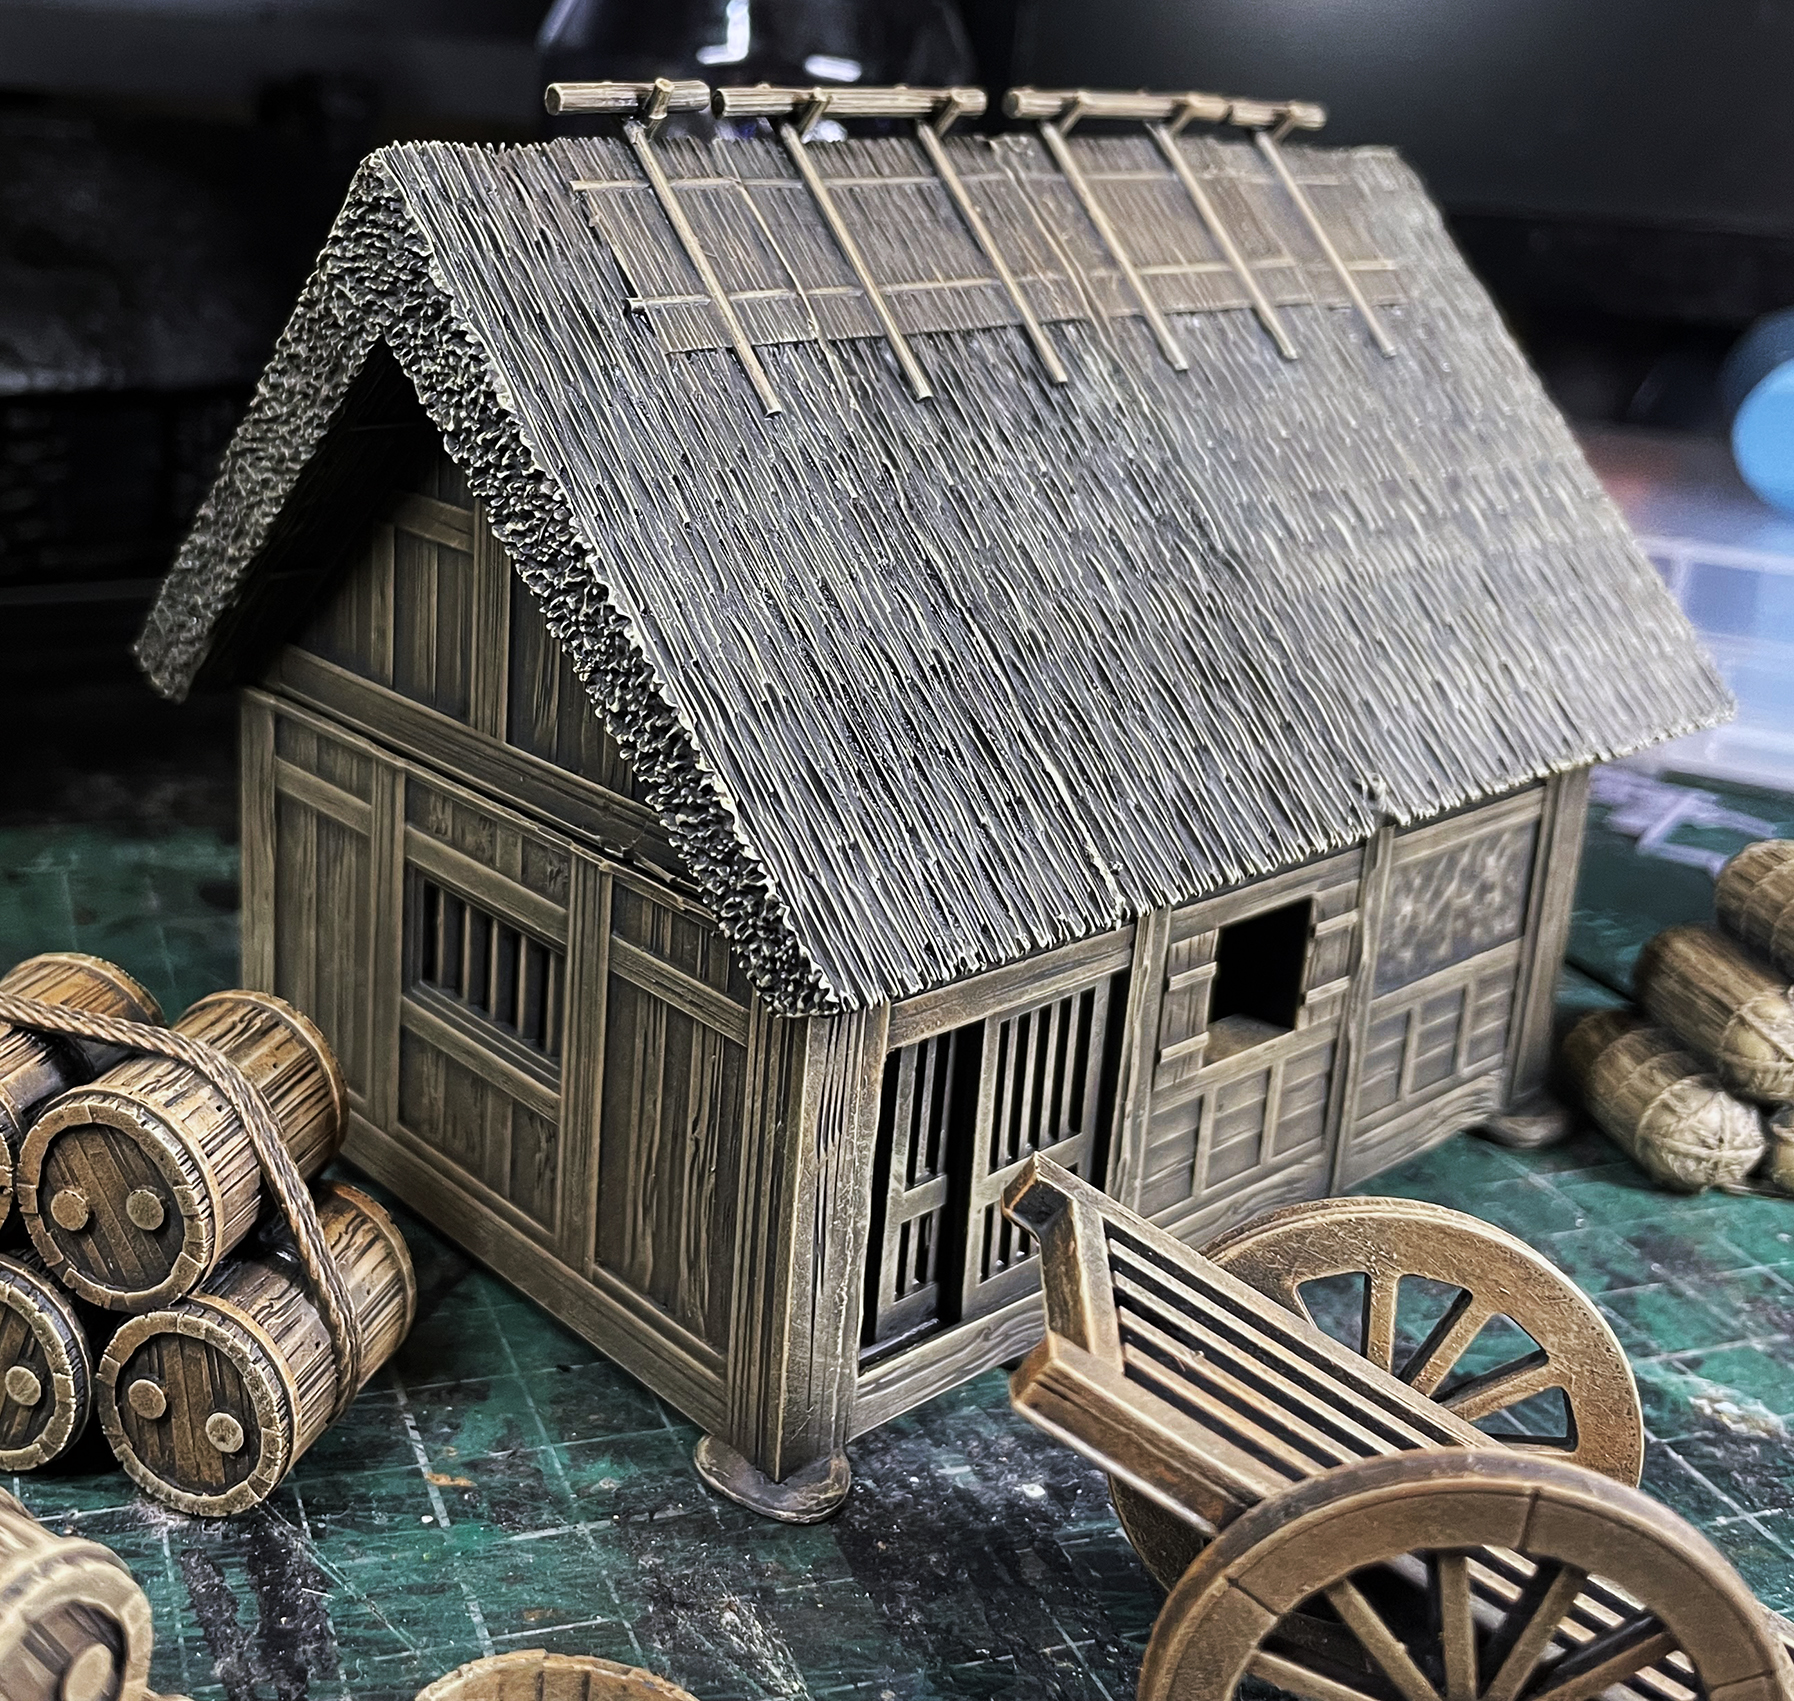
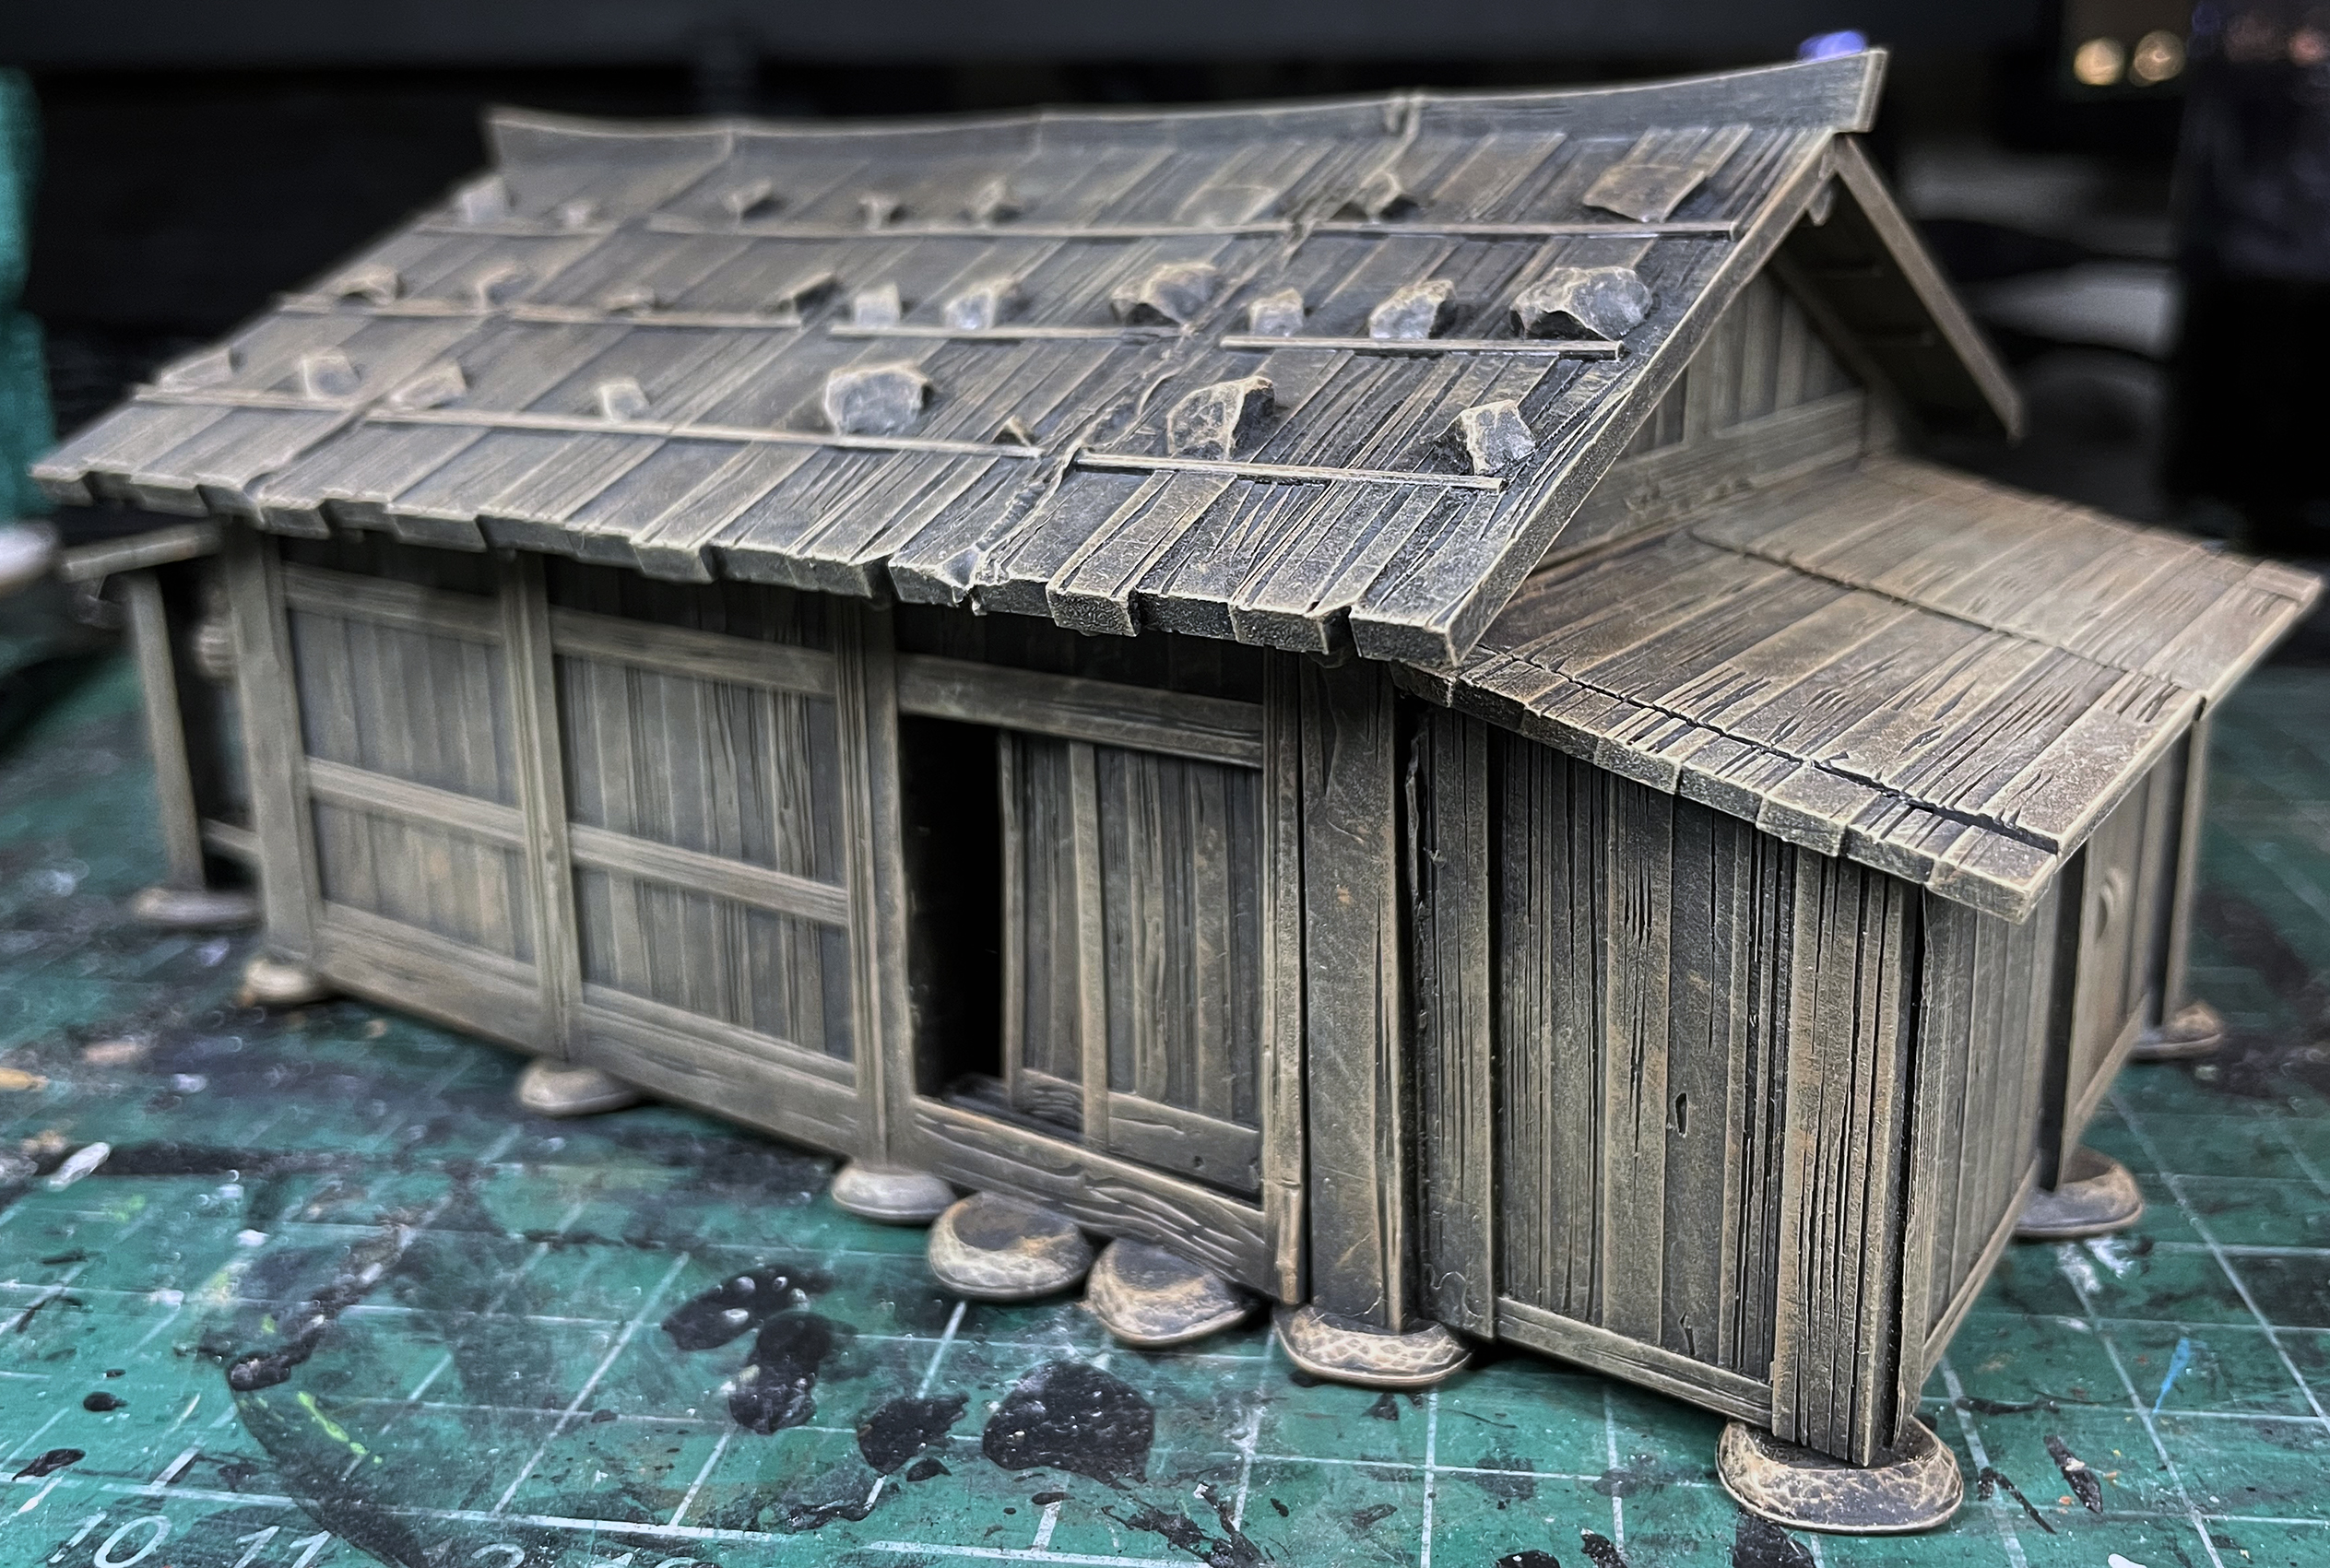
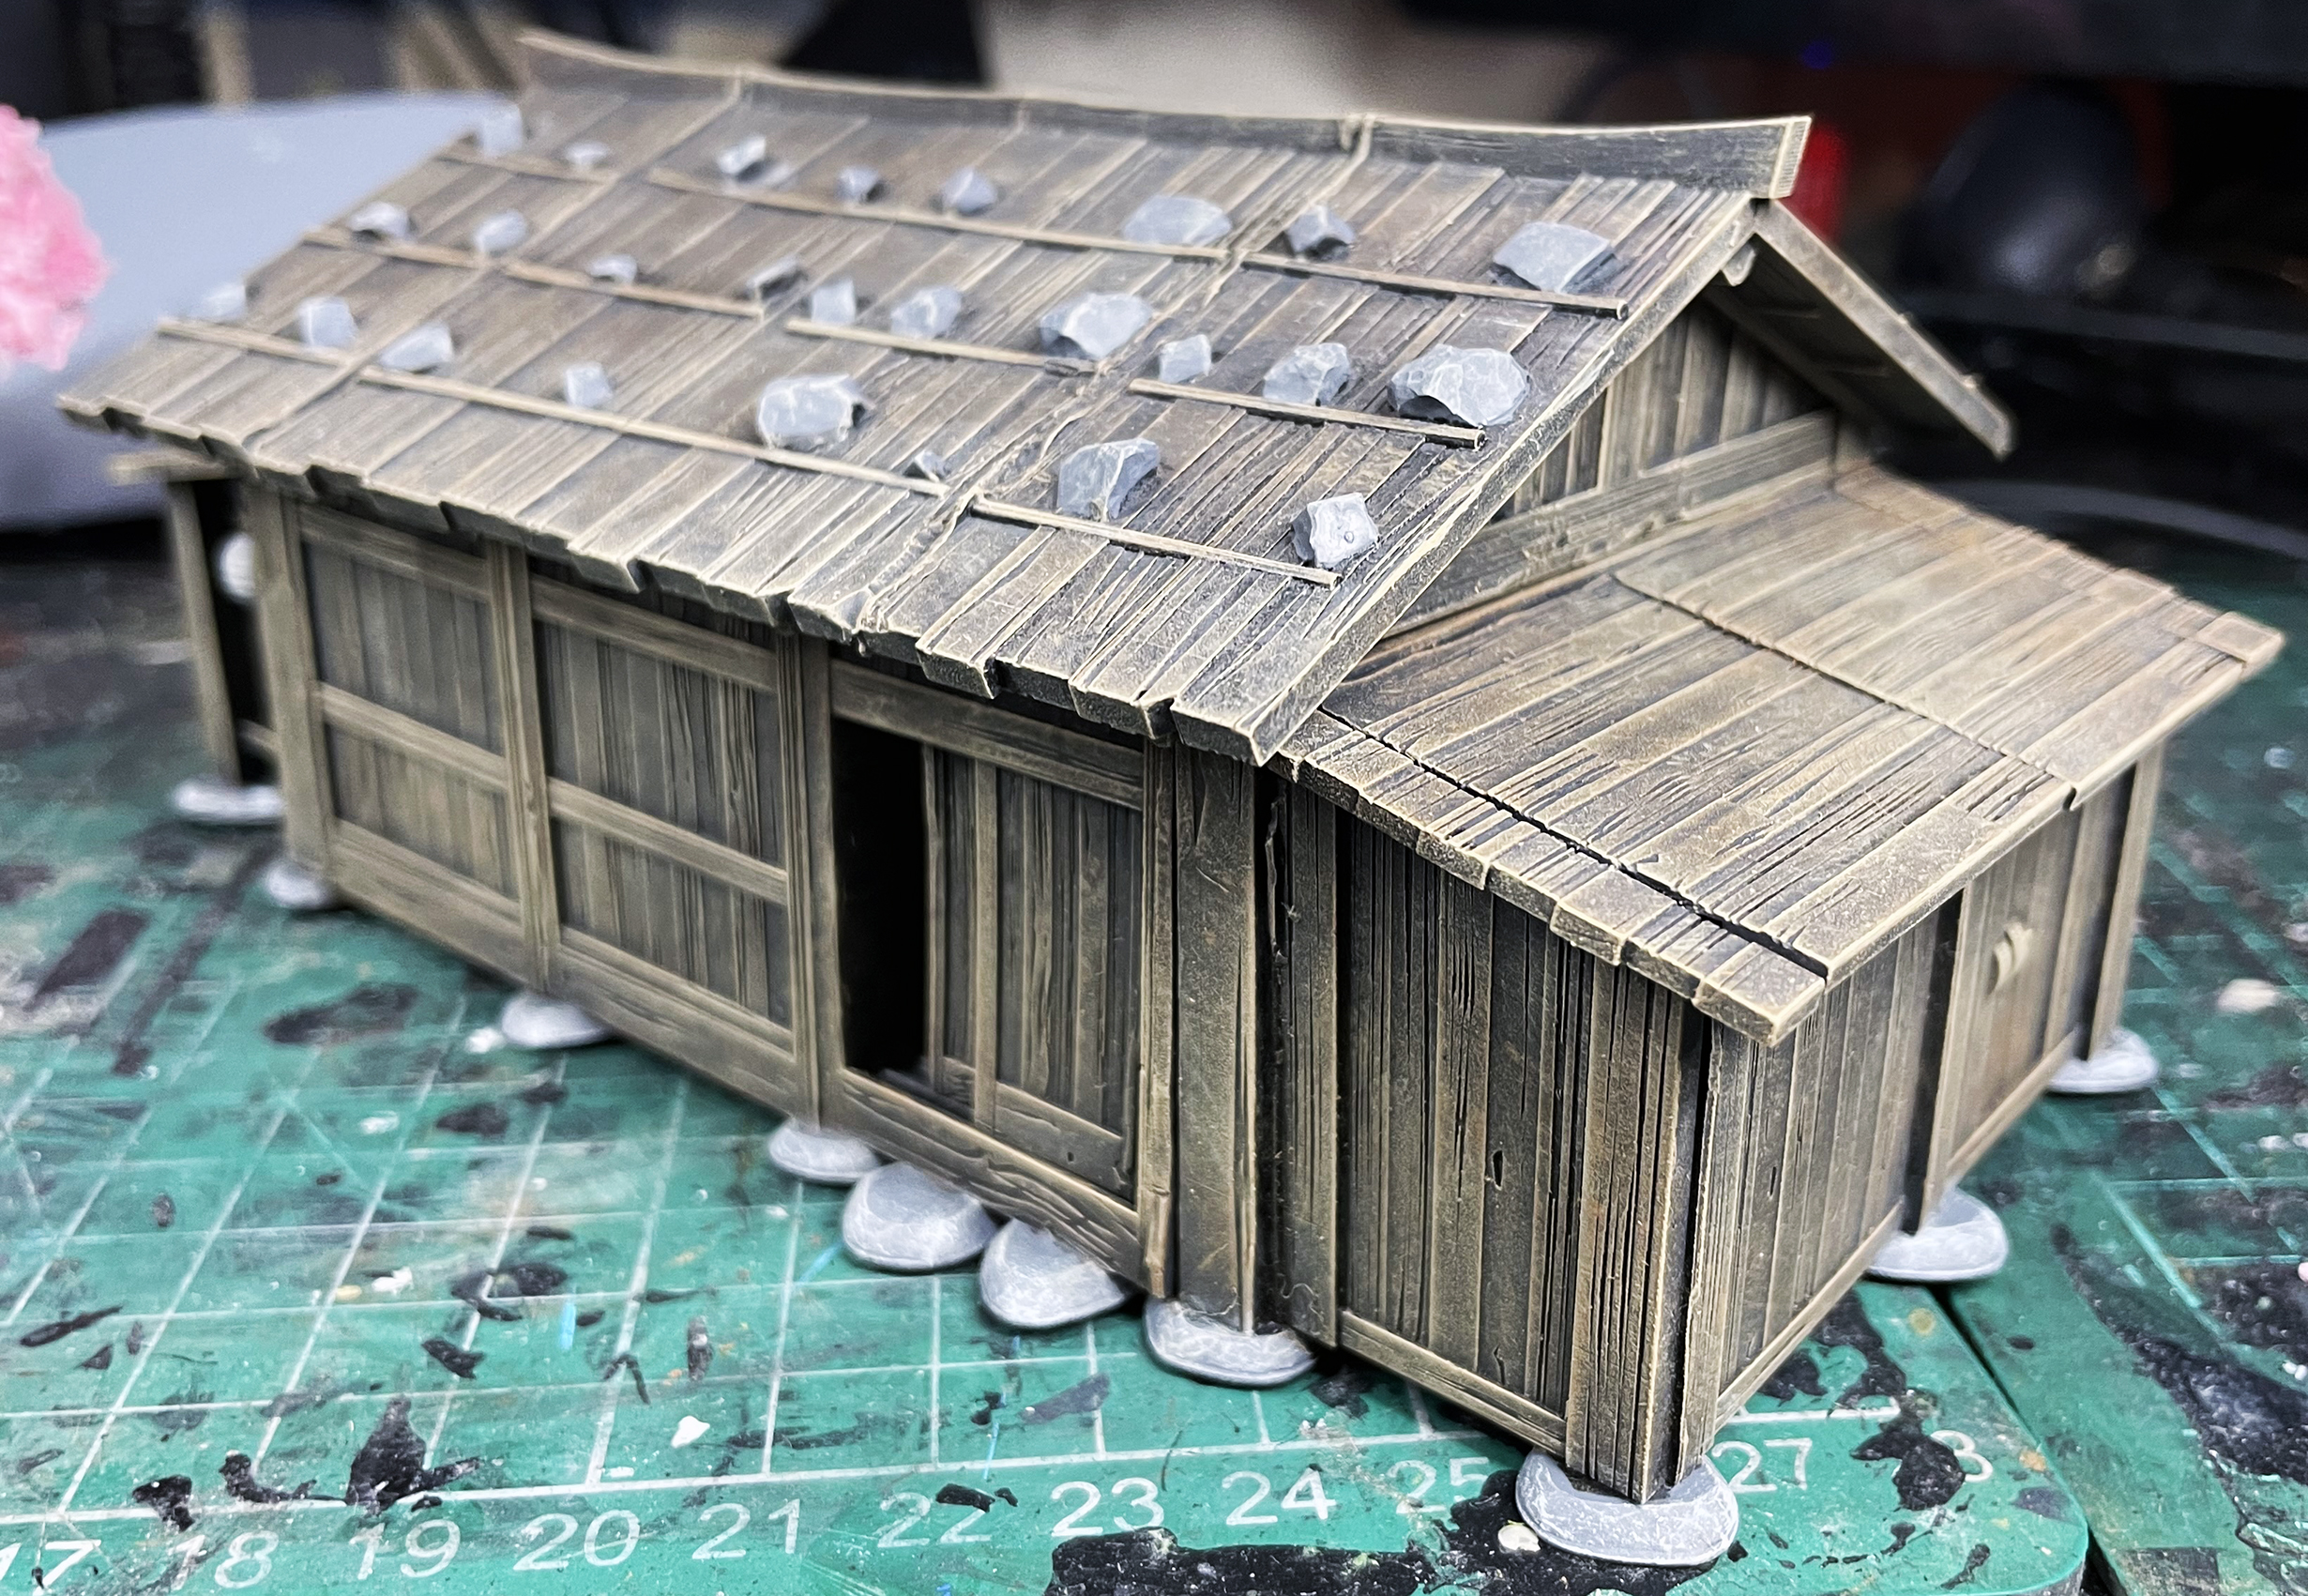
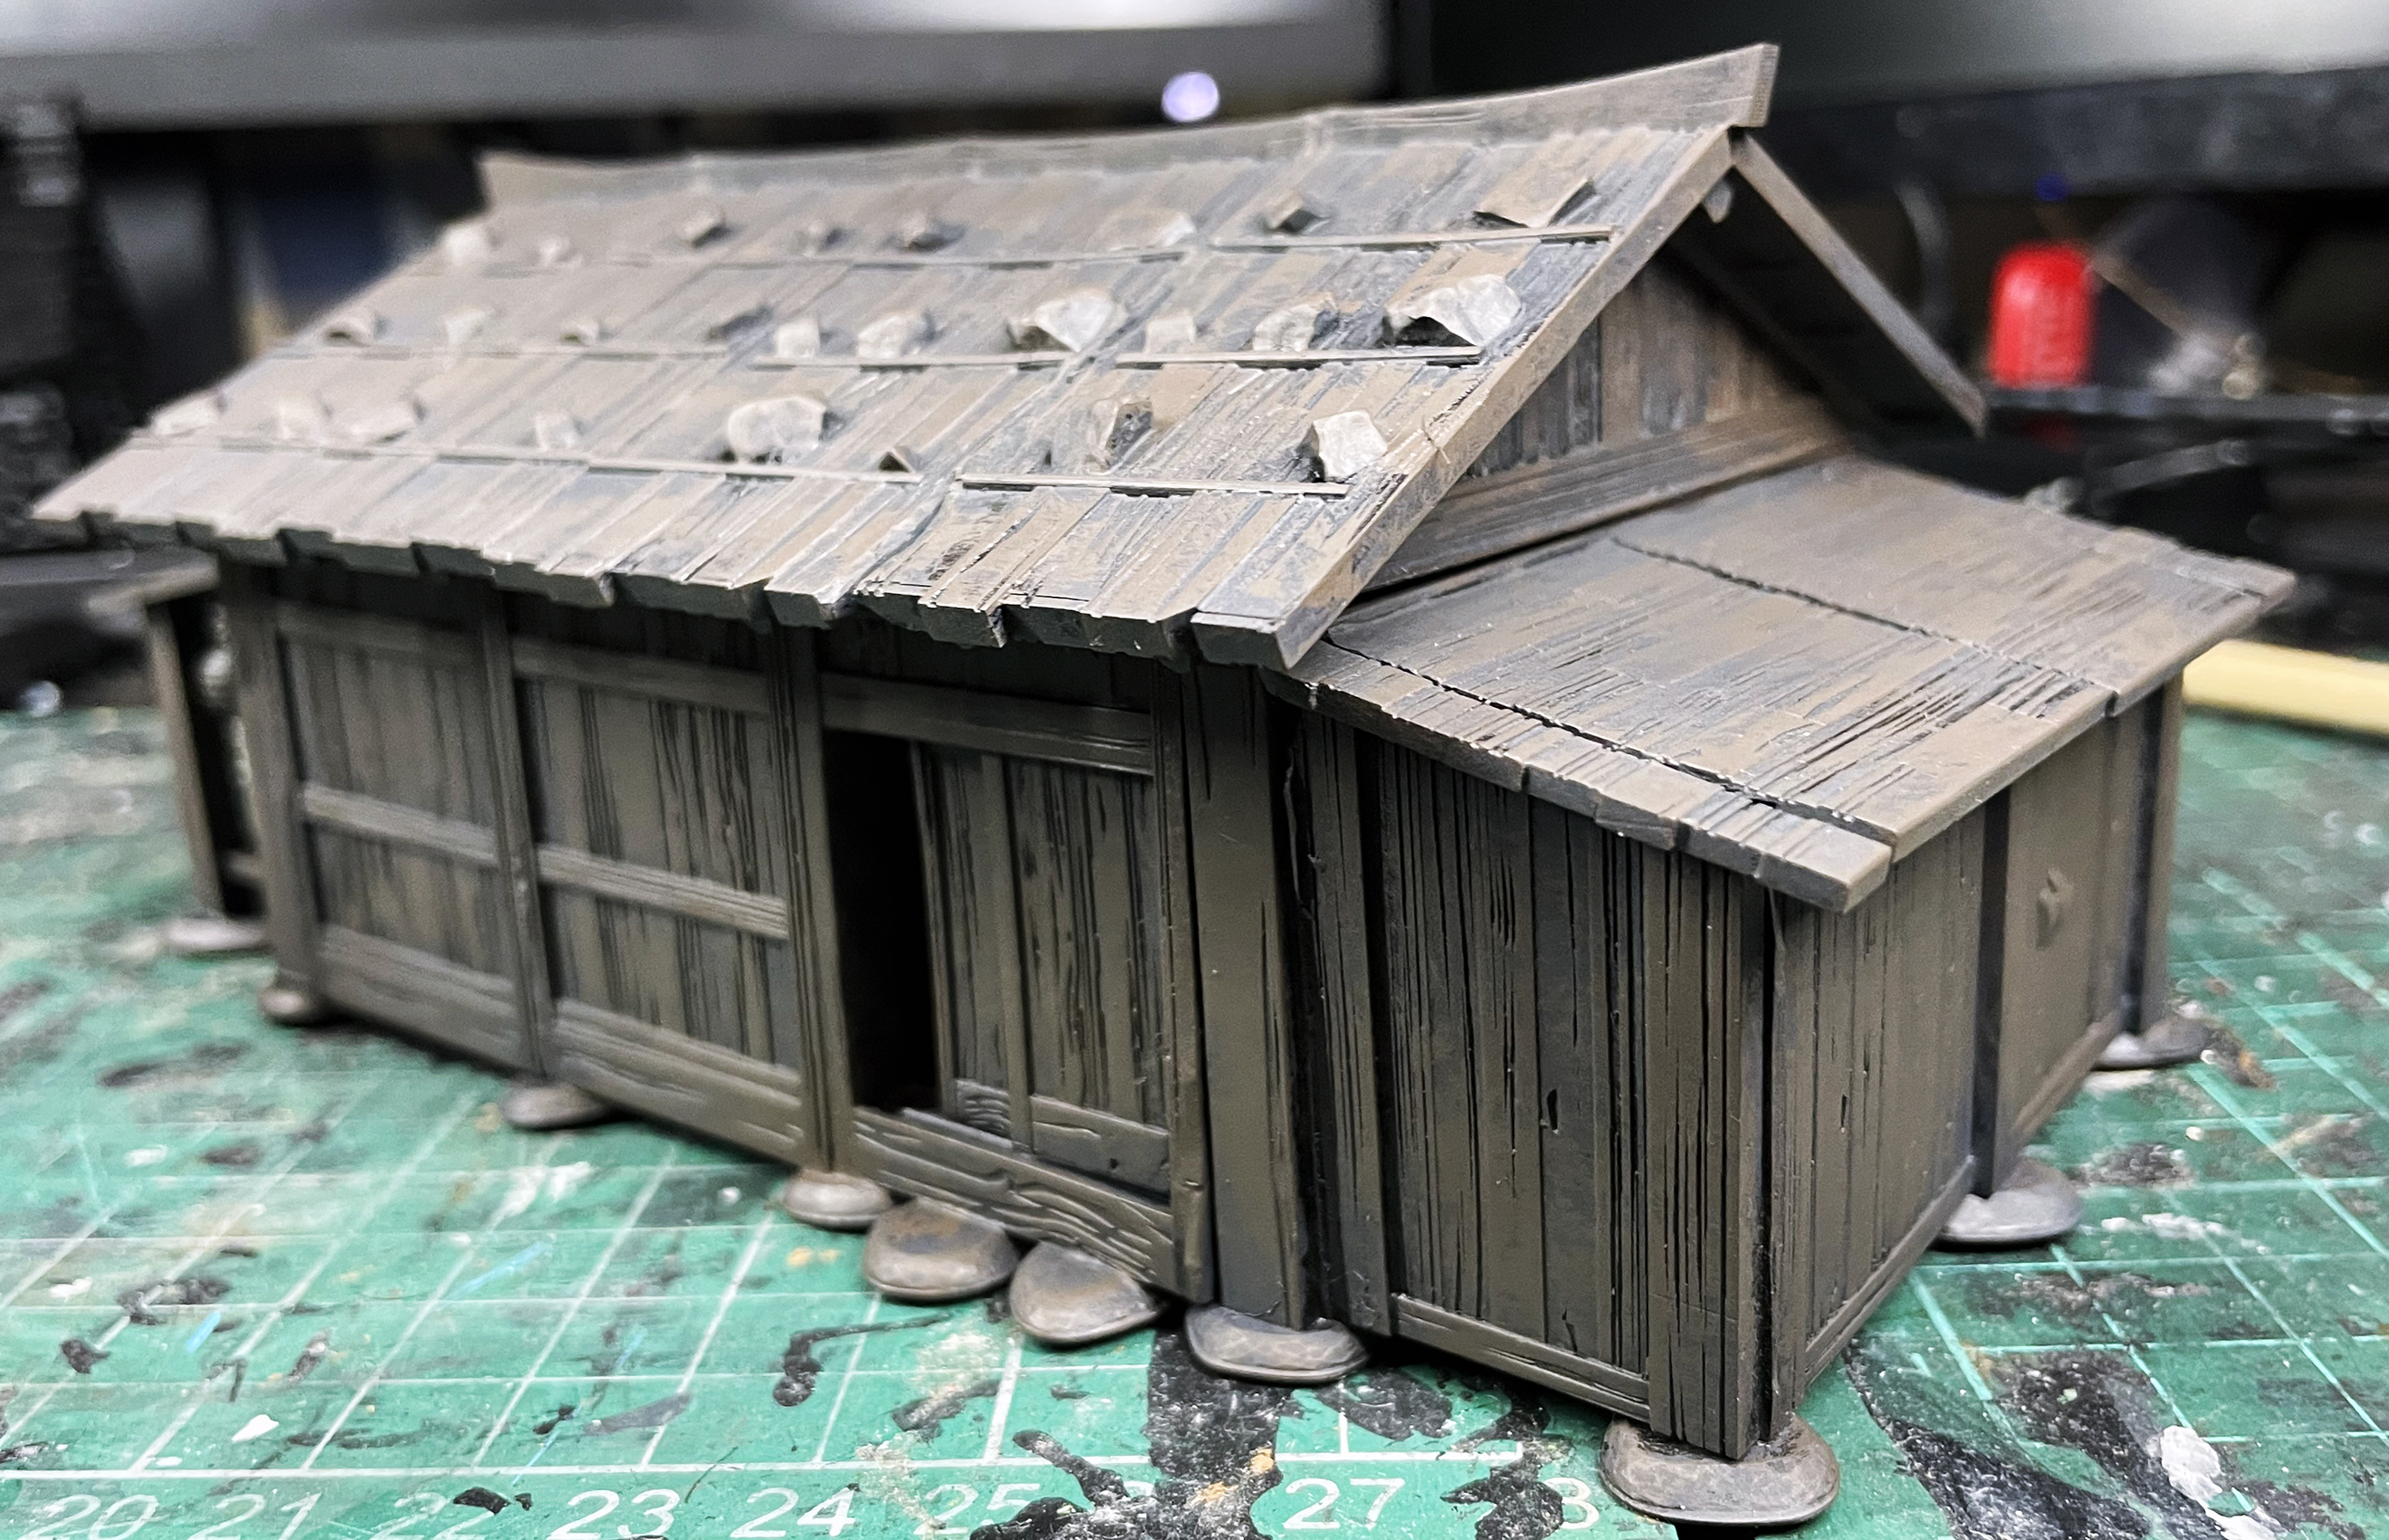
 Japanese Village House
This is a strange place to start a new project but it sort of makes sense. I started this a very long time ago and with the interest in my club, Leicester Phat Cats, and the excellent TV series Shogun, I started re vamping and updating some of my old Test of Honour stuff and building on it.
So I found some rather amazing, module Japanese buildings from 3D Alien Worlds, and started to print these off to build and through I can use this as a project/guide on how I paint aged wood.
So here it is.
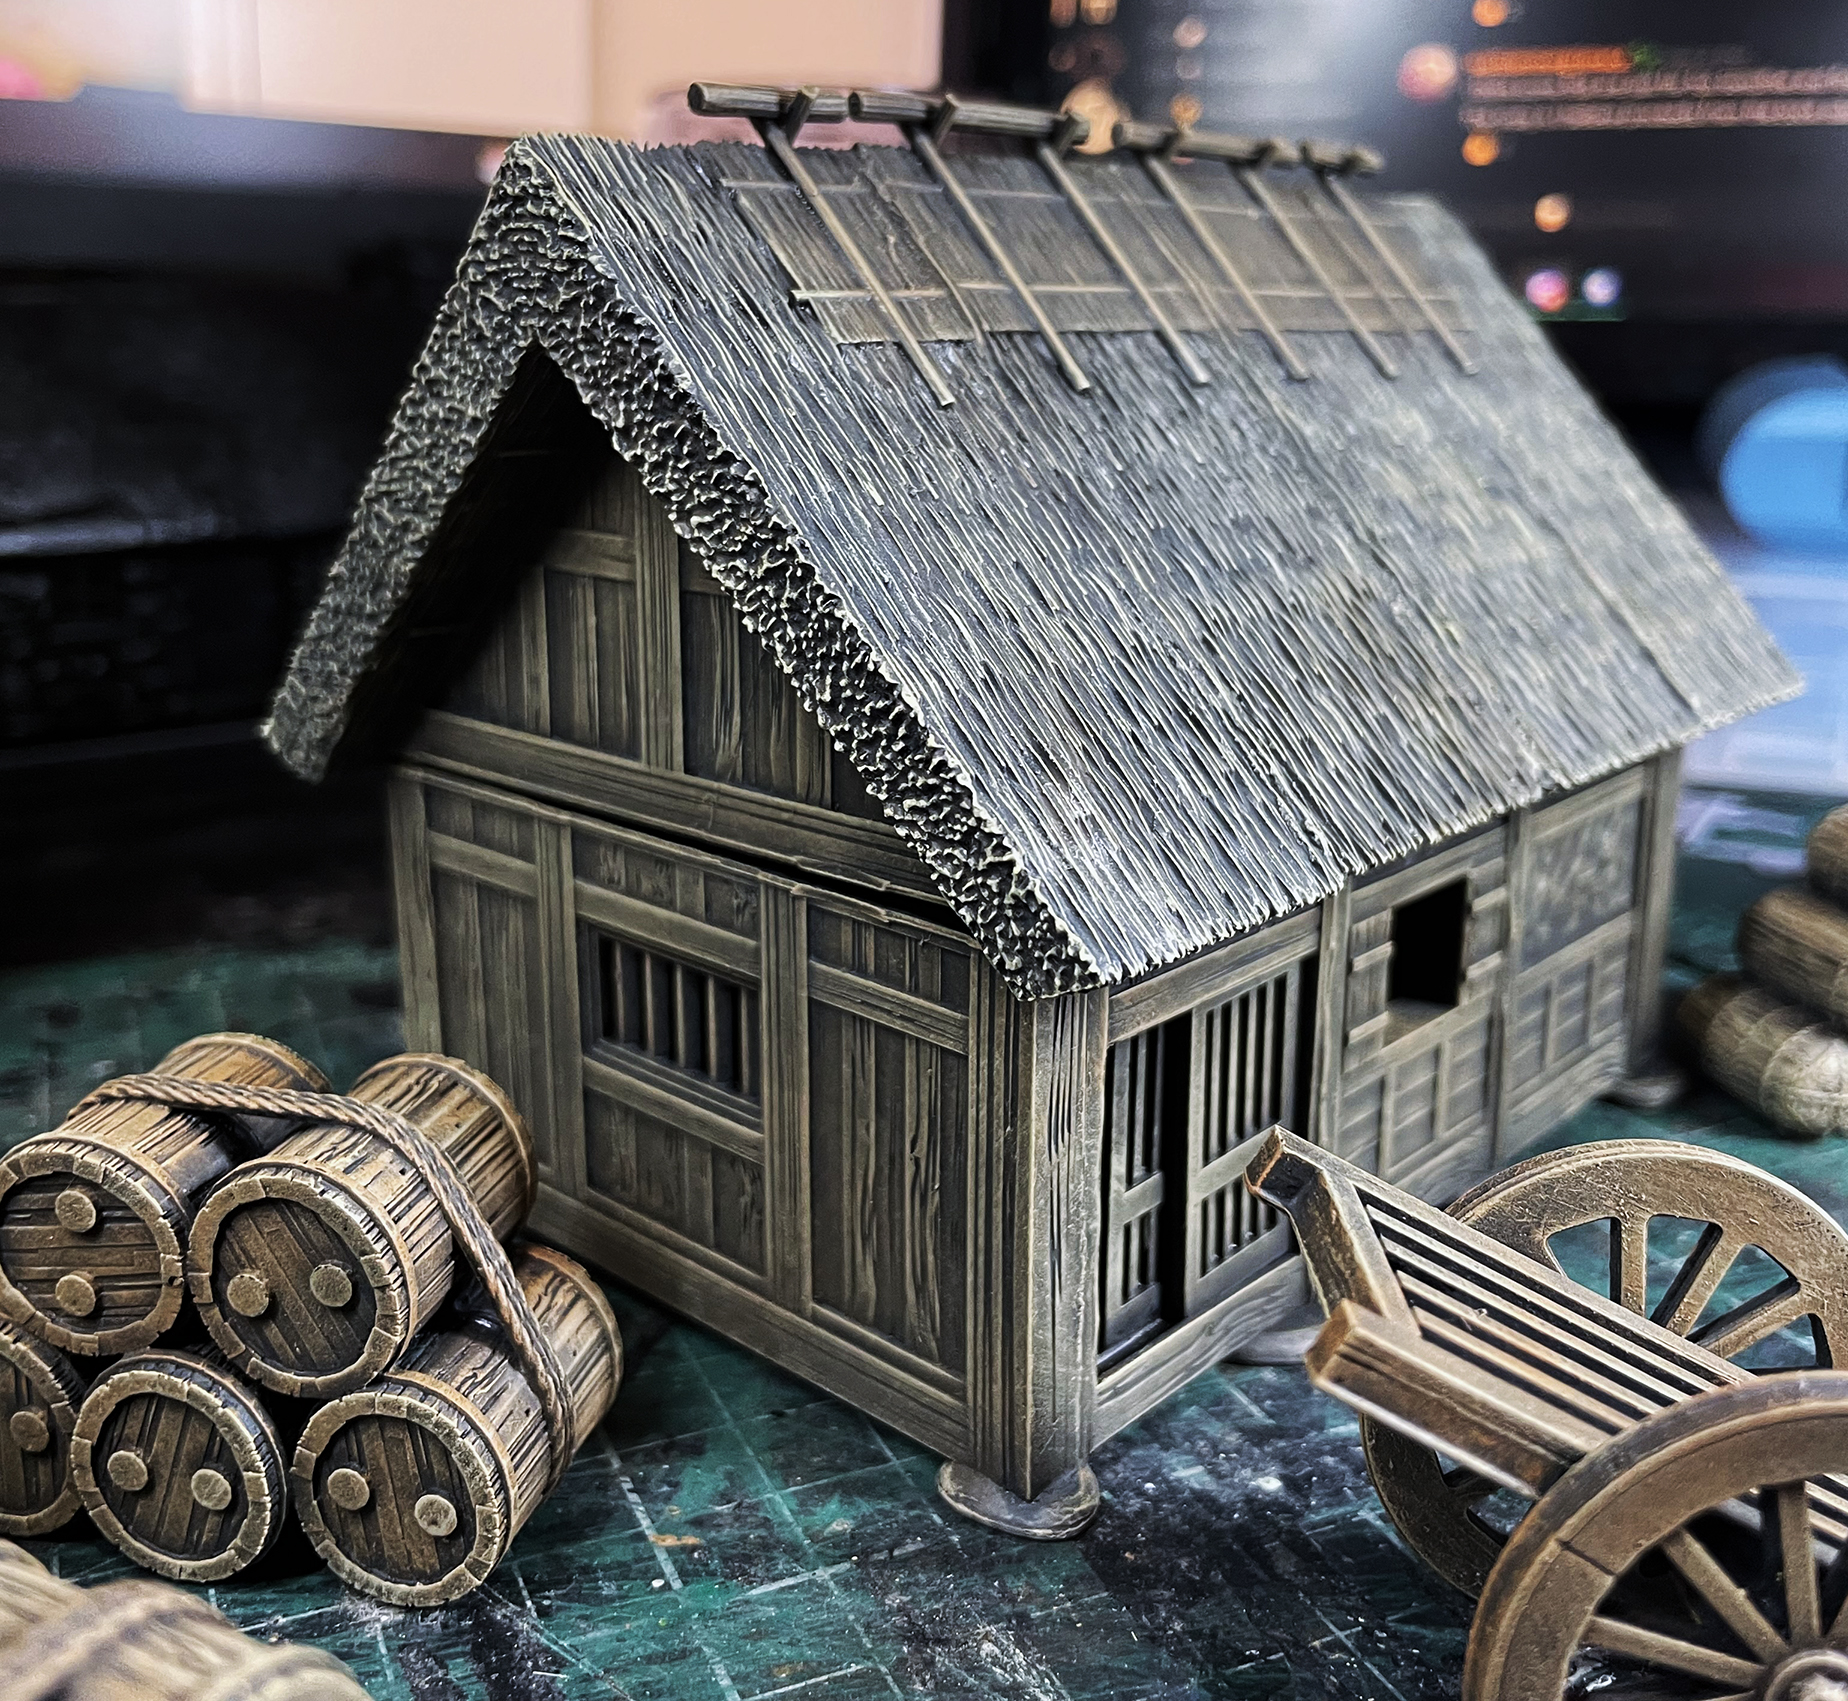
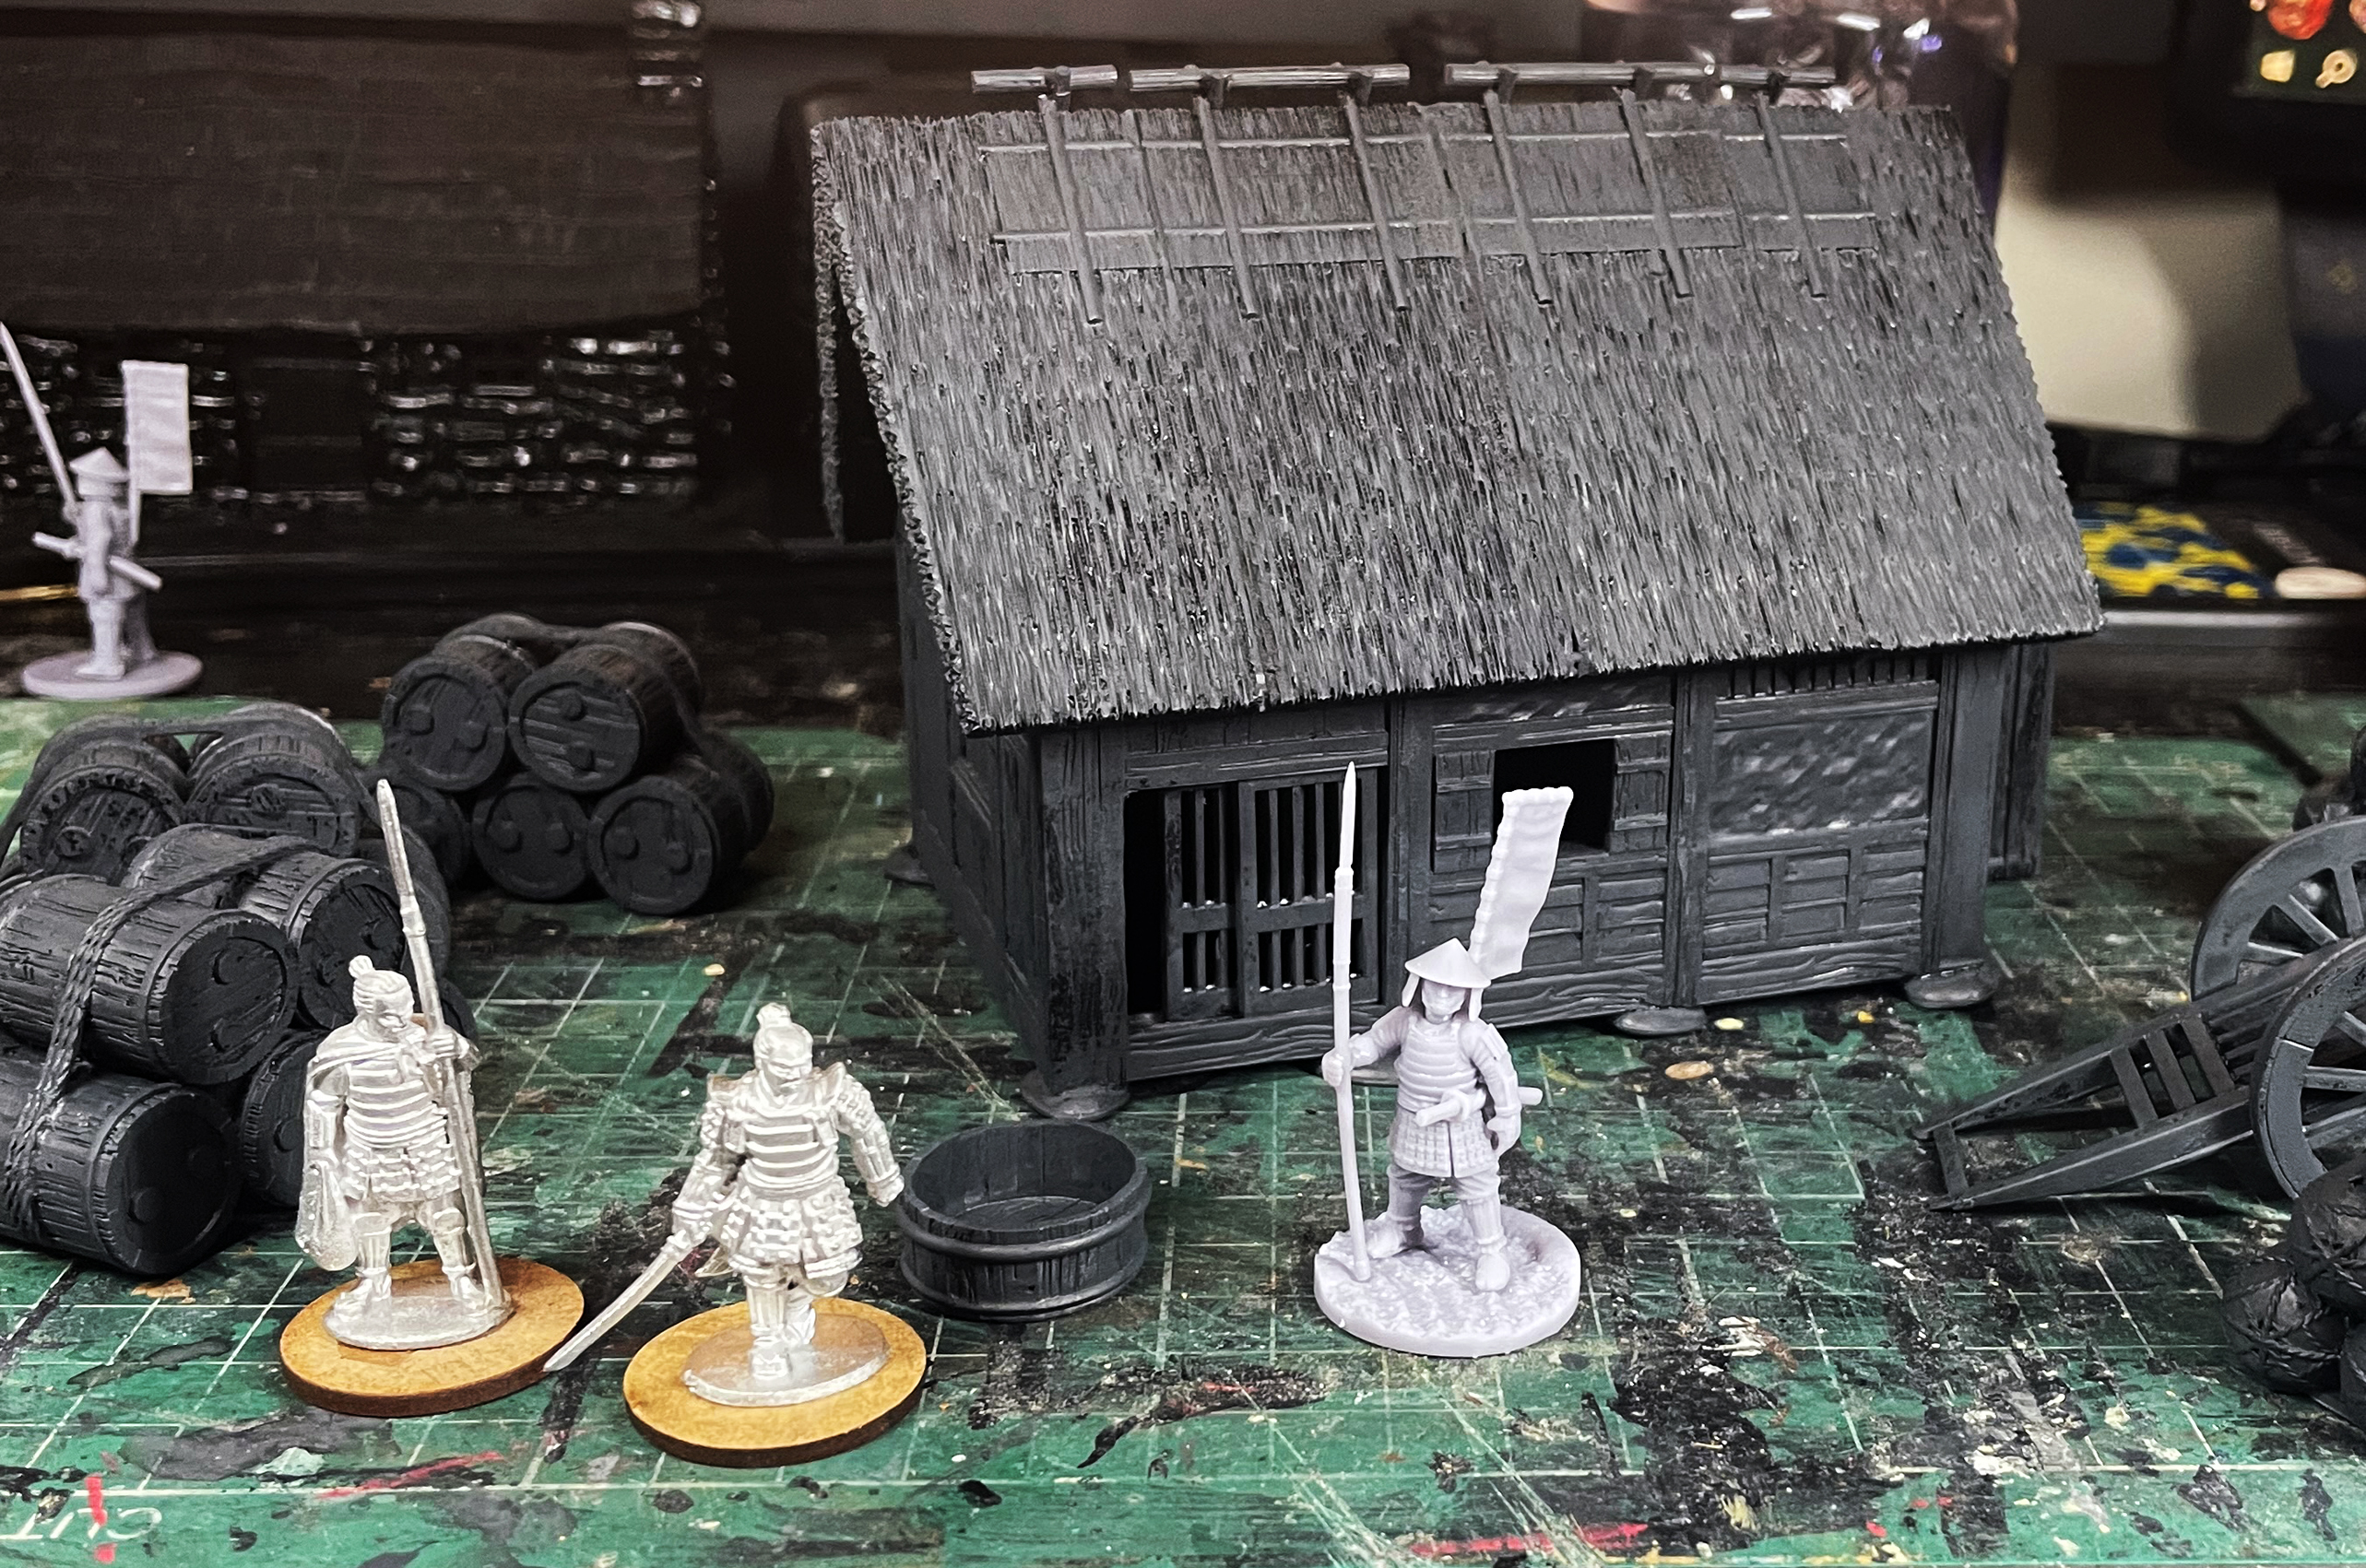
Assembled my fourth Japanese rural(ish) building and I so love these 3DAlienWorlds modular kits. They even come with interiors but I’m not doing that at the moment. Just need to fill the gaps in the roof now.
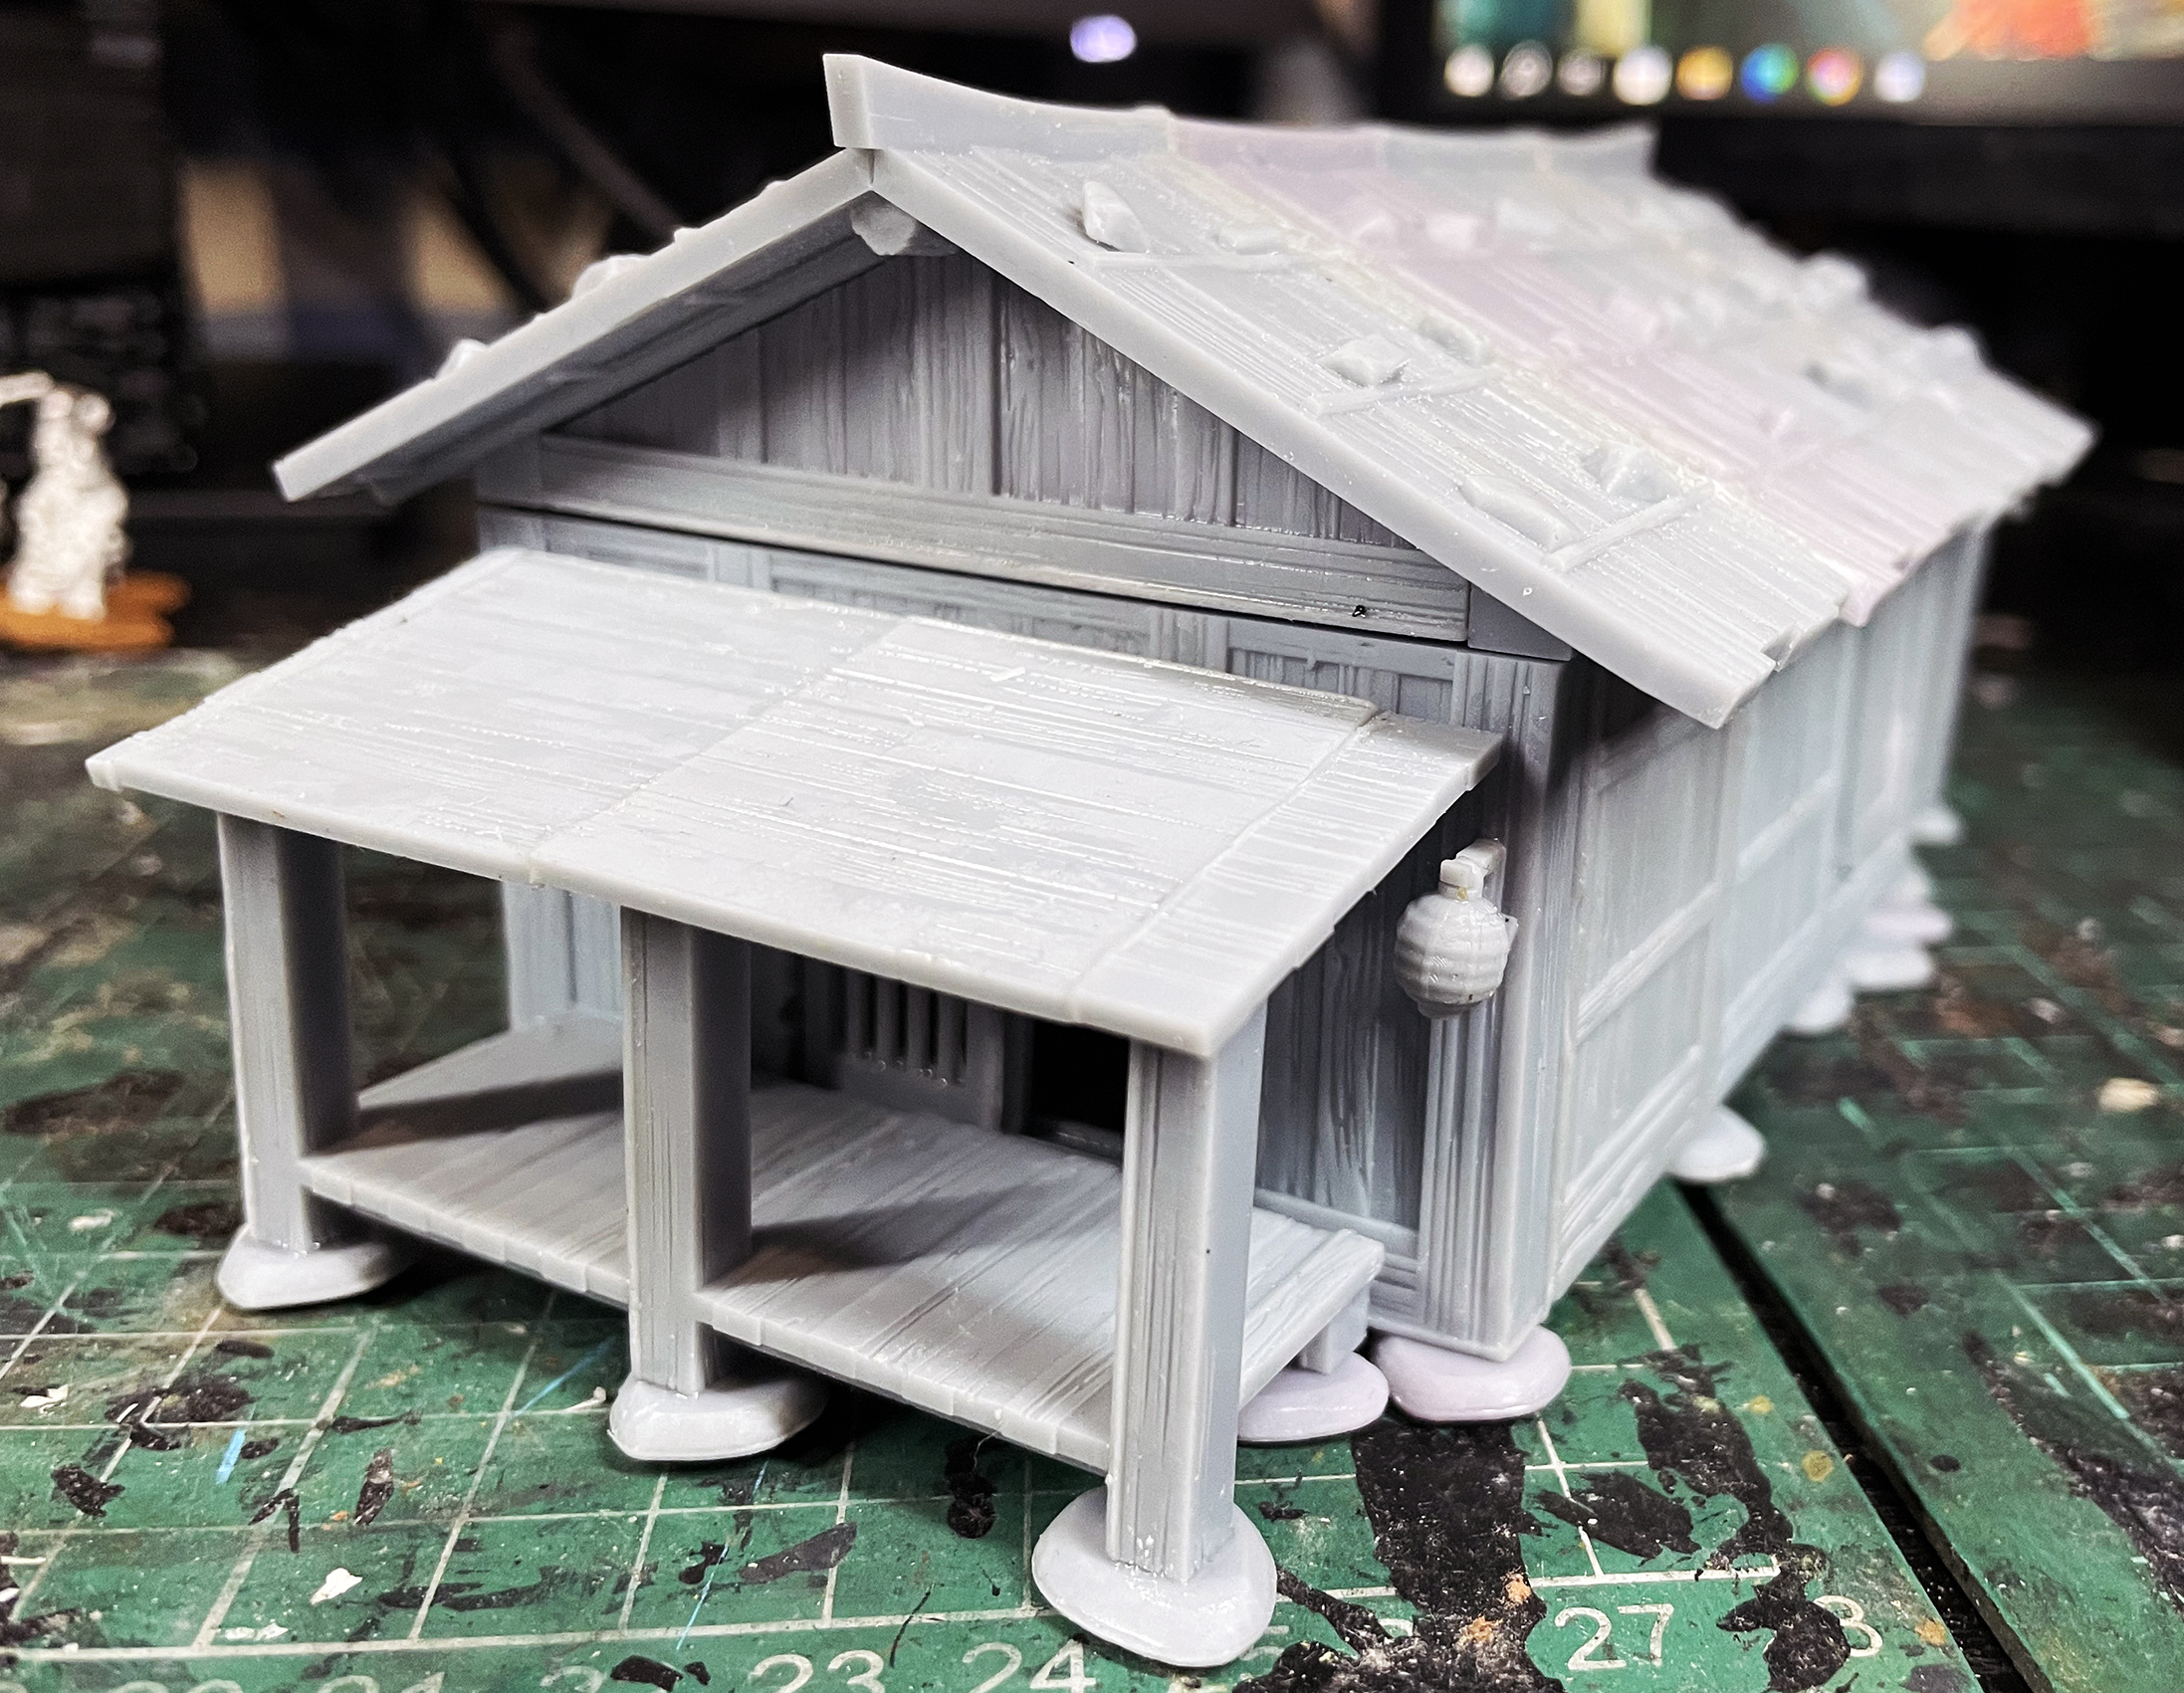
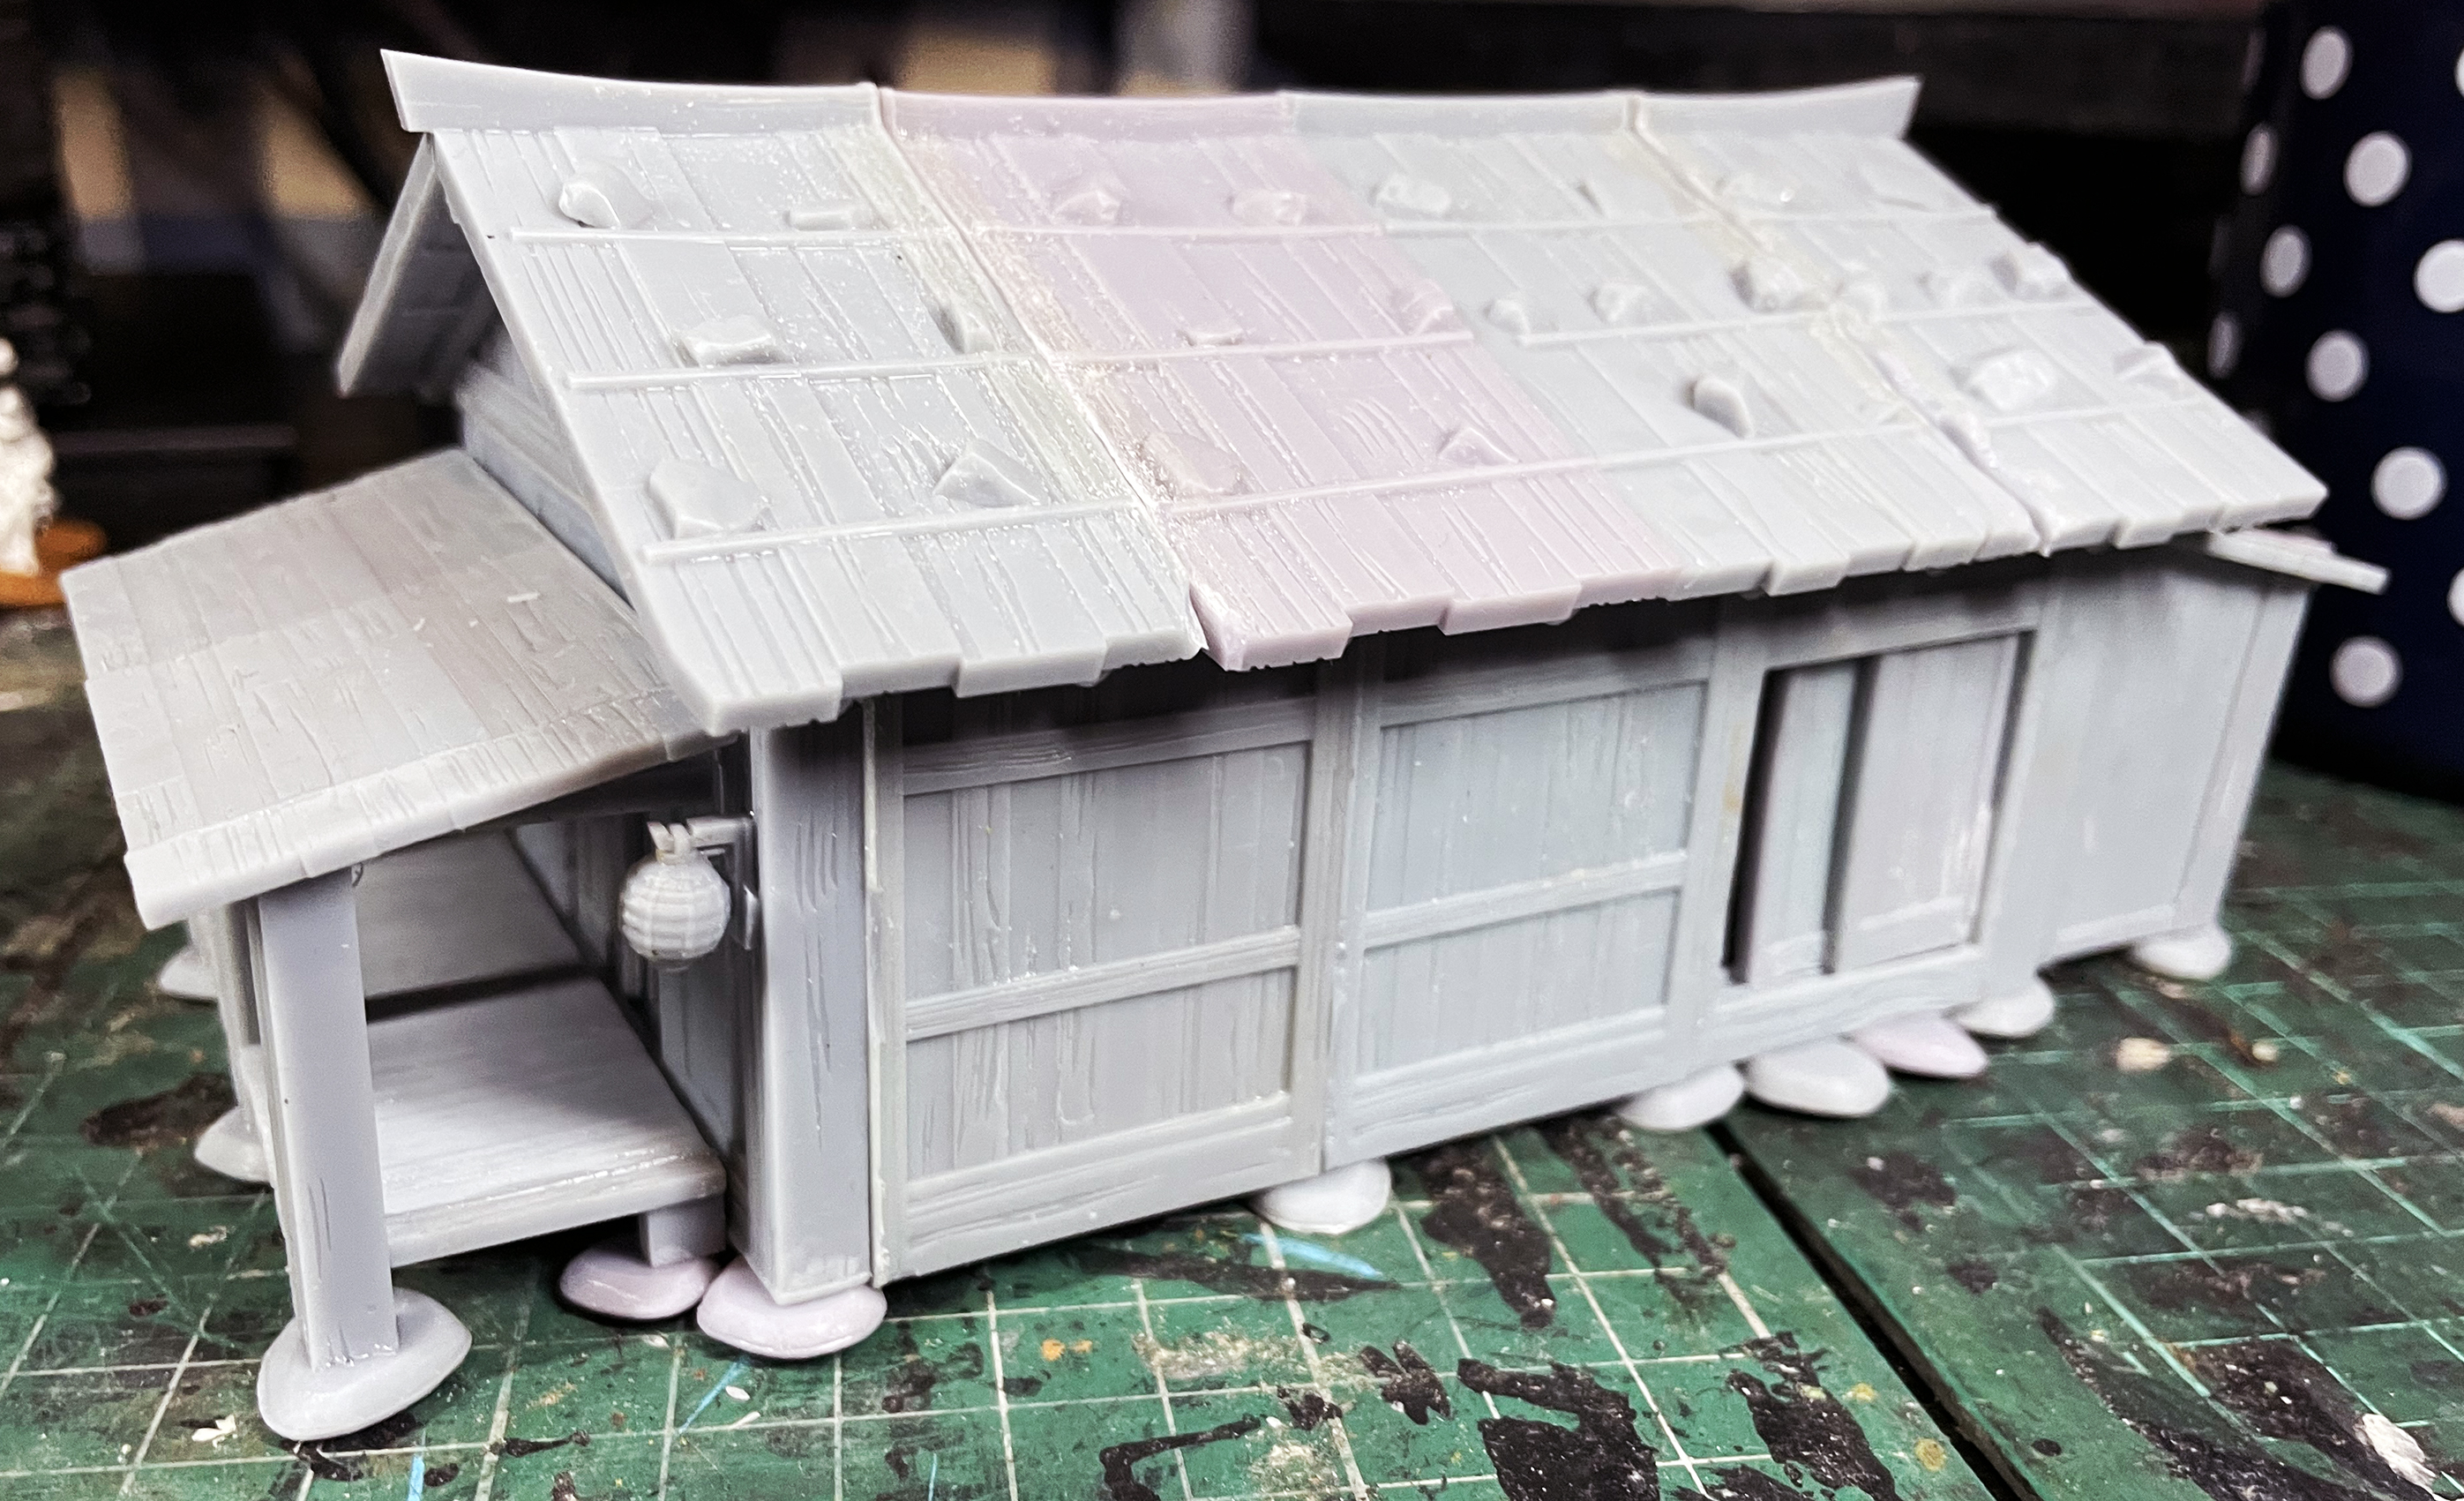
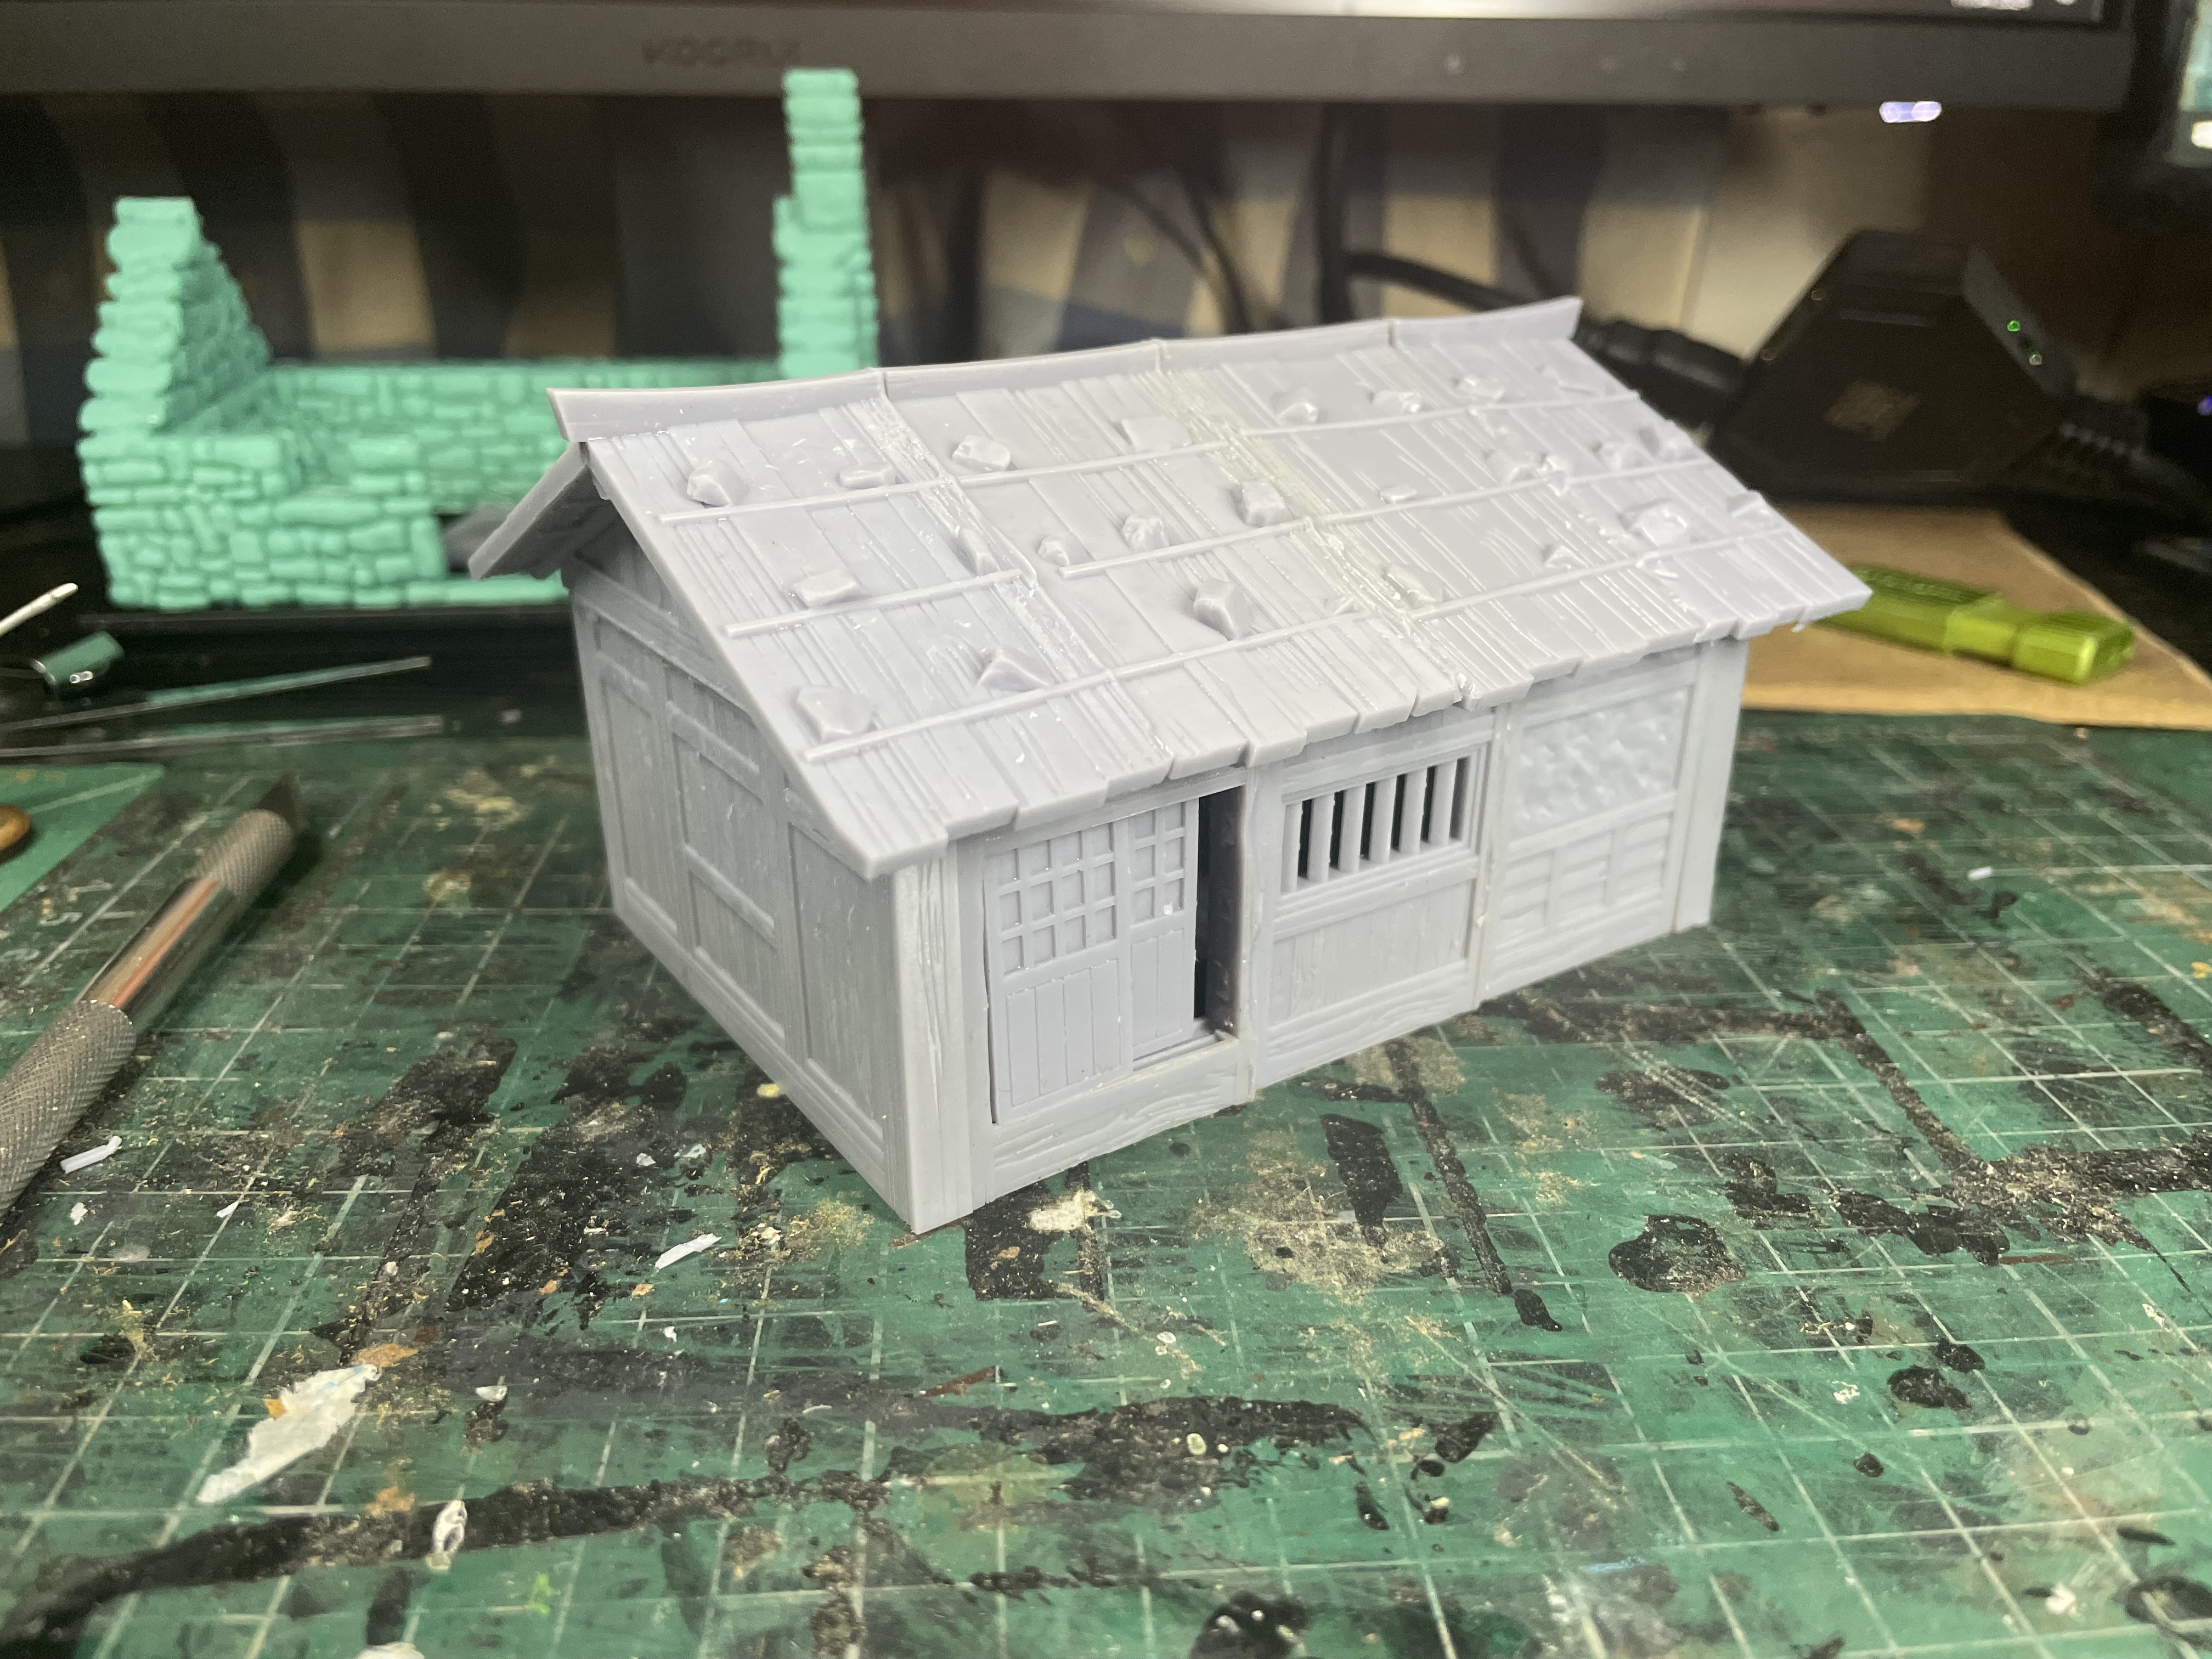
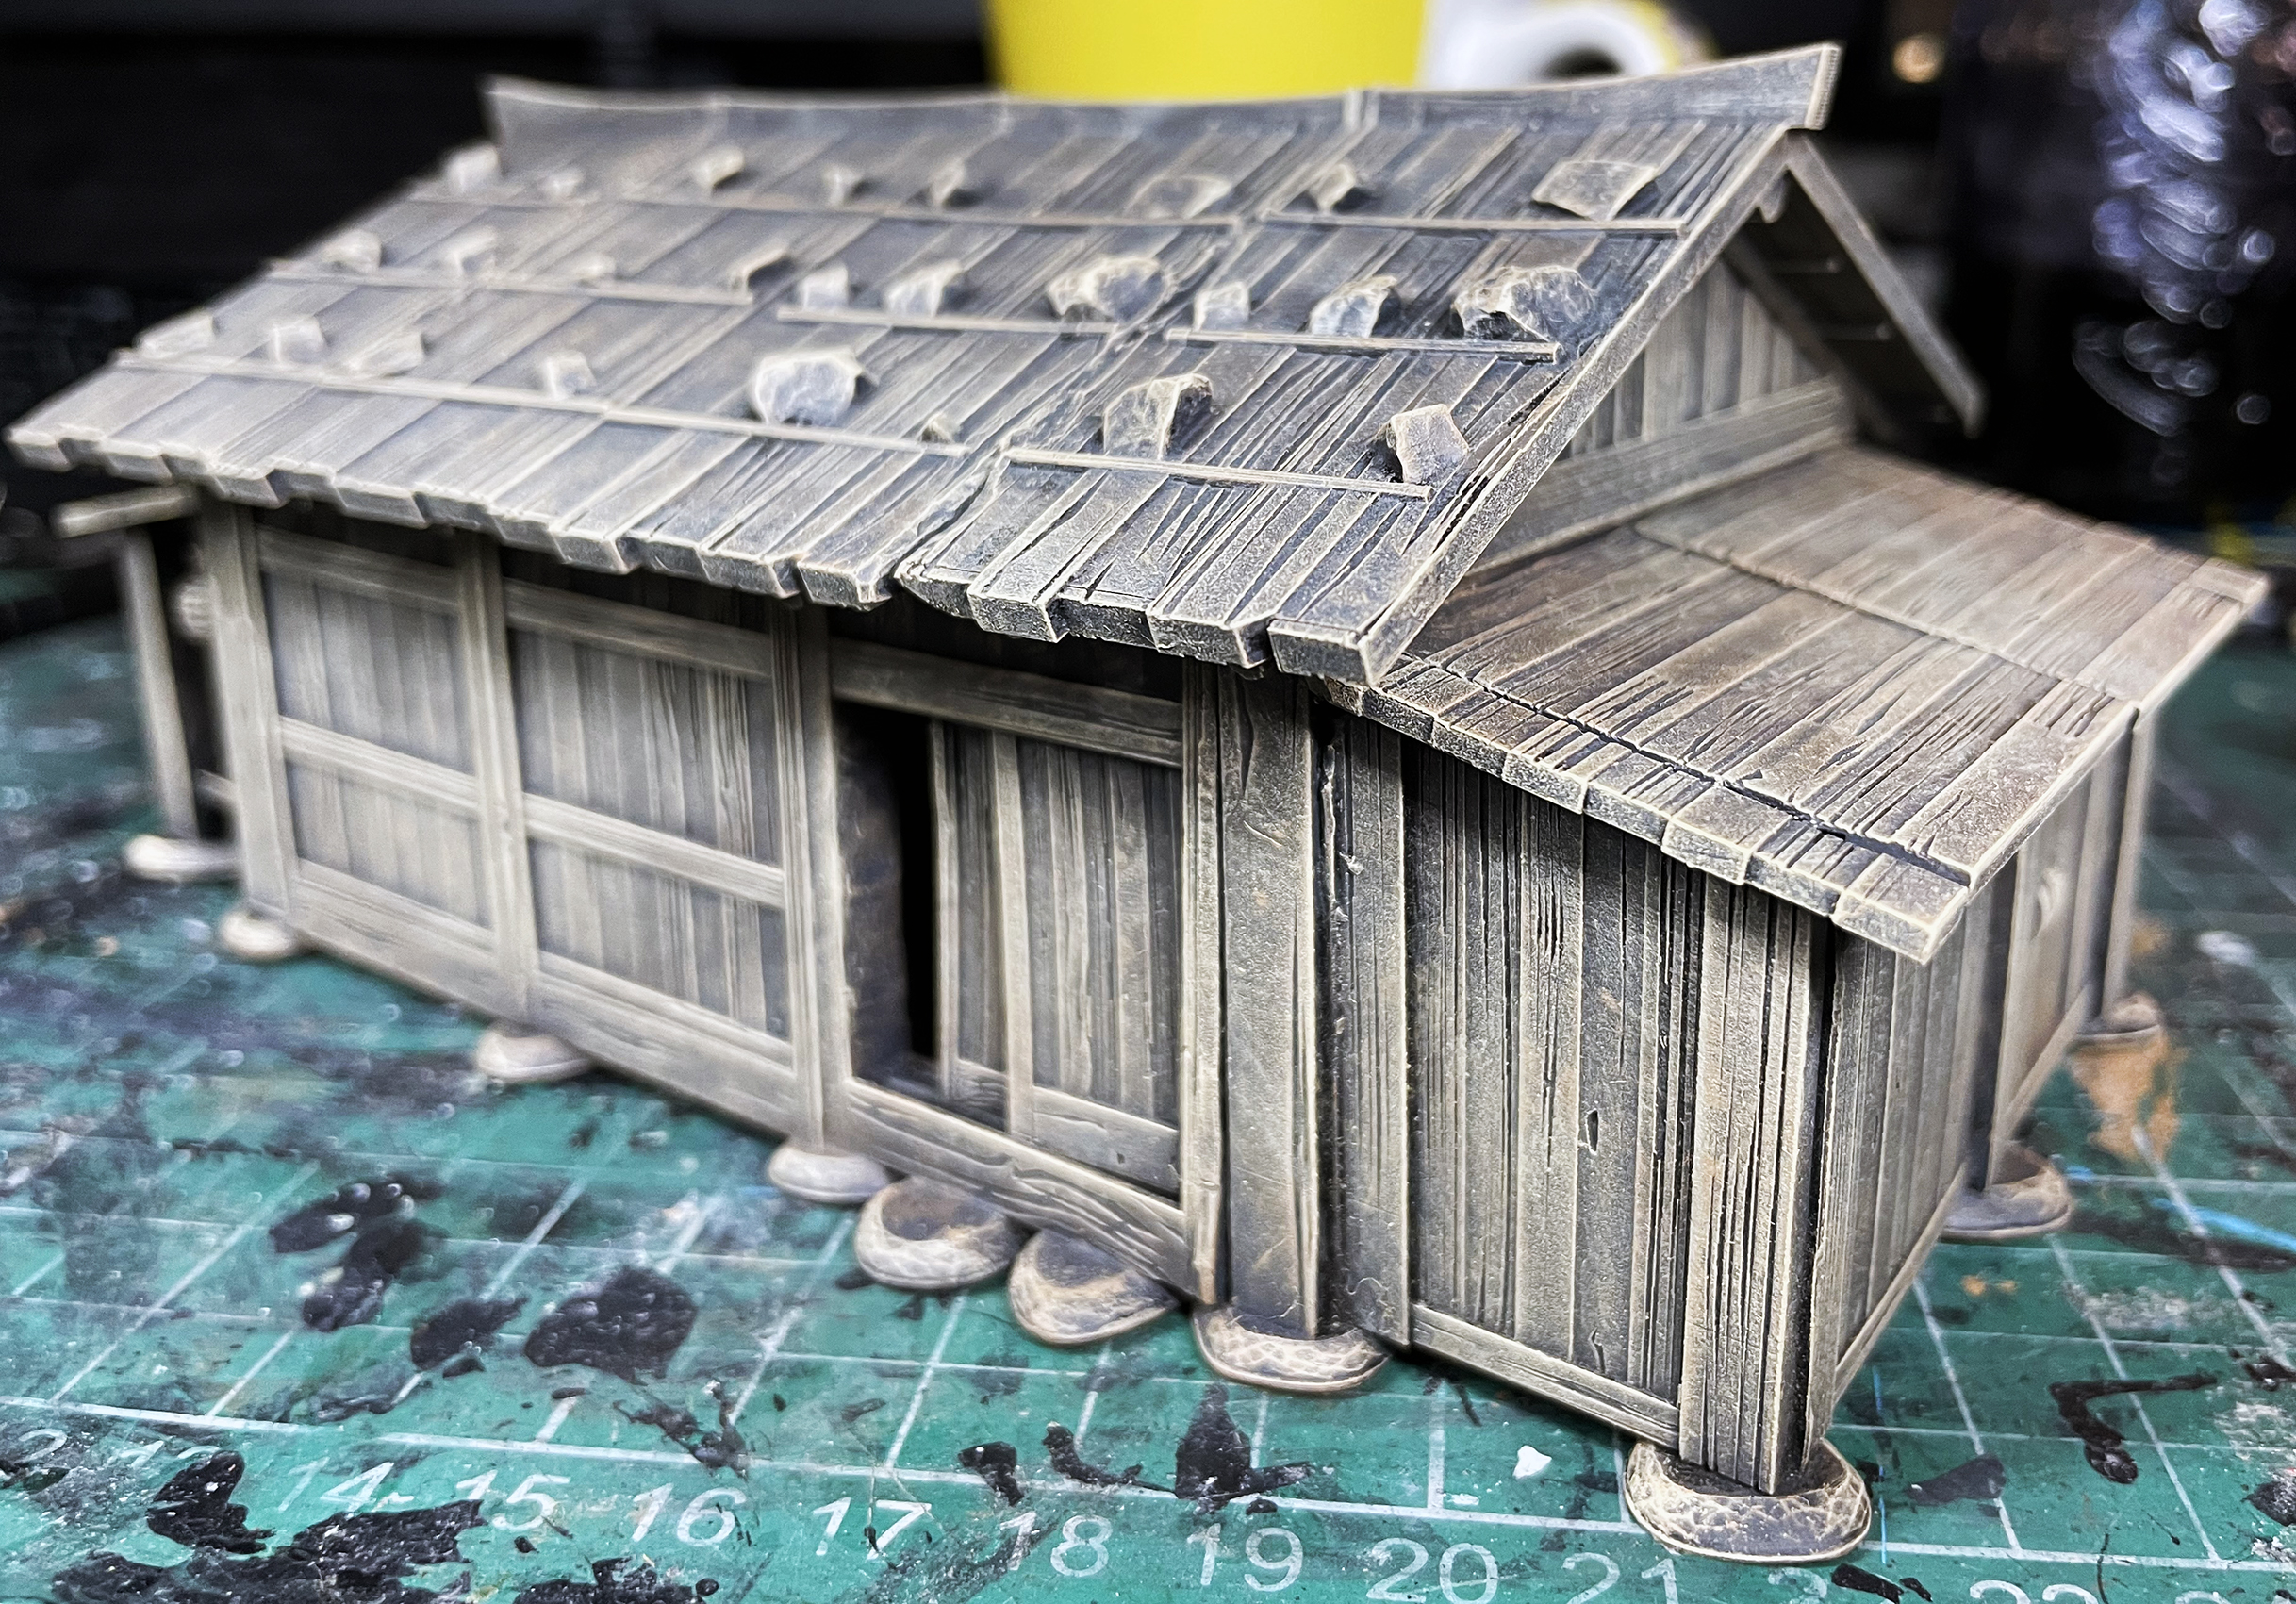
Firstly I prime it black and then my first coat is Vallejo Model Colour German Grey.
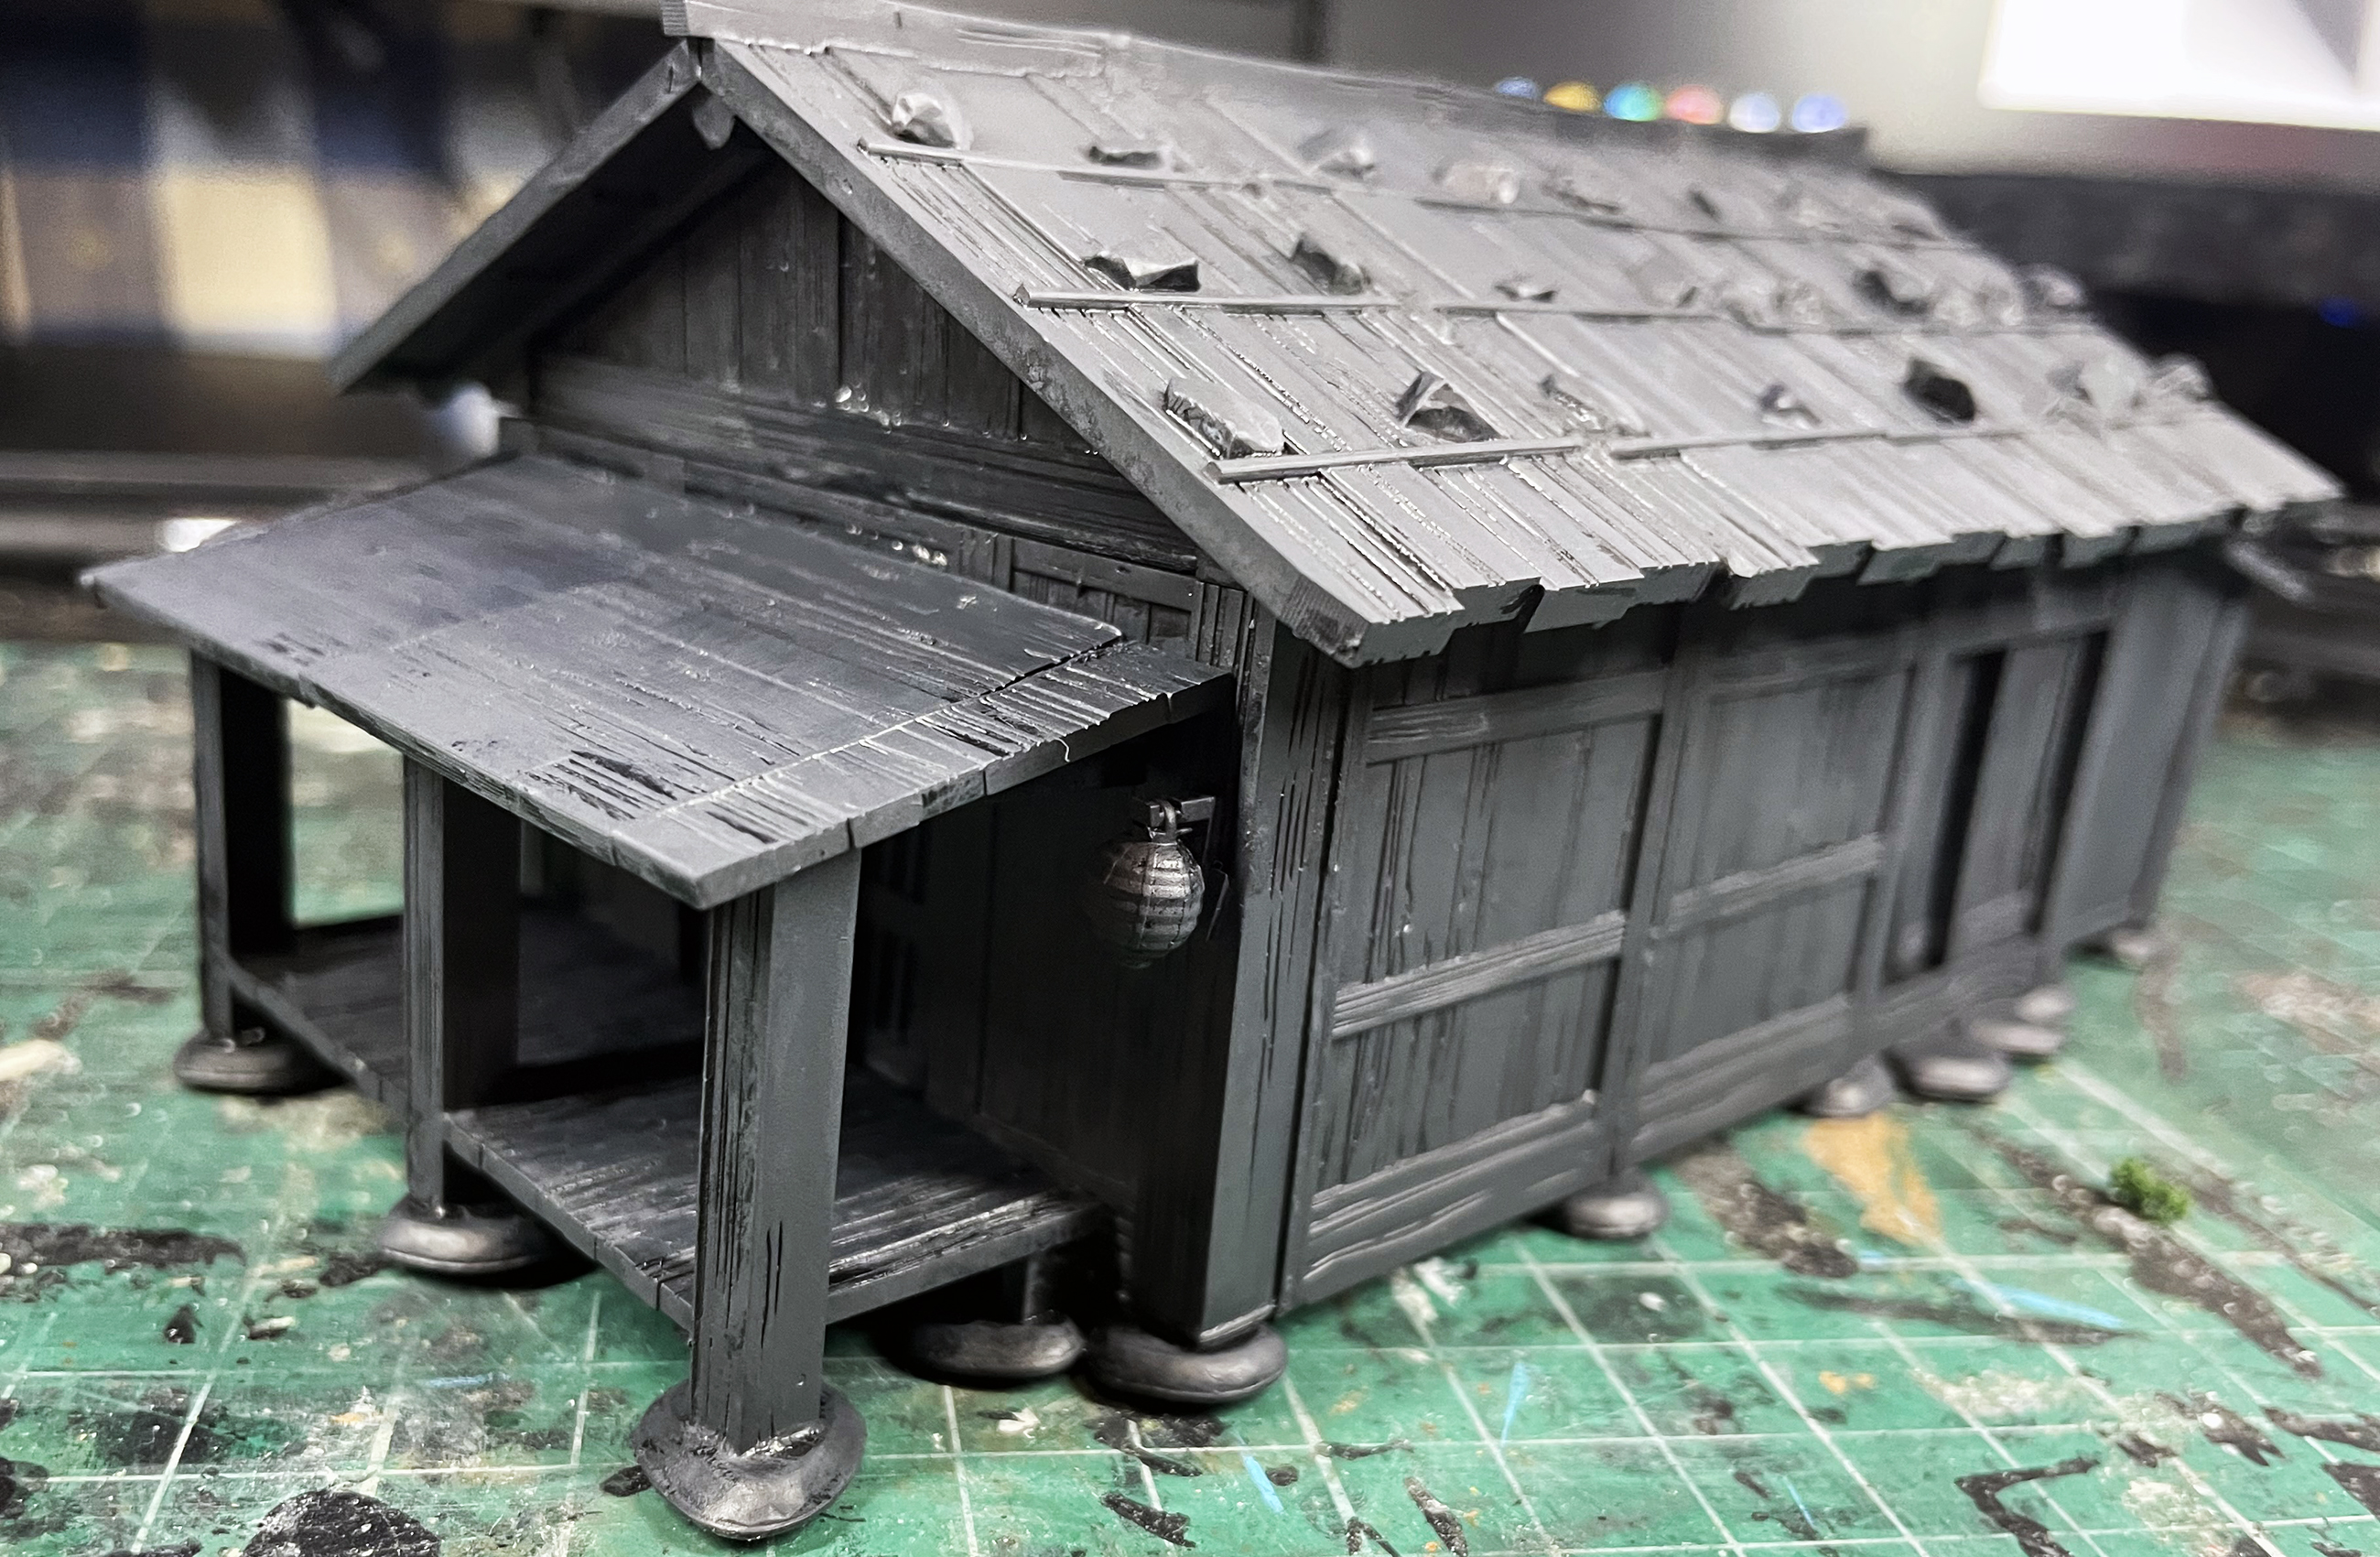
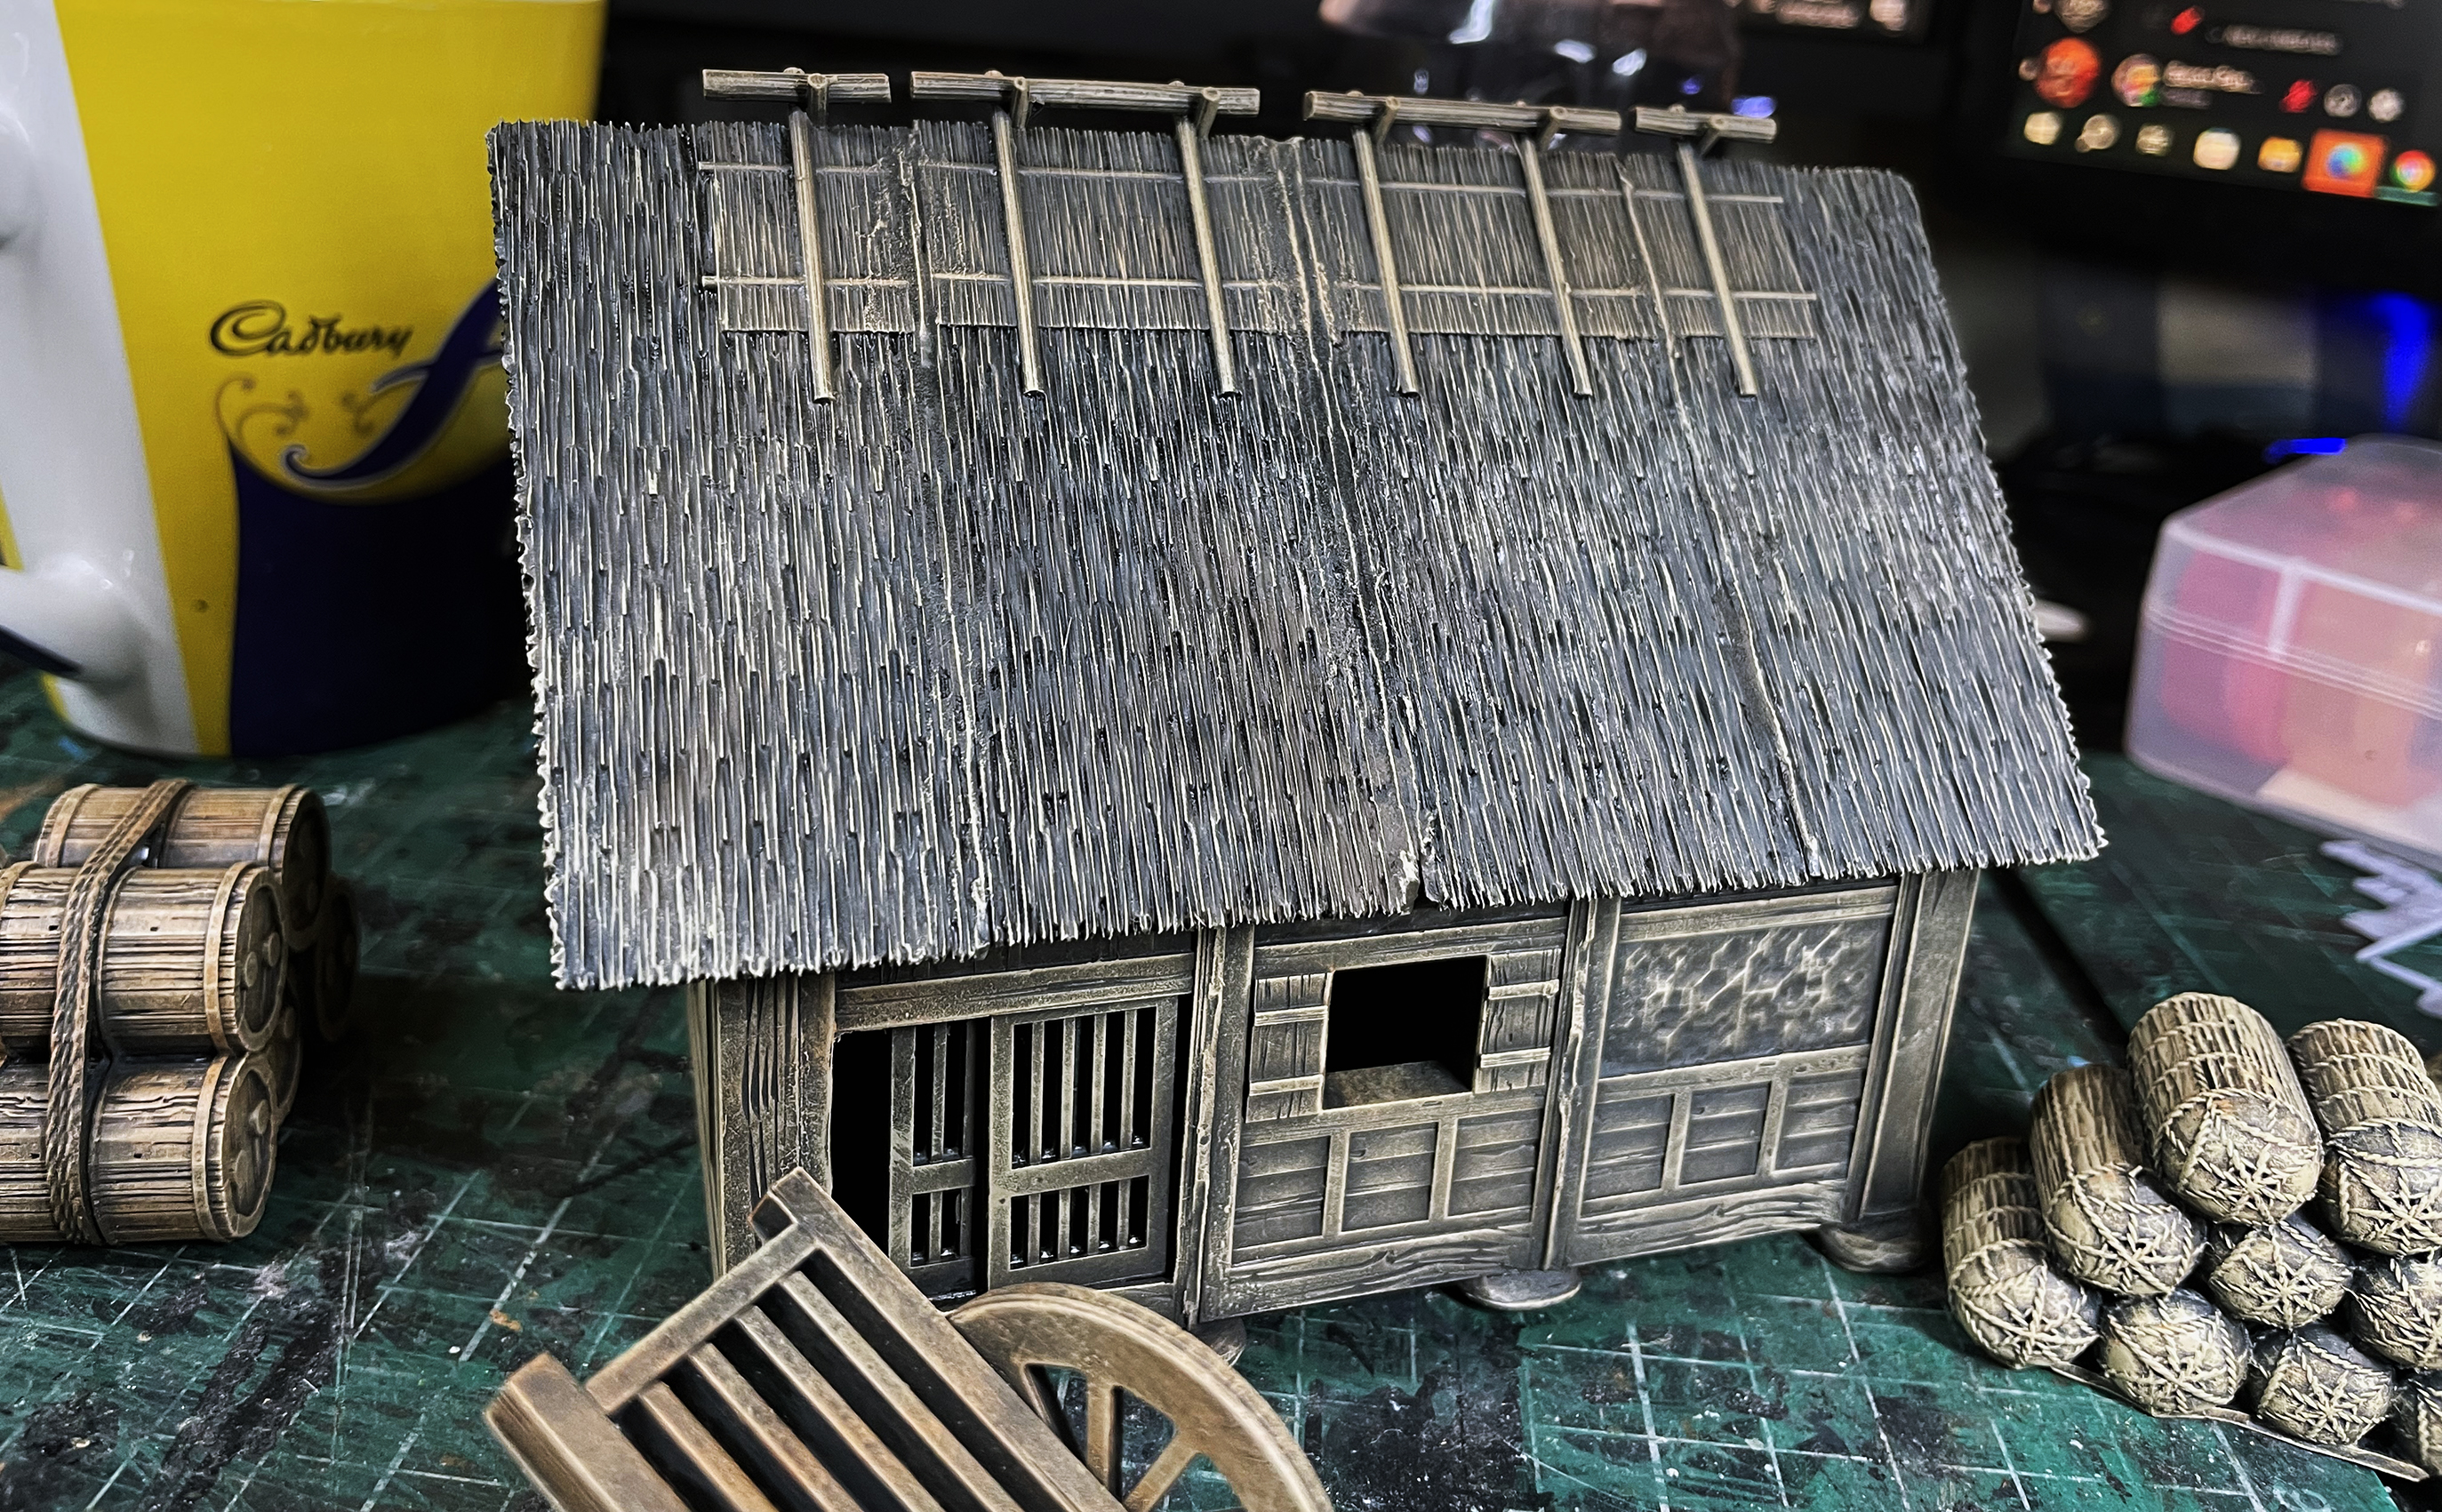
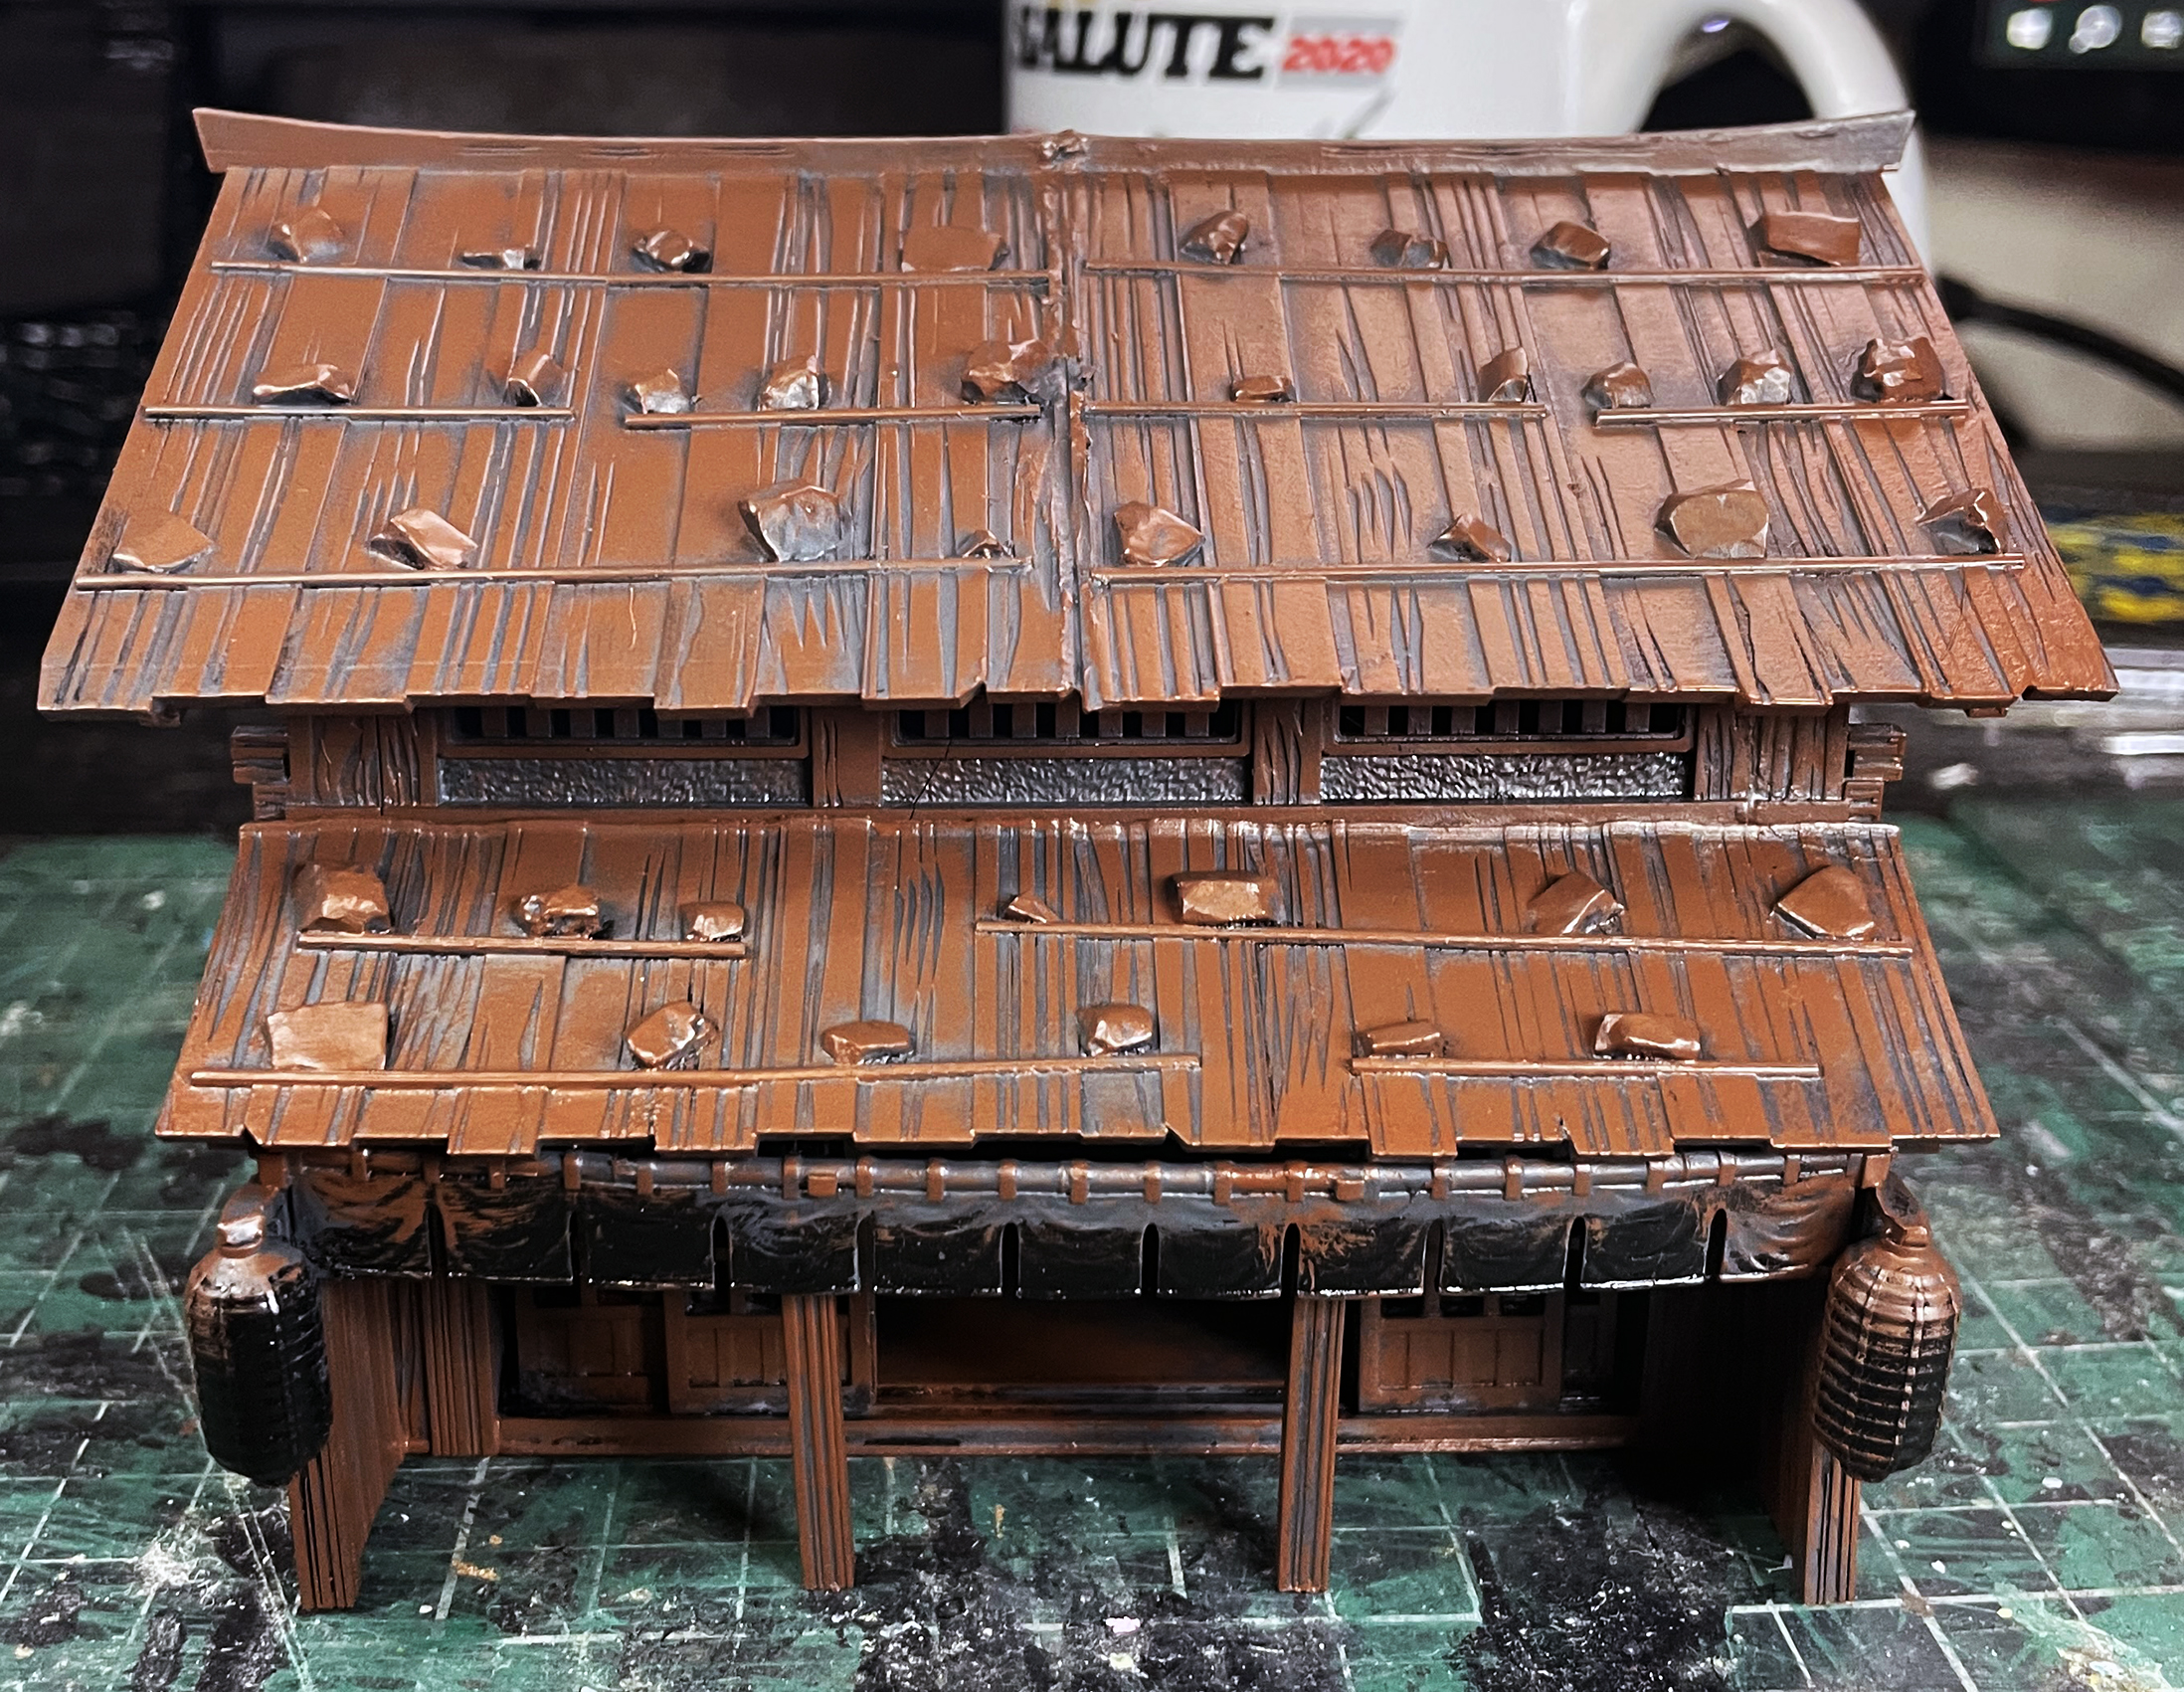
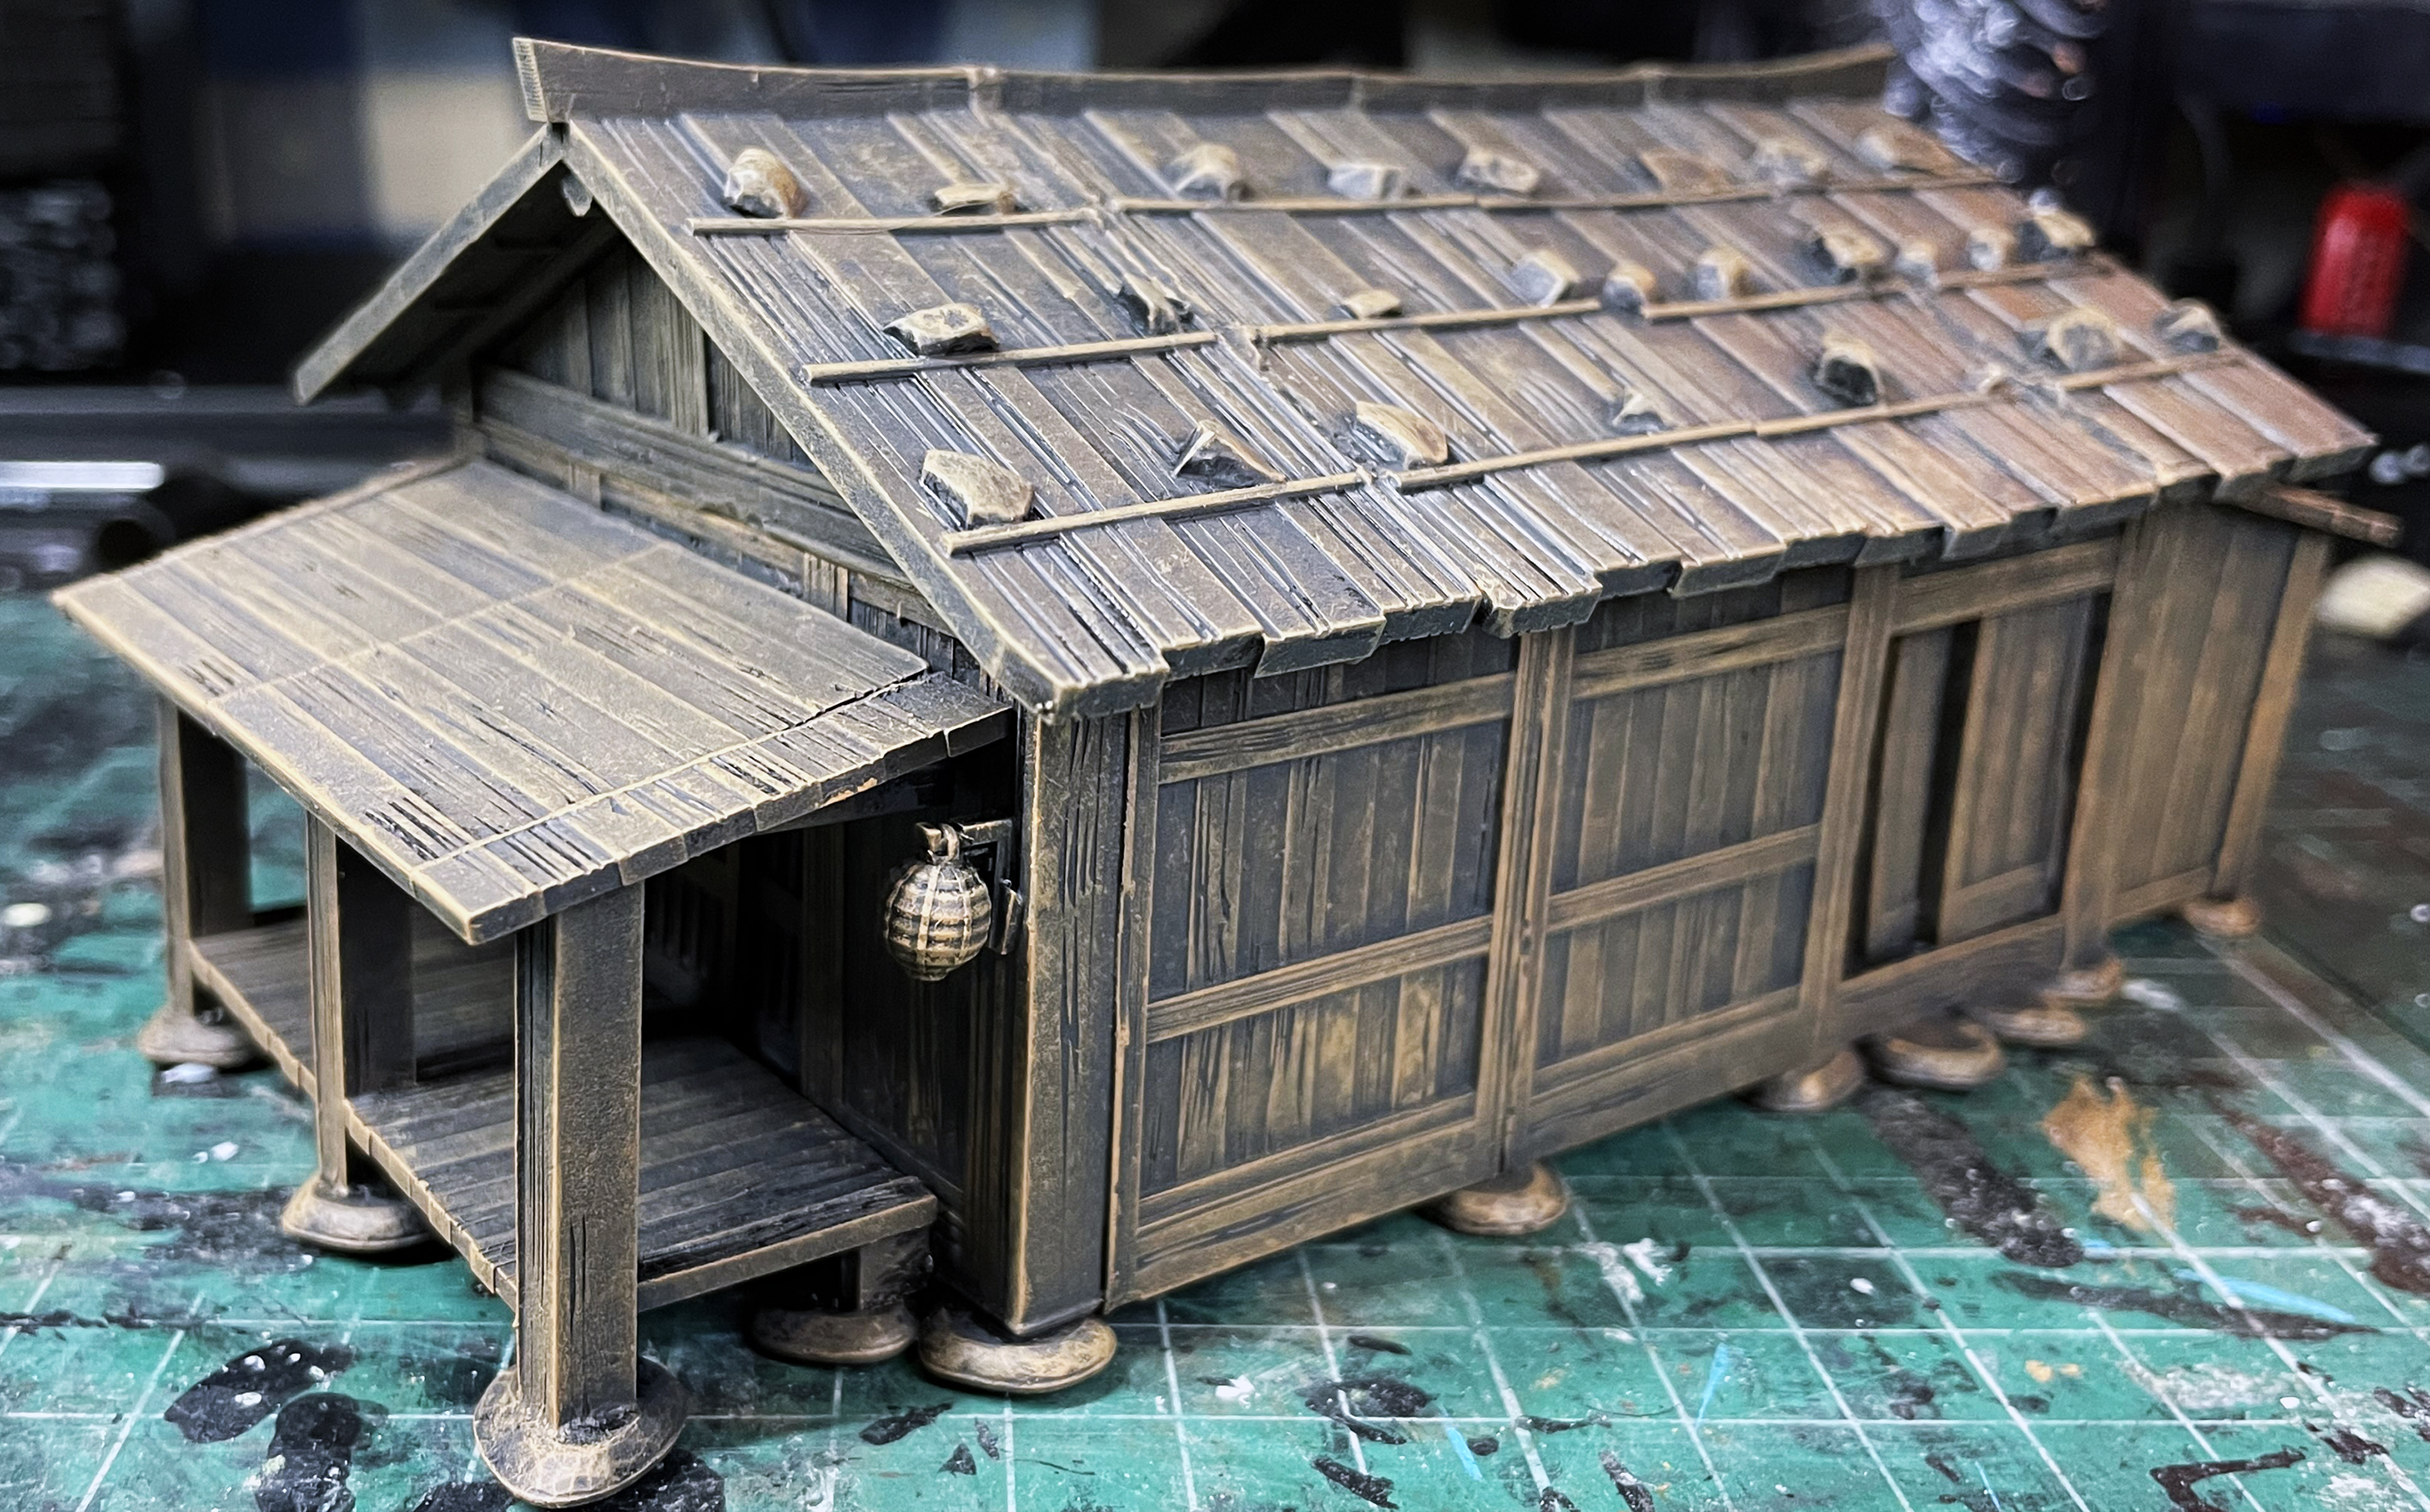
The next stage is to heavily drybrush Vallejo Model Colour USA Olive Drab all over the building. I like Olive Drab as it is a nice greeny grey brown and is perfect for the base of aged wood.
The next stage is done and this is a drybrush of Vallejo Model Colour light Brown. It’s a lovely warm colour and adds to the overall effect.
To Be Continued