


Warhammer 40,000: Class of (Spring) 1986


Recommendations: 75
About the Project
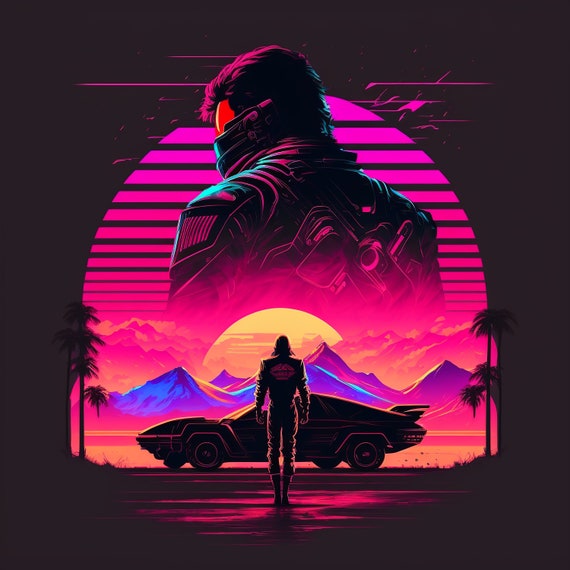
Why does the grim dark future have to be so...well, dark? I'm finally going to work on painting up my Warhammer 40K models, but with a little 1980's and synthwave color palette.
Related Game: Warhammer 40,000
Related Company: Games Workshop
Related Genre: Science Fiction
Related Contest: Spring Clean Hobby Challenge 2024
This Project is Active
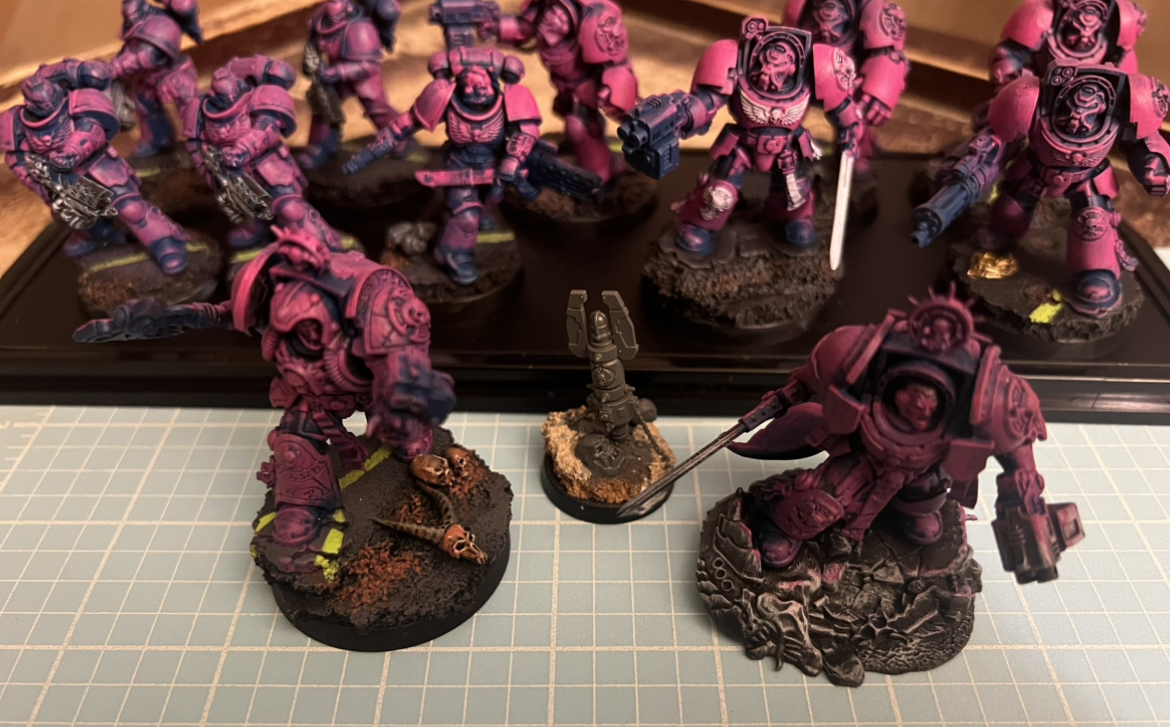
Chapter VII - The Sun Sets On Another Project
As the project comes to an end, I am proud with what I was able to get accomplished.
For the Space Marine Combat Patrol, miniature has its own custom paint and the main 12 models have paint on them.
I would have loved to have finished them all, but sometimes other things have to take priority to our hobby time.
That being said, I’m never going to be done with this project. I will have a full 2,000 point army of Synthwave Space Marines!
Until next time, friends.
Chapter VI - A Mini(ature) Rant
The event is almost over and I haven’t been able to find motivation to continue painting. Life, work, and whatnot really puts a bit of a damper on the desire. I did want to finish at least building and prepping the rest of the Combat Patrol. This led me to a small realization that I’m sure a lot more before me have realized…
How the bloody hell does this constitute as a miniature?
The Space Marine Combat Patrol says it includes 13 miniatures. That is literally a throw away piece you add to a sprue to balance it out and/or an extra little freebie. And, yes, I realize it has actual gameplay use in the game. Still that is some large bull for a “miniature” in a…checks price…$160(USD) Combat Patrol.
I’m glad I only have the Combat Patrol via the Leviathan box and the Ultimate Starter, otherwise I’d be really ticked off.
Sorry. I’m trying my hardest to be more positive, especially in my hobbying, but wow.
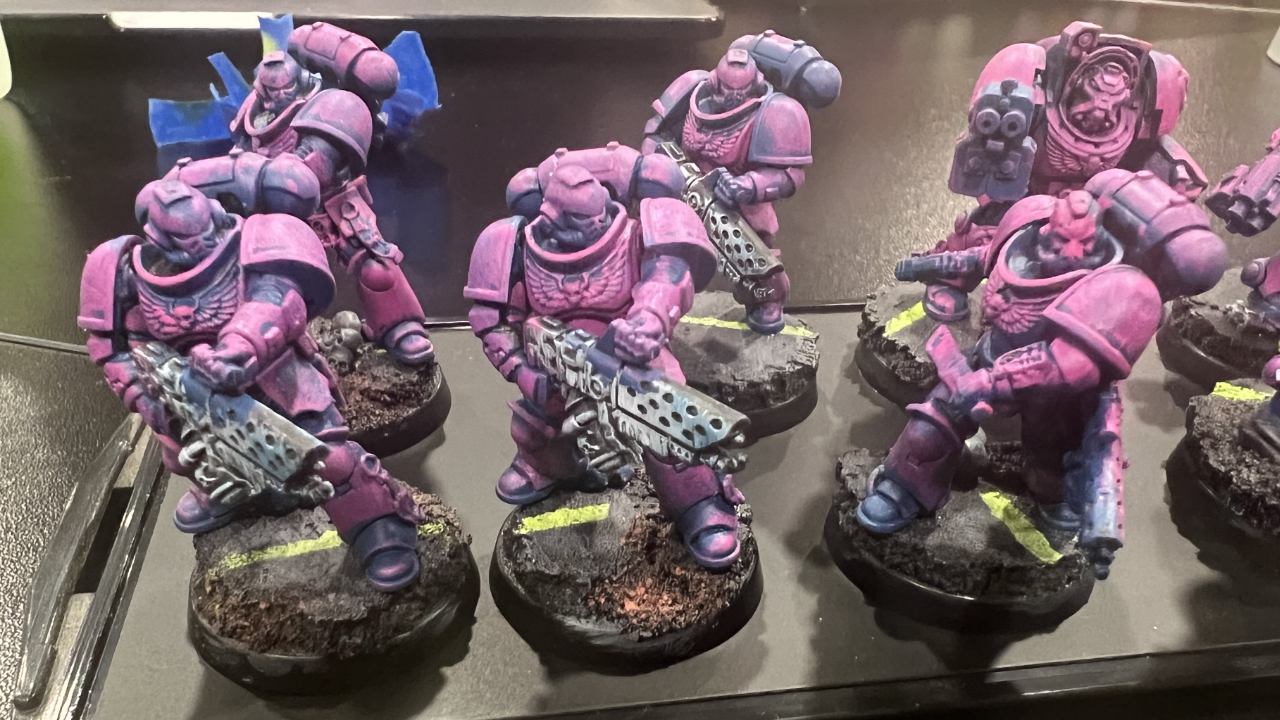
Chapter V - Infernus Squad Part 1
We had an impromptu hobby night tonight, so I decided to put some paint on the Infernus Squad models.
Originally, I was going to try airbrushing the paints, but decided to simply brush it own. Not much was done different than the Terminators from the last entry. The only thing different is the Infernus Squad being smaller than the broader Terminators.
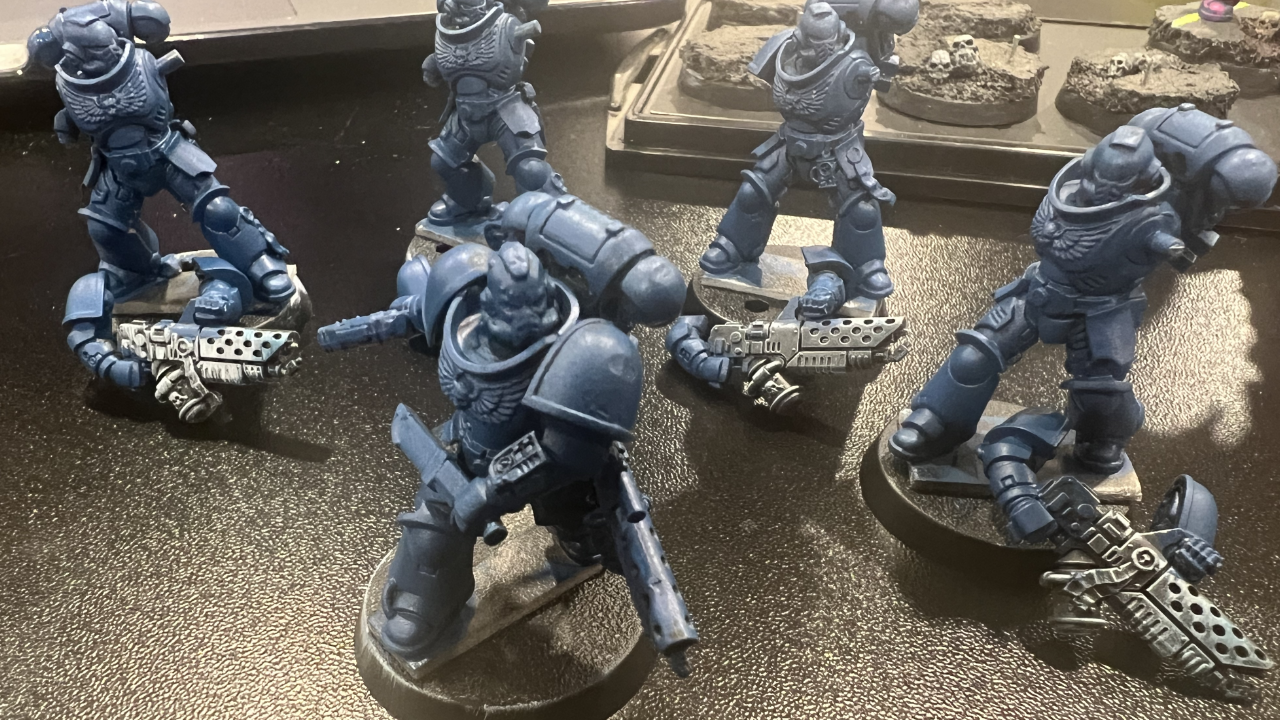
Chapter IV - Painting Some Terminators Part 1
Now that the bases are modeled, I decided to start by painting up the Terminators. I didn’t want to waste time on a test model, so I assumed these would be the best place to start. Their larger build makes for the perfect canvas.
To begin with, I’m going to be using Army Painter Warpaint Fanatics for these models, specifically Imperial Navy and Wicked Pink.
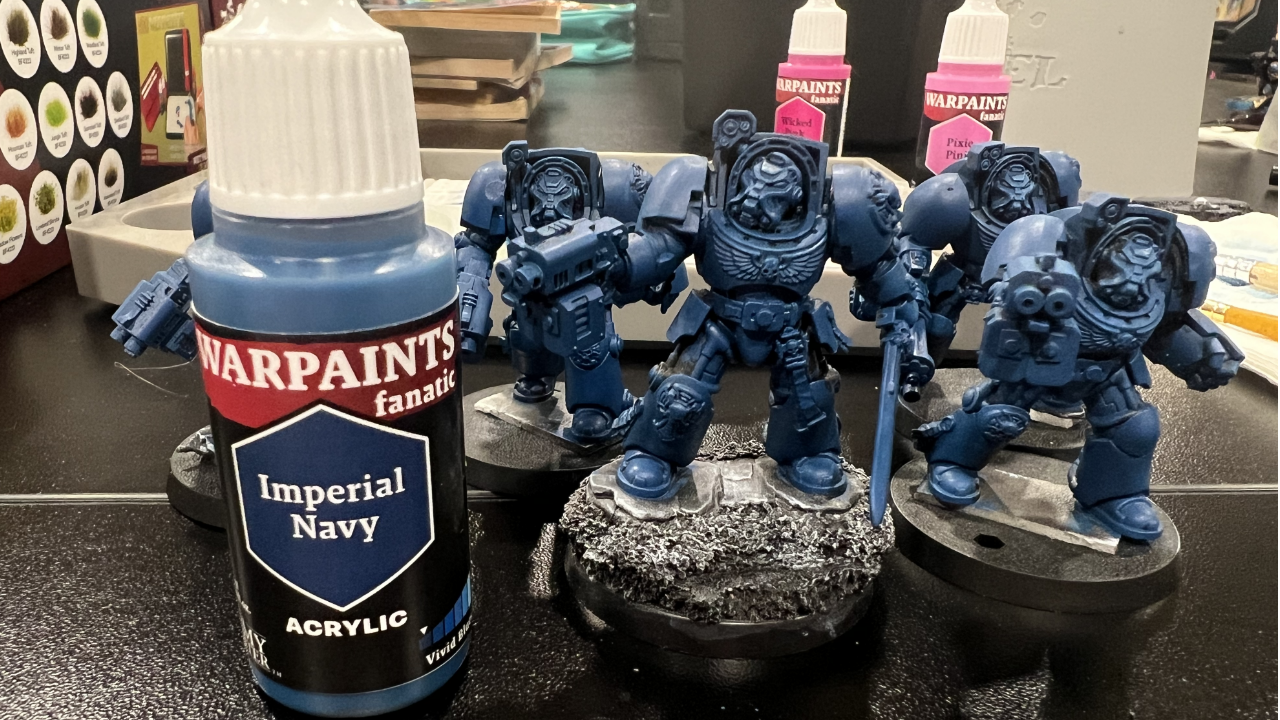
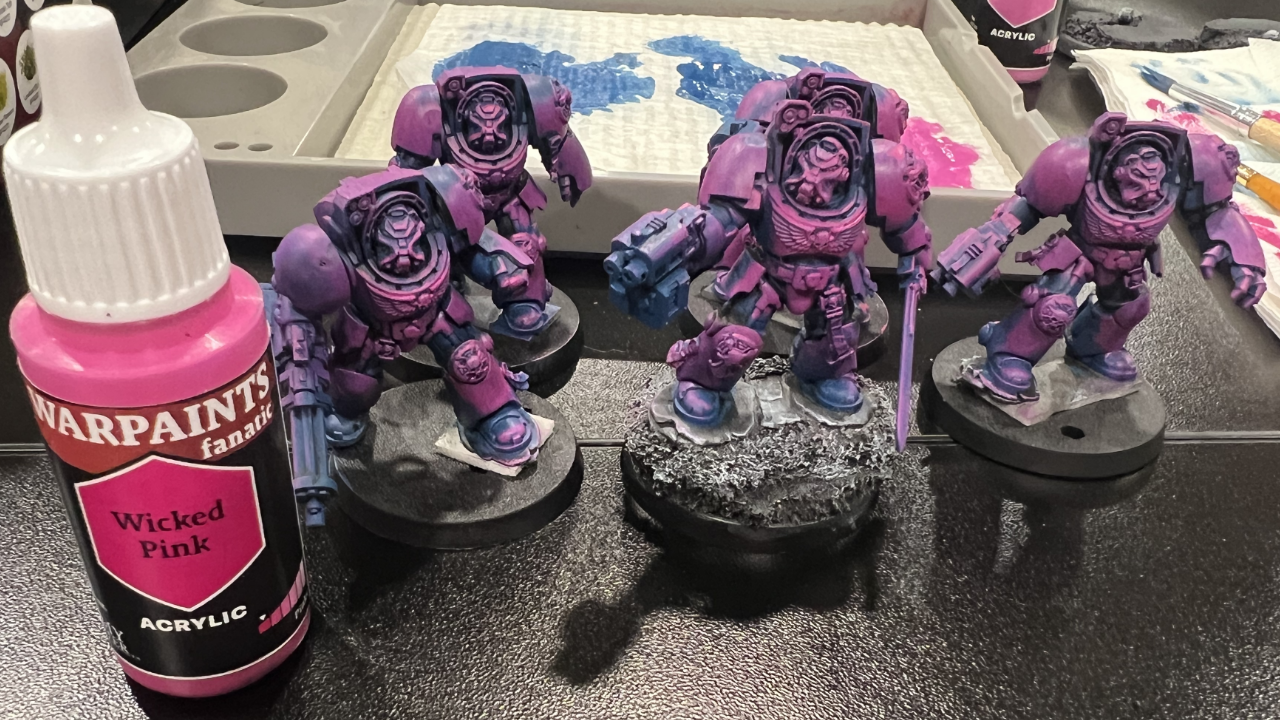
For the Imperial Navy:
I covered 100% of the models in this color. I did originally prime them black, but I think the blue will add a much nicer shadow color to the model. This will also save me time later as I wanted the under armor to be a blue color anyways.
For the Wicked Pink:
I did an over brushing of the Wicked Pink on approximately 75% of the model, going in a downward motion with the brush. Later steps will use a lighter shade of pink and I’ll be able to blend it into a more natural transition (hopefully).
For these two steps, I might attempt using an airbrush on the rest of the Combat Patrol. I’ve only ever used an airbrush to prime before, but it might be a bit of a time saver, especially on the Infernus Squad.
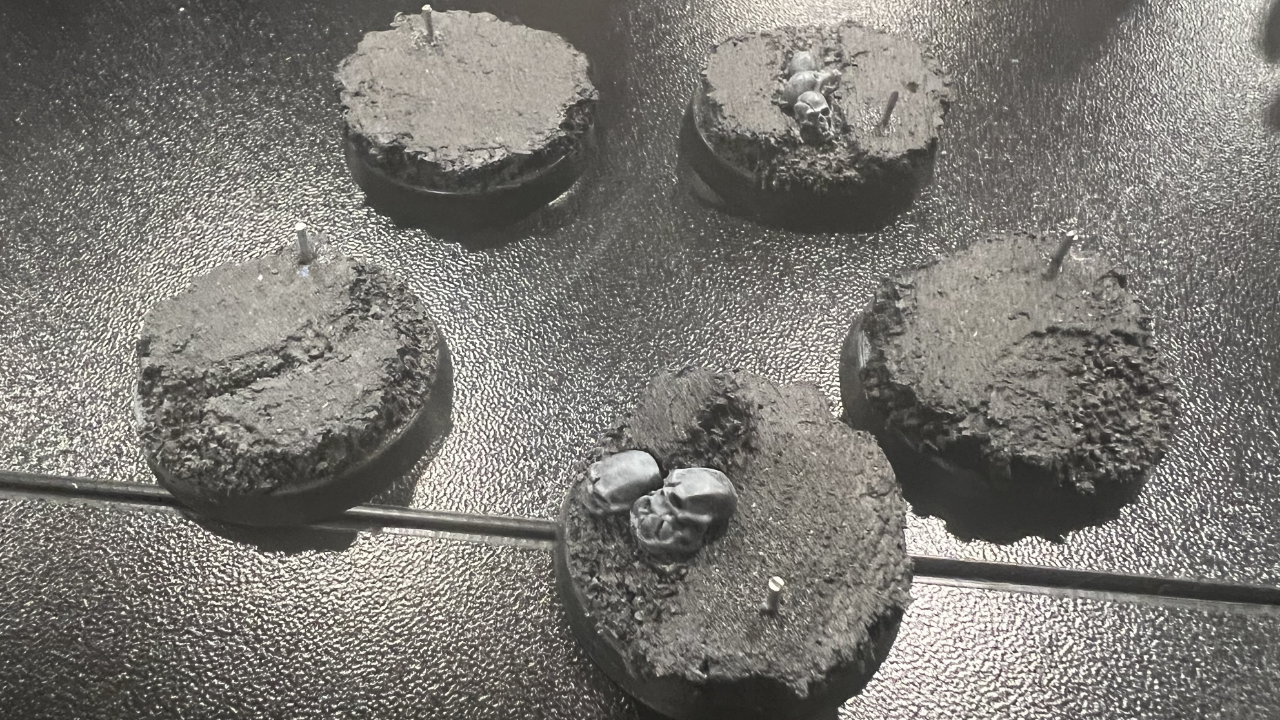
On to the bases!
For the bases, I had a couple of different paint recipes going on to bring them all together.
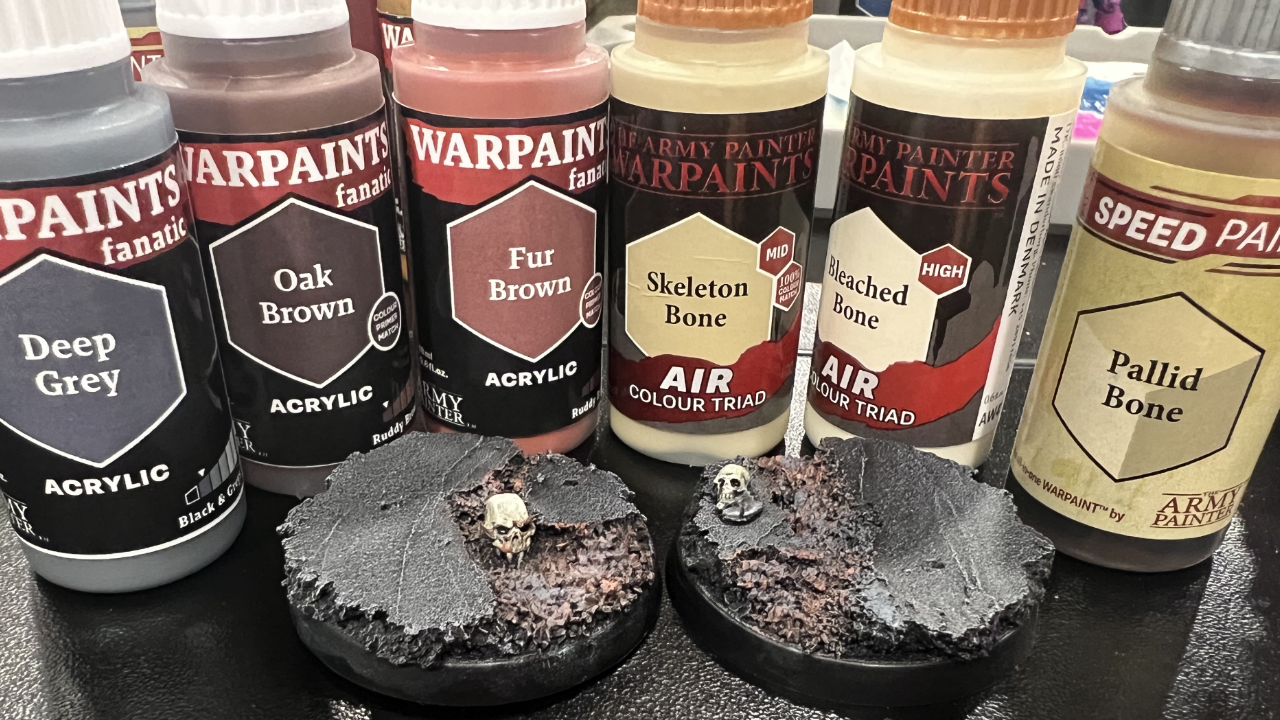
For the stone roads:
After the initial dry brushing of Titanium White in the last entry, all of the stone work and rubble was covered in Army Painter Speed Paint Gravelord Grey (not pictured). That was followed by a light dry brushing of Deep Grey.
For the rubble:
Following the Deep Grey drybrushing, I went over the rubble with a dry brush of Oak Brown and Fur Brown. The idea with this was to give the rubble a muddy look without the need of applying any mud texture paste.
For the skulls:
All of the skulls were initially covered in the Pallid Bone Speed Paint. I thought this was a bit darker than I wanted as they sort of just blurred into the stone too much. I highlighted them up using Skeleton Bone and Bleached Bone from the Army Painter Air line. These look a lot better I think.
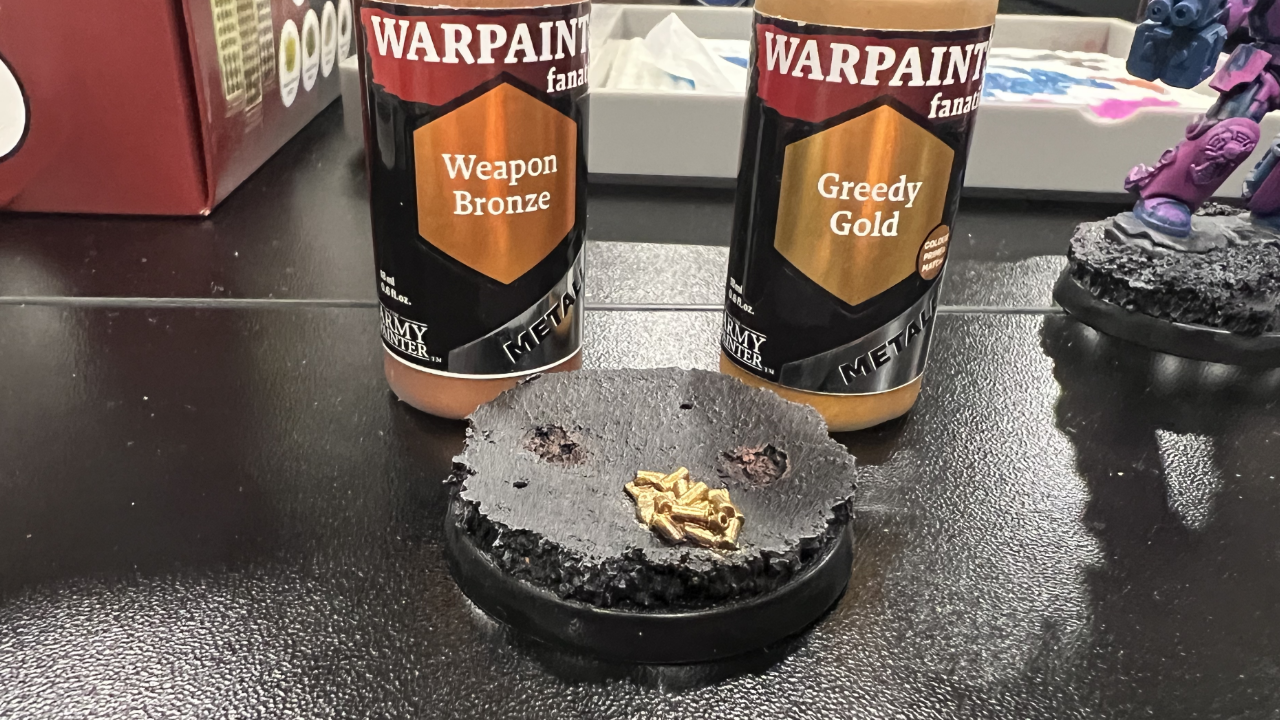
For the bullets:
Lastly, for the pile of spent ammunition for the one Terminator. The bullets were first painted in Weapon Bronze, followed by a light dry brushing of Greedy Gold. The Greedy Gold made for a fantastic highlight without over powering the Weapon Bronze.
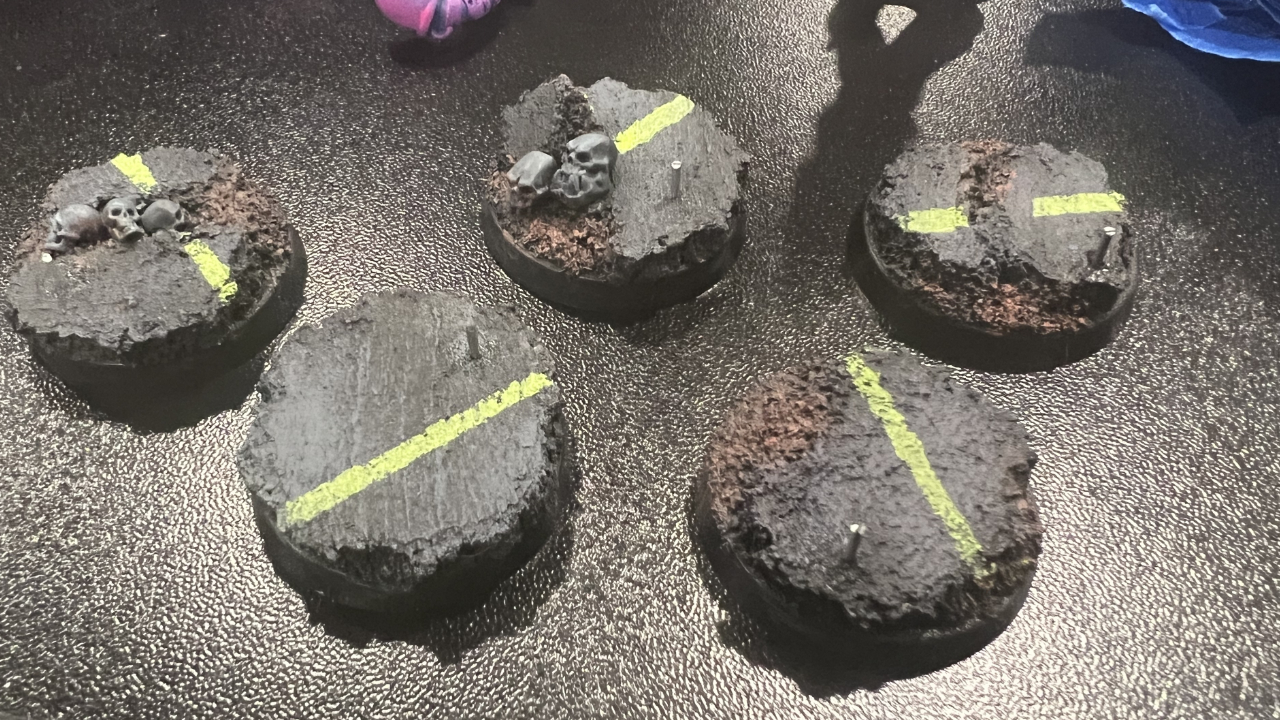
I think the bases are looking good but they are missing something to make them pop. They need some street/traffic/whatever lines.
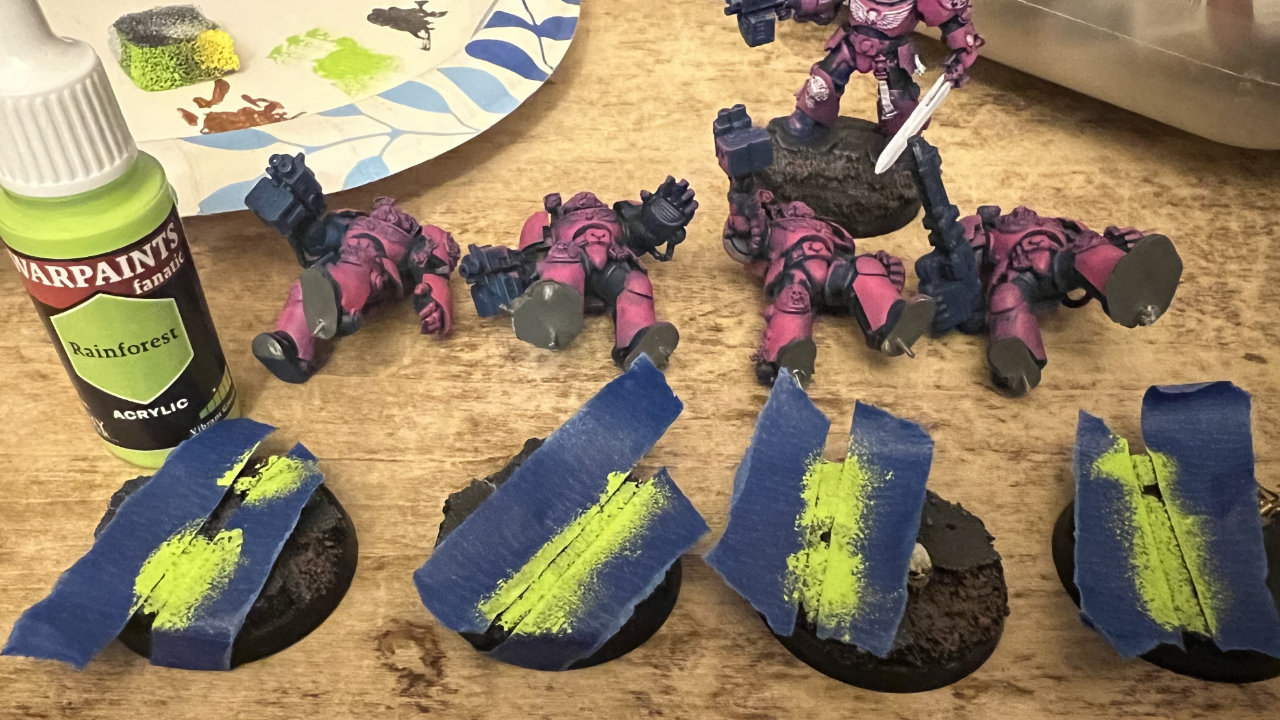
I masked off a strip going in different directions on the bases. Using the super vibrant Rainforest, I sponged in the masked off lines. Maybe these are the color of the dividing lines for traffic this alien world? Or they could be hints of radiation seeping through the stone work? Who knows, I certainly don’t!
After that paint dried, I pinned the models in place. Rainforest definitely added a little extra wow-factor to the bases, that’s for sure.
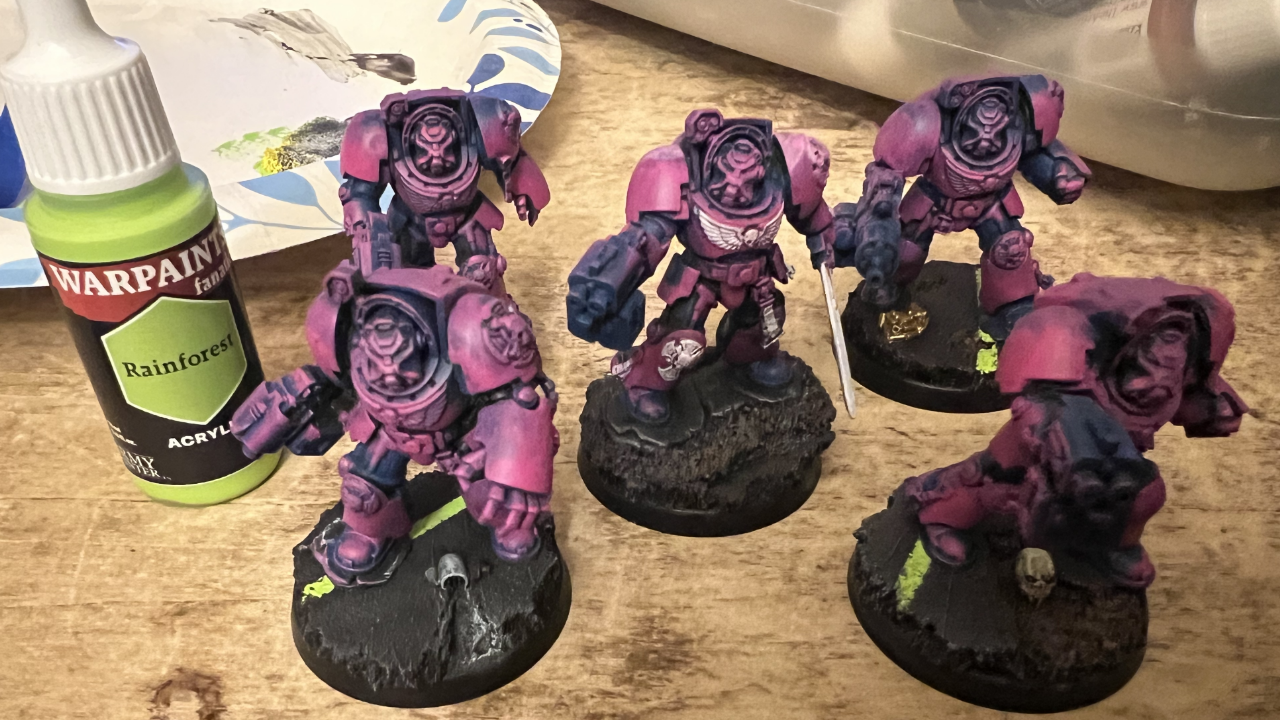
With the models attached to their respective bases, I can go in and more easily do all the fine detail work that still needs to be done. And howdy is there still a lot to be done!
That being said, I’m proud of my little, poppy Terminators so far.
Chapter III - Beginning with a Solid Foundation
Now that we’ve sorted through the short term goals and paint scheme, let the real fun begin!
One thing I always like to start with with any hobby project are the bases. For my synthwave Space Marines, I’ve decided on a destroyed cityscape/road. I wanted to go this route for two reasons. First, the darker colors/tones of the road will really make the brighter models pop on the tabletop. Second, it’ll add a bit of a cyberpunk/dystopian future vibe to the synthwave aesthetic.
First thing I’m going to do, however, is replace all of the official Games Workshop bases with the magnetic bases from the folks at Cobalt Keep.
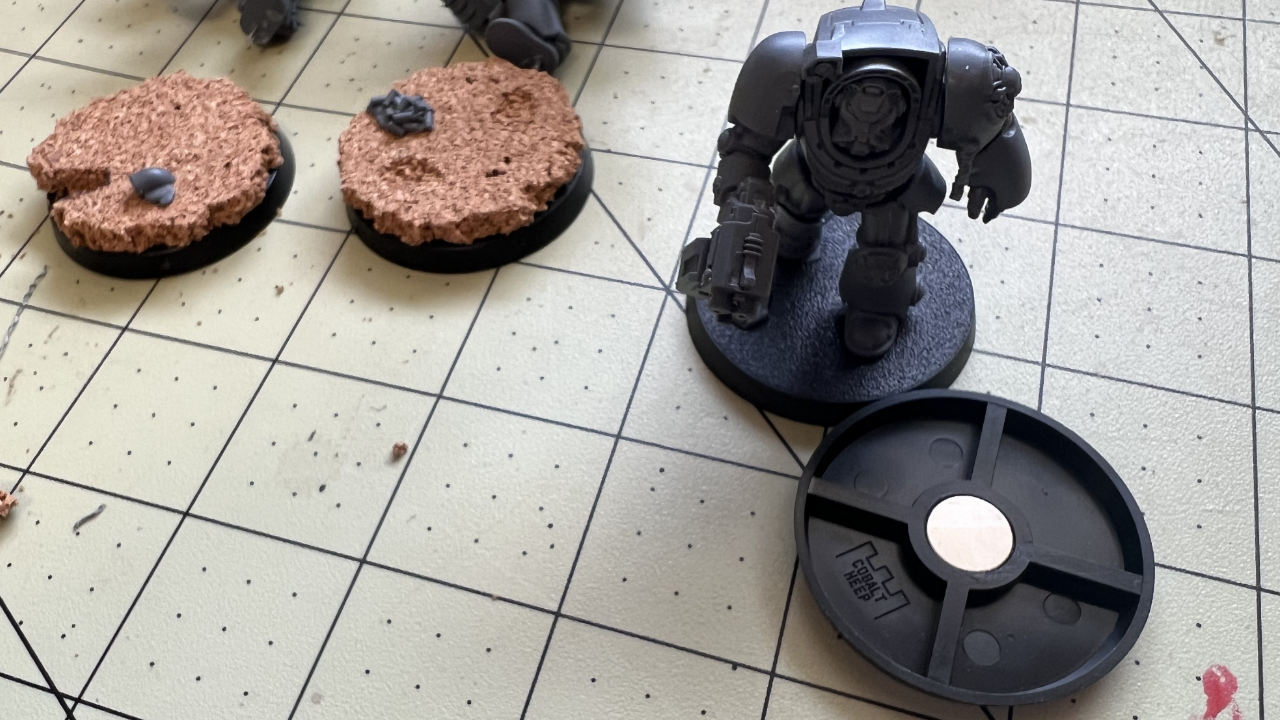
I love these bases as they make magnetizing a breeze. Each base comes with a magnet that is the perfect size for the center slot.
After replacing the bases and putting in the magnets, I gather the usual suspects for the basing material:
- Cork
- Woodland Scenics: Fine Ballast
- Woodland Scenics: Medium Ballast
- Huge Miniatures Texture Paste: Stone
- Citadel Skulls (Gotten off the OTT webstore. Buy Merch!)
- Stynelrez Black Primer
- Pro Acryl Titanium White
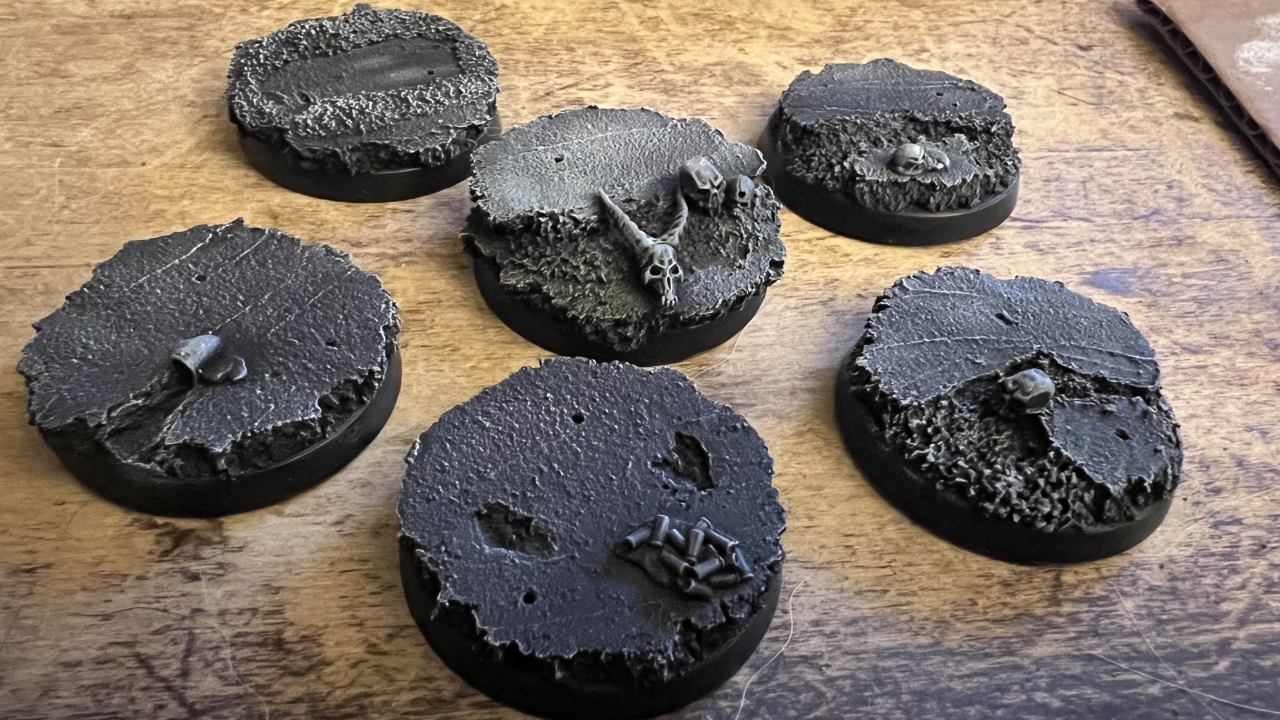
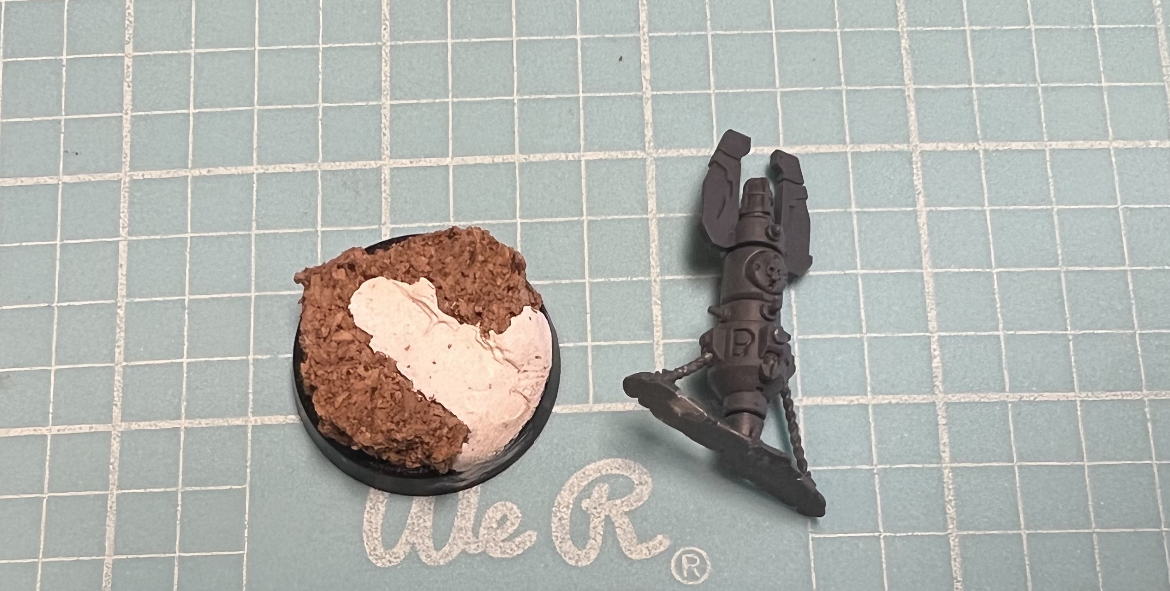
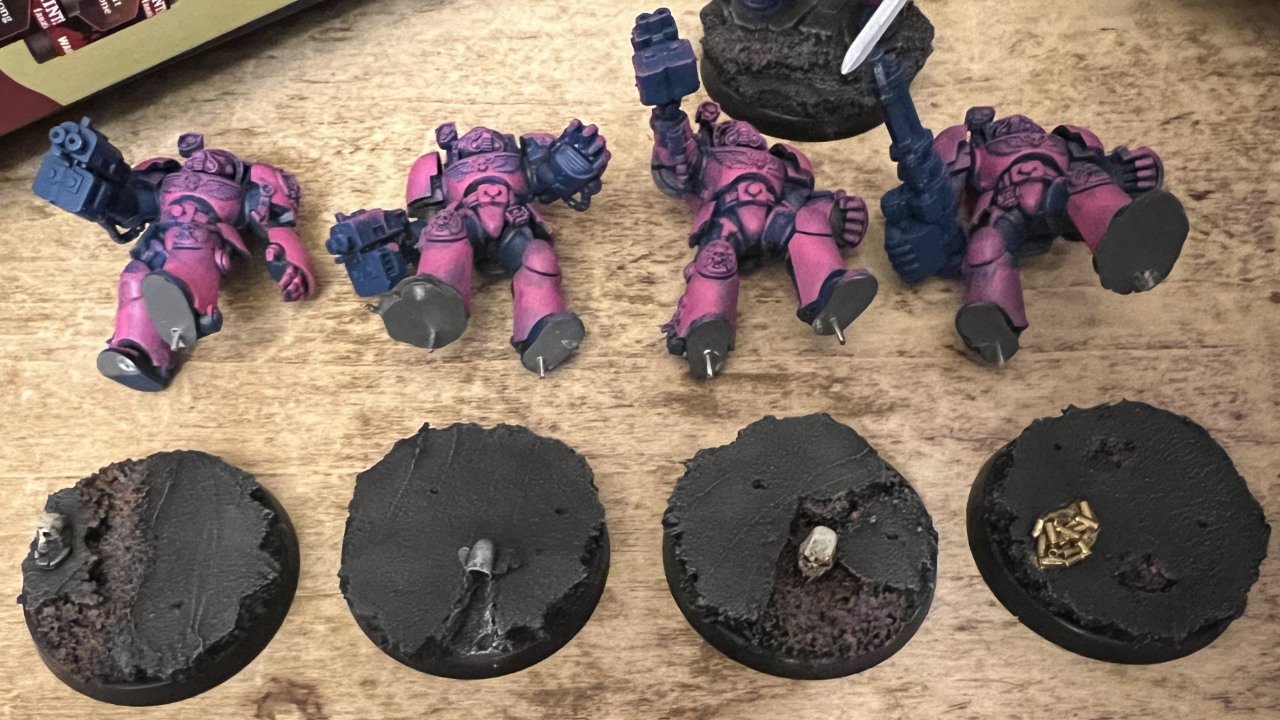
I tried to make sure to include any basing bits that the models might come with, like the pile of bullets or random sewage pipe. The sculptures included those for a reason and I’ll keep them in so long as they don’t clash with my idea for the bases. Otherwise straight into the bits bin.
Also, I only used a single layer cork (I think it is .25″/.635cm) for models like Terminators, but used a second layer for the character models (like the base in the middle). I know it adds a little height for the model and puts me at a disadvantage for making it an easier target to hit, but I like character models getting a little something extra. Plus it isn’t like I’m going to be going to any tournaments with these things, just fun games with friends.
Chapter II - Obtainable Goals and Paint Schemes
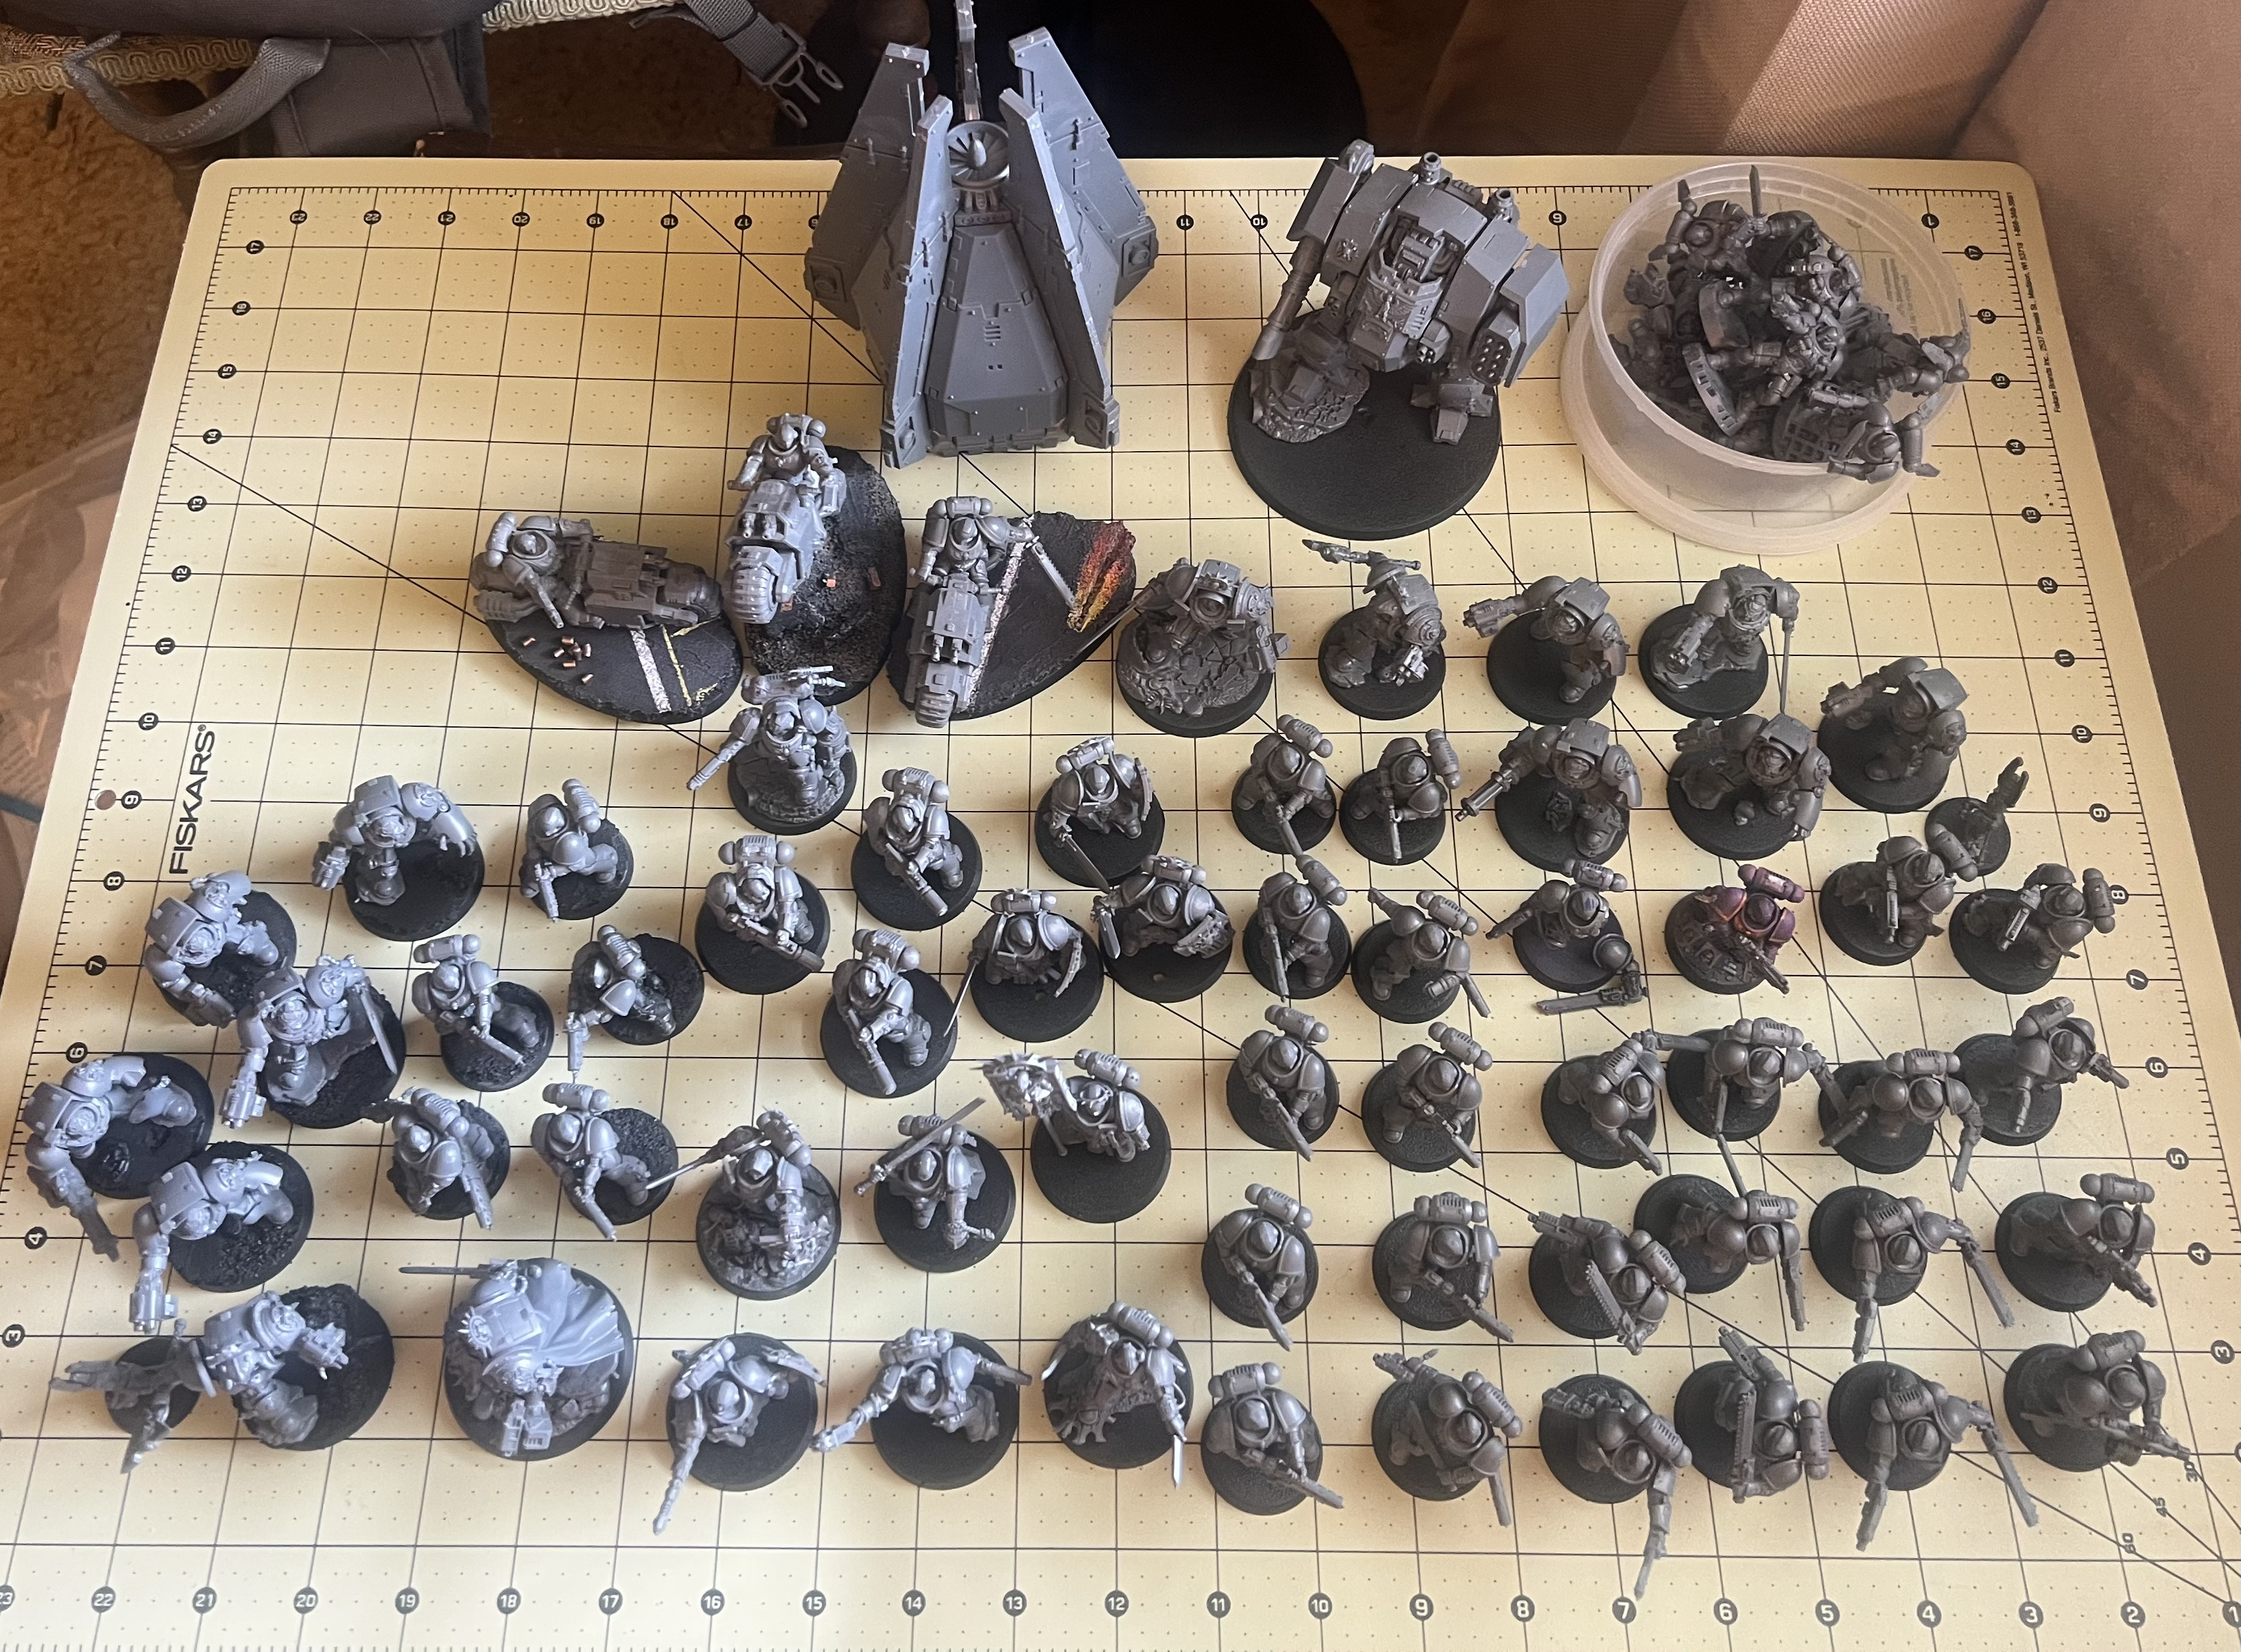
According to the Warhammer 40,000 app, I have just shy of 3,000 points in Space Marines. I know it’ll be impossible to paint all of those to a decent standard by time the event is over. Ultimately, though, I would love to have a fully painted 2,000 army at some point.
So where to begin?
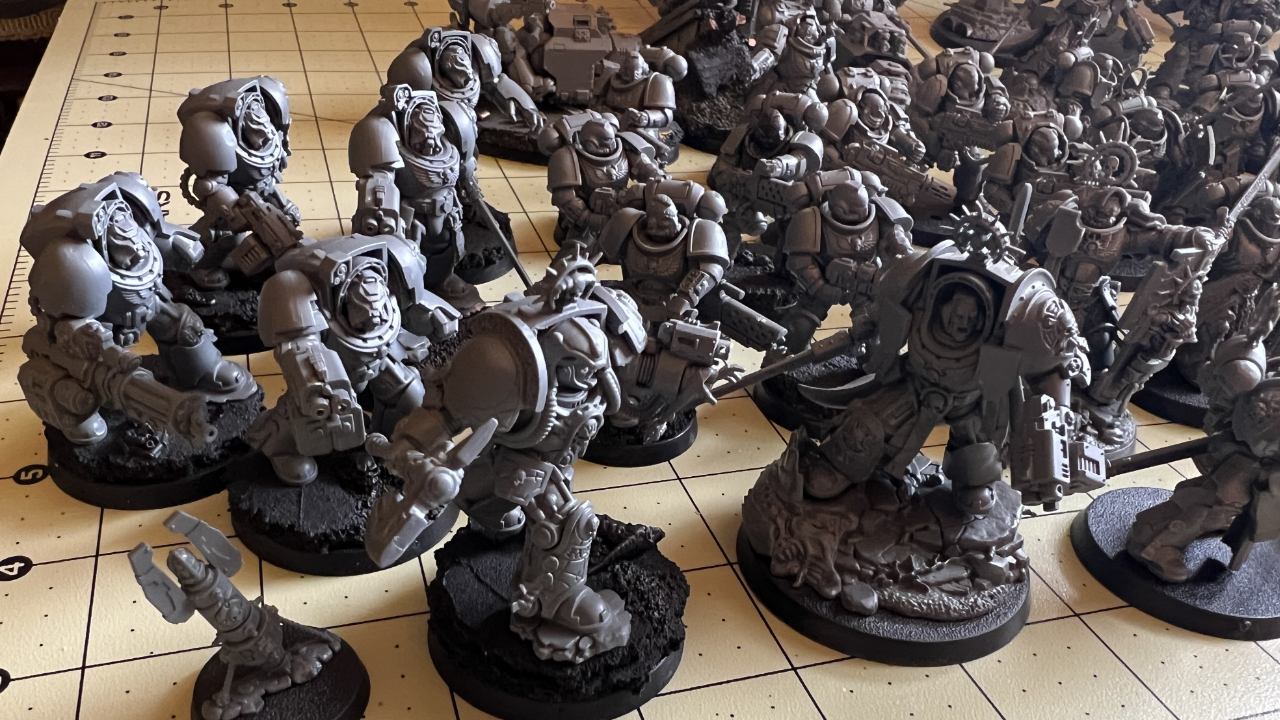
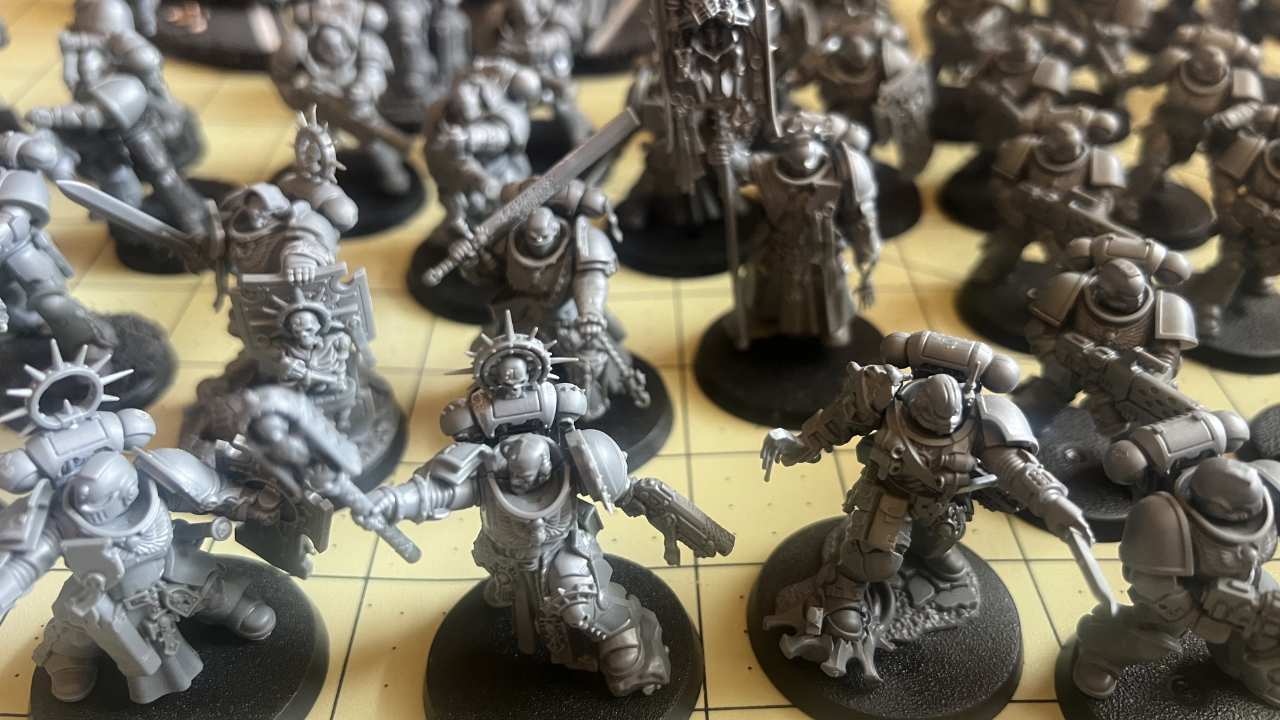
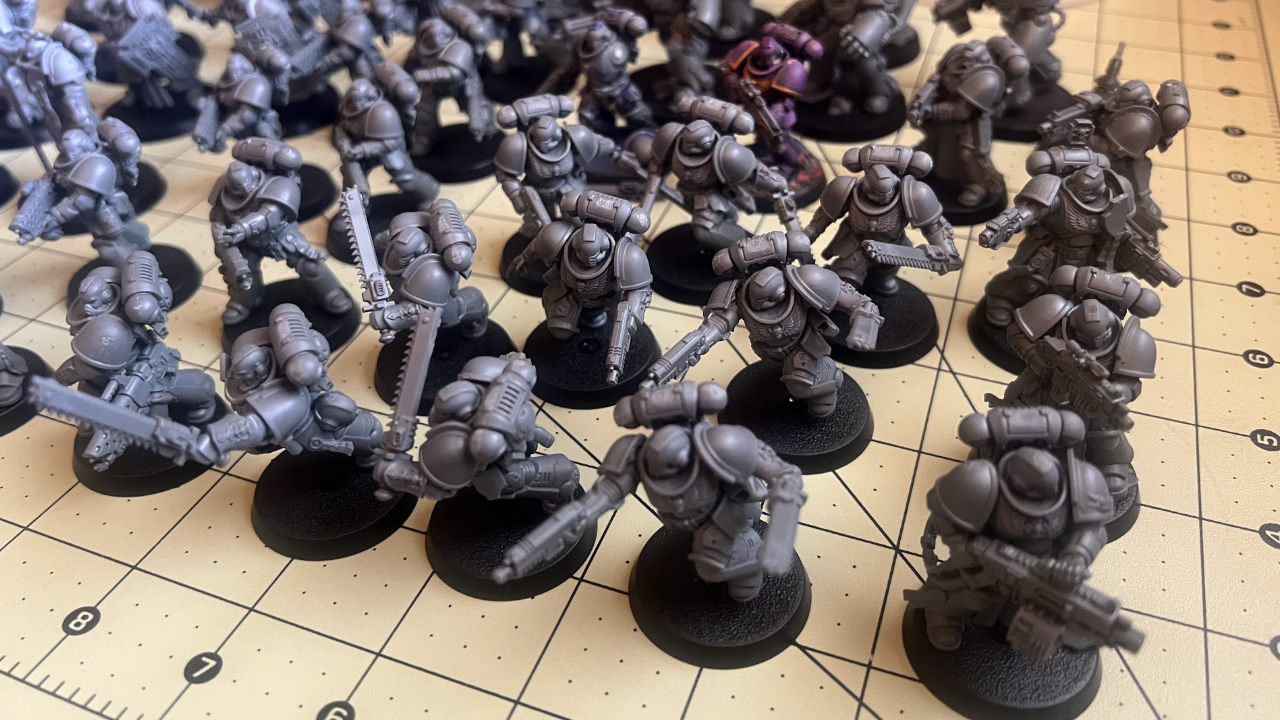
If the finish line is the 2,000 army, then the starting goal should be something simpler. We are going to start with the Combat Patrol: Strike Force Octavius.
Combat Patrol: Strike Force Octavius:
- Captain in Terminator Armour (Captain Octavius) (95pts)
- Librarian in Terminator Armour (Librarian Tantus) (75pts)
- Infernus Squad (5 models) (80pts)
- Terminator Squad (5 models) (175pts)
- 12 models/425pts
Starting with the models that are a part of the Combat Patrol will put me at almost a fourth of the army painted and give me a fully painted army for that game mode. Seems like a win-win.
Now, what about a paint scheme?
One of the things that I’ve loved about 10th edition has been the freedom Games Workshop have given the hobby side of the game. With it being a lot less what-you-see-is-what-you-get, any chapter of Space Marines can be painted in any creative way we want. With that in mind, I’m going to strive to make the grim dark future a little less…grim dark.
One word: Synthwave!
Chapter I - Once More Unto The Breach, Dear Friends, Once More...
I had this really beautiful first entry posted but I guess the OTT servers ate it? Instead let’s cut that long, long story short, shall we?
Since I first bought into Warhammer 40,000 with the Indomitus box, I’ve yet to paint a single army/faction. The only models I have painted so far are the event model I painted for a local store (that was a part of my Spring Clean 2023 challenge) and a Ta’u Fire Warrior squad that got me Bronze at GenCon 2023.
With that in mind, regardless of my late start for the 2024 challenge, I’m going to attempt painting up as many tiny plastic Space Marines as I can before the end of this.