


It’s going to be something…


Recommendations: 1226
About the Project
One day Gothic Horror, Victoriana, Steampunk and Medieval Fantasy all met up in my head. They started to fight it out which would be the subject of my project for Terrainfest 2024. Limbs flayed as the battle commenced and it was not long before they were all strewn across the floor in a tangled mess. This is my approach to this. Chuck it all in a pot, mix it up, and see what comes out.
Related Genre: Weird
Related Contest: TerrainFest 2024
This Project is Completed
Sewer tutorial part two
Here is the second part of my really simple guide to the sewers.
The woodwork is painted with, you guessed it, Leather Brown. I used a cheap long long-handled craft paintbrush. The long handle makes it easy to get into the terrain. Slightly watering down the paint makes this a speedy process.
I then very quickly dry-brushed the rope with Wargames Foundry Rawhide Mid-tone. This is another of my favourite colours. Of course, you can use any colour you want, this was just the colour I fancied doing mine.
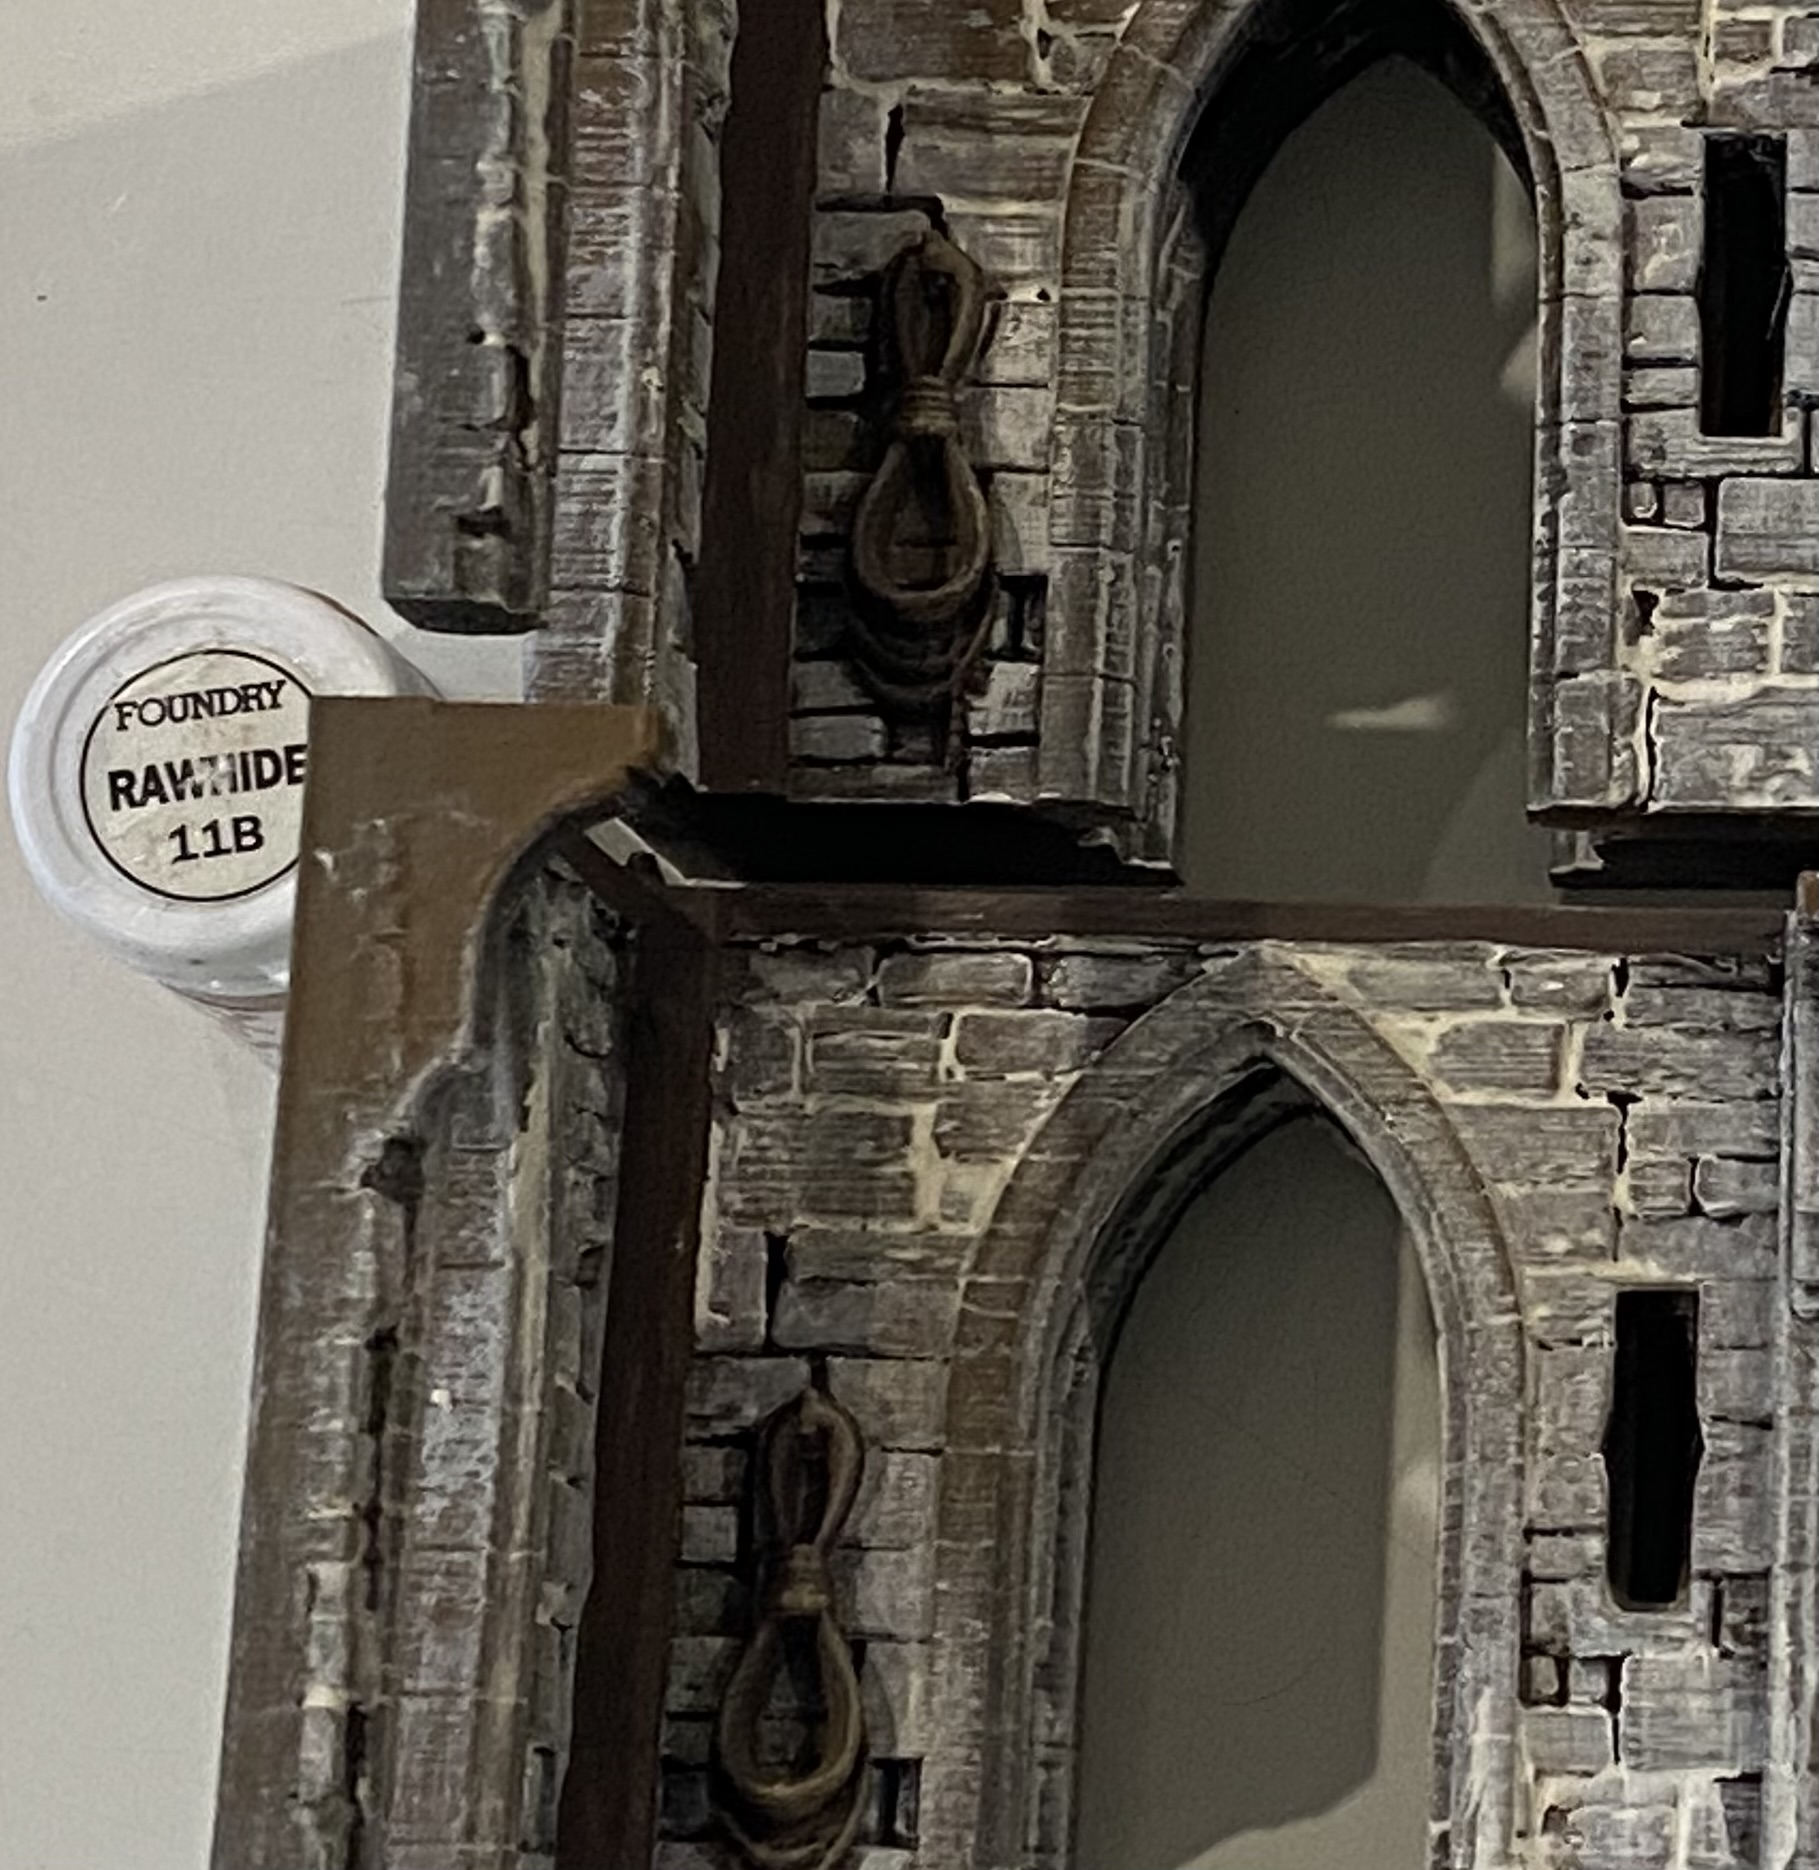
After that, yep you guessed it, Rawhide highlight from Wargames Foundry is lightly dry brushed over the rope.
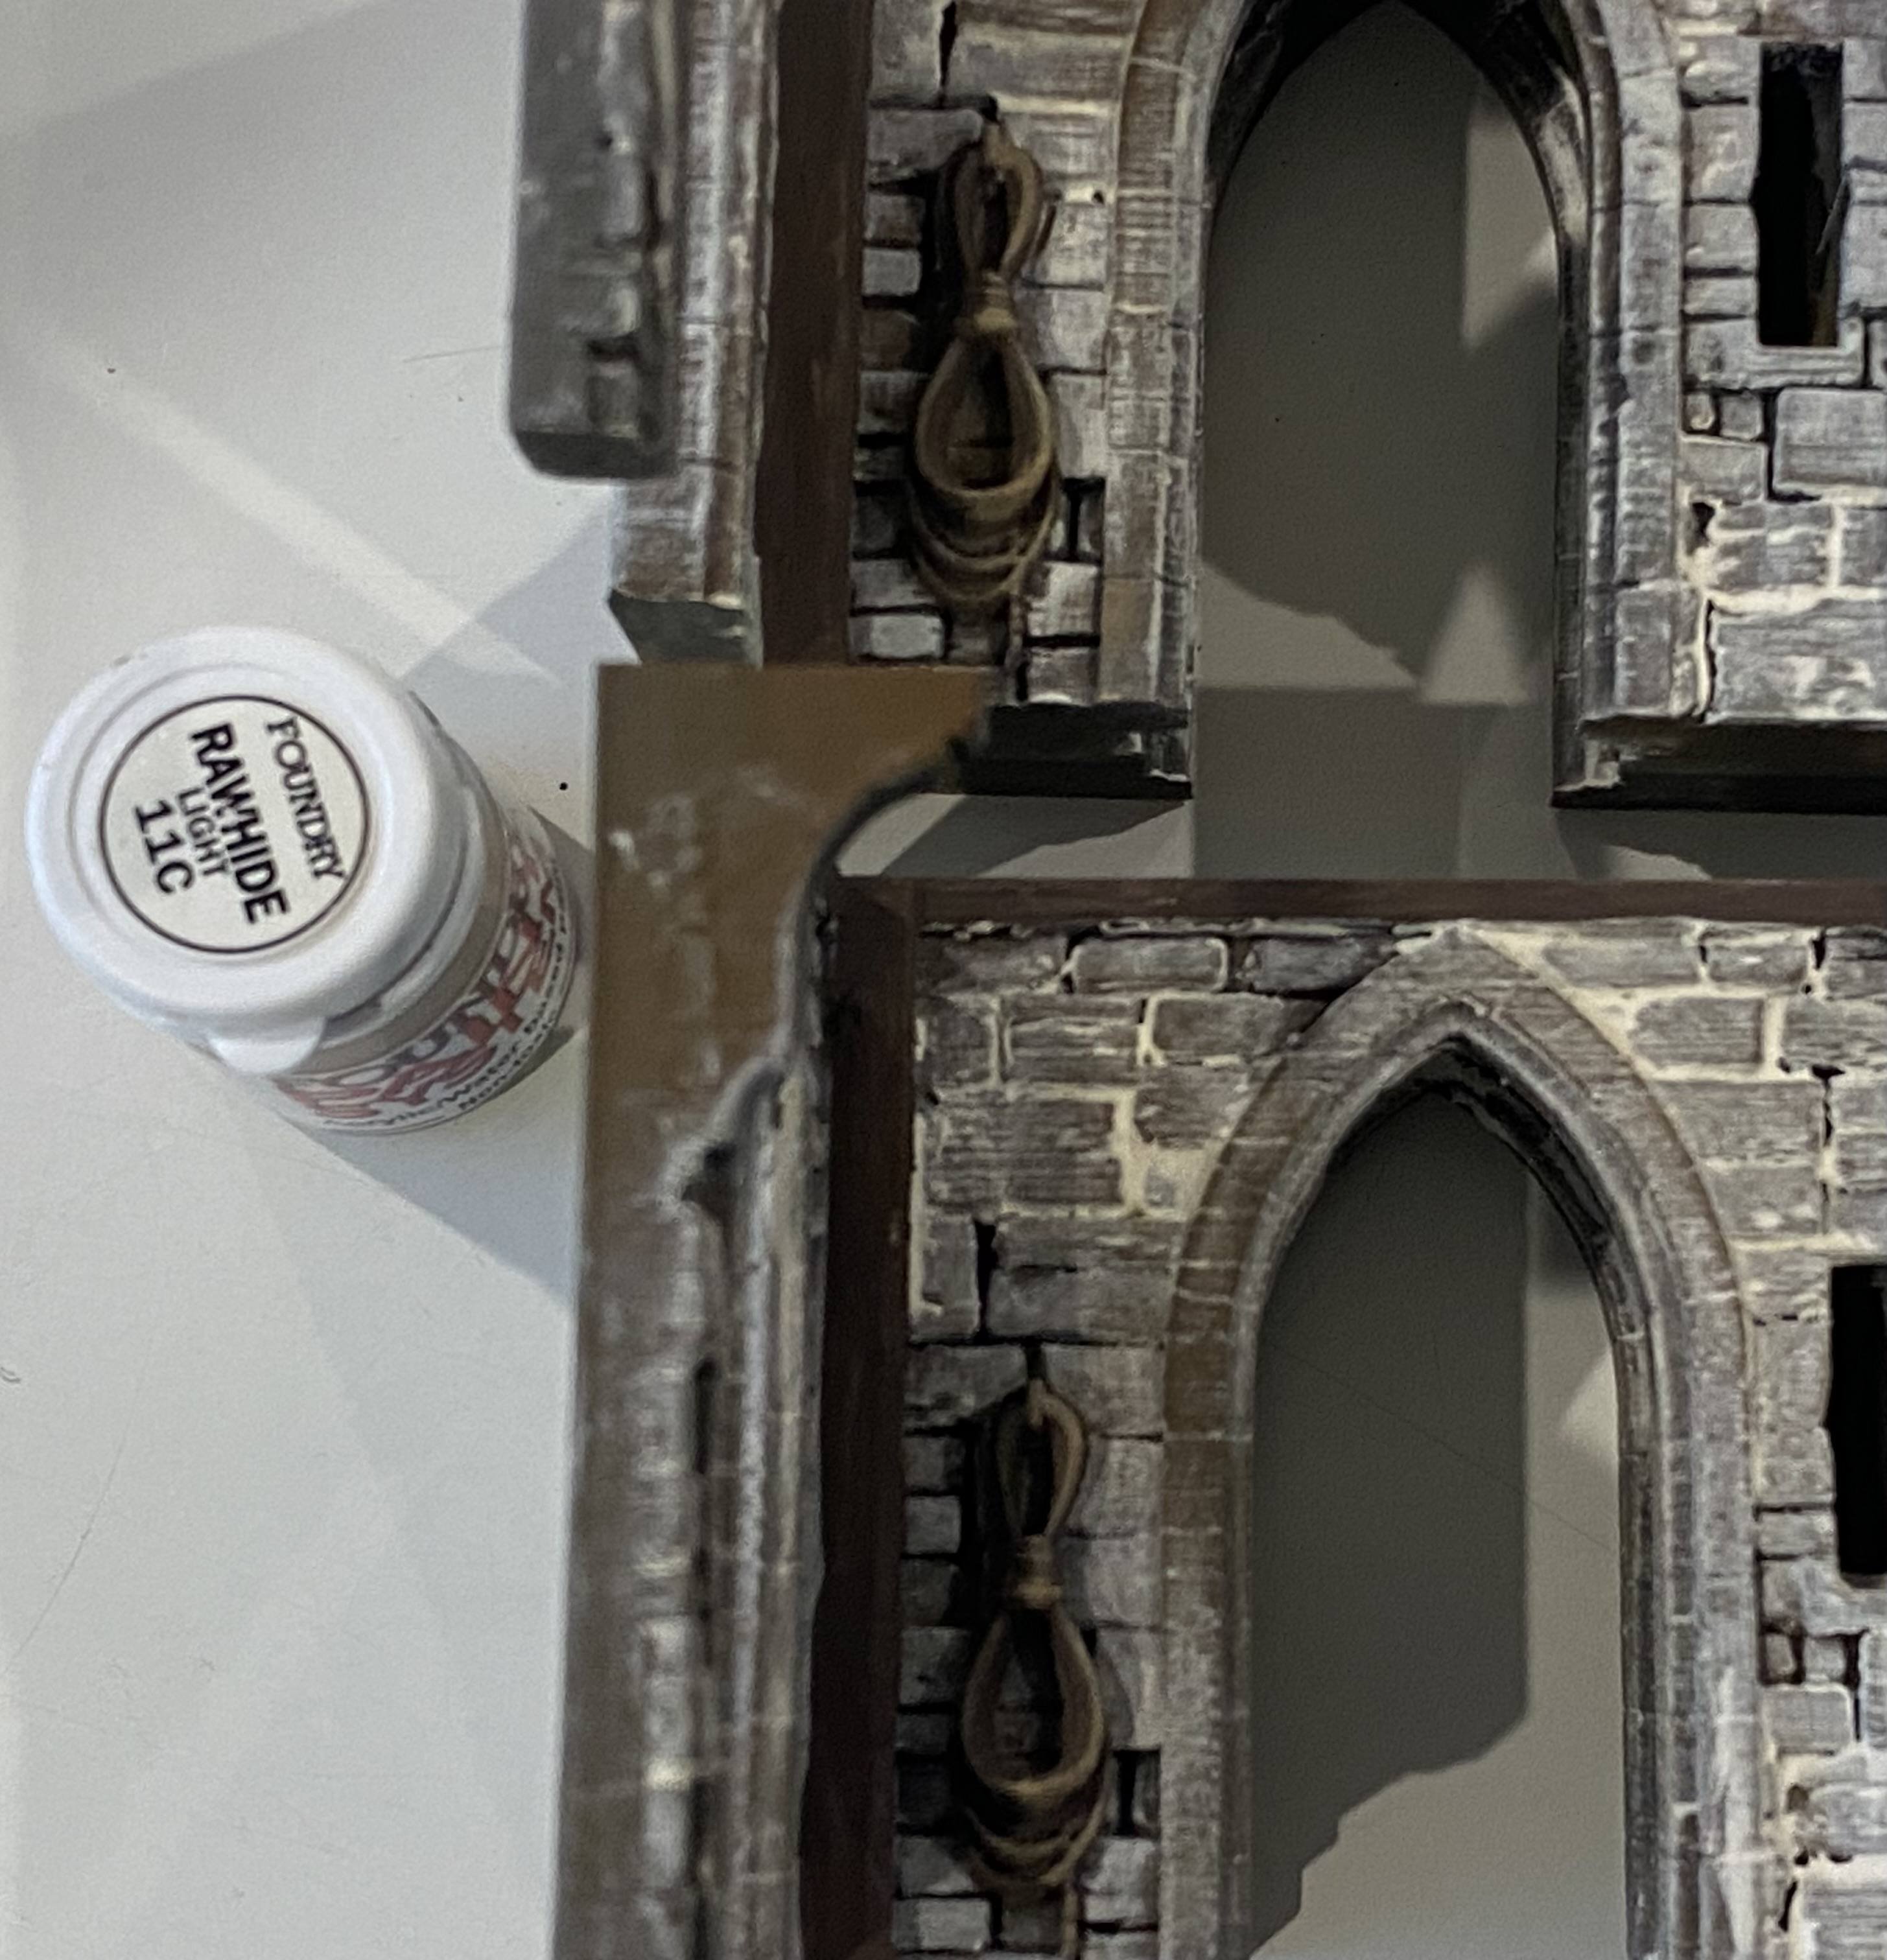
Finally, I lightly streaked on some weathering using washes. Just a note that the black wash on its own is quite dark so I would suggest either watering it down or mixing it with the light grey wash.
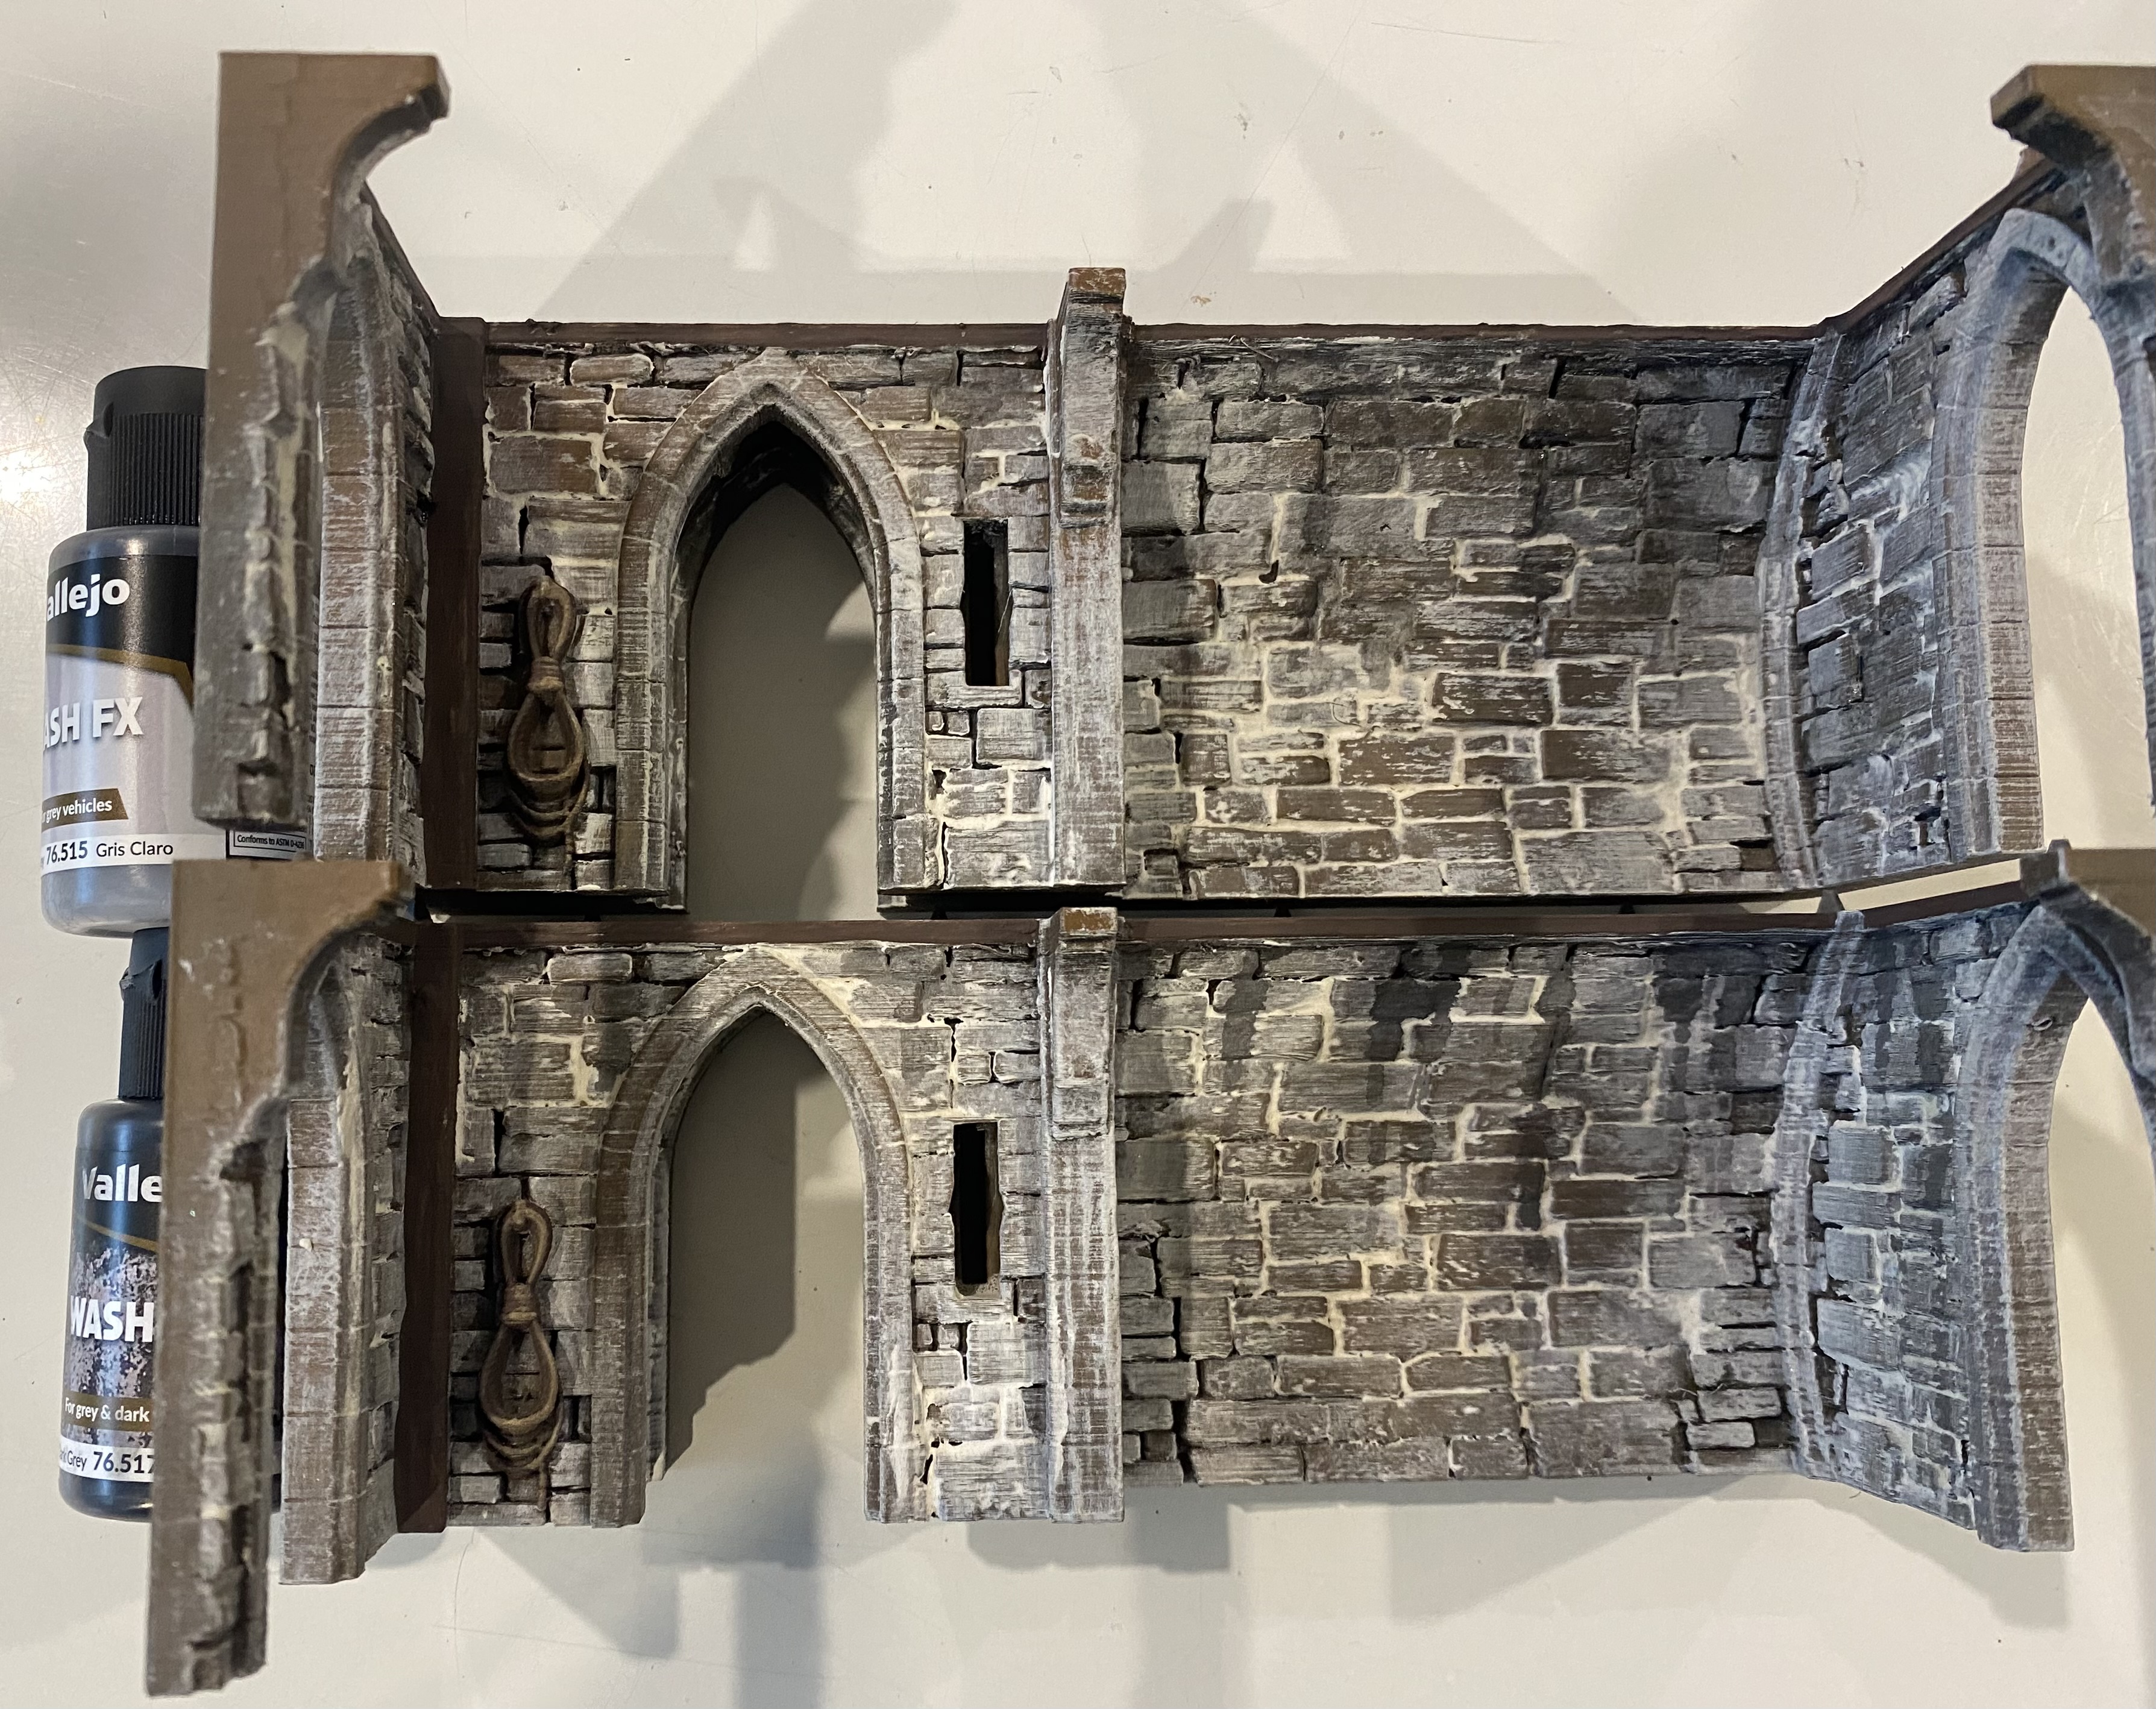
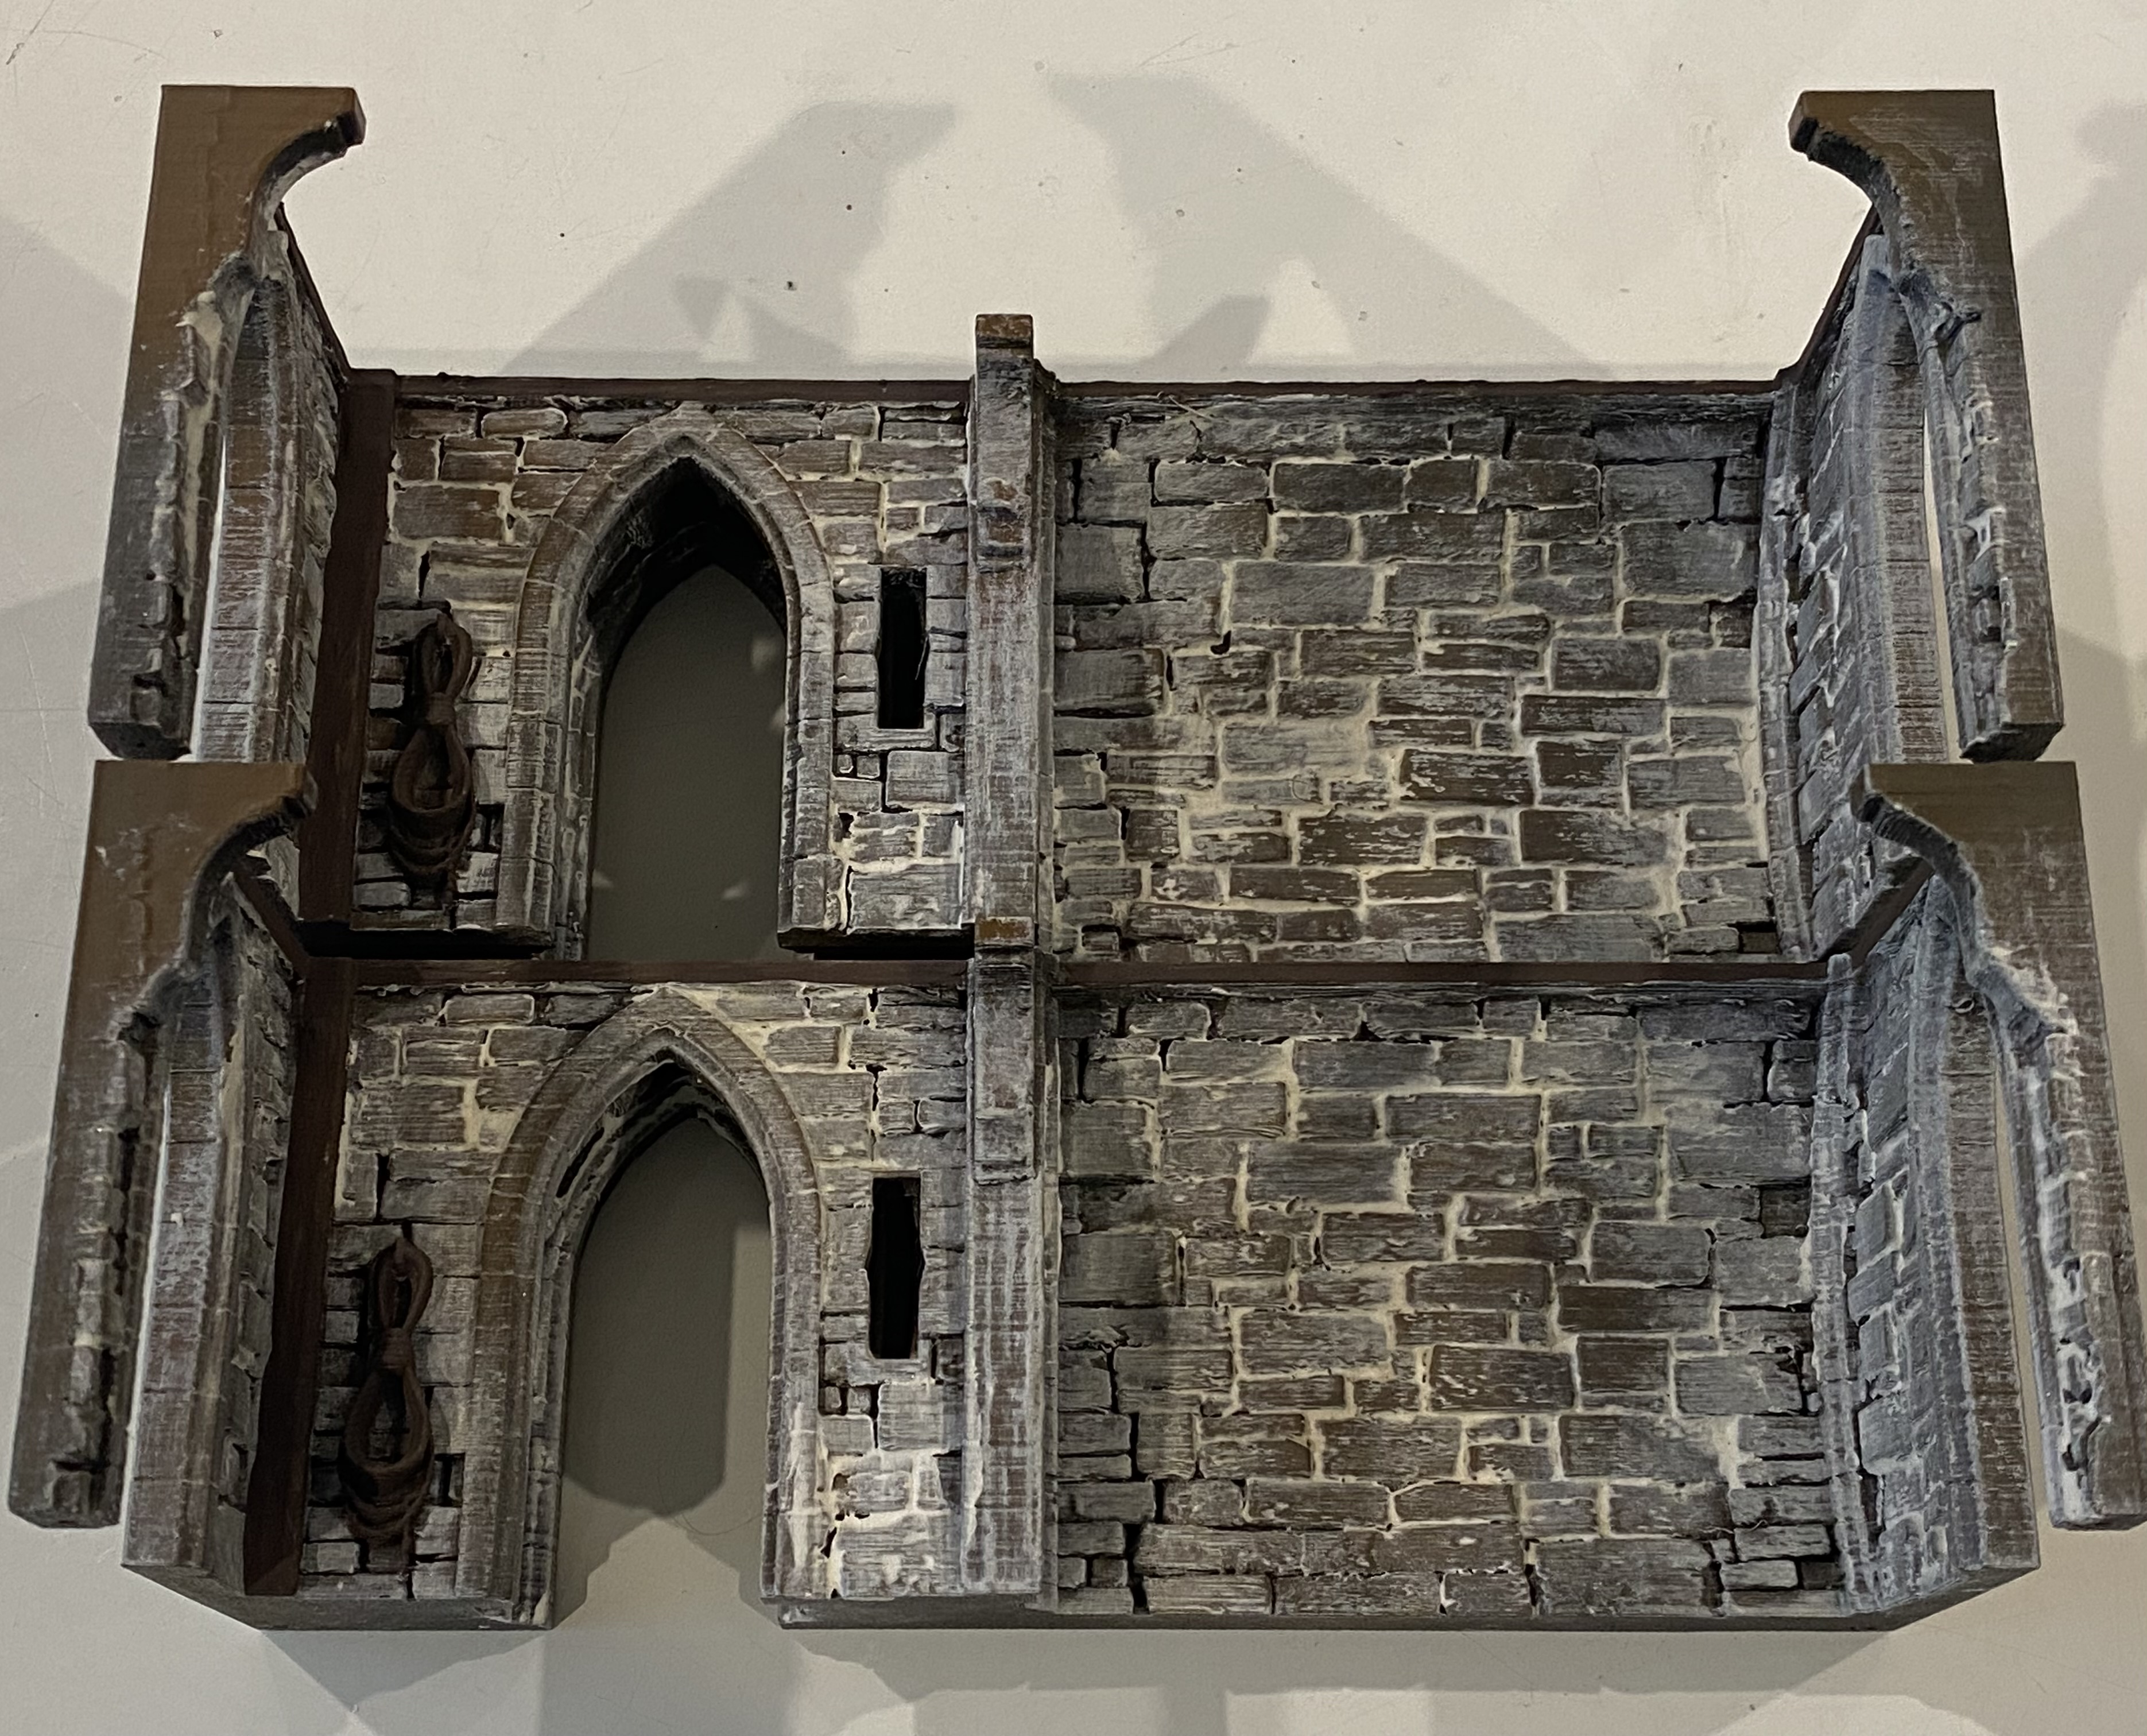
The benefits of rimming
The next stage of the process was to paint all the rims. The benefits of rimming should not be overlooked. It creates a nice rim or border for your model much like a frame does for a picture. We do it with our miniatures so why not do it more with our terrain?
You can use any colour; the goal is to make the model look ‘finished’.
For dark damp passageways and that kind of thing, black rimming, in my opinion, is the way to go, although a very dark grey or brown could also work well.
If I was doing snowy terrain or rimming something with a lighter colour some soft earthy greys could look good, and for something green, maybe a more natural brown rimming.
Anyway, the point is, never underestimate how finishing off in this way can enhance other colours and create a nice effect.
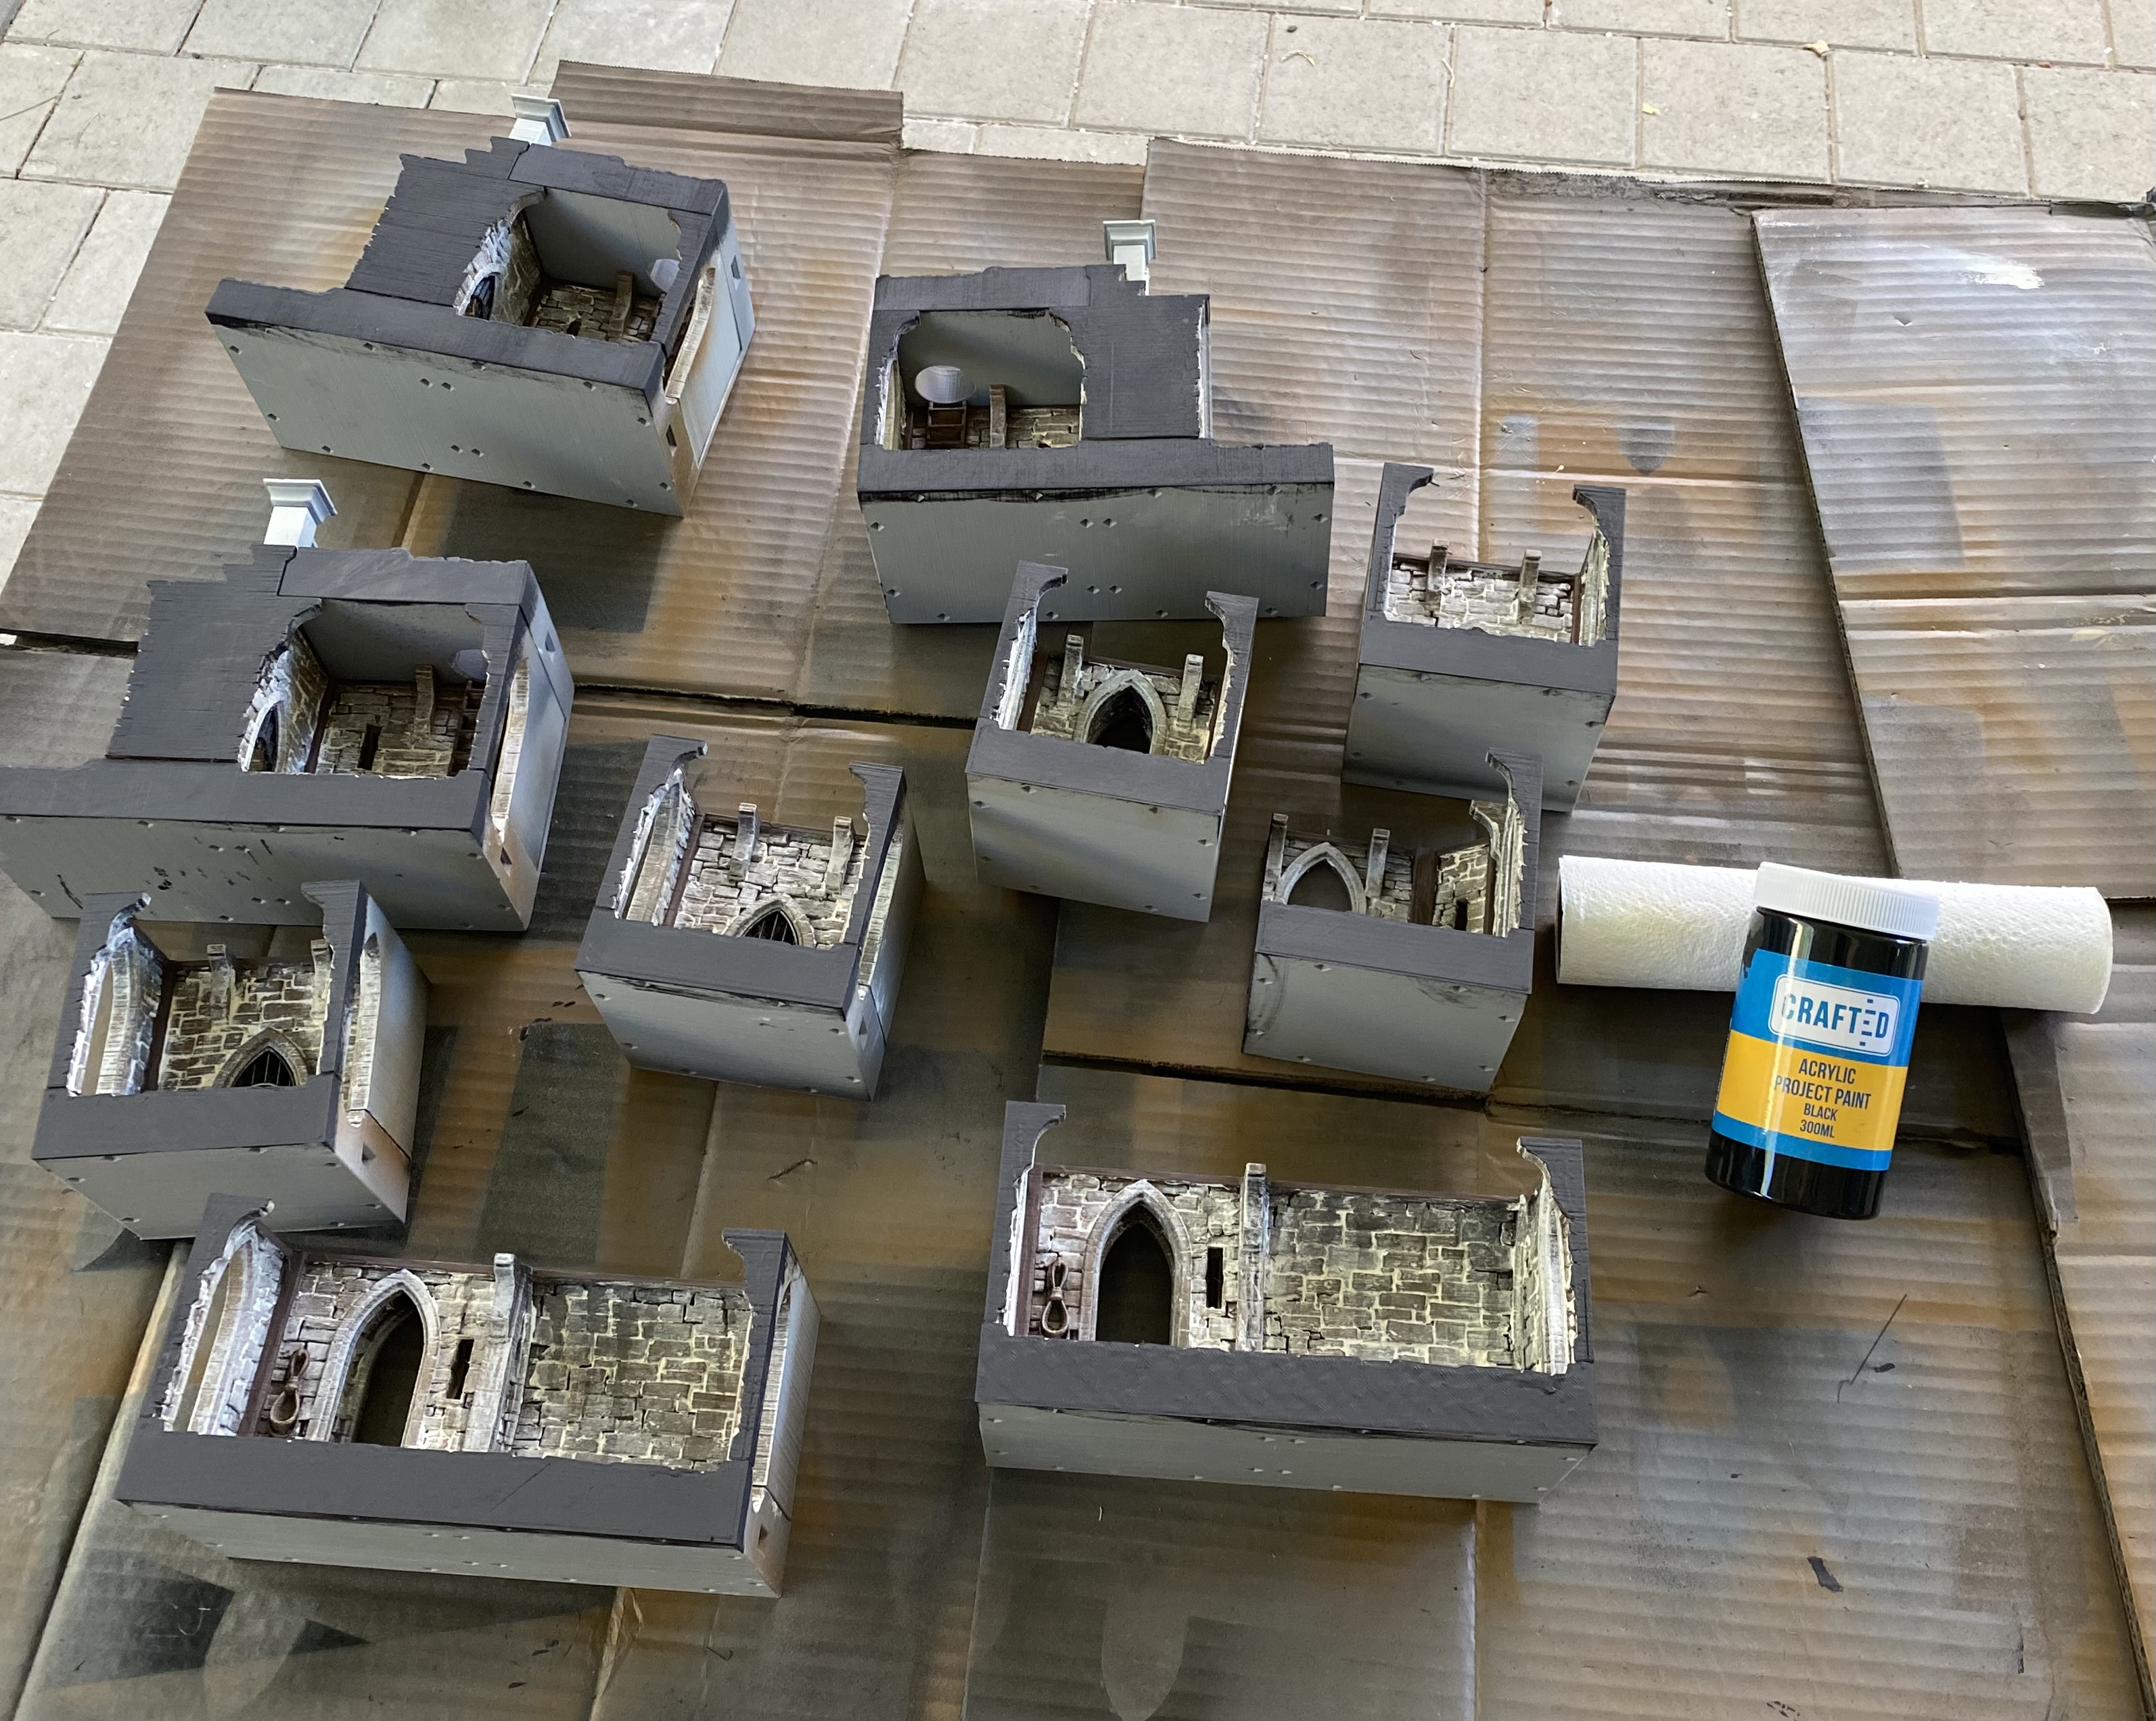

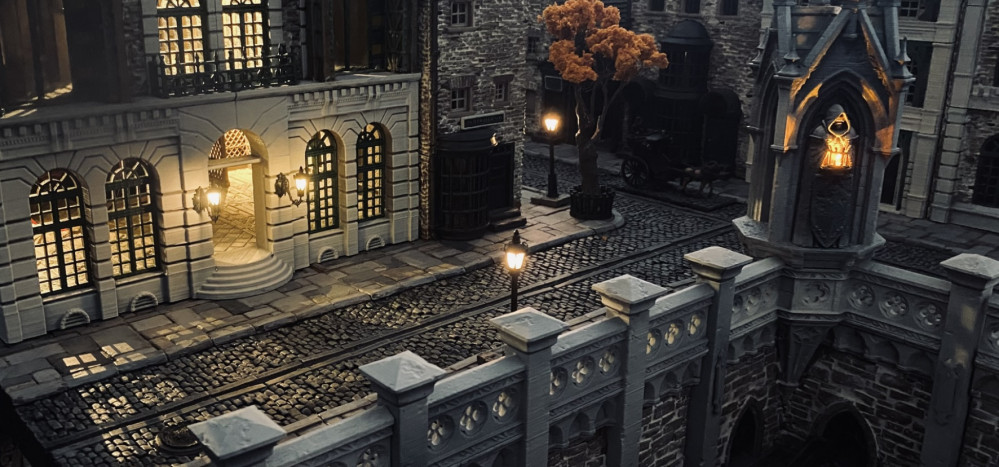
The sewers also need some form of lighting. I have expanded some of the sewer network further into the board to create an illusion of depth This way I can put lights further into the board for different effects and give the impression that the sewers don’t just run around the edges of the table


Finally, a state-of-play shot of where I am up to.
I still have more flagstone tiles to paint, honestly, it feels like they are never-ending now. I am looking forward to getting them done so I can move on to the slum area.
I also have to do all the individual removable covers that go under the flagstone tiles to cover up the sewer network that goes beneath the board. These little covers will also raise all the flagstone tiles to the same height.
In this image, I have added some of the clips in place to pull the board together a bit better than in previous pictures. It’s getting there.
Hallelujah
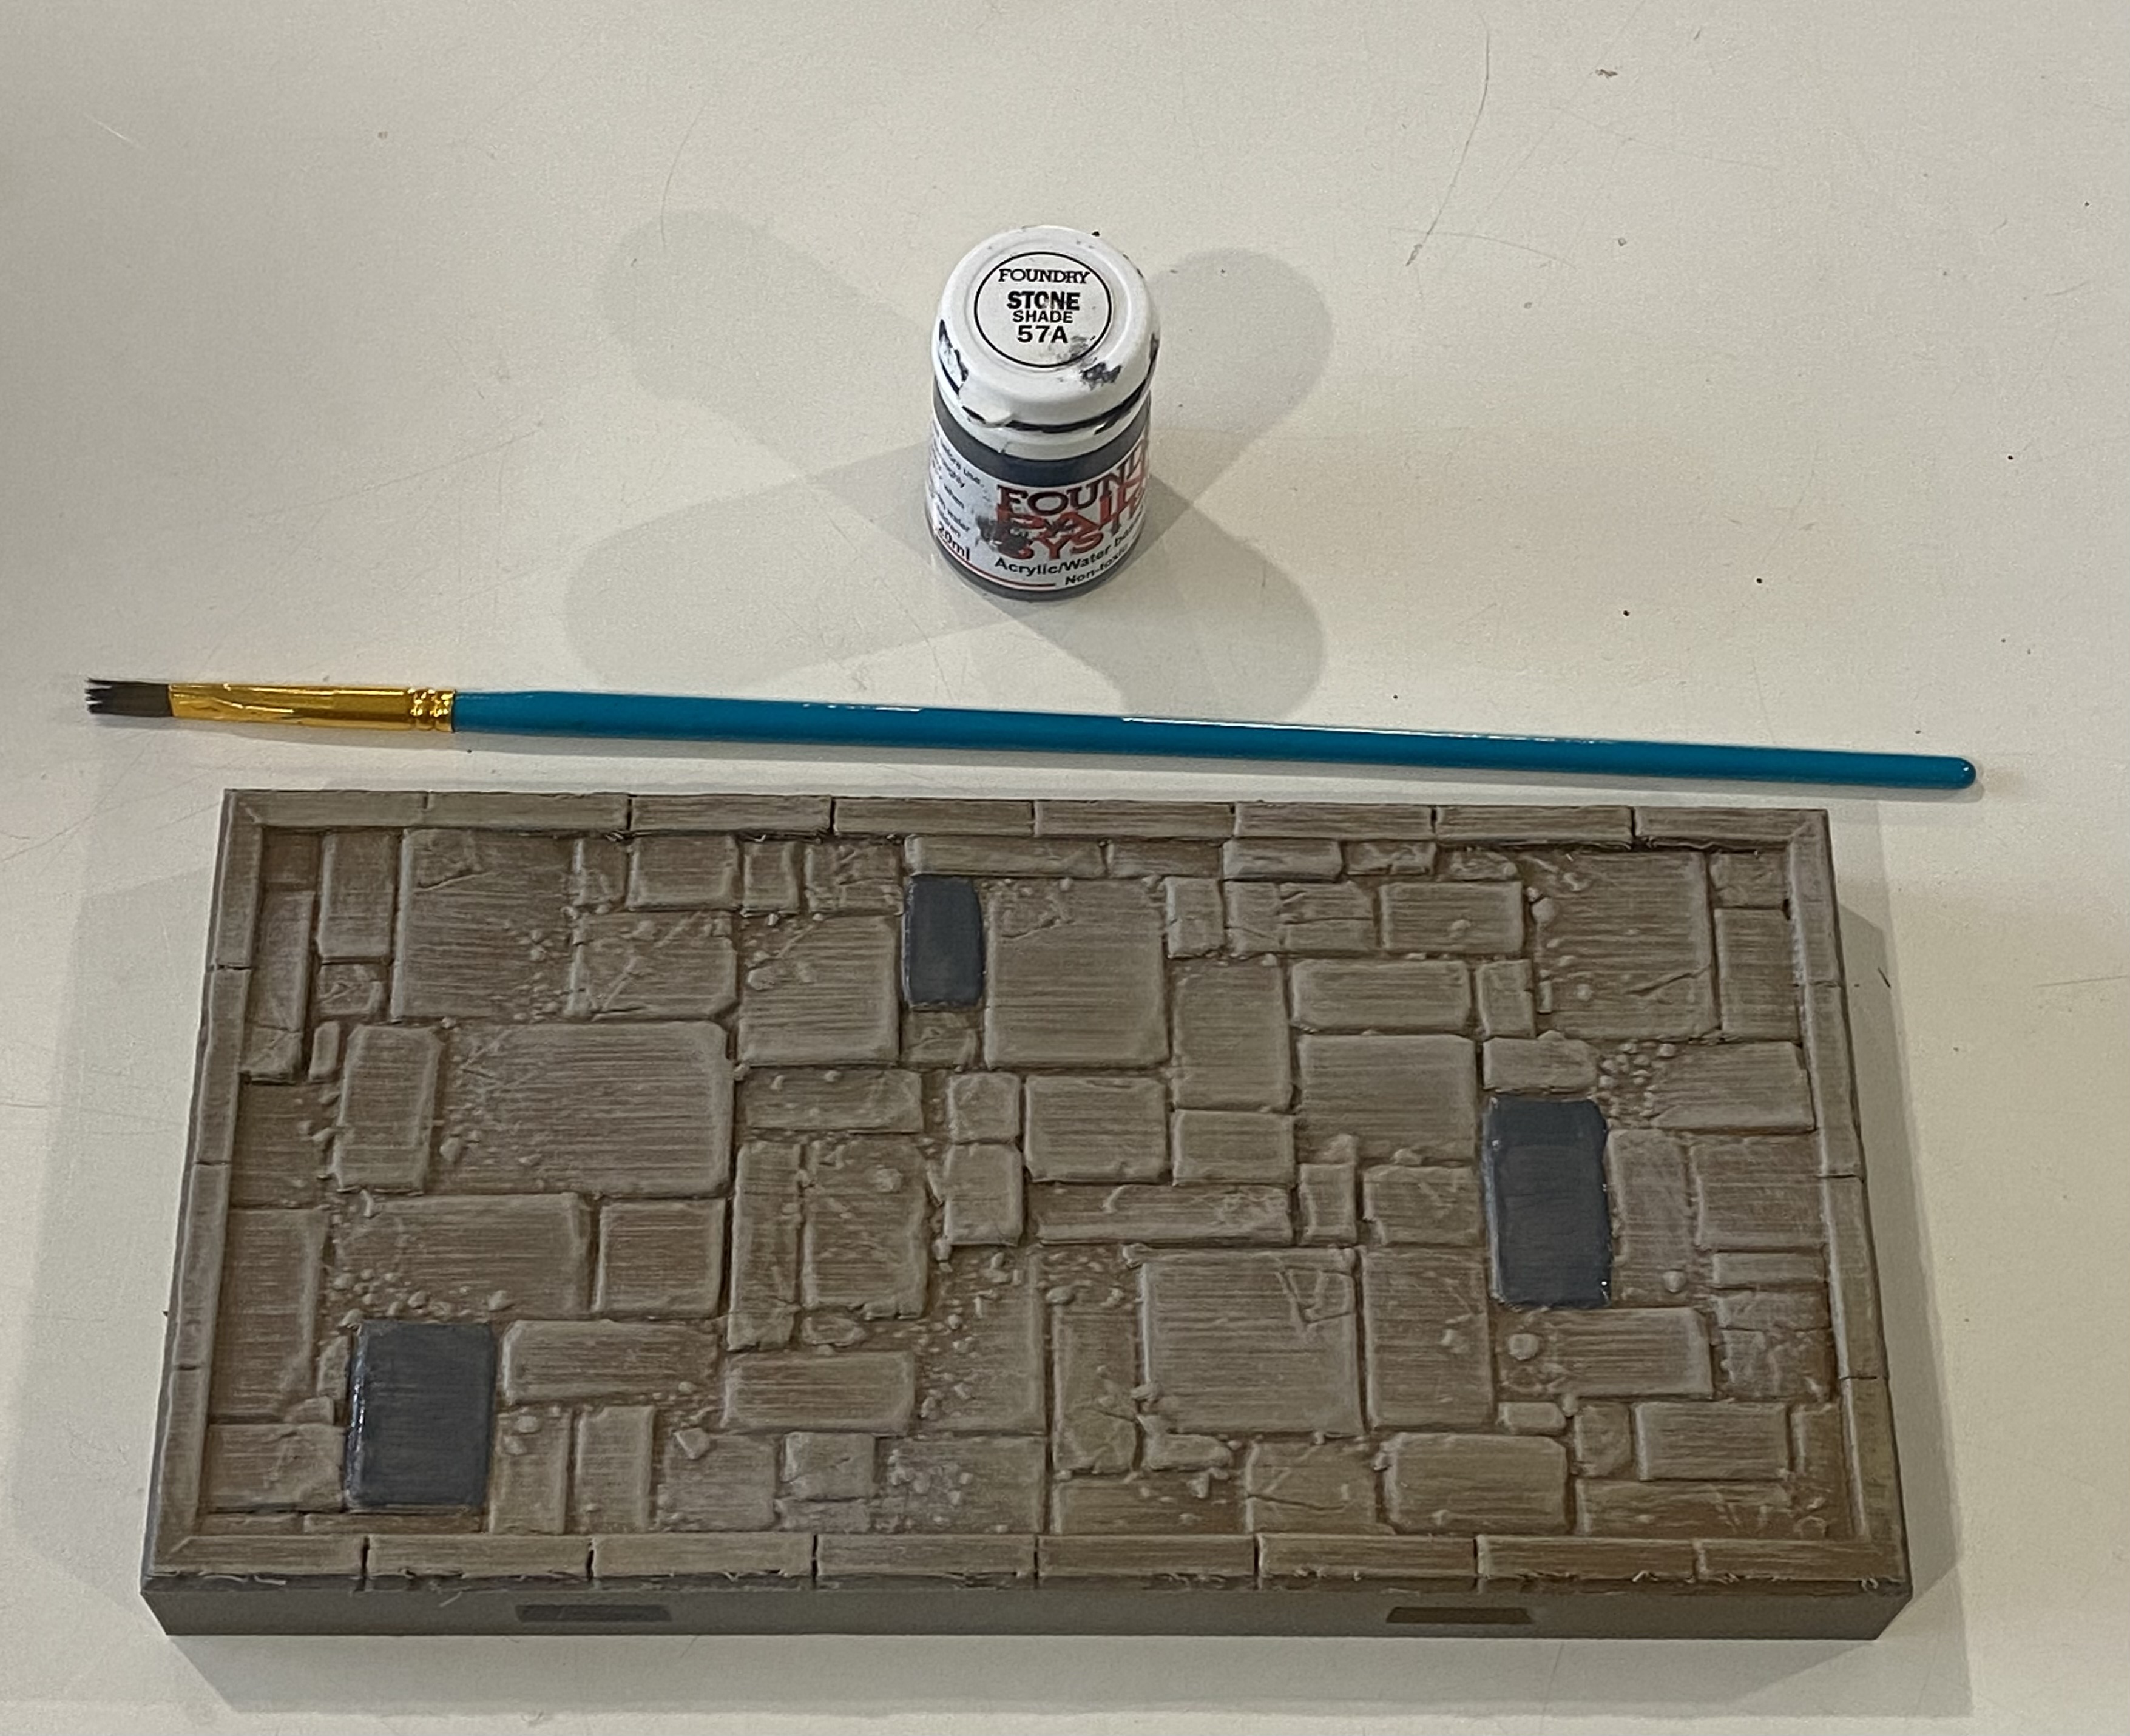
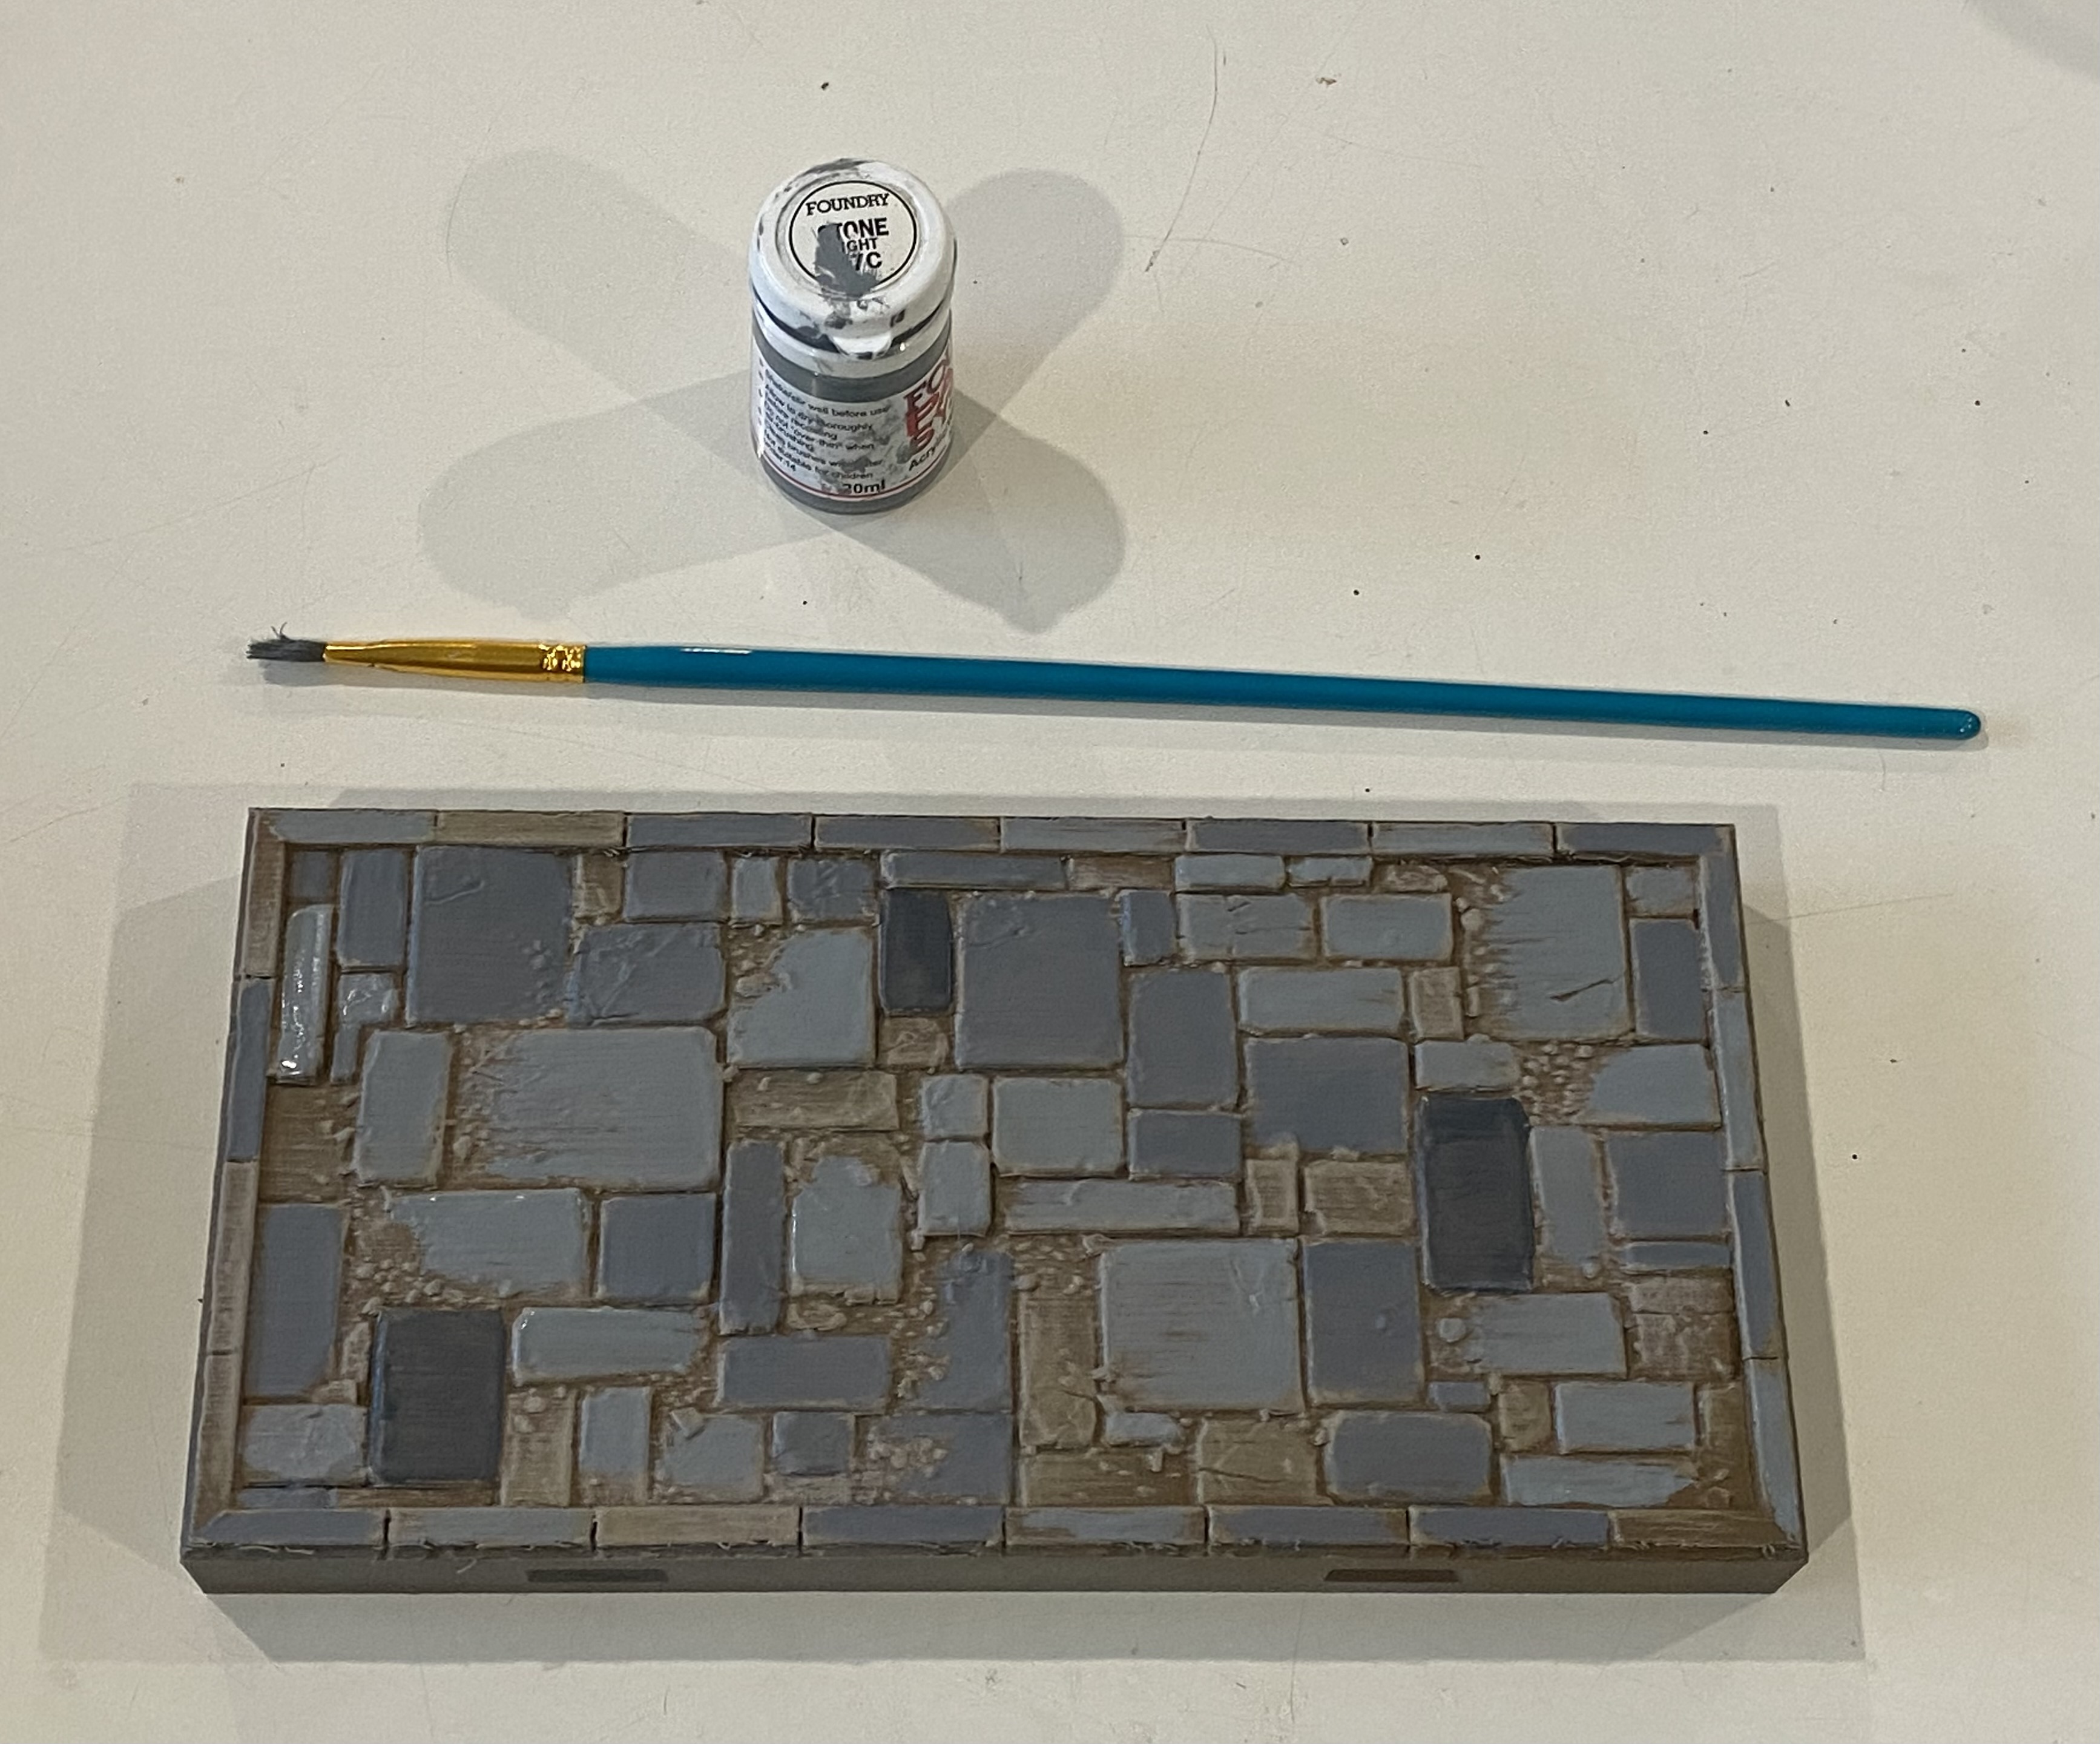
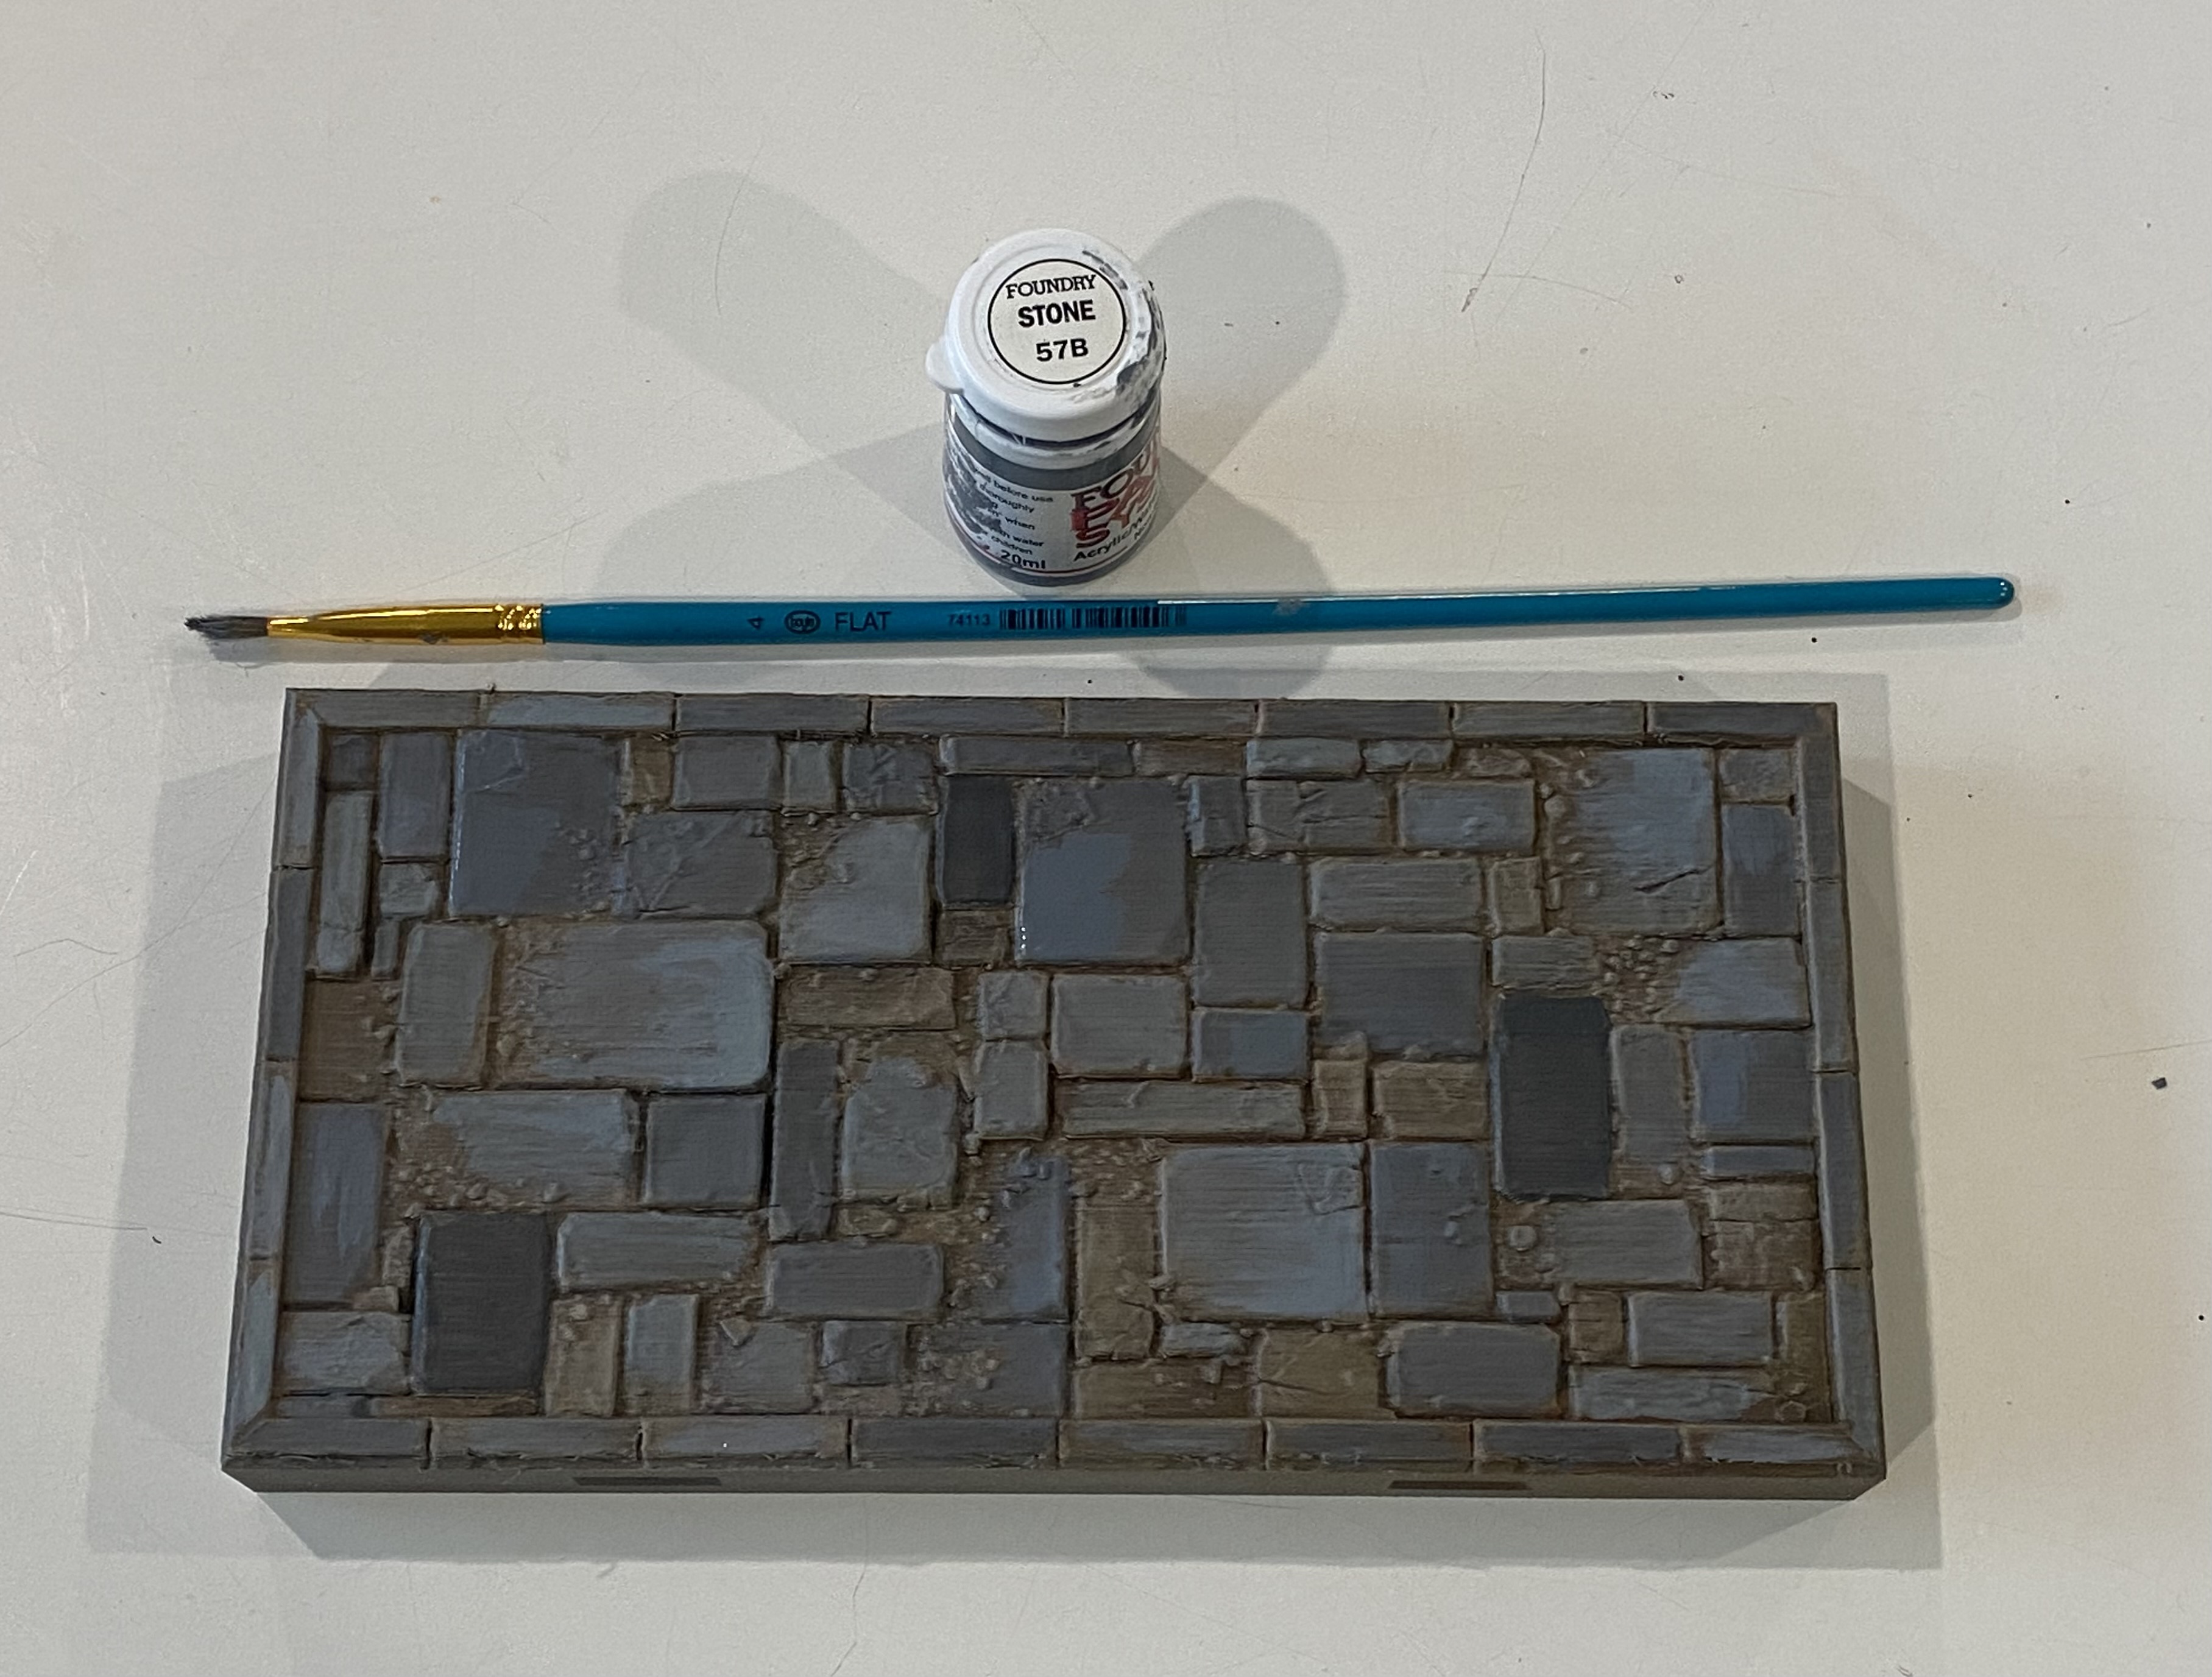
The last stack of flagstone tiles.
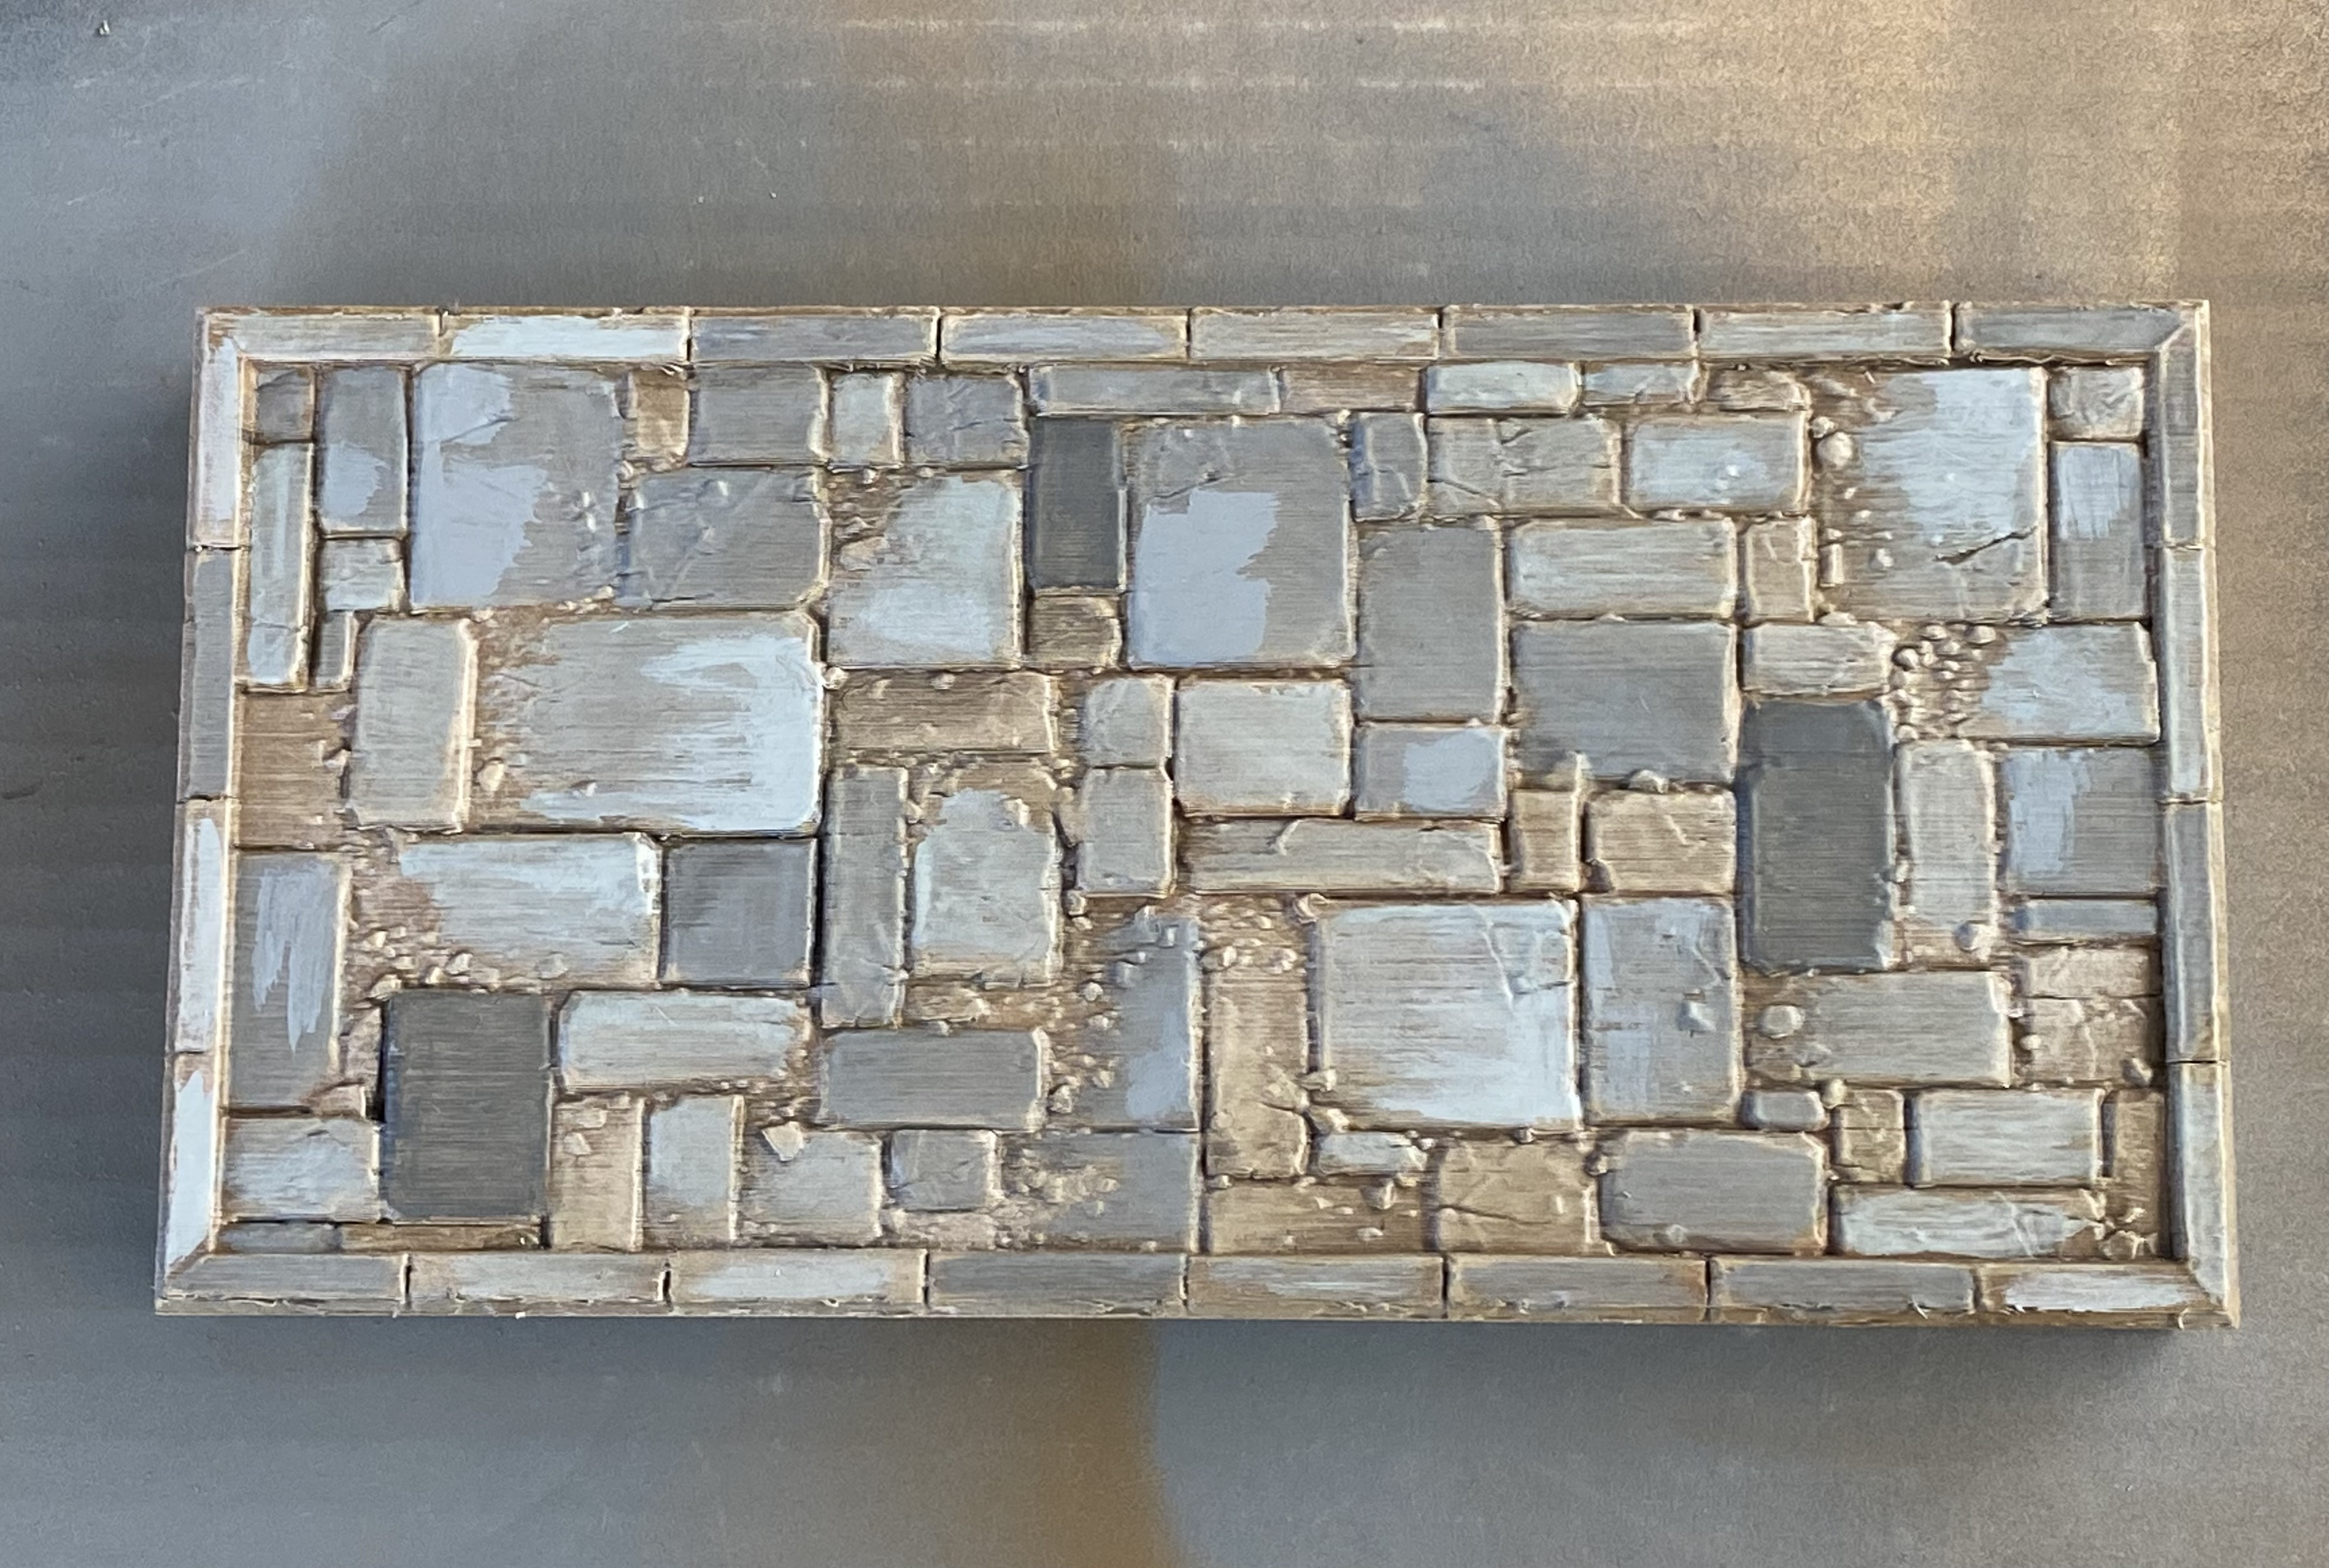
I thought I would take the time to photograph the same tile throughout the process, starting at the point after the dry-brushing stage
With each stage, I do it quite roughly and don’t take too much care with what I am doing.

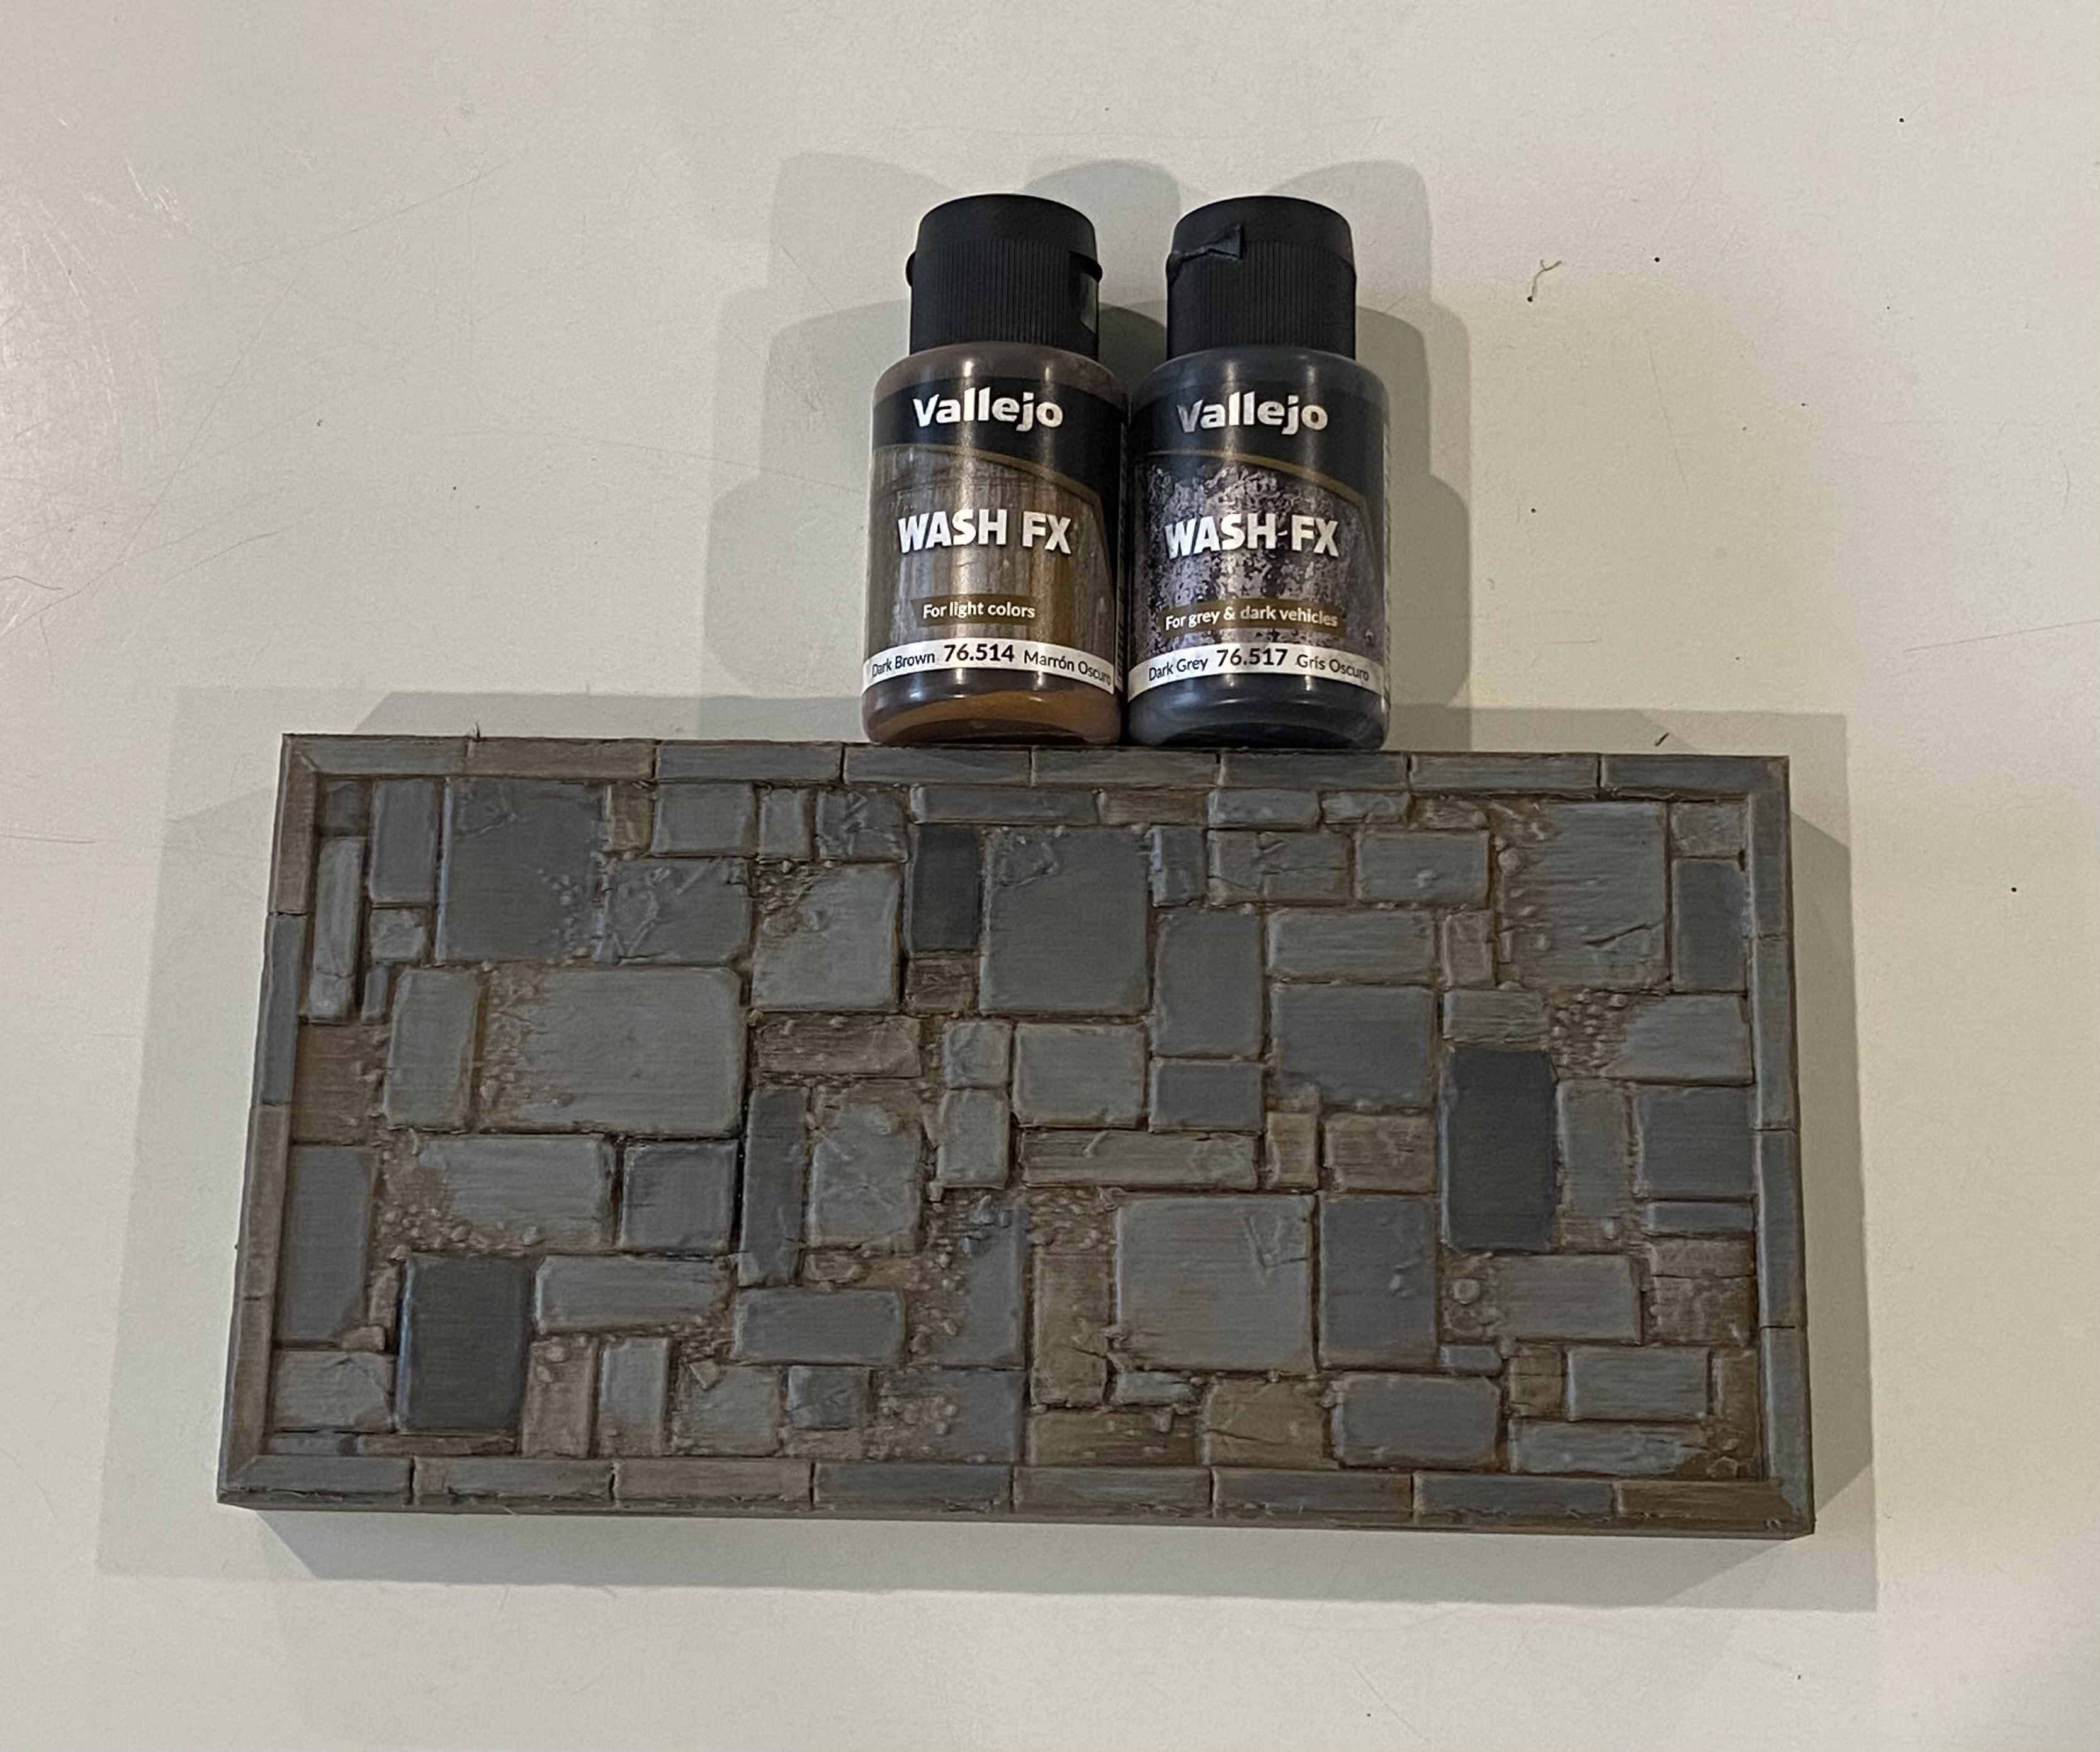 Splodge the wash on then wipe it all over with a bit of paper towel.
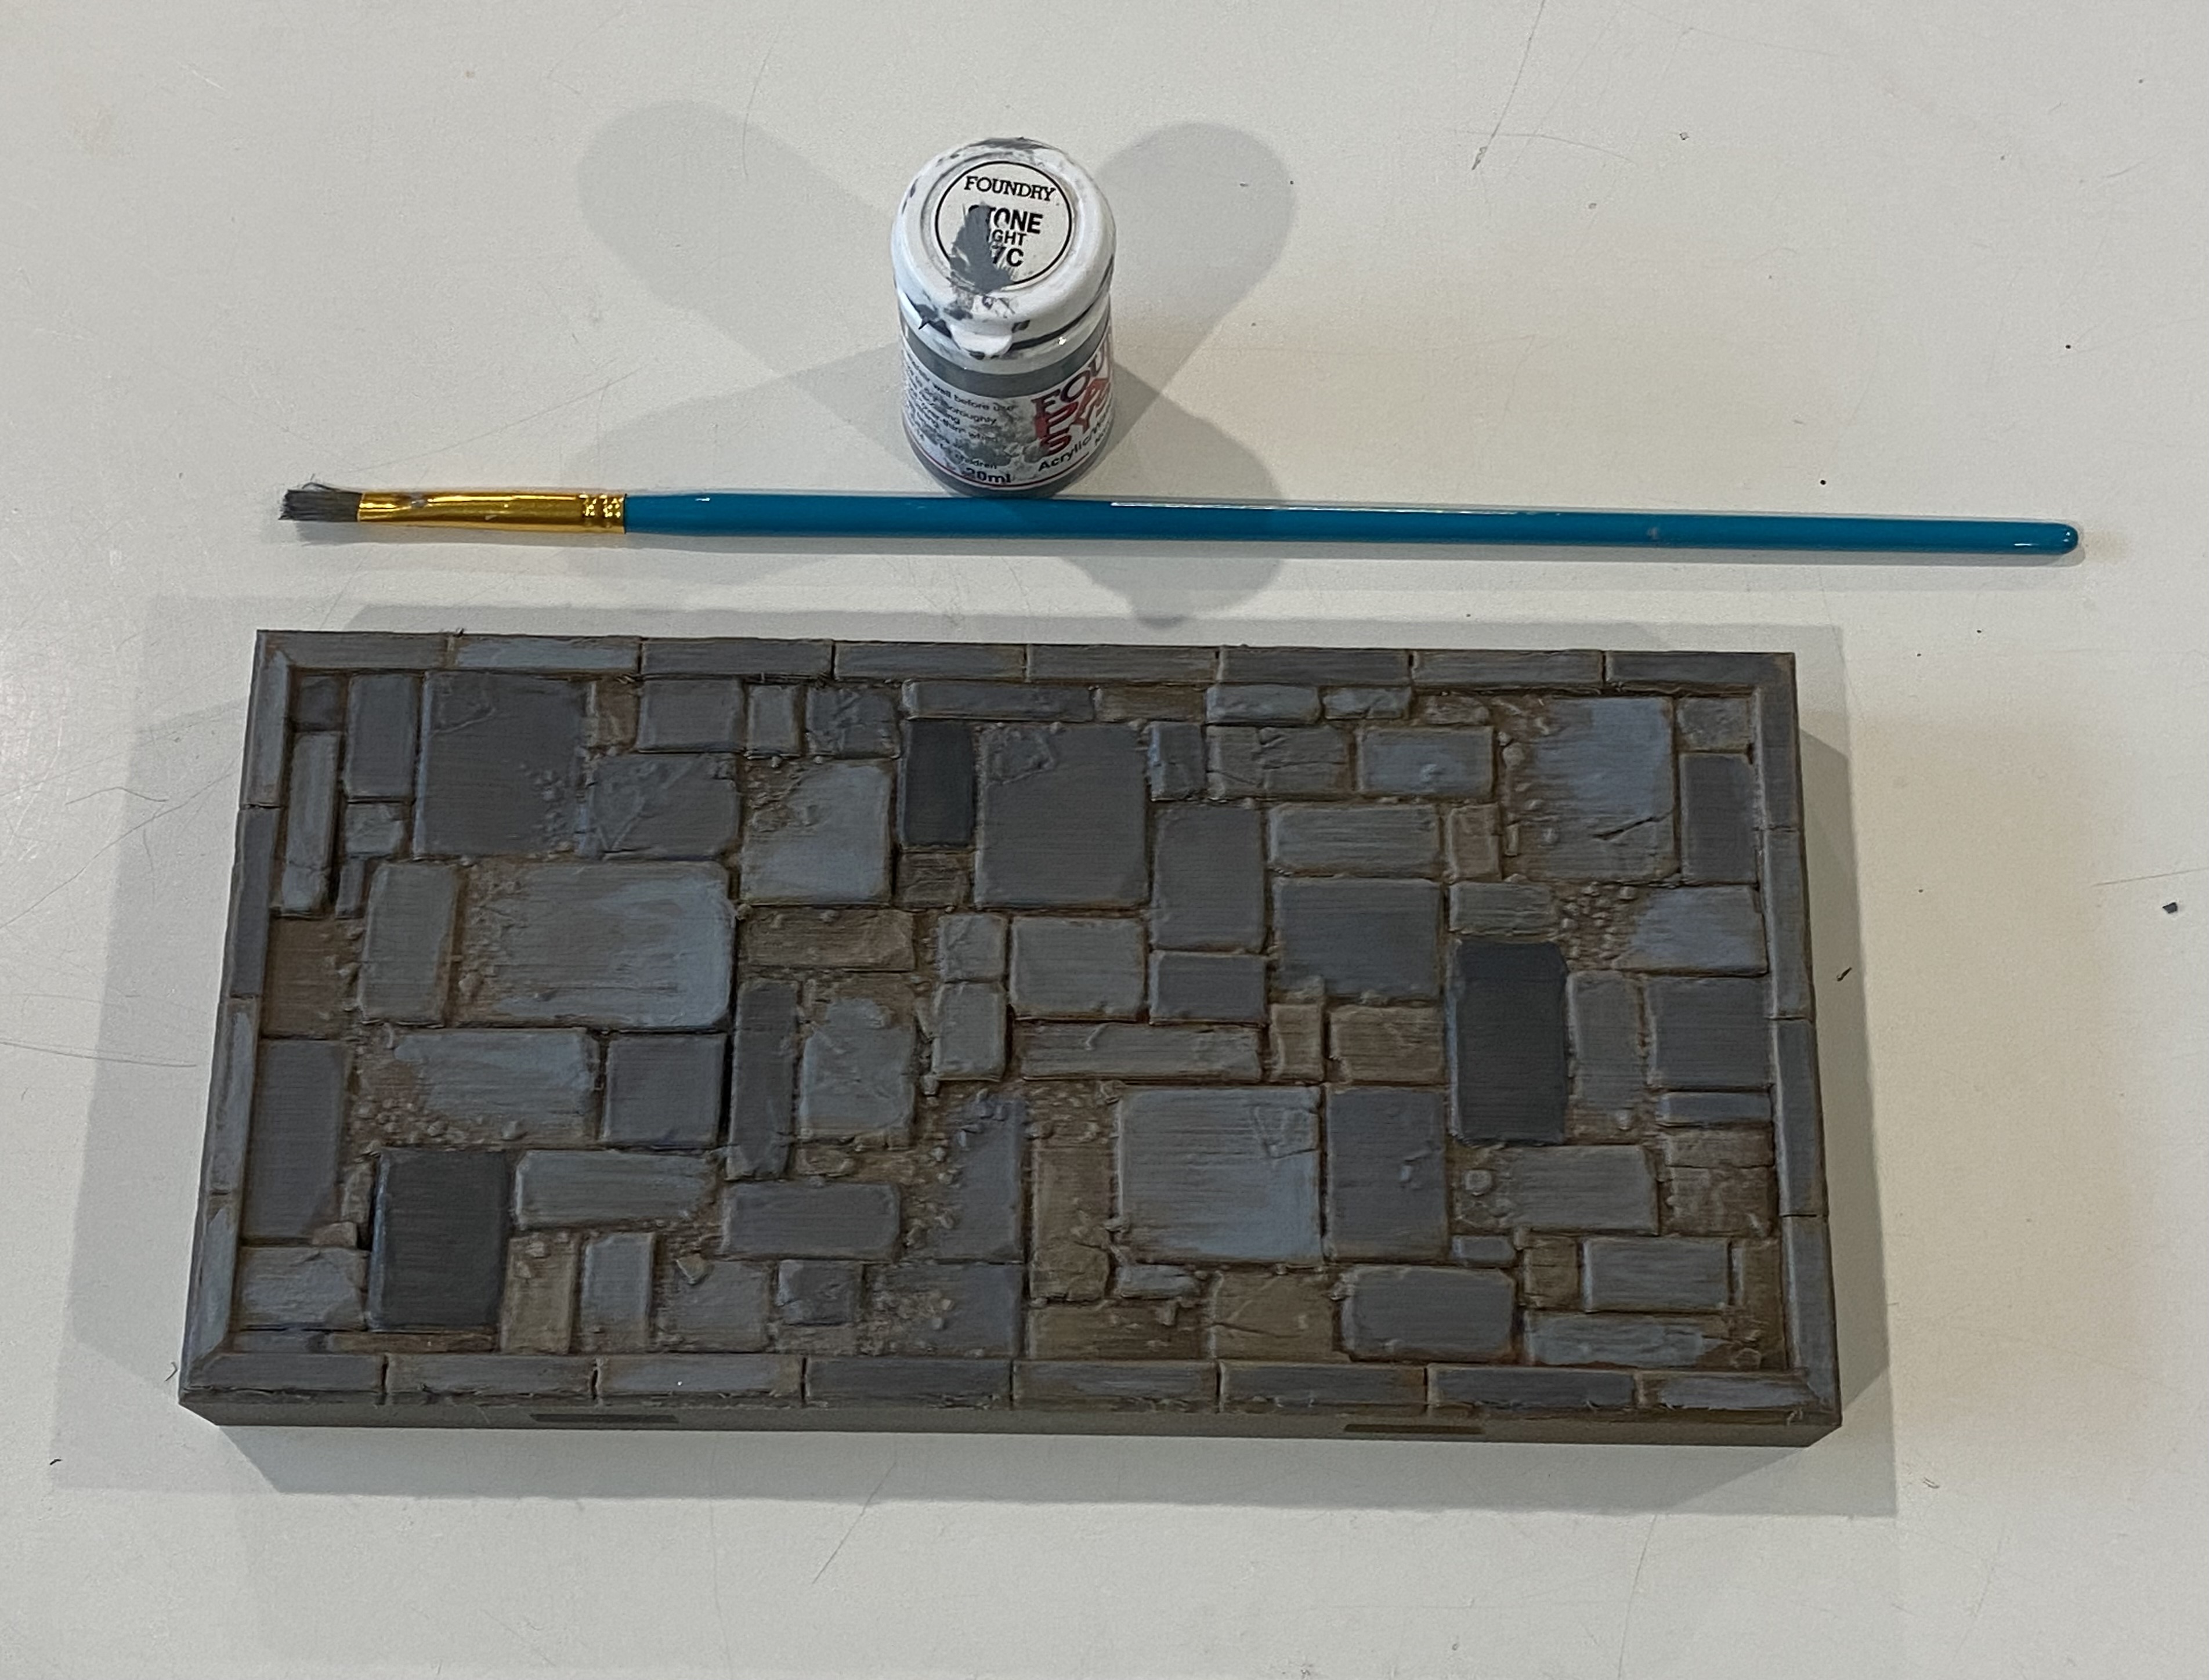
Thats it. All the tiles are done now. Just a few more bits to do to support the last of the raised areas and then I can move on to the fun stuff.
 And a picture of it not taken in the dark. Doh.
The state of play
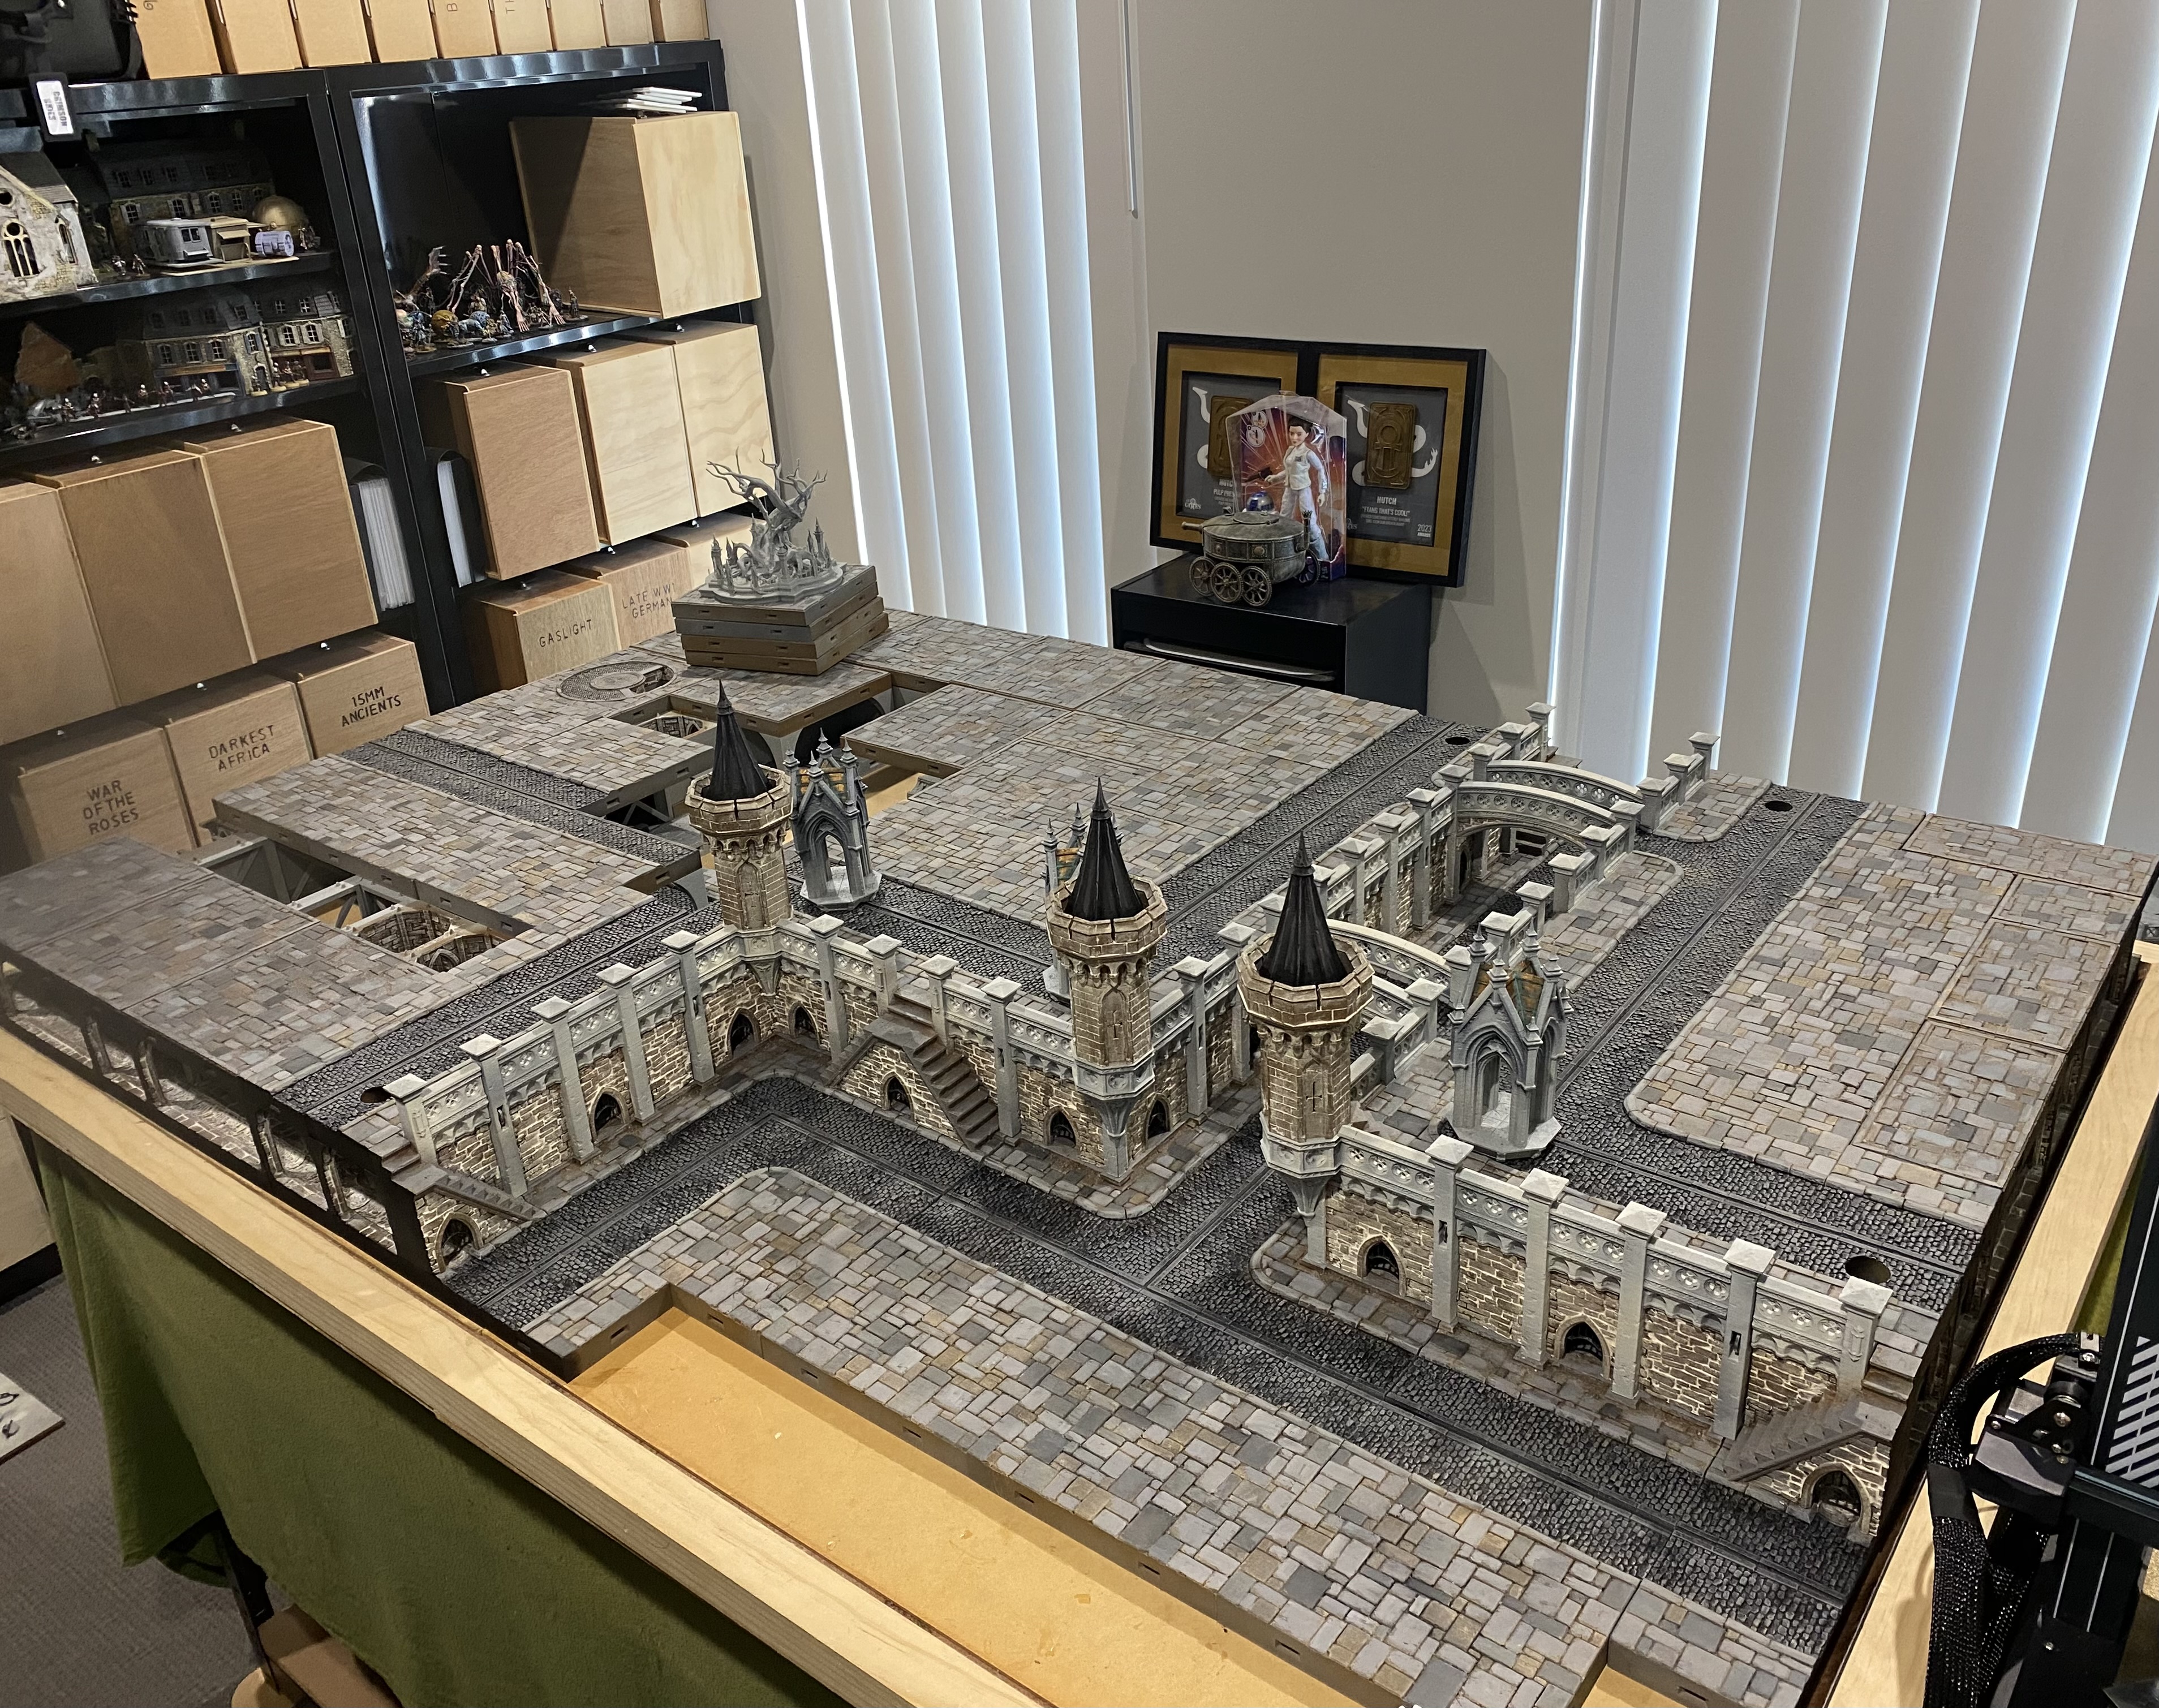
There are a few more riser sections to finish to support the elevated floor. So, with that in mind, I thought I would make a start on the slum area.
The slum area will be quite a large area of the layout because the idea is, much like in Dead Man’s Hand I can set up the entire table and run different scenarios in different areas of the table. This way scenarios can flow across the board without having to reset stuff. The layout can be swapped around if needed but for each string of scenarios I would probably stick to the one layout as much as possible, just using different areas.
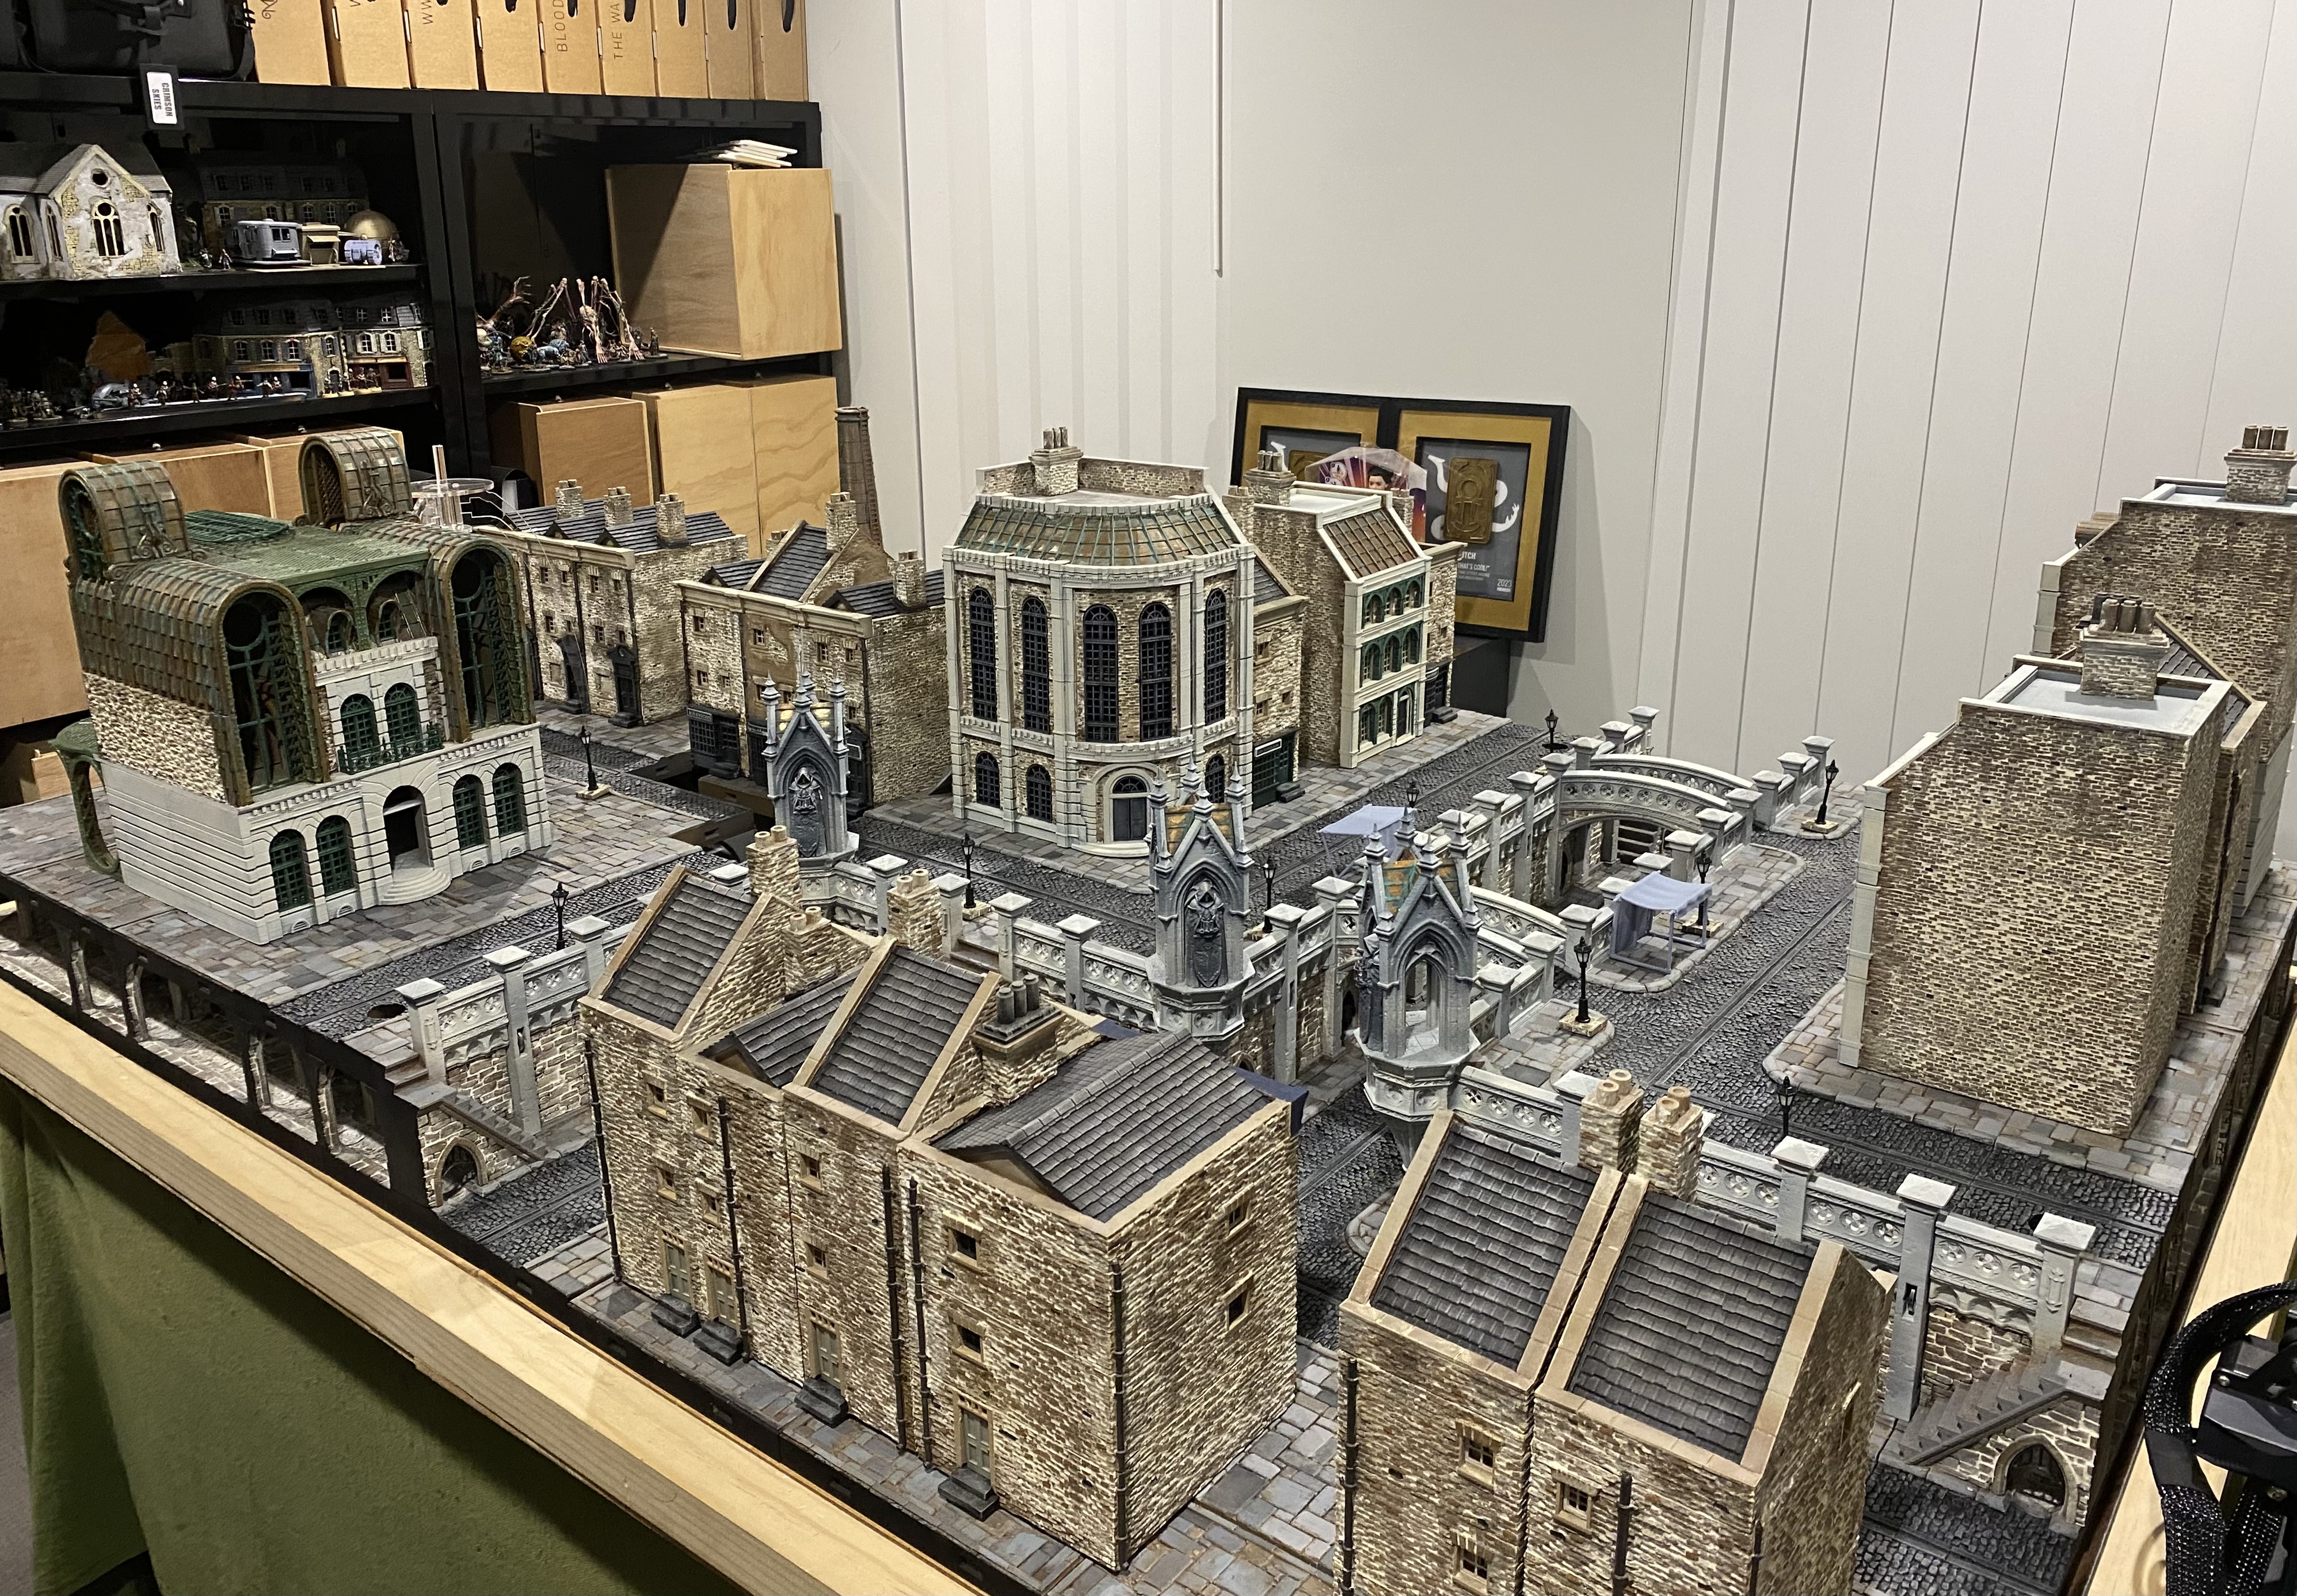 Disclaimer - The buildings on the table set up in this picture were built last year.
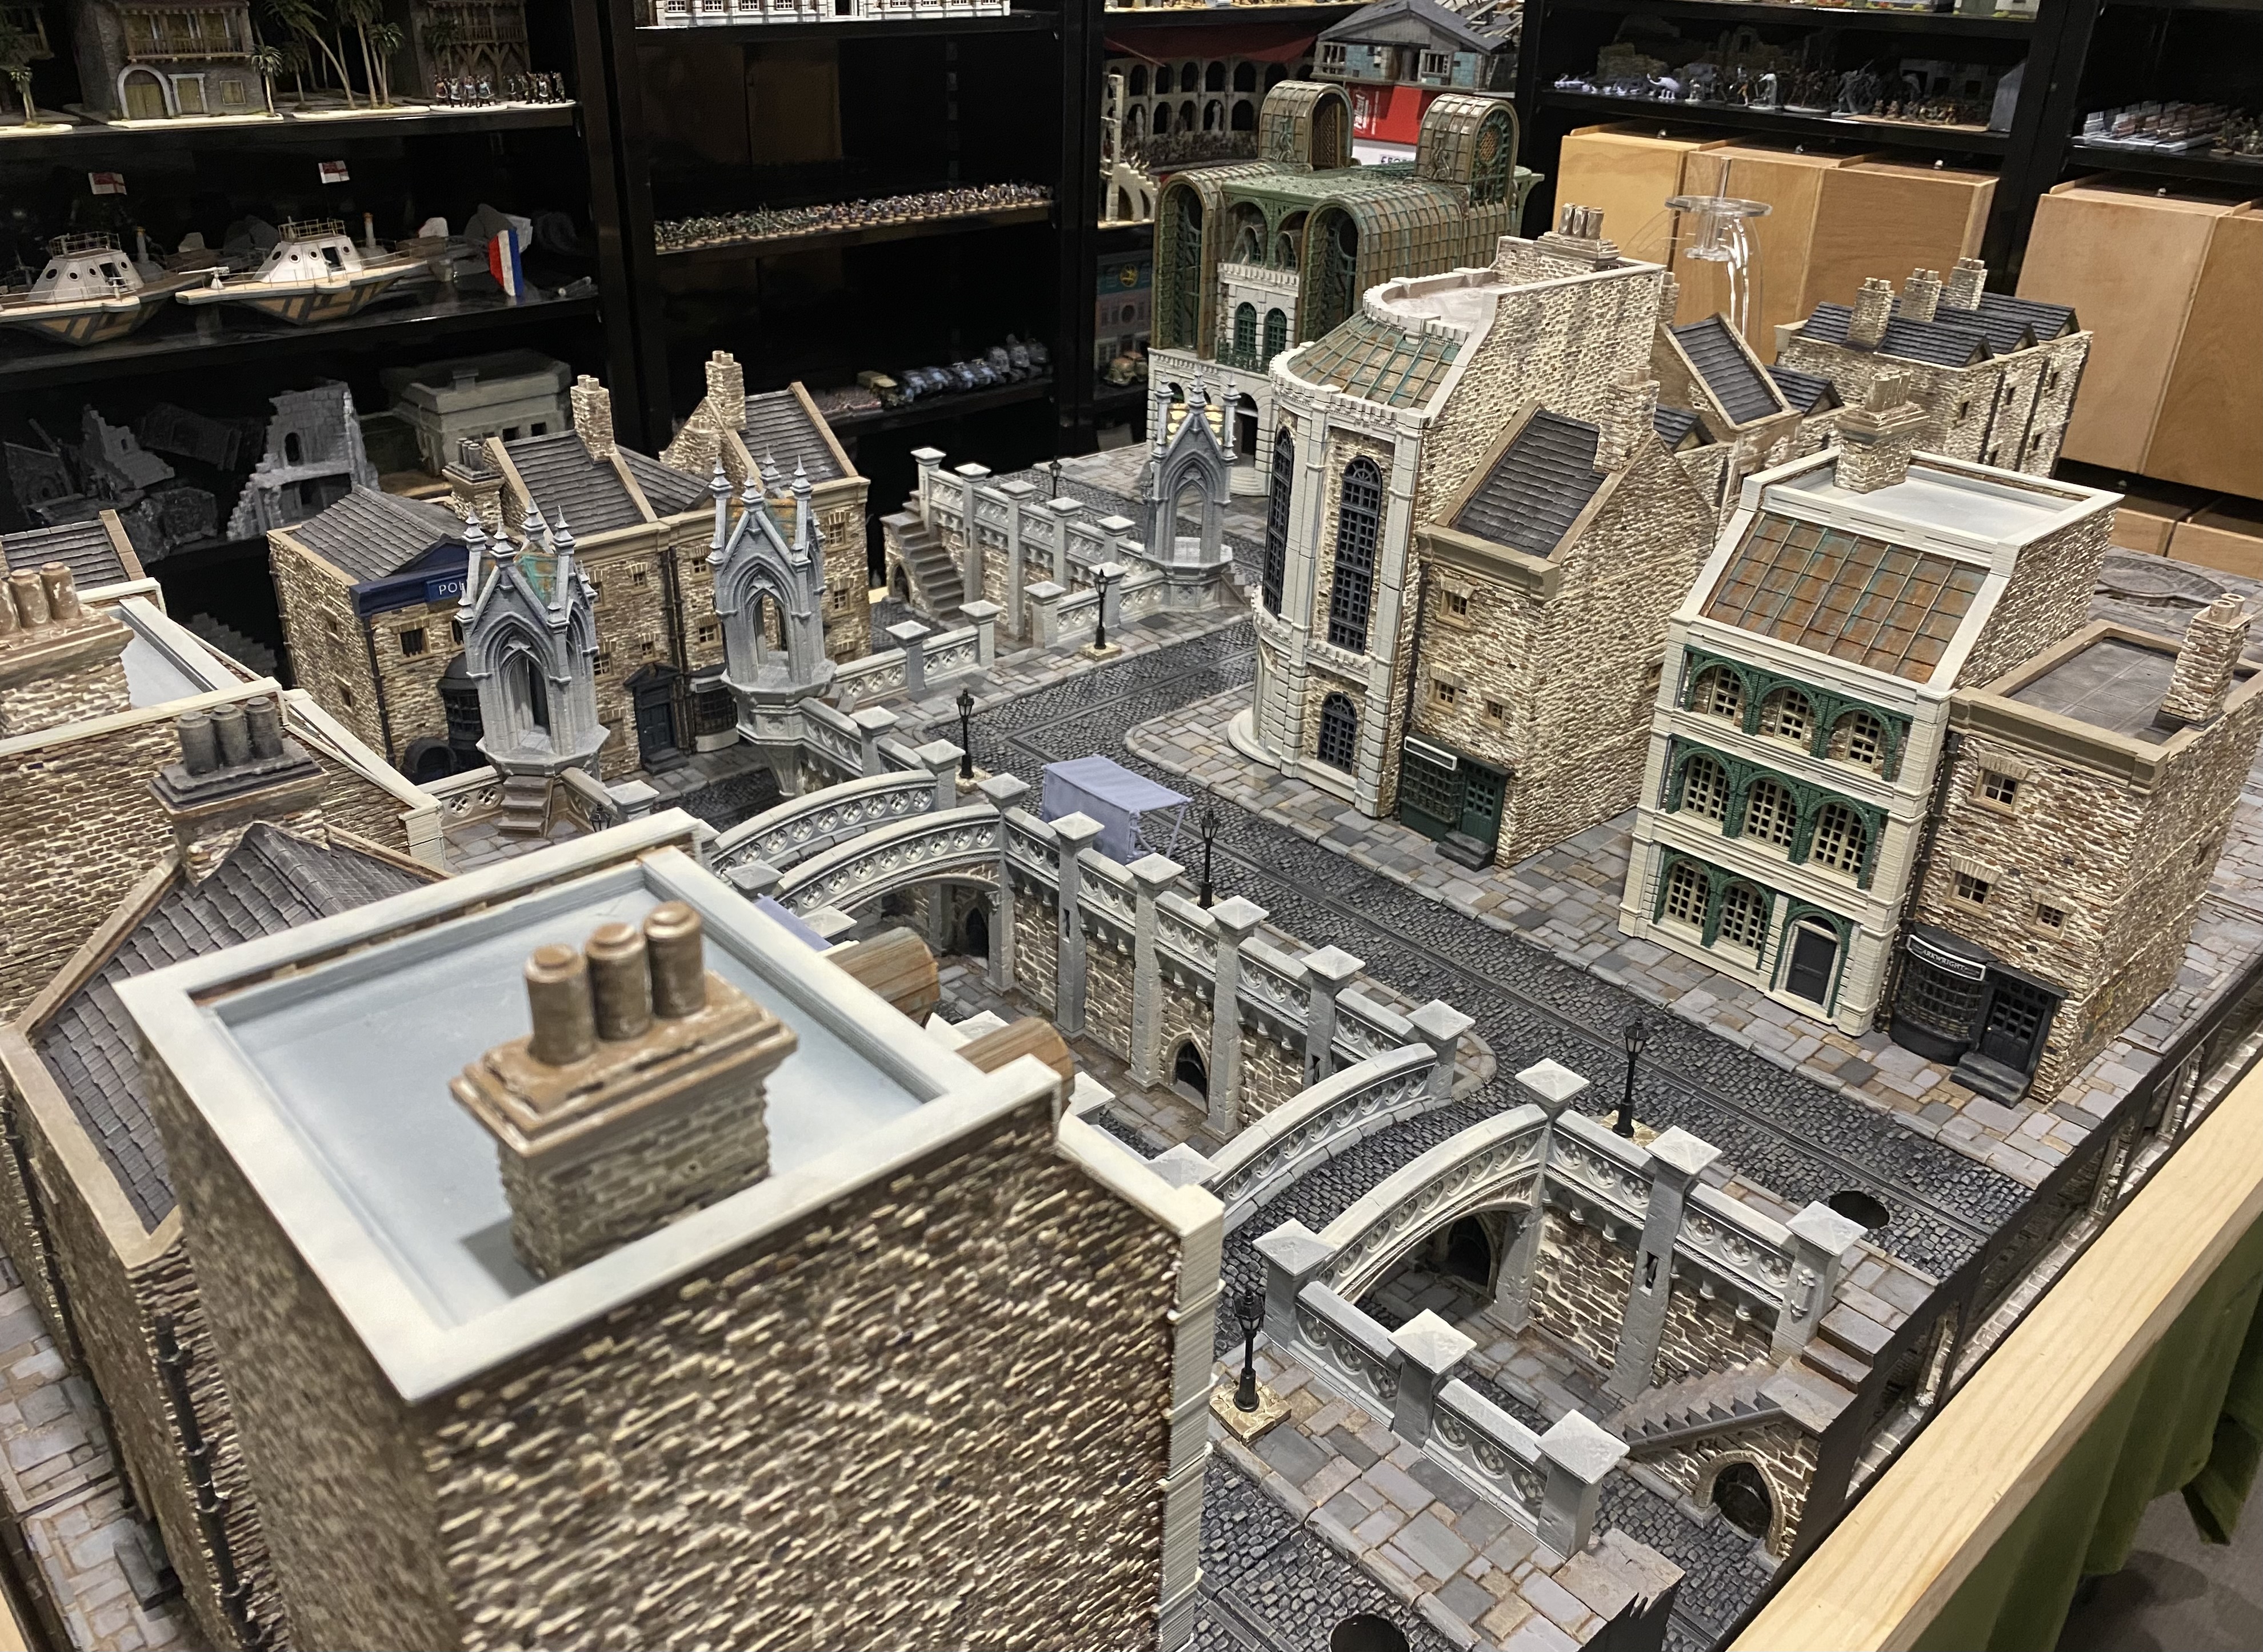 Disclaimer - The buildings on the table set up in this picture were built last year.
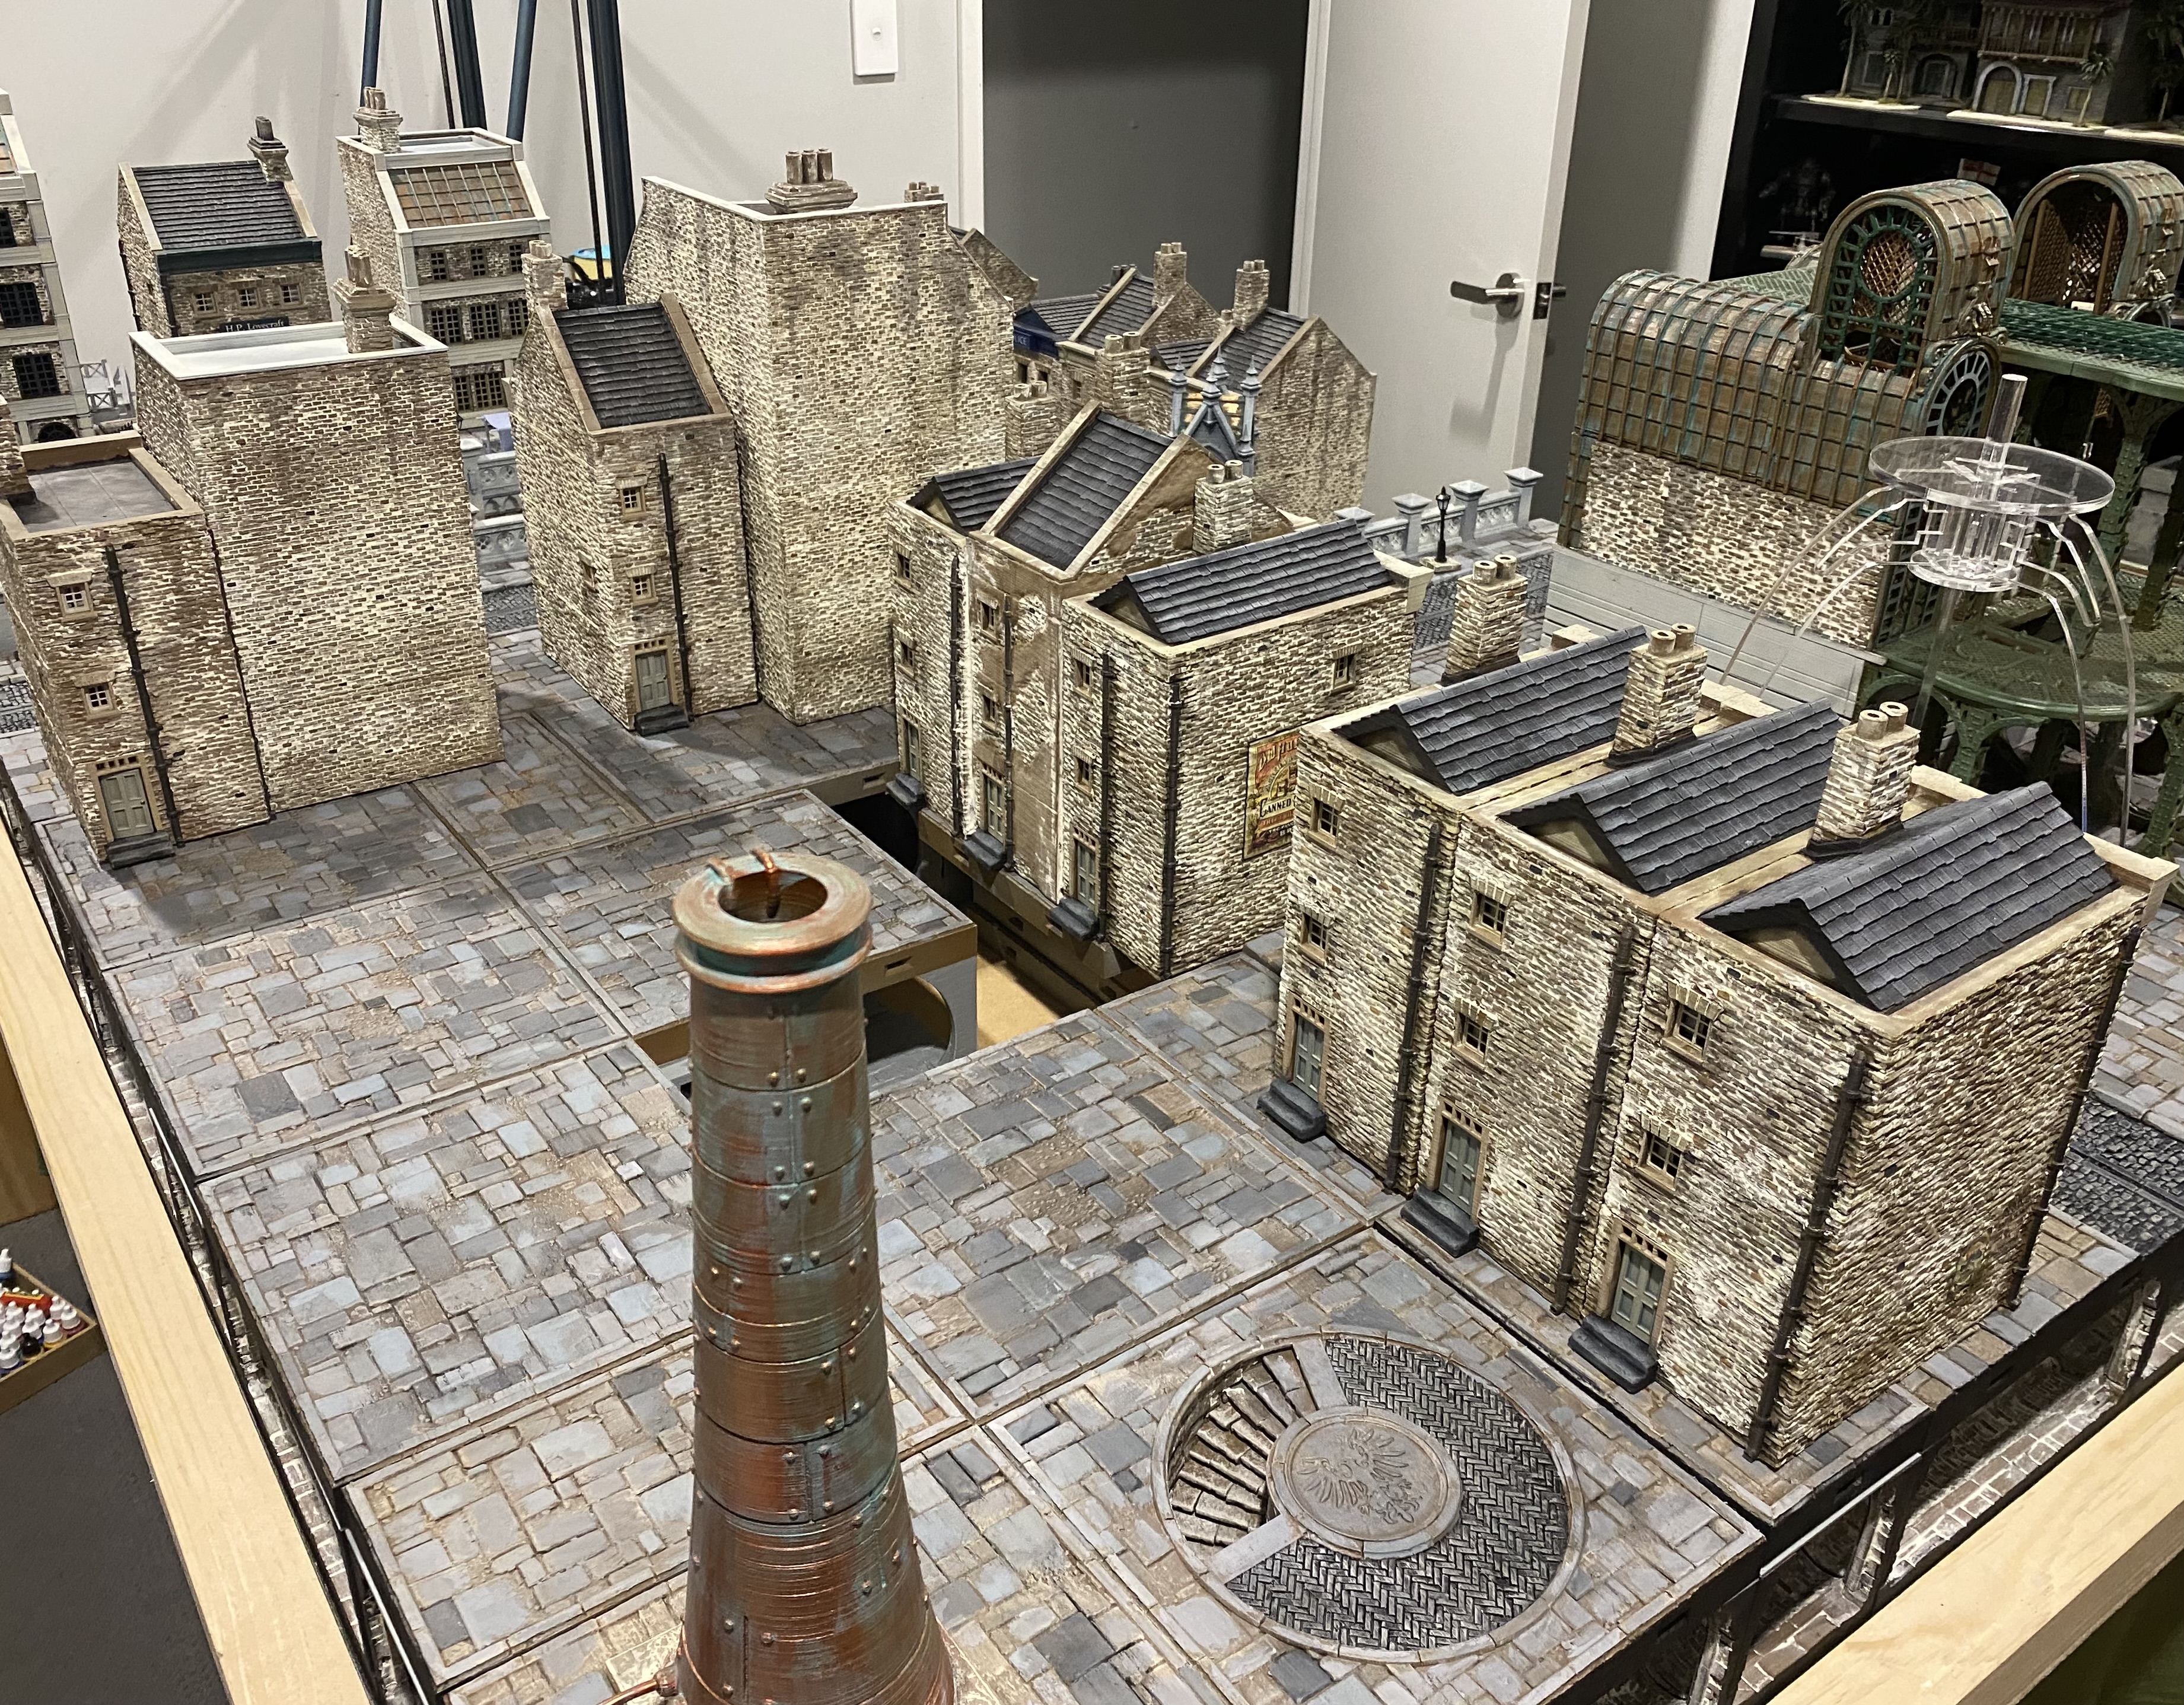 Disclaimer - The buildings on the table set up in this picture were built last year. This is where the slums area is going to go, near some steps going down into the sewer system. Thinking a mix of wooded and brick buildings here, maybe some with scaffolding holding them up.
 I then had a thought, maybe I could also use this table for things like Mordheim or even, shudder, 40k when I get dragged screaming and kicking to have to play it with my mates.
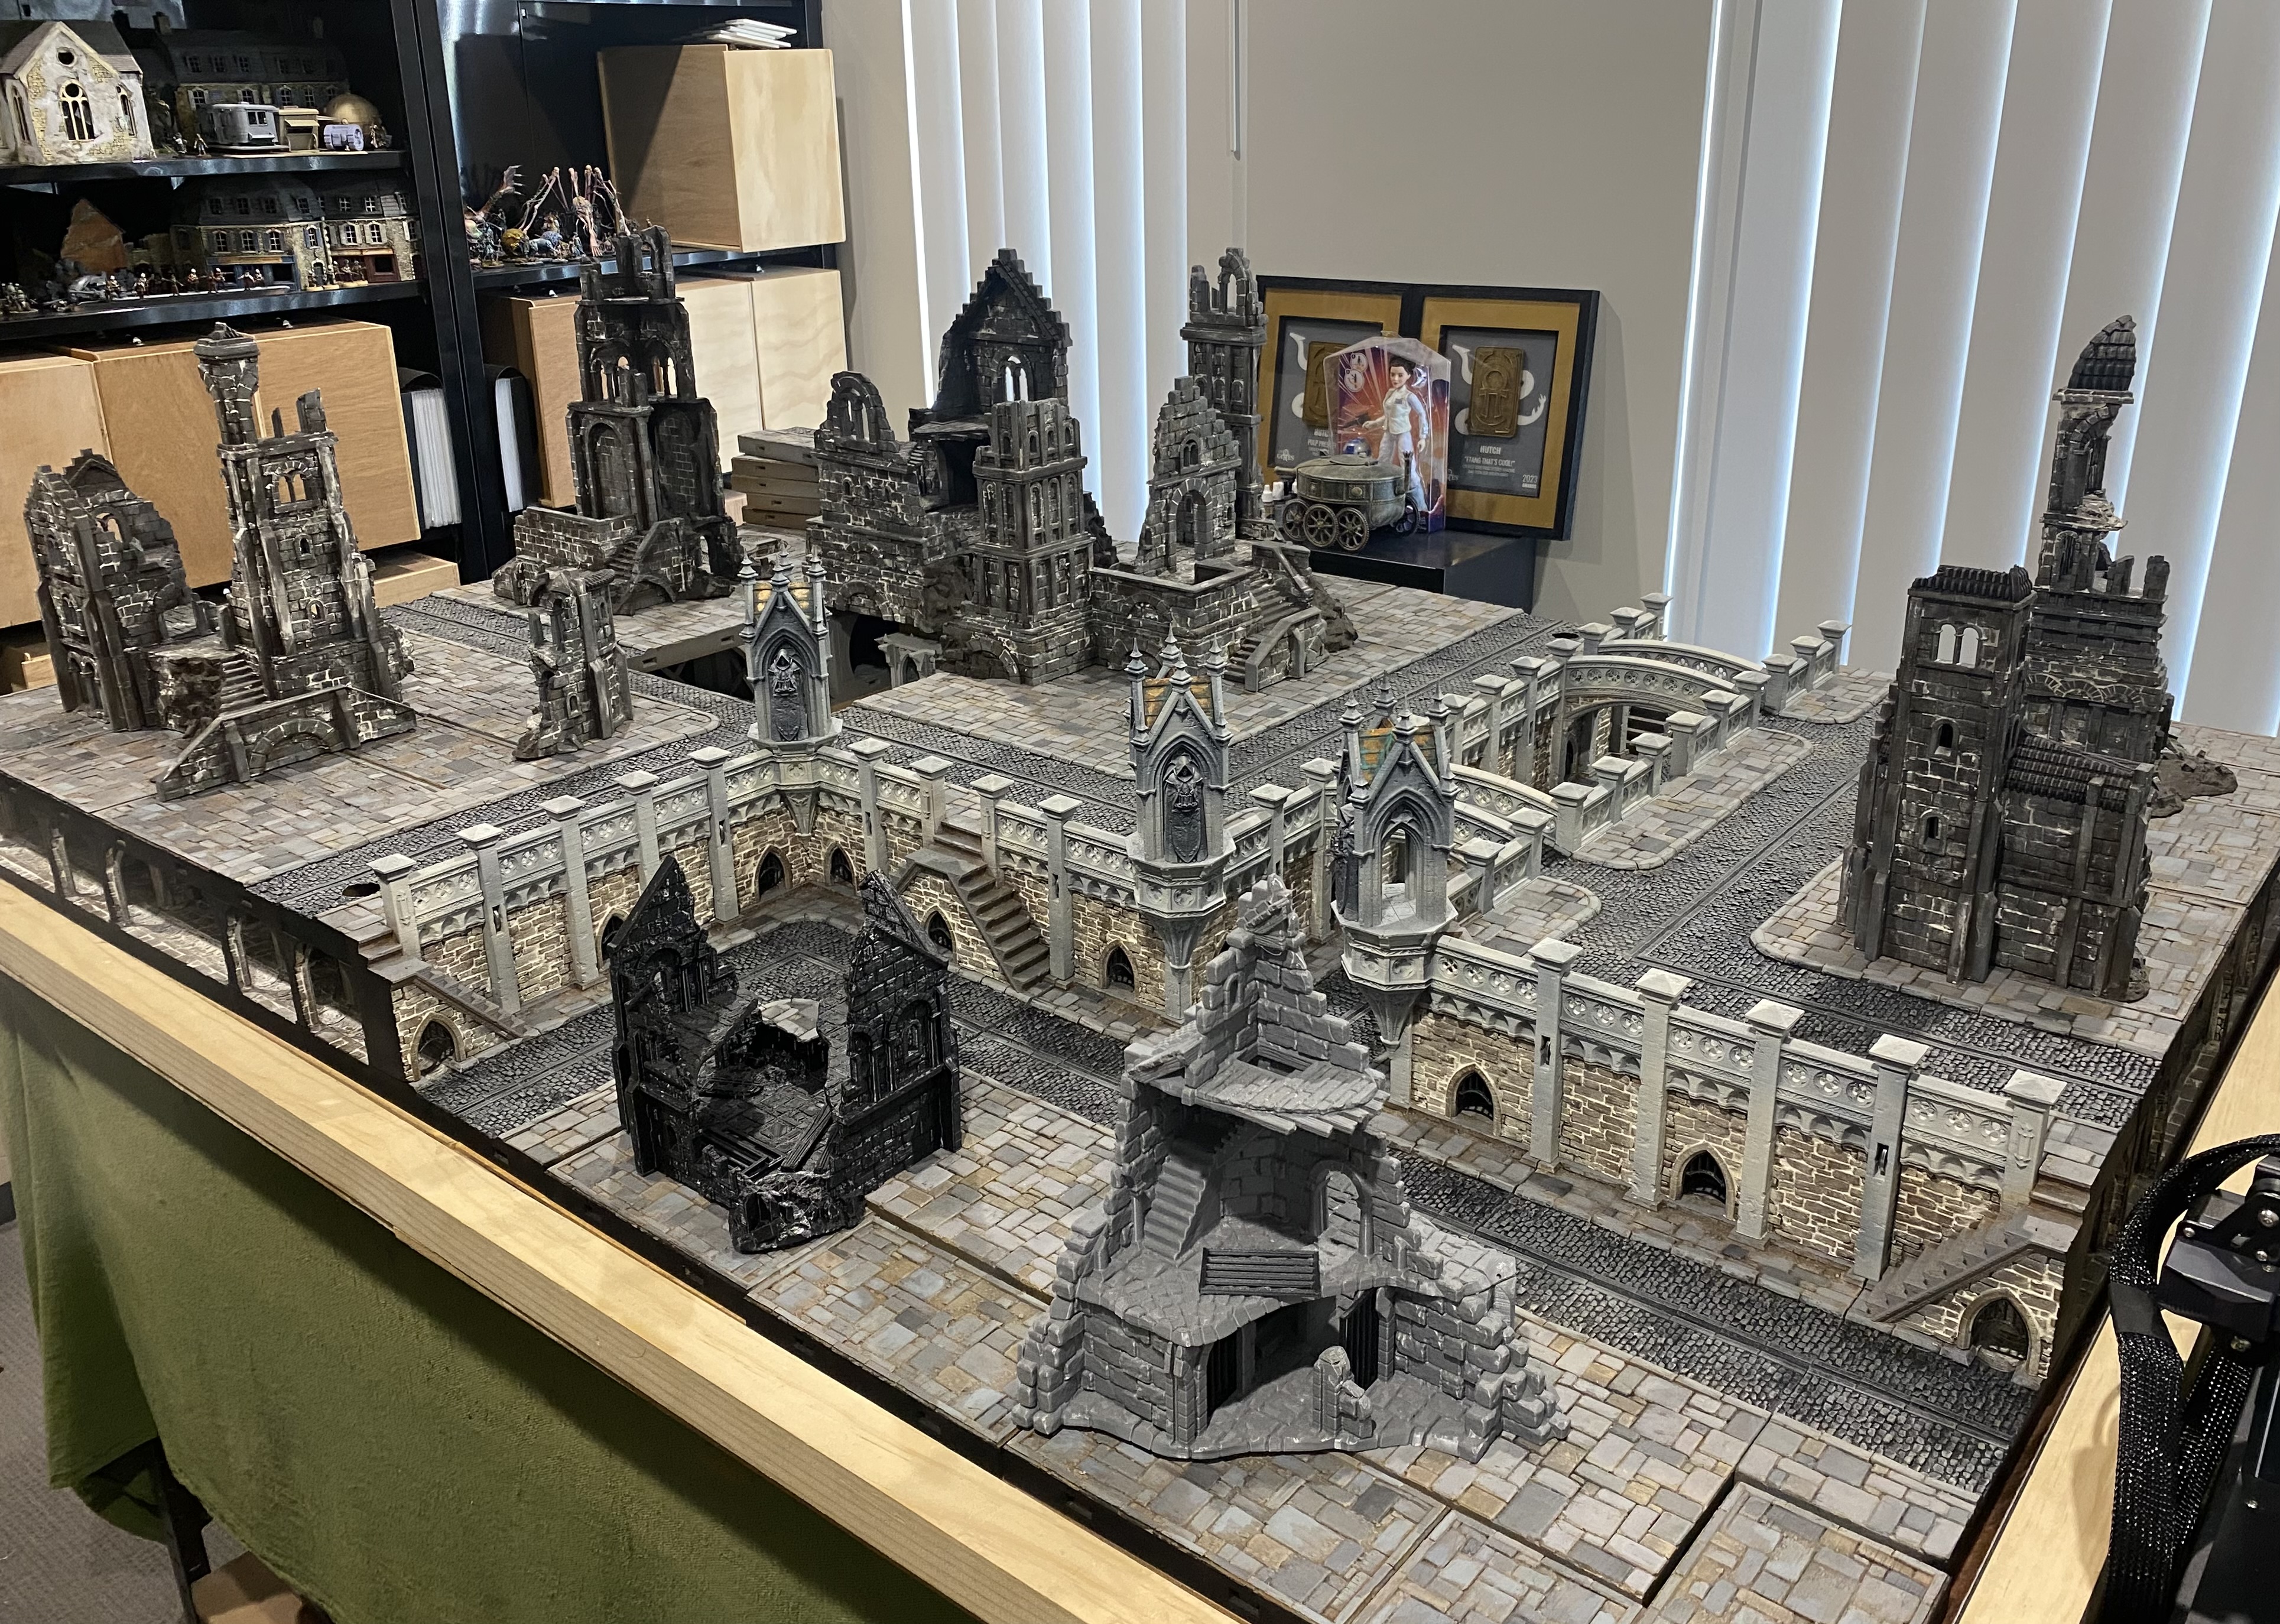
I have lots of ruins, I mean lots and lots of ruins, so I set some of them up on the table. They won’t all fit but I can get about 50% of them on the board at any one time. That is not a problem though as it means I can swap things around.
I think if I give them a repaint, and do up a damaged bridge to replace one of the existing bridges and a few collapsed wall sections I could make it work.
Thoughts?
 Disclaimer - The buildings on the table set up in this picture were built last year.
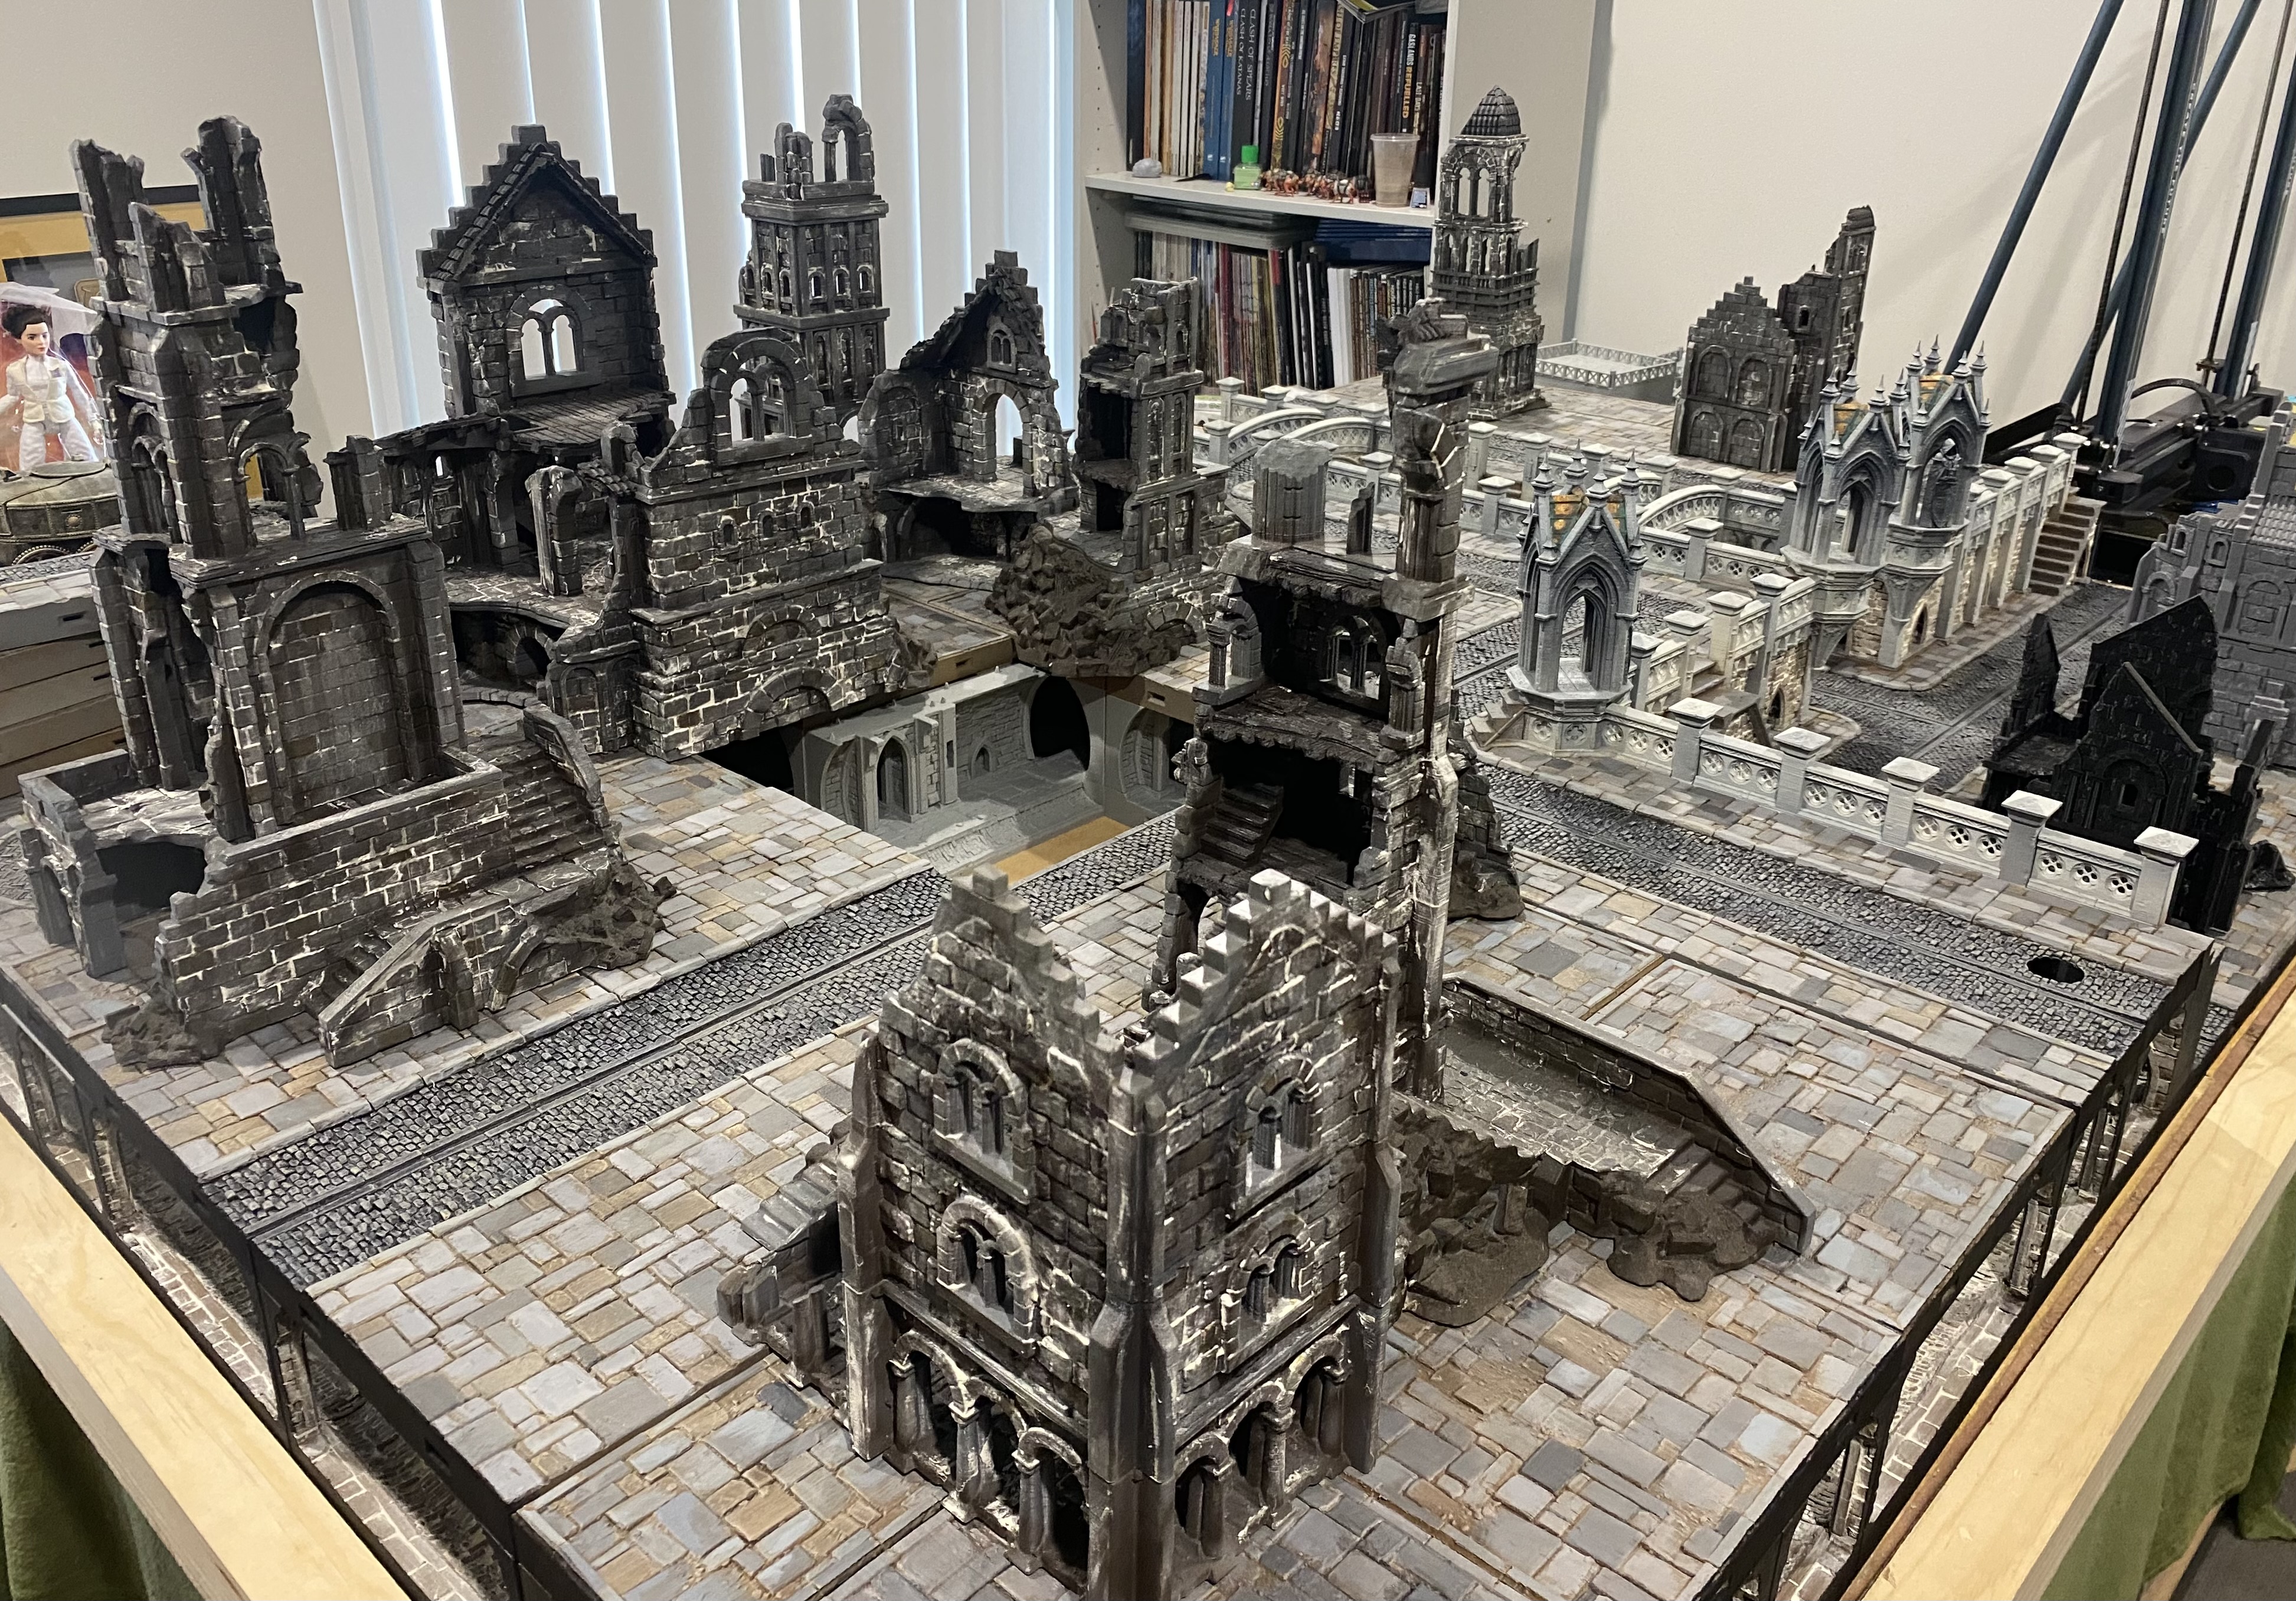 Disclaimer - The buildings on the table set up in this picture were built last year.
Slumming it
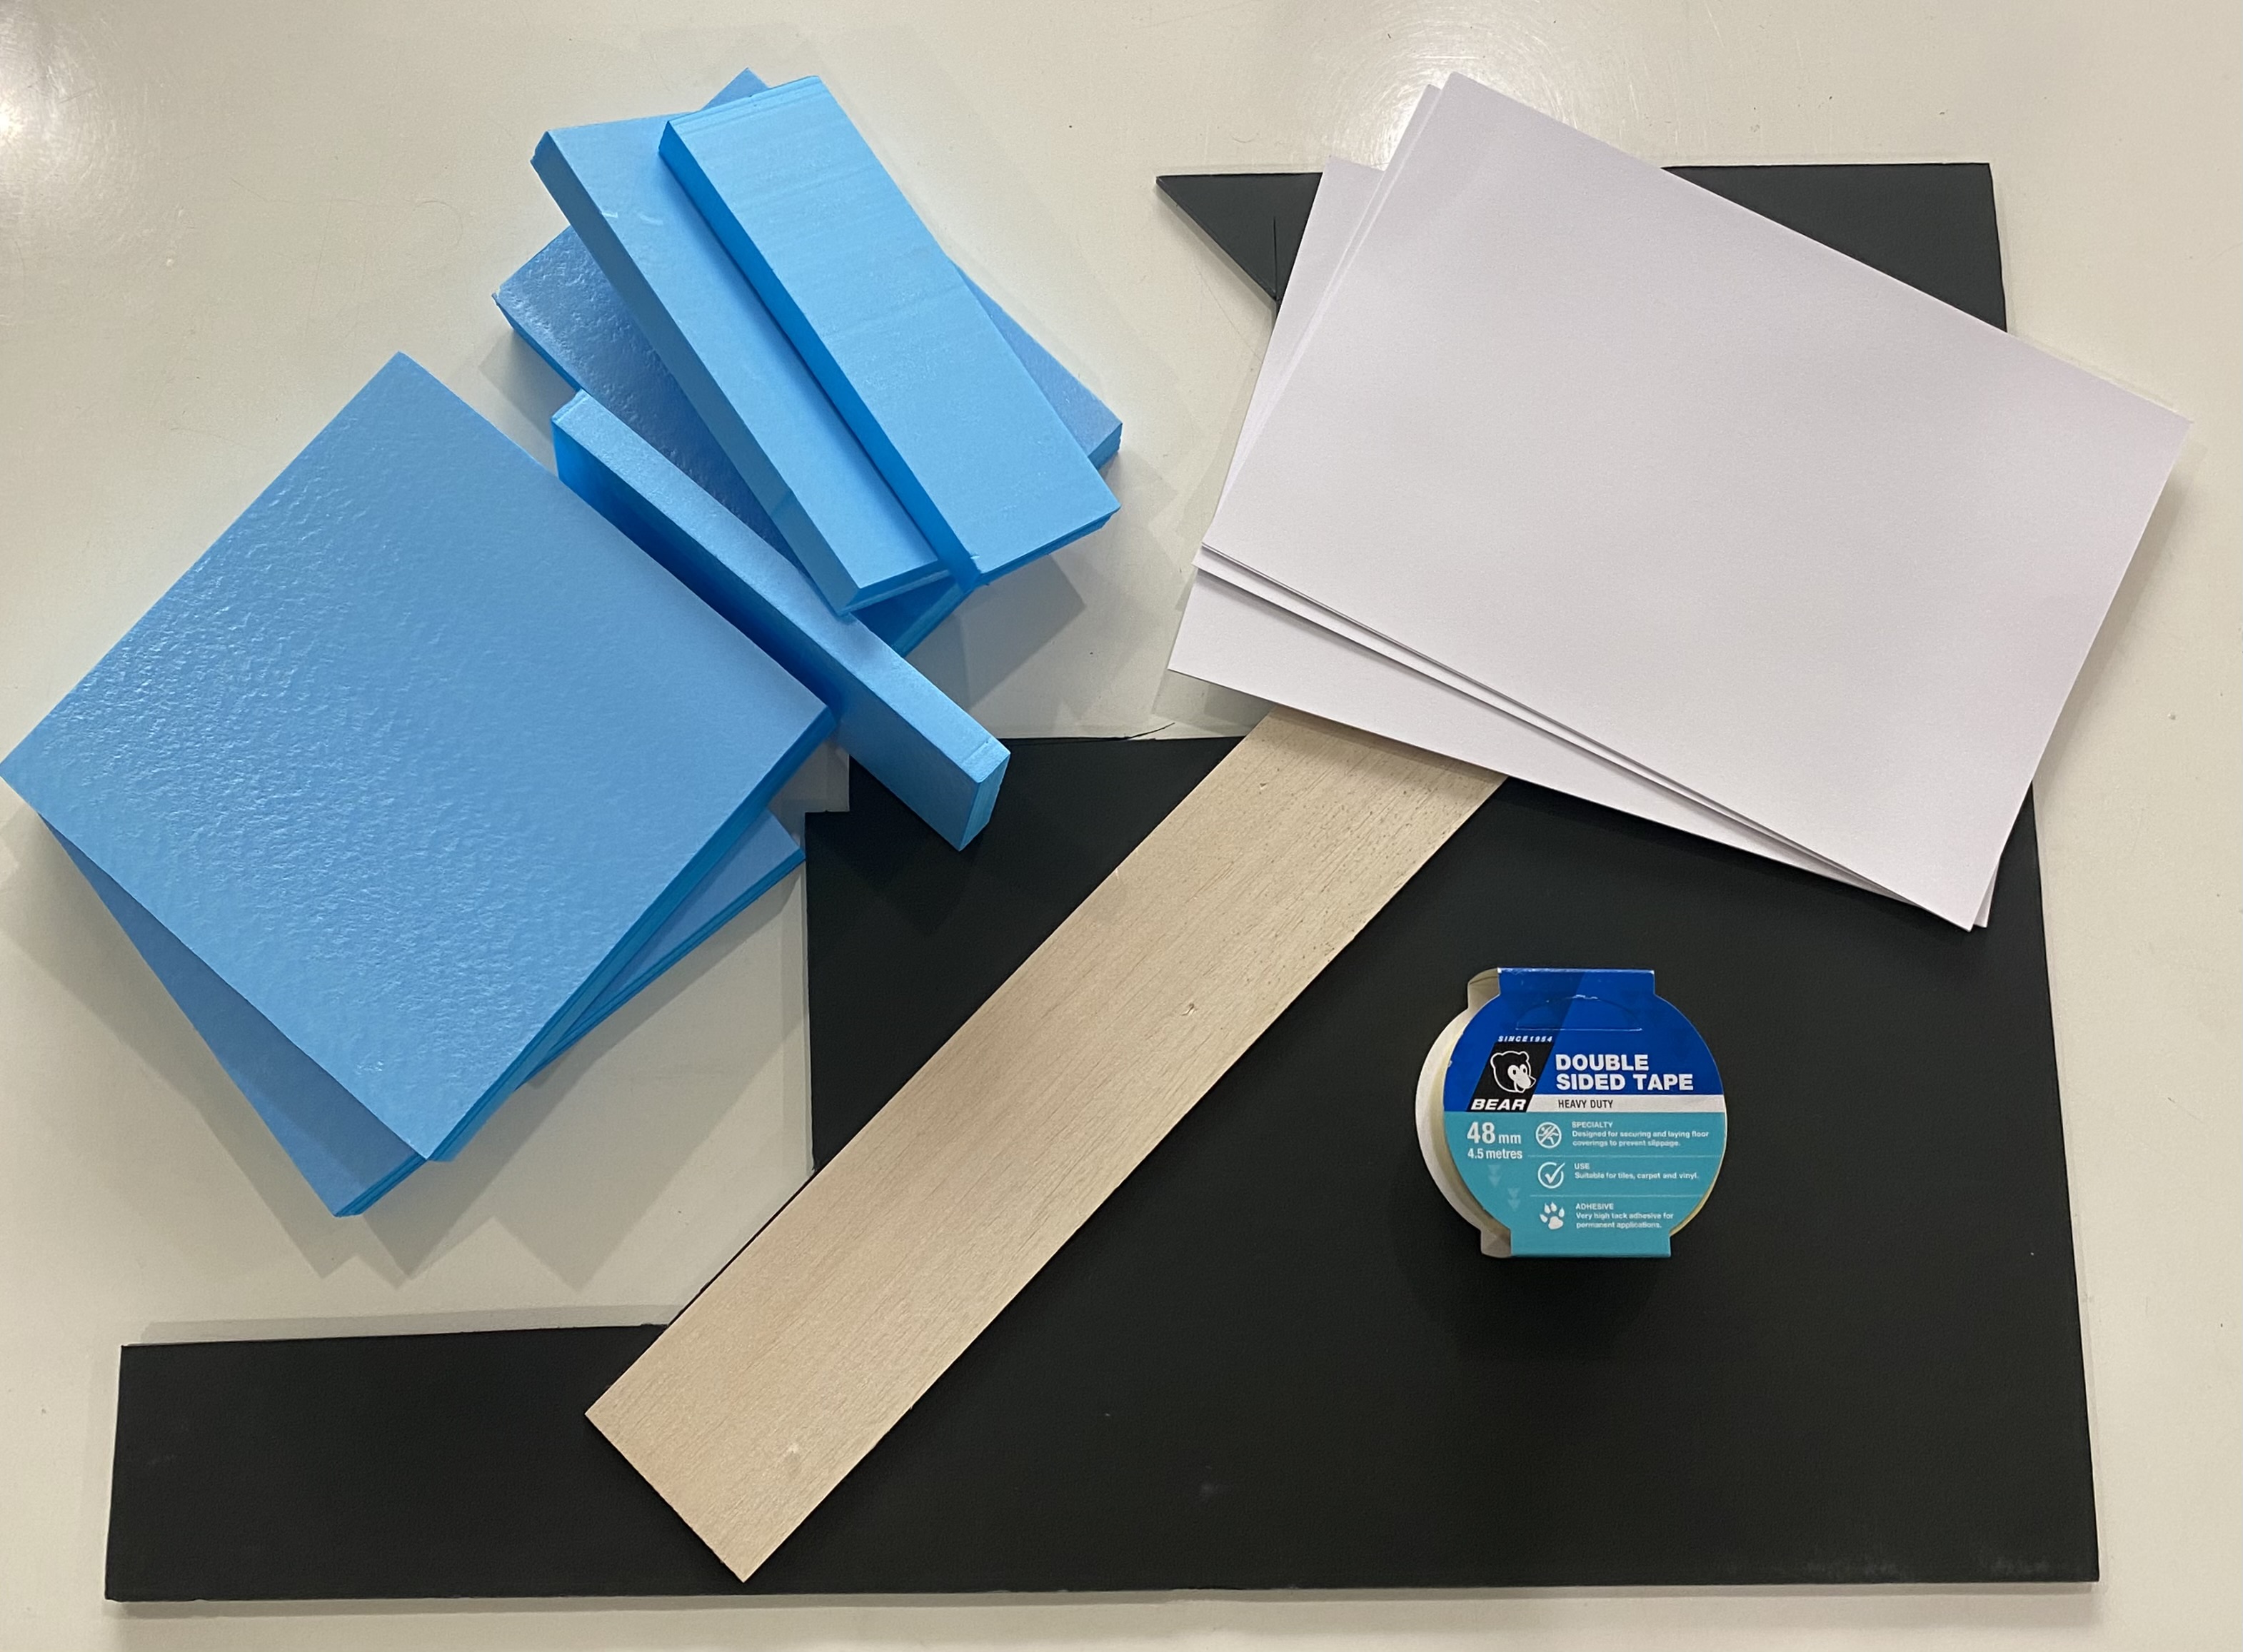
Time to start on the Slum I think. Enough with the 3D filament printing and onwards with some more traditional building methods.
A quick stocktake of resources that I have in the garage, and also raiding the kid’s craft boxes, let me be honest since they got old enough to use computers I don’t think they have touched this stuff anyway.
Some foam-core, some white thin card, some balsa wood sheet, double sides tape and some XPS foam left over from my Dungeonalia Project
Of course, I also have all the normal stuff like things to cut this stuff with, paint, brushes etc.
Timber cladding
I need a quick way to do timber cladding so decided to use double sided tape on thin card.
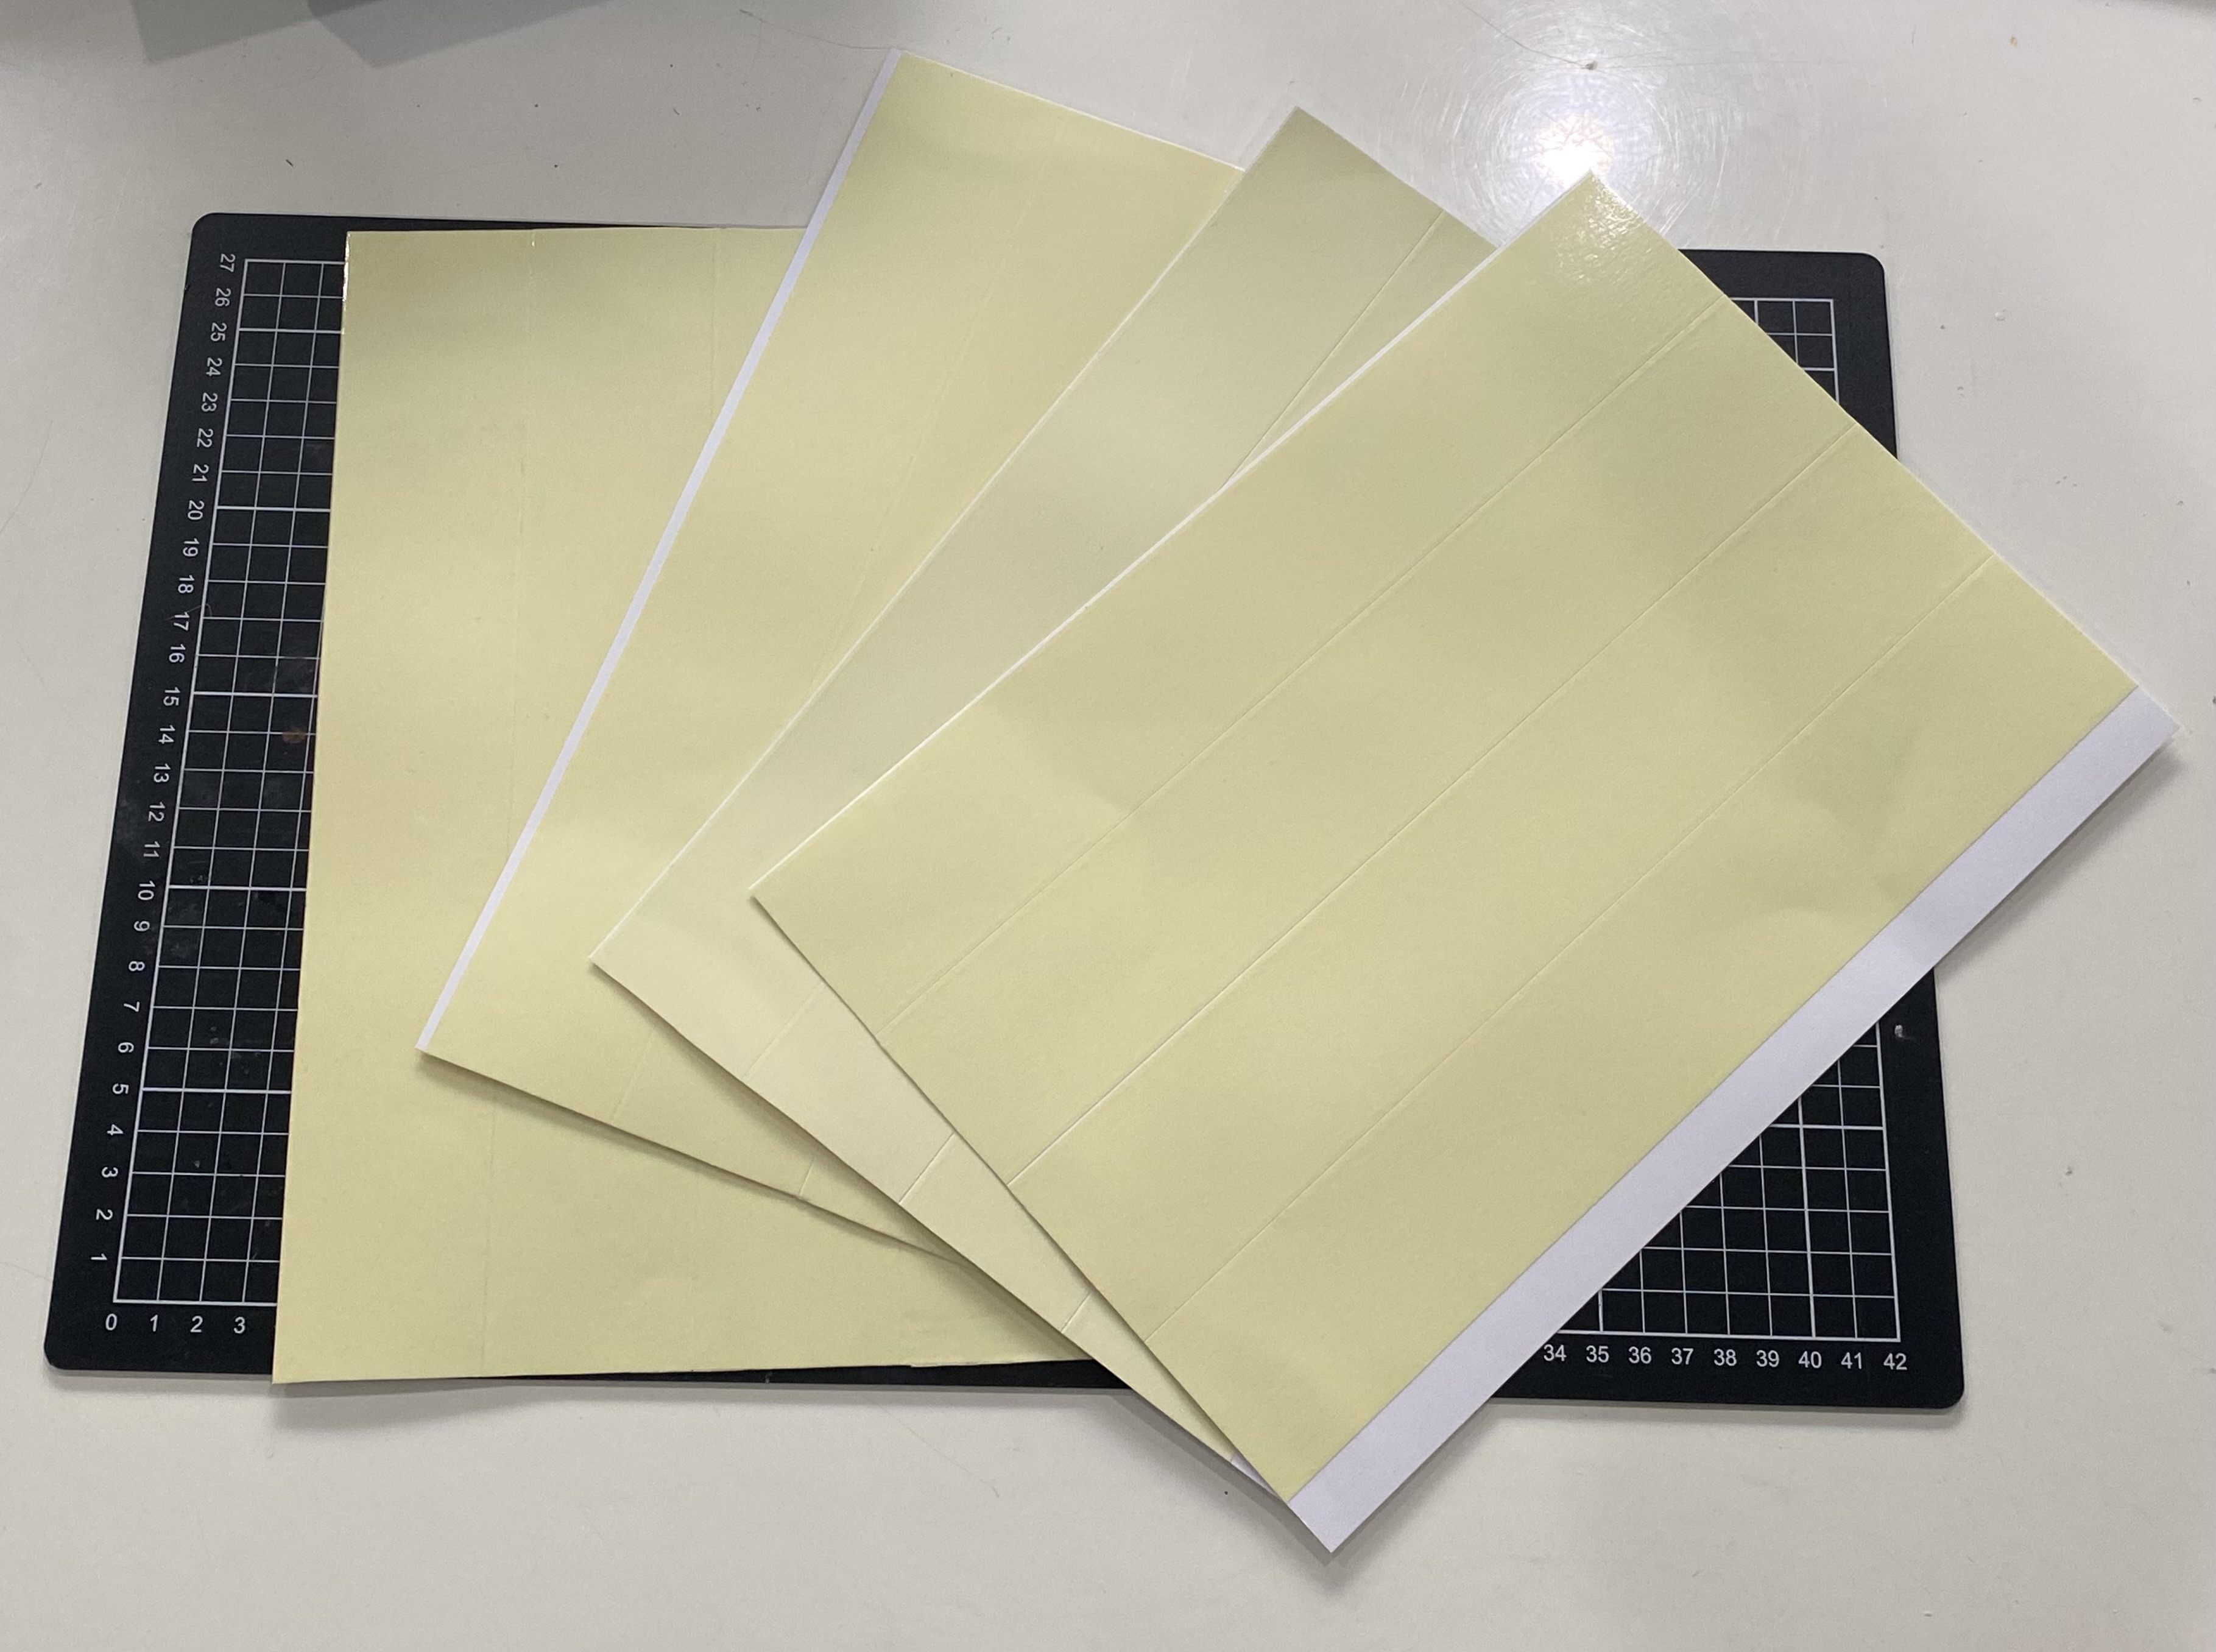 Double sided tape stuck to sheets of card.
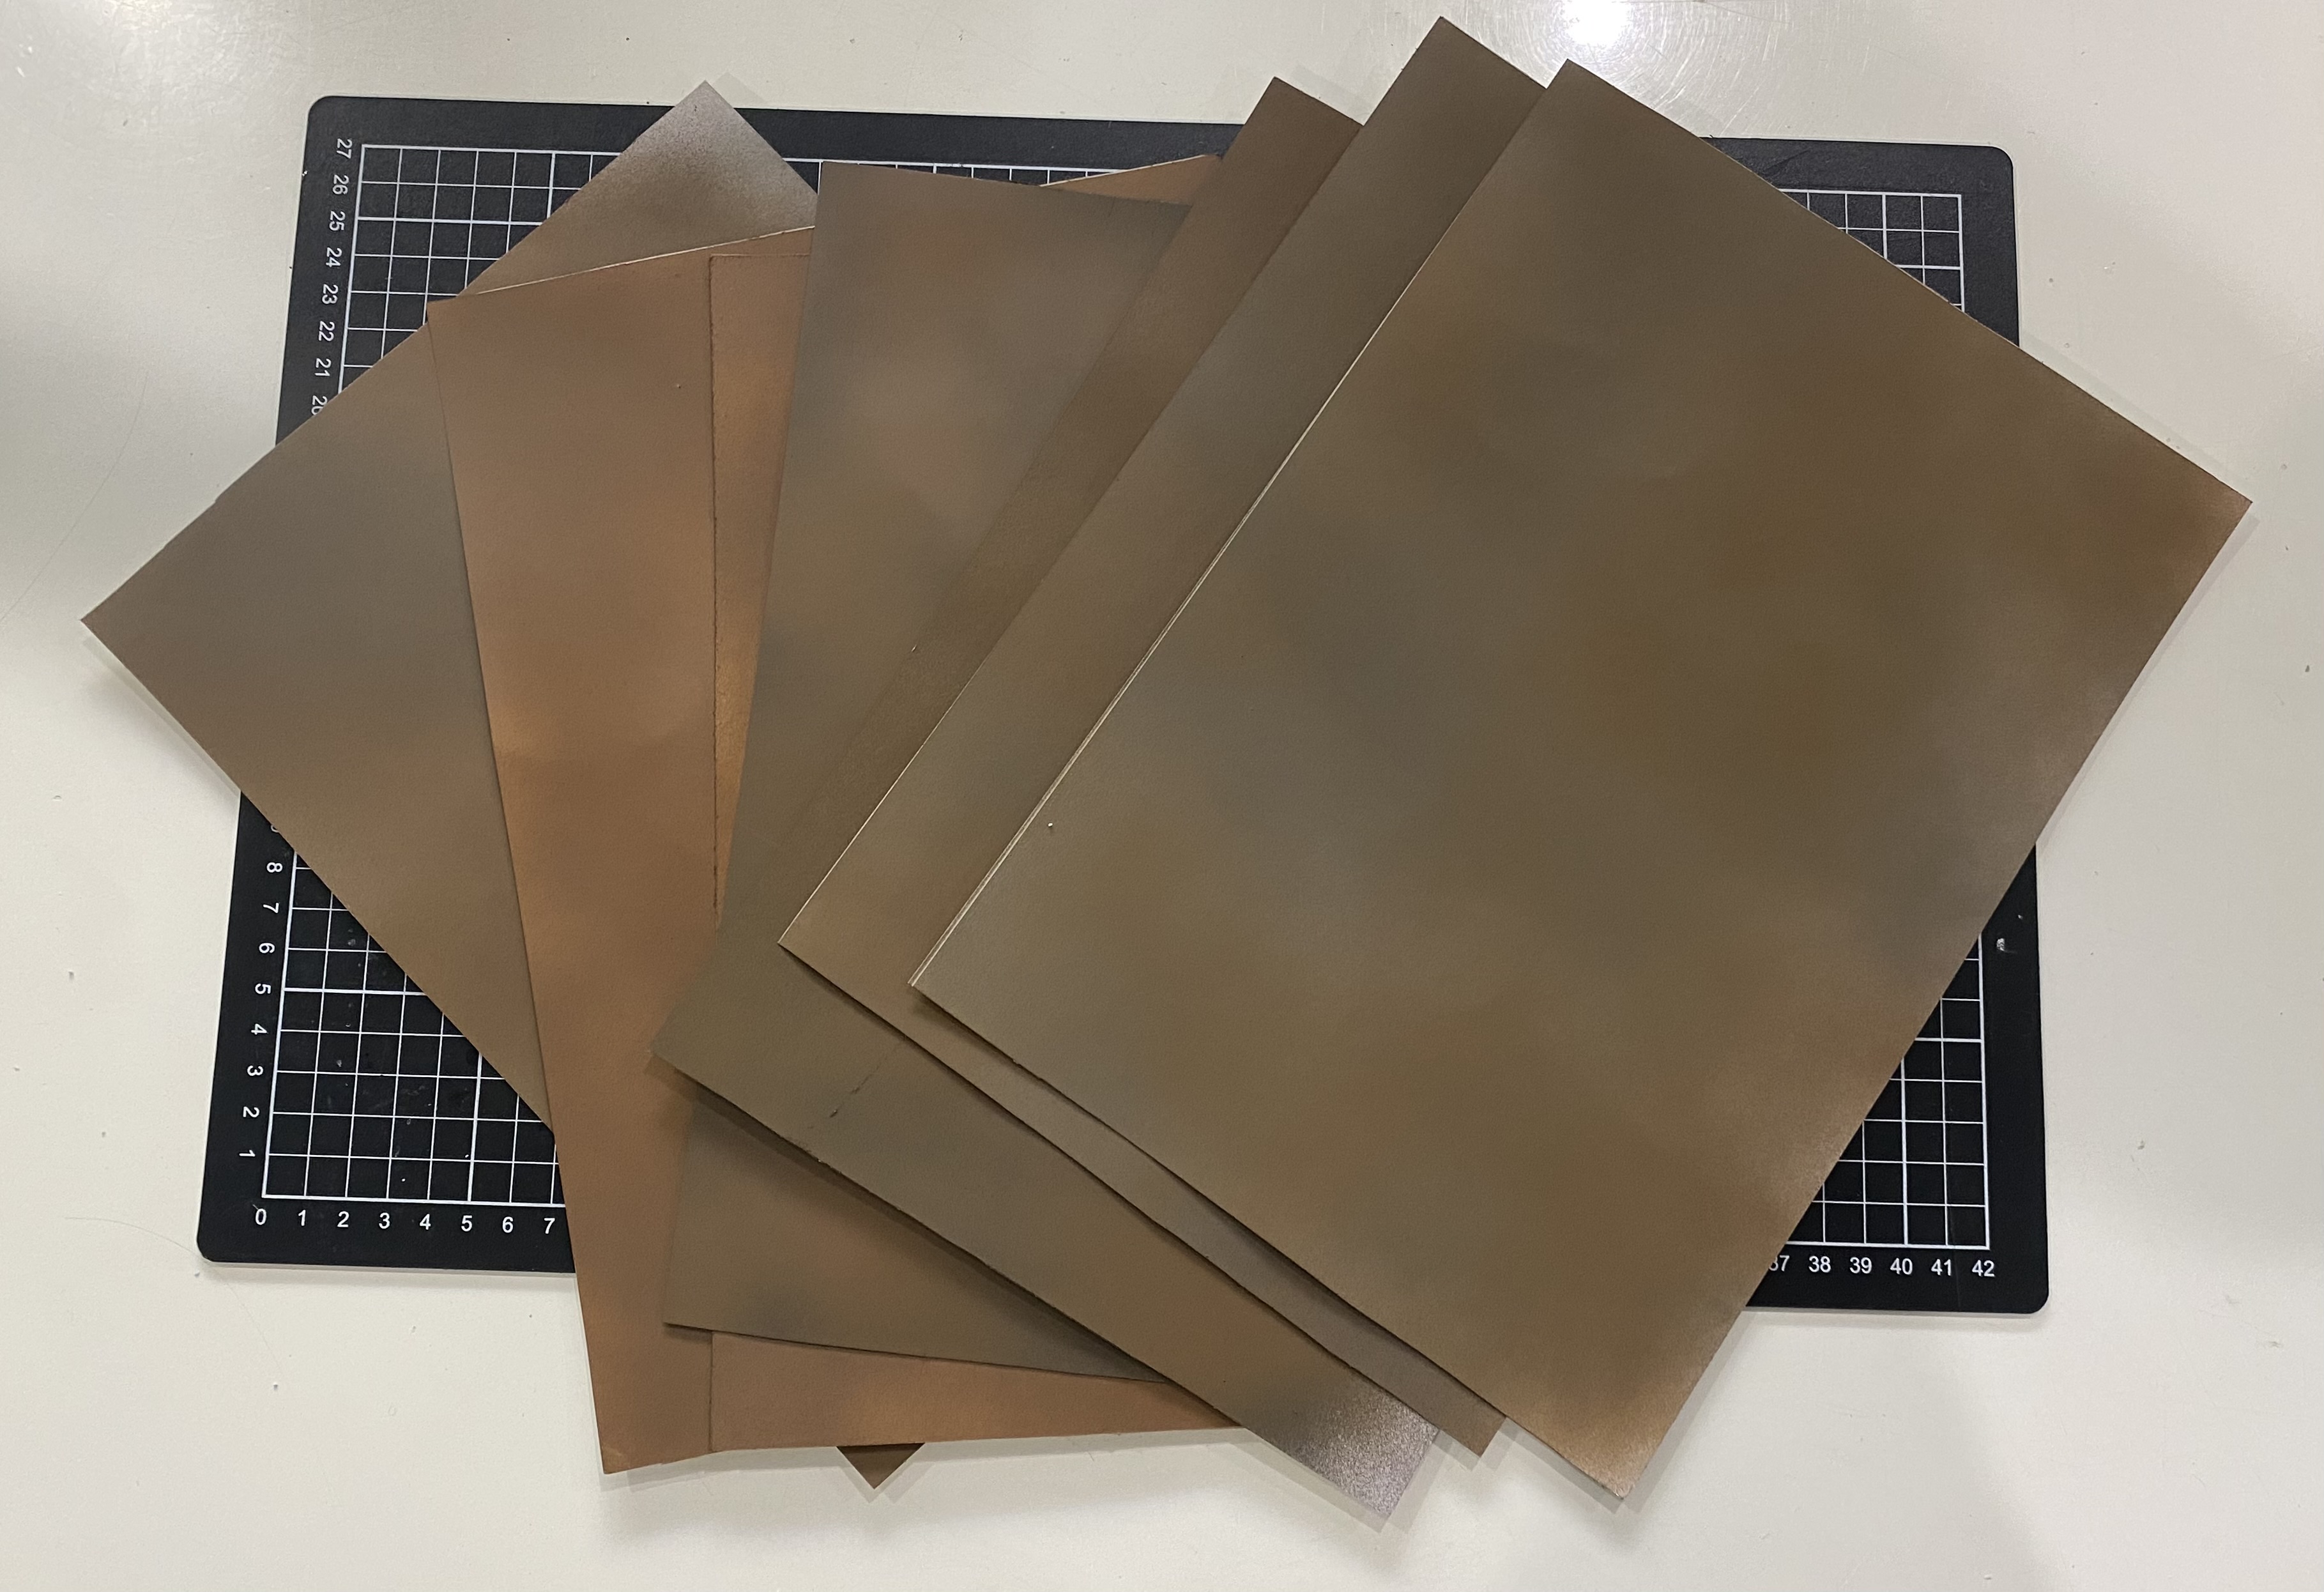 Spray painted with Leather Brown, over white, black and grey undercoats to give subtle differences in shades.
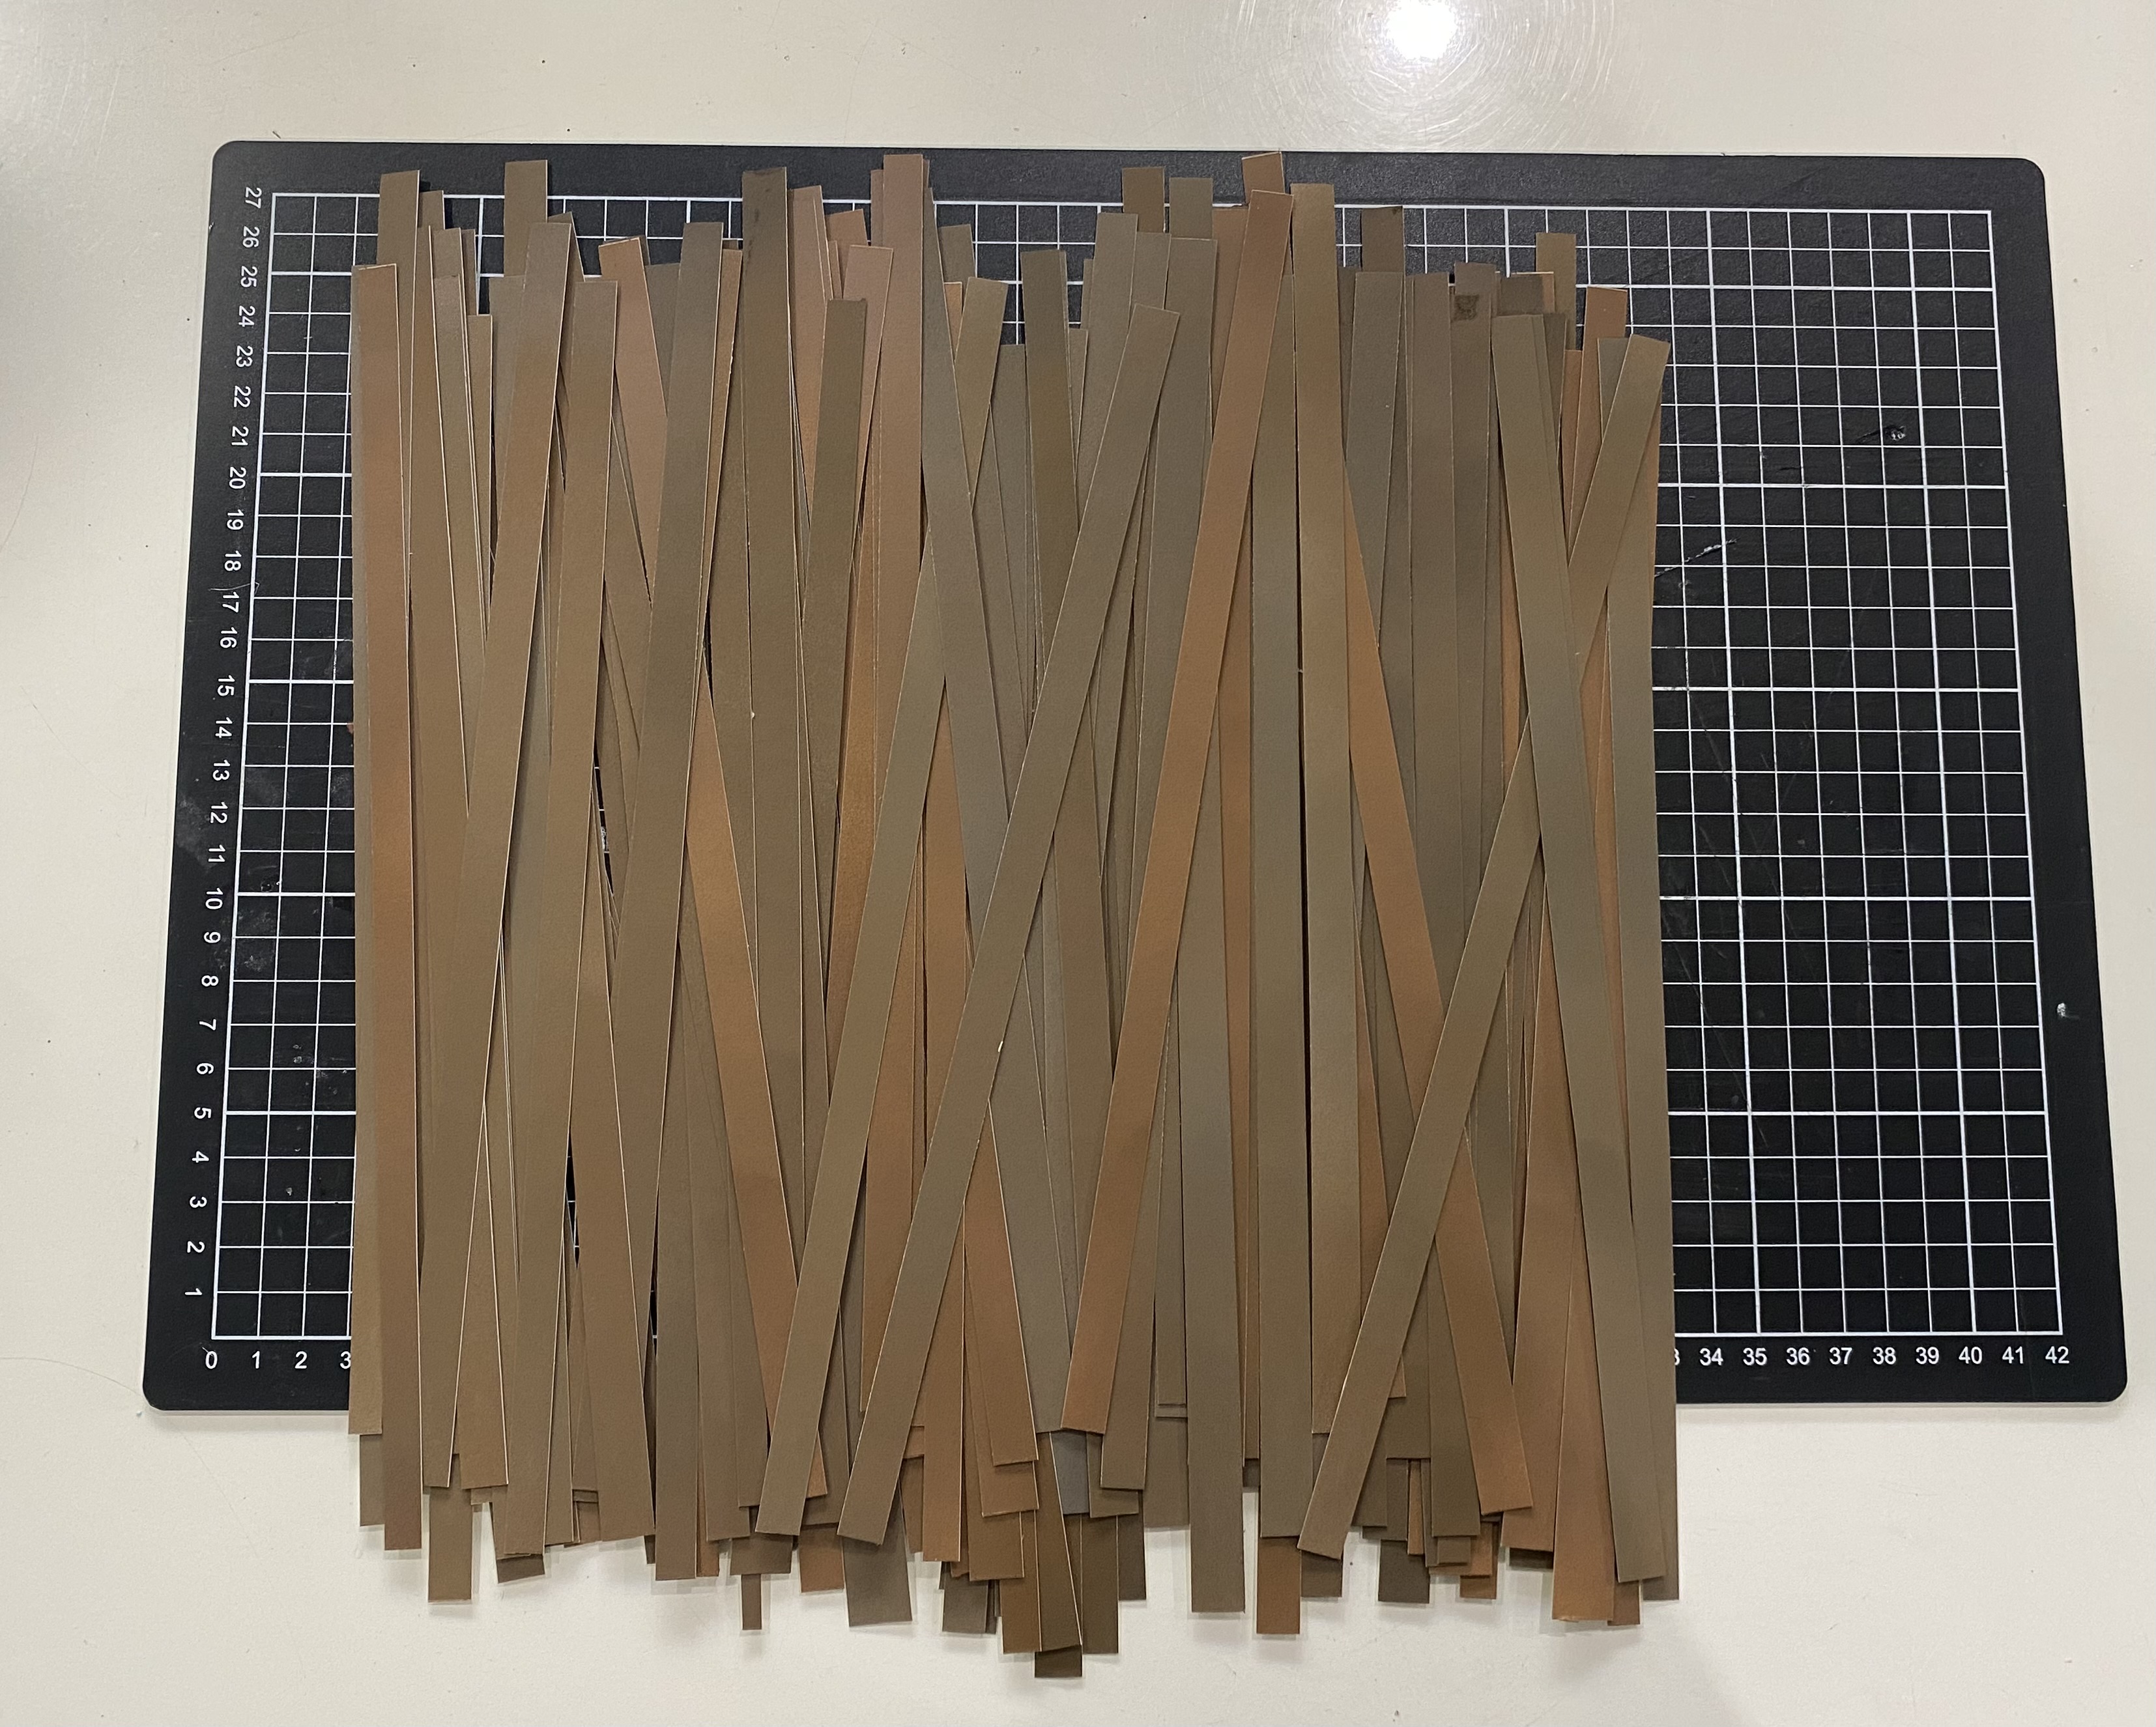 Sliced up in roughly 1cm wide strips using a guillotine.
 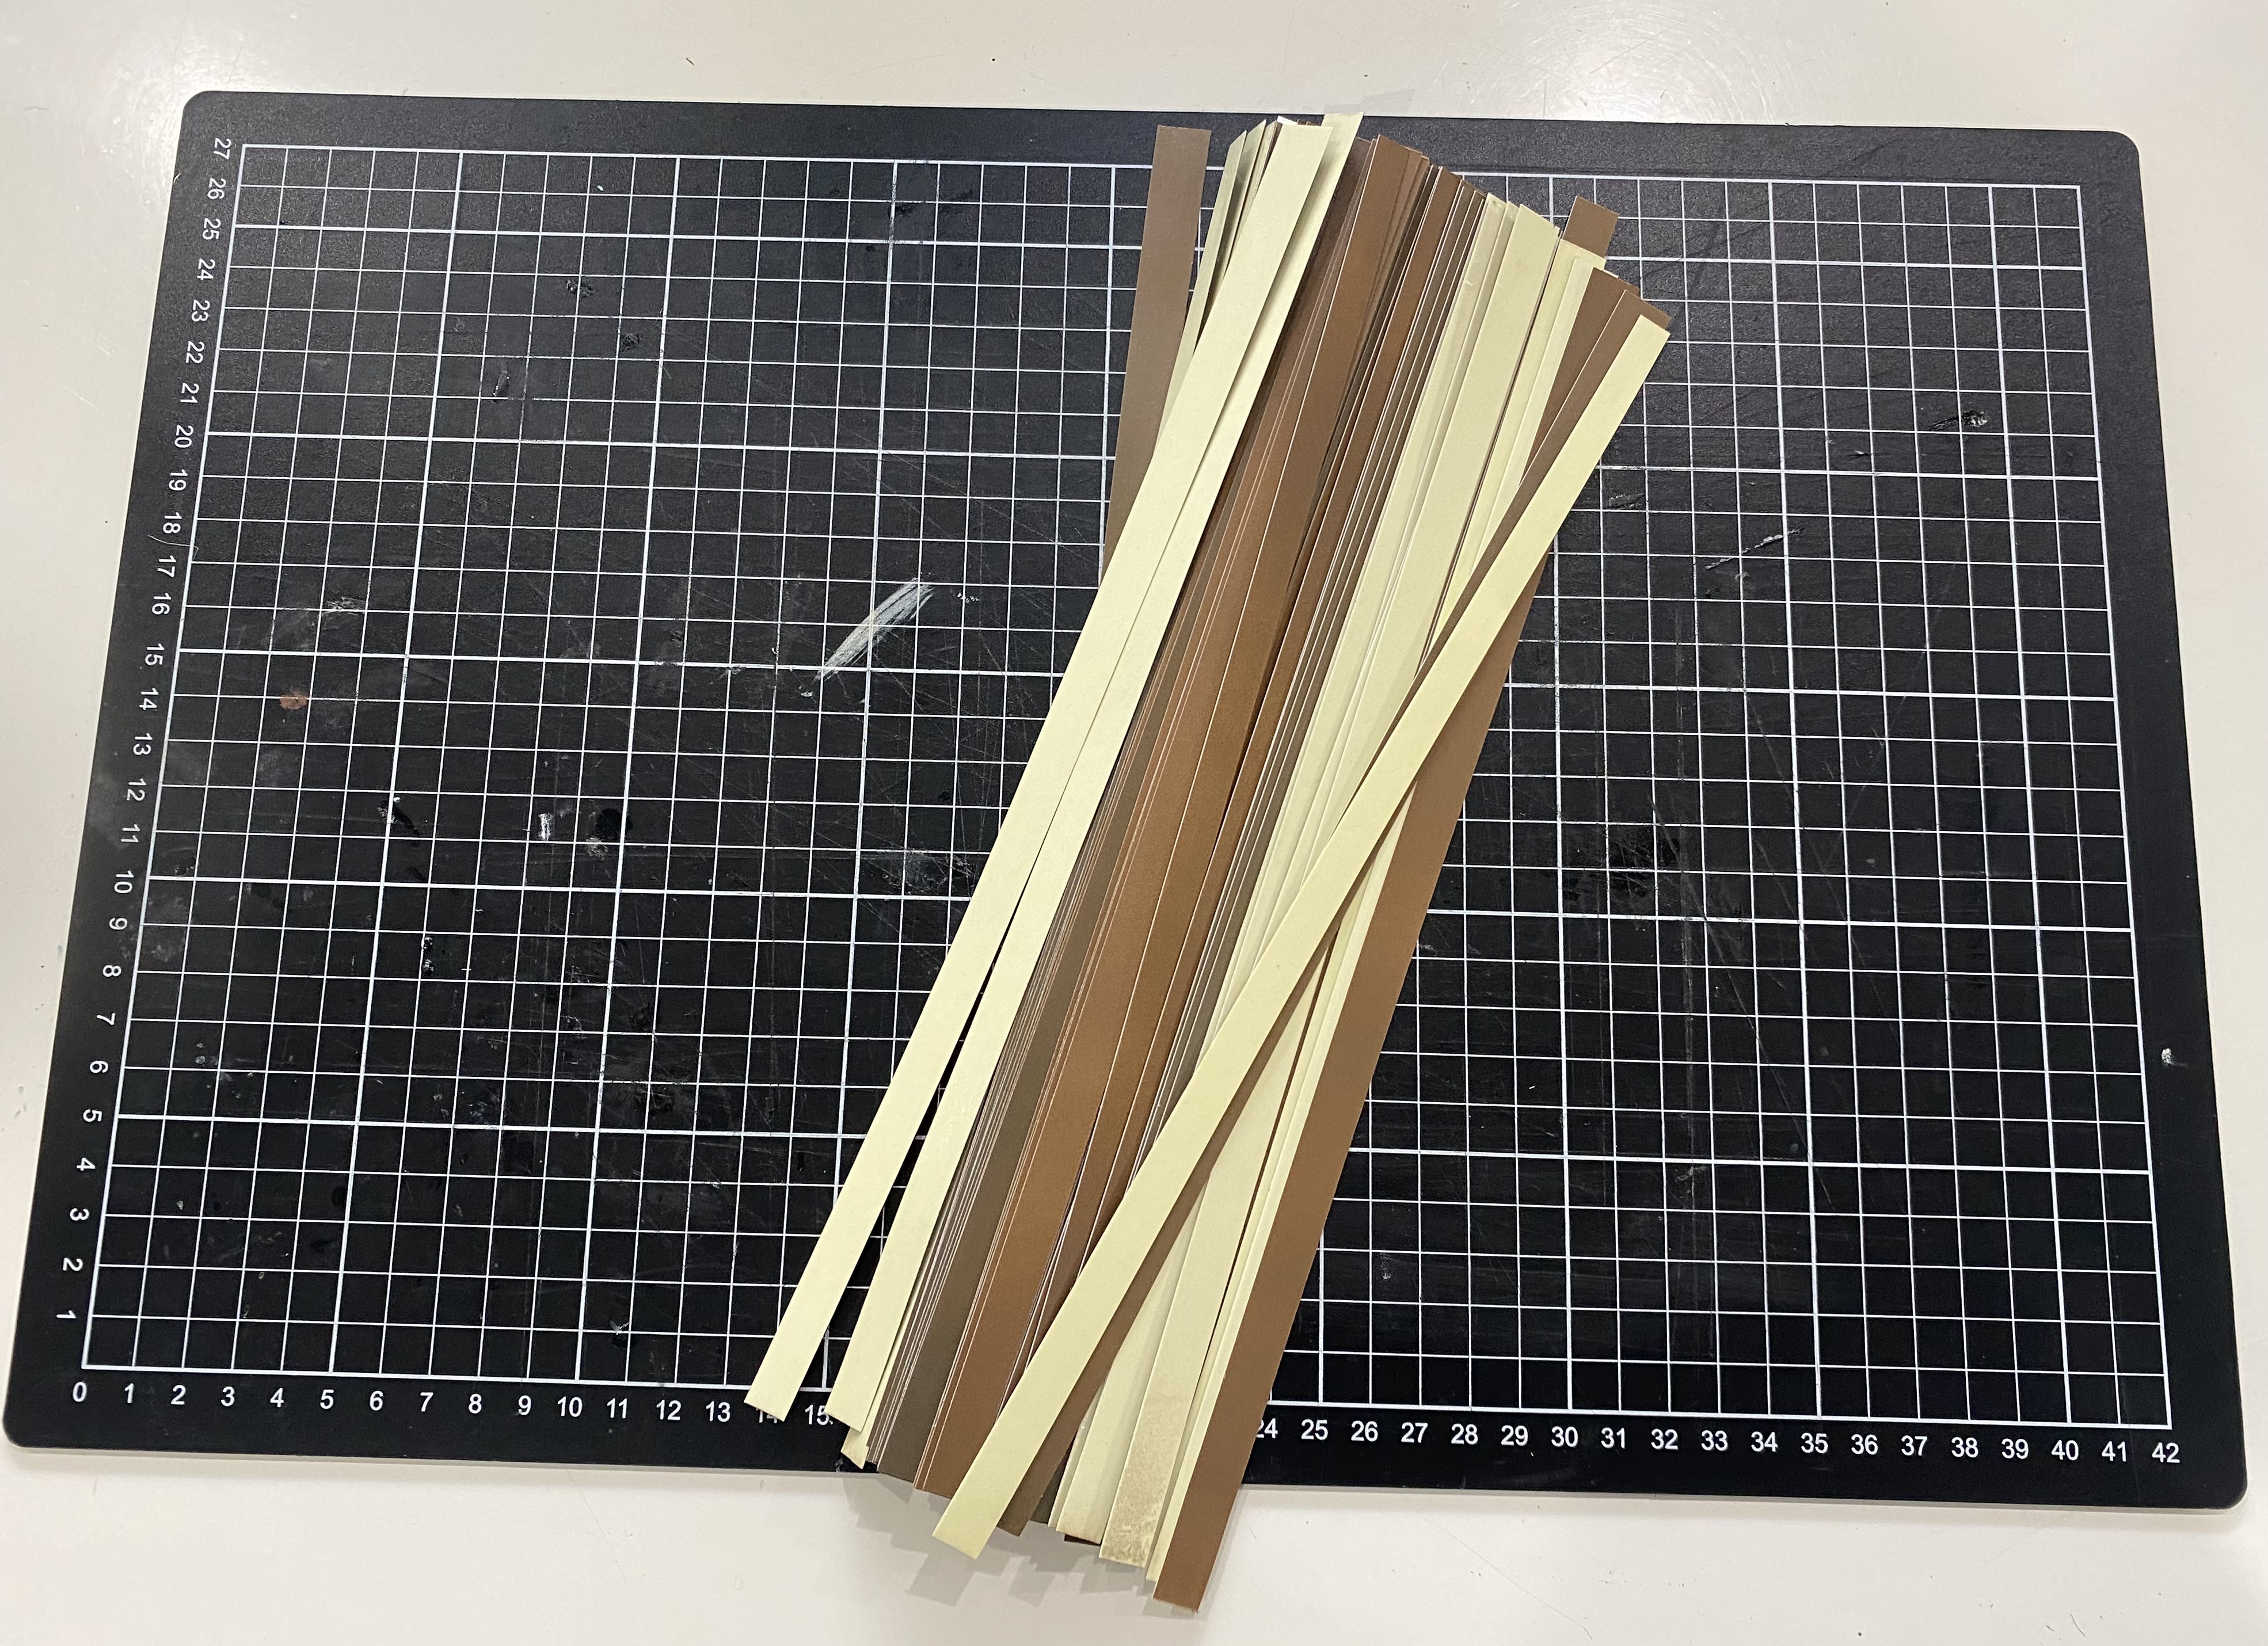 Mixed them all up into a bundle.
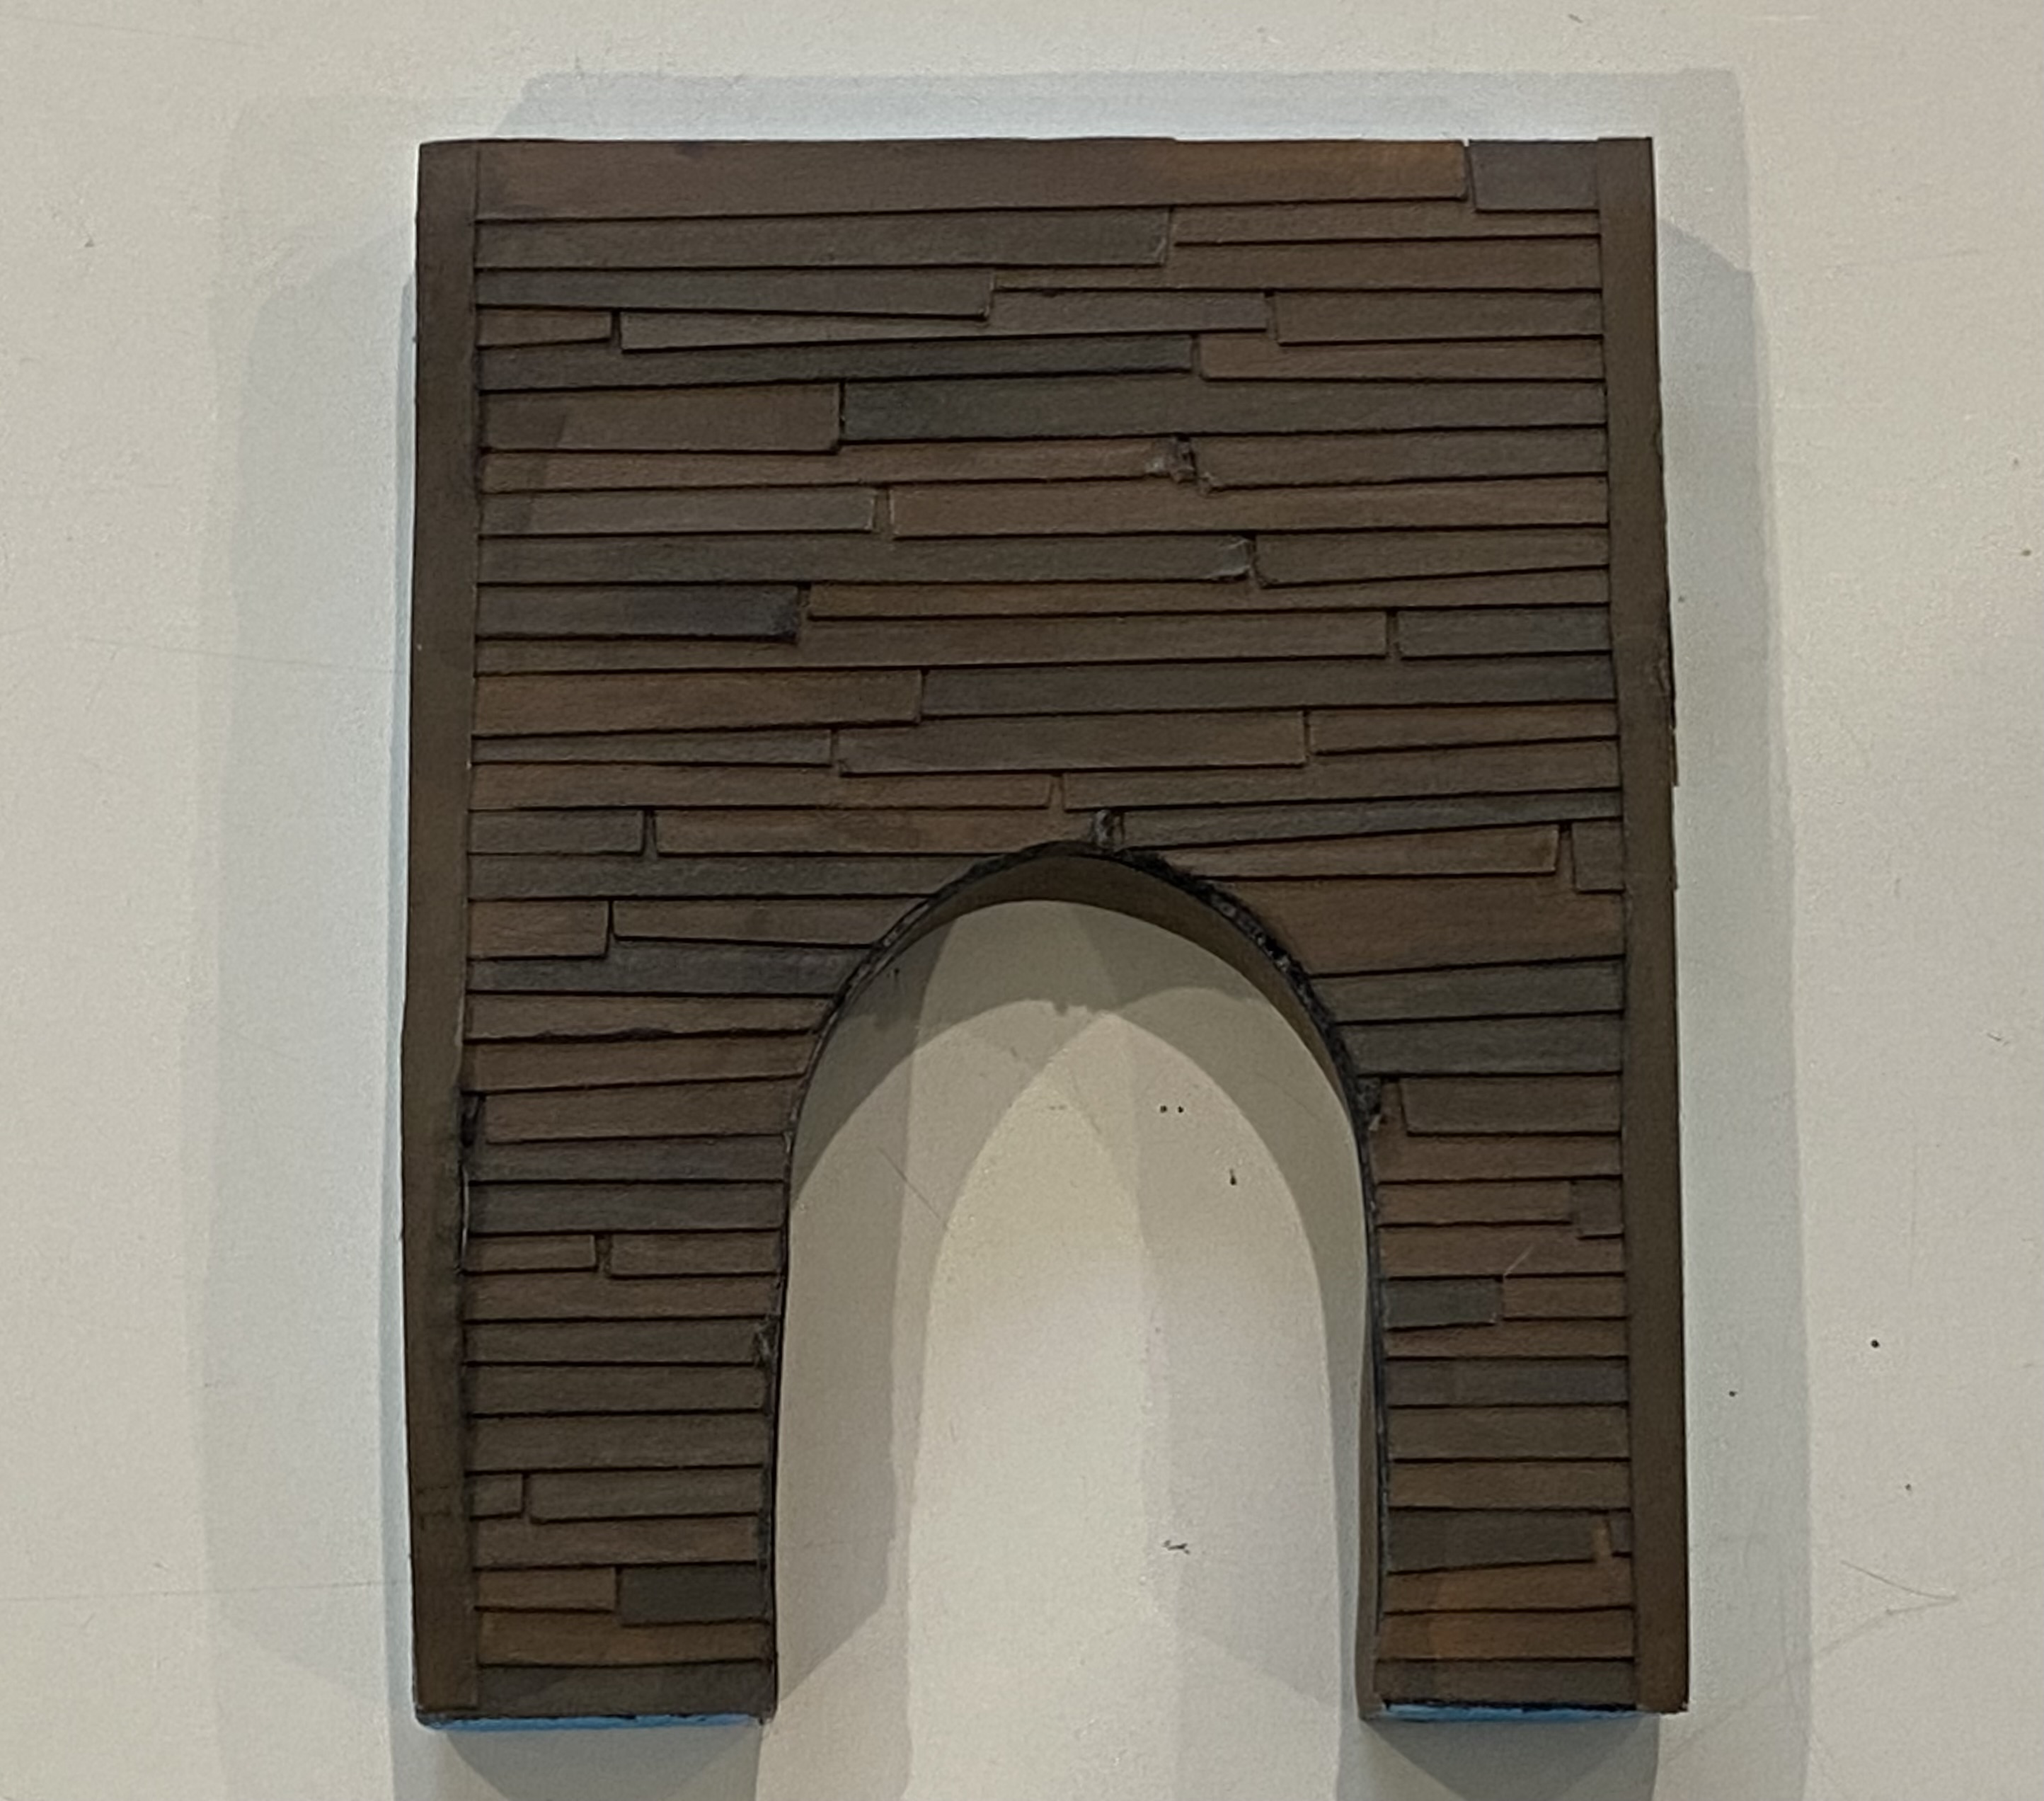 Peeled off the double-sided tape to attach them to an XPS foam shape.
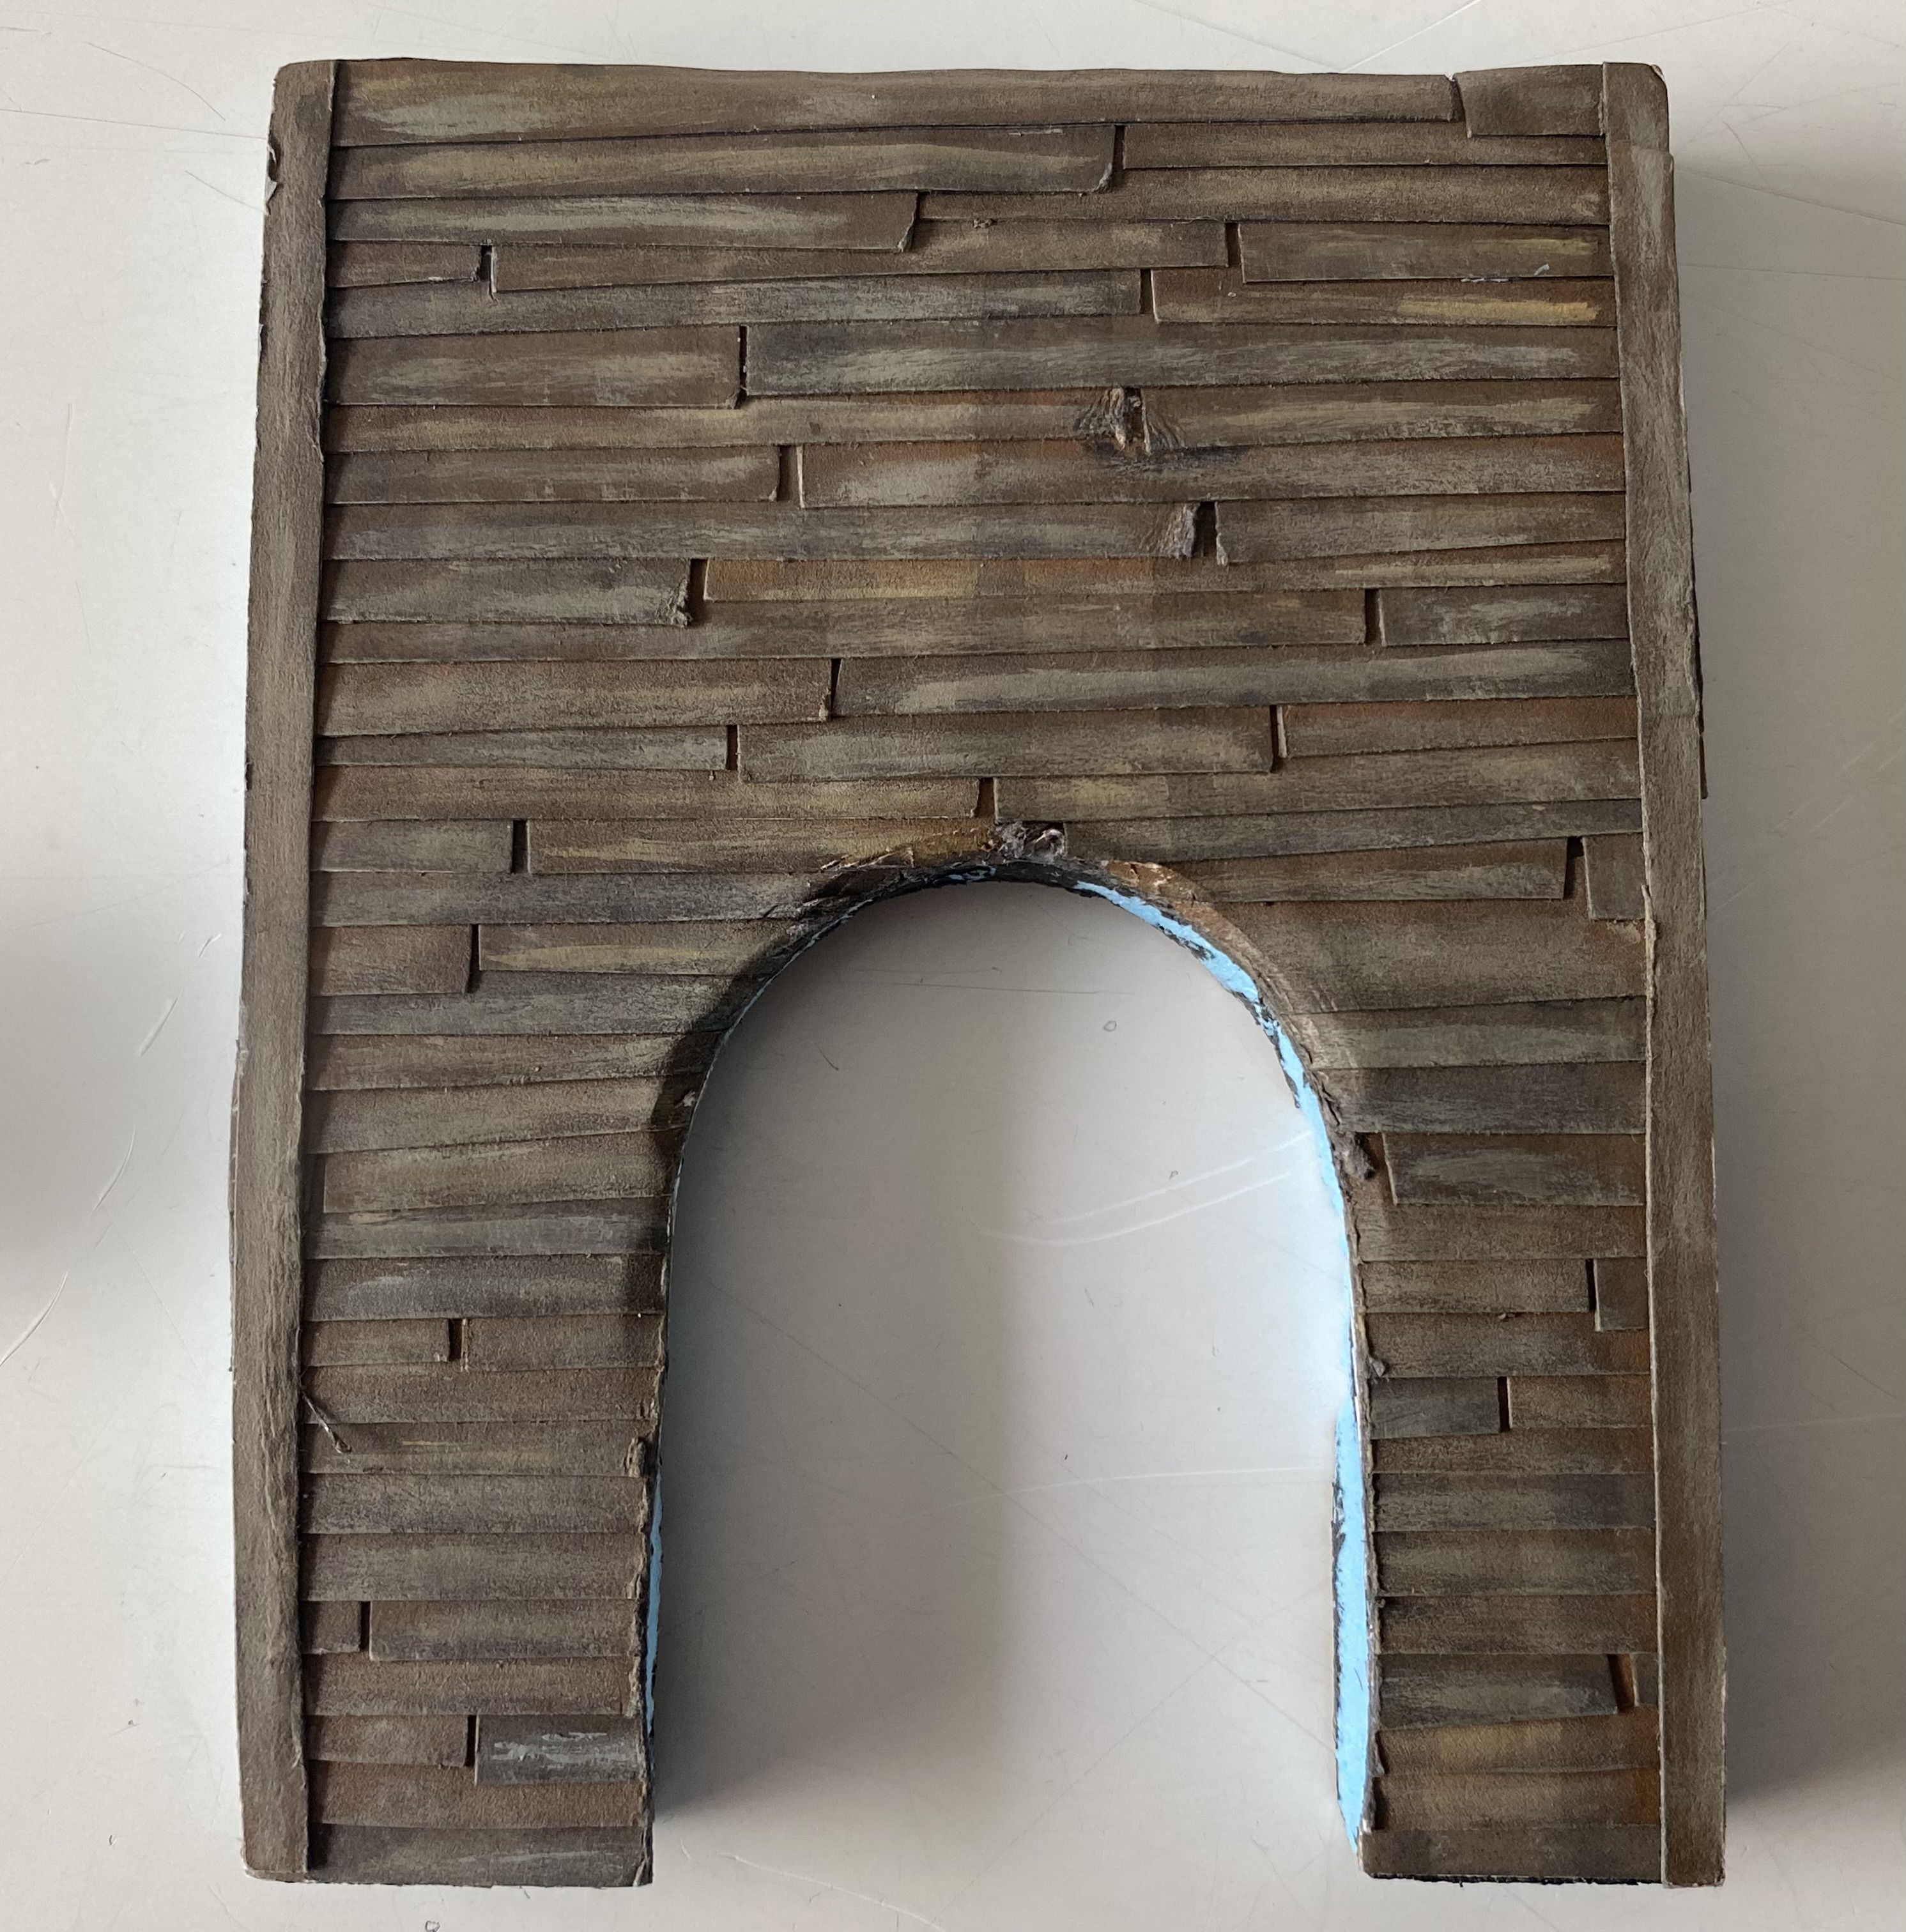 A light drybrush with sandy yellow and some ink washes for weathering.
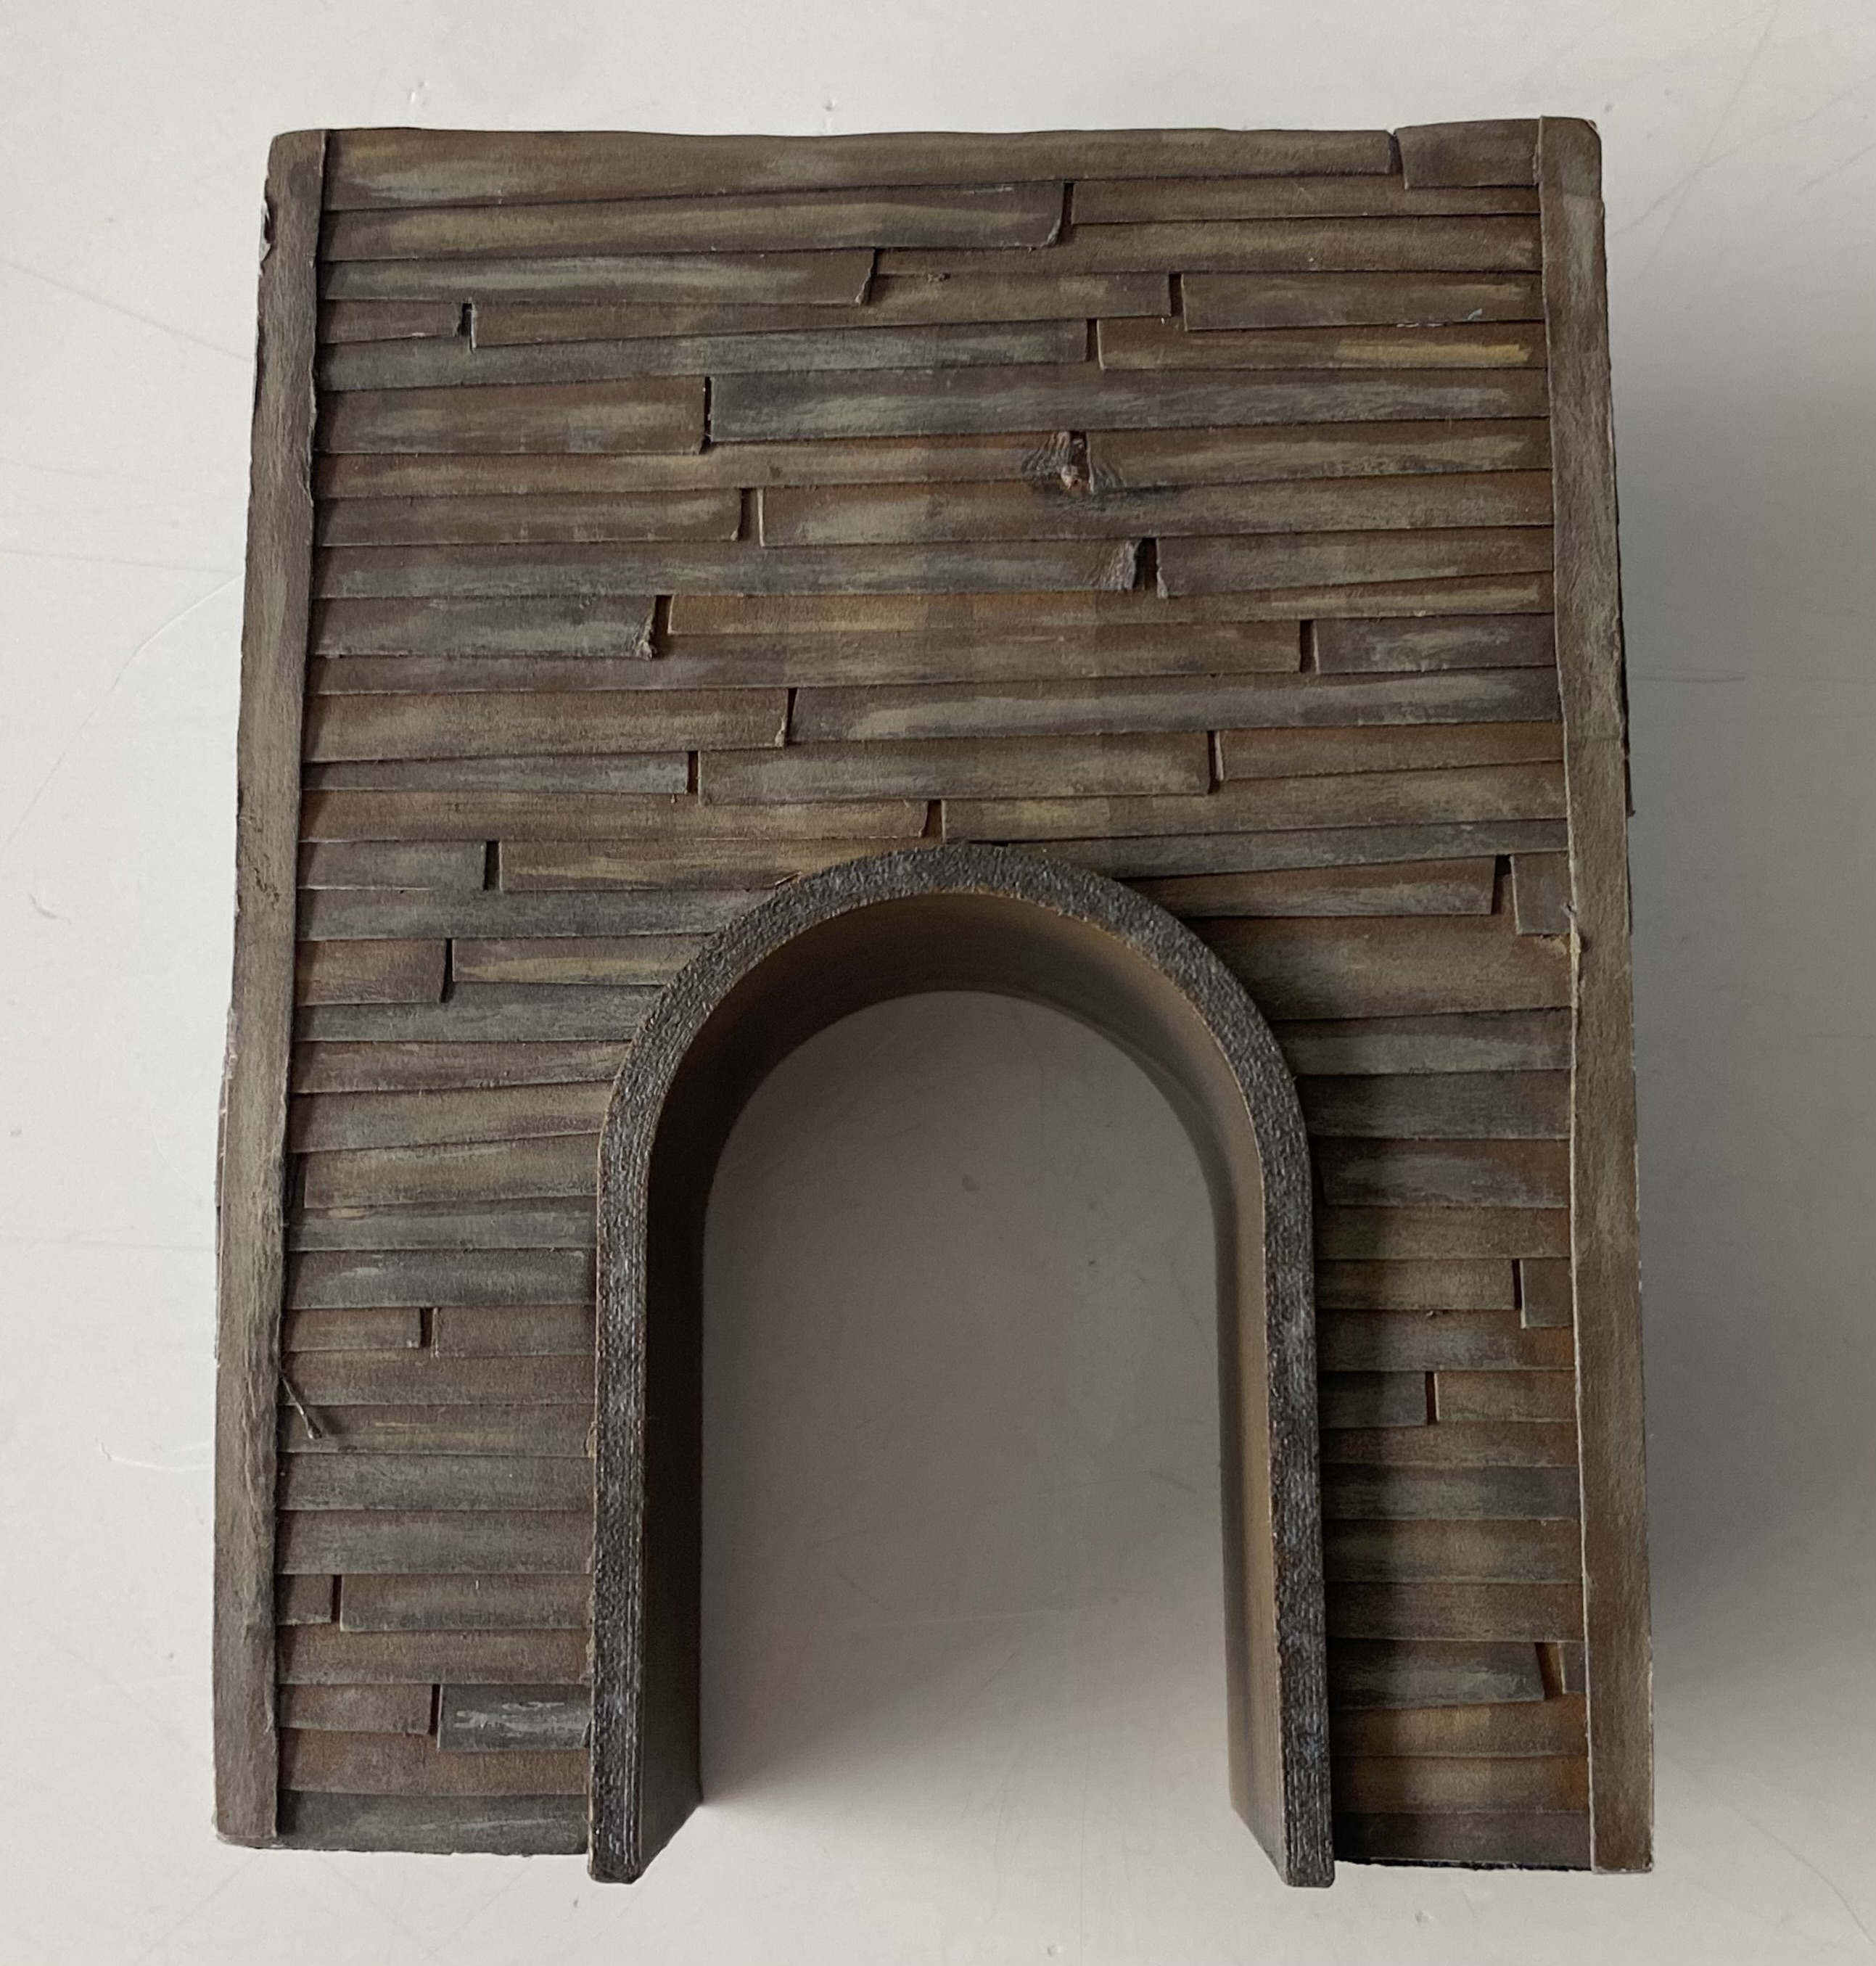 Finish off with a simple archway.
A Disclaimer
I have tried my best to indicate that the buildings shown in some of the images come from last year’s Terrainfest2023, those can be found HERE and HERE
However, it has come to my attention that some people may flick through and look at the pictures and not read anything written, and they may have missed me mentioning it previously. So, to set the record straight I will mention it again.
Some of the images include buildings that were not made during this period commencing October 1st 2024. The focus of this project is the board that the buildings sit on and a few extras that I will add here and there. I will endeavour to make it even more obvious if I can. I have added notes to individual pictures in the hope that helps.
The photographs showing my previously built buildings are intended to show how this year’s build complements my previous entry, to further expand on the setting and how it all comes together as a complete setting. In addition, I am hopeful that the pictures provide inspiration and encouragement to others.
What they are not is an attempt to pull the wool over anyone’s eyes. If preferred. I can remove them if they are offensive or considered to be an underhand tactic and show them in a different project if that would put people’s minds at ease. 🙂
Filling the hole
Just a little update today, filling the holes down into the sewer system.
Painted up just like everything else on this project so nothing earth-shattering. It does finish the roads off though.
 Rather boring looking holes.
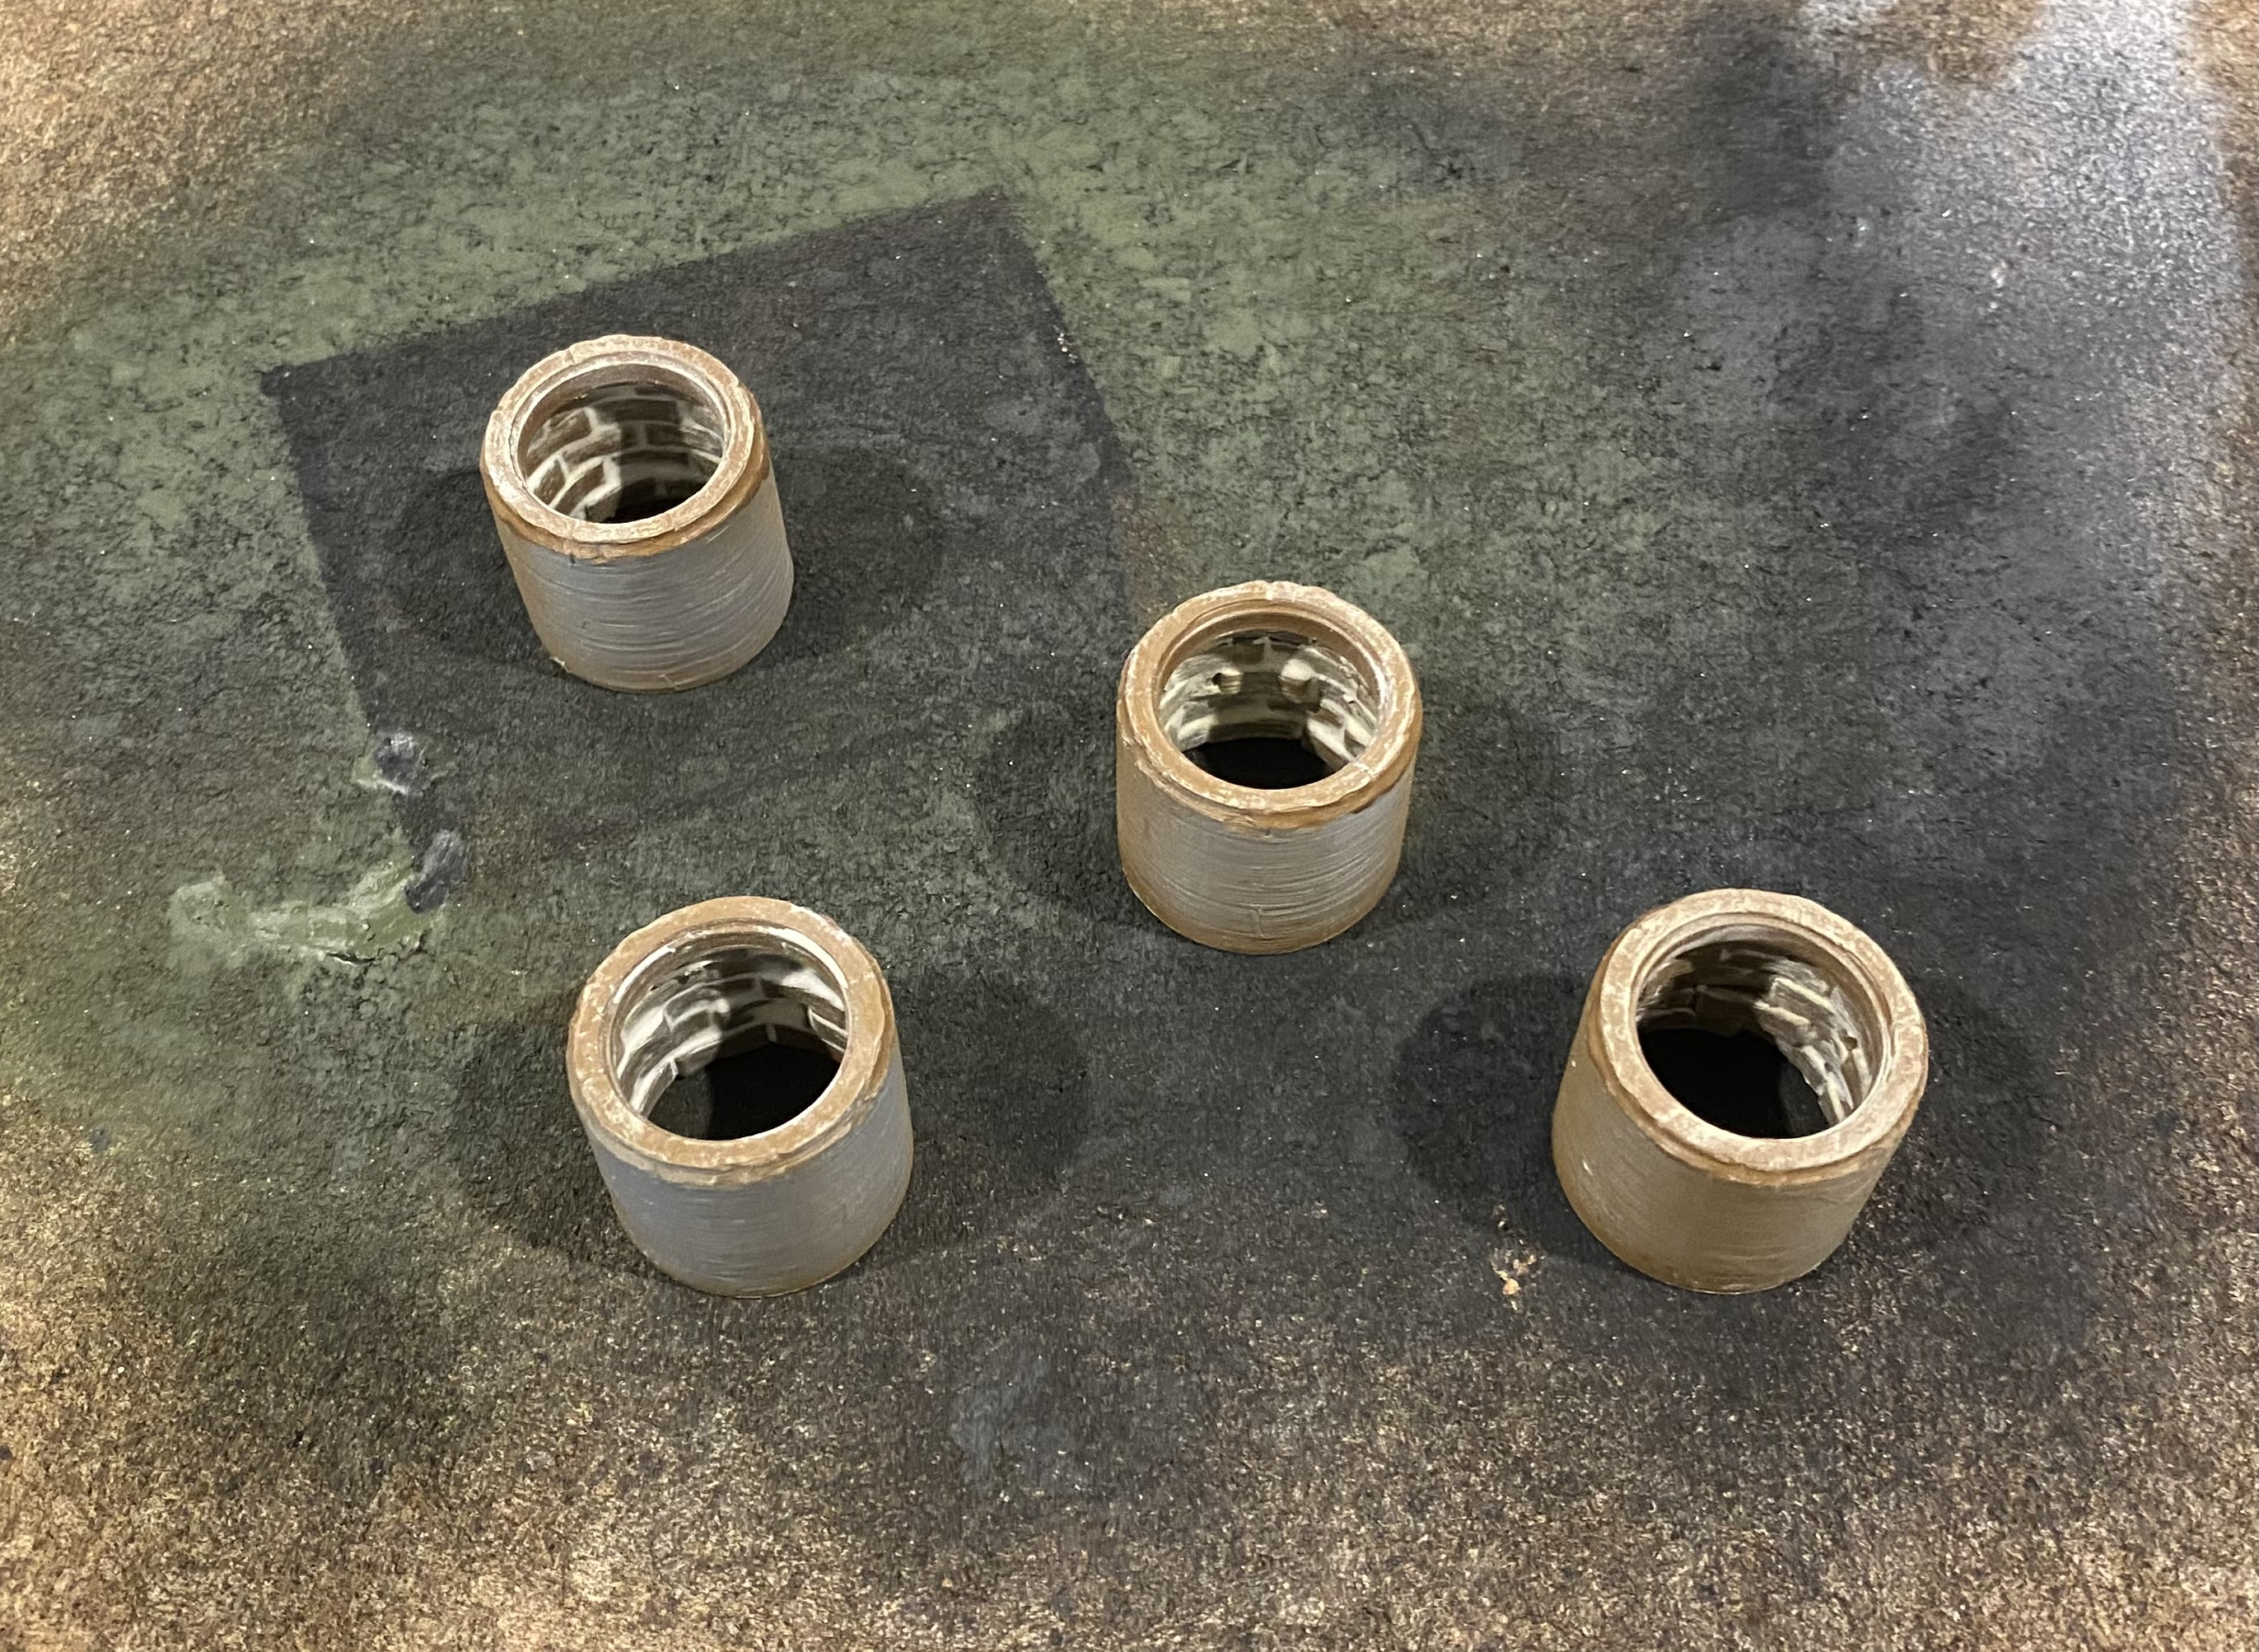 Little tubes with the brickwork on the inside.
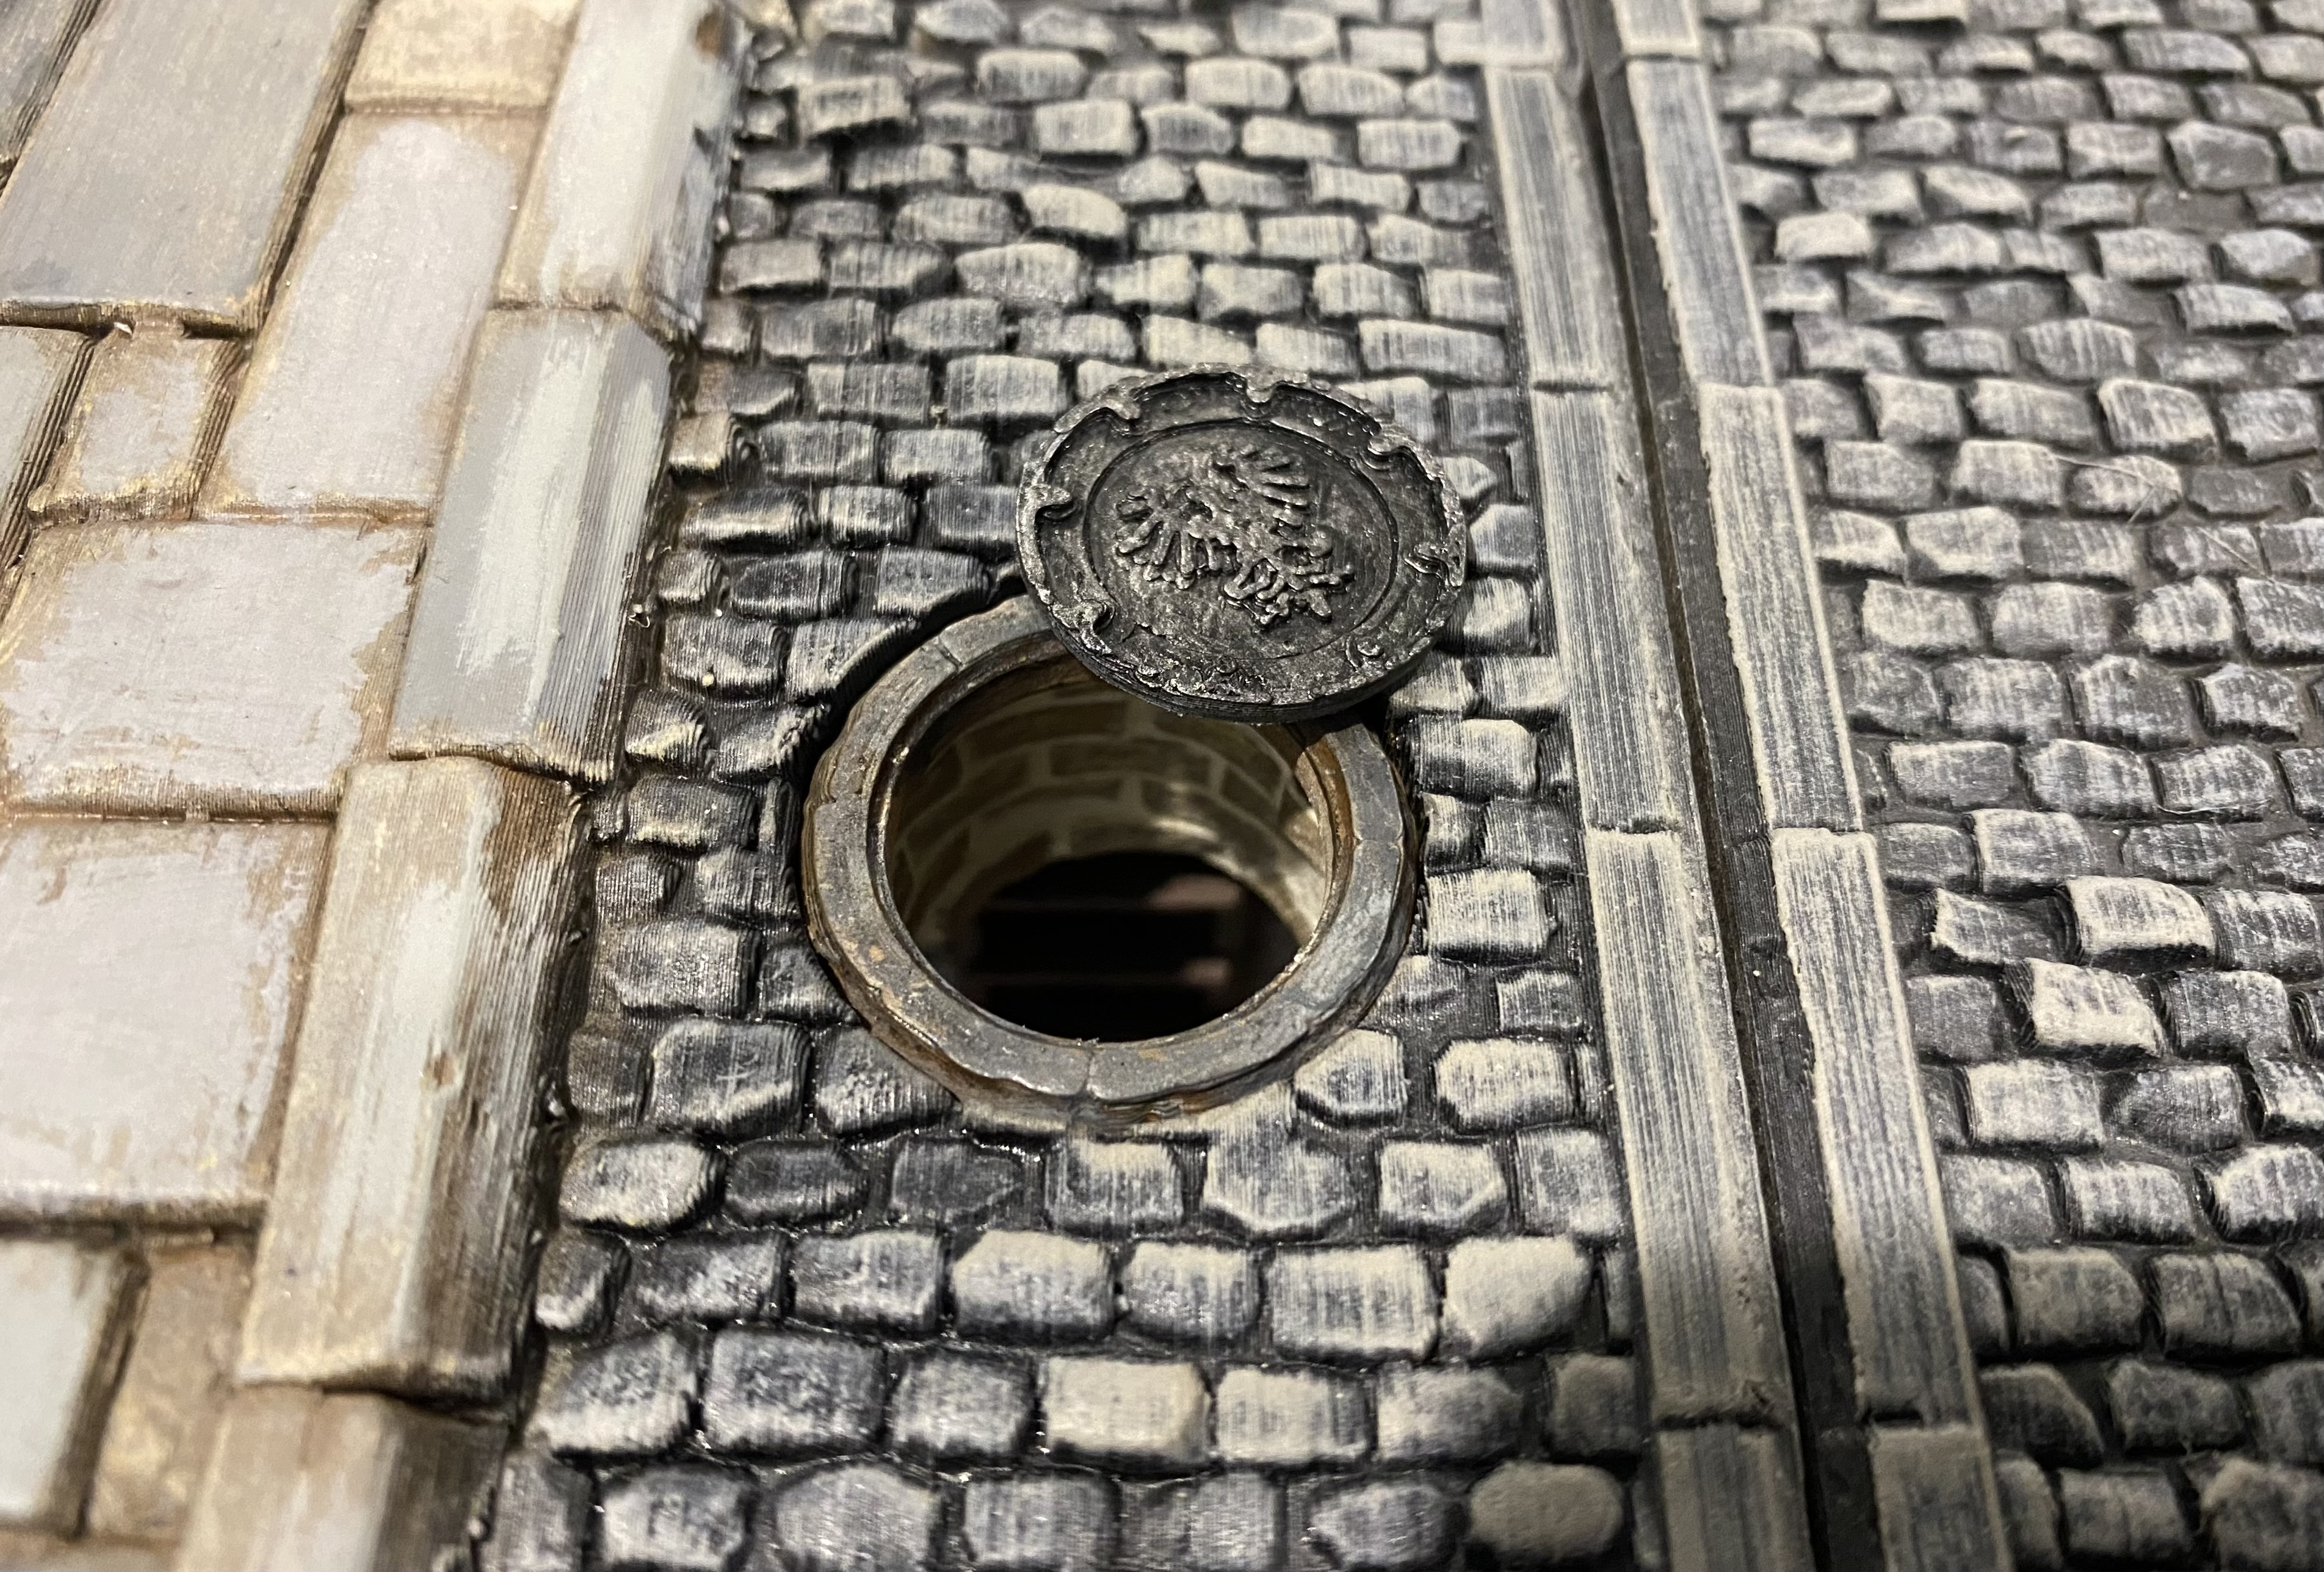 Little tube gets pushed into little hole to make it less boring.
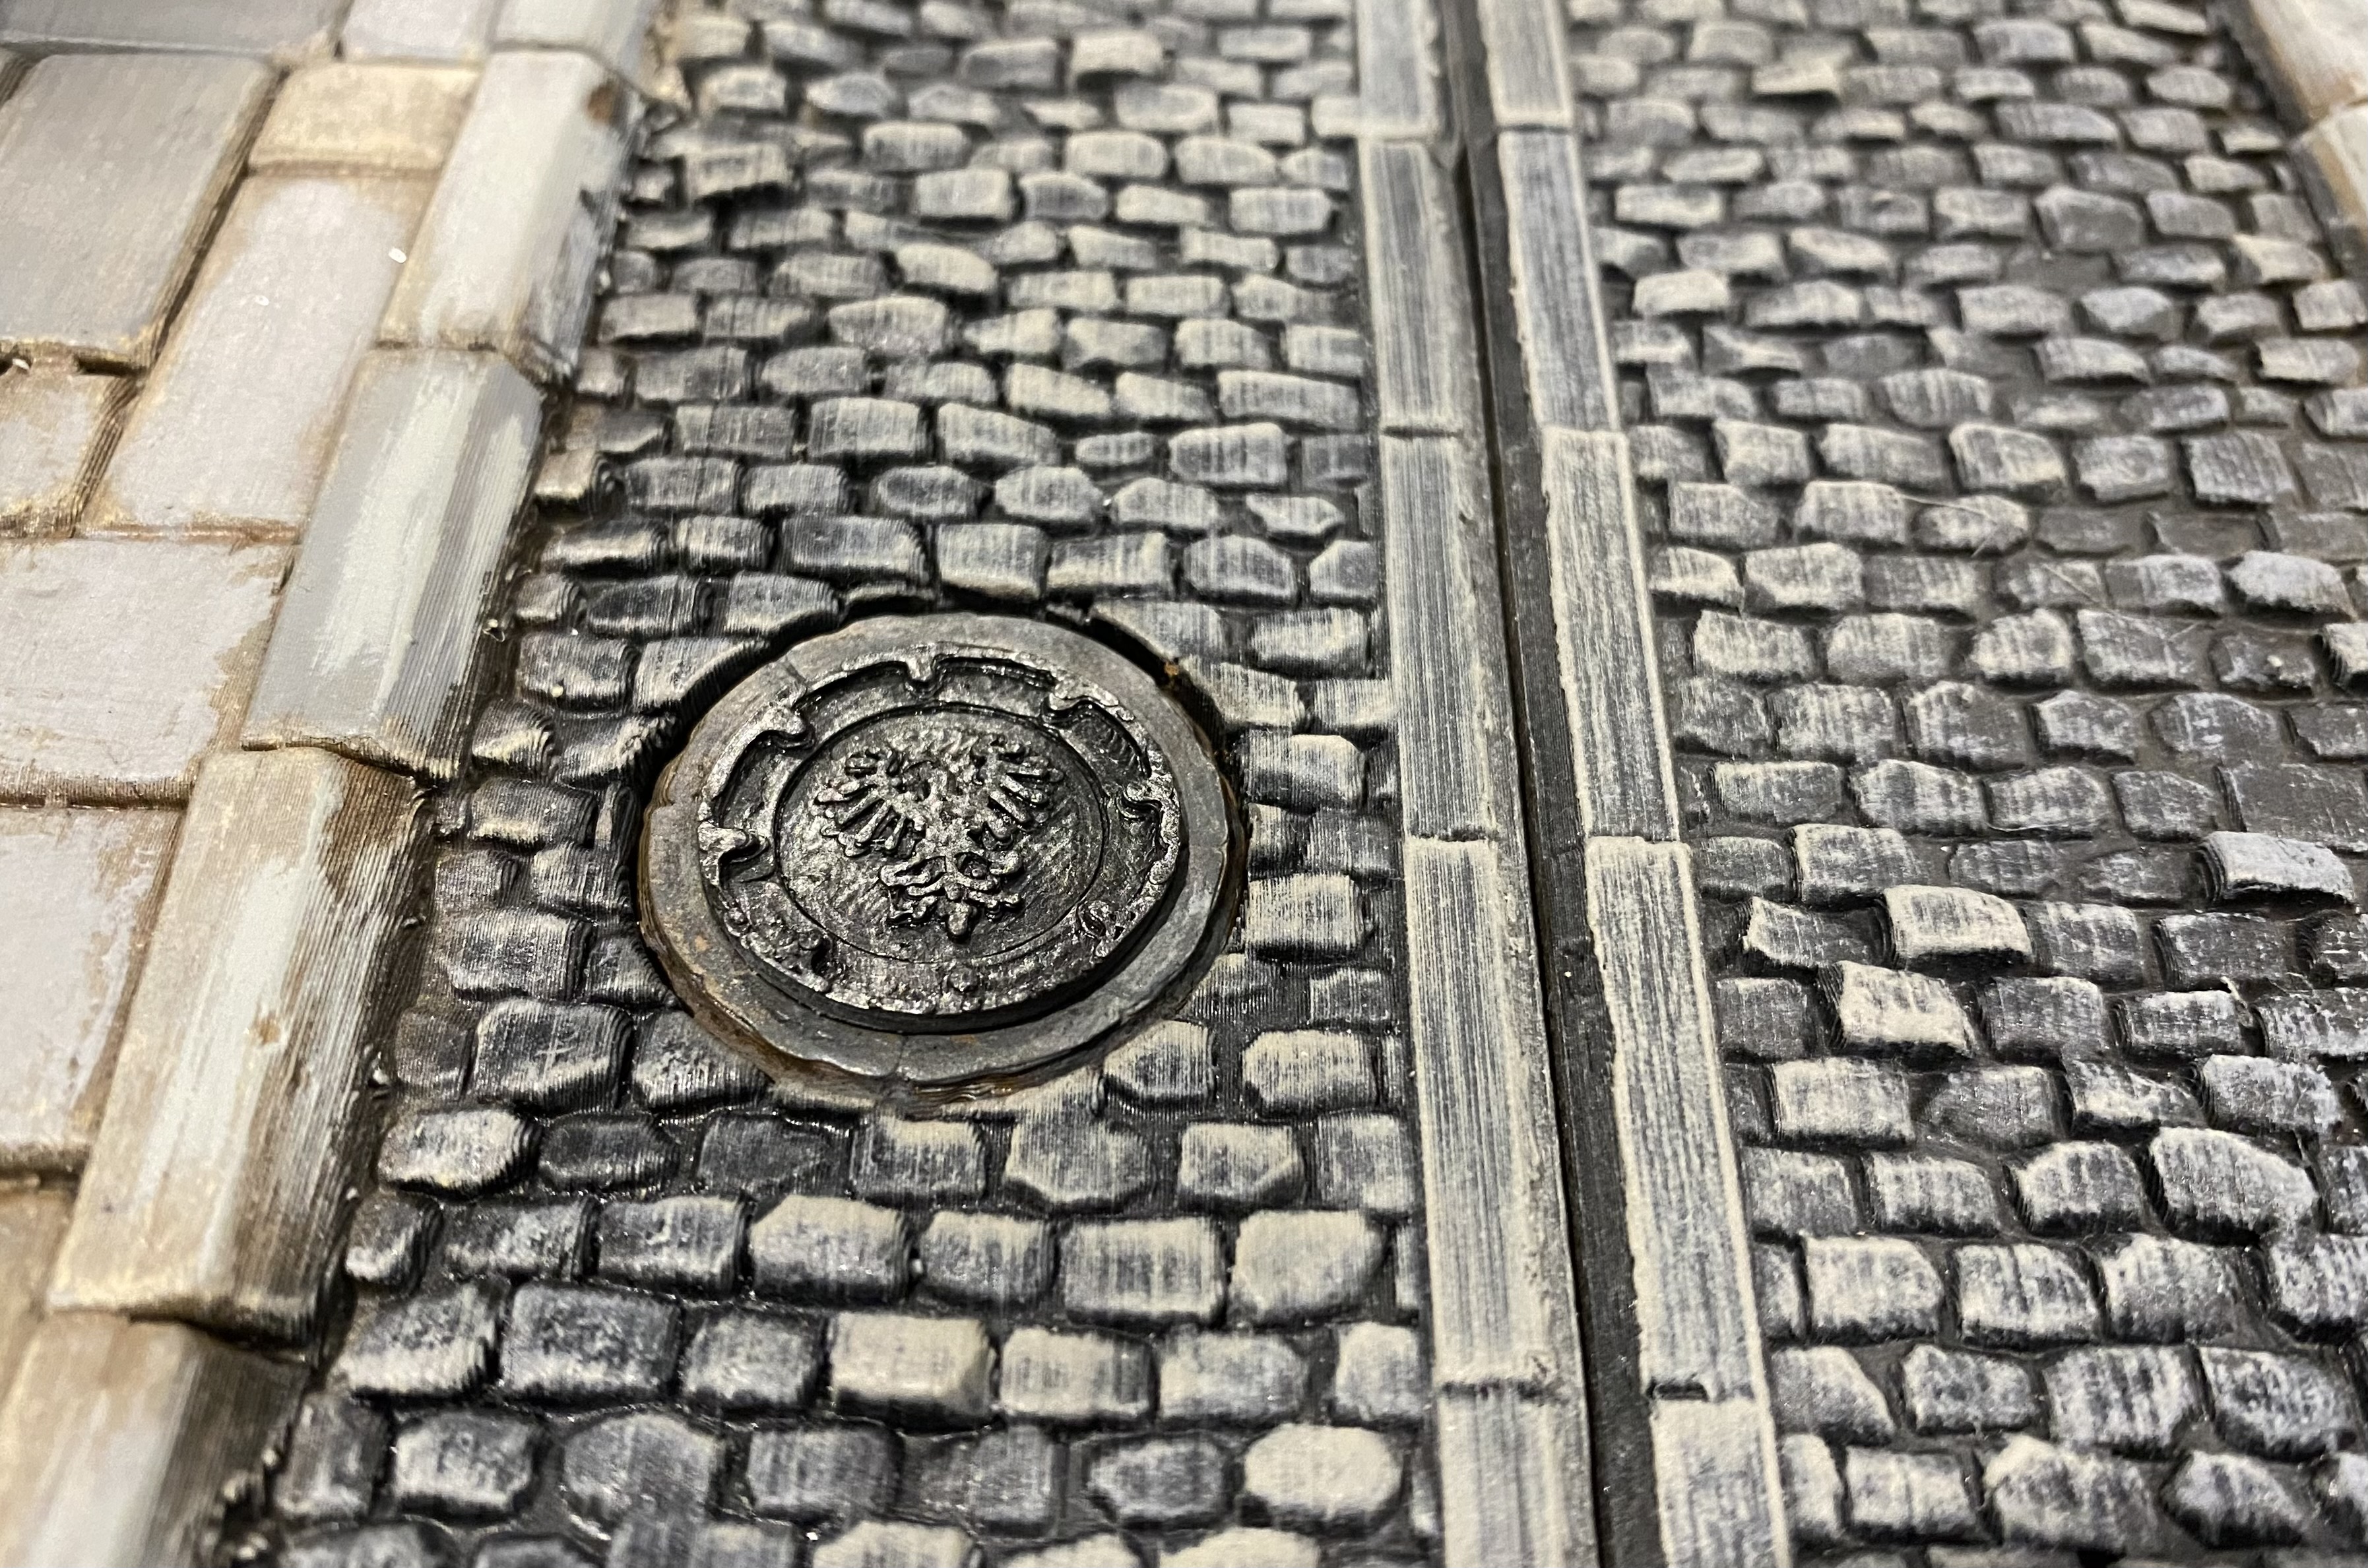 Manhole cover goes on top. Job done.