


![1918 Spring Offensive Wargame | Full Rules Overview with John & Gerry (WW1 Tabletop Game) [7 Days Early Access]](https://images.beastsofwar.com/2026/03/unboxing-warfulcrum-games-1918-spring-offensive-review-coverimage1-225-127.jpeg)


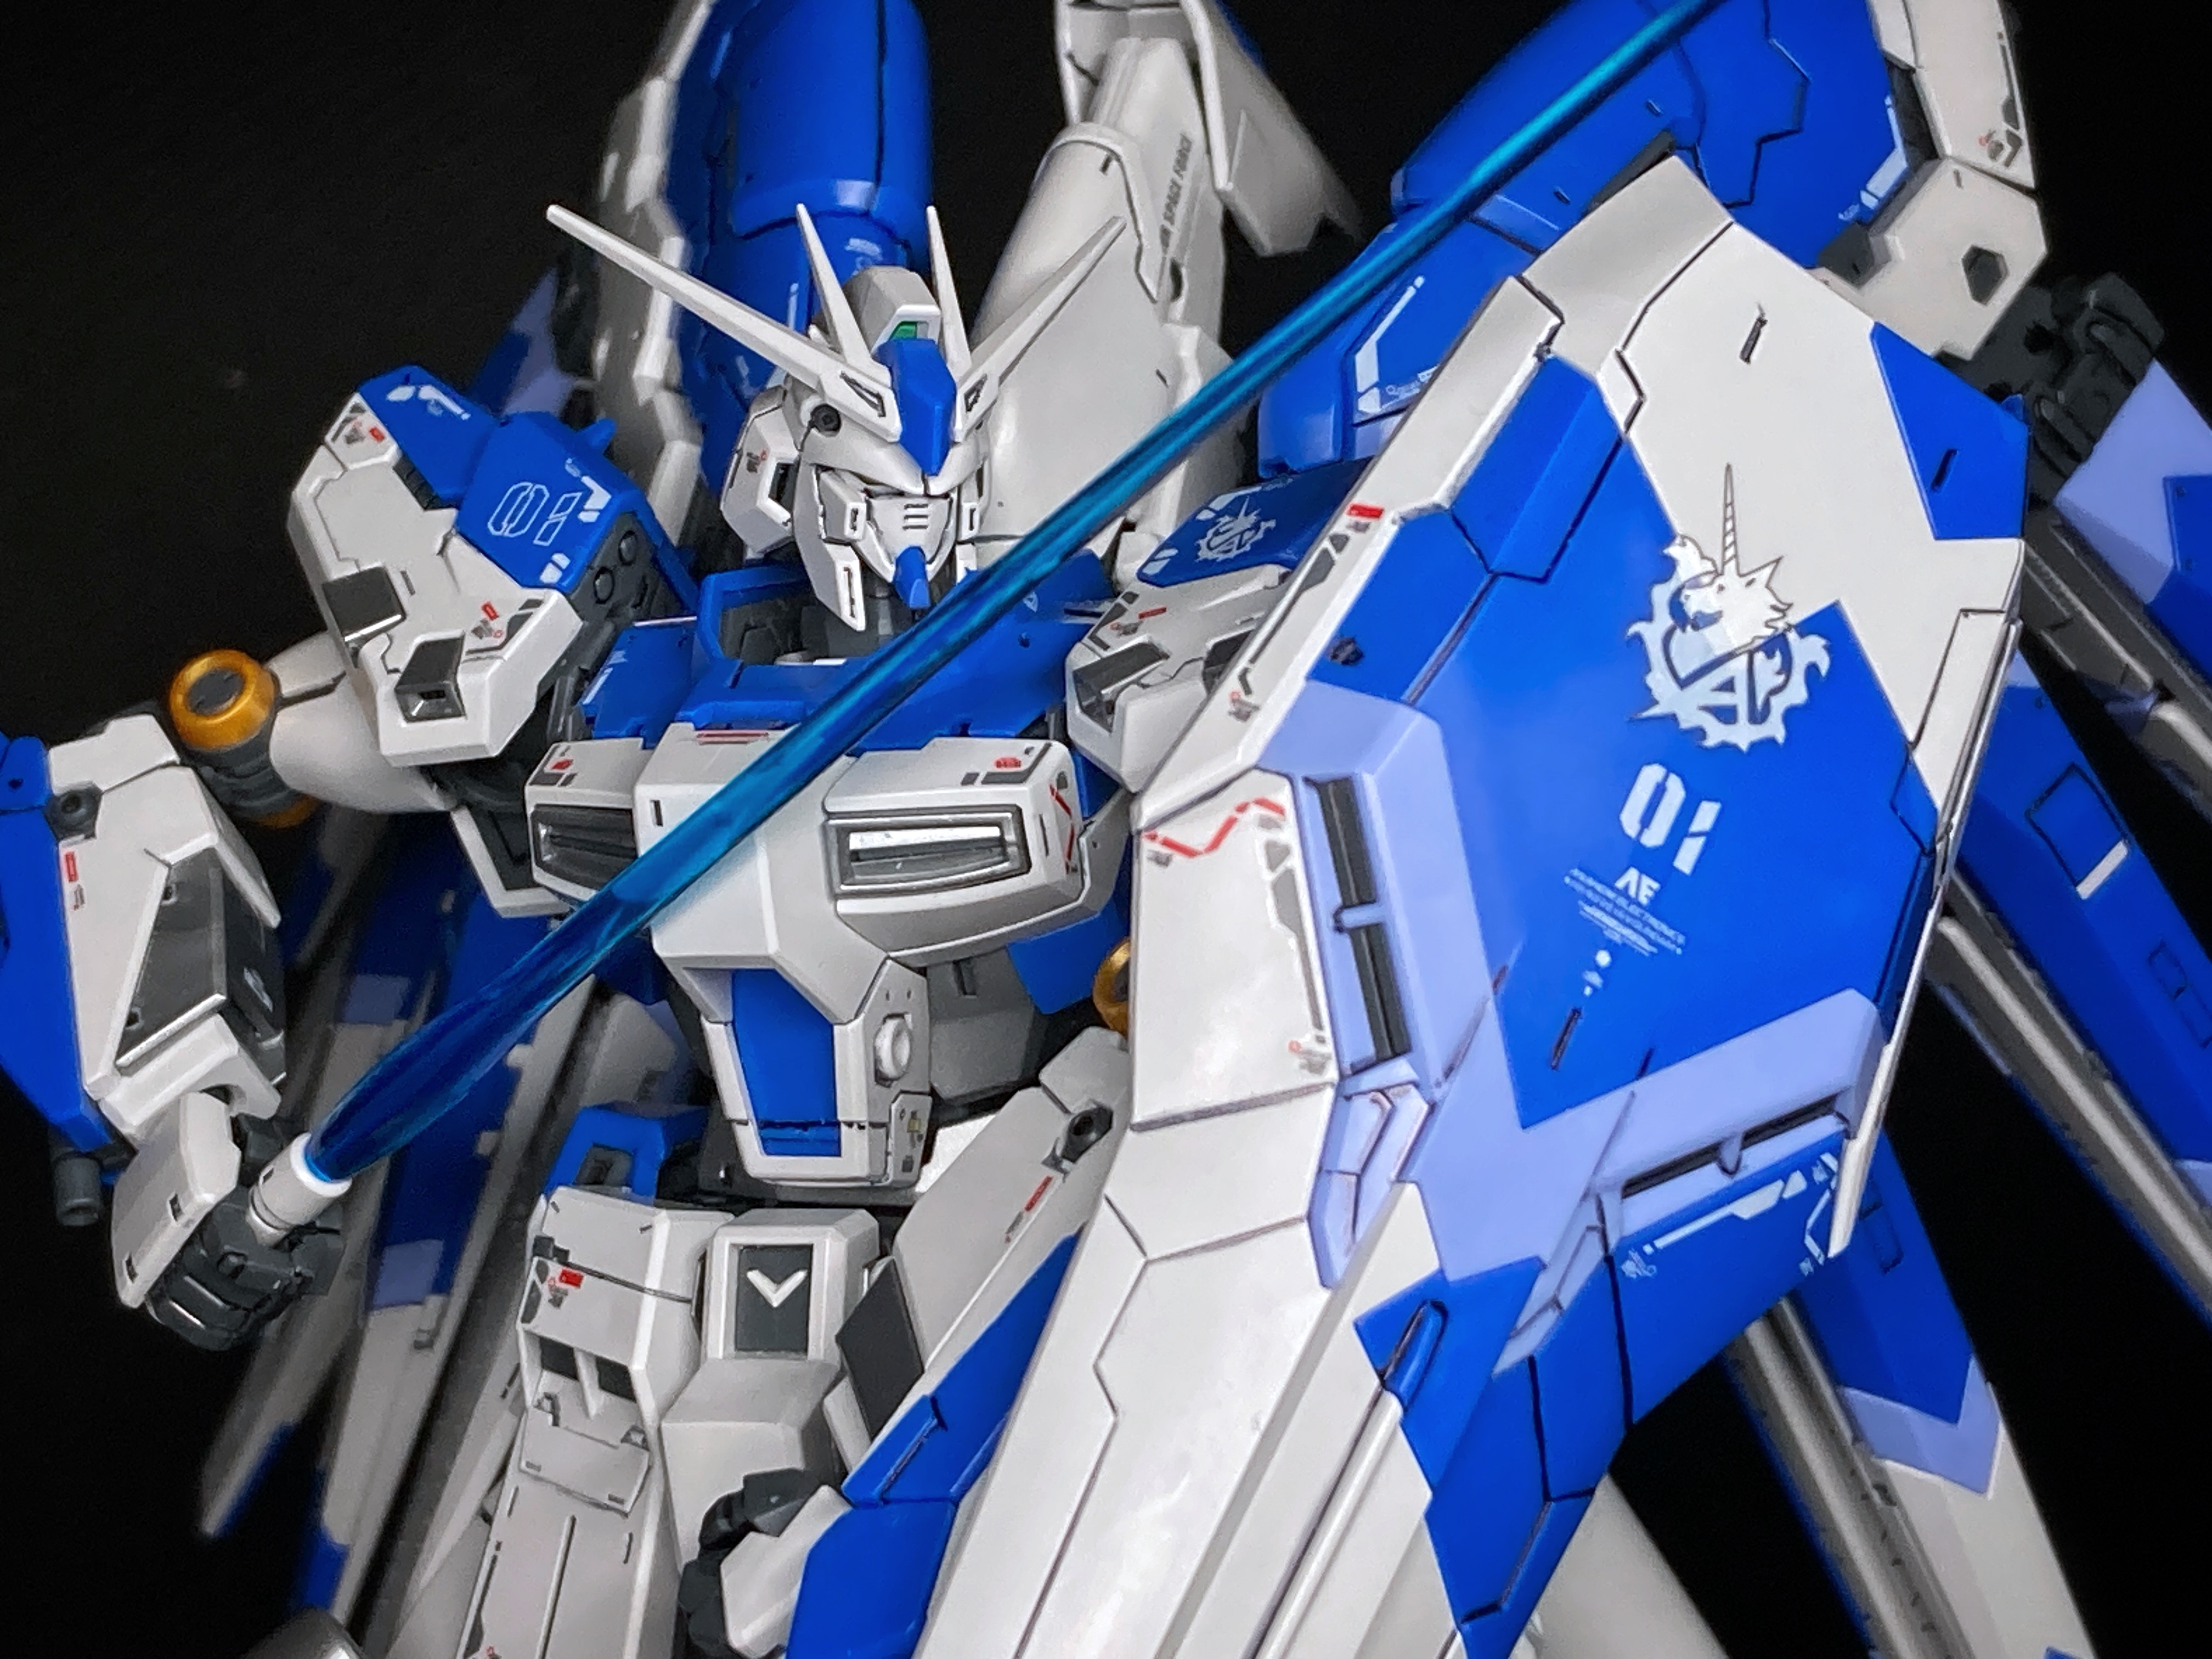
Demonsub Builds The Gundam Hi-Nu


Recommendations: 216
About the Project
A project to chronicle my building of the Real Grade Gundam Hi-Nu (RX-93-v2 Hi-v). It will show my general working approach from panel lining, parts cleanup, assembly and decals. I won’t be showing detailed assembly of every part but more a general progress, and maybe highlight cool things in the build.
Related Genre: Science Fiction
This Project is Completed
Sprue Sorcery & Fin Funnels
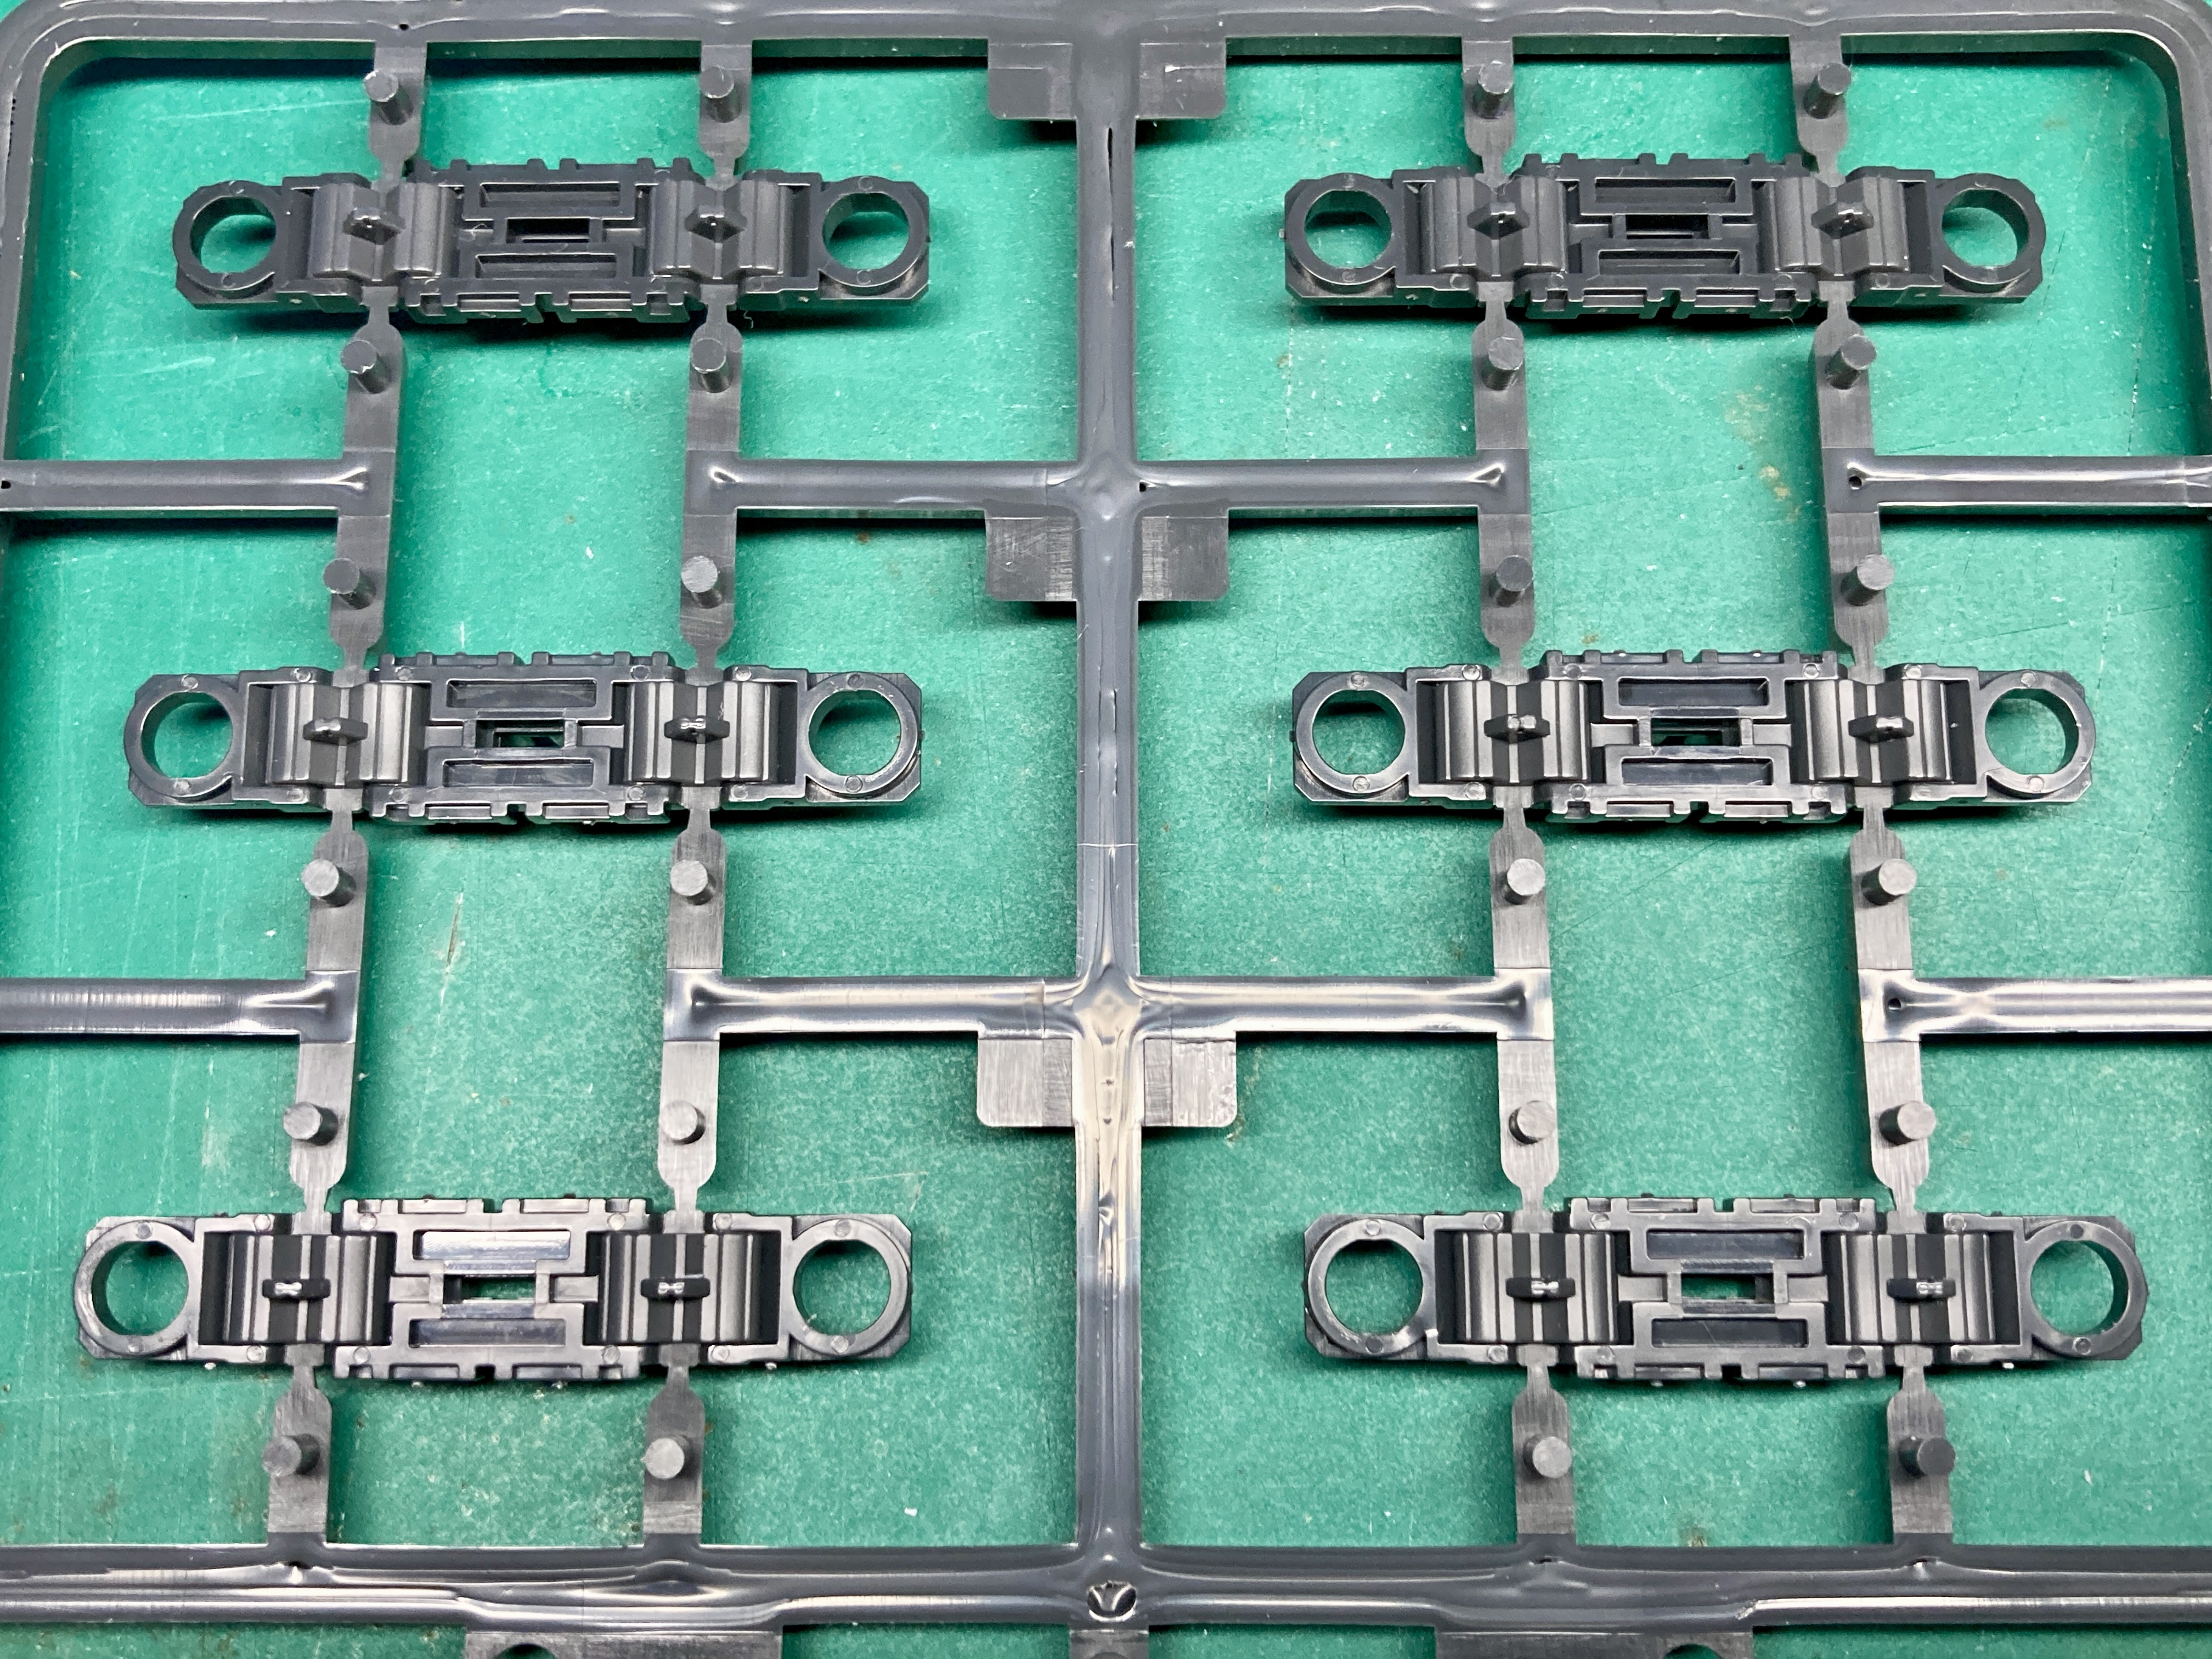

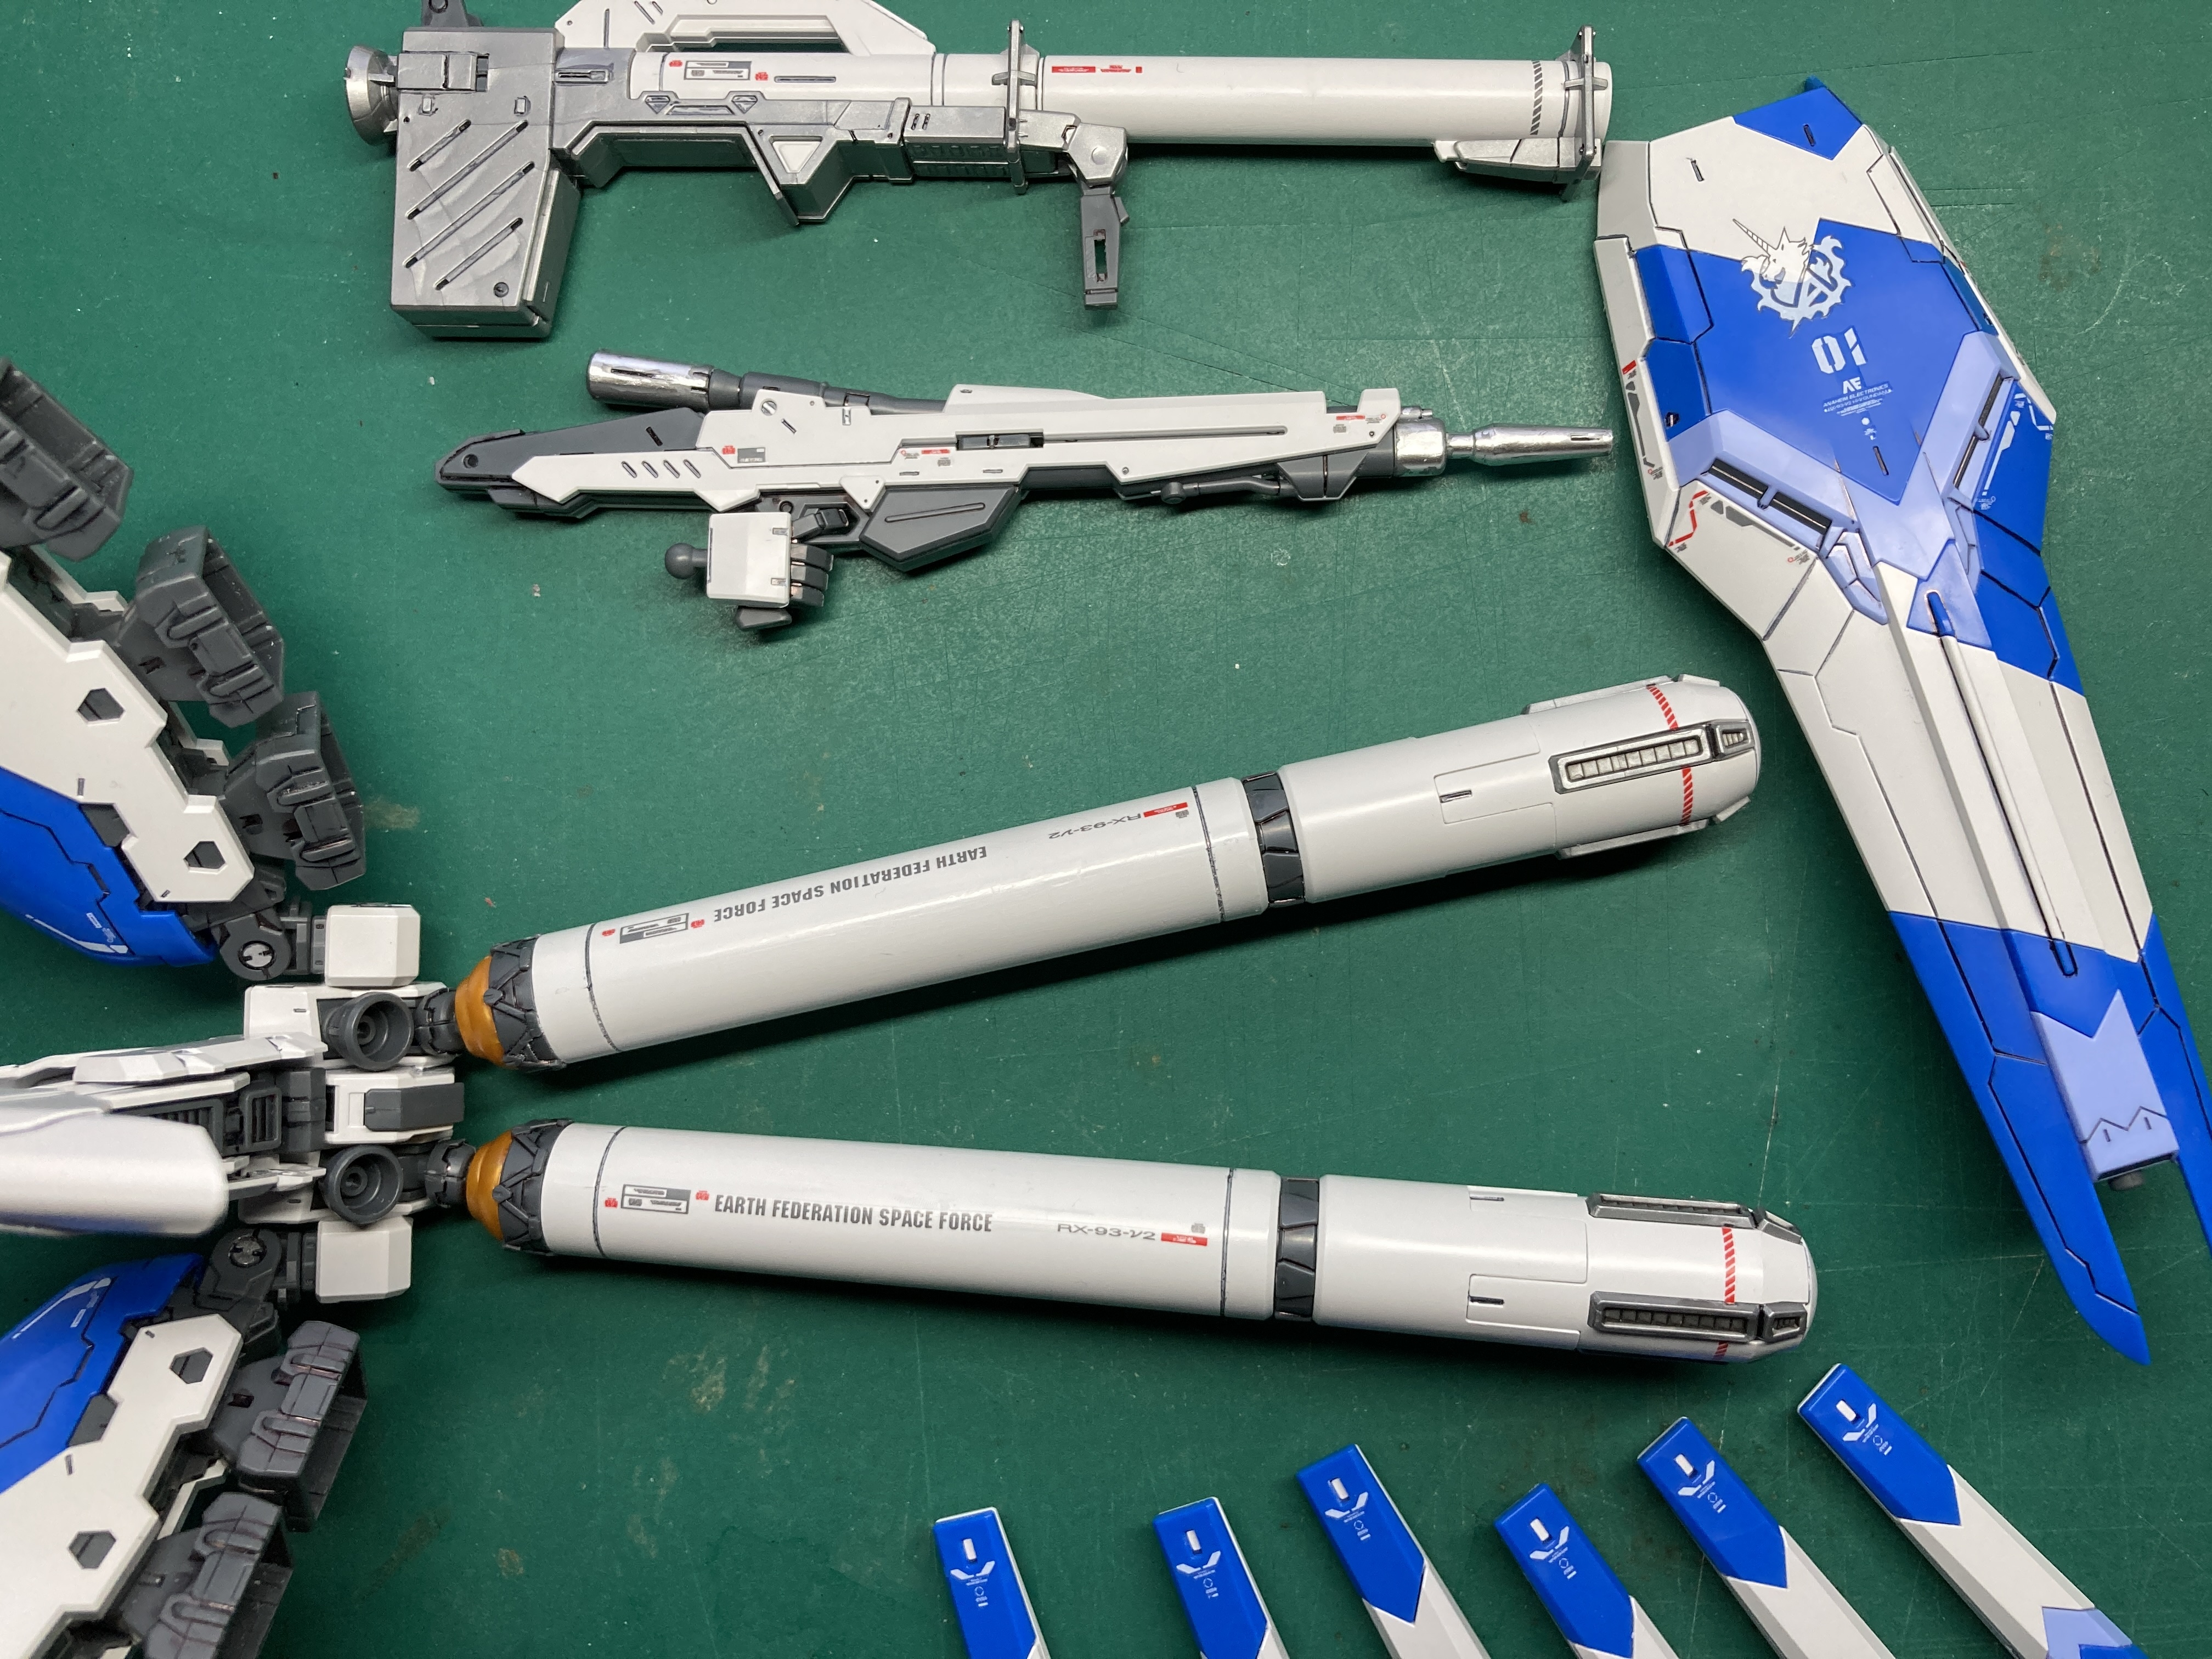
This is the first kit I’ve built which has a sprue of moving parts. Yes! Actual moving parts right off the sprue! To me it looks like some of the parts have been cast in a different plastic first then another plastic has flowed around them and this new plastic also forms the main sprue. Still, it’s quite amazing.
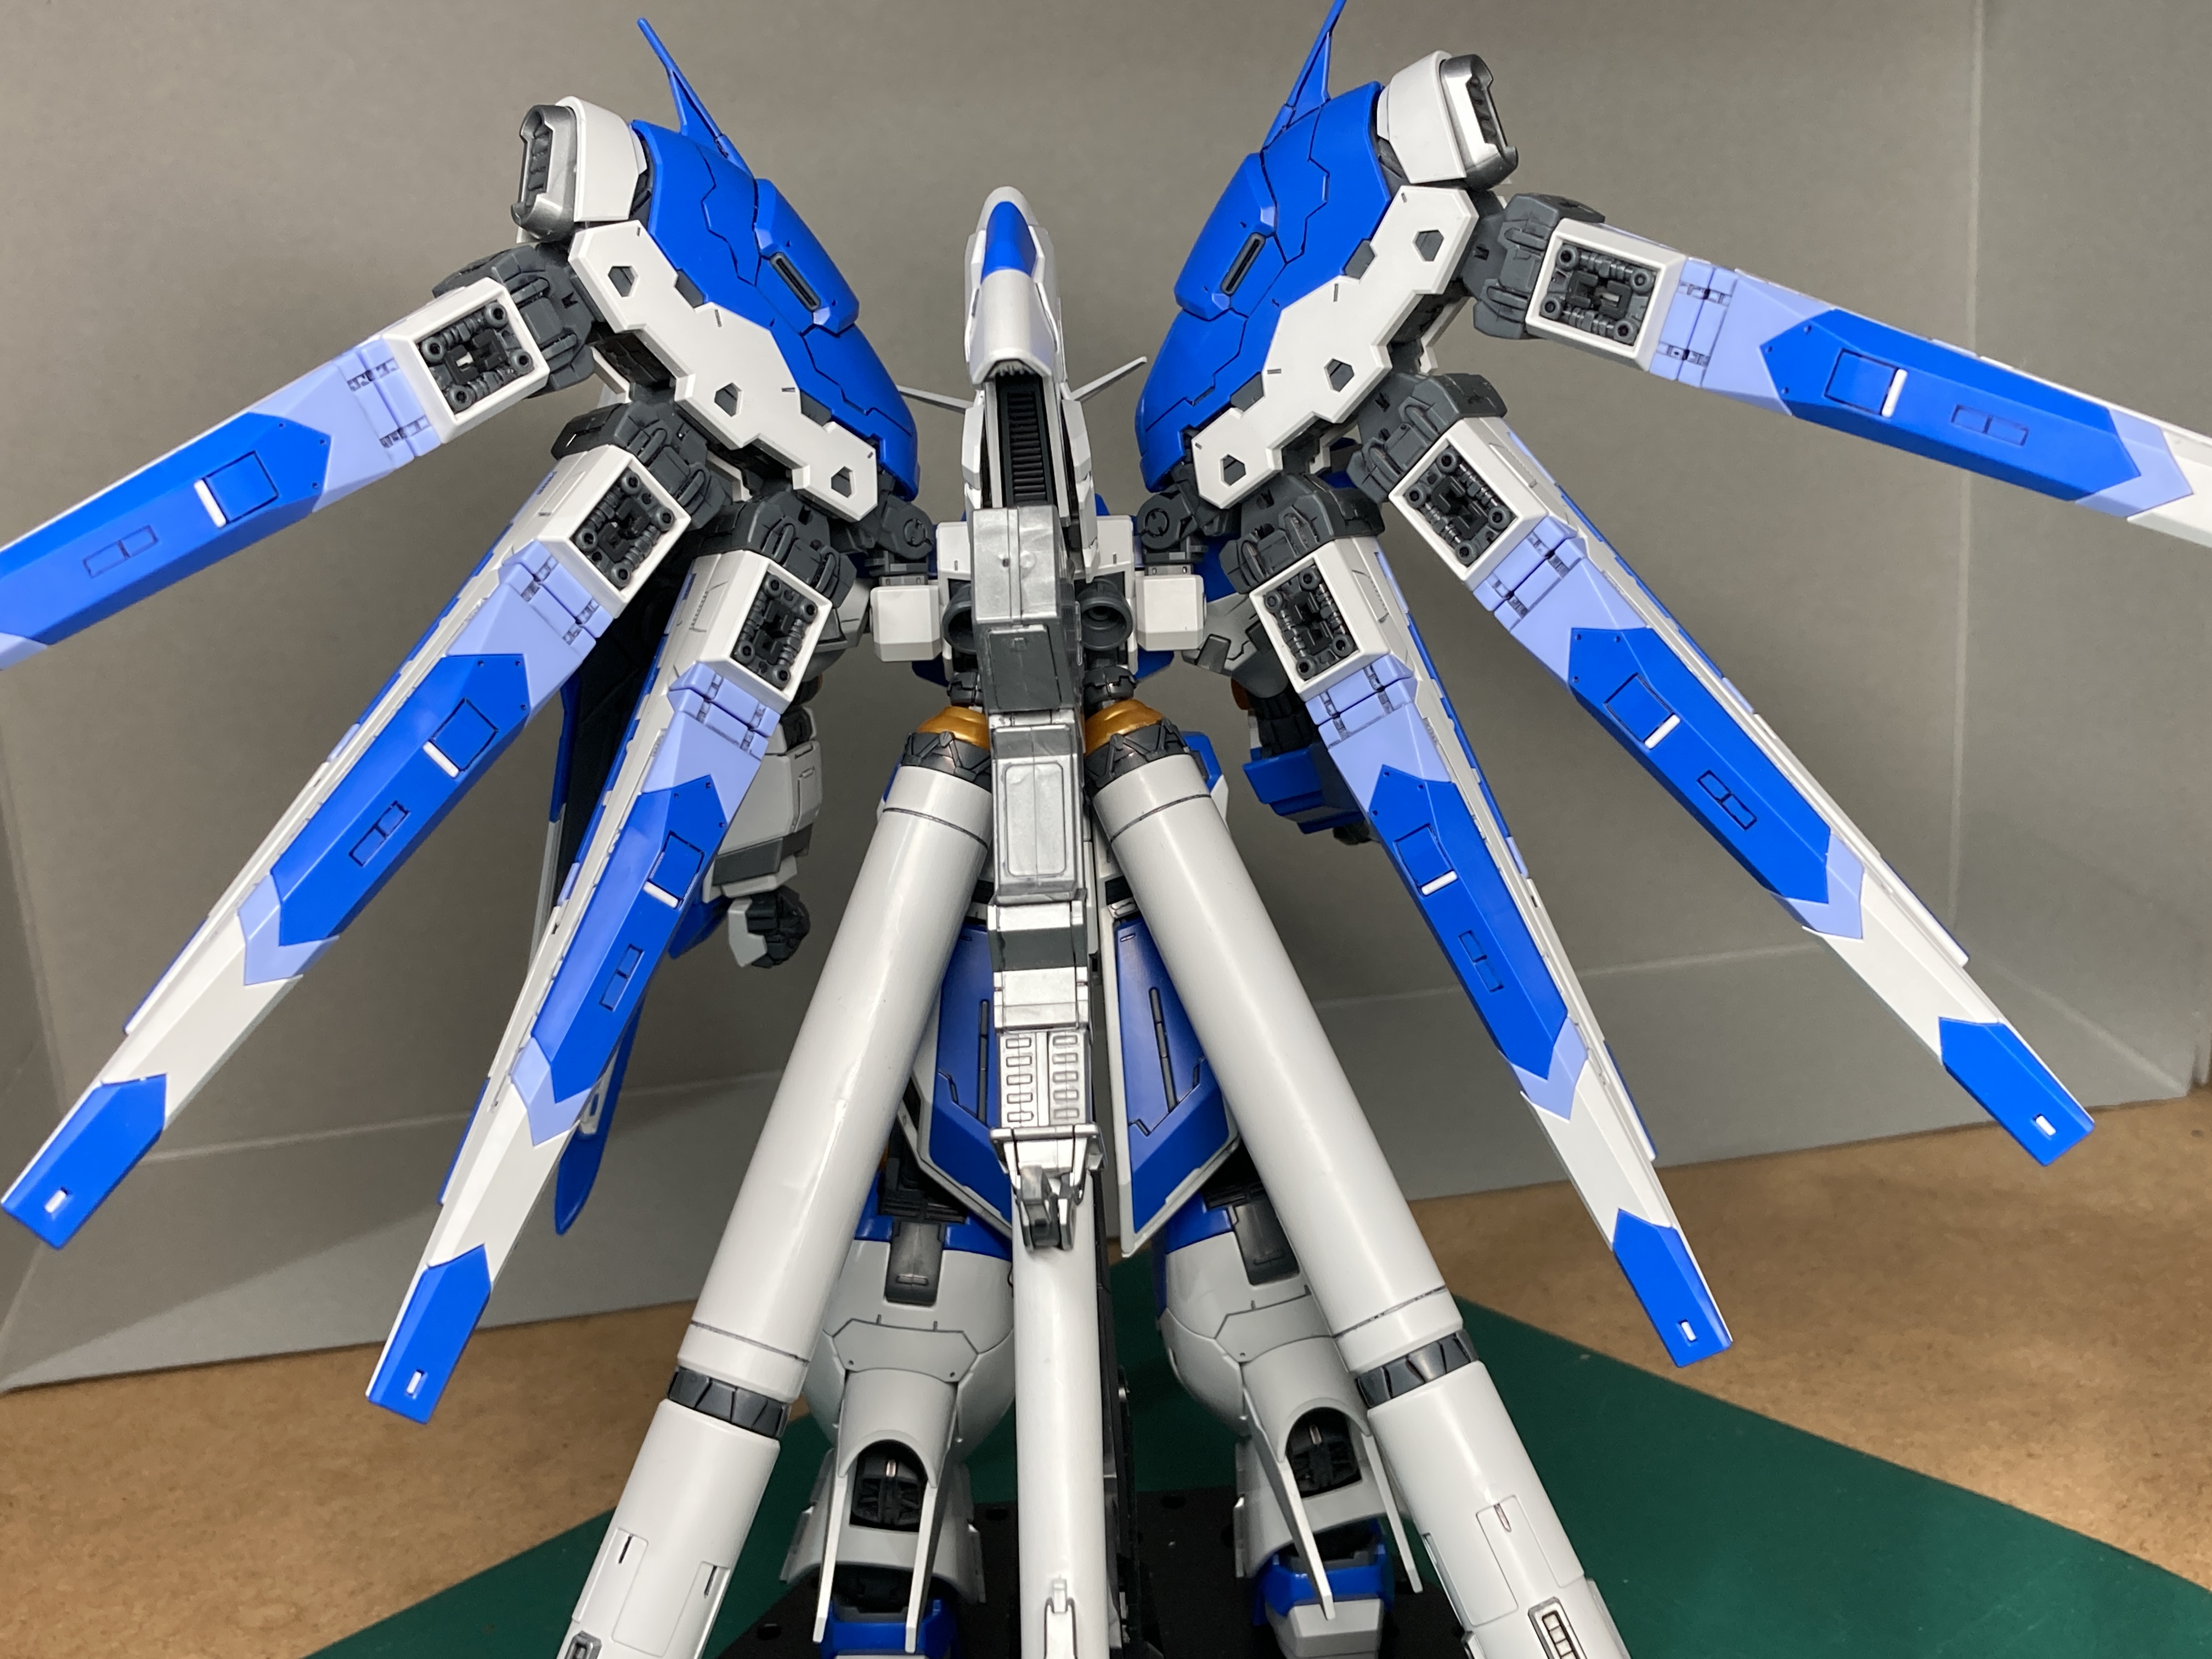
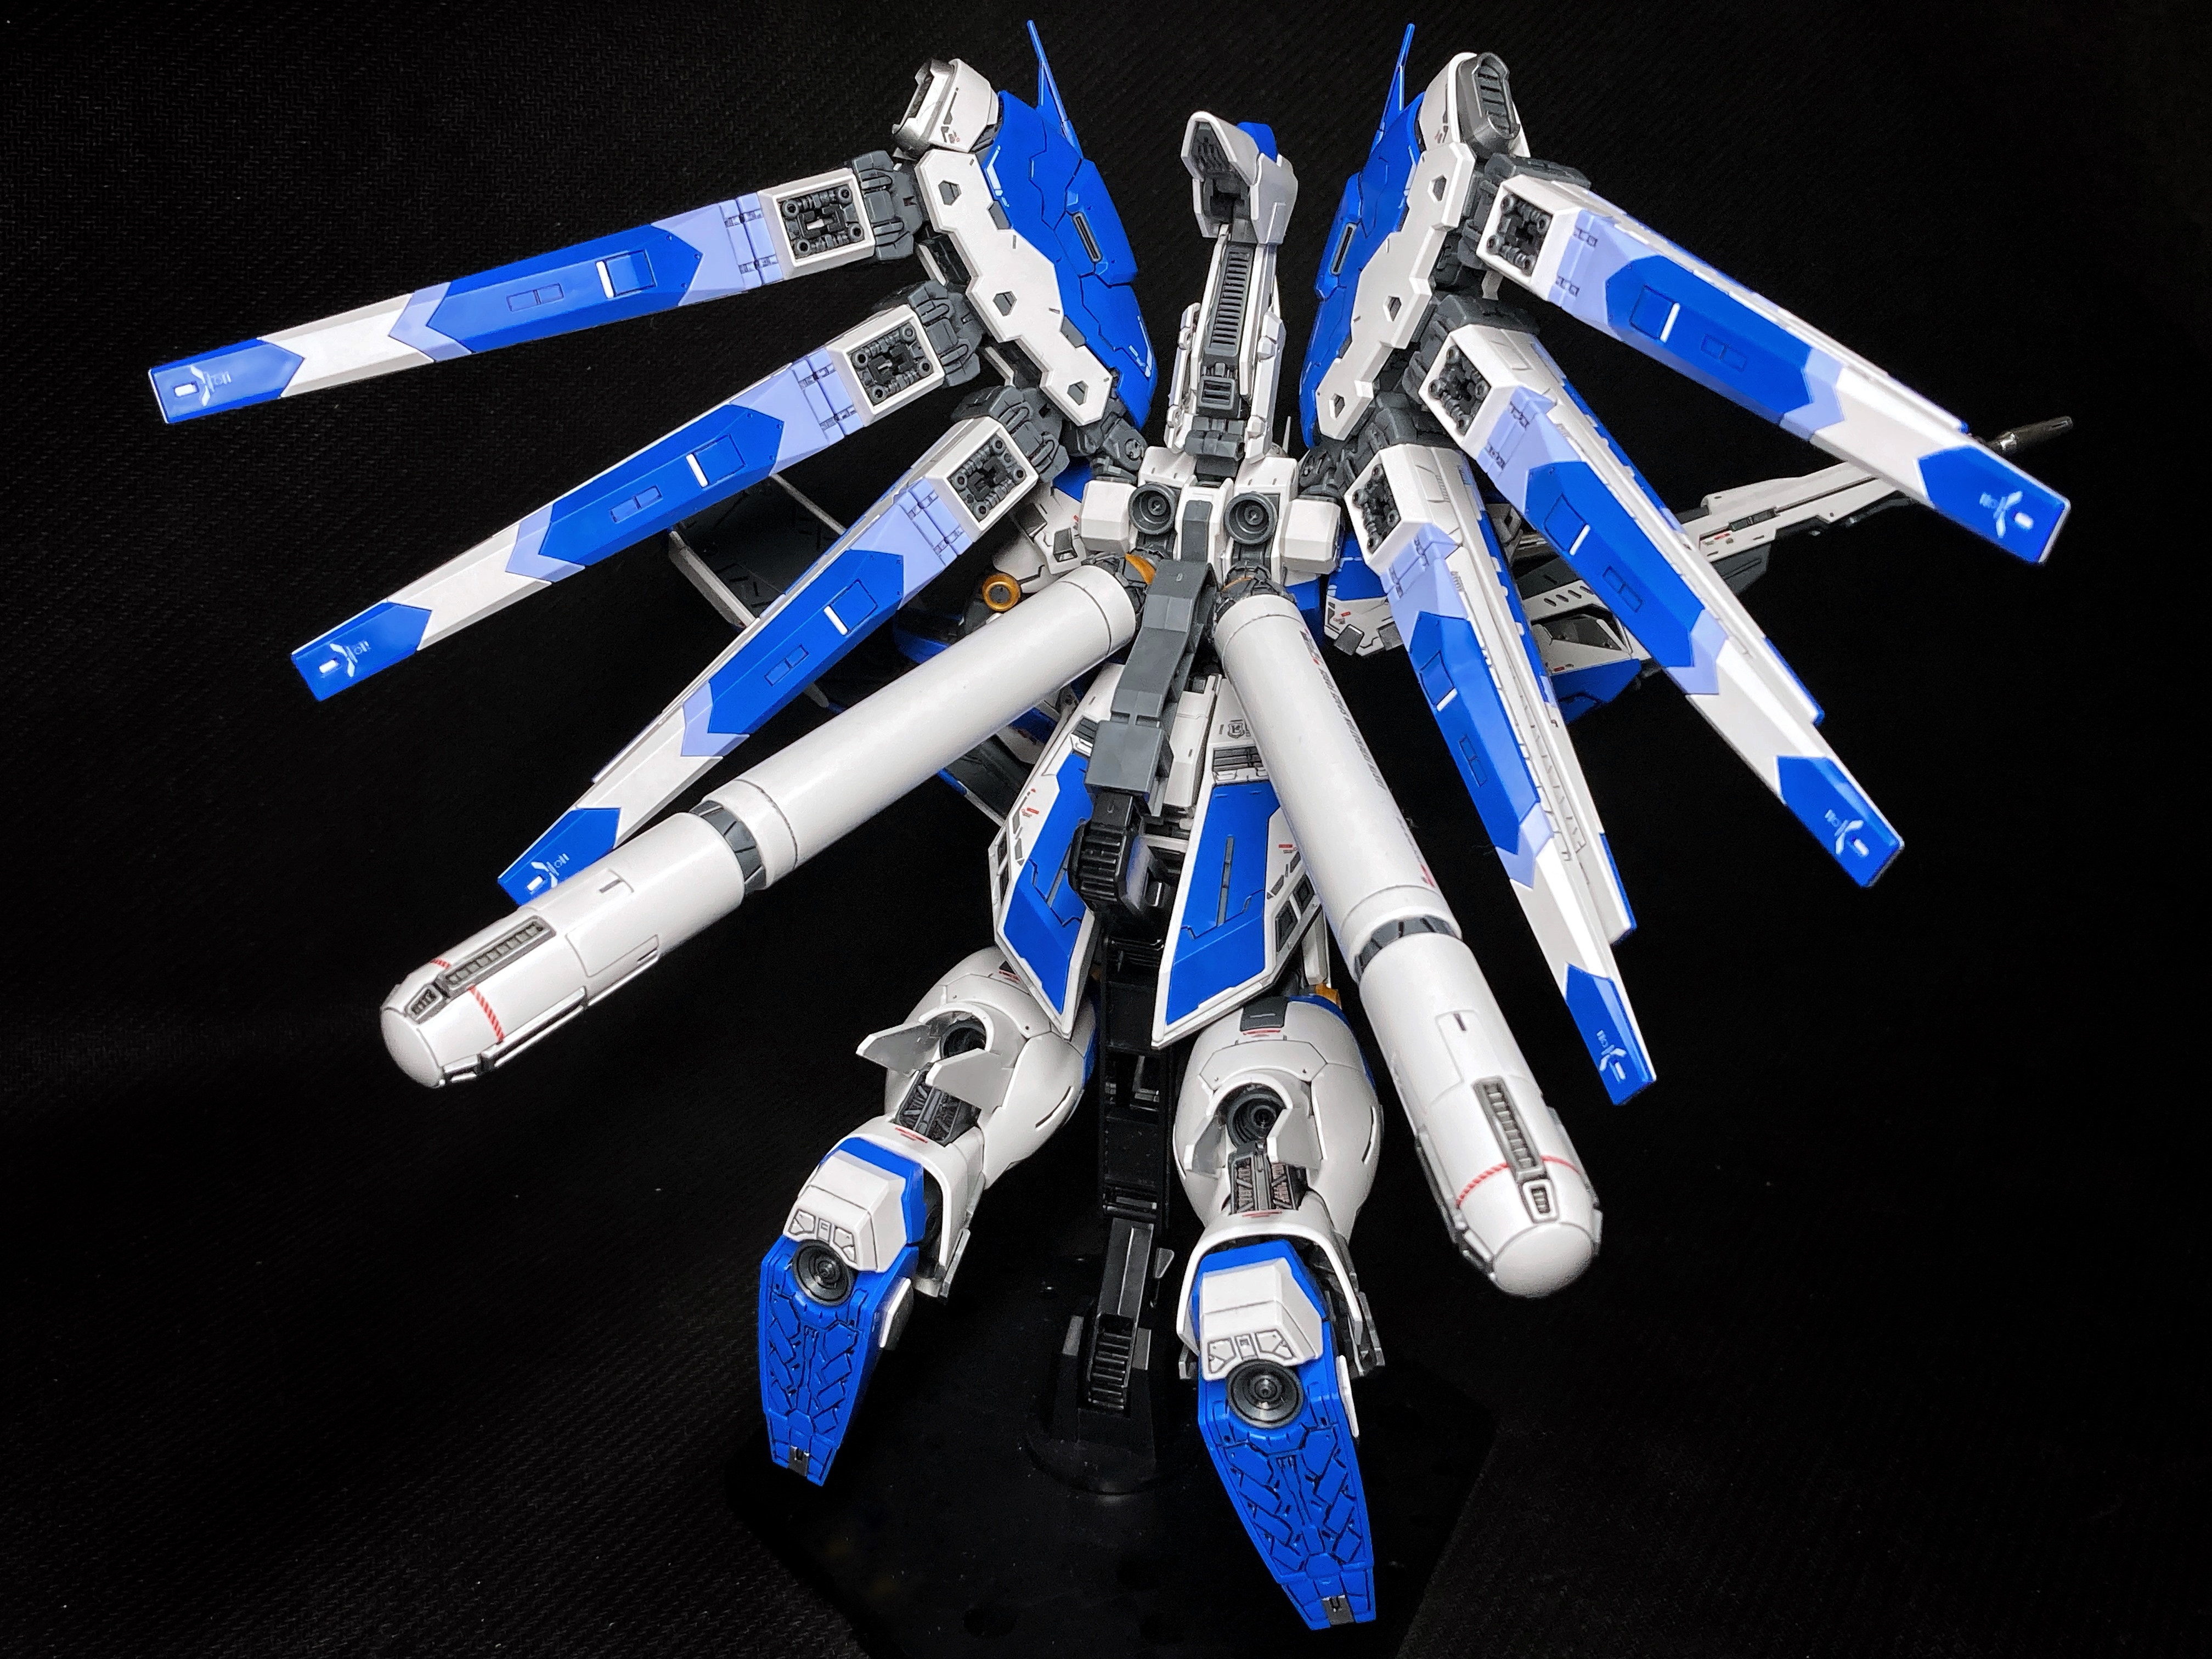
So once the fin funnels are built, all six of them, here’s what they look like.
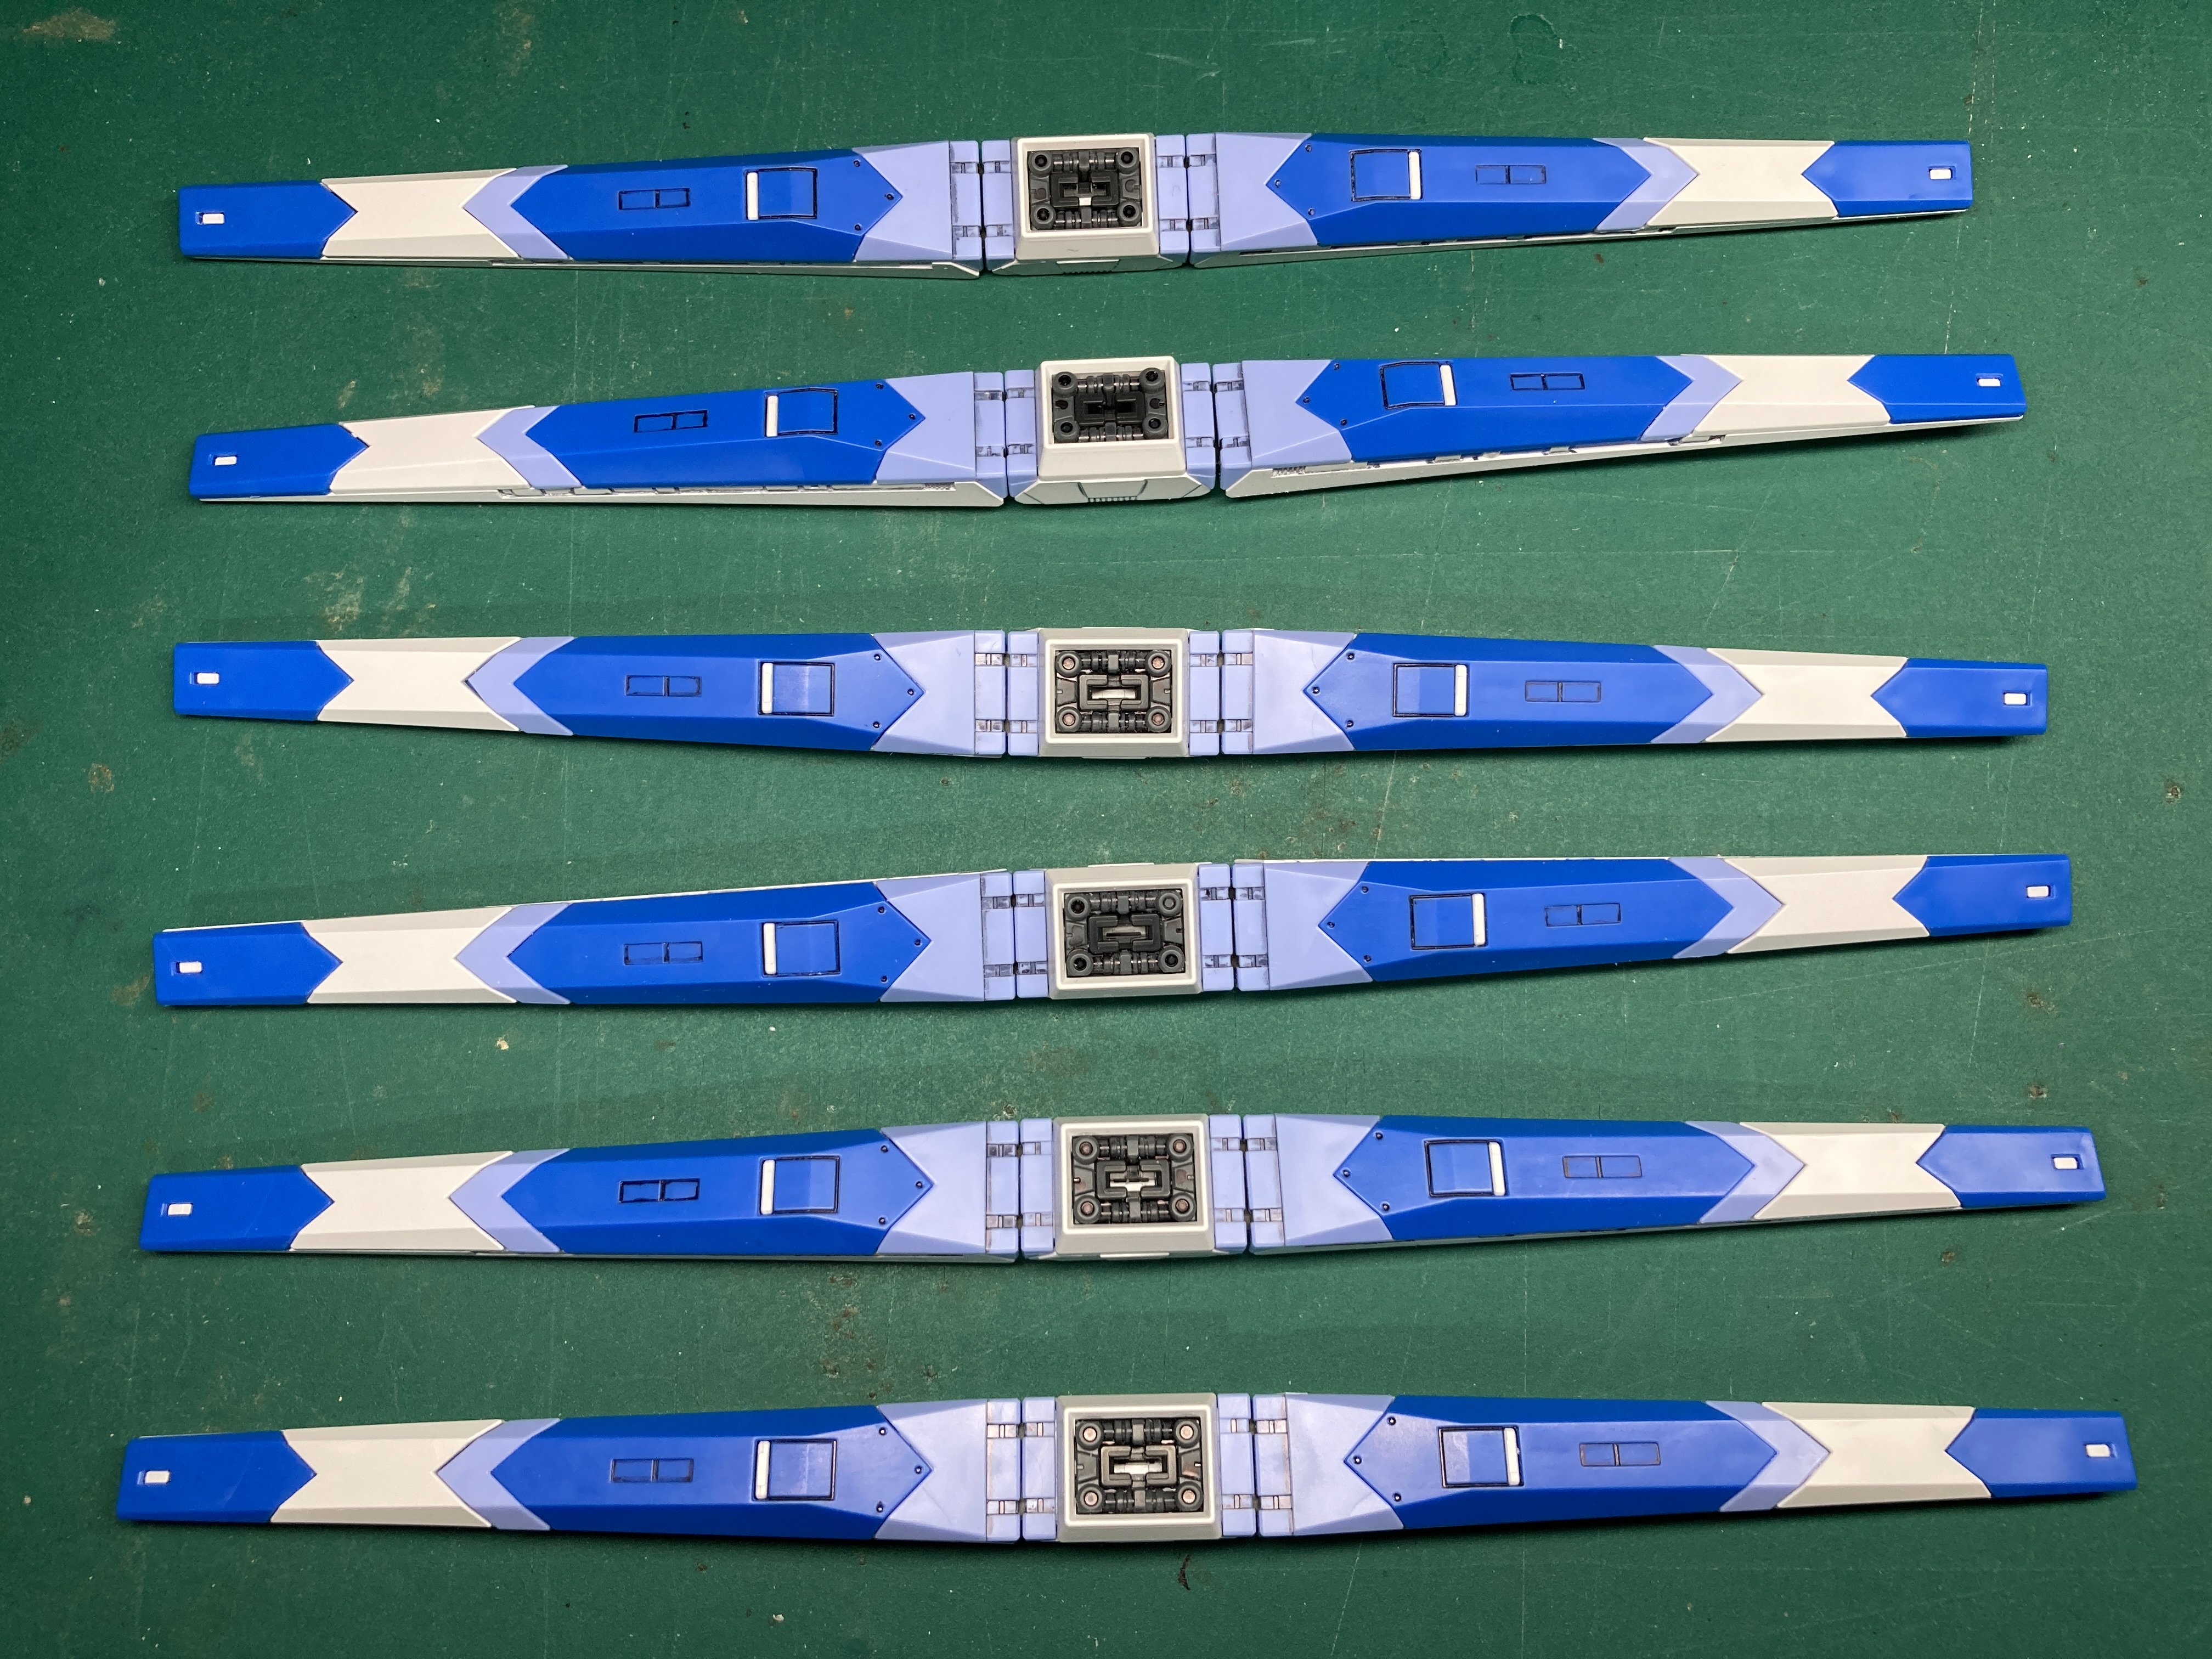
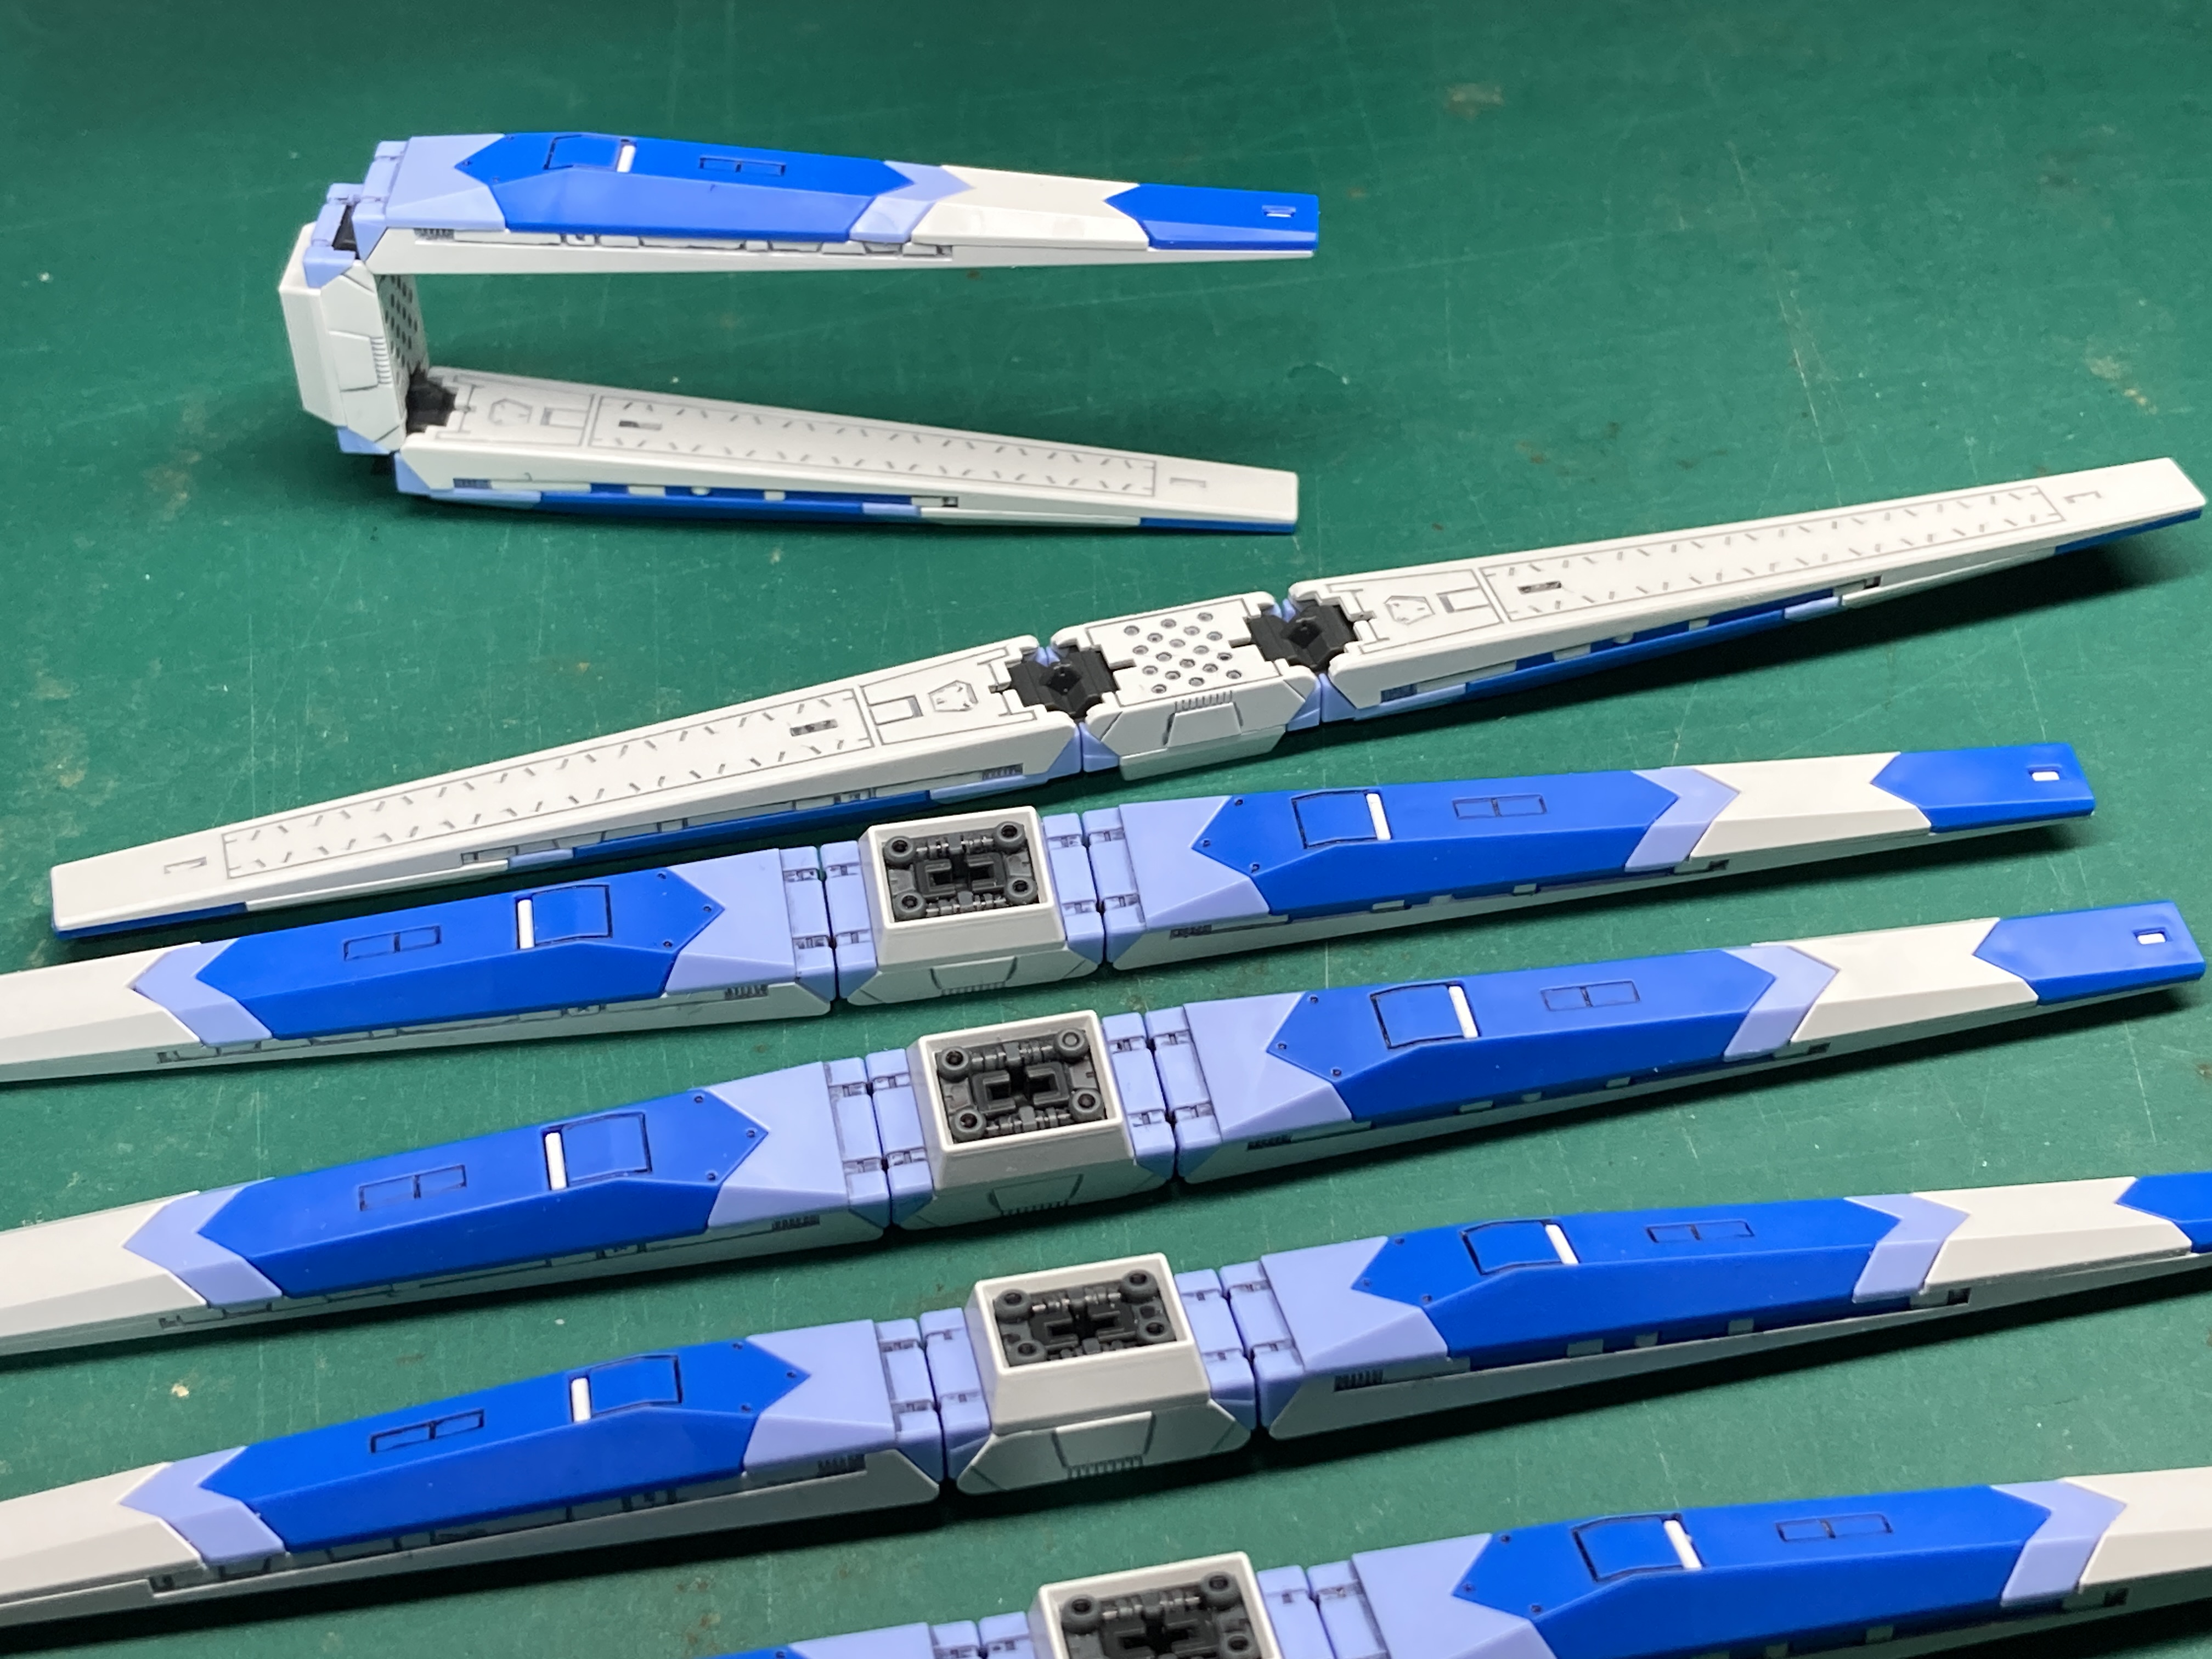
These took quite some work as there are quite a few parts and a lot of panel lining. In the story, these separate from the main Gundam and fly around and shoot similar to drones.
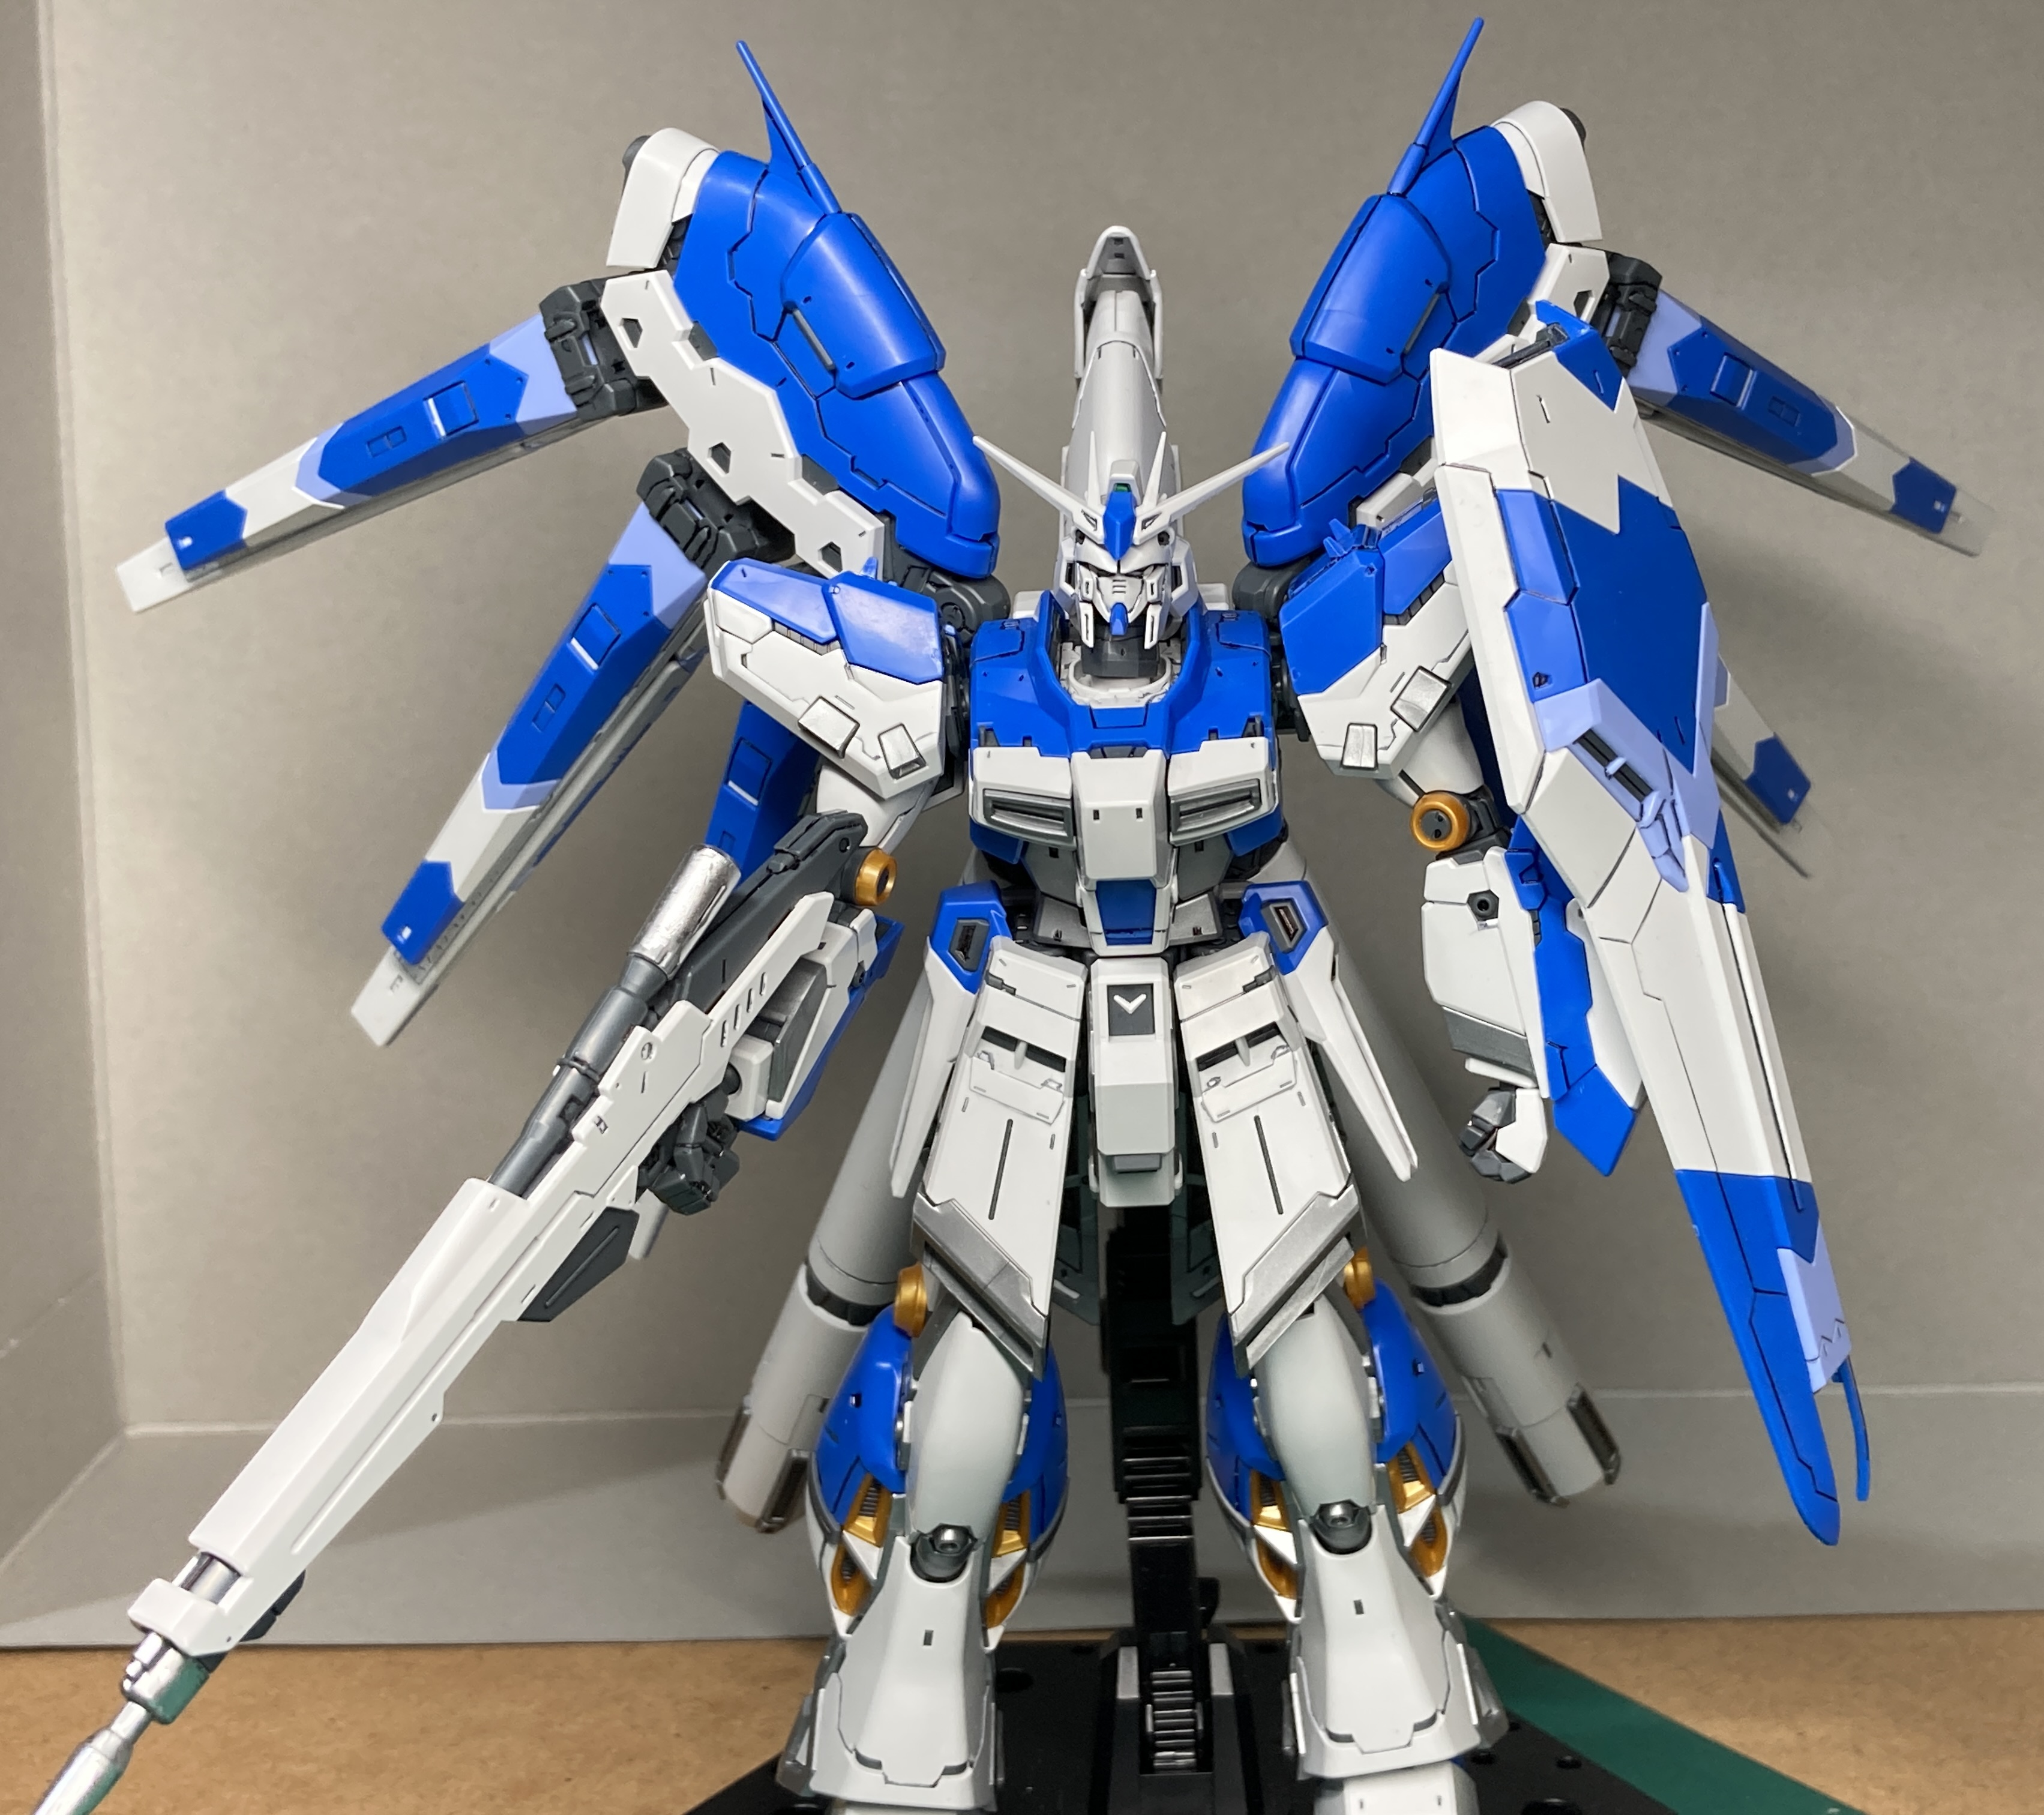
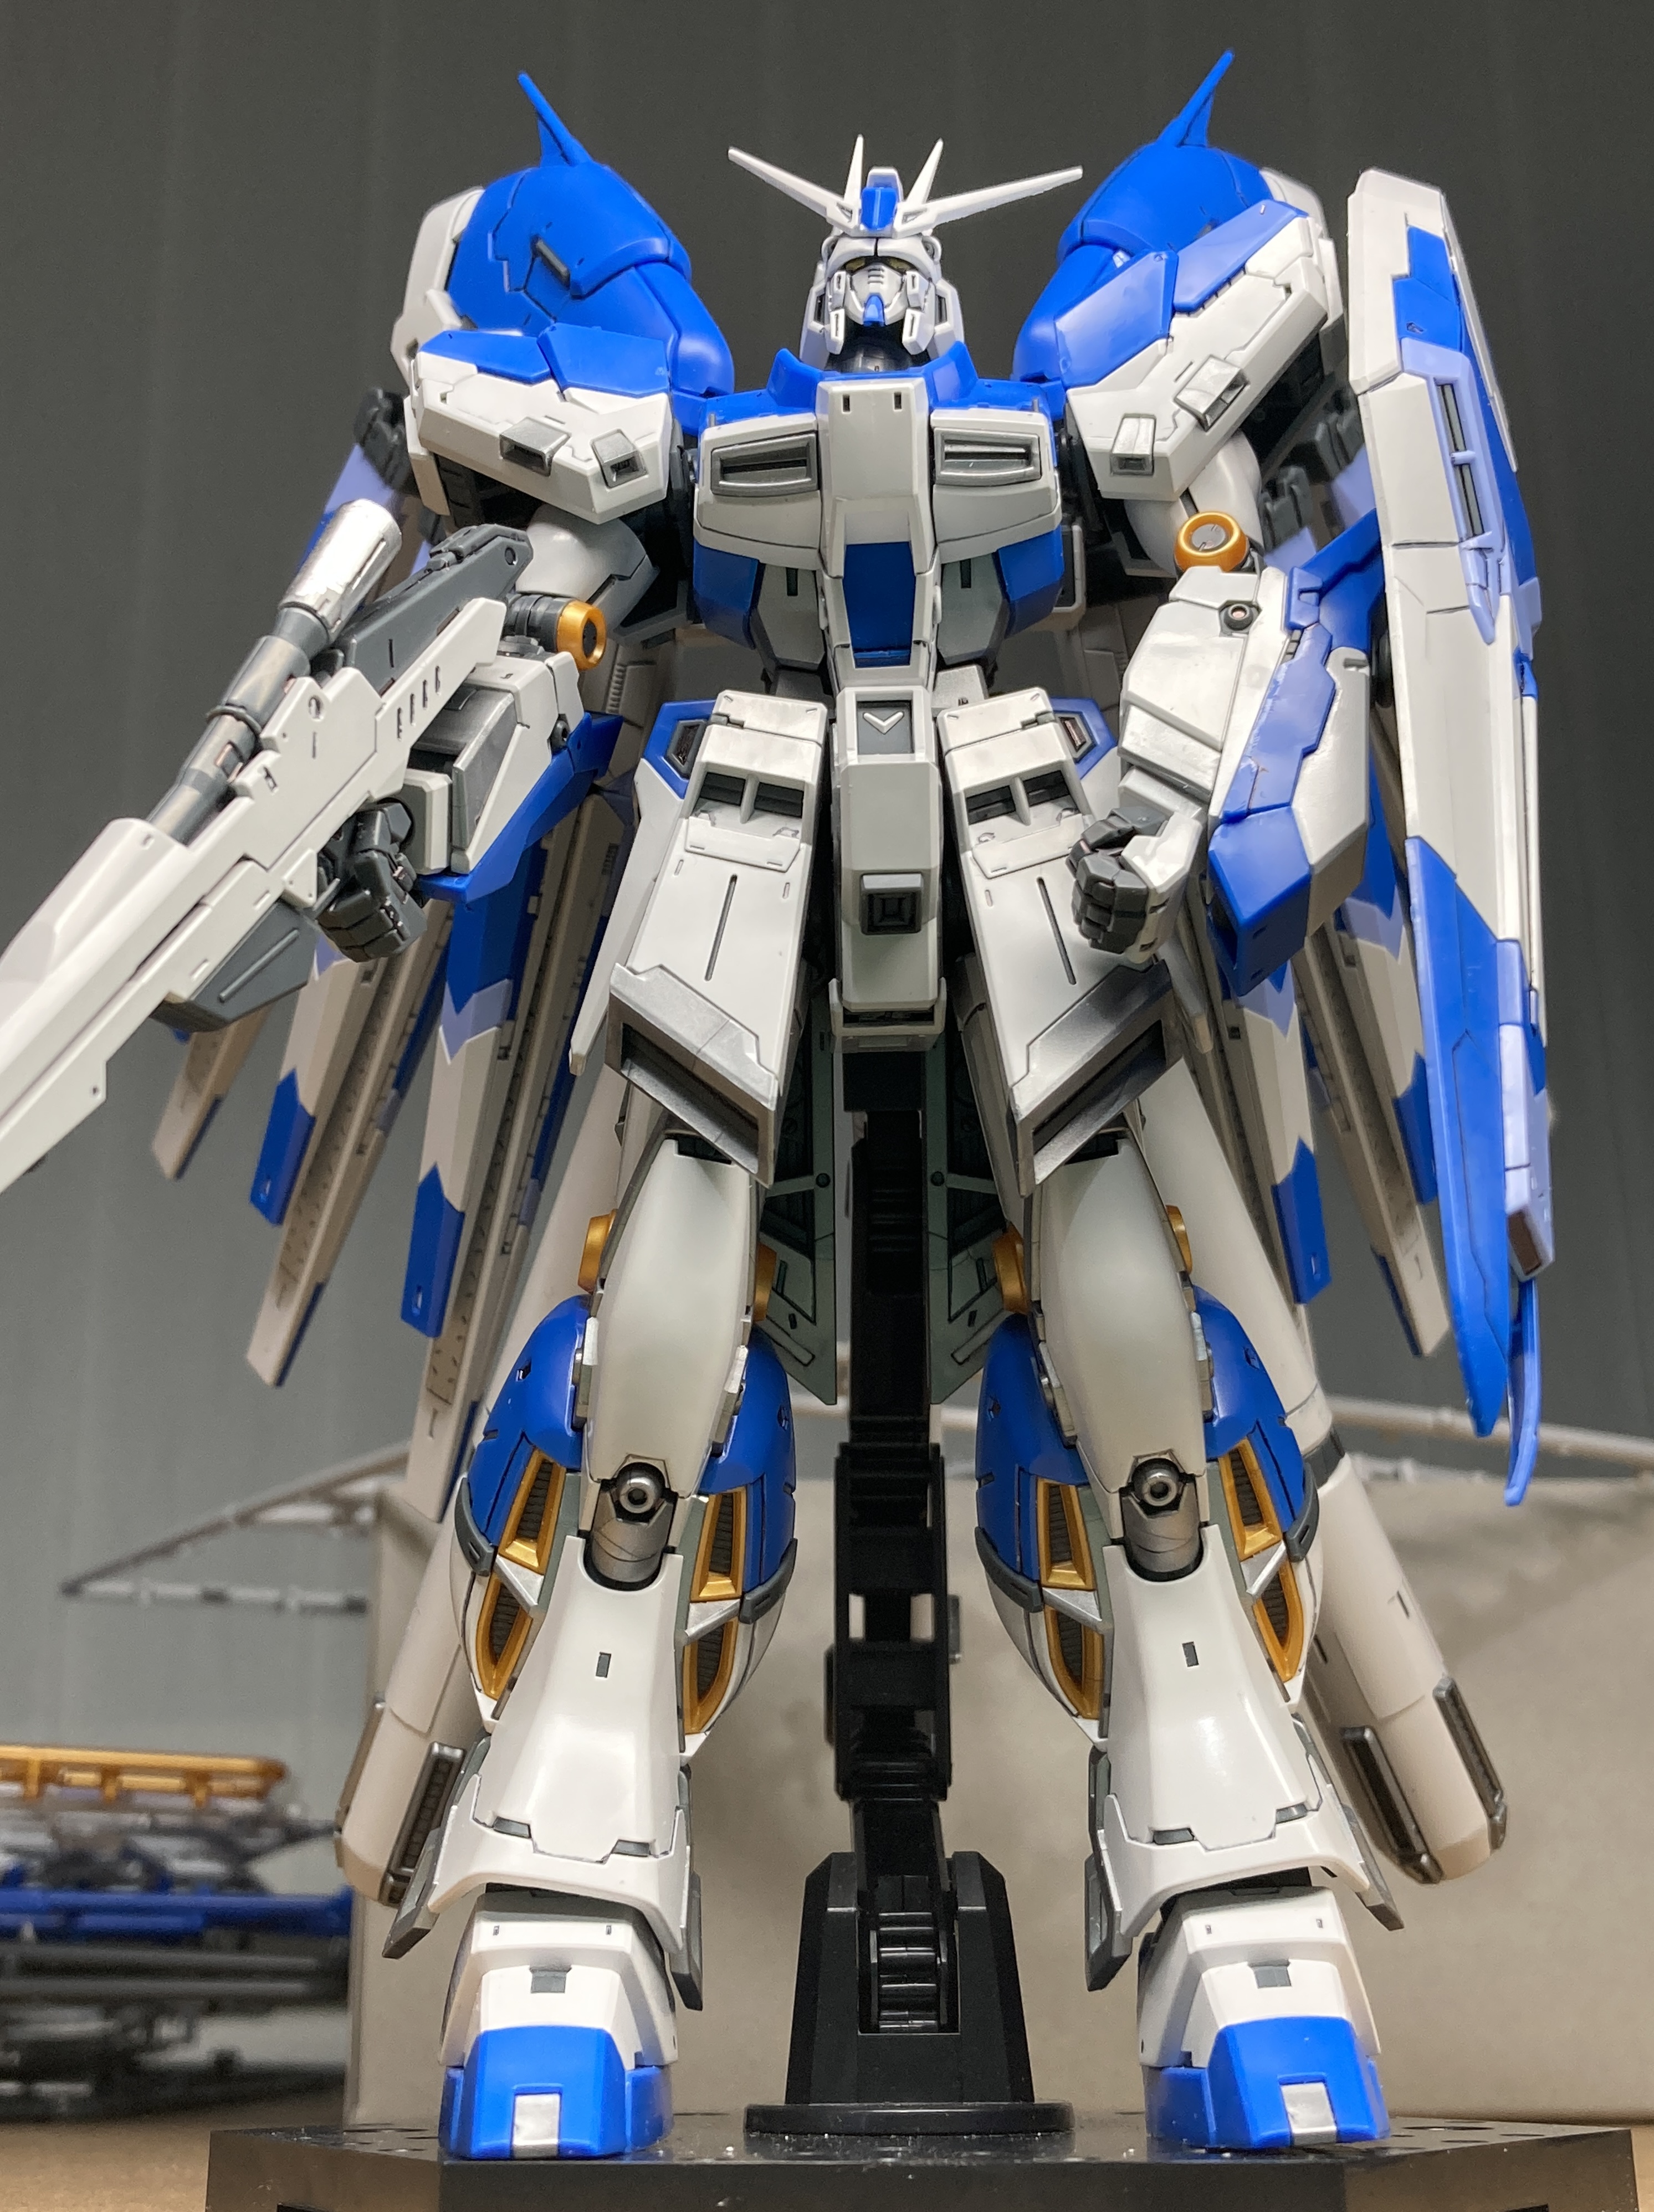
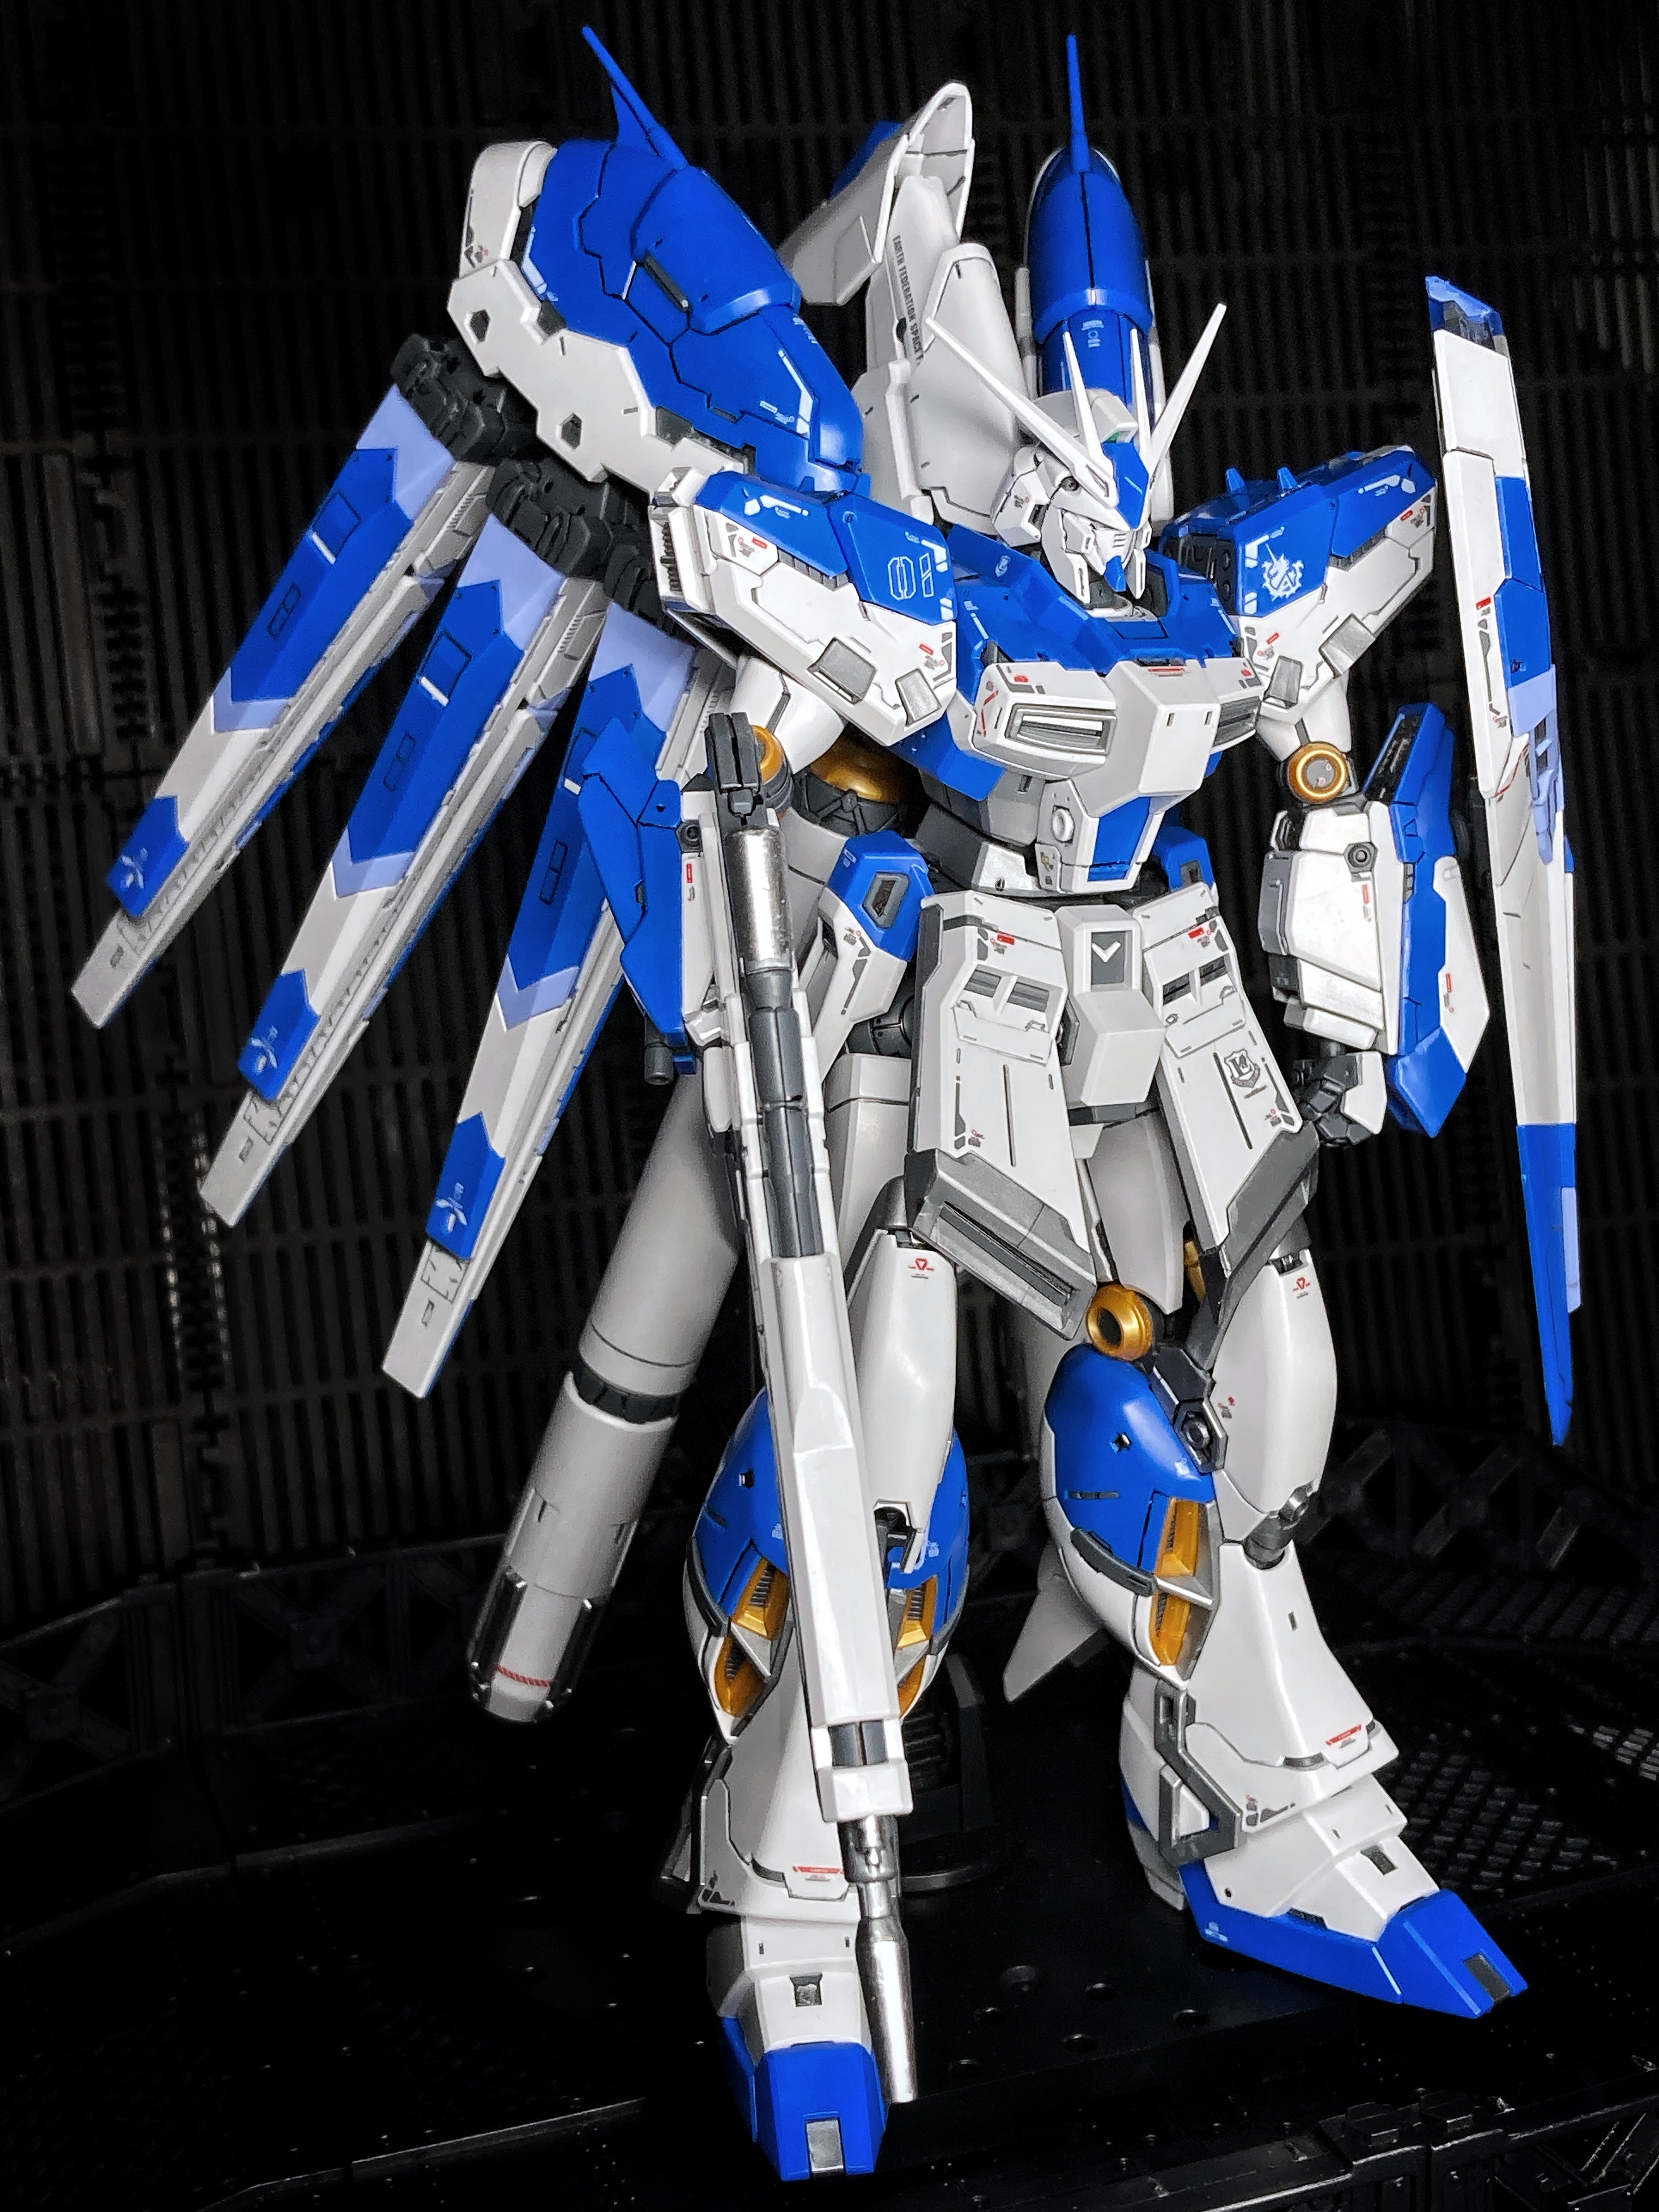
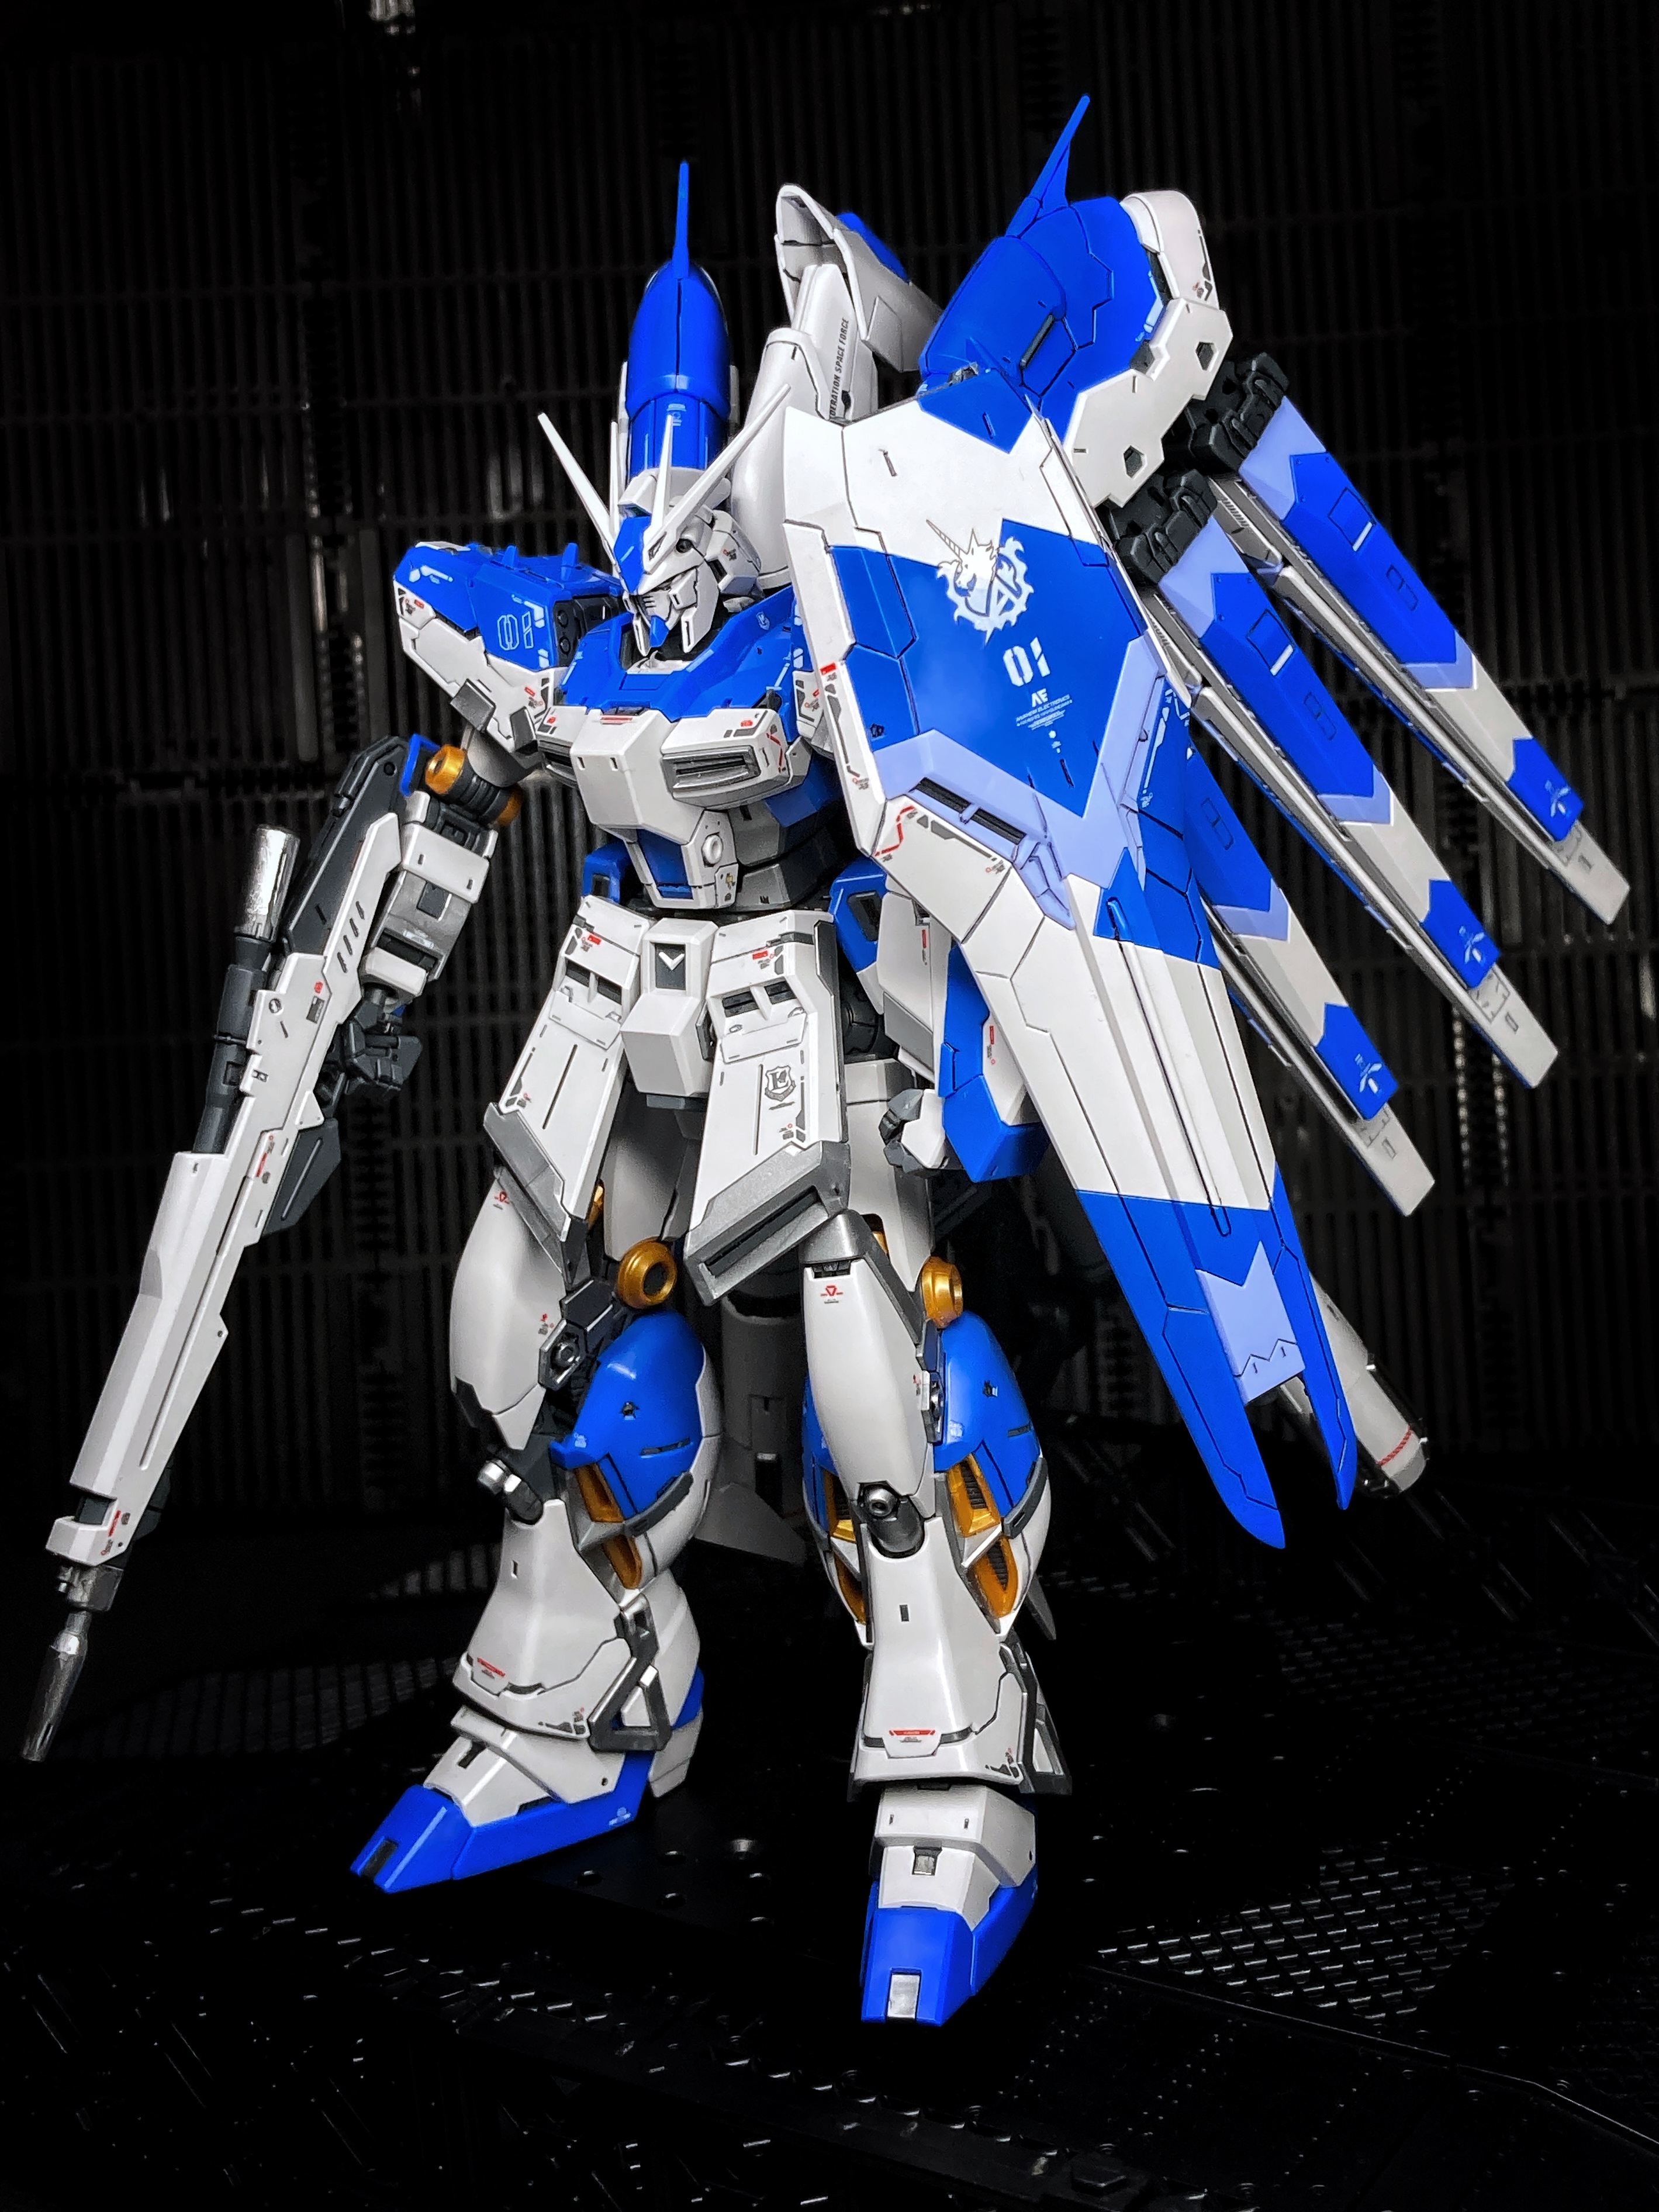
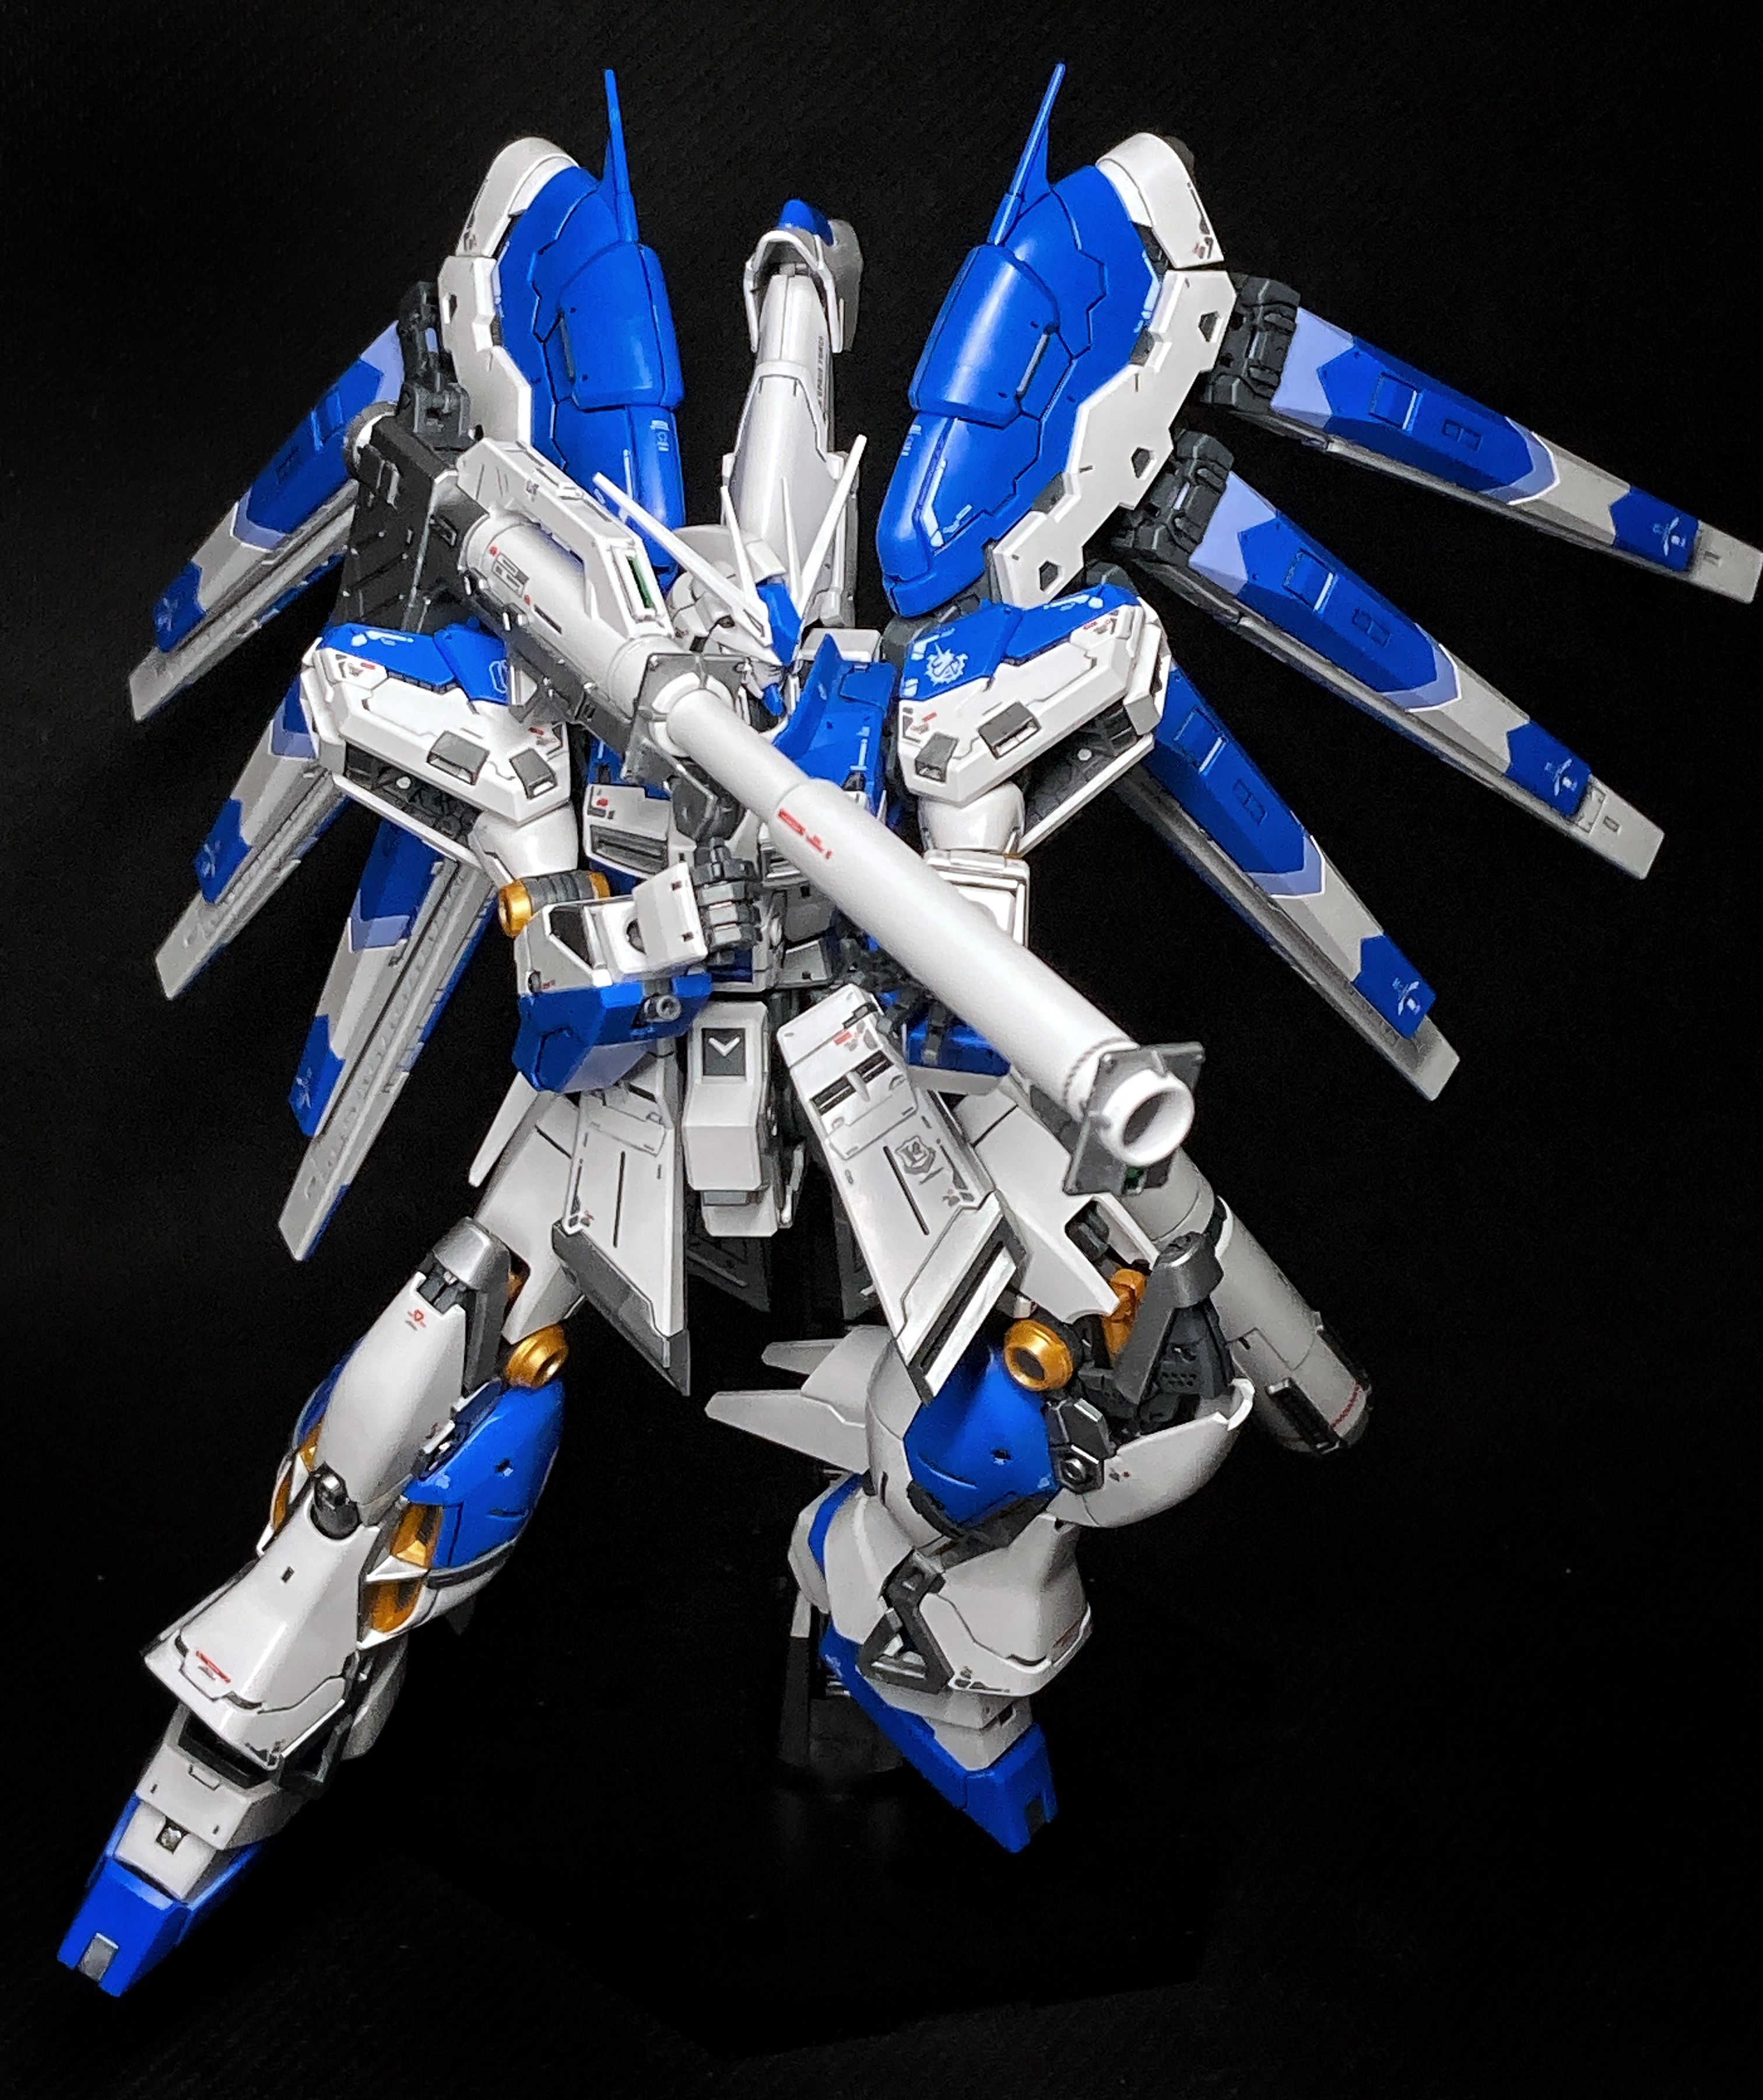
Here’s a few quick photos of the funnels on the completed model

So the build is complete but there’s still a whole load of decals to add. I also want to review the tools I used during the build and what I’ve learned going ahead. Finally when it’s all complete I want to take some beauty shots to really show off the model (if I can).
Water Slide Transfers & A Tools Review
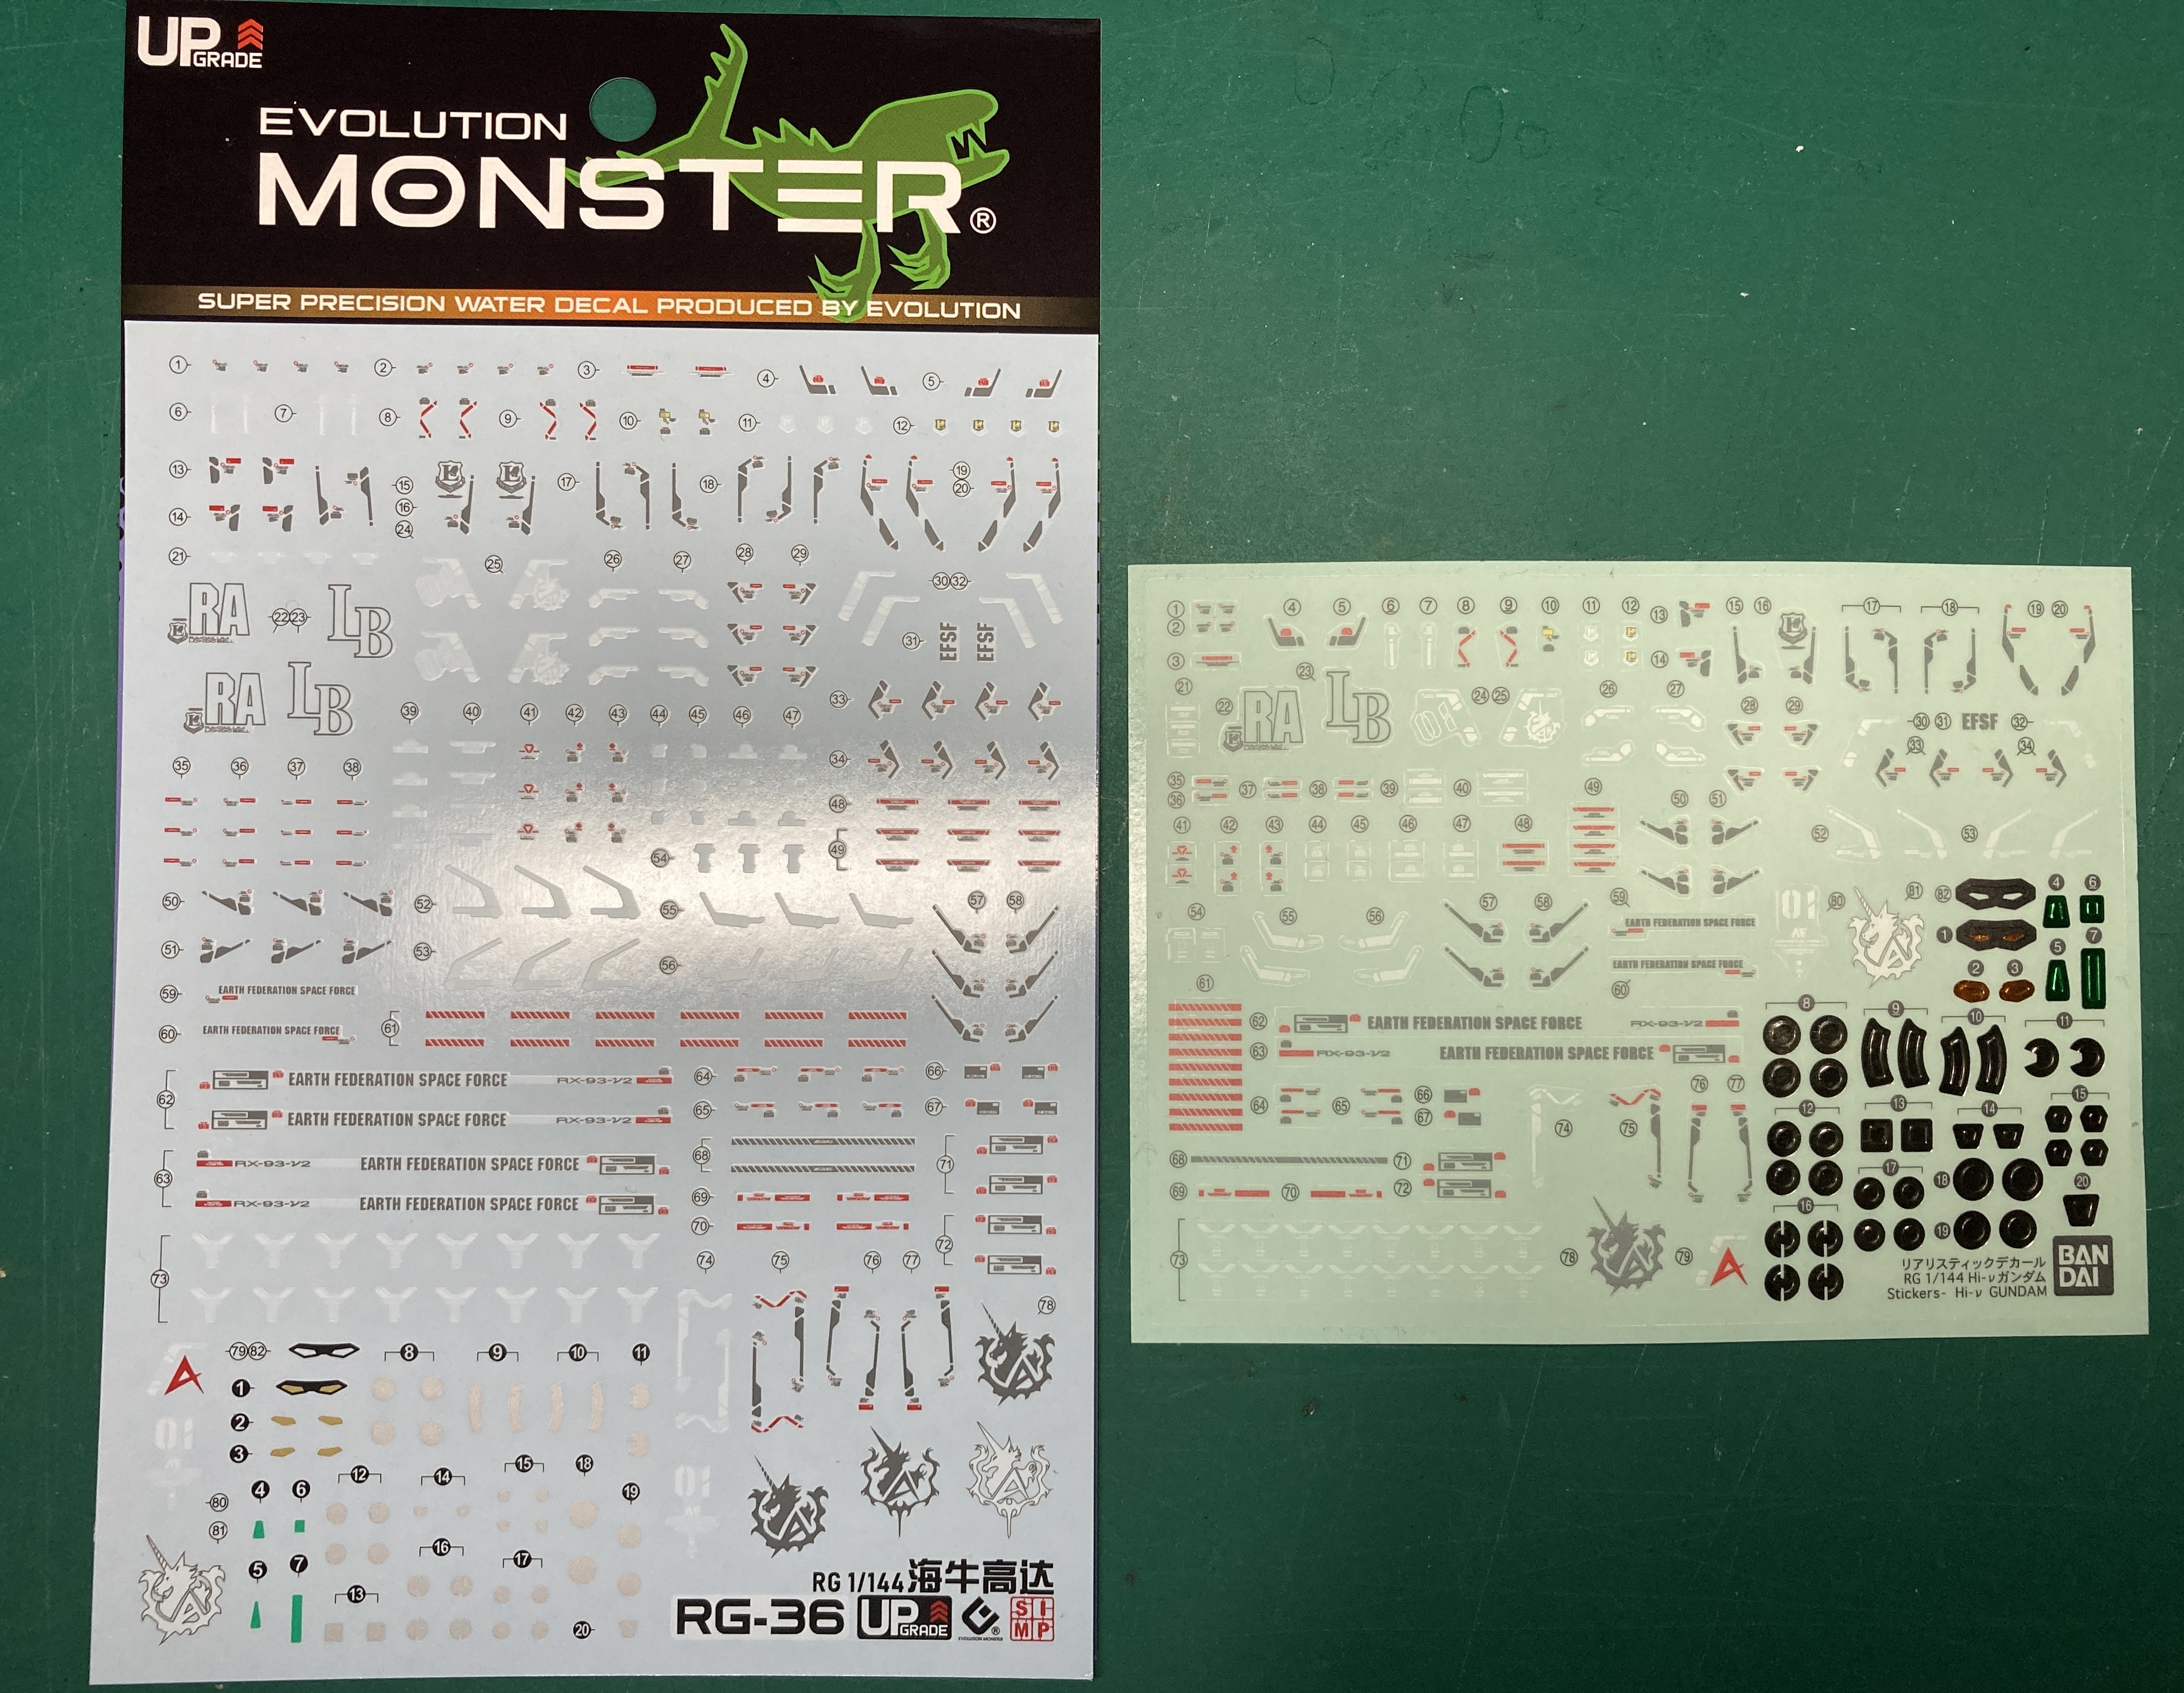

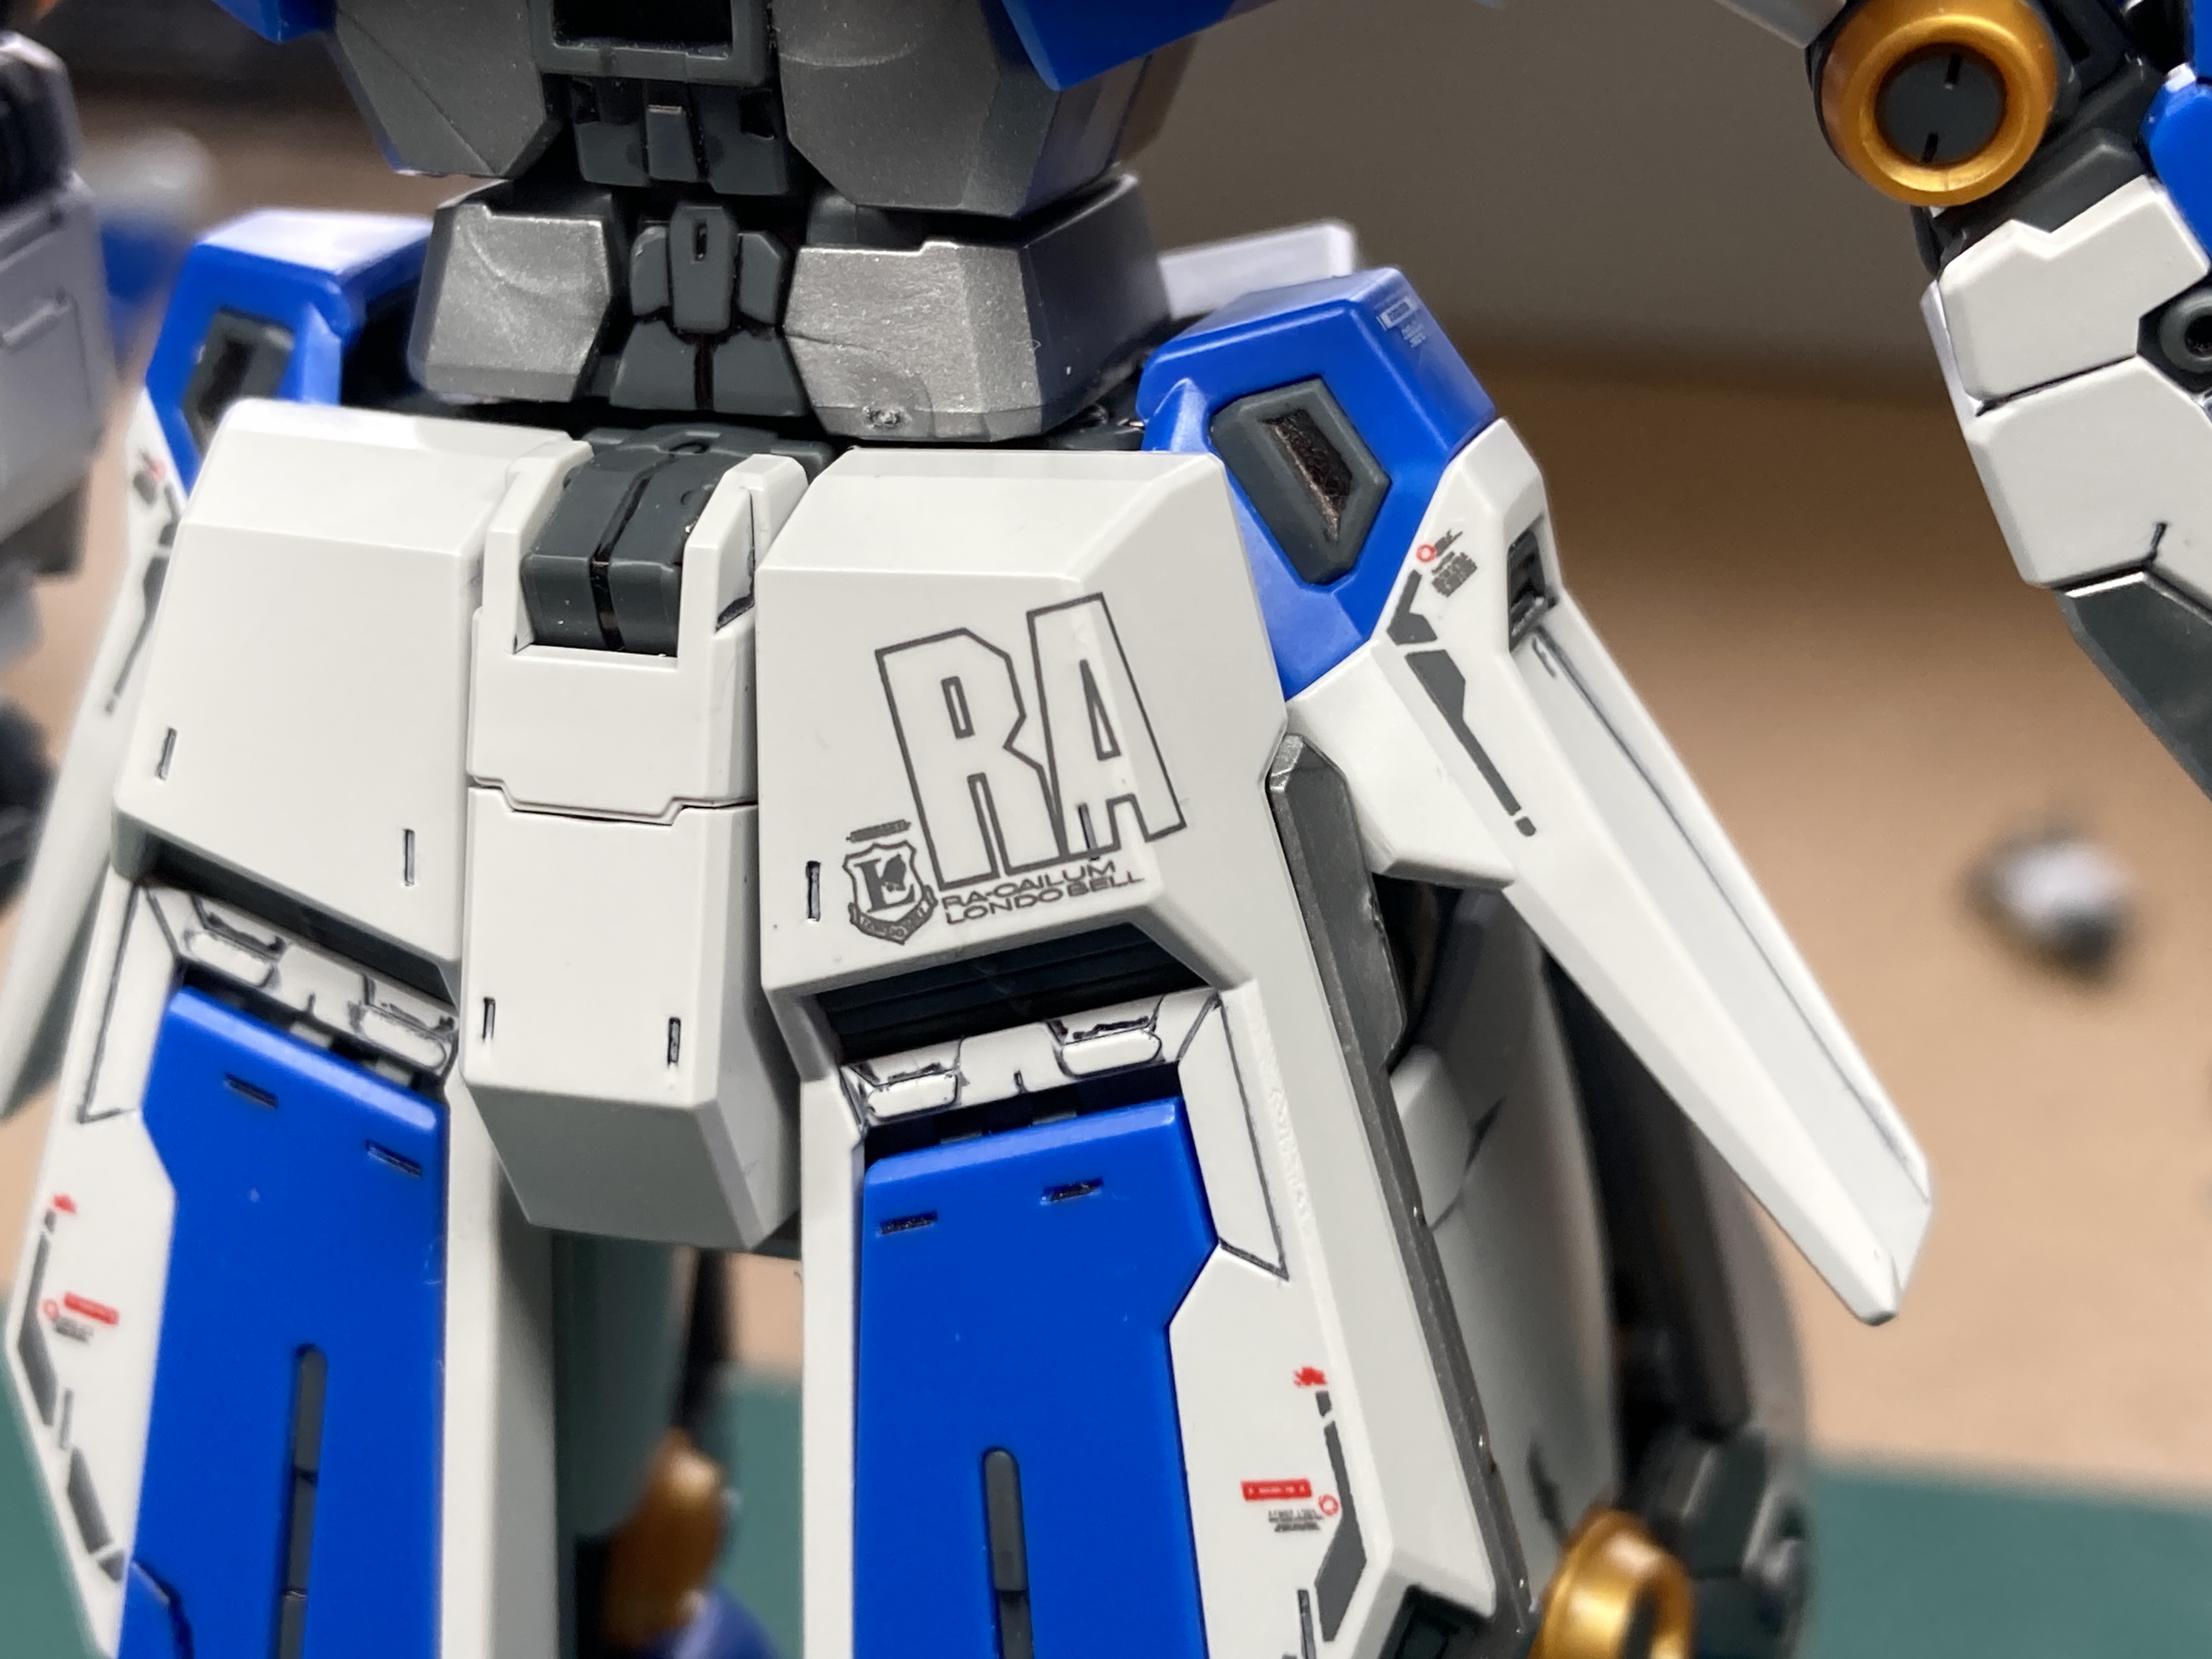
So the question was, go with the stickers included with the kit or use some 3rd party water-slide transfers? Easy, I much prefer the finished look of the water-slide transfers. While a little more faf to apply they look much cleaner. While the stickers look good over white, over the darker colours you can really see the backing plastic.
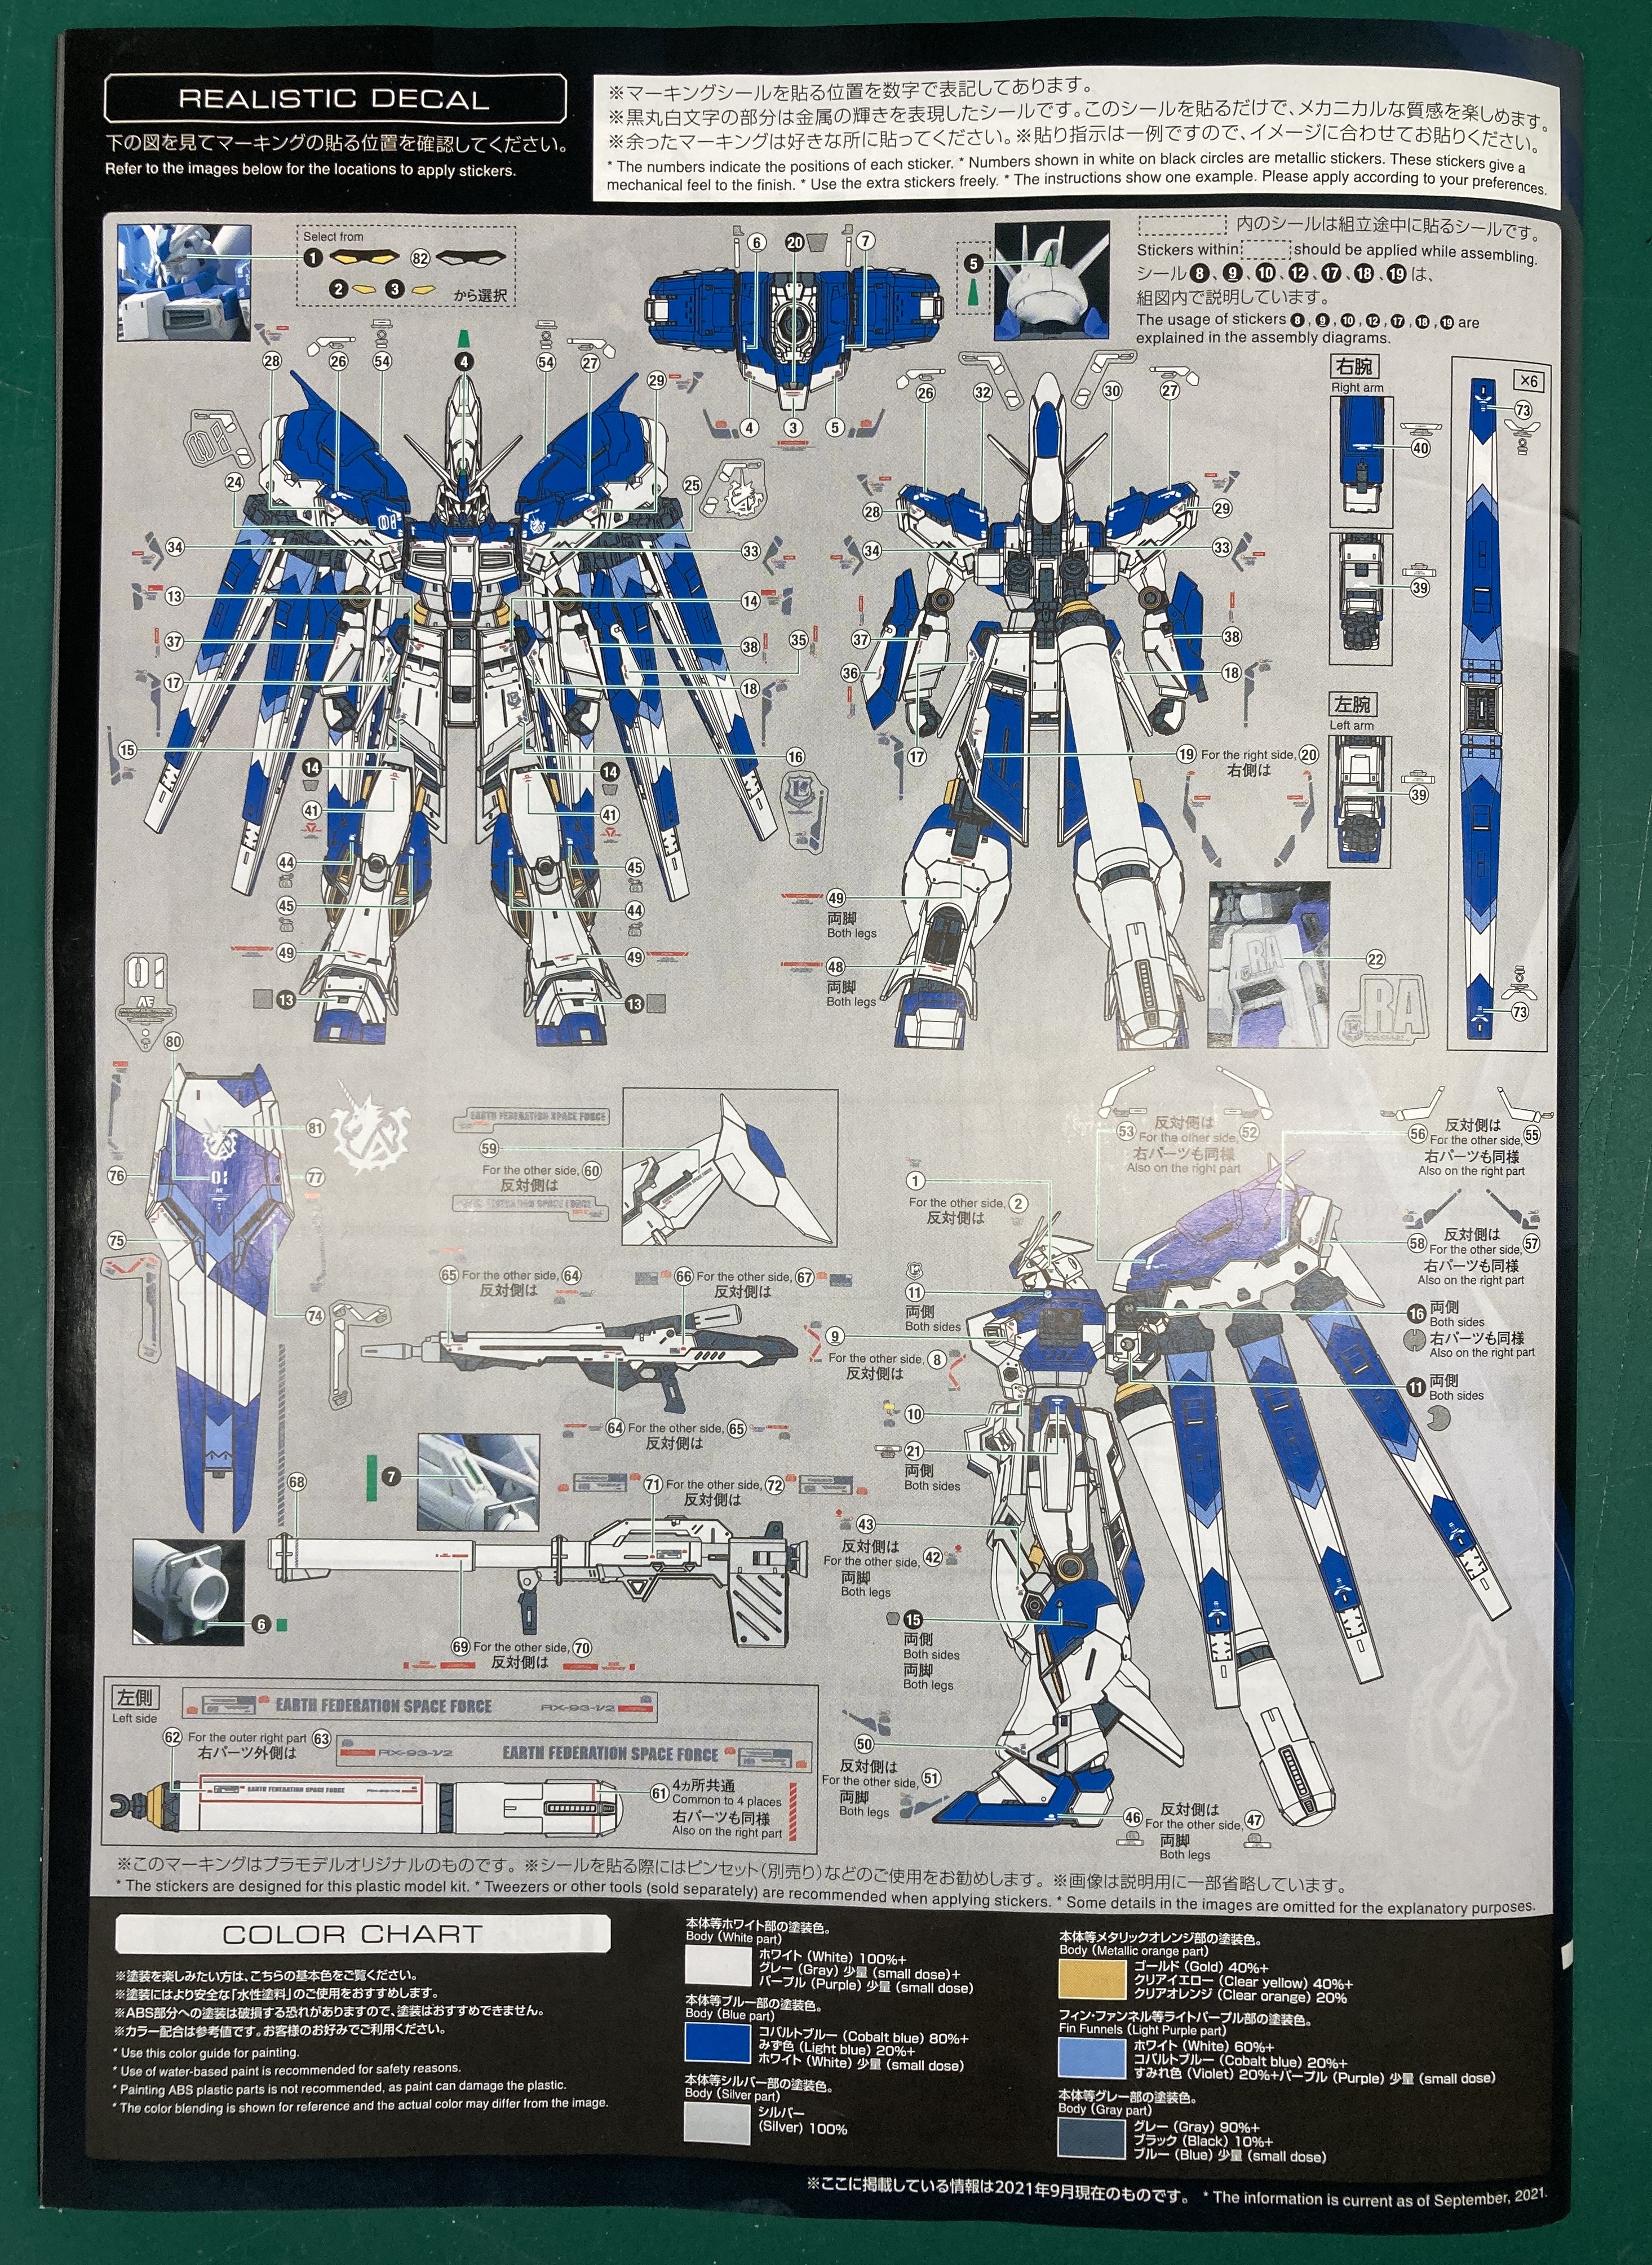
What I really like with the Evolution Monster decals is that they are numbered to match the stickers, and since the instruction book also has a guide for applying the stickers, you can use that same guide for the transfers. You also get a few spares which can be handy.
I used Micro Set and Micro Sol to help set the transfers, a precise pair of tweezers and some cotton buds to absorb extra moisture and to gently roll over the applied transfer on the model to make sure it’s flat against the surface.
A Tools Review
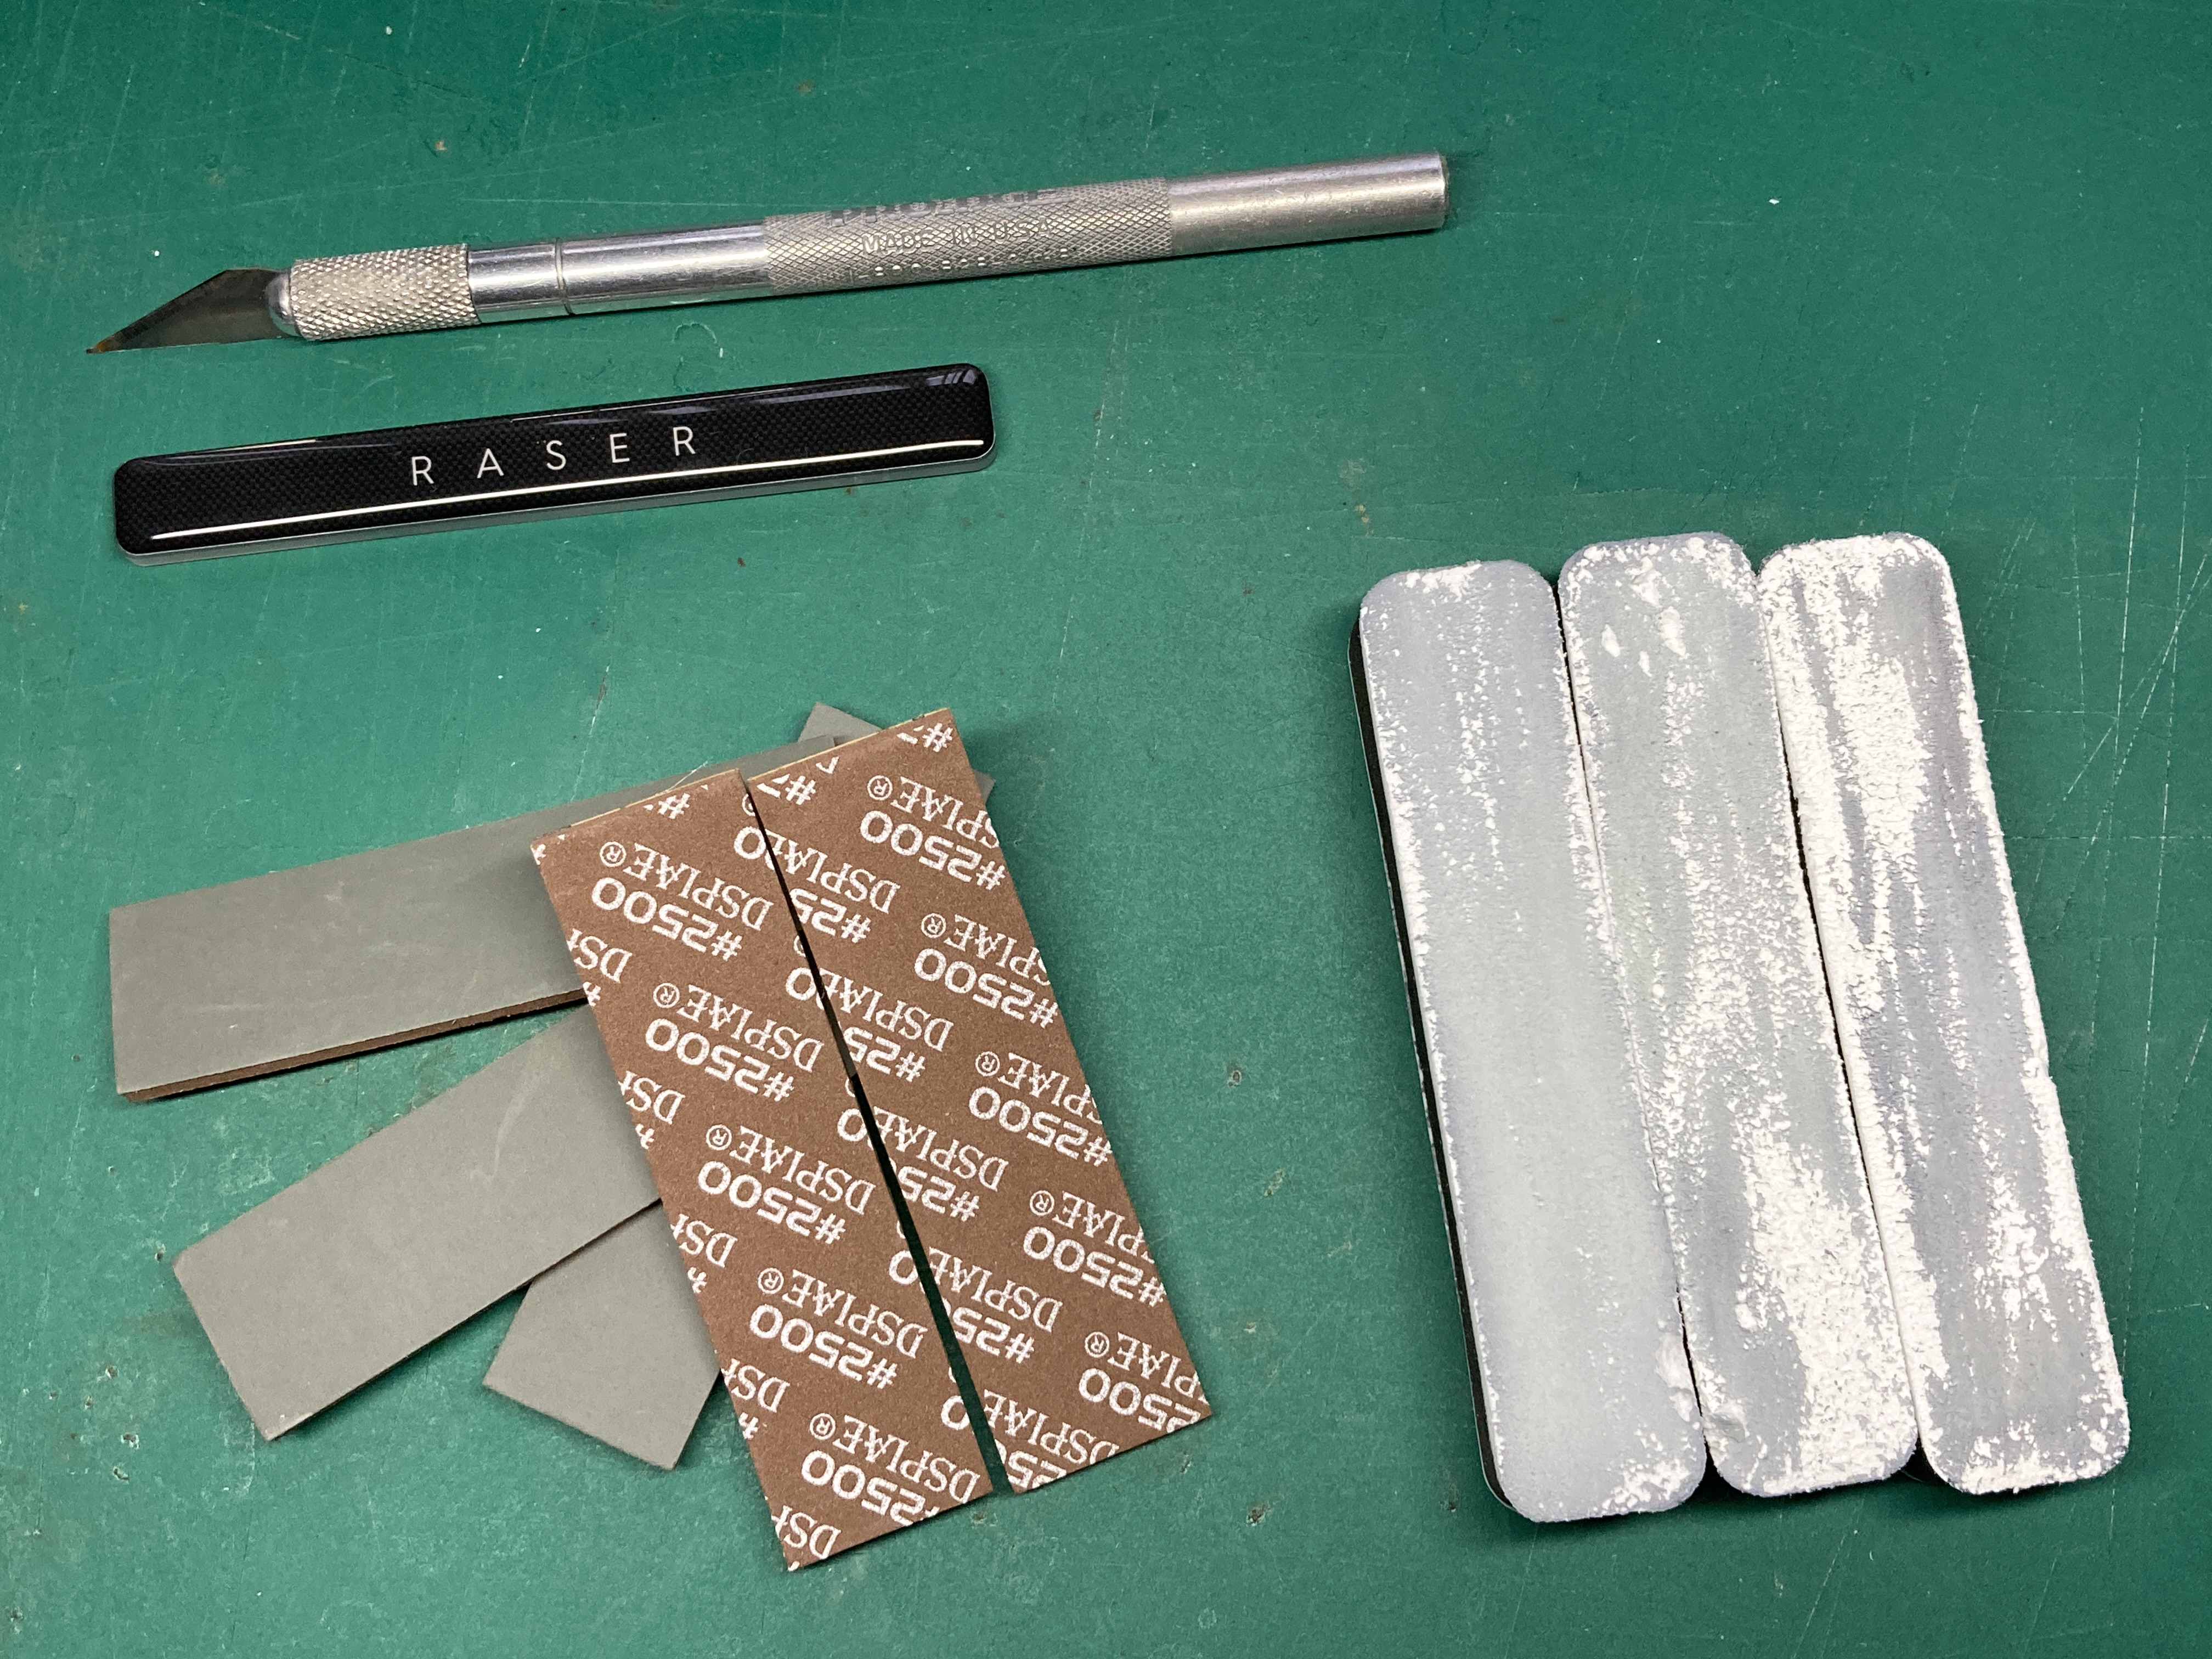
I’d say the star of the show was my Raser glass file. It removed all of the sprue gates or nubs very easily without scratching the plastic, to a smooth finish. I did find it a little too big in a few places but they were very rare and my hobby knife was used for those, since all of them were hidden after assembly.
The Balancer wasn’t really needed for its original use which was to remove any glossiness from freshly filed areas. For me it’s main use was to remove marks and mistakes left by the panel lining pens. So basically it was a glorified 2500 grit sanding sponge (3 for £5.99). As you can see in the photo I wore all three out. I actually ordered (for my next Gunpla project) some sanding sponges which were around £4 for 5.
The clippers performed as expected so no need to comment on those…,which I just have, oops.
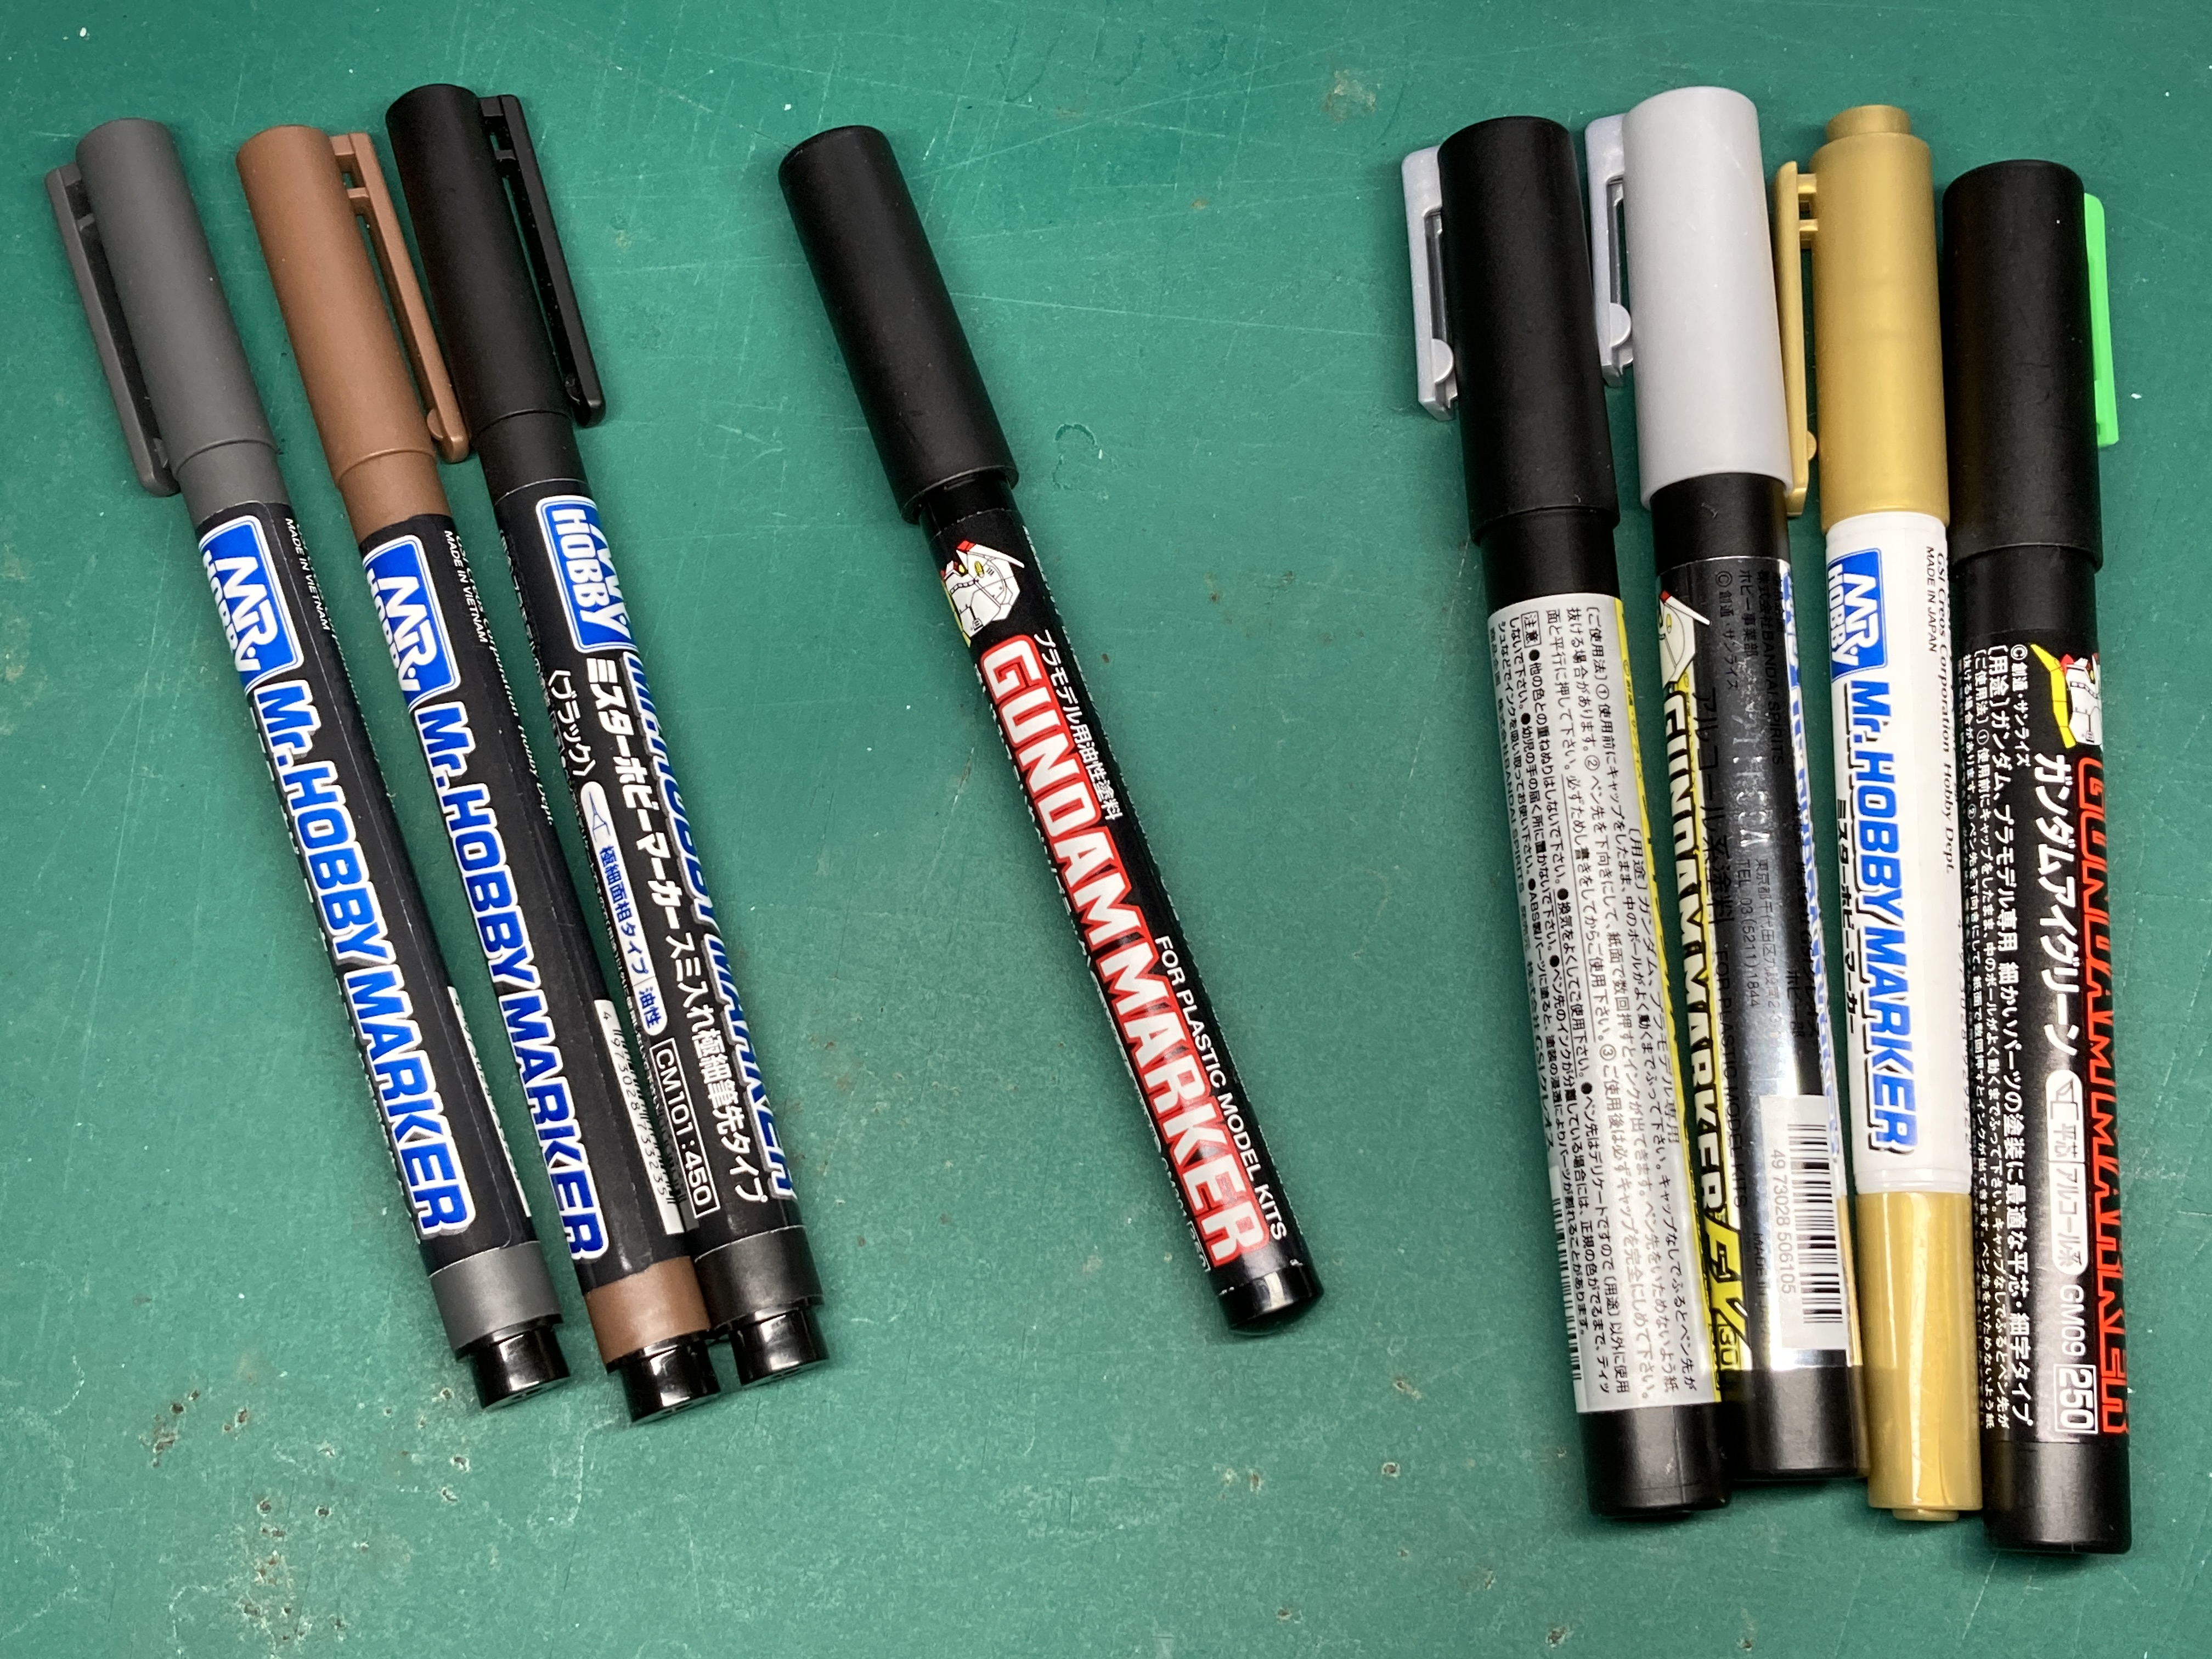
So I’m a very big fan of the brush pens. The brush is fine enough to get into all areas and fit into the panels with very little problem. It’s mostly just a skill issue on my part as my hands aren’t as steady as when I hold a paint brush to paint miniatures.
I’m not a big fan of the pour type capillary action pen. I find it quite messy with a lot more clean up to be done since it leaves little dots after each application. This was the first Gundam marker I bought and I’ve tried it on several kits. I don’t think I’ll be getting any more.
The metallic markers really look good. The one flaw I see is that most of them have wedge type nibs which makes using them for small crowded areas very difficult. I’ll still continue to use them though.
Next time I’ll post a few beauty shots of my completed model and that will be it for this project. It’s been a lot of fun these last couple of weeks and it’s definitely a hobby I will continue to pursue more of in the future (I might already have a few more kits waiting).
-Stop Press-
This project won a Golden Button and was featured in this episode of the XLBS and in this Community Spotlight article here. Thanks and I’m happy I could make John scream.

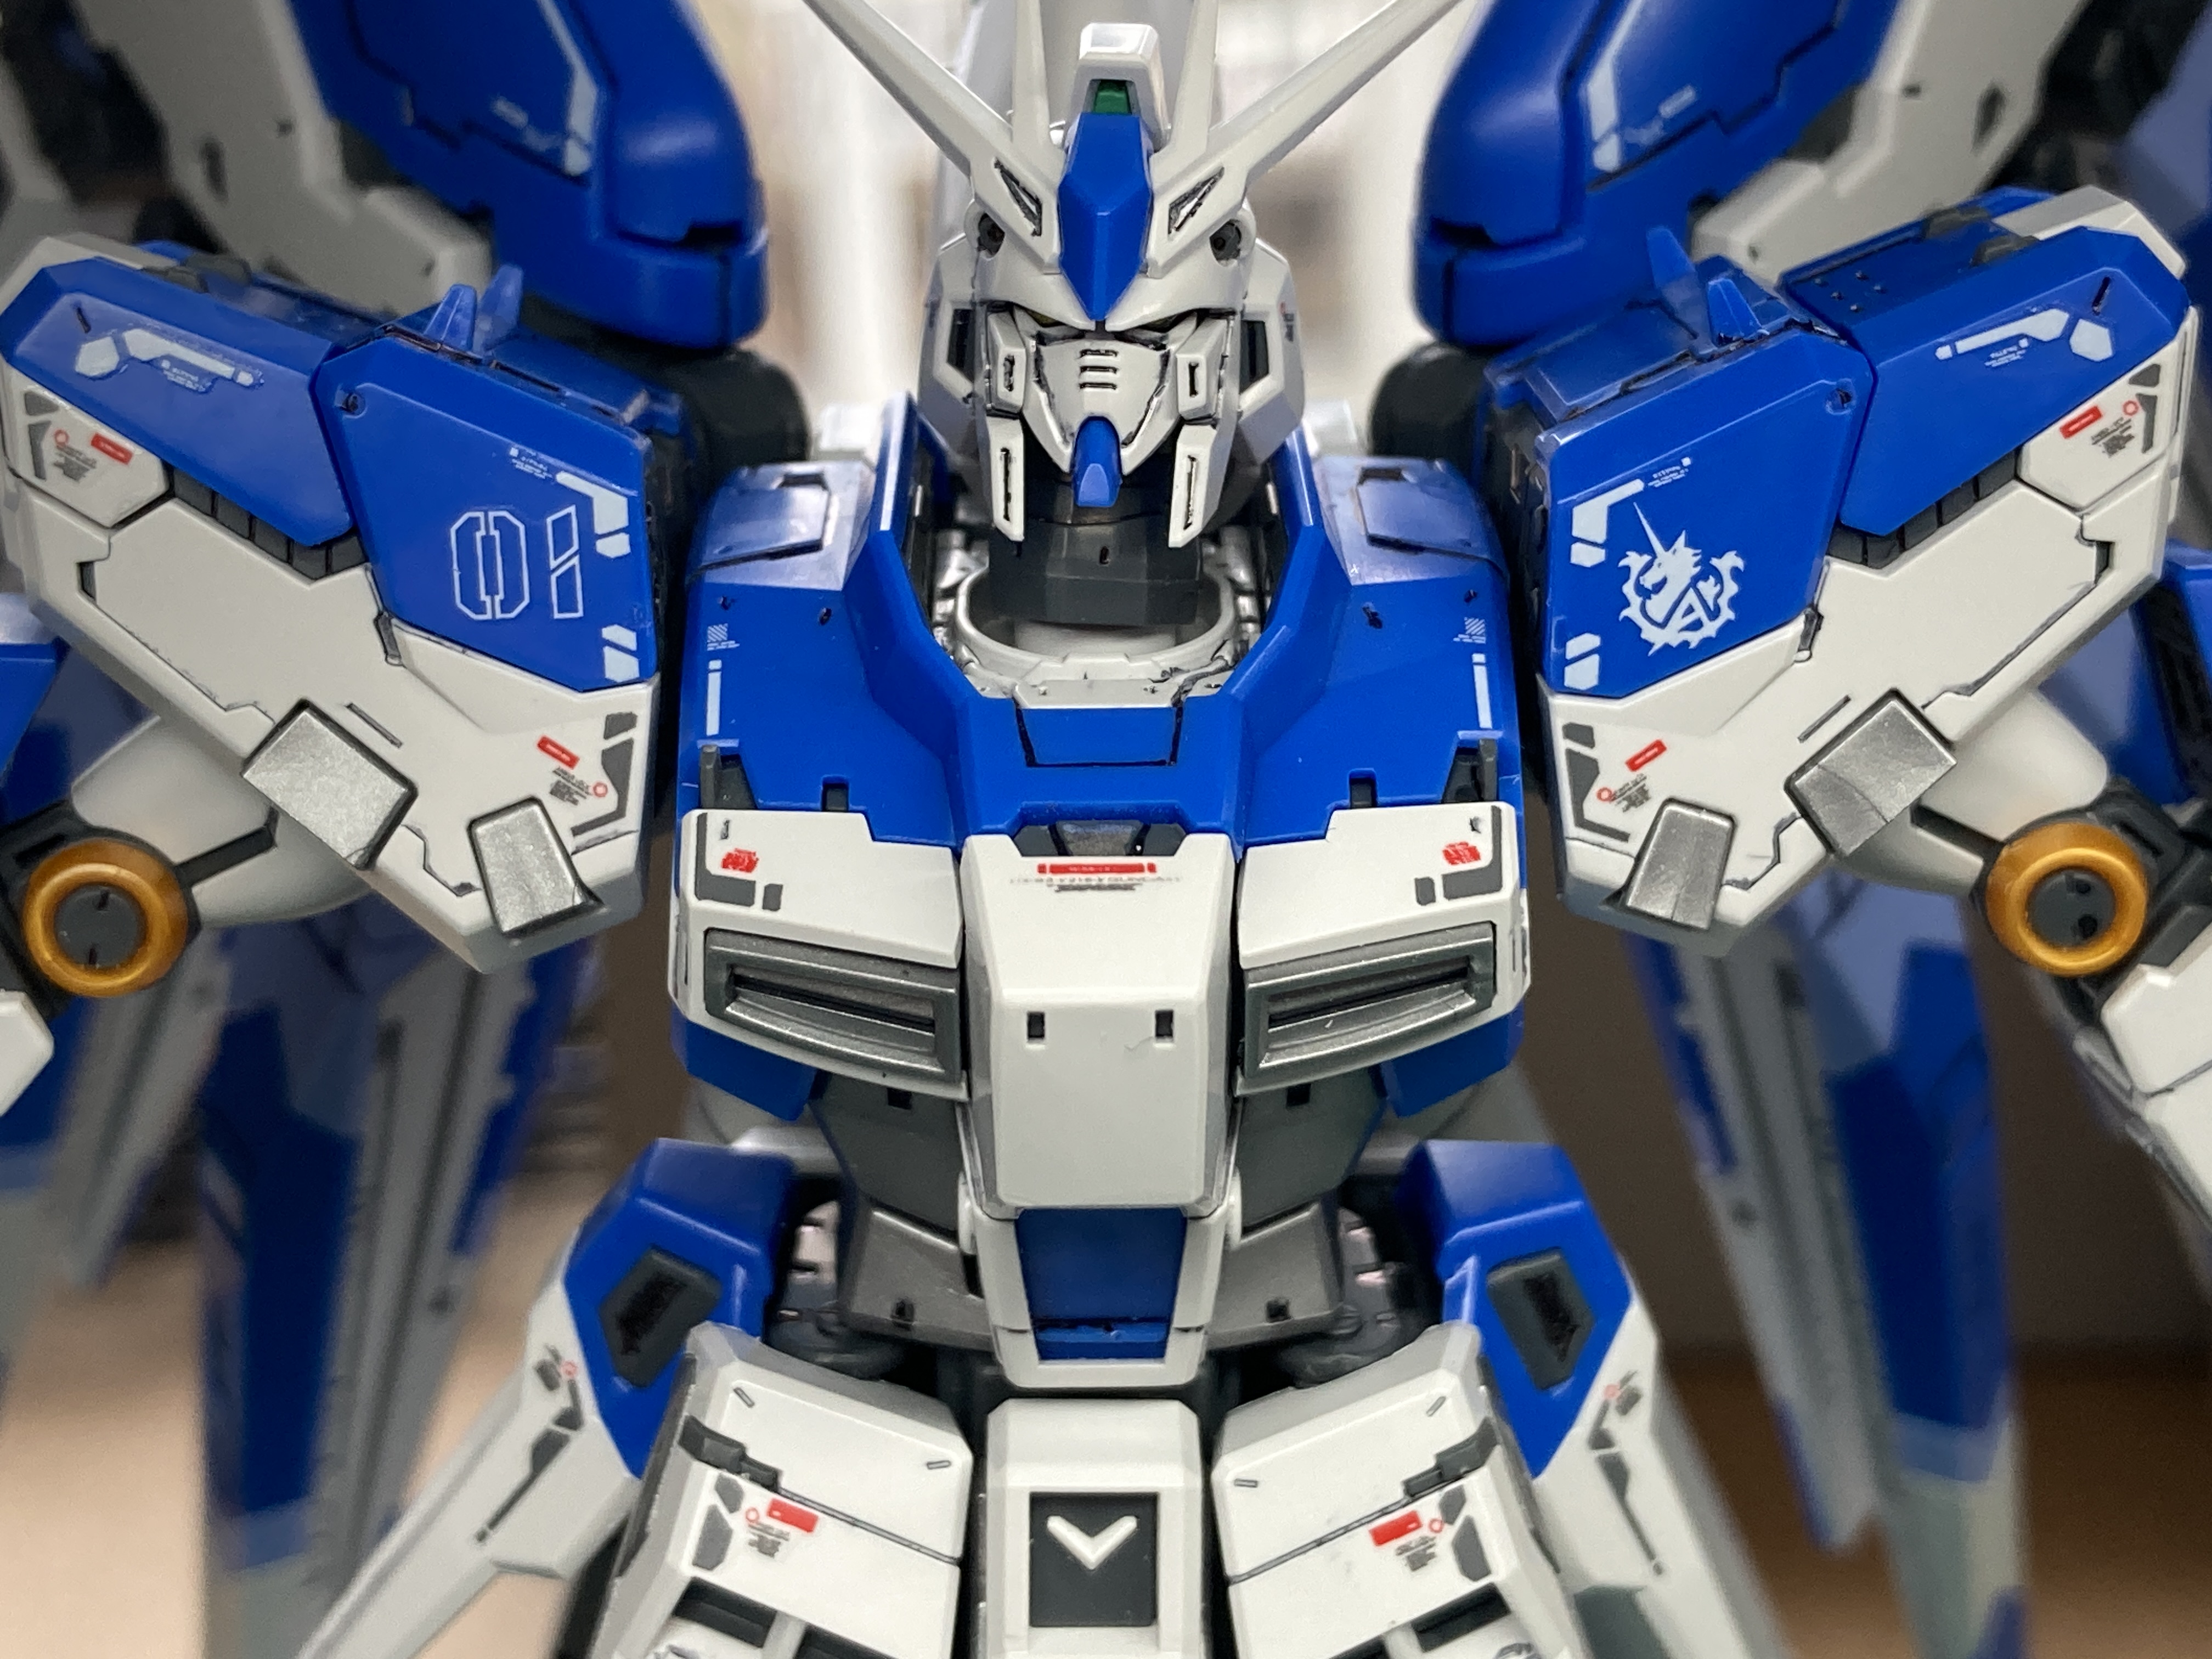
The Finished Gundam

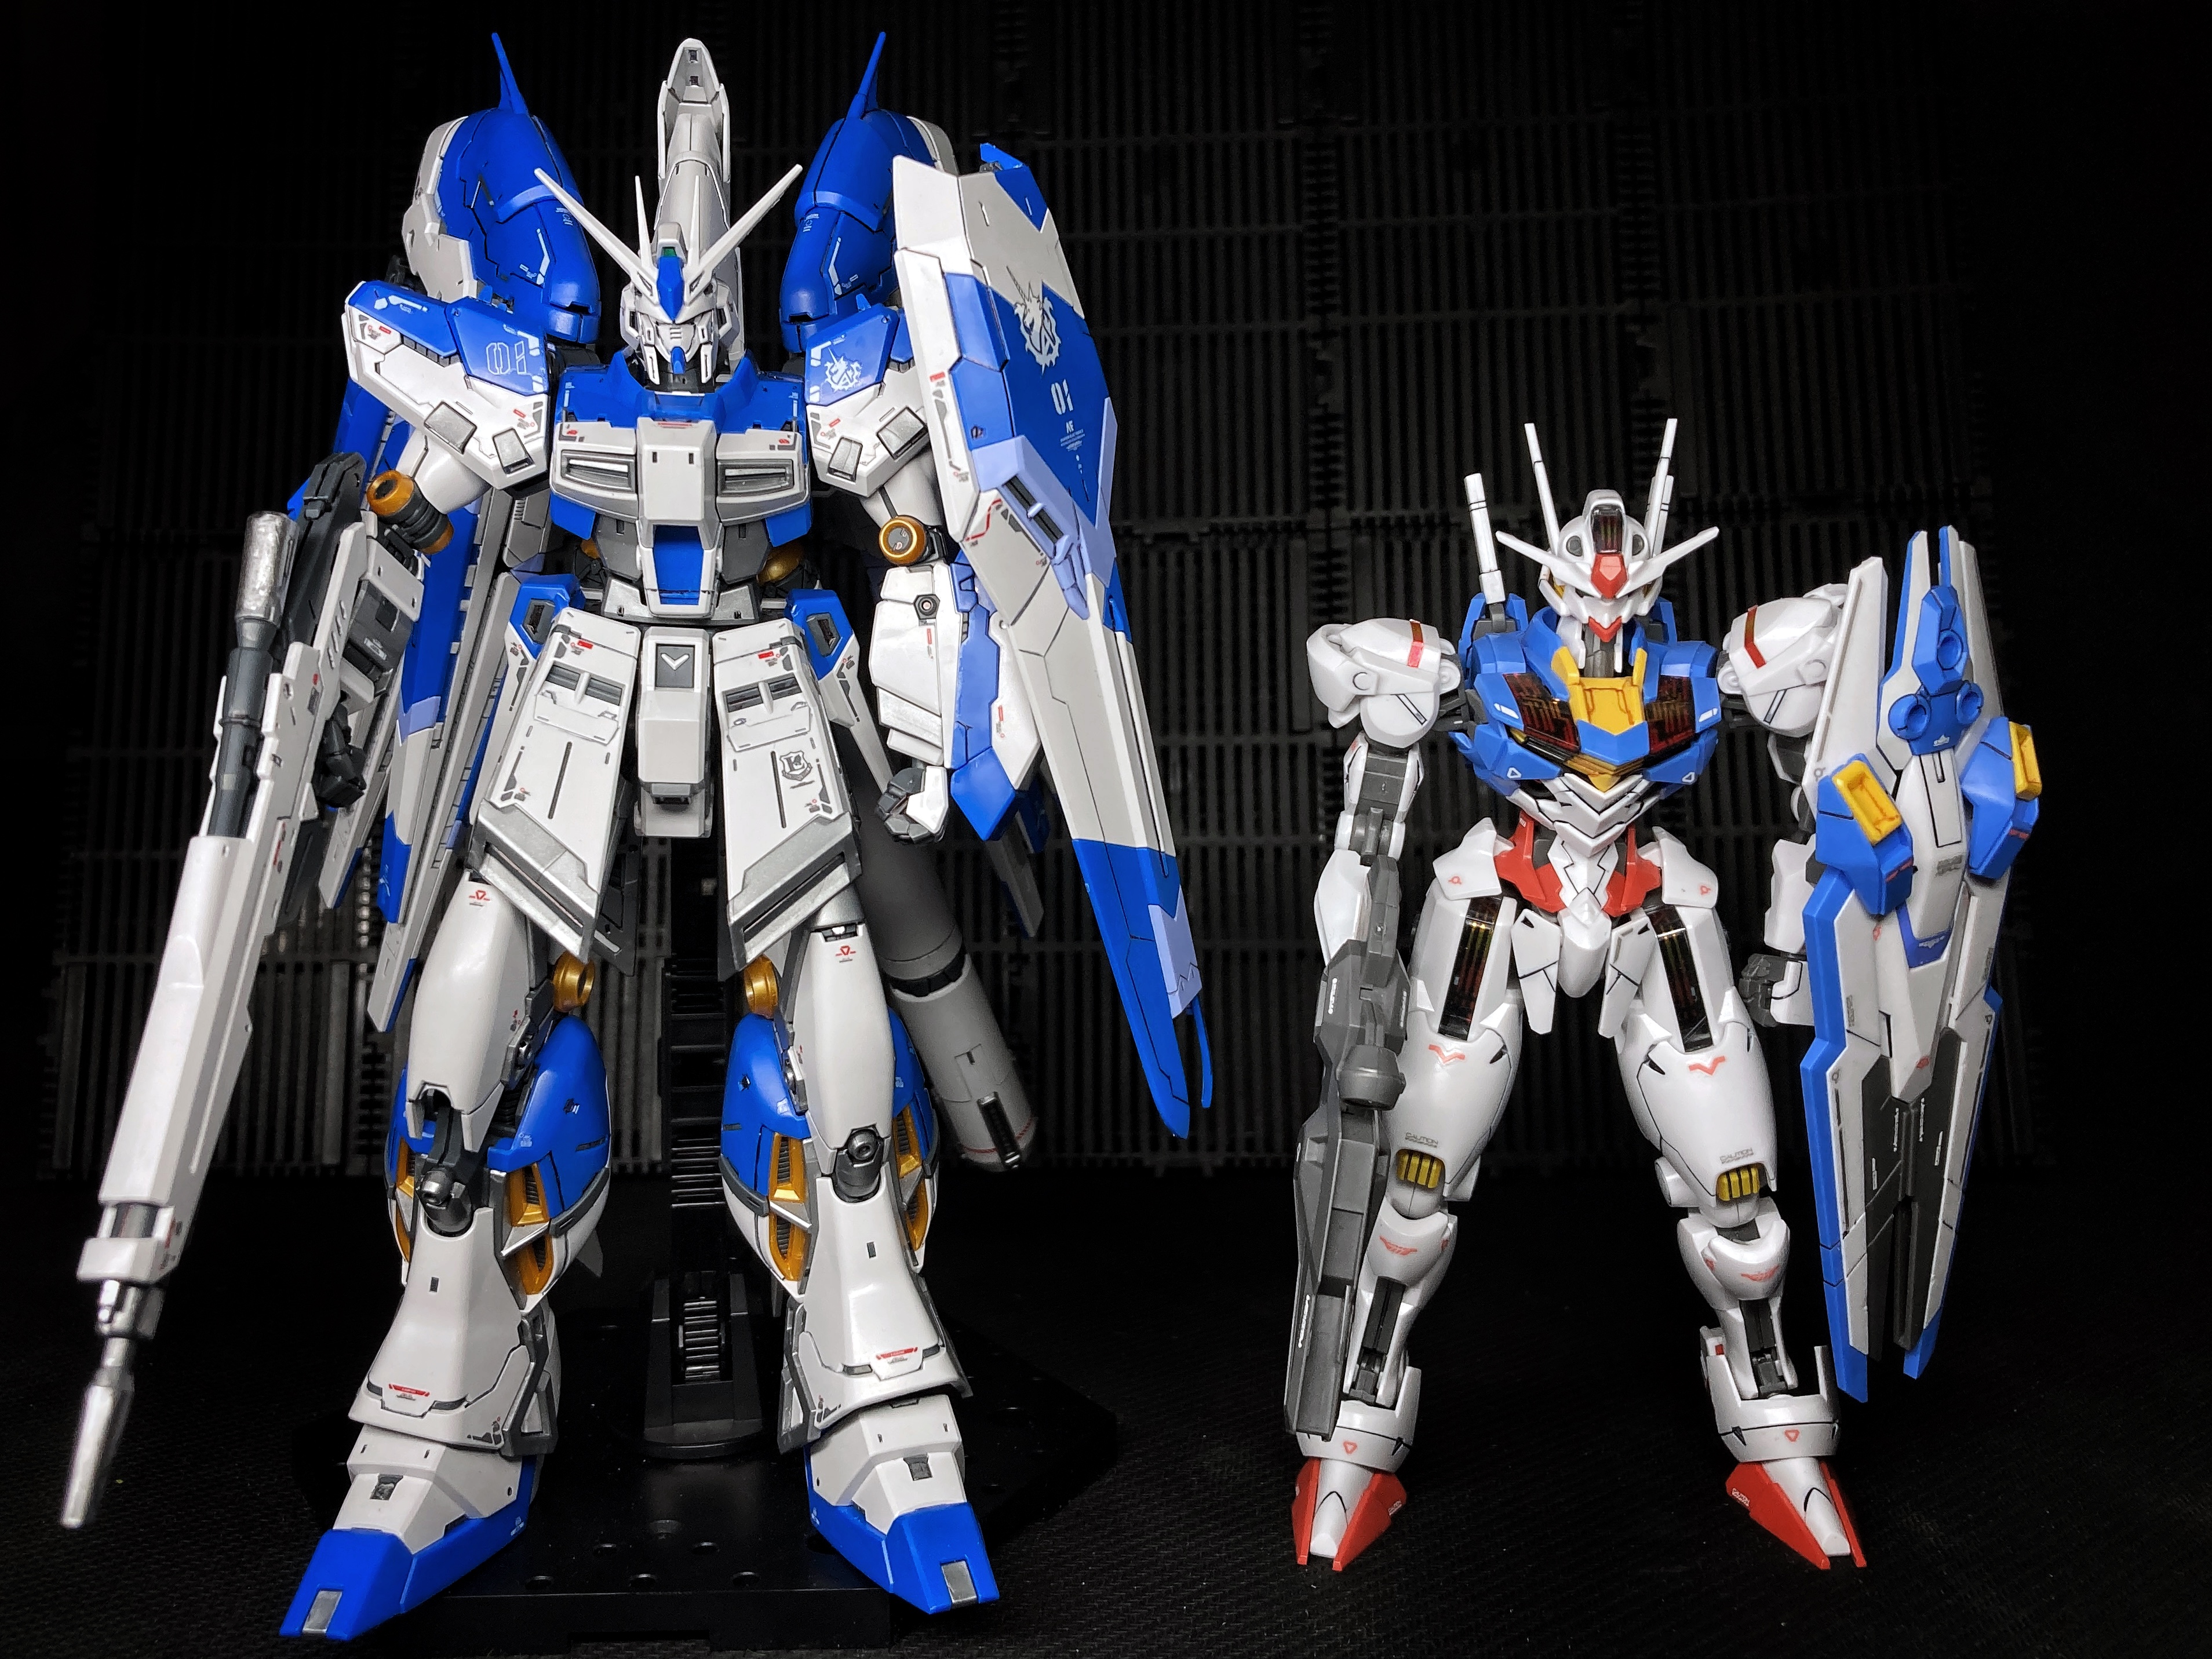 Here’s a comparison with an HG Gundam Aerial to show off how big the Hi-Nu is. Both of these are the same 144 scale and the Aerial is a typically sized Gundam.
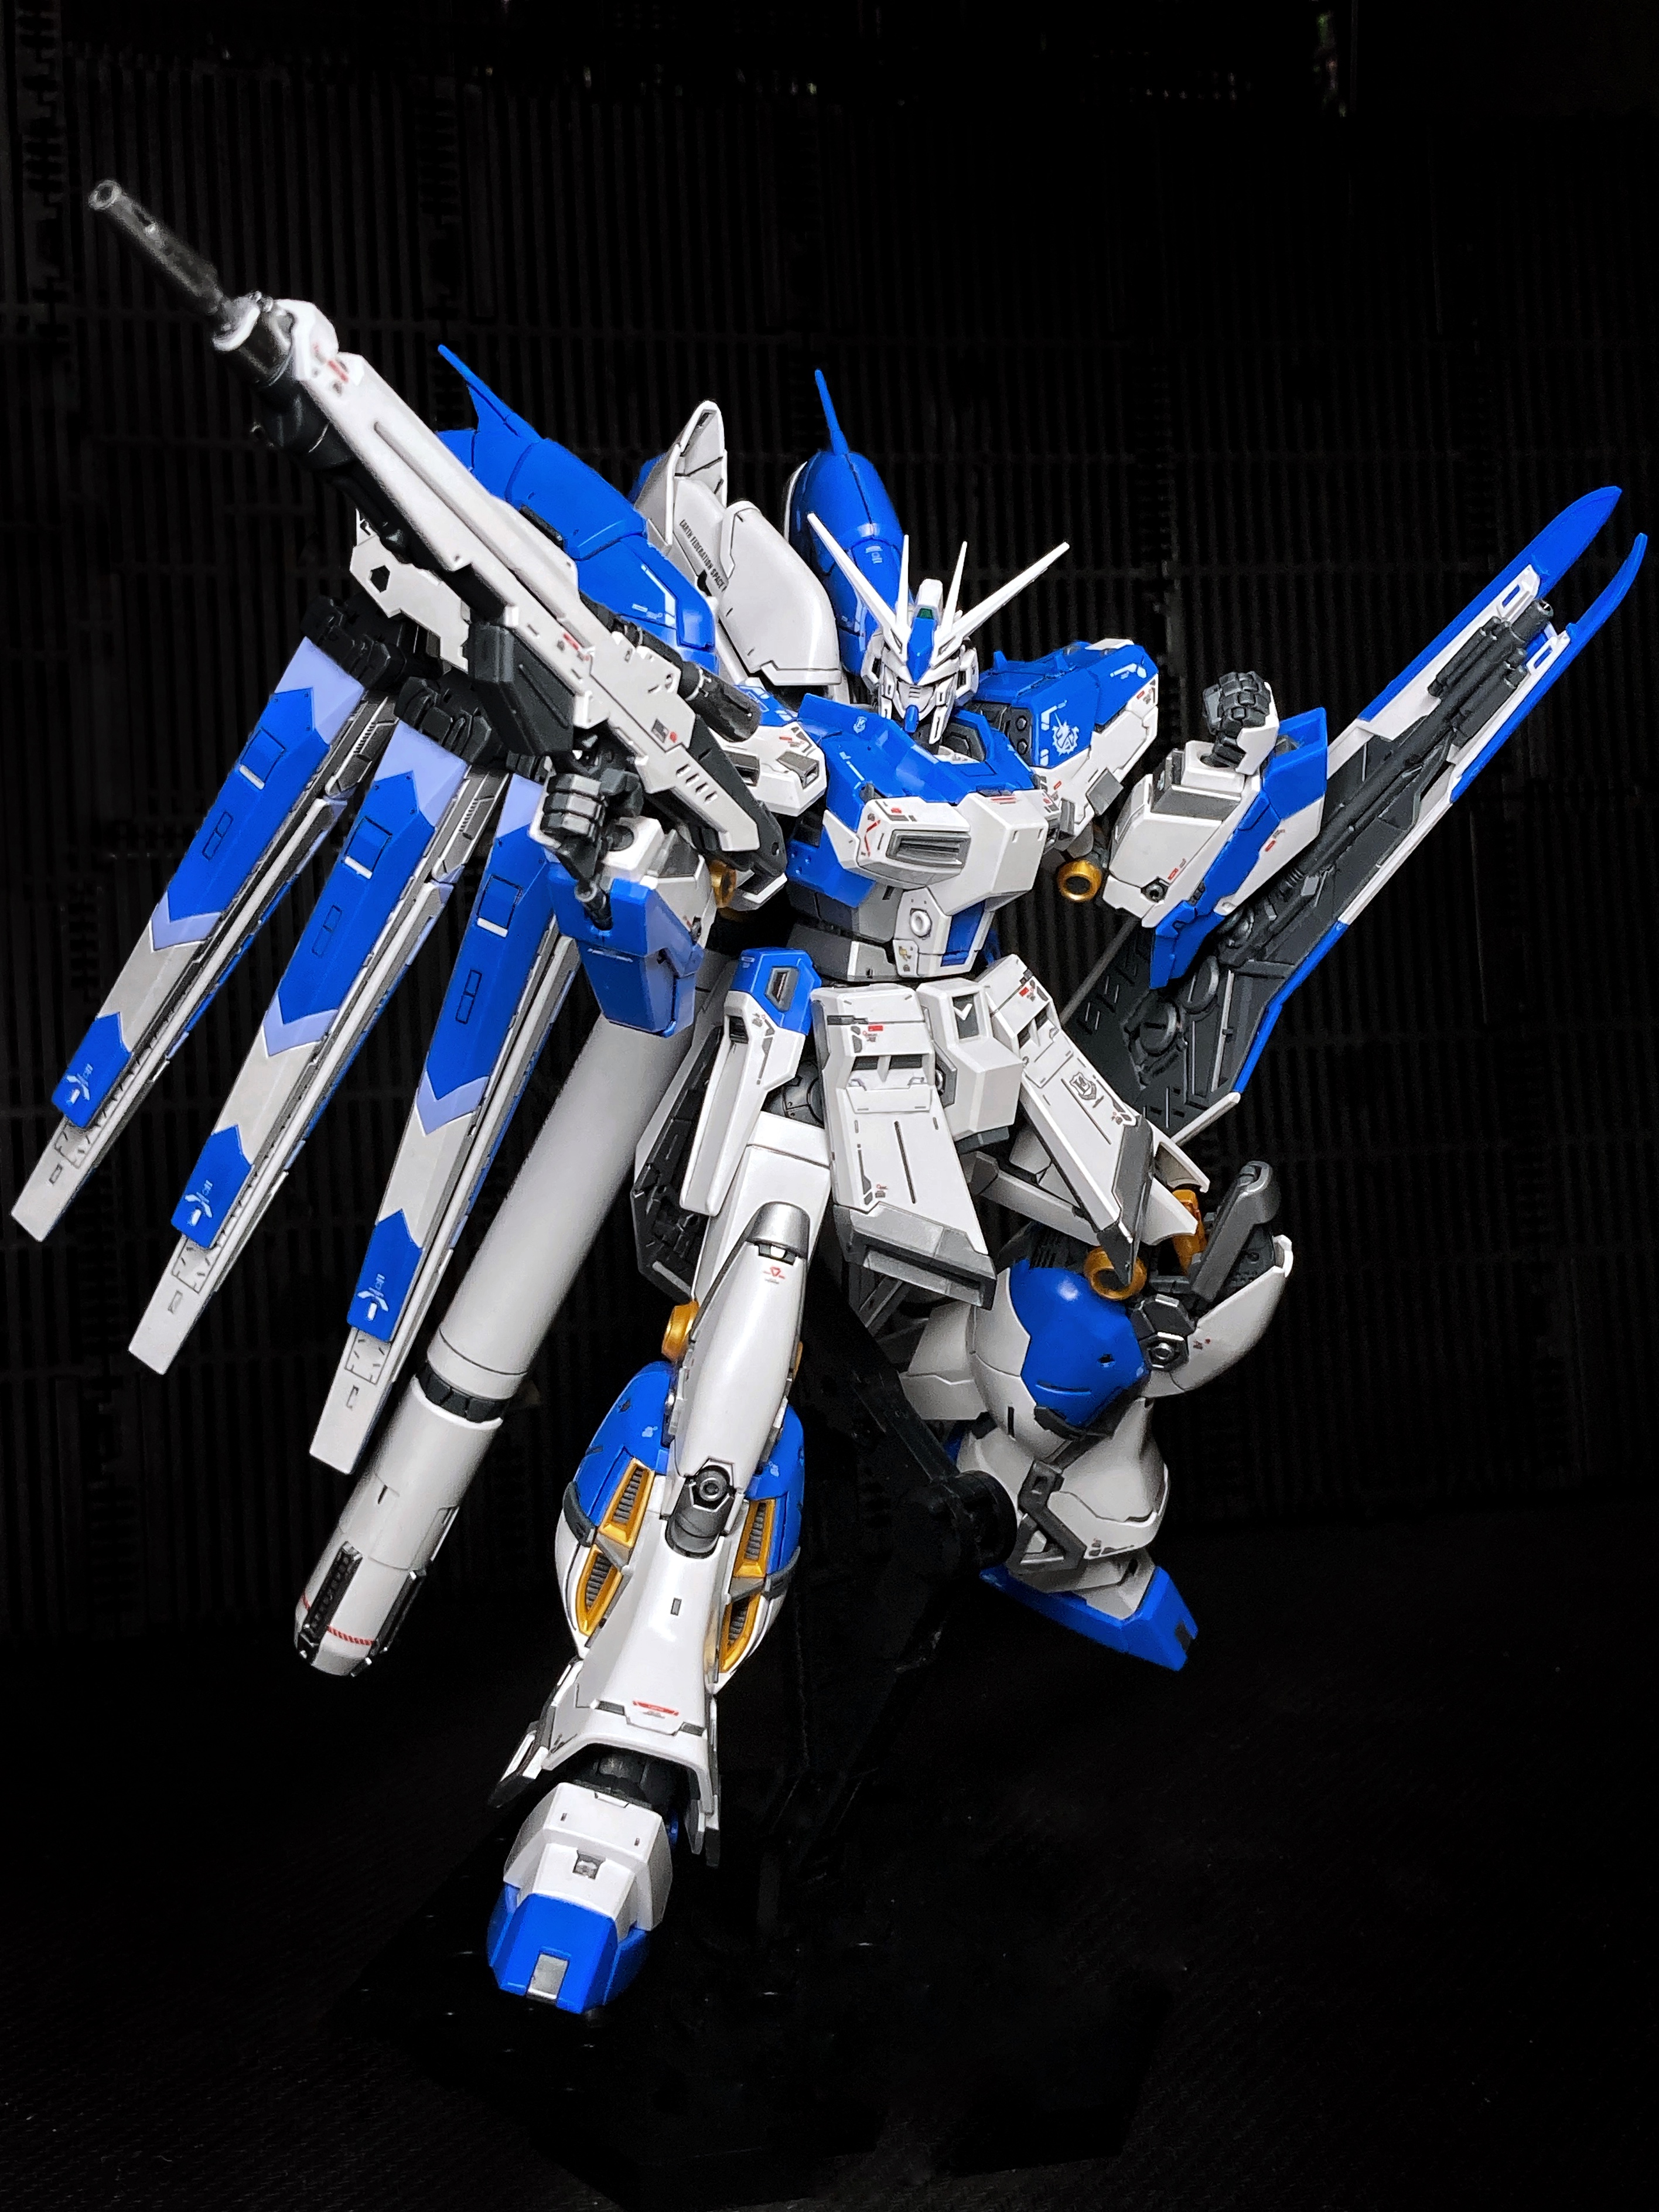


![StarCraft Tabletop Miniatures Game Pre-Orders Live Now [Updated]](https://images.beastsofwar.com/2026/03/starcraft-tmg-news-cover-600-338.jpg)


![Mounted US Cavalry On Kickstarter For Dead Man’s Hand! [Updated]](https://images.beastsofwar.com/2026/03/us-cavalry-main-600-338.jpg)


