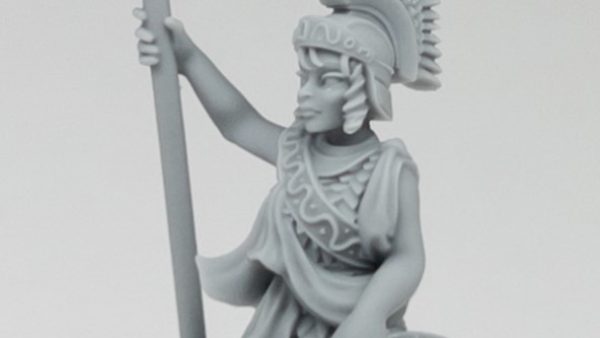

![Atomic Tank – The Robot Wars Review | Fast-Paced 10mm Sci-Fi Wargame [7 Days Early Access]](https://images.beastsofwar.com/2026/01/unboxing-hydra-miniatures-atomic-tank-the-robot-wars-coverimage-225-127.jpg)

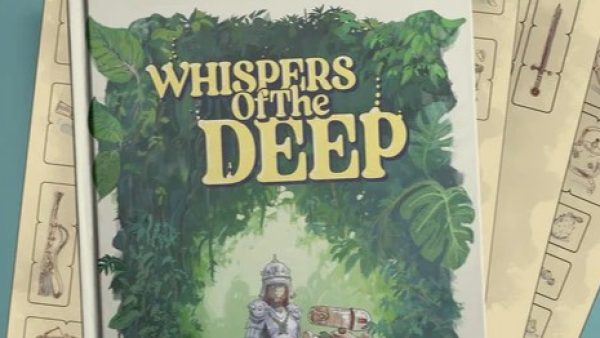
![246 Dwarves in One Box?! | Wargames Atlantic Dwarven Host Unboxing & Review [7 Days Early Access]](https://images.beastsofwar.com/2026/01/unboxing-wargames-atlantic-epic-fantasy-battles-dwarven-host-coverimage-225-127.jpeg)


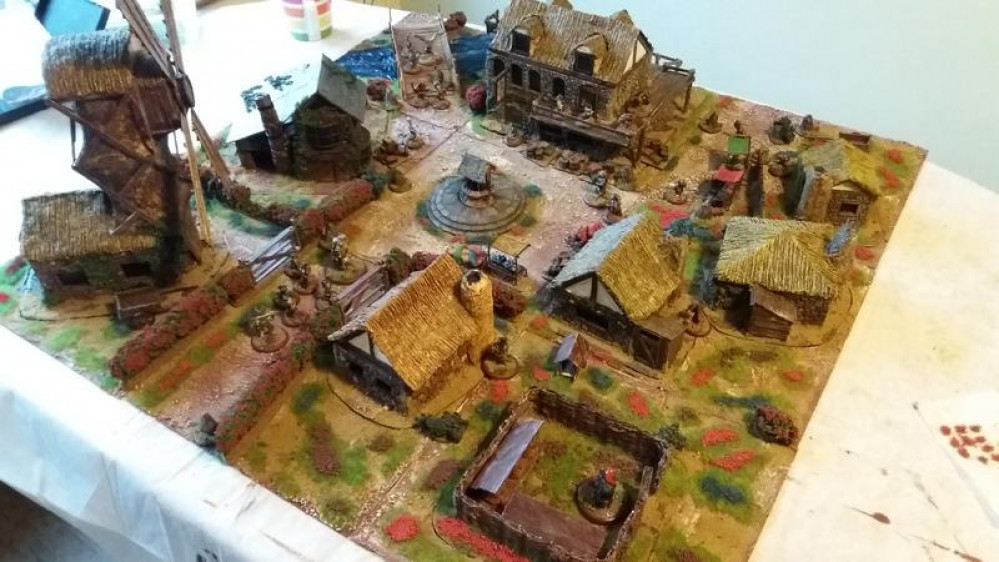
Soldado’s Burrows and Badgers terrain – Part the second! The Mansion of Marneous Blackwick!


Recommendations: 914
About the Project
This project started out as me building some terrain for use at home to get my wife and daughter into gaming, now its become a bit of a monster part one (the village of Nutting Hill) went to Salute '19 and because people liked it, it has spawned part 2 "The Mansion of Marneous Blackwick!" Im hoping that I will again be able to take this to Salute for 2020.
Related Game: Burrows & Badgers
Related Company: Oathsworn Miniatures
Related Genre: Fantasy
This Project is Active
Its going up in smoke!
 So the roof is done, in the same way as the well, but without the rounding provided by the nail clippers
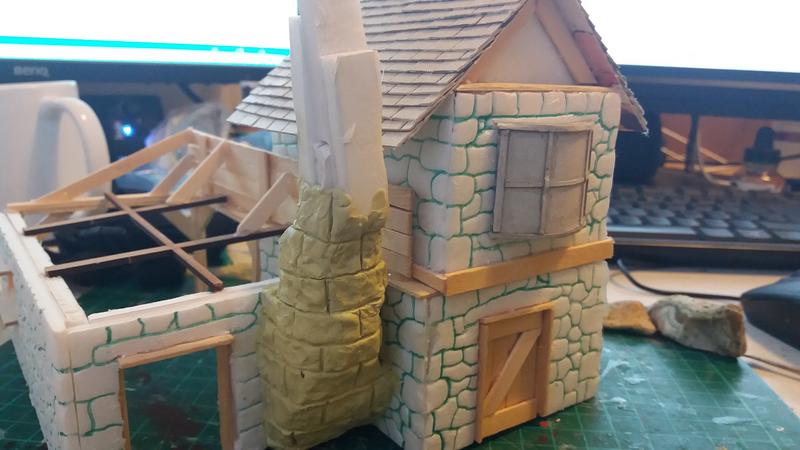 And onto the chimney, instead of the daub effect for other chimneies in the set, Ive gone for a rickerty stone effect, The form is off cuts of foam board and a milliput skin again textured with a real stone and carved with a sculpting tool.
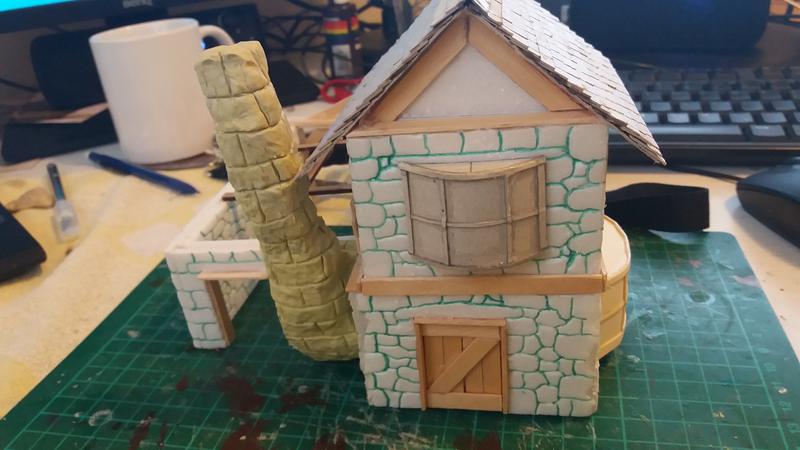 Now all that remains on the cimney is to put some support collars onto it once all the other bits are done.
Buildin on up...
Progress continuemmms
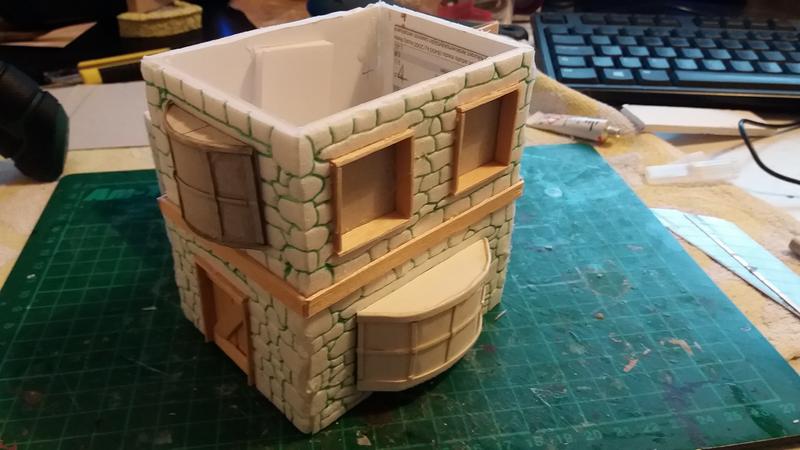 Adding a first floor
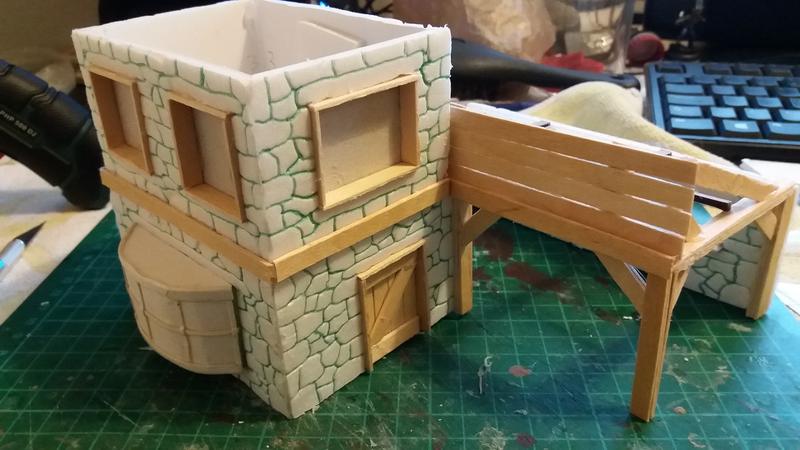 still the first floor
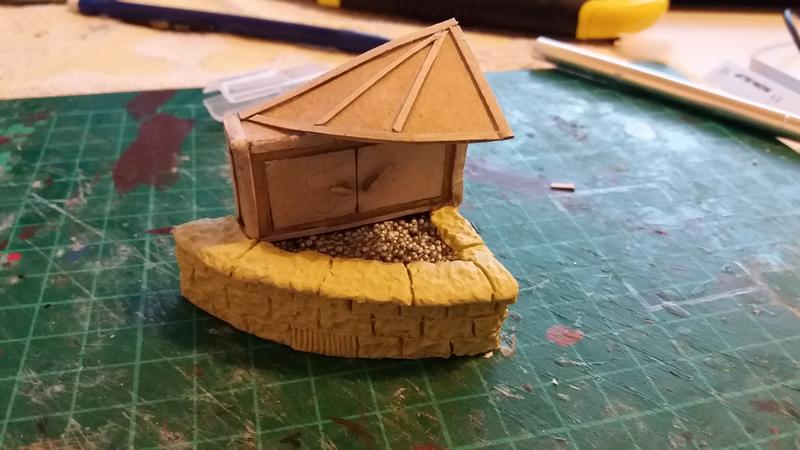 The forge is complete
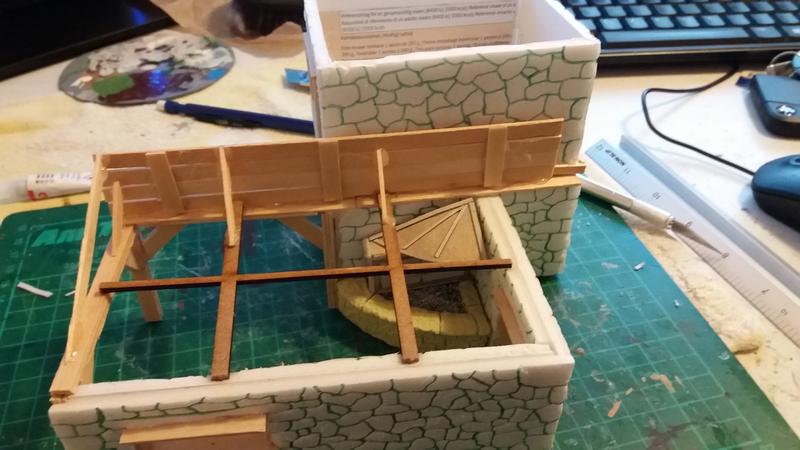 But will we be able to see it when the roof is on?
Forging on...
And beating about the bush….
So while I prevaricate on how to do the terrain board itself heres some bushes
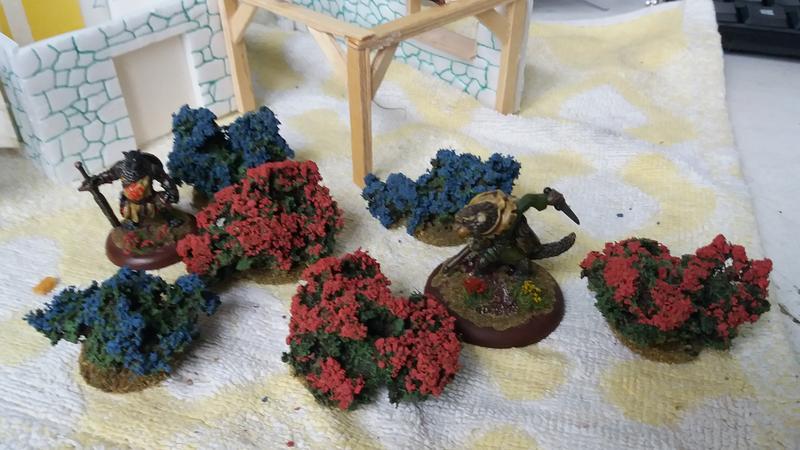 Heres what we end up with
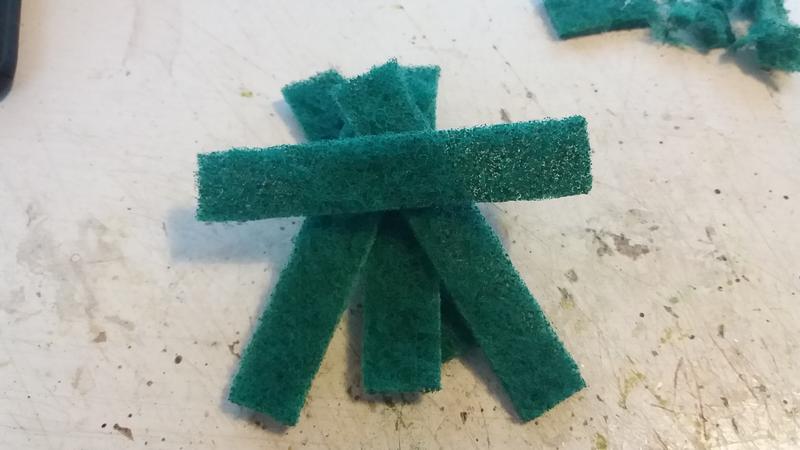 Start by cutting a scouring pad into strips, Ive cut these to be about 10mm wide
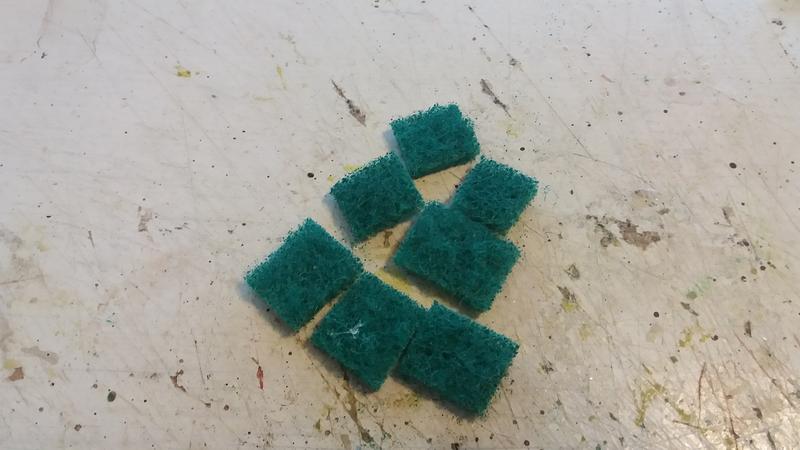 Then cut into not quite squares, the bigger the bushier but over 20mm and theyre awkawrd to keep upright while the glue dries
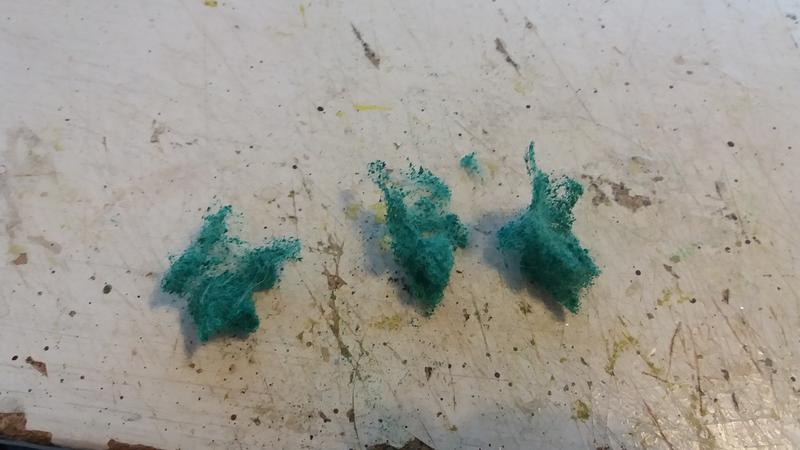 Tease the squares apart, you'll need about 3 per bush
 Hot glue the 3 bits together and the to a base.
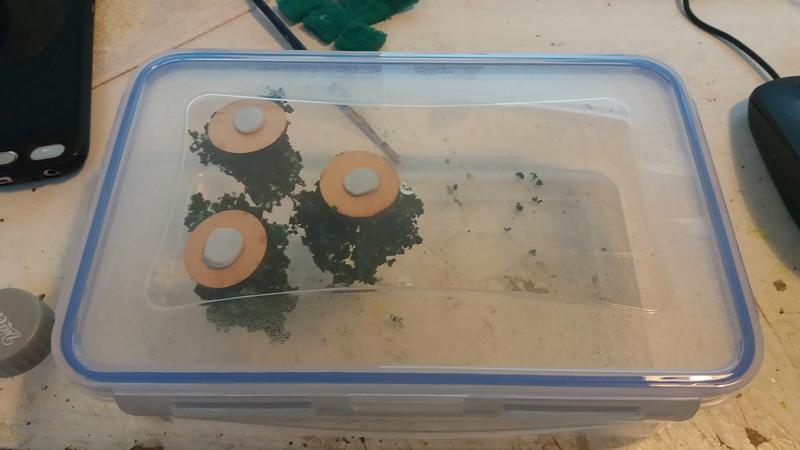 coat in pva and sponge bits, then hang them upside down so that the weight of the PVA doesnt leave them flat, I did this in a box so that anything that dropped off wouldnt make a mess on the floor.
 Once dry, paint them in the same way we did the hedges and then add some coloured flock.
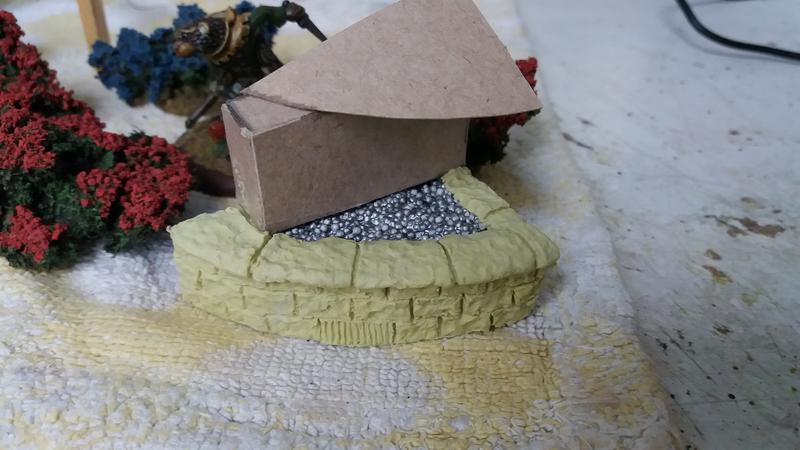 And Ive added some stone texture to the forge itself, milliput and a small stone and a carving tool were all that was needed.
Hammer time, duh duh duh do do....
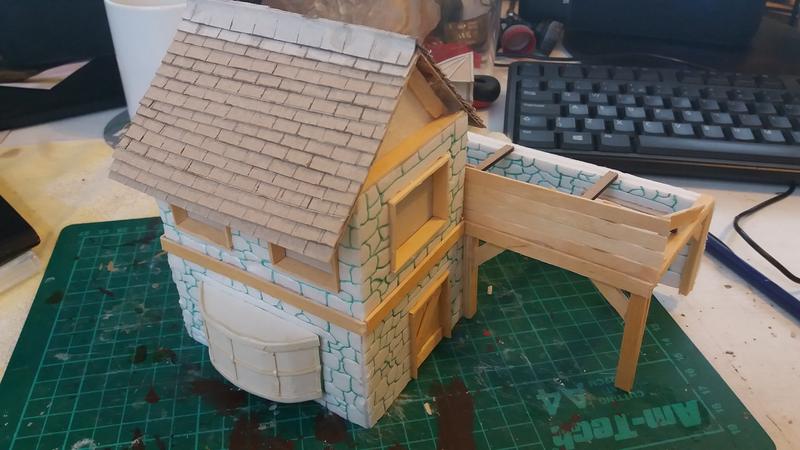
So plans for the salute board continue and Im thinking to field one warband as the villagers from the latest KS. 2 of which are a baker and blacksmith, I have neither a bakery nor a smithy so why not make both? or indeed combine them into one piece? so I have (or am as its not finished 🙂 )
 So all the walls are made, and the display window for the baked goods is added.
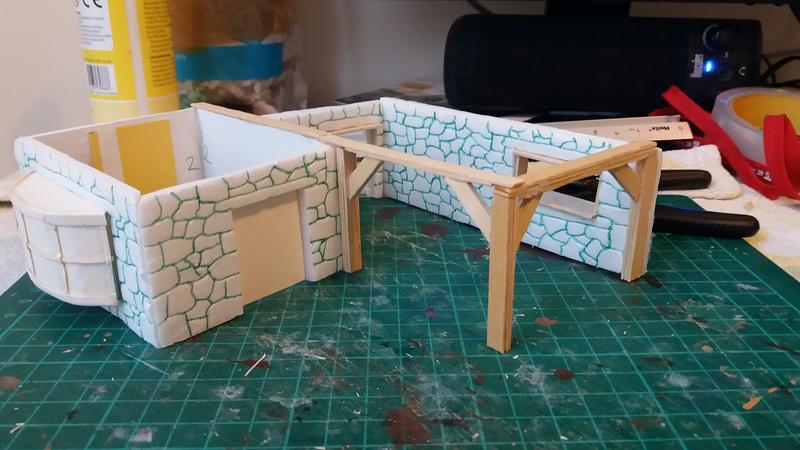 Some woodwork added, coffee stirrers naturally :D
 I have started the forge "form" I will texture this in the same way as I did the well with milliput to create the stone texture. The coal stuff in the pile and the forge is called "foam clay" marketted towards kids but it smells horrendous and my daughter wanted nothing to do with it, so now its mine :D useful for coal or even fruits etc.
Long way up, short way down....
Well heres news, my terrain and painted minis will be making an appearance at Salute 2019! yikes….
“The Nutting Hill Job”: The Kings guard are transporting a paychest, they’ve got it, you want it! 3 players must compete to get the paychest off the table, The guard will fight to keep you off!
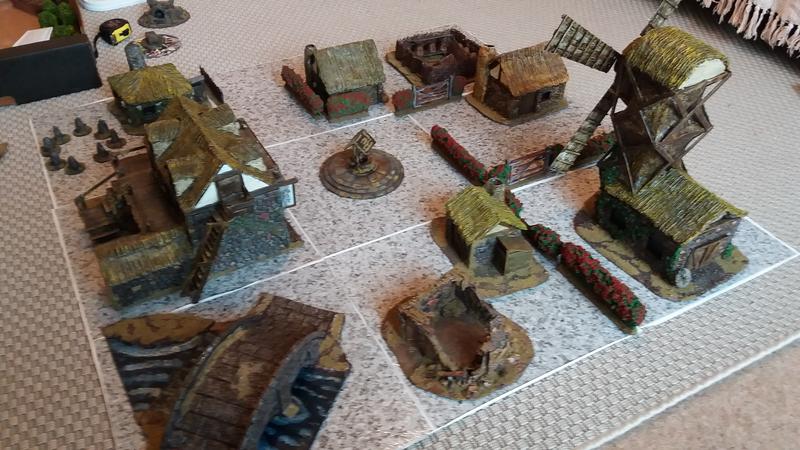 So an initial layout, I might yet replace the ruin and the building next to it with a Blacksmiths/ bakery building.
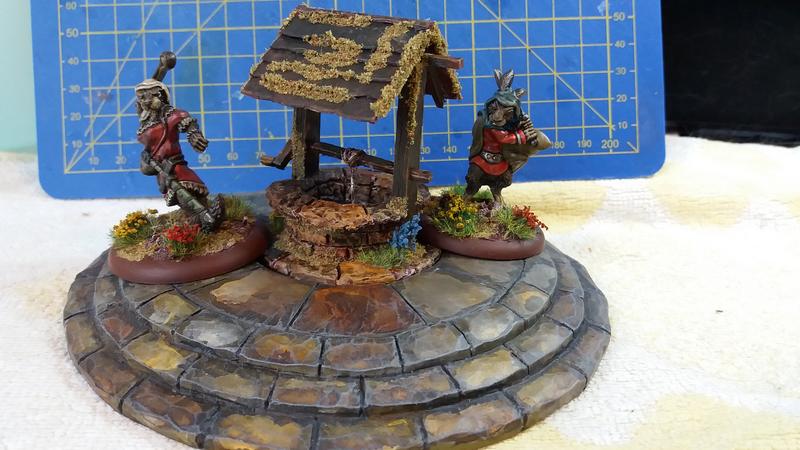 And the well is completed, which is one less thing on the list of stuff to do for Salute :D
Well, well, well...
On one of Oathsworn’s KS they offered an “arcane circle”, a lovely piece that had 3 inserts, one had runes, another was bubbling liquid and the third was an altar. very nice, but not a lot of use to me (except in pulp games). Now I want to use the circle as the village center piece (think of it as a roundabout outside the inn) but with the above inserts still not a lot of use so I decided to make a well…
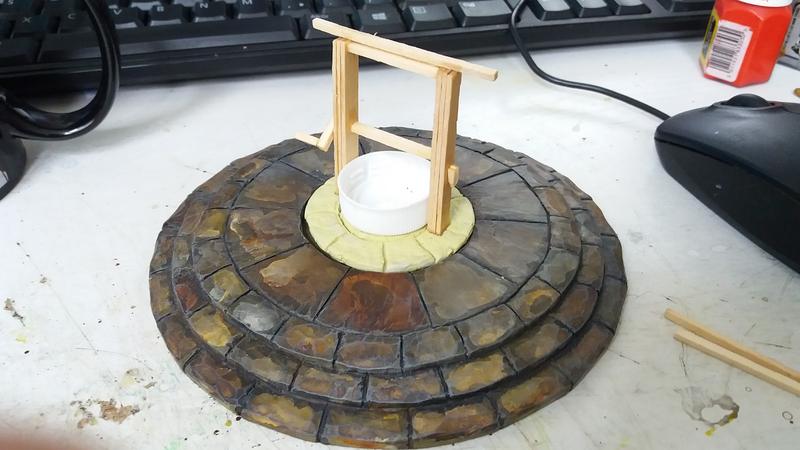 So initial build, I made a circle of milliput the right diameter and textured it and created the flag stones, then while still wet I placed the well wall form (an old bottle cap) and the coffee stirrer uprights.
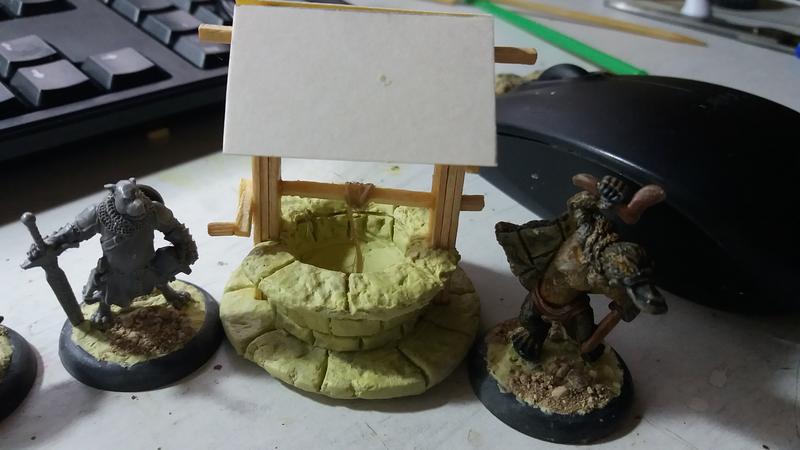 Well walls done, again with milliput, more of the wooden structure done and the roof blank is in place, minis for scale HF figure on the left and Oathsworns Platypus on the right.
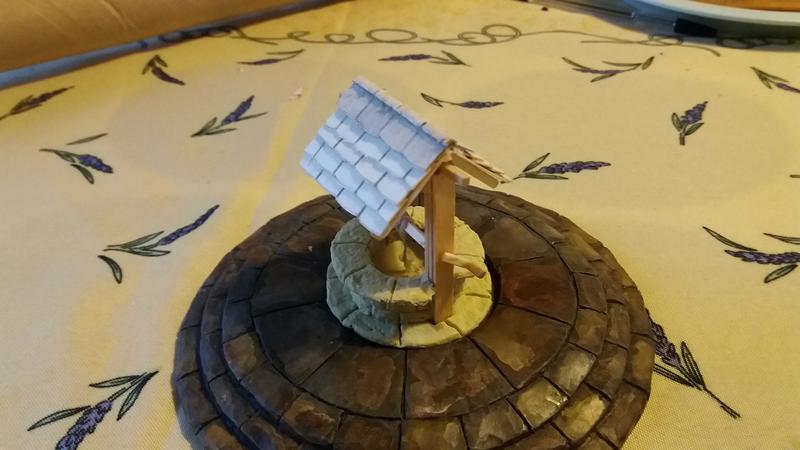 Roof shingles done, slight curve created by using nail clippers, because I couldn't be bothered actually doing shingle curves with a knife :D
A bird in the bush .....
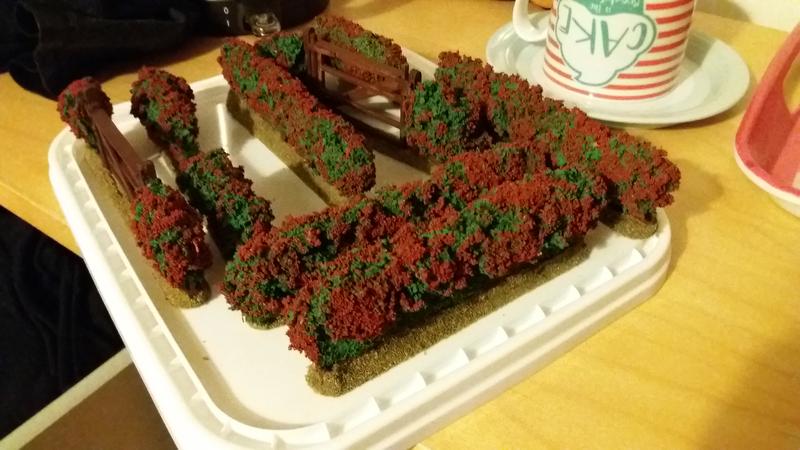 So after managing to find the time to progress the rest of the hedge sections I decided plain green wasnt interesting enough, so I added some coarse Red Flock to represent berries etc.
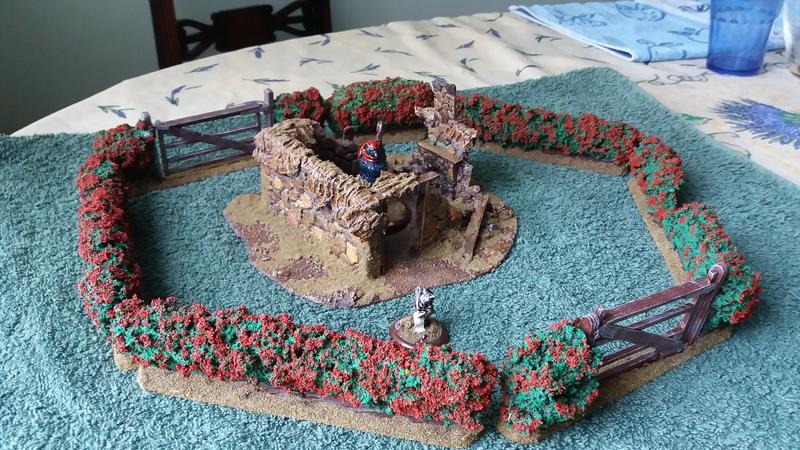 And how it looks with one of the houses
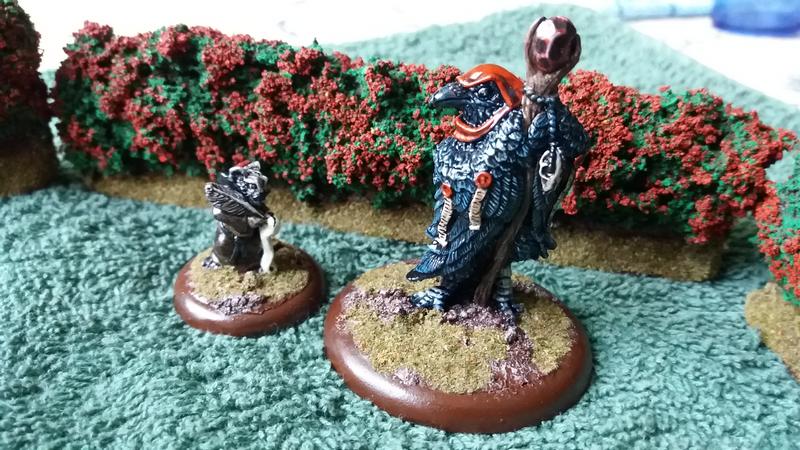 I even managed to find time to paint two more minis :D
And the results are in.....
 I think it works quite well, certainly better than the last versions. sorry for the rubbish lighting
 What follows is a little how to, its not exhaustive, if youd like more detail on something, drop me a comment and I’ll get back to you.
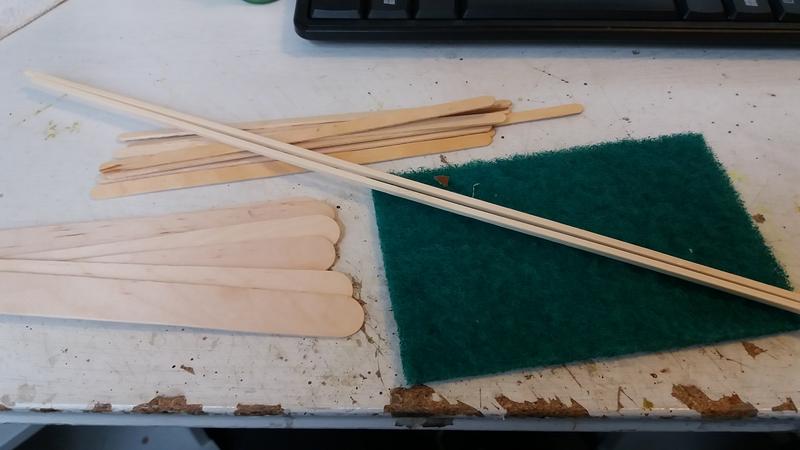 Basic ingredients, tongue depressors, coffe stirrers, scouring pads and square bamboo rod
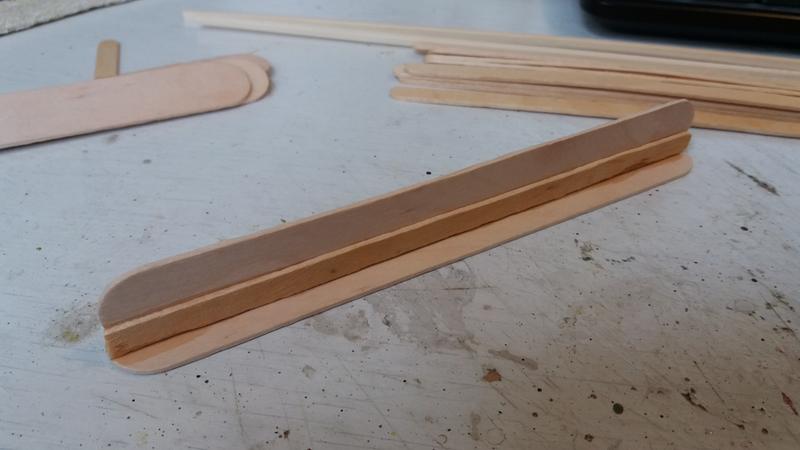 with super glue stick a coffee stirrer to eac side of one edge of a tongue depressor, glue that edge to another TD gining you a stable foundation.
 the scouring pads I have are 10cm wide and almost exactly the same length as the TDs (sheer luck) cut the SP in half so that you have 2 5cm wide sections, using hot glue attach to your foundation, BOOM! basic form done.
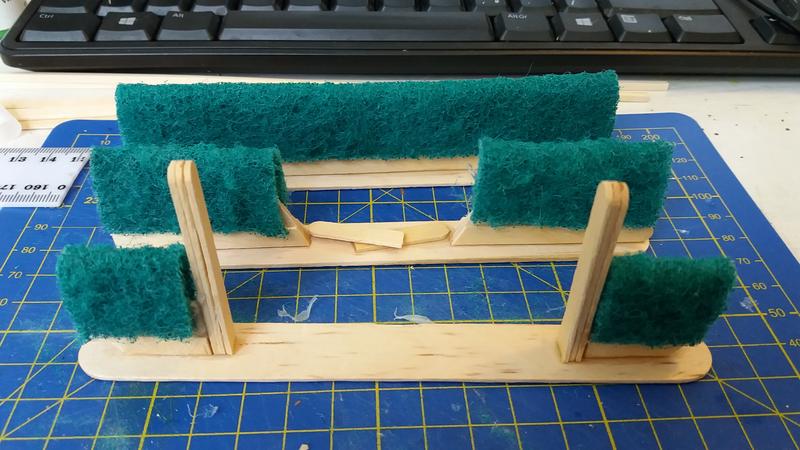 3 different types, back, basic solid hedge, middle a broken through section (man that badger was miffed!), front a gateway section sans gate.
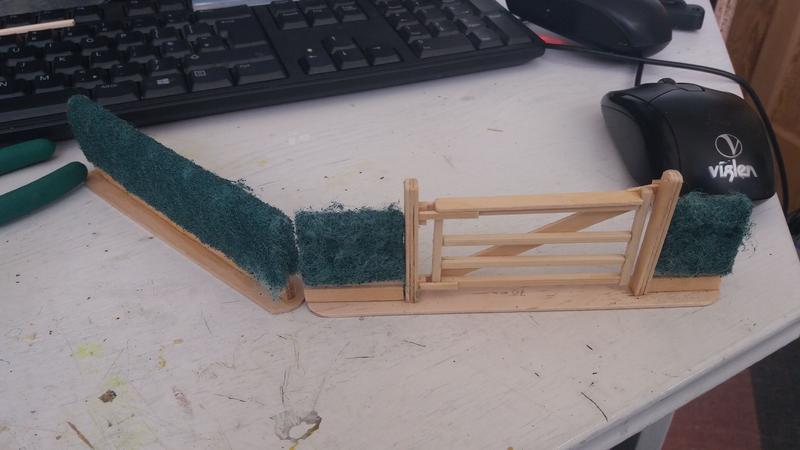 how they look together
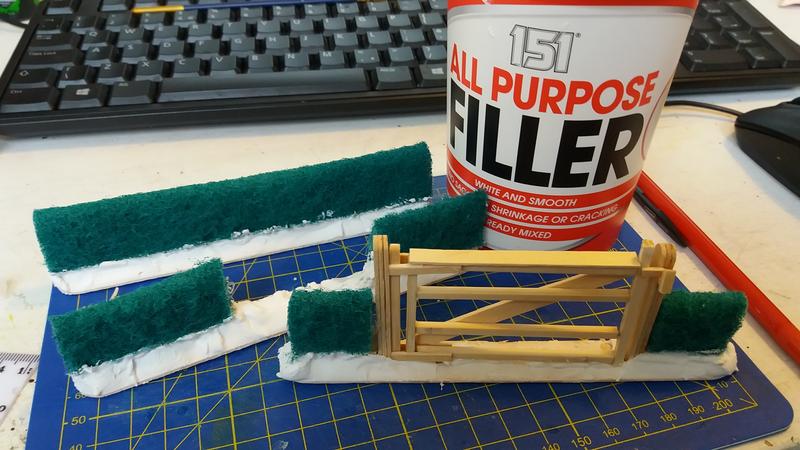 add some filler to make the ground, I use poundshop pre mixed stuff, cheap and cheerless...
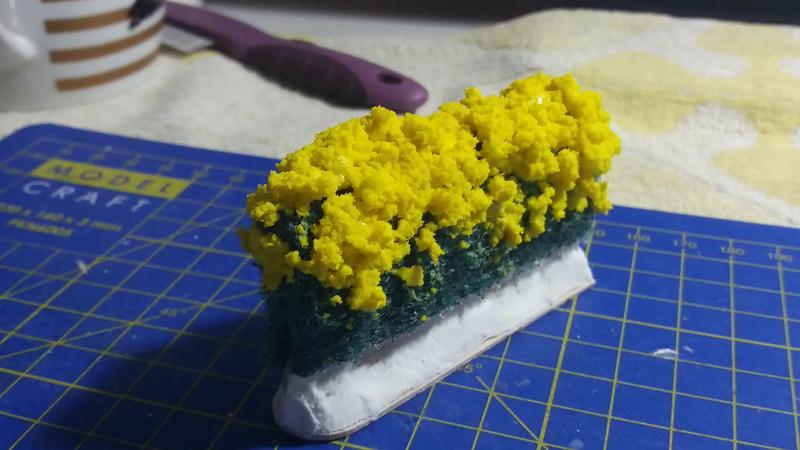 Test section, I glued some foam flock stuff using PVA onto the section to give it a less uniform appearance.
 and other sections have the same treatment.
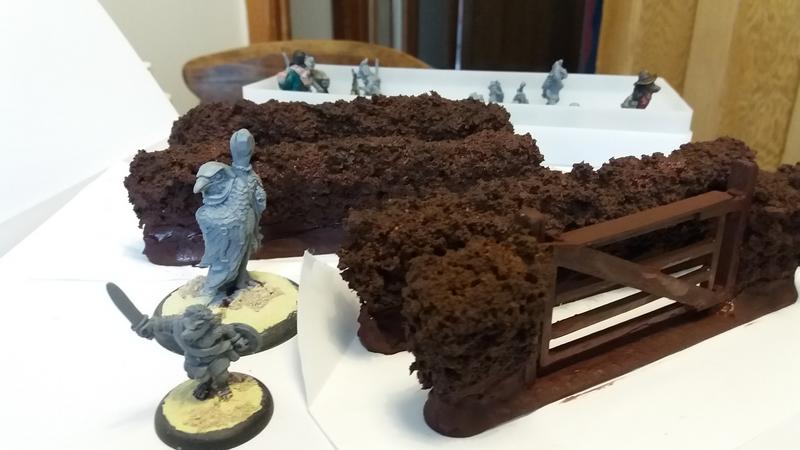 break out the burnt umber, I buy the artist acrylics from the works and thin it down with Klear floor wax, sounds weird works great, it even goes through an airbrush.
 so here is the test section finished by drybrushing different shades of green and adding some fine flock around the base of the foundation, sorry for the rubbish lighting but I feel it works rather well, certainly better than the last versions