![Make Your Own Star Wars: Legion Heroes! Rebel Agent & Officer Set Review [7 Days Early Access]](https://images.beastsofwar.com/2025/12/unboxing-atomic-mass-games-star-wars-legion-rebel-alliance-agent-_-officer-coverimage-225-127.jpg)


Infinity Terrain


Recommendations: 942
About the Project
designing, Building and painting Infinity terrain, plain and not so simple...
Related Game: Infinity
Related Company: Corvus Belli
Related Genre: Science Fiction
This Project is Completed
Painting the Service Area
Been a bit of a week for me in non-hobby land. Still found time to hobby!
Midweek I loved the comments on the Hobby Hangout I got I did see someone advising of a spelling mistake. Please feel free to point this out with other comments. I do this Blog as fun and so that it’s useful (mostly to myself). Spelling and writing is very much not my strongpoint. Any comment to improve the project or the blog is very much appreciated.
Sadly the above made the project move to the top which was unintended and sorry if you clicked on and didn’t see an update. I also learned that titles and single image text do not spellcheck.
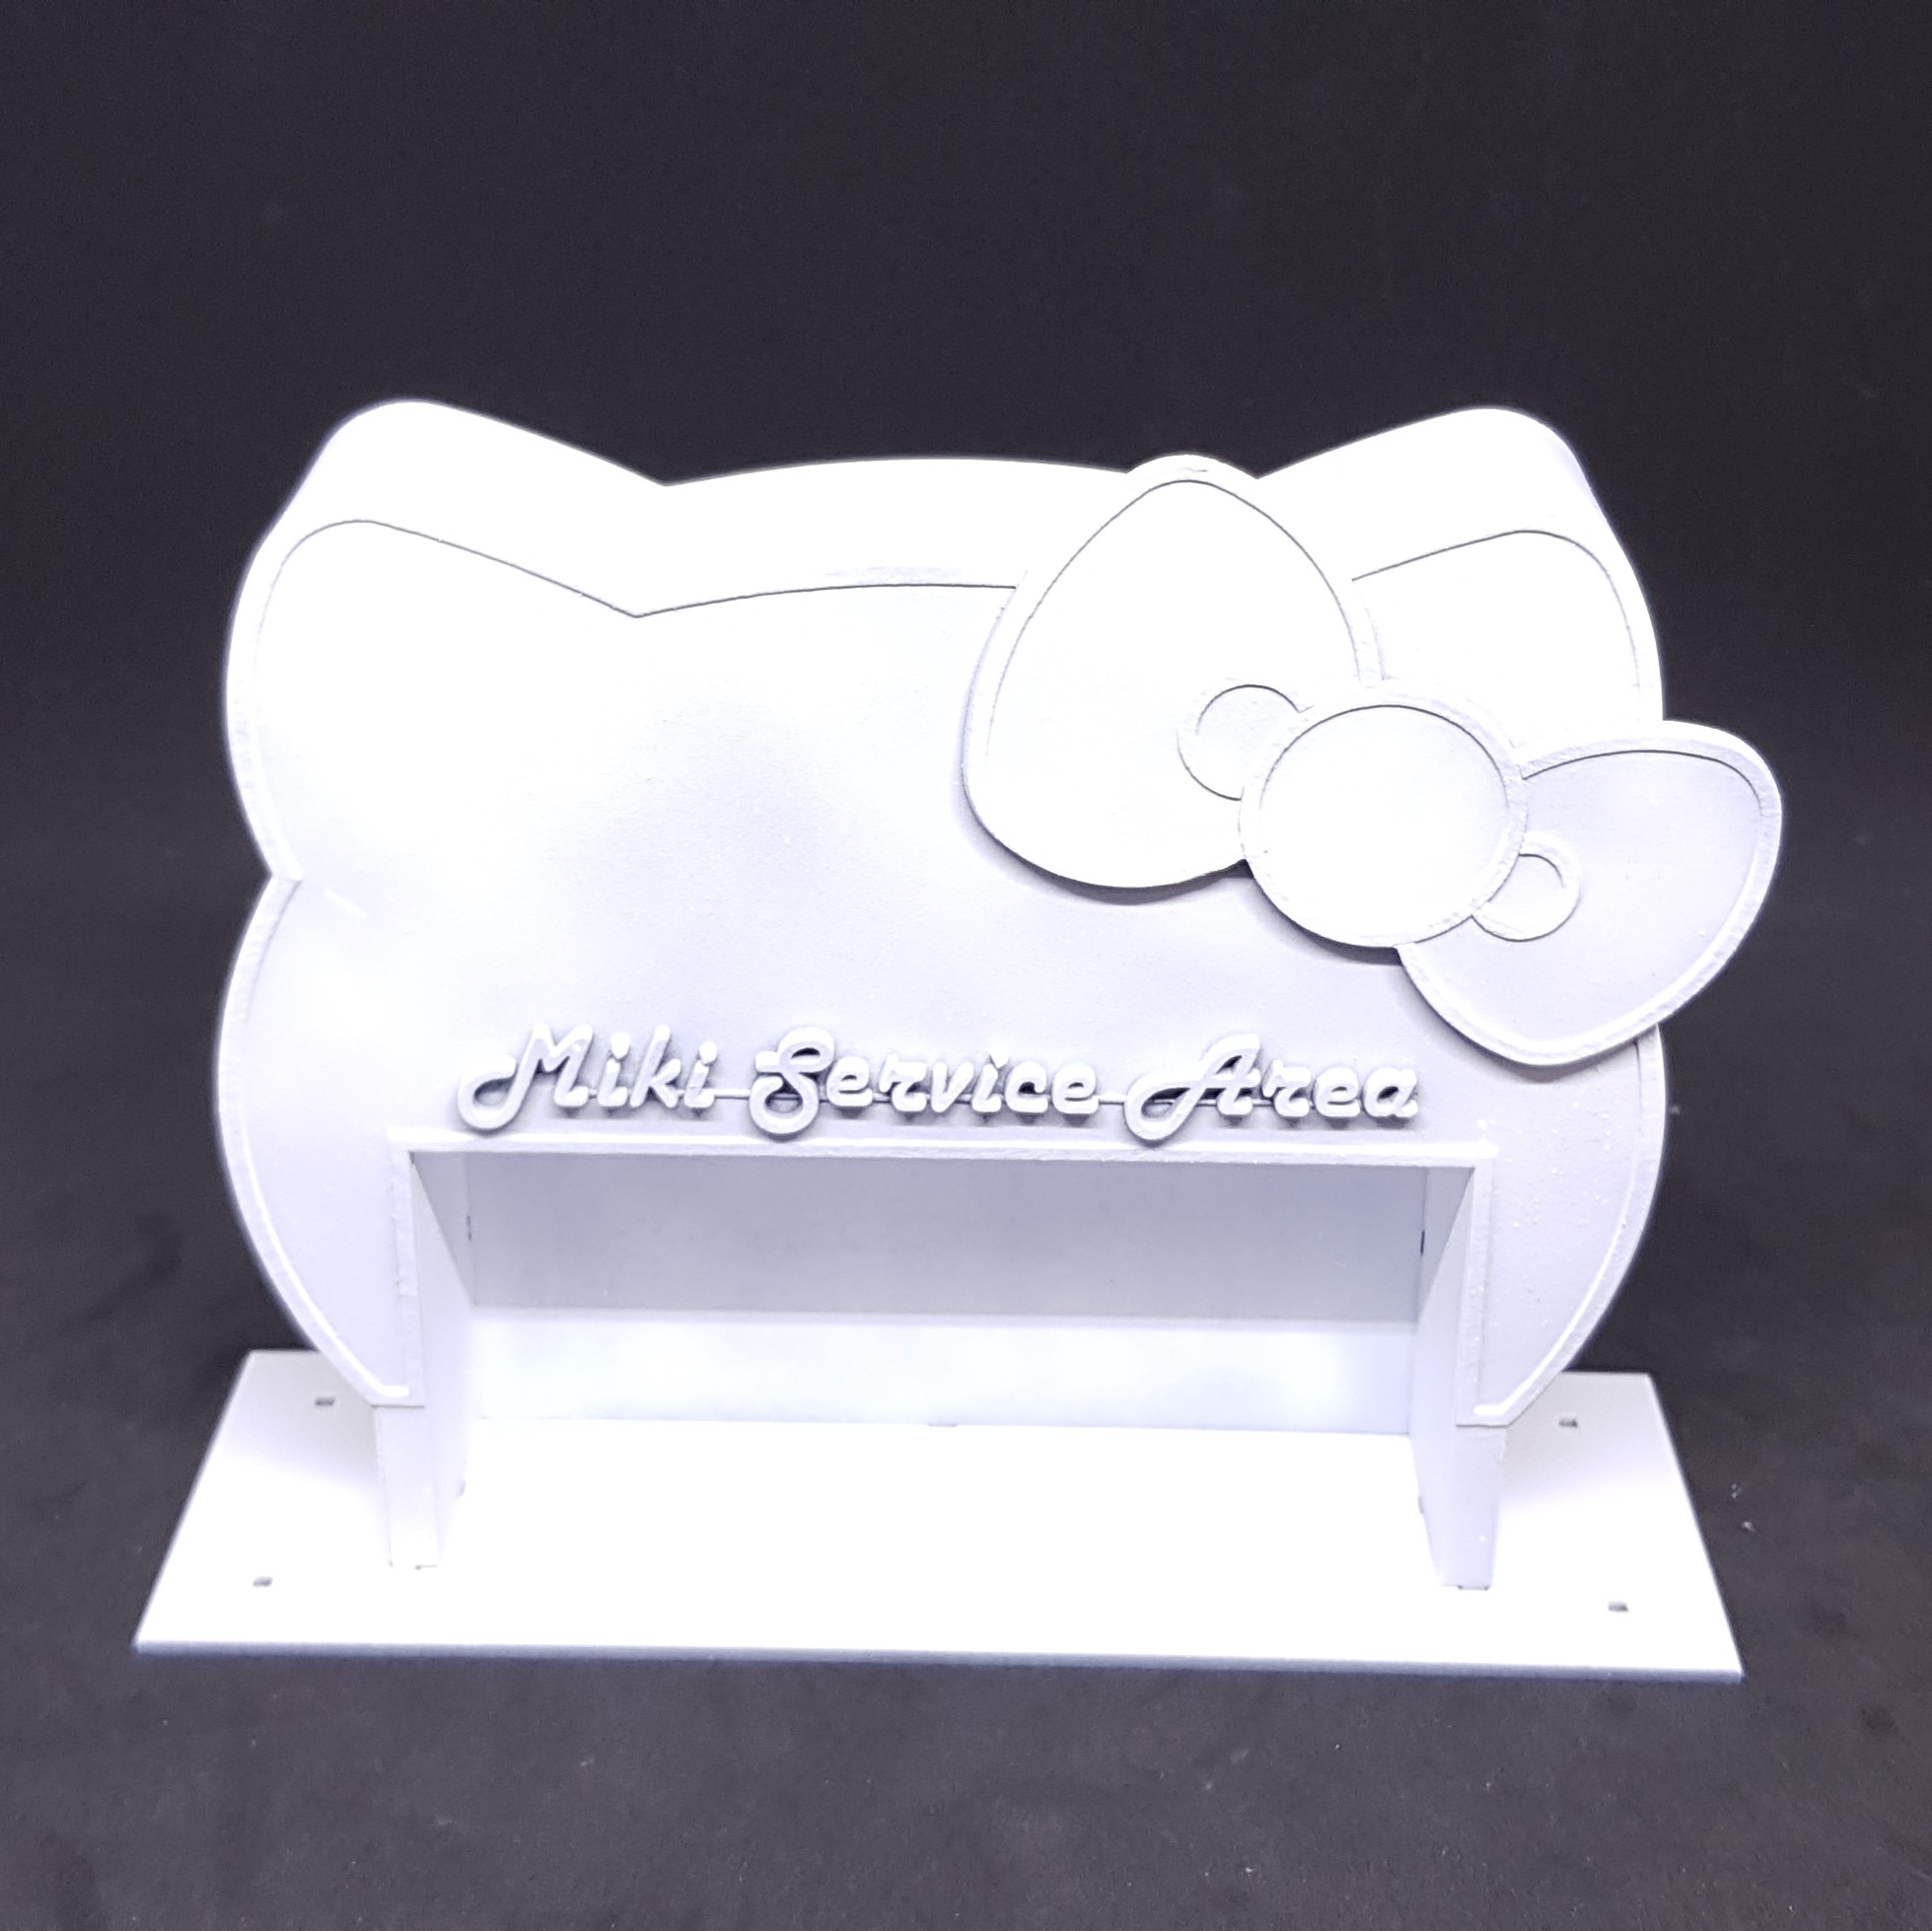
I started to get the Service Area painted. I knew I didn’t want to hand paint this it’s too big and I needed to add interest onto this. I decided to do some blends. I wanted to keep the service area itself the same colours roughly as the picture.
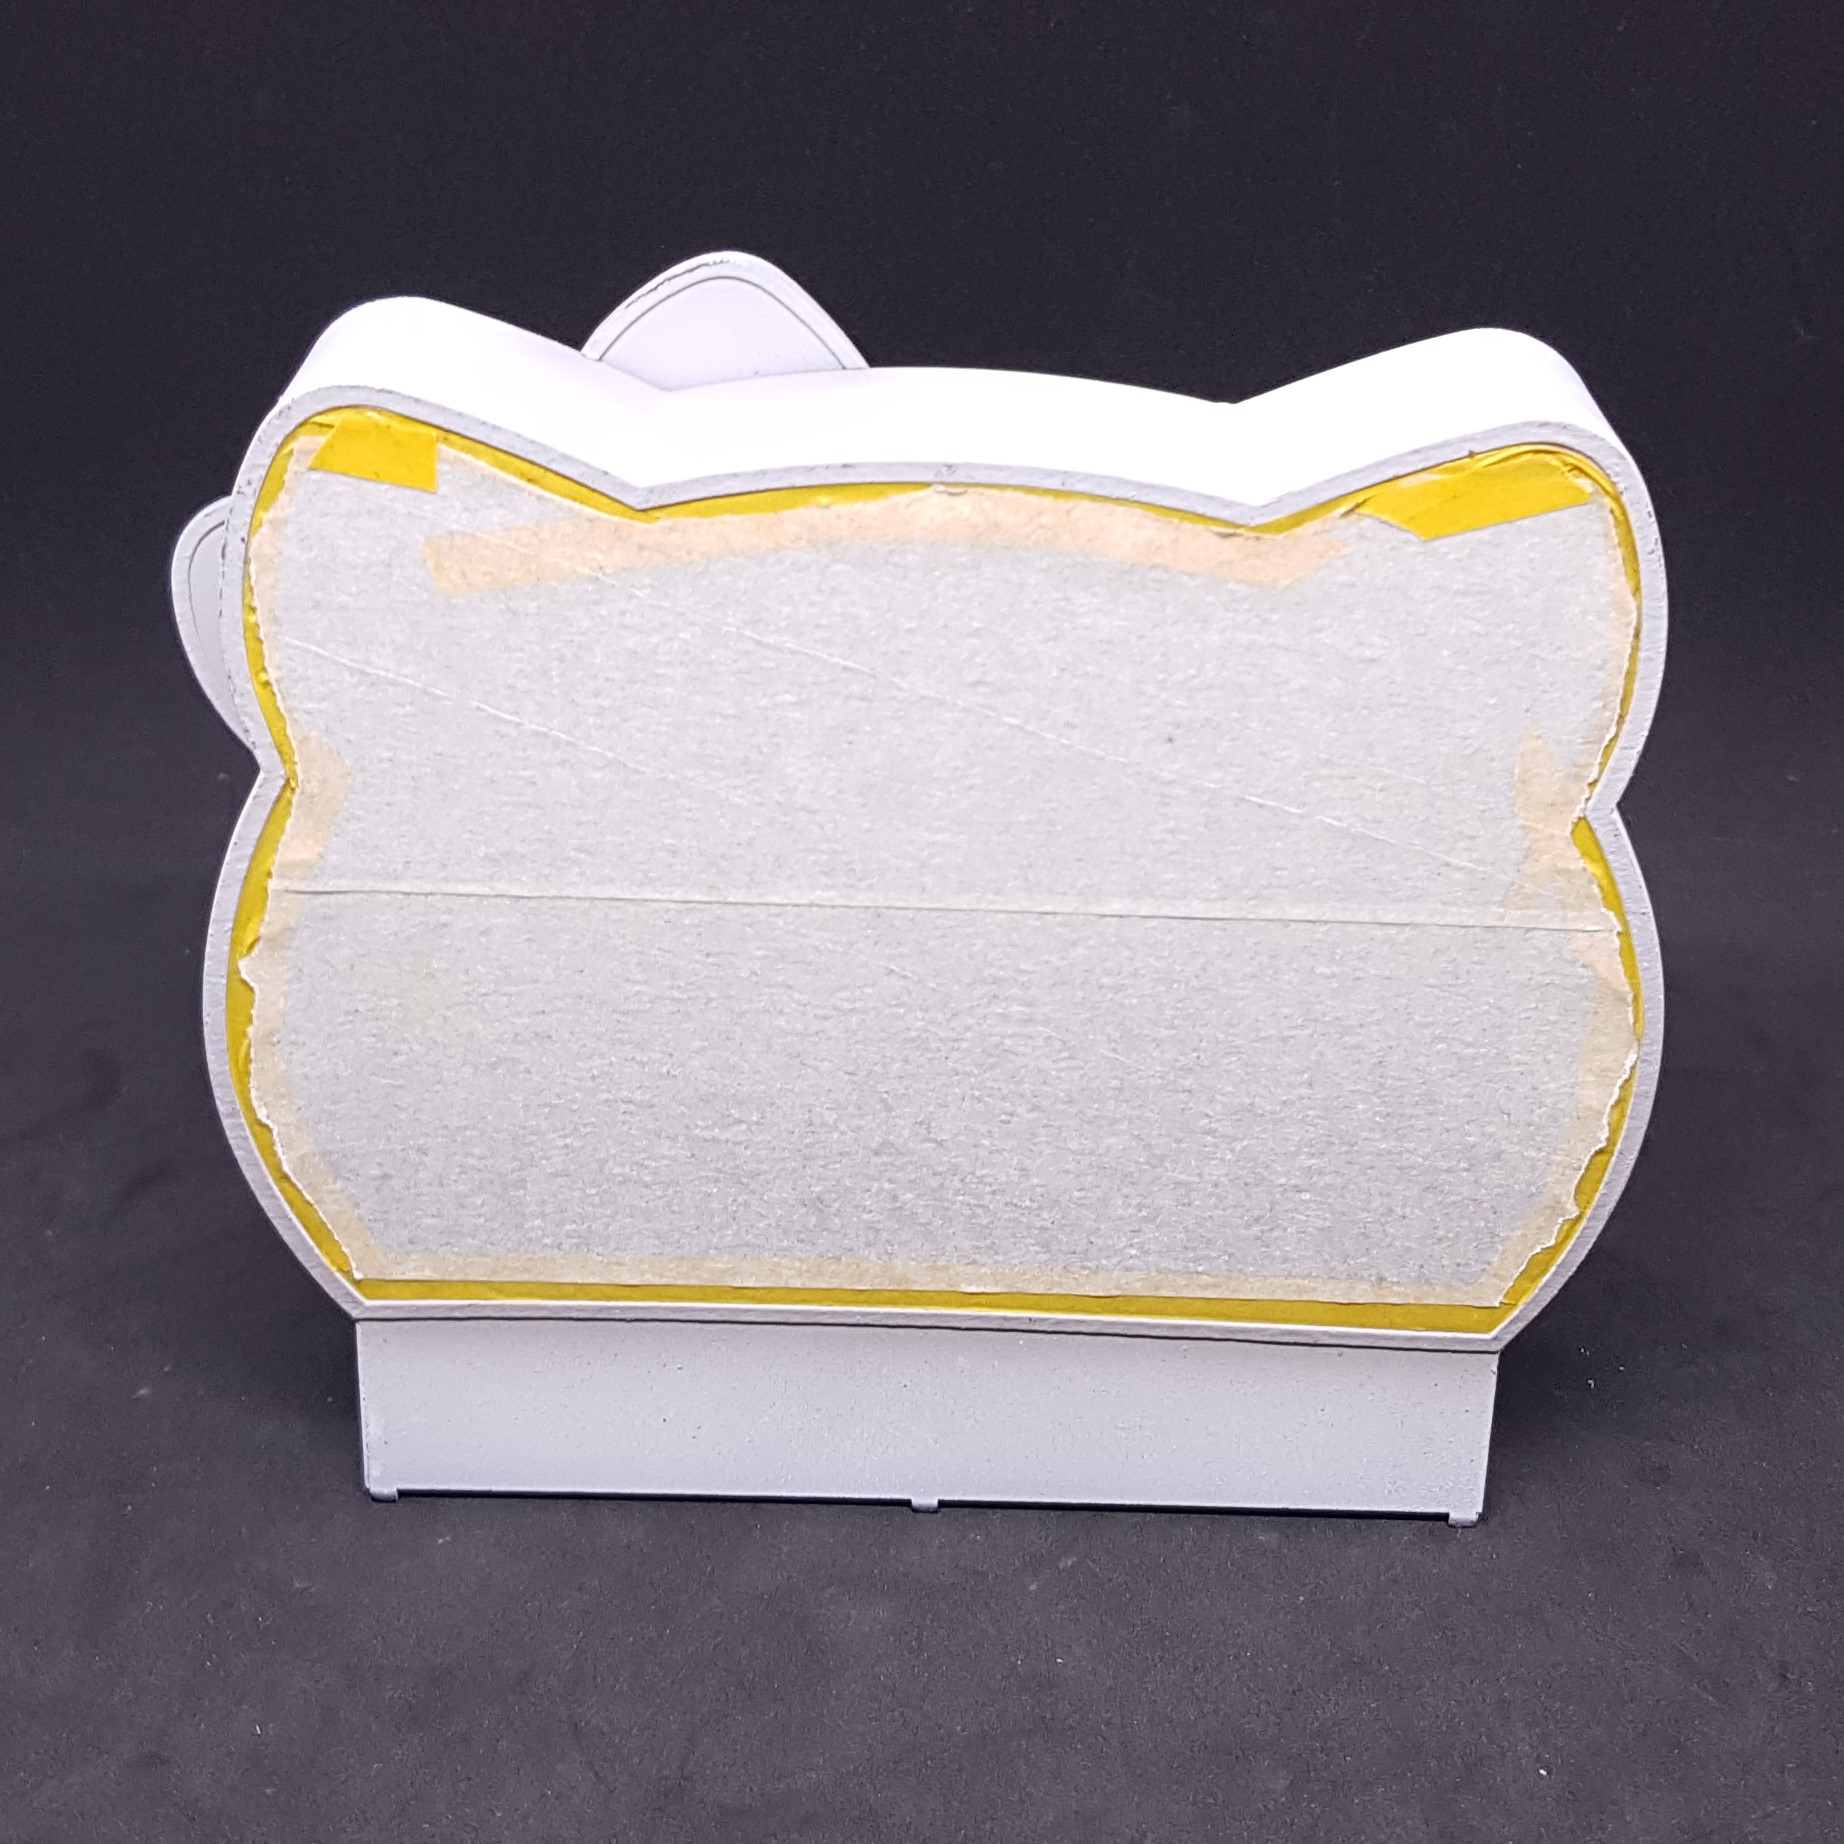
I started by painting the Service Area white then masking the model off.
Here are a few tips:
- You can bend masking tape around curves. The thinner the masking tape the easier this is. You can do this inlayers if you need it to be thicker.
- Save your good (expensive) tape for edges, use the cheap stuff to fill in or use paper and stick it down.
- Take some of the stickiness of cheap masking take off so it doesn’t pull the paint off.
- You can mask then cut round of you have an edge to place your blade against.
- After masking and cutting go round and ensure all edges are pushed down.
- If you leave masking tape on for some time use a hairdryer for a few seconds to loosen the adhesive before pulling the tape off.
- You can place a blade on the asking tape and lift up to cut the tape.
- if you have parts that fit together you may already have some waste material you can use for a mask.
- Just before painting check for spots you have not masked. This has saved me more than a few times and it’s difficult to see what you have not masked (including here).
- The more time you spend masking the better it will be. (the below was as fast as I could go)
I am not the best at masking, I never give it the time it deserves. I just want results, this is terrain and I treat it as such and any problems I can turn into features. If you want a close to perfect finish you can get it but take the time to do it.
I Sprayed white. then done a grey face over the front and the back. Then masked.
Sprayed white then masked the trim then went onto the final colour red I done a darker red at the bottom then went over everything in a light red then unmasked.

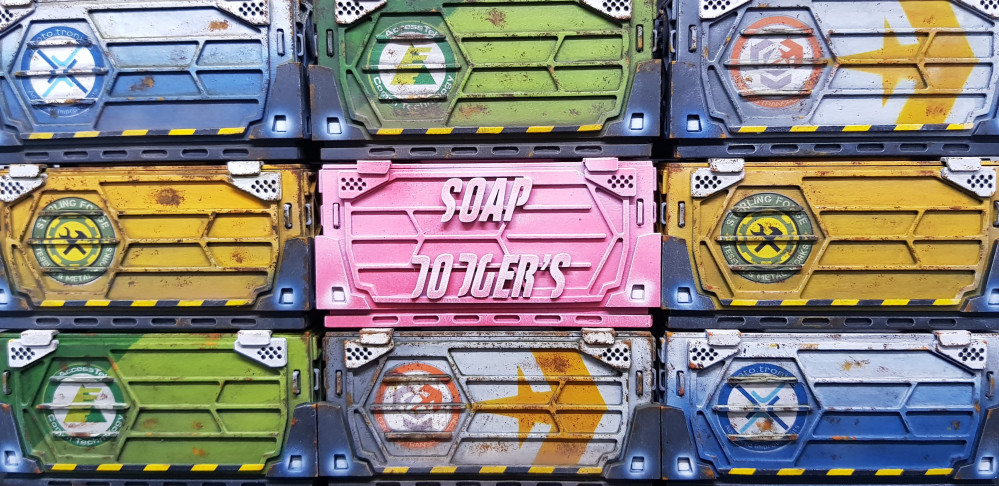
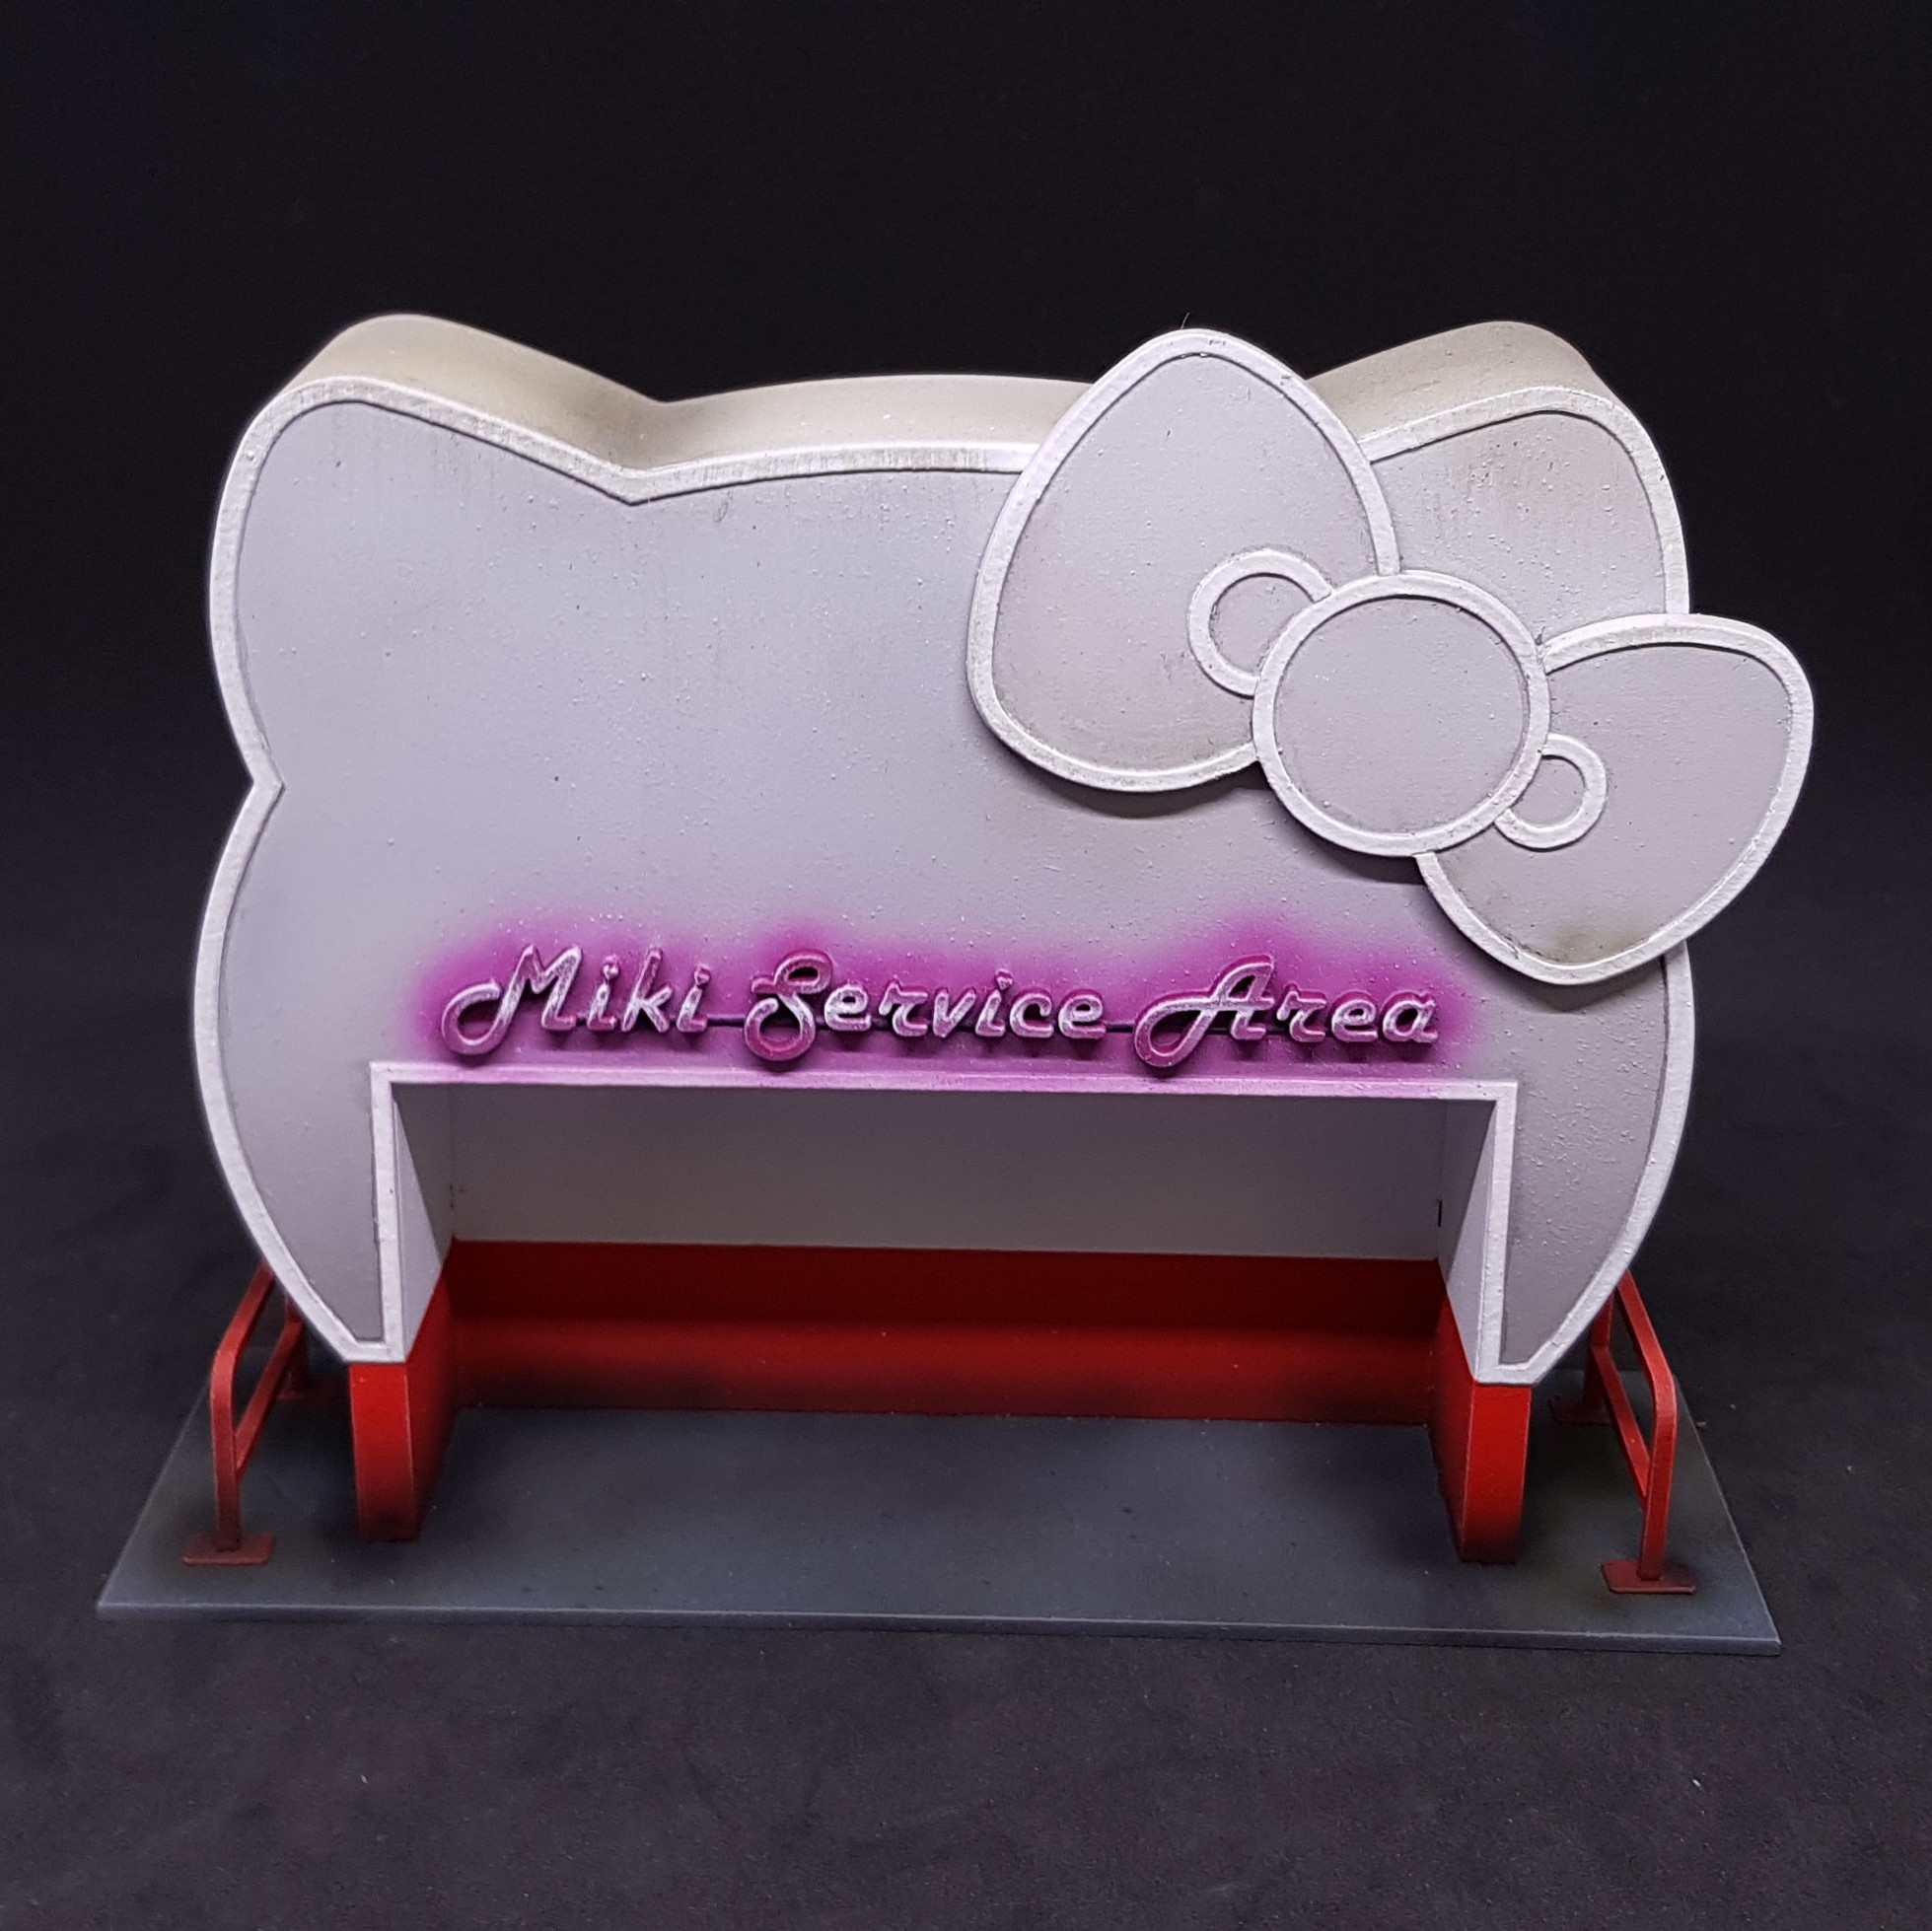
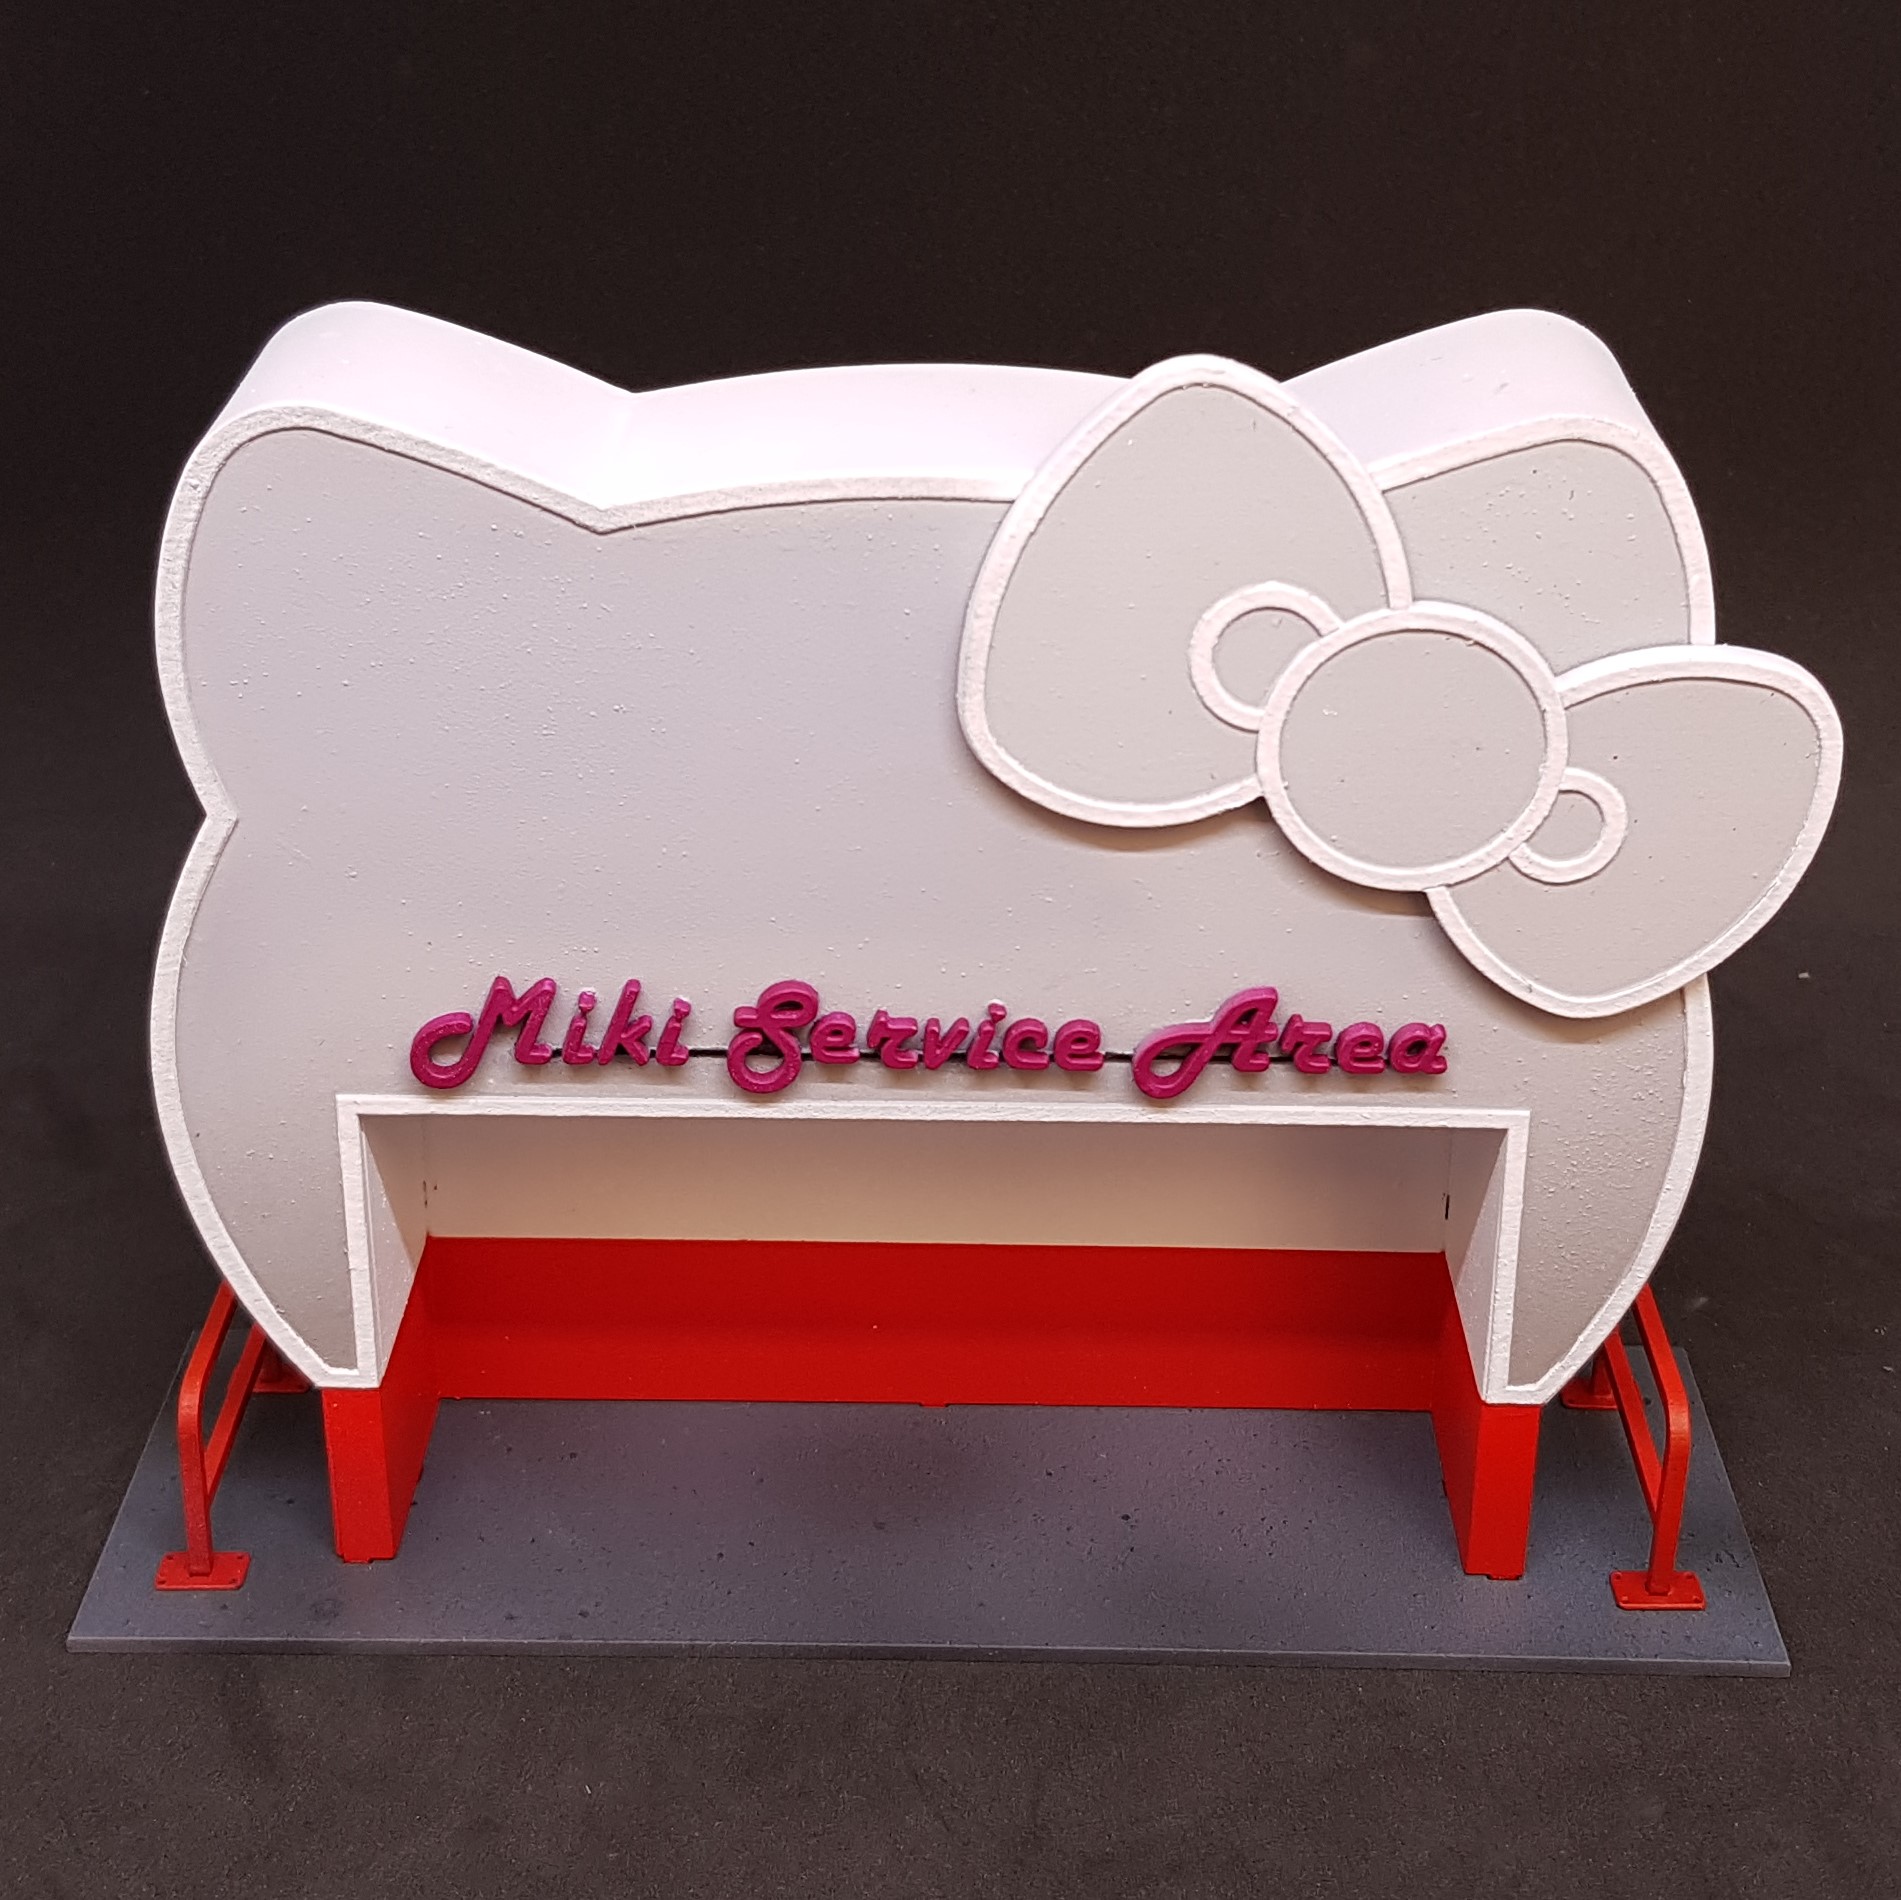 I sprayed the base grey and speckled (sprayed from afar) with two shades of blue and black to give some texture. I hand painted the sign in a pink, this will get a glow effect when done.
 I felt that the railings didn’t look like they fitted in. I went back to the laser cutter and made some mounting points for the railing. This detail is in the original photo. Do not know why I didn’t spot this before. I painted this solid red as the side of it was almost the height of the railing.
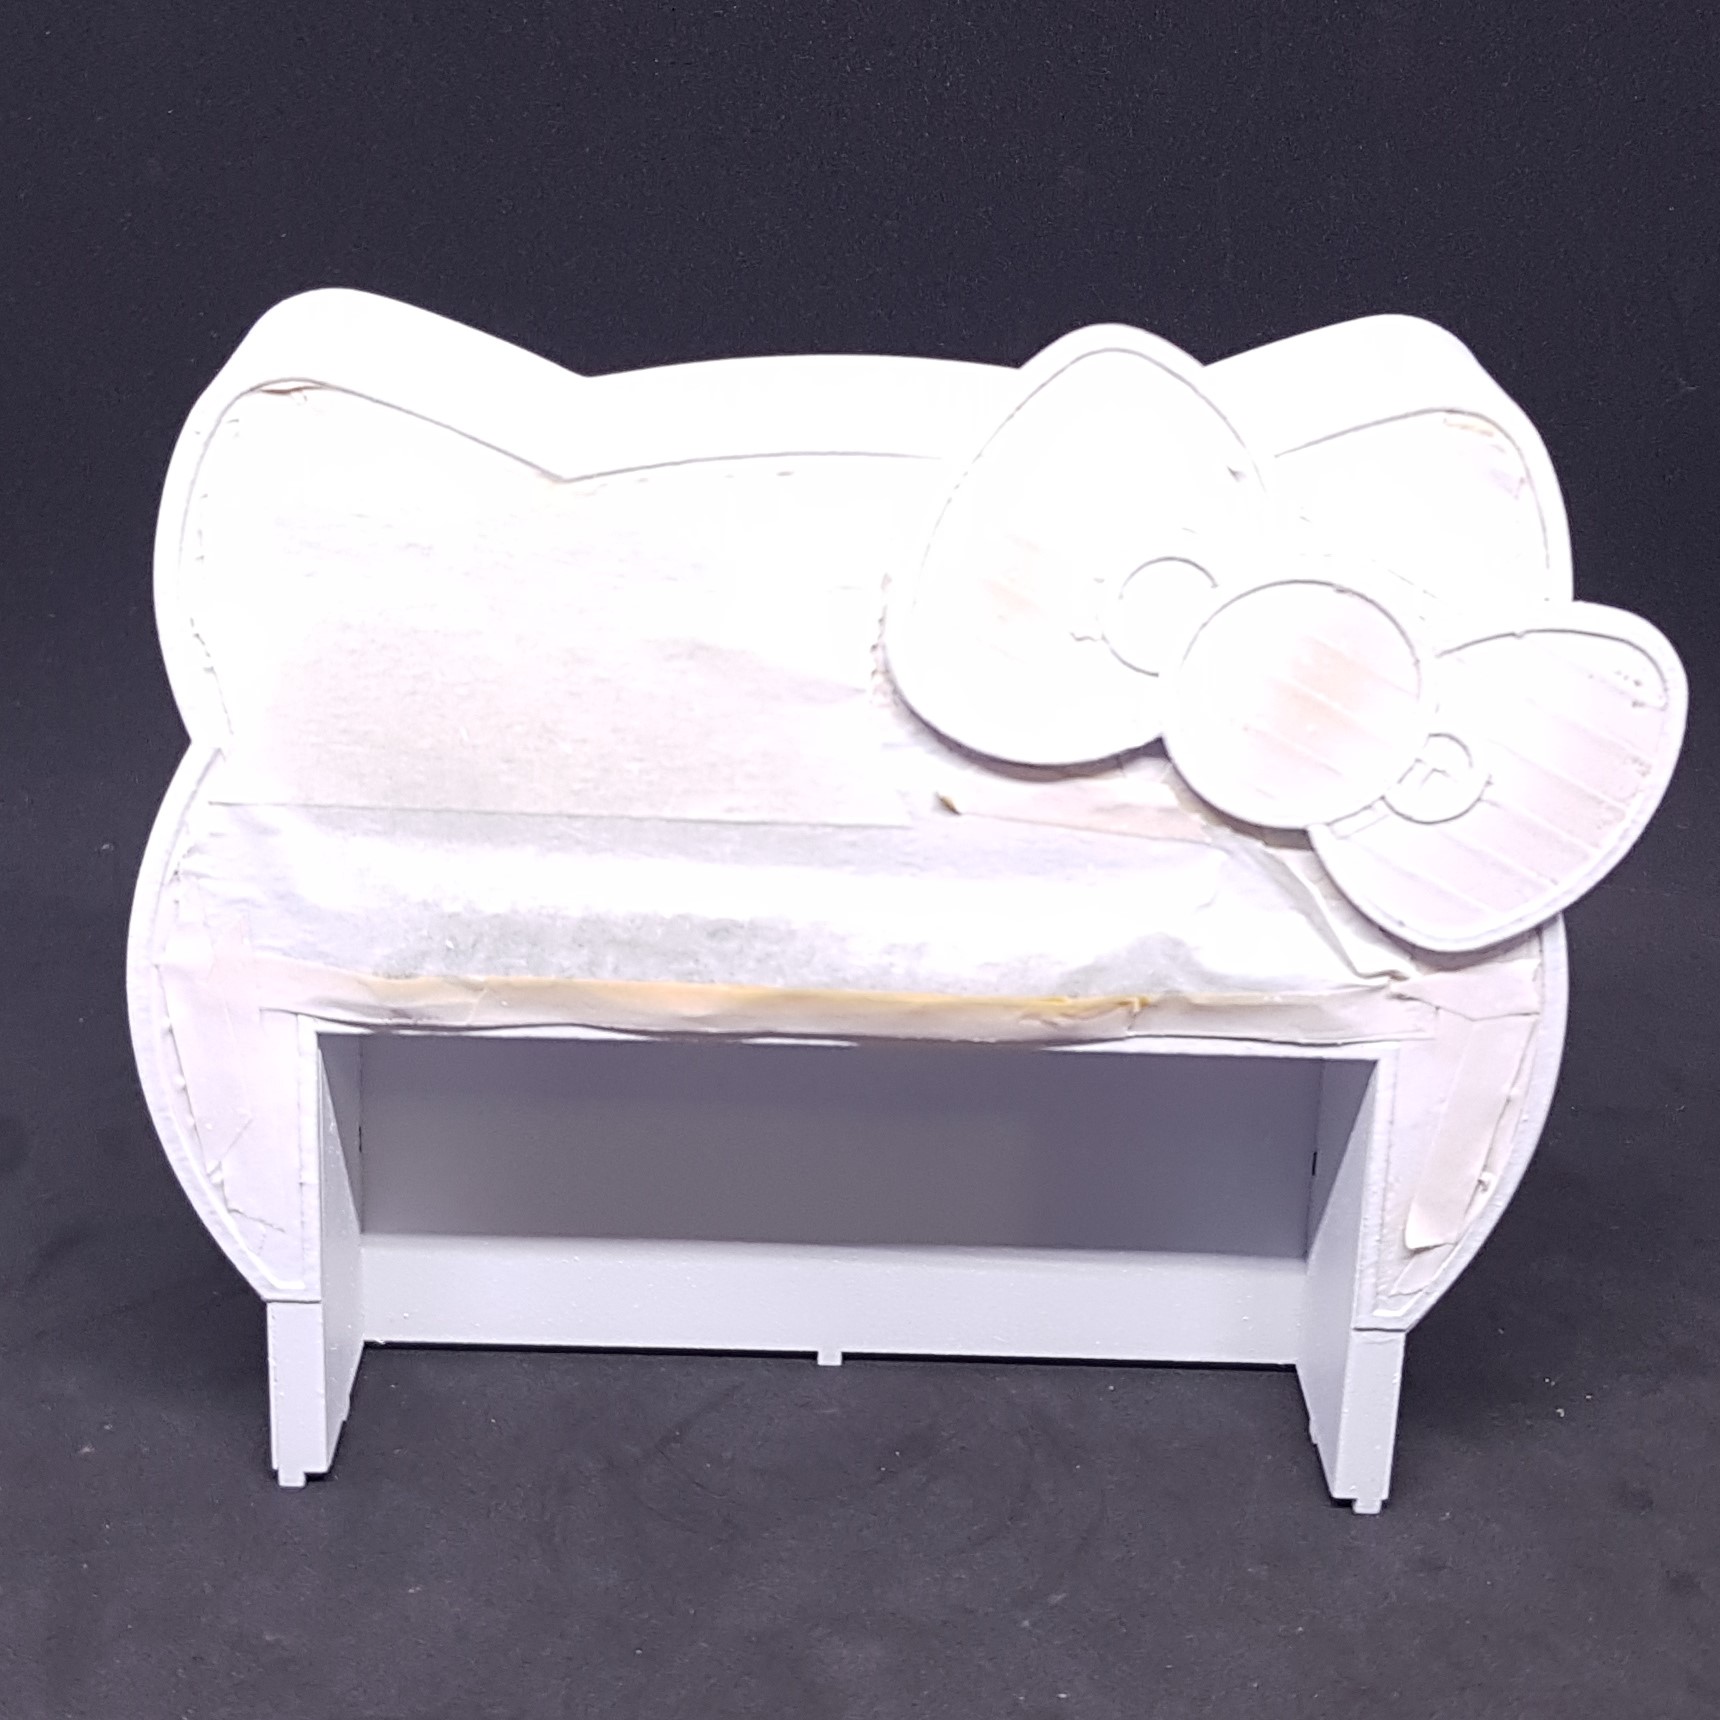
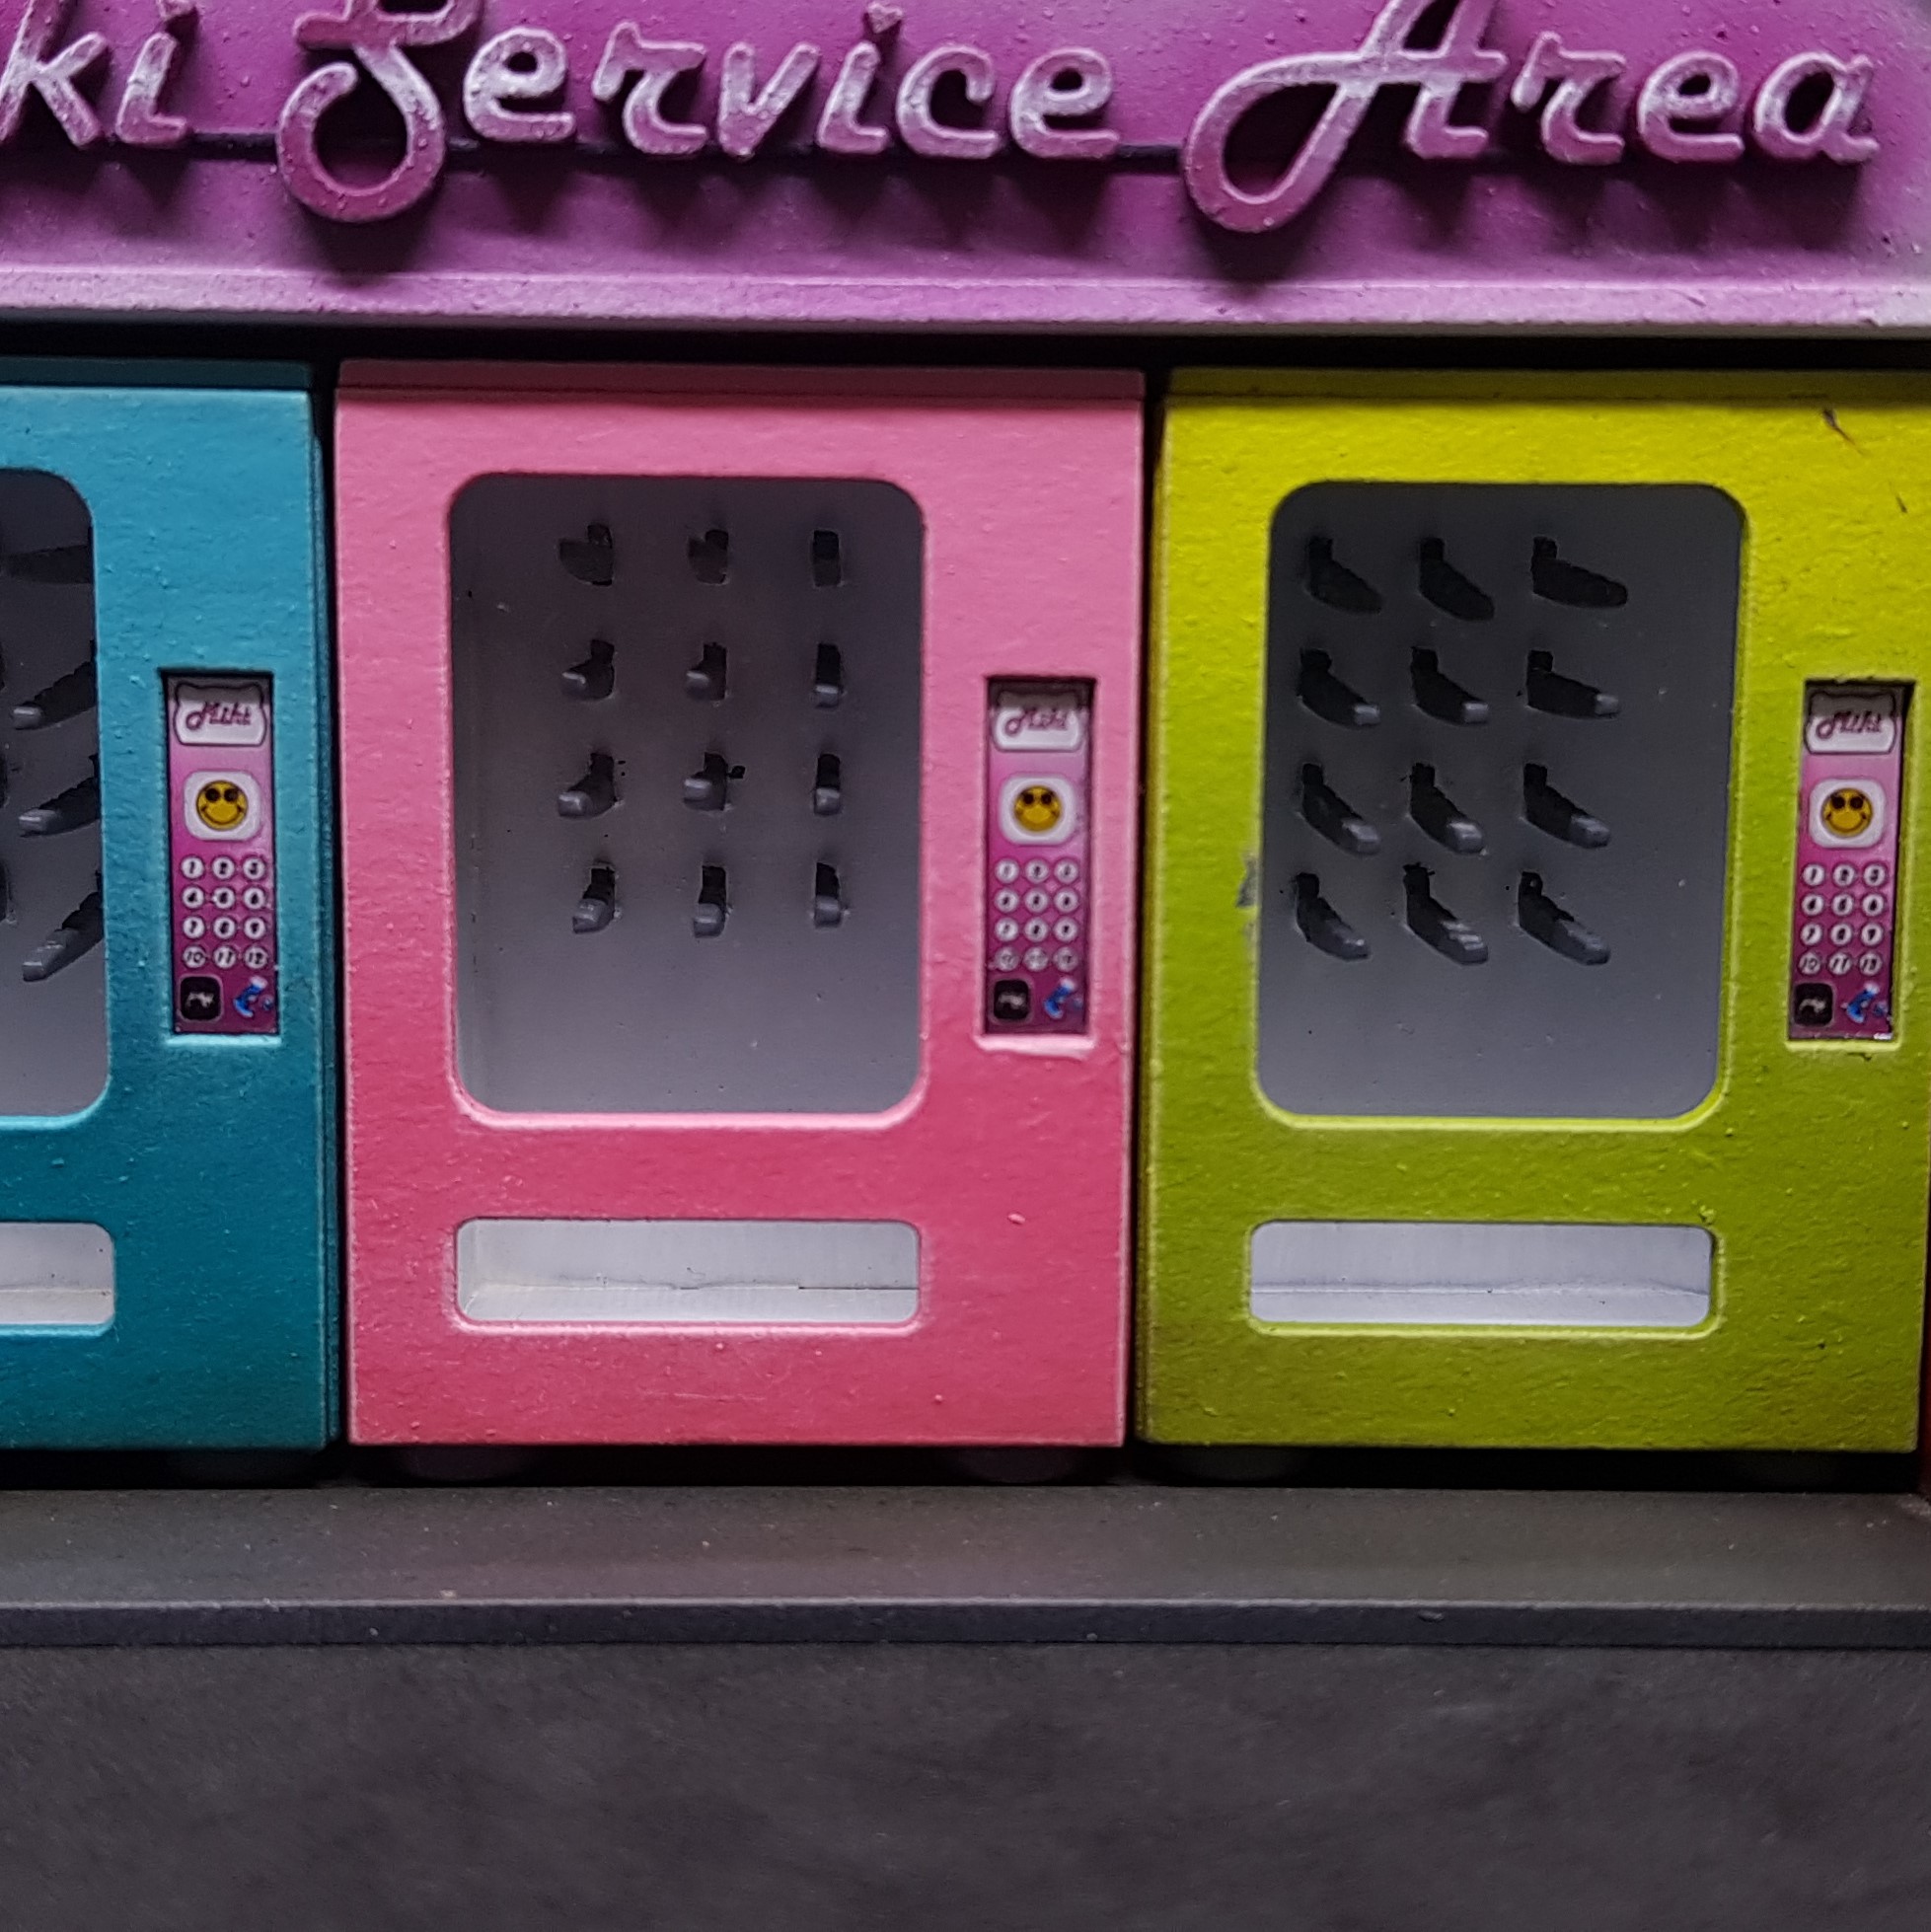
  I painted the containers without taking pictures. This was simple, I painted the inside white so that you can see the contents (which I decided to leave out?). After this I used the cut-out pieces from the laser cutter as a mask. I push fit everything back together and sprayed white then went in with a two-colour fade from dark at the bottom to light. After this I took off the front and removed the MDF mask. Hand painted the product rails, put in the acrylic and used PVA to mount the glazing so this didn’t fog up. Pushed everything back together and it didn’t need glue so left this (if I wish to fill this later).
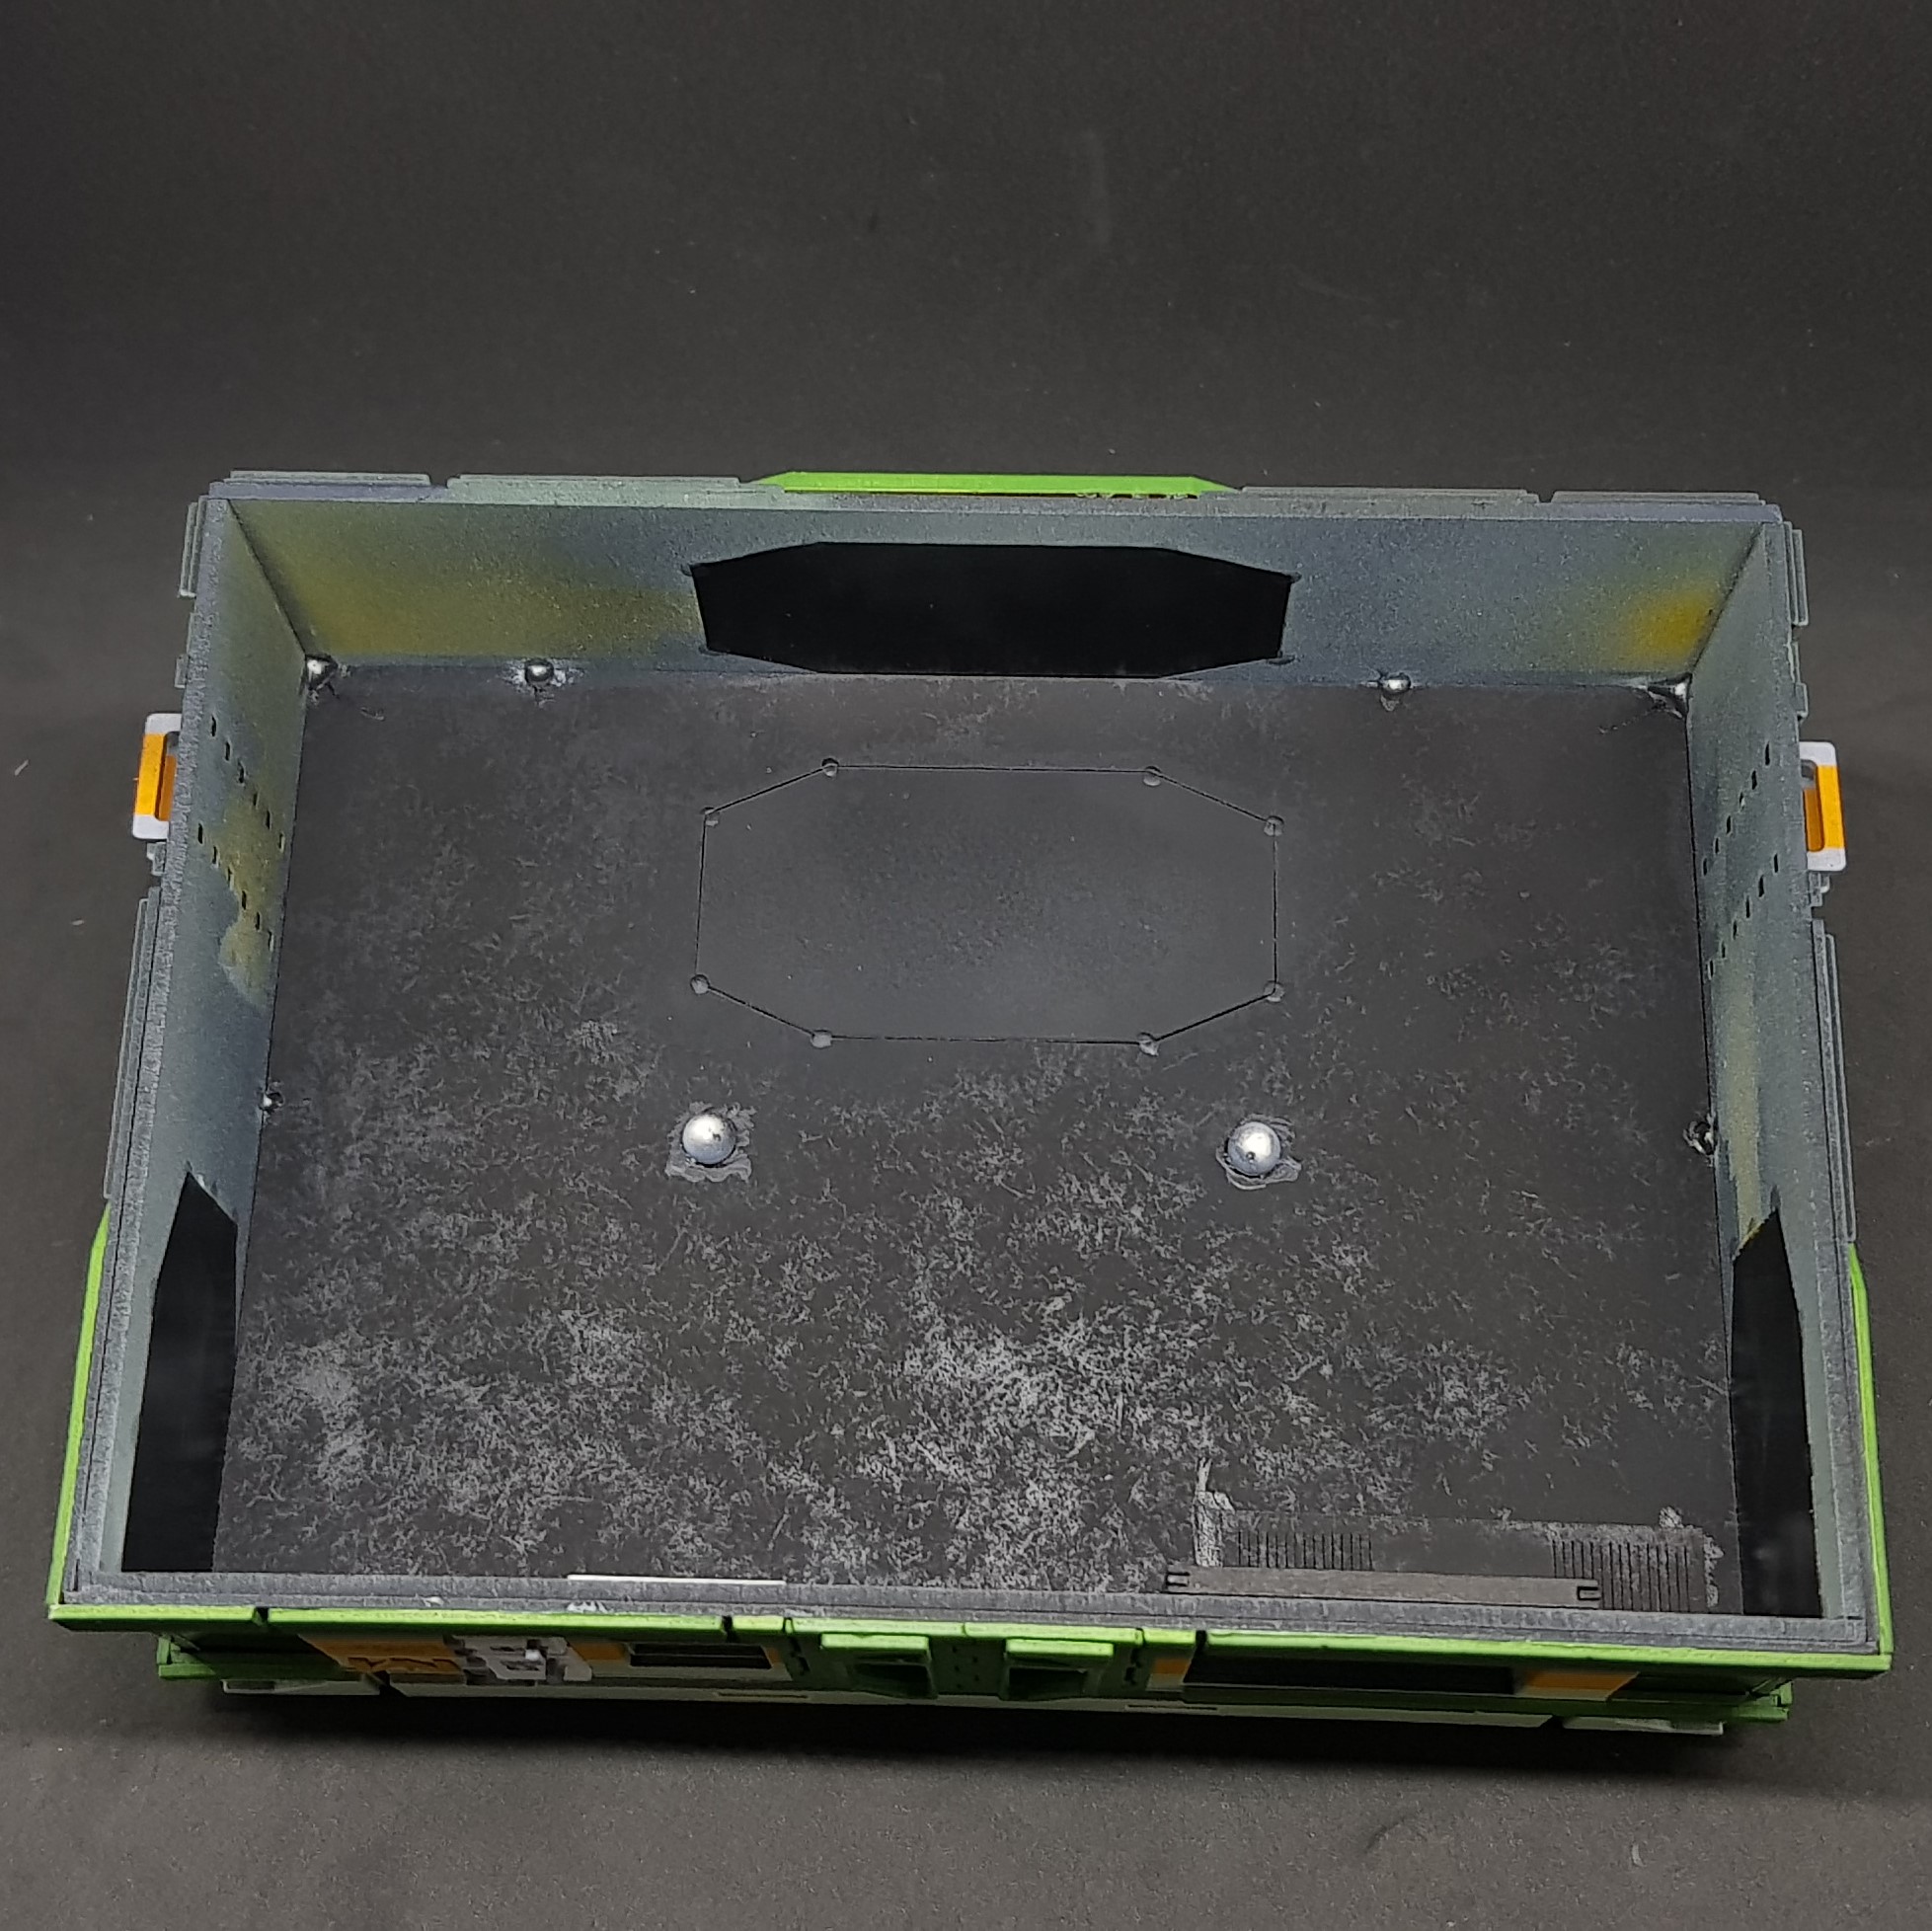
 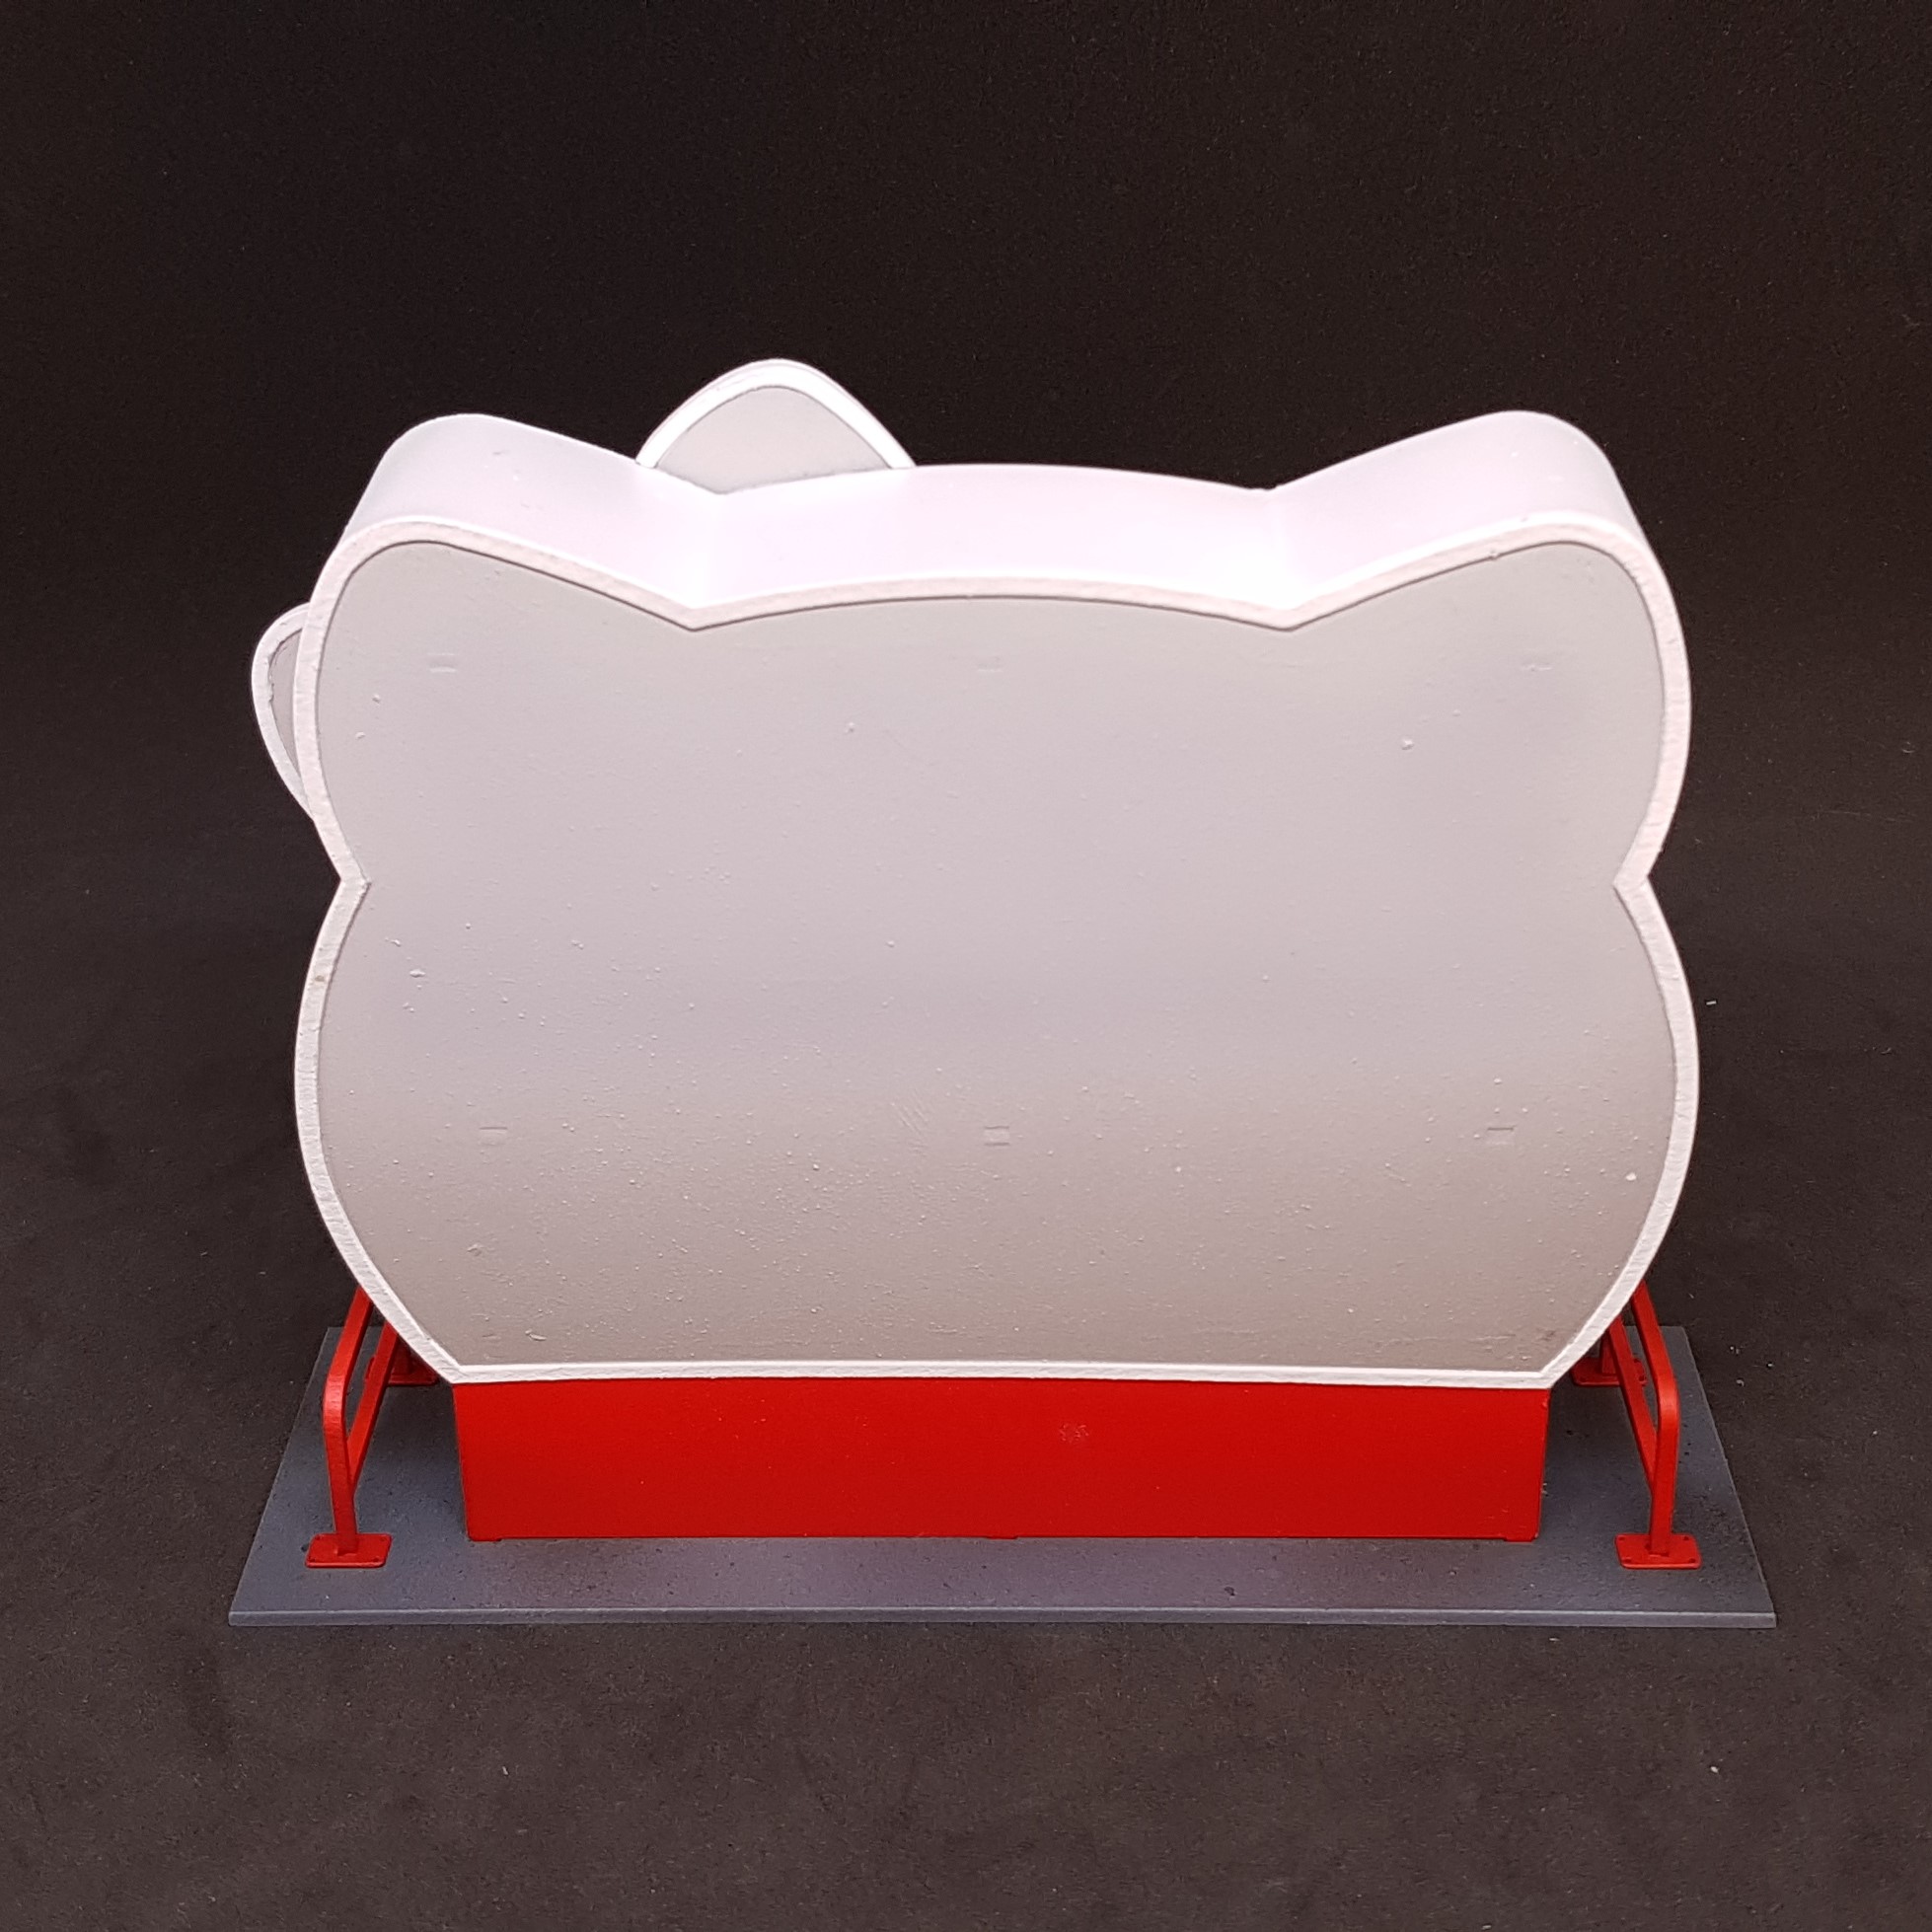 Had a hiccup. My wedding ring put a dark line on the front and back so had to mix up a colour to fix this. It worked but you can still see this under camera but not in real life. Here is the back.
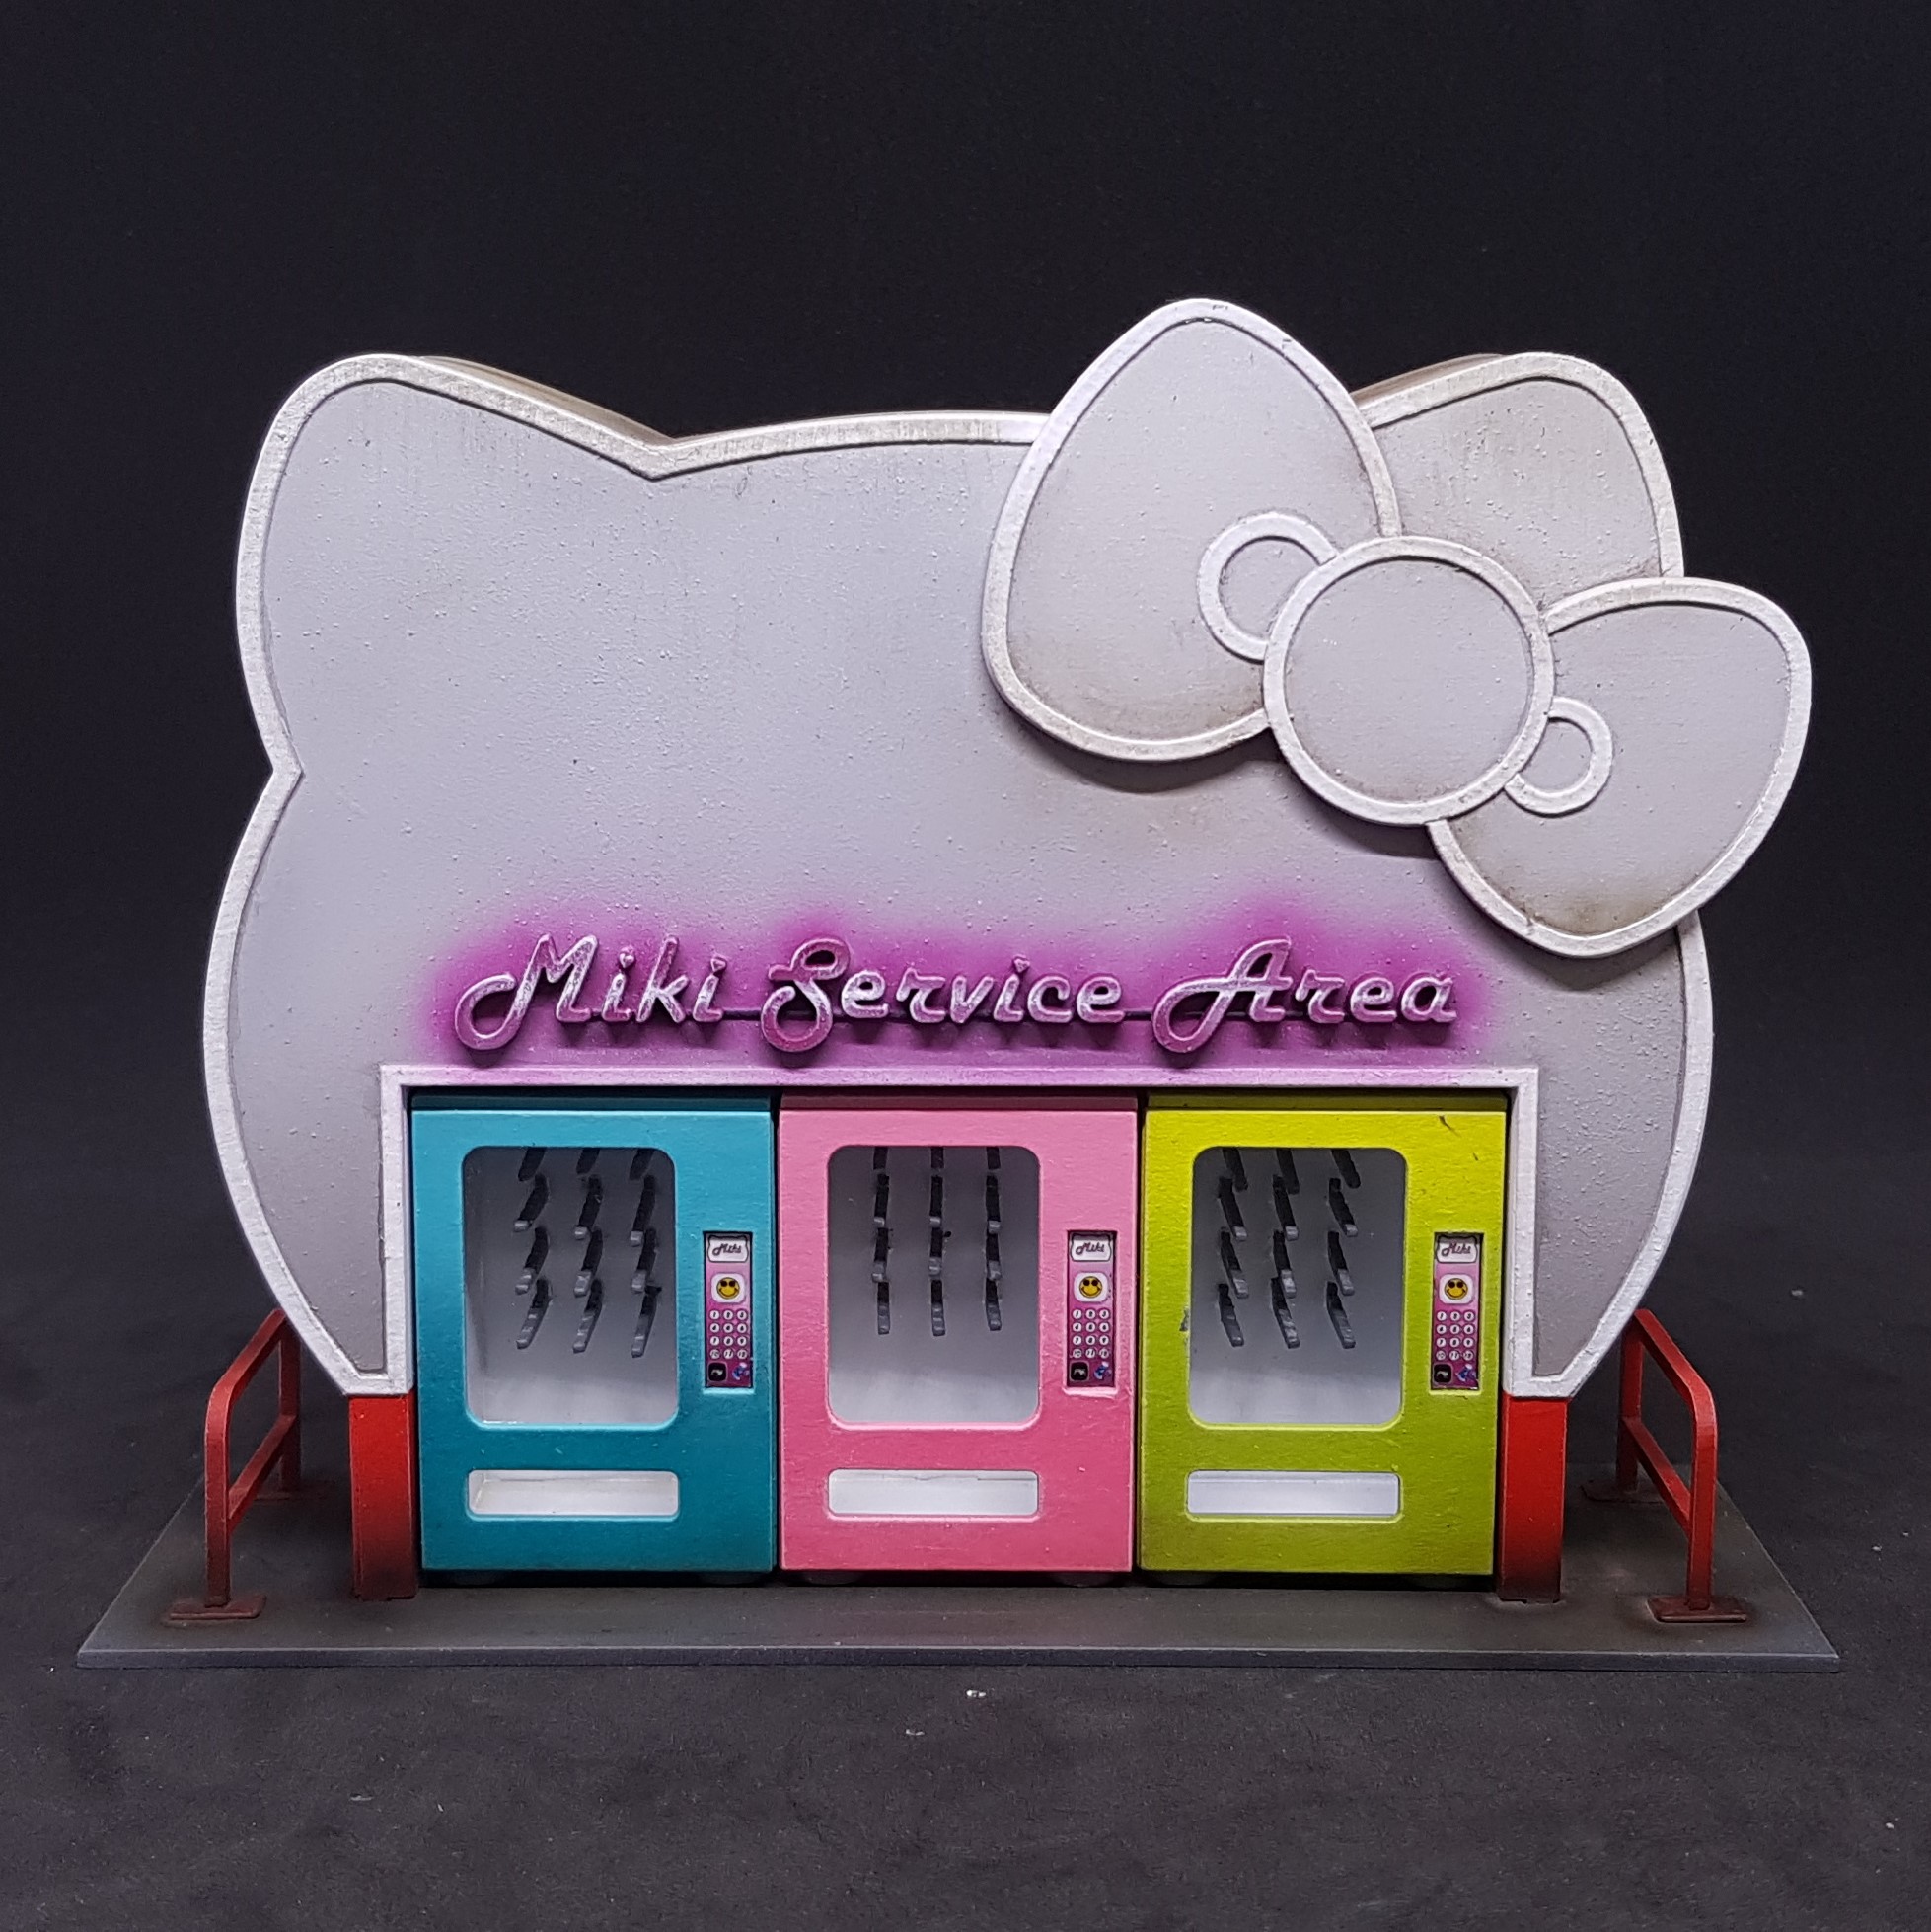
 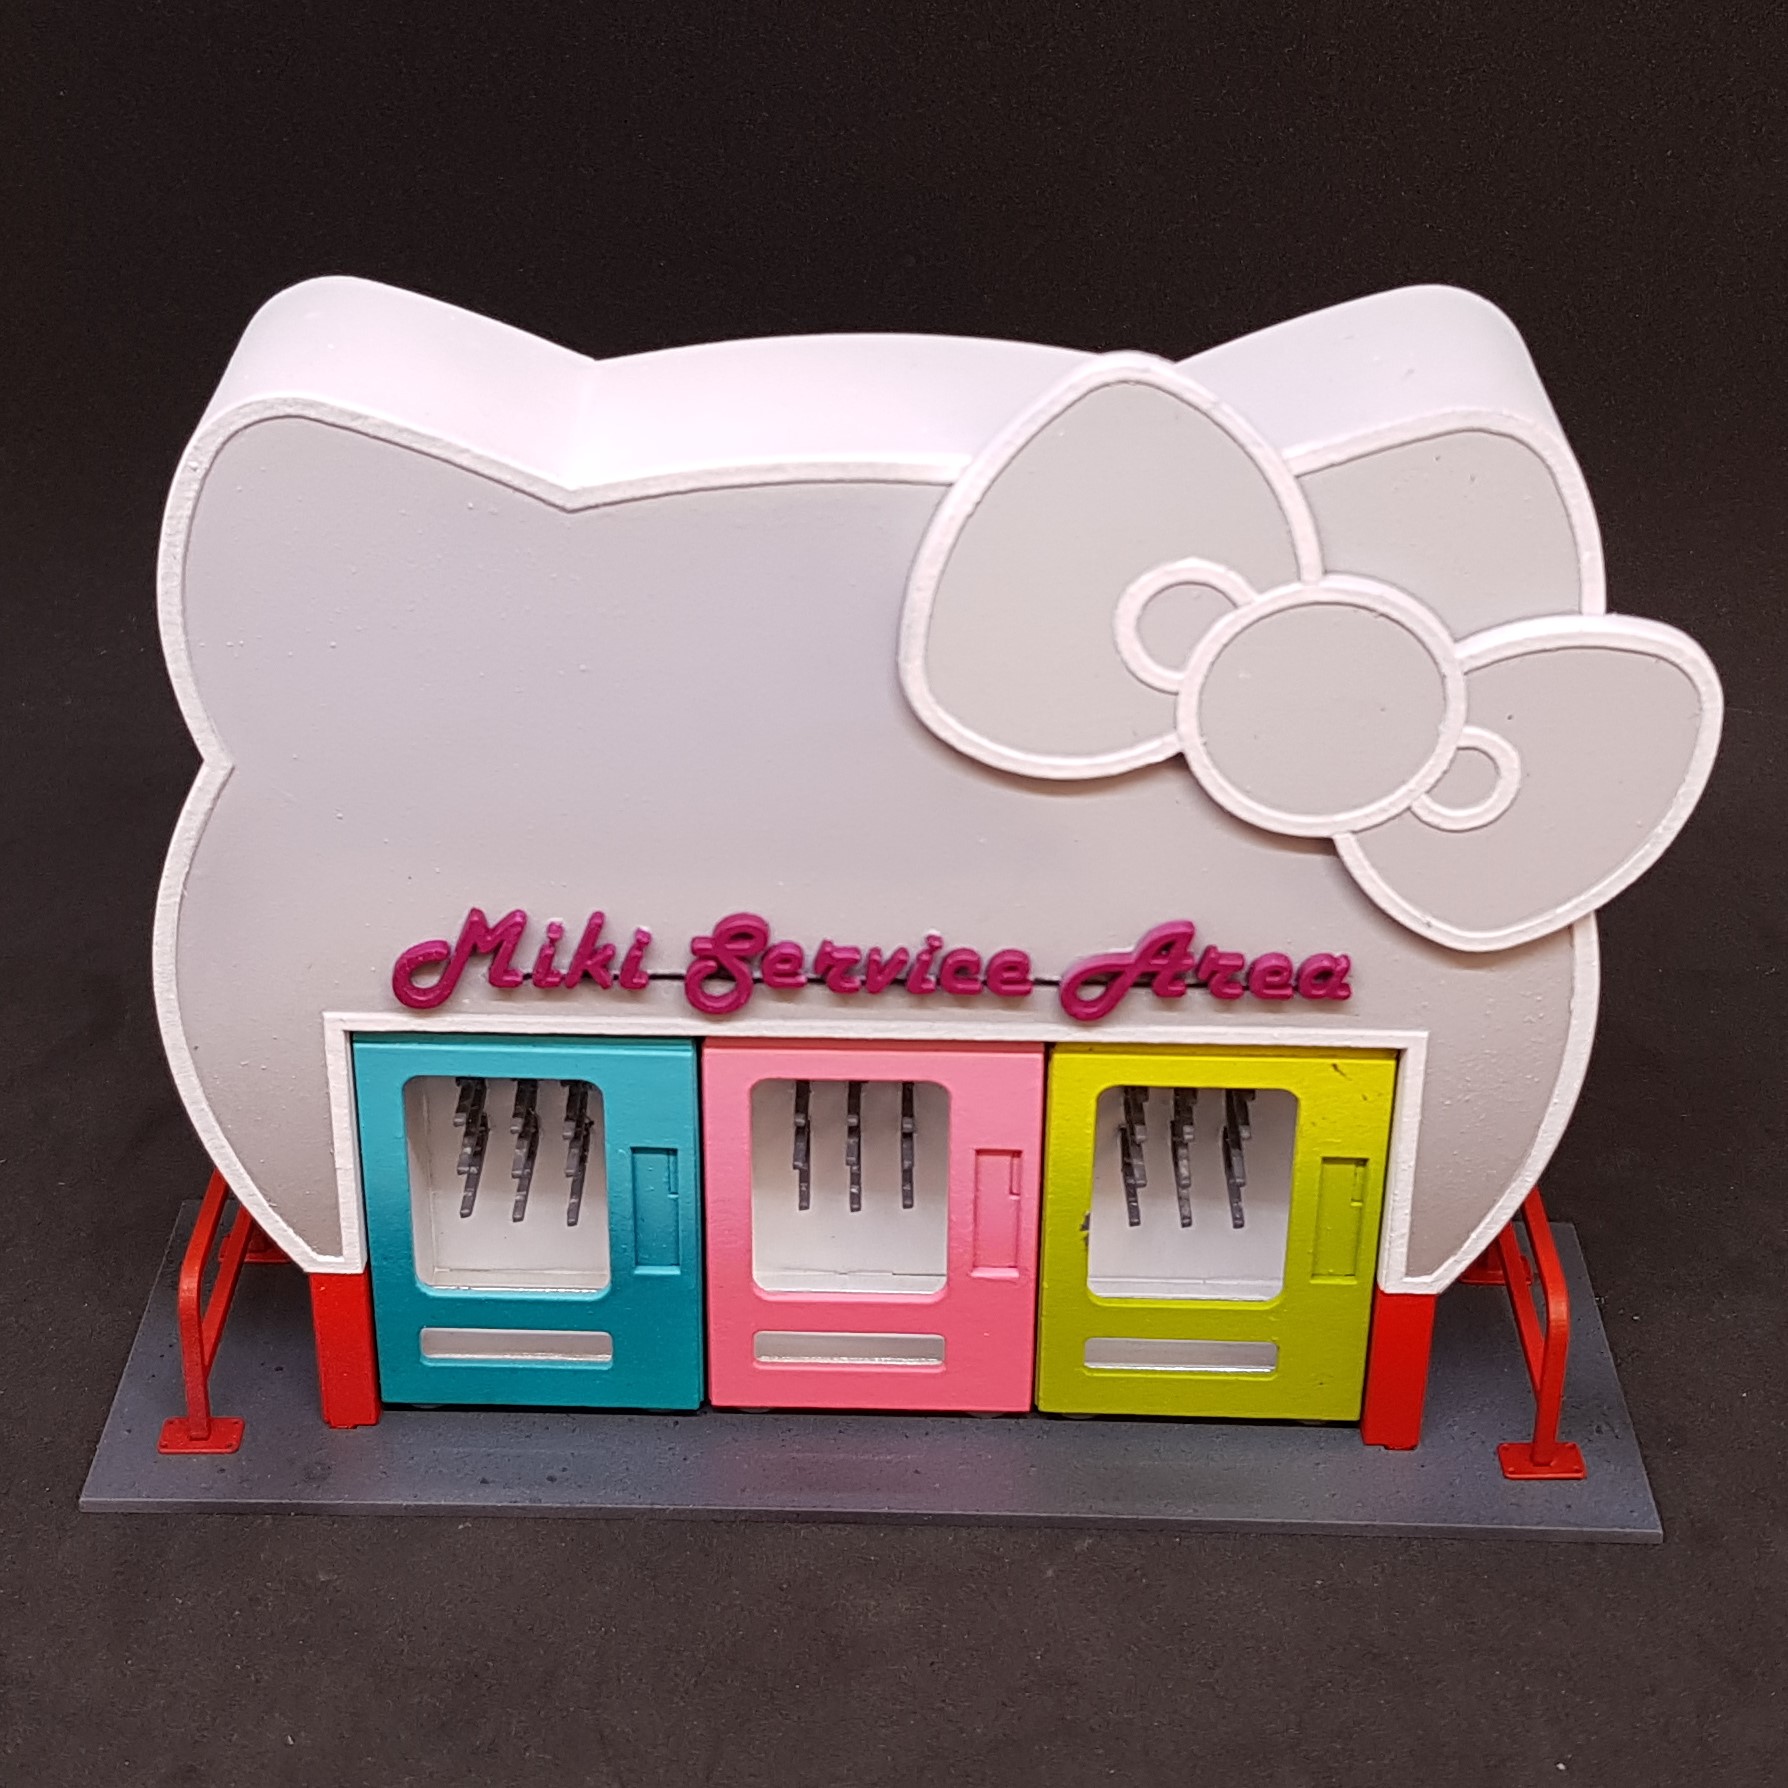 Everything together. I like the contrast of the fun building with a drab paintjob and the boring vending machines and exciting colourful paintjobs.
 So that’s me so far. I have a to do list today:
- highlight everything I may just do this with thin white to make it pop apart from the red on the building.
- Glue everything. Most is push fit assemblies at the moment.
- Weather this. This will be very difficult as a white roof you don’t normally see would not be white on any day apart from the day of construction.
- Do the sign, give it a glow with an airbrush of pink and then hand highlight it to pop.
- Make and fix on the control panels on the vending machines.
Almost done and then I need to get my thinking cap on for the Hobby Challenge. Can’t wait to see what everyone comes up with this time.
Finishing the service area.
Fun afternoon finishing this up.
Glad this is done. The project was supposed to be faster than this. but I am now the proud owner of some more infinity terrain.
My aim was to make something used but not in disrepair and failing. I looked at roofs around me. Good thing about living in flats and looked at some of the sheet metal roofs around.
Here is what I done.
 I glued and done all the wet painting I wanted to do. I started on the roof by spraying brown from afar just on the top and a very thin dusty coat. I then went back in and used Vallejo streaking grime again from afar. This gave a good base to work from I then dried this with a hair dryer and then sprayed water on the top and then again with streaking grime. I then used an old dry brush to streak the sides. I then used some medium to water down the pink and sprayed around the lettering I lightened this with white and done the same finer this time. I then went in with a drybrush to try and give it that 80’s neon glow effect. Not as good as I have seen, but I like it.
 I went on to take some black wash and spray round the base I knew I would be using grey industrial weathering powder and this tends to lighten things so wanted to go in with something dark before this.
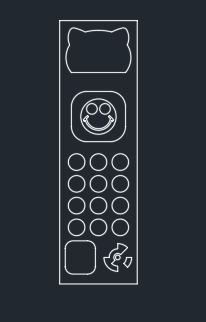
 I designed the panel in CAD again. I don’t know why this this is so much faster than trying to create with any other drawing programs I have. Also, I can ensure the scale is correct and it will fit.
I then put this in some photo editing software and coloured it. I wanted to match the neon colour of the sign to make them stand out.
I then prepared as I did for the power hub with gloss varnish then cut to size ready to apply.

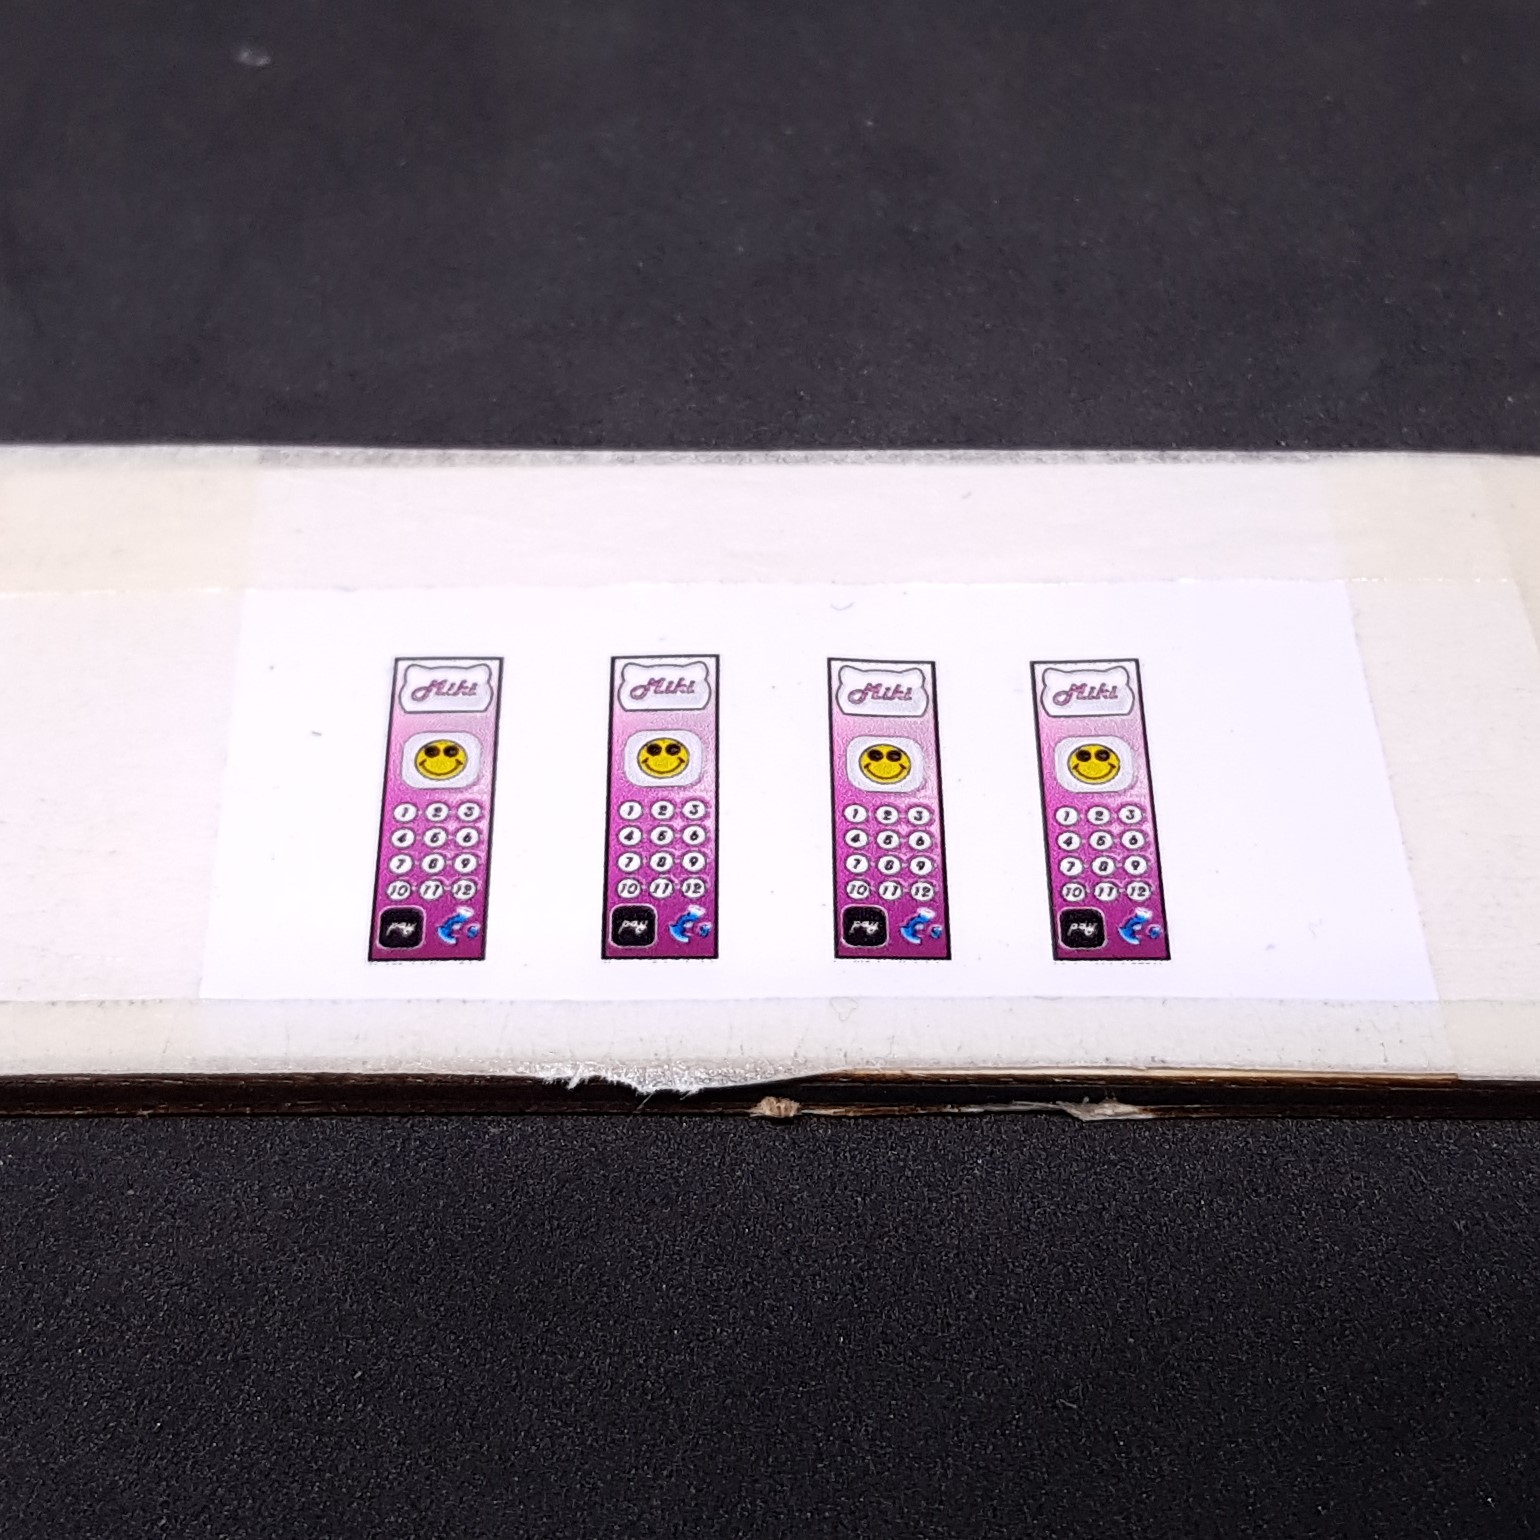
 Some weathering powder and I am done. I do like this and I tried to think out where to weather. I think the machines would be in good condition, but the housing would just need a deep clean. Most of the muck is on the top as most buildings are.
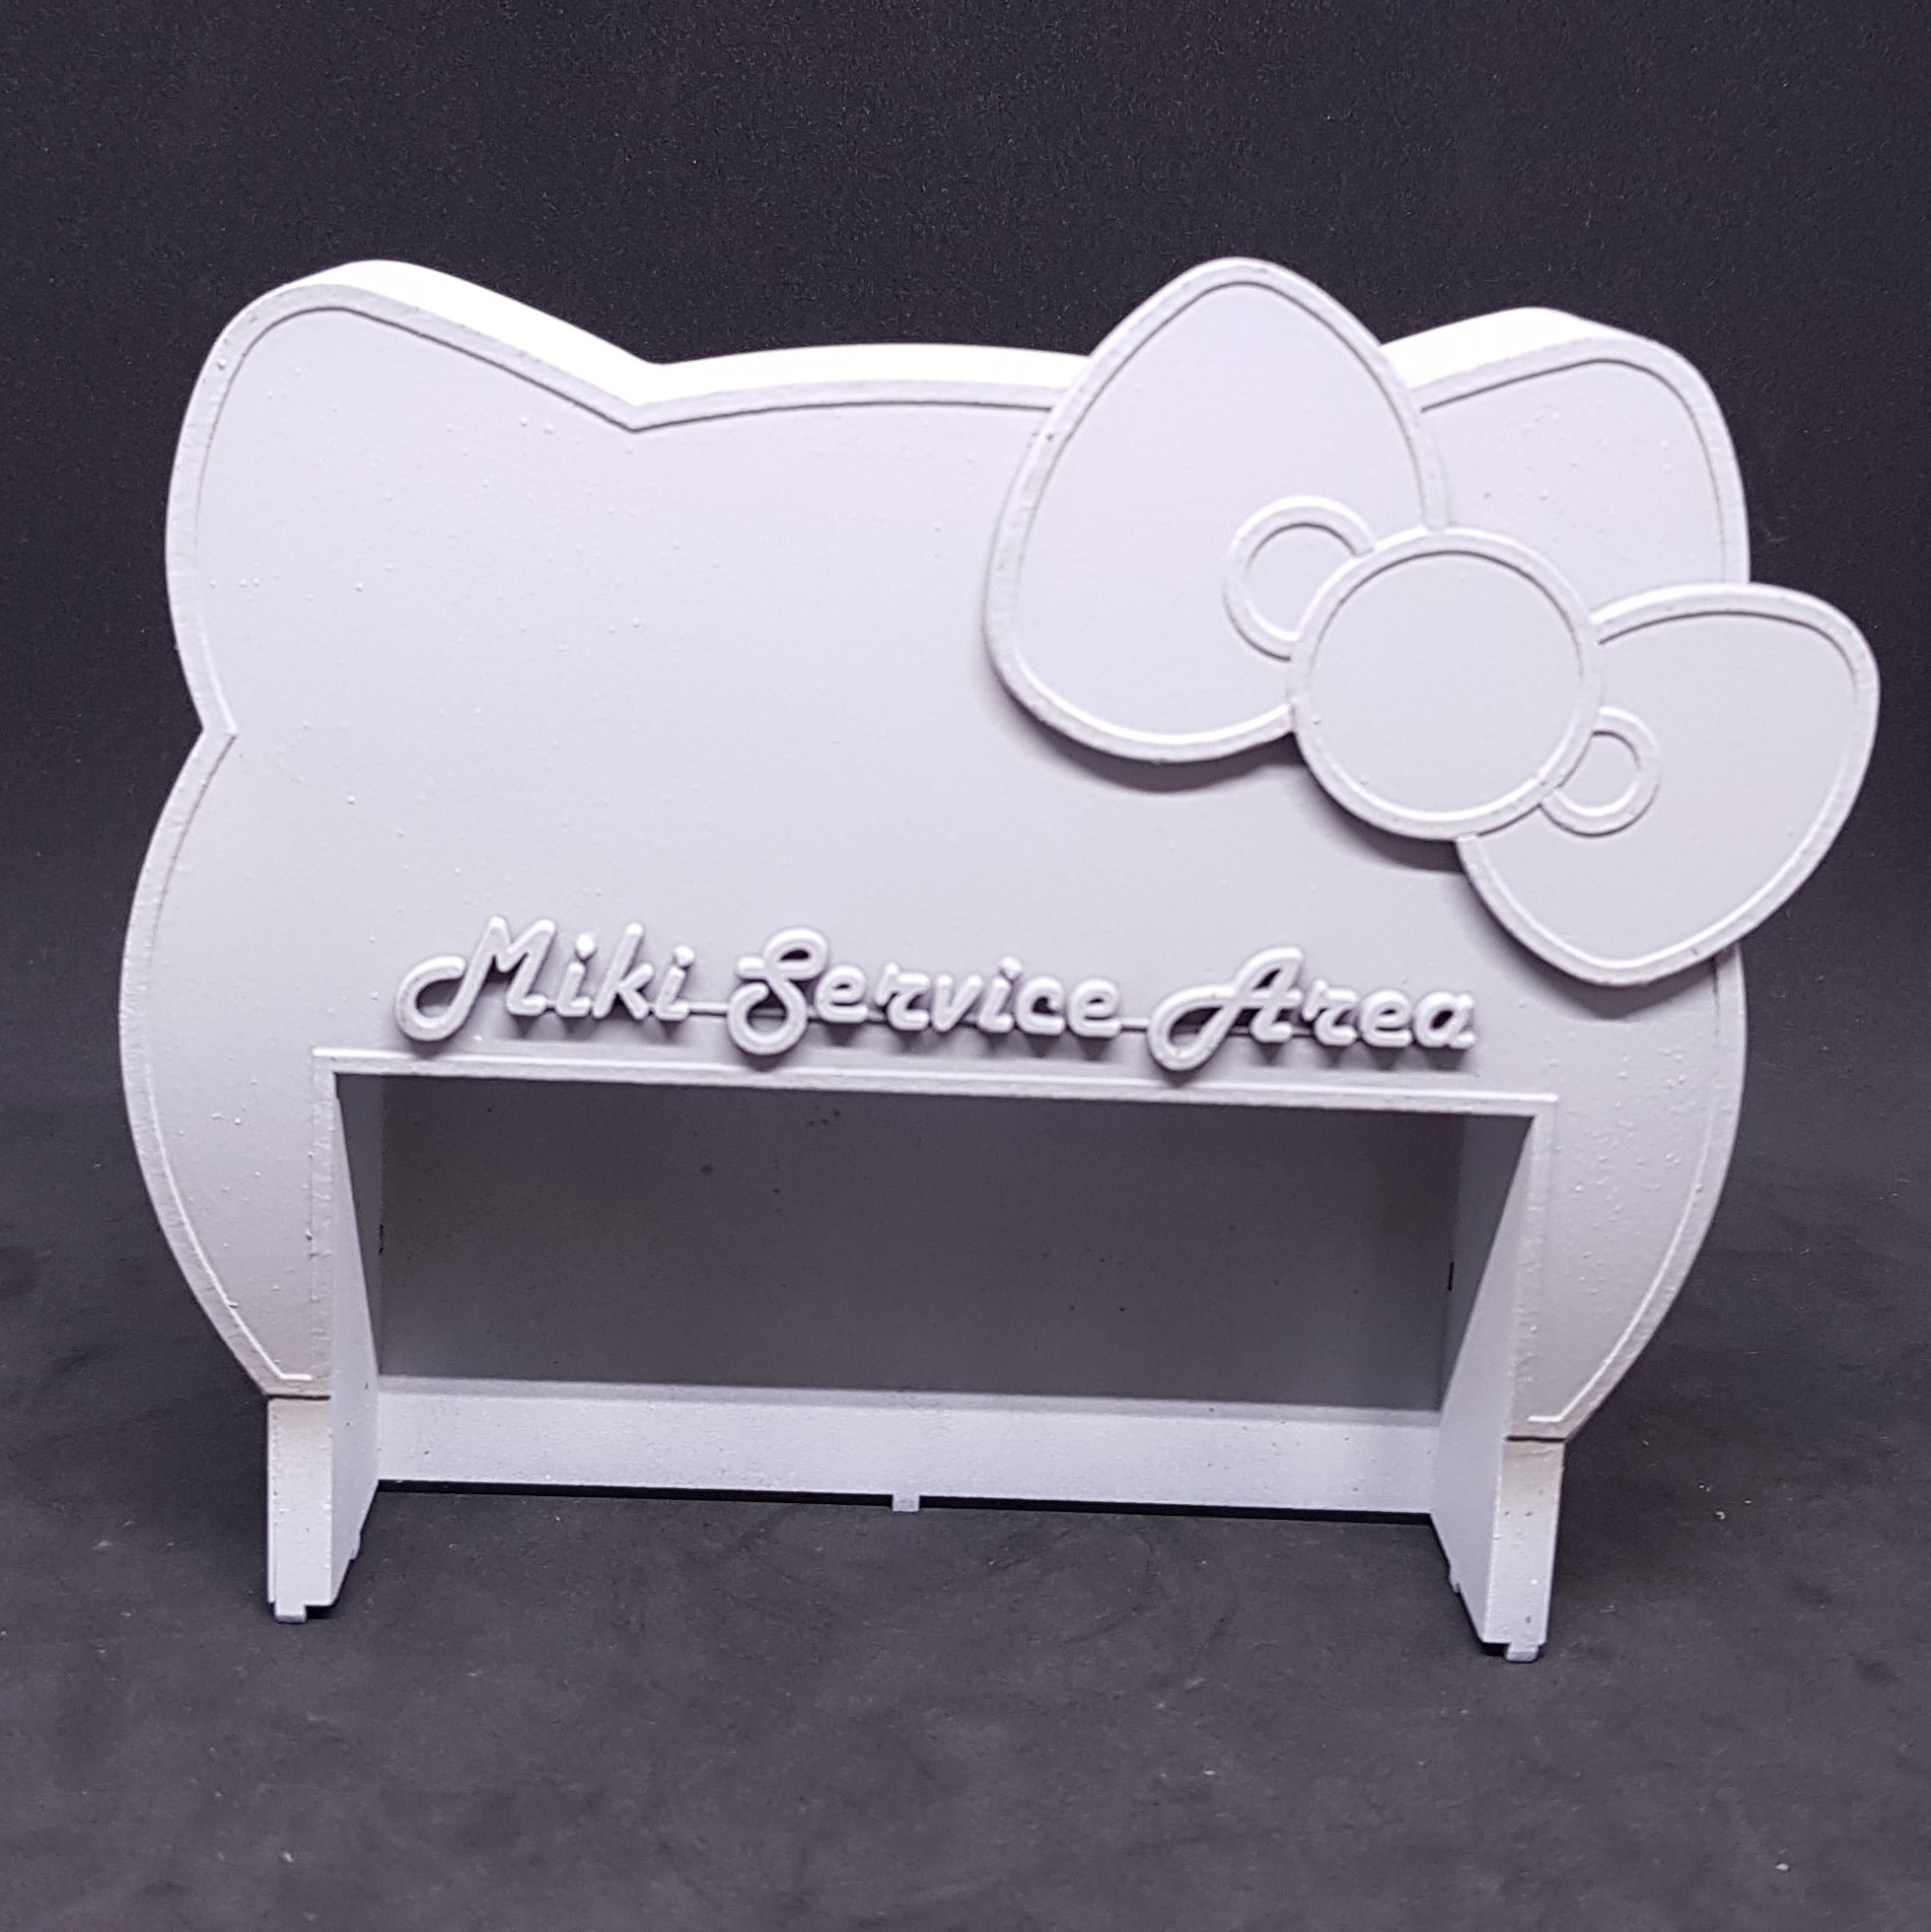
 The back ddosnt look as plain as I though it would. The white line and the red break this up enough for me not to feel it needs more.
 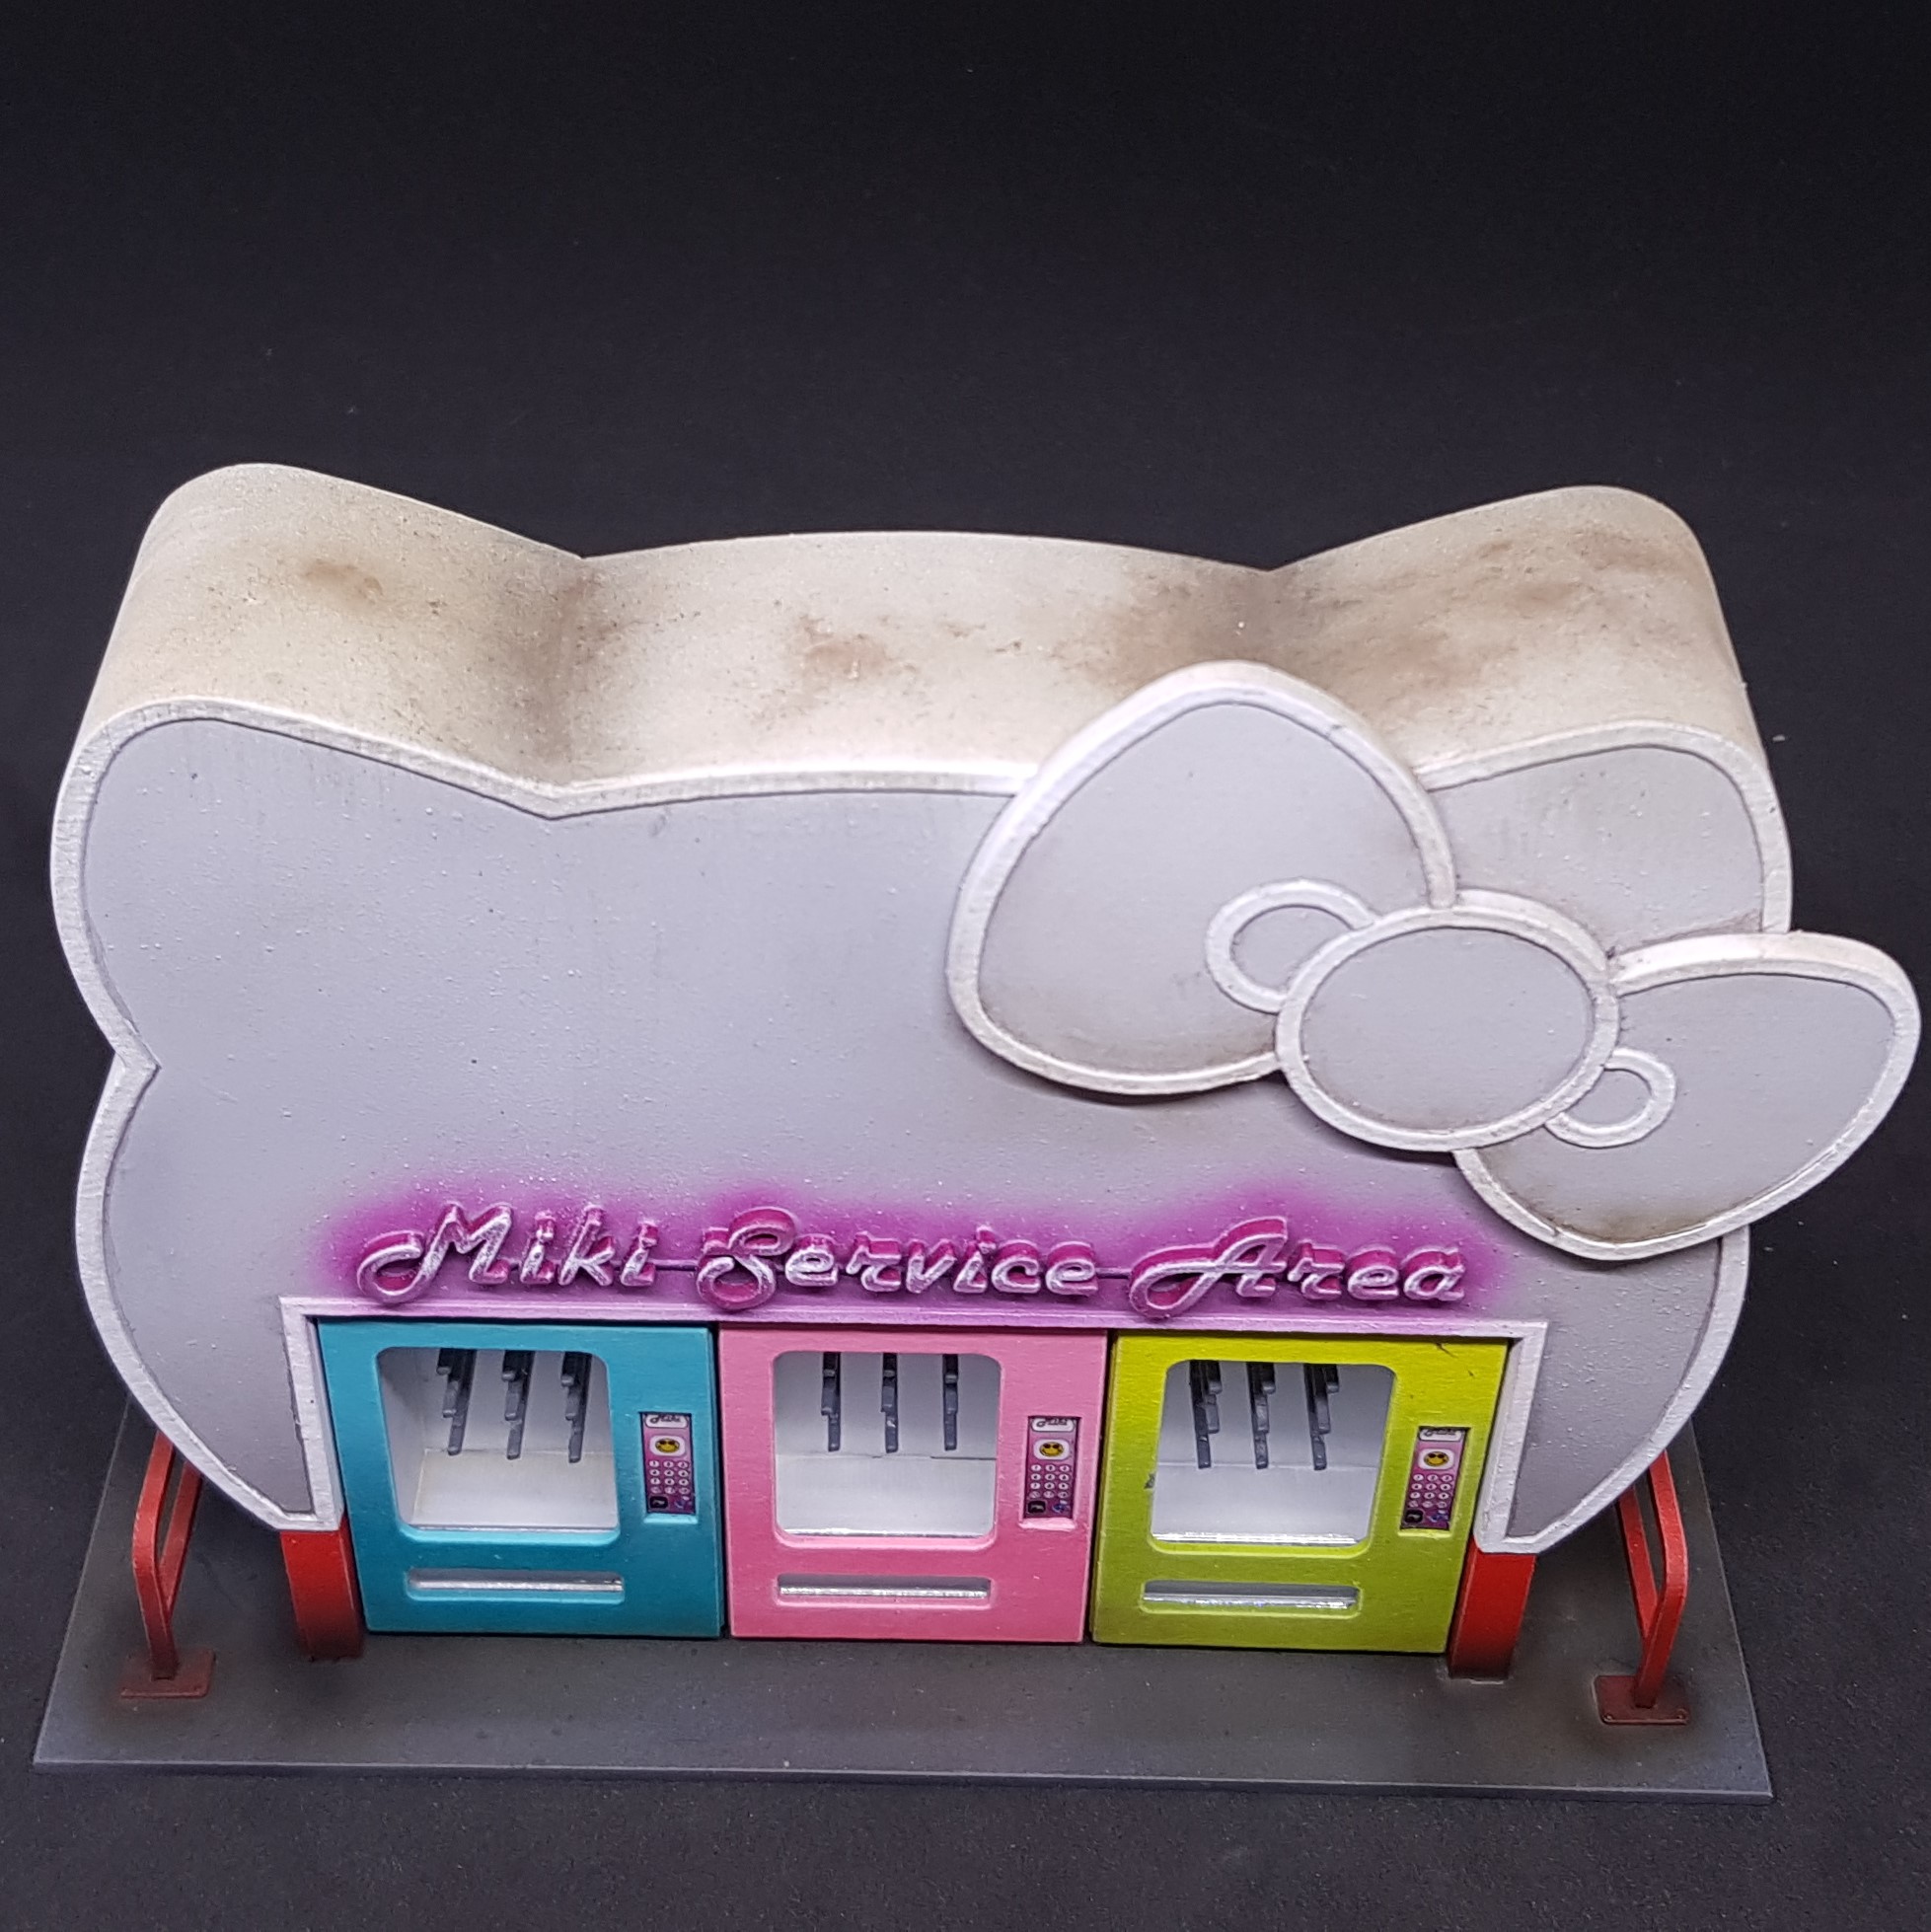 I think the roof looks like the one I can see from my window. You can still see some white but it's dirty where the rain would have pooled and ran.
 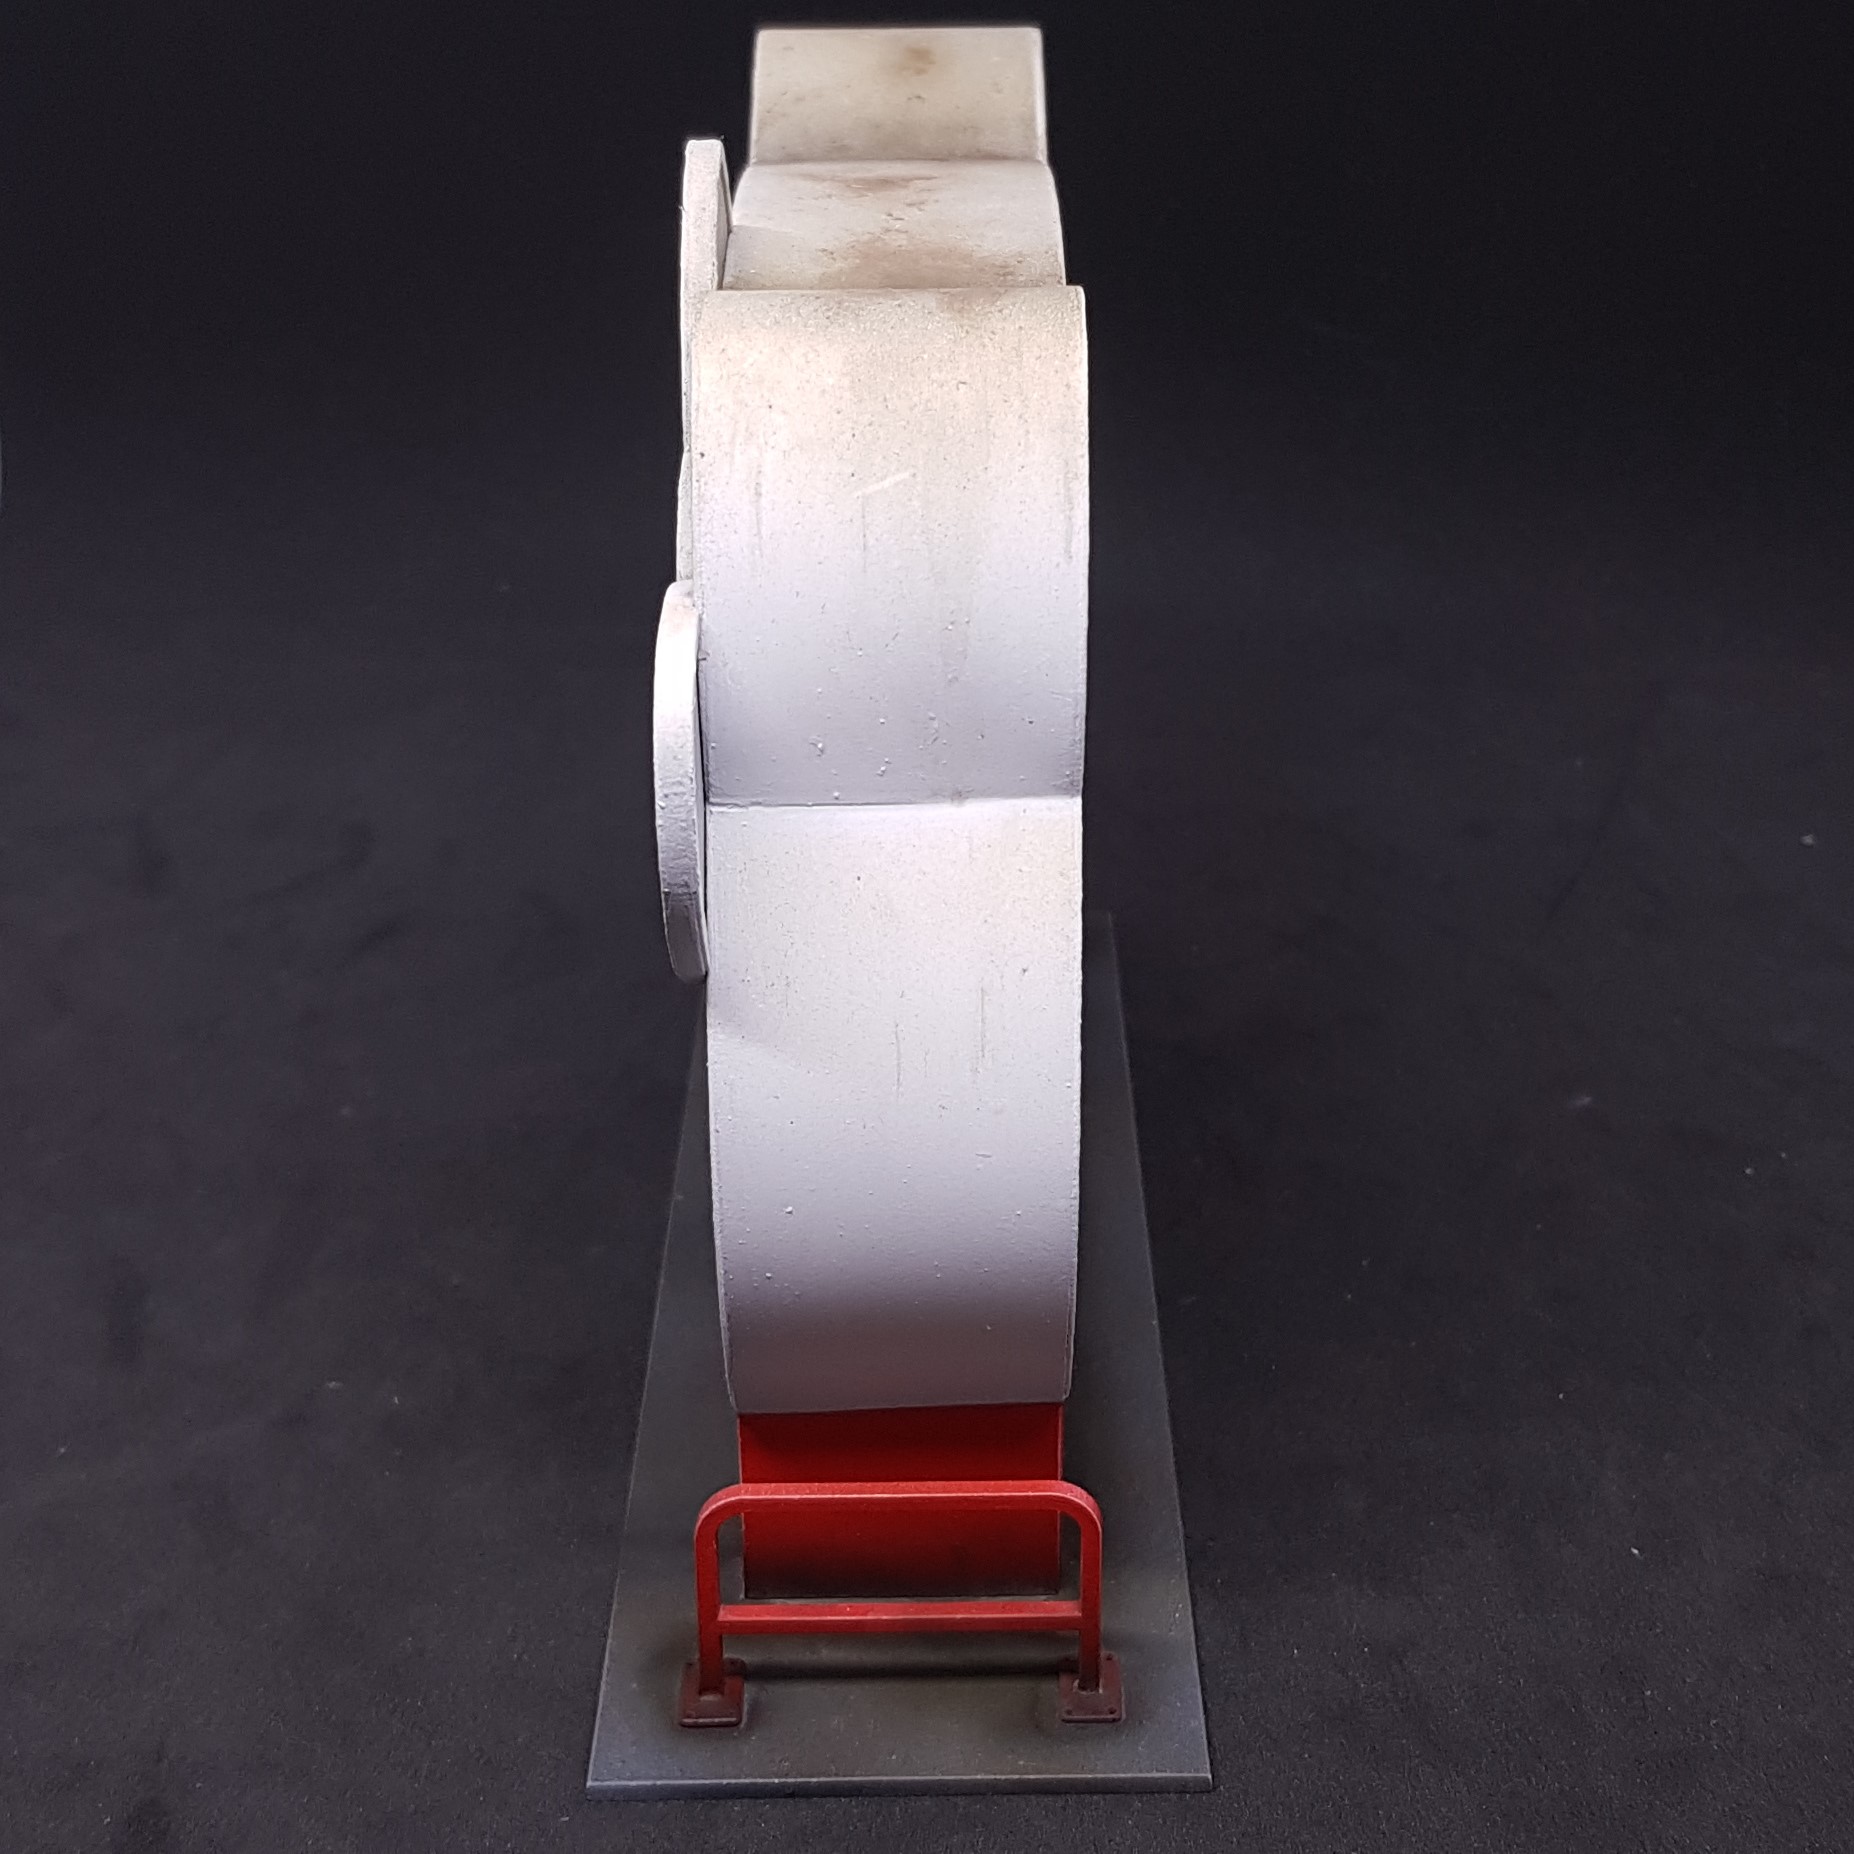 I have decided I do not like acrylic streaking effects. I perhaps do not know how to use them but the oil ones I have used in the past are far superior.
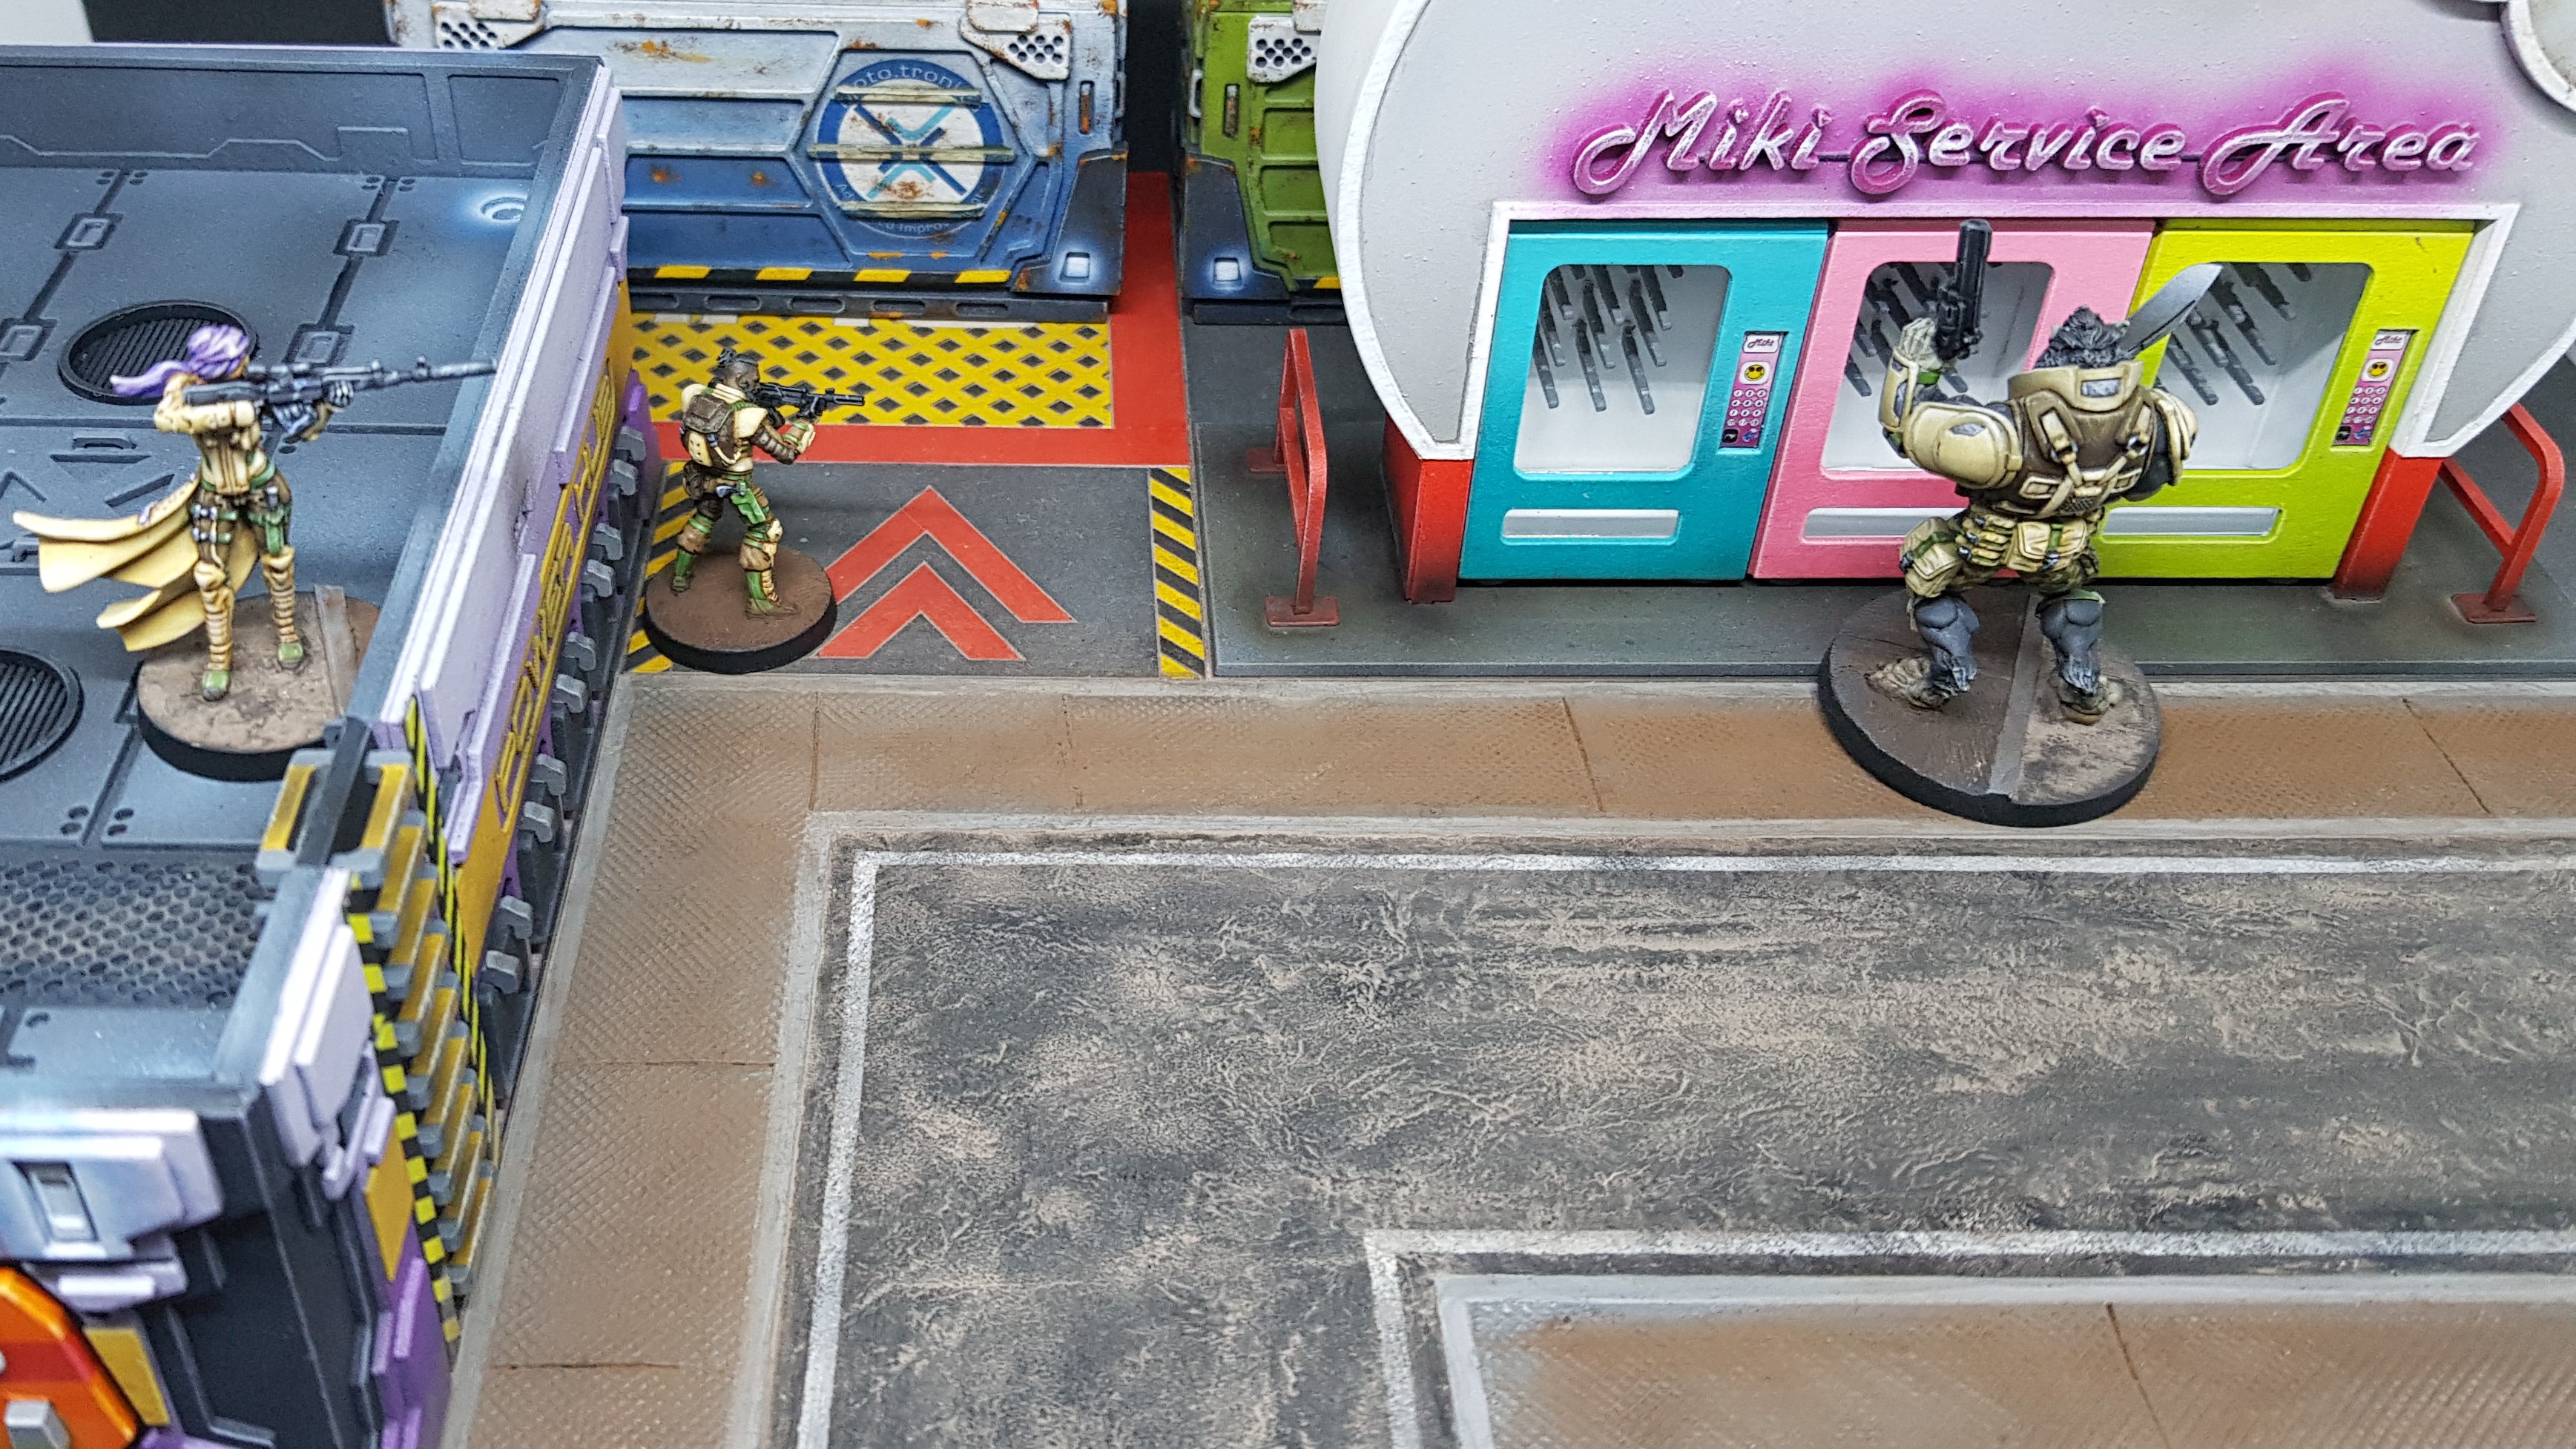 A hungry Devil Dog looking for food only to be disappointed. His bad day turns out to be an ambush!
And that’s it done. I have a lot of non hobby work coming up (I hope) and the hobby challenge is going to keep me busier still. Thinking about what to do…
This project is not going on hold as I know I will still be doing things even though I am busy. I have a management module to do after all. It may be a little longer between updates.
Hope you think this is as fun as I do. Was good to take a break from reality and make a cat shaped building.
More to come, soon-ish…
So it begins... Again - Main Management Module.
I played more infinity at the weekend and realised I have way too little terrain. Luckily enough I have the management module to do. Fired up I loaded up the drawings and started to go through converting my 3D drawing to 2D for laser cutting.
I started to lose motivation just drawing so I decided to do the roof section fully to base coat and leaving only weathering and glow effects. Then go with renewed vigour to get the rest done.
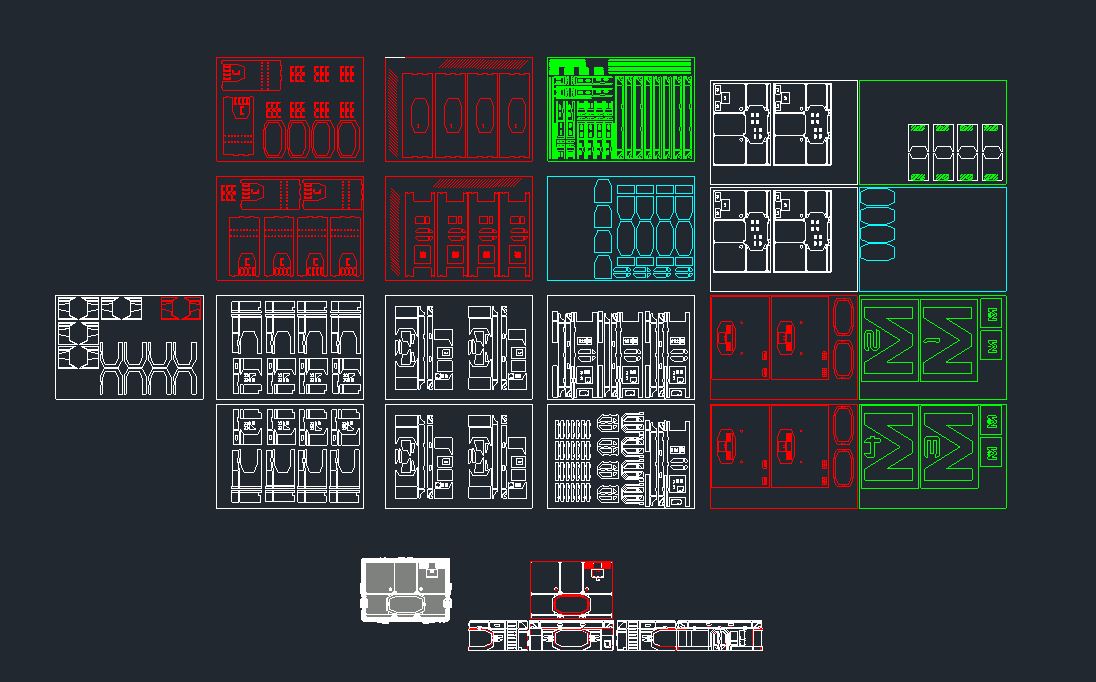
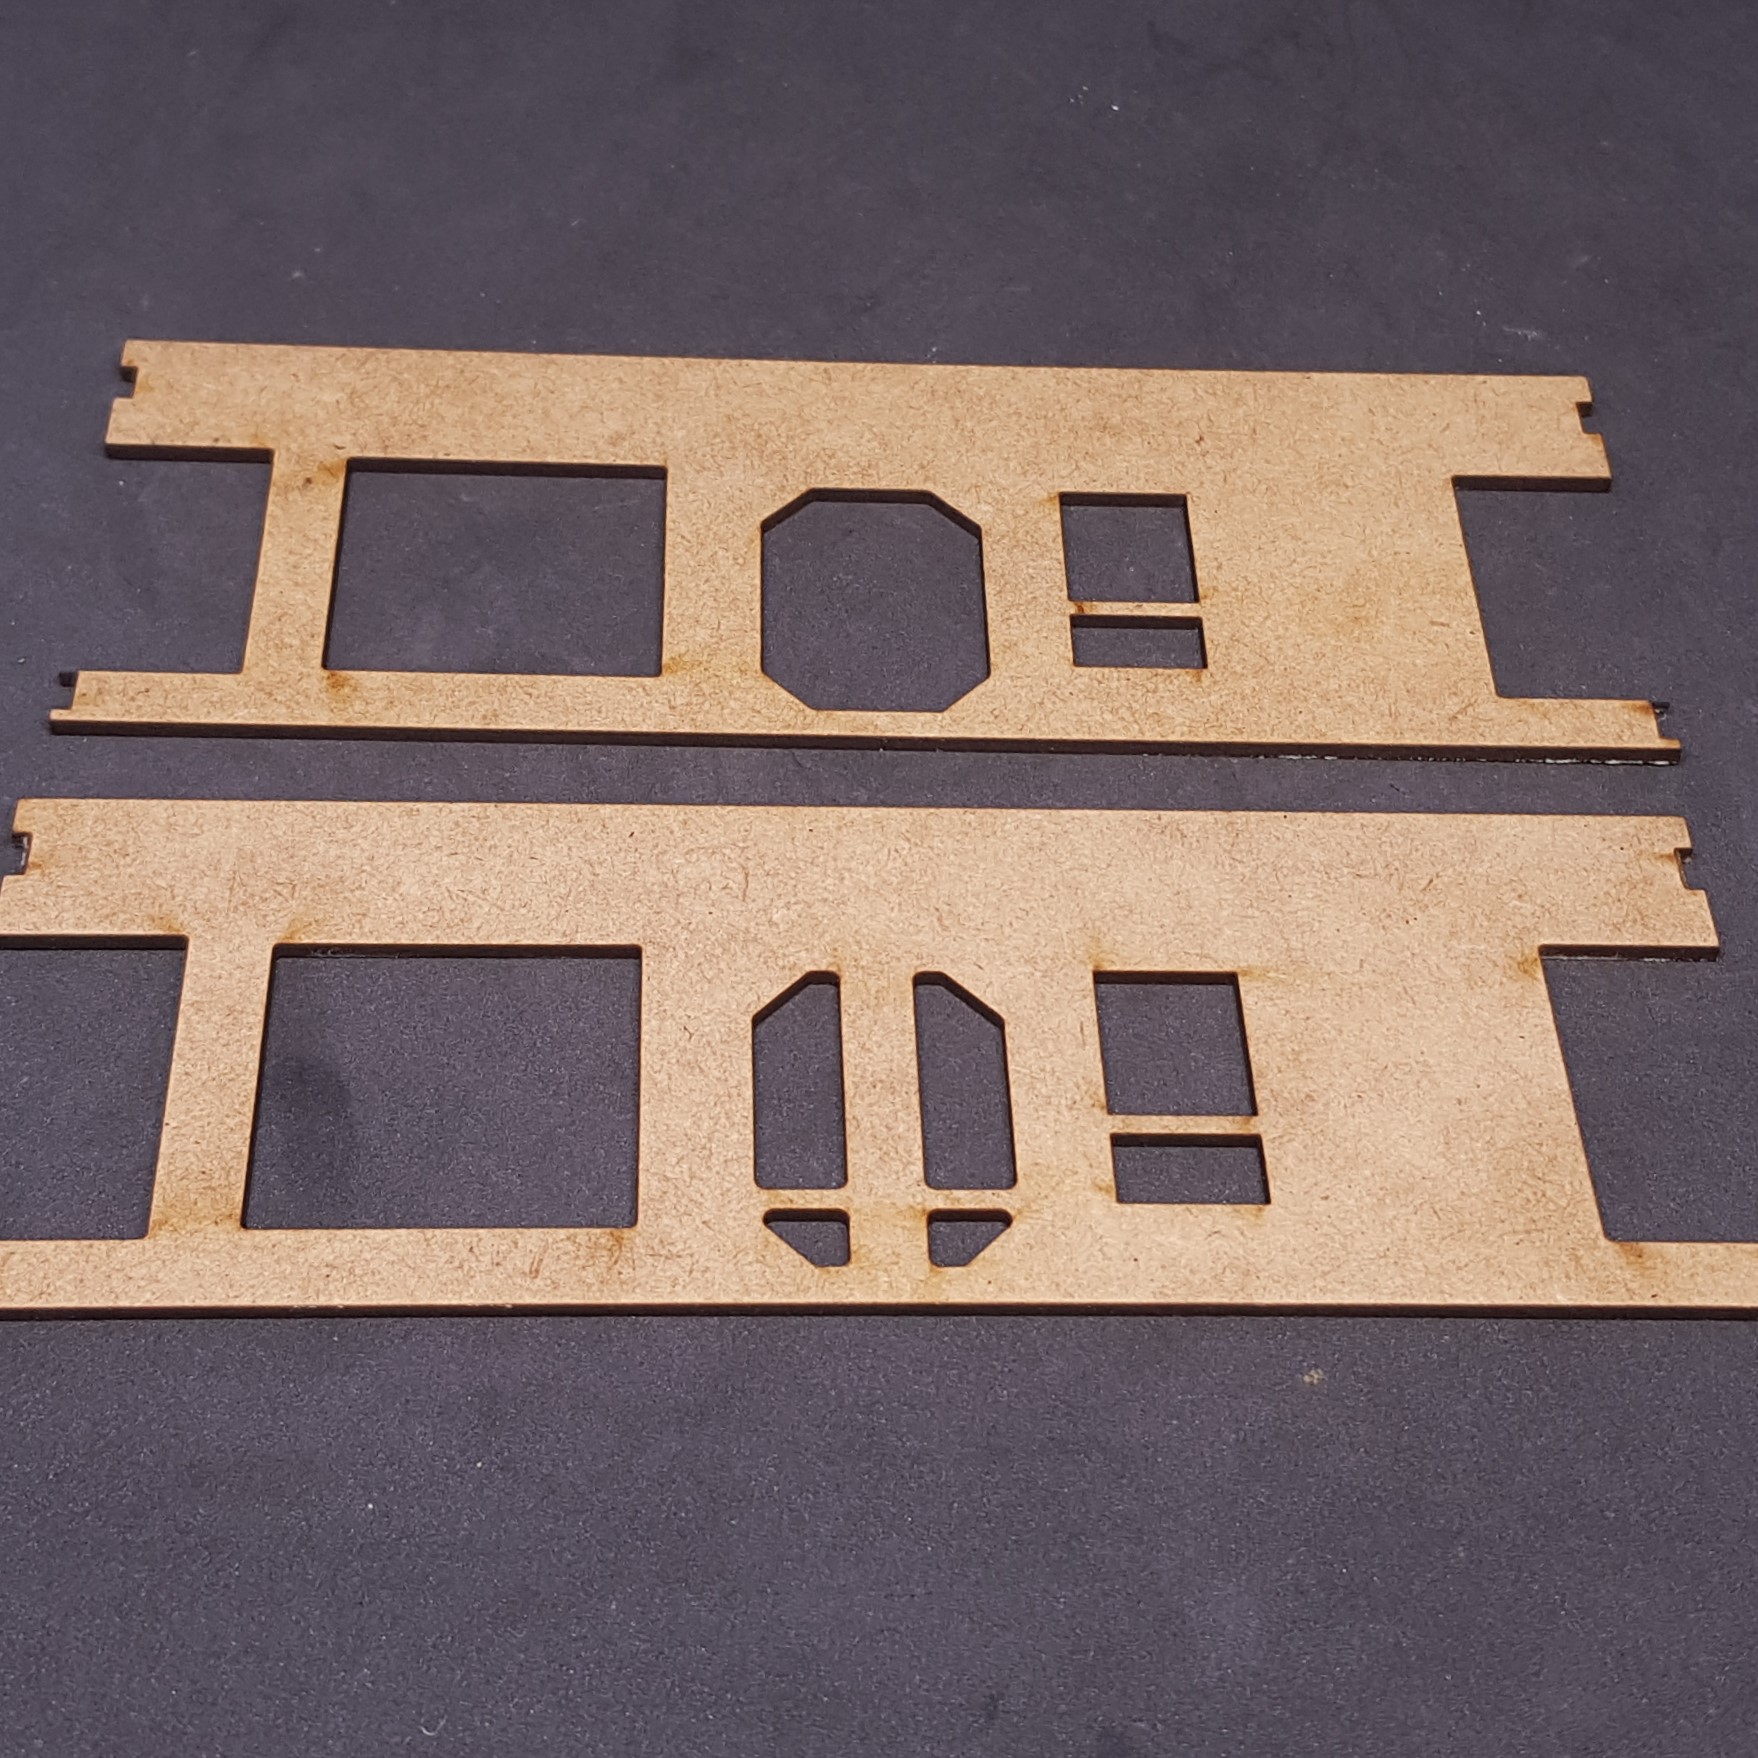
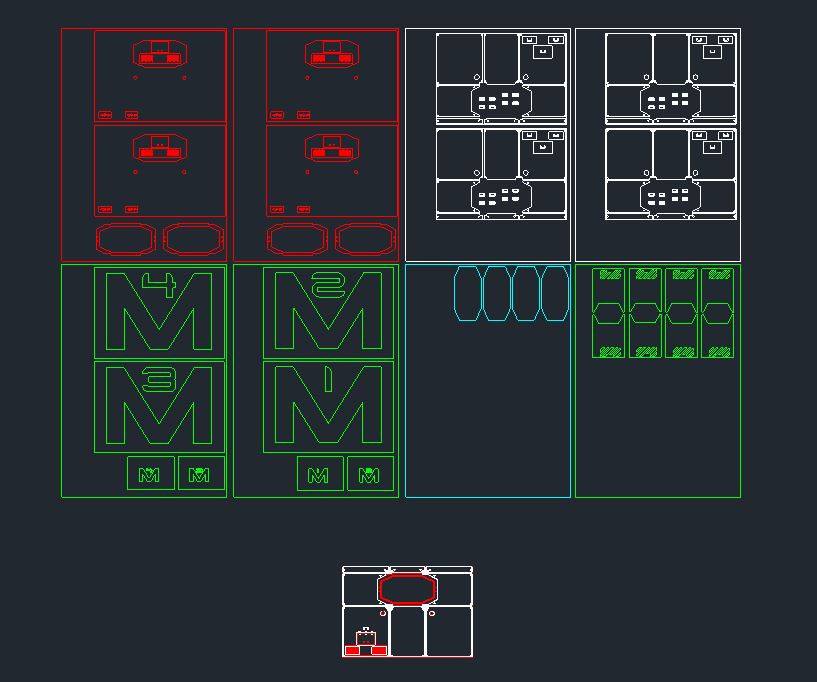 Drawing of roof, components and masks required.
 I laser cut everything out of the usual 0.5 and 1mm card and 2mm MDF. I also cut some 2mm clear acrylic to use as glass and assembled with superglue (minus the acrylic). I done a basecoat of black with and grey and dusty blue speckle.
Here I tried something awesome. I used dots of liquid mask to stick down masks and used to offcut of the mask to position this on the model. This worked and was accurate to 1mm which is good for this.
I then used a heaver light grey and a blue grey for the main colour leaving the darker M using an airbrush.
On a side note. The full name for this building in infinity is “M3 Main Management Module” I think the M3 is the shorting of main management module I wanted 4 of these so took a liberty to remove the words and change the numbers and colours. Just so you don’t need to point this out 🙂
 Mask "glued" with Liquid mask
I removed this mask and then removed the dots with a ball of liquid mask. I then added more masks (one pictured) in the corner and the hazard stripers beside the ladders were done using white through my airbrush and then the masks removed in the same way.
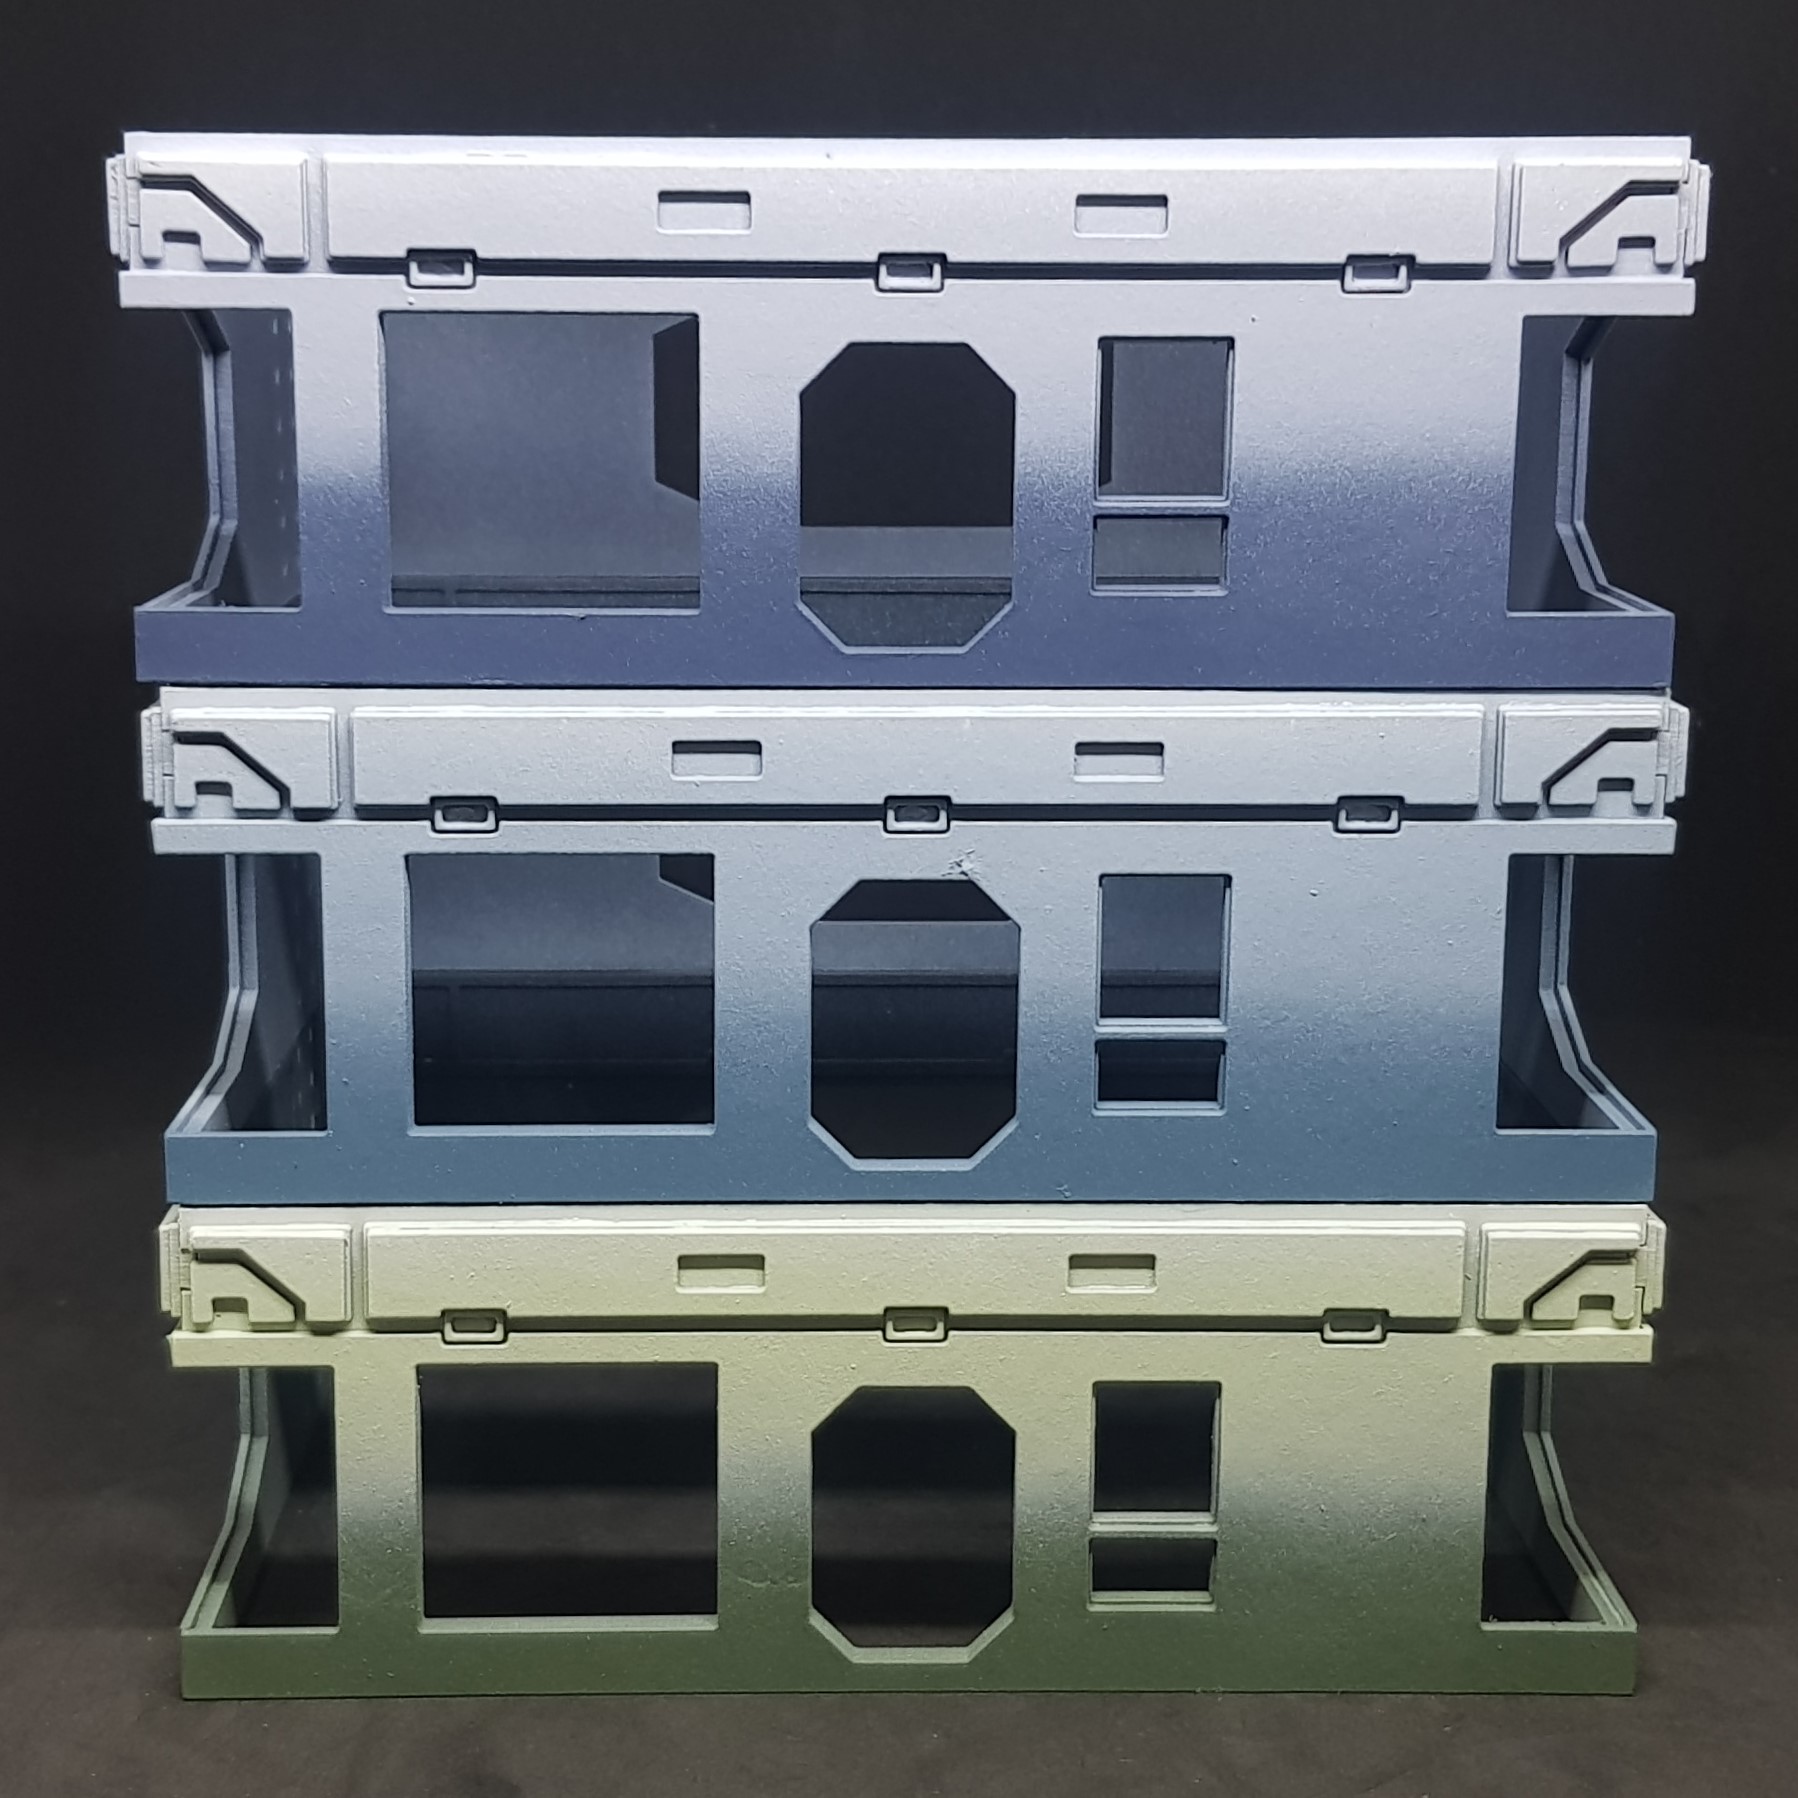
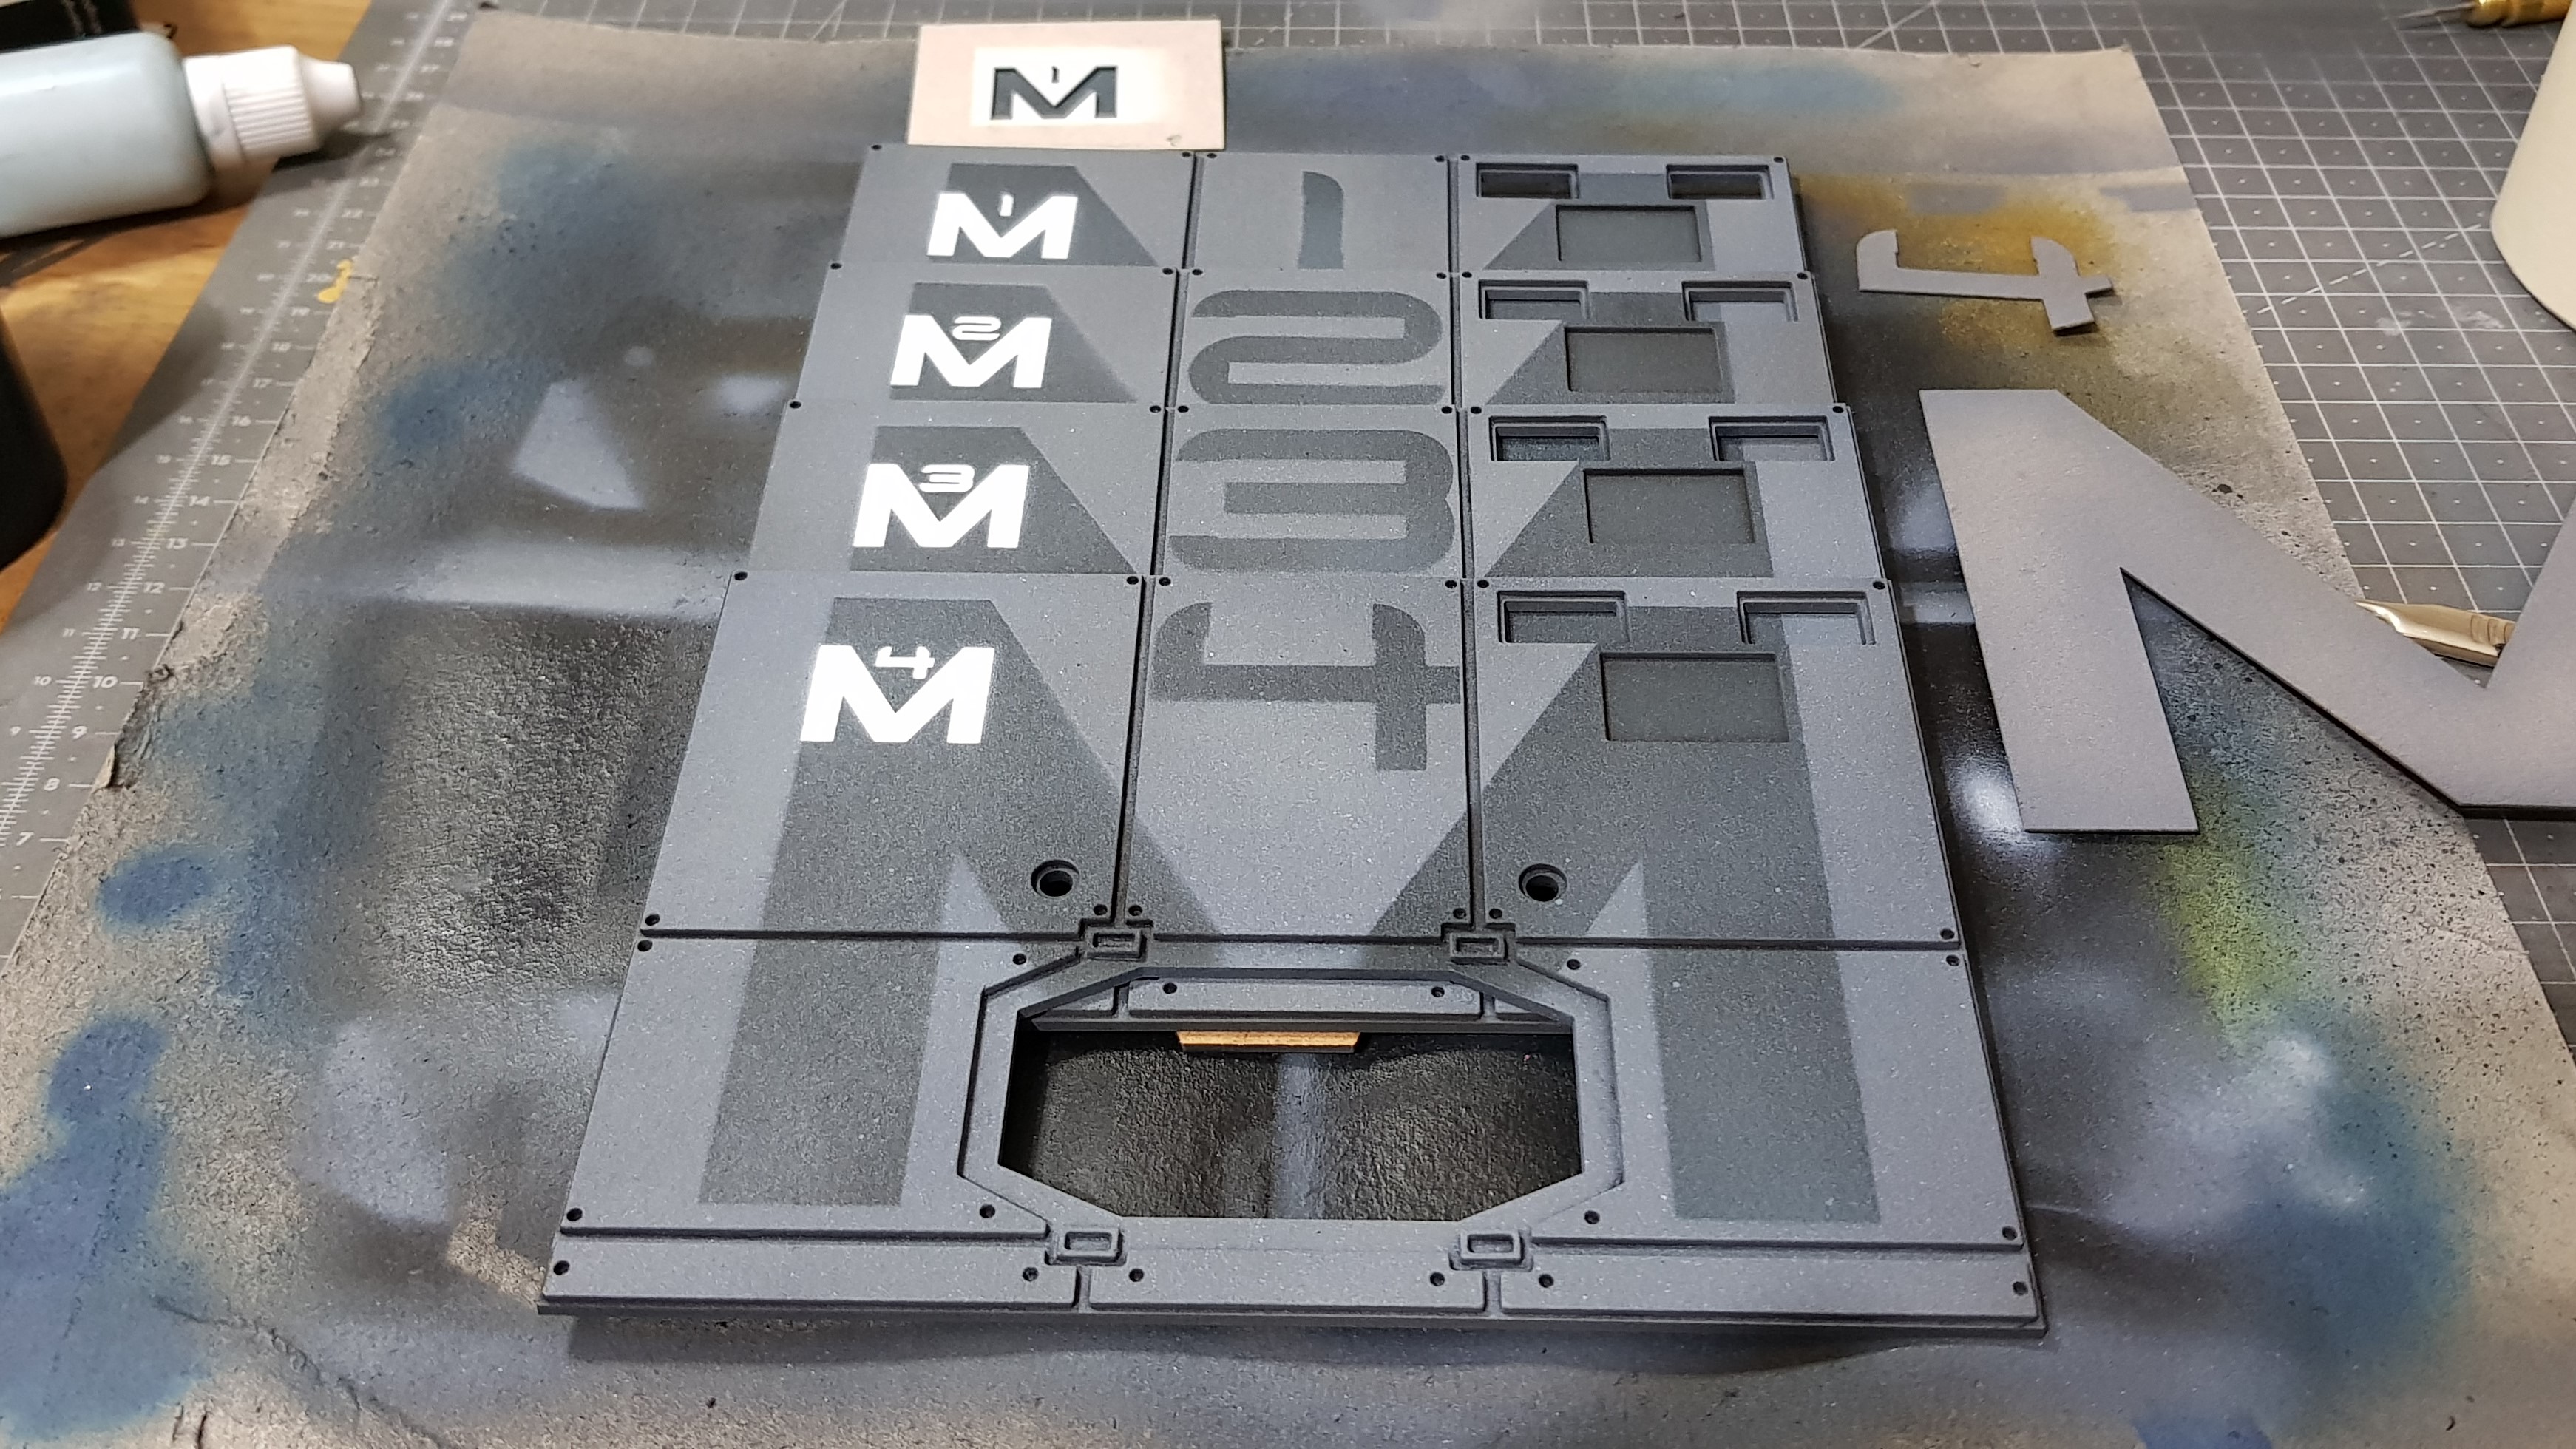 All 4 roofs with main and second mask completed.
 I blacked out all non raised detail with a brush.
I painted the coloured components and the handles and grey fixings in a very light grey and attached them with superglue.
I also painted some BB’s white for the lights and glued with superglue.
The Acrylic was back sprayed black leaving the protective backing on instead of masking.
 Base painted roofs.
 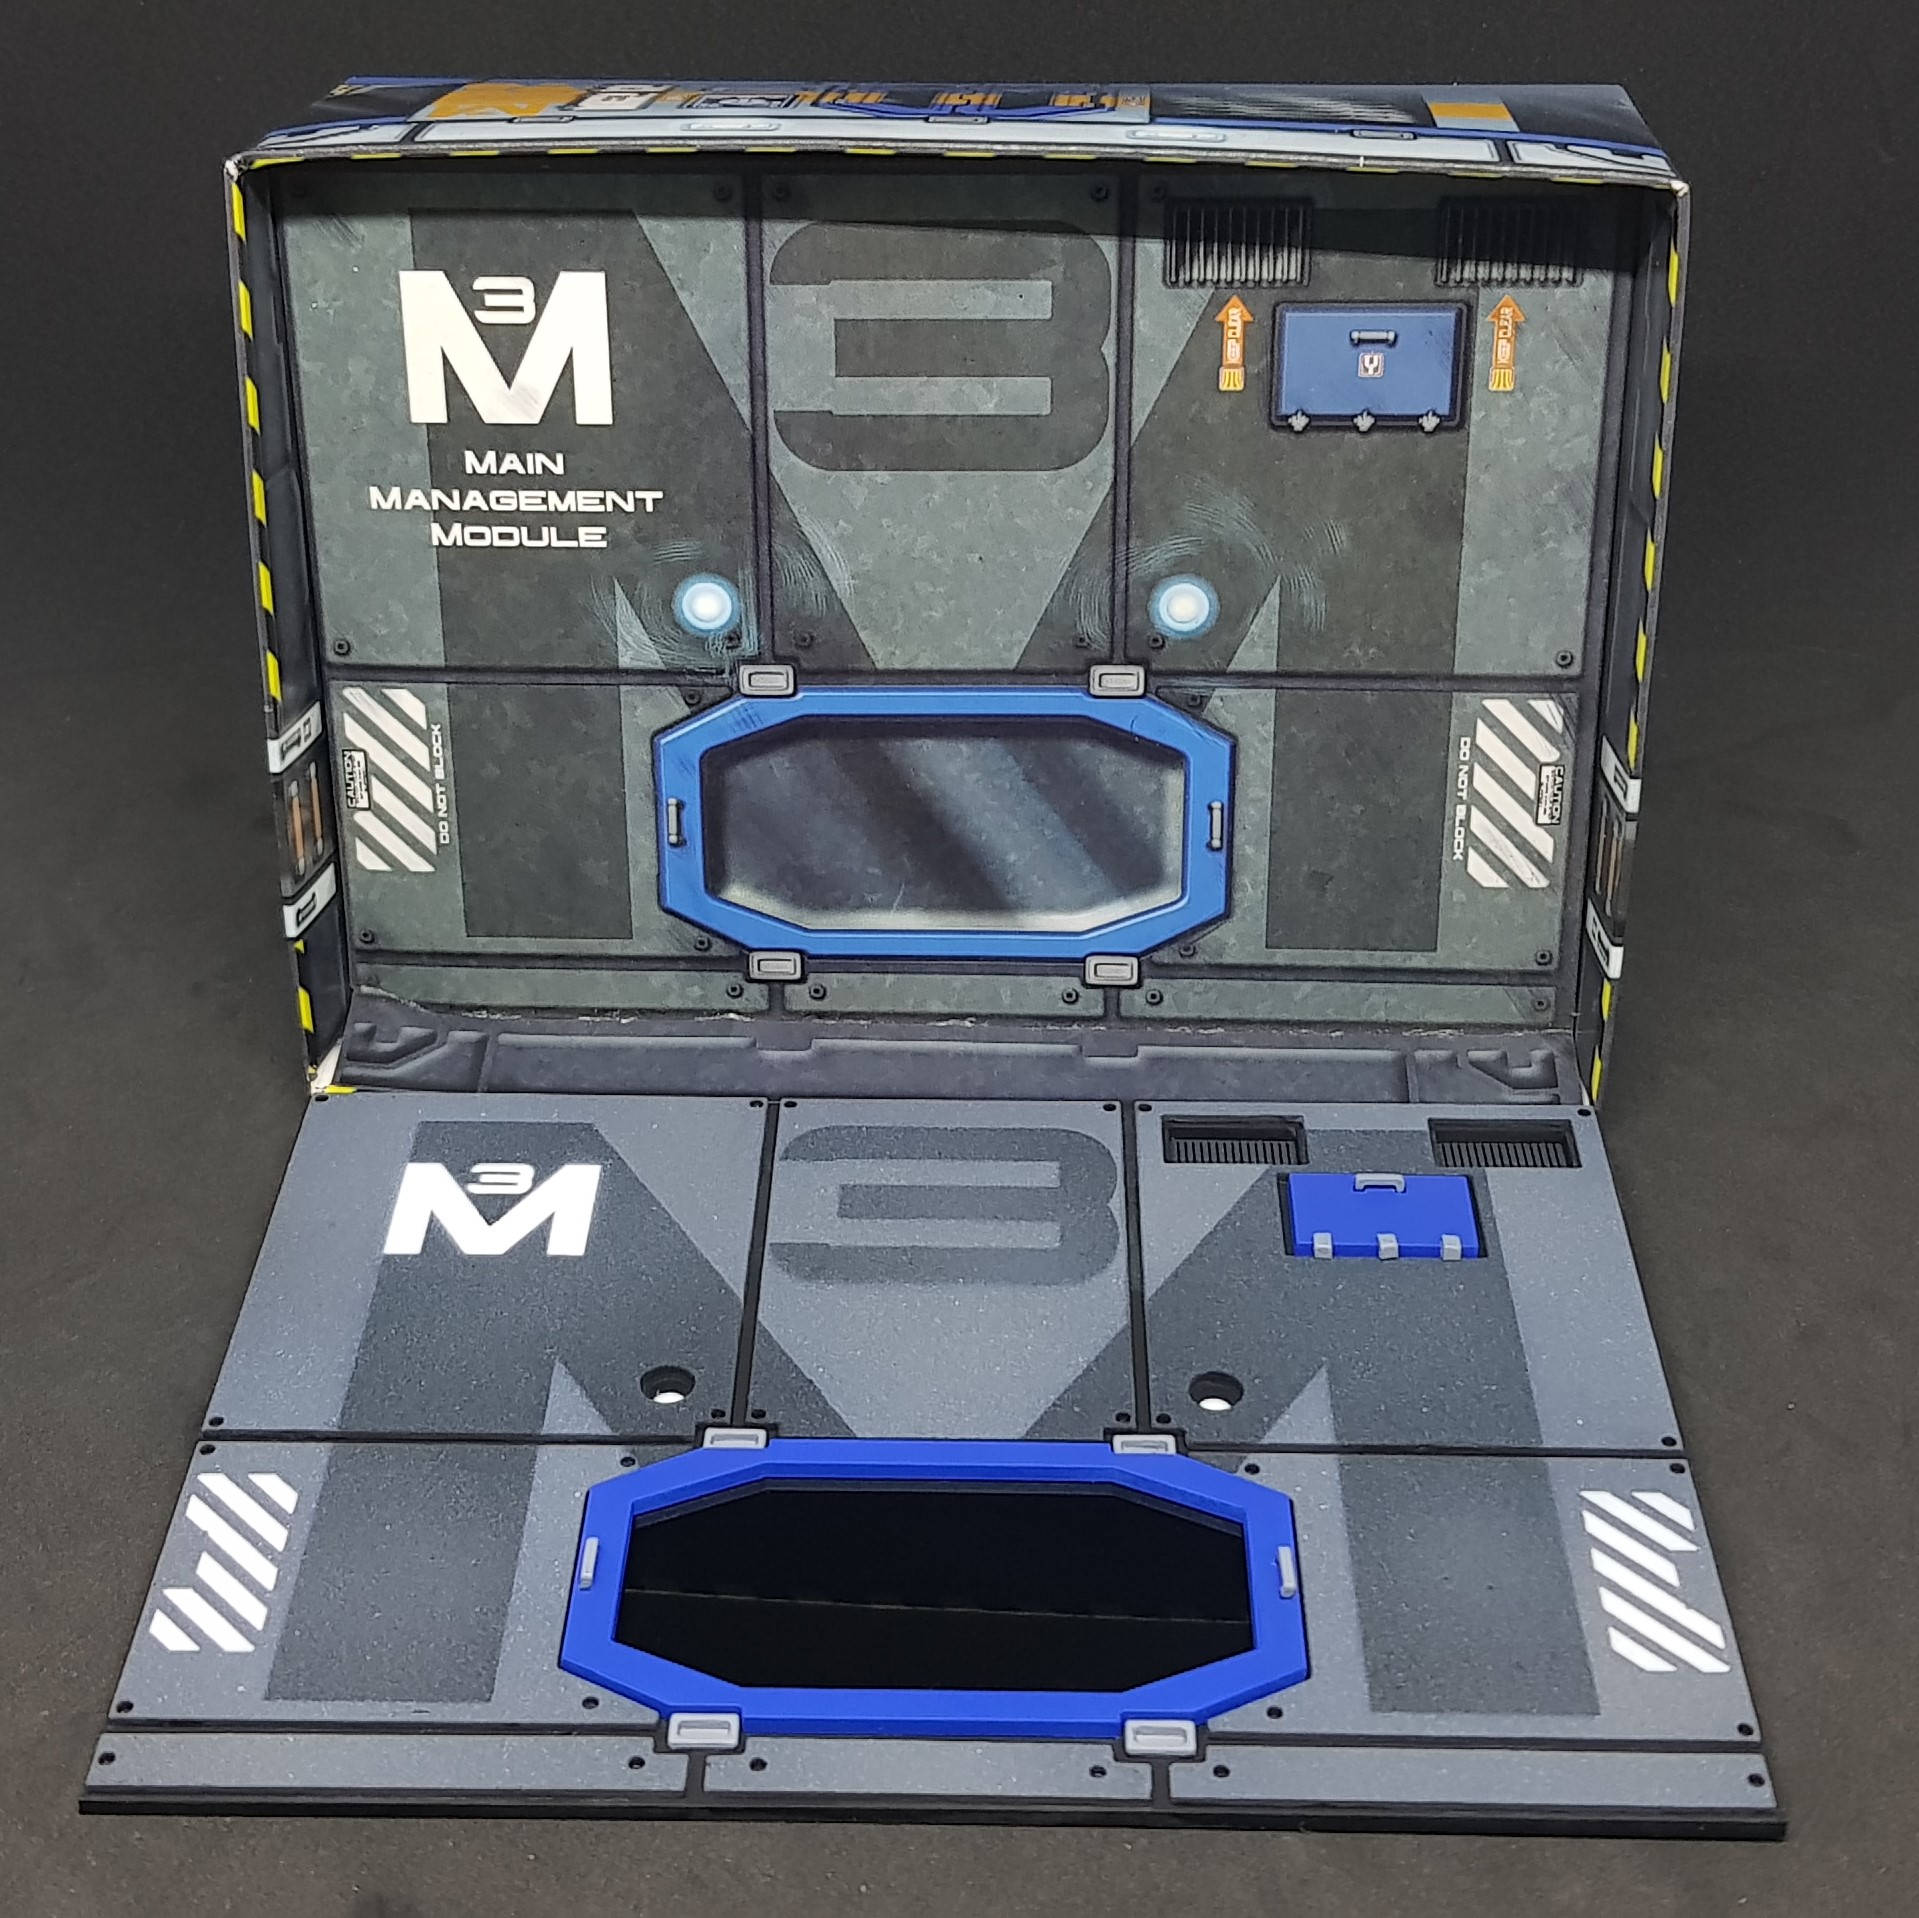 2D card building compaired with 3D part.
 So there we have it. All done up and ready for the building elevations to be added.
Back to the drawing board for me now. I have a lot of work ahead of me and a few decisions to make.
This felt so much better than just sitting (re)drawing for a week. Feels good to break this up. More to come!
Building and starting to paint the Main Management Module
This took almost a day to re-draw and then cut out all of the parts. Only a few changes made on the fly and a couple of mistakes of material thickness. I done this yesterday and got one assembled today. This is not a quick process and I may not get anything further done until I get back after the boot camp a week on Monday but we will see.
Everything was stuck with superglue and all of the parts that are separate are stuck with masking tape for the moment to ensure the parts fit. The build for one took 4 hours non-stop it’s not perfect so I decided to paint this as number 4/ The most important is number 3 as this is the original so I will do this one last.
 CAD drawing
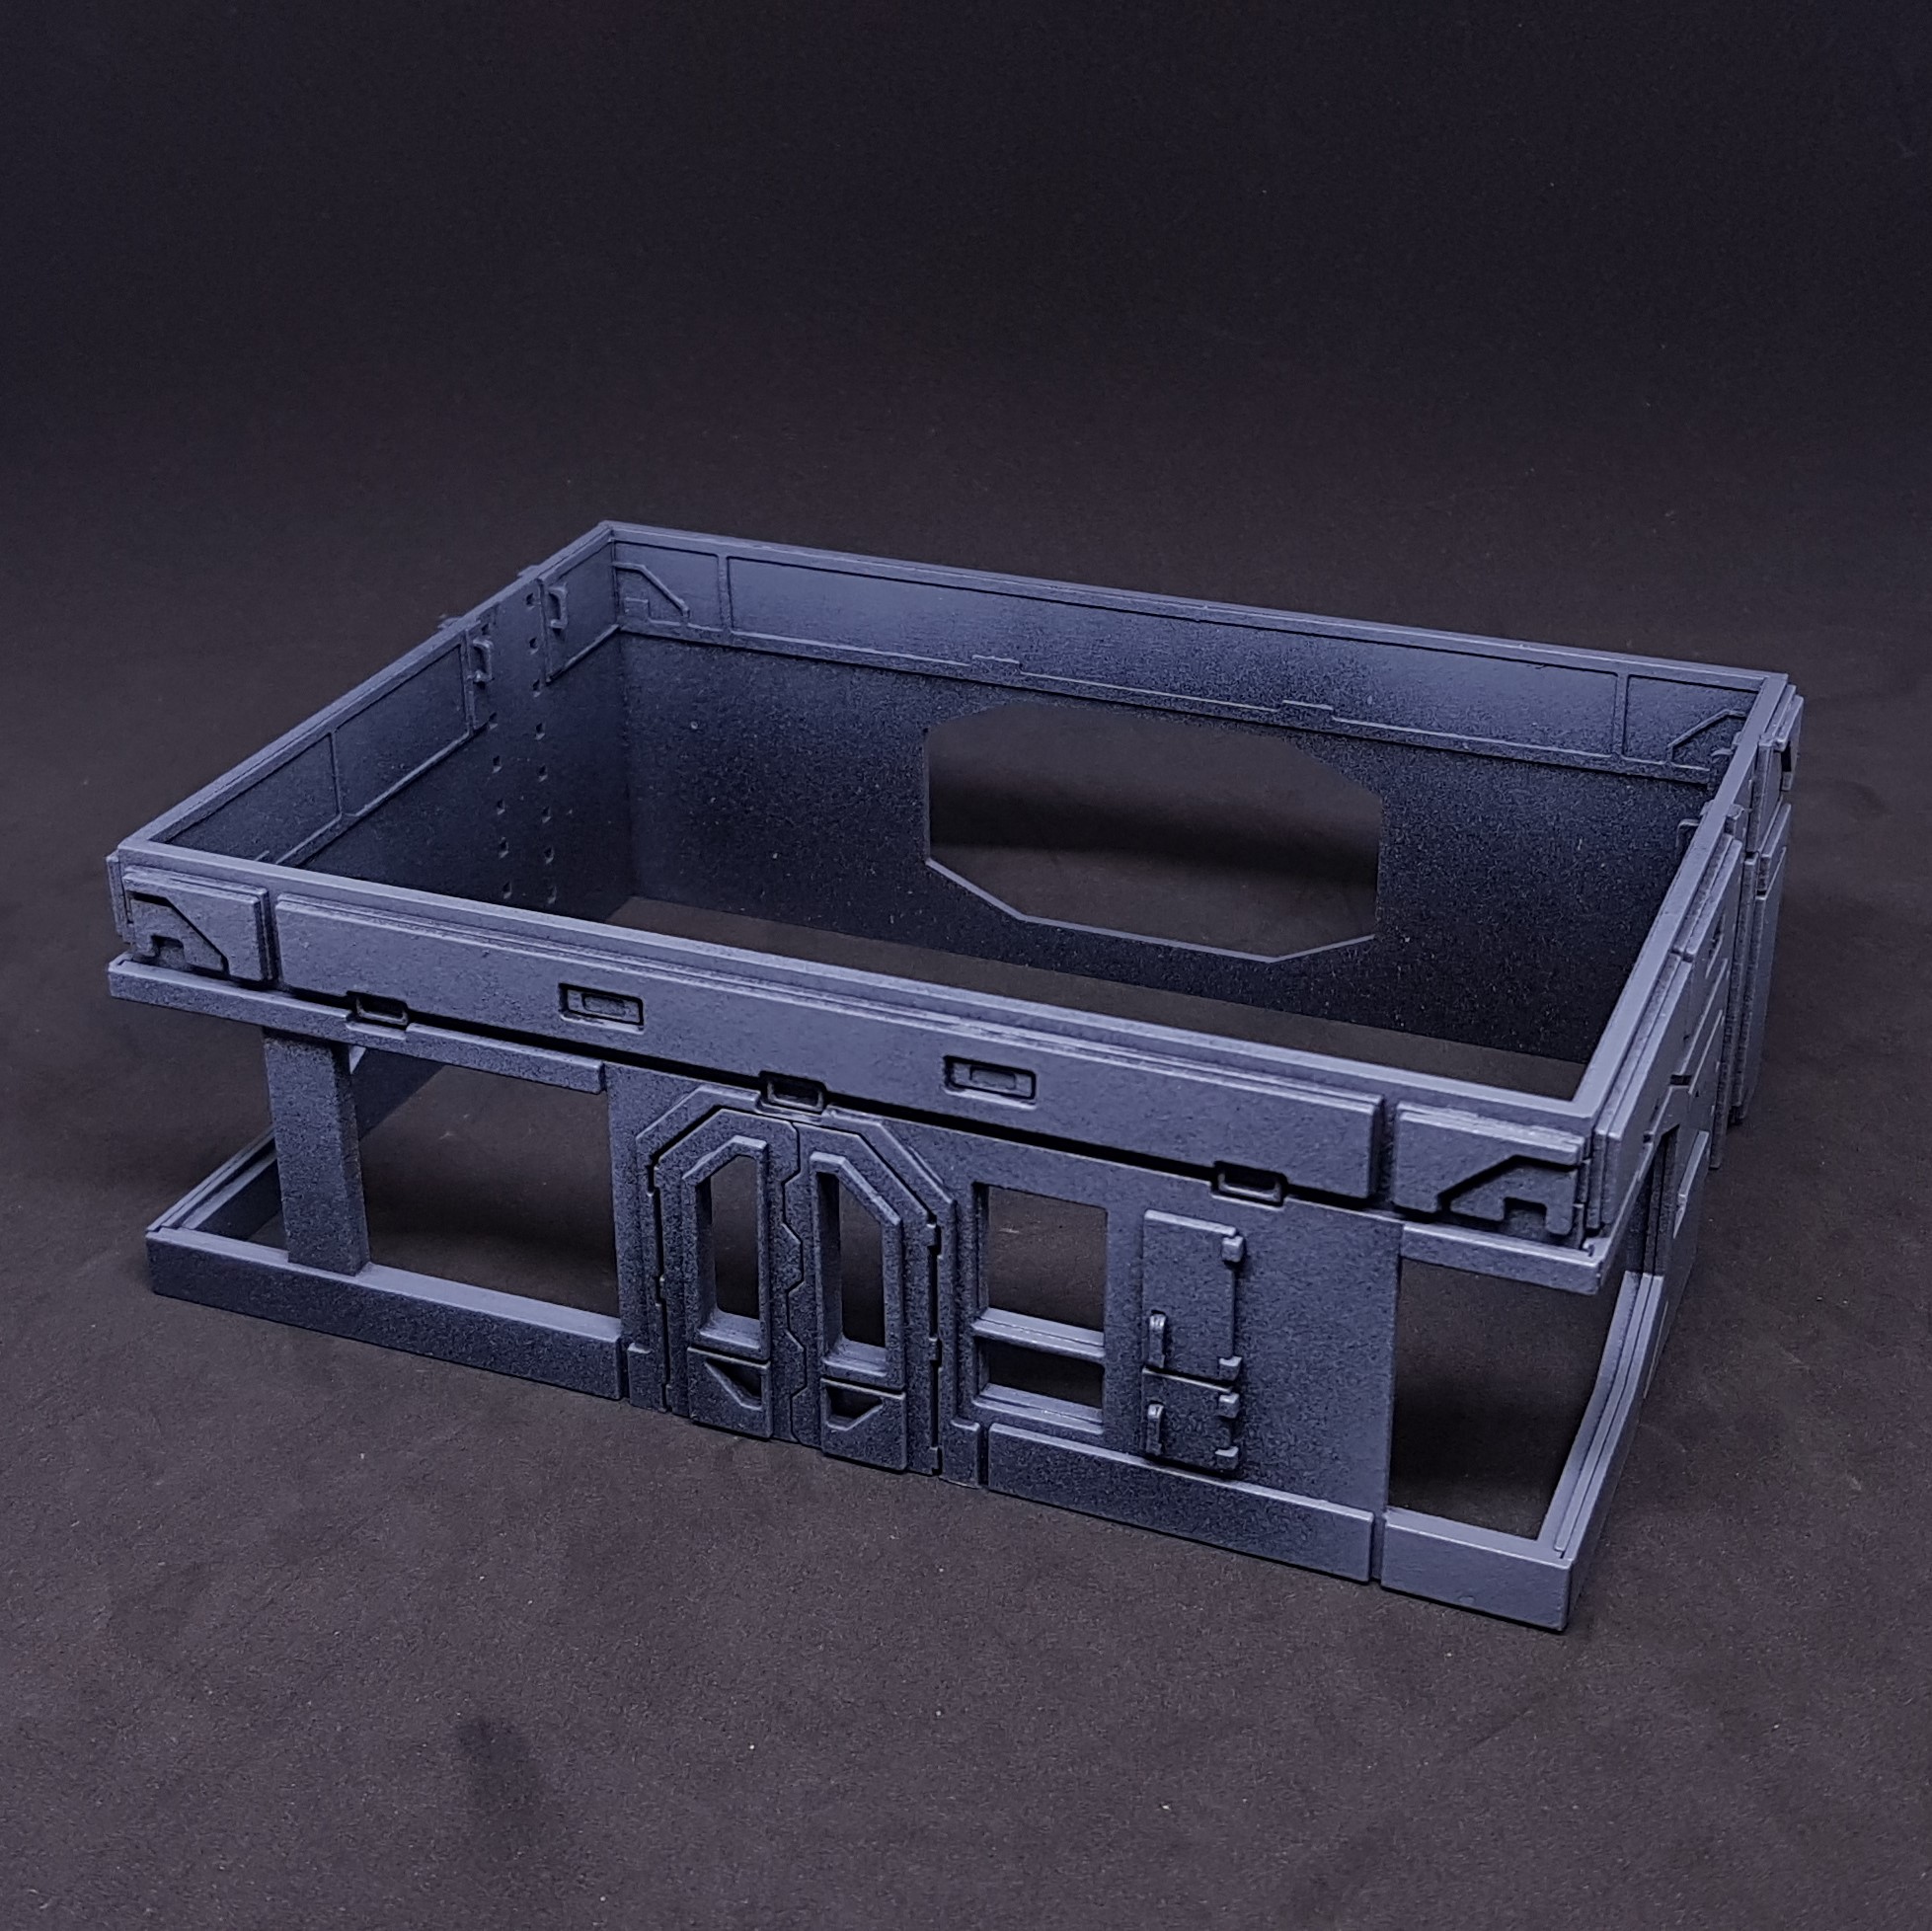
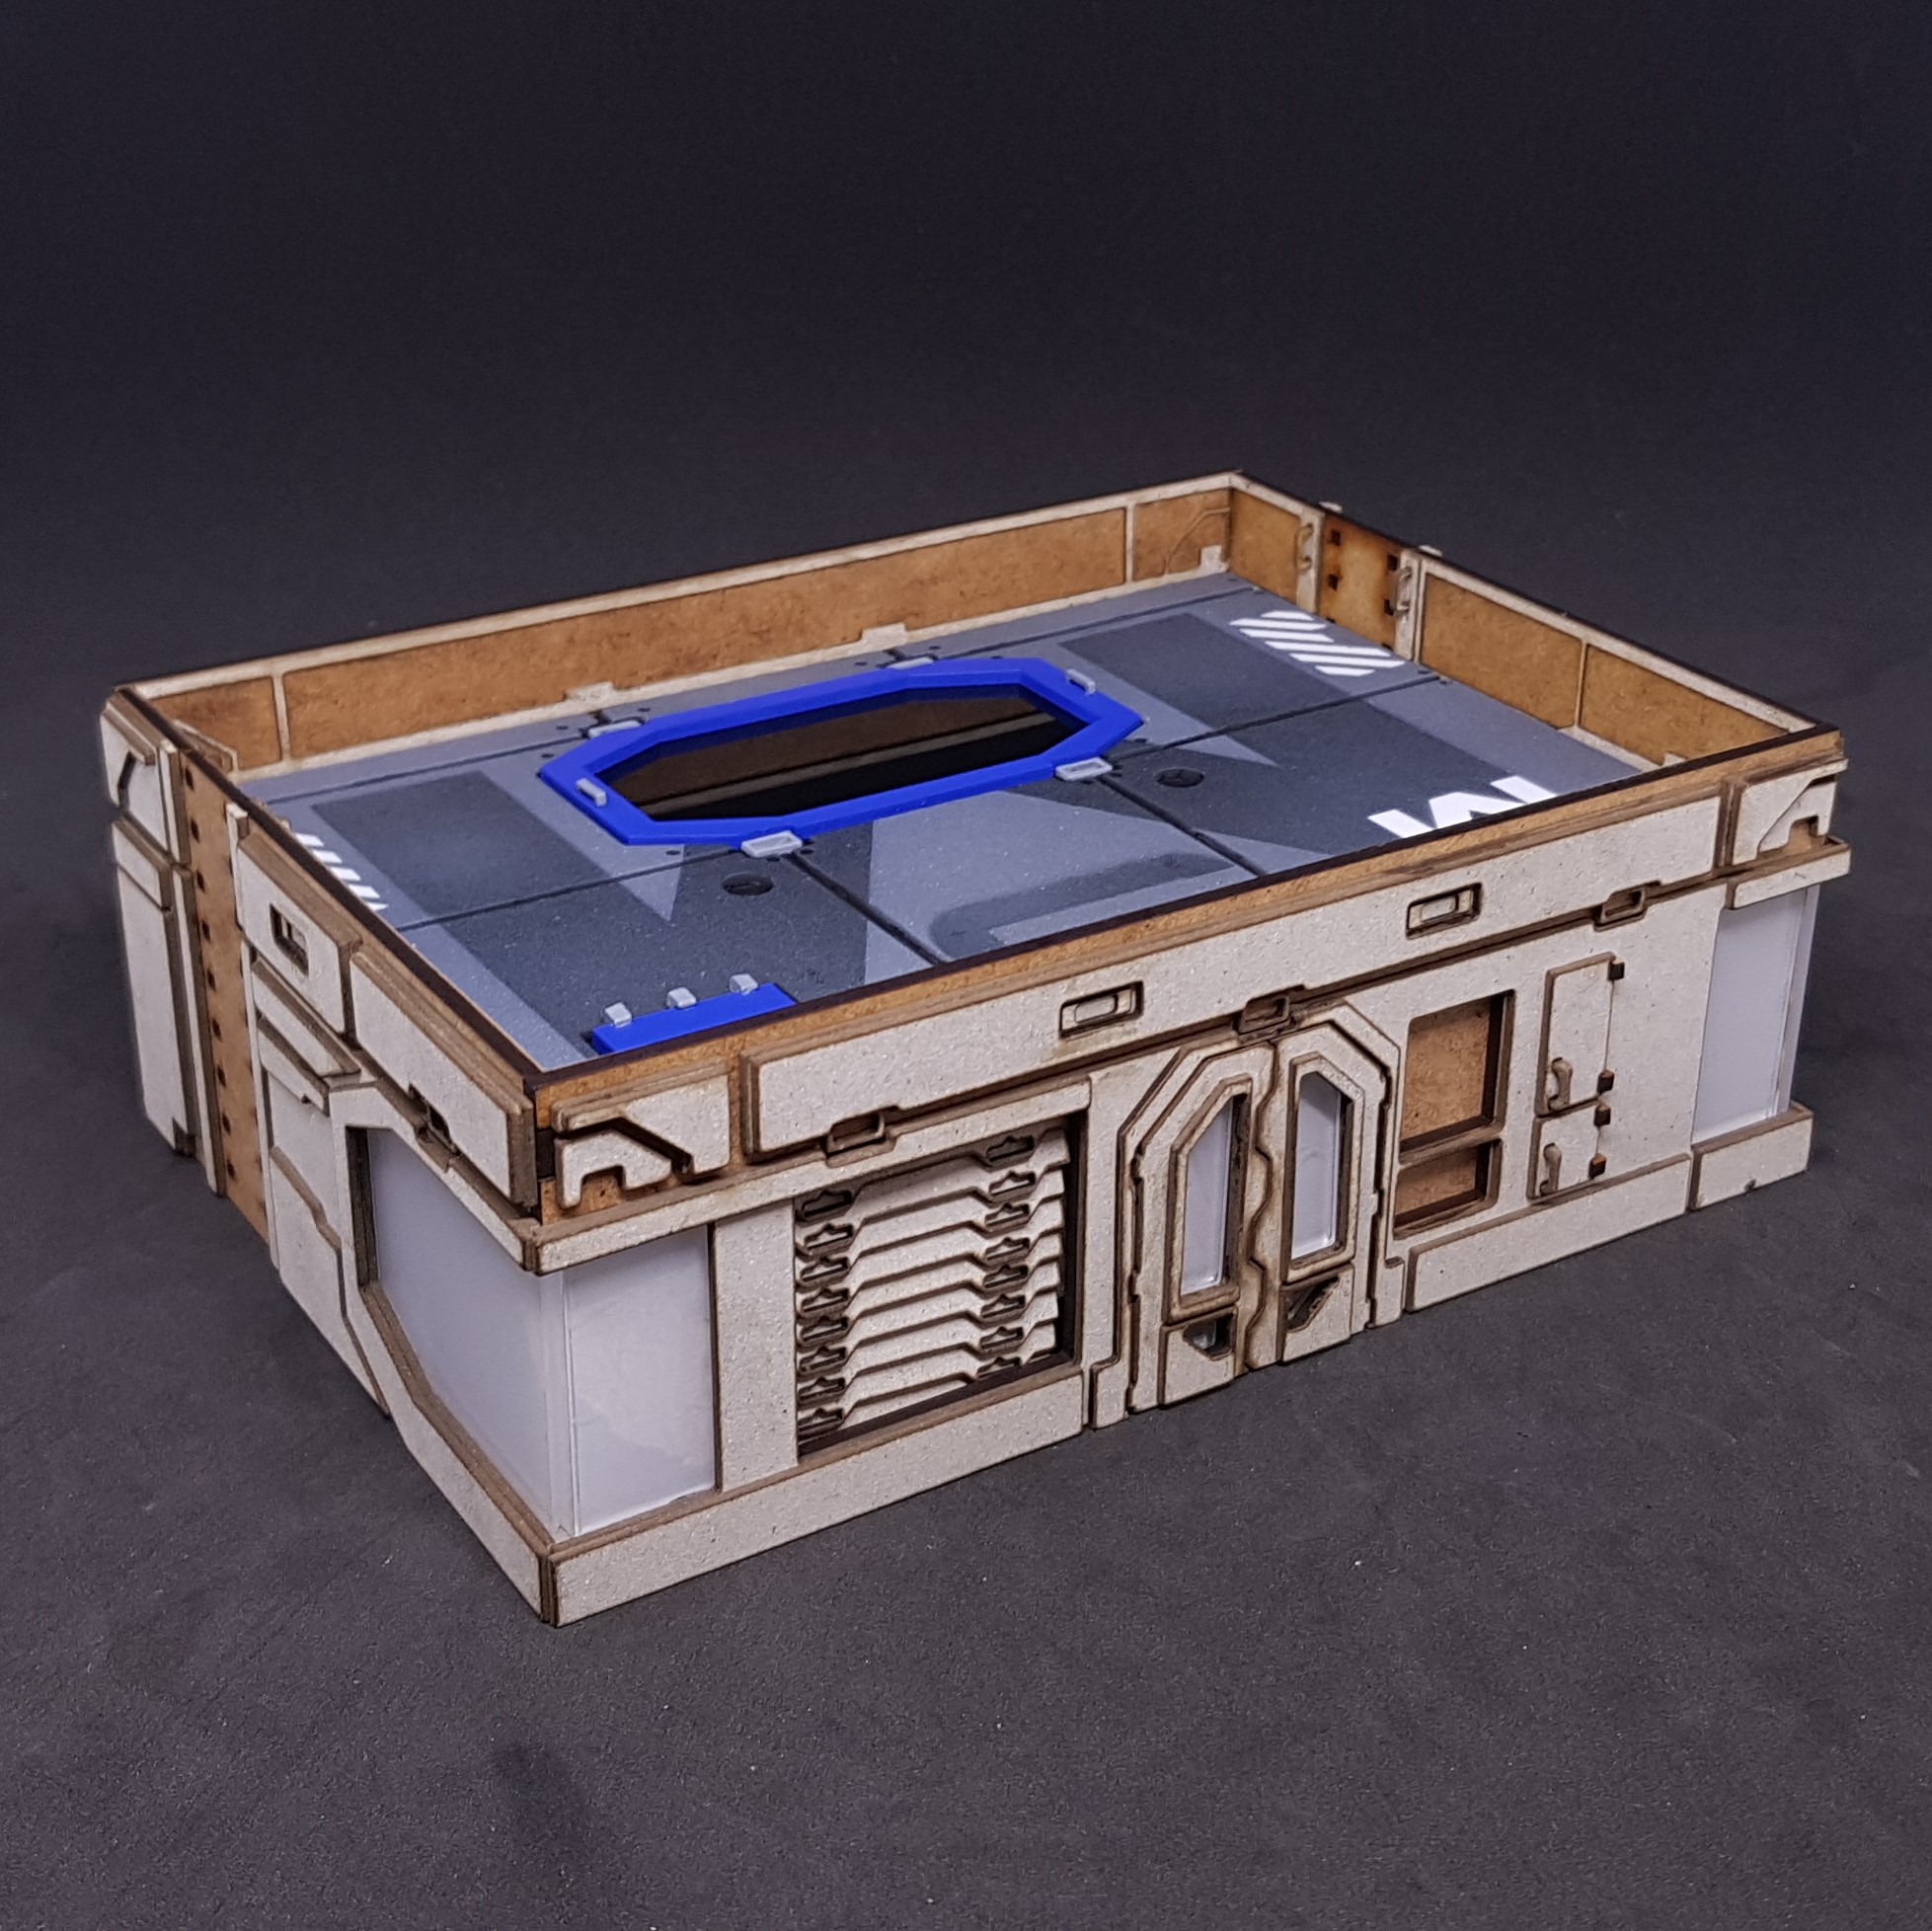 Front of the Main Management Module
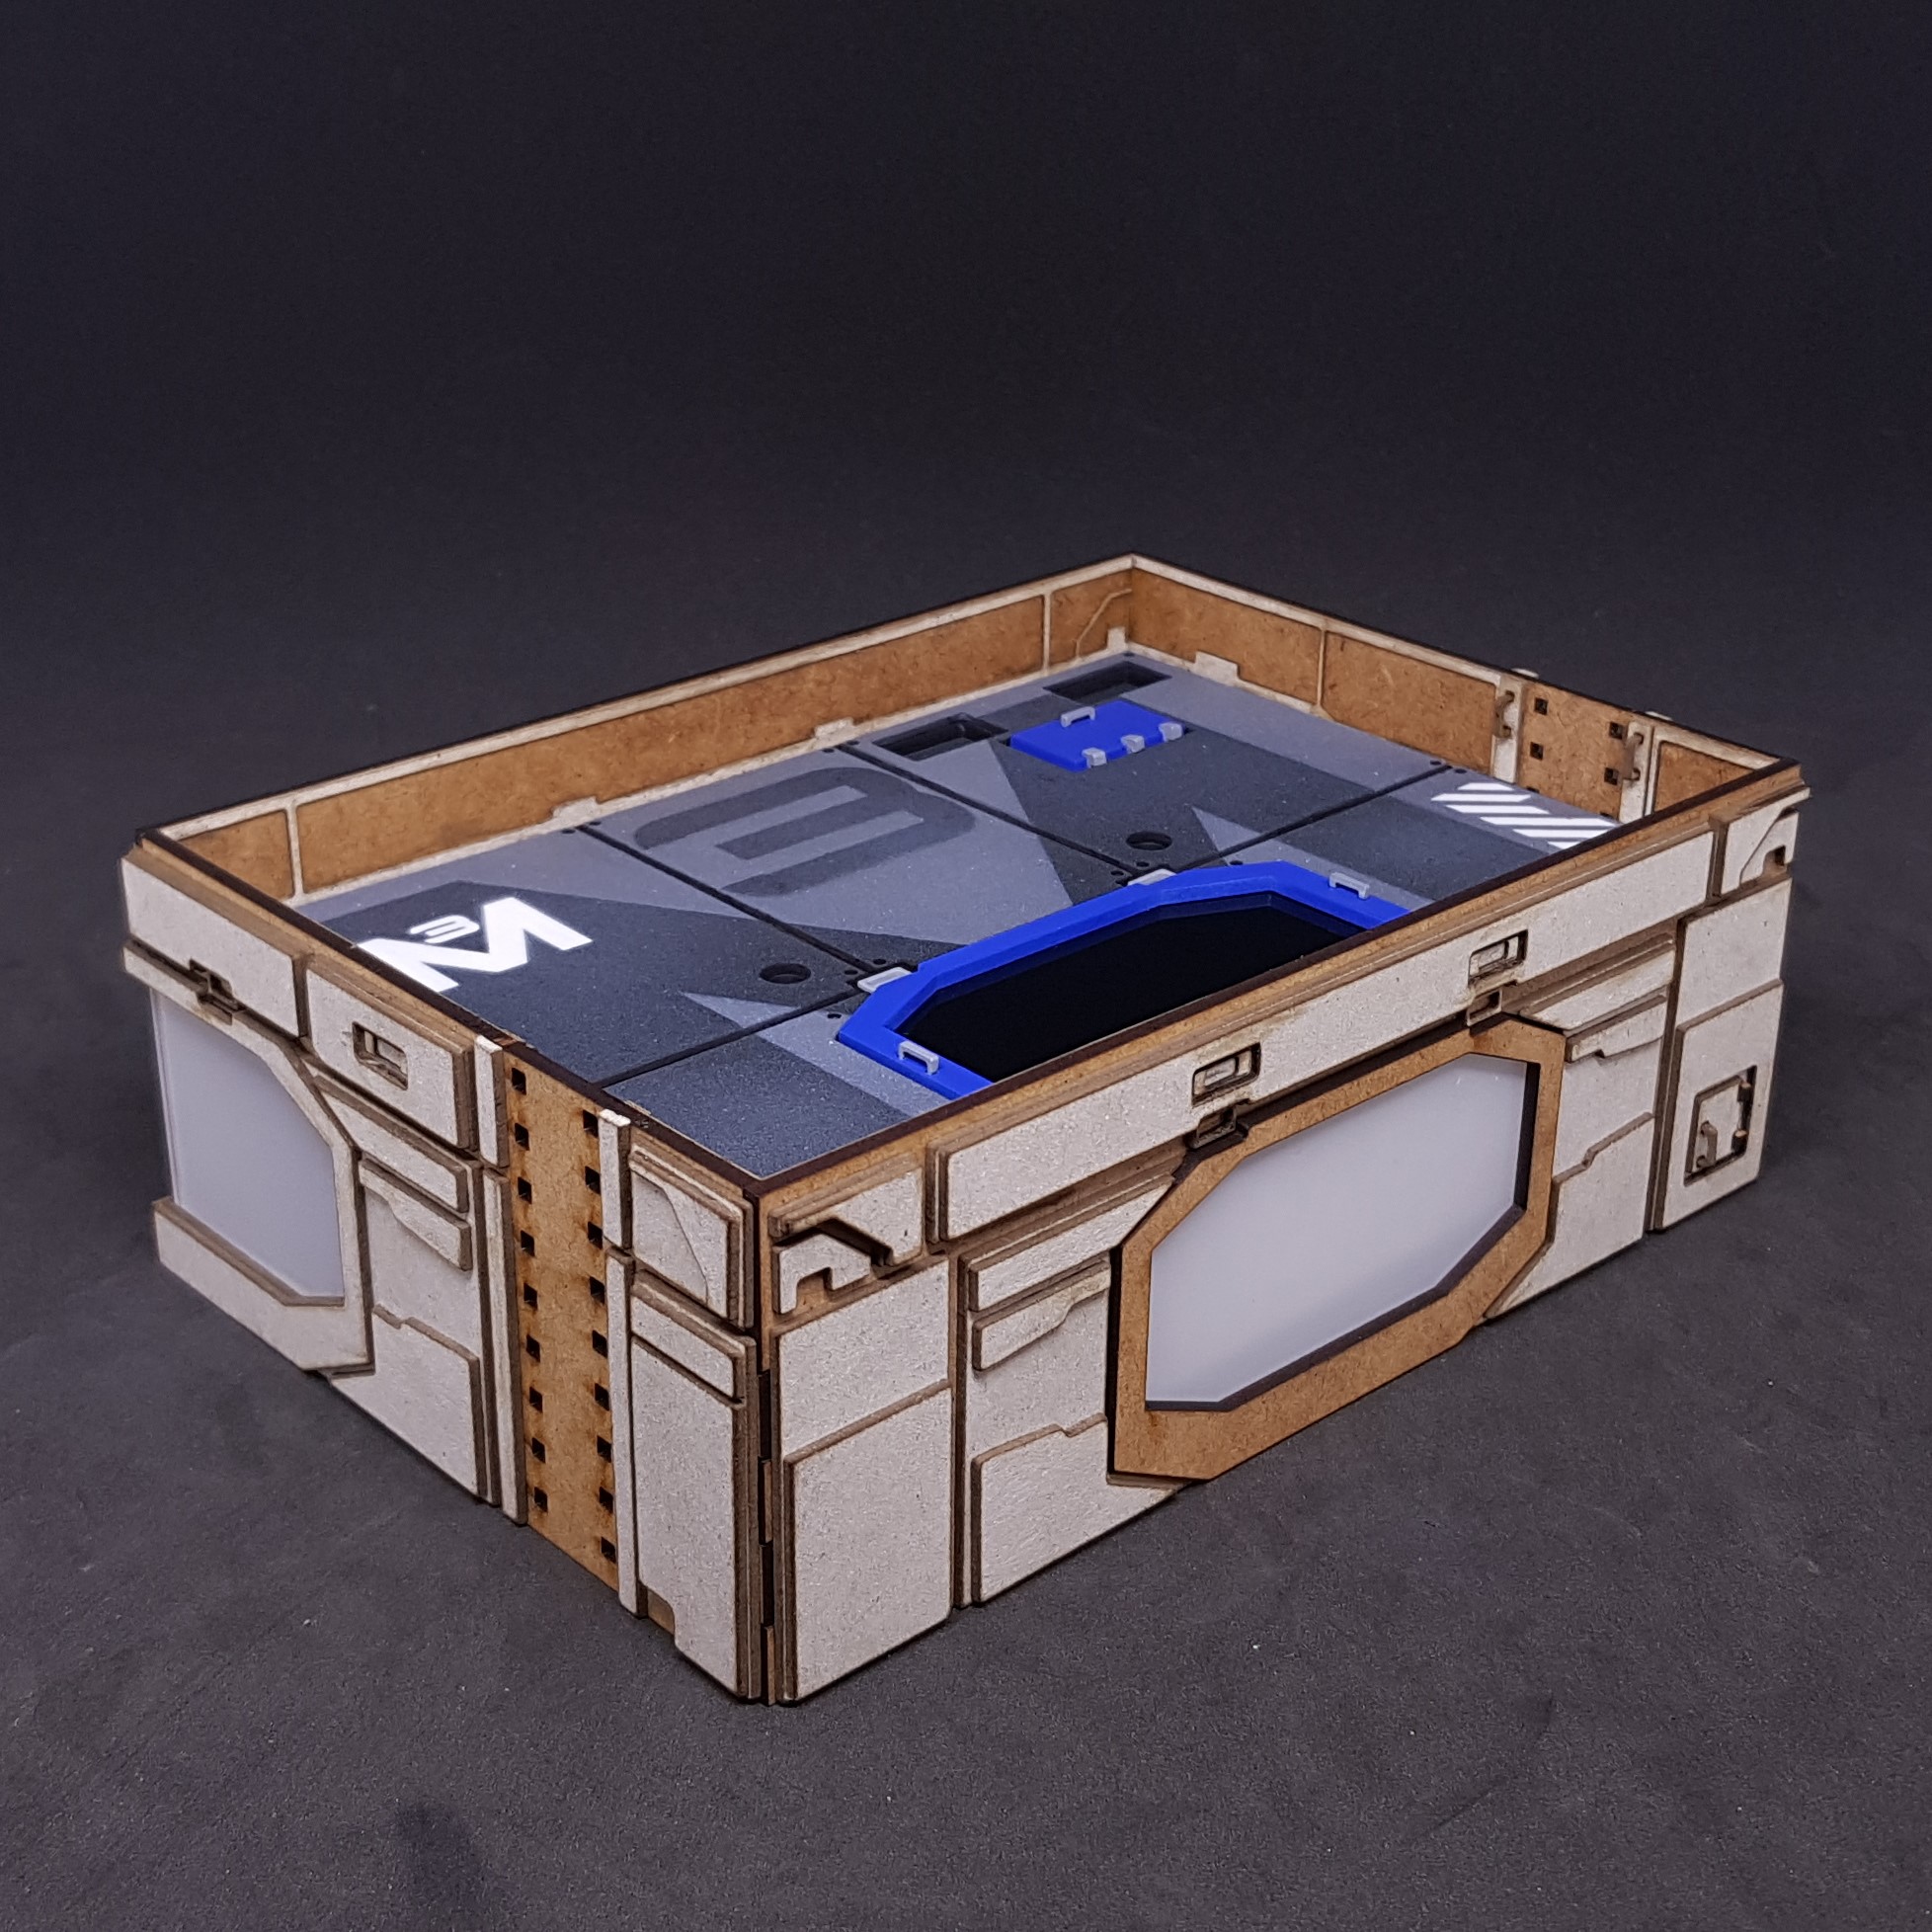 Back of the Main Management Module
These are some of the details that I like the most so far.
The shutters are only masking taped on but I think this will look great painted.
The small cabinets look cool and fitting felt a bit weird these not being MDF.
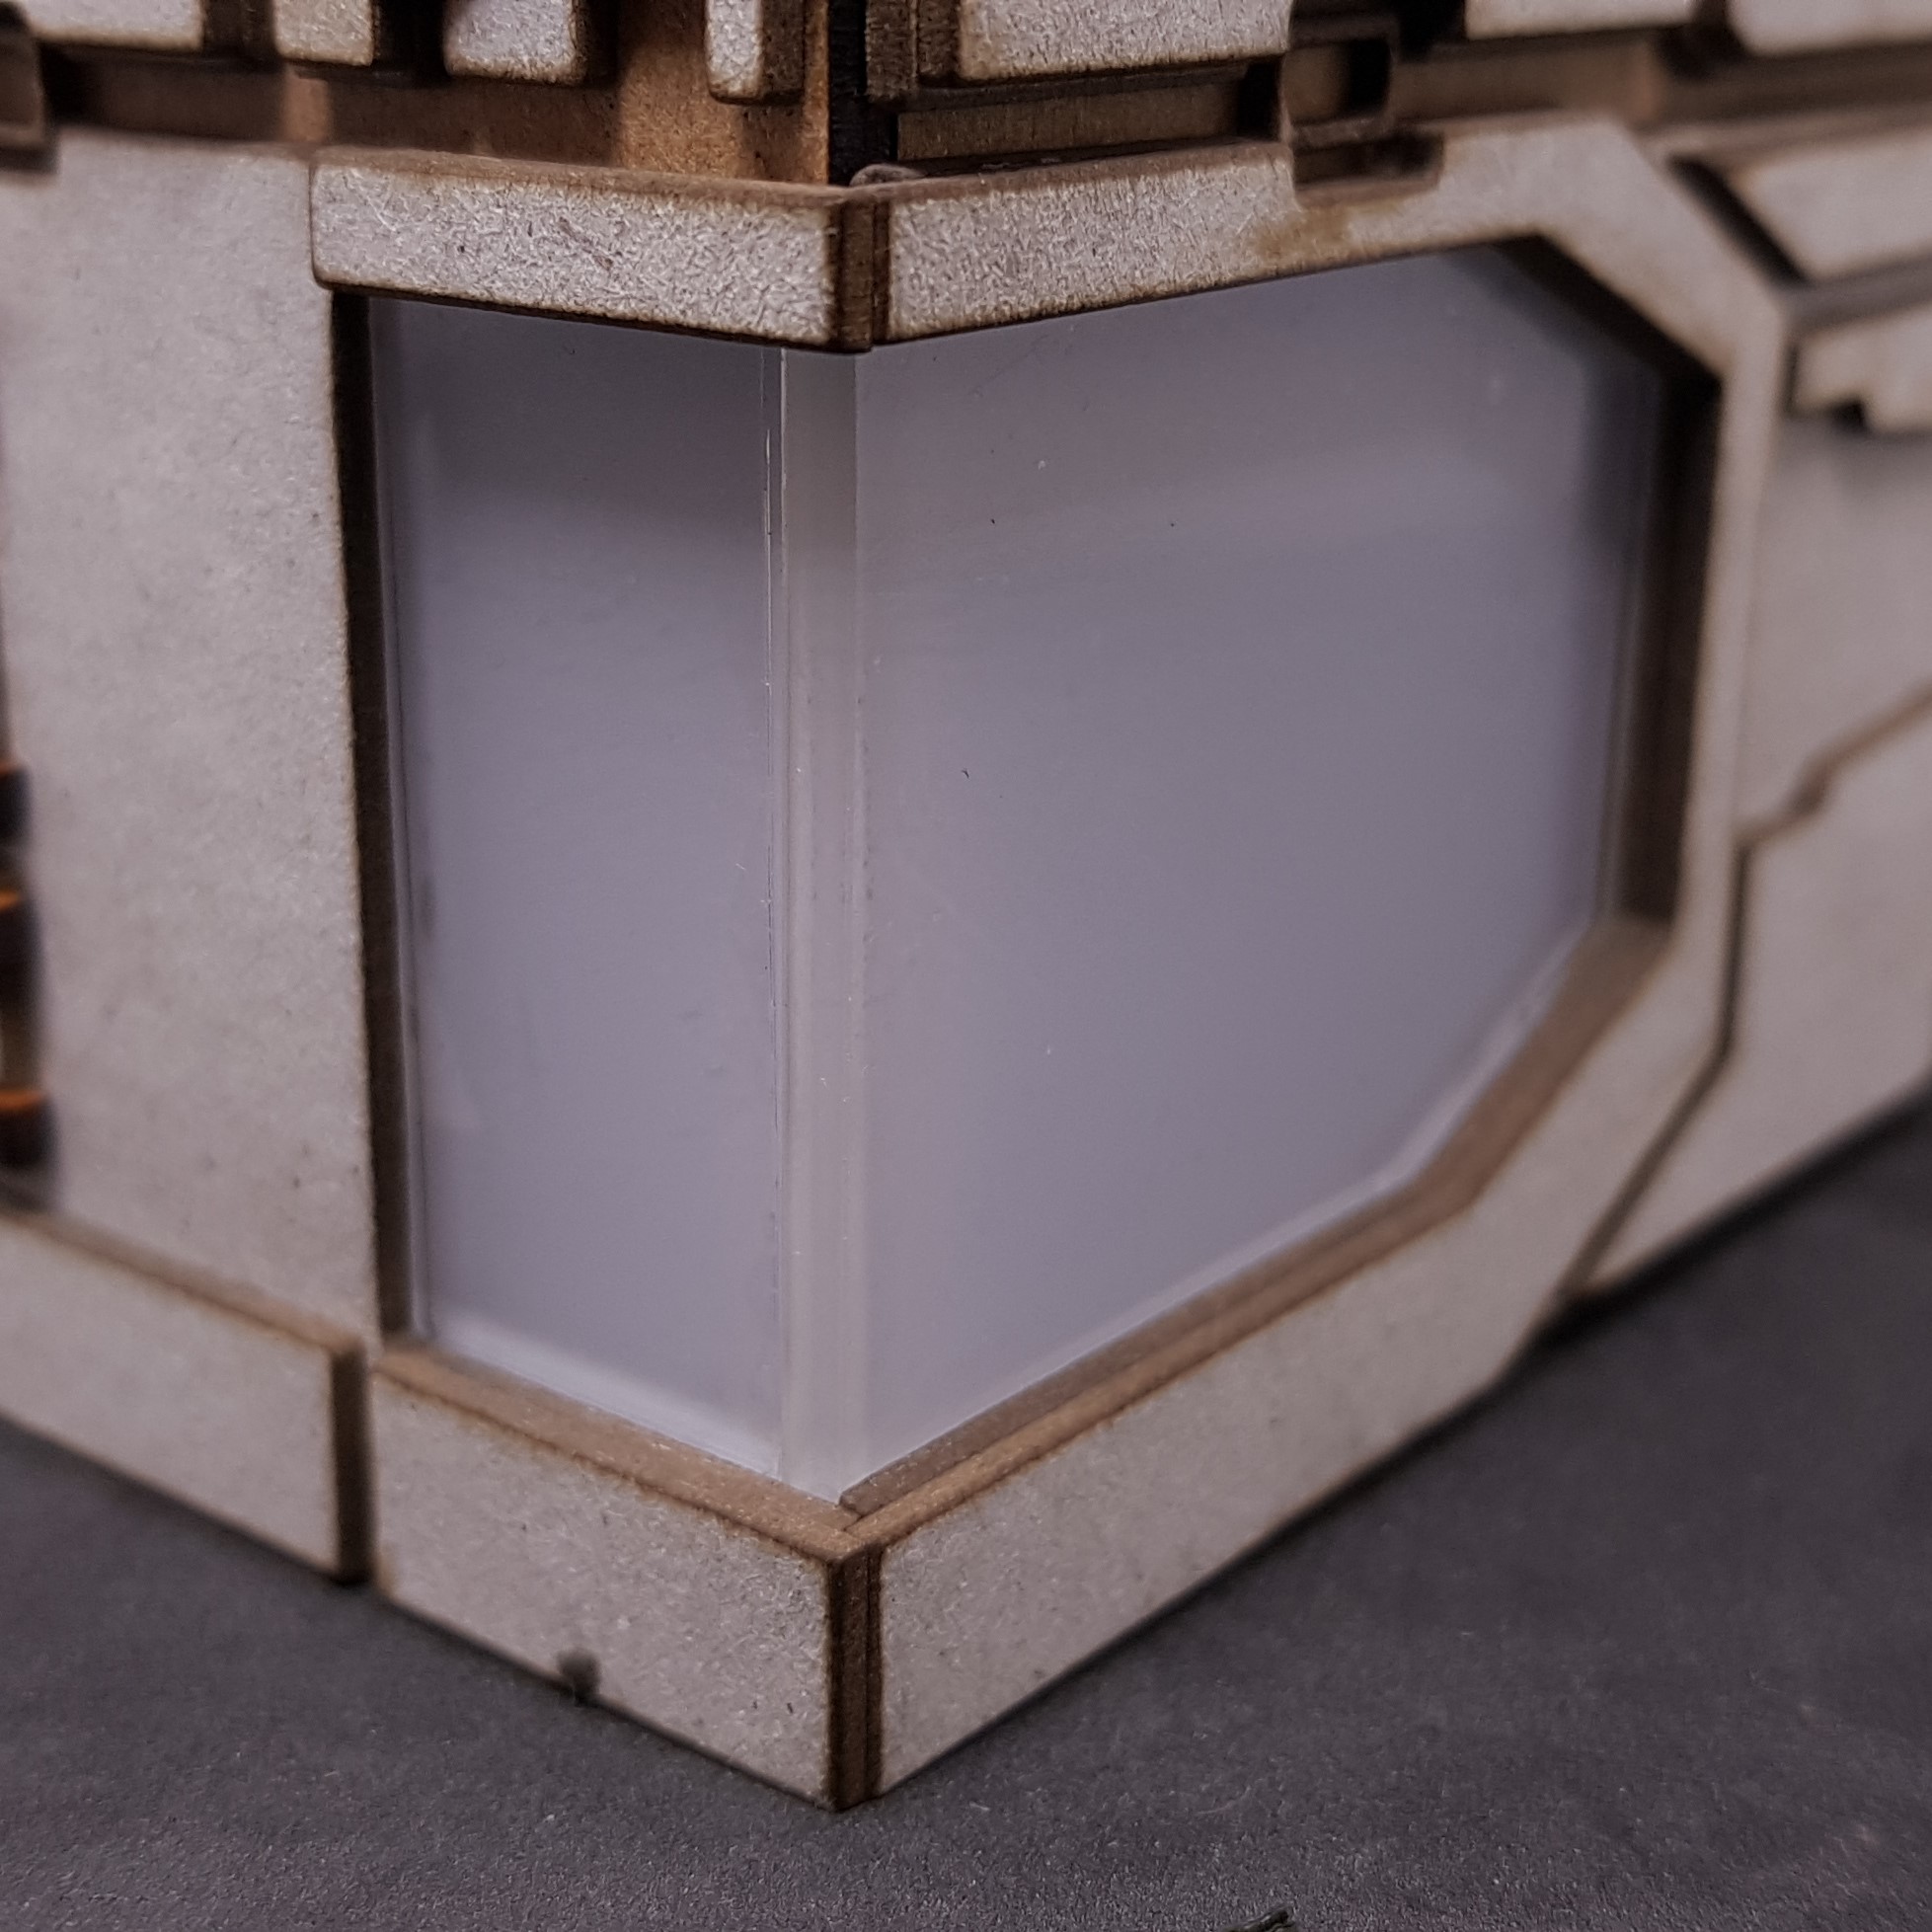
I like the acrylic windows these will look good back painted black the challenge will be gluing them prior to you don’t see the gap. I may chicken out and just make them in two pieces.

So came the painting. Done this as usual in a zenith so I would get a good idea of the shape I was dealing with. This was done in Poundland black and primer grey.
I then moved on I thought about just being them all blue with different colour hatches and door. I decided to try and make a similar colour like I done with the Power hub each different for each number.
 Zenithed front
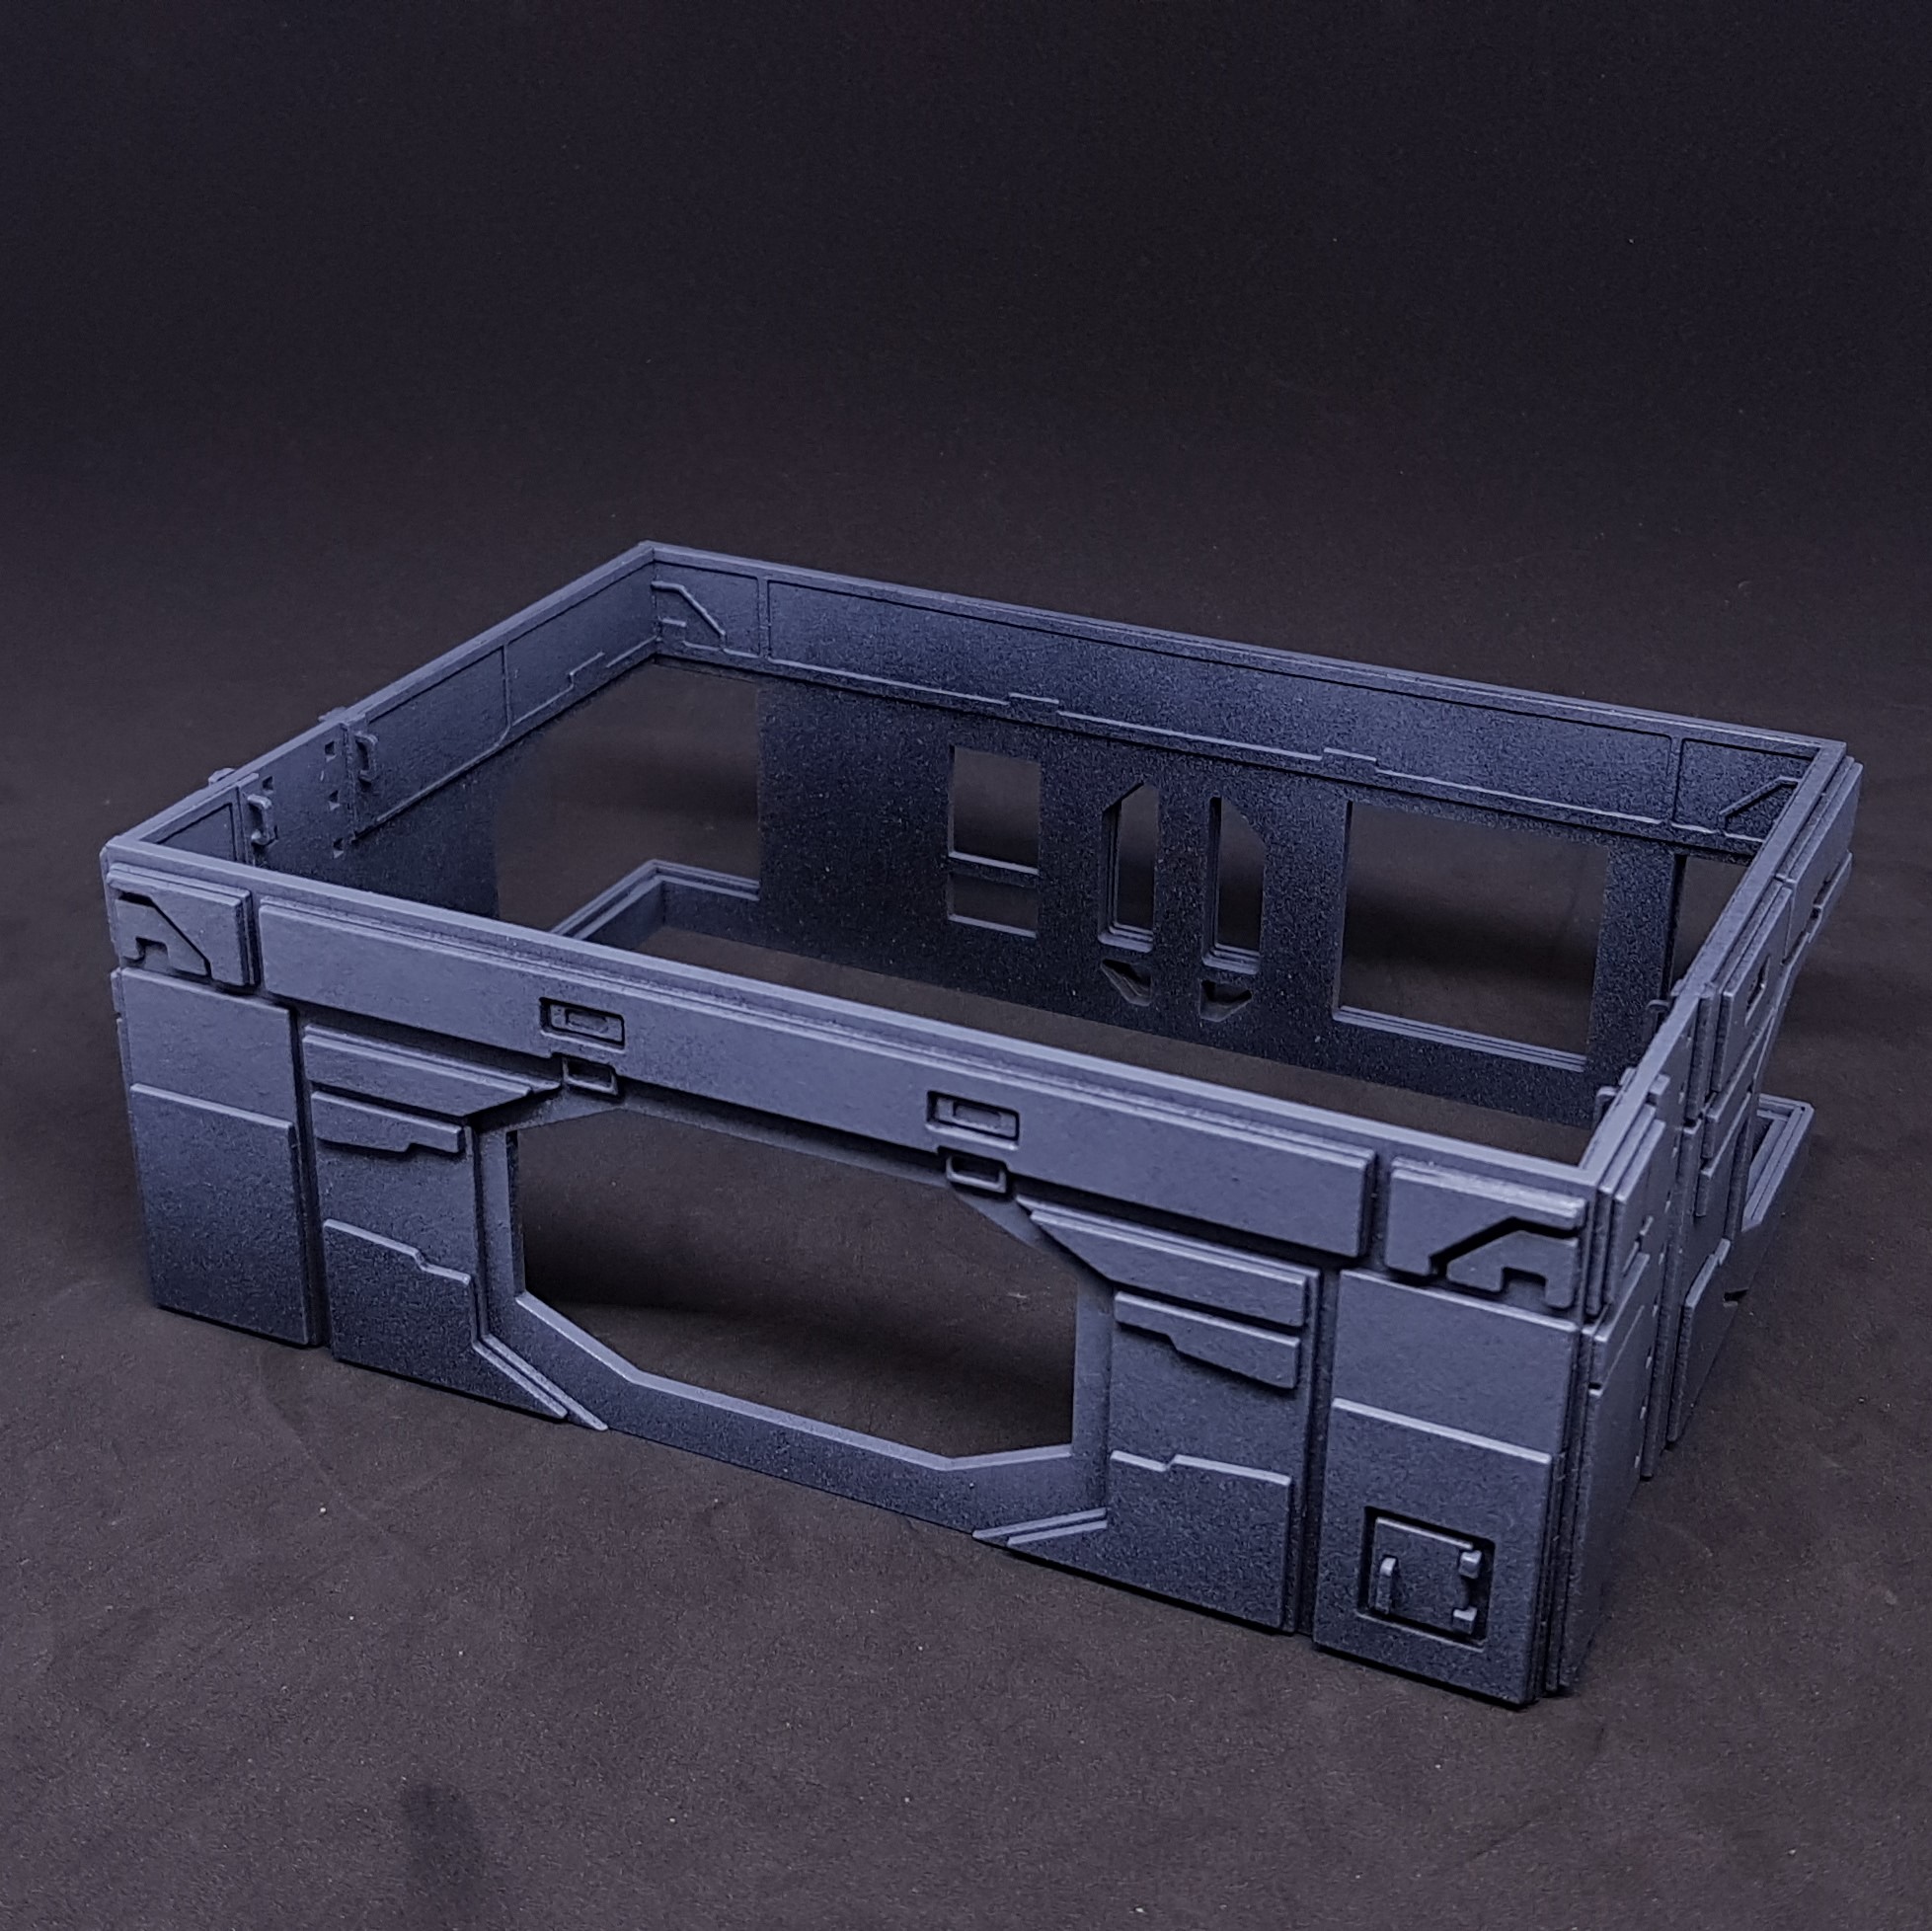 Zenithed back
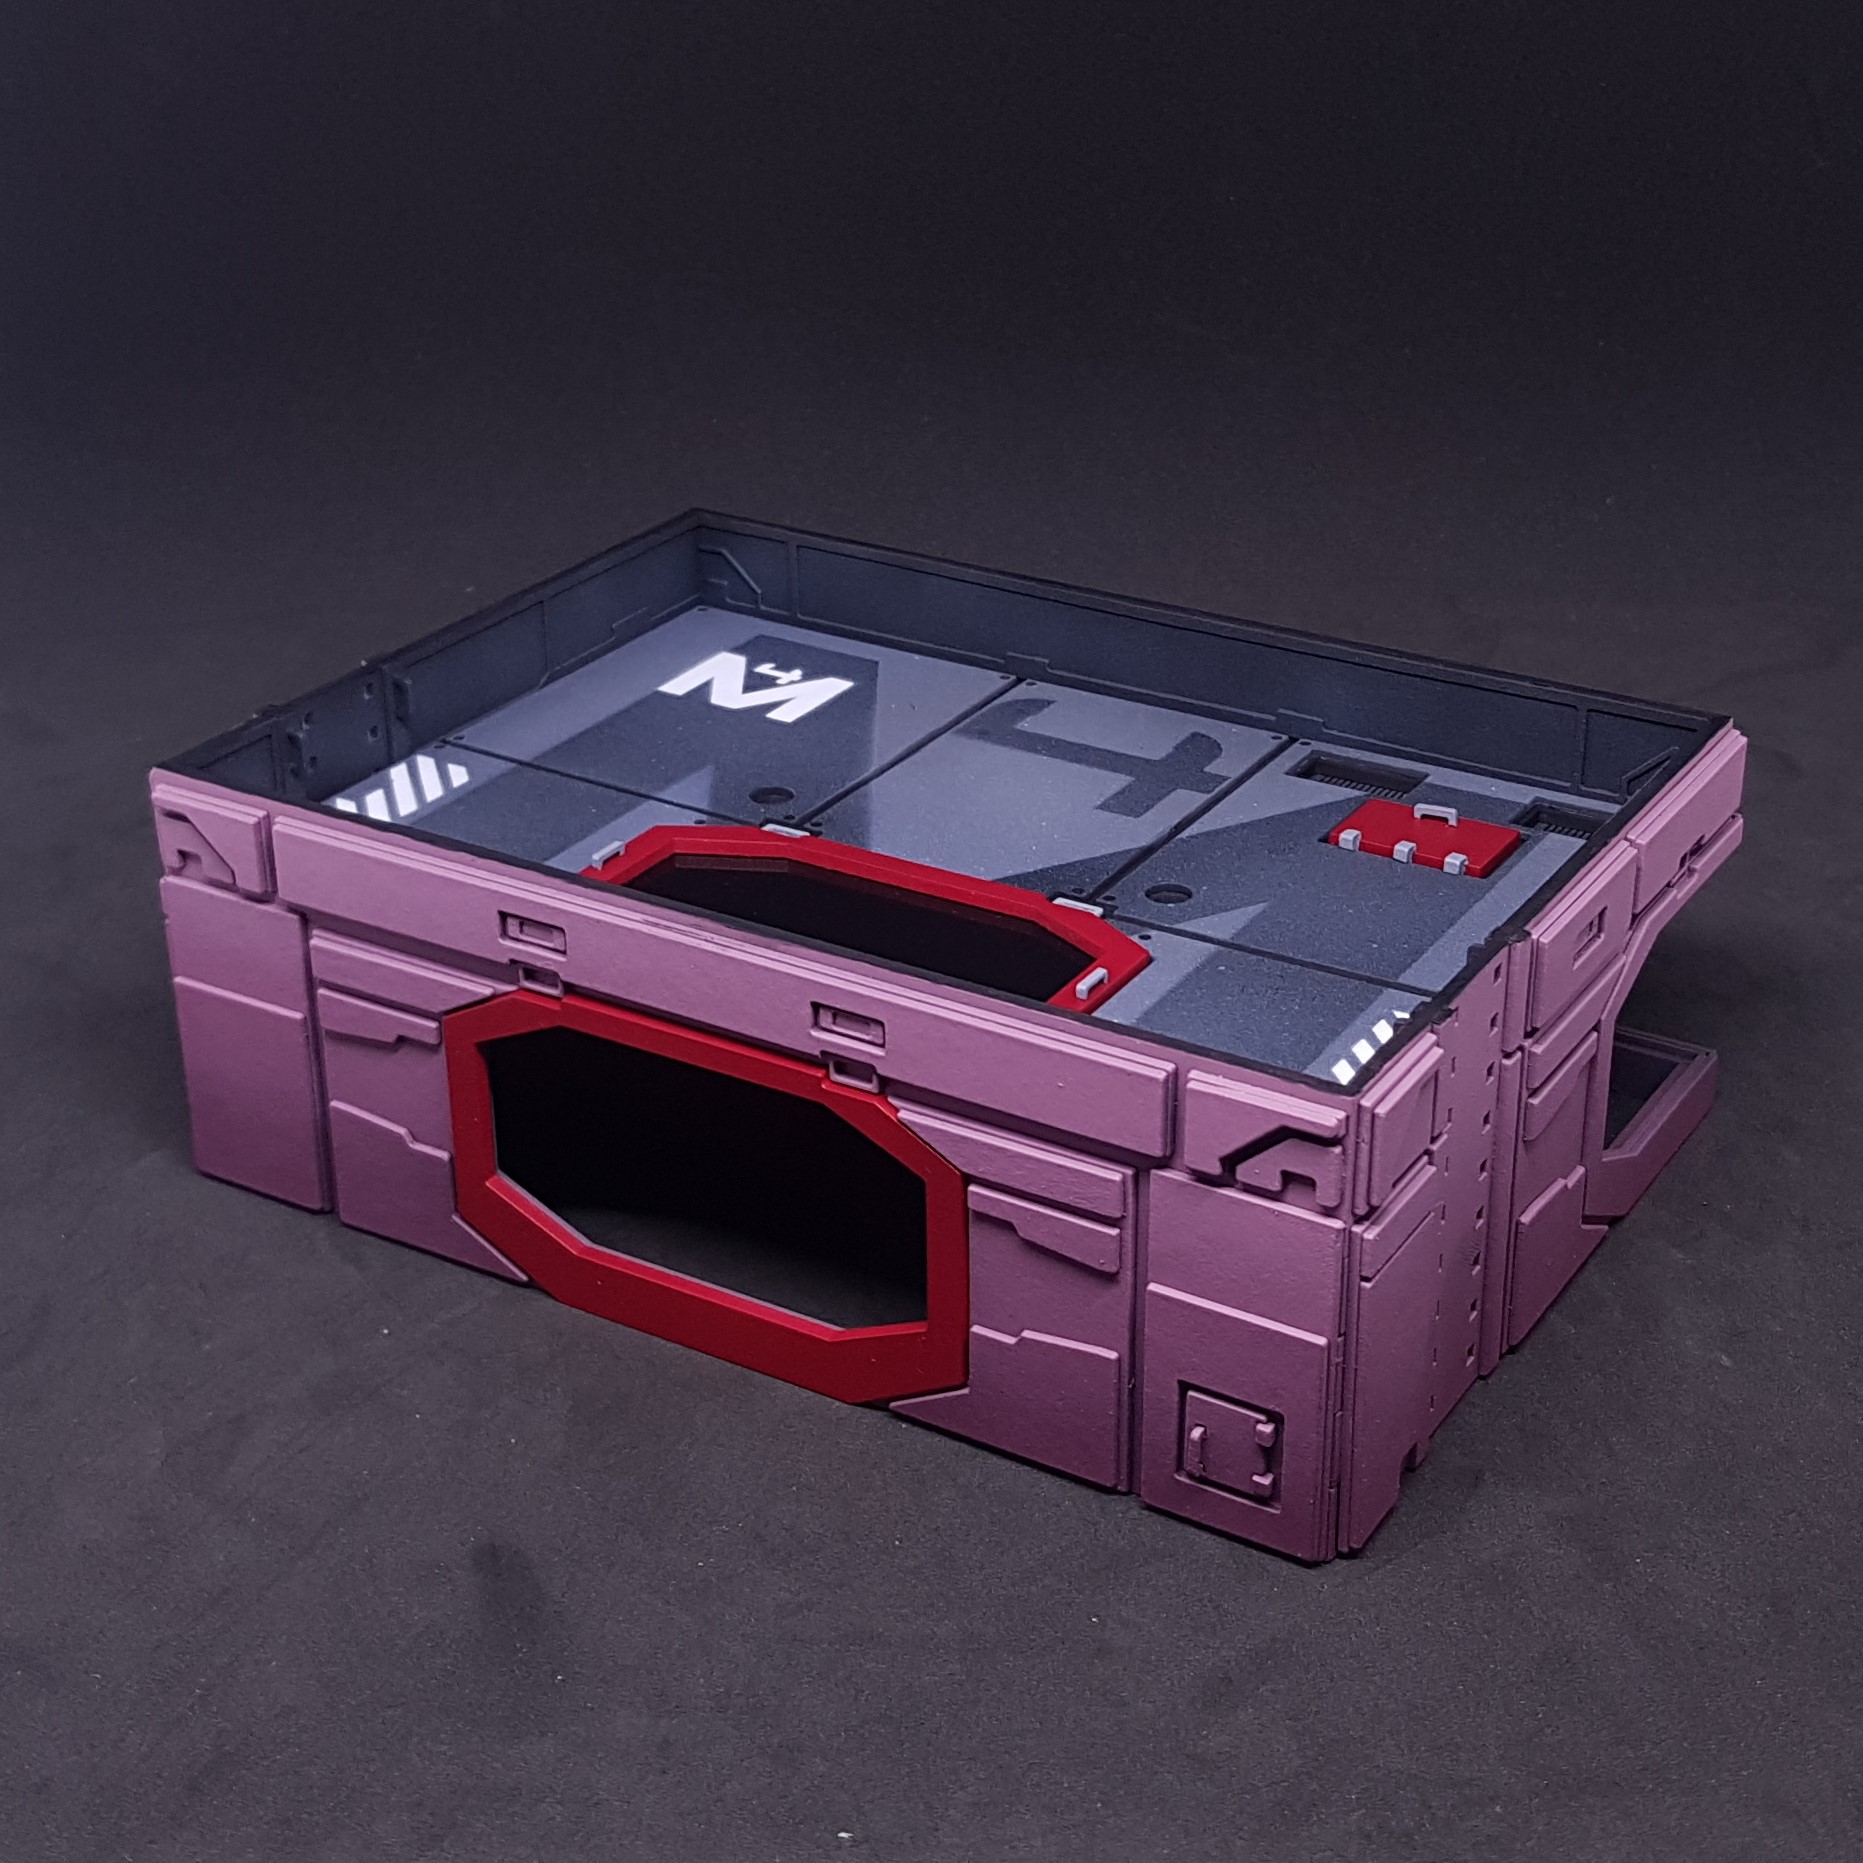 Base coat of red on outside and roof test fit back
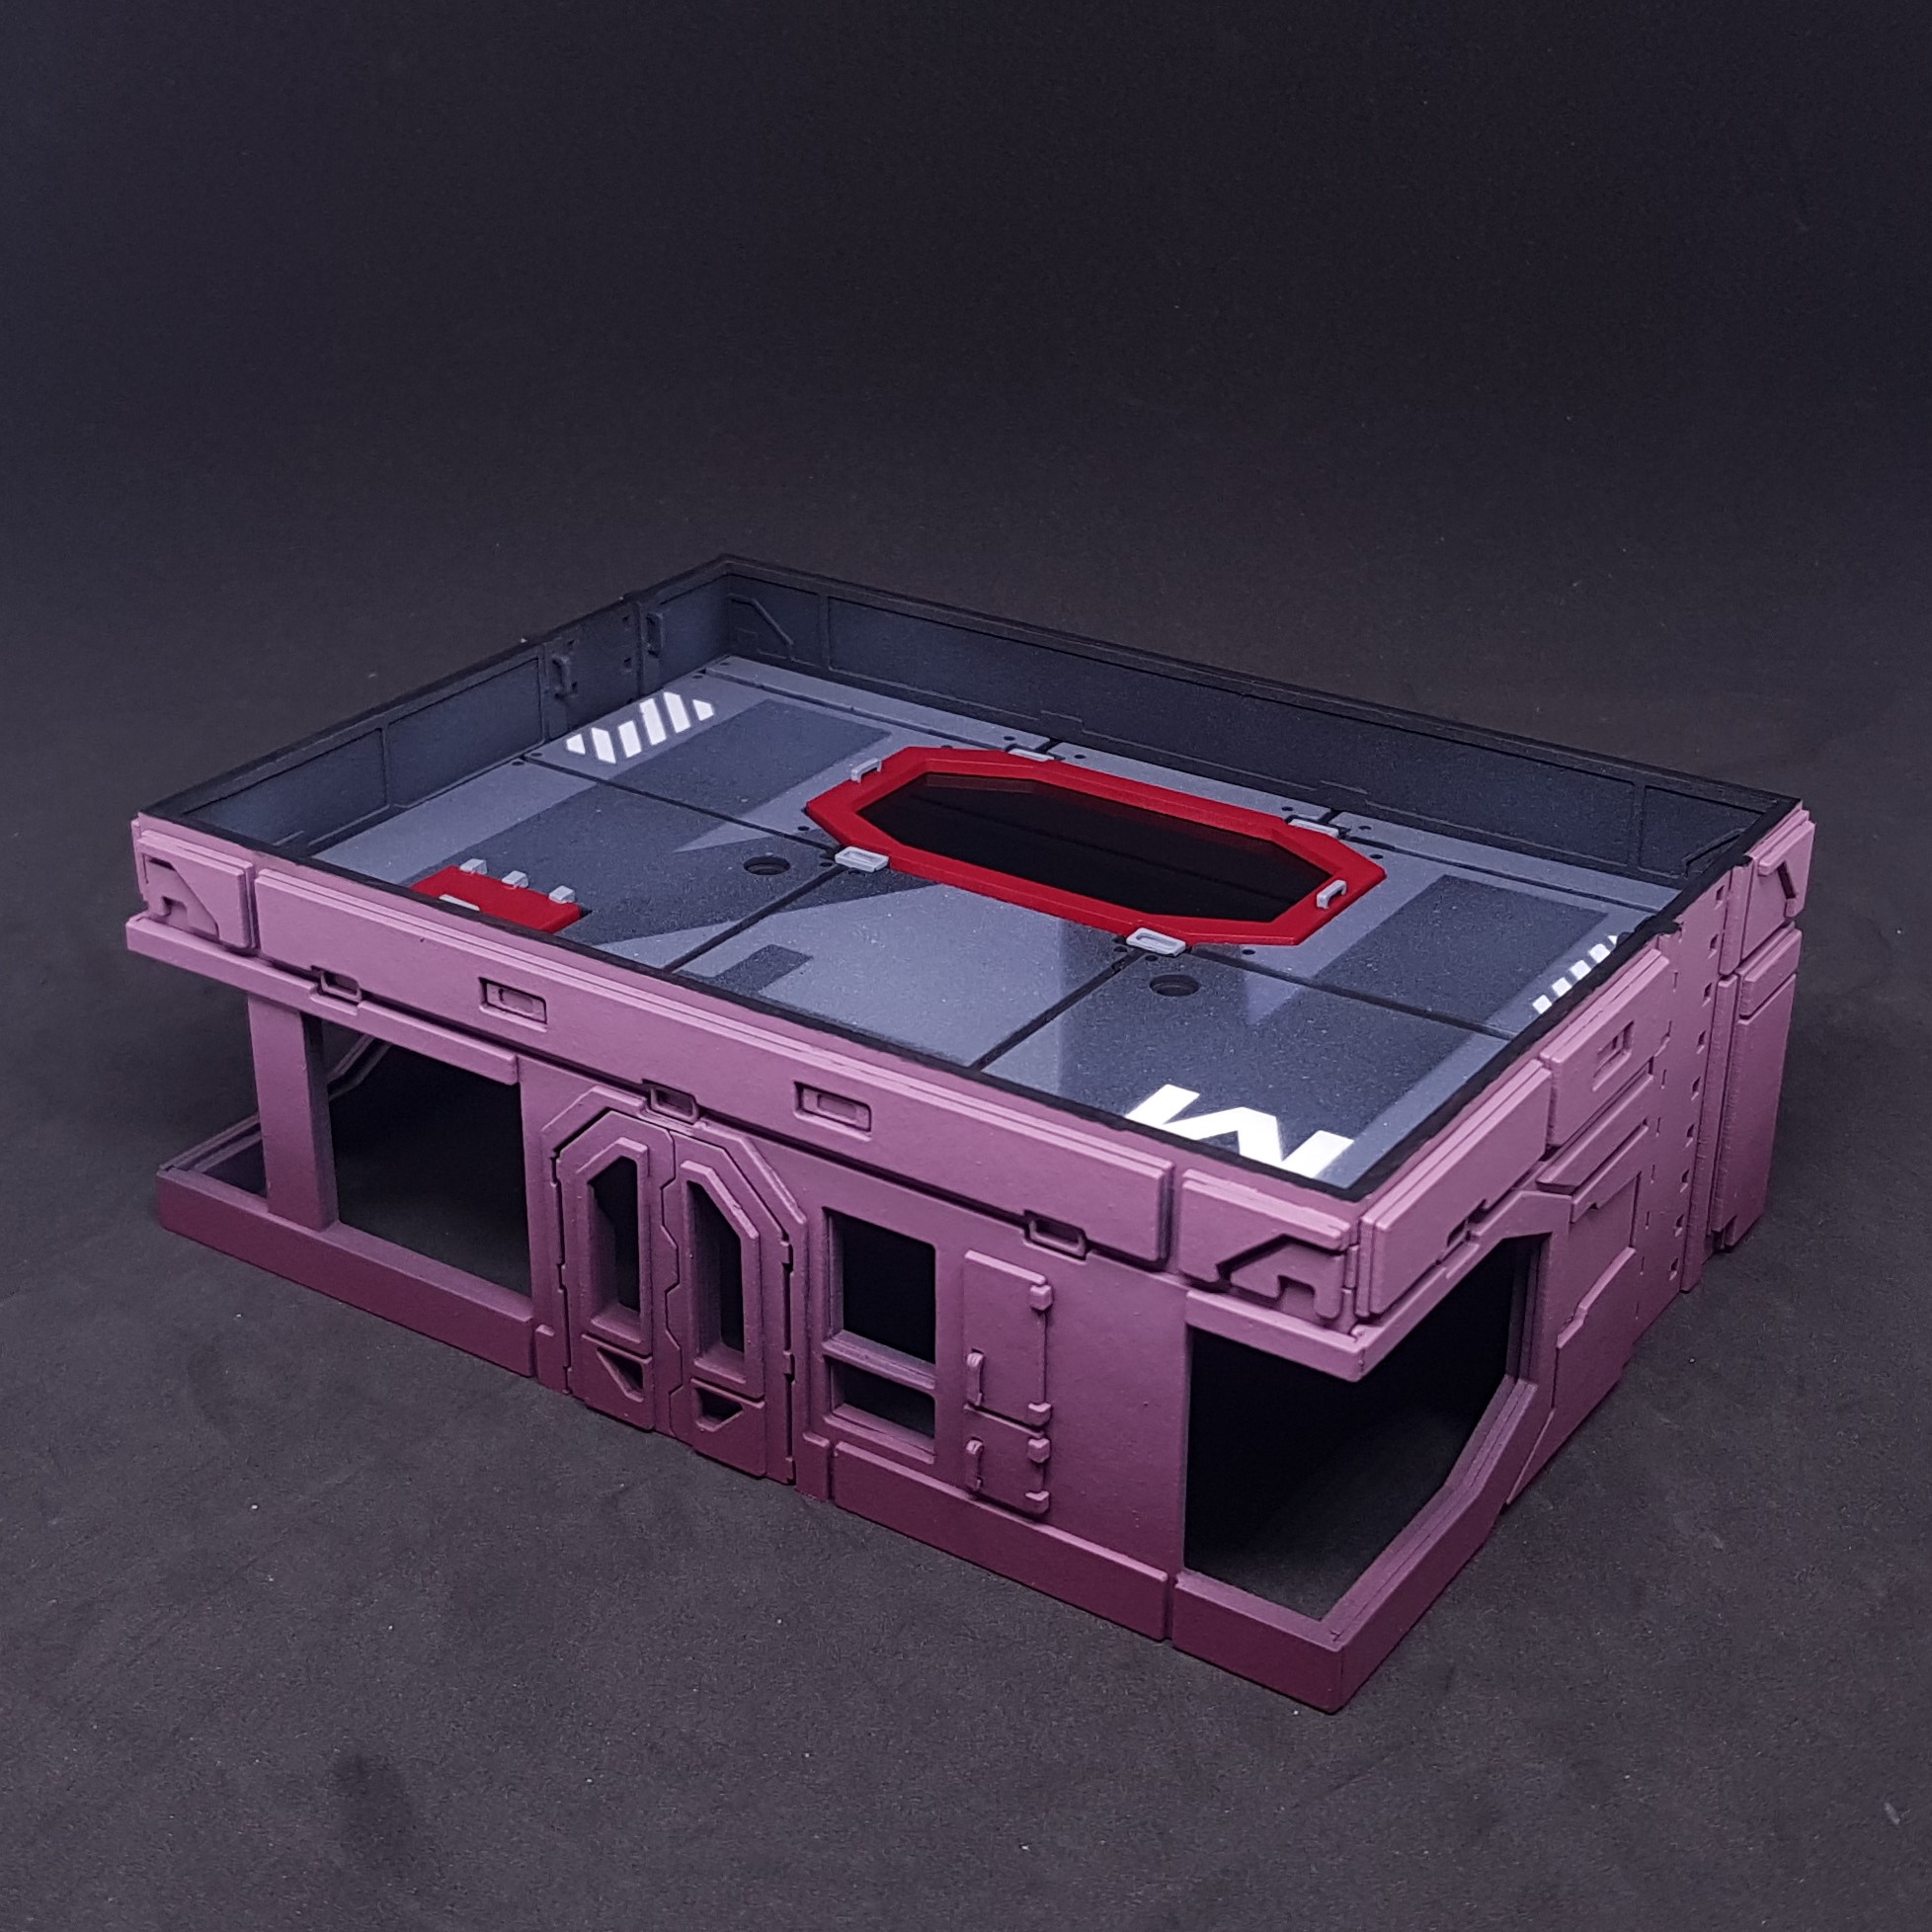 Base coat of red on outside and roof test fit front
So there we have it, my weekends work so far. Not all of it I have 3 bags full of components for the 3 other hubs. I didn’t like building these they are not symmetrical enough for me and lines that should flow don’t (on the paper model and mine).
Good start on this. Hopeful to finish this up with something I like. May be just over a week before my next update. Time to start putting things aside for the boot camp!
Problems... I dont like it.
I swithered whether to put this out there as it seemed a bit negative. Criticism and self criticism if the only way to improve at something as subjective as art. It should be part of everyone’s process.
A bit of background to the above statement. The original was art and design. I love the art Marcos Hidalgo done for the original paper building. The design not as much, this is not hate. This is personal taste. A few things do not make design sense to me and break my immersion.
As I now have a 3D version of the building a few things have became apparent to me of my representation of the original work and my decisions in making this 3D.
 As it stands in a non finishes state - Front
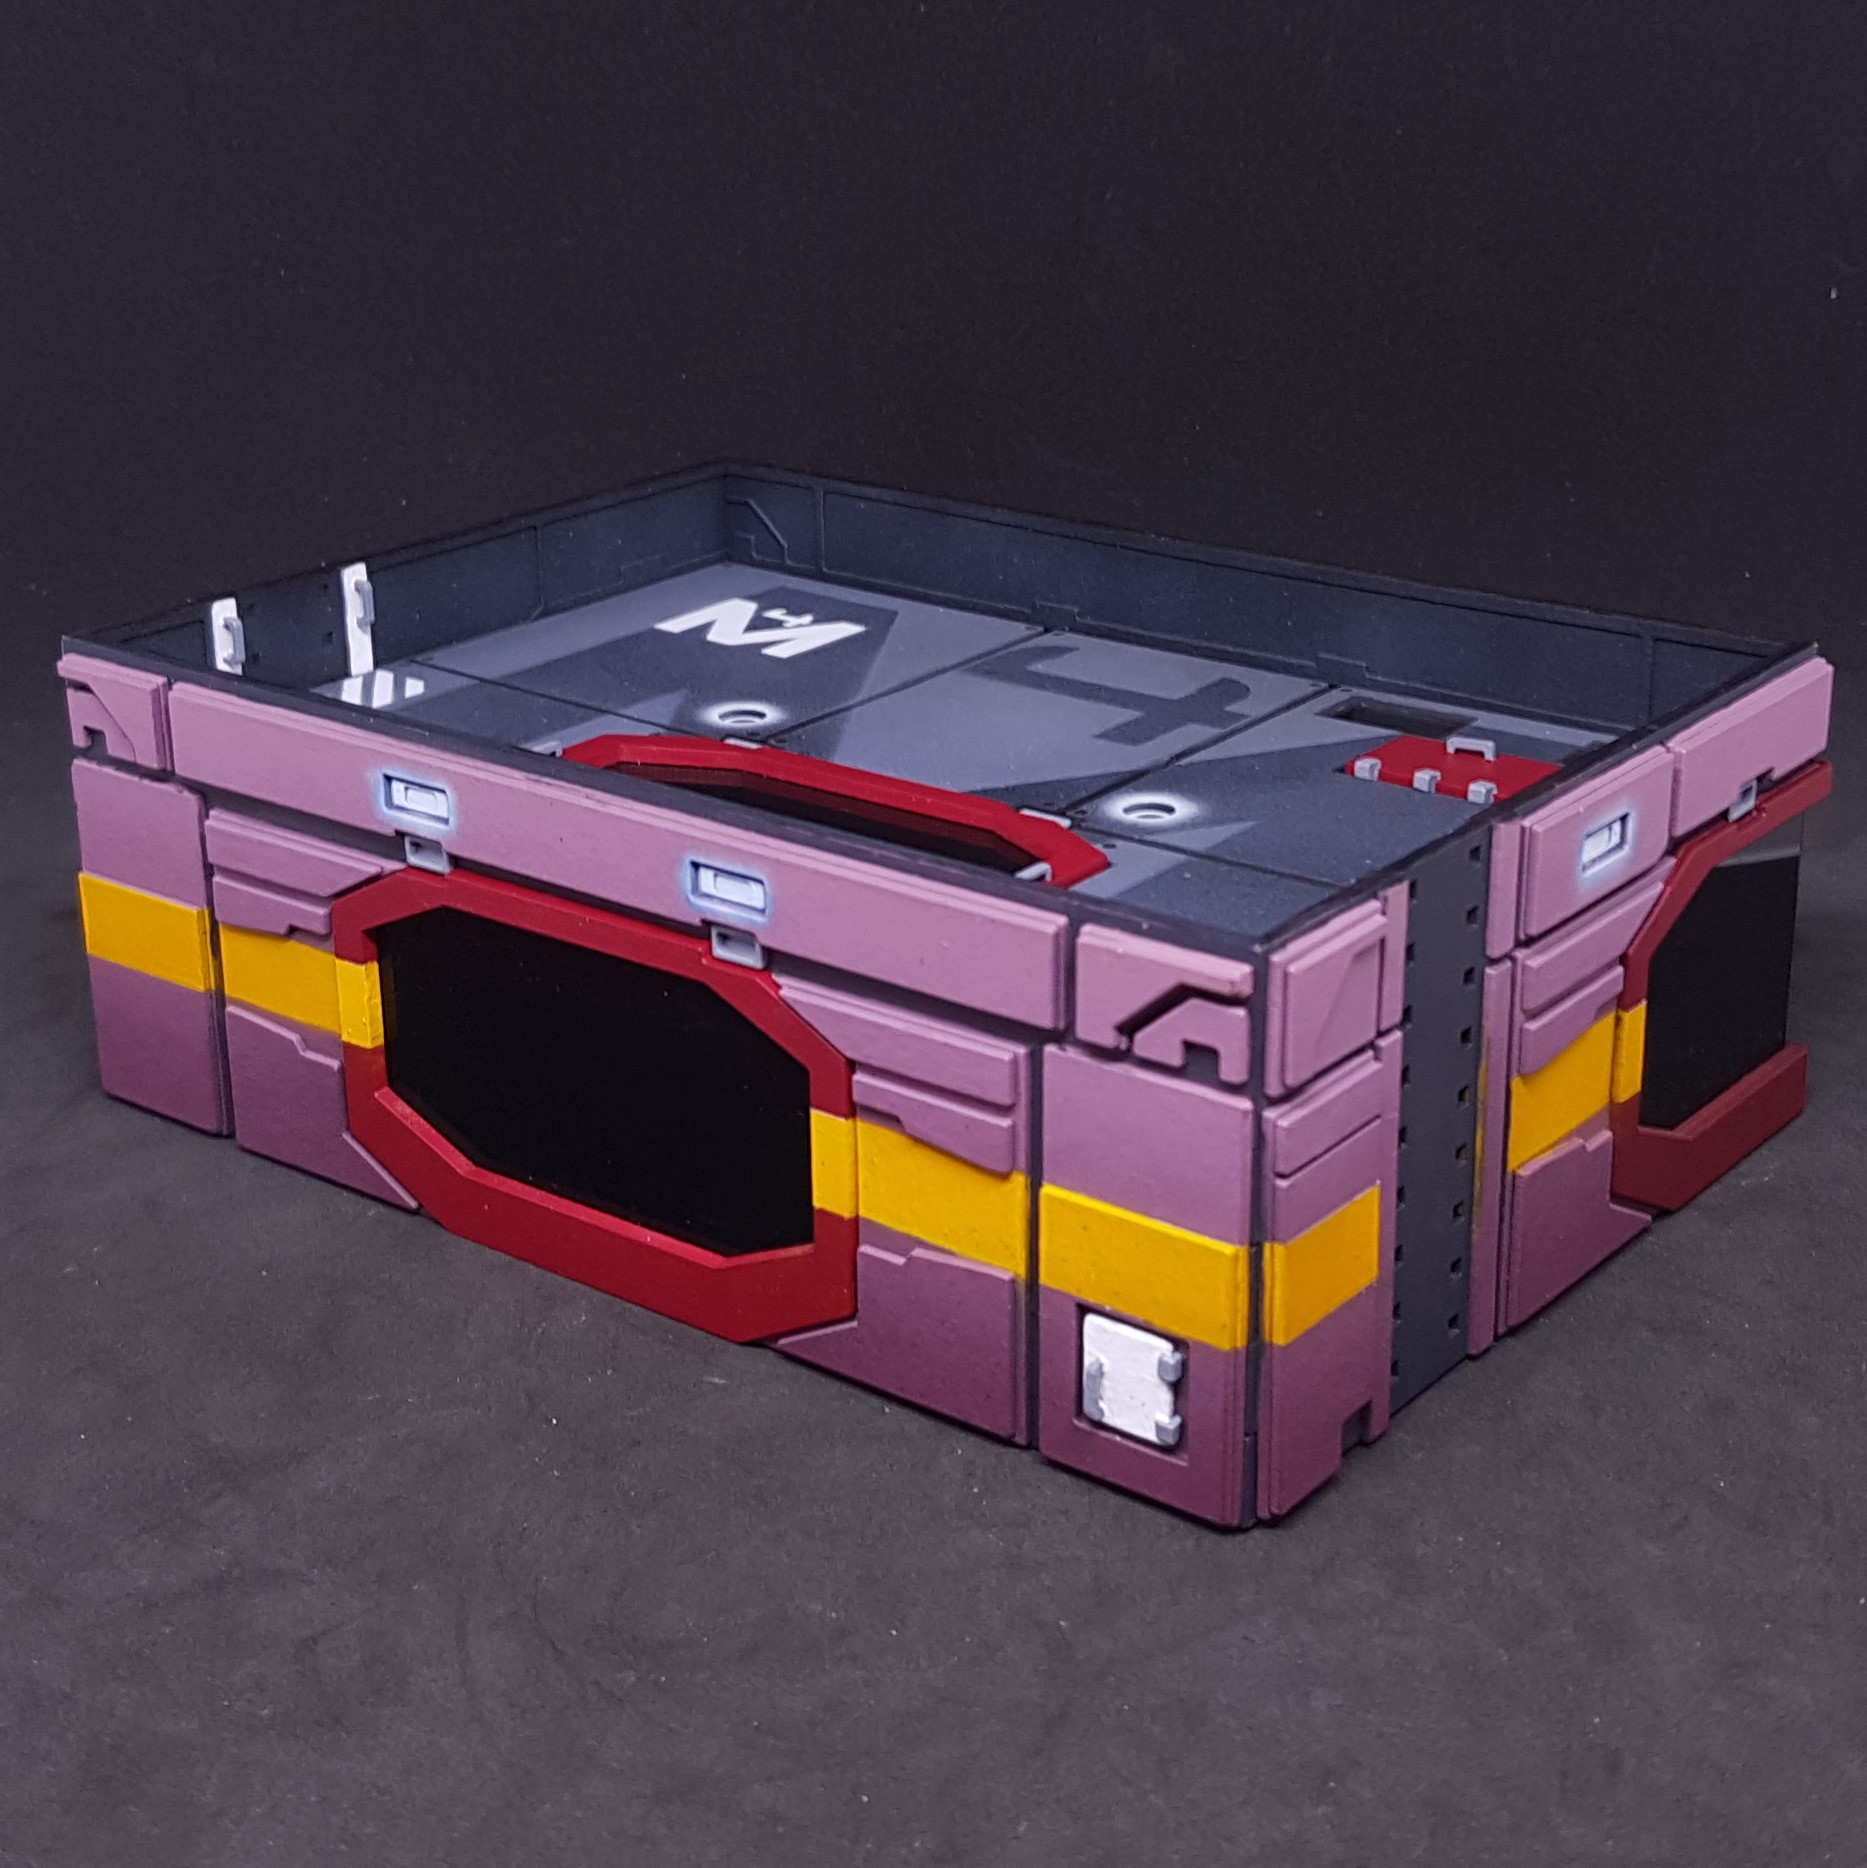 As it stands in a non finishes state - Back
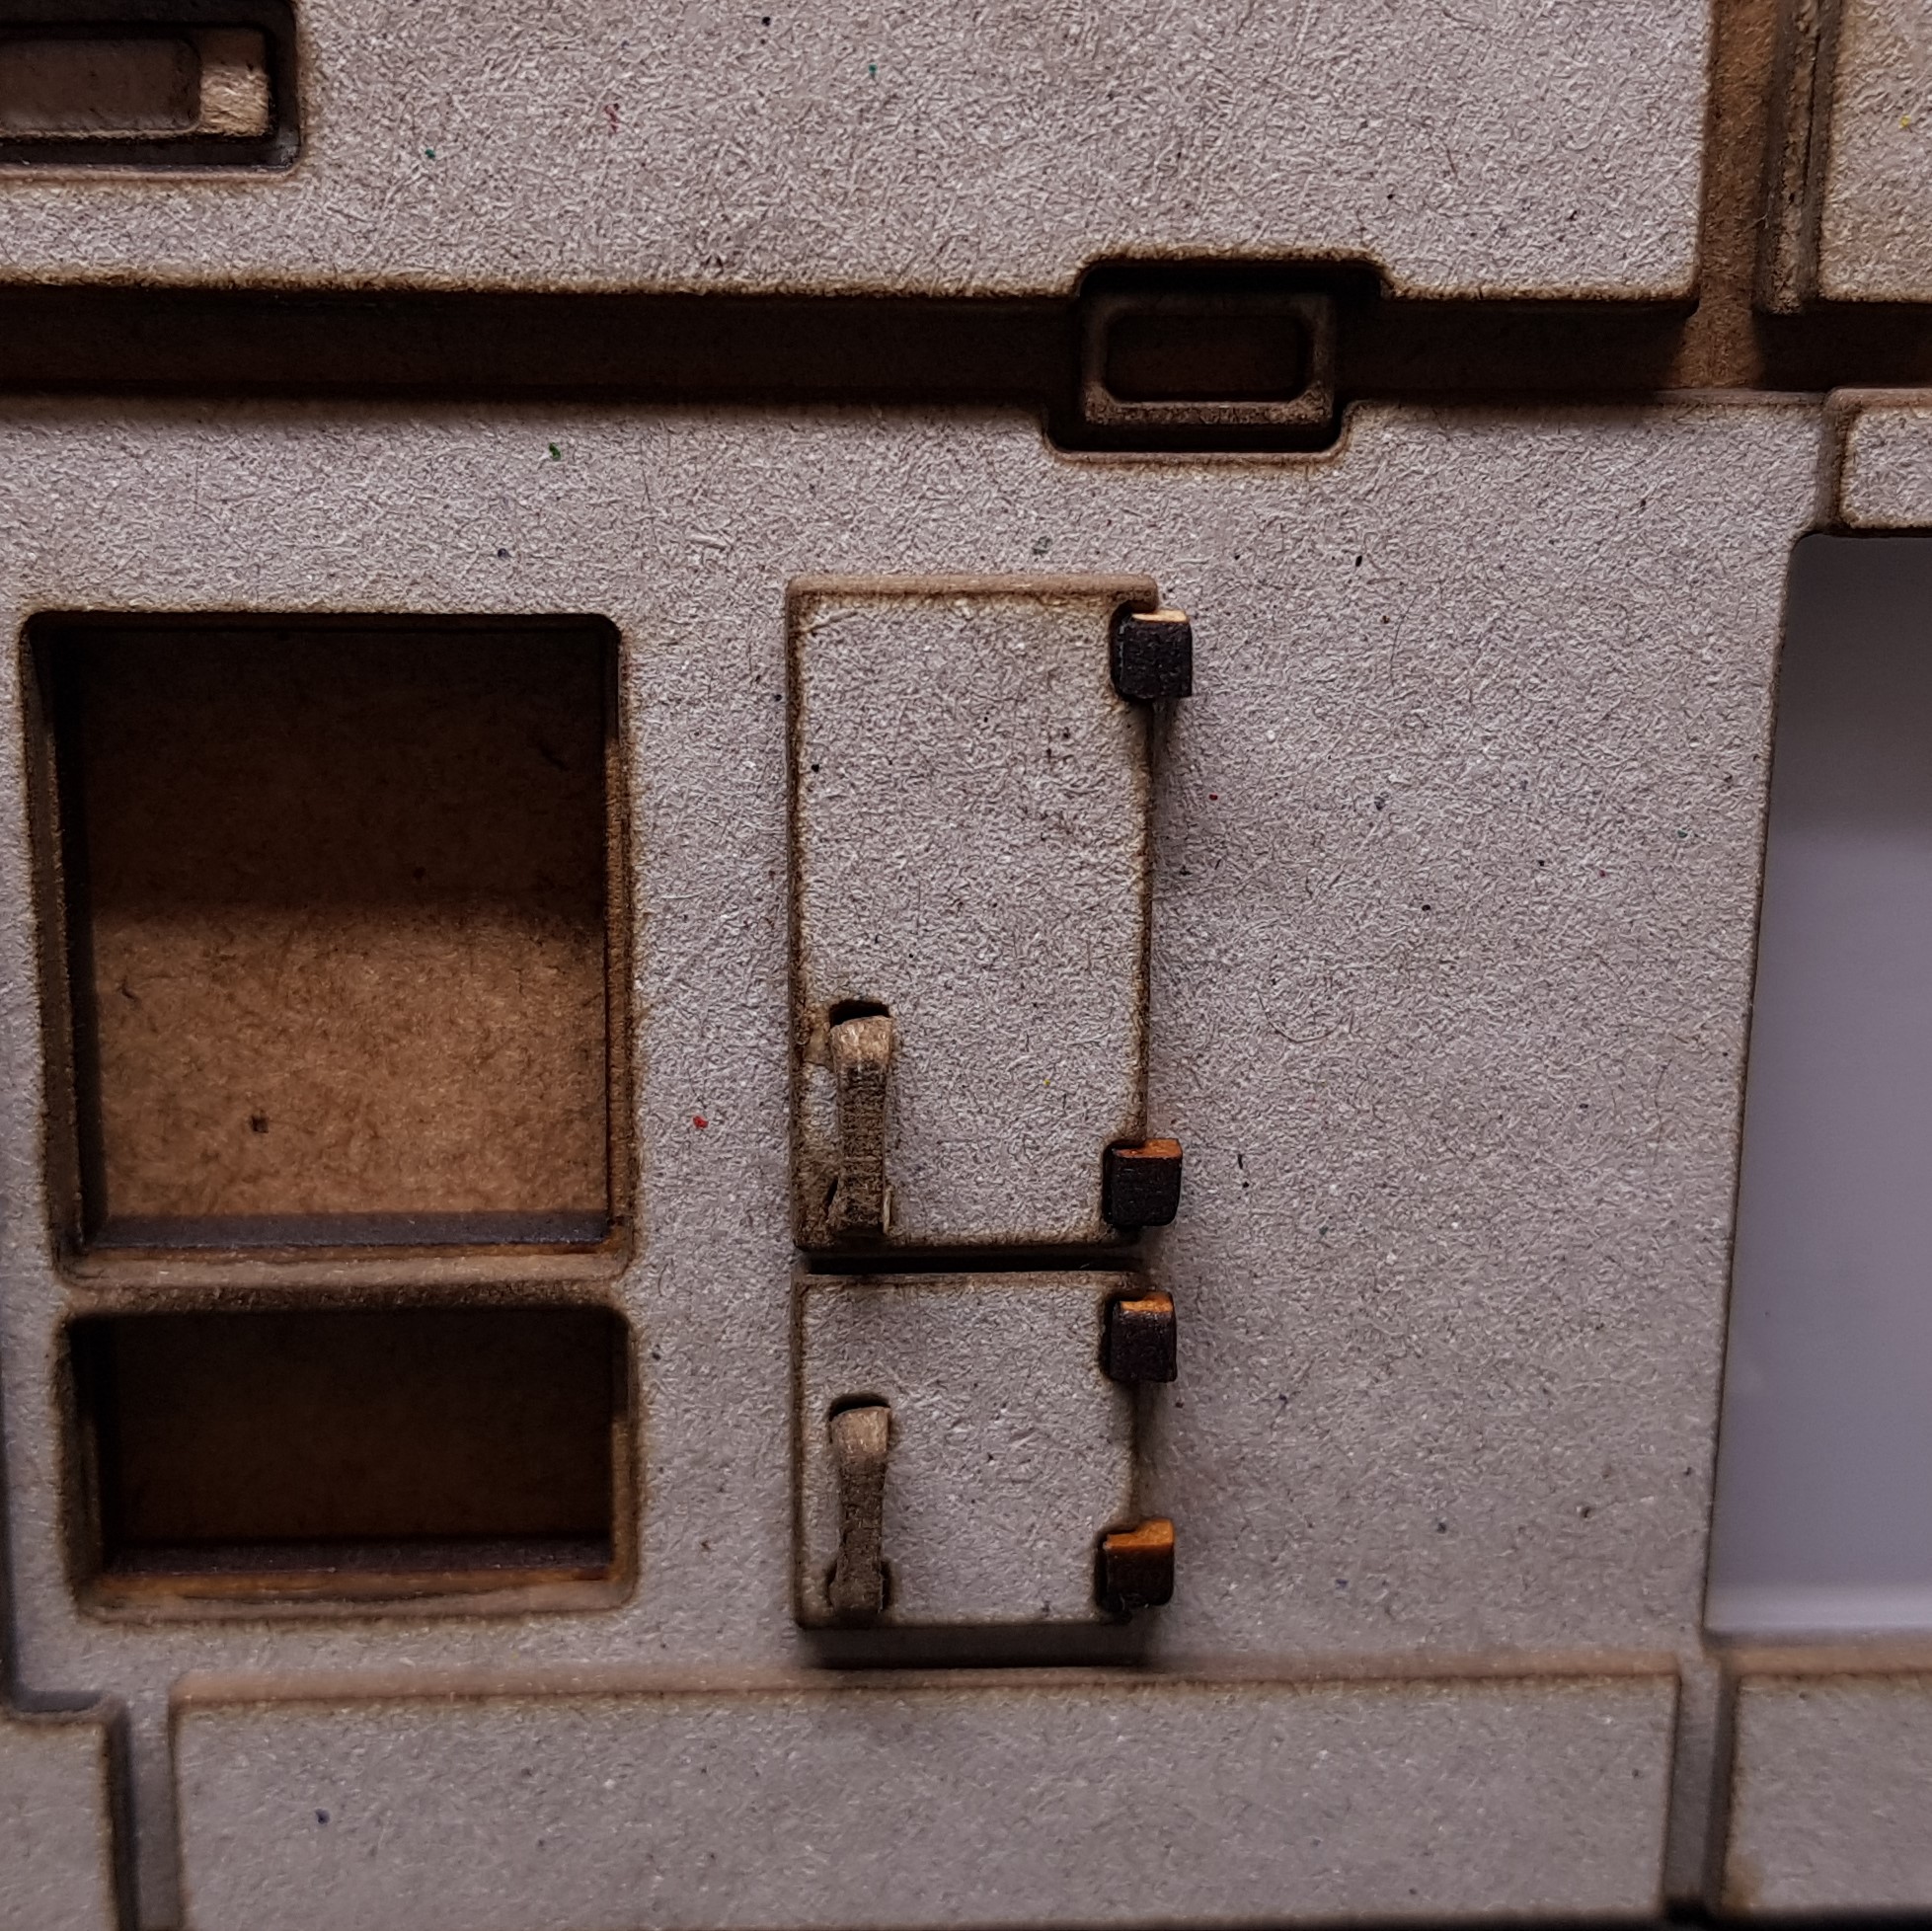
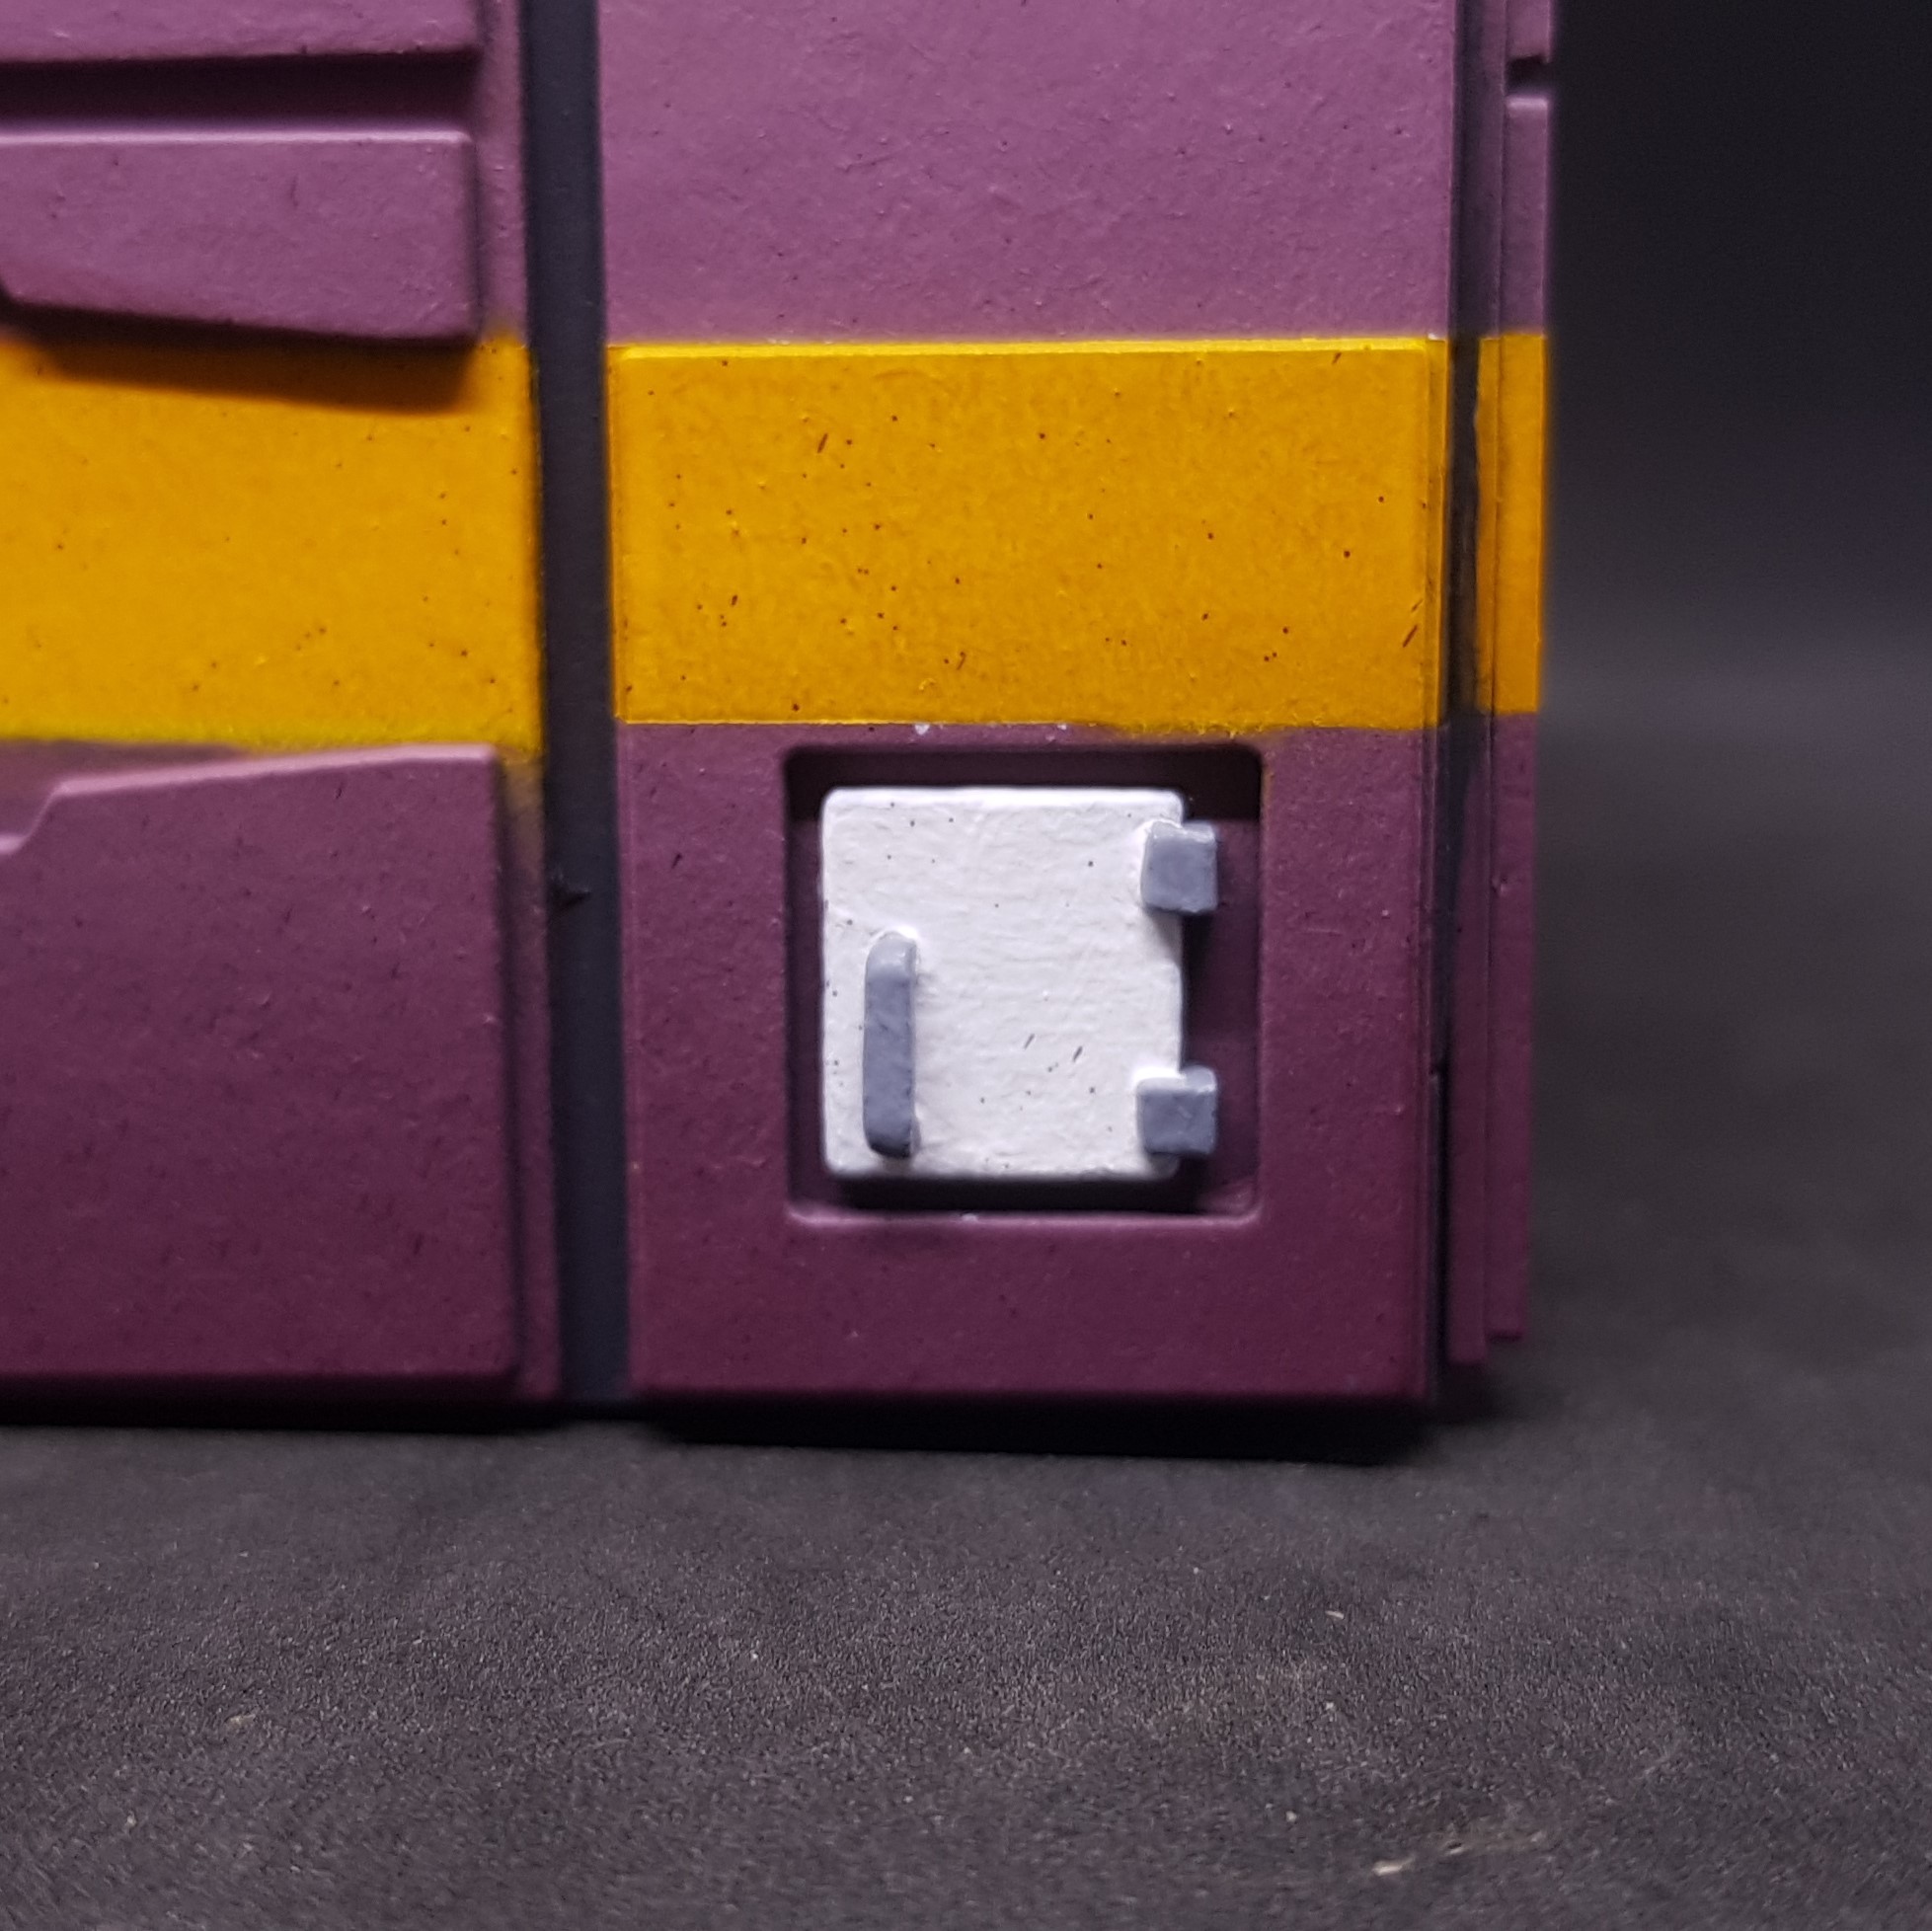 Rear first aid box - Taking this up to white from a dark plum colour is a nightmare I need to do this off model then attach it.
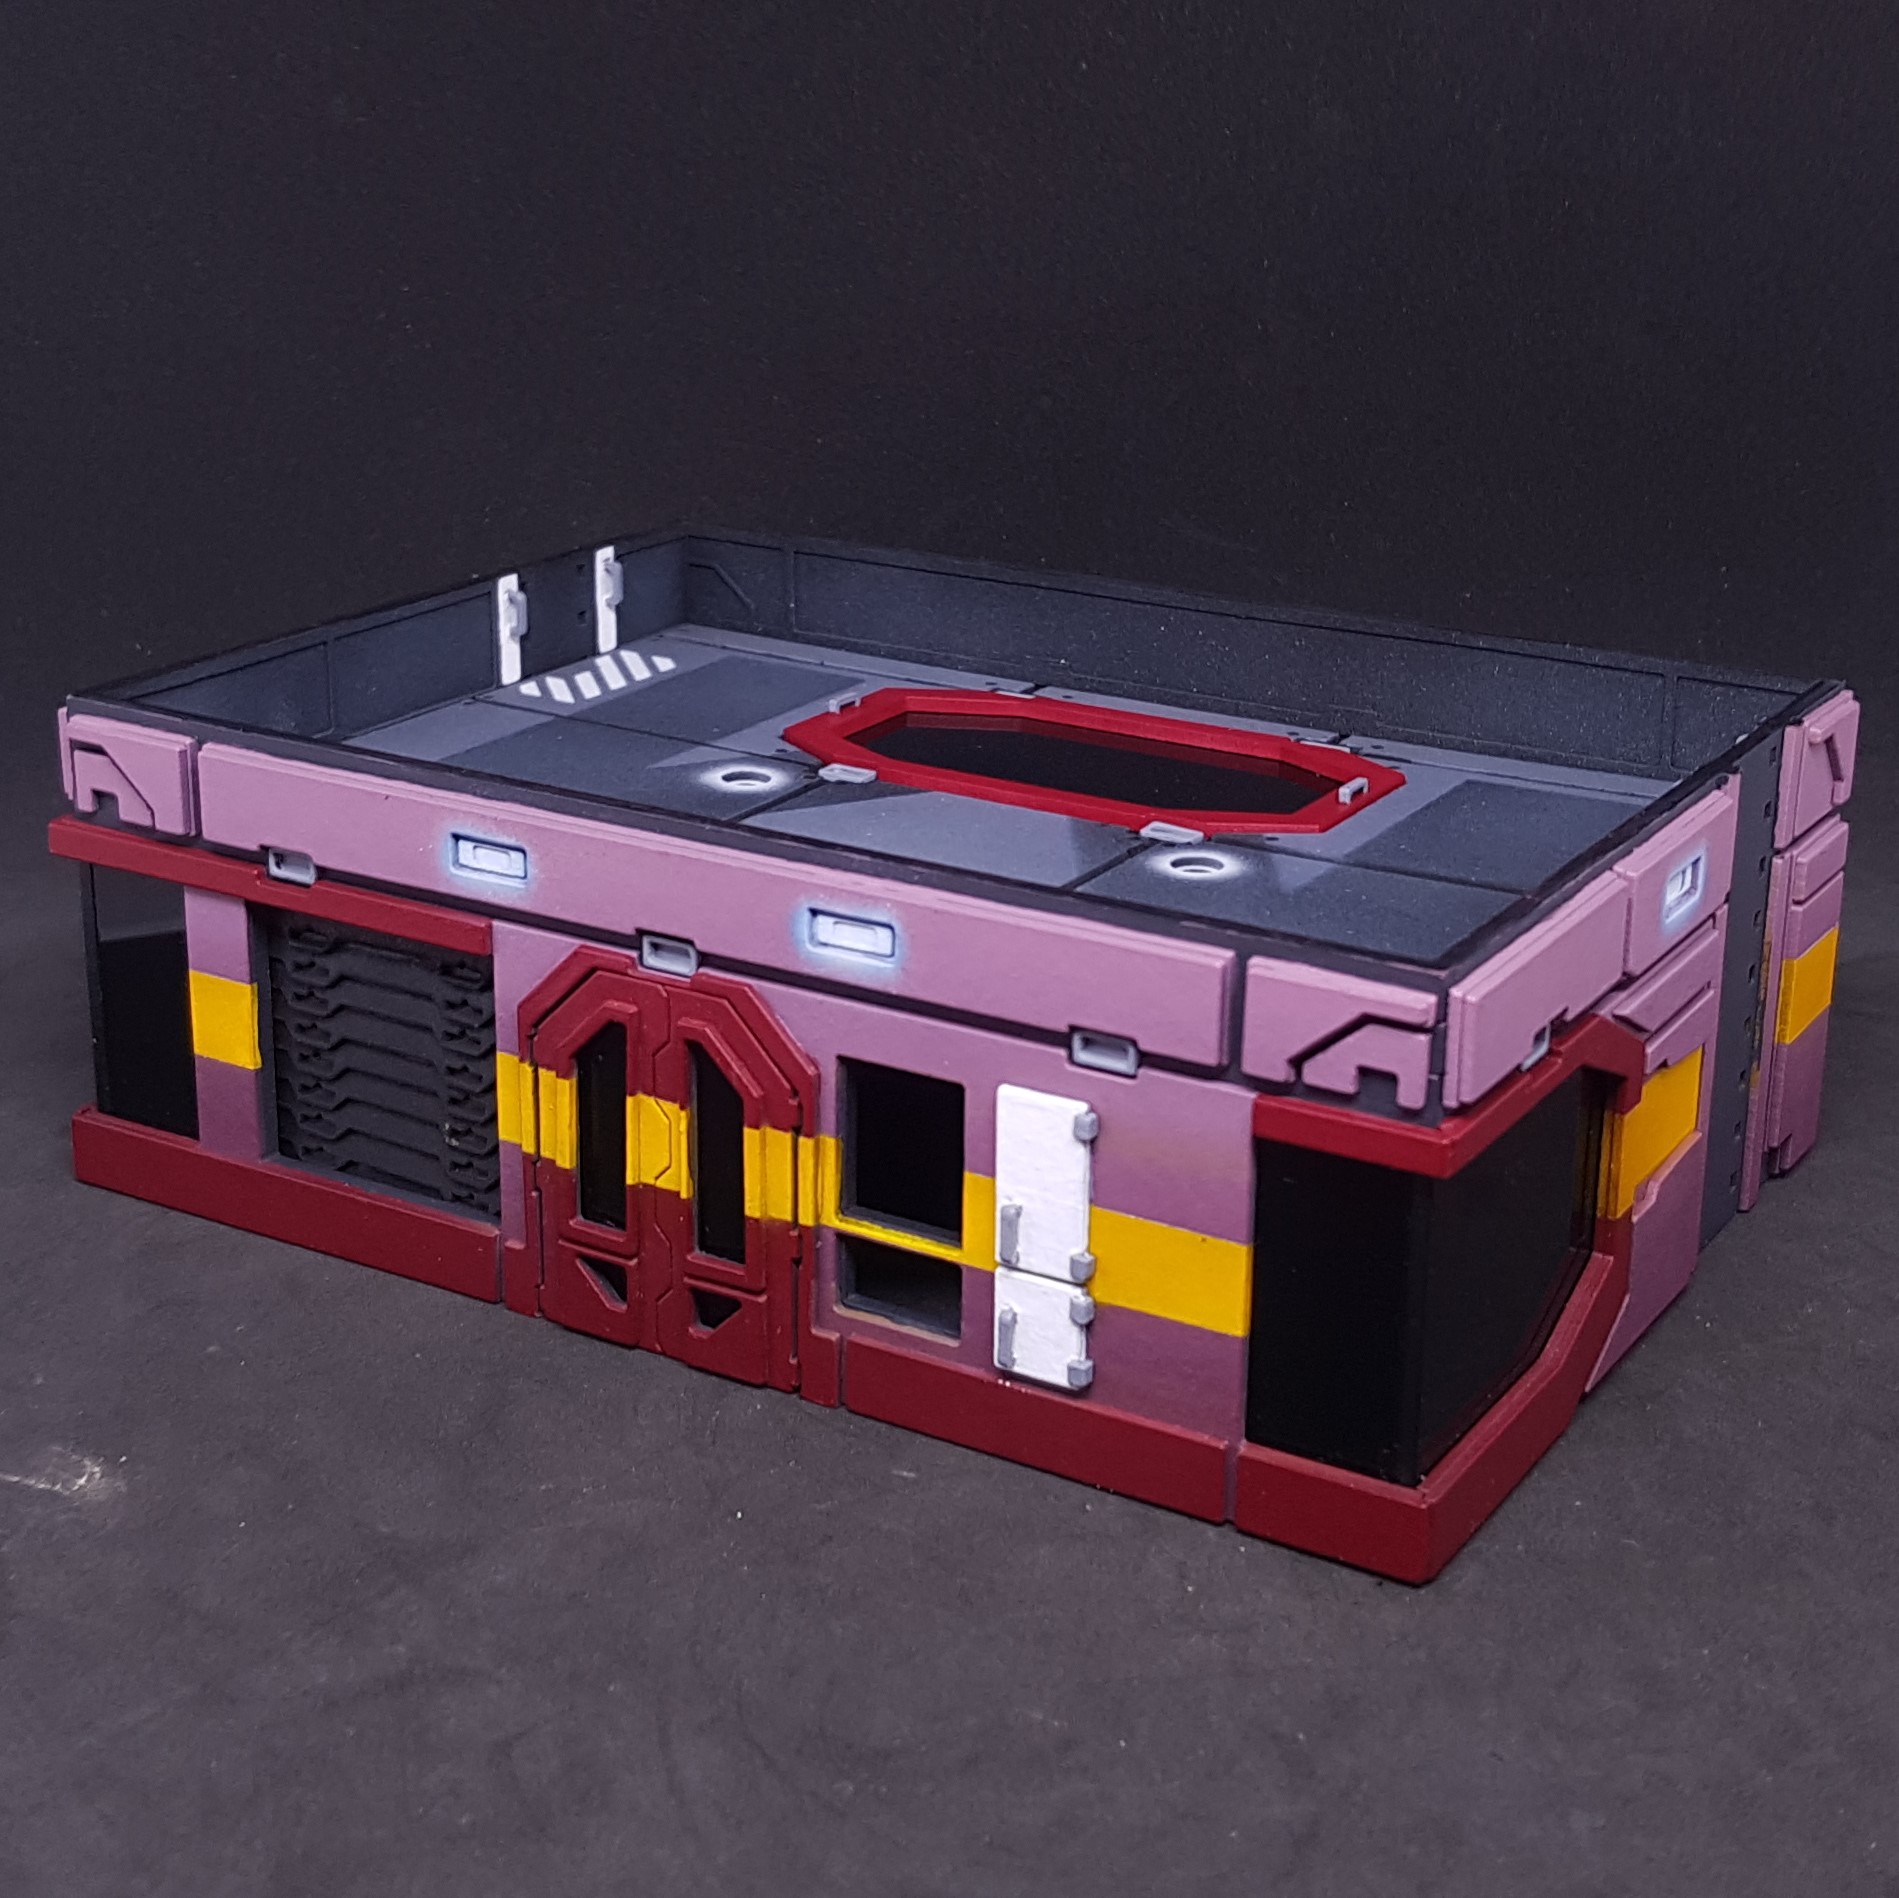
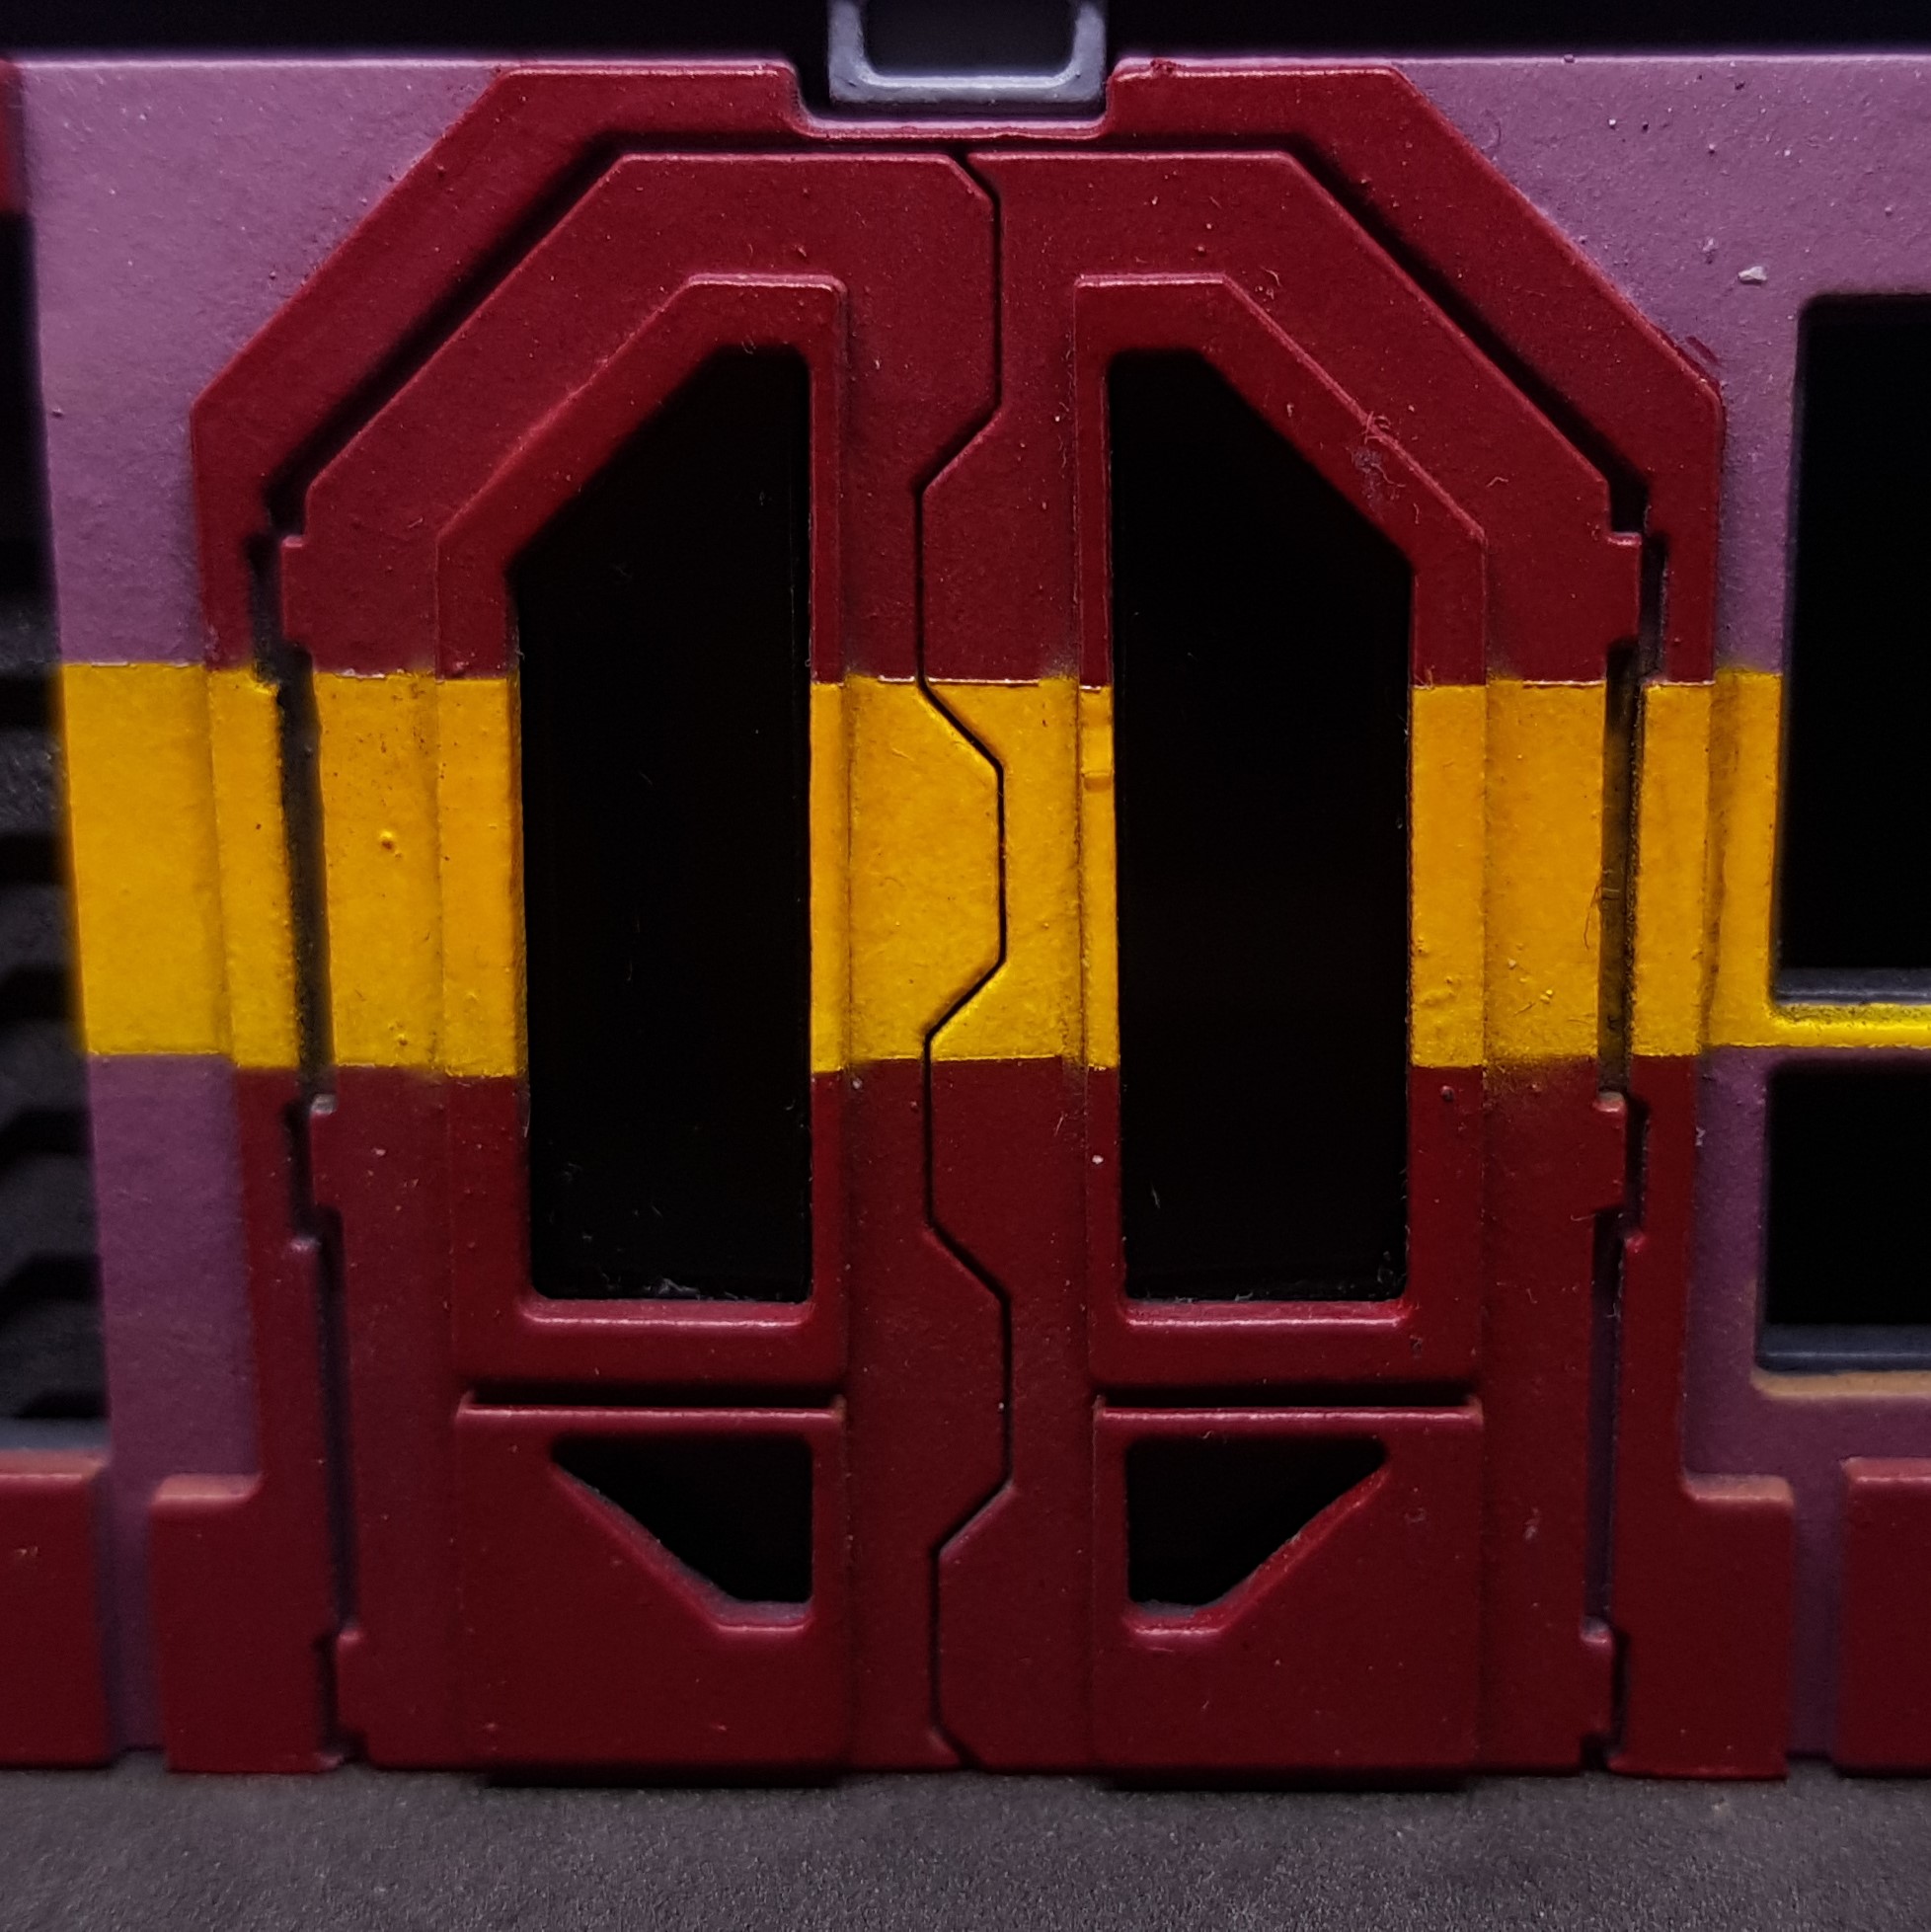 Front door - I do not like the yellow across the door. I have painted a fair few doors and I have no idea why you would put a stripe over the door. I think I will change this to a solid colour. This will also make this easier to paint.
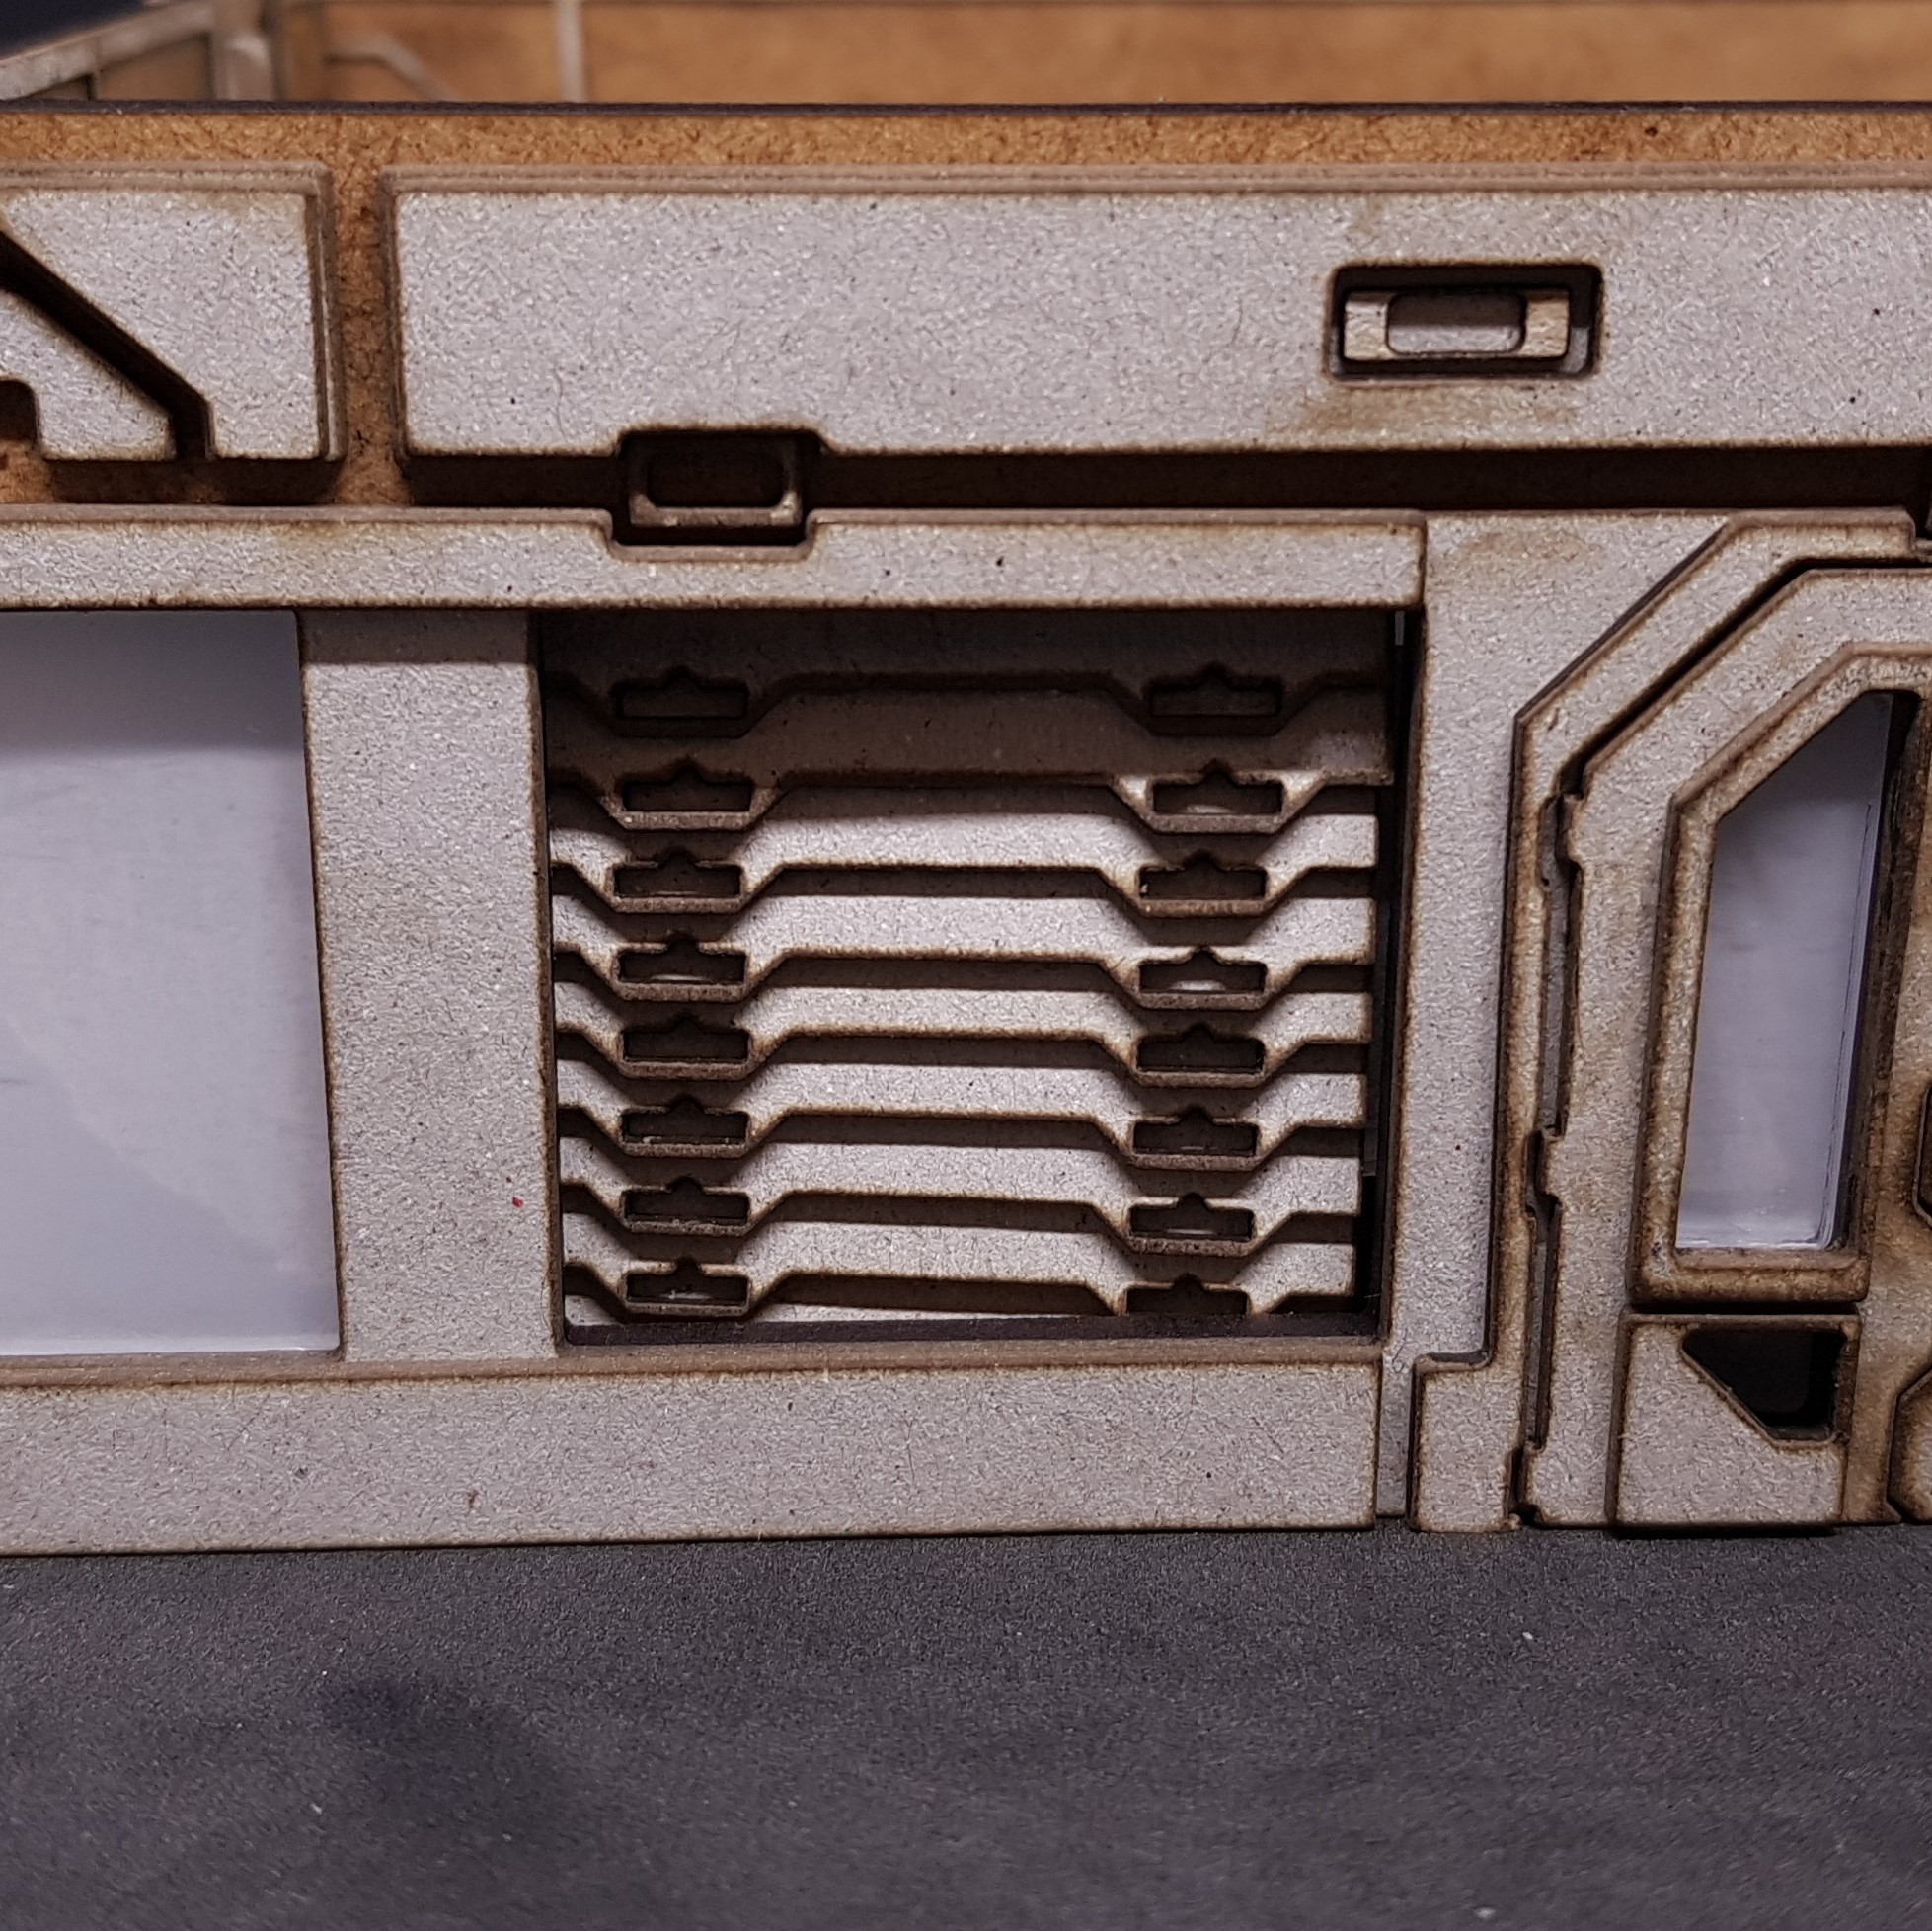
 The shutters seemed to me like a great idea for them nor all to be straight or uniform. I absolutely hate this. It needs to be straight.
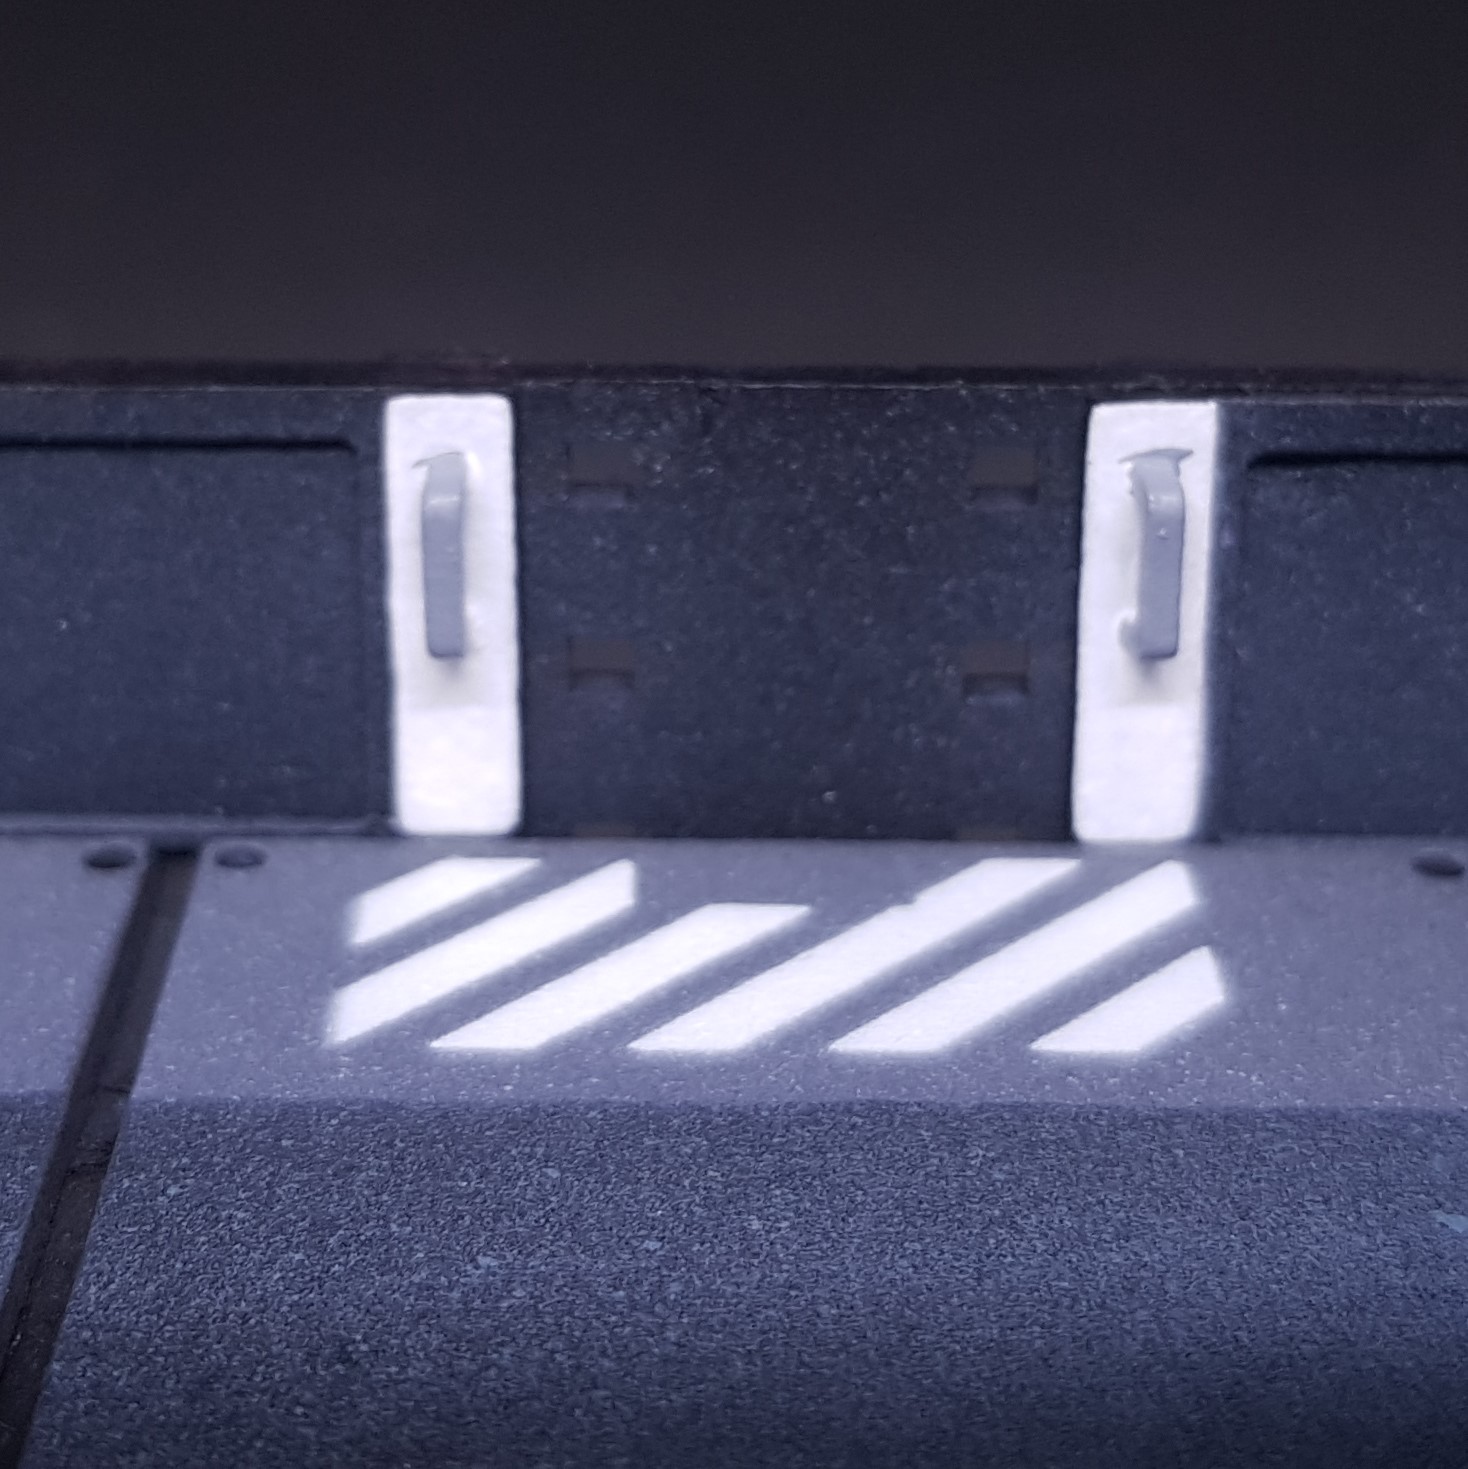 Again with the white I will do these off model then attach.
 The door windows are a nightmare. They are not right. Sorry about this picture It was just all black so had to use flash. I cant make them flush the way I designed them. This needs simplified to make the end result uniform, neater and easier.
 So, Change’s to make this better for me.
- Remove yellow parts to the window and door frames (sorry Marcos!).
- Take more time in masking the yellow stripe. This may be aided by the change in the building and painting.
- May change colour of the main walls just for number 4.
- Paint the white doors and handle sections before applying them to the model.
- Straighten the shutters.
- Redesign the doors.
- Break out the top floor section so I can reuse it.
So there’s a very positive post, Why positive? Because I will make something I am happier with as an end result by being constructively negative.
The line is drawn under painted version 1.0 Onto the changes!
Overcoming some problems
So I had a couple of design issues to resolve. First being the shutters.
I cant believe how much those irritated me. Probably because I loved how they turned out but hated the execution of them.
I made an overly complex jig to help me build them. I don’t want to get into the maths I went through but the jig took about an hour of time my time to think about and plan and build.
The good thing is when the jig was done I made all 4 shutters I need in around 10 minutes which is about how long it took for me to do one wonky one.
 First design issue resolved!
The issue with the door windows is that they glass didn’t sit flat in the frame. There are 4 layers between the inside of the building and the outside at the window section. 1 MDF and 3 x 1mm card. Dropping in 4 small panes of Perspex was tough.
This presented an issue as I had already cut all the parts required. Not to worry MDF is cheap and I only need to replace one section.
I decided to make the glass one section instead of 4. this should make it easier to fit in and it cant all be at slightly different levels and angles.
 Top is the new section bettom is the old
  new door from the front. No difference or compromise in the end effect.
 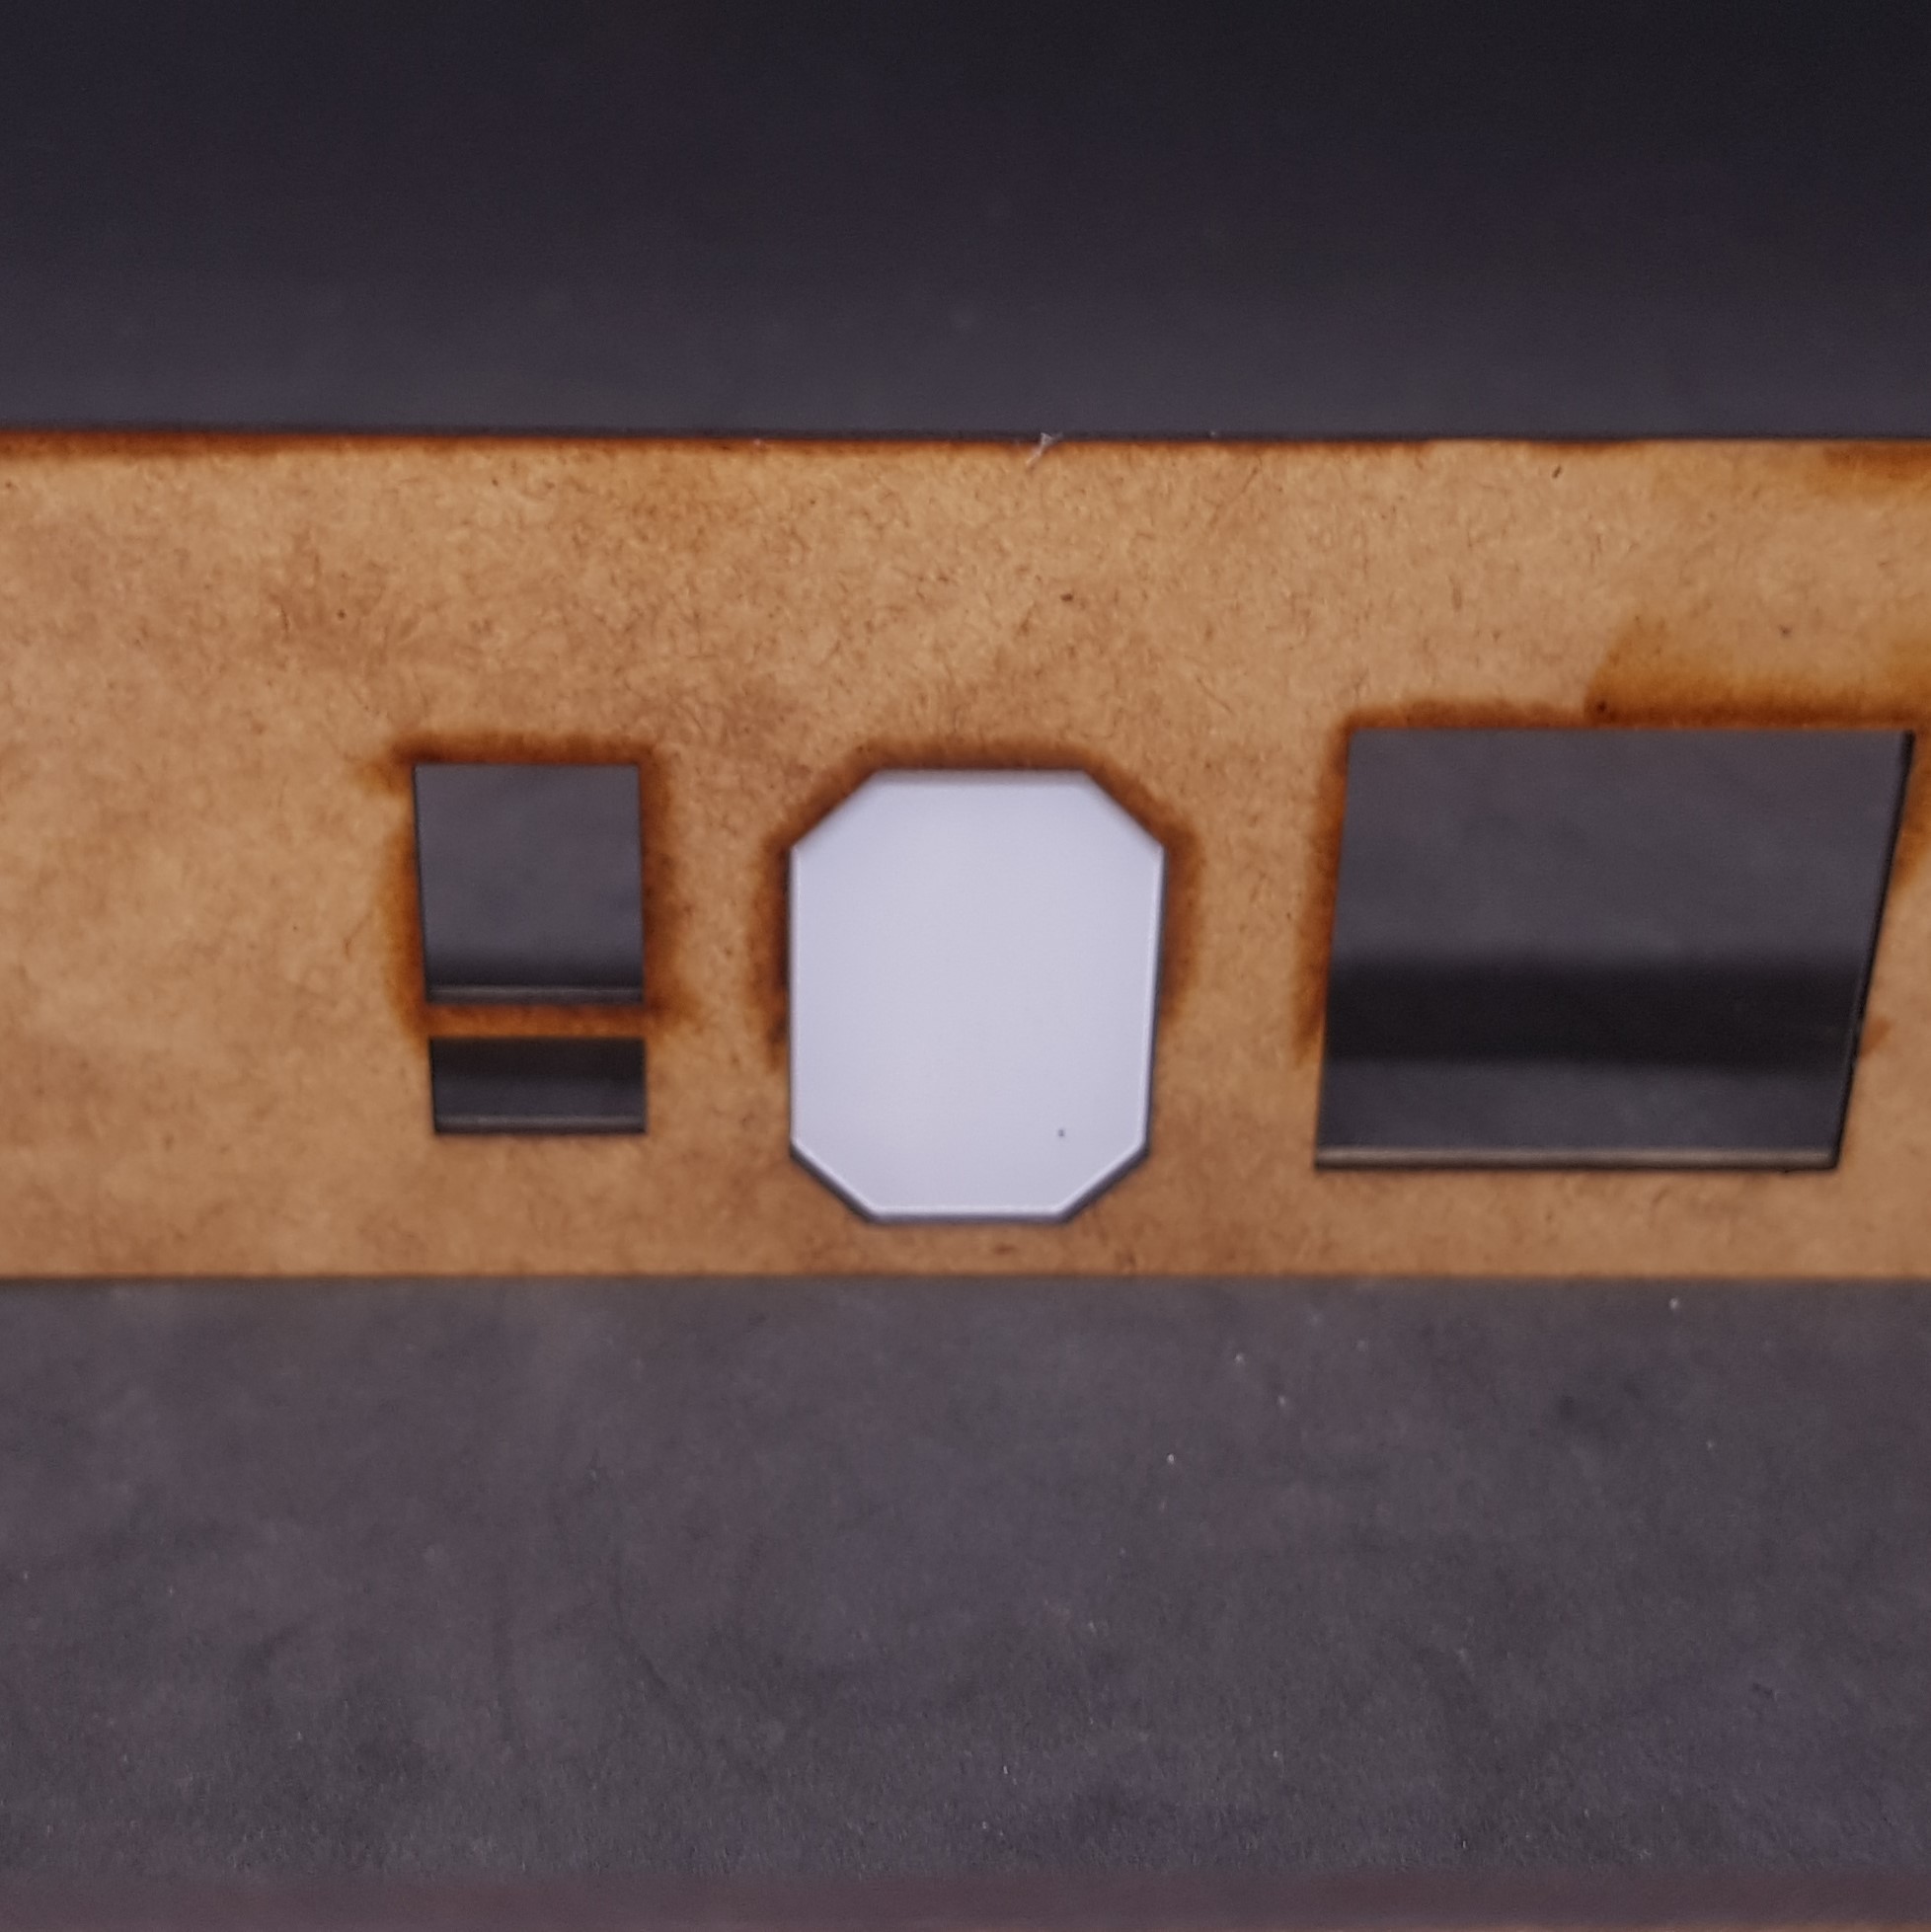 From behind showing how much simpler this is to the other post.
 So that’s the design issues resolved. I think I will get all 4 buildings constructed now for the main painting stage.
More to come,this may take a while unlike everything else in this project. 🙂
Progress
Had some time this weekend to do some work. I decided to build the remaining 3 management modules.
The building in sections worked well. I base coated and zenith’d as before I decided to use PVA to assemble instead. This involved lots of clamps and at times this parked the martial as I didn’t use packing. This doesn’t seem to detract from the final results.
The fades and colour choices are not my best but I think the end result looks good enough. I still prefer the original card model fades but these are done perfectly as only a computer can.
 All 3 base models ready for components.
 I decided to do the models one at a time from this point. This means that any mistakes are not necessarily on all models and I can learn each time.
I did however spray the strong main component colours. I have all the parts.
I needed to do the yellow stripe along the middle. this took about 2 hours of masking for one. I didn’t want any bleed of yellow through. I did do this well but still ended up with one piece of visible overspray.
After this I sprayed grey then the yellow. This worked out a lot better than the first test model.
I unmasked then painted the dark grey in-between the panels.
I assembled the blue components. This was done with PVA I can see sections on the interior I will need to paint blue by hand. this shouldn’t be an issue.
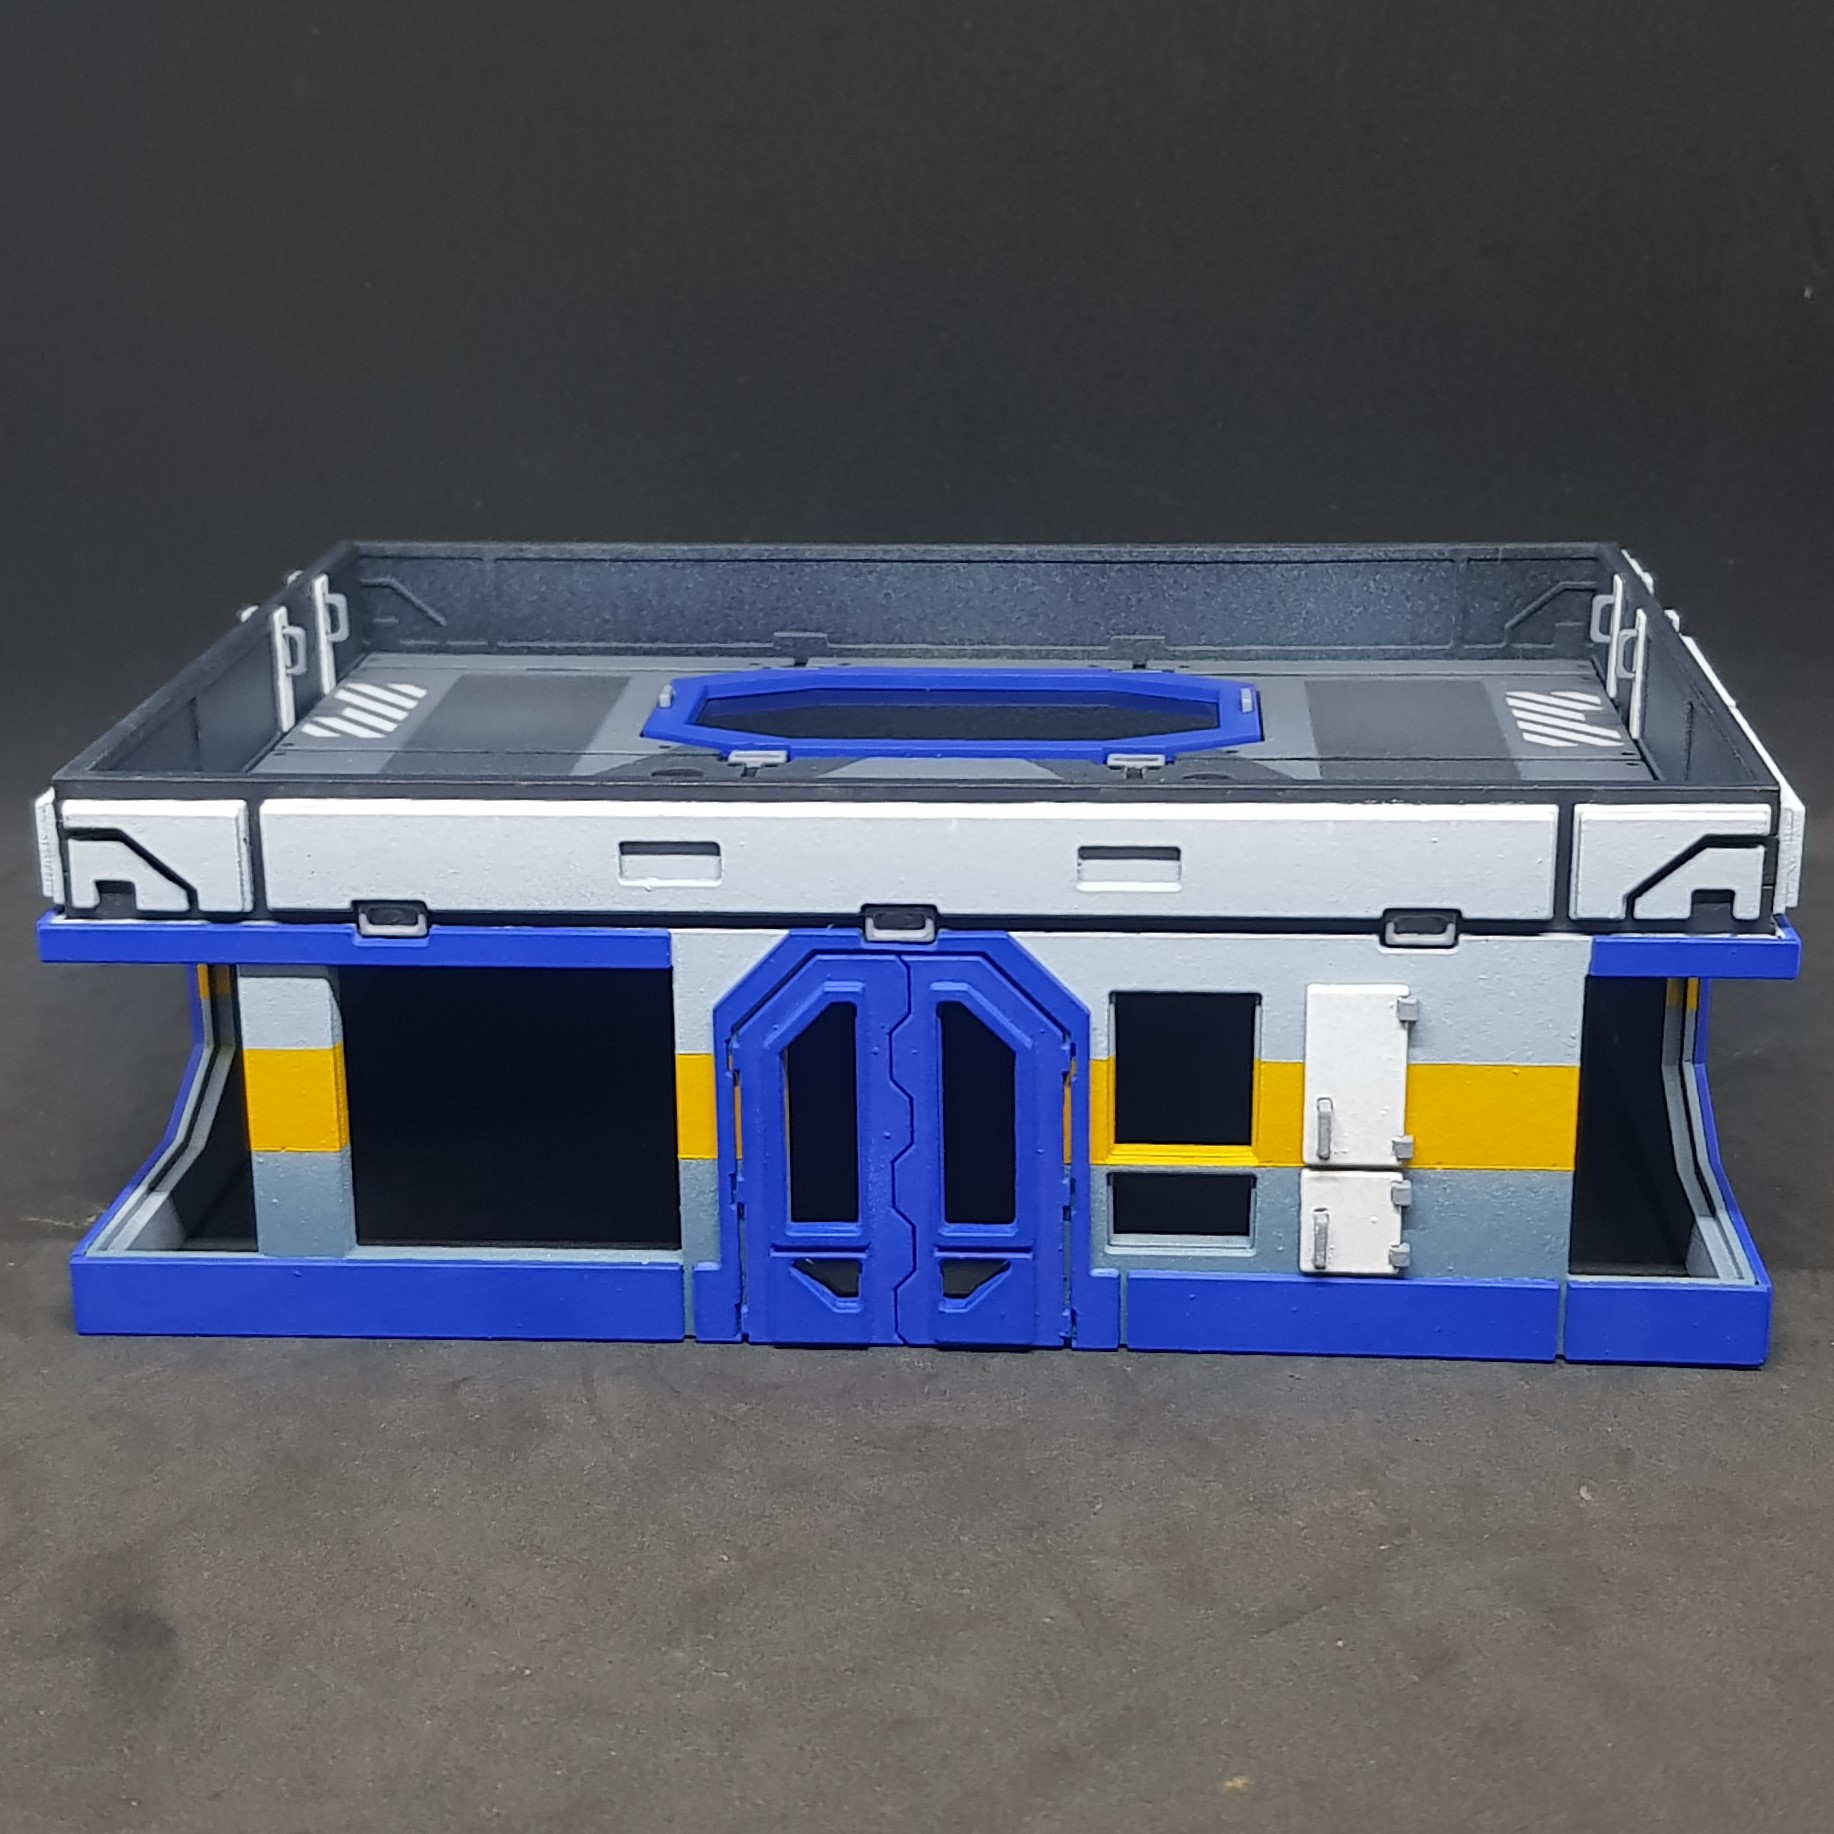 Front
Front Back
Back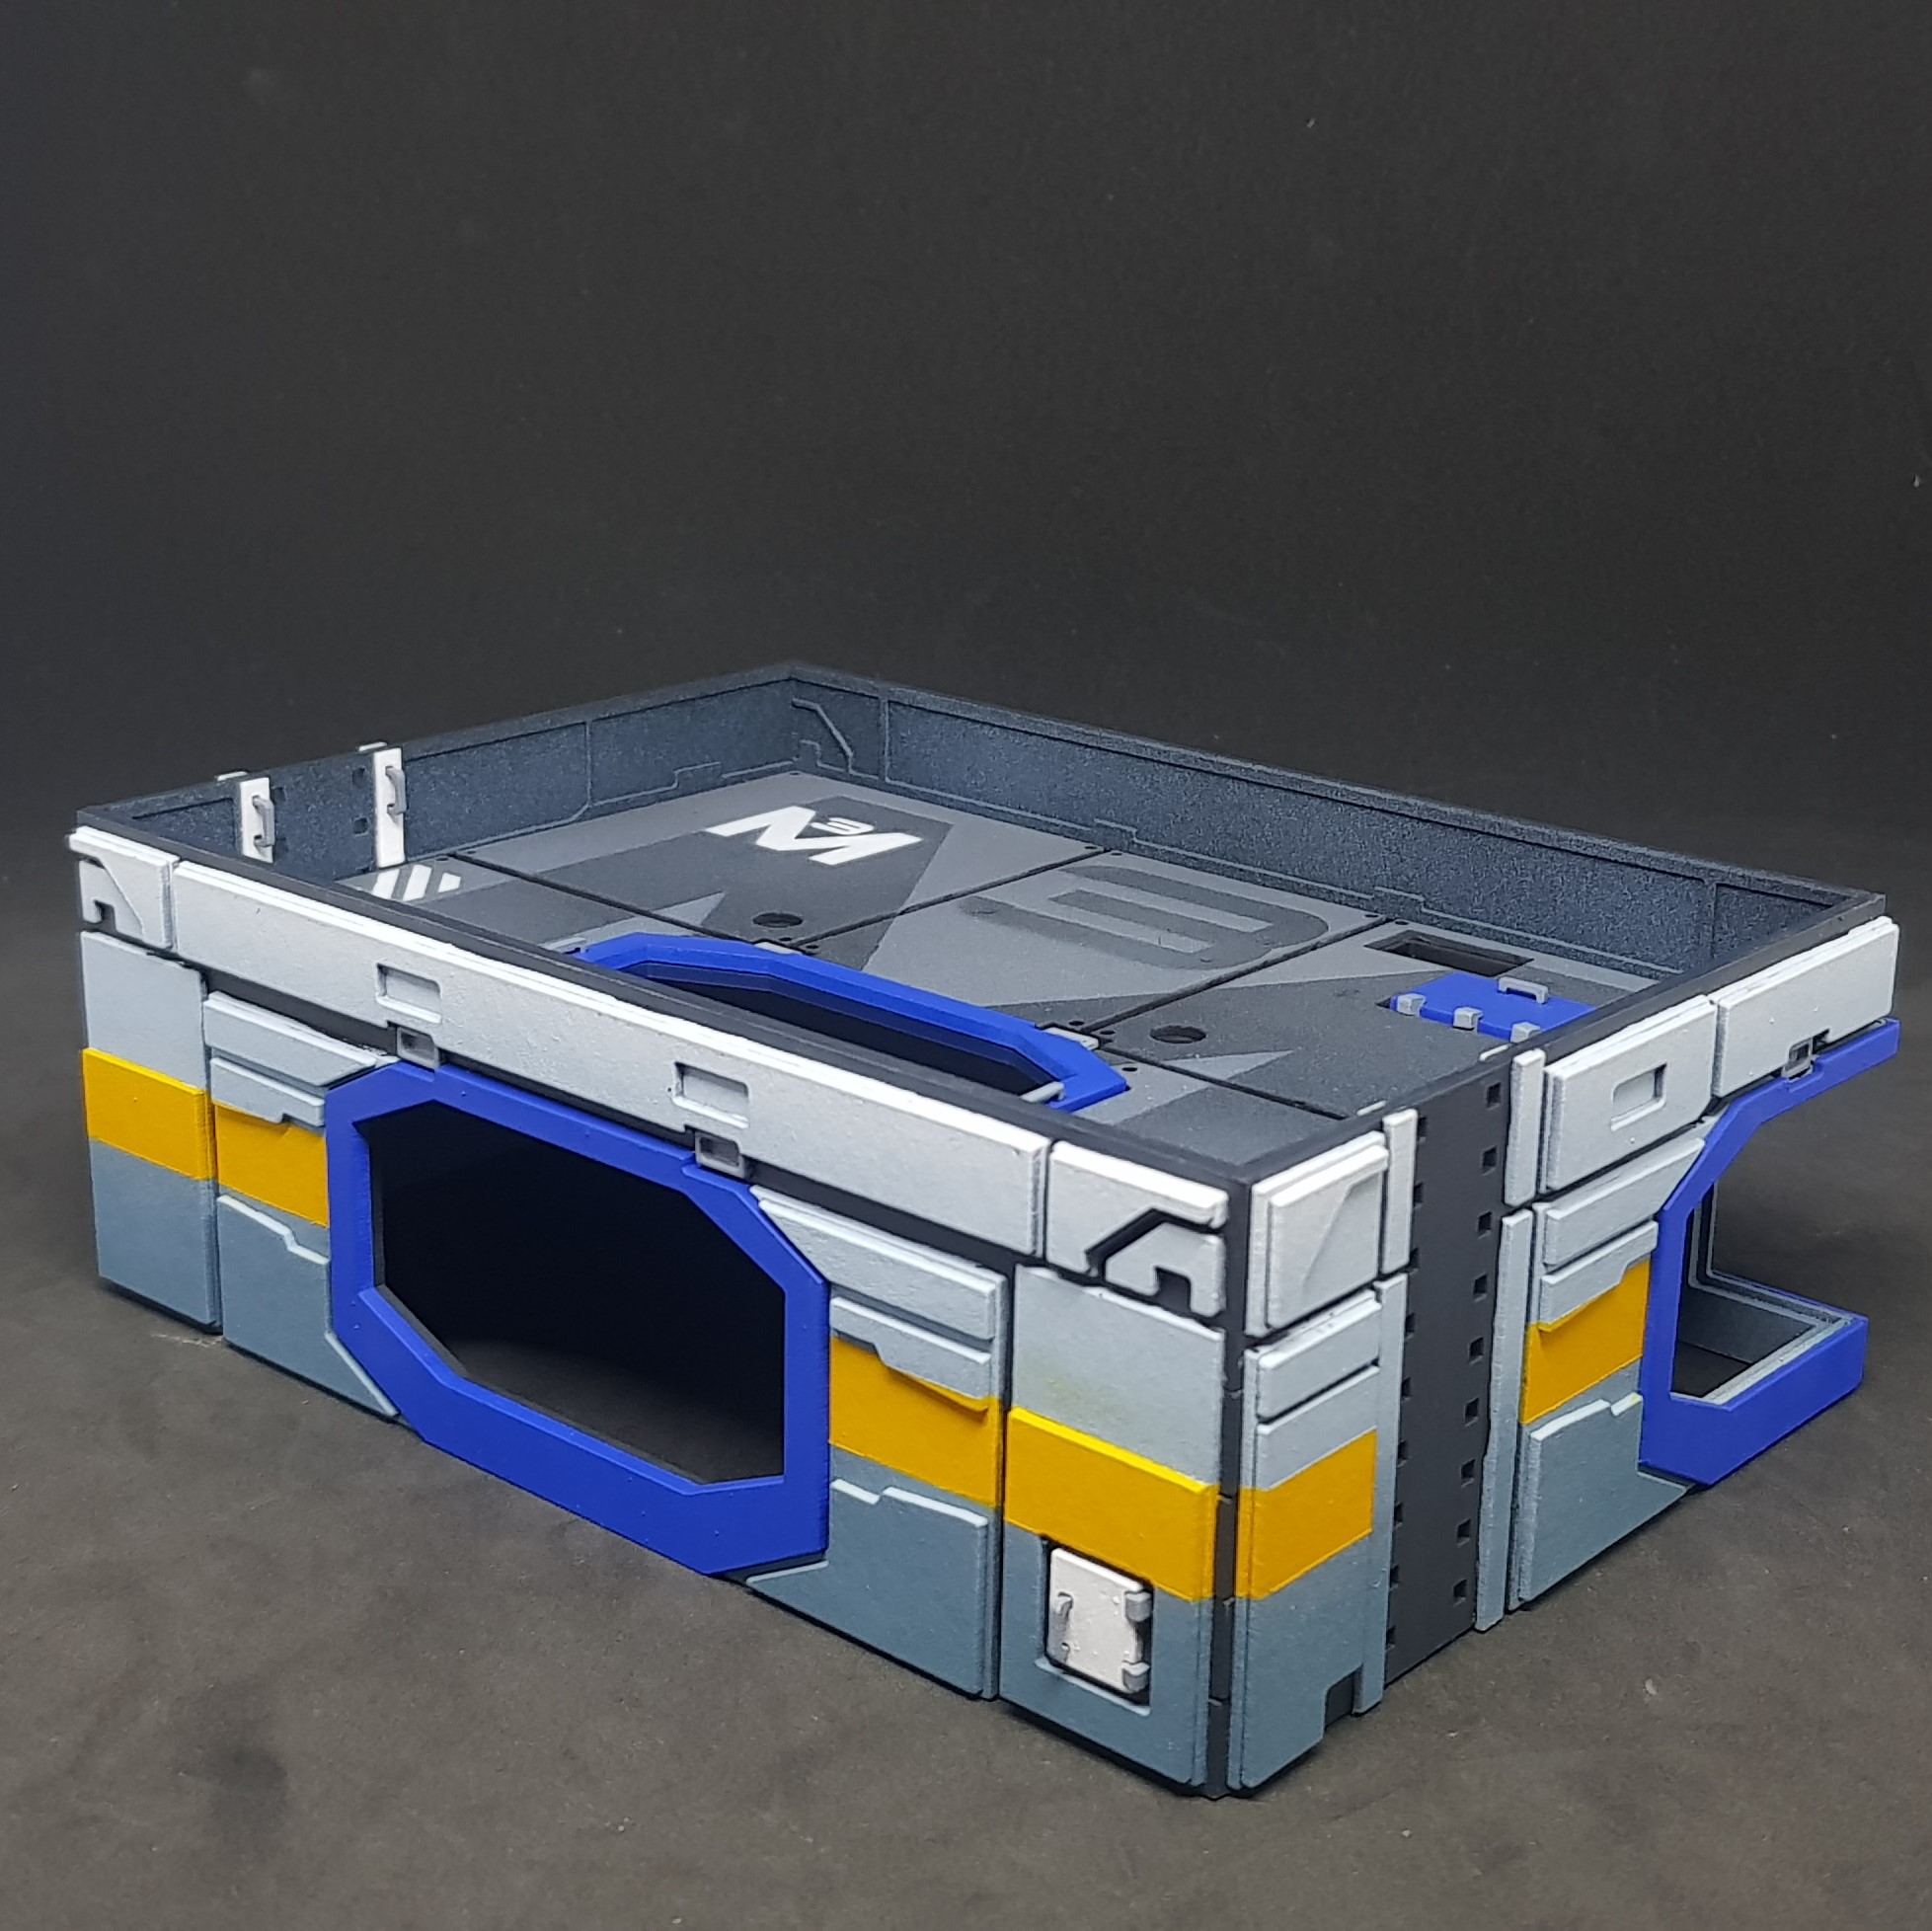 Back / side
Quite pleased with the results so far. this is far neater than the original. I put in the roof just push fit for the moment. I need to back spray and put in all the windows and start on the dreaded ladder rungs on the side. Touch up the areas in blue.
I do prefer not having the yellow stripe over the doors and window frames. This makes me feel less tense looking at the object. (don’t know why)
More to come. I hope to have this one finished next weekend.
Finishing touches and design elements.
With the major problems sorted out I started to focus on the details.
I needed to make some transfers, paint the ladder rungs *shiver*, design and print some touch screens.
I will start with the rungs. This was perhaps the worst job in the world. I had to do this two times for the last buildings I didn’t even want to do this one time now.
This time I broke it down into processes. The full painting of the ladders for all three buildings took just over an hour which is fantastic. I cut a template sheet out of 1mm card. I put masking tape over the back leaving sticky square holes for the rungs to slot into.
I mounted everything and undercoated grey then went over in orange. After this I used 10mm tape to mask each one then sprayed grey.
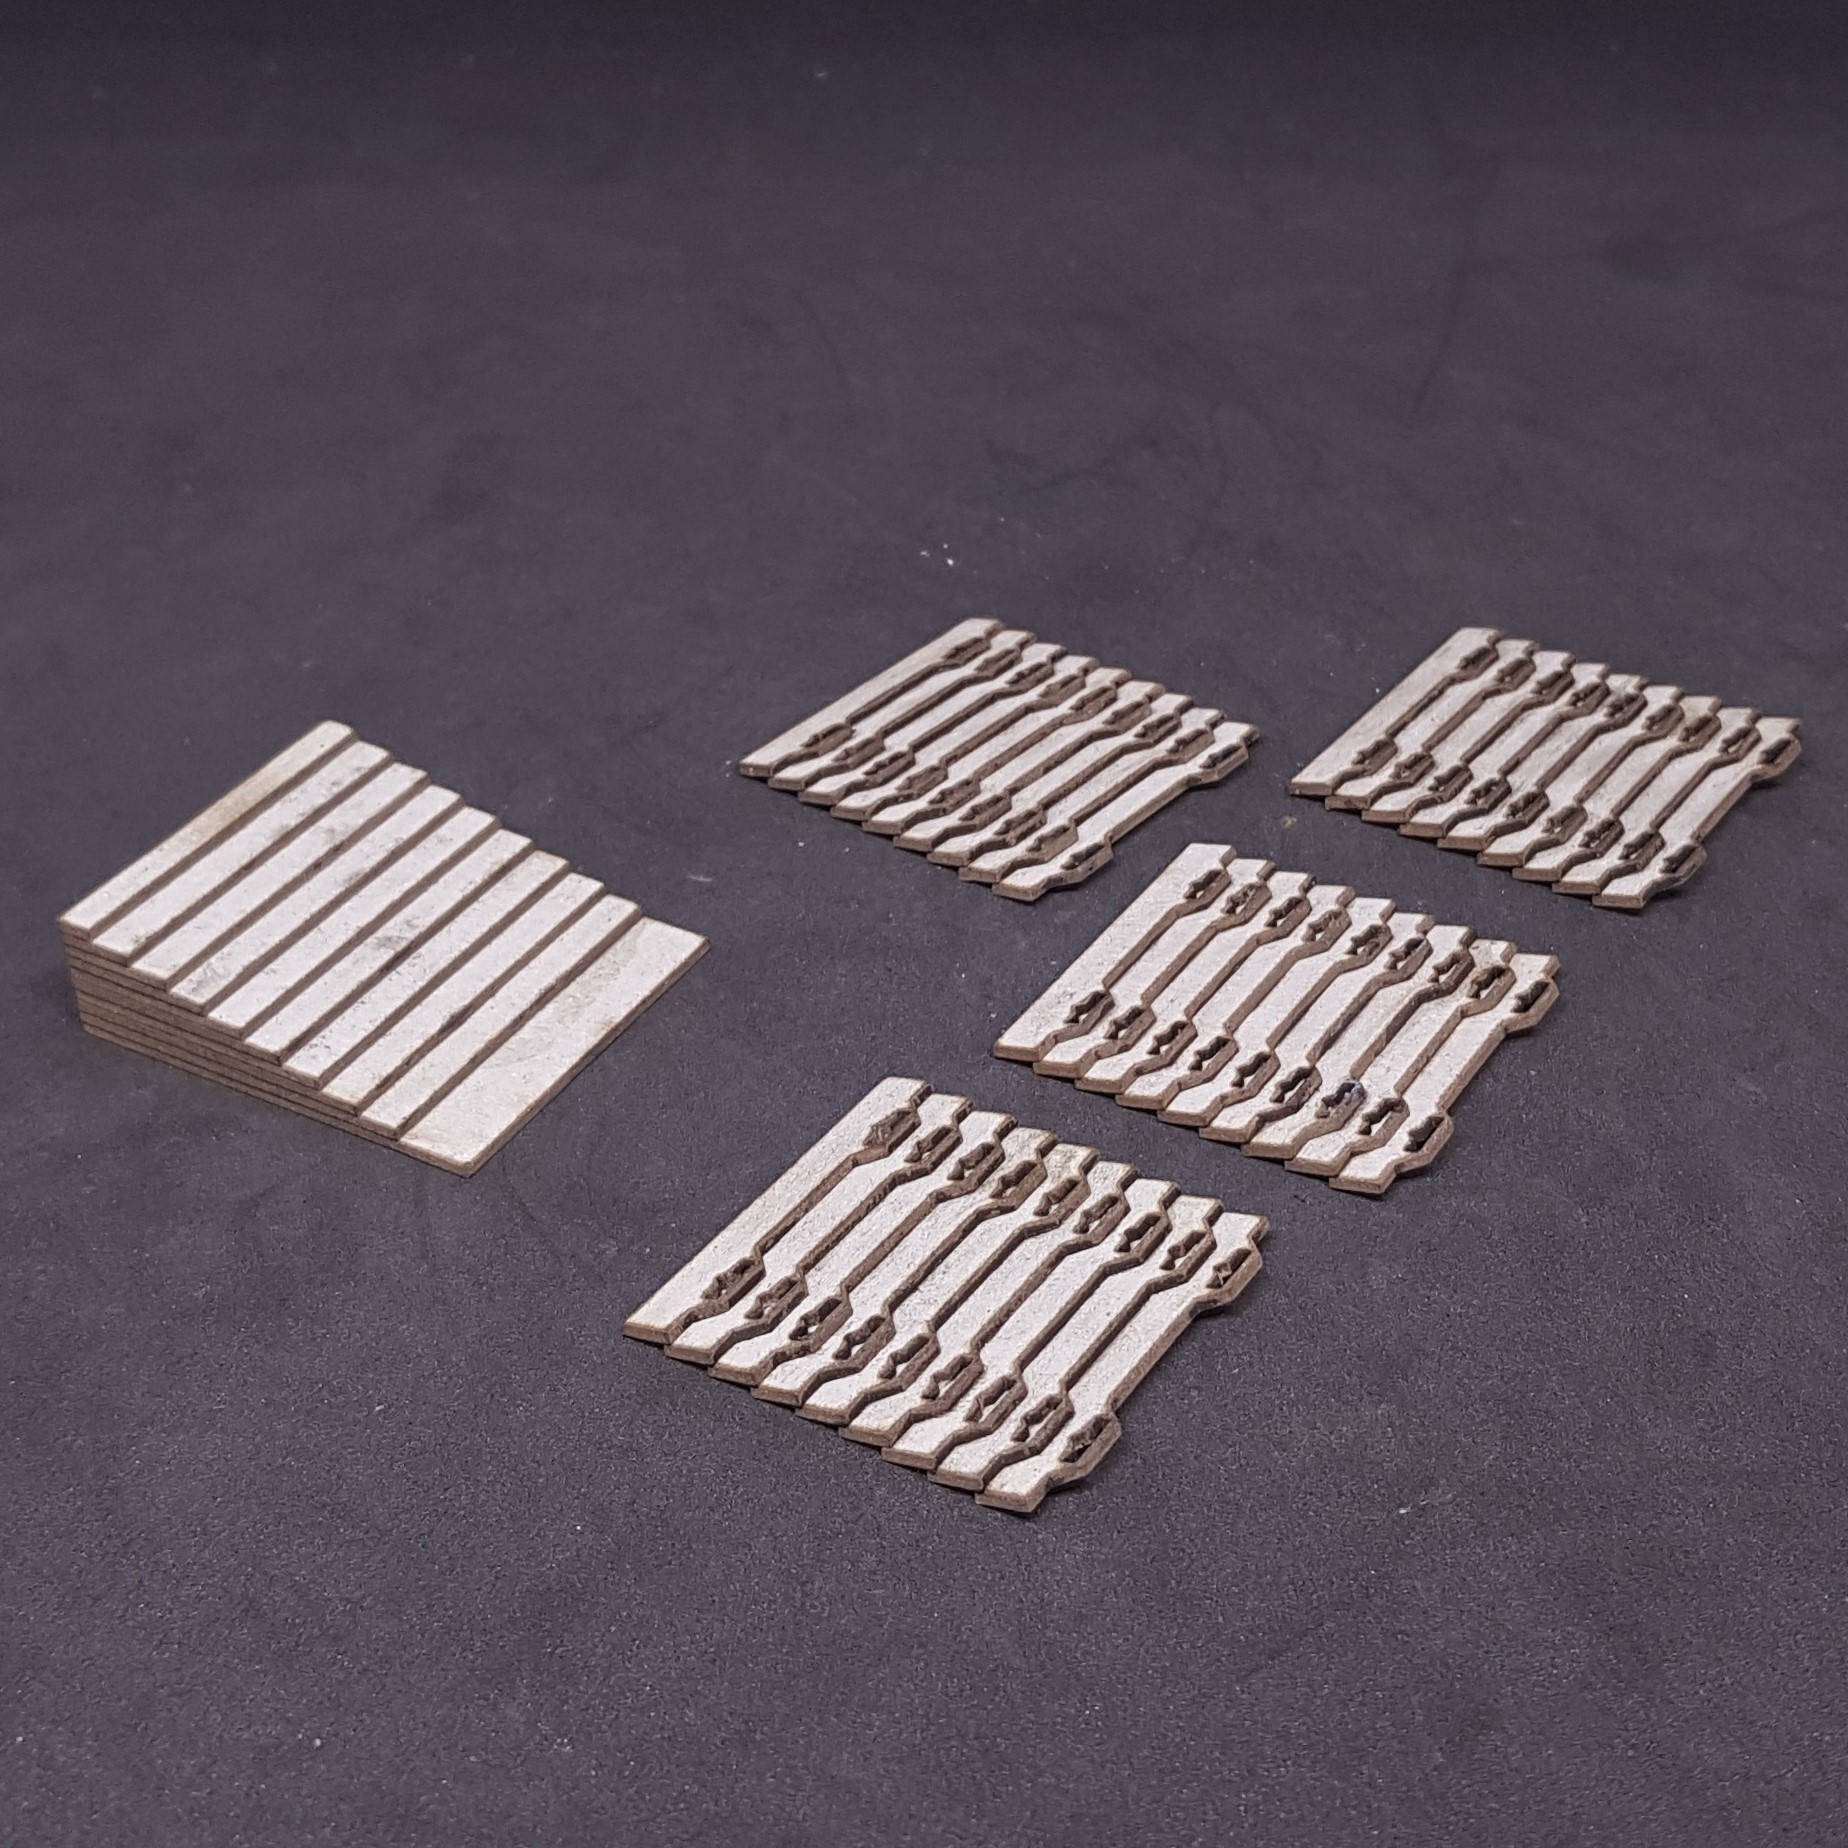
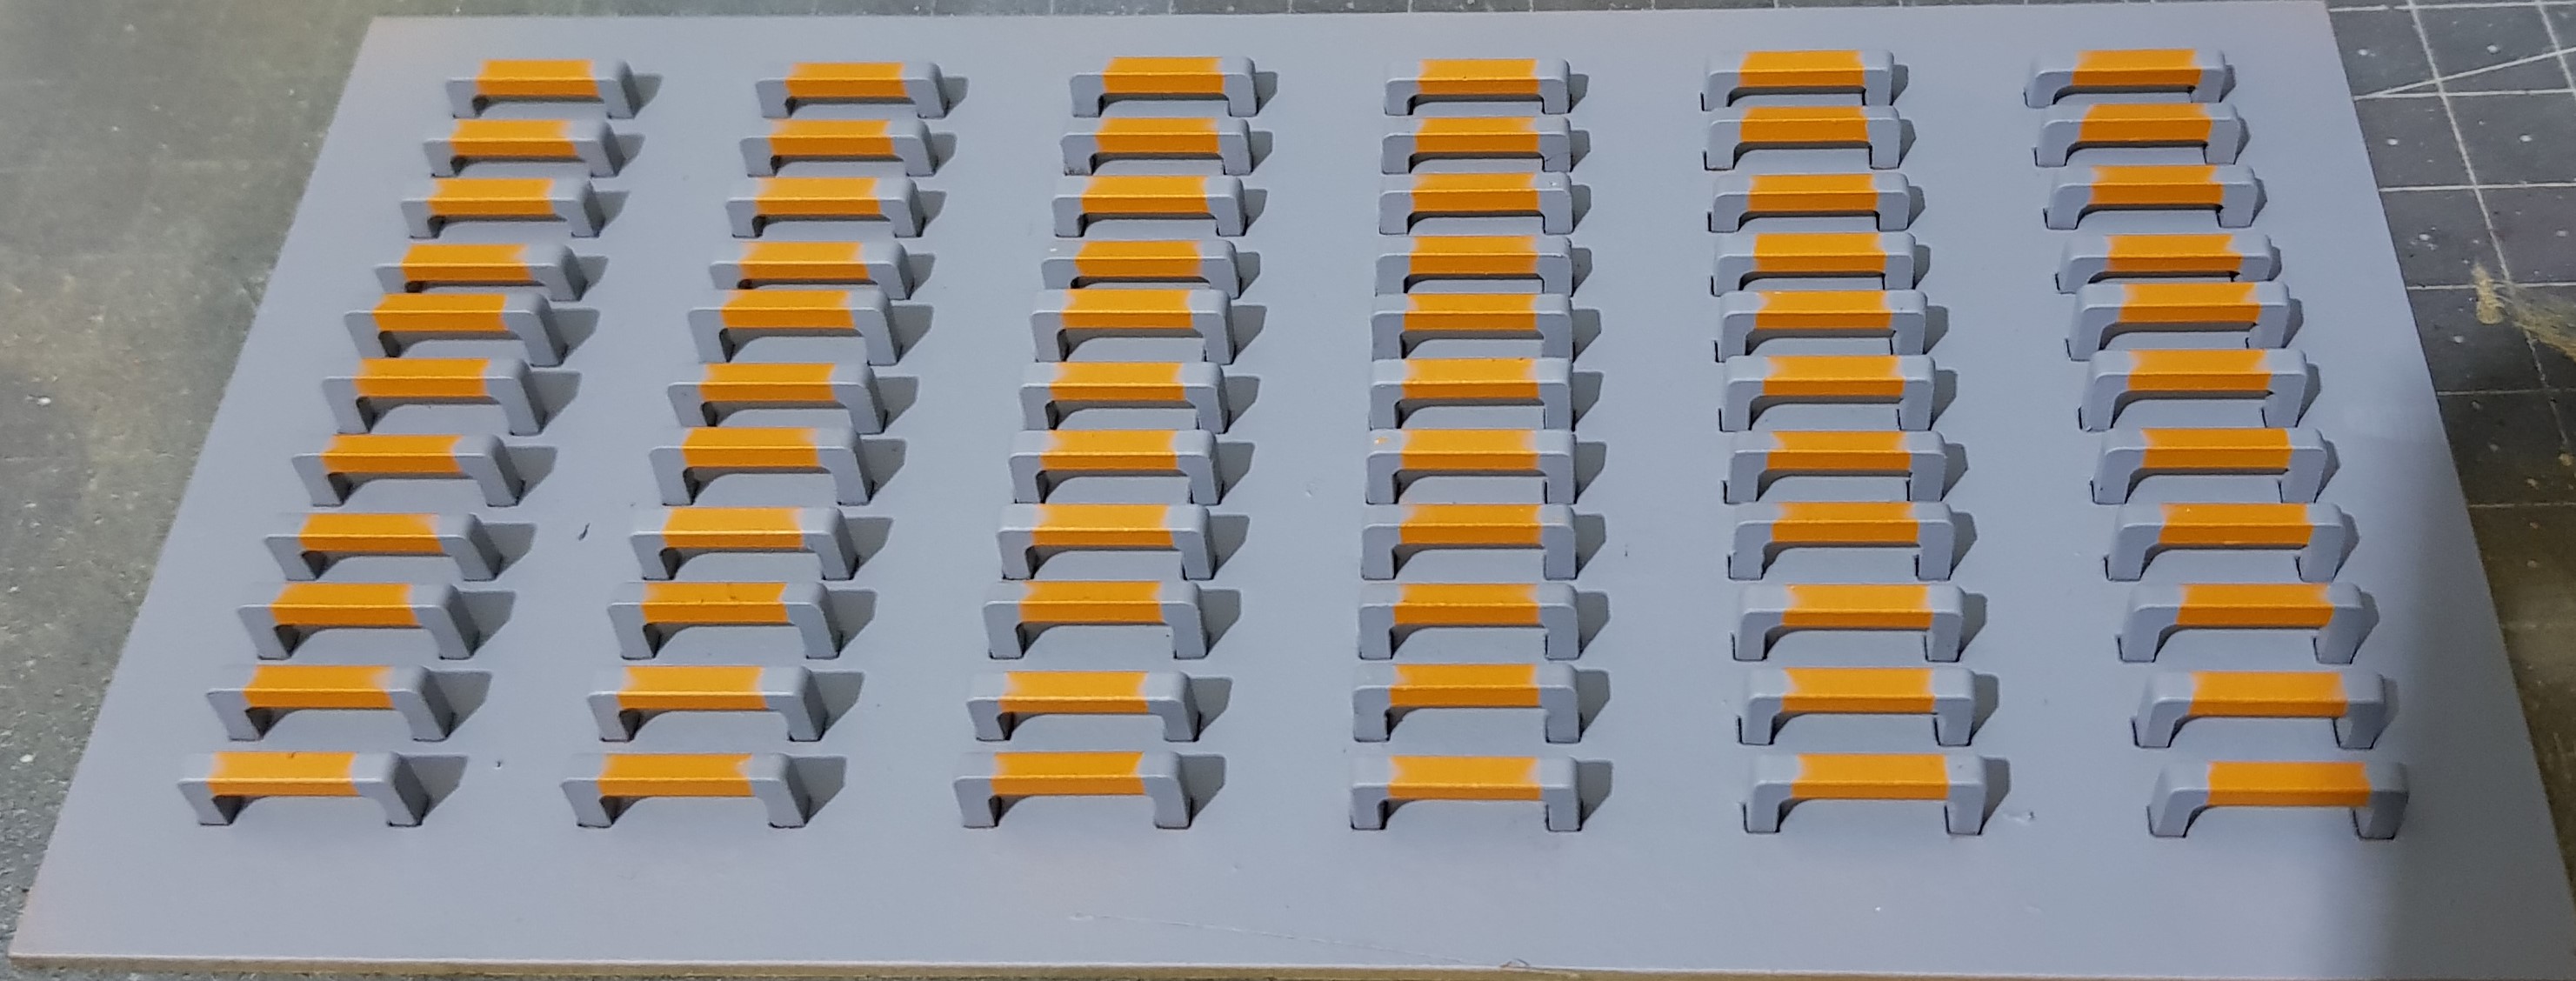 Ladder rungs finished ready for mounting
For the transfers I designed in CAD and coloured in photo editing software. This was then printed onto transfer paper, gloss spray varnished and cut and mounted with water.
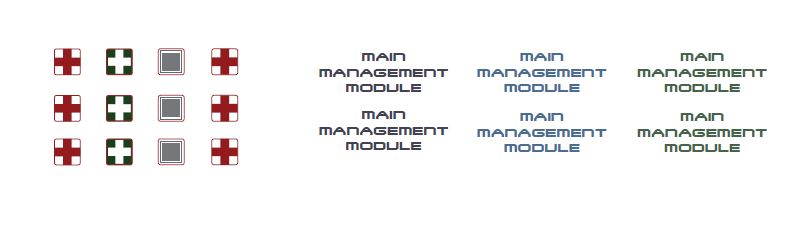 Transfers
For the screen this was done as before designed in CAD then moved into photo editing to add effects and colour. This was then printed on photo paper, gloss spray varnished then super glued down to a piece of plastic. To mount I placed double sided tape on the sides. Placed in place and then PVA put all round on the back to hold into position as I don’t always trust double sided tape alone.
While I am on this Image I also laser cut out of 0.5mm card some “M #” text. I mounted these on masking tape primed and sprayed yellow.
I done the hazard lines using some laser cut templates and laser cut 0.5mm card. Similar to before but these were much longer and turned out ok and was fast. I decided not to be to anal about this and decided they did not need to match up all the way.
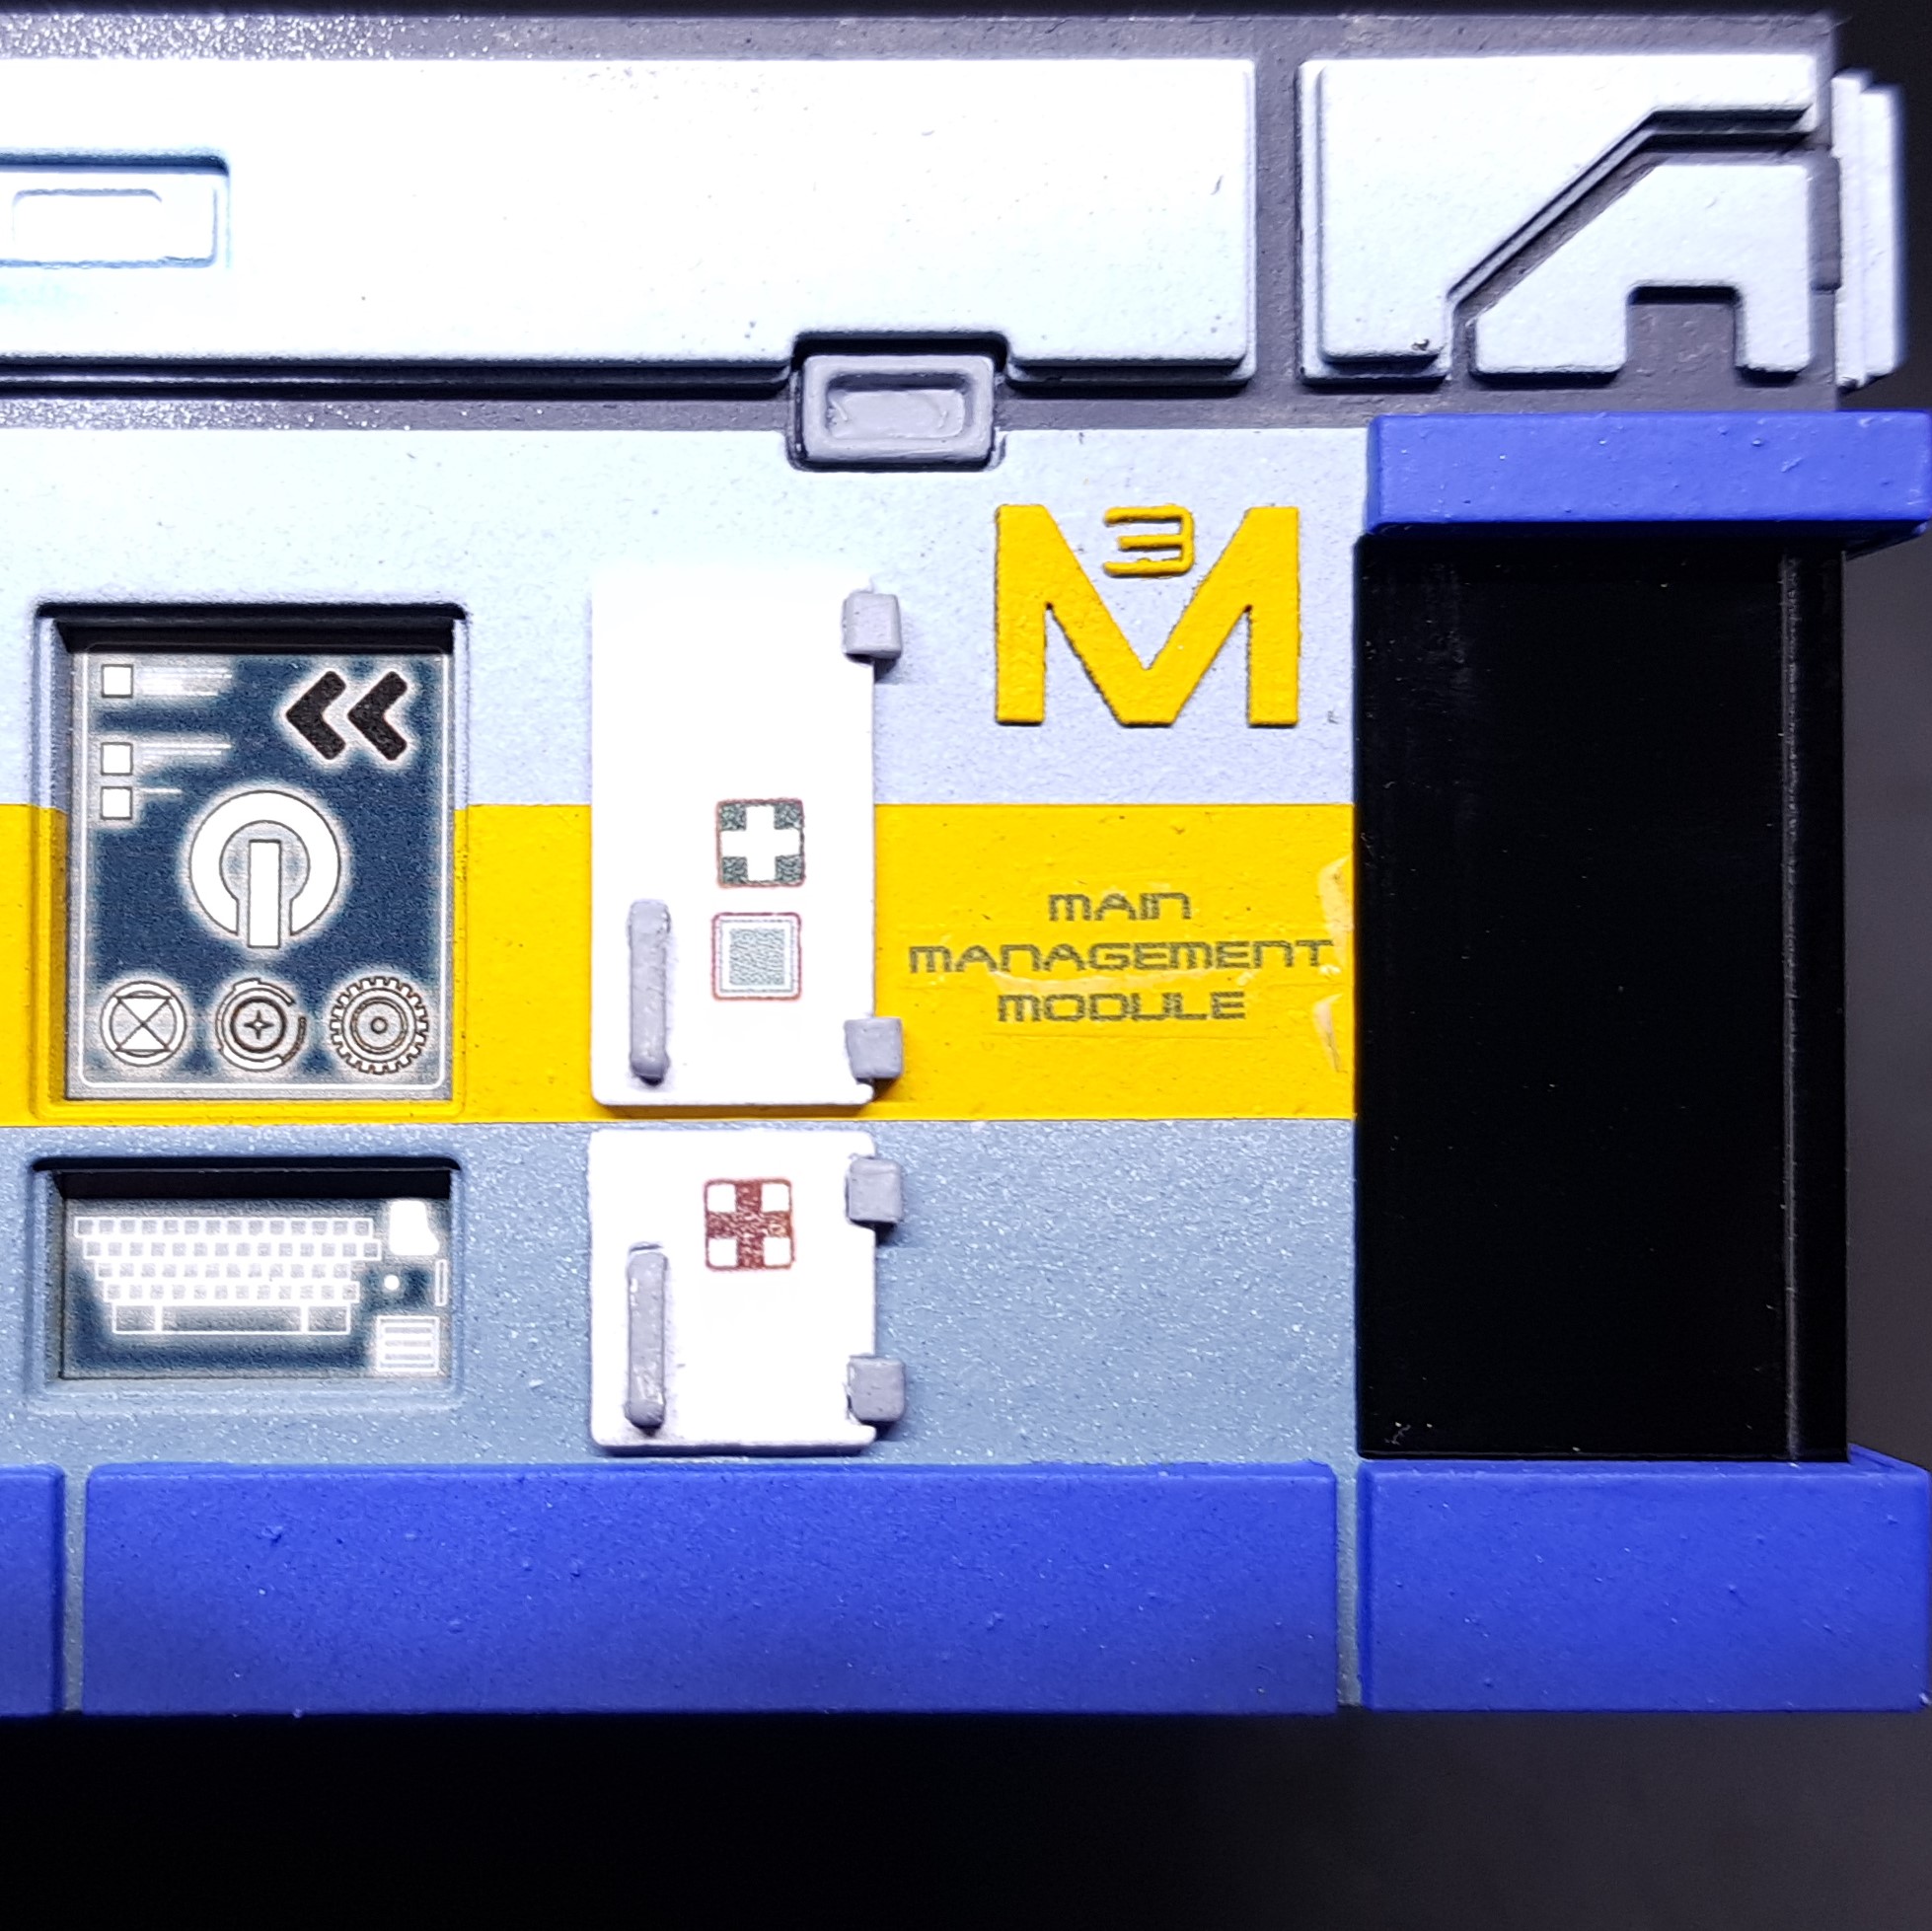 Finished section showing how the details look when added.
 I decided to show my working here.
This is also a good time to advise how I done the windows. These are not perfect but they were never going to be as they were in two pieces.
On module 4 (test) I just back sprayed the clear acrylic on the back in black and stuck it together.
I do know how to do these perfectly (if you can be bothered). You cut the two joining ends longer than they need to be. You then cut or sand a perfect 45 degree angle down the side about 0.2mm longer than it needs to be and you then sand and polish this back up to clear. You then use a product called Tensol to weld the two sections together and then polish the seam until nearly optically clear and mask and back spray. The above would take me about 6 – 9 hours of work for the 6 corner windows so I didn’t do it this way.
I masked off the join on the windows and left this clear as it came off of the laser cutter which is glossy but had a little ripple. Then back sprayed and this took about 20 minutes for all 6 instead. I then unmasked and inserted the windows. I then used PVA to glue this, it was also a nice strong glue-less fit as well, PVA is more for my piece of mind (aka, drunk prevention).
I also didn’t like that you can see in the side of the shutters. I designed then cut a window frame for the inside so you cant see in.
 shiowing the back window.
 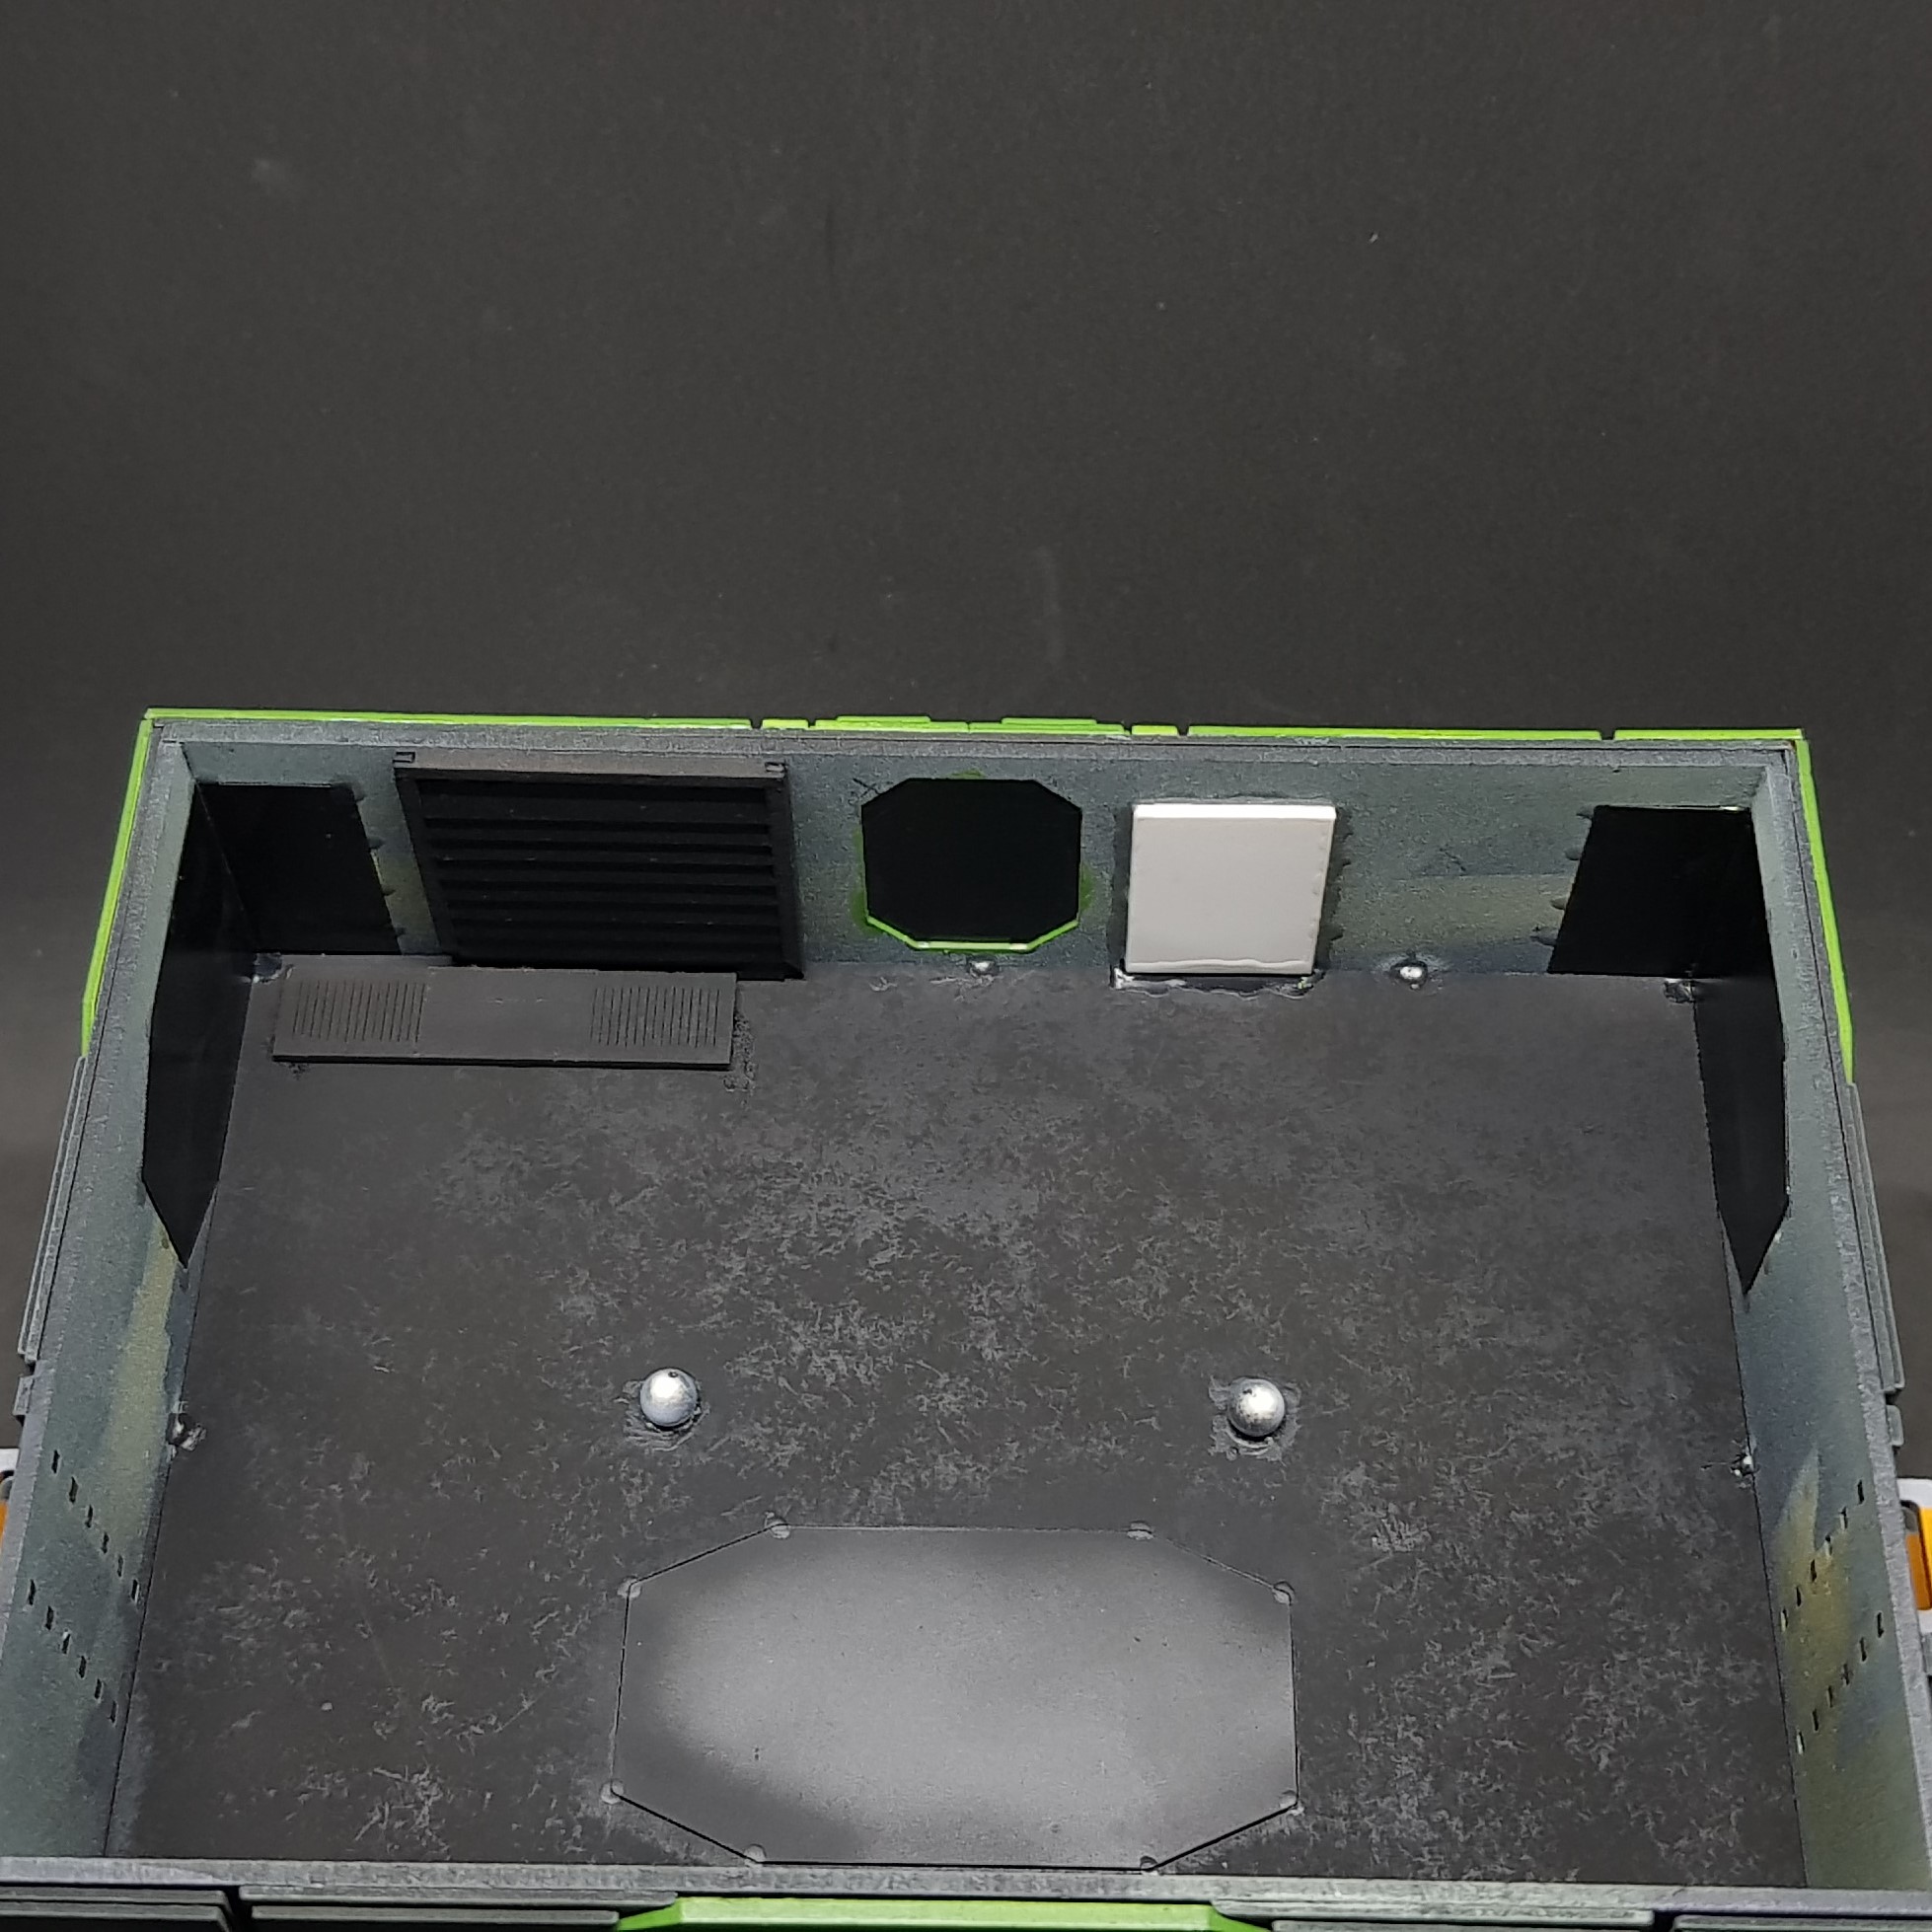 showing the side windows, doors and touch screen
I am almost at the last post section for the Ice Storm starter. These details make up the last parts I needed to design/build and assemble. More to come in about 10 minutes.