


Necromunda: The Halls of Hive Primus


Recommendations: 607
About the Project
Way back in the mists of time games workshop released a small little game called Necromunda, maybe you've heard of it? The idea of gang wars in these massive hive cities immediately caught my attention and the vast diversity of gangs, bounty hunters, mutants and general lowlife scum opened the world up to all kinds of crazy and innovative ideas. After 2 decades of waiting GW finally release Necromunda again, but unlike its original release the initial box set was missing the cardboard and plastic 3D terrain and instead focused on a 2D warzone. Necromunda to me should be played in a 3D space so I started this project to try and create a modular terrain system to offer the choice of making maps from the underhive and to also allow customisation to build upwards and outwards to create something unique.
Related Game: Necromunda
Related Genre: Science Fiction
This Project is Active
To top it all off...
The vats look fine on their own but i wanted to take them a little further and add some functional scenery to the top as well as showing where the vats are filled, i decided the best way to do this would be to add an extra layer to the top which would have connections for pipes as well as acting as cover.
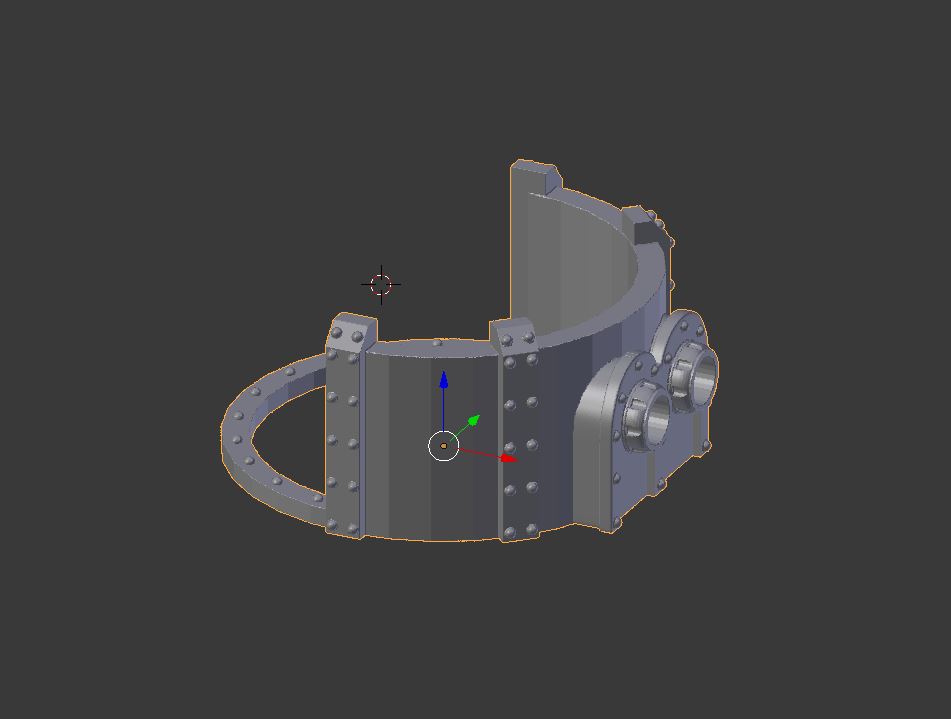 I build up a wall to add to the top of each tank, each wall would have a circular ring designed to fit over the brewdog plastic beer can holders and also have two holes designed to take standard 5mm drinking straws.
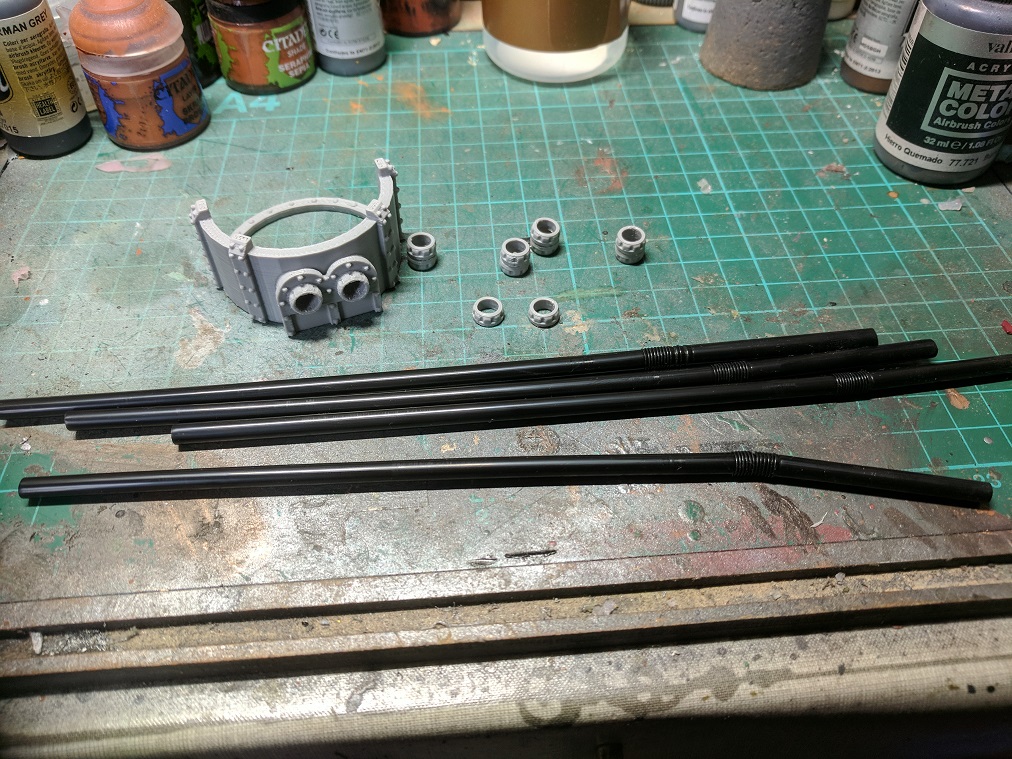 I printed off the cap ans also printed off some small 7mm rings which would slide over the straws.
 Cutting off the bendy section to each straw i fitted a ring to the bottom of each as a base.
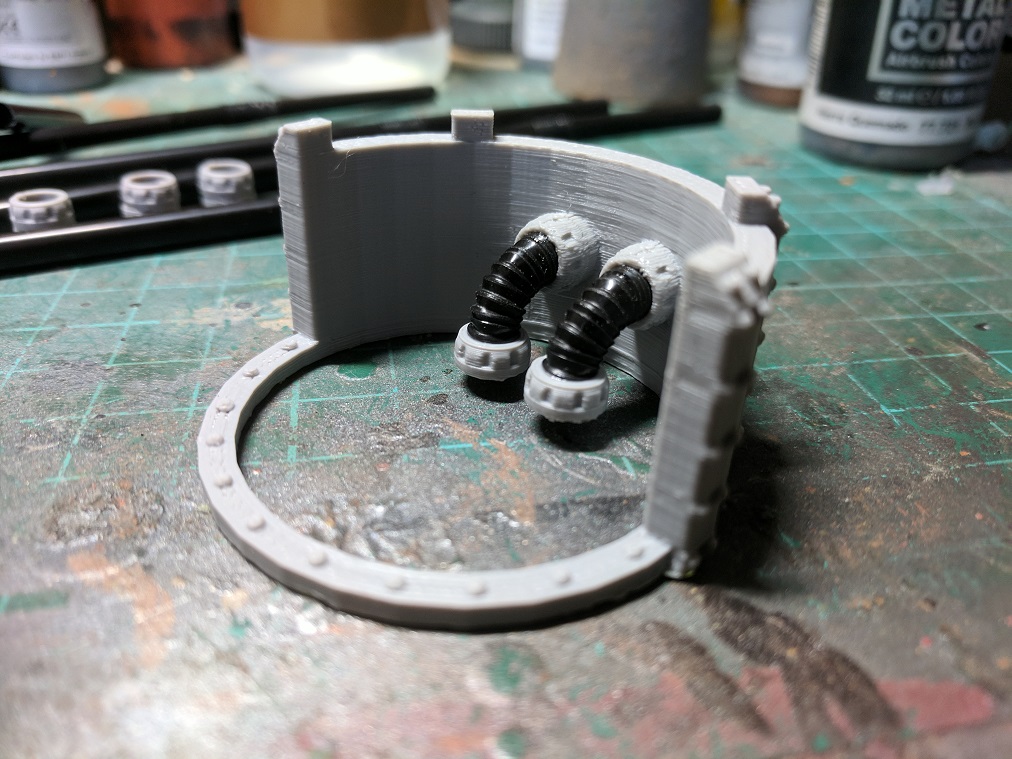 I fitted the pipes to the inside of the wall, its only a small detail but it adds a bit of realism to the piece.
 The finished cap panted up with gun-metal and rust from Vallejo and washed with strong and dark tone inks from army painter.
 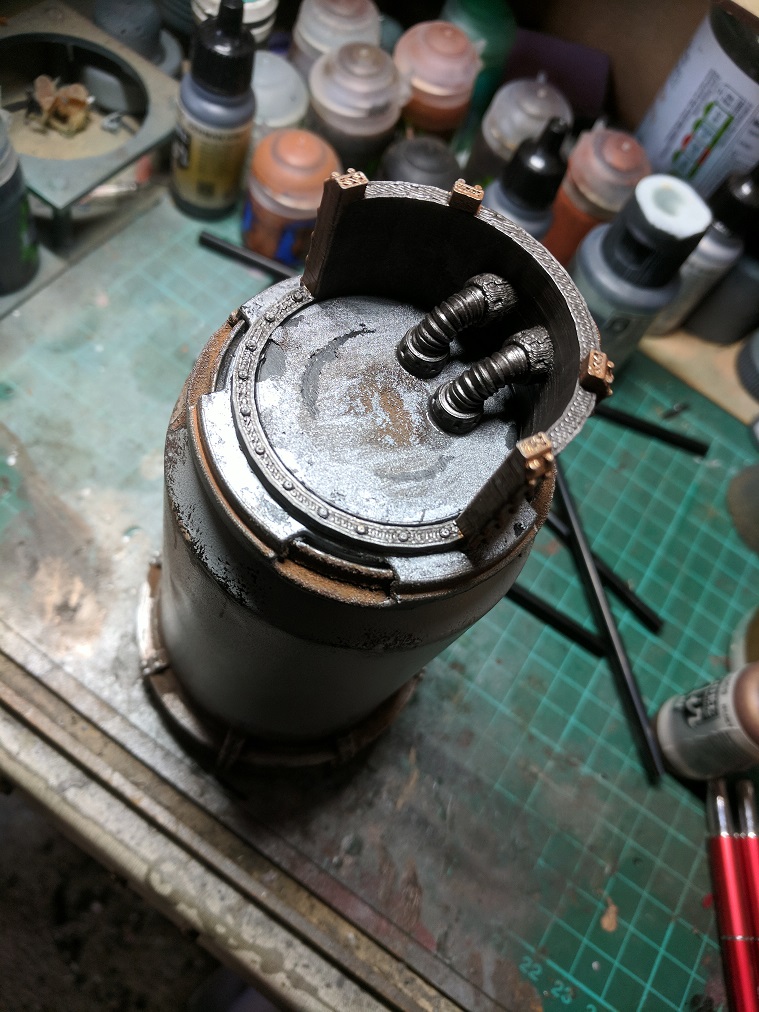 The inside of the cap, unfortunately fitting the piece caused the paint work on the original cap to chip and flake but nothing another layer of paint wont fix.
With the caps complete its time to look at making some extra pipes and a base for it all to sit on, back to the workshop…
More Beer, More Ideas...
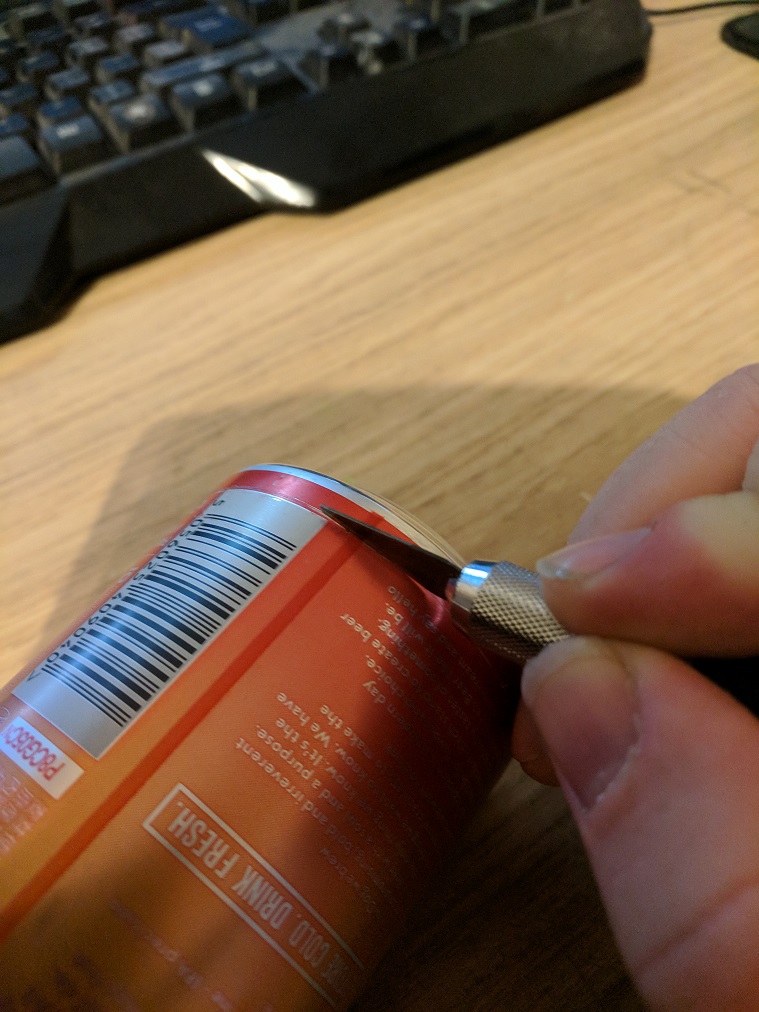 I wanted a couple of collection silos for the sludge vats and what makes great silos?... Empty cans! I started by scoring the edge where i wanted to cut with a good hobby knife and then went over the same lines a couple more times, this makes it much easier to get a good clean cut.
 With the guide line in place its easy to judge if the line will be fairly straight or if it needs to be scored again.
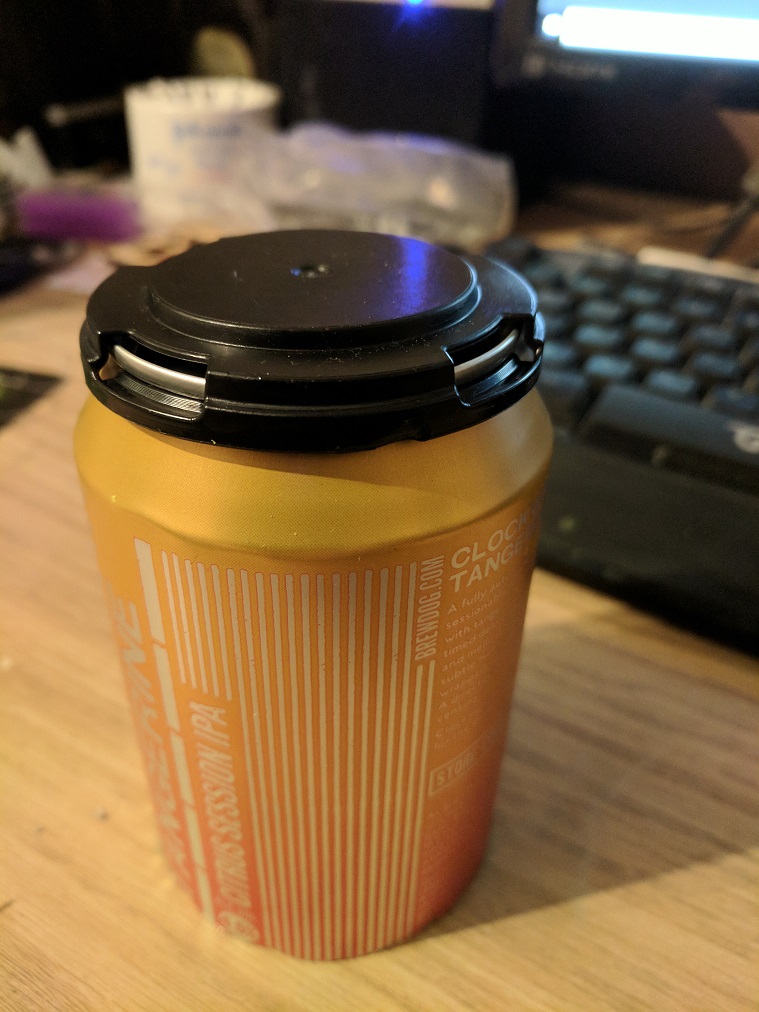 I cut off the bottom of the can then replaced the plastic cap from the pack holder, this will add some more detail to finished piece.
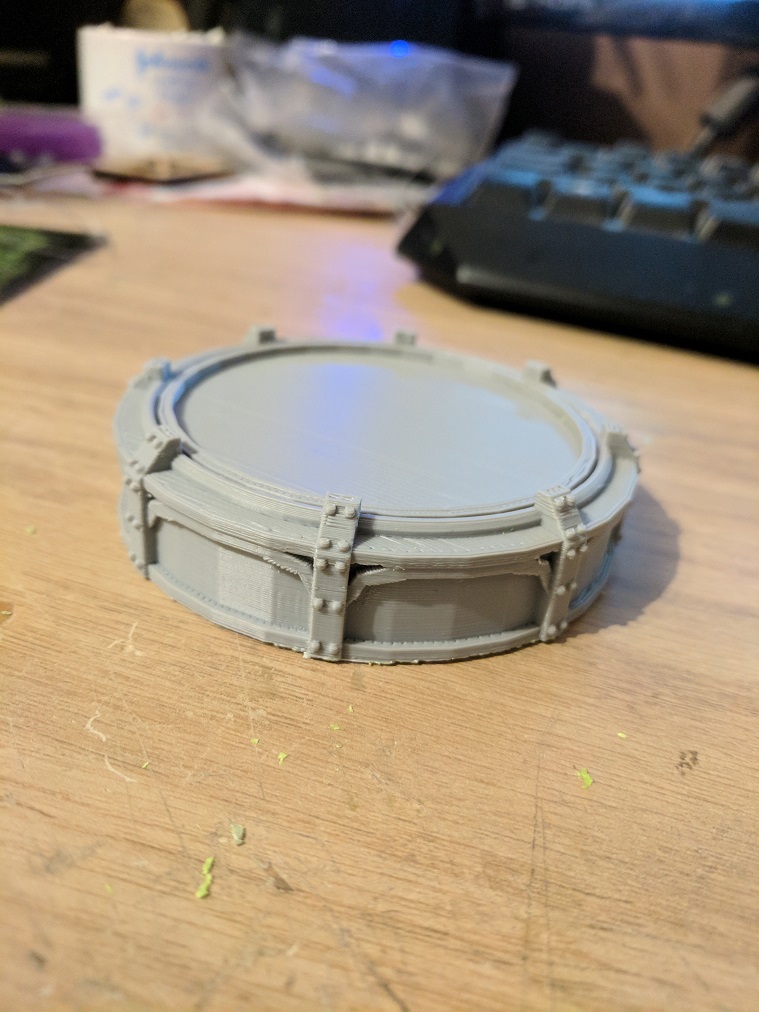 Printed out a suitable base which the can will be fitted onto, i wanted something that looked industrial but ornate at the same time.
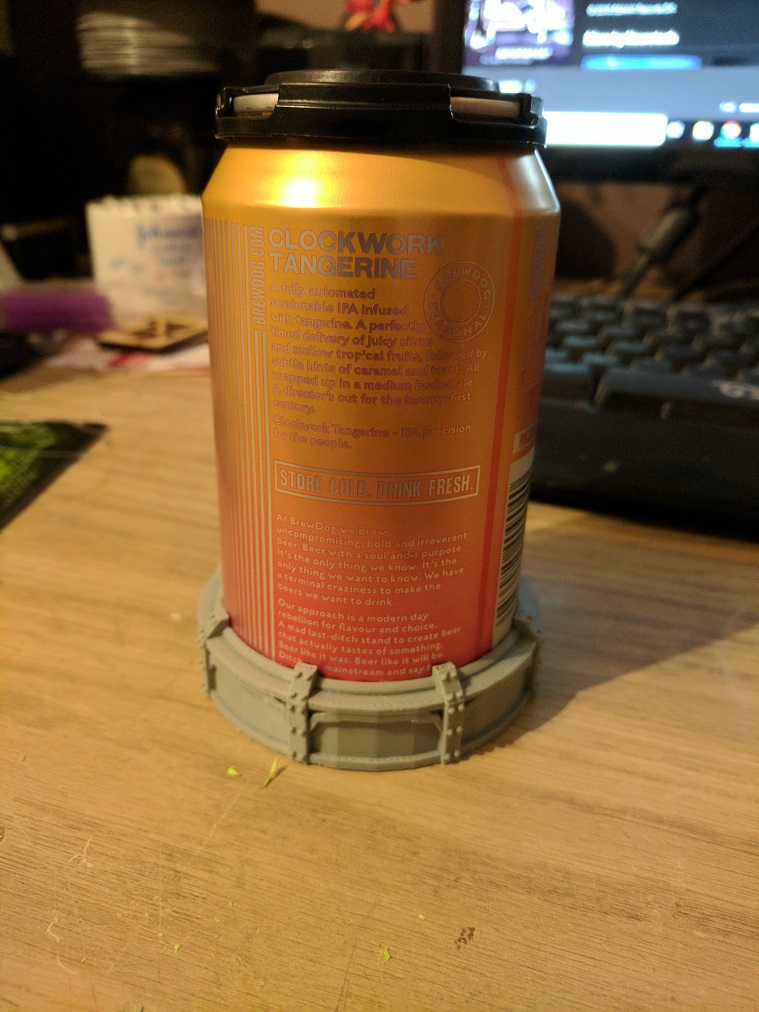 The can and base together, things are looking good so far.
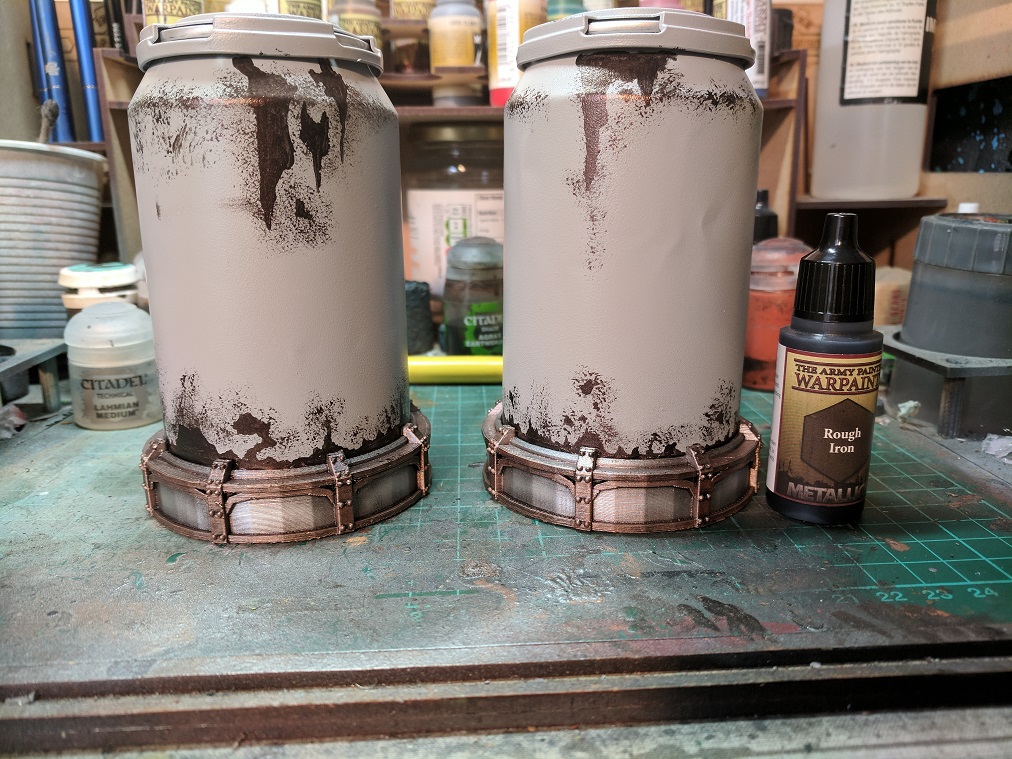 First layer of paints, metals done in the usual fashion, the can sprayed in a standard grey primer and for the rust/chipped paint base i used rough iron form army painter.
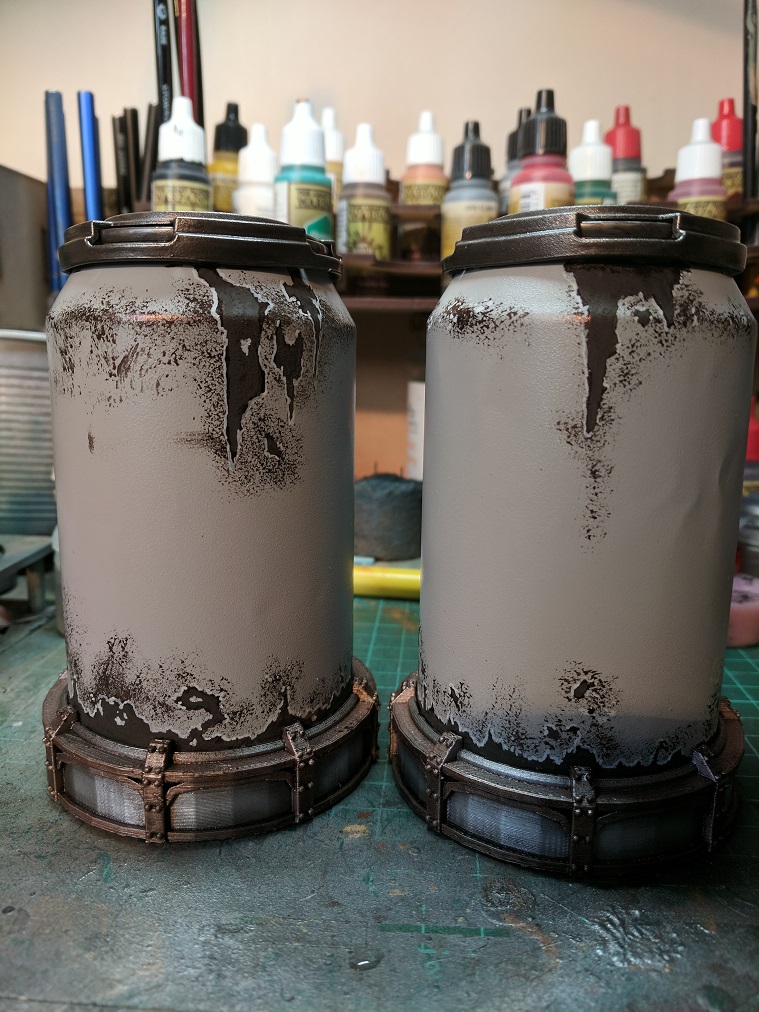 Edged the chipped areas with some light grey paint to add a bit of depth.
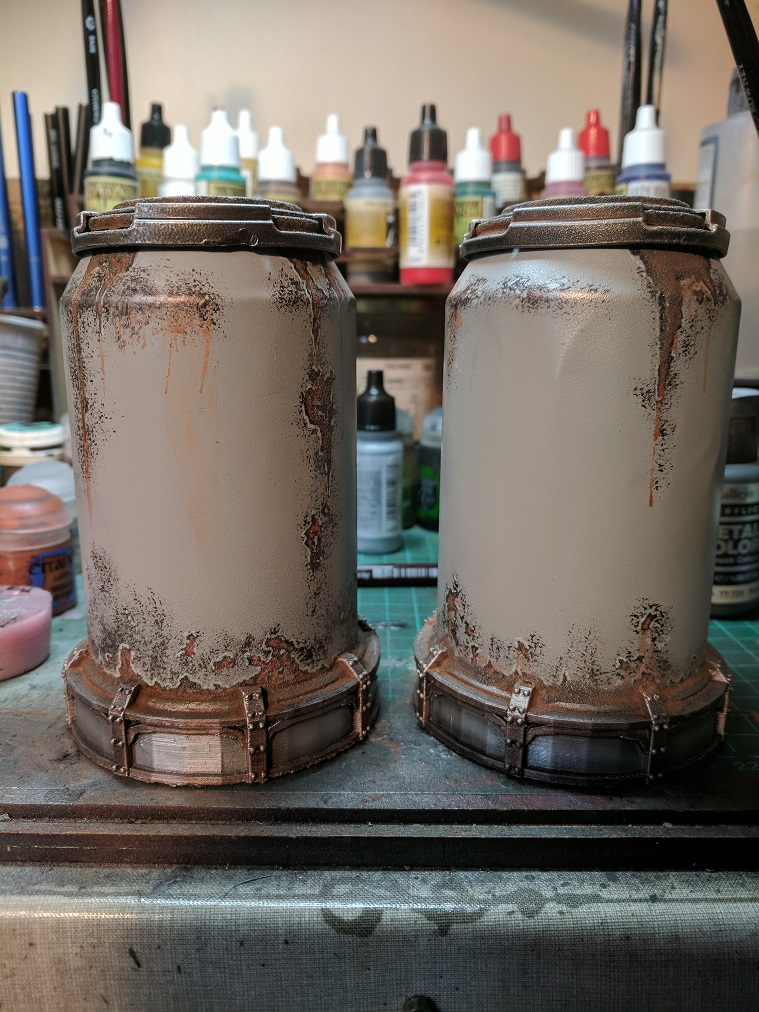 Then finally added on my rust mix and iron powder to add a it of texture and colour before finally drybrushing in silver paint.
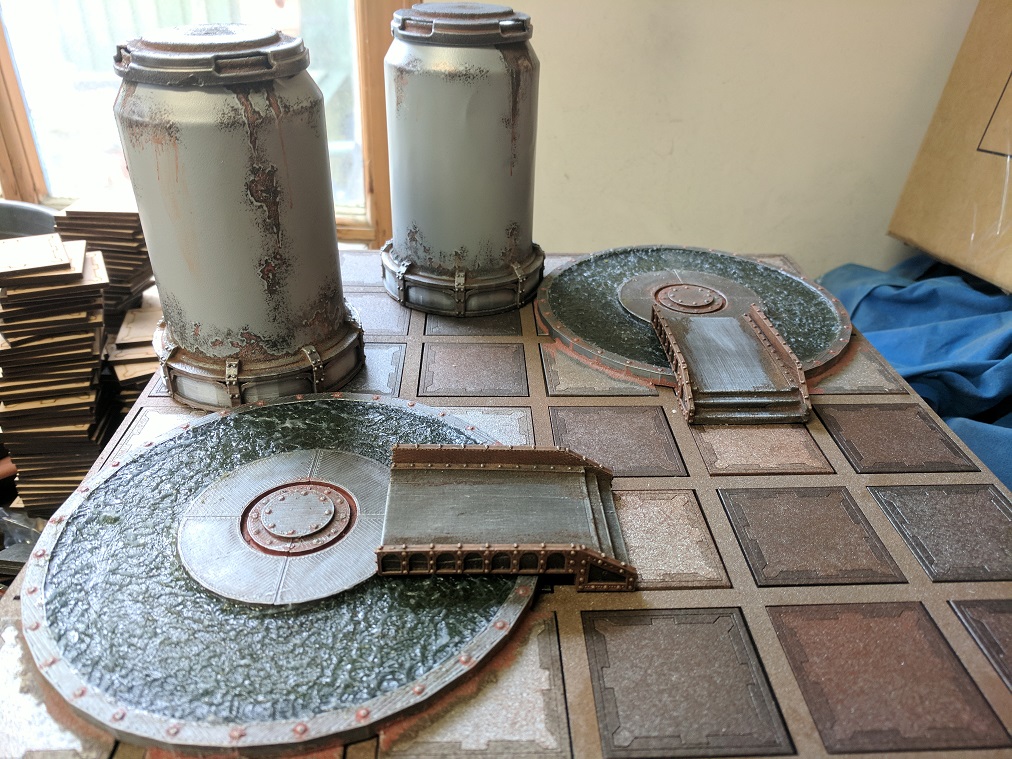 The finished vats with their collection silos.... I'm going to need a few more cans i think
In the Underhive Sometimes it's best NOT to know where your next meal is coming from.
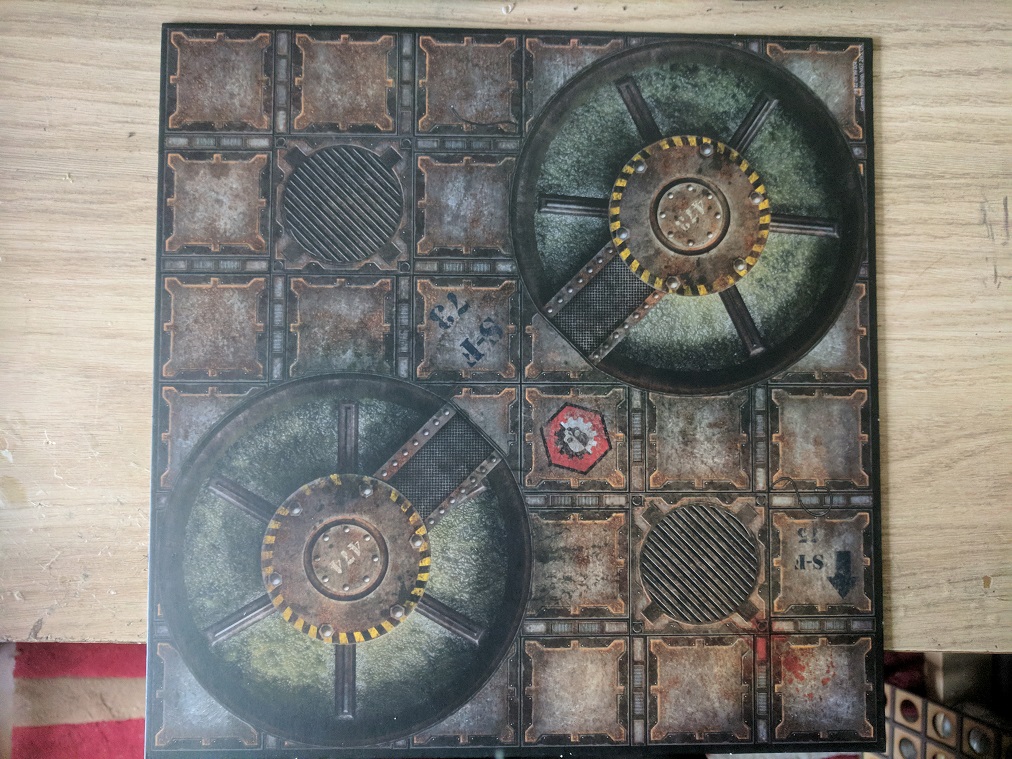 Keeping with the subject of water and vegetation i decided to make the sludge vats from the delta-7 badlands board expansion set, essentially big holes in the ground filled with slime which passes for food in the underhive.
 Made up the vats in the 3D printer then painted them using the usual metal and rust combinations. the inside of the vat was painted with death world green before being filled with the liquid crystal resin from the last project.
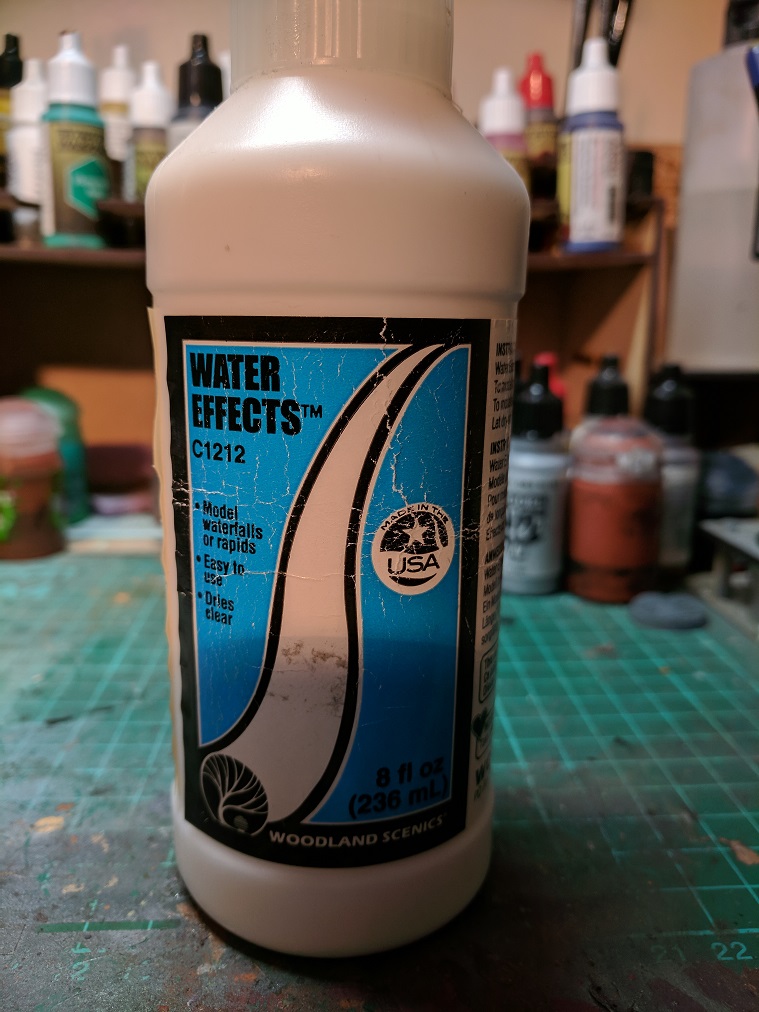 The wave effects were made by dabbing on some of the woodland scenics brand of water effect paste.
 The vats each had a bridge but i decided to make 2 for each to give a few more options when setting up.
 The finished vats with the bridges.
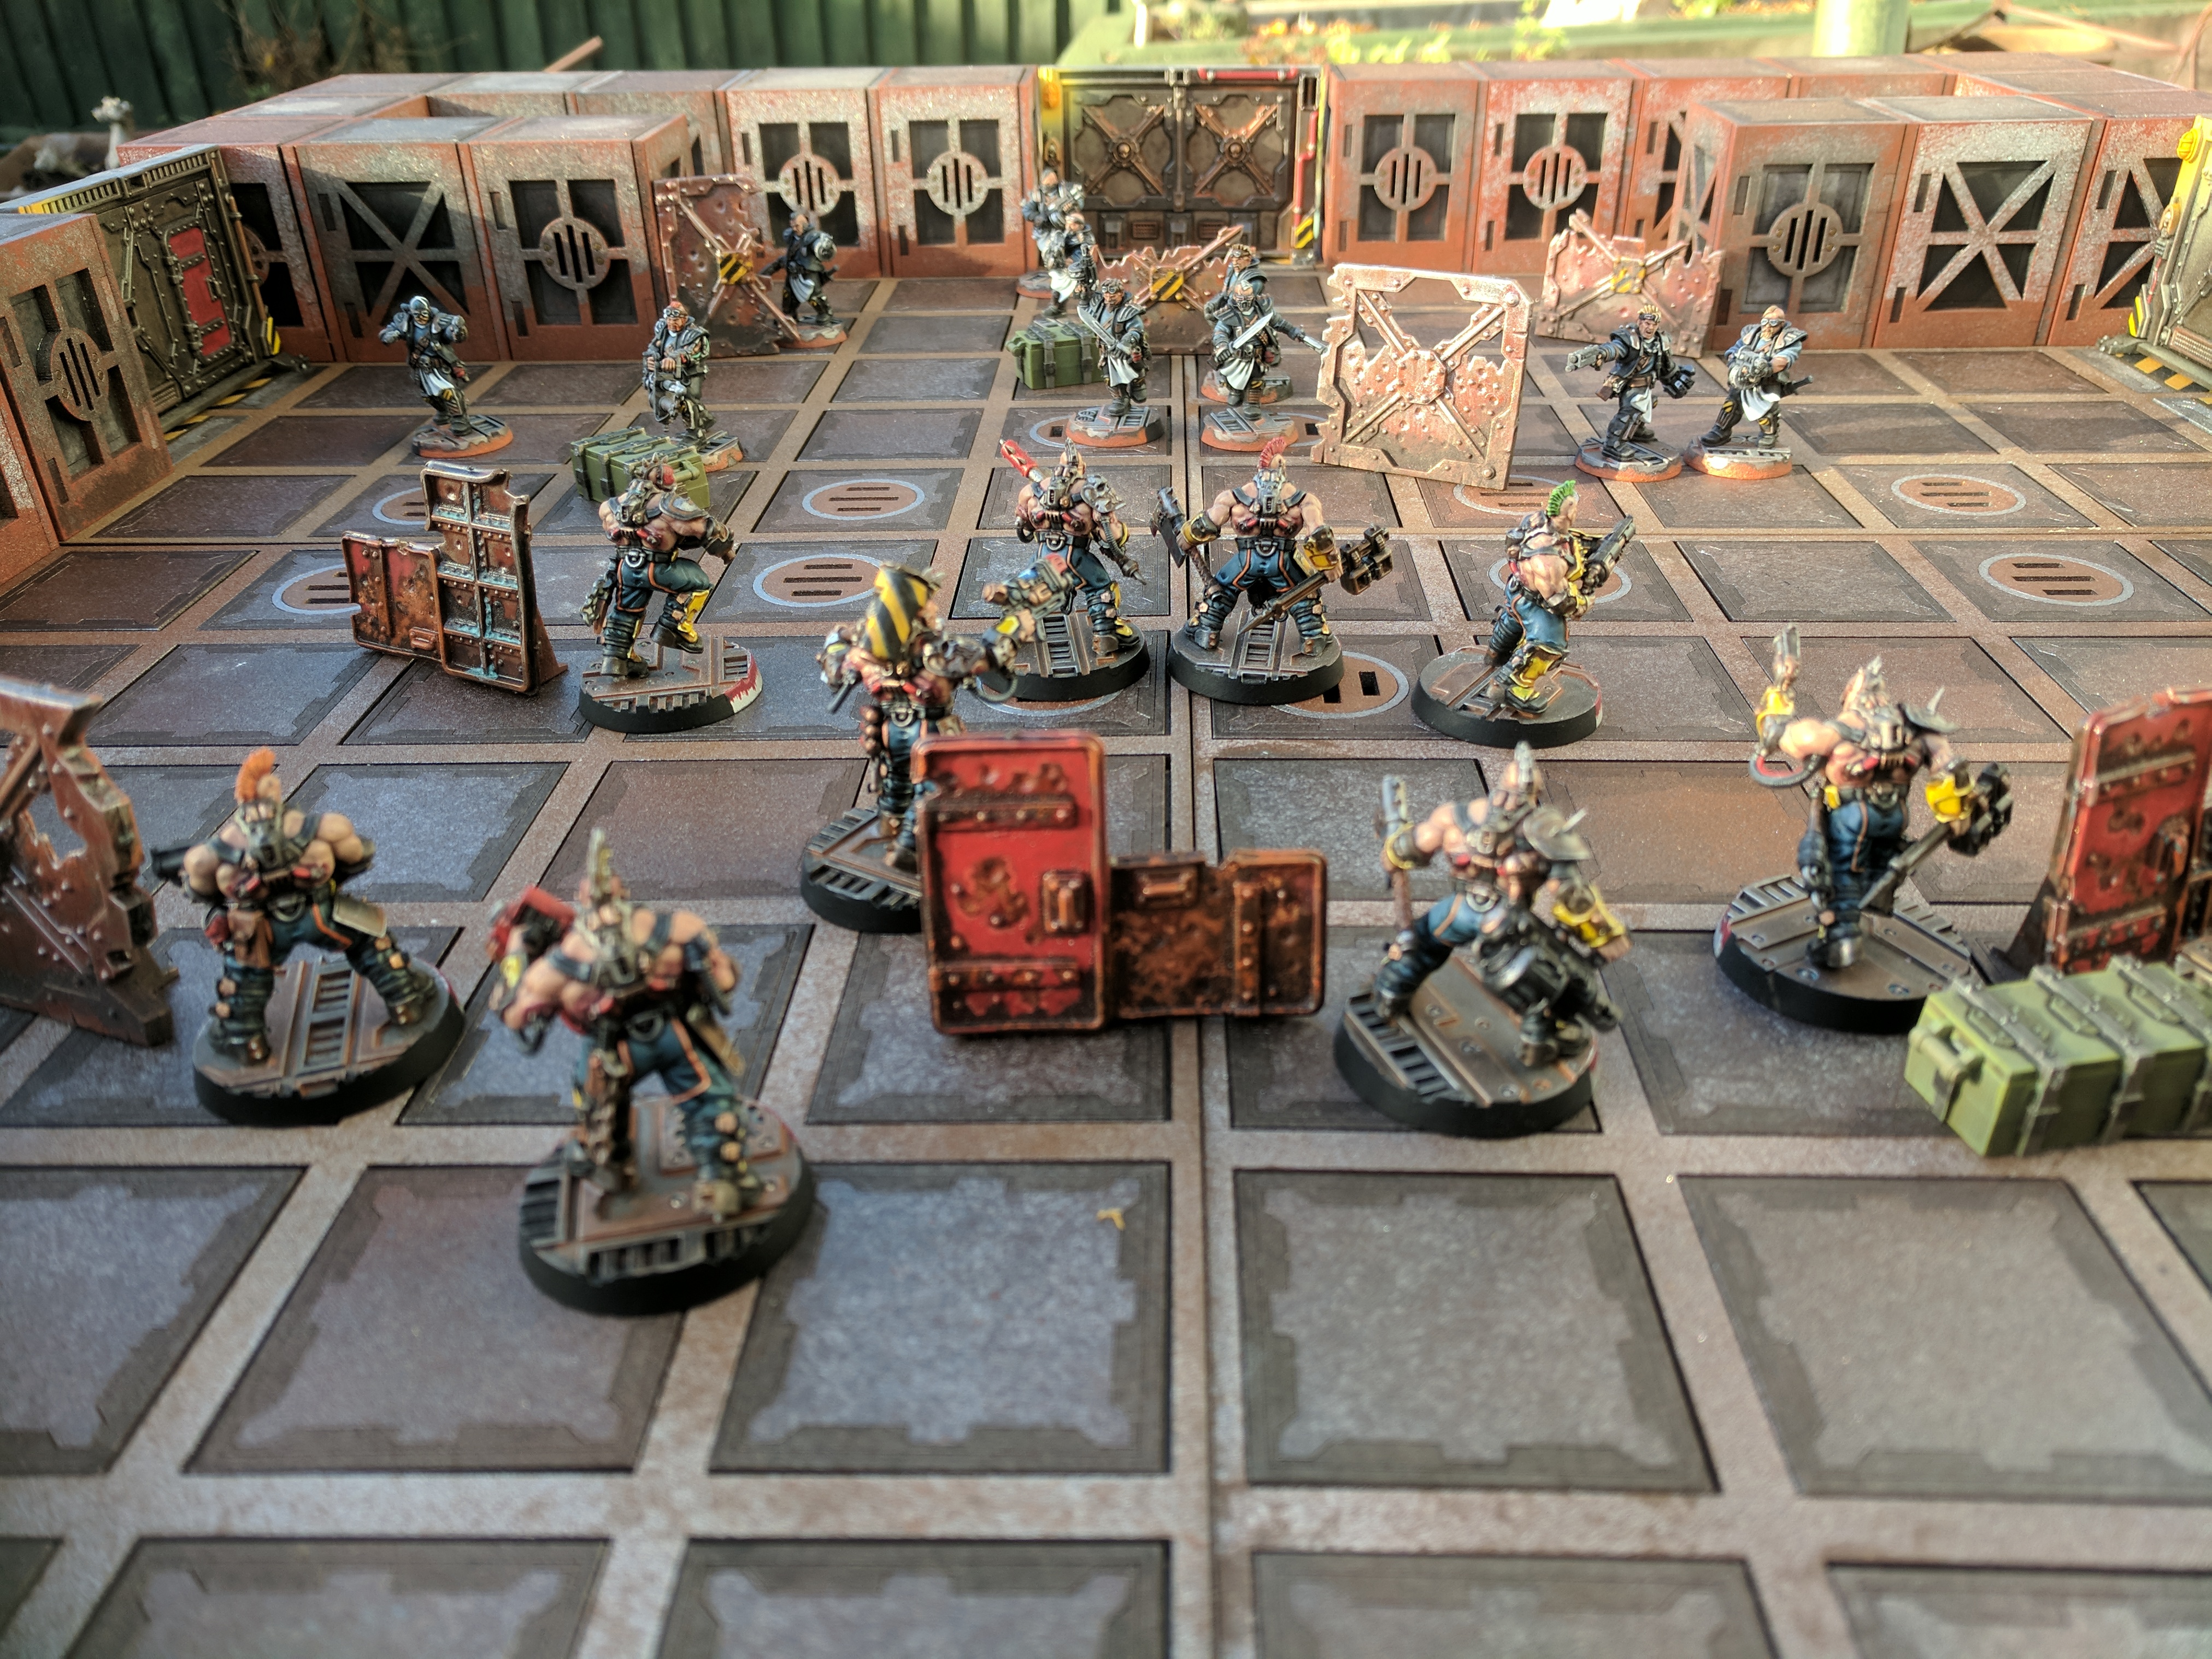
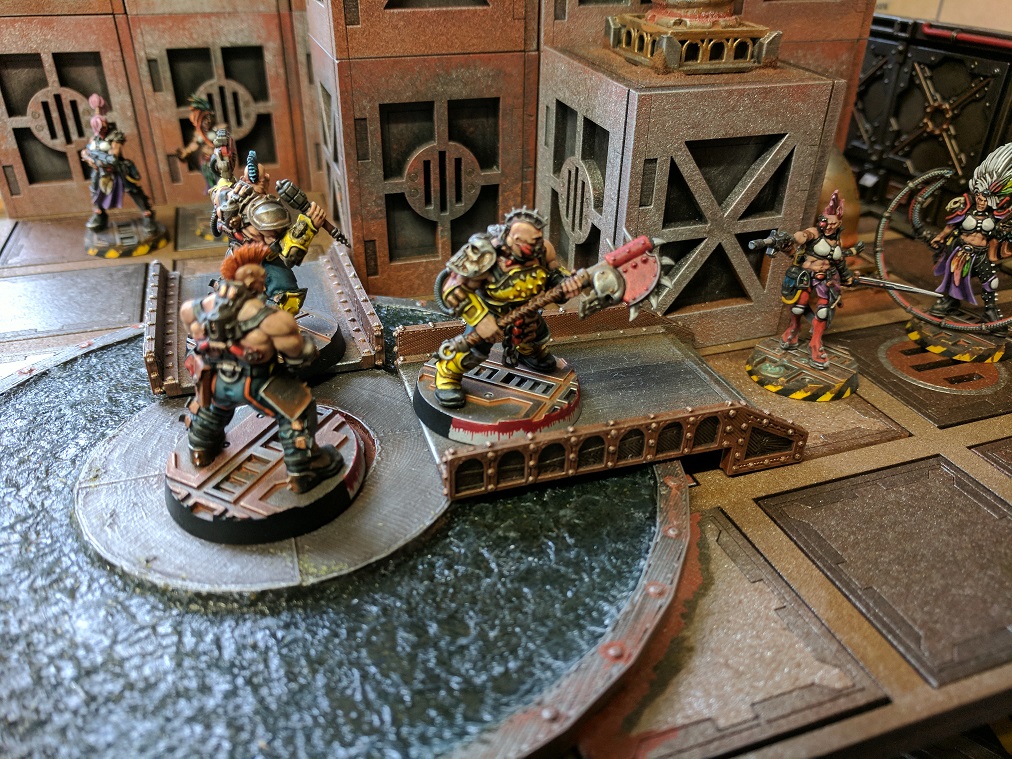 I like scenery which limits movement or provides obstacles to traverse, looks like these Goliath gangers have fallen into an Escher ambush.... Time to sink or swim.
Life finds a way
For the next part of the project i thought it would be nice to throw in a few scenery pieces that could act as obstacles or barricades but also add in something a little more unusual to the background, i figured the hive would have things like water basins to collect pipe run-off or even provide some kind of growing area for lichen, moss and ferro-weeds.
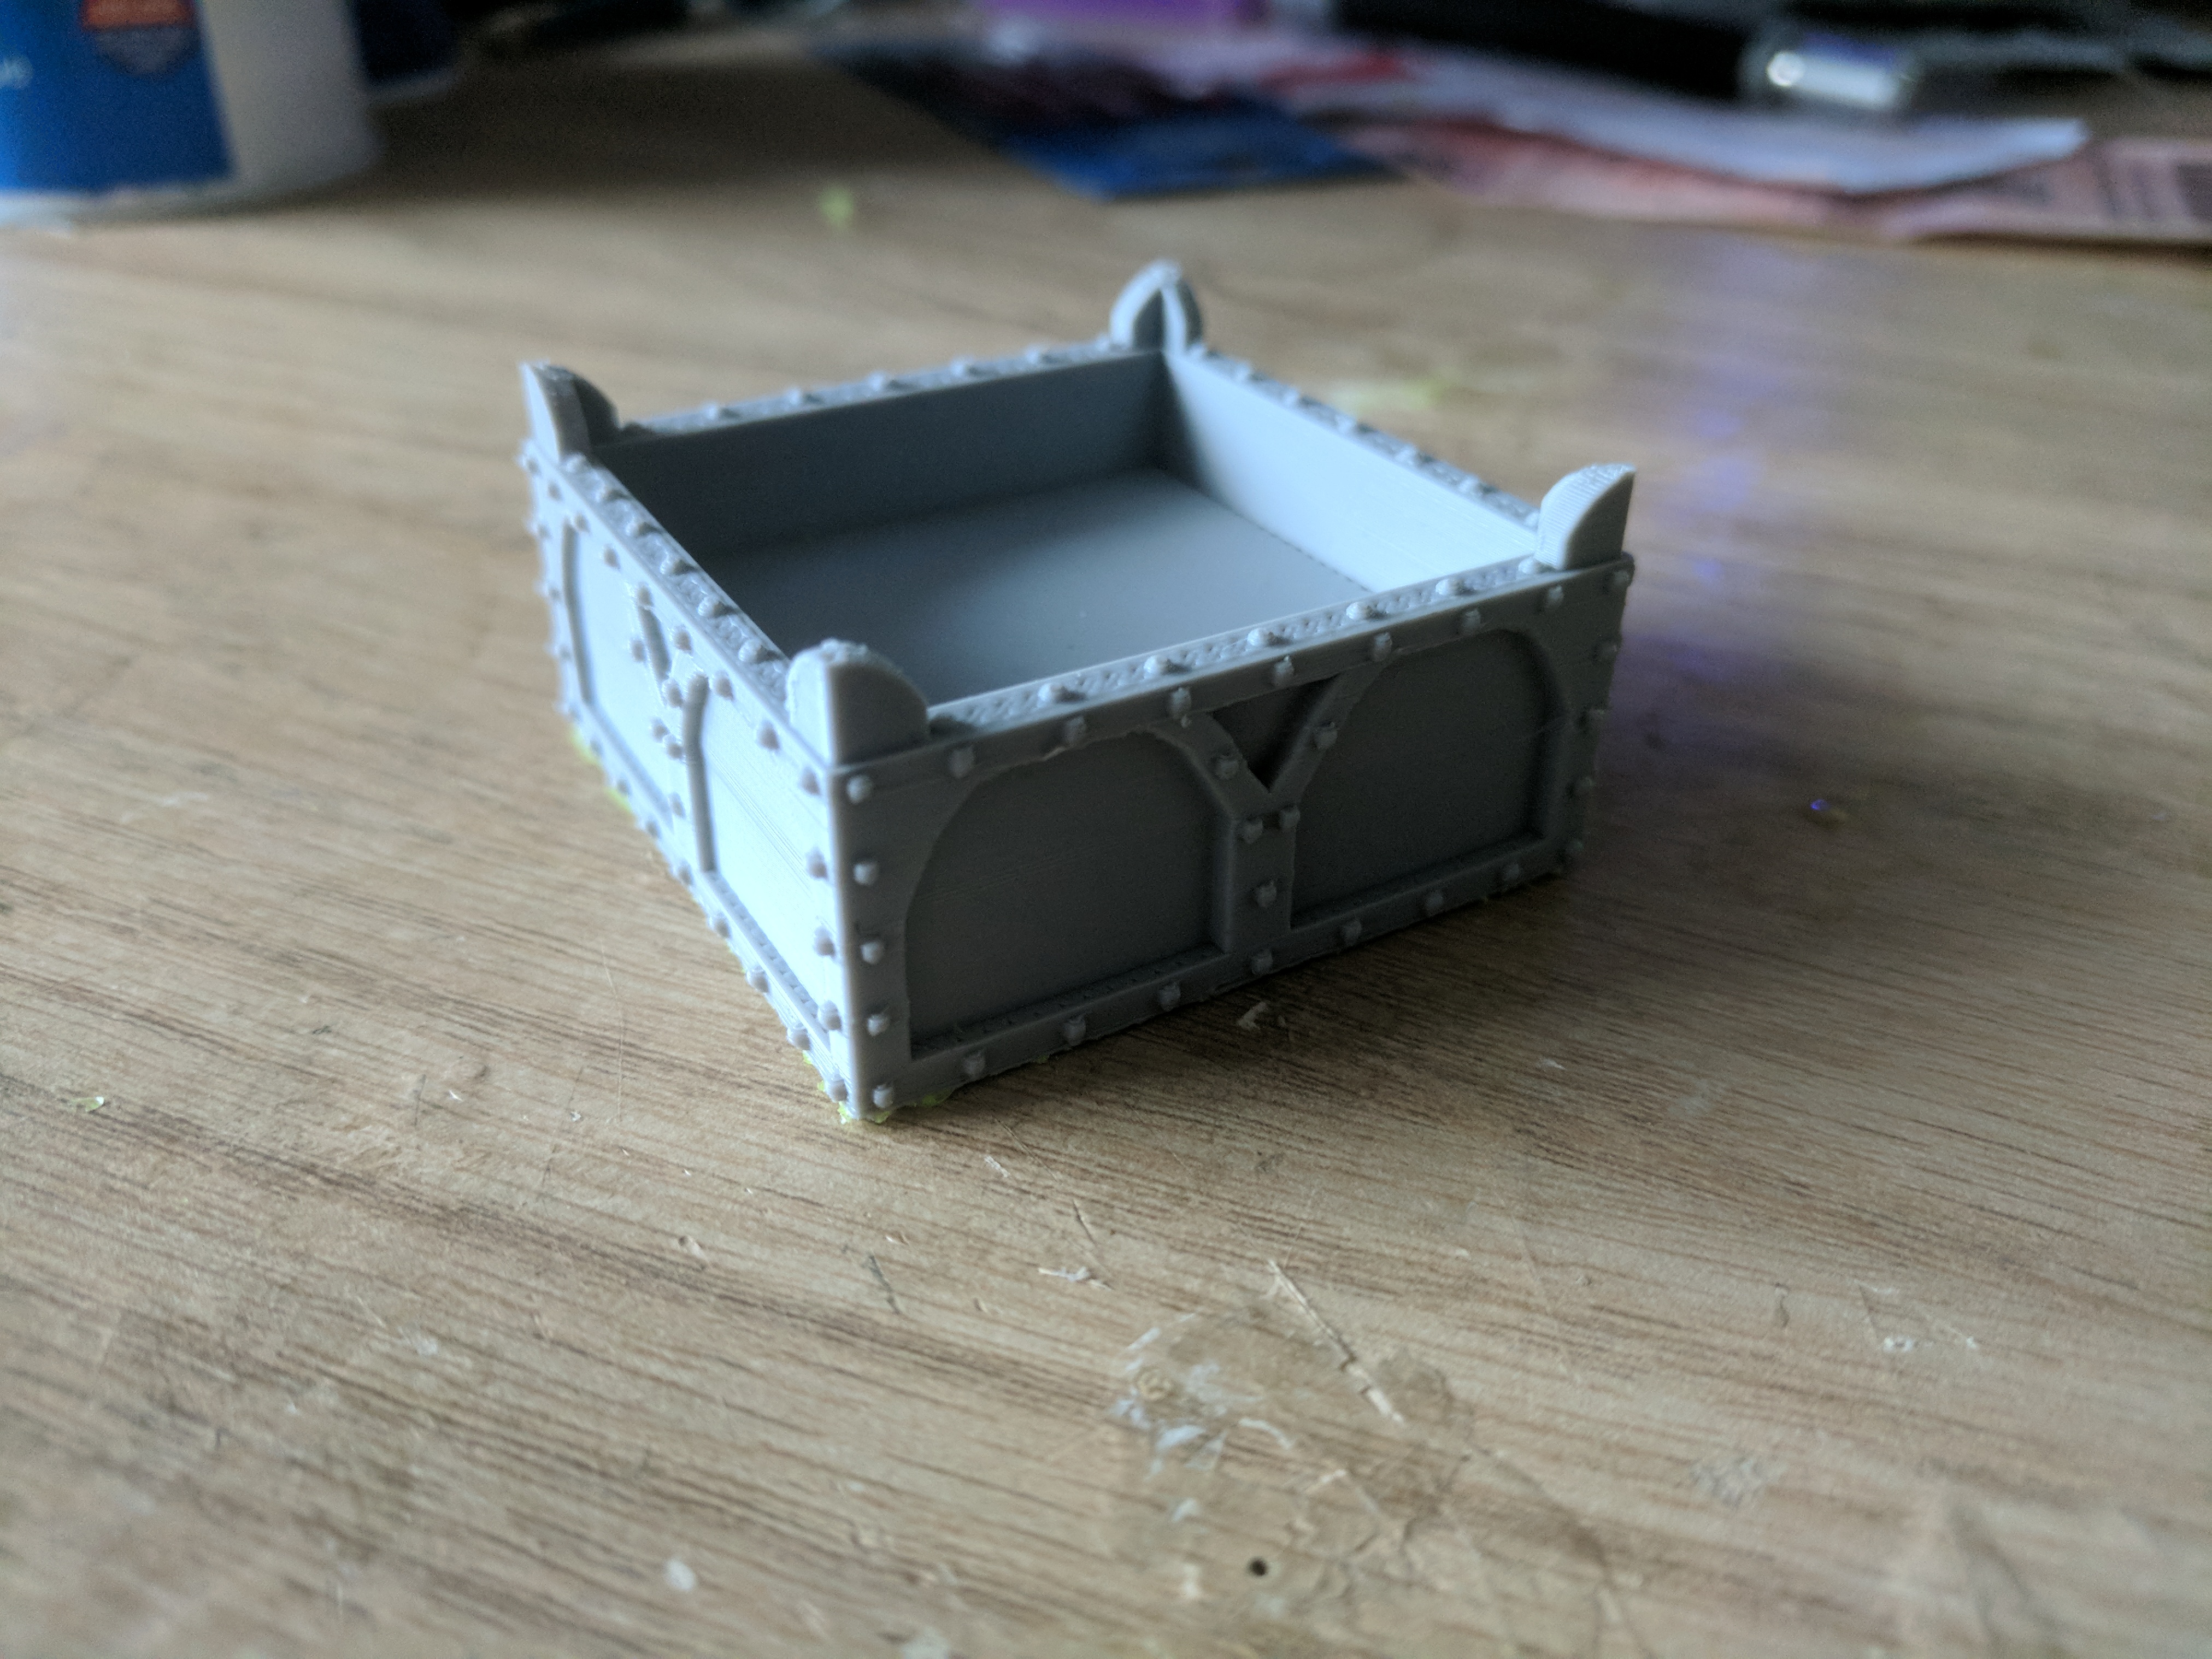 I put together a simple box and added in some Gothic flourishes, some arches, raised corners and of course lots of rivets.
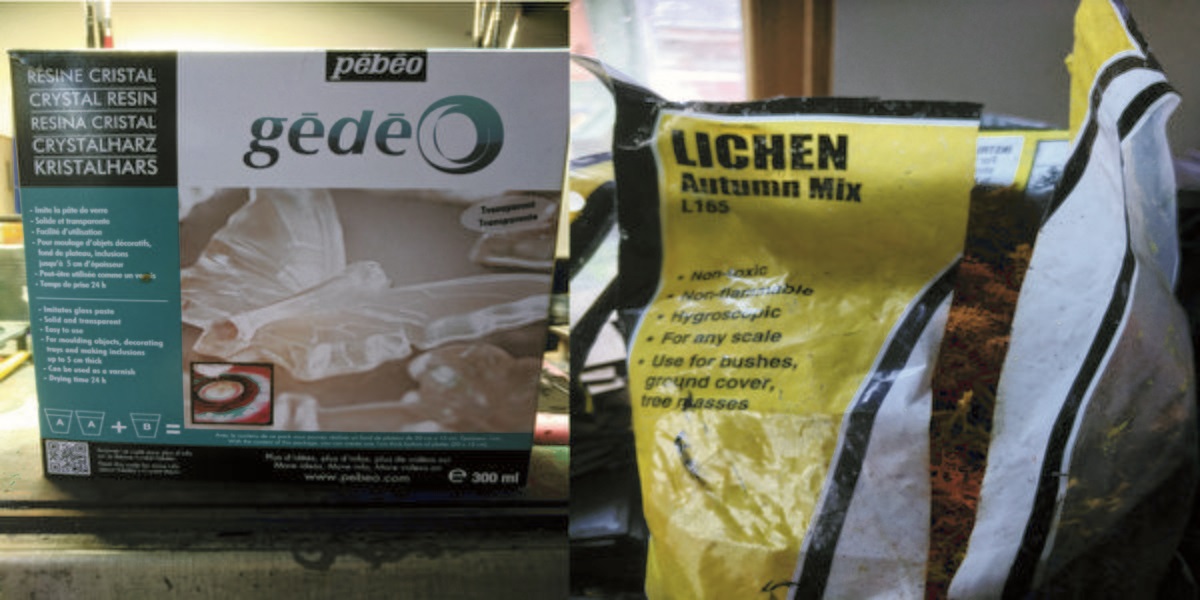 For the water effect i used some liquid crystal resin, not exactly cheap and I'm sure there are some cheaper versions out there but i had some left over from a previous project. For the moss i went for the woodland scenics range of autumn lichen, i didnt want anything too green or vibrant since the vegetation would most likely be half dead, under artificial light or was a species that had evolved to eat rust and metal.
 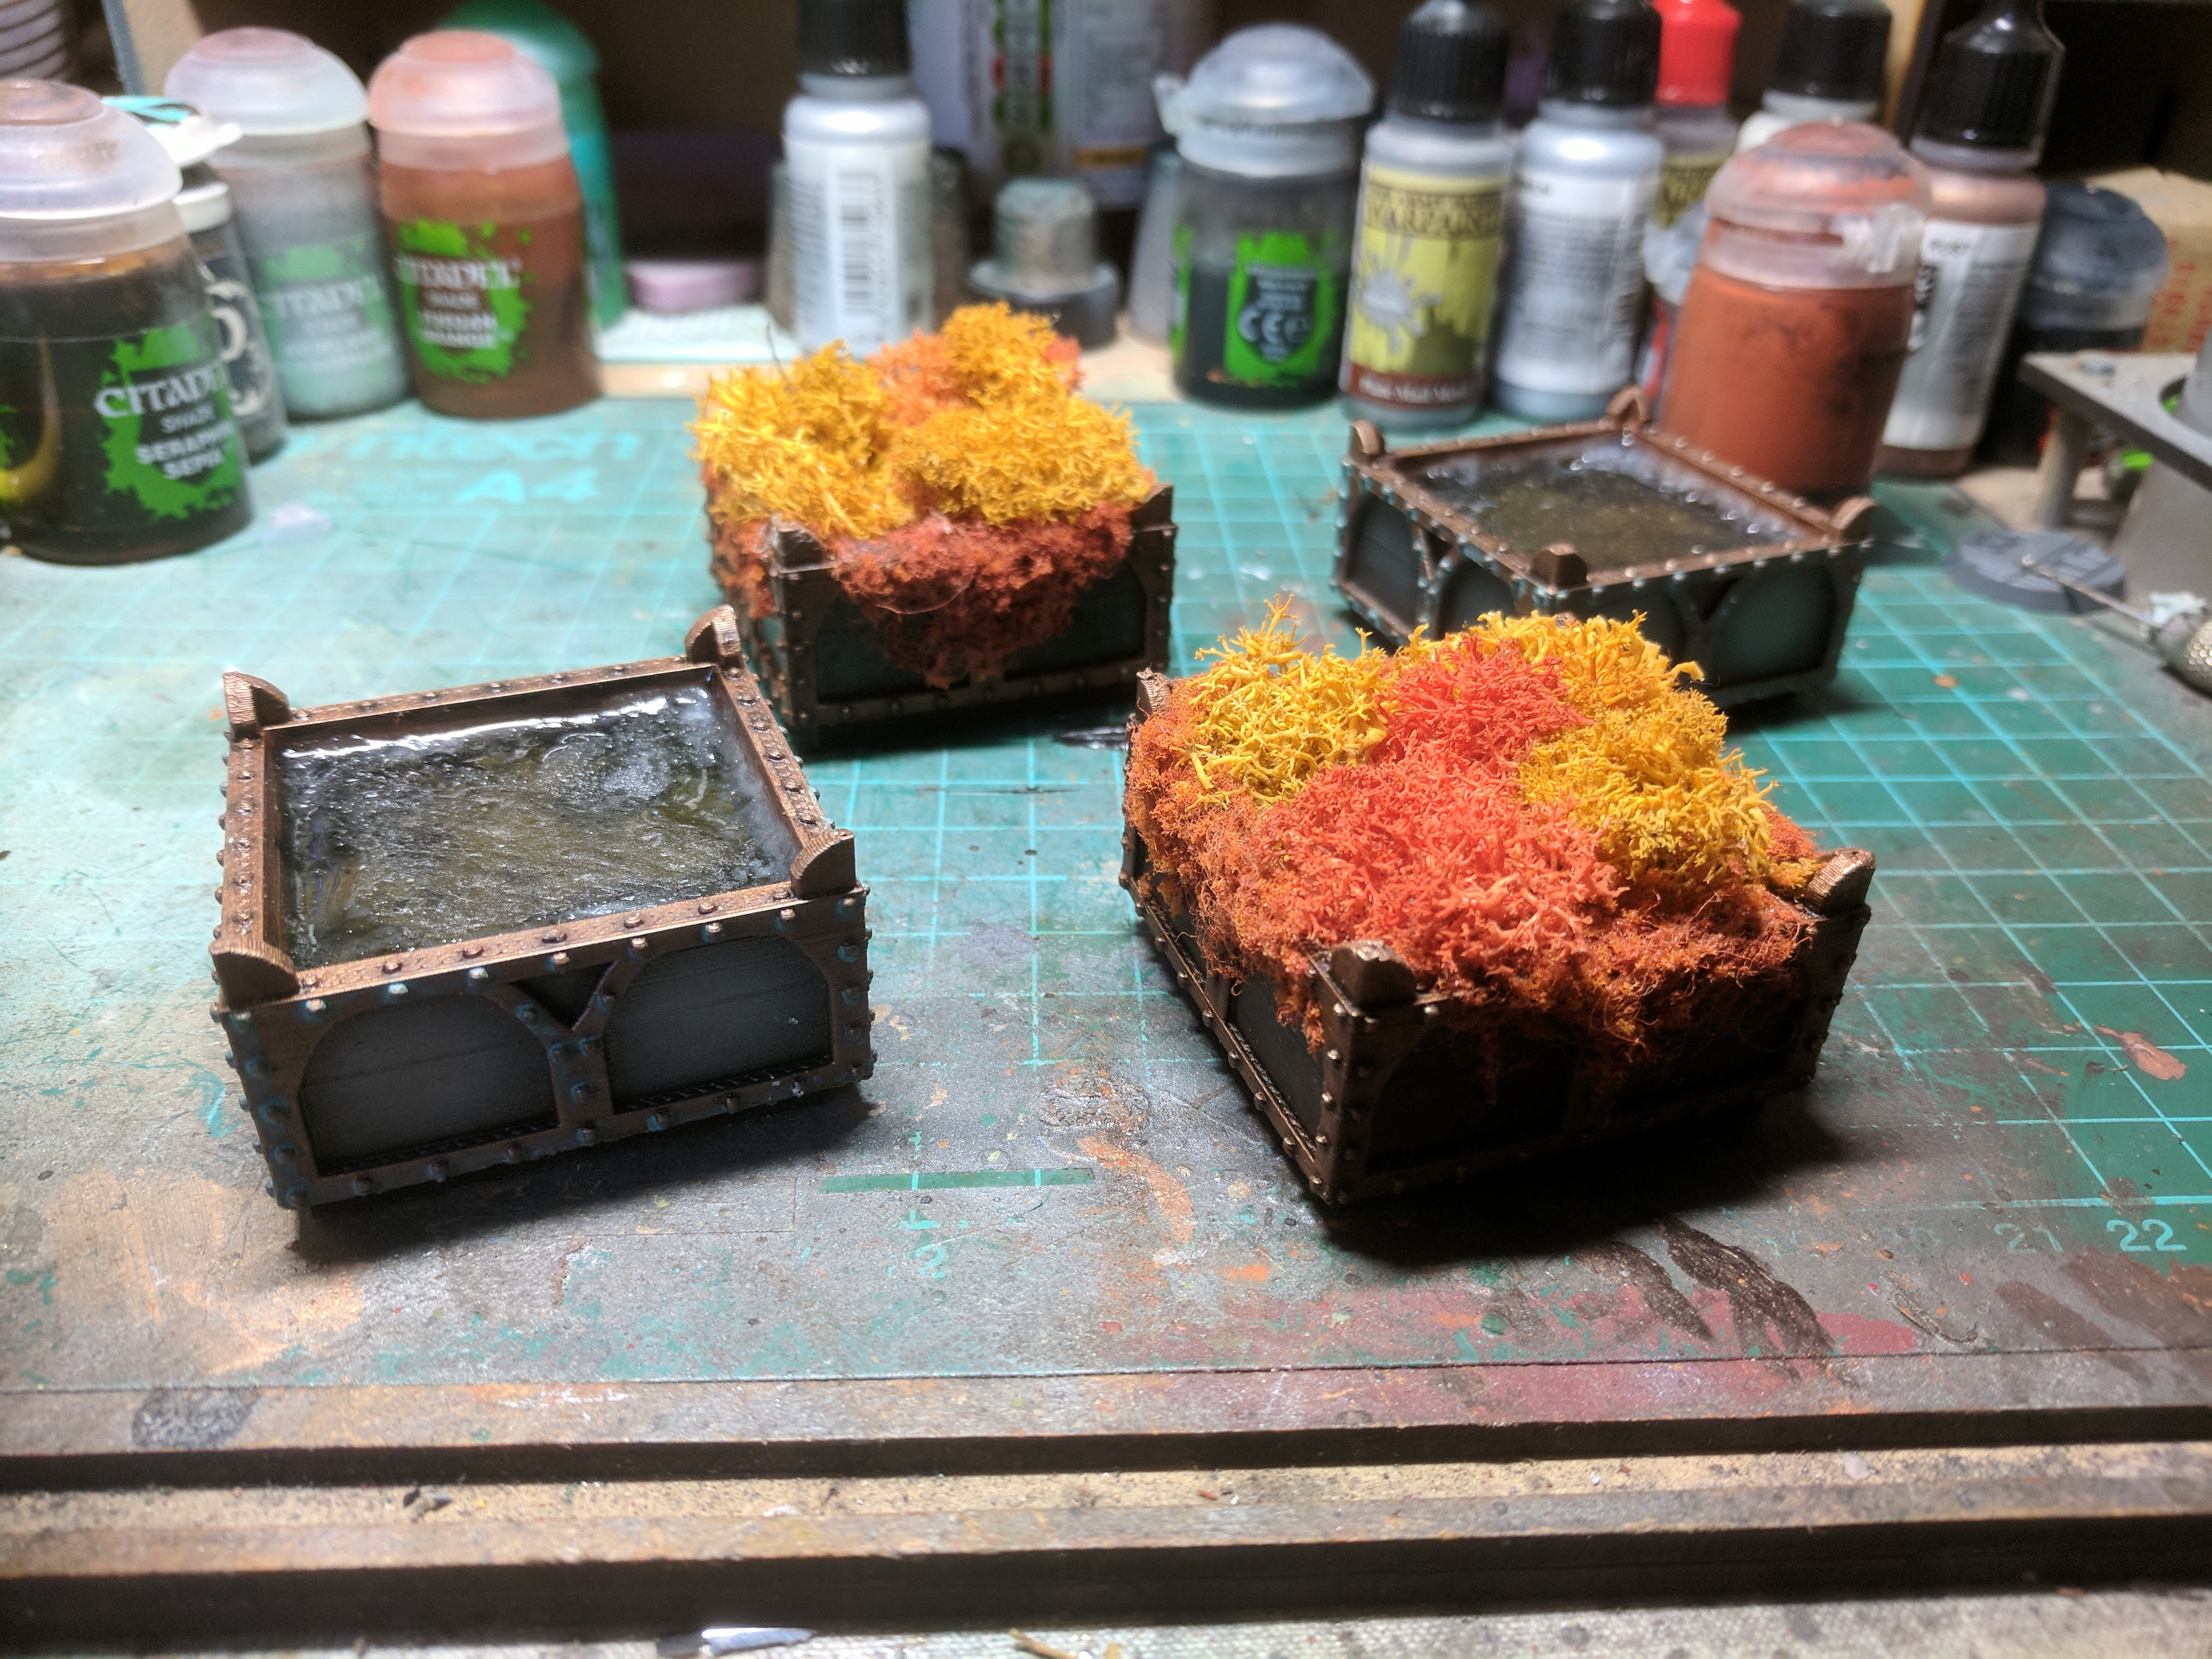 Painted up the boxes using standard dark metal and brass colours then added in the resin to a couple and glued the lichen into the others.
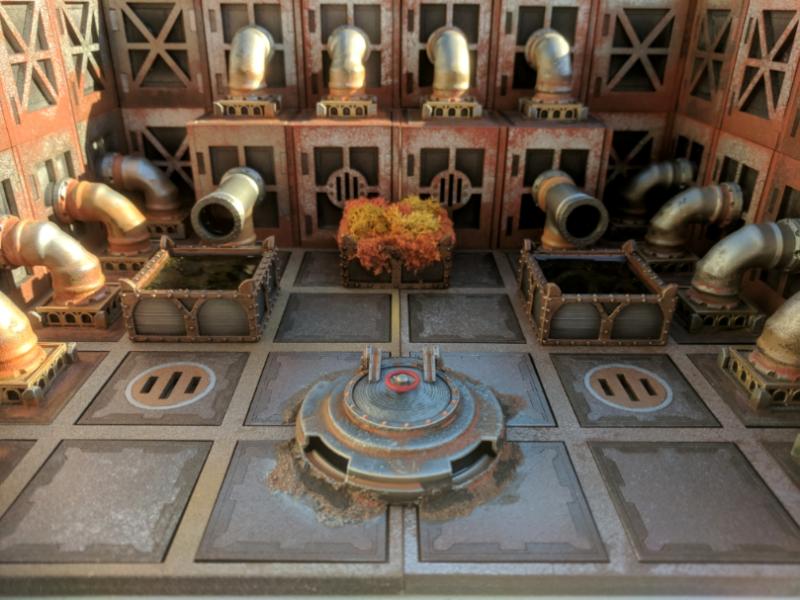 Welcome to Flushing Waste Springs.... Please don't ask us about your lost jewellery, baby Sump-kroc or missing Juve... you really don't want to know!
Lower your tone and bring it together.
 When i started this project i really wanted to limit my painting jobs to spray can and sponge stippling only but looking back at the original paint job on the construction cubes i decided that it did look a bit iffy, the rust effect was very strong and different brands of paint were definitely showing.
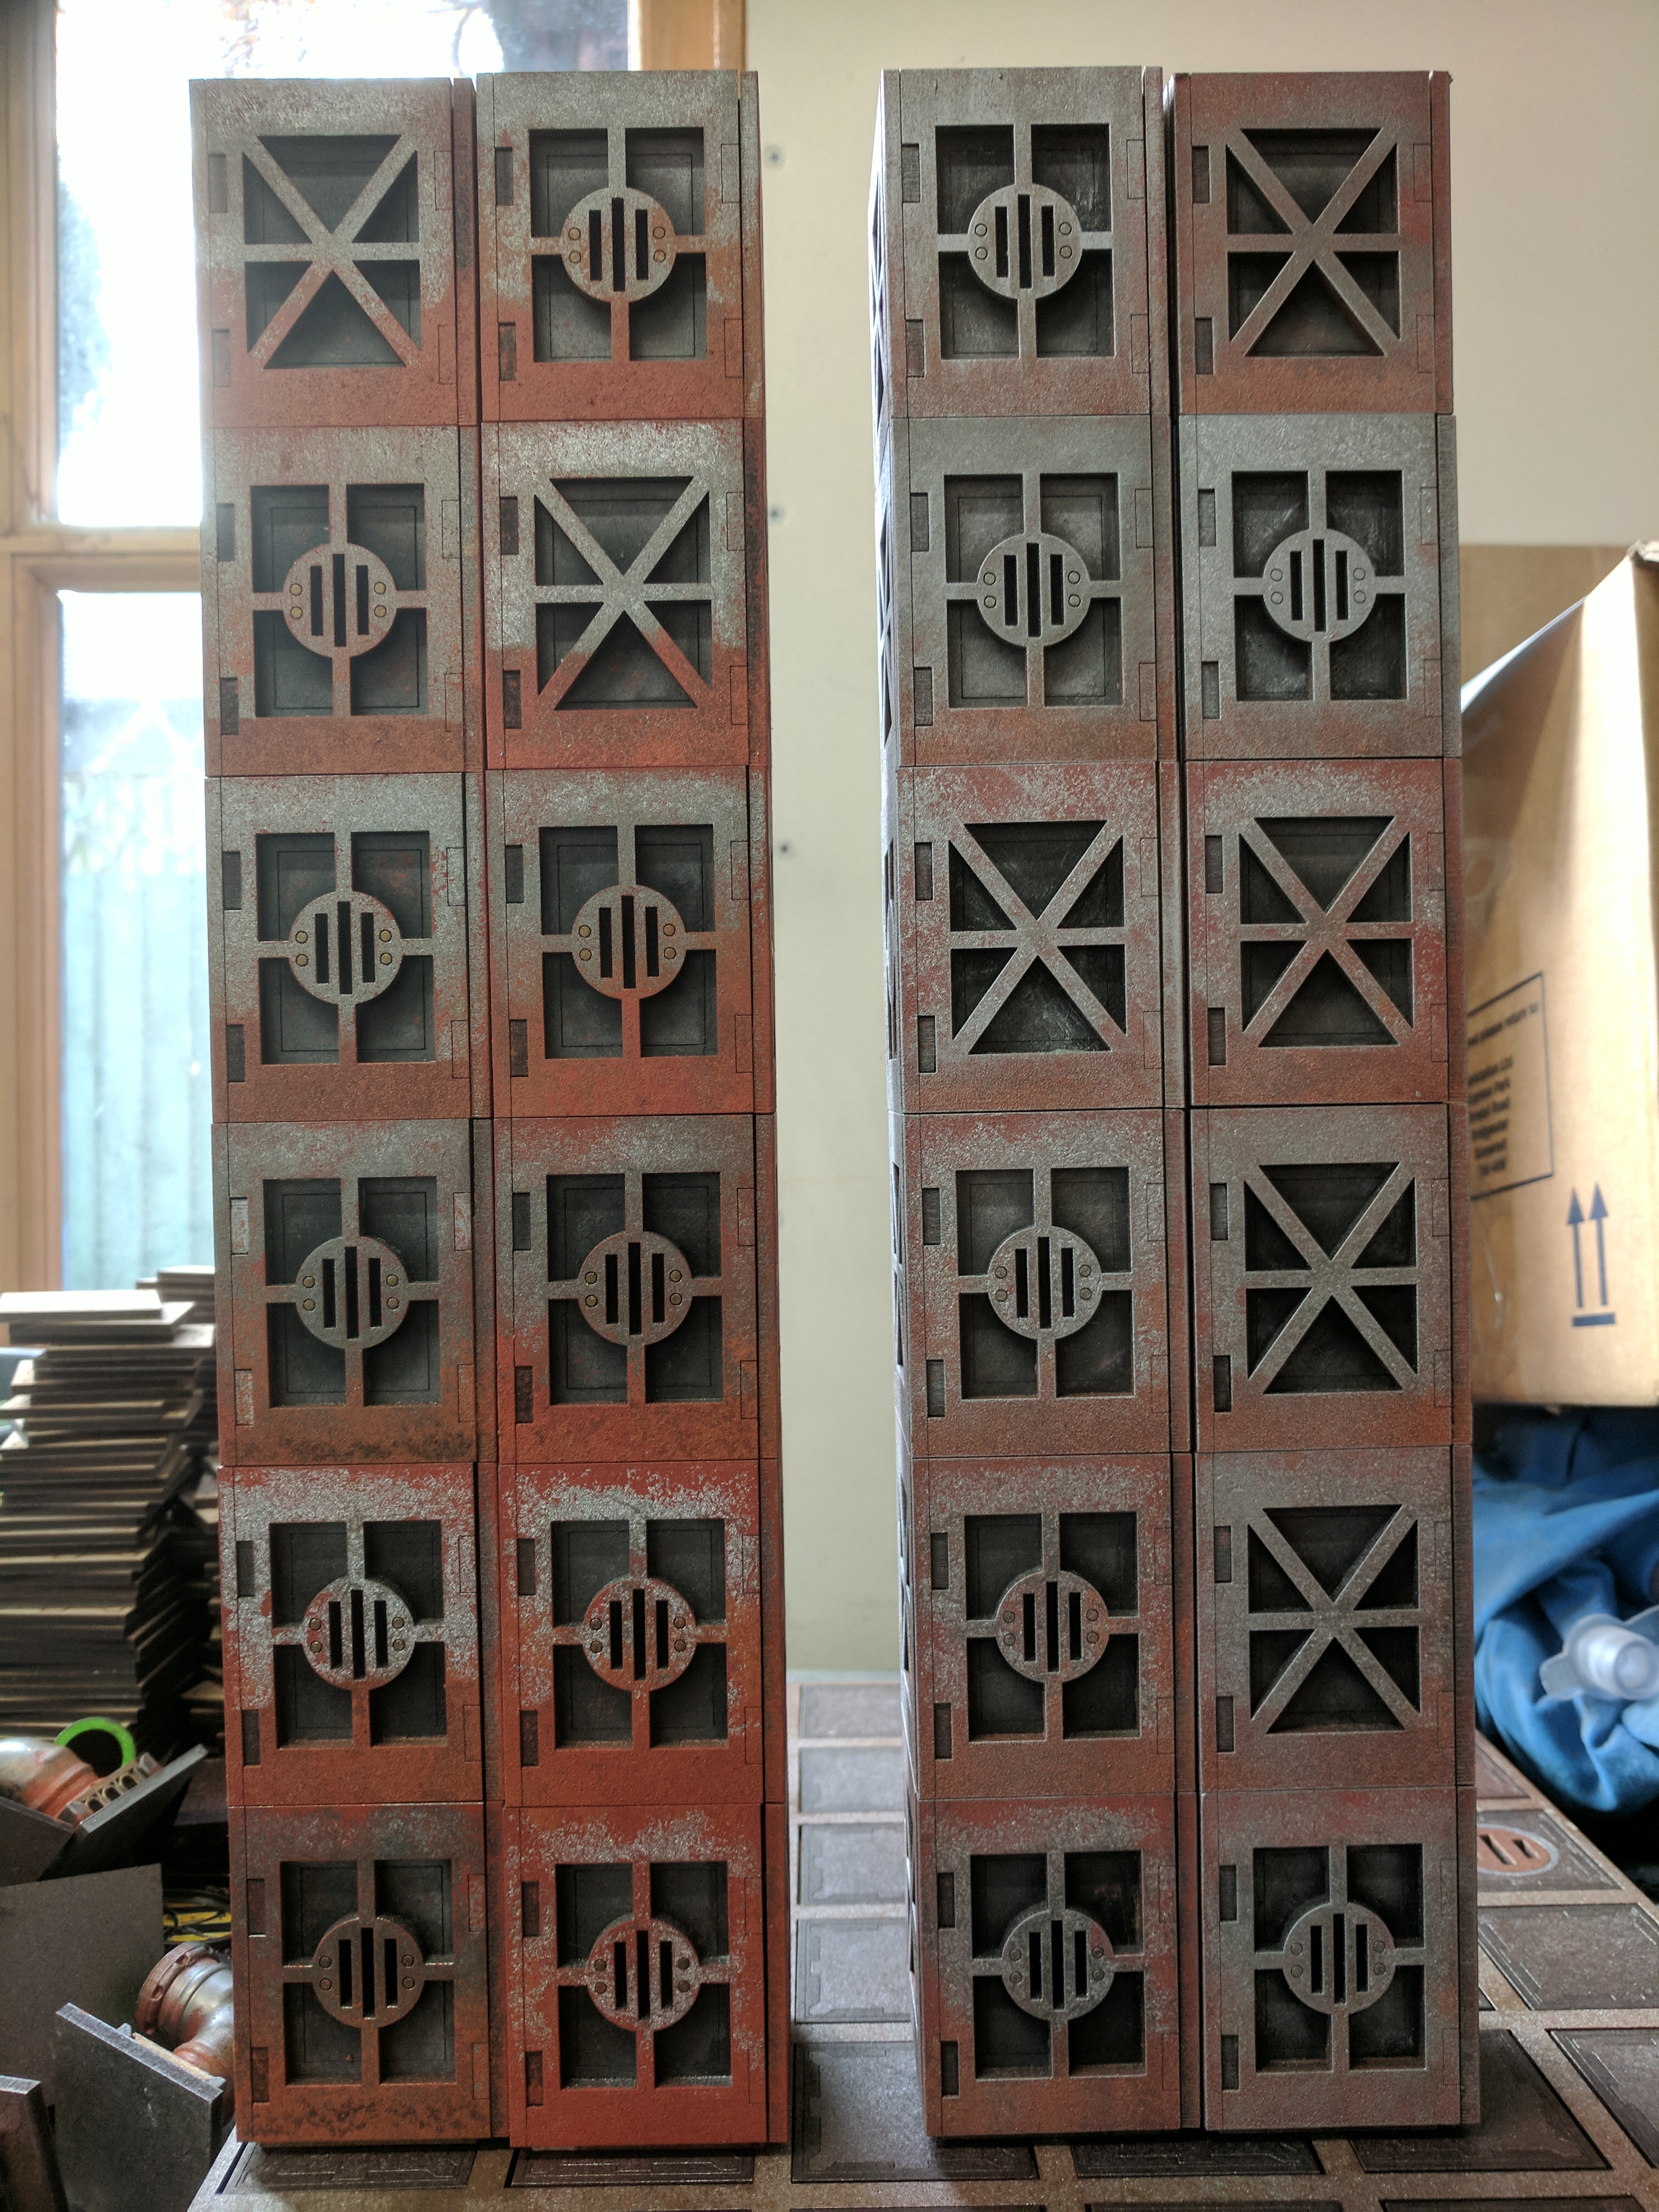 I went back to the original cubes and attacked them all with a heavy drybrush of a light silver tone, it took about an hour but the difference was worth it, the silver paint toned down the rust effect, highlighted the textures from the paint and generally brought the colour scheme together for all of the cubes making them look a bit more unified.
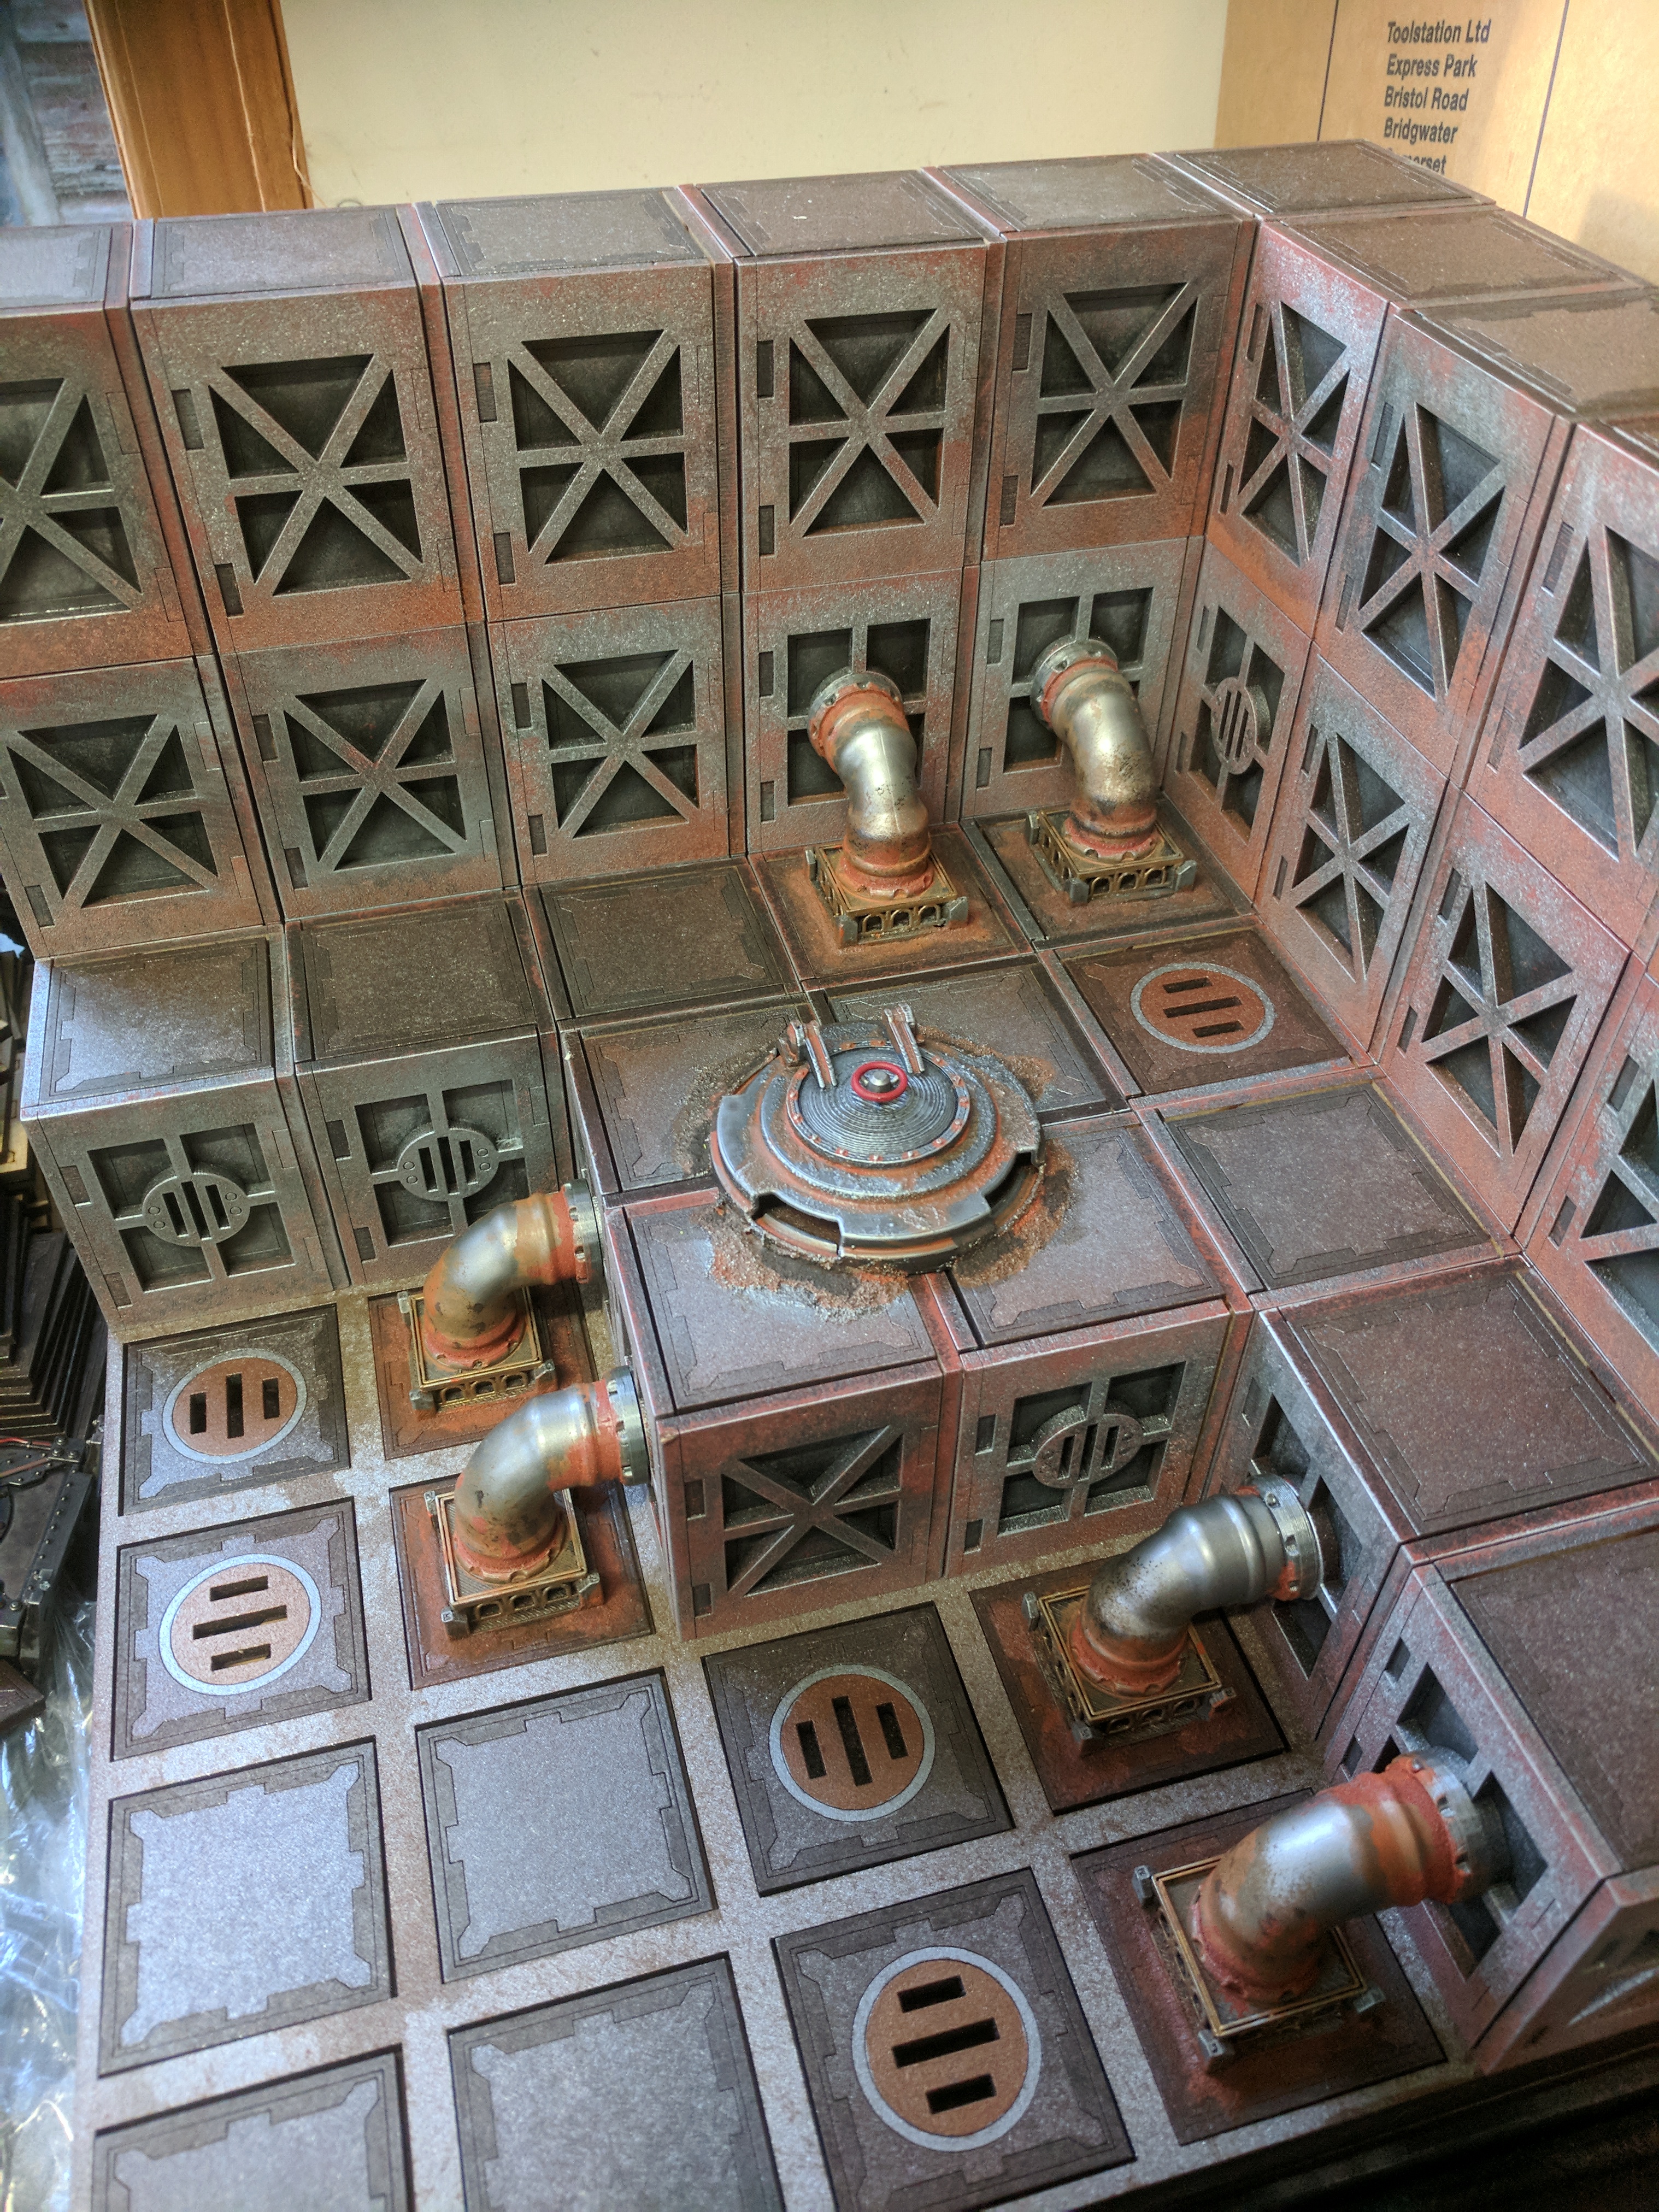 when placed together the colours matched up much more effectively and the muted tone on the rust now allowed other pieces of scenery to stand out more against the background.
Beer gives me ideas...
 As mentioned before the boards were missing detail, they looked good on their own but they needed something extra to give that hive city feel.
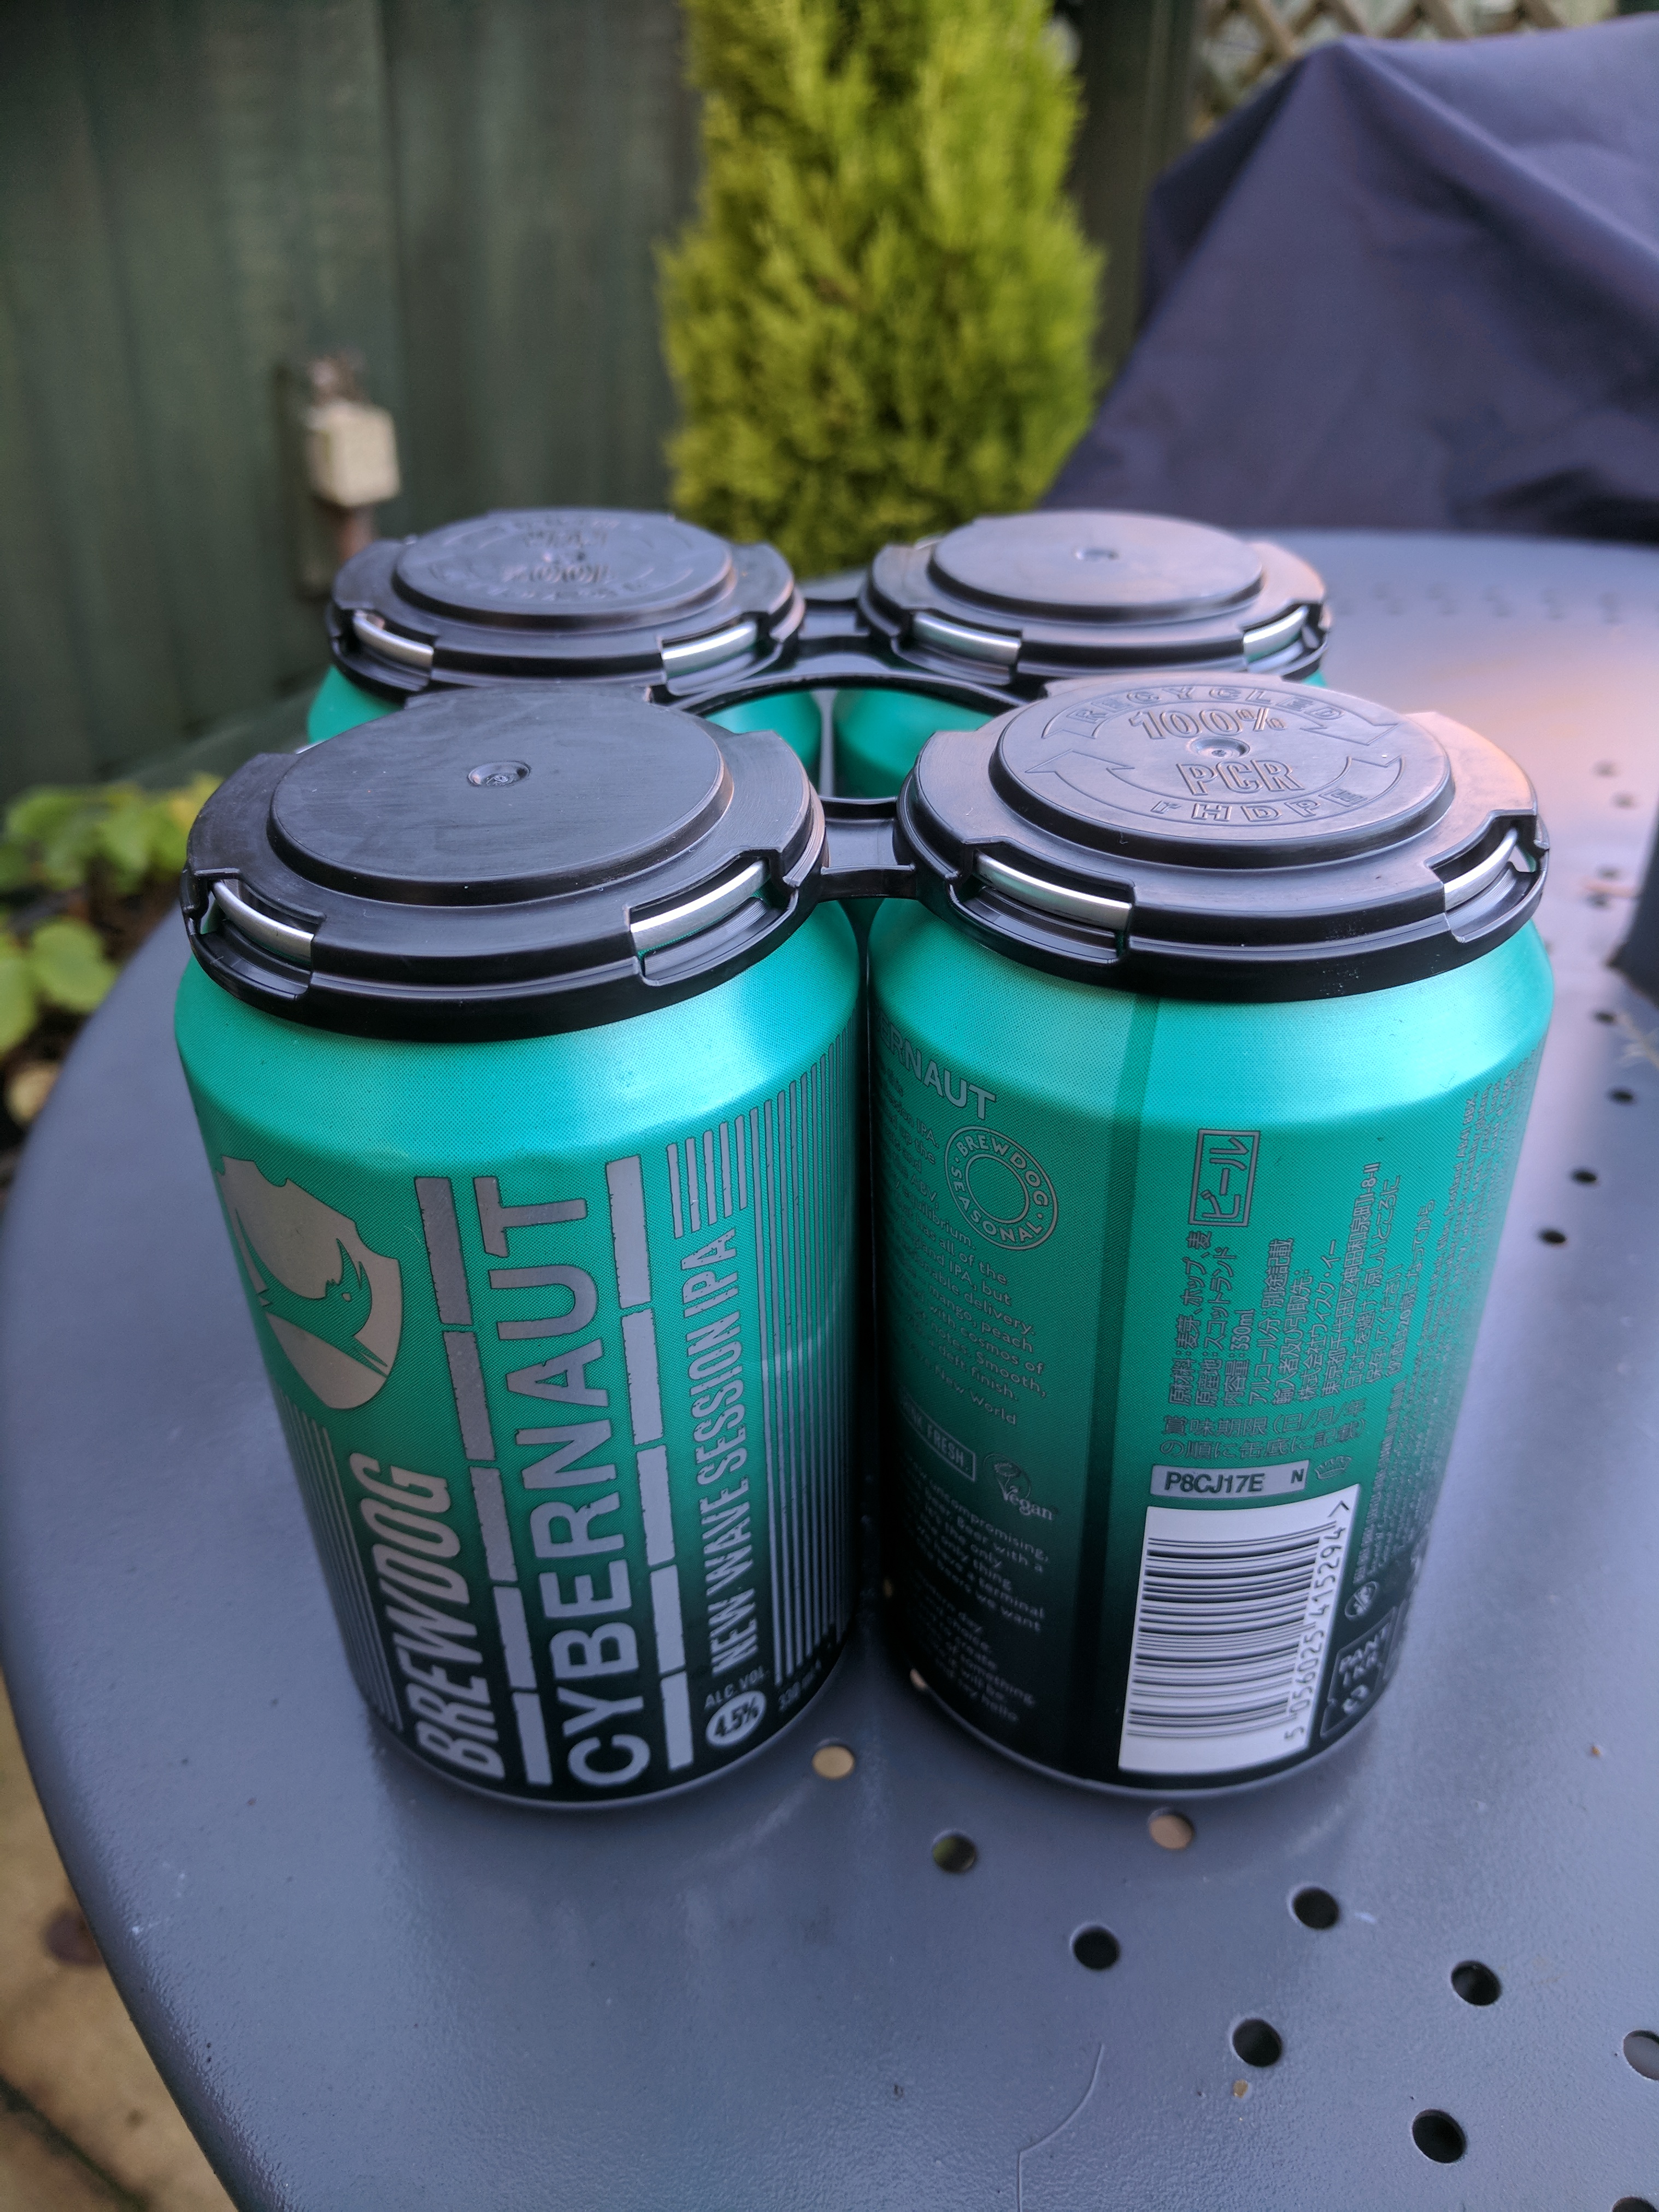 I picked up some beer with my weekly shopping and looking at the pack holders i had an idea.
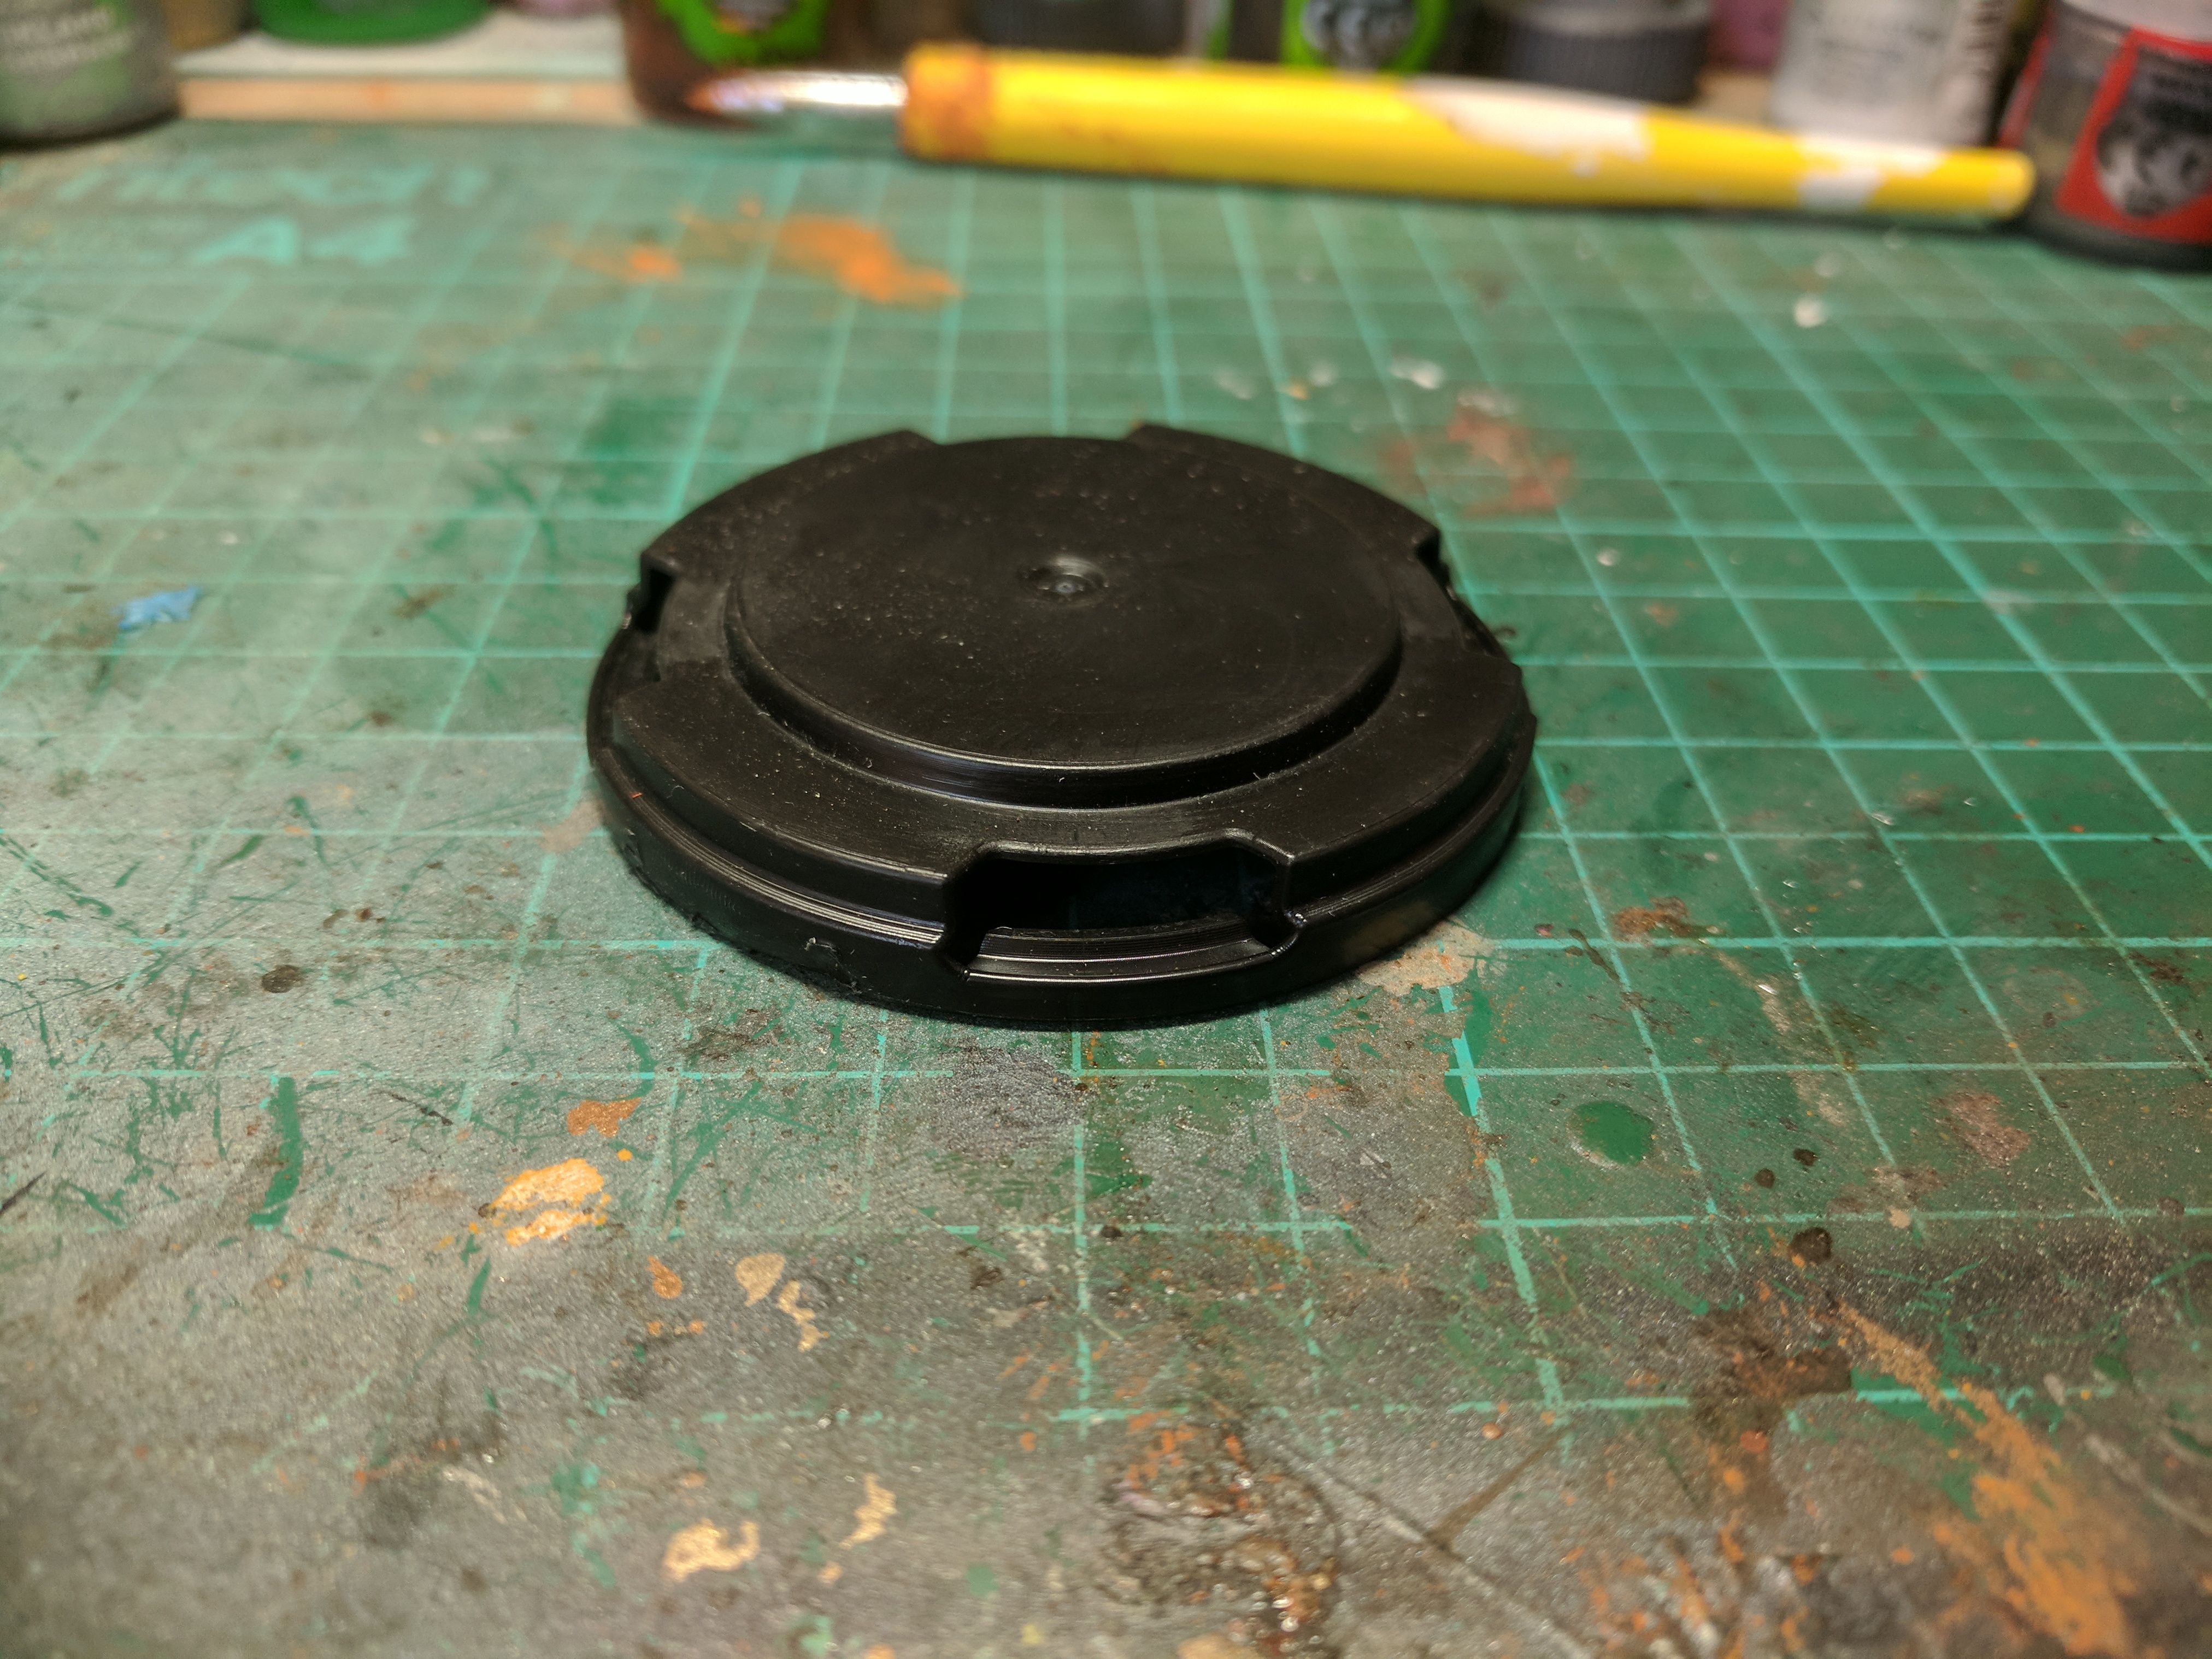 Removing one of the caps i cut off the extras to leave me with just a single circular section of plastic.
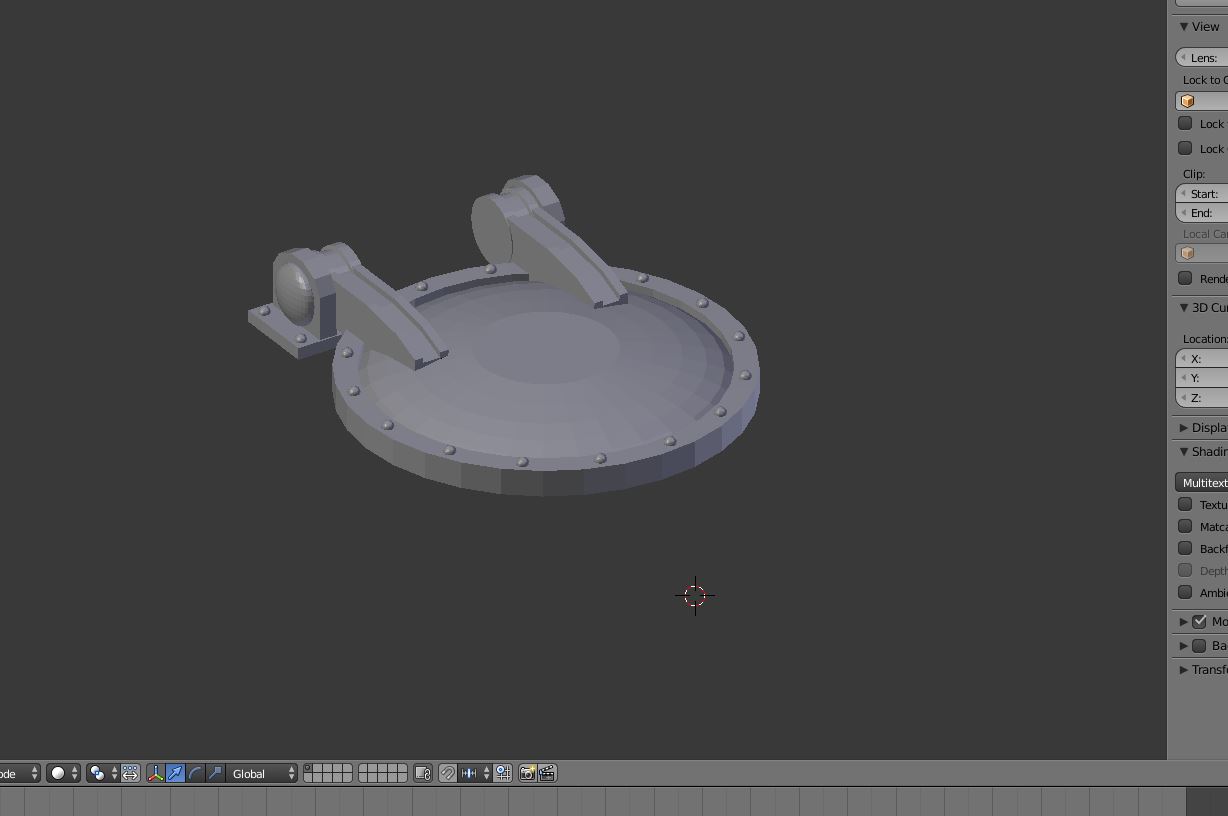 Jumped back into Blender and built up a quick submarine hatch.
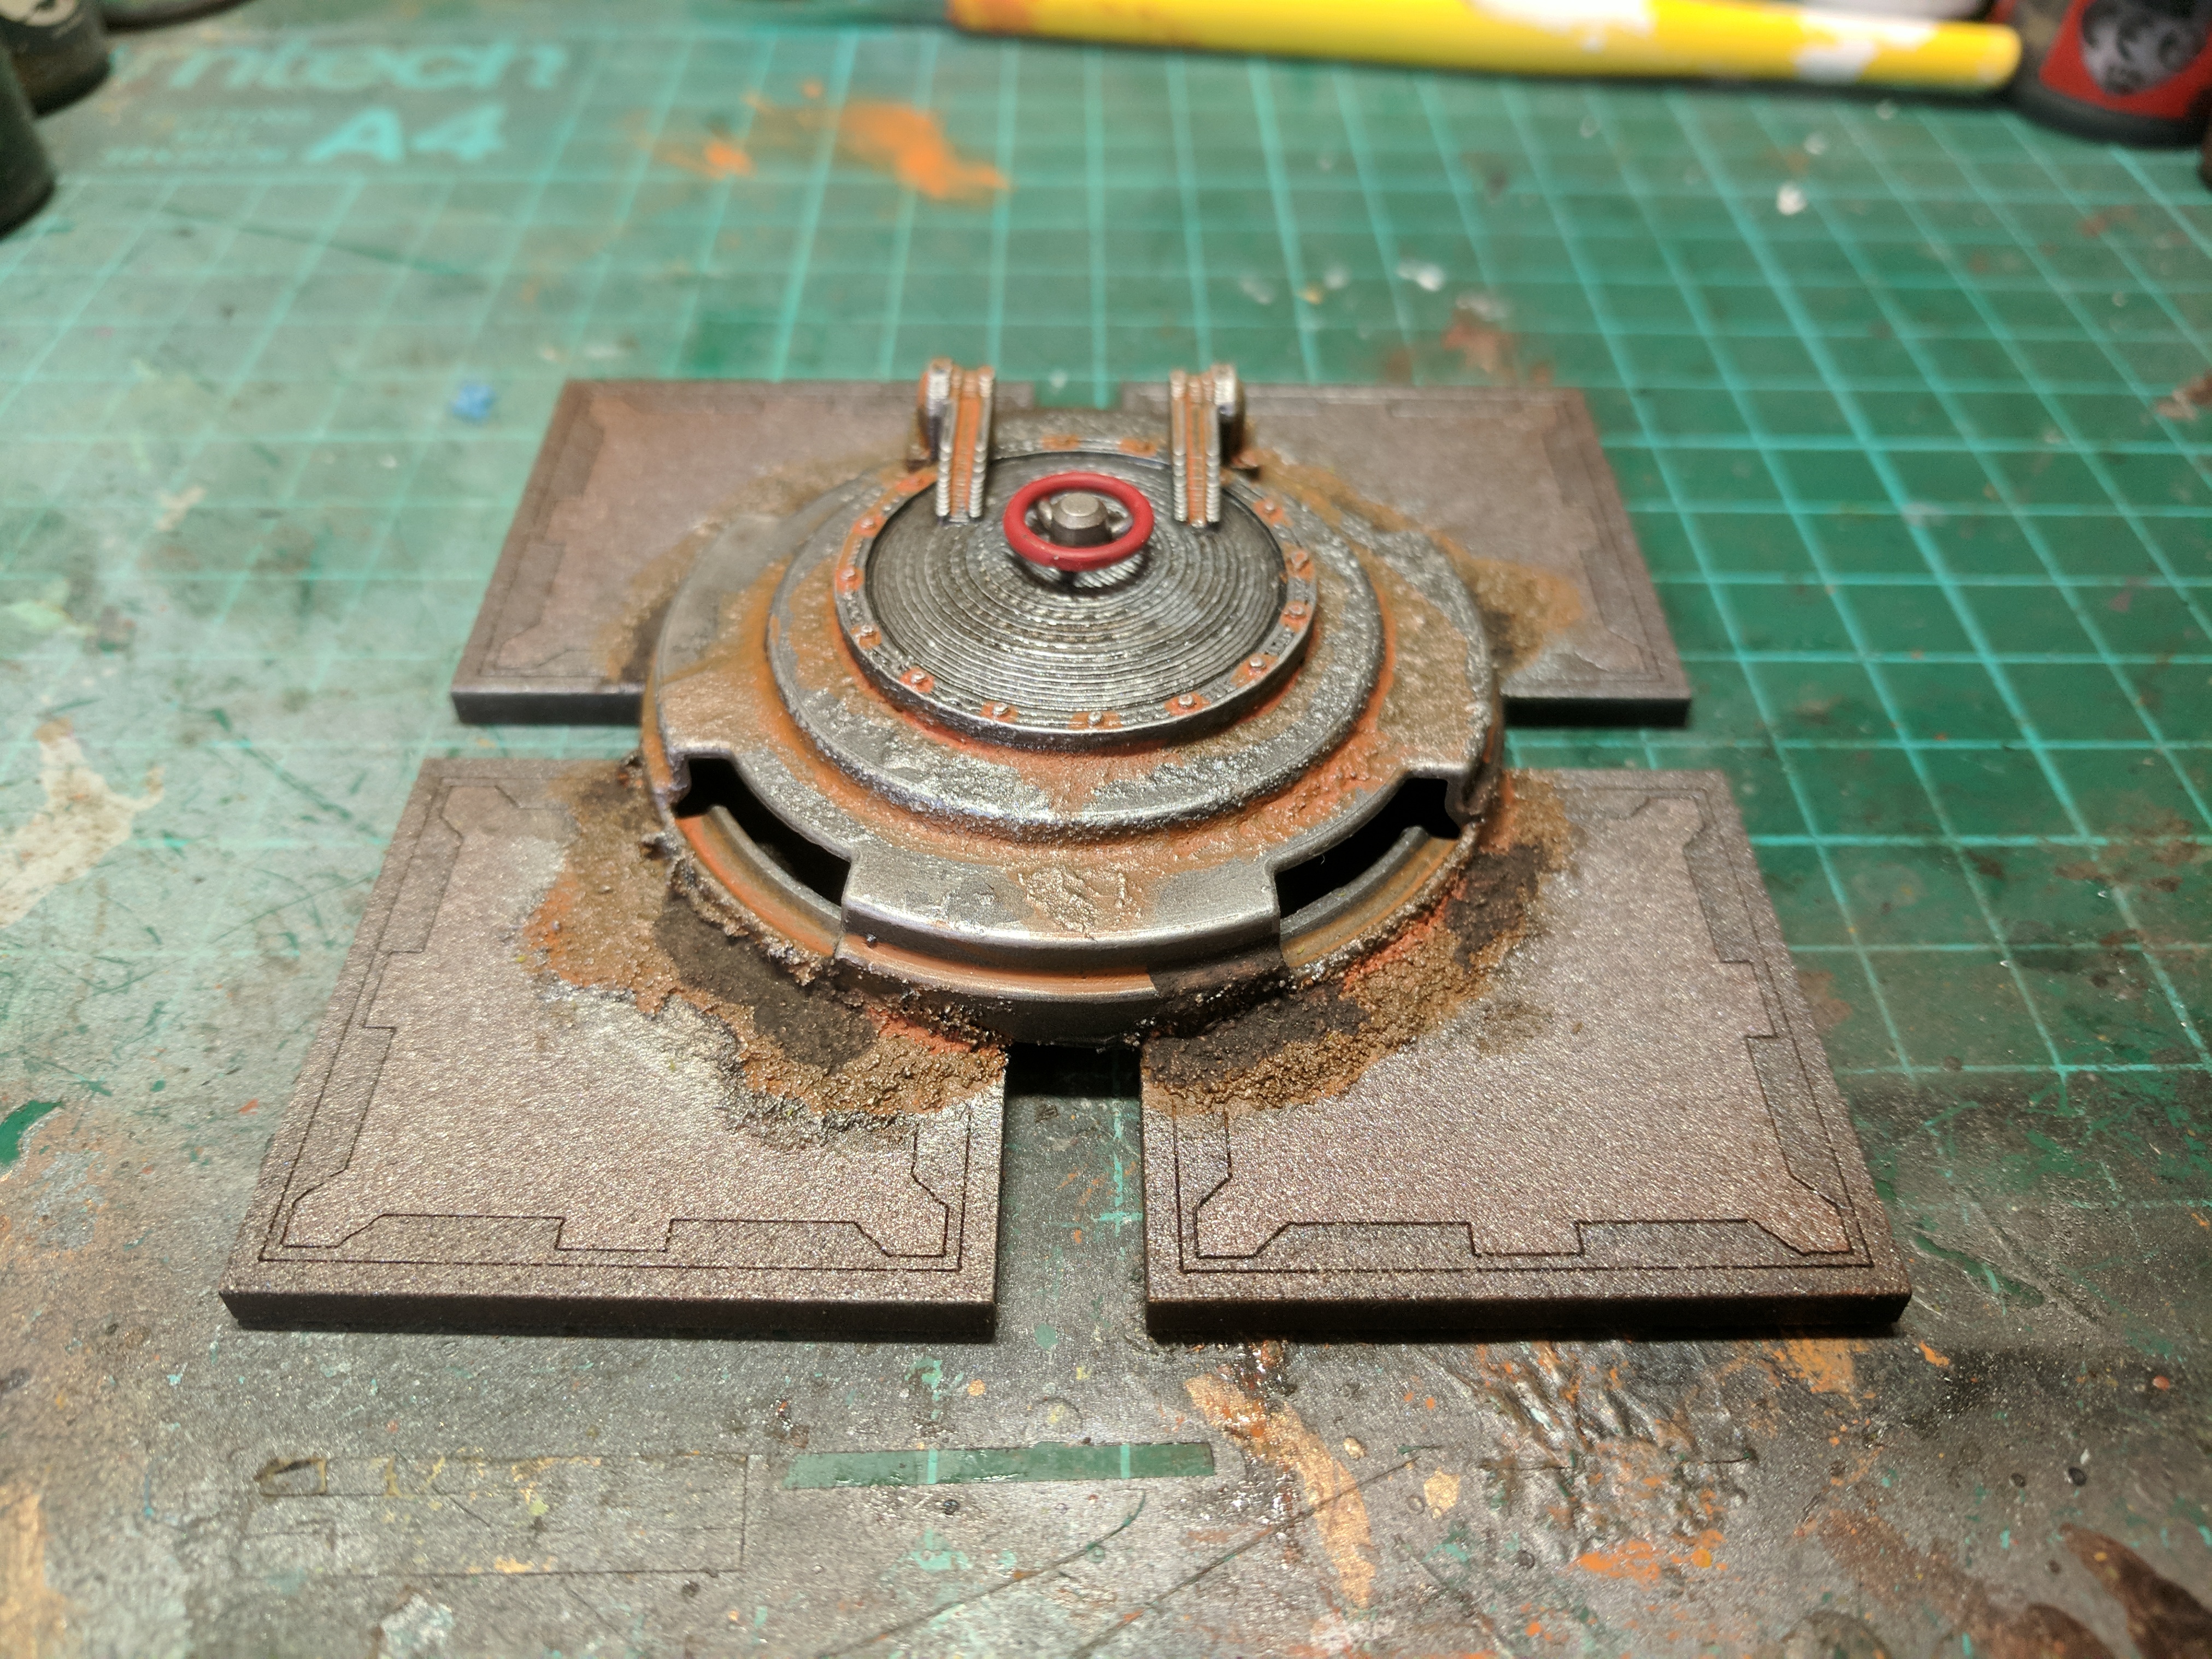 Glued the pieces together and added one of the hatch handles from the Necromunda underhive kit to top it off. Sprayed the whole thing in Lead Belcher and weathered it with the usual combination of washes and added in some watered down skrag brown and rust effect paints before finally gluing the piece to 4 tiles from the board.
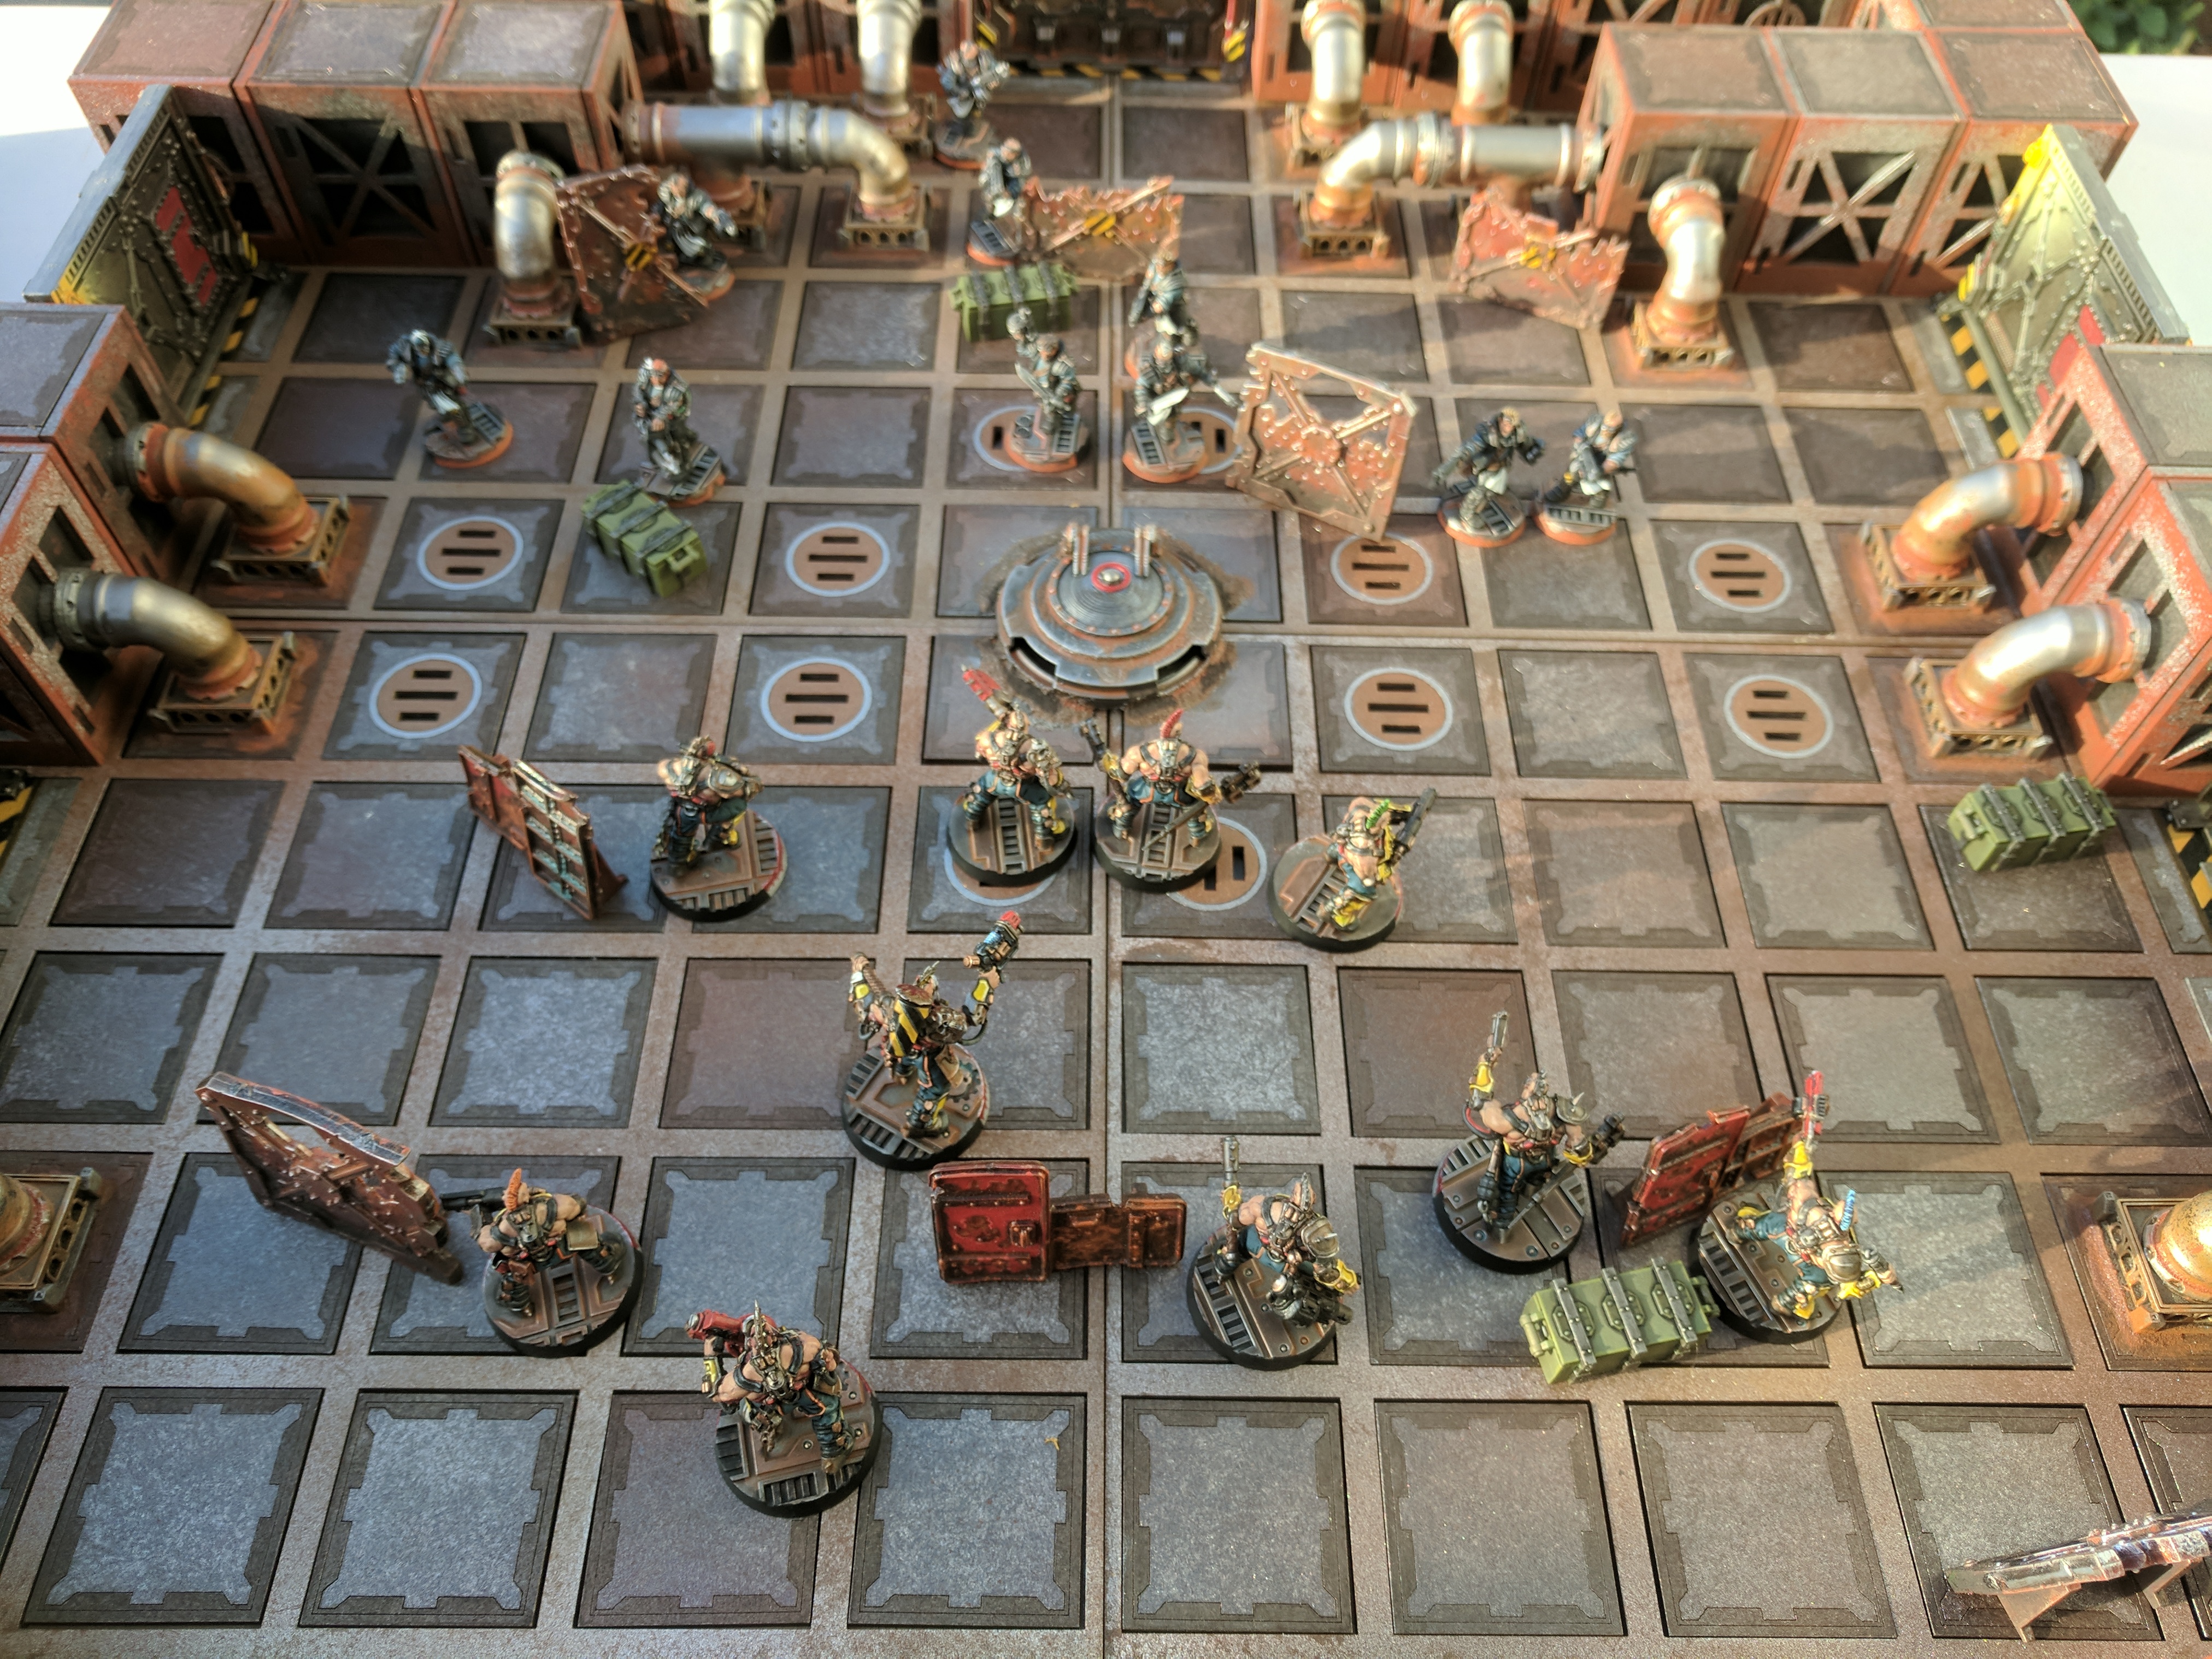 With the addition of the pipes made previously and the new hatch the battle now has a bit more flavour to it, I imagine something like the Goliaths trying to wrestle control of an important transit hatch off the defending Orlocks in one of the Hives Sludge processing zones.
Going to need a bit more than WD40 to shift that.
I really want a lot of my scenery to have a heavily rusted dirty appearance so i decided to try a little experiment using artist medium, iron powder and humbrol weathering powders (iron oxide and rust).
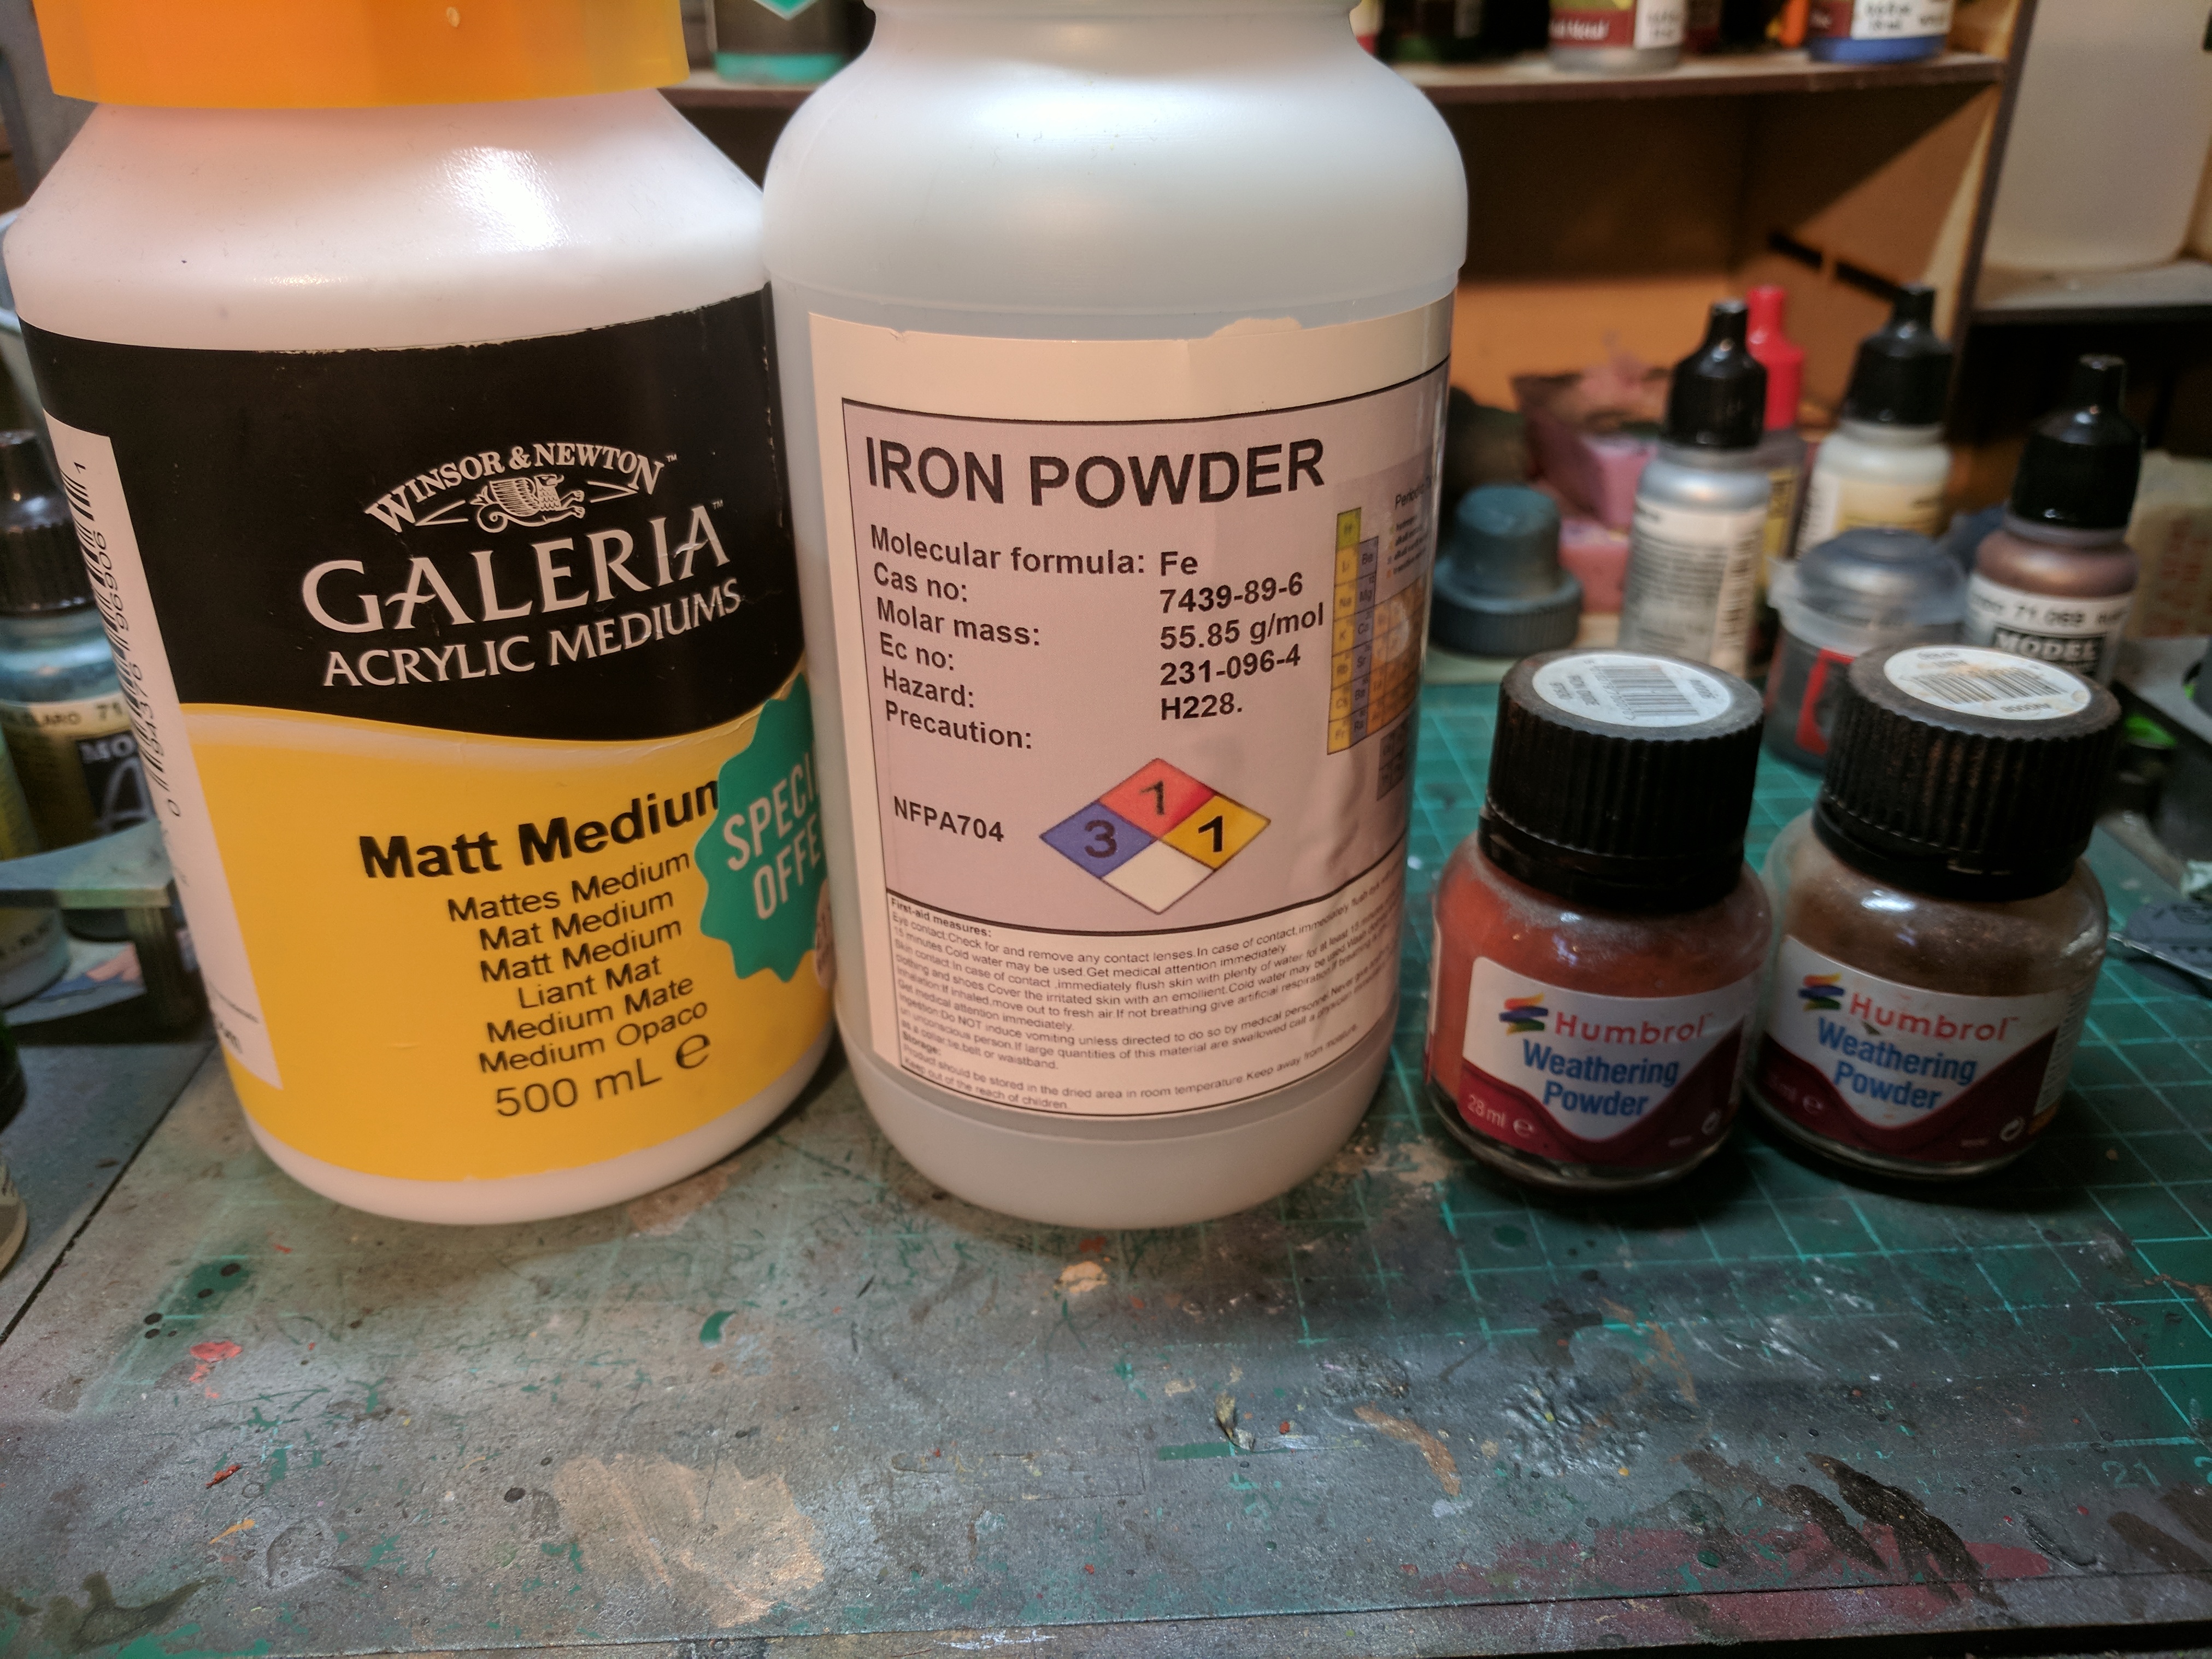 The base components to my rust paint mixture.
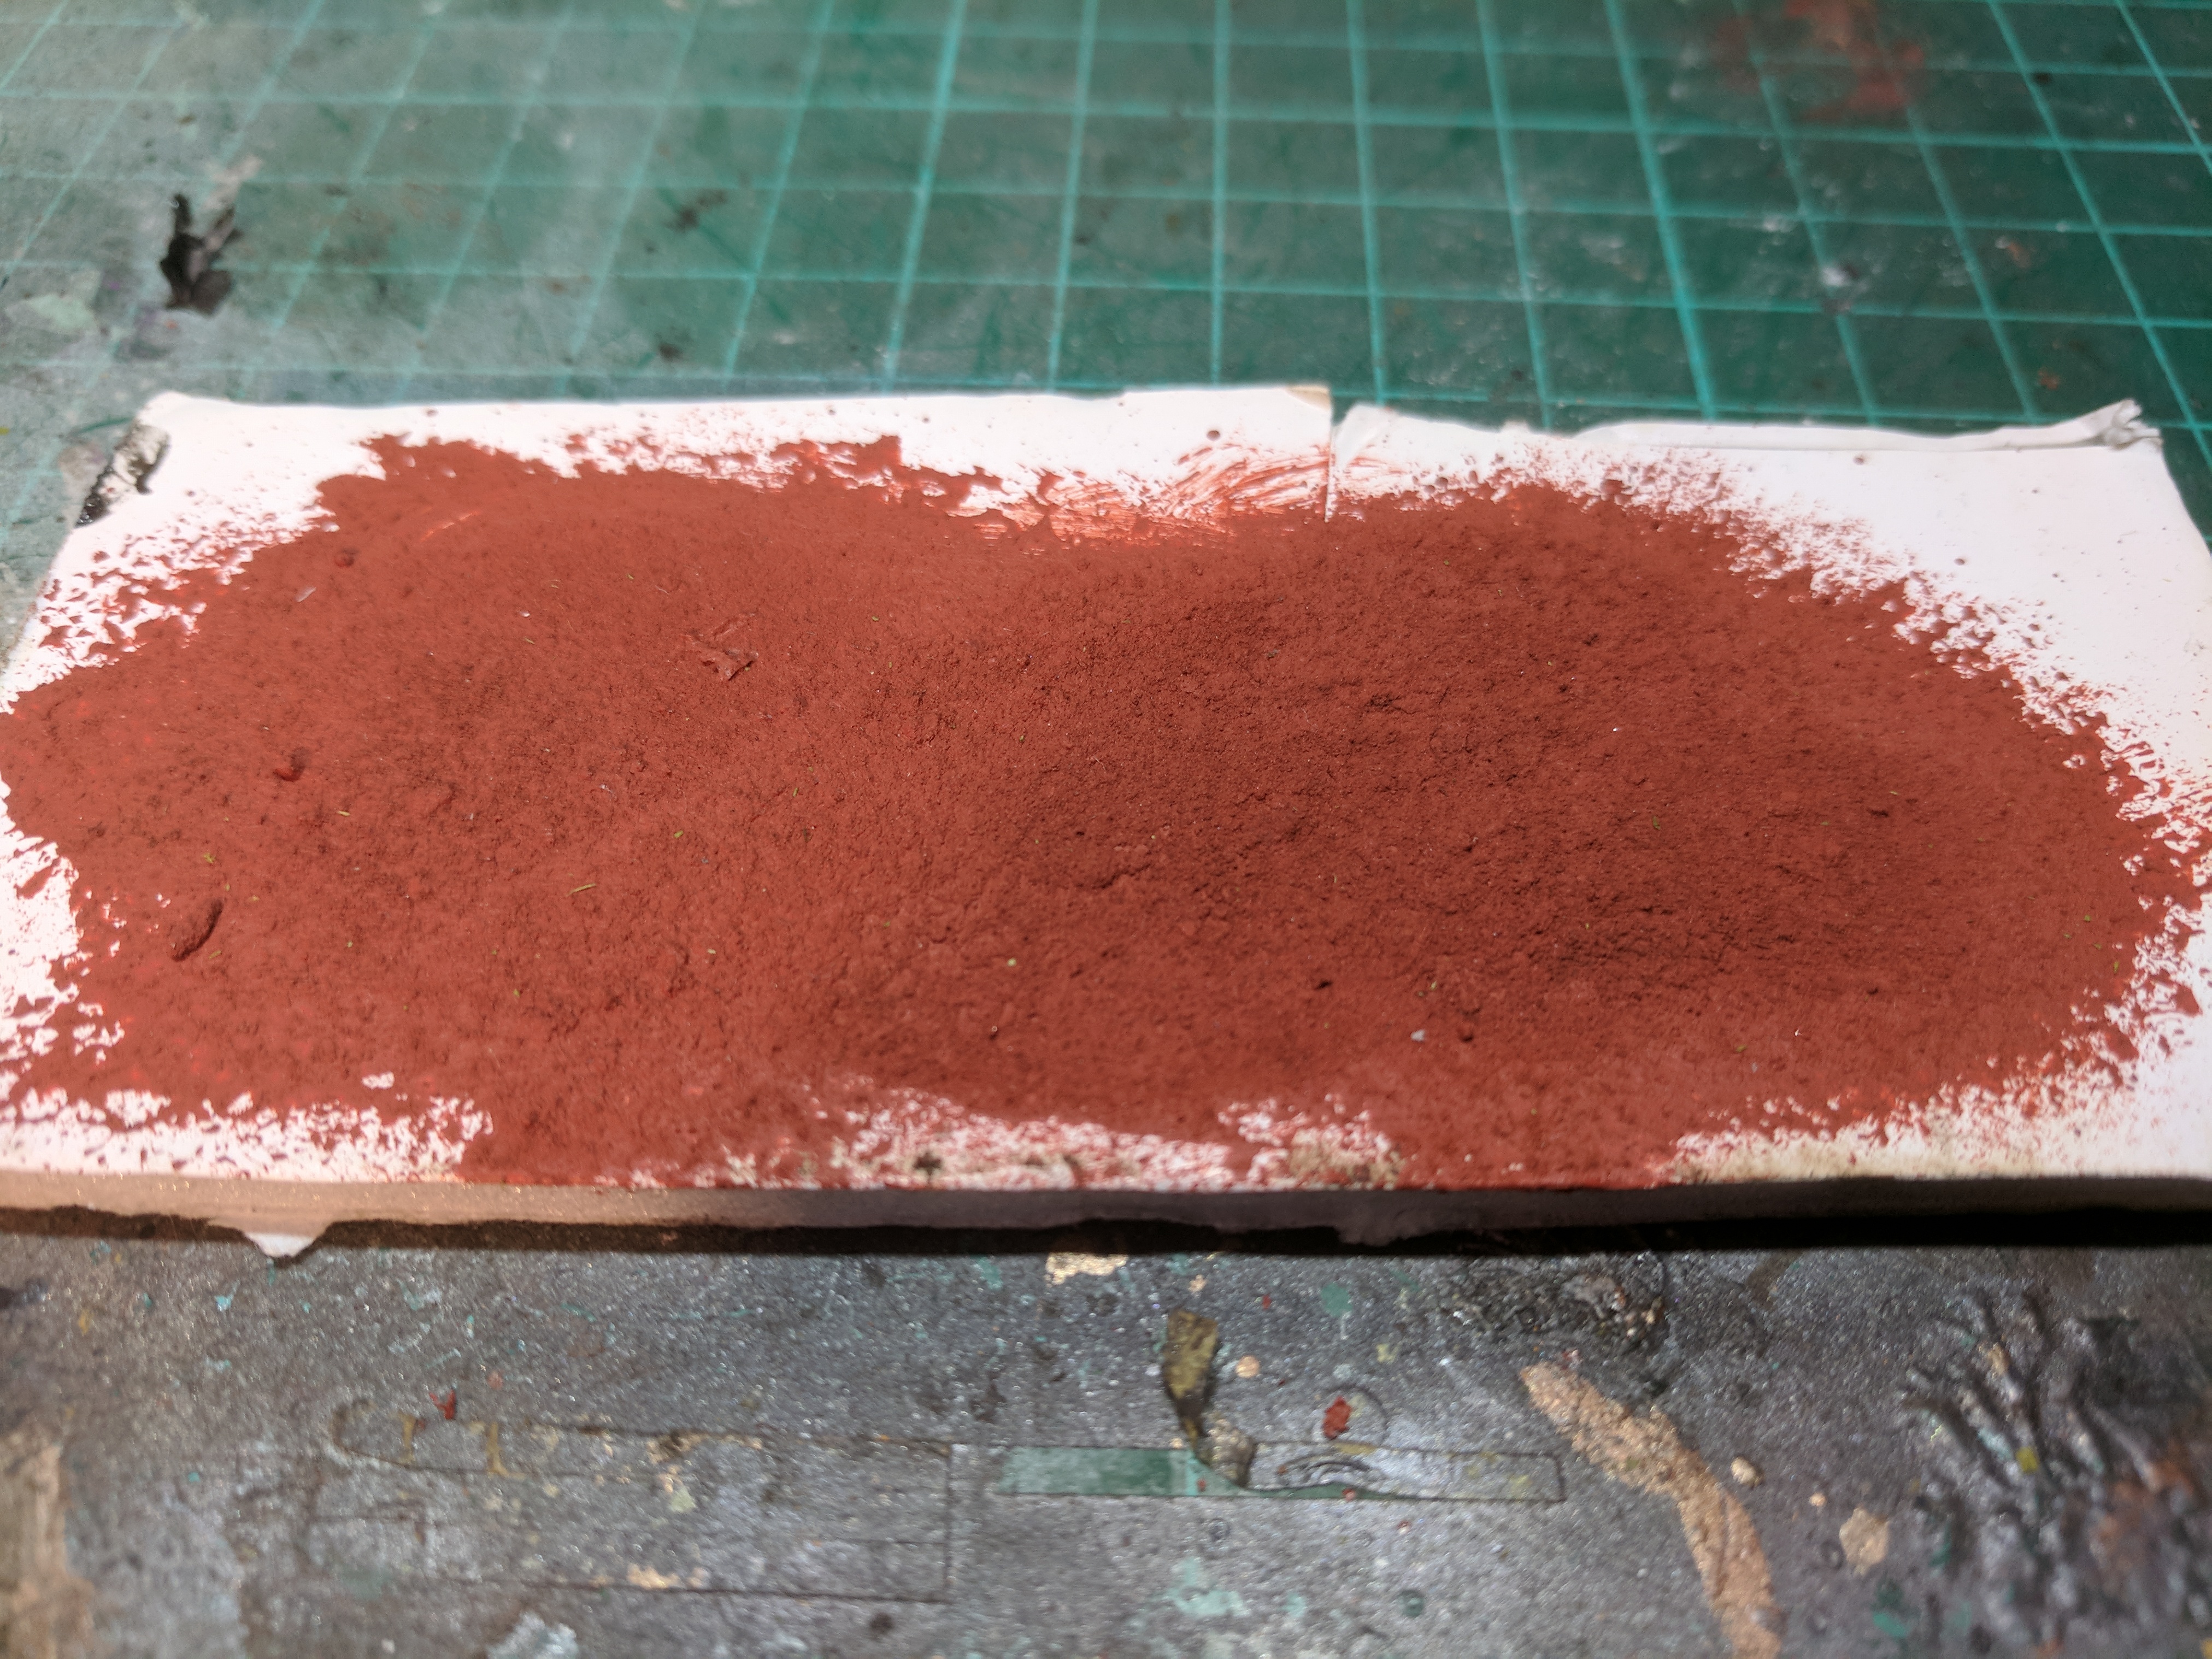 When applied in thick layers the iron powder and weathering powders build up a rough texture and when dry the paint has a slightly powdery look.
 Another thing about iron powder, it oxidised incredibly fast. Mixing some iron powder with some PVA glue and water makes a decent fine texture paste which starts to take on a natural rusty look within hours of application.
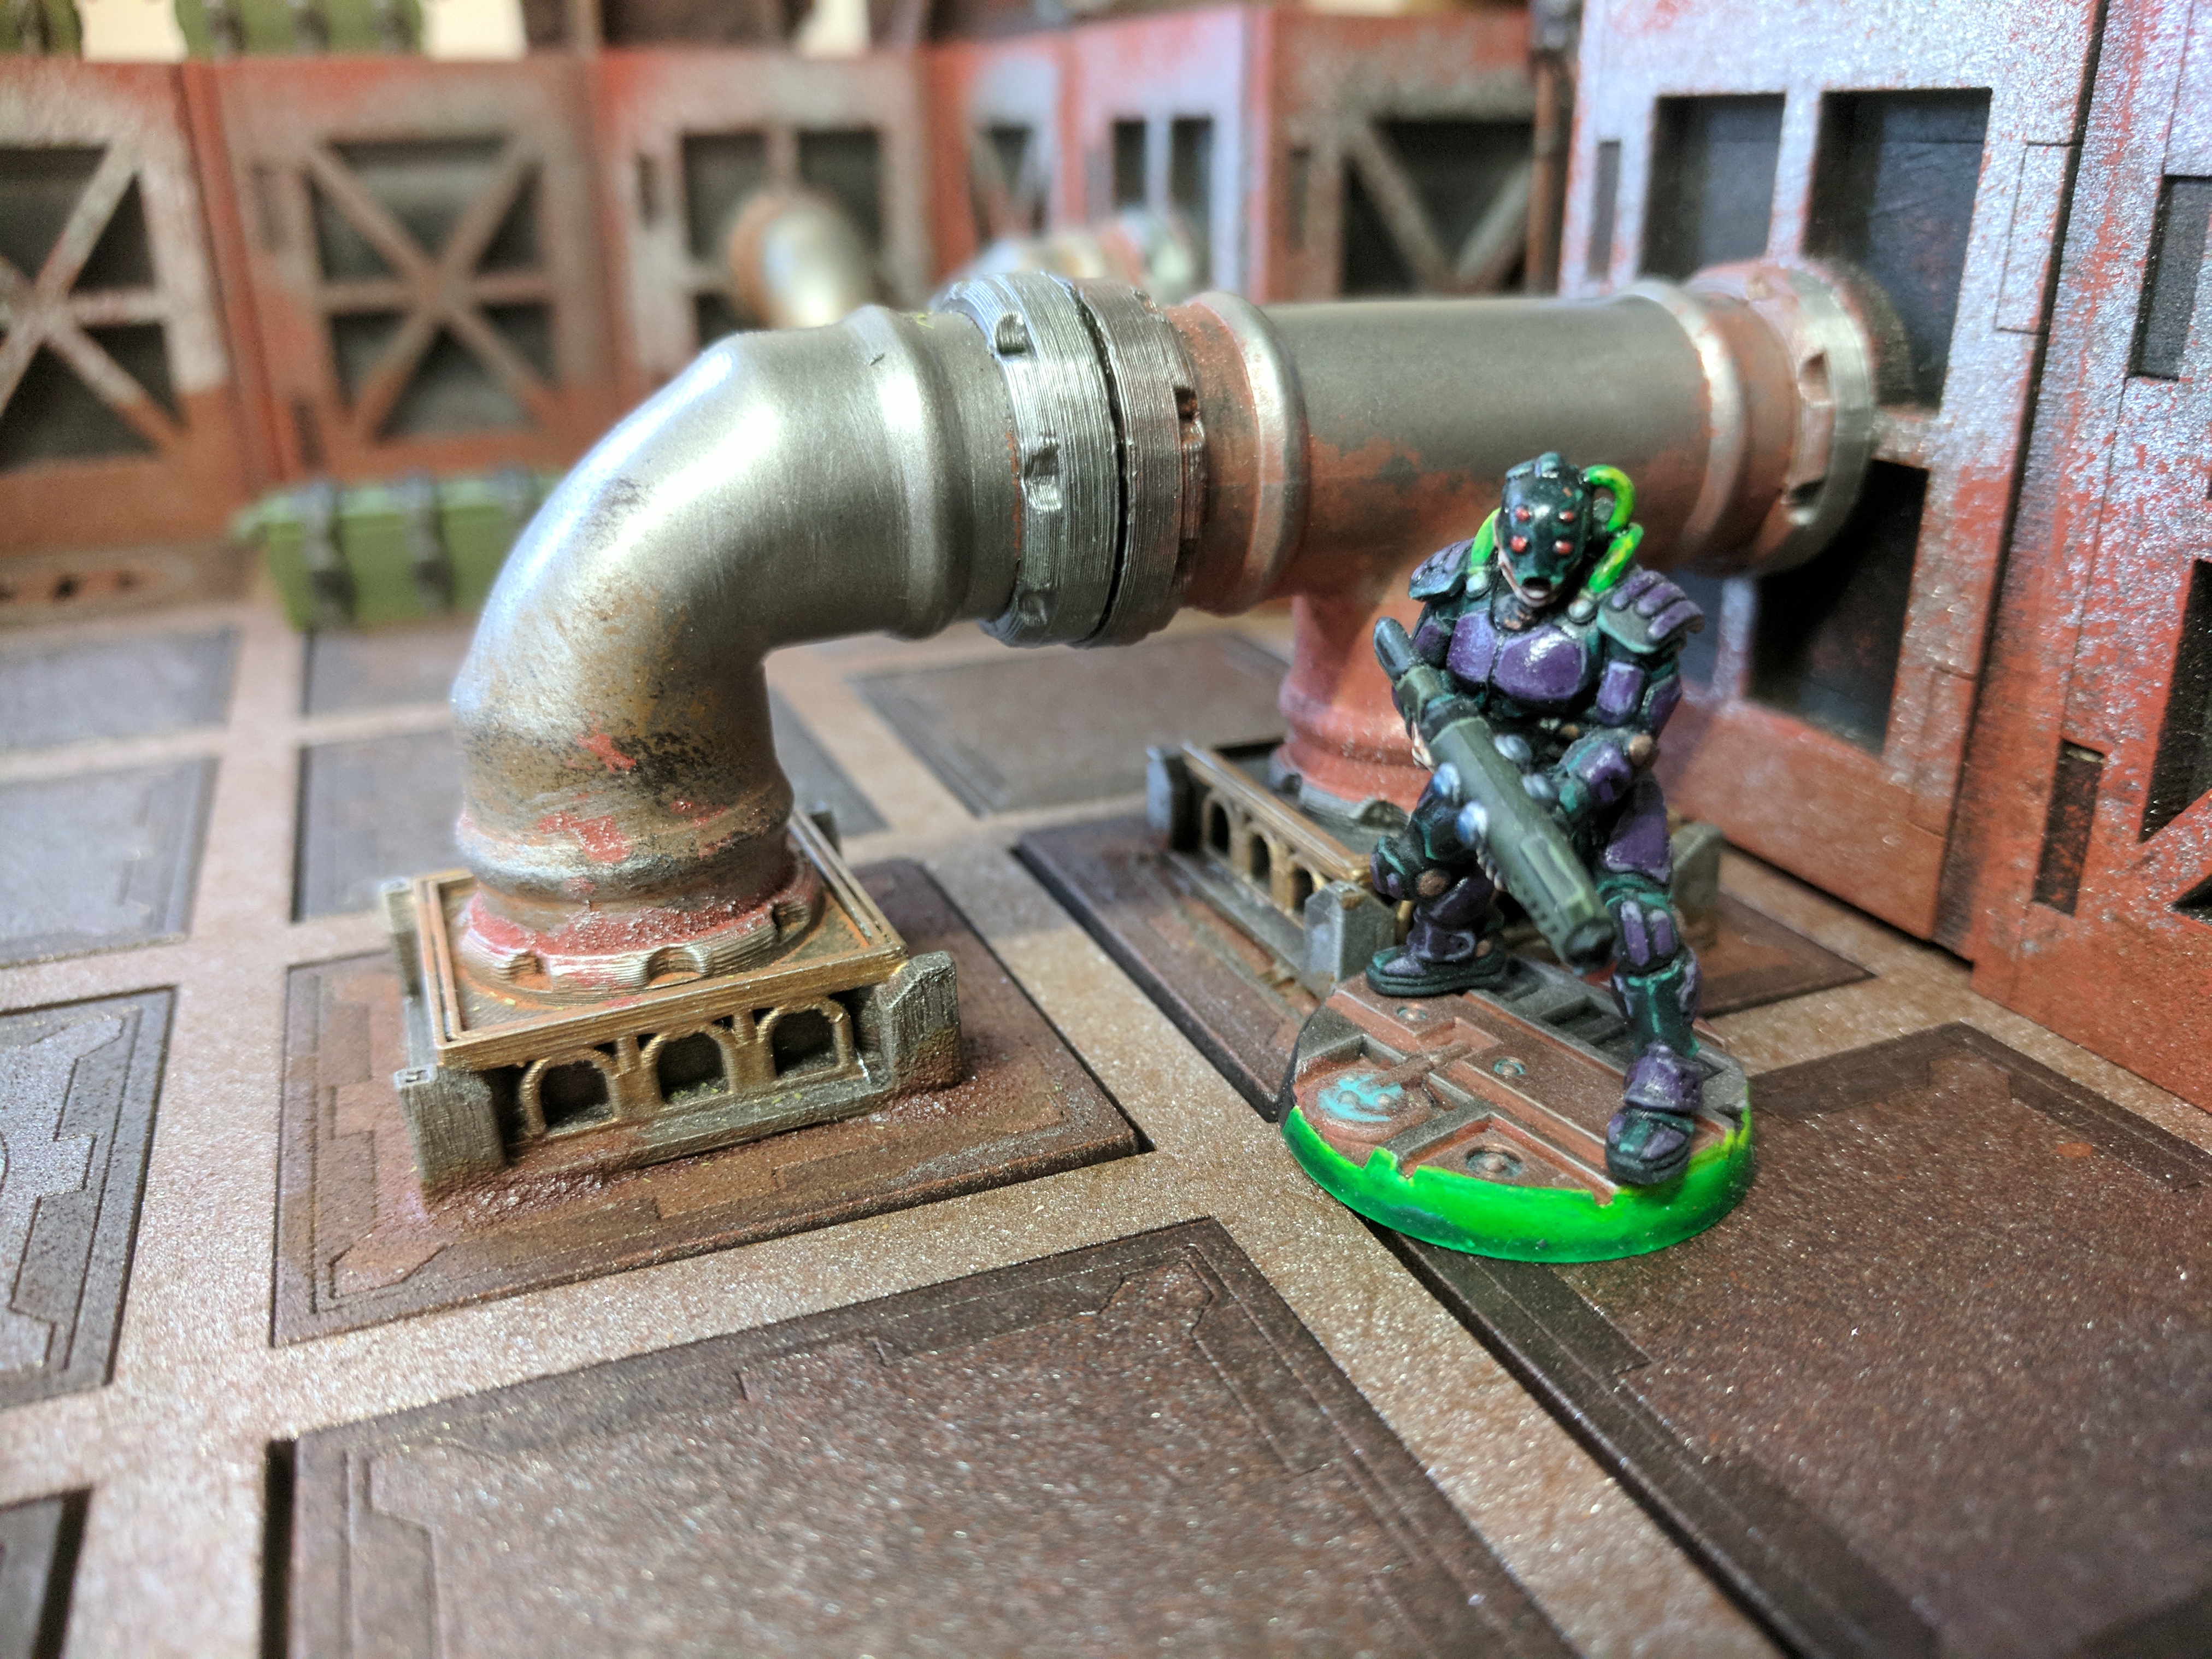 On the picture above the rust paint has been applied to the pipe and the iron powder and glue mix has been applied round the base, after drybrushing with a light silver the texture stands out and gives the same effect as the typhus corrosion technical paint.
Its a bit... bare, how bout a few throw cushions, a coffee table.... some industrial pipes and built up grime?
Even with the scenery from the game the base boards and construction cubes by themselves looked a little bare… it’s time to add in some additional scenery.
The first thing i wanted to add was some industrial pipes, the kind of thing that could carry water, air… and other things.
I based my idea around 15mm copper pipe connectors, nothing too fancy just the kind of thing you can pick up from most DIY stores.
 I also wanted something a little more ornate, so I created a base block in blender to be 3D printed (for those looking to get into 3D printing Blender is an excellent starting point and its FREE!)
 Each pipe would consist of a base block, end cap and a pipe fitting.
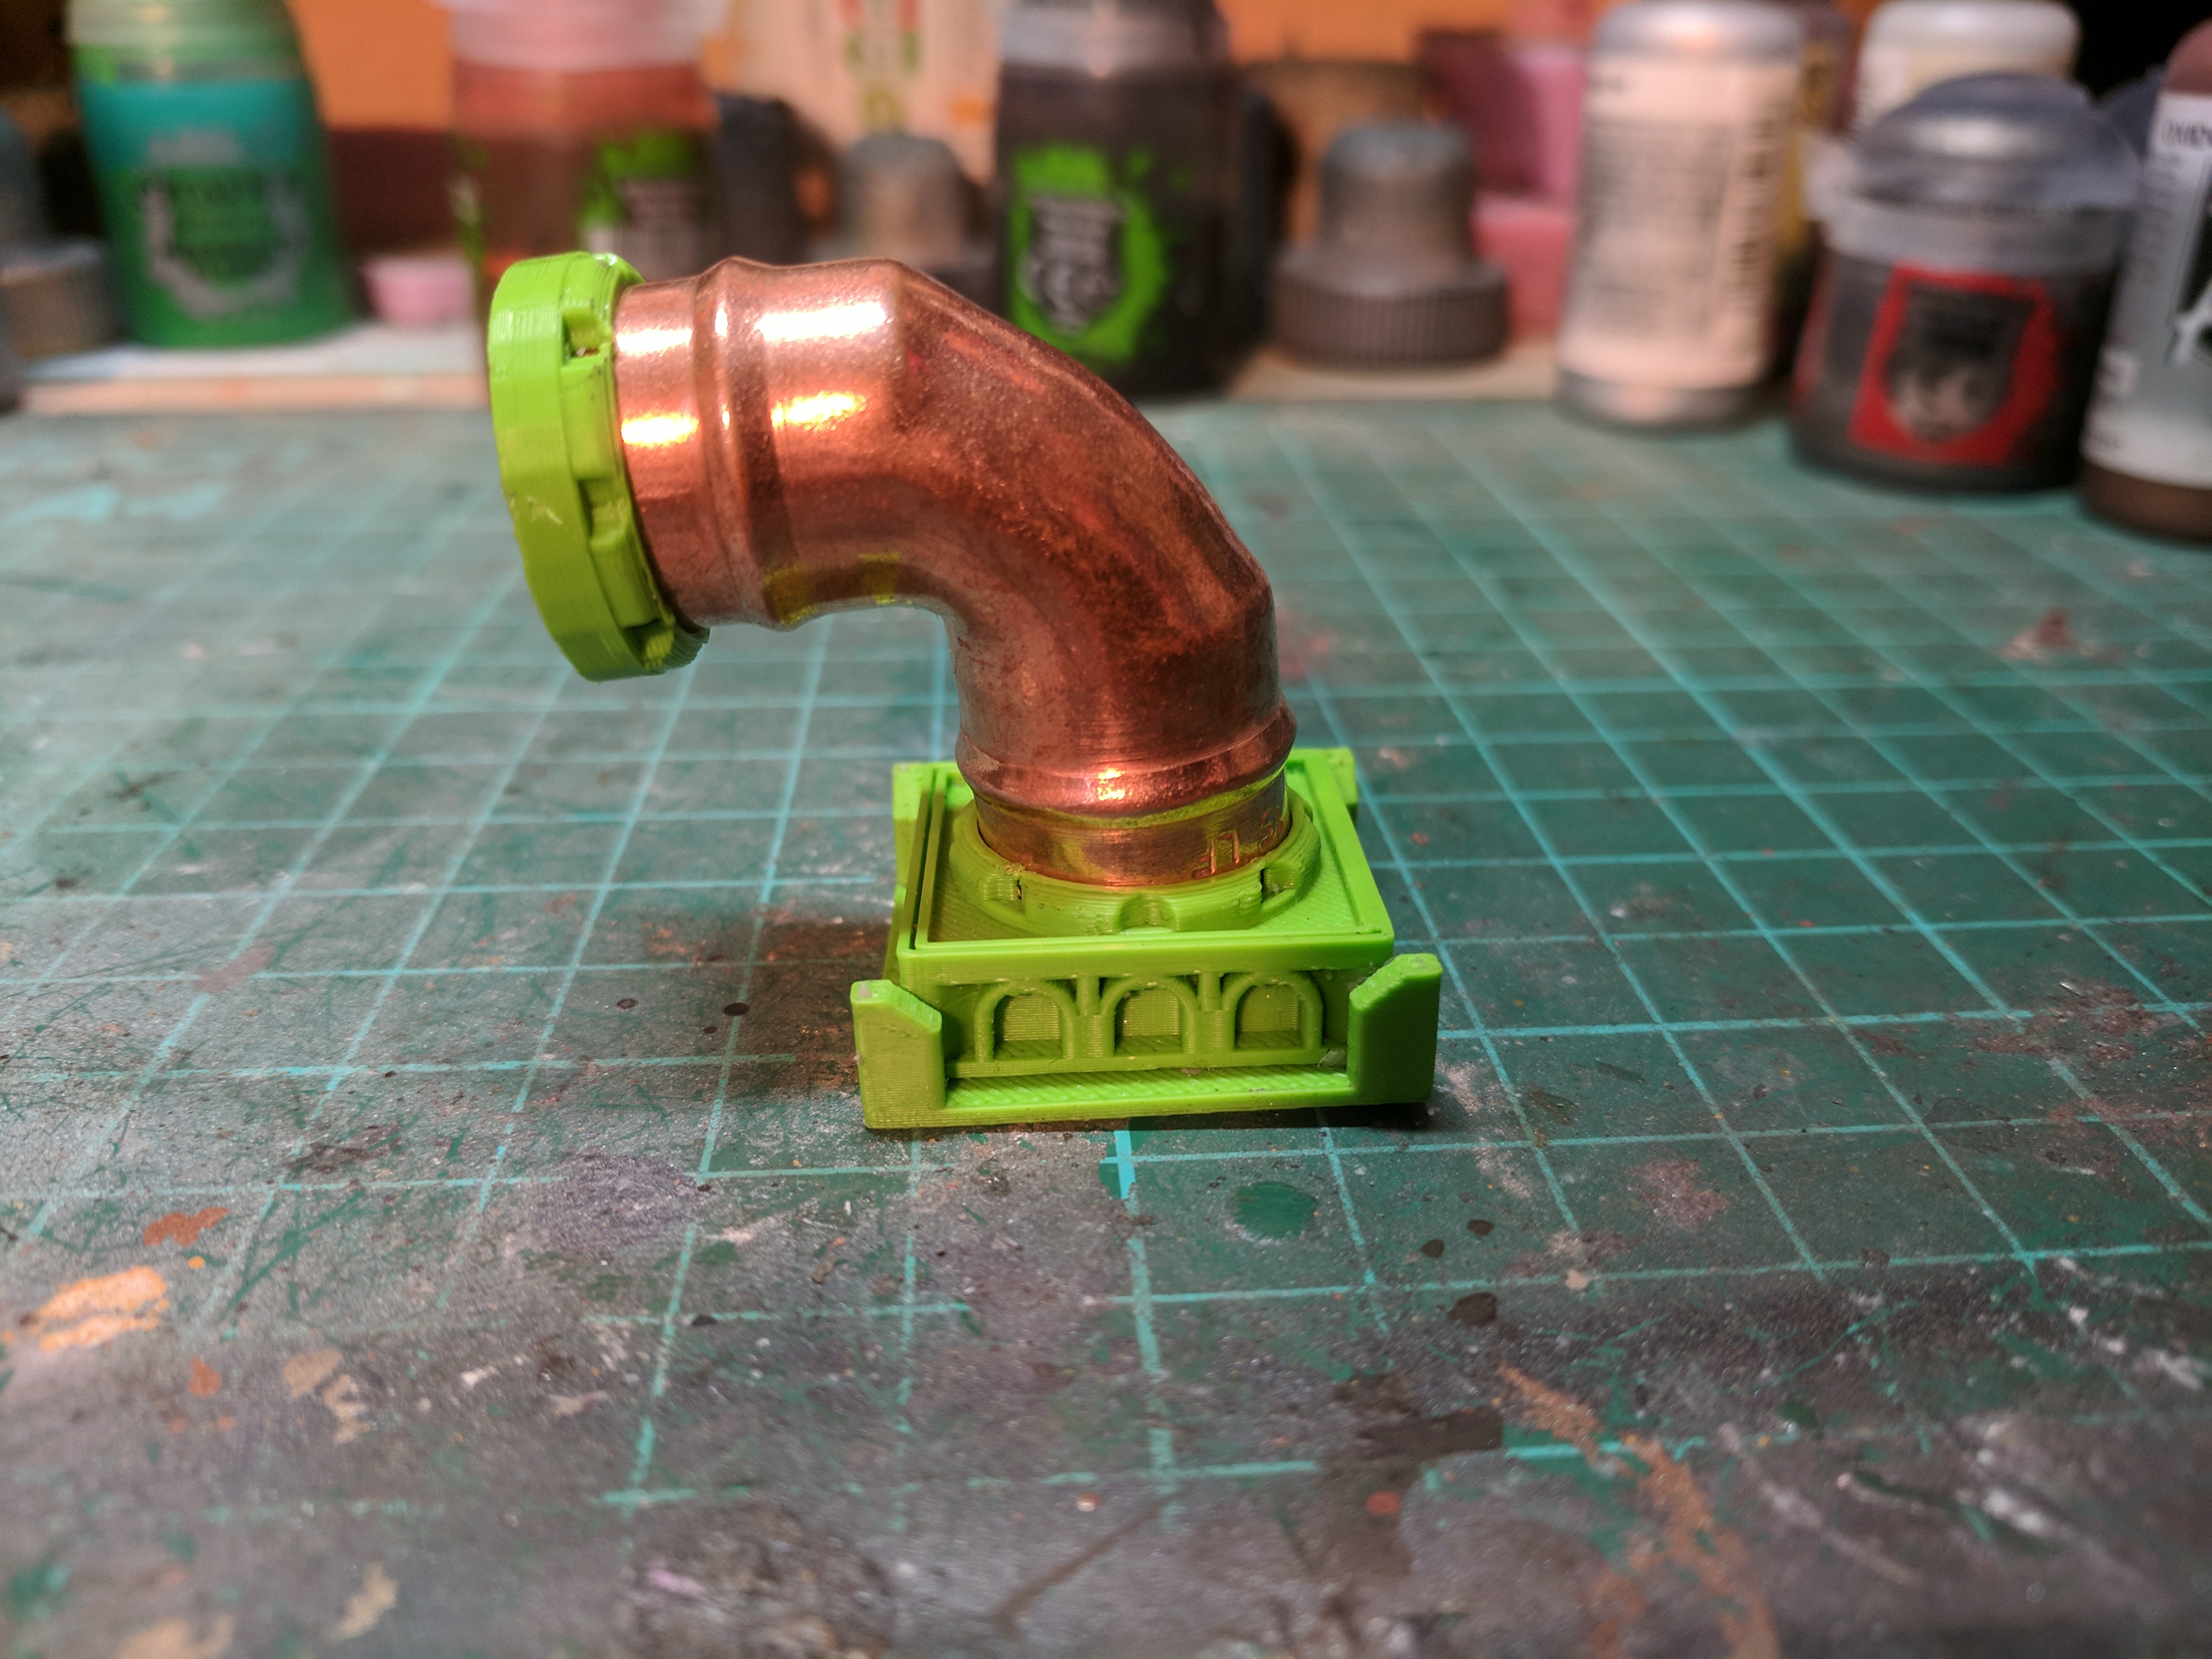 Once i was happy with the dimensions and fitting it was time to glue it together and paint.
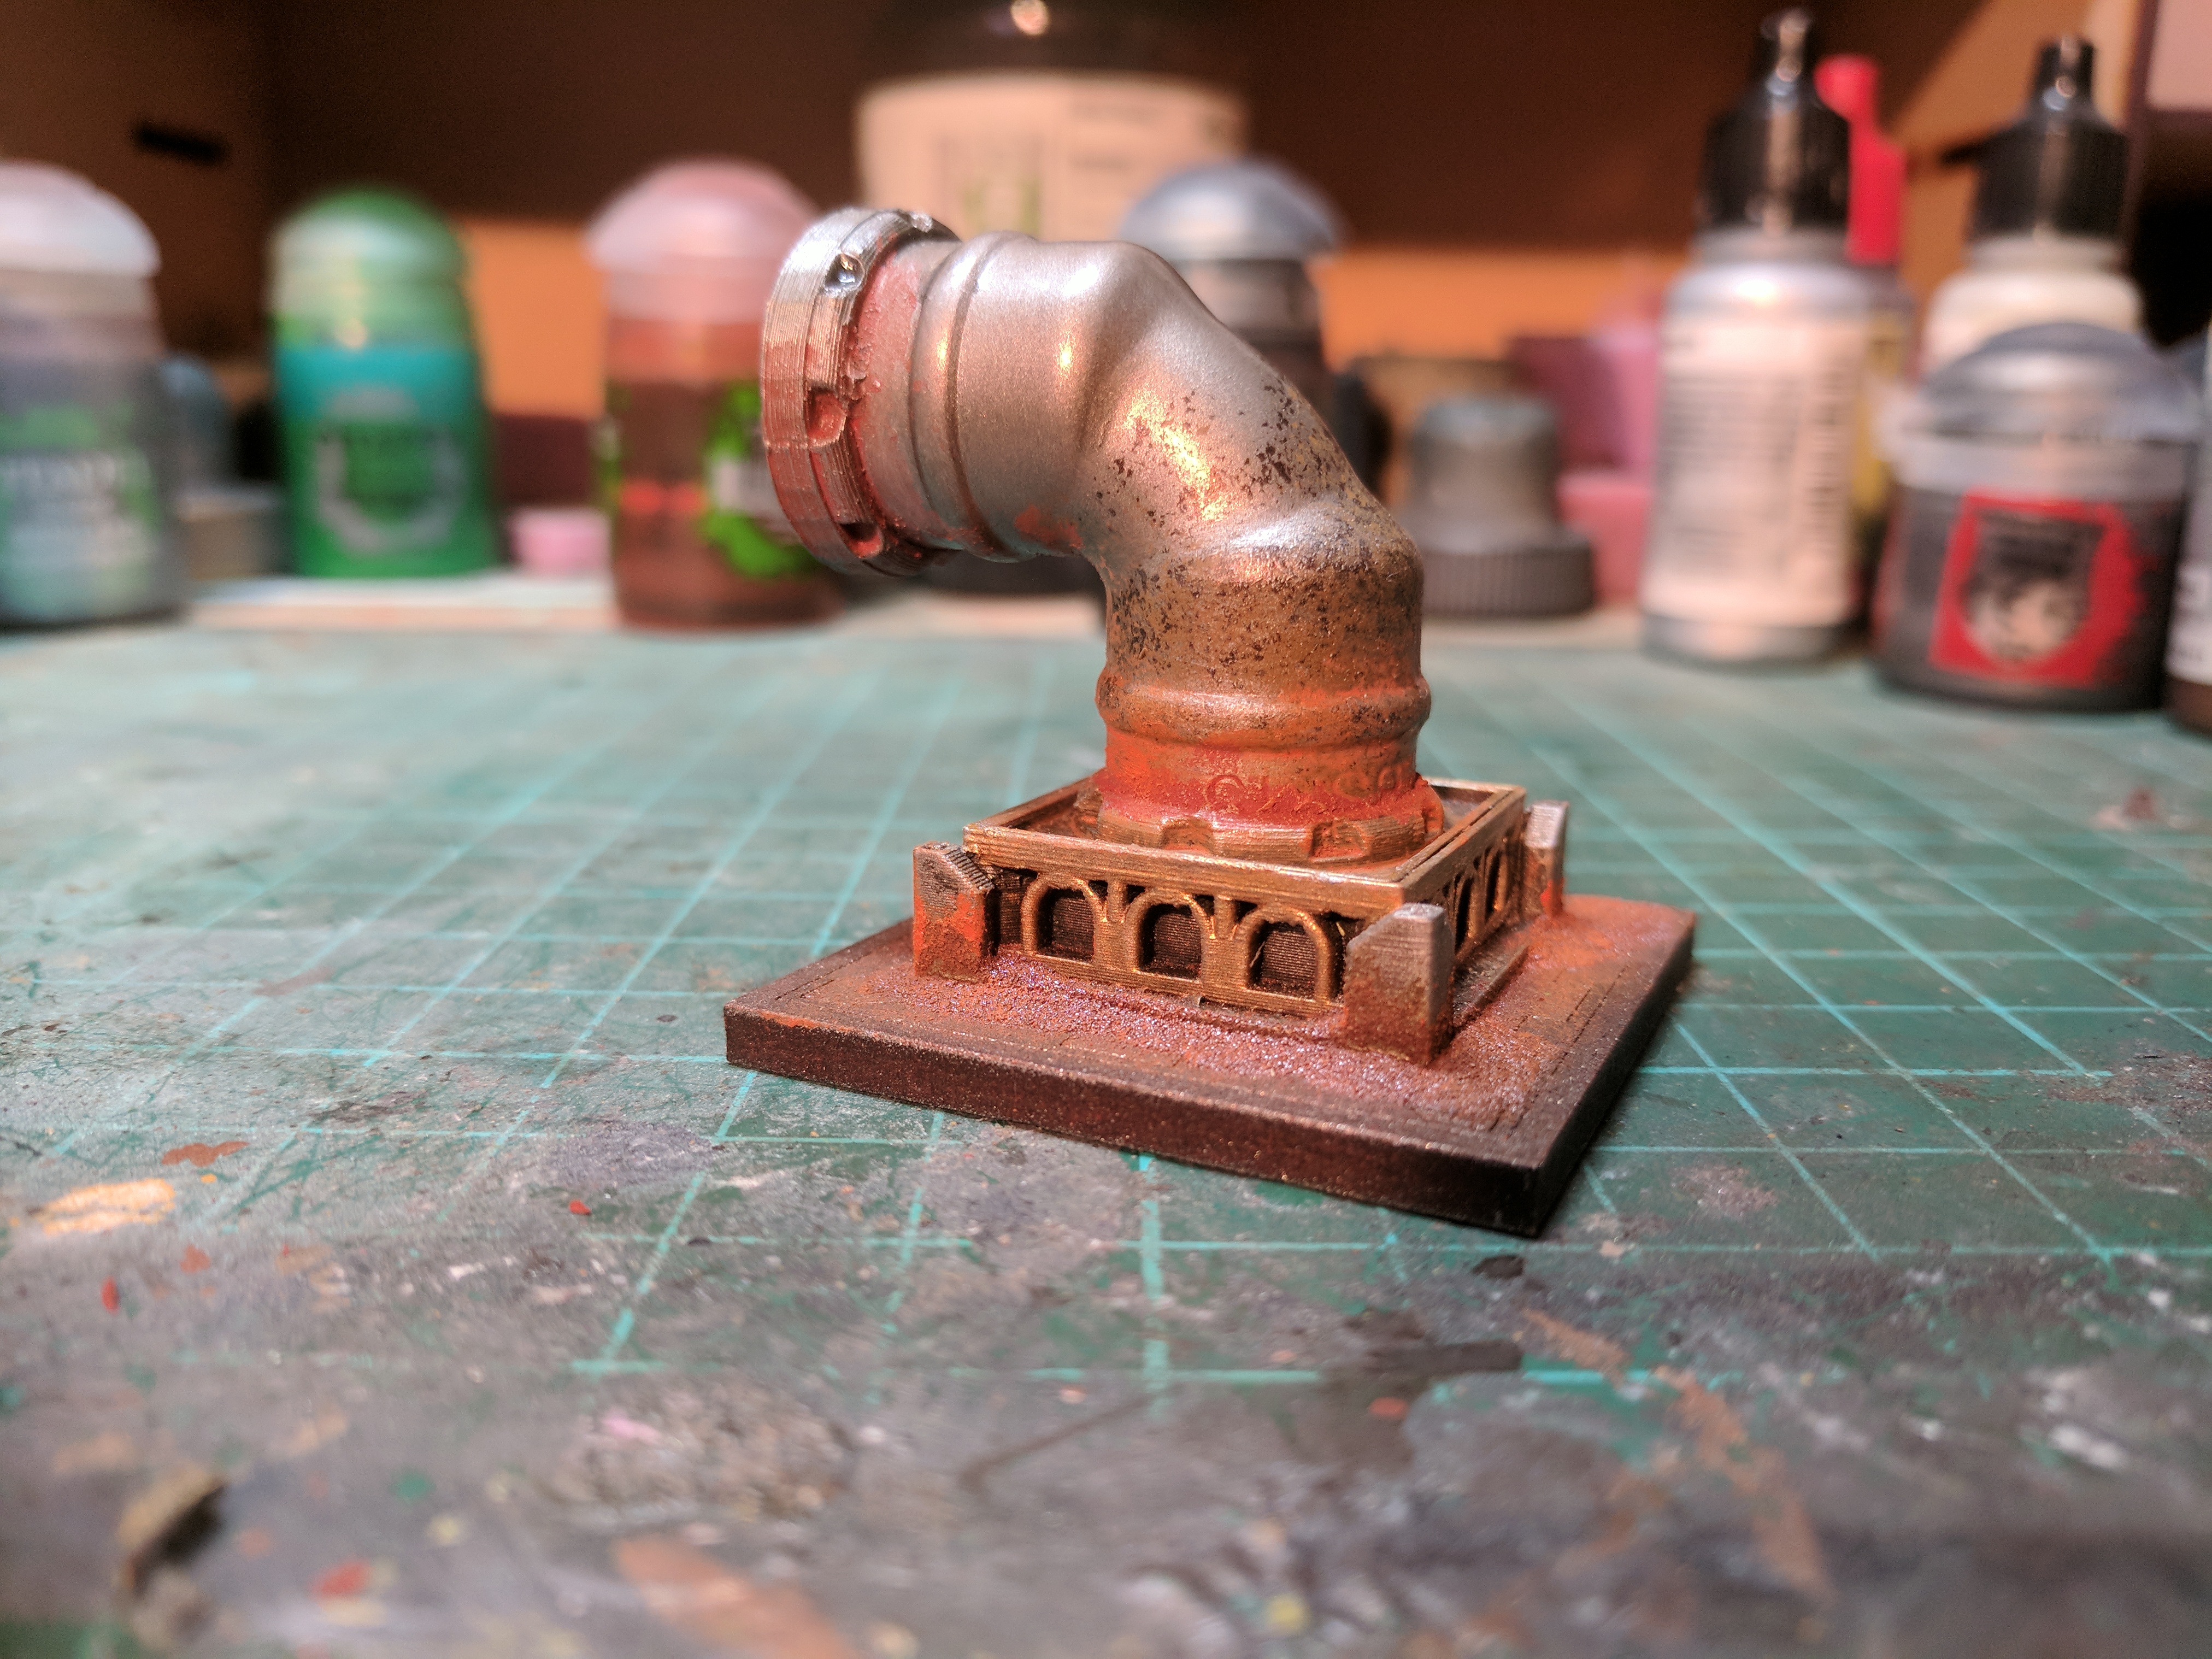 Sprayed the pipe with Lead Belcher, then washed with nuln oil and agrax earthshade (perfect for creating an aged metal look) i added in my own rust mixture (which i will expand on in another entry) and then glued the finished piece to a tile, finally i drybushed a light silver to bring up all the textures.


